Leaderboard


Popular Content
Showing content with the highest reputation since 06/04/25 in all areas
-
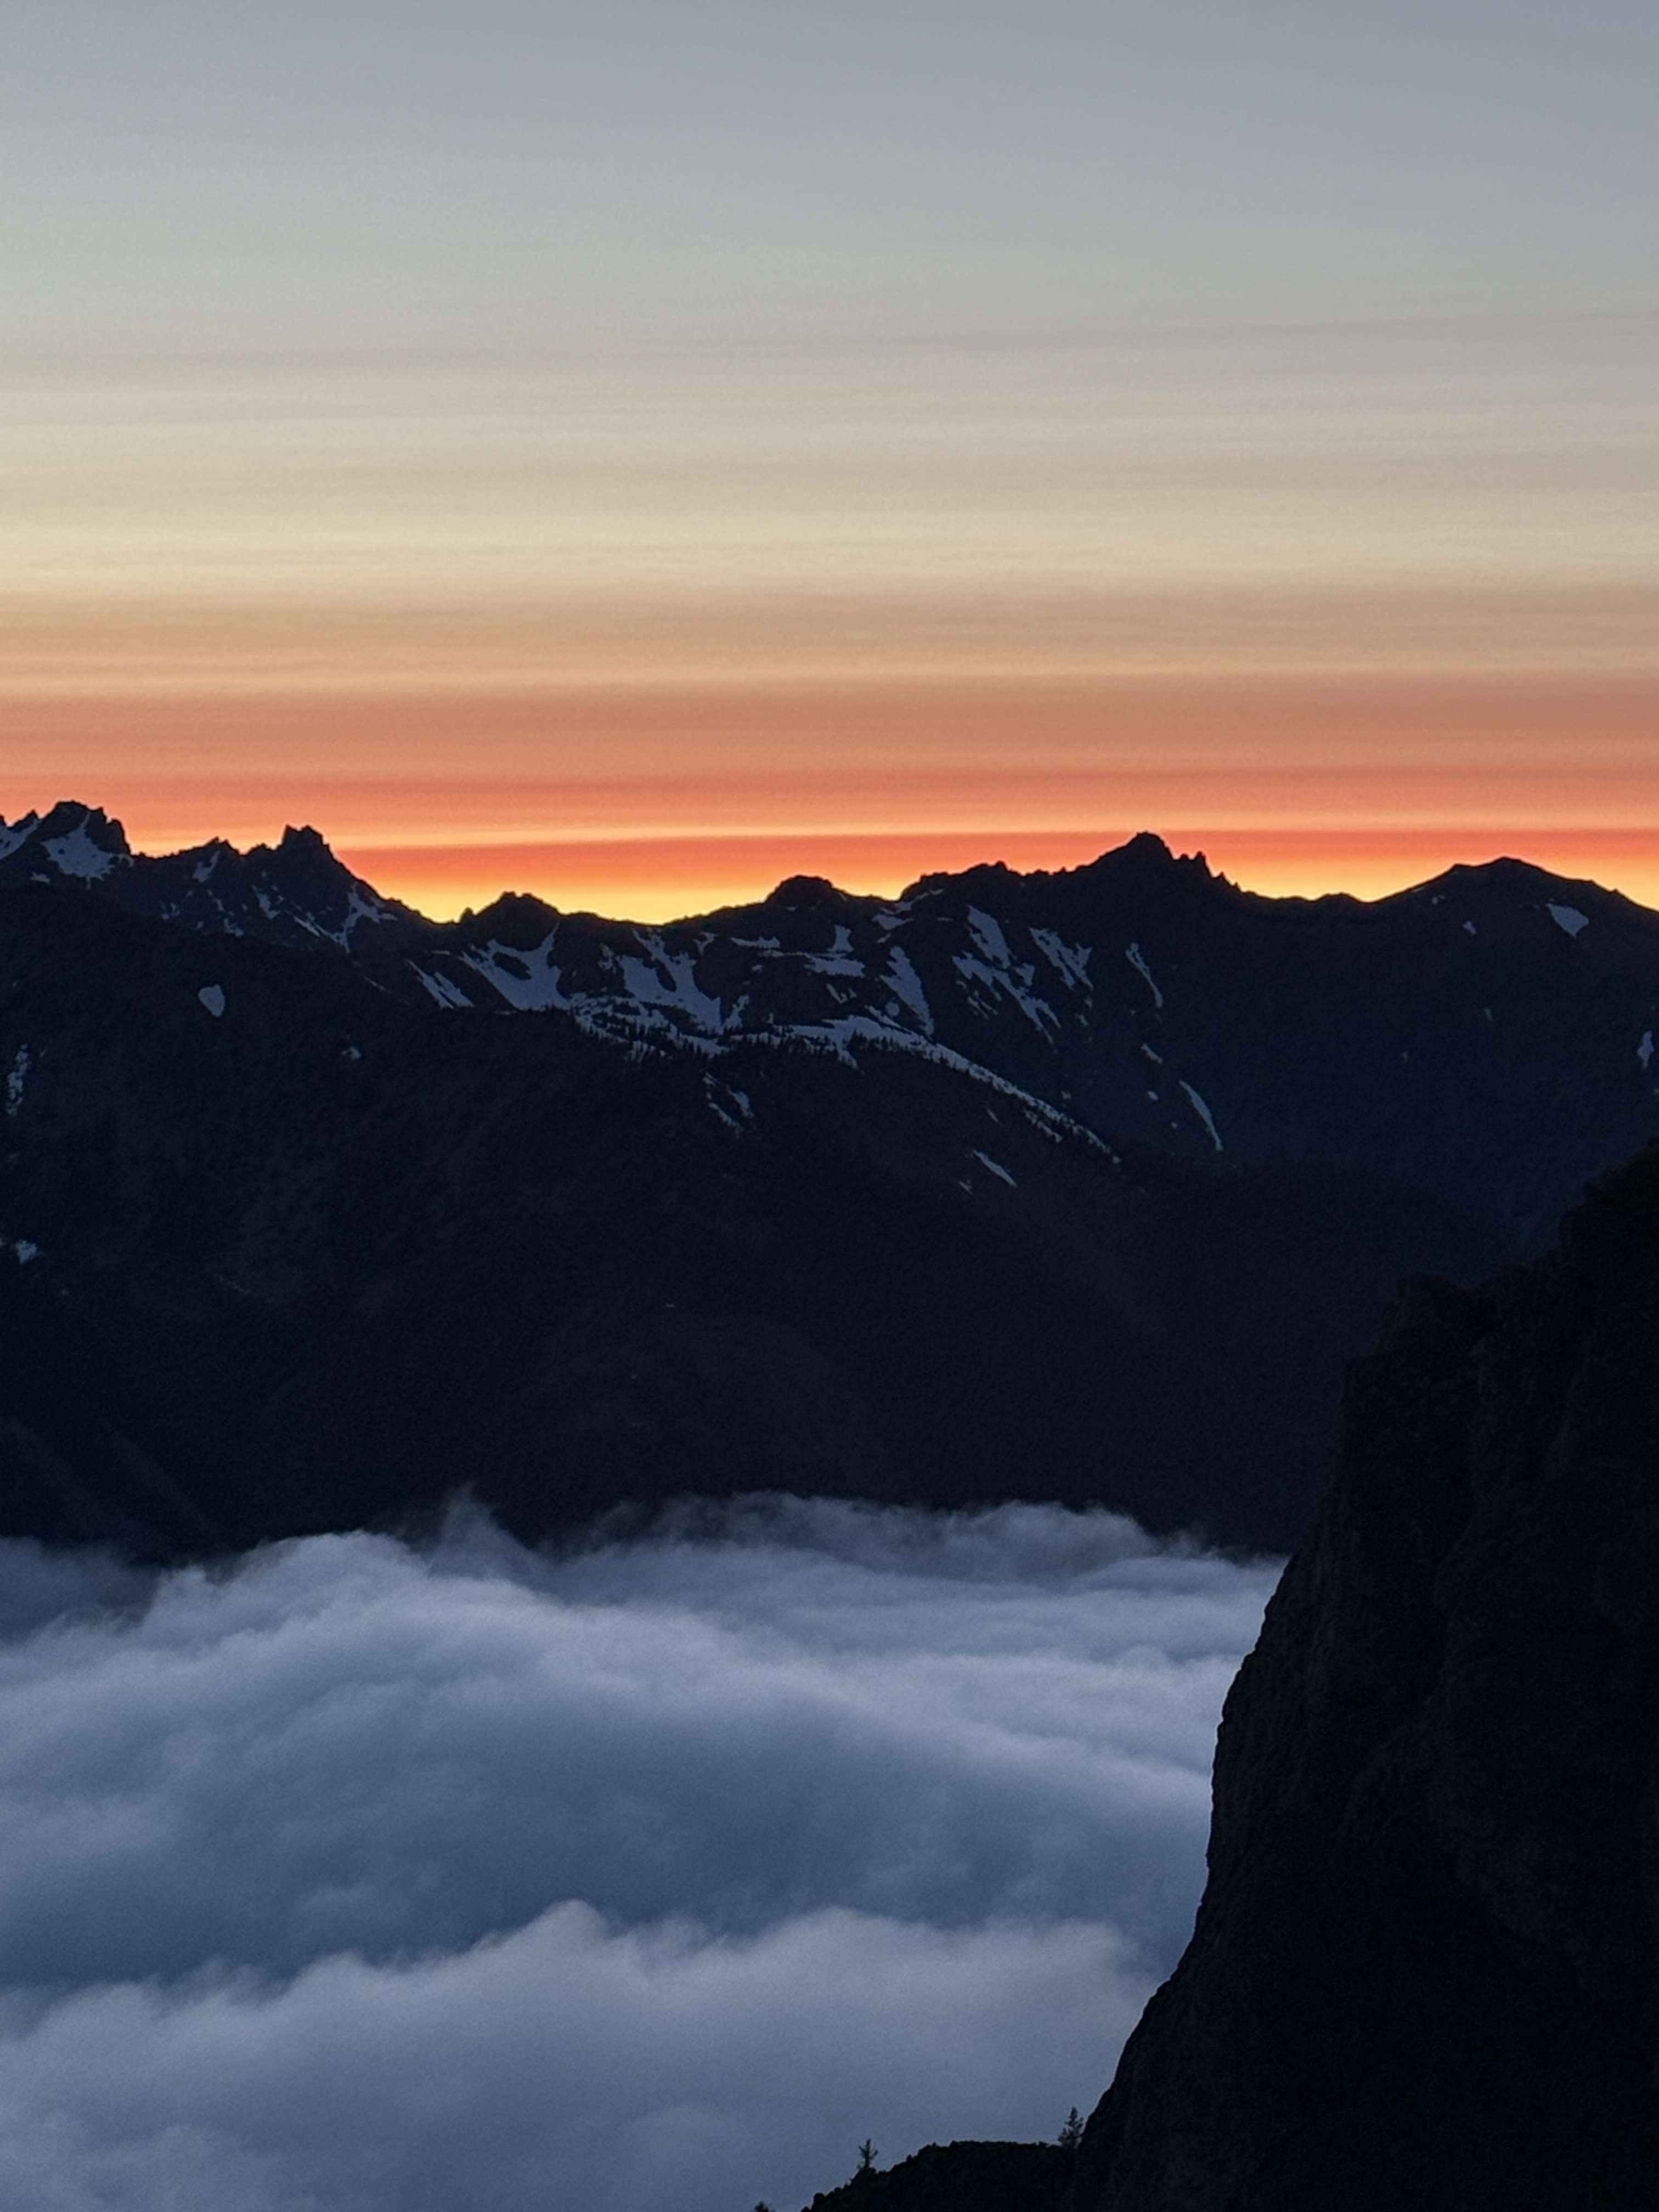
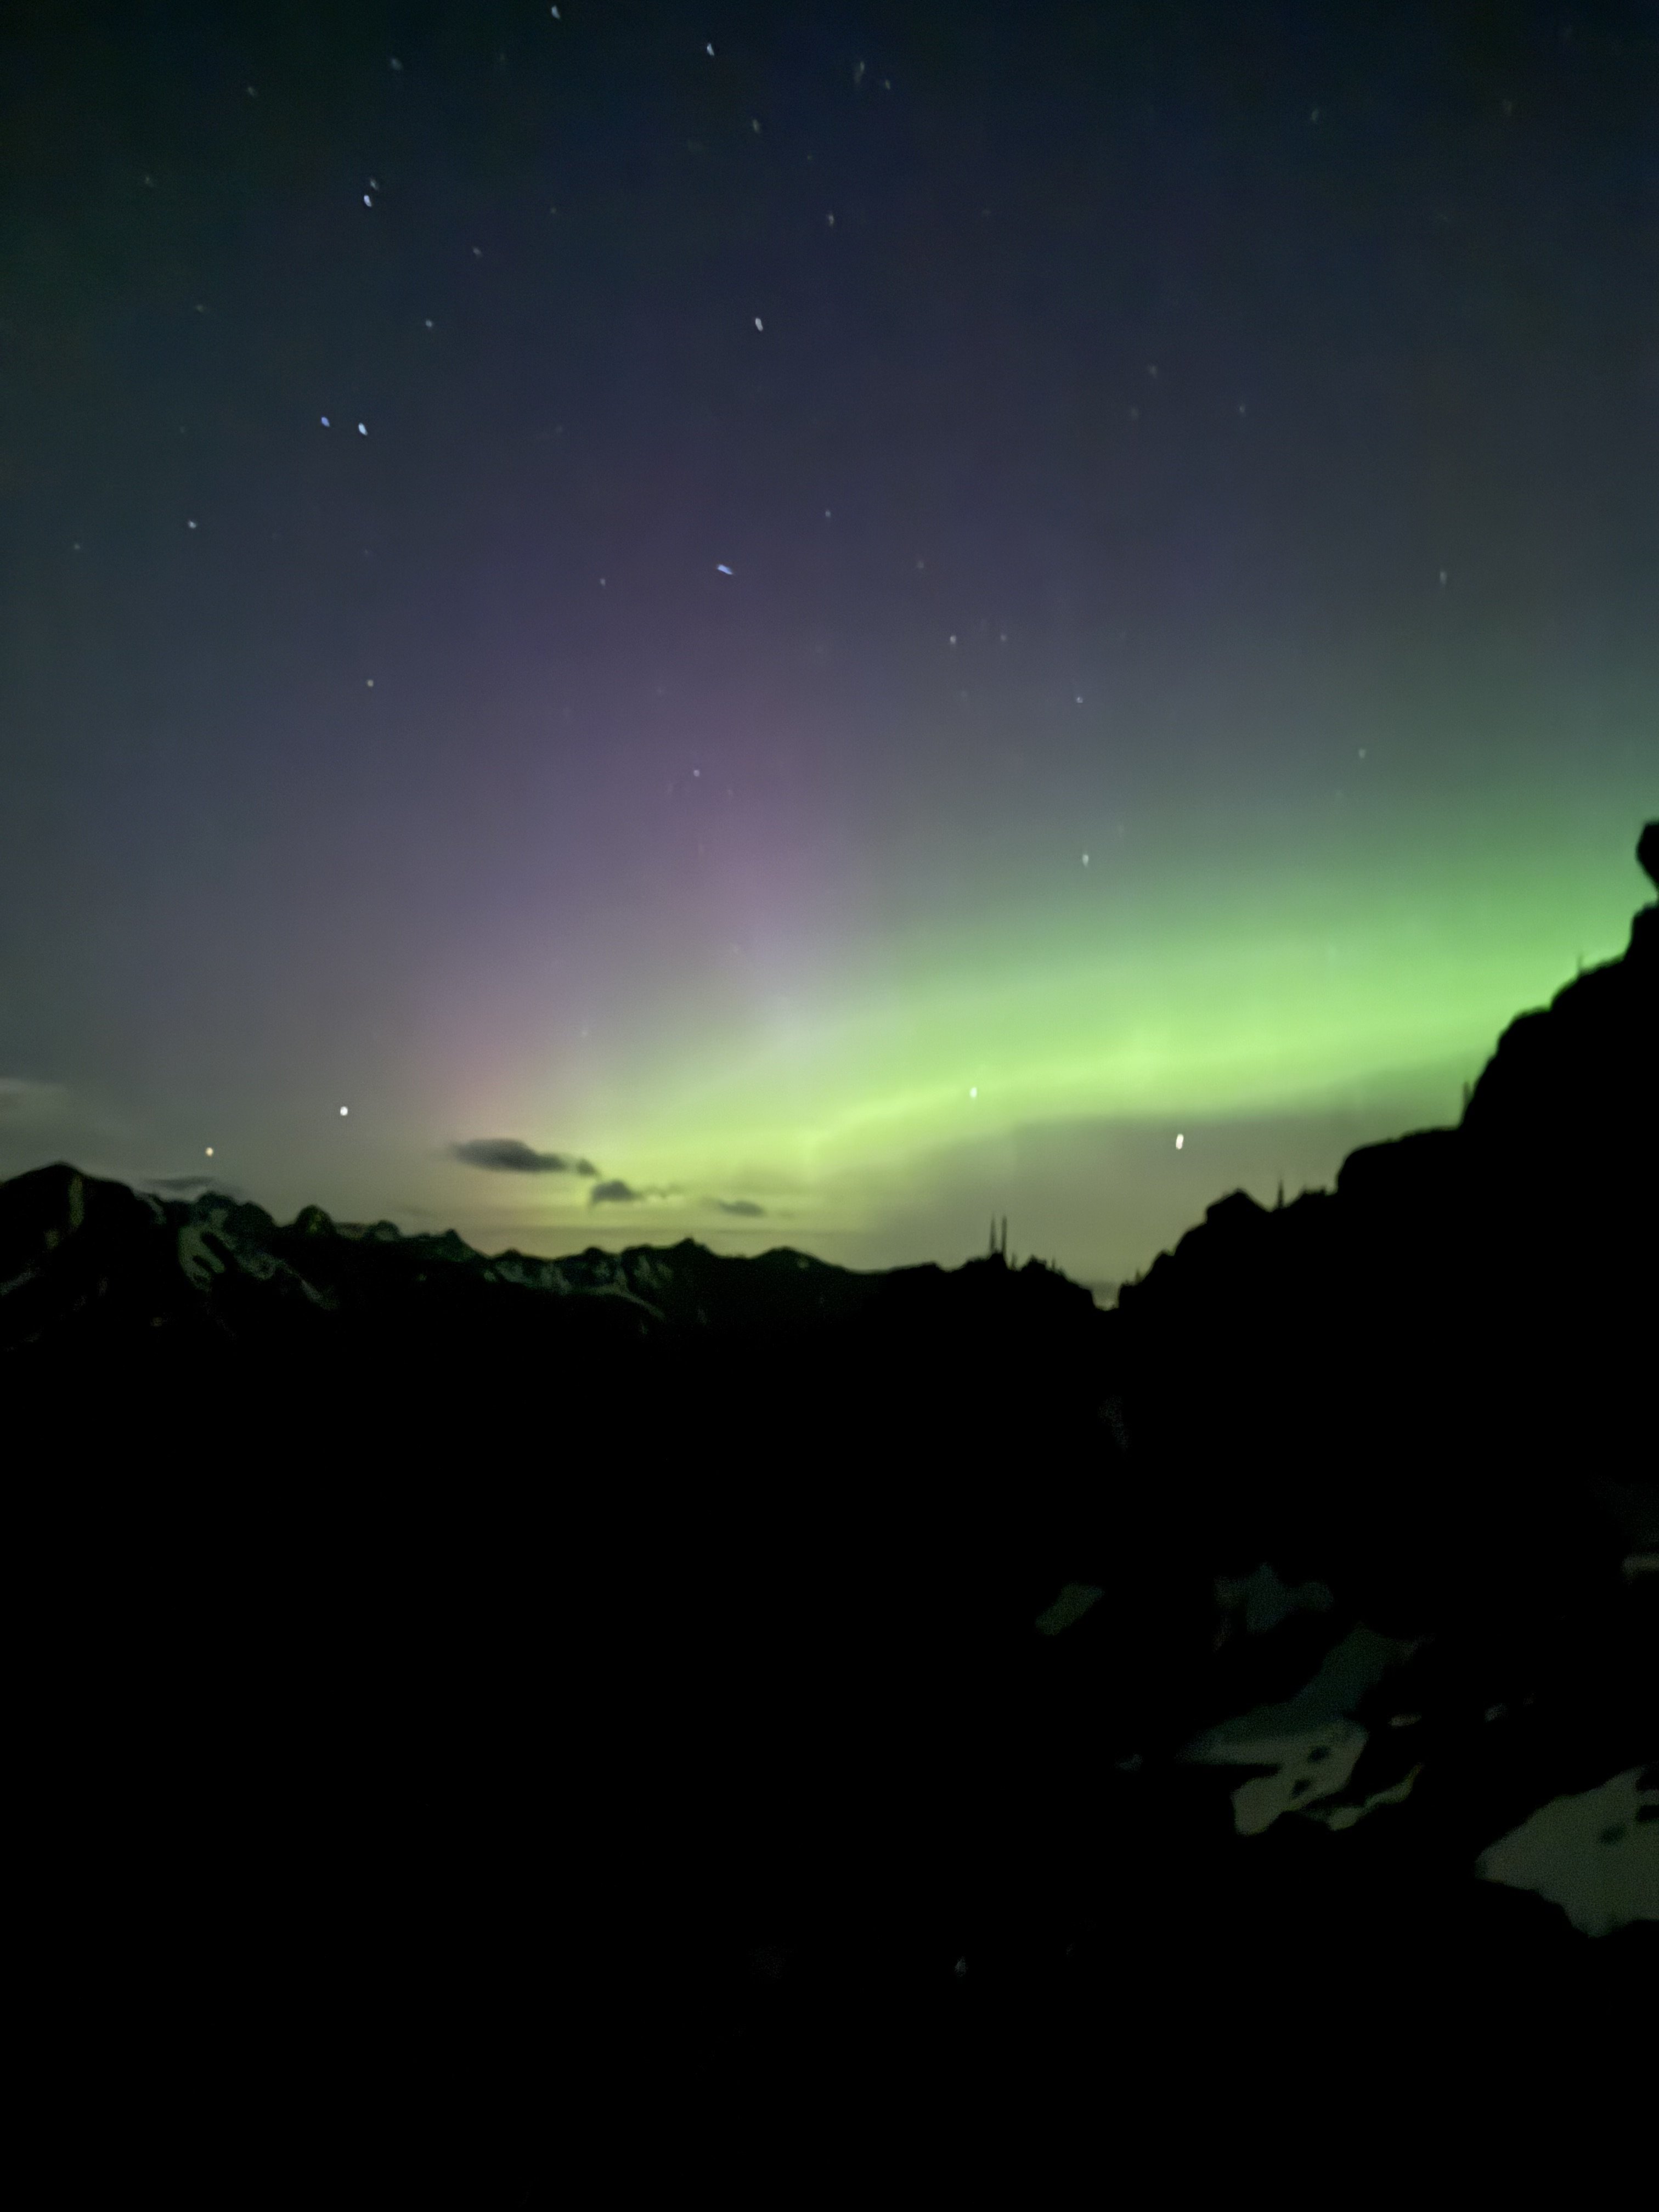
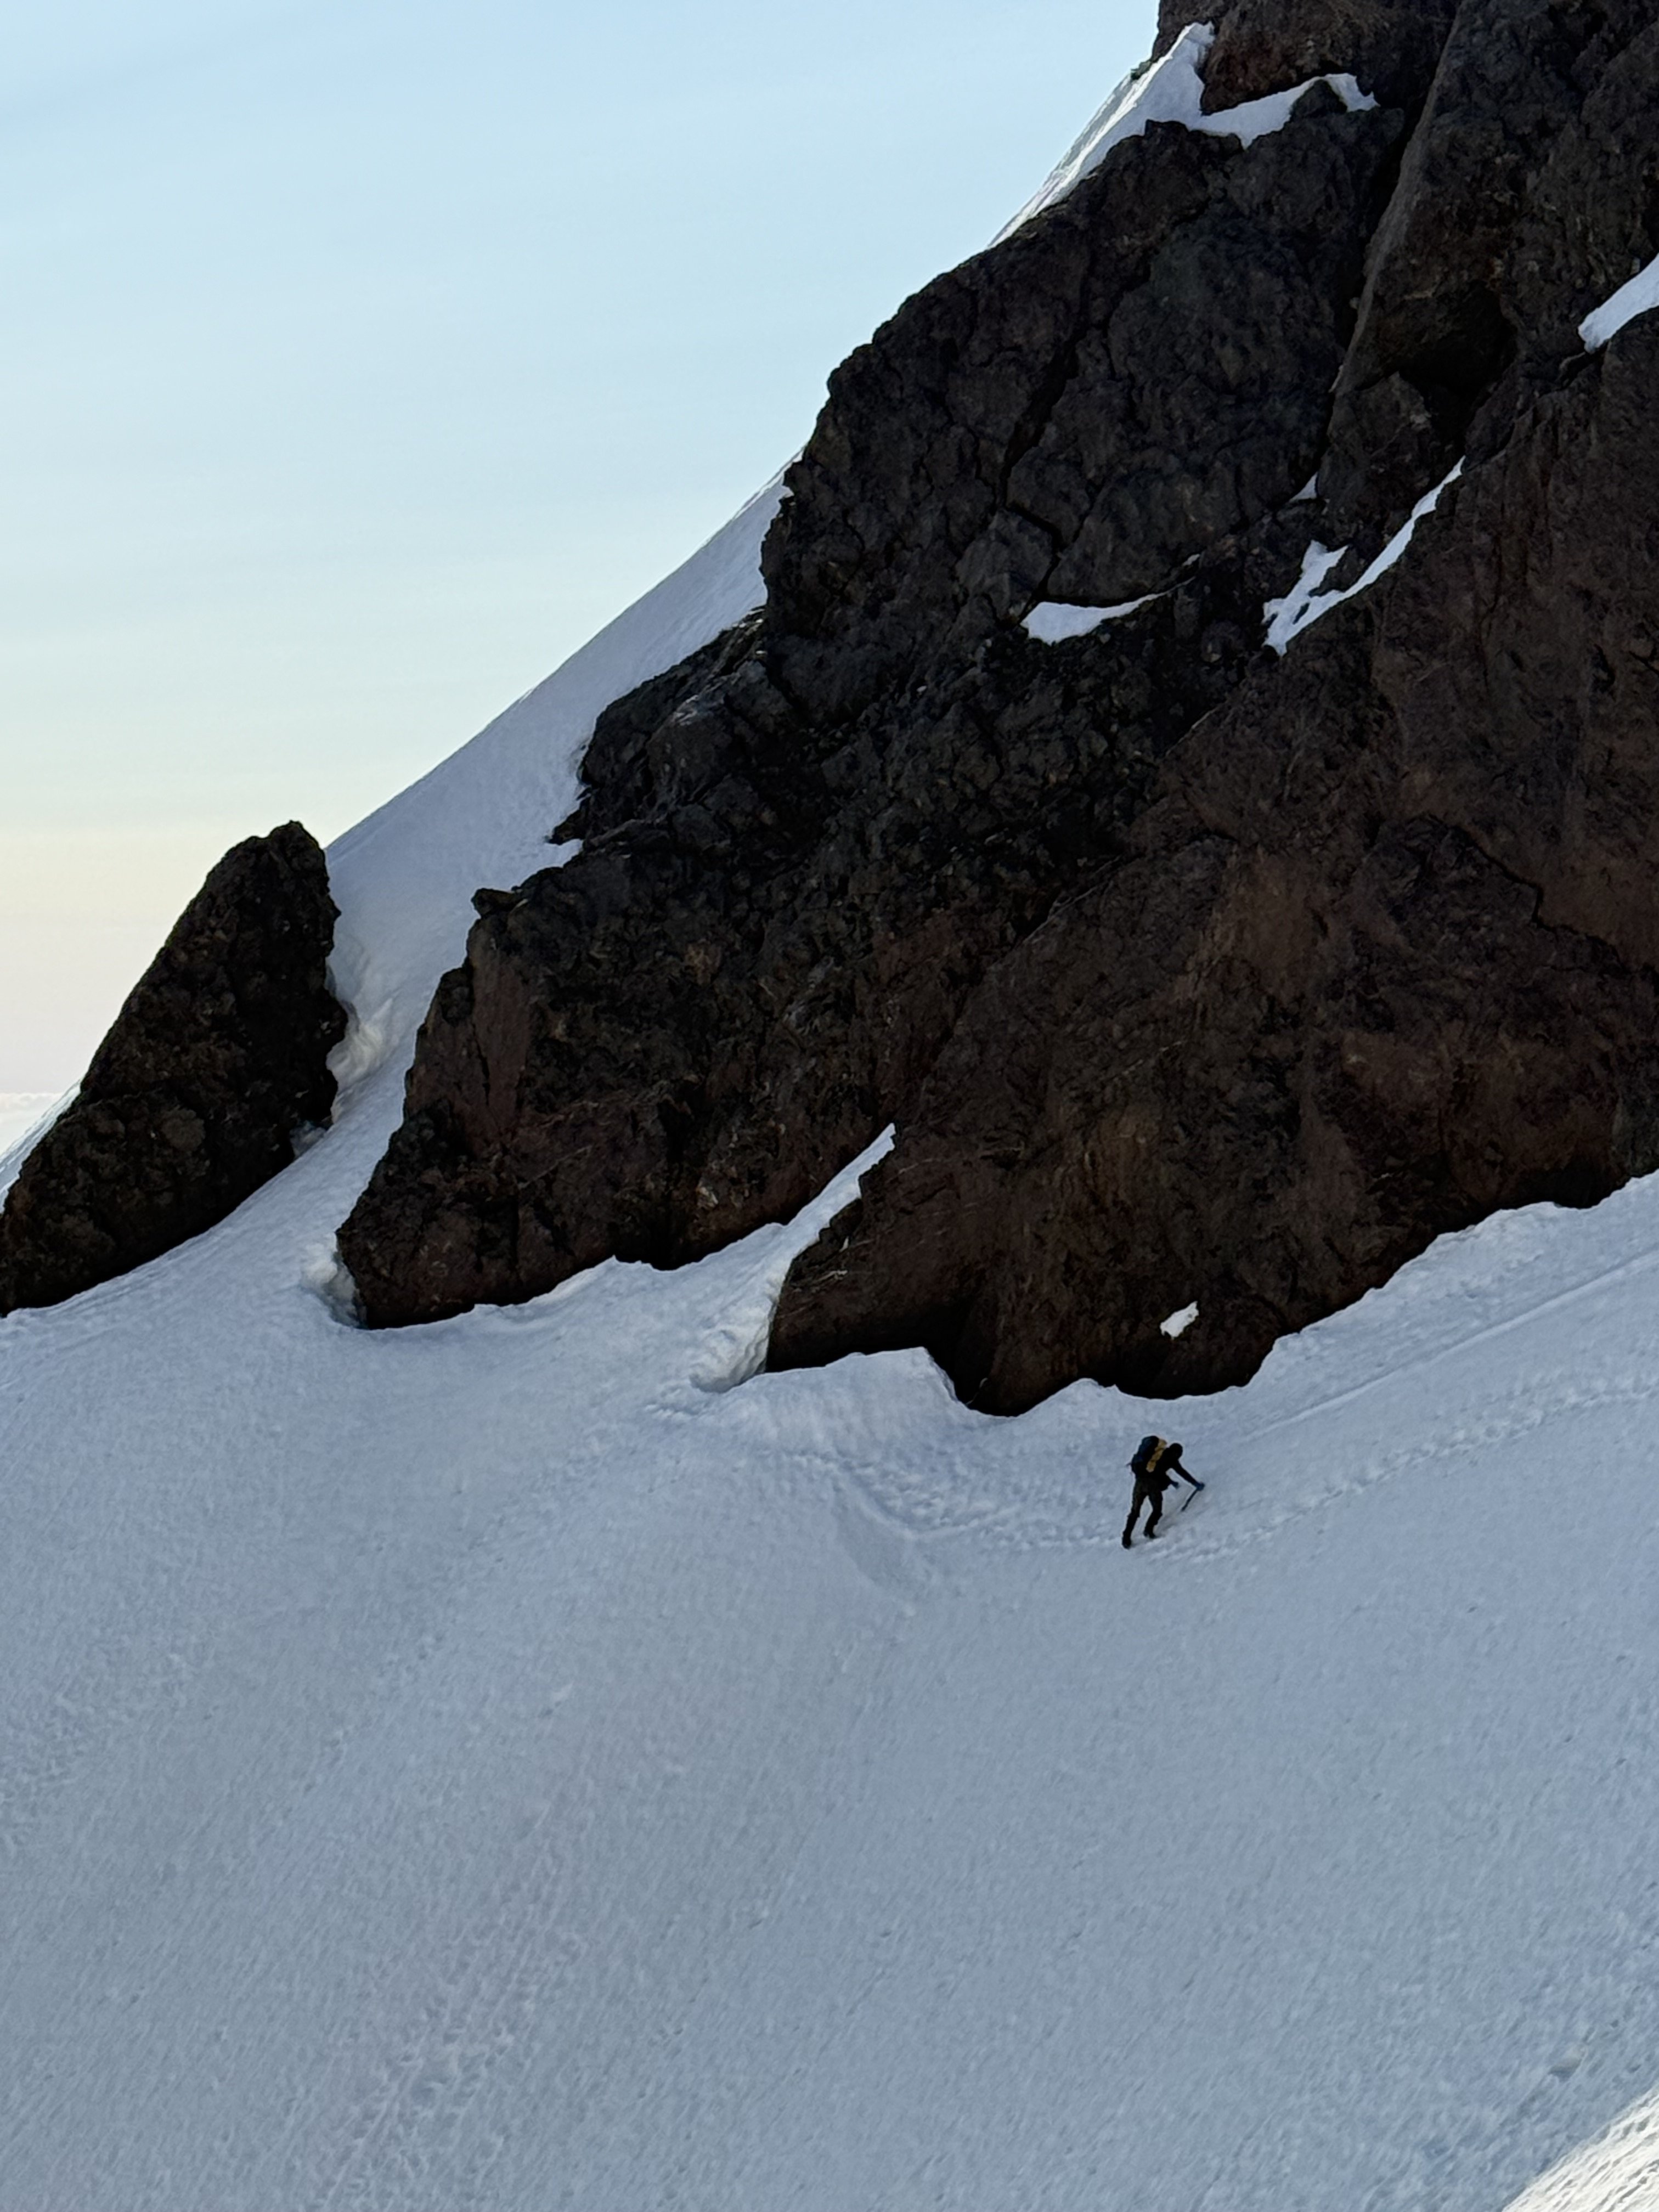
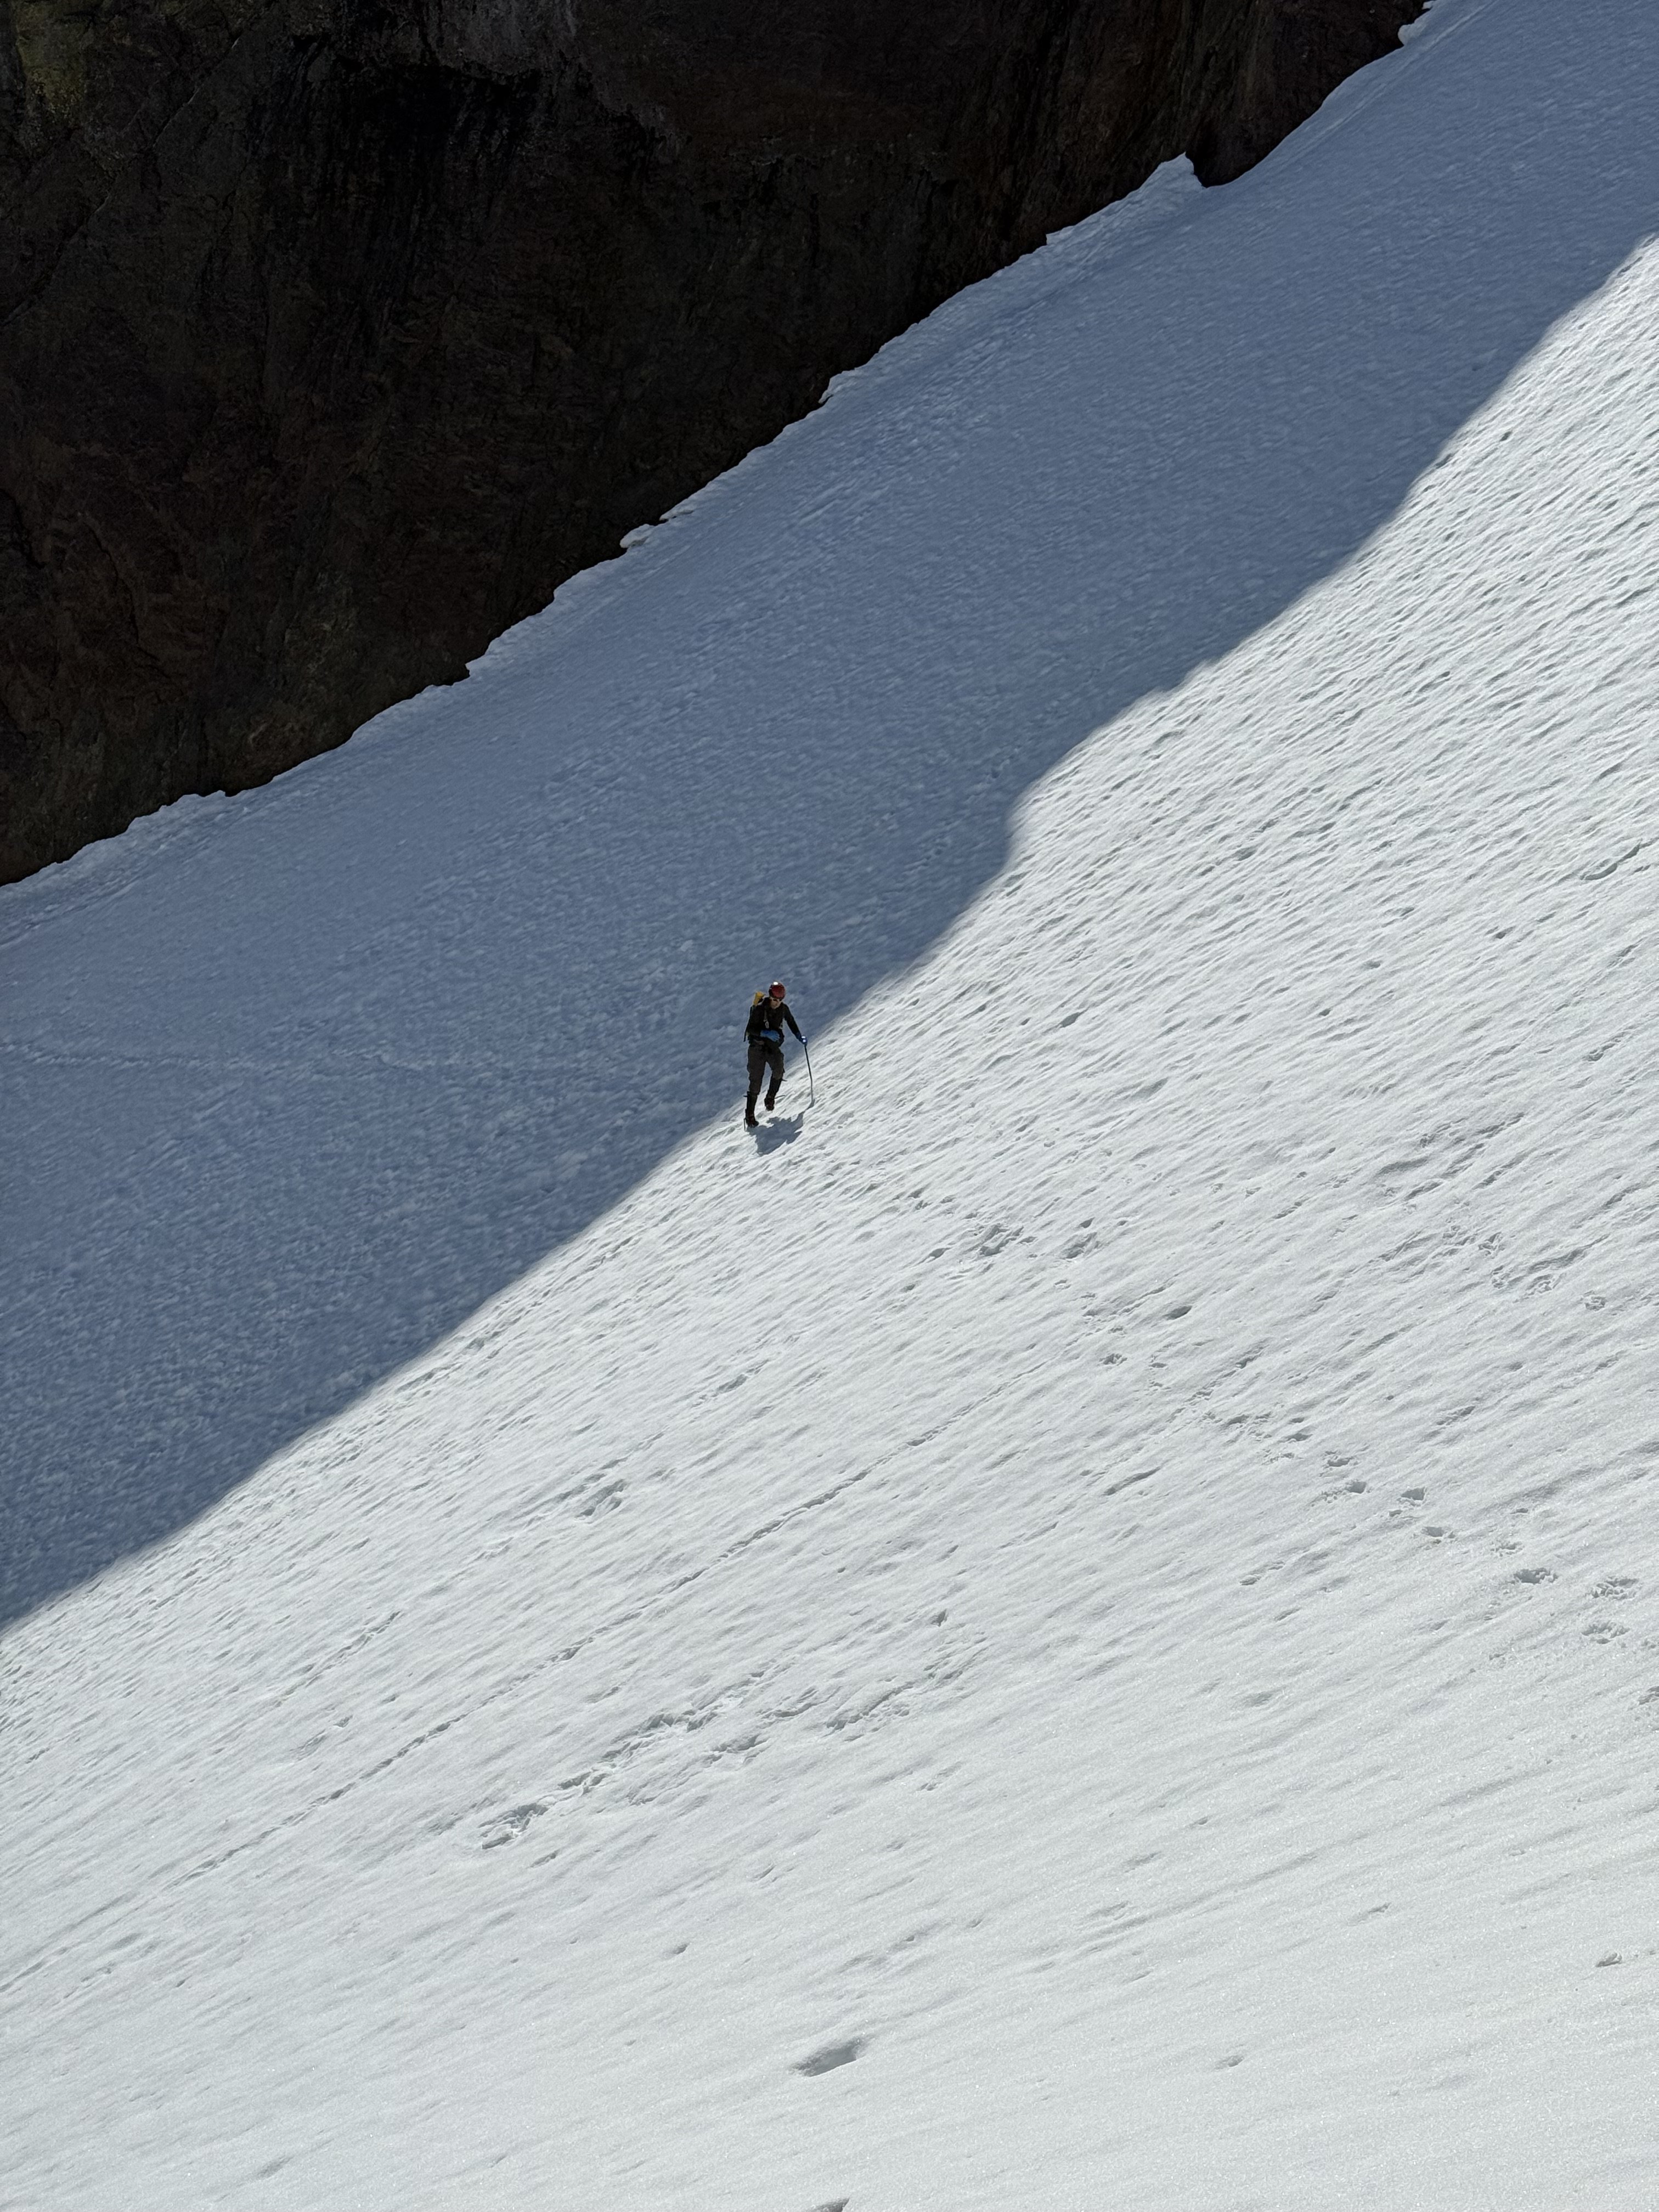
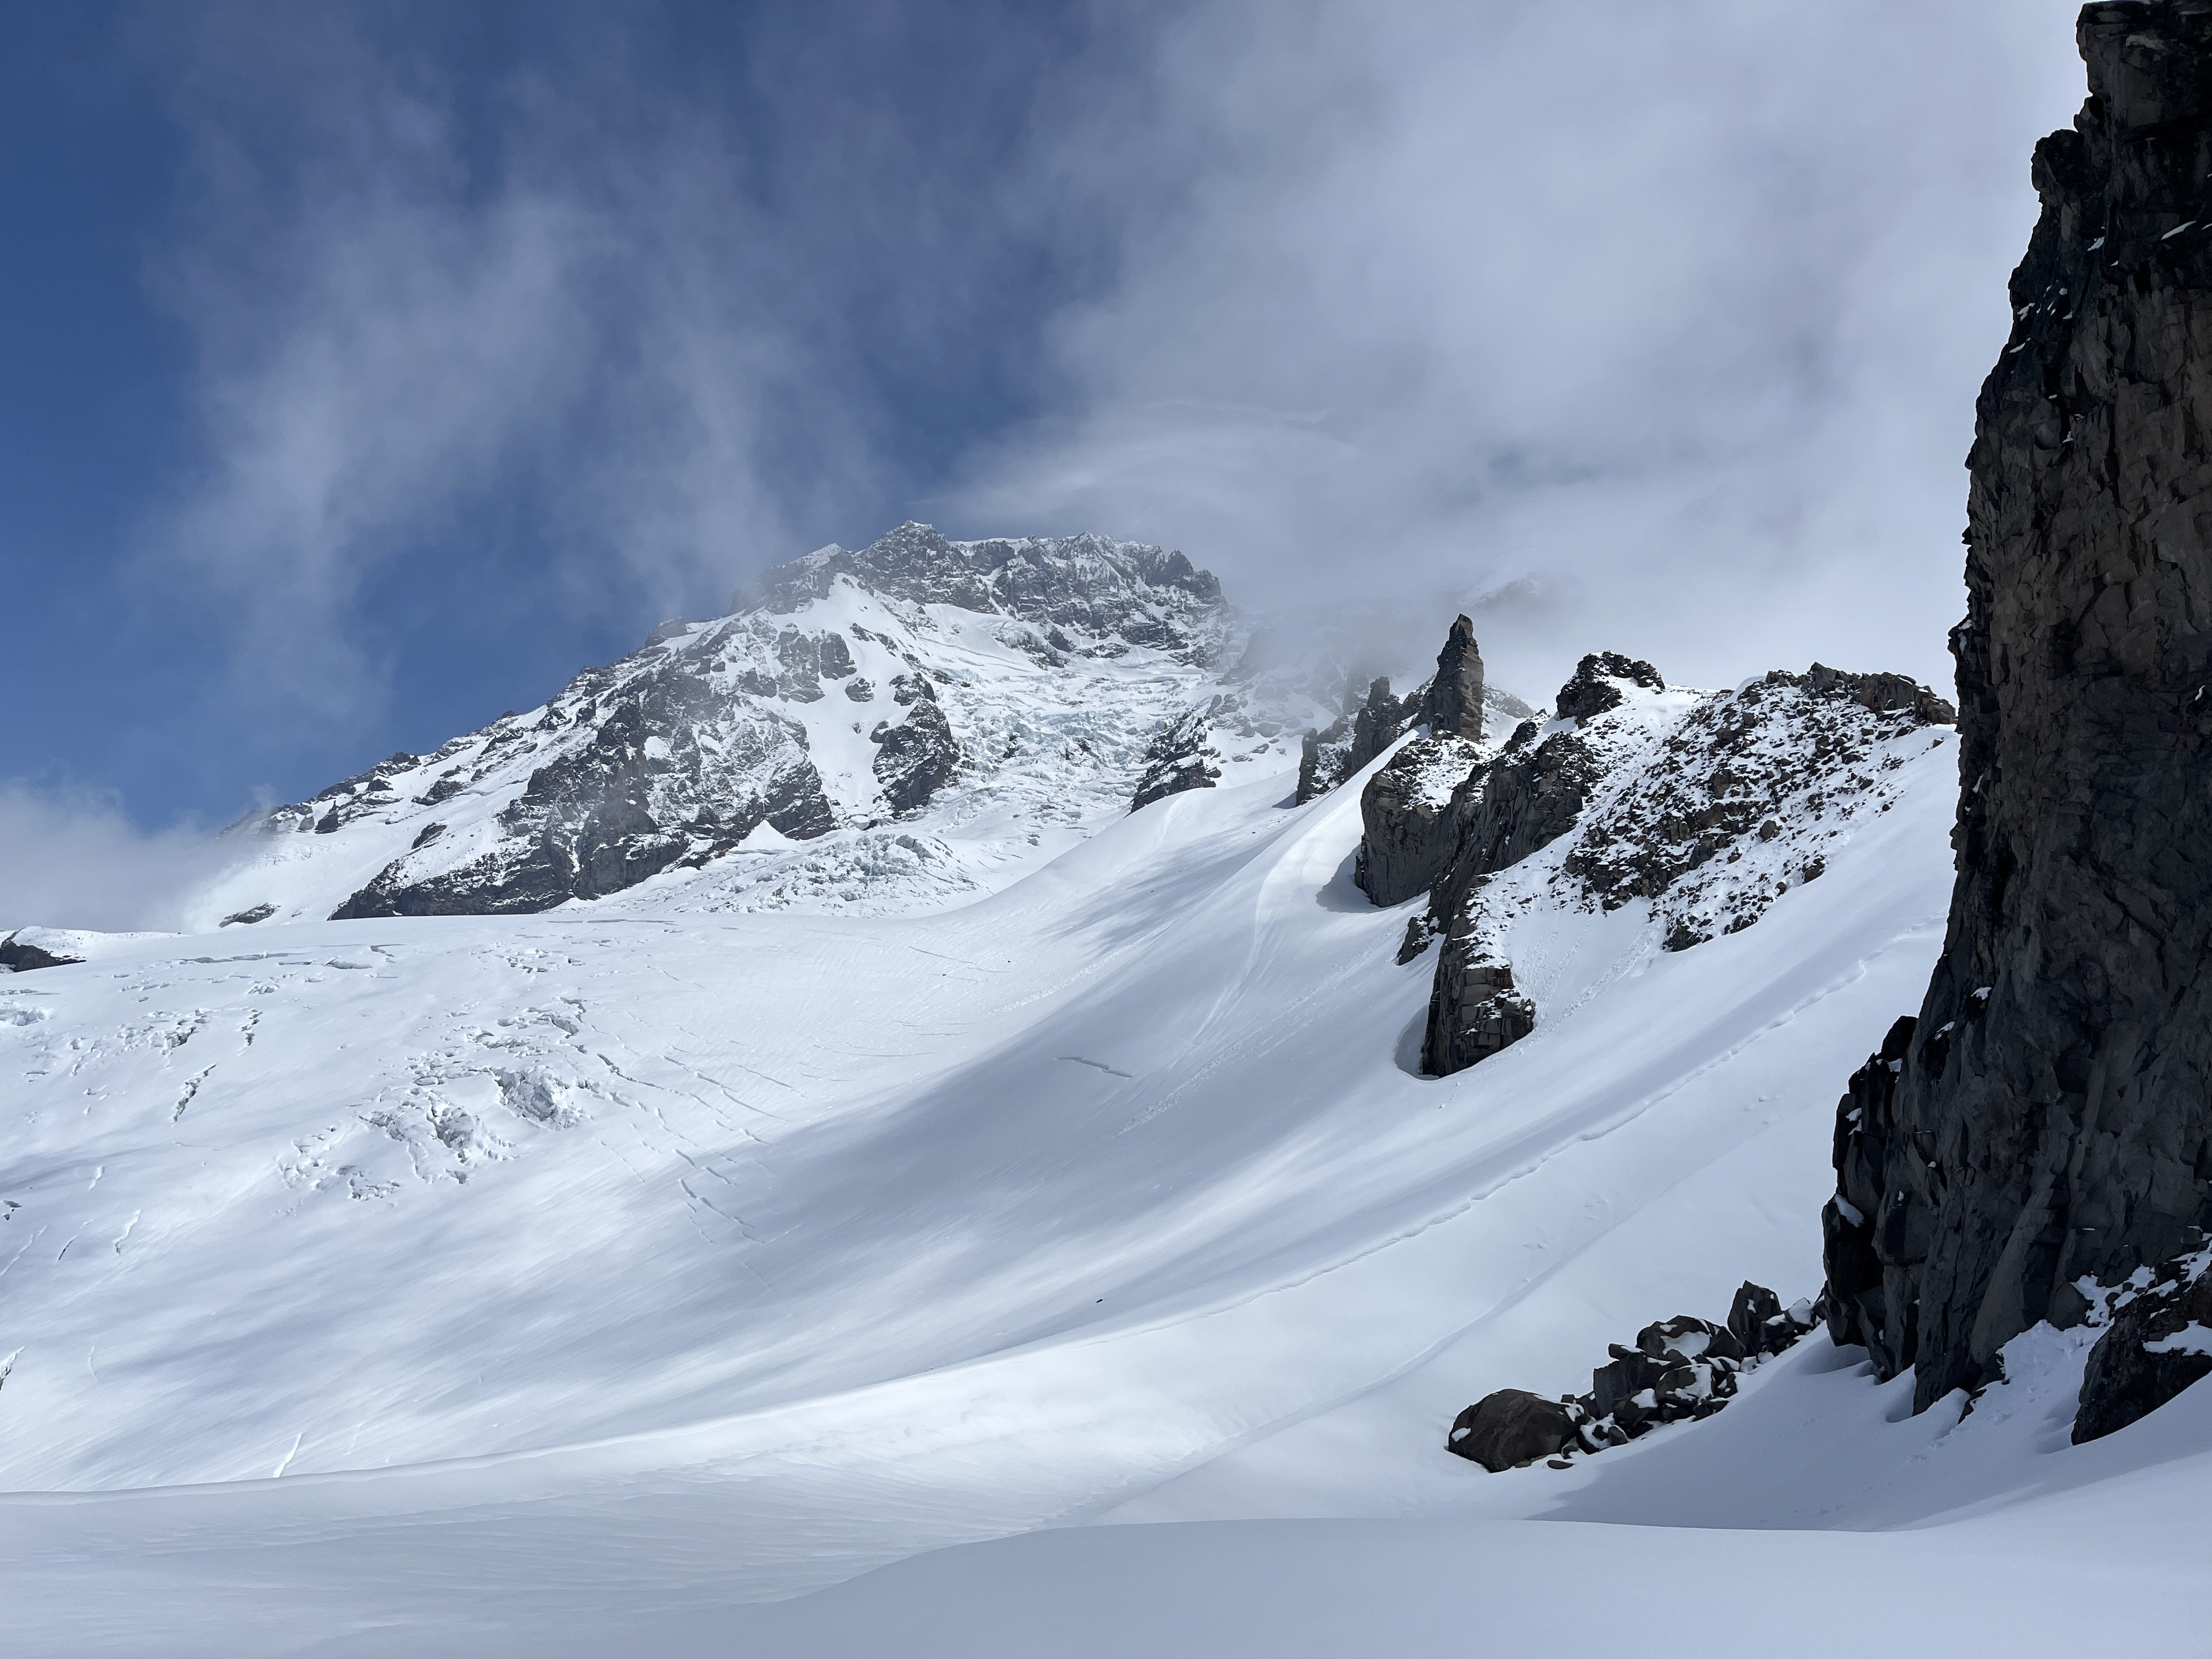
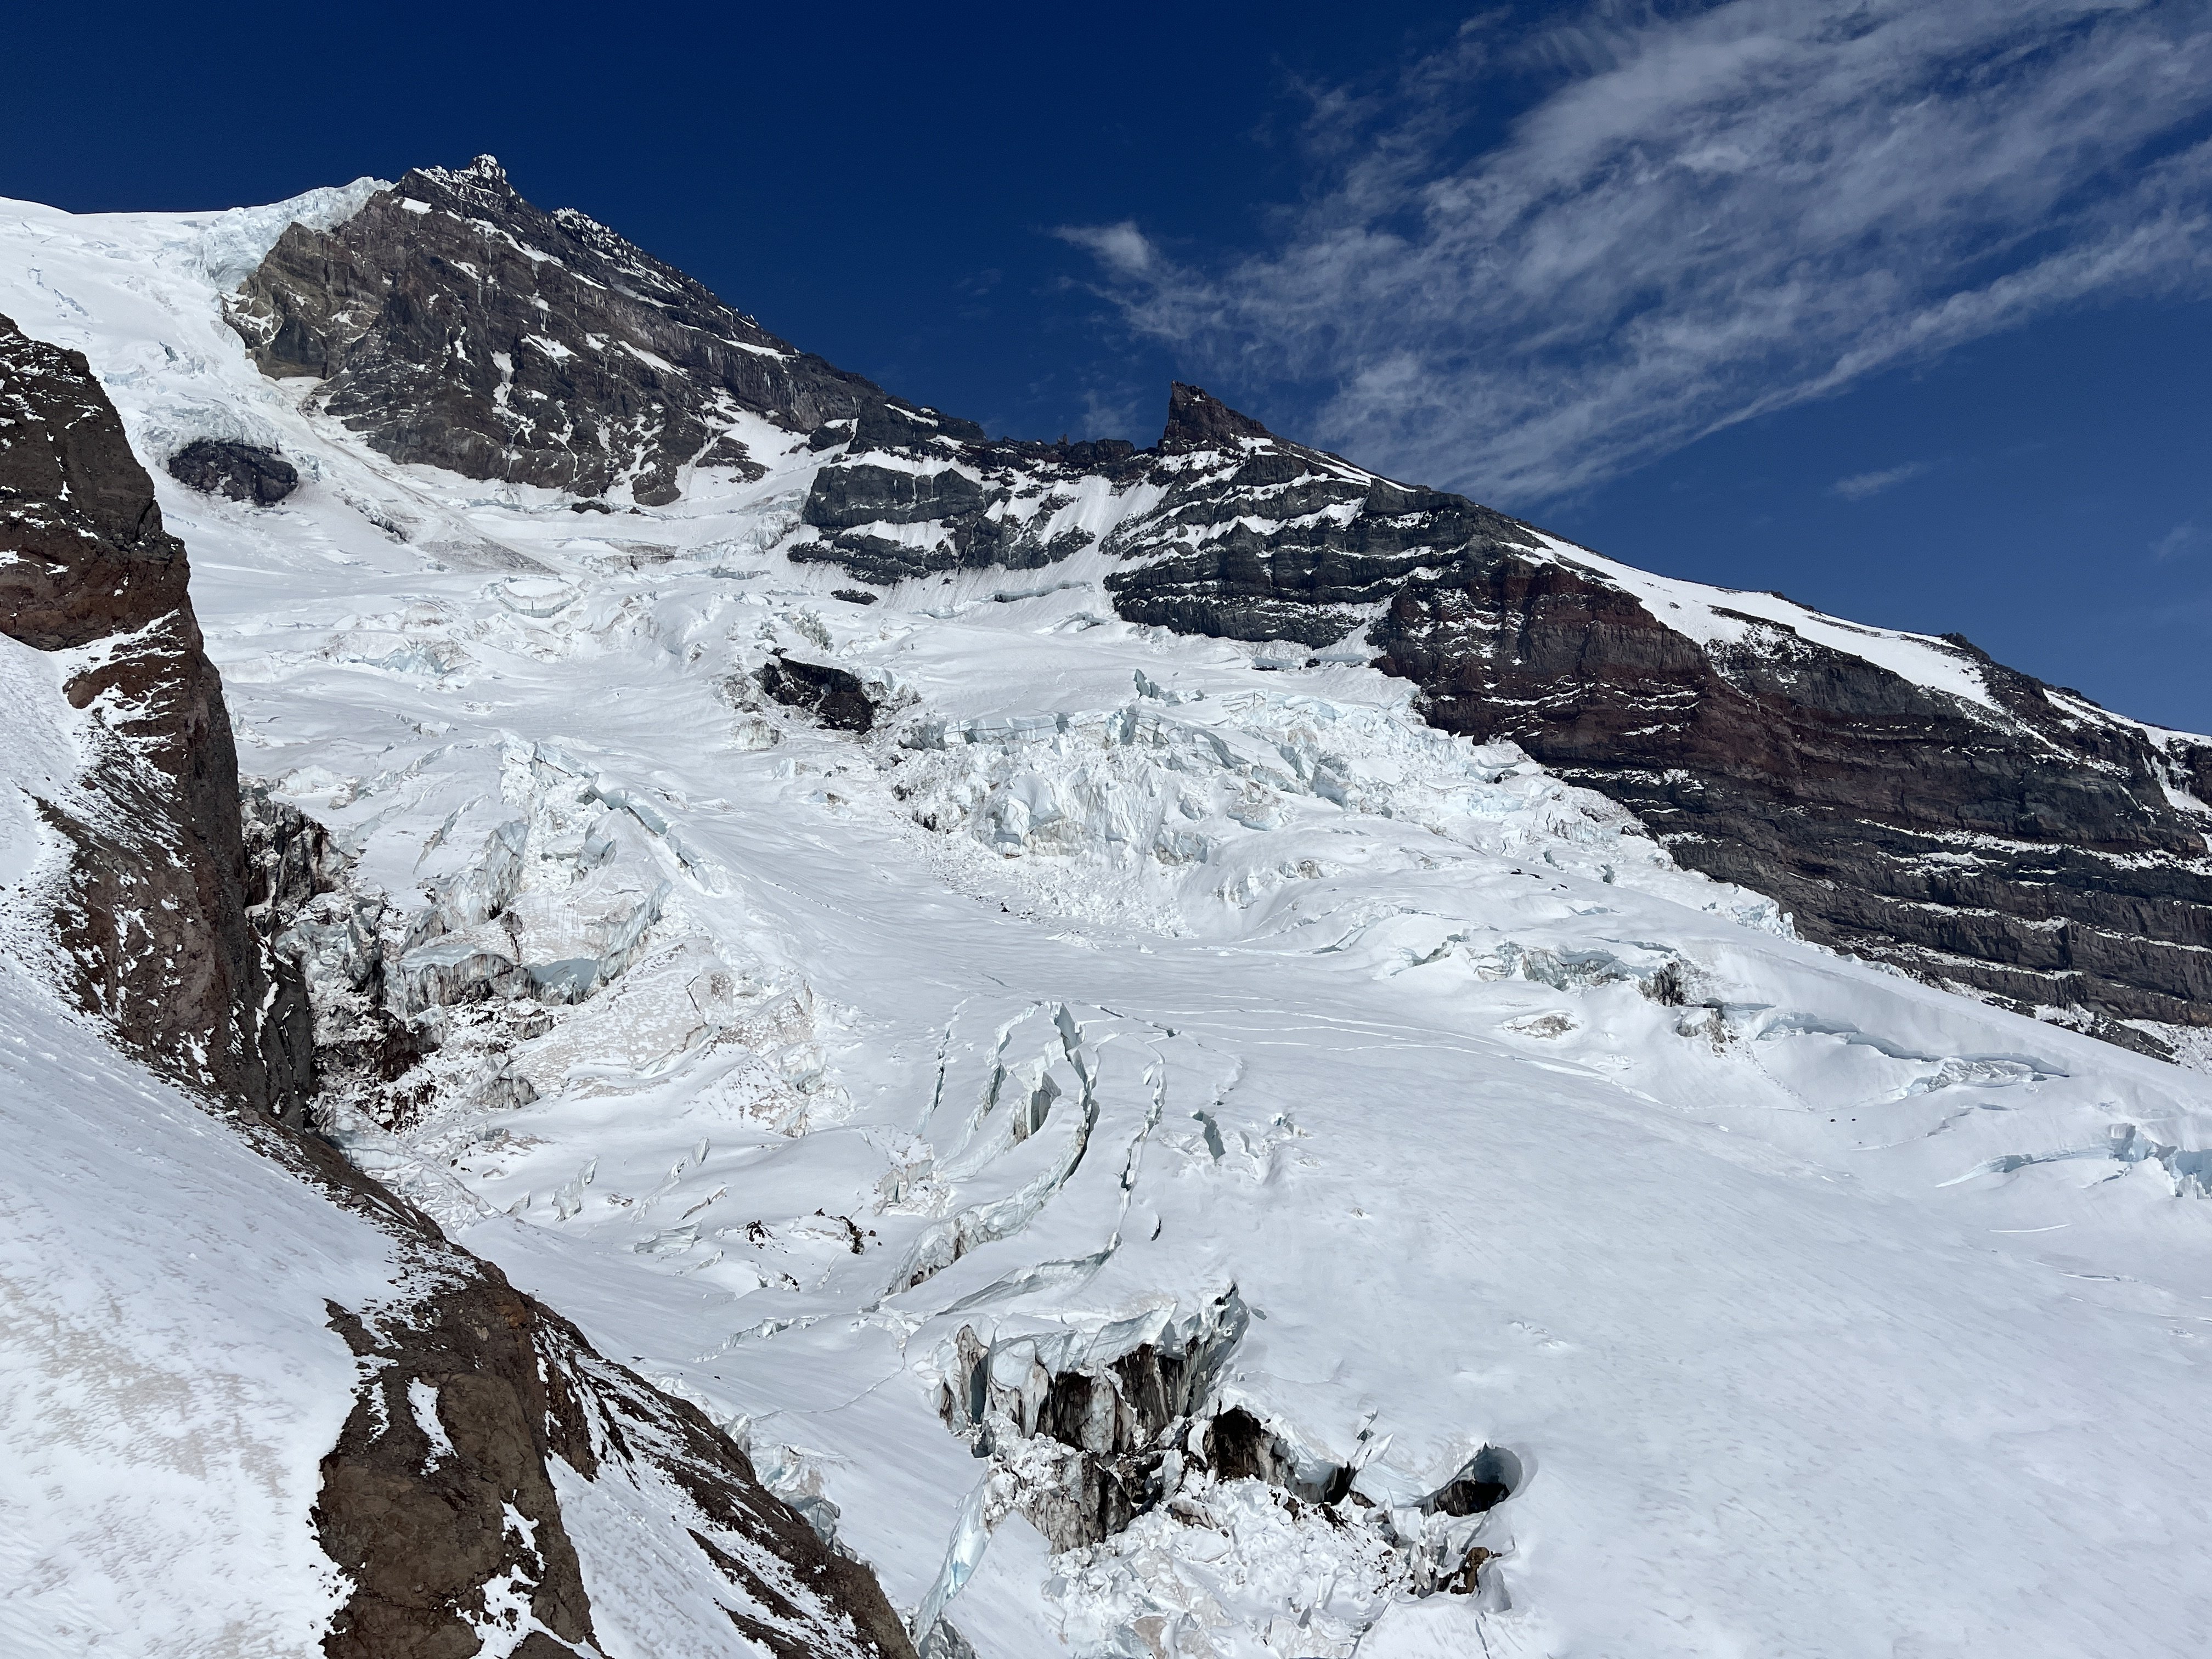
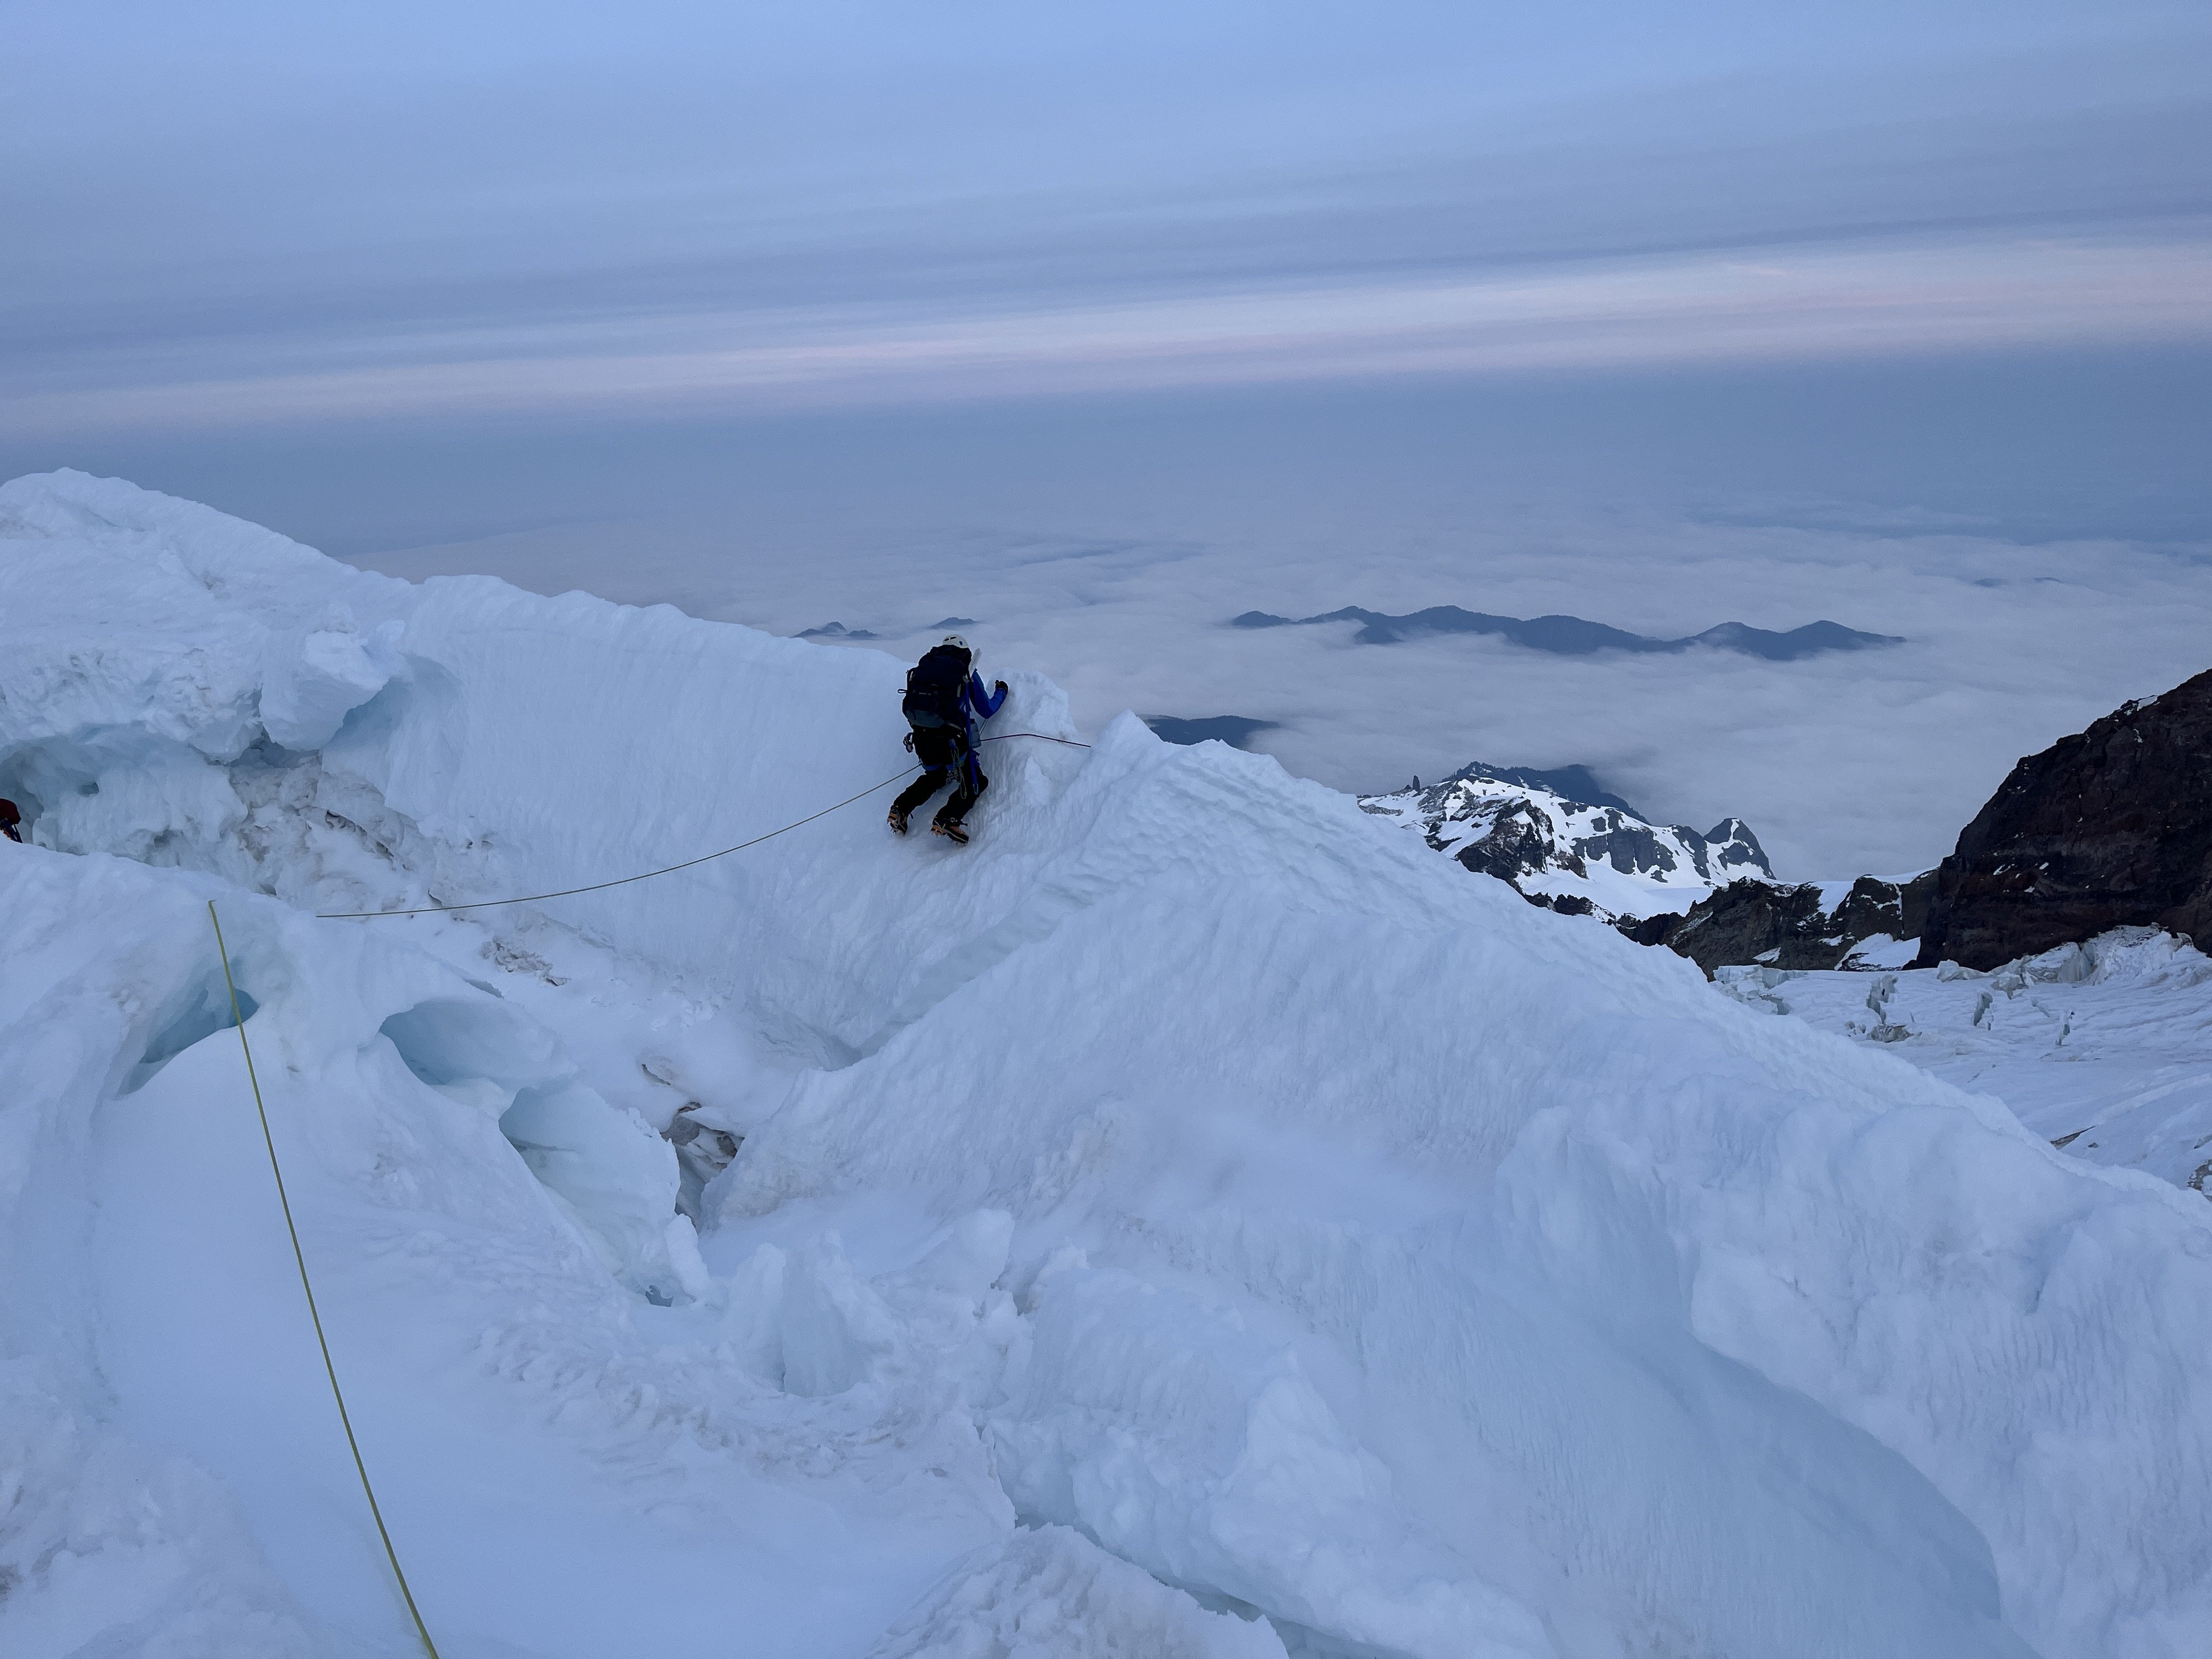
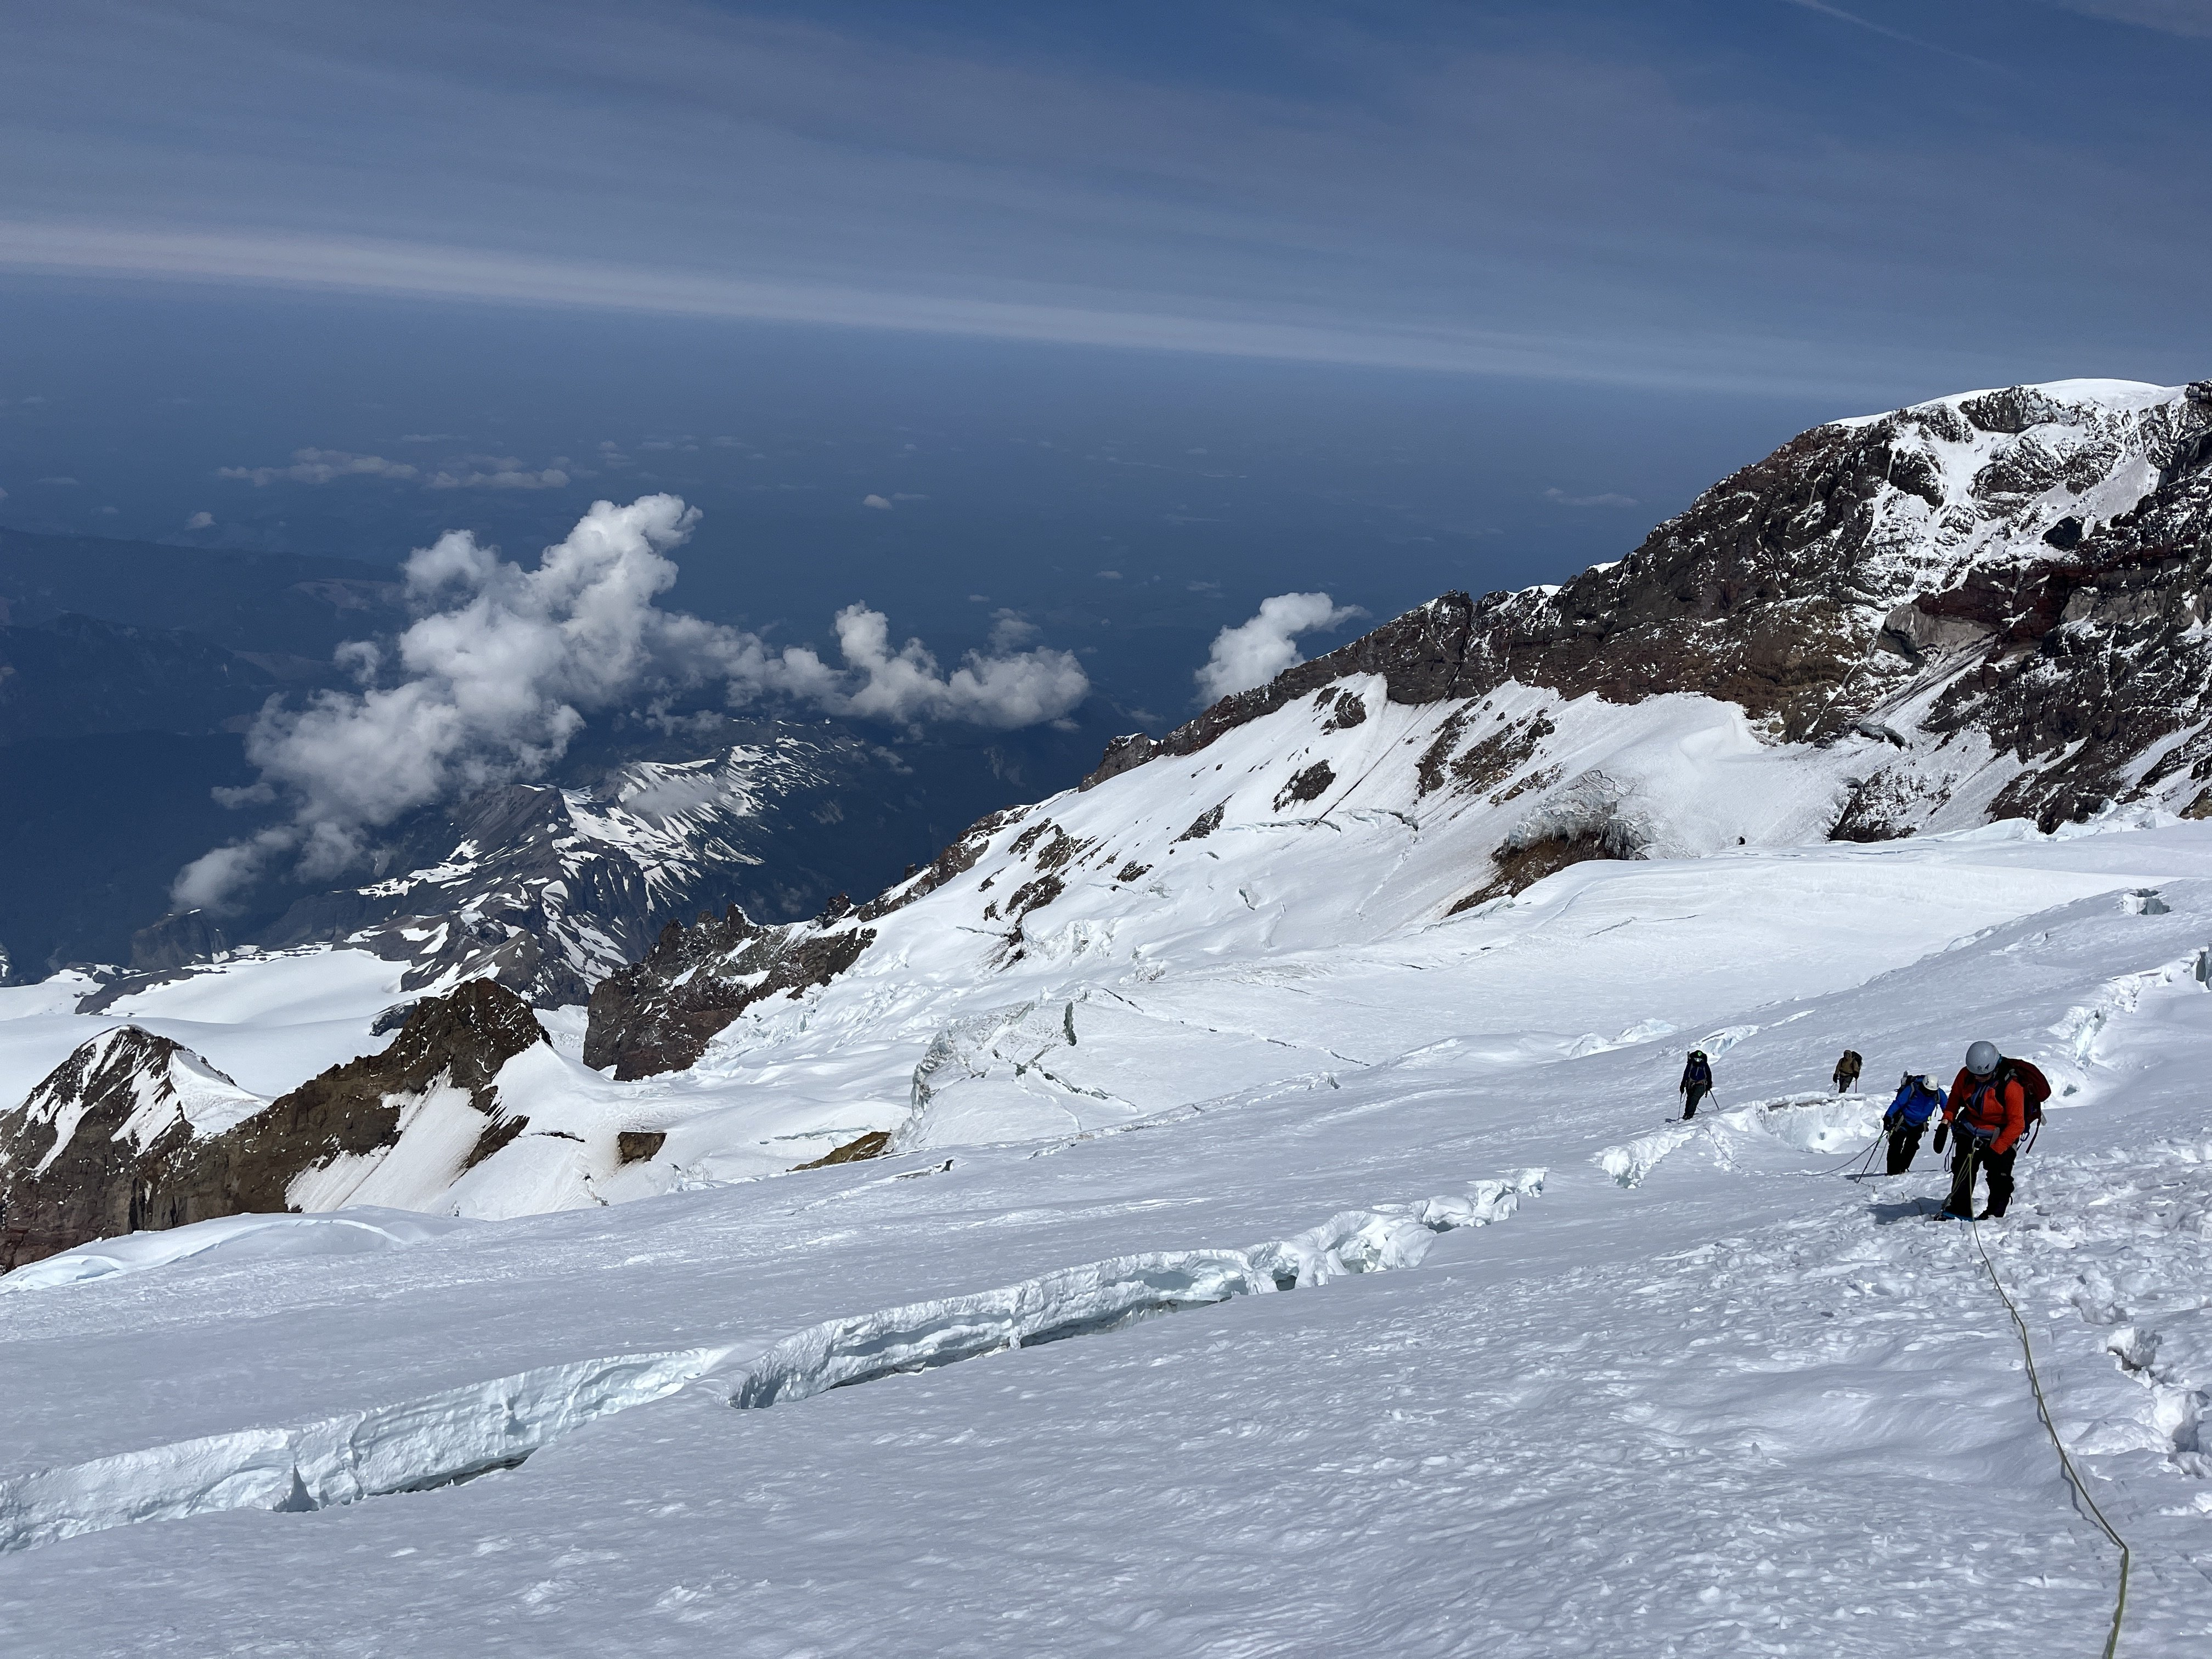
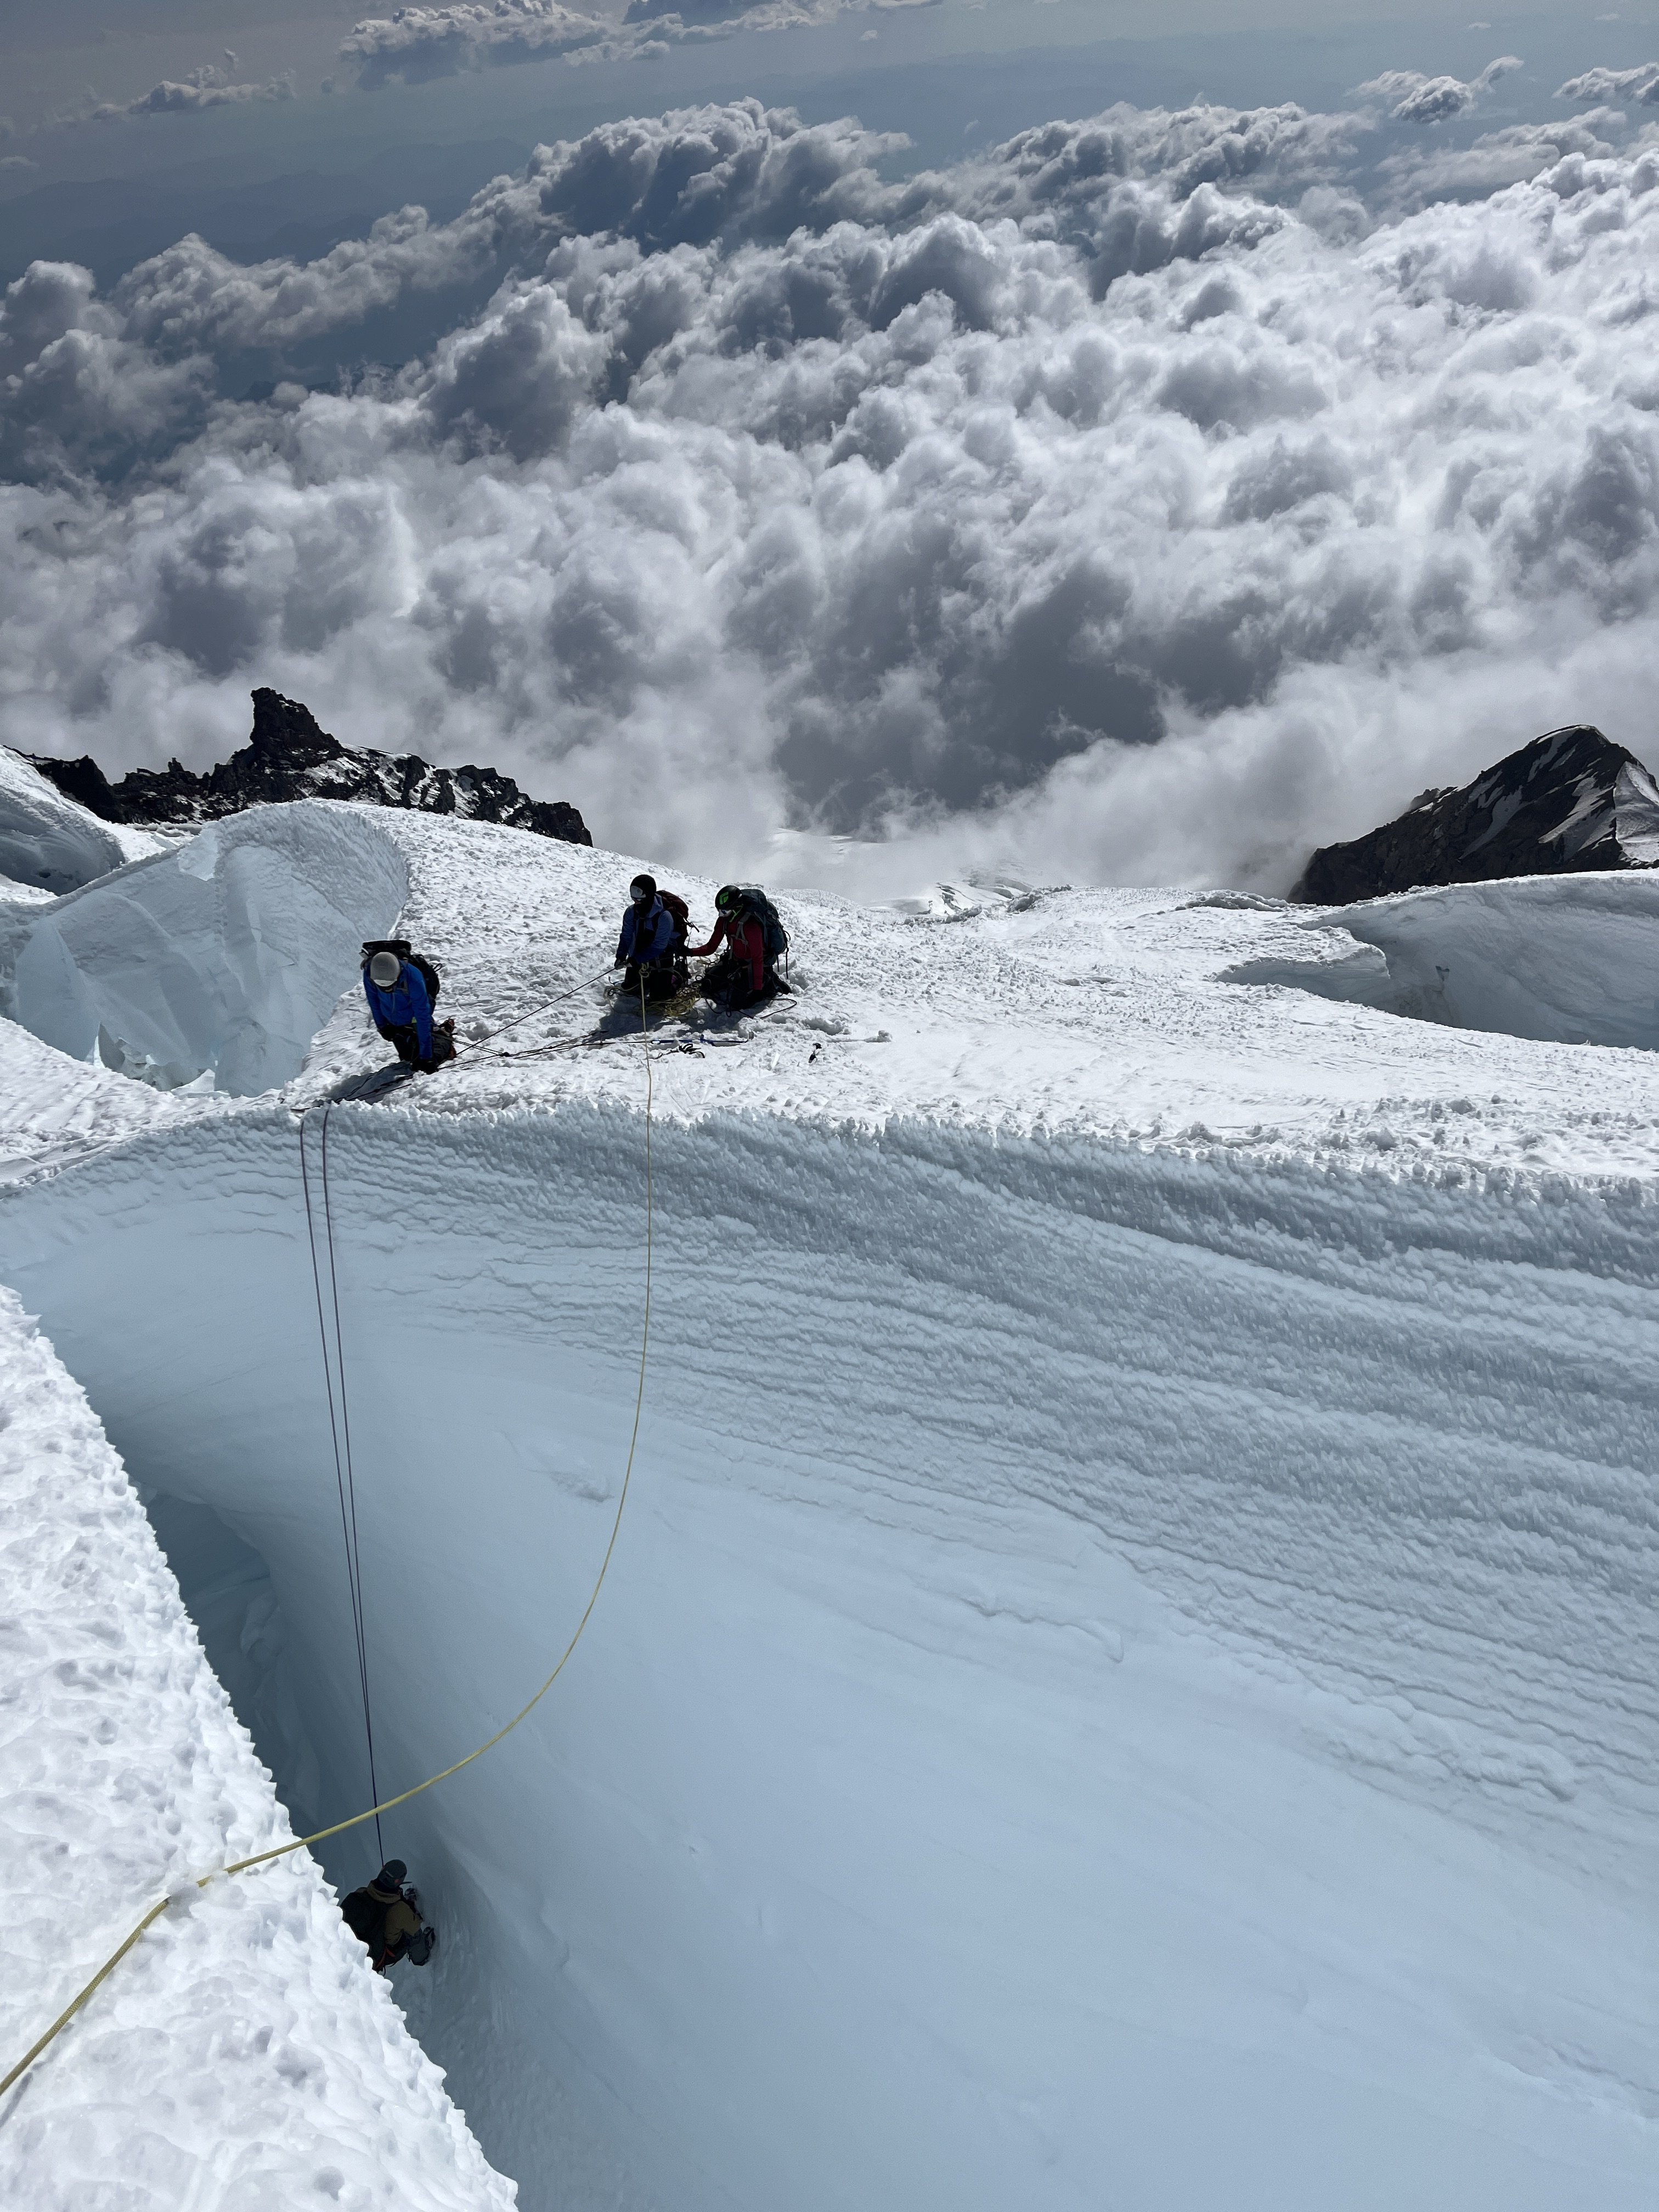
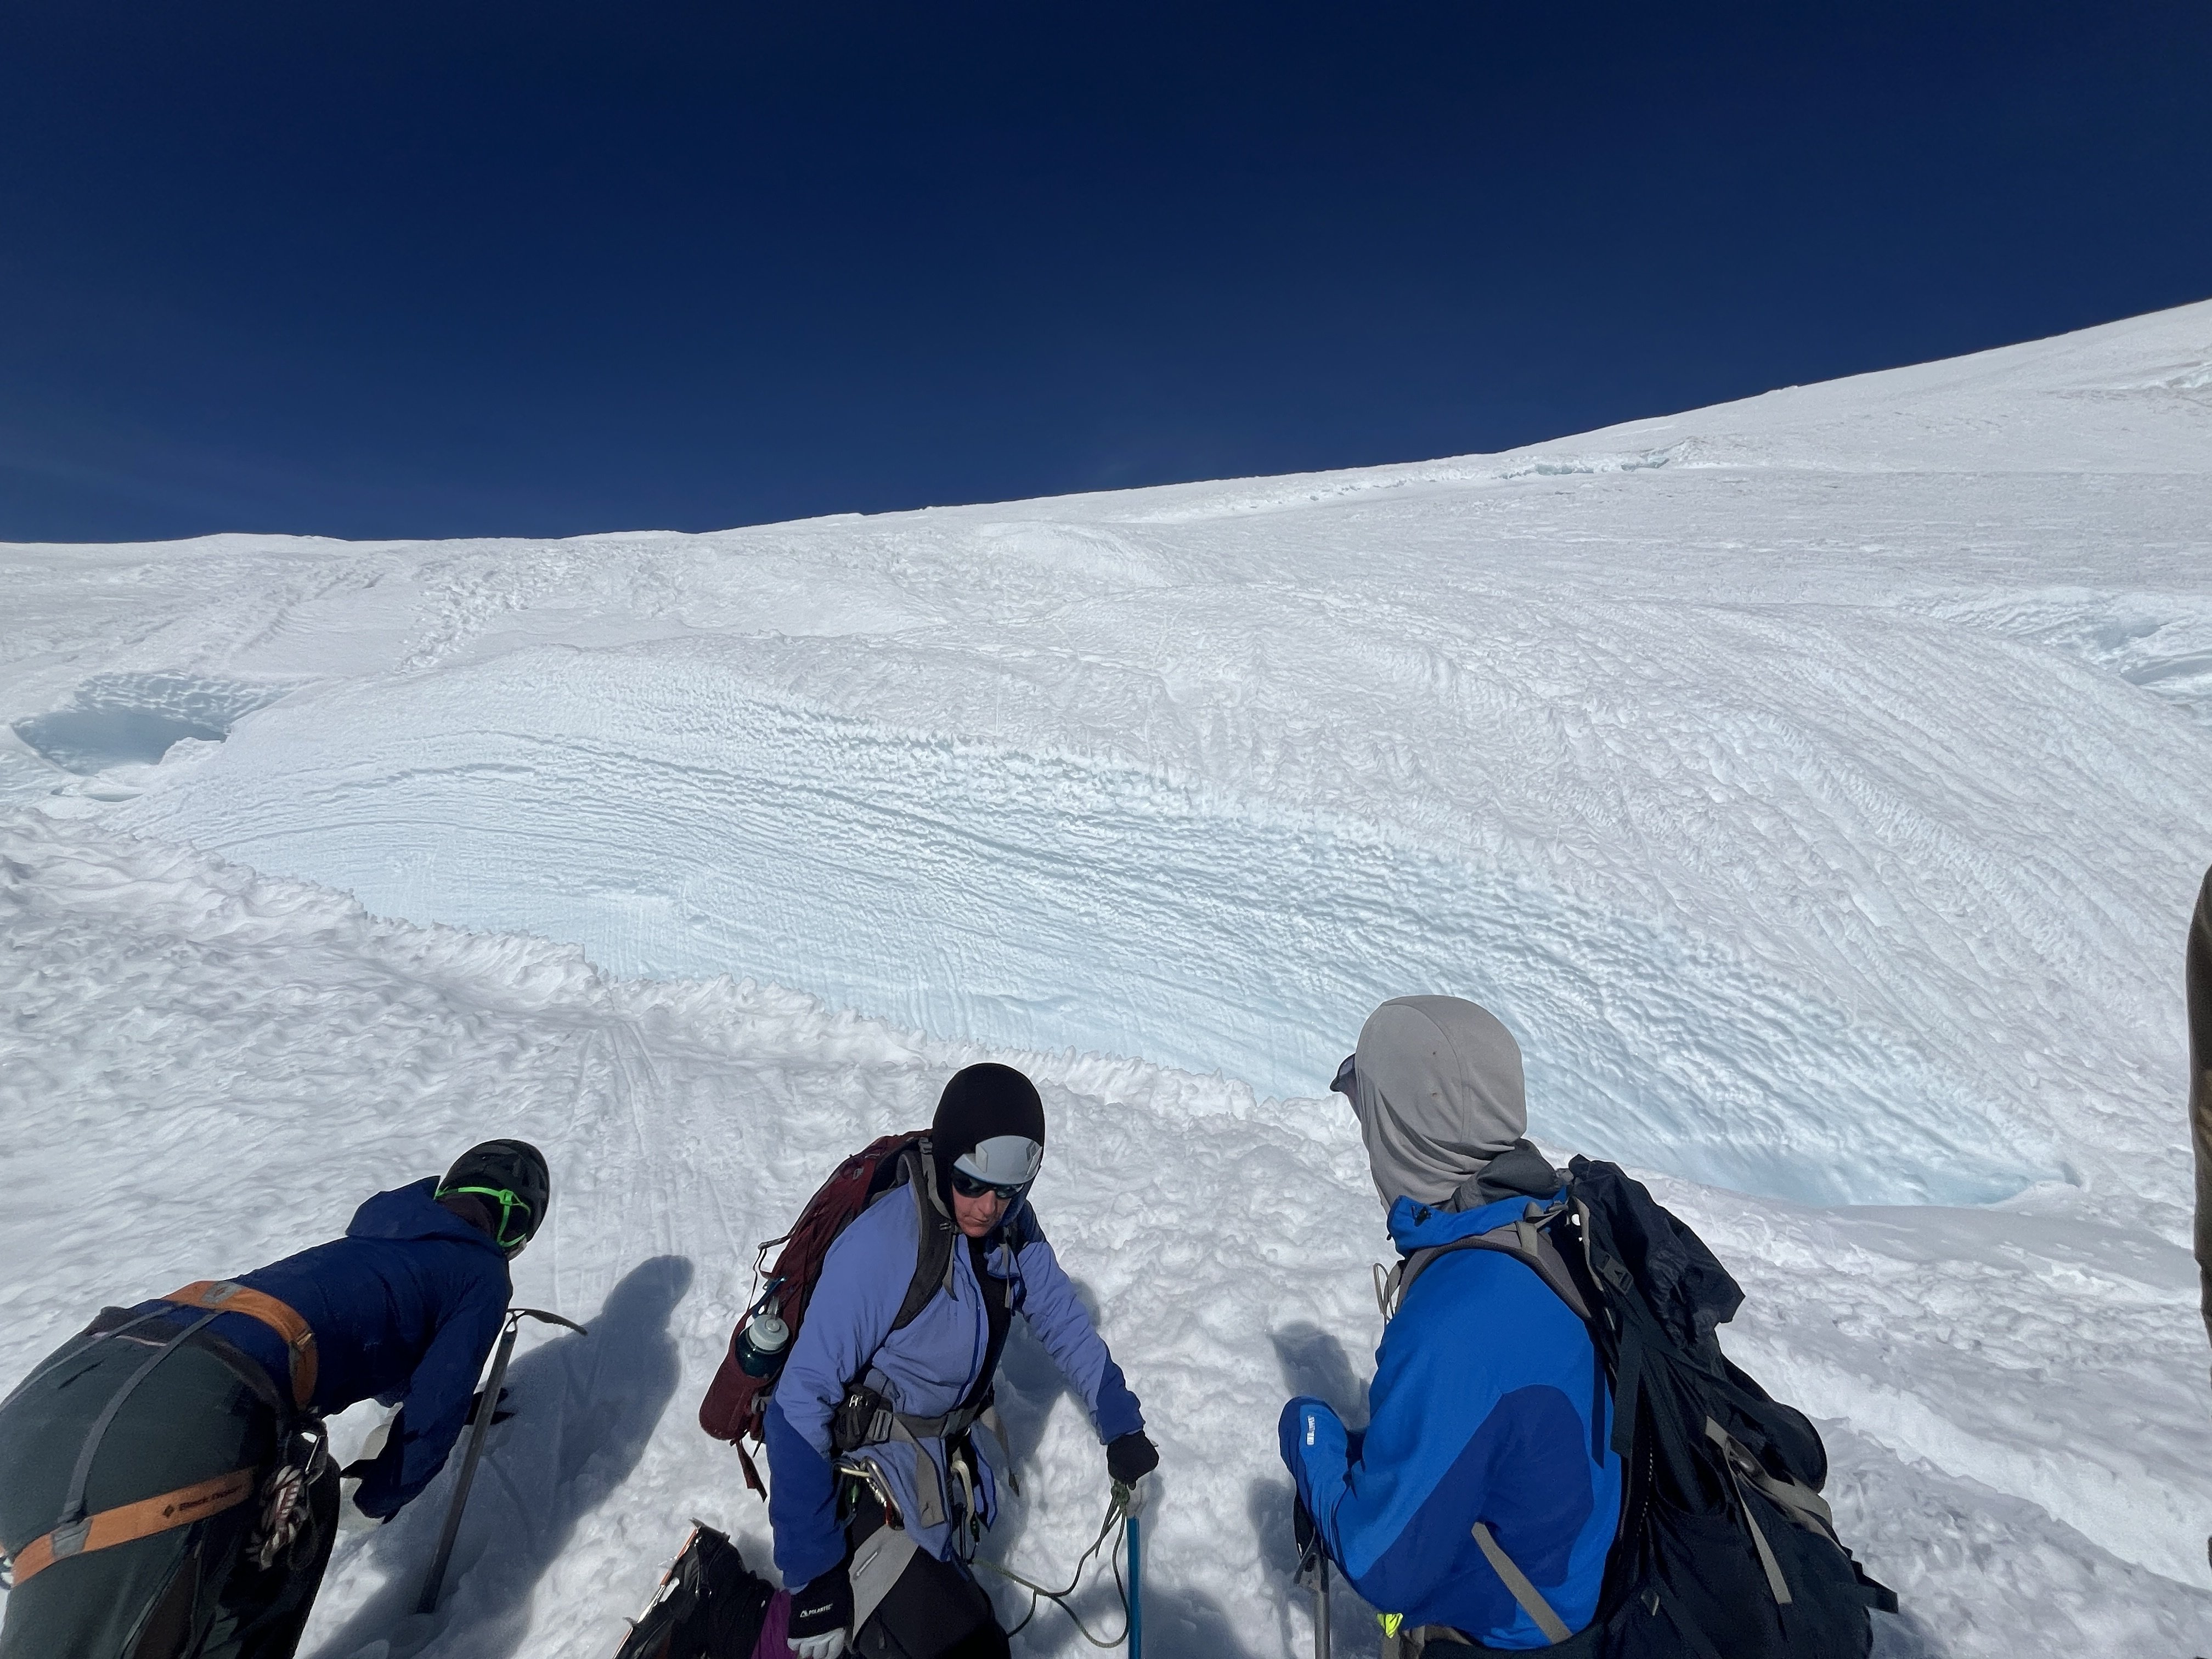
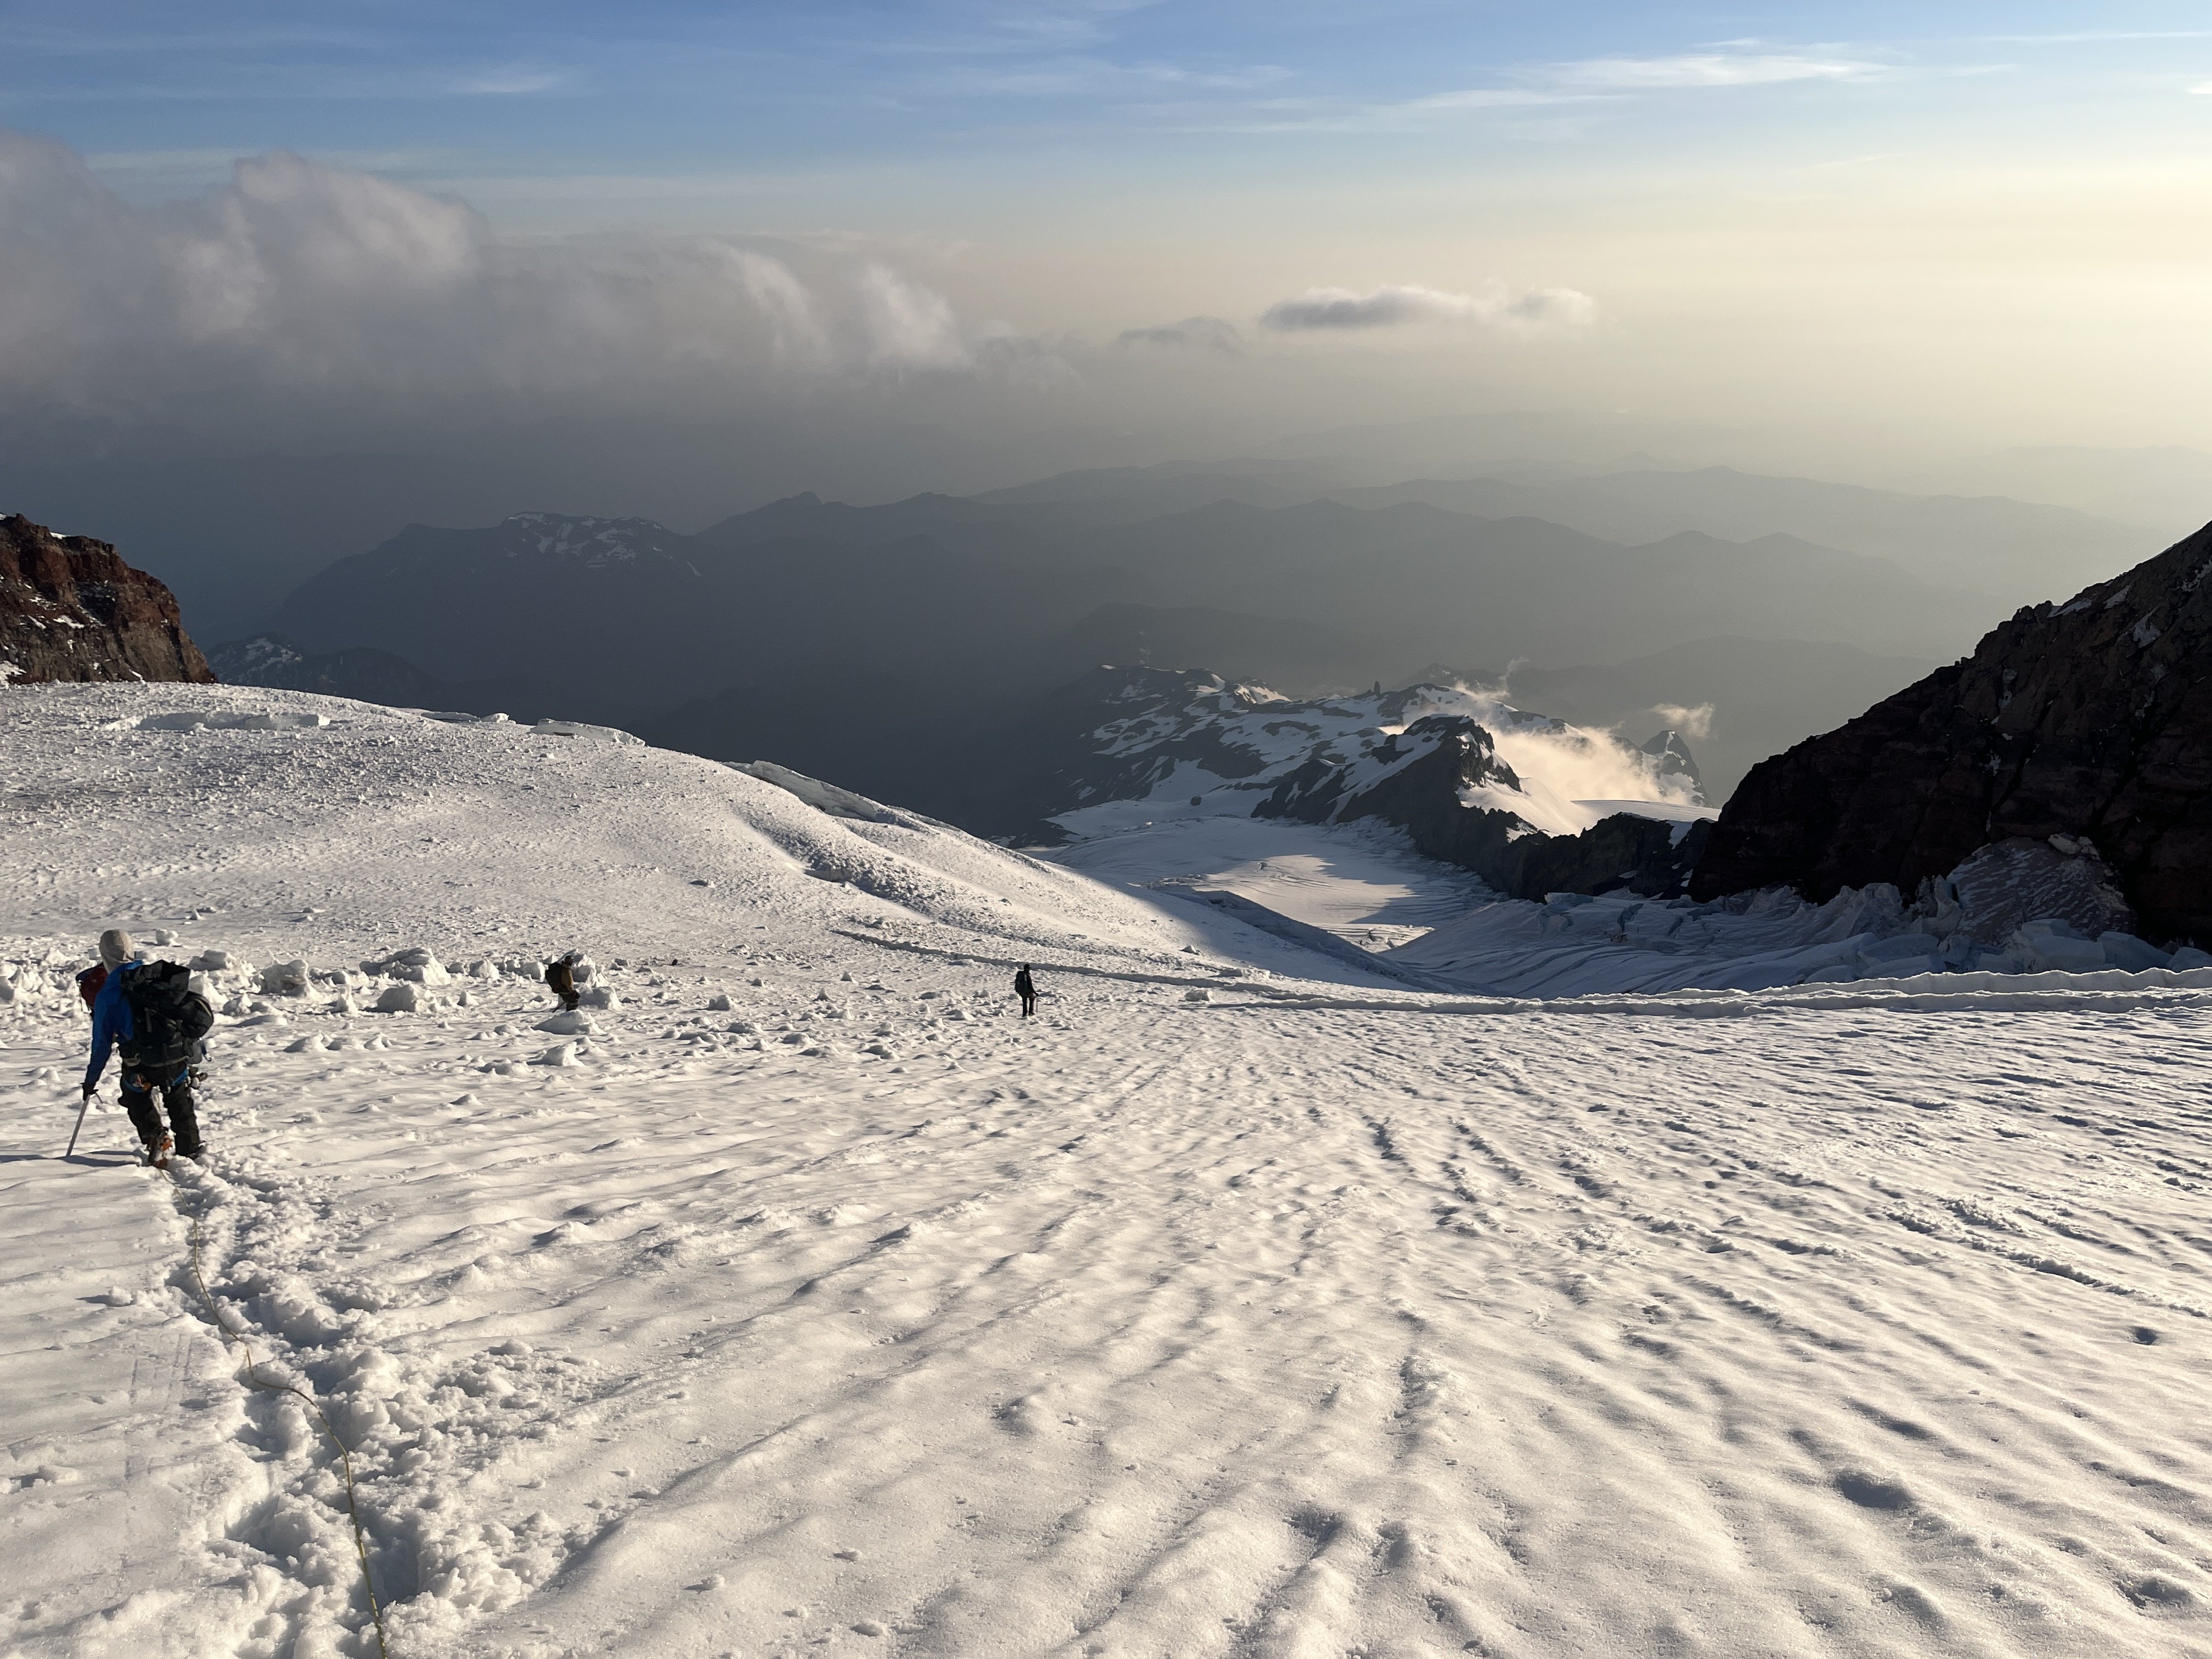
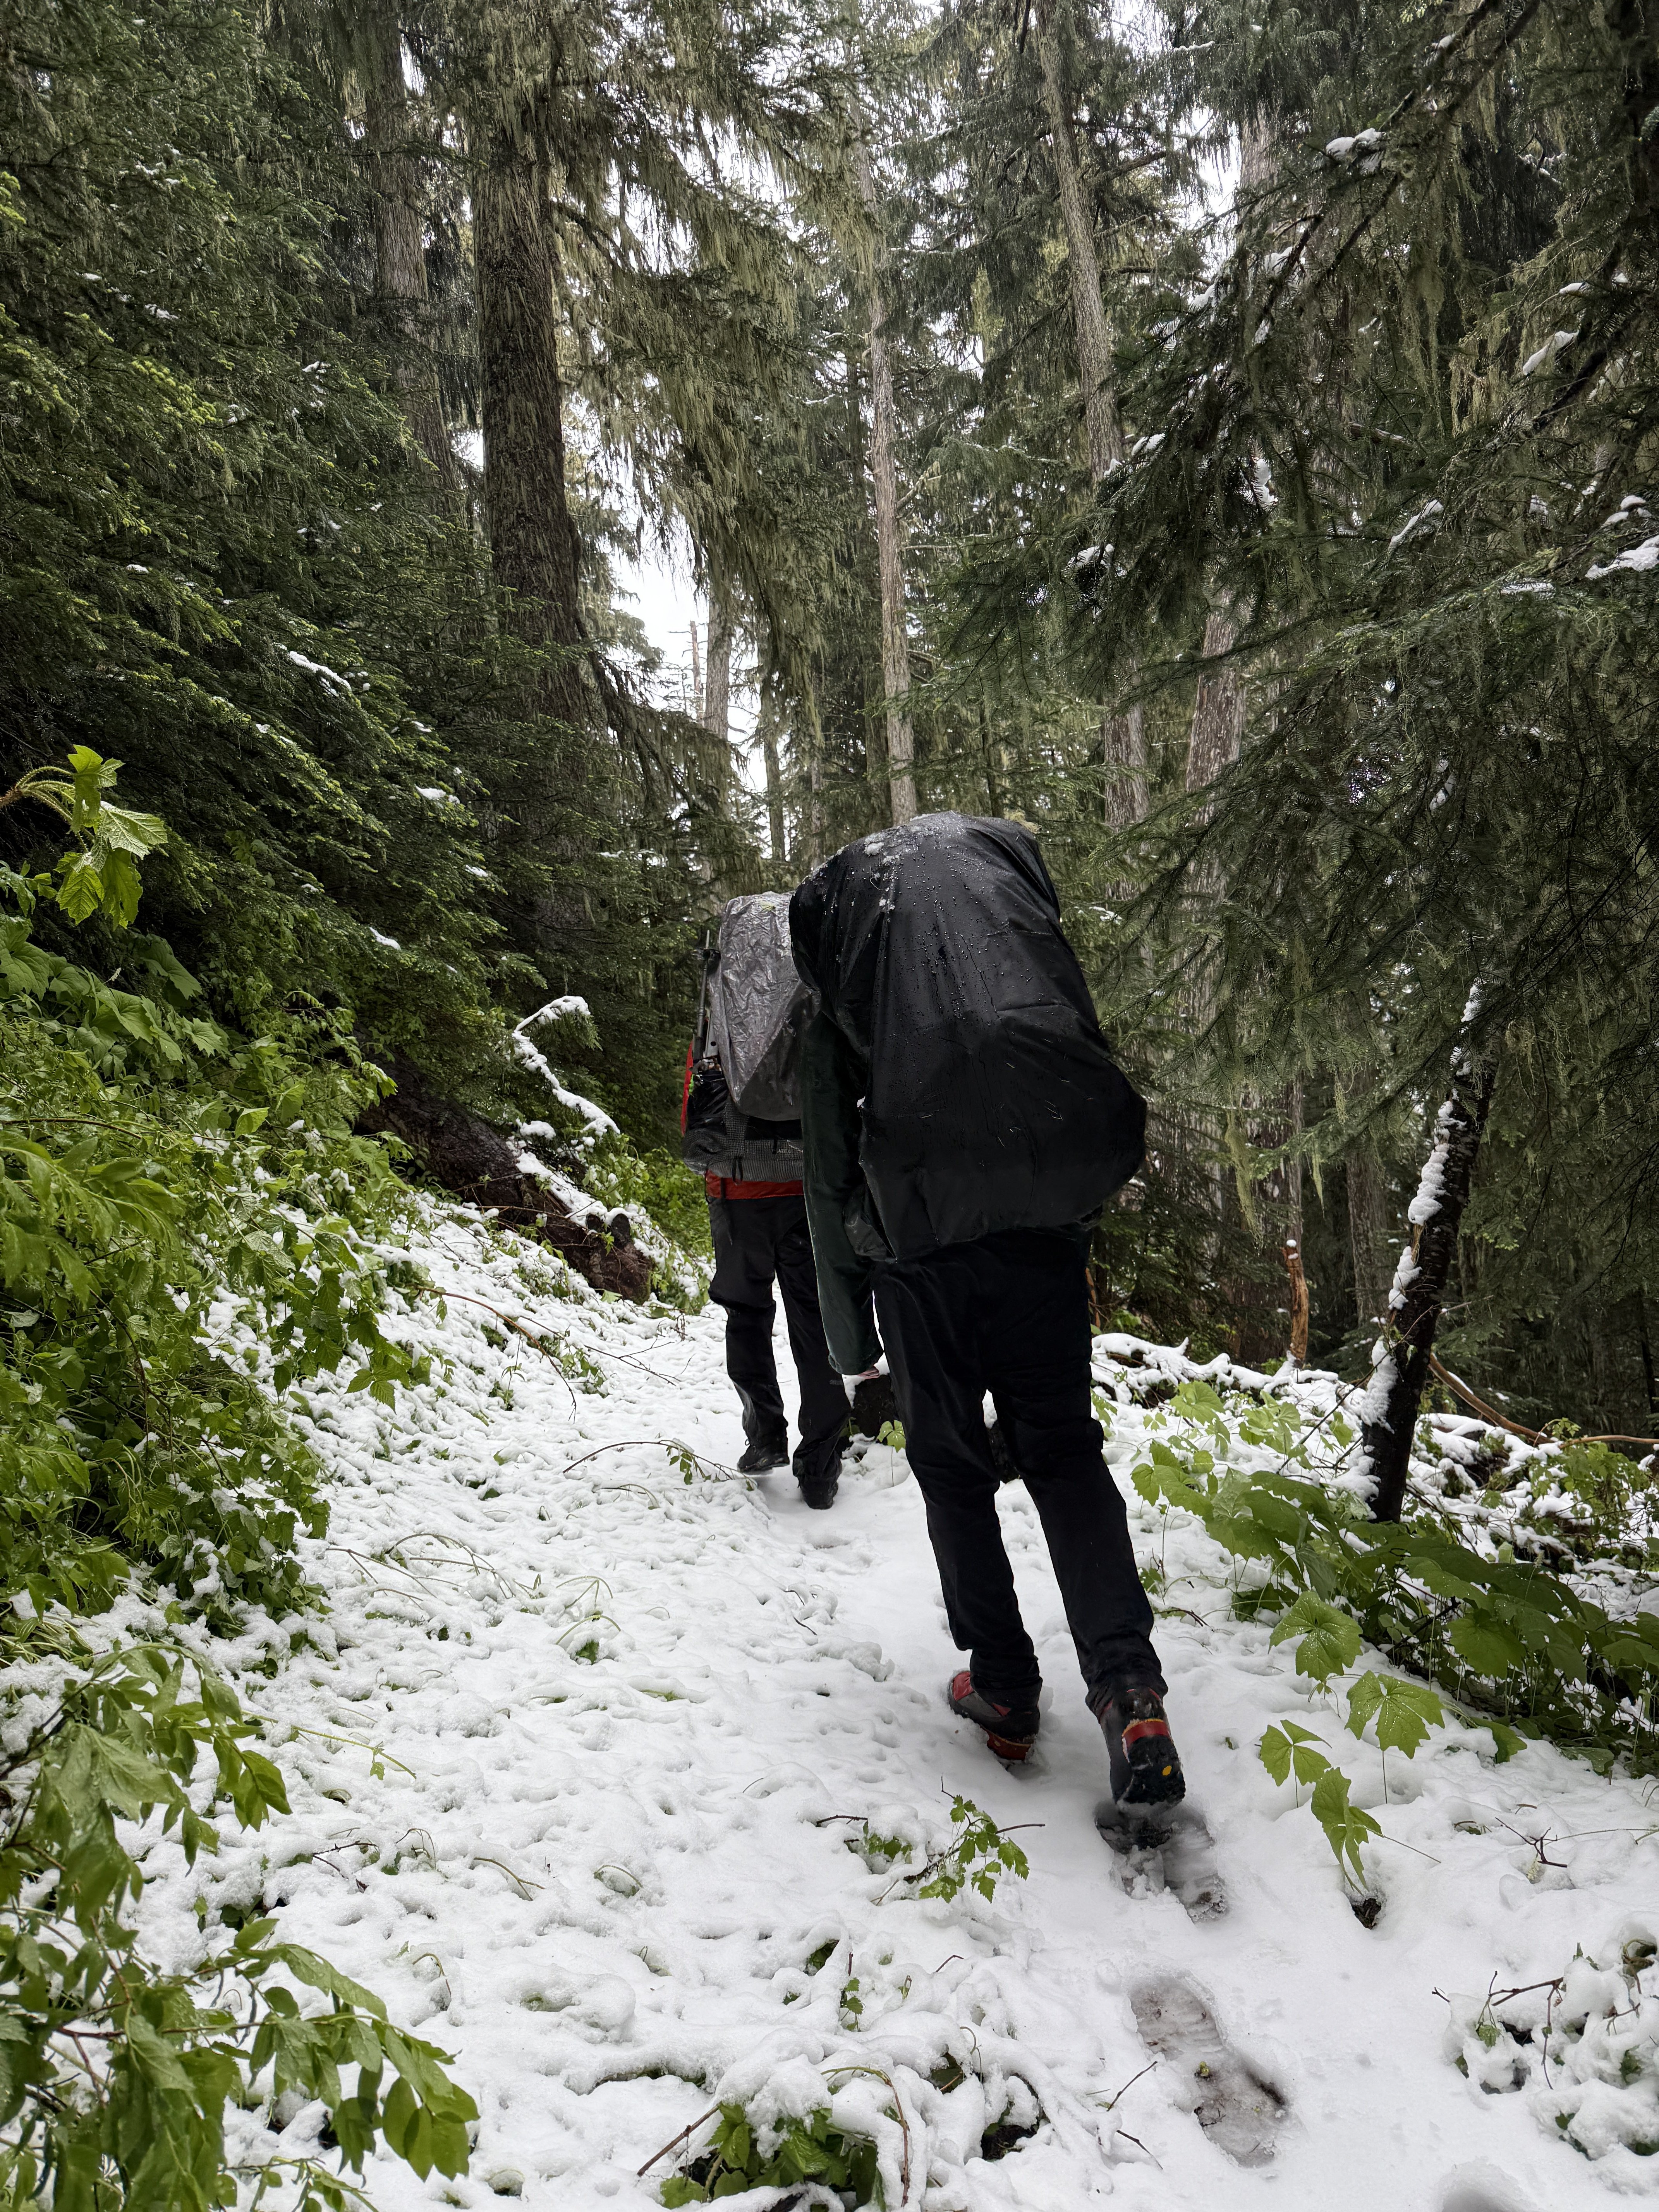
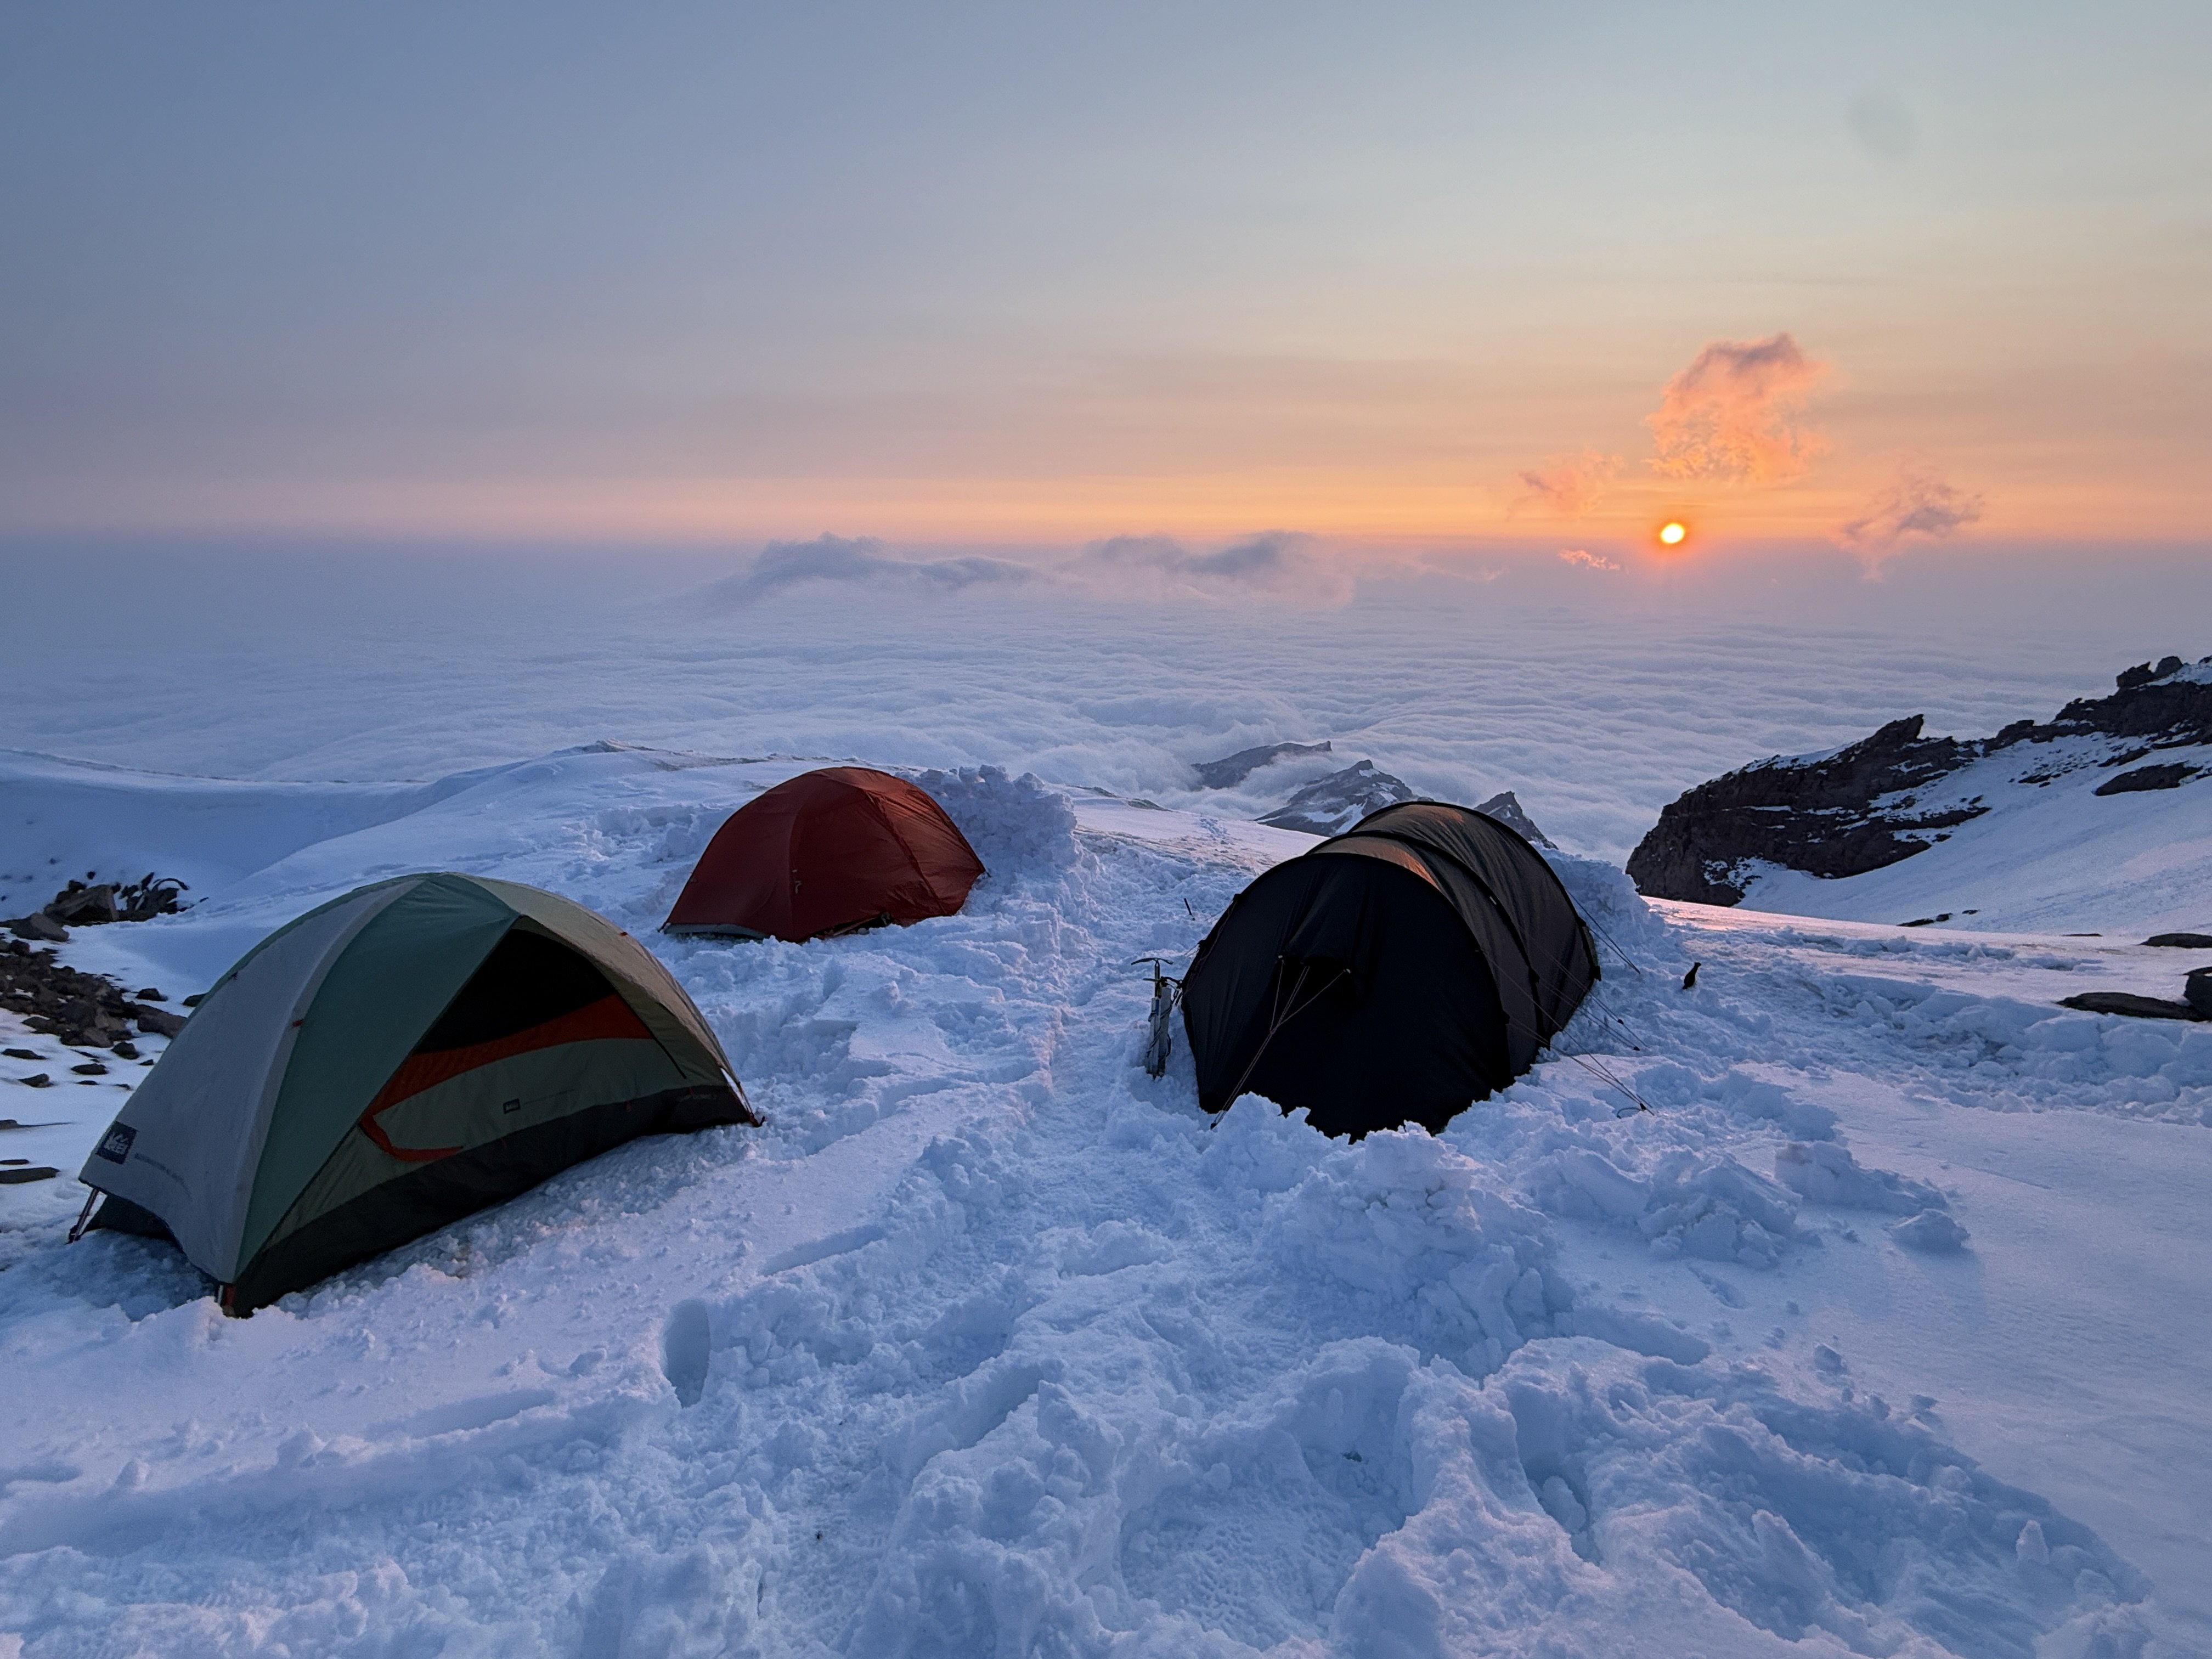
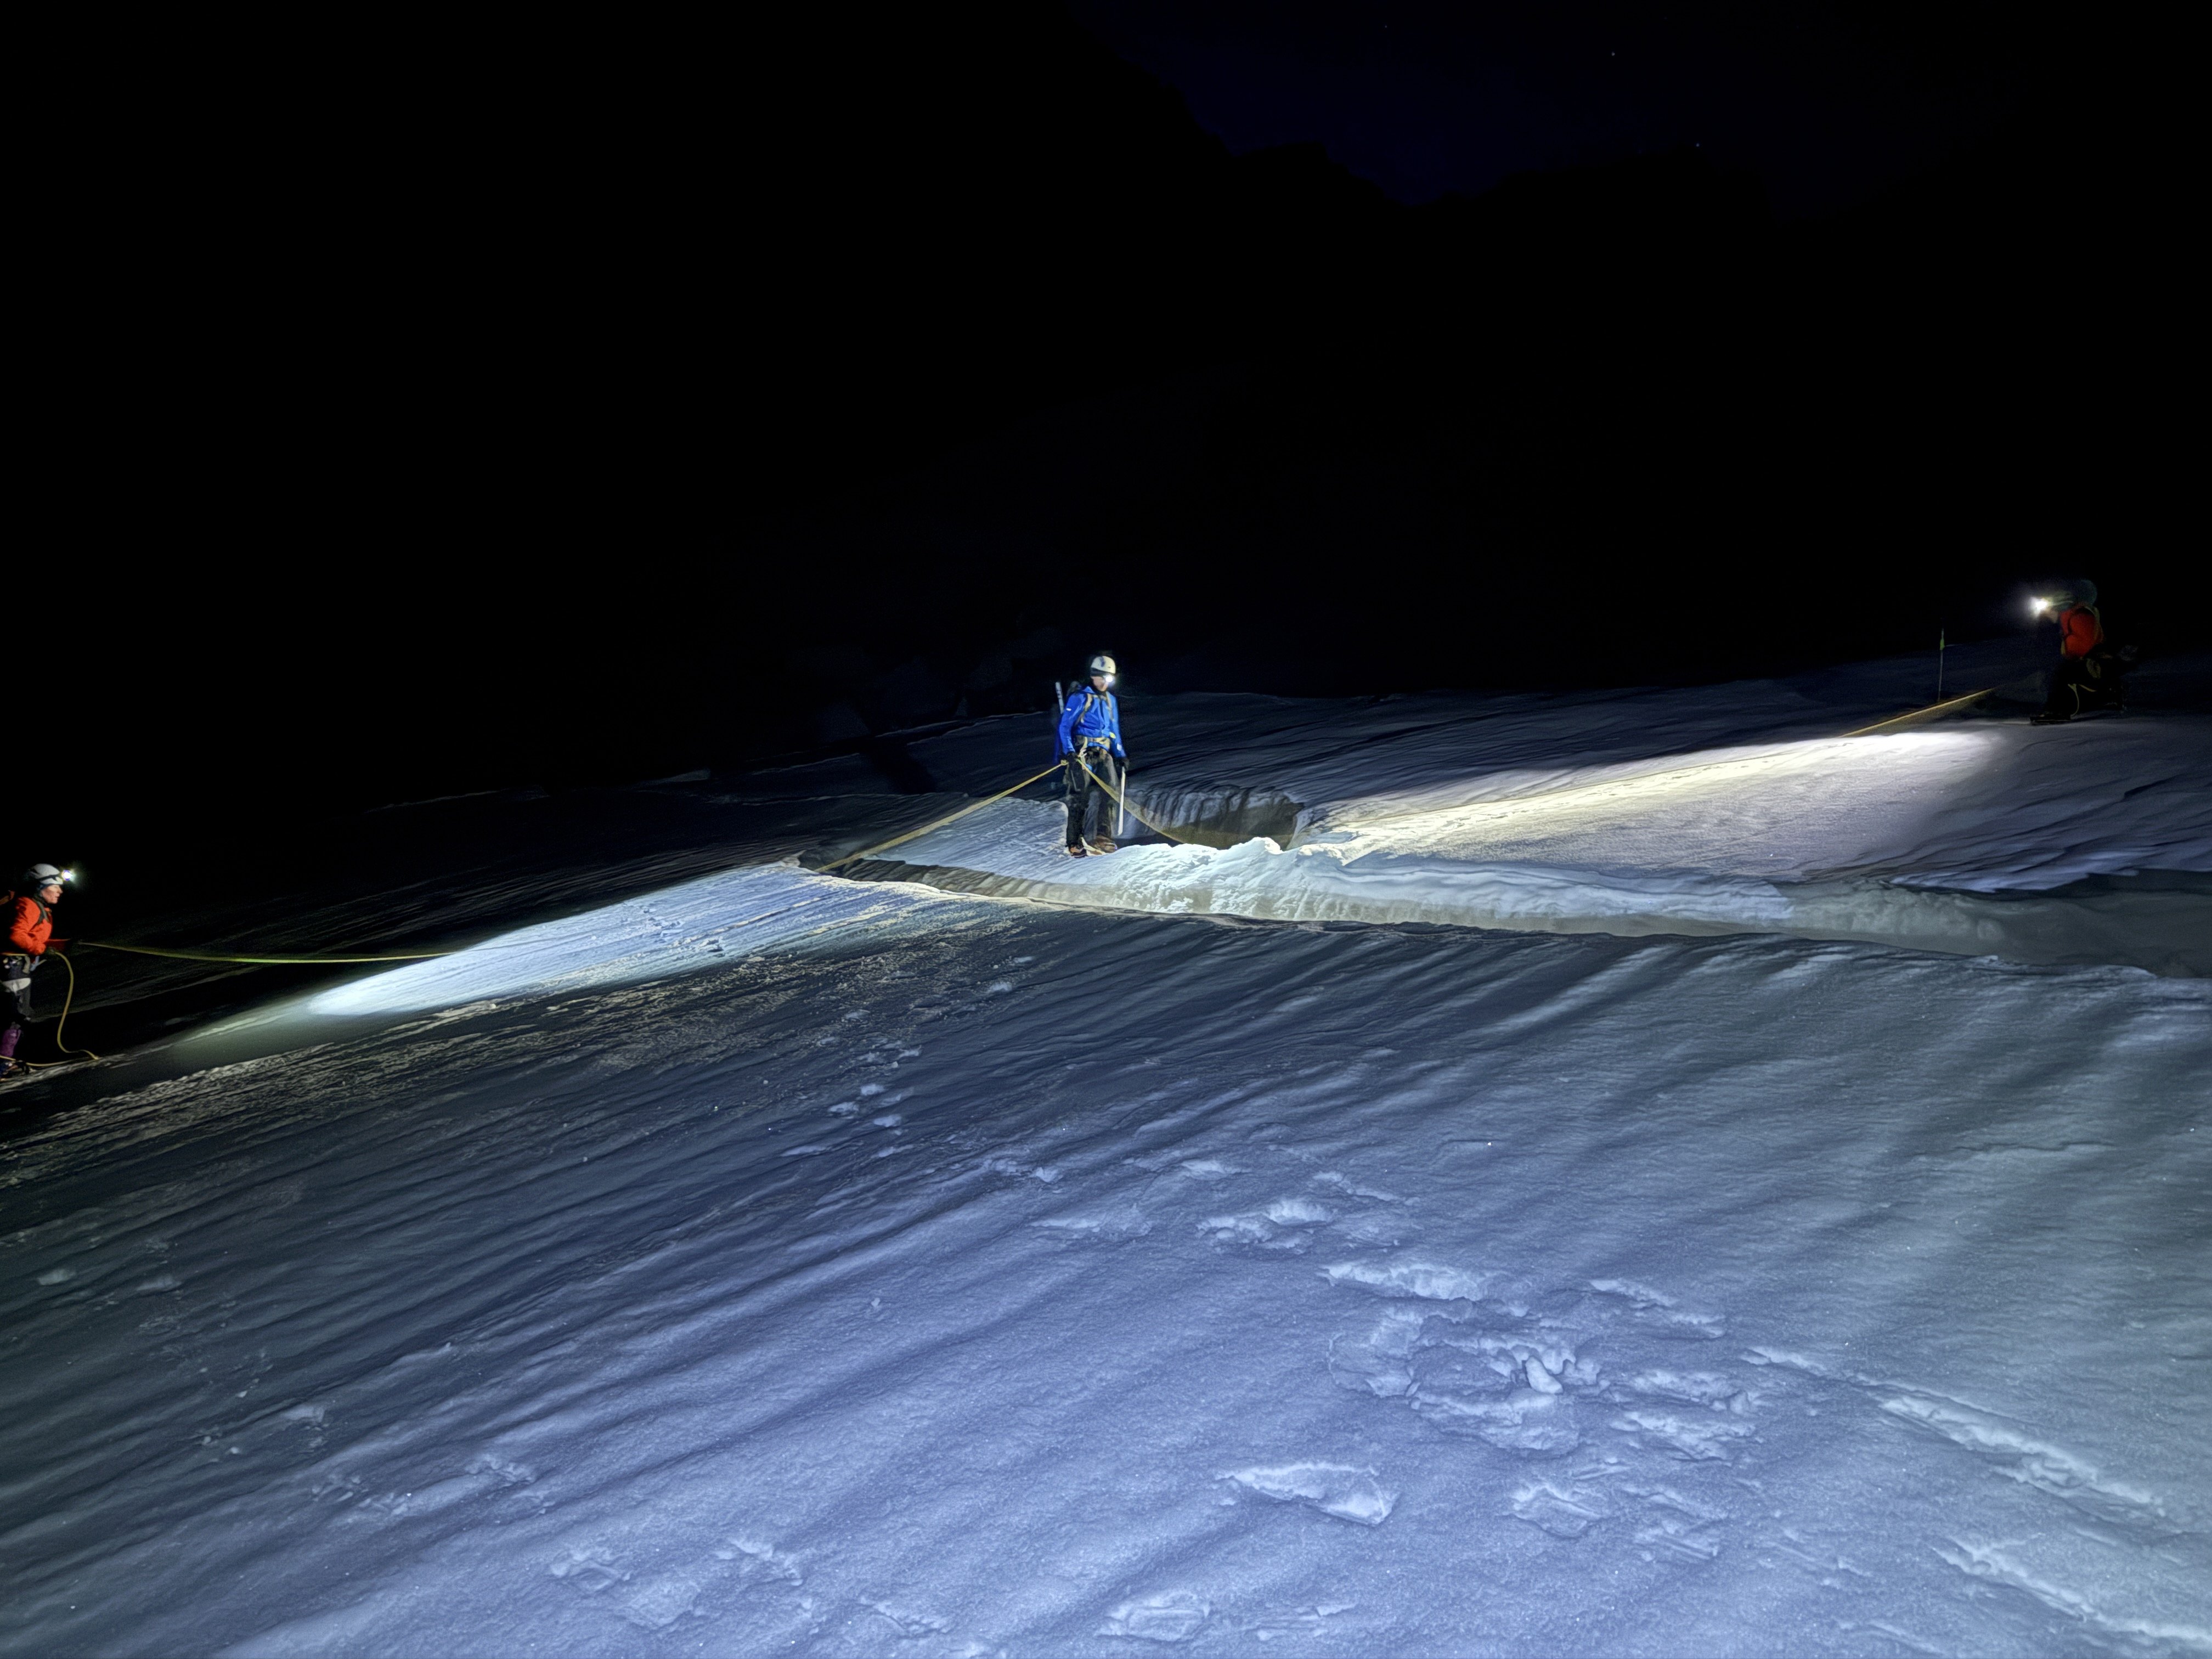
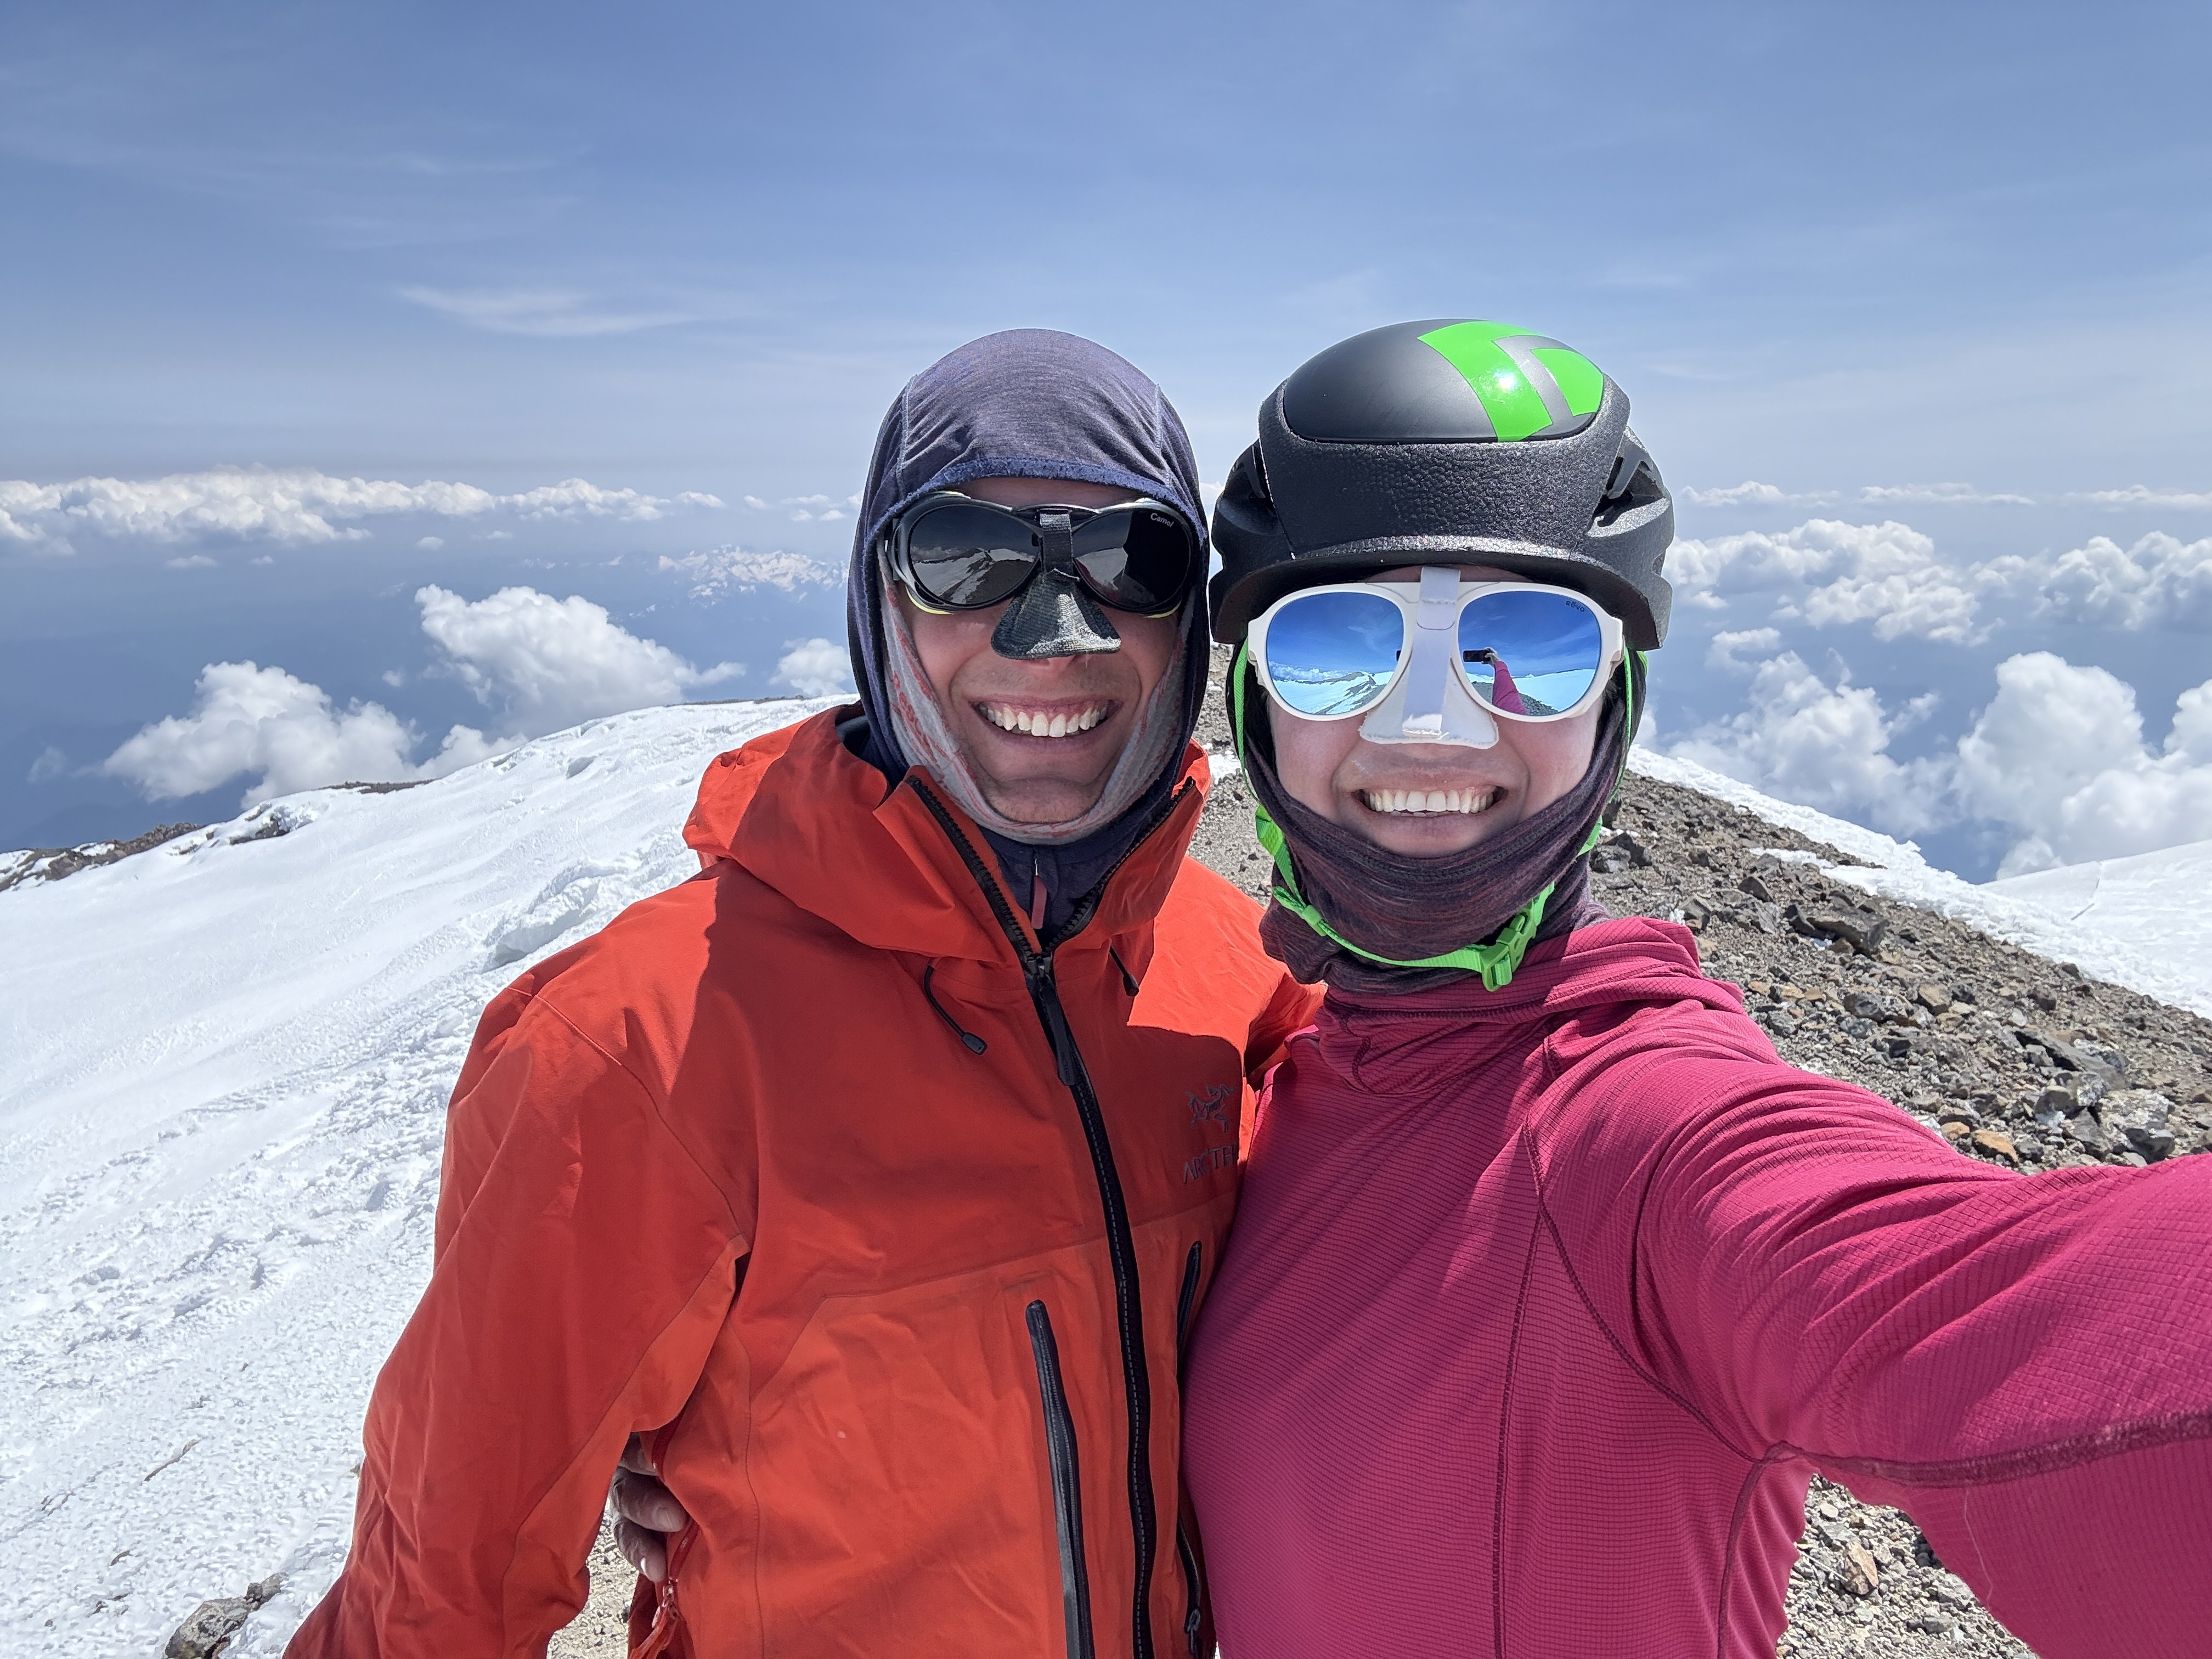
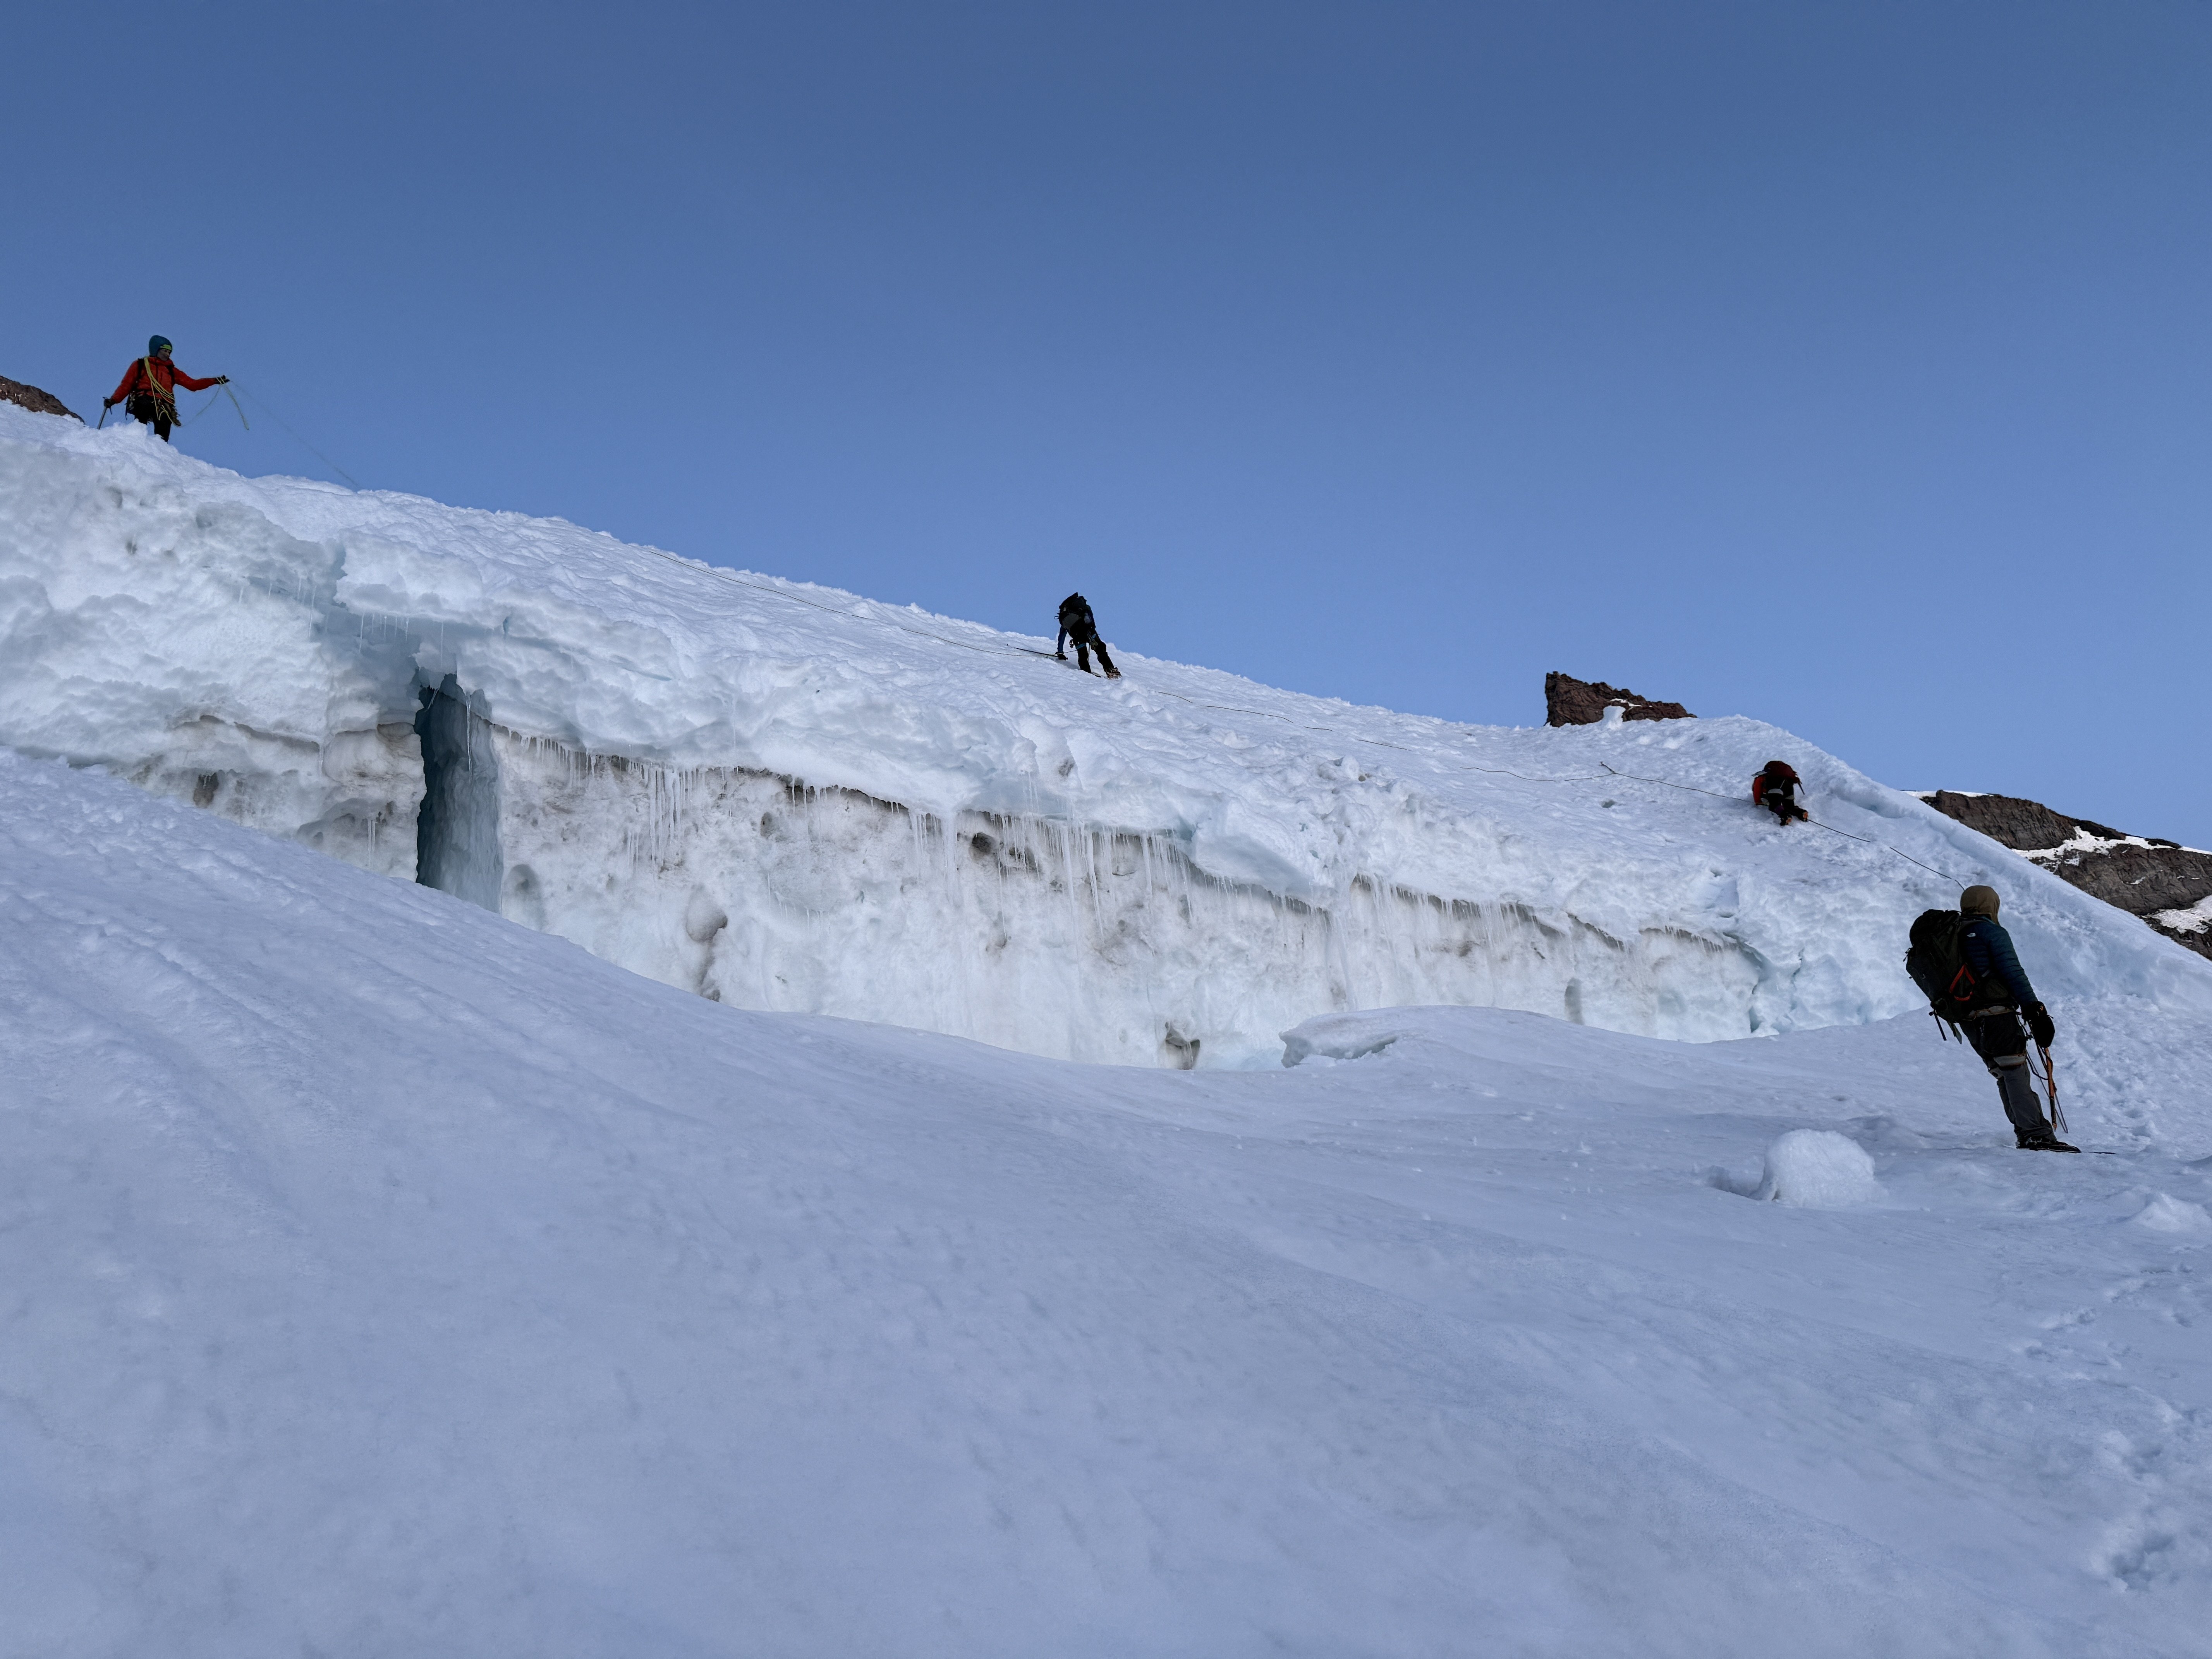
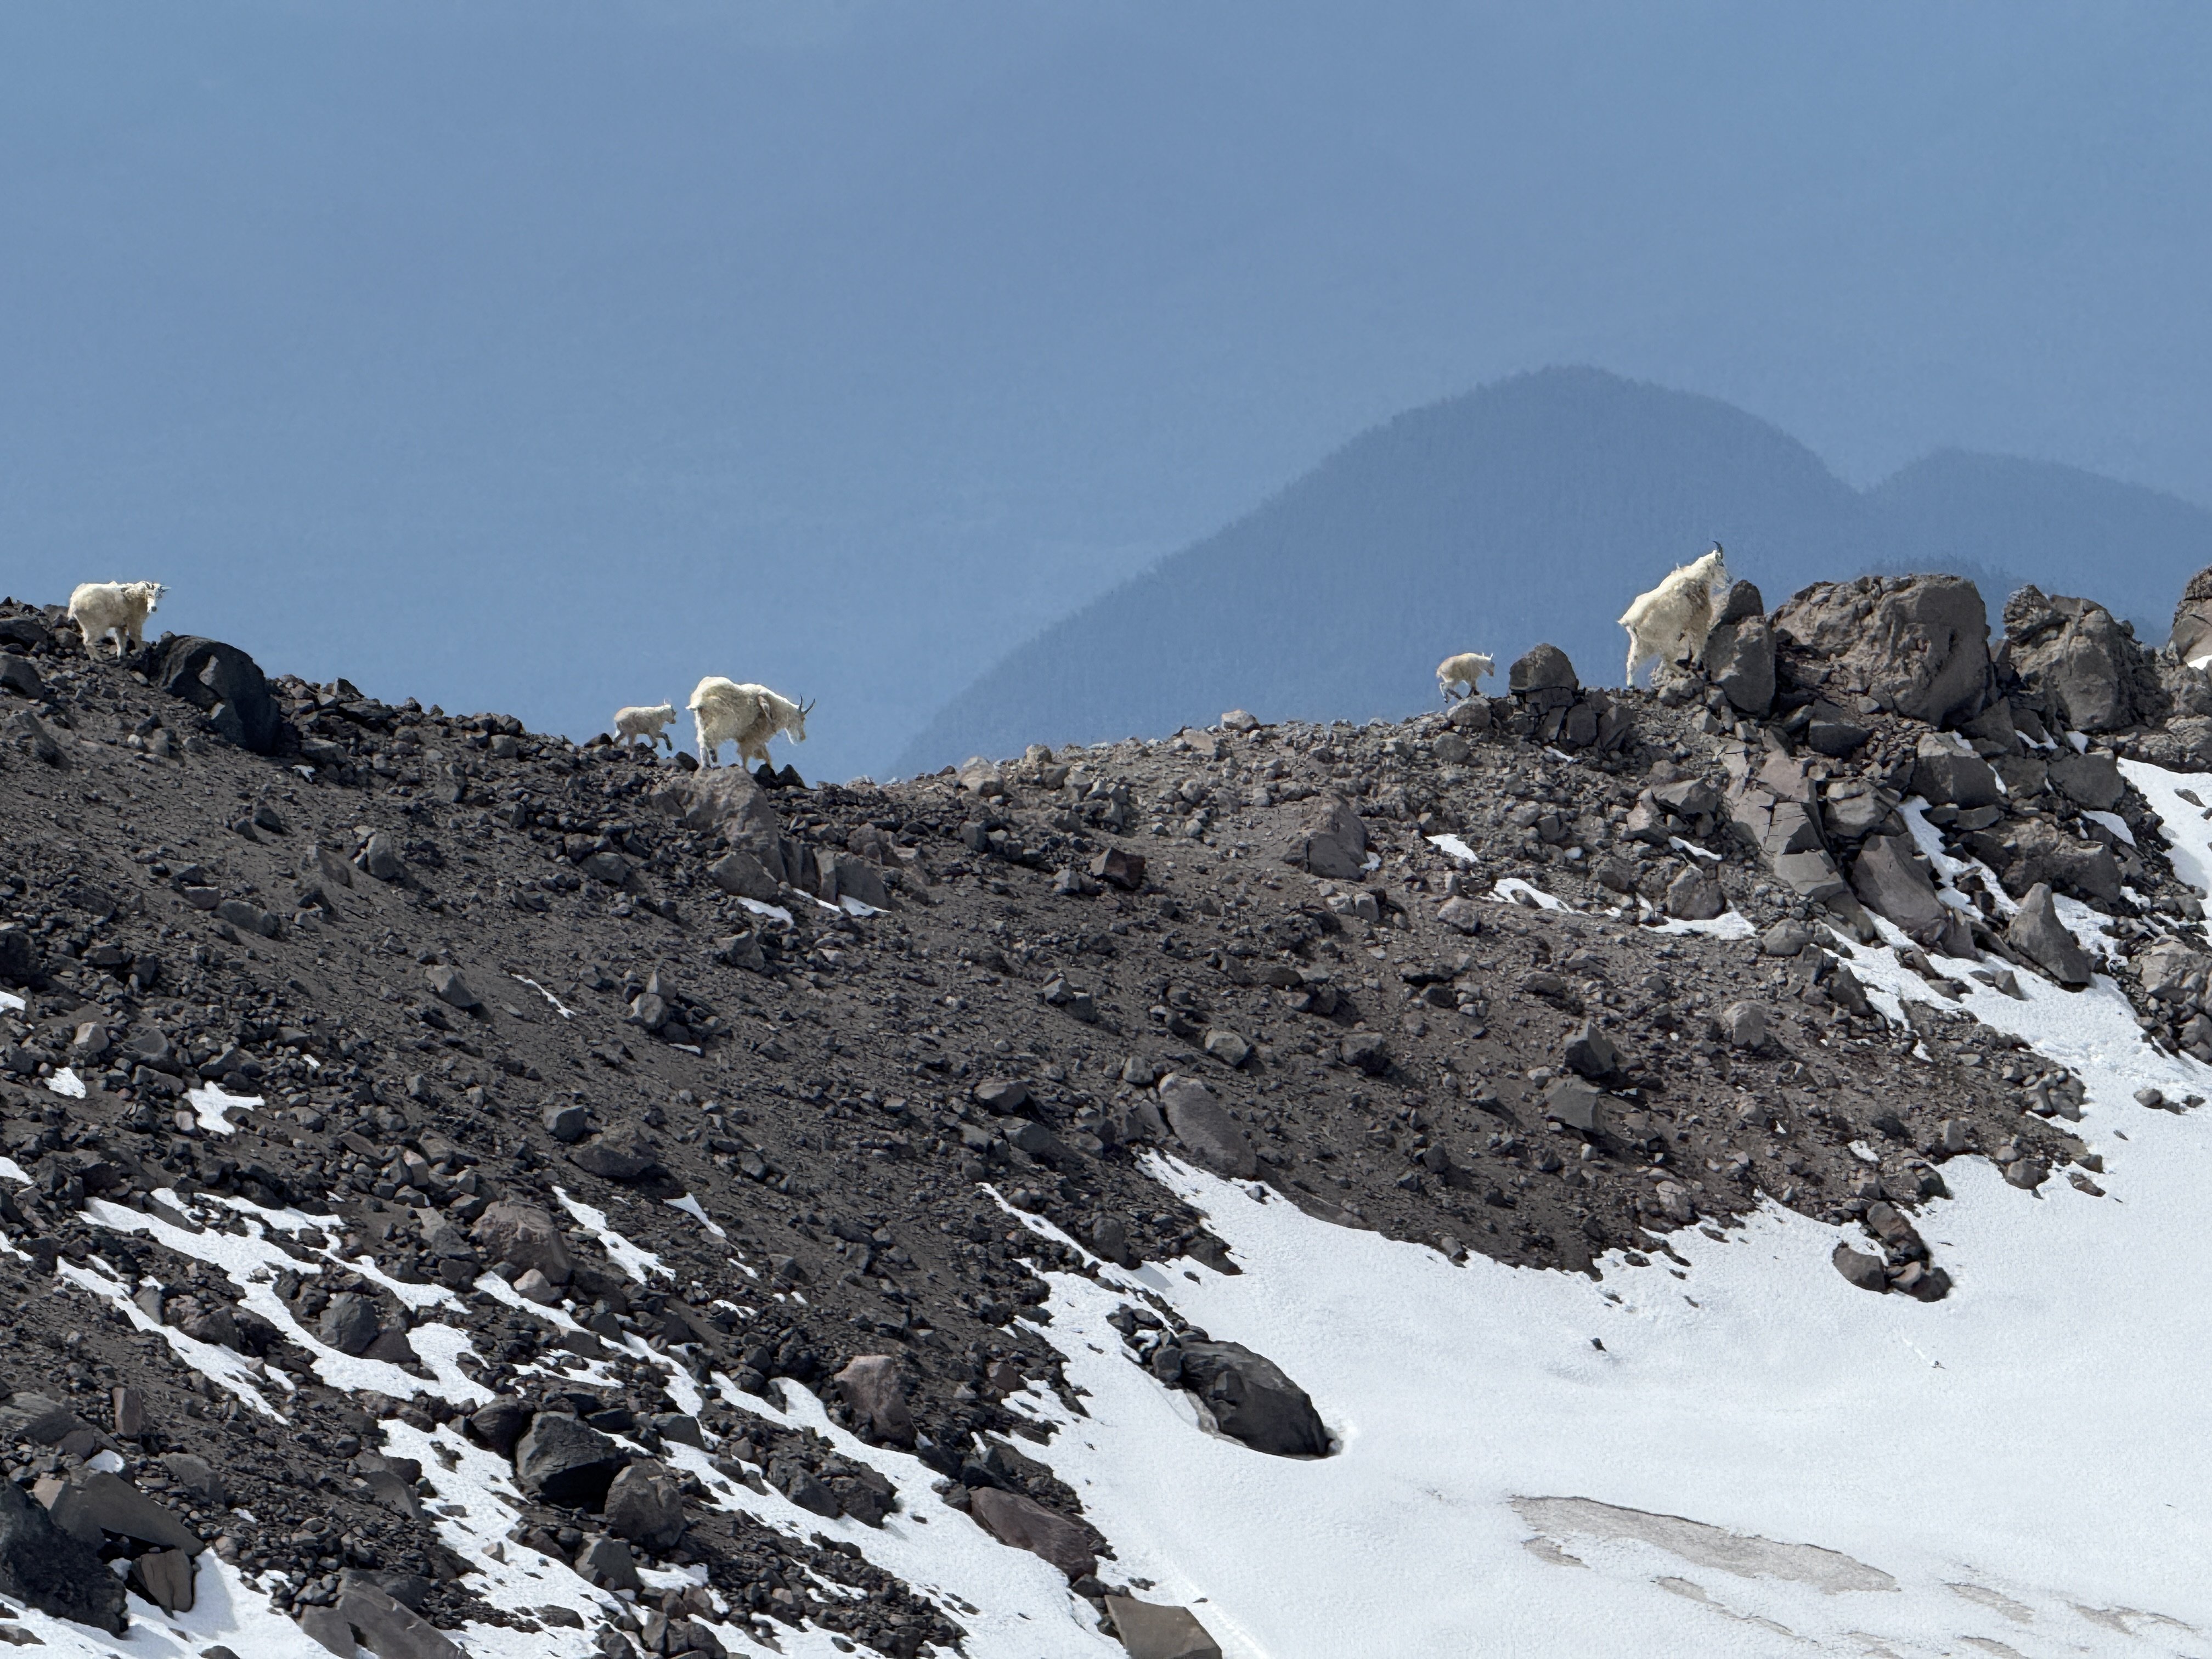
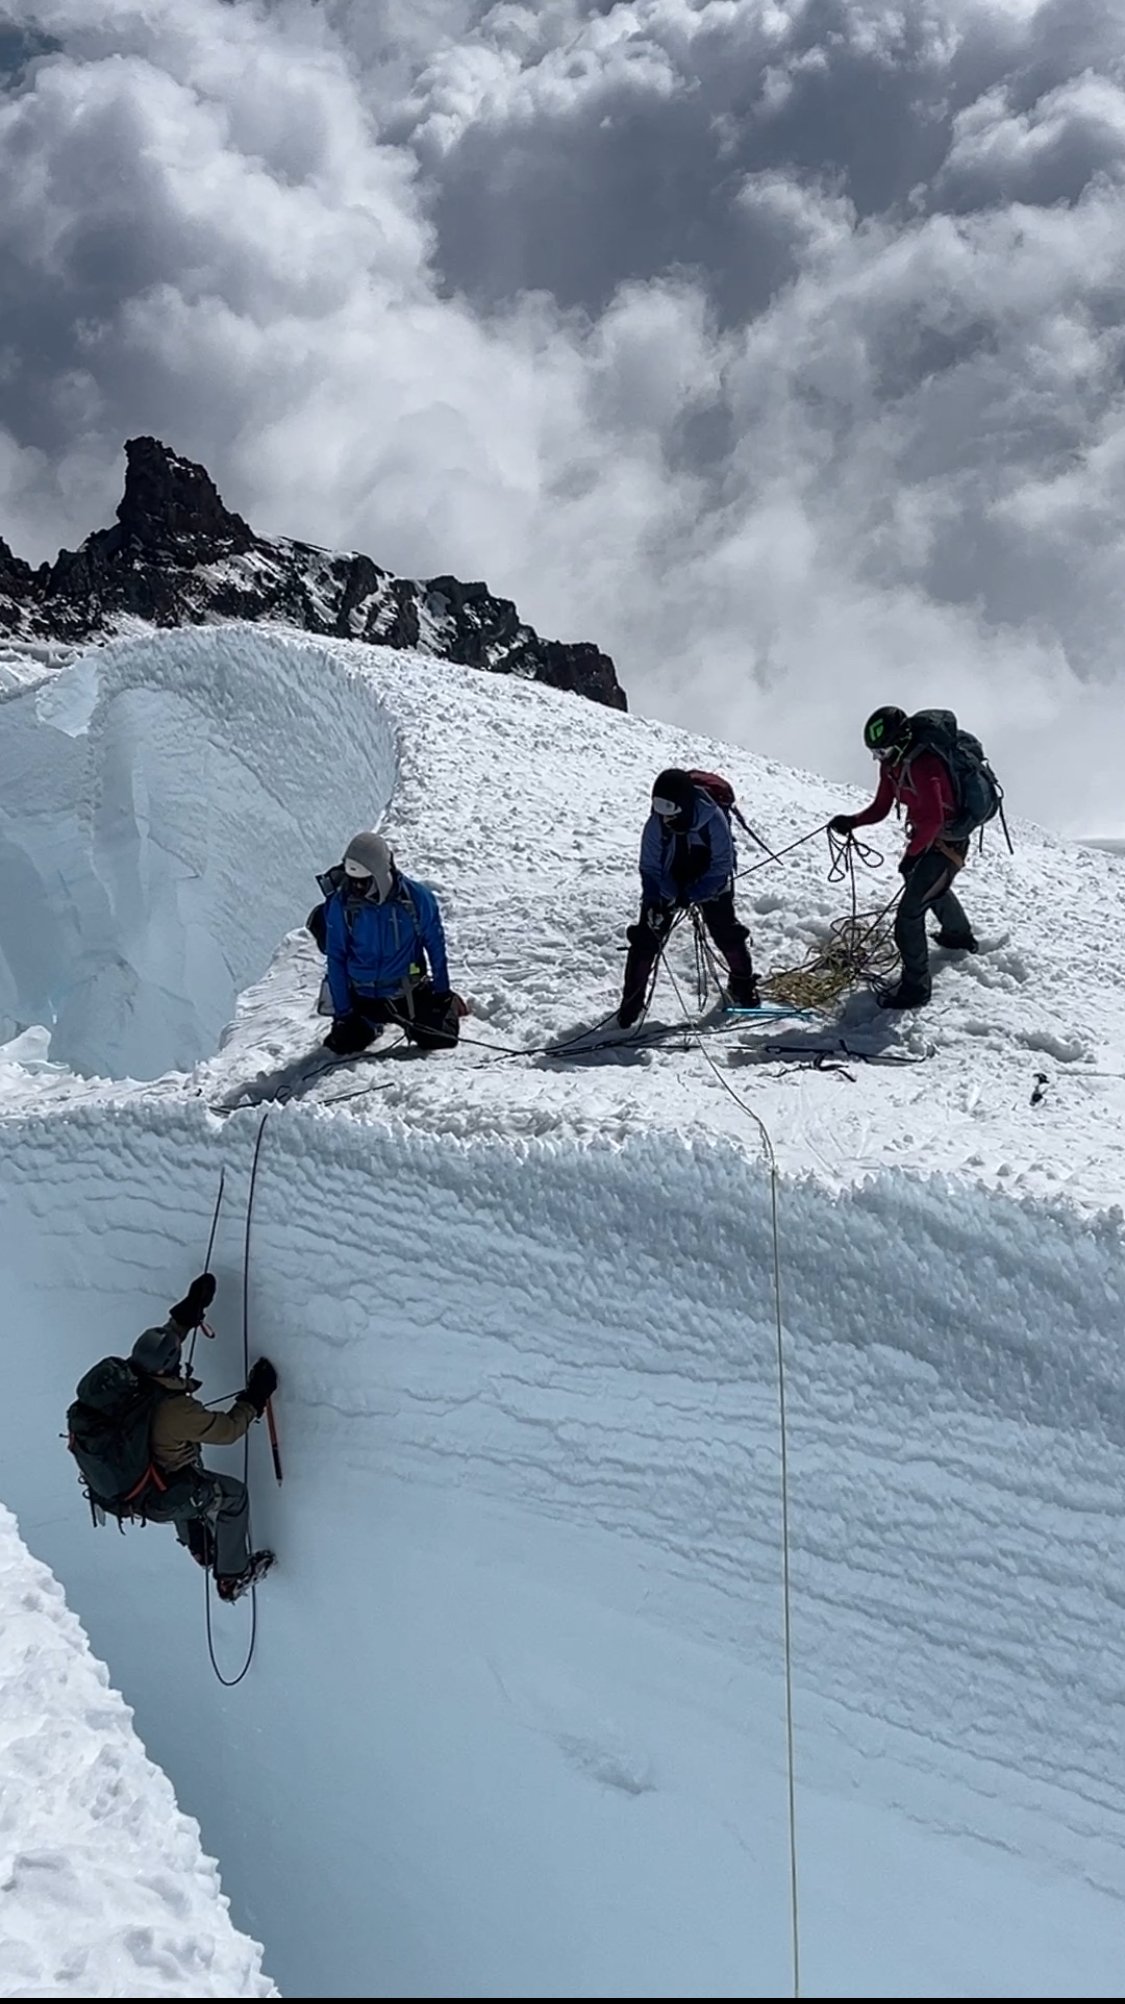
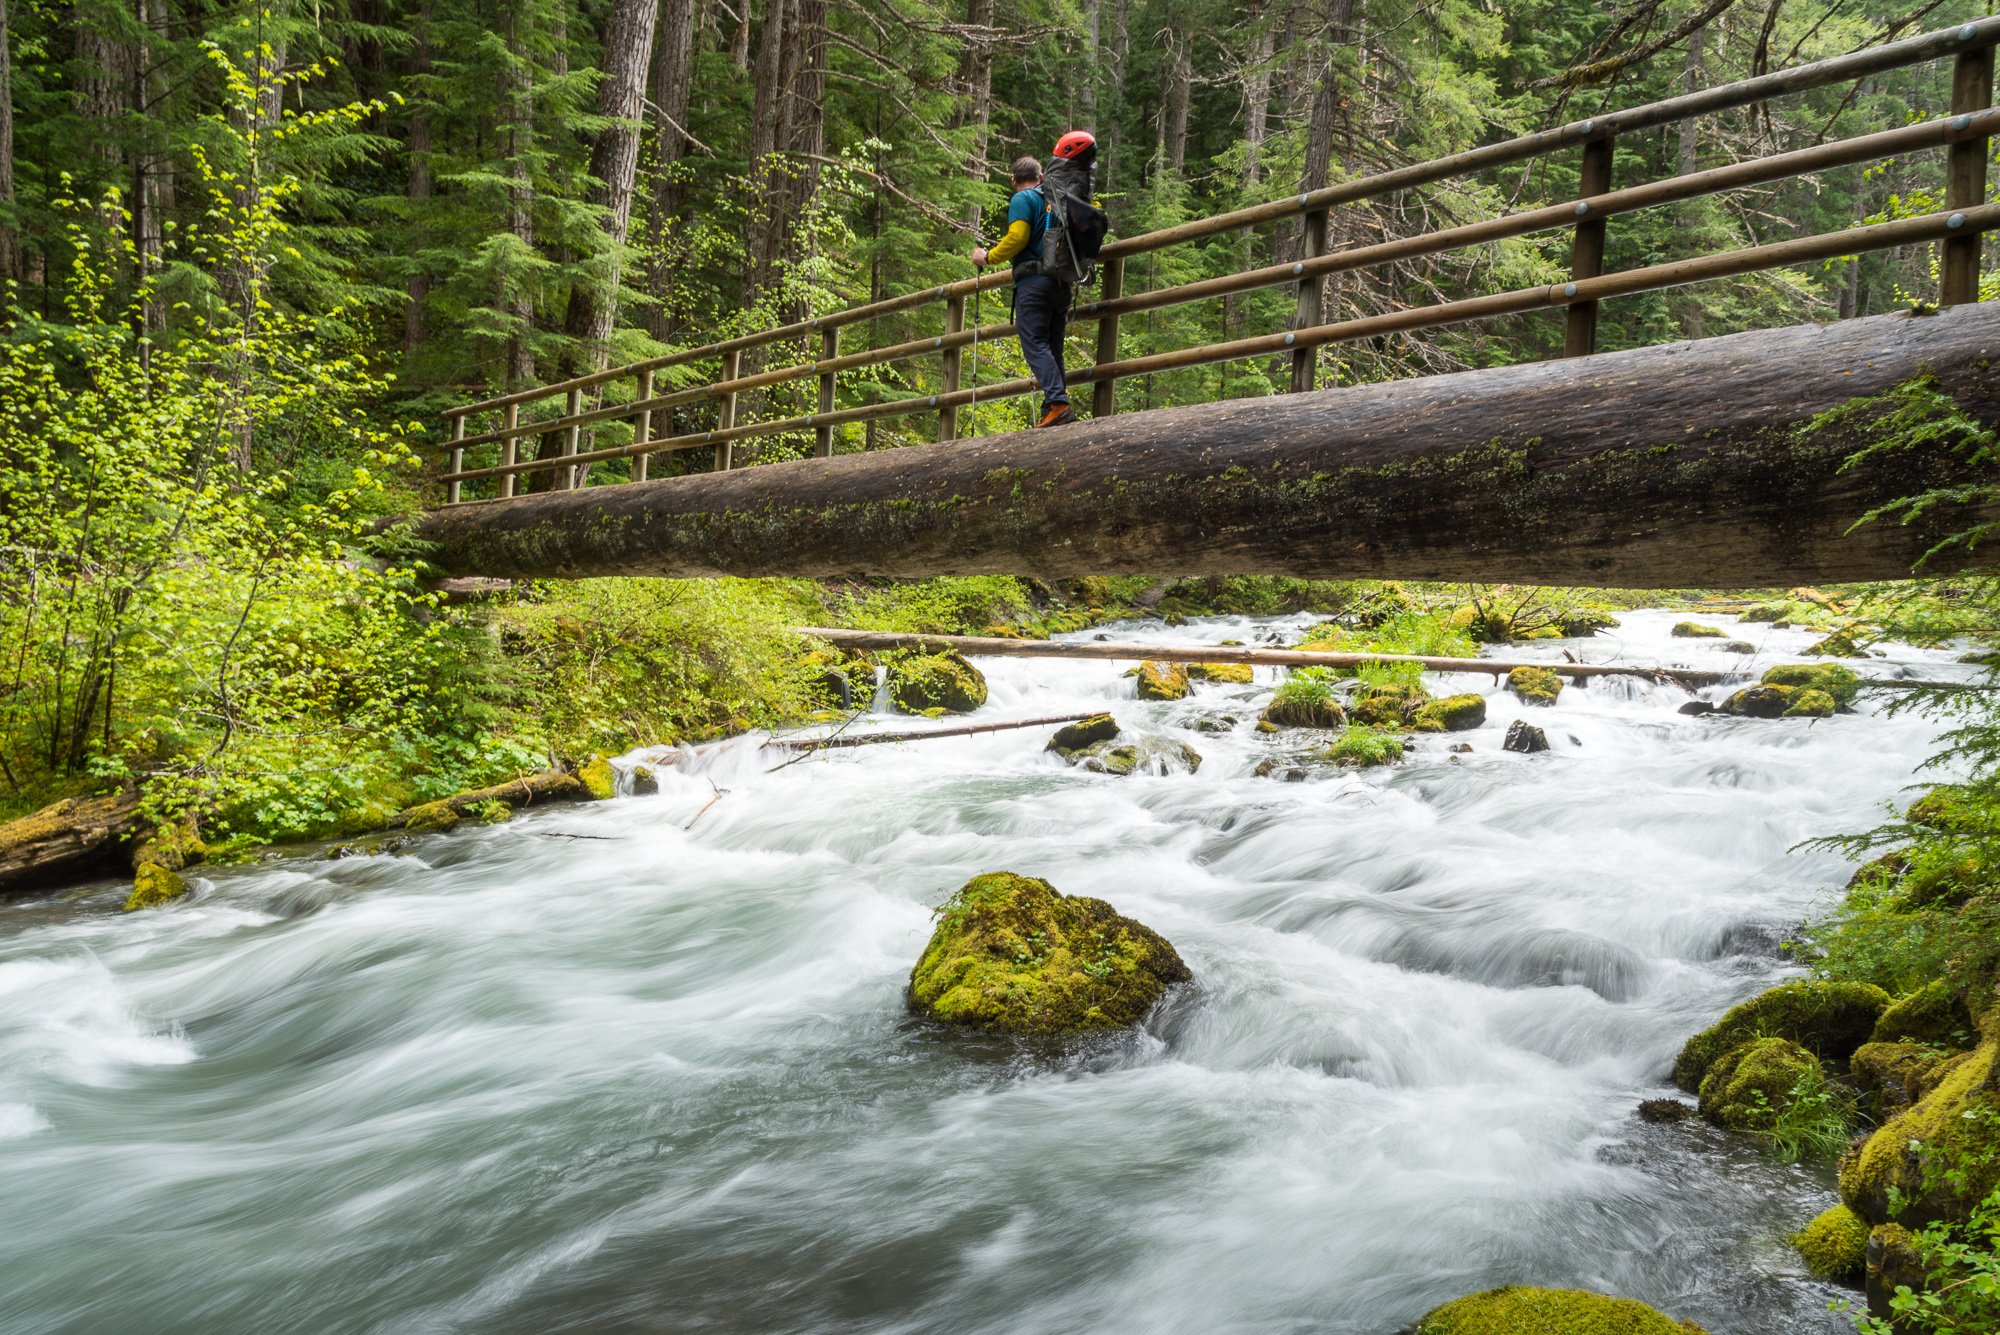
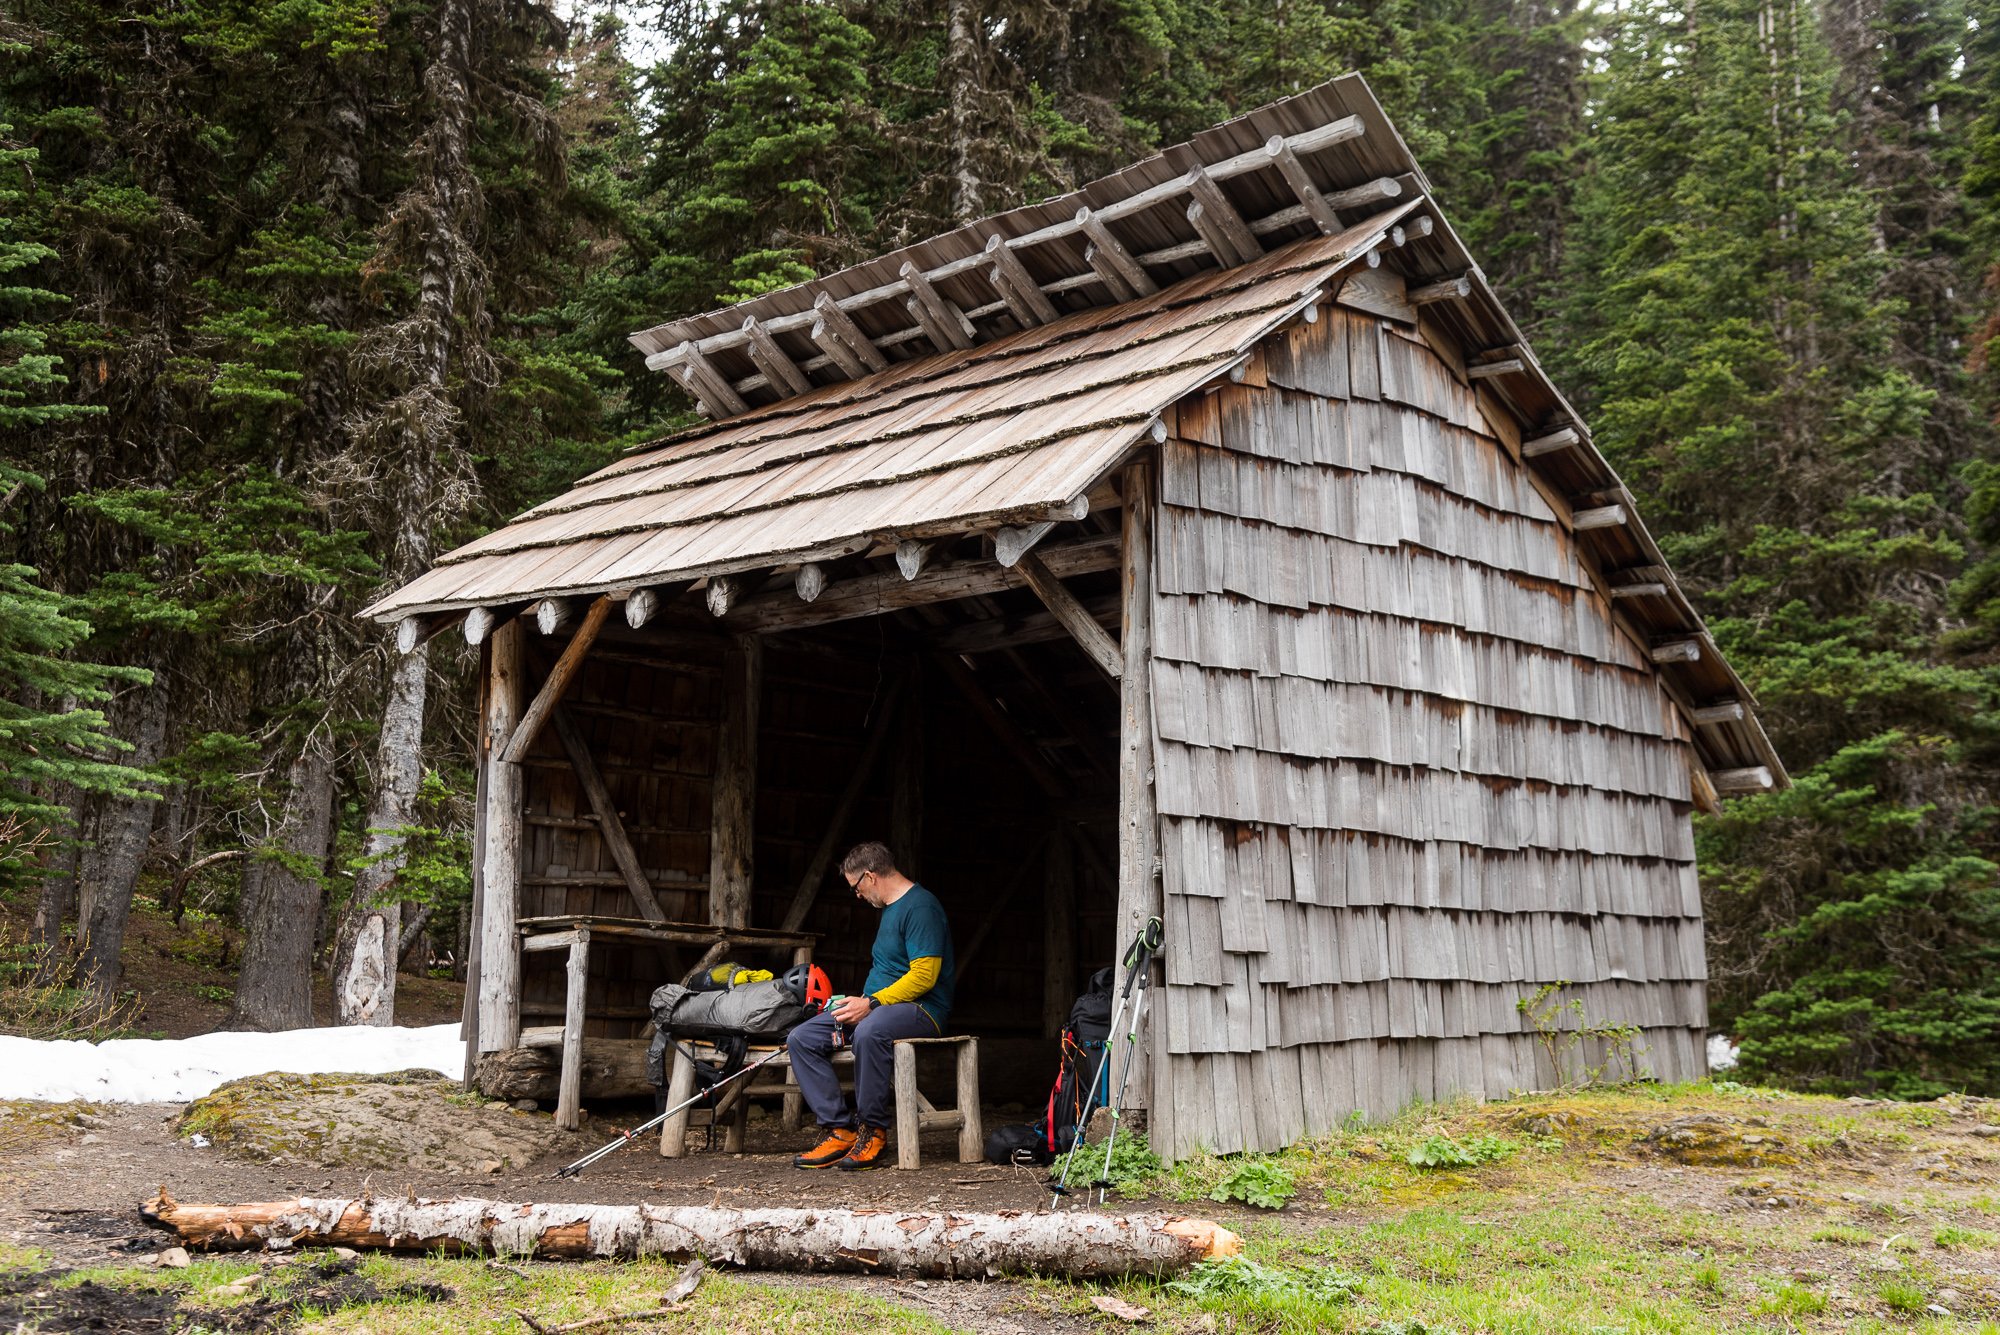
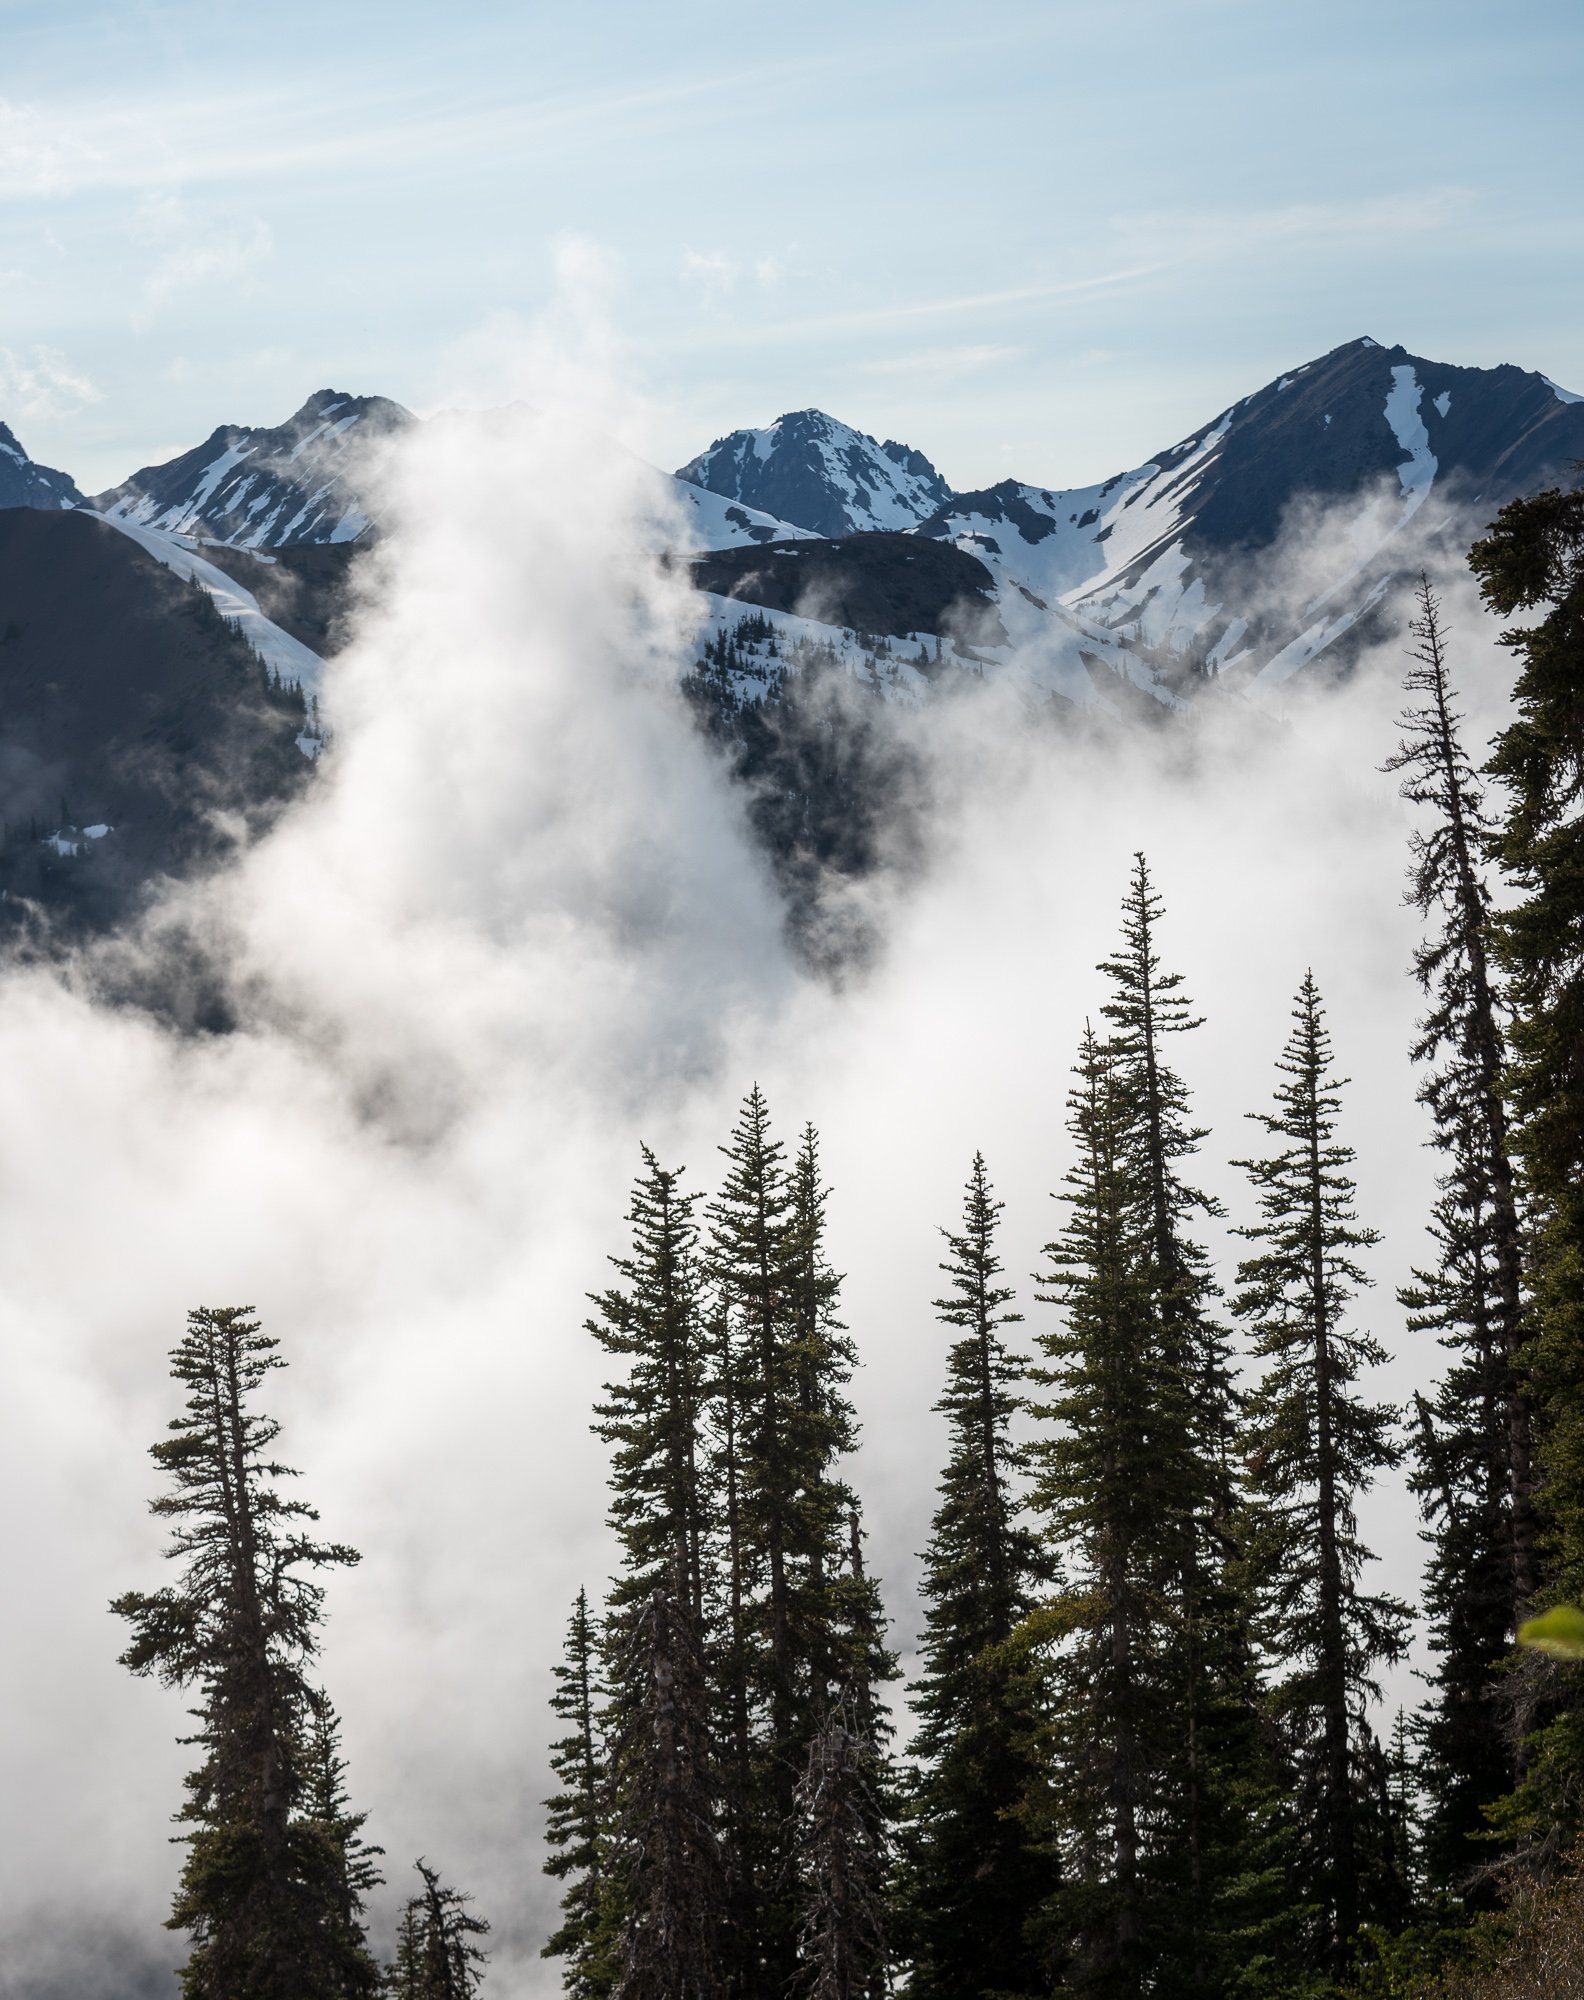
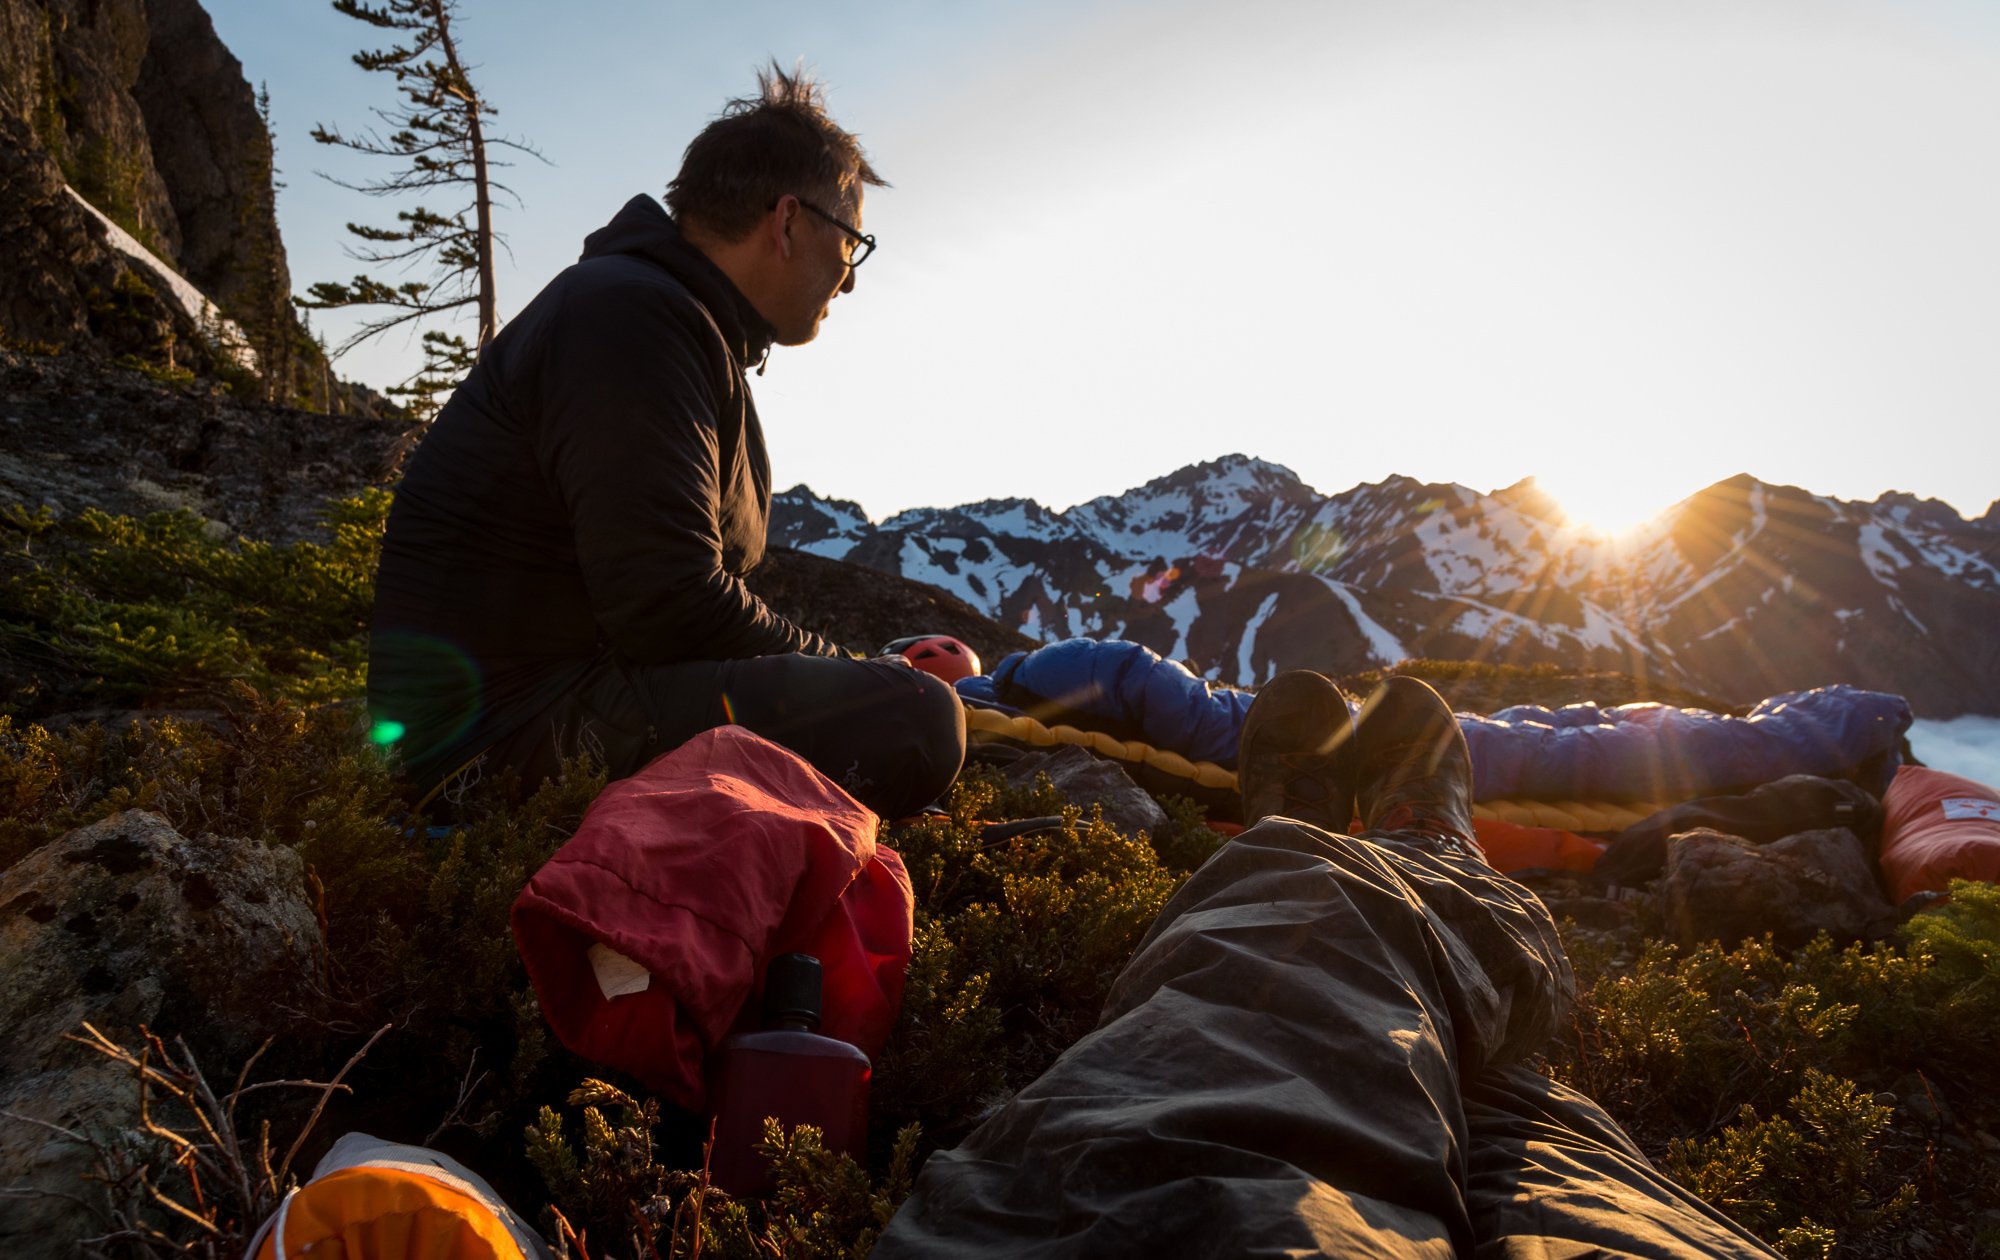
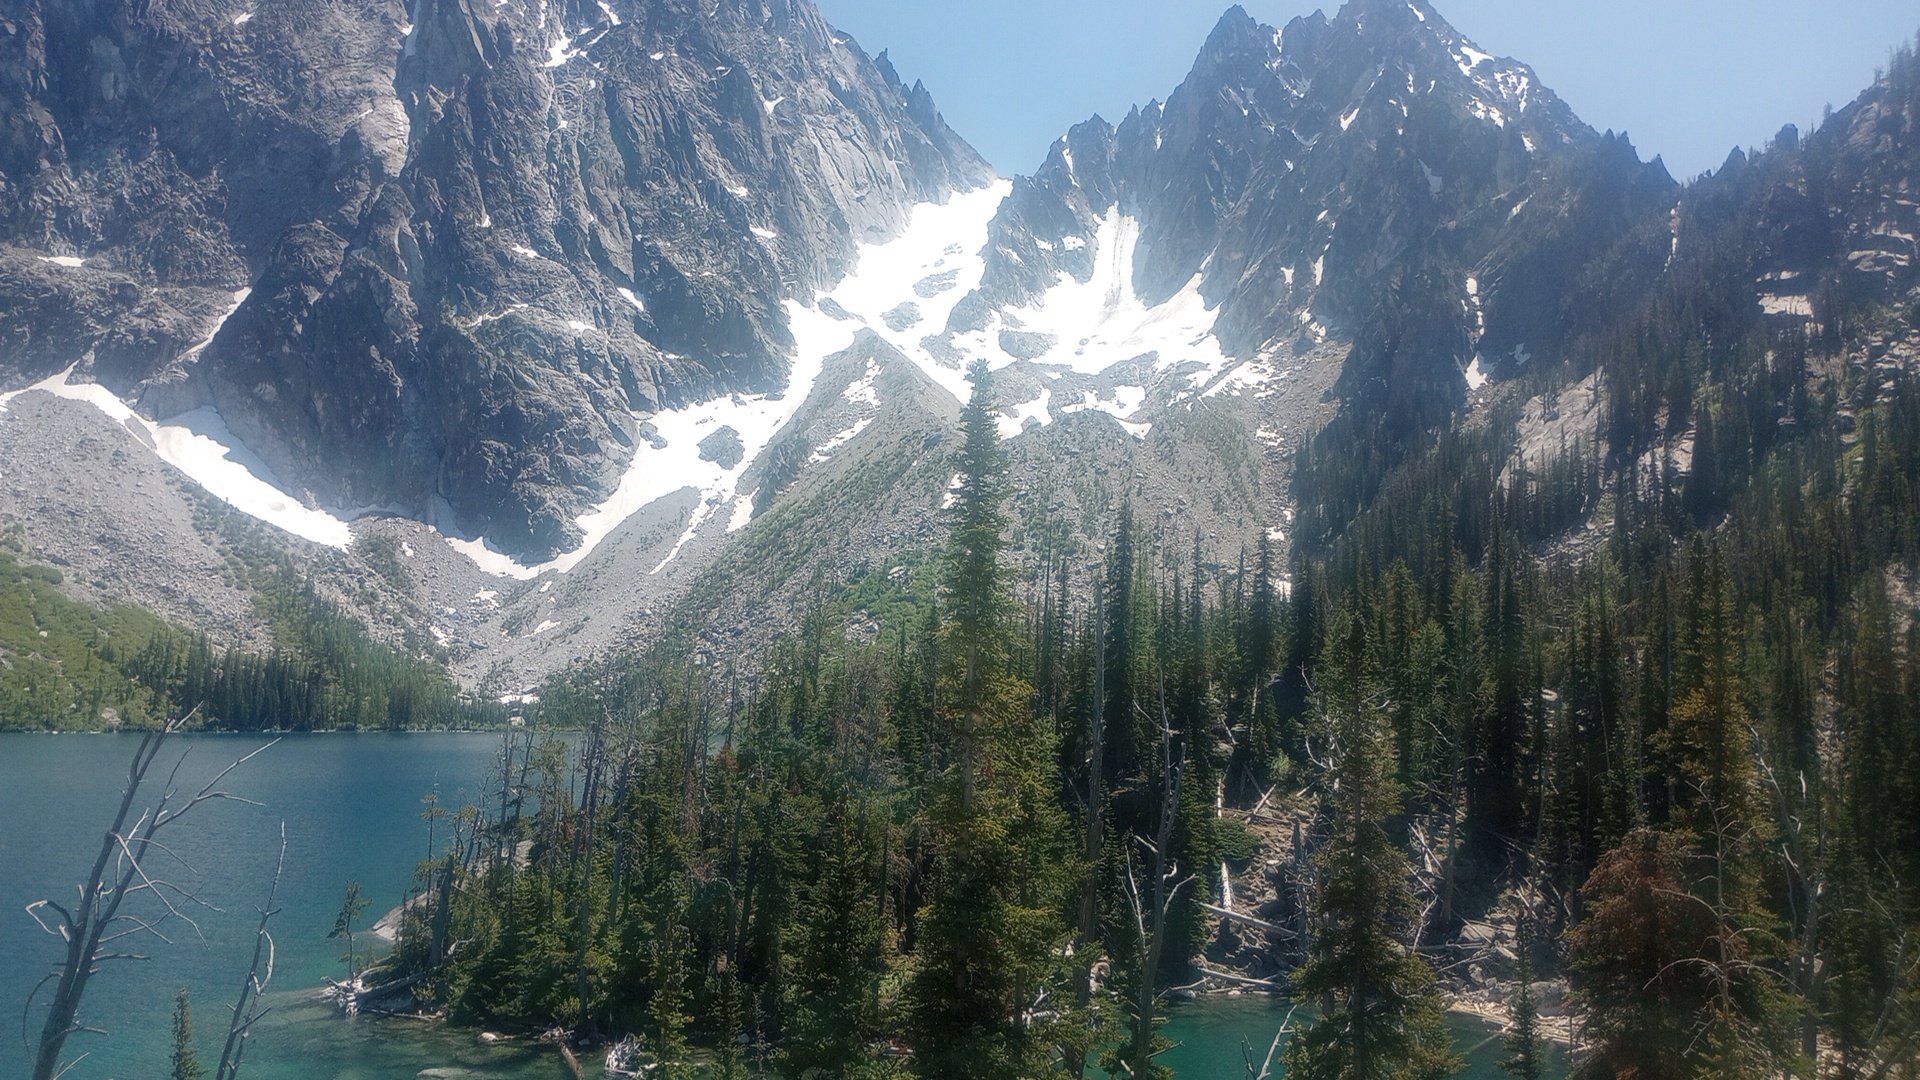
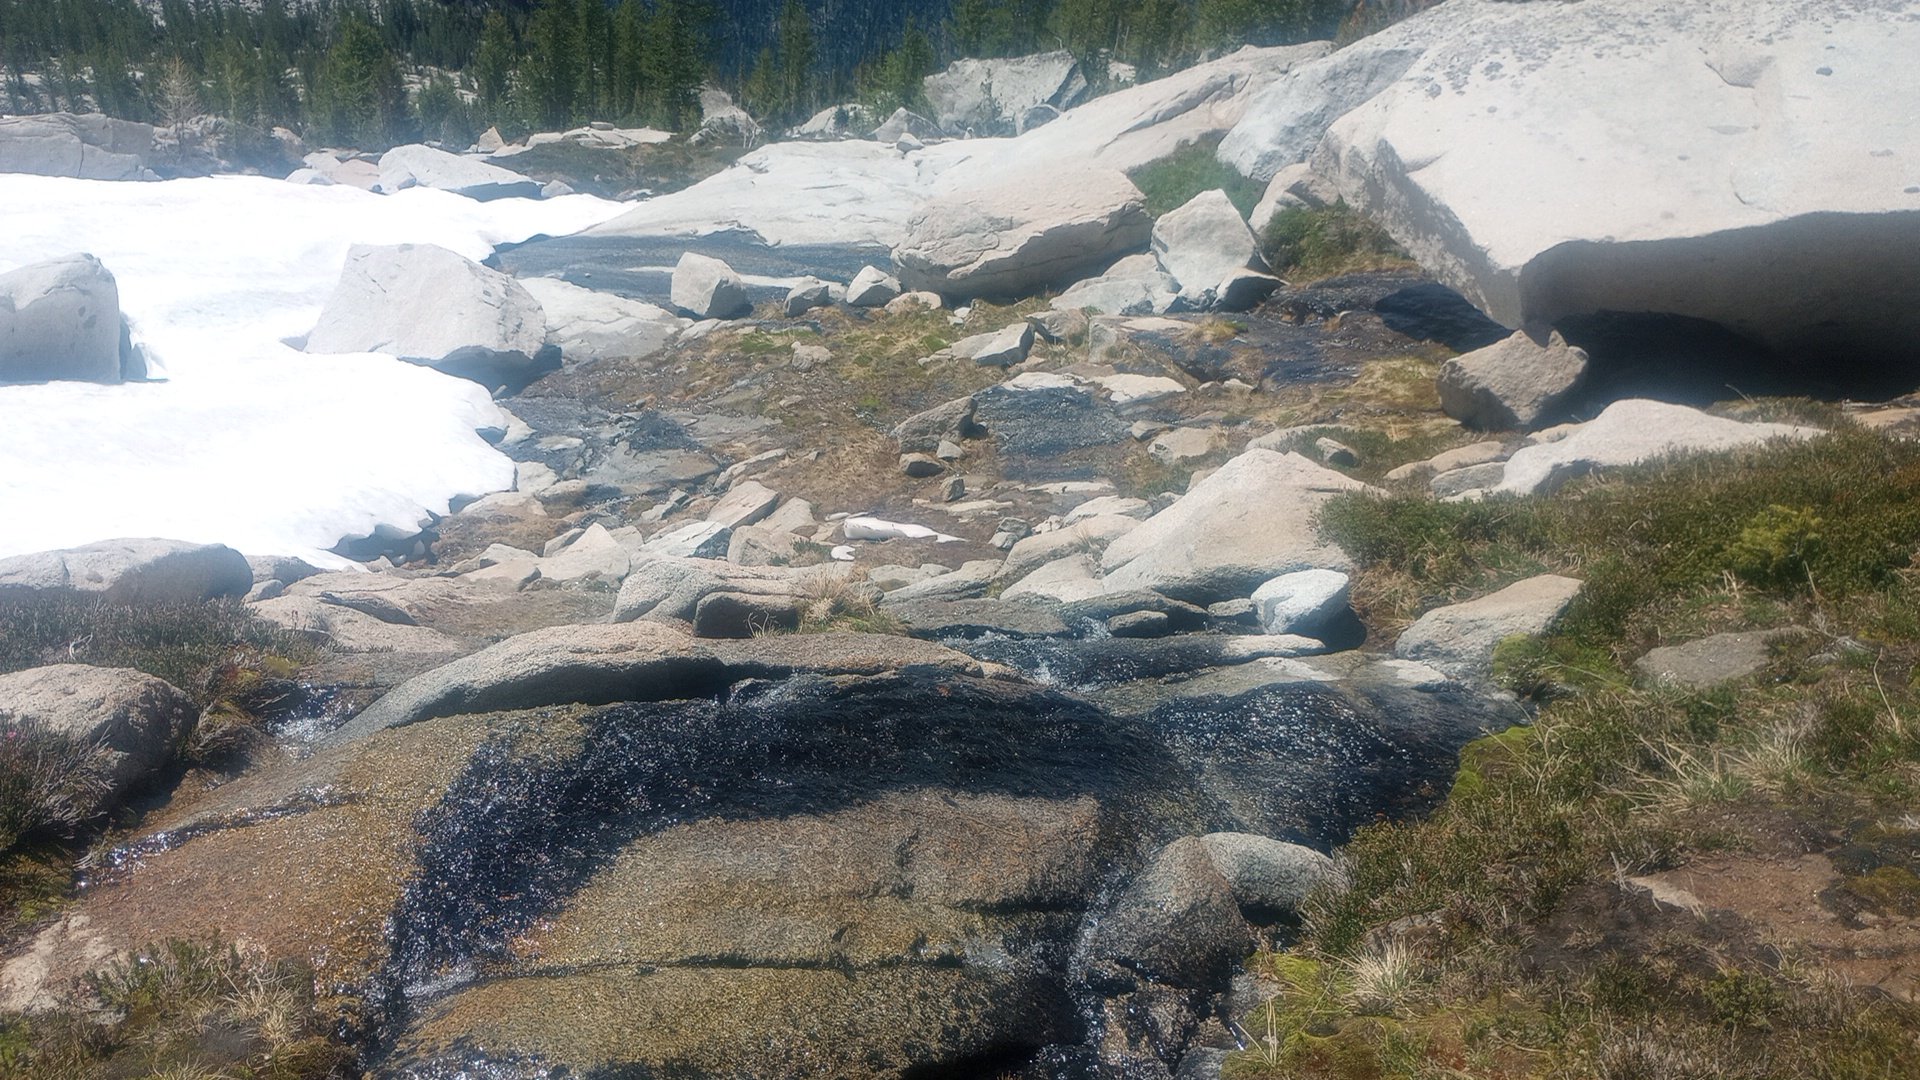
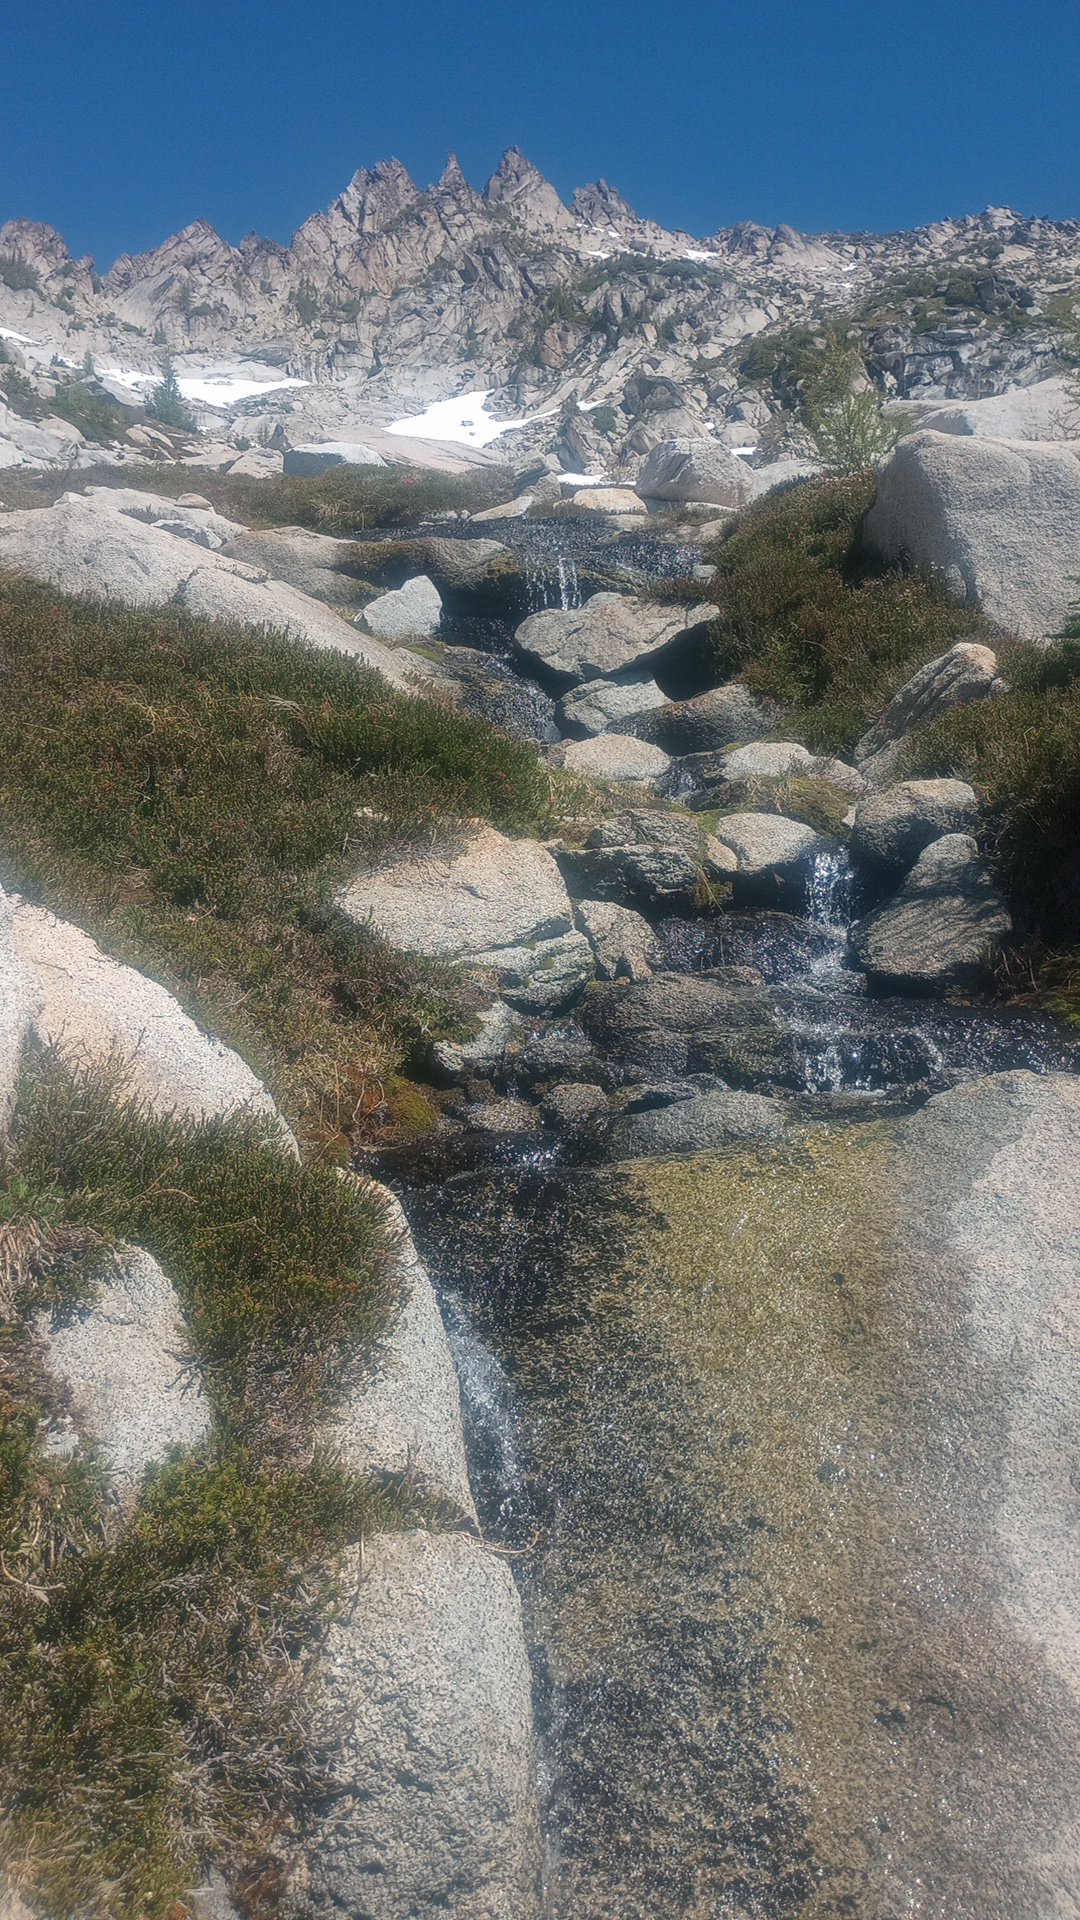
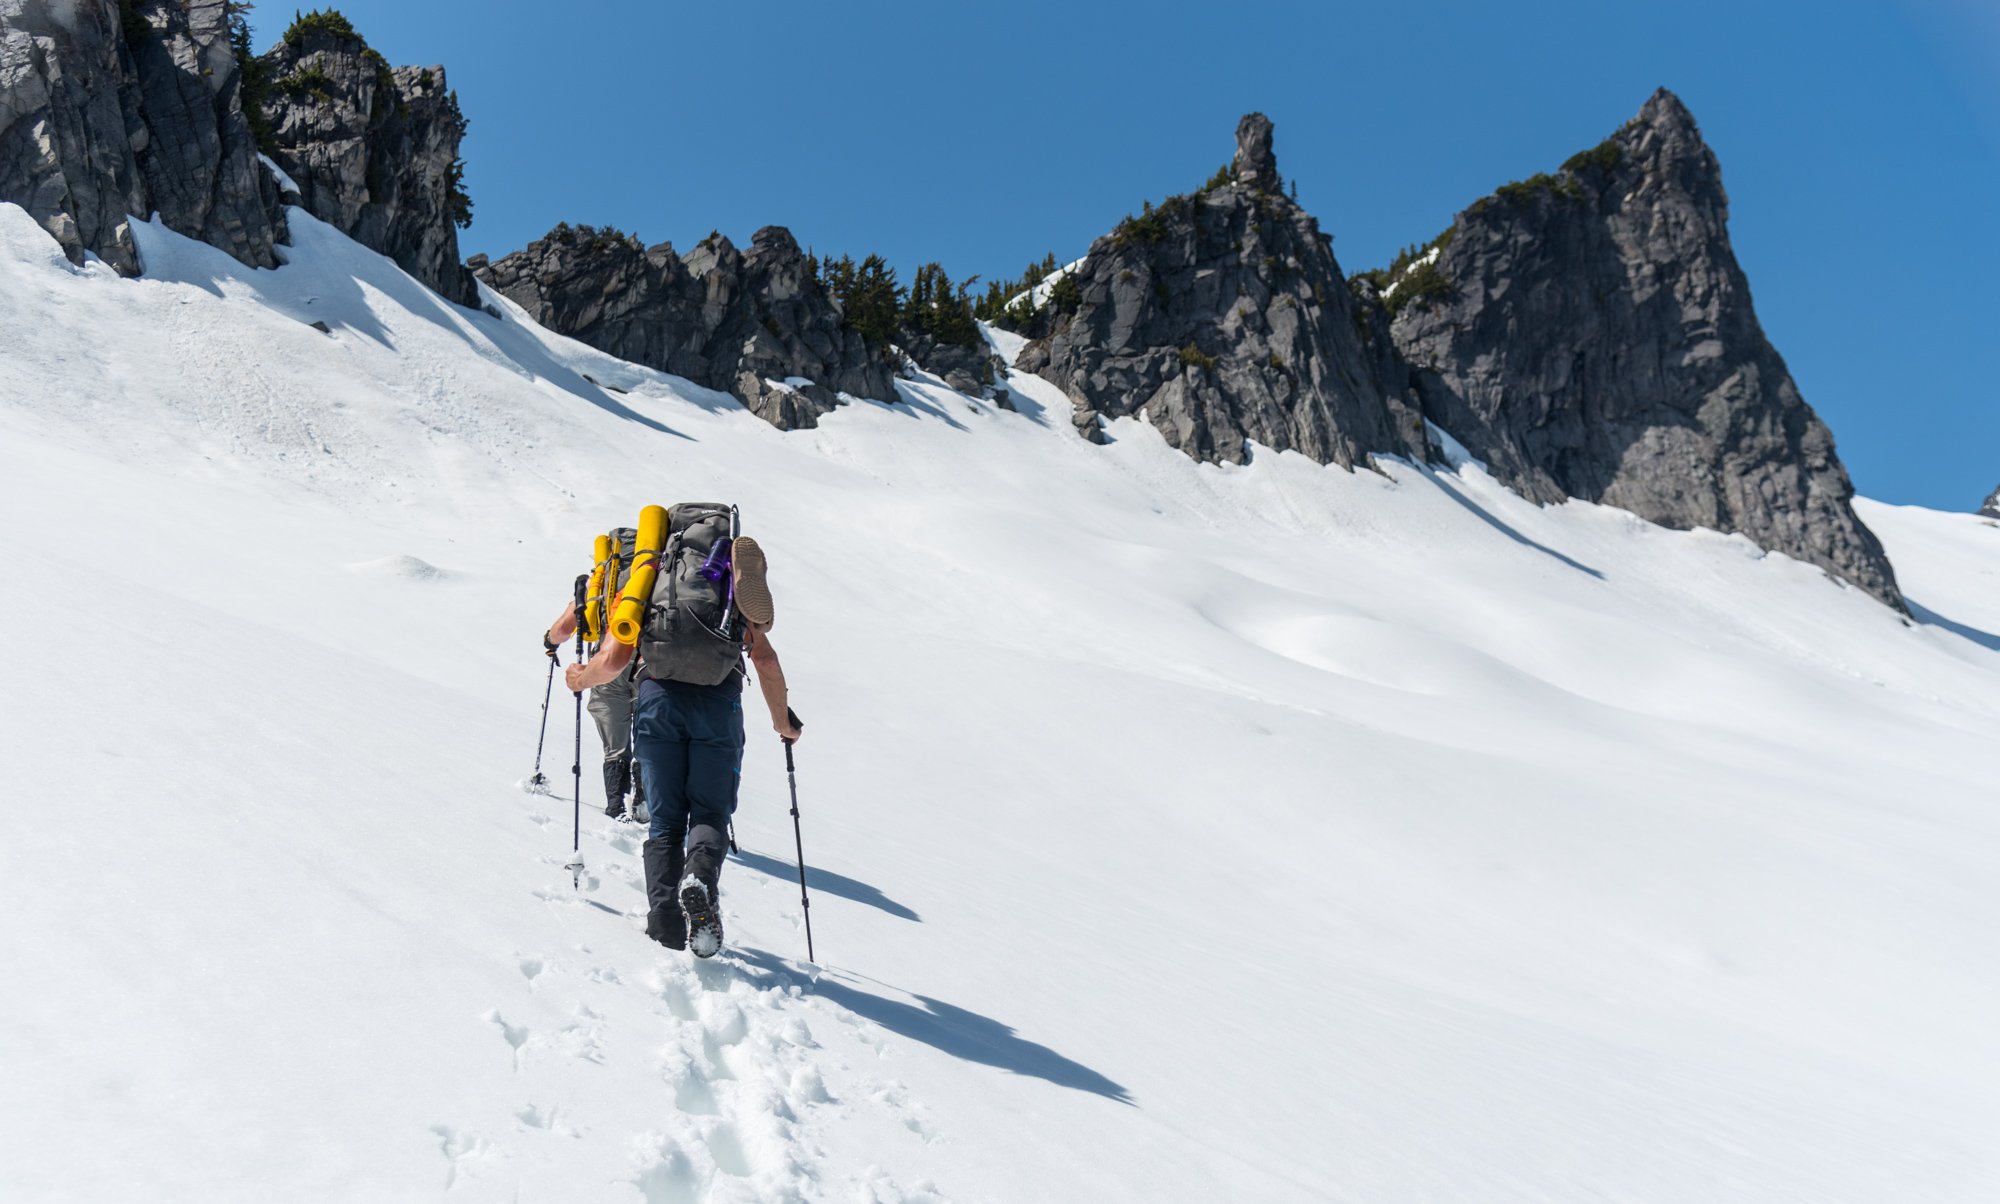
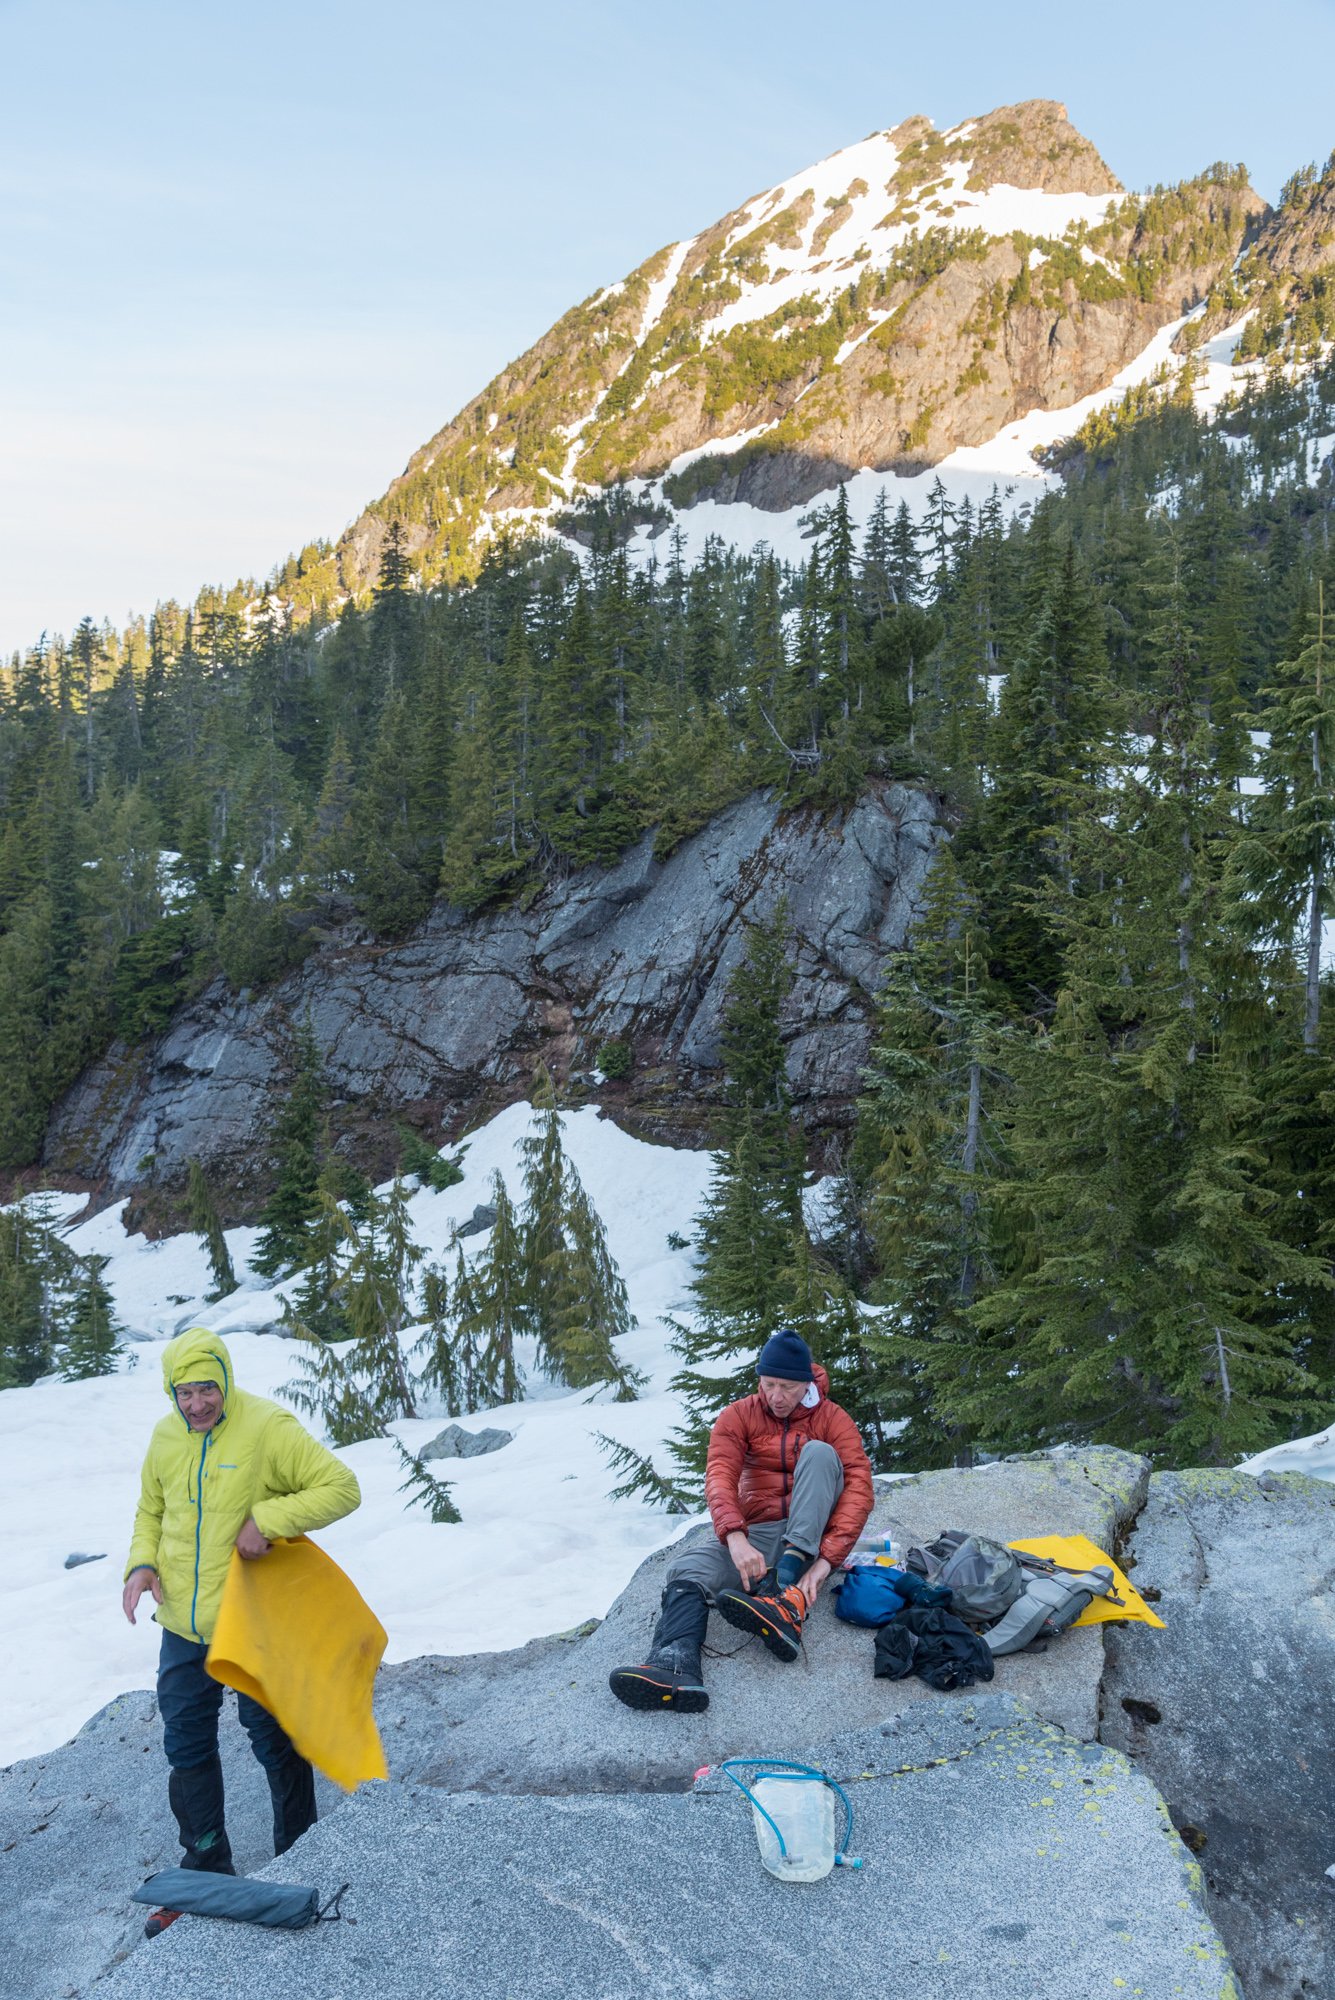
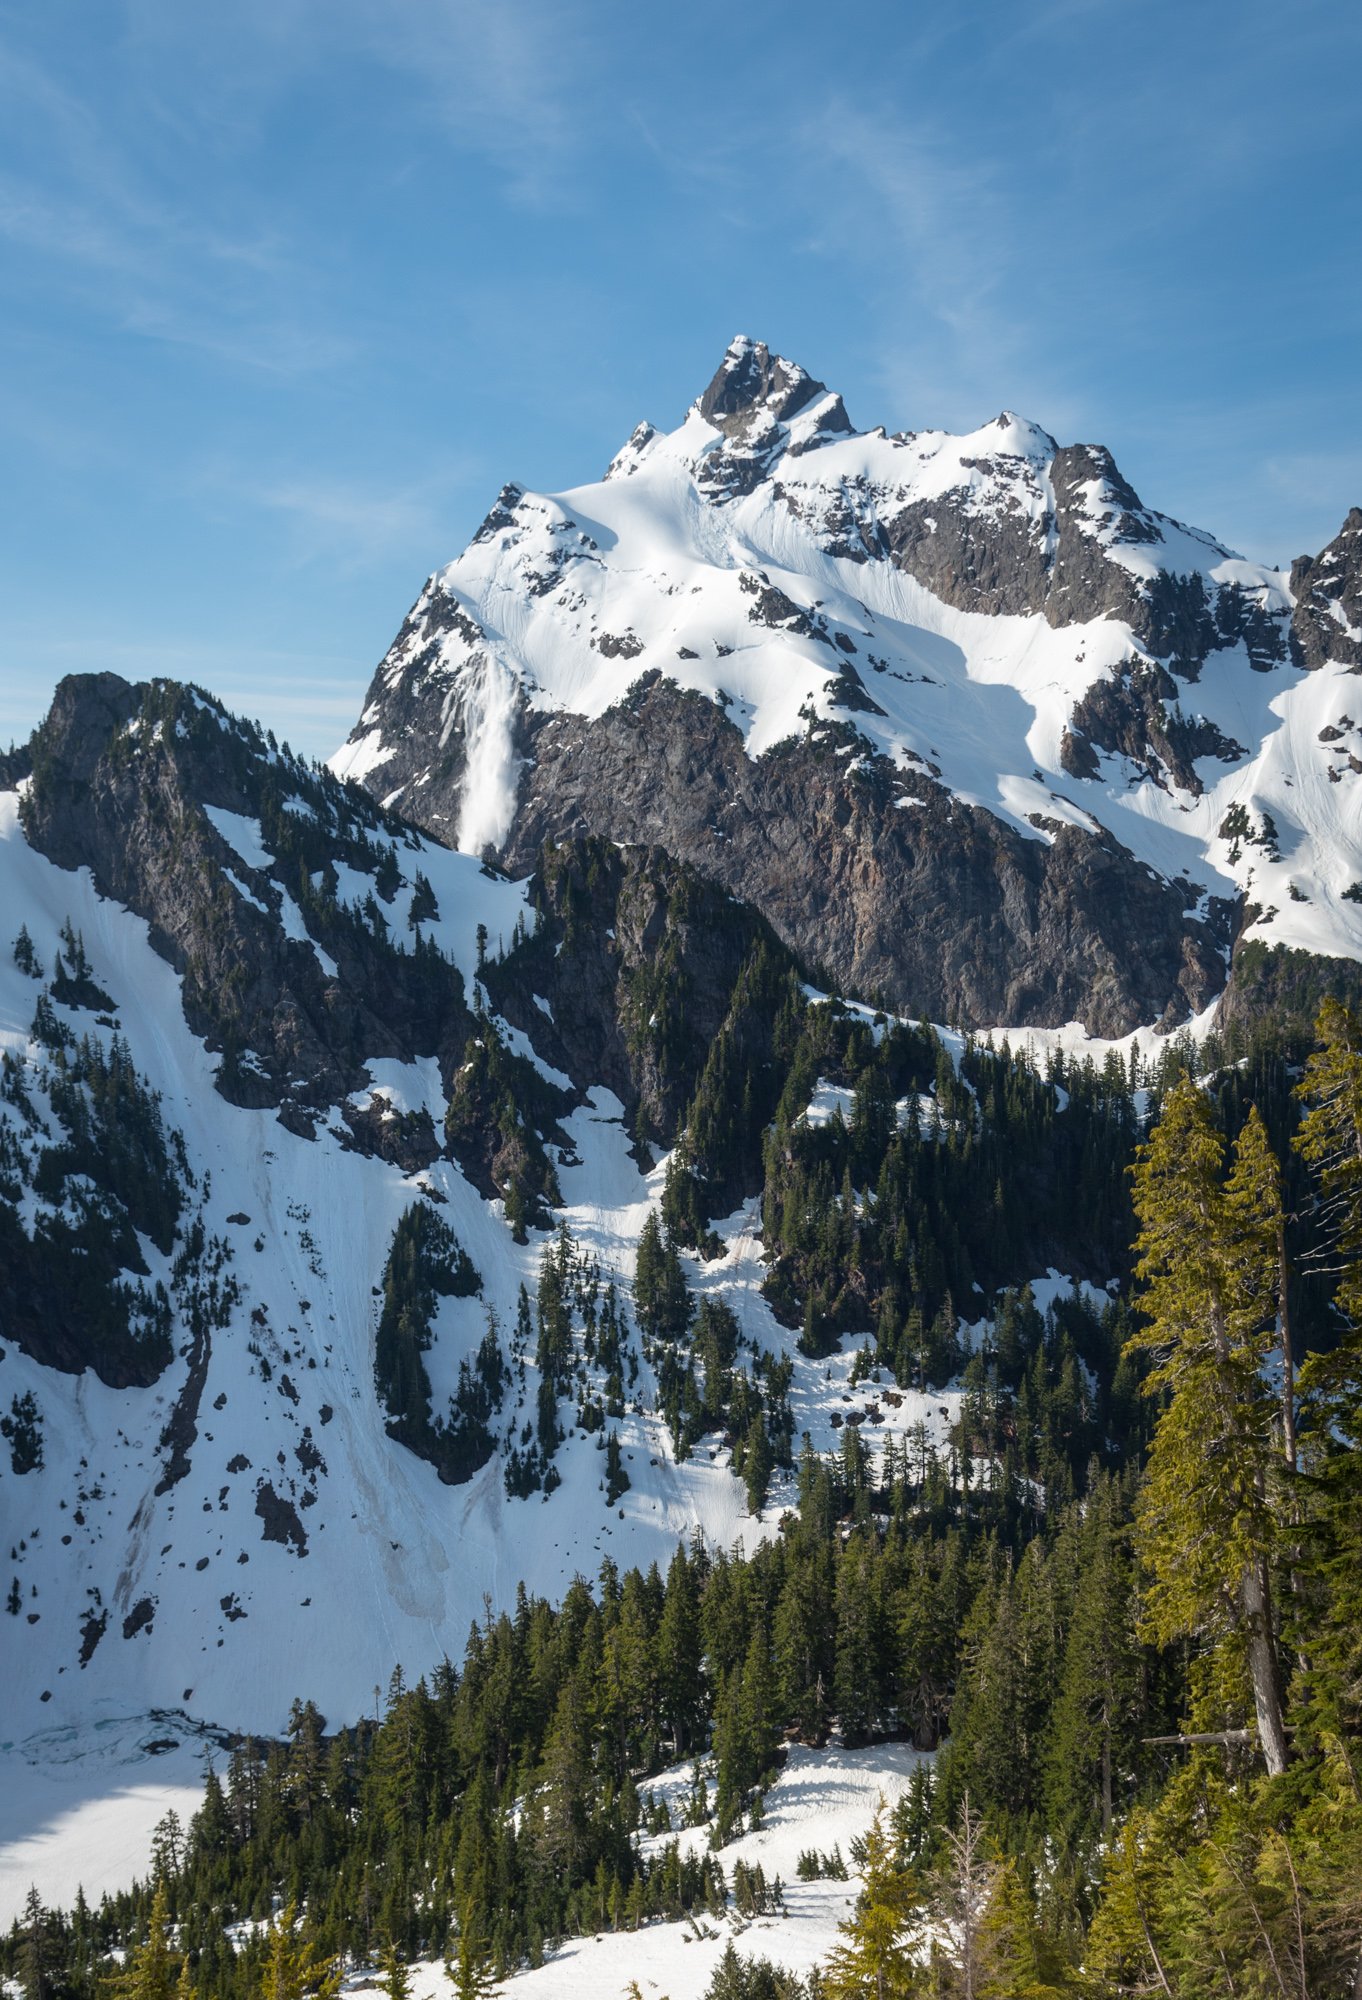
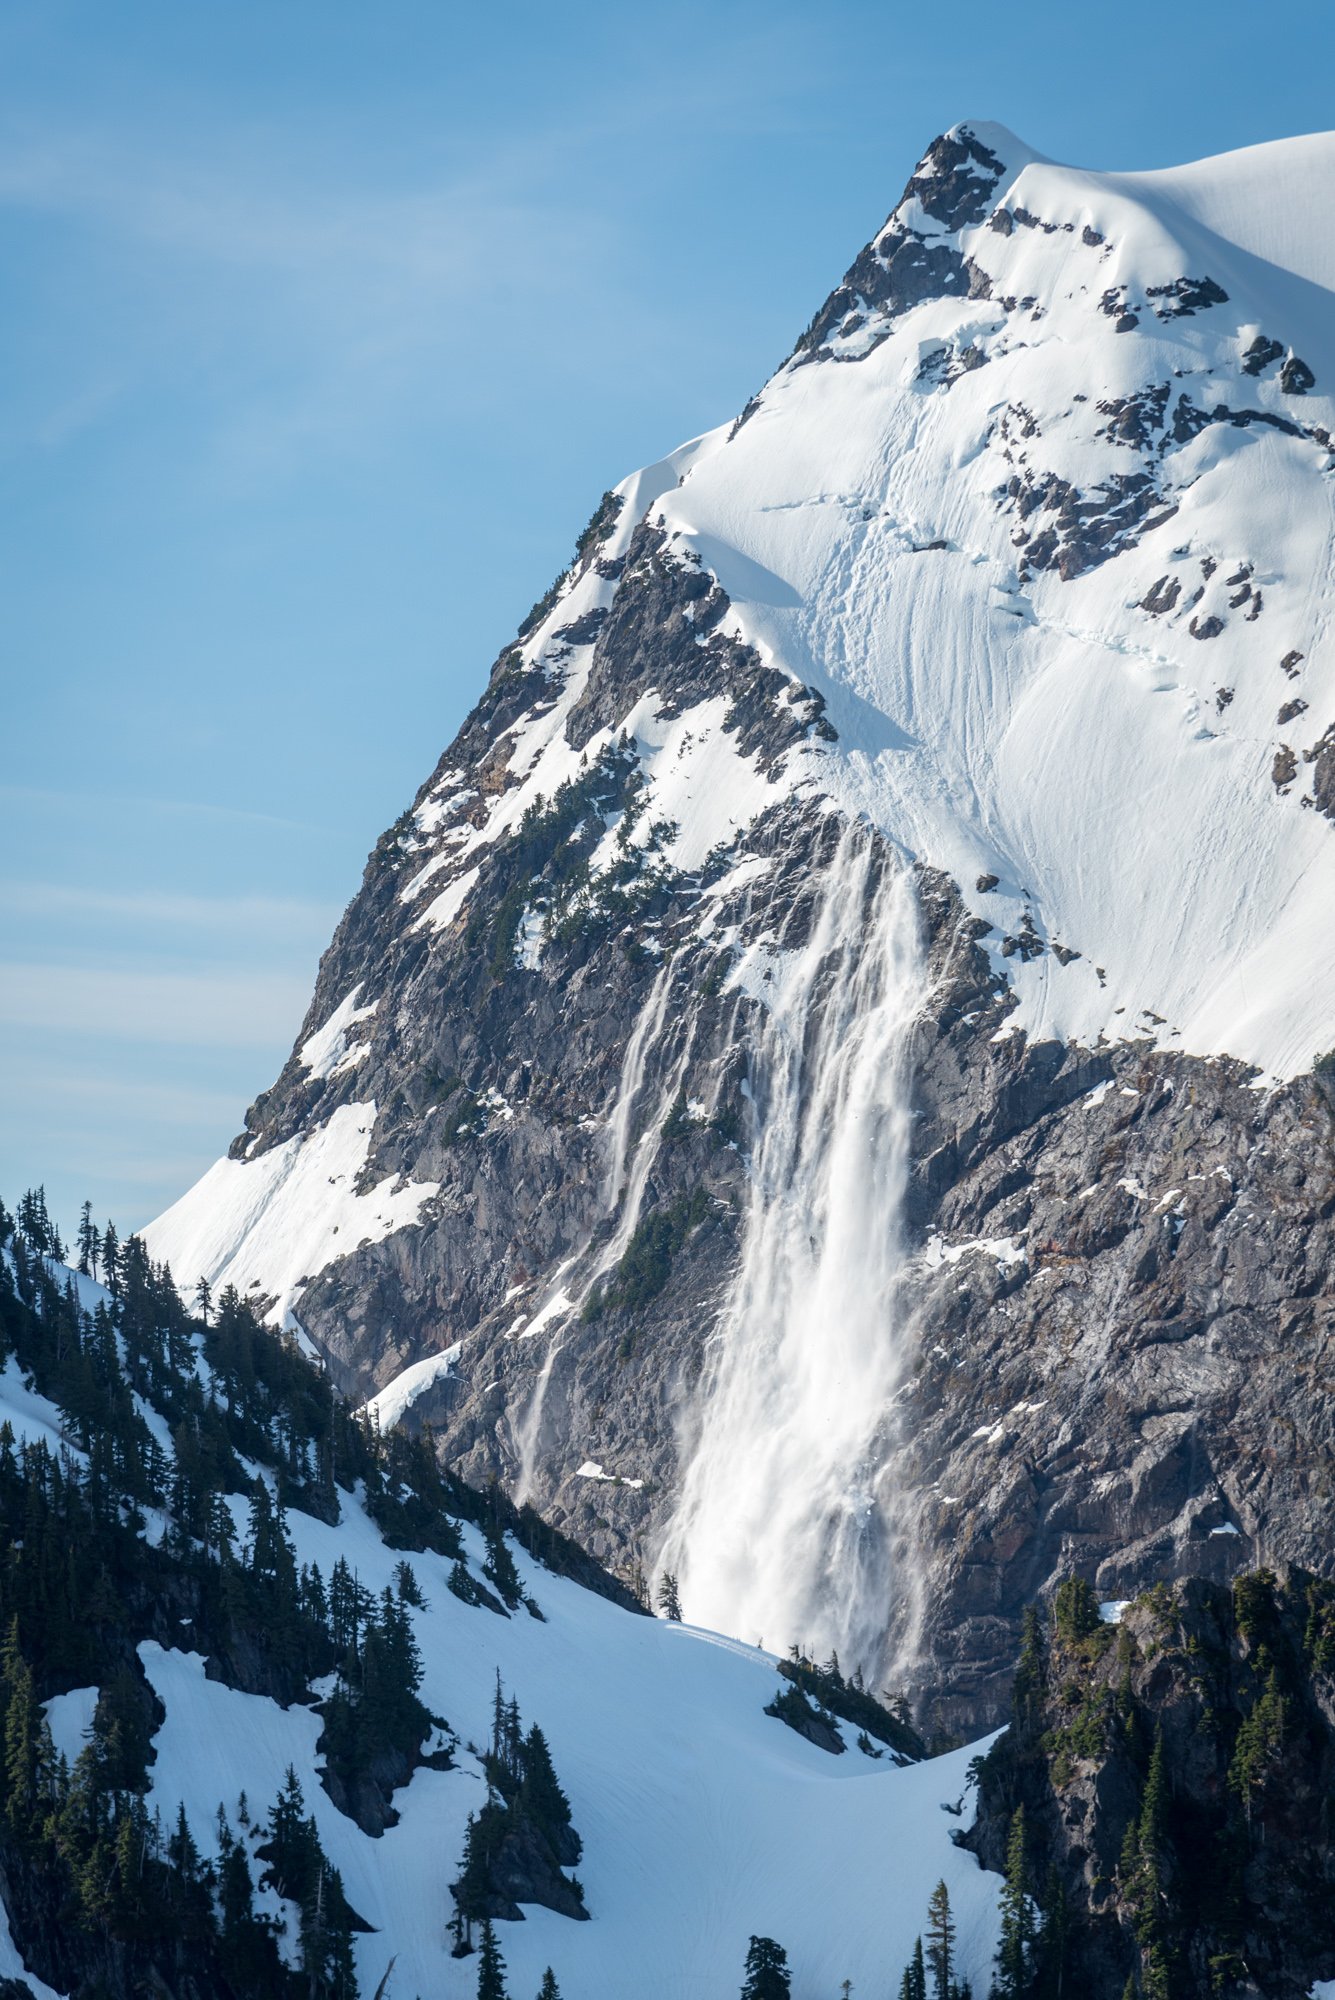
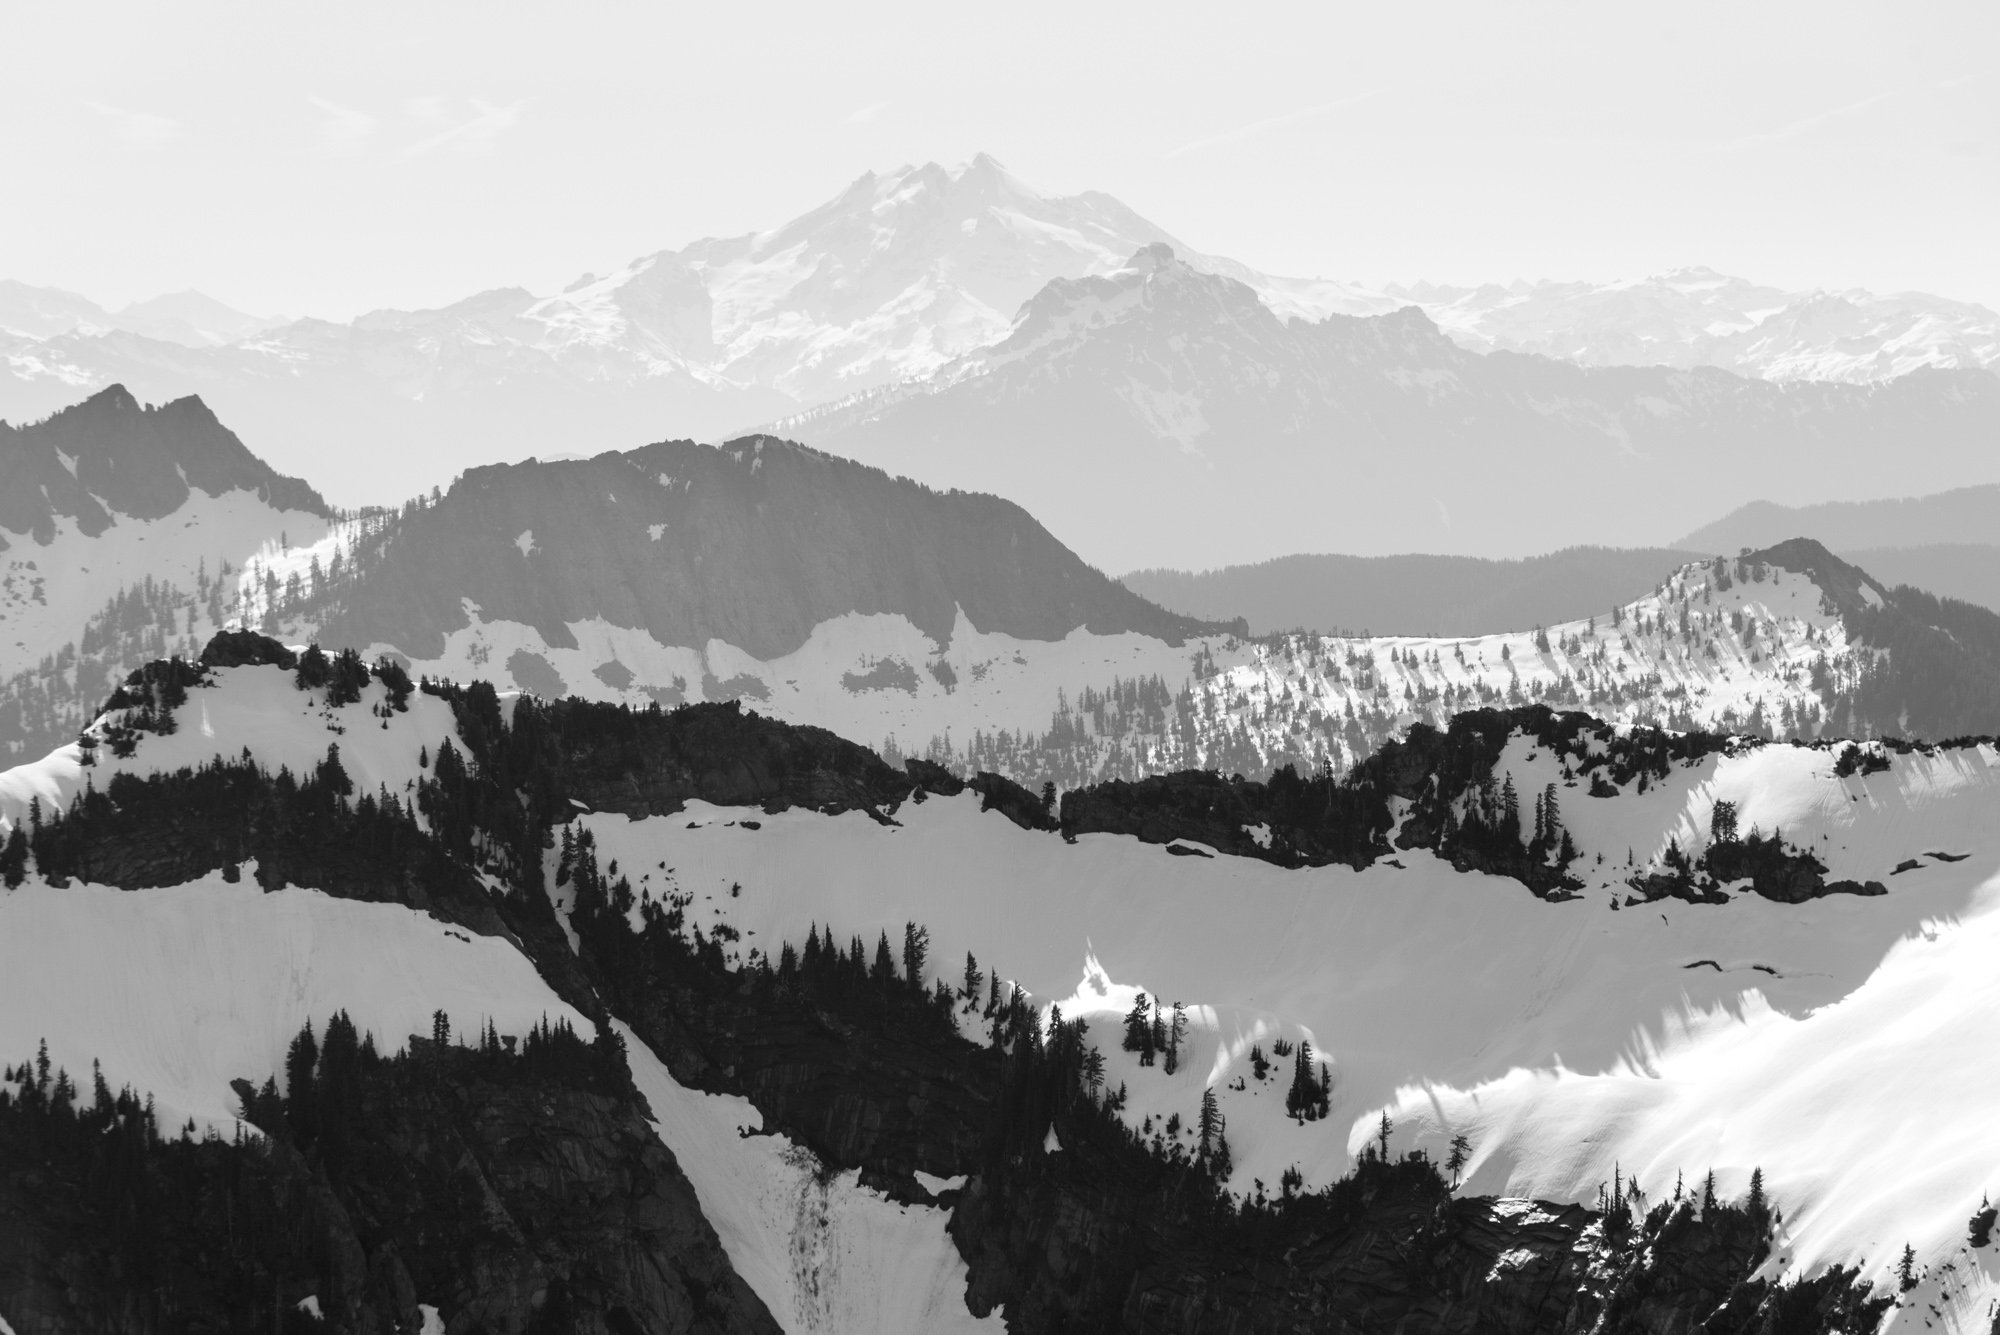
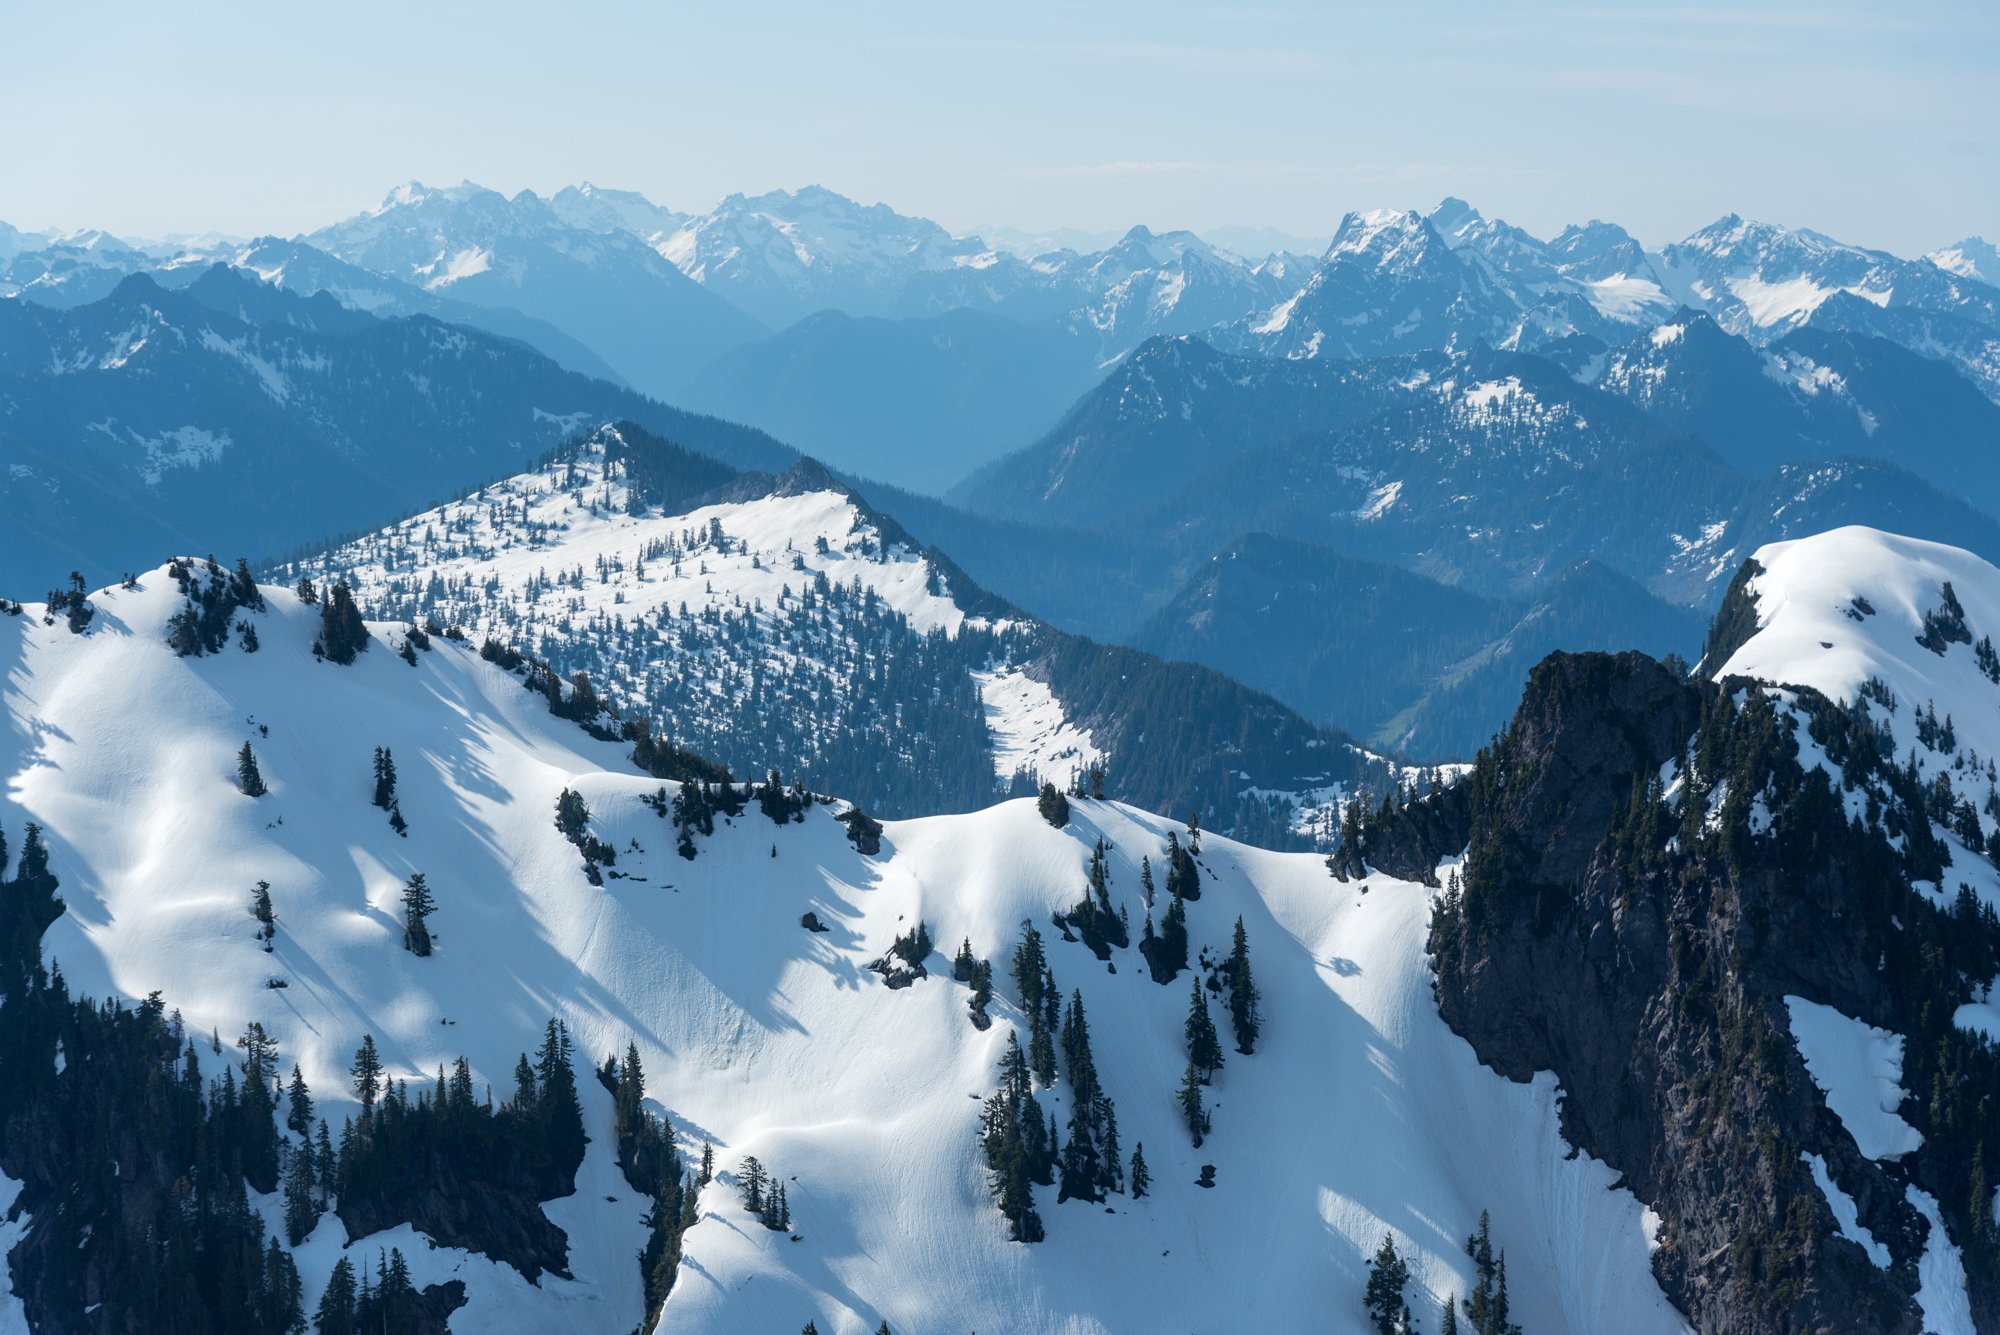
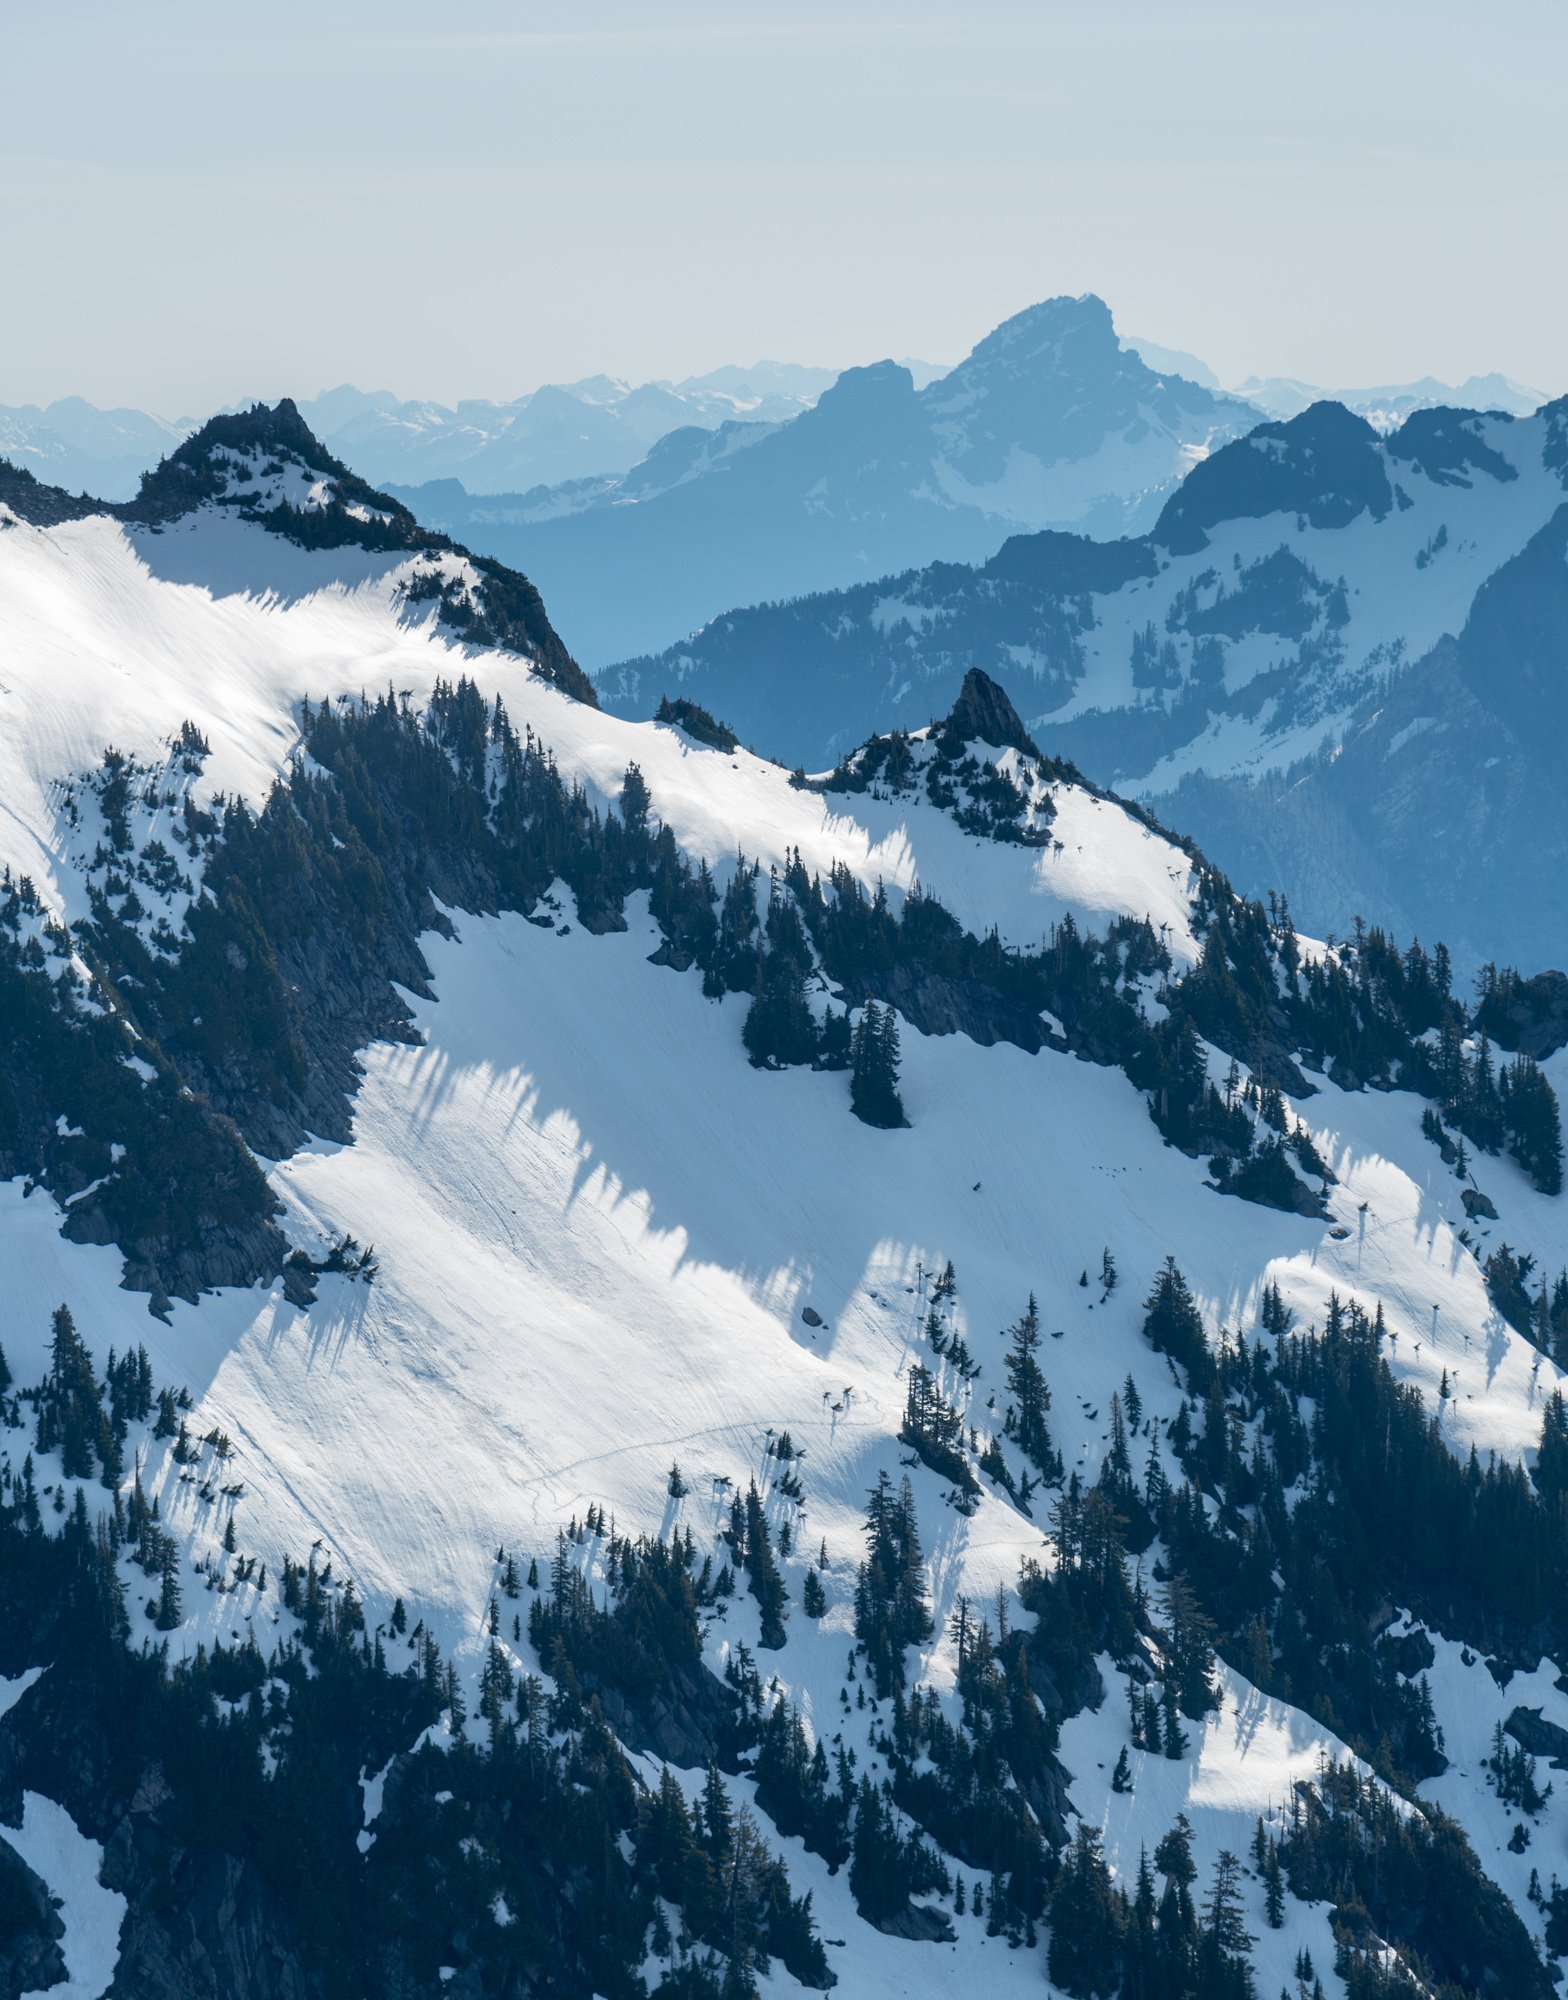
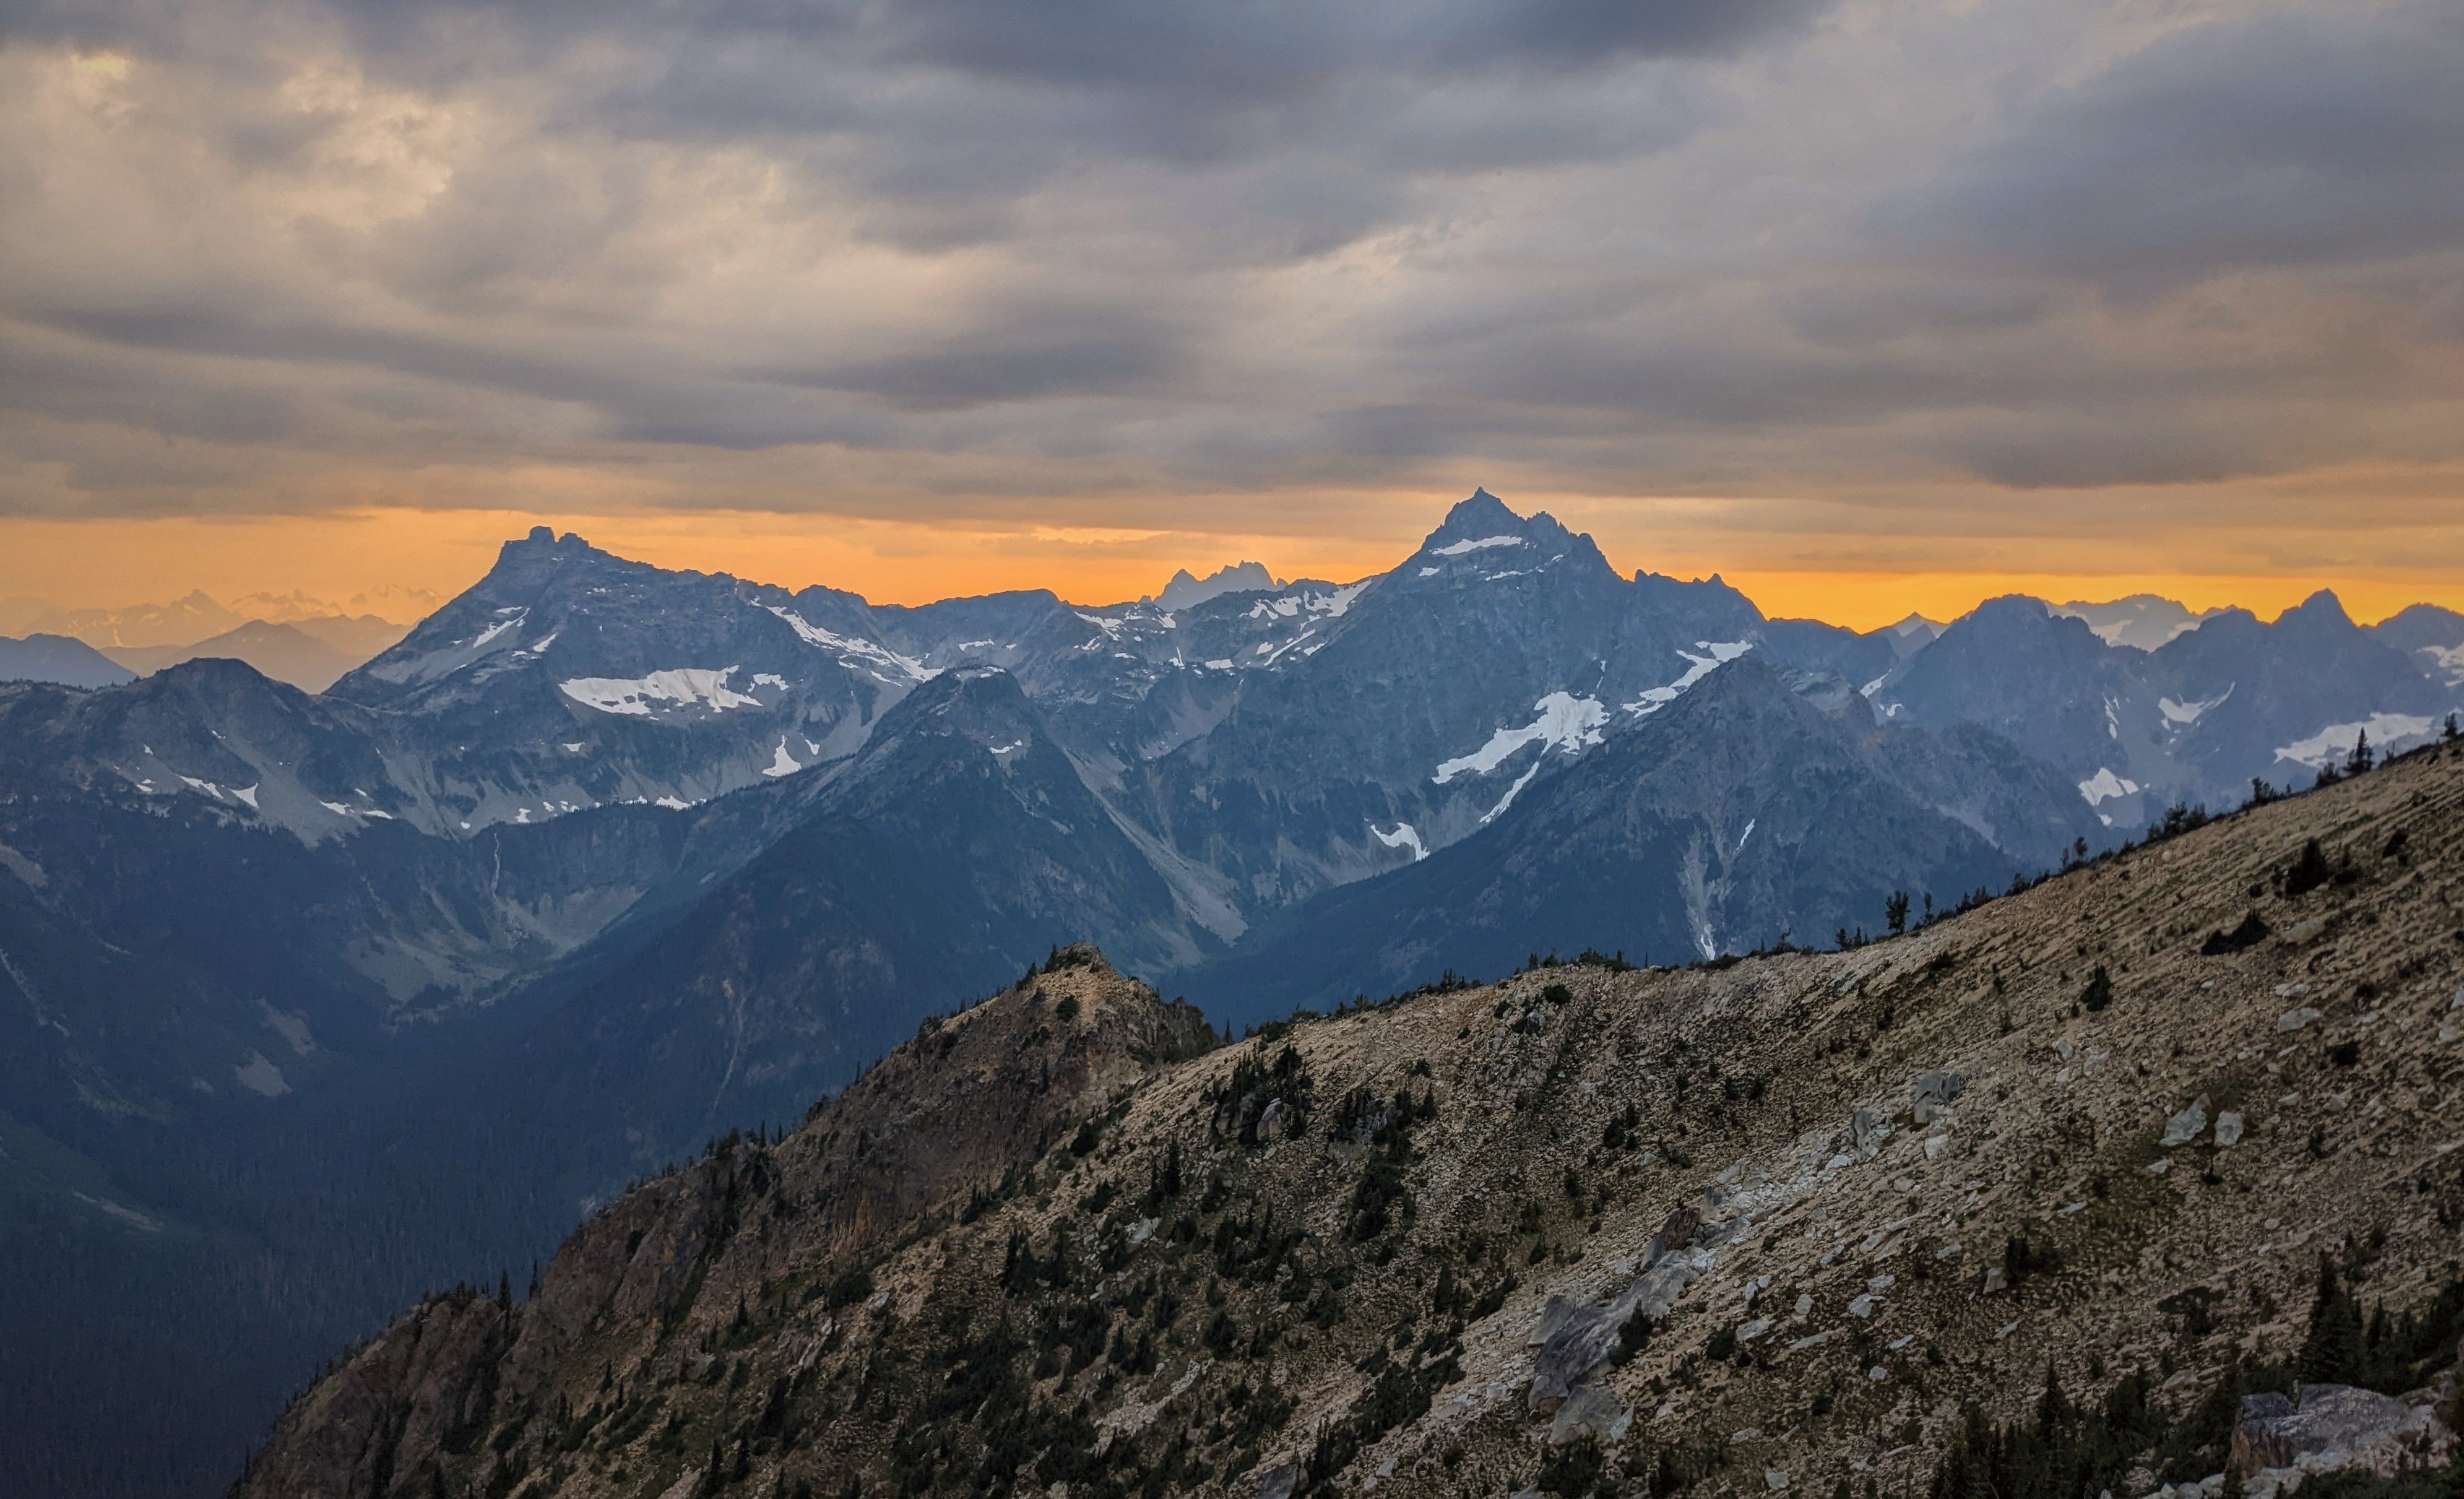
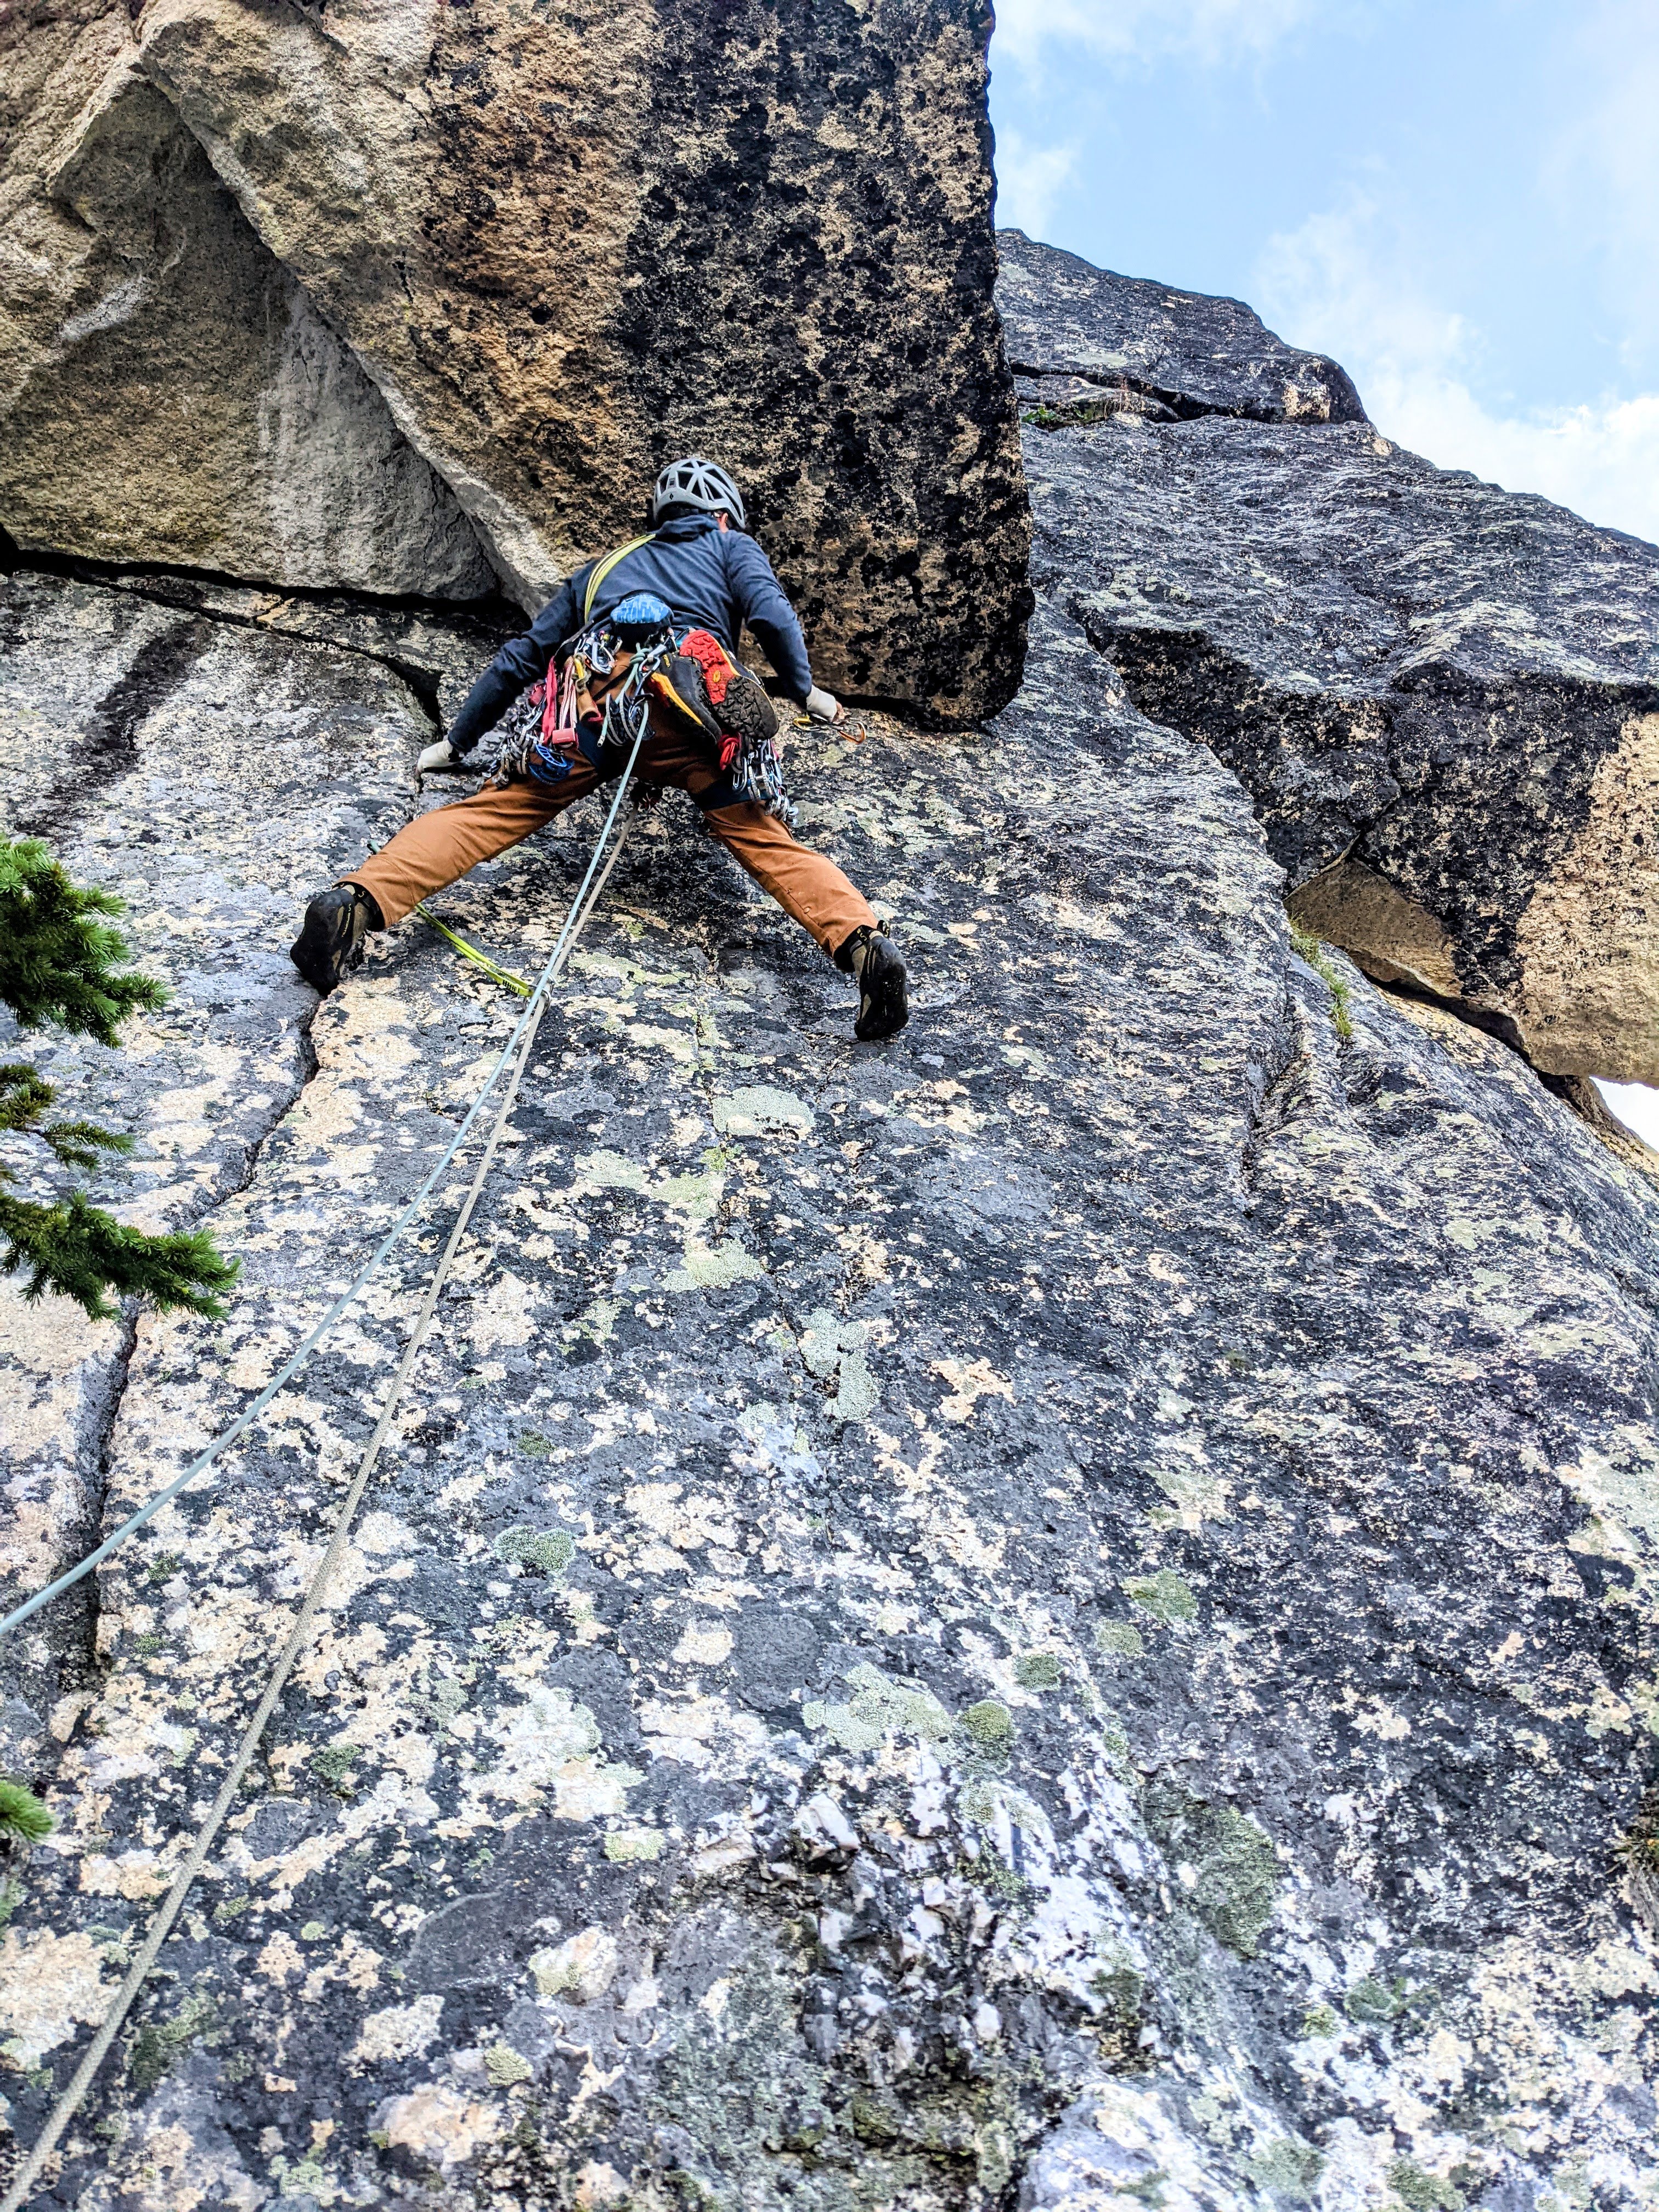
There are plenty of trip reports out there about the Tahoma Glacier, so I won't elaborate too much on the route. Last year we had planned to climb this route but with a very terrible forecast during our dates we postponed it a year. This year we braved the rain on day 1 in hopes of the promised good weather for summit day. Thankfully it paid off. Leaving the trailhead Saturday morning in the rain. (Photo by my wife) Found fresh snow from the previous night that was now a sloppy mess.....still raining. (Photo by my wife) Rewarded with this view on Day 2. We moved from Camp 1 at 6,200 ft up the Puyallup Cleaver to high camp at 9,800ft at the base of Saint Andrews Rocks. Looking at the Puyallup Glacier. It was well filled in and easy walking up to high camp at 9,800ft. Looking down at the Tahoma Glacier from high camp. You have to drop down the ramp to reach the glacier proper. Sunset at Saint Andrews Rocks at 9,800ft. (Photo by my wife) Early morning crevasse navigation. (photo by my wife) Some more crevasse shenanigans in the broken up sections. More crevasse zigzagging. (photo by my wife) The team nearing the top of the route approaching 14,000ft. The summit with my wife and I. At 13,100 feet on the way down our 2nd person (out of 5) had a sliding fall into a crevasse. I have always said that if you keep your intervals tight you shouldn’t have to worry too much about crevasse falls. And over the last 15 years this has proved true in both the PNW and AK. With multiple small punch throughs over the years nobody has ever gone farther than their armpits. But this time was different. This is because if you punch through a snow bridge you will likely go up to your waist or backpack but then be tight and climb out on your own. I think this is true for typical crevasse falls….bad snow bridge, or winded over crevasse. These are times were you are surprised and fall right in. There is an entirely different type of crevasse fall. This is when you take a fall in steeper terrain and are unable to arrest that fall prior to the crevasse. I never really thought much about this because I feel really confident on crampons and look at those short locations as “do not fall” sections. But clearly with a less experienced group I need to take those sections a little more seriously. Our #2 guy on the rope was very tired on the way down which I am sure contributed to the fall. He fell in just such a place on a traverse above a crevasse on terrain I would call “no fall zones”. He fell off the upper lip and into a big open crevasse. The rope wasn’t super tight but there wasn’t an excessive amount of slack in the system. It was in difficult terrain where there were multiple obstacles stacked right after each other so team members were navigating different technical obstacles all at the same time (not ideal). Looking back I think I could have potentially avoided the incident by the use of running protection. I just felt so secure in those sections that I didn’t really think it necessary. But when taking newer people out it is better to take a couple minutes to add running protection than a hour to pull someone out of a crevasse. Lesson learned for sure, and I am just really glad he was ok. When the fall occurred, my wife who was leading the rope team had just finished all the technical obstacles and was on the lower lip of the crevasse. #2 was working across a traverse 8 feet above the lip of the crevasse and then had a 10 ft down climb to a narrow snow bridge. #3 had just finished a down climb and was just making a step across a thin snow bridge and onto the traverse. #4 was at the beginning of a down climb. #5 (myself) was anchoring the back on the slope above. When #2 fell he was unable to arrest in those 8 feet and so fell off the upper lip. He stopped about 30 feet below the lower lip and just above a sloping snow ledge. The rope never came tight to my wife (#1) because #2 fell towards her creating slack. #3 was pulled off her feet across the snowbridge onto the traverse. She was able to arrest. #4 was pulled off his feet and into the down climb. Myself in the back was able to arrest and hold the fall helped by #3 on the traverse. Thankfully #2 who fell in was uninjured. We were able to give him a little slack so he could get his weight on his feet onto the sloping ledge and then we started working on a plan. It took a bit of time to get things setup since the terrain was complicated where most of the team had arrested the fall. But in the end we were able to get everyone except for myself to my wife's position on the lower lip where there was a great spot for rescue. They were able to equalize 2 pickets (1 deadman and 1 end SLAM) and then used a 3:1 system with an ice ax at the lip to keep the rope up. Once the system was set 2 people were able to haul out the climber in less than 5 minutes. Having various different levels of experience on the team we spent a few minutes afterwards discussing and debriefing the incident. Here were a few lessons people found helpful. Place anchors further from the edge so there is more room to haul. When moving downhill keep walking down past the obstacle (body belay) vs. a hip or ice ax belay. This allows you to quickly run downhill should someone slide towards you creating slack. You need room to walk around at the anchors when performing a rescue. If in a safe spot think about just being out of the system. If not then use cord or the back end of a rope. Both the first 2 rescuers got pretty pinned into short tethers that prevented much movement initially. Have 1 person take lead on patient care and tell the person in the hole to put on warm clothes…even in best case scenarios it is going to be 15-20 minutes in the cold crevasse. If there is a ledge in the crevasse consider giving slack to get the person off the rope and onto their feet. Use the rope for backup should the snow give way again. Think through all the steps that need to get accomplished and try to figure out what can be done concurrently to speed up the process and gain efficiency. Here is the rescue in progress from the top lip of the crevasse at the beginning of the traverse. I ended up be "stuck" on the high side and only helped through directions. I felt the team plenty competent and taking the time to get me to them would just delay pulling out the fallen climber. One more shot as the fallen climber nears the lip. A shot looking up at the top lip of the crevasse and the traverse above. You can see the top of the upper down climb above the traverse on the left. The thin snowbridge is hidden behind the traverse on the left. The final down climb and narrow snow bridge are on the far right after the traverse. The whole incident took about an hour from the time of fall to having everyone out and gathered up at the lower lip. From there we continued down the glacier without further incident. Although people's nerves were a bit shot and any steep terrain encountered further down was negotiated with slow care. This resulted in a very long but safe day. Farther down the glacier at about 11,000ft. We hiked out the next day in beautiful sunshine and tired bodies. But got to see some goats in the process. (photo by my wife)

 7 points
 -
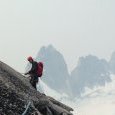
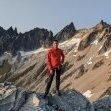
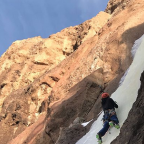
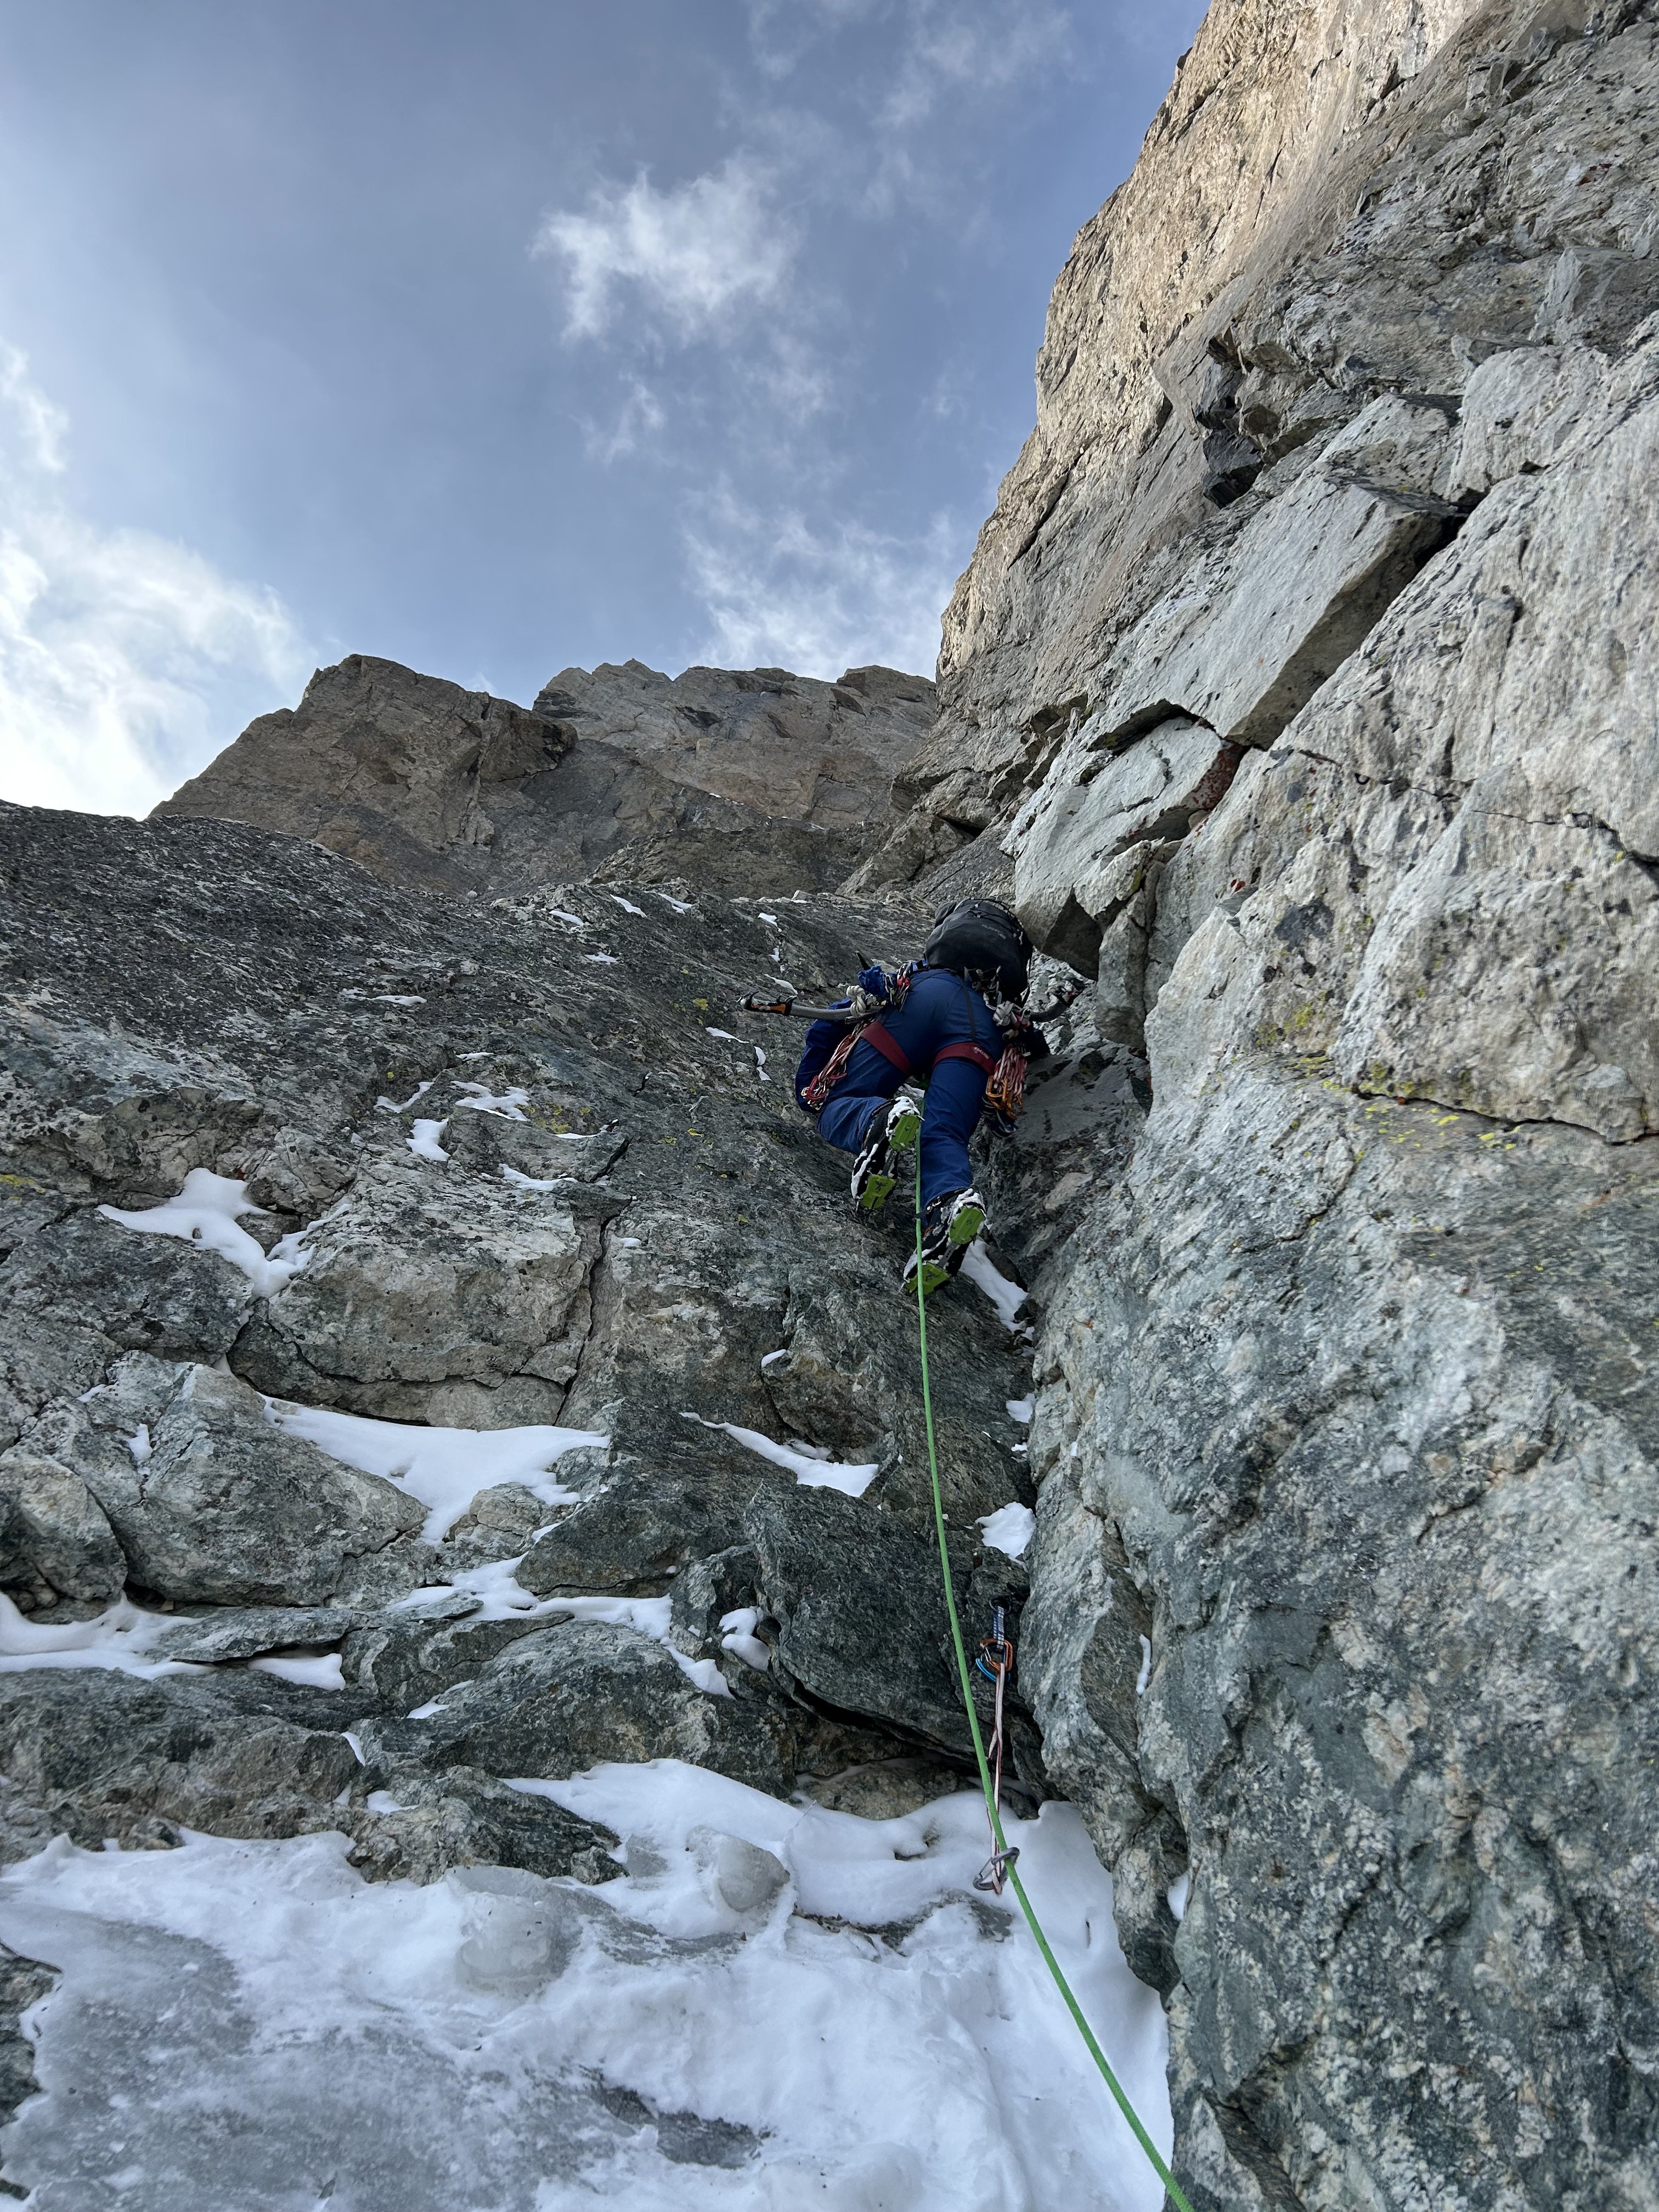
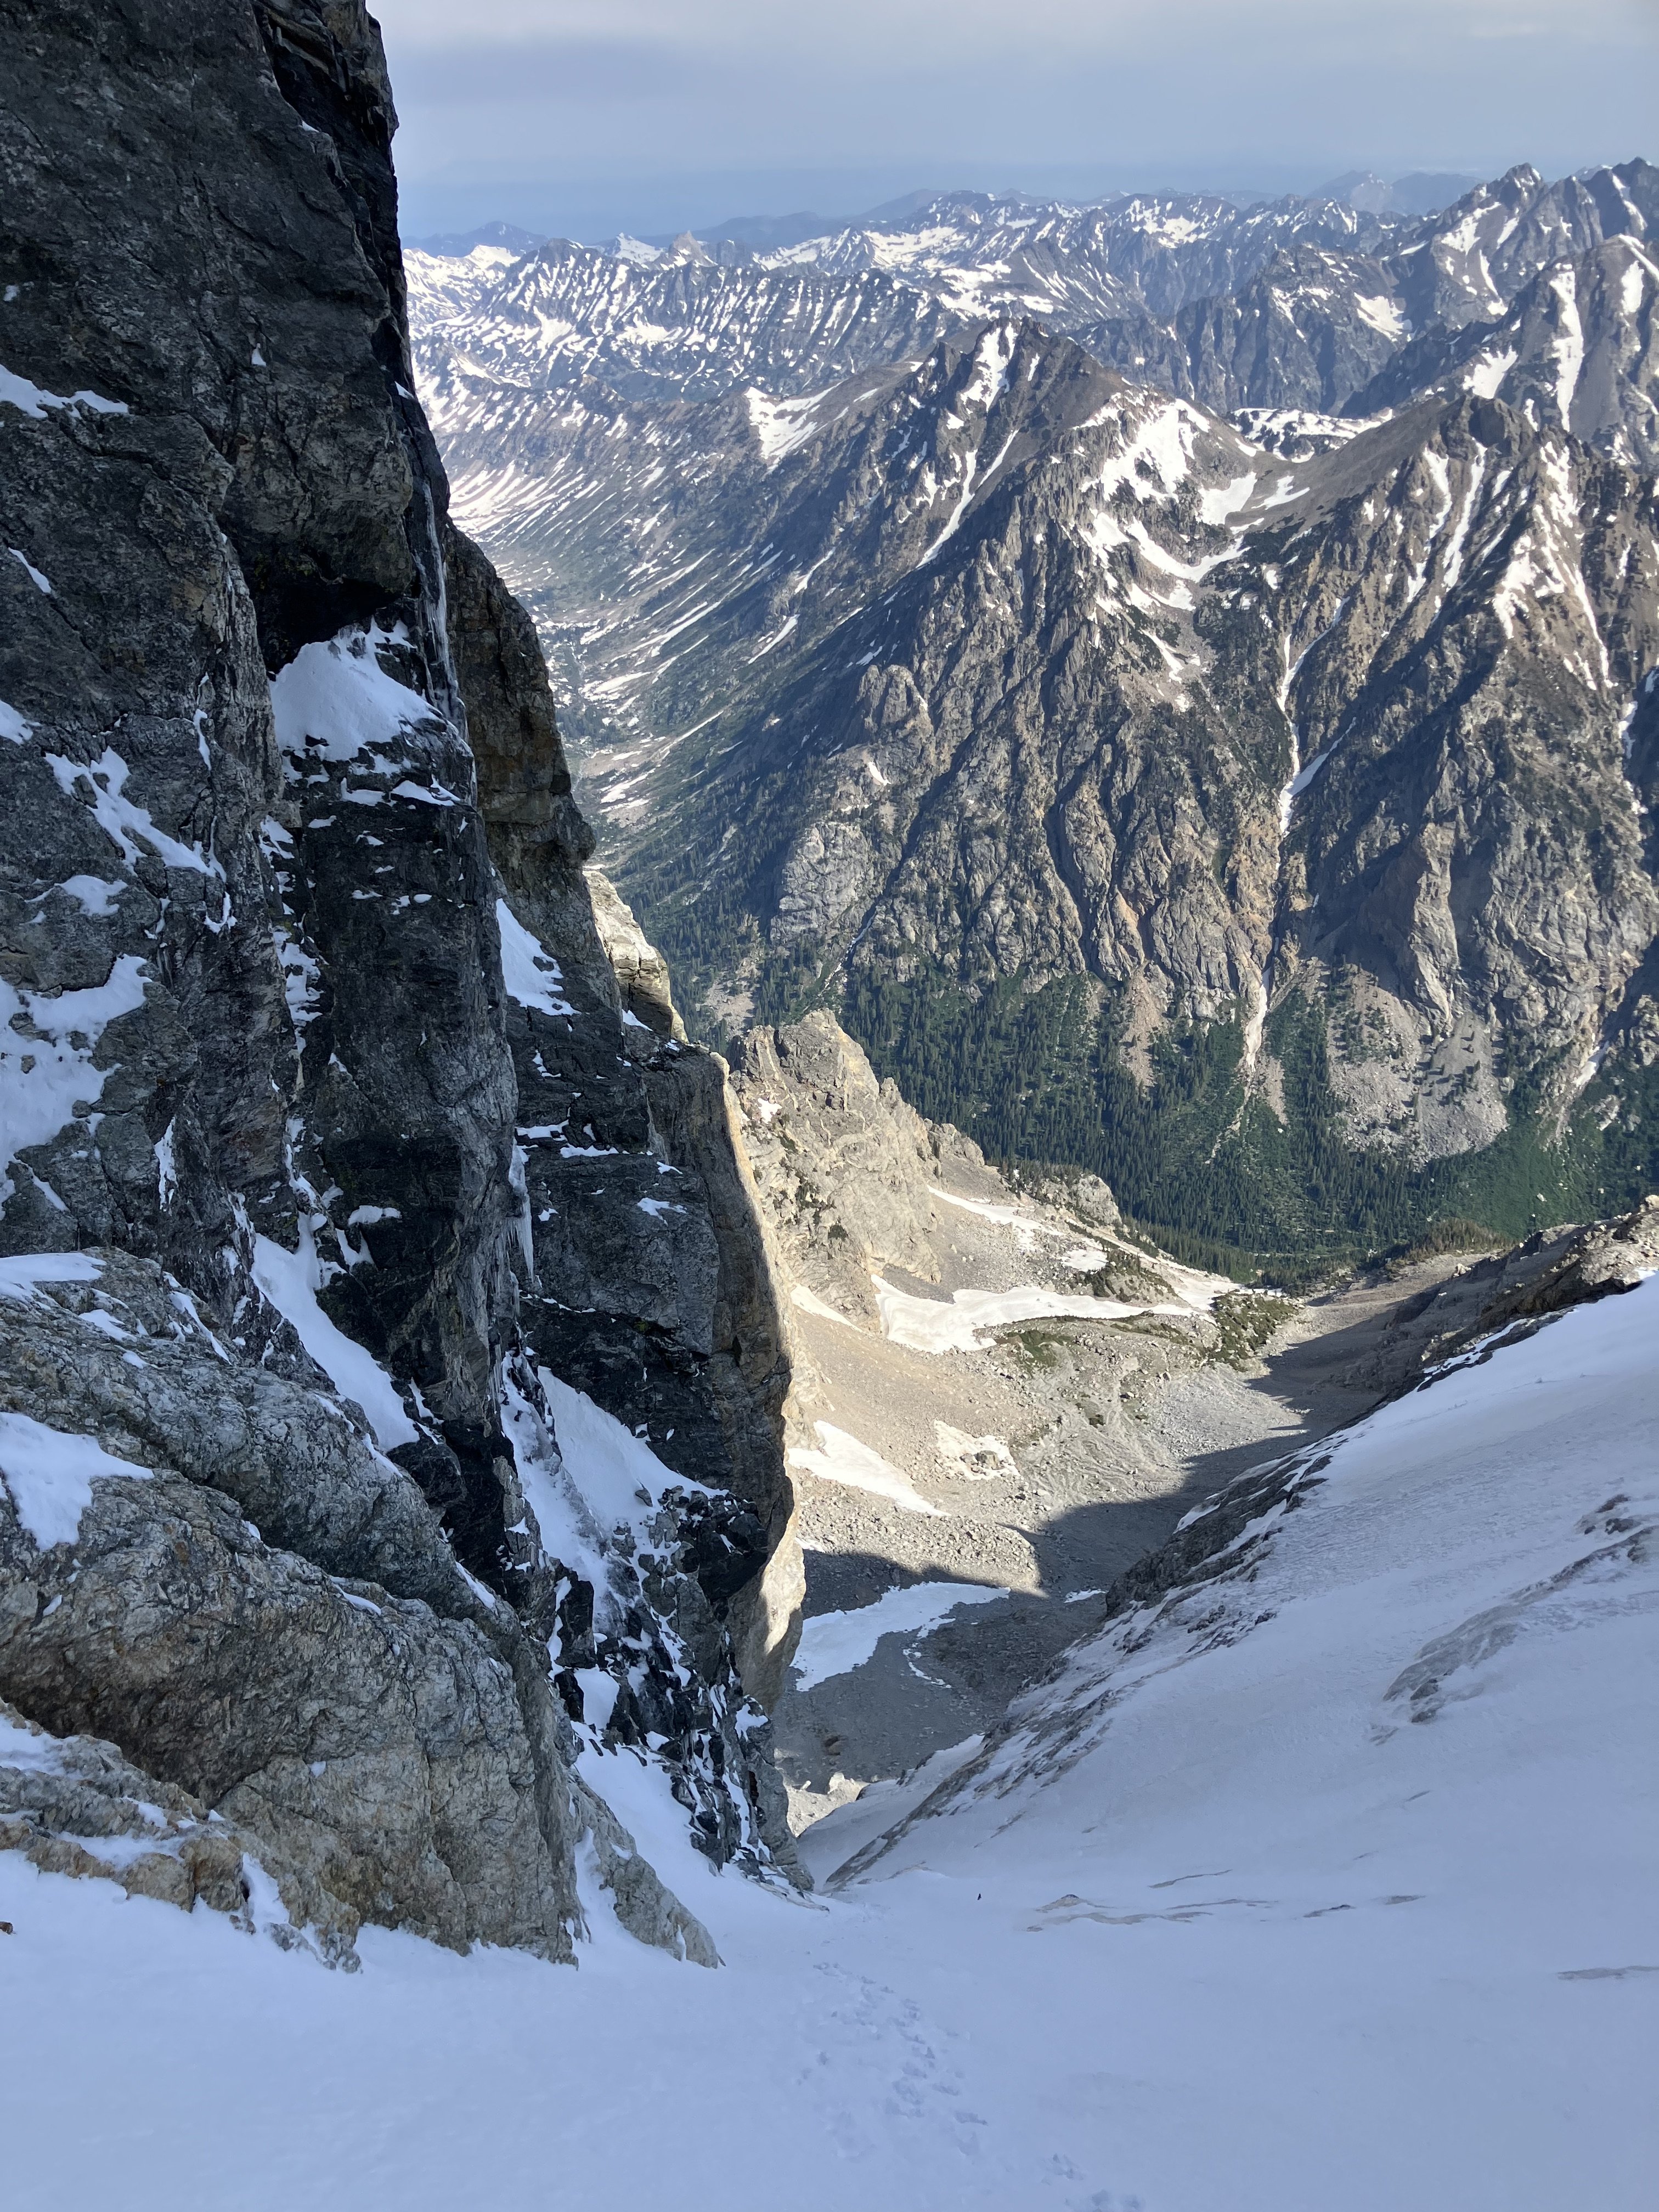
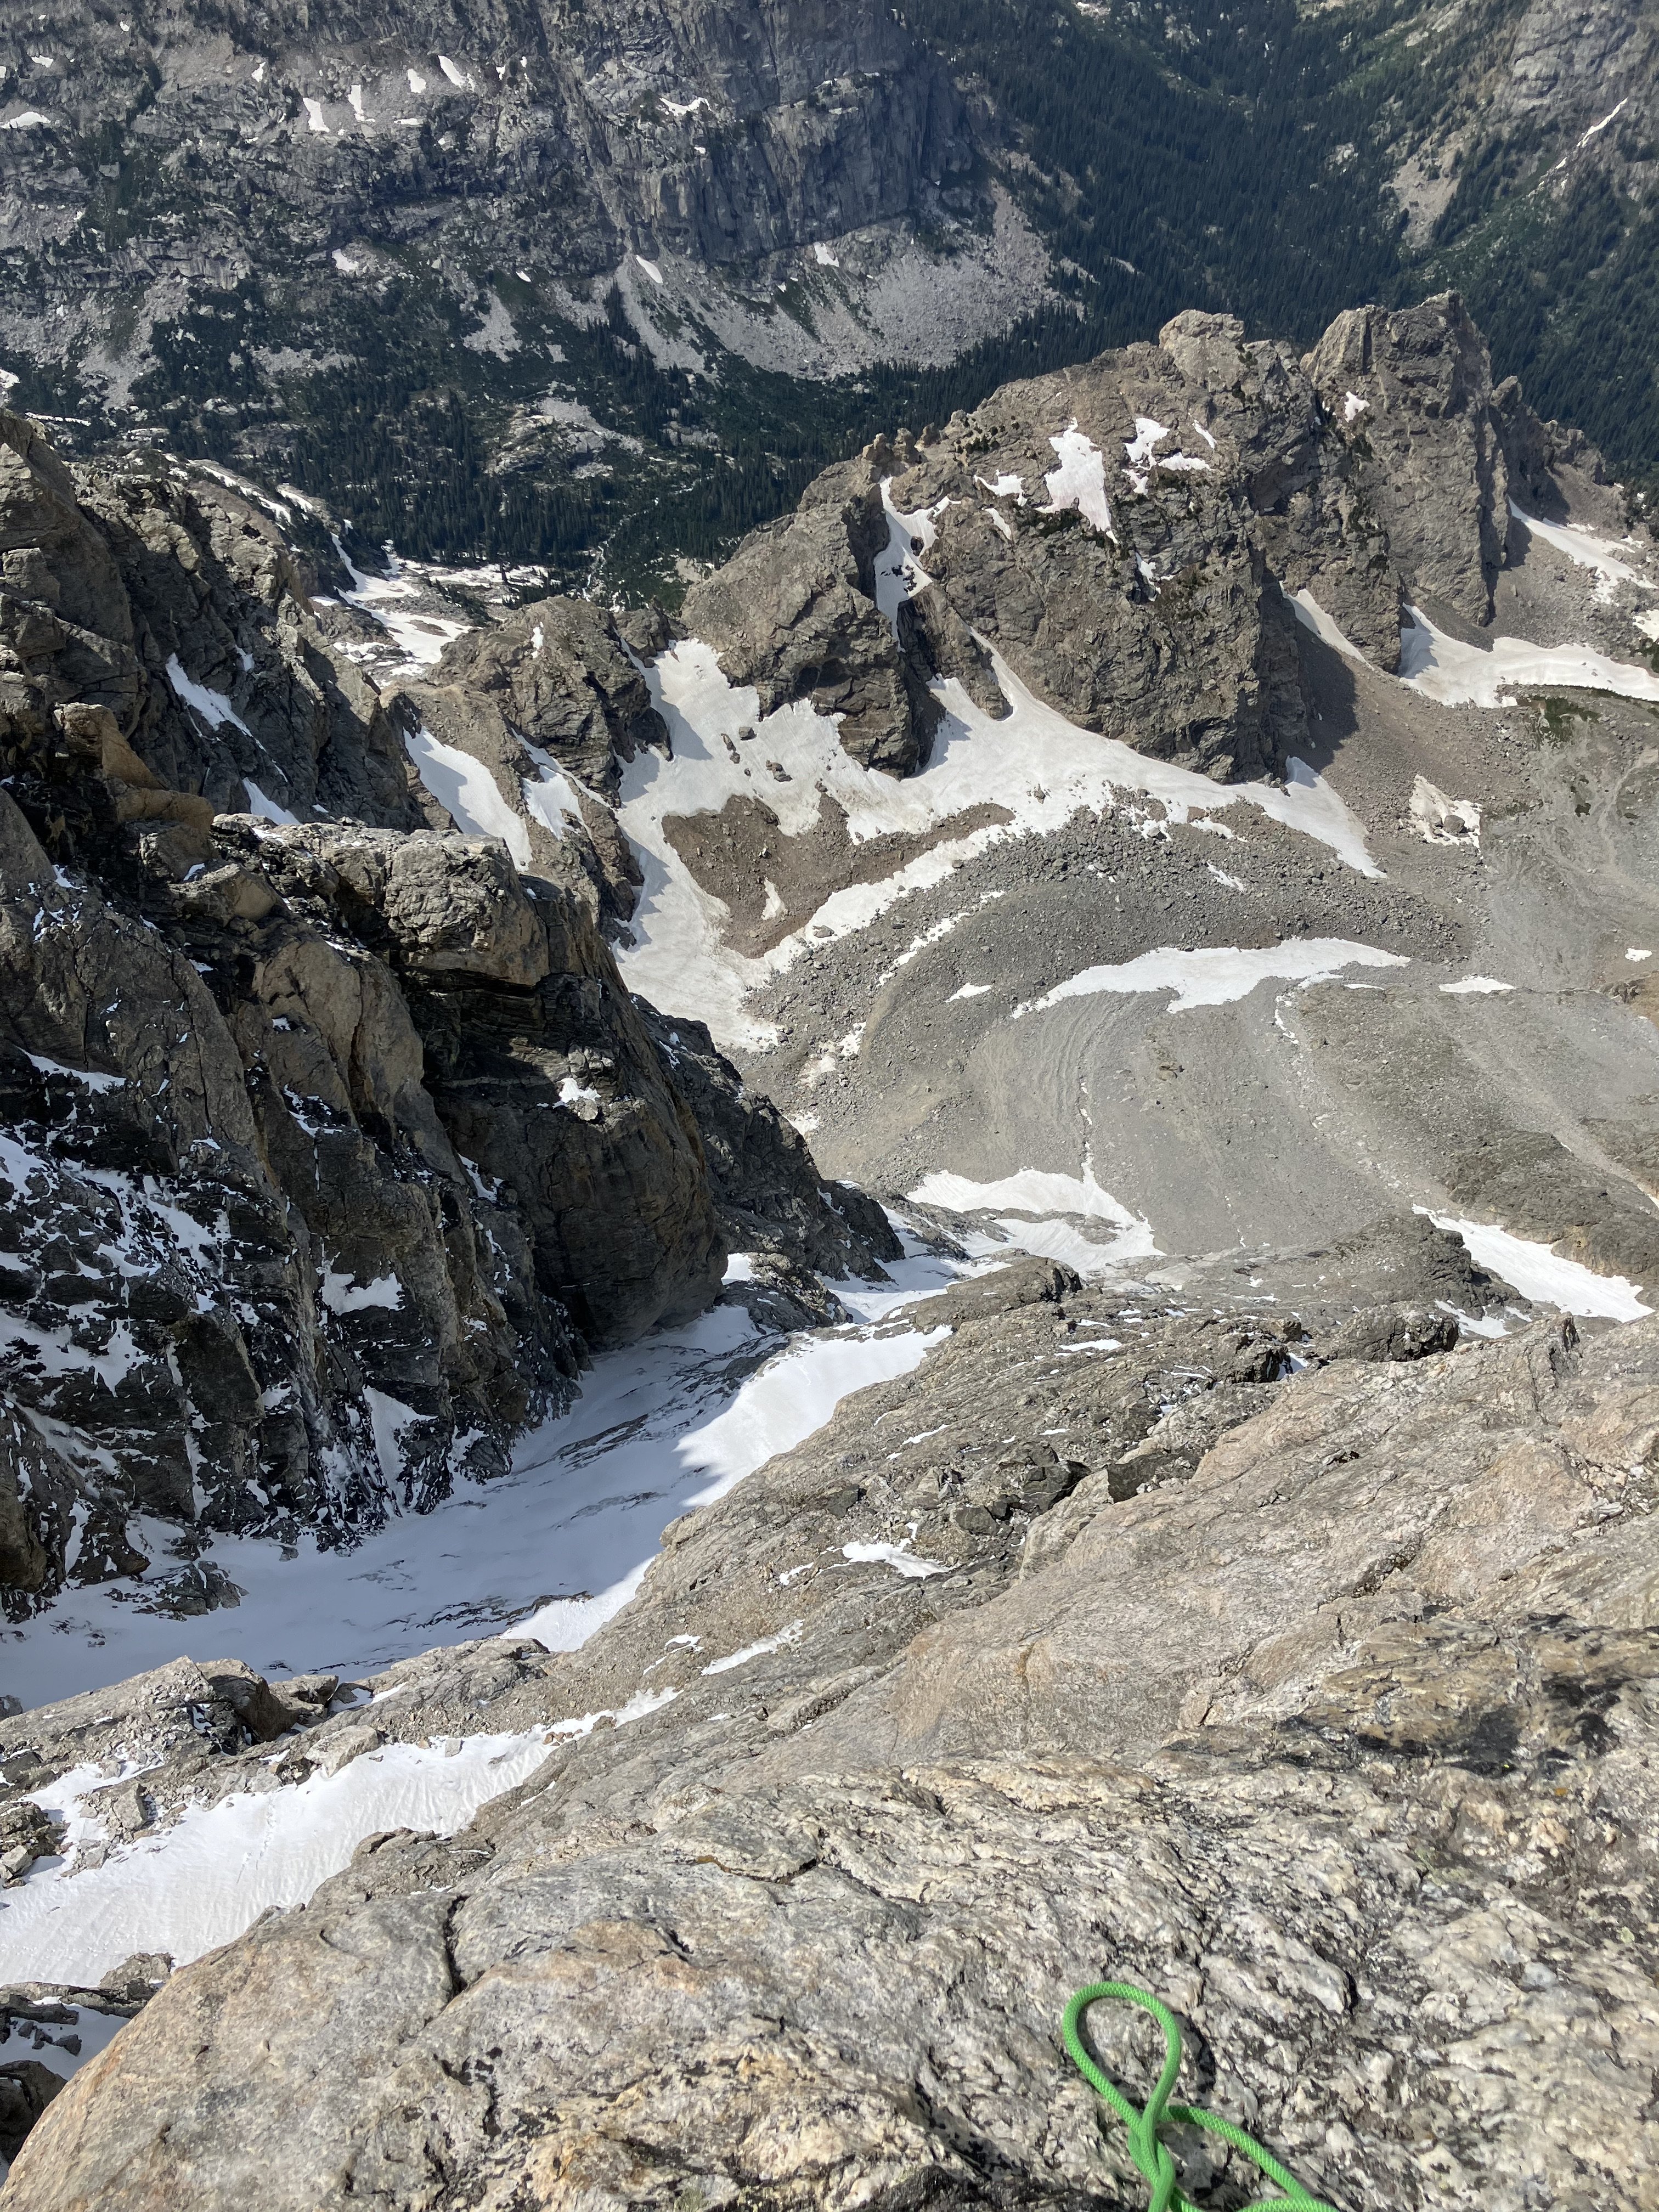
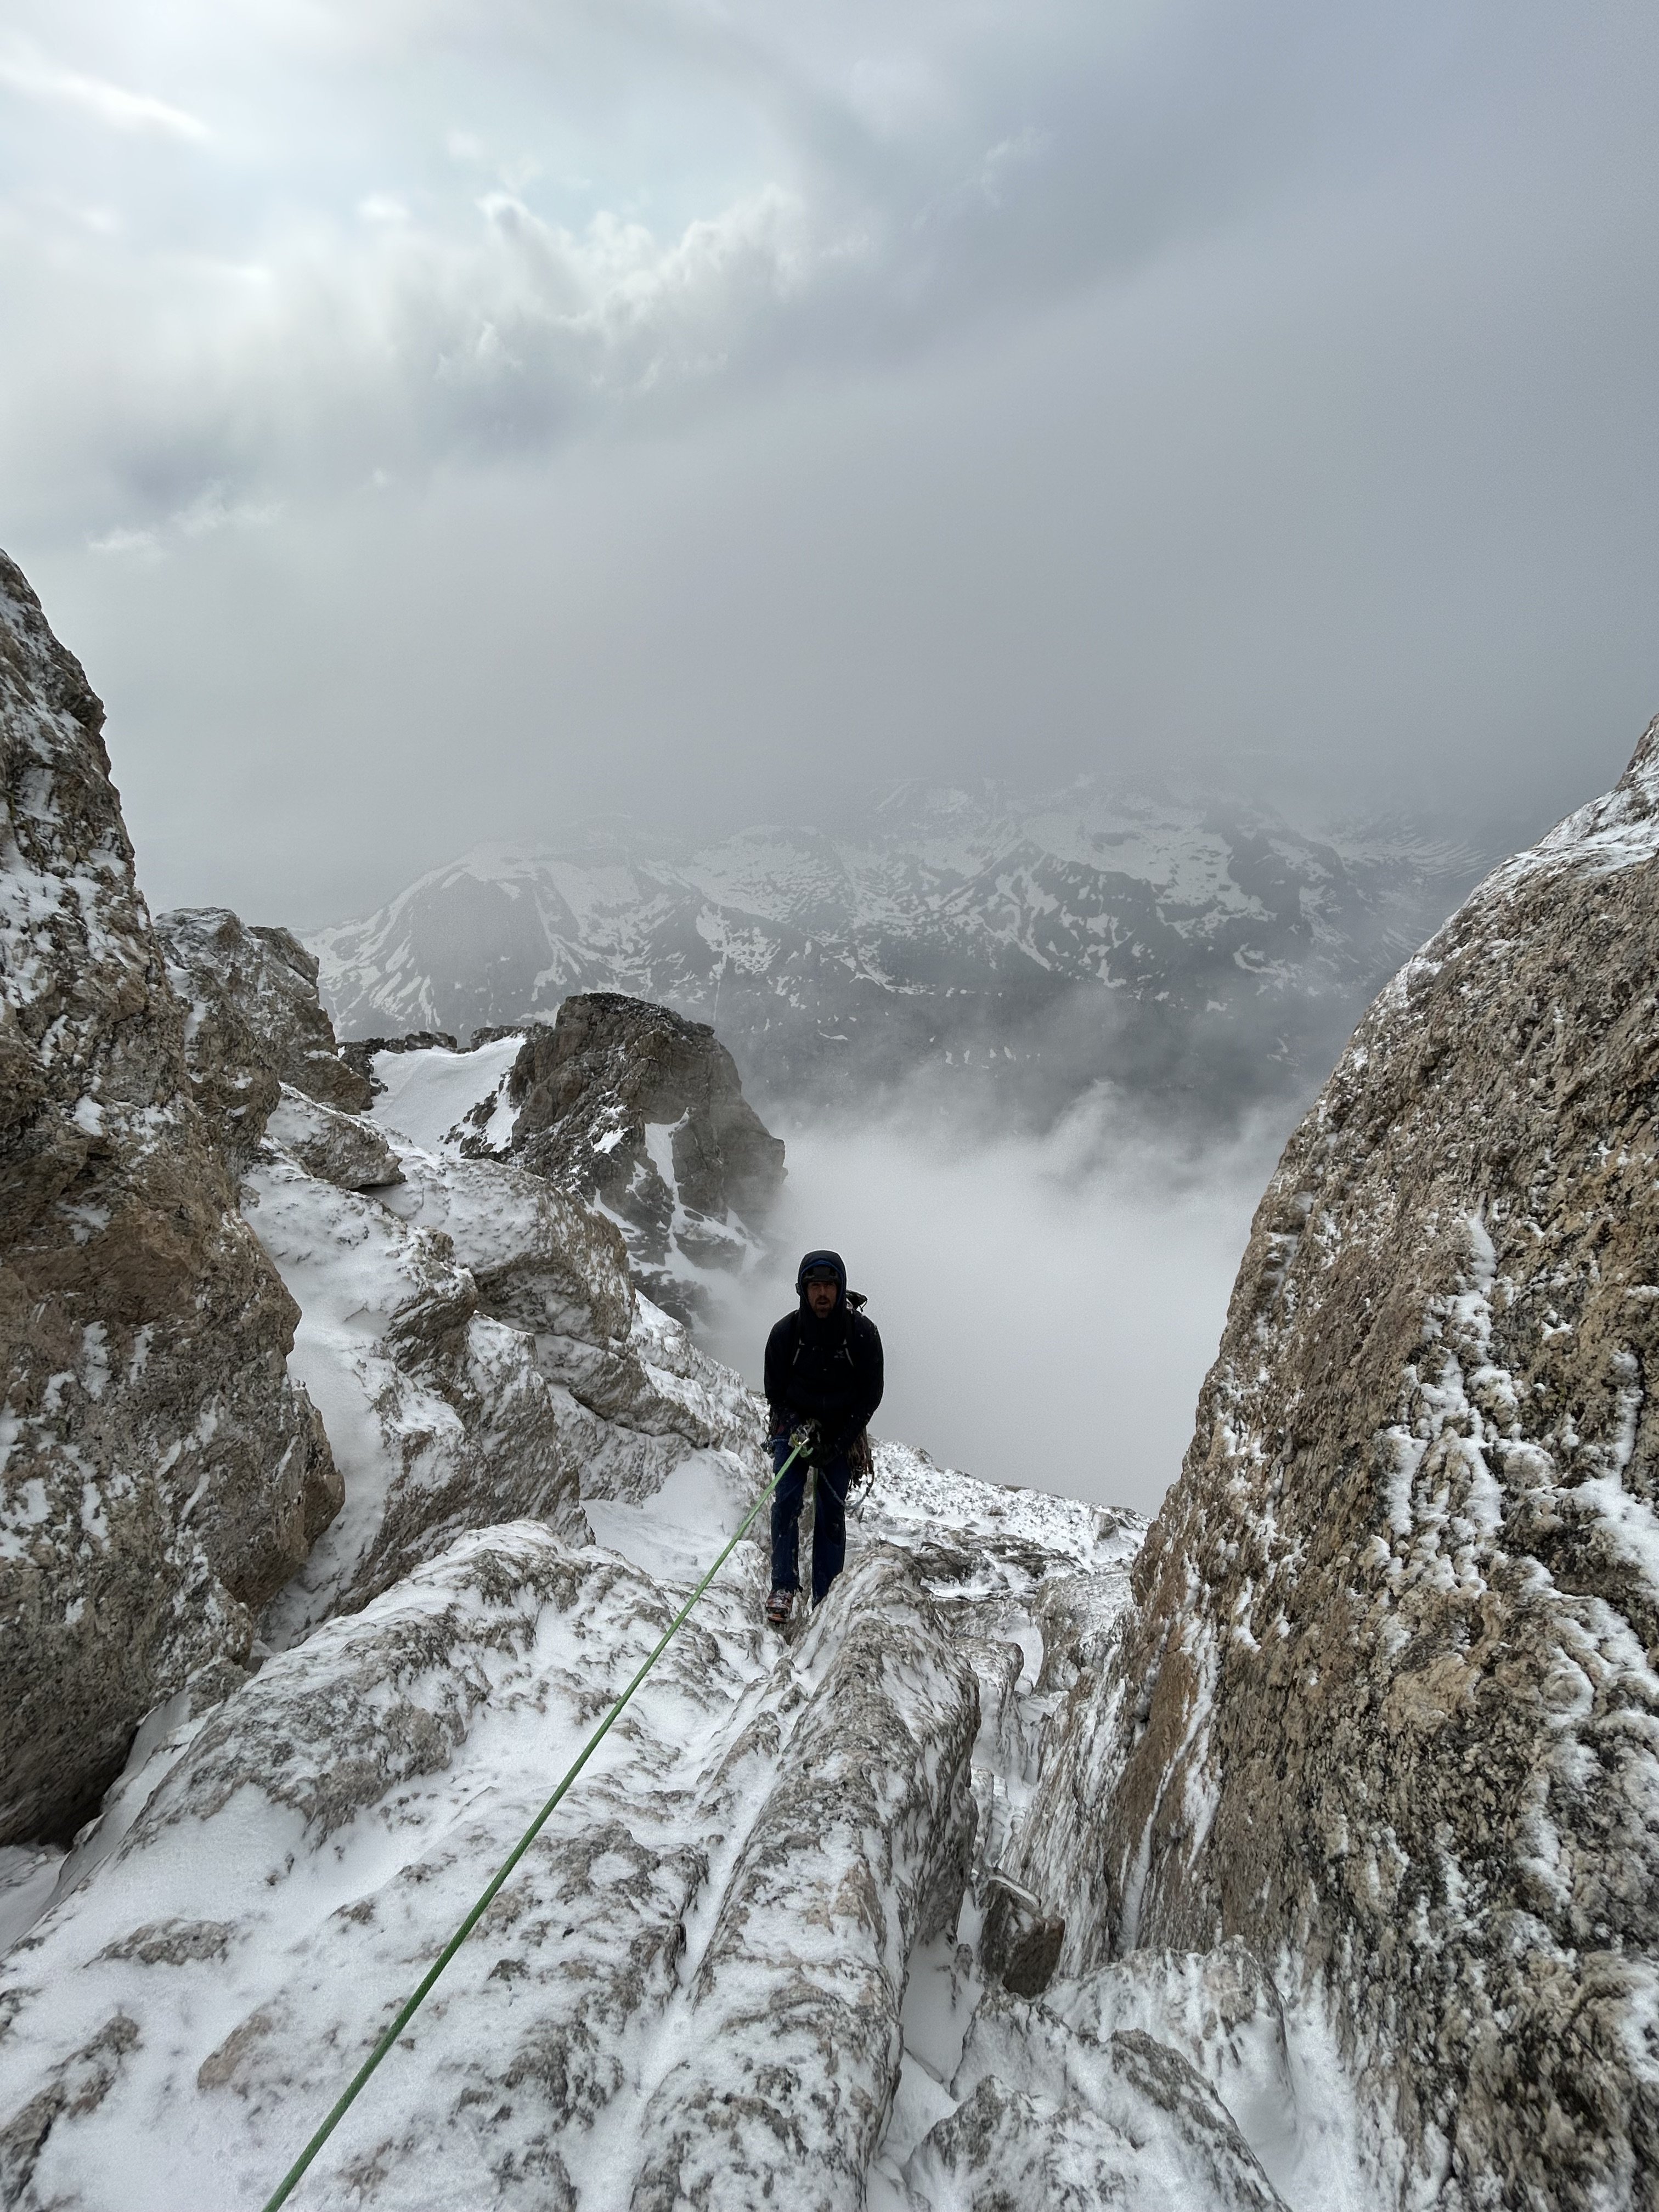
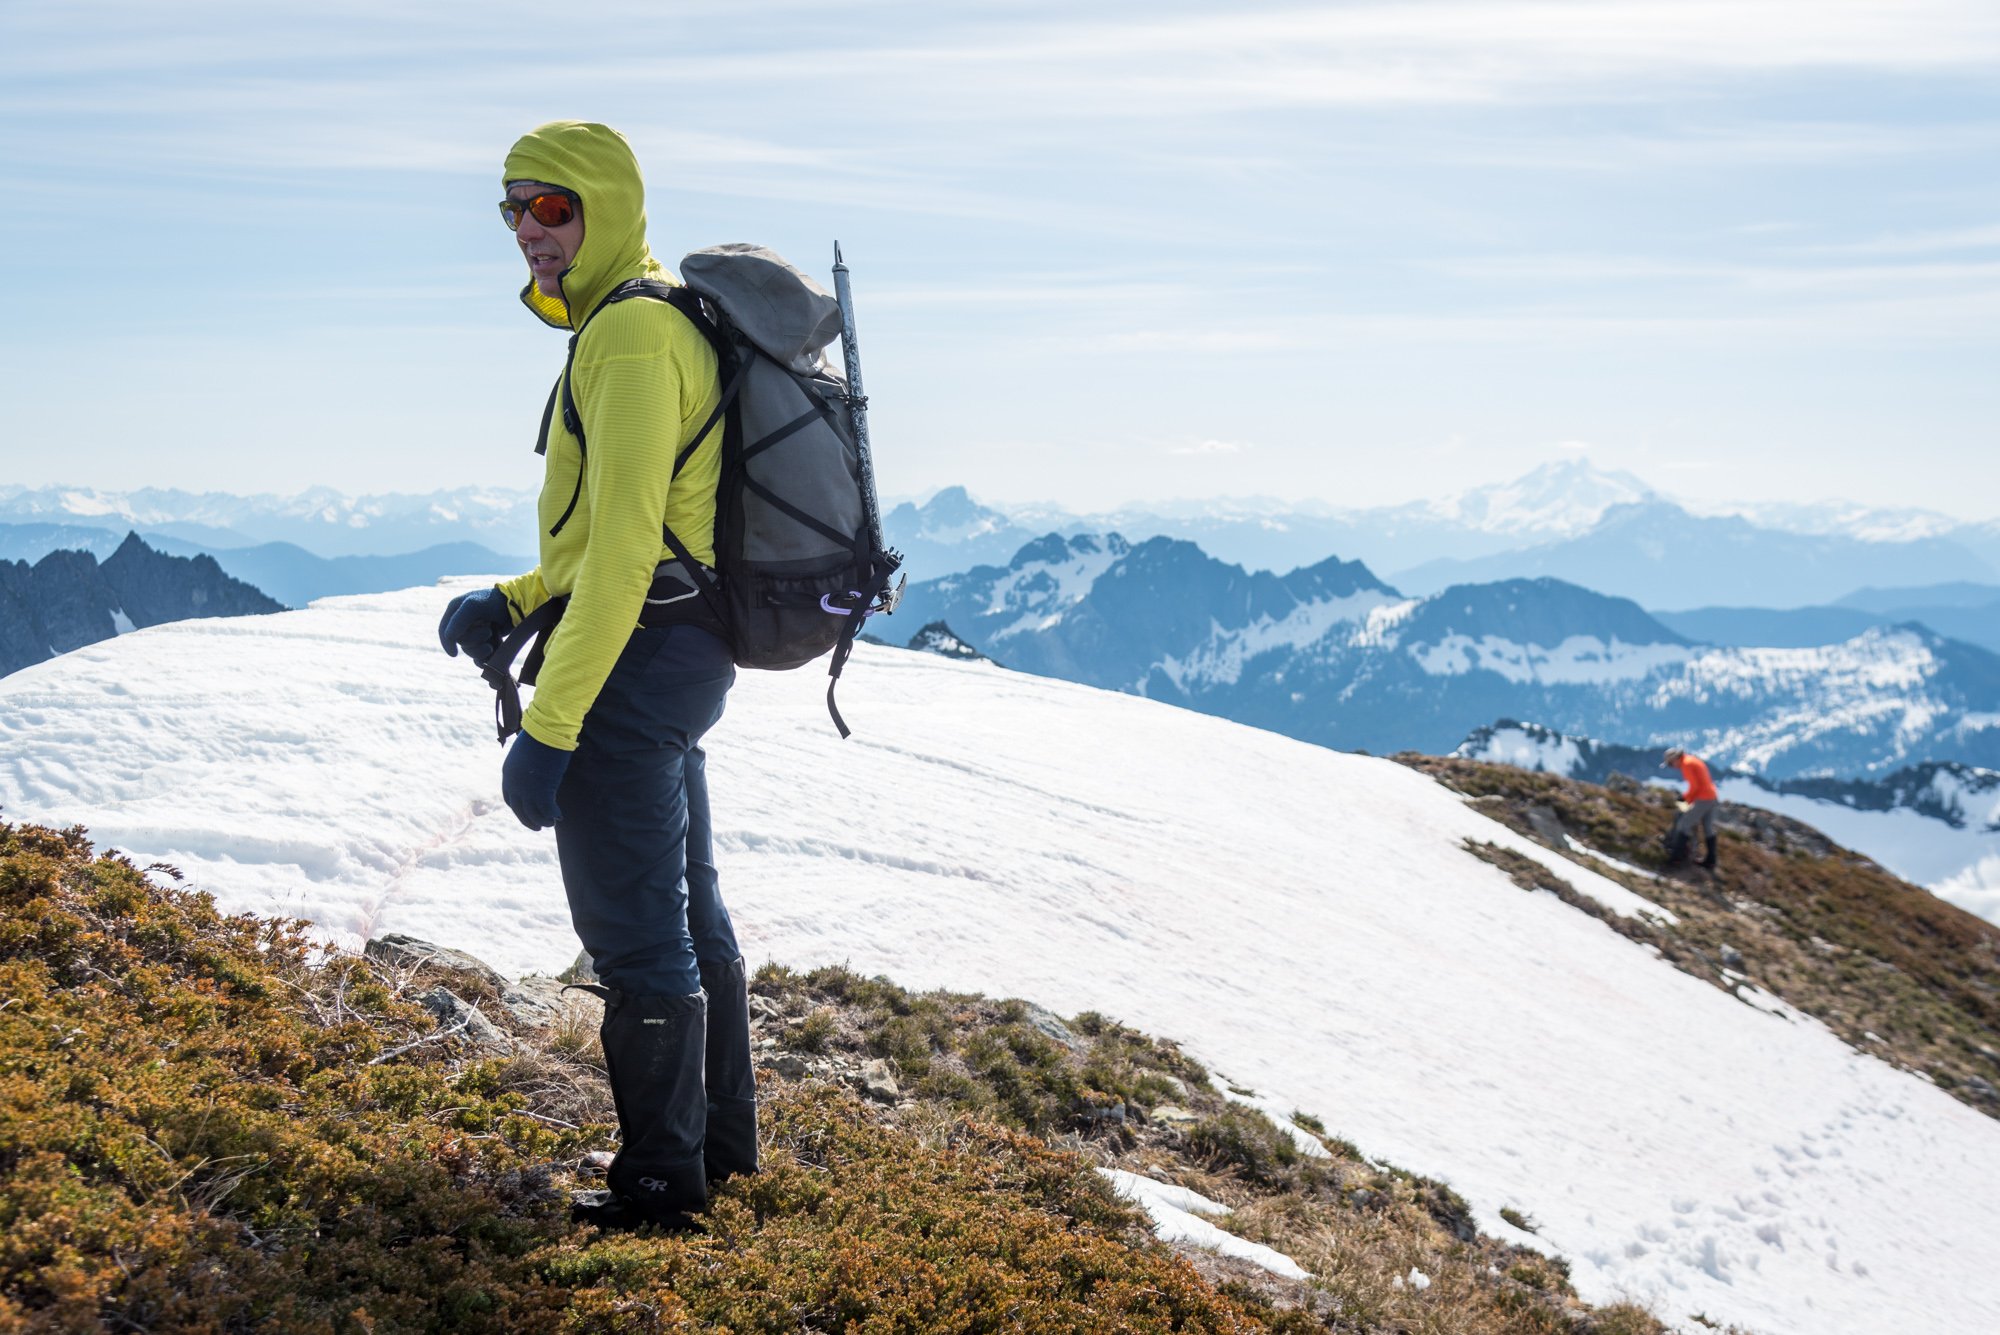
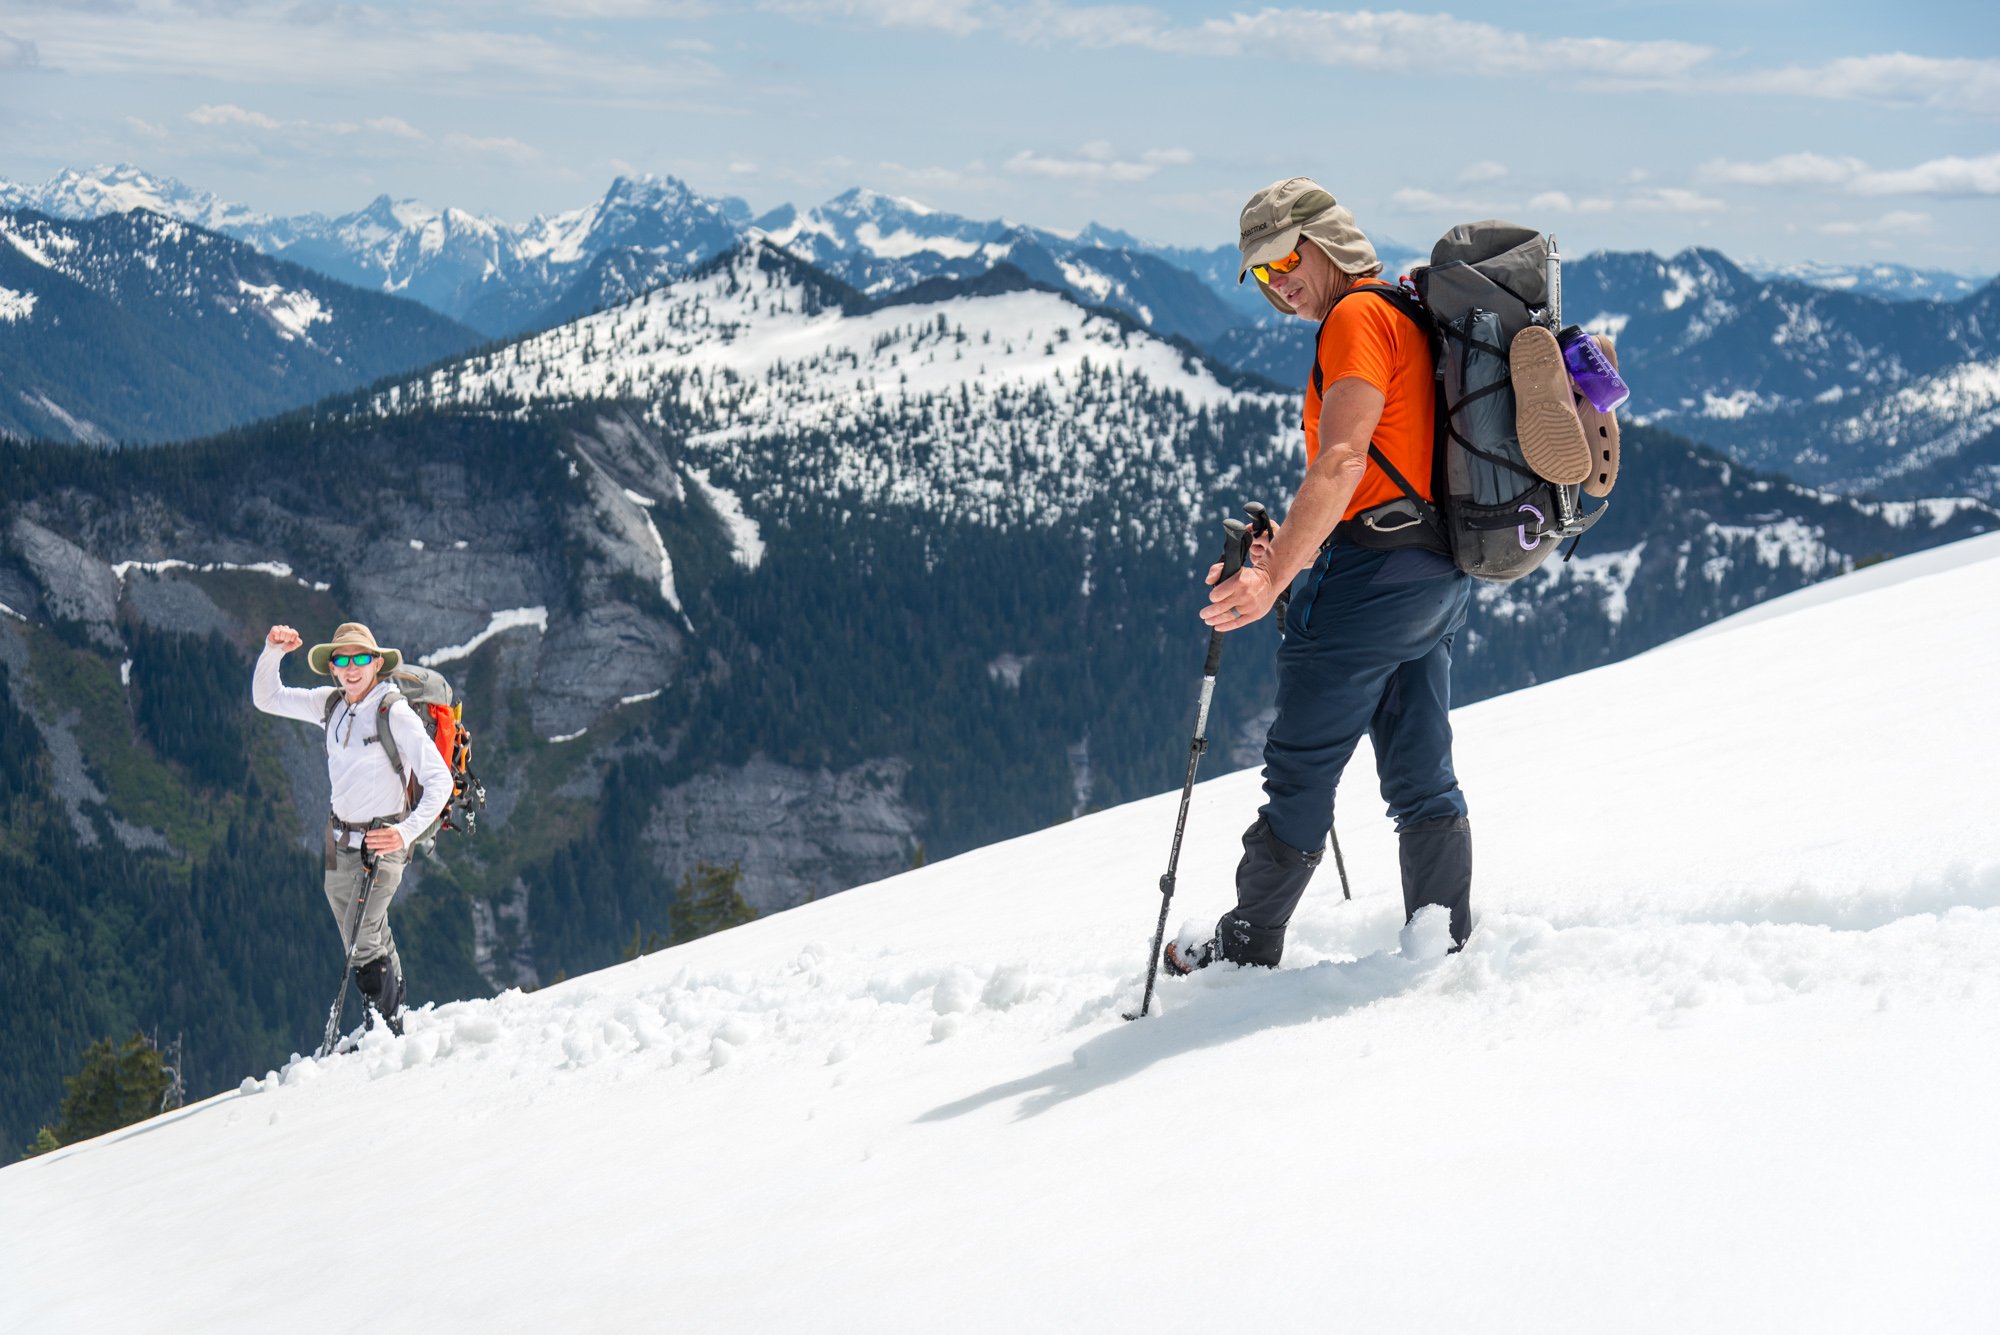
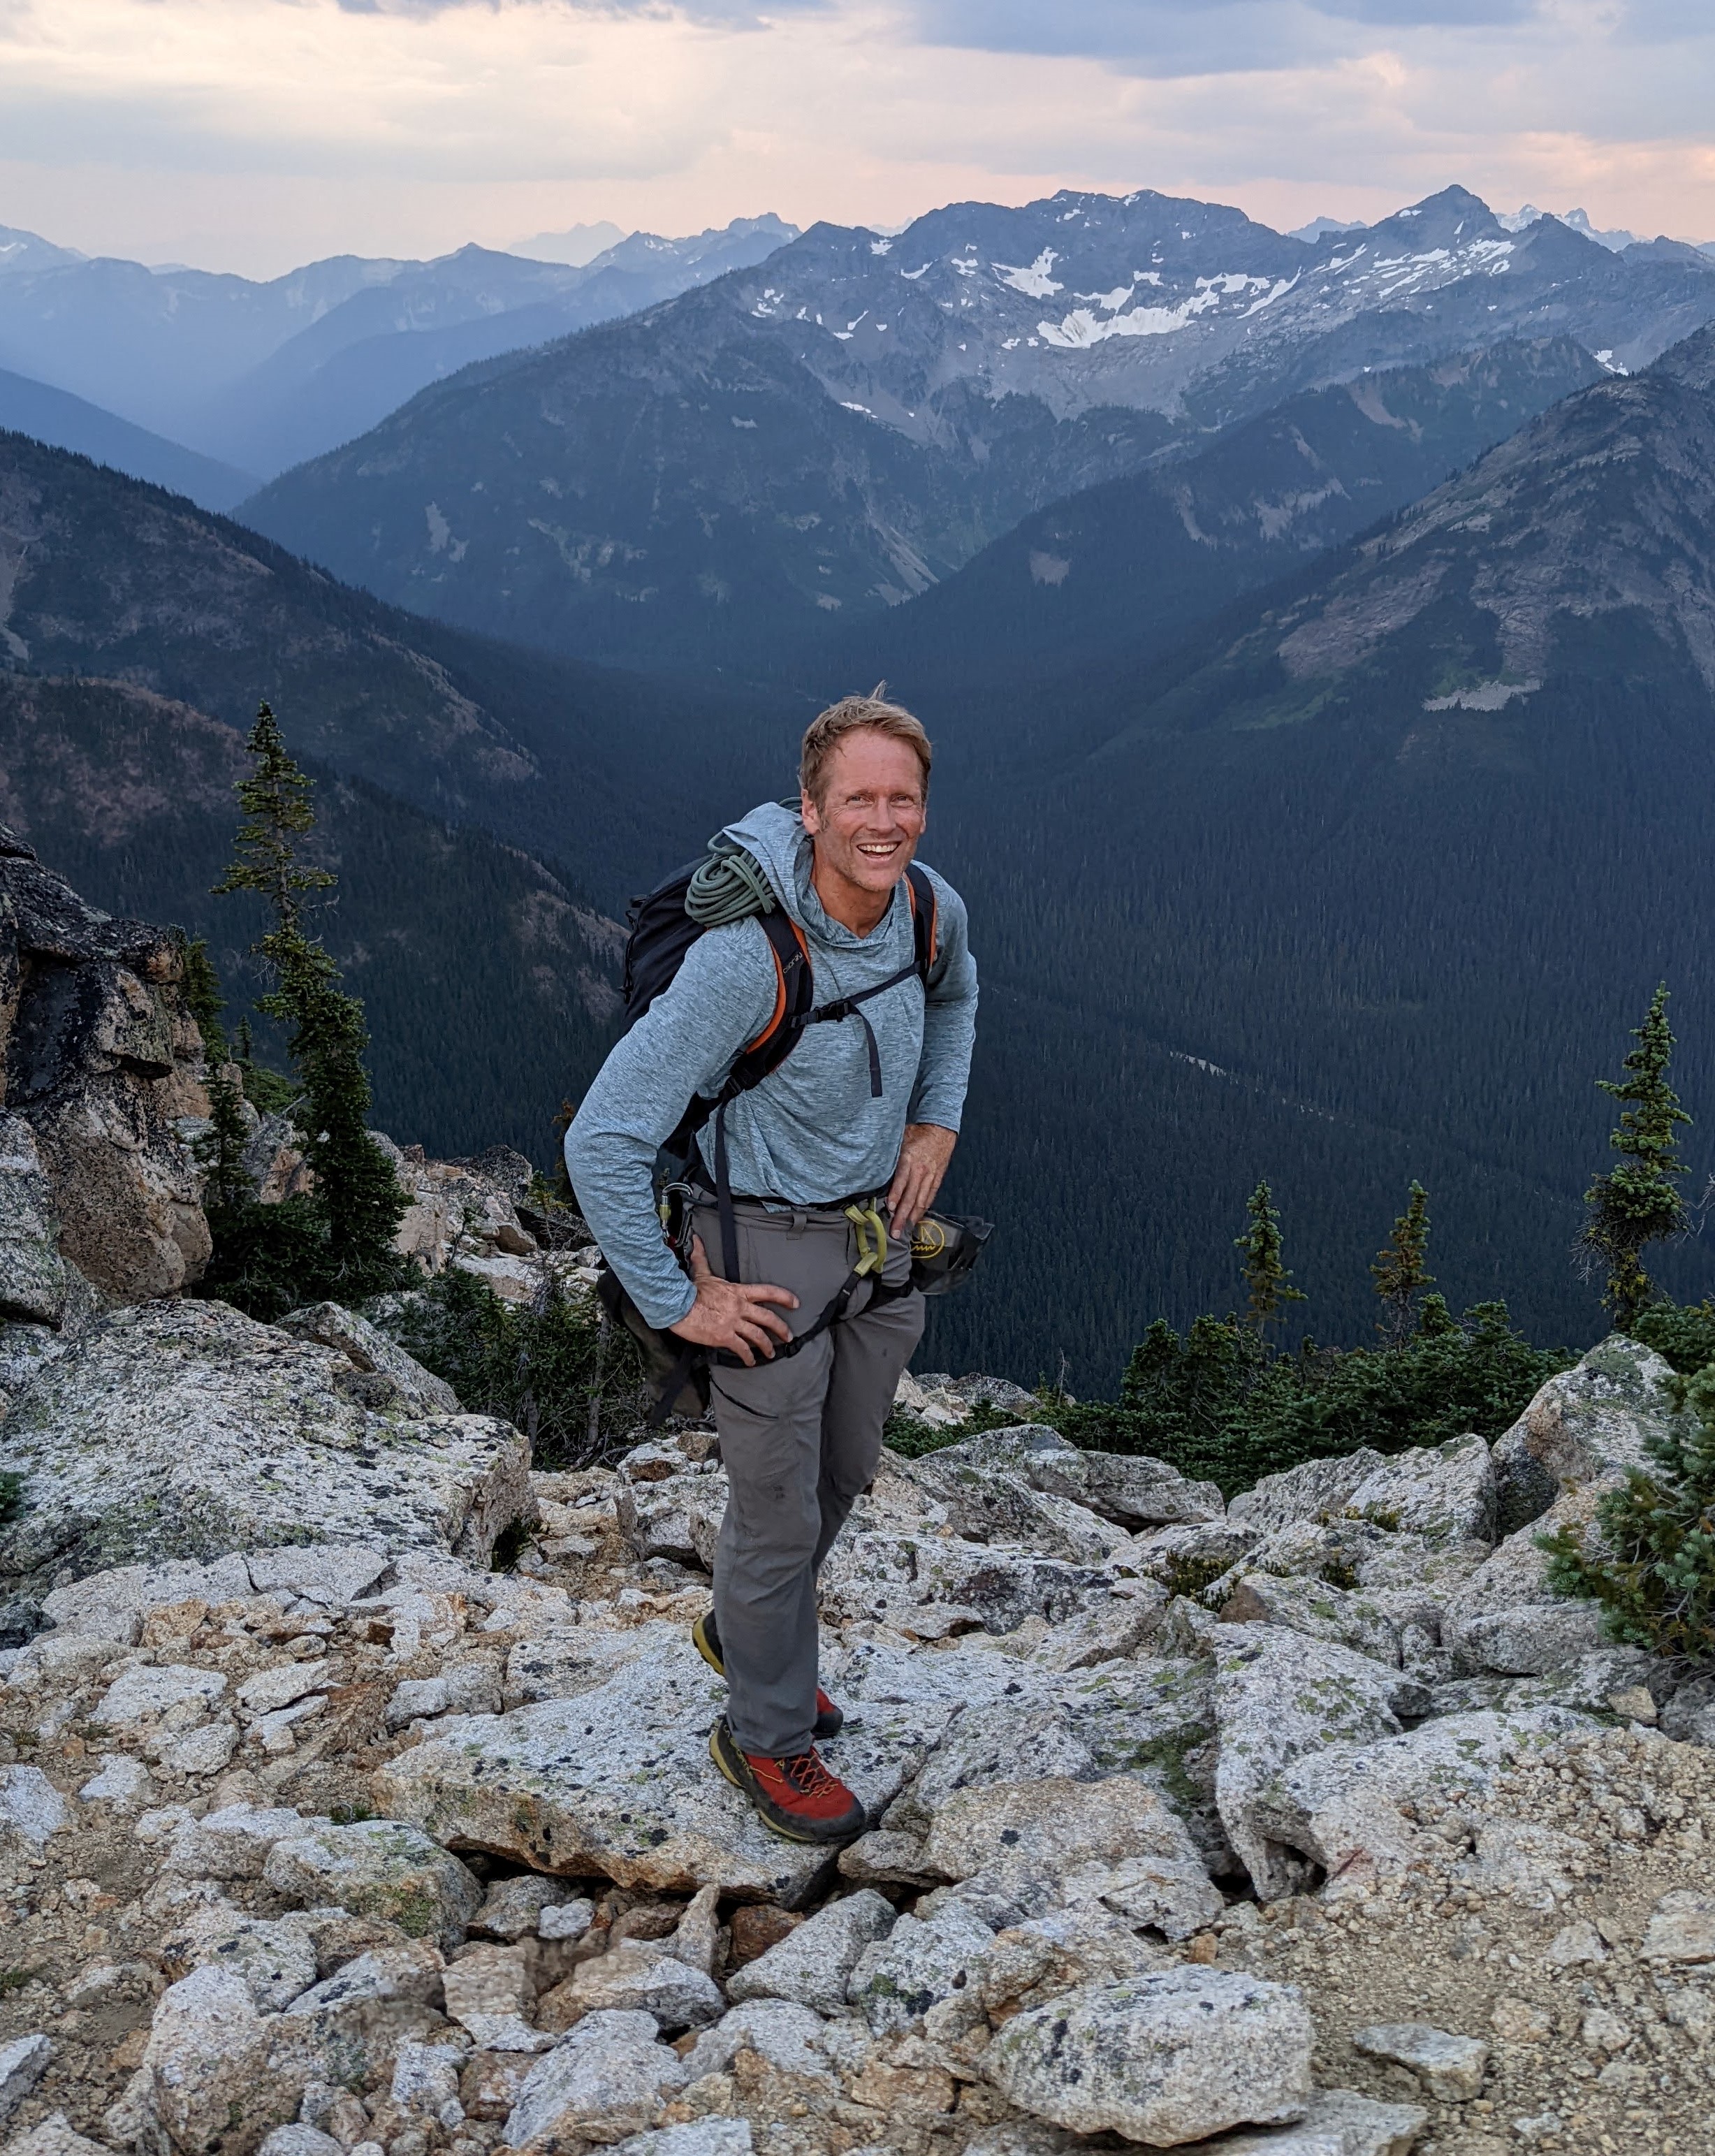
Trip: Tetons - Black Ice Couloir to West Face on the Grand; Direct South Buttress to the summit on Moran Trip Date: 06/23/2025 Trip Report: Dallin and I had gotten skunked by climate change two summers ago in Canada, so this year we decided to book a week together in late June and go wherever the weather looked best, with the goal of climbing long routes to summits. We were just starting to get really excited for Roger's Pass when the weather changed and we bailed to a more southerly range, the Tetons. The week was starting cold so we decided to prioritize ice routes. We had reliable intel that Run Don't Walk was out, but Black Ice had seen a mixed ascent 10 days prior and temps/precip seemed to suggest it would only grow. Wanting to do all the things, we hiked up to the Lower Saddle prepped to link into the West Face. The Black Ice/West Face linkup is George Lowe's pick for the 50 Favorites book. In his topo he cuts left on a snow field to the West Face, missing the crux of BIC. Since BIC is hard to find in condition in this age, we opted to climb BIC through the crux if it looked good and then cut out left higher, if possible. This strategy worked out well. The crux of BIC was thin ice on slab to neve sticks above a chockstone, very fun. A long, snow covered slab/ledge system allowed us to traverse out onto the West Face, starting with the rock climbing on pitch 4. We only brought a single pair of rock shoes, so Dallin lead everything and I followed in full shank boots, making the old school 5.8 traverse pitch quite exciting. After 5 difficult (for me in boots) and wandery pitches we reached the end of the difficulties on the Lowe topo. At this point the weather came in, snowing and thundering. After dead ending a couple times on the scramble to the summit I downclimbed into a snow filled gully, reattached crampons, and climbed a tenuous verglassed slab to snow only to find it was powder on featureless slab. Luckily, a leaning flake crack provided a good torques and we topped out in a white out. The sun poked out again just in time to allow a quick navigation of the raps. After a night at a friend's house in Jackson, we repacked for a sunnier objective. That afternoon we paddle boarded over to Leigh Canyon and bushwhacked up the drainage until we were under the South Buttress of Mt. Moran. We bivied on cleared camp spots in some cottonwoods next to the creek. At 4am we rolled out of bivy bags and headed up through the brush and scree to the Direct South Buttress route. We had heard the first pitch of Blackfin was the preferred first pitch which accessed the second ramp. However, after looking at various options and downclimbing off one horror show of stacked blocks, we just scrambled higher on the first ramp and did the original low 5th start. More route finding difficulties slowed us and ate up time, but we persisted and gained the main line of pitches up nice cracks which appeared to be a lovely white granite in places. The traverse pitch and crux was not too bad, we opted to simply pendulum and aid at this point in the day. We reached the hanging bowl at 3pm and thought maybe we could still do the remaining 3000' to the summit before dark (oh hubris). Wet and vegetated slabs, sandbagged old school climbing, and extremely exposed tower ridge traversing in high winds saw us reach some good bivy sites in the second hanging bowl with a little bit of daylight left. We cut our loses and settled in for a cold and windy bivy. The next morning we were up and moving by 5am. Many more route finding difficulties lead to an off-route, overhanging, bomb bay chimney that ended with a mantle on to the summit plateau. We tagged the summit at 1:30pm and had a quick snack/water break before descending the CMC route. Neither of us had climbed the CMC or Moran before so this made for some interesting and surprising situations as we down-simuled and rappelled, culminating in realizing we had to rap into the Drizzlepuss notch and climb up the peak on the other side to escape. Once over the annoying DP, we raced down to the lake and paddle boarded leisurely back to the car with a beautiful sunset until hoards of mosquitoes found us. A dunk in the cold water and shivering night drive into Jackson with the windows down let the bloodsuckers escape. We got late night pizza slices and then had to drive 2 hrs around through Alpine to reach Driggs because Teton Pass was closed for construction... always one more problem to surmount! I passed out in the back of my car in Driggs at 2am and drove home the next day. Thanks to our families for letting the dads go big for a week! Double rainbow in Driggs was a good omen. Dawn on the Valhalla Traverse to reach BIC. Dallin on Valhalla Dallin finishing the Valhalla traverse Dallin's pic of me leading the mixed pitch to access the BIC Lookind down the BIC before it started getting more icey. Crux on BIC Dallin switching to rock shoes on the West Face Me following on the W Face Looking down the W Face on the BIC IMG_4881.MOV Dallin's video on the summit in a whiteout First rap off the Grand Enclosure with the clouds blowing off. Below the DSB on Moran Dallin's pic of me catching Z's below the DSB, I'm too soft to go with the rope bivy these days. Myself following one of the better pitches on the DSB Dallin's pic of me leading the penji to aid crack pitch. Dallin getting ready to follow the crux/aid pitch This is the "5.5" exit pitch from the DSB... friction slab feet and a jug rail... 5.9 in Squamish for sure and pretty consistent for the grades on this route. Endless 4th/low 5th on the upper SB. Dallin getting water at the second bowl before going looking for a good bivy site. Dallin cheesing when we thought it was almost over. Dallin leading what we thought was the last hard pitch... turned out to be a few more and lots of shenanigans. Myself following said pitch... quite good. IMG_3646.MOV Summit of Moran, finally! Gear Notes: All the toys... really, all of them. Approach Notes: Standard beta available on the interwebs.


 6 points
 -
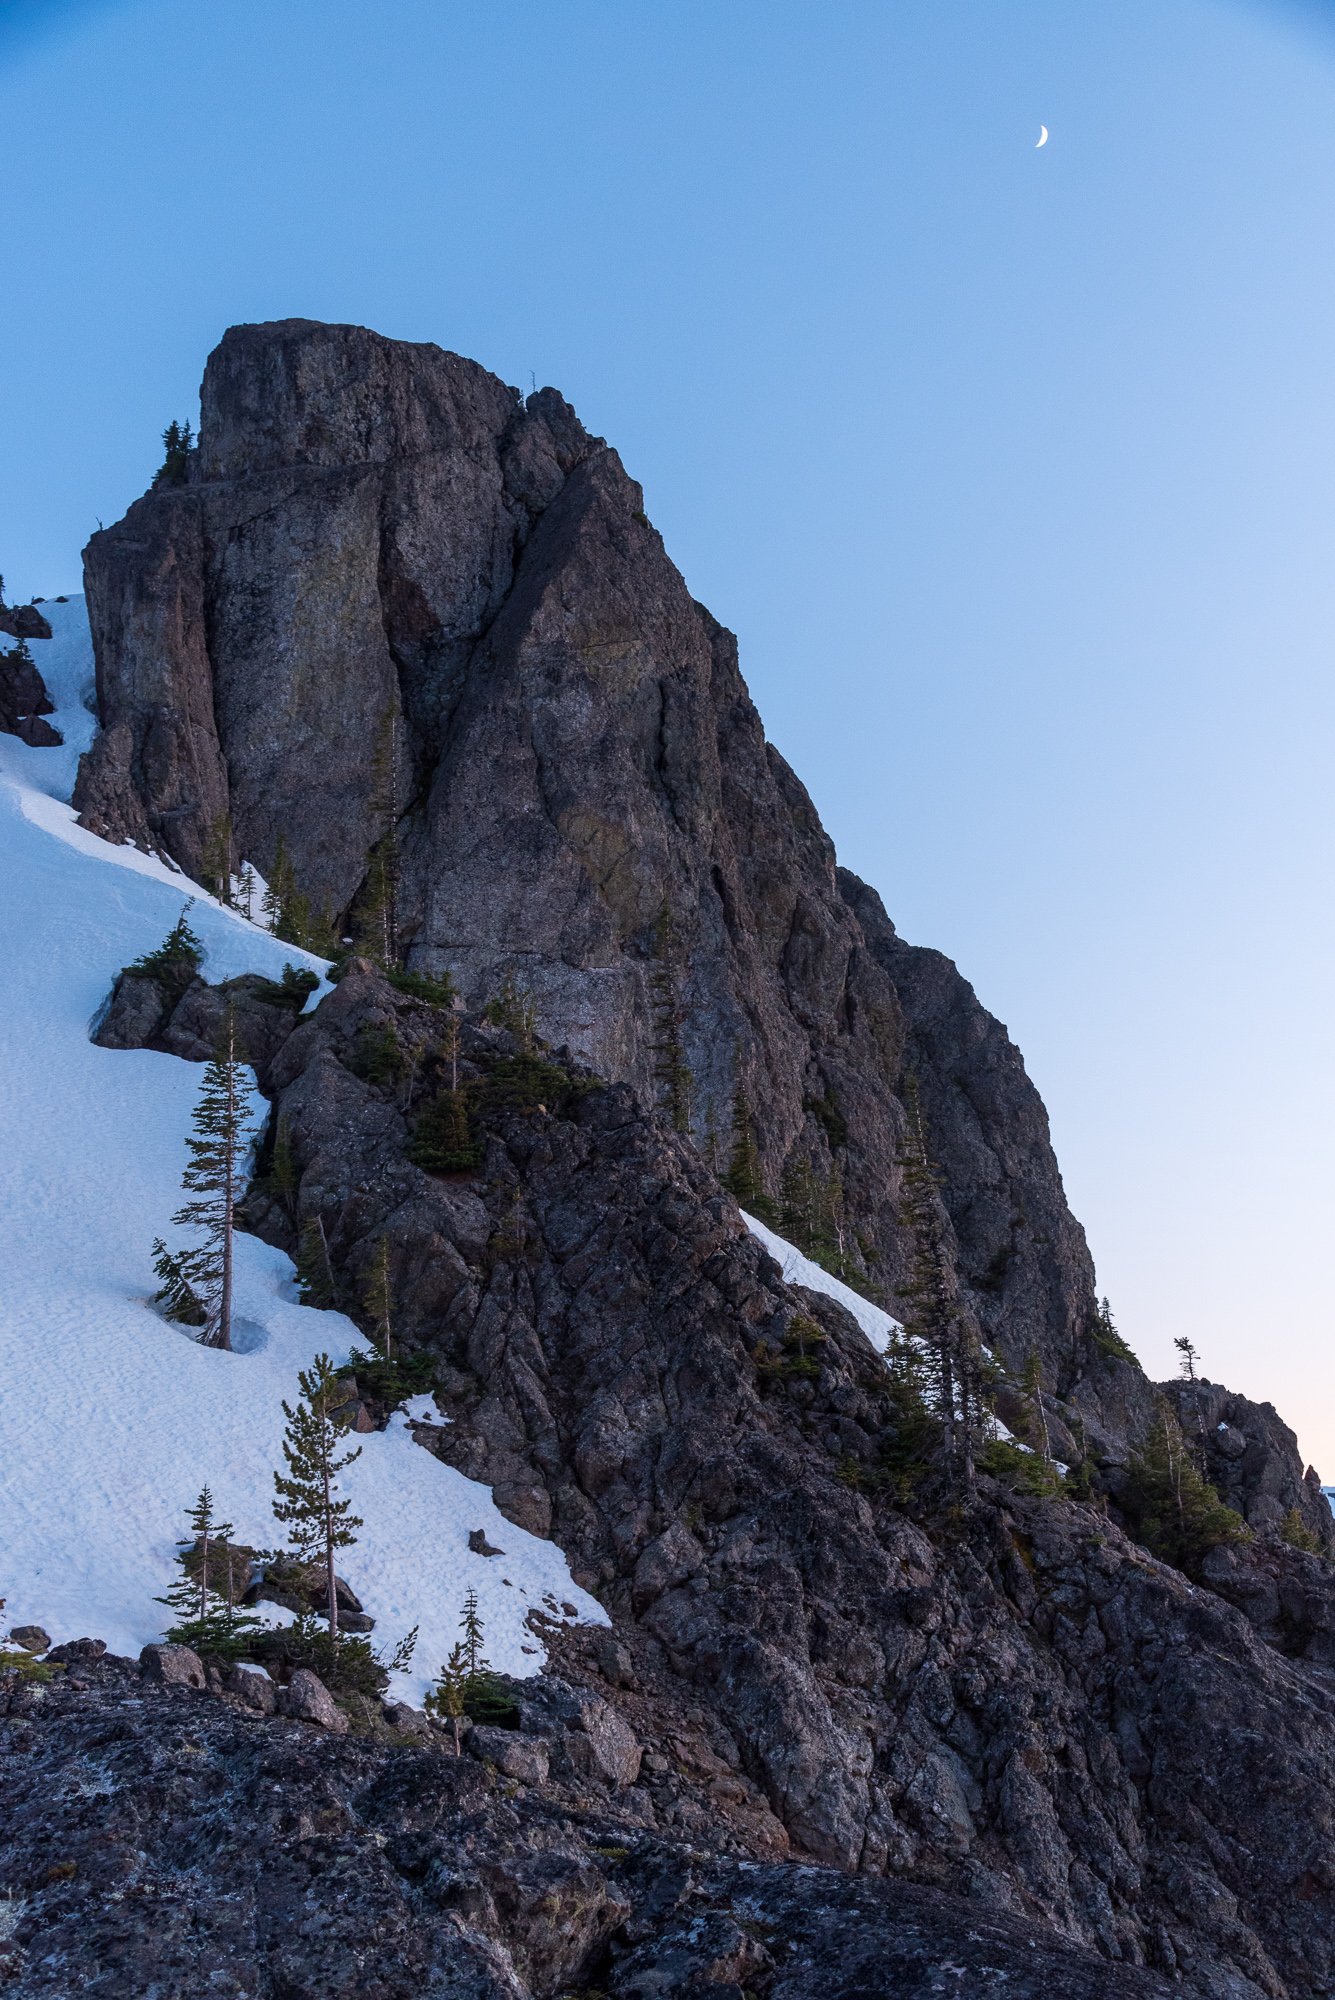
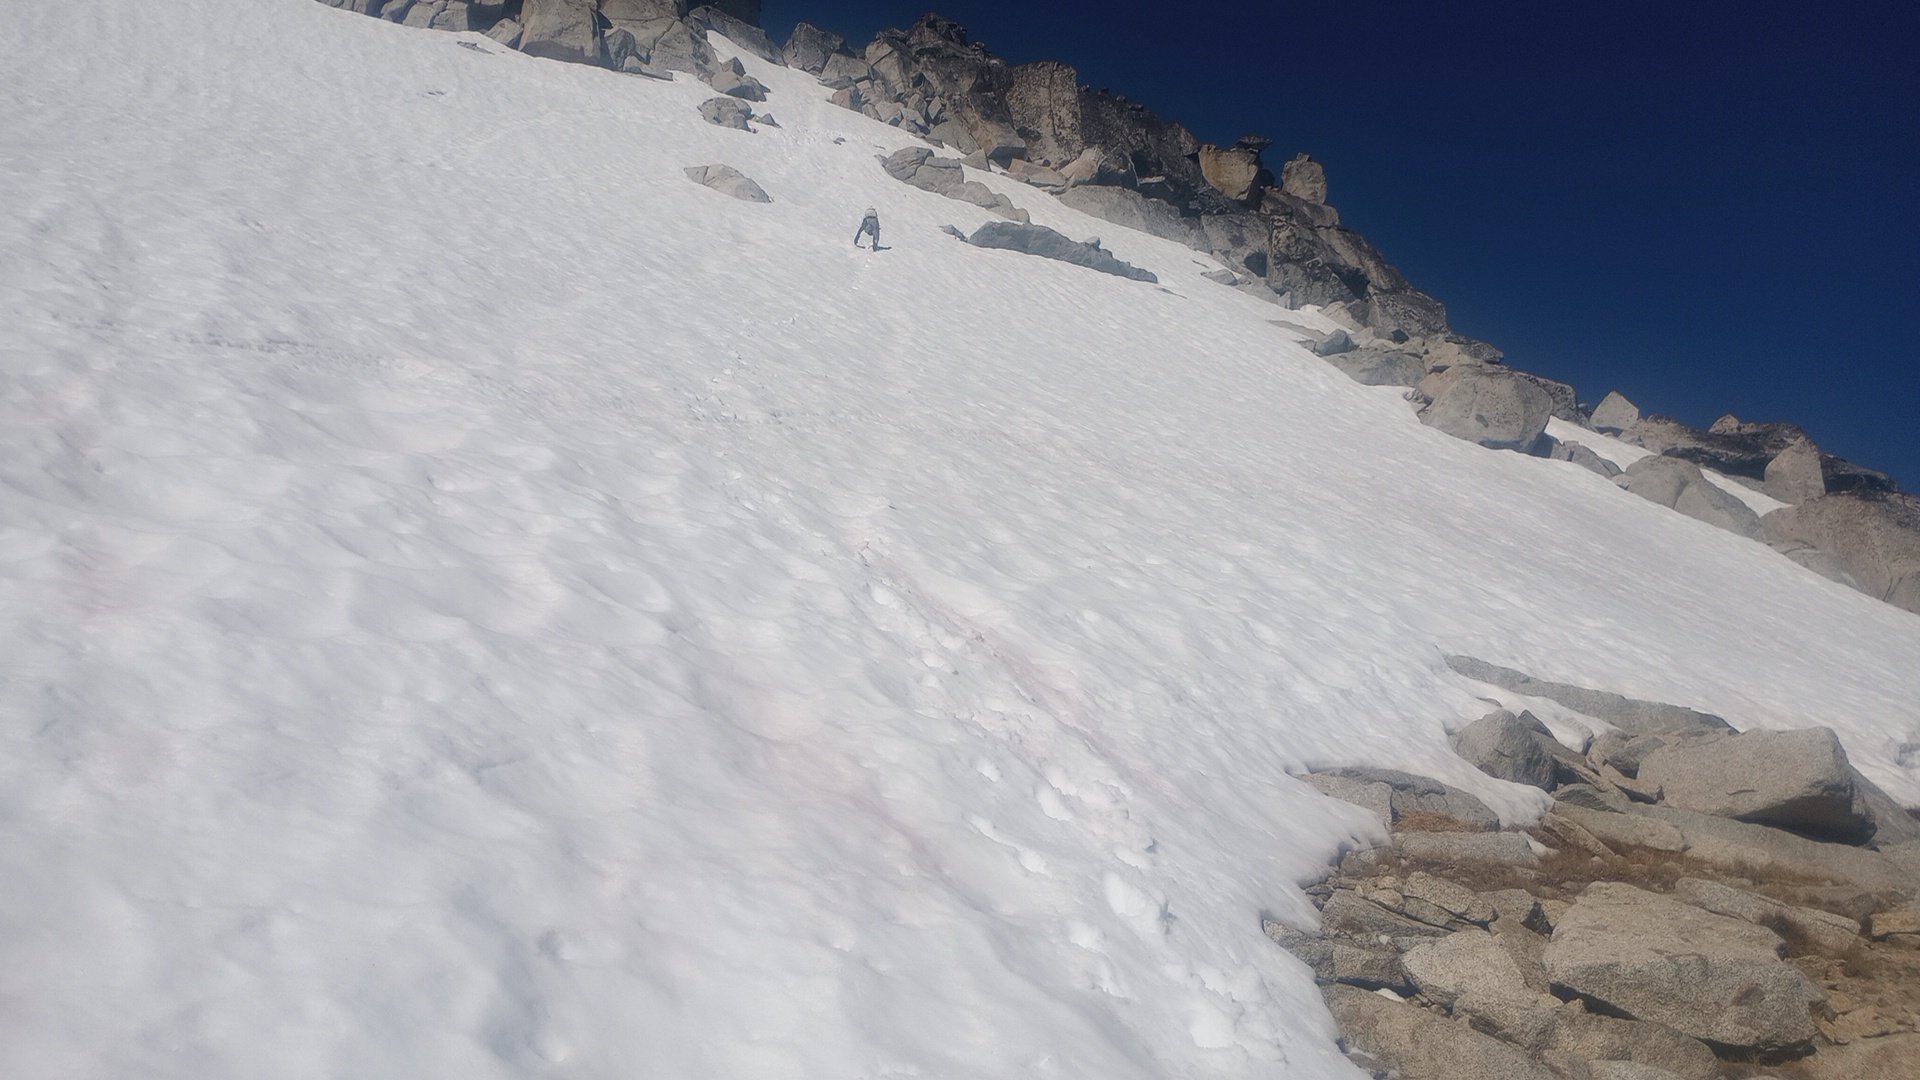
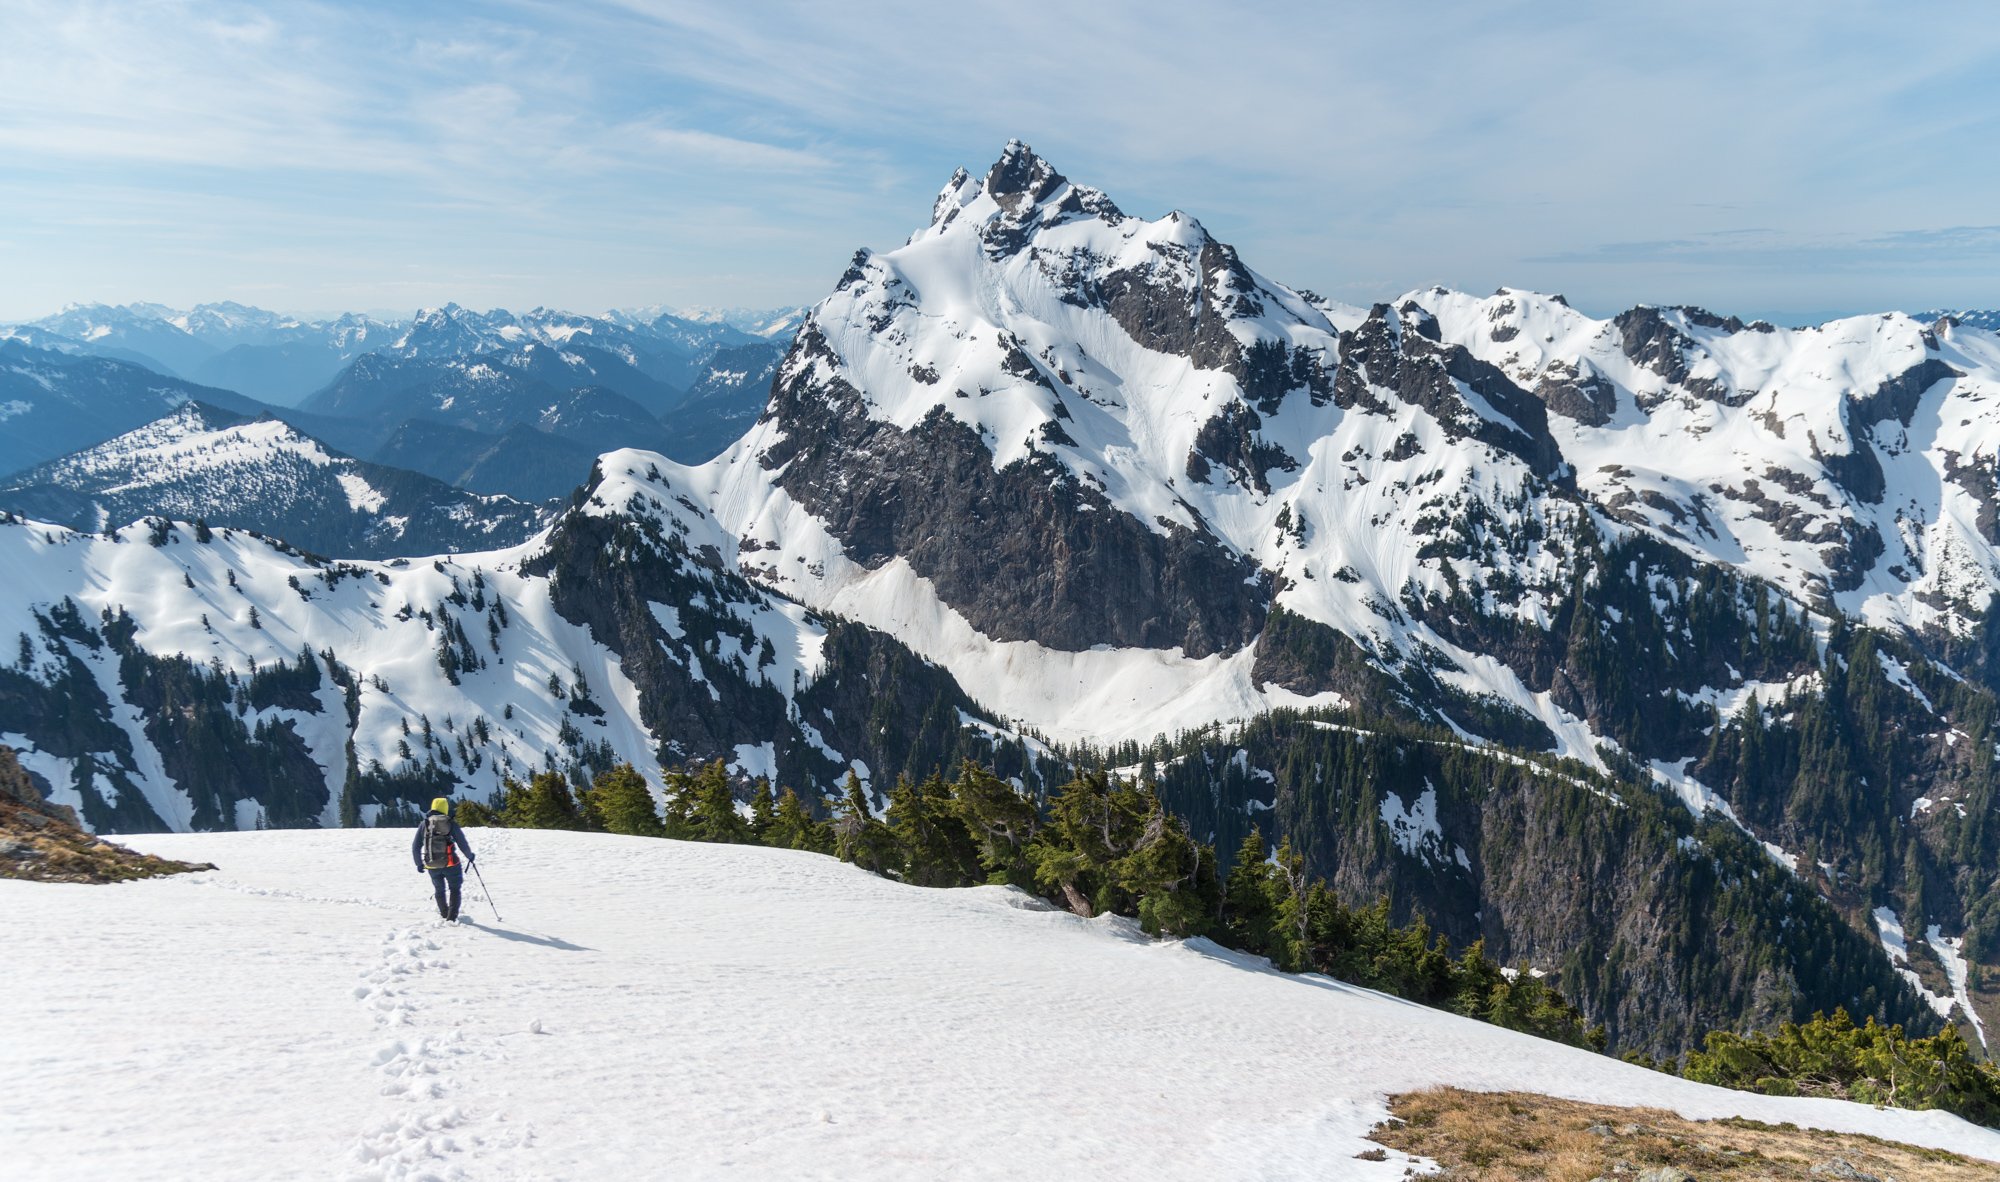
Trip: Mixup Peak - East route Trip Date: 06/10/2025 Trip Report: First day of summer break was yesterday for me. What I’ve learned from summer breaks is they pass fast, can’t just sit around. I’ve got a lot of things to get to but figured I’d set myself a standard by getting out the first day, even if my partners were busy. Spent Monday night at graduation for the old seniors and the mounties gear grab so got home at 9:30 and talked to my parents. Originally wanted to do an overnighter and bag magic too but couldn’t take a car on wednesday so I settled on just mix-up. Slept through my alarm by 30 minutes but was driving by 3:30 and and at the TH by 6. Later than I would’ve liked but wasn’t gonna do anything better with my day so figured I may as well give it a shot. Biked up the road in an hour and tossed it in the alder. 2 hours later I was at cascade pass with a lot of cobwebs in my face. Followed some goat tracks on the traverse over the cliffs and was soon moving up towards the U notch. There was one old track continuing to cache col but nothing super fresh. The gully towards the U notch was more melted out than I’d seen in any photos. Brought two ice axes and was glad to have em. Very doable with one tbh but if snow conditions were harder I would’ve definitely wanted both. Traversed around to the V notch and made a few 5th class moves before being on steep 4th class until I gained the hump. Was glad I brought a rope to rappel that. From here I was onto the slabby ledges and had a fun time working my way up. The summit was intimidating but I found a low 5th path onto the ridge. The final move pulling onto the ridge was steep and airy but I felt confident in my holds so took a lil breath and everything was okay. Summited around 12:30 and was very glad to see some rappel anchors with fresh-ish tat. Summit register was full but of the few random pages I flicked through, I found Jeff Wright, Fred Beckey, Martin Volken, and most notably, my freshman science teacher. Took a photo and he was pleased to see my find. Enjoyed the summit until 1 and then figured It was time to get off that god forsaken rock. Ooh but the views were pretty cool. First time looking at the middle cascade glacier, I could even see all the way out to dome. Gotta do the ptarmigan this summer I guess. Anyways, a couple rappels brought me off the summit block, then a lot of down scrambling, then 1 more to the V notch by 2:00. Wrapped around to the U notch and made a rappel down through the top section since there was an anchor already there. Was also this insane cornice thingy that seemed to be precariously balanced. Tried to stay off to the side because I didn’t wanna get killed by some goofy looking snow glob. Once at the bottom of the gully, it was a nice stroll with good views back to cascade pass. Saw a group of four goats at cascade pass which kinda scared me. 1 idiot teenager vs 4 mountain goats, I don't think the odds were in my favor. Lucky for me they ran up towards Sahale as I was taking off my crampons so it was a nice pleasant walk to the pass, where I arrived around 3:30. Saw my first humans of the day as a party was finishing the hike towards cascade pass and headed towards Glacier camp on Sahale. A nice stroll down the trail got me to my bike at 5, and by 5:15 I was at my car. I buzzed a hiker too fast on my bike which he was very unhappy about at first but then we made up and he turned out to be a reasonable guy. A bell on my bike might not hurt. Usually its cars buzzing bikers so was funny to be bikers buzzing hikers. Anyways, Twas’ my bad and we seemed to make up for it. I learned from it. Heres da photos for the populace Gear Notes: Rope nice for rappels. Crampons 'n axe ofc Approach Notes: aint so bad. Just walk n keep walking
 6 points
 -
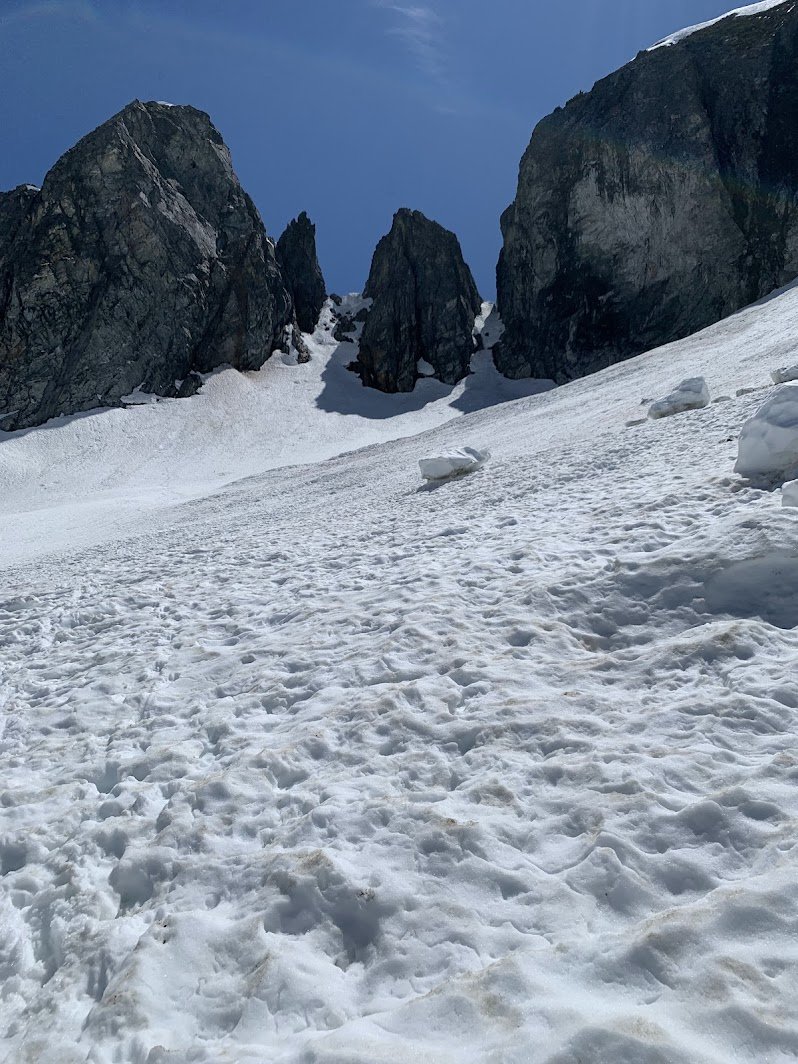
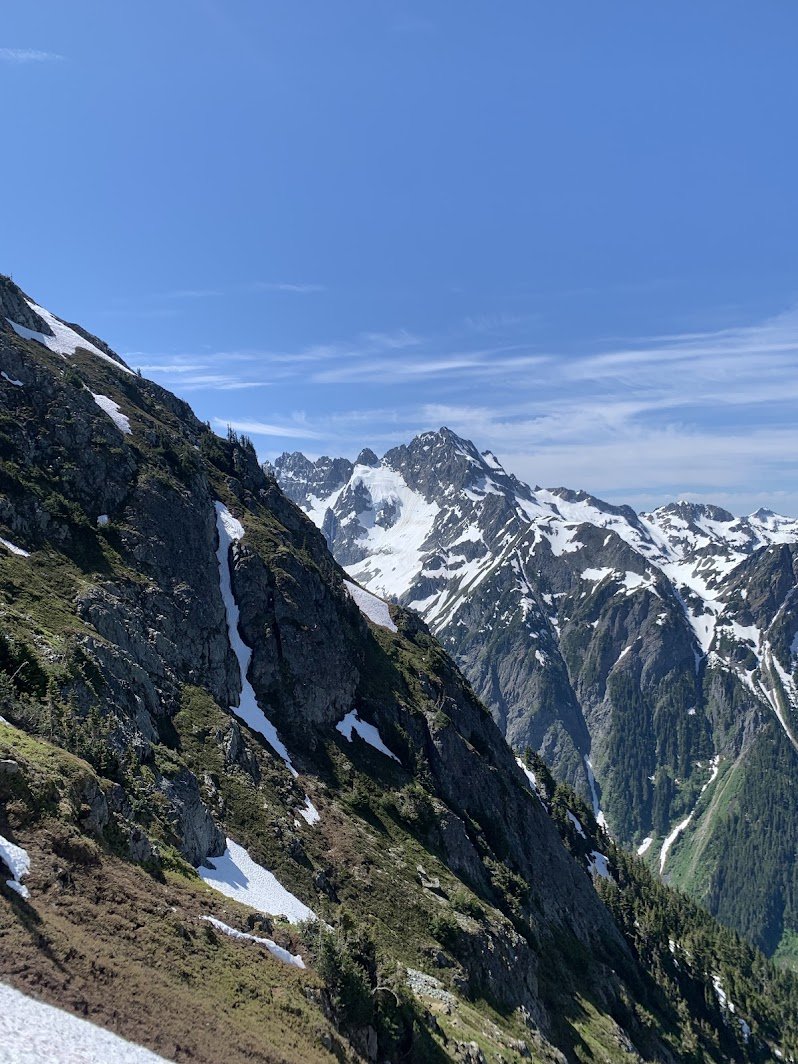
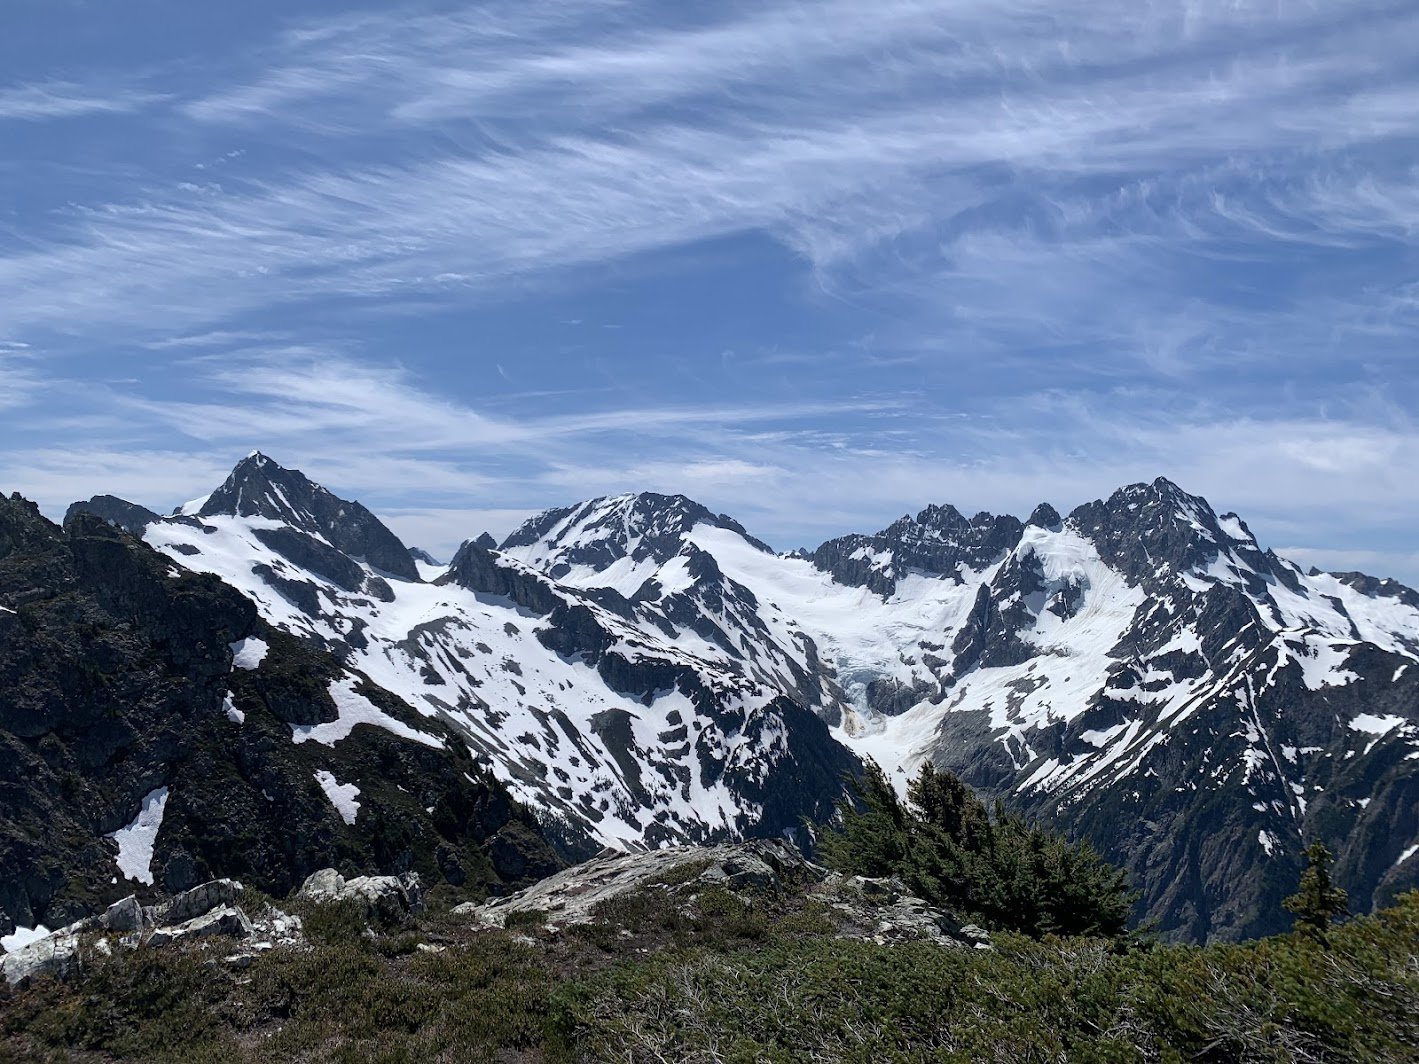
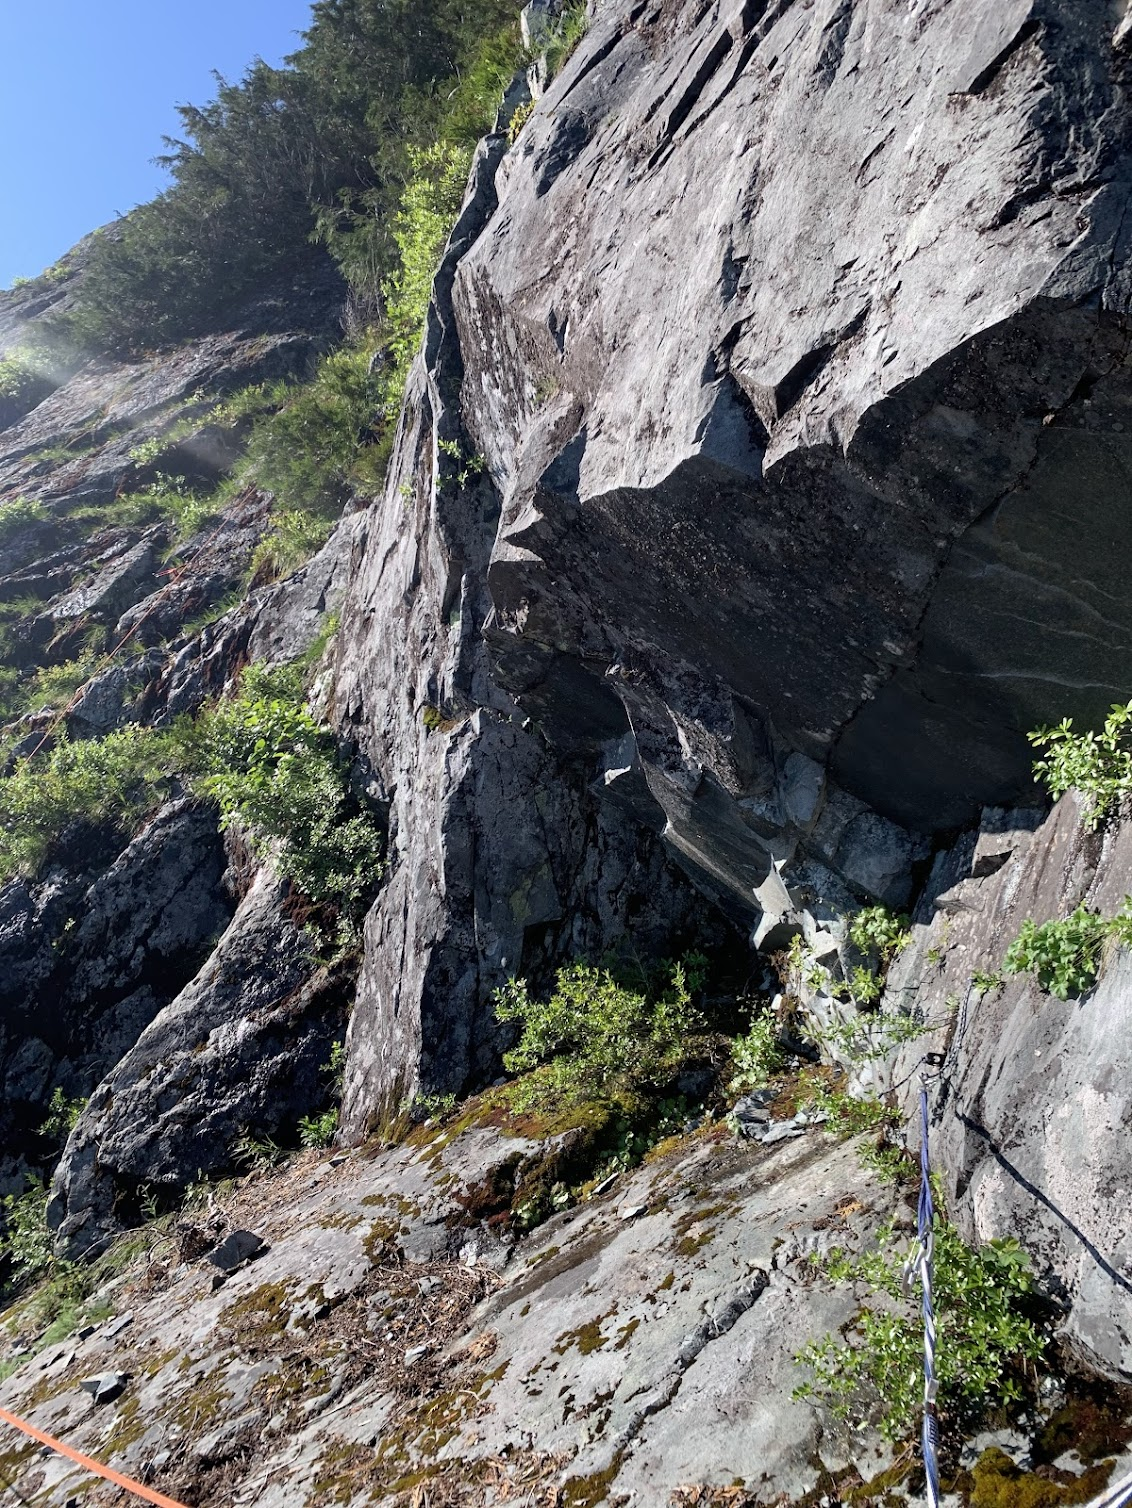
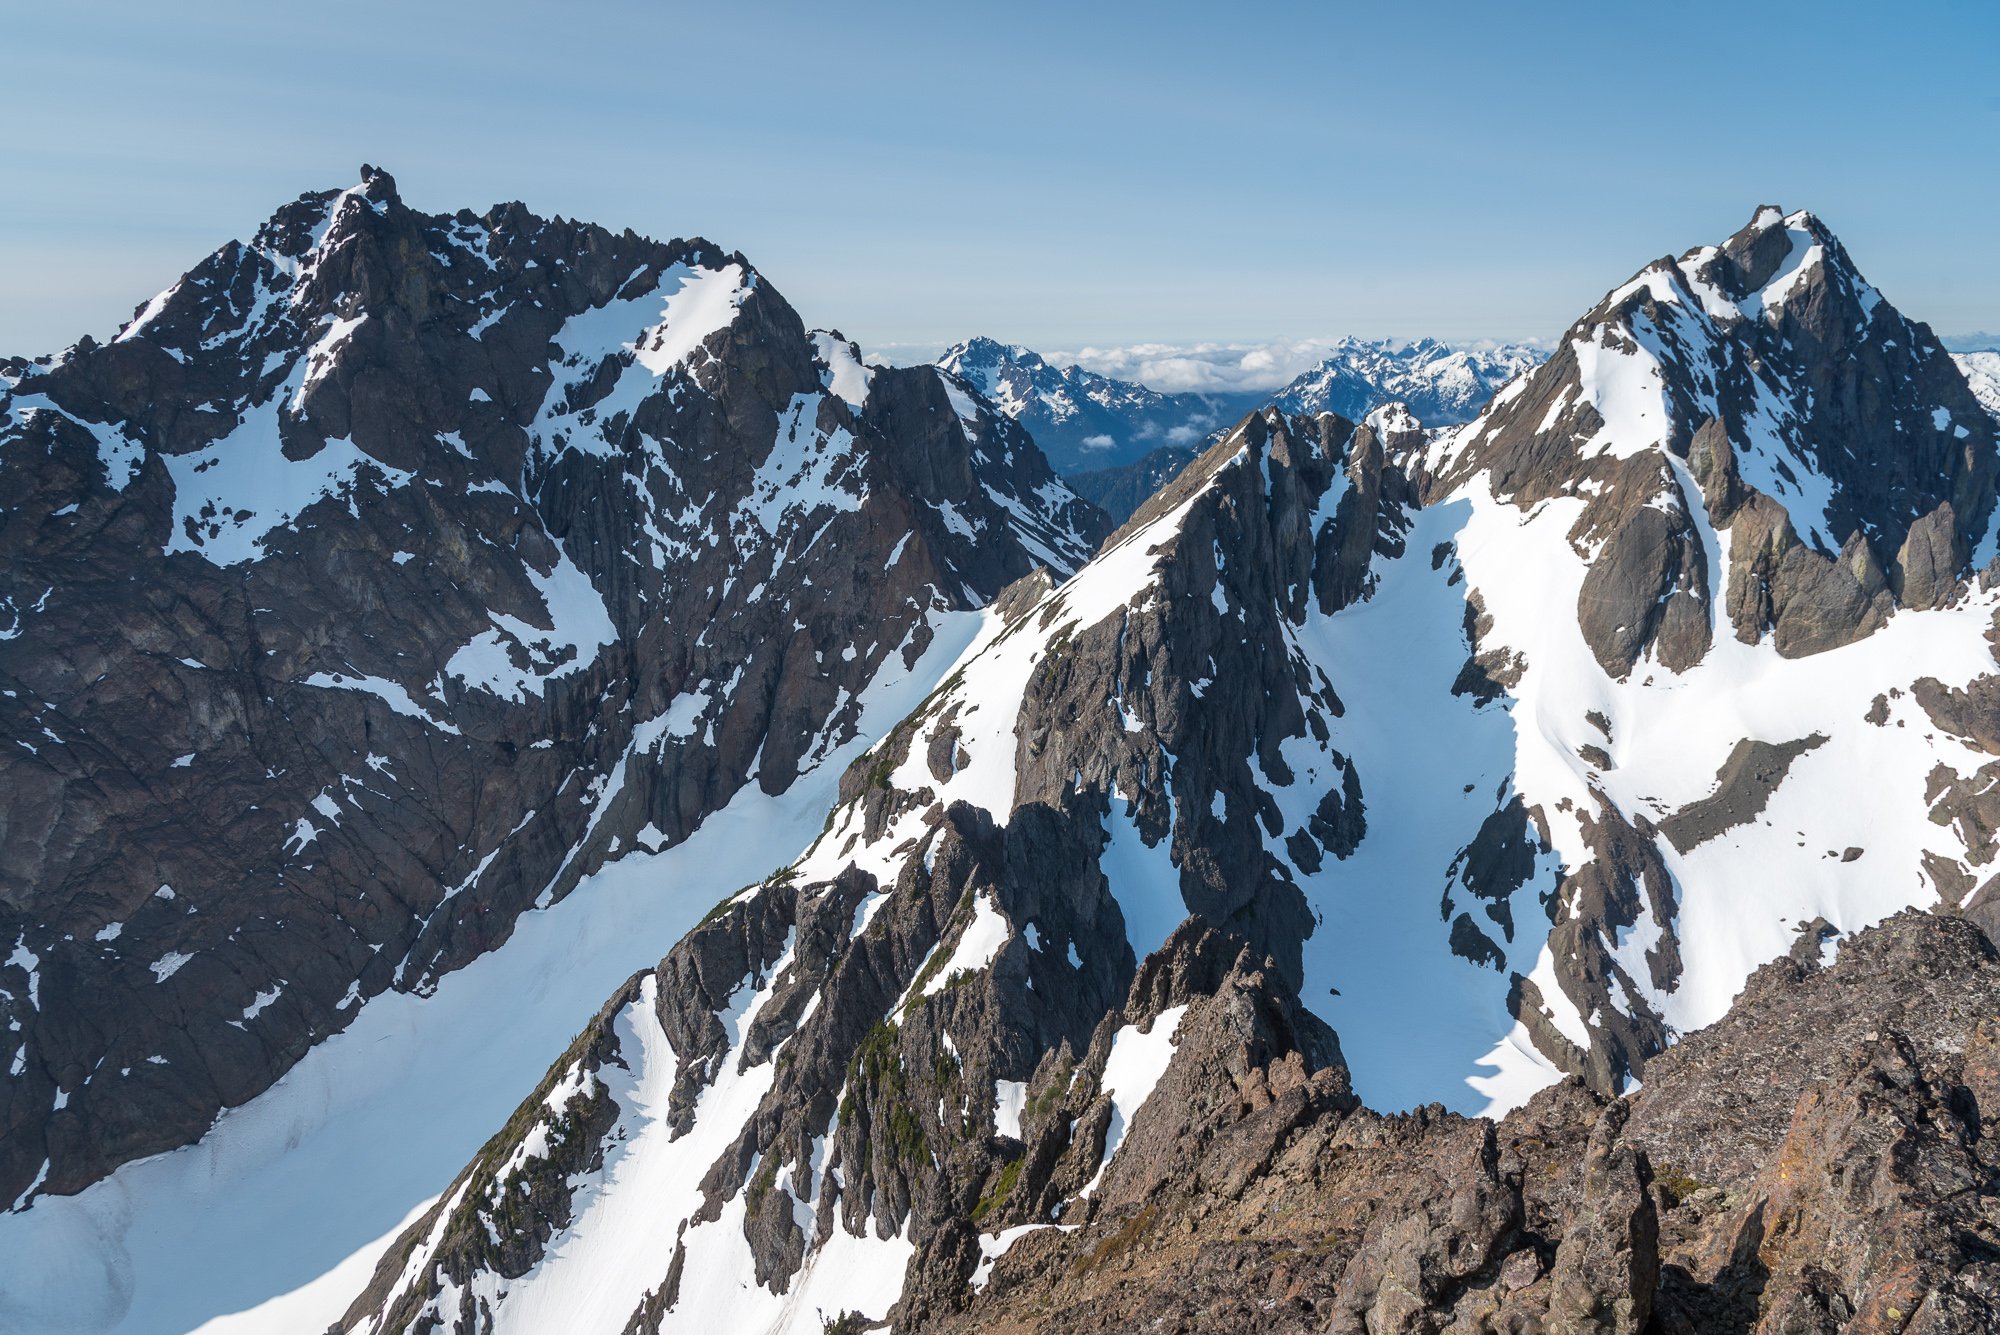
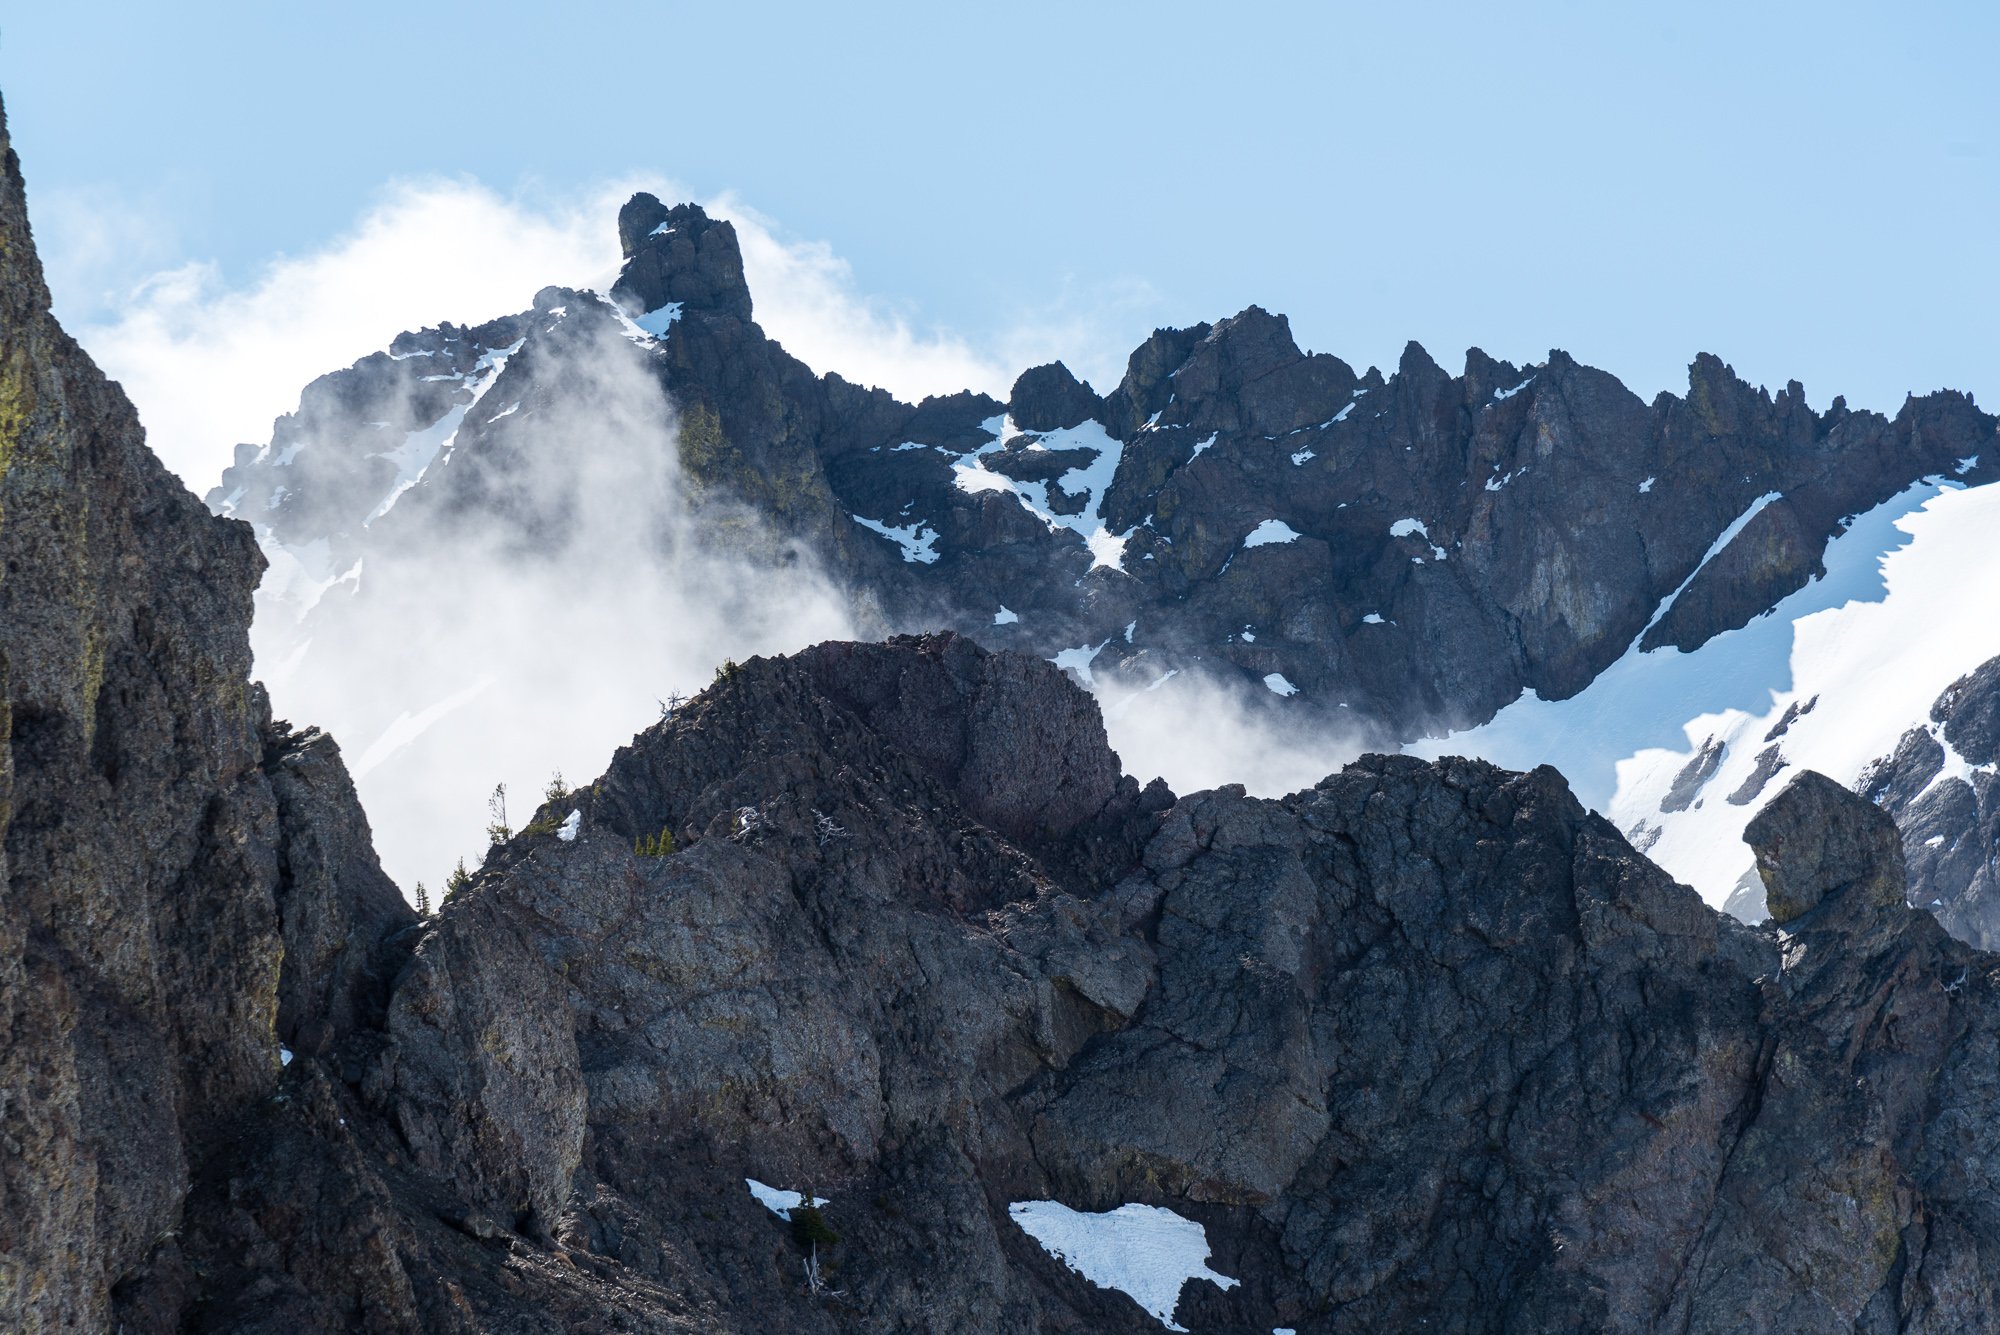
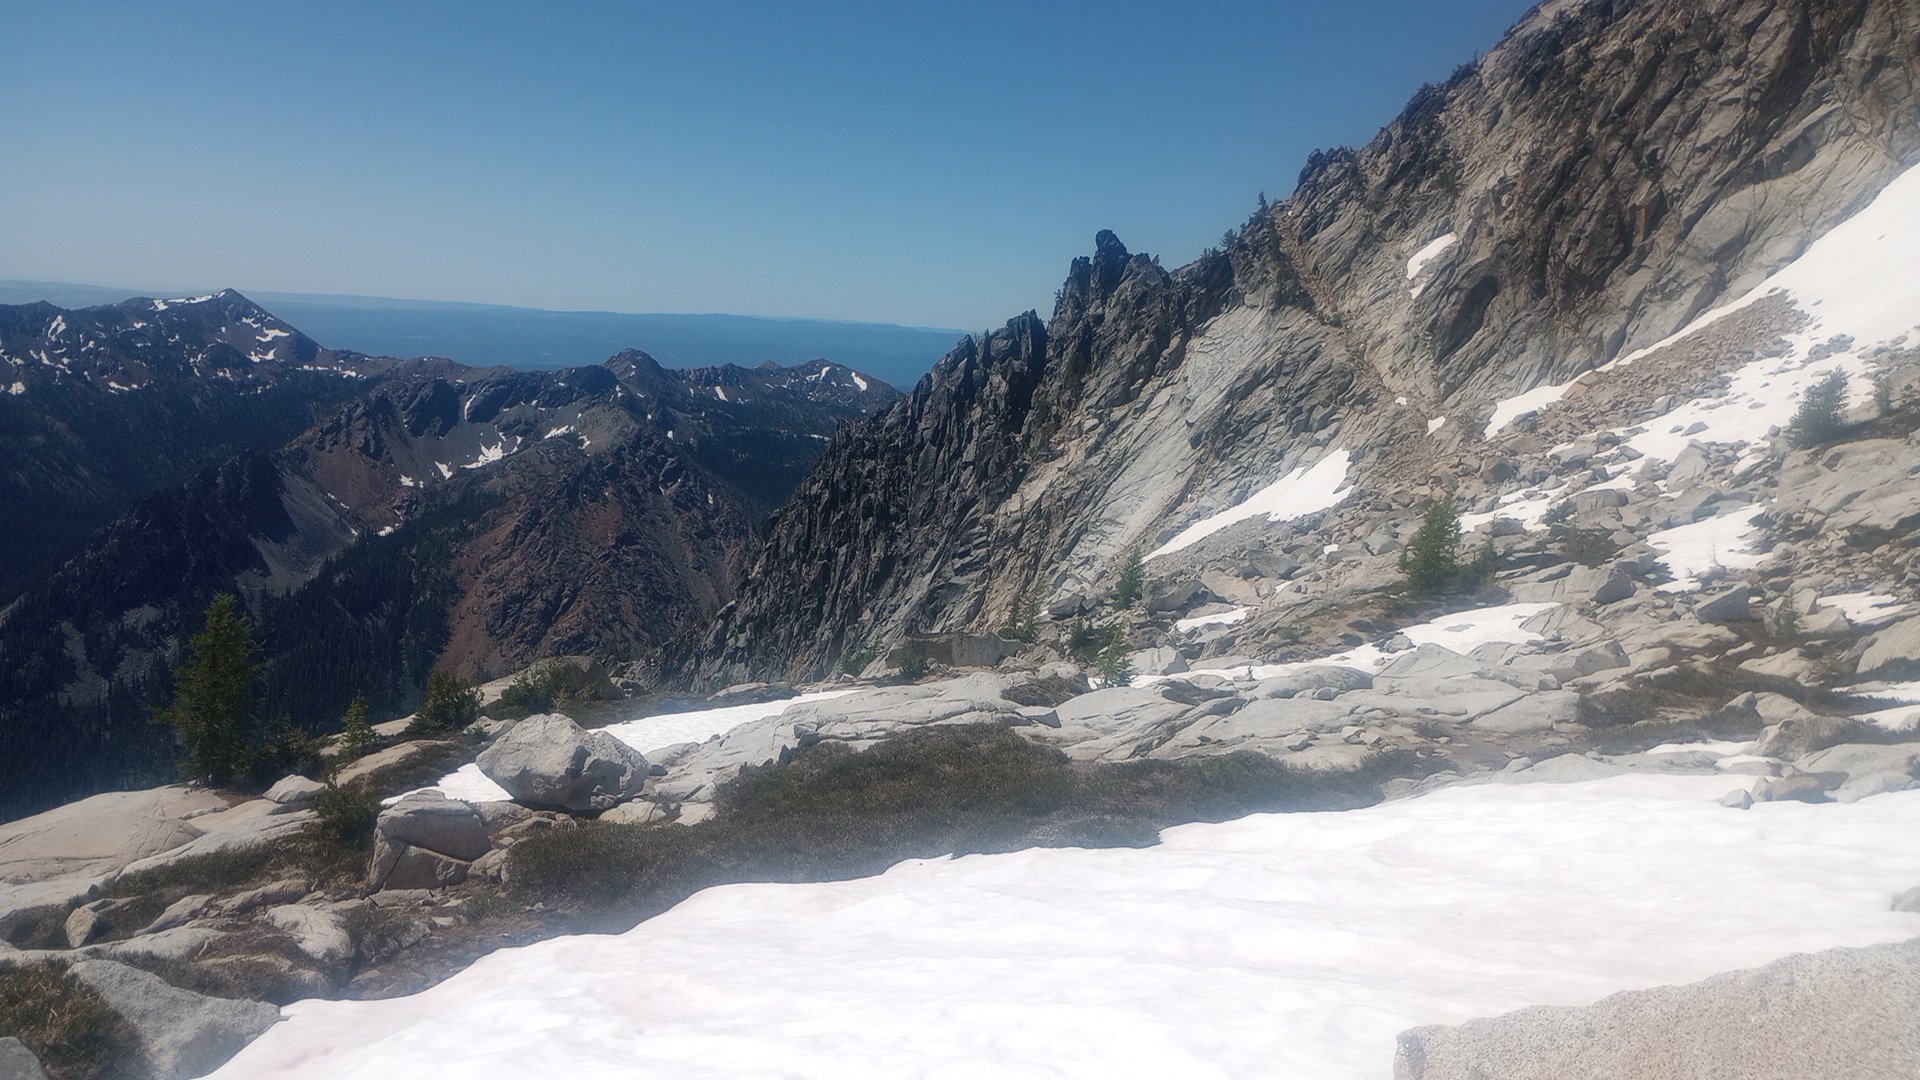
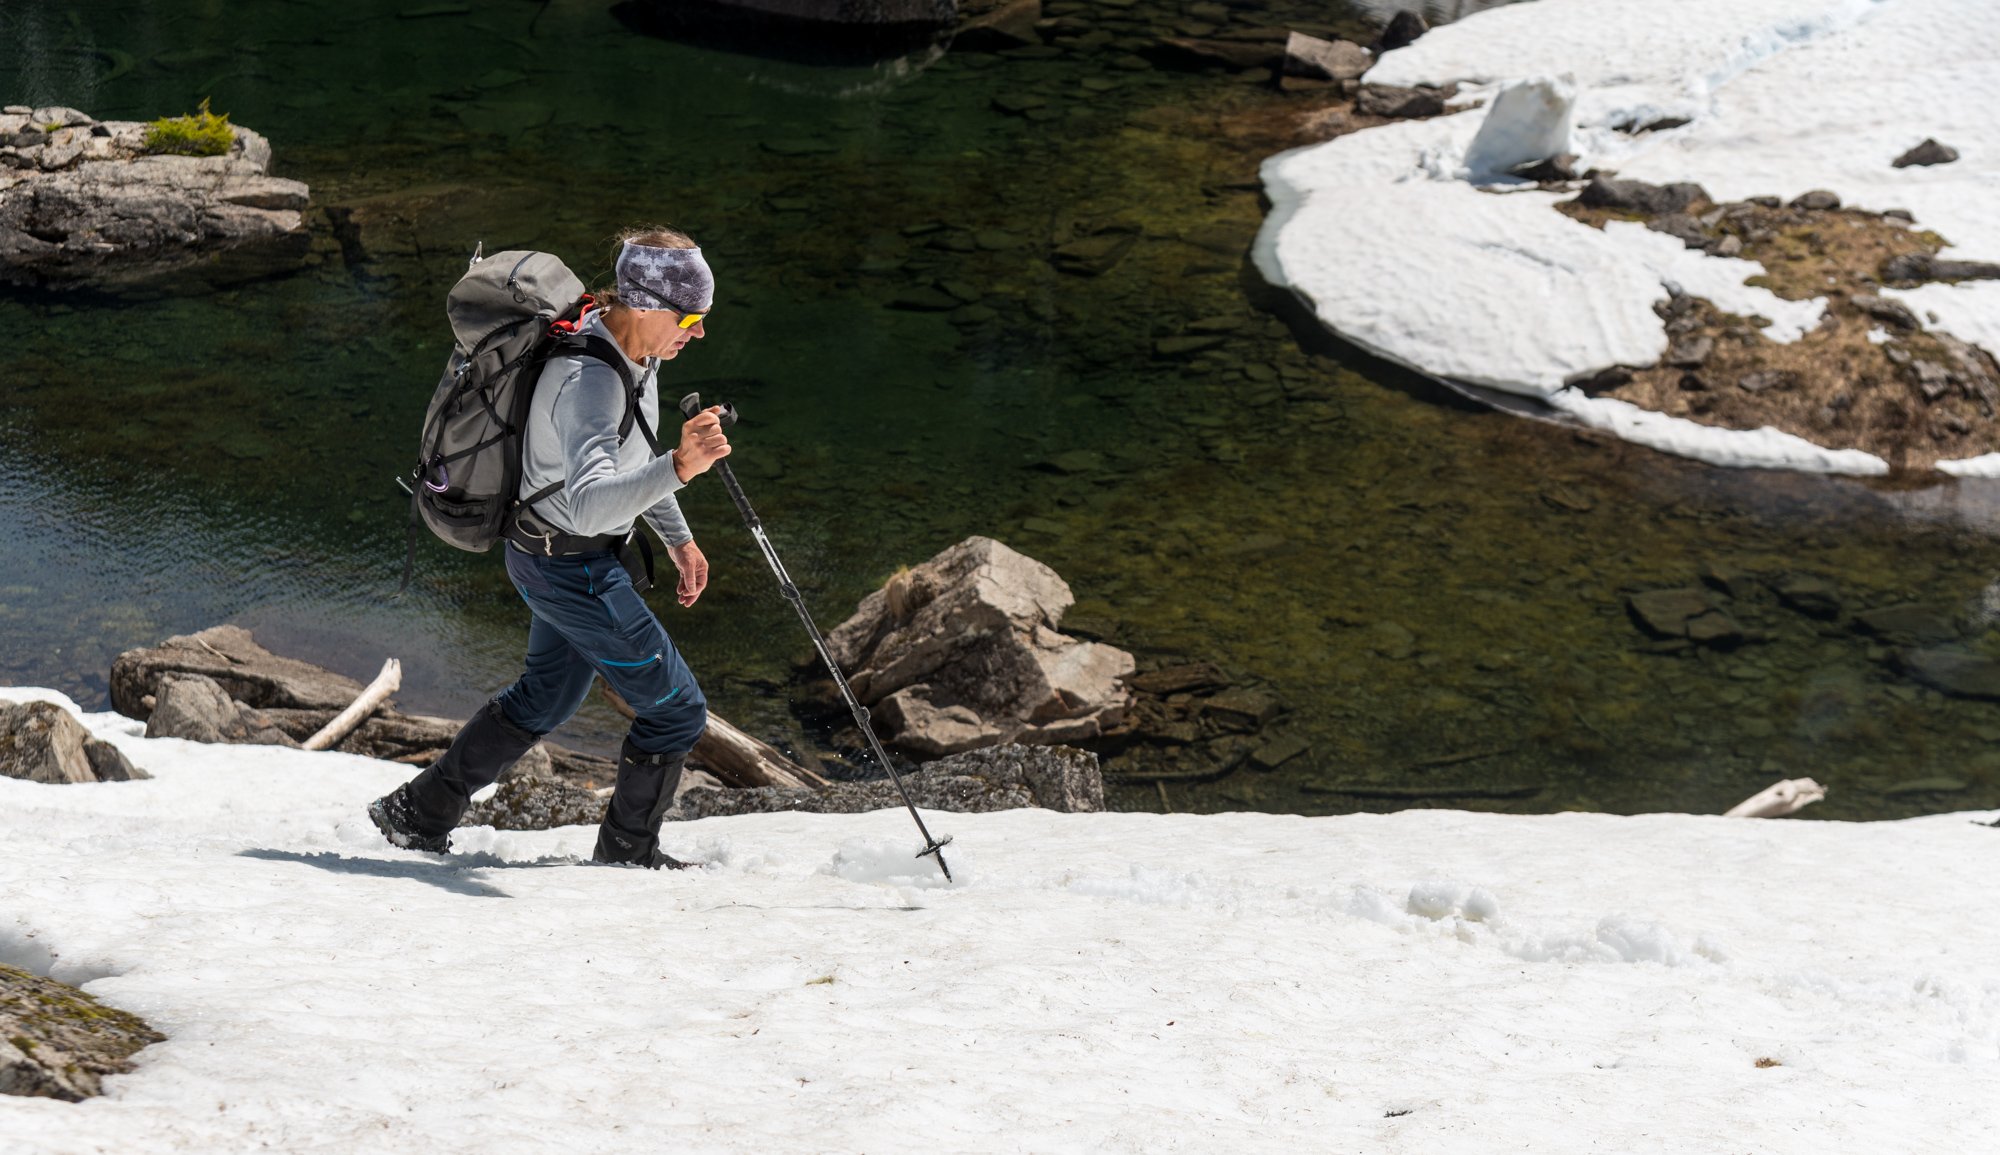
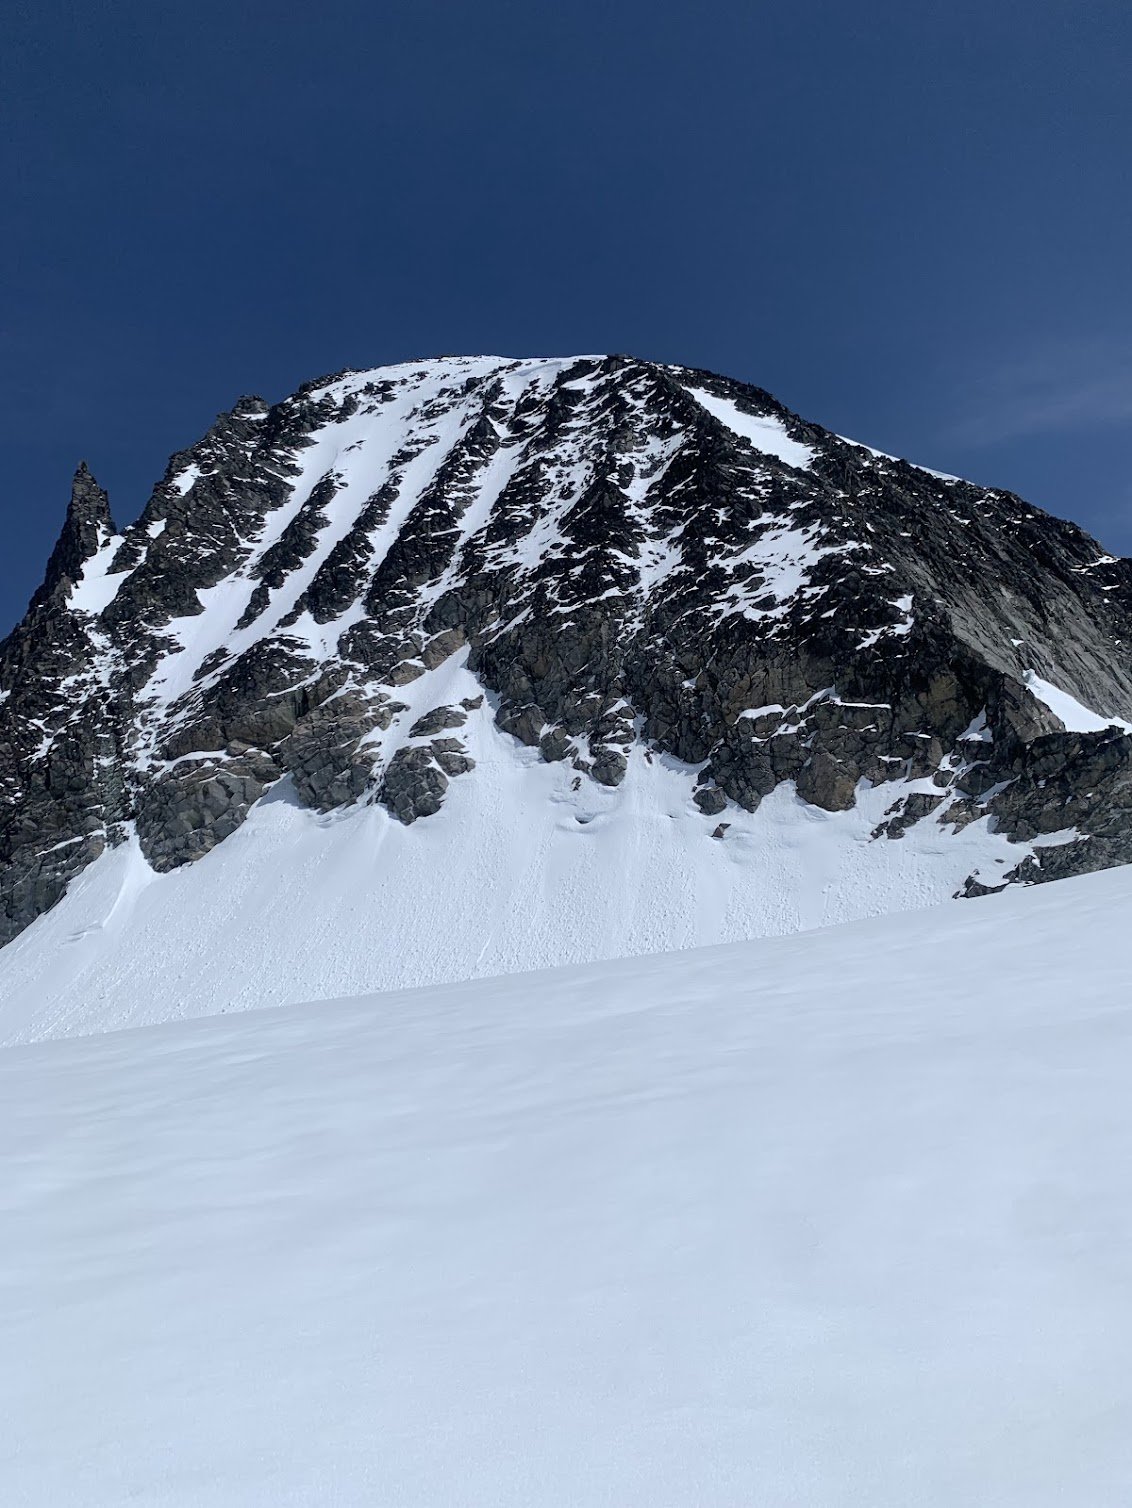
Trip: East Fury - North Buttress Trip Date: 06/29/2025 Trip Report: In the couloir leading to the buttress from its east side, the drawbridge is up. It’s hard to think of a route in the cascades that I haven’t climbed that I was more excited to try. From Luna col the position of upper snow arete looks insane. And the photos in this 2017 report don’t hurt: https://cascadeclimbers.com/forum/topic/100747-tr-mt-fury-north-buttress-6232017/?tab=comments I was lucky to find a partner inspired enough to take a day off and put in the considerable effort to get out there and check it out. Saturday was a little cloudy and not too hot, which kept things relatively smooth on our way from big beaver to Luna Col. Even though I’d seen it before, the first sight of the northern faces of the southern pickets that rewards the grind up to -6400 was literally breathtaking. I let out a little pious whoa. The last mile or so took approximately forever but we arrived well before dark, 11.5 hours after drop off. A ghost set up our tent. From the col the couloir didn’t look too promising but wasn’t obviously impossible so we proceeded to go for it the next morning, leaving camp at 5am (4:30 might have been better). As in the trip report from 2017, we trended left on the descent to Luna lake, which worked well. From the lake we traversed W and SW, bottoming out around 4500’. At this point we could see the snow was not continuous in this first couloir and quite a bit lower, maybe 15-20 feet, than in the 2017 reference photo. We found a ~5.0 exit onto slabby rock and got up to easier ground. Continuing up we traversed as quickly as possible across the exposed face to the entrance of the main couloir. From below it still looked worth trying. But only about 200’ up it we encountered a hidden moat spanning wall to wall, just above where I am in this photo. It was tall and unnervingly hollowed out. Questing up and left on the rock for a bypass was fruitless. I found steep slabs without much pro. And transitioning from boots and crampons to rock shoes while exiting a tenuous snow location onto a narrow rock stance turns out to be very awkward. At 30m I ran out of rope (folded 60m half), placed a piece and down climbed on top rope back to the snow. We down climbed the steep snow back out the couloir. About to down climb to the first couloir. Looking up on our return to Luna lake I thought, hmm, we came down that? It looks improbably steep but is actually reasonable. All throughout the cirque there was surprisingly little activity given how warm the day was. At camp 12 hours after we left the evening was unpleasantly hot and buggy and I impatiently awaited the reprieve of dusk. In the meantime there was some helicopter activity near Outrigger. I hope everyone involved is all right. The heat was considerable already at 7am the next morning when we began our descent. I used crampons but there really was no hard snow to be found. We took a long break at the stream by Luna camp and it seemed then that we’d make our 5pm taxi in plenty of time. One small delay occurred when we saw two bear cubs climbing to the top of a tree right off of the trail. Mama wasn’t making herself seen or heard, so we backed up a little, made a bunch of noise and gave them a few minutes to clear out. We didn’t see the cubs again and did see the mother a little bit off trail, not acting aggressively. Checking the time. As the afternoon miles went by we realized that we were slipping behind and had to really push to get there right at 5pm. The driver was very nice and encouraged us to take the time to cool off in the lake. I don’t know if I have it in me to try this route again but if I did it would have to be possibly even earlier in the calendar, and in a year with above average snow pack come June. The west side alternative doesn’t appeal much to me, the photos from Steph Abegg make it look like overhead exposure would last a lot longer than it does while traversing in from the east. Gear Notes: Crampons, ax, whippet, 60m half rope, single picket, light rack and some bail gear Approach Notes: Big beaver to Luna col to Luna lake


 5 points
 -
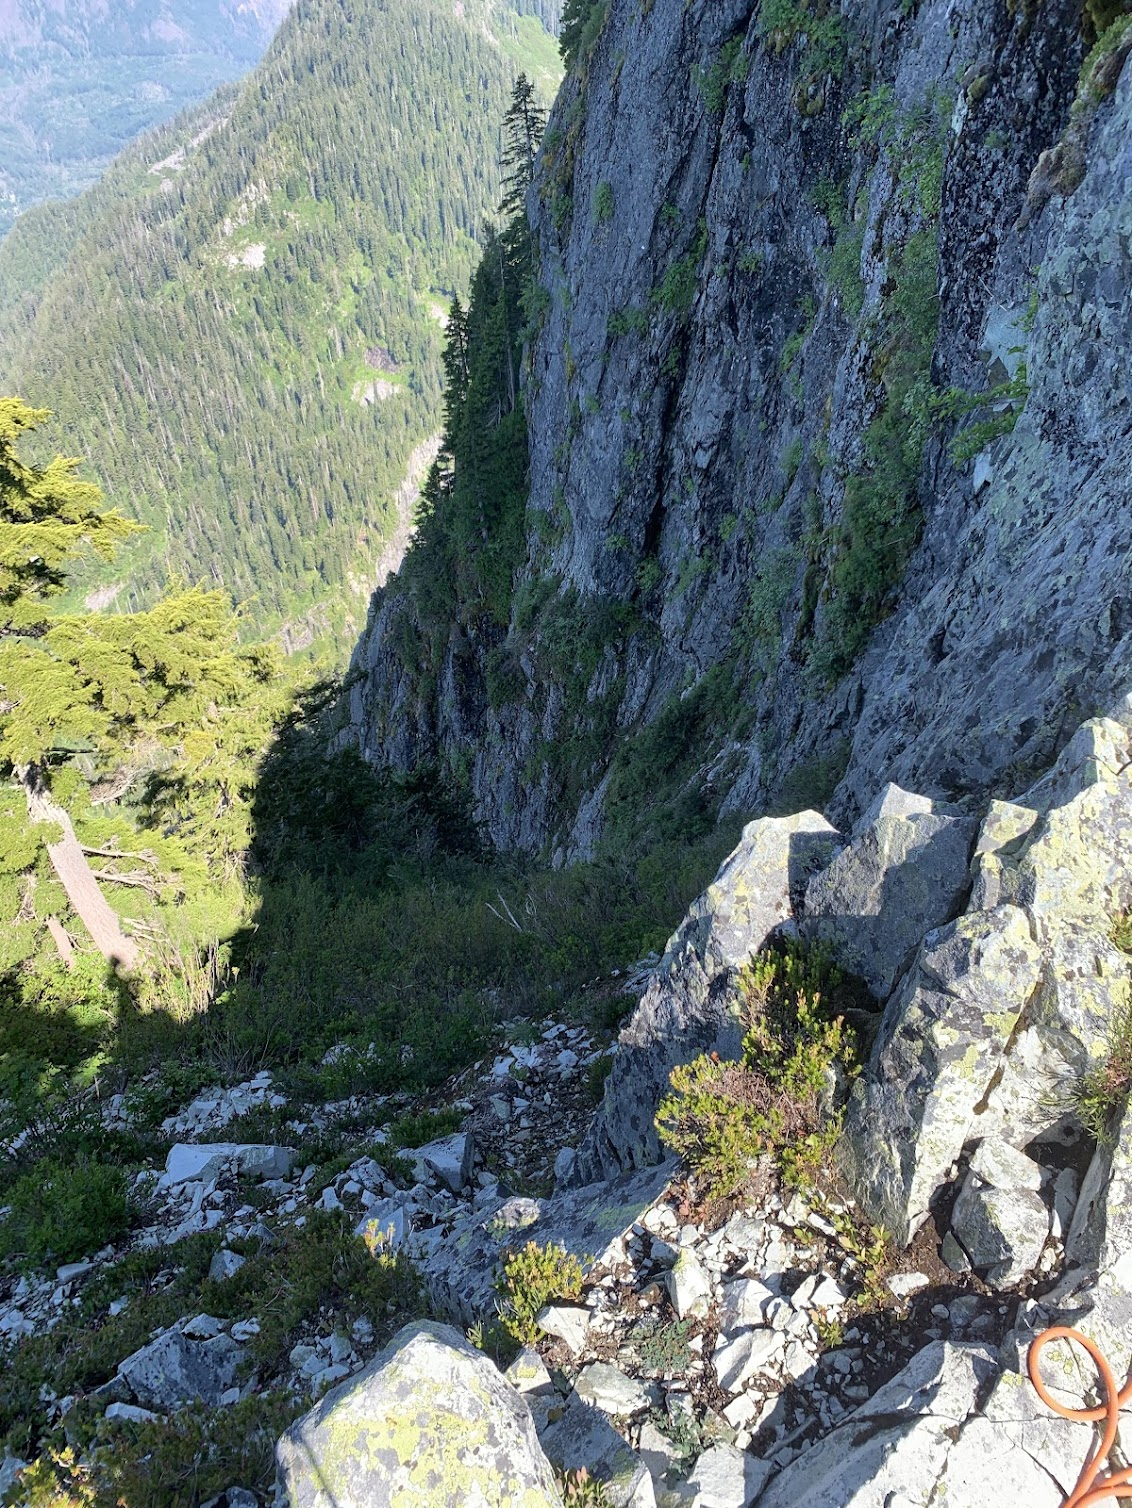
Trip: Mount Index - North Face Trip Date: 06/29/2025 Trip Report: Kinda tired but figure I should write some stuff down while it’s fresh in my mind. I’ll split this into two parts, the story and the beta. The Story is pretty simple, me and a partner decided to go for the Index traverse on Sunday and Monday. We had extra time on saturday so we hiked into lake serene to make for an easier morning. Without light on Saturday night, we made the mistake of trying to bivy at the flatter spot in the topo on the north of lake serene. This is very schwacky. Don’t do it. It wasted a lot of time. Anyways, Sunday am we worked our way up the talus and then up to the ridge. It was still a little wet and loose so we decided to rope up. Halfway up, my partner bonked and our pace slowed considerably. We made it to the summit late and decided that in his condition it wouldn’t be safe to commit ourselves to the rest of the traverse. A nice summit bivy ensued and then 16 rappels + downclimbing the next day. We chilled in by the lake and hiked out at a reasonable time. In the descent we also realized it was prolly a good idea we didn’t commit ourselves to the traverse. It fingers were beat and the rock was so warm that touching the rock was truly painful. Wouldn’t be fun to be forced to climb in that. My partner has a brain and realized this blue collar suffer climbing aint for him, but if anybody wants to get on something suffery with me, let me know. I got a lot of time this summer and like to put my head down and work. Anyways on for the beta Beta: Approach via Lake Serene. Take the trail around the lake to the talus field. Follow the talus field up, eventually getting near the cliffs on the left but not on them. Eventually you will be forced into the bush to the right of the cliffs where there is a faint climbers trail. At times it can be decent but often, its only marked by the fact that you can see the ground every once in a while. Bushwack 4th class up onto the NE Ridge, pulling on lots of branches. Eventually you’ll get out of the schwack and onto the ridge. Take the easiest looking route up, roping up if you feel necessary. Climb this until you reach a slab with two pitons under a roof. Once here take the leftward brush filled ramp for about 50ish meters until you reach a short E facing exposed rock rib. This is a great pitch with exposure above lake serene. It will quickly ease up into a nicer gully below an open book feature. Climb to the treed ledge on the left side below this open book where you’ll find the crux pitch of the route. Start up on left side of the open book before traversing right on smaller holds to get to the easier gully above the open book. Here you’ll find a block with a lots of slings for a nice belay. At the block, climb hard right out of the gully and then climb straight up the steep trees and brush until it gets too steep. Here you should see a small hidden ledge going around right. Take the narrow, exposed ledge around the right skyline where you’ll finally see the North Bowl. Traverse, pulling steep brush, to get into the open bowl. Once in the bowl, the route goes up the steeper long gully on the left. Work your way up this thing, staying on the right side of it for most of the time. Eventually, before the gully turns right, you’ll find yourself on a nice ledge to the right of the gully with a slung tree and a piton + nut anchor above it. Climb up here and then to the left back into the gully. From here(when the gully turns right) it is 60 meters of steep bushwacking up to the toe of the North Rib. The North Rib is the highlight of the route. Stay right on top or barely(a few feet) to the right the entire time. This can be led in 2-3 pitches or one easy simul. It is exposed, but the holds are great unlike the rest of the route, and the location is amazing. Once at the top of the ridge, quickly climb up the small slabs onto the summit ridgeline. Scramble this, along, or slightly to the right for most of it until you reach the summit. slab with pins below roof. Ramp off to the left great exposure on E facing rib topping out of open book looking down rightwards turn at end of gully filled with steep branches. Taken from toe of N. Rib ig I'll have to come back for these guys summit bivy summit ridge scrambling(taken on way back) Gear Notes: Double rack to #2 but a single would probably be fine. Bring lots of double length slings, you'll be slinging a lot of shtuff. Approach Notes: Lake Serene -> boulder field -> Shwack
 5 points
 -
Trip: Warrior - NE ridge Trip Date: 06/01/2025 Trip Report: After talking about it for several years, @olyclimber and I finally got out in the hills together to climb Warrior. It started, like all good Olympics trips, in the rain, wondering if the forecast for fair weather was ever going to materialize. Thankfully it did and @olyclimber and I headed out into the dripping forest along the Dungeness, marveling at how green everything was and how beautiful the waters were. It was going to be a good trip! Boulder shelter: Within a few hours we were at Boulder Shelter, one of the CCC era structures still in use today in the Olympics. @olyclimber , as his name suggests, has a long history with the range and regaled me with stories of his youth, scouting trips, and other entertaining adventures and misadventures in the Olympics. Before I knew it, we were under the cirque on the west side of Warrior, ready to leave the trail and head upwards to a scenic camp perched next to a tarn still buried under winter's snows. It was clearing off nicely and we decided to sleep out in the chilly breeze to admire our surroundings. It got cold during the night and dawn brought a hard freeze to everything, but thankfully our water was only slightly iced. It would be a very firm ascent to the col separating the two summits of Warrior, but thankfully the day was clear without much wind. @olyclimber ascending to the col: Inner Constance and the Rotten Rockenspiel: At the col we started the traverse NE on steepening snow, barely getting the frontpoints of our aluminum crampons into the hard neve. I offered to head on up and "have a look" while @olyclimber hung back. It never got really very dad friendly and I contemplated turning around at nearly every weird snow/rock transition. The abundant snow/ice on the summit rocks made it much more challenging than expected, but for better or worse I continued upward. @olyclimber wisely stayed back and enjoyed the sun at the col while I hemmed and hawed my way to the top. Constance and Inner Constance from the summit: The view west to Mystery and Deception from the top: The summit rocks. The easiest route starts left of the photo and works up and right. The direct route is supposed to be low fifth? We had some miles to cover and driving to do and so I didn't linger on the summit long, and we carefully descended the still rock hard couloir back to camp: Admiring Constance along the way back to camp: along with Mount Mystery as we descended from the high country and out the Dungeness trail: Thanks to @olyclimber for keeping the dream of Warrior alive for me these past few years and making the trip happen! We are quite fortunate to have so many adventures waiting for us just a few hours away. Gear Notes: ice axe, crampons, helmet Approach Notes: Dungeness trail past Boulder Shelter then up into cirque by small tarn, west of the summit. Climb prominent couloir NE to saddle between Warrior summits and then traverse steep snow to the NE until you can ascend up and right to gain the NE ridge. Follow up and right via exposed and steep scrambling. Best if snow free, which is likely by late June.


 5 points
 -
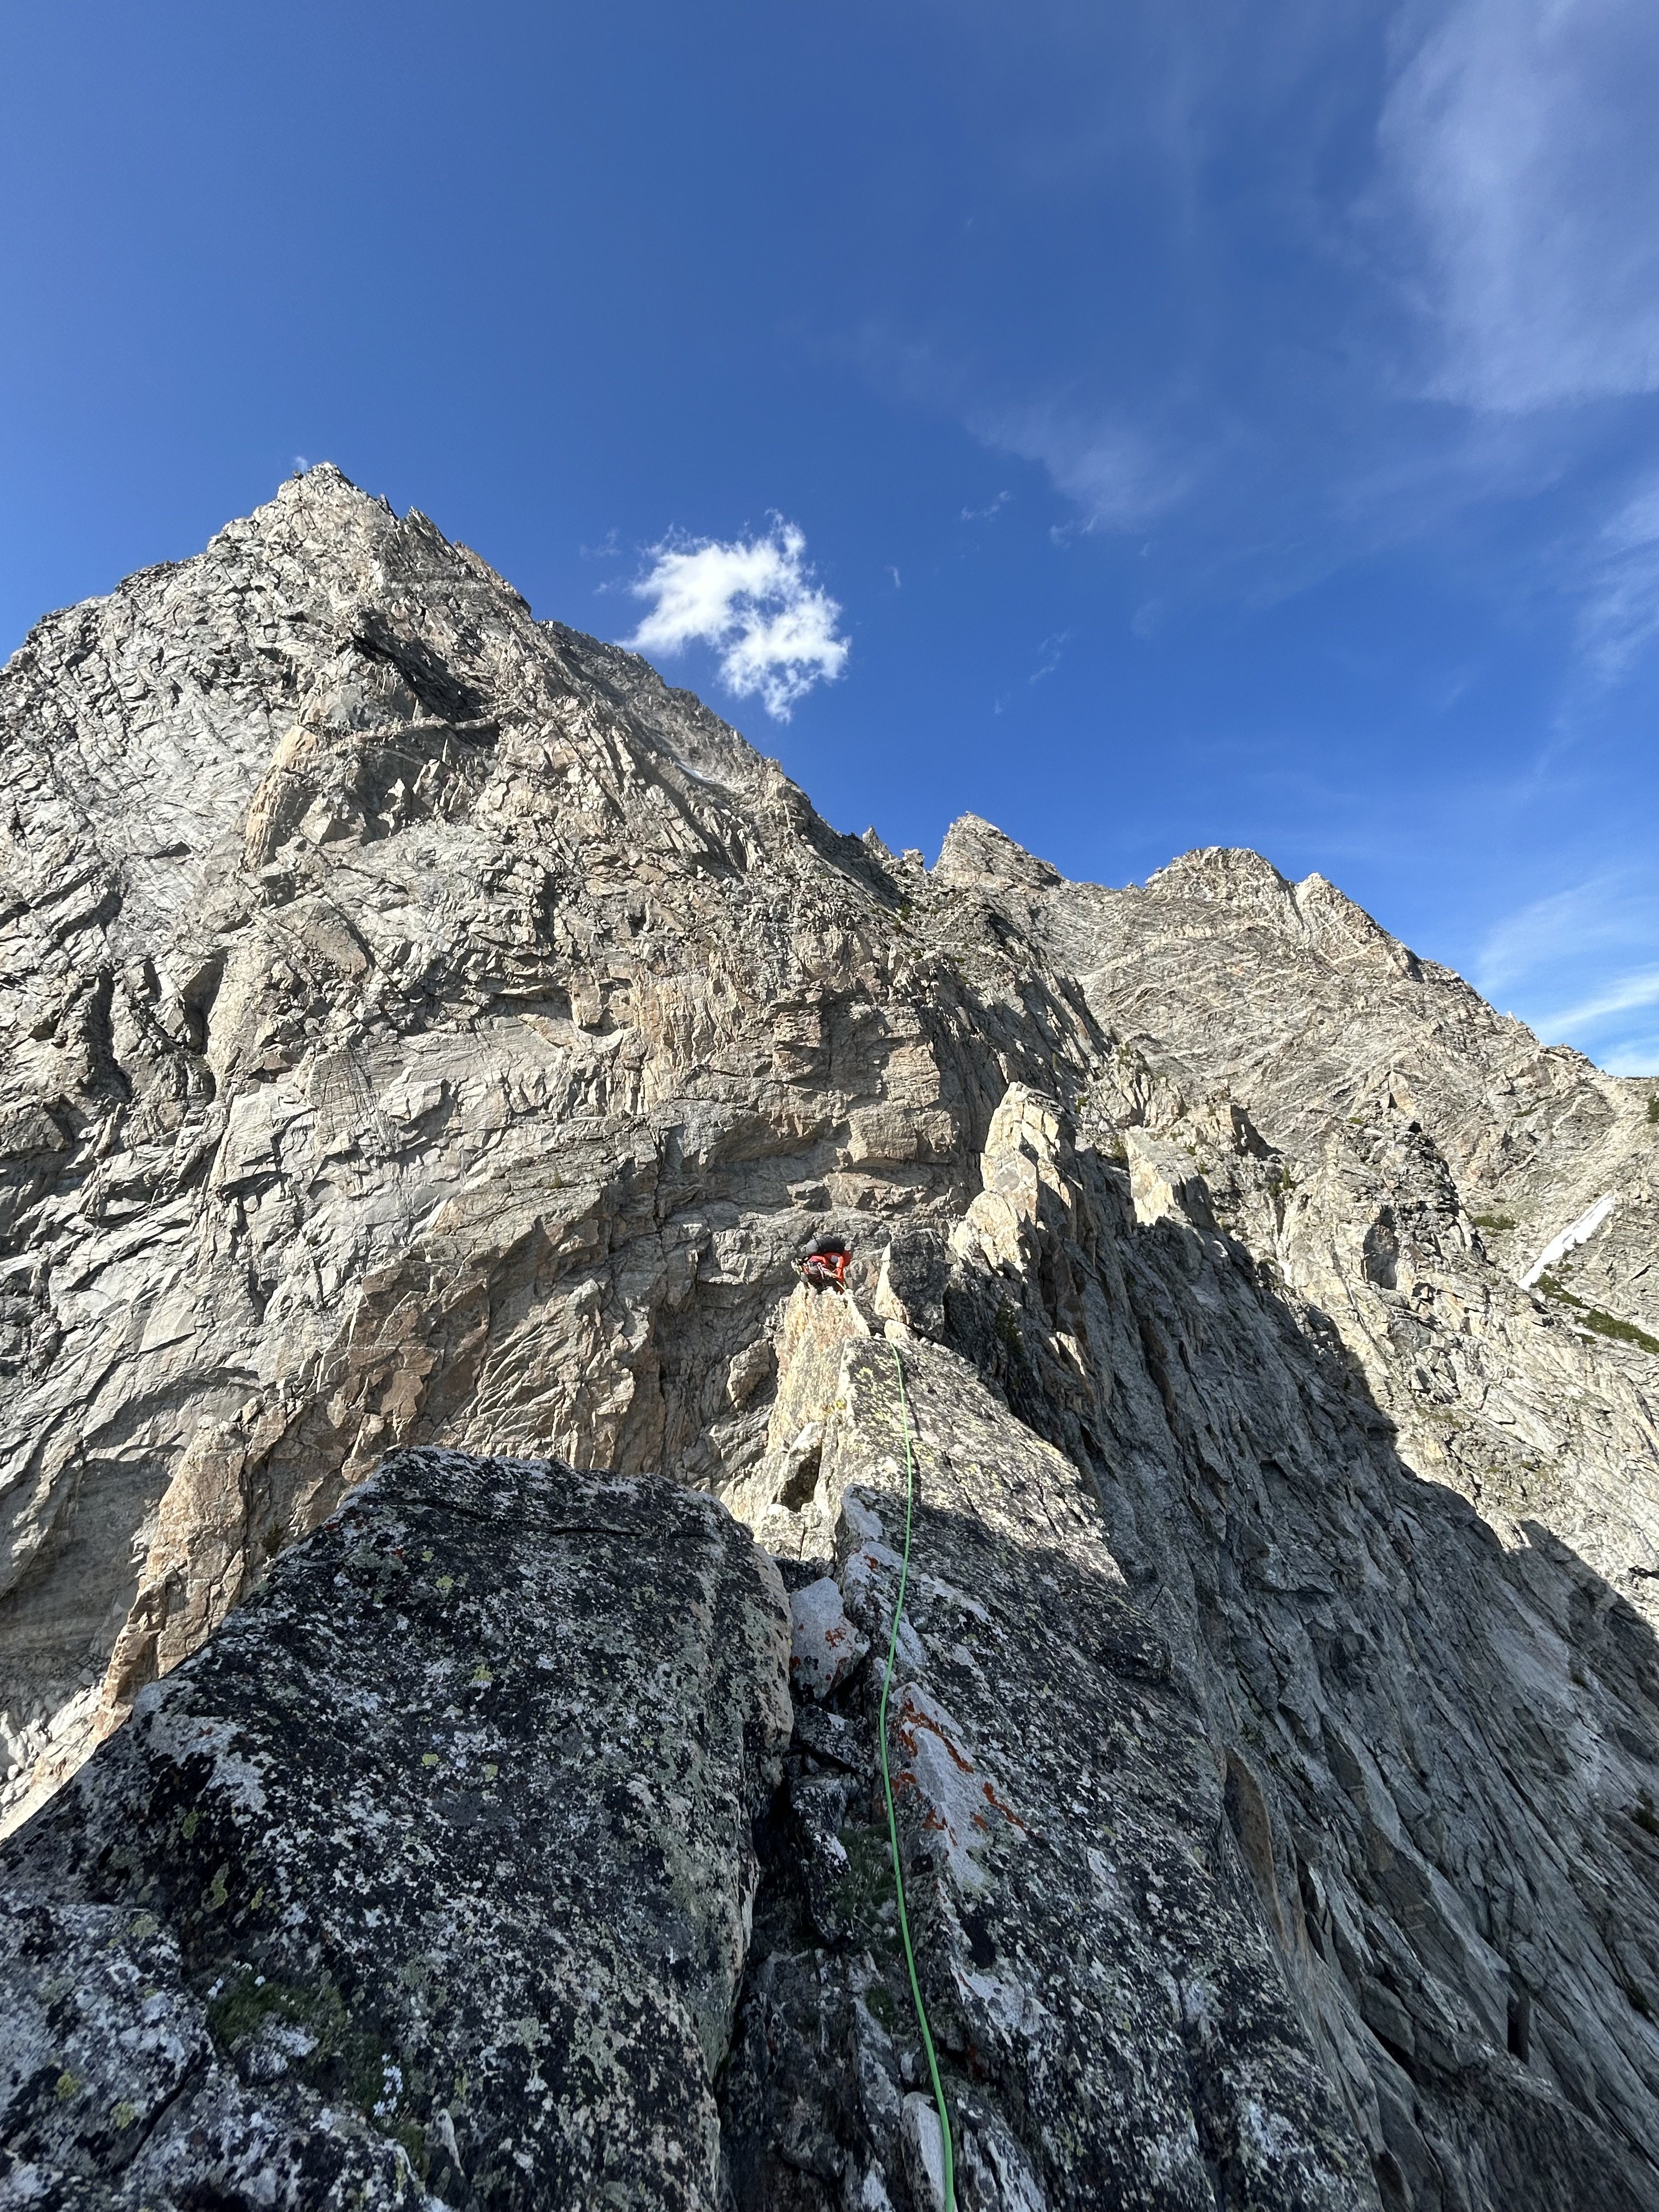
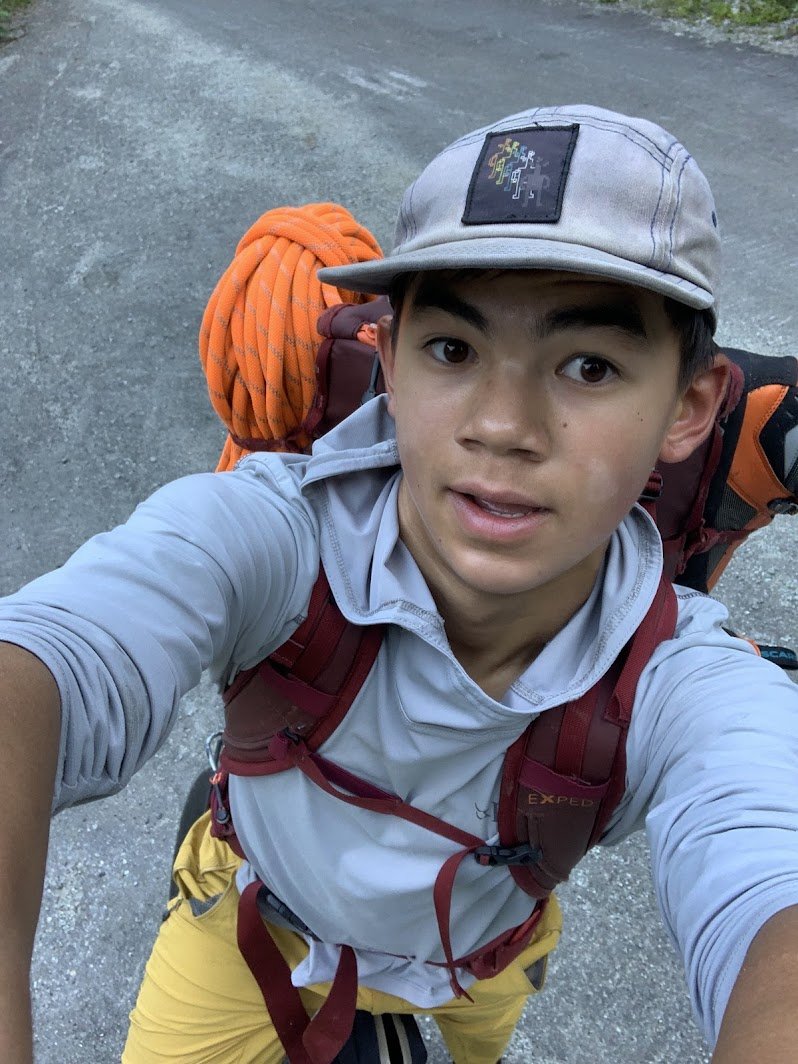
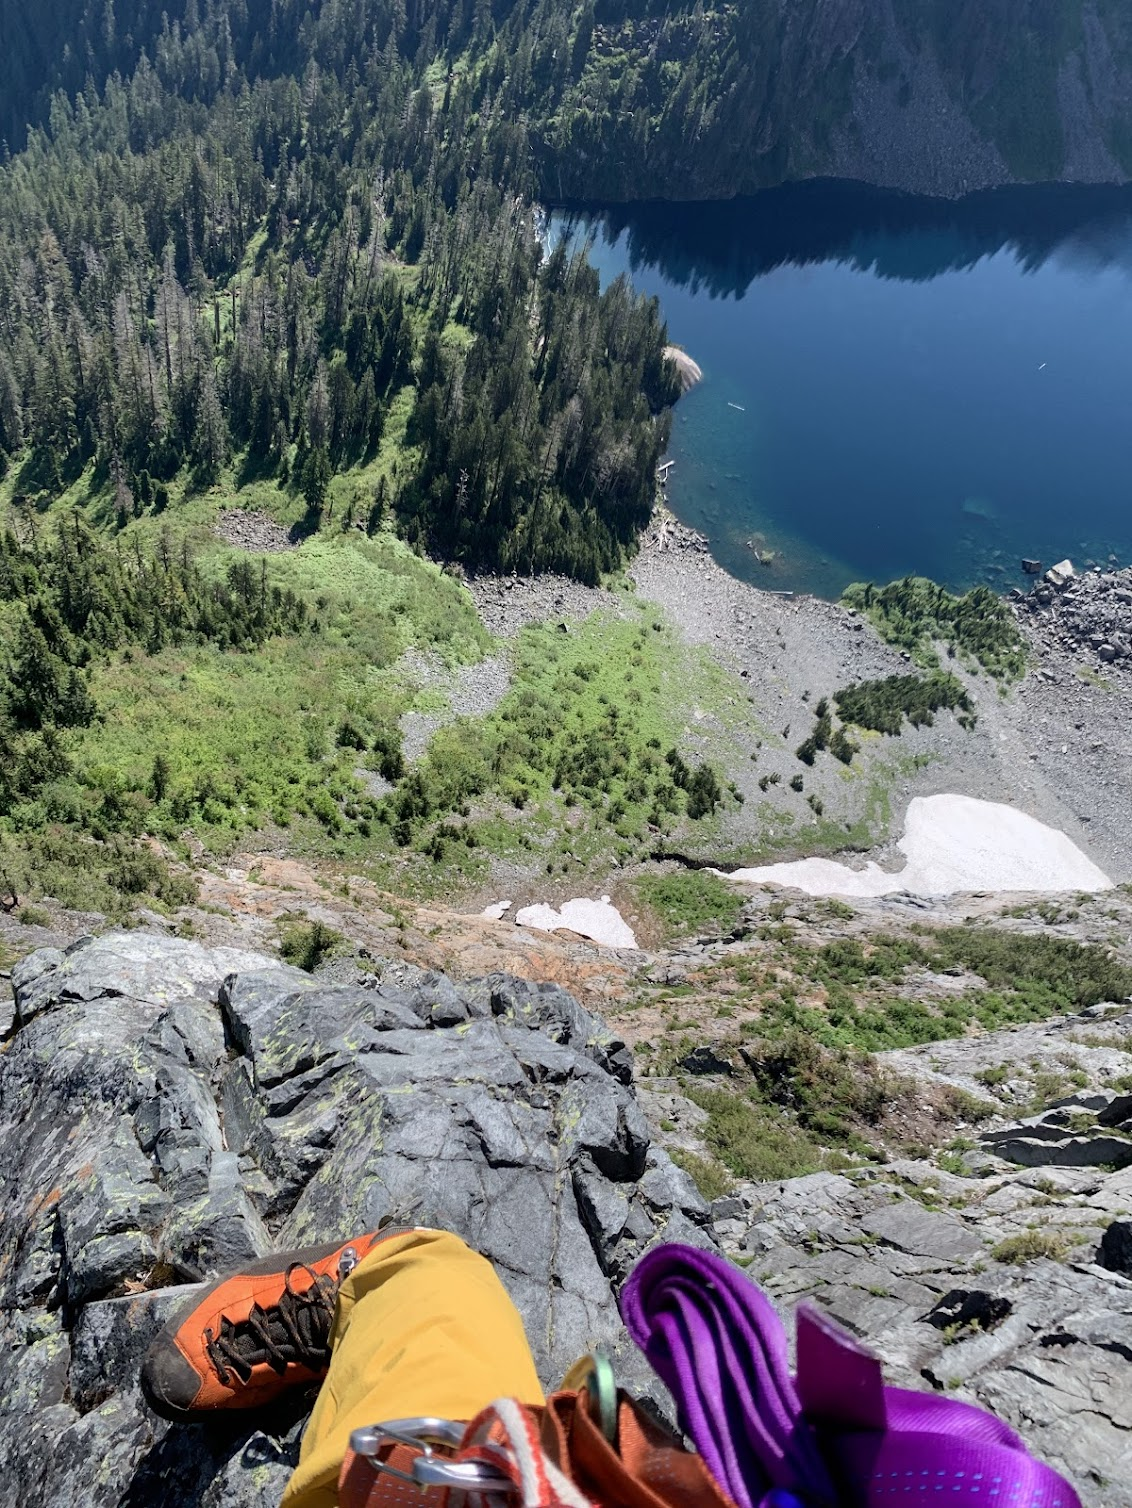
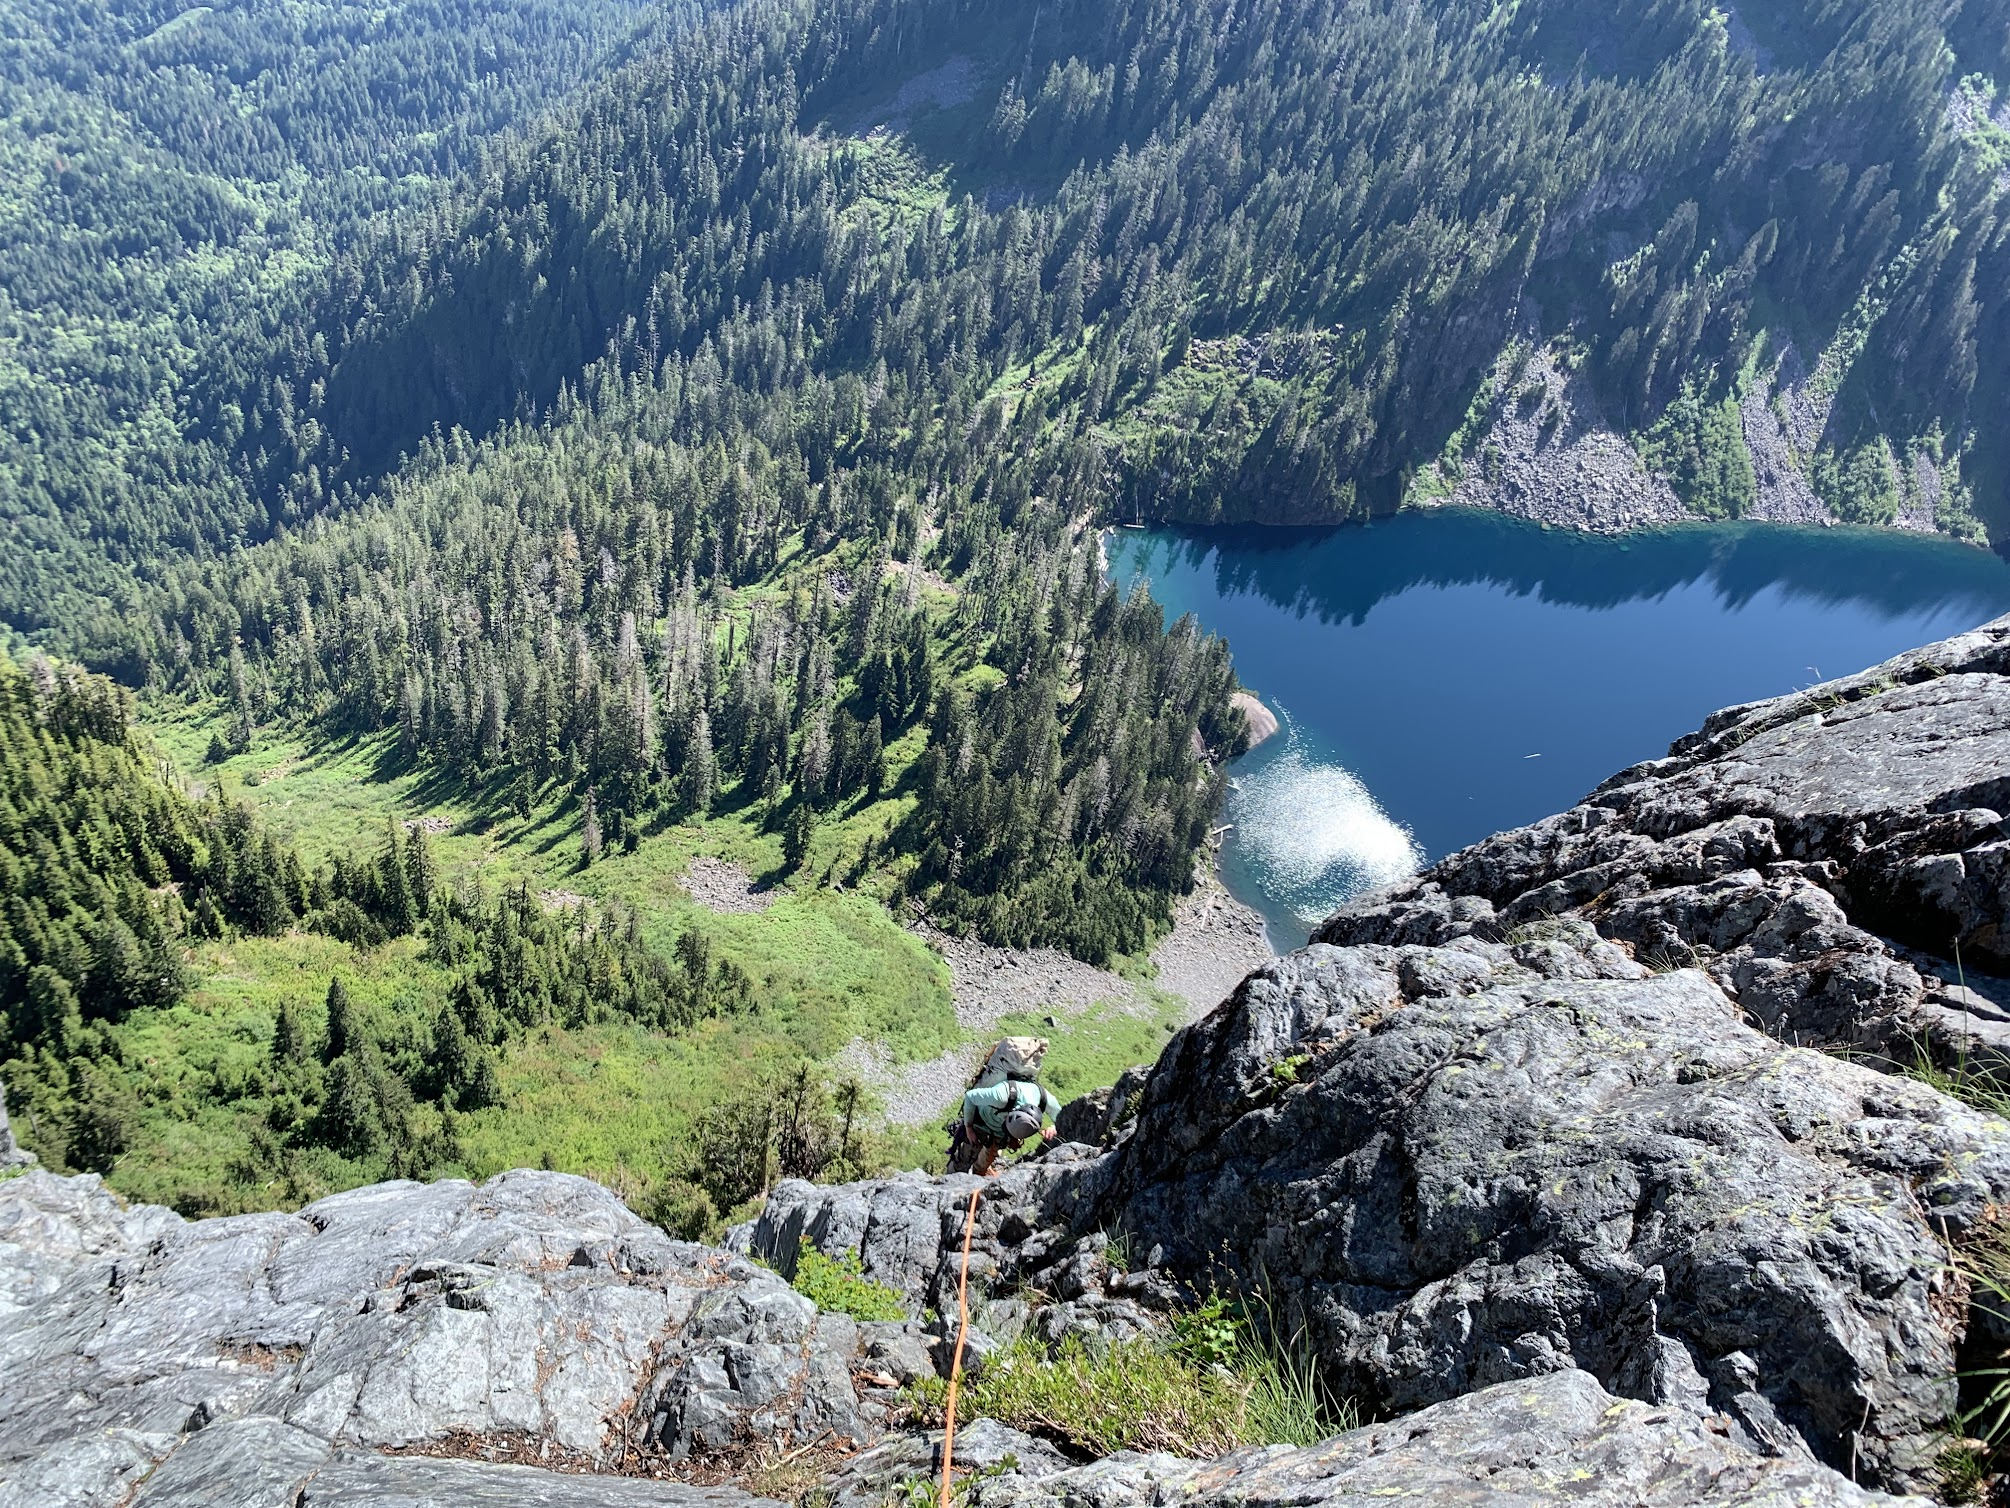
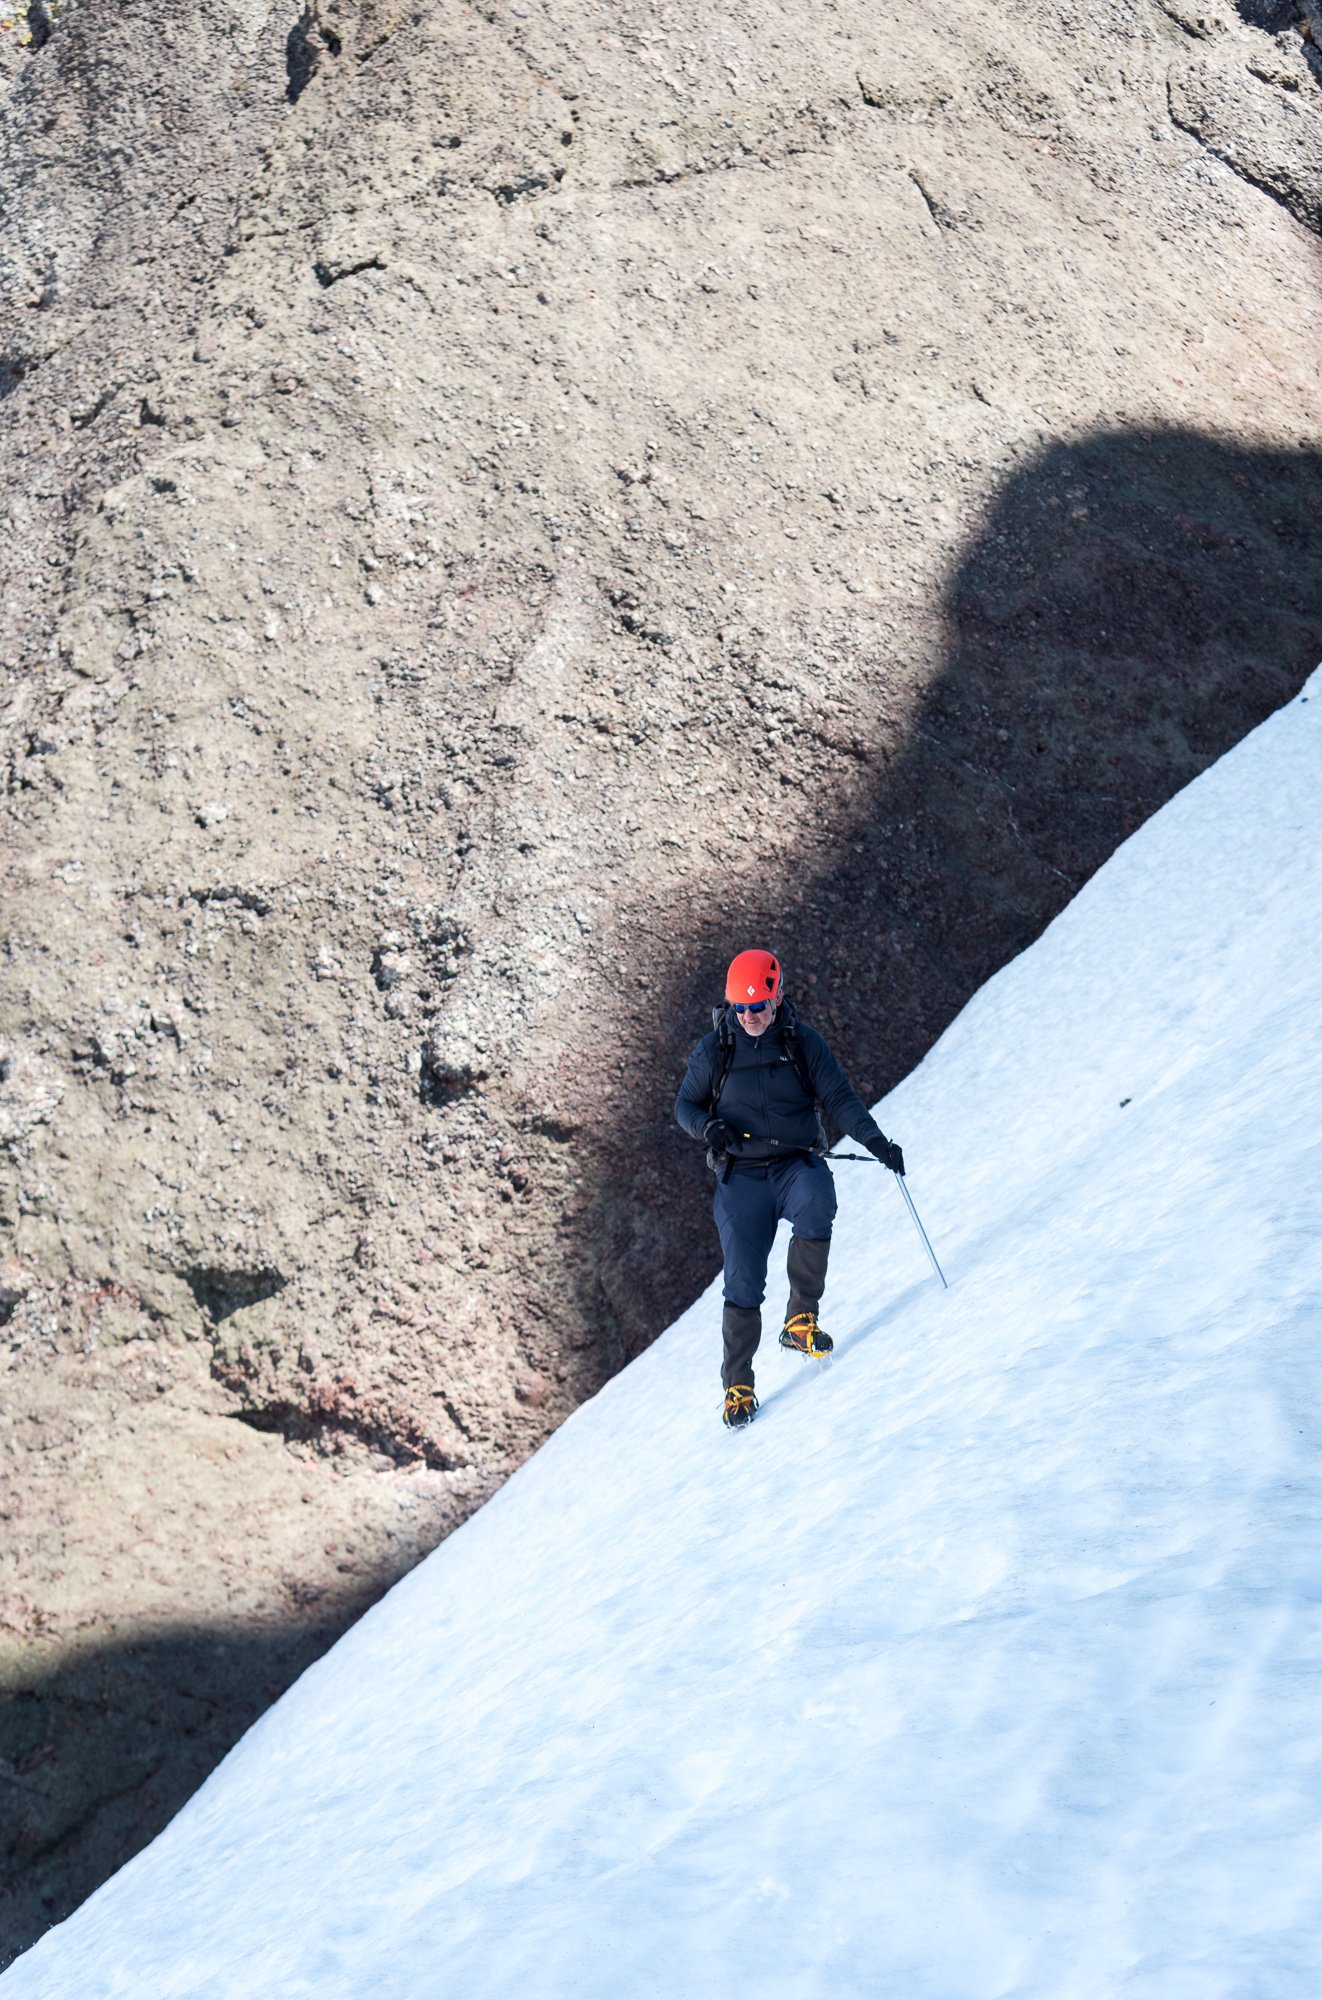
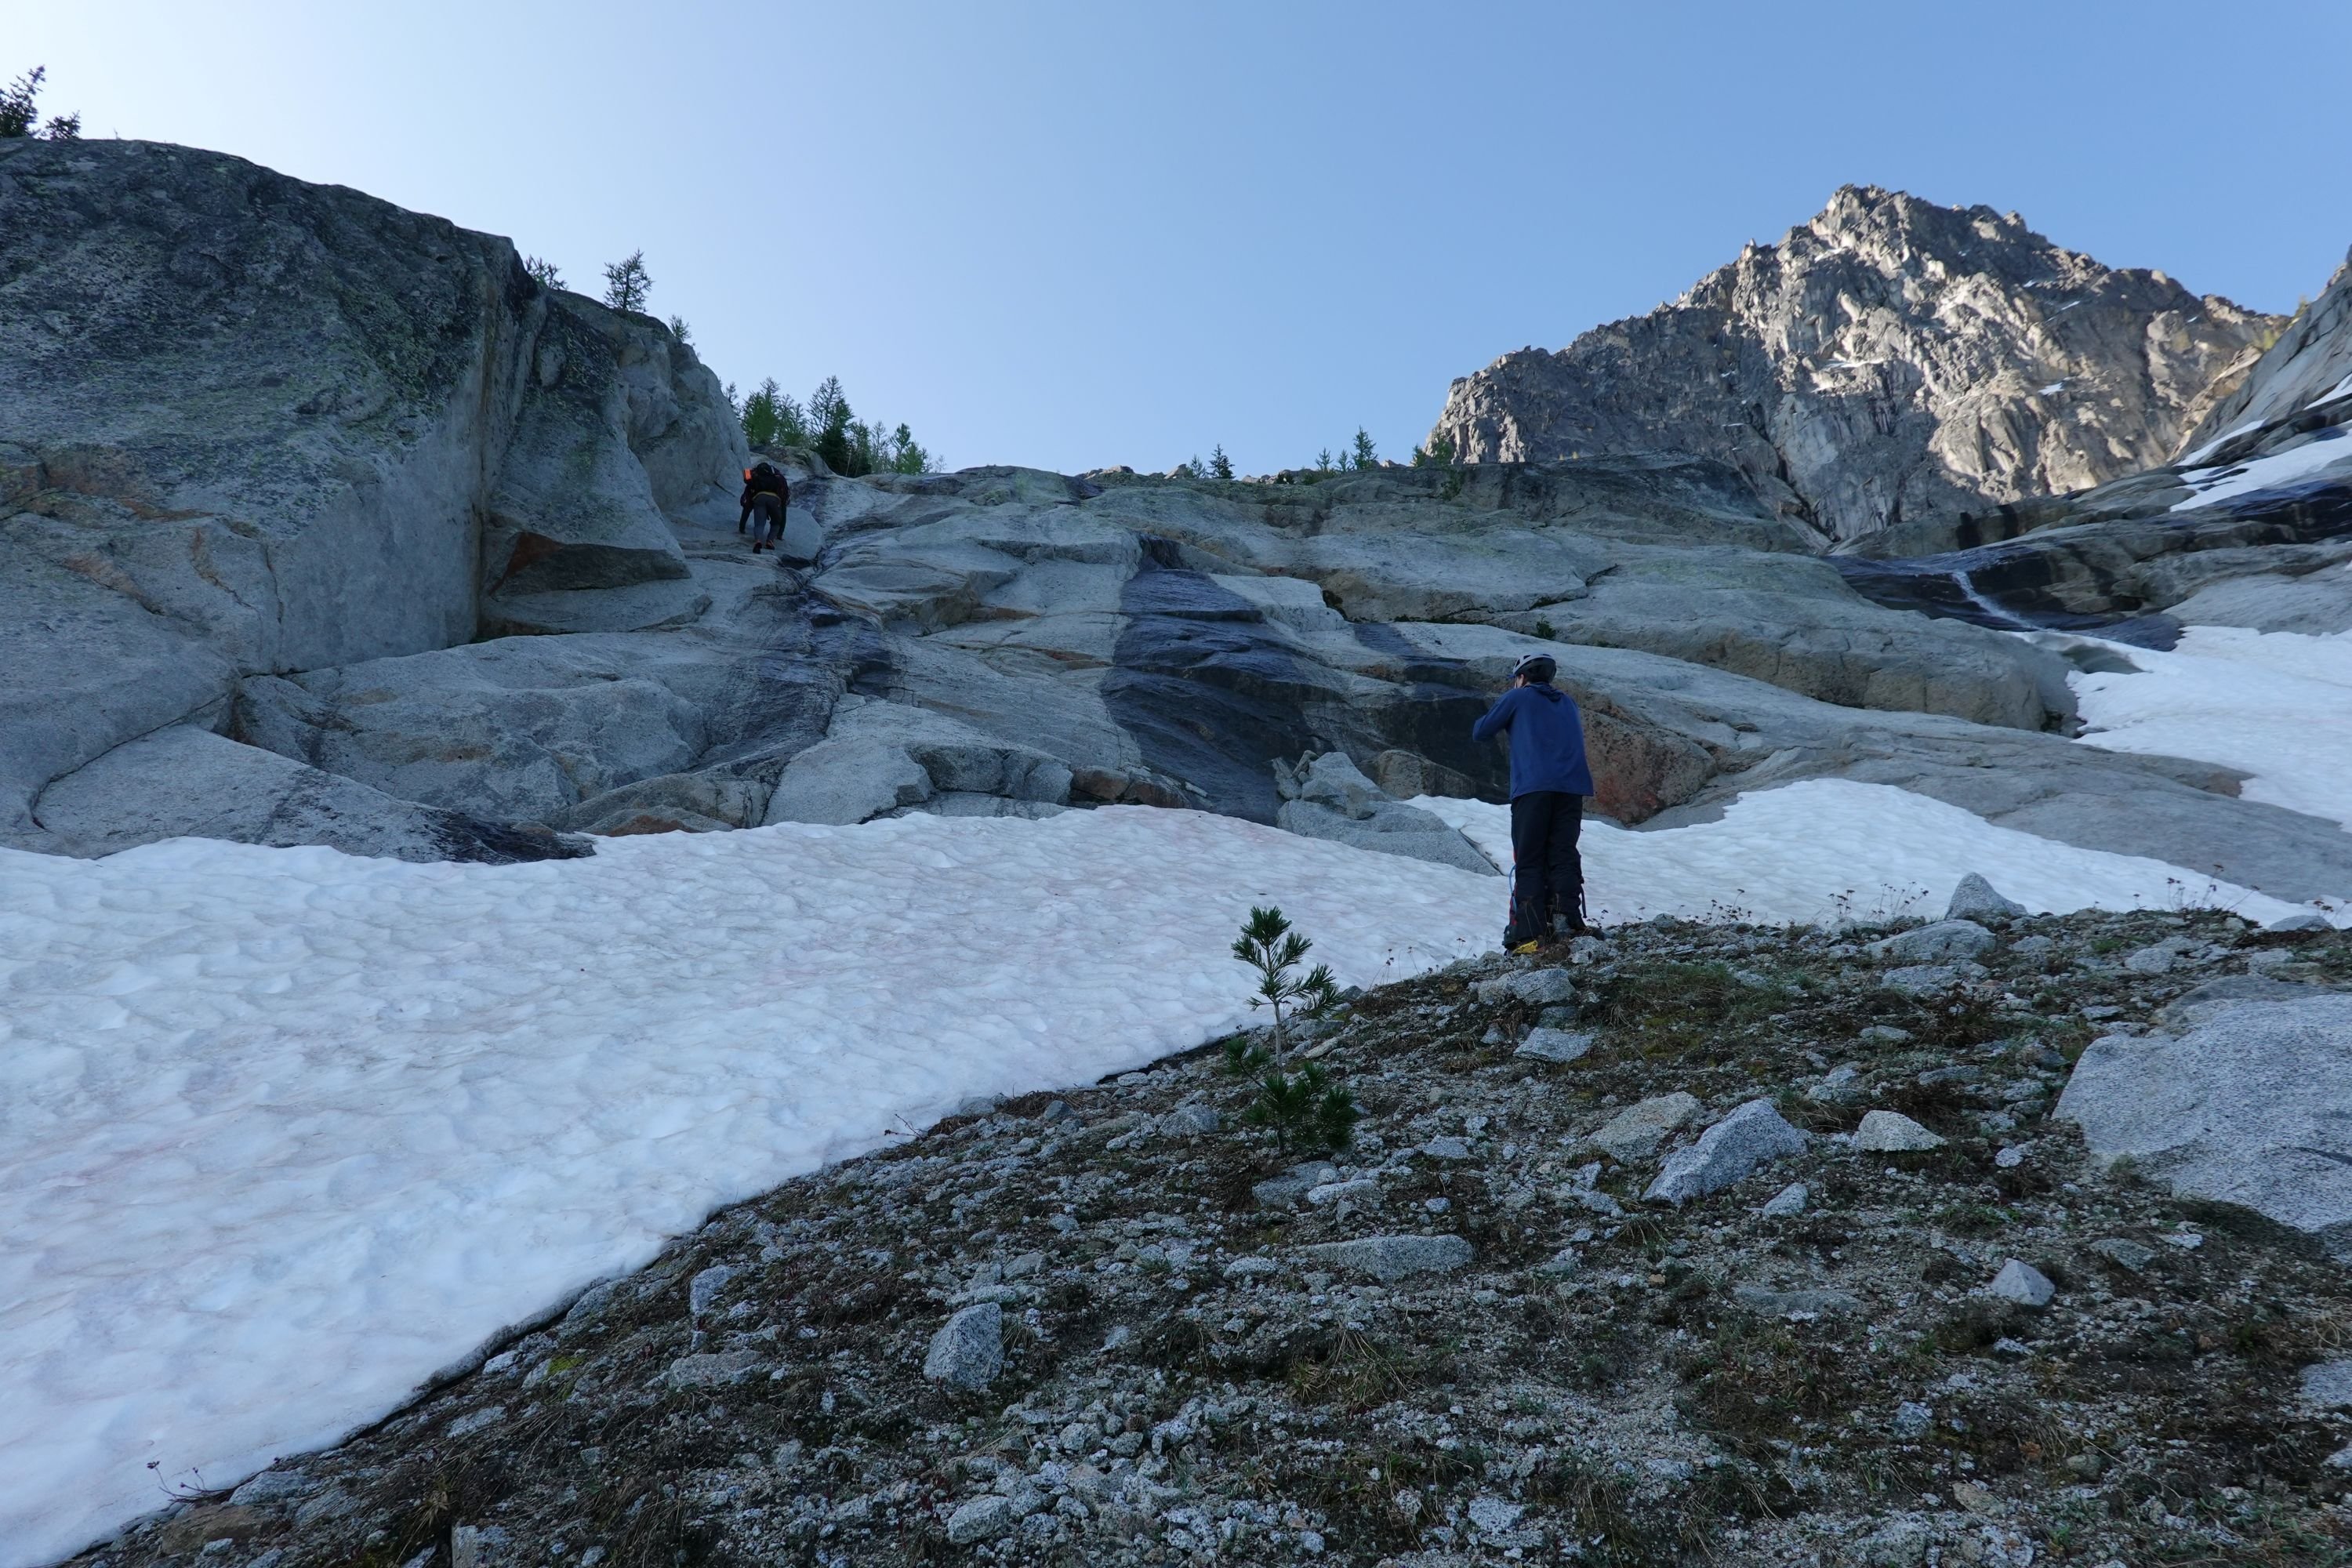
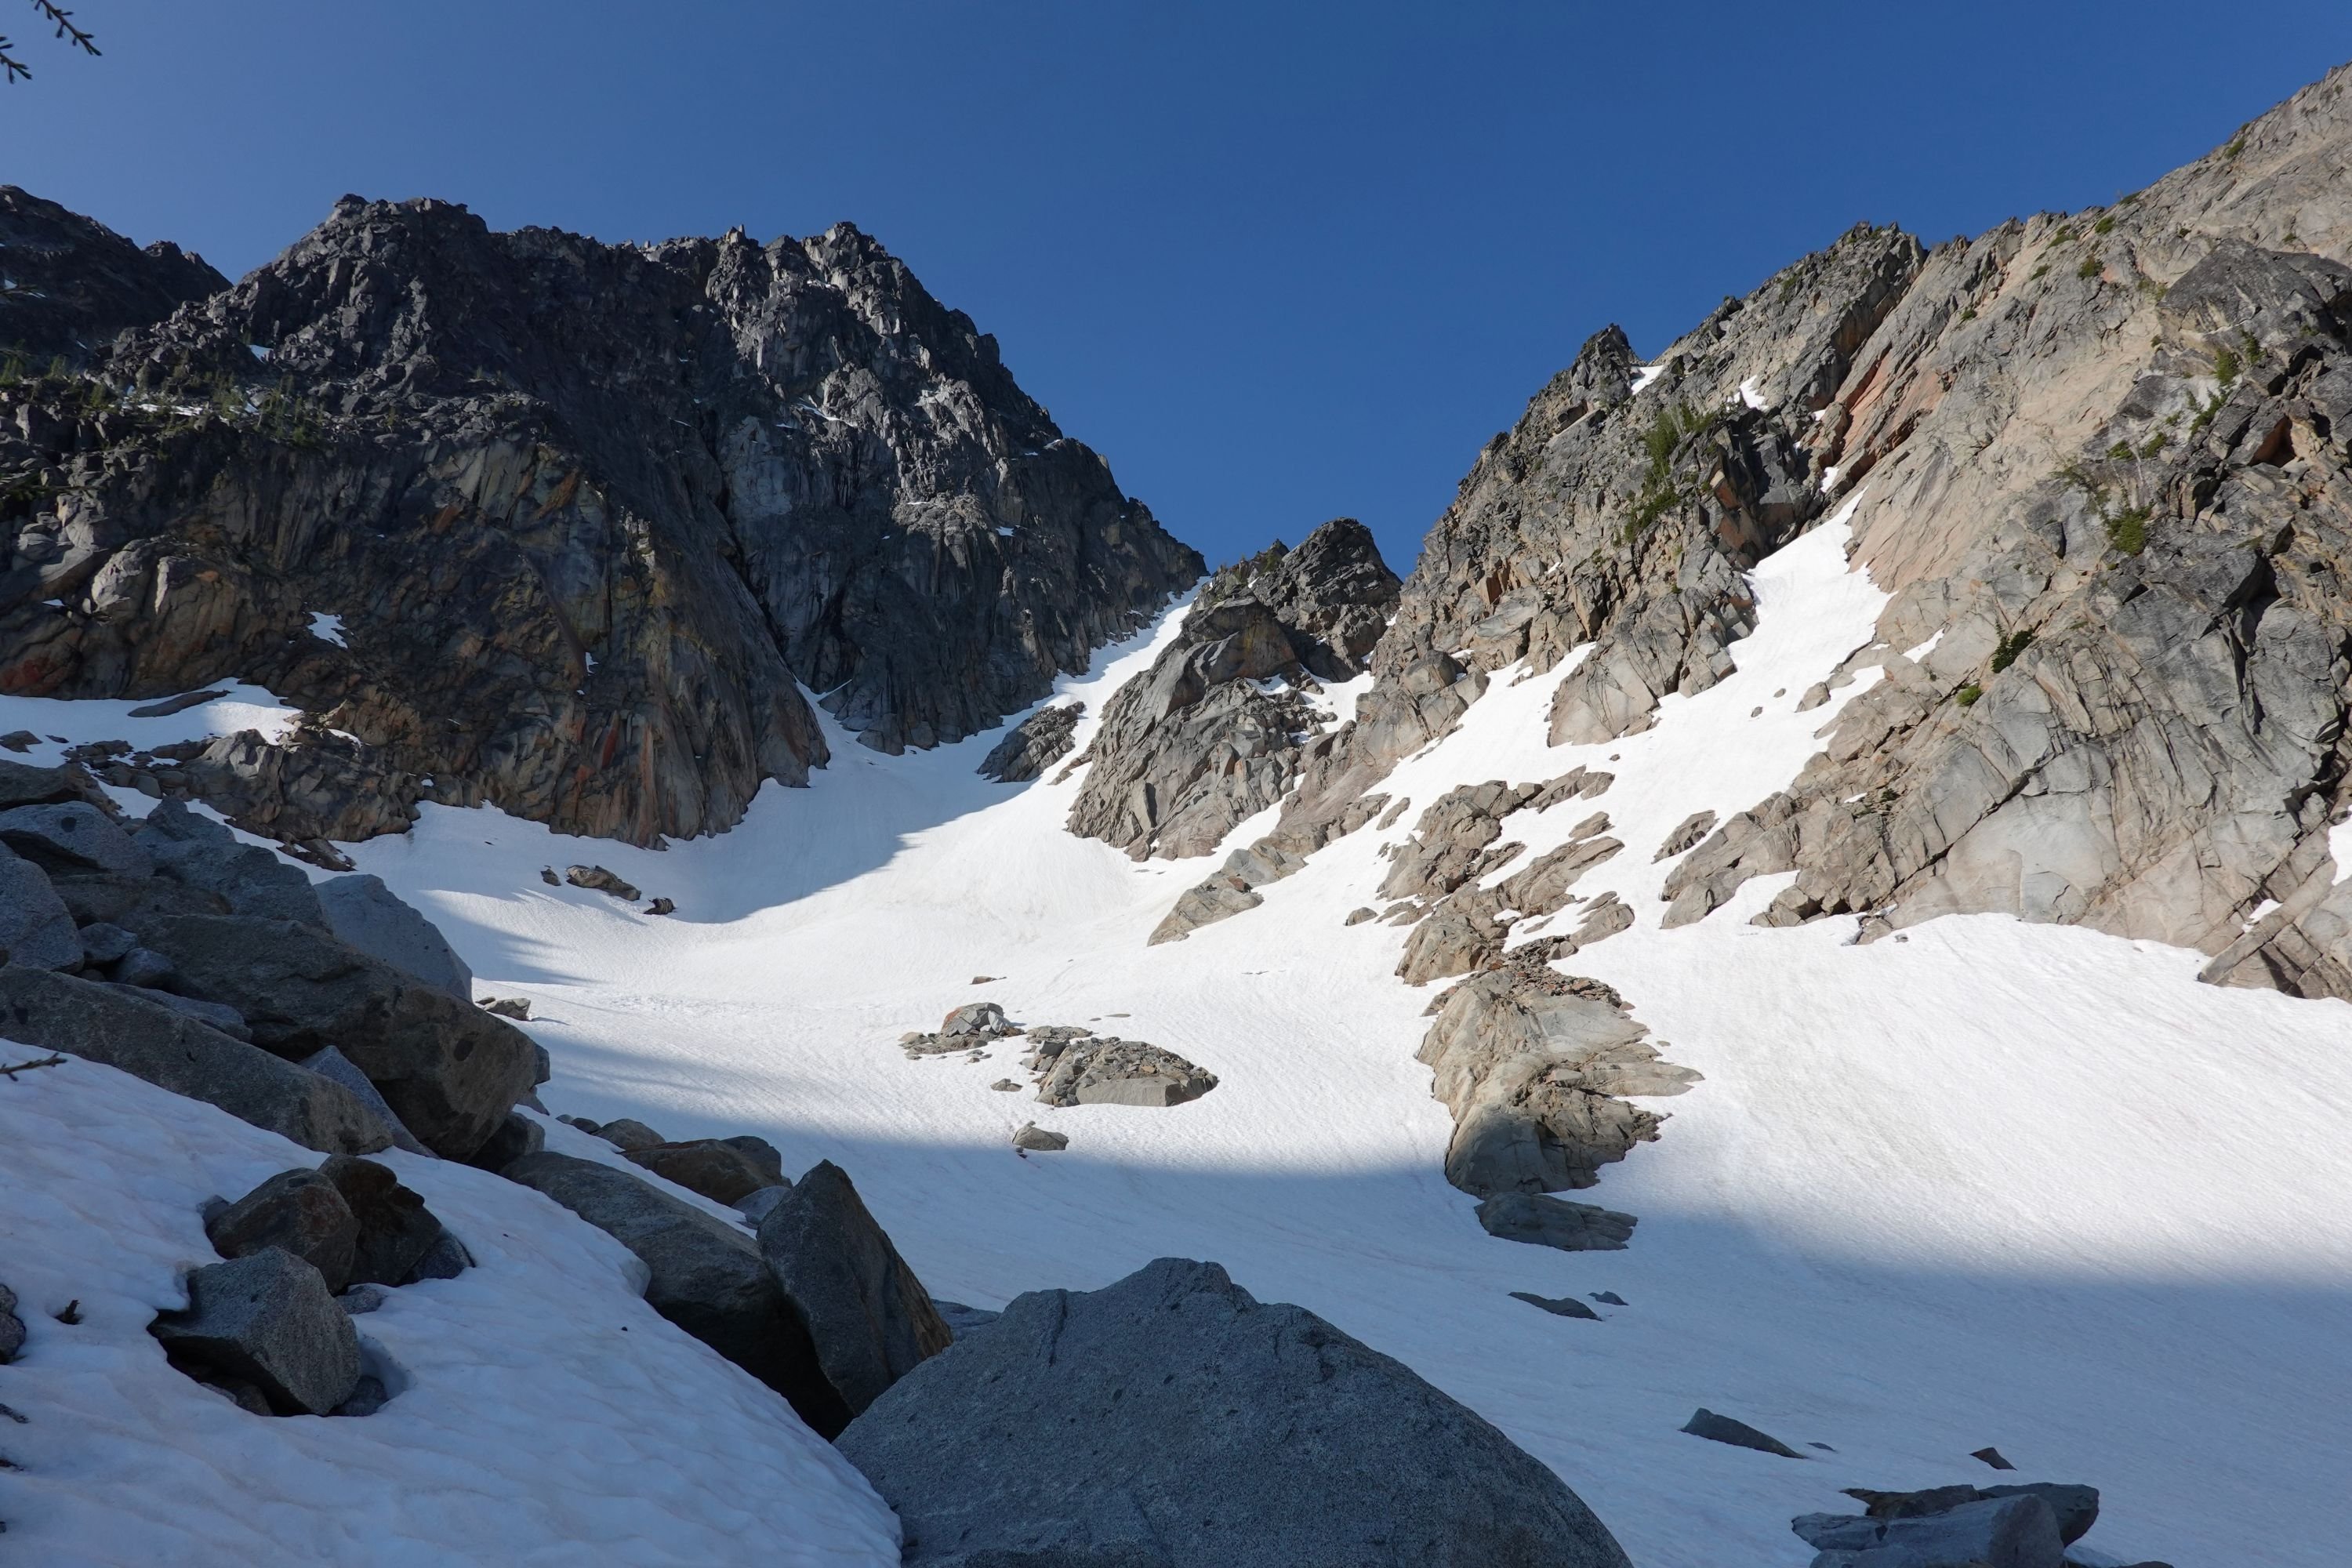
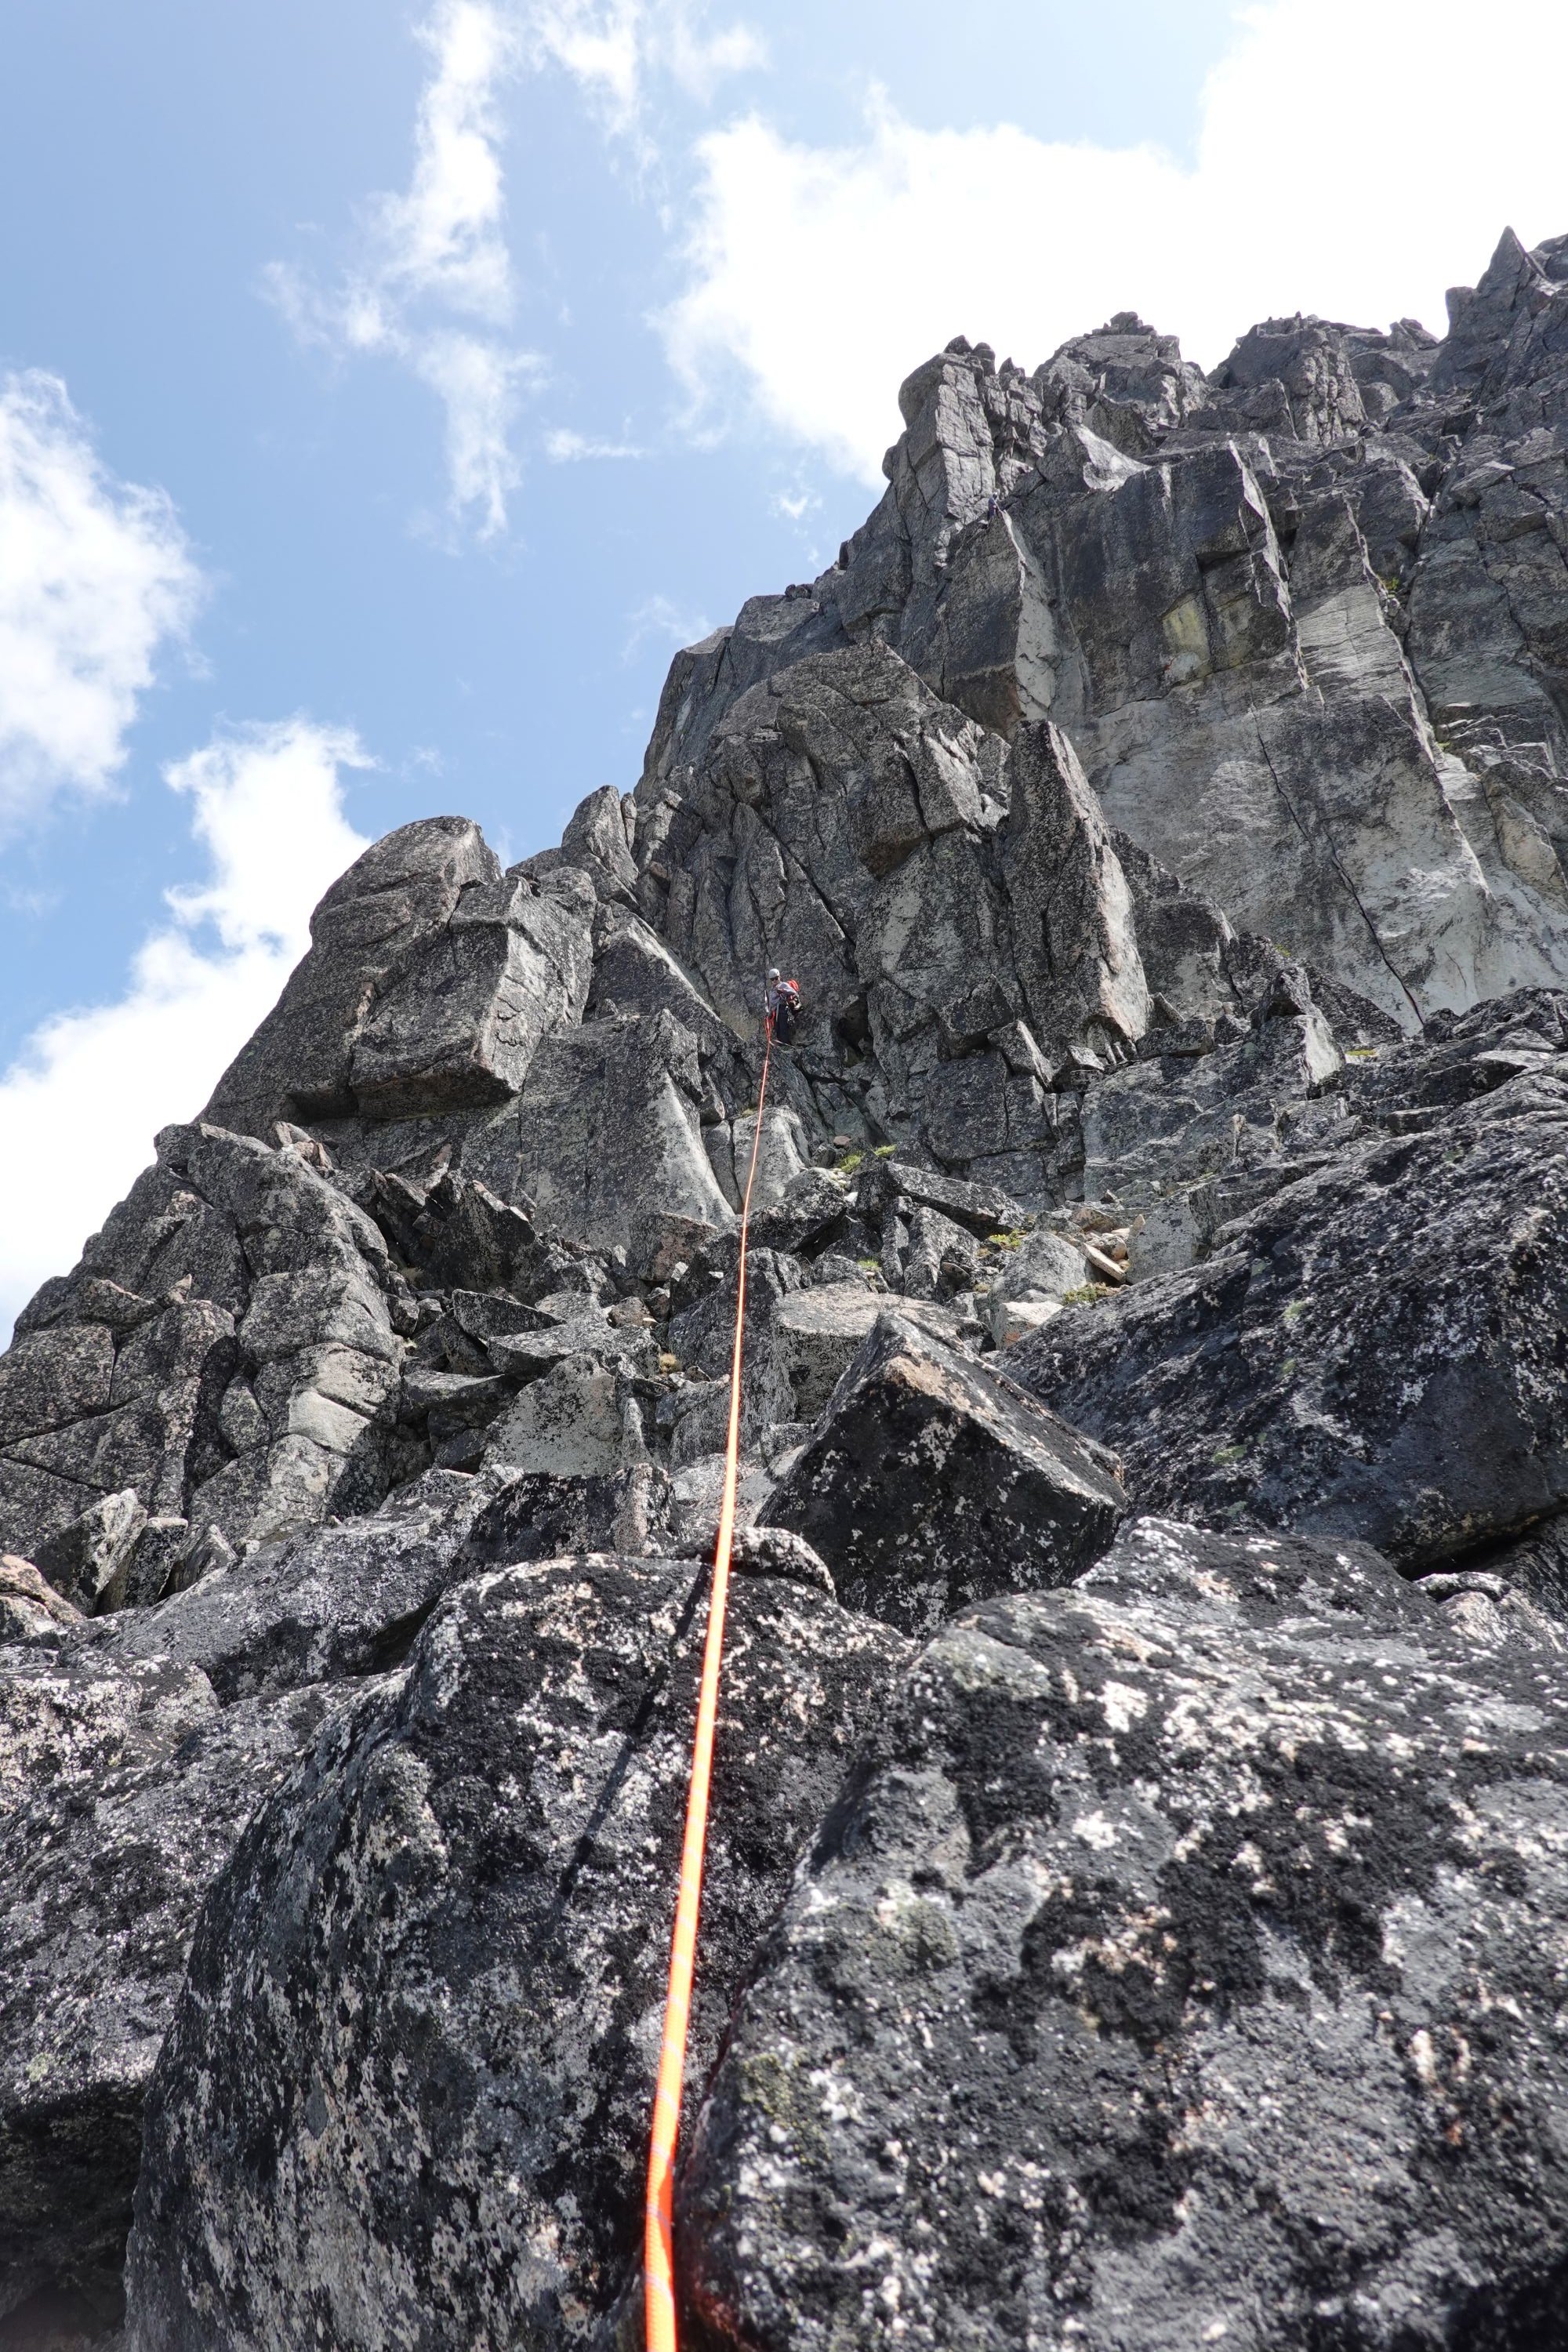
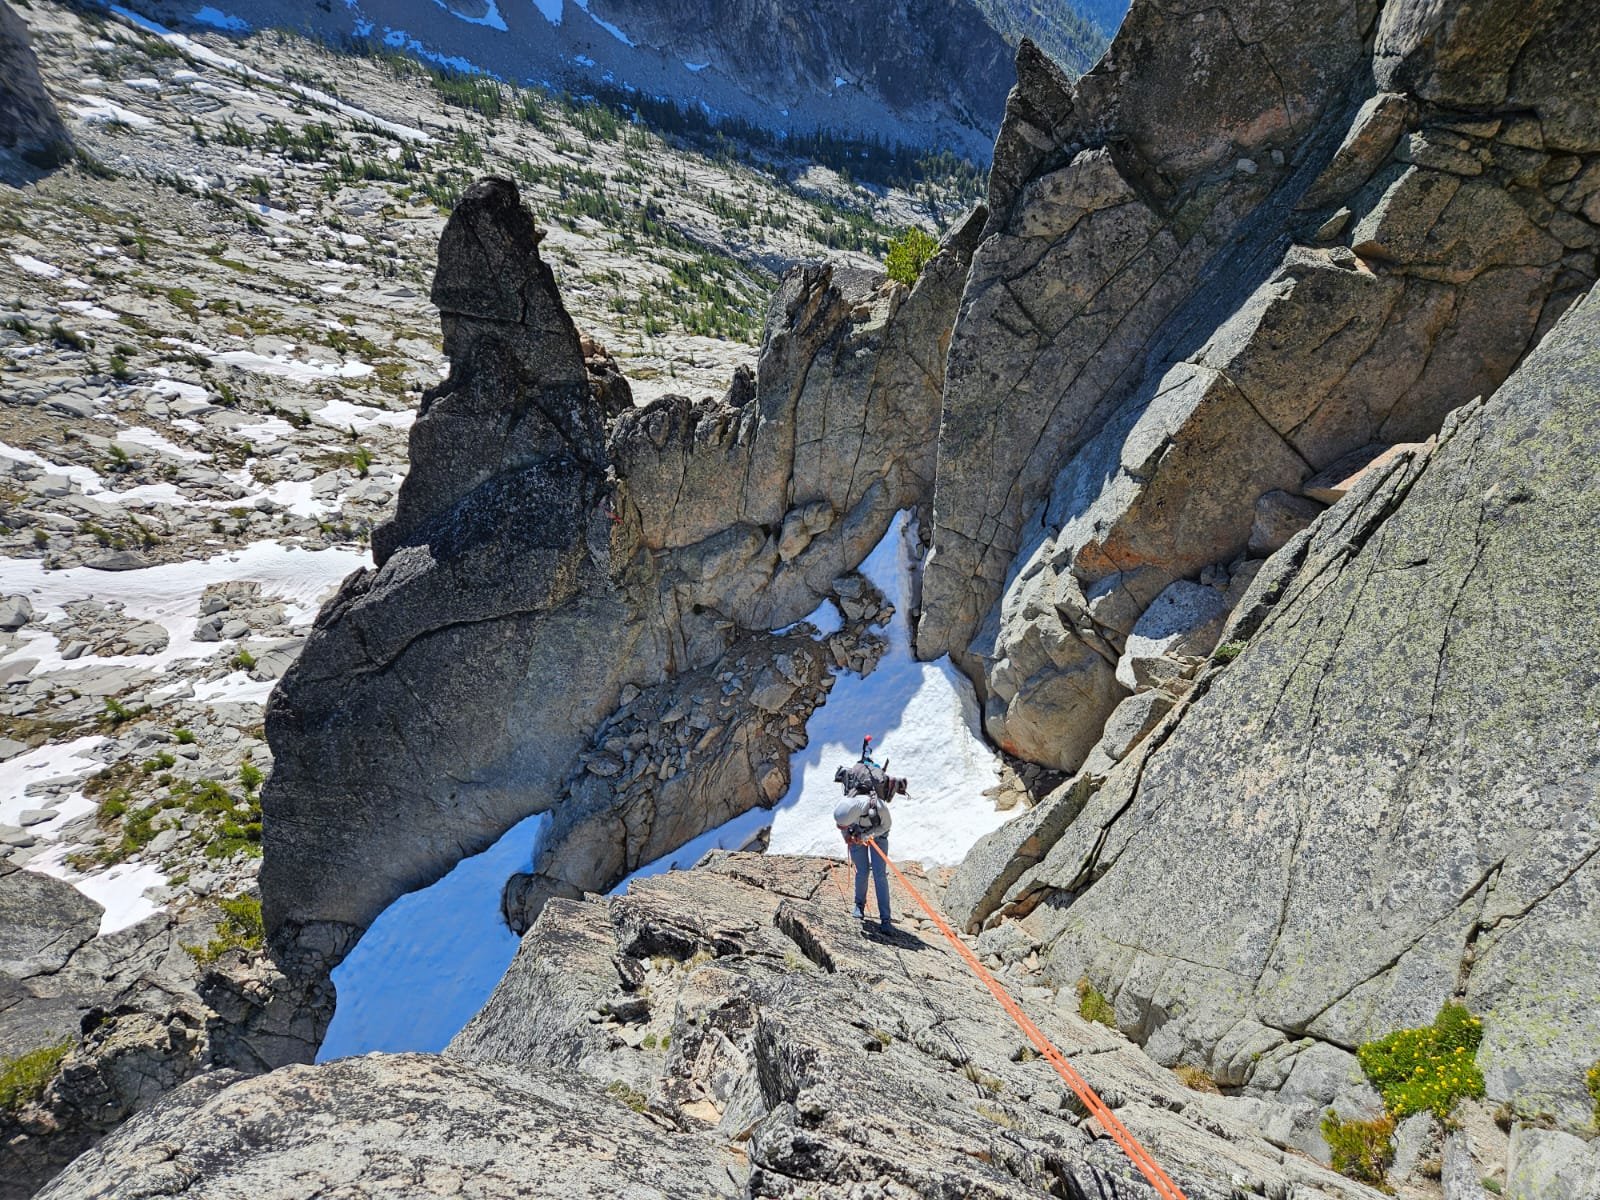
Trip: Argonaut Peak - NW Arete Trip Date: 06/14/2025 Trip Report: Climbed the NW Arete of Argonaut over the weekend with a party of 4! Haven’t seen any trip reports yet this year, so here is a relatively brief one outlining conditions. Our plan to split the climb into a Friday evening approach + Saturday climb did not quite go as planned, and ended up becoming my longest summit day yet at 21 hours… But we got the summit! Our timeline was roughly as follows Friday: 6:45 PM - Departure from trailhead 8:15 PM - Start of climbers trail 11:30 PM - Finally broke out of the treeline 12:30 PM - Bivy Saturday: 6:15 AM Start 7:20 AM - Slab crossing 9:40 AM - Top of notch 5:00 PM - Summit 8:50 PM - Bottom of rappels 11:50 PM - Back to main trail on Colchuck Lake 3:00 AM - Back to trailhead Notes on the route: -Navigating the off trail portion out of the treeline is nontrivial. We lost a lot of time trying to do this by headlamp, as we weren’t able to see the most efficient route out of the trees/slide alder. -For navigating the slab before the snow climb, we had one person solo it, then build an anchor and drop a rope for the rest of us. -I believe the snow finger going up to the notch where the climb starts usually defines if the route is still in. There was still a reasonable snow finger for us to climb up. -There’s a topo and route description floating around that describes the route in 5 long pitches, which we found generally as advertised. - We got off the summit in two double rope rappels. I hadn’t seen this mentioned in other trip reports, but the first rappel was the sketchiest rappel station I’ve ever used. It’s just a mid sized detached rock with webbing wrapped around its contact point with the ground. We backed this up with a gear anchor for everyone but the last to rappel. -Most of our trip after this was by headlamp. Thankfully I had been out there two weekends ago for Colchuck Peak, and was able to help plot a reasonably efficient path down Colchuck glacier and the boulder field in the dark. We dipped left into the moraine, then skirted the left side of the boulder field down until the lake. -The rest after this was an eventful if slow hike back to the trailhead due to navigating by headlamp + the fatigue starting to set in. Long day, but a fun climb! Has about all you can ask for in an alpine climb (could maybe do without the slide alder though lol) Route overview, including the bivy sites I saw on route Slab crossing Current snow finger conditions Top of pitch 3 Top of pitch 4/start of pitch 5. If using the topo map, I believe this station is actually ~10 meters earlier than recommended, and we needed to simul ~10 feet so that my partner could build an anchor at the actual end of pitch 5. Climber crossing the flakes on pitch 5 Backing up the sketchy first rappel station Gear Notes: Full rack. Not all was needed for the climb, but was helpful in completing the climb in 5 long pitches Approach Notes: see report above
 4 points
 -
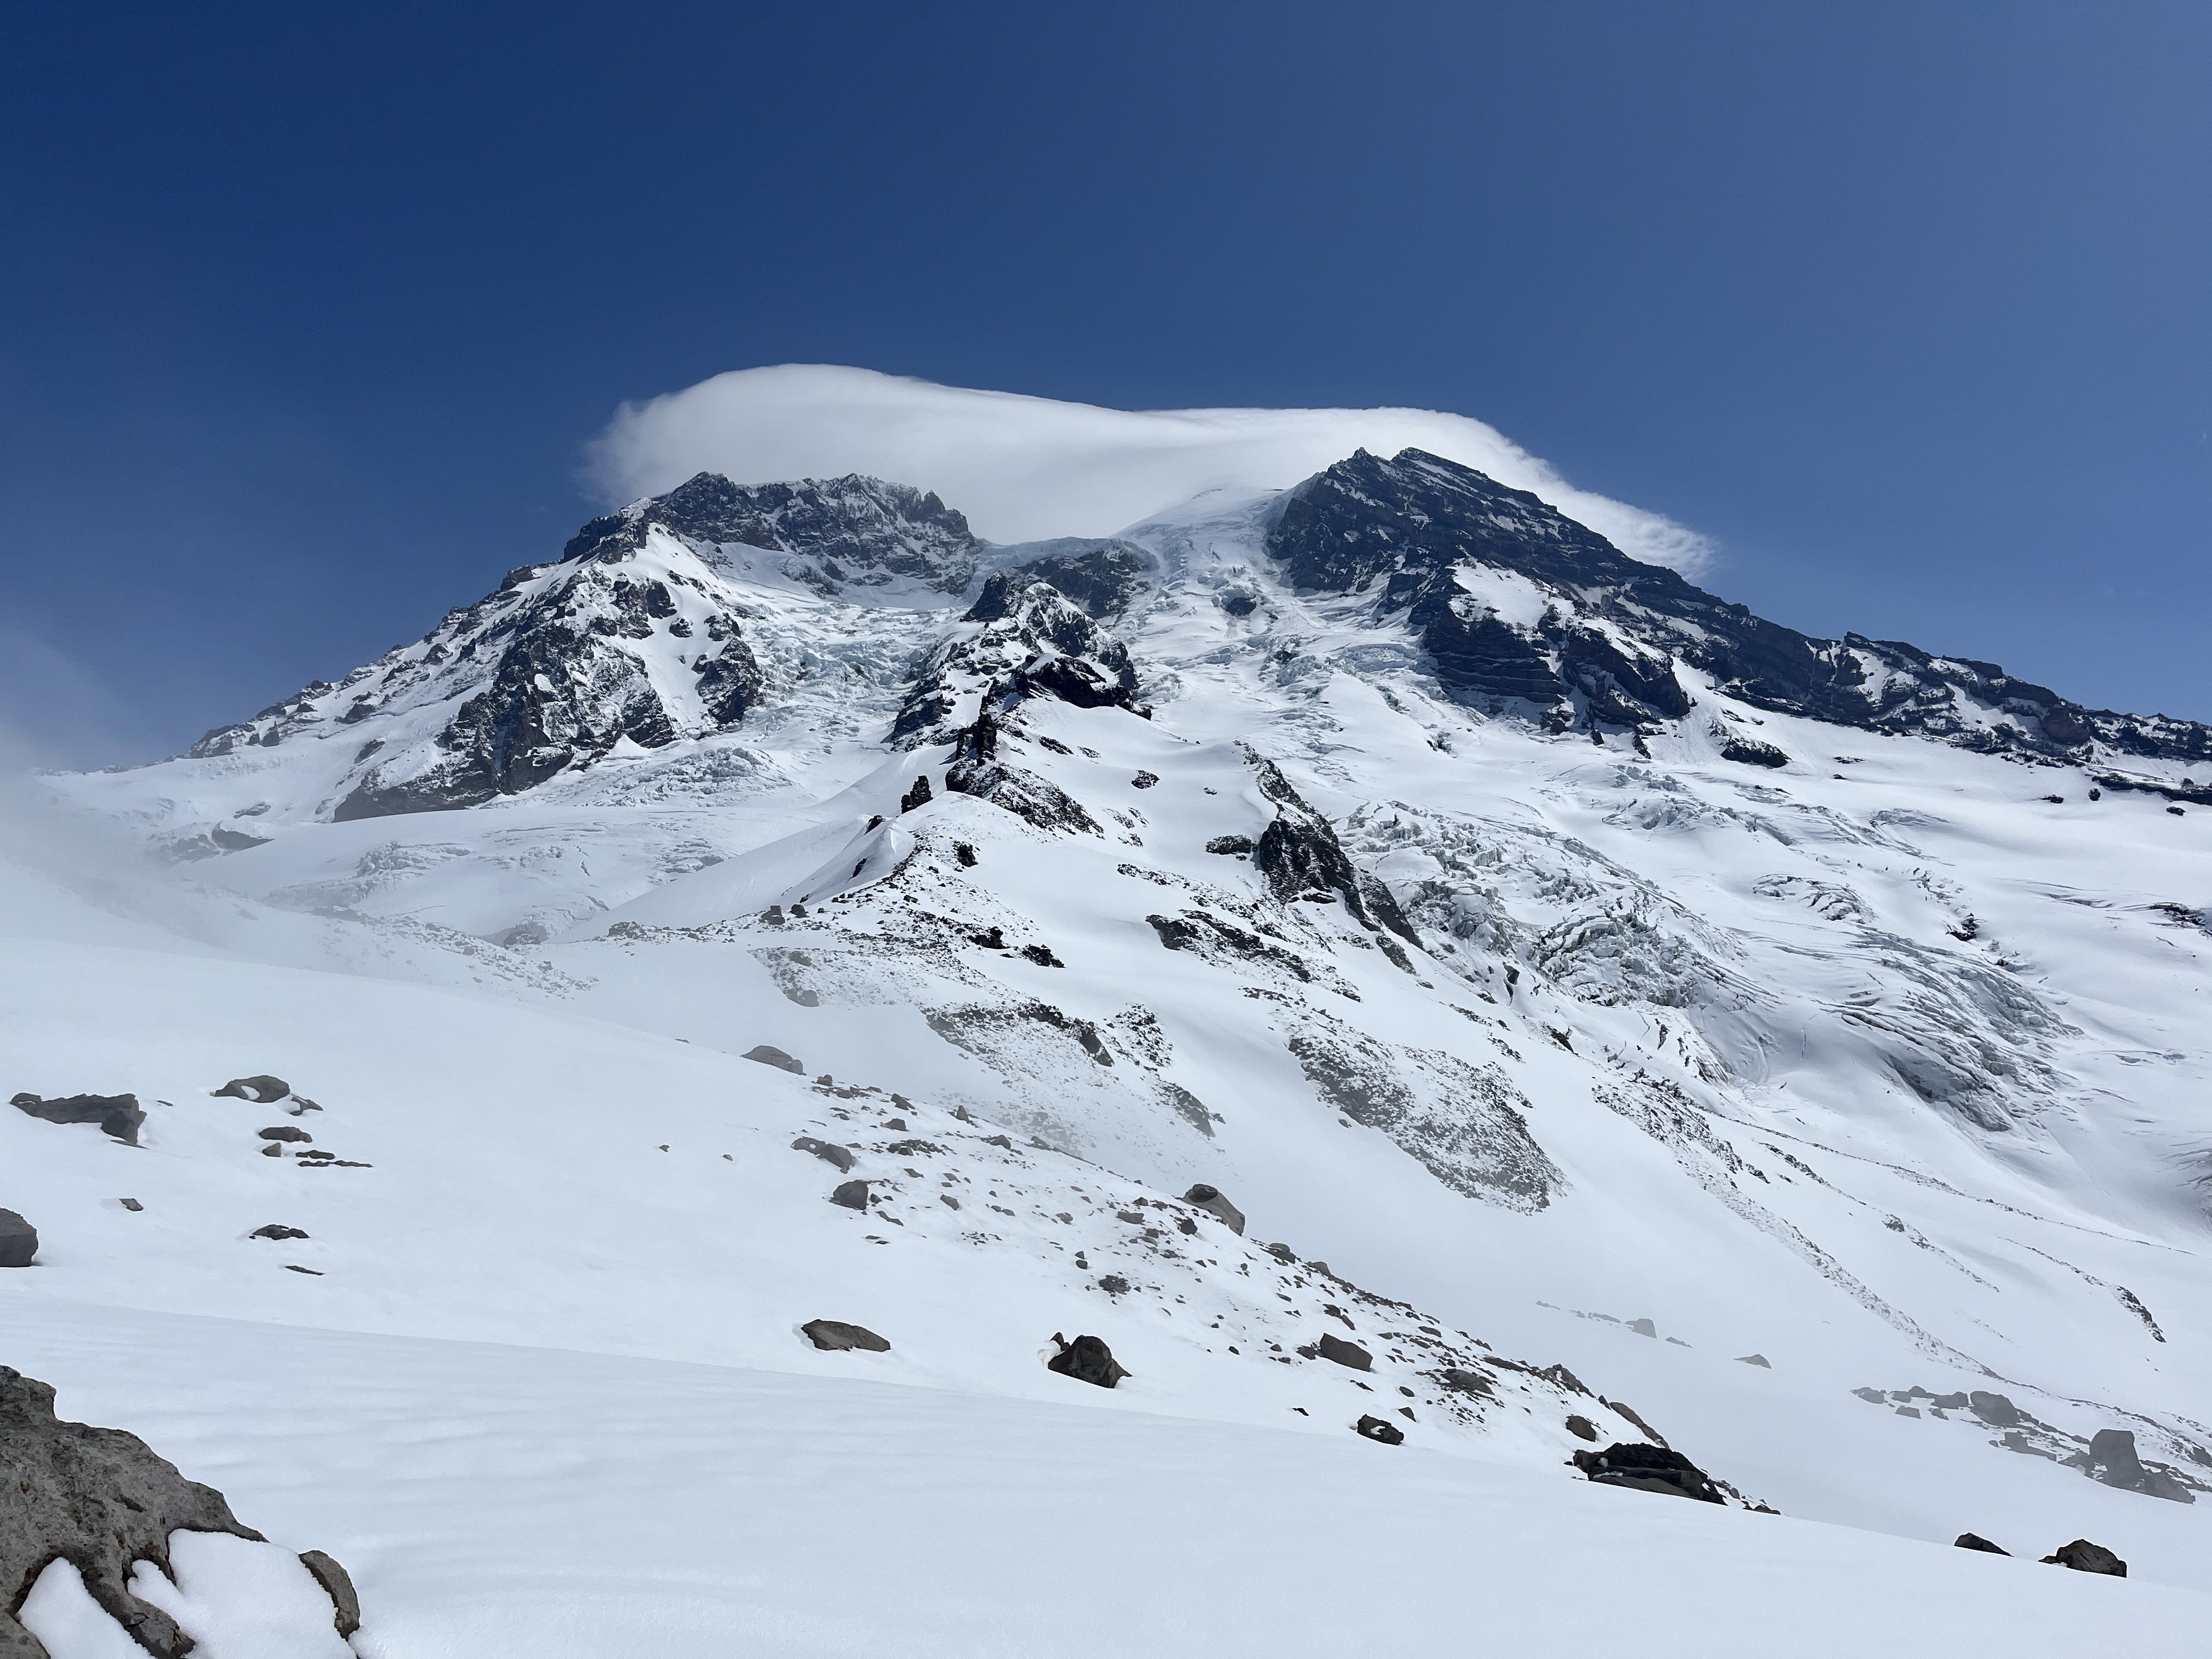
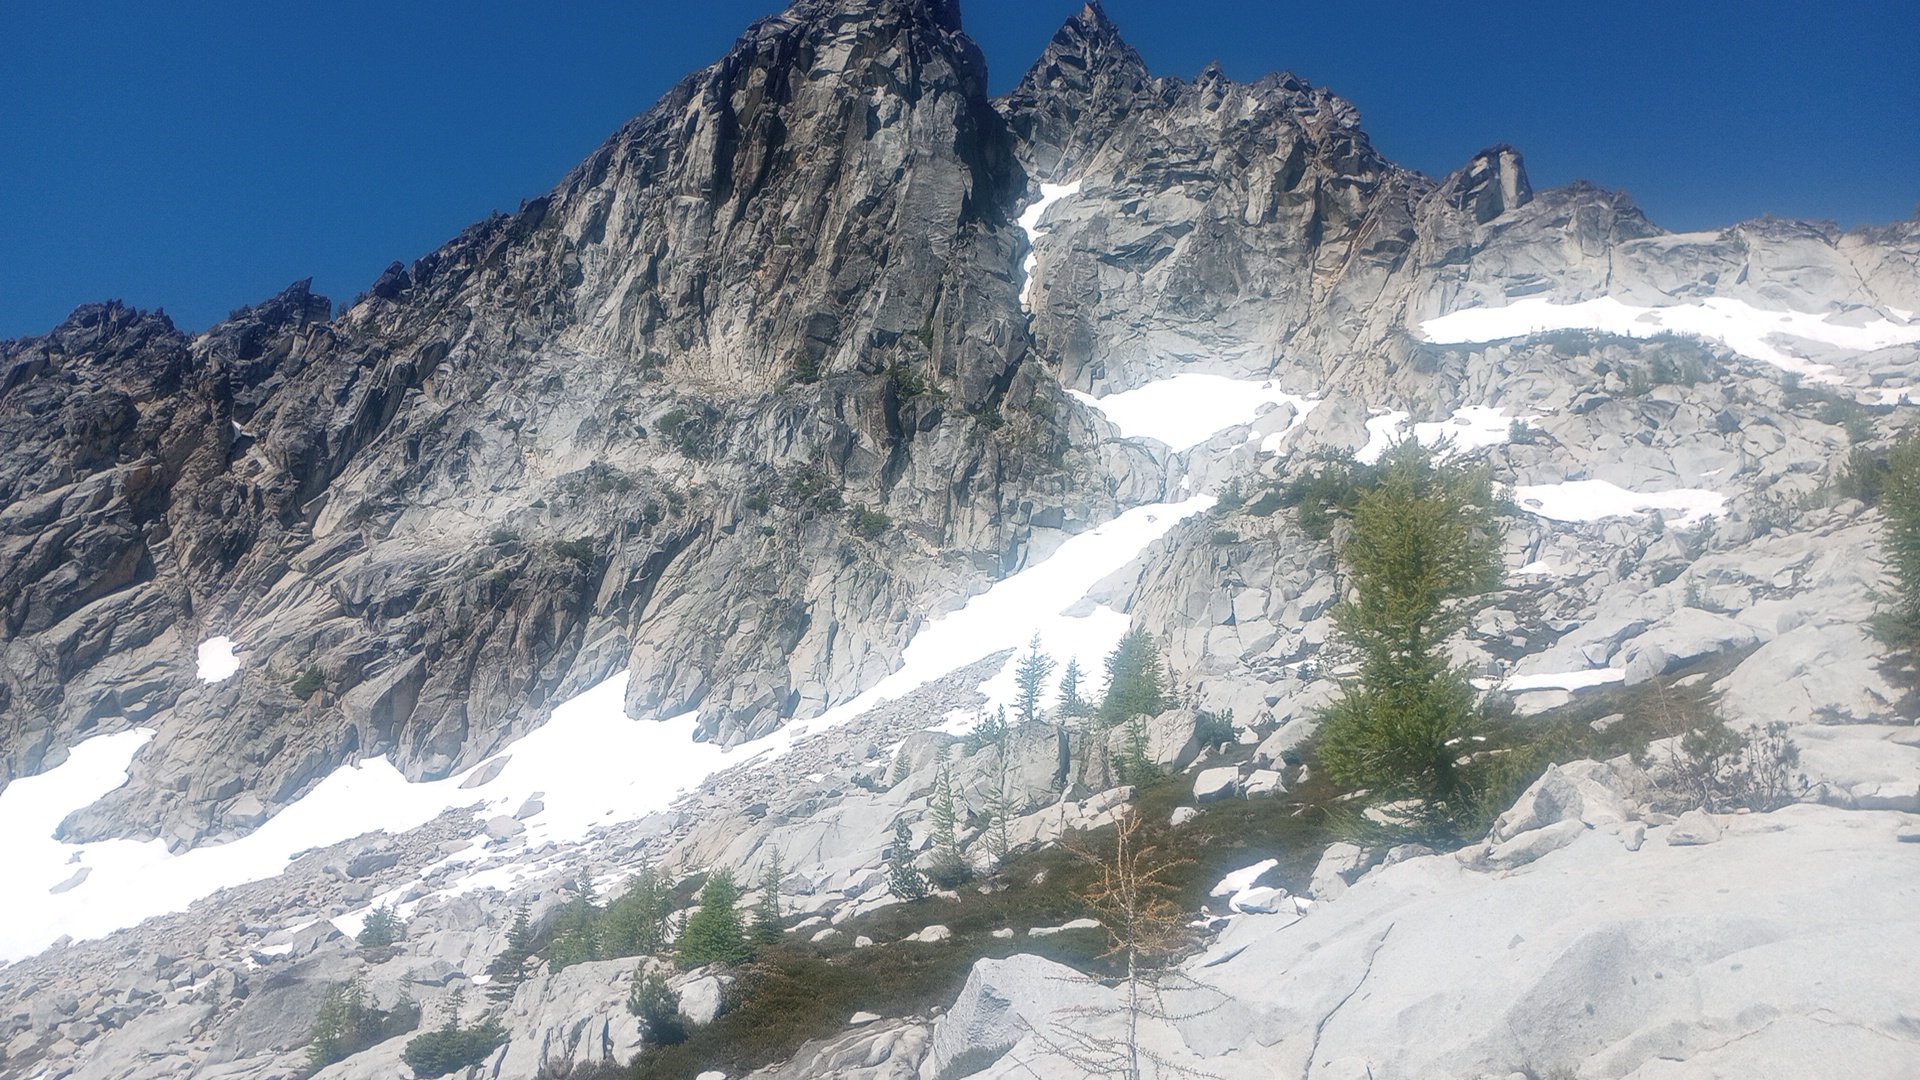
Trip: Mount Rainier - Emmons Central Trip Date: 06/30/2025 Trip Report: When looking at Emmons from Sunrise, Andrew got the idea of trying a route that would connect with a feature similar to the Emmon-Winthrop route corridor but positioned in the middle of the expansive glacier. This feature starts around 10k and provides easy direct access to the upper mountain. I was skeptical about the idea until I had a closer look myself a few weeks ago while climbing Cowlitz Chimney. We could not find any information about this route and decided to refer to it as Emmons Central. Please, let us know if you know the history or previous ascents. To spice things up Adrew pitched starting the glacier terminus. We scouted access to the moraine Saturday afternoon and took closeup picture of the route to weight our options. The pictures did not show any clear paths to the corridor but the “right” side variation looked the most promising. Sun morning, we hiked and shwacked to the terminus and started making our way up the glacier. The idea was to skirt very broken up lower section on the right, then hook left trying to ascend to a rocky ridge in the middle of the glacier. We could then follow the ridge for a little bit until being able to push right to access the start of the corridor. We identified one potential make-it-or-break-it crevasse below the rocky ridge but did not see any clear dead ends along this option. After leaving the moraine and getting on snow we started aiming for a nunatak at 9400 following open slopes with minimal crevasse issues. From here we initiated our left hook as the glacier became more broken up. After some navigation we reached the crevasse with a question mark and were able to get across on an exposed but solid bridge far left. This brought us to the rocky ridge where we set up the camp at exactly 10080ft. Being in the middle of a glacier with the largest area in the contiguous US and having dry ground to sit on was awesome. Looking up from camp revealed crevasse problems we did not see in the pictures. The general plan was to keep going right and that is exactly what we did in the darkness the following day. It was obvious when we finally gained the ramp because there were no crevasses in sigh as far as the headlamps could shine. The angle starts around 40 degrees and gradually eases off with elevation as it trends slightly left. Around 12.5k the route connects with the late season DC route variation. To our luck we ran into set of boot prints around this elevation. Later on the boot path became marked with wands so my guess is that the guides or rangers prepared the route for when the regular DC gets too broken up. We followed the boot prints and wands until connecting with the regular DC and the well beaten path to the summit. We descended via the standard Emmons-Winthrop route. Gear Notes: pickets Approach Notes: Moraine trail to "End of maintained trail" sign then follow a boot path down. We then hiked along the vegeration up until it looked more open3 points
-
Thanks for your TR, Christopher! Dan and I had our own alpine adventure on the NW arete of Argonaut this past weekend, approaching and climbing to the summit on Saturday, sleeping near the summit, and descending Sunday. I am definitely glad we did it this way -- it made for two relaxed days without any need for headlamps and the snow on both approach day one and post-rappels day two was great for climbing, never too firm or icy. We thought the climbing was really fun and the whole trip had good adventure factor. I felt silly wearing trail runners and carrying light mountaineering boots AND rock shoes but it worked well for me; I think if I'd been climbing a whole lot of 5.8 recently I'd probably have felt good in approach shoes/not needing a third pair of footwear. We brought a single rack and that worked for us for 5 long pitches with a tiny bit of simuling. We were able to avoid MOST of the slide alder but luckily we weren't carrying skis and it wasn't the "trap you in place" variety so the handful of minutes of it didn't feel too tuff. We both switched to rock shoes for the "slab crossing" before the snow finger. The rock was sticky and great. There was snow under the big summit block so we didn't go thirsty with our summit bivy (beautiful sunset!). The descent made us think a little bit, but there are a lot of rap stations and trees and lots of beta. We did three single rope rappels and some 4th class downclimbing that could have been avoided... Here are our pics in case they're helpful for people heading out soon or hoping to check snow conditions in the area (high-quality photos are Dan's): Snow finger (that's a false top to it) Snowfield on the descent before starting rappels: Our second single rope rappel into the gully, we walked across 4' of flat snow then butt scooted/au chevalled the moat to get to the notch, rapped off tree on other side for third rappel: The traverse from the bottom of the raps over to the south side of the Colchuck Col was BEAUTIFUL:
 3 points
 -
For clarification, it's my understanding they were climbing the glacier route on Silver Star and fell in the area of Chianti Spire. I'm a mountain rescue volunteer and don't have any problem with them requesting a rescue. Falls like that can cause internal injuries that may not be apparent. Live streaming the rescue is totally inappropriate and should result in a loss of phone privileges for a minimum of two weeks and no TV after dinner.3 points
-
3 points
-
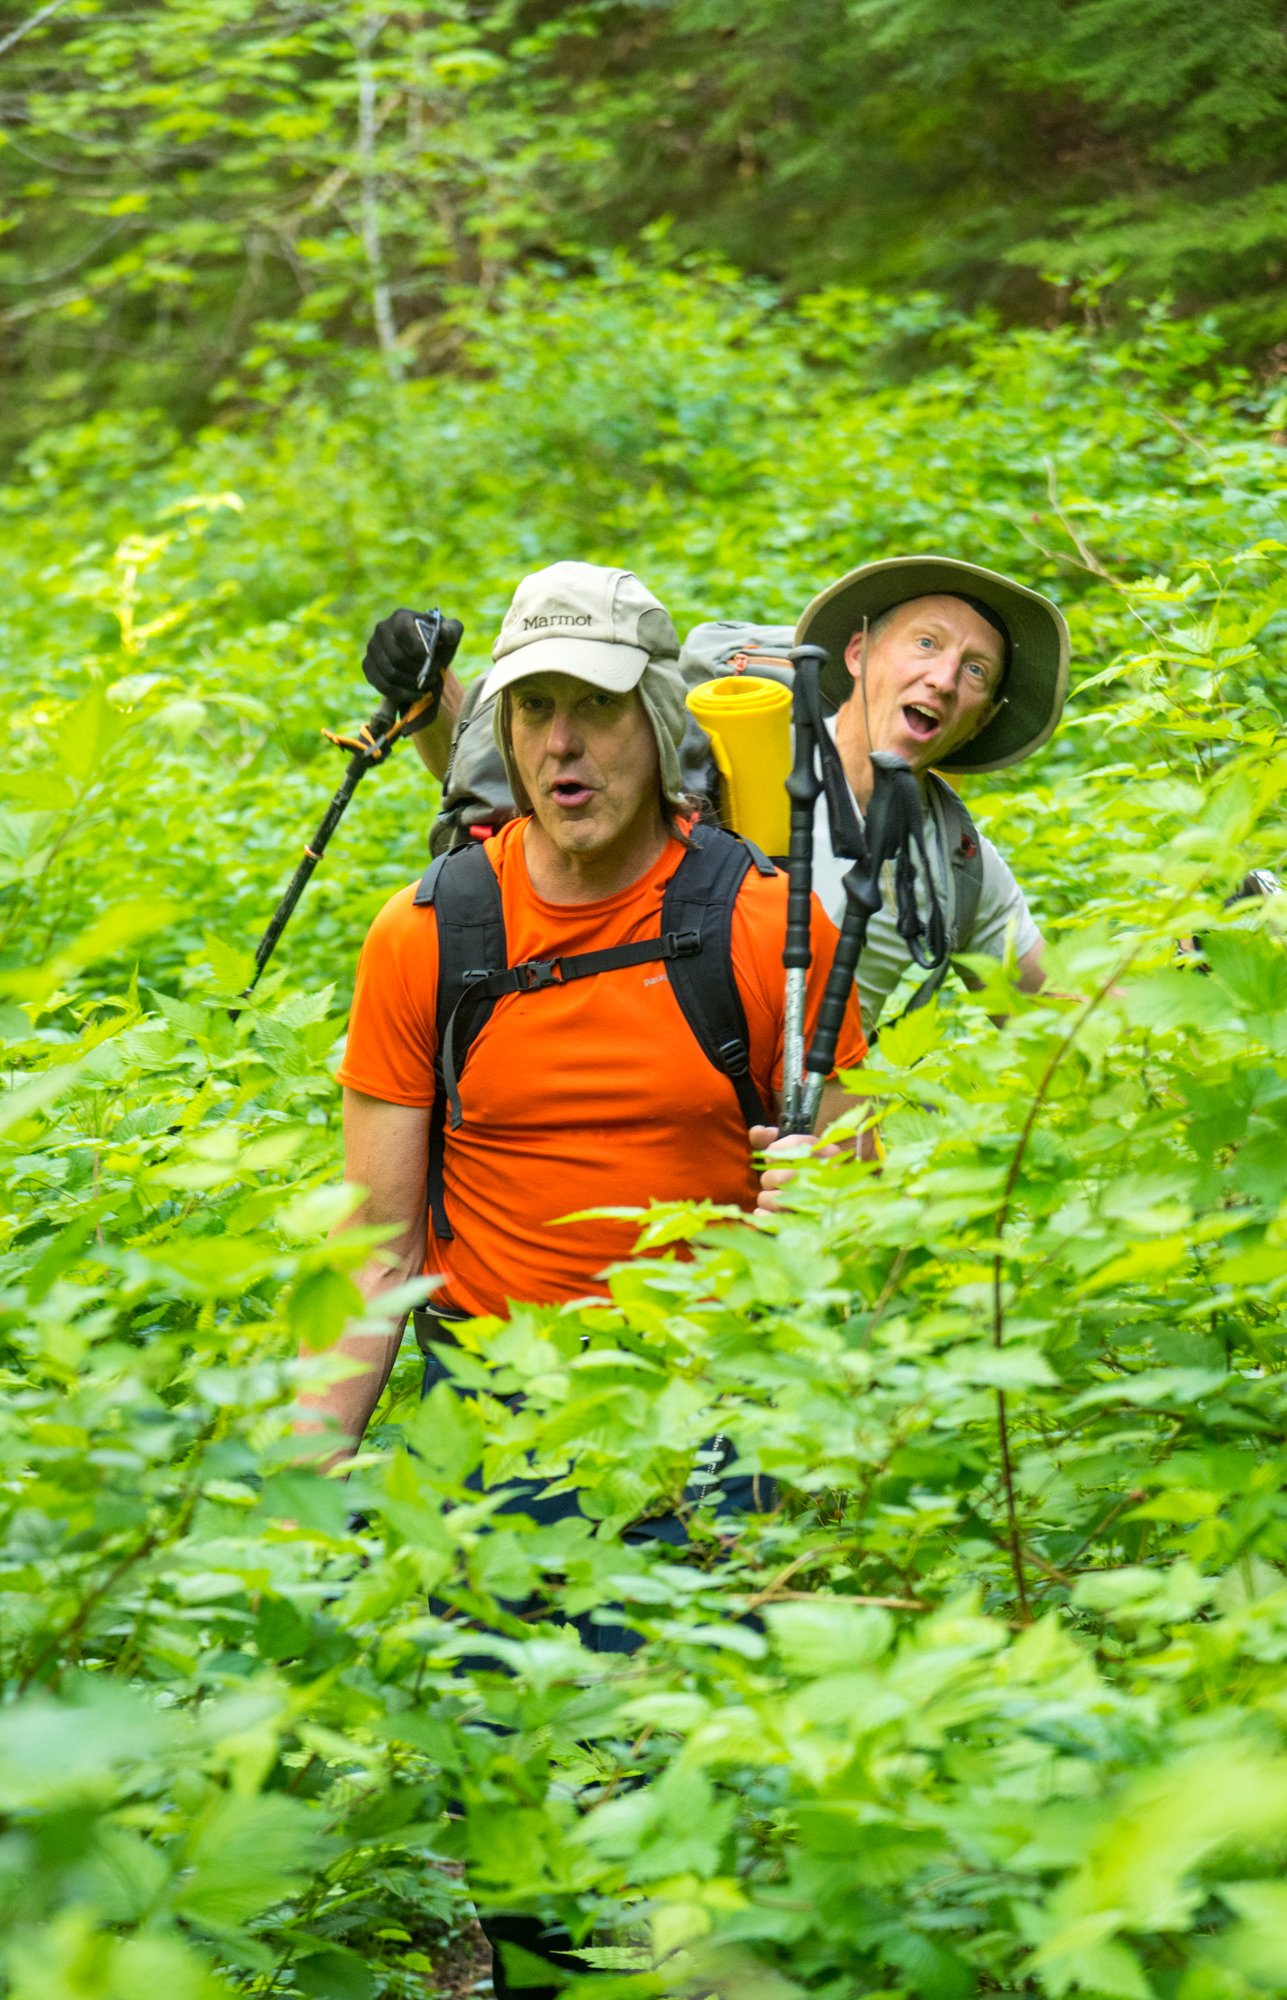
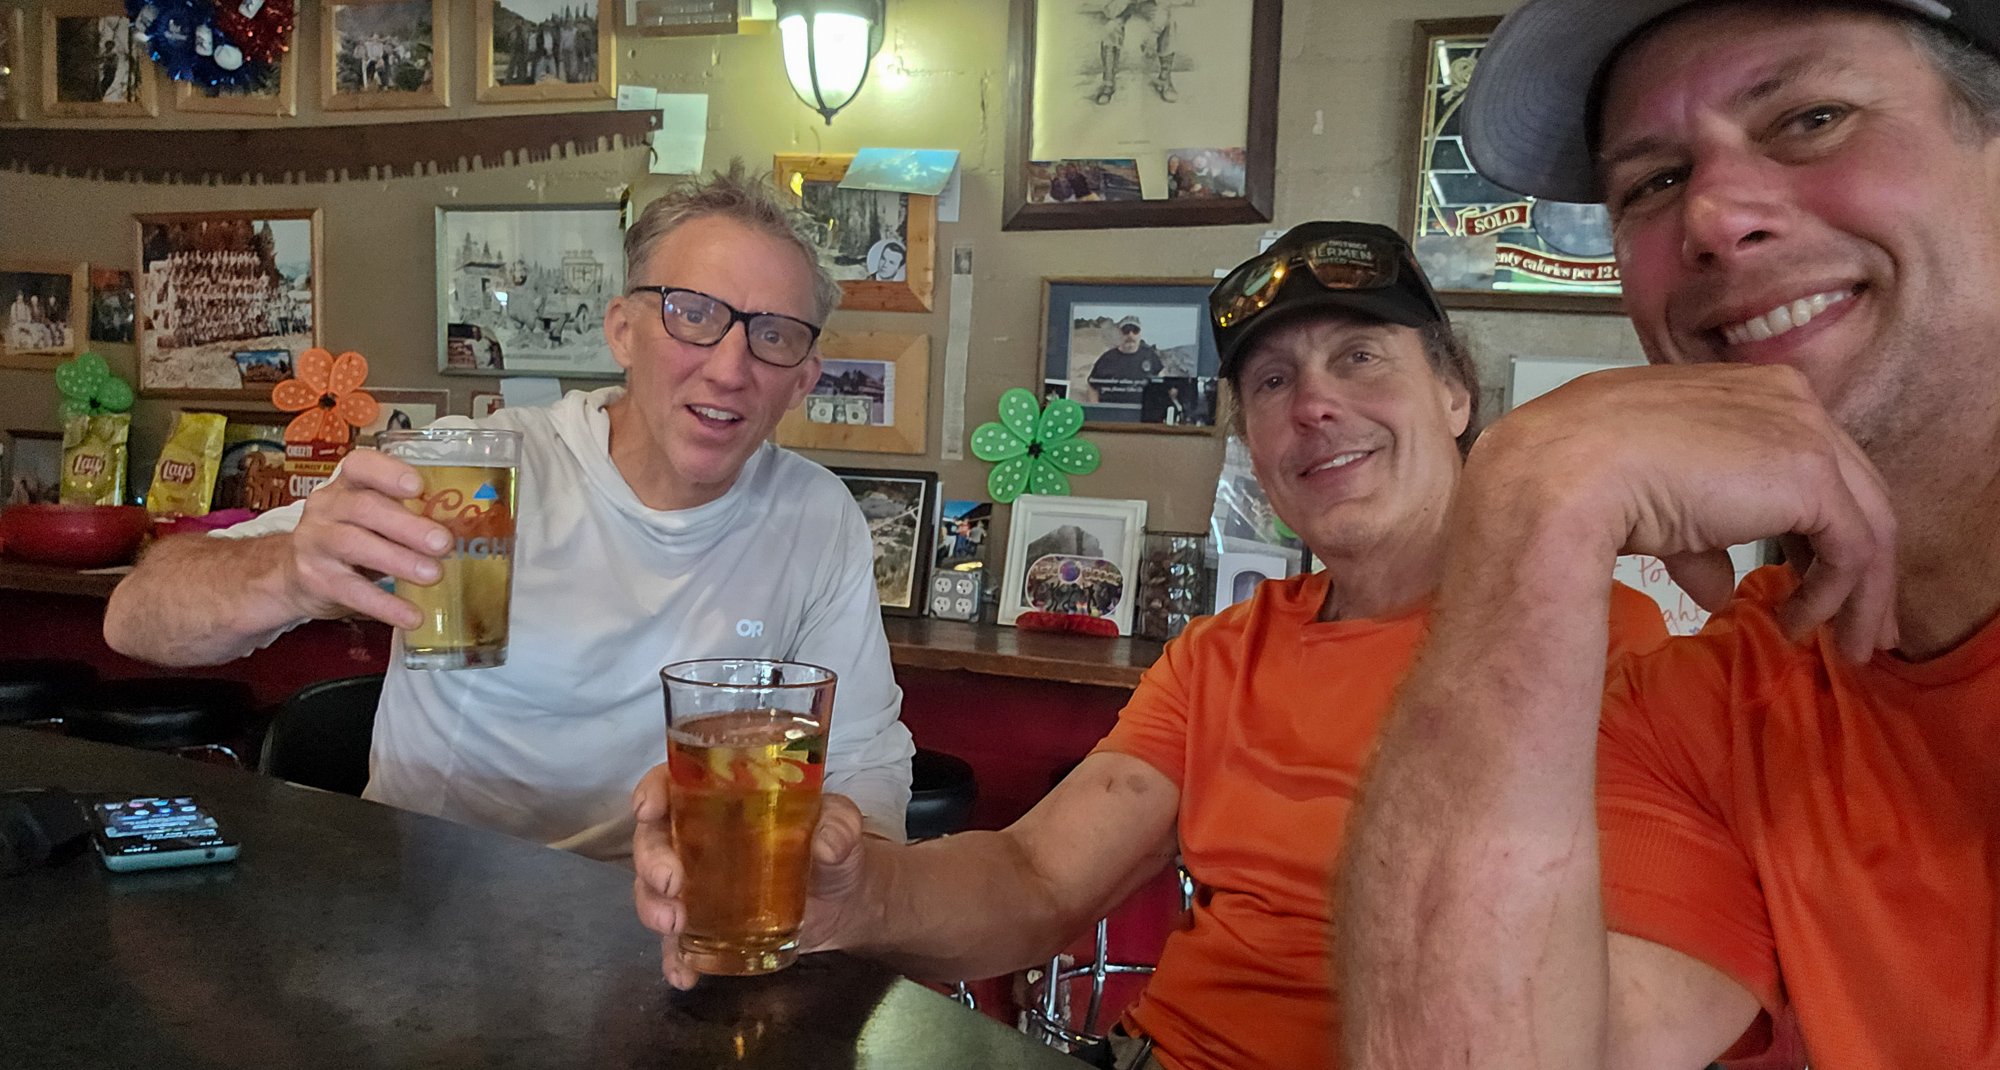
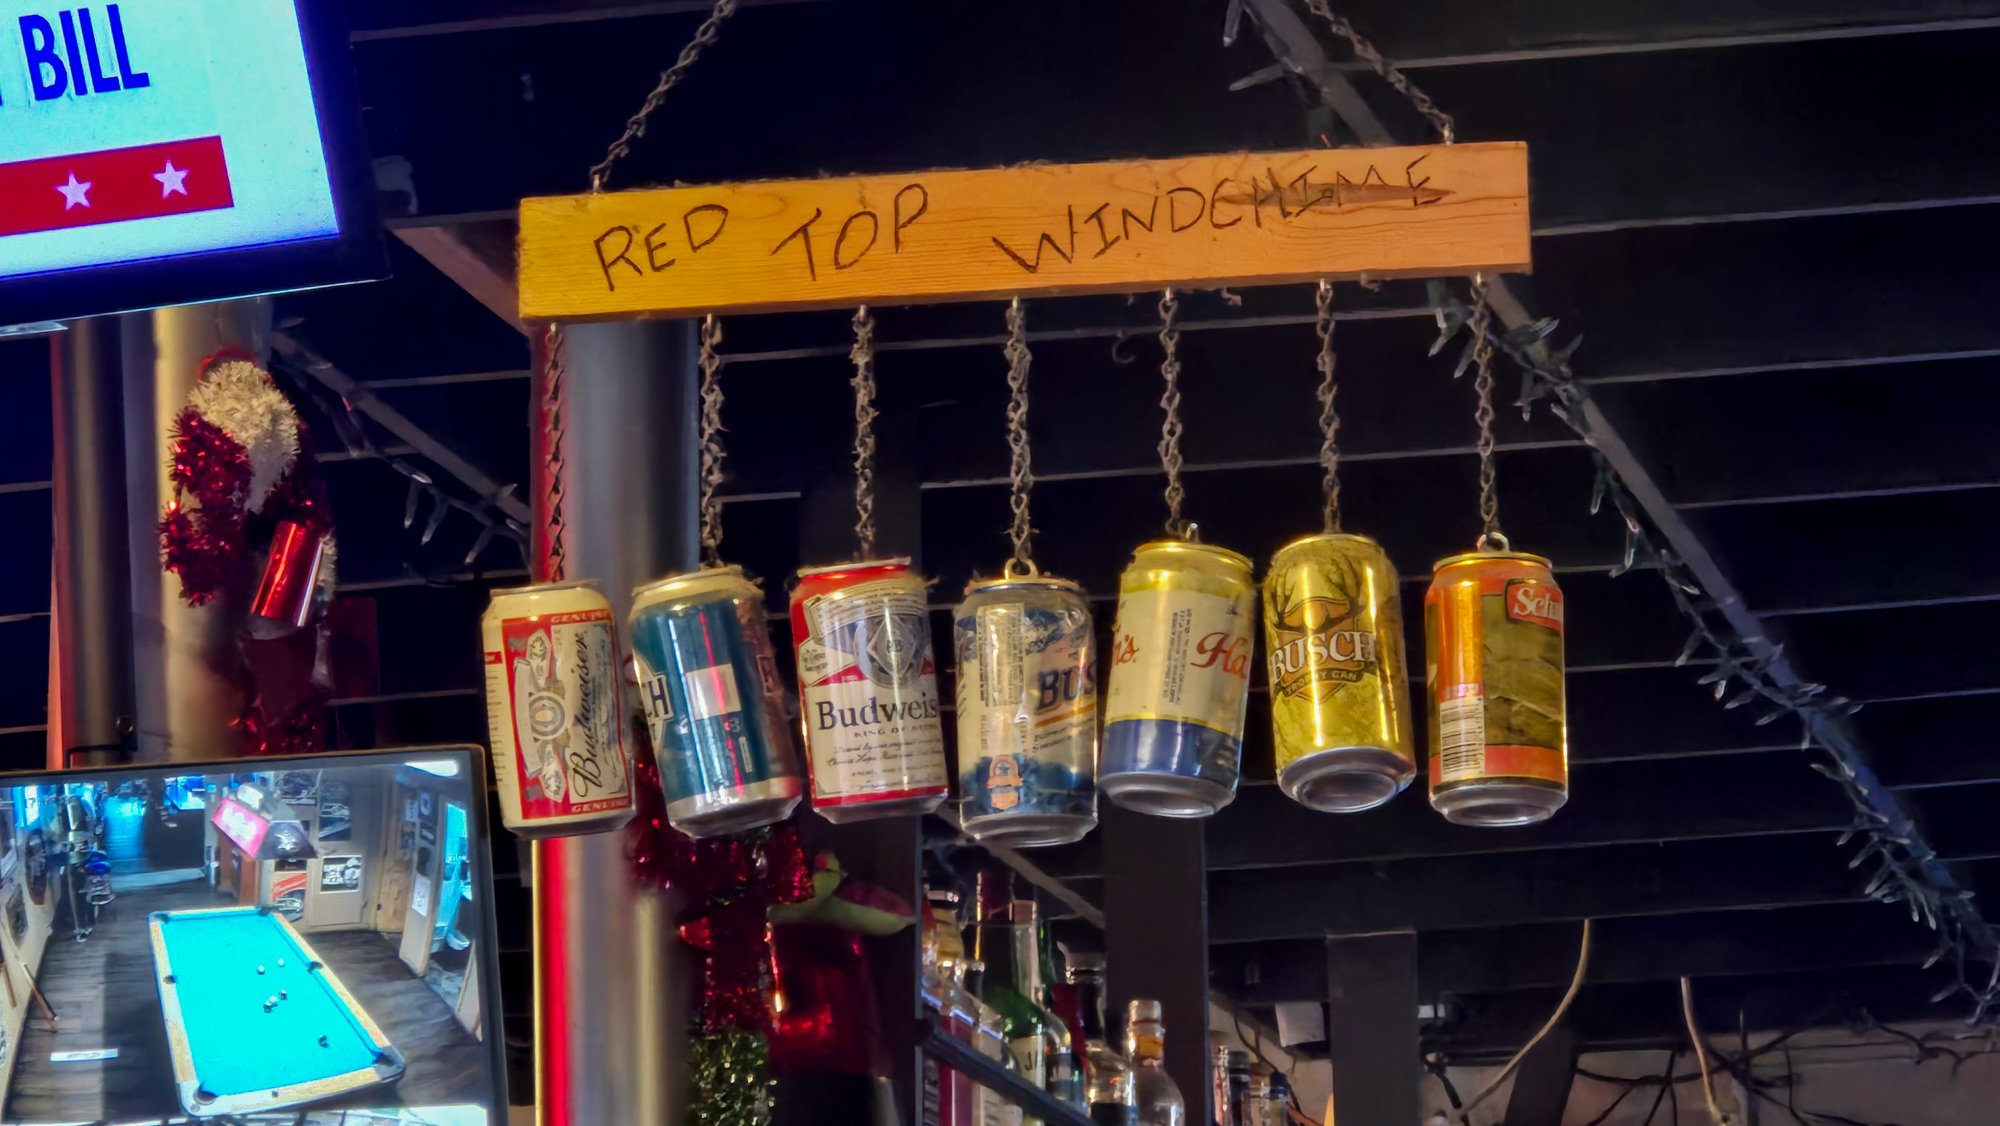
Trip: BULLEN! - via Squire Creek/Bullen Lakes Trip Date: 06/01/2025 Trip Report: "I felt as if we had joined Sisyphus and his rock in Hell." - HERMANN F. ULRICHS on first ascent of Mount Bullen I mean, who hasn't read the passage above in the Green CAG and decided that they just had to climb Mount BULLEN? Or, maybe I should ask, "Who has?" No matter, @sepultura and @therunningdog were not asking many questions, and that was a good thing for me, since otherwise I am pretty sure we would have diverted to a more "normal" destination on Memorial Day weekend. And by "normal" I mean a mountain with more than one TR on the internet. Which means, after this TR, BULLEN will be officially "normal". Glad we got that all squared away for the masses sure to descend this summer As it was, we didn't see another soul the entire way in or out of the mountains, not on the Squire Creek trail and certainly not in the brush. But we did find several routefinding challenges on the timbered rib above Squire Creek to keep us entertained. And some head scratching to get from the ridge down to Bullen lakes. And some wandering and wondering to find a suitable campsite. But this is what we came for, right? Right guys? I won't spoil the adventure for you, and smooth out the rough edges of your trip to Mount BULLEN!, don't worry. But just know that you can do it without a rope! Which is good, since we didn't have one. Sometimes the crux of these North Cascades blue collar adventures isn't above treeline. But what BULLEN! lacks in technical climbing it makes up for in ...uhhhh... fun? Just make sure you go with partners as entertaining as I had. If you play your cards right, you'll laugh, you'll drink some whiskey, you'll banter like old times, you'll marvel at your luck finding such solitude on a busy holiday weekend, and you'll come out to toast your success at the Red Top. Because, is there any more to the Chossdawg life? @sepultura and @therunningdog on the Squire Creek Trail. Let the good times roll!: It is important to get in touch with your feminine side before caressing the choss: We were pretty excited when the snow covered the brush: Then less excited when our feet began to squish: The prominent couloir on the left is the ticket in early season, or so it seemed to us. We camped on these large boulders near Bullen Lakes: @therunningdog on an interesting section rounding the south shore of Bullen lakes. @sepultura does his best to stare down BULLEN!: We paused to watched this avalanche roar down the North side of the North Finger of Three Fingers: Dakobed and Pugh: SE to the headwaters of the South Fork Stillaguamish and the Monte Cristo Range: Whitechuck, and our tracks coming up and over from Squire Creek: @sepultura eyeing the last bit to the summit. No brush, no problem!: Cumbre!: Three of the OG Choss Dog Millionaires on the summit of BULLEN!: Heading down: @therunningdog is always ready for his glamour shotz: @sepultura prefers his to be action shotz: Suffer together!: If you climb BULLEN! you really must celebrate at the Red Top in Darrington. To do otherwise is just poor form: I'll get some captions in later this week.... Gear Notes: ice axe, crampons, leather garden gloves, helmet (though we opted not to) Approach Notes: Squire Creek for awhile and then follow your choss urges upwards and then downwards to Bullen Lakes, then around the lakes to the south, and then up. Retrace your steps back to the car, since you won't figure a better way most likely than they way your choss urges guided you in originally. It seemed better in snow, but I'm sure without snow would feel more blue collar.


 3 points
 -
Anyone know how to make videos work? Nevermind, they just needed to load a bit.2 points
-
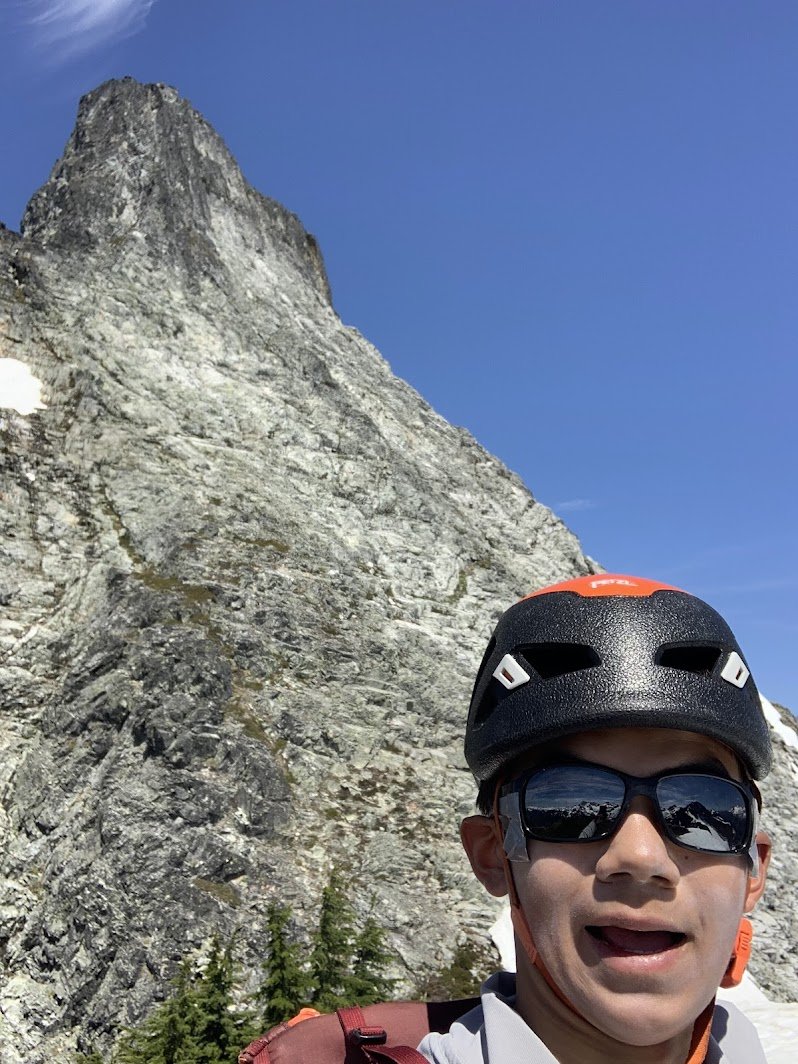
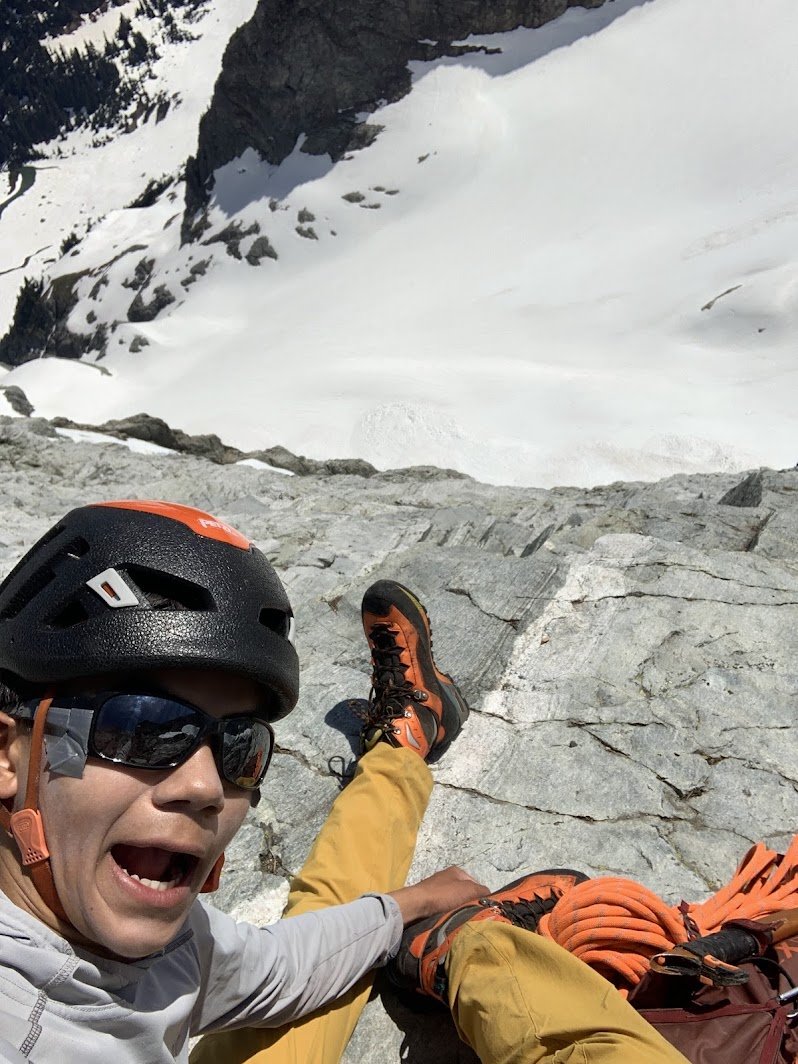
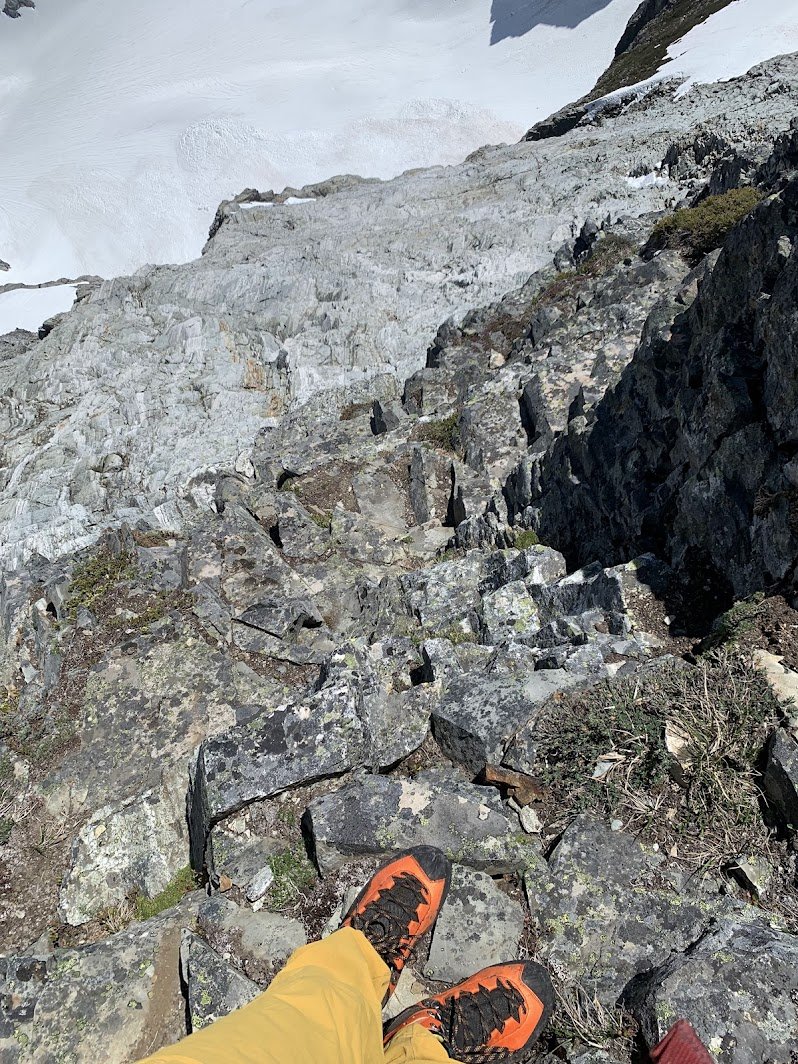
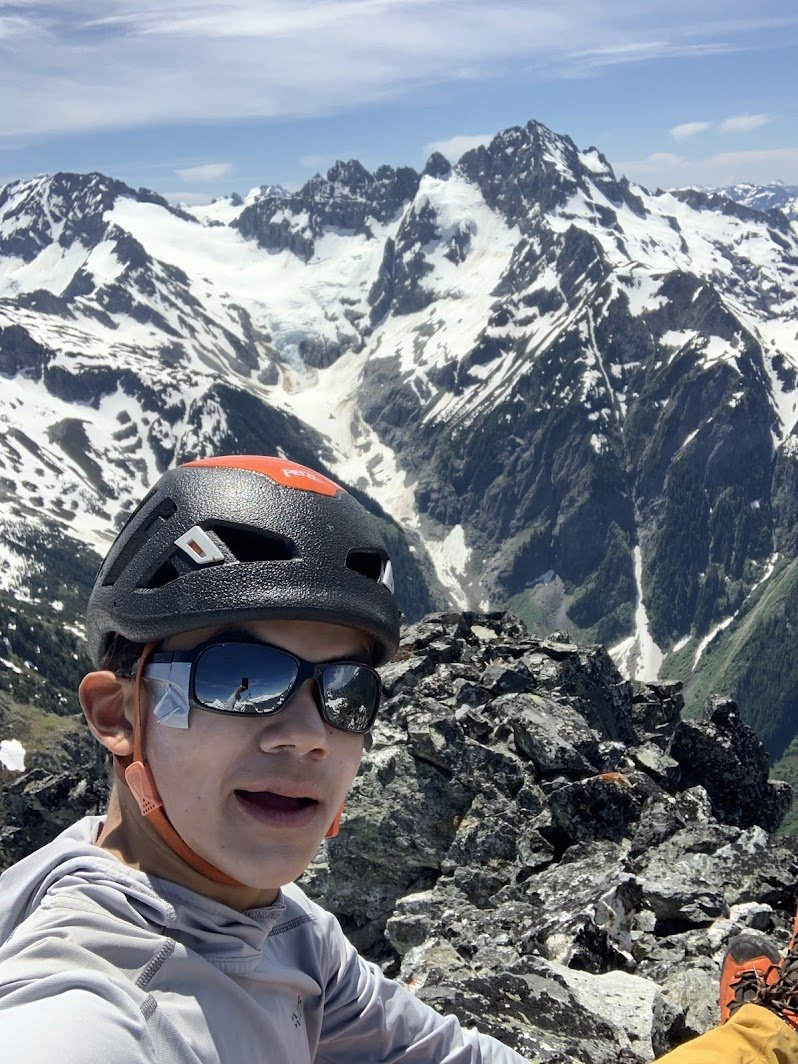
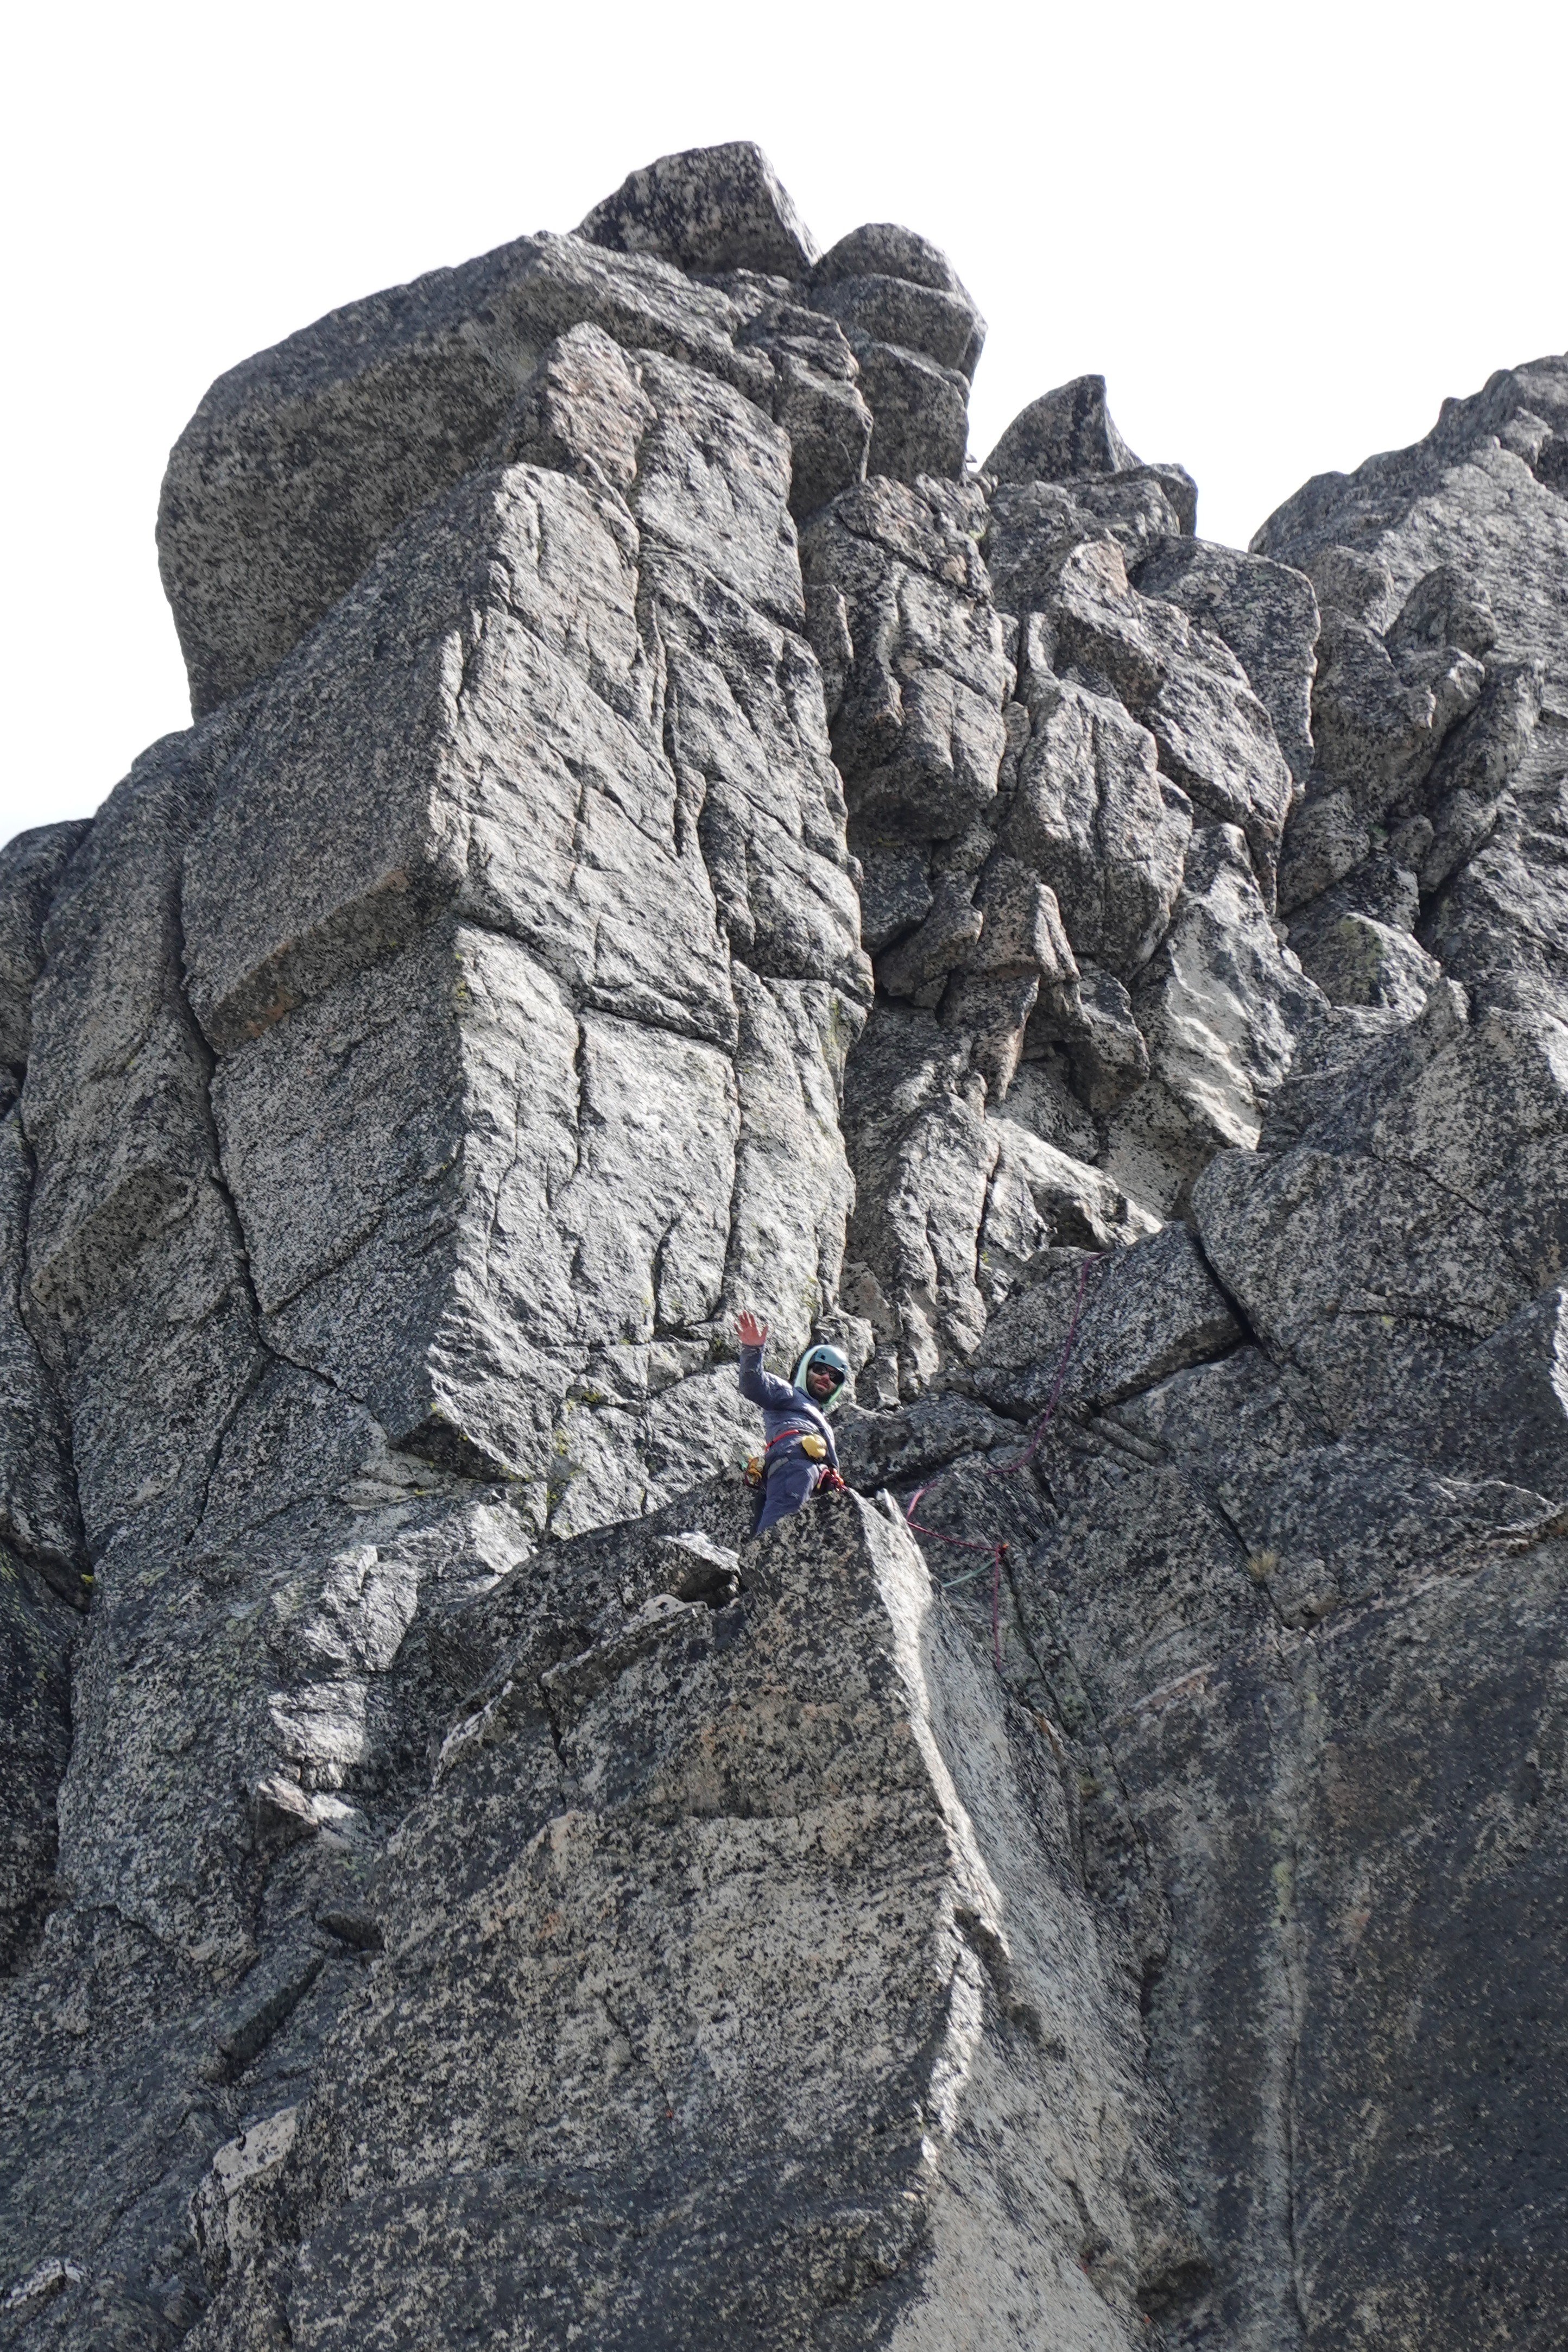
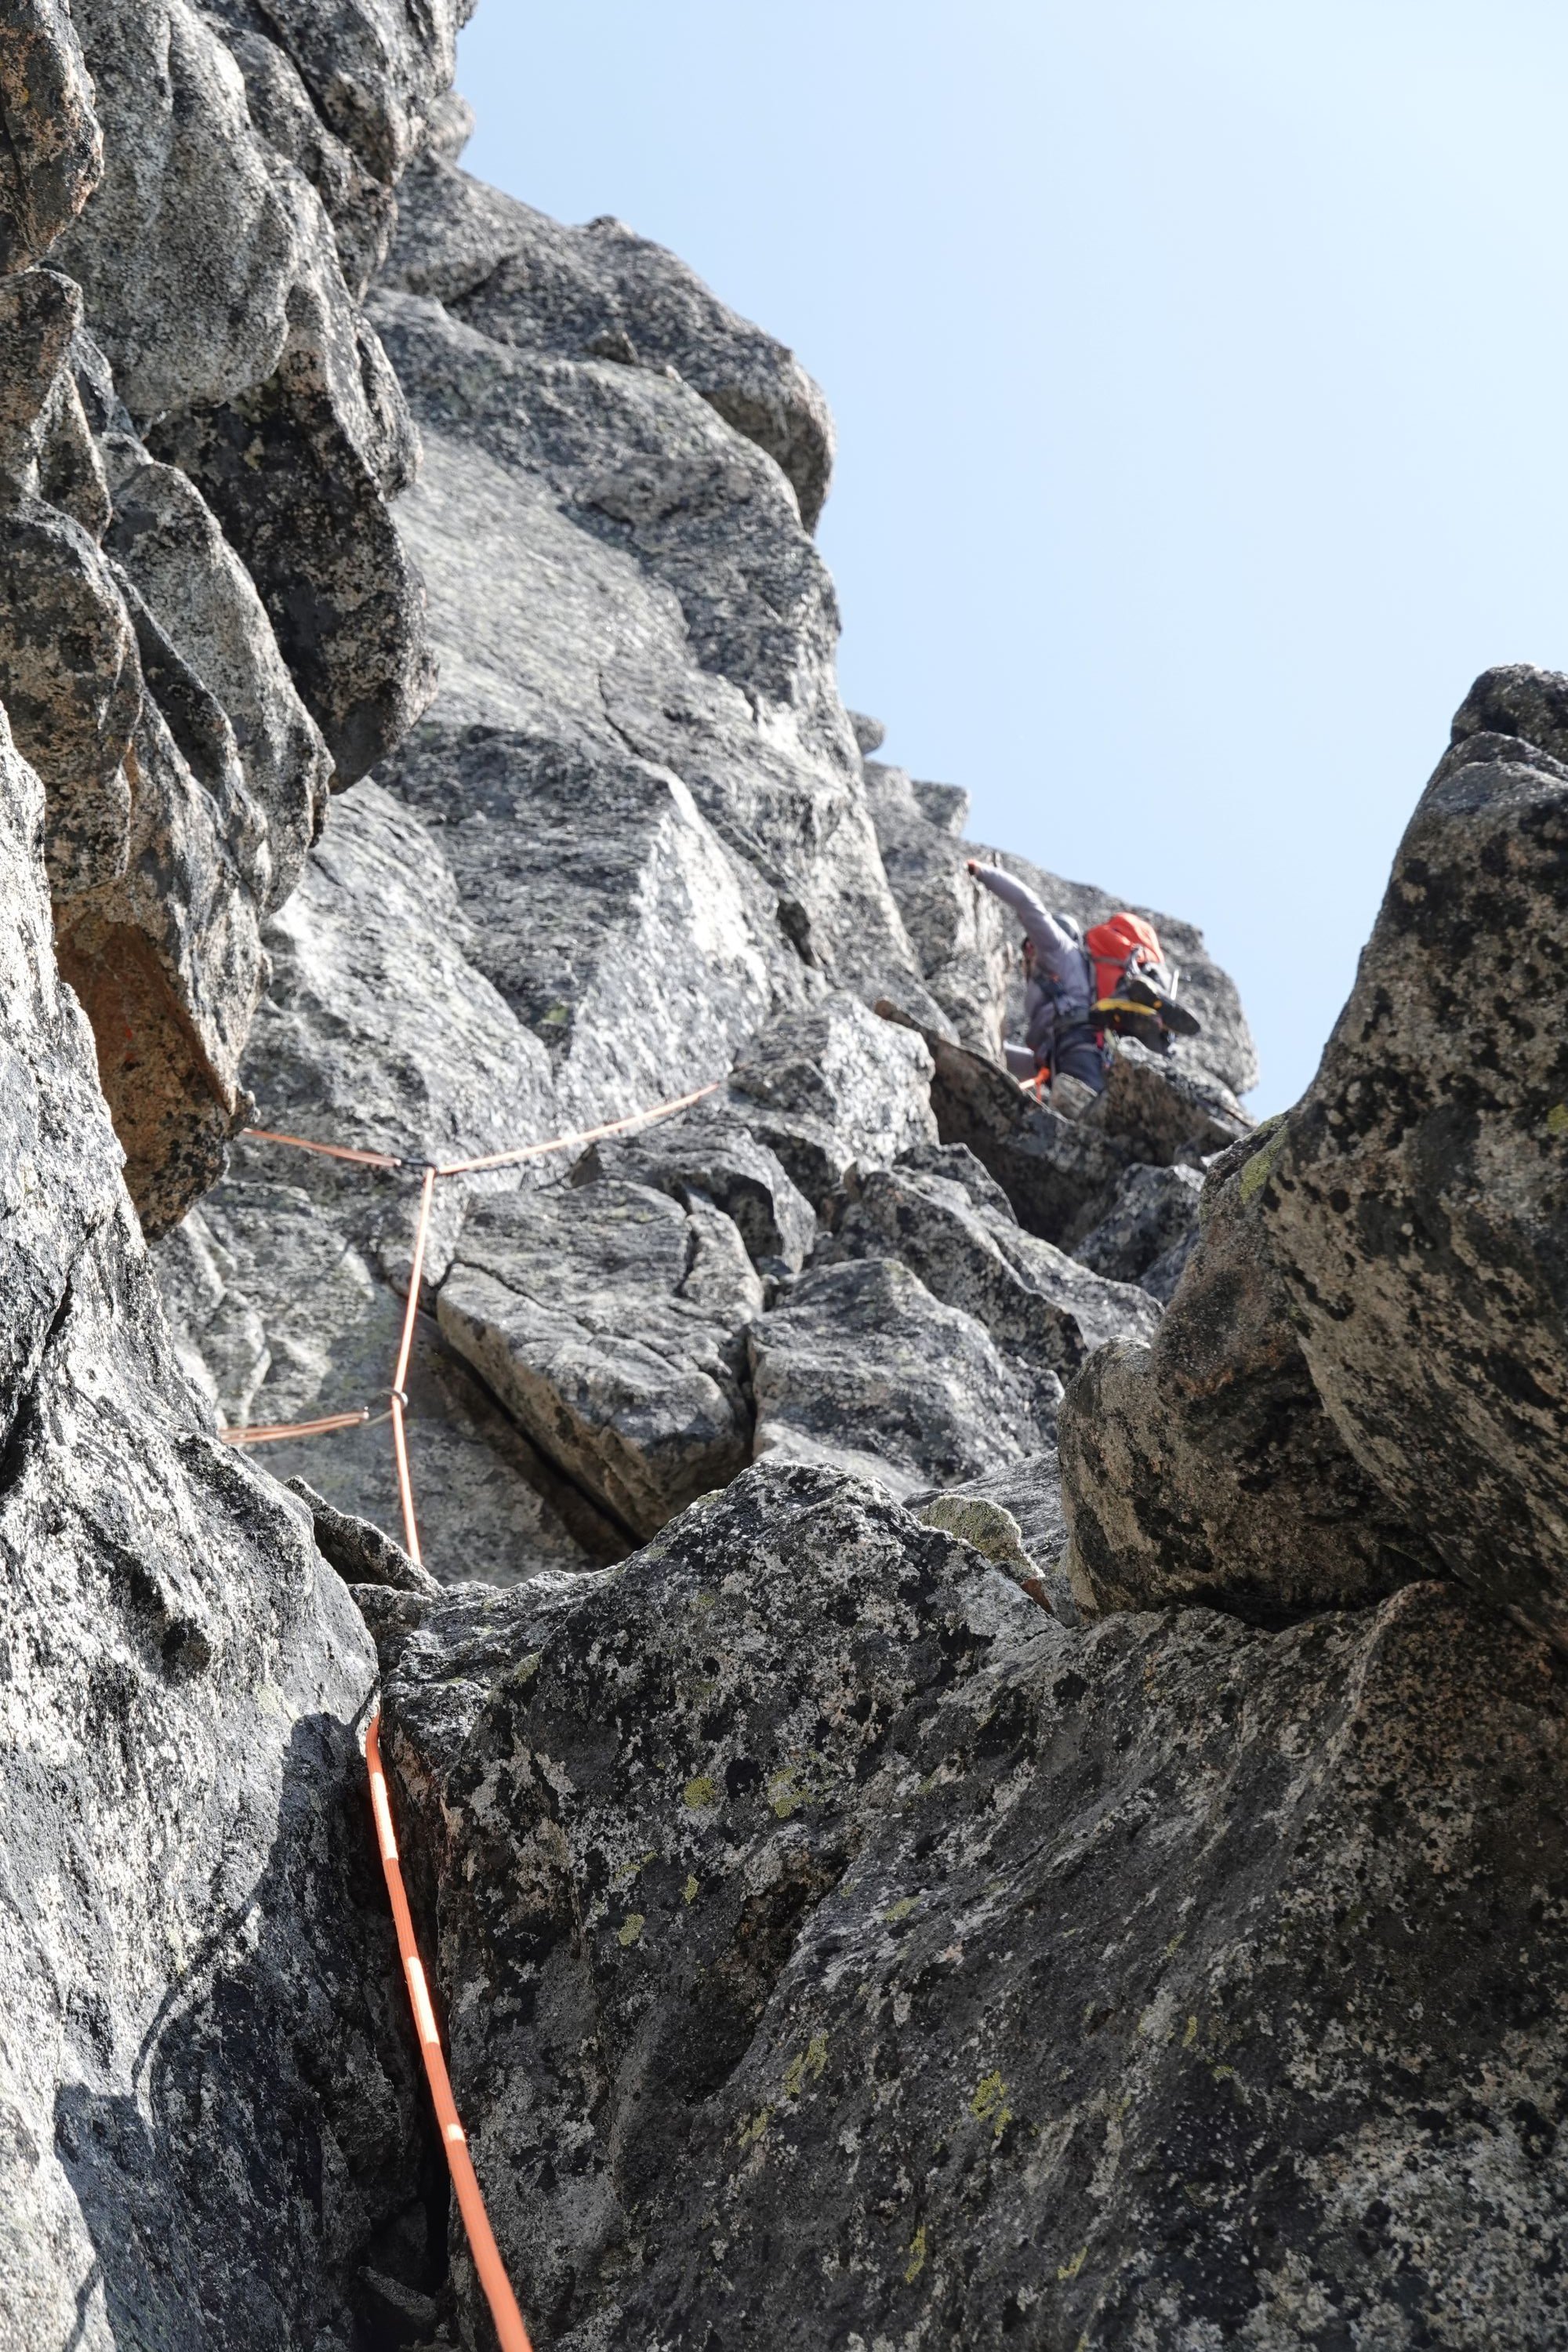
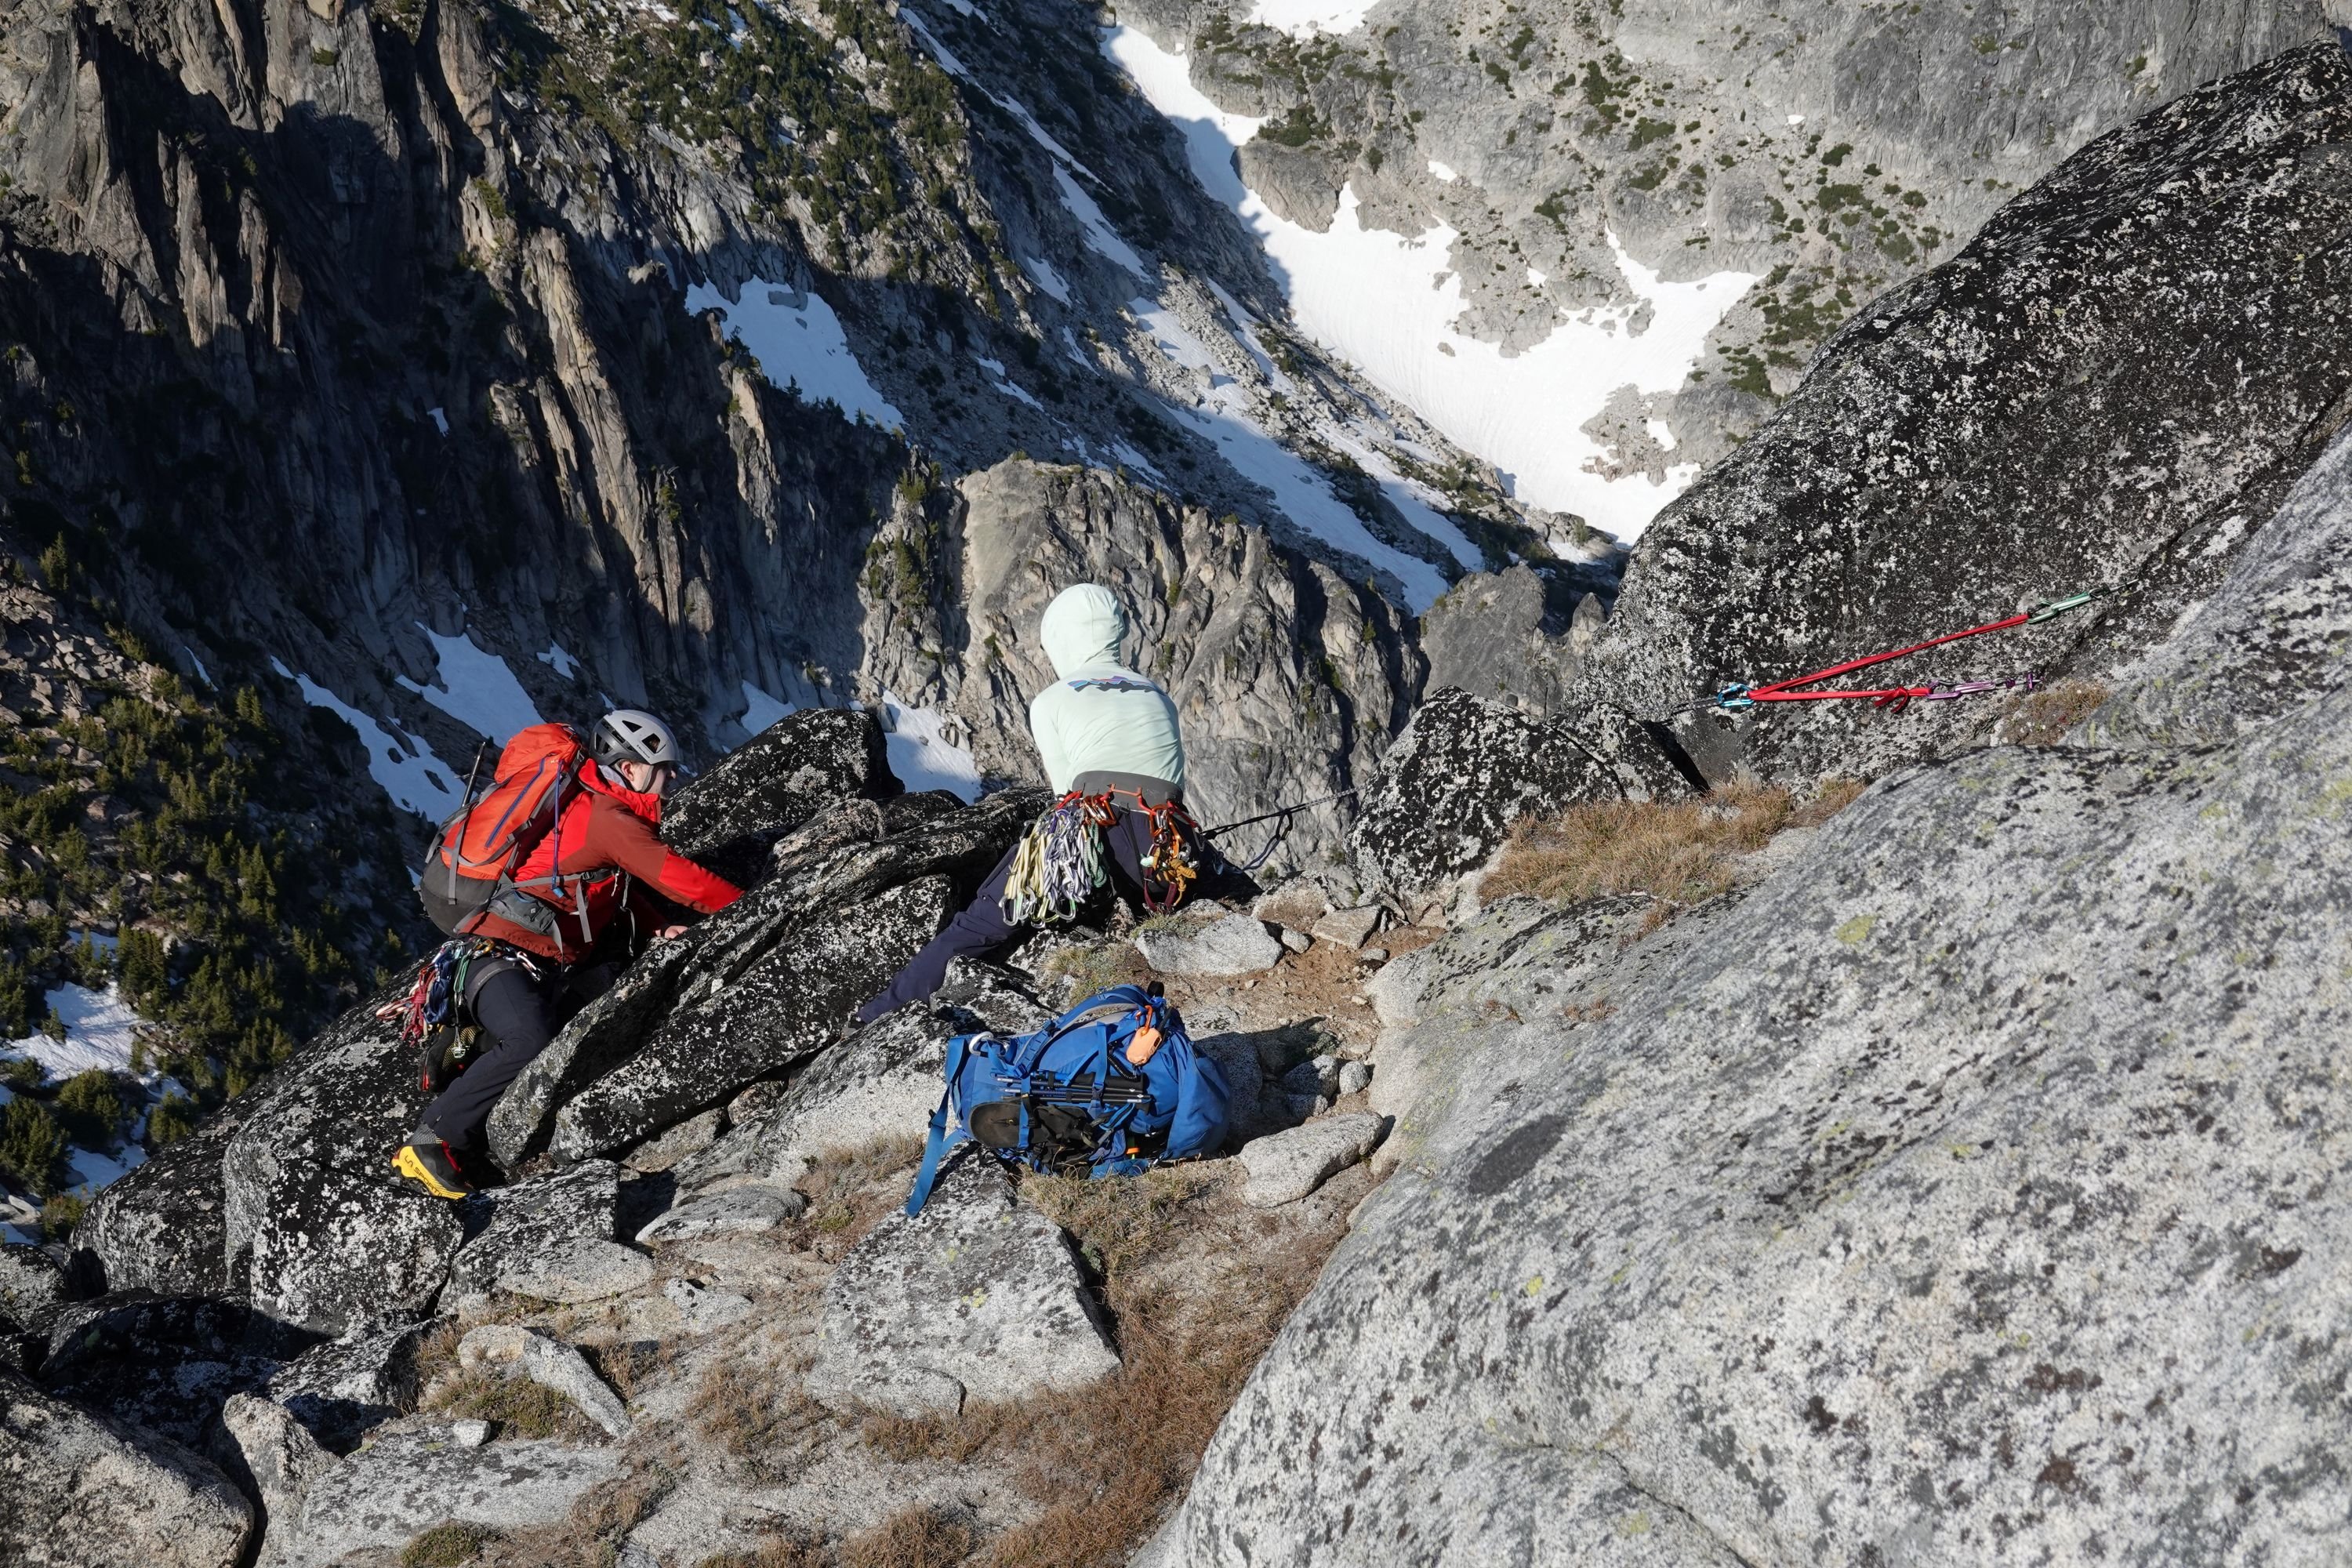
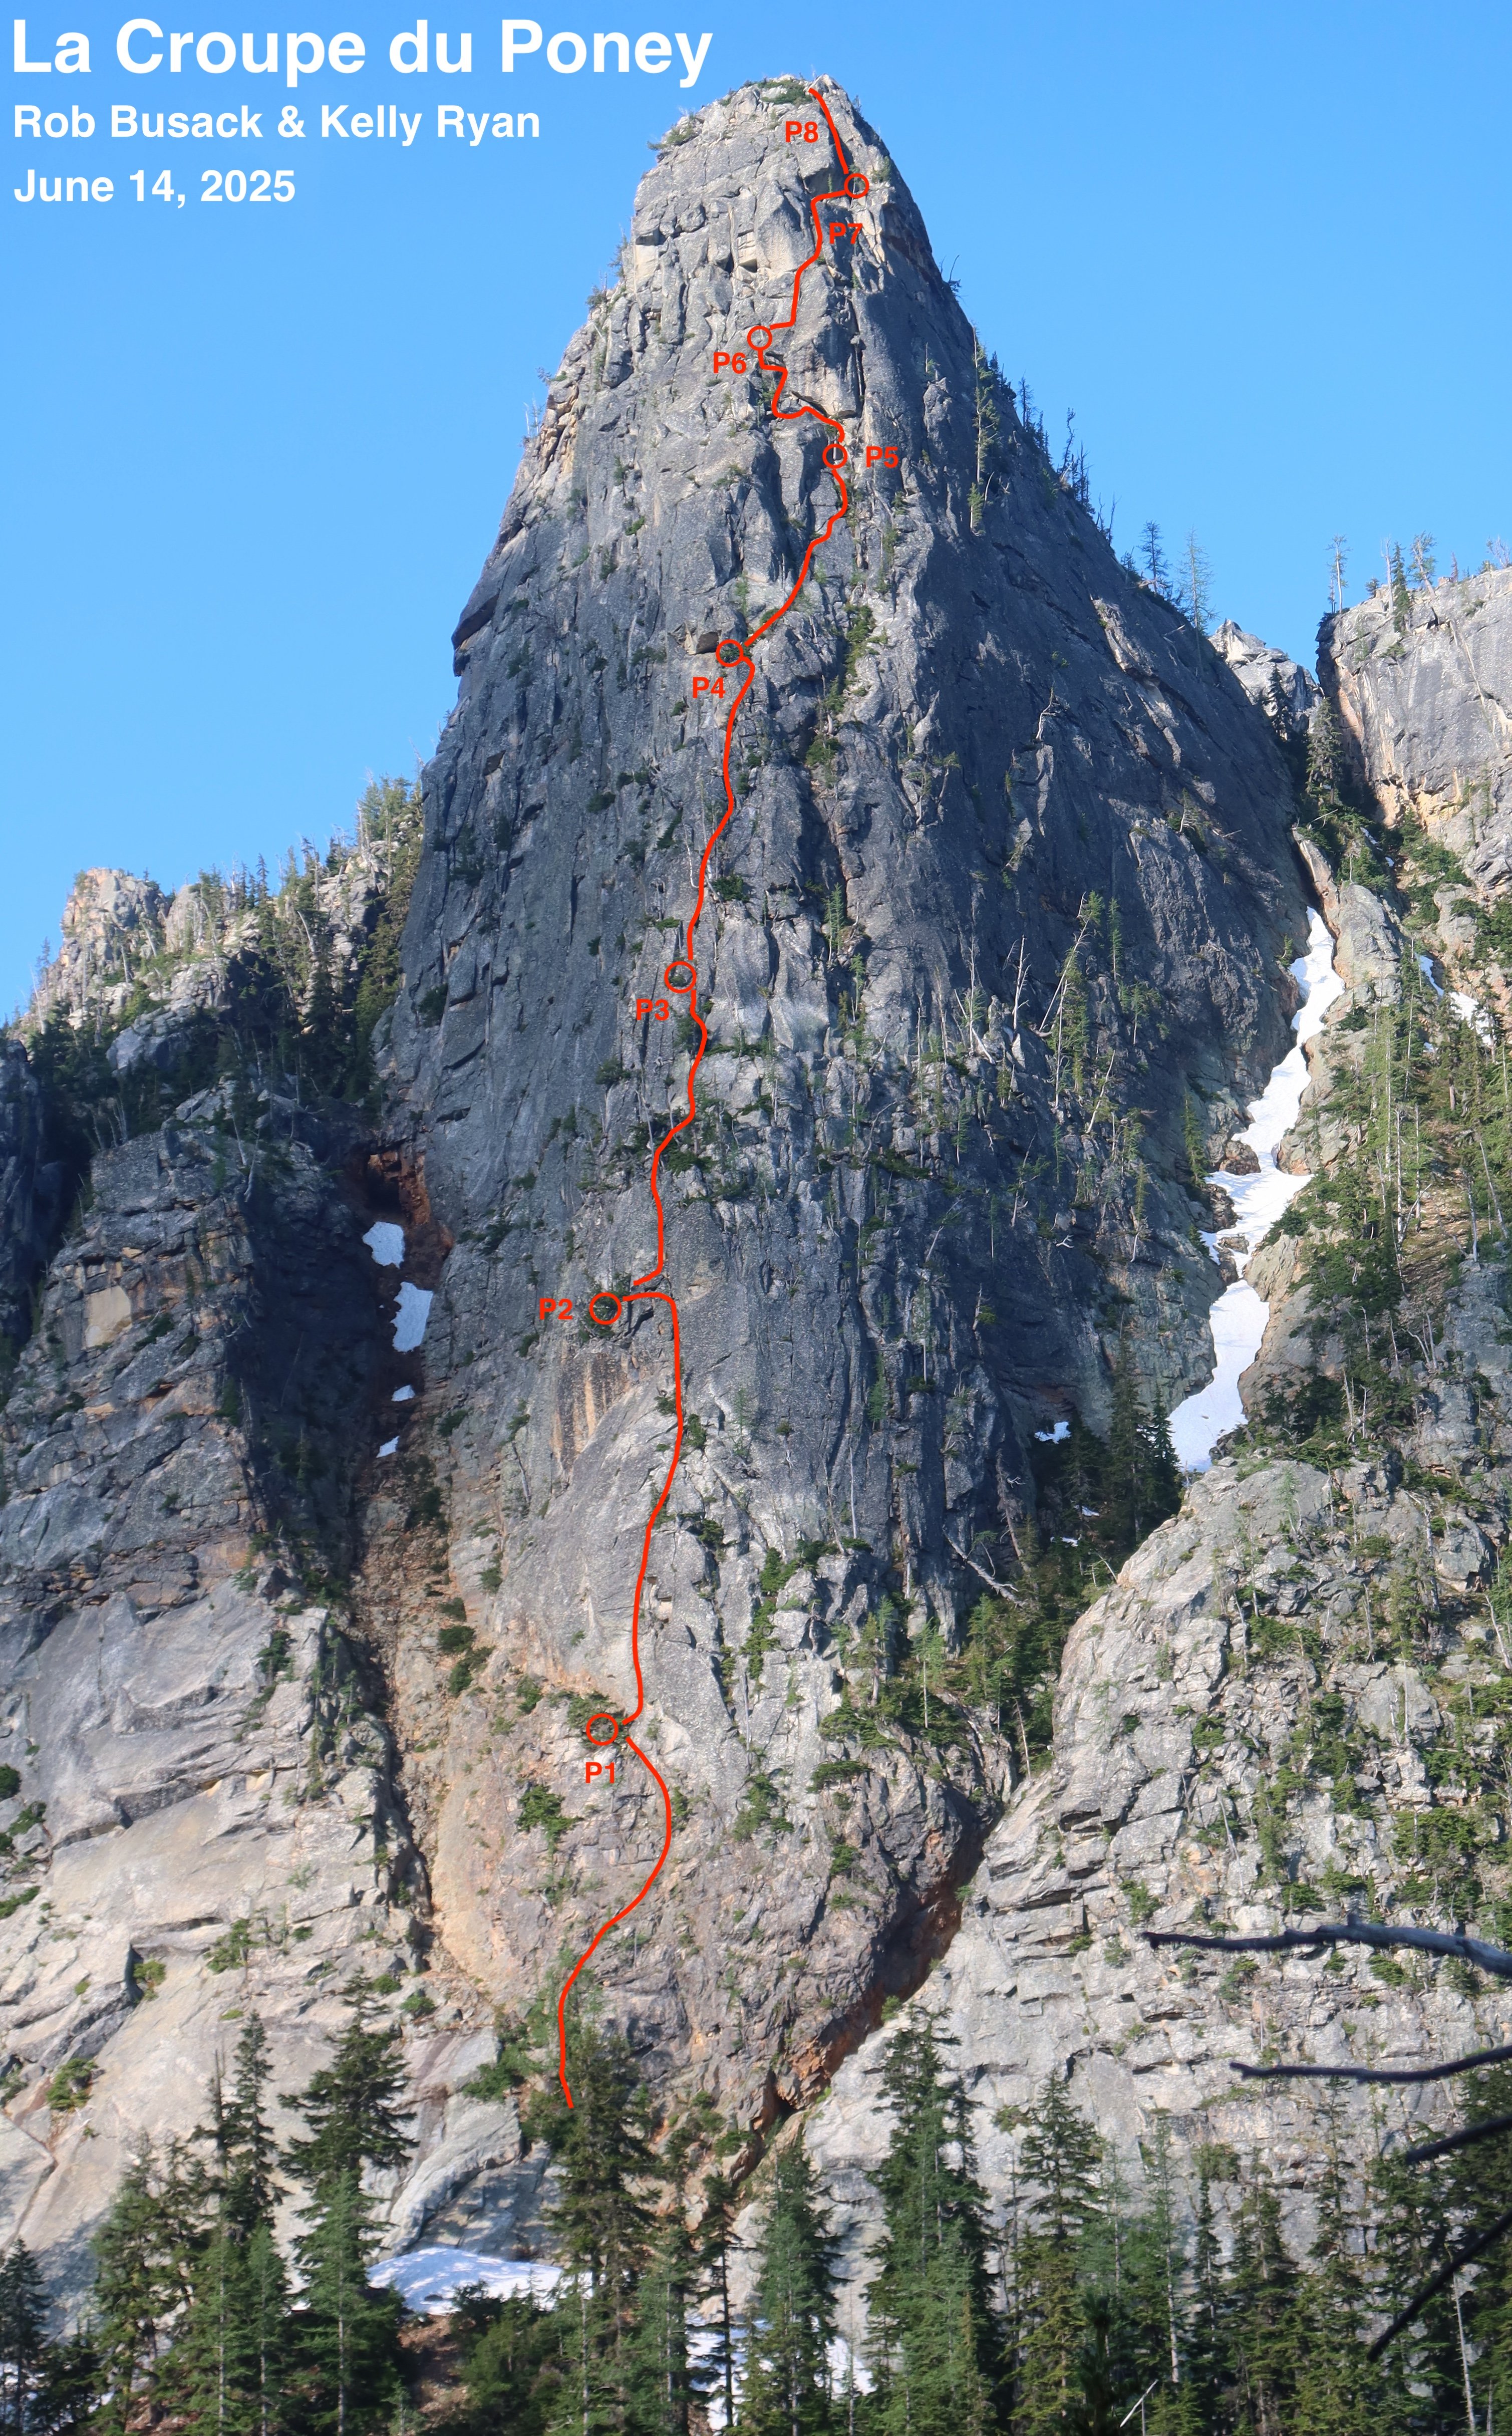
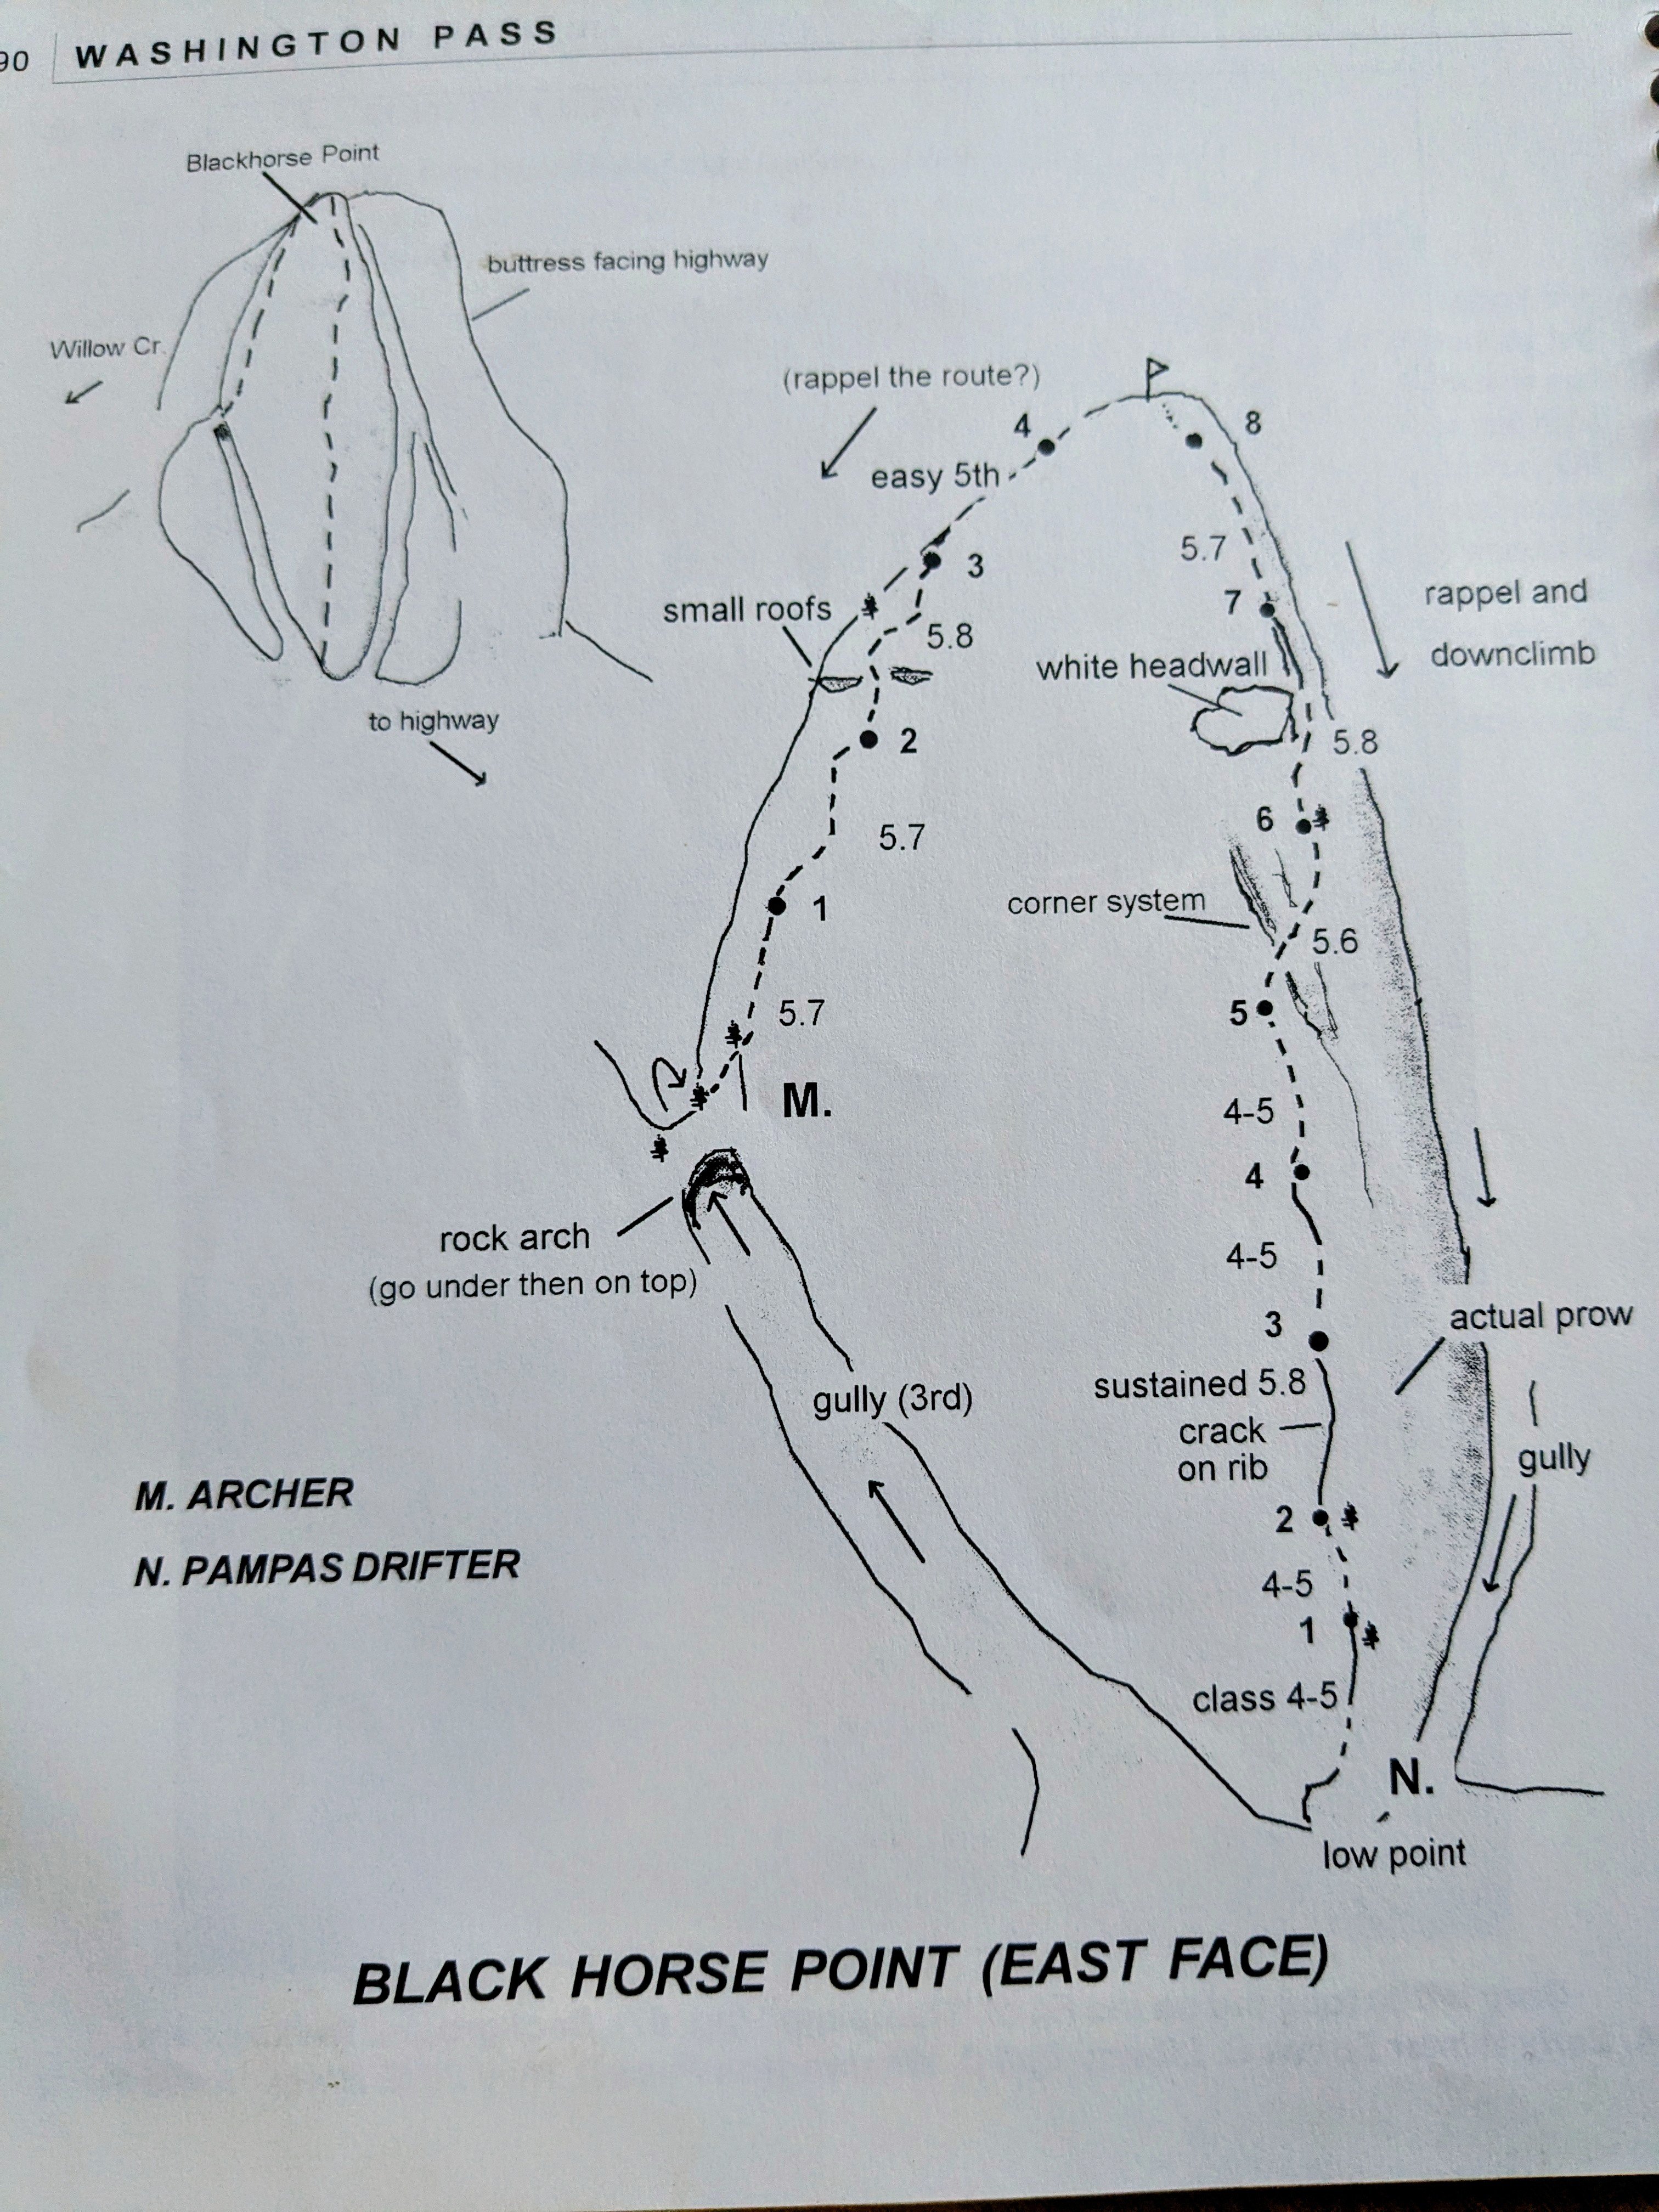
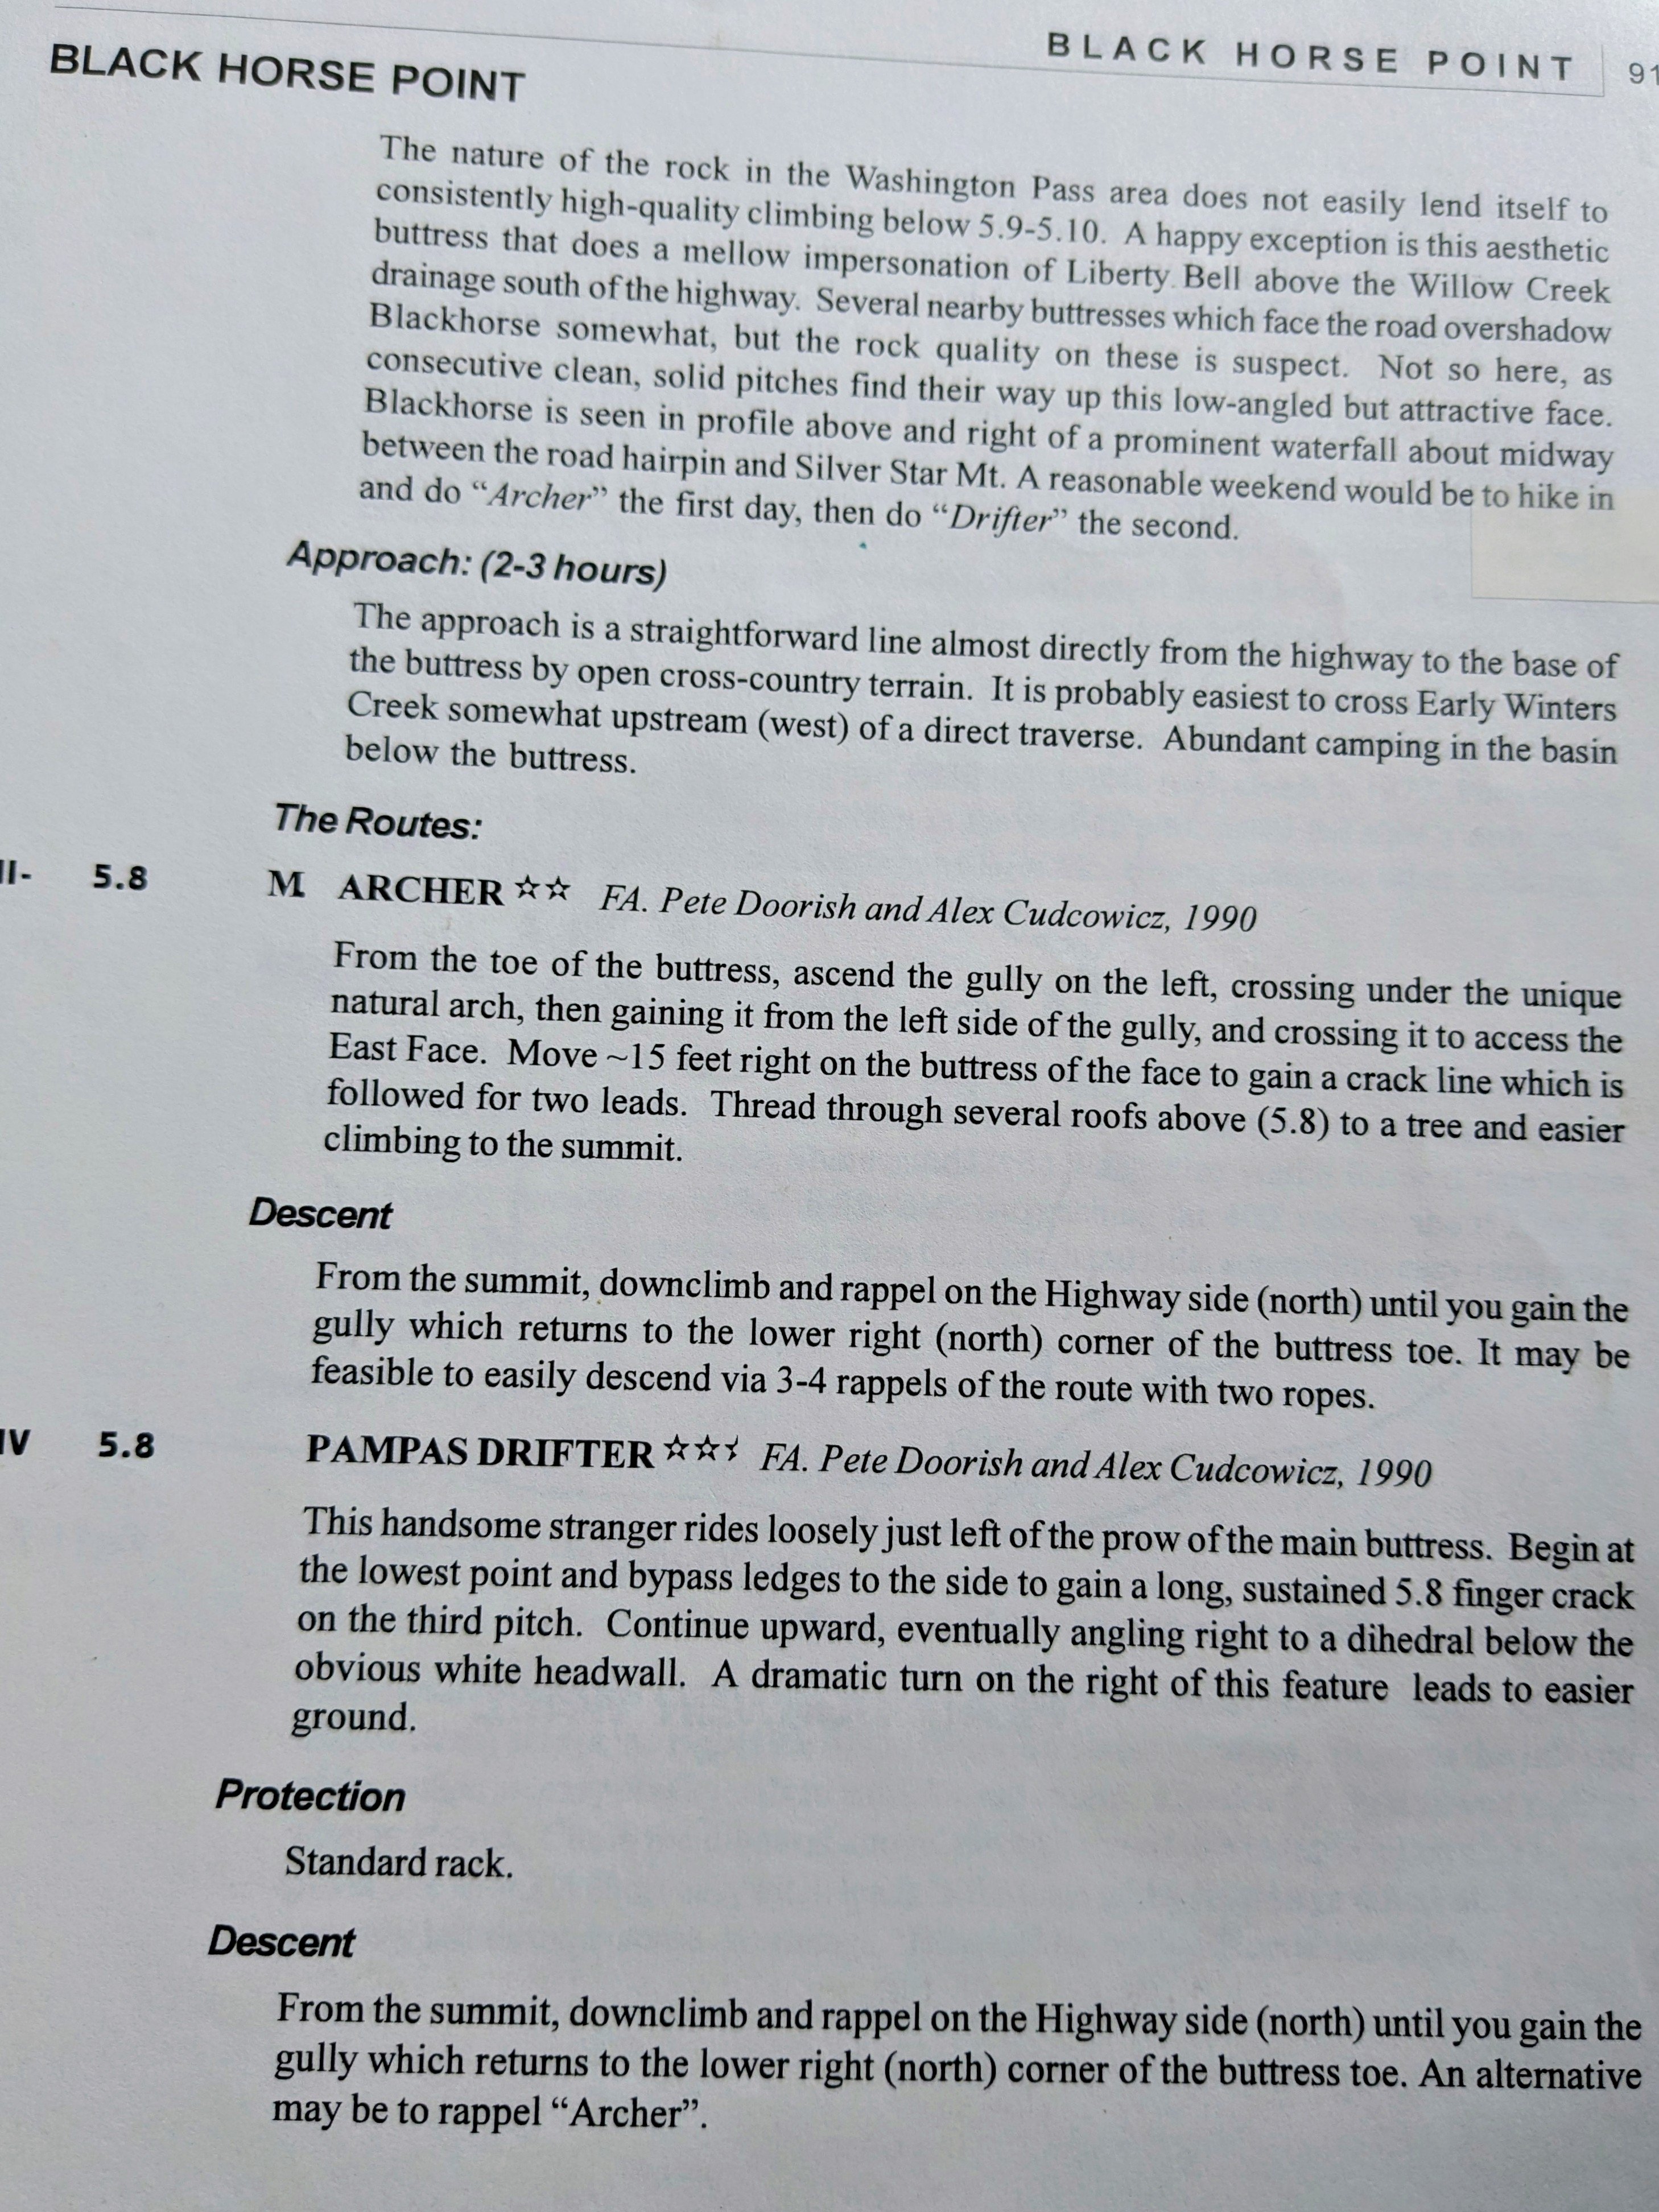
On Saturday, June 14th, Kelly Ryan and I climbed a rock buttress in the Washington Pass area, based only on photographs I had taken of that rock buttress a couple of weeks prior. It has 1000′ of mostly moderate and enjoyable granite climbing, with trees available for almost every belay station. The route is solidly Grade III in size. We swung leads for eight long pitches, where I led the odds and Kelly led the evens. We estimate that maybe one pitch was 5.9, and a number of others were 5.7 / 5.8, but there certainly were factors that could have led us to over-estimating difficulties at the time, so it's possible those difficulties will get downgraded upon the arrival of more opinions. There is a walk-off from the top, which returns to the route’s base. We took a lot of extra time dealing with the details of the unknown here, but with the beta now known, I imagine par for the course could be 12 to 13 hours car-to-car for this moderate route. It's hard to know if this is a new first ascent or not. We definitely climbed it in the style of a first ascent; and despite a lot of searching, I've yet to find conclusive proof that the particular line we climbed has been previously climbed in its entirety. Whatever the case may be, I'm rather proud of our little effort here! More details in this write-up: https://rocknropenw.com/2025/06/17/la-croupe-du-poney/
 2 points
 -
Too many clouds for an ol feller to choose2 points
-
Yeah that was a great trip guys. Classic Choss Dog Millionaires! It’s important to realize that you can still have lots of remote flavor in the Cascades and not be that far from the road, but with that said it’s certainly a chore getting into BULLEN. Seems like good potential for Repulsive 69 list- lots of Brush, Wet Slabs, Loose rock, Steep snow with dirty moat moves, and uncertain creek crossings. What’s not to love on a JG trip? I see the glorious line in picture 7! Forget the Internet, FB, Trip reports and Gaia tracks, pick up the Beckey Guide and find yourself an adventure.2 points
-
Transition between glaciers was just a steep lil snow step. Doable, just annoying. Had to take ski's off for it but still snow-covered when we did it. klawatti wasn't fully skiable(photo below)
 2 points
 -
Trip: Mount Wow - Via Lake Allen Trip Date: 06/02/2025 Trip Report: Climbed Mount Wow with Dwayner today. Very enjoyable hike to Lake Allen up the very steep boot path, then mostly snow to the short ledge. Bare there and above. Flowers are starting to show everywhere the snow isn't hanging around. About 4000' gain/loss in only about 6 1/2 miles round trip. Steep. Gear Notes: Mountain boots still helpful. Ice axe too. Approach Notes: It's a boot path to the lake.
 2 points
 -
1 point
-
there will be plenty of people up there. take more sun protection than you think you need (hats, buffs, glasses - sunscreen never lasts long enough). Take lots of water and start early. 3 AM from the parking lot is probably early enough if you're fast, otherwise it is more pleasant as a two-day trip. take a trash bag or waterproof pants for the glissade down! (remove crampons for the glissade)1 point
-
Hmmmm....important distinction....let's see....I think the west side?1 point
-
Well done surviving an attempt on that one! It was on the list until it I saw it firsthand in 2007 and realized I wasn't nearly tough enough.... but maybe it was the massive/serac rockfall that strafed the approach while we watched, or at least that was the mental excuse I used all these years.1 point
-
Very cool. Thanks for sharing.1 point
-
I have a copy of that Burdo guide and it looks like the route you climbed follows a fair bit of "Pampas Drifter" (5.8, Grade III-IV). FA was by Pete Doorish and Alex Cudcowicz in 1990. Not the greatest pictures, but the topo and (brief) description are attached. That team also had the first ascent of "Archer", which Dale Farnham told me was named after a dog Pete had at the time. I think the main difference is that you jogged left under the "white headwall" and Pete and Alex kept to the right? Regardless, I have been really curious about this route (and Archer) since I came across it in the old Burdo guide. Hope that your TR puts some more traffic on it. Nice work!
 1 point
 -
Her name didn't come up on an AMGA search of guides, for whatever that's worth. Then I read the article you posted, and it doesn't say she is a guide, only that she was 'leading' three people. Probably just means she has more experience than the others. We've all been there. Punching through a hole is a classic early season hazard that can catch almost anyone off guard, unless you're probing every step, which is completely impractical in the mountains. Vlogging the rescue isn't something I would do, but it isn't illegal and doesn't harm anyone. So yeah, "old man yelling at clouds" here pretty much sums it up. Go out and get some yerselves before yer dead.1 point
-
I bet Bryan could hook you up with a copy for the right quantity of raw beef.1 point
-
I borrowed a copy from a friend several years ago and distinctly remember reference to several lines on that buttress. Regardless, It's great to see attention being paid to these lesser known features!1 point
-
Wayne would know better than most! Congrats regardless, it’s hard to find new territory these days!1 point
-
It’s not for everyone but appreciate those who share in non-corporate media! How much do you think OnX paid REI for that site? Gotta recoup.1 point
-
Likely an FA. You give great detail in your trip report. Do you have something on mountain project yet? It looks like a fine climb!1 point
-
Don't be trying to access your public lands @Fairweather!1 point
-
https://www.dailymail.co.uk/news/article-14792543/amp/Michelino-Sunseri-Grand-Teton-national-park-mountain-strava-court-trial.html 😂😂. Damn imagine getting cited for cutting a switchback based on your Strava track!1 point
-
Great TR! Thanks. We did this one back in the 1990s--I think it was mid May and the Boulder Shelter was buried to the roof. I do recall some very, very steep snow below the top that was obviously covering a cliff band. This was the era of 35mm slides; I'll have to flip through the book.1 point
-
Wow, that is a big effort! I have had this on my list for a long time and still do....thanks for the report!1 point
-
Careful there @Lucas Ng, lots of steep looseness for a soloist! I know, my dad voice coming out, but I want to be reading your TRs for many years. Well done coming back safely, looks like a beautiful day in the hills!1 point
-
My takeaway is don't get complacent if you're not the team leader or you're just less experienced than your partners. Research the routes, know the descent and if you have concerns, speak up. I wonder what compelled this group to intentionally plan to descend the climbing route (the day before) instead of the standard descent that did have fixed anchors.1 point
-
Thanks for the company and I’m sorry about your ear which endured all my tales of my misadventures. Dang summit still eludes me, but I’m at peace with that. My crampons were not cooperating and it was too late once I figured them out. it was really nice spending time up there with you. Since those mountains are my home turf I will probably make another attempt some time. Goes to show how conditions can make it a cakewalk versus a more serious endeavor with a little temperature variation. Onward to more adventure.1 point
-
I think anyone that has climbed technical territory for a long while has been in this situation. I know some of you have climbed much more than me. You end up trusting a single suspect anchor because it is all you have. So far, if you’re reading this, we have lived. And as those anchors go, some are more obviously desperate than others. Yeah in ideal conditions always back it up. Otherwise you have my best wishes. RIP.1 point
-
Forest service full accident report. Confirms presumed failure of single anchor point. https://bloximages.newyork1.vip.townnews.com/kxly.com/content/tncms/assets/v3/editorial/8/44/844567ae-de1f-463b-9ba0-3c157259fb33/6848c7bac1406.pdf.pdf1 point
-
Sounds like a certain type of fun!1 point
-
I've always wanted to head south of Cinderella, nice work that is a lot of terrain. I never knew him but it seems Dallas touched a lot of lives for the better. Here's our story from a couple years ago:1 point
-
I just want them to arrest and incarcerate people who cut in line during my commute home from work. String them up, tar and feathers.1 point
-
Oh, duh! You meant THE mountain!🤣
 1 point
 -
Idk if they would do this but please check out the sponsors of this board. American Alpine Institute.1 point
-
I climbed Mt. Rainier in September 1969 with Phursumba as one of our guides. He was newly arrived at Rainier Mountaineering, as I recall. I worked at the front desk of Paradise Inn and lived in a dorm nearby so I was used to the altitude. I was in college, and other employees and I used to go up to Camp Muir every now and then. Phursumba was a bit of a hit with the girls who worked at Paradise, he was tall, handsome, kind and sweet. He made many summit ascents leading climbers. The day we employees climbed I don't remember any other climbing parties. It seemed we had the mountain to ourselves. We slept at Camp Muir and rose at 2:30 a.m. because we needed to be on the summit by 12 noon. This was to avoid avalanche danger from the warmth of the afternoon sun. Phursumba went up the mountain with ease. For me, it was the most strenuous thing I've ever done, but so worth it. Thanks to Phursumba and the other wonderful guides.1 point
-
Trip: Davis Peak - South Route - Skiers Variation Trip Date: 04/23/2025 Trip Report: After reading this recent TR on a skiable route to Davis Peak in the NCNP we had to give it a try. My buddies and I had attempted Davis in January of '22 so we knew what we were getting into with the approach, but a skiable route to the summit that avoided the difficult scramble near the summit sounded awesome, plus it's always great to do a 3000' bushwhack with skis on your back. So the next time we were too sick to work but not too sick to go skiing we hit it up, Wed the 23rd. The bushwhack is bad, but not terrible, there is little undergrowth, just deadfall so it's mostly just navigating. Above 2600' it gets much better. The track Ryan Stoddard and Nick Roy posted is pretty much perfect, when we deviated from it by more than 30’ we regretted it. We hiked to the start of a boulderfield at 4200’ before we could start skinning, which was a bit farther than optimal, but not much, the 4000'-4200’ traverse below cliffs was postholing intermittently, so not ideal. Above 4200’ we cruised on firm snow, making great time skinning. The route up is straight forward hooking around to the west and up to the summit. We didn’t spend long on the summit as the snow was calling, naturally the skiing was over WAAAY too fast and we had to swap out for shoes and walk down, down, down. 12 hours after we started we were back at the car for a hot beer (not used to this spring thing yet). It was a nice route, rugged for sure, but an amazing peak in a spectacular position with views from an interesting angle into the Snowfield group and the southern pickets. Everyone should go do this! Ryan has a GPX on NWHikers No snow in sight, lets get it! Dylan and the Pickets. Gear Notes: Ski gear. Carried avy, axe, crampons. Dark clothes, the forest is sooty, I found work gloves to be nice for the deadfall and burned forest. Approach Notes: Park at the Gorge Creek overlook, at the east bridge abutment there is a trail up, go up.1 point
-
This is really intense climbing. I'm grateful that you could be composed enough to get these amazing pics. And thanks for writing up the account here. About the "atmospheric displays": What Olyclimber wonders about: it is not a sundog. Sundogs are white spots either side of the sun, slightly higher in elevation when the sun is high, and sometimes a bit reddish at the outer edge. Those colors are most likely part of a "circumhorizontal arc", a very beautiful display. Happens when the ice crystals are quite small and hang in the air perfectly stable, like a hexagonal plate on a table. I can't tell from the pic, but I'm guessing that the arc should be about 50 degrees below the sun. The above two pics by Priti: The top one is also a circumhorizontal arc. One of my favorite ice displays. The bottom pic is really amazing though. The oval around the sun is a "circumscribed halo". Rare to see it so distinct. The line arcing through the sun is the parahelic arc. It is due to reflections off the sides of ice crystals. Also rare to see it extended so much. Perhaps it went clear around the horizon to make one large circle? (I've seen it do that once.) And then there is that strange bottom "hump" below the sun. I've never seen it myself, but it appears to be an excellent case of a Parry arc. All of these are due to small ice crystals. So glad that you noticed it and took pics. Keep your eyes peeled and get more pics like that if you can.1 point
-
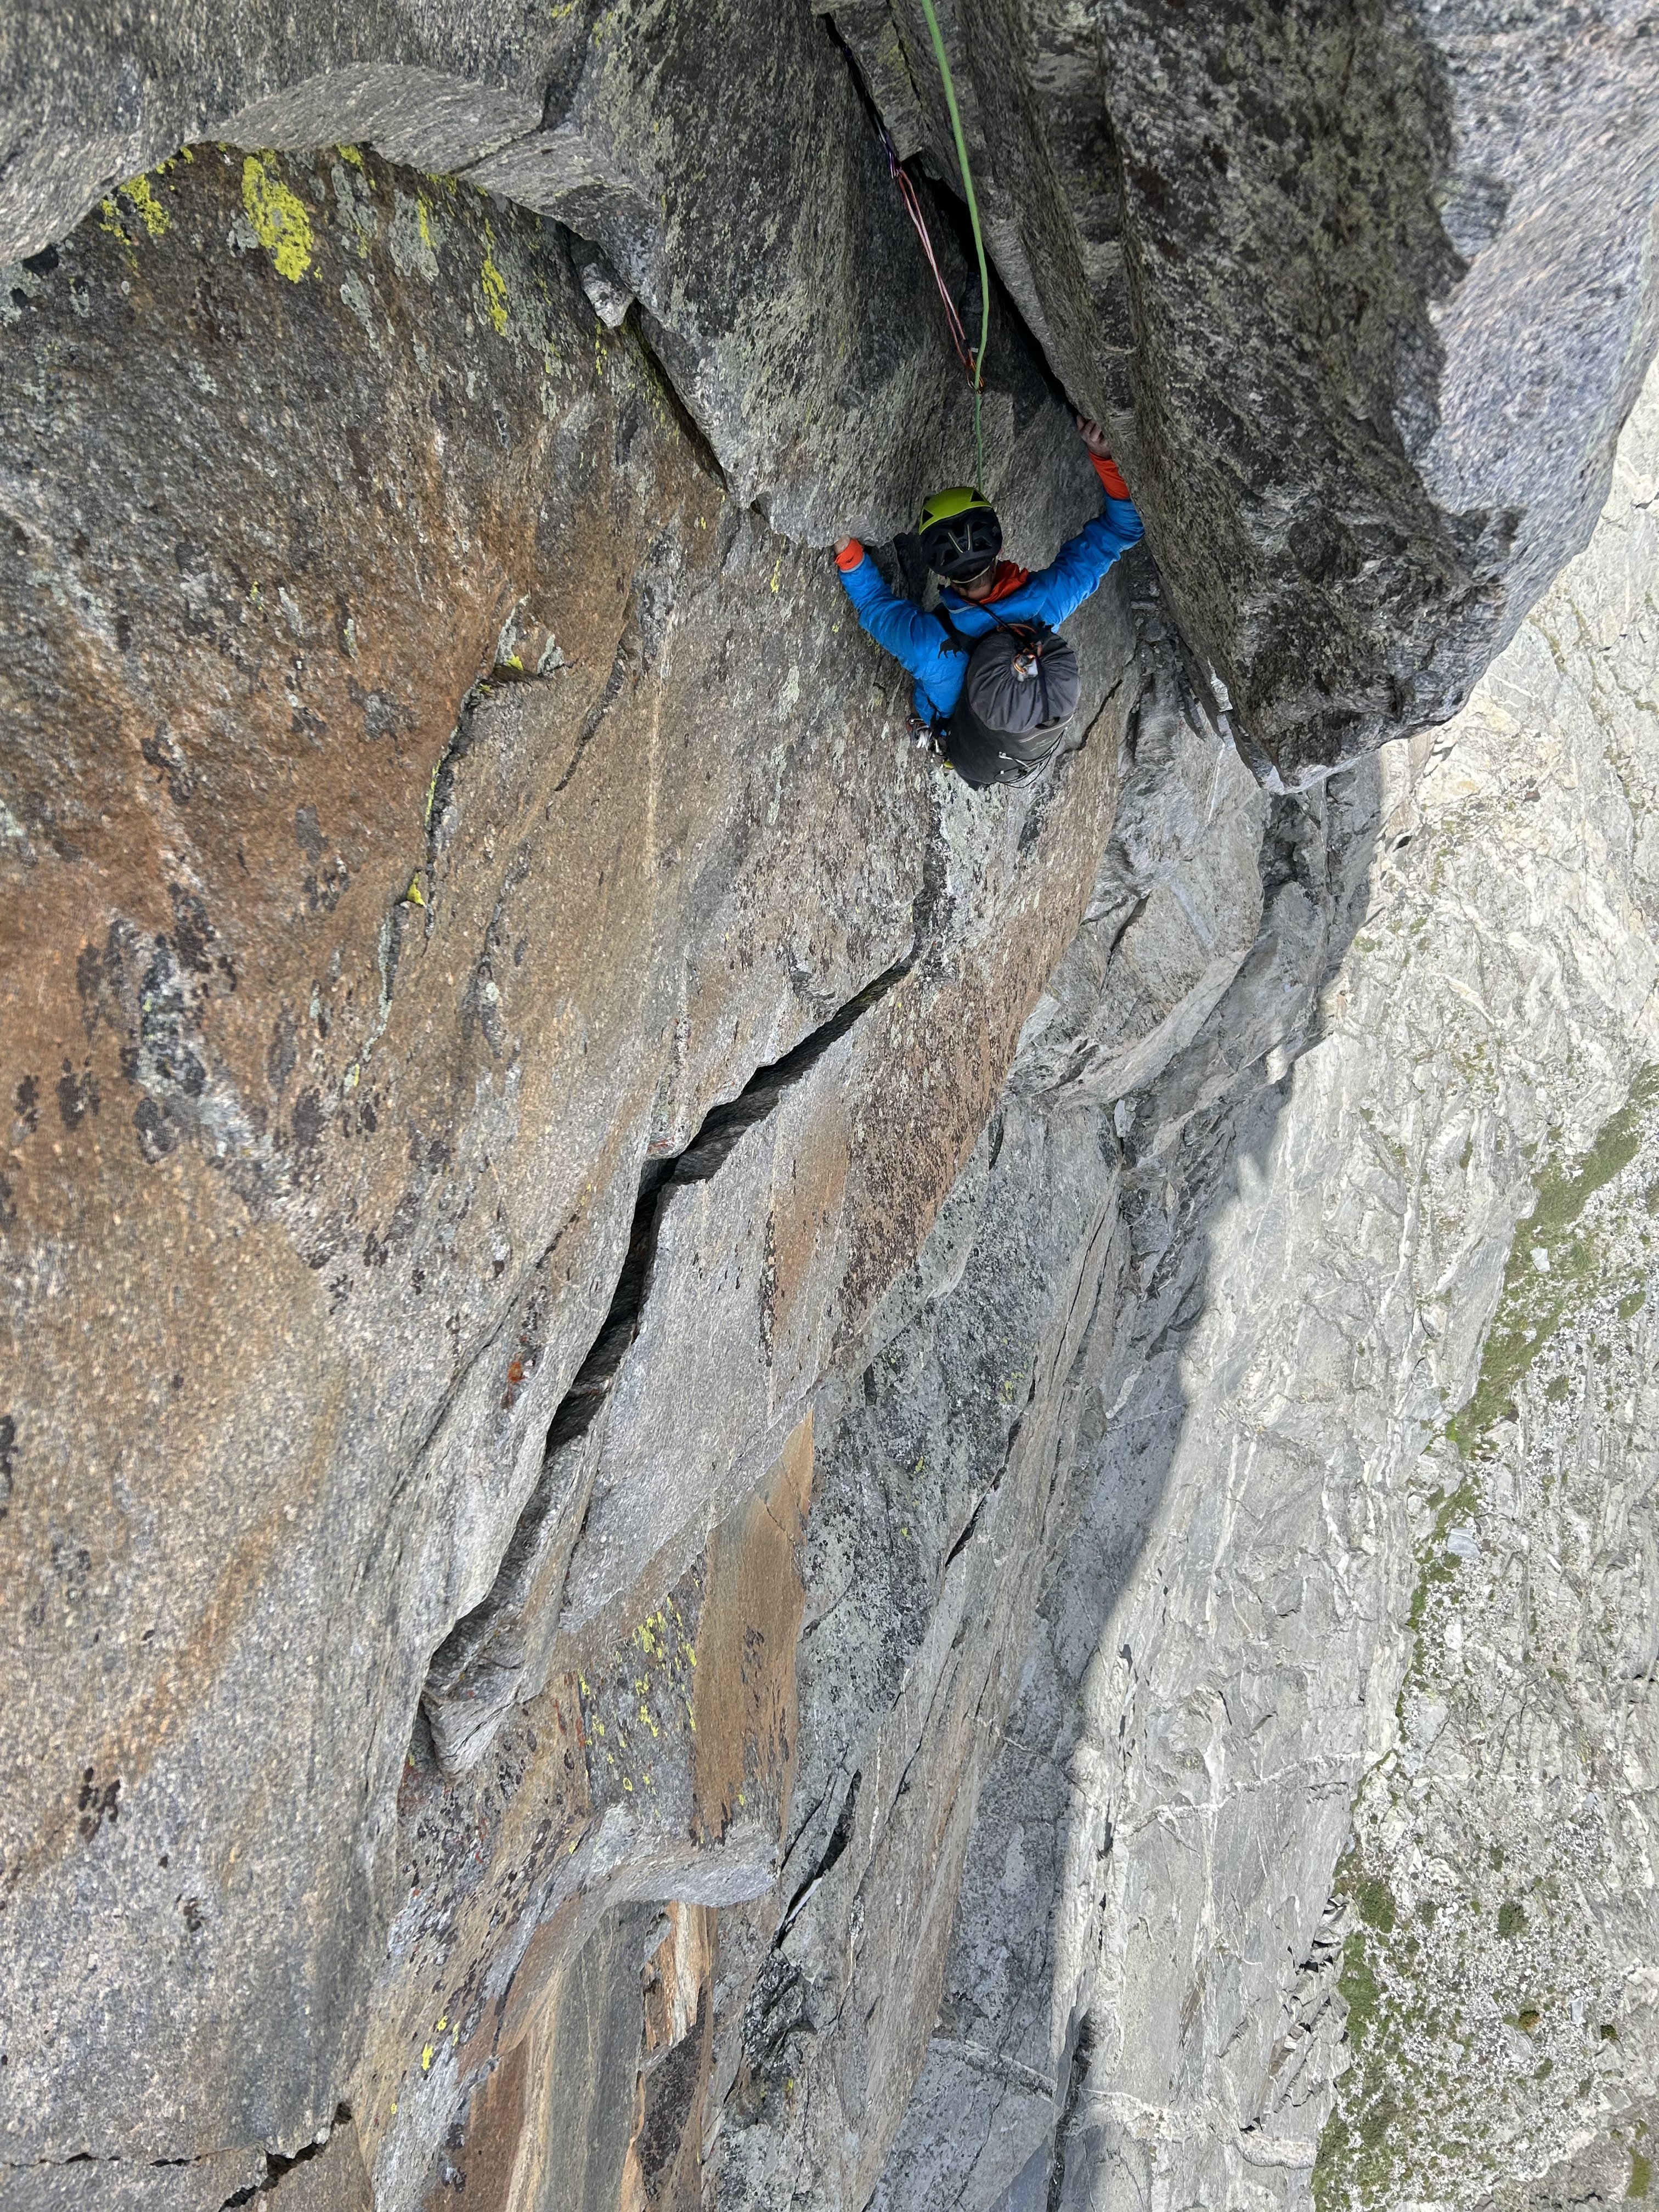
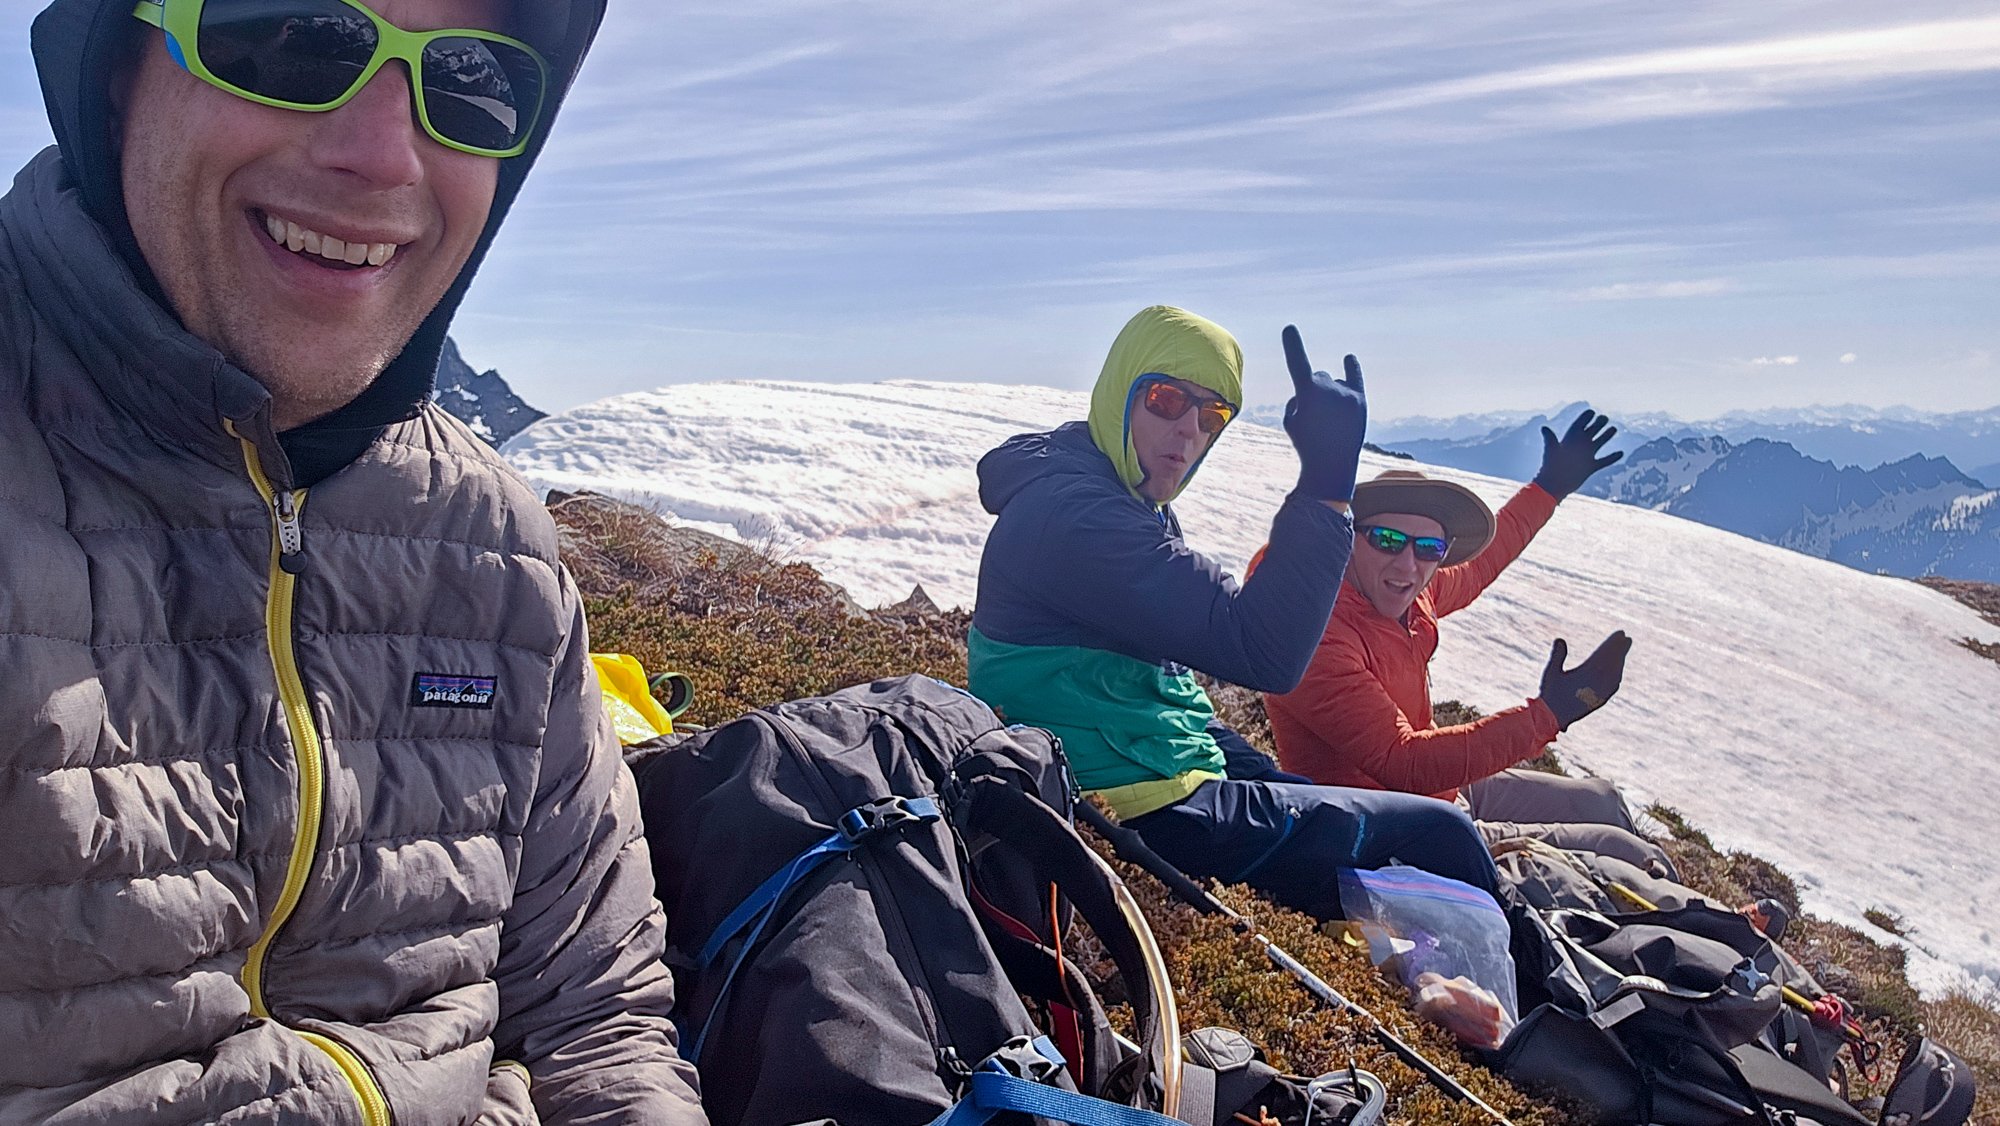
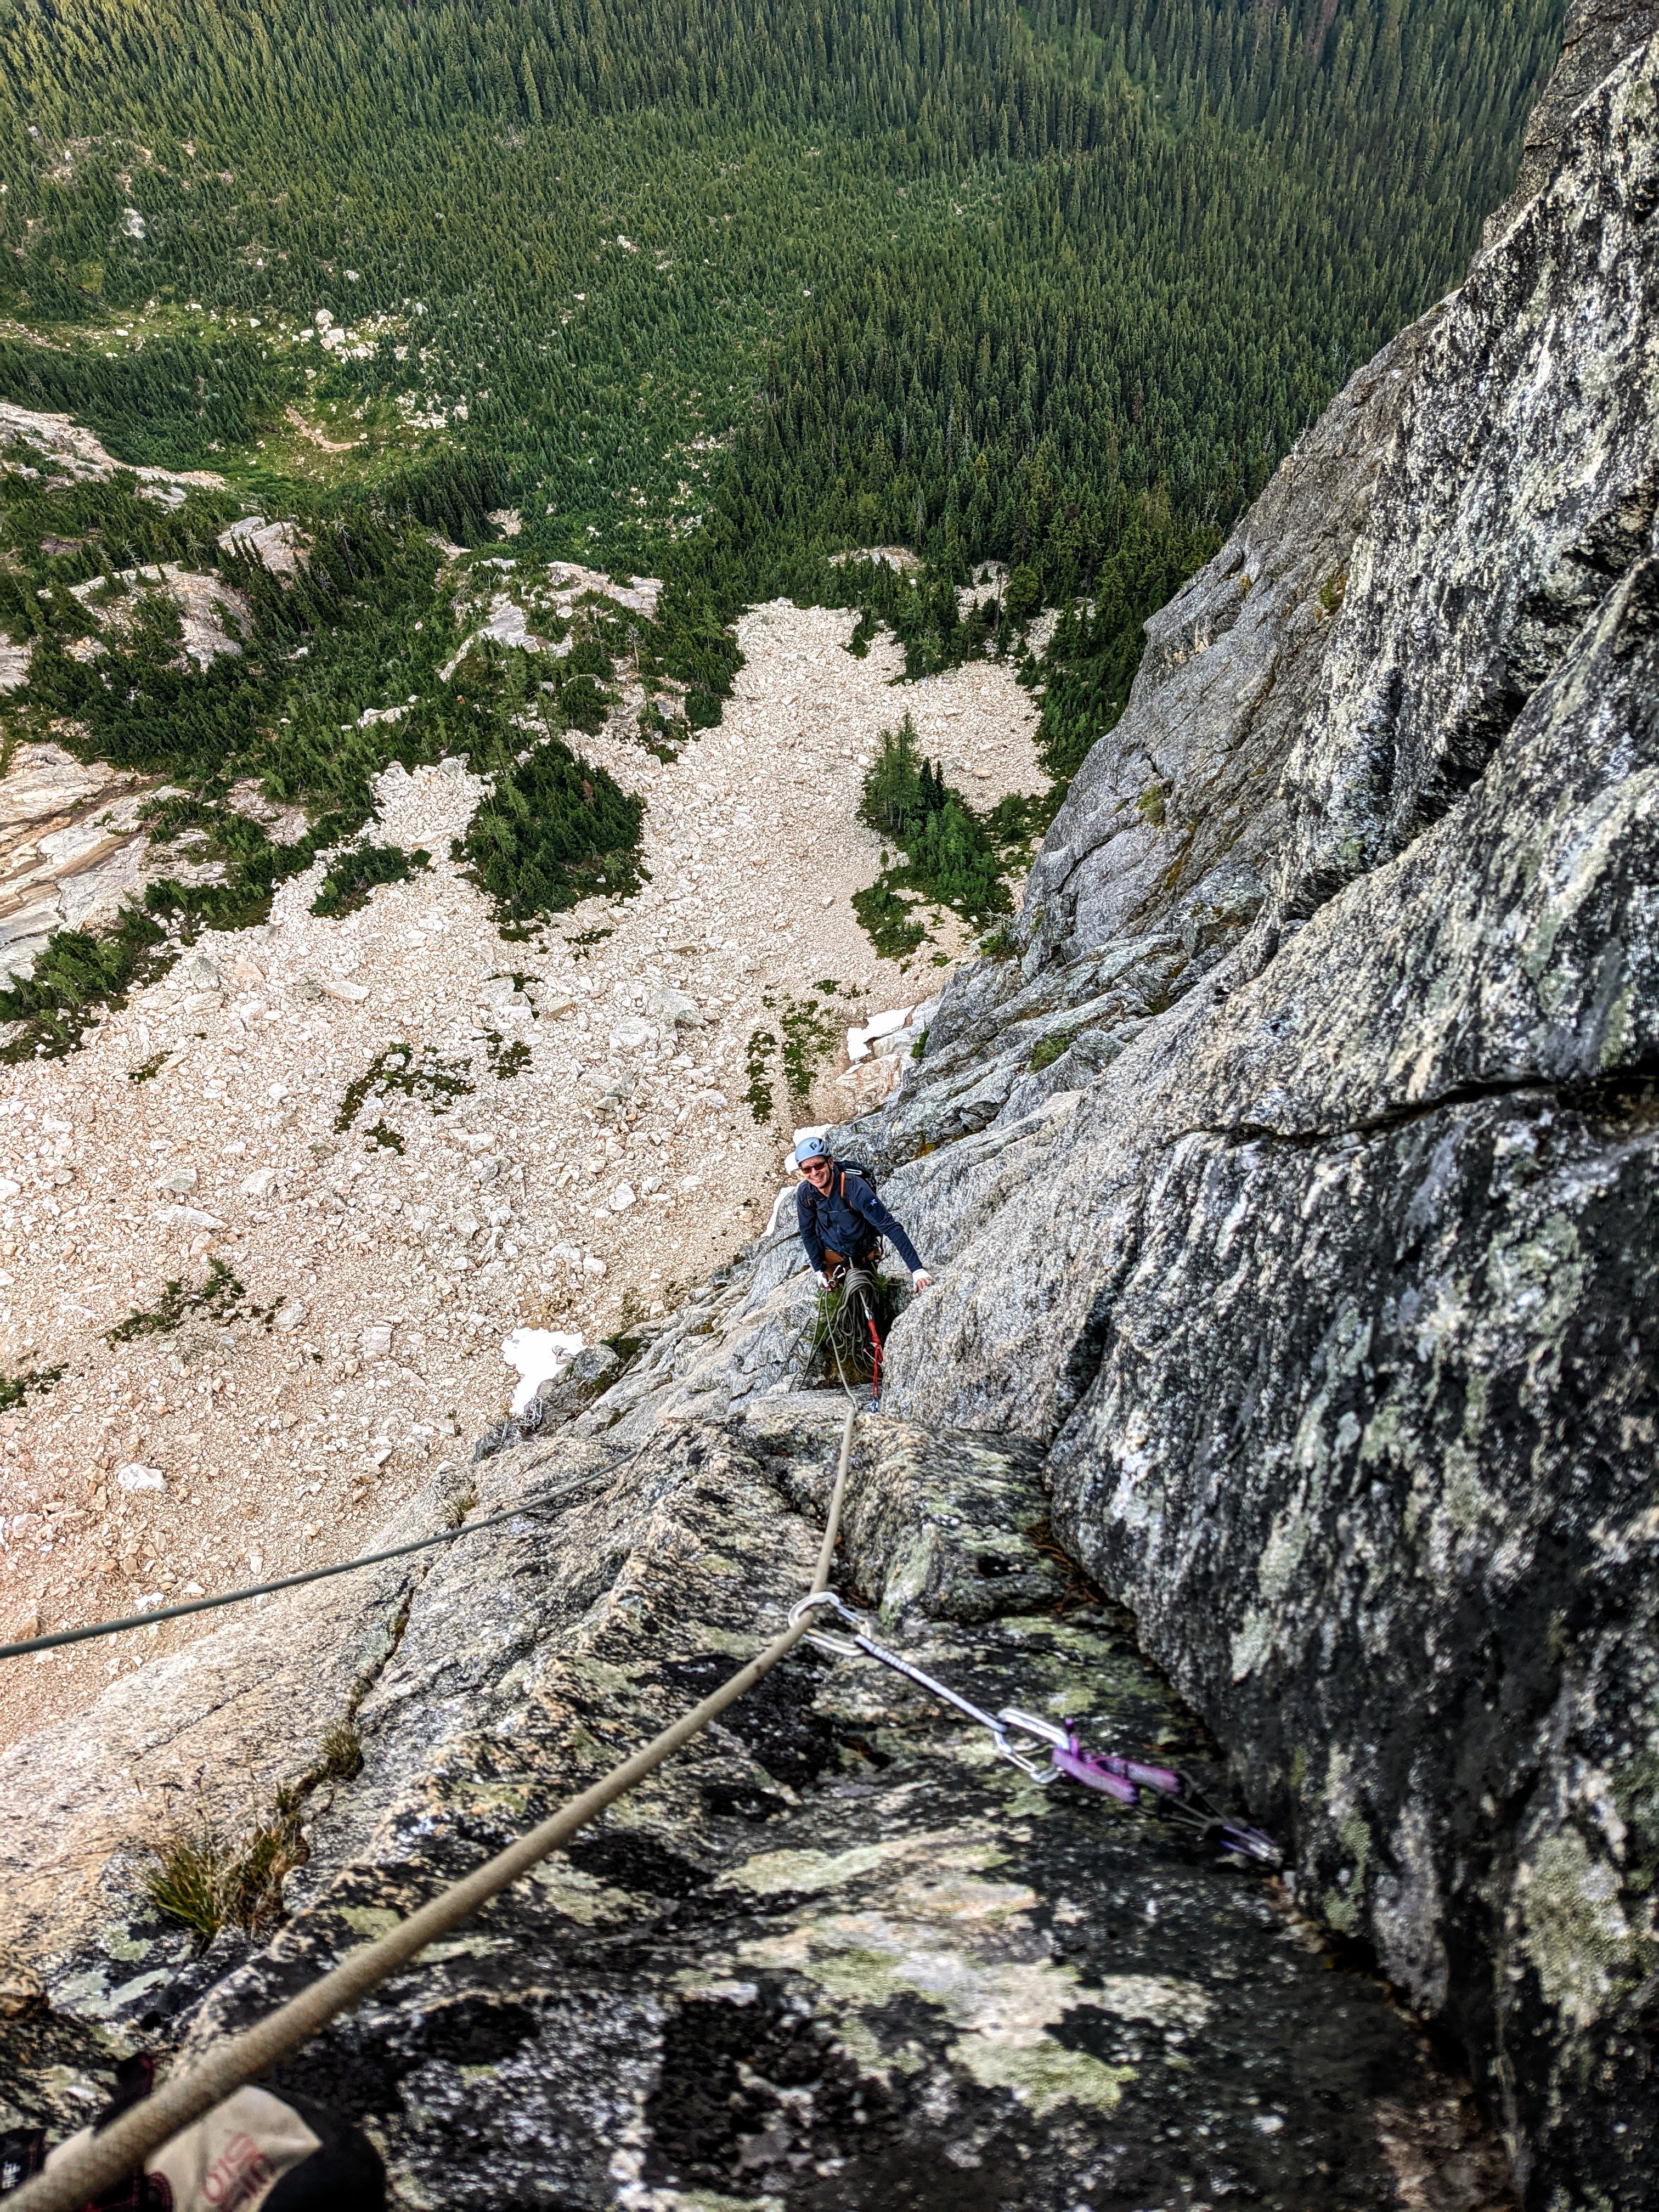
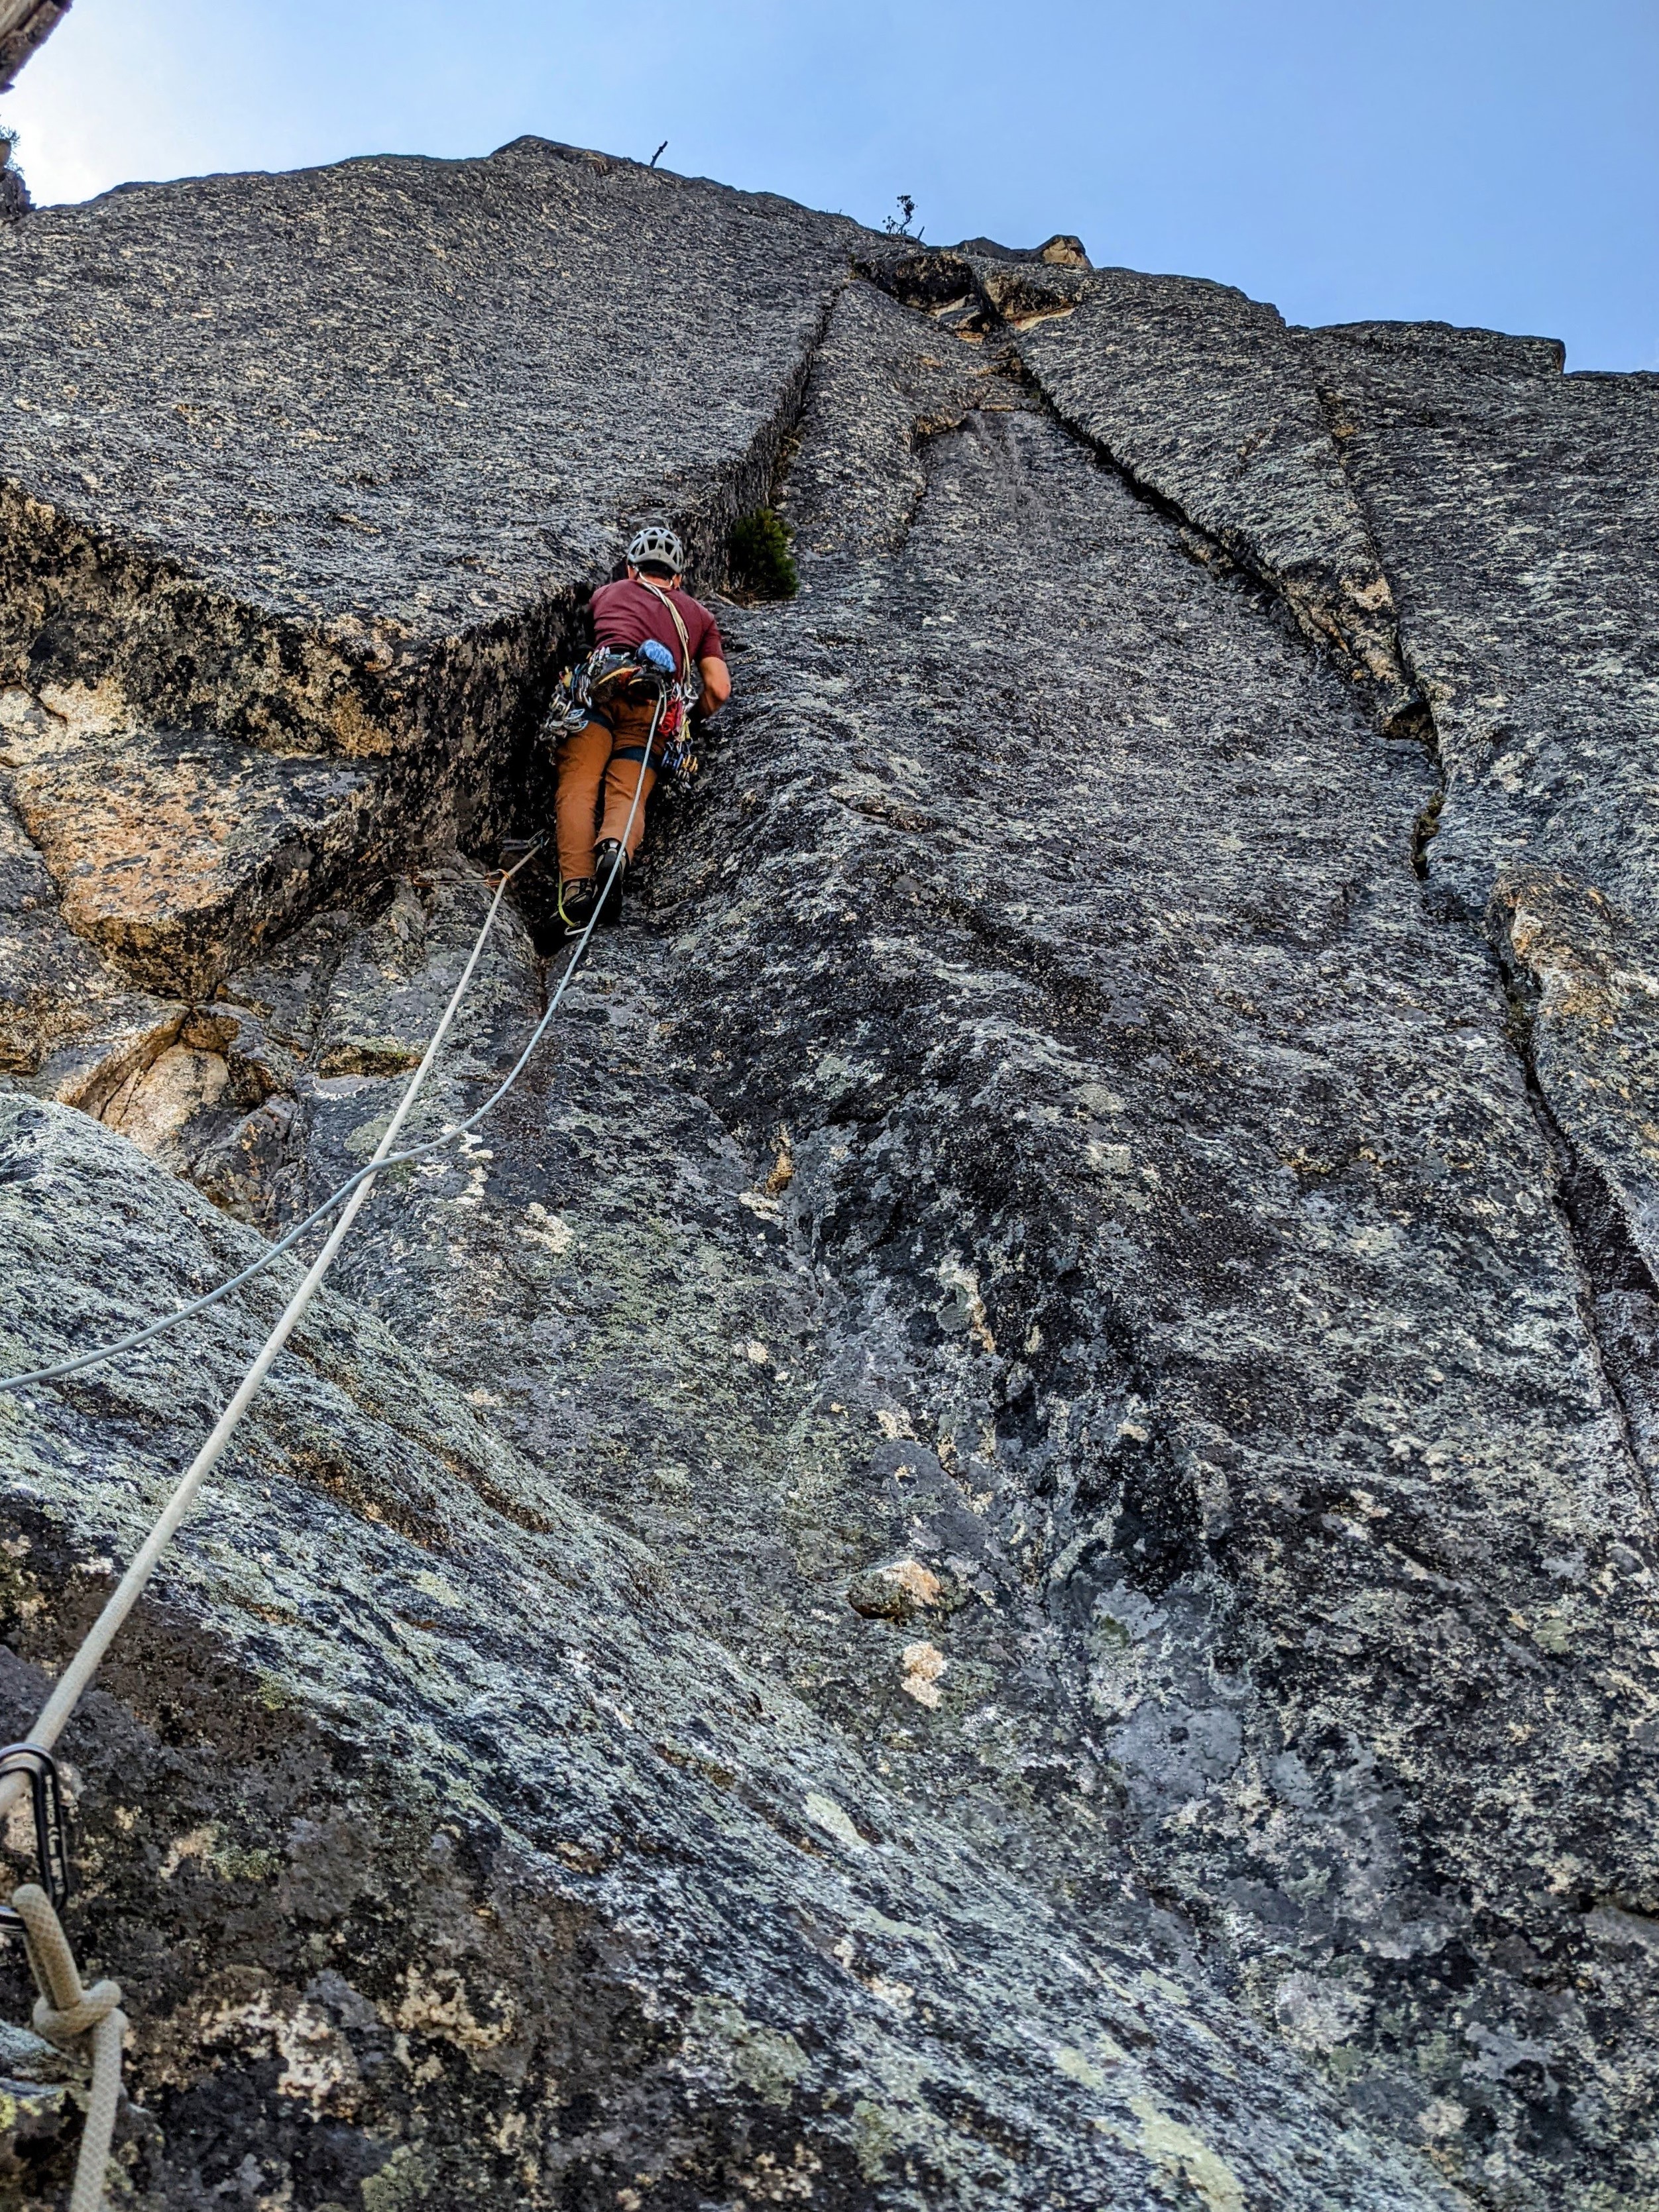
Trip: Porcupine Creek Wall - Salad Days III 900' 5.10+ Trip Date: 08/20/2022 Trip Report: It did not go unnoted when Eric Wehrly moved to town. While our more noteworthy first ascents may be of a…umm…slightly different style, in my mind’s eye I generally enjoy any adventure far from the road particularly if it involves unclimbed terrain. Finding like-minded folks at a similar point in life, that is old, is not easy. So I assumed at some point we’d tie in together. It did not happen quickly. While phone numbers were exchanged and talk of getting out occurred, the years passed by. Maybe I came on too strong. During Covid there may have been a day at Mount Erie where I loudly berated Eric to be my “New Best Friend!” as he TR-soloed nearby. Clearly, I needed a better incentive than that. Halfway up the Pacific Crest Trail between Rainy and Cutthroat Passes a large wall of granite stands proudly above the trail. I first walked by it eighteen years ago with my then girlfriend. From a distance it had the obvious geometry and tone of good rock. A friend and I almost went to check it out but we made other plans and the idea was largely forgotten. This summer I strolled by it again, with my now wife and our two teenage children. Still there, still grey, still splitter. A week later I spent a solitary day circumnavigating Porcupine Peak. The summit was eventually attained, and, on the descent I found myself beneath this wall I had considered for decades. Carefully glassing it I became discouraged. As I walked away I thought “almost but not quite, the start may not go and the rest is just a bit too dirty and discontinuous.” However, it’s amazing what some grainy iPhone photos and a bit of selective memory can do. Furthermore I finally had the sort of incentive Eric might respond to. On Saturday August 20th we stood below “the start that may not go” and sure enough it didn’t. As this had been my idea, I felt obligated to get us rolling so I began a long circuitous pitch climbing easy terrain off to the side before a long downward traverse led to a committing mantle onto a vegetated slab above. Struggling with massive rope drag from the severely Z-shaped pitch, I encountered a recurring theme of frantically hacking away a clump of heather to find a small cam placement. Eric quickly downrated my estimated grade and then scrambled up more heather covered corners to the base of a steep, relatively clean layback flake. Perfect edges made the otherwise intimidating flake go quickly. Unfortunately, the intended route up a long “hand crack” above the flake turned out to be 100 feet of 4”-6” offwidth. The scale of the wall was turning out to be a bit larger than anticipated. Instead, Eric made a delicate leftward traverse before committing to a steep, broken crack formed in part by some precariously hollow fridge-sized blocks. Easy terrain led to the base of what had appeared to be a splitter from the base of the wall. Above I could only see a slammed shut seam covered in a thick crust of lichen, moss, and dirt. Eric proclaimed it to be a finger crack. I was highly skeptical. But on new ground there’s nothing worse than being the person who forfeits your partner's last proud lead by bailing off into indirect, unappealing terrain. I spent several minutes pawing at the start, muttering random negativities. After a few minutes I finally committed to the initial moves into the corner then rapidly hung on a nut. But it was started and despite my deep pessimism about there actually being a climbable crack under the filth I found myself inching upwards. Sand and pulverized lichen poured into my eyes, my nose, my ears, and my shirt. Aiding up in 8mm dyneema slings progress was dispiritingly slow as I cleaned out every single placement. Time oozed on and hours later I finally pulled the singular hand jam at the very top of the 150-foot crack and flopped onto a good ledge. Now relatively cleaned out, Eric rapidly followed the crack free proclaiming it 5.10+. Having climbed three pitches in five hours and 45 minutes, simple math suggested that our rate of ascent was significantly slower than the sun's rate of descent. While I did not yet suggest bailing, I did point out this obvious observation. Yet Eric confidently proclaimed that the “walk off” would in fact be a walk and that we would only need headlamps once we were within spitting distance of our packs. Regardless of attitude at this point, the wall kicked back a bit and the next pitch looked easier. No reason to bail yet so Eric headed out, moving quickly across a thankfully clean hand crack before moving out of sight into the corners above. Progress slowed, the rope stopped moving, I almost nodded off. The clouds continued to build as the rope made halting progress. A random inquiry on my part was met with a stern “Not Now”. Eventually Eric reappeared above having navigated some sketchy 5.10 face climbing to avoid an impossibly munge-filled corner. Moving left and right, up and down he eventually retreated to a blocky alcove from which we could reappraise the options above. With the rack refreshed the obvious direction was through an overhanging V-shaped corner. Chimney moves, flared jams, wide stemming and possibly some tension left me once again above my gear, hanging off a sloping rail, feet stemmed out on small dishes, surrounded by thick mats of grass and heather pasted in corners. With my ancient Chouinard north wall hammer wedged into a hummock, a brief struggle ensued between which would be pried off first, the hummock or myself. Thankfully the hummock released, revealing a perfect hand crack. The climbing relented and the rate of progress discernibly increased. As I neared the end of a lead the sky finally cracked open with a brief squall and a lovely rainbow filling the valley. Despite the weather I finally felt committed to the climb. Going over the top was now the path of least resistance. Almost every challenging climb you undertake has that beautiful inflection point, when hours, days or even years of uncertainty just melt away leaving you relaxed and in the moment. Eric climbed another beautiful corner with sustained finger cracks under the hummocks and dirt. The final pitch was a perfect finale. Shockingly clean granite with delightful climbing up to and around a large roof followed by easy, clean slabs to the top of the wall. The Cascades were bathed in a beautiful soft glow and views extended from Dome in the far distance to the sun setting off the shoulder of Mesachie Peak. The walk off was anything but, and had it been dark we would have been in for a genuine epic. Yet much as predicted headlamps only came out as we finally exited the talus onto delightful heather meadows not far from our packs. If you're familiar with Eric’s and Rolf’s first ascents on massive walls of less than stellar rock I’m sure you’ve wondered what makes them tick. My simple observation would be an extremely positive mental attitude with a surprisingly conservative aversion to potential loose rock. My successes have largely been built off an ability to separate the negativity of my dumb brain from the mechanical motions of moving upwards. It’s worked but doesn’t seem nearly as efficient as Eric's approach. I’d like to think I might adopt some of his positive mindset in the future. That said I’m pretty sure we influenced each other, as we headed out down wet talus with heavy packs Eric could be heard muttering “If you added a few bolts...”. Hour and twenty minutes from parking Lot Enter the Drag-On (forever) In my happy place (after the rain) Exiting the wall Views South and North Old Dirty Bastard and Mr. Clean Postscript After Eric graciously spent another day of his life reclimbing and fixing the first four pitches with me I went back for the Labor Day weekend and put in thirty hours of cleaning, creating fixed anchors and adding several variations to avoid indirect, loose or excessively dirty terrain. Rock is excellent and clean throughout. Rappelling is quick and efficient vs. the unsavory walk off. There is a pile of good climbing up there.
 1 point
 -
Nice trip! I've been wondering what that area bounded by Easy Ridge, the Pickets, and Triumph is like, and your photos make me want to go tag Despair. I'm jealous of your clear skies, and your zoom lens -- you must have been carrying some serious glass. PS -- Be a cheap bastard. It's only another 7 miles ;-).1 point