Leaderboard


Popular Content
Showing content with the highest reputation since 01/03/26 in Posts
-
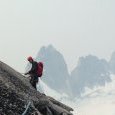
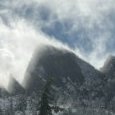
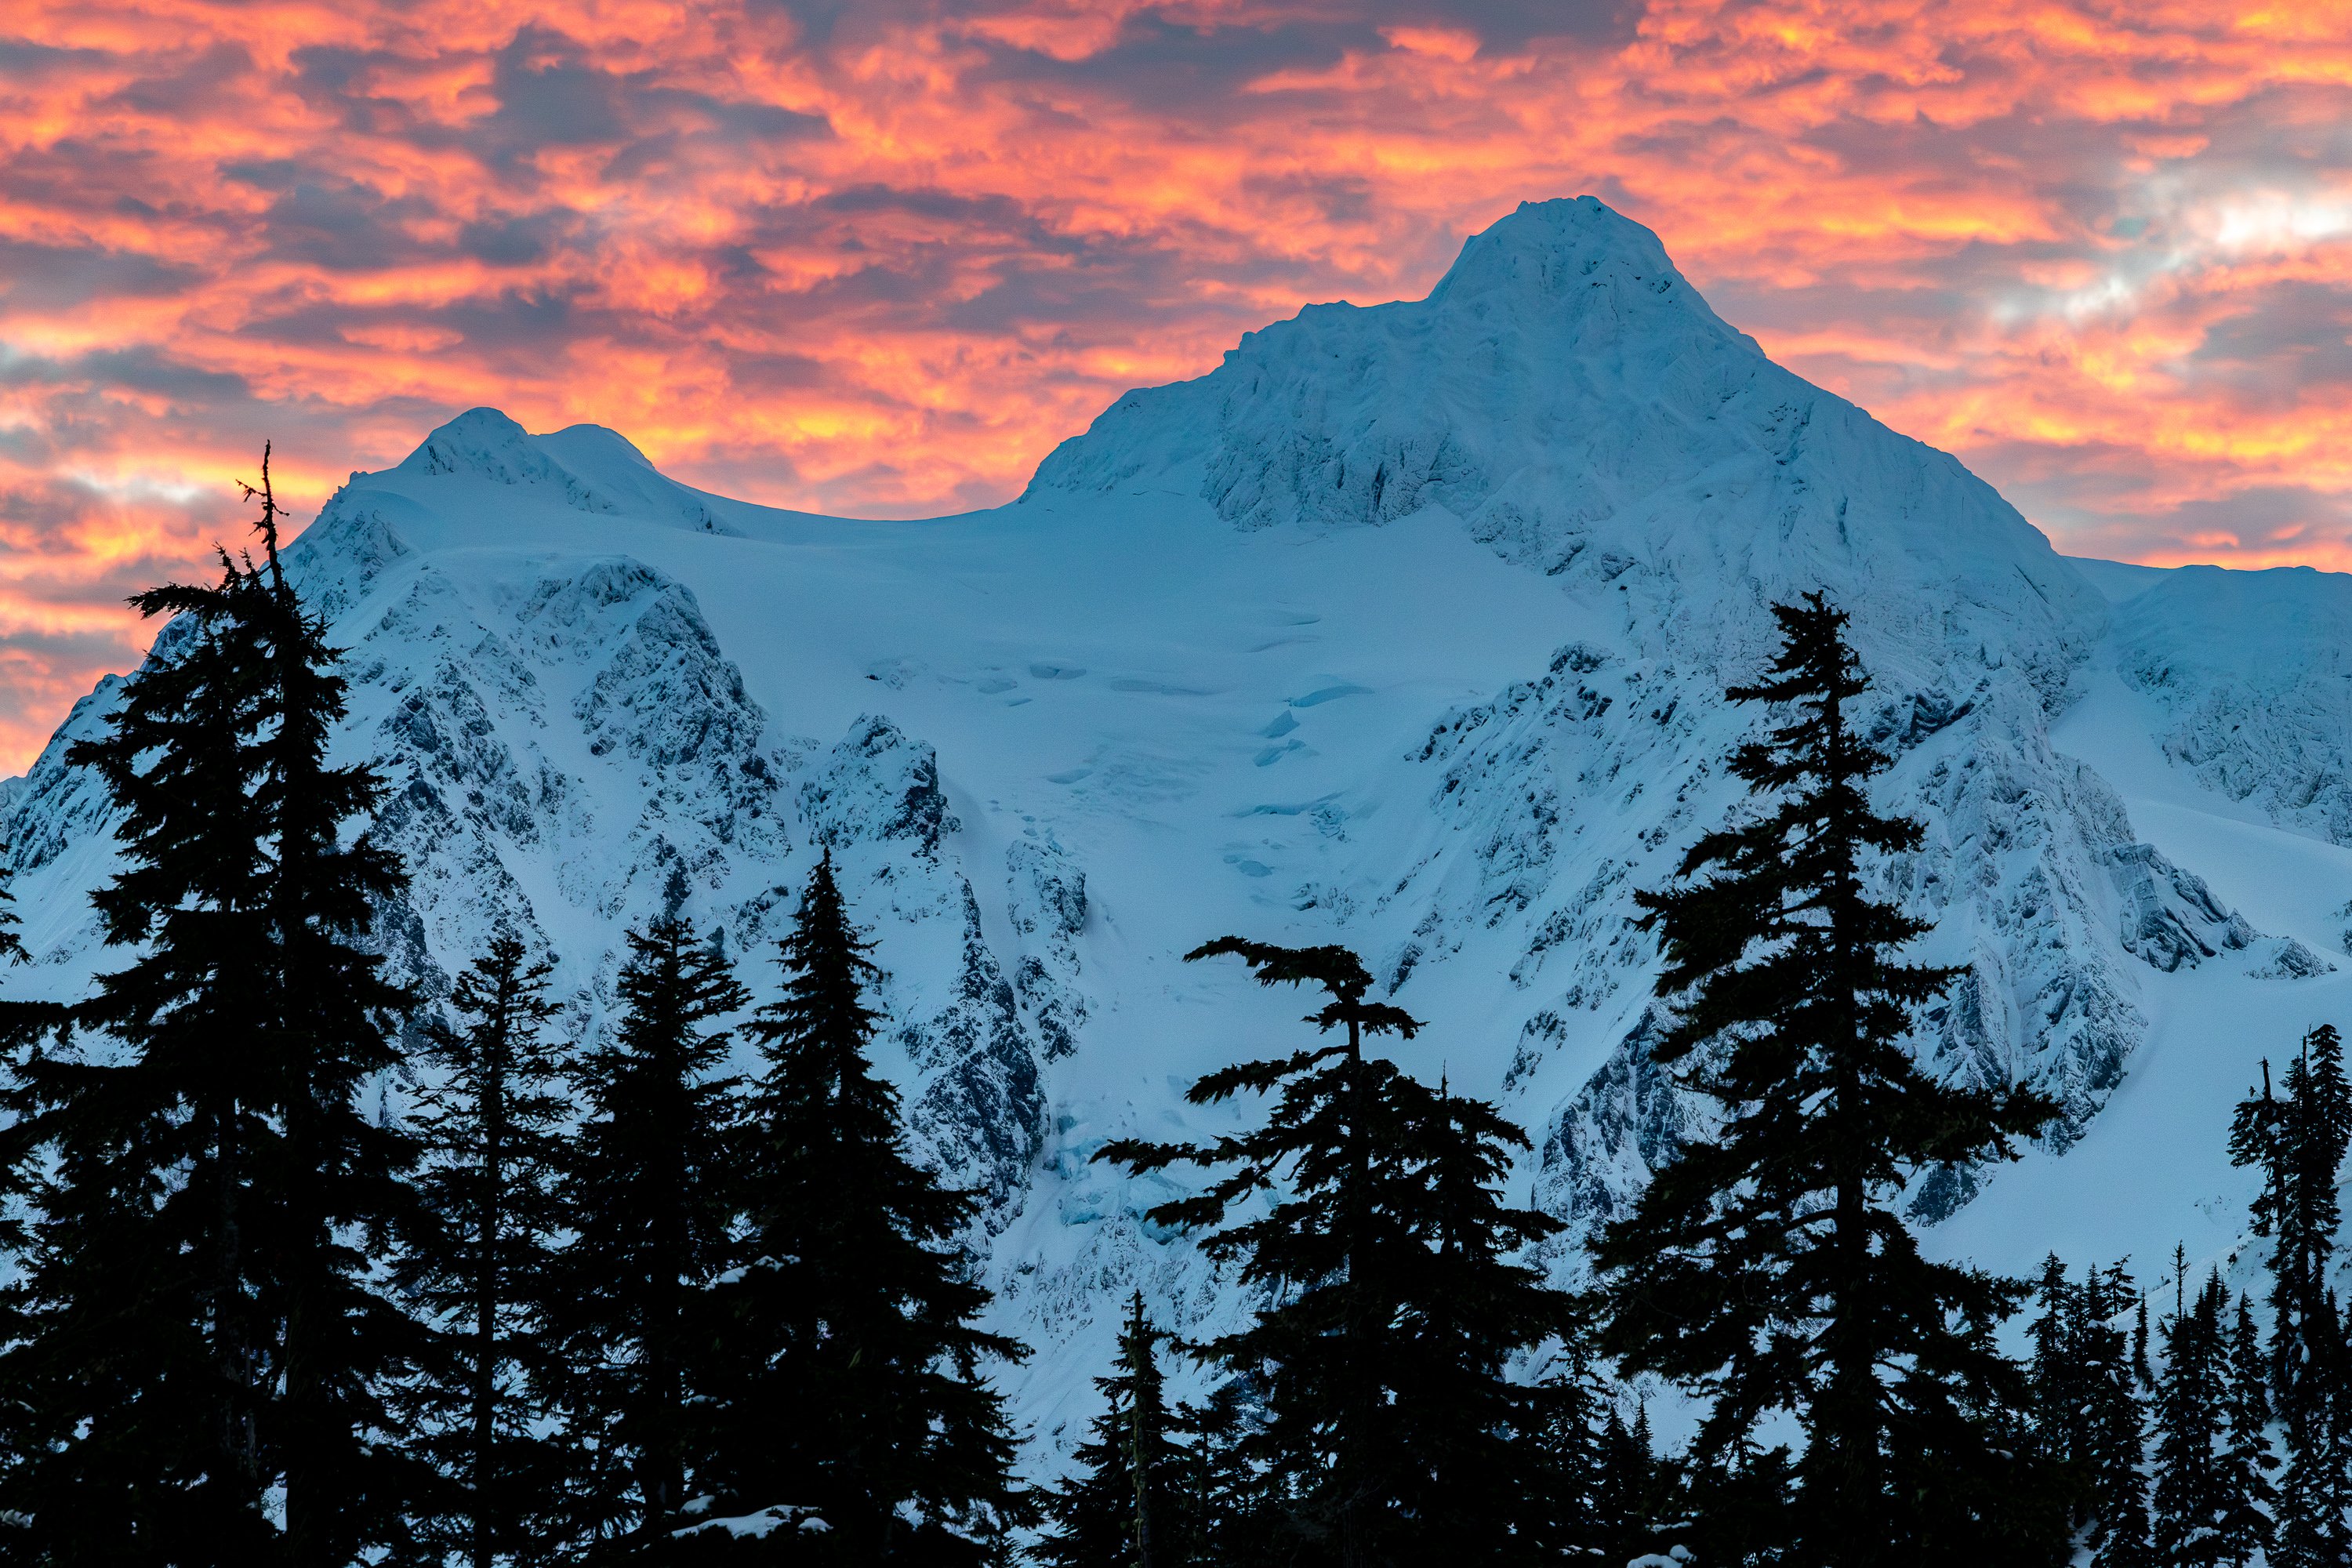
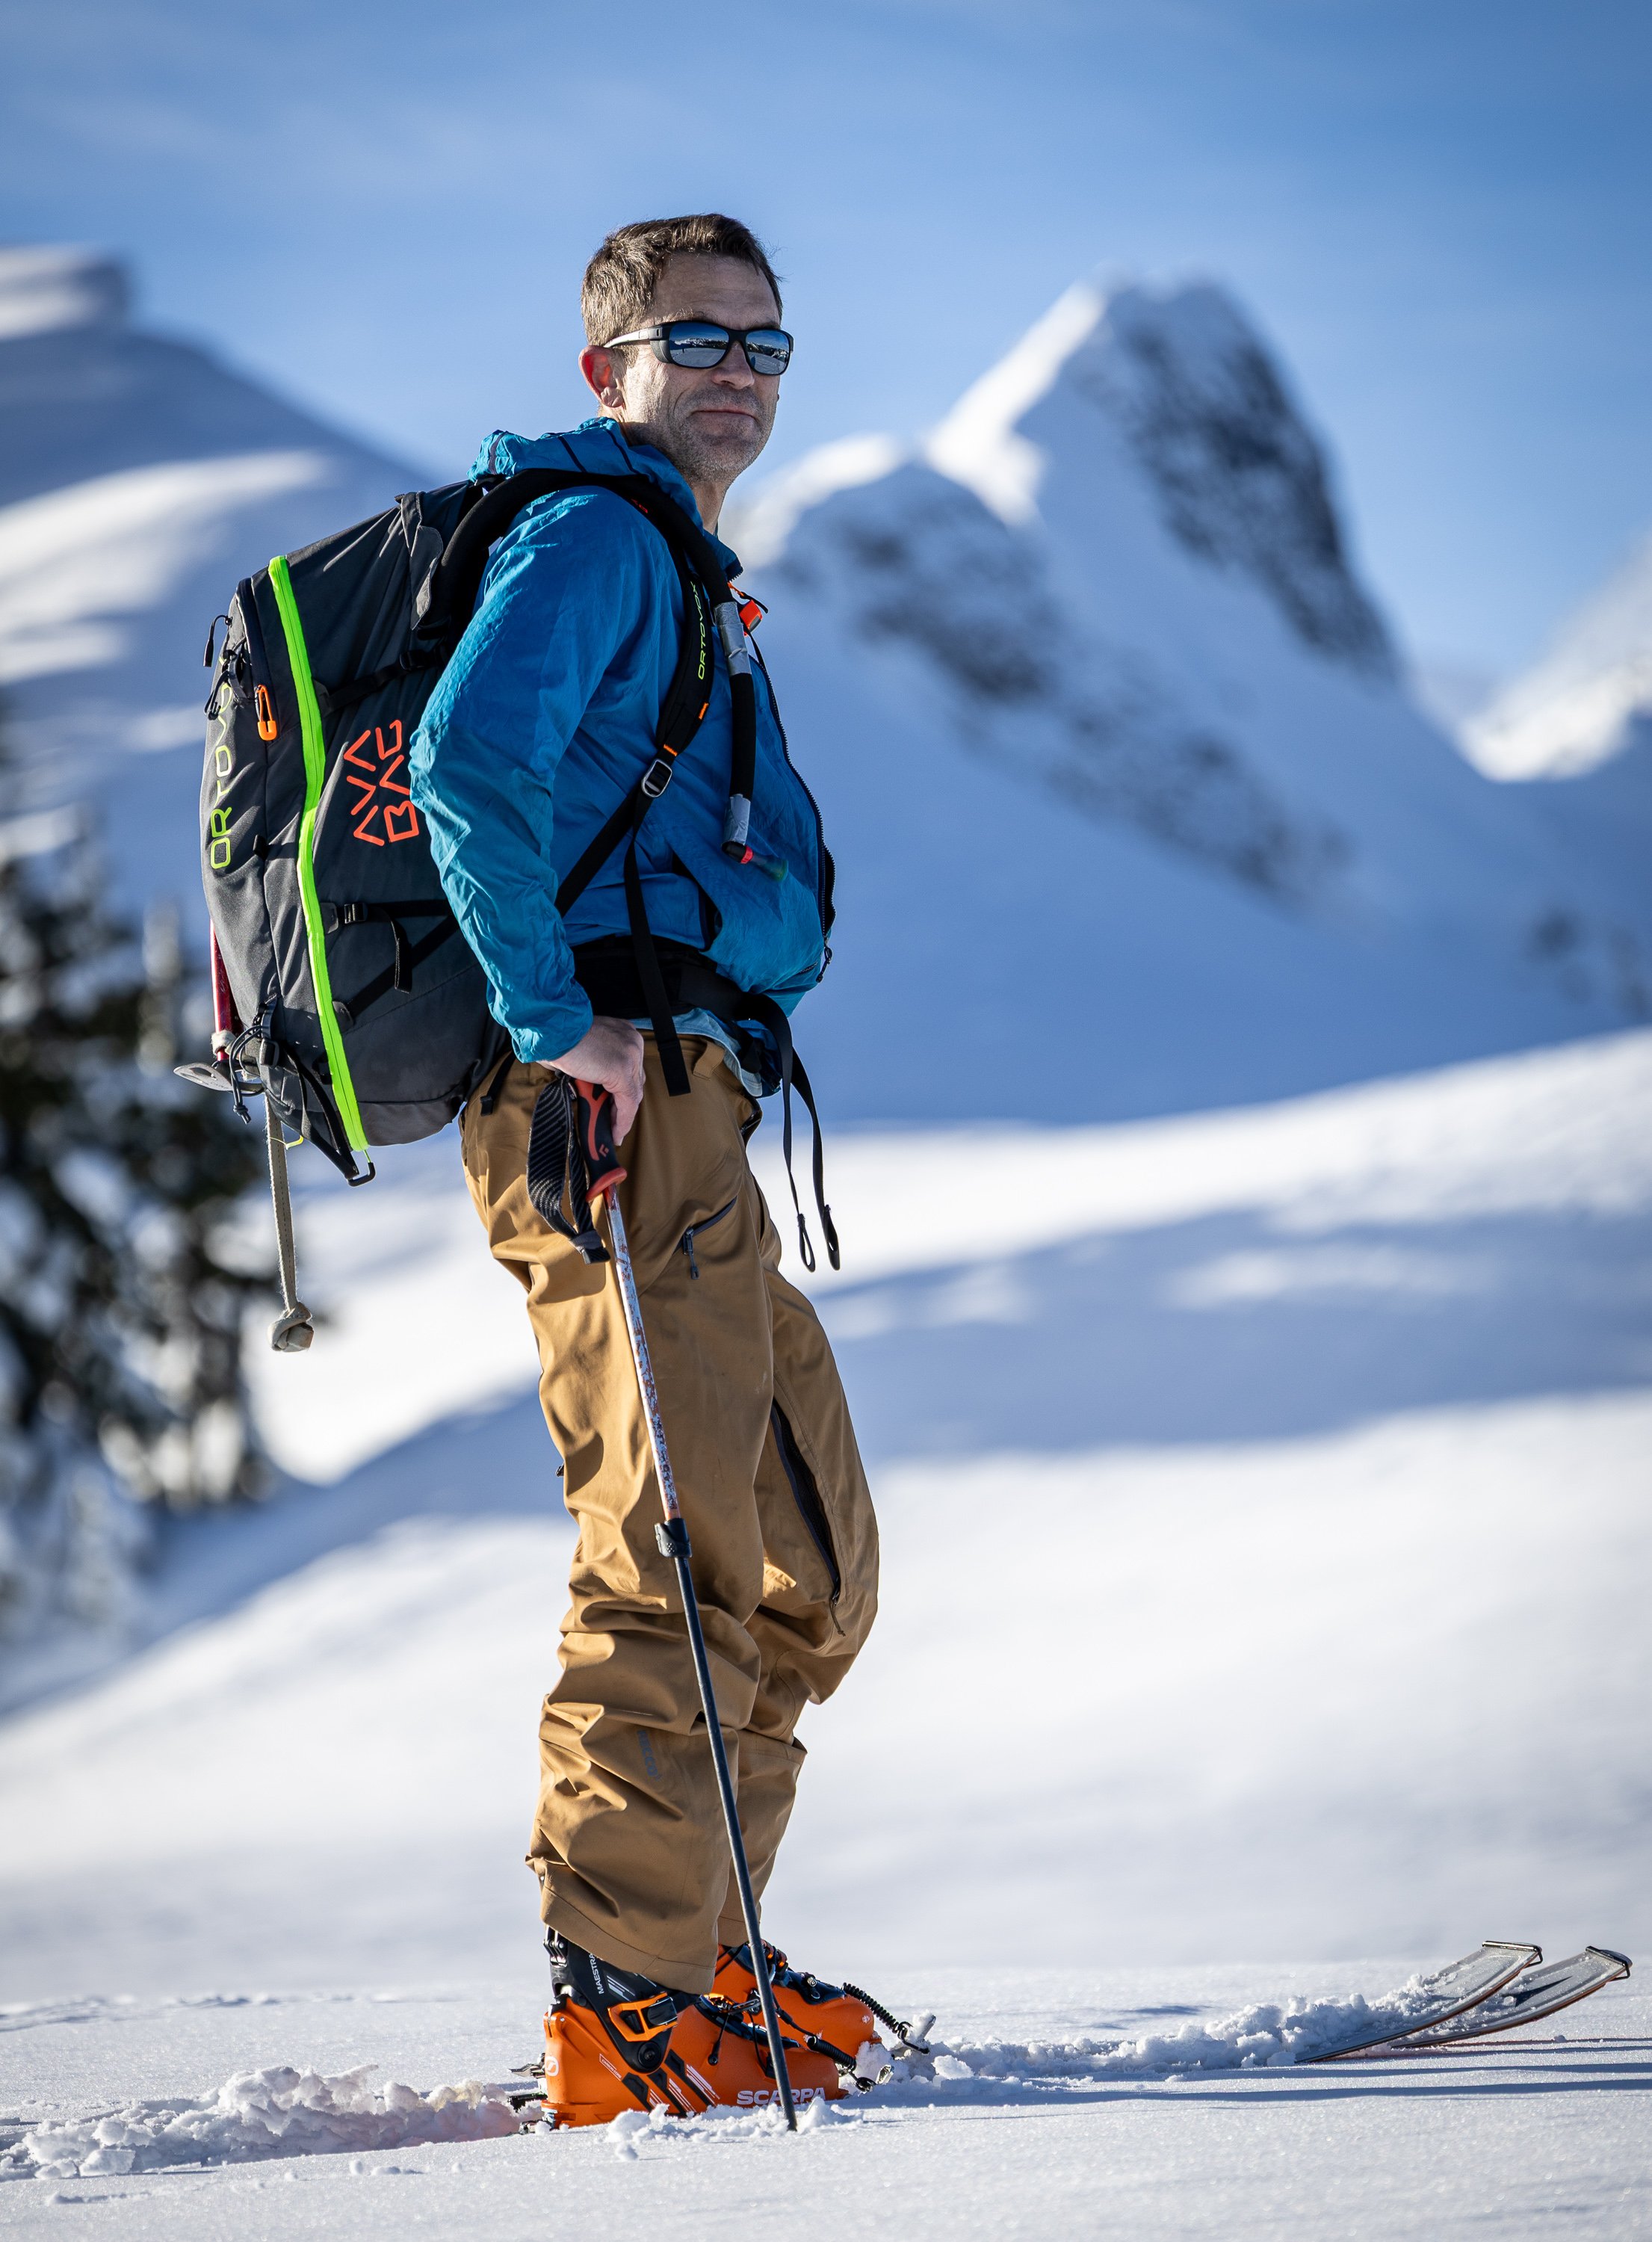
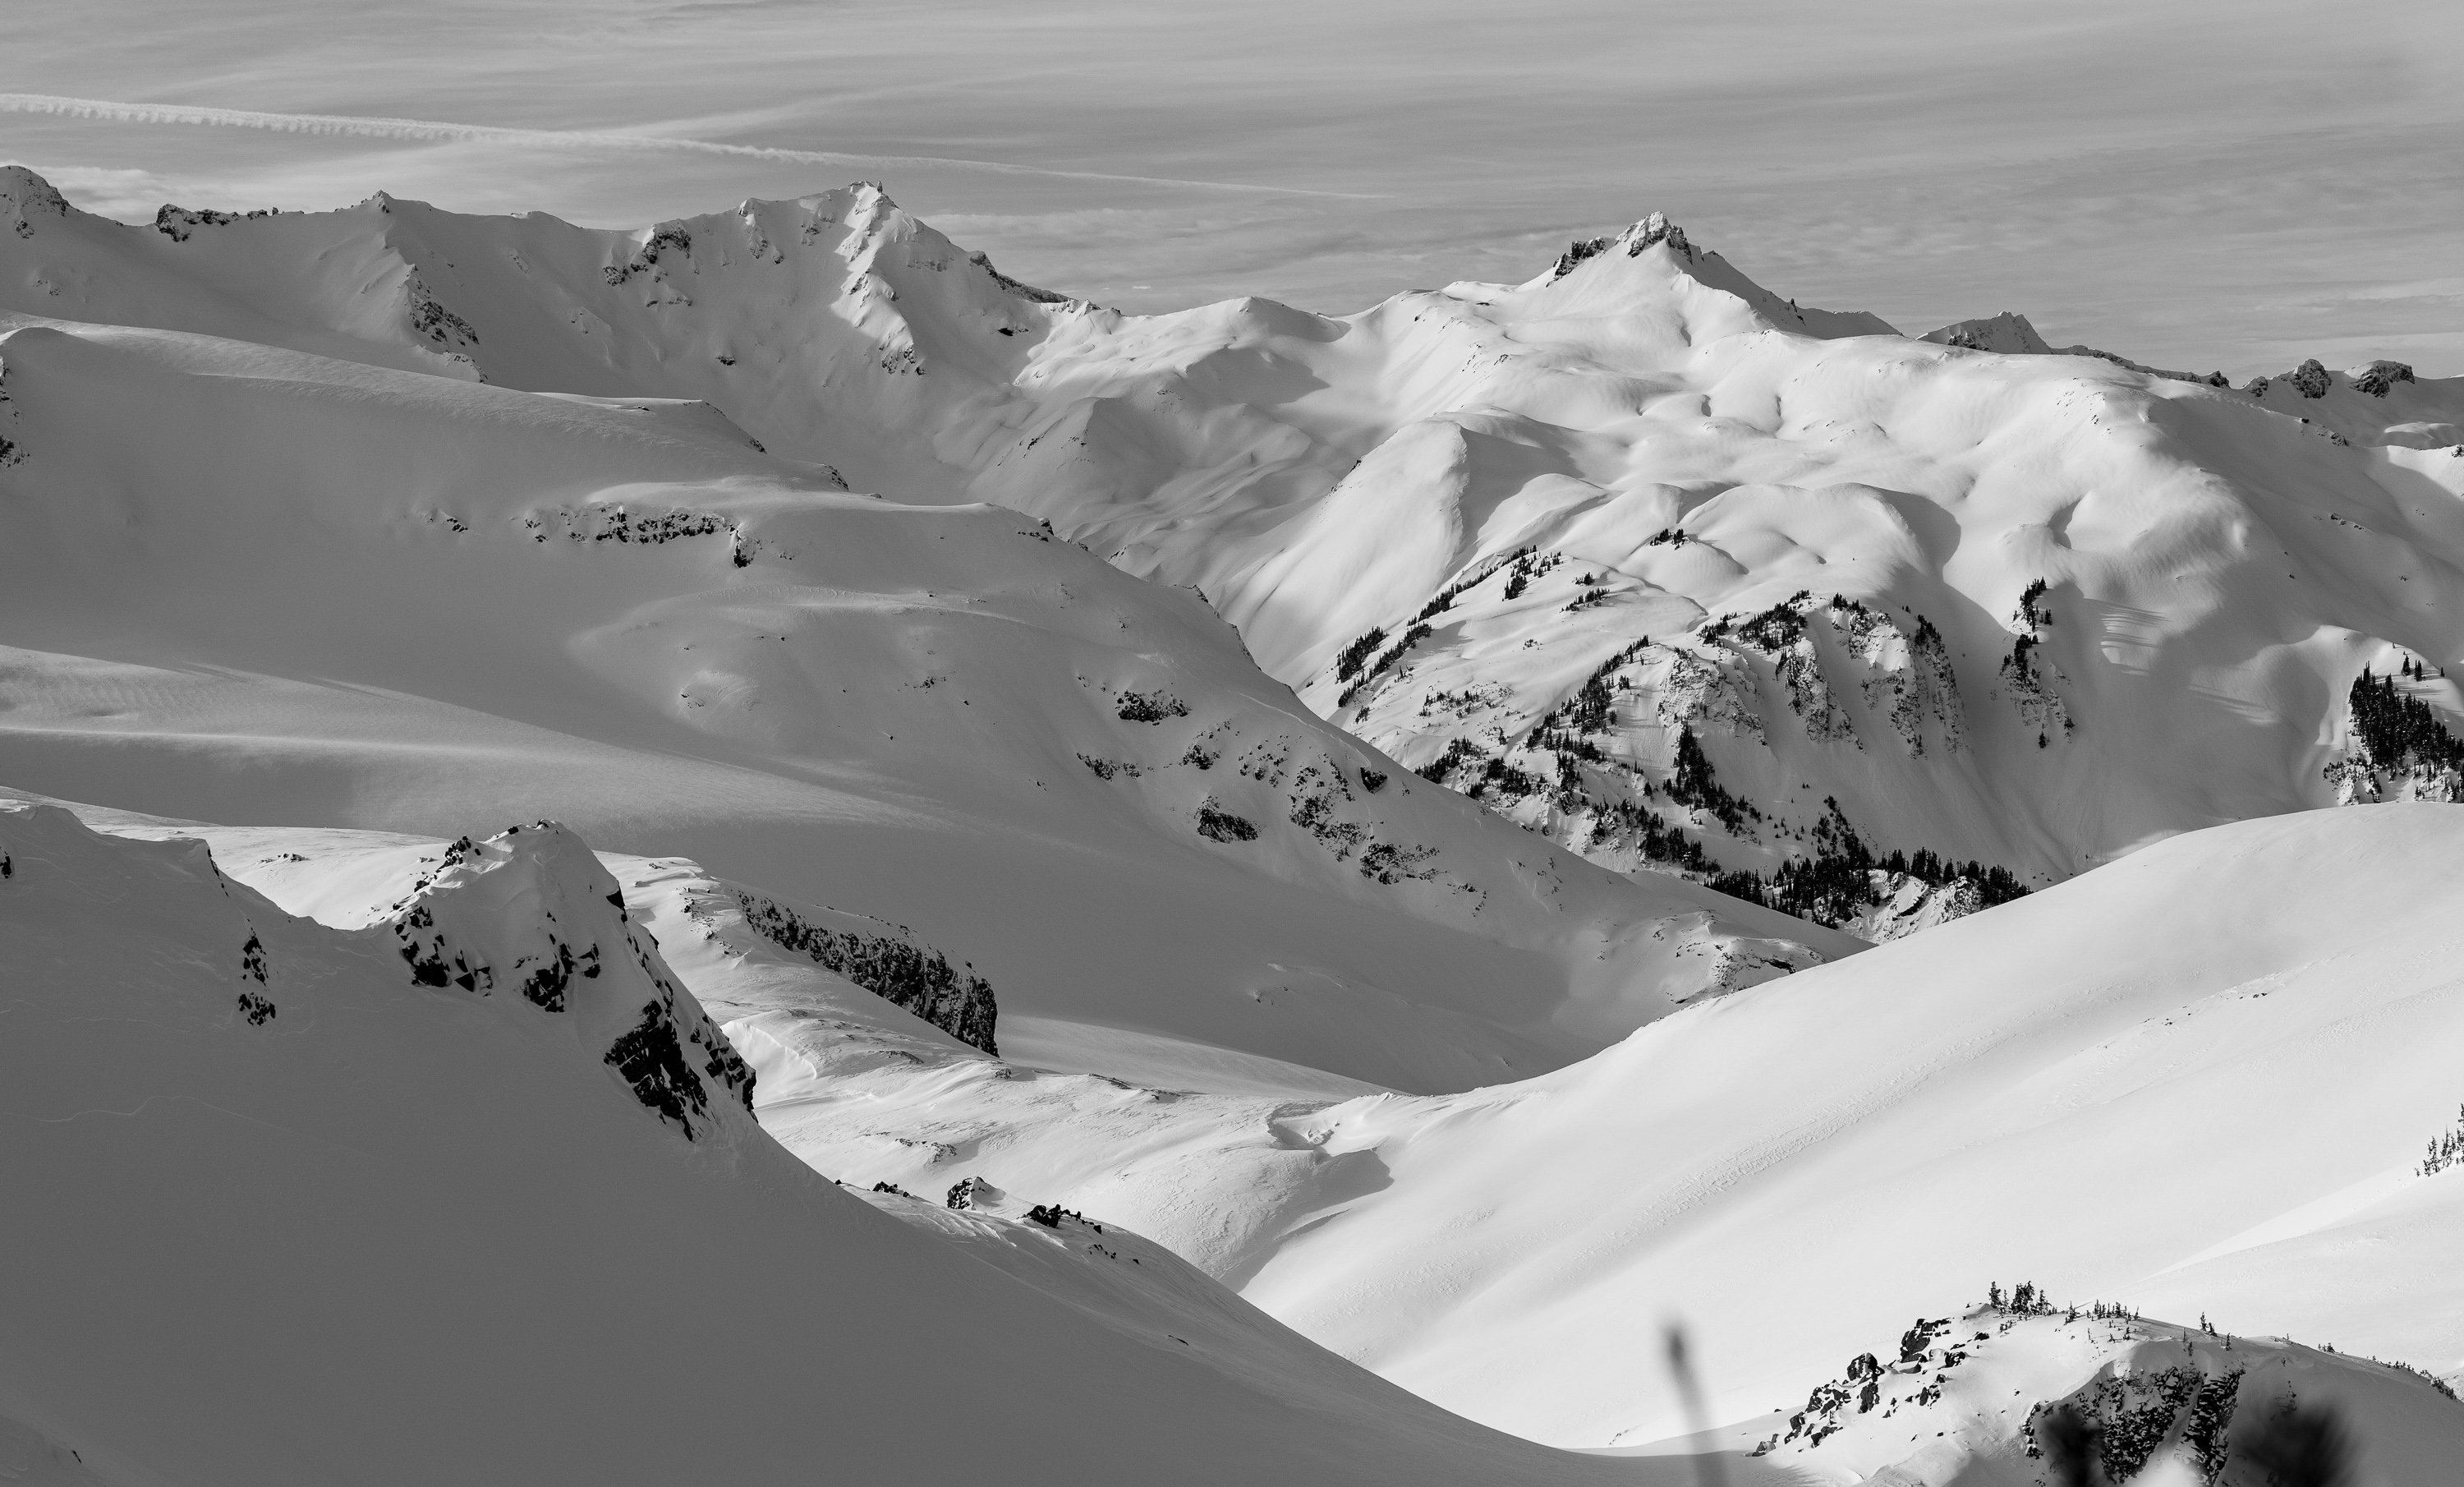
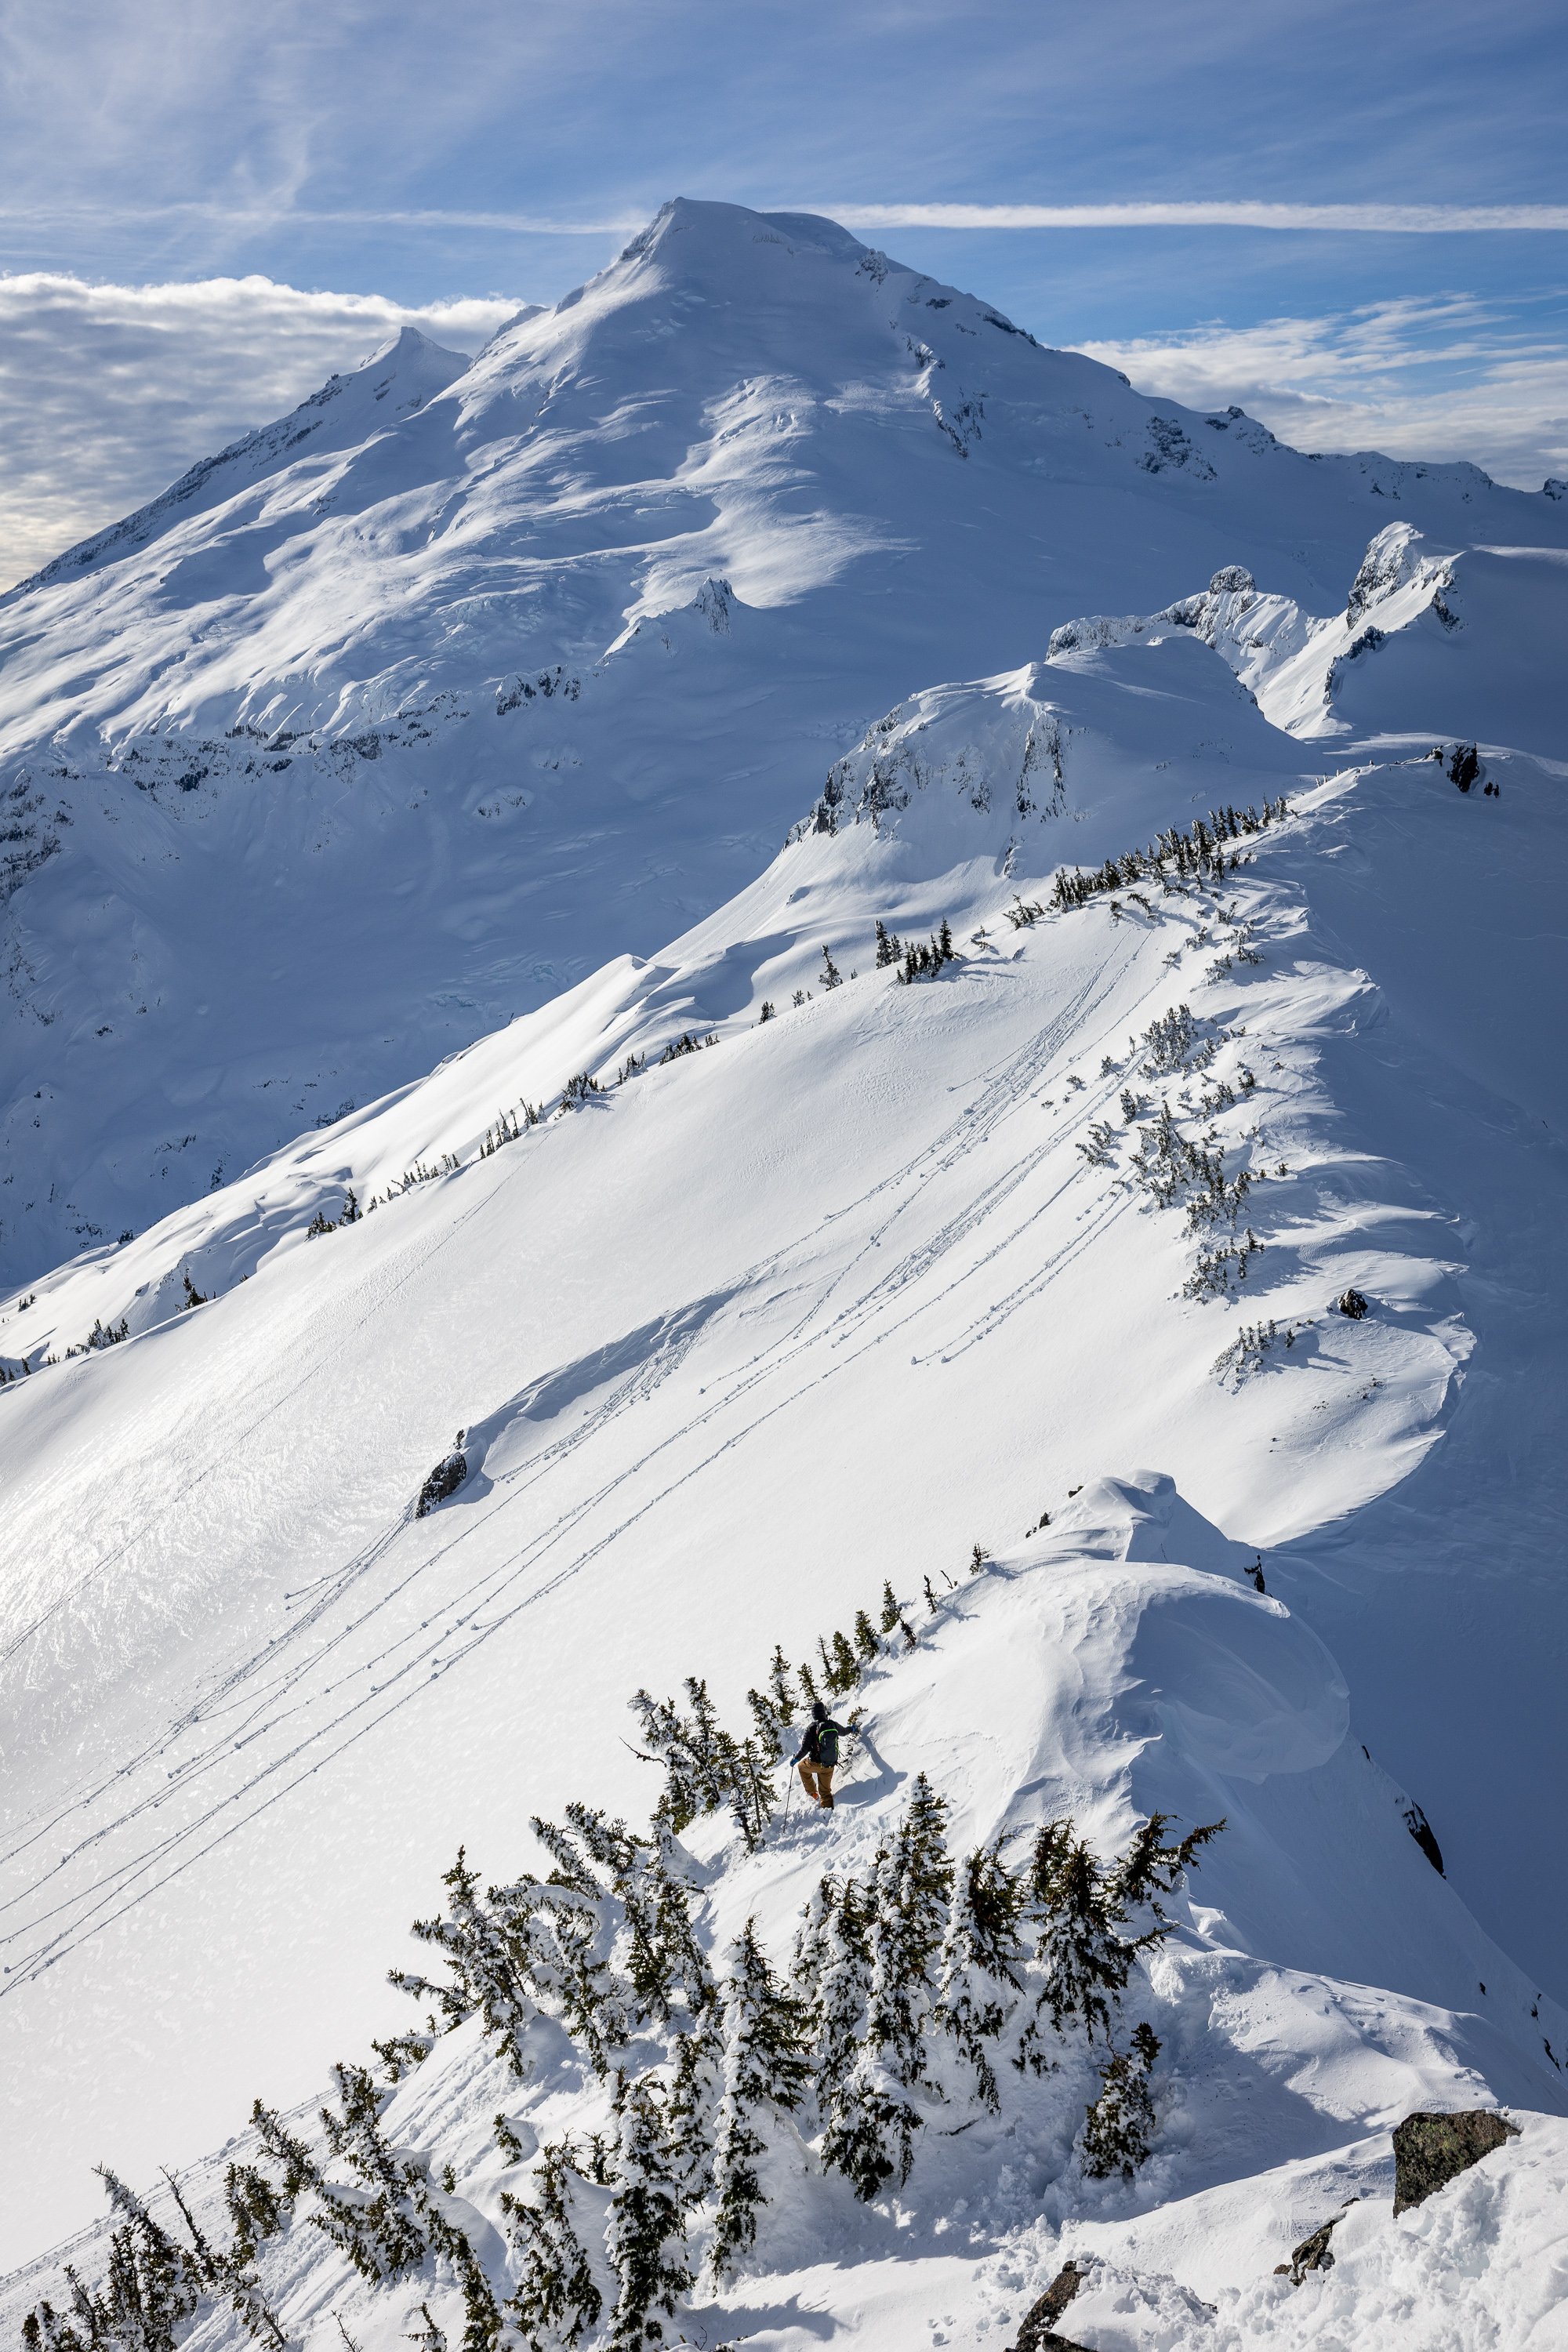
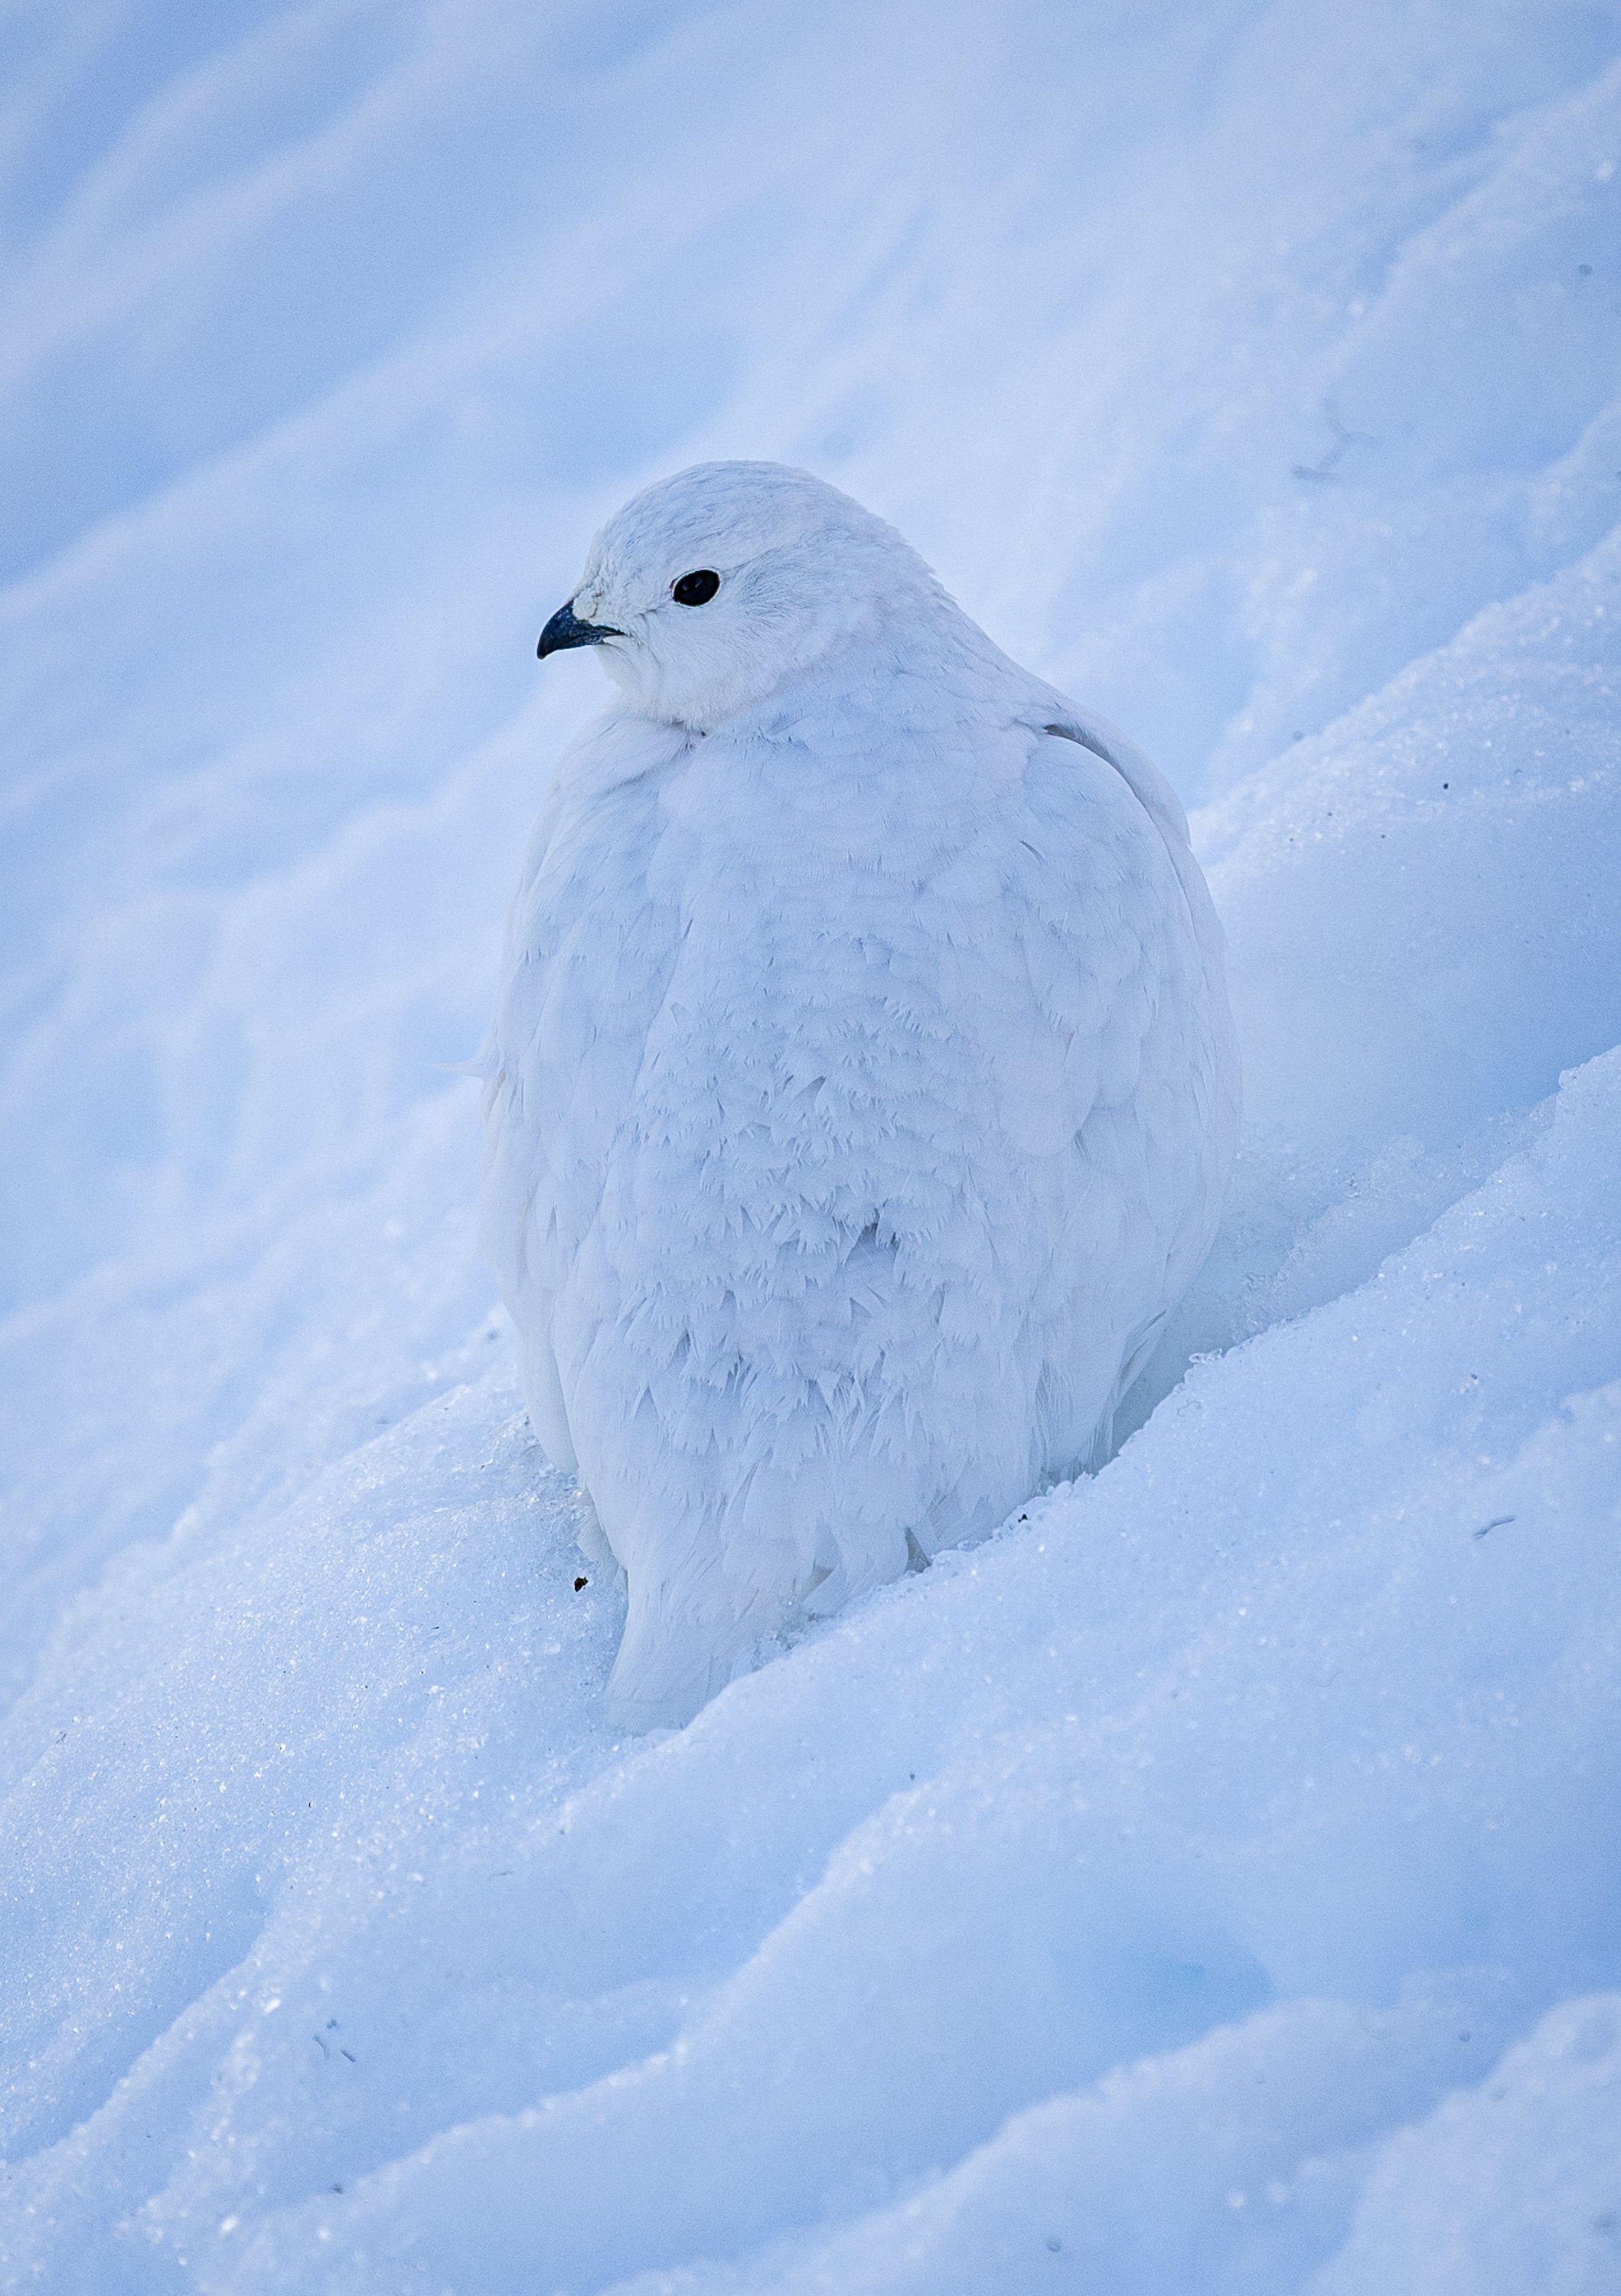
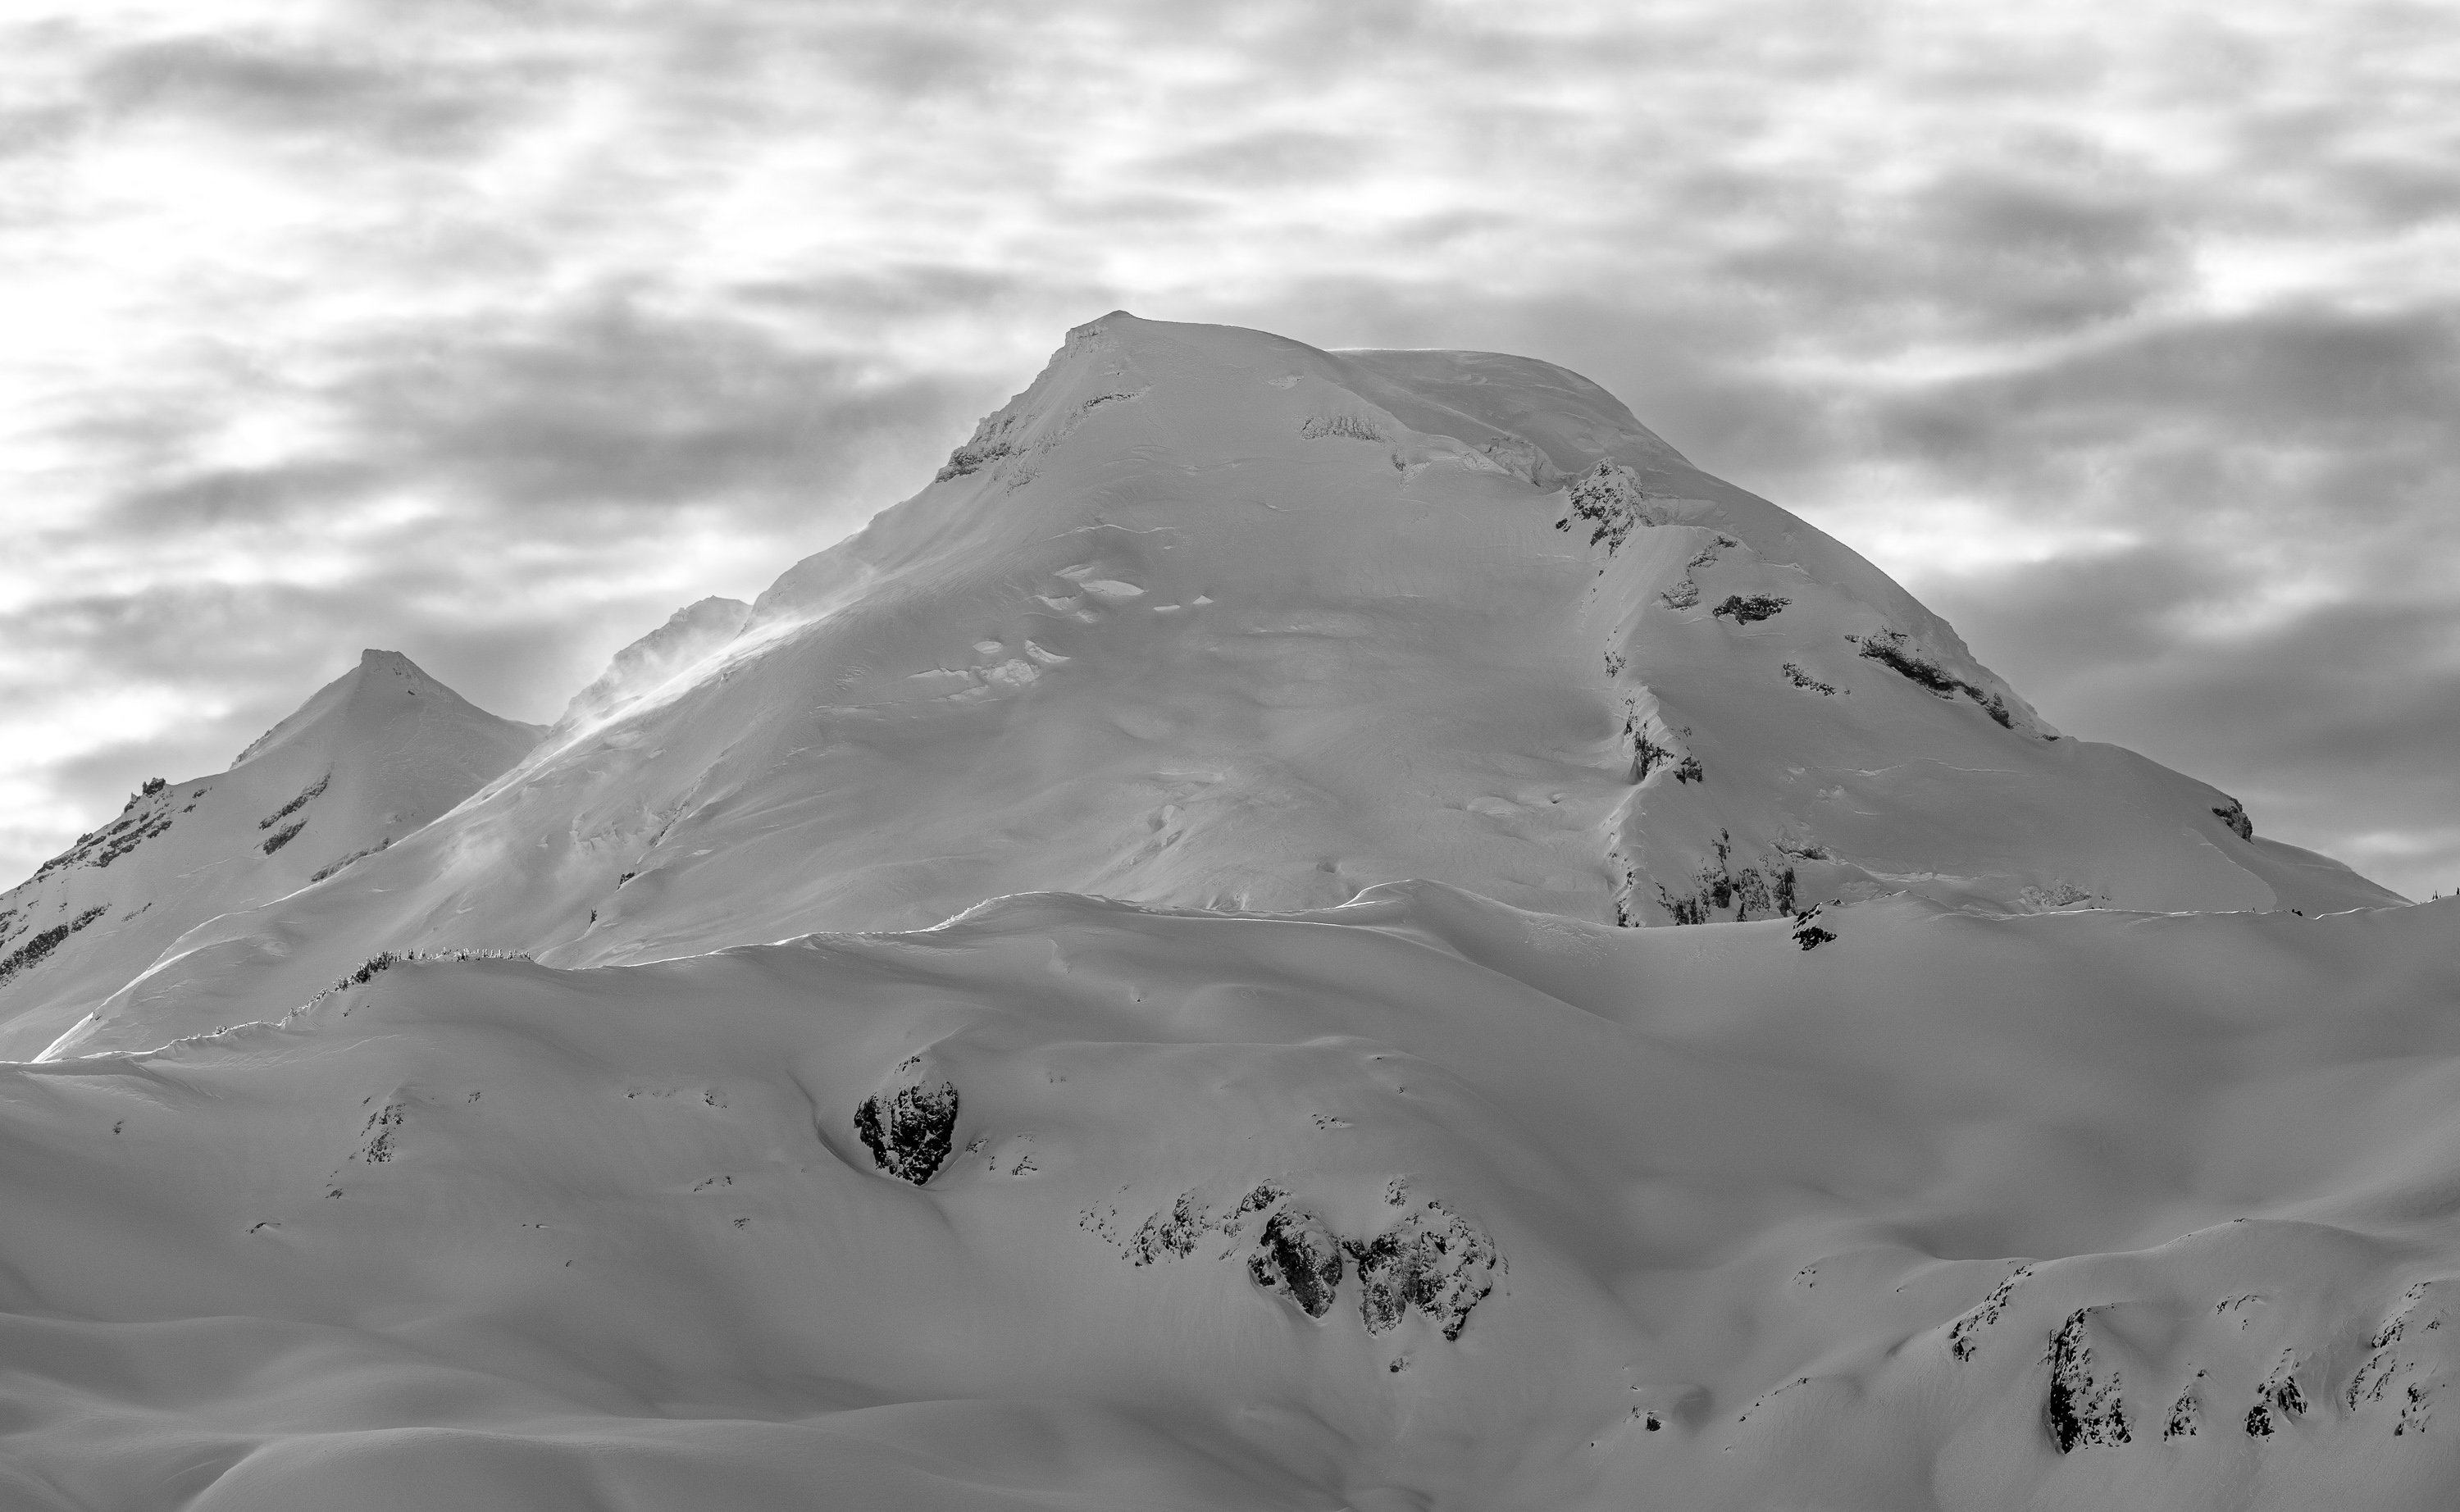
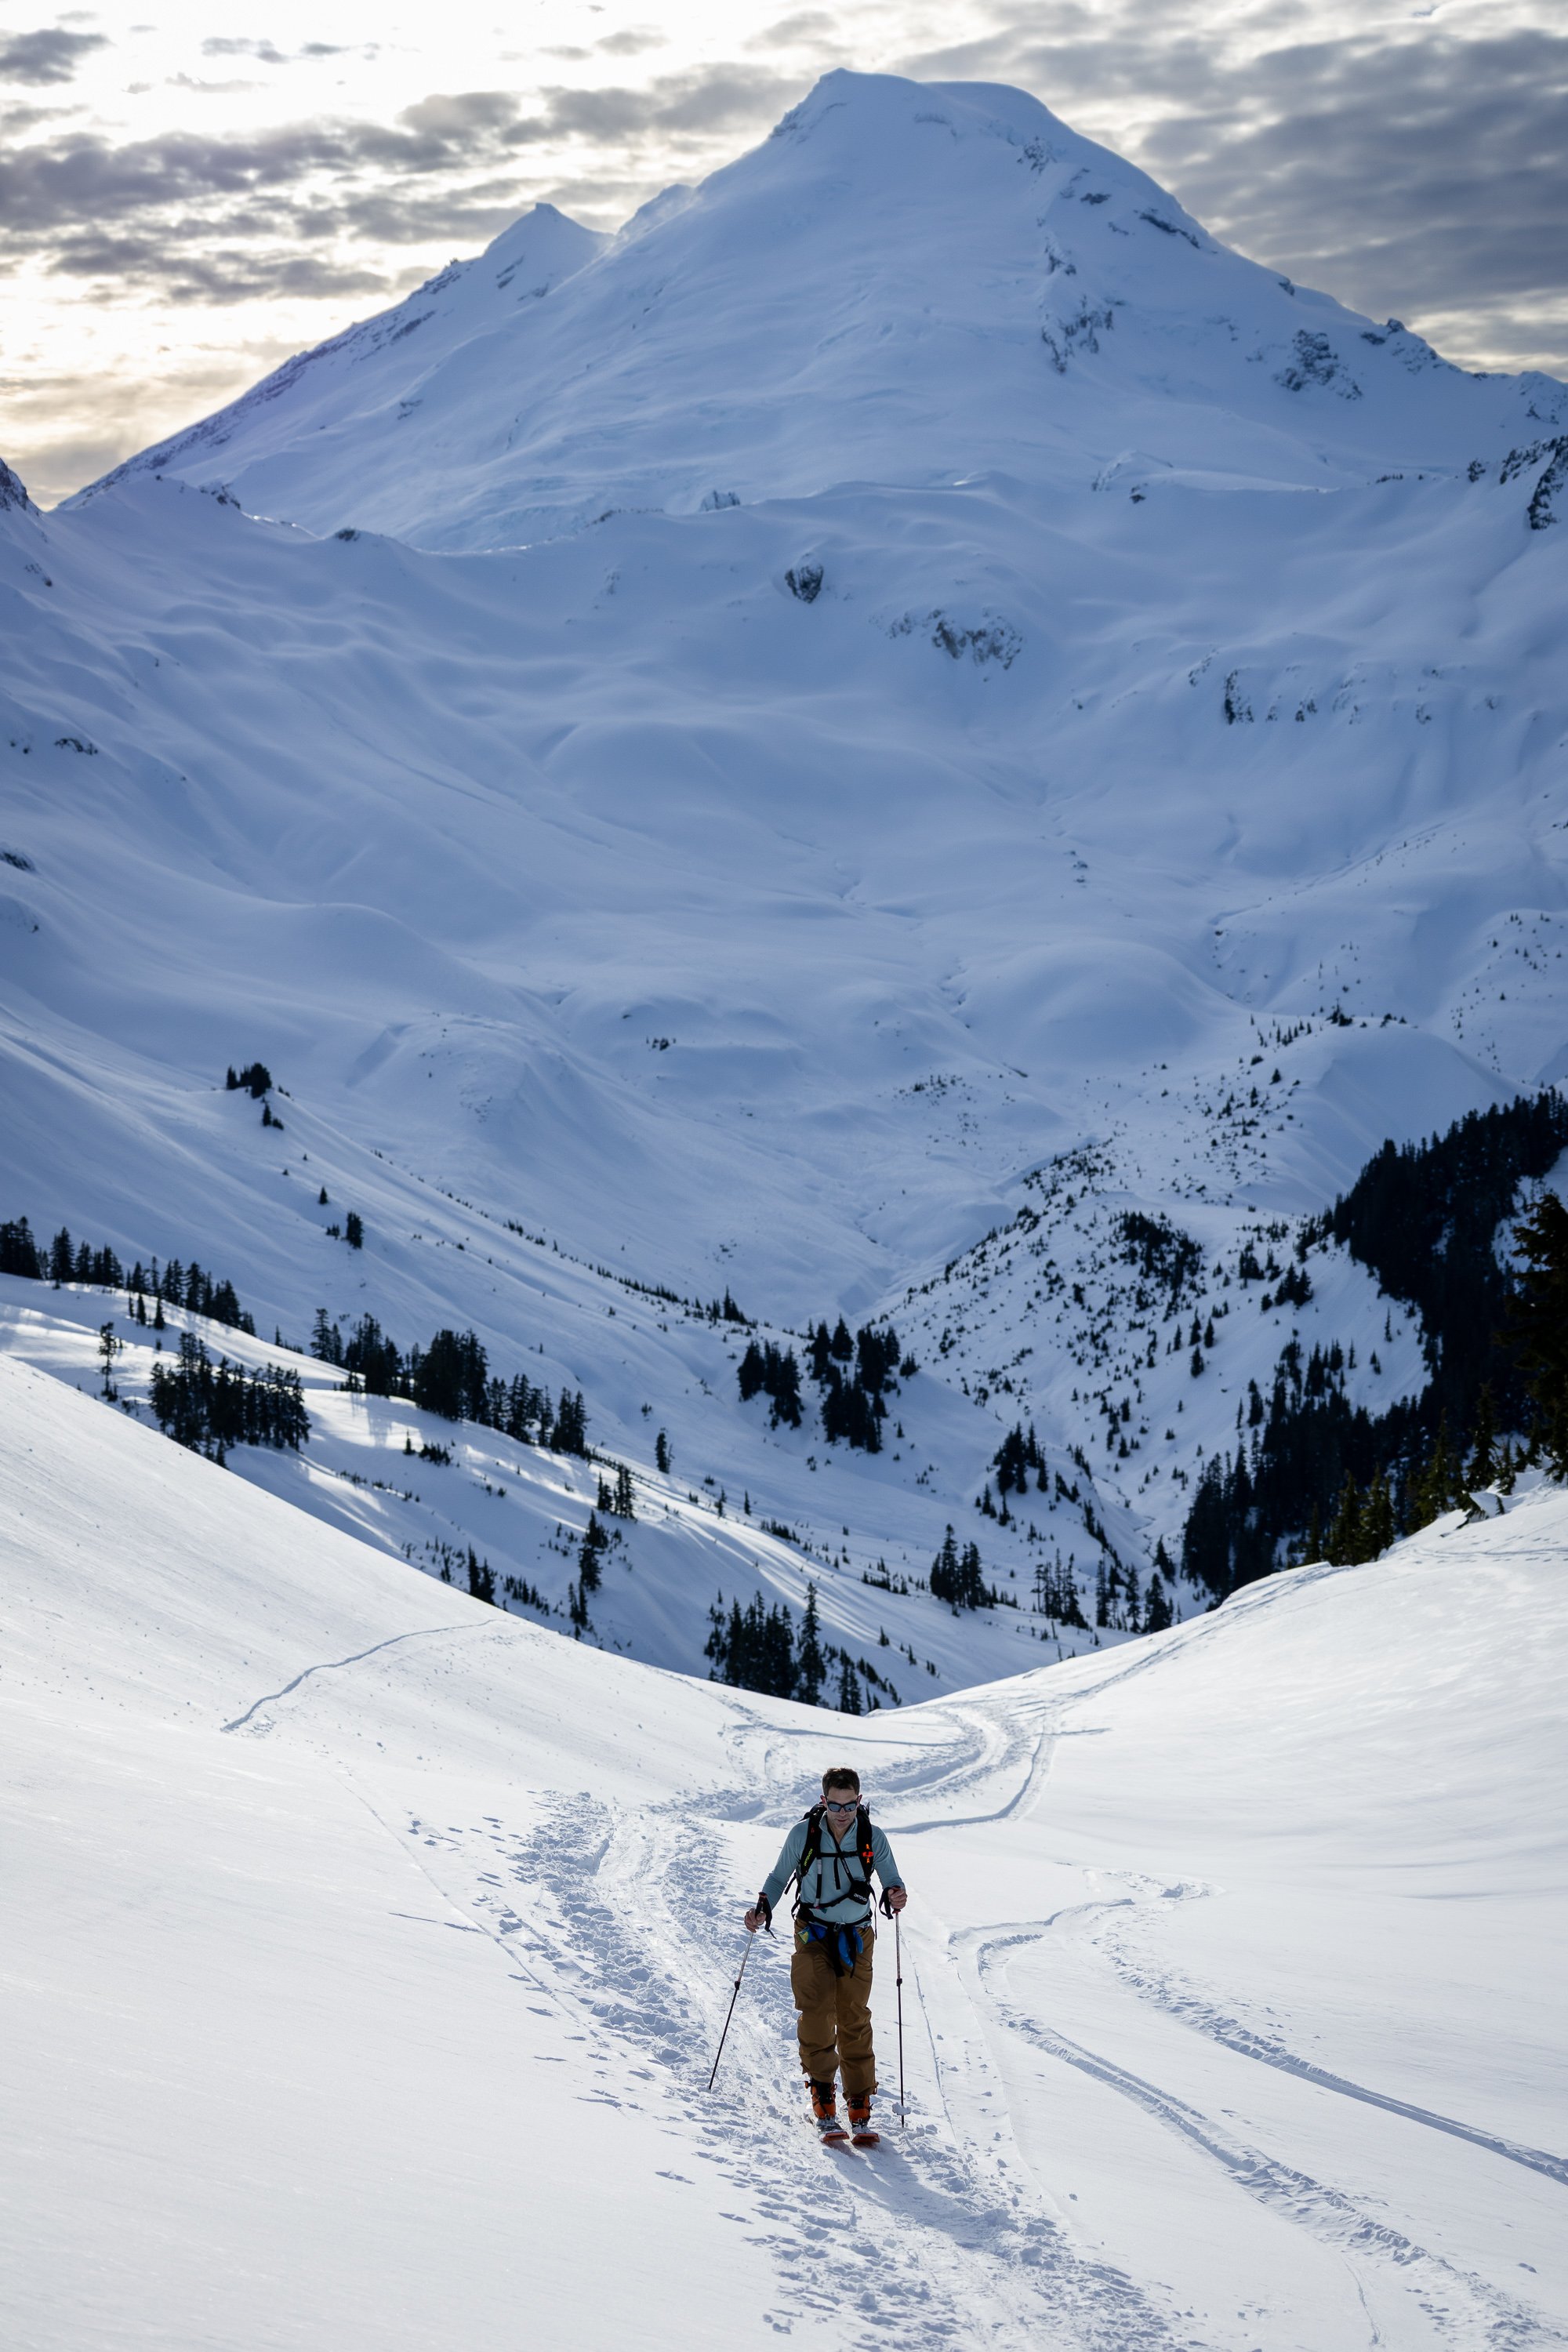
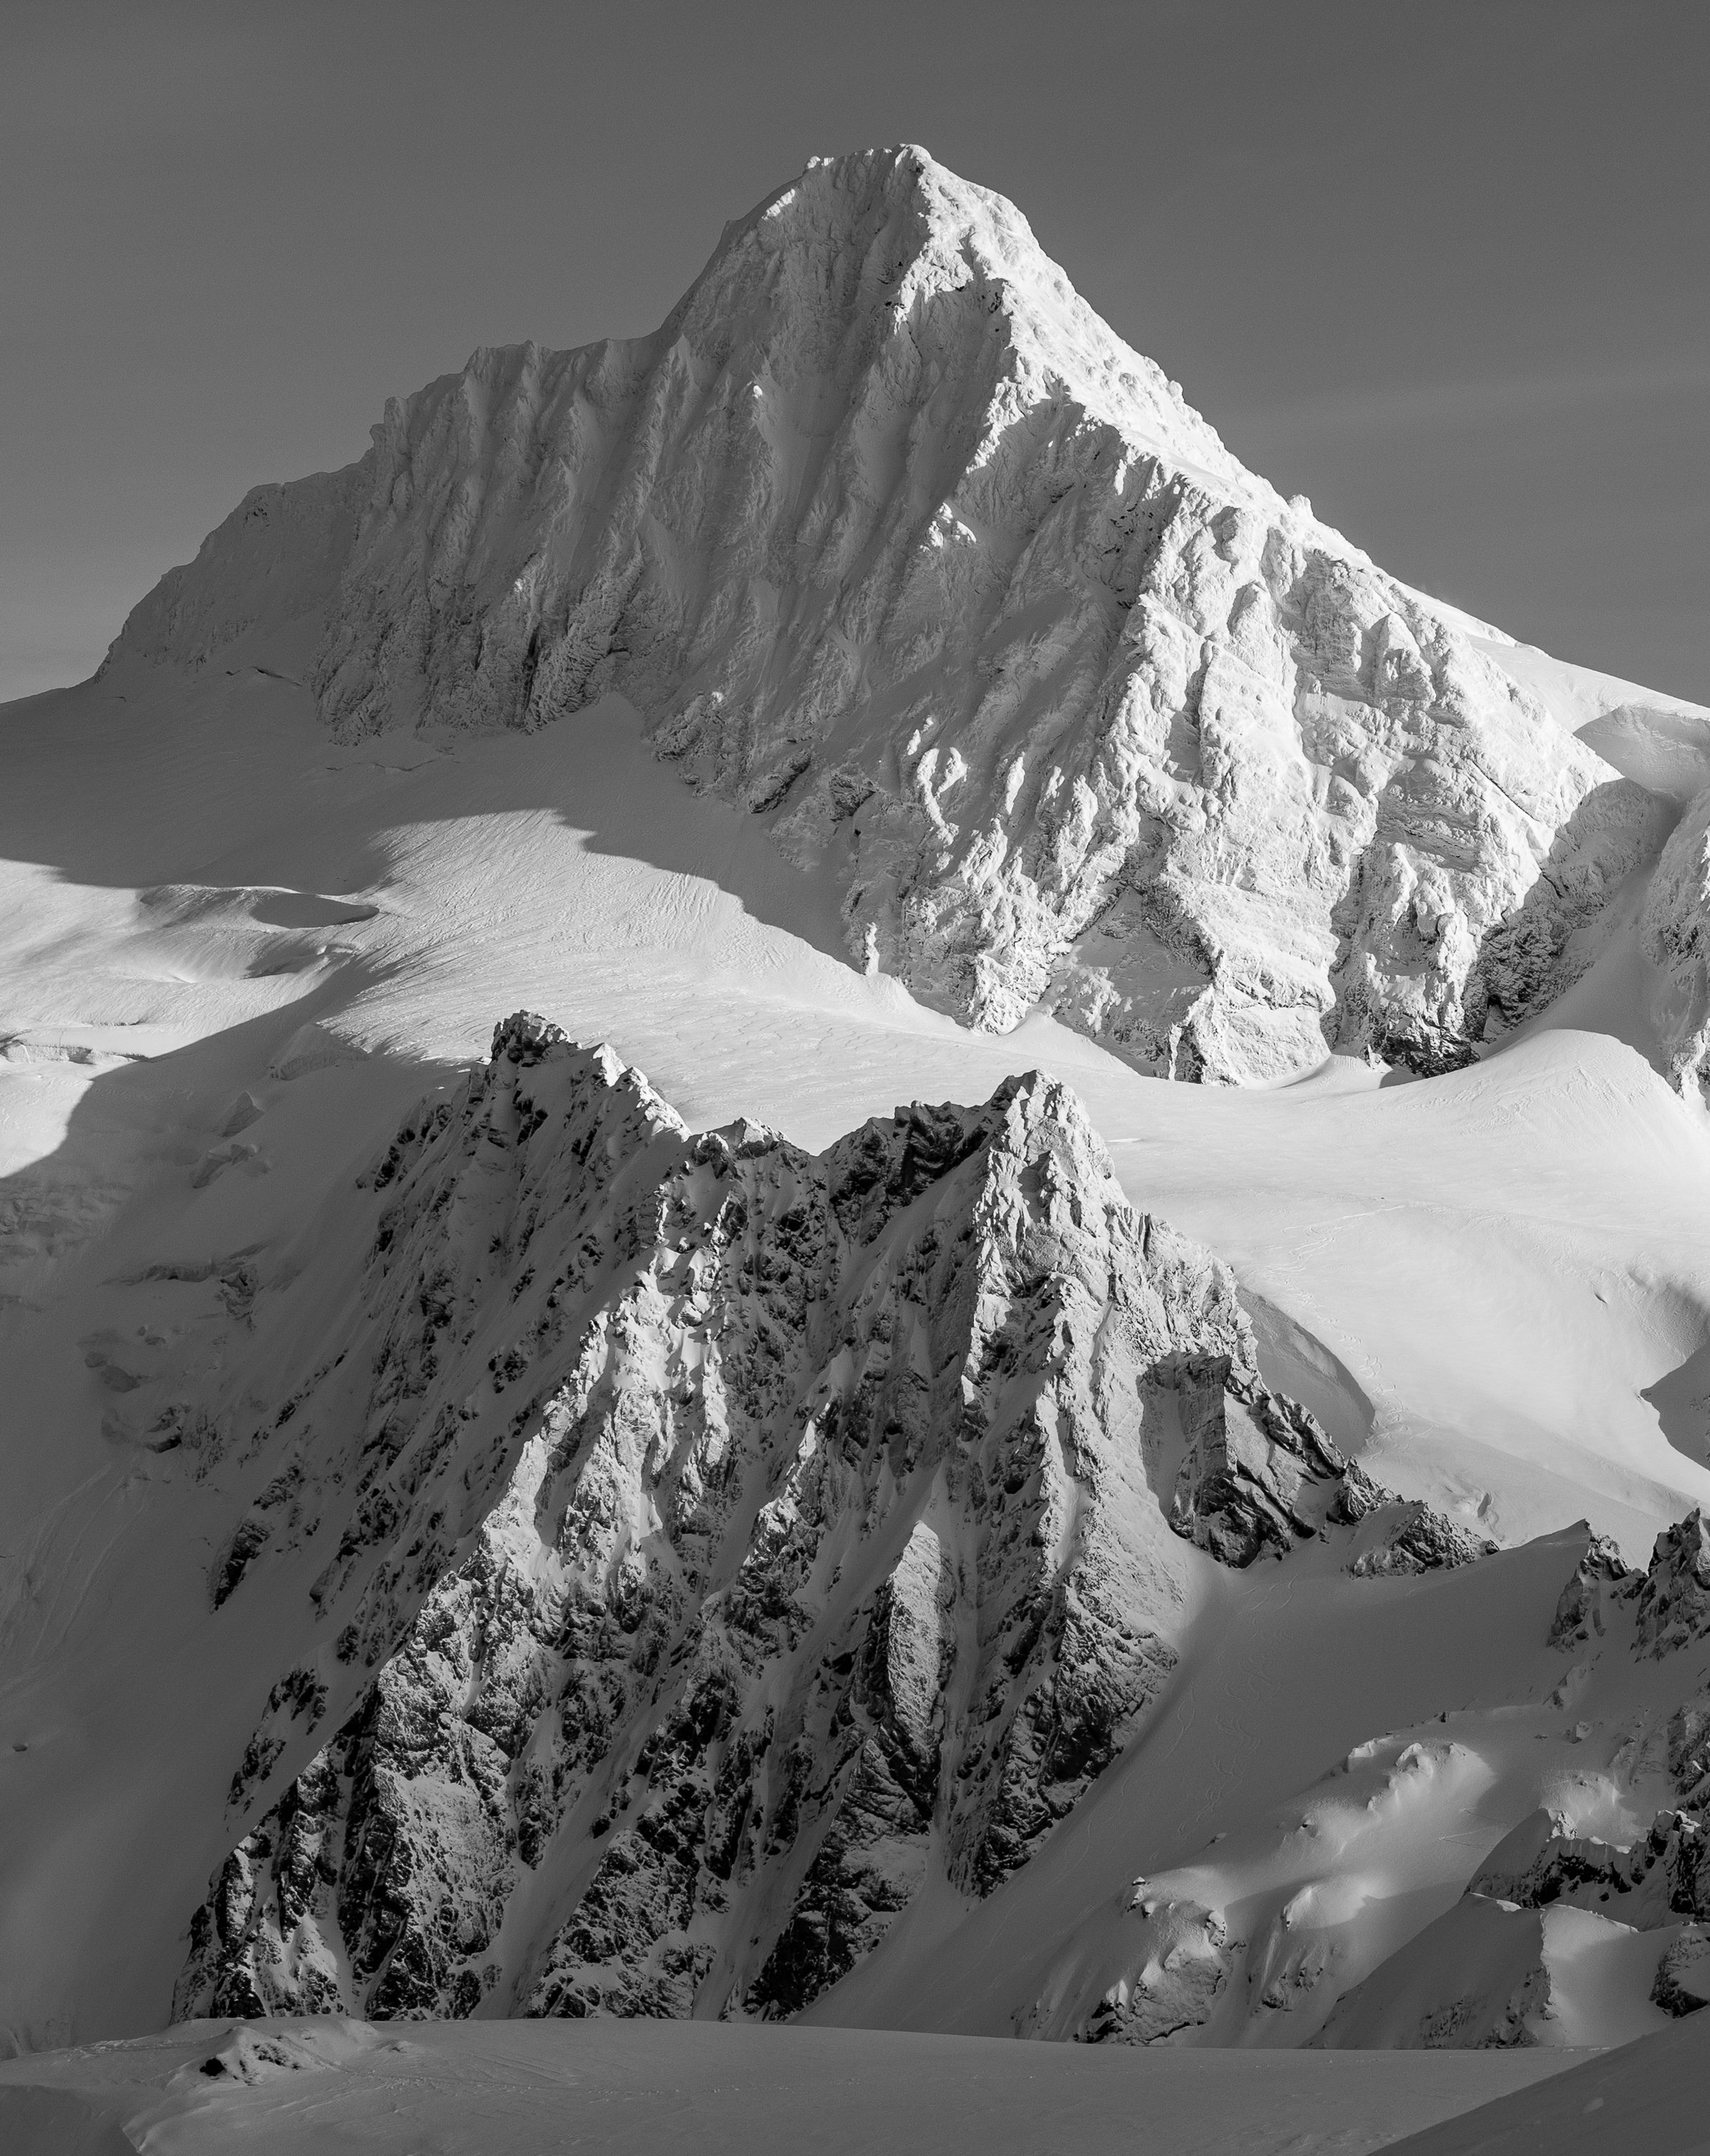
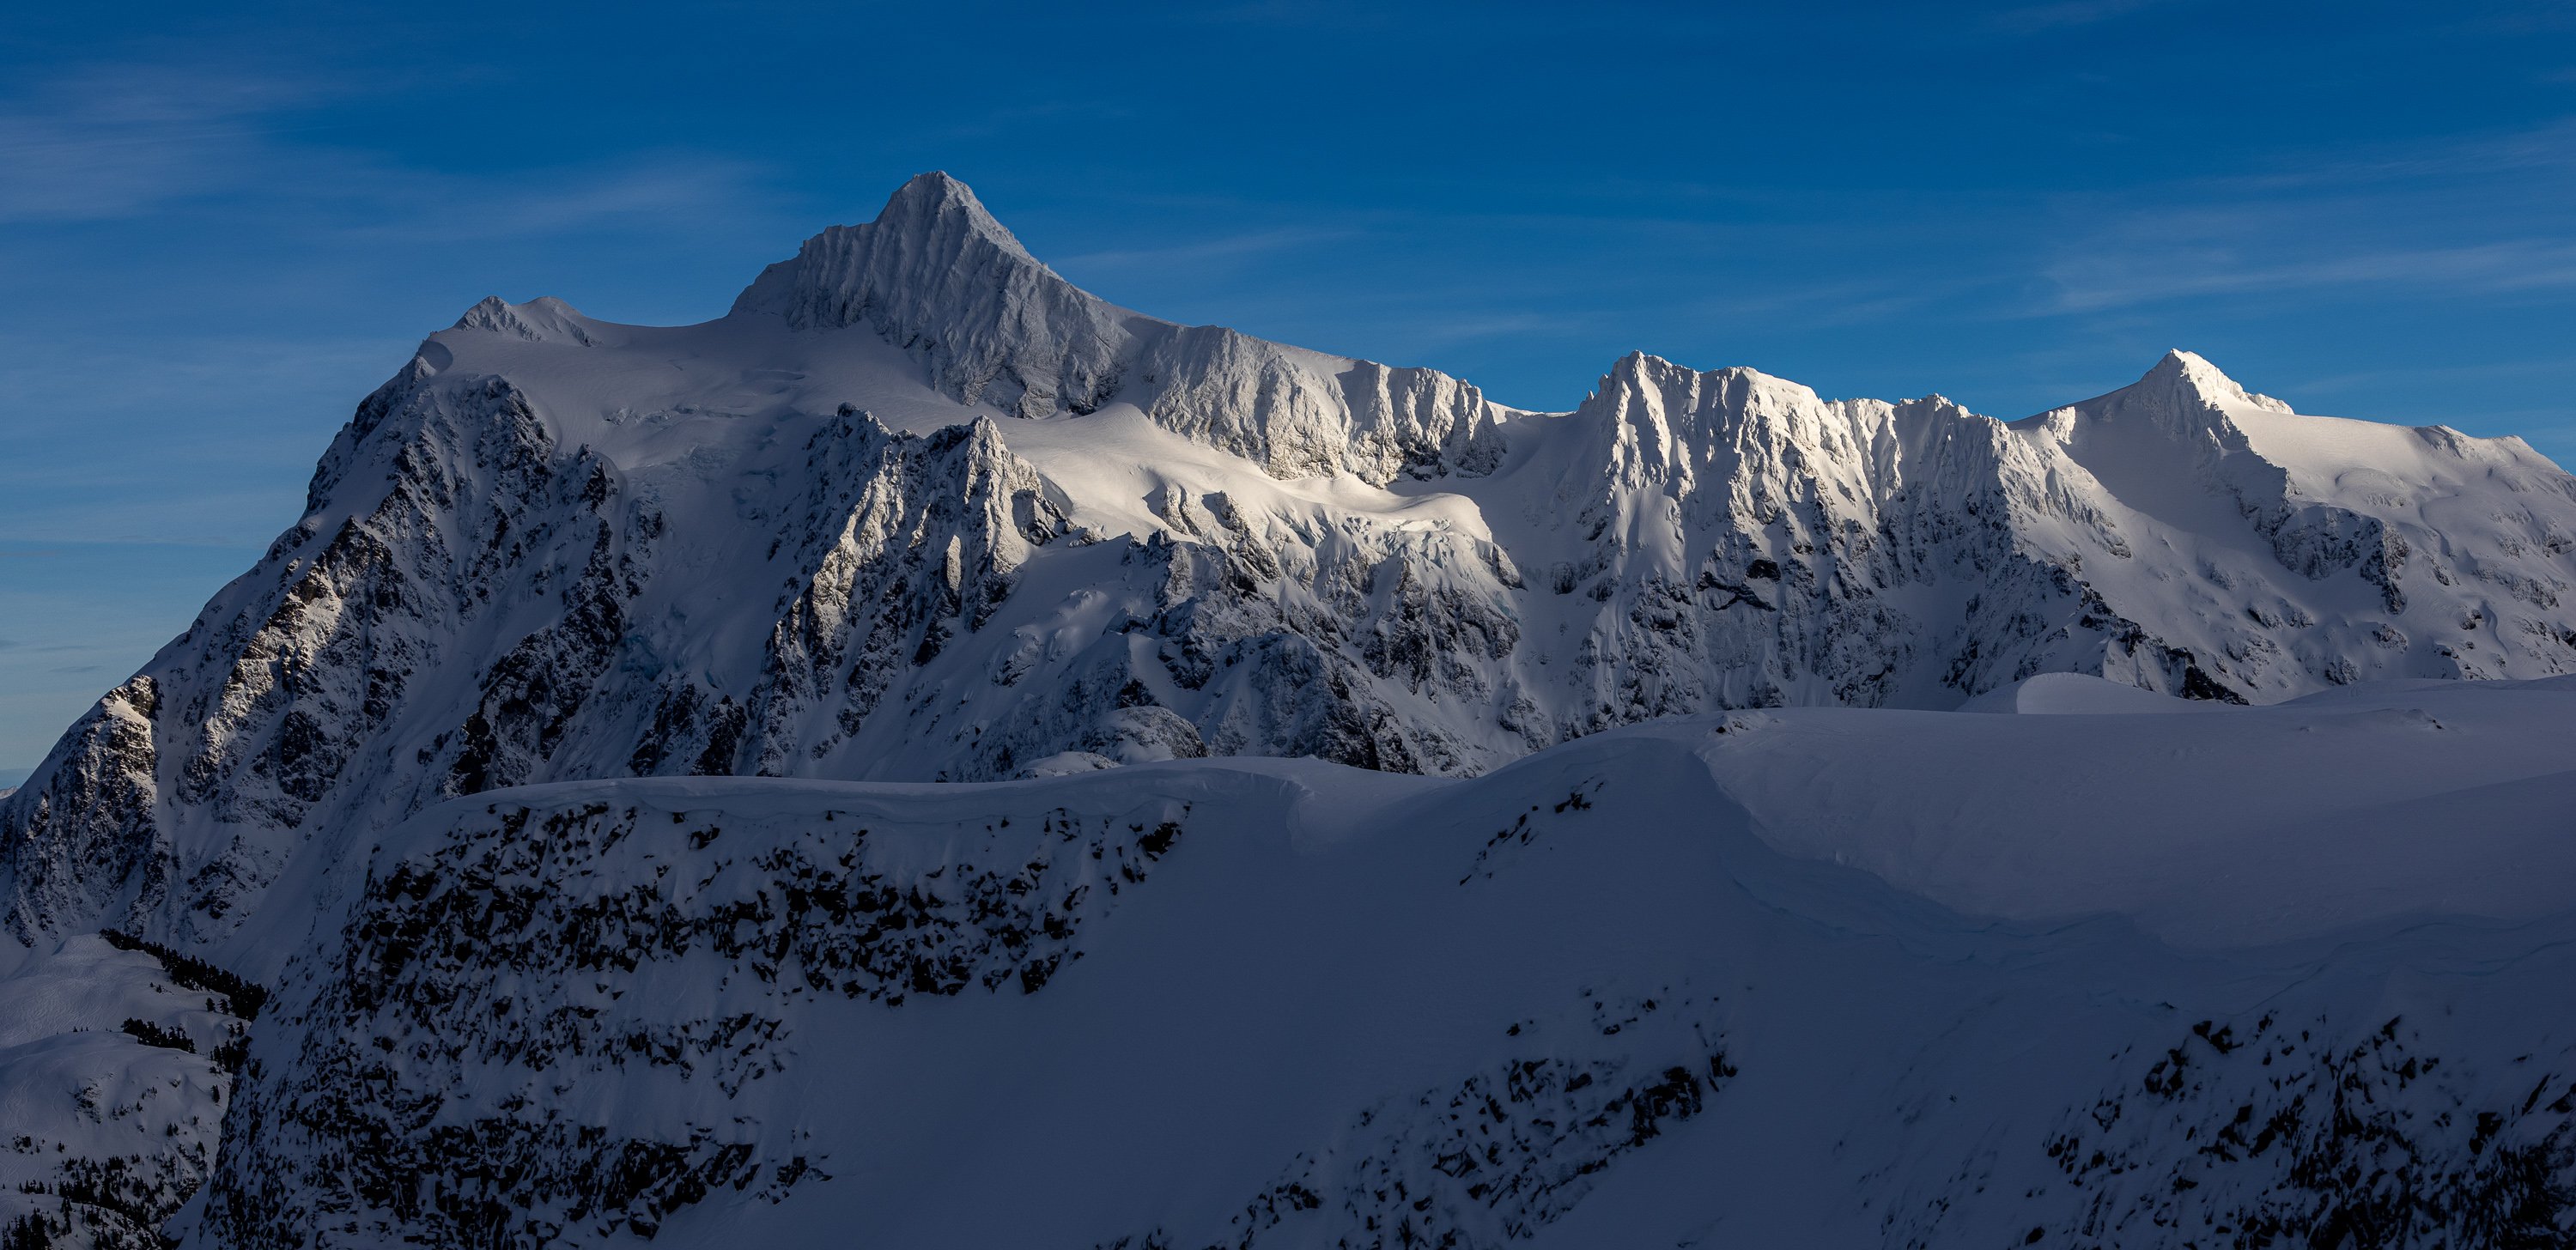
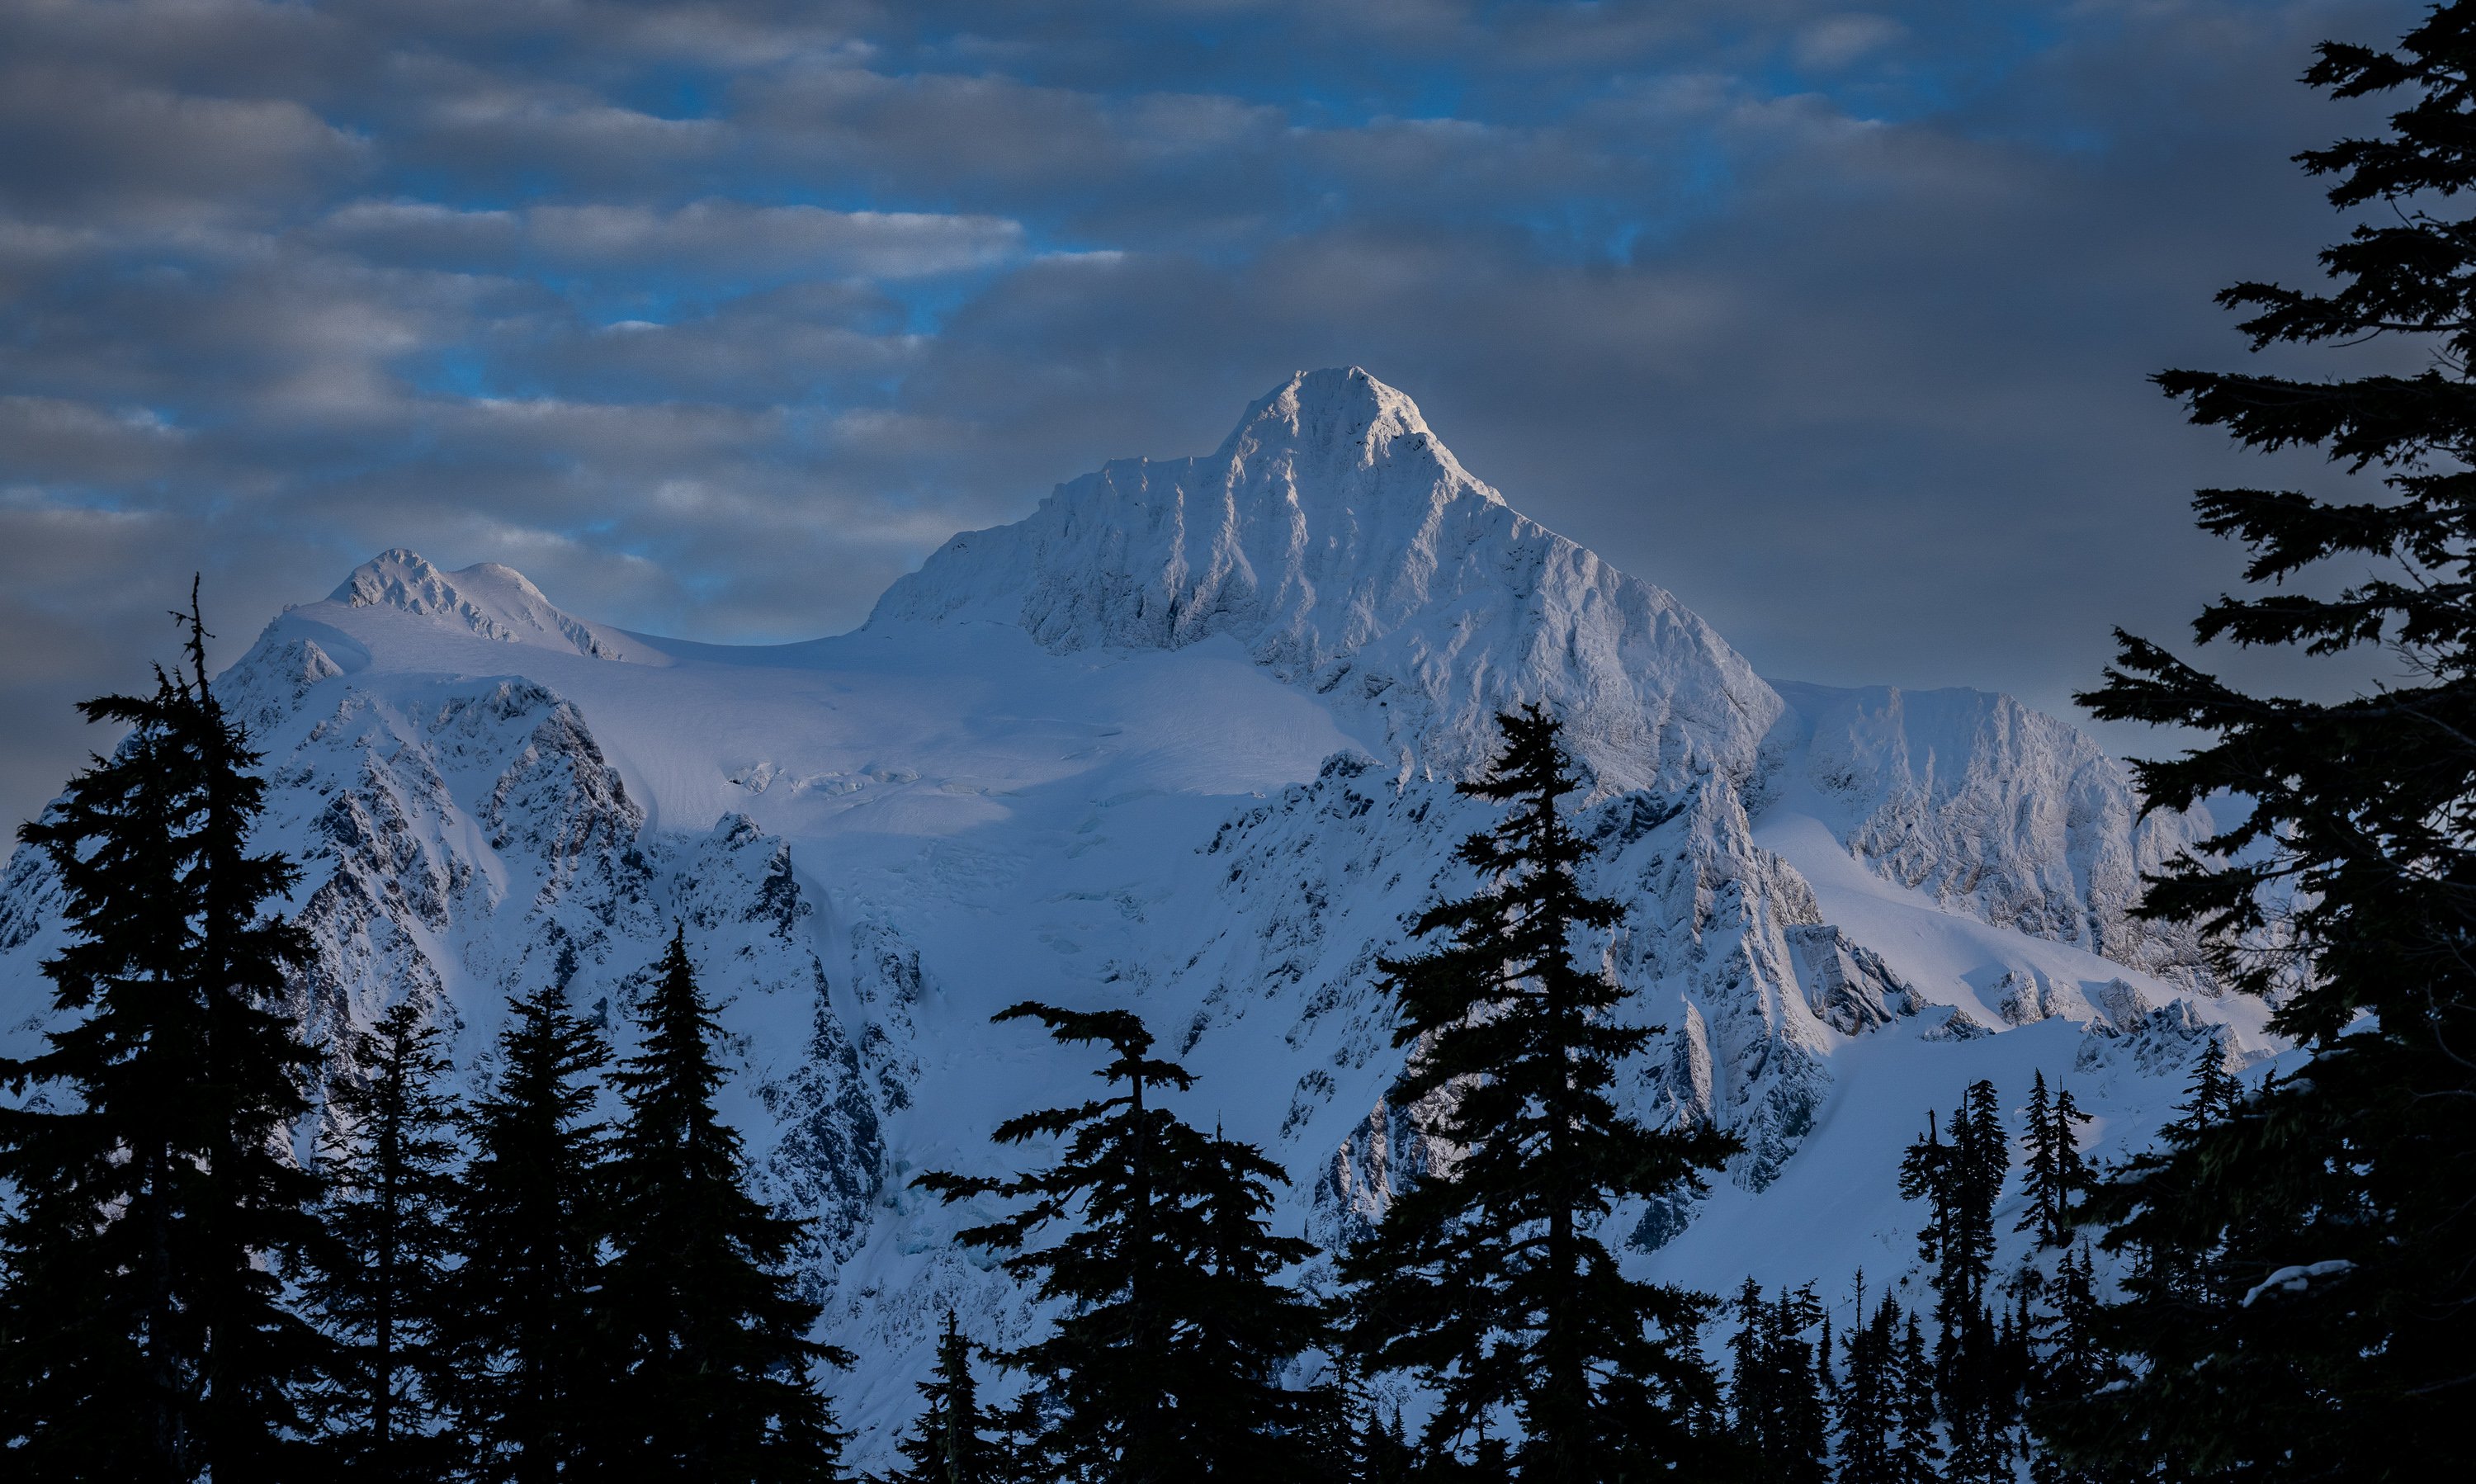
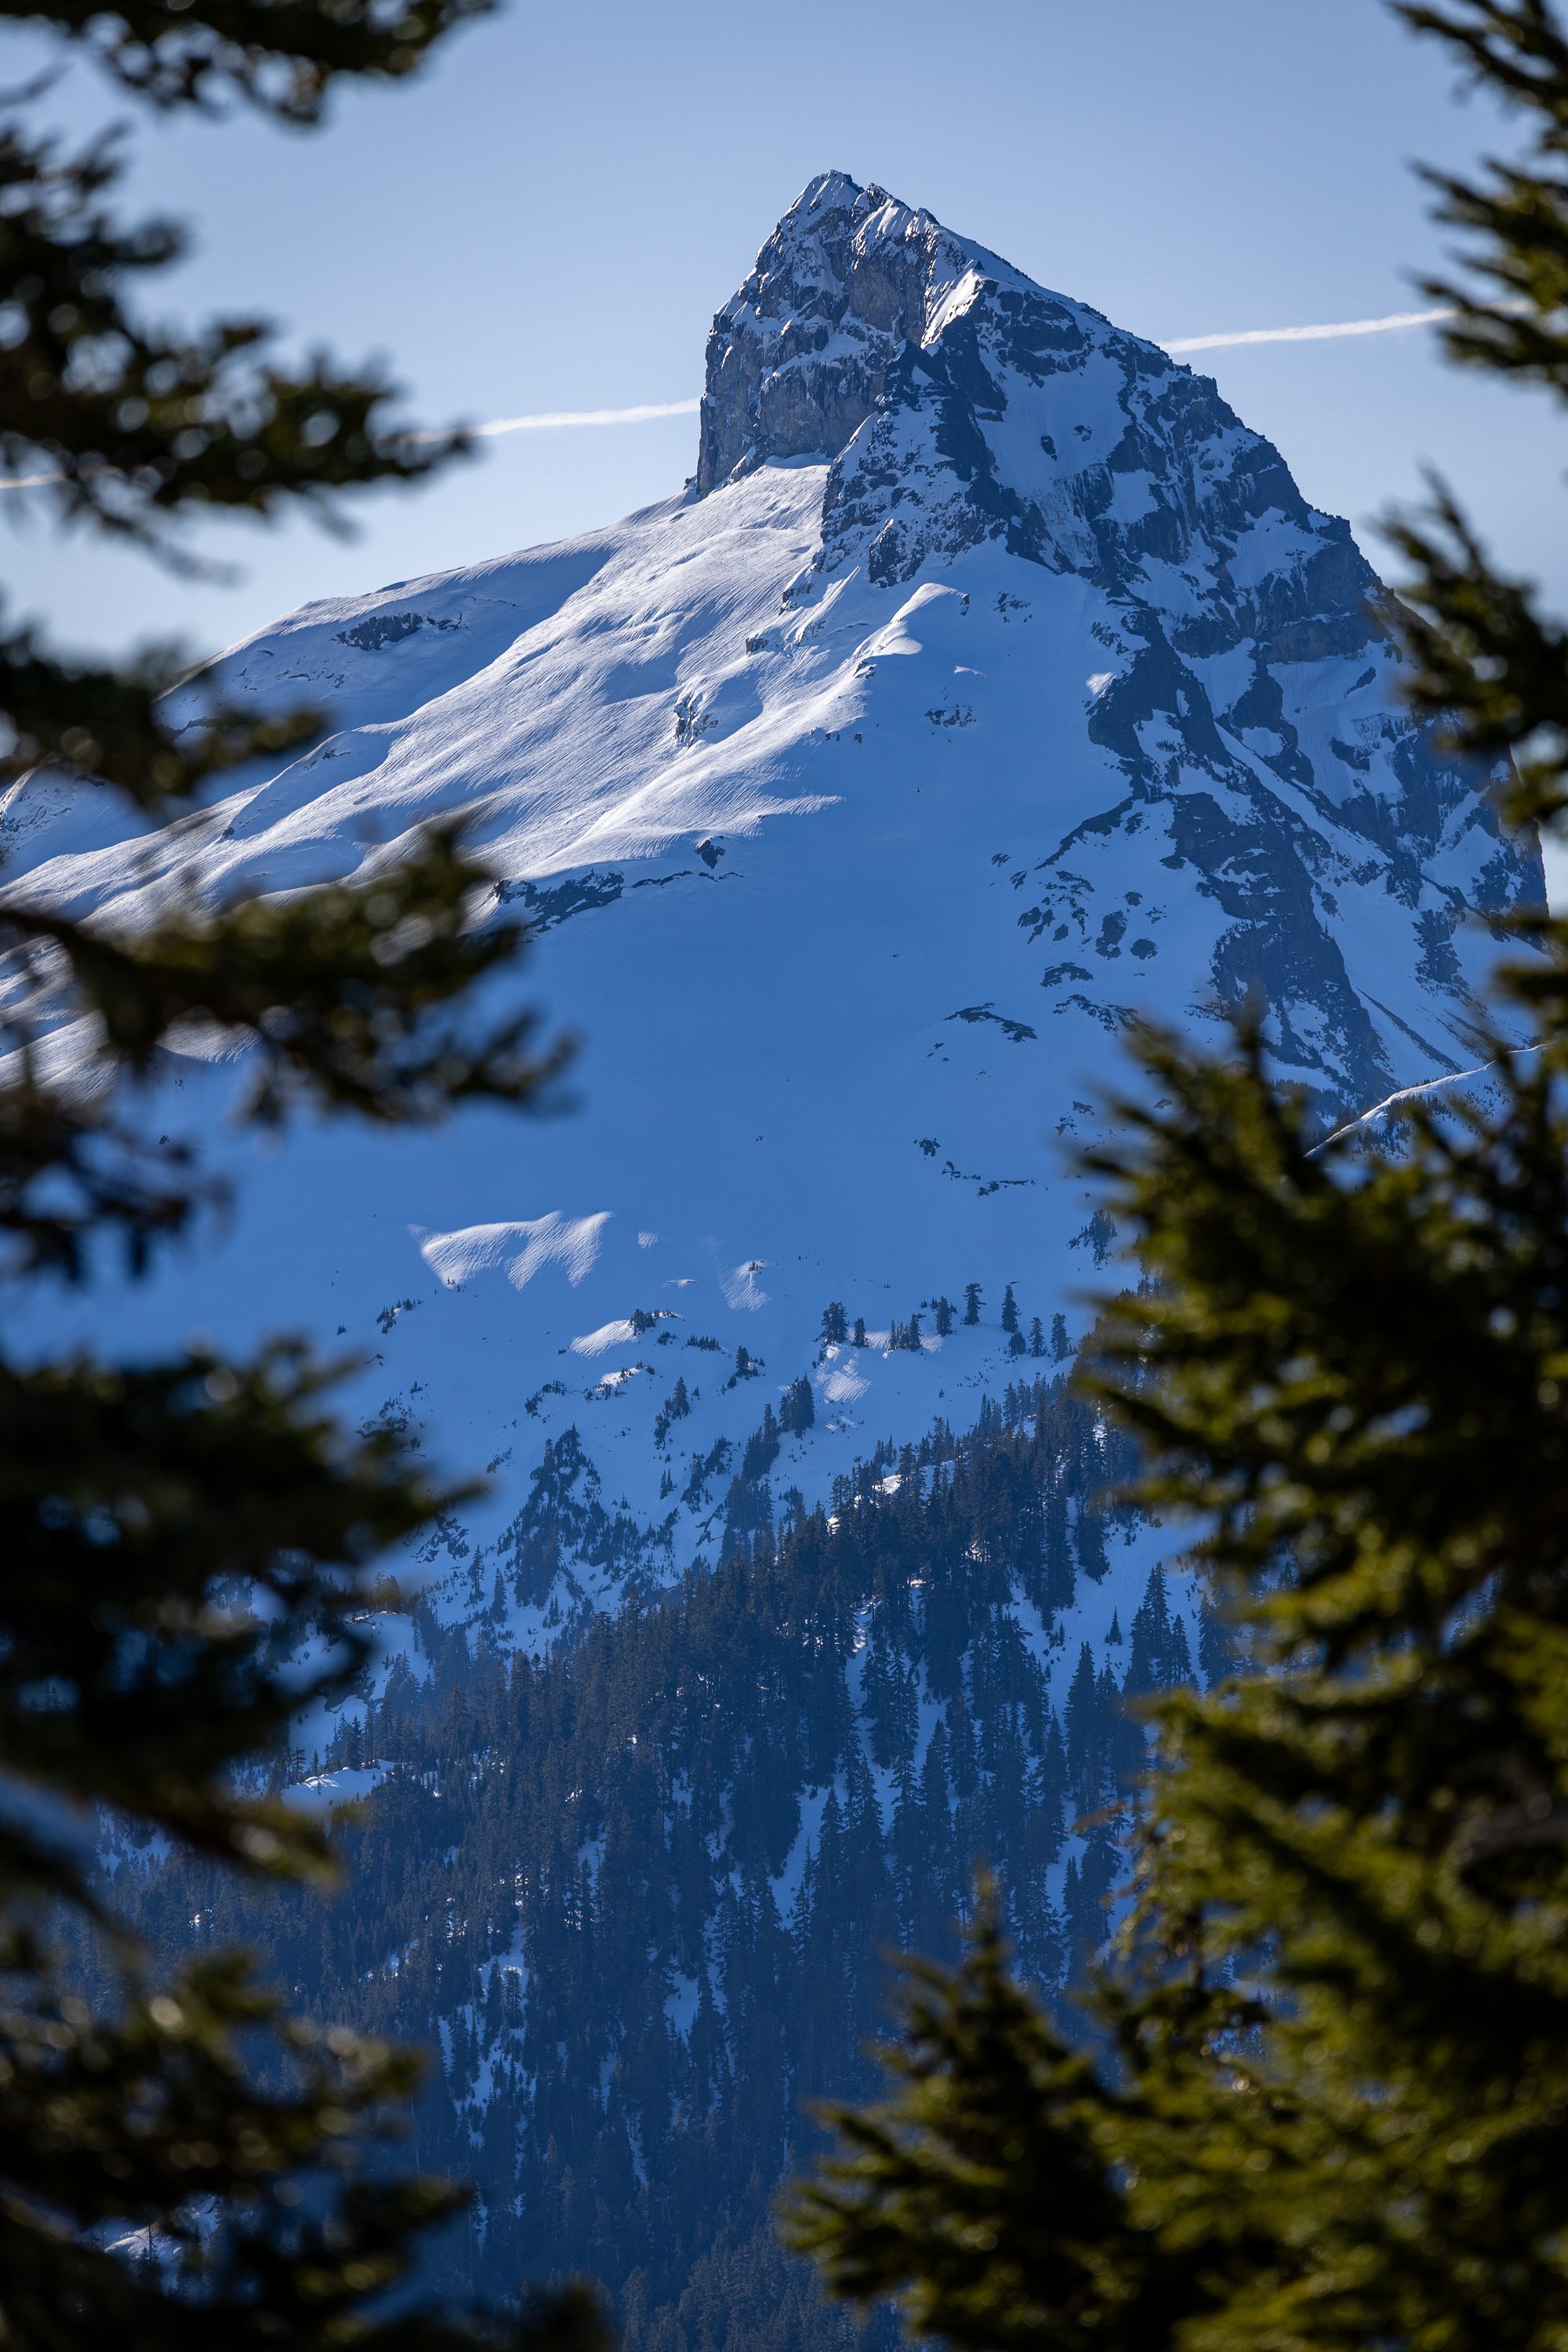
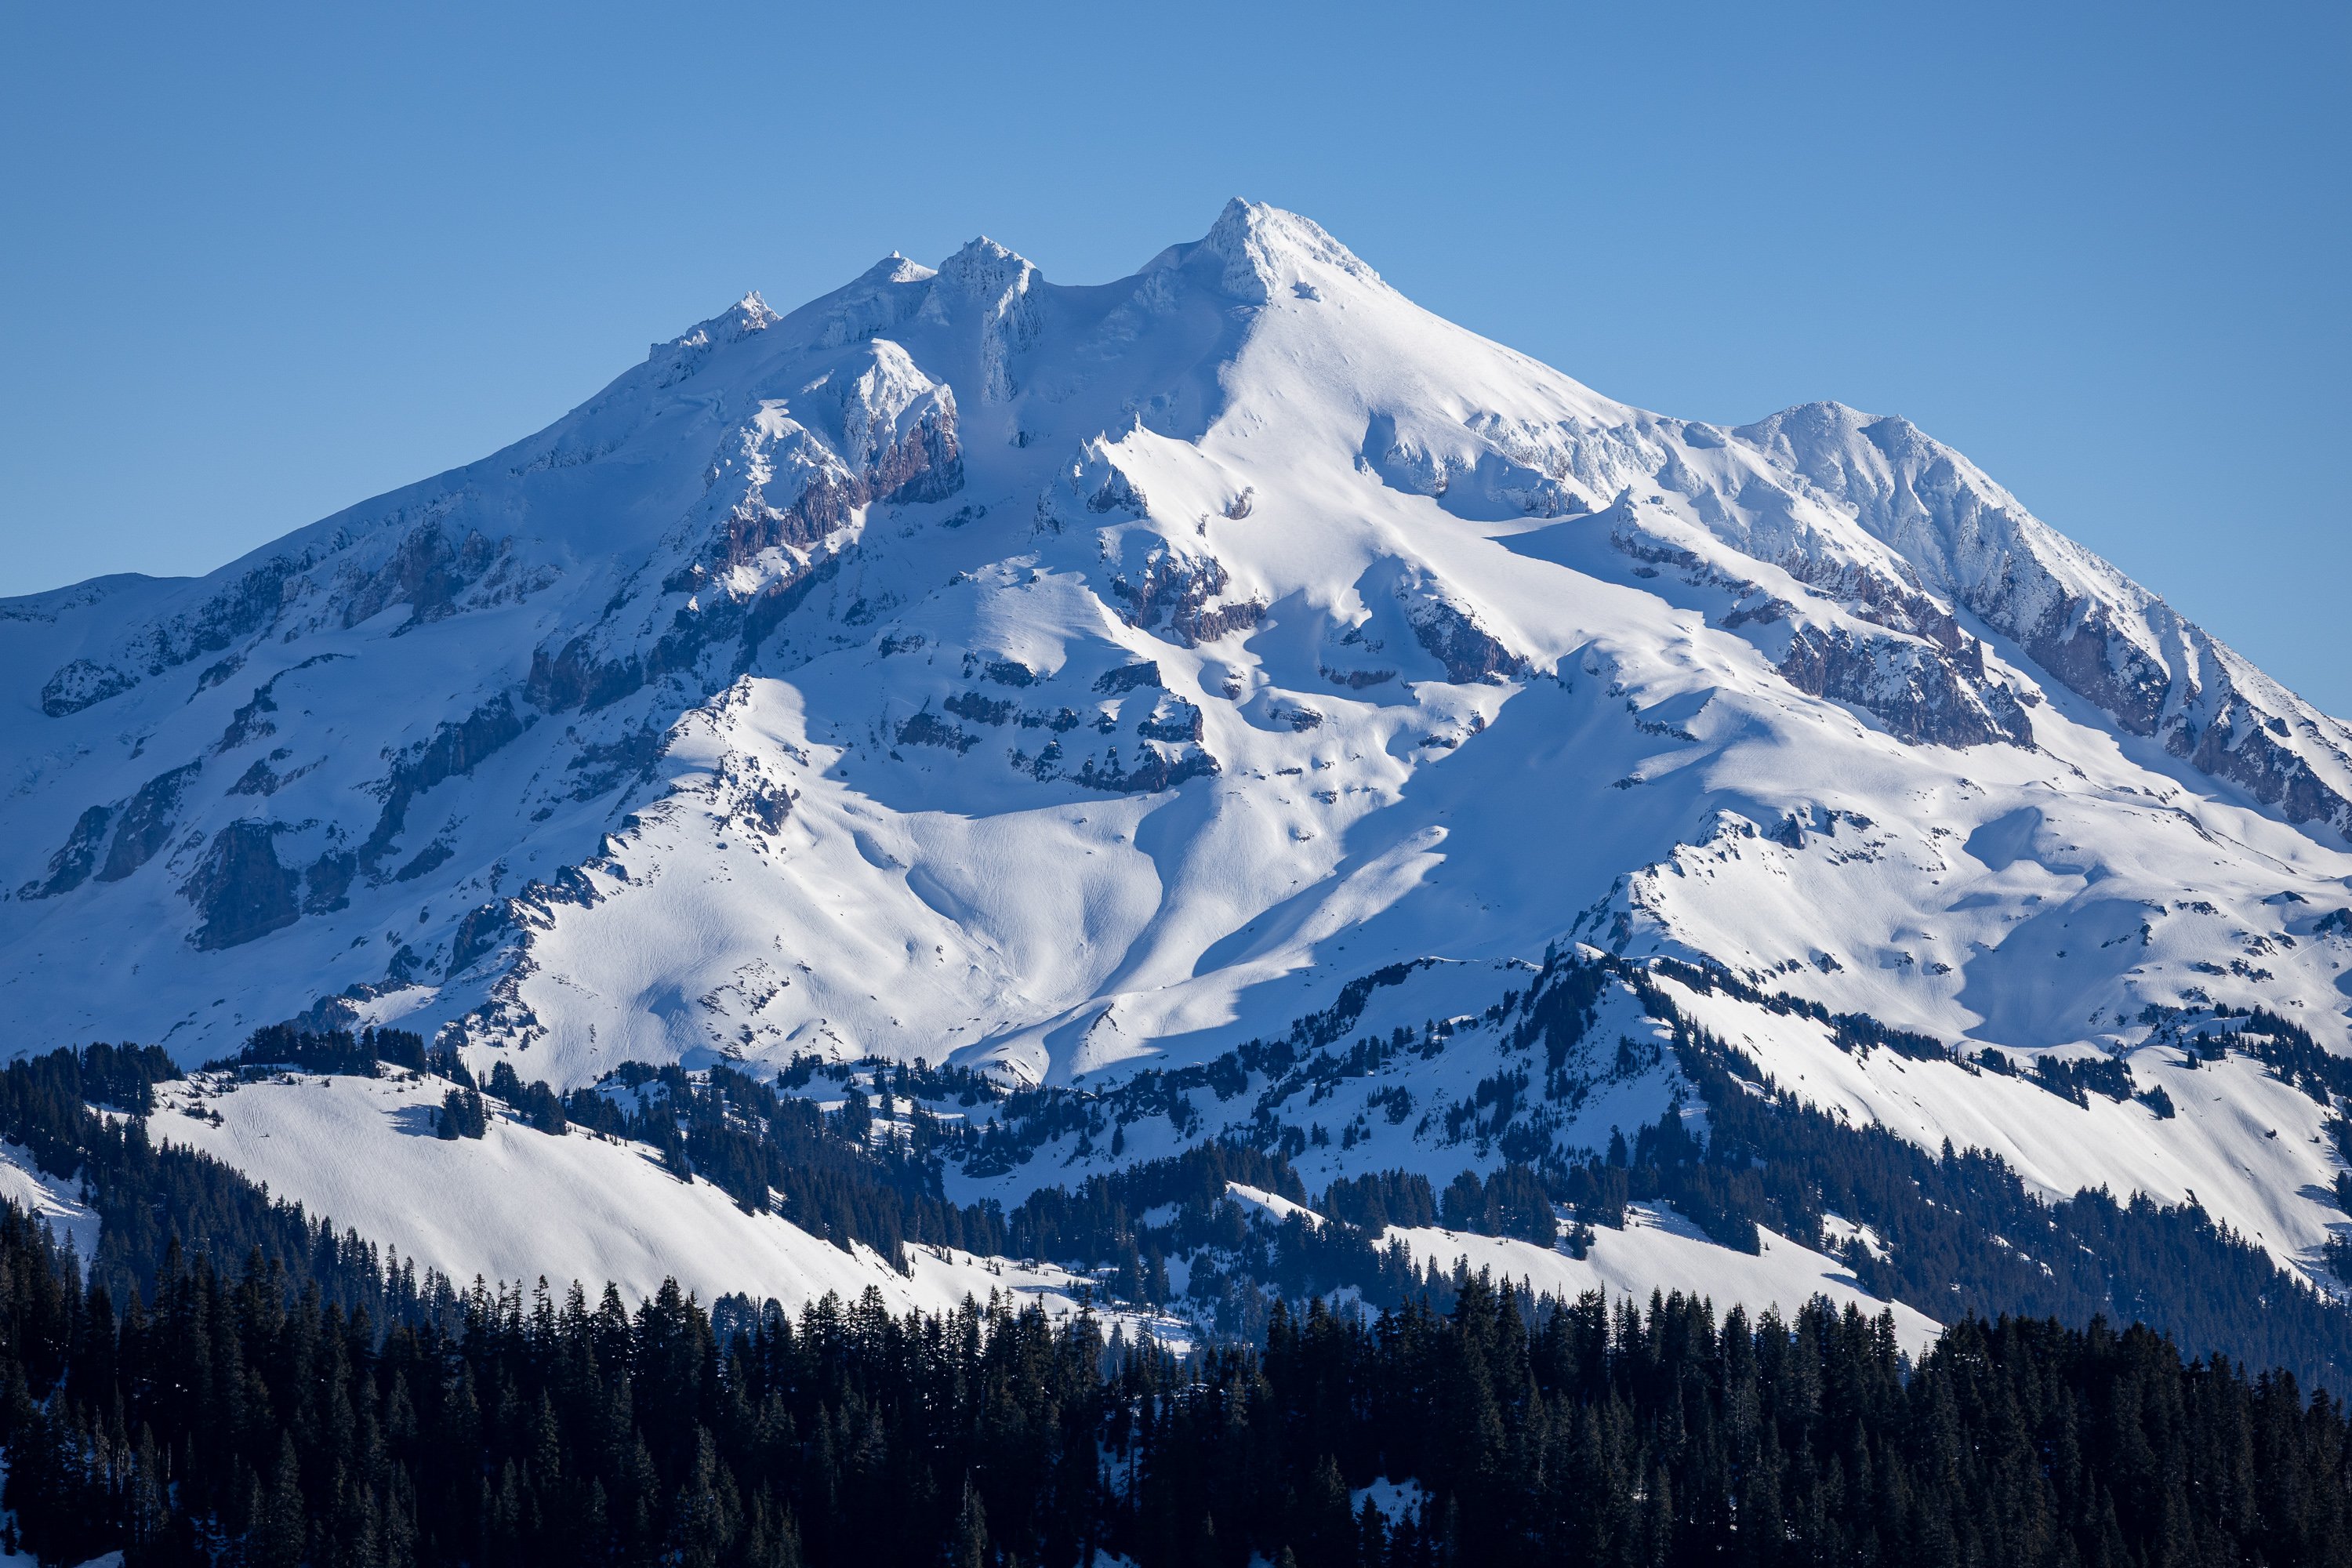
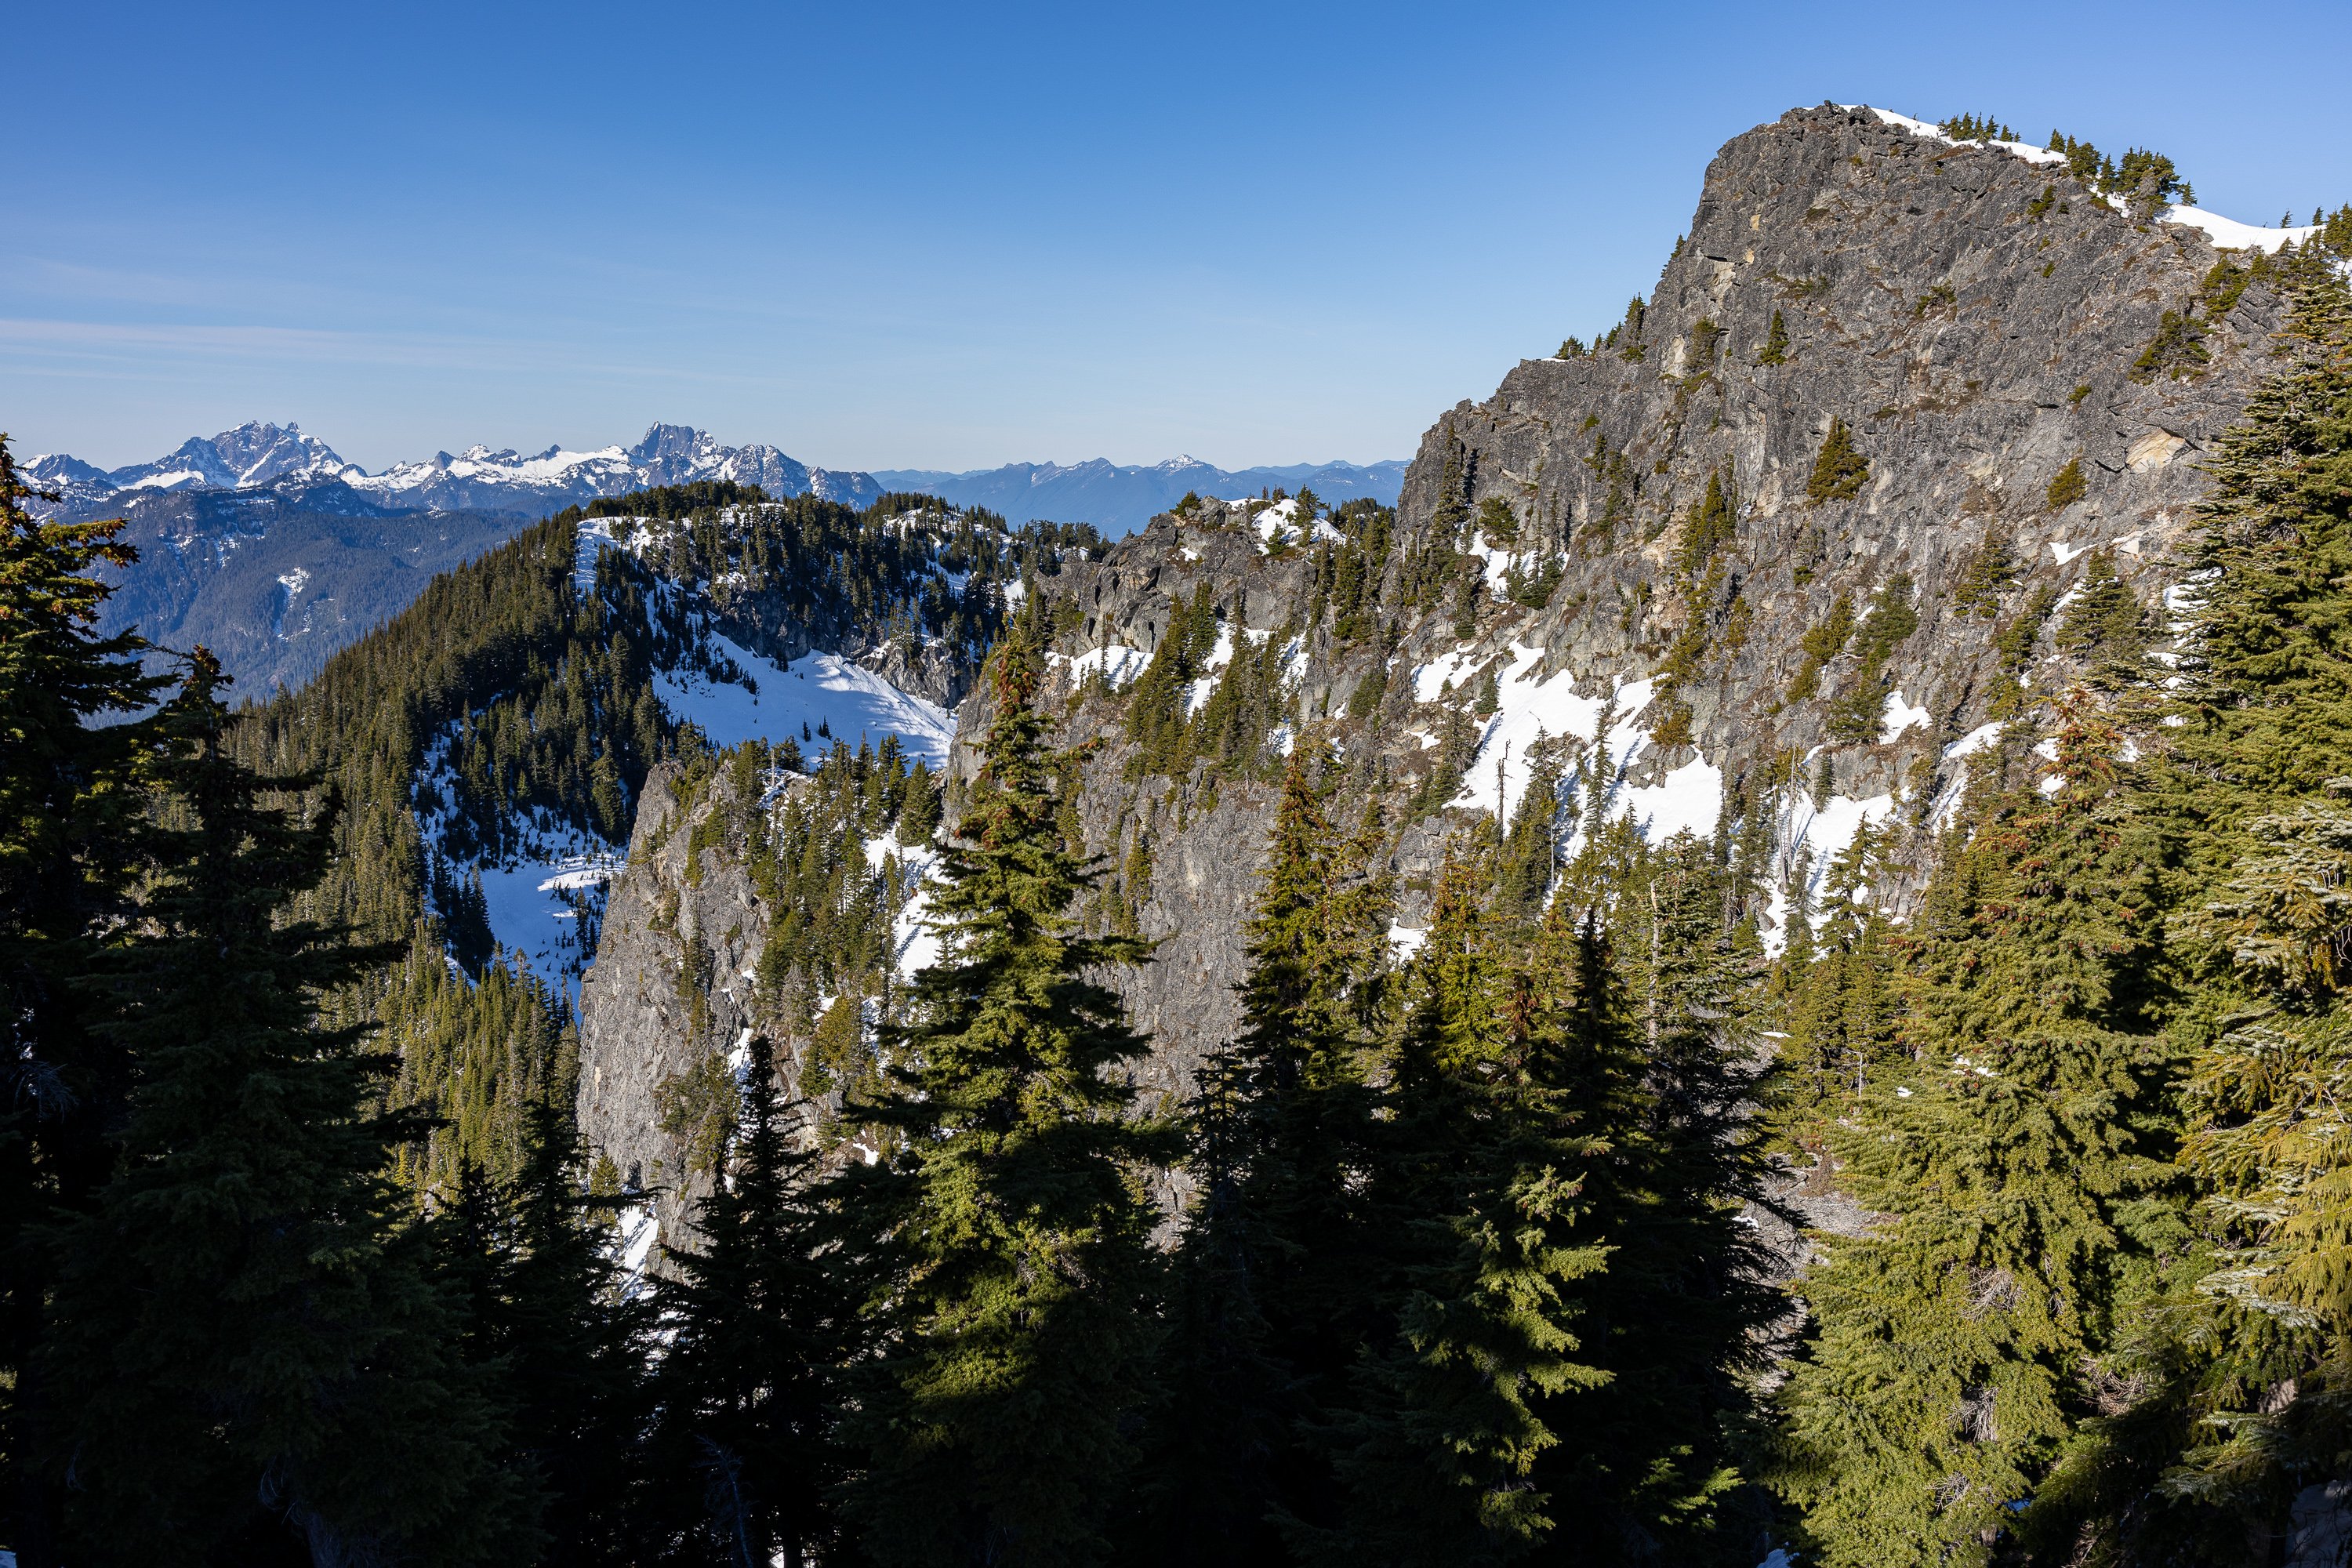
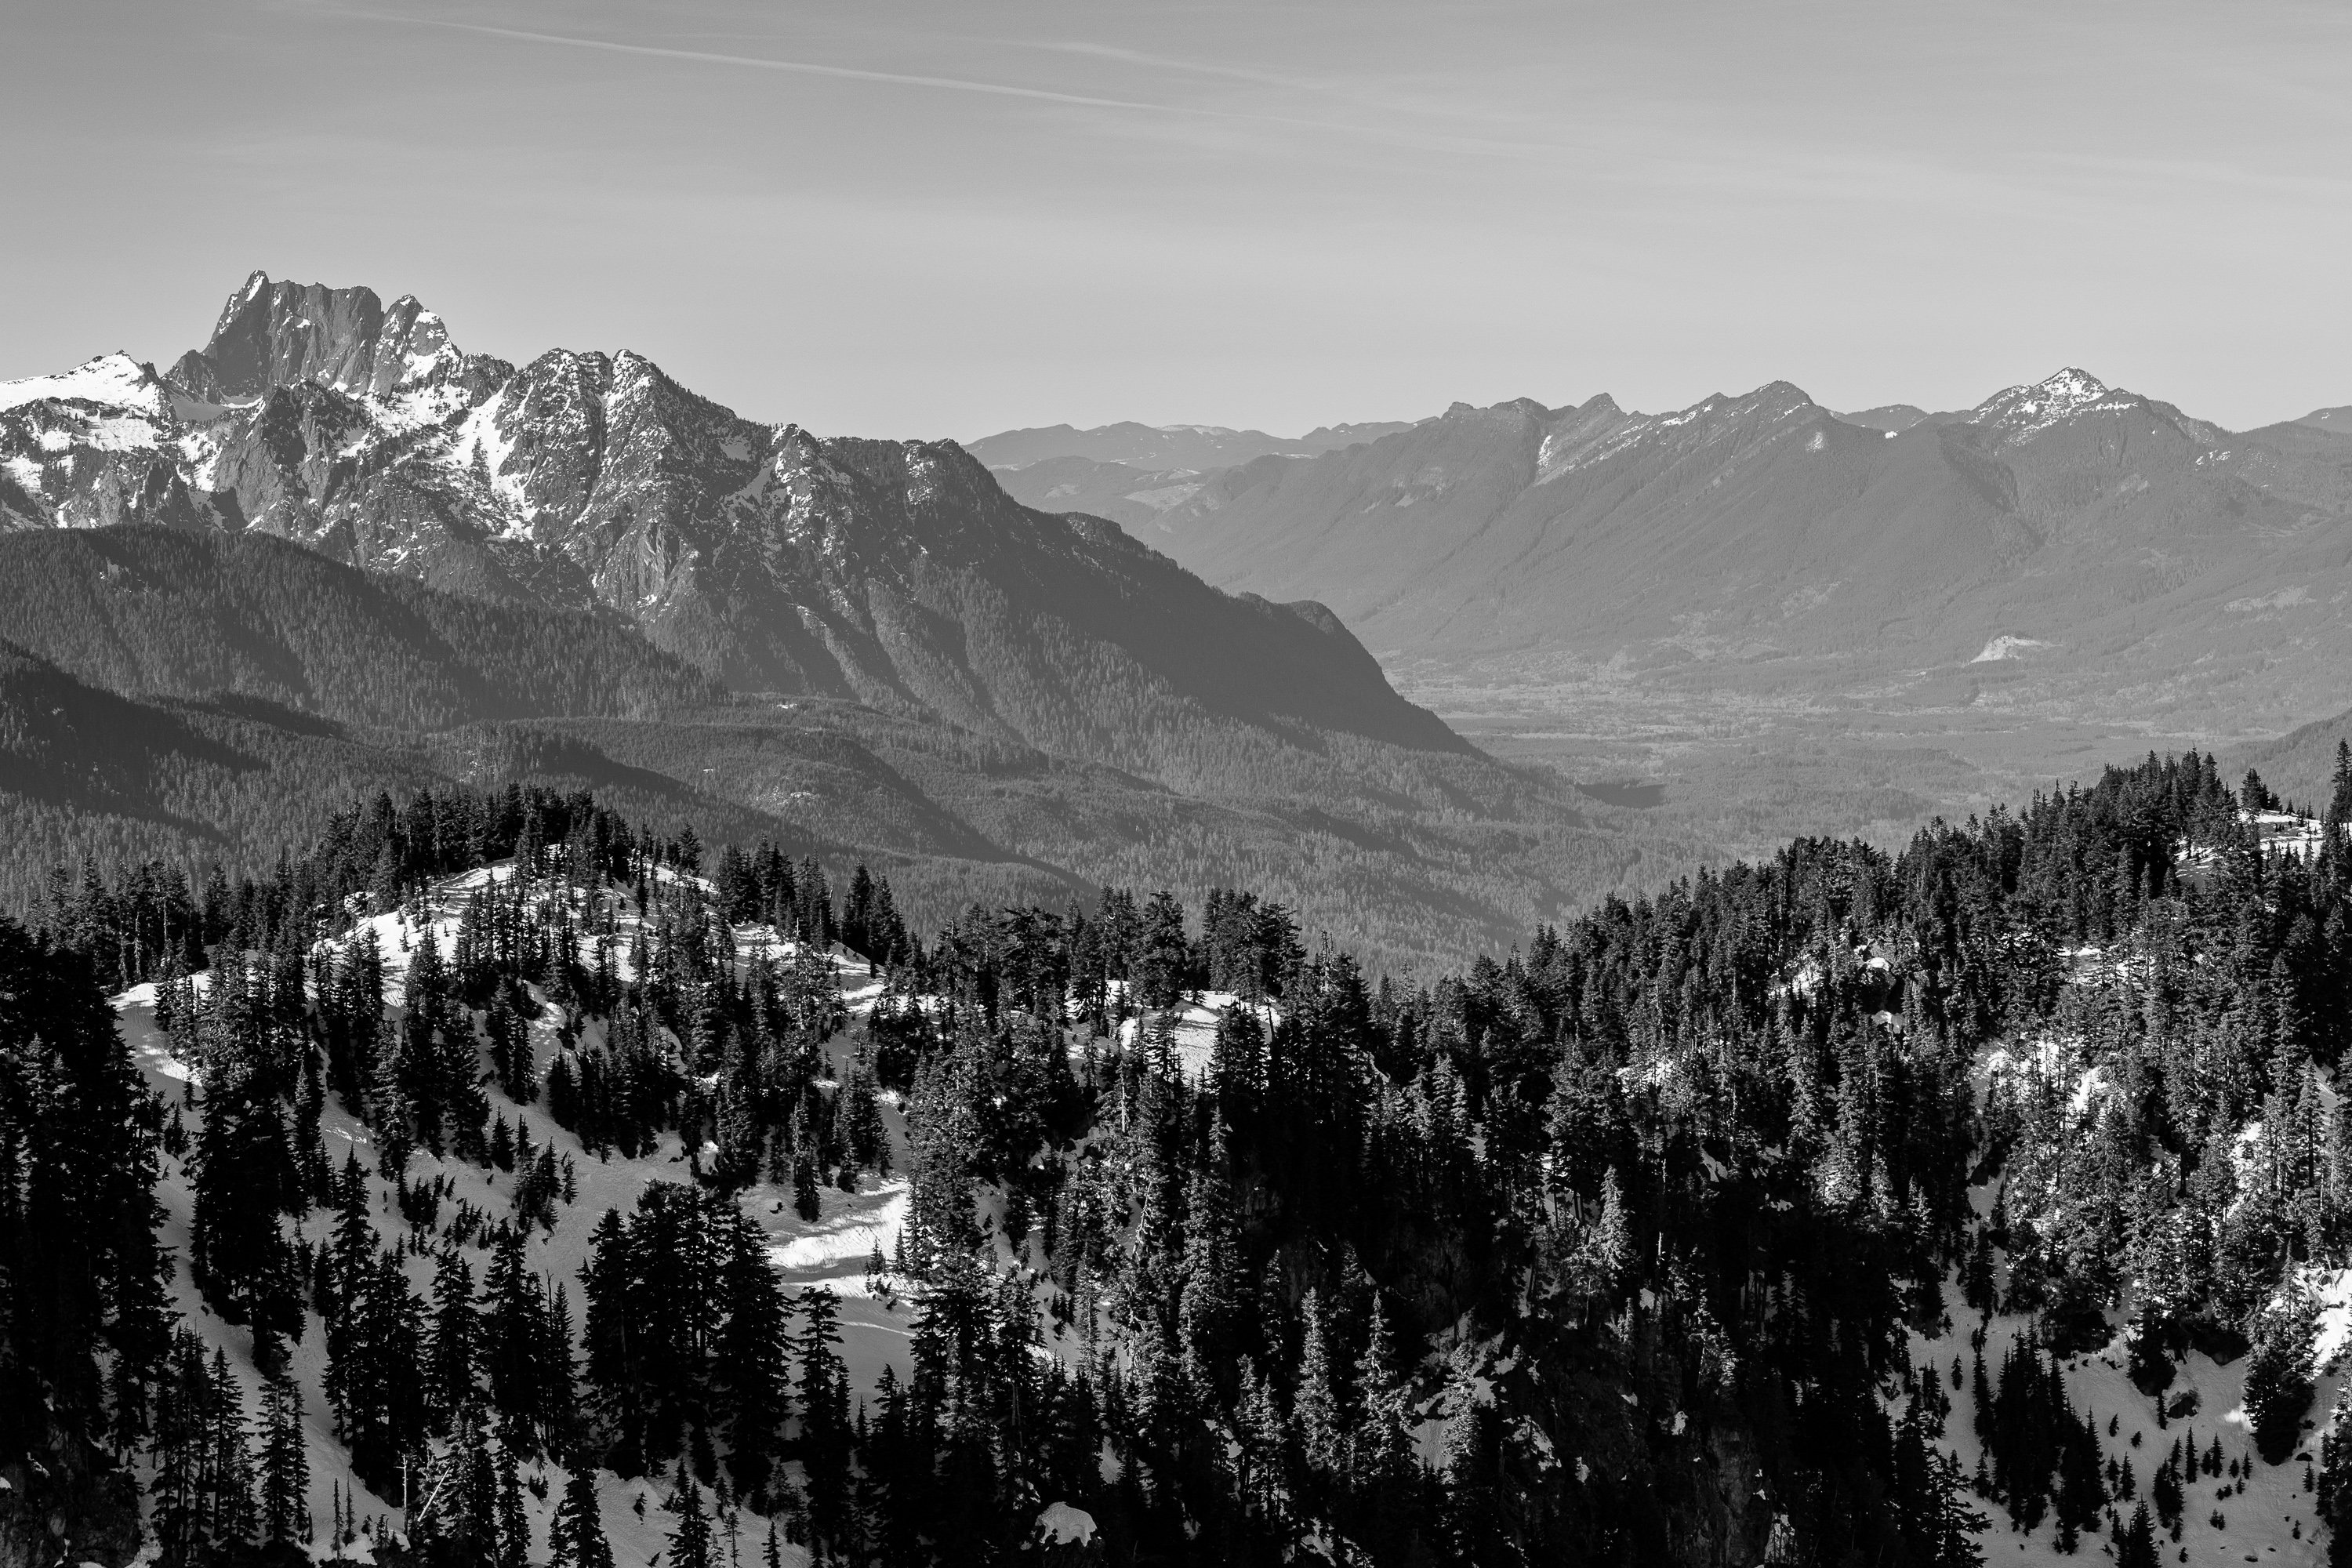
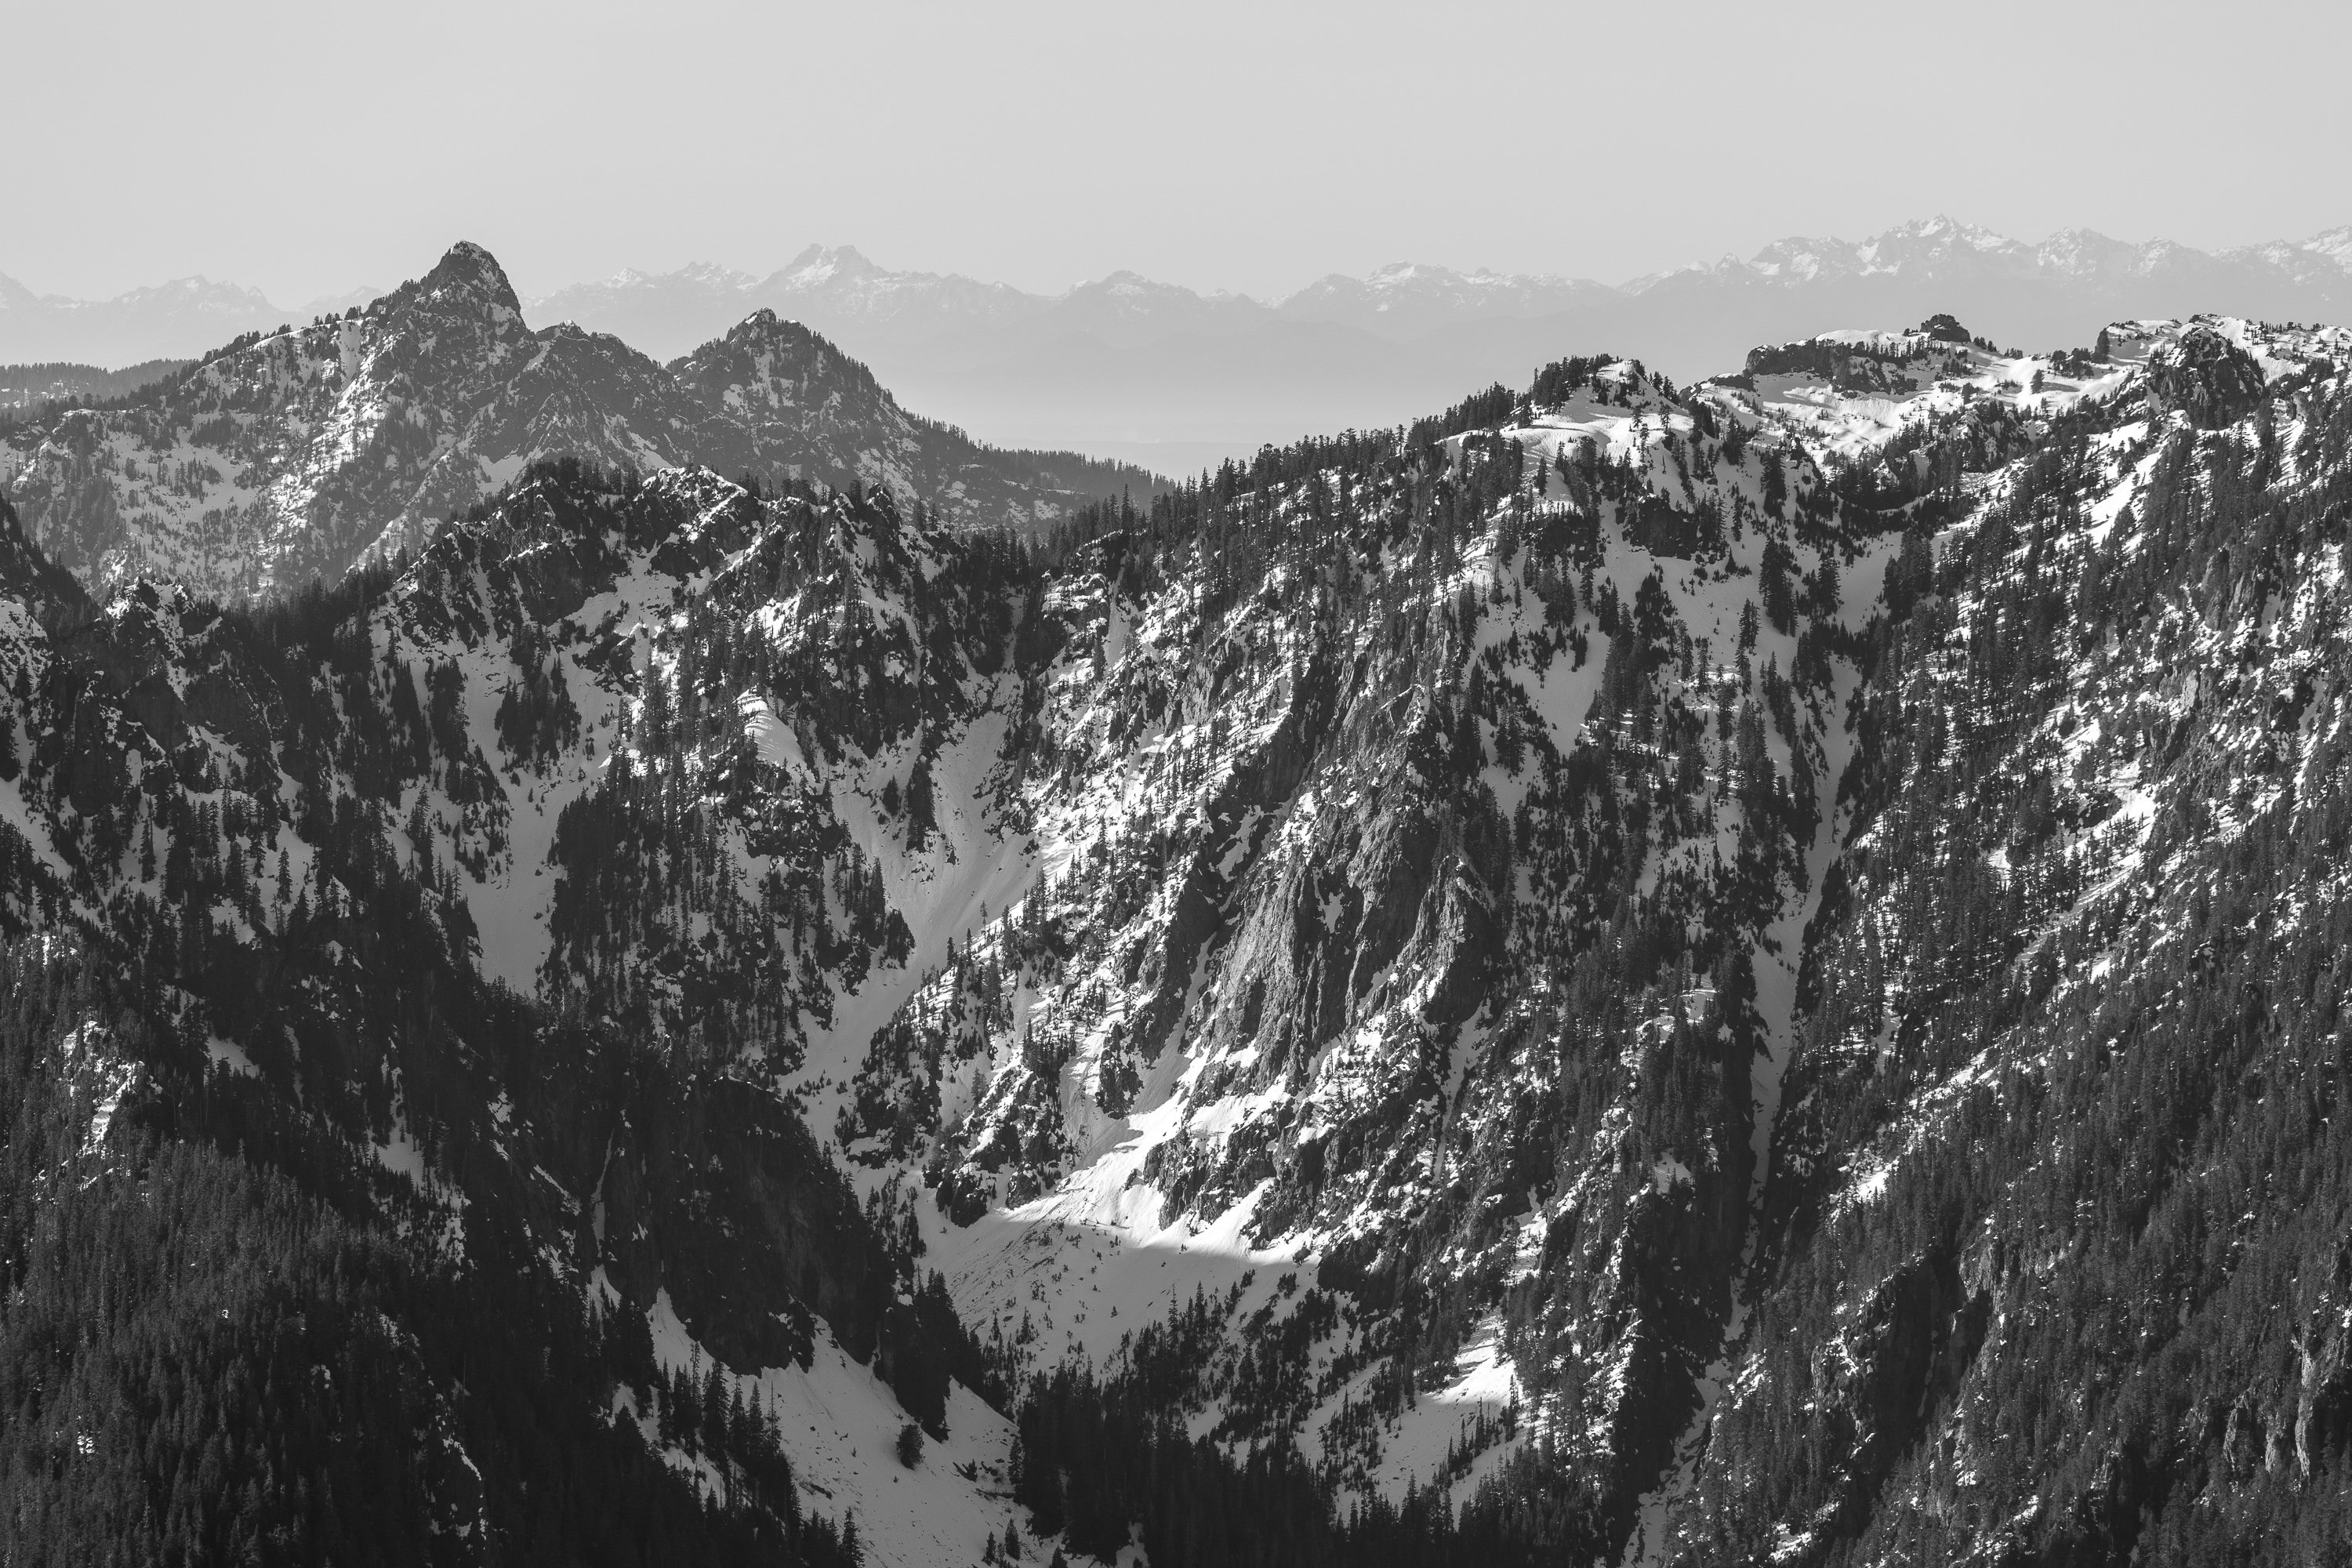
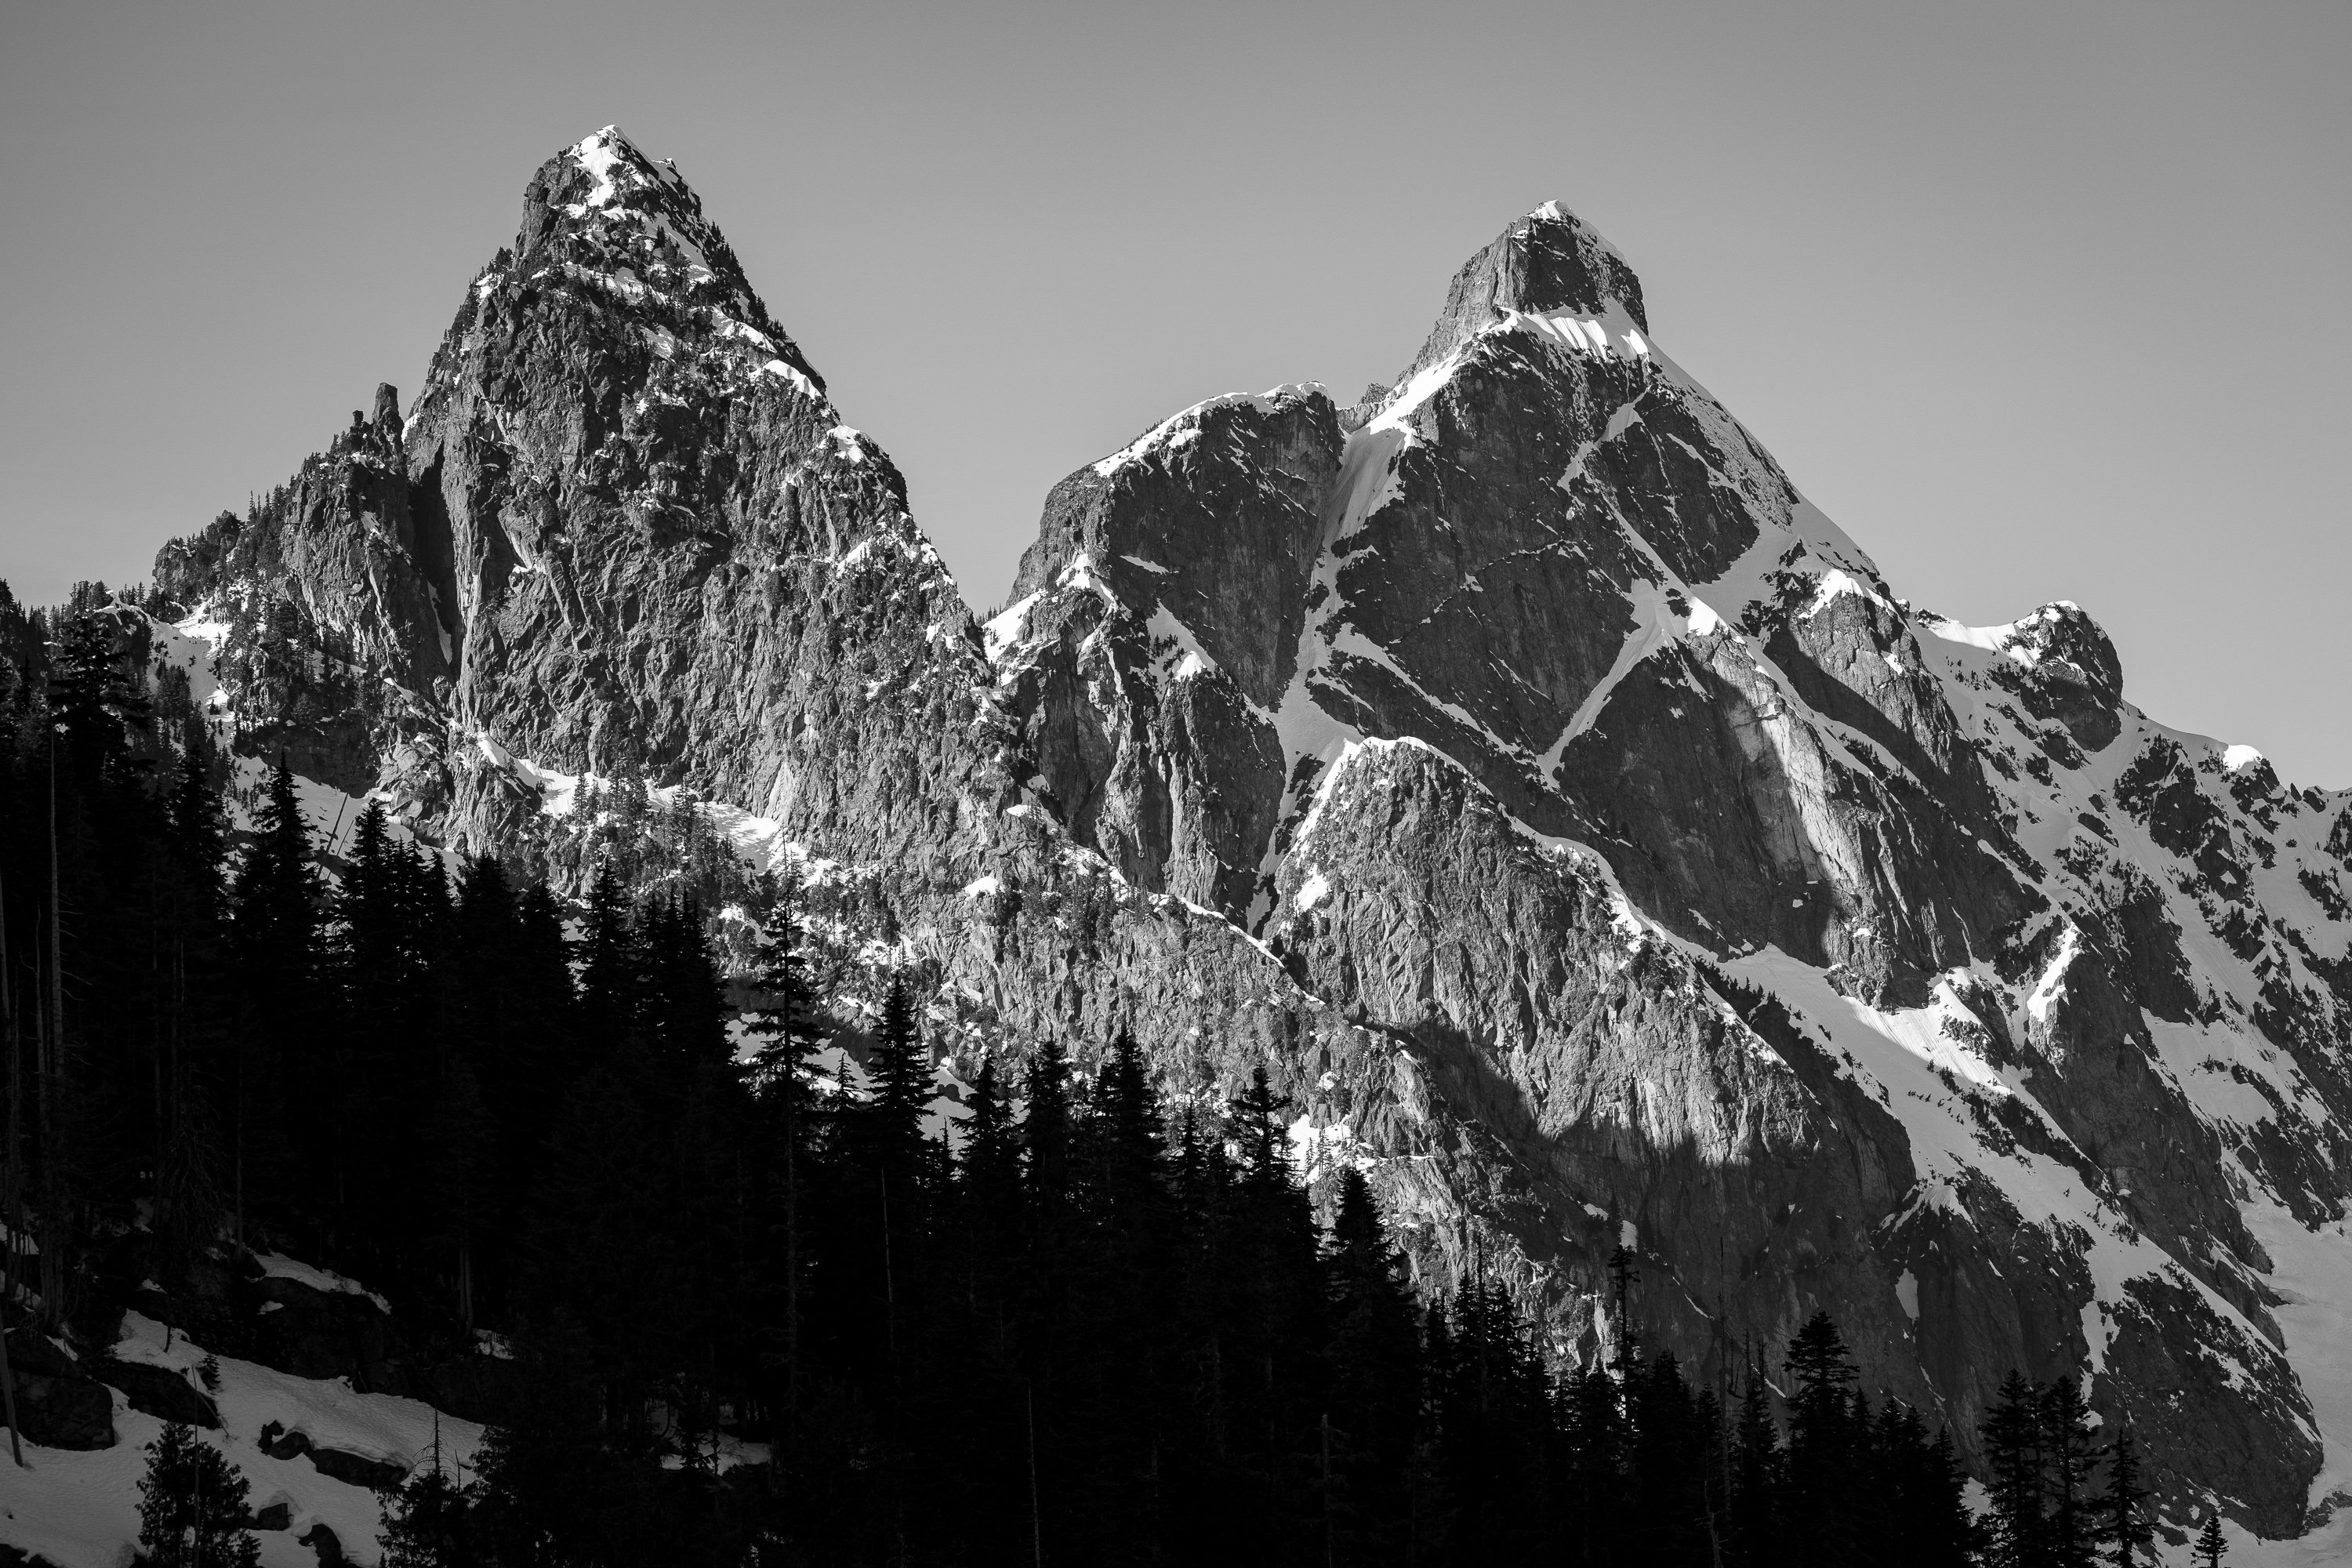
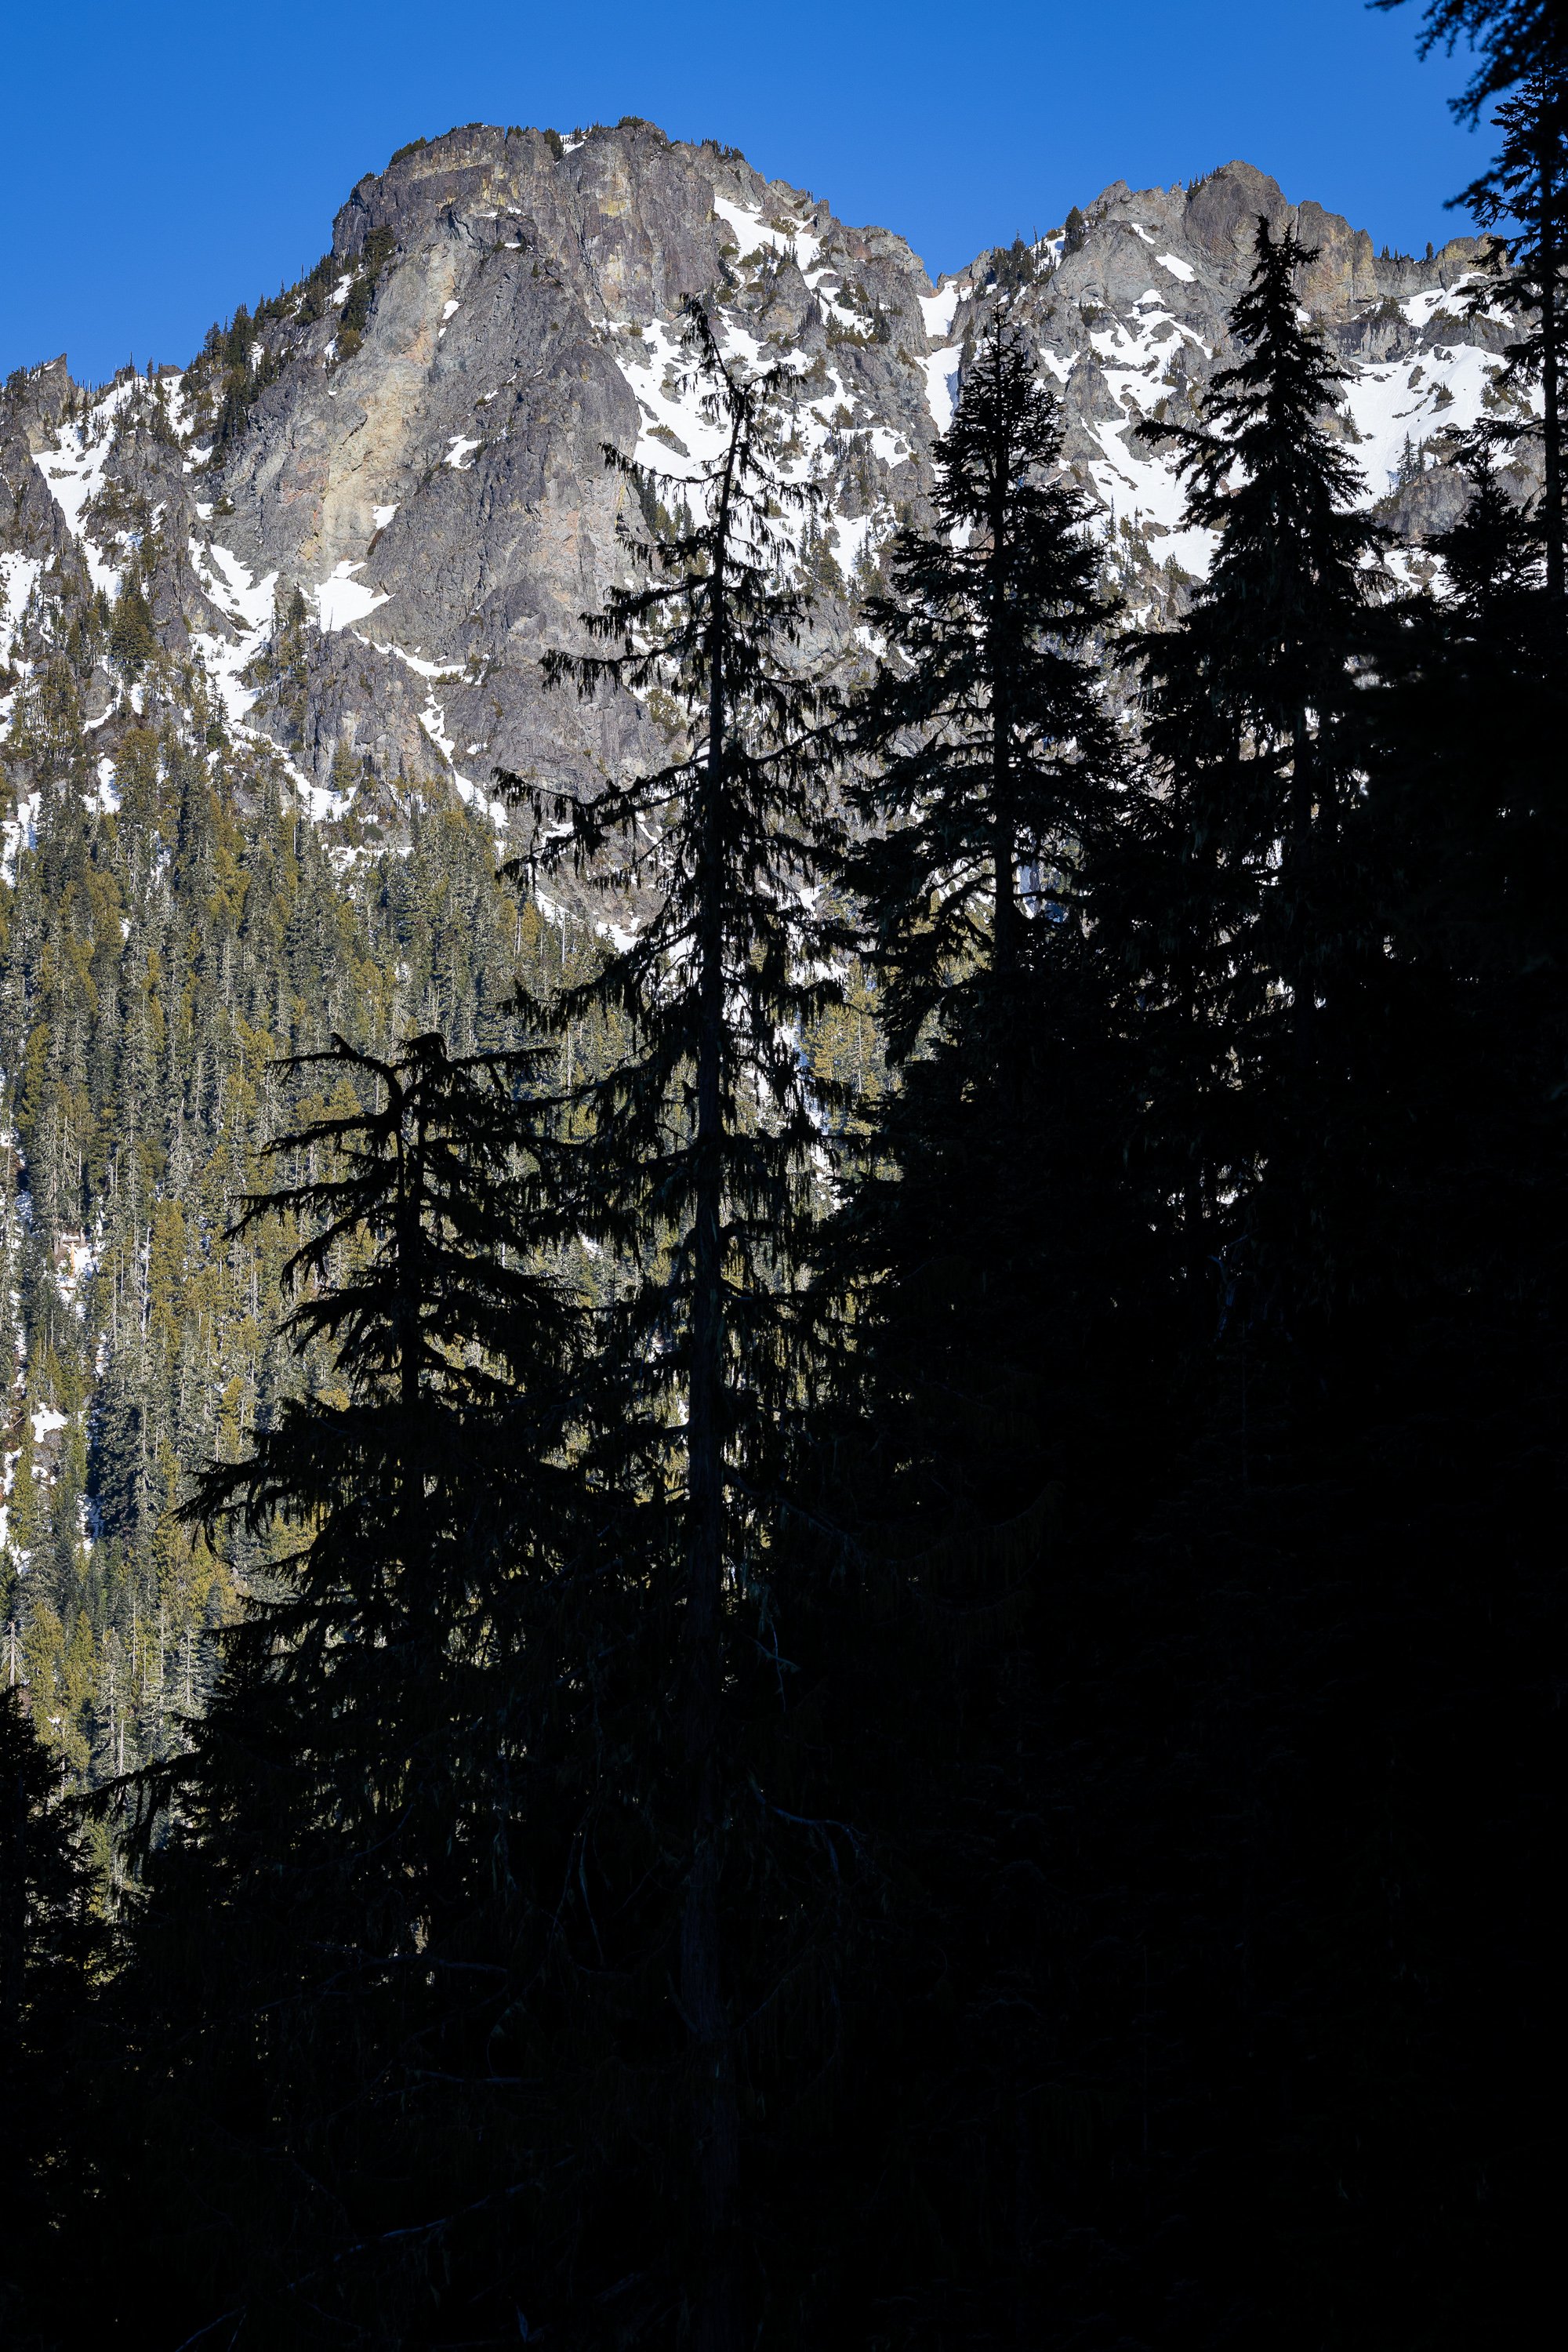
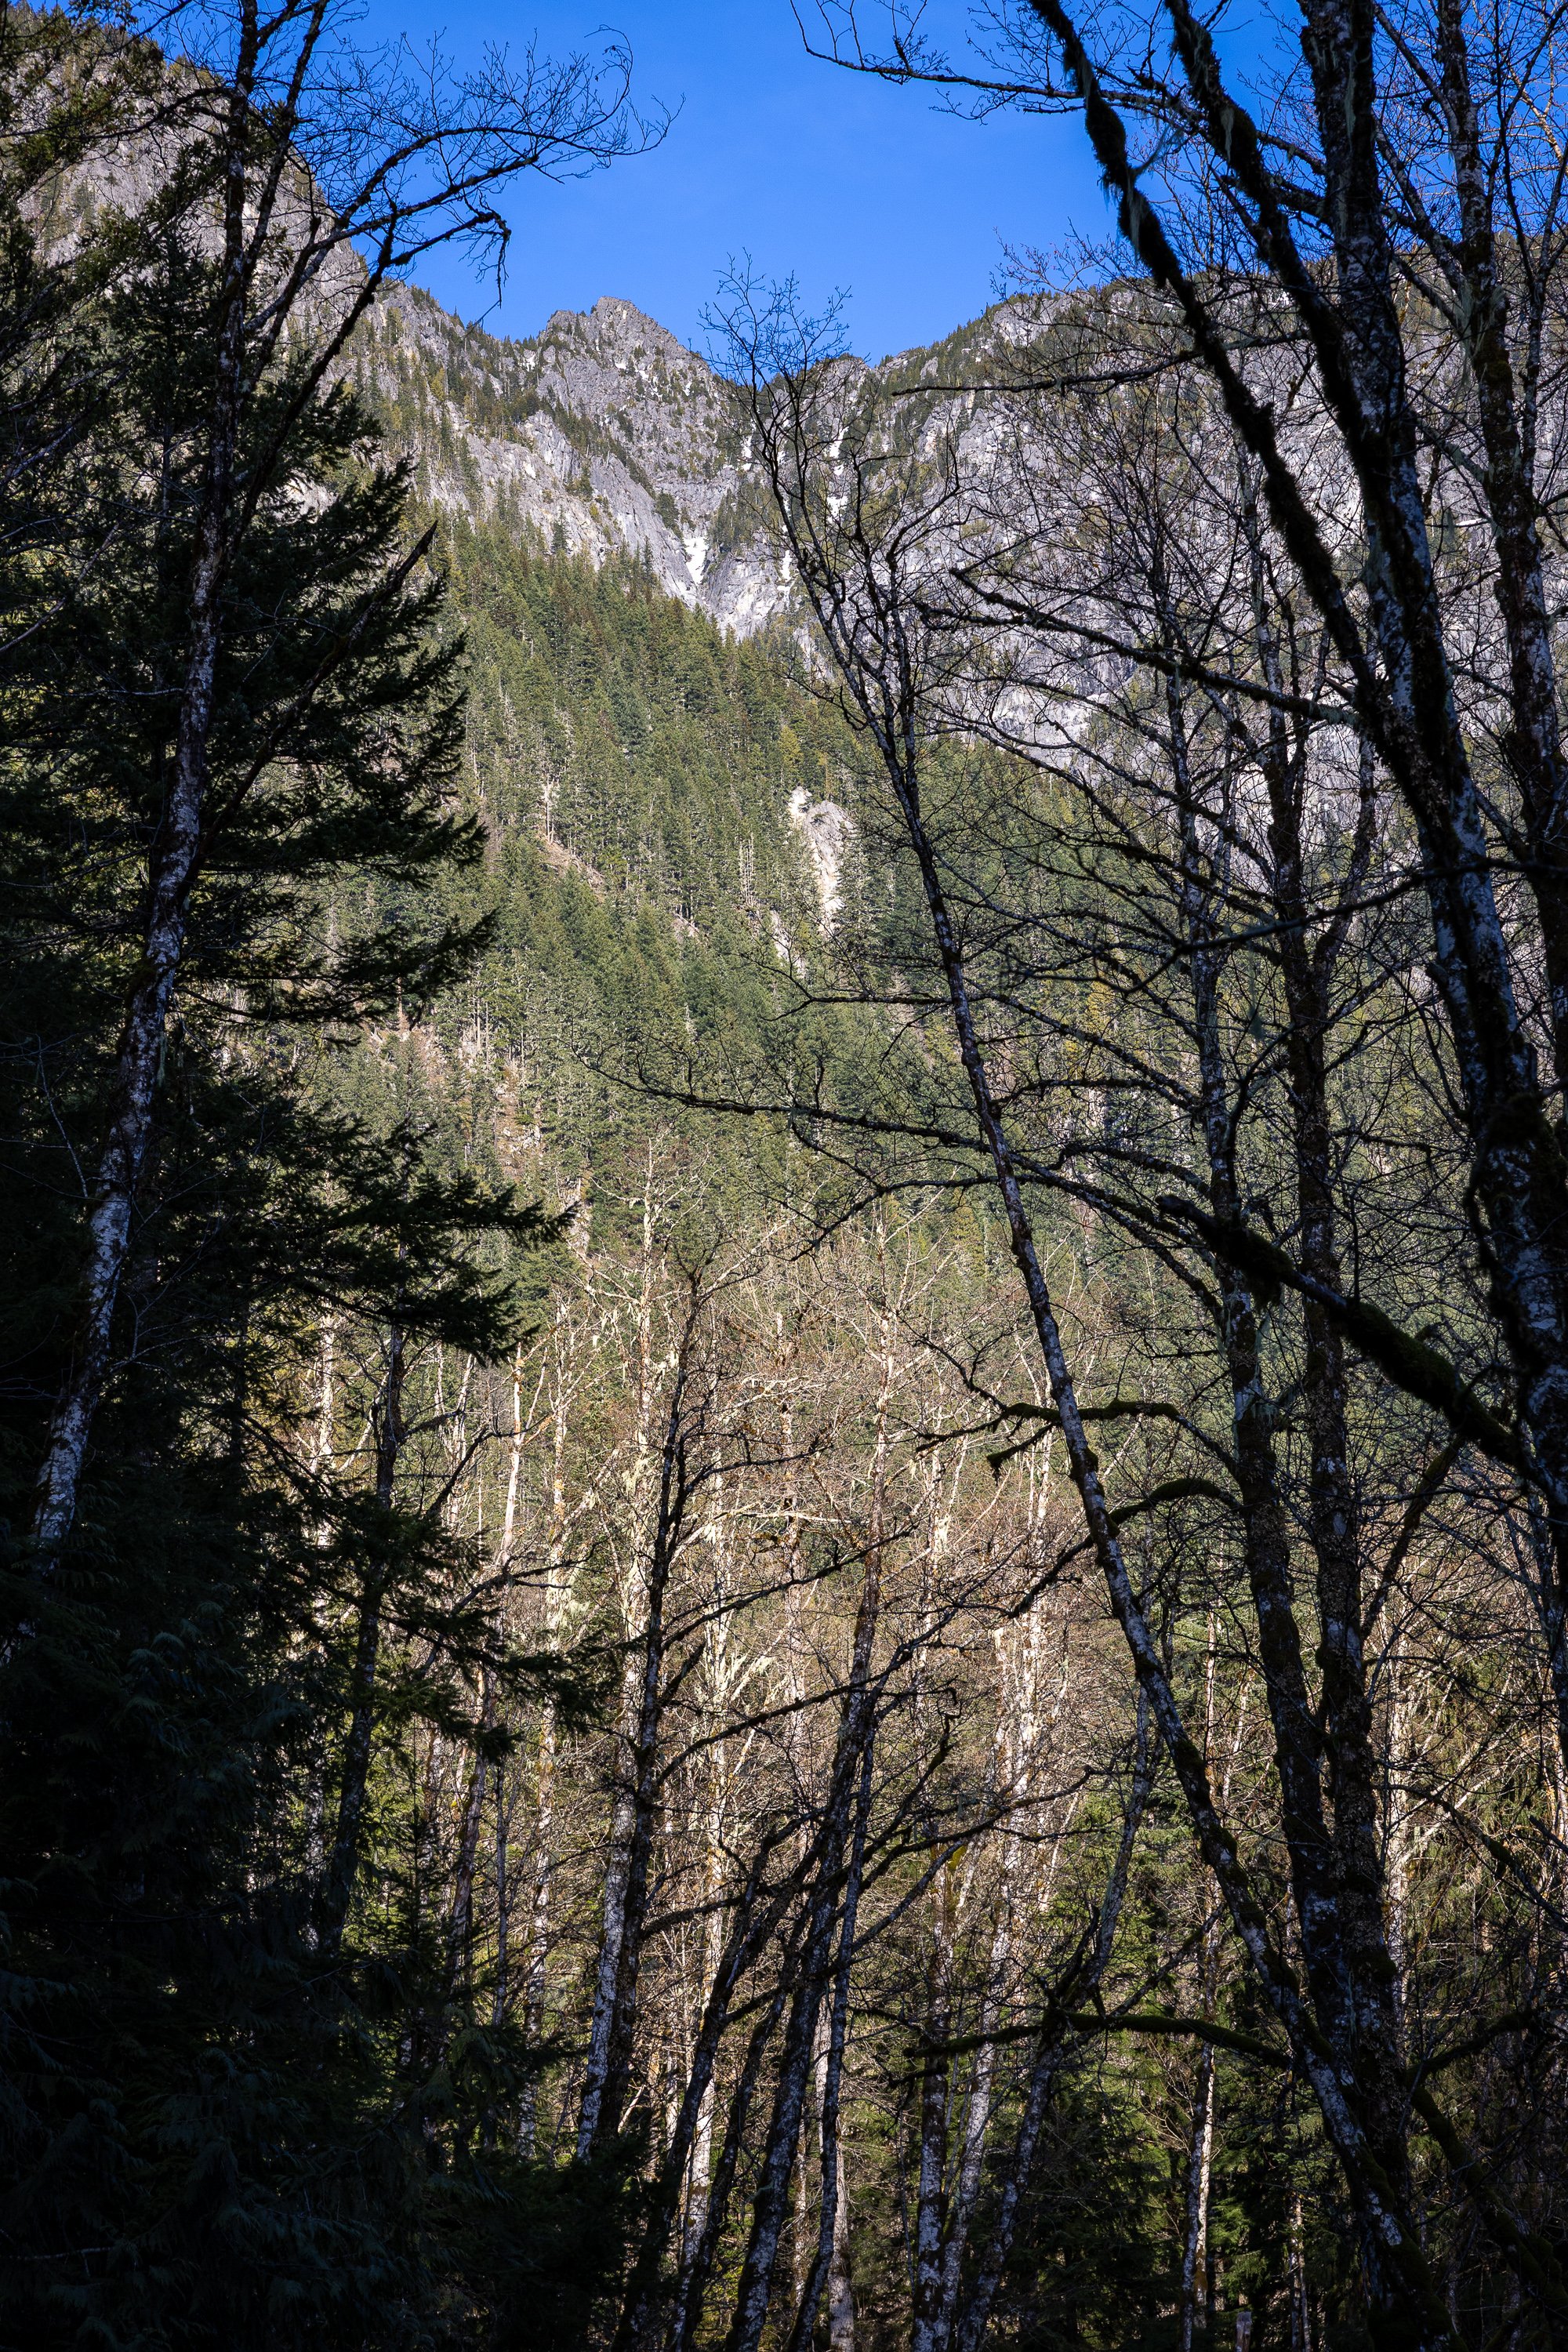
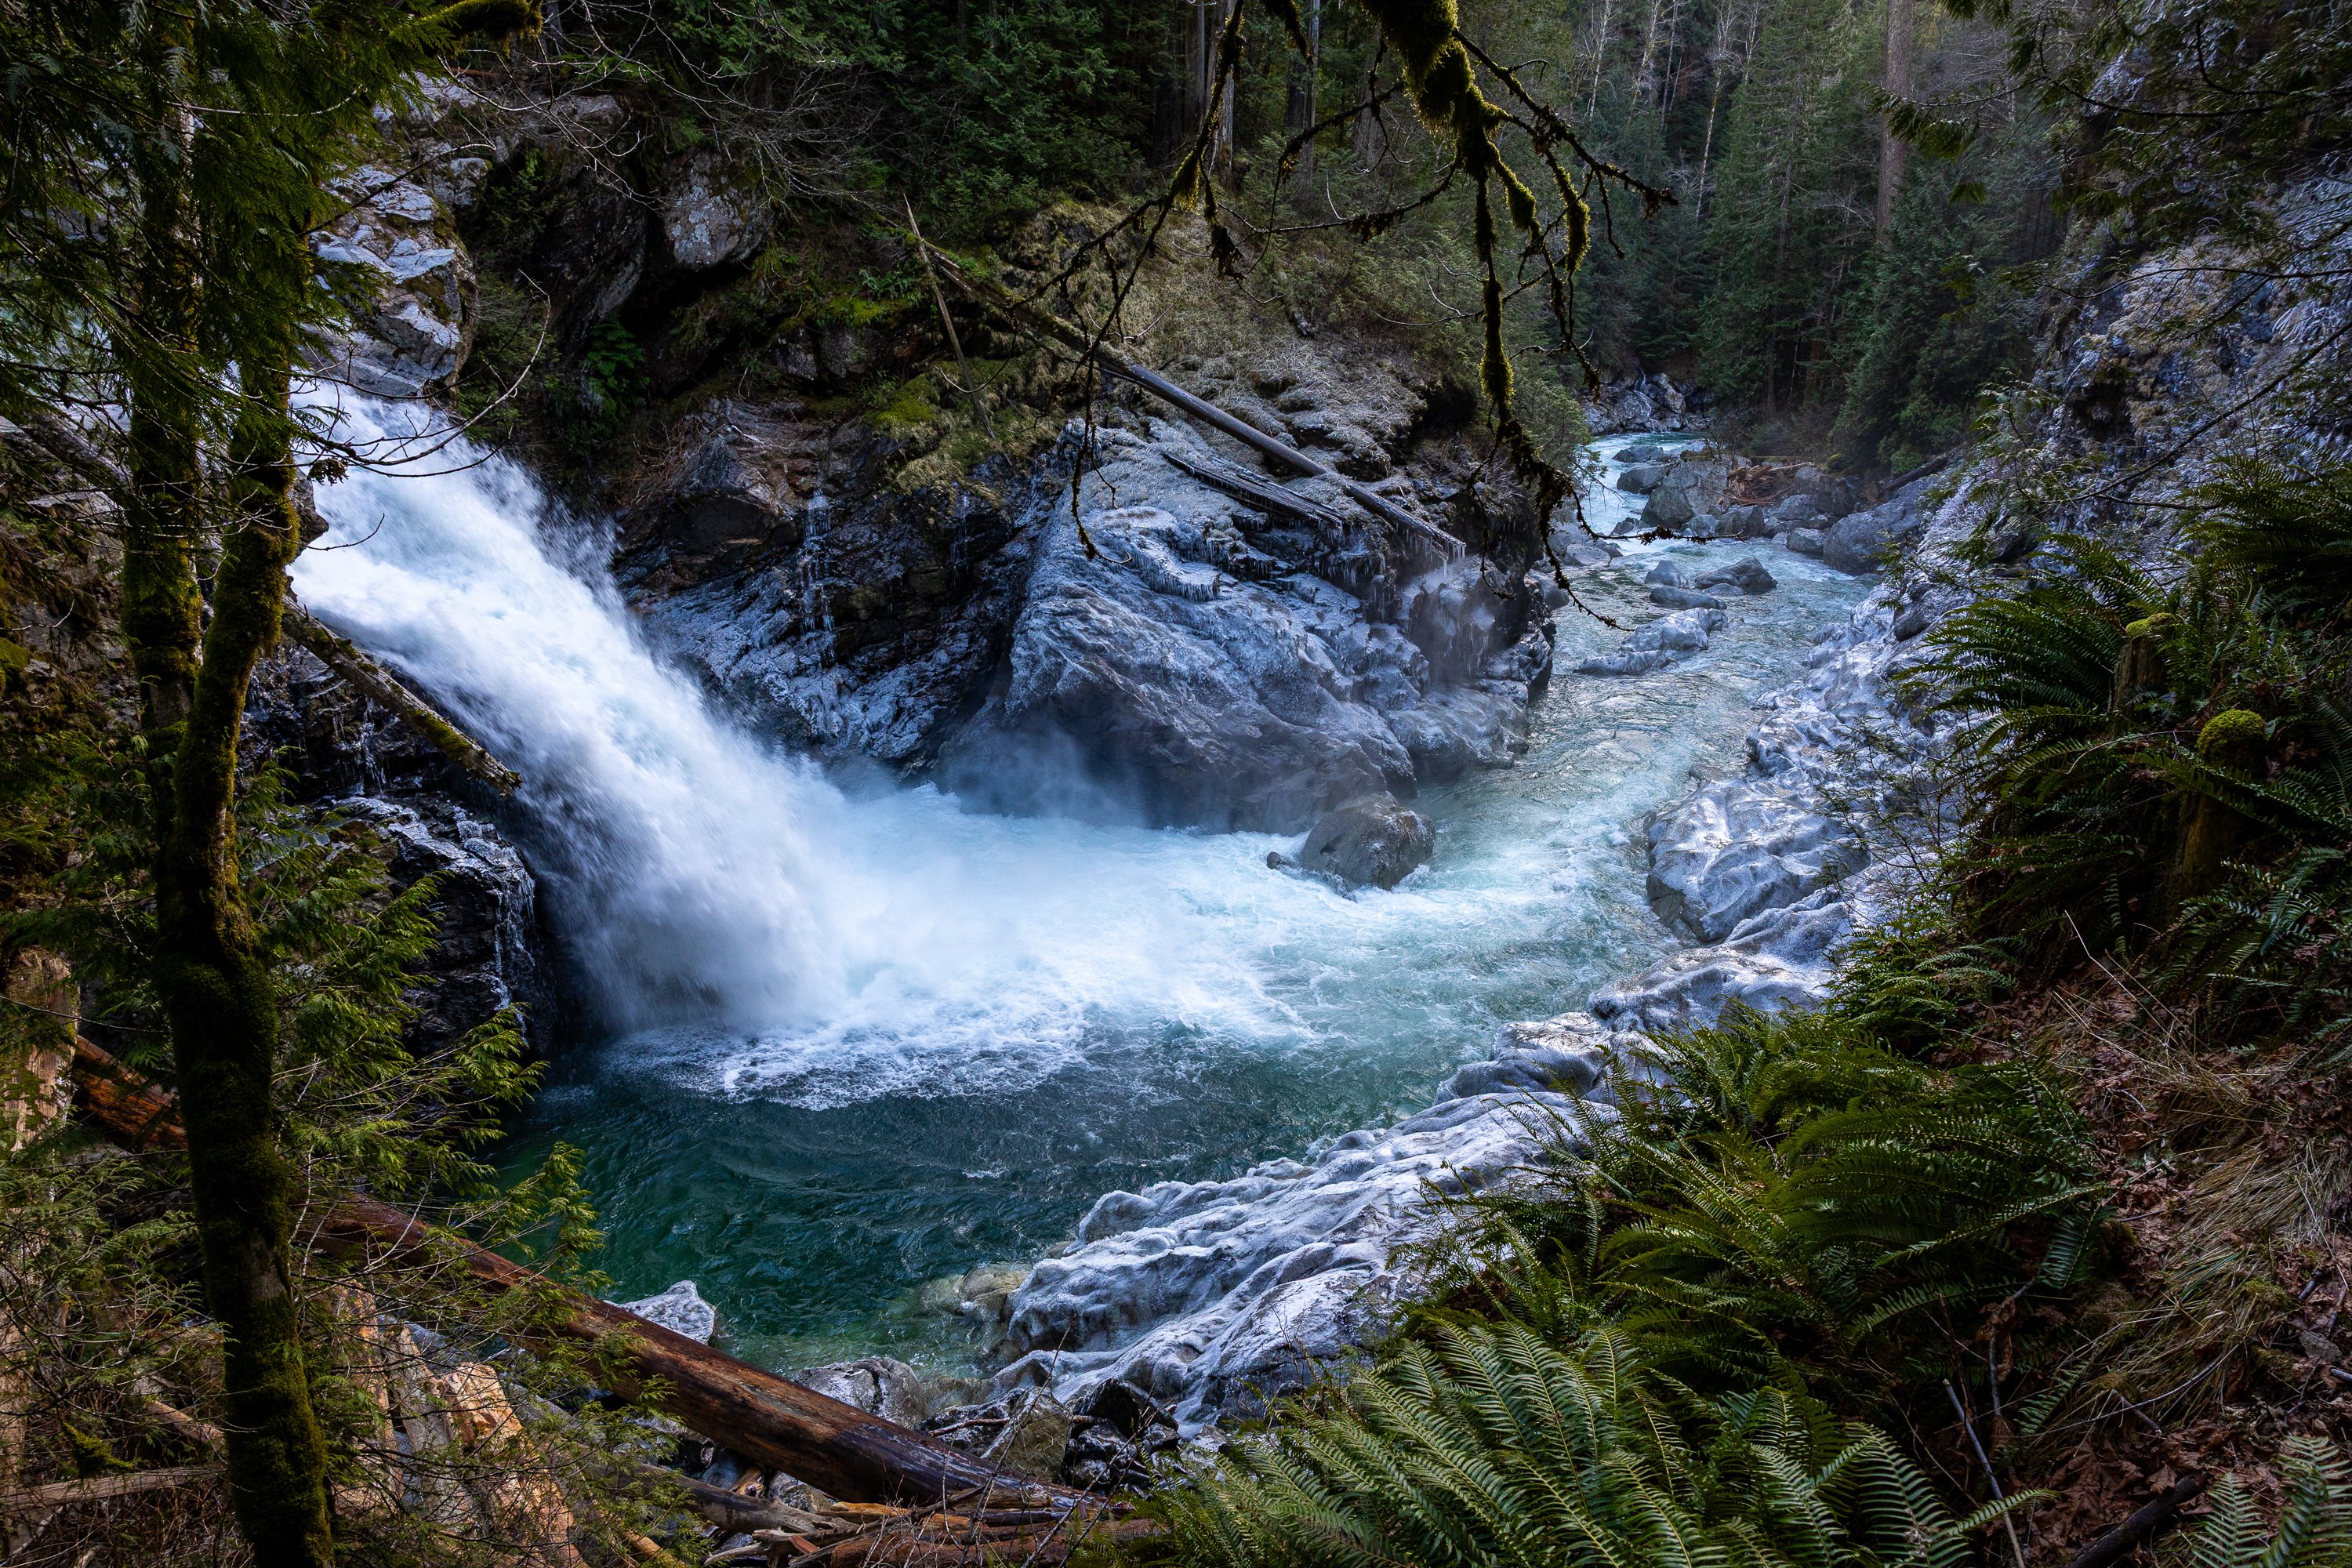
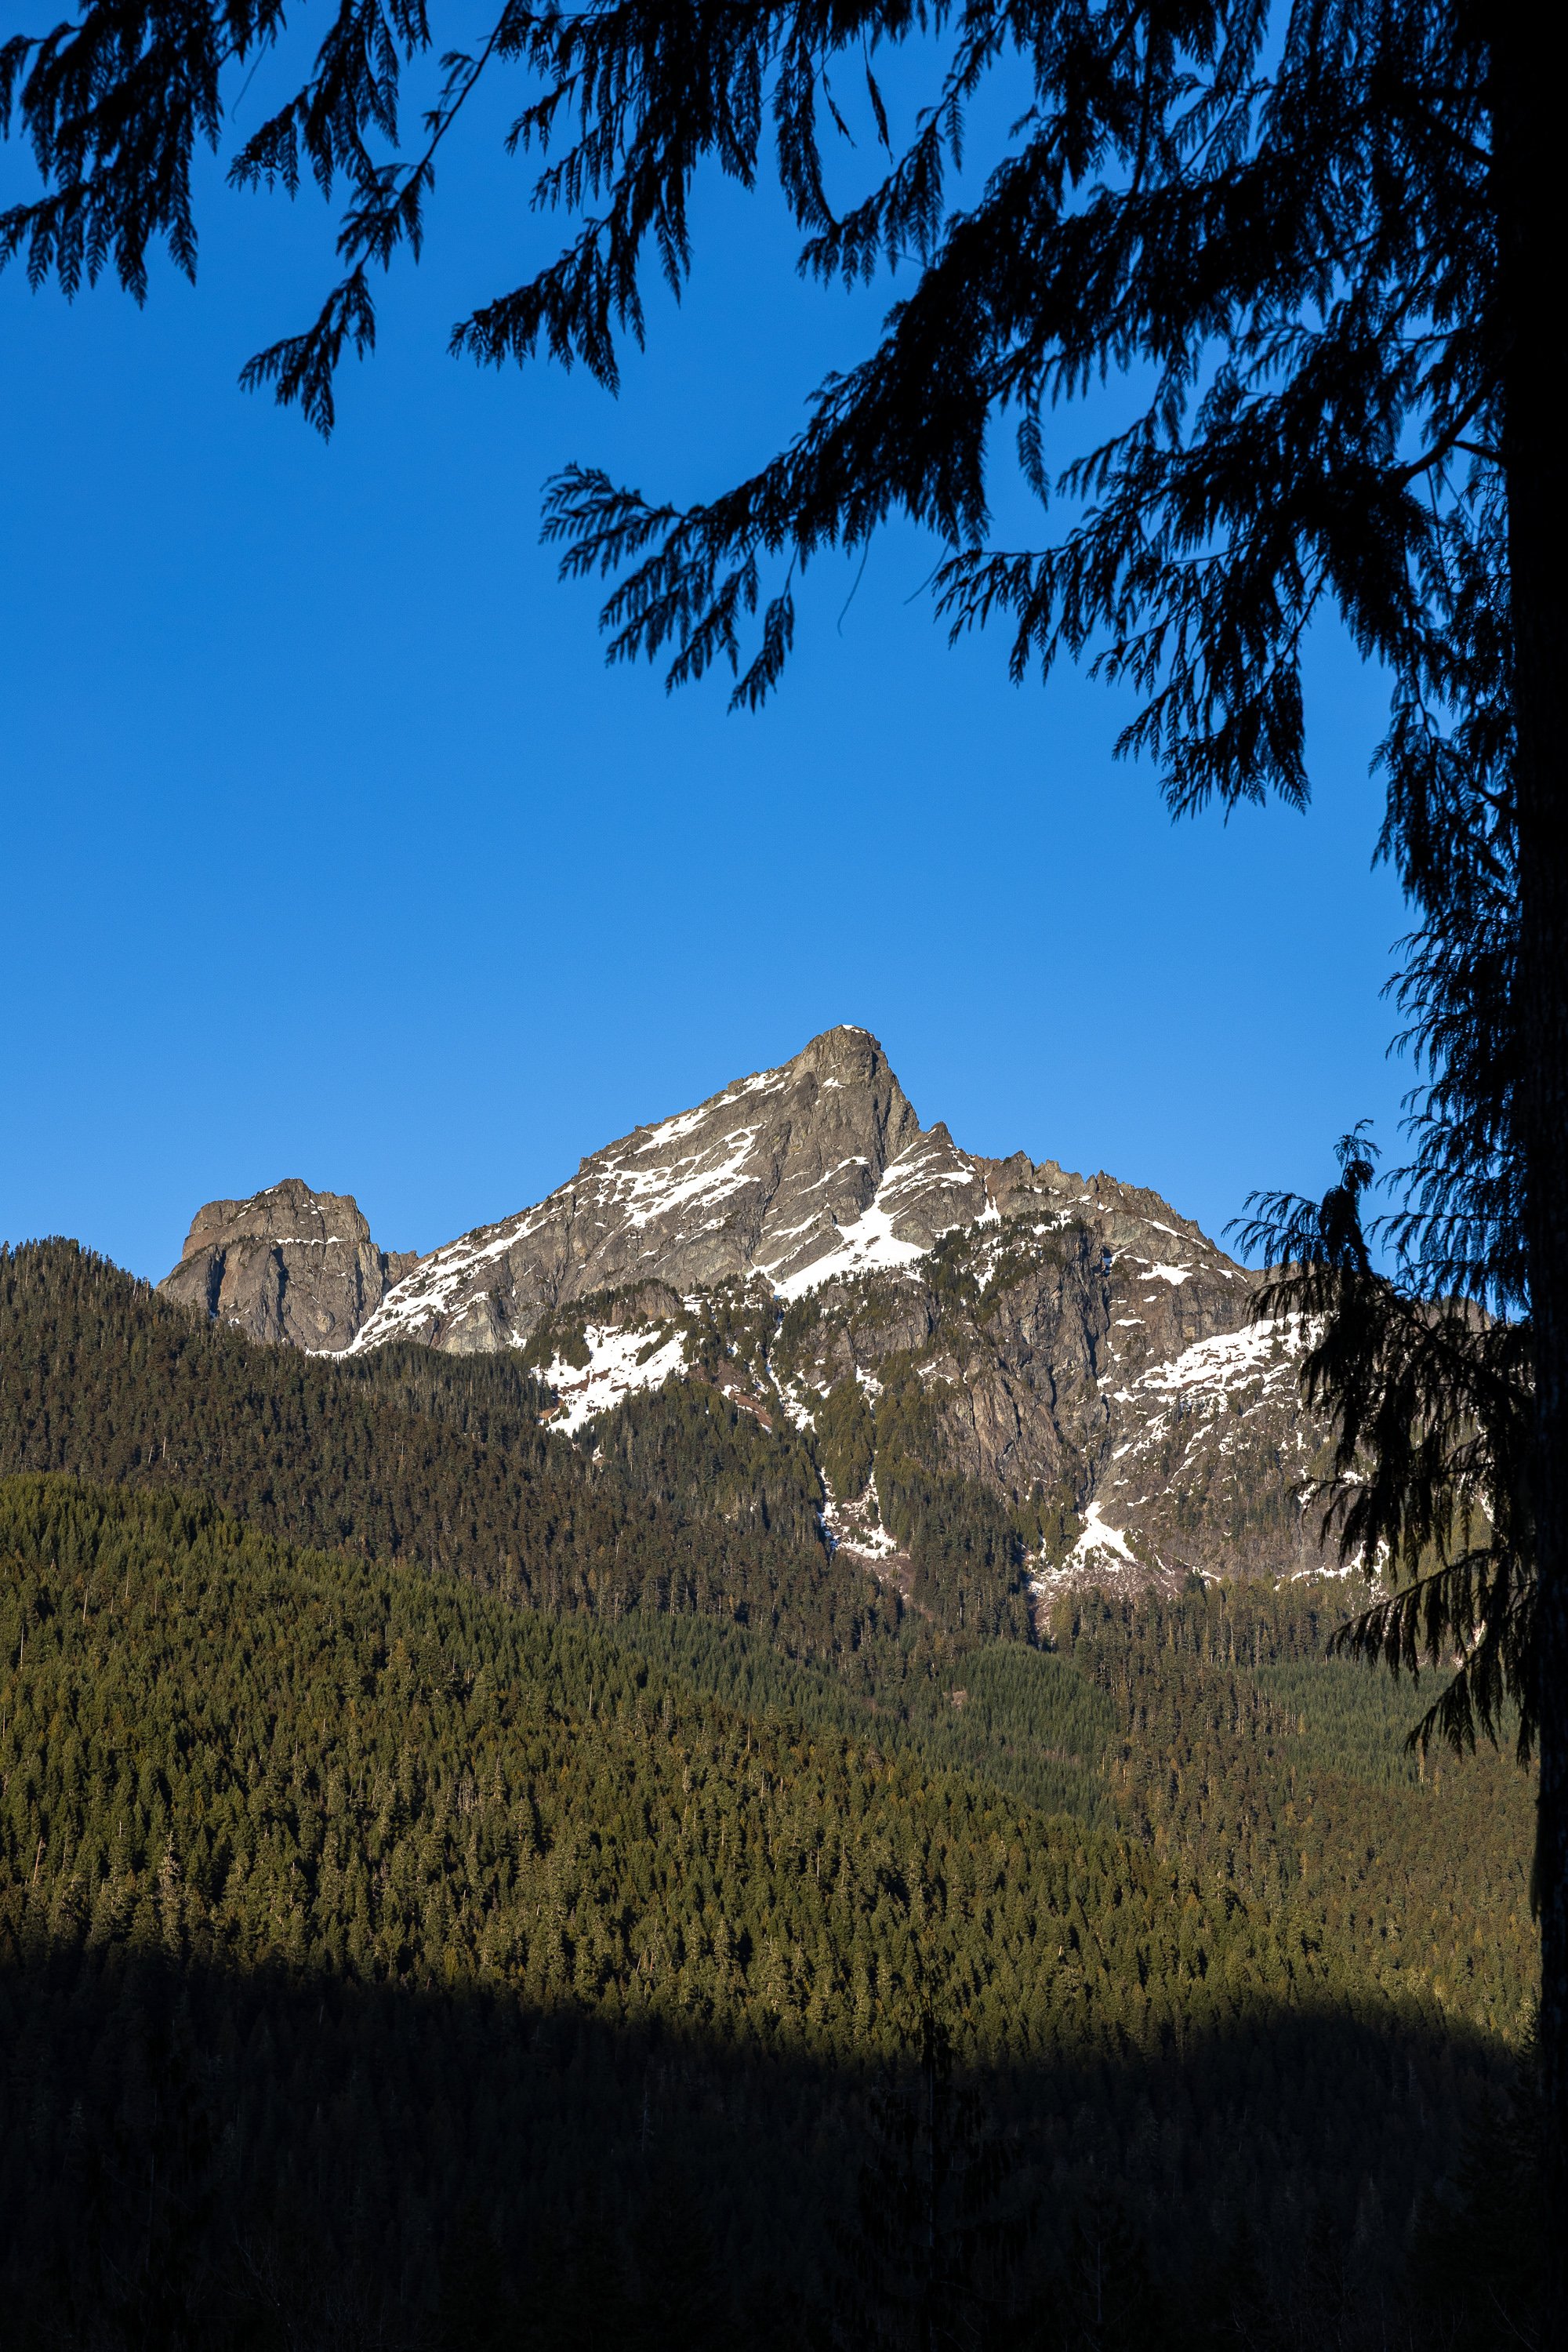
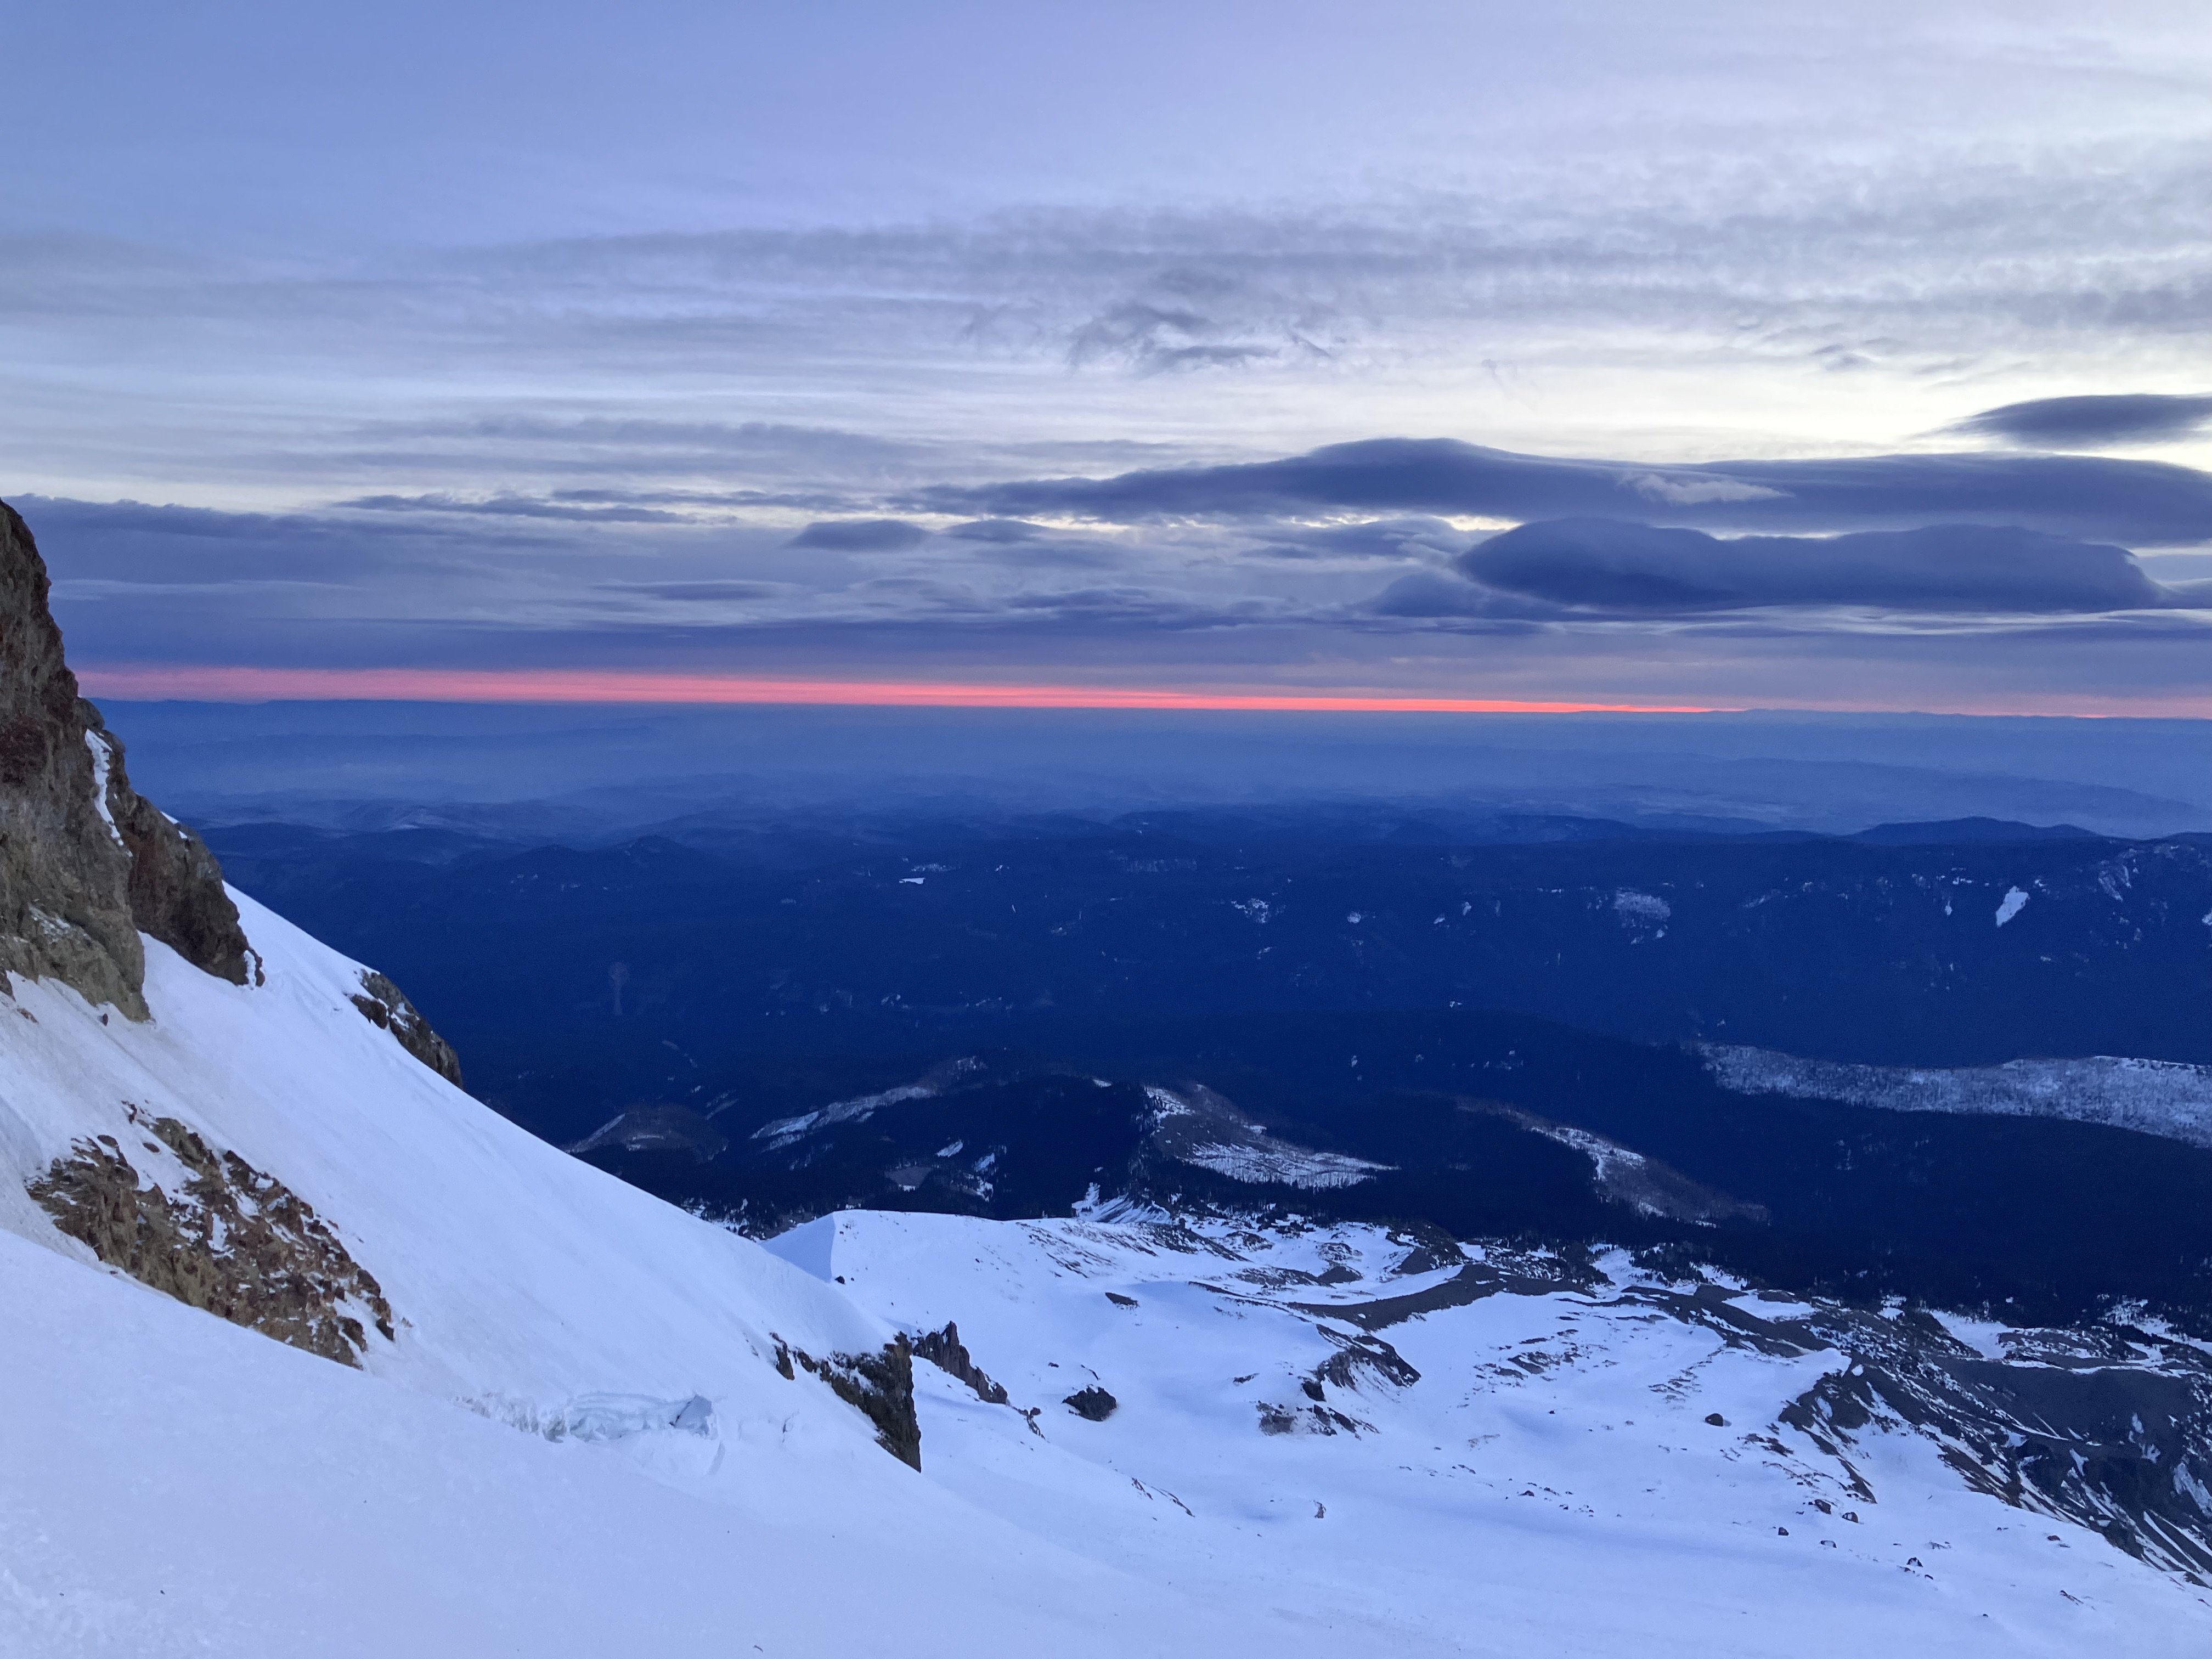
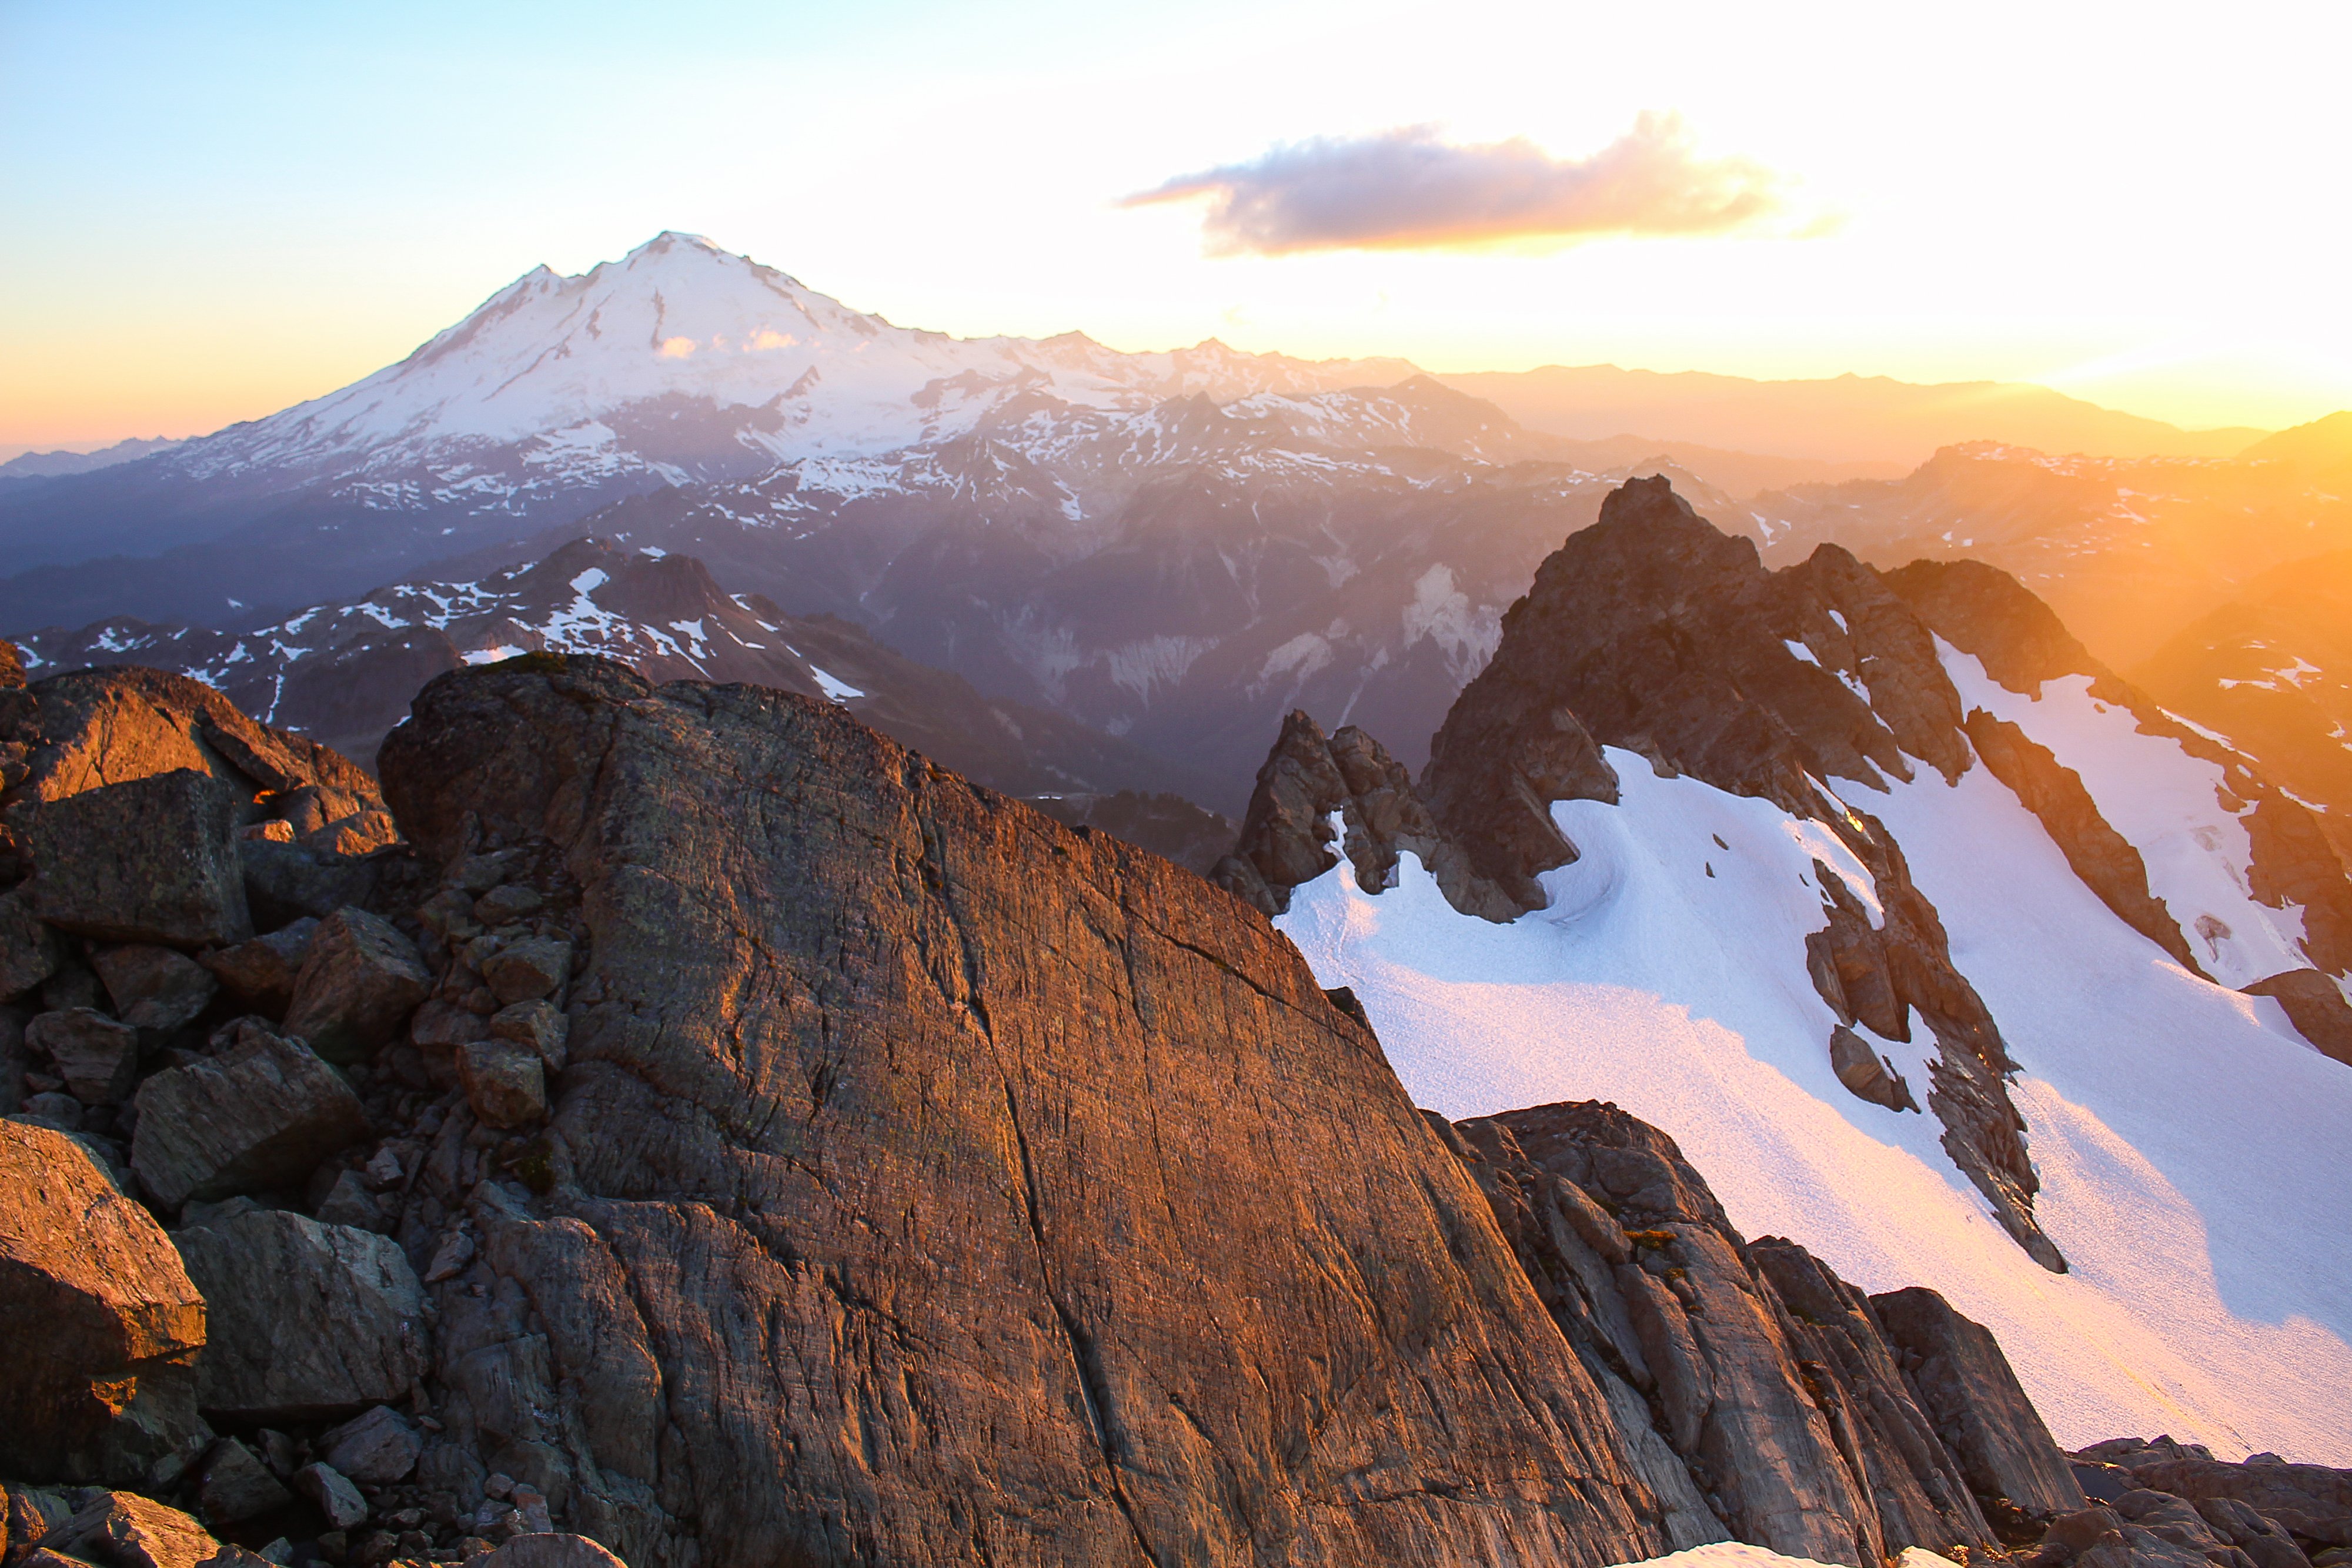
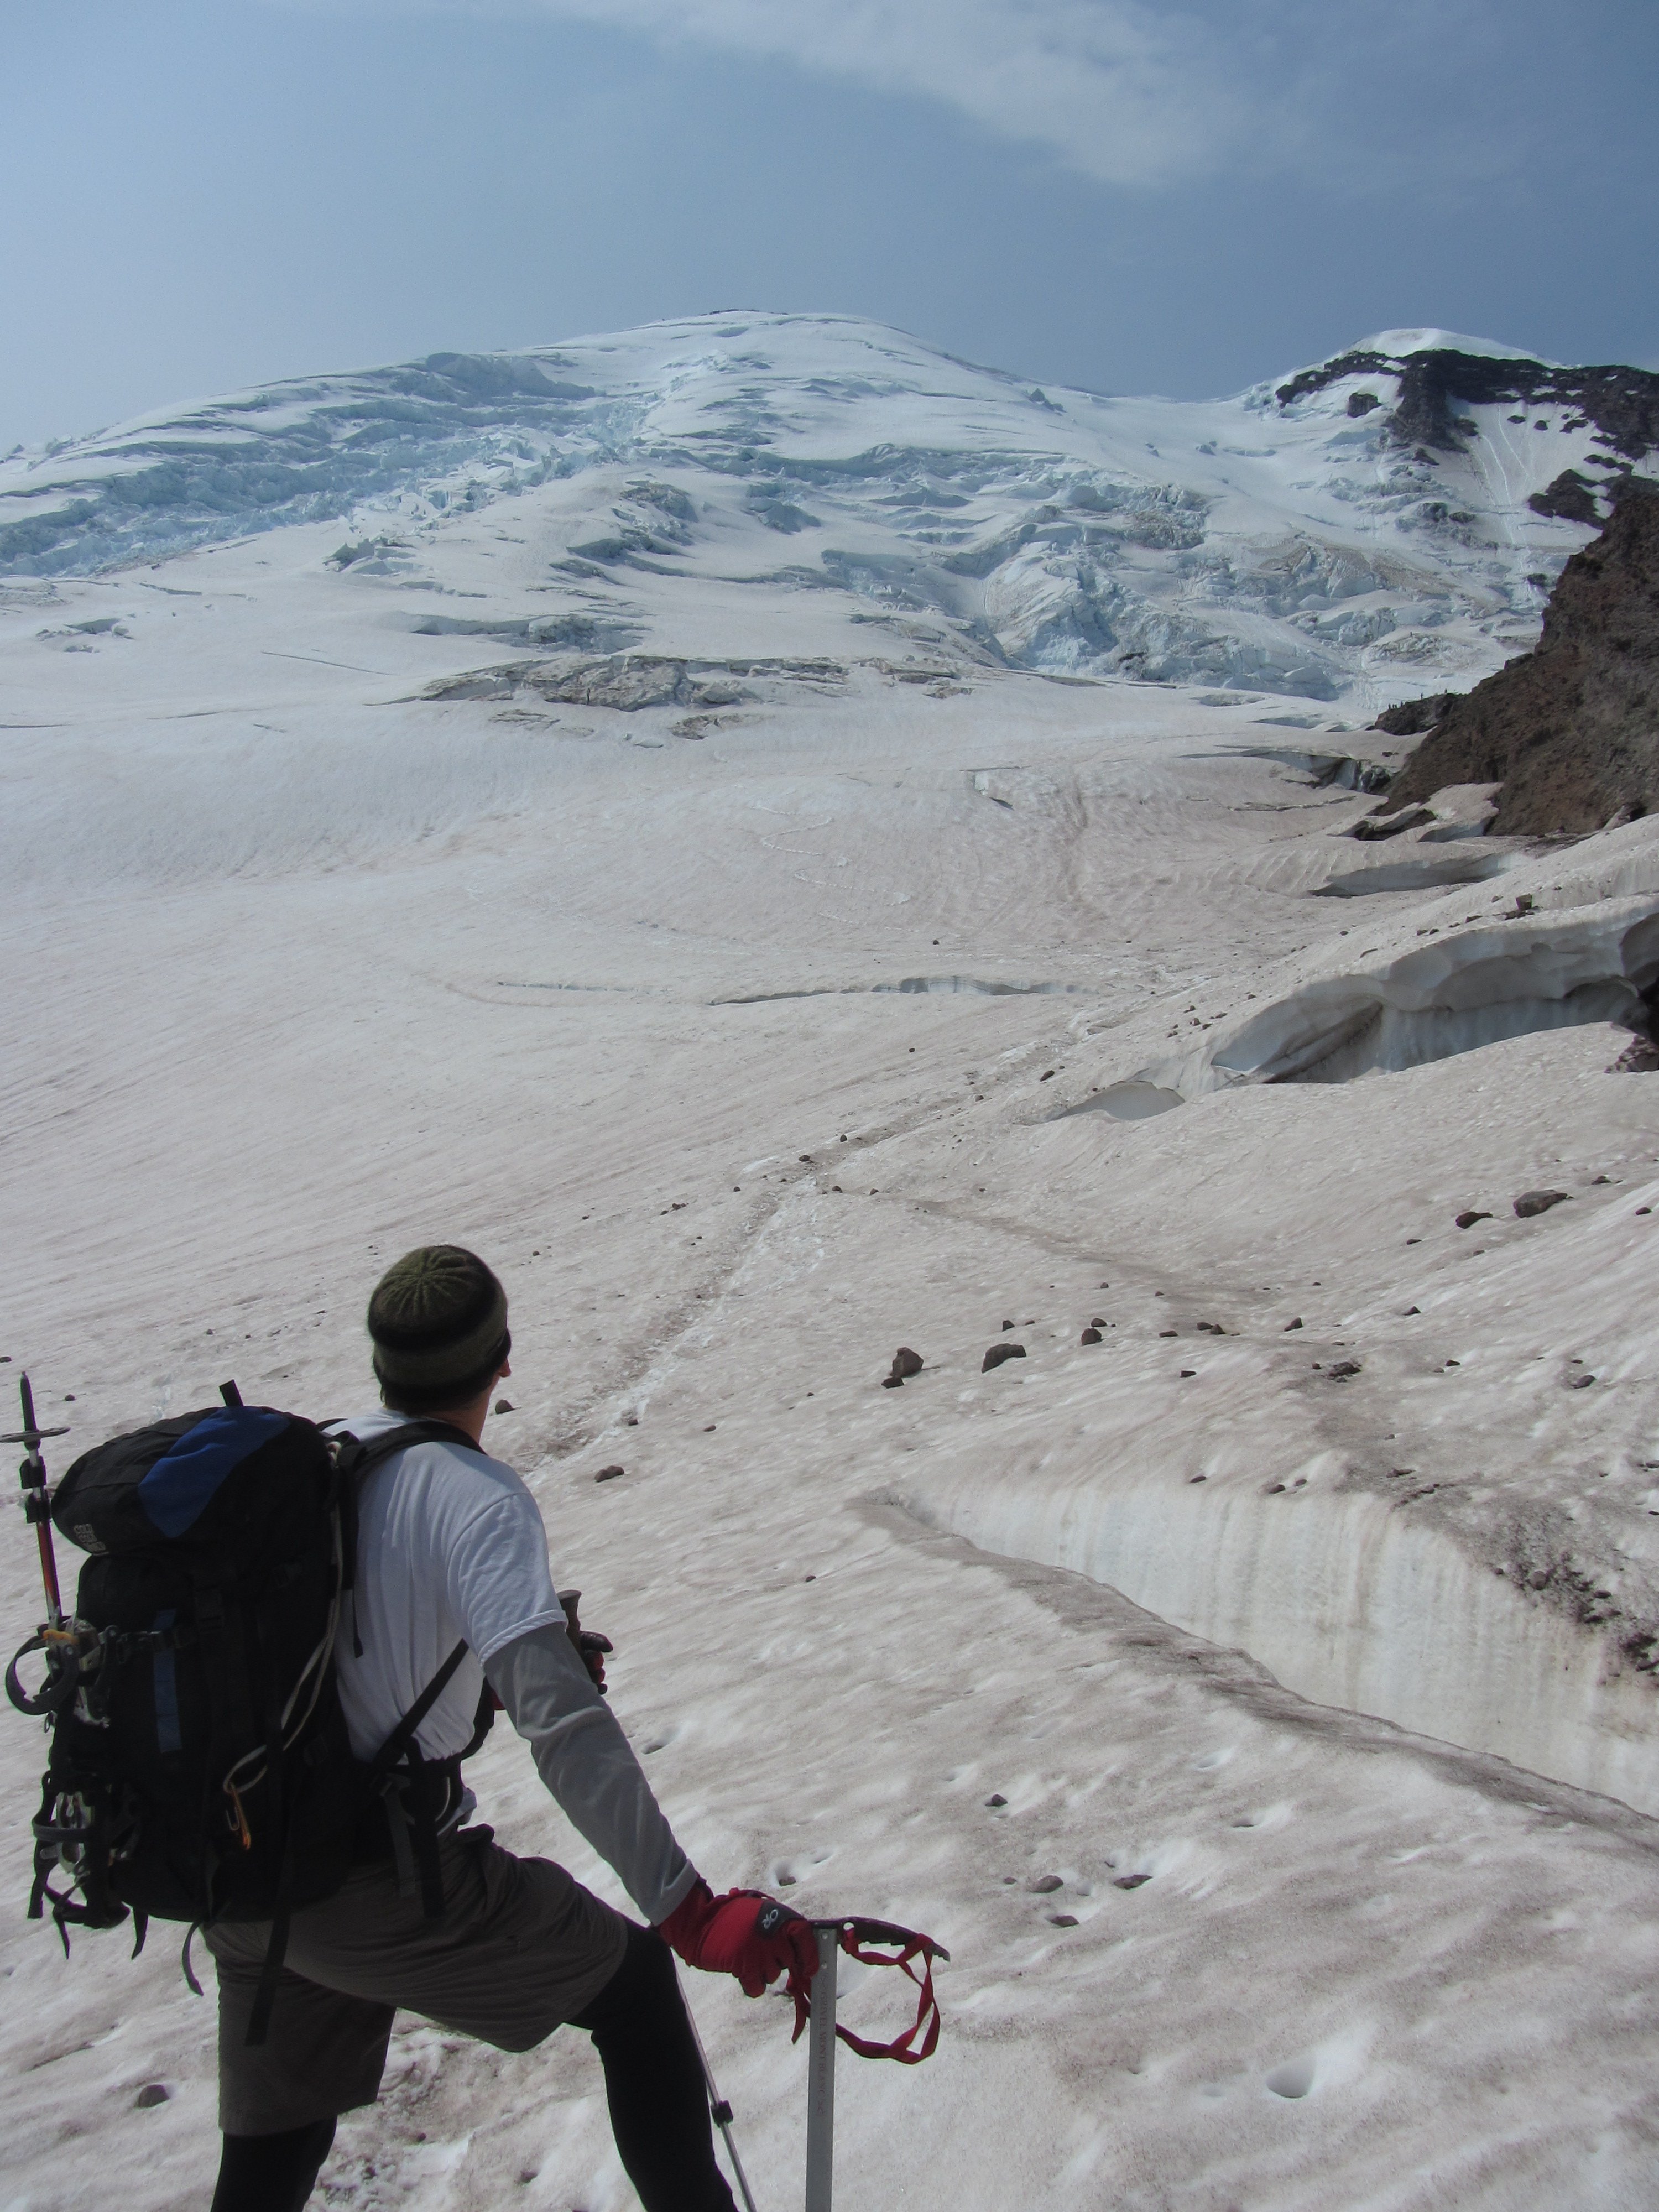
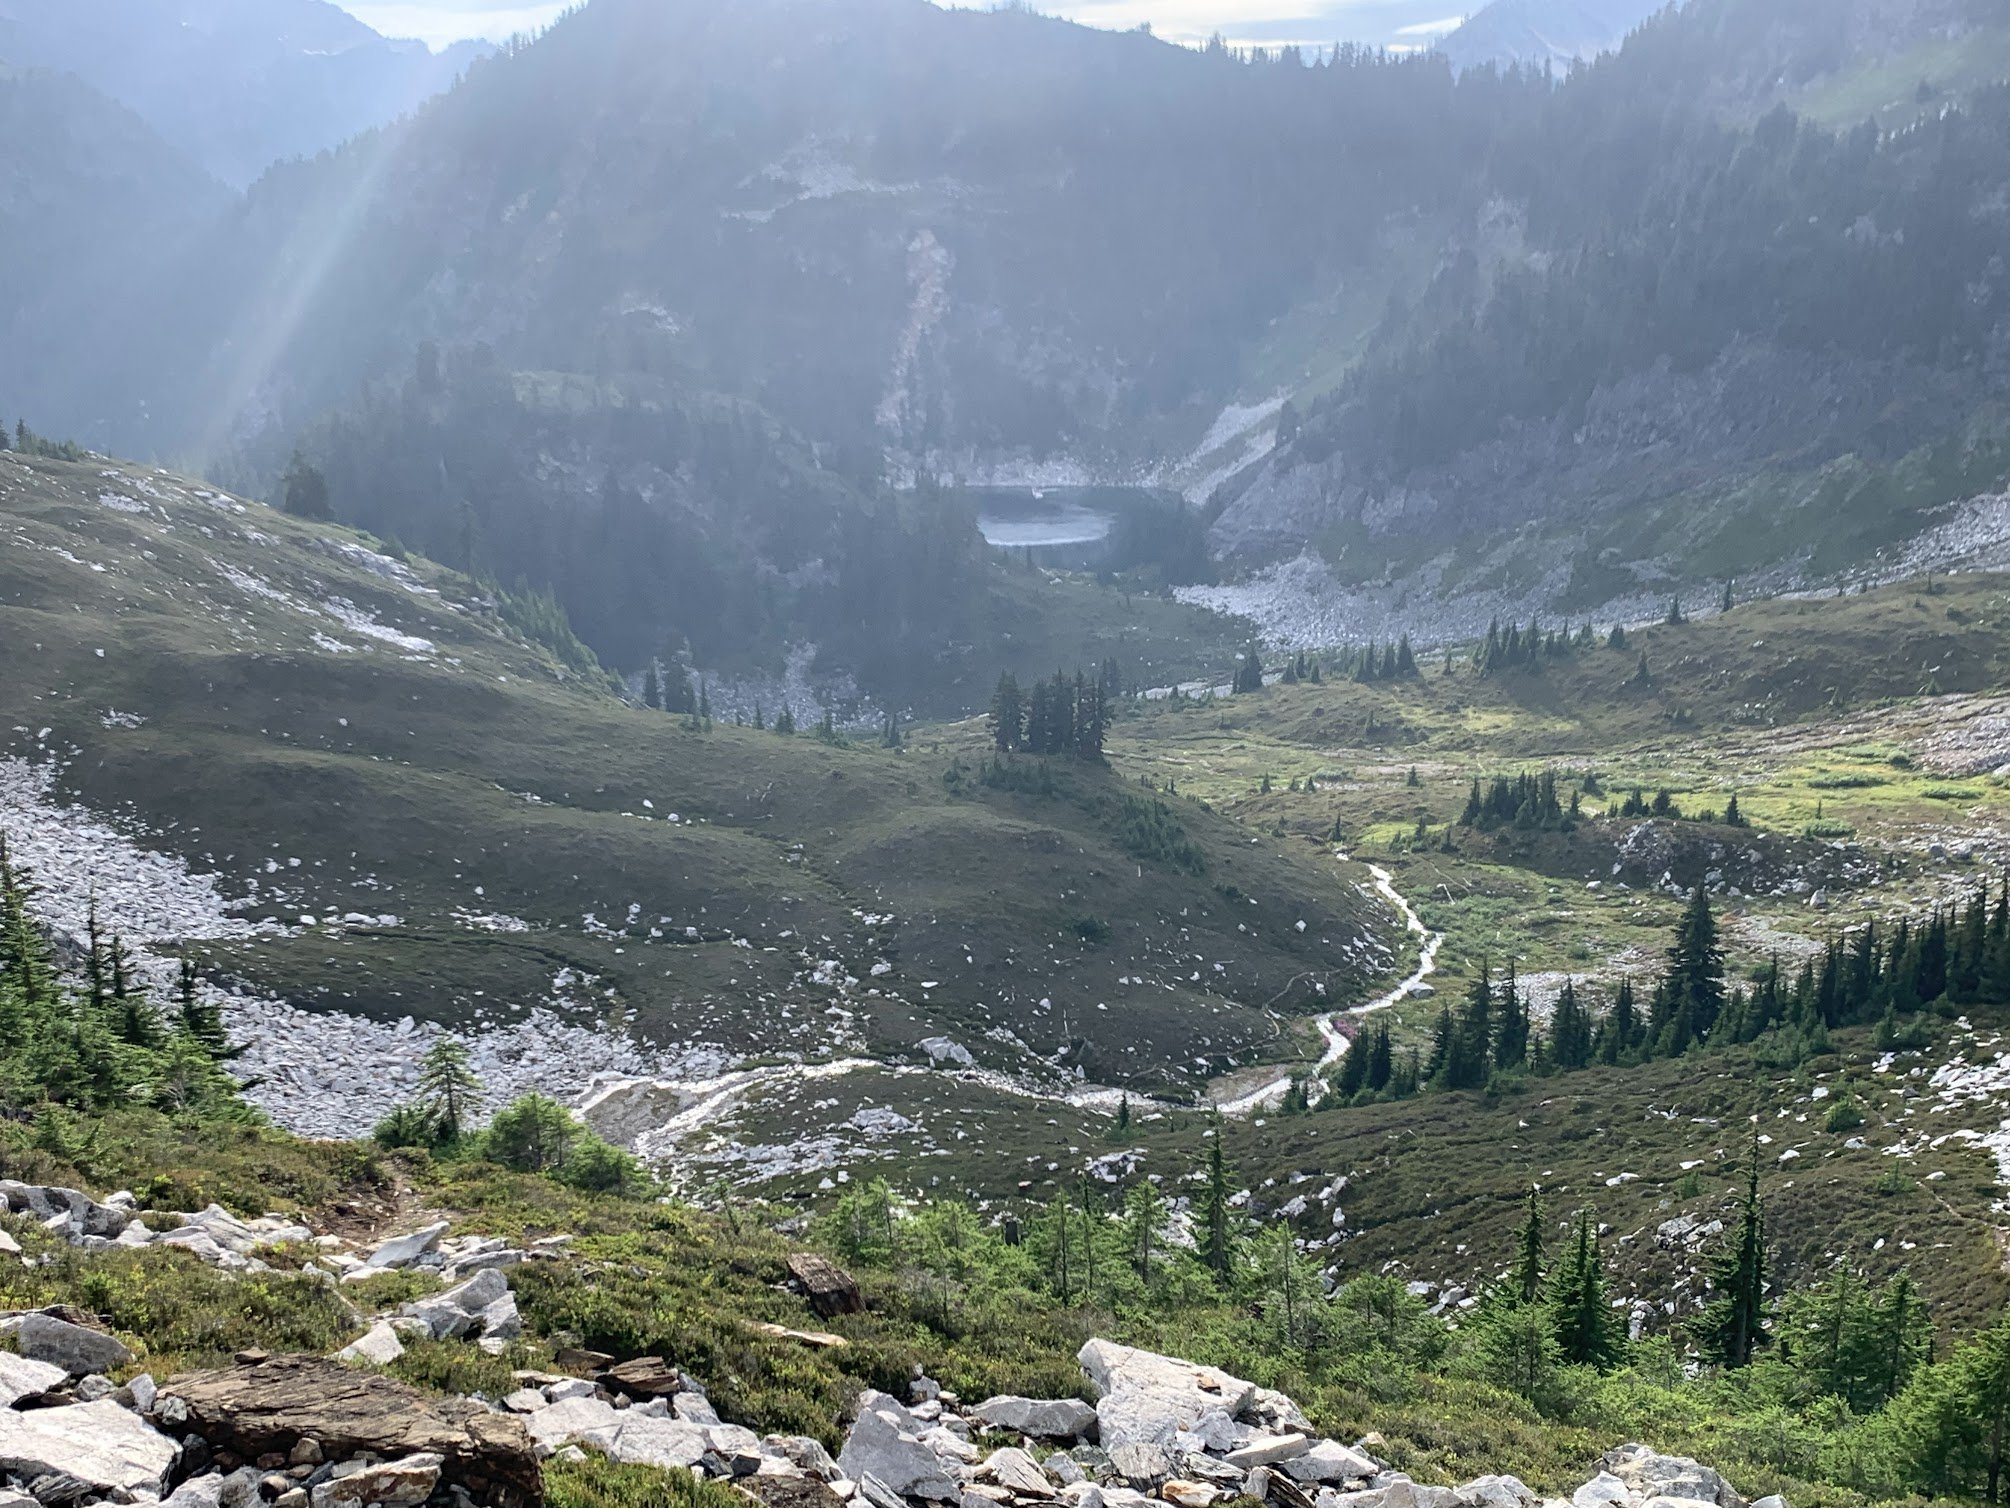
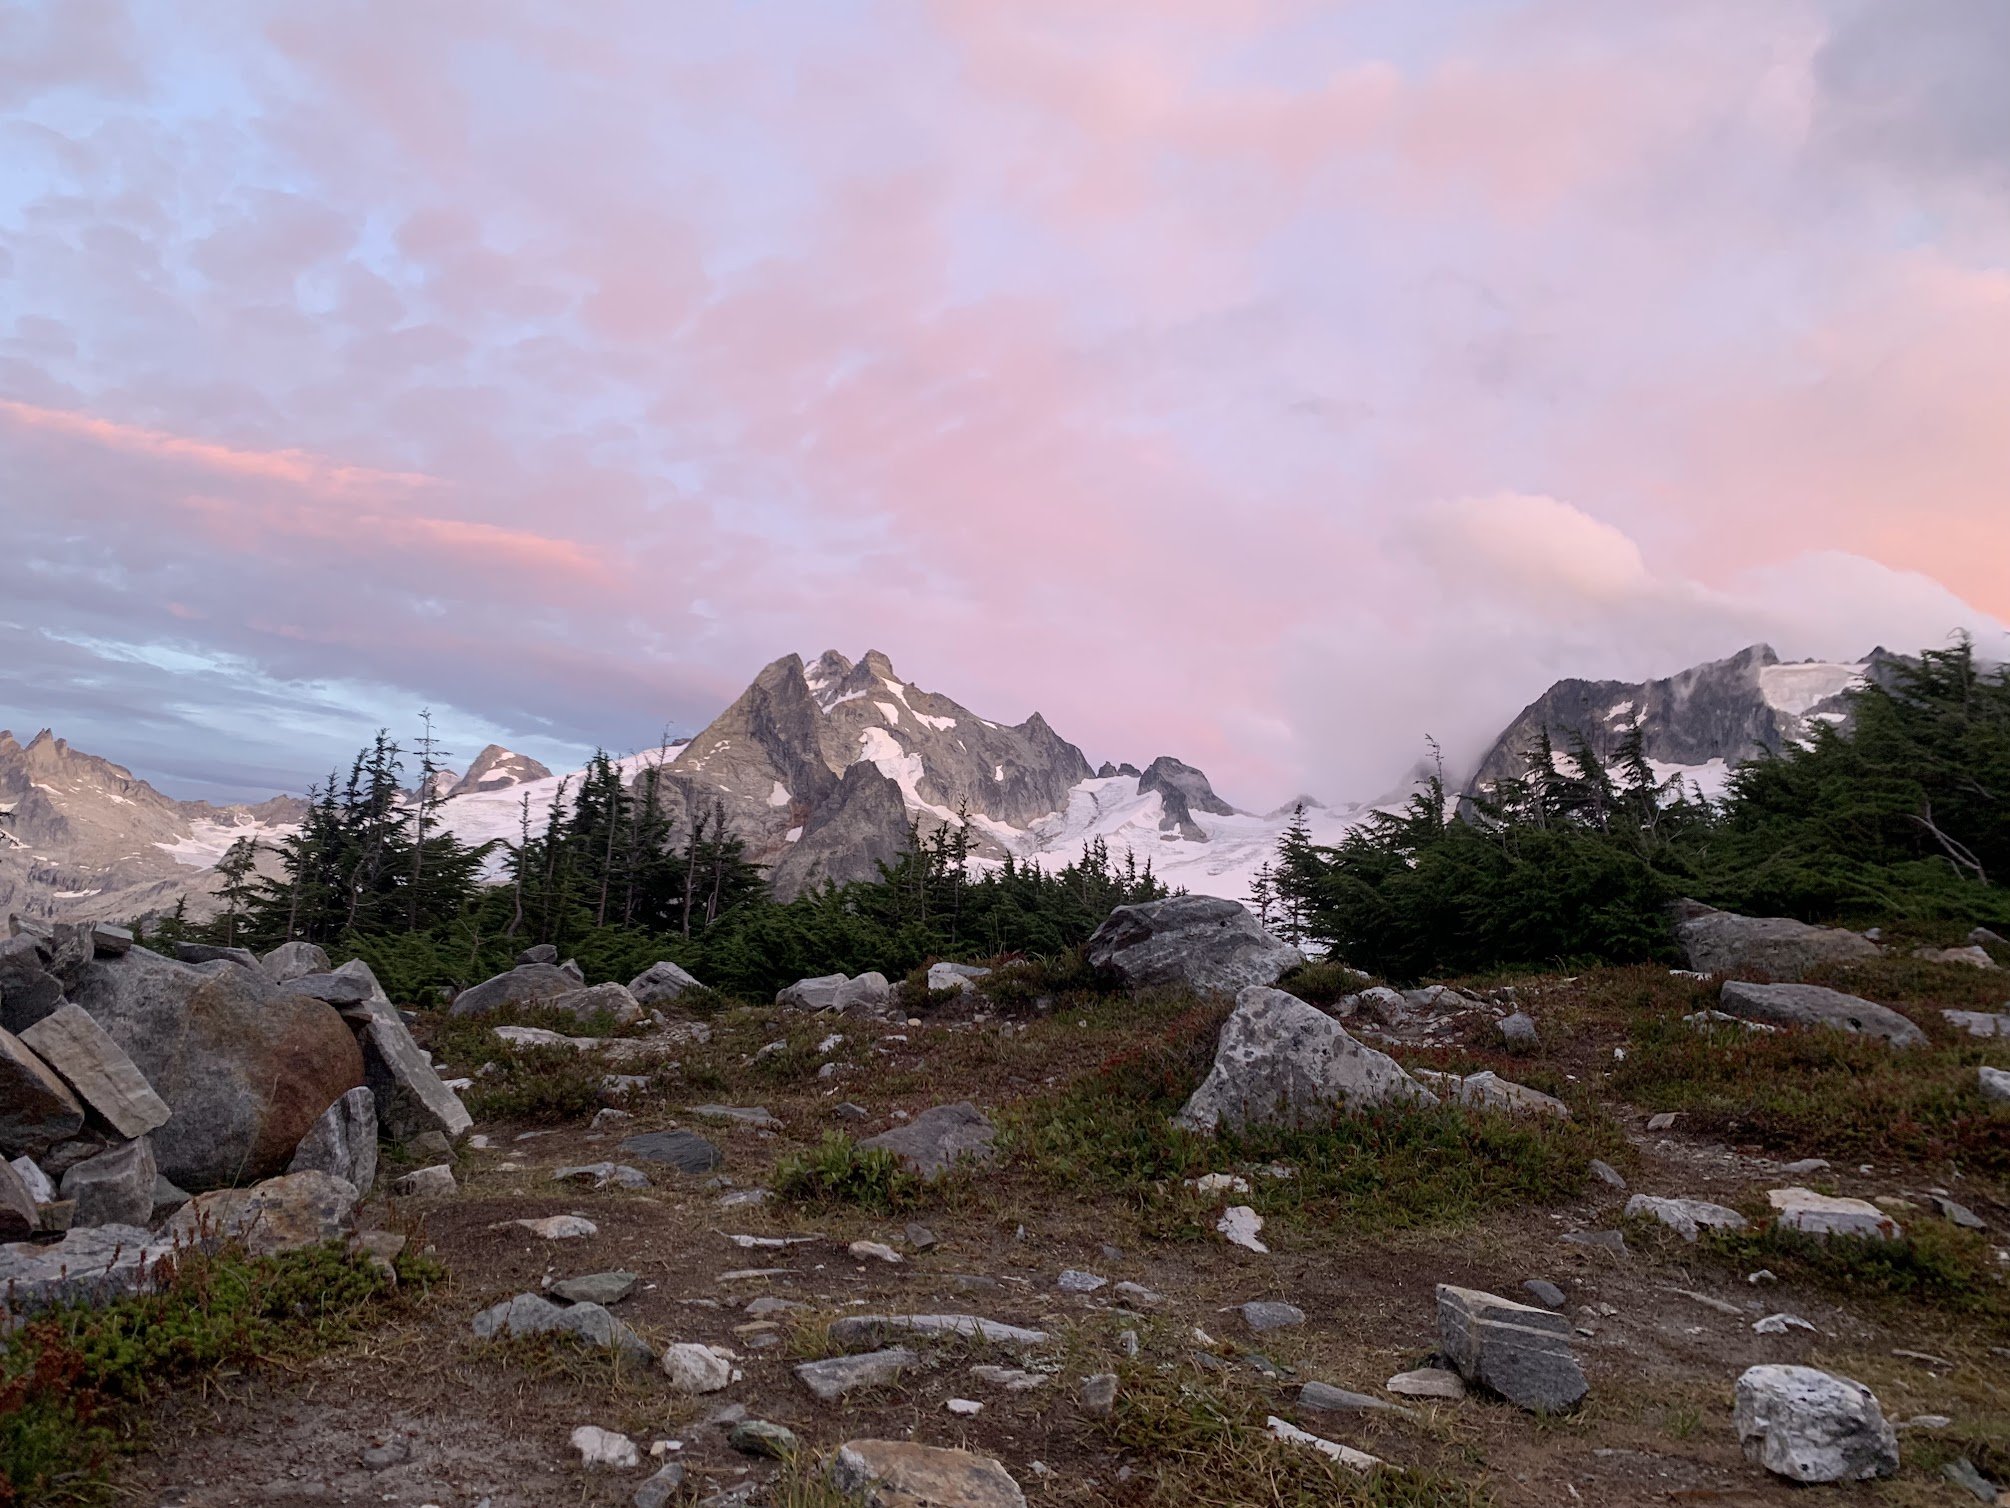
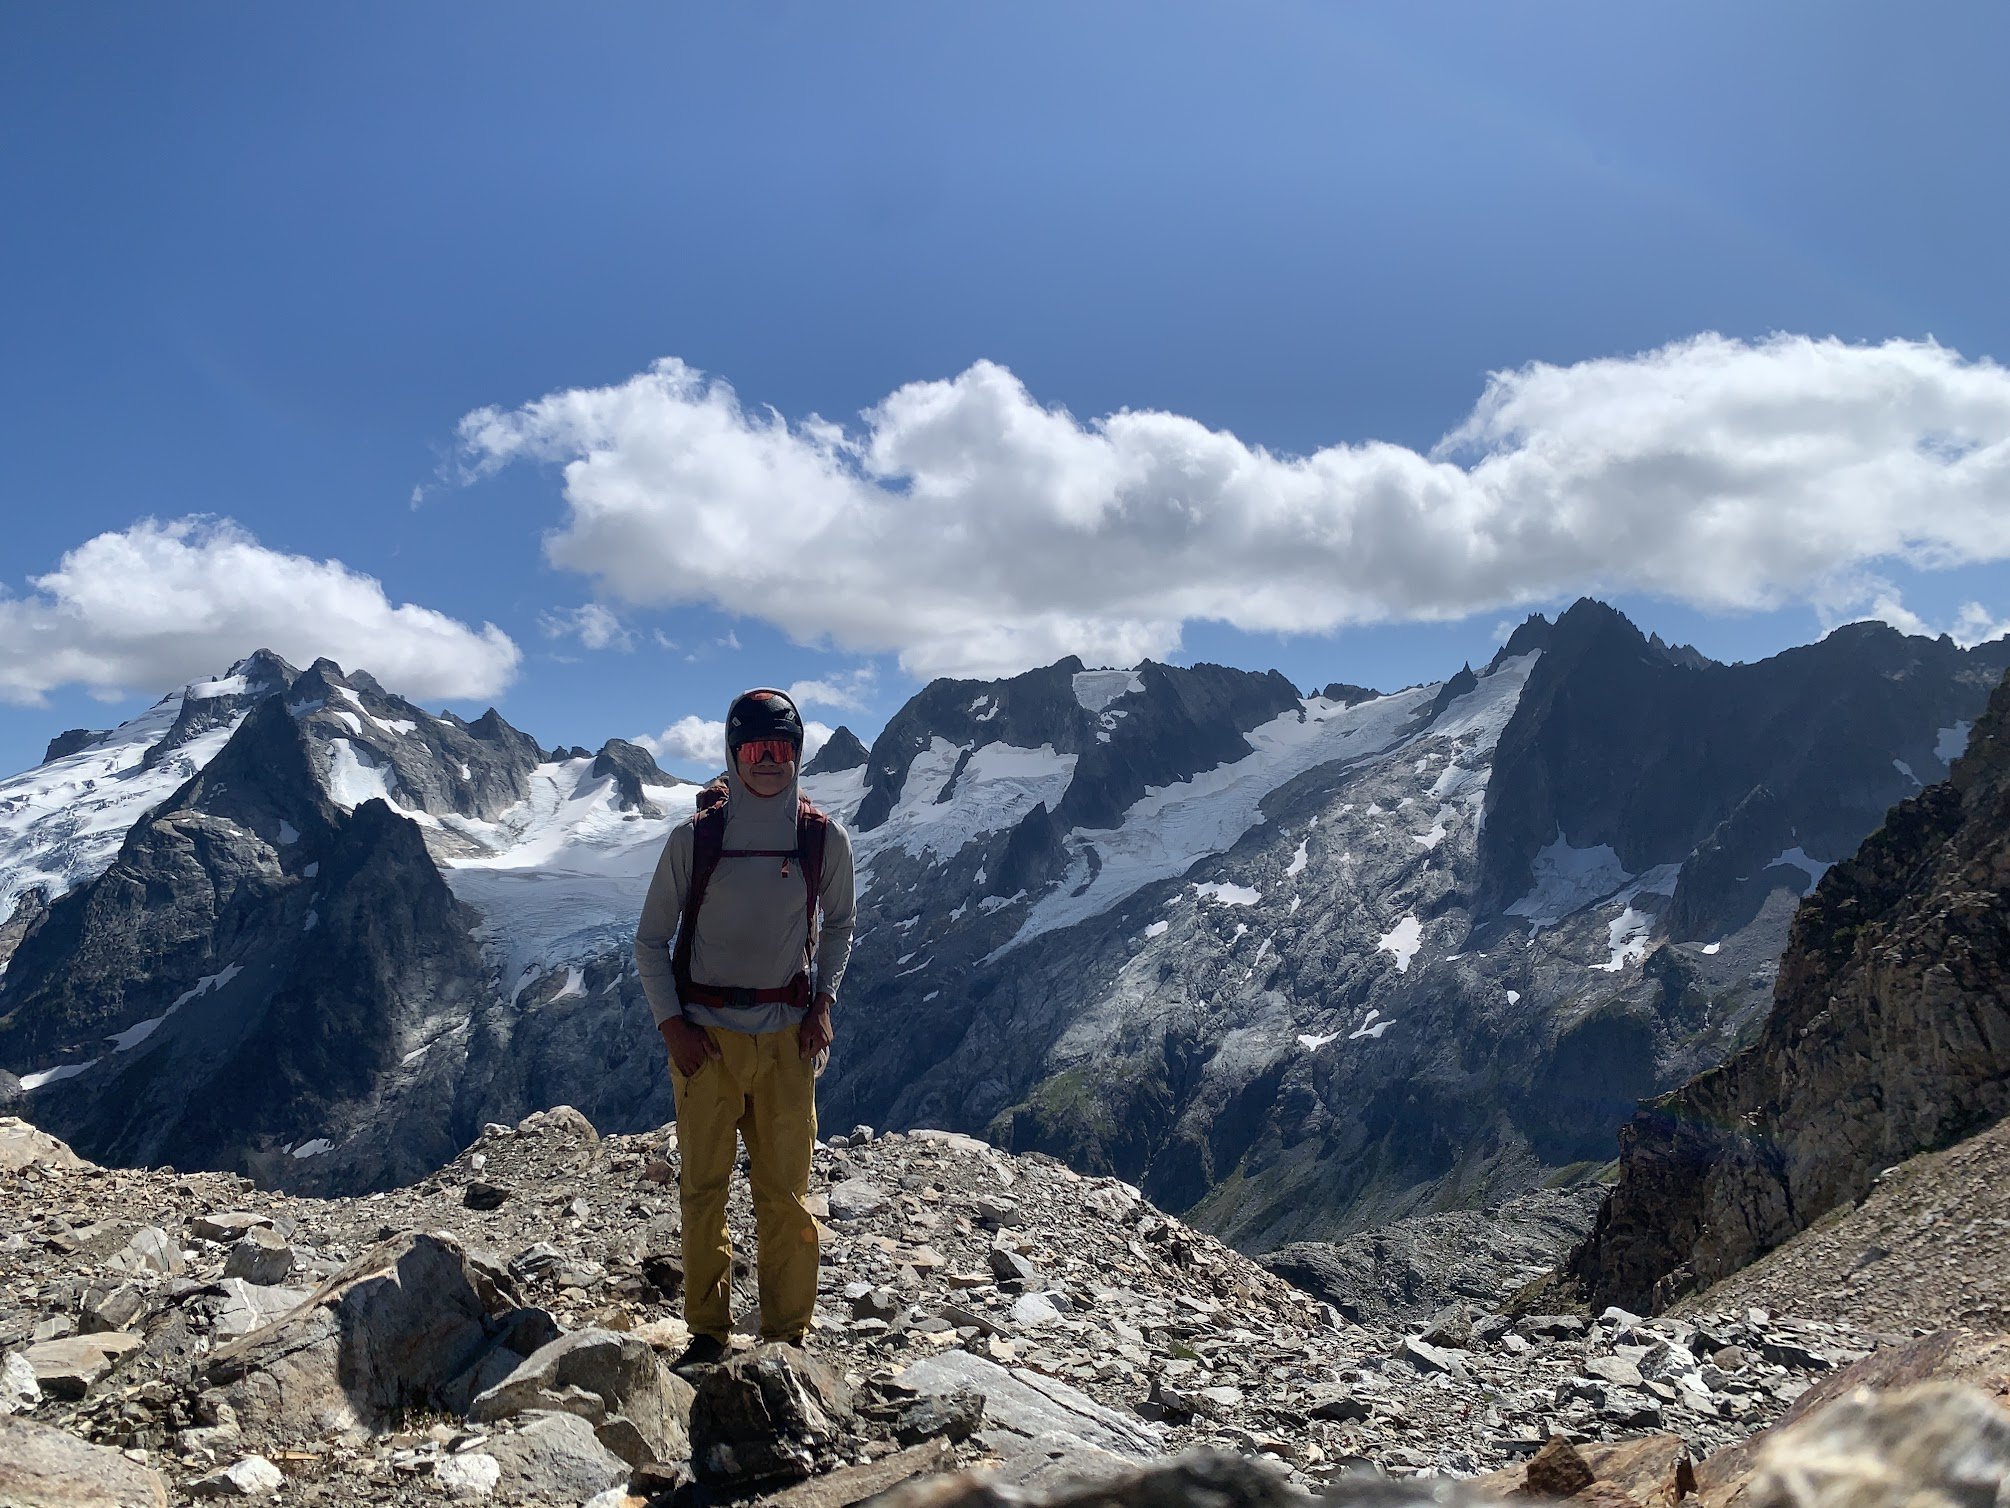
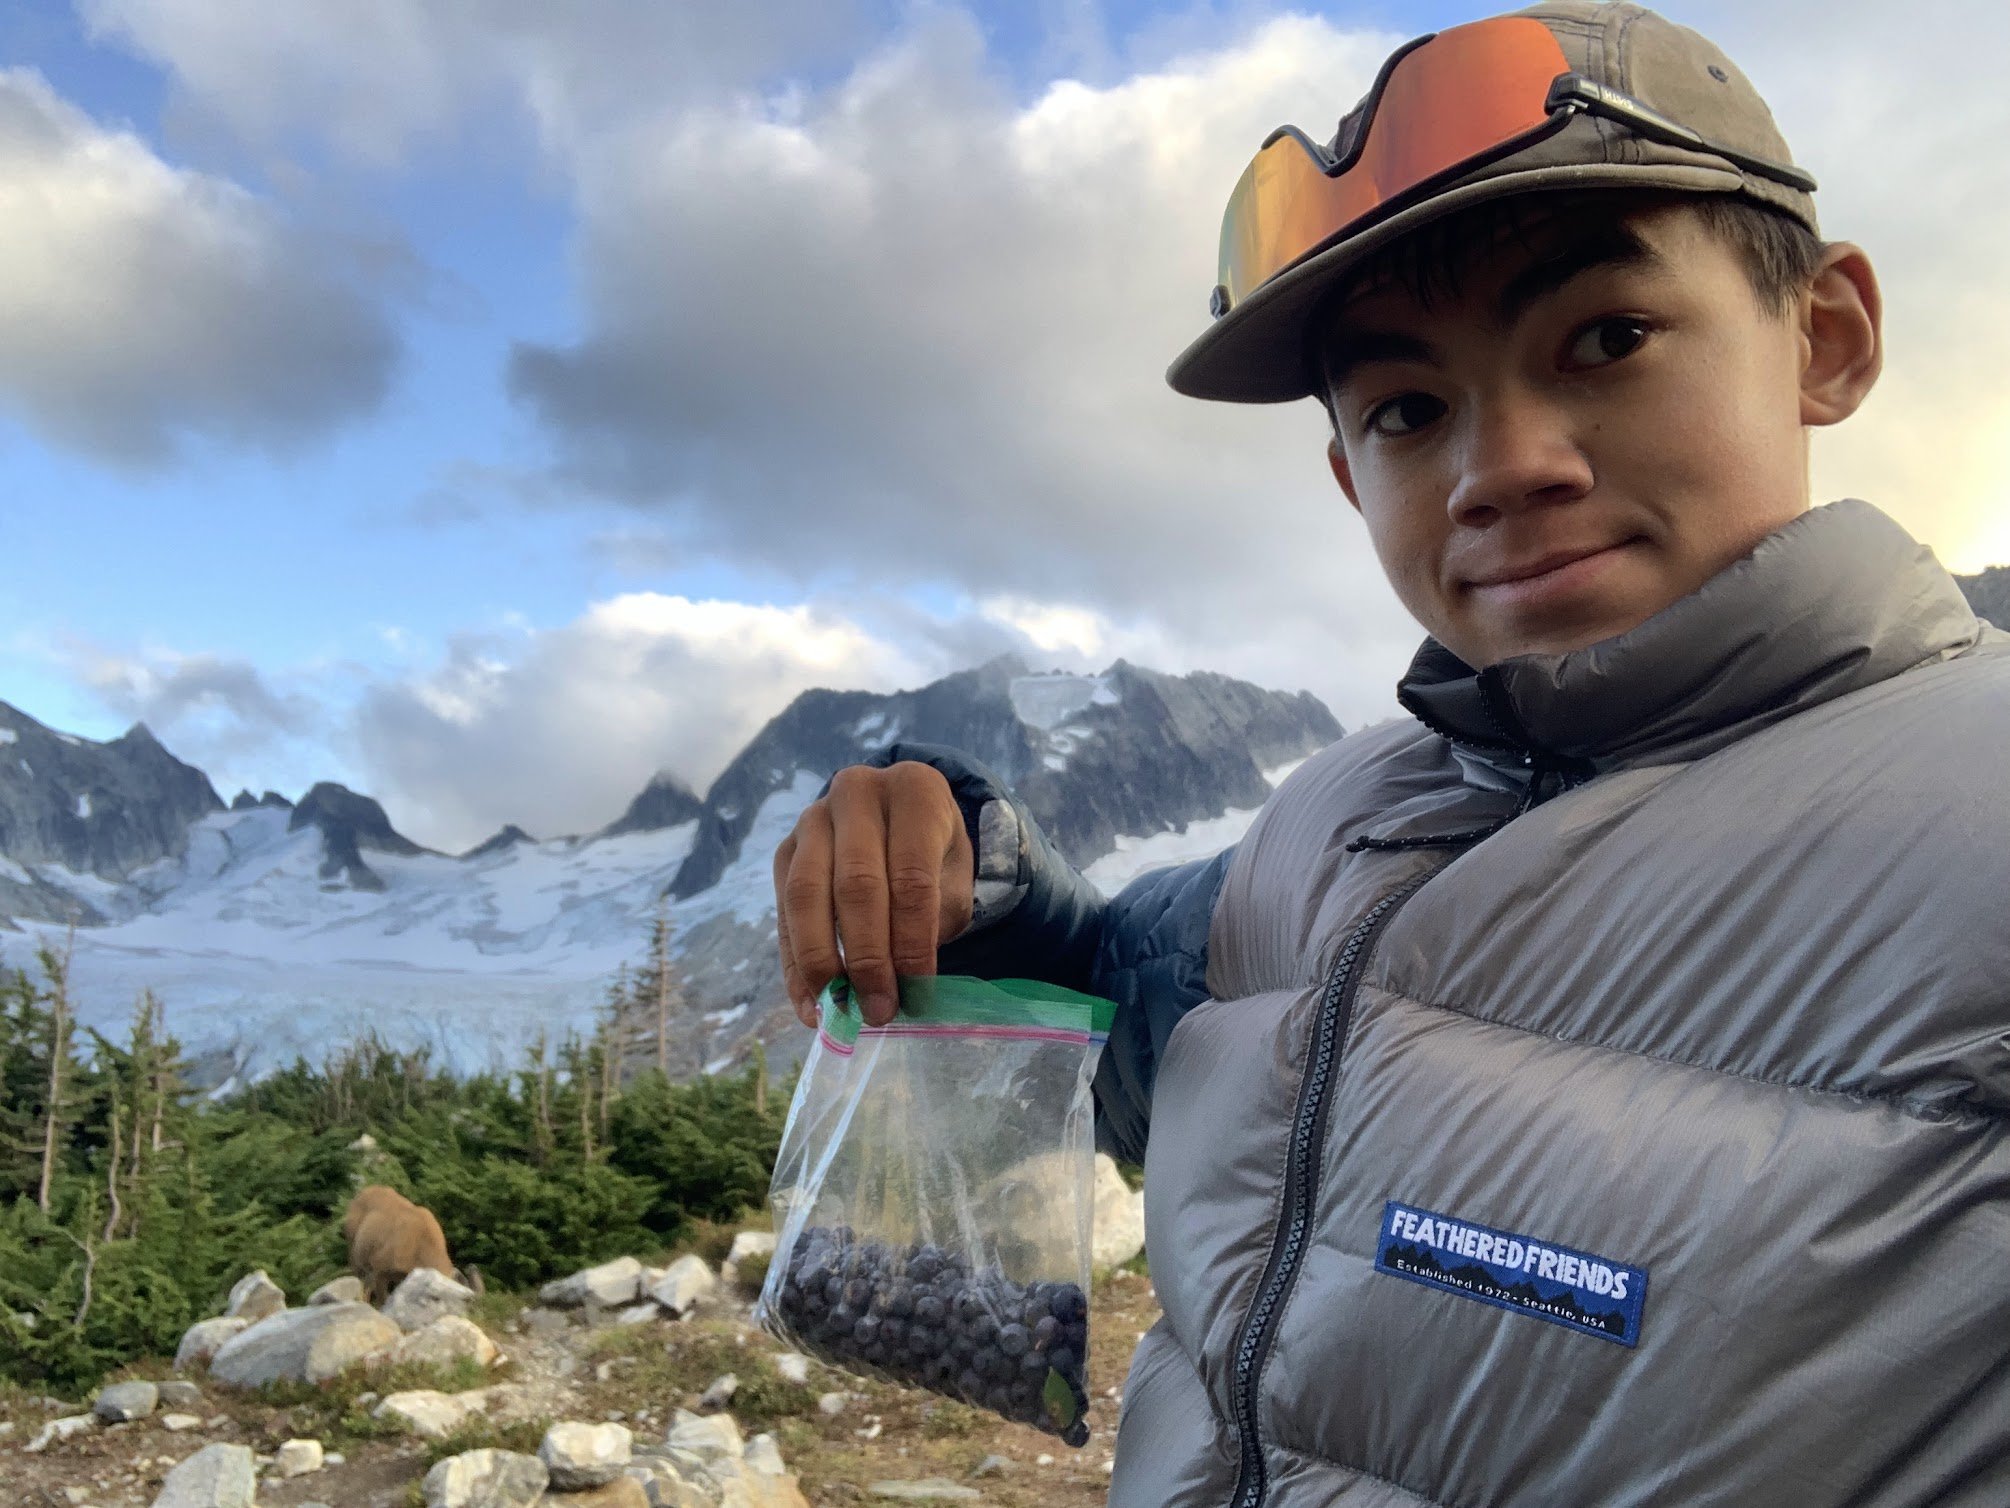
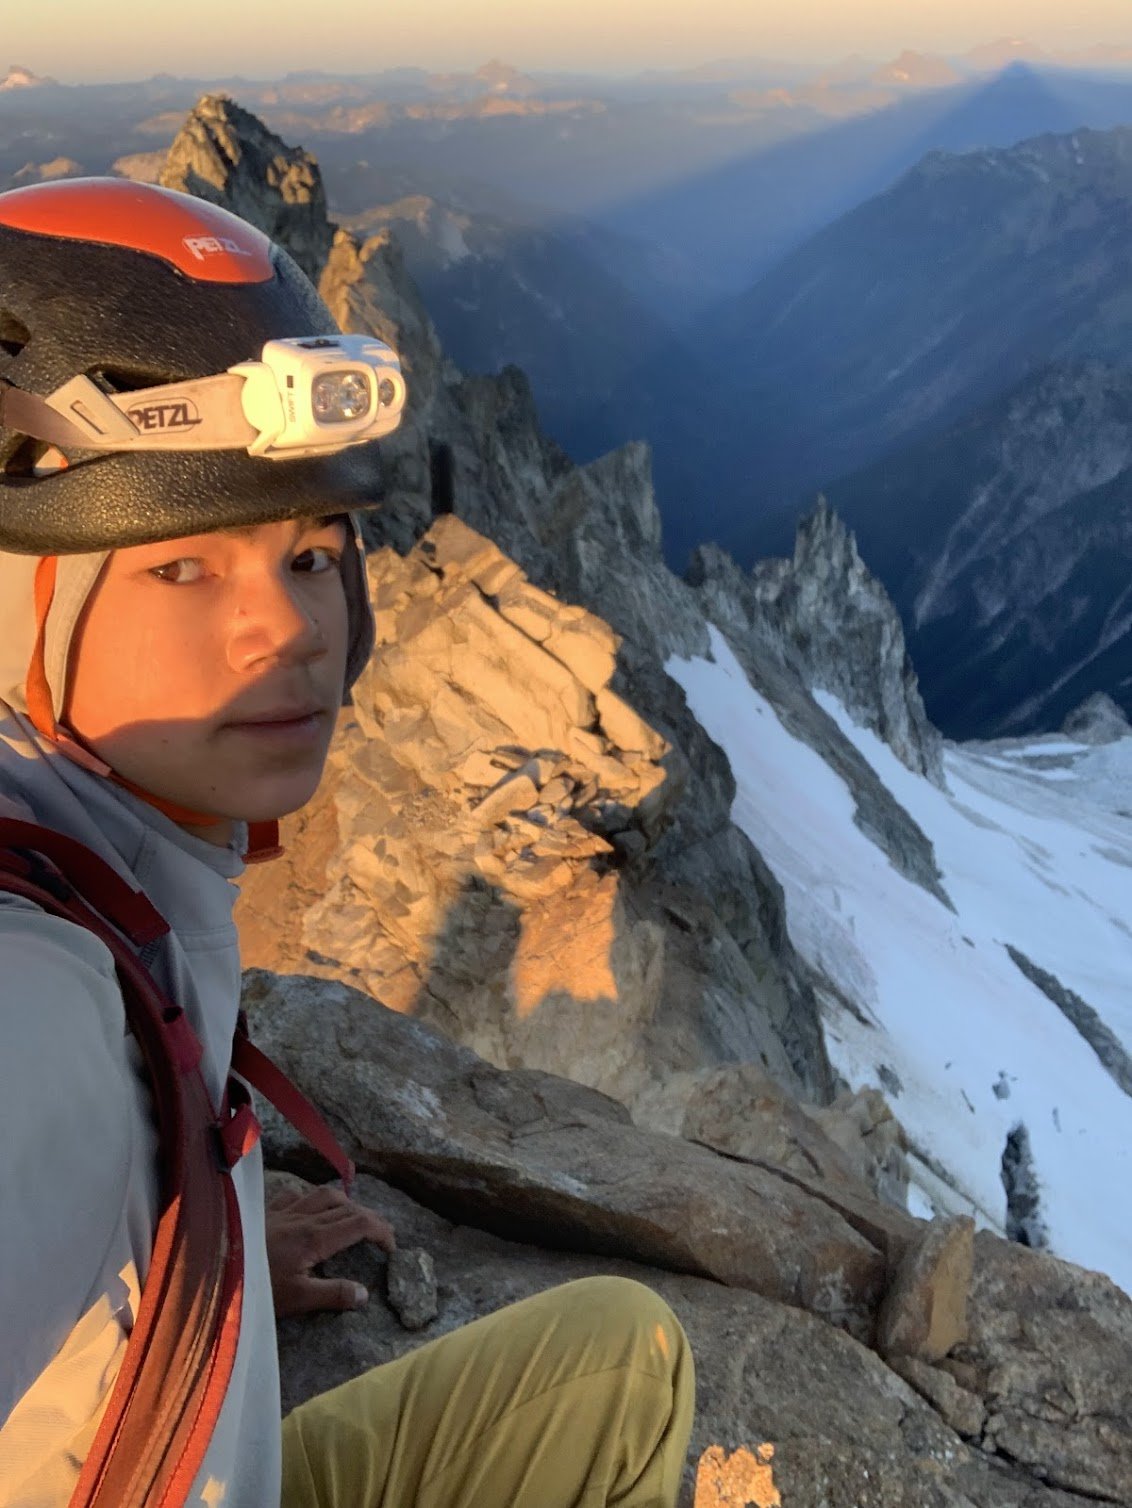
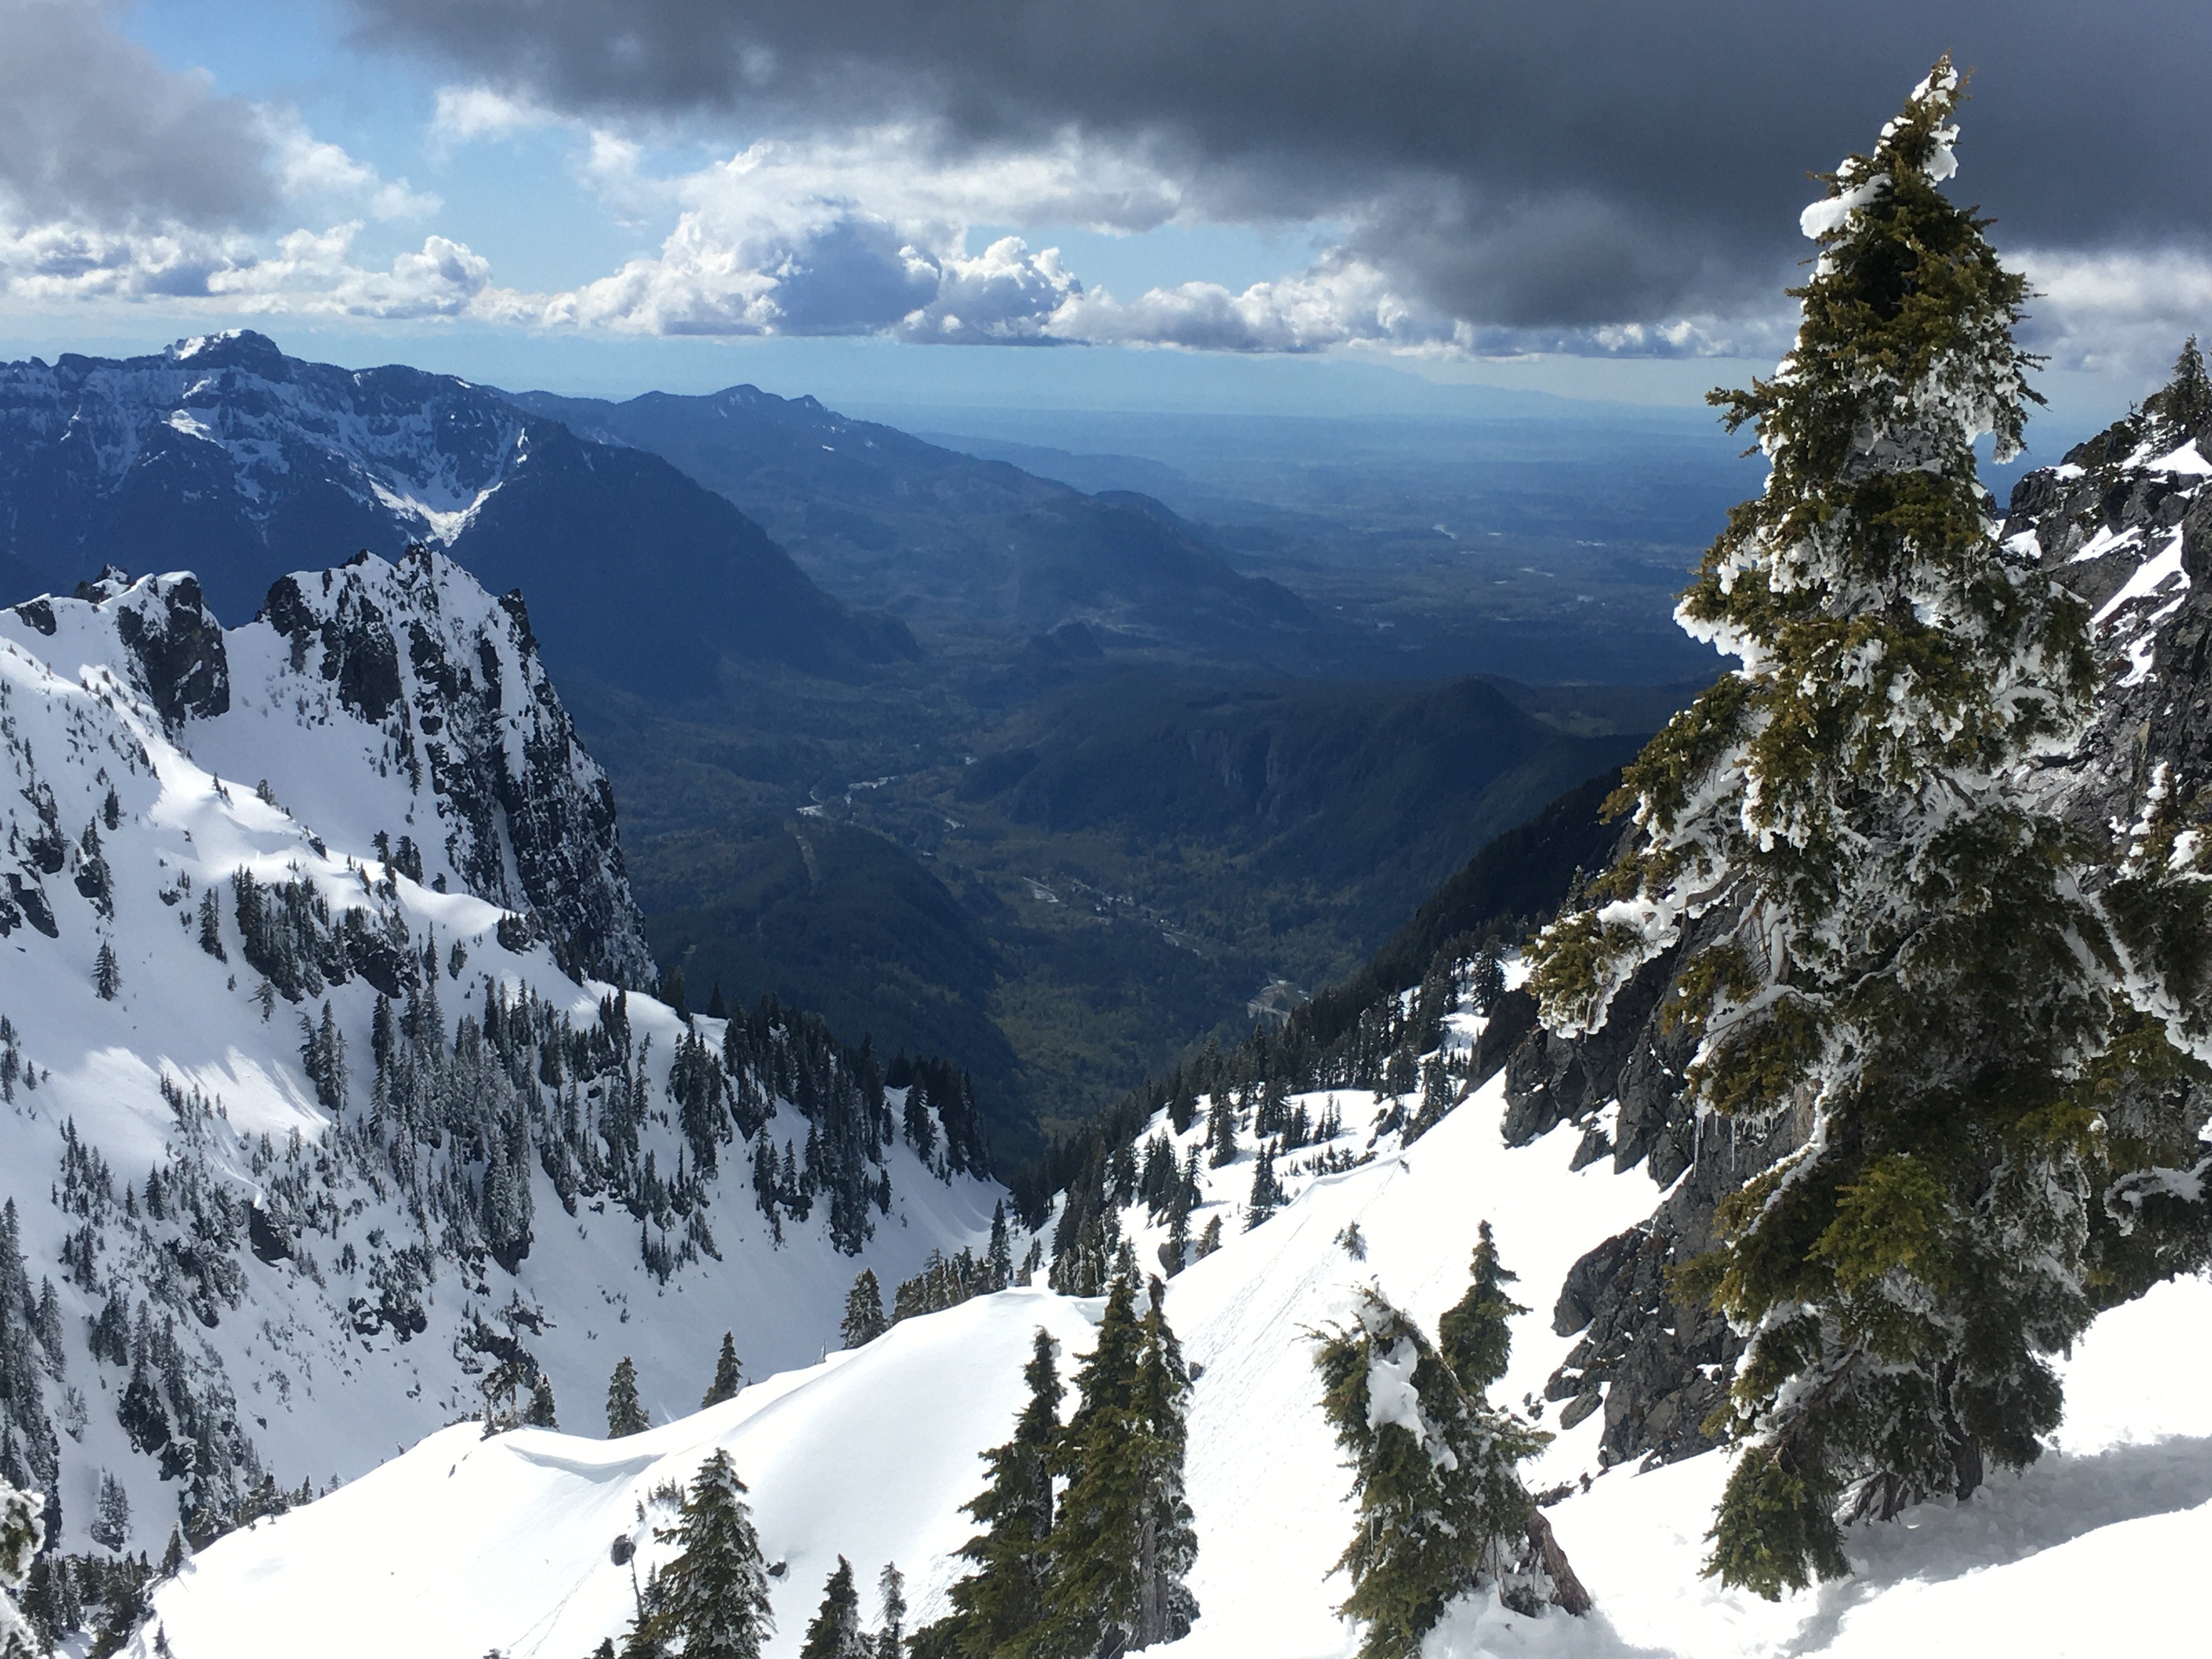
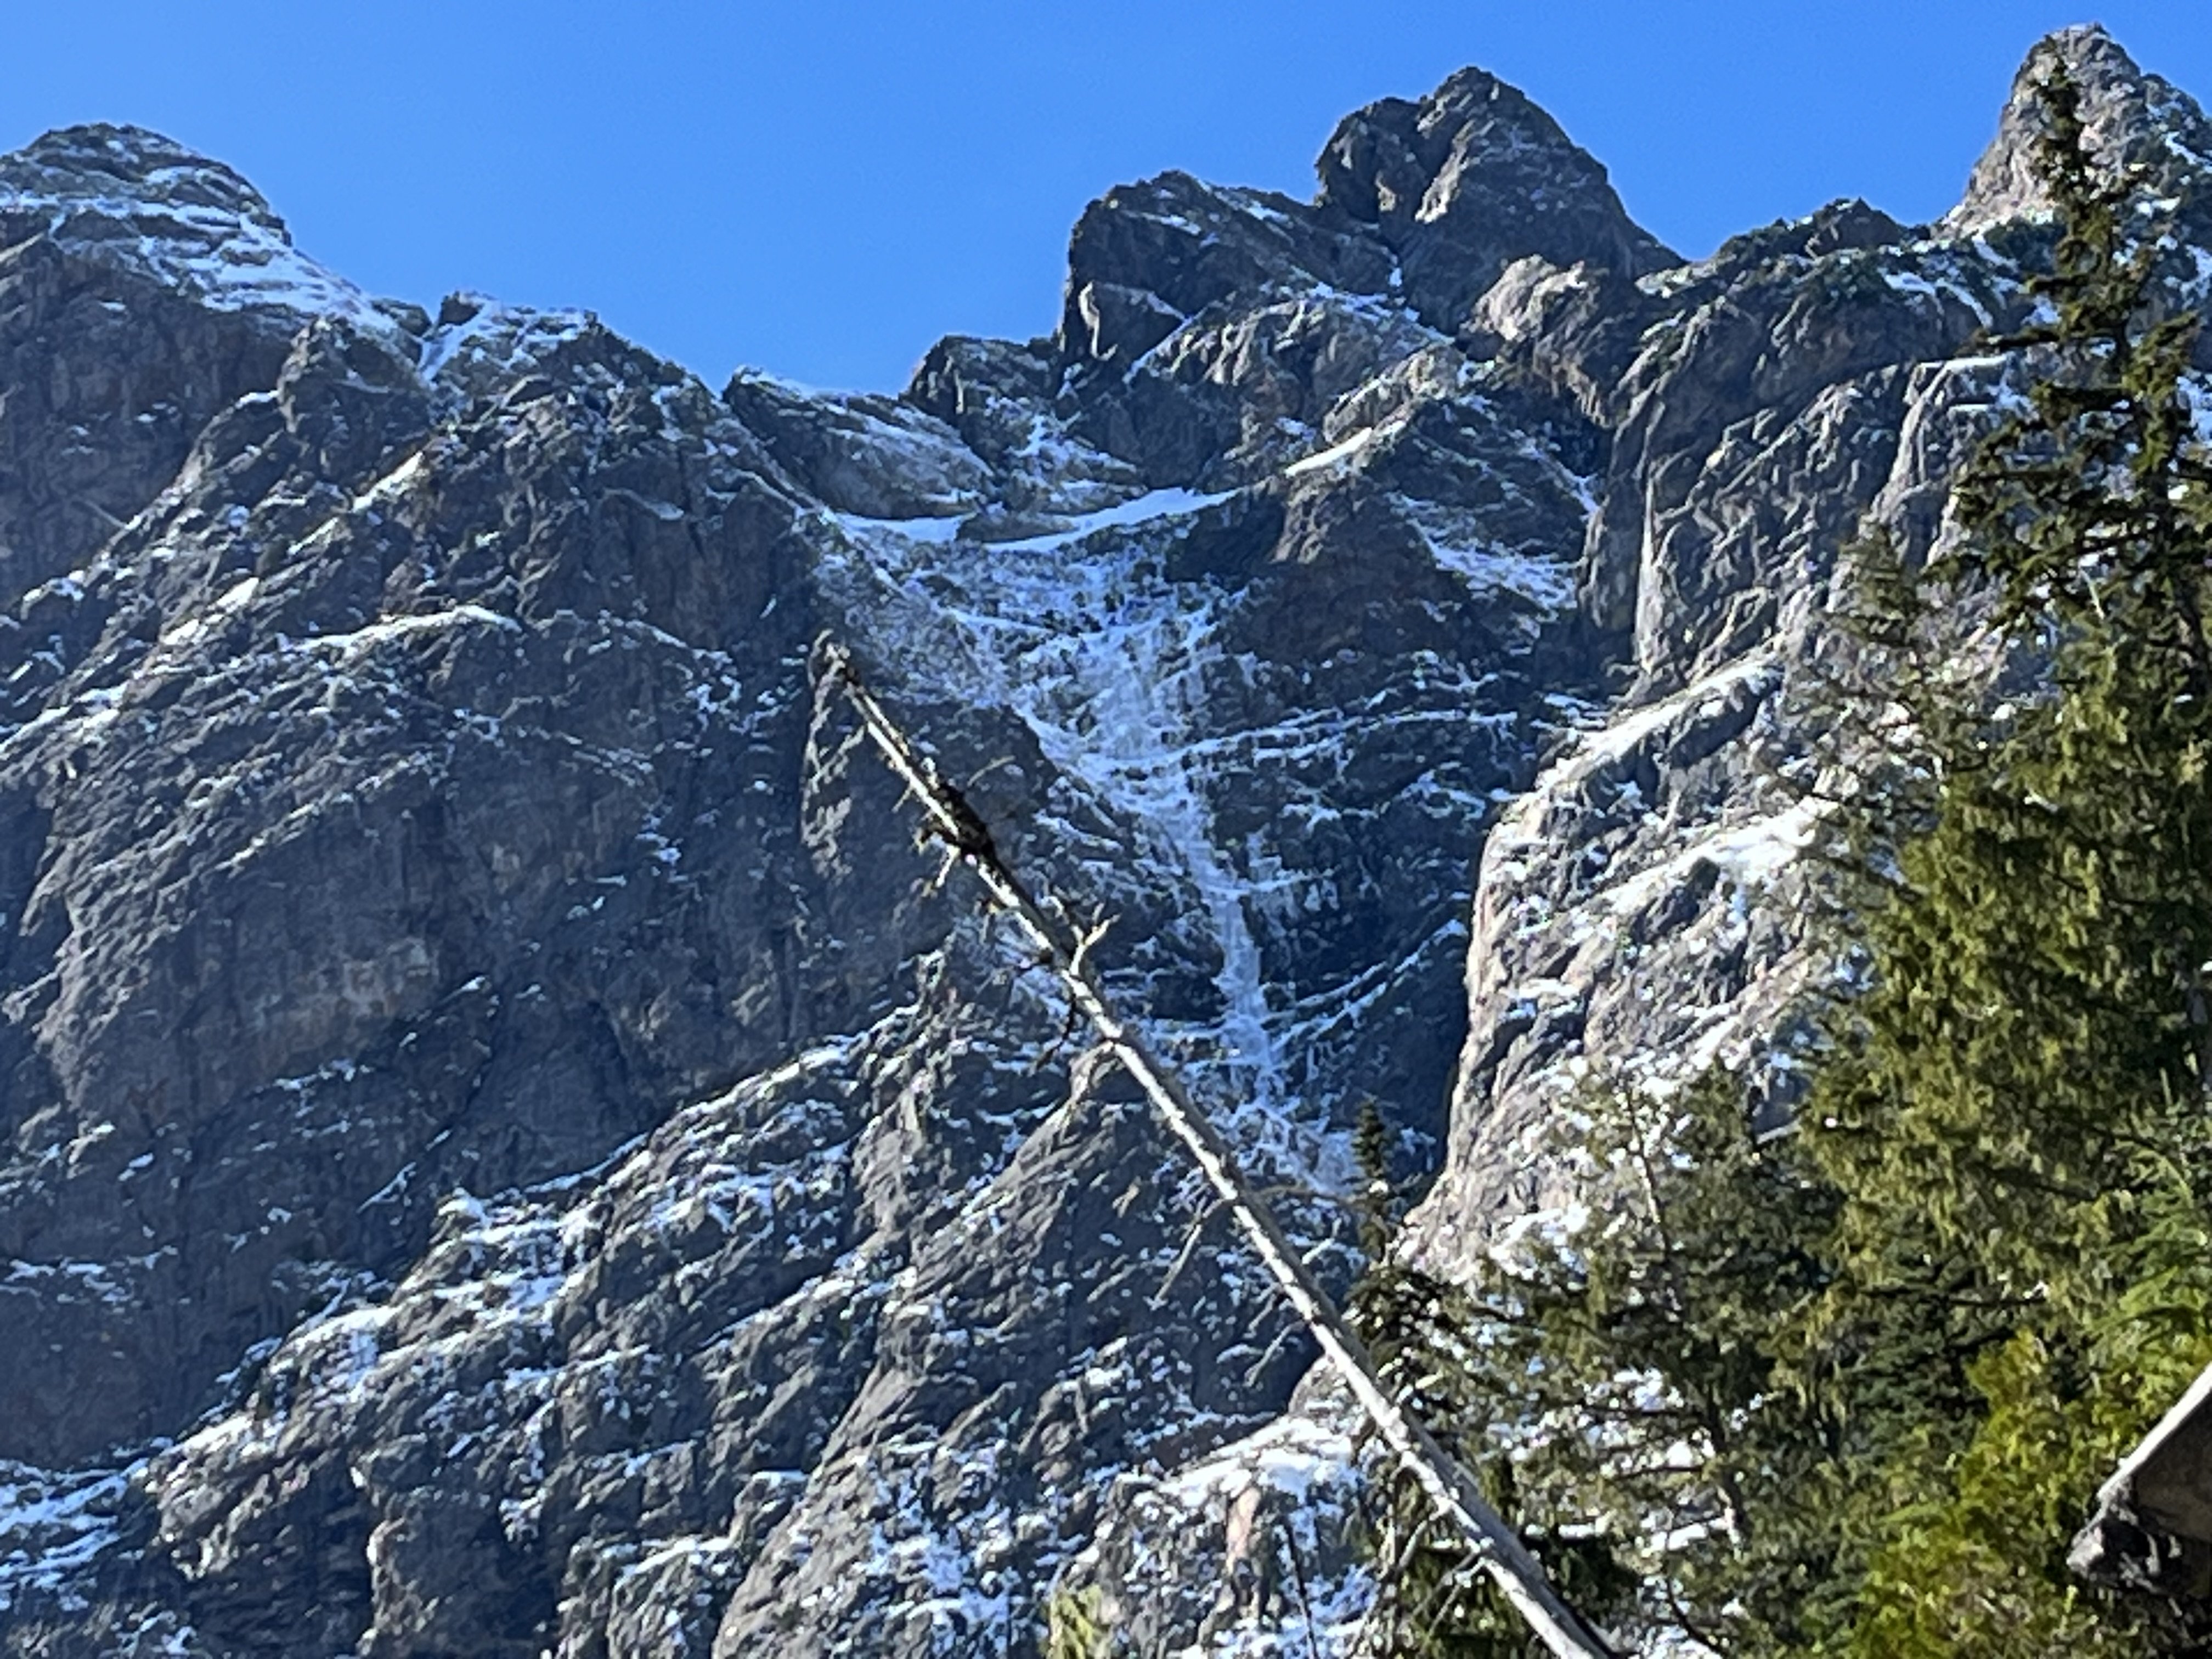
Trip: Coleman Pinnacle - Standard Trip Date: 12/30/2025 Trip Report: It has been a slow start to the ski season. A very slow start. But despite the setbacks, I've managed to have a few good days the past several weeks up in the Baker backcountry. We're fortunate up this way in that our usual backcountry backyard emerged relatively accessible from the December Floods. US2 and 410 aren't quite so lucky. I've not been doing anything remarkable the past few weeks in the Baker backcountry, but I do have a new camera that I have been having fun getting to know and so why not post a few photos from the classic Coleman Pinnacle tour? This is an outing that I tend to come back to over the past 20, climbing it every 5 years or so, if only for the views and the fun run down into Wells Creek. If you haven't been out that way.....you probably won't like it. Best to stay near town and reduce your carbon footprint. Sunrise from the parking lot: The classic view of Baker from Artist Point never gets old (to me): @Trent approaching the heli line: @Trent and Coleman Pinnacle: Der Shukshan: @Trent skinning up under Coleman Pinnacle: Summit of Coleman Pinnacle: Out to Chowder Ridge: Descending from the summit with Baker looming ahead: Ptarmigan in winter plumage down in Wells Creek: Windy on der Kulhsan: coming back up over Table on the way home: Shuksan is one of my favorites in the North Cascades: Sunset from the parking lot. As Ice Cube would say, "Today was a good day". Gear Notes: flotation, but please, leave the snowshoes at home. Approach Notes: Heather Meadows to Artist Point to alpine glory


 9 points
 -
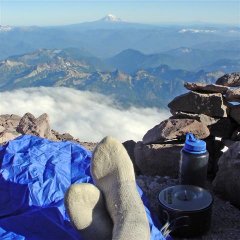
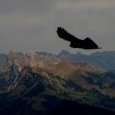
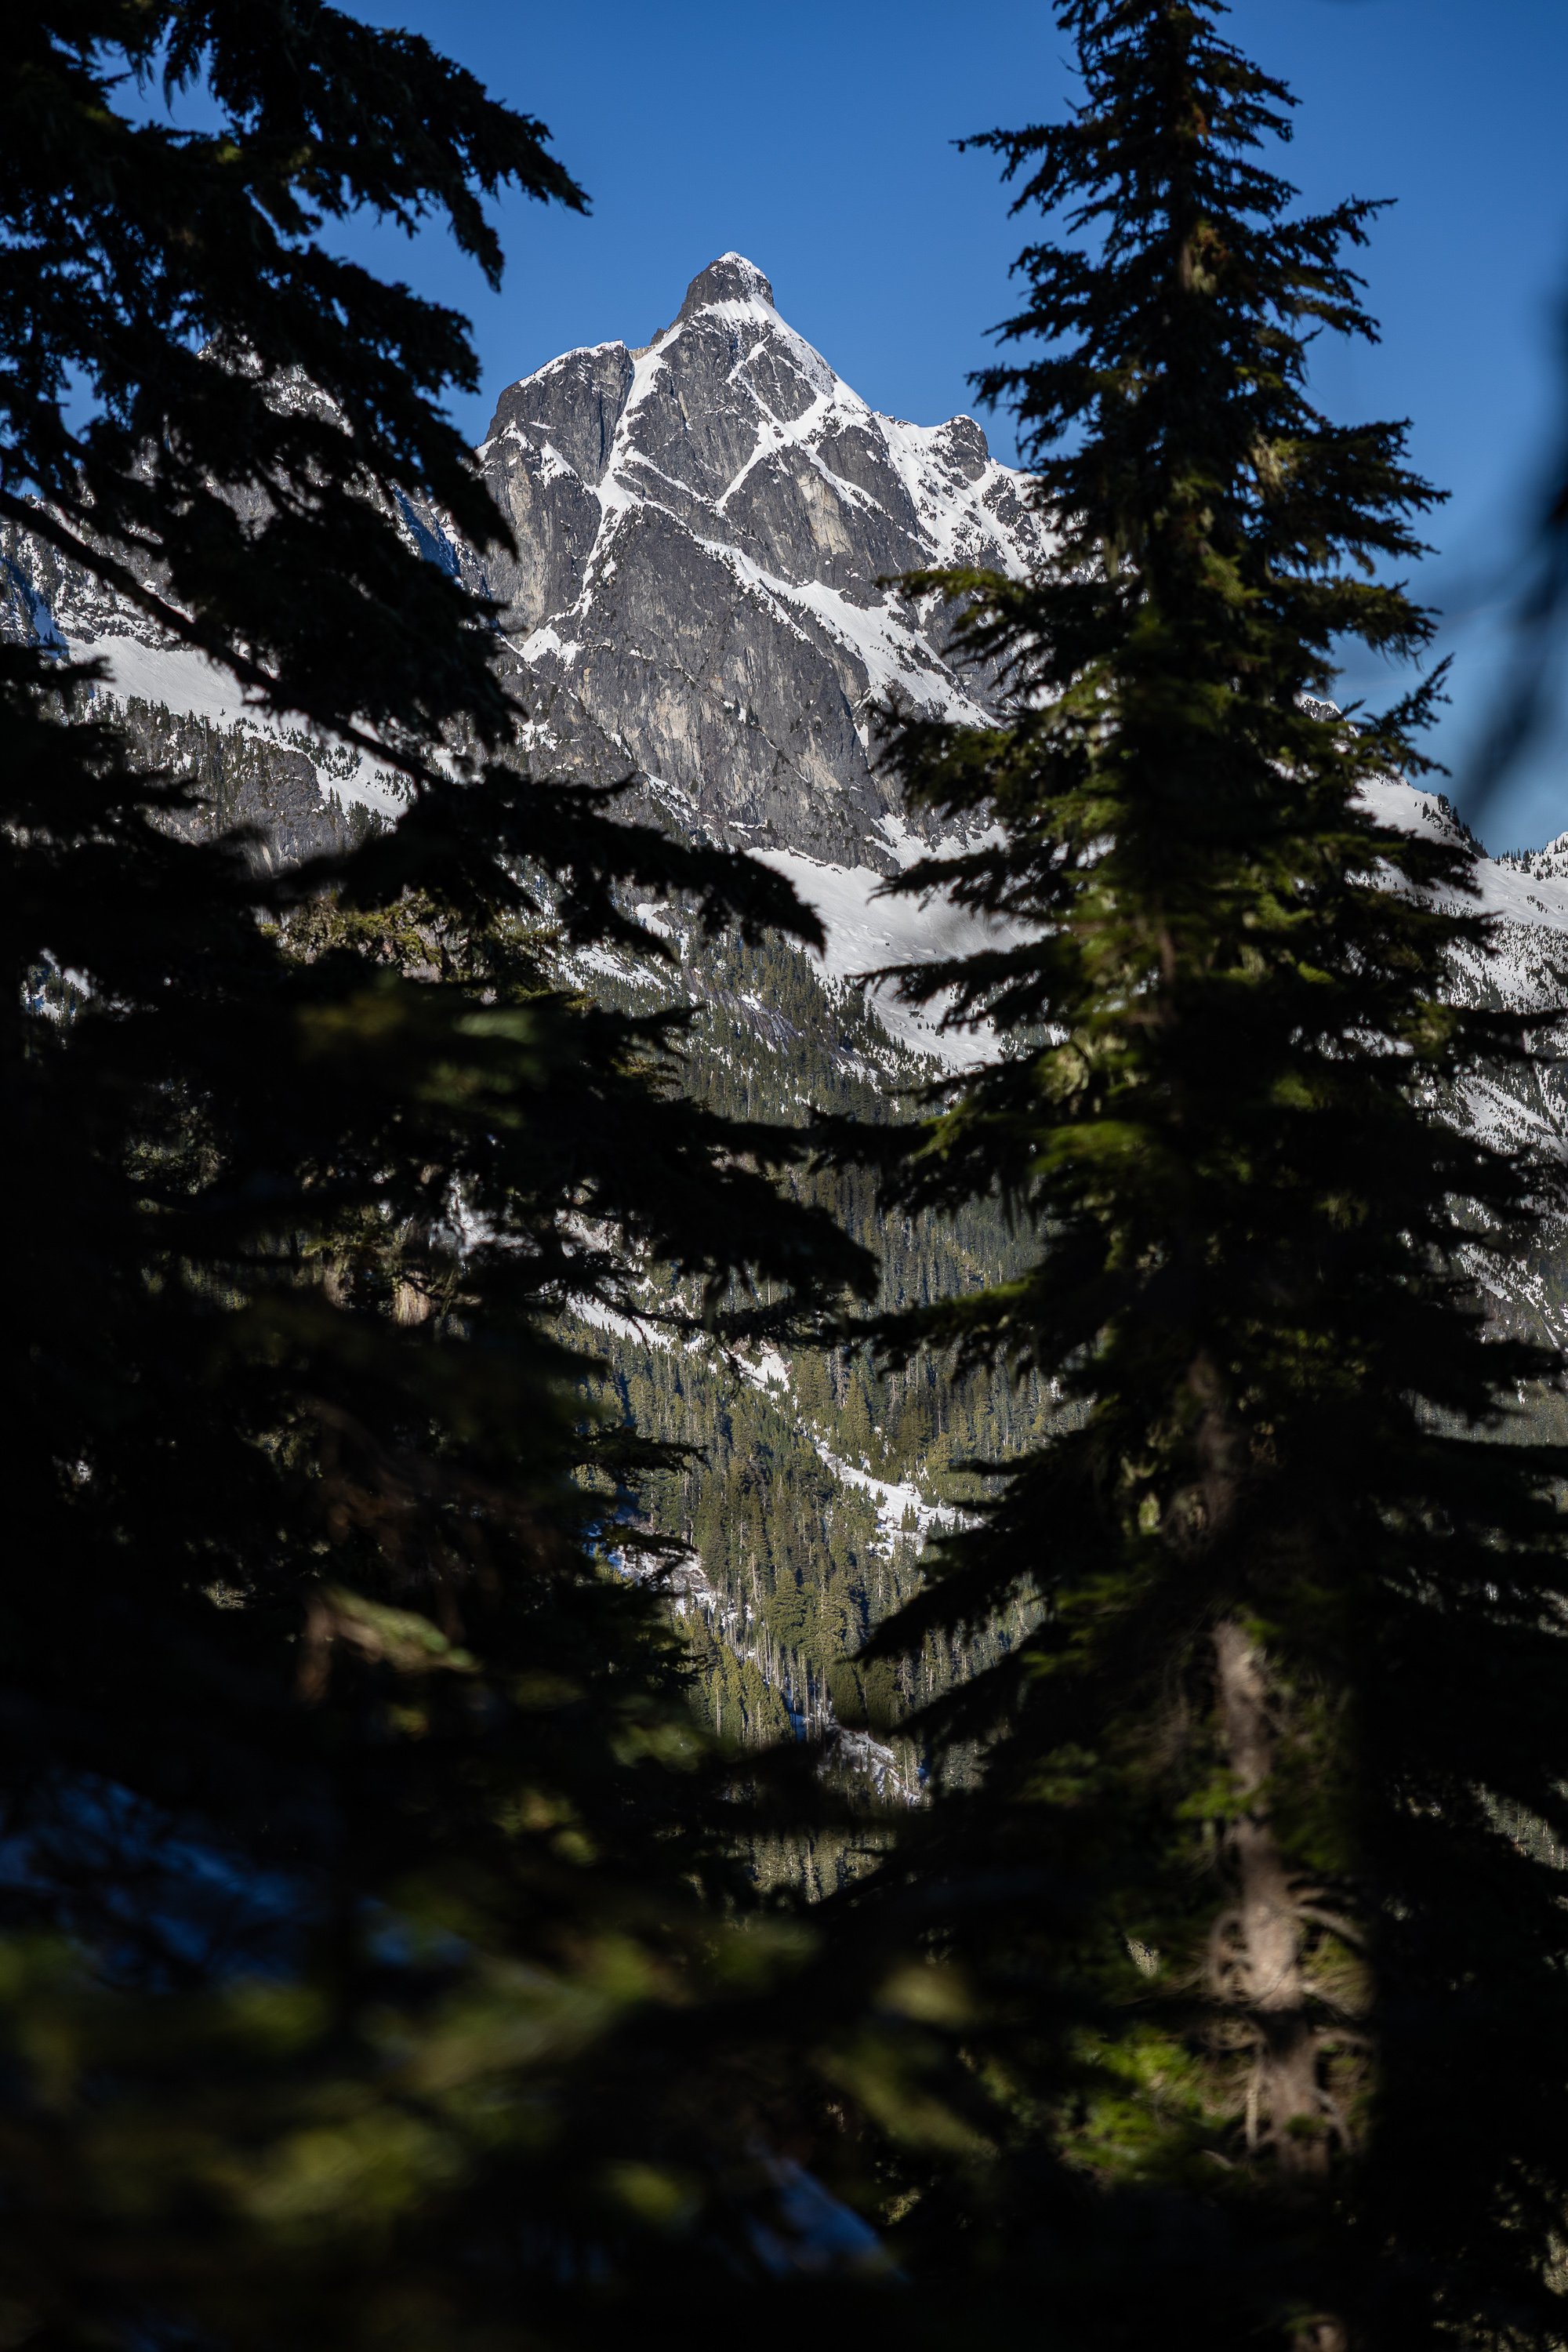
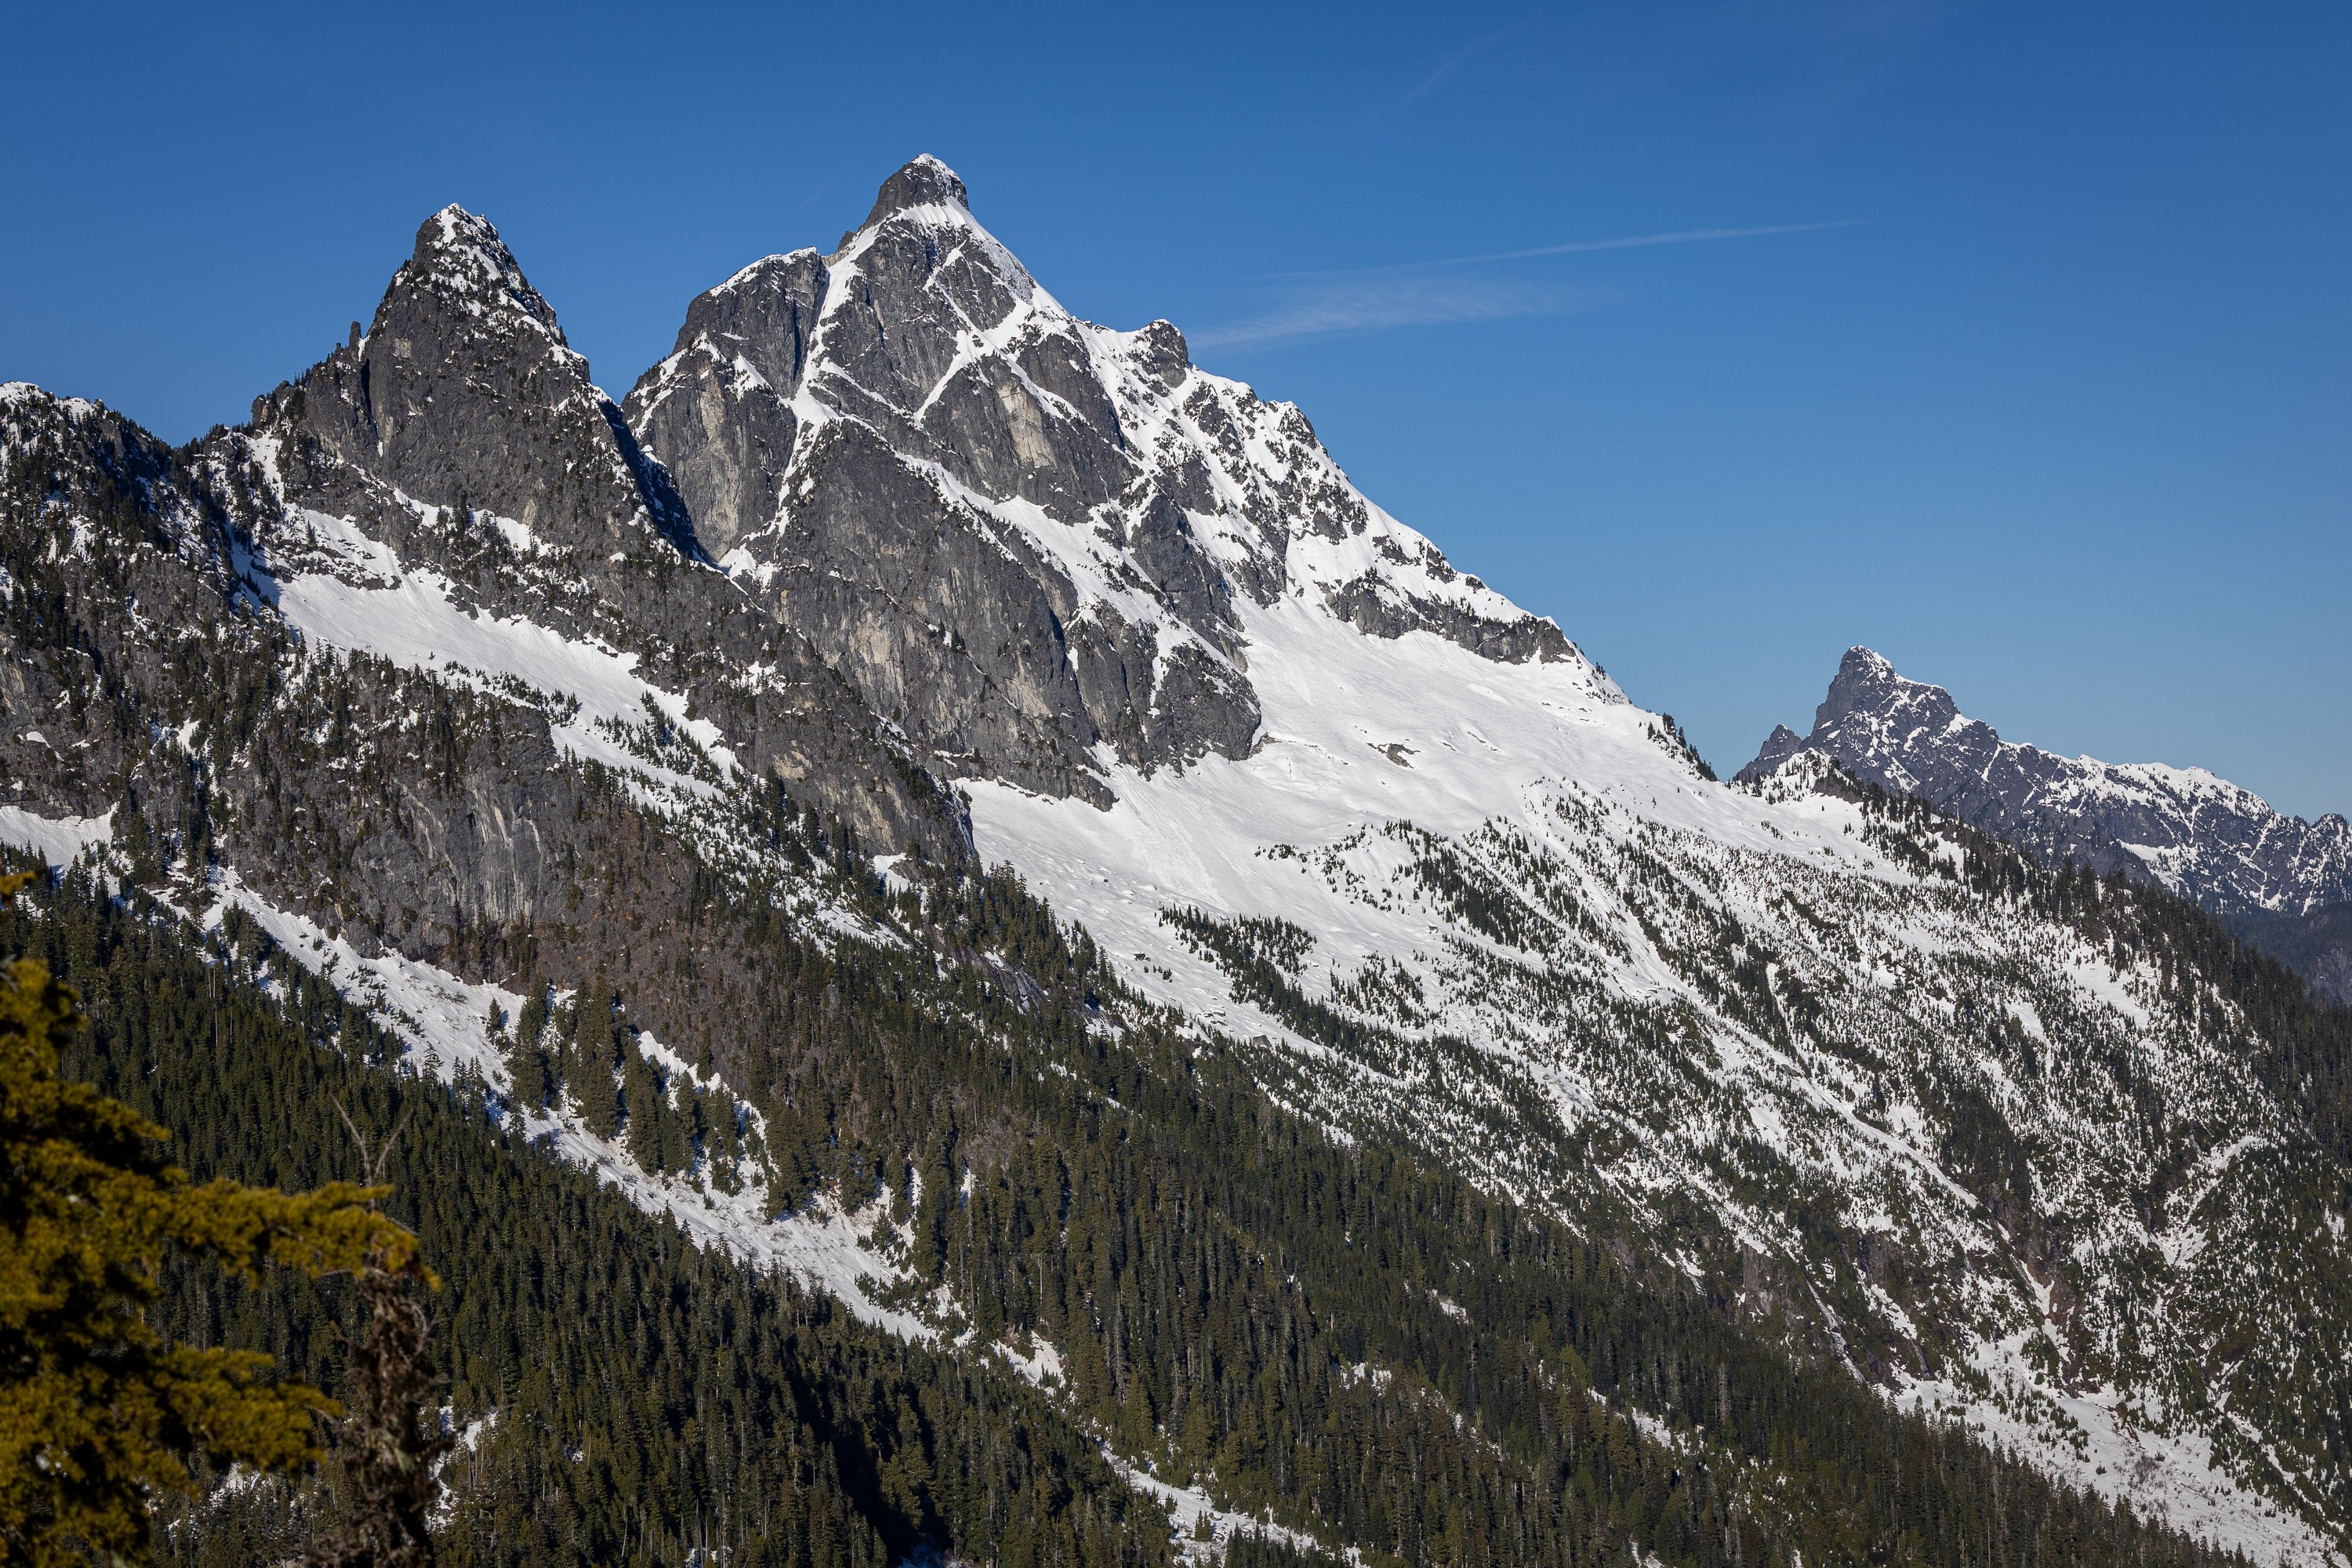
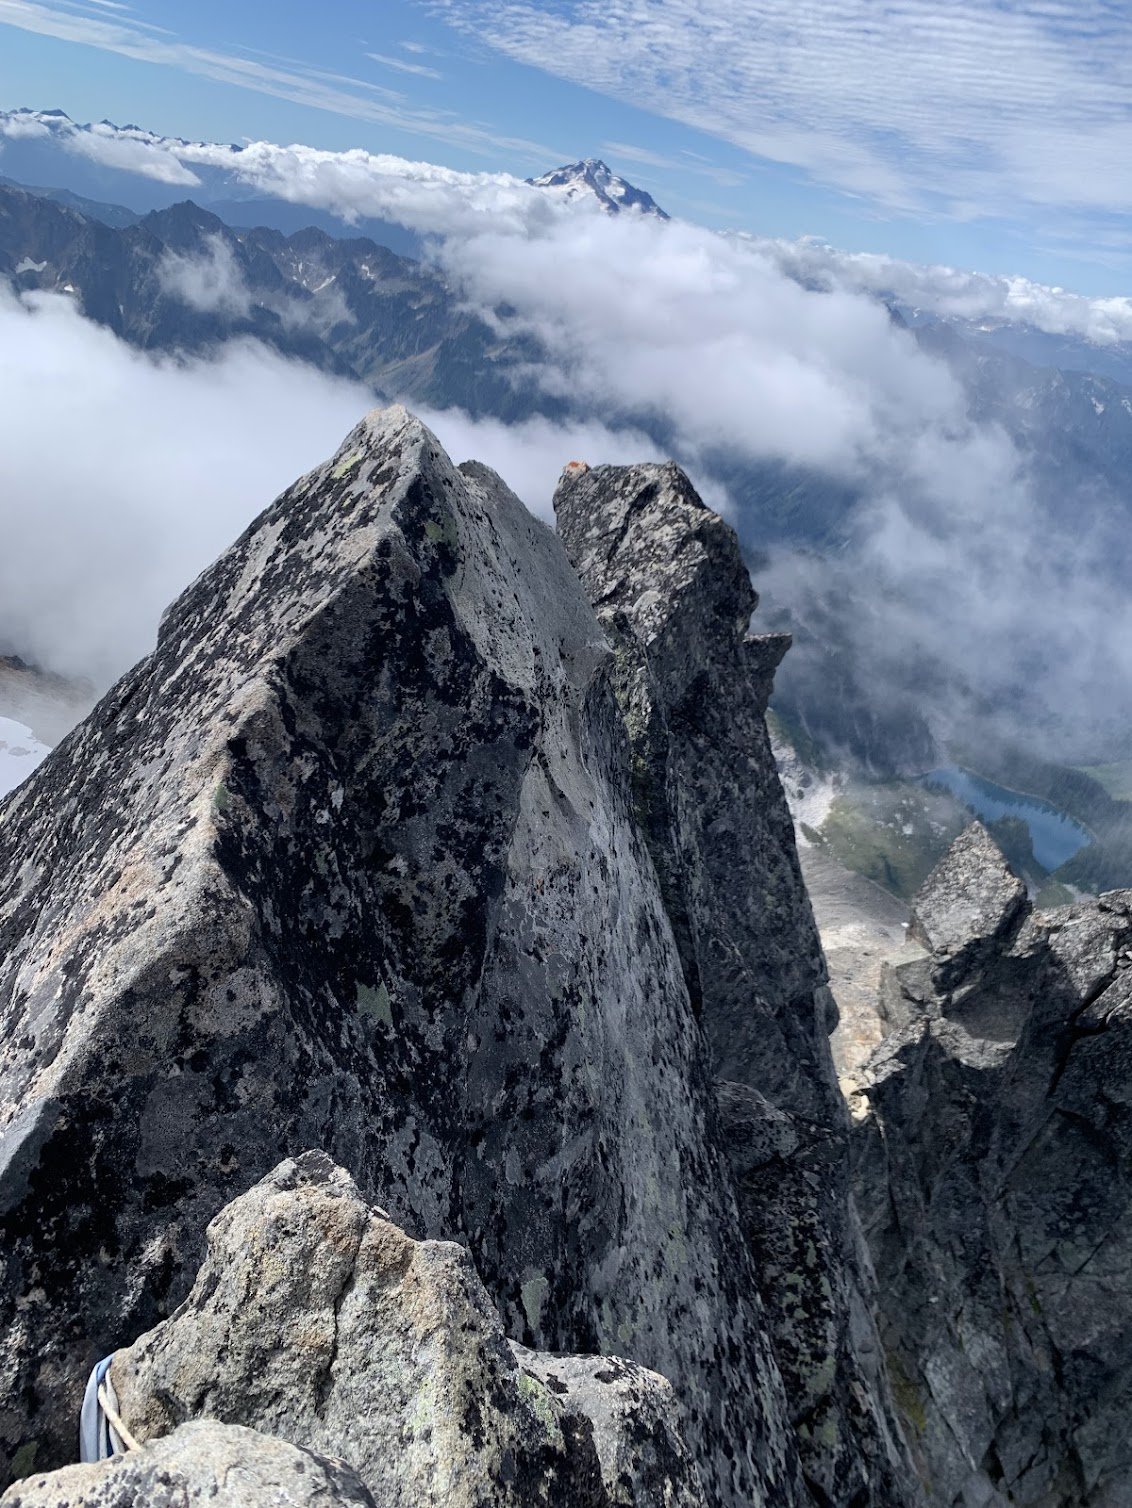
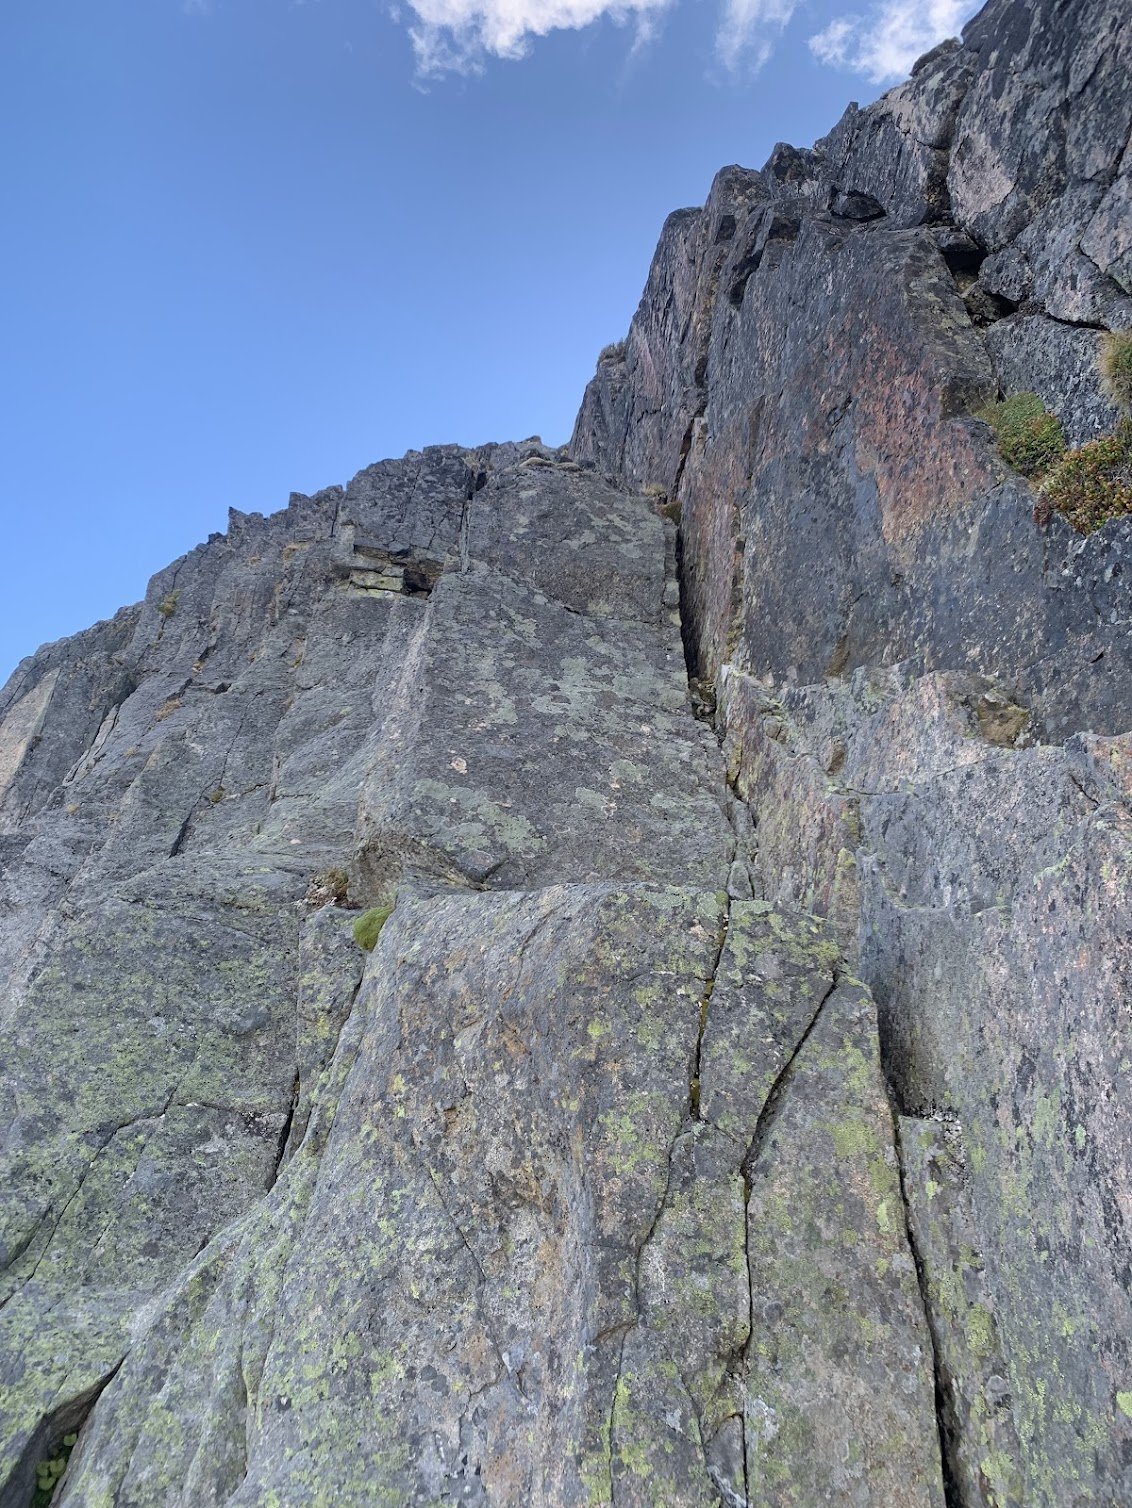
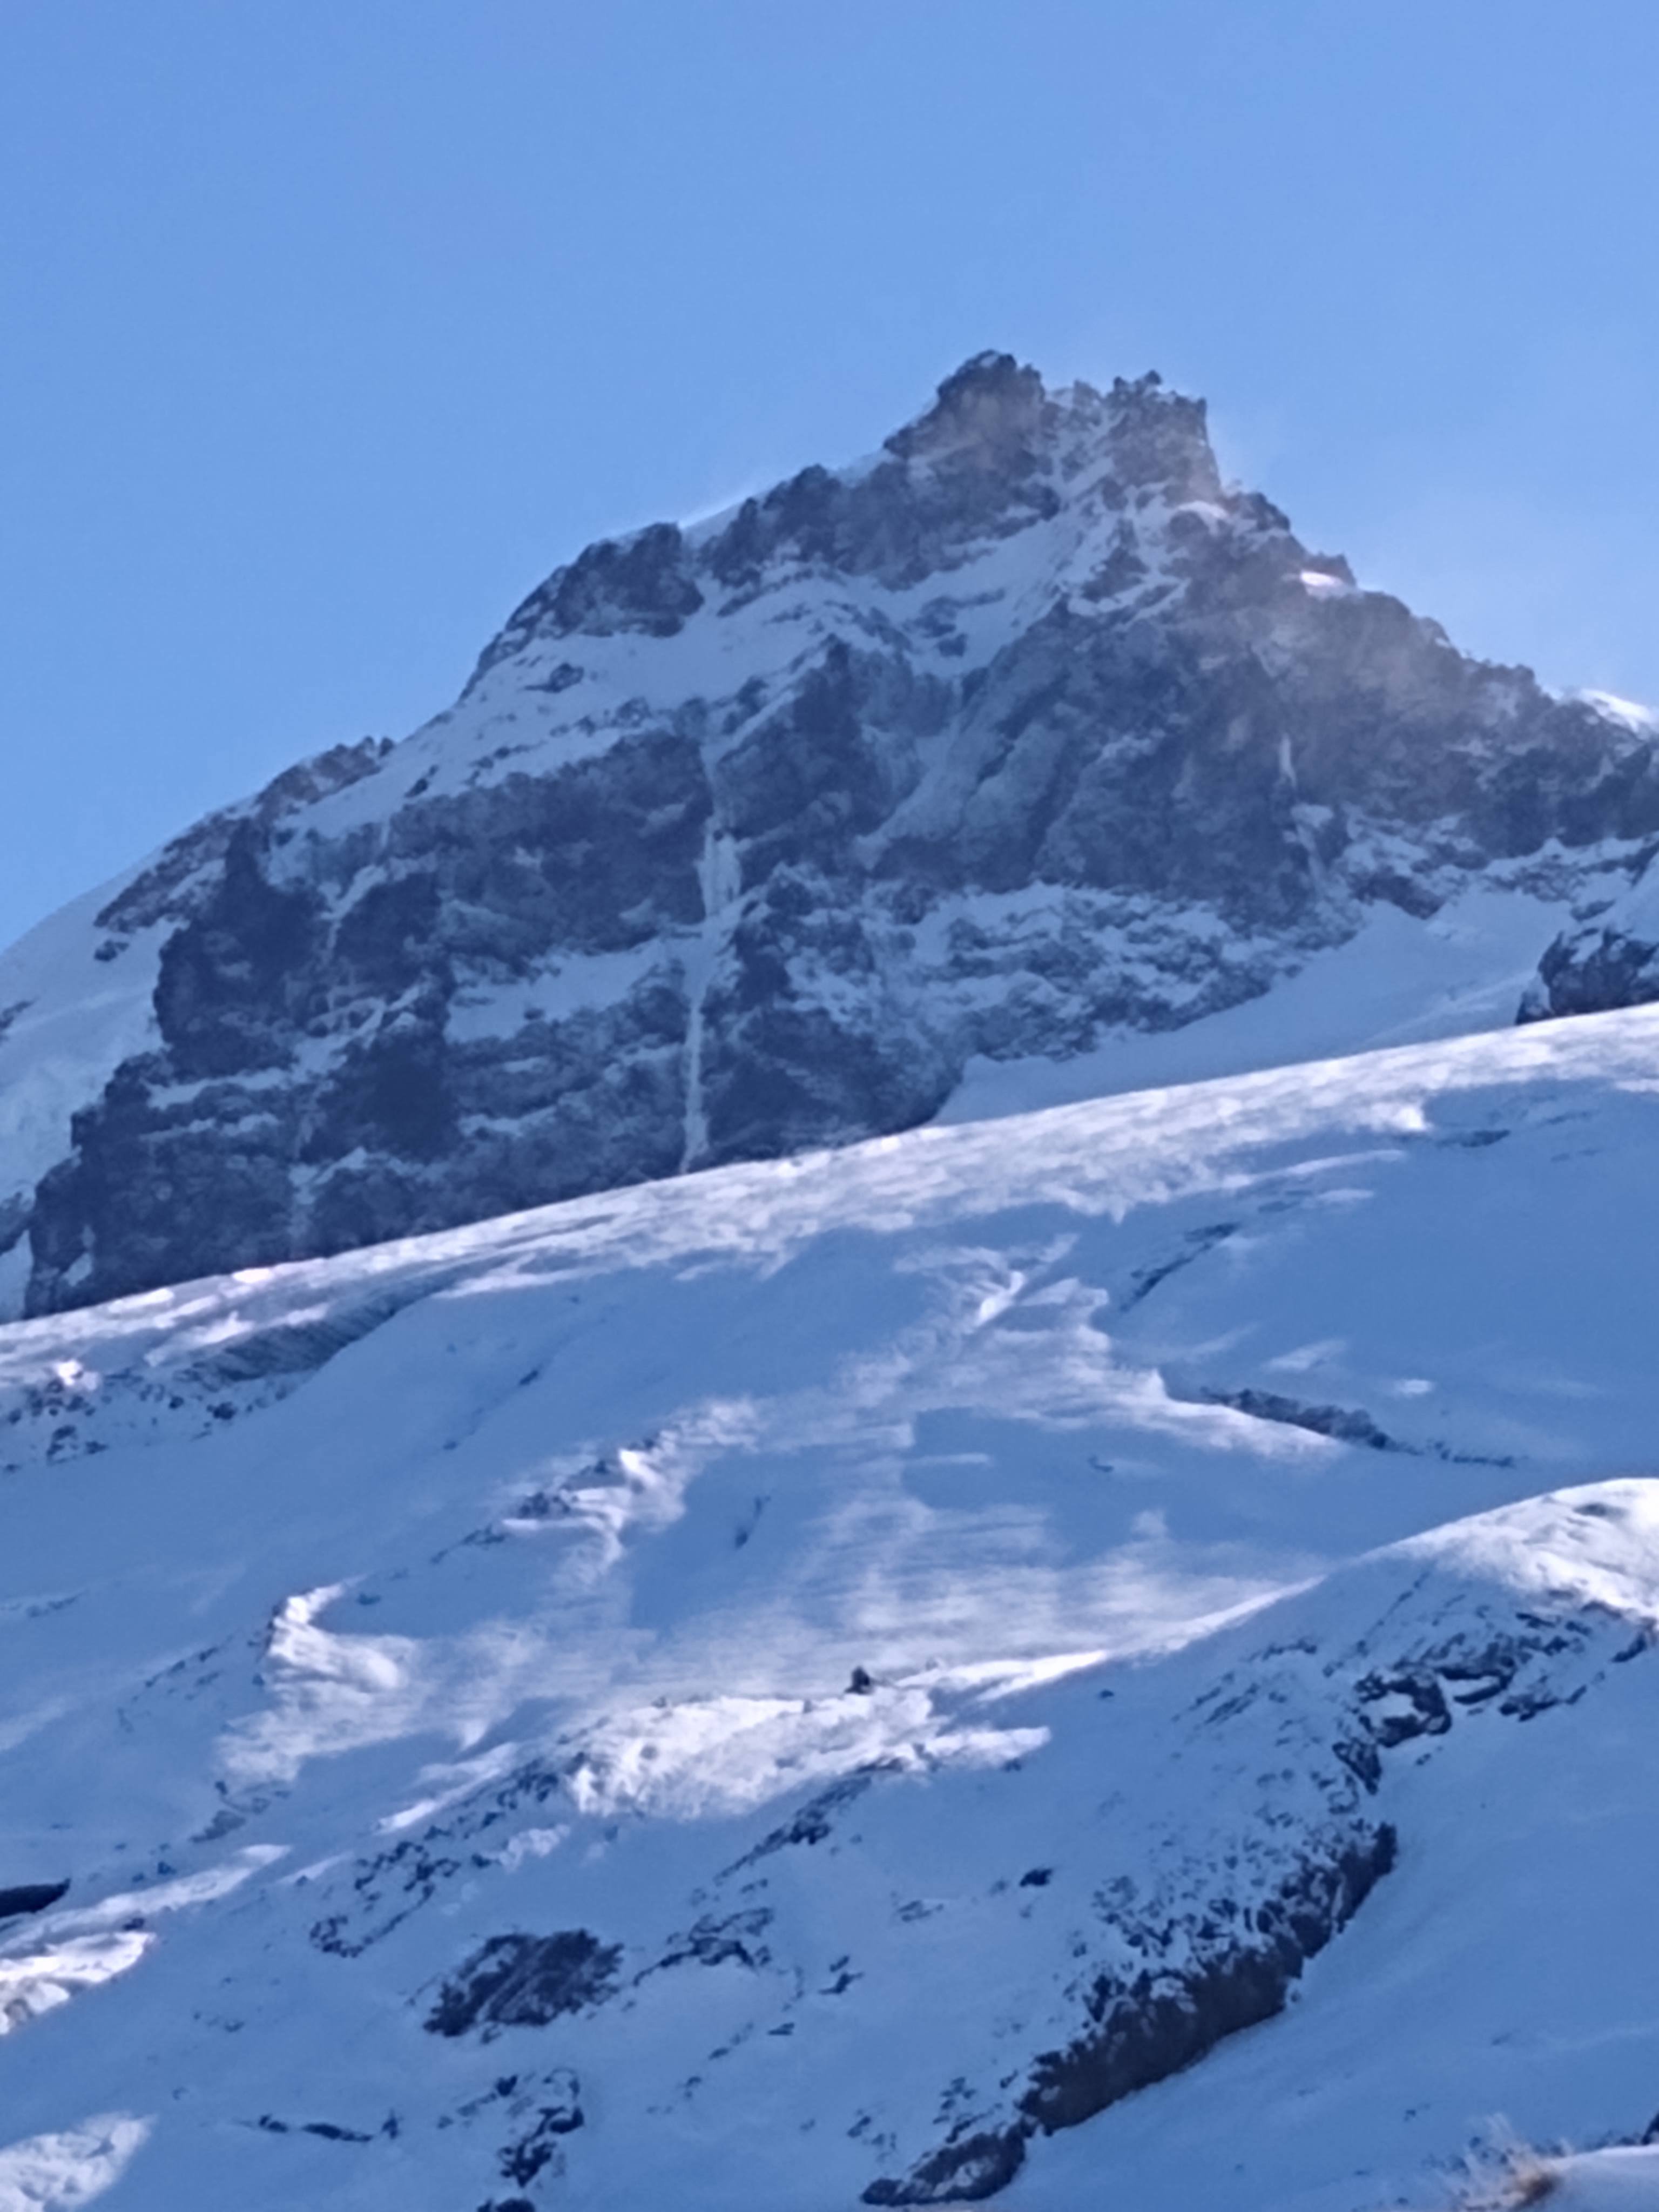
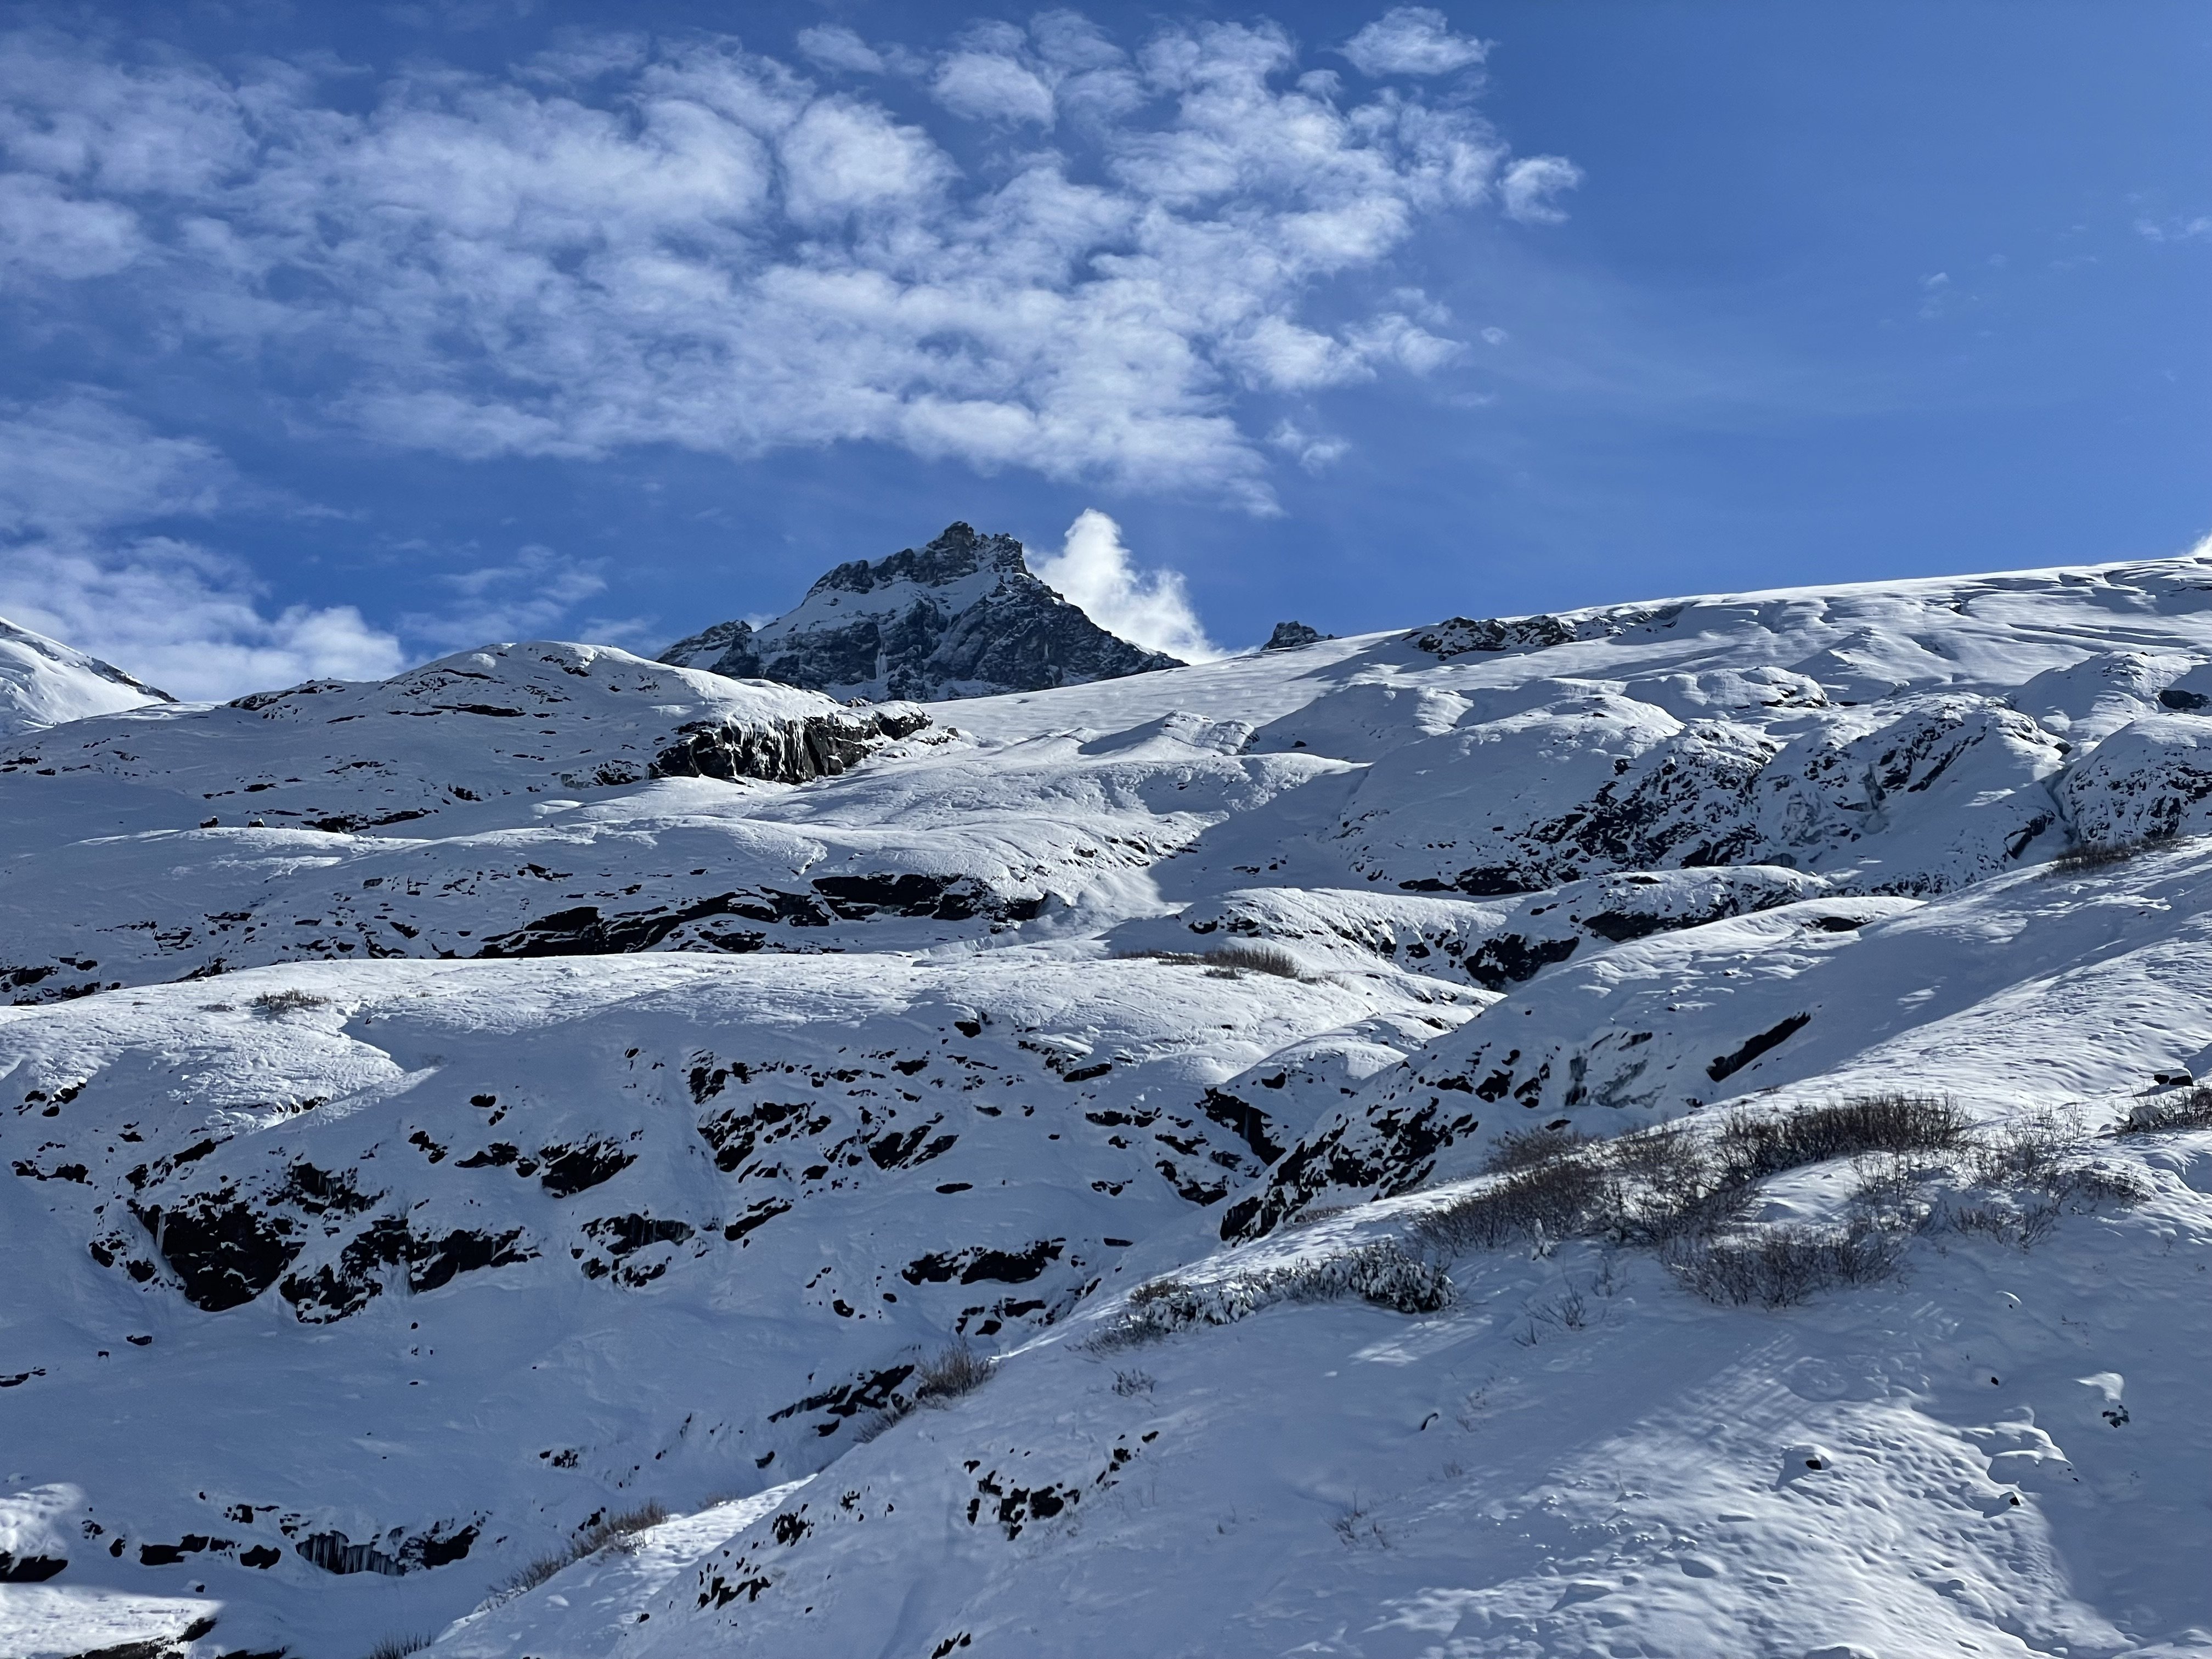
Trip: (Ira) Spring Mountain - East Ridge Trip Date: 01/25/2026 Trip Report: This long stretch of grim ski conditions had me casting about for other ideas in the North Cascades and Olympics (Ellinor, maybe I'll do a TR) these past few weeks. This past Sunday I cast off solo up the mountain loop highway from Darrington, aiming to get to the Lost Creek Ridge Trailhead. Surprisingly the MBSNF had a current report that you could drive all the way to the TH and indeed you could. Everything was in great shape, including to the turnoff for Pugh (not sure about the road up, however). 2wd would get you to the LCR trailhead at this time, which was somewhat surprising given the apocalyptic nature of this past December. Unsurprisingly, I was alone at the TH, and set off up the dry trail. It was generally in good shape, though with a good bit of blowdown in the first half mile or so. It had been 29 years since I'd hiked the trail and I had forgotten what large trees there are in this section of the Sauk. Of course, when they fall down, I wish they were a little smaller: Within a couple hours I found myself at Bingley Gap (hitting snow about 500' below gap), where I put on crampons, got out the axe and started up the steepening ridge. Views of Pugh and Sloan teased through the trees as I gained elevation: Within a few hundred feet above the Gap, the east ridge of Spring Mountain narrowed and steepened dramatically and I found myself doing some spicy scrambling in crampons sans helmet. Oops. (Don't worry, I found an easier way down to the north and below the ridge itself). Soon, Dakobed came into view: And then, not long after that, the summit of Spring, which was smaller and more noble than I was expecting: The view from the summit was sublime (about 3.5 hours from the car), extending across Sloan and the Monte Cristo peaks to the Olympics and up north past Darrington into the heart of the North Cascades. It was just me and a lone raven up above, croaking as it rode higher on the thermals. It was a beautiful day in the North Cascades. Out to Hall Peak and the Olympics: I stayed on the summit for about an hour (3 bars 5G service FYI), flinging digital poo at those that couldn't make it out with me that day. But I was a bit uncertain about the descent, since I didn't want to descend the way I had come up and left early enough to give myself some time to figure things out. Impressive views of the east side of Pugh slowed my pace on the way down. I had brought my new telephoto, which came in handy: Breccia Mountain: But I needn't have worried. Straightforward snow slopes (though steep-some facing in) were fairly easily followed from the summit all the way back to Bingley Gap. No sketchy scambling with crampons was required and within an hour I was on the trail bombing back to the car. I arrived early enough for a stop at the NF Sauk Falls (highly recommended), where a nice view of Spring Mountain was also had (summit is that middle rock): I hadn't seen anyone all day, nor a car, since leaving the pavement a bit south of Darrington. This was somewhat surprising to me, given that it was a beautiful Sunday, but then I remembered that there was a Seahawks game on. Too bad for those folks, I guess. I sat for a bit along the road as the sun sank west, admiring Whitechuck Mountain. I never get tired of a good day in the North Cascades. Gear Notes: axe, crampons, helmet Approach Notes: Lost Creek ridge trail to Bingley Gap. The east ridge can be followed, more or less to the summit from the Gap, though it can get spicy in places. An easier route drops a couple hundred feet on the north side of the Gap and then up and left through avy paths to the summit.

 6 points
 -
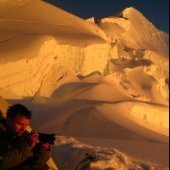
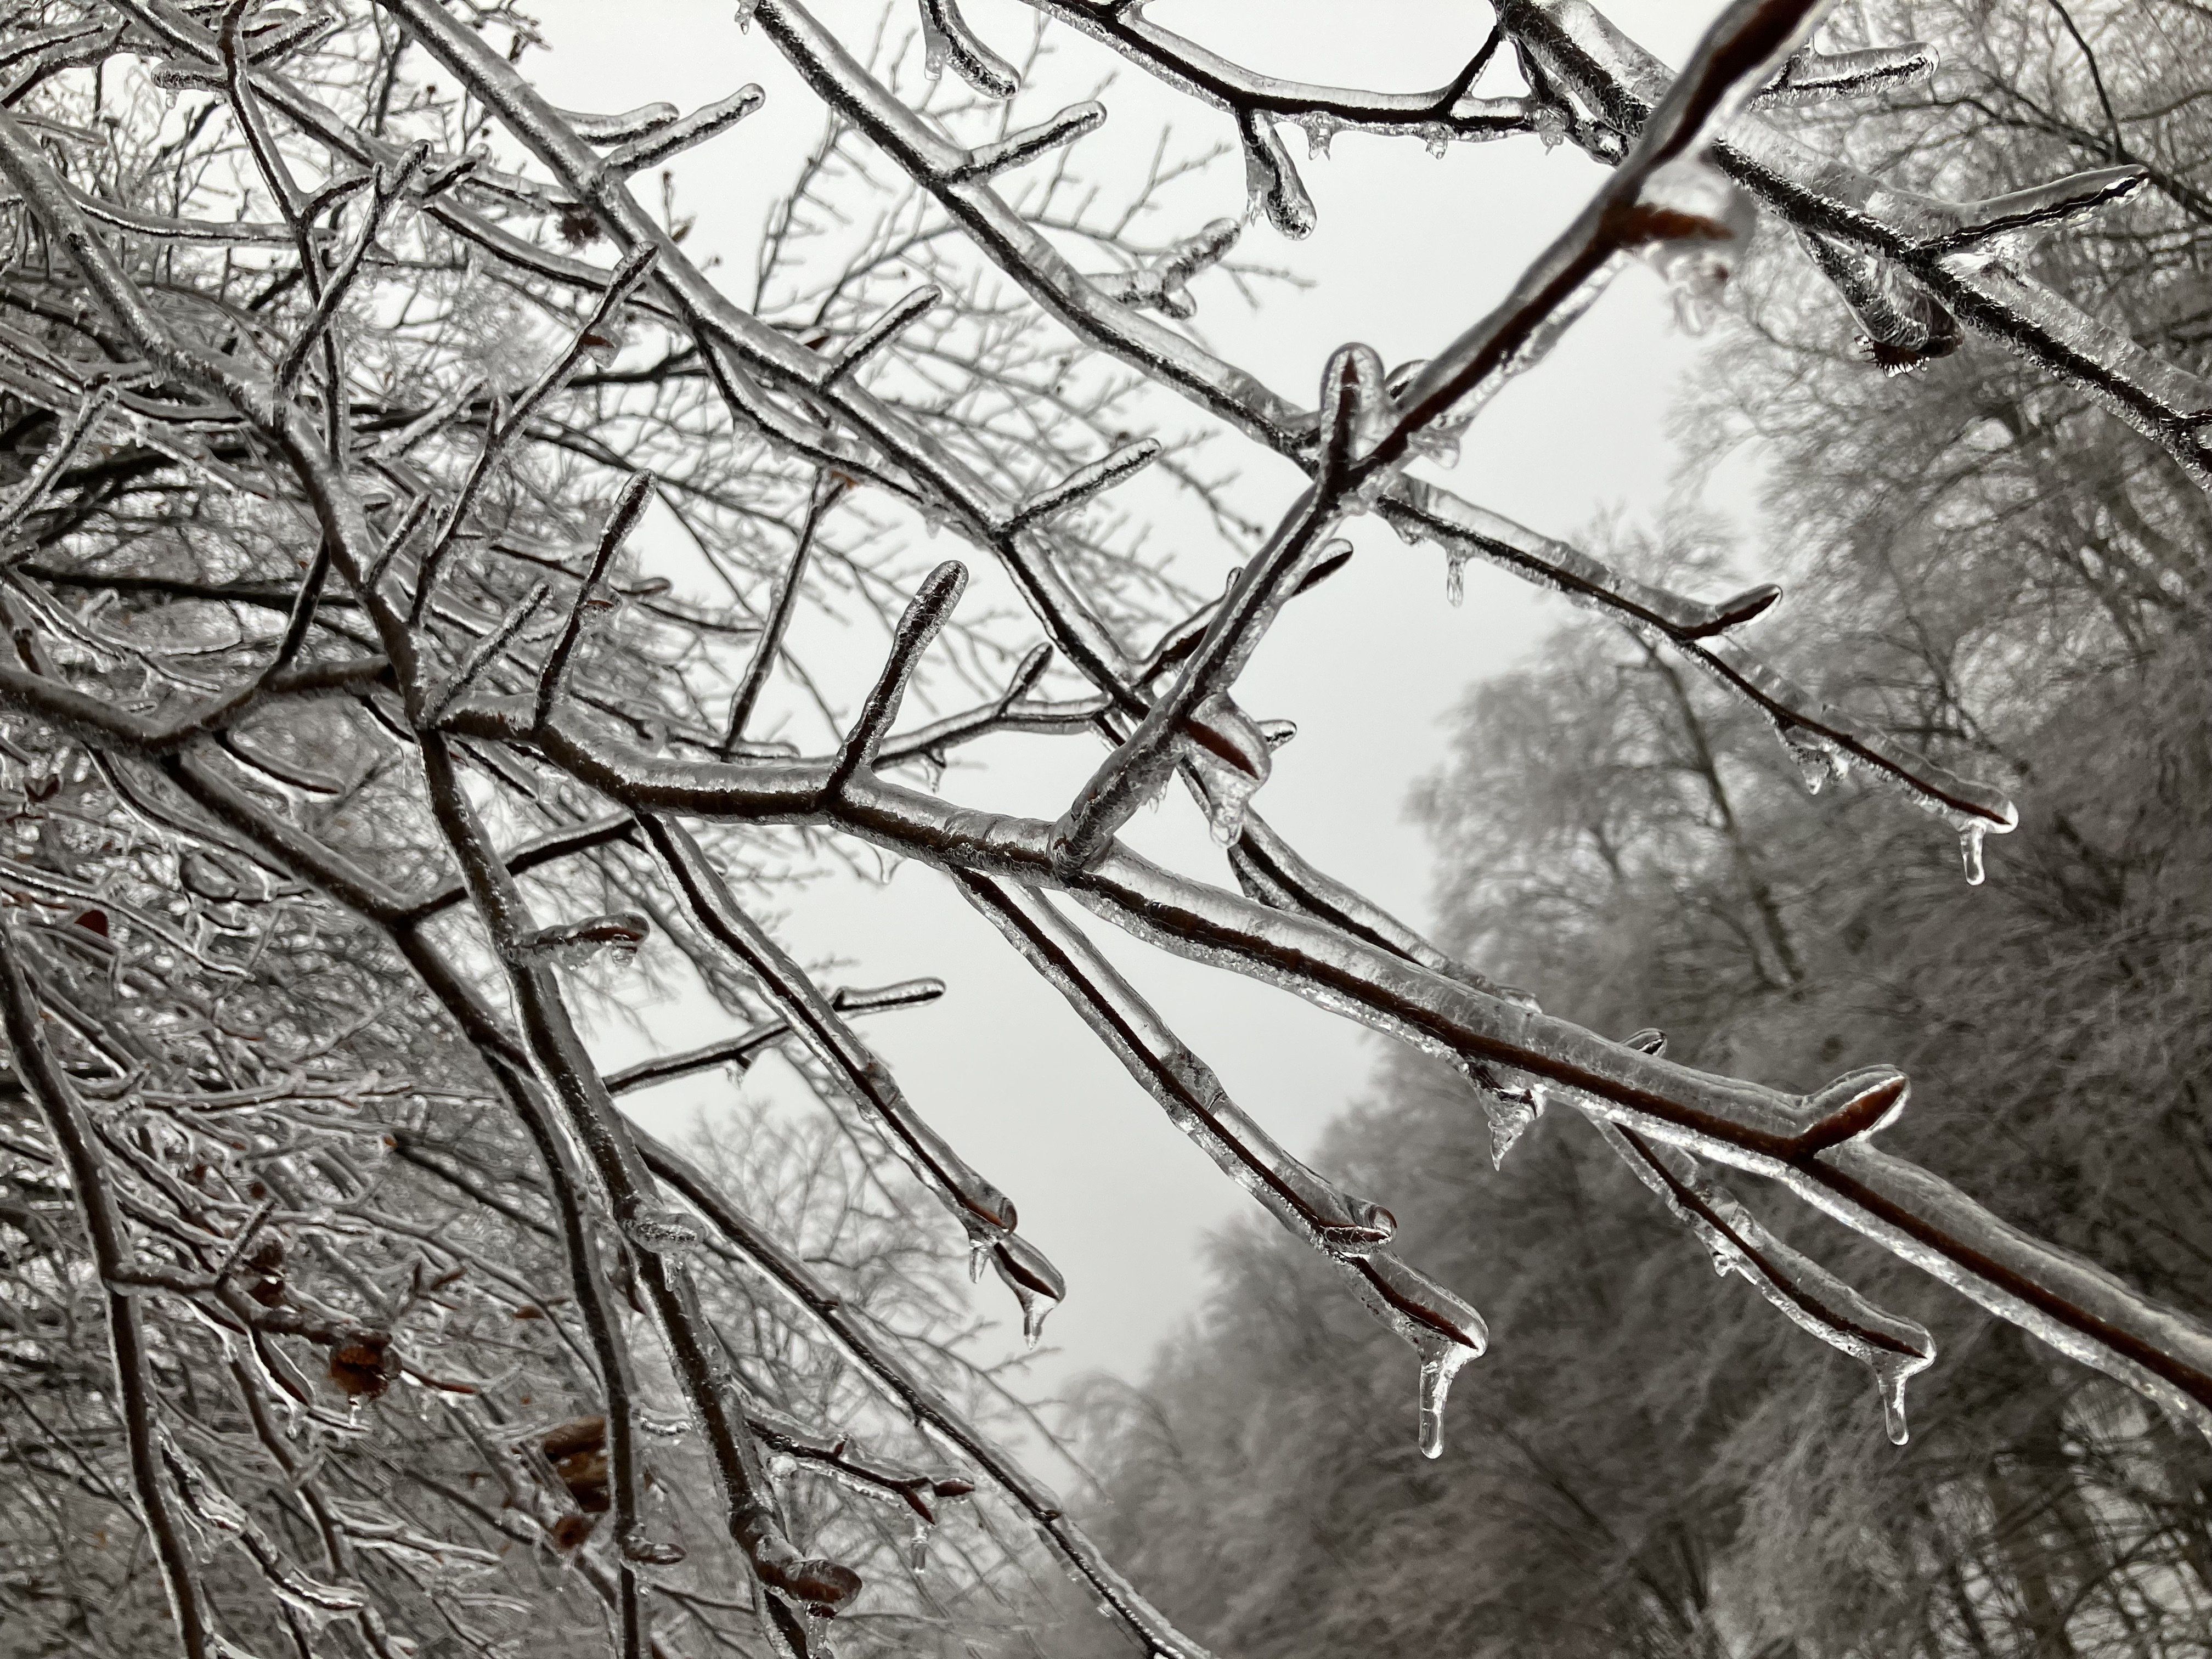
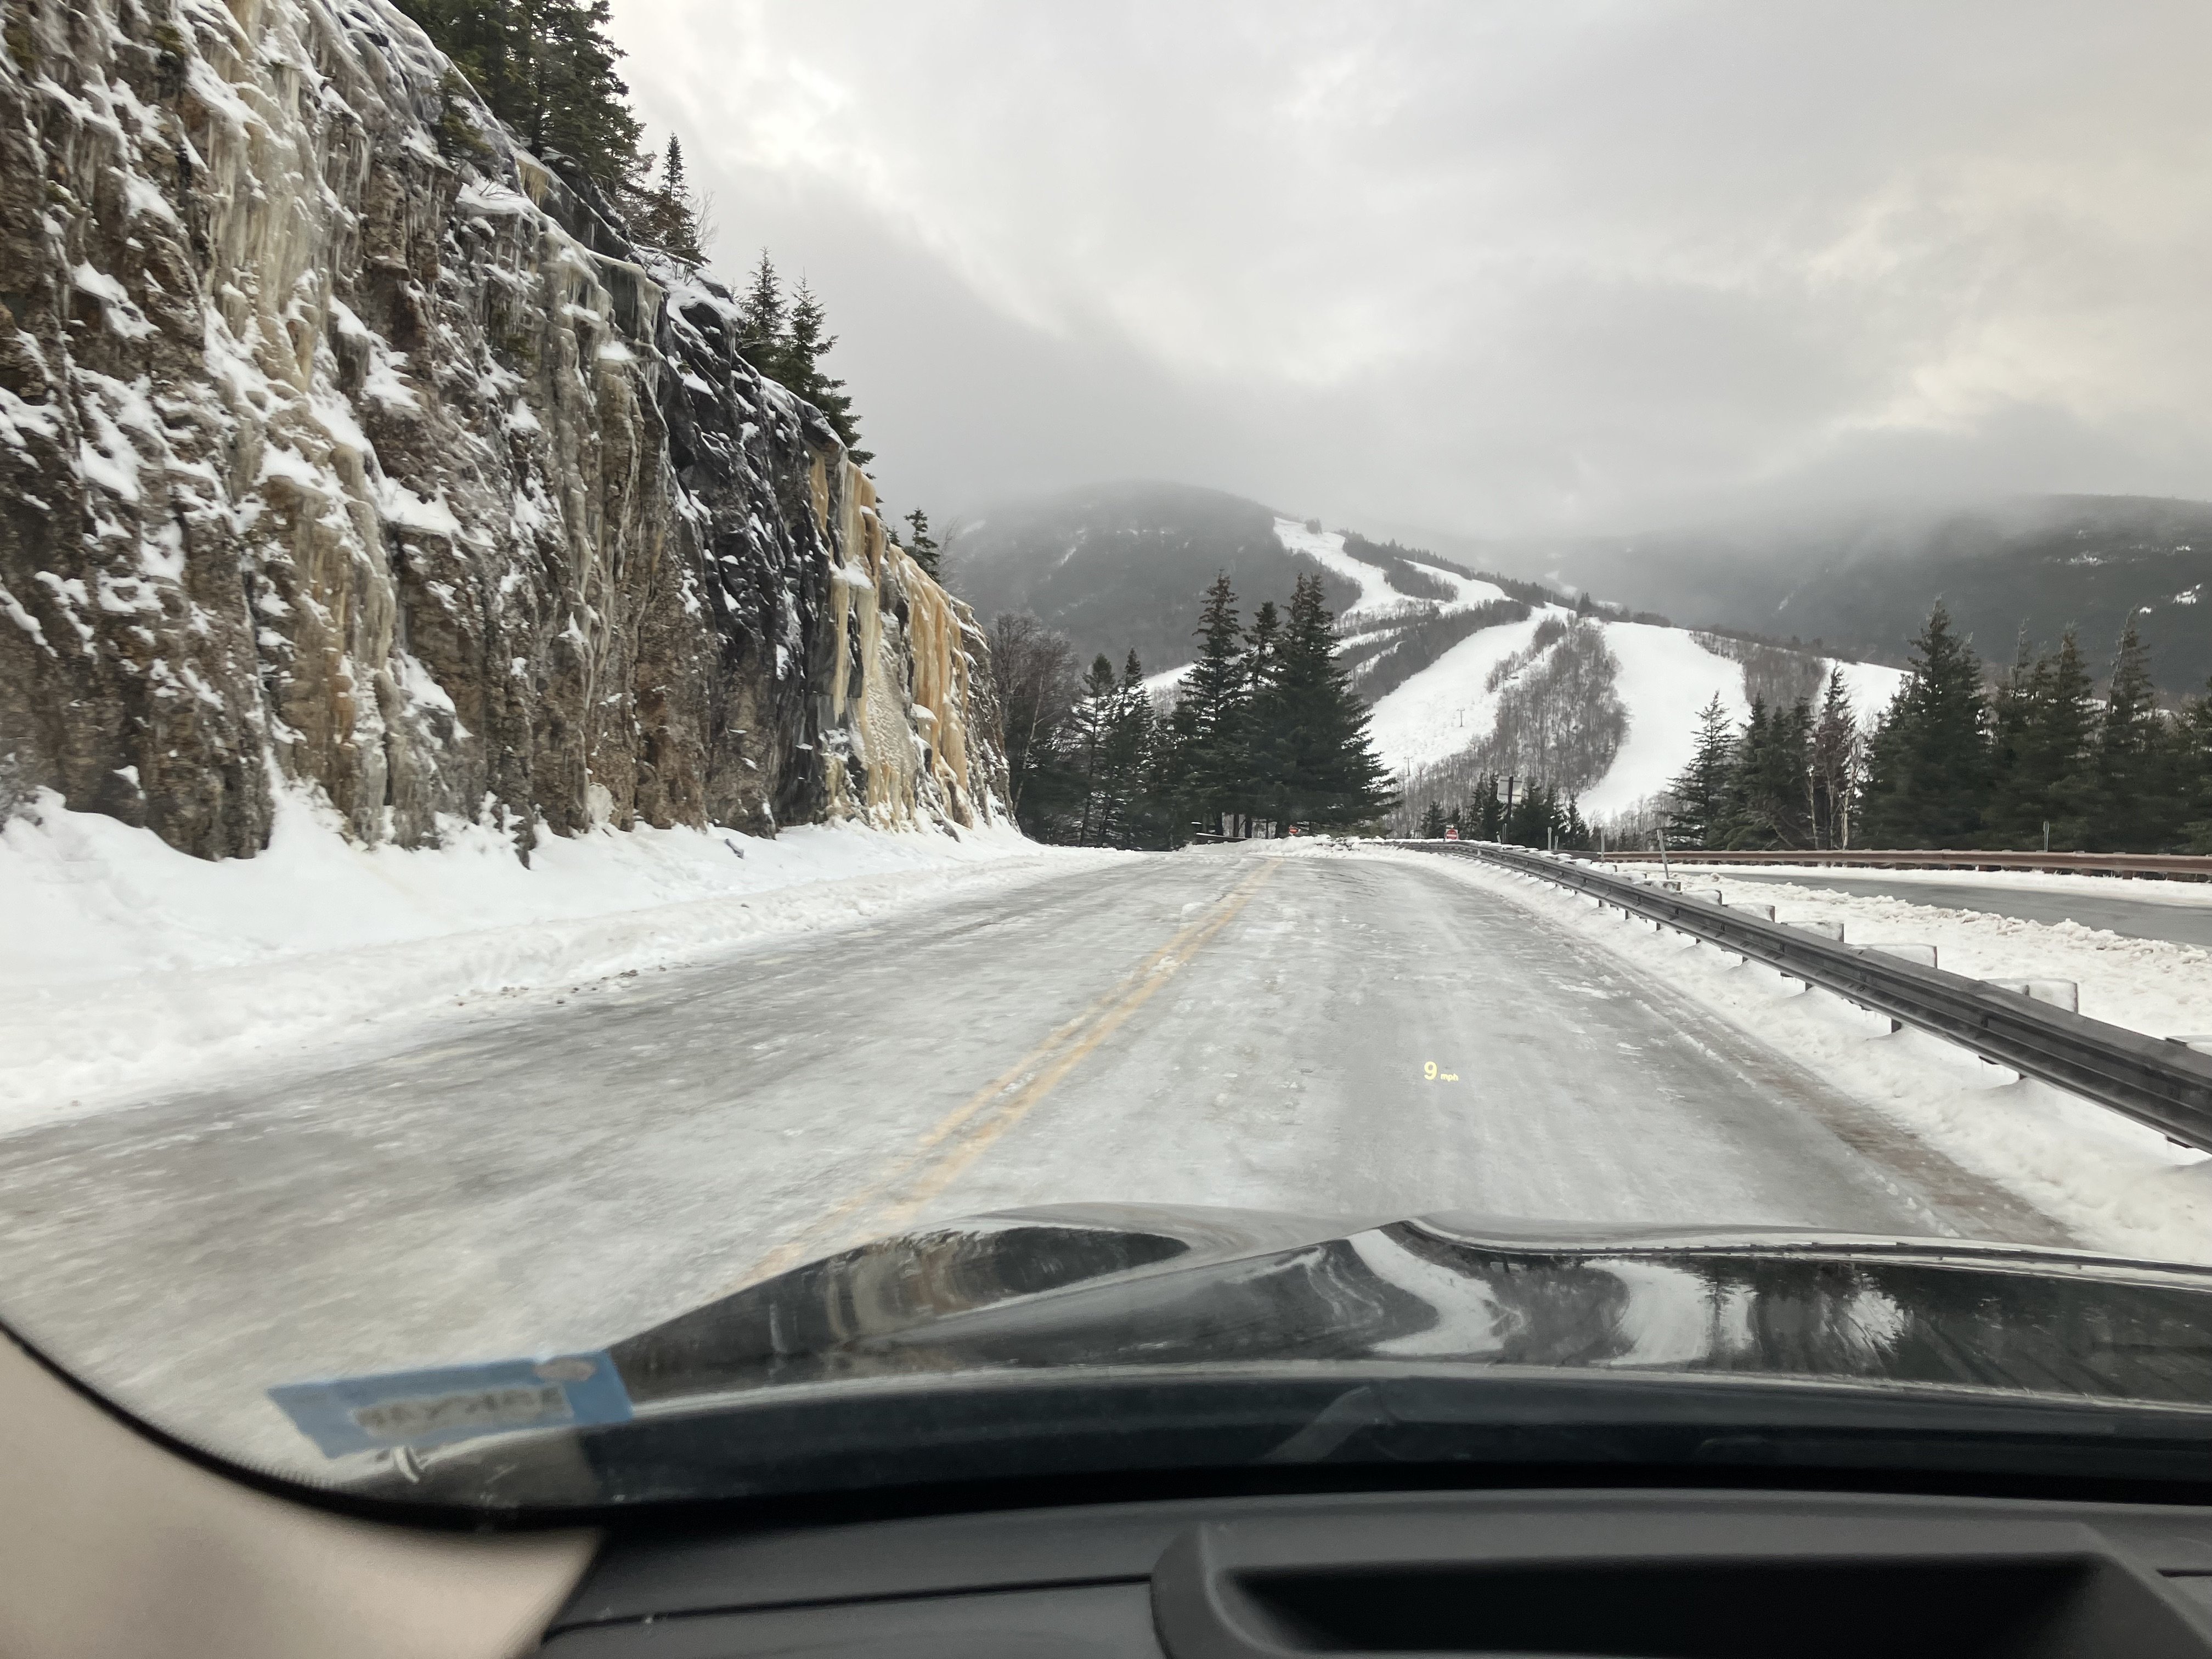
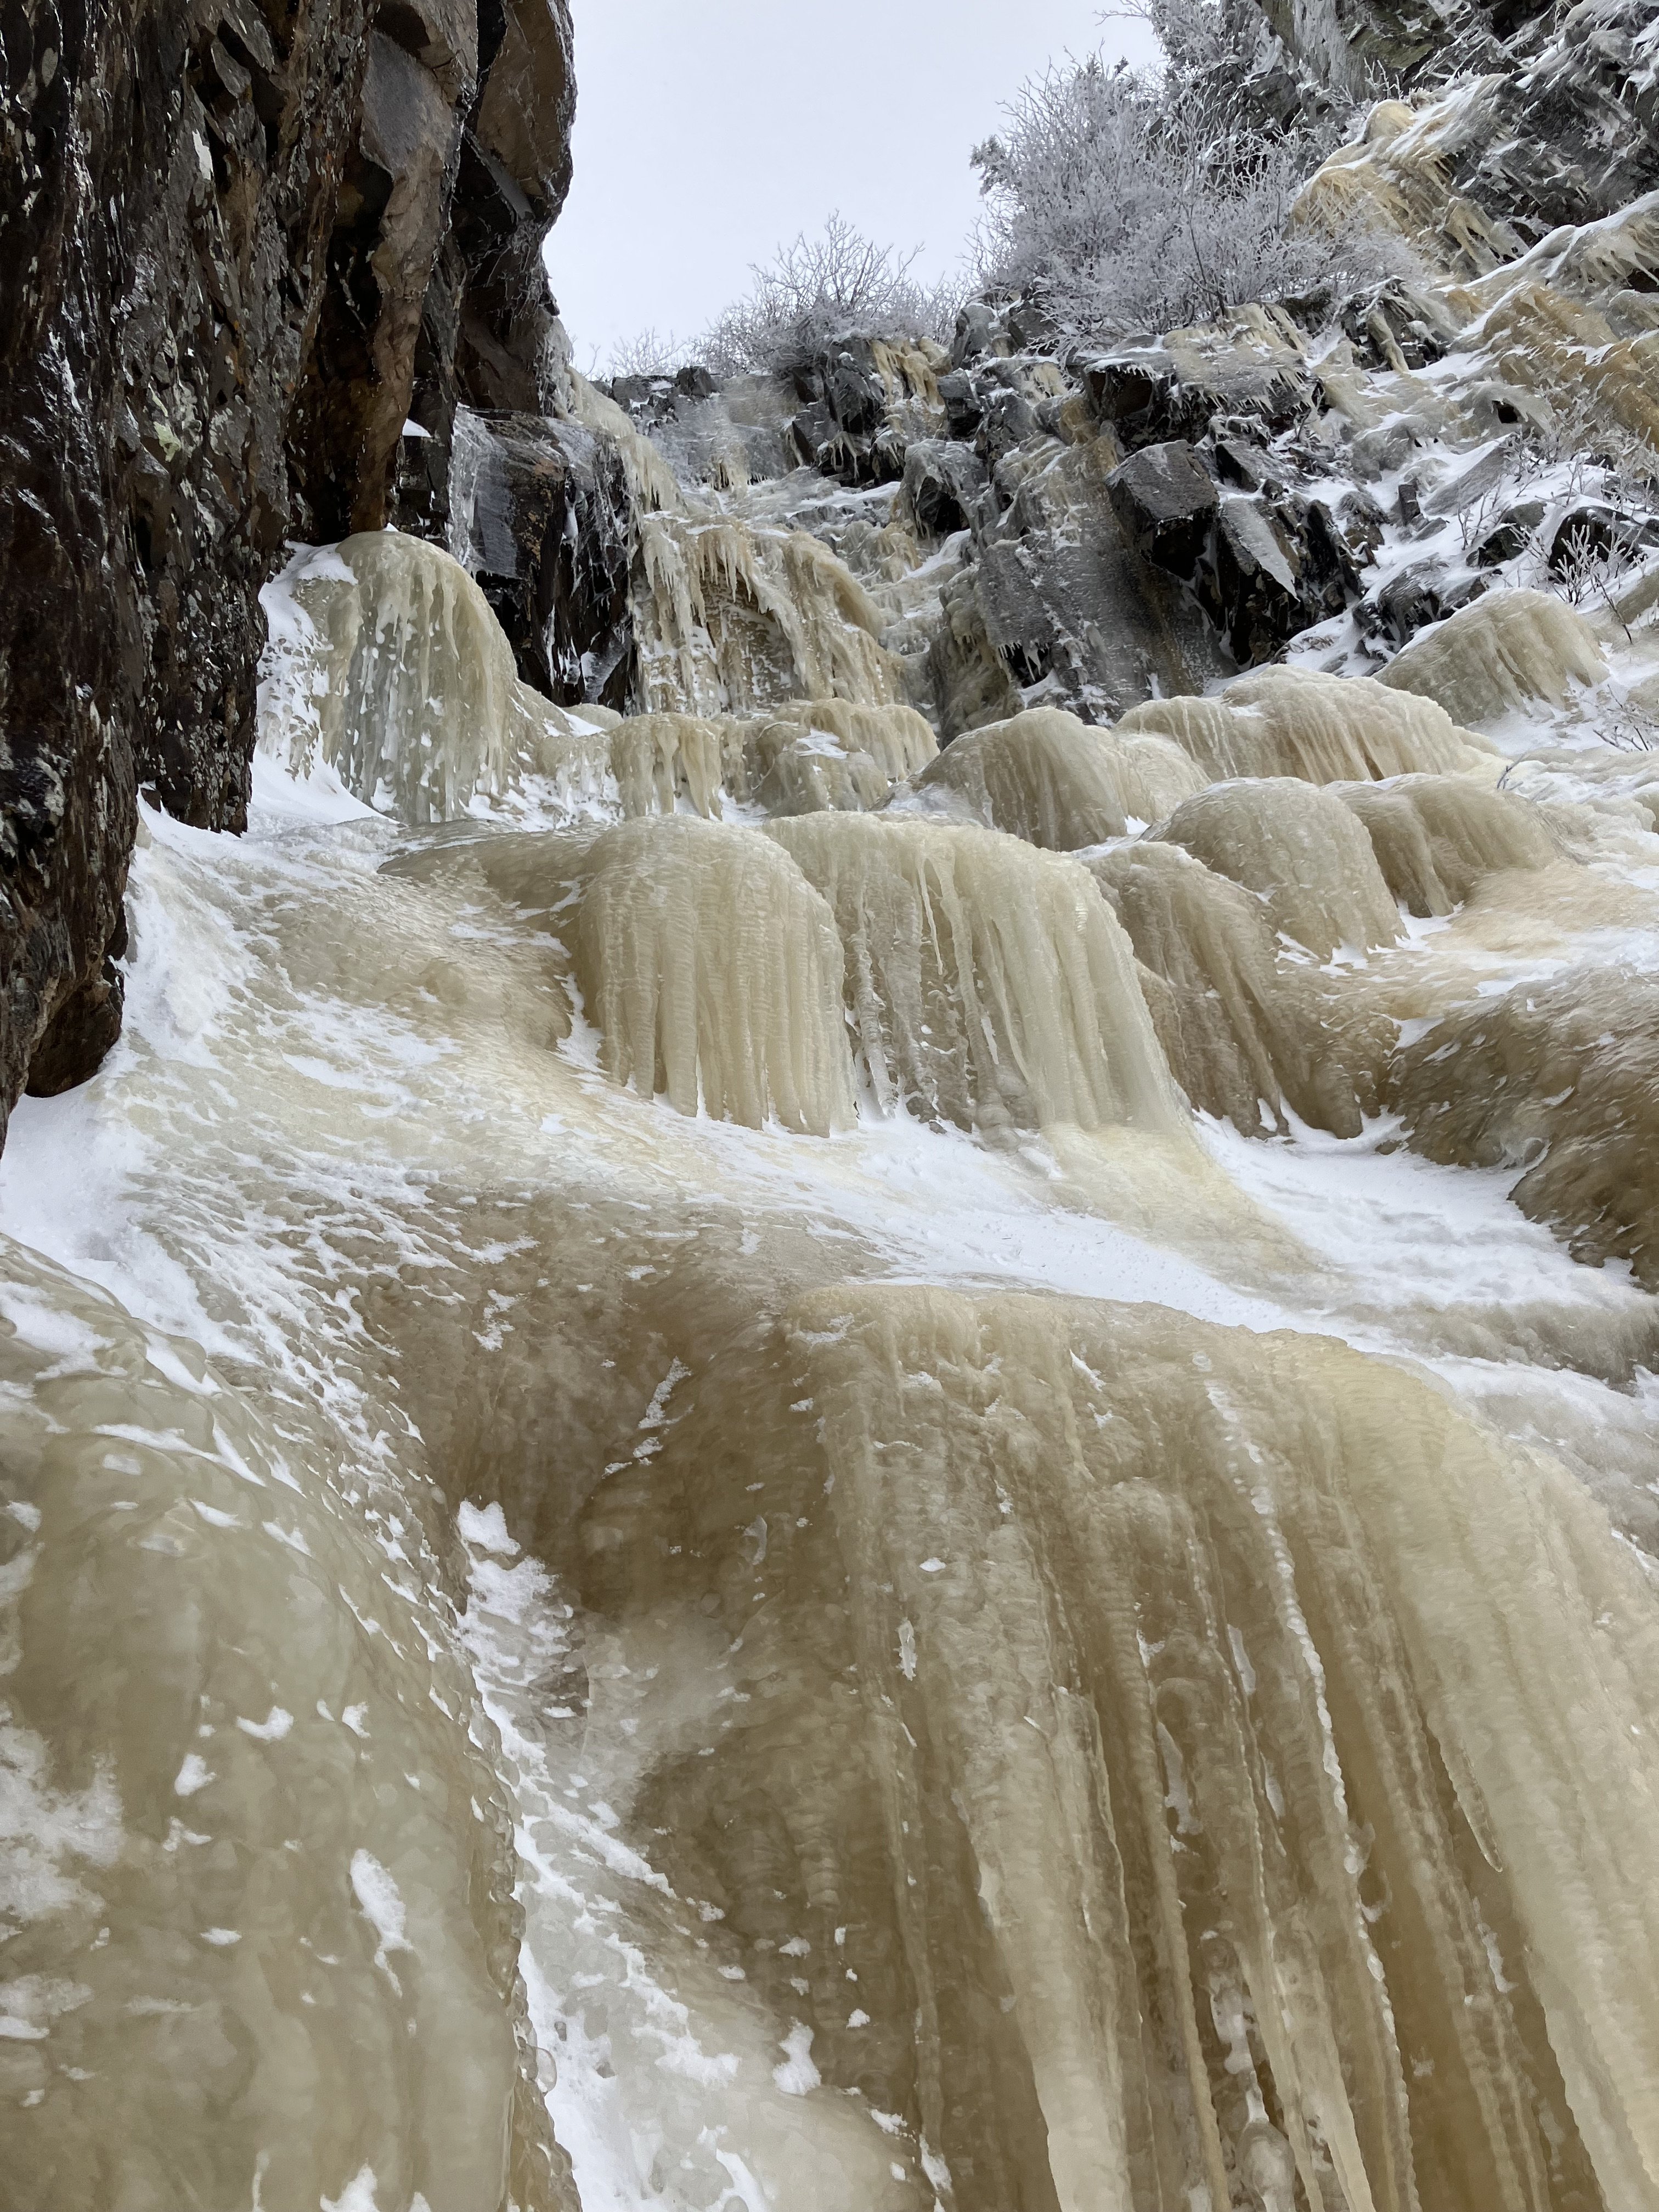
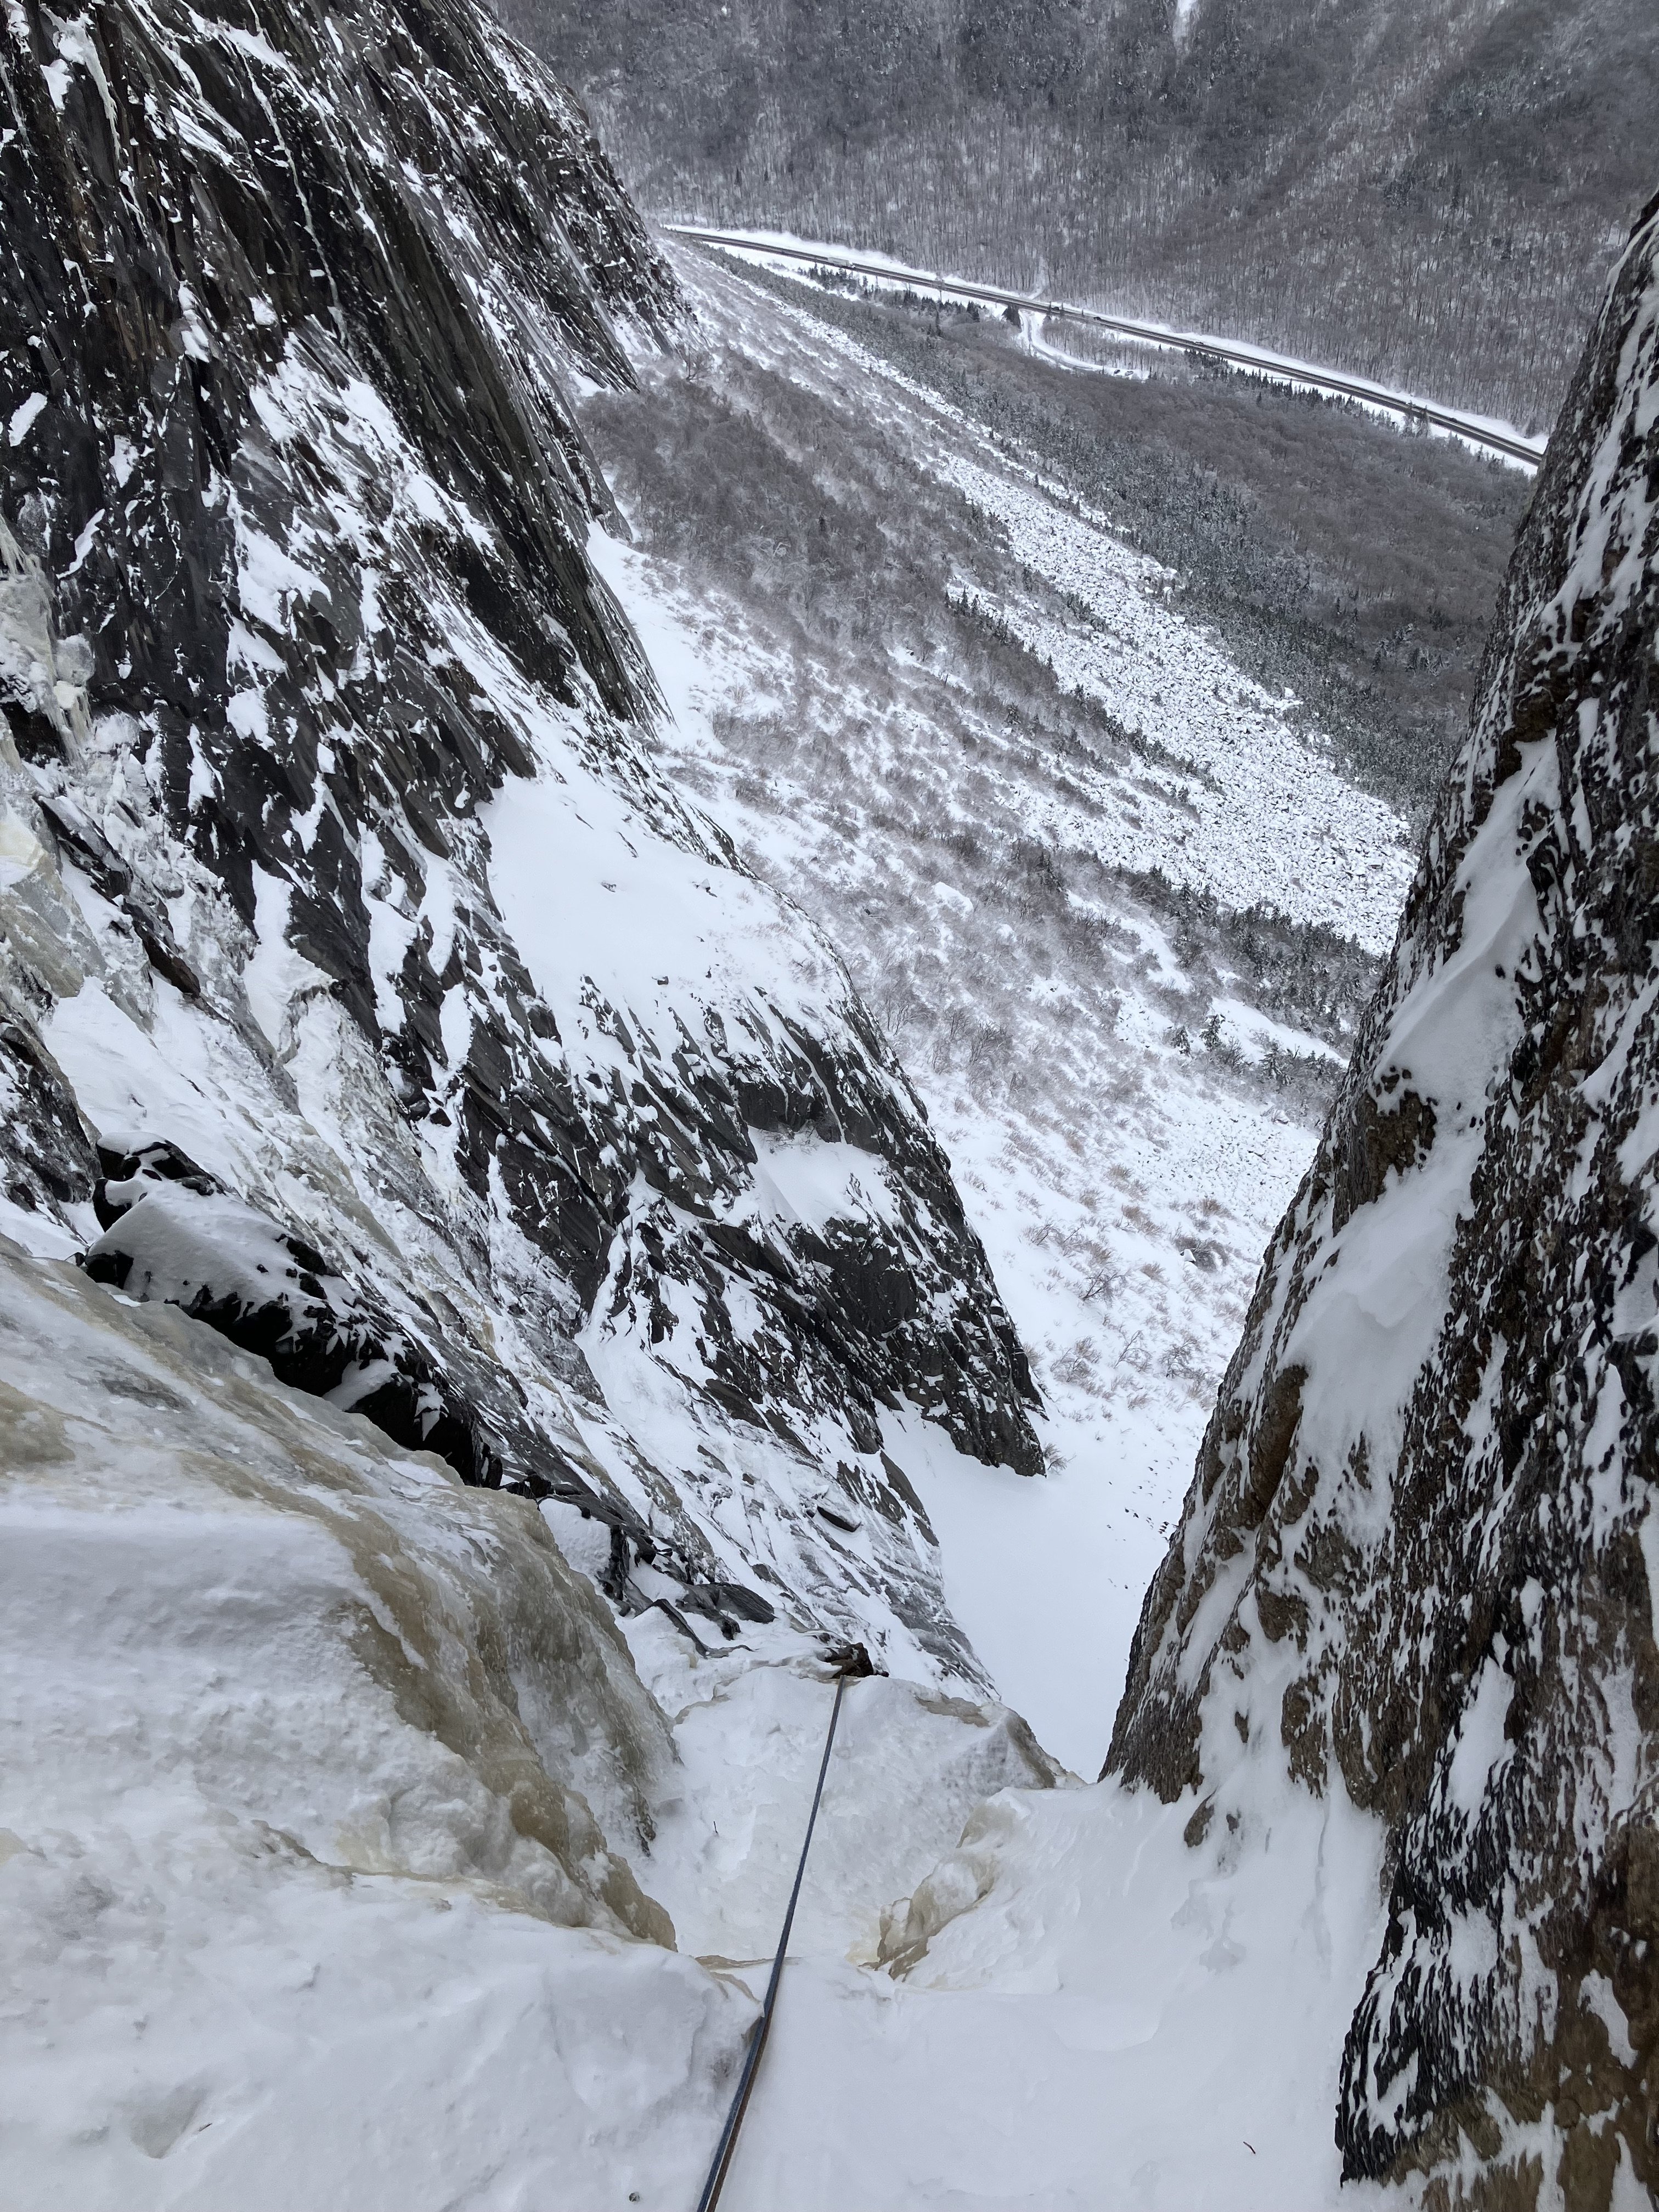
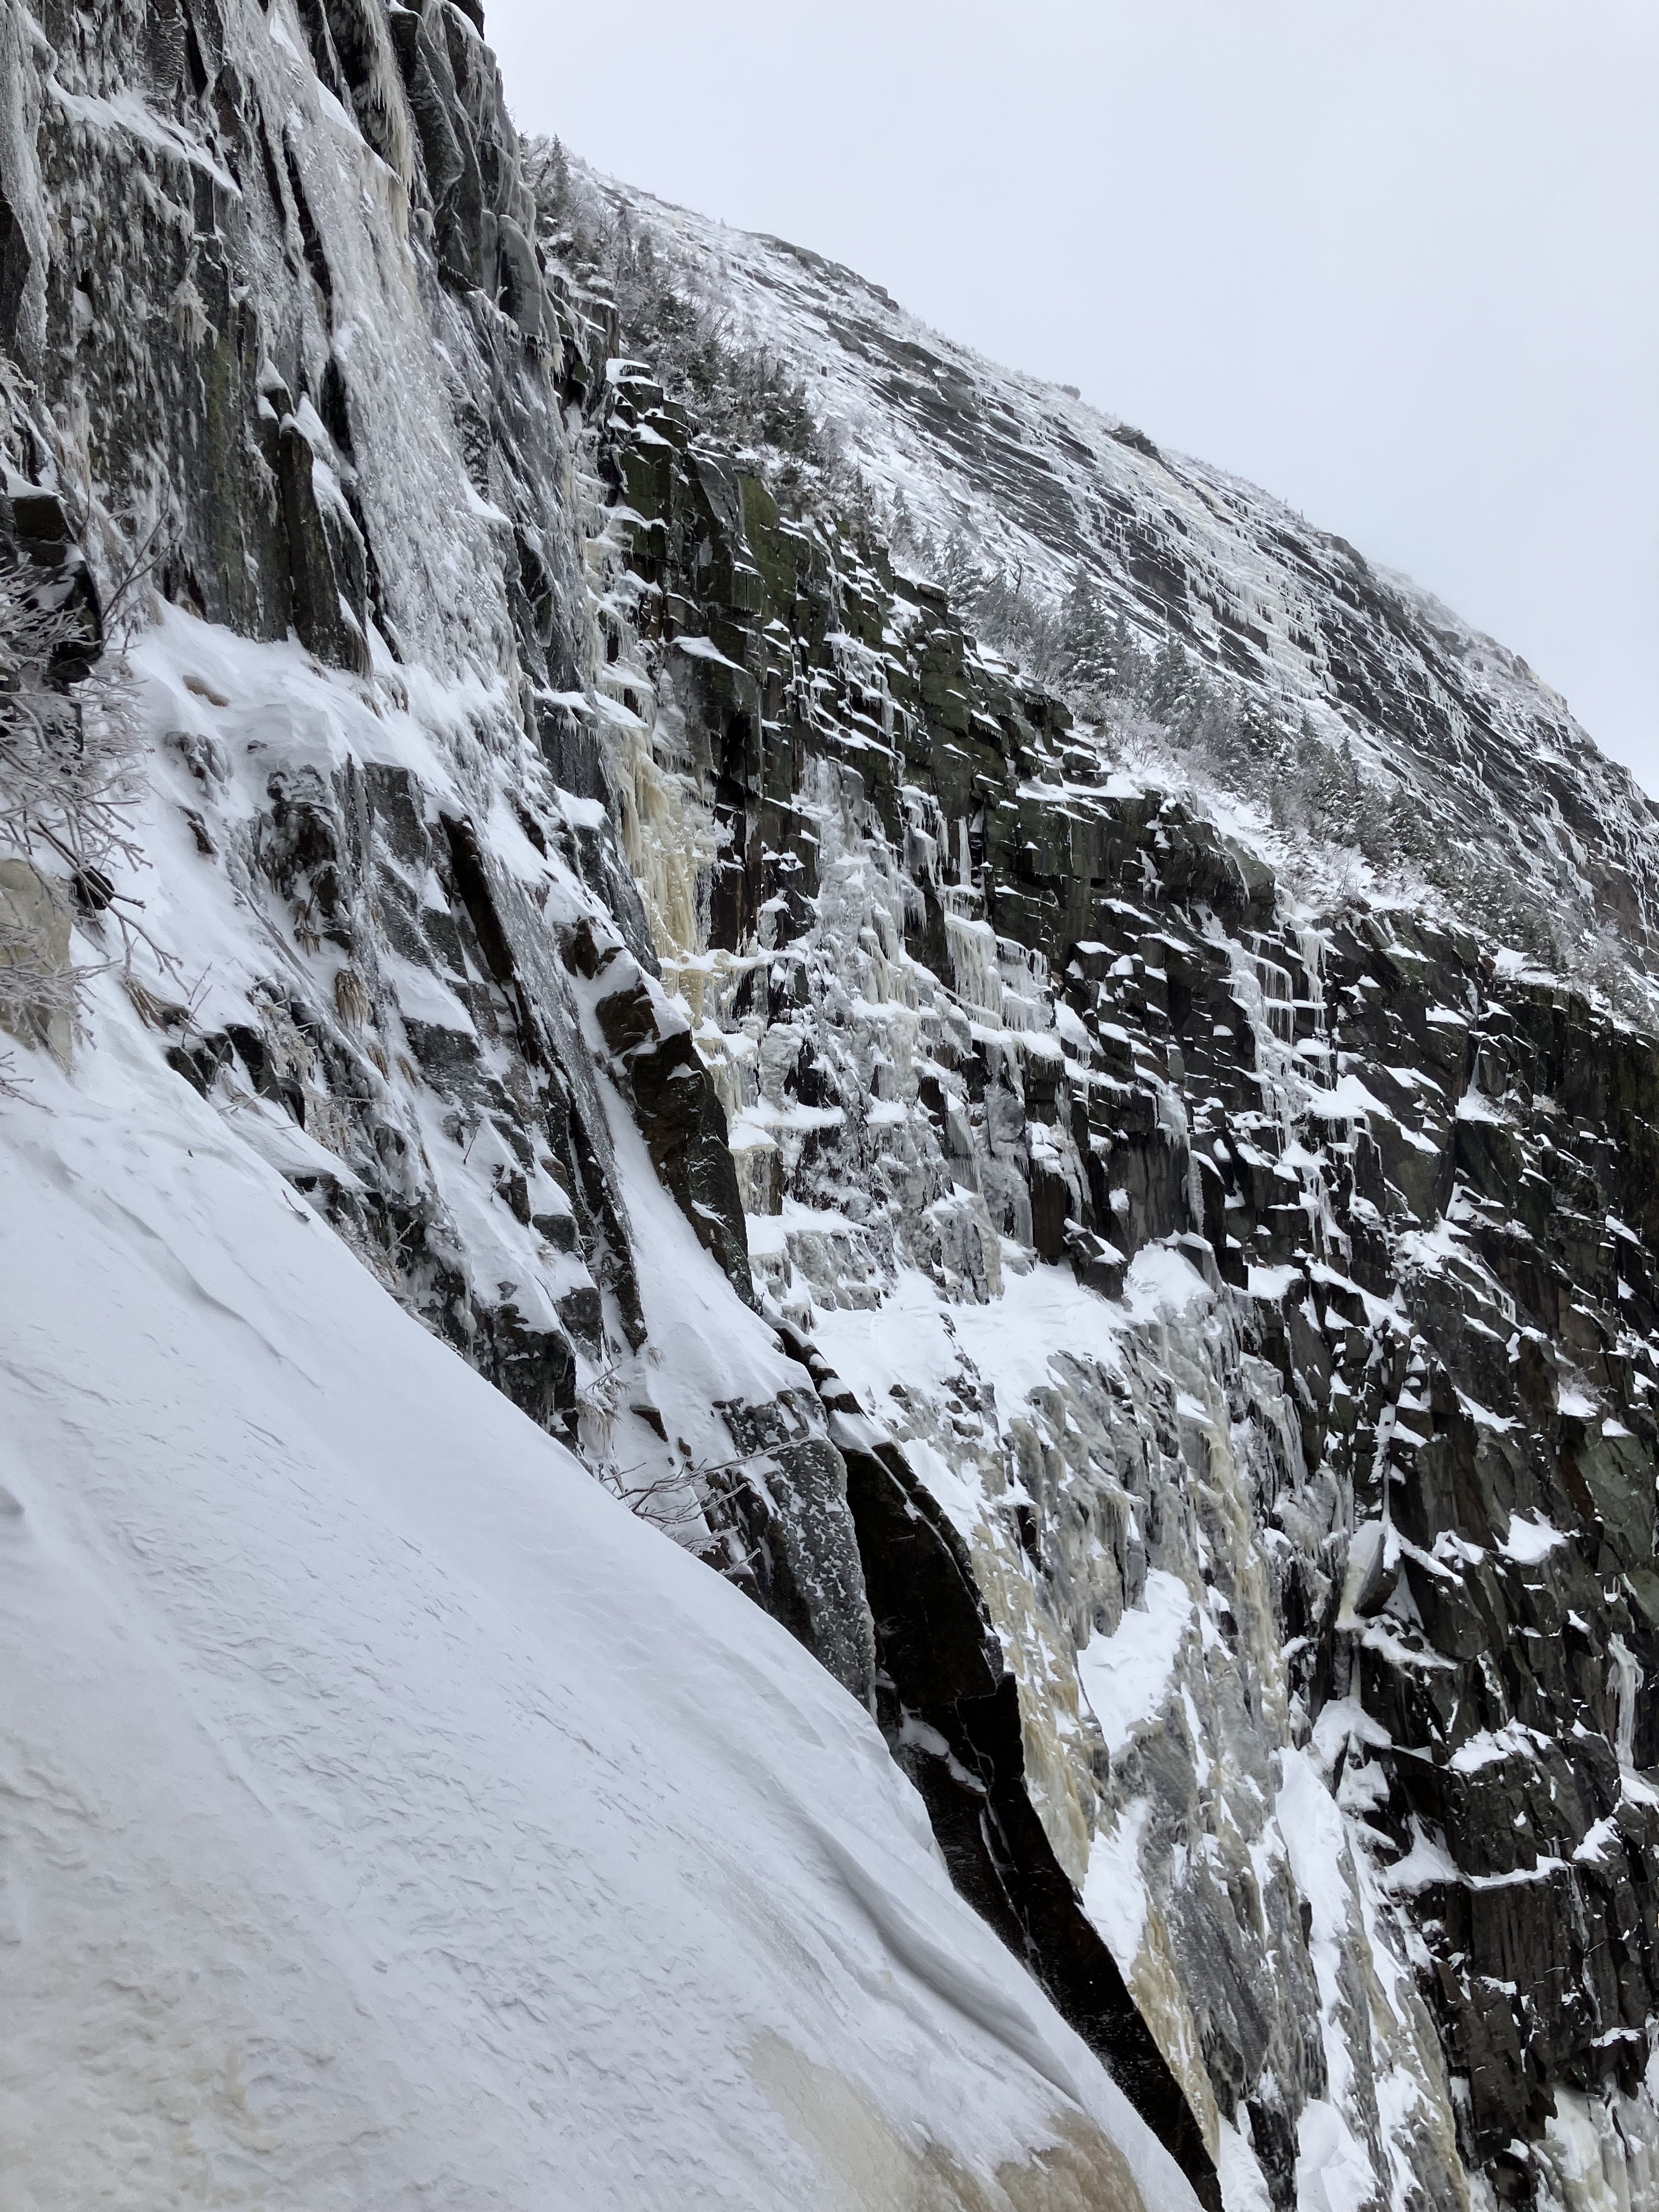
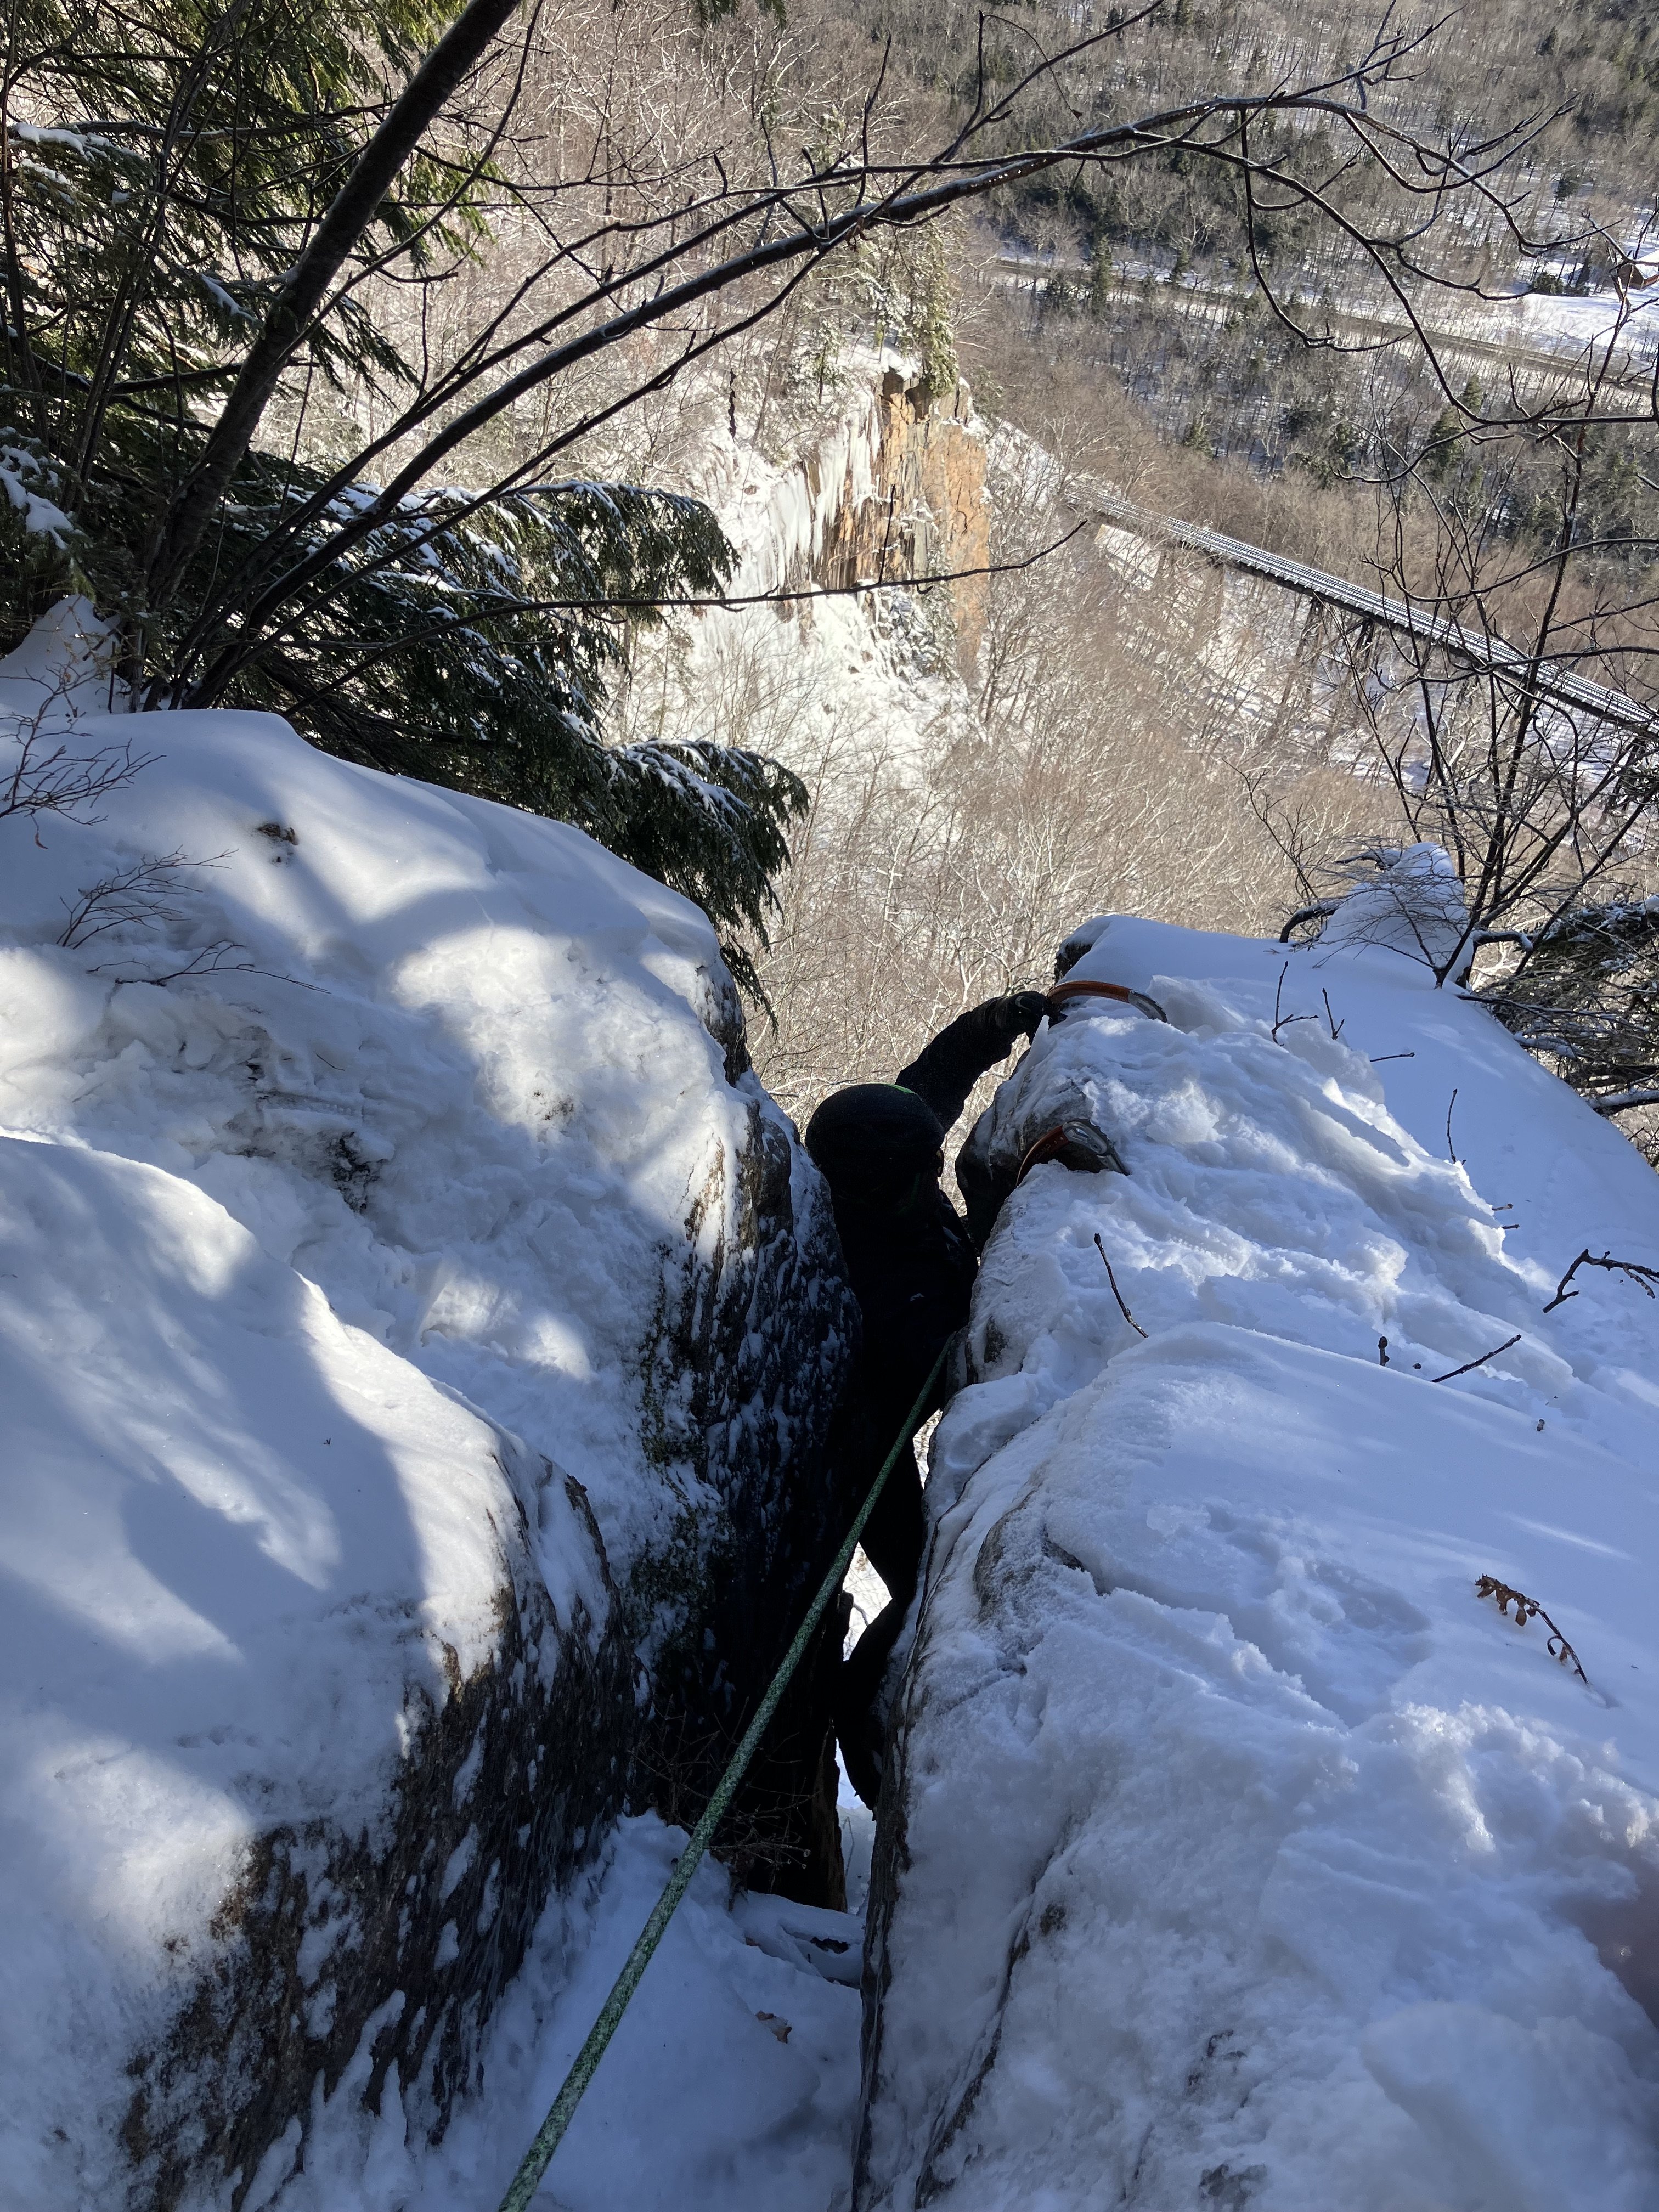
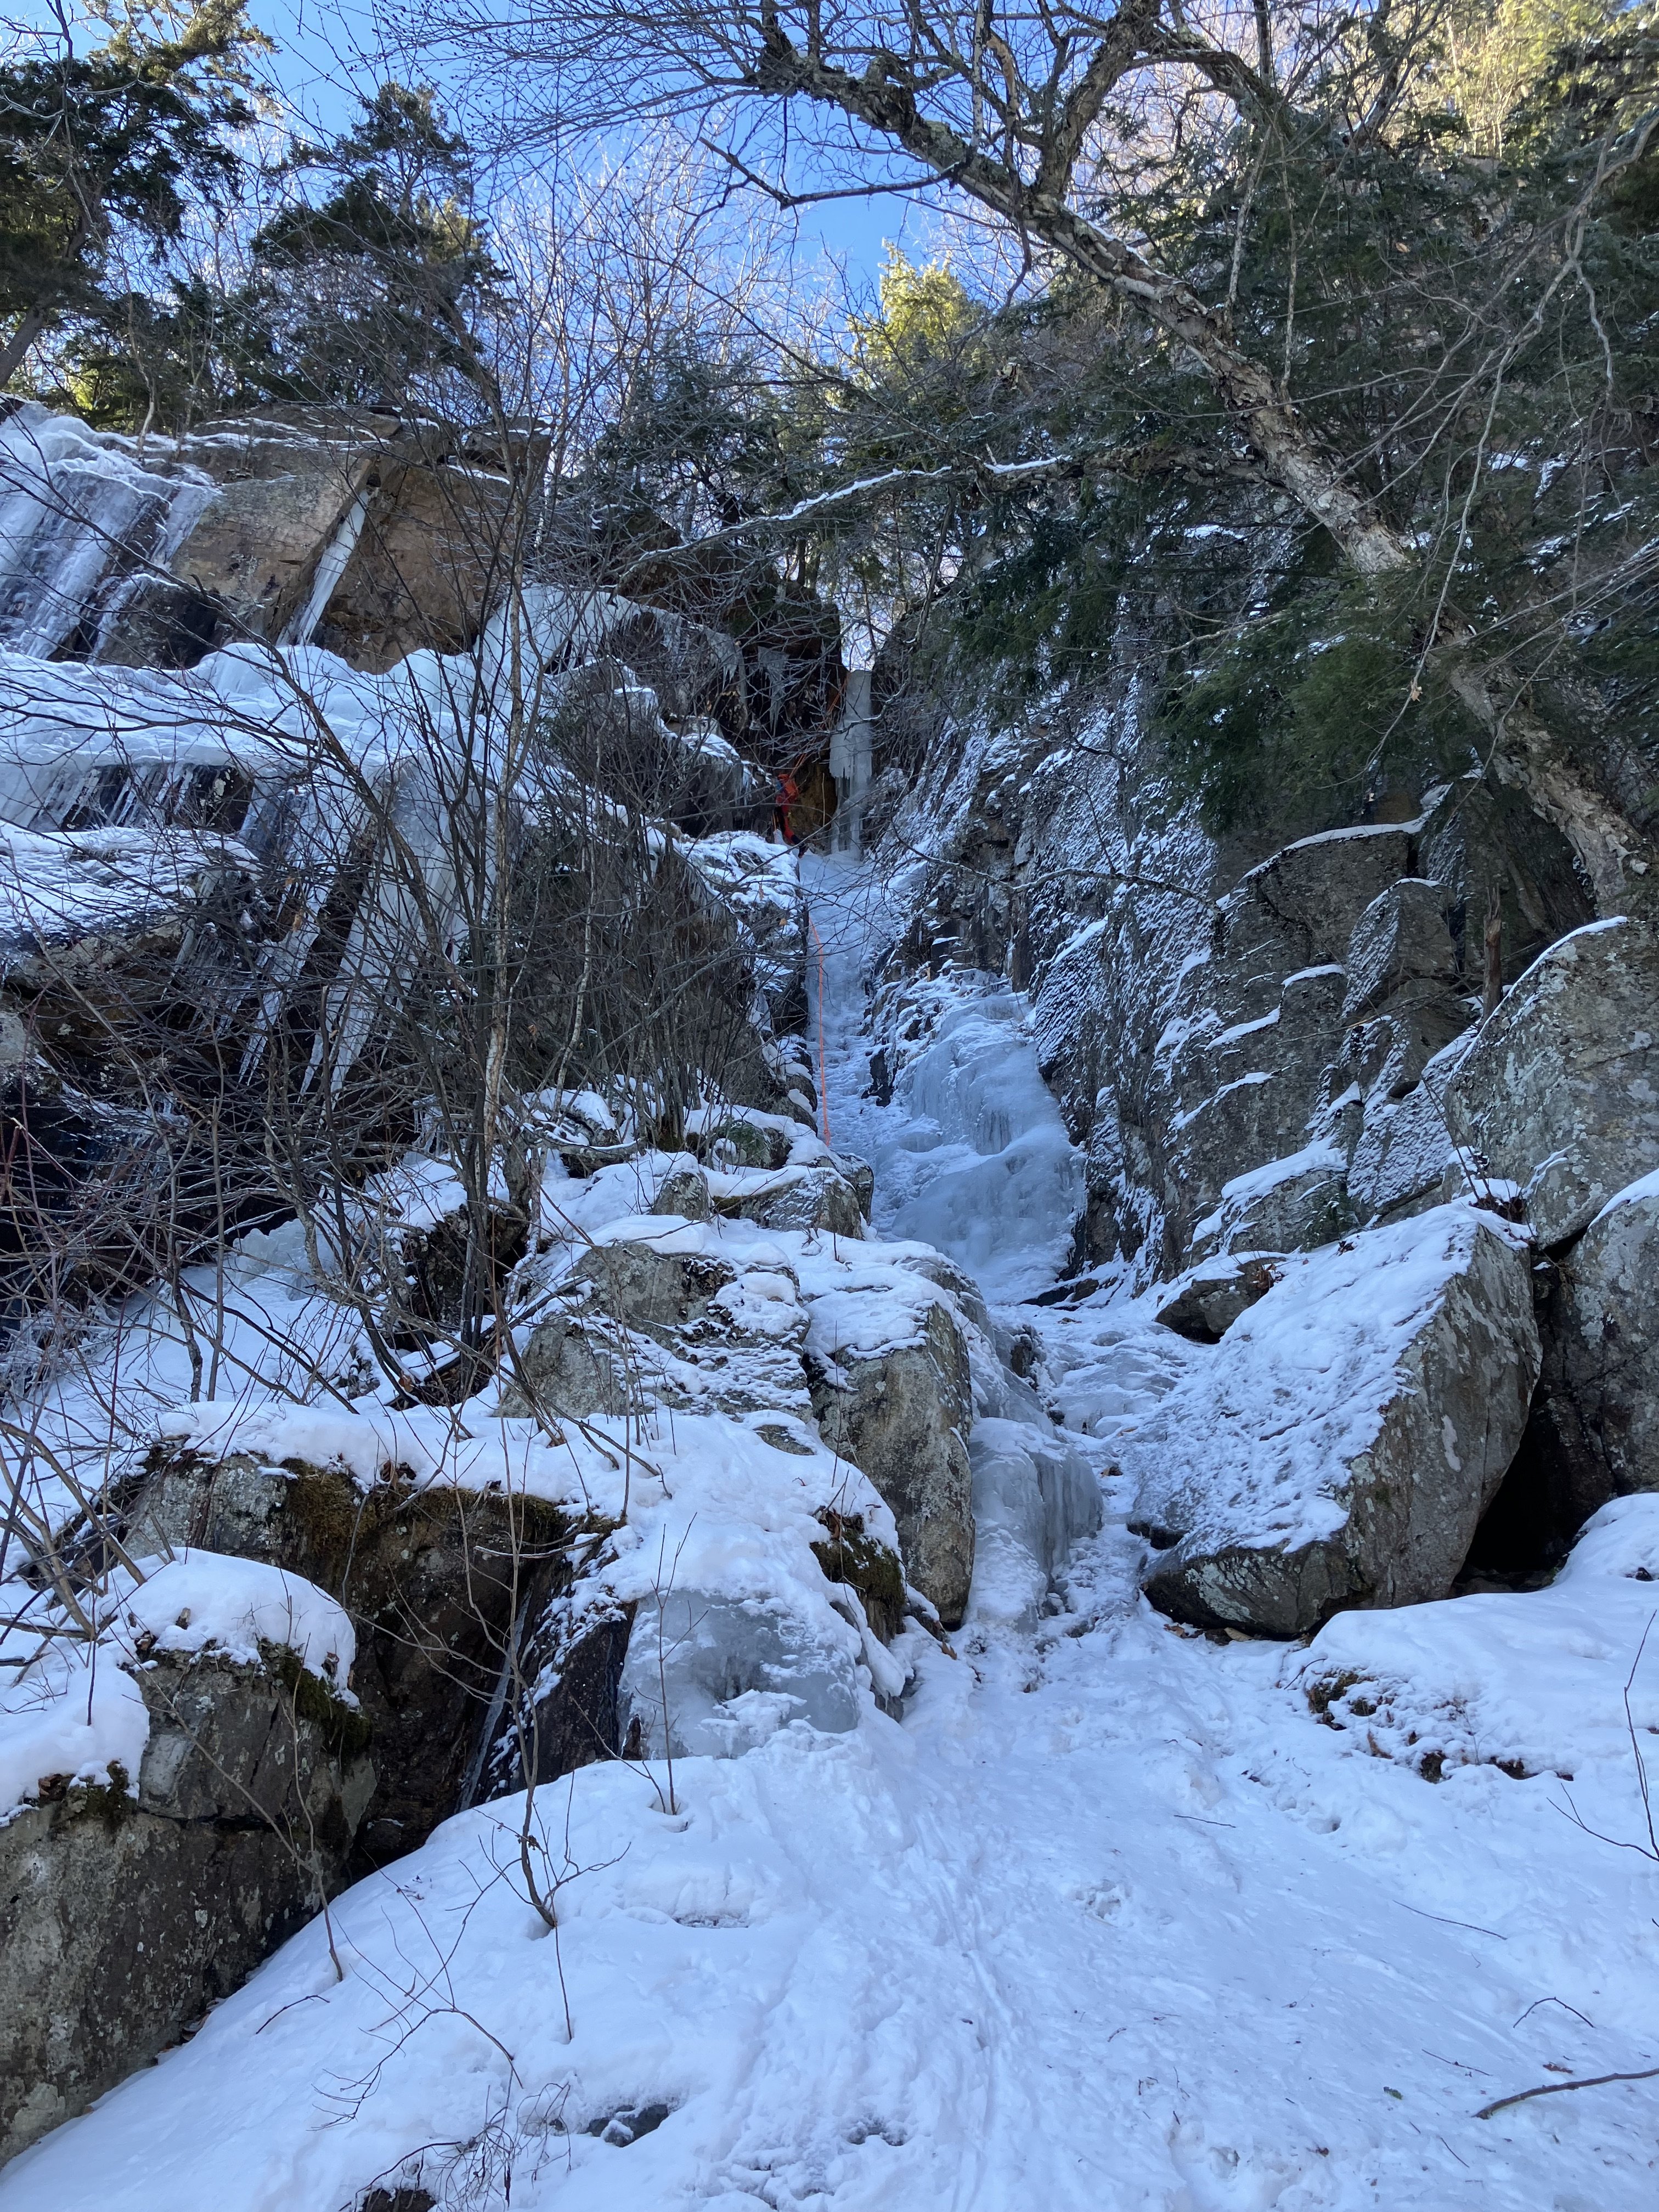
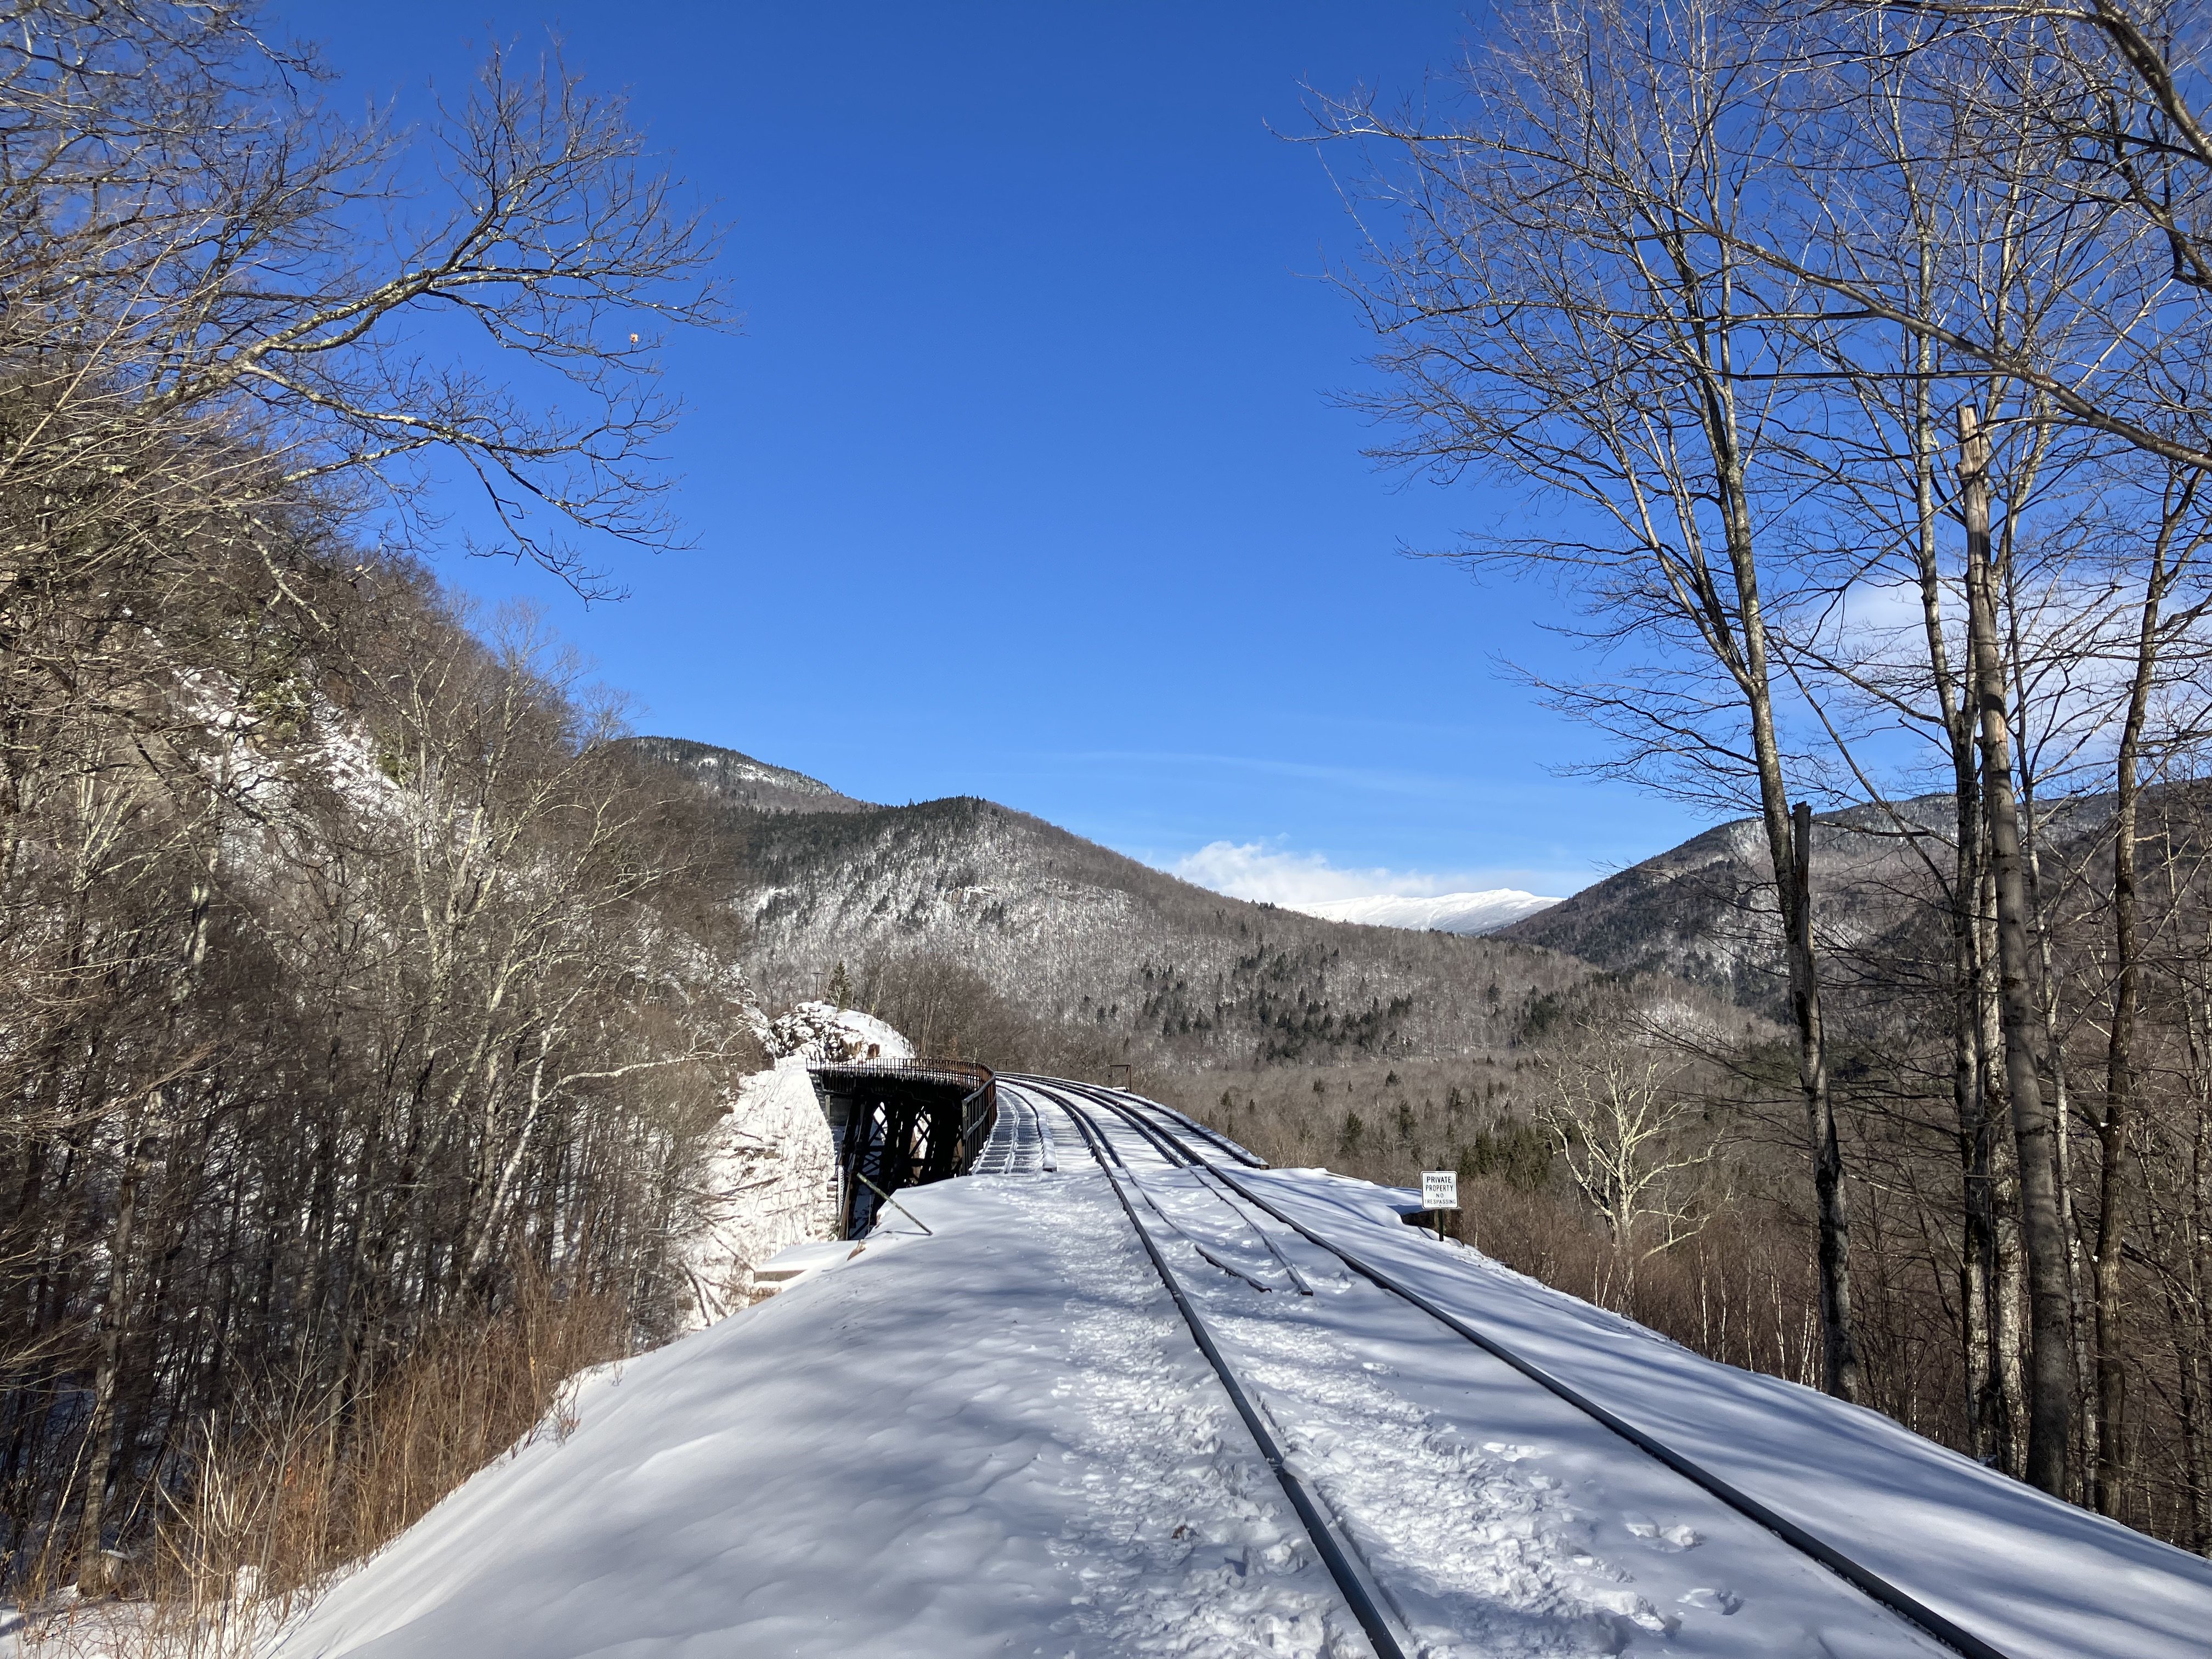
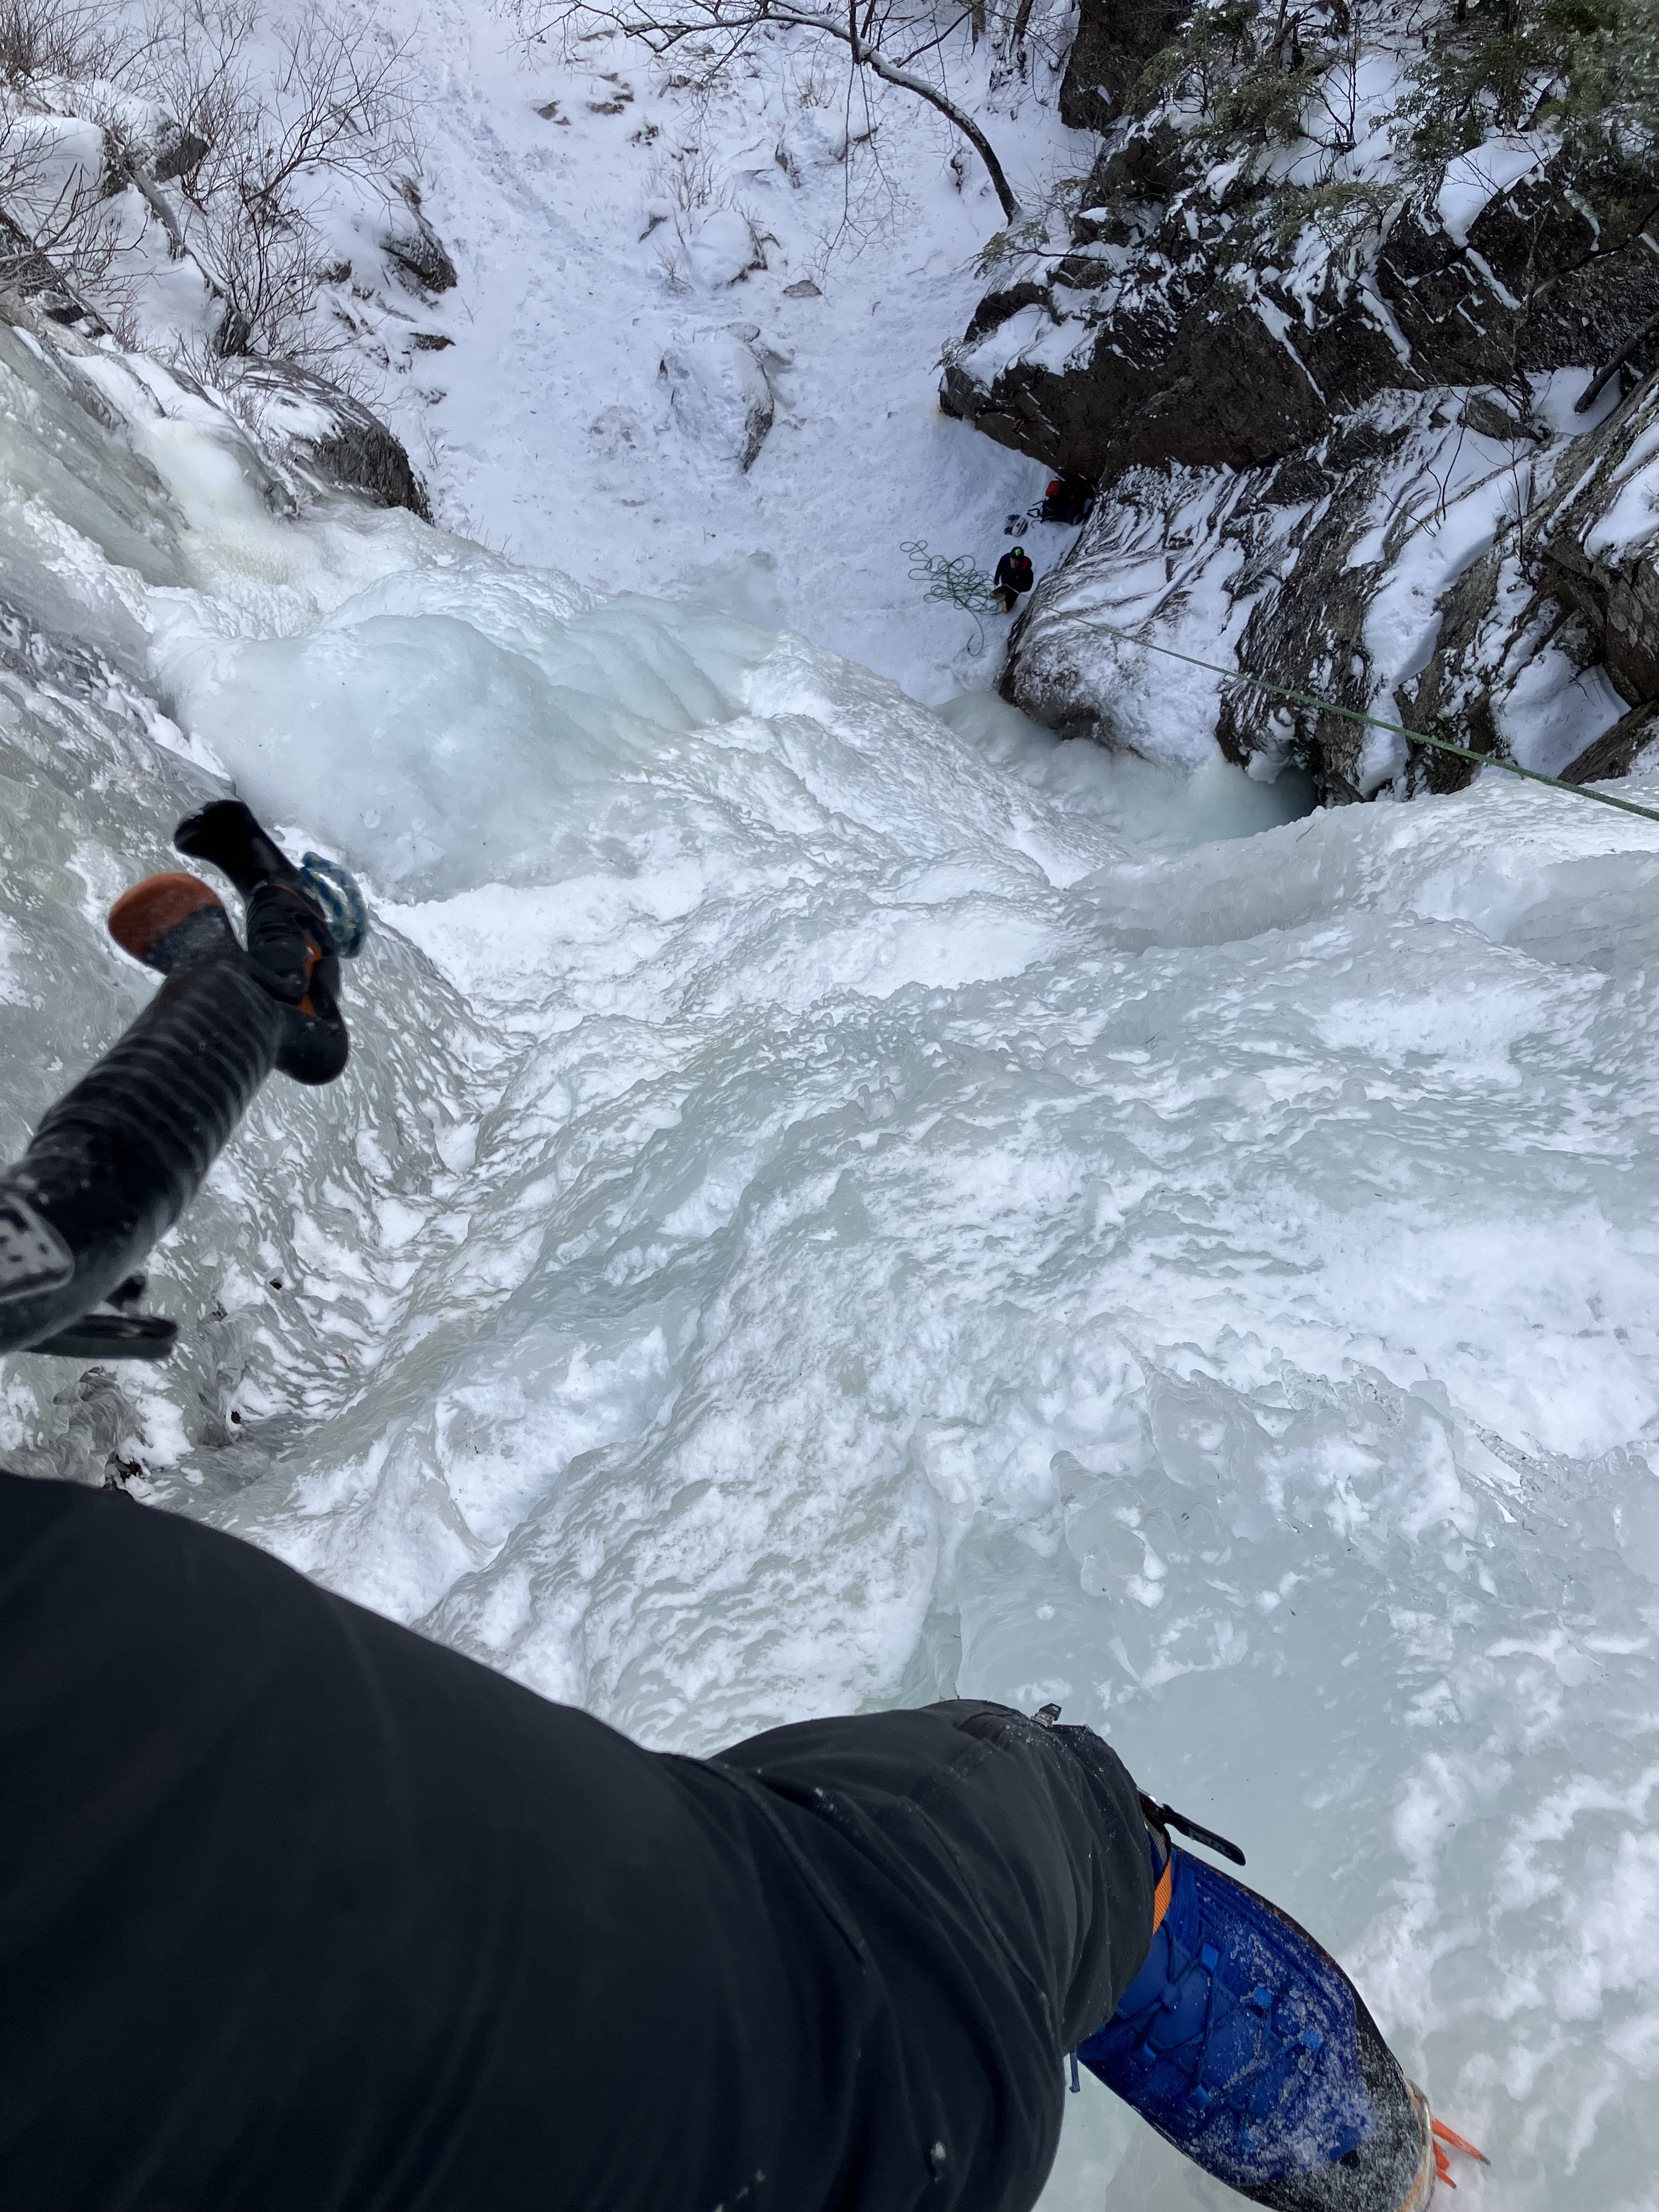
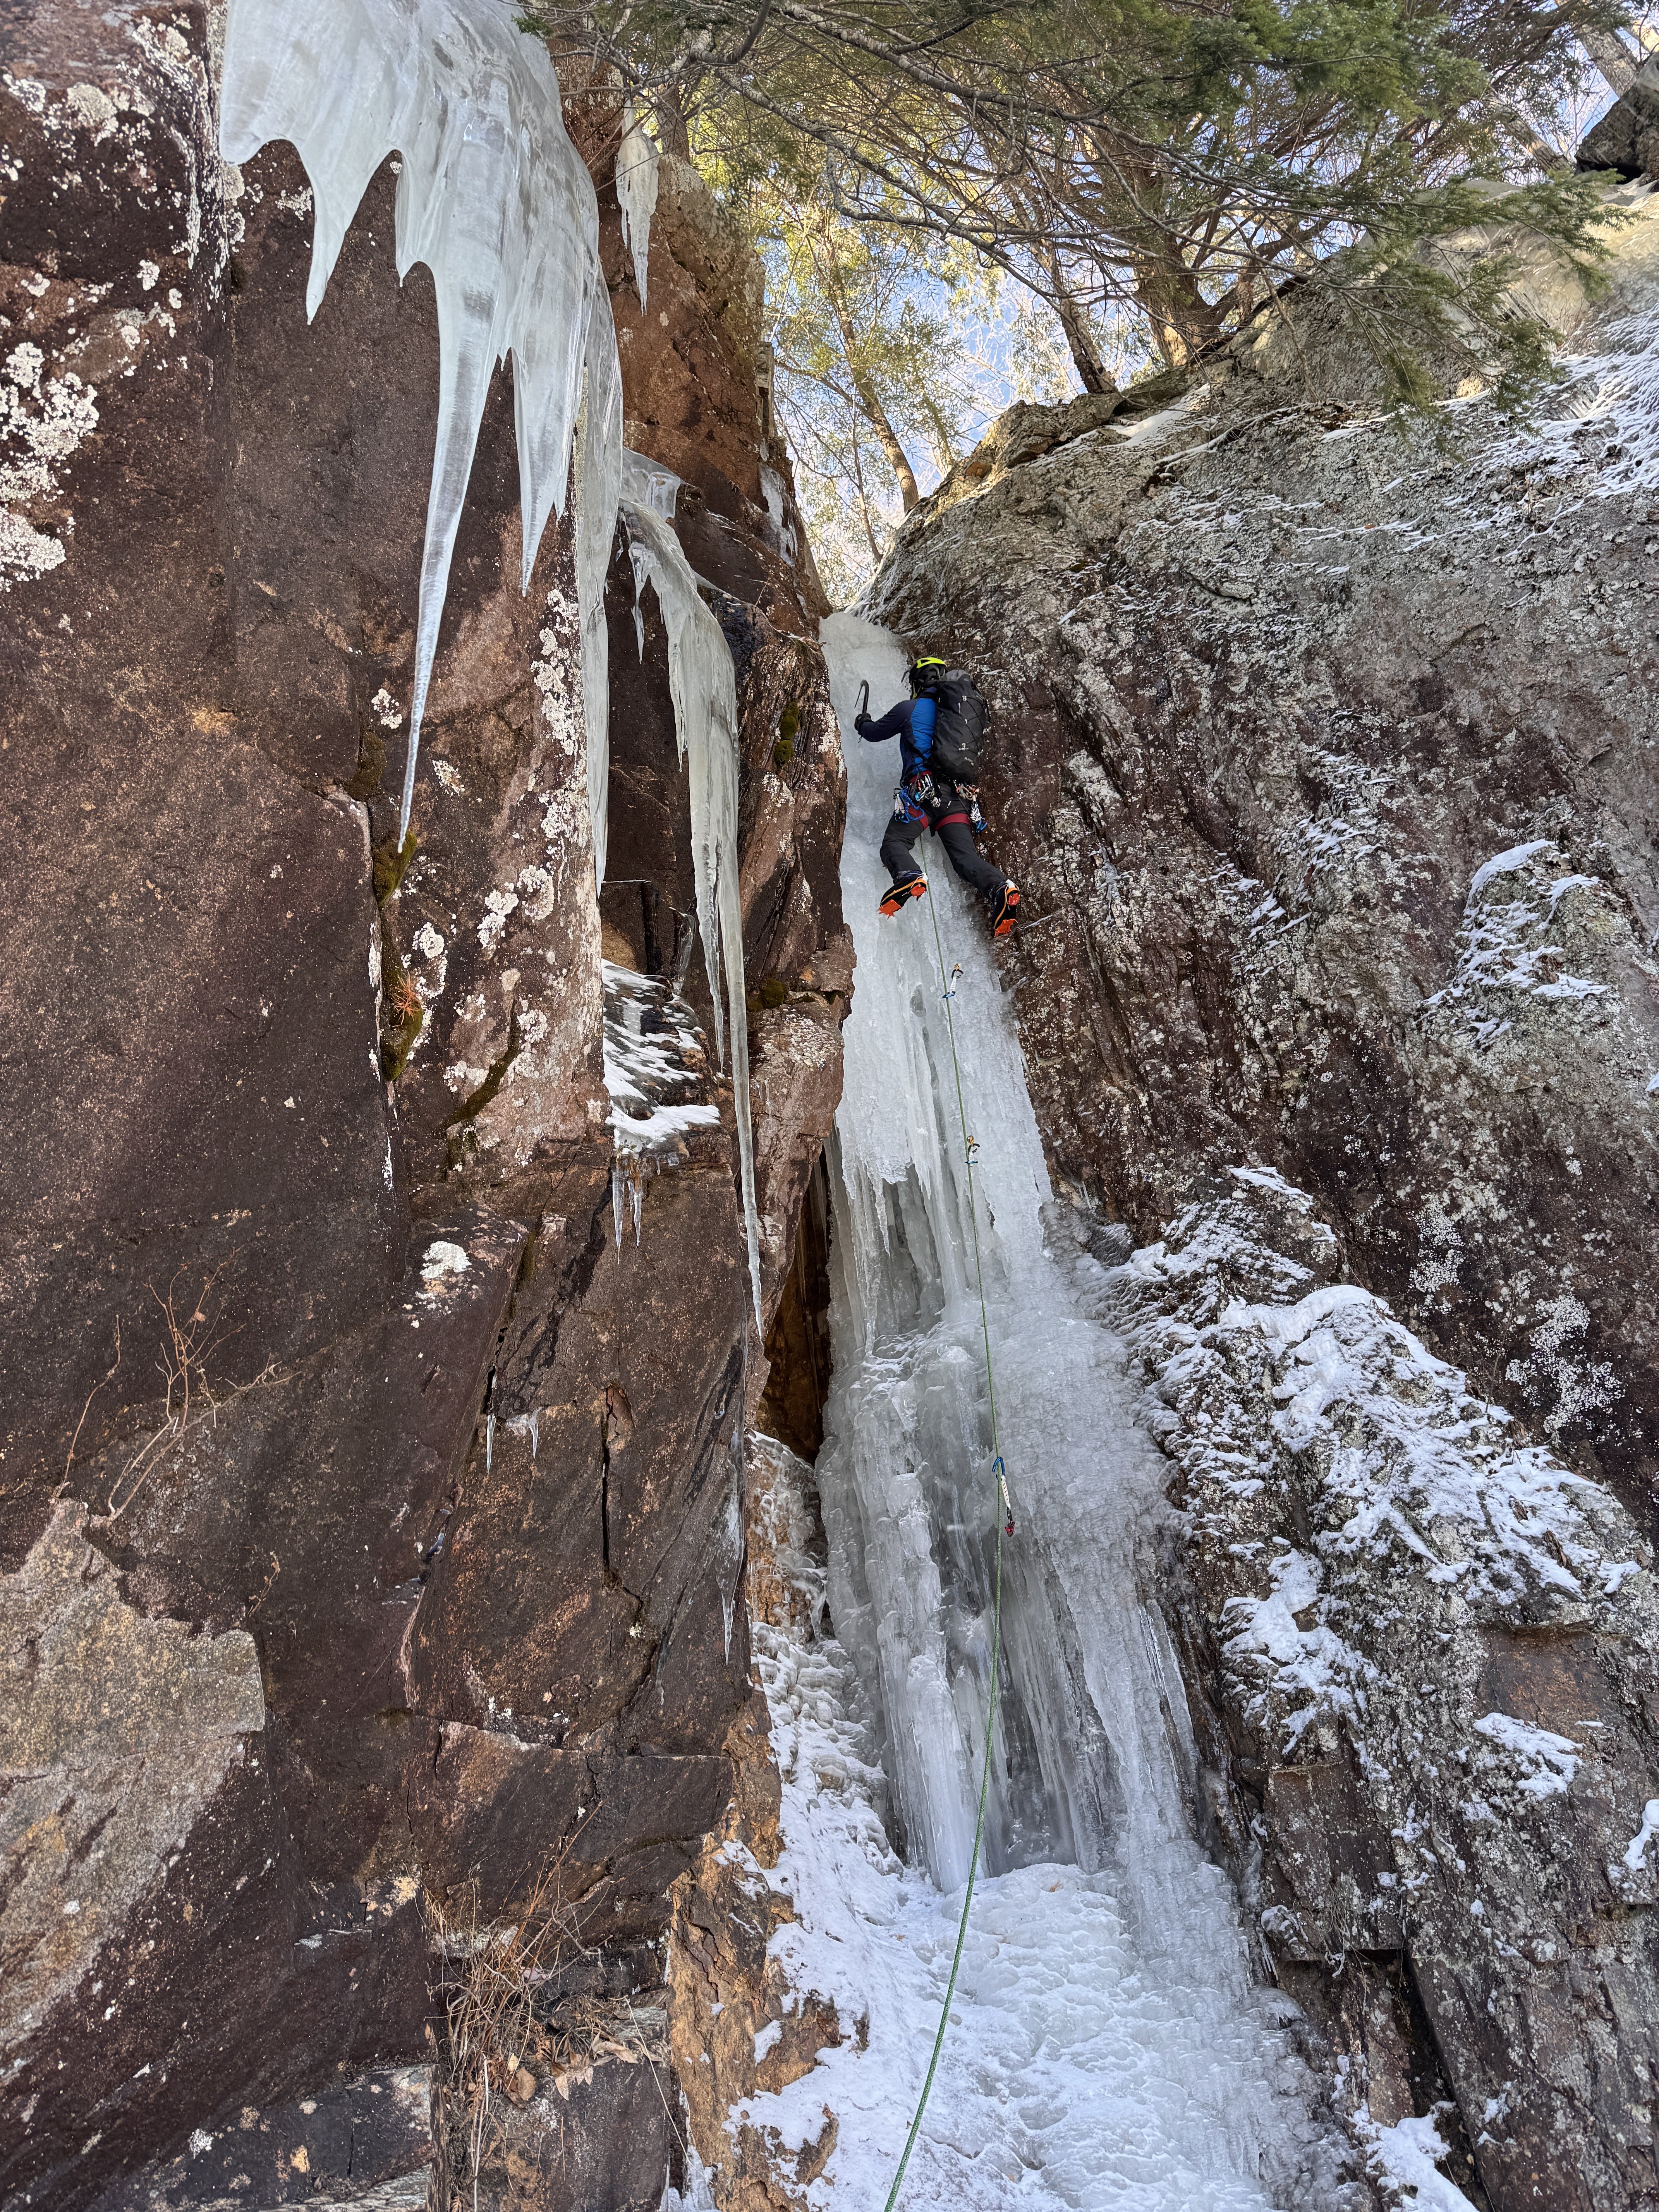
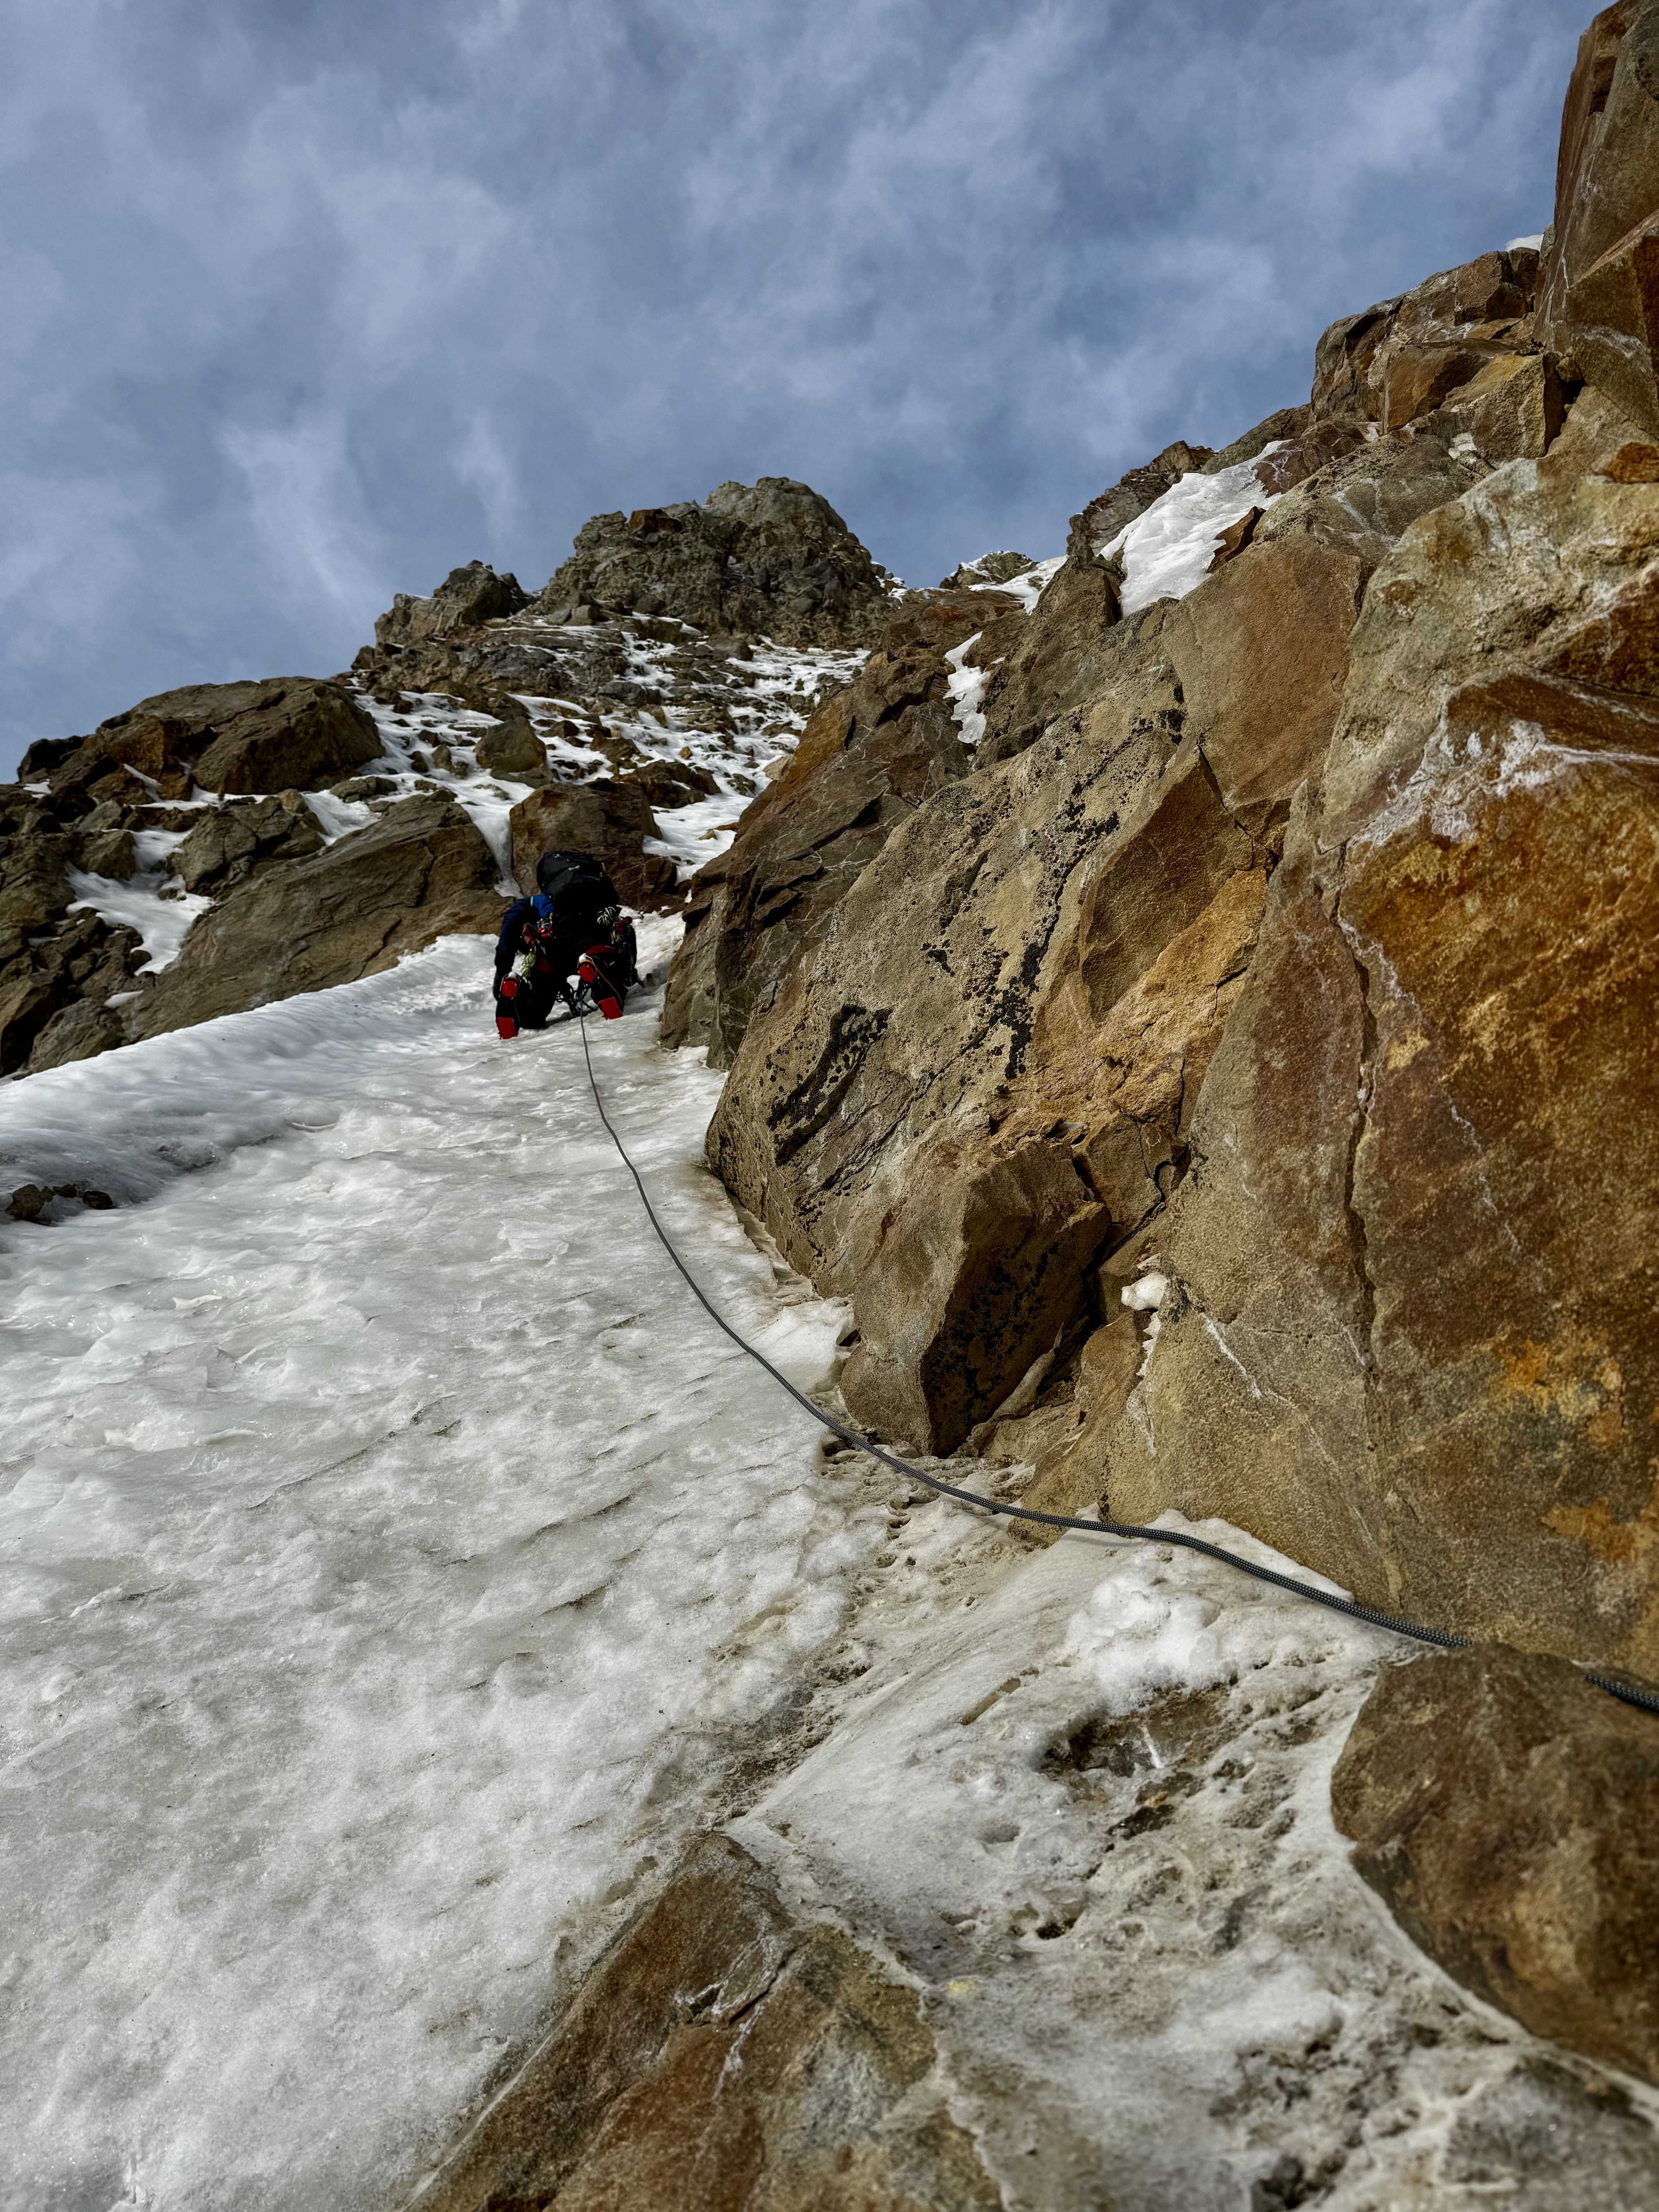
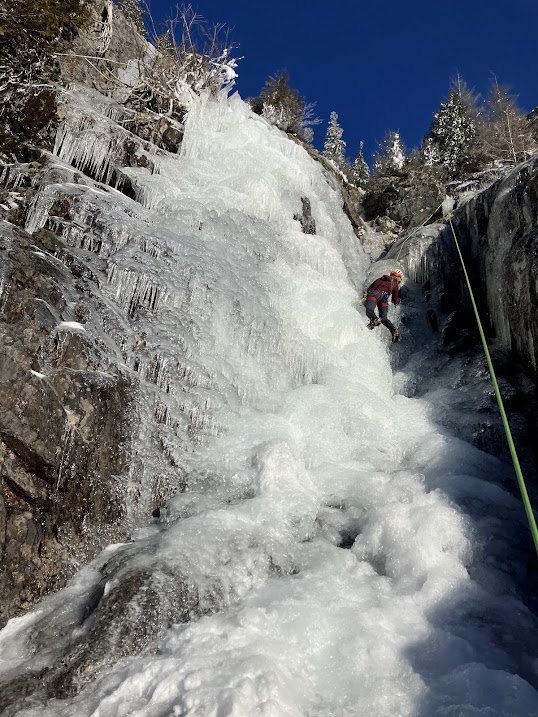
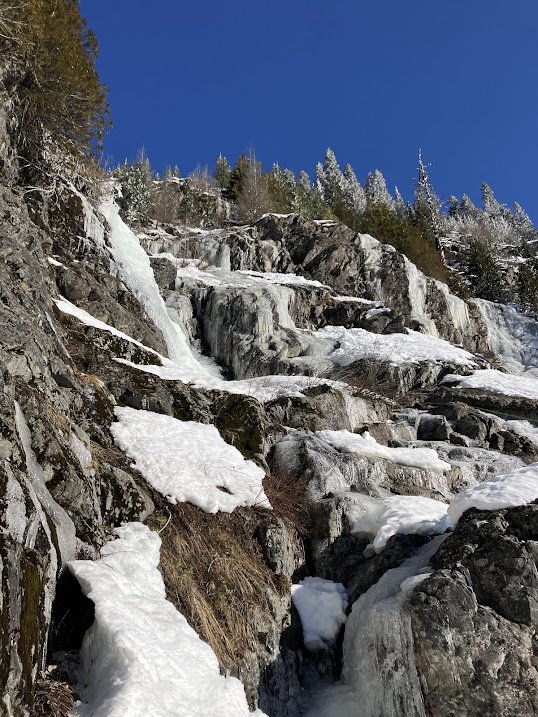
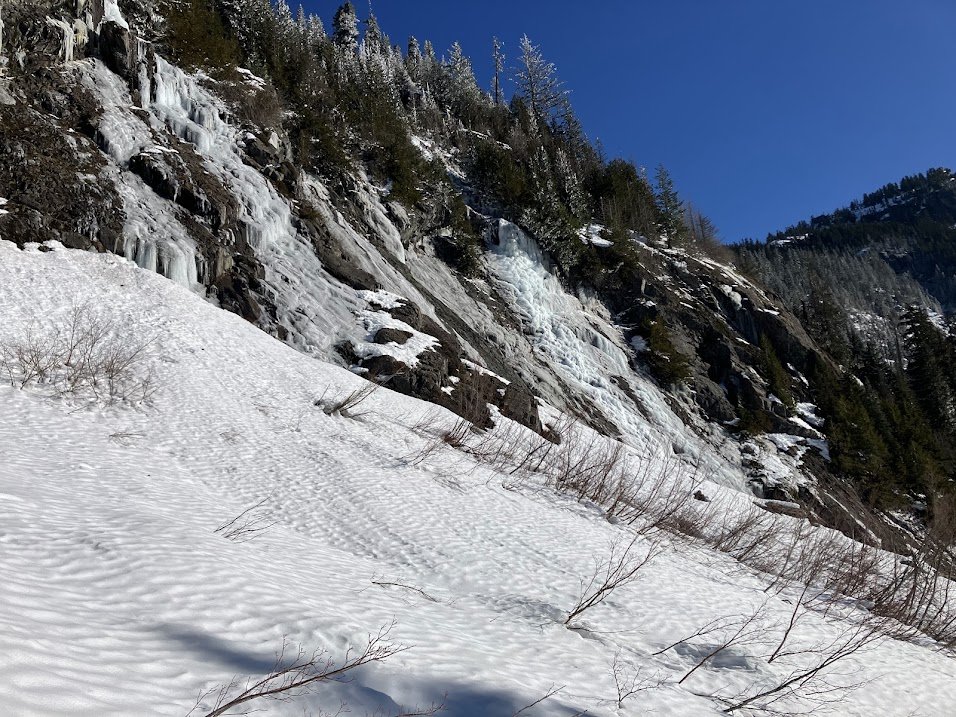
Trip: New Hampshah - Black Dike and Frankenstein Classics Trip Date: 12/30/2025 Trip Report: Was in New England visiting family for the holidays and got to sneak away for two days of ice up in New Hampshire. Lots of beta out there on these routes, but I will just reiterate what you probably know... the ice is plentiful, plastic and easily accessible. Worth a flight out from the NW? Maybe not given the other options much closer, but if the opportunity arises I recommend. I found this website to be very helpful for partners and conditions... https://www.neiceconditions.org/ ...They also do some great things (like the instagram hack) that seems like it might be useful here too. Day 0 scoping after freezing rain Like every road cut... Day 1 Black Dike High of 8F, 50mph gusts Pitch 3, harder than it looks Looking over at Fafnir... next time! Day 2 Frankenstein Clif Pegasus Rock Finish, Hobbit Couloir, Dracula + some thinner TR laps... 10-20 min walk from the car park. Pegasus Rock Finish is a second pitch alternative that goes up the pillar... Partner topping out on the Rock Finish... Partner's shot of the top/crux of Hobbit Couloir... HC and PRF from the ground... Approach vibes... Dracula... Gear Notes: Standard ice kit Approach Notes: Micro spikes were helpful


 5 points
 -
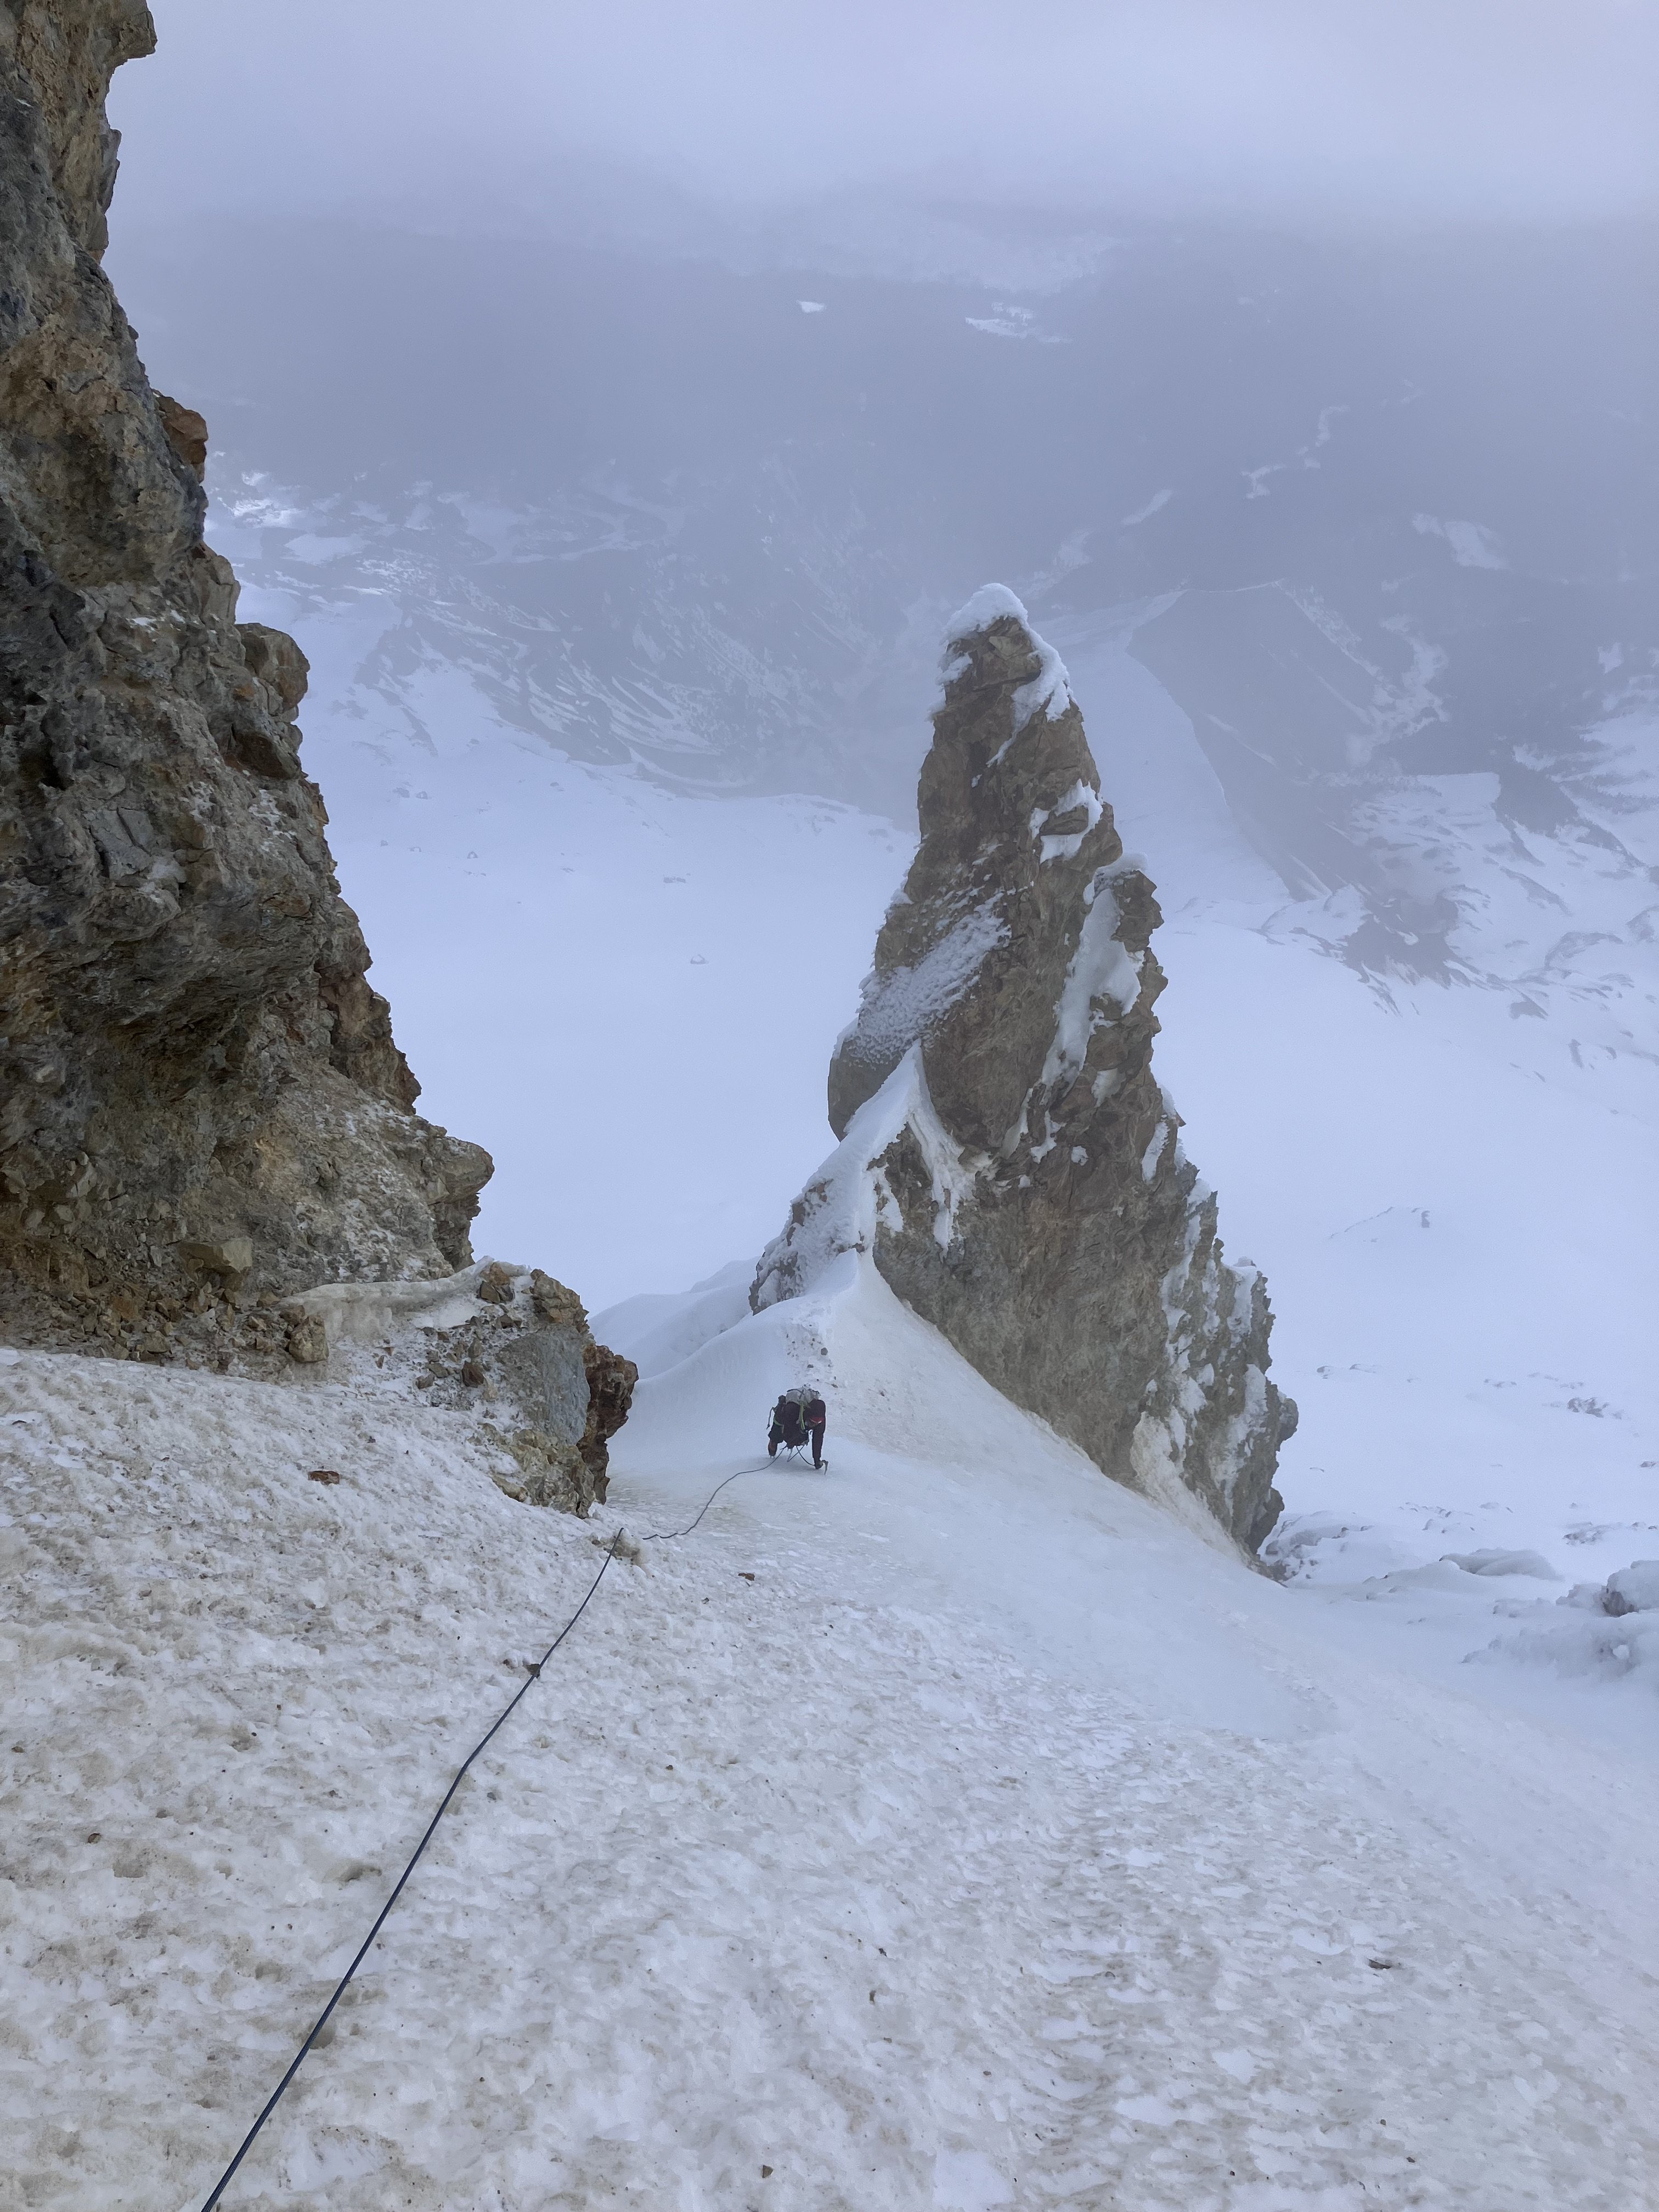
Yeah pretty much all the info I can find is for the right side too. Thanks for looking. @Tucker_Merrill and I climbed a variation of the line I drew last weekend and are trying to figure out if what we climbed is an existing route or not. Regardless it was super fun and recommend others go take a look if we get another weather window this season. I'll be writing a trip report for it at some point unless Tucker beats me to it.
 4 points
 -
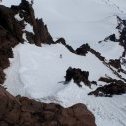
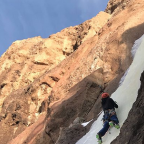
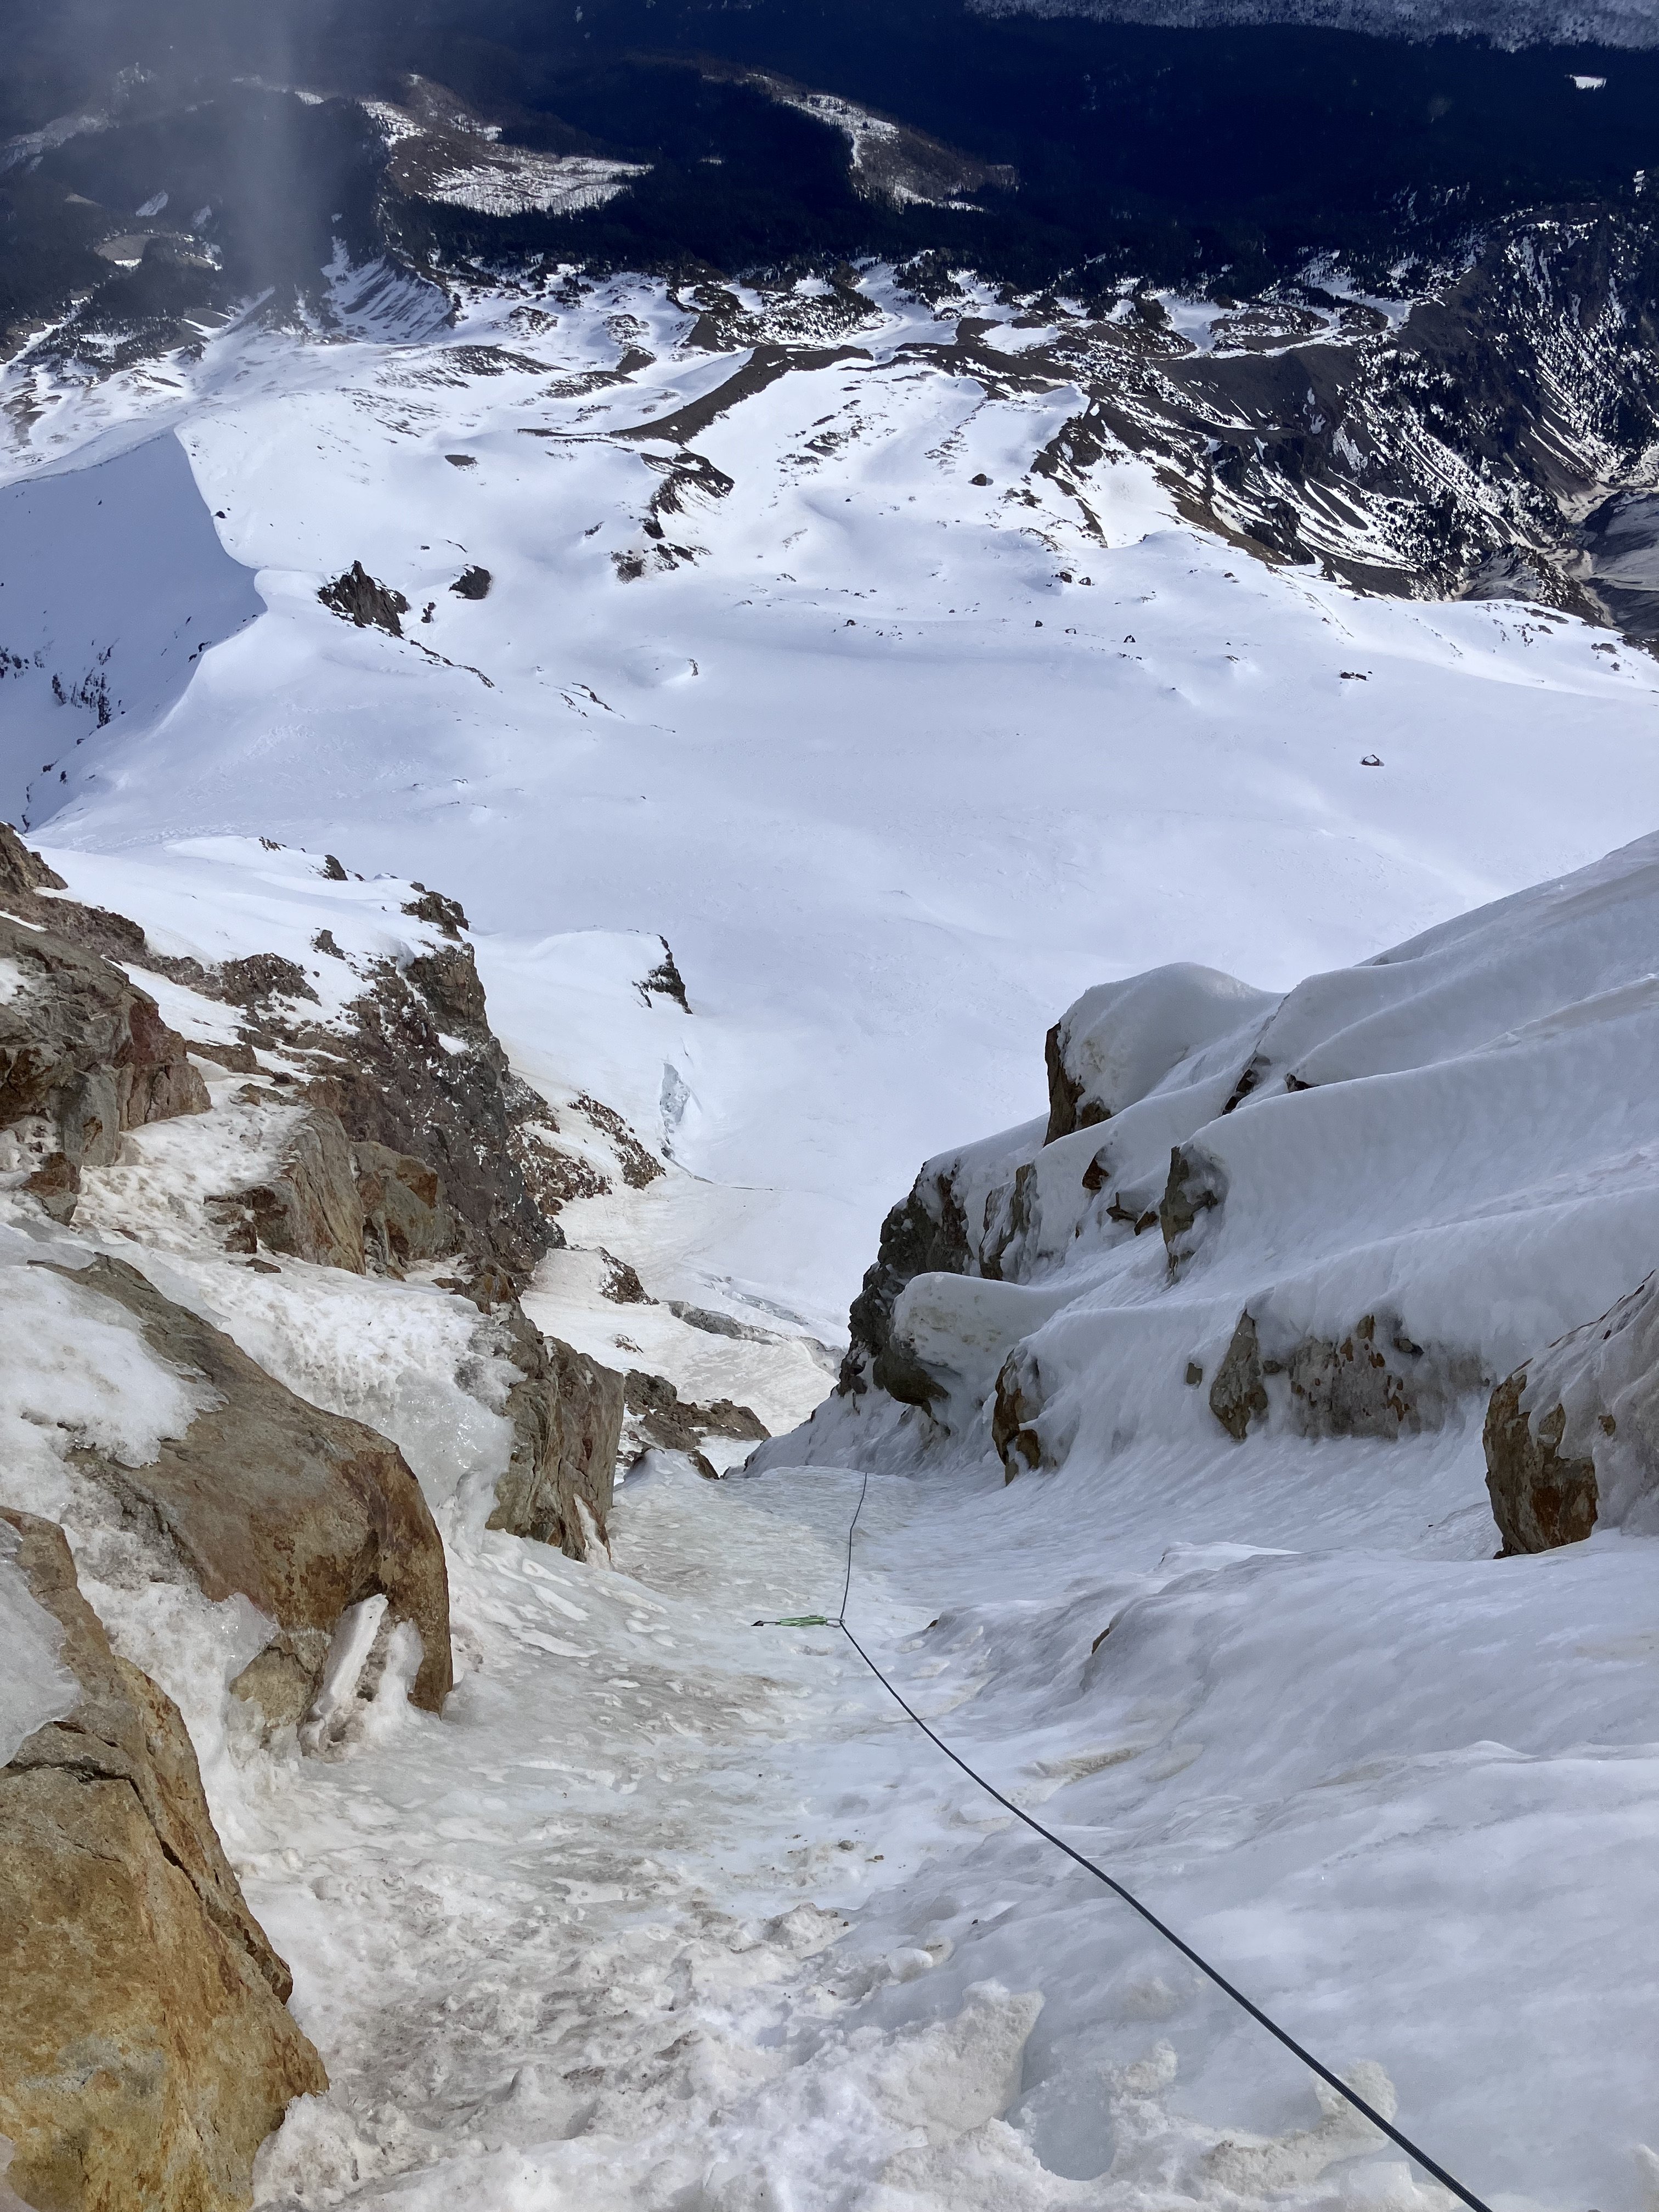
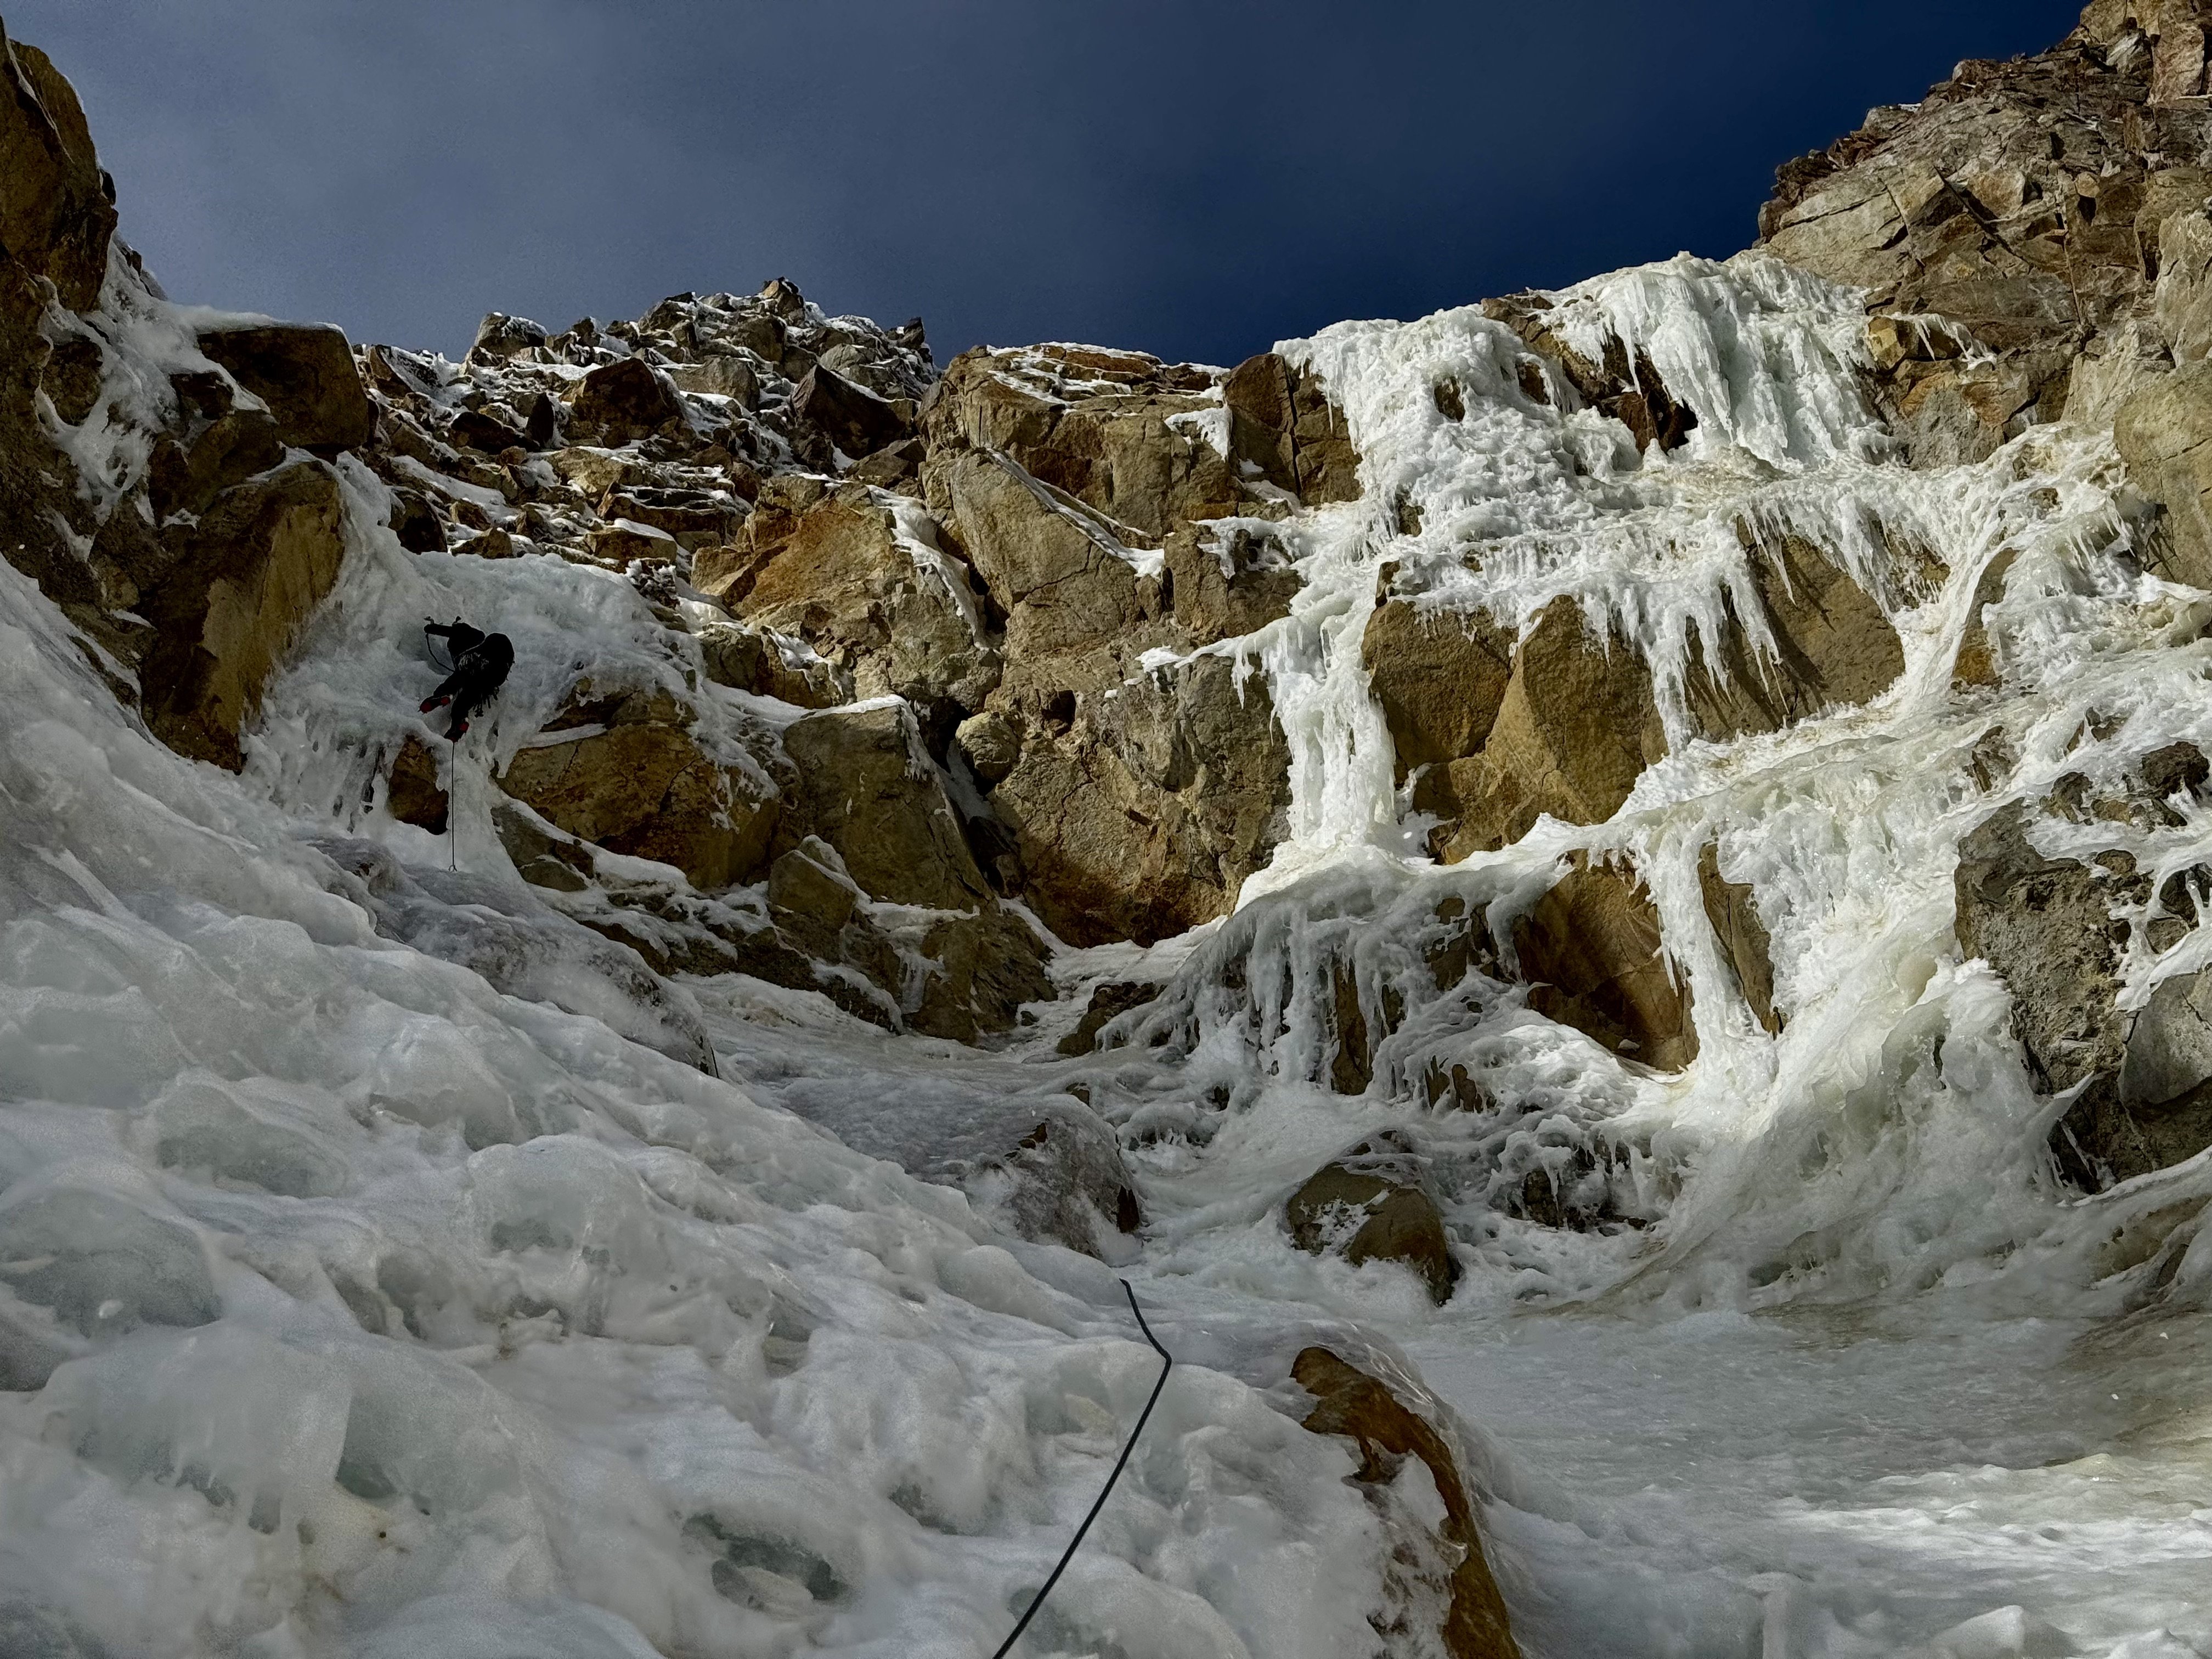
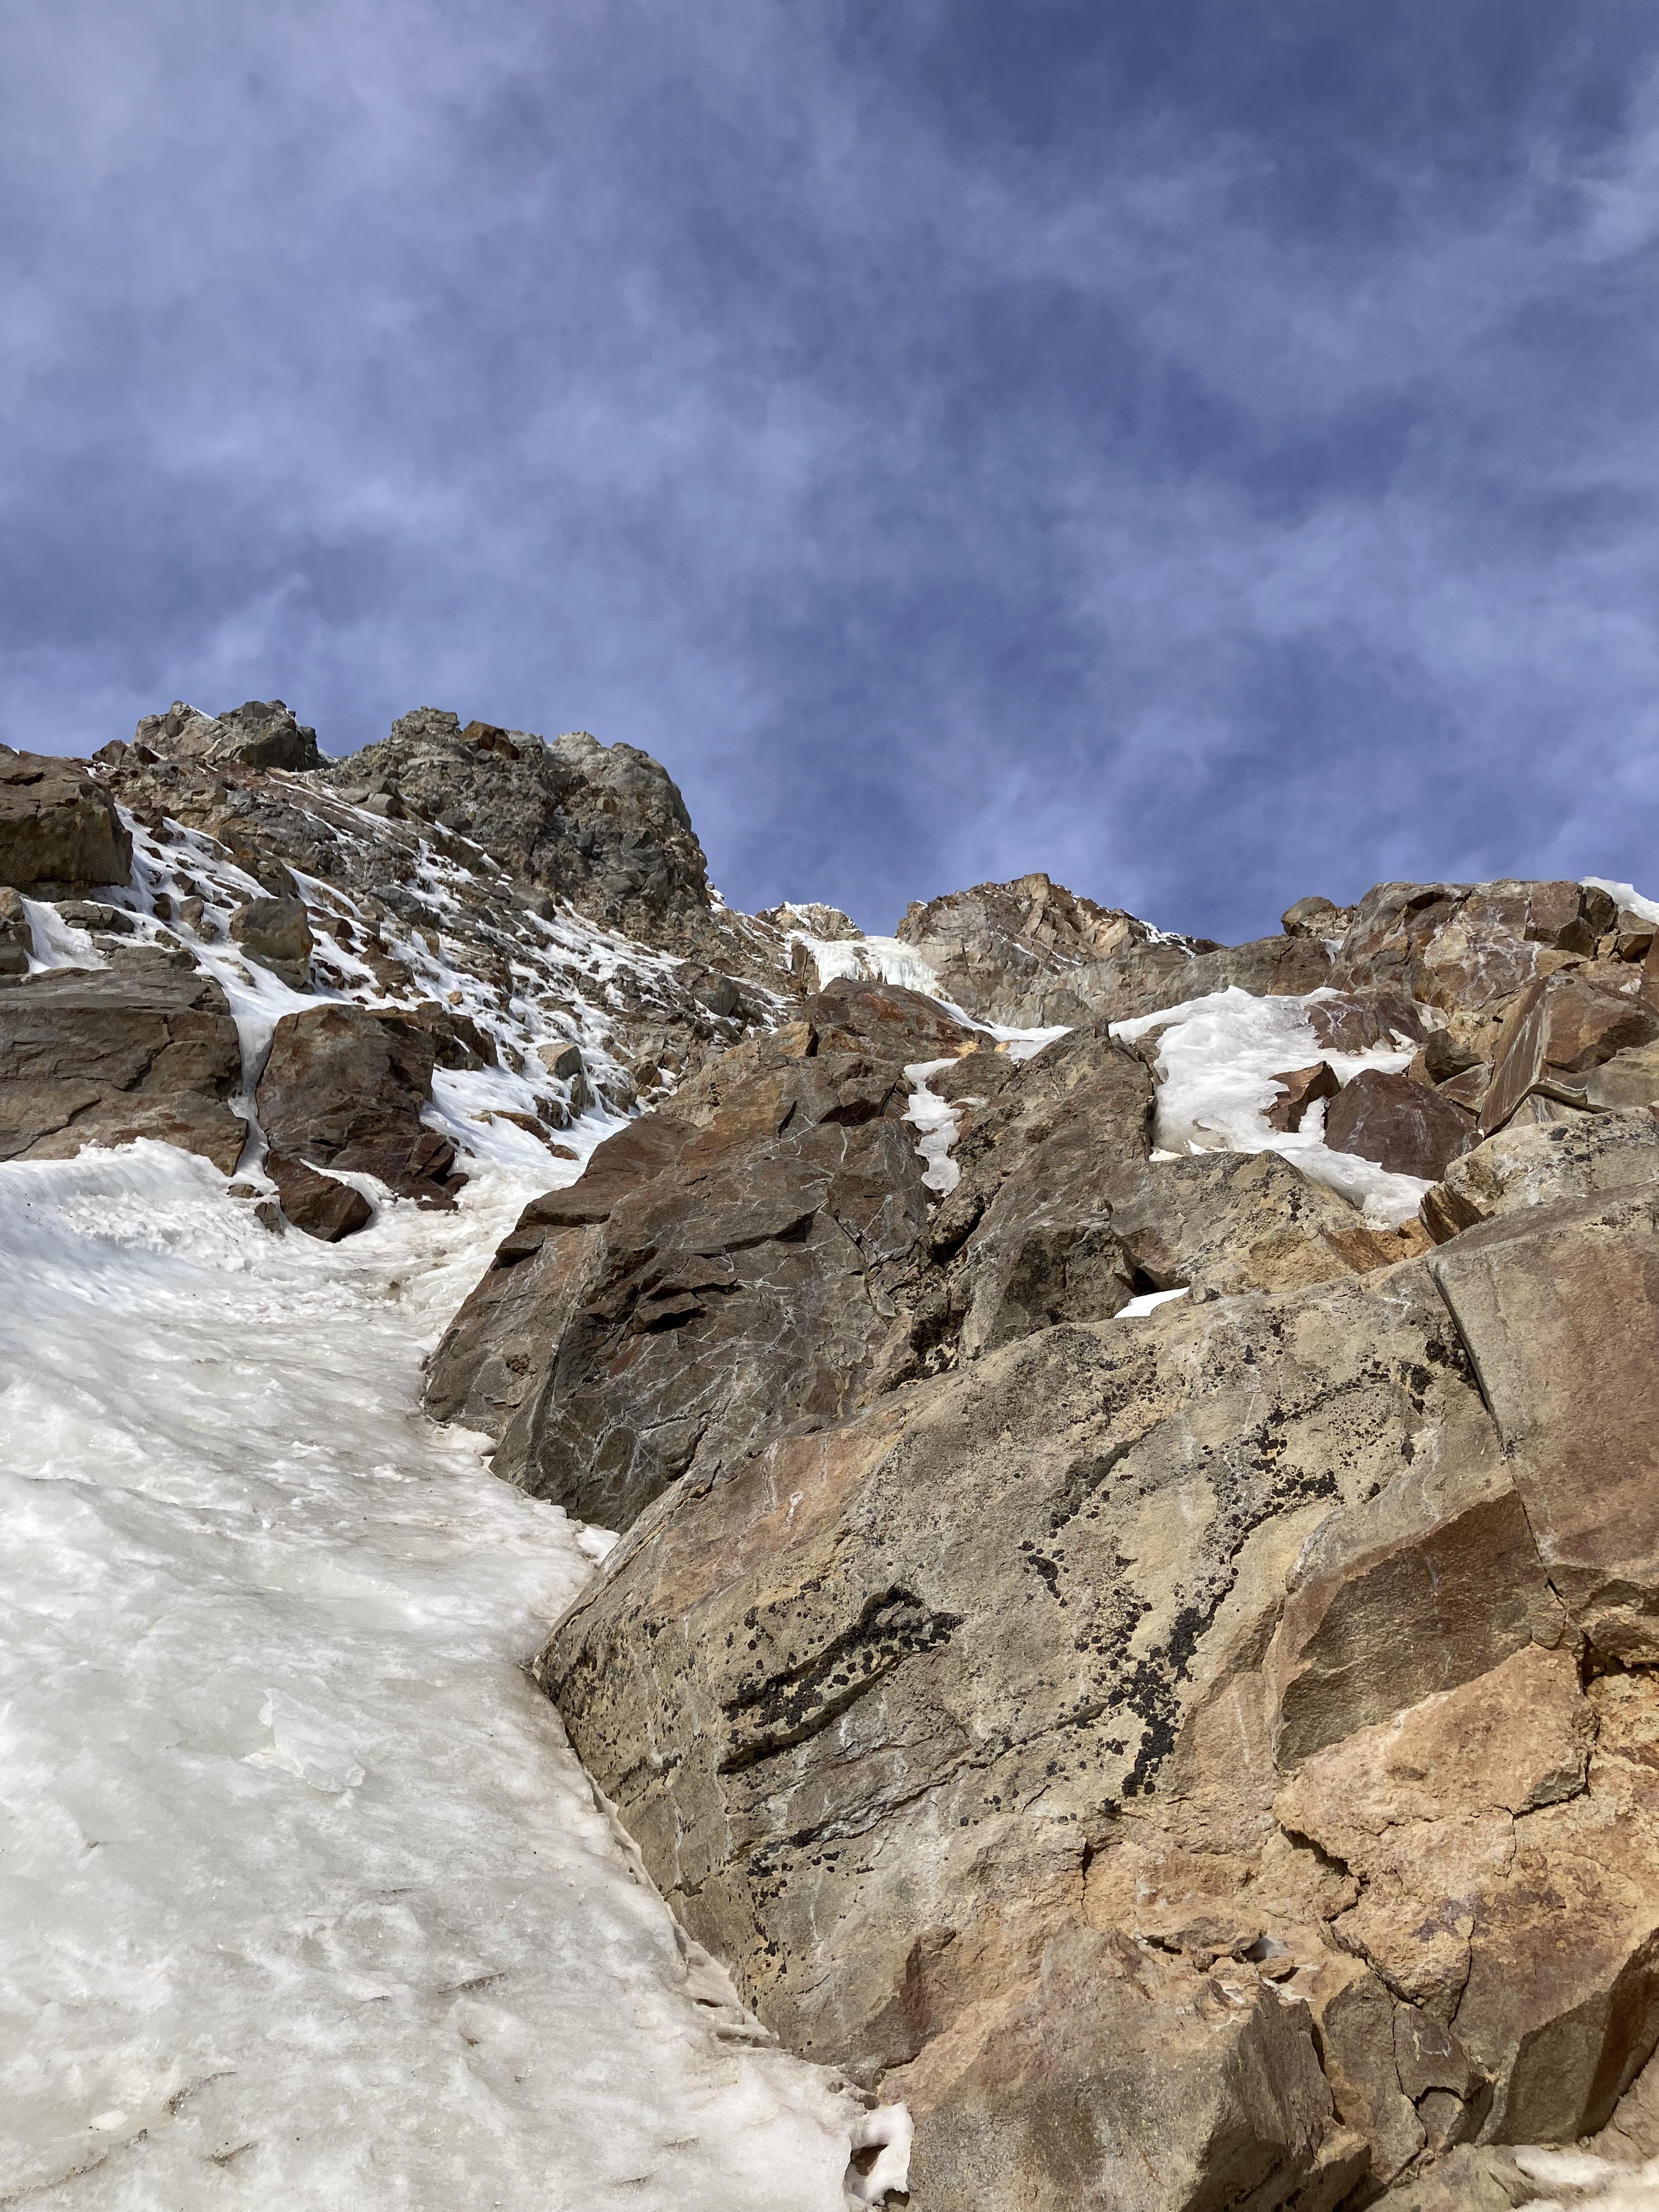
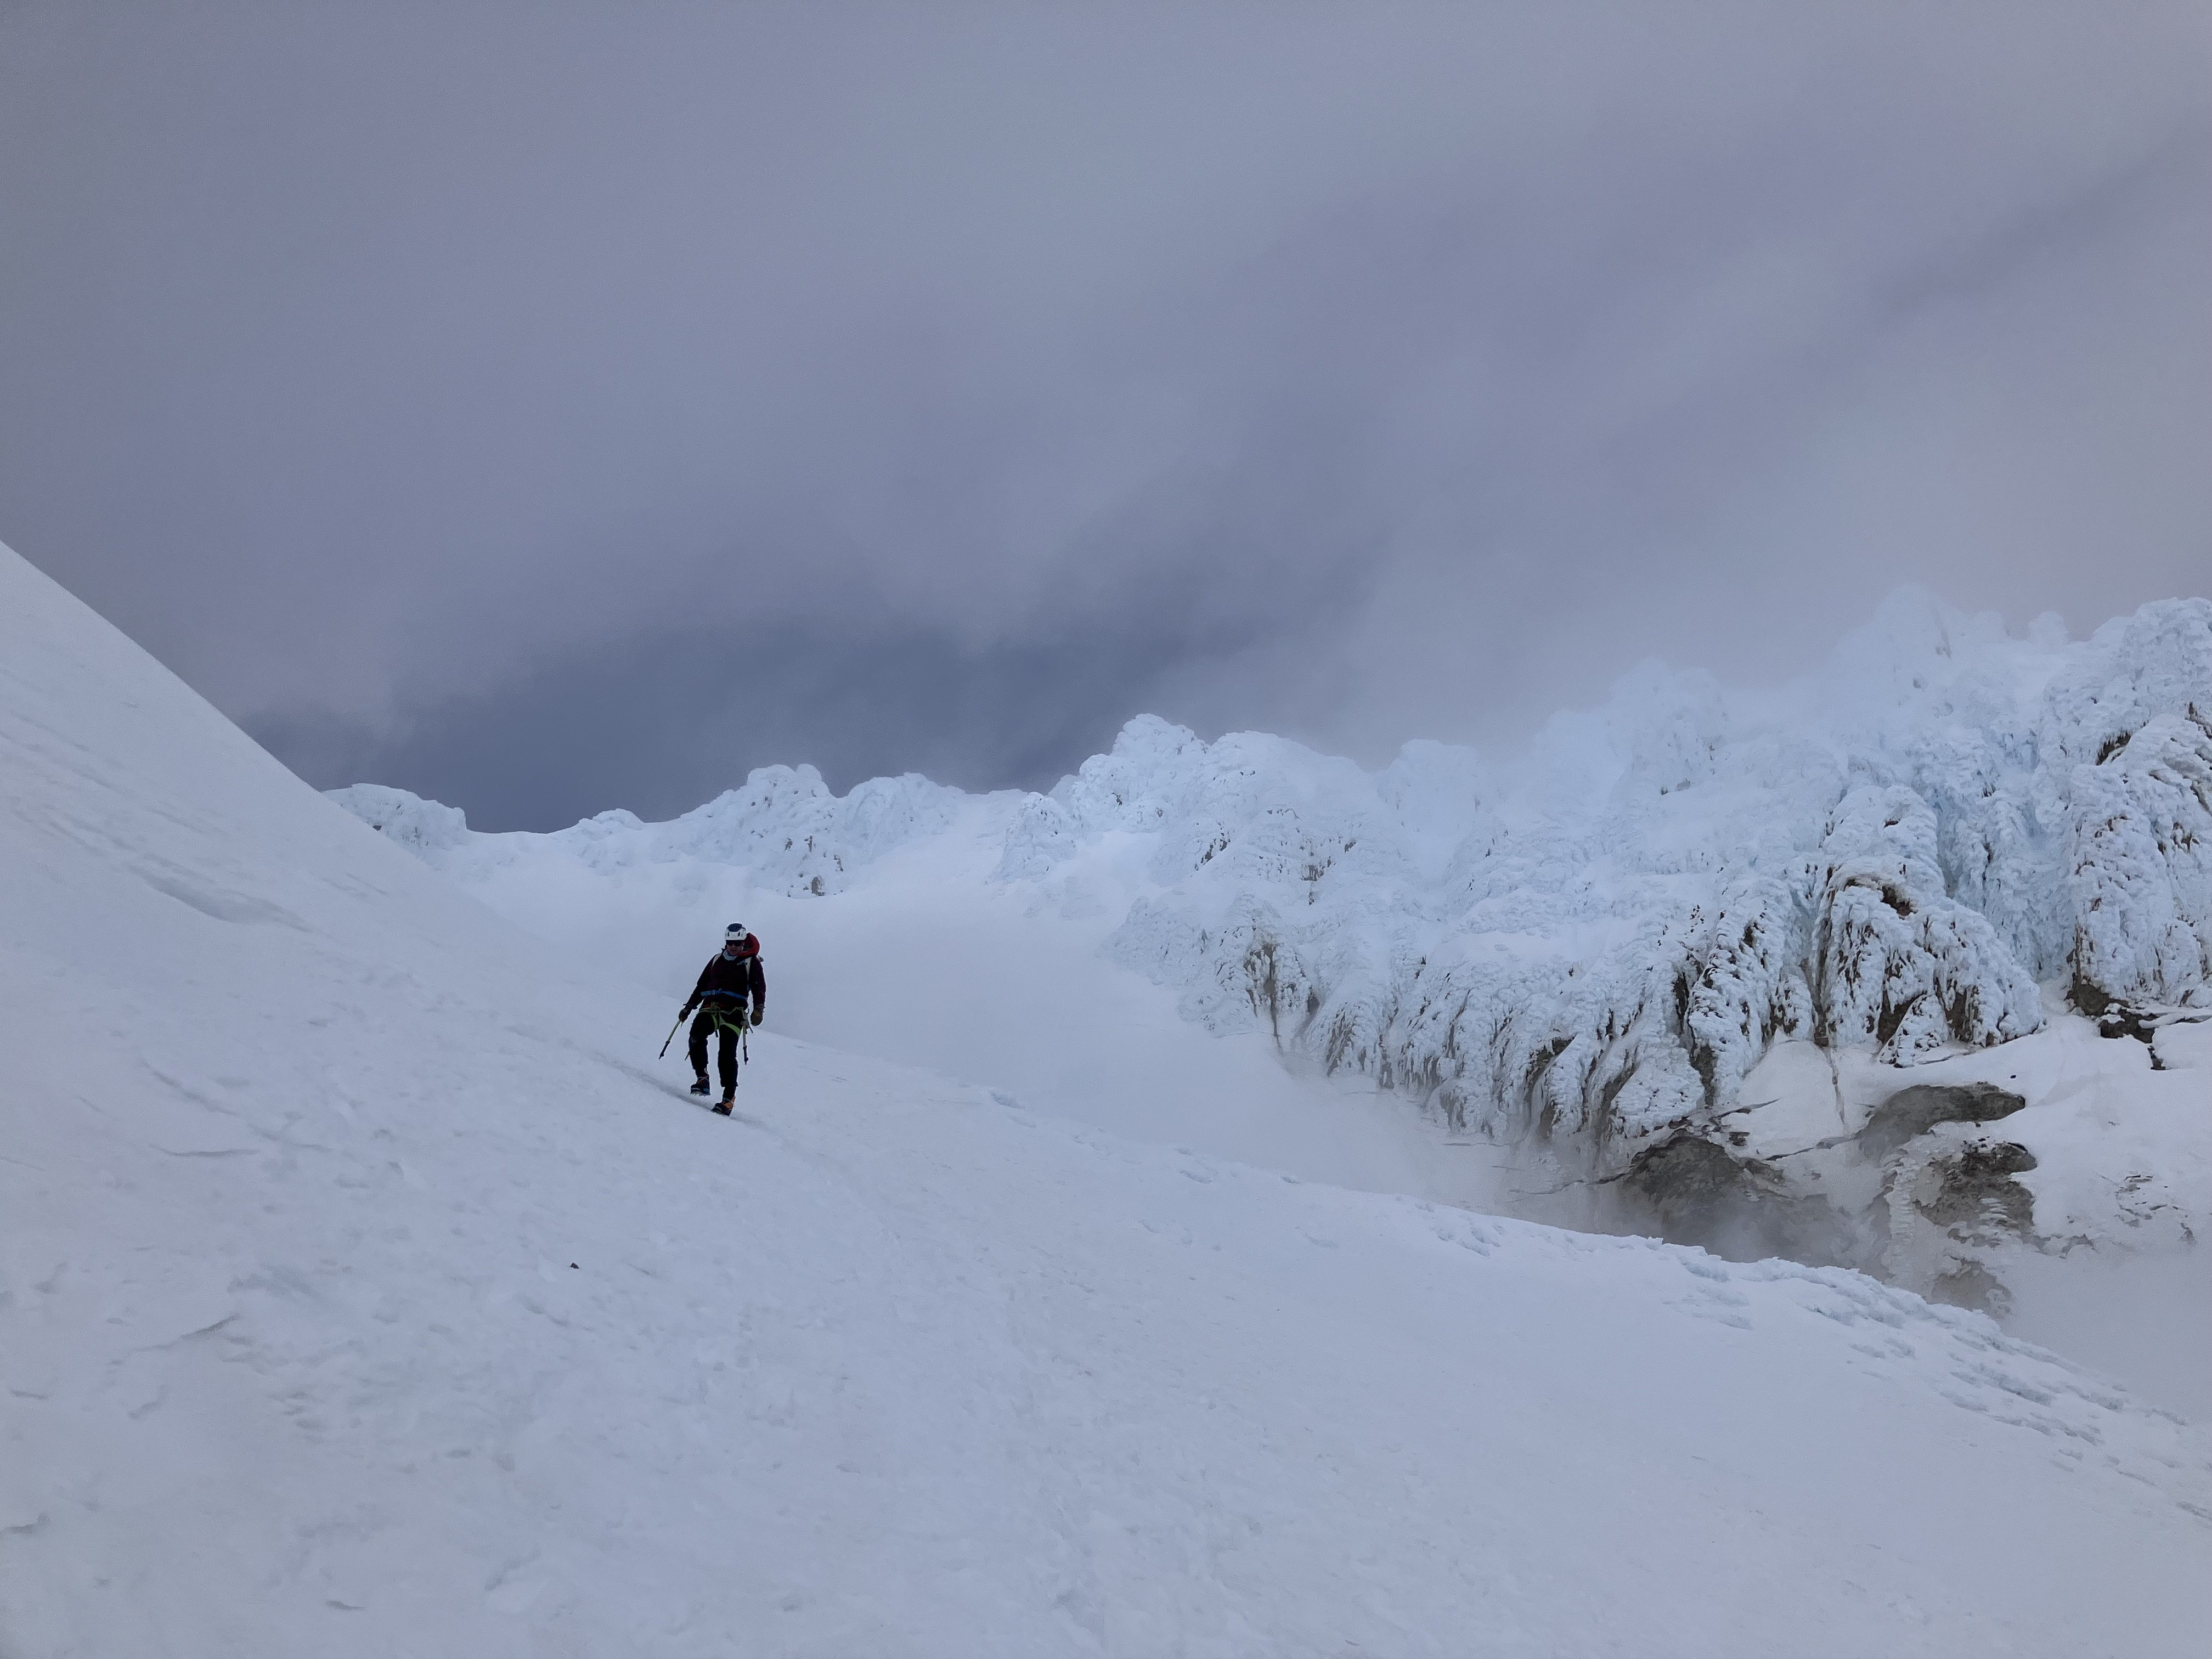
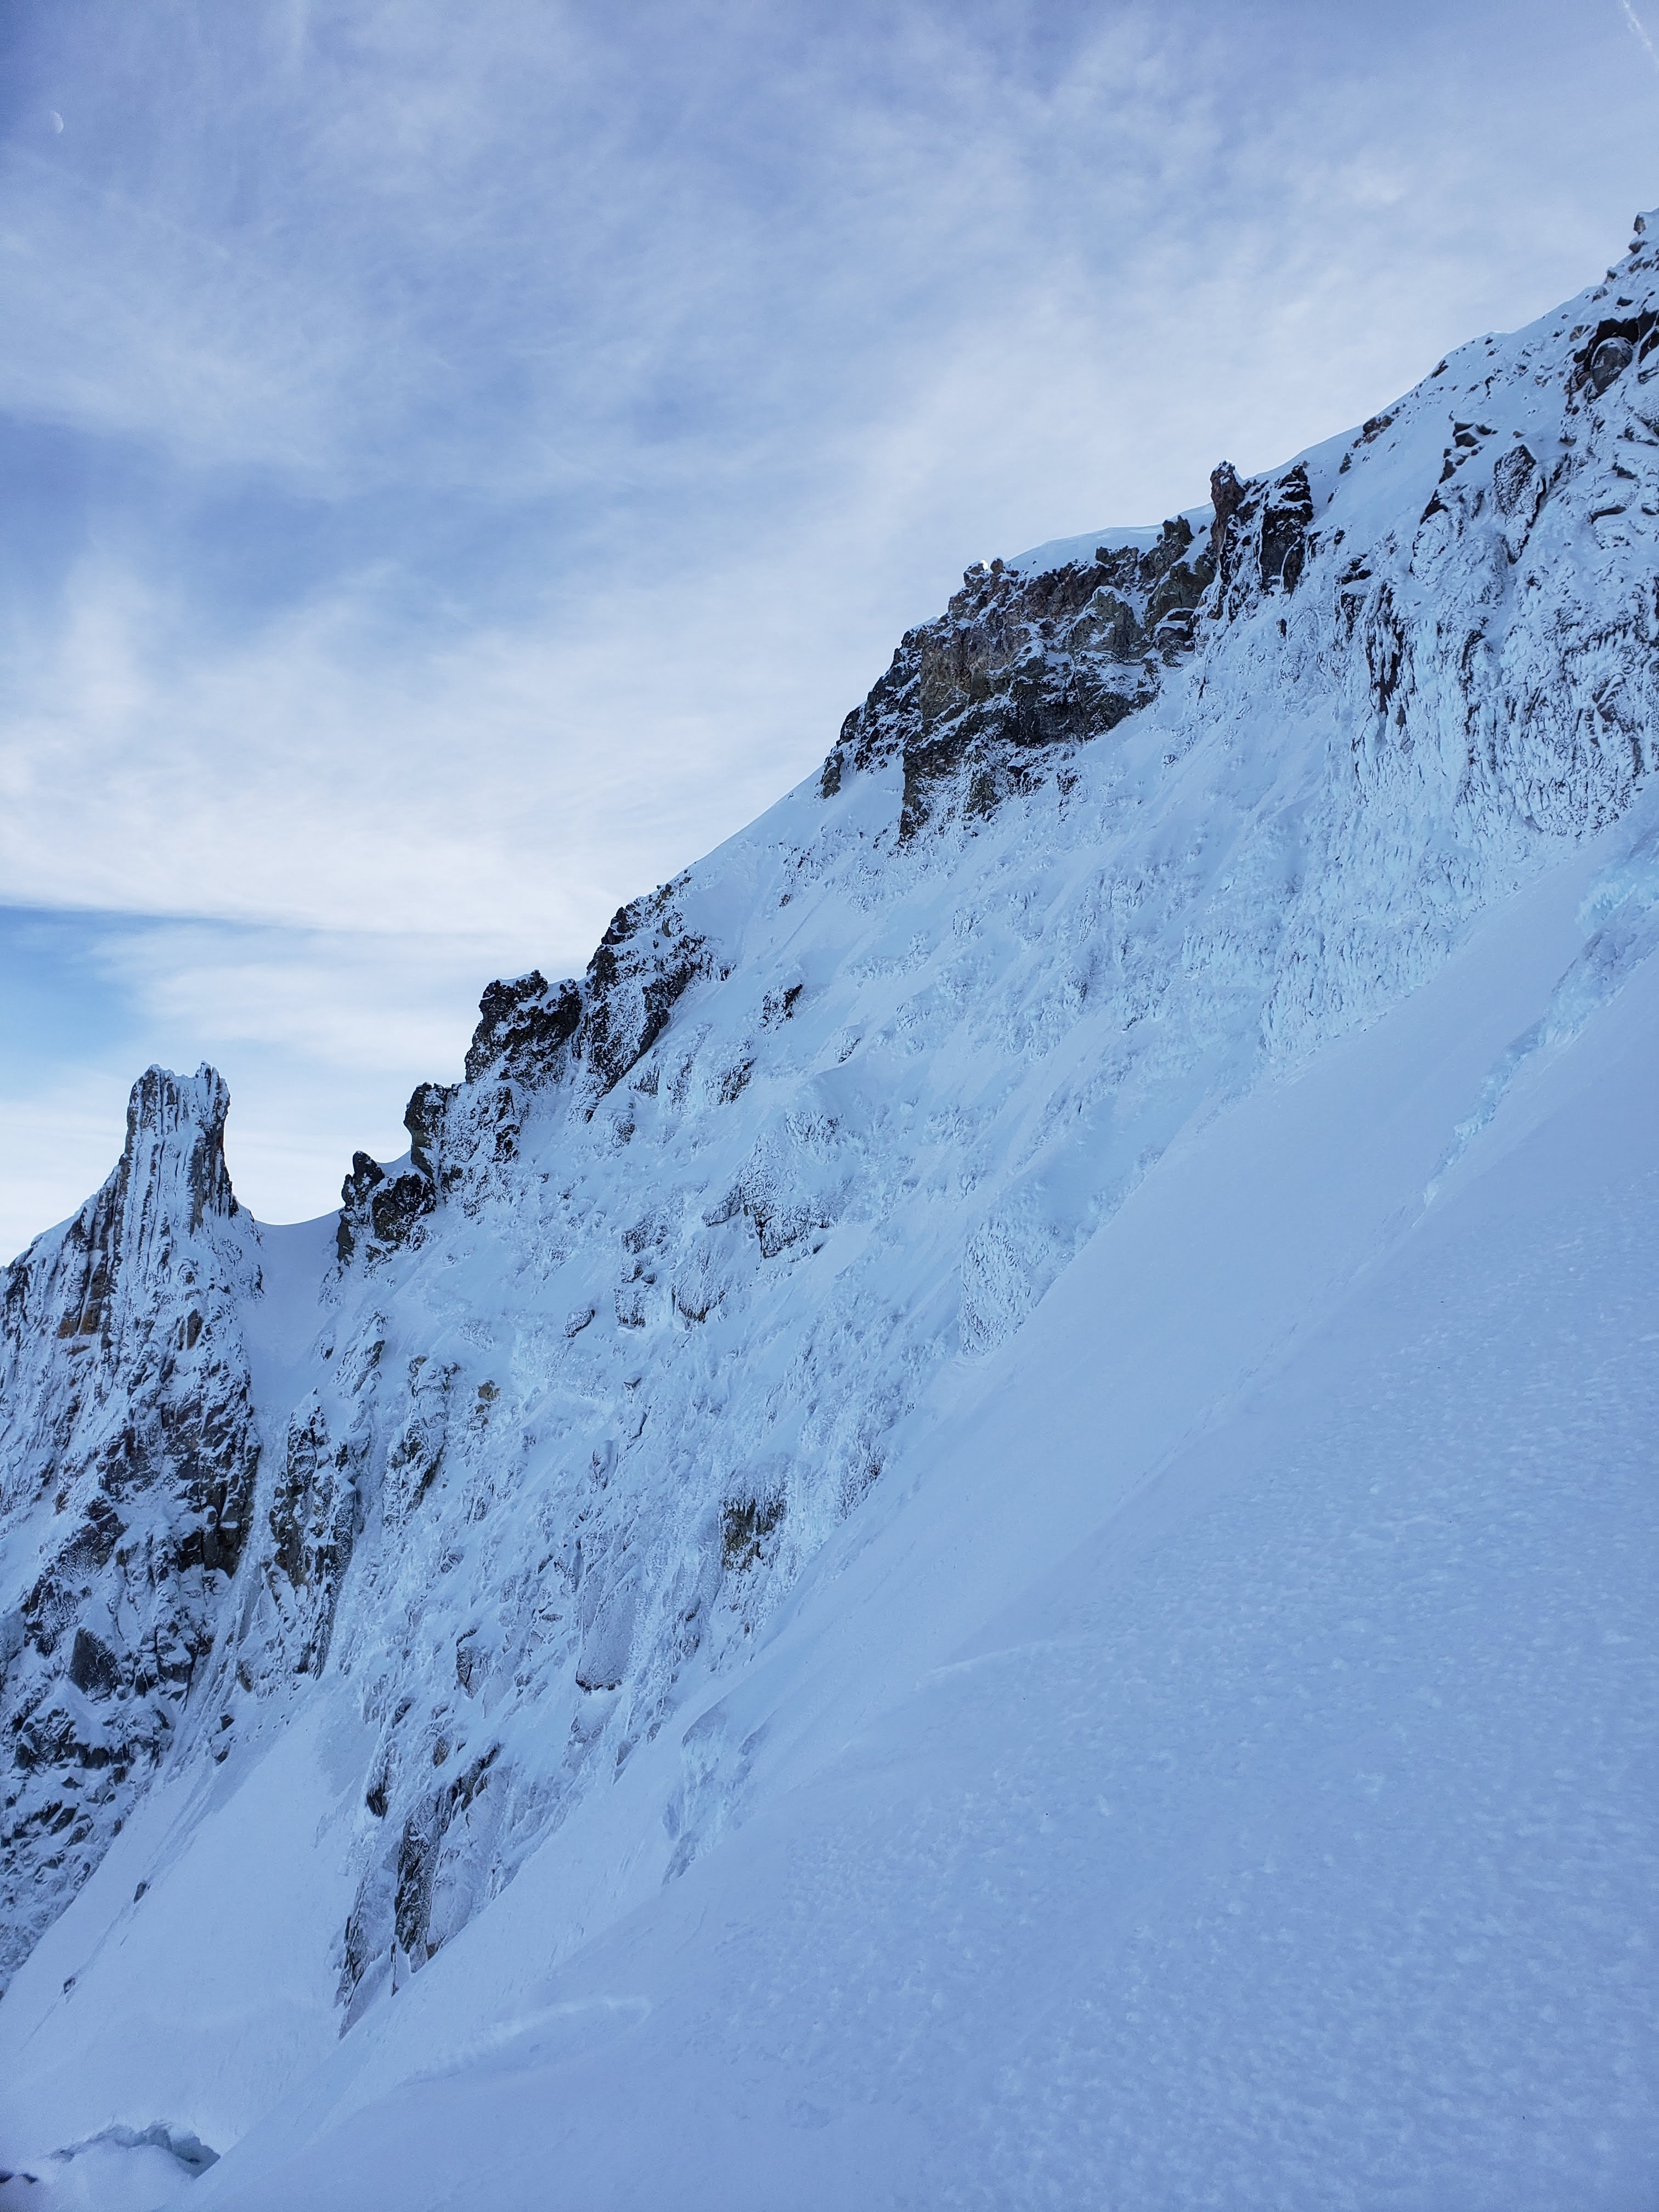
Trip: Black Spider on Wy'east - Arachnophobia Trip Date: 01/31/2026 Trip Report: Climbed Arachnophobia the other day. Good ice, a little brittle first thing. Snow is very icy which makes for some tiring front pointing. Not as sun baked as it might appear. Five long pitches does it. L side of schrund went easily. Thanks to G for being a great partner, and Kyle and Matt for going up the route first so I didn't need to leave the family just to have a look-see. Pictures... Luckily sunrise had some cloud cover. Starting up the ice-looking bits, after some snow-looking bits that were still icy Snow-looking icy bits on P2 Starting up P2 Leading P3 Looking down P3 Coming up to the final belay at a rock anchor Descending S Side Hoping we get some snow this winter. But while we wait the sticks are quite good. If you need more beta, please feel free to DM me. -Sam Gear Notes: Single rock rack (small cams and nuts useful, nothing bigger than 0.5), pins, 10 screws Approach Notes: S Side and traverse over White River and around.
 3 points
 -
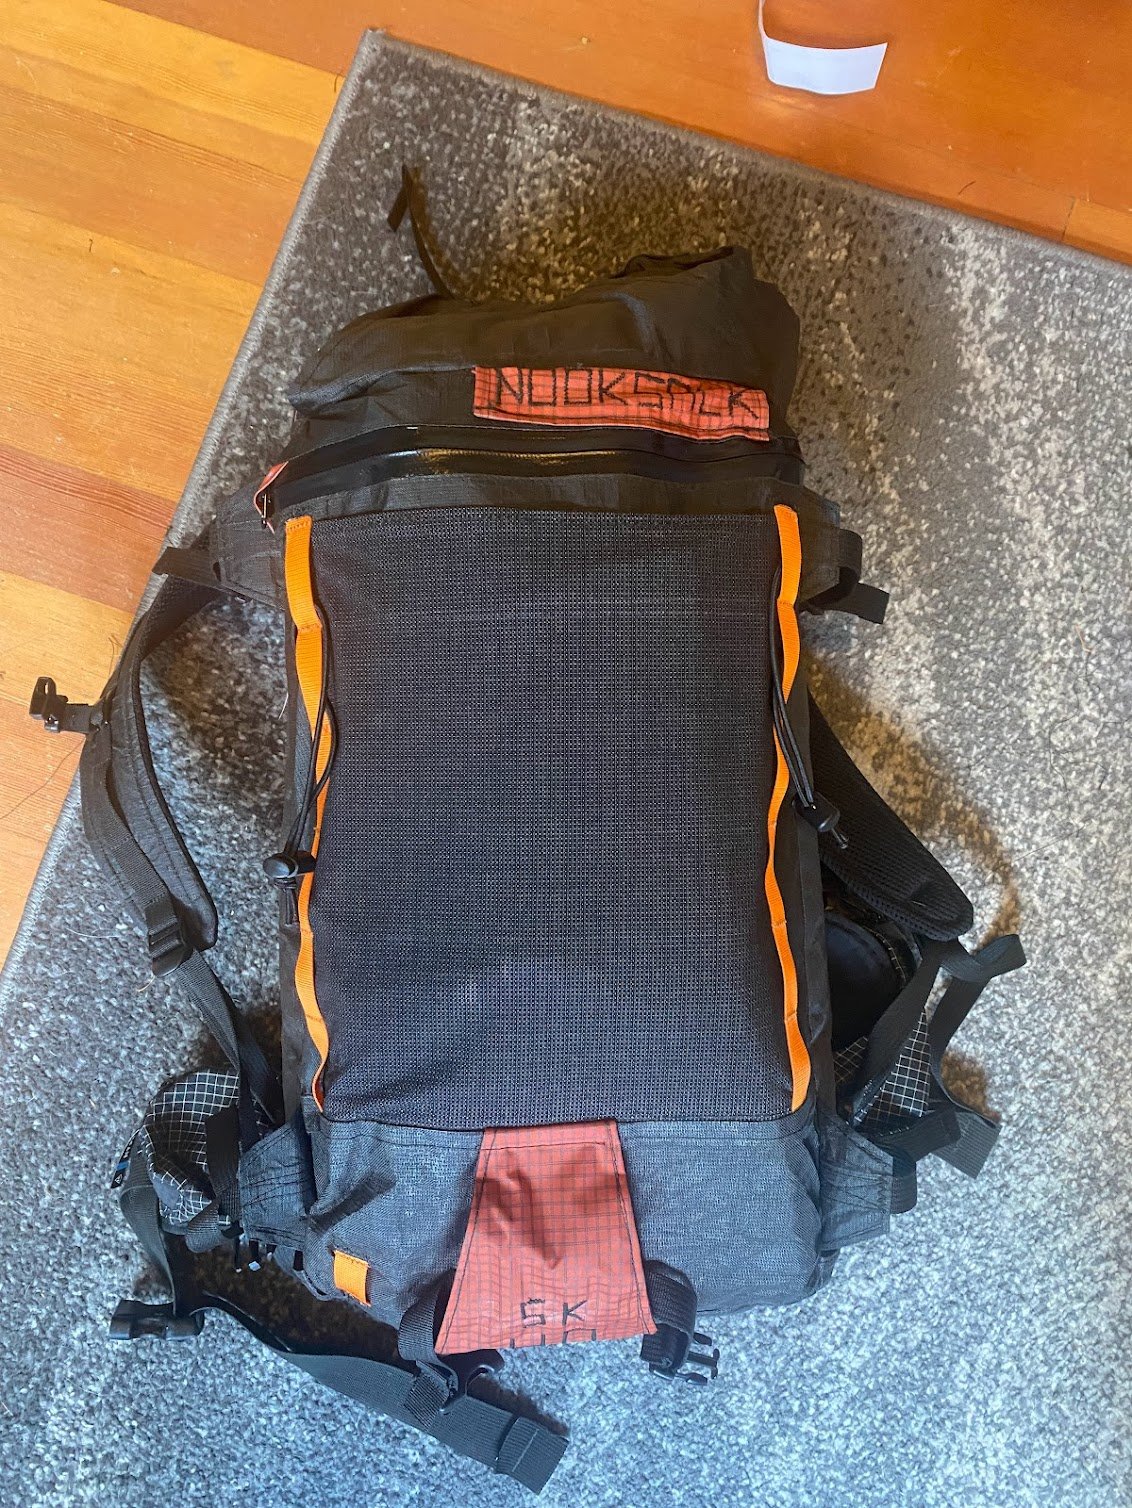
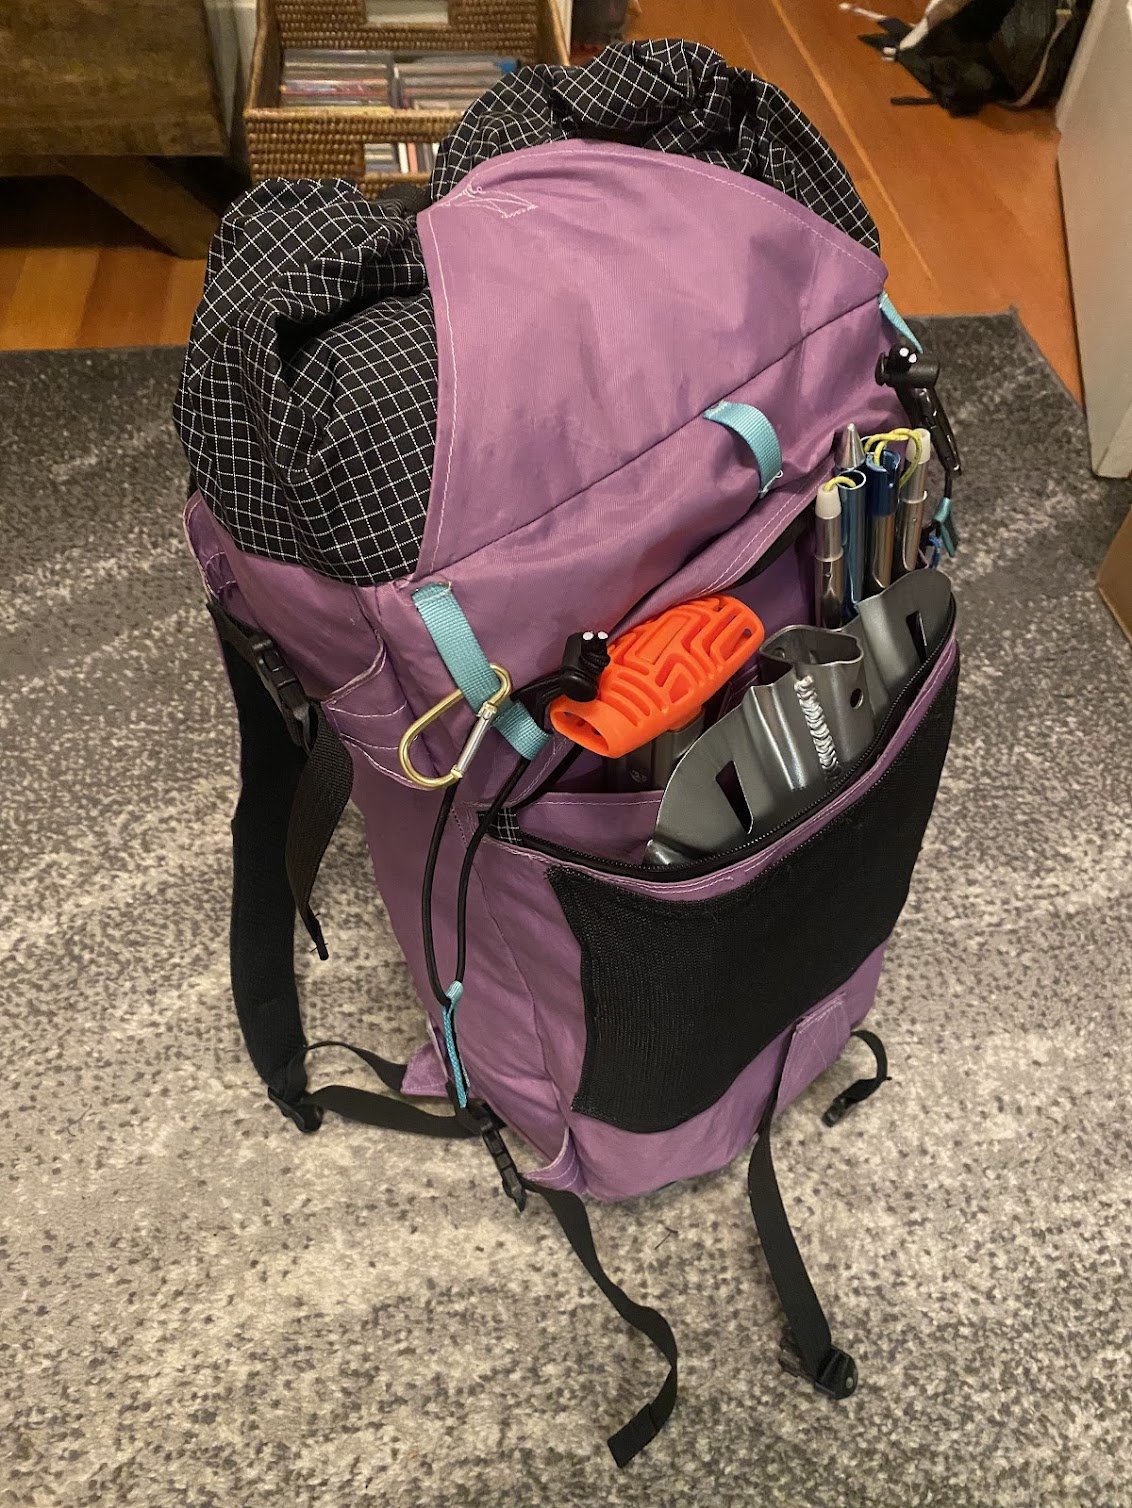
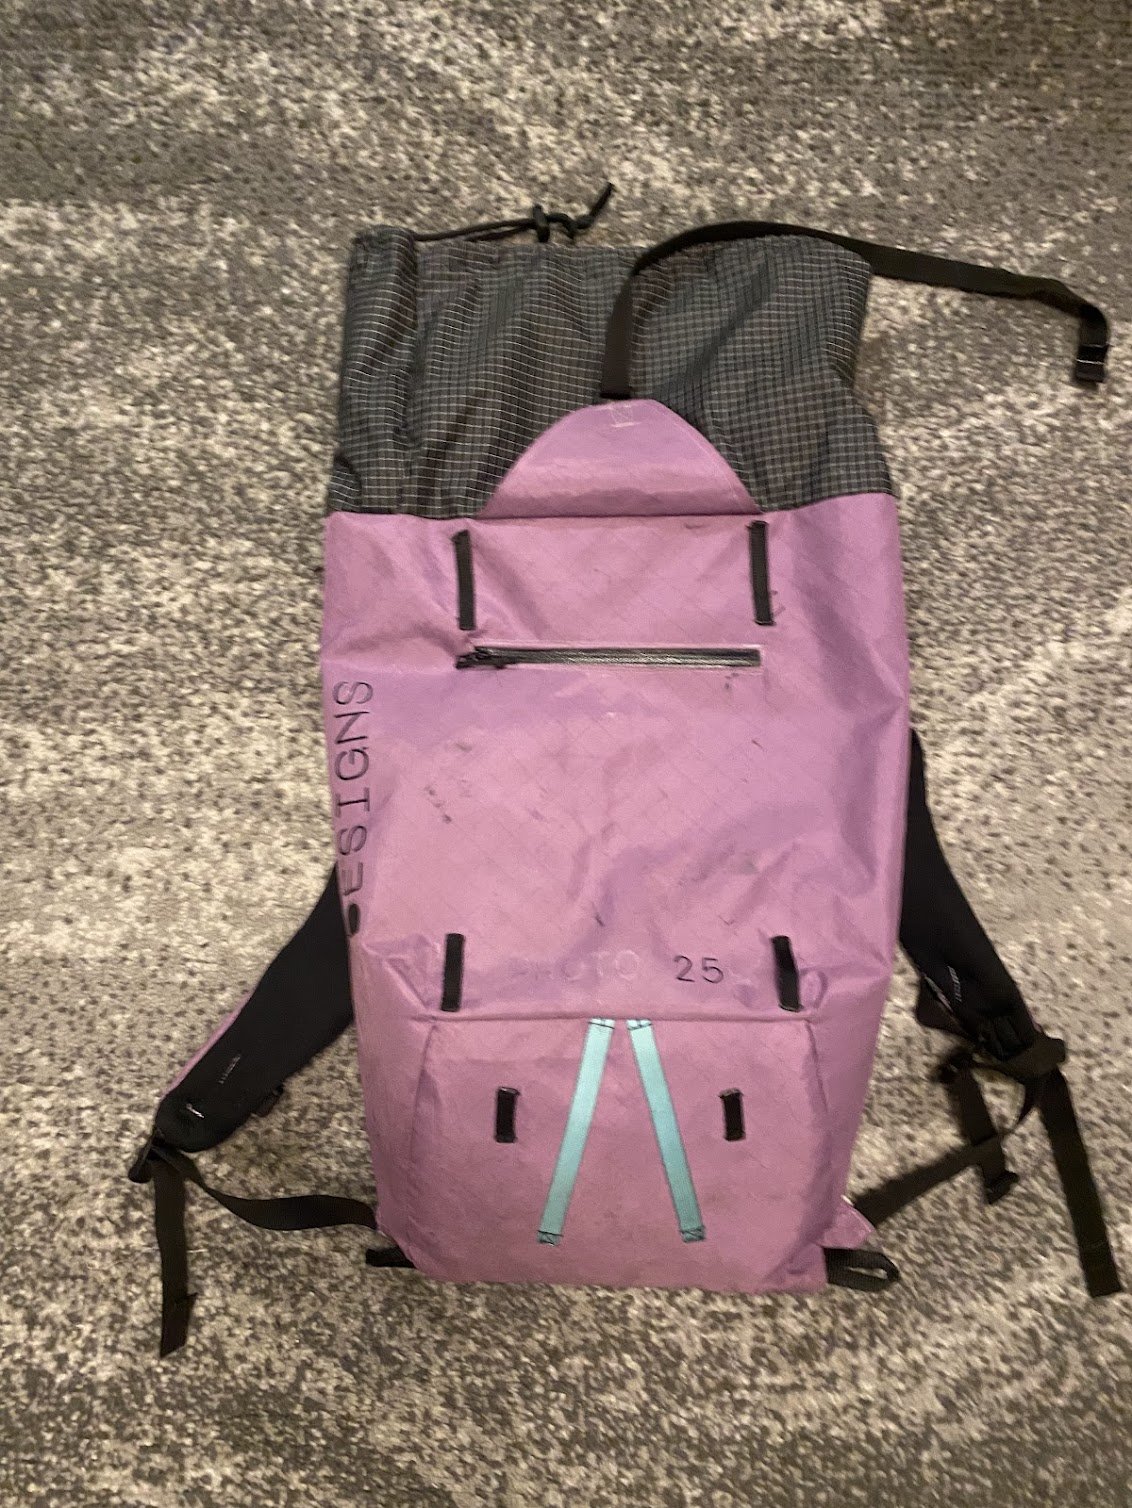
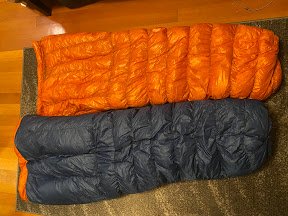
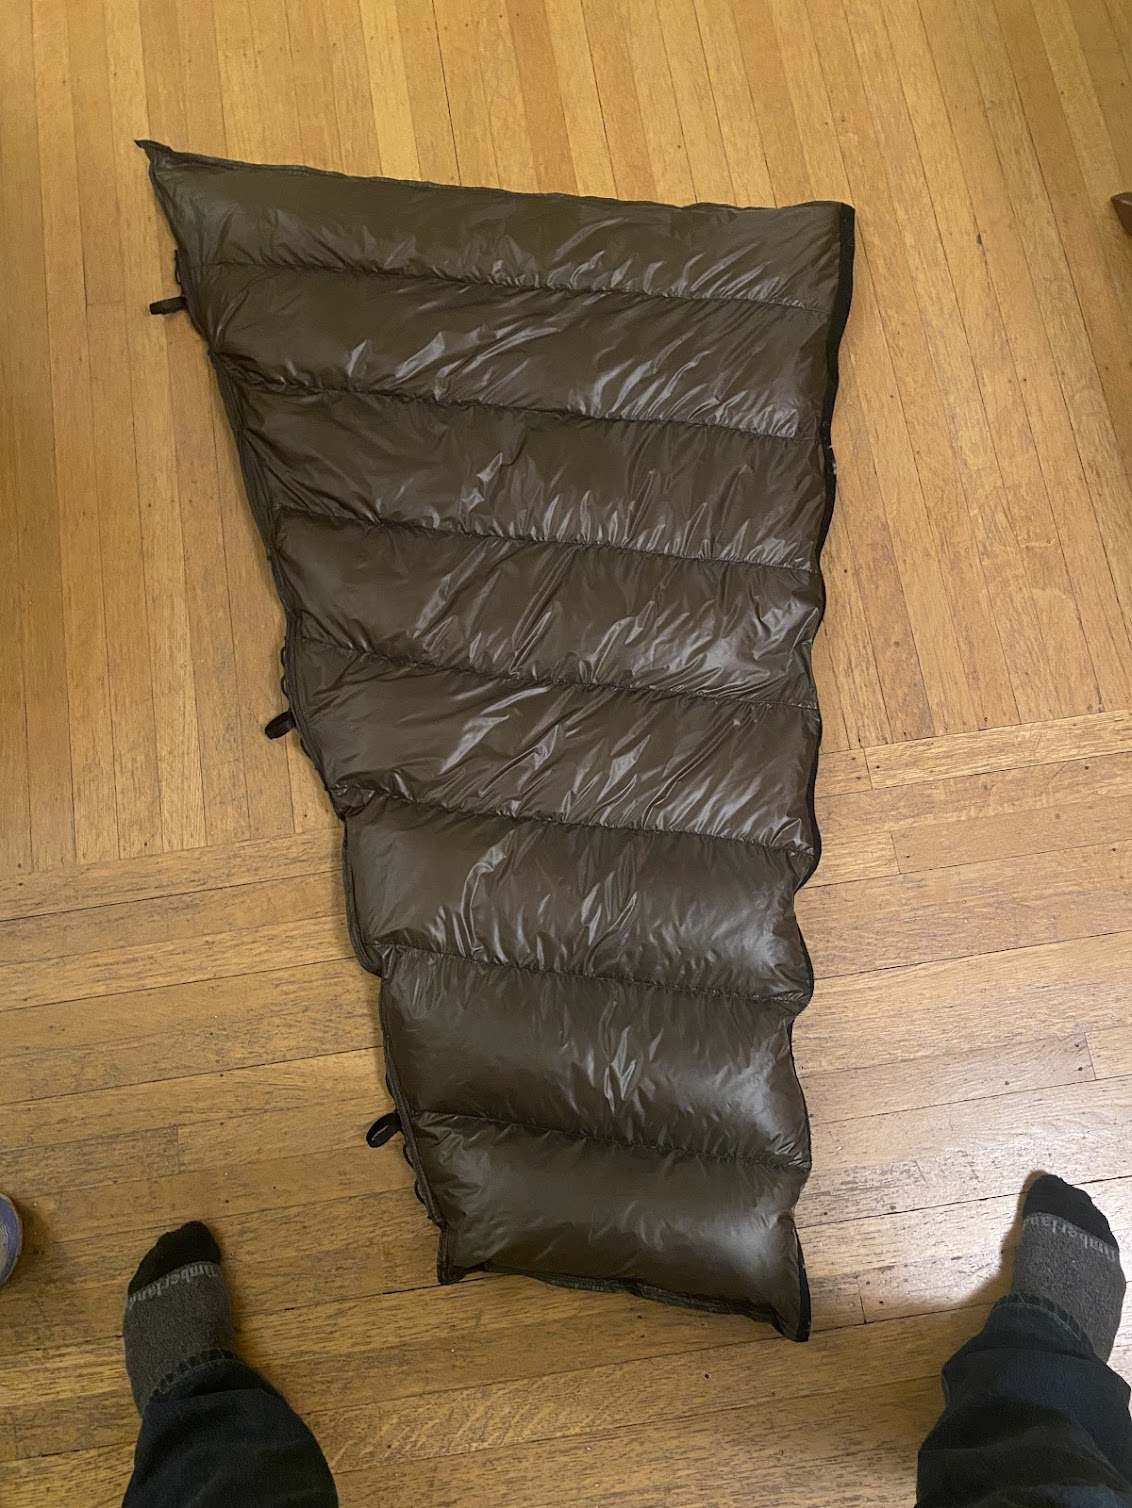
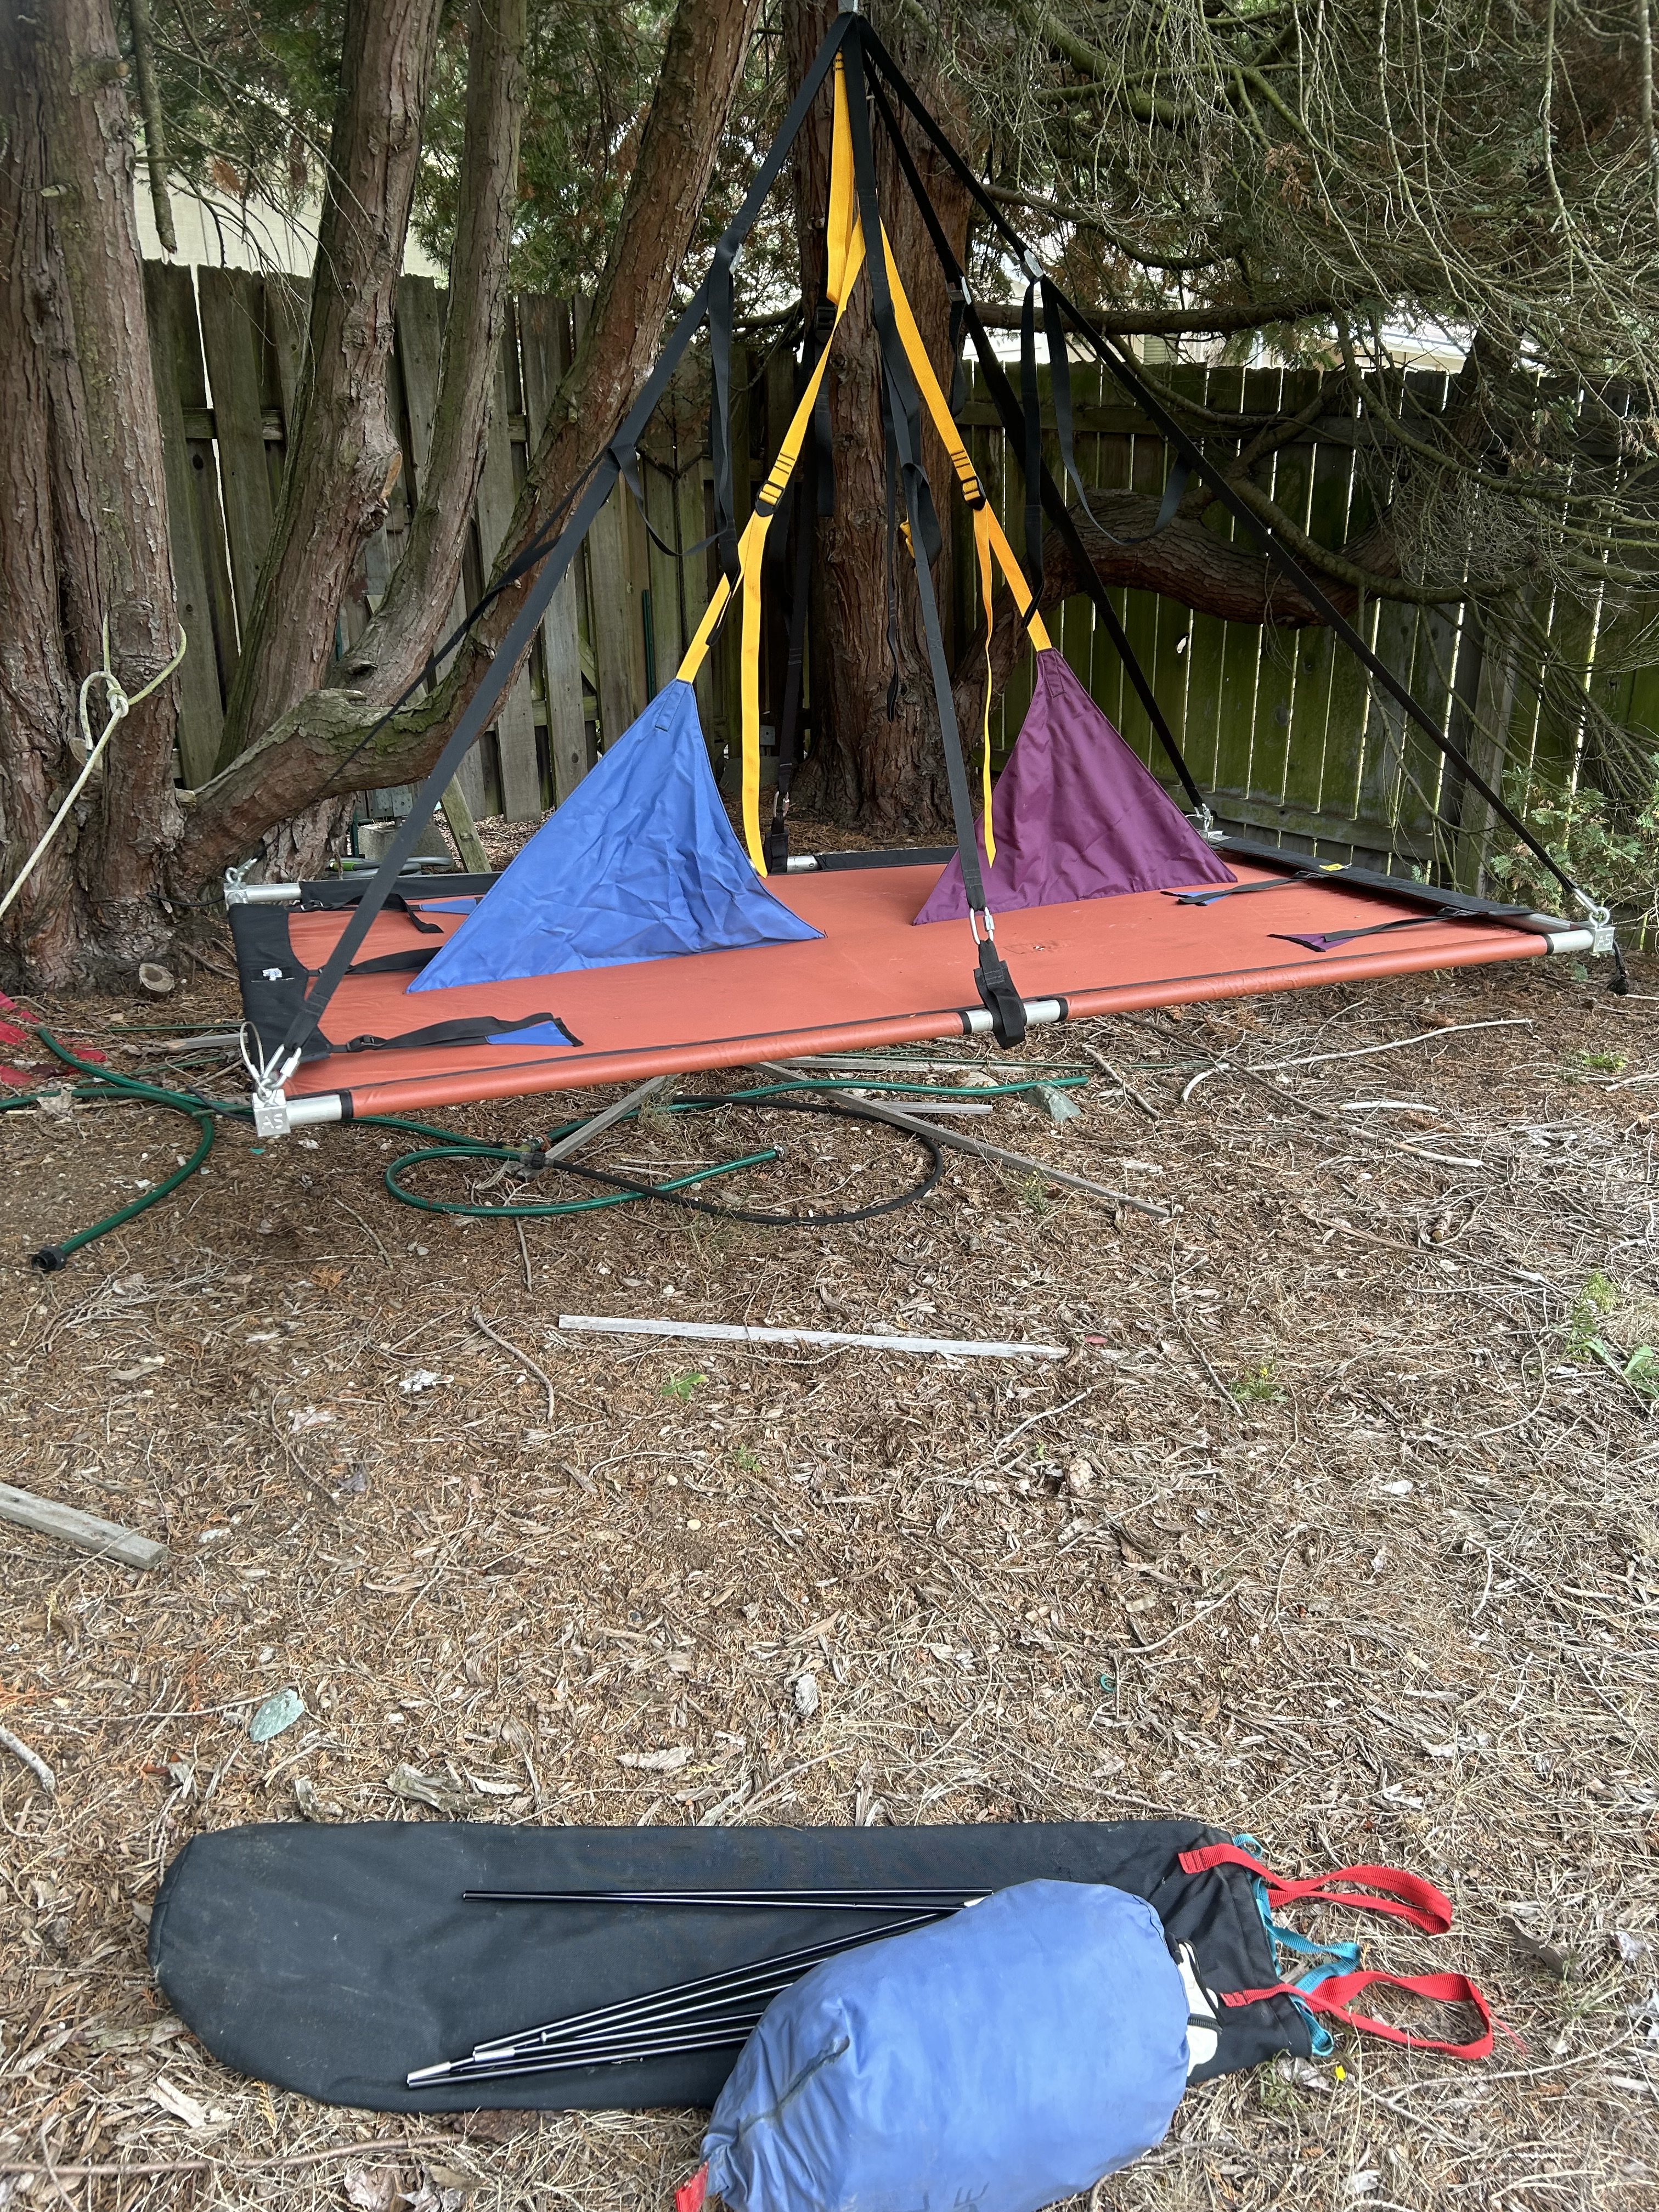
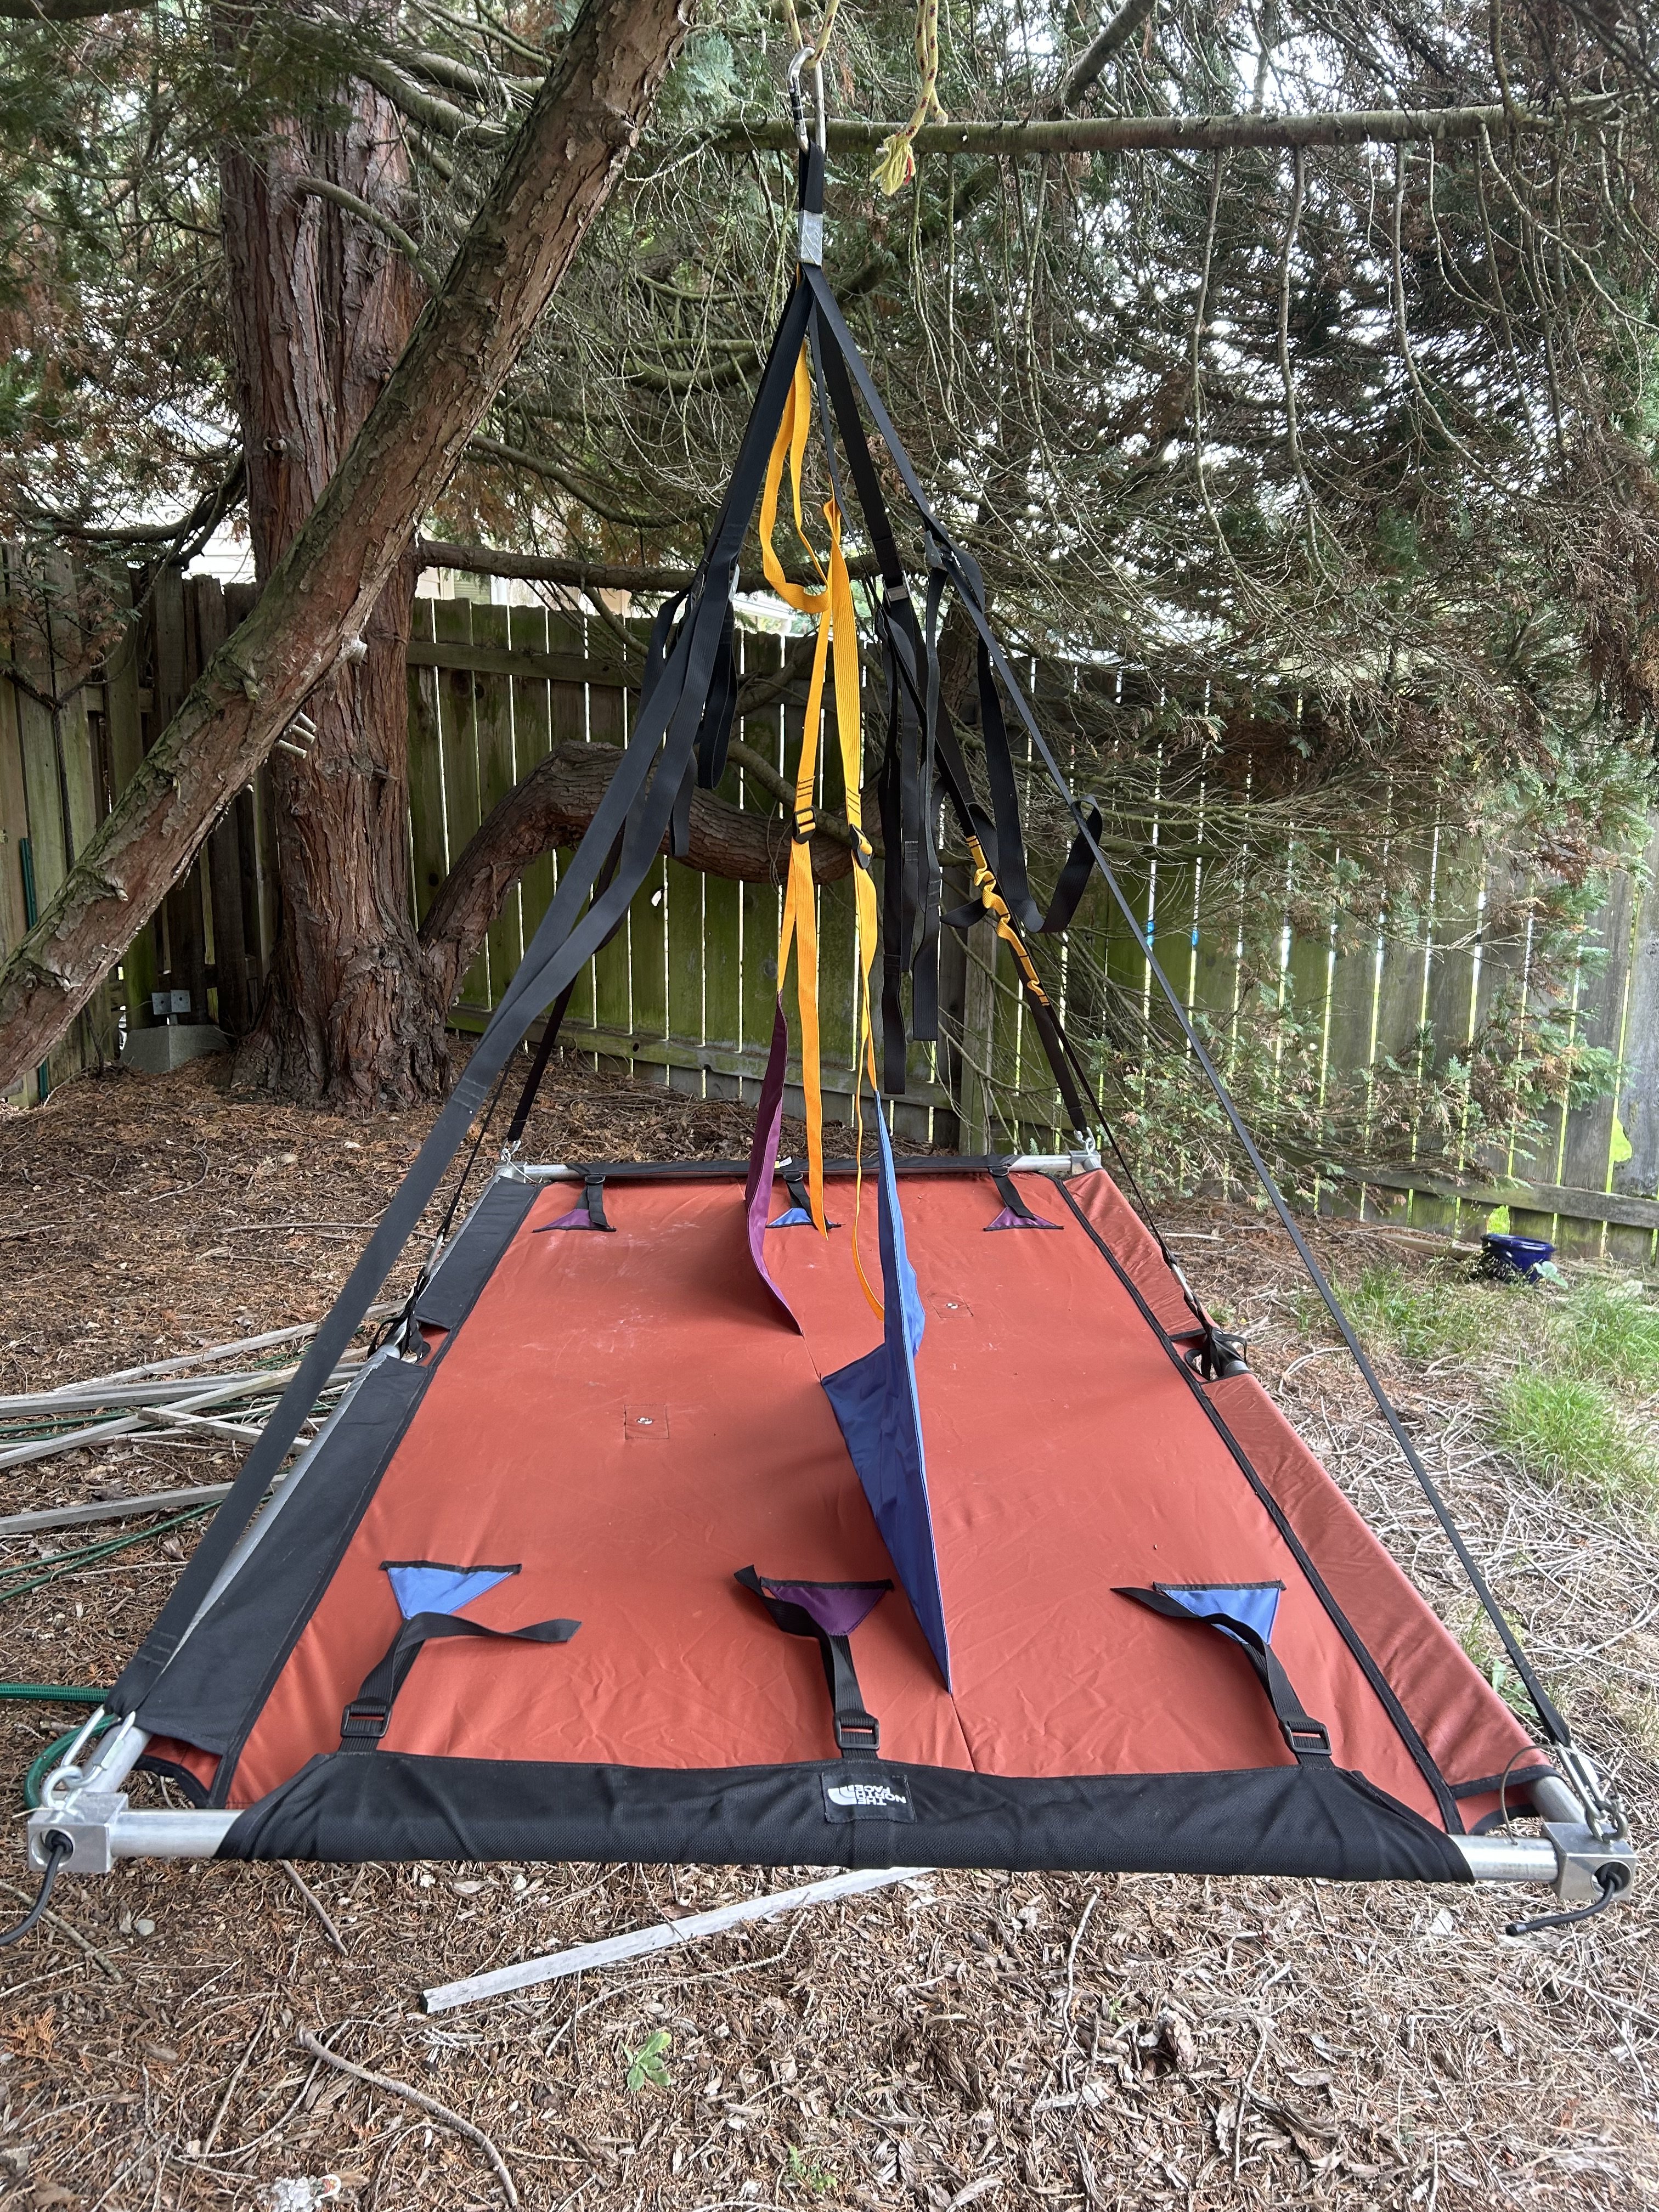
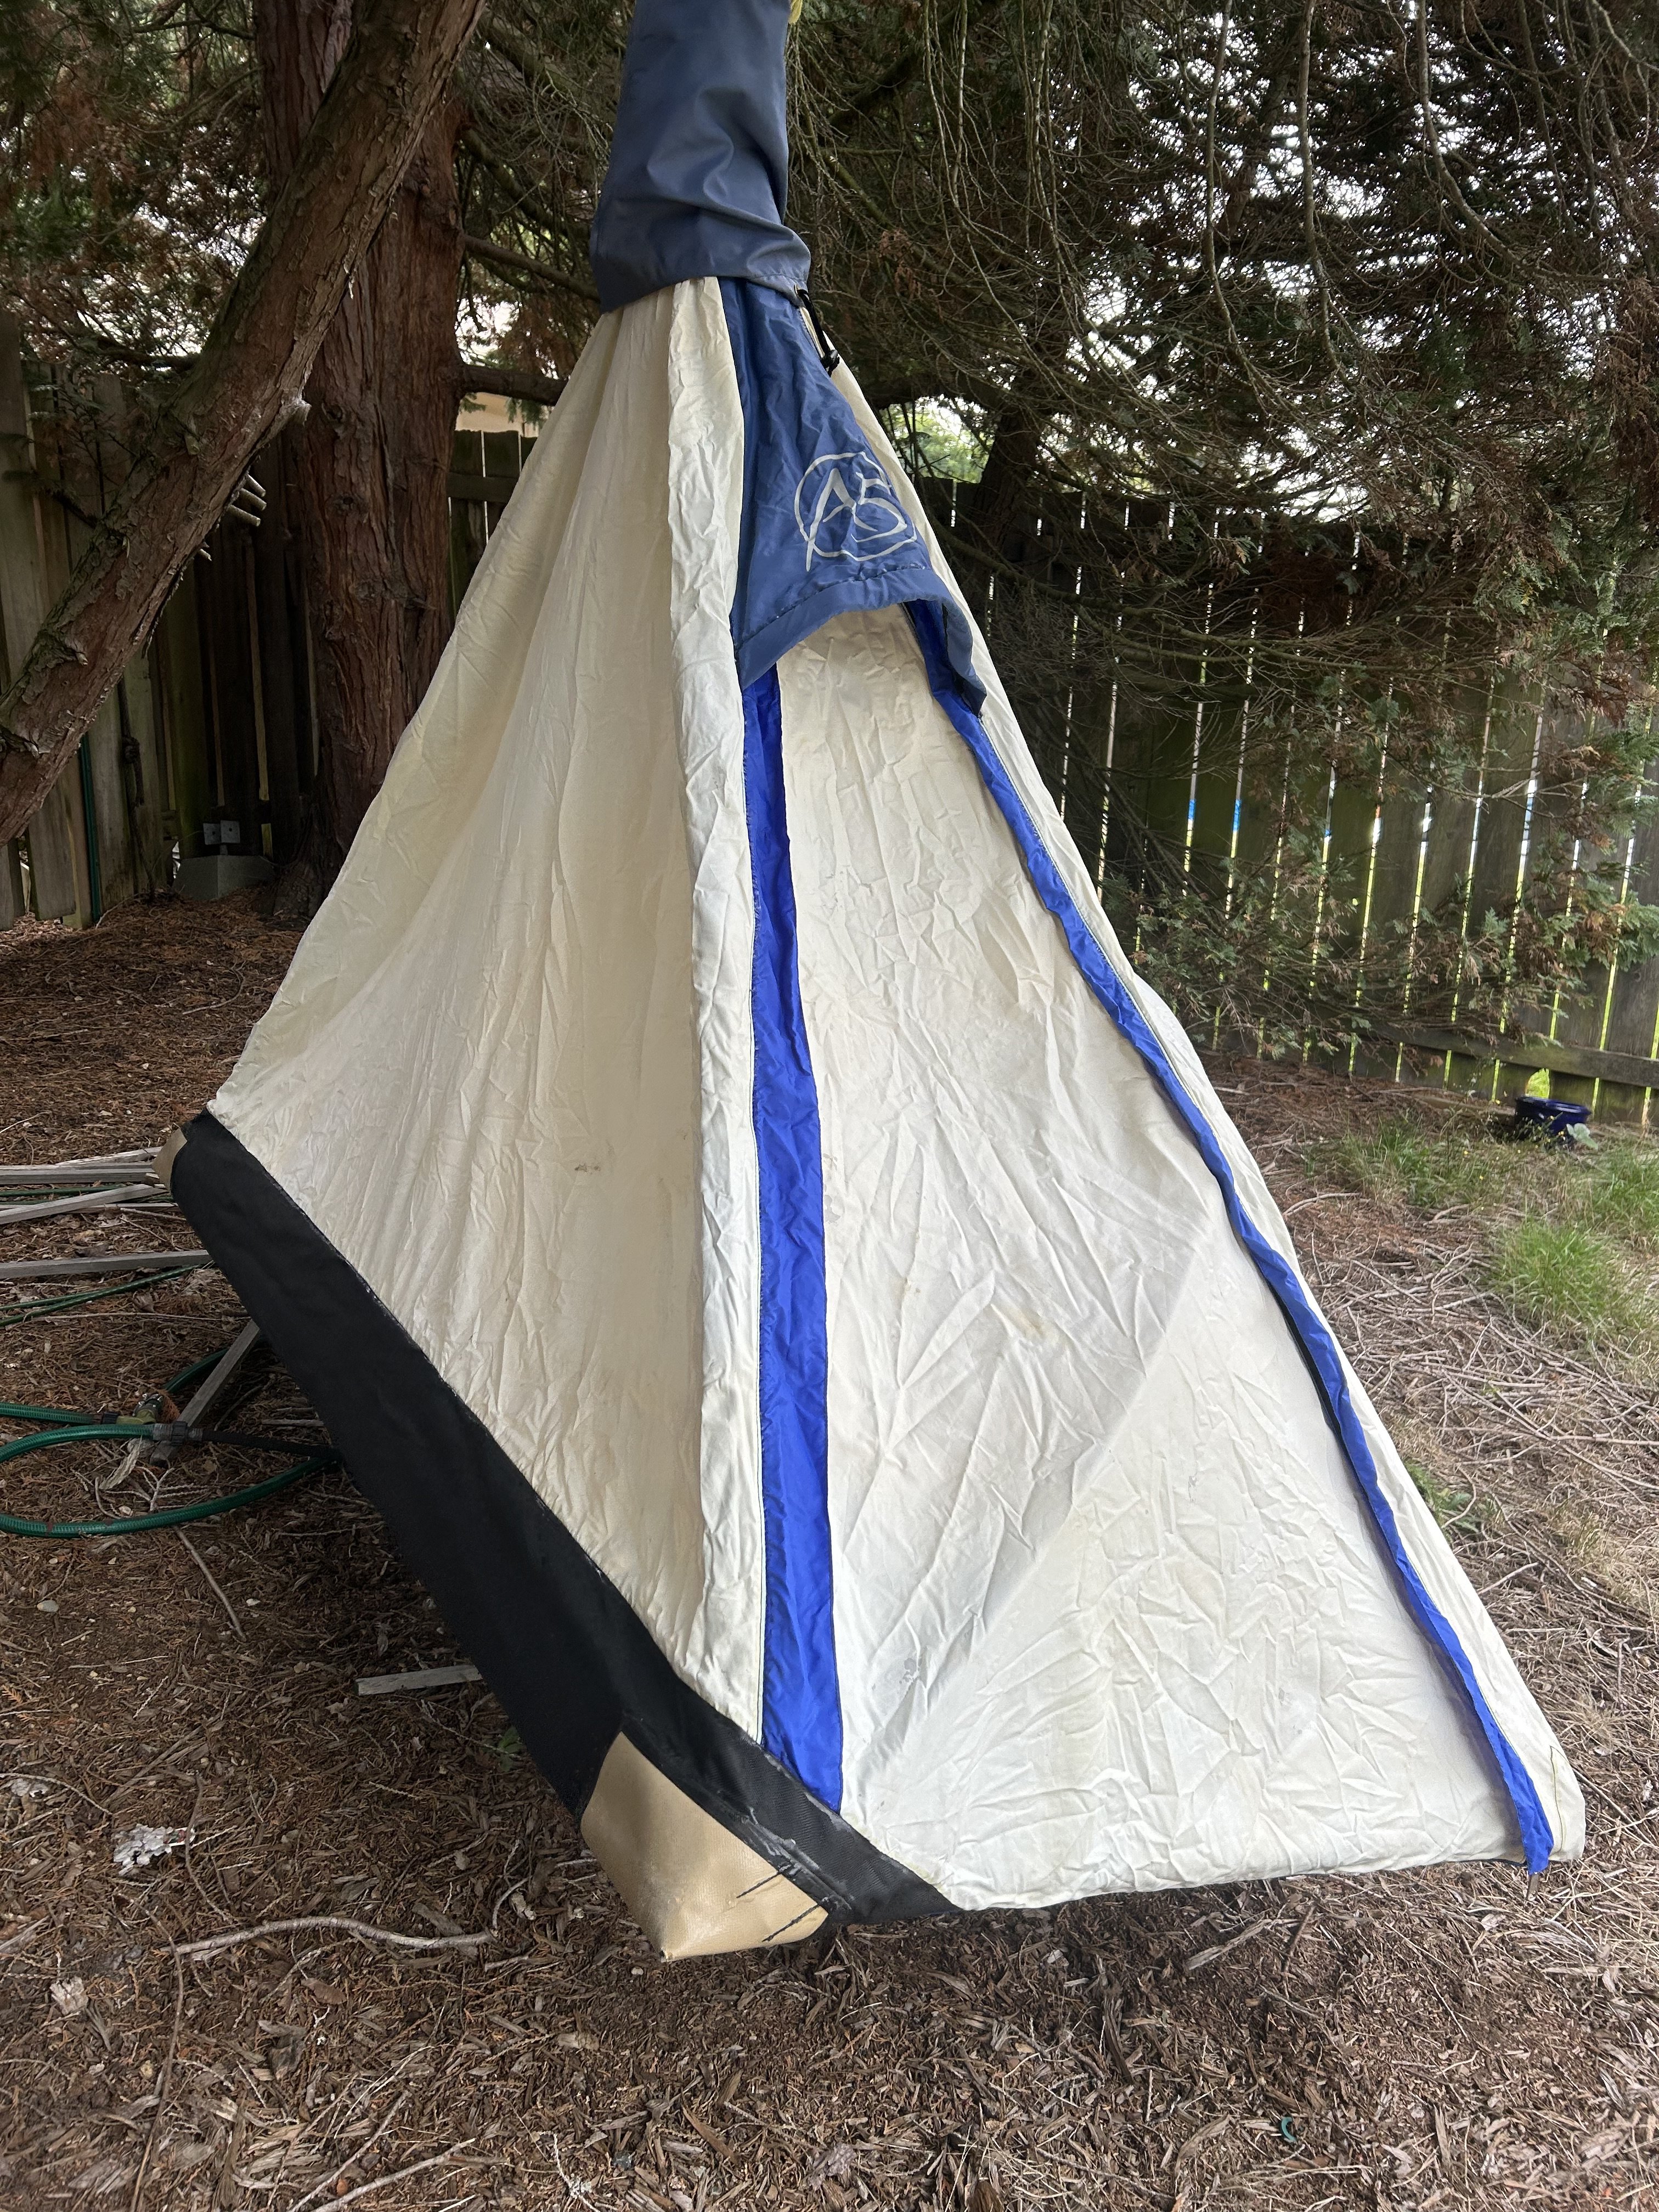
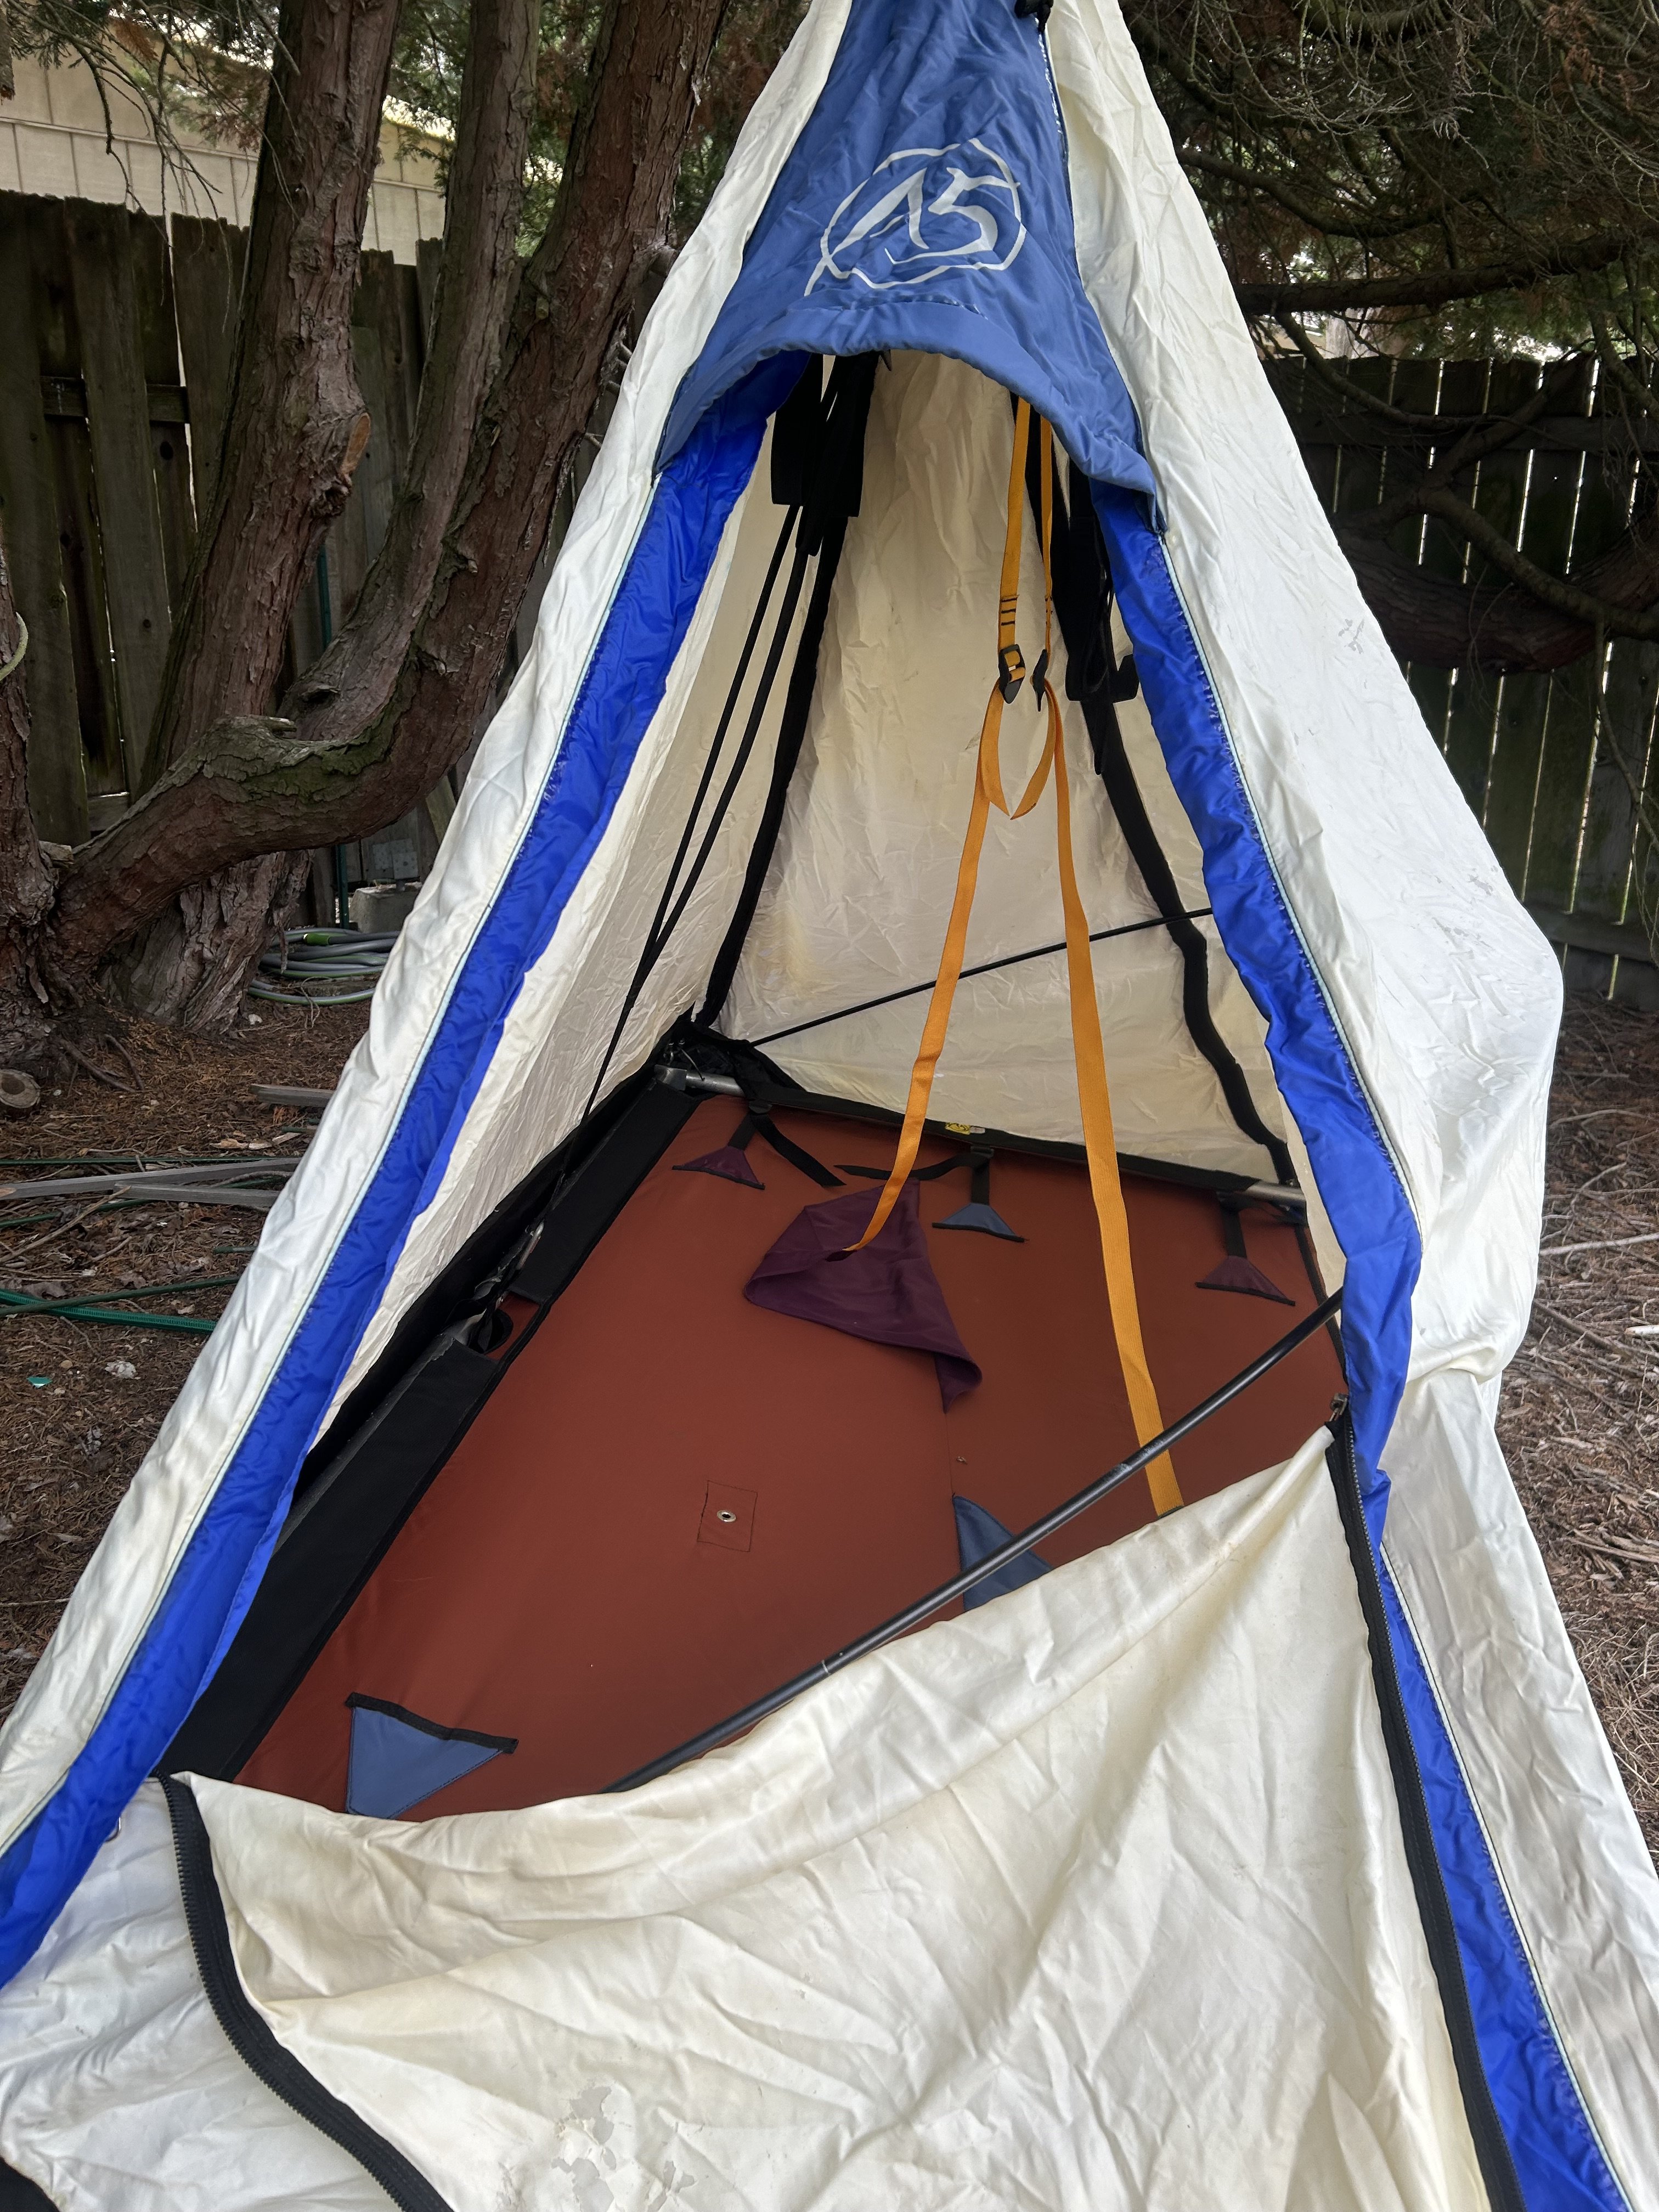
Some backpacks and sleeping bags I've done in the past couple years. Have also built an ice screw roll, bike bags, and more. Great rainy day activity for the gearheads among us. Also including a quilt extension commission that I just finished up. Open to small projects and have reasonable prices
 3 points
 -
Trip: Guye Peak - South Gully Trip Date: 01/22/2026 Trip Report: My friend Vraj and I climbed the South Gully of Guye Peak during the strong inversion layer on 1/22/26. This was both of our first times up to the peak and we were rewarded with some great views above the low hanging clouds. We left Seattle later than intended due to the usually busy traffic on a Thursday and ended up parking at Summit West Lot W3 right around 0900. We asked one of the Summit employees about the parking and were pleasantly surprised when we learned you do not need a pass to park there on a weekday (non holiday). We then worked our way to the base of the South Gully moving pretty slowly and finally roped up around 11 AM. The conditions at this point were ~32F and cloudy as we were very much still in the inversion. Mixed climbing between loose Class 4 and snow for about 7-8 total pitches. The going was slow as it was both our first time in this type of terrain and found the protection to be limited. We were pleasantly surprised with how much snow remained in the gully due to our own pessimism on the south facing route. We were also looking forward to our friends who had told us to go find snow somewhere else! Some fun climbing through the chock stones (which were completely bare) led us up and out of the gully turning left prior to the end. Vraj took the lead on the last pitch before we decided to unrope and scramble the rest of the way to the south summit. This was ~1630 and the light was starting to fade. We wanted to make it up to the north summit before dark so we had to hustle. After reaching the south summit we traversed to the middle summit easily on a snow band. We were looking around for about five minutes before spotting the correct rappel station off a tree below the summit. We made it to the final ramp up to the north summit which contained the best snow of the trip. Topped out on the north summit at 1750 to a fantastic view of the backlit cascades. Downed some much needed calories we made our way back to the parking lot off the north side and through the Commonwealth getting back around 2000. Gear Notes: 60m rope 1x 0.5 - 3, nuts 2x pickets (did not even think of using) 2x ice screws (why) Approach Notes: Standard South Gully approach (MTN Project)3 points
-
East side of Mt. Pugh two days ago.
 3 points
 -
We are not dead! That was extremely trying. The server totally crashed in a terrible way right in the middle of a super intense week at work for me and I was taxed mentally to the max figuring this out. Luckily I have a couple really good friends, ex-coworkers...but they are friends to give me moral support and confidence to do everything I did which was rebuild everything on modern software. So the site is in a MUCH better place than it was pre-crash. I still have a bunch of maintainance to do, but the site is back up and going. Thank you for sticking around. We WILL keep this place alive dammit.3 points
-
Sloan and Bedal this past Sunday:2 points
-
Dakobed from Helmet Butte:2 points
-
Sunset from bivy below Winnie's Slide
 2 points
 -
Original plan was to climb the south gully of Guye but decided to drive down the Alpental road to check out conditions. Ice cragging a short walk from the car doesn't come along very often in Washington! There was a decent amount of ice on the various Alpental falls. A grab bag of thin/brittle with some fatter bits and some low angle hero plastic thrown in. Plenty of water running under everything. Mostly we set up a top rope on the climbers leftmost side directly under the Phantom Slide (Aplental IV I think?)...I've skied this in fatter snow years ::sigh:: Alpental II looked pretty fun though dicey for good screw placements. Sadly I only brought a few screws because the original plan was Guye (sorry Michelle!) so we didn't go up it. Saw two guys who said they went up to look at NY Gully and it was totally dry/ice free, otherwise no other climbers. I think Alpental II is the far right flow
 2 points
 -
Great shots Jason, the new camera is proving itself! Thanks for getting me out for a great day!2 points
-
A few more photos from a single-push on the Emmons I forgot about.
 2 points
 -
Three weeks ago, when it was still winter:
 2 points
 -
Speaking of what we want to preserve on this site....this thread is a great read. Here's to you Mr. Stoddard!2 points
-
Yep. That was me. I have a picture of me holding the approximately dictionary-sized rock that came through the tent while I was sleeping at thumb rock and embedded itself in the snow about 12 inches above the top of my head. It would have killed me if it had been 18” lower. Weird waking up in a fully zipped up mountaineering tent due to a weird noise and looking up and seeing the night sky. Wait, aren’t I still in the tent?2 points
-
Gorgeous gallery and well composed! The Artisan is indeed in.1 point
-
I took a look at, but chose not to climb, Eliot headwall on 2026-01-25. Here's a picture. It's a bit difficult to tell but I suspect that much of the snow is very firm. I haven't been up the north face gullies this season but in late november cooper spur offered roughly 1000 feet of climbing with penetration varying from crampon points to the ball of the foot or so.
 1 point
 -
Great write up and beautiful photos of Steve Barnett's favorite July ski tour! I've been meaning to do it but that southeast side of Table after a good snow spooks me. You hit it right in terms of timing. I was sitting on top of Hadley Peak in late July taking in that view (seen in your Chowder Ridge pic, but from the opposite view). Such dreamy ski touring terrain for an extended snow camping trip! In Barnett's 1987 book "The Best Ski Touring In America" (highly recommended!), he talks about the winter avalanche risk on that SE aspect of Table (hence his preferred time to do it is in summer), and how a party got caught in a storm on the way back and buried up to their necks by an avalanche off that side of Table. Instead of continuing to Artist Point, the party turned back and made an epic exit via Wells Creek drainage, stumbling over logs and through icy water and devils club thickets in freezing rain. Barnett wrote: "They spent the night keeping warm by wringing their clothes out". Type 2 fun. Even when you hit the Wells Creeks logging road it's still a looong slog back to Nooksack falls and the 542. Coming back via Chain Lakes and Herman saddle is less avalanche risk but that group probably hadn't done it before and the route finding through the trees and hillocks covered in snow can be circuitous. I believe Chowder Ridge is actually the ridge barely seen in shadow on the right skyline of the photo. The rounded ridge in front of it I believe is Dobbs Cleaver, draining into Bar Creek. It's wild terrain up there, so close yet feels so remote when you are back in there. The peaklet to the left of Hadley on the connecting ridge is Peak 7842 and continues up Bastille Ridge to the Cockscomb just north of Grant Peak. That view of the bowls of Wells Creek in your "coming back up over Table" photo look amazing! Ted Mueller wrote in his 1968 book "Northwest Ski Trails" (with great B&W photos from the Spring brothers): "These north-facing slopes are smooth and unbroken between 4800 feet and 6200 feet. The variety of runs is unlimited throughout this entire area." Rainier Burgdorfer wrote in his 1999 book "100 Classic Backcountry Ski and Snowboard routes" : "Whether or not you decide to reach Coleman Pinnacle, there are abundant possibilities for runs over 1,500 feet in length." Thank you for posting up!1 point
-
SJake on the summit of Luna, taken from the false summit with a disposable camera in 2018. One of those perfect mornings in the alpine.
 1 point
 -
Black Cloud Thunder by Twark Might It is eleven PM. Thirty feet of snow has fallen in the last twenty minutes. My fingers are frozen solid. The wind is pounding our ropes and our determination. Our belay consists of one piton hammer stuck three millimeters into a rotting hunk of moss. Harry Hampered is vomiting green and brown spew and bleeds copiously from his rock-fall-broken nose as I get ready for the final pitch of our new route on Les Grands Tombés in Chamonix. Worst of all, I think I’m out of batteries and can’t listen to my Discman. * * * I got the call three weeks ago in Boulder. I was sitting at the Airy Green Fairy café with--let’s call her--Amy. “Twark,” she pressed, sensing doubt perhaps by the way I held my pinky on my espresso-cup hand, “now is when I need you. I’m starting my organic community garden for underprivileged Latino youth with cerebral palsy and autism, and I need your support. I want you here with me and those kids, being a role model and helping.” Away off in the distance, September snows dusted the Rockies. Her voice drifted away into the clear empty air as icy couloirs, sheer granite cracks and ripping winds filled my mind with the usual NWA soundtrack: “You think I give a damn about a bitch? I ain’t a sucker!” “I’ve got stuff to do,” I told her, throwing a fiver on the table and standing up. Idly, I wondered if she was good for another round in the sack, and then forgot about it as I saw the Big Bad Bodies Gym sign down the street. Time for pain. * * * Climbing will go faster, I realize, now that I have cut Leif Trailer free from the rope and he has fallen to the death that suits wussy people who refuse to lead dangerous pitches. His screaming is nearly gone from my mind as I start up the pitch. I find a tenuous placement for my left tool. An enormous chunk of ice slams my right shoulder, breaking my arm. I now have only one arm to climb with. As the pitch begins to overhang by 45 degrees, I have to do one-armed dynos with my left tool to ever smaller holds with no feet. I move up thirty feet on no gear, then grab my tool with my teeth so I can use my arm to put in a screw. “Eat my ass, Will Gadd, Raphael Slawinski and Stevie Haston,” I mutter through a mouthful of tool. “THIS is mixed climbing.” * * * Alpine climbing is brute amazing pain, punctuated with moments of elation that only the few and the proud—the hard alpinists—will (and should) ever be able to savor. I begin my training routine with six hundred one-armed pull-ups per arm off of my Stubai straight-shafts. Bent tools are for posers. I follow this with six marathons and two thousand push-ups. In the weeks that follow, the frequency of Amy’s phone messages drops to around one per day. I get into the Zone, crank up the Joy Division and the Rancid, and get hard. Nights, I rent Masters of Stone videos and wonder at all the losers working boulder problems, prominently displaying their Patagucci and Horse Race clothing. The only way you could get farther from Real Climbing is to sit on a beach and imagine a mountain. And then float up it. * * * “Secure,” I scream at Harry. Towers of black cloud thunder over us as Harry jugs the pitch. He arrives, and I look deep into his eyes, and want to kiss him when he says “You are one crazy motherfucker.” This is why I climb in the alpine—to feel so close to both death and another man that kissing him and watching him die become equivalent sensations and equal possibilities. We are close, Harry and I, as we posthole toward the summit up the final snow slope. Then I hear the rumble of the avalanche. * * * I want to go light. We pack two screws, one nut, three small cams and one two-millimeter rope. Weight is for gumbies. I am naked under my Gore-Tex suit. The harness feels delicious on my scrotum as I test my gear in the privacy of my apartment. We will bring only water, energy bars and caffeine pills, and we will climb for 80 hours non-stop in order to finish the route. Boulder is full of girls with ‘biners holding coffee mugs to their backpacks and morons in SUVs with Petzl stickers as I head to the airport. Maybe the hardest moment of the climb is persevering through the dangerous approach slopes of sport, trad rock, bouldering, aid and gym climbing that threaten to avalanche safe idiocy onto me as I work toward The Real Thing. * * * Hanging with one heel spur, the avalanche roars over me. I vaguely hear Harry screaming as I take his full weight and he dangles in space. Something jogs my Discman, and suddenly the music returns. “Don’t call, don’t call me white,” sings Pennywise, something I can identify with. Who wants to be a member of the lame loser class that dominates? I get energy, and use my arm to haul Harry up. We continue to the top, blink twice, and stumble down toward bed. The next morning, we discuss the route name and grade over coffee. We agree on “Fuck the Entire Universe, Who Are Losers but Don’t Know It,” and grade the route at Grade VIII, WI7 A5+ 5.15c M22X. Harry, after this experience, will never climb with me again. And so, at the end of the climb, I am only really beginning up the lonely mountain of total alpinist commitment. http://www.falling.ca/1 point
-
Historically, a solid gold thread. This is what we’re fighting to preserve, but also to continue. The free flowing exchange of ideas represented.1 point
-
22.5y ago, holy shit! Trip report from 20031 point
-
There were so many rocks littering the tent platform at Thumb Rock that I tunneled into the up hill side about 2' so at least my head would be protected during the night. We were in bivi sacks so even a small rock would've been exciting. Wasn't there a TR a while ago where someone had a rock come through their tent in the night at Thumb Rock?1 point
-
You can get free Copernicus satellite imagery here: https://browser.dataspace.copernicus.eu/?zoom=10&lat=47.66954&lng=-121.40991&themeId=DEFAULT-THEME&visualizationUrl=U2FsdGVkX18z6Zi7g1Gbn2Jvf7fcB7hKdFXY56XViUM1f0y3pjlscnbMy4%2BSm%2FxjluCs8JUTQx8CDq%2BkXXcBjEKcs%2FIdXAgLCLpQHbynBn9mF0ONoxVS17wsMJ1aztTj&datasetId=S2_L2A_CDAS&fromTime=2025-12-22T00%3A00%3A00.000Z&toTime=2025-12-22T23%3A59%3A59.999Z&layerId=1_TRUE_COLOR&demSource3D="MAPZEN"&cloudCoverage=100&dateMode=SINGLE And free NOAA snow depth modeling here: https://www.nohrsc.noaa.gov/interactive/html/map.html?ql=station&zoom=&zoom5.x=2&zoom5.y=14&loc=48.946+N%2C+122.239+W&var=ssm_depth&dy=2026&dm=1&dd=7&dh=15&snap=1&o5=1&o6=1&o9=1&o12=1&o13=1&o15=1&lbl=o&mode=pan&extents=us&min_x=-122.86666666667&min_y=47.899999999996&max_x=-120.99166666667&max_y=48.949999999996&coord_x=-121.92916666667&coord_y=48.424999999996004&zbox_n=&zbox_s=&zbox_e=&zbox_w=&metric=0&bgvar=dem&shdvar=shading&width=800&height=450&nw=800&nh=450&h_o=0&font=0&js=1&uc=01 point
-
The ledge is in good shape but the fly is undoubtedly no longer waterproof. Shoreline area.
 1 point
 -
Thank you Benjamin S!1 point
-
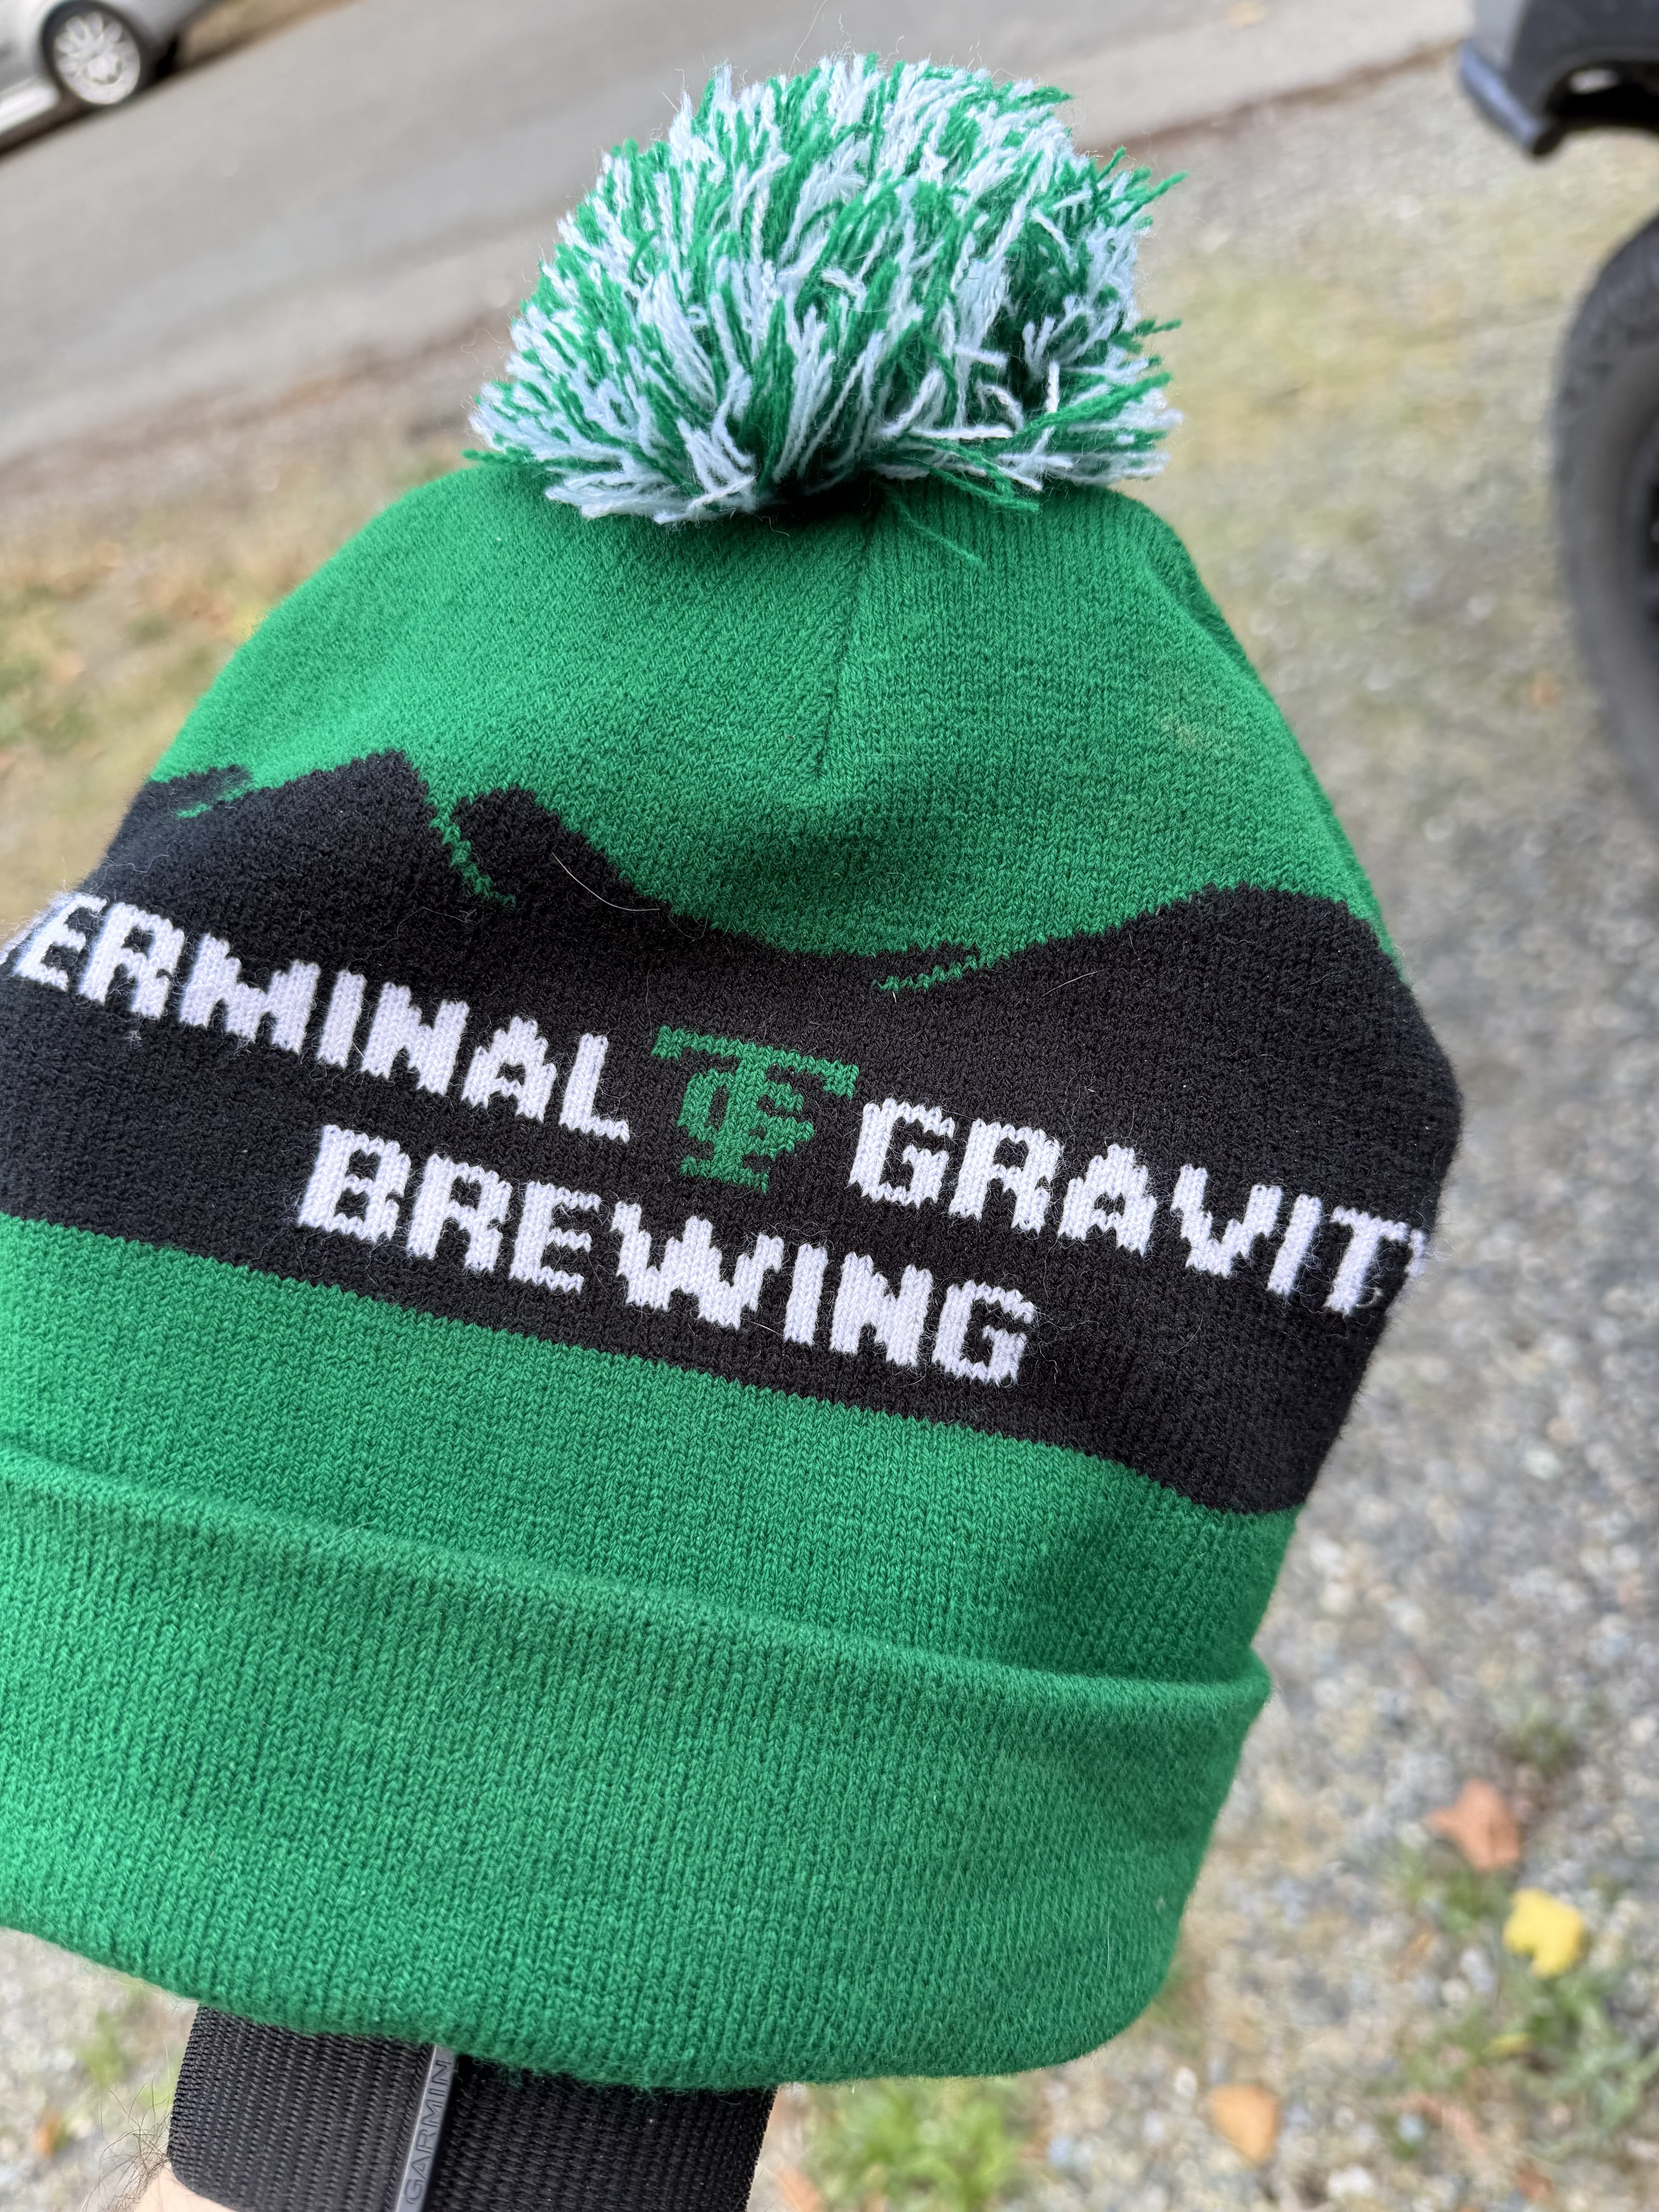
On a road trip in Idaho and Montana and came across this hat in a thrift store in a little town in Montana when I stopped in to get some steak knifes. Got this and three steak knifes for $2. Thank you Steve and RIP.
 1 point
 -
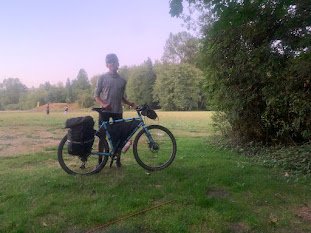
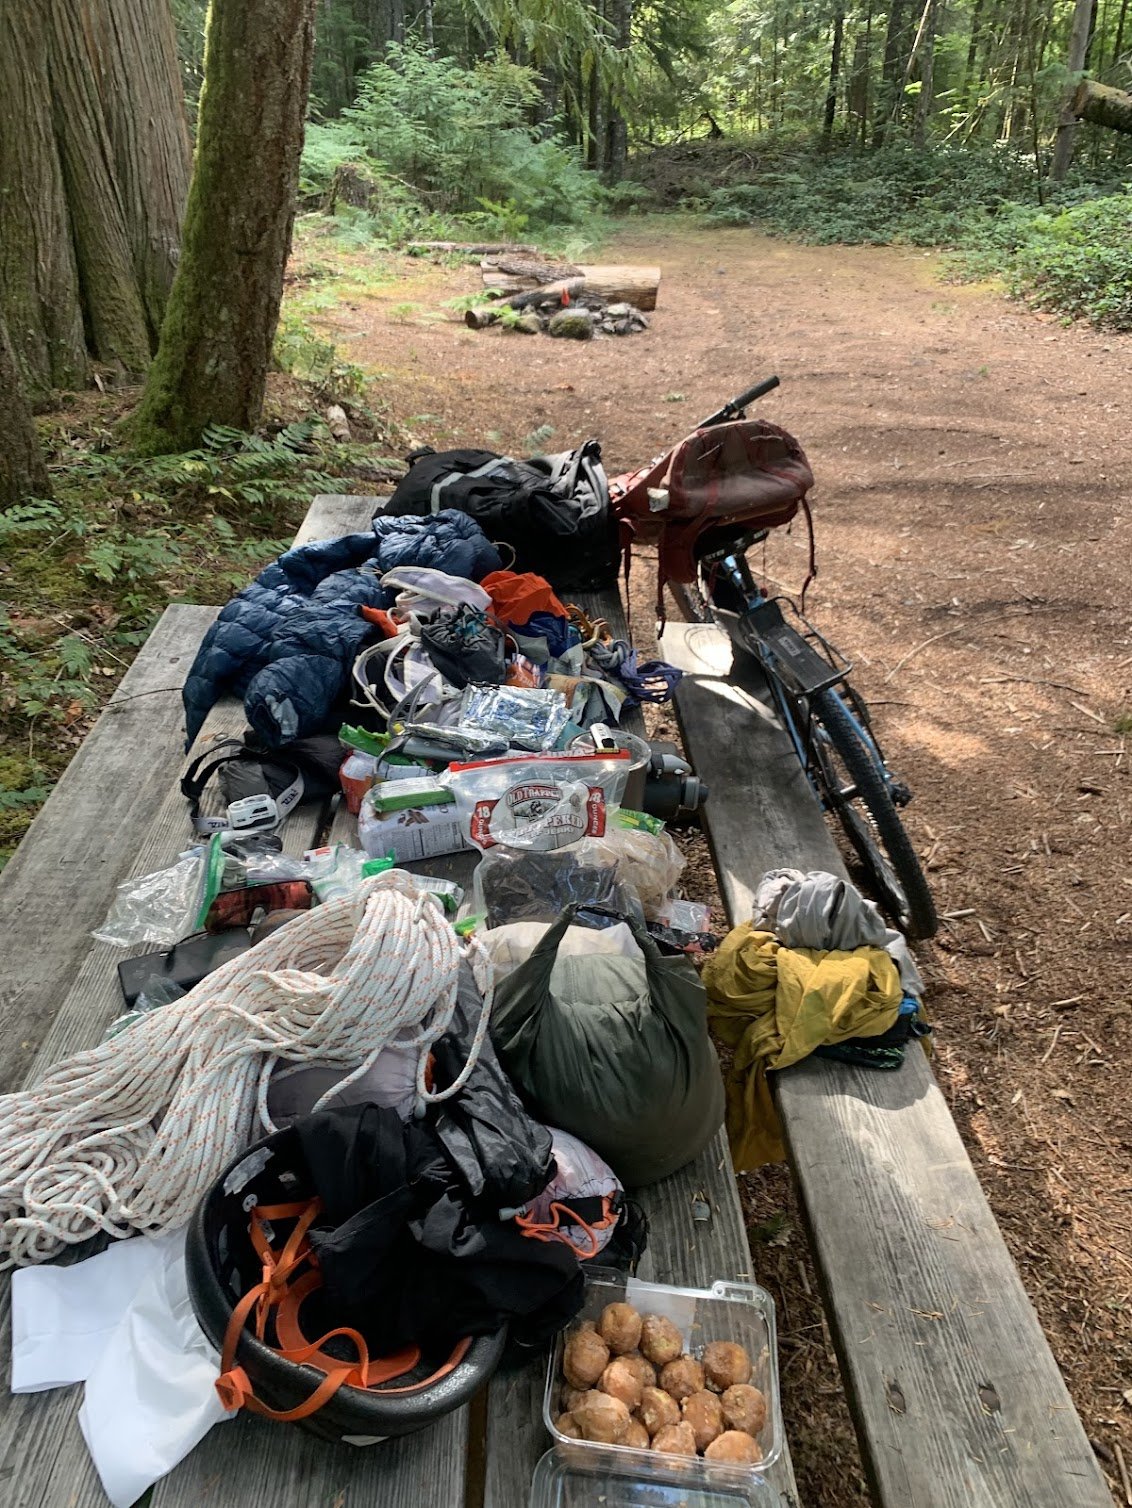
During the past school year, I’d made the plan of doing a bike to climb trip this summer. Mainly due to the fact that it’s difficult to borrow a car from my parents for a while, but it also just seemed like a neat concept, and I was down for an adventure. After getting back from the North end of the ptarmigan traverse, I was inspired by the peaks further south. My partners were either out of commission or had came up with the lame excuse of “work” and “paying bills” so I figured I’d make it a solo trip. The peaks on the ptarmigan traverse made good sense for this since they’re usually 4th or low 5th making it a pain to bring rock gear. The only challenge was glaciers, but I hoped with my later-season climb they would be mostly dry. I was pretty lazy about prep so a late Saturday night found me and my brother binging a show. I woke up at the too-early time of 7am on Sunday and packed my bike before setting off at 10. Sunday 8/17 The first day was quite chill until I got to the centennial. At my first break on the centennial, I went for my phone when I realized my pannier pocket had been completely open and in a position to spill out the contents for the last hour while I’d been biking down a windy hill and over railroad tracks. I looked around but couldn’t find it so I asked a kind stranger to see if I could call my parents to find out the location. The man, Tom, ended up driving me back an hour of biking to the last known location but after a 1.5 hour ordeal, I came out empty handed. I figured I’d continue on with a garmin and stop by somewhere to get a map. Hour or so later, When I reached down in my frame bag for some snacks, I found it tucked behind some bike tools. The rest of the day went smoothly and I got into Darrington around 6 or 7 in time to get some food, buy groceries, and set up camp. Monday 8/18 As was the trend for the trip, monday was also a moderate day. I biked 30 miles to the trailhead and hiked up to itswoot ridge. The Downey/Bachelor creek trails are now well cut out. Always able to see your feet. At the Bachelor turn-off I ran into two climbers who were coming down from dome. Once I got to cub lake, I met a backpacker who had twisted his ankle a few days ago. An hour later I watched a helicopter come pick him up. I worked it up to Itswoot ridge where I went over to back the peak before setting camp at the established bivy sights to a nice view of dome and glacier. Tuesday 8/18 Trying to save phone battery and figuring the ptarmigan was obvious, I navigated the old fashion way. I knew that I had to climb through snowfields to the spire col so went to what I thought would be the obvious one. Once I was climbing the gully to the col, I found that it was much much looser than I had expected. Topping out, I realized I was definitely in the wrong place, I’d gone to the spire/west spire col. A shitty descent and some more vert later, I got to the right col. I scrambled up spire peak and enjoyed a mix of sun and clouds. TR’s had reported a licheny slab that wouldn’t be fun in approach shoes but it wasn’t too licheny anymore. From here I made the awful descent down to the basin where I traversed around to cub lakes. The only snow of the entire day was between the col and the base of the spire point. I got into cub lakes early and bagged 7340 and Lizard before heading to bed. Wednesday 8/20 The goal for the day was simple, Sentinel and Old Guard. The south cascade glacier was entirely dry and it was cool to see all the glacier monitoring equipment. I found a nice left leaning ramp up the West face of sentinel and scrambled to the top. With the sun and clouds there was a cool glory effect. I descended down, traversed over to the Leconte Glacier, and followed the dry glacier to the col. With some endrunning I was able to stay entirely on ice except for a large snow patch right before the col past the schrund. The scramble up was fun and I enjoyed good views of the more northern peaks. I descended back down and got back to camp by 4. Made some oatmeal and figured I’d scramble up old guard at 4:30. Made it from camp to the base of the North ridge in 45minutes before realizing that there may be some 5th class. It ended up being about 5.6 but it was a secure chimney so I felt comfortable. Made my way down by 6:30 where I found a deer at camp. Picked lots of berries alongside the deer before settling in for the night. Also lots of unfazed marmots. Thursday 8/21 Woke up to find my helmet 20 yards away from my tent. The marmots had stolen the foam padding from it. Spent the morning walking over to the dome-dana col. I went up and over to the itswoot ridge side since I didn’t want to solo the Dana glacier. Set up a nice camp before scoping out conditions. Figured it would probably be do-able but I wanted to do it in the early morning before sun hit everything and while snow conditions were firm. I was doing everything in approach shoes and hybrid crampons so steep stuff was not my forte. Listened to podcasts and sat around for the easy afternoon. That night was horrible, some mice disturbed me for two hours, eventually getting into my tent by making holes in the mosquito netting. My food was hanging but they still walked around by my feet. Didn’t get a ton of sleep. Friday 8/22 Started at 5am, picked my way up the glacier trying to stay on ice. Summited dome at 6:30, down by 7:30 before the sun had even hit camp. Figured I might as well make it down to the trailhead where I found myself at 2pm. Quickly packed the bike and headed towards darrington where I stopped to gorge myself at the burger place. Afterwards I hopped back on the bike in the 93 degree heat to bike to arlington where I camped in a park. This night also sucked too. Loud music + heat + my grimy body only gave me like 2 hours of sleep Saturday 8/23 I knew it’d get hot so I was moving as soon as it was light out, made it home in 5.5 hours where I showered and gorged myself. I’d been doing some moderate rationing for most of the trip so was, and still am, quite hungry. Overall it was a great trip to end the summer. I’ve got a oral surgery tomorrow that will put me out for 2 weeks and by then, I’ll be a week into the school-year. Been busy getting out recently but with this off-time, I’ll probably put together some mini-TR’s on my site(https://lucasfng.blogspot.com/). I’d been wanting to do a long trip over the summer so this satiated my hunger, though it would’ve been nice if I could've got more than one in.
 1 point
 -
Different people! Not to say anything of Mr Ng’s ability or potential. Maybe we all want to spot the next jeans wearing Cheamclimber, but I think it best just to encourage and help out the youth who clamor for the hills in our little community here. No sense in saddling expectations or projecting where someone is going. He will find his own way, and I hope his motivations are always his own. I do enjoy the TRs! Thanks Lucas!1 point
-
More evidence that boomers ruin everything for the youngsters. How's this kid supposed to be the youngest to climb anything now?1 point
-
Hey @Joshwl.....Sounds like you should hire some guides and not put that sort of responsibility on partners to bring a minor home alive to his parents. I worry that anyone under 25 won't properly understand the gravity of having someone's son in their care on a route like Liberty Ridge. As the parent of 15 and 17 year old boys, I would ground my kids if they were trying to do something like this with your level of experience- mostly because I've climbed Liberty Ridge! While you may pull it off and be the "youngest" to climb the route, it won't result in much attention and really isn't something that will change the the trajectory of your life for the better. Sorry to be the wet blanket old guy, but I do believe it is the truth. Glad that you are so psyched on the mountains though! It is a grand hobby that can enrich your life for decades....1 point
-
Index town walls.
 1 point
 -
There is snow on the ground at 5k'. Let the games begin!1 point
-
Where is that?1 point
-
A little bouldering. Should be better in a couple of days.
 1 point
 -
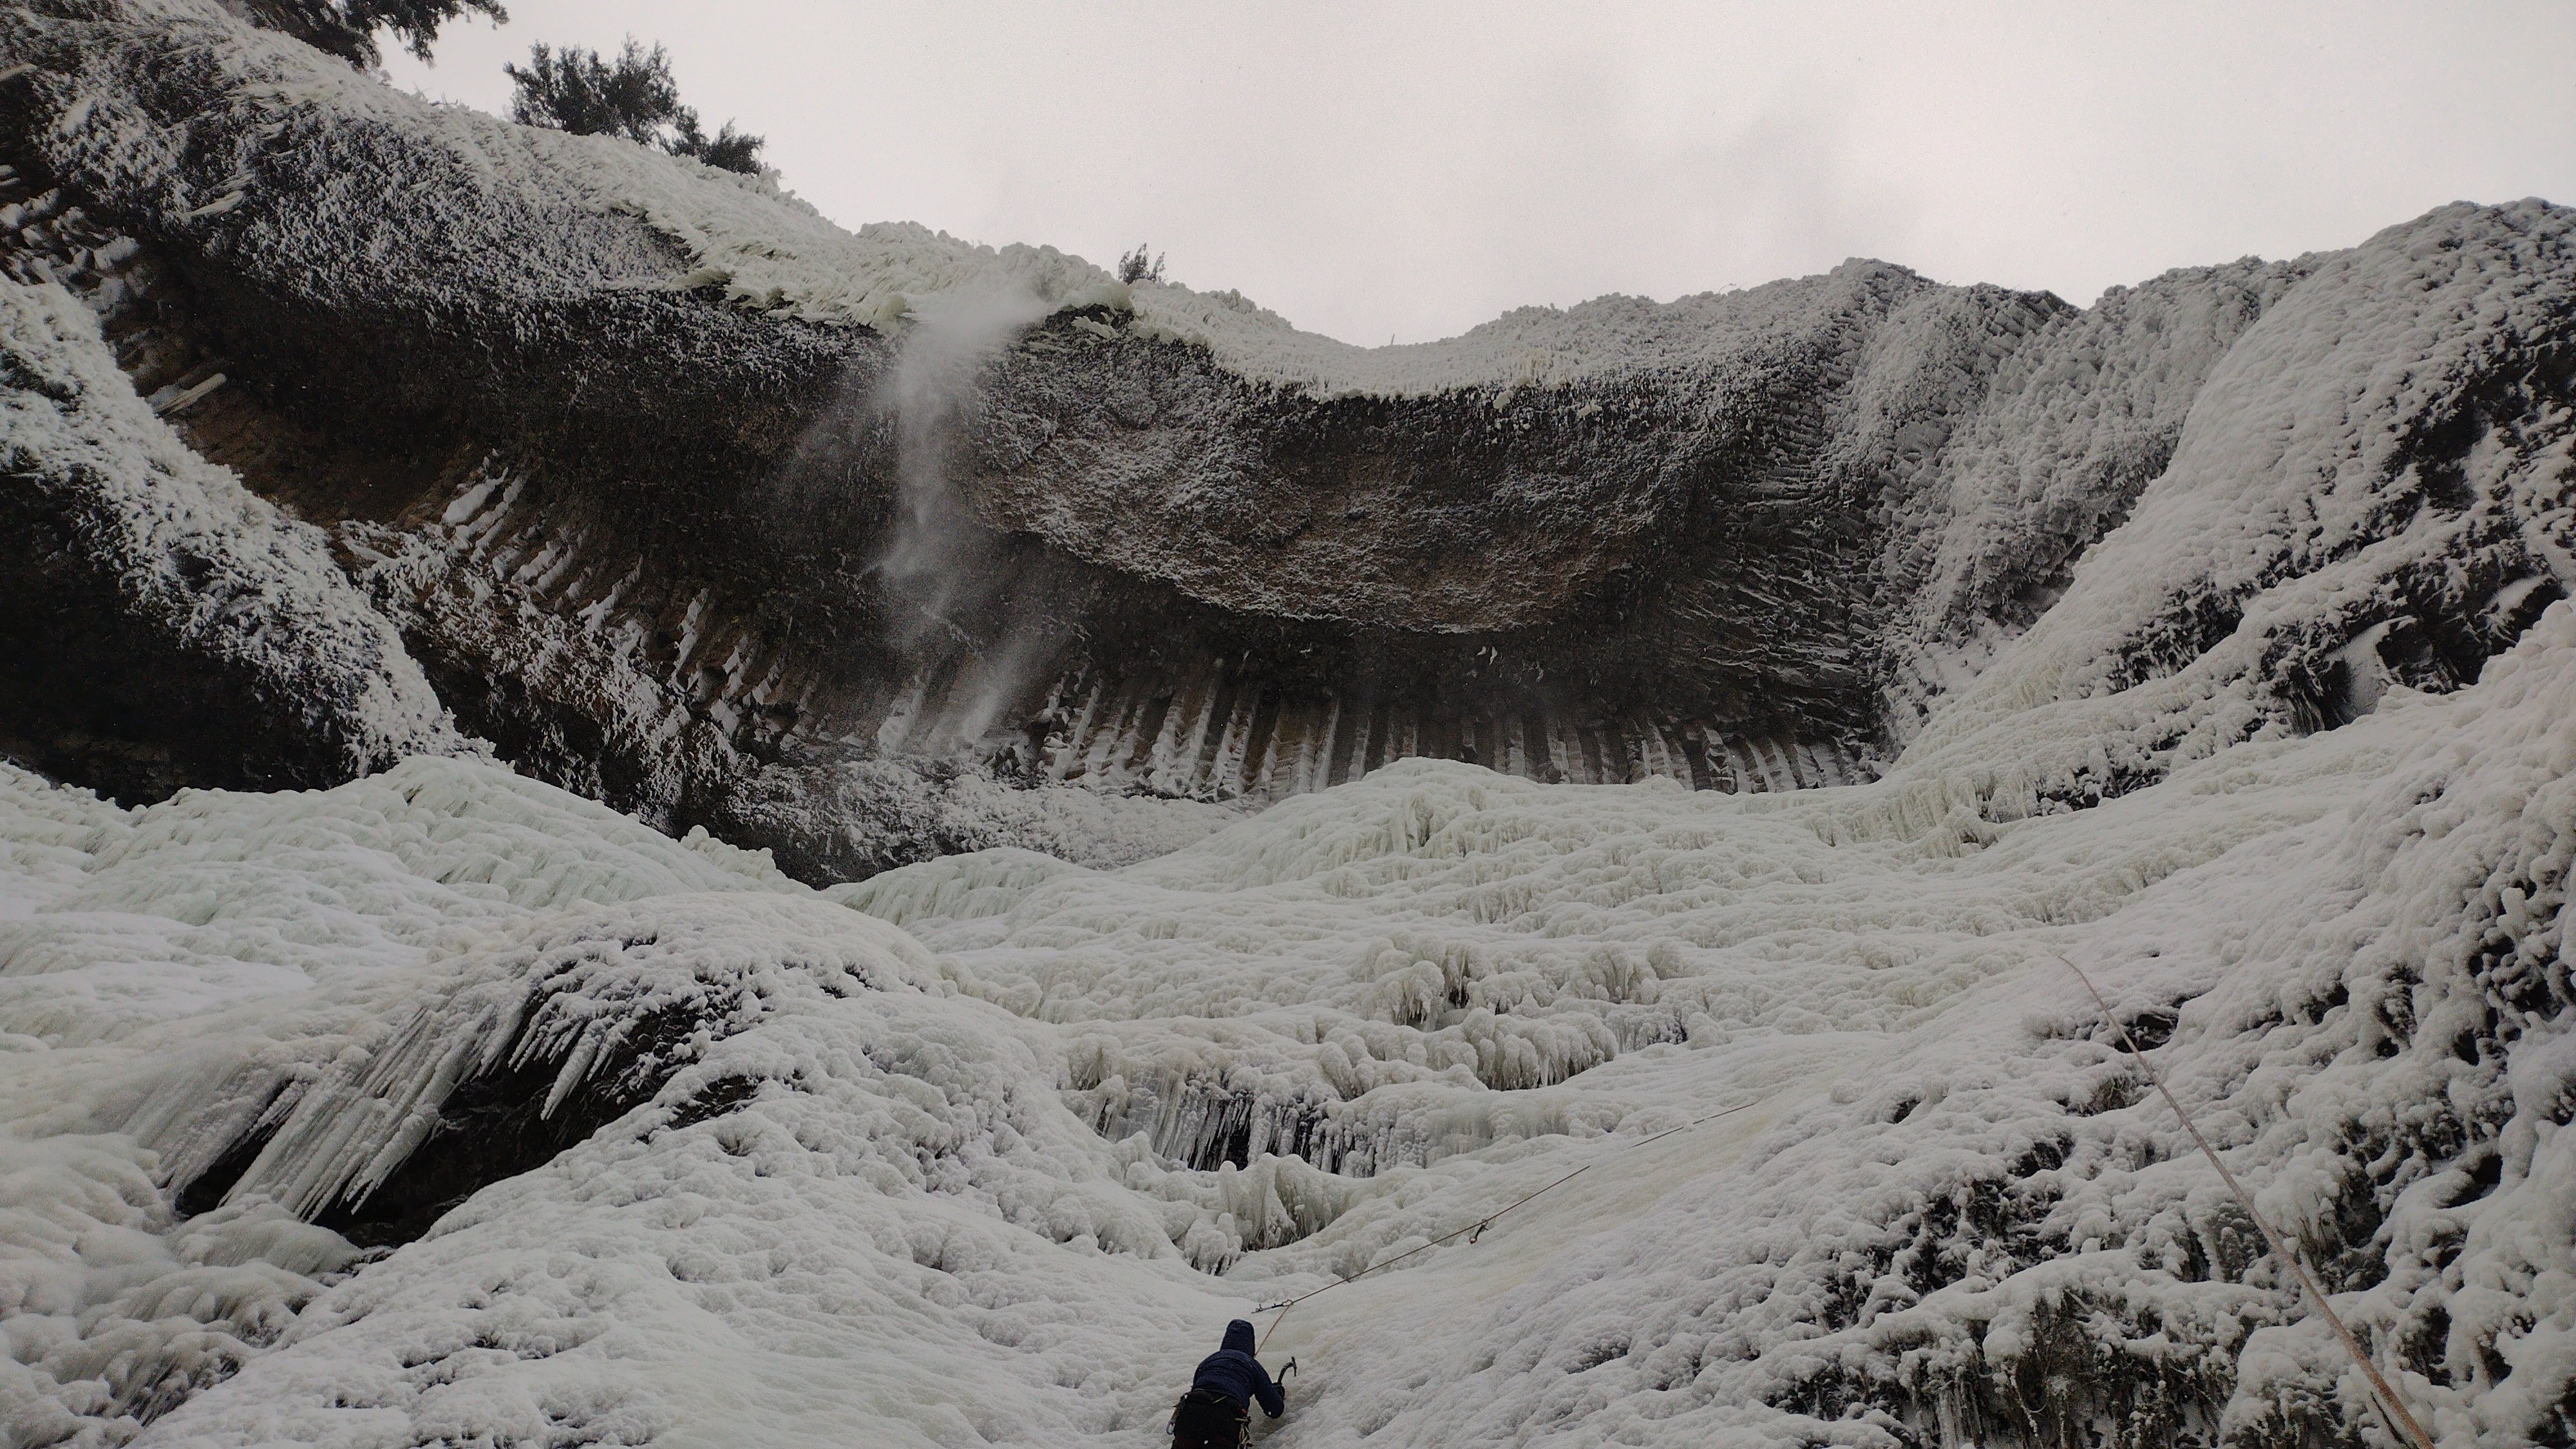
Columbia Gorge Ice! Post your photos! Mist Falls 1/14/2024 Left a V thread and backup screw 80-90' up. Use at your own risk. Likely will be under a bunch of ice tomorrow. Have fun, be safe! -Kip
.jpg.1bc59e1ed475e340b96d865a20e3d974.jpg)
 1 point
 -
clouds parted enough today to look (january 10) - Drury is disconnected blobs of ice, Pencil appears to have formed and fallen; little-to-no ice visible on any of the usual prospects in either Icicle or Tumwater Canyon. If temps drop as forecast, I'm hoping to see improvement by weekend.1 point
-
Well it looks like we might actually get ice soon so that's exciting. I was thinking about getting up into hwy 20 on Sunday or maybe Leavenworth does anyone know how drury is looking?1 point
-
Running with water, most likely. 40s last night over WA pass.1 point
-
Three Fingers from Squire Creek last weekend! Who knows what it looks like now.

 1 point
 -
I was up thereabouts a week ago skiing on rocks and the ice on the Polish route on Colfax looked decent. Crappy pic but best I could get
 1 point
 -
I went up to heliotrope yesterday and had little luck finding any well formed ice flows. Probably a couple more days for things to form up nicely. Here are a couple of photos. On the right side of second photo you can see a relatively well formed flow.

 1 point
 -
Yes! That’s exciting. Suppose to snow more this week.1 point
-
1 point
-
I took a clinic from twight at the ouray ice fest last year and right as he started talking his crampons got tangled and he fell on his face. And then later he was soloing around on some easy WI and dropped one of his leashless tools. It was quite entertaining.1 point
-
FUCK YOU!!! I once tripped on the way to the gym while crossing the parking lot...it really sucked...i almost quit climbing and took up skiing because of it!1 point
-
'Bone, It is highly visible from Castle Rock. -Mitch1 point