Search the Community
Showing results for tags 'first ascent'.
-
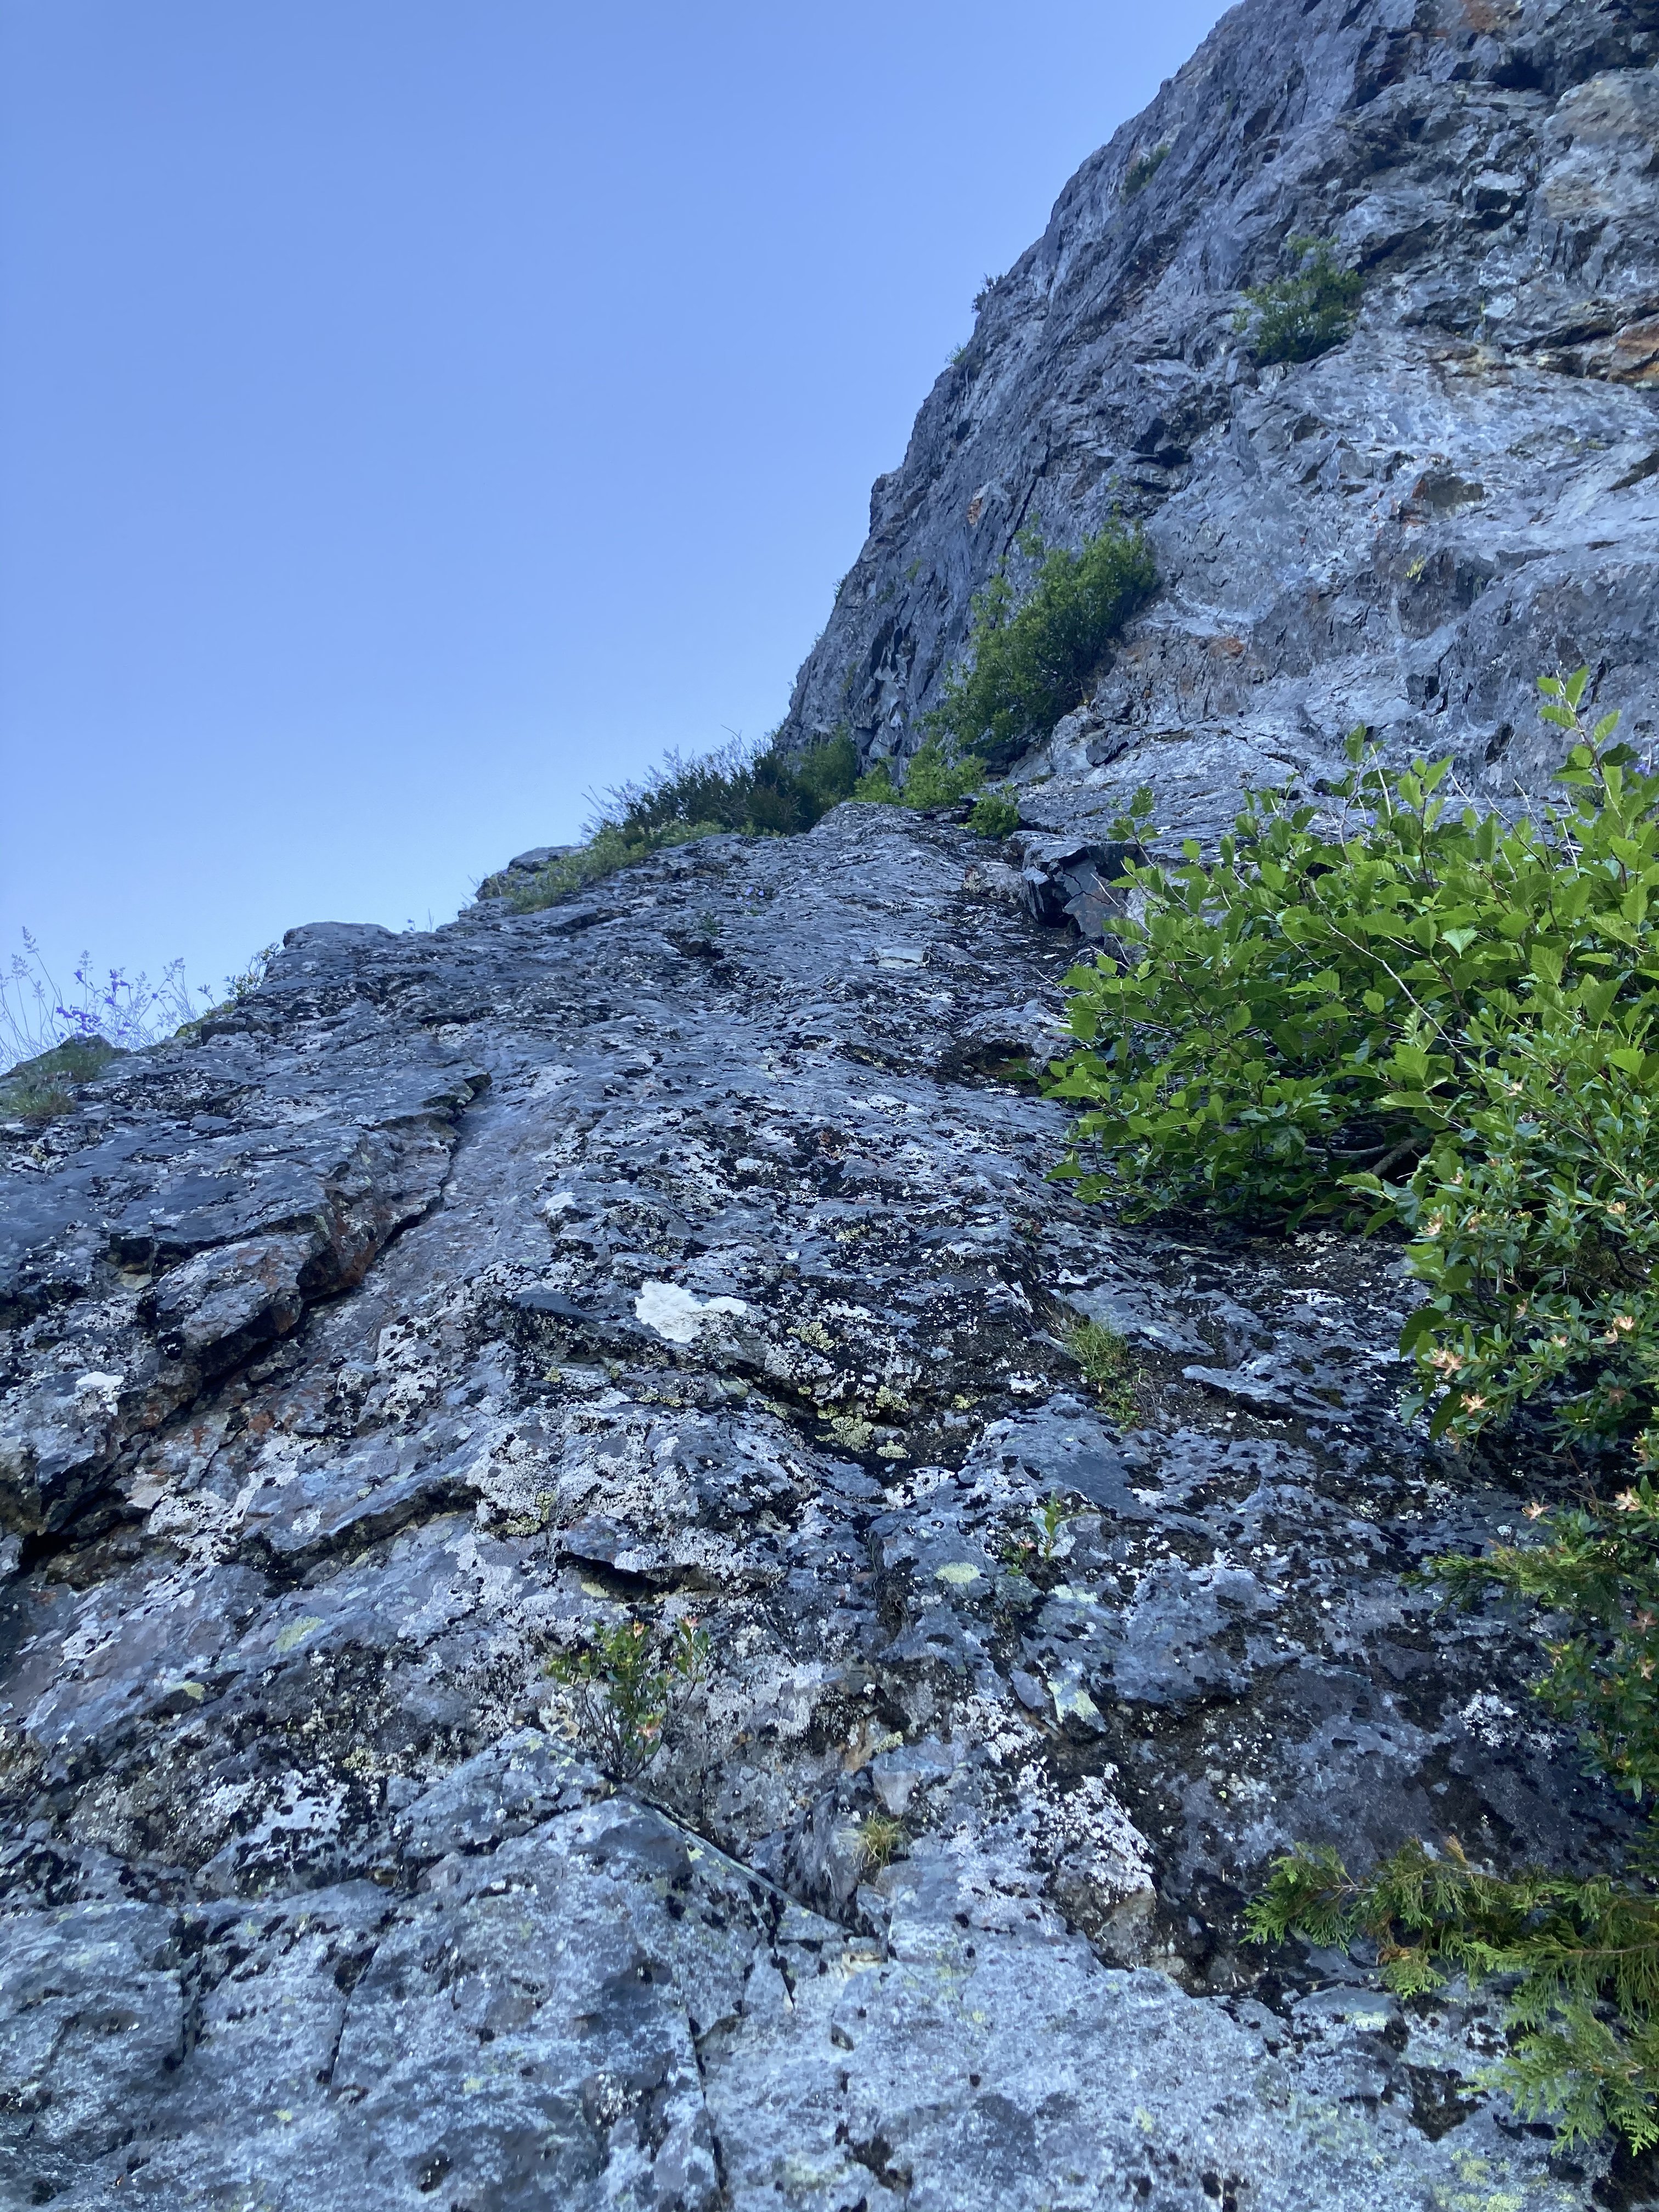
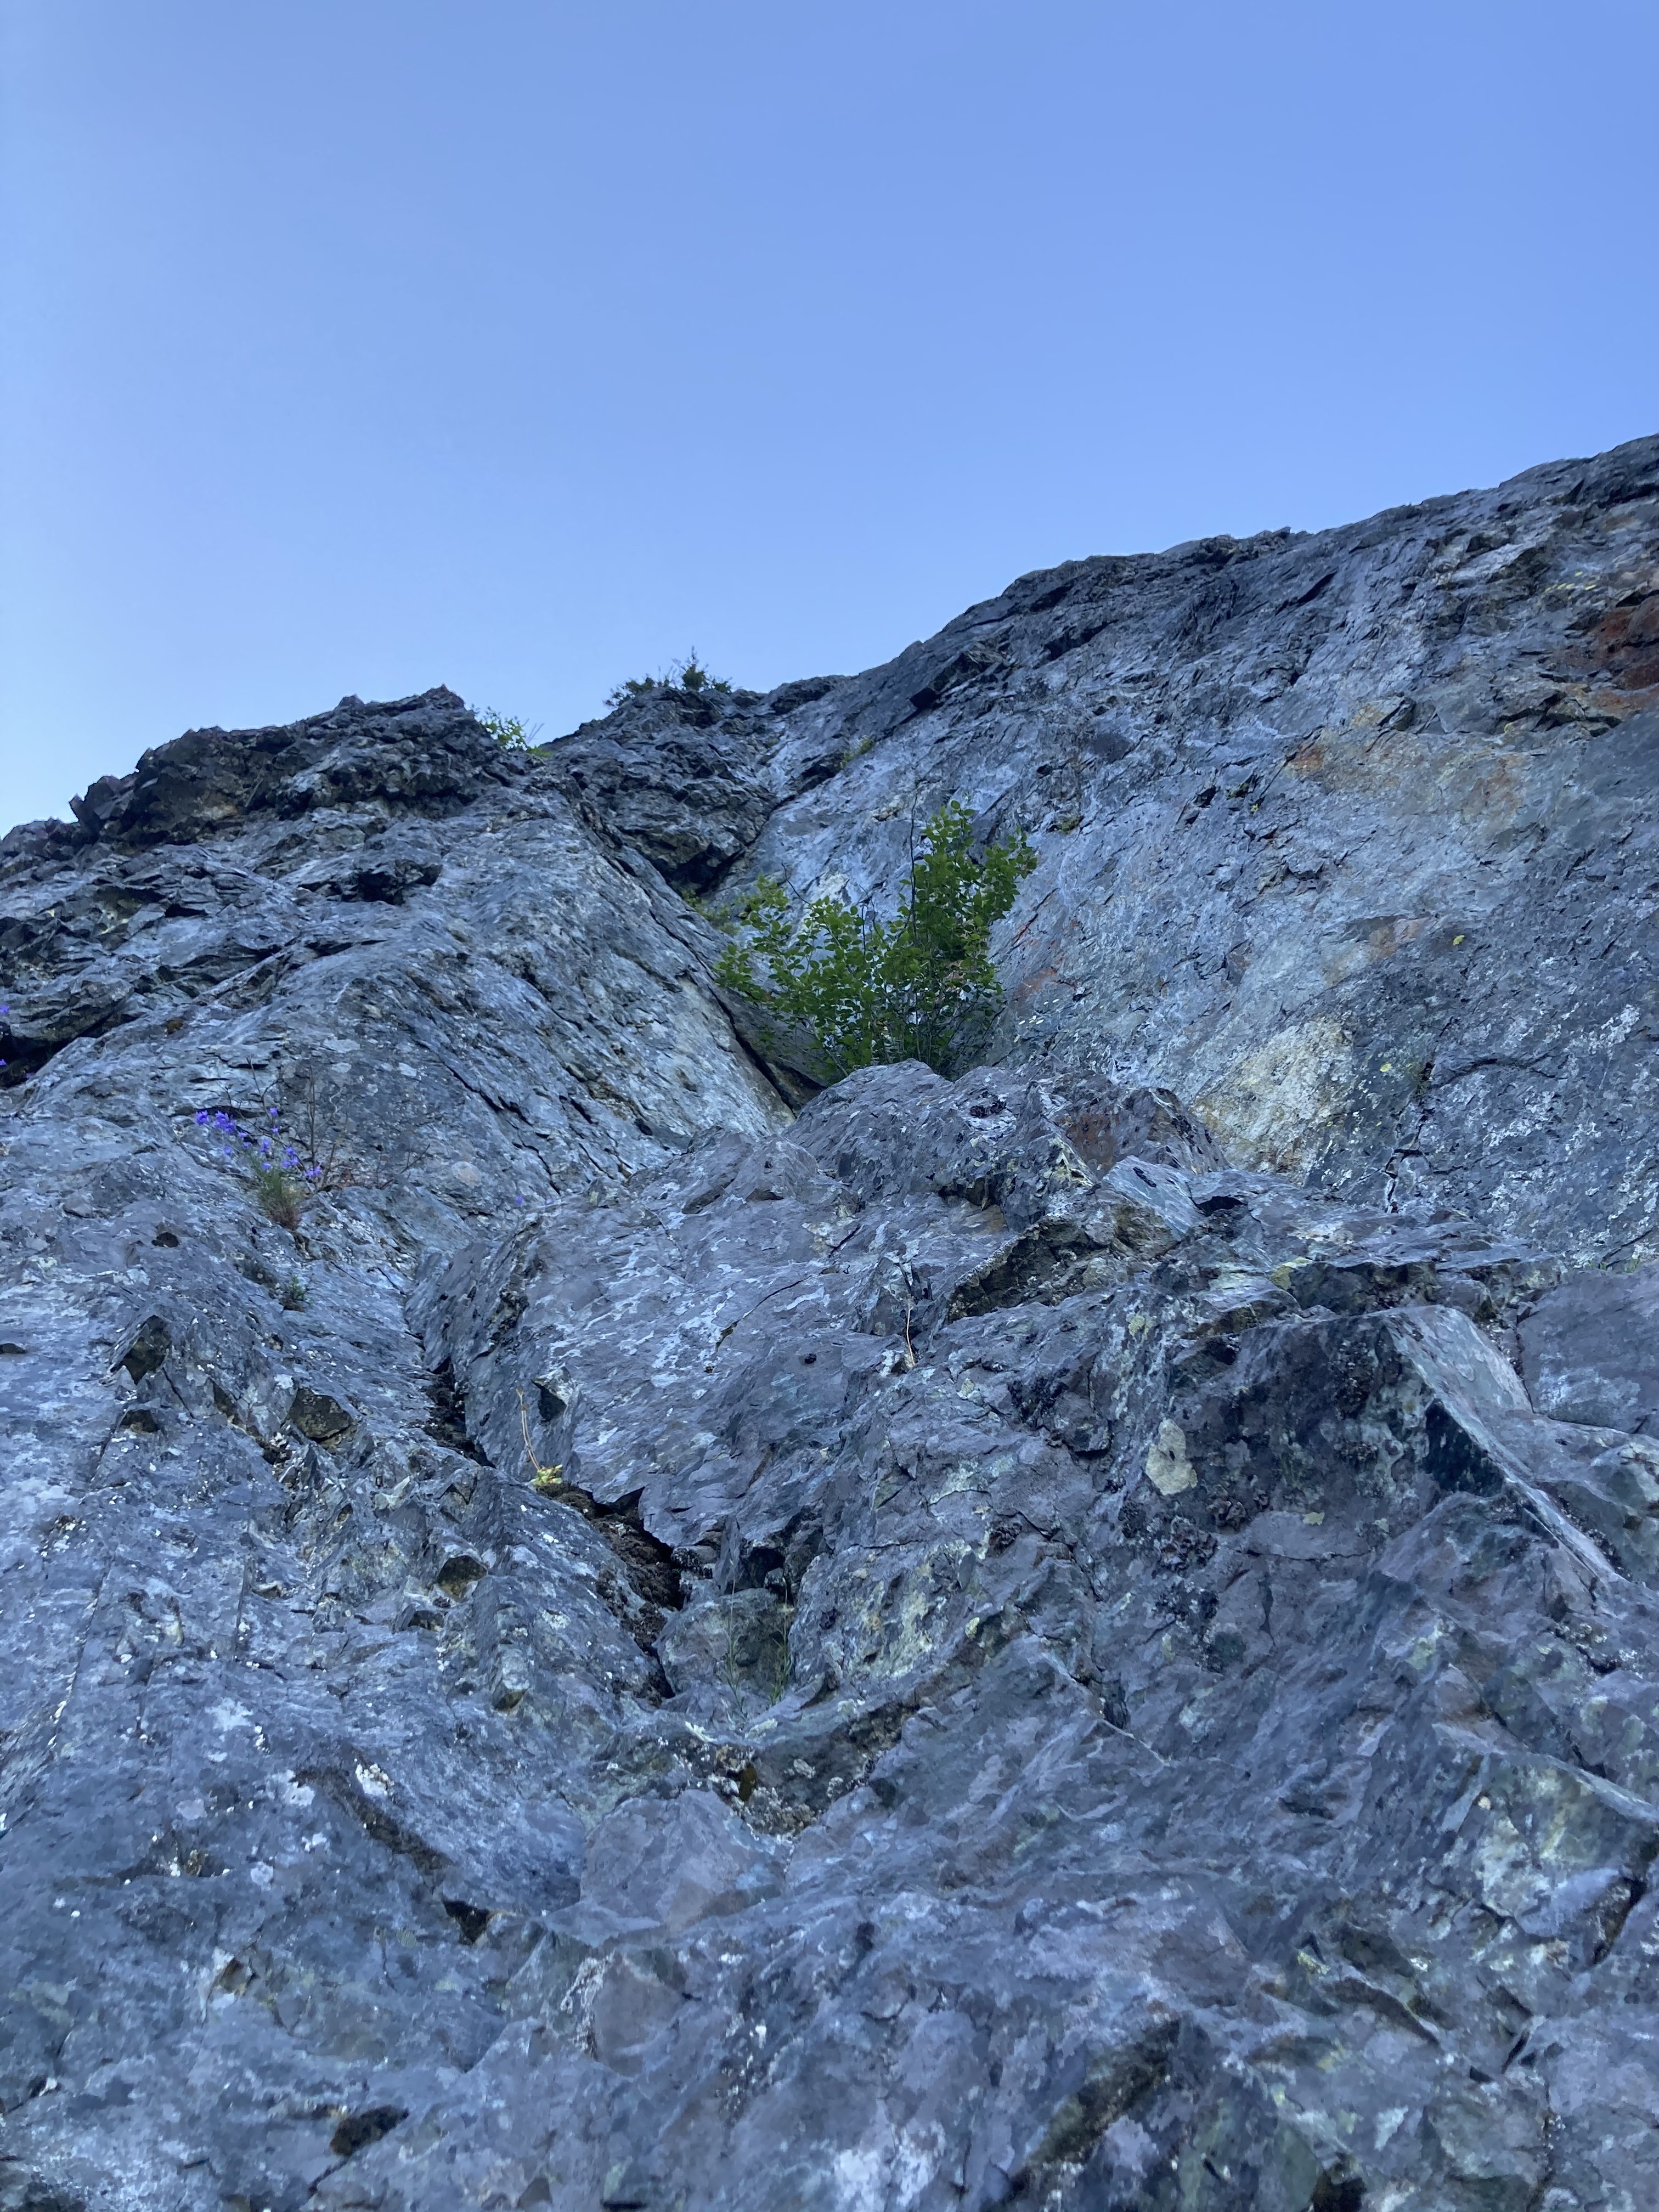
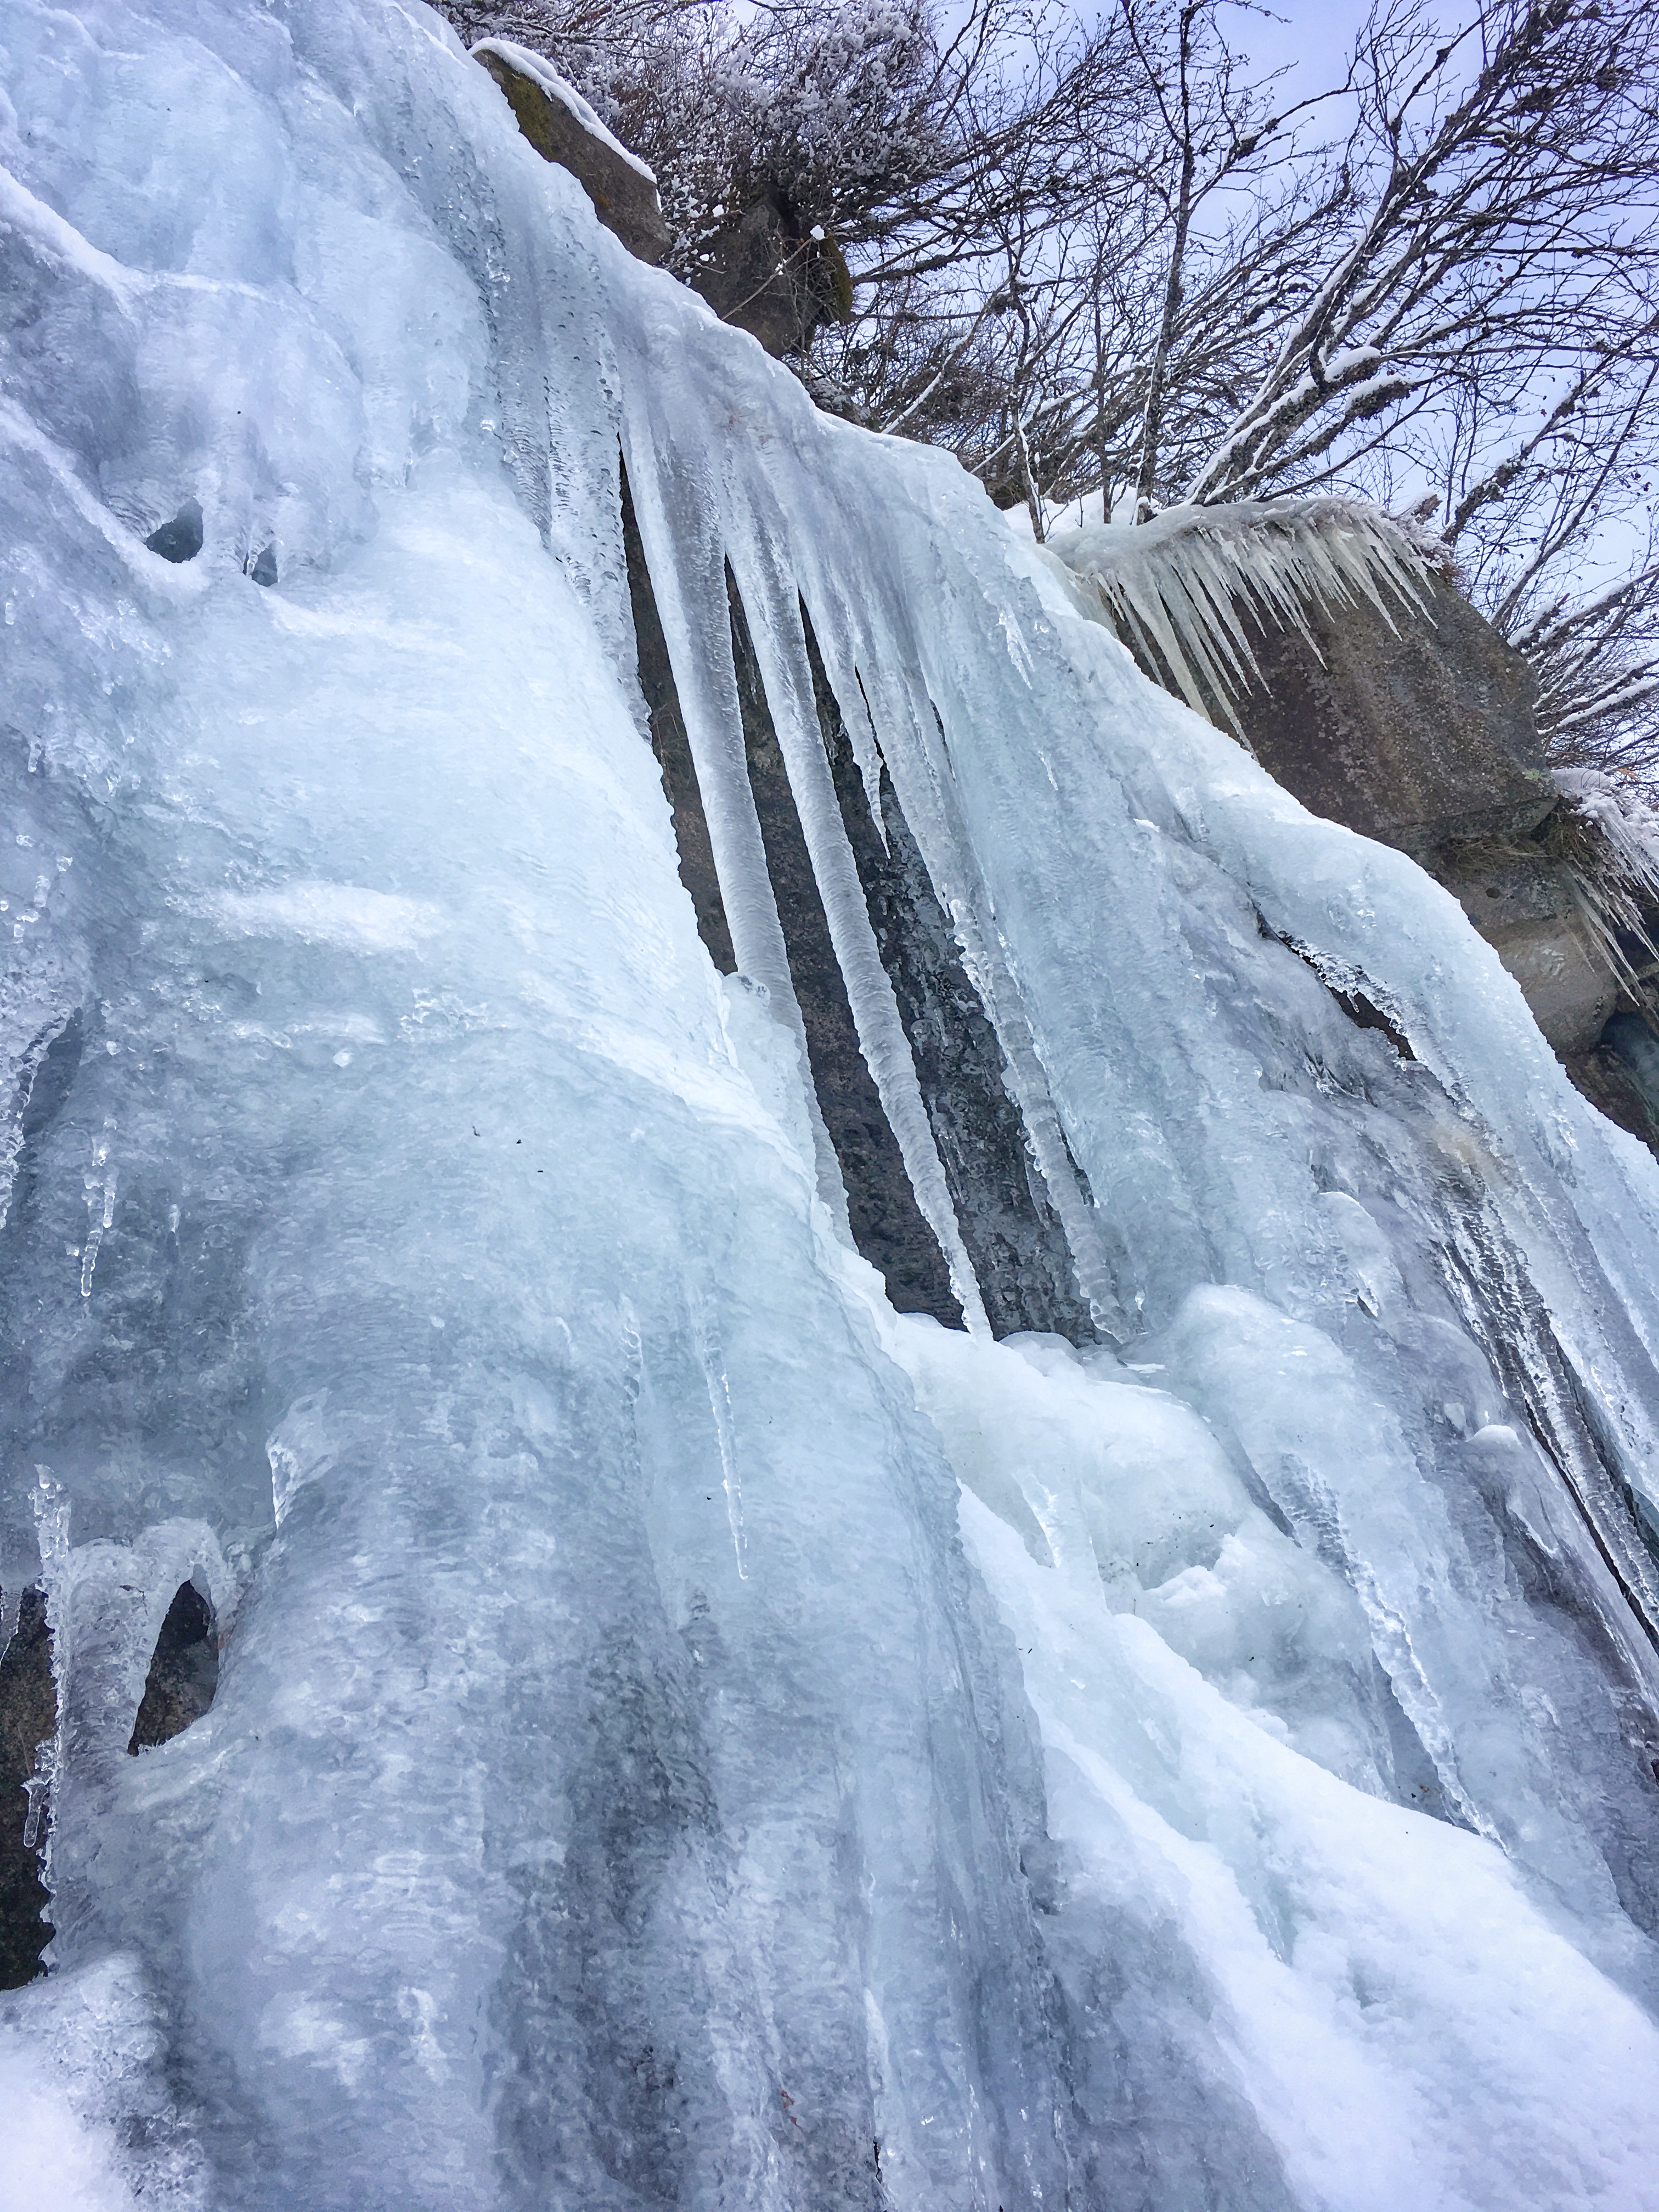
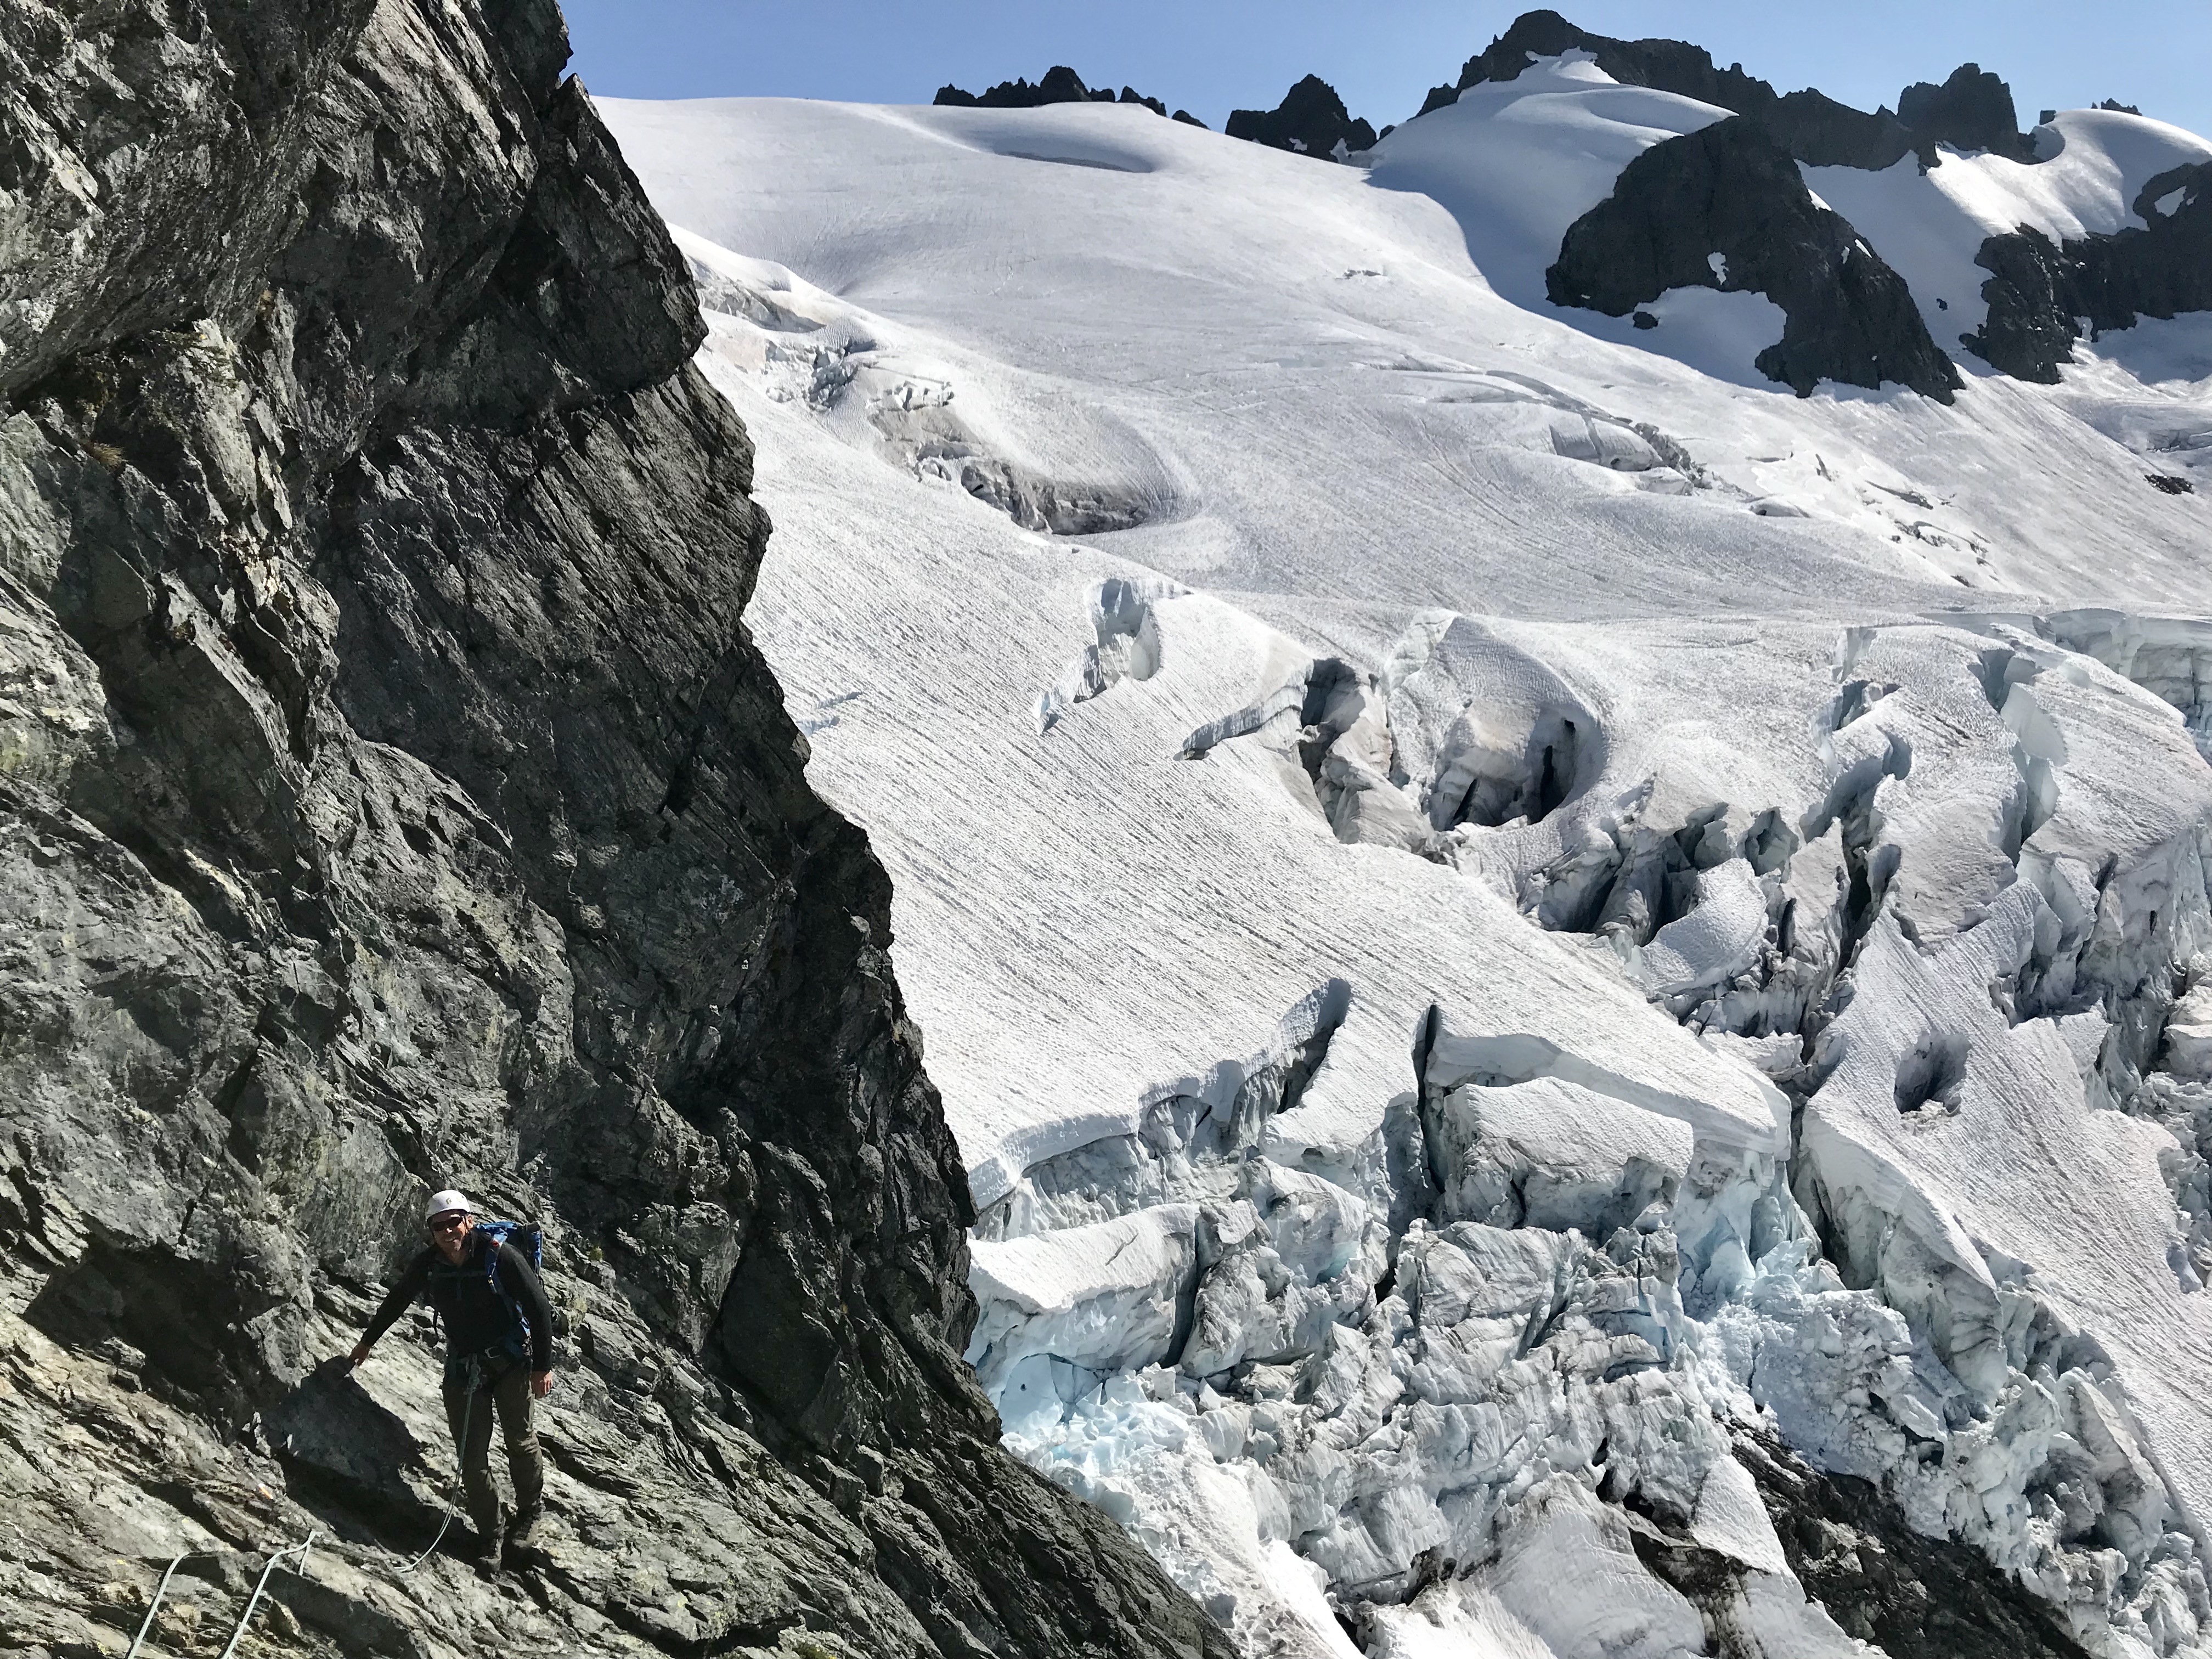
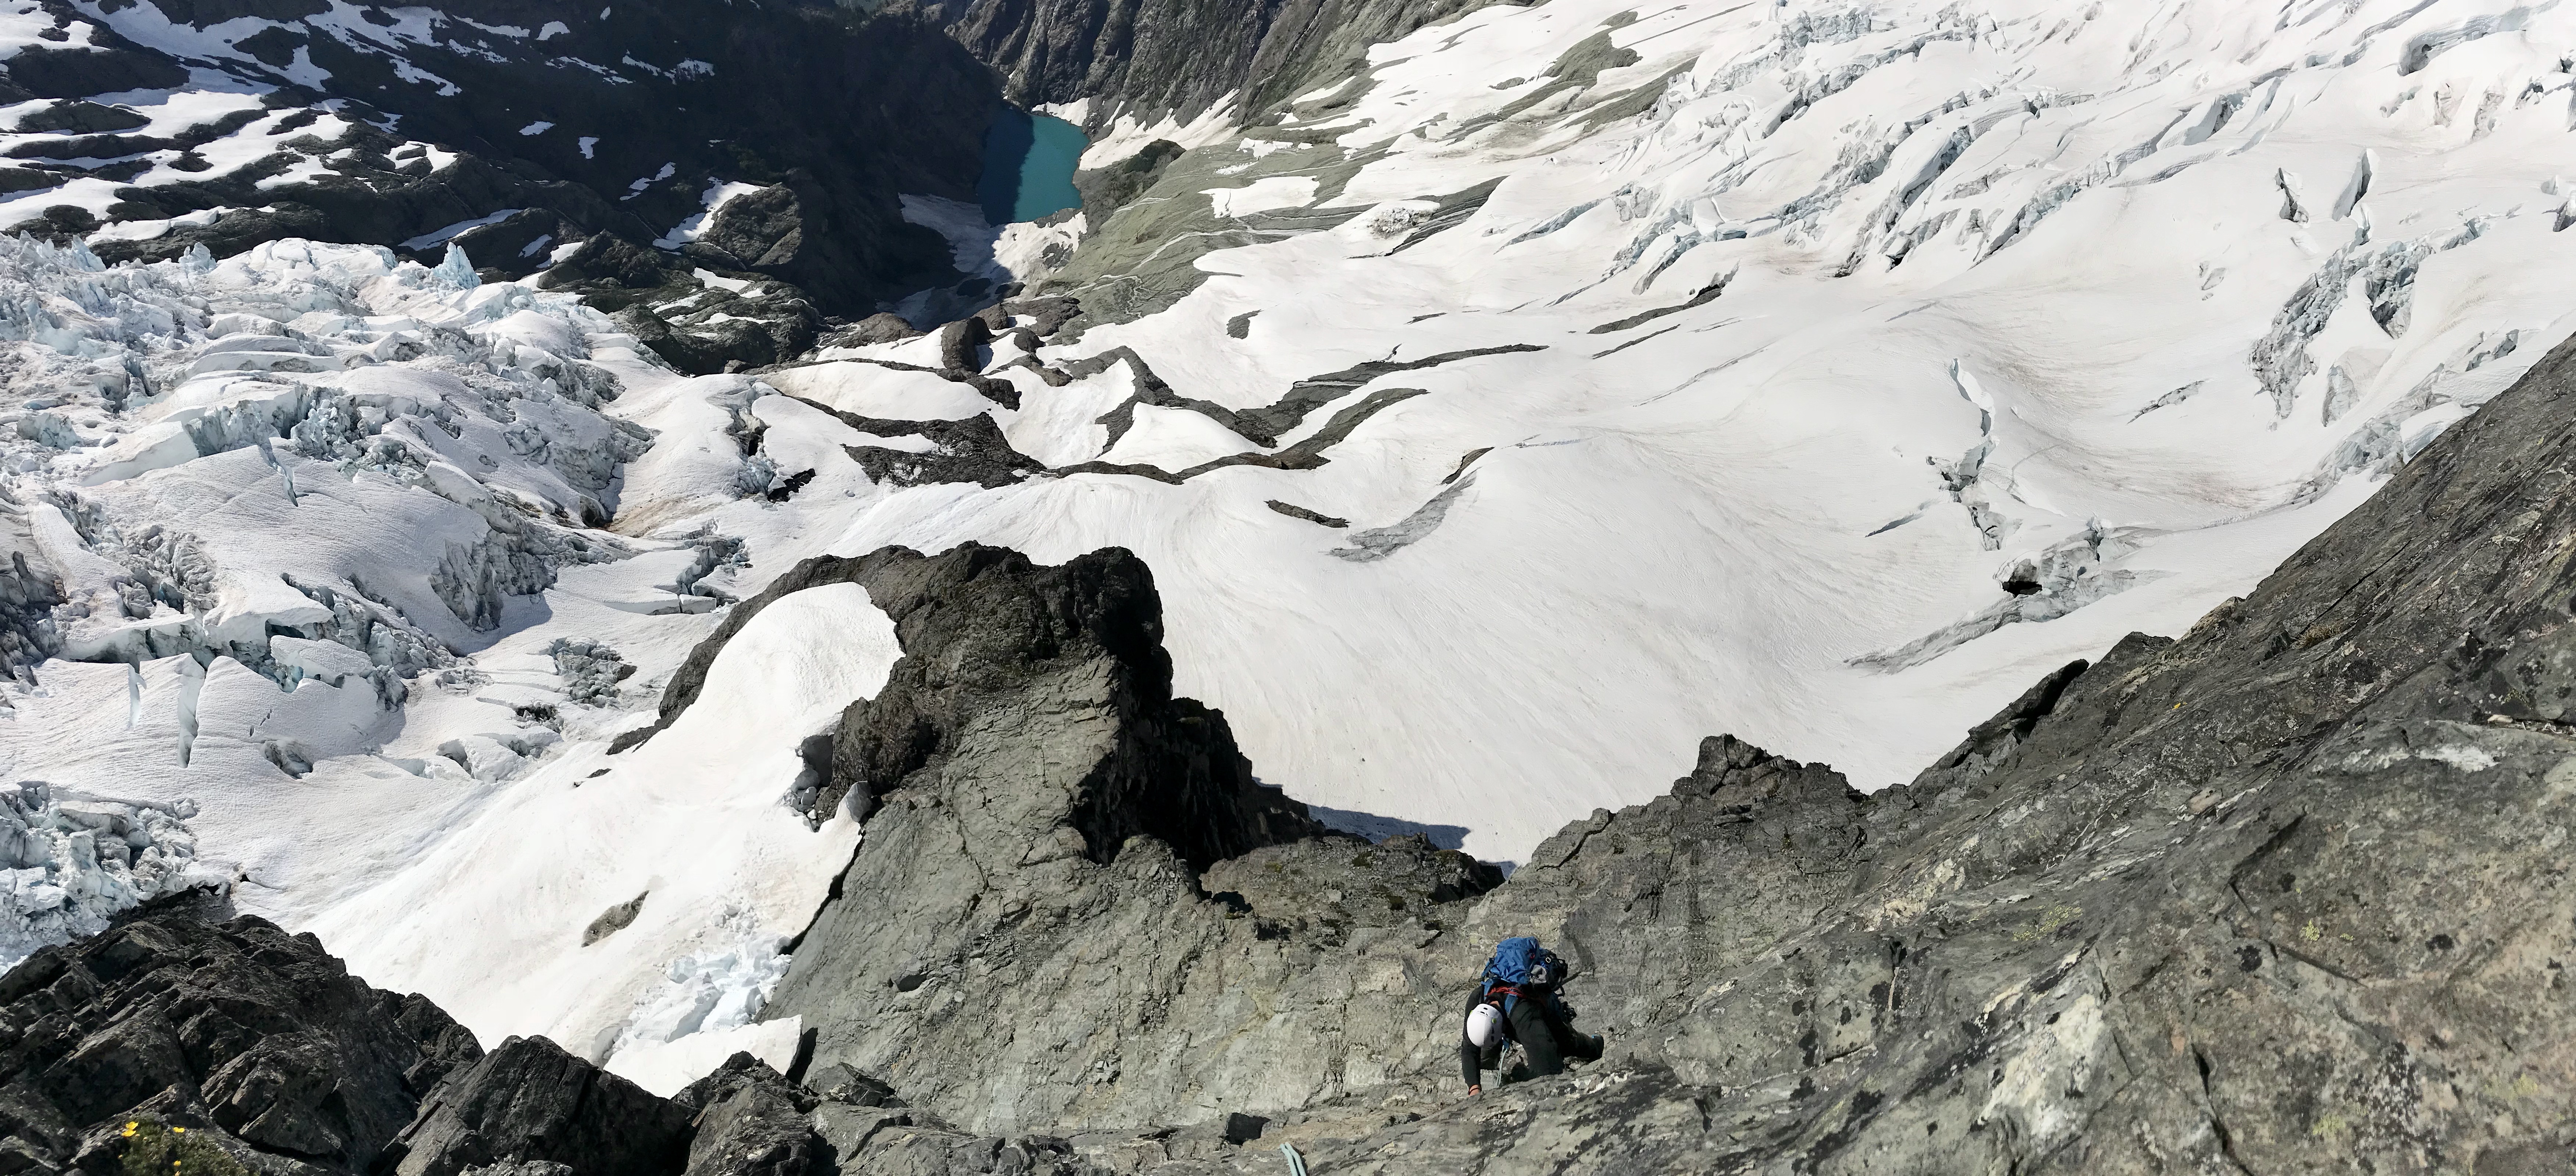
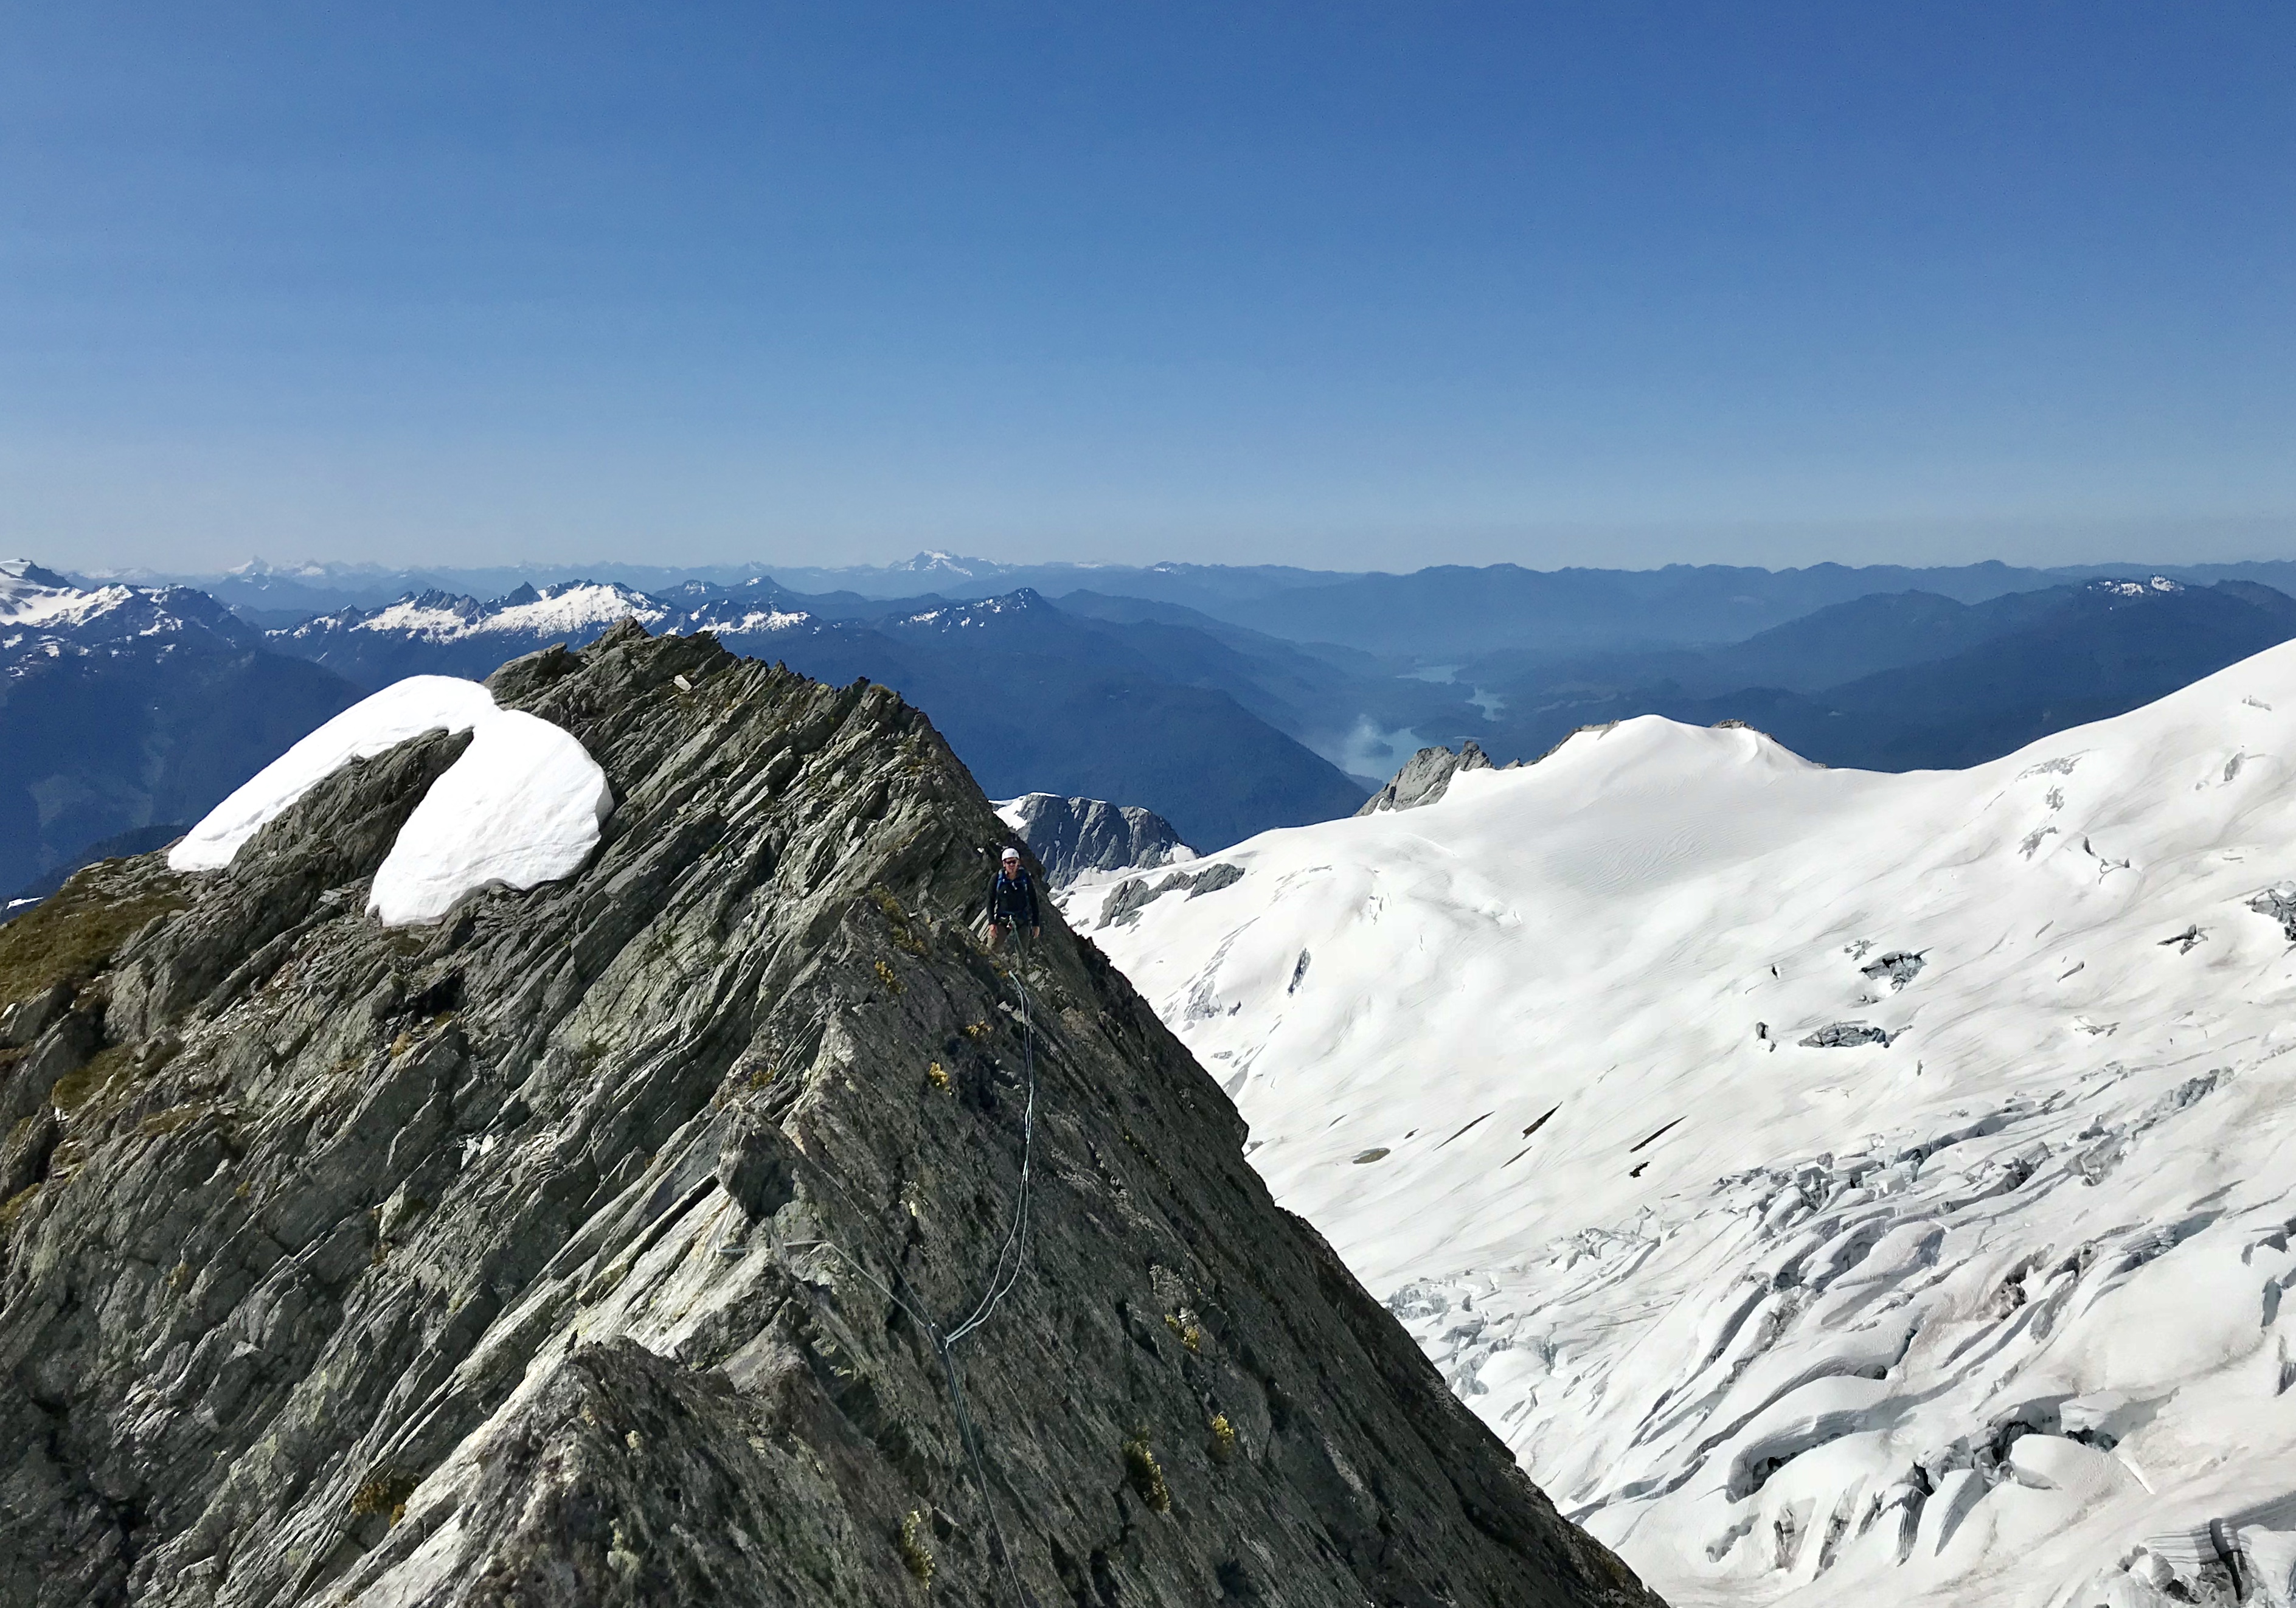
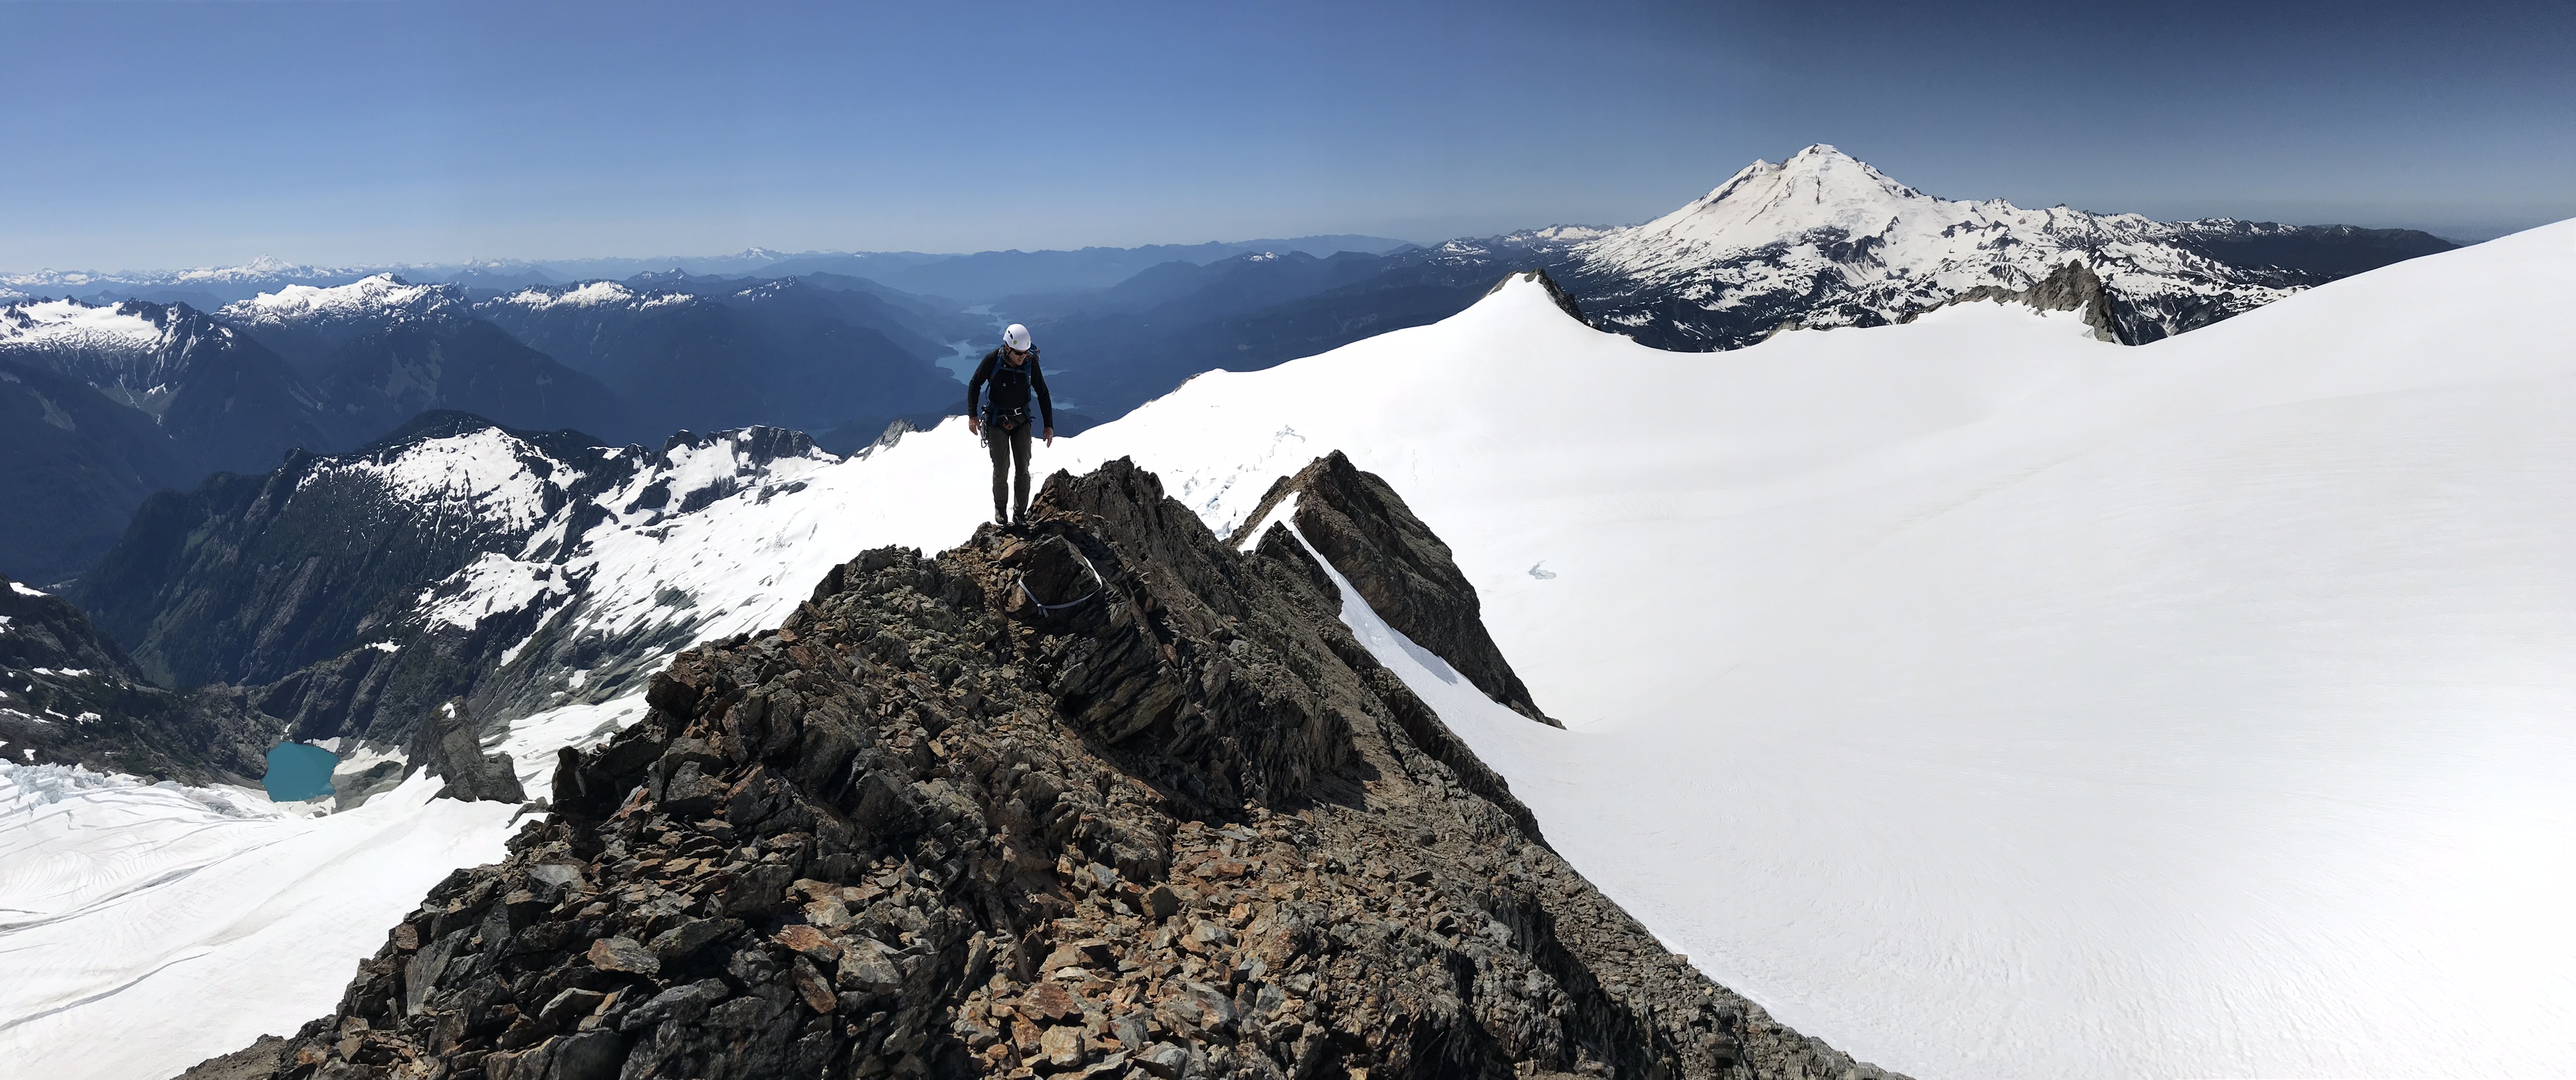
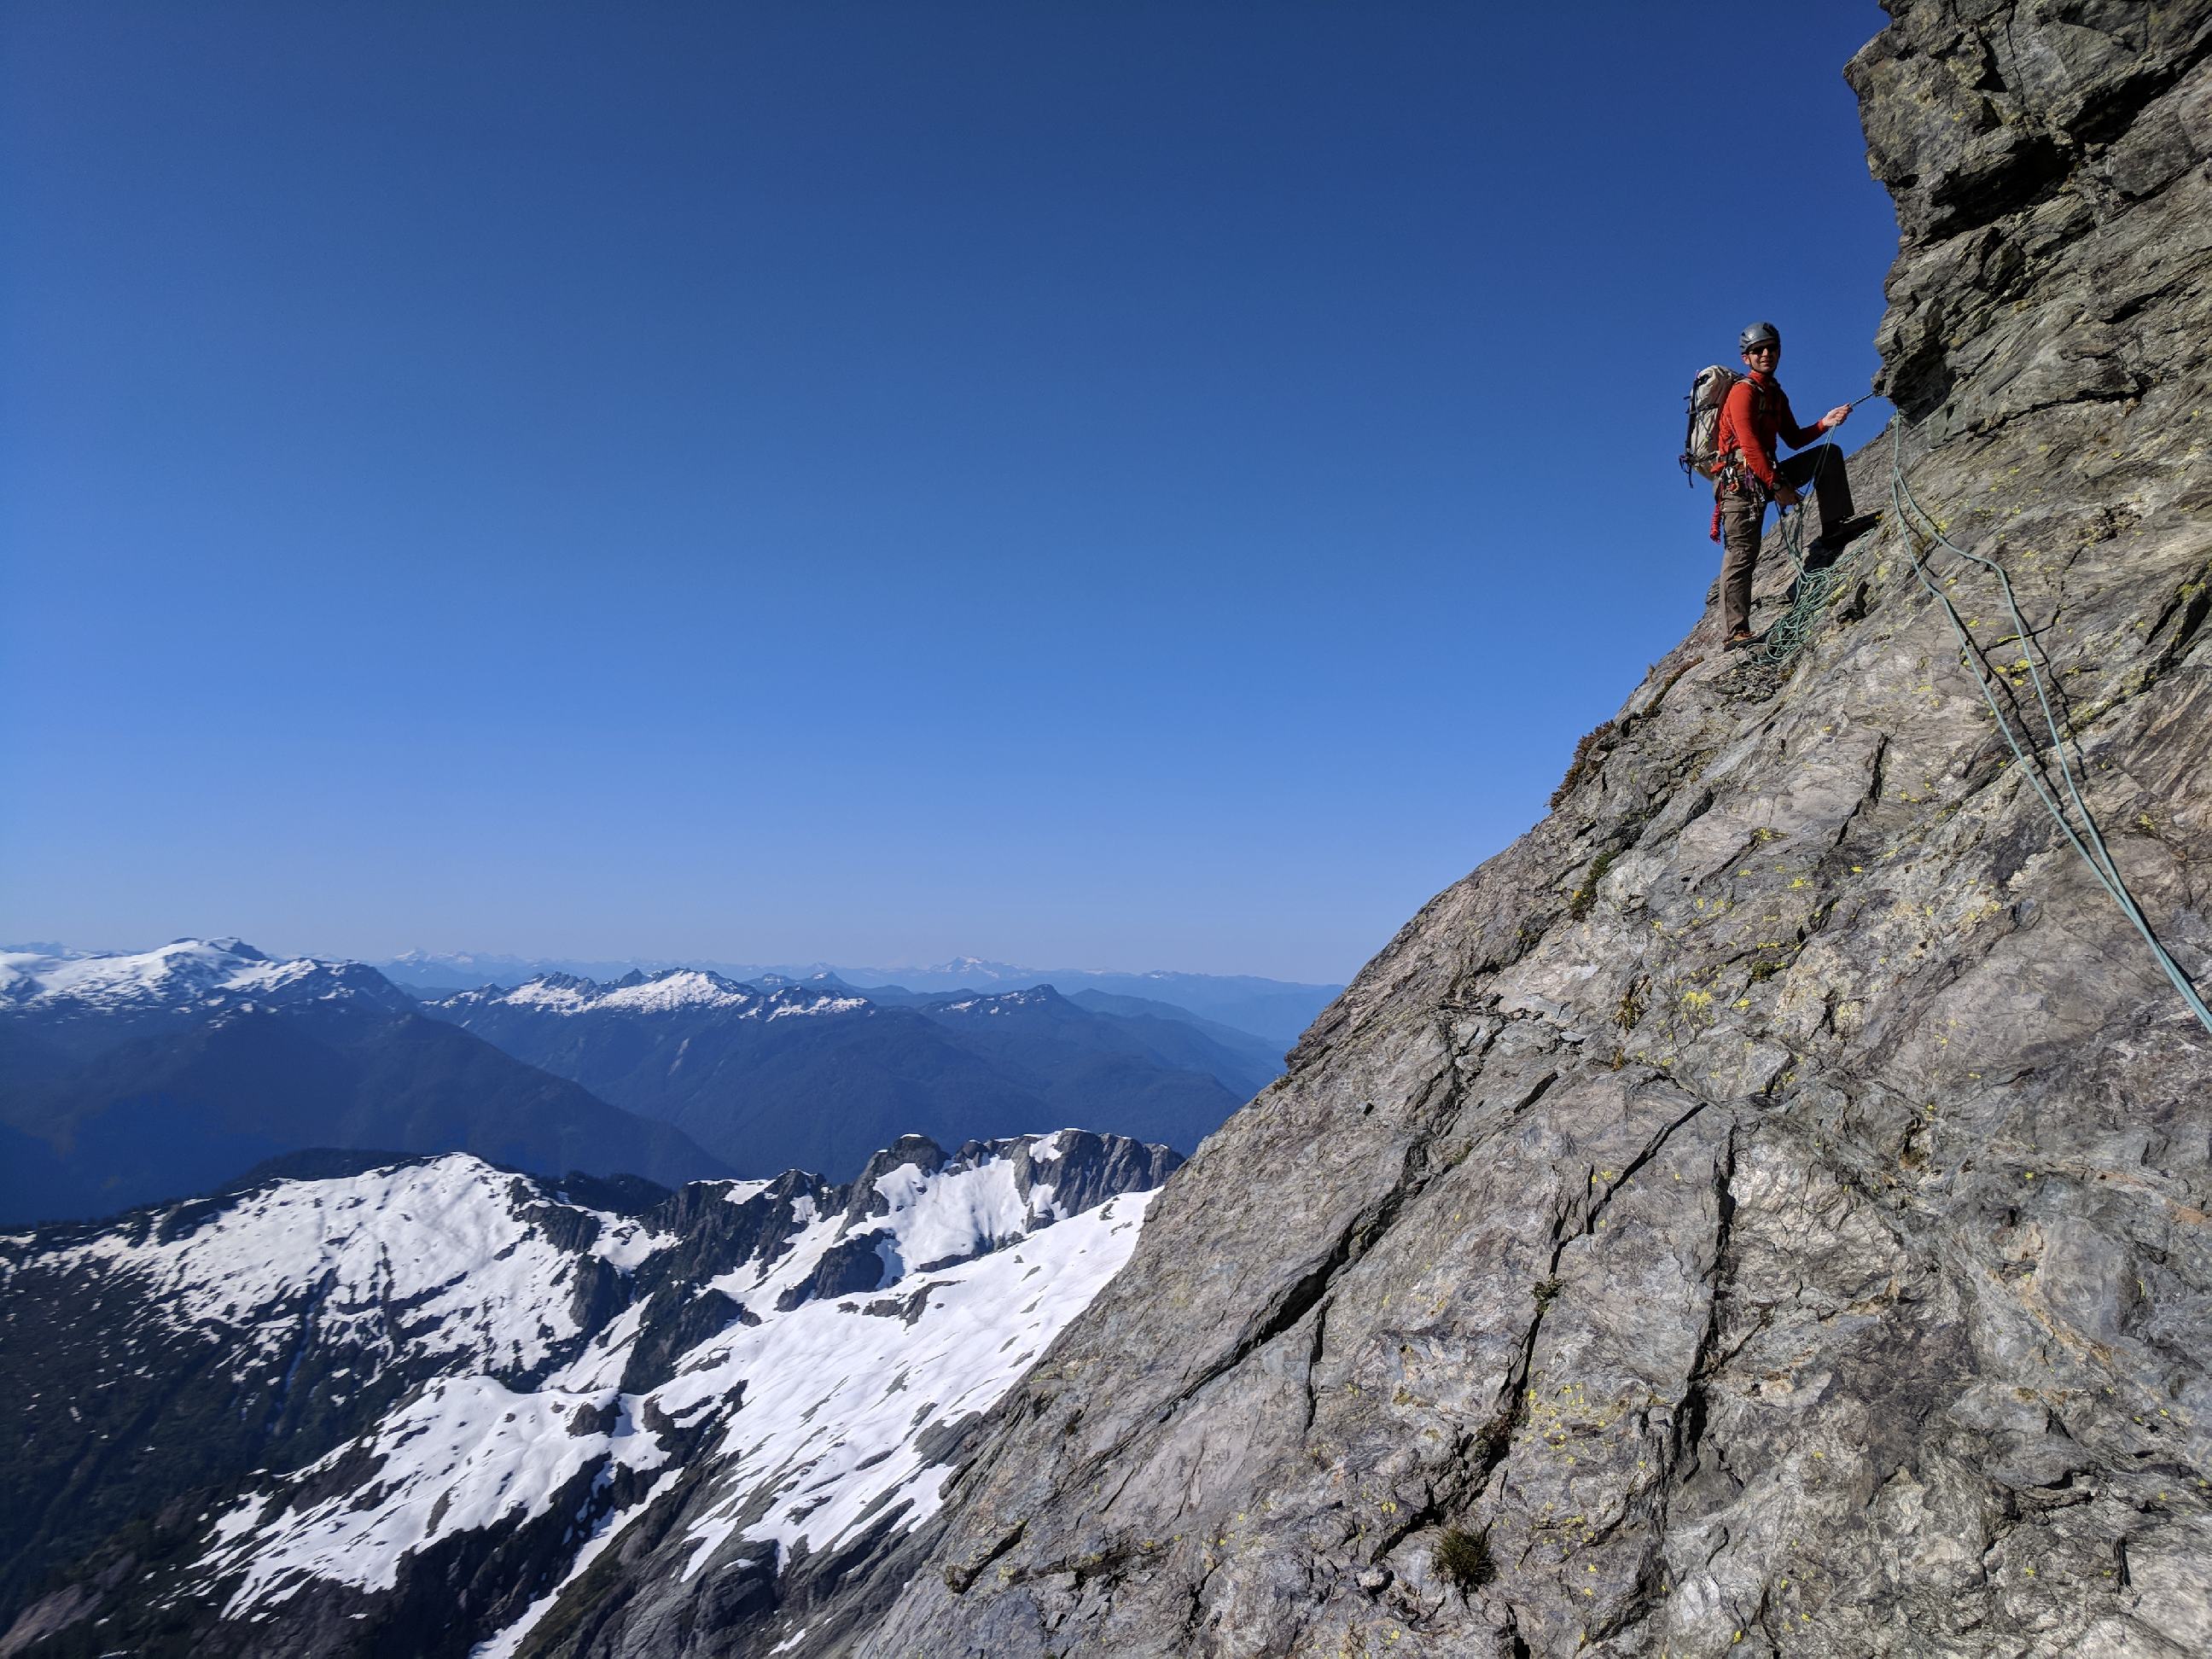
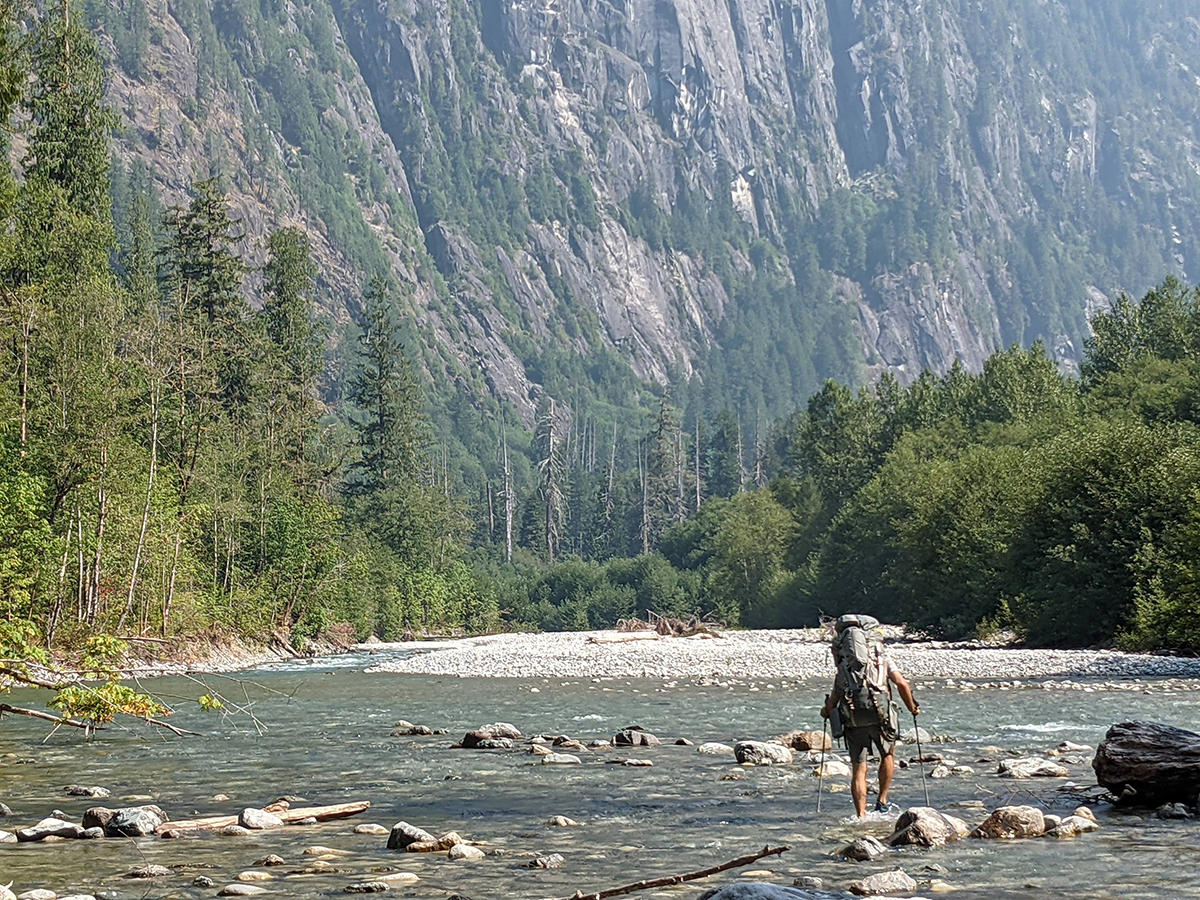
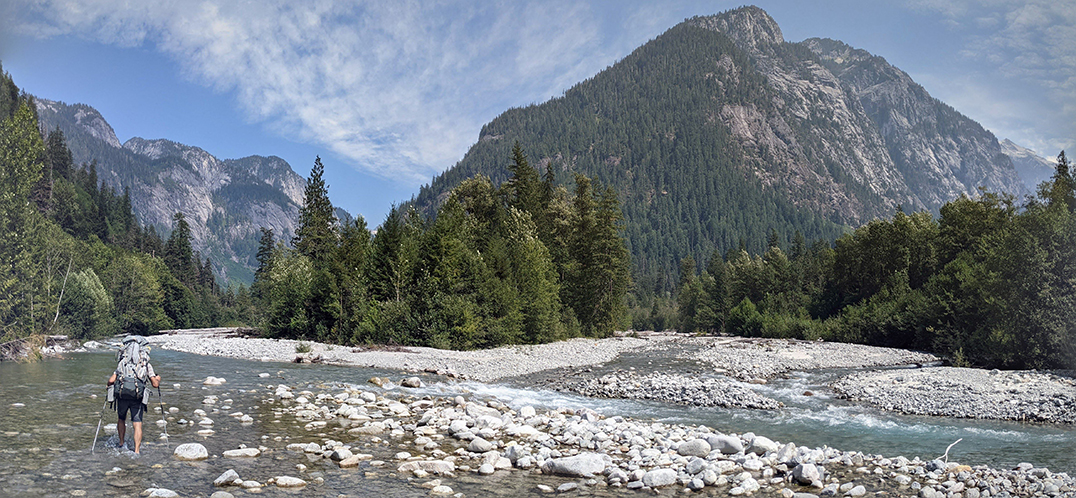
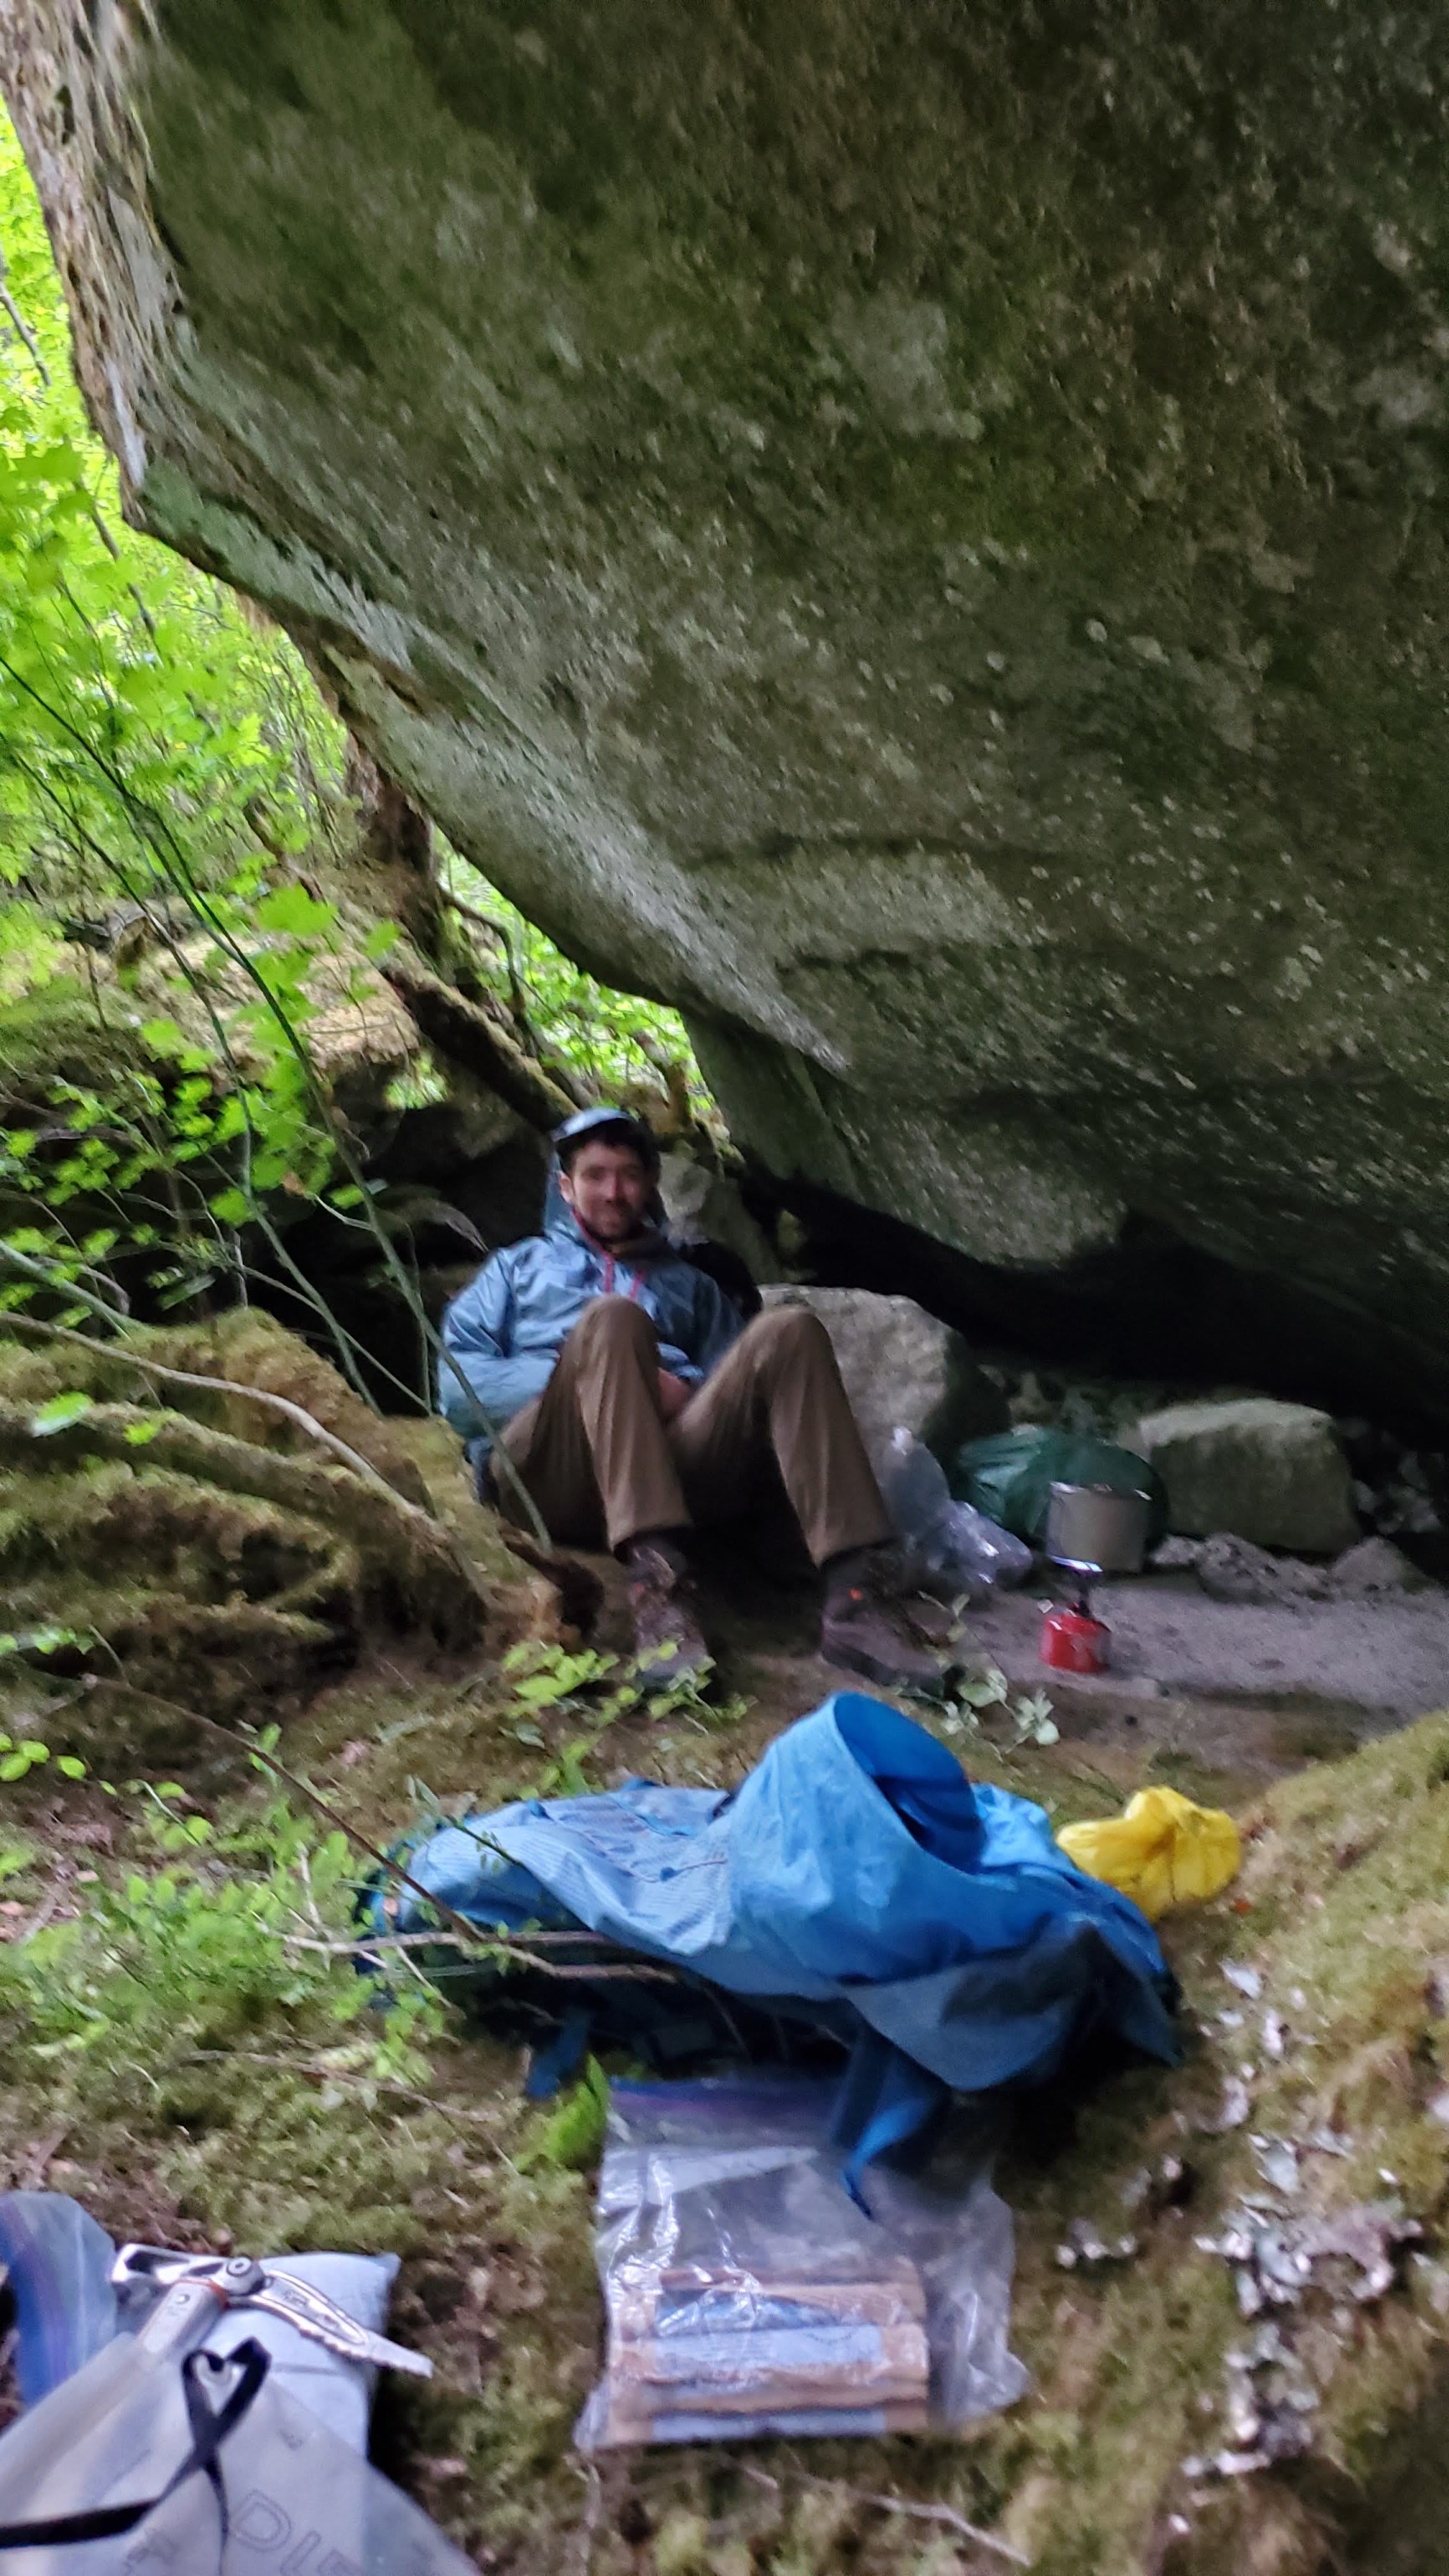
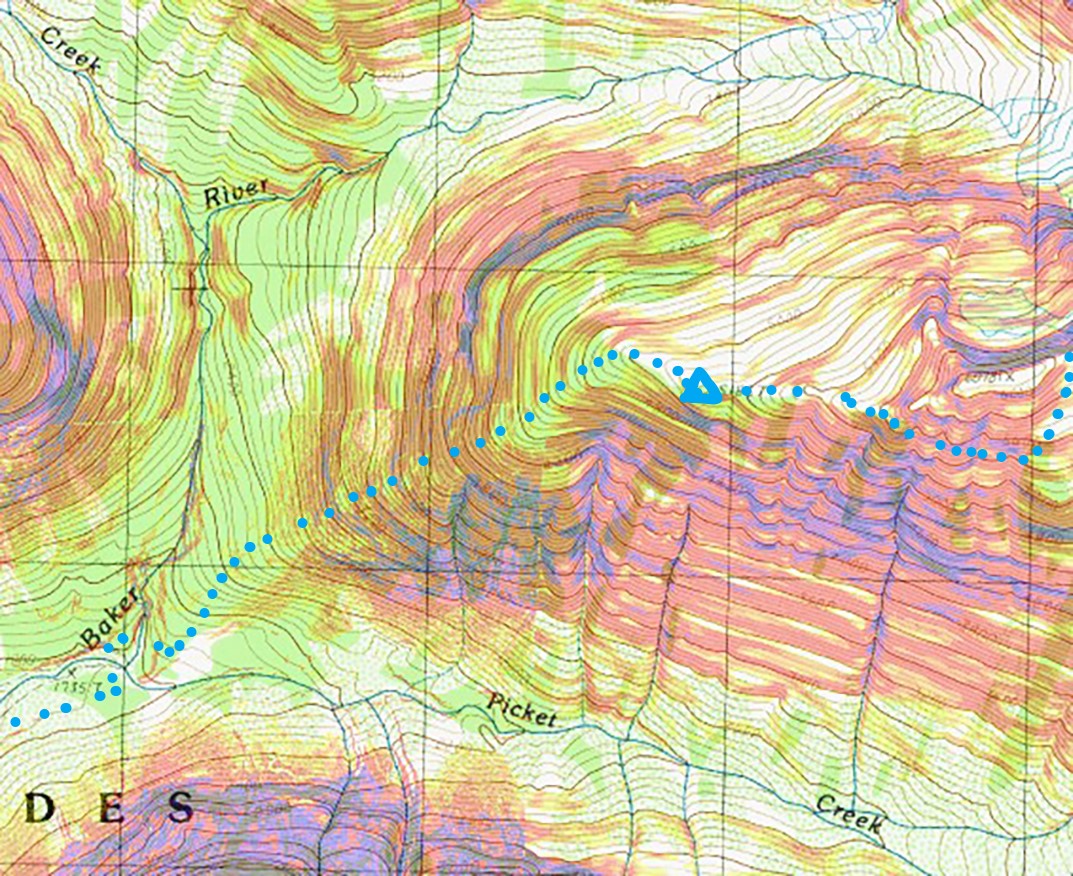
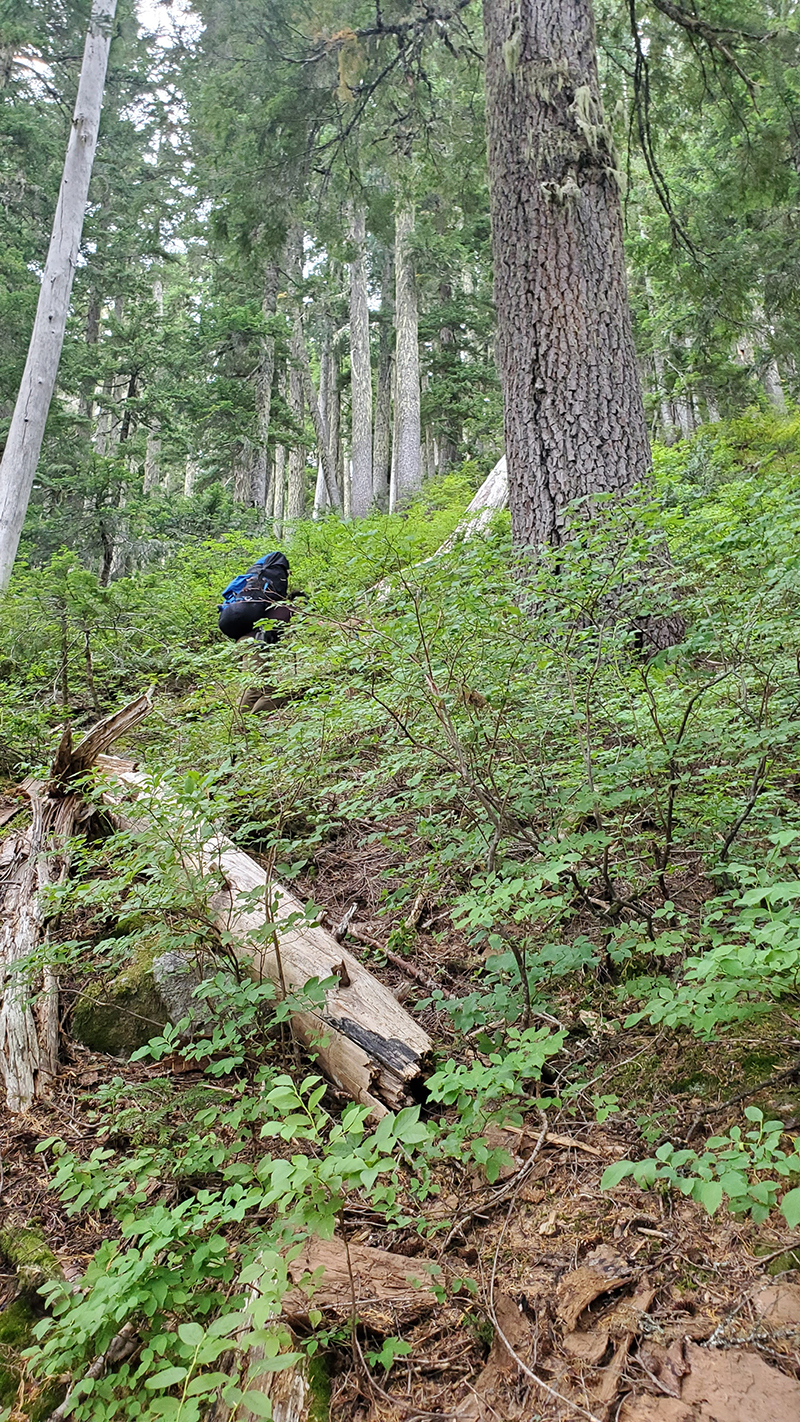
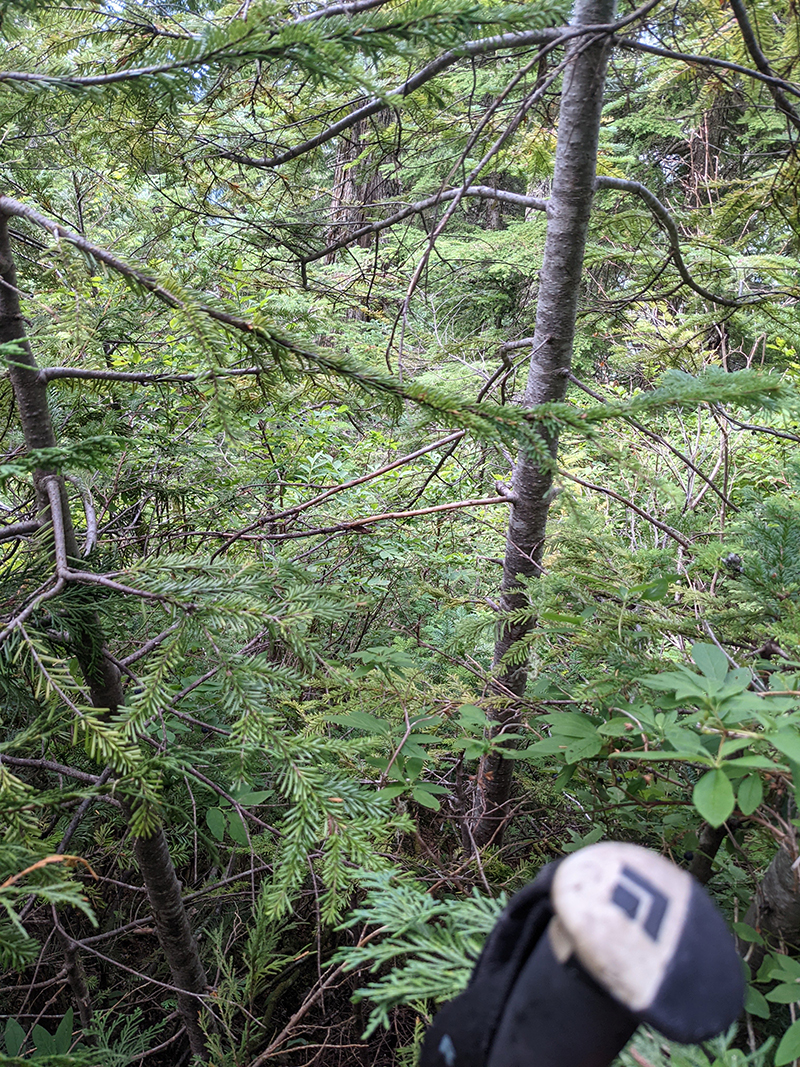
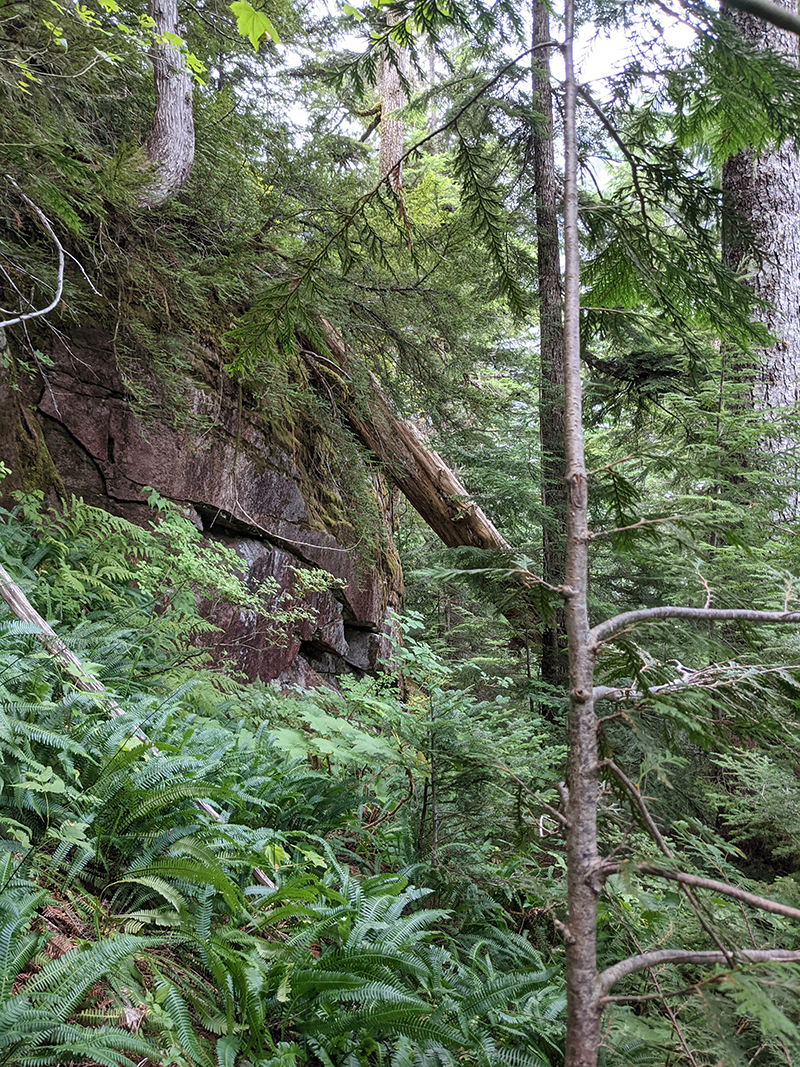
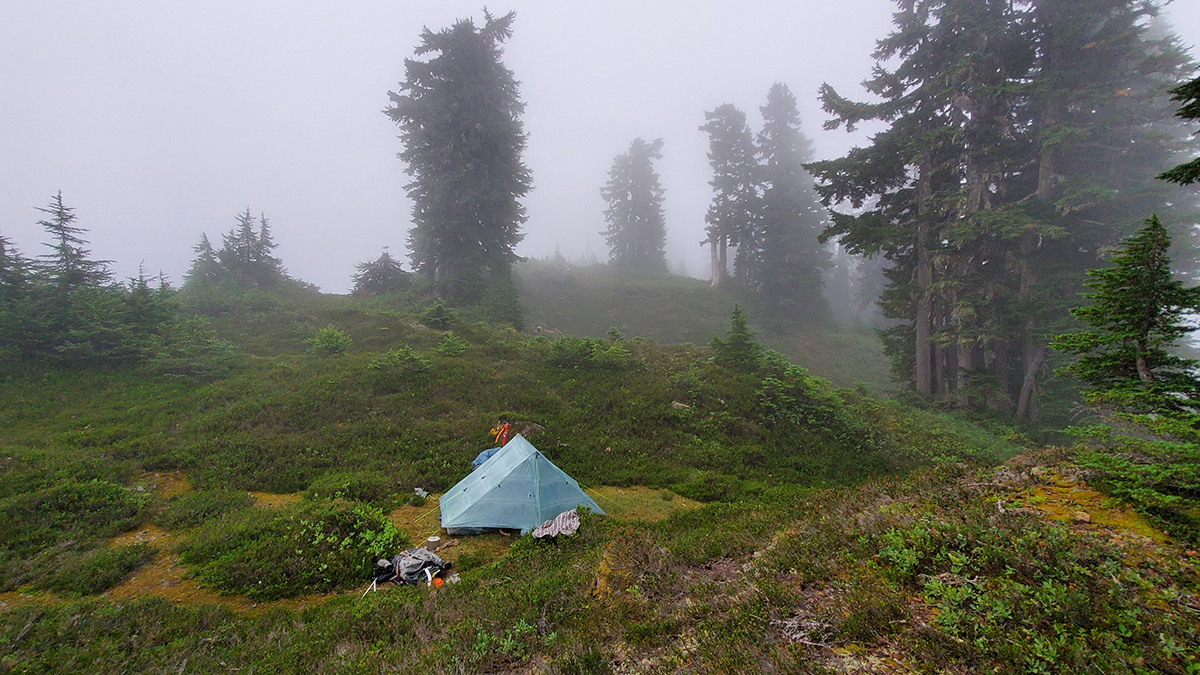
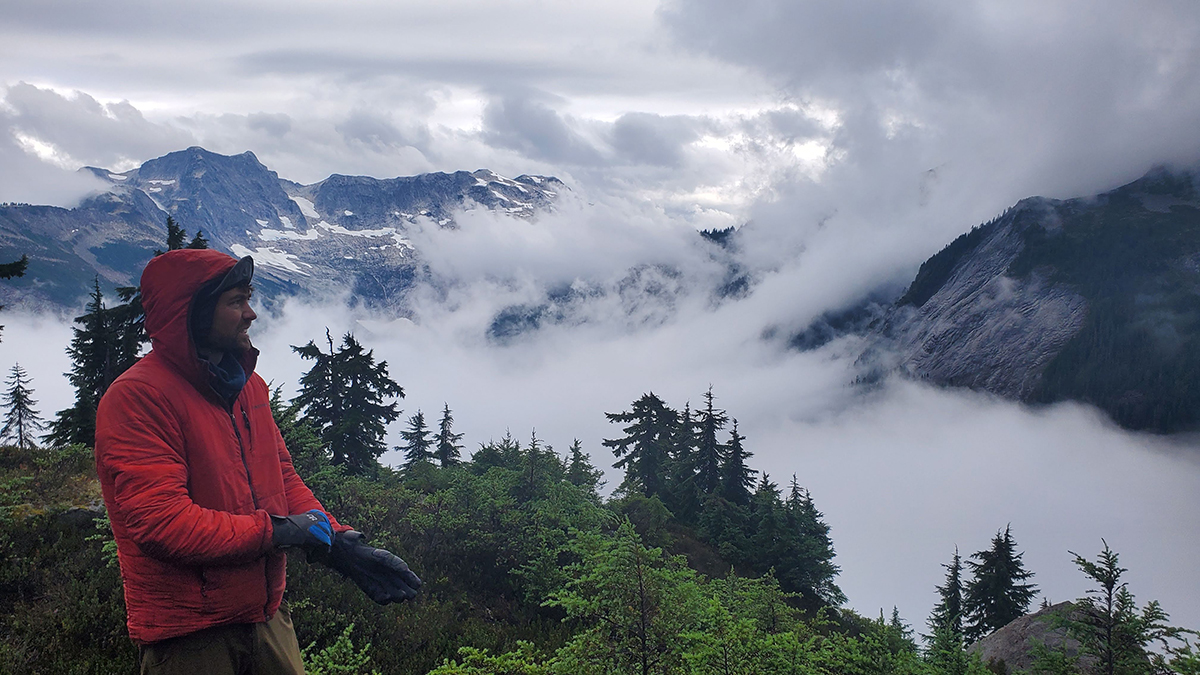
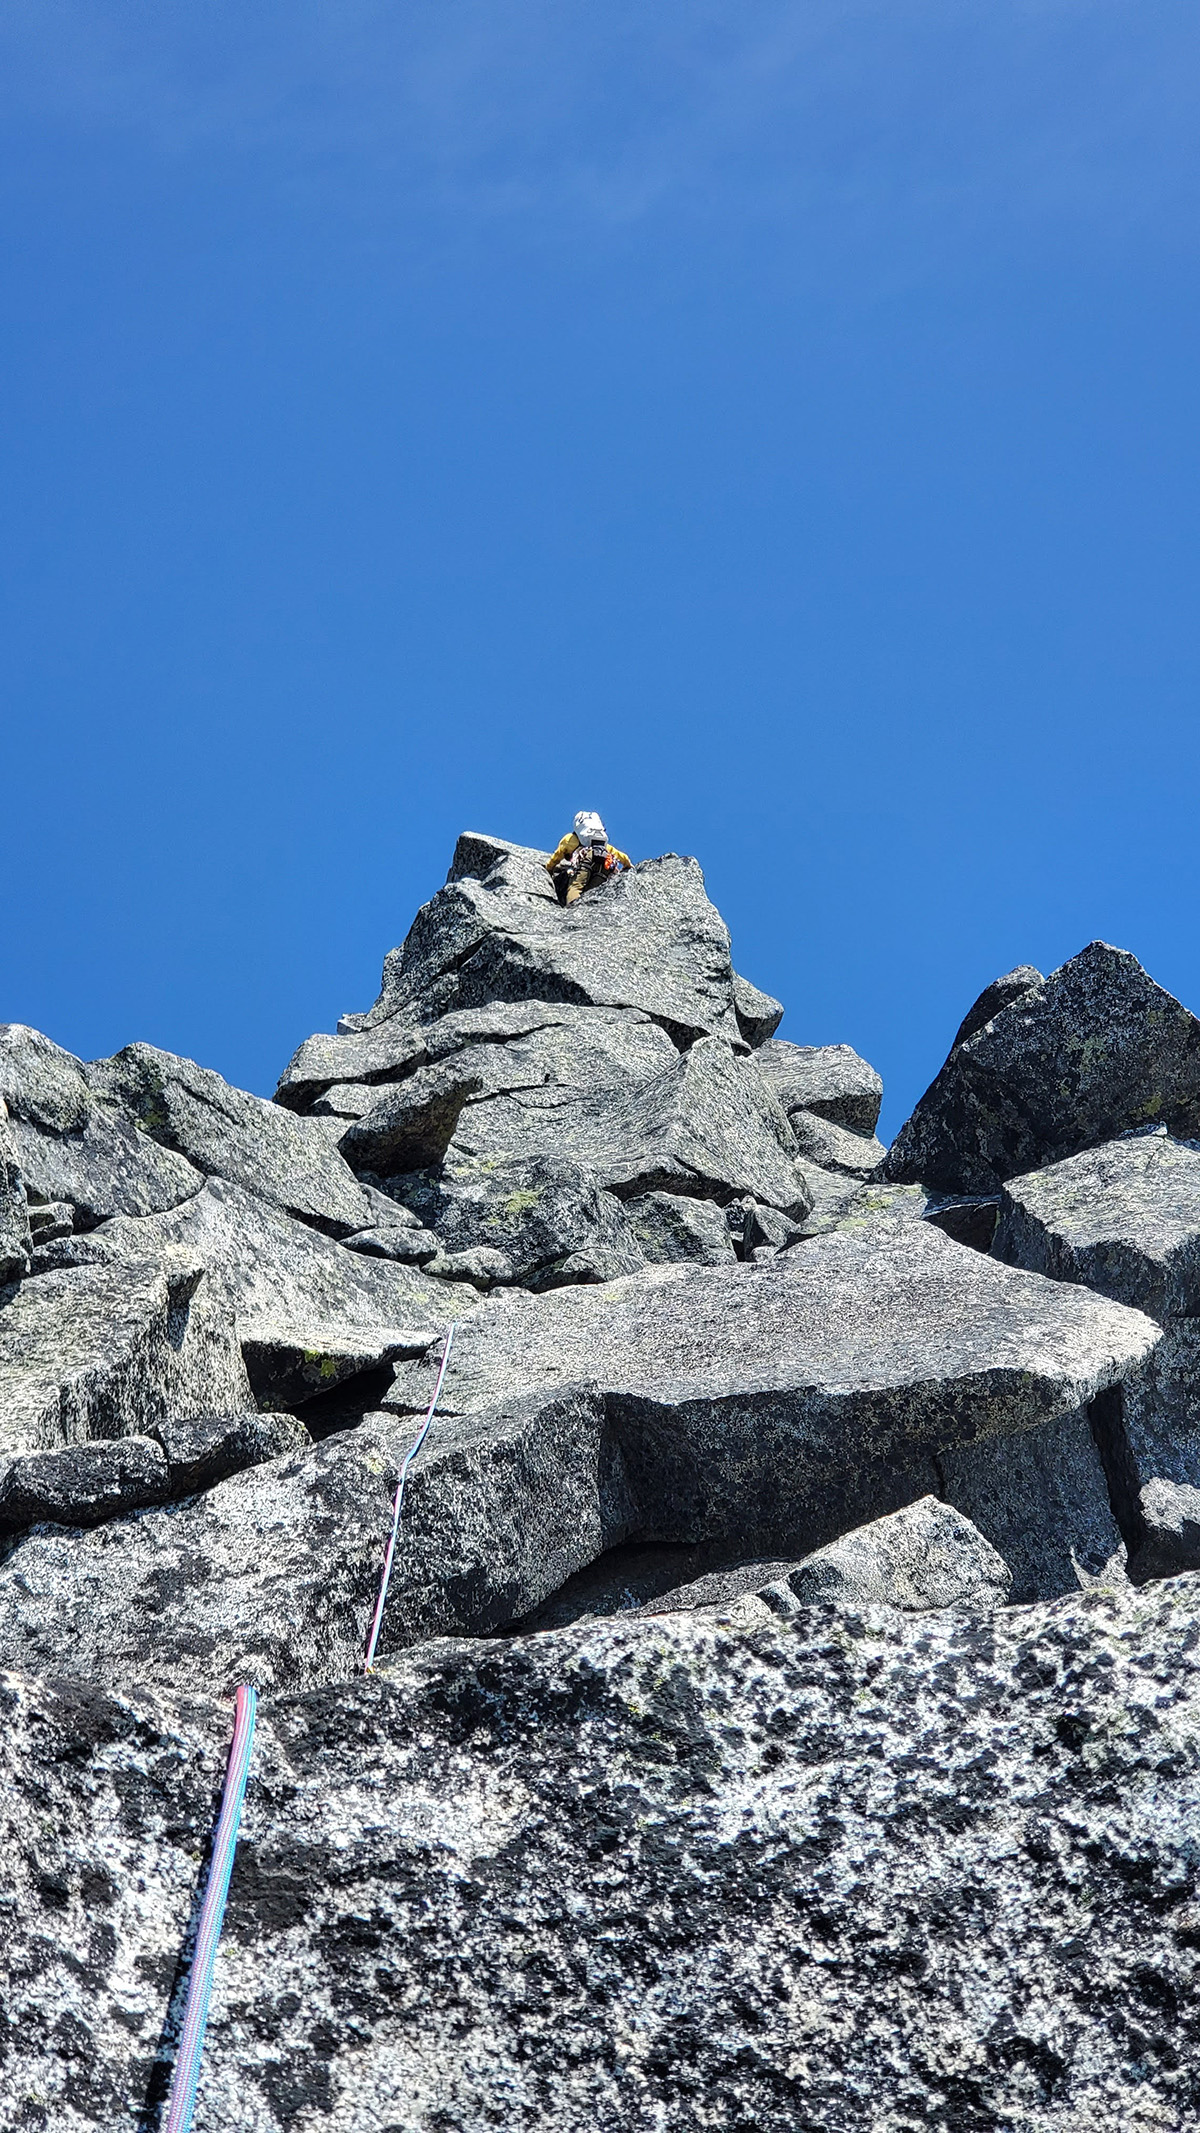
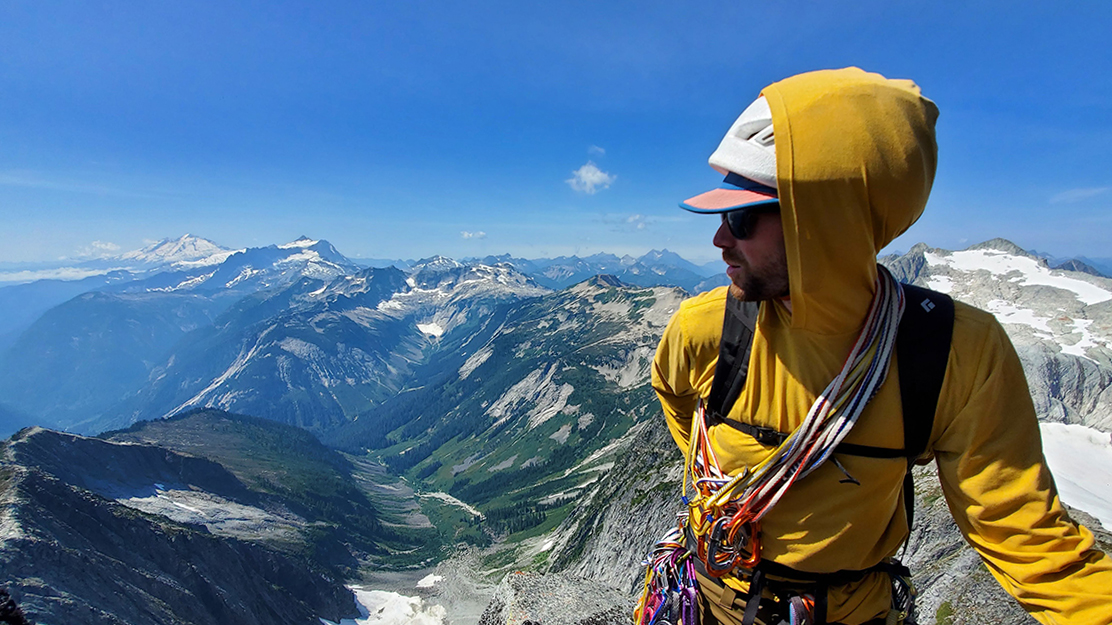
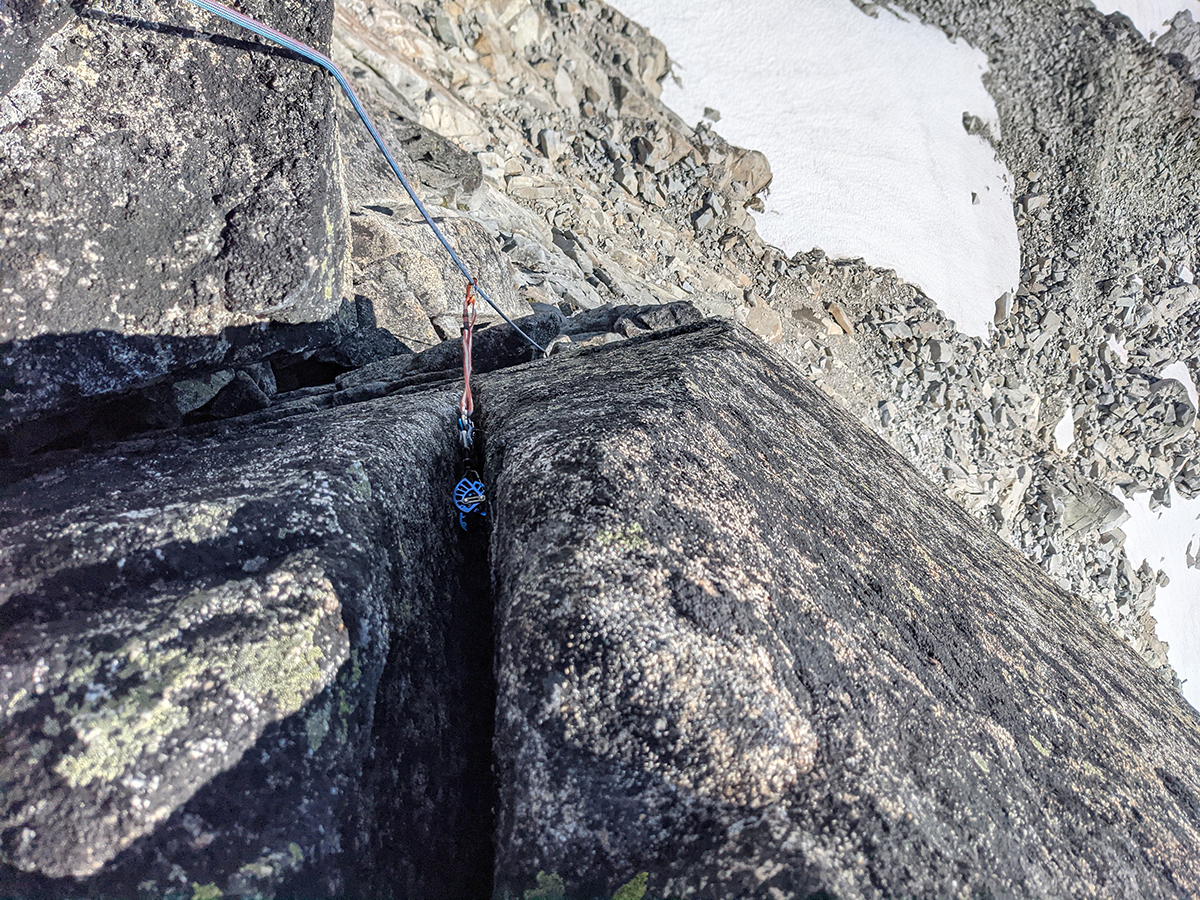
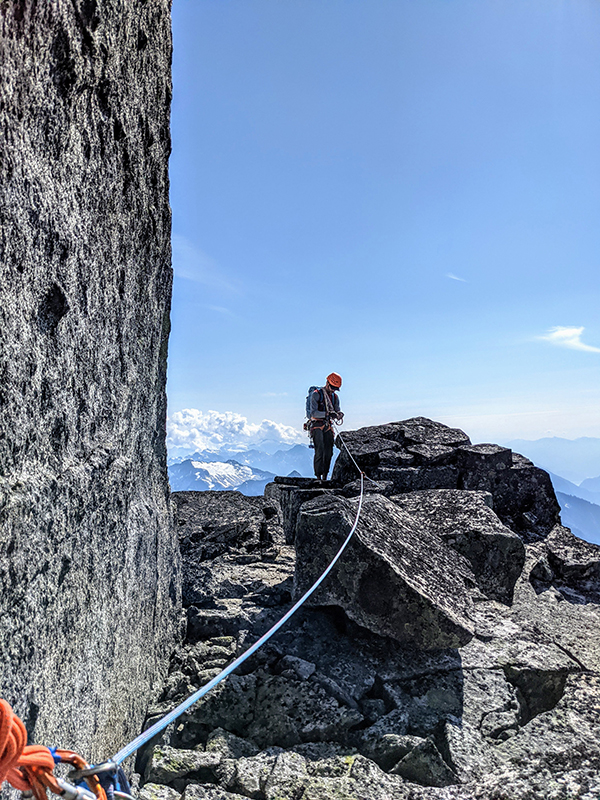
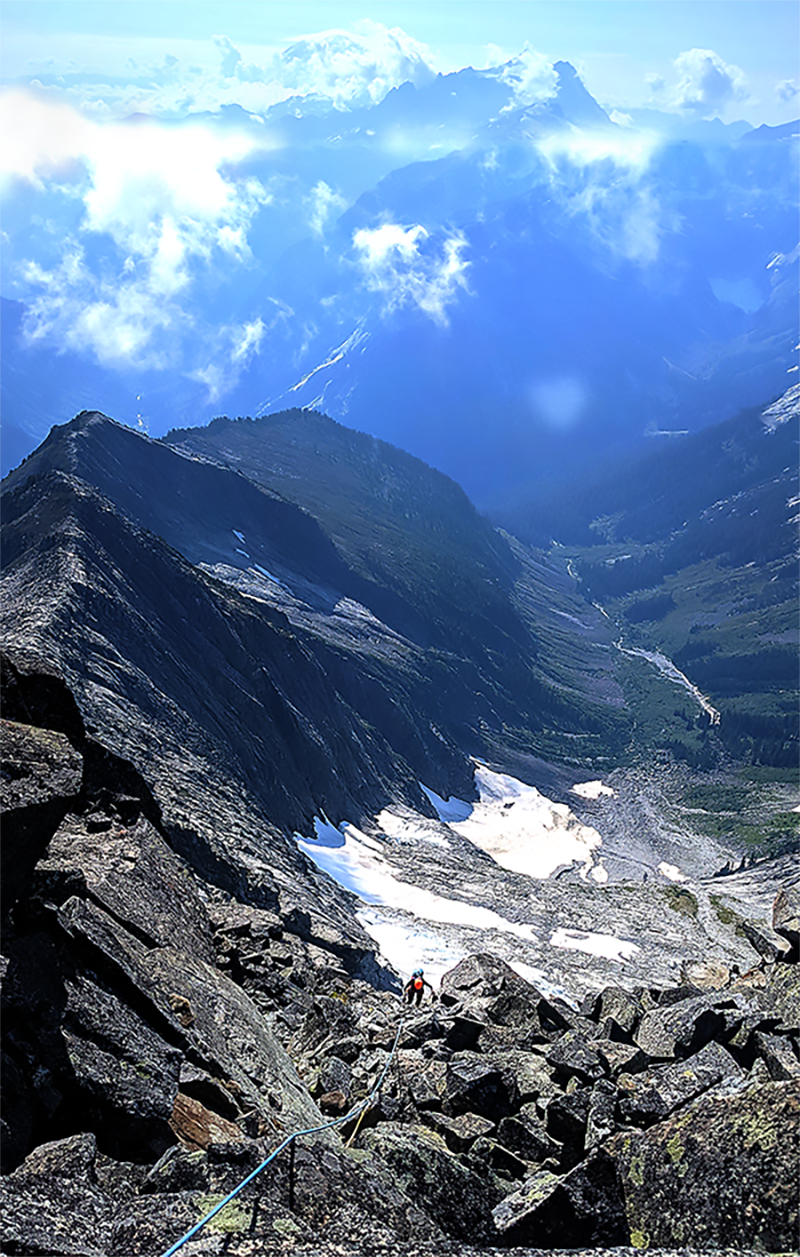
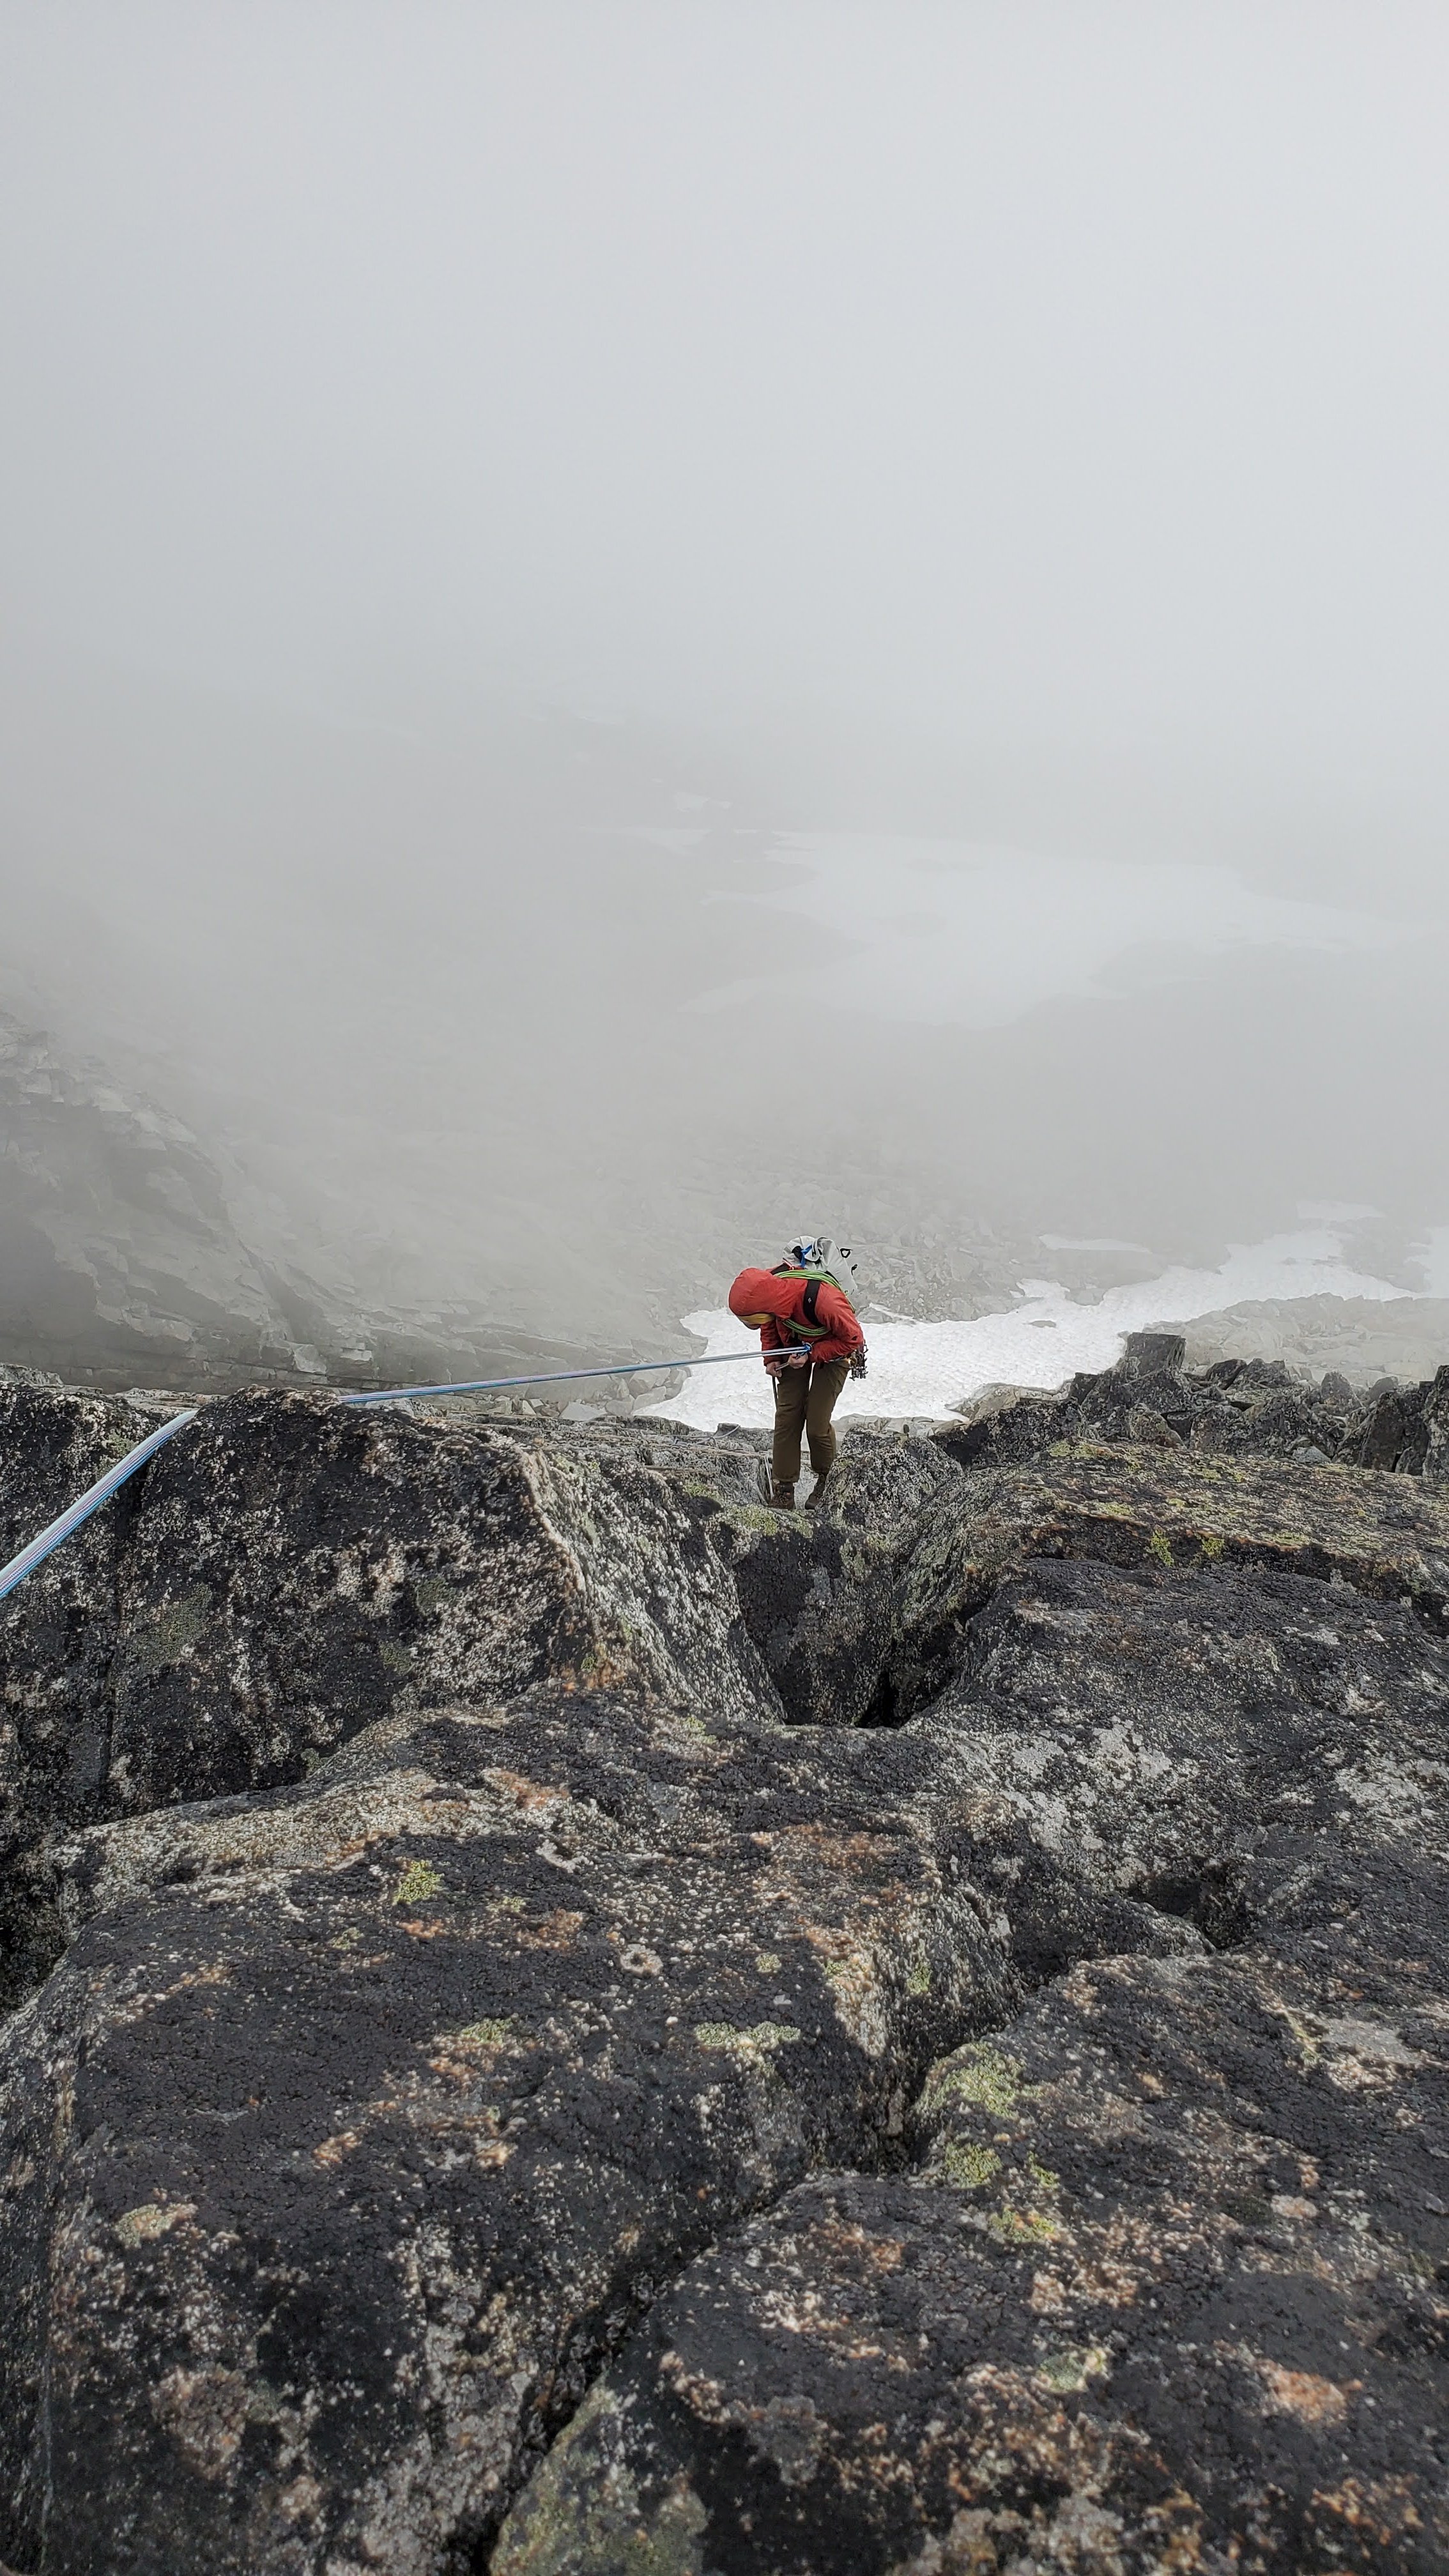
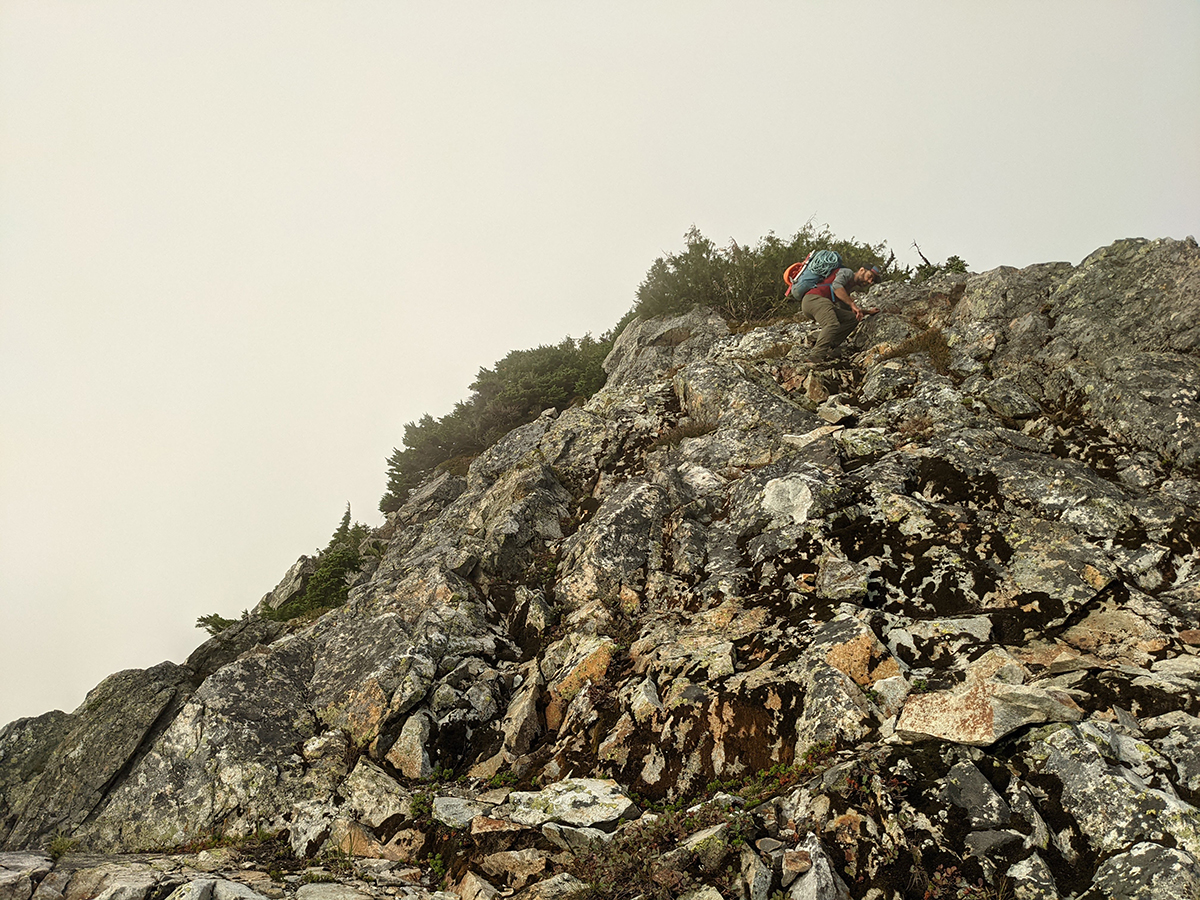
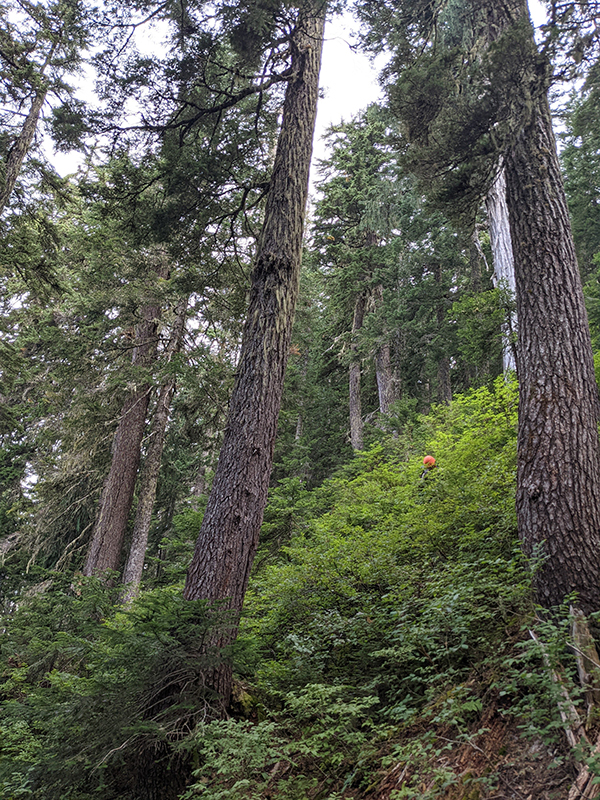
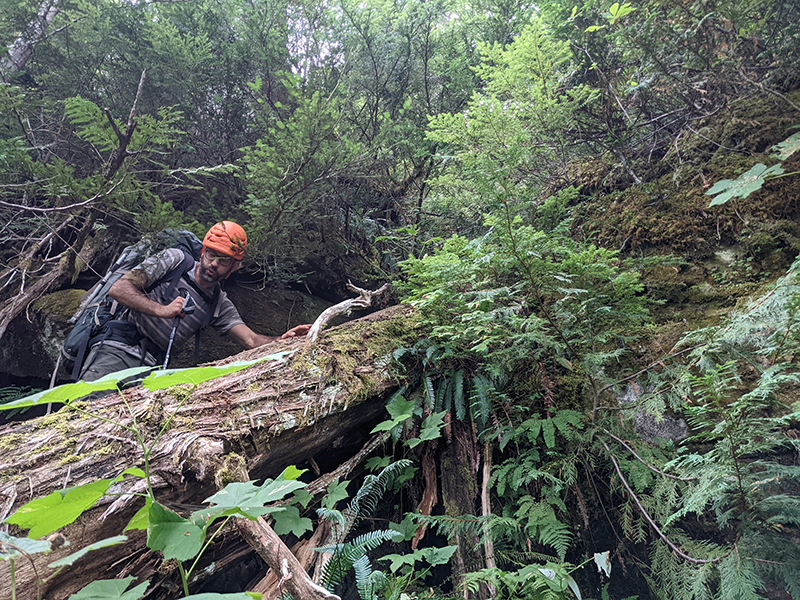
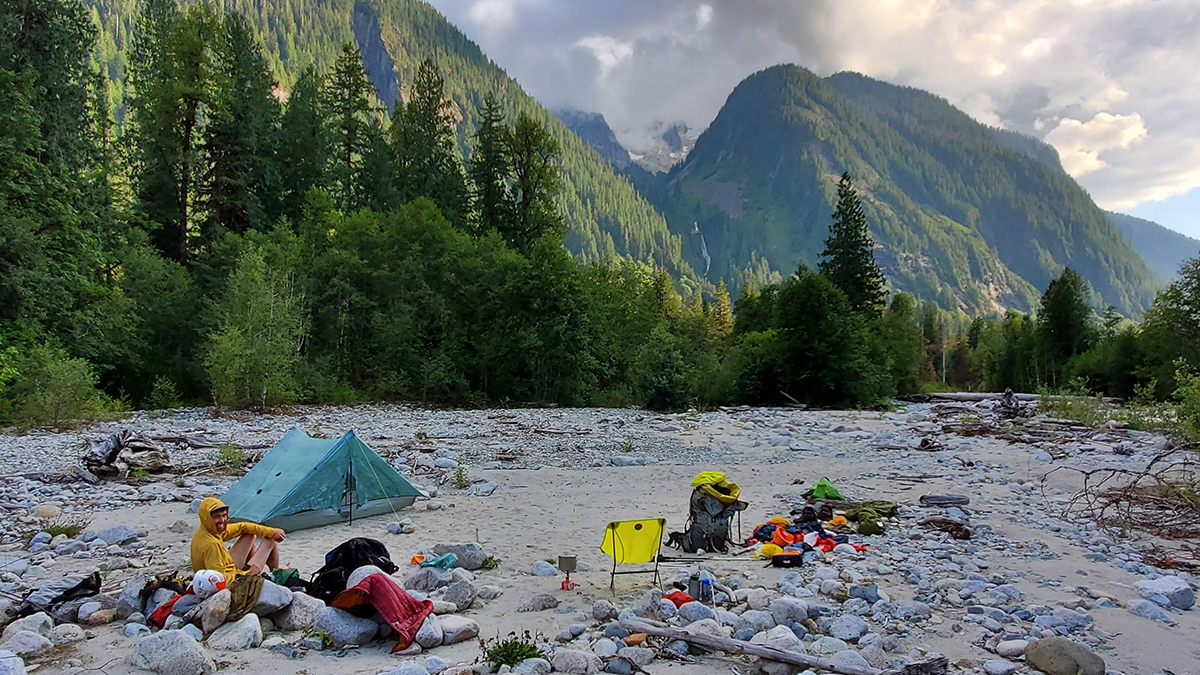
 Trip: Northern Pickets - Mt. Challenger Middle Peak & FA of SW Ridge of Challenger 5 (Peak 7,696) Trip Date: 08/18/2021 Trip Report: Northern Pickets, image pulled from publicly accessible Google Book Preview of Cascade Alpine Guide, Vol. 3. The SW Ridge of Peak 7,696 is the righthand skyline. Fair use intended. TL;DR: Climbing partners Joe Manning (manninjo) and Joseph Montange ventured up the wild and rugged Baker River valley in mid-August 2021, seeking a shortcut into the Northern Pickets. After several days of travel, we climbed a very fun, new, five pitch, 750', 5.7 route on the Mount Challenger massif, the Southwest Ridge of Peak 7,696 (aka Challenger 5). Baker River Mandatory wading on day 1 starts several miles upriver Time to go to the beach! It’ll be fun: miles of sandbars and loads of deep blue swimming holes. Wading up the river in tennies. Getting to curl our toes in the sand. Sounds promising as a way to approach the remote and reasonably inaccessible Picket Range. Relaxing, beachy-type vacations are not my norm, so the Baker River seemed like the best of both worlds. Get the summertime water fix AND have an adventure scoping out the “direct” route into the Northern Pickets. The approach, documented in the 1968 Tabor and Crowder guide, has no record of folks actually going all the way in that way in the last 50 years. I’m sure some folks have, only to be swallowed by brush and never seen again. Mike Layton wrote in 2006 that John Roper “thoroughly sandbagged” him and Wayne Wallace on their approach to Spectre Peak by suggesting the Baker River. Following “six hours to travel a mile and a half along the Baker River we bailed. Ahead were three more miles of rain, brush, and swift water followed by a 5000-ft climb to the ridge… after our eight-hour false start, we dragged our soggy asses and 25-lb packs to the Hannegan Pass parking lot to restart the trip.” Pioneer Ridge (center-right) and the confluence of Bald Eagle Creek and Baker River For our part, we wanted to push beyond the Pioneer Ridge version of the Baker River approach and continue up the river, to the confluence of Picket and Mineral Creeks. From here, a spur ascending all the way to the Mt. Challenger massif would provide an escalator into the alpine. In fact, after all the beach time, we’d probably need to burn off some of those beach-induced calories. In all seriousness, there’s really no easy way into the western side of Northern Pickets. For a fit and competent party, stocked with full climbing kit and several days of food, Easy Ridge, Whatcom Pass and Peak, Eiley Wiley, even carrying over Fury all take at least two days. Sometimes fast and light parties get to Perfect Pass in a day for a two-night blitz of Mt. Challenger. But if you want to do something on the west side of Spectre, Phantom, Ghost, Crooked Thumb, anything on the south side of Challenger, it's two days just to get there (and two more to hike out). It was with this knowledge that we set off up the Baker River, hoping to find the equivalent of the Northwest Passage into the Northern Pickets. While we may not have found quite that, we did get to spend several days in one of the most rugged, wild, untrammeled and primeval wilderness areas this side of Alaska. The fact that access started less than a 90-minute drive from home was remarkable. The sheer quantity and apparent quality of the granite cliffs spilling off the sides of Pioneer and Mineral Ridges is mind boggling. It’s a beautiful looking mix of Index town walls, Squamish, Darrington, Yosemite, name any notable granite bigwall area. Were it not for a lack of trails and fixed anchor ban in the park, this zone would be a serious destination. As it exists today, it's worth admiring the incredible views every step of the way in. Just don’t forget to watch your step along the way. For folks who find off-trail travel “not so bad,” the stats are compelling. It's less than half the distance of any other way into the range, and less than half the elevation gain. There is no penalizing elevation loss. The approach lacks the objective hazards (e.g. icefall traversing around Whatcom Peak) and subjective hazards (e.g. exposed, loose scrambling over Whatcom or across the Imperfect Impasse) one would find coming in from other directions. The Baker River is a late season approach - the river needs to be low enough to regularly ford and wade. Most of the river walking we did was shin to knee deep. A pair of low top mesh approach shoes worked perfectly to hike in and out of the river. We got waist deep in the river once or twice, though that may have been avoidable. Make sure you line your pack with a garbage bag or other waterproofing. Sections of mandatory bushwhacking punctuate the river walking There is unavoidable brush, including some that registers as “BW5” on the Cascade Brush and Bushwhack scale. As with most off-trail approaches, the bushwhacking was far worse going in than coming out. Only a handful of times did patience grow thin and tempers flare due to frustrating travel conditions. Another dead end in the brush led Joseph to remark that “it wouldn’t be an adventure if there were no doubts.” At this point, with the hour growing late on the first day, we were having some serious doubts about the viability of the approach. After a breather and channeling the power of positive thinking, we made it through the worst of the brush and found ourselves a mossy camp in open forest next to a brook and several large boulders. With full packs loaded for climbing out of a base camp, it took about the same amount of time to go in this way compared to past experience with the more-frequently documented approaches. The crux of the approach, encountered on day two for us, was the wooded spur above the confluence of Mineral Creek/Baker River and Picket Creek. The wooded spur with approximate line and color showing slope angle It starts out innocuously enough. Low angle, brush-free walking past ancient cedars the size of skyscrapers, some well over 15 feet in diameter, soon gives way to steeper and steeper hillside. In what could be the toughest 2,000 feet of elevation gain anywhere, you’ll fight insanely thick brush, mostly saplings and huckleberries, all at a gradient of over 30 degrees, while dodging cliffs including a significant band at about 4,000 feet elevation. Helmets and dirt-ponning may feel necessary to descend safely. Steep huckleberry Typical brush thickness on the wooded spur Several cliff bands are hidden in the brush of the wooded spur Perhaps the effort overall is greater going off trail, though that is going to vary individual to individual. Climbers with their brushmaster degrees, good route finding skills and smaller, lighter packs could conceivably make it to the Challenger 4/5 col or Phantom alp slope camp (or pretty close) in a single big day via Baker River. We broke out of treeline on the afternoon of our second day, hiking into a thickening misty fog. Wonderful camping exists there on grass patches among the heather fields next to perfect 250 gallon tarns. Bring a water filter for the tarn water. Camping on a natural grass tent pad next to water around 4,900 ft Our third day, we woke up to driving rain - not the forecast we hiked in with. It broke into a light drizzle by midmorning and up the alp slope ridge we went, reconning for a higher camp. By midday, an updated forecast gave us a limited window to climb the next day only, August 18th. Chance of showers returned the afternoon of the following day, August 19th. Being well provisioned for several days of rock climbing, the change in weather was disappointing but we’d have to make due. Resigned to the revised forecast; Mineral Mt. in background As I’ve learned in the Pickets, 20 or 30% chance of showers is pretty much 100% chance of rain and low-to-no visibility. We ended up moving camp on day three just a half mile further up the ridge, to a larger patch of grass with an even deeper little tarn and mystifying views of Whatcom Peak, Mineral, Shuksan, Baker/Kulshan and numerous other mountains. We elected to leave base camp there on the ridge around 5,200 ft and go light above. Camp 2 on the ridge, Whatcom Peak in the mist and Perfect Pass at center right We had big (for us) ambitions for our week, yet somehow even the best-laid plans seemed to get waylaid by weather and slowed down by river crossings, vine maple, cliffs, huckleberry, and route finding. Southwest Ridge of Challenger 5 (Peak 7,696), 5.7, 5 Pitches, 750’, Grade II Rock climbing can be just plain Type I fun. You’re outside, with good company, in good weather, using your brain and body to briefly overcome gravity, dancing with the minerals, having a jolly ‘ol time. For whatever reason, granite especially lends itself to this kind of climbing. Joseph contemplating existence on the summit of Mt. Challenger's Middle Peak After scrambling Mt. Challenger’s Middle Peak on day four, Wednesday morning, August 18th, and considering different options for more climbing, we circled back to the south face of Challenger 5 to scope out some pretty neat looking rock. The granite was white to dark with a golden burnt orange in places, peppered with blocks, flakes, and large chicken heads. Fun scrambling to contour back west under Challenger 5's south face Anywhere else these cliffs would be stacked with moderate trad lines. We contoured all the way around the south face until there was nowhere left to go. The southwest ridge dropped off down the imposing west face. Above, a distinct ridgeline ambled up towards the summit. Belay at start of route The route started from a broad, jumbled, and blocky ledge system roughly where the seasonal snow line of the SW ridge ends and the more black, lichen-stained rock begins. If you were hiking directly up the ridge from below, it might be possible to add another pitch for fun, but we cast off from the highest “scramble accessible” point. Climbing on pitch 1 The first pitch went up slabs, followed by a left-facing corner with a laughably fun 5.6 hand crack. Above the corner, a good stance on a ledge set up a short finger crack to another ledge. The rock was exceptionally solid and remarkably splitter, with bomber gear exactly where you might want it. Topping out pitch 1 Starting pitch 2; camp, approach ridge, and Baker River all lower left The climbing went for four more pitches like this, ledgy yet exposed ridge climbing punctuated by fun crack segments. Every roughly 40 - 45m pitch ended at a spacious belay ledge with a slingable horn or solid crack for gear. Views and position on the peak were something to behold. Climbing on pitch 2 Pitch four was the standout, with an improbable and slightly intimidating step right onto the exposed face after a short offwidth pillar. A horizontal traverse with a few hundred feet of exposure led to a straight up crack system culminating in another perfect hand crack, which started at red camalot and ended with a good little stretch of near-vertical number 3 jamming. A final mantel ended on a flat ledge big enough to park a bus on. Awesome exposure and jamming on pitch 4 Huge belay ledge at top of pitch 4 The final 60m pitch cut hard left, off the ridge and onto the west face via an unmissable ledge system. A blocky and slightly loose gully led directly to the summit, with the headwaters of the Baker River 4,000 feet below nipping at our heels and Shuksan and Kulshan swirling in the clouds to the west. Final climbing to the summit As soon as it came in, our weather window was on the way out. Within 15 minutes of arriving on top we were getting engulfed in the mist. We’d left our axes and crampons at the base of the route, and not knowing there was a scramble route off the peak, we elected to rap the south face from the summit and contour back to our gear. In hindsight, had we carried glacier travel gear, we could have descended to the north and potentially gotten back on the glacier, climbed back up to the col, and returned that way. In any case, two raps with two ropes got us off the steep terrain. We retrieved our gear from the base and headed back down the ridge to our 5,200 ft camp, arriving just in time for an incredible sunset as the clouds broke once again. A view of our route from the approach ridge Descending on the approach ridge Back at camp Deproach With the chance of showers in the forecast, we felt good about two summits, a new route, and three nights camped out on an incredible ridge. Now all that was left to do was to reverse miles of steep, trailless wilderness back to civilization. 40 degree huckleberries on the descent Finding the "secret passage" through a major cliff band; we were prepared to rappel, yet managed to avoid it on the way down We camped at the beach for our final evening, near the confluence of Bald Eagle Creek and the Baker River. There was enough sand to walk around barefoot and relax, taking in views of Scramble Creek falls and the North Ridge of Mt. Blum. Surprisingly, someone had camped there in the days we were up high and had left a fire pit, complete with charred logs. One might think the novelty of wading down a river would wear off by the last day of the trip, but surprisingly it didn’t. Out the way out, we knocked over a handful of cairns we made for ourselves on the way in. The only other sign of people we saw was the fire scar and some fishing line at the final campsite, which we packed out. It'd be great to keep it that way for the future. My opinion is this approach is destined to remain in obscurity when “easier” approaches exist, but it is a truly direct and viable way in to the Pickets. Having the right attitude about brush would help immensely. Walking in the river beat the heck out of the alternative Take only pictures, leave only footprints In the days since, I’ve been dreaming about the walls back there, packrafting part of the deproach, scheming about another trip back into the wilderness of the great nearby. It’s adventures like these that, for me, climbing in the Cascades are all about. Many thanks to Joseph for the great company, partnership, use of photos, and willingness to try something different. Gear Notes: Extra shoes for wading, rock climbing gear to #3 camalot, crampons/ice axe for glacier travel Approach Notes: Starts from the Baker River Trailhead. See Tabor and Crowder's "Routes and Rocks in the Mt. Challenger Quadrangle" and Beckey's "Cascade Alpine Guide, Vol. 3" for more approach details.
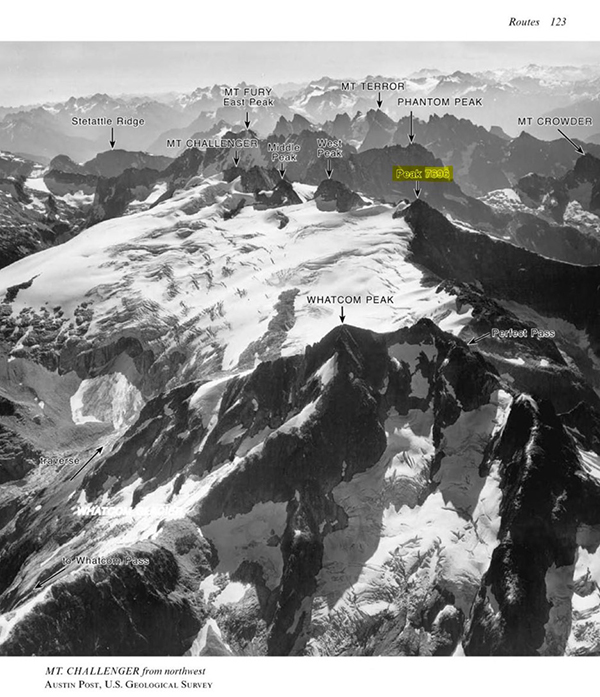


-
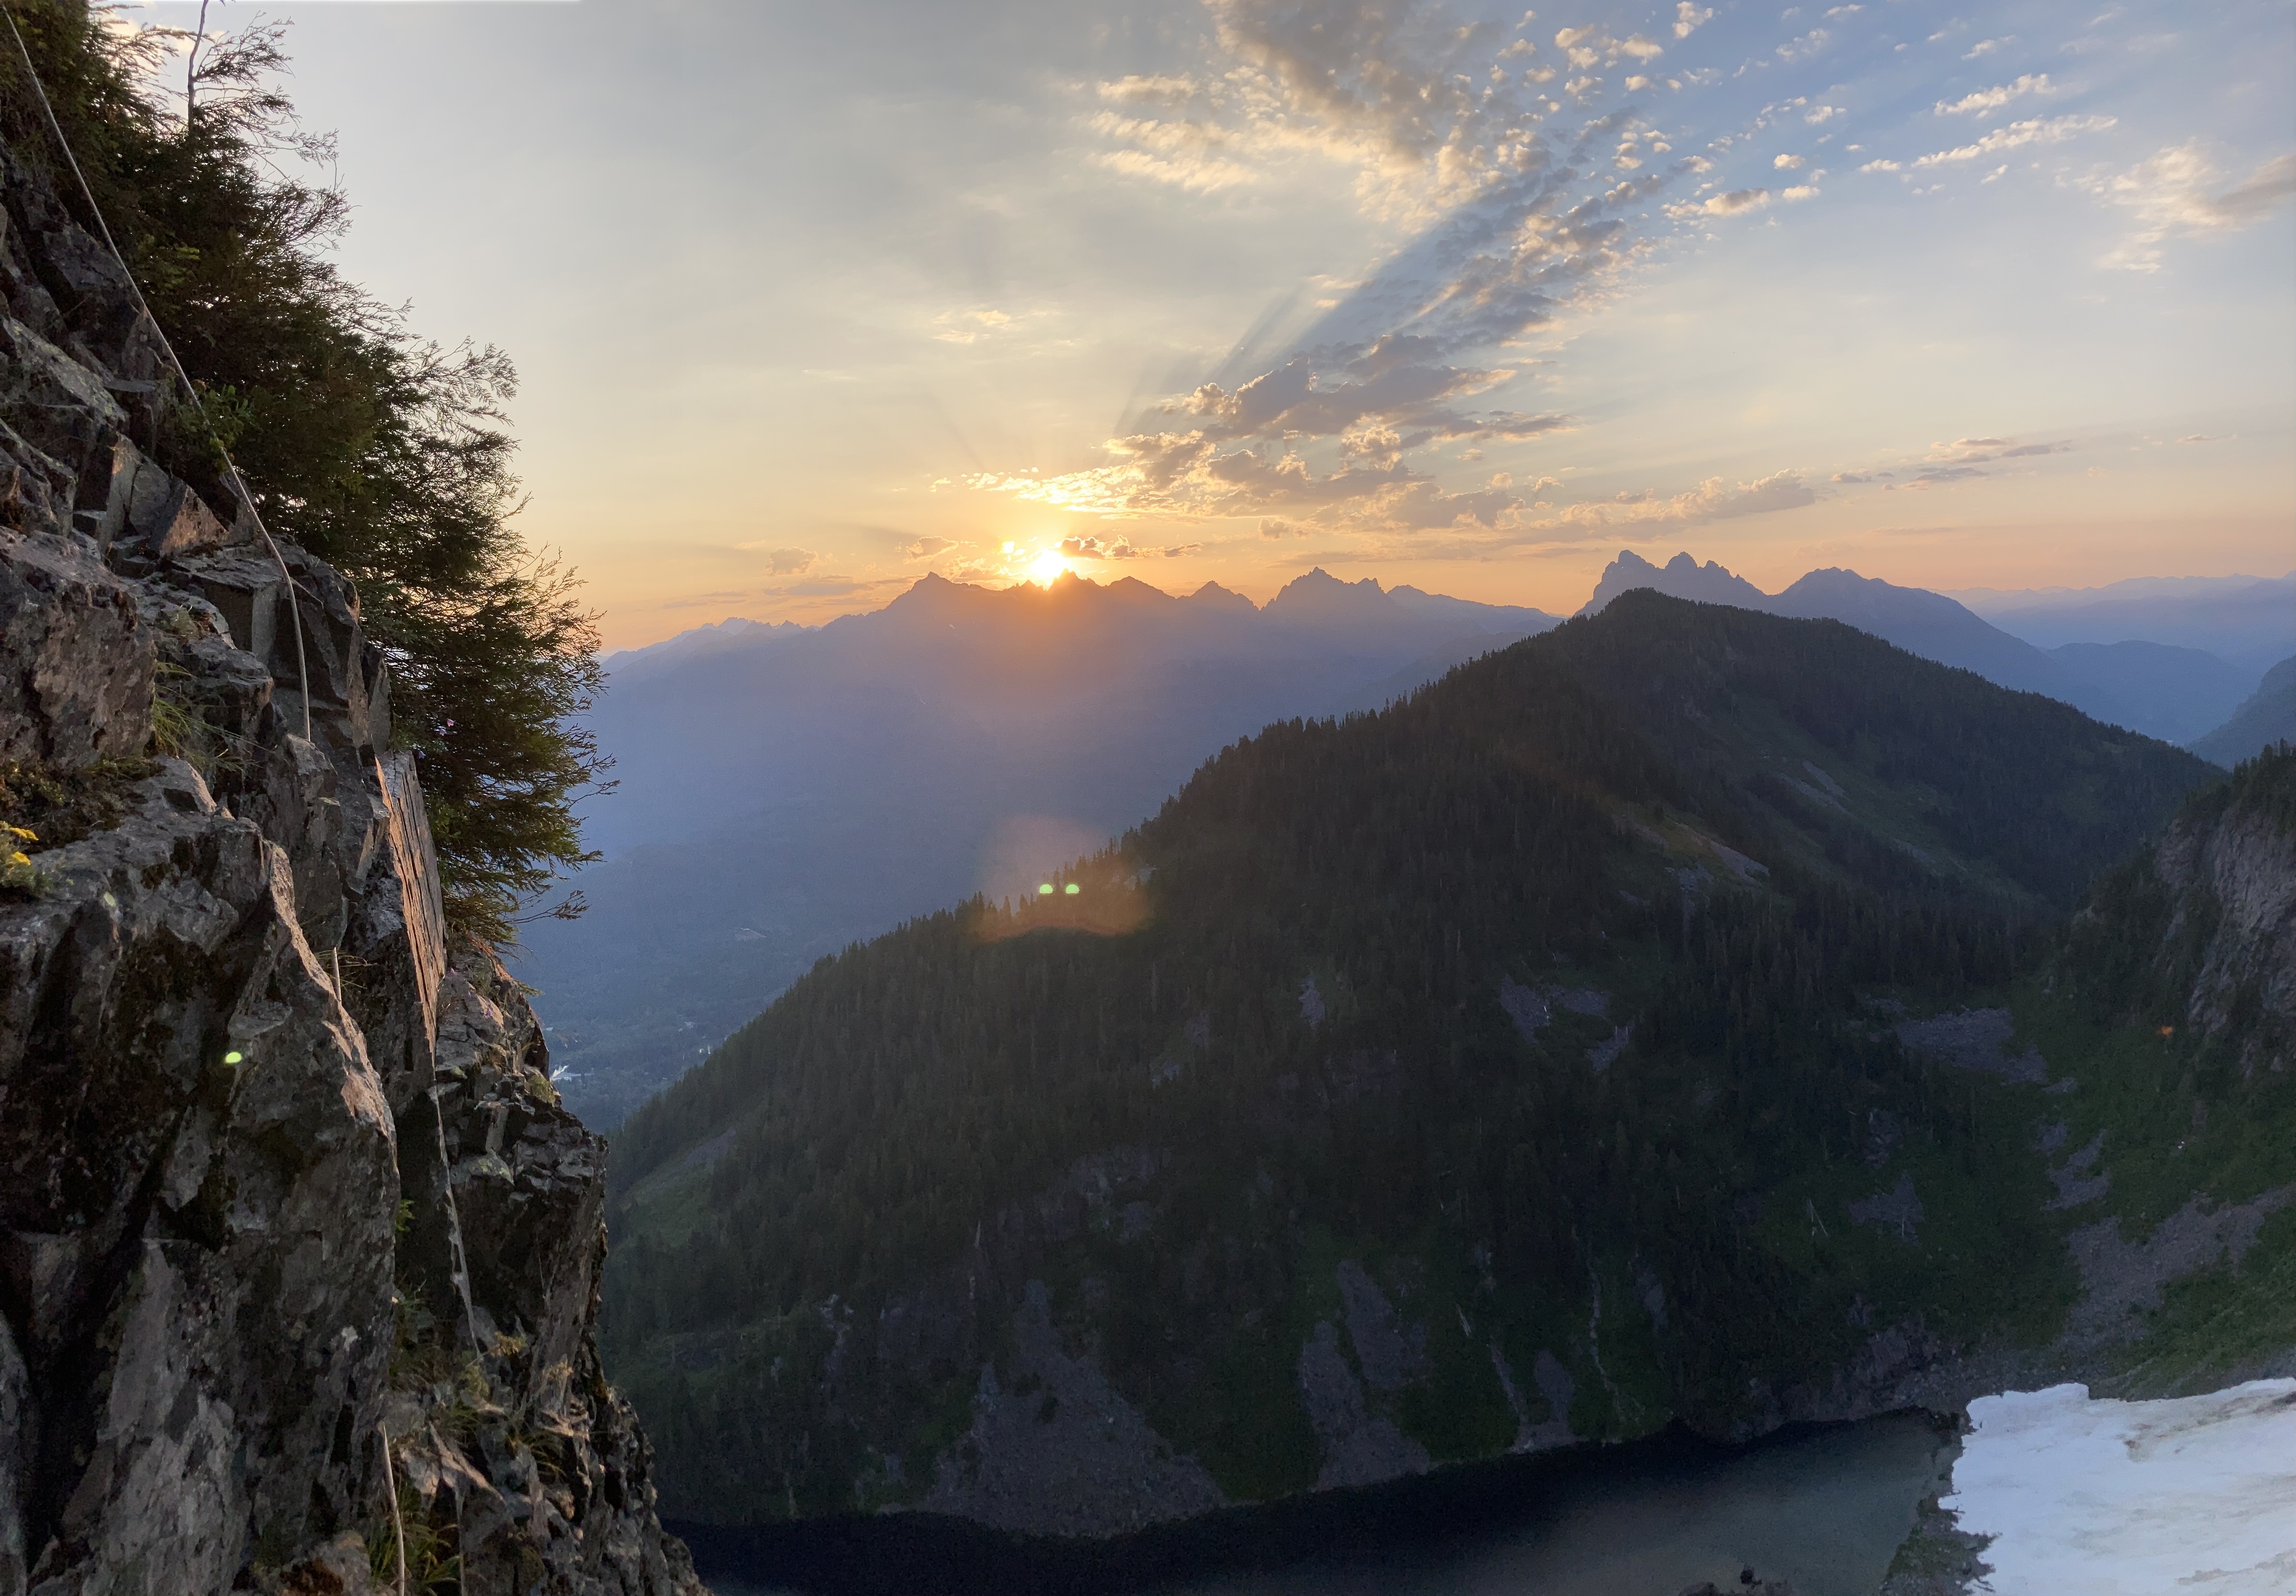
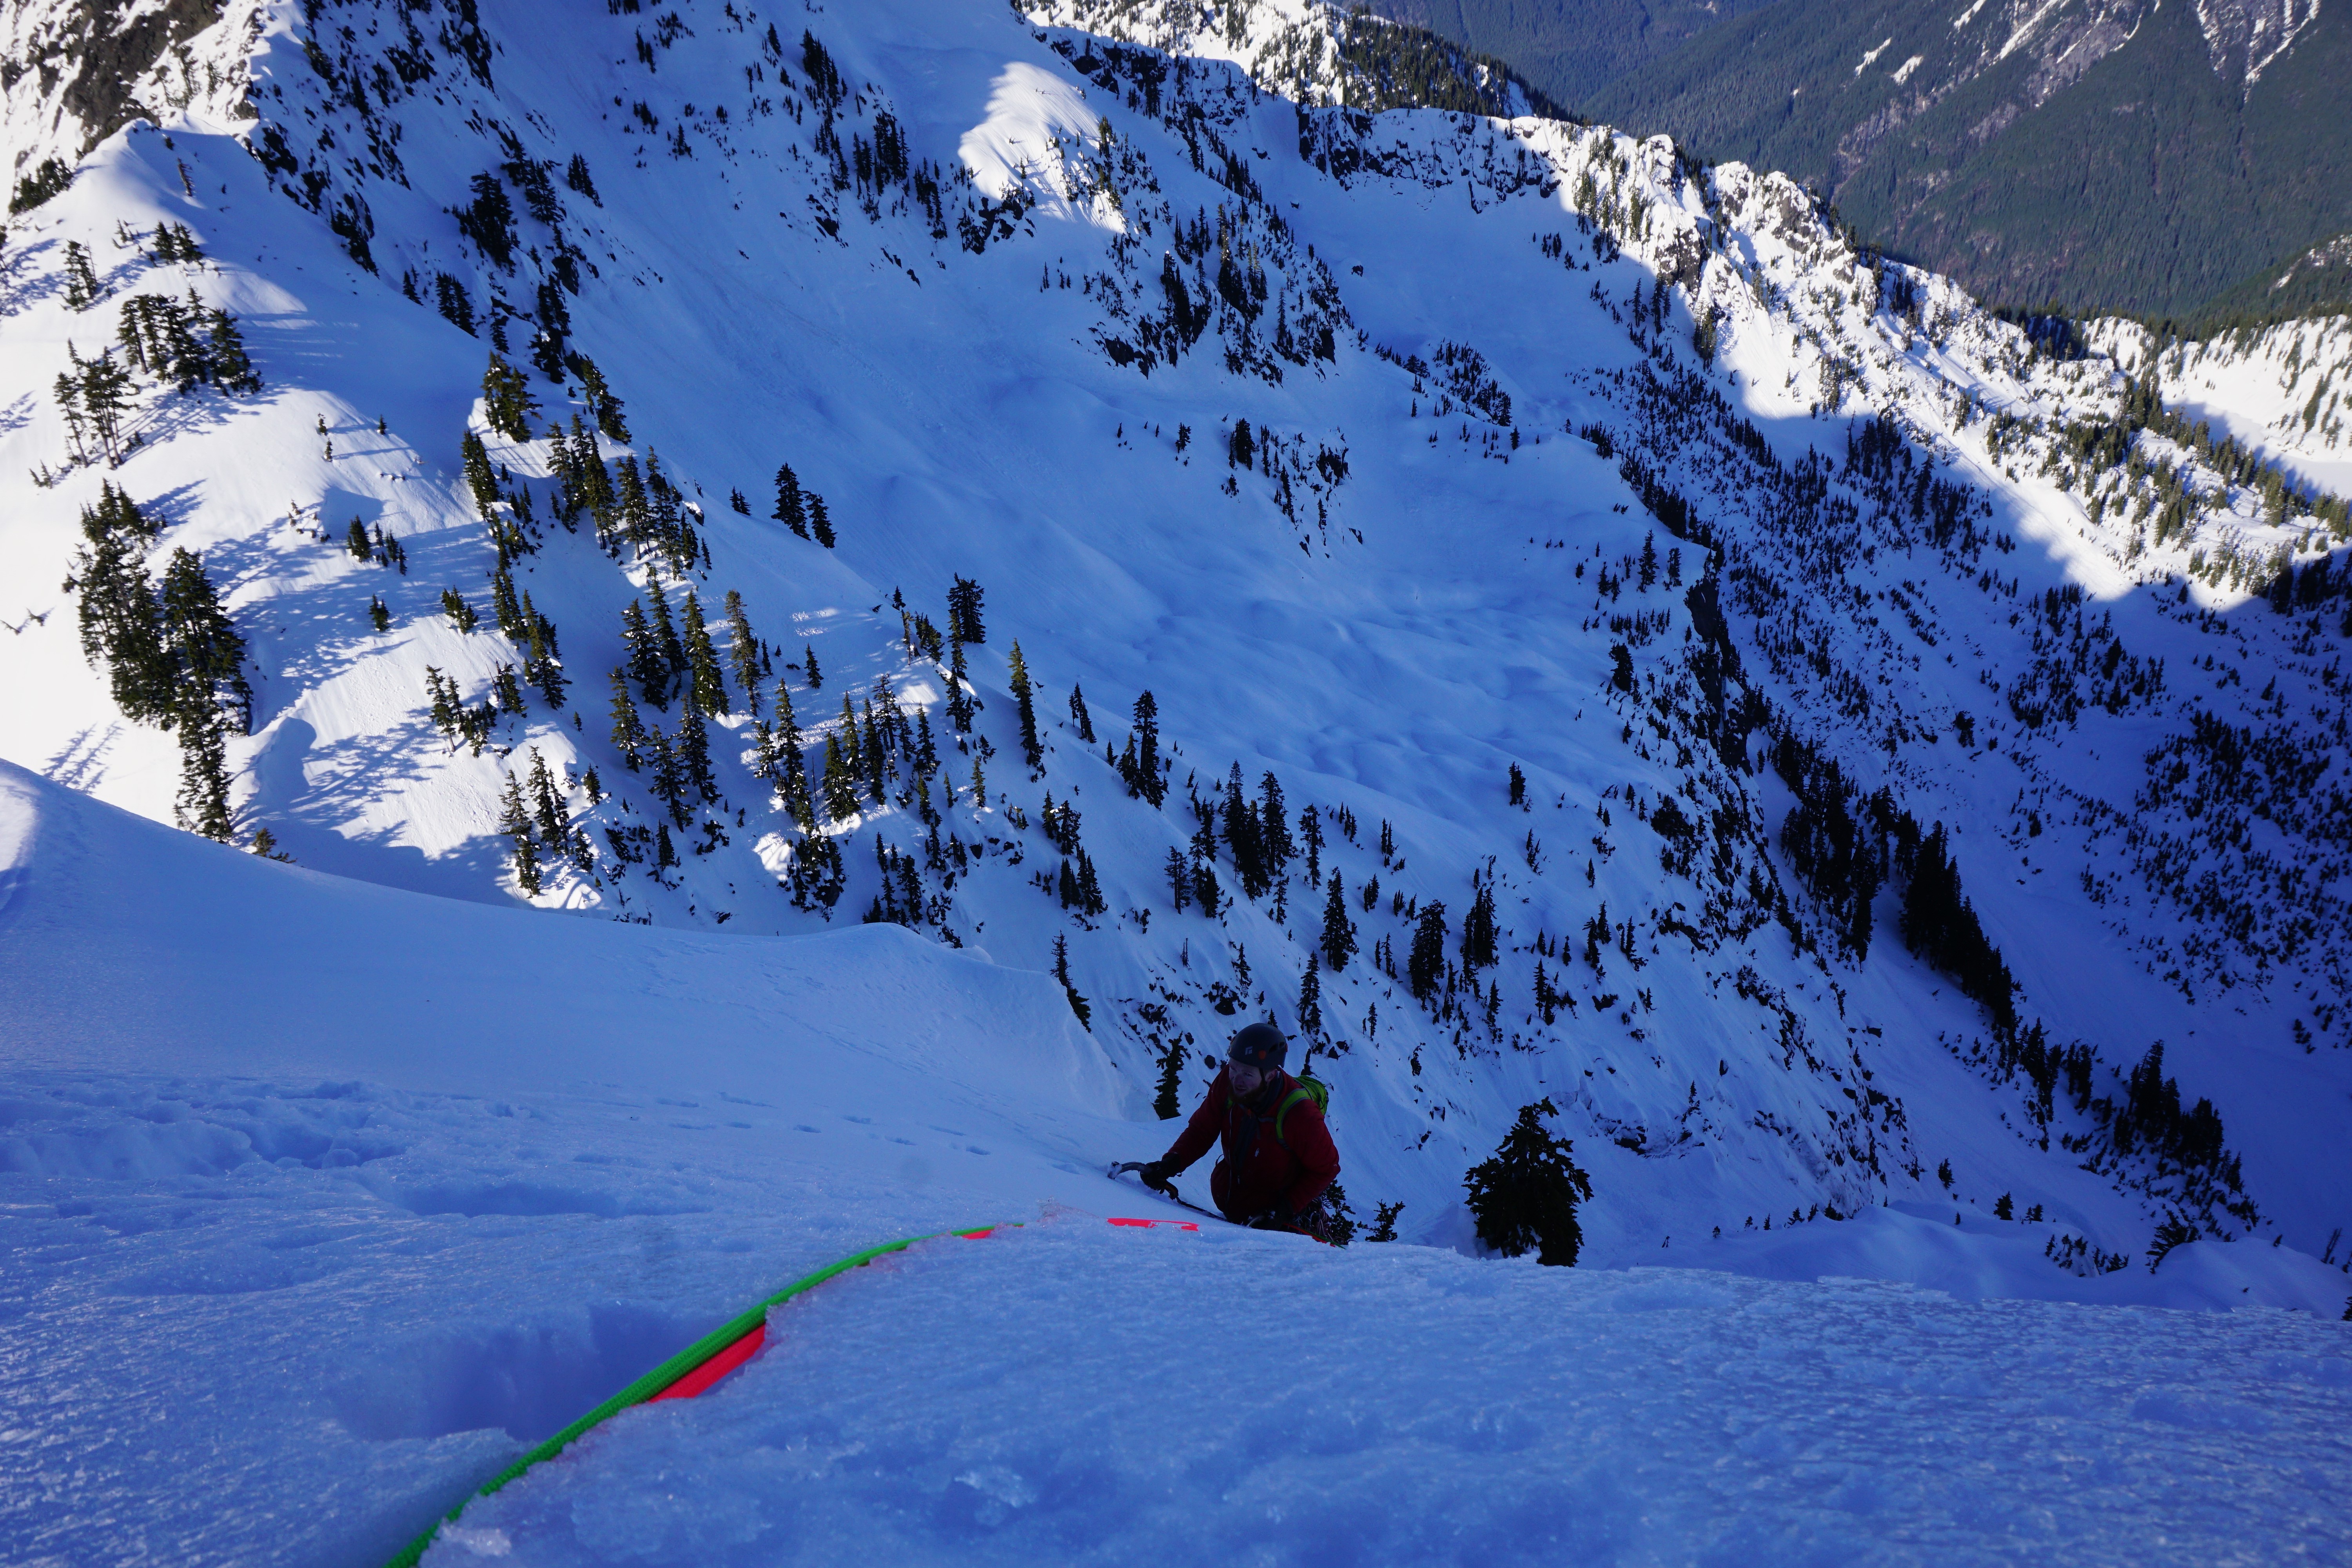
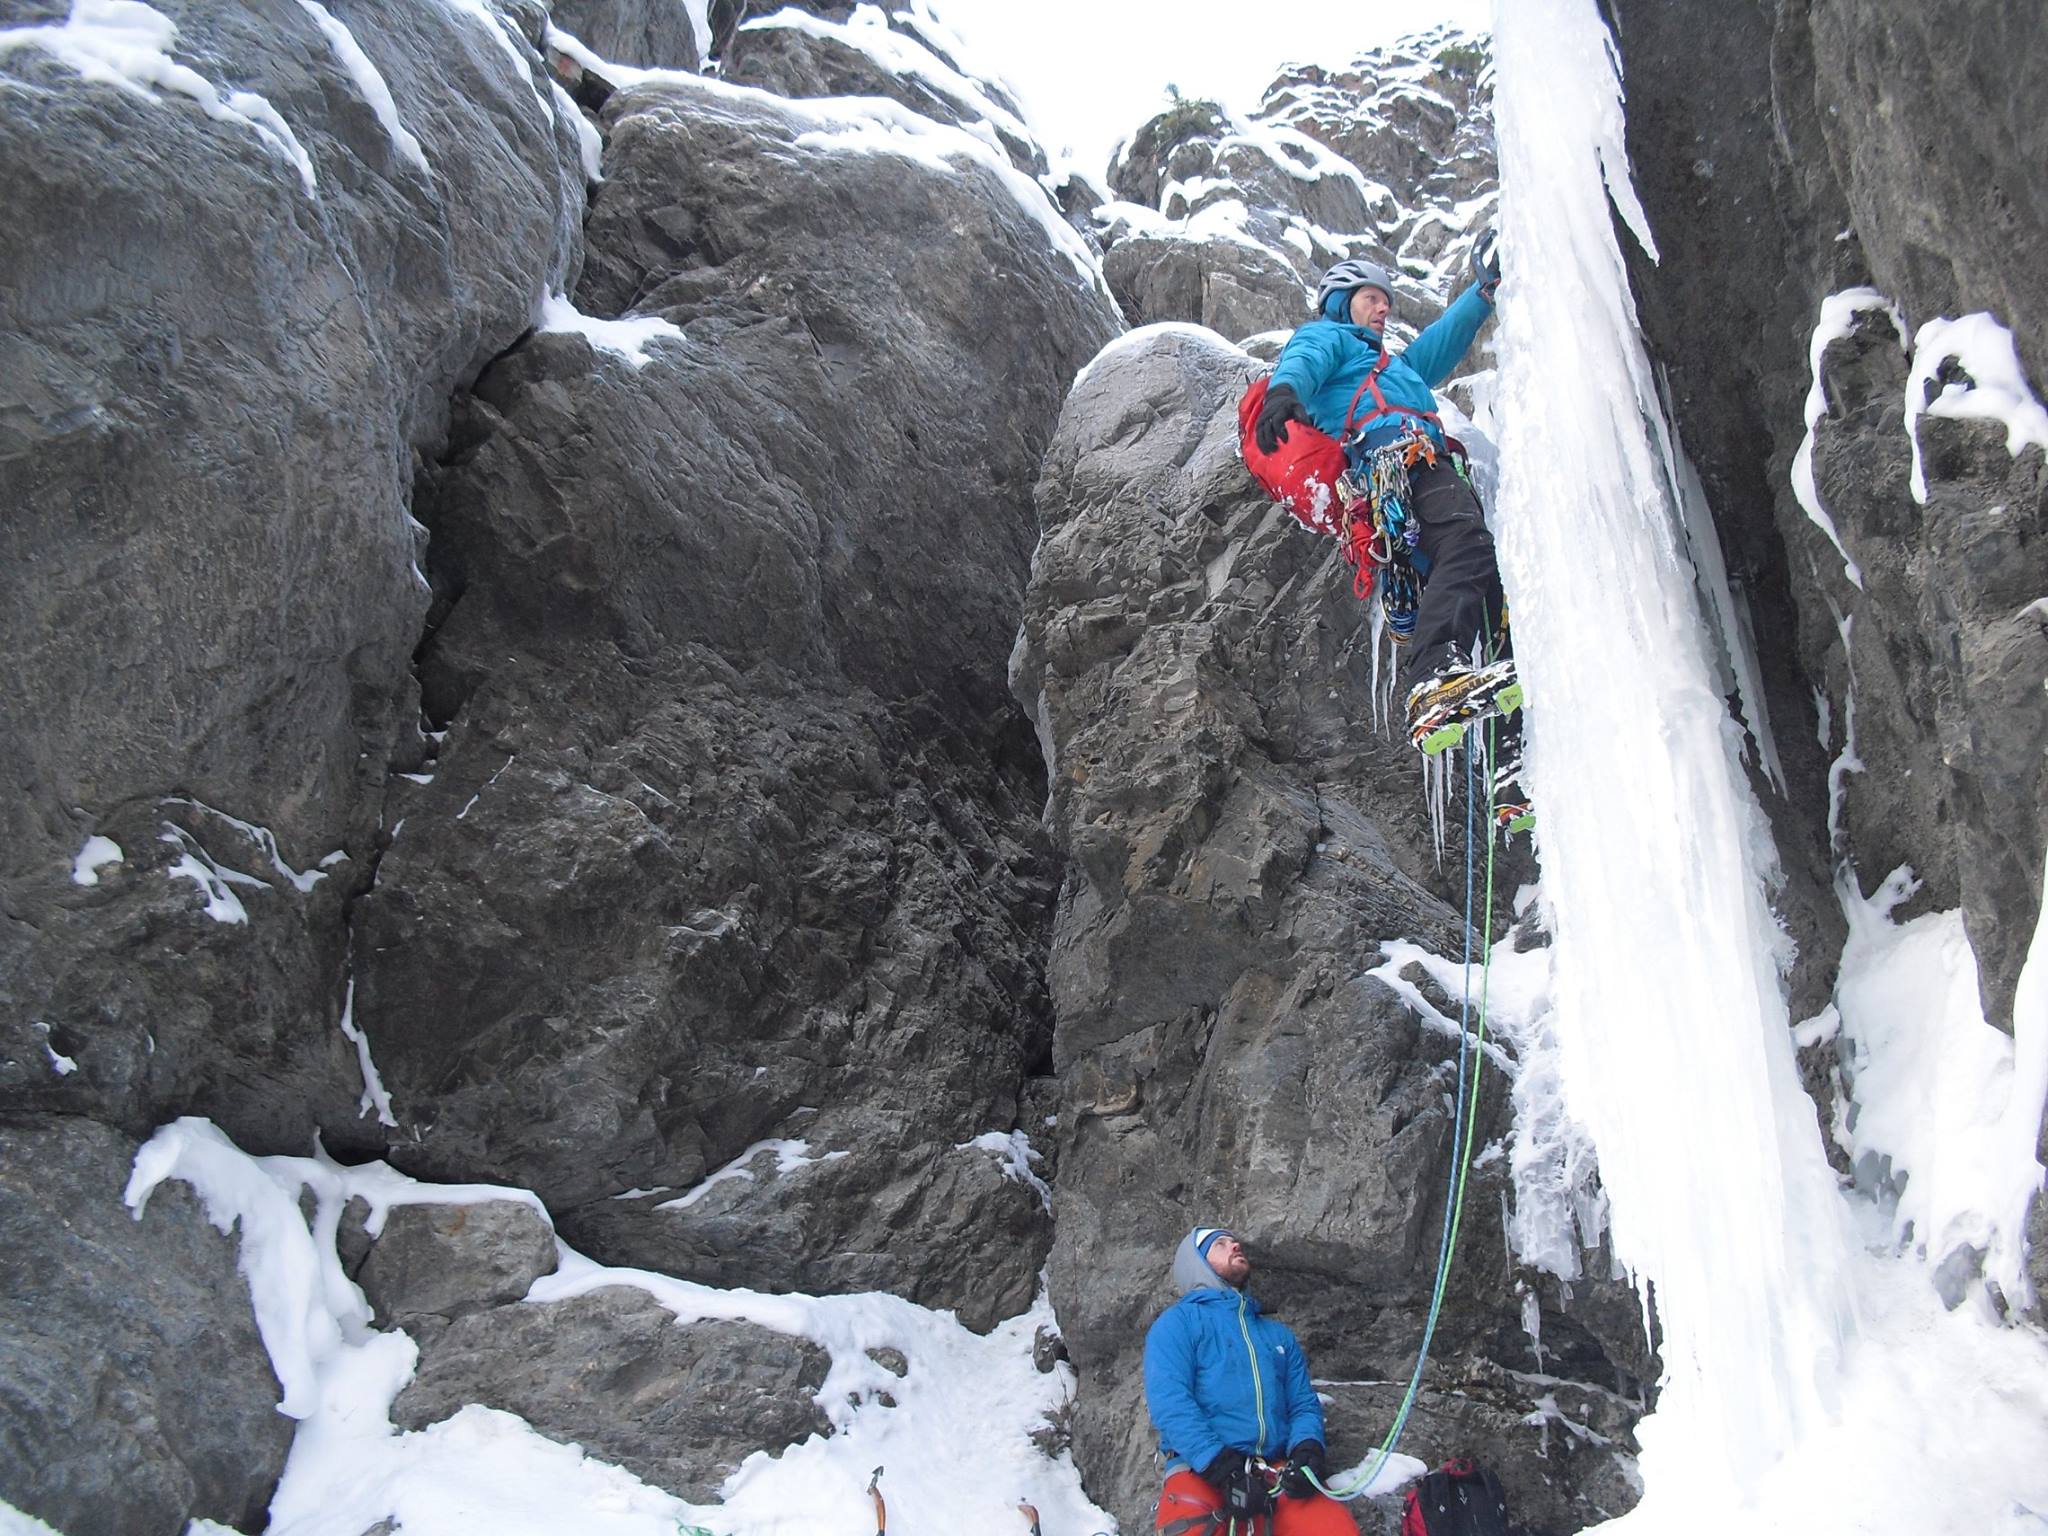
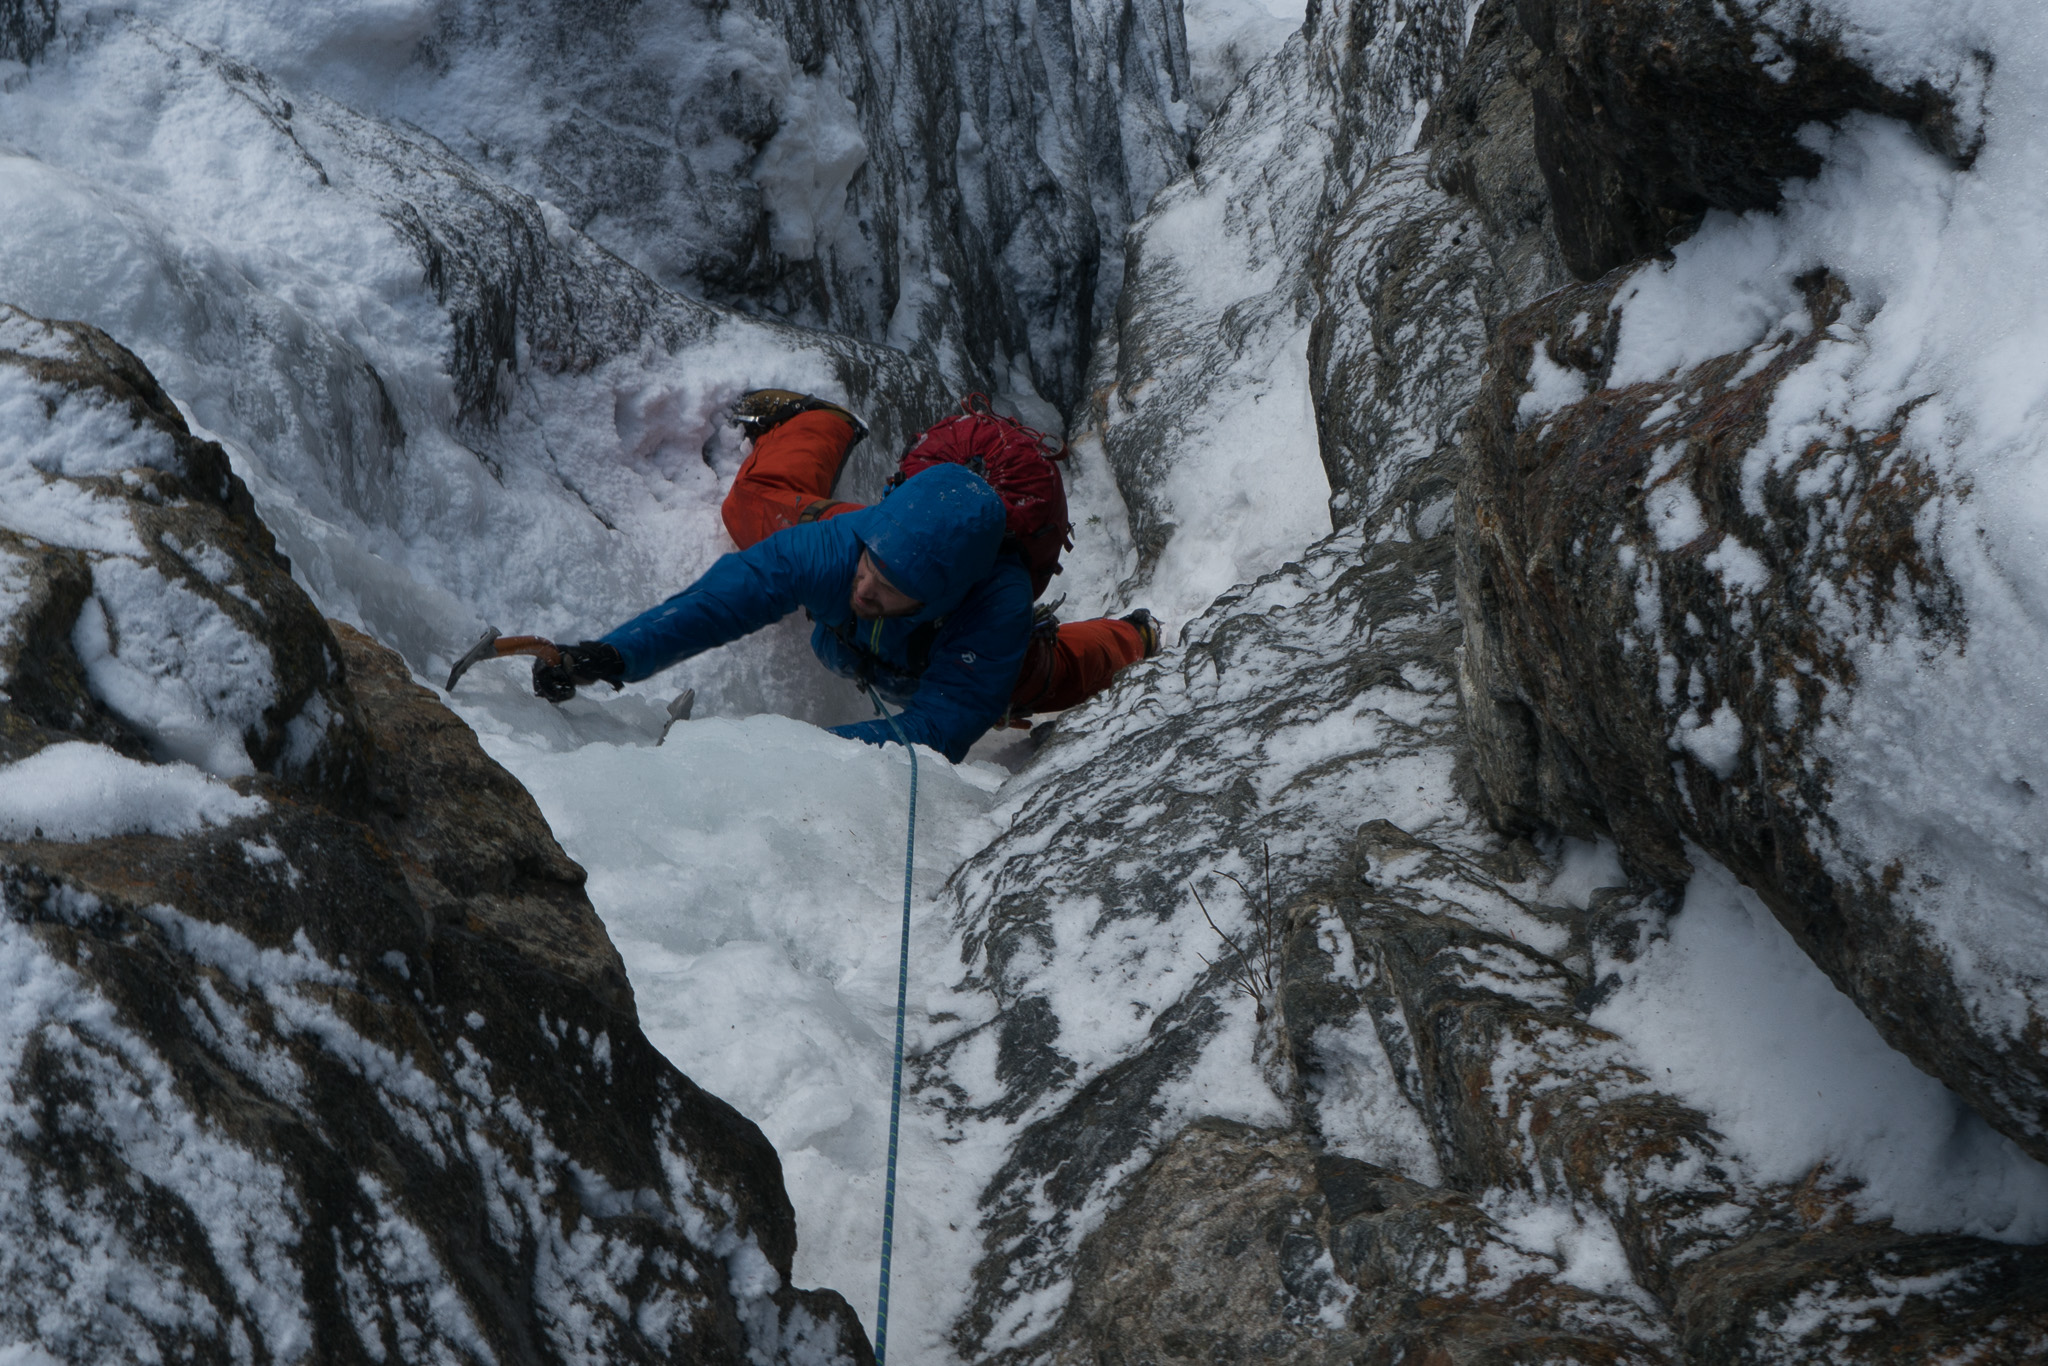
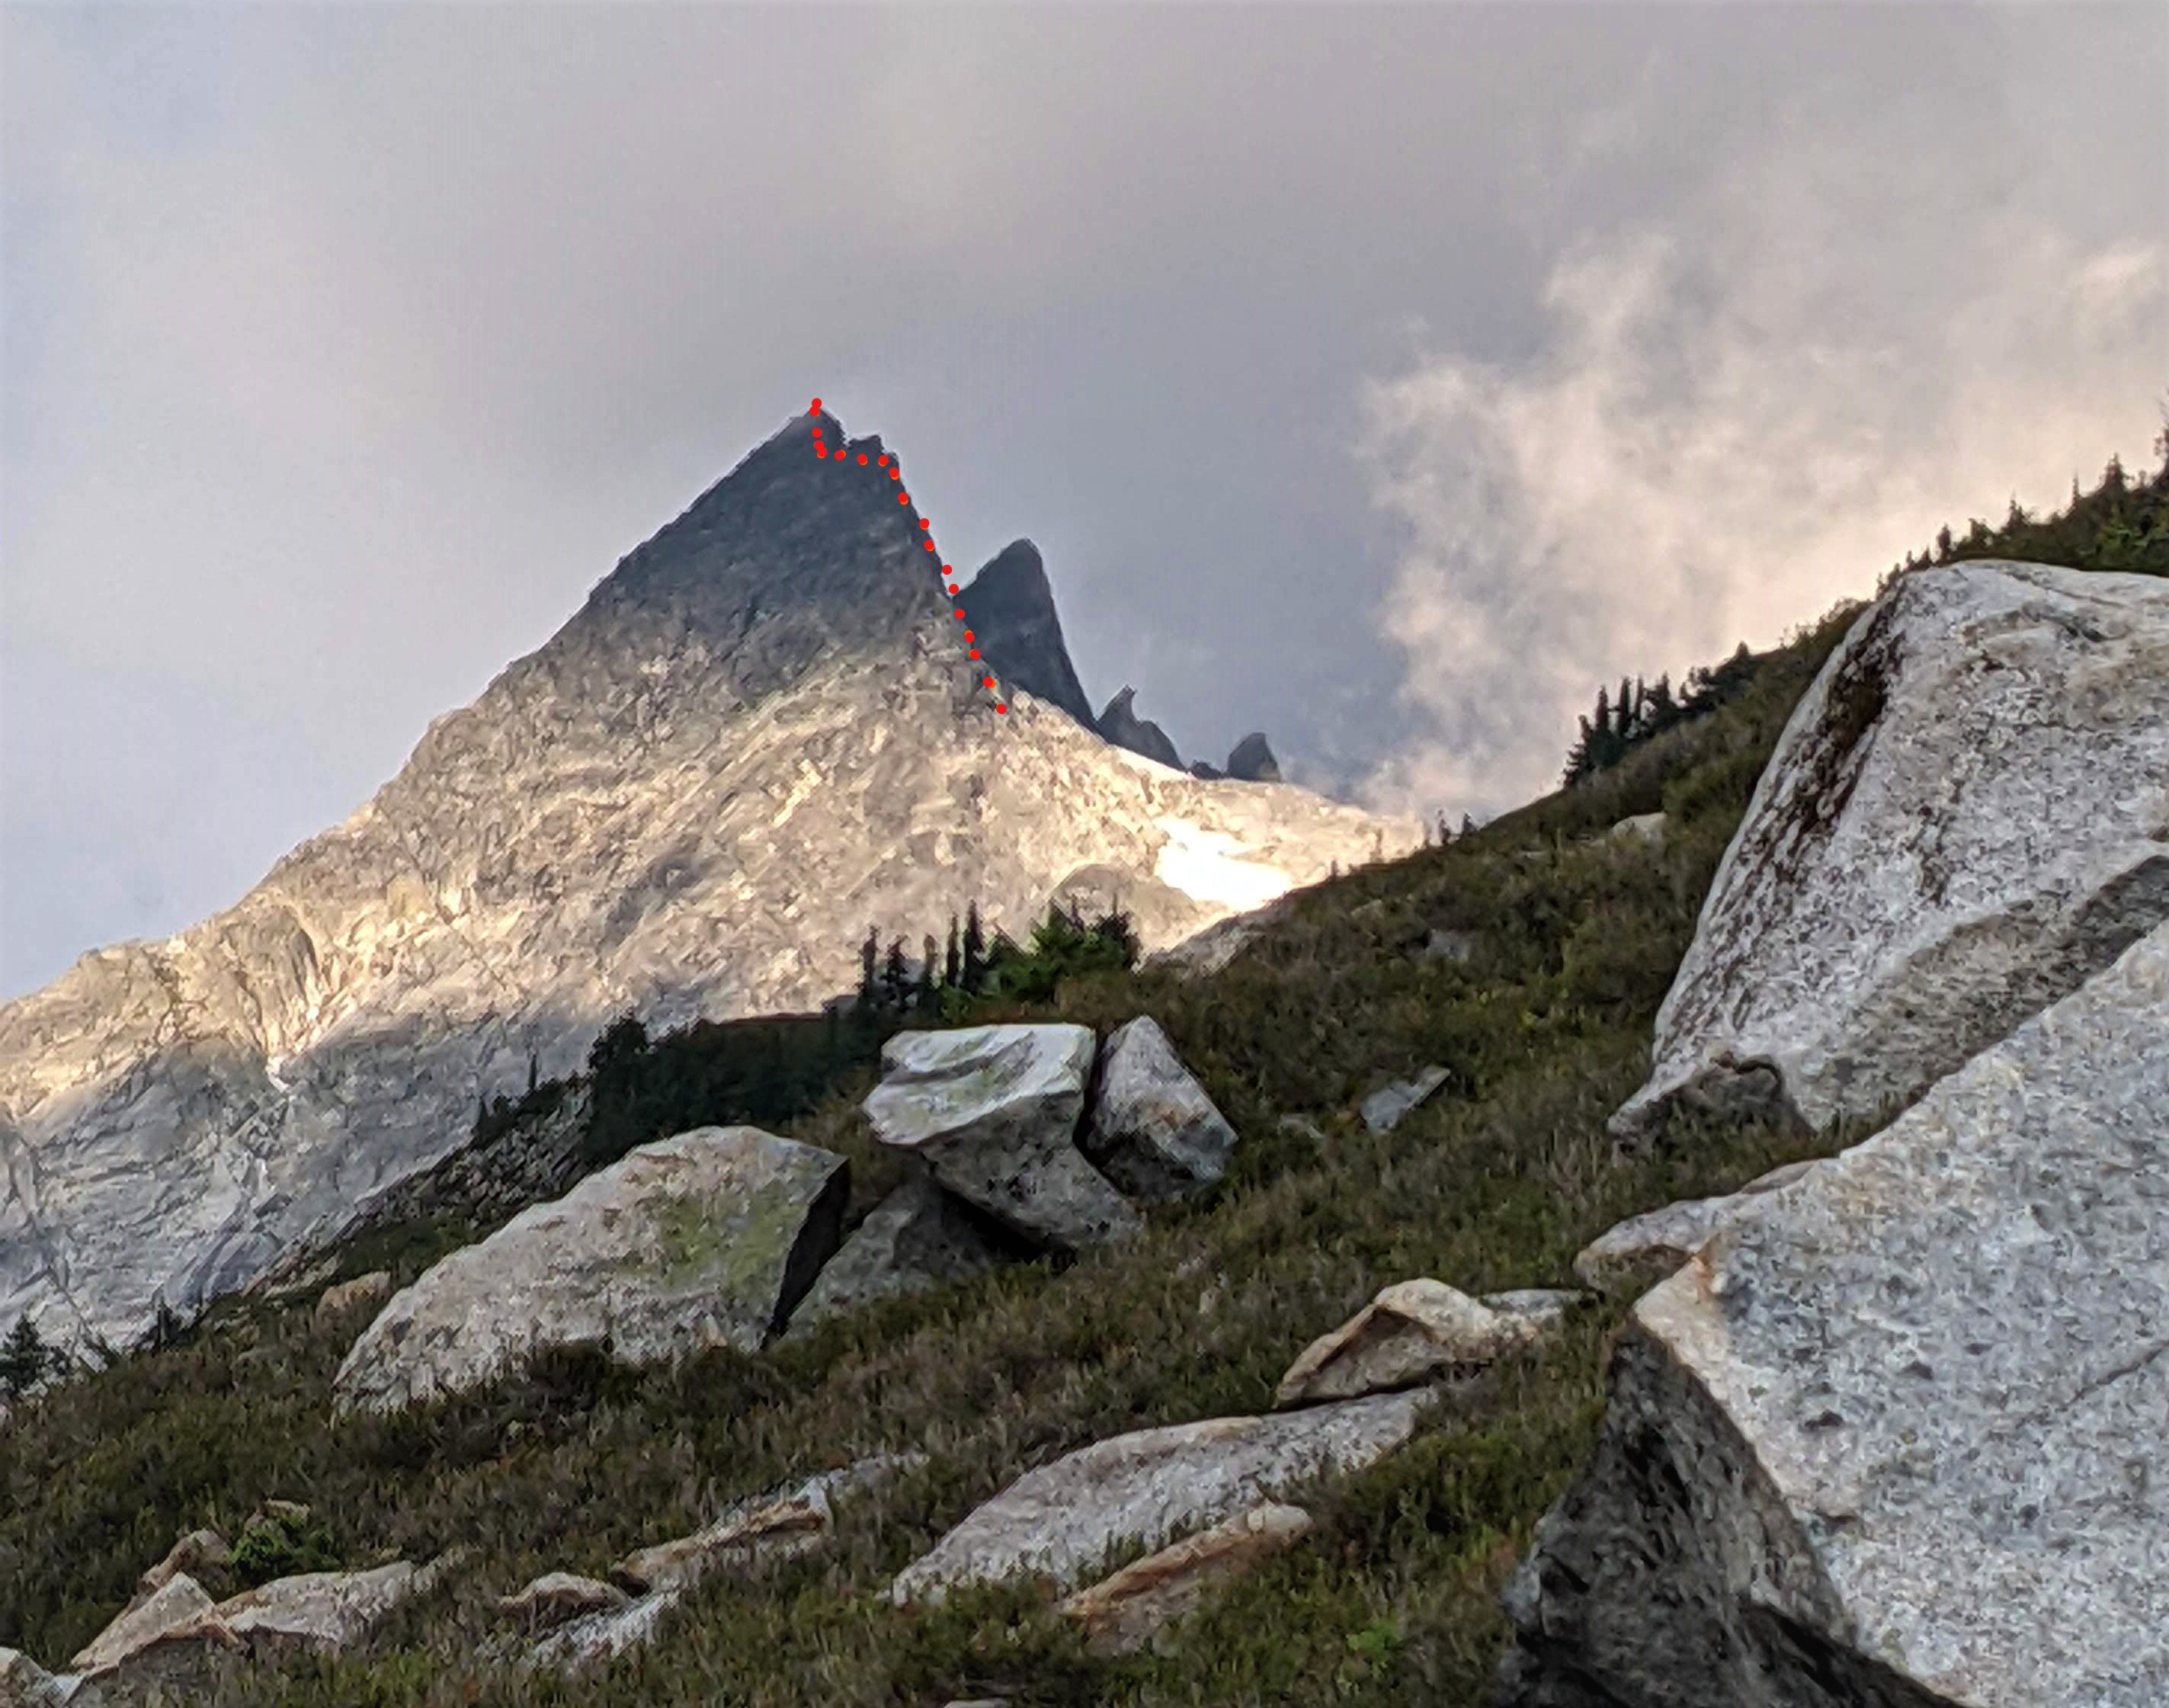
 Trip: Phantom Peak, Northern Picket Range - West Ridge IV 5.7+ aka "WHAP" Trip Date: 07/30/2021 Trip Report: "We have a problem" stated the leader of pitch 6. He had encountered an airy and cruxy 4’+ gap in the ridge and simultaneously observed a fresh plume of wildfire smoke erupting in the distant valley that marked the return home. His partner – who could not see him or his immediate problem, but could see the smoke – shouted “What?”, seeking clarification regarding which of many possible problems they had. The leader re-shouted “WE HAVE A PROBLEM”, apparently as if over intervening seconds, a realization intensified that perhaps this was a more general statement, one readily applied to anybody that comes to this place. The first step is acceptance... They quickly concluded that bailing halfway up the ridge would not really impart any advantage to dealing with the new (to be named) Bear Creek Fire, so continued tackling the climb. The pitch 6 problem, a long span across a hundred-plus-foot gap in the ridge, was easily the hardest technical move on themostly 5.7+ route—bound to be a “classic of the range”, as oft proclaimed at each belay. The route takes the right hand skyline to the summit spike well left of center (link to an album w/ annotated pic): The leader used a nut and a sling to create a handhold for tension and a more certain move across the gap. The second on this pitch cleaned the gear, and with the benefit of long legs and a top-rope, made the balance-y stem across the gap and the next move across – probably a V0 or V1 boulder move (5.10ish), depending on leg length. Two pitches later the duo topped out on a tower and rappelled approx. 100' into a notch. Pitches 8 through 10 were on generally solid rock with a pleasurable position. A total of 10 pitches of roped climbing gave way to ~400' of soloing to the summit ridge and traversing a sharp ridge to the summit -- exhilarating. The untimely arrival of the Bear Creek fire compelled us to forego other plans for the area and head homeward. As it turns out, a rainy afternoon through the next morning would have largely scuttled those plans anyway. That same weather pattern allowed us to exit via our entry route, as the fire was a bit north of our return route--thankfully, as the other exits would have involved an even more unsavory amount of distance and logistics. Folks with a certain taste might opine that we picked a plum with this route, as it offers mostly solid rock, modest vegetation, and enjoyable movement. Some high-hanging fruit is rotting on the vine, but this one was perhaps only a little overripe. More pics below. Looking up at part of pitch 1 and a fair bit of the rest: Rolf on pitch 4: Looking down pitch 6 at a chimeric rat-beaver, a fin on the ridge, and Mt Despair in background left: From the summit ridge, a nice view of Crooked Thumb and its subpeak Ghost, w/ the many peaks of Challenger in near background: Invigorating soloing on the summit ridge: From Perfect Pass, the fabulous Baker River drainage, filled with smoke: One in the party -- not gonna say who -- repeatedly urged a fire exit of the northern pickets via the brushy Baker River, convinced that his charm and/or good looks (yeah, after two days of bushwhacking) would score us a ride back to our car. The other was deeply skeptical of this strategy. The return along Easy Ridge under an increasingly smoke-veiled sun; don't worry, if you tire of loose talus and scree, many more paranormal modes of travel await: Here's a link to an album with more pics. Summary: Rolf Larson and Eric Wehrly establish a new route on Phantom via its West Ridge, aka We have a problem IV 5.7+. 10 pitches plus soloing. An obligatory John Scurlock photo of the ridge, extending toward the viewer: Gear Notes: Standard alpine rack. Also made use of tri-cams from fingers (black, pink) to thin hands. Approach Notes: Find the larger truth of the Easy Ridge approach – easy only in the middle – or take other long options. Making liberal use of granny gear with heavy-ish packs, over Wed/Thurs we took roughly 20 hours from Hannegan Pass TH to a moraine camp under Crooked Thumb/Ghost Peak. Generally budget 2 days, +/- a half day.
-
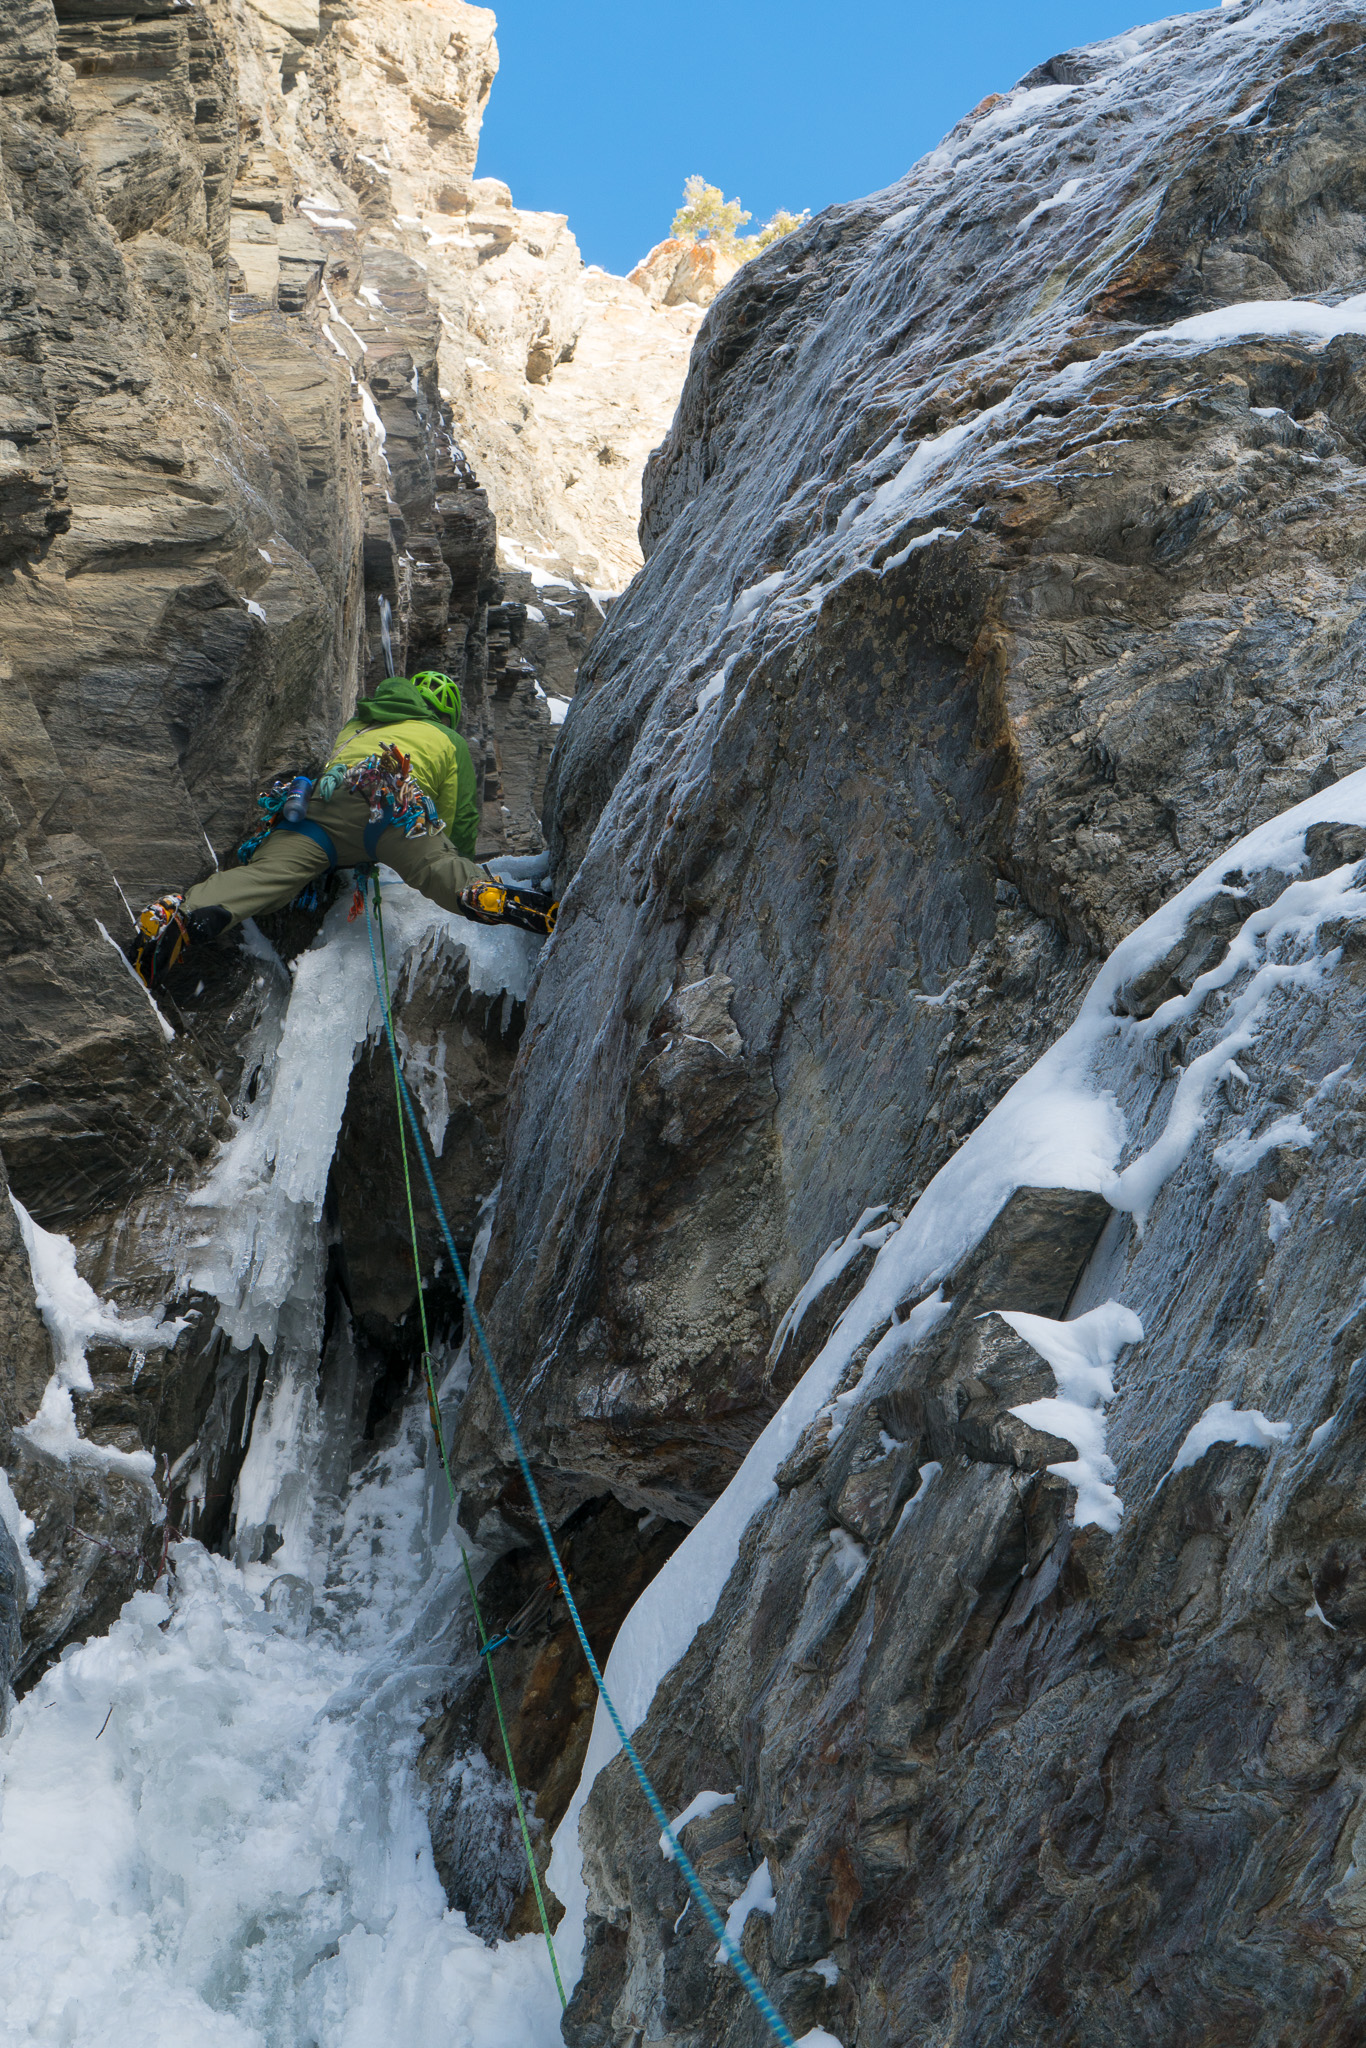
Trip: Pistol Boulders - The North SnowfedScrubBeltMossEatingChossFeedingLowball Arete (post- AND pre-break Trip Date: 05/10/2021 Trip Report: (All dates are approximate) Salutations, rotting-material-disposing-of umbilical creatures. A few things about myself (Daniel) and my PiC {Partner in Choss} (Trevor), before we begin. Things I am not: A competent boulderer, an experienced climber, someone who has climbed at Index more than twice, someone who has climbed at Index other than rope soloing more than zero times, or legally able to buy alcohol. Things I am: Full of youthful vigor, a man with an unhealthily high tolerance for wielding the mighty Brush & Hammer while inhaling mud and/or moss dust and/or broken steel bristles and/or droplets of Trevor's sweat, a lopsided brain-carrying individual who cannot let a day go by without organizing some click-and-drag meaningless 'net site/endlesspatiently correcting those sore souls who are Wrong and Portray There Wrongness on the Interwebz, and able to consume alcohol (illegally.) Things Trevor is not: That Into Bouldering. (Hast anyone heard of a legendary figure known as Trad Princess?) Things Trevor is: Really Into Choss and Lowballs. Those of you who know Trevor (Rad) can fill in the rest in yer heads. Well, there's bouldering on I-90 now. (middle fork and the pass) Erk. Bouldering that isn't '''''''''''''''''secret'''''''''''''' enough to post on Youtube and discourage others from finding it. (Deception Glade / Far Side boulders) K. What we've done is double the number of boulders in the North Bend area, with a 30min (contrived [aLl cLiMbinG Is coNtrIveEd]) approach (better than the Gold Bar slog) and a much closer drive than the Bavarian Granitodise or the All-Arete Granodiorite Seep Road Hike Festival. What's the downside, you ask. (Or rather, you ask, 'why should I care.') Well, they're certainly smaller (and can only get smaller), dirtier (but will get cleaner) and lower quality (lowball lovers unyte) than the aforementioned Leavenworth or Gold Bar. There's plenty of good beginner climbs plus some awesome harder ones............................... however. How did this come about, (I doubt that) you ask. June 2020. It all begins with the legendary Beered Rowe. Legends speak of the tru first name of the legendary Stone Gardens routesetter, the legendary Kyle. During his legendary rampage through Washington finding the one problem at every new area that required zero cleaning whatsoever, doing zero cleaning whatsoever, making a sic send vid, and posting the problem on Mtn Project, Beered wandered below the Gun Show cliff and named two legendary routes with legendary names (no, actually, really unimaginative): Inside Out V6 and Upside Down V2. He then posted them on Mountain Project. No one repeated them. (Apologizes to Kyle if he reads this.) Late January 2021. Trevor Puppy Lovr, as he is known on the Project of Mountains, also known as Trevor Taylor, heads up to Corona Crag to find it snowed in and sketch as h*ck. His insatiable desire to develop SOMETHING led him to the posting of the comment on Beered's page, inviting anyone to come help him clean the 'other boulders that need cleaning' below Gun Show. Jan 20. I, during my daily scan of new comments on Washington areas, happen upon Trevor's comment. Recalling my favorable impression of his Mtn Prj forum personality (turns out it was his real one), and desperately needing a real climbing partner, decide that being willing to muck about in muck would ingratiate the Puppy Lovr and trick him into thinking I was a climber worth actually climbing with. Jan 21. Trevor receives my message, and tentatively sets a date to explore. Feb 3. I show up (10 minutes late) to the Far Side parking lot. There's white stuff on the ground (g-g-g-gaddagagasp). I look past the extremely lanky unkempt fellow for Trevor. Oops. I hold back my kneejerk comment ('Your Mtn Prj avatar is very misleading as to your looks, probably cause it's mostly your puppy and wife, I'd fix that if I wert thou') and manage a hoarse 'Hey, you Taylor?' Hoarse because I sing with raucous vocal power while lone in the truck cab. Fortunately, he didn't hear my slipup. Off we go on the slippery trail. Fortunately for my throat, Trevor is happy to chat about (sport) climbing (is neither) adventures all over the Exits and 'that time I climbed Mile High Club with Rad and he had to TR solo the bottom half with a bucket of developing gear.' You didda WAT? I've stumbled upon a tru blu dirtbag, says I. (This impression was formed mostly due to his mullet and beard). We discover the boulders. I have no opinion, my few trips to Gold Bar been mostly for the use of bushwhacking rather than climbing. Trevor deems them 'mega classic.' We begin with a brush and expose some rock, then wander about to see the rest. Thiccccccccccccccccccccccccccccccccccccccccccccccc moss is quite apparent on anything that looks interesting to me (slab). Feb 5. I go out alone to clean, get too excited by a slab, and slip stemming against a tree to fall ten feet into a hole. Feb 9. We meet again in the parking lot, again carrying pads against all odds, again carrying brushes which are always useful. The boulder we cleaned is.... dry? There's snowpatches on the freakin' dirt for Sam Hill's sake. Now comes the moment in which Trevor sees my climbing prowess. I manage to send the V1 stand first, and eventually get the V3 low start too... this went through a succession of names and we've settled on Stunher. Don't ask. Please don't. And if all else fails, don't blame me, it was Trevor's idea, and his first one was worse. Feb 16. Another lonely soul (but a crusher of 12s), he of the lovely nomenclature Evan Lovely-Meyers, joins us for a night of scrubbing and exploring. Before he arrives, we fail to bolt a boulder for cleaning due to drill bit mistakes. Lel. A tree has fallen on are MostCurrentlySiked [sic] boulder, so we go to work sawing the branches off. The snow is three feet deep in some drifts, but we discover the Titanium and Chamber boulders. Walking out on the highway with headlamps, us three vagabonds are mistaken for lost mfs, and a passing snowmobiler (in a truck) offers us assistance. Feb 21. We decide that the Pistol Boulders (below the Gun Show amirite hehehe L.O.L. rofl lmao lmaorofl jfc what am I saying Ah HA HA HA) is an appropriate name and begin texting names back and forth intended to shock, with a twist. For example. Trevor: "Imagine if we named a route KKK but in the description we put it stands for Kurt Killed a Klansman lol" Me: "lol sounds funny lol" Him: "lol yeah let's do it" We don't do it. Feb 24. We scrub again. Evan begins the long process of realizing he wants to climb, and not scrub, by bailing. We love you Evan. Feb 27. Trevor scrubs solo. We've finished most of the original area (or so we thought) and have begun the enormous task of cleaning the award-winning Least-Productive-Boulder-By-Size-to-Route-and-Route-Quality-Ratio-Boulder, aka the Philosophical Sandeagle Boulder. There were inches of dirt and several bushes on the 200+ square foot top before we put a bolt in (after failing twice on the Slab & Wesson Boulder) and (Trevor) takes a shovel and leaf blower to it's face. (It never stops seeping). The first of the lowballs begins on the Montgomery Boulder. Trevor makes the historic first ascent of the Initiation to the Pistol Boulders, Experience Beats Youth V1+, in hiking shoes. March 3. We scrub, I make the second (not flash) ascent of Experience Beats Youth and the first of Montgomery Mantle V0. Evan bails again. (We still love you Evan.) I add boulder pages to Mountain Project, attracting attention from a few nosy users. We discover the leaning boulder that Must be Seen to Be Believed and Trevor sends Weight of the Universe V4. Beta: Double toe hook, left heel hook, right heel hook, mantle. At least if you're 6'3" +4 ape like the Trevdog. Then (wow what a send day! Either that or I have the dates QUITE wrong) Trevor takes out Barrel in the Butt V5, later renamed Turd Burglar. March 4. I draw a map, prematurely. March 6. Trevor, a sport climber at heart, puts two more bolts in boulders. (They really are necessary.) The bushmud covered top of the Titanium boulder begins to clean up as well as some steep faces. March 7. I bring my brother out to help scrub, on the Titanium boulder and (true to form) a few lowballs. Trevor hikes in gear and pads while not eating all day for medical reasons. March 8. I climb solo, sending a few V2s and 3s that I (embarassingly) hadn't sent yet. March 9: Scrubadub rub, three brushes down to stubs There's dirt in my pants and my nails are nubs Garbage bag coat and a dirty ball cap The rules of Dig Club I burn into the map Moss smell is noticeable to those at my work I shake off weird looks with a quite nervous twerk It was hard to sleep at first cause the rocks are so cool Now cause my nose hurts and there's mud in my stool Sick lines abound, but on the lowballs we scrub 'This ain't gettin' no chicks to give us a back rub.' doncha know brajjjjjjj shitty poetry is the opiate, of, like, the masses, man? Right? Or is that something else? March 10. Silencer, the proudest line in the North Bend region, requires surprisingly little brush work. Trevor begins to work it and finds it exceedingly difficult. (My Tarantulaces (yeah, I know...) have holes worn in the toes so even if there were feet on this thing I couldn't stickem. March 11. Trevor works Silencer solo as I am a lazy ass lil bitch. March 16. I can't remember anything about this day but we did something or other. Not each other though ghey lol. March 17. I rear end a Subaru, putting my truck out of commission for some time. Trevor soldiers on alone while I replace the radiator, oil filter, timing belt, engine mounts, transmission crossmember and (still not yet) bumper. Oh, the humanity. March 21-23. Puppy Trev sends Silencer, thinking he captured it on video when it fell over a second in. It's a brilliant slightly overhung V6+ on very grippy rock and tiny holds. Also, Pistol Pinch, a desperate double pinch huge kneebar start three millimeters off the ground, on a six foot tall boulder. The first repeat is still up for grabs. April 2. I fix my truck. Left in the wake is three oil-ruined sets of clothes and two weeks of brutal labor. Oh, the HUMANITY MOTHERFRACKER! IT'S HUMANITY! SYMPATHIZE! EMPATHIZE WITH MY POOR CHOICES AND LAUD MY EFFORTS! hehe. April 3-10. We rarely see each other but Trevor sends most of the easier routes in the Access Road Zone. We're about finished, except for a few projects thy Trevpup wants to attempt (d.r.a.m.a.t.i.c ForeShadowing) and some trail work. April 12. 'I wanna try Turd Burglar' touts Trevor. The low start to Barrel in the Butt is a climbing-through-a-hole sit dab nightmare with the Barrel in the Butt (a large rock) making it impossible. The rock is the best (read: razor sharp, sharper than the sharpest granite) in the area. D R A M A T I C F O R E S H A D O W I N G (Oh, I'm good.) April 13. We knock the rock out of the hole, thus Barrel in the Butt is no longer an applicable name. Trevor begins to suss out the start, moving higher and higher up as it just feels impossible. Body tensioned horizontally under the roof, PupperTrevPupper's foot blows, his knee shoots forward, and boom, the rock slices right through his knee. I had a hard time realizing how bad it was at first. But it was bad. Basically his TC moment. My trend having been toward lighter and lighter loads, I just brought shoes, water and chalk out, so I run the half mile back out on the highway to my truck, and drive back with the first aid kit. He slaps the wound together and hobbles to the car, then meets his wife at the parking lot. Ended up with twelve stitches. The Knife Fight project, low start to Turd Burglar, remains unclimbed. April 14. Now that we finally went out together, I begin adding routes on Mountain Project with a vengeance. We end up with almost 70. Some other North Bend bouldering developers express interest (Bryce Overstreet, Richard Kurz, the Badwater Bouldering boys [Jake and Kyle Love]). April 21. Bryce heads out with Trevor and deems Experience Beats Youth mega classic as well. Short Note: The amount of times we said '[hurr durr climbing words] Mega Classic' while out at the boulders rivals the amount of Jack Reacher books Lee Child churns out in a fiscal year, i.e. seventeen billion. May 4. Unrelated, but a spark plug in my car exploded. oh the HOOOMANYTY!!!!!!!!!!!!!!!!!!!!!!!!!!!!!!!! May 10. Jake and Kyle Love, local V11 crushing Youtubers, join me for a day of filming and climbing. The video isn't finished yet or I'd link that mother. They repeat (and occasionally downgrade) all the hardest climbs, including Experience Beats Youth (mega classic according to them), Weight of the Universe, Turd Burglar, Silencer, and .45 Up 46 Down. The Knife Fight Project and the bathang downclimb low start to Weight of the Universe are deemed 'too dabby and too hard.' Jake sends two new V7s on the Titanium Boulder, Kolibri and Bloodshot, now the hardest routes in the area, plus Not Another Bat Hang and Suppressed, the direct finish to Silencer. Thus ends the saga. Here is the link to the Mountain Project page, which has instructions by me that I'm not going to copy/paste. Climbing in Pistol Boulders, Central-West Cascades & Seattle (mountainproject.com) The approach is not amazing with a pad but most of it is on the wide and well-graded Dirty Harry's Peak trail, then the Climbing Access Loop to Gun Show, then down into the clearing between the cliff and the highway. We have a few more projects listed on MP, please send them if you can and report back. Enjoy the boulders if you happen to enjoy bouldering, or I hope you enjoyed my (..........................hehe......................) fake af acid trip TR that was far more fun to write than it is to read, I am sure. -Daniel Montgomery (I'll add pics later, they're all on my phone, and no way I was gonna thumb all that out.) Gear Notes: 10% brushes, pads, chalk, brooms, leaf blower, rake, hoe, shovel, saw; 89% spit and grit, 1% duct tape. Approach Notes: Hike to Gun Show, beeyotch.
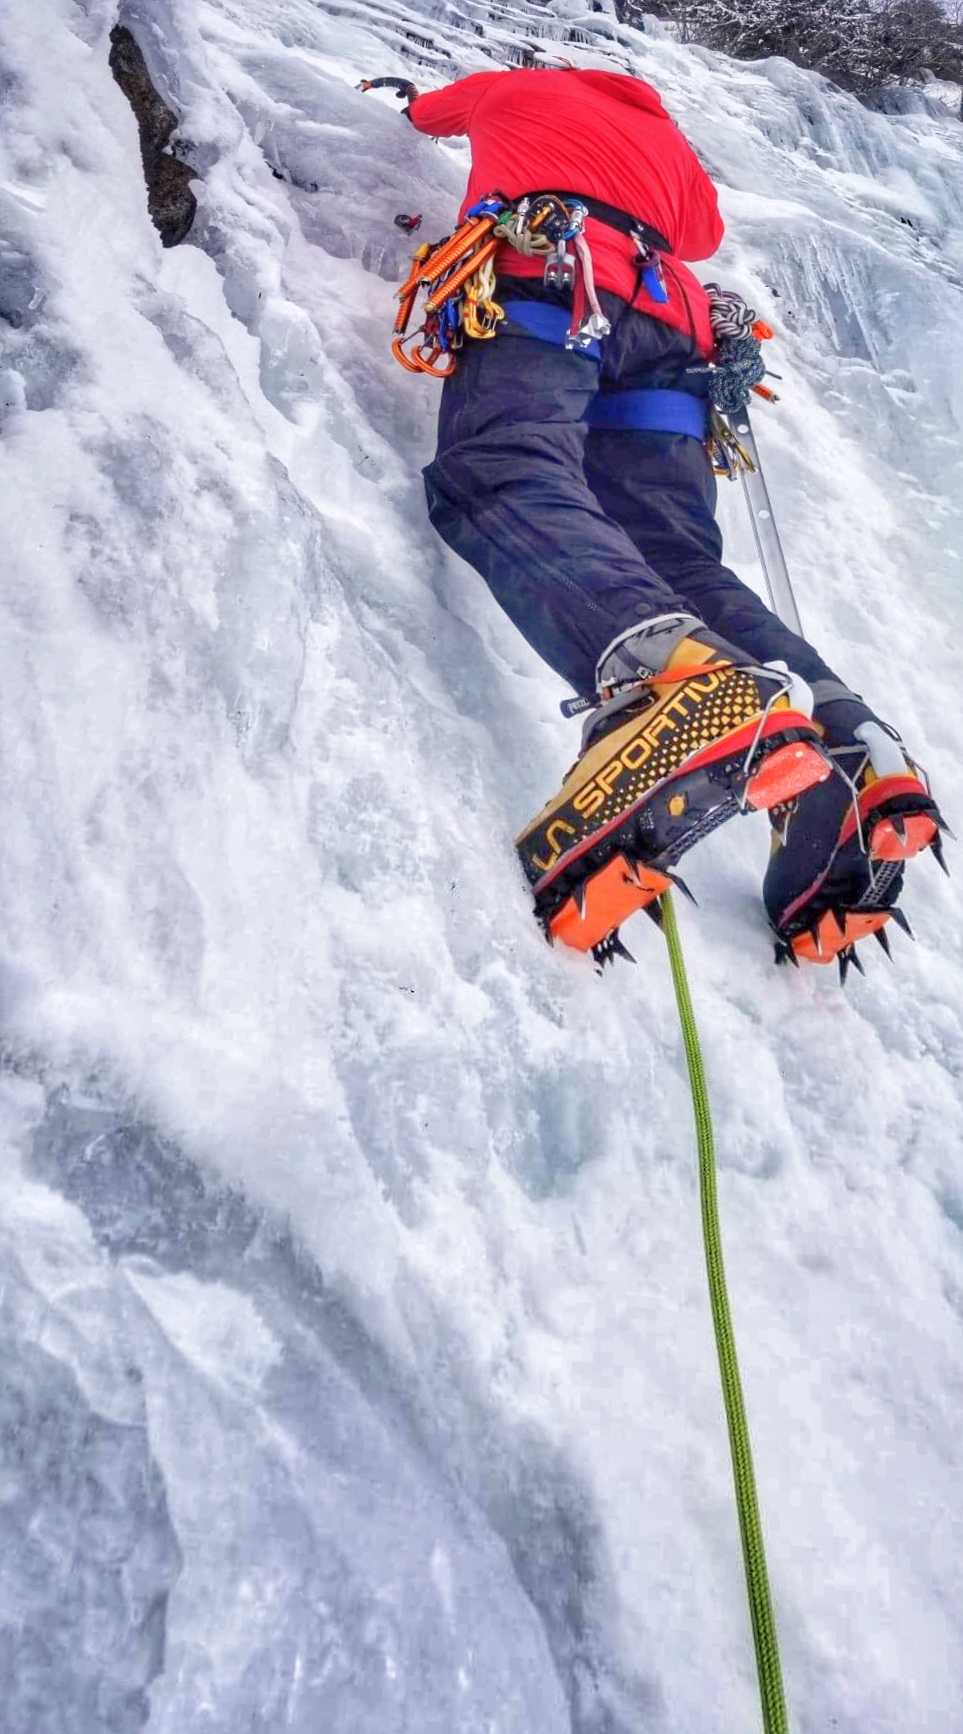
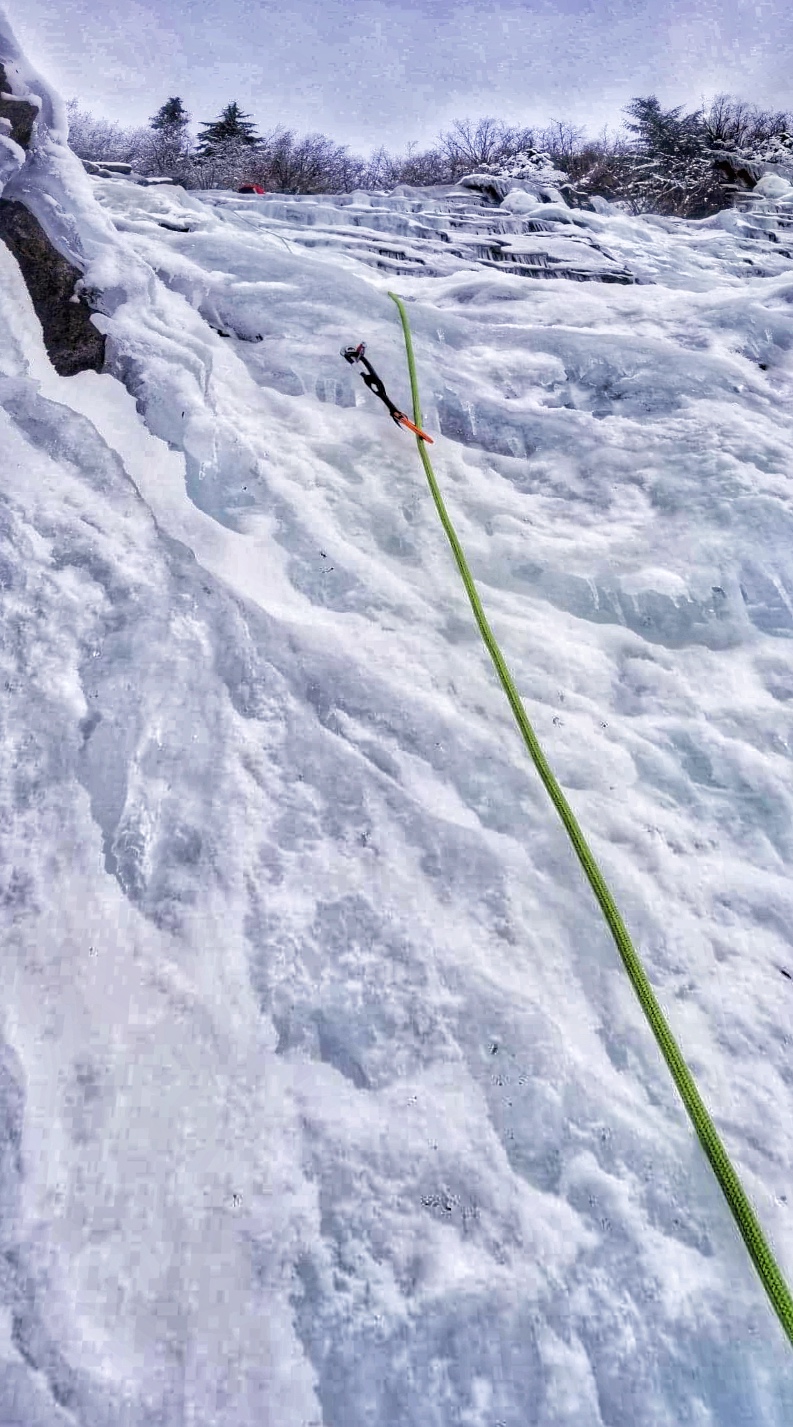
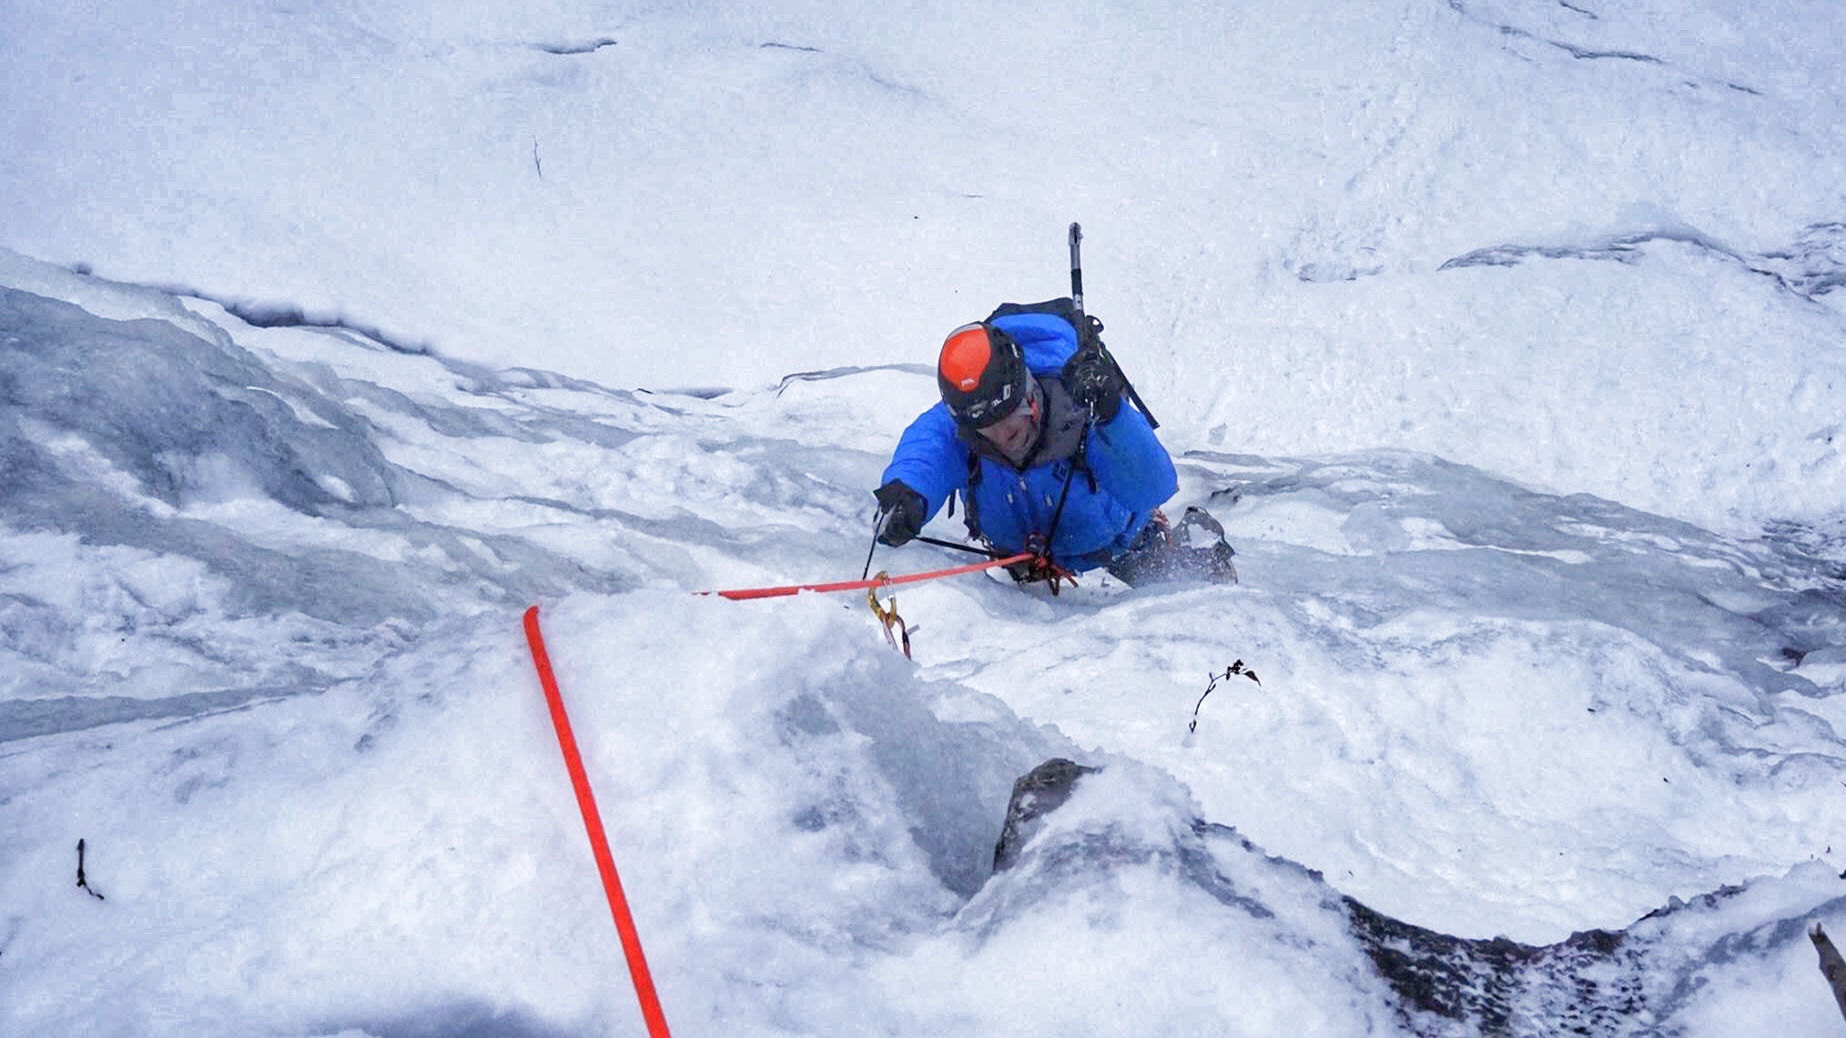
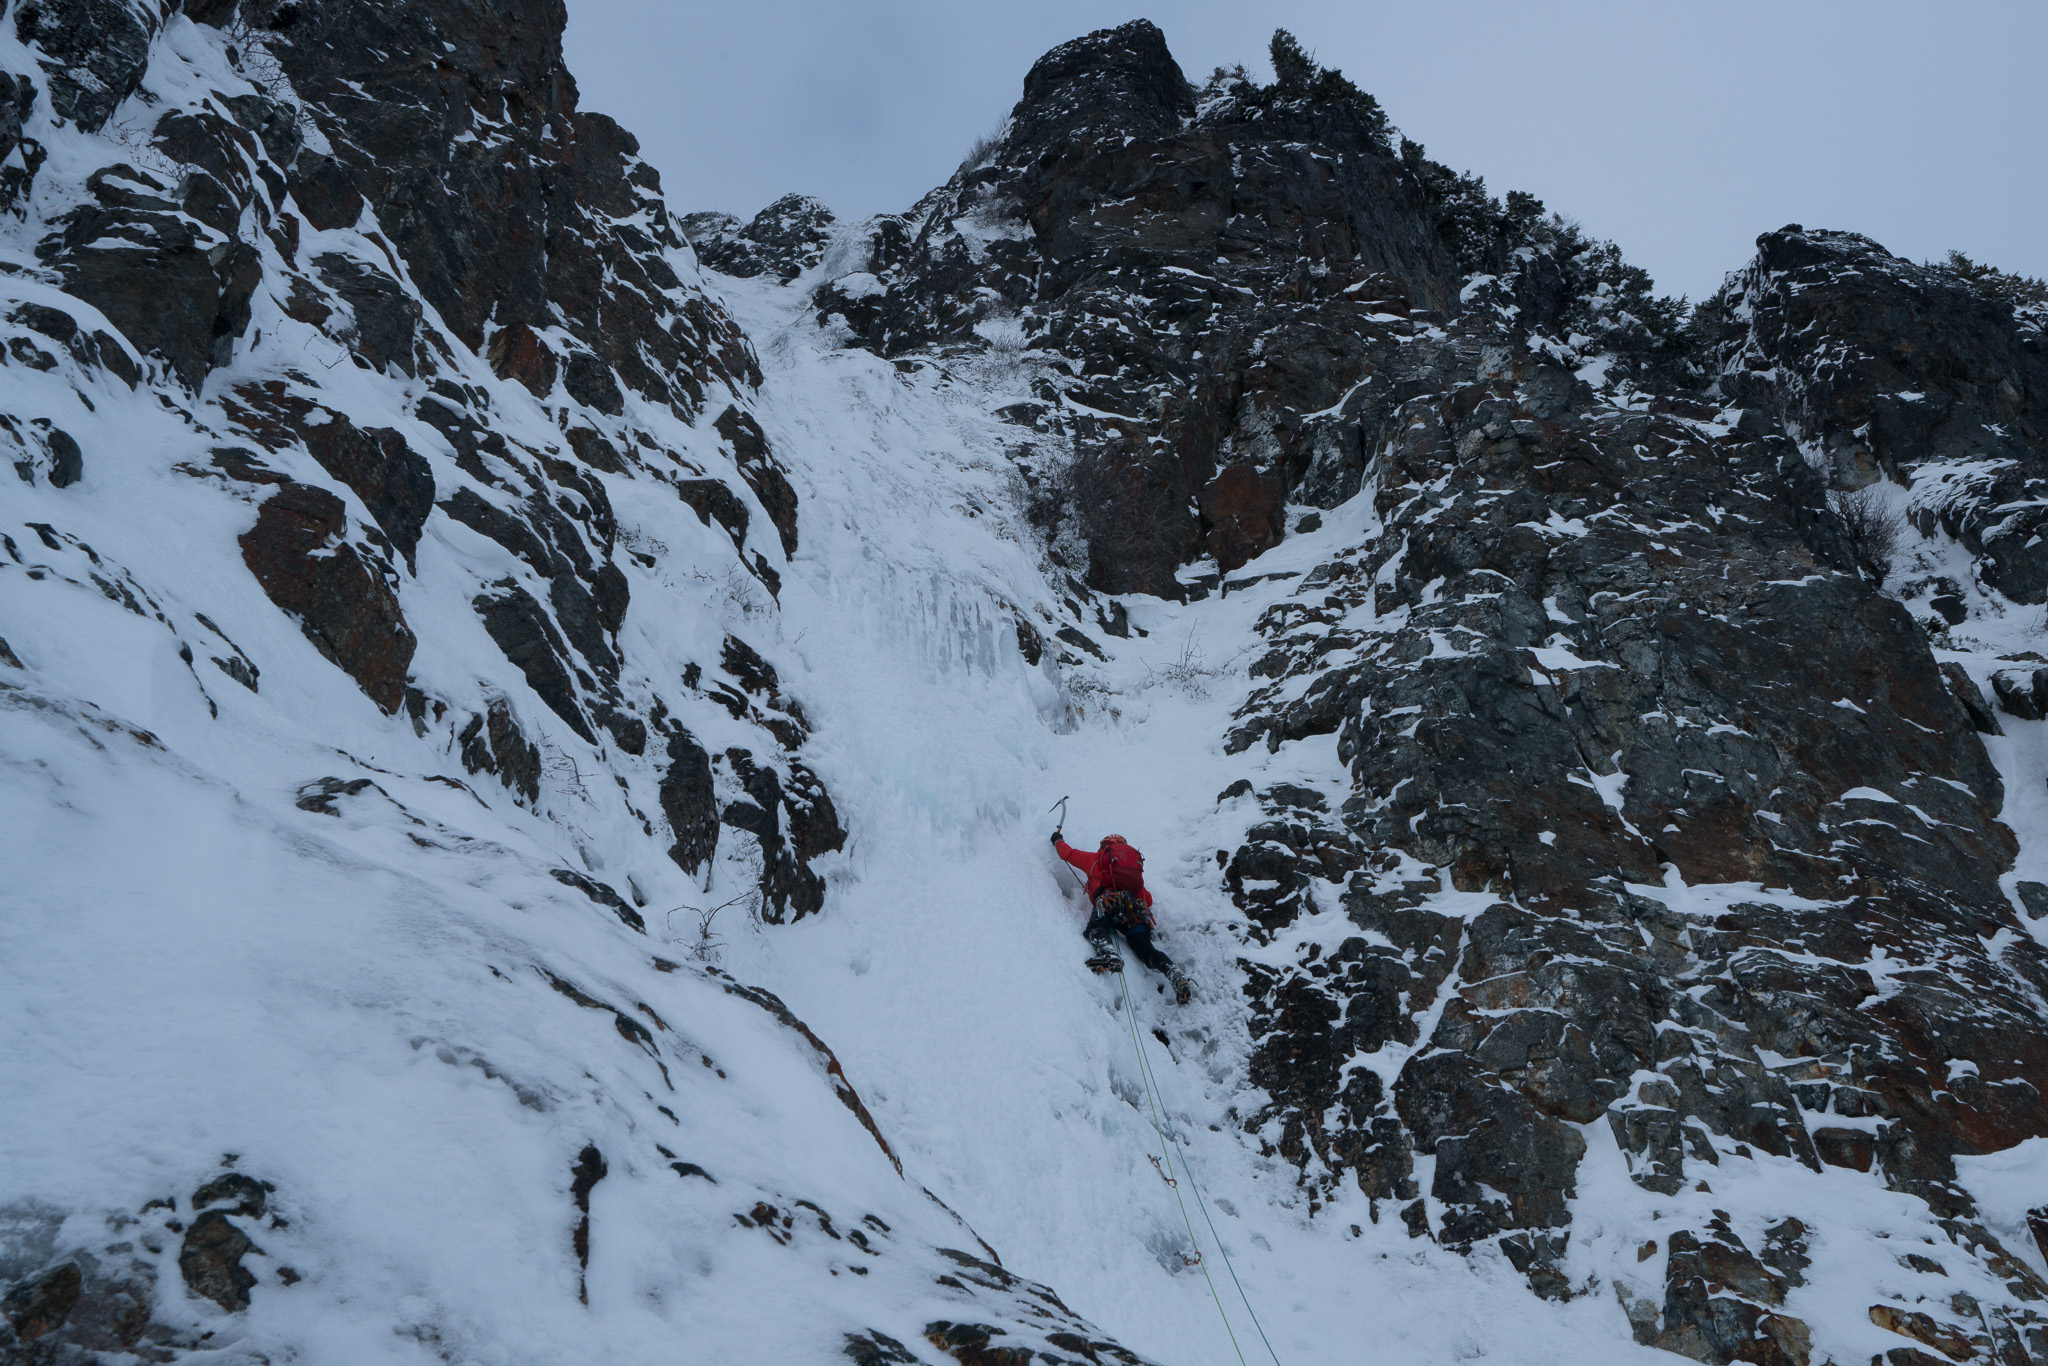
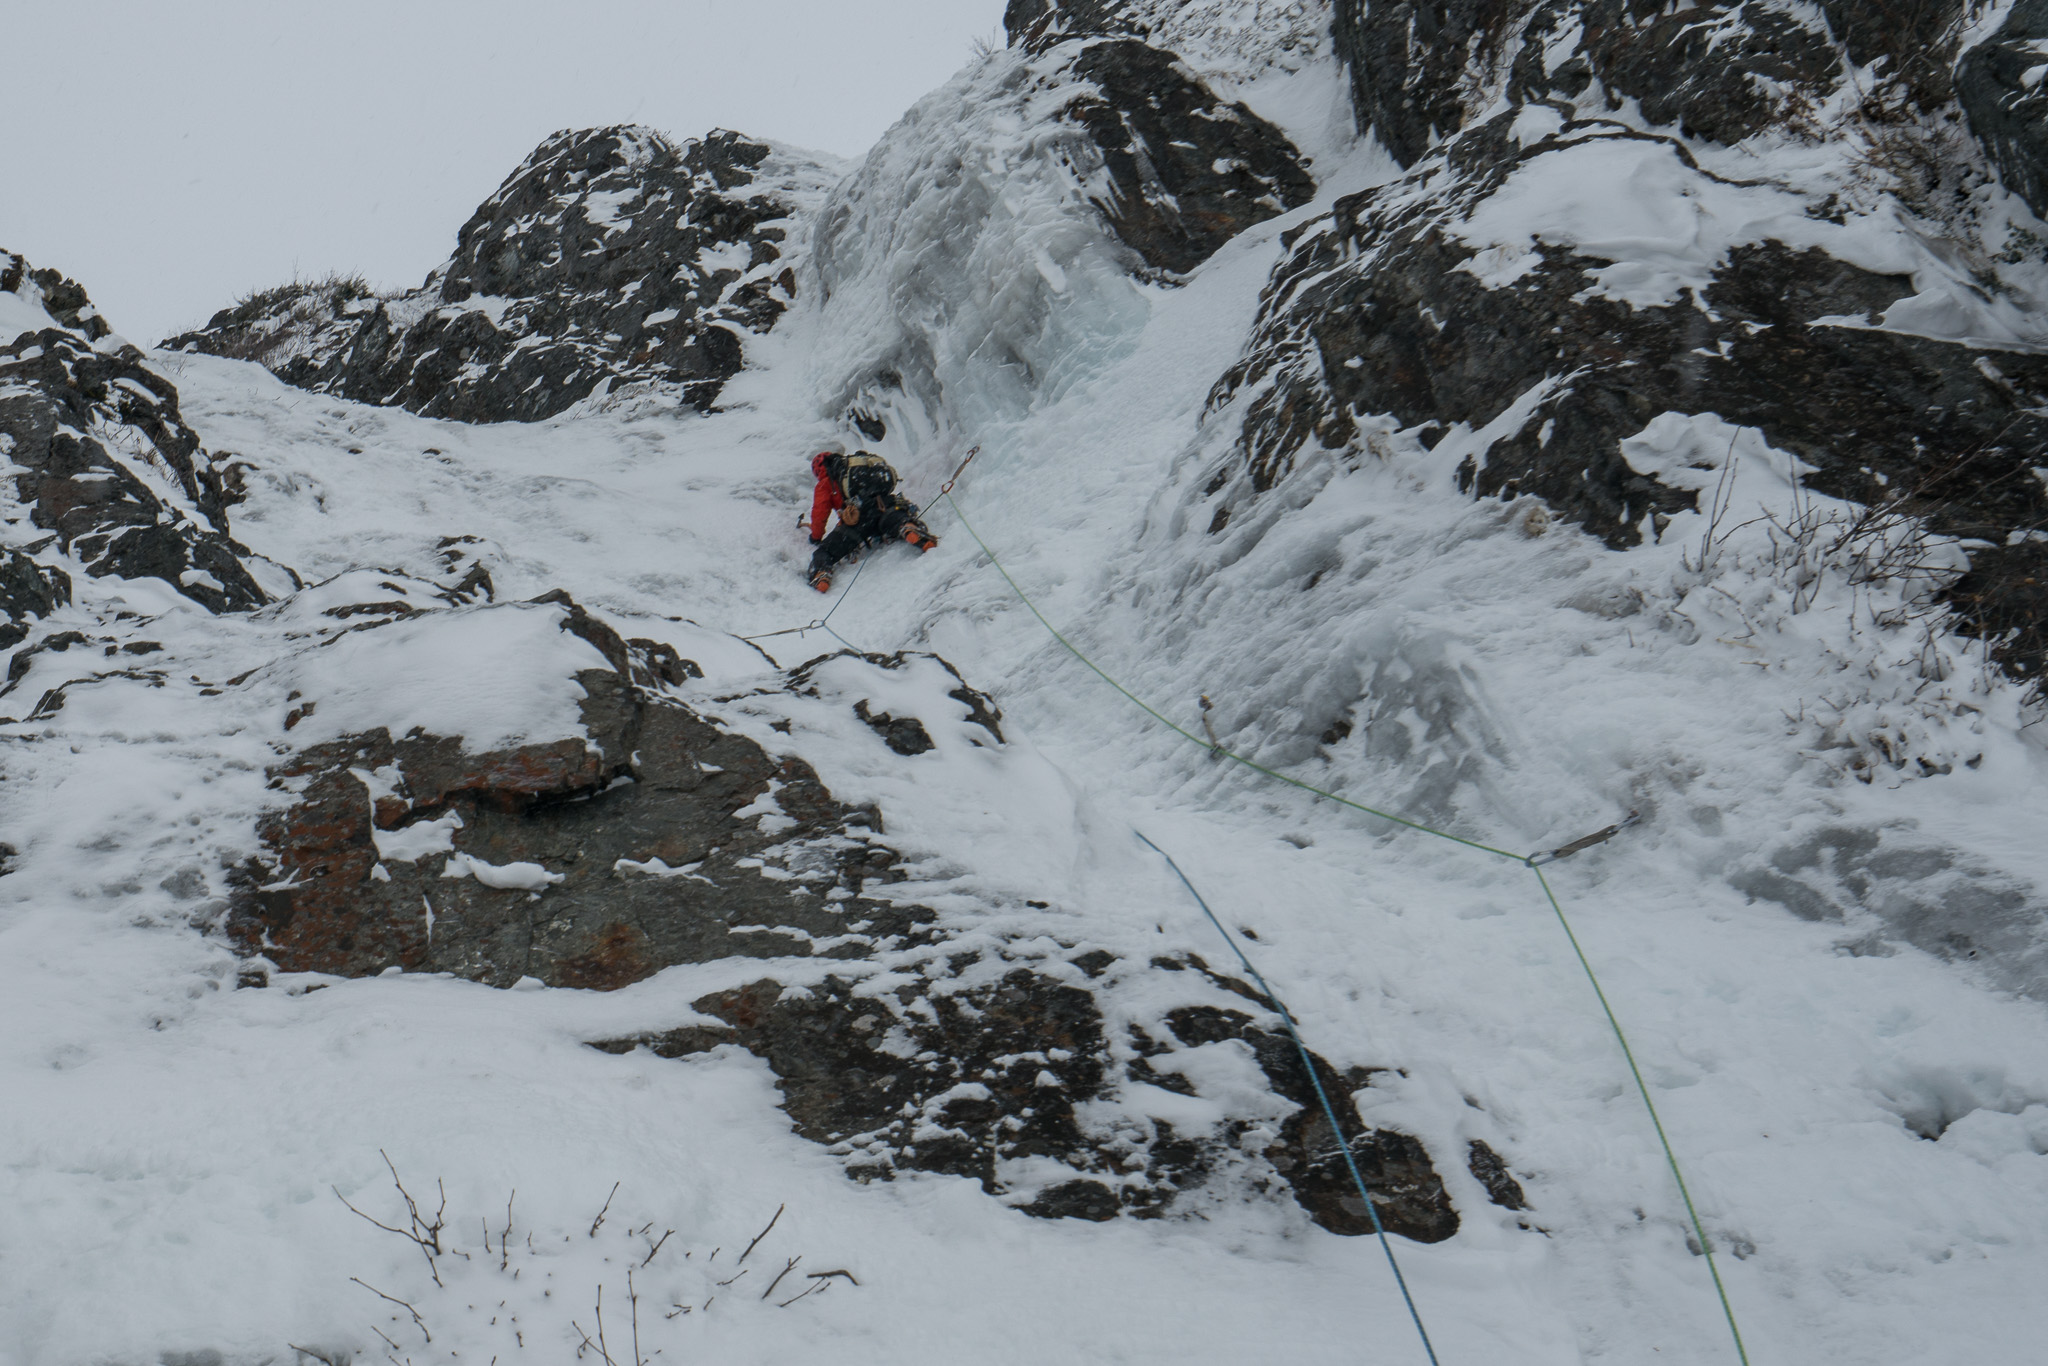
-
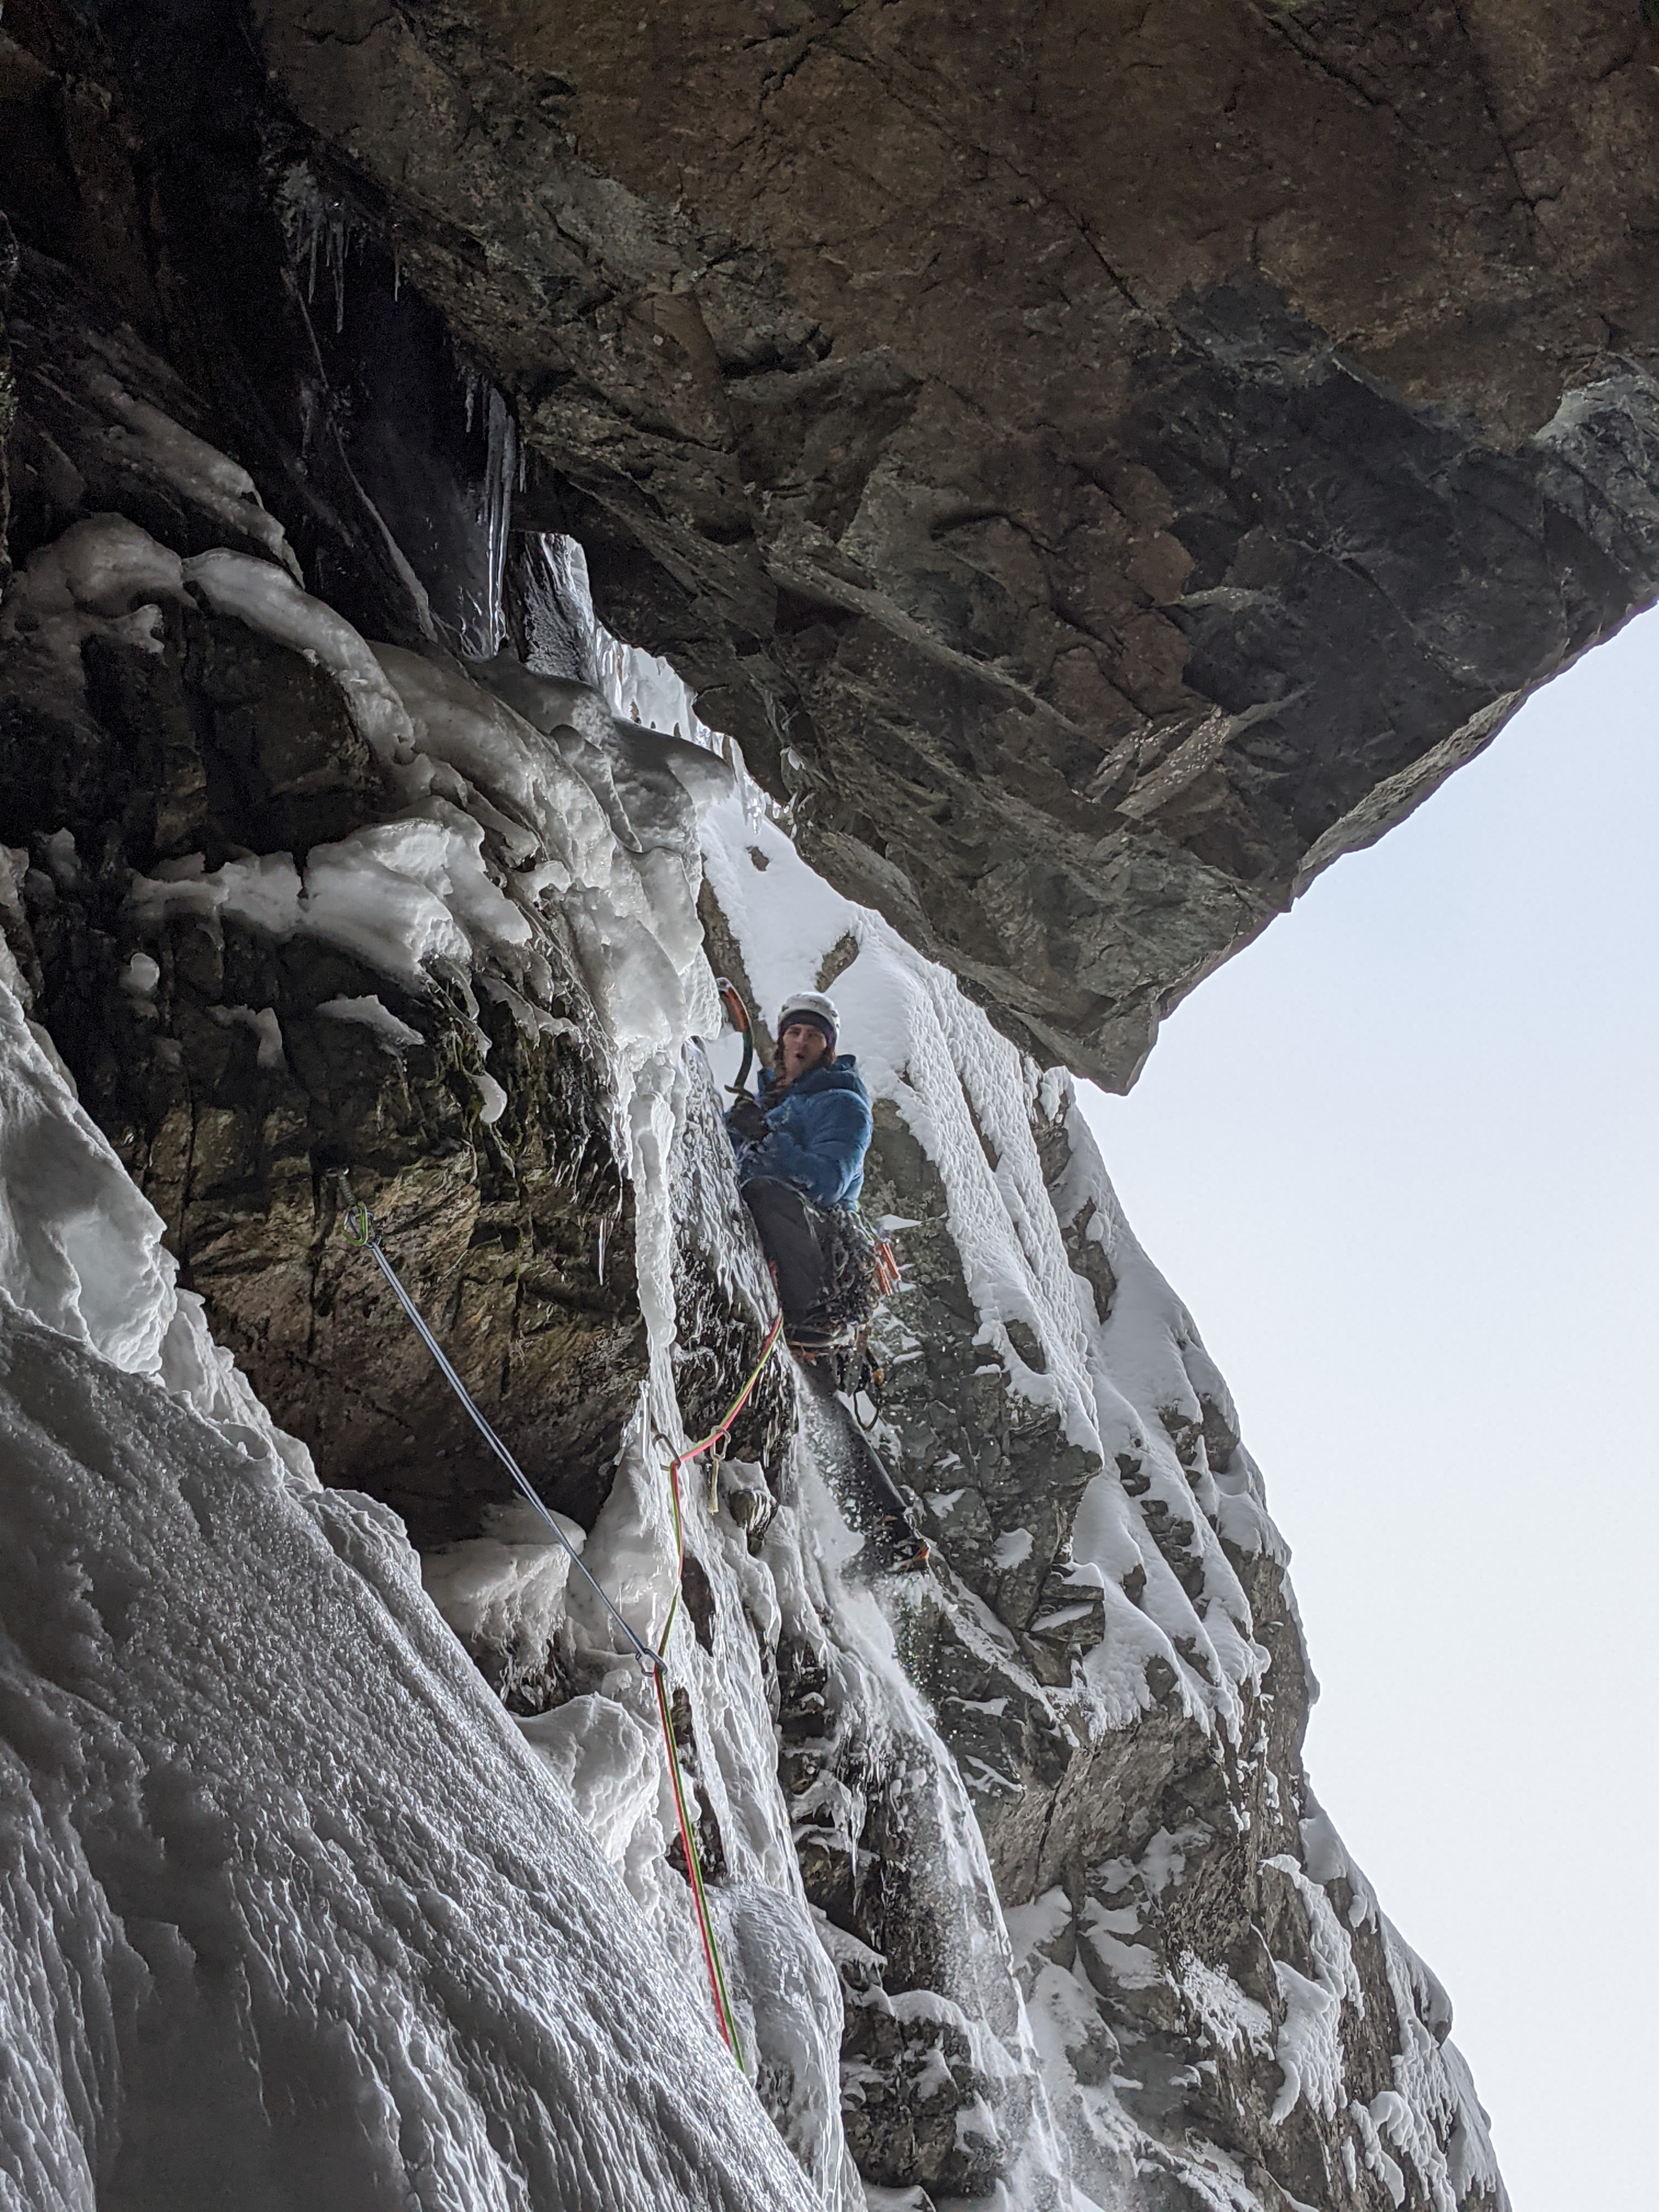
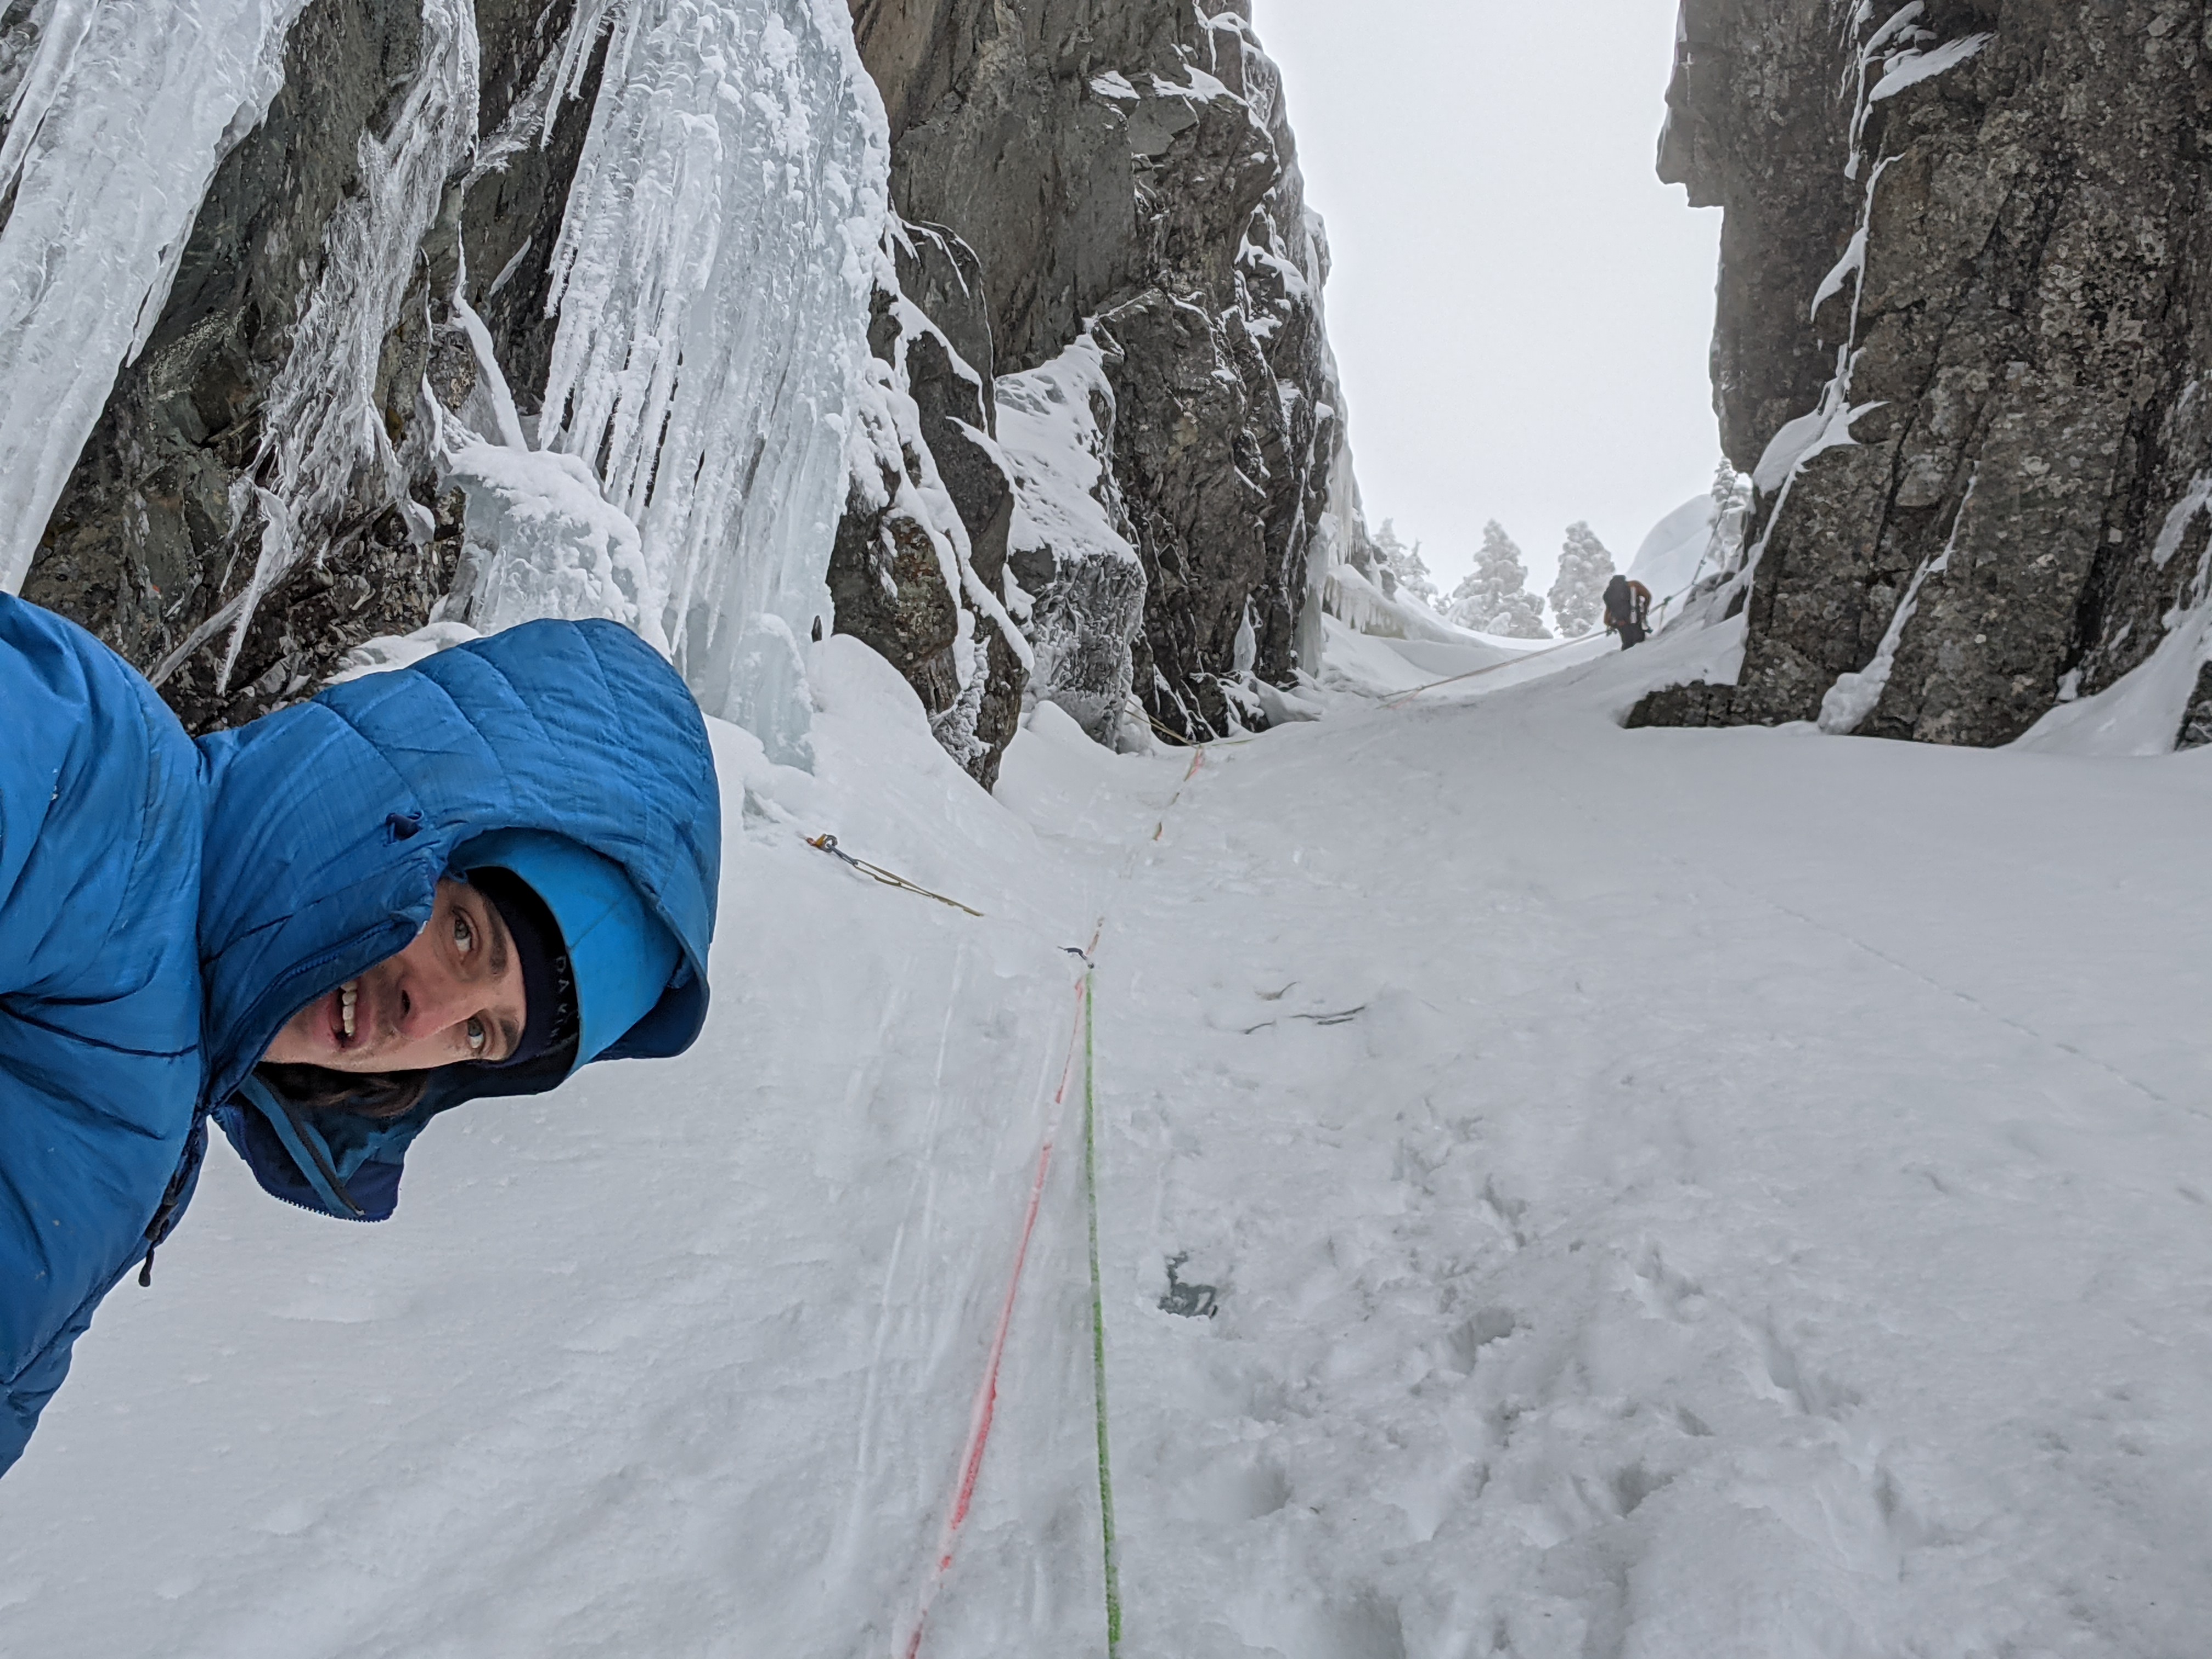
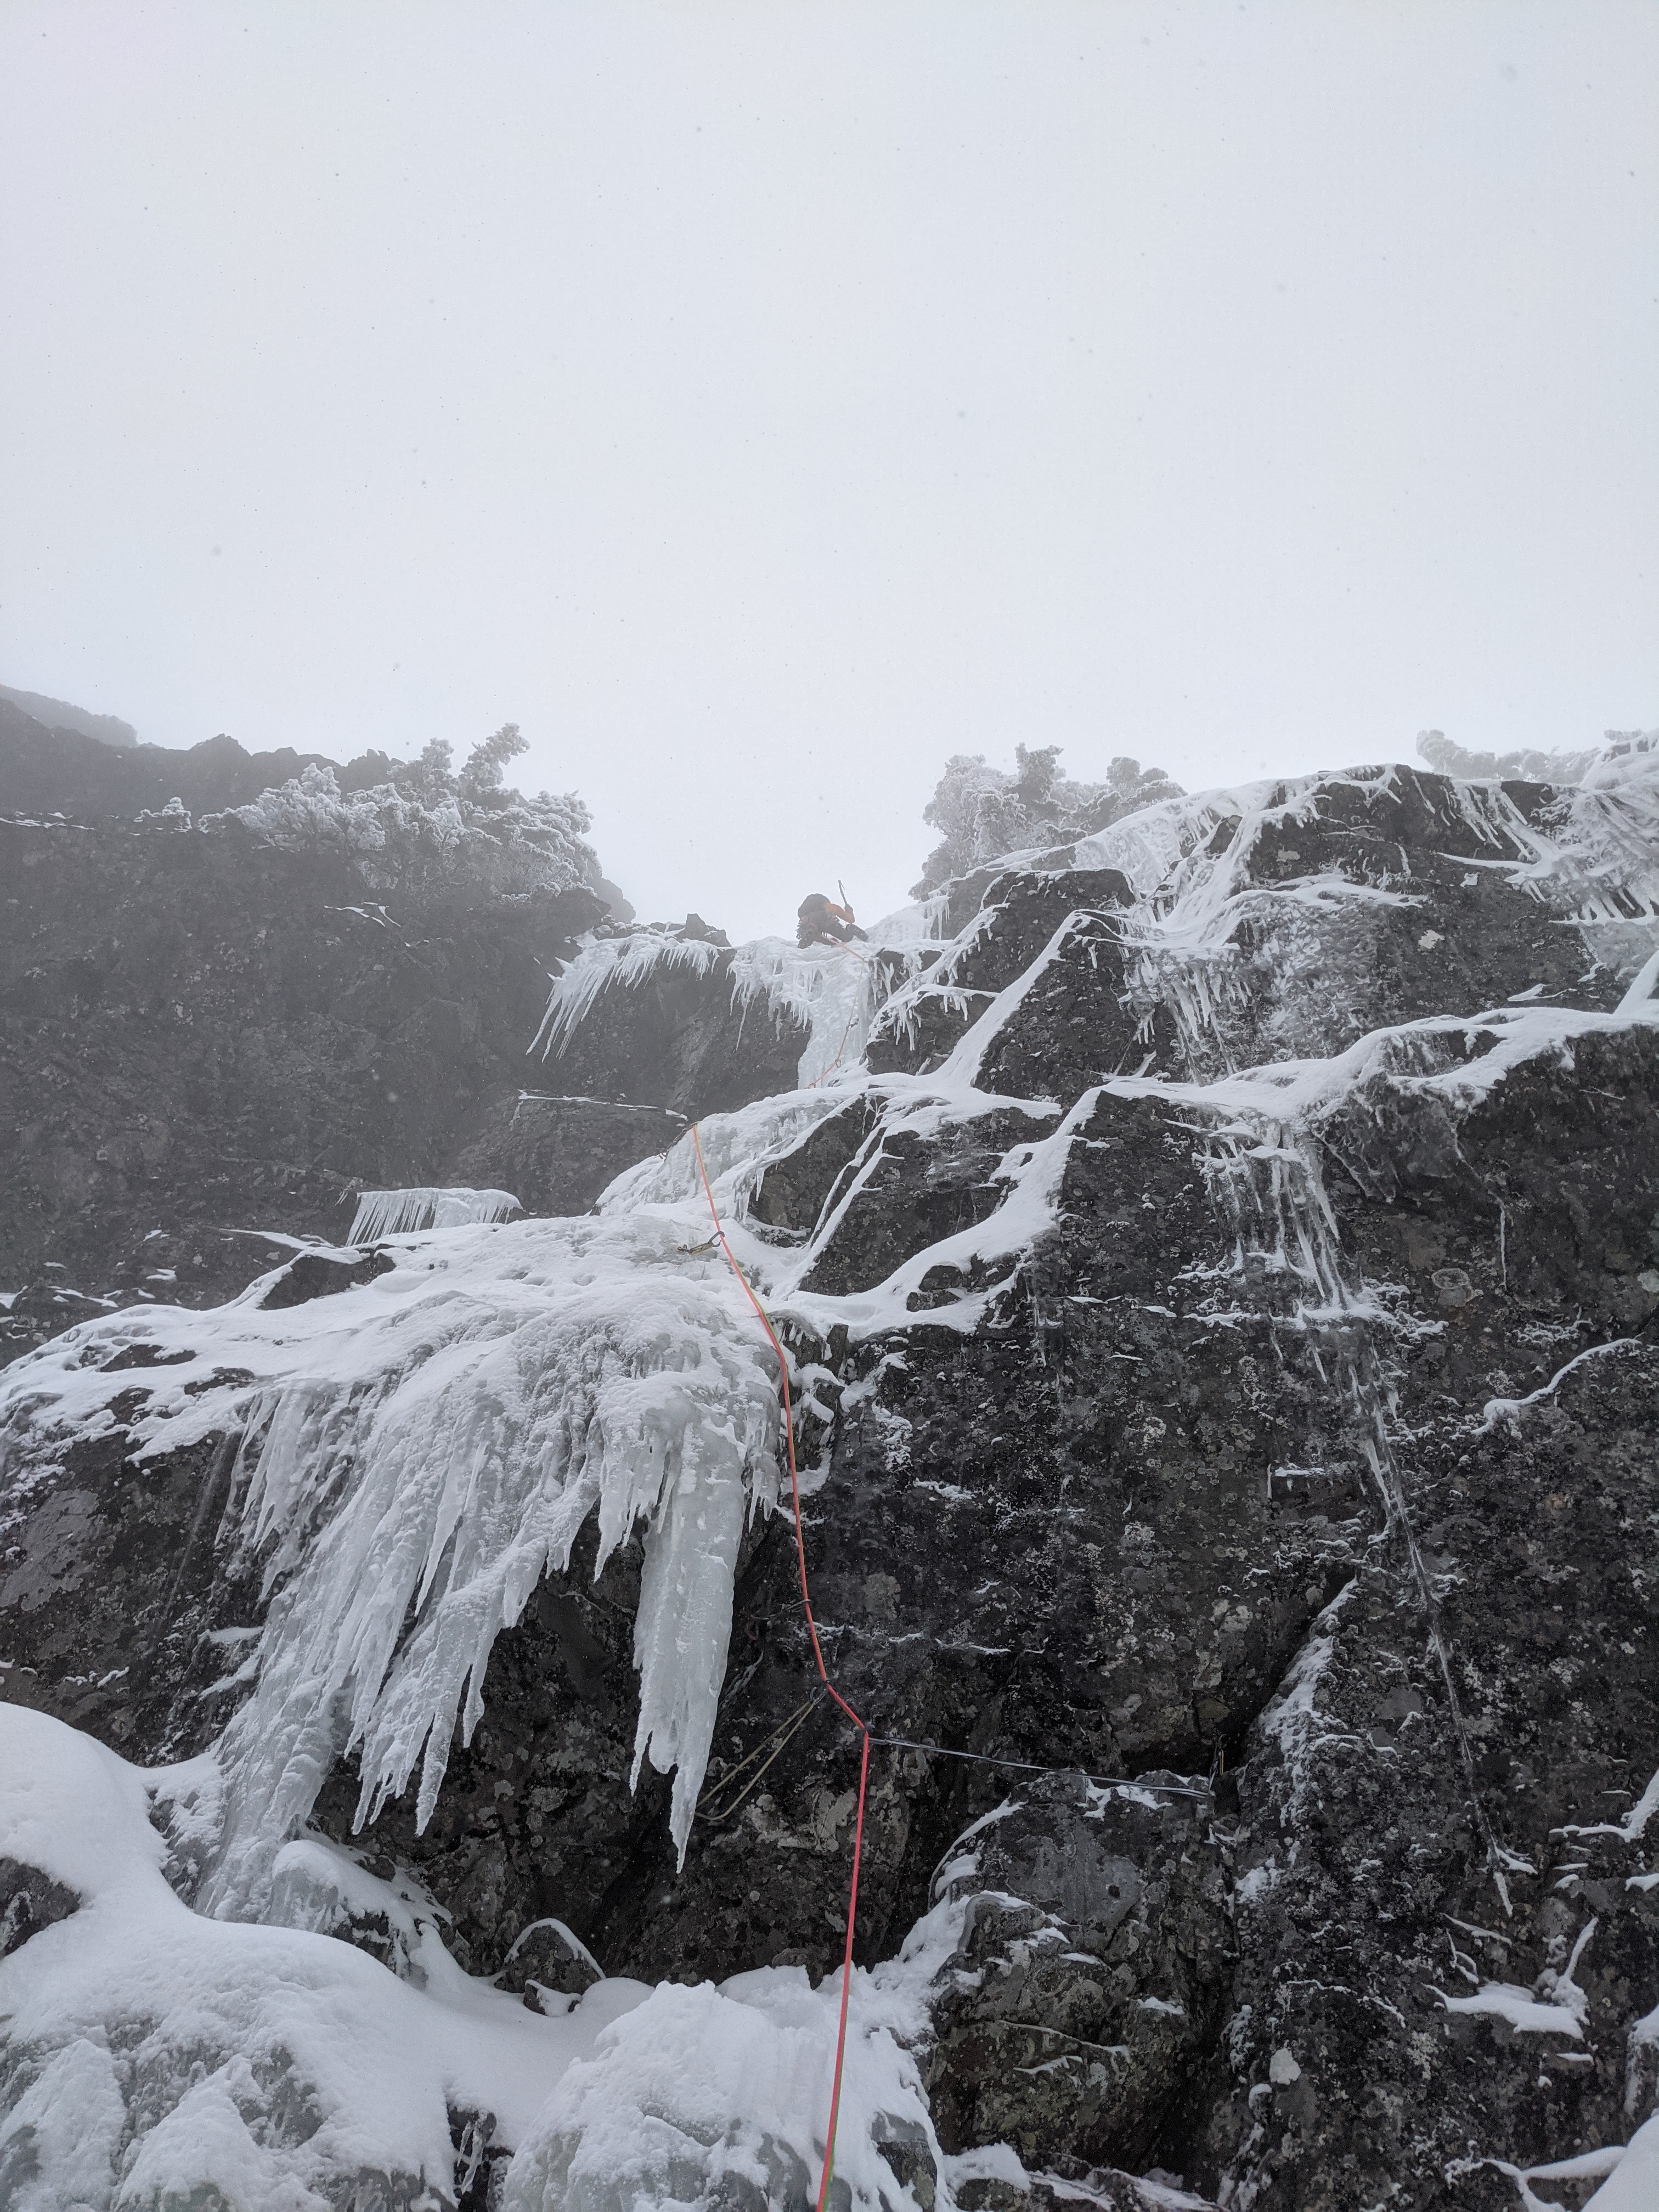
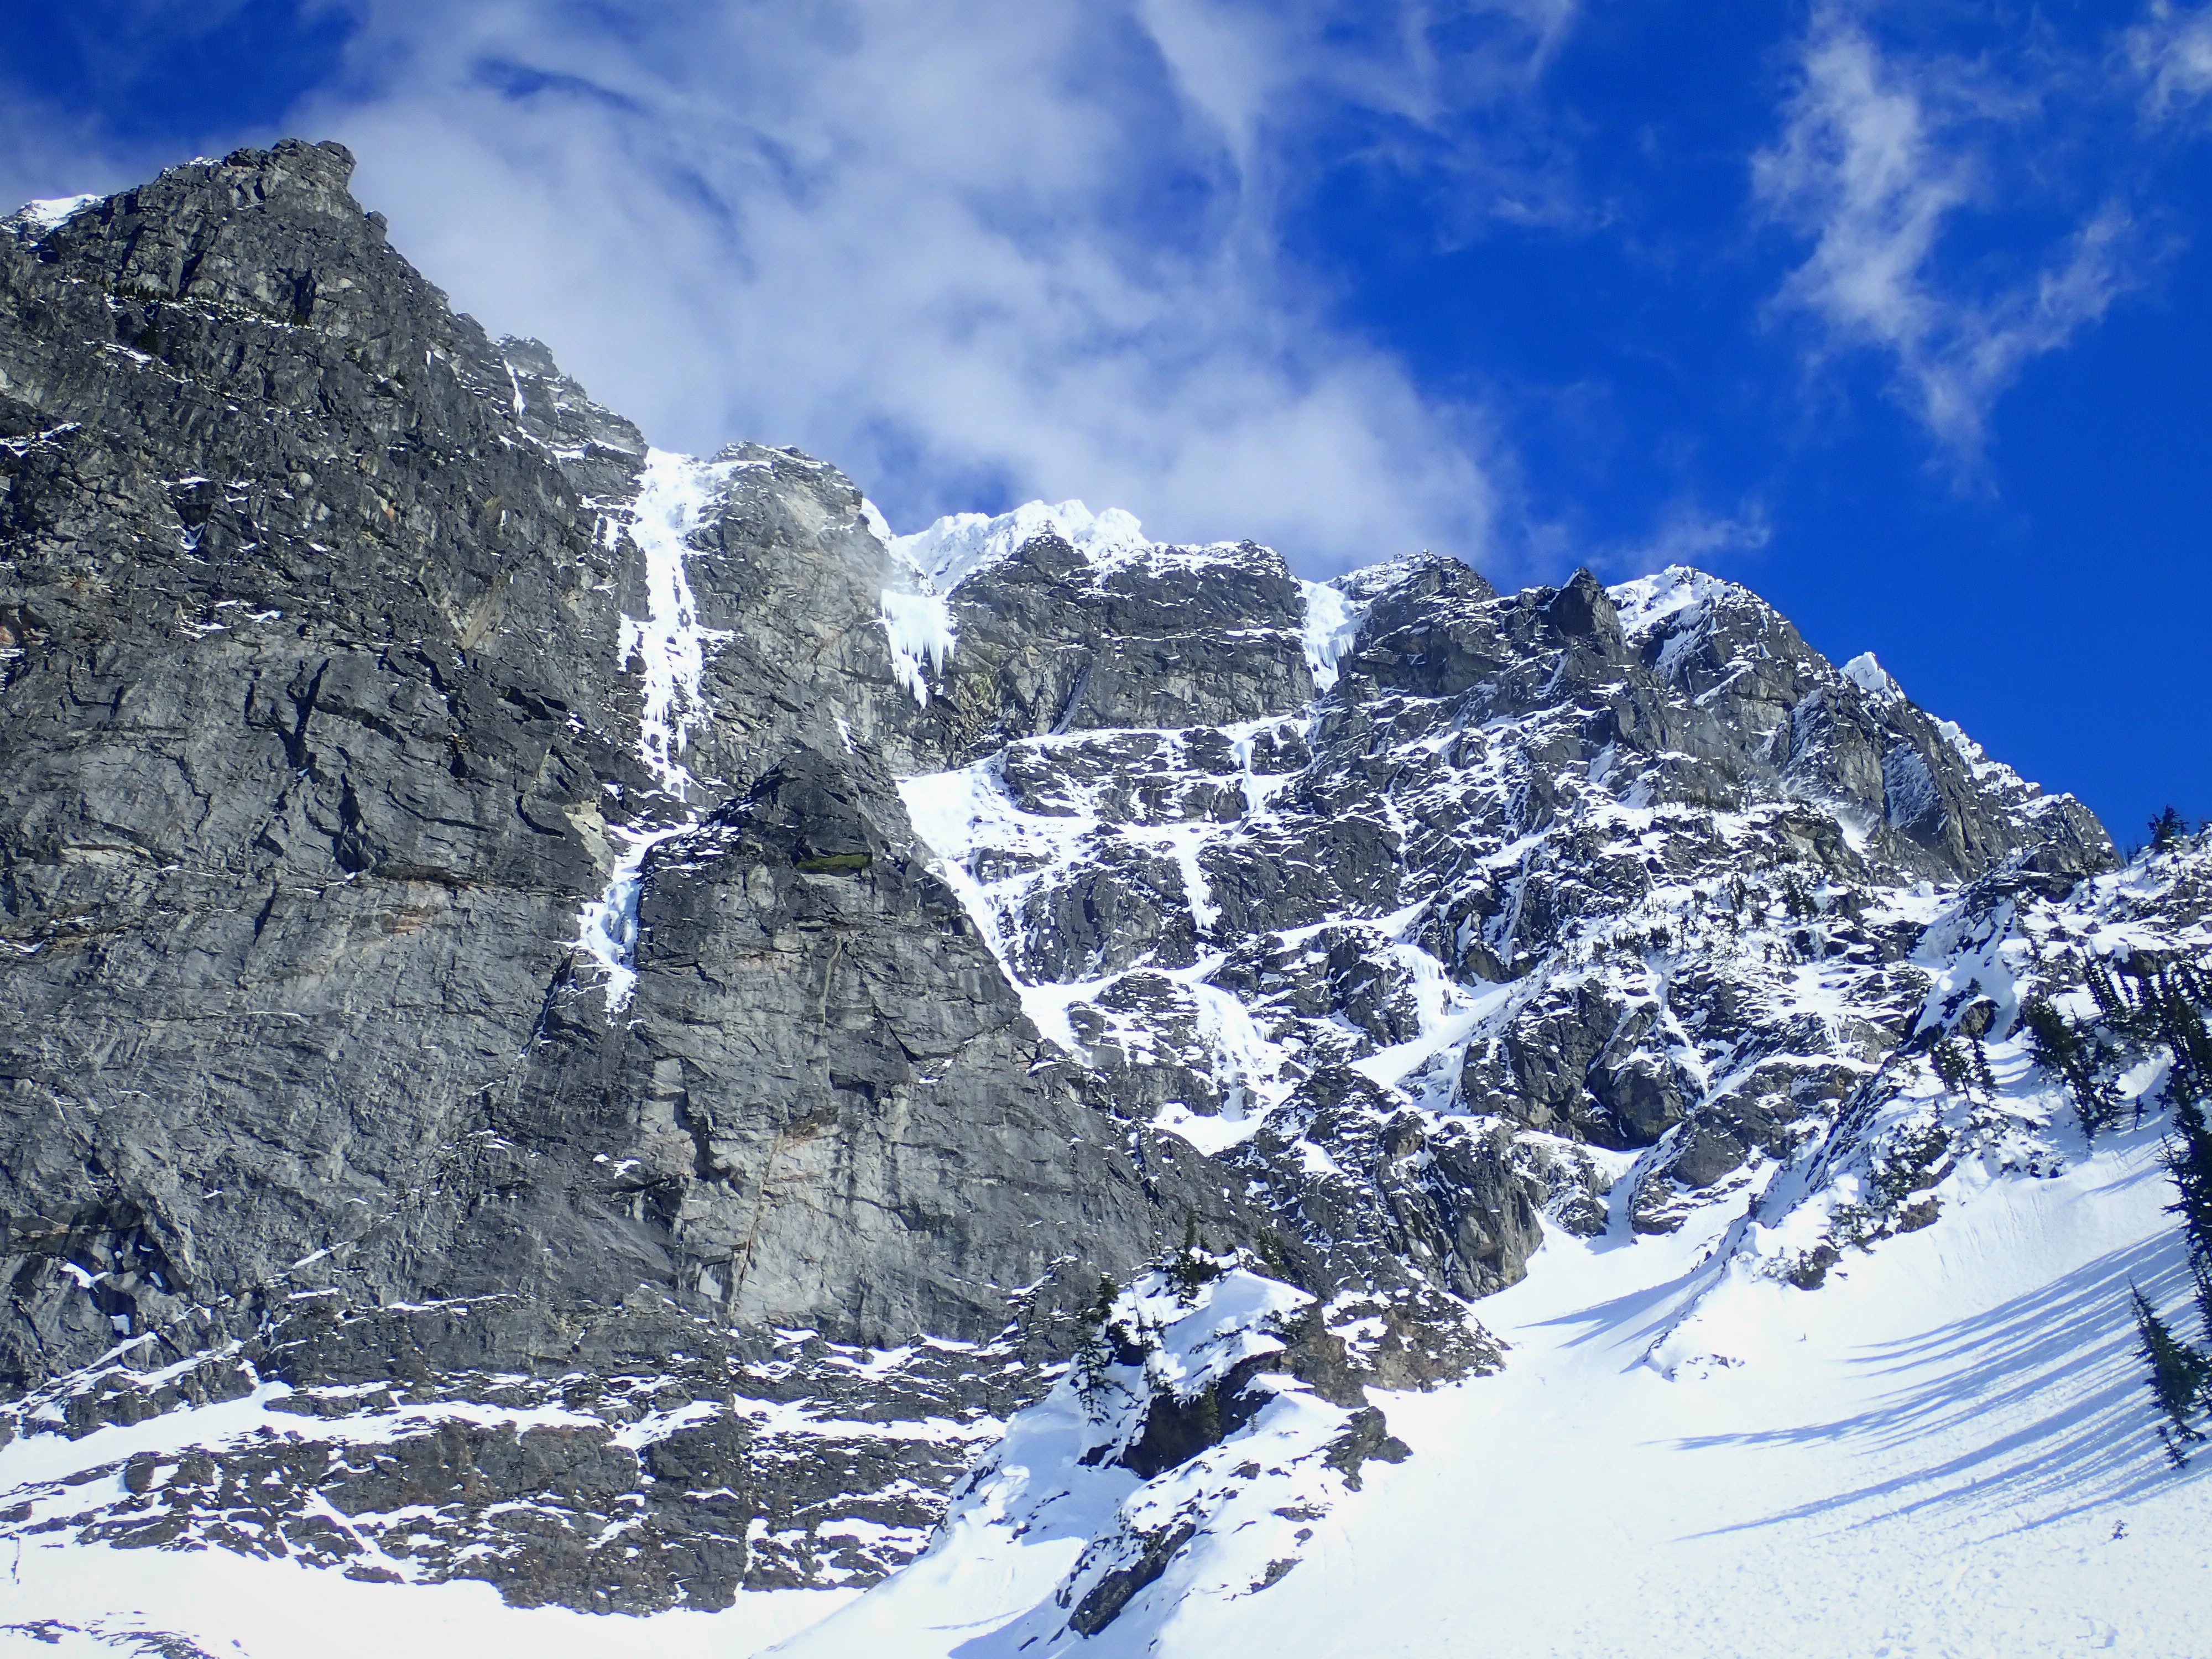
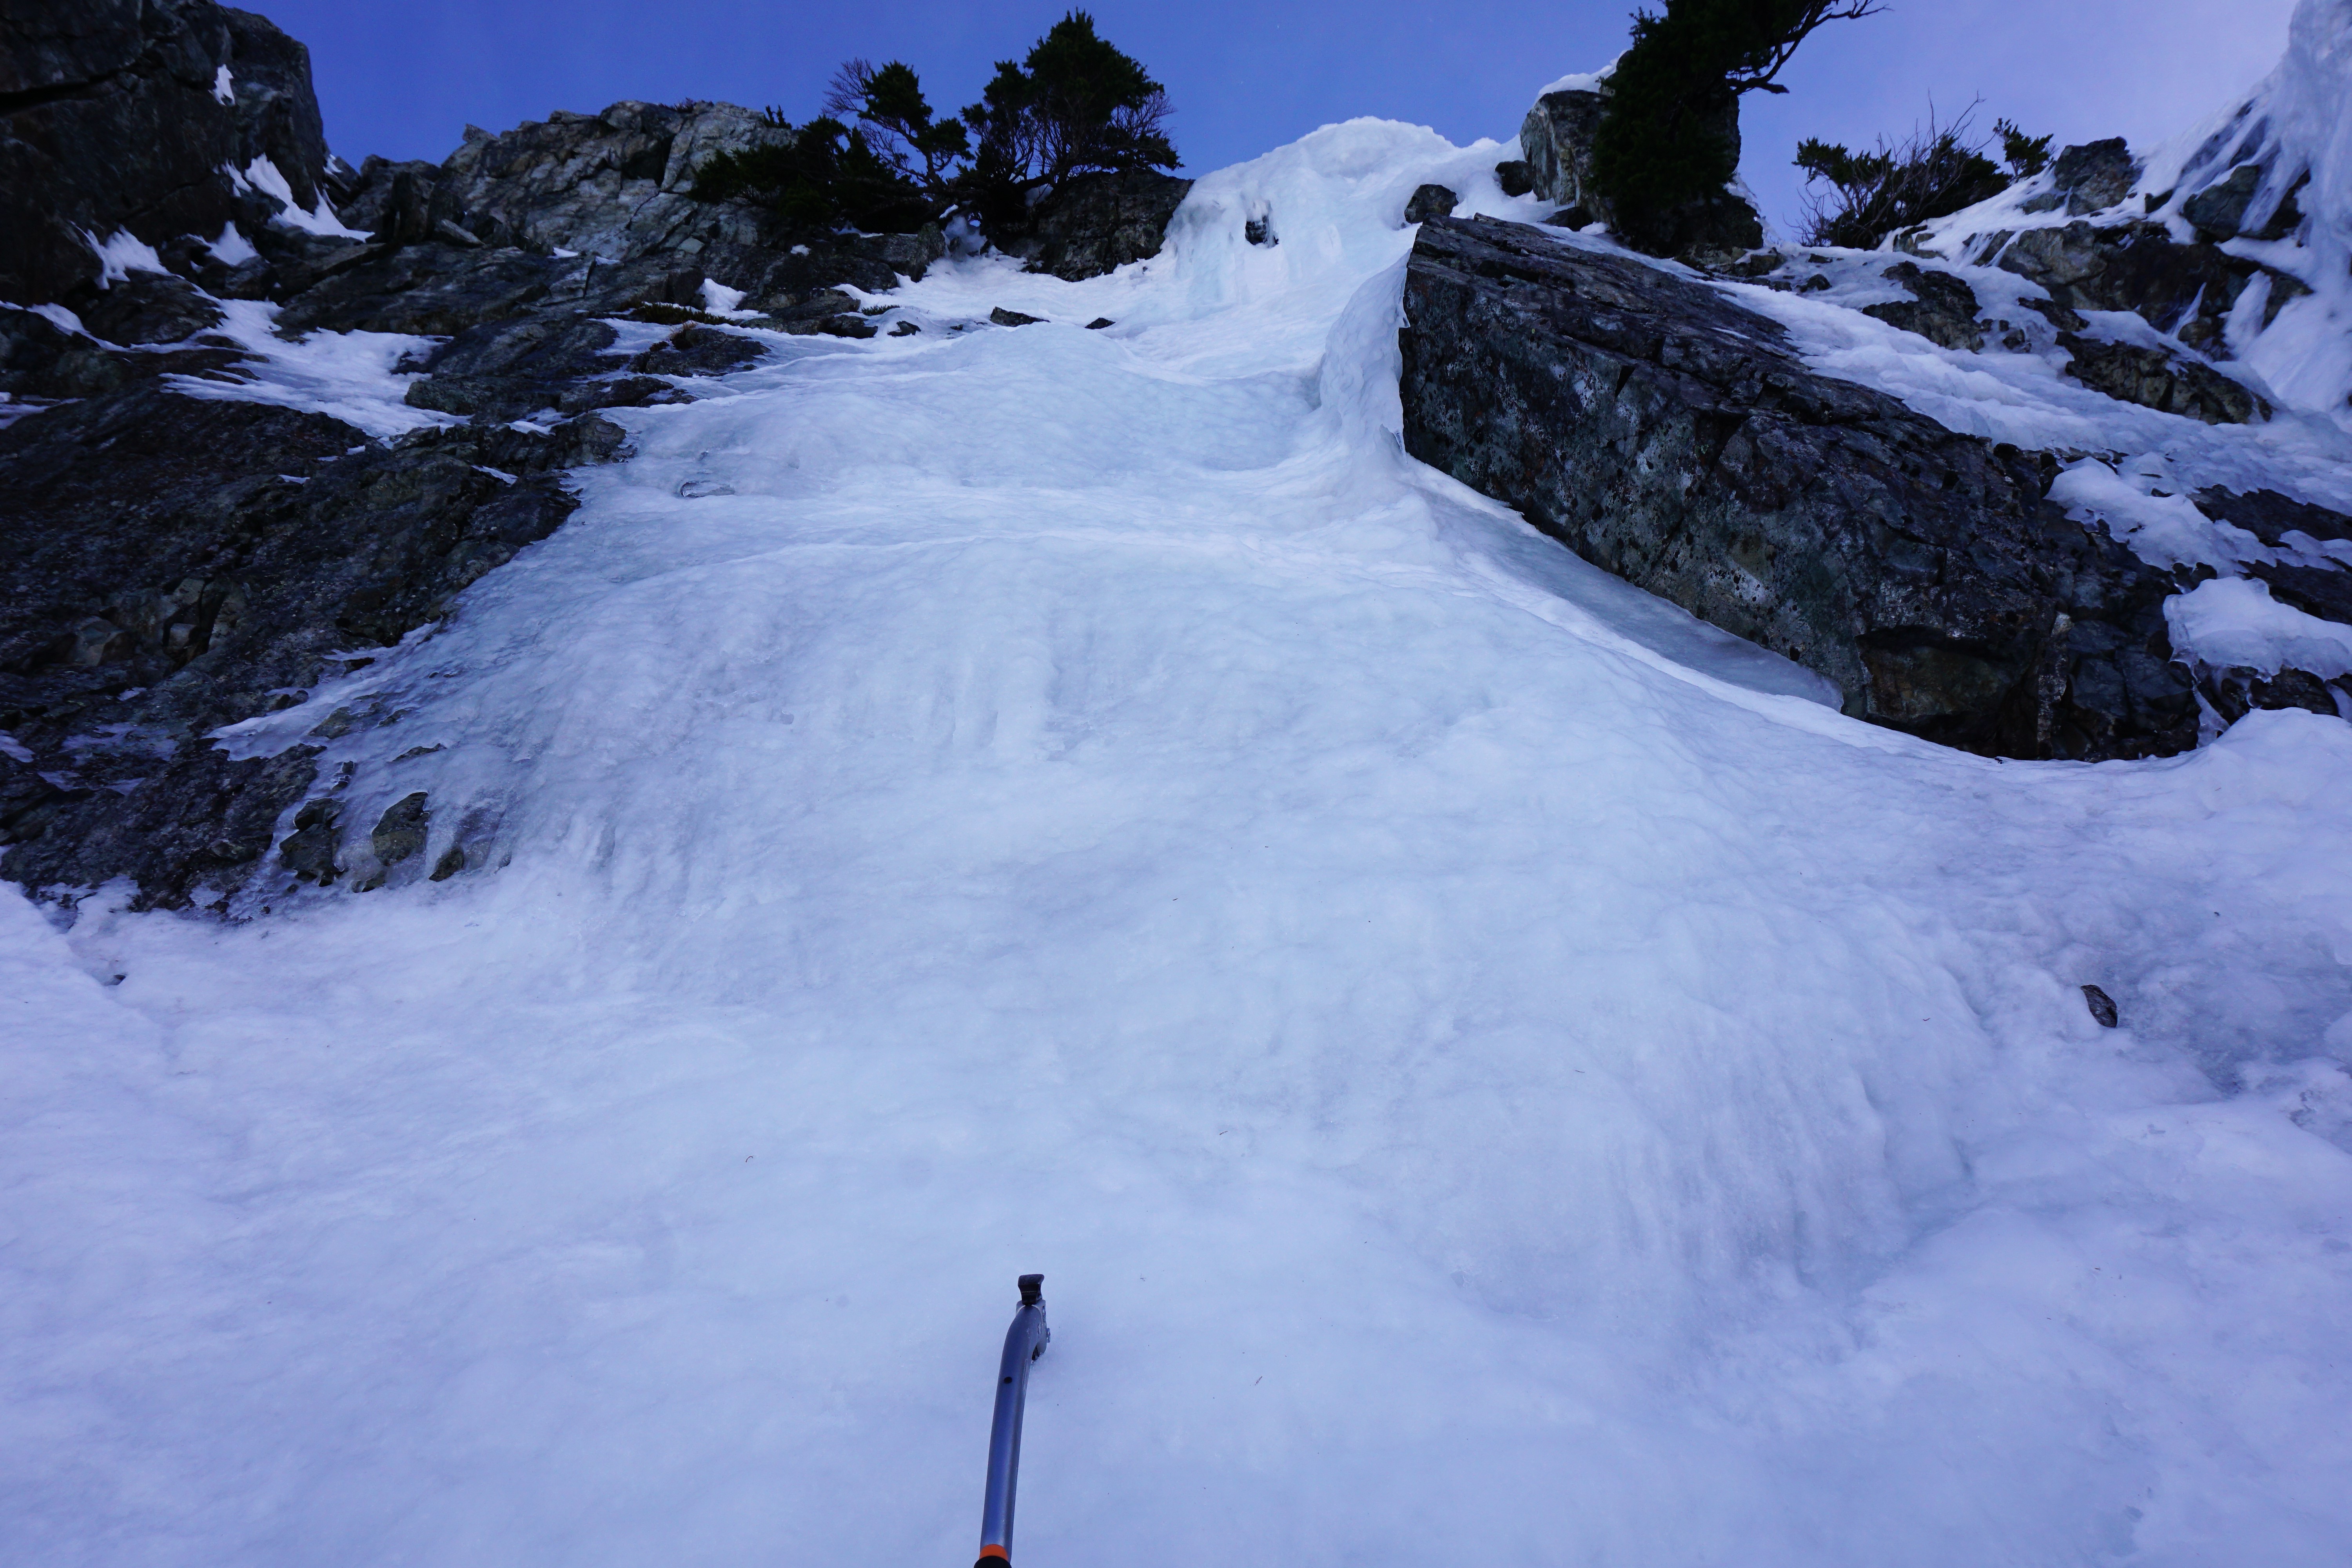
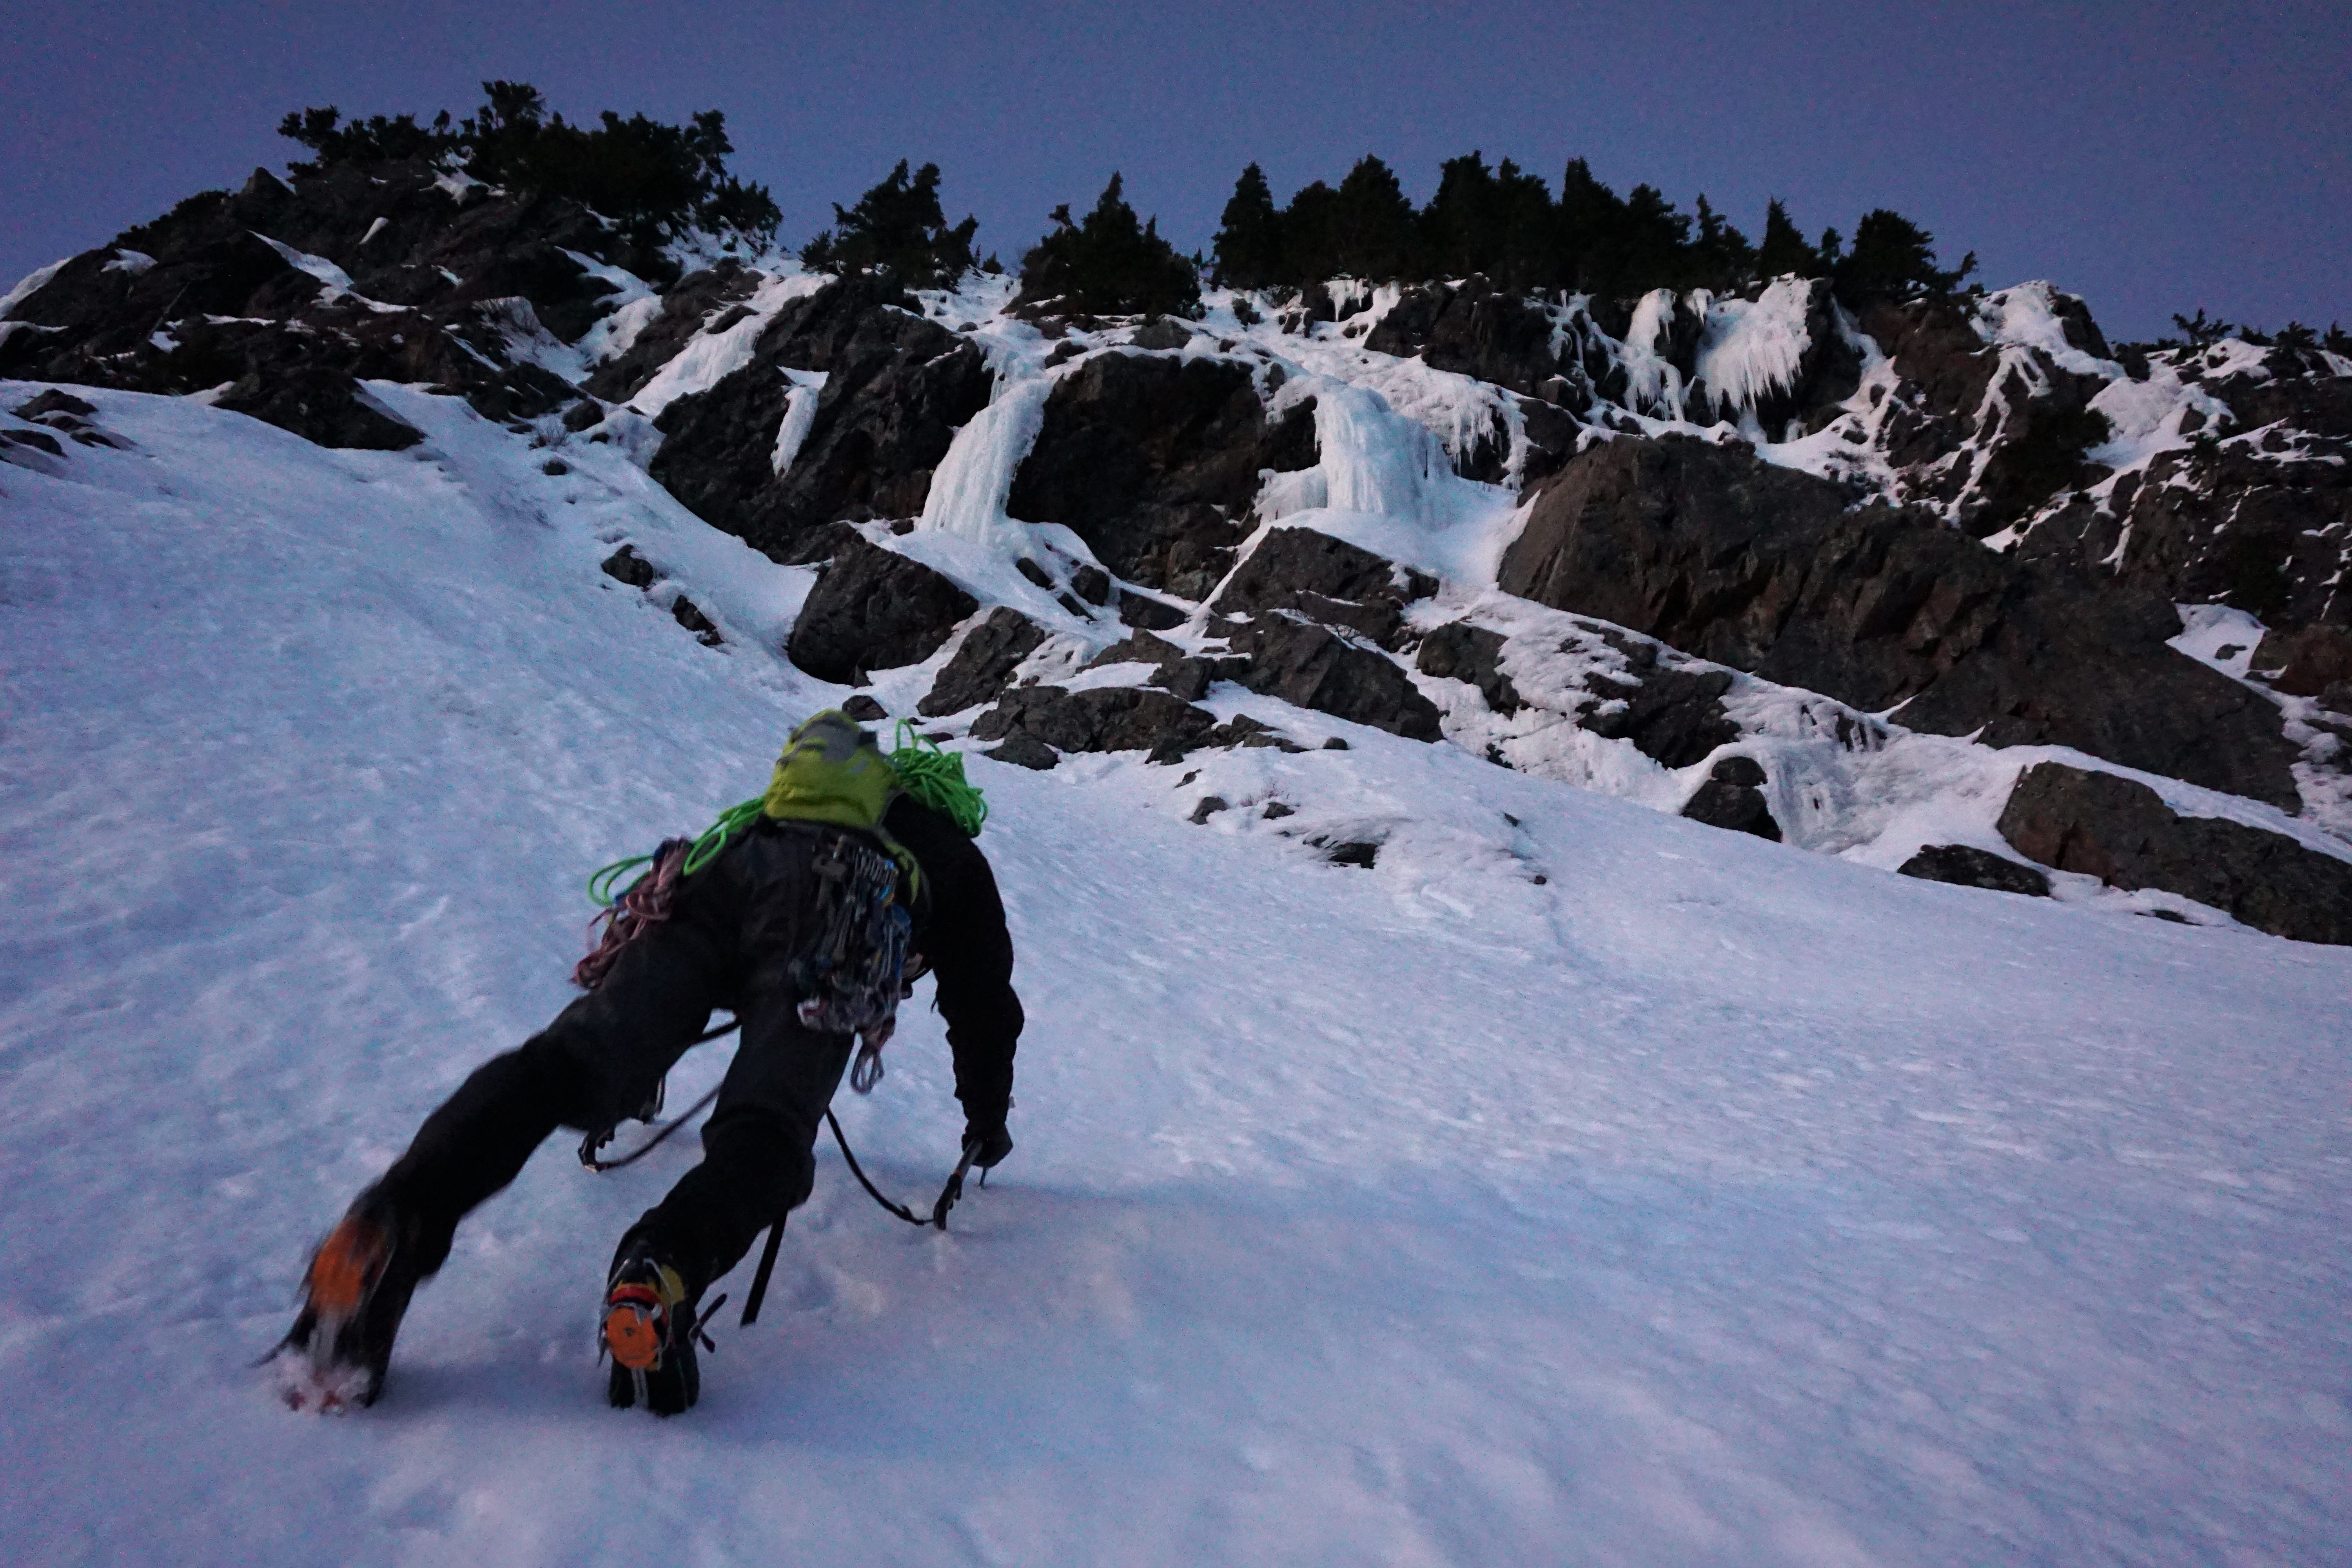
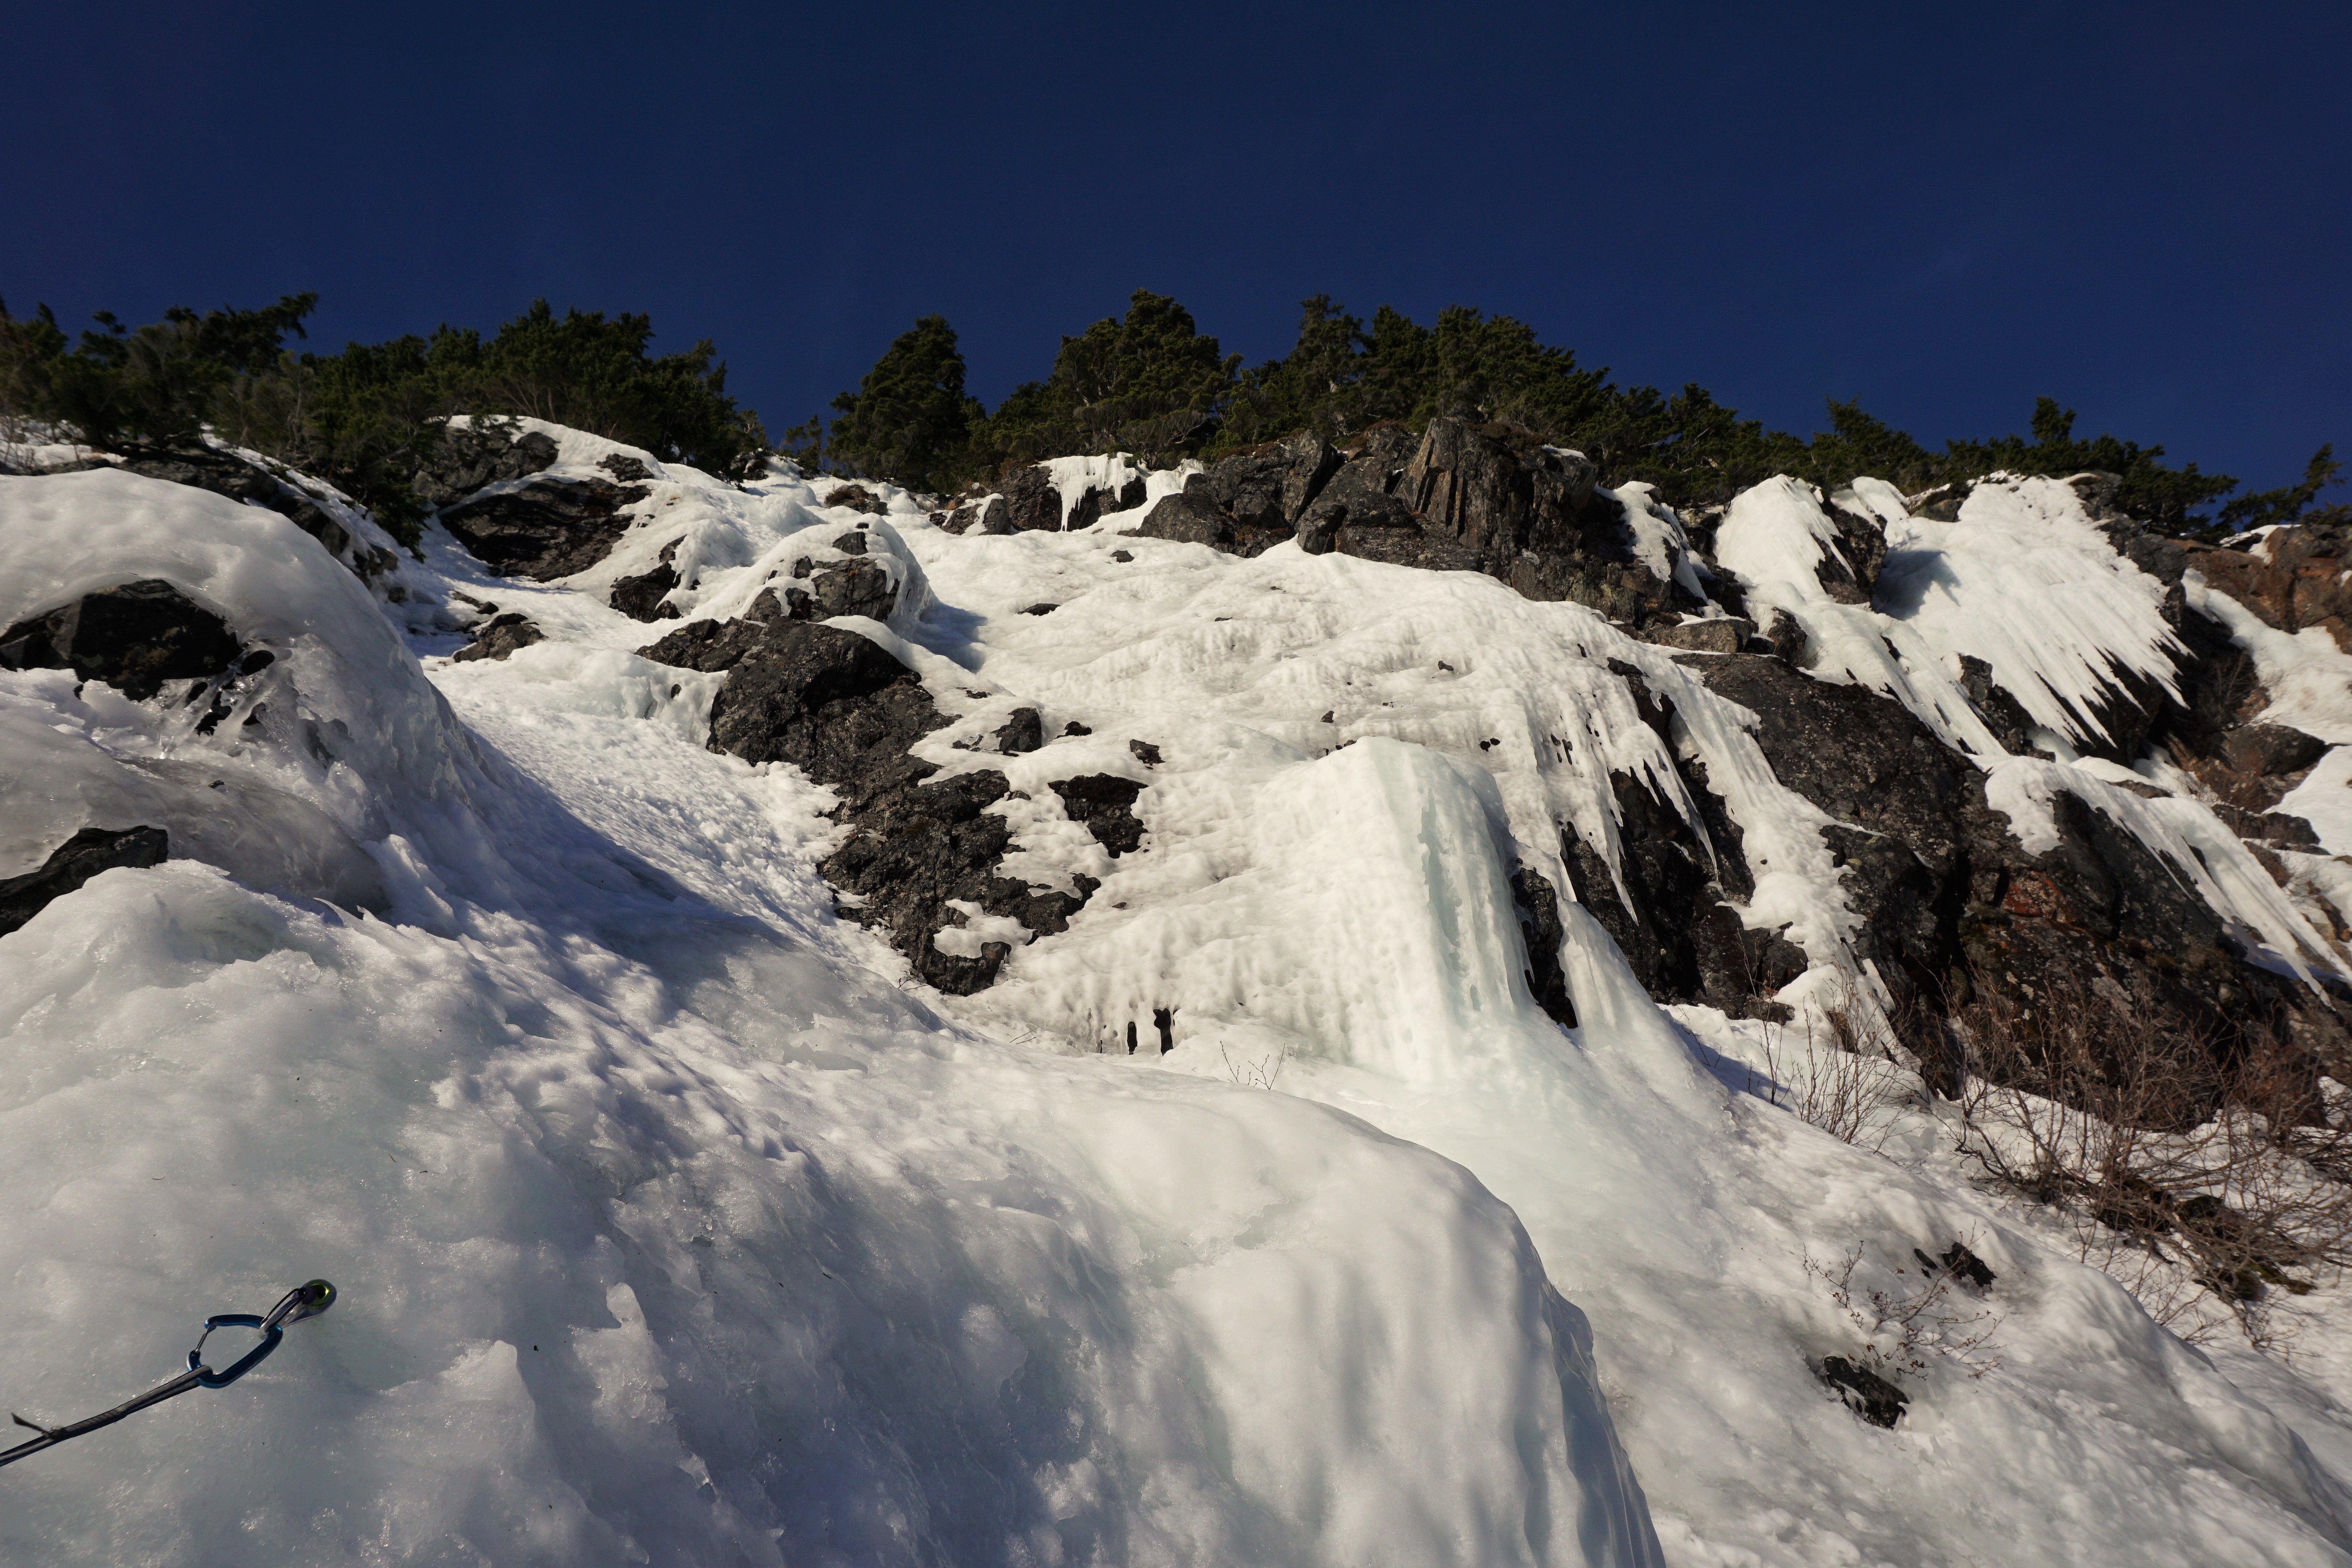
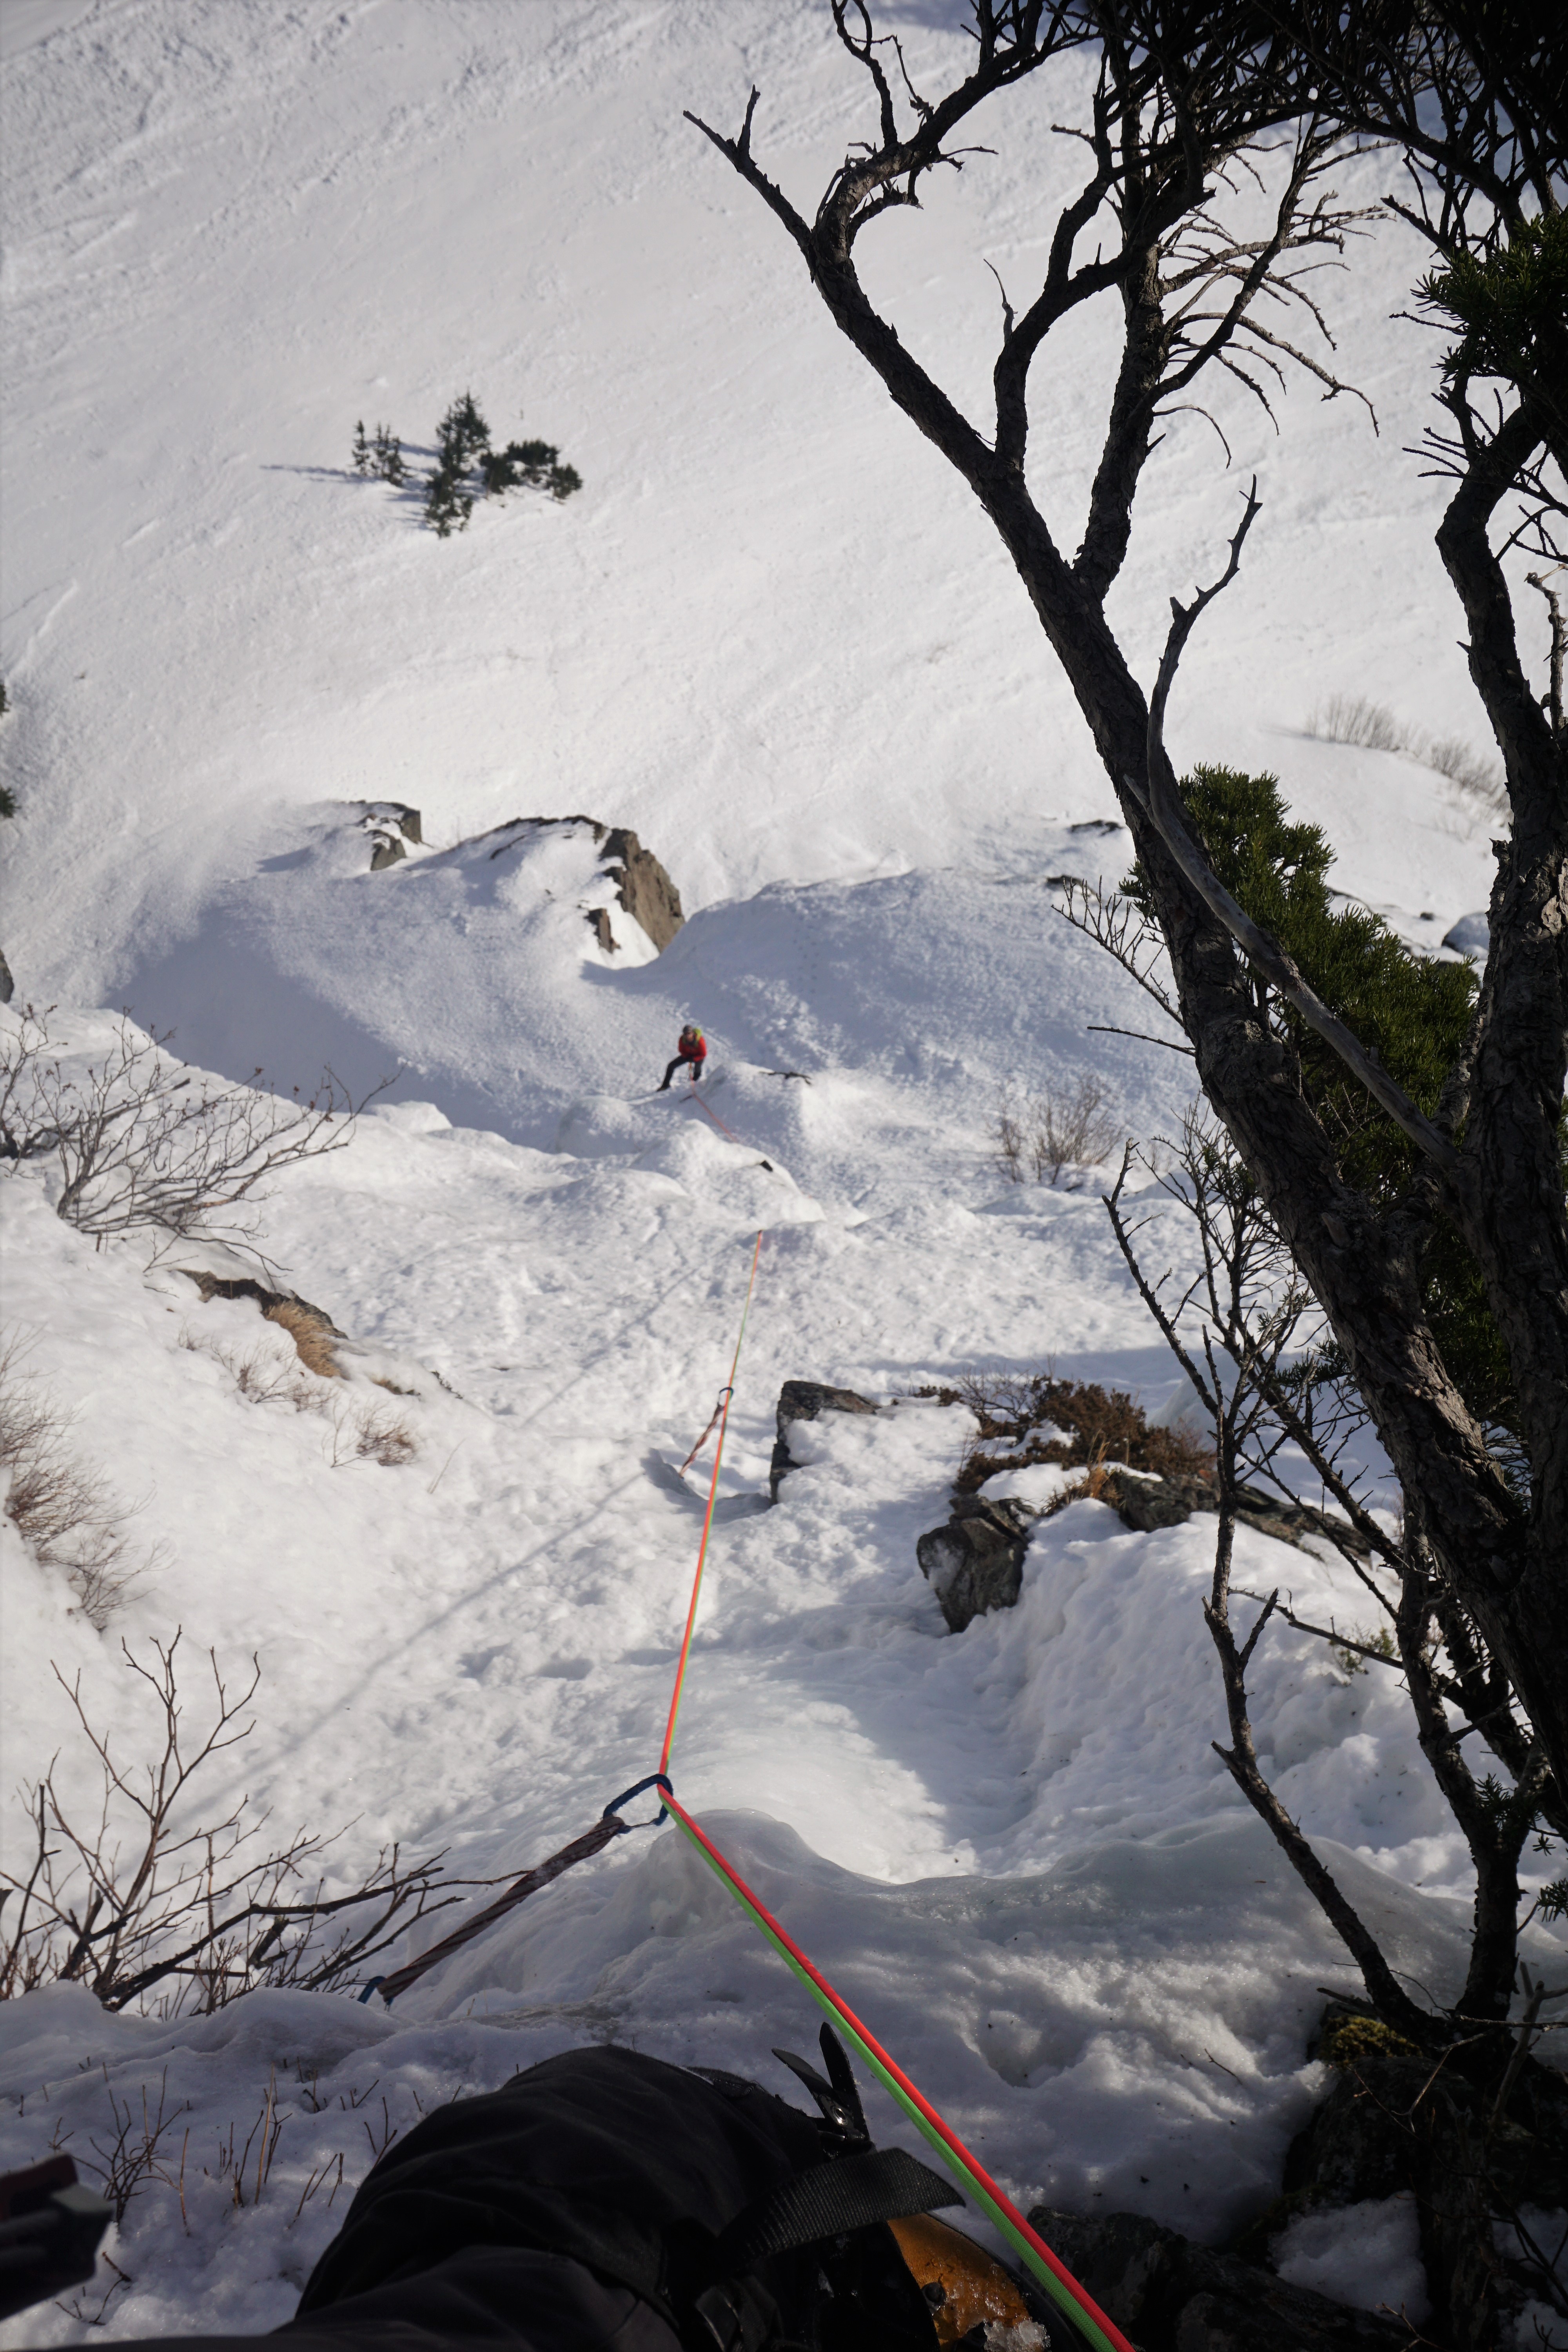
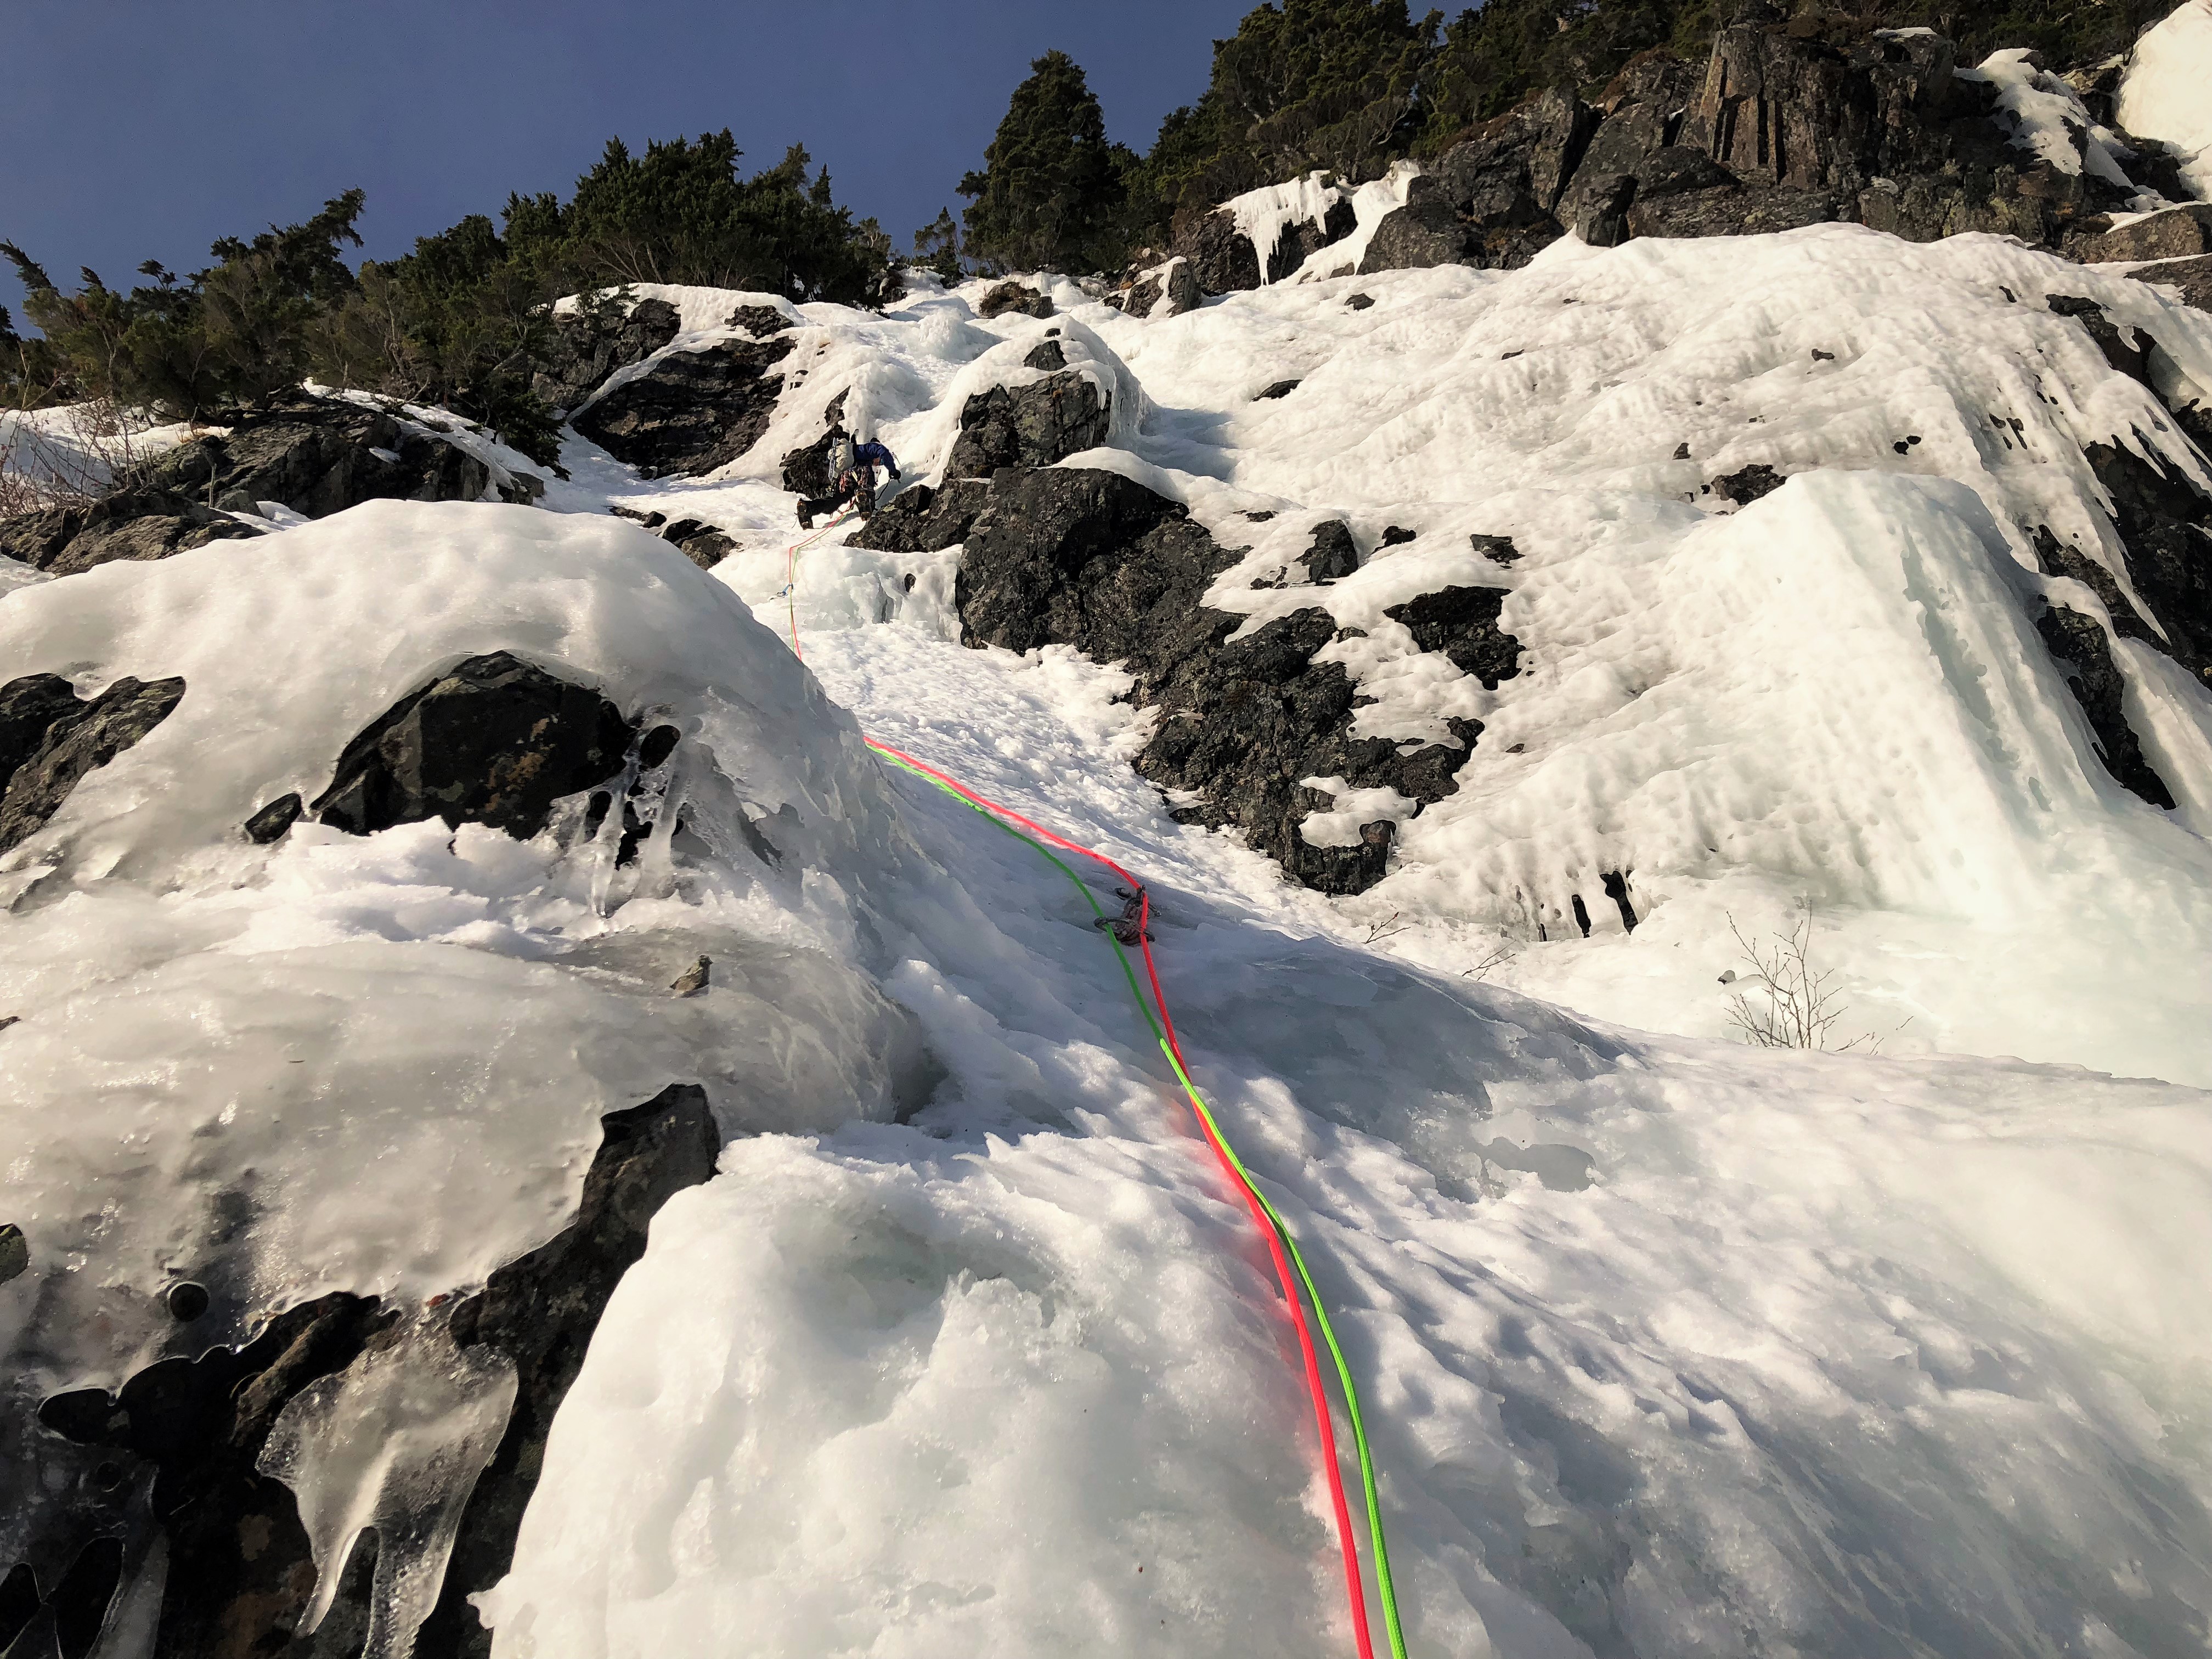
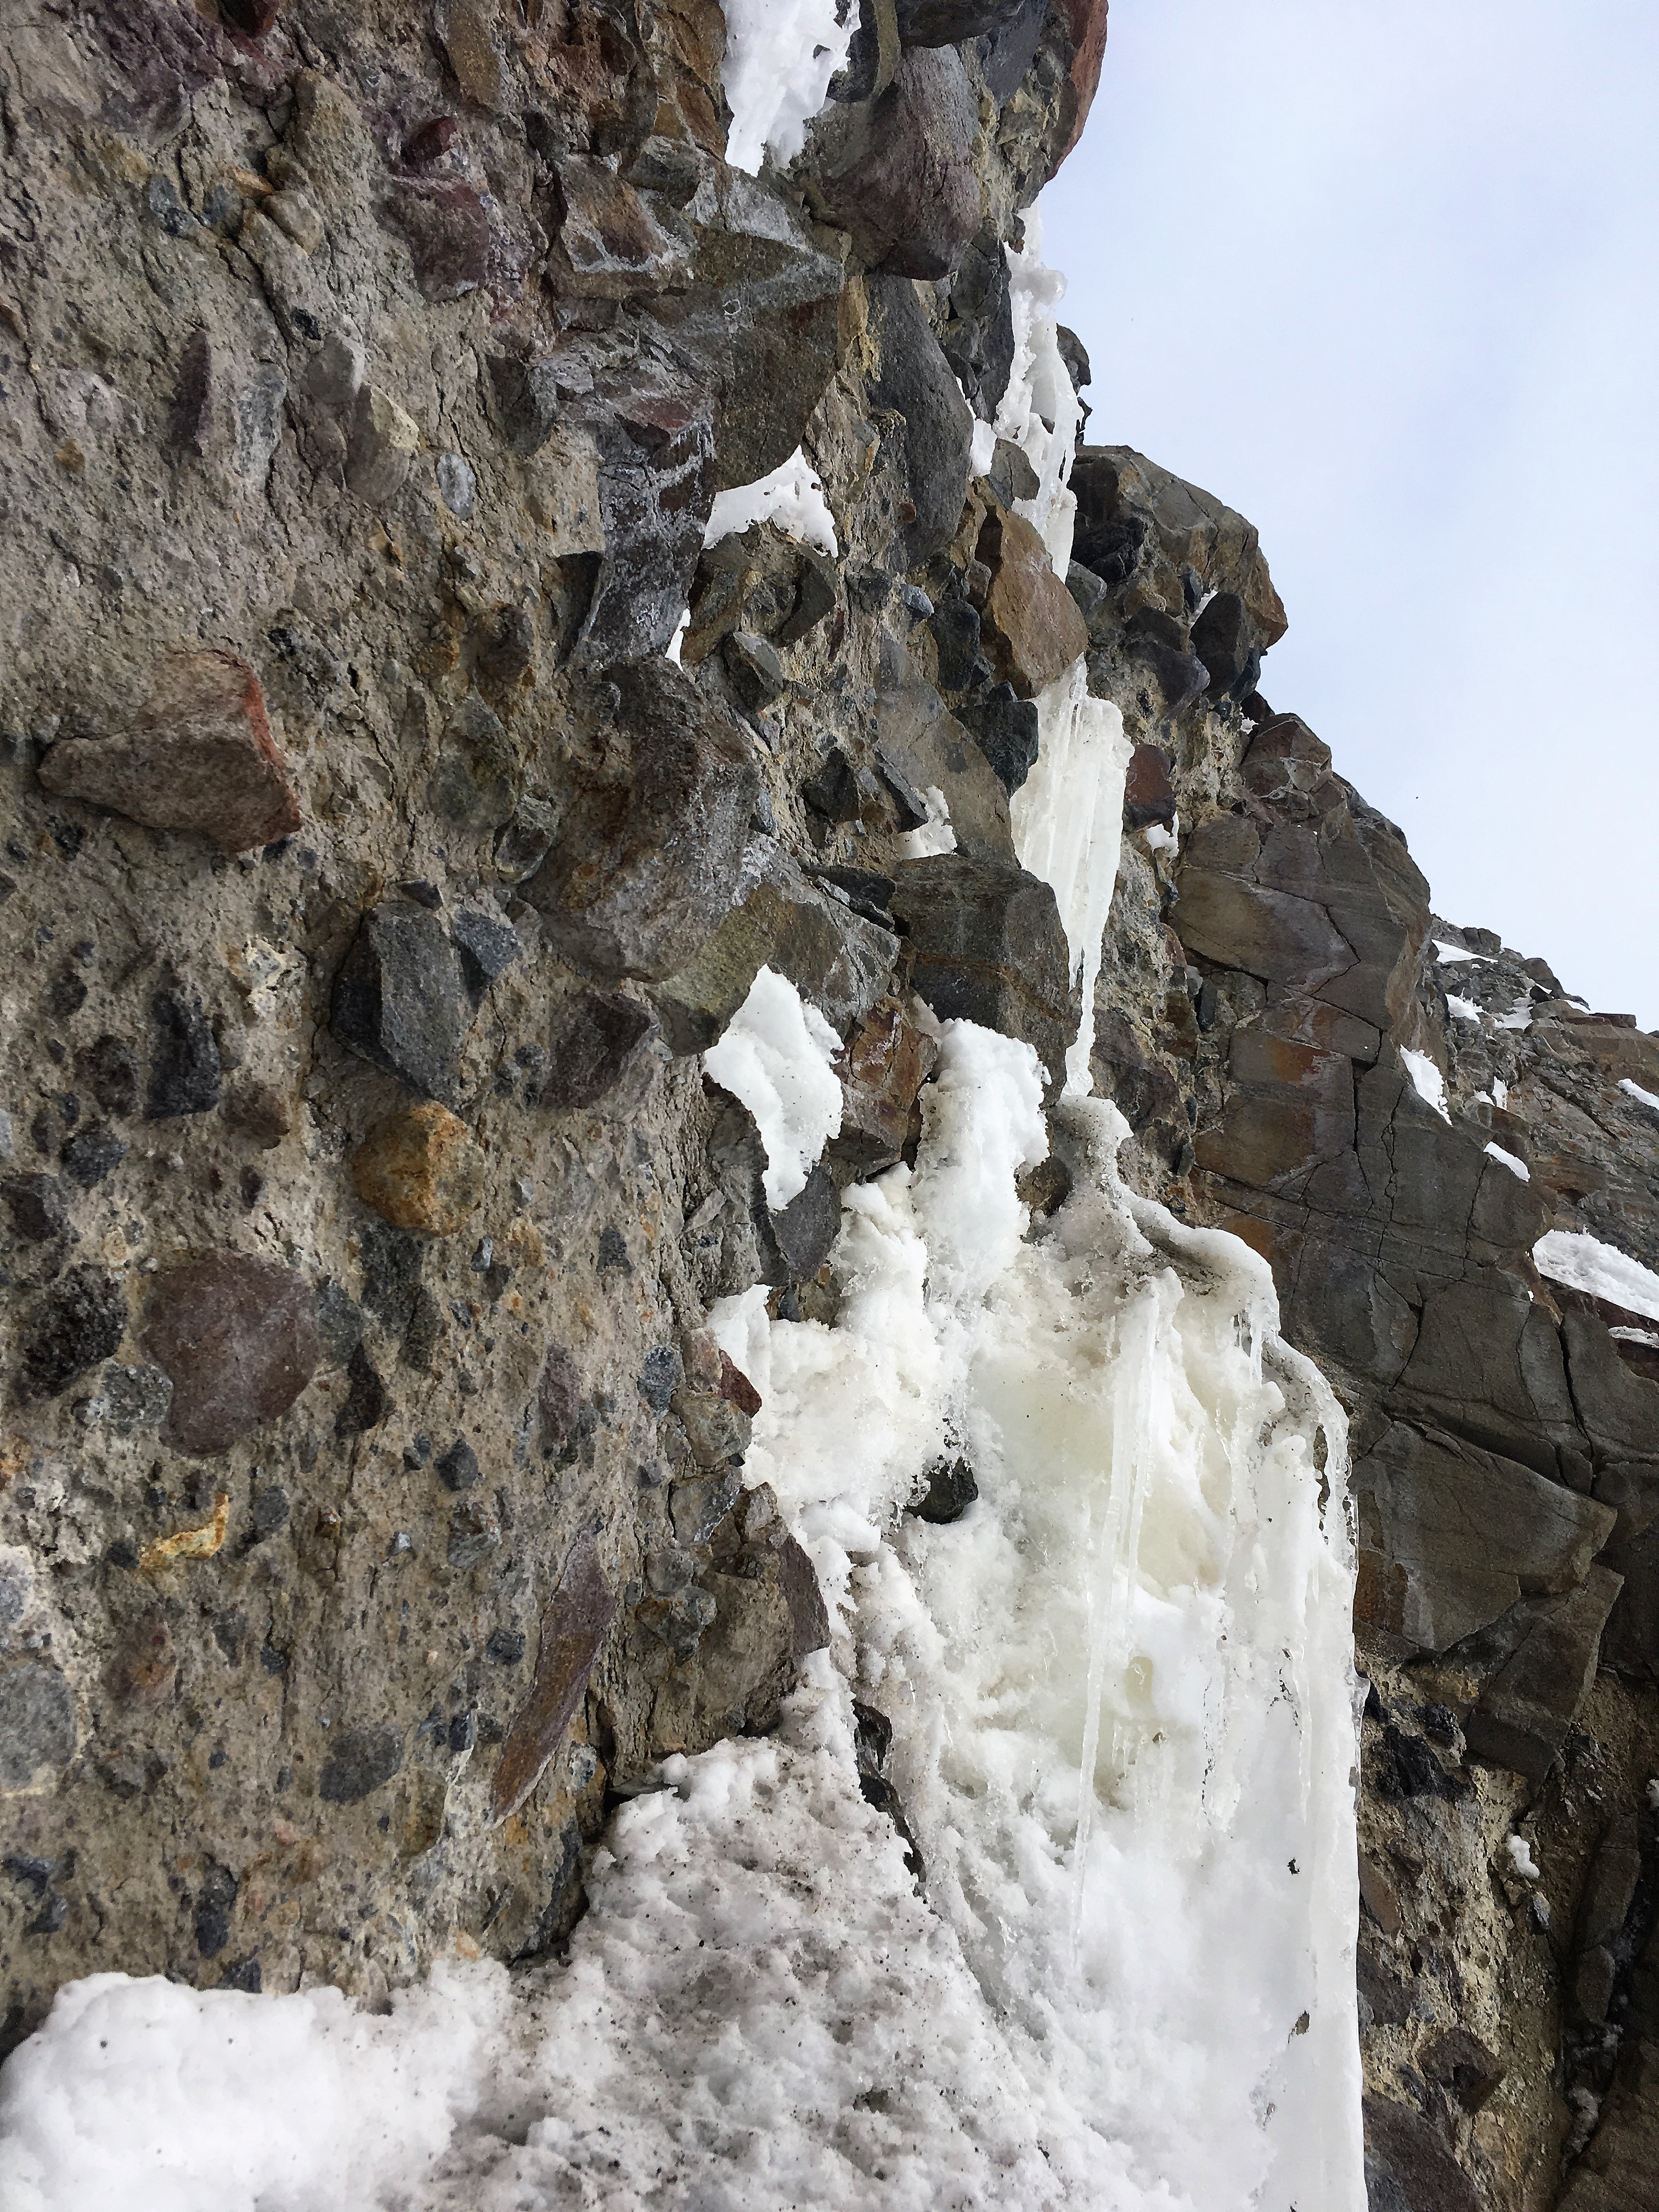
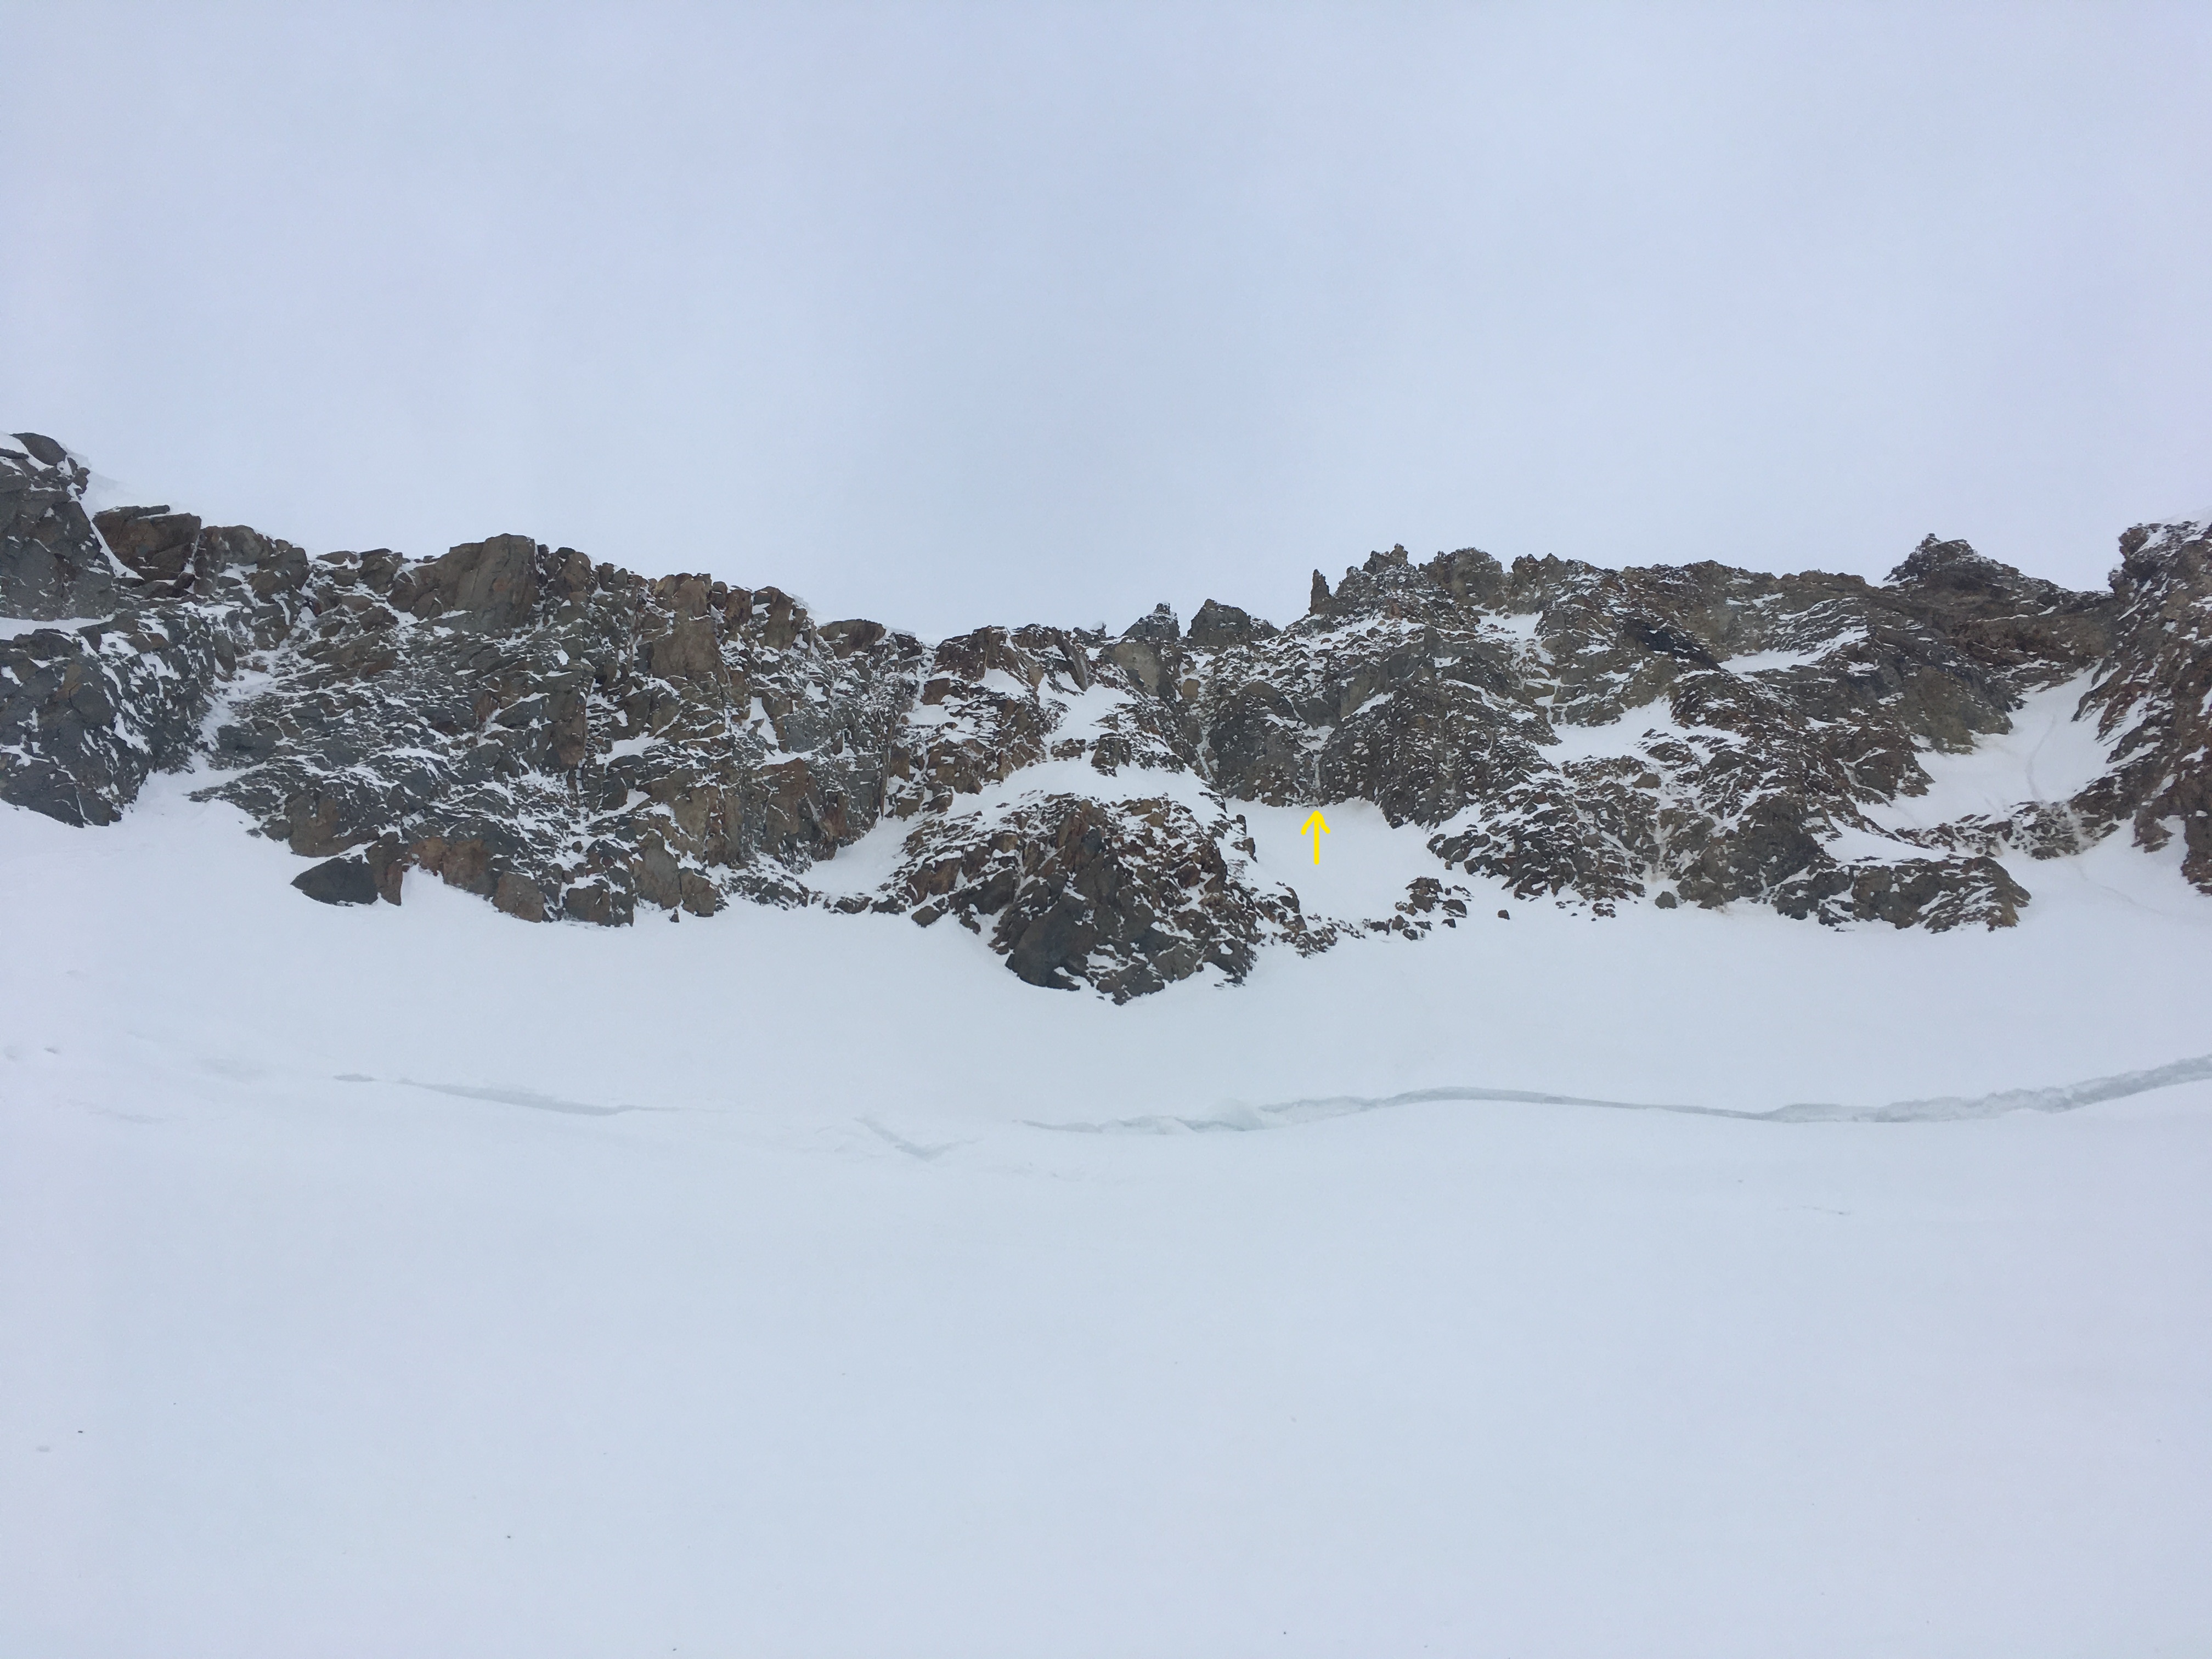
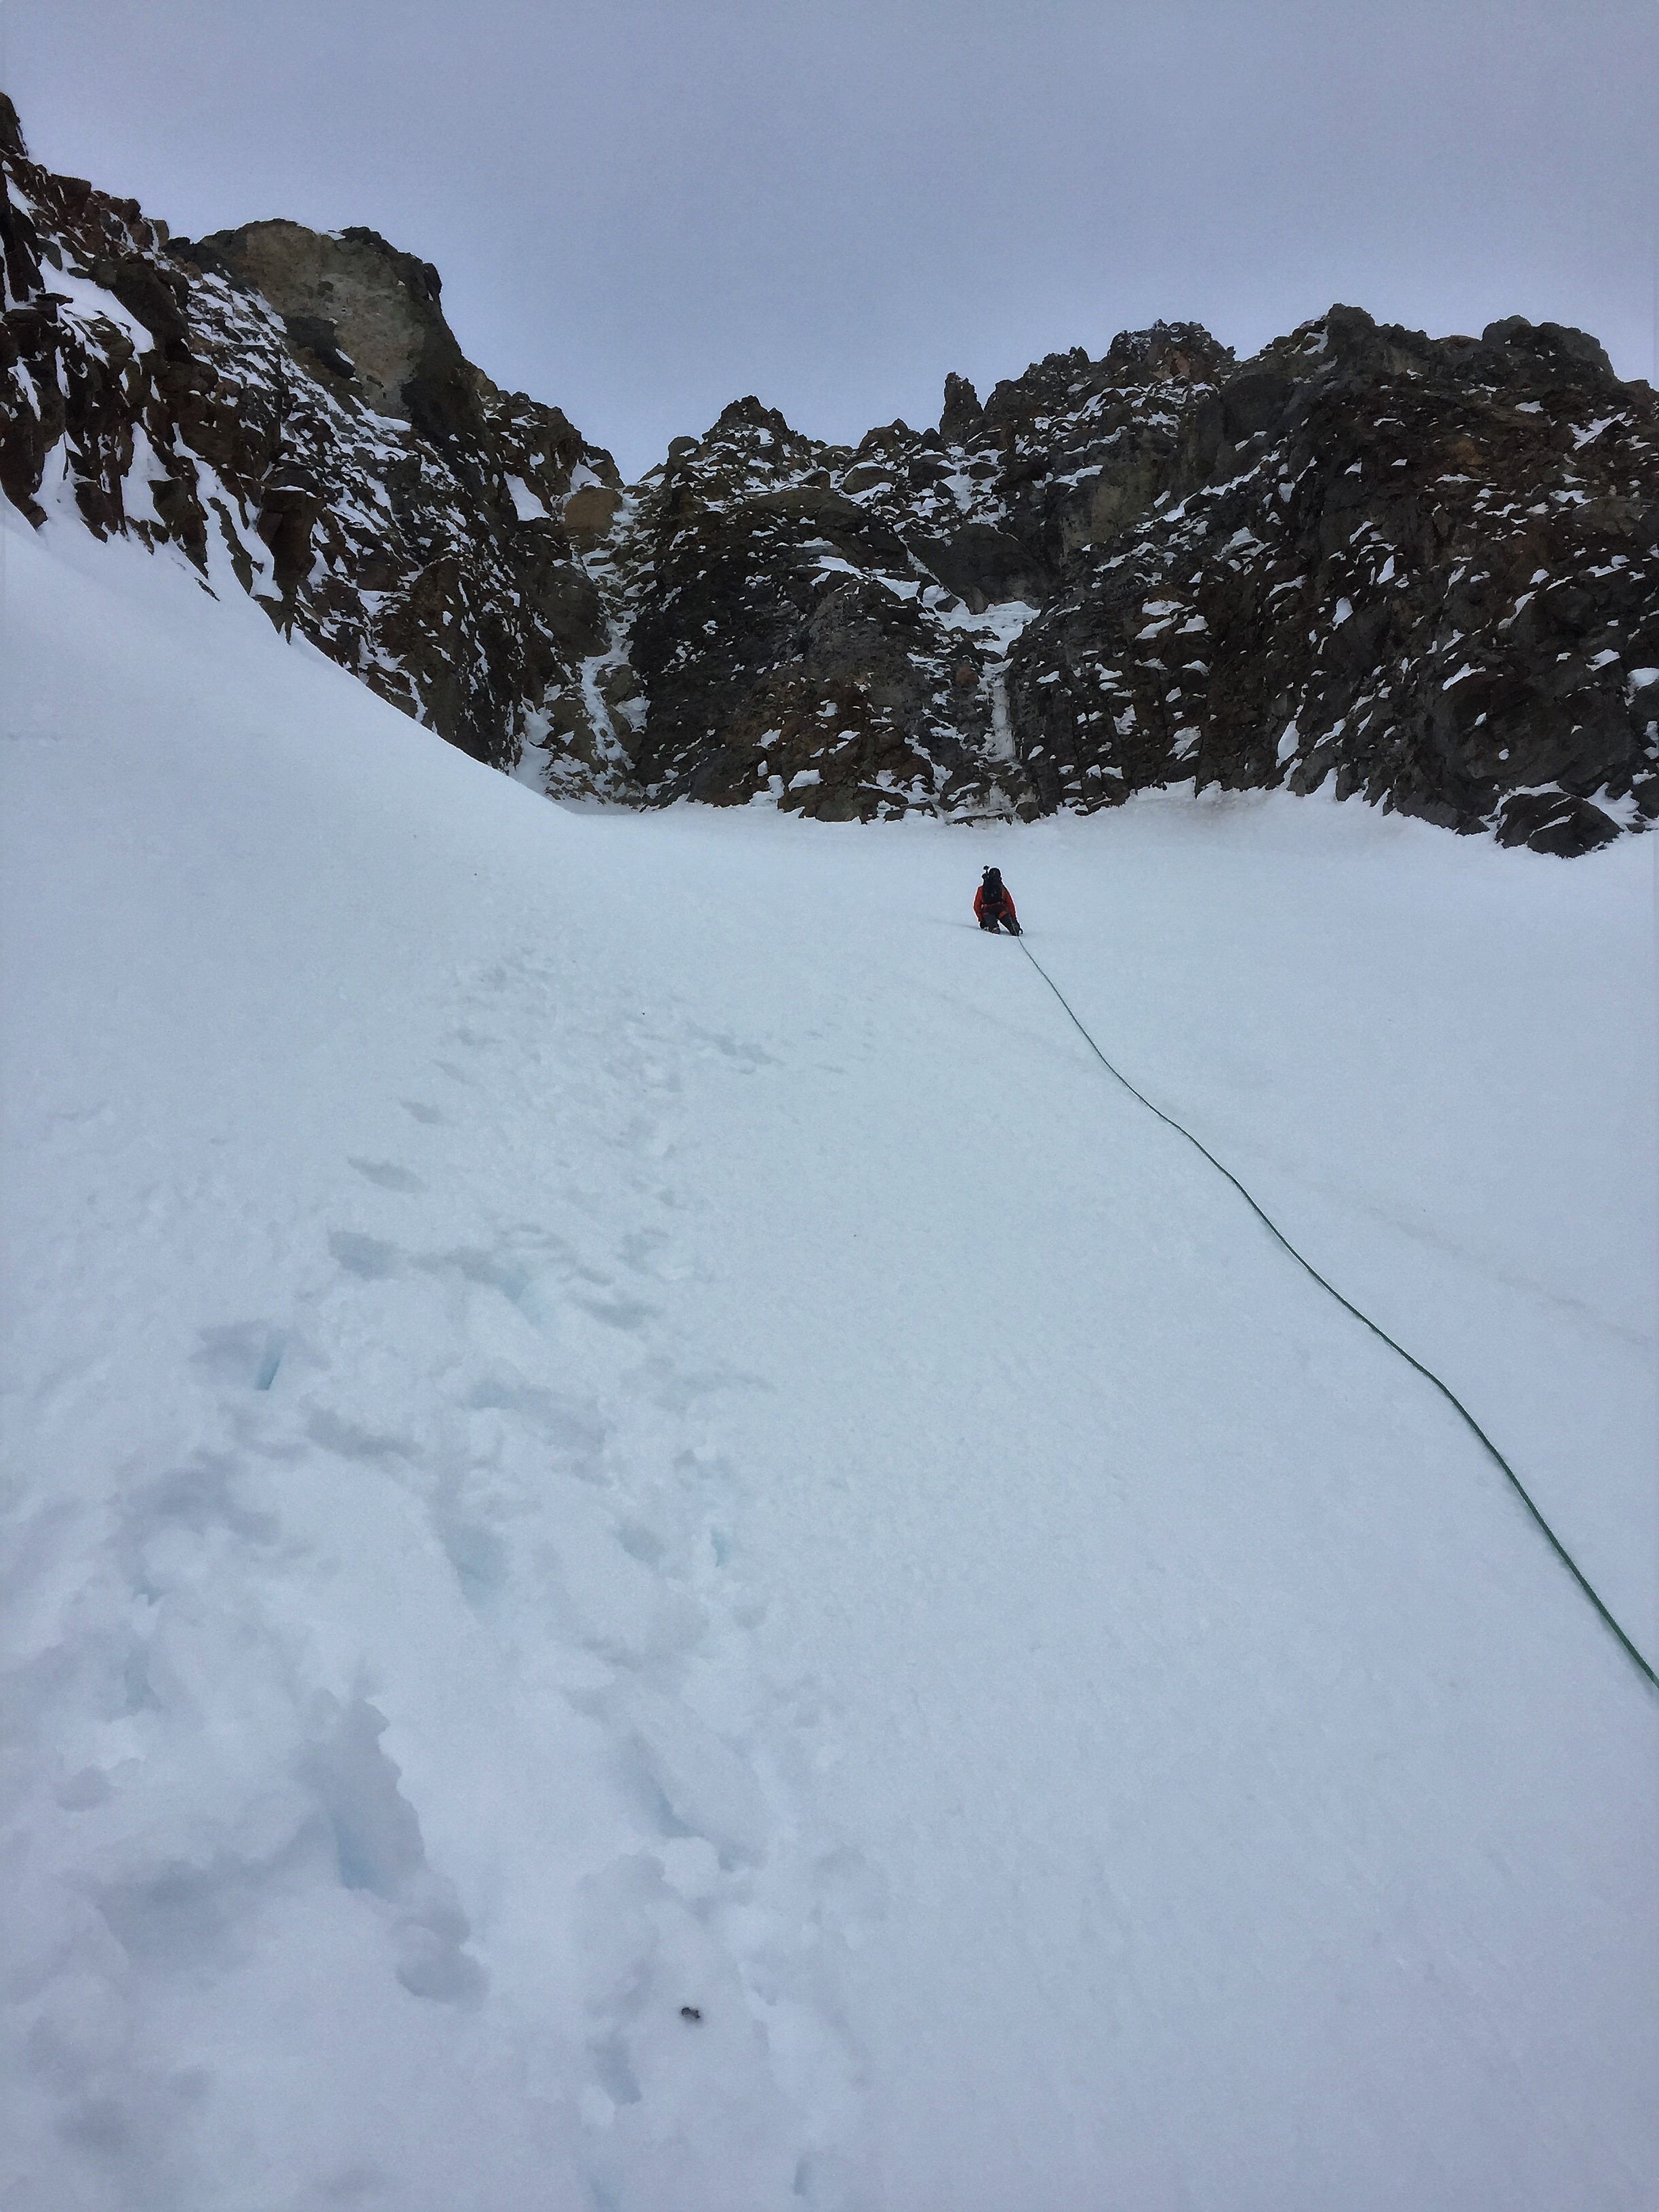
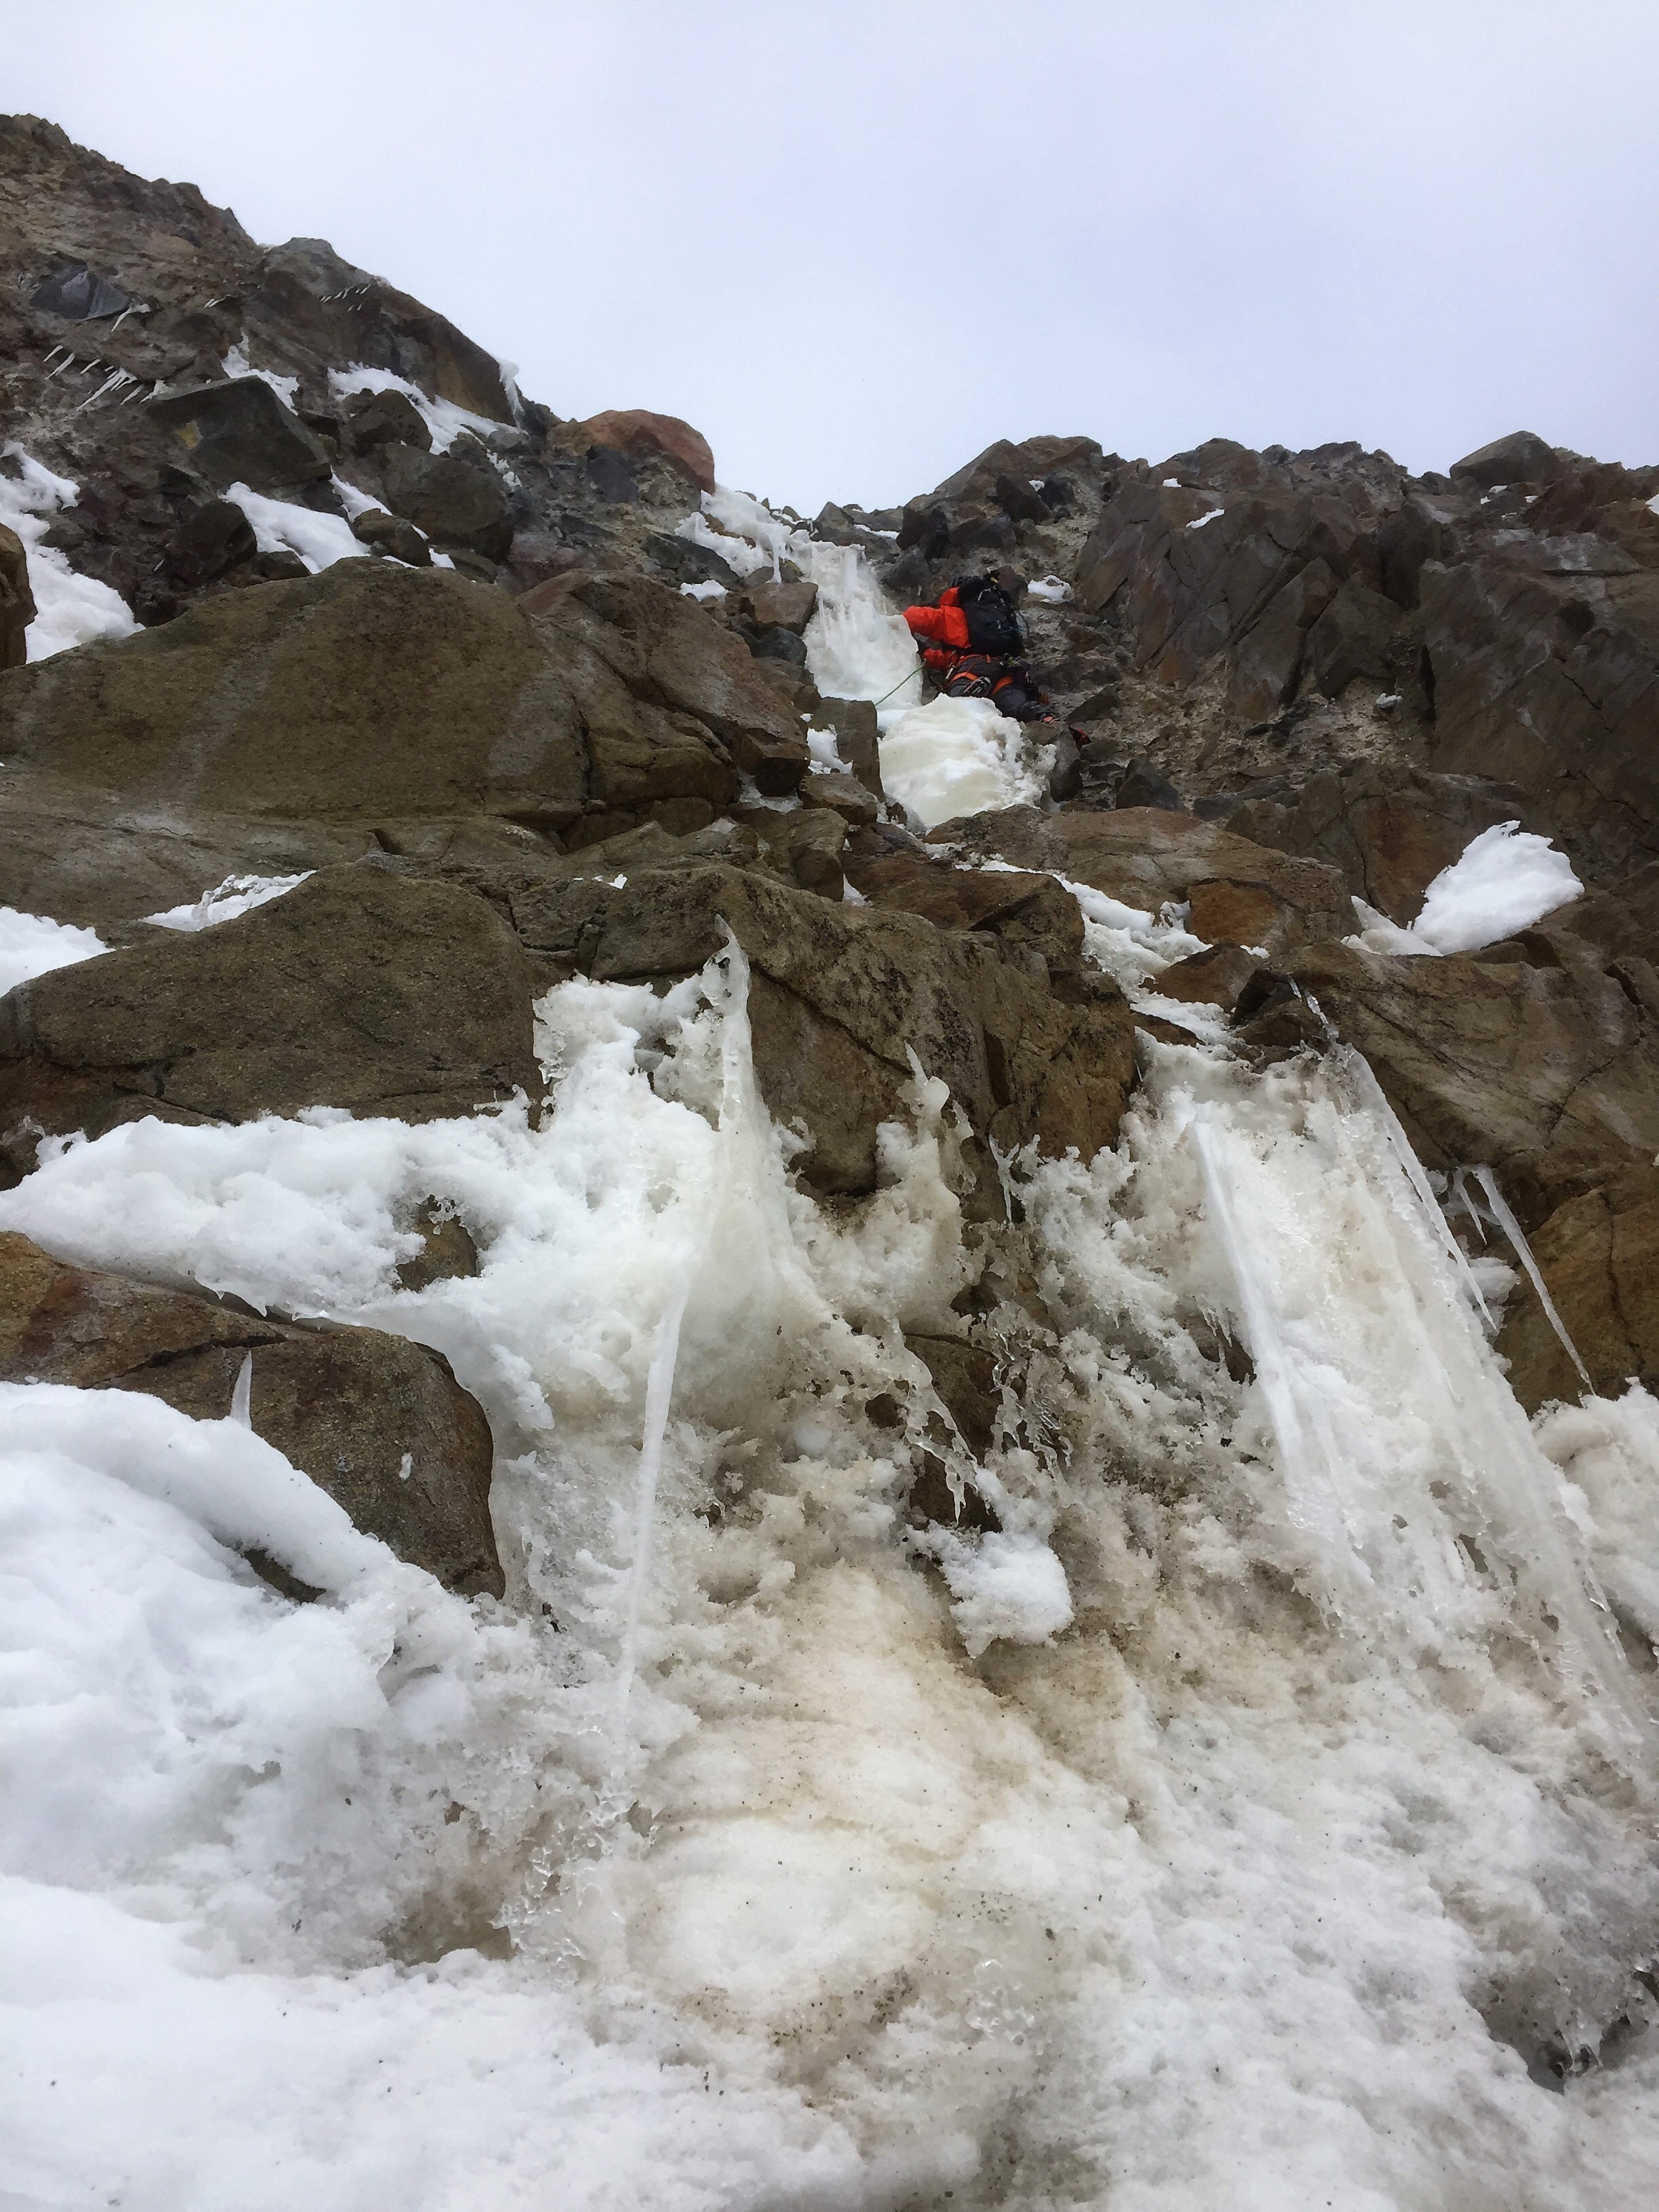
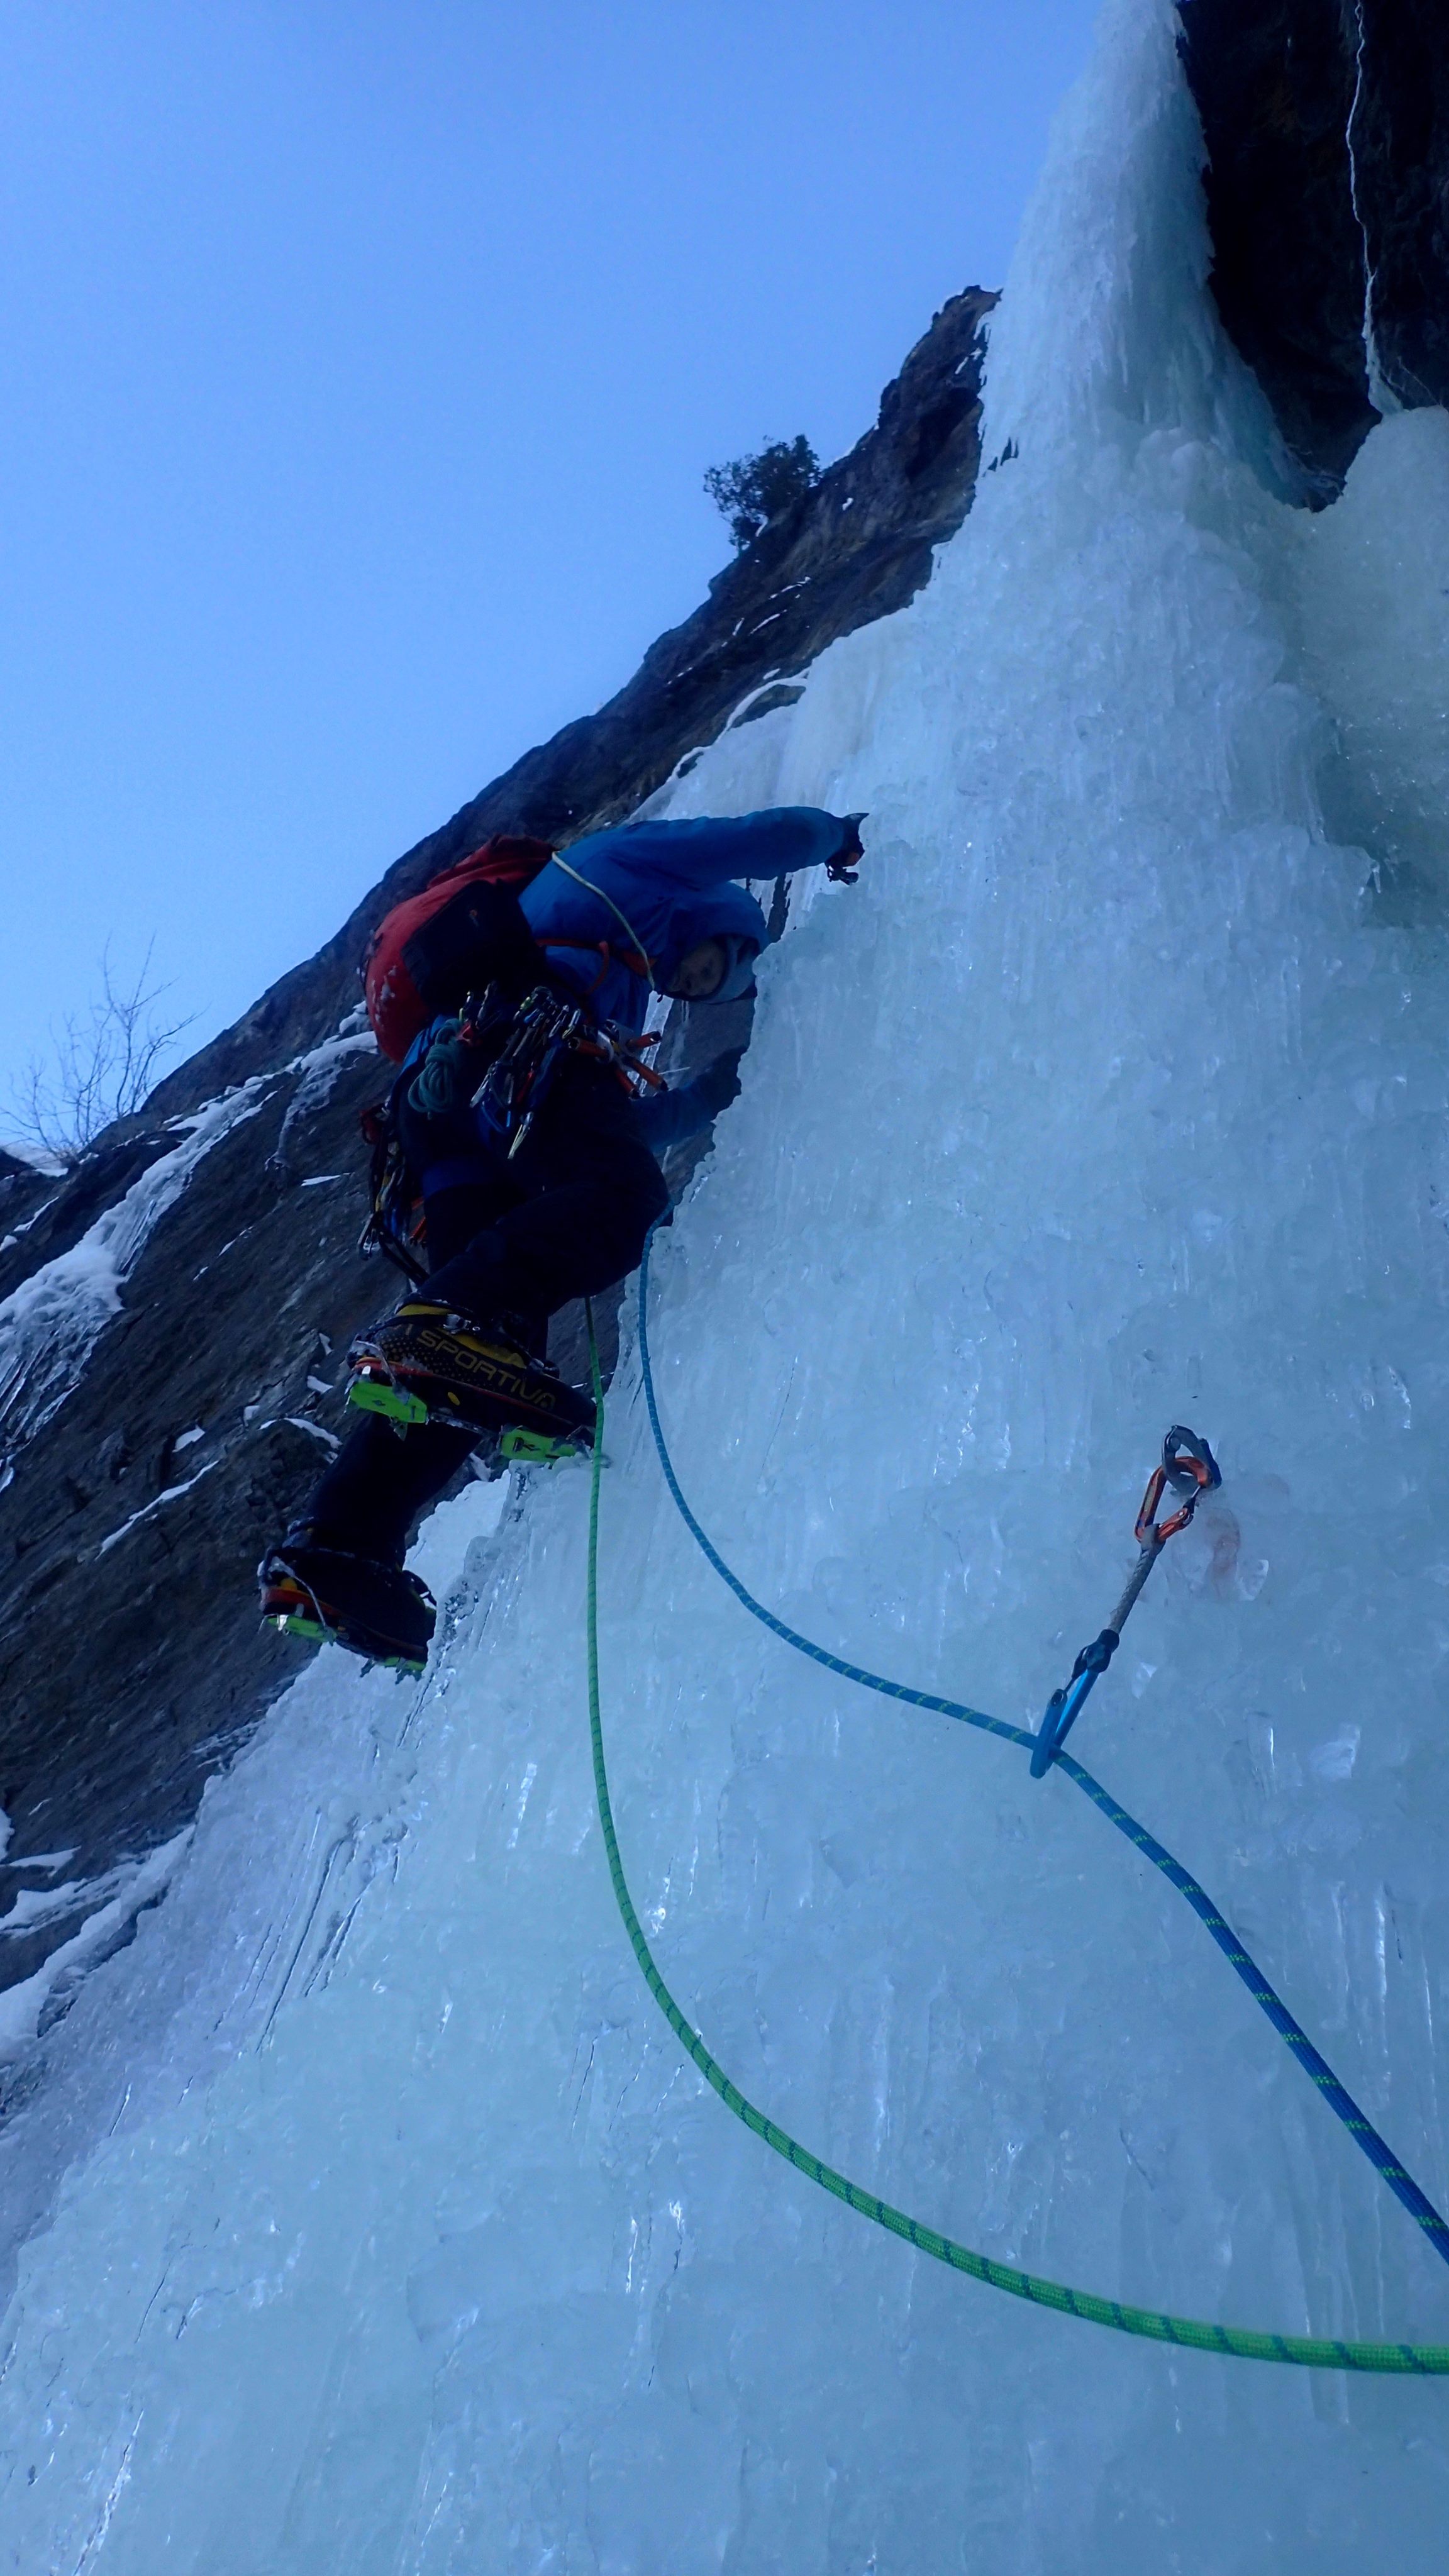
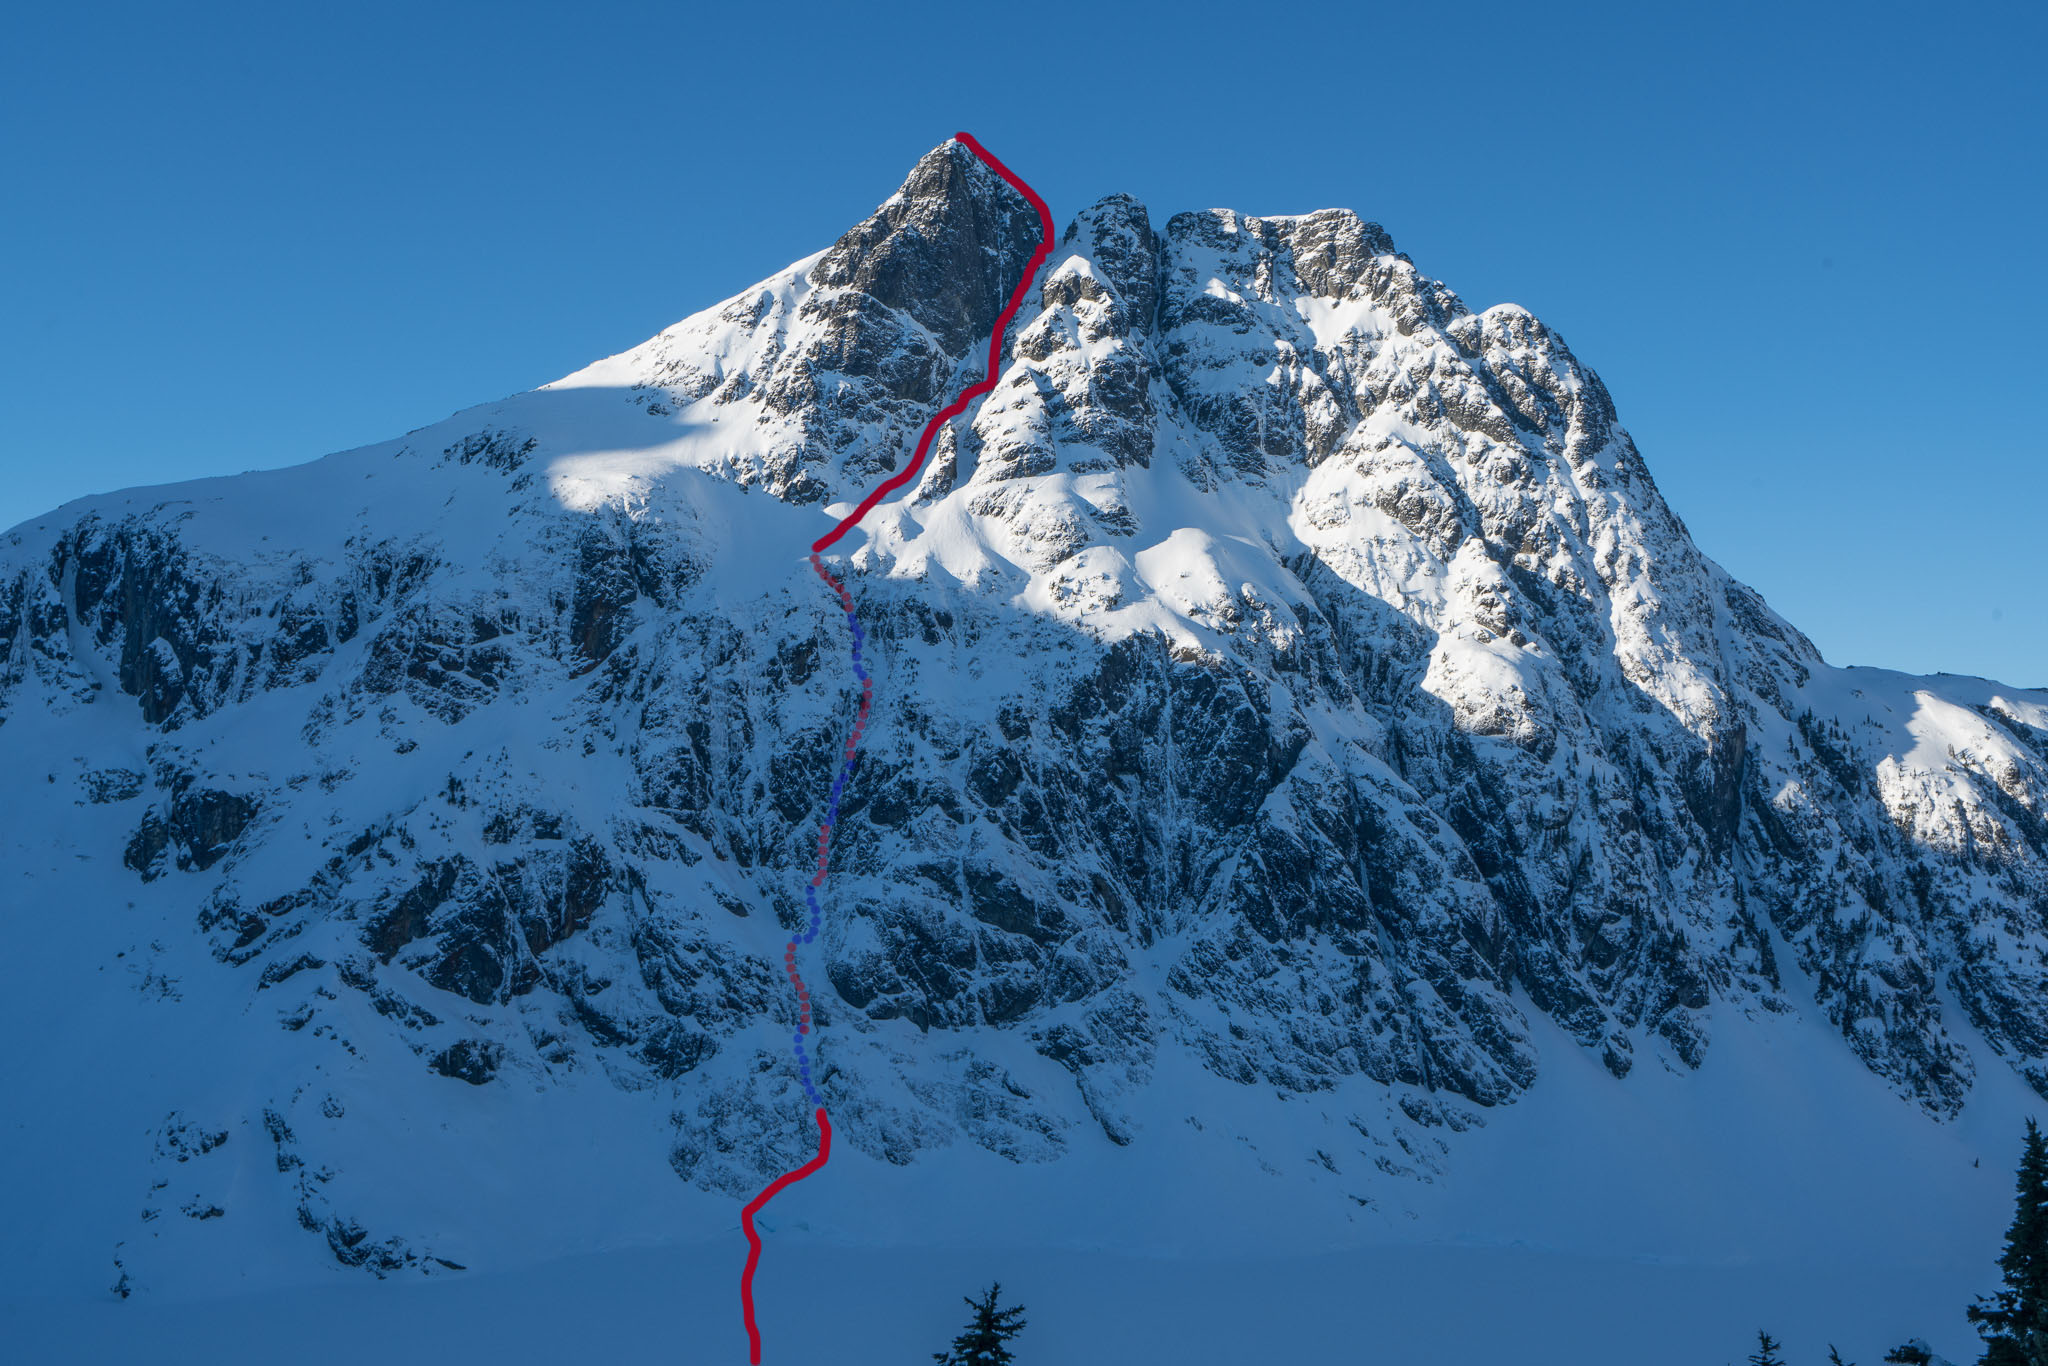
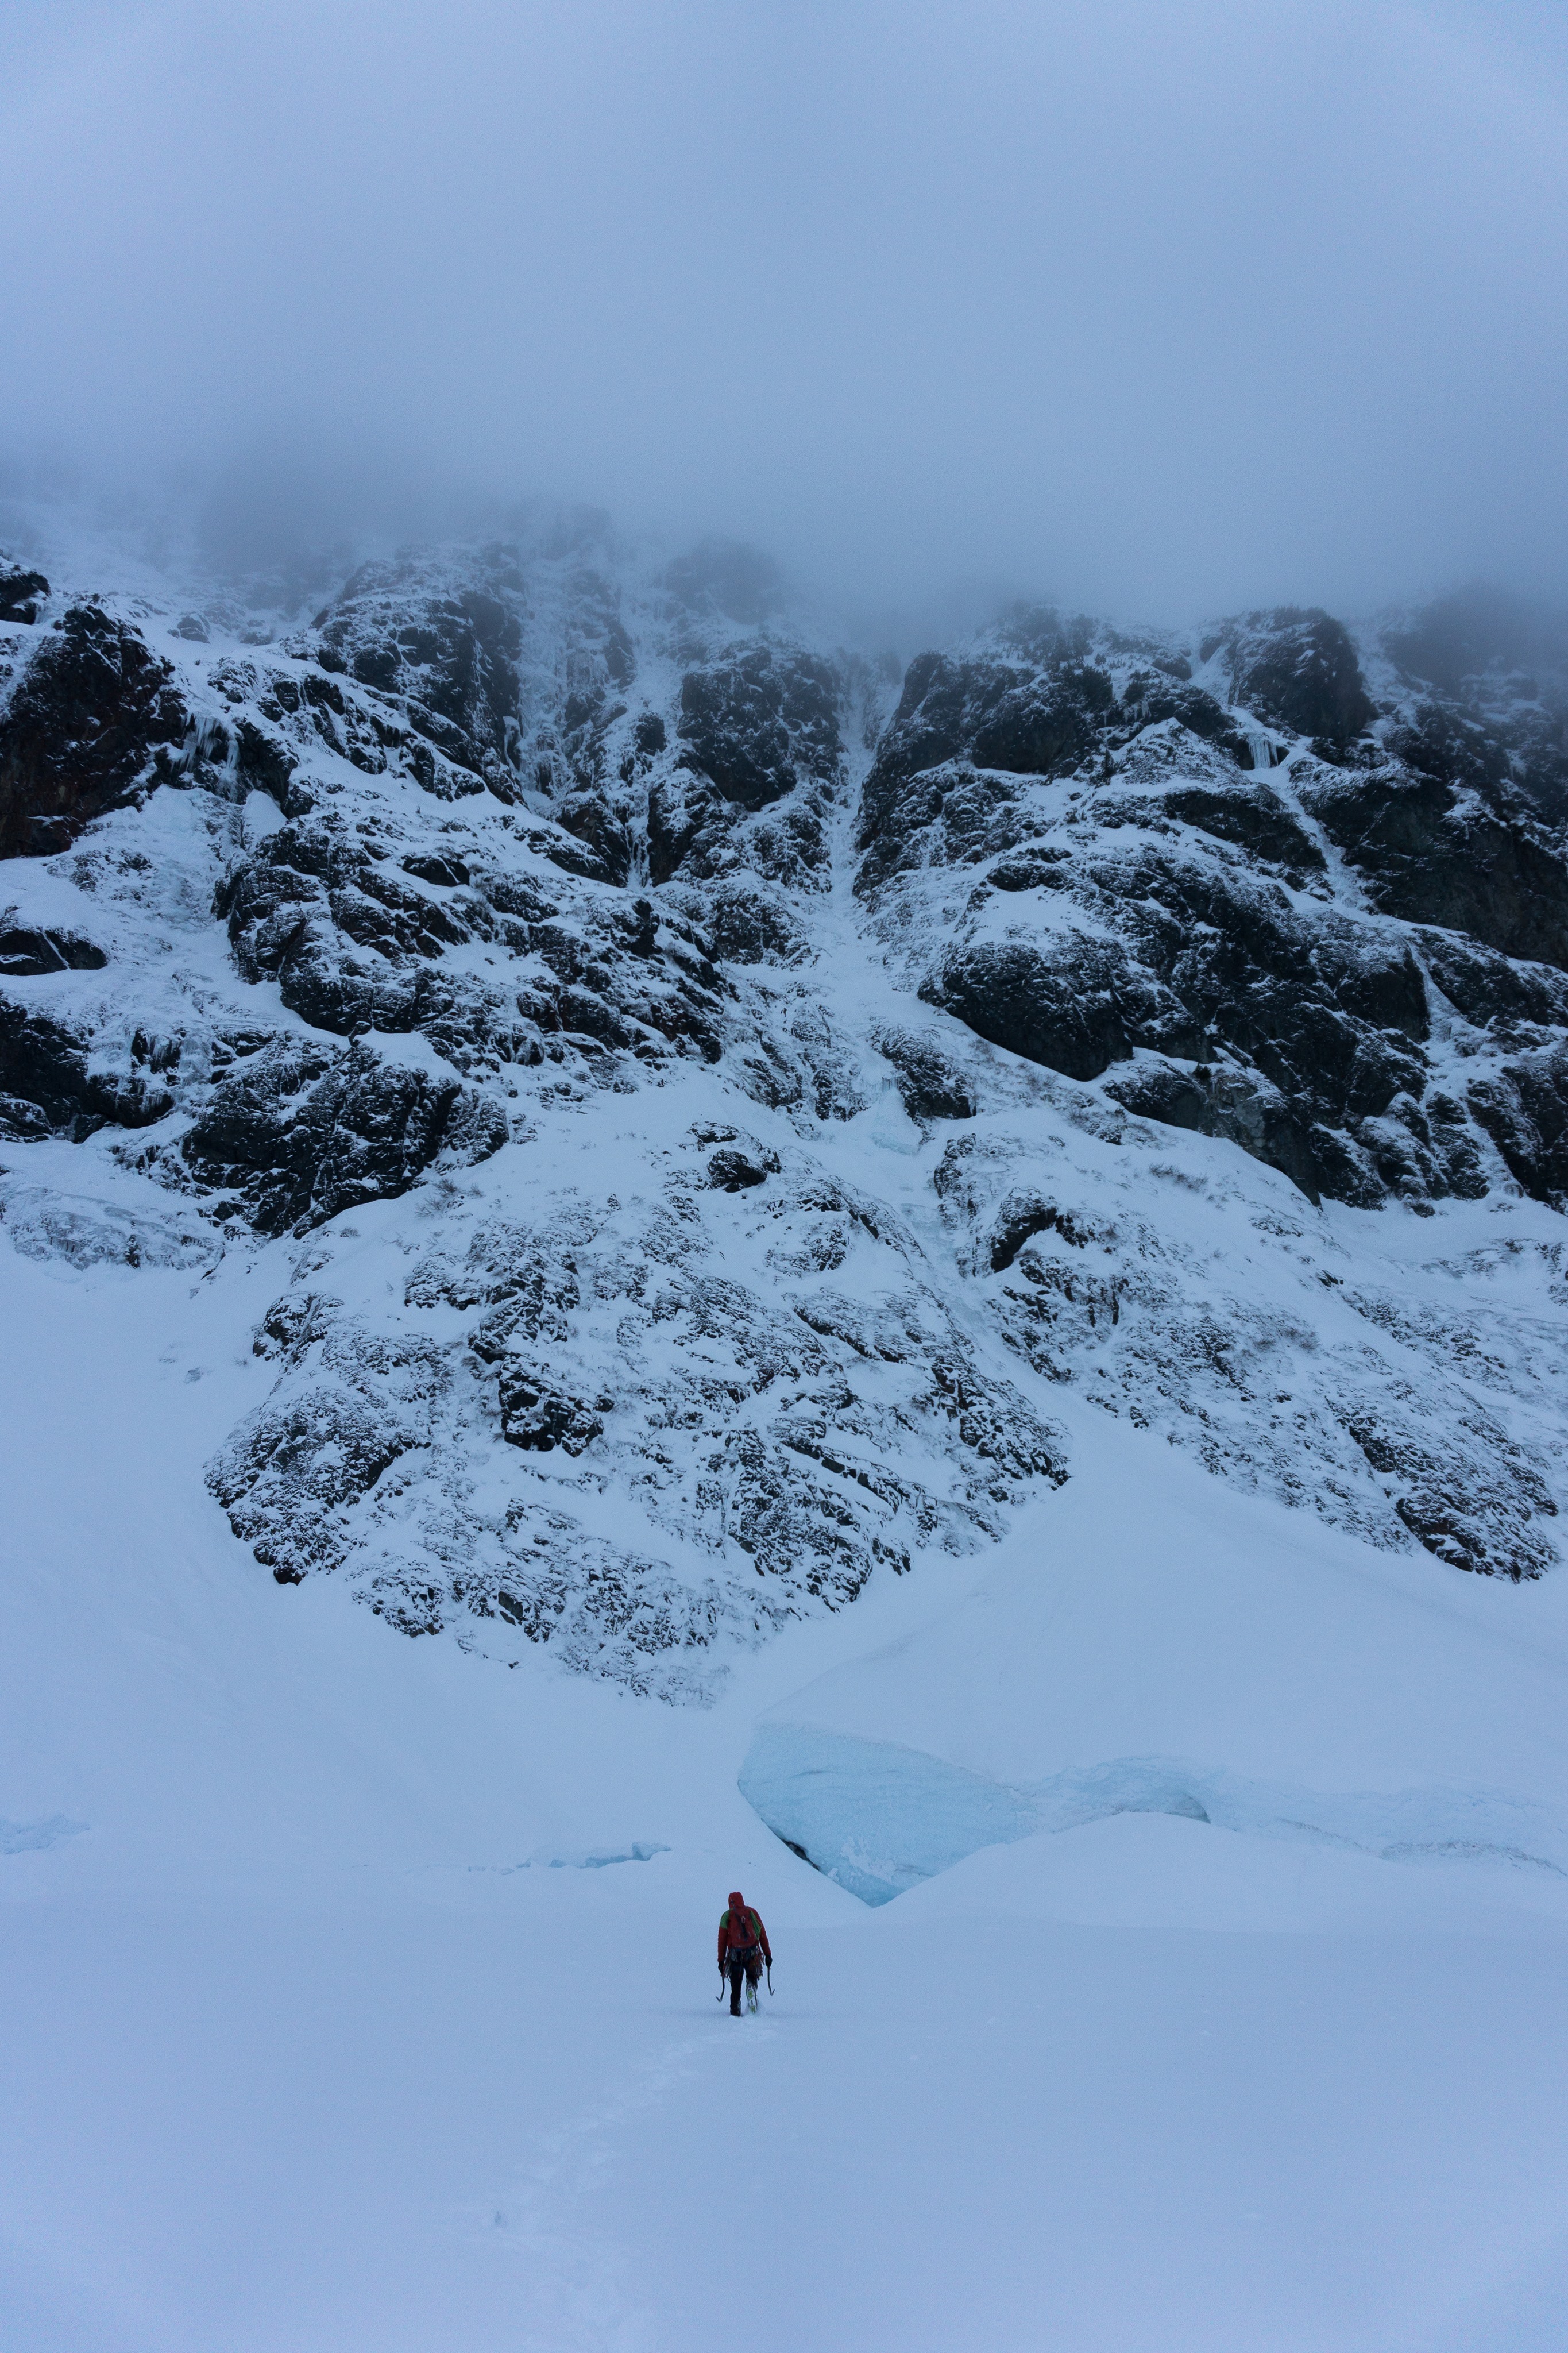
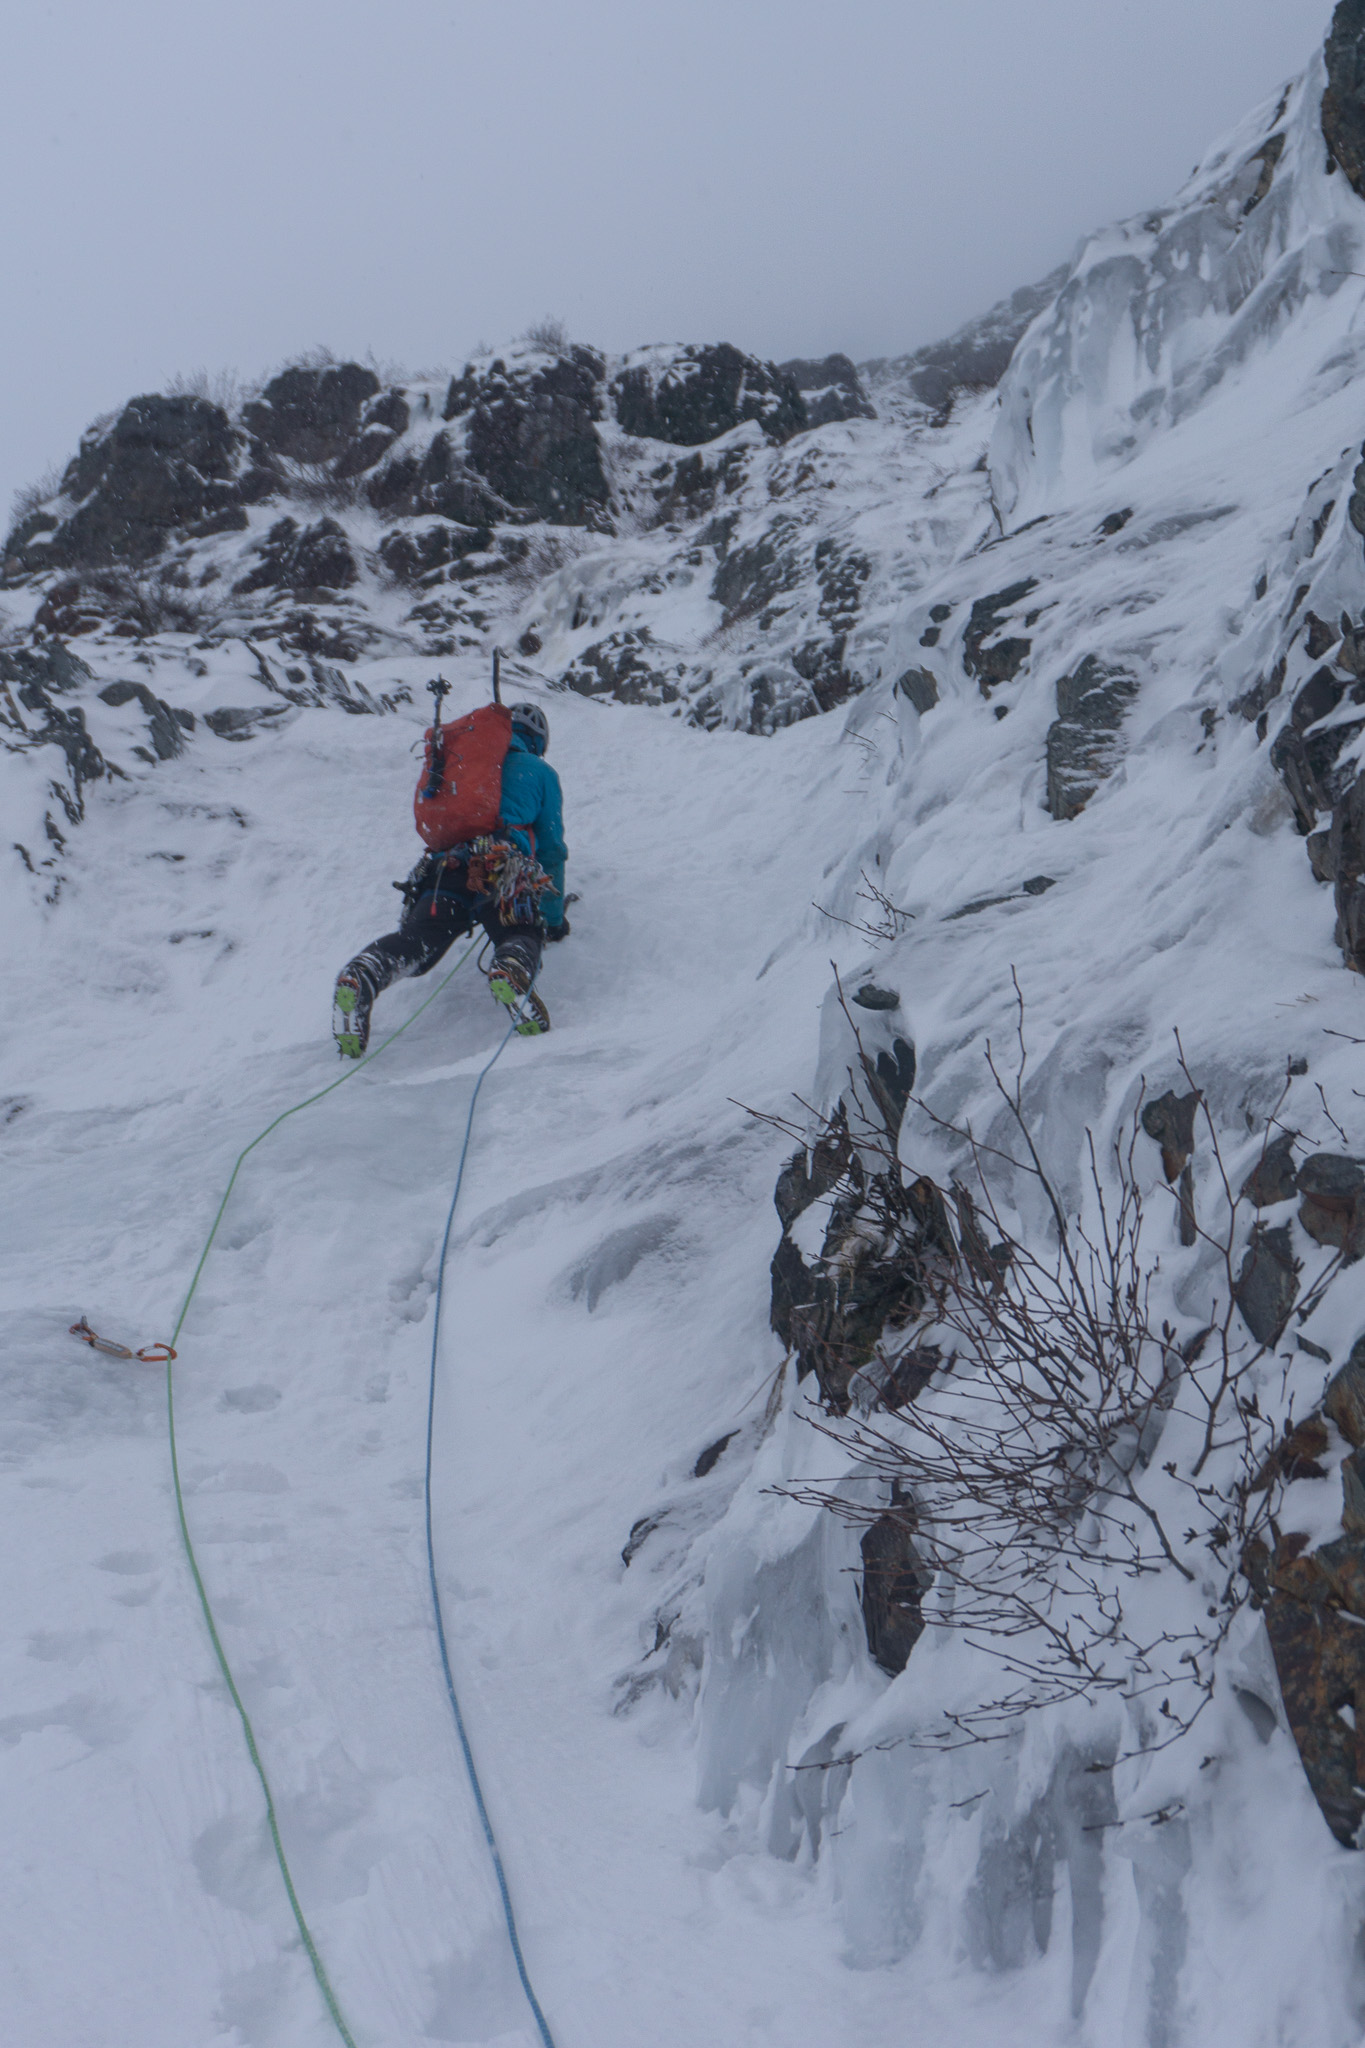
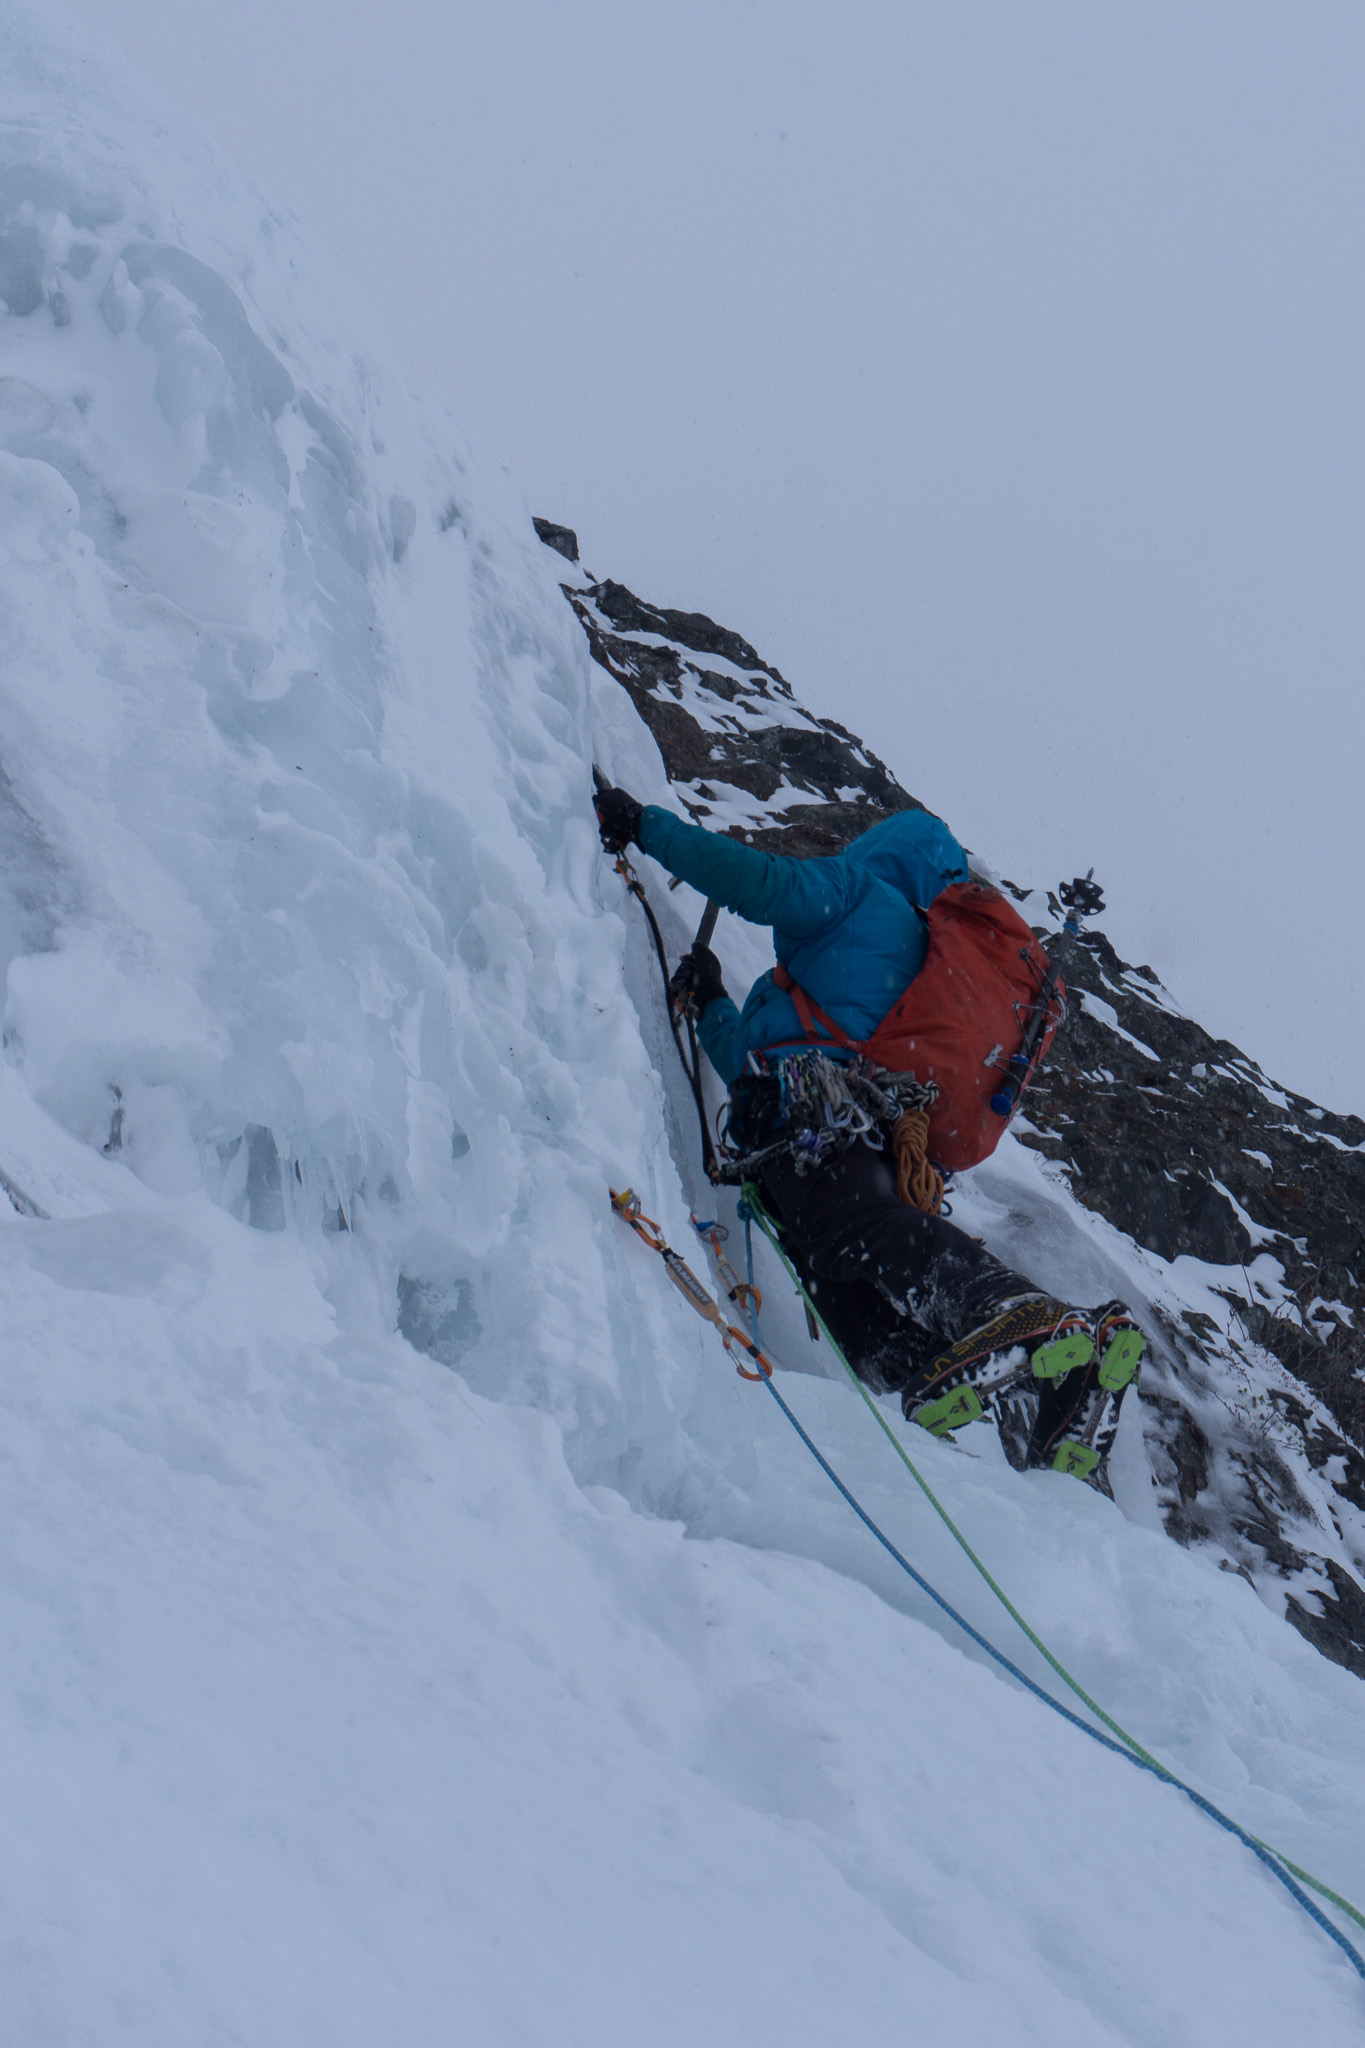
 Trip: Snoqualmie Mountain - [FA] The Snostril and Post Nasal Drip Trip Date: 01/29/2021 Trip Report: Since it took three attempts to send this climb, this TR will take the insufferably long form, written in the “how-the-sausage-is-made” and “what-I ate-for-breakfast” style in homage to the golden days of cc.com. Had I more time, I would have written a more concise TR. The hipster TL/DR version goes: “Major Tom, Christian, and I ran a quick Snostril lap the other day, condis were all time.” 12/4/2020 – Background and first attempt. The seasonal stoke to bash metal into ice seemed much stronger than usual this fall, corresponding to the collective increase in strength of the local crew, many of whom I am only recently met. These guys had been spending months training in a dimly-lit, south Seattle pain cave, and outside at the new Exit 38 dry crags - Wayne’s World and the Road House, and they were burning to get on the real thing. When Tom Beirne and Christian Junkar called and asked me for ice climb ideas and if I wanted to join their early season Alpental Valley ice hunting exhibition; I knew it would be futile, way too early and way too warm still. But I had only taken the tools for a walk once this season, so I signed up for their second day. On their first day, they scratched their way up Chair’s NE Butt, so we decided to see how things were coming along on the NW face of Snoqualmie. I had never seen this face so early in the season and it was what I expected – some thin smears, towering walls of bone dry rock, and none of the usual mixed lines had enough ice to launch up. The best looking “ice” I spotted was a continuous smear between the Snot and Thunder Basin exit shoulder, just left of a cave, which we marched under heading to the bigger but unformed mixed lines on the middle of the face. I have skied below this western aspect of Snoqualmie’s backside too many times to count but no ice ever caught my eye in this area before, probably because it is usually covered by a heavy snow blanket. The ice that grabbed my attention, would not be called ice in most other places but we take what we can get around here. Much discussion and indecision ensued as the team pondered the best of a lot bad options to attack. Not being known for my patience, I dramatically kept looking at my watch and stomping my feet until Tom agreed to belay me on my route pick. The climbing wasn’t exactly cruiser, but was thin aerated ice, not much more than one inch thick, with front points searching for rock divots, not thick enough for stubbies but just enough pin and poor cam placements to bring it down to around PG13. After about 40M of tenuous climbing, I was ready to be done and pulled into an alcove on the left with a faded of piece of tat around a chockstone (buried now). Tom lead up another 20 M of thin ice with some rock gear to a four inch diameter tree (buried now) with old tat up and right of an icy couloir above. The next pitch looked even thinner with more rock and less ice, but we could see a huge chockstone roof with a steep smear barely visible on the right which set the hook for a return visit after the ice got a little chubbier. Christian’s video of our first attempt: 12/26/2020 Second attempt, one pitch higher. A desired high pressure system proved elusive but Christian and I went back for round two anyway based on my stupidly optimistic read of the forecast. I saw a potential 12-hr window between one low exiting and another, more vigorous low, arriving. We skinned up marveling at the magnificent ski conditions (deep and soft) and knowing a serious effort today may not be a good idea. When we left skis at the top of the exit chute's shoulder, it was obvious that even our descent into Thunder Basin would put us on a potentially loaded slope, so instead of booting down this slope I have skinned up so many before, I rapped off a tree for some insurance against the millennial snowpack (i.e., easily triggered). Pitch one got about 5M shorter compared to our first attempt due to growing snow fan at the route’s base. With a higher base and thicker, more mature ice, I was able to quickly combine our two previous pitches into one 55M lead to our highpoint on the small tree out right. Christian led the next pitch which went around WI4- and was a 60M rope stretcher into a huge cave formed by a gigantic roof chockstone. He had already endured a nearly continuous spindrift shower following P1 but that was just the warm up for his P2 lead as the snowfall intensified. The conditions turned pretty full on, and it was hood up, zip up, and don’t look up because there was no respite from the parade of sloughs from the chute above. After some more thin ice with marginal rock gear on the left wall, Christian topped a final bulge and cruised some steep snow into the huge cave - the Snostril’s nostril had been entered. I really wanted to lead us out right and up to what could only be an easier slope above, but the problem was a short, overhanging rock wall had to be breached to exit the cave. Up and down I went to try to find a way through or around this wall. Straight across on dry powder over rock, or on some ice smears up high just below the roof, or down and around perhaps? I kept getting stopped due to either the lack of gear, the lack of tool/’pon placements, the lack of ice to stick, or perhaps the lack of big enough balls. Way up at the top of the cave above the belay, there even was an invisible nasal cavity which was snorting out wind and snow that I considered trying to access and squeeze through, but the rock up there looked too overhanging to explore. The view of the crux from the belay: Meanwhile, if I could climb out from the cave, the reward would be swimming in the fire hose of snow pouring down now, so our yellow light was clearly turning red. Time to flee to fight again another day… I built an anchor by slinging a boulder with my cordelette (love love love the much maligned cordelette) and equalizing a knifeblade in the upper left side of the cave and we rapped. All the new snow made the ski back to the car as fun as skiing with a heavy pack gets. Just climbing these first two pitches, rapping, and skiing down would qualify as a pretty rewarding day. The Snostril cave may not be as high and wild as Supercave’s cave, but it is still a really cool piece of mountain architecture - a sheltered room with a great view, and even a Covid-friendly icicle shield if you end up sharing this belay cave with climbers from another pod. 1/29/2021 – Third attempt and send. If someone put a gun to my head and forced me to leave the PNW for one month every winter, I would pick January. The jet stream's snow machine typically shifts south or north, the ice is typically anemic, and I typically flee north to Canuckastan for one of my two favorite playgrounds: the Powder Highway and/or the Icefield’s Parkway. Due to the current northern border wall, I left WA in early January for American’s best substitutes – Cooke City and Cody. Upon my PNW return in mid January, temps were still on the warm side but the continued dirty ridge of weak high pressure with occasional rain events started to open alpine possibilities. @Michael Telstad and I enjoyed a splitter day climbing a new mixed climb on the Upper West Side and Mik Metzler and I climbed the NF of Index under cruiser conditions, which was quickly repeated by Michael and Sean @sfuji Not able to come up with another inspiring ice objective (this simply has not been a good ice season in the PNW), I signed on as wing nut/belayer to Michael’s idea of climbing Goat Wall’s next gen, multipitch, dry af route - Mazama Queen. We spent another half day on Mazama ice before beginning the long drive home. I was completely ice satiated and really looking forward to giving my tools a few weeks off and spending some quality time with my skis. As I was bludgeoning Michael with another loud listen to the new Avalanches' record, ring ring goes my phone as Tom calls in while driving back from competing in the Ouray Ice Comp with Christian. We trade stories from our recent adventures and I proudly proclaimed my ice retirement plans that I have repeated one too many times to Michael already. My ice rat was stuffed, fat, and happy. Well, after nine days straight of climbing, Tom and Christian’s rats were still surprisingly hungry, borderline ravenous even; so Tom starts grilling me for beta on the two new climbs next on my list; one being pushing our Snoqualmie line higher. I nonchalantly provided some vague details and didn't think much about it because they have a long drive and I am just settling into ice retirement, so I tried to steer Tom to the other FA that didn’t really speak to me by texting some photos. As the conversation was winding down, Tom causally mentions that they will probably drive through the night and try to finish the Snostril before the weather window slams shut the following evening. Well, I’m here to tell y'all that retirement is a myth, a fallacy, nothing to strive for. “Can you drive a little faster Michael? I’ve gotta get home and start drying gear.” The three of us left the Alpental lot at 6am, this time without skis. Arriving home the previous evening, Tom had just enough time to remove the camper from his truck but not enough time to sharpen his tired picks, so Christian graciously arrived late to afford Tom some parking lot maintenance time. The drier and warmer recent weather made it relatively easy to boot up what is usually the 5.11 Phantom skin track. Because of our prior knowledge of the route, the good conditions and weather, and our collective stoke and fitness levels; I felt zero anxiety, today was going to be straight up fun in the hills. Better yet, we divvied up the leads on the approach so that everyone would get a new pitch, and Tom would get the crux. The send was almost guaranteed. Christian led P1. The ice was fat and straight forward, great screws everywhere, fun WI3+. The stoke was high. The belay tree we used previously was buried, so Christian built a belay on horizonal dead branch and gear just right of the P2 couloir. I took P2, which was mostly good ice with a short crux of rotten egg shell which fooled me into swinging picks into rock way too many times until I got smart and used a few rock footholds on the left wall to gain some higher sticks into better ice out right. Pulling over the bulge put me high enough to see the crux cave exit wall I backed off a month ago and fuck yeah, yeah, oh yeah! Lots of new snow accumulation had made the rock step shorter and there was ice everywhere now. This was going to go down! Tom and Christian quickly followed up into the cave and Tom got busy doing what he does best. Tom is not only the strongest and best technical mixed climber of our crew (and our second best freestyle MC), he just placed third in the Ouray ice speed comp so this thing was probably going to go down fast. As I belayed, Christian scurried around the cave like a rabid snafflehound, shooting video. Tom placed a .75 cam up high and left, tried to force the direct rock traverse that previously stopped me, but then climbed down and right onto a snow step above a small moat. This enabled him to climb up a body length, scratch and sniff for some decent sticks, place a stubby and then a #3 cam, and turn the corner out of the cave and onto some thin ice up and right. Tom vs the crux: He exited on some more barely-stubby-thick ice to the bottom of the upper couloir, and built an anchor on the left rock wall to make this a 30M pitch. This was not straightforward climbing and not an easy crux to figure out, but Tom is one those climbers that you watch and can’t determine how hard or easy something really is because he climbs fast and makes everything look chill. I went next and tried to avoid committing to a thin icicle mono foot placement he used because it seemed unlikely it would hold body weight, but once I did, the crux went pretty quickly but was definitely not a gimme. There was just enough ice for decent feet but it was still balancely and insecure in places. I robotically removed all the gear without thinking so Christian got to follow with no directionals in place. We agreed on a grade WI4, M5 but pitches like this are difficult to grade because it was not the ice or the mixed that was the specific crux, it was moving from one to the other and back again, balancing on so-so feet, while taking any gear you could get. (To keep this under ten pages, I'll spare everyone my recent rant where I ponder out loud if we are beginning to sandbag the grades of our new mixed routes, and I would not recommend a leader that maxes out at WI4 or M5 try to lead this route.) We were now in the bottom of a 100M long, mostly snow couloir that is reminiscent of the Snot proper, below the steep entrance at the top. Christian was up next and the agreed plan was he would run out the rope and Tom and I would start simuling to the trees we could see at the top of the couloir. After 55M of snow up to about 50 degrees, Christian stopped and spent a decent amount of time playing around on the right vertical wall. We thought he was bootying an old anchor but then he yelled off belay. It seemed strange for him to decide not to simul to the top since the last part of the couloir looked so low angle. Looking past Tom to Christian at the P4 belay. Royal Robbins, in his masterpiece of snark and self-awareness, Tis-sa-ack, about his and Don Peterson’s ascent of the NW face of Half Dome described feeling his younger partner’s impatience “running up the rope like a continually goading electric current.” When I reached Christian, I could feel his overflowing stoke running down the rope to me like a positive electric current, he was almost jumping up and down for a reason I did not yet understand. (I encourage you to click that Tis-sa-ack link, for no other reason than to see the best Glen Denny best ever photo of Robbins and Peterson after they topped out. I'll never be able to write that good but I have a chance of maybe equaling Peterson's disdainful sideways glare). OK, OK already, back to the Snostril... Christian had stopped and built an anchor because he could not just walk by an aesthetic pitch of mixed ice steps leading left out of the couloir, which he knew was a better finish compared to the easy snow finish if he kept going straight. This should have been my lead but Christian wanted this lead so bad he was almost vibrating. I can be pretty selfish with taking the sharp end especially on a money ice pitch, but there was no way I was going to assert my lead rights and take this pitch from him. This season I have really enjoyed roping up with new partners who are so strong and stoked that sitting back and watching has been almost as rewarding as leading. Tom belayed and I shot video while Christian entered his happy place cleaning loose rock from behind a flake for gear placements and working out the opening mixed moves. Christian getting ready to plug gear: He fired a lower mixed crux and pulled over an ice budge leading to thicker and better ice – definitely the best water ice of the day. The pitch ended with a 10M vertical ice curtain leading to a big tree belay and an easy walk off. This was 30M of fun mixed awesomeness which makes for the preferred alternative finish to what would be the P5 final snow slog of the Snostril. Christian taking us to the top: It was such a cool pitch, we gave its own name, and Post Nasal Drip, and we graded it WI4/M5. (Note - copy and paste sand bag rant here.) An easy snow slope walk-off brought us down to our packs, and walking down Snoqualmie did not bother this skier one bit today. (My notes here say something about Tom going down the most on the descent and owing us many beers, but my hand writing is hard to read at this point). I have become used to getting back to the car hours after sunset lately (or, in the case of Index, a few hours before sunrise) and we still had over an hour of daylight to spare. The Snostril is a great introduction to the mixed playground that is Snoqualmie’s NW Face and is a nice addition to face's previously established routes, especially if you are not in the mood for a longer day. The day we climbed it, it probably had the most pure ice climbing of any route of the face. By leaving the anchor in the cave, one can retreat easily after the first two moderate ice pitches if not feeling the mixed crux above. As the snowpack deepens, this crux will become easier. If this route sat above Cham, it would have gotten a ski descent by now. I made you slog through this narrative so your reward is viewing Christian’s video of the Snostril’s second attempt and send: Excitement is building for the ClimbSkiRip Post Nasal Drip edit, soon to drop... Here is the route as seen from John Scurlock's plane, image used by permission (note - the original name of Post Nasal Drop was Temres and I aint gonna attempt editing this photo, I paid way too much to my 6 yo nephew to create the original): I am still waiting for some retired hardman to reset his cc.com password to let us know that he hiked this route back in the early 80s, but the wifi may not work that good in his assisted care facility. Gear Notes: Single rack to #4, knifeblades, short screws, Temres 282-02s Approach Notes: Up and over, walkoff
.thumb.jpg.202ae28d845e30d556650539735e1317.jpg)

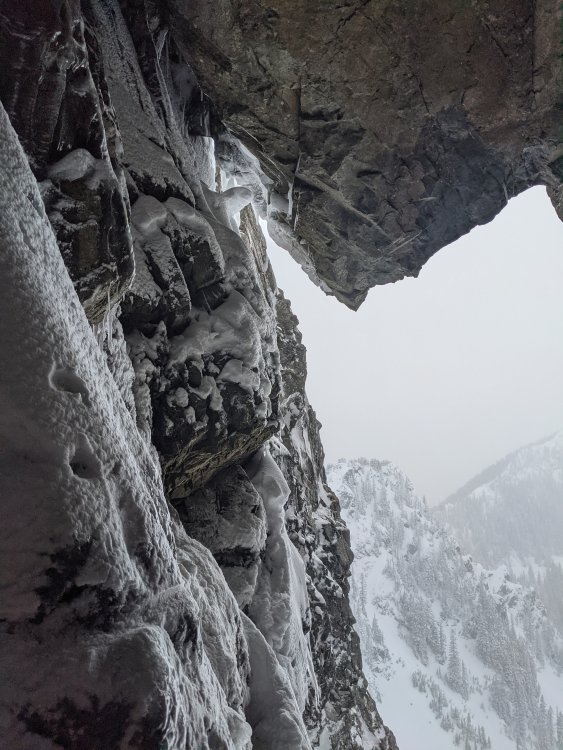
.thumb.jpg.10a64de5a509645c6f49ee25f7dfd192.jpg)

.thumb.jpg.2c08c9d9c1de4ccdd6a77a747d518c7c.jpg)
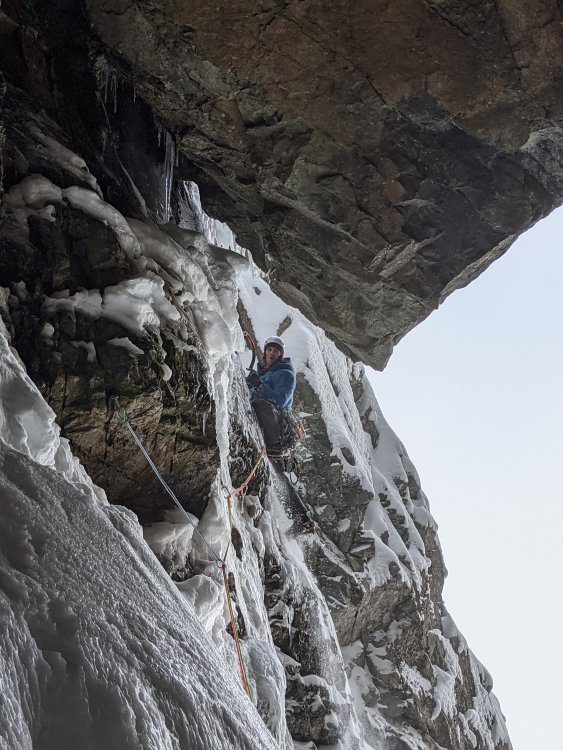

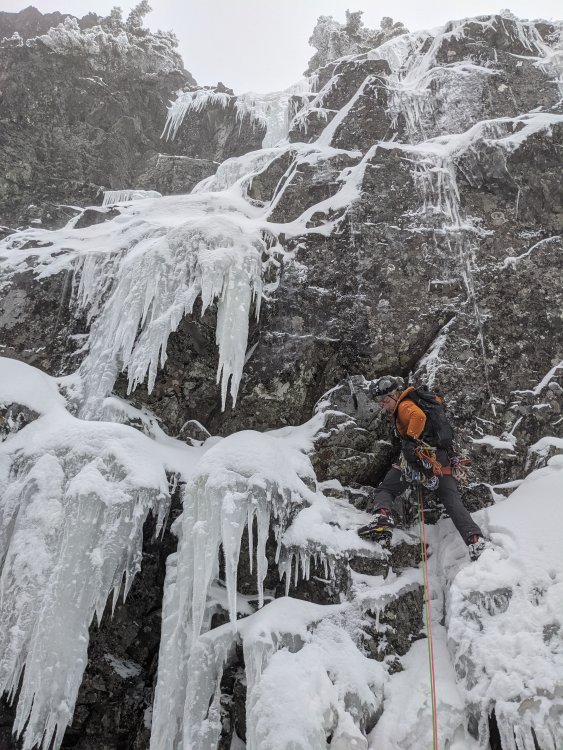
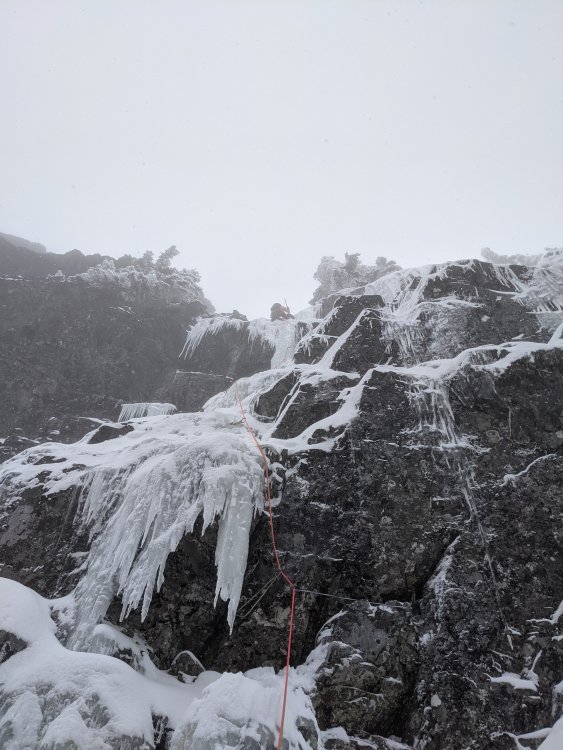
-
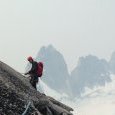 Trip: Chair Peak West Face - [FA] The Upper West Side (WI4+ M4) Trip Date: 01/18/2021 Trip Report: Grade Update: Doug and I agreed to upgrade the route from WI4+ M4, to WI5- M5 when submitting to the AAJ. This decision was made to align more with the grades of the Canadian rockies. Keep in mind that this route is immensely condition dependent. Yesterday @Doug_Hutchinson and I skied out to the west face of Chair with low expectations and too much weight on our backs. As far as I can tell, this face has seen little to no winter climbing activity and was completely off my radar until @Kyle M showed me some photos. Our route started by slogging up ~700ft of steep firm snow with a couple easy ice chokes along the way. Nothing worth roping up for. The sun starts hitting the lower snow slopes around 10am, so I would recommend timing things so you start climbing no later than 10:30. After the slog we arrived at the head of a small alcove where we kicked out a platform and roped up. Gear for a belay is hard to come by, take what you can get. I took the first pitch which ended up being a tricky 20m M4 left facing corner system. Nothing was ever really that hard, but protection was difficult, and the rock quality left something to be desired. A really cool looking super direct mixed pitch can be found just to the right and would probably go at M7. Doug then took the lead on the money pitch. While only about WI4+, this pitch proved to be a pretty serious lead. The crux required climbing into an alcove behind a detached curtain, grabbing a rock hold with your right hand and swinging over a bulge above your head. Not your usual WI4. This pitch took good 10 and 13cm screws, but not always where you want them. One could probably bail back to the snow from here with 2 ropes. Moving forward we climbed a full 65 meters of scrambly snow/rock/ice up to a scottish looking headwall, and up a ramp to the left. Belay off a small tree that may be buried in different conditions. I have a hunch you can go either right or left, not sure which is easier. A short sketchy mixed pitch took us up to the false summit. Not hard, just tenuous and poor pro. ^Placing the only piece on the pitch ^The piece The route finished with a classic Au Cheval alpine ridge traverse with snow and ice on the north side, and warm dry rock on the south. This traverse is VERY poorly protected, and definitely not straight forward. Descent: There are two good options for the descent. The best option by far, is to do this route as a carryover, foregoing the skis and descending the normal route to the east. This requires very firm conditions, but would be much shorter. Since we left our skis in the Melakwa valley, we were forced to descend that direction via a long snow gulley opposite of the standard rappel anchor. The first rappel shares the piton anchor with the standard descent, just in the opposite direction. We left a piton and nut anchor 60M down to the left for future parties. This rappel only got us half way to the next worthy tree, luckily the snow was good for down climbing, but we were well aware of the exposed cliffs below. Two more raps off trees took us to the schrund. Ski back over Bryant col, or for bonus points, continue out via the second half of the Chair peak circumnav in the dark. Link to my Strava track can be found HERE for approach and descent help. Get on this climb! We thought it was pretty classic, and likely not in good condition very frequently. Reach out to me with any beta needs! Thanks to Kyle M for this photo! Green is the route, Red is the descent, and the Yellow dots are rap anchors. The last rap is in a bushy tunnel that may be difficult to find for future parties. Gear Notes: Single rack .2-2, stoppers, KB's and Bugaboos. 6-10 Screws 10-16cm most useful. 2 Pickets brought but never used (per usual). 60m twin ropes. Approach Notes: Ski or boot up and over Bryant/Chair col via pineapple basin. Descend over to Melakwa lake, and up to the base of the wall.
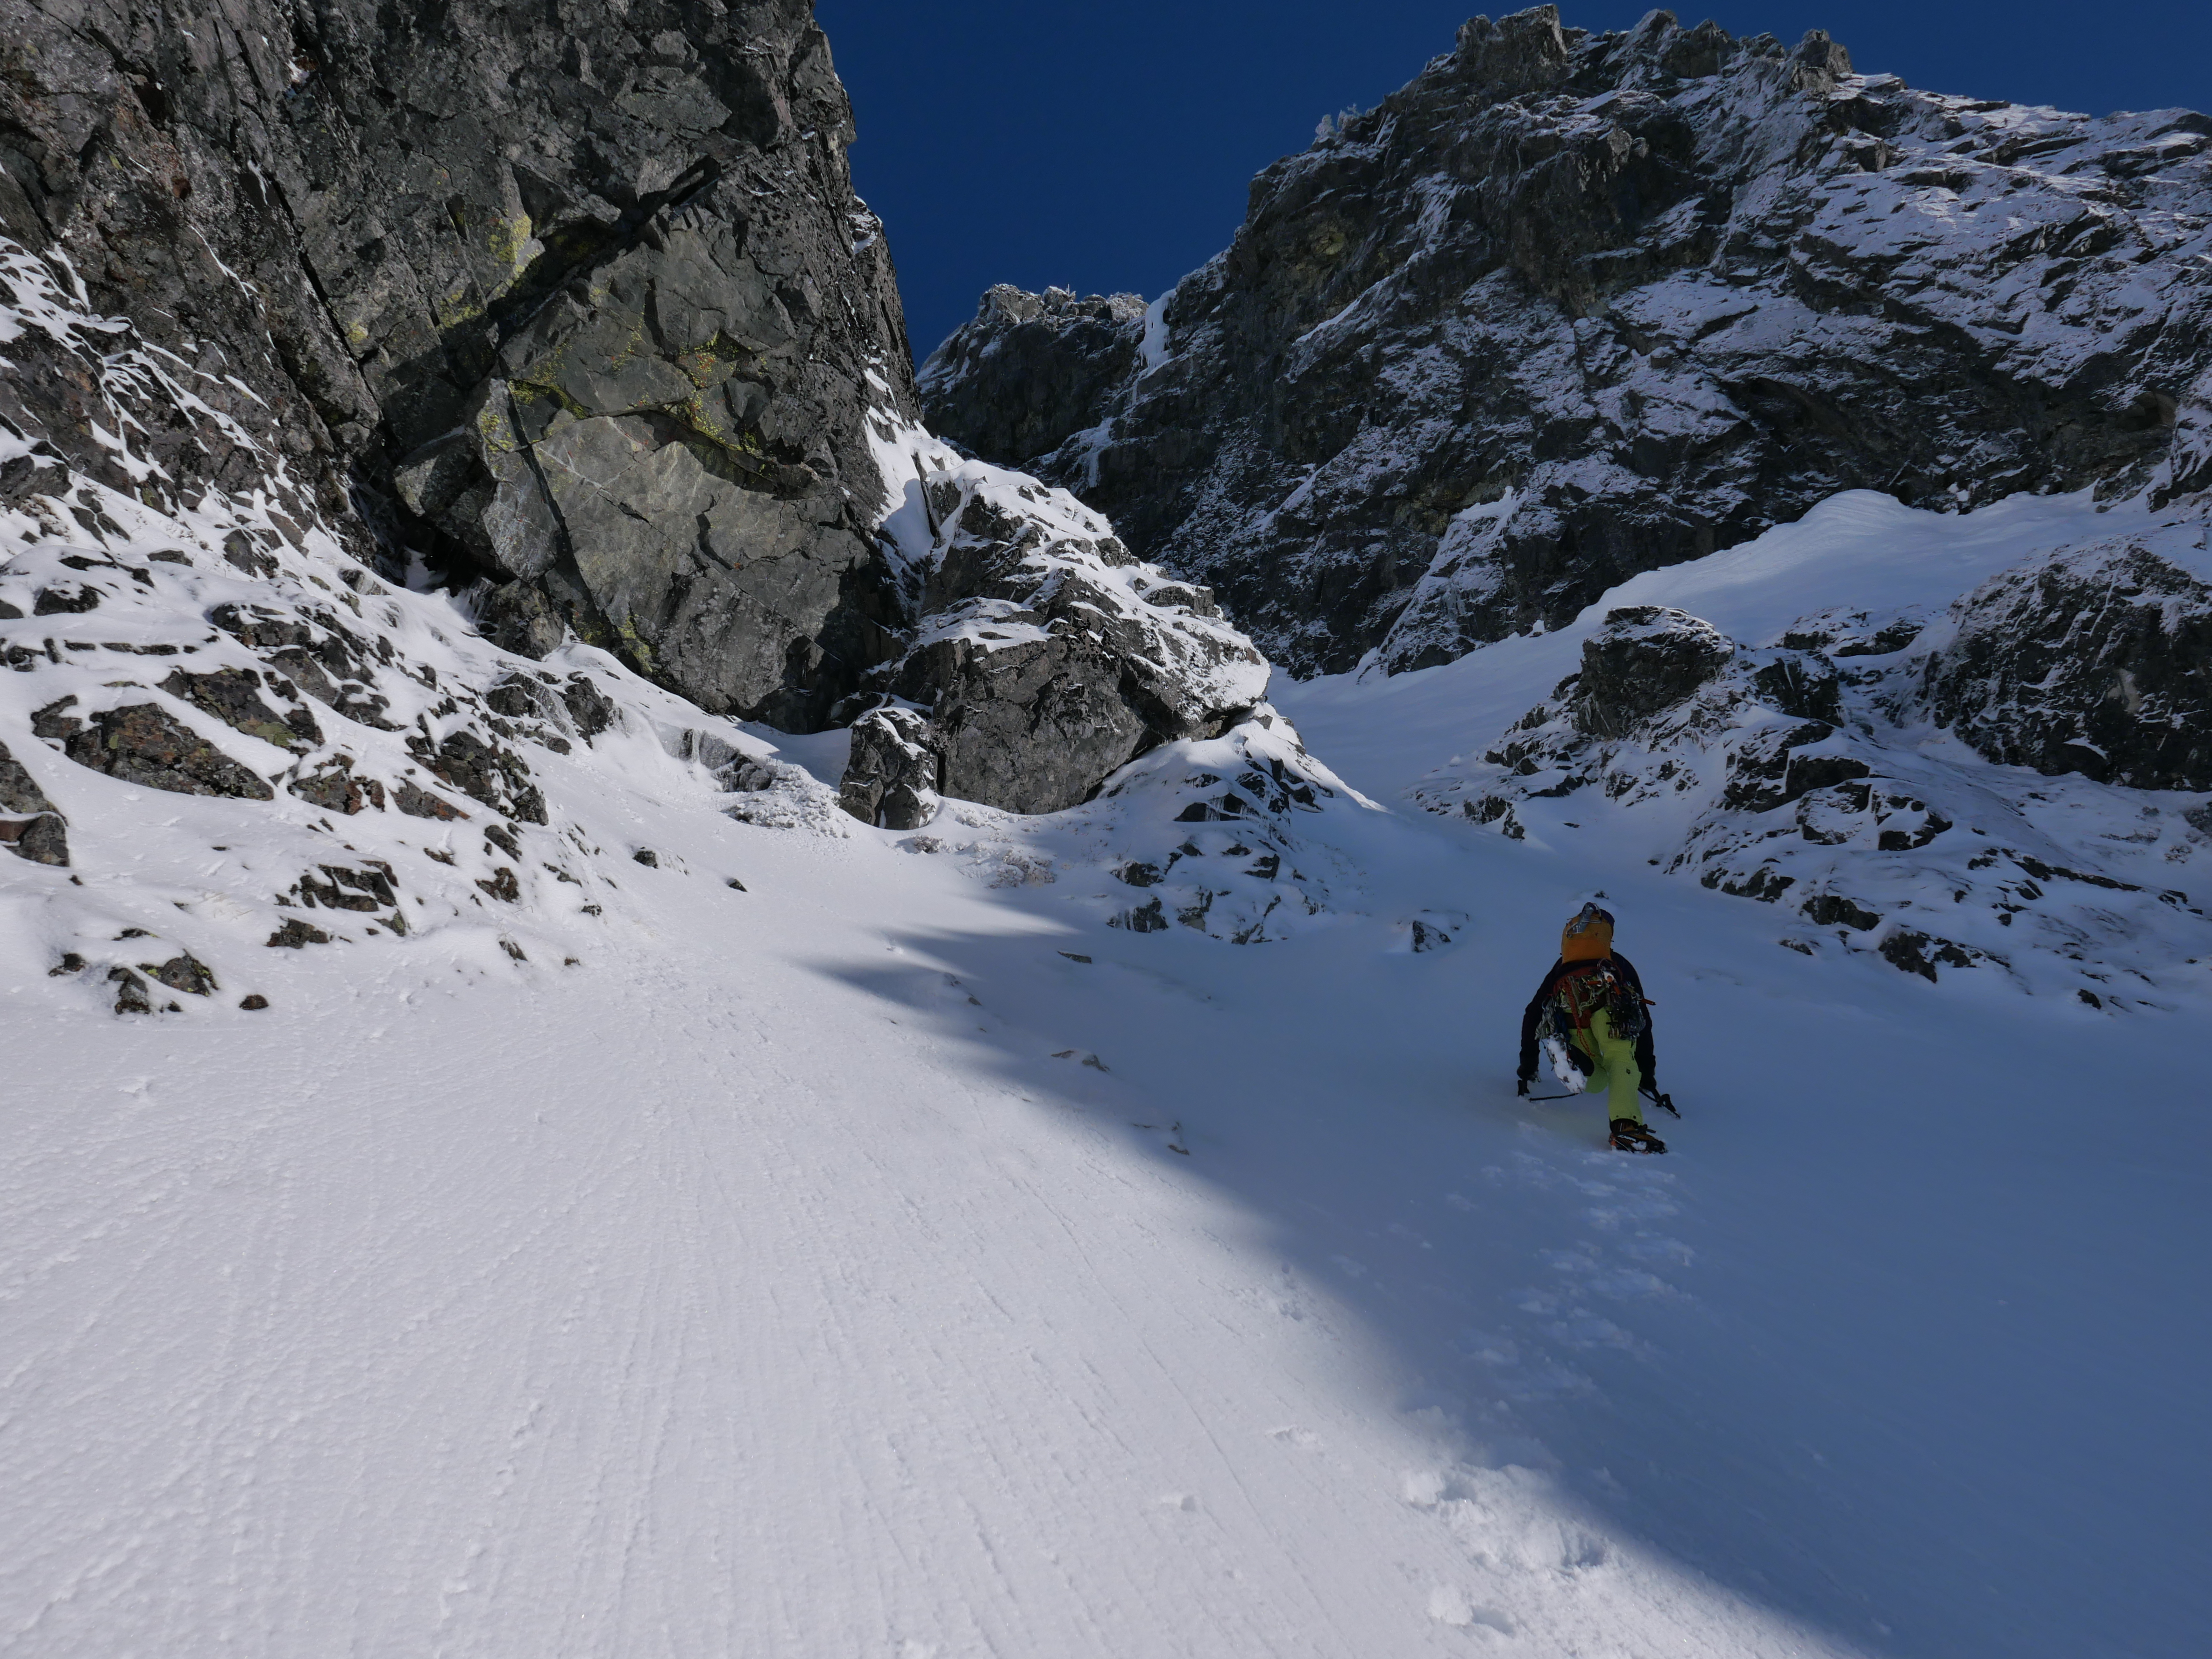
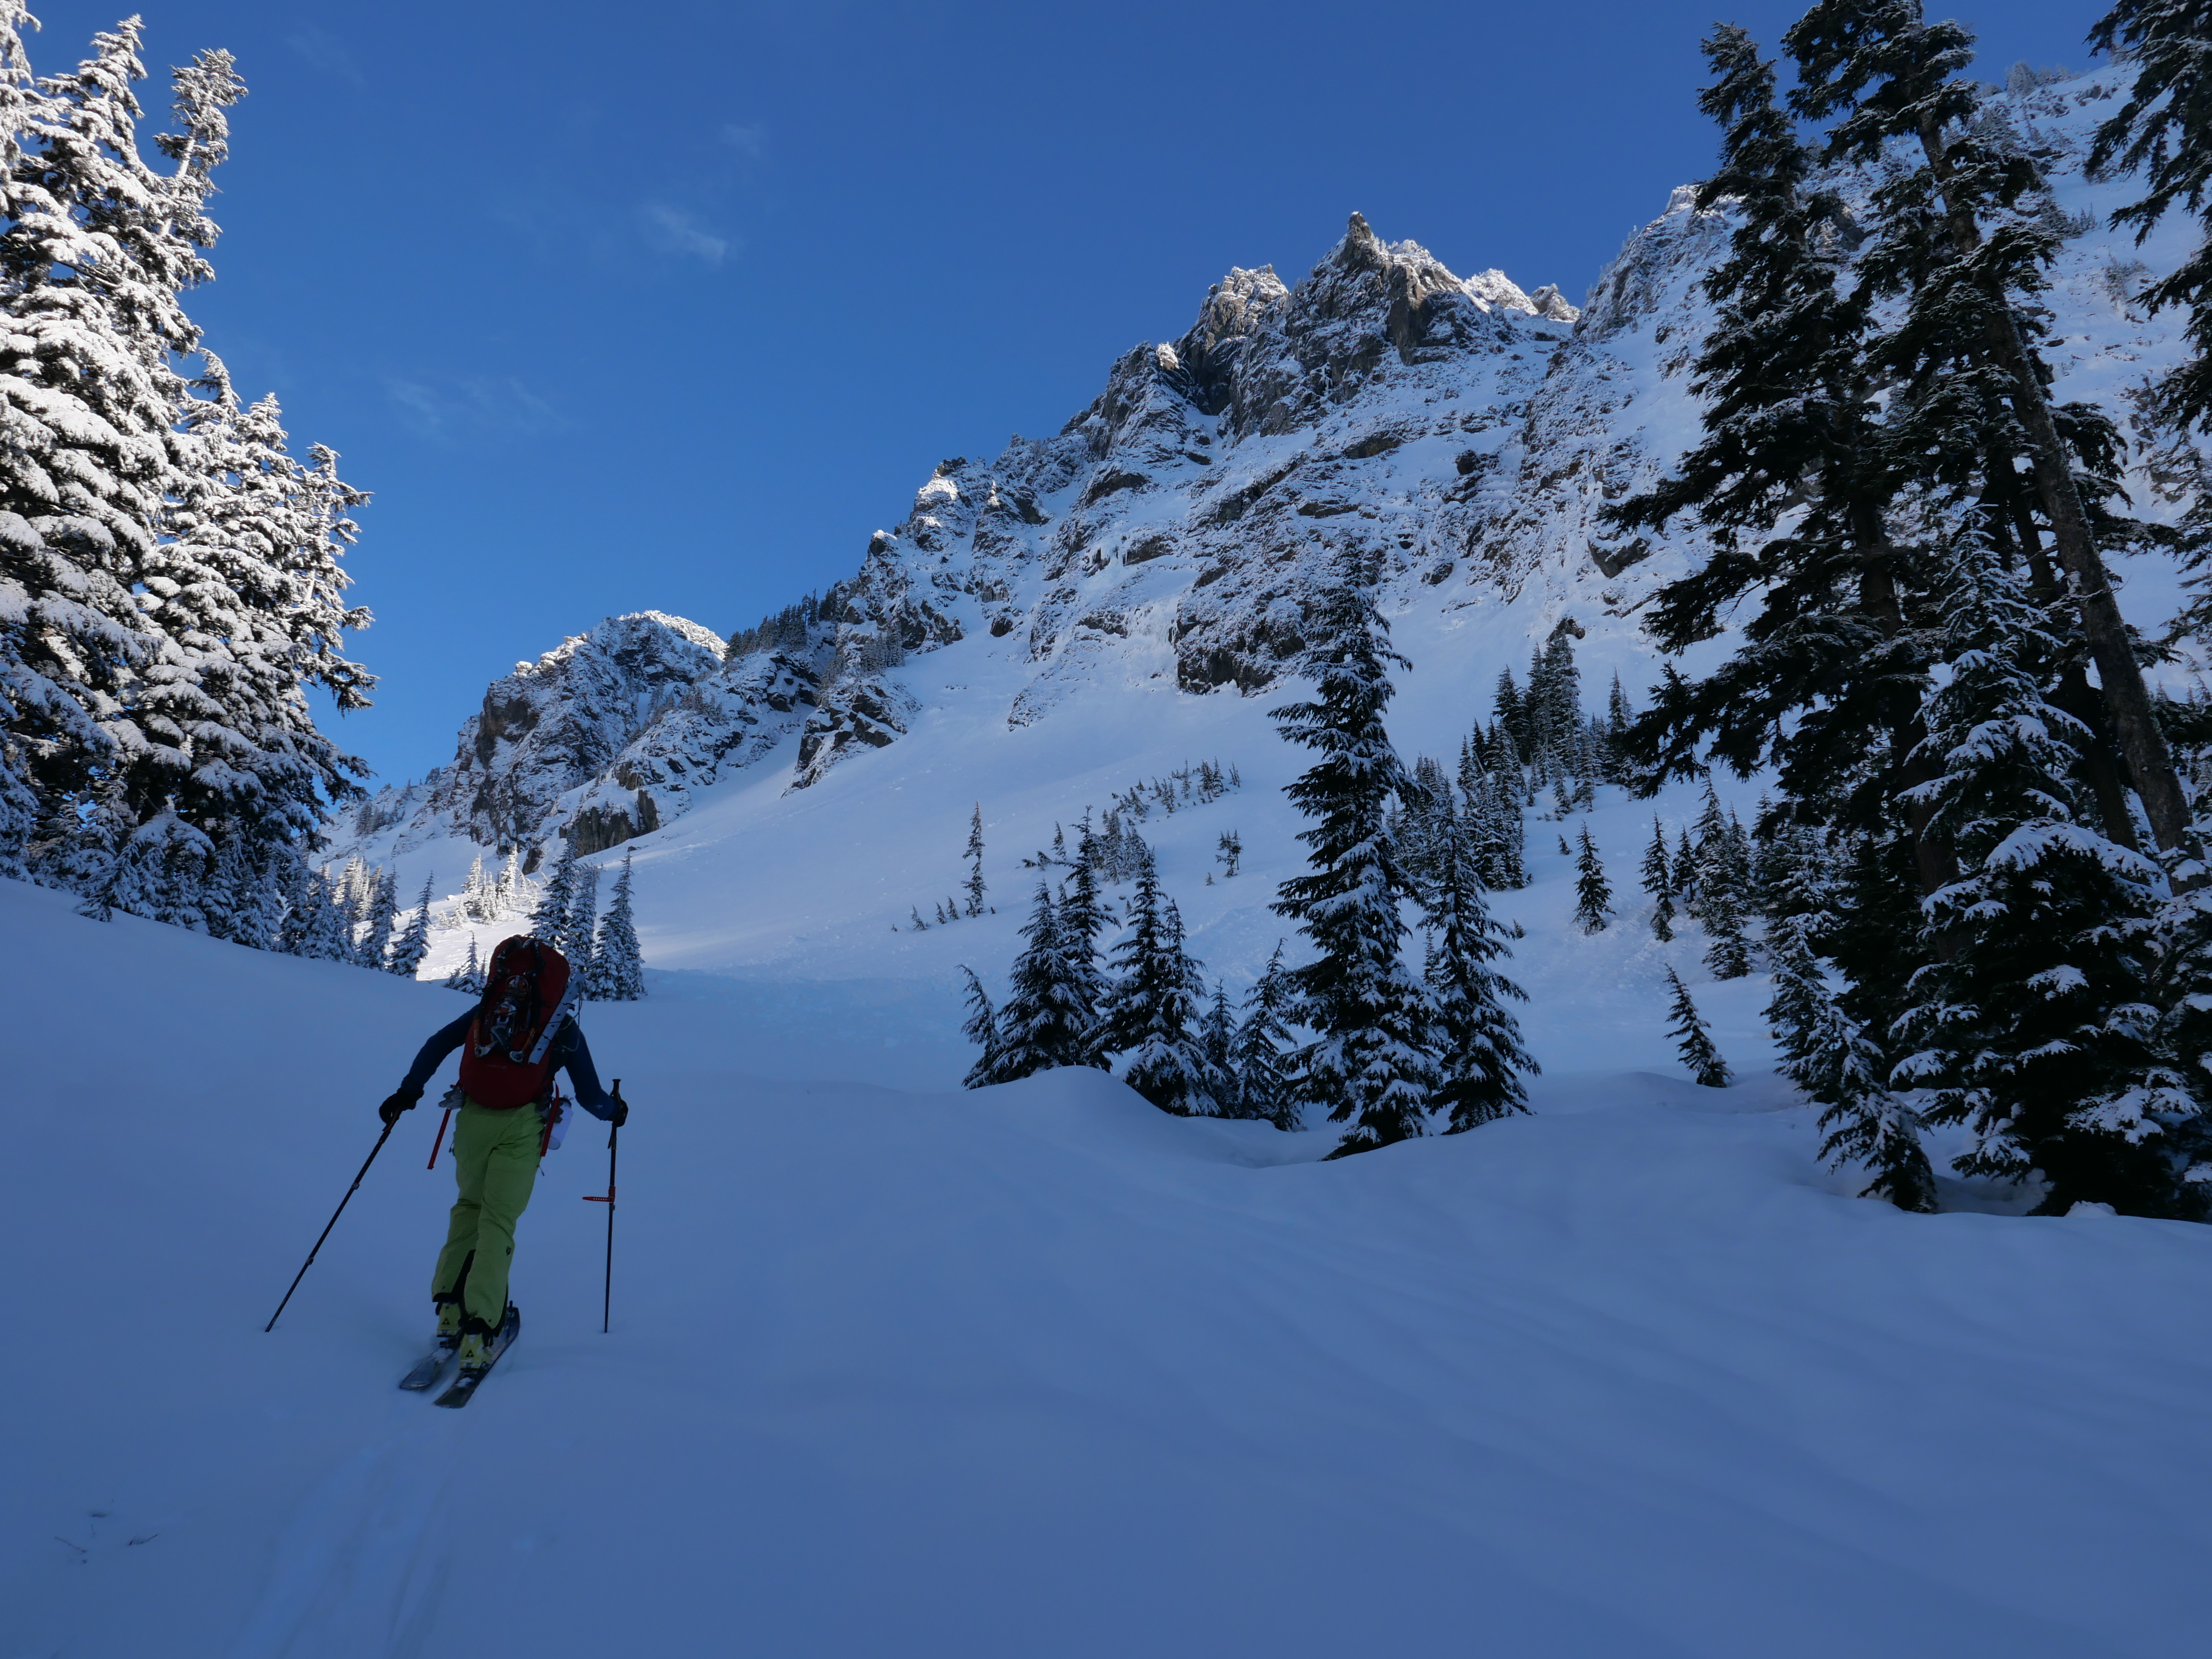
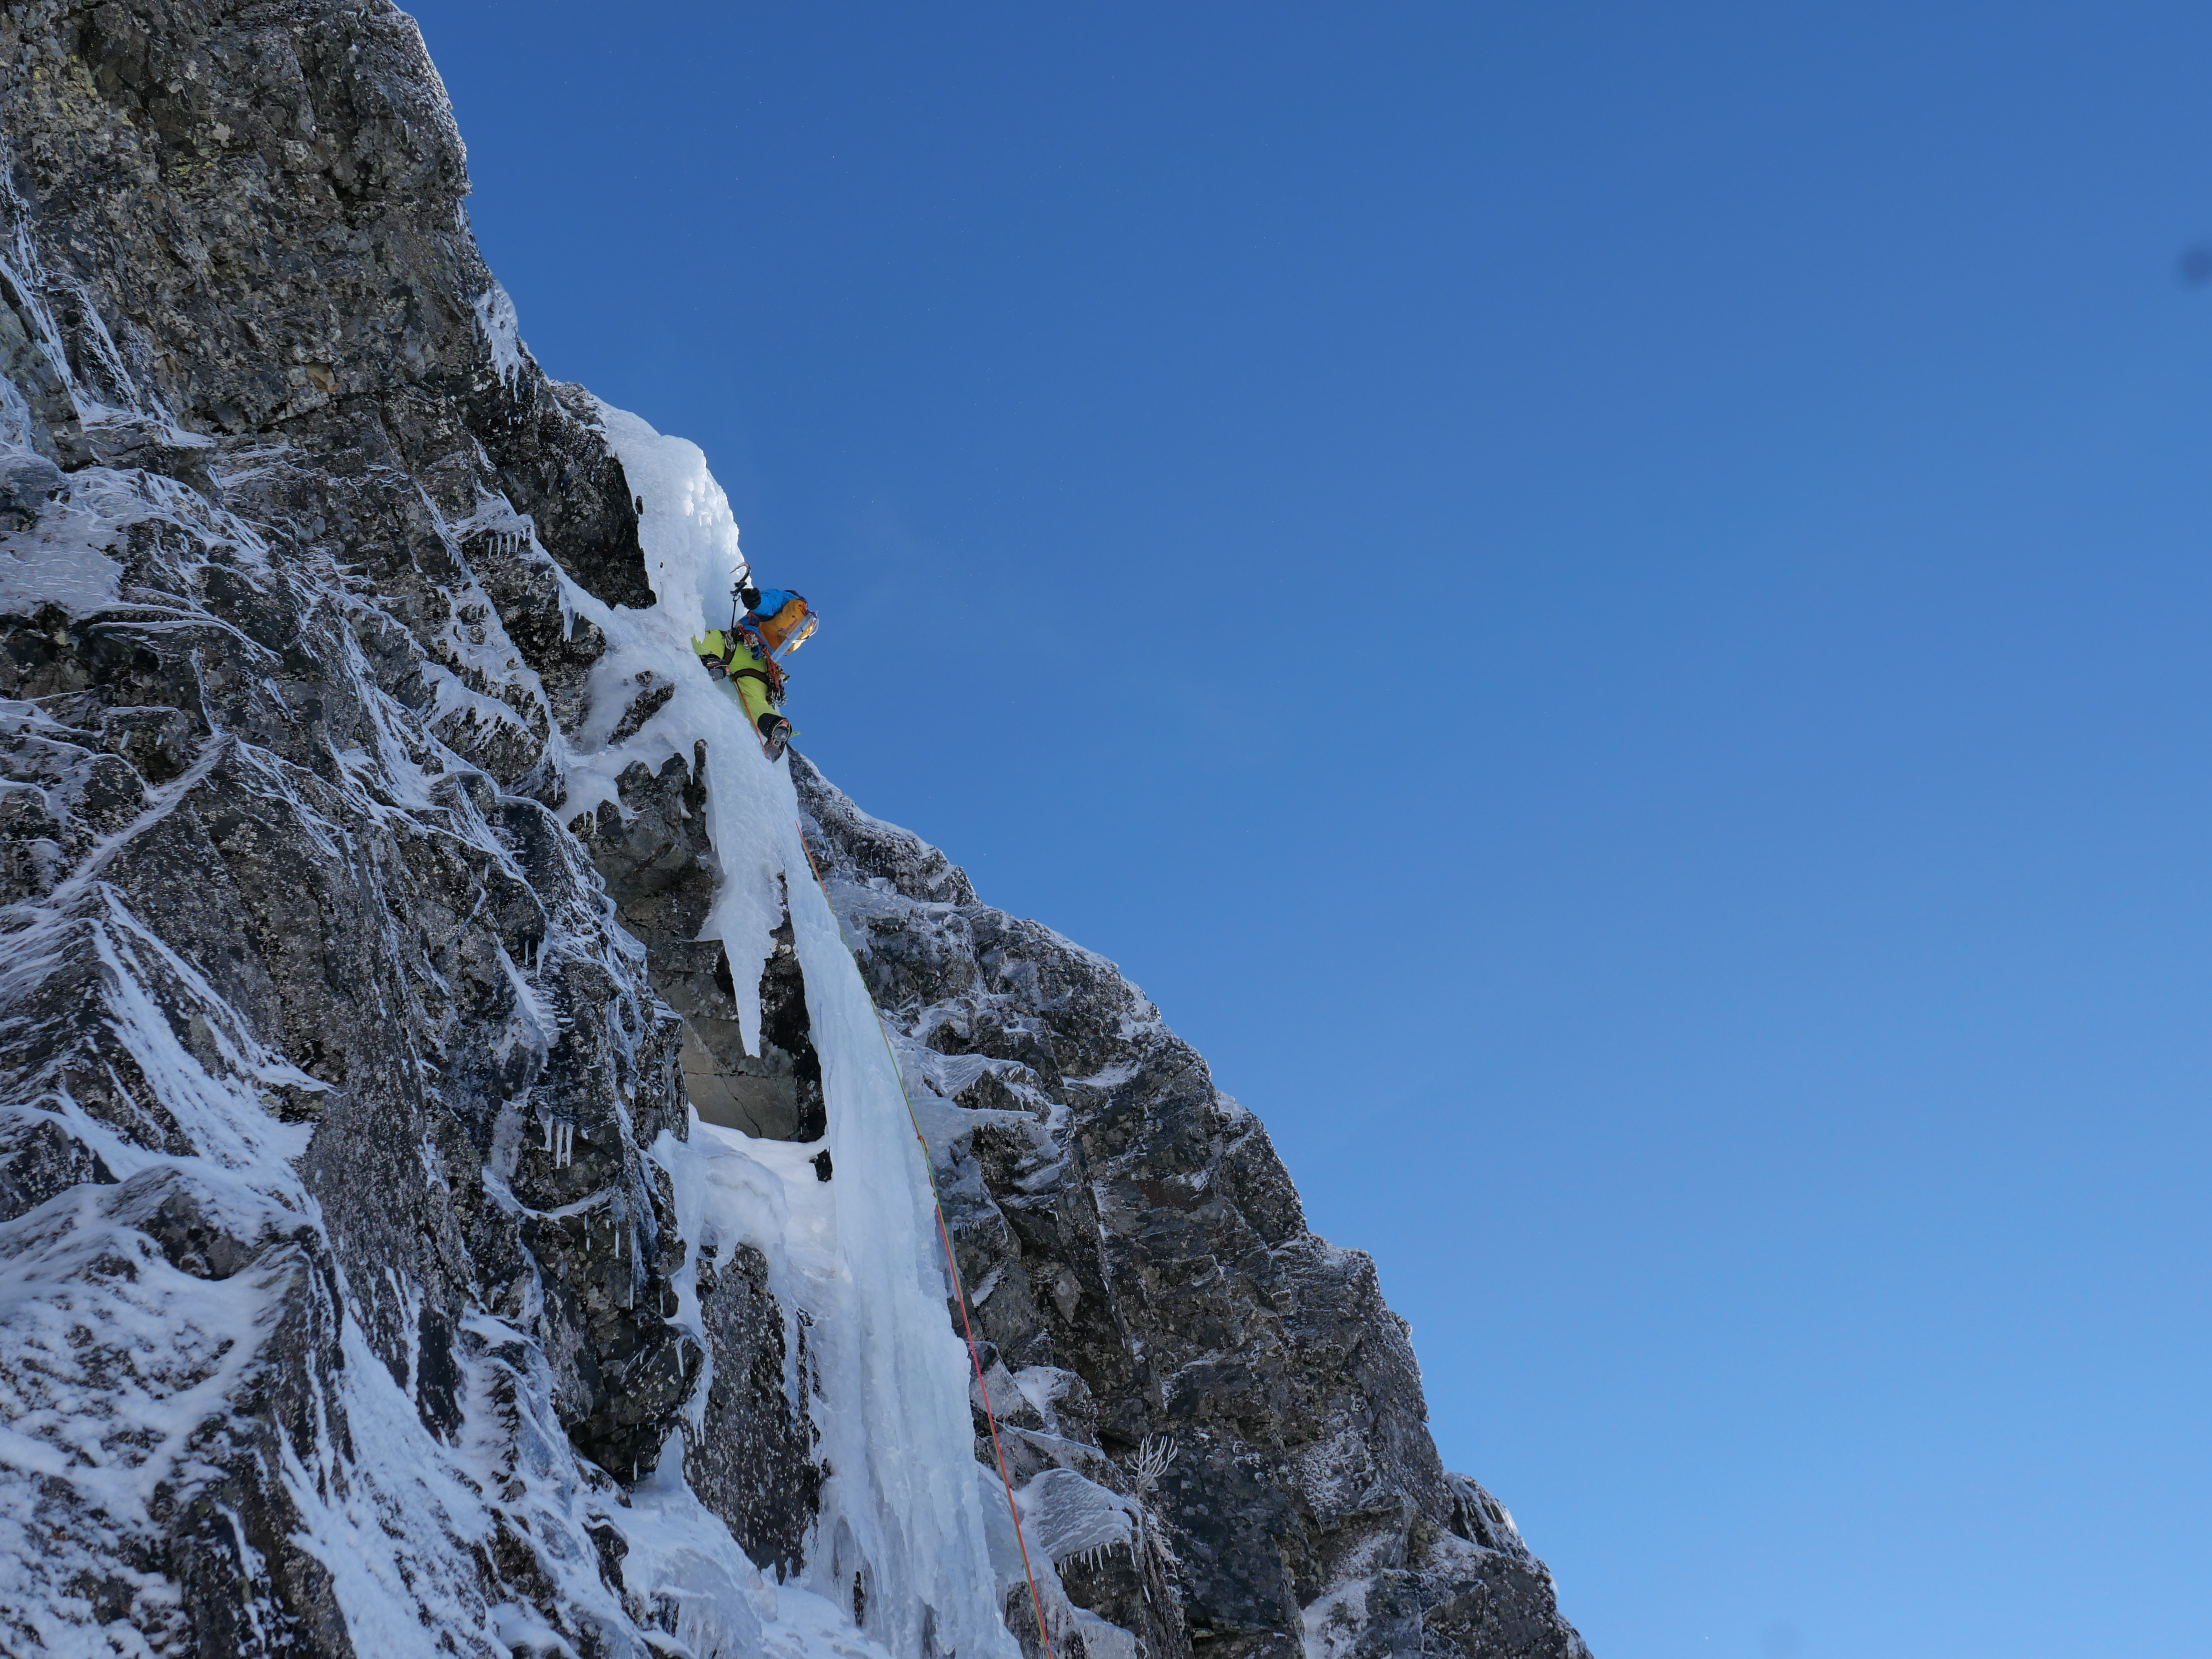
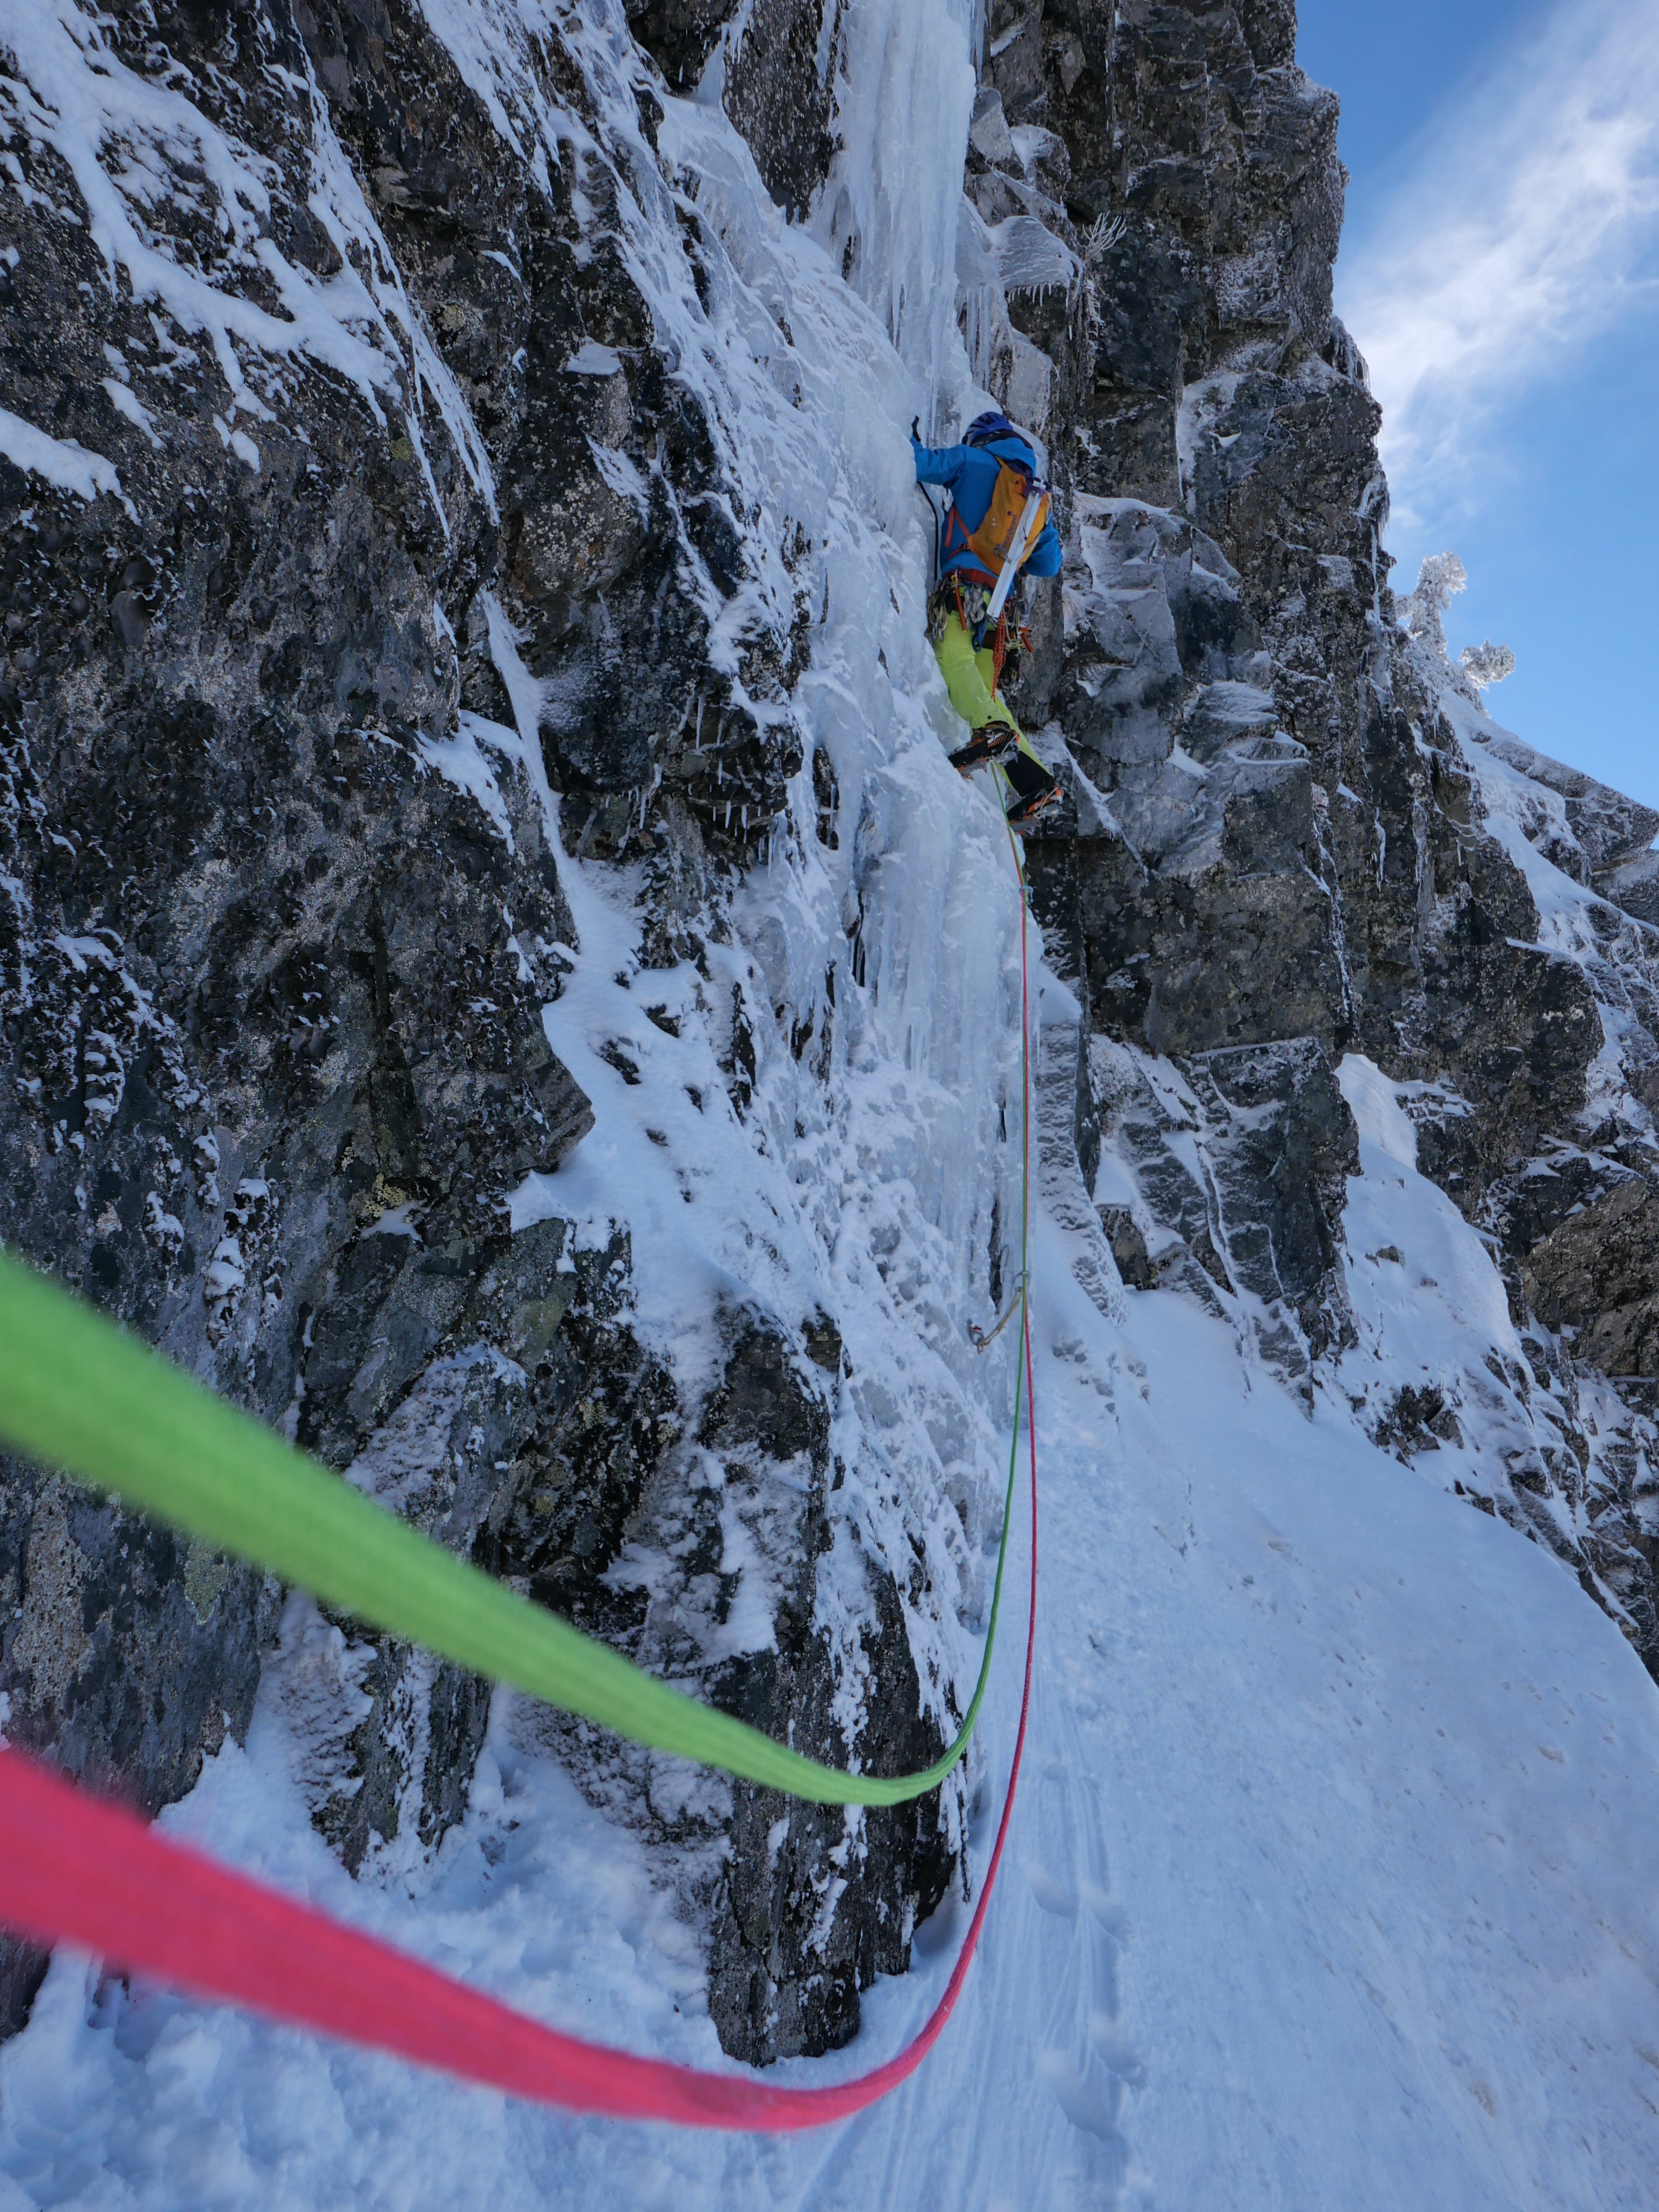
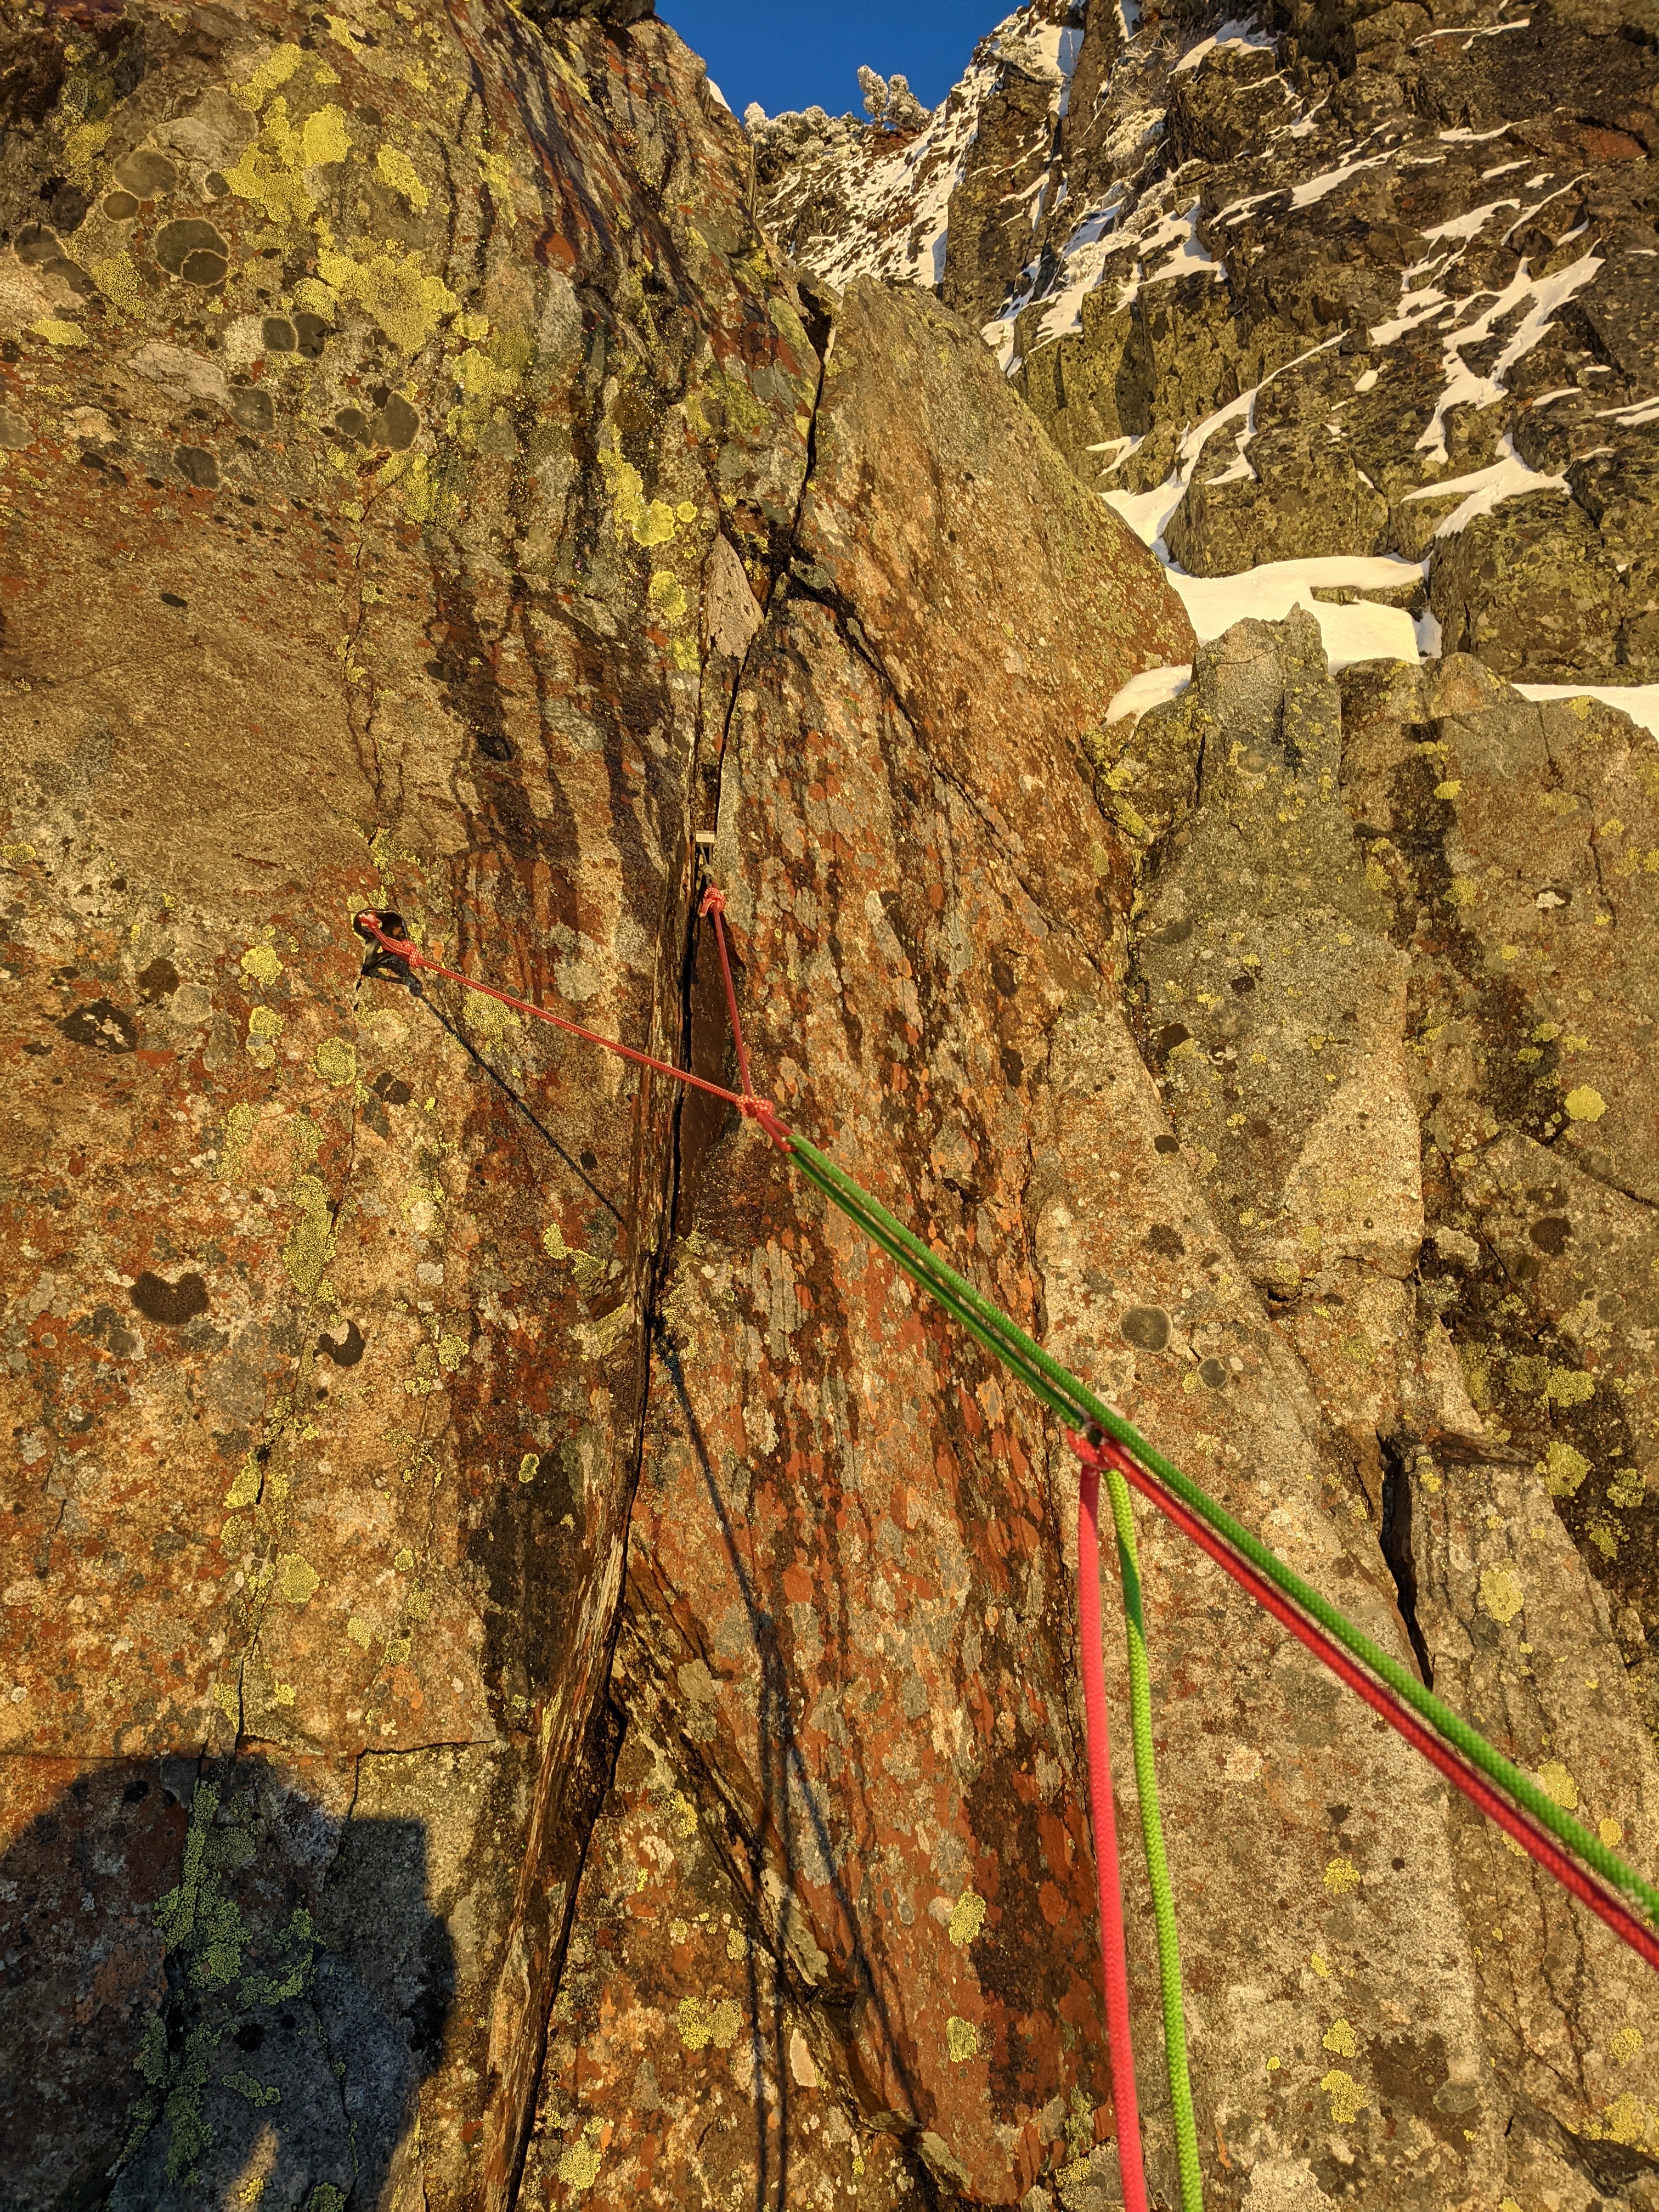
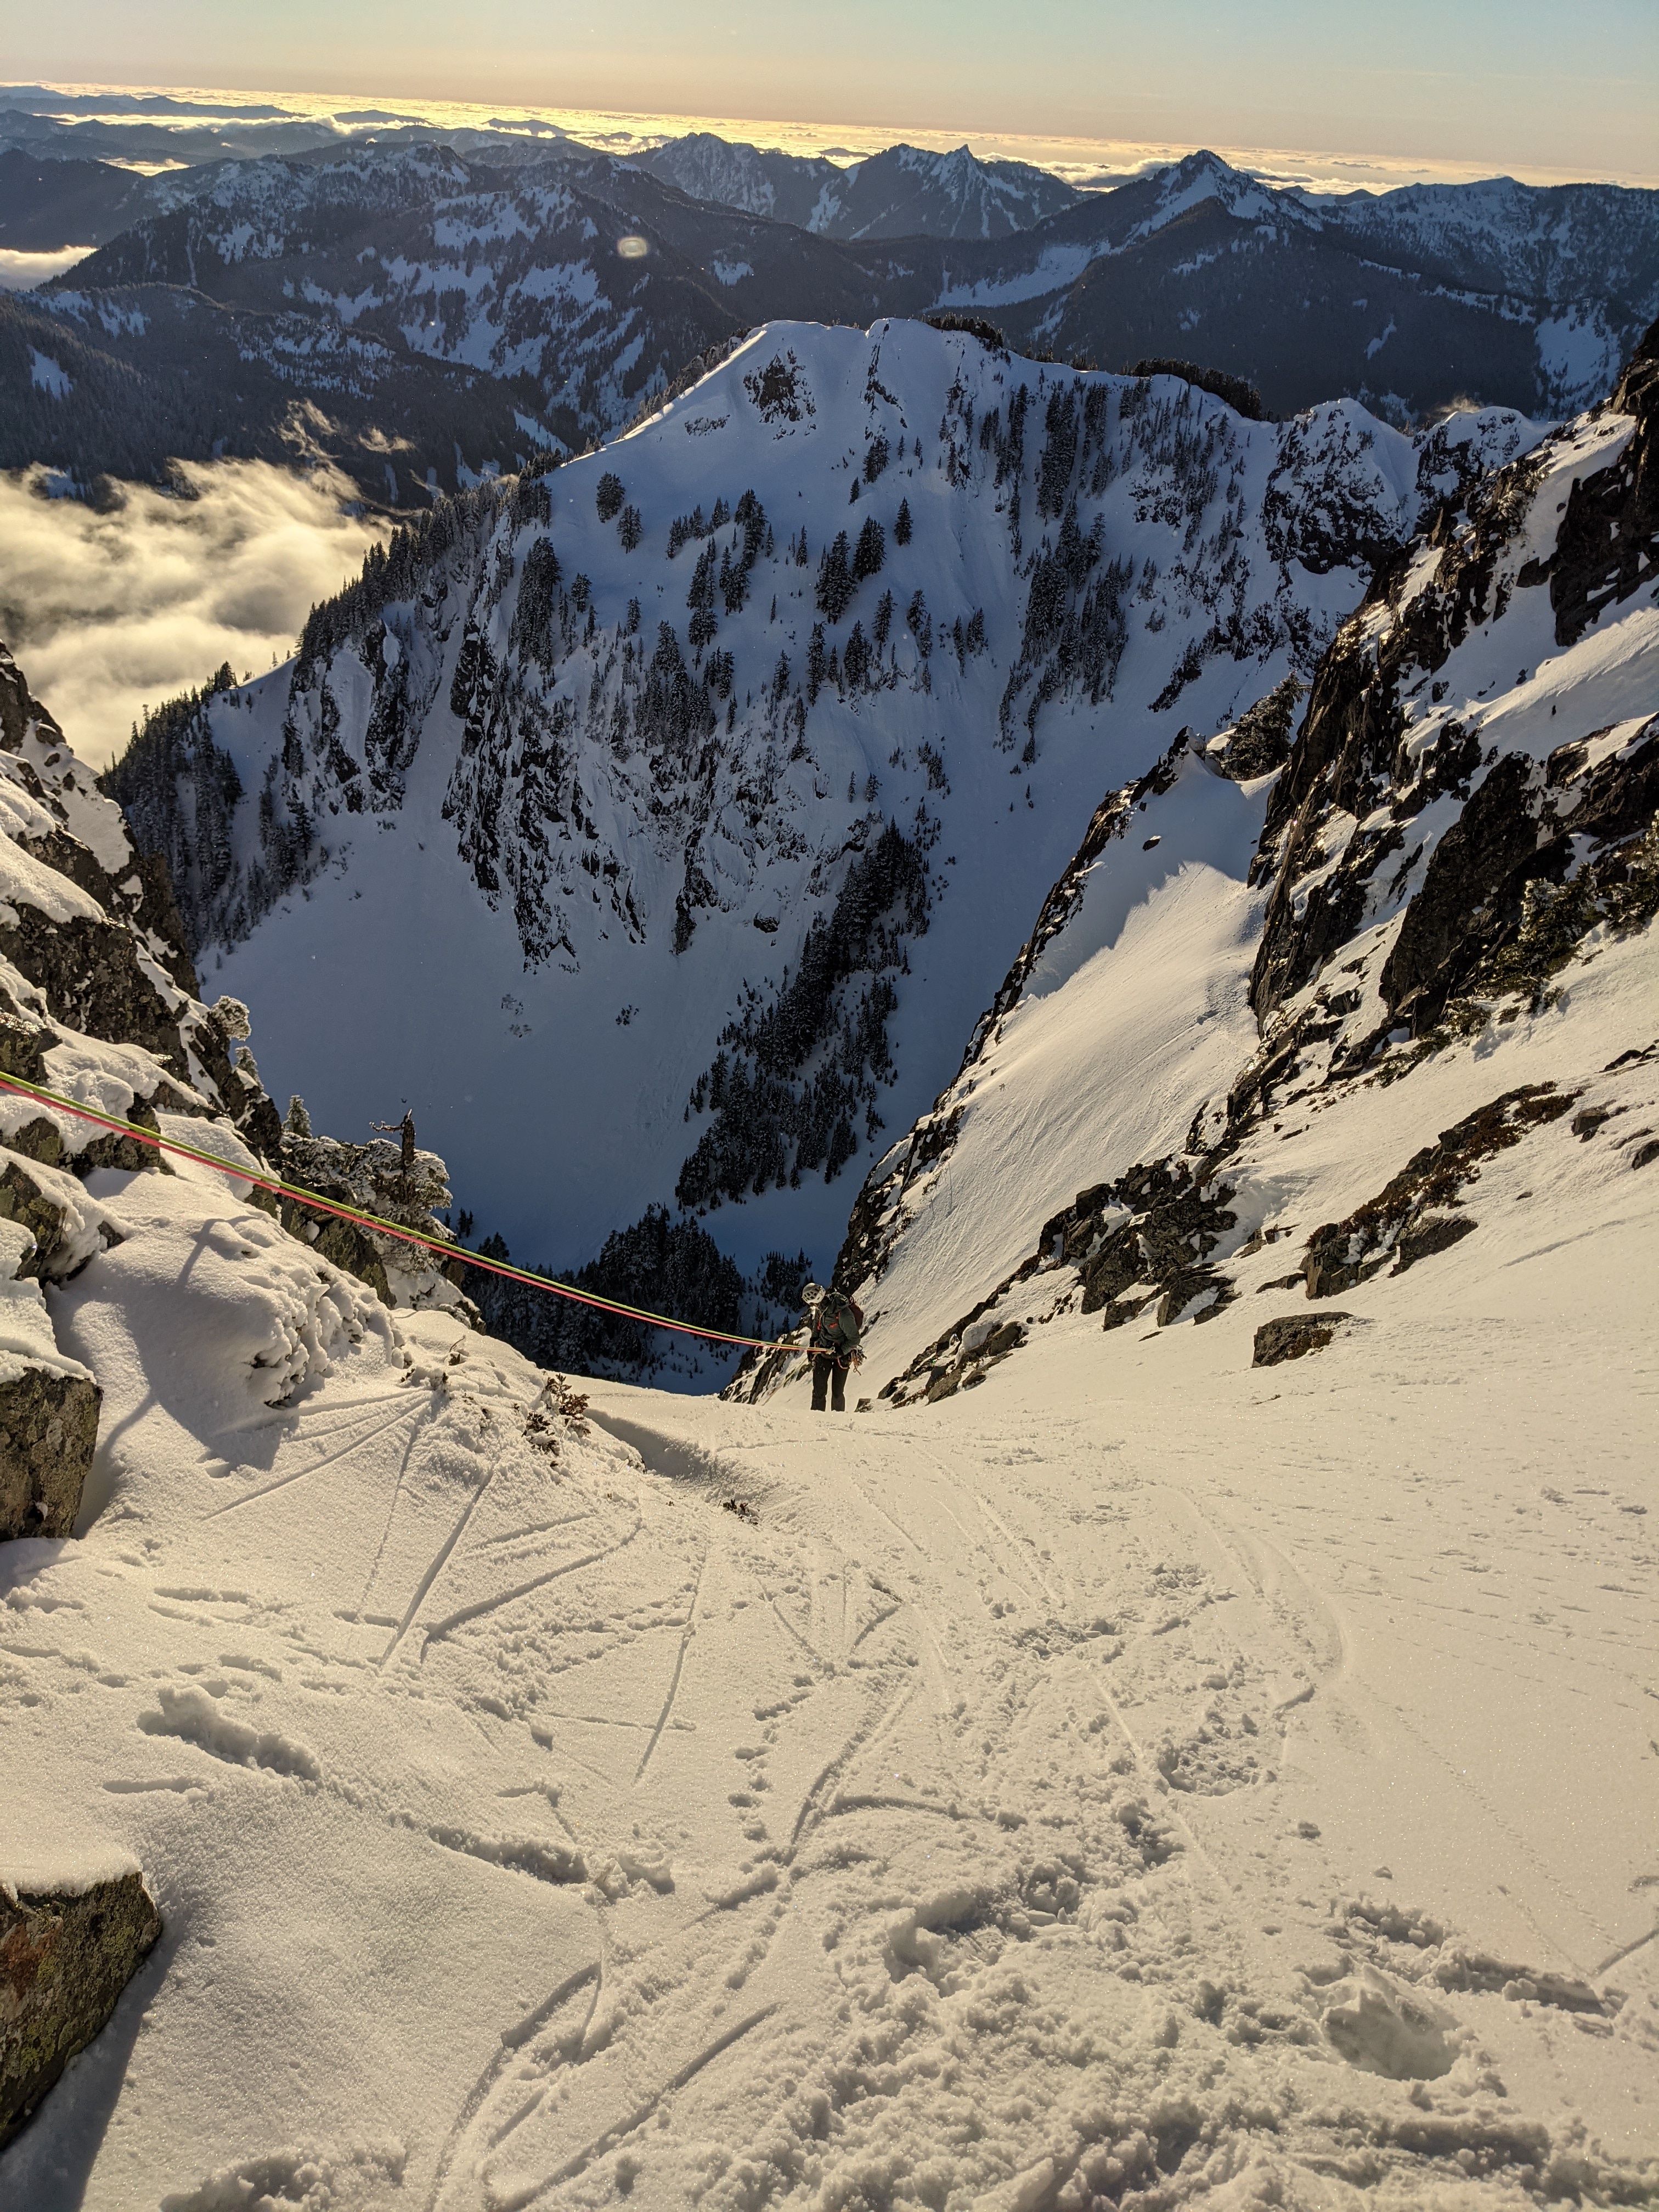

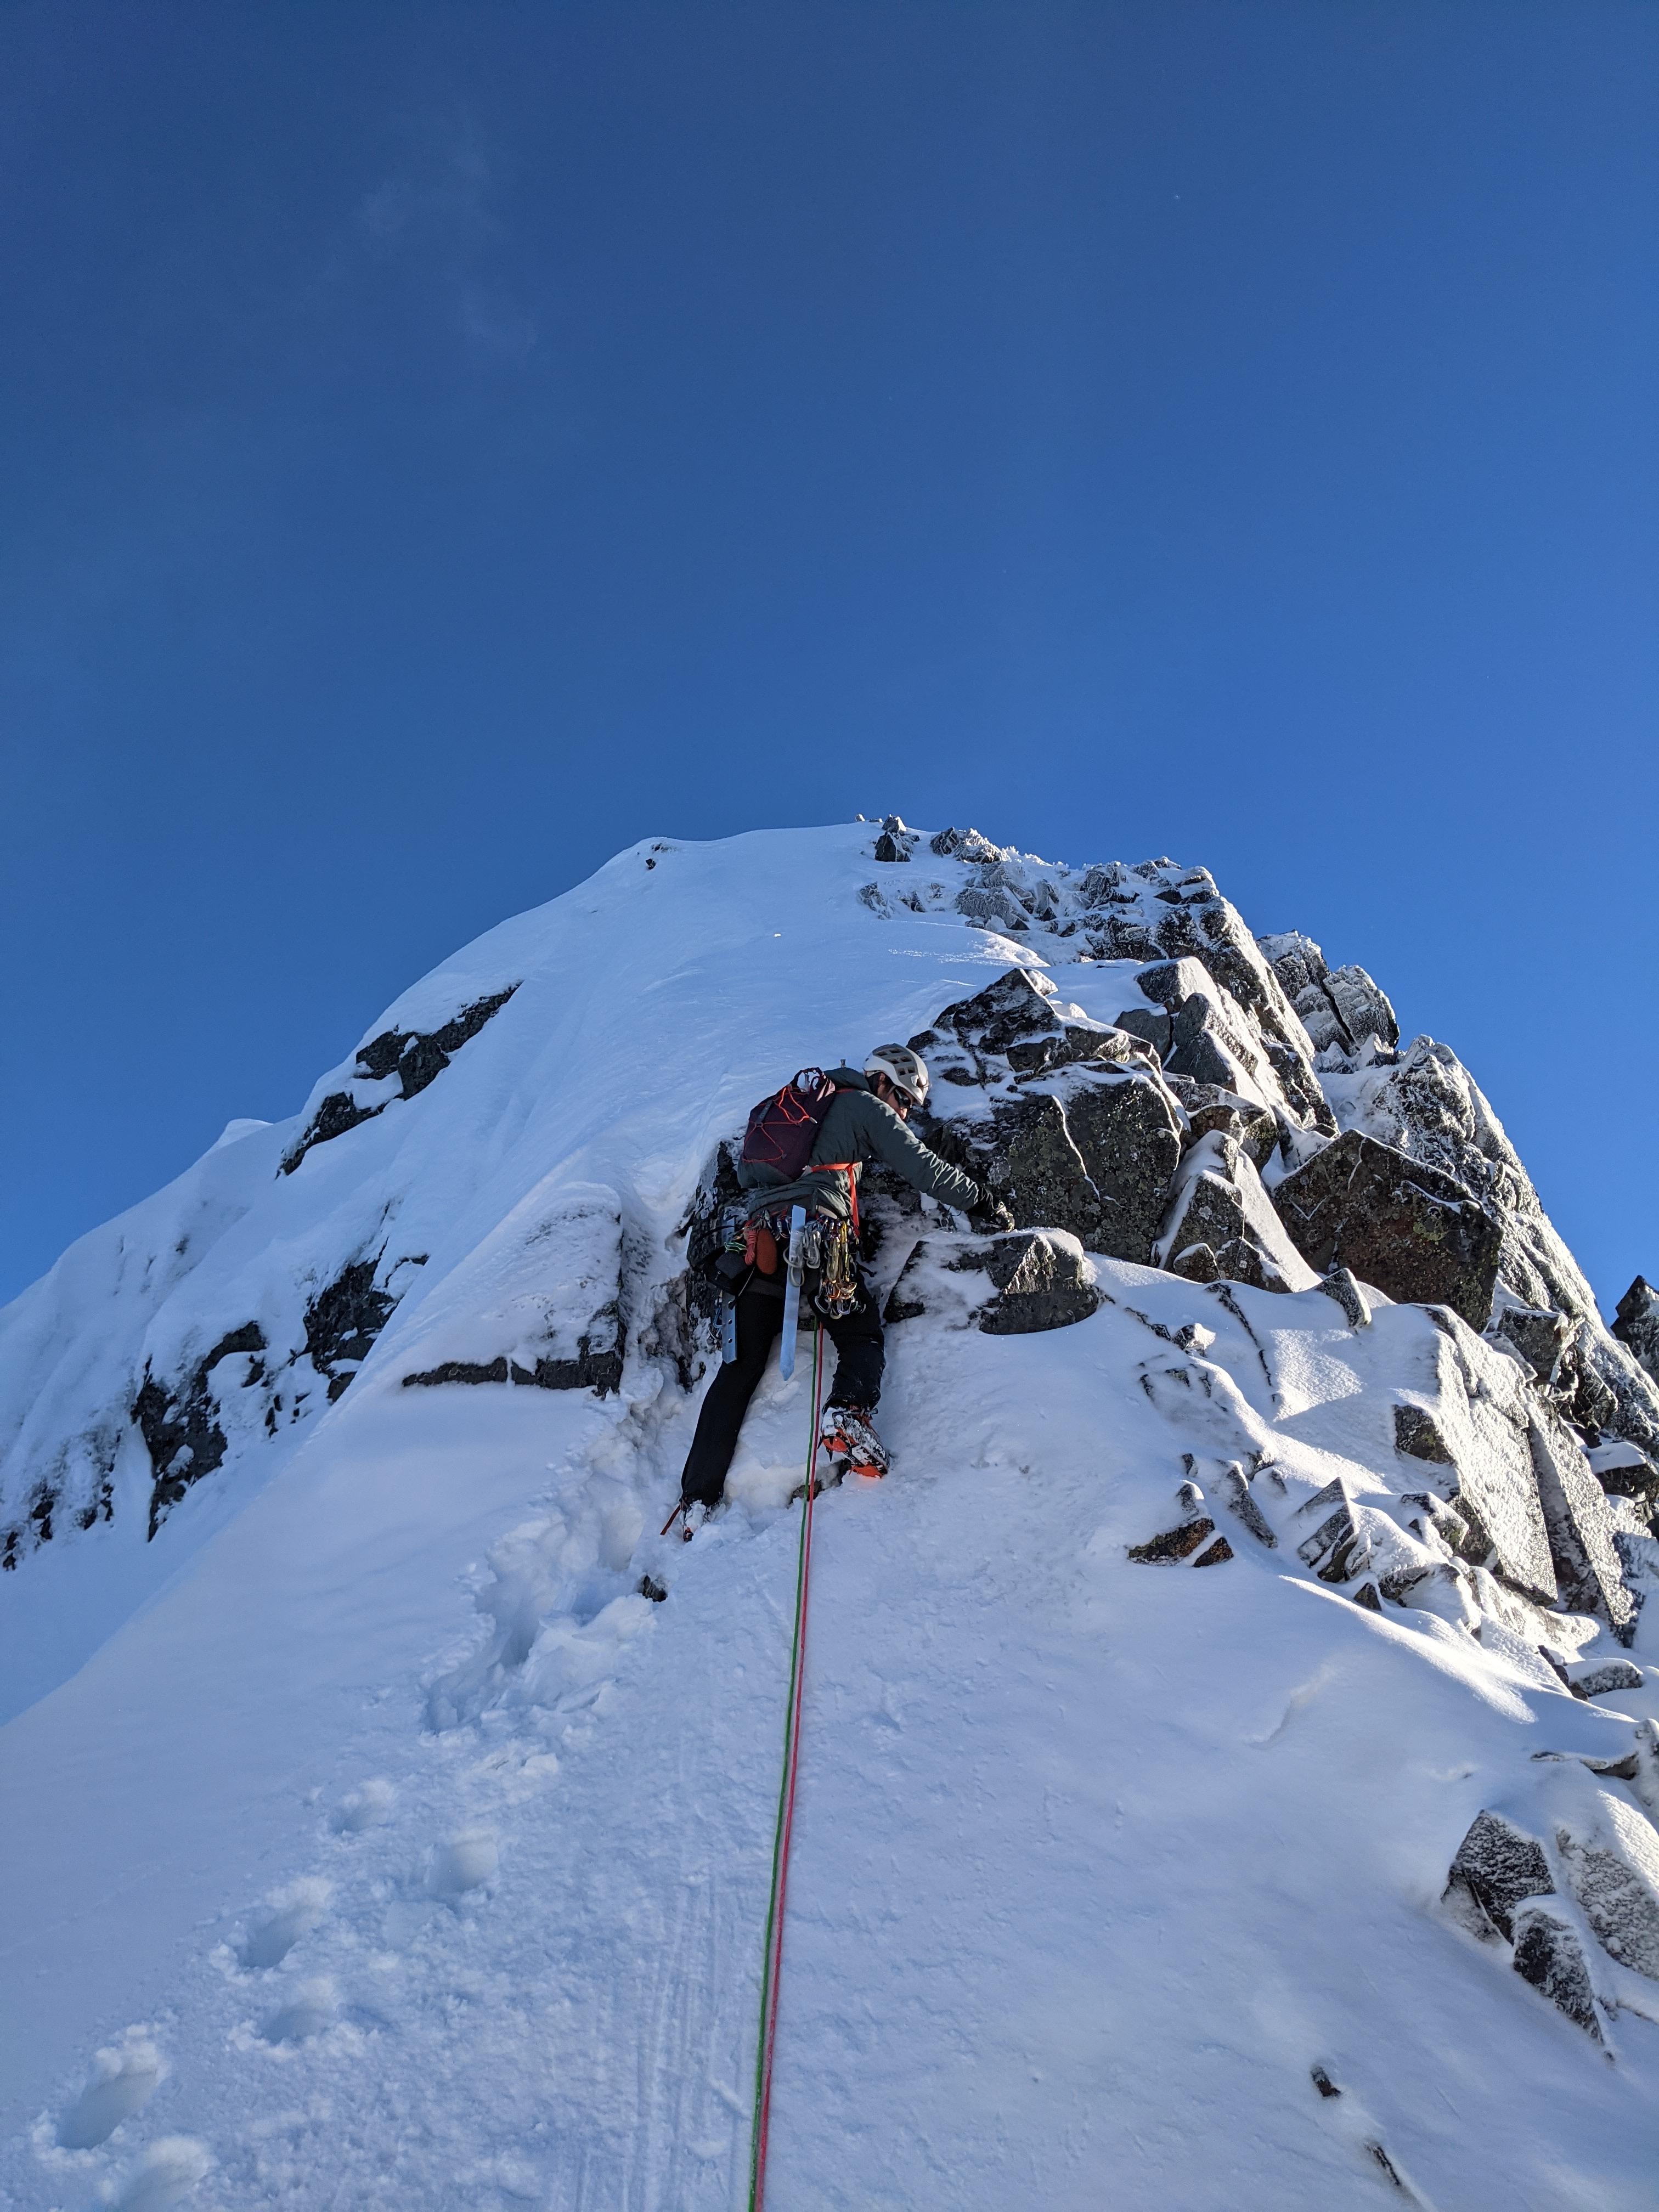
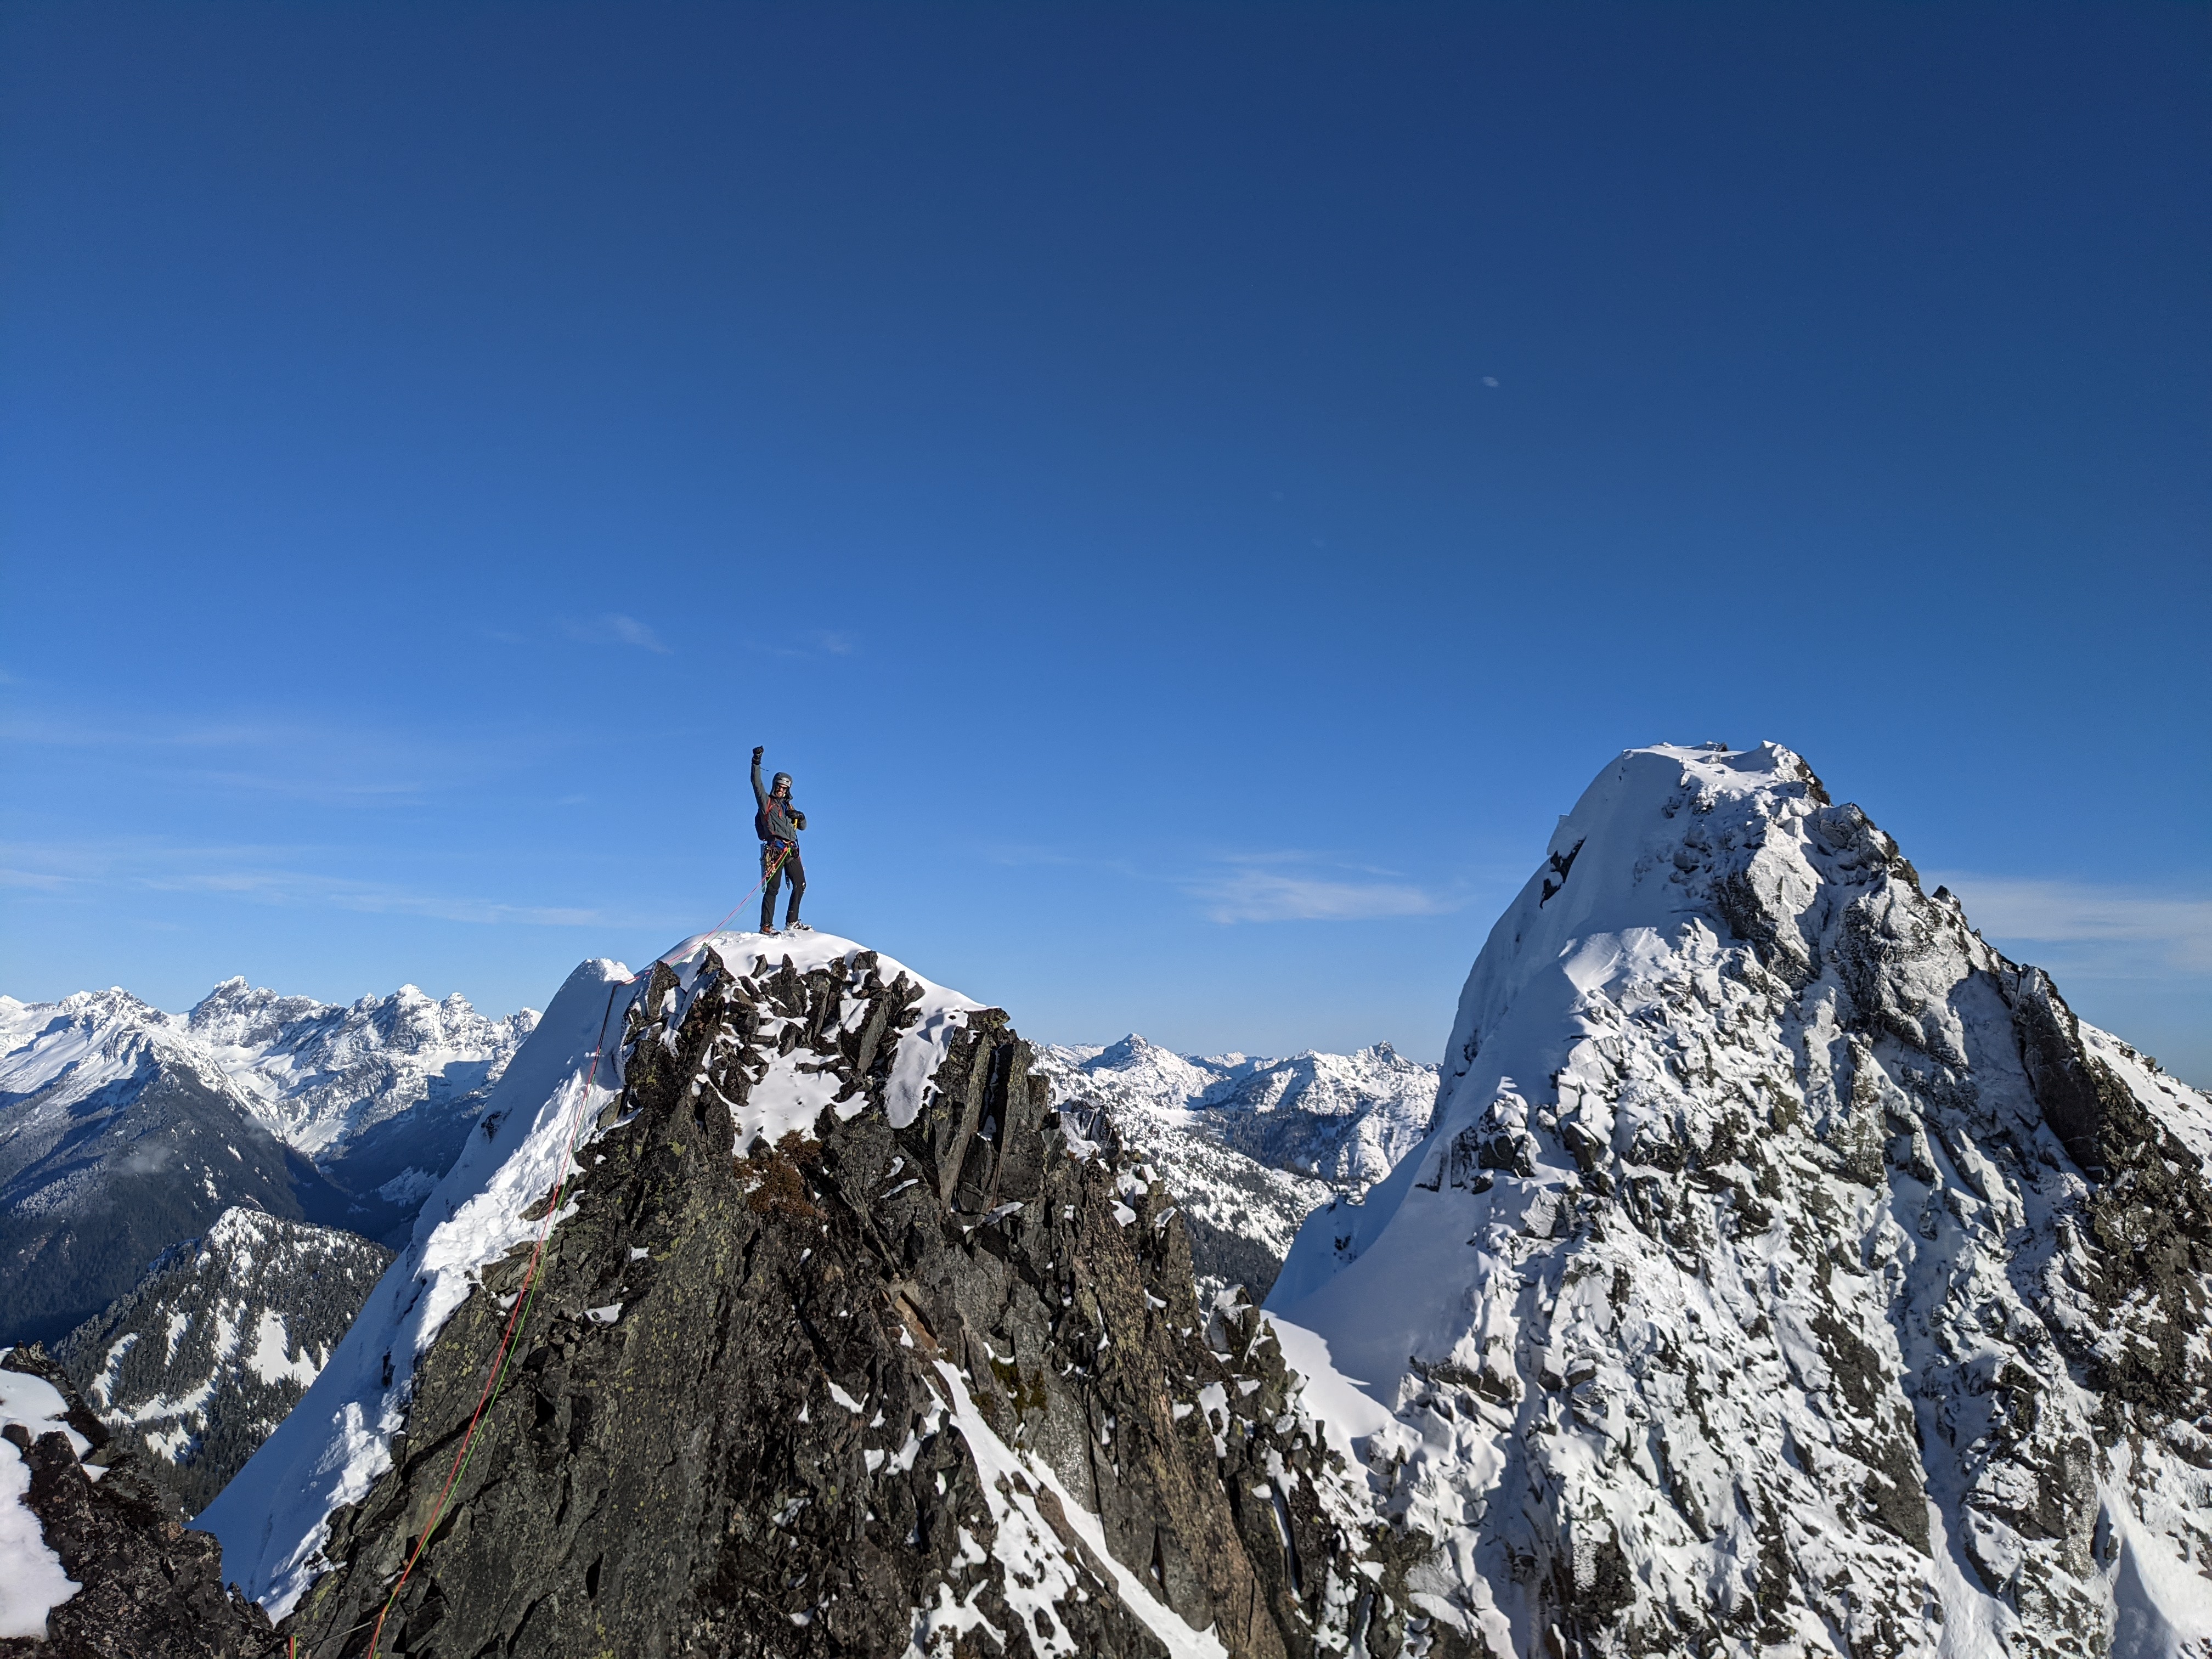

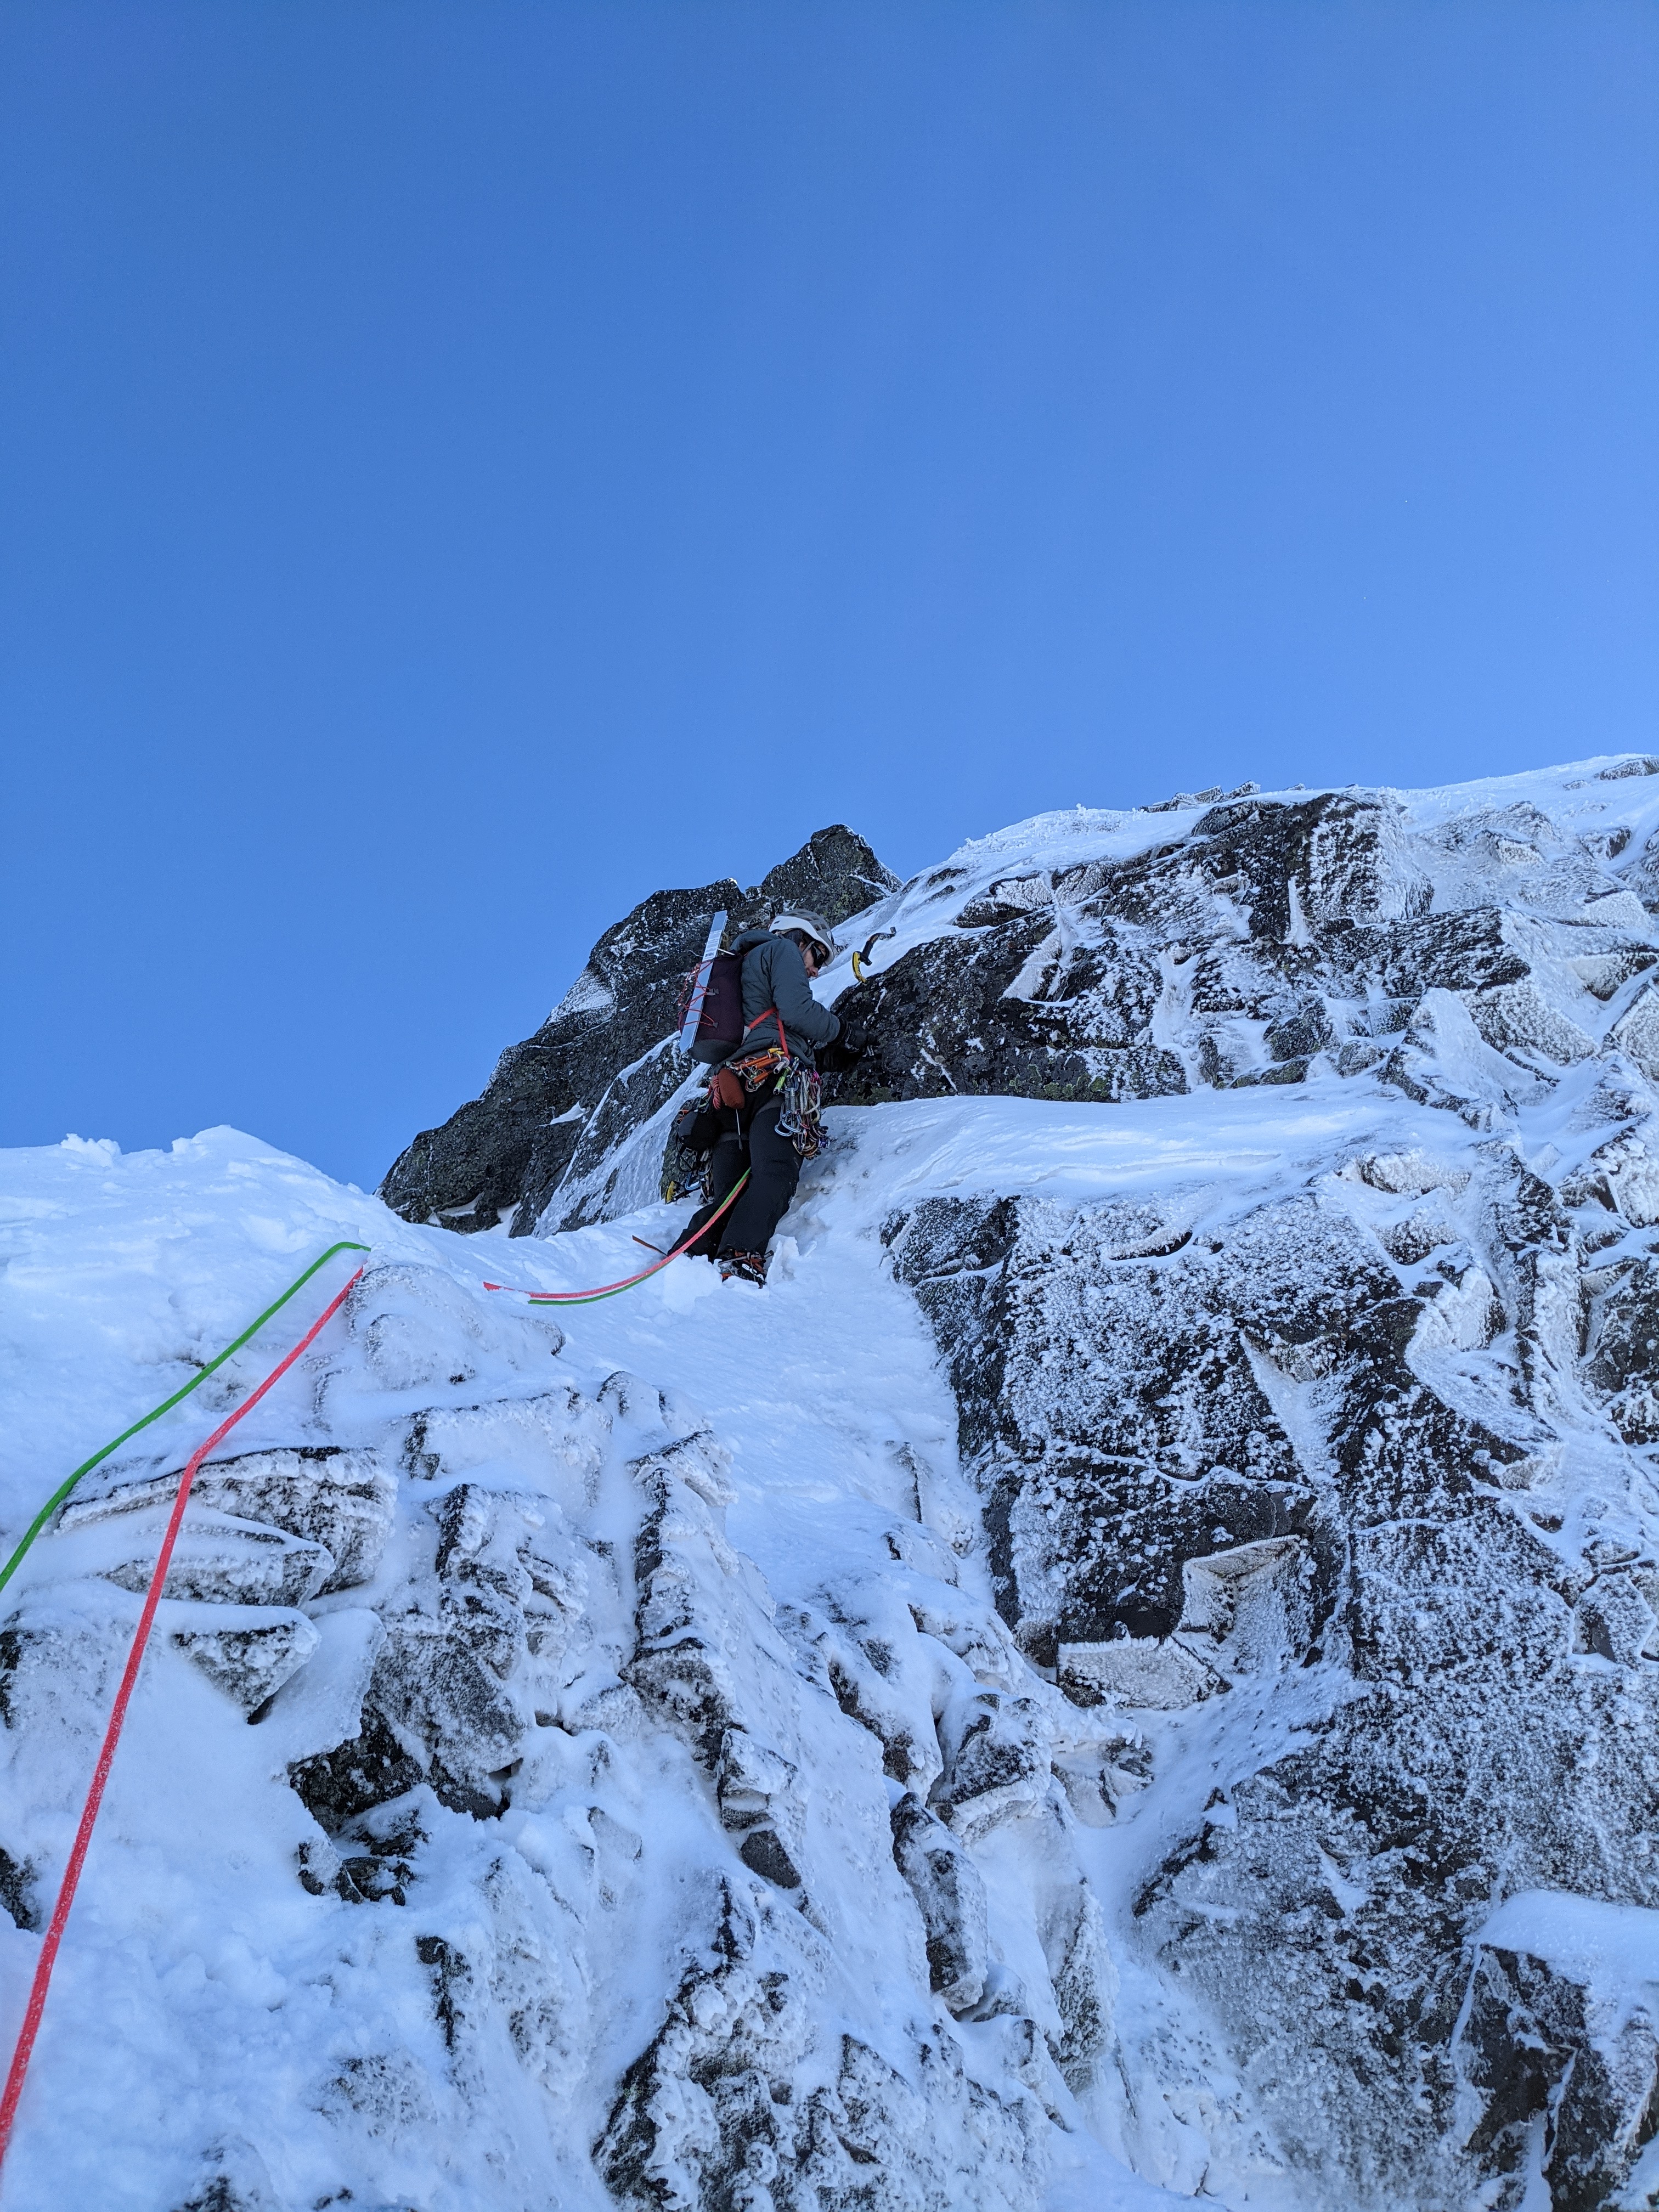
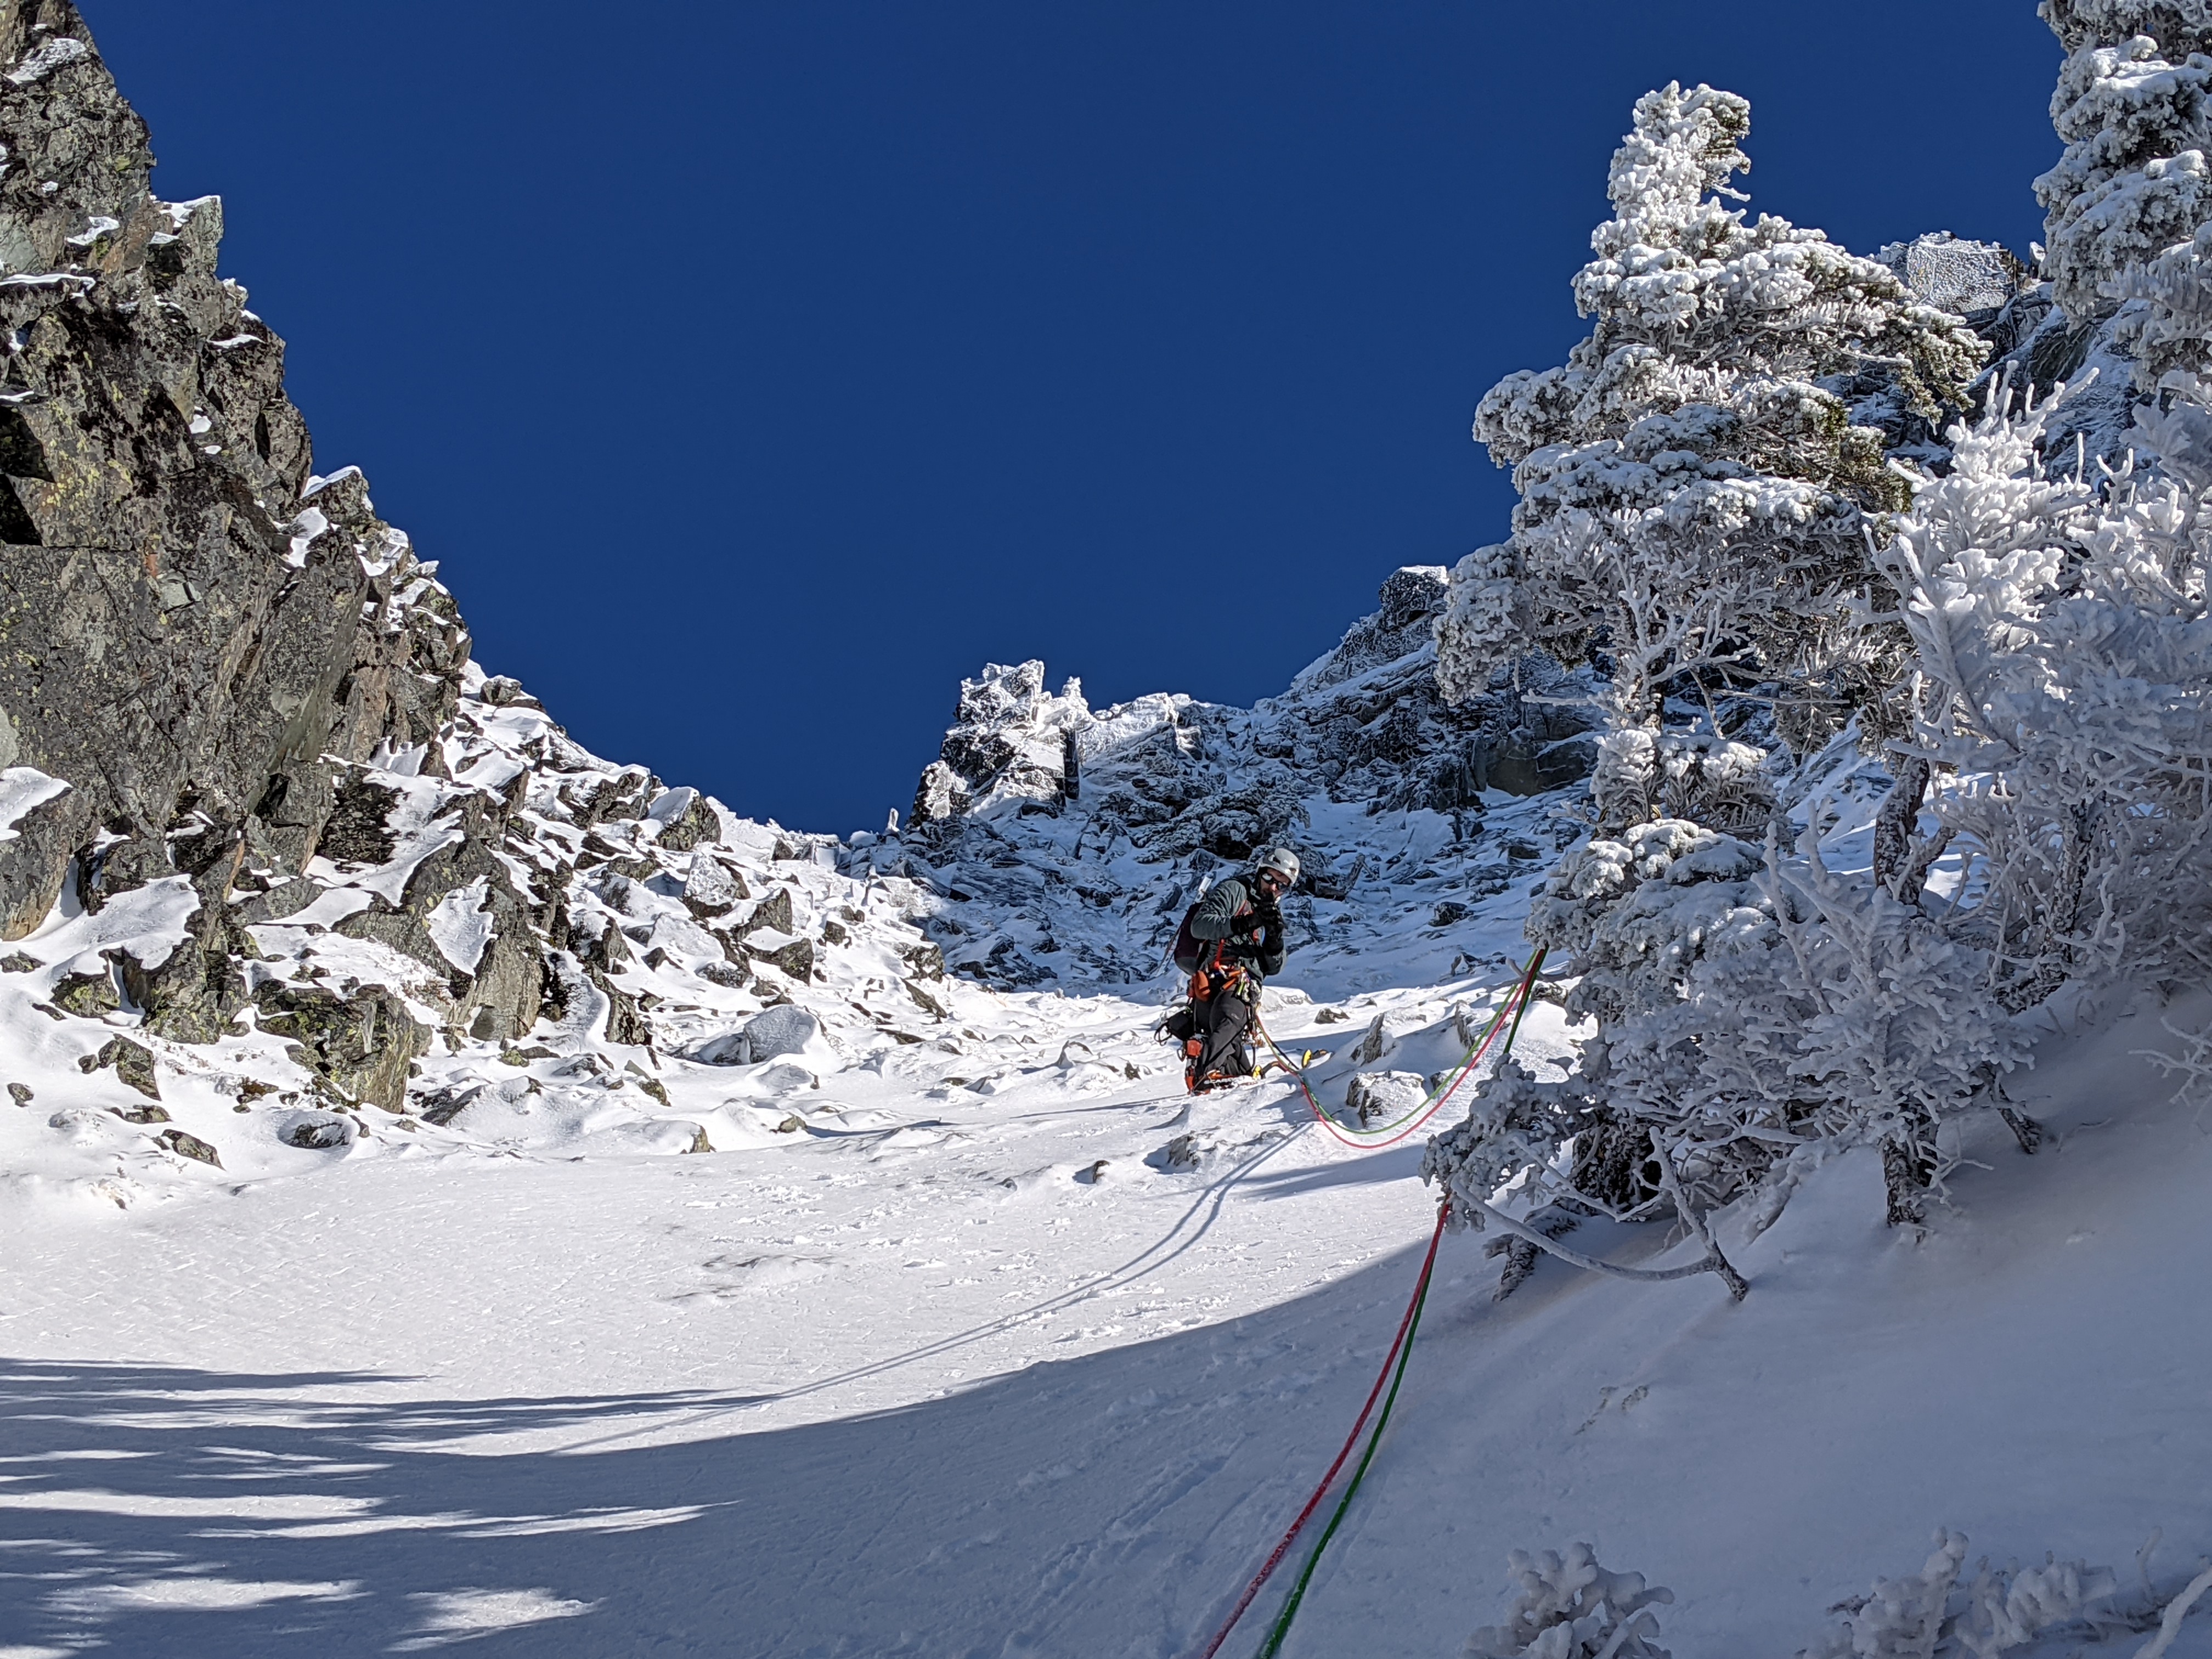
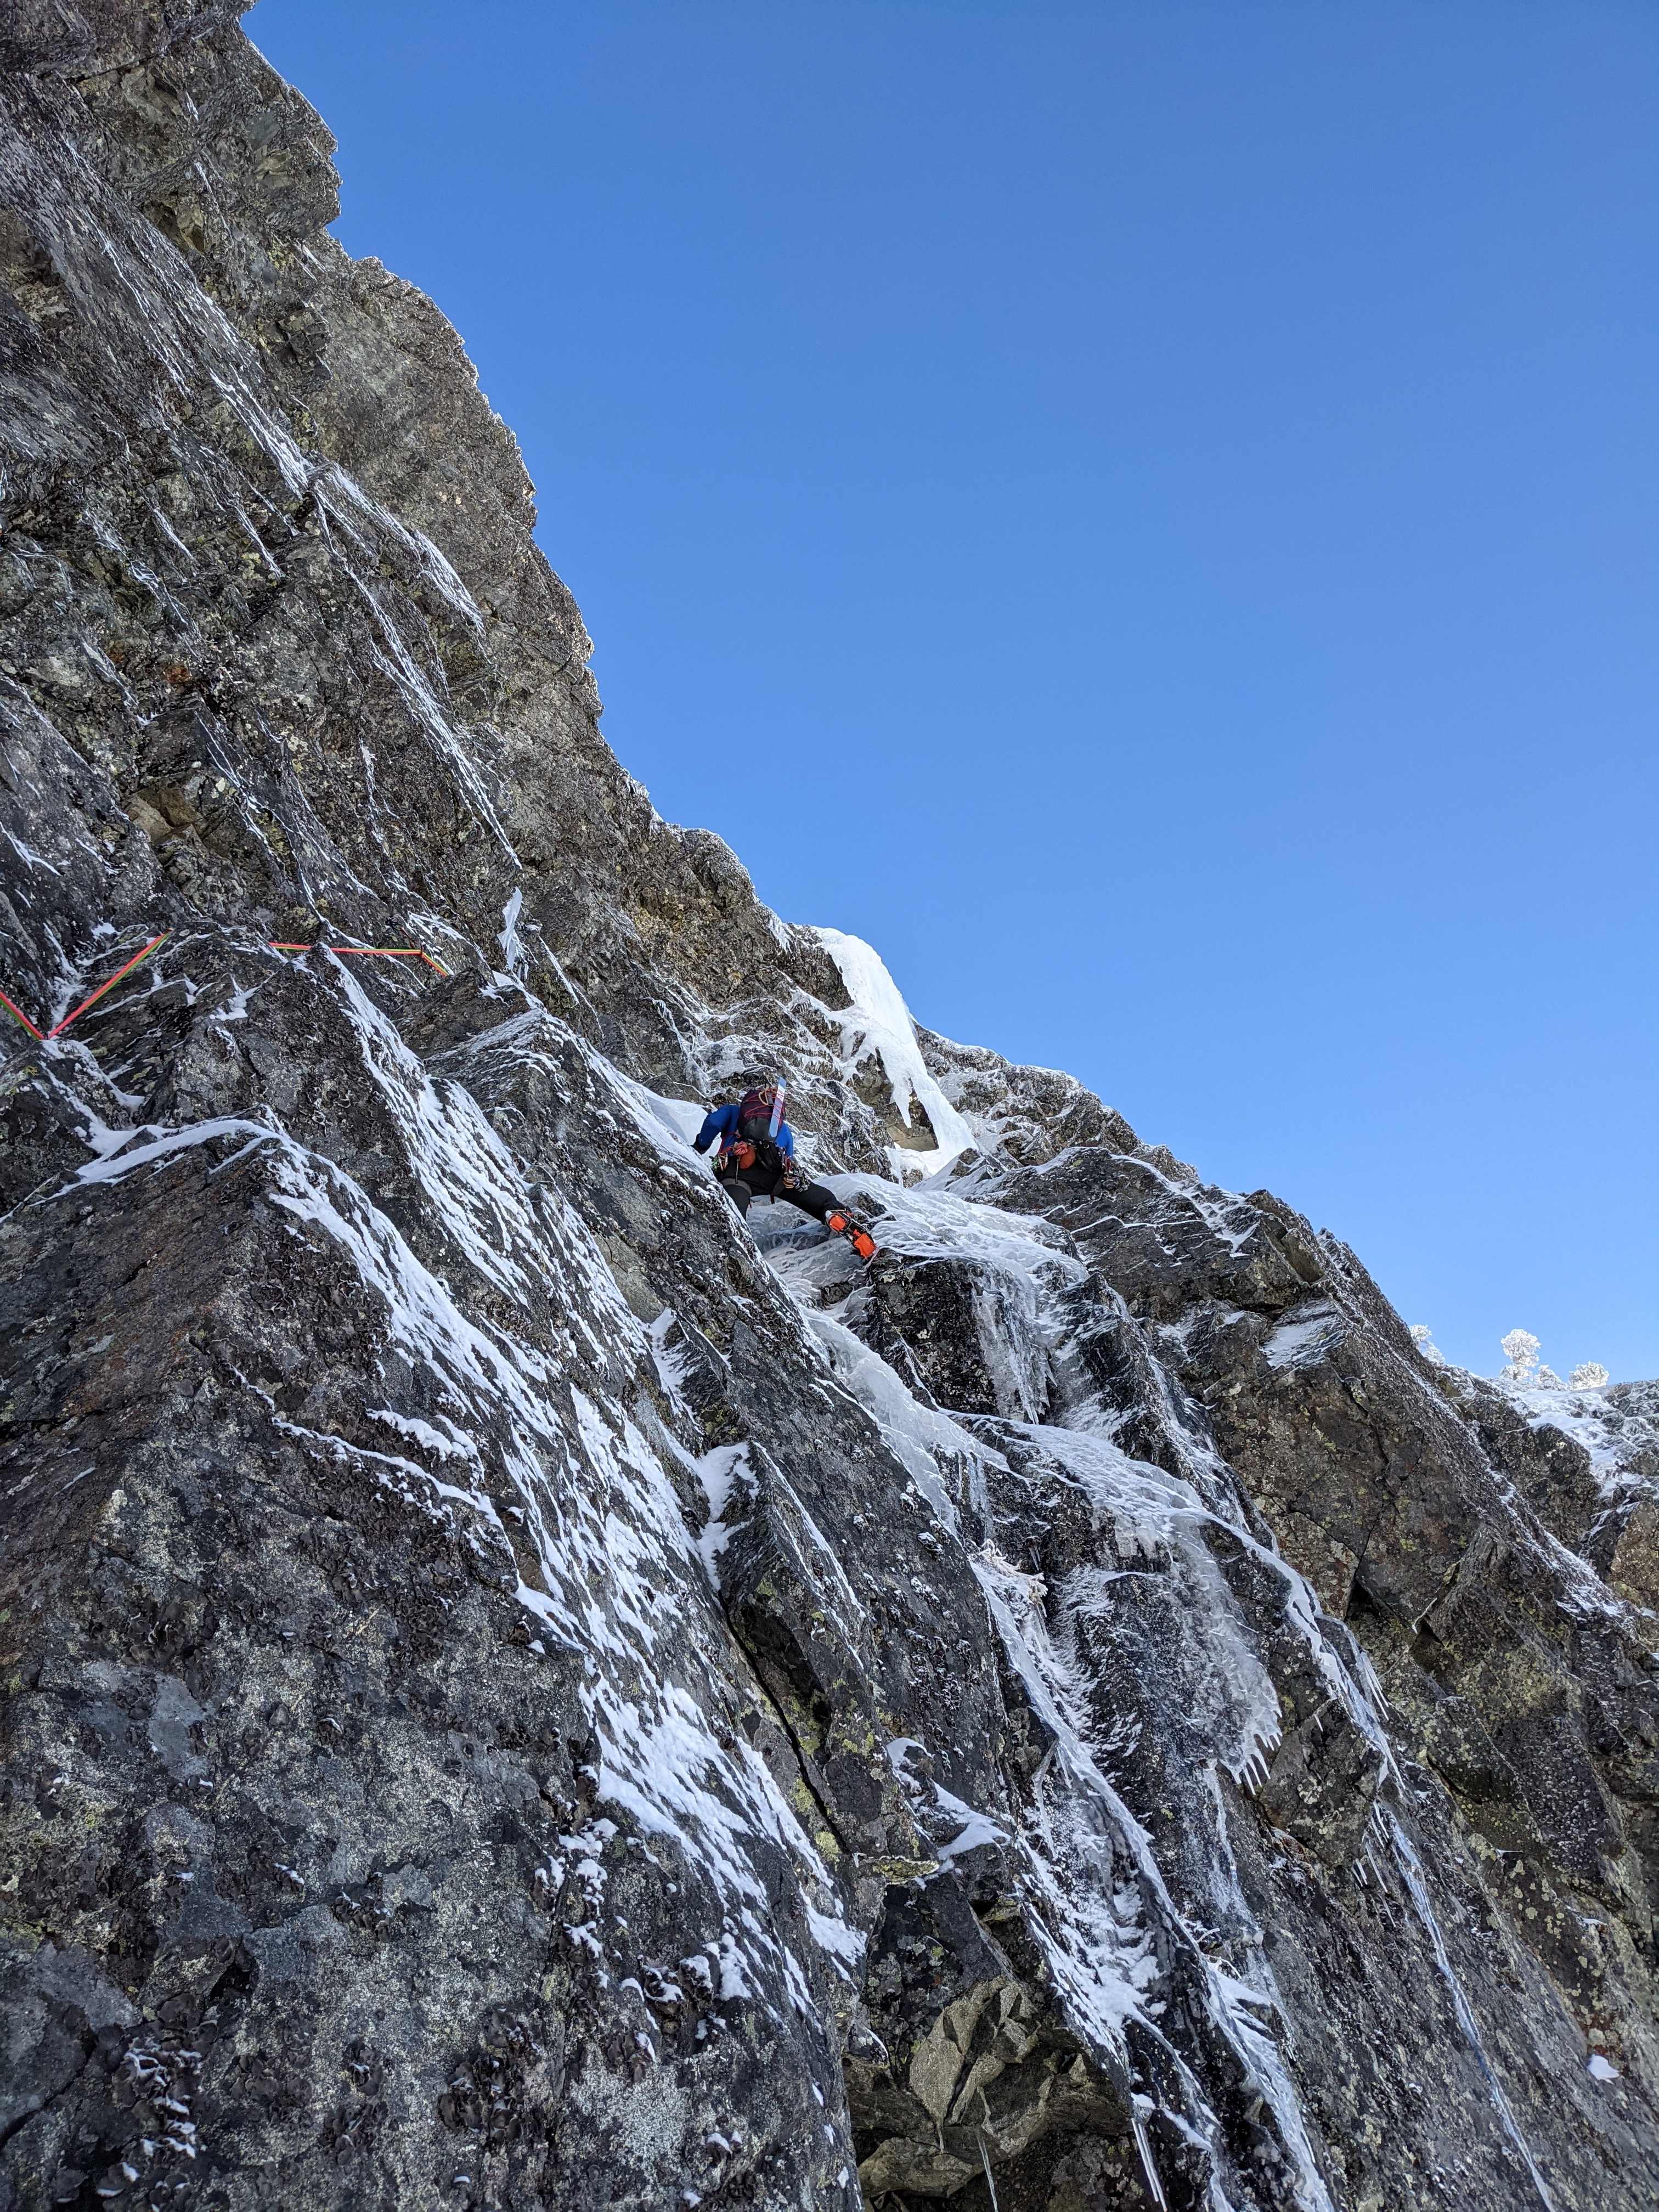
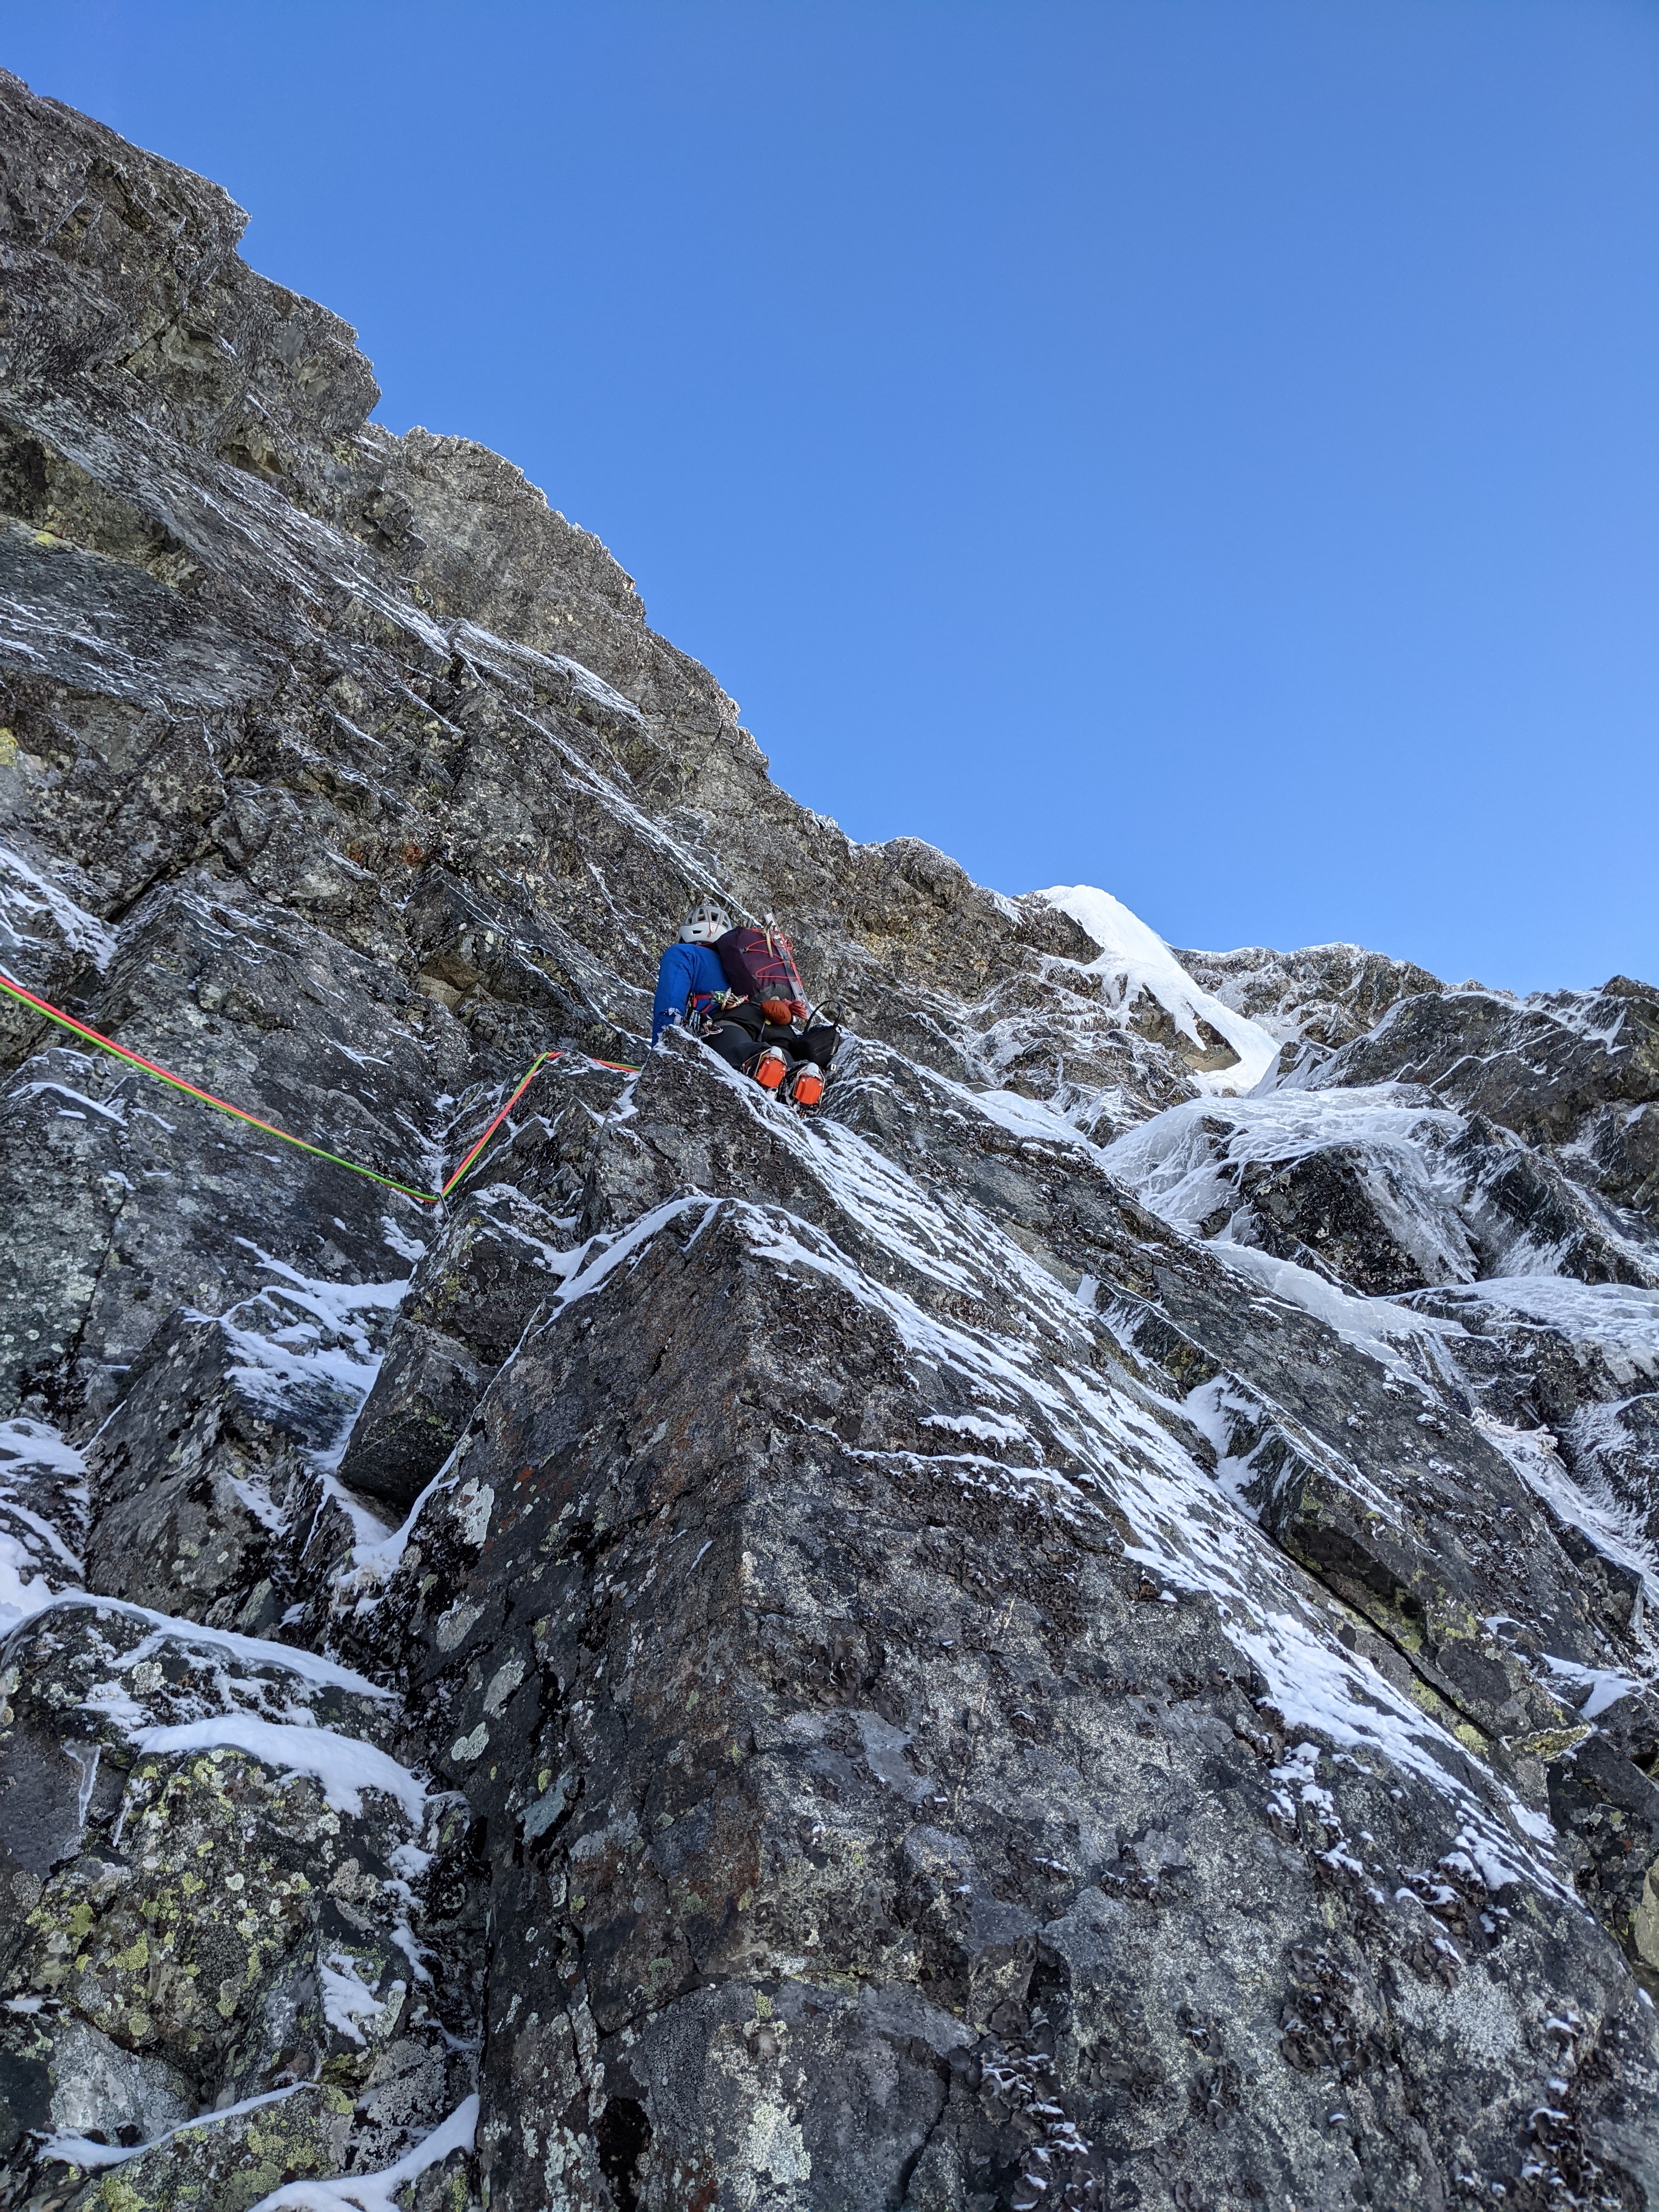
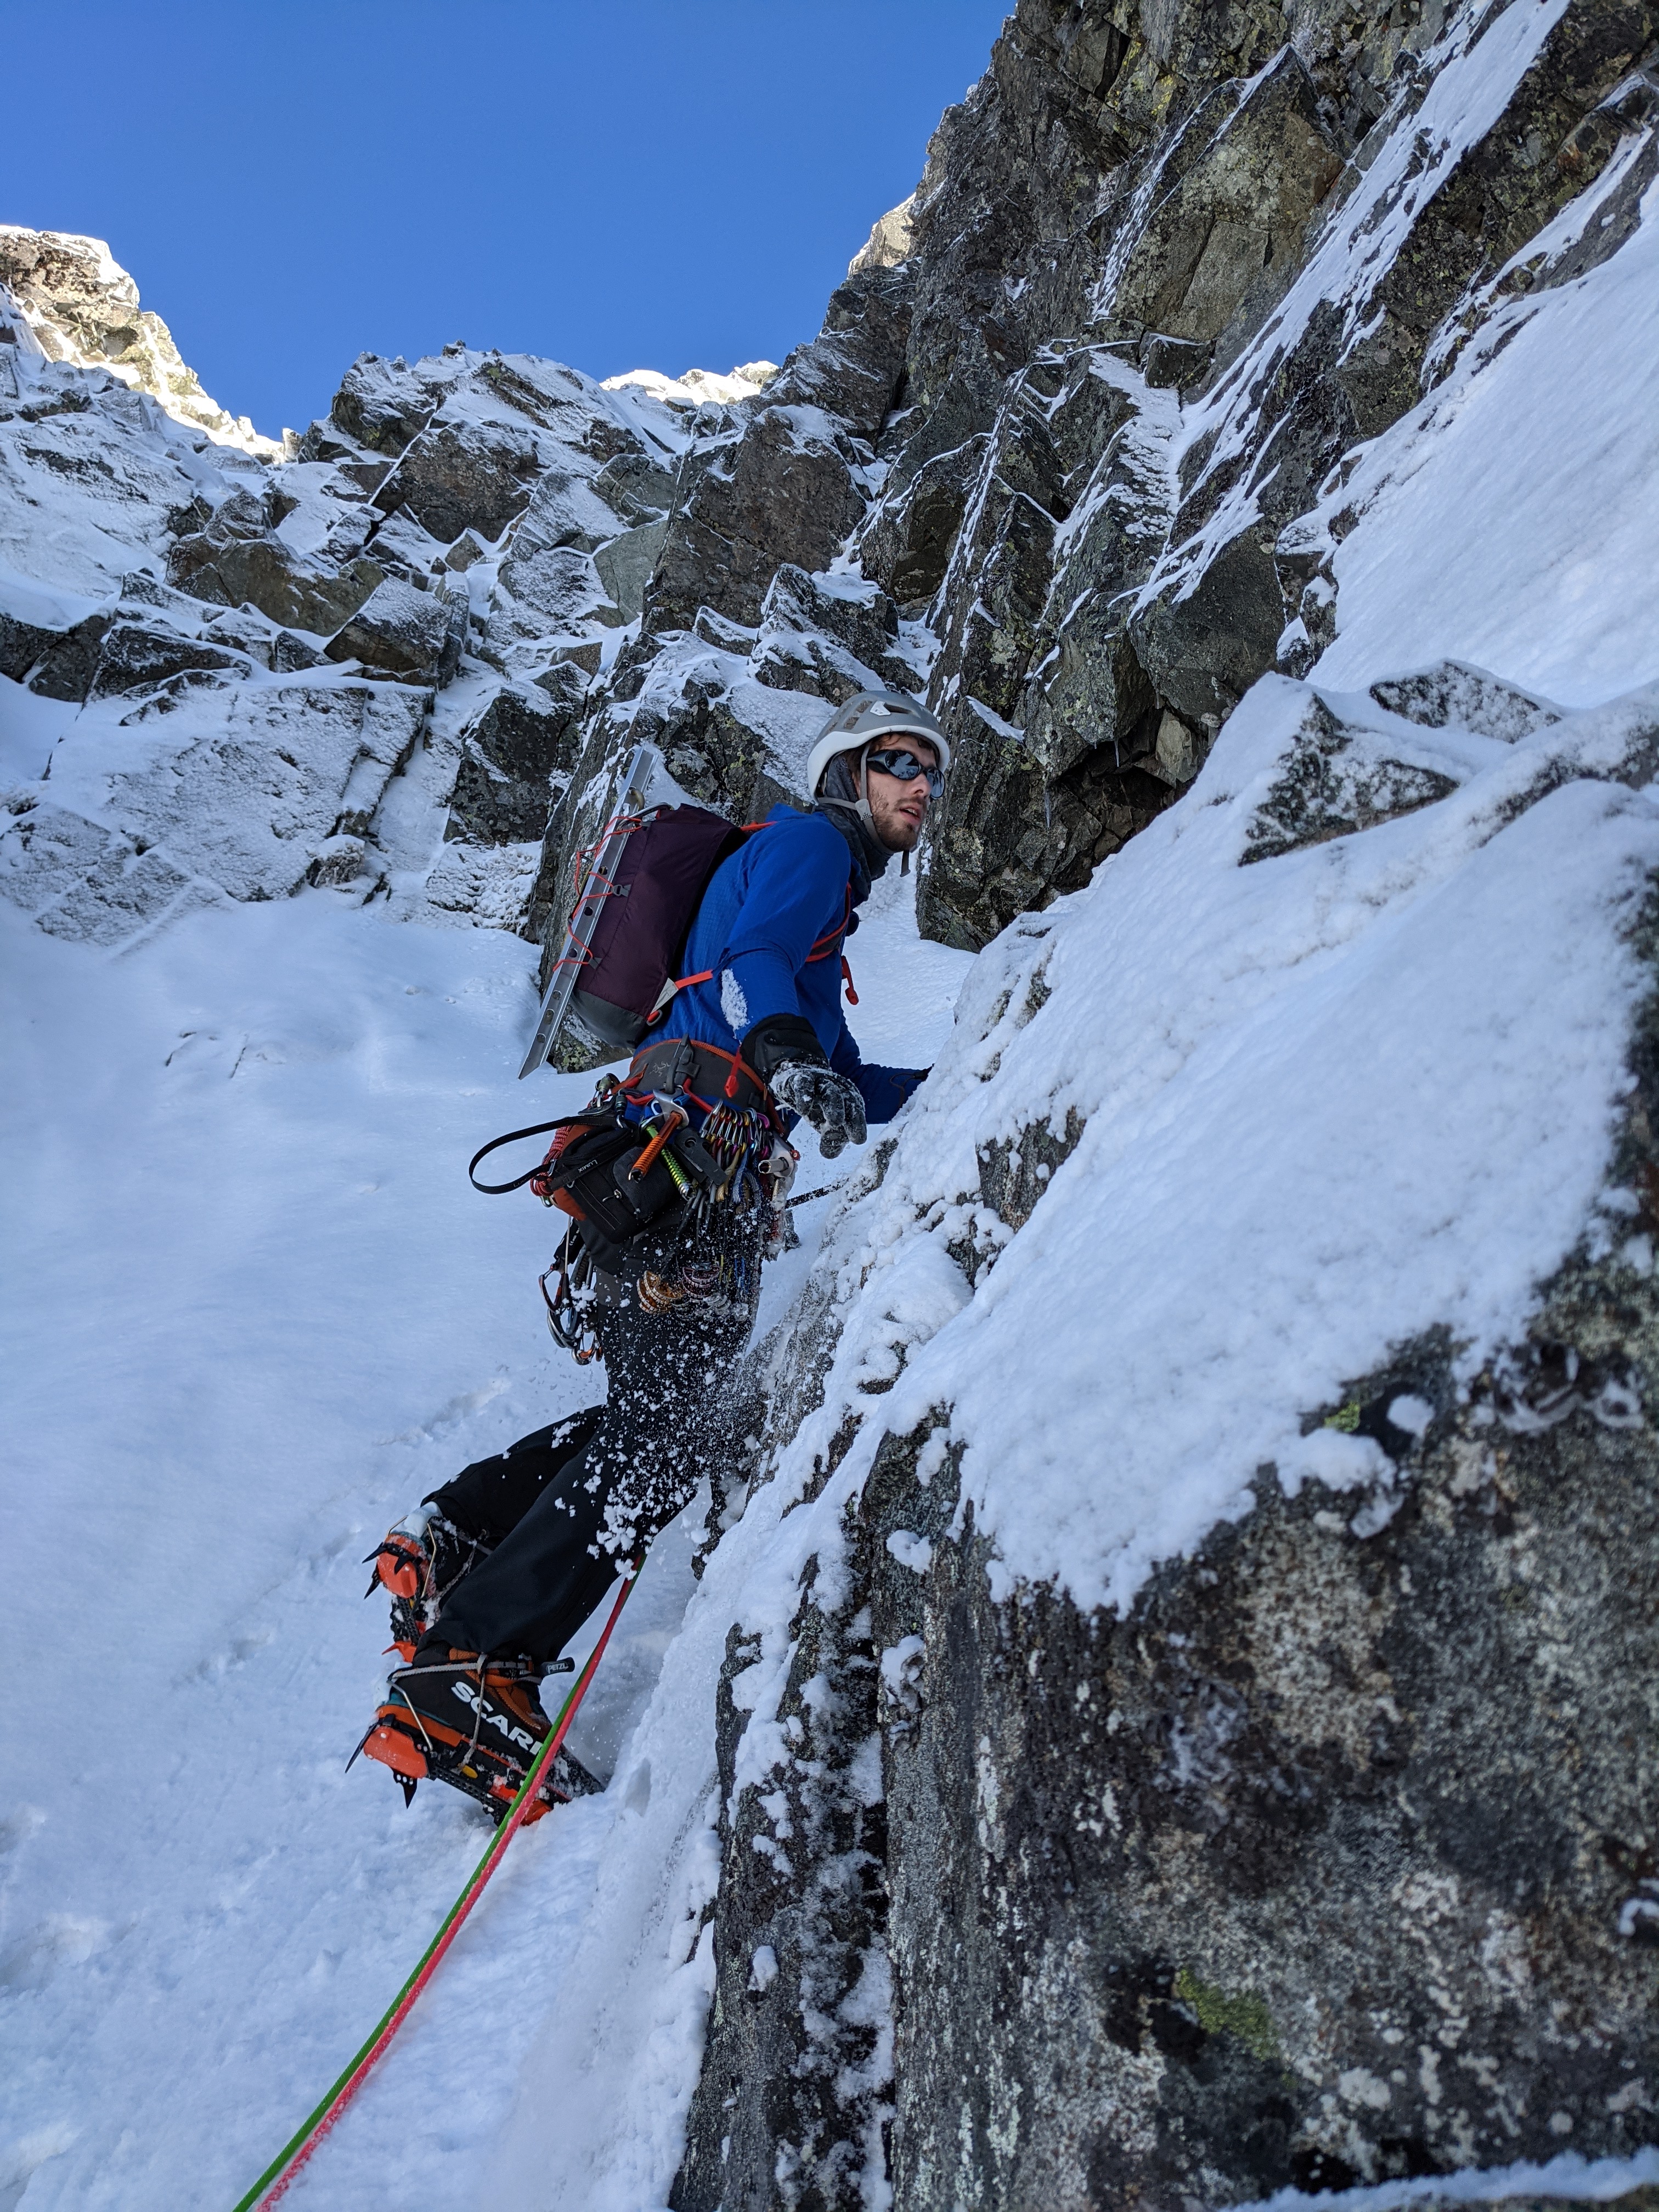
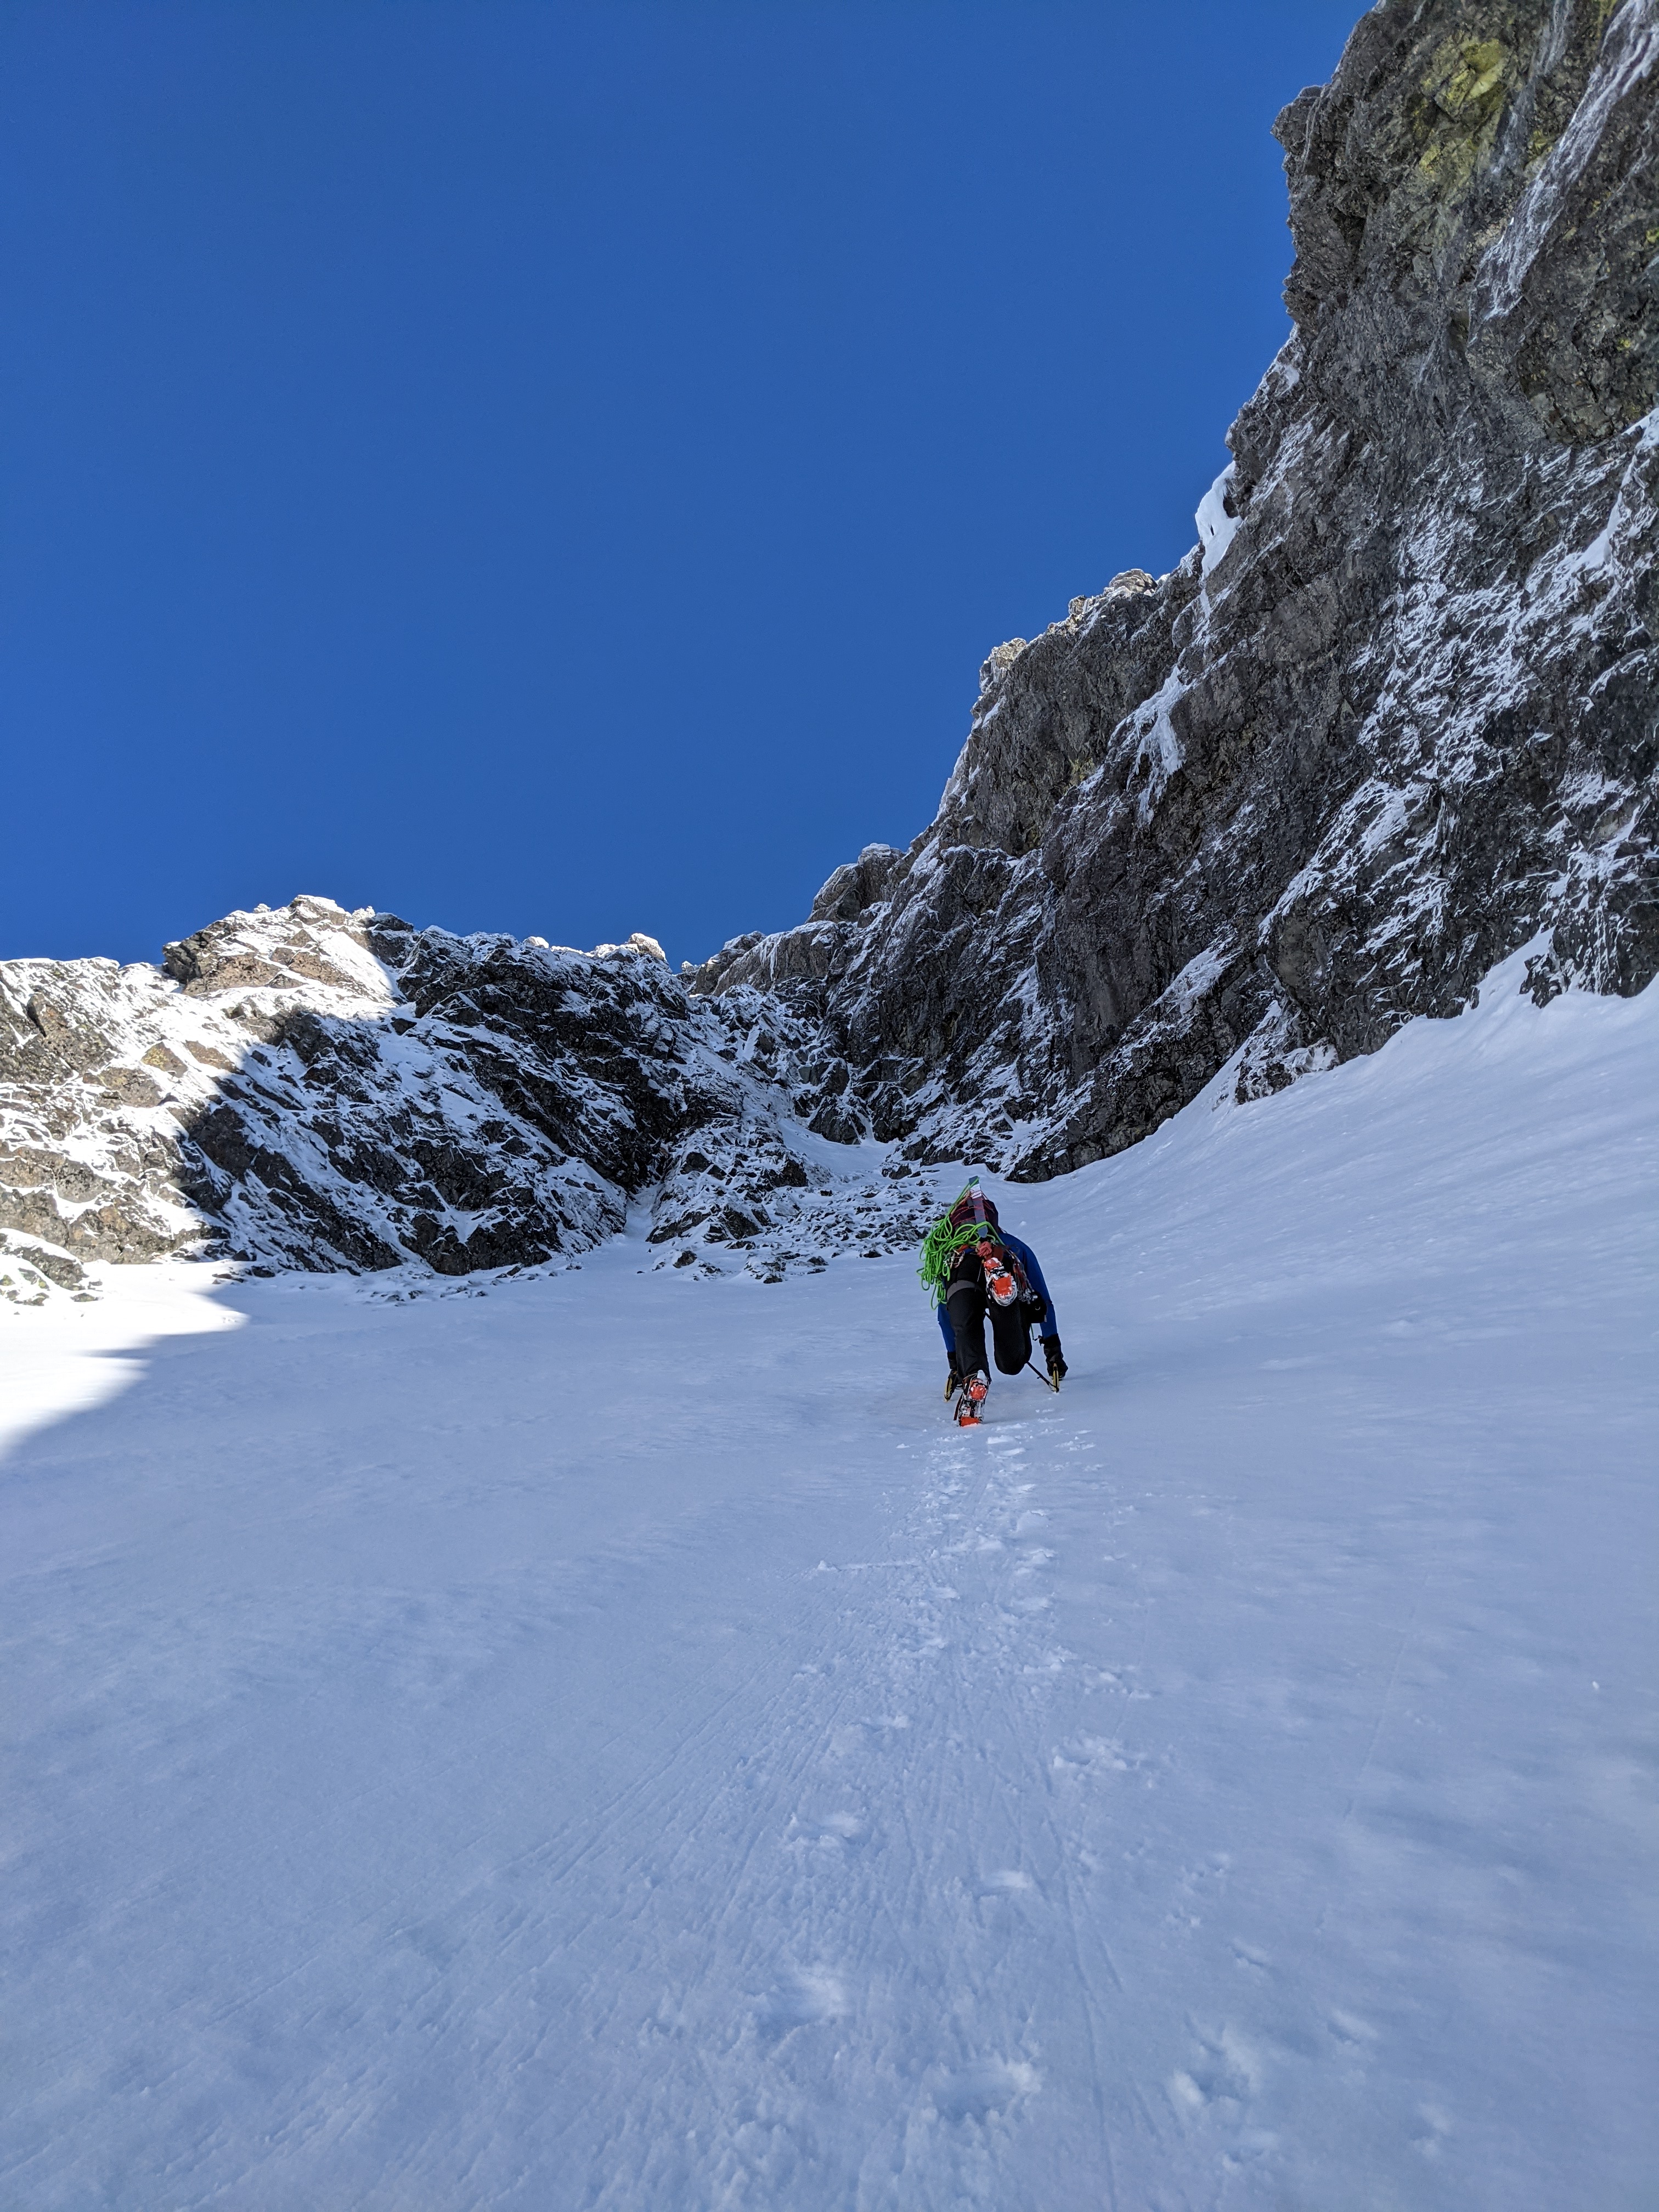
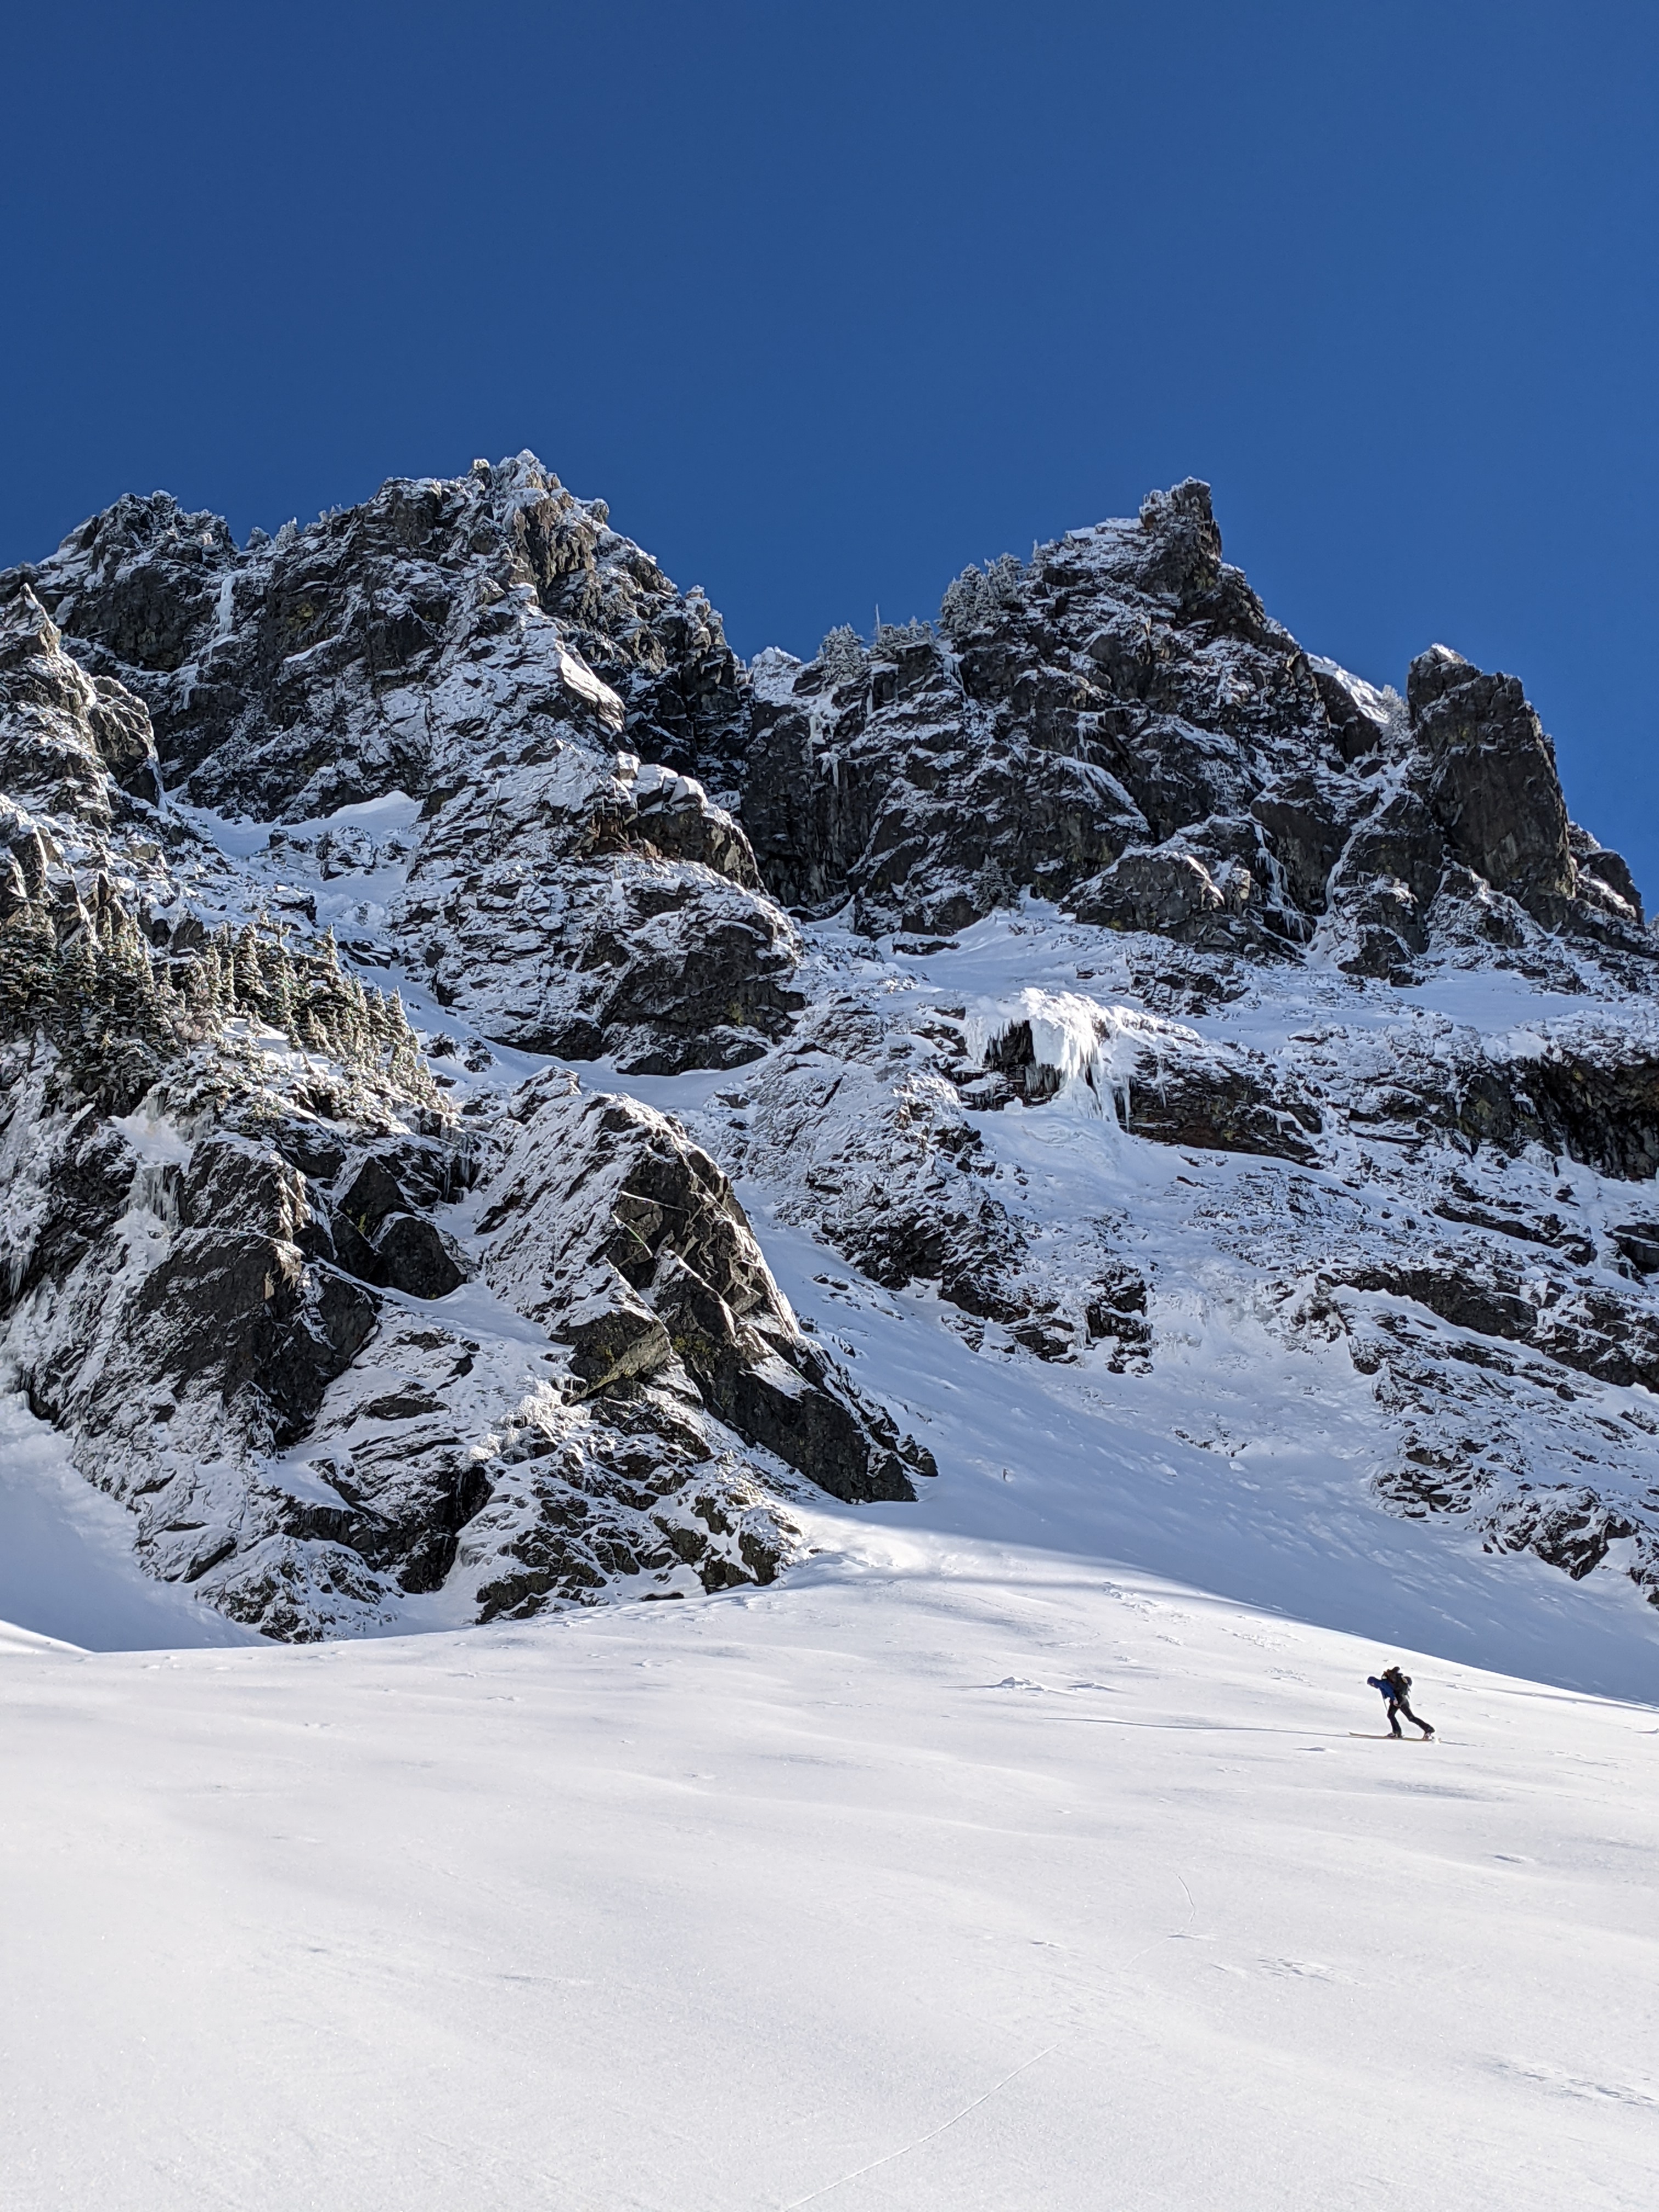

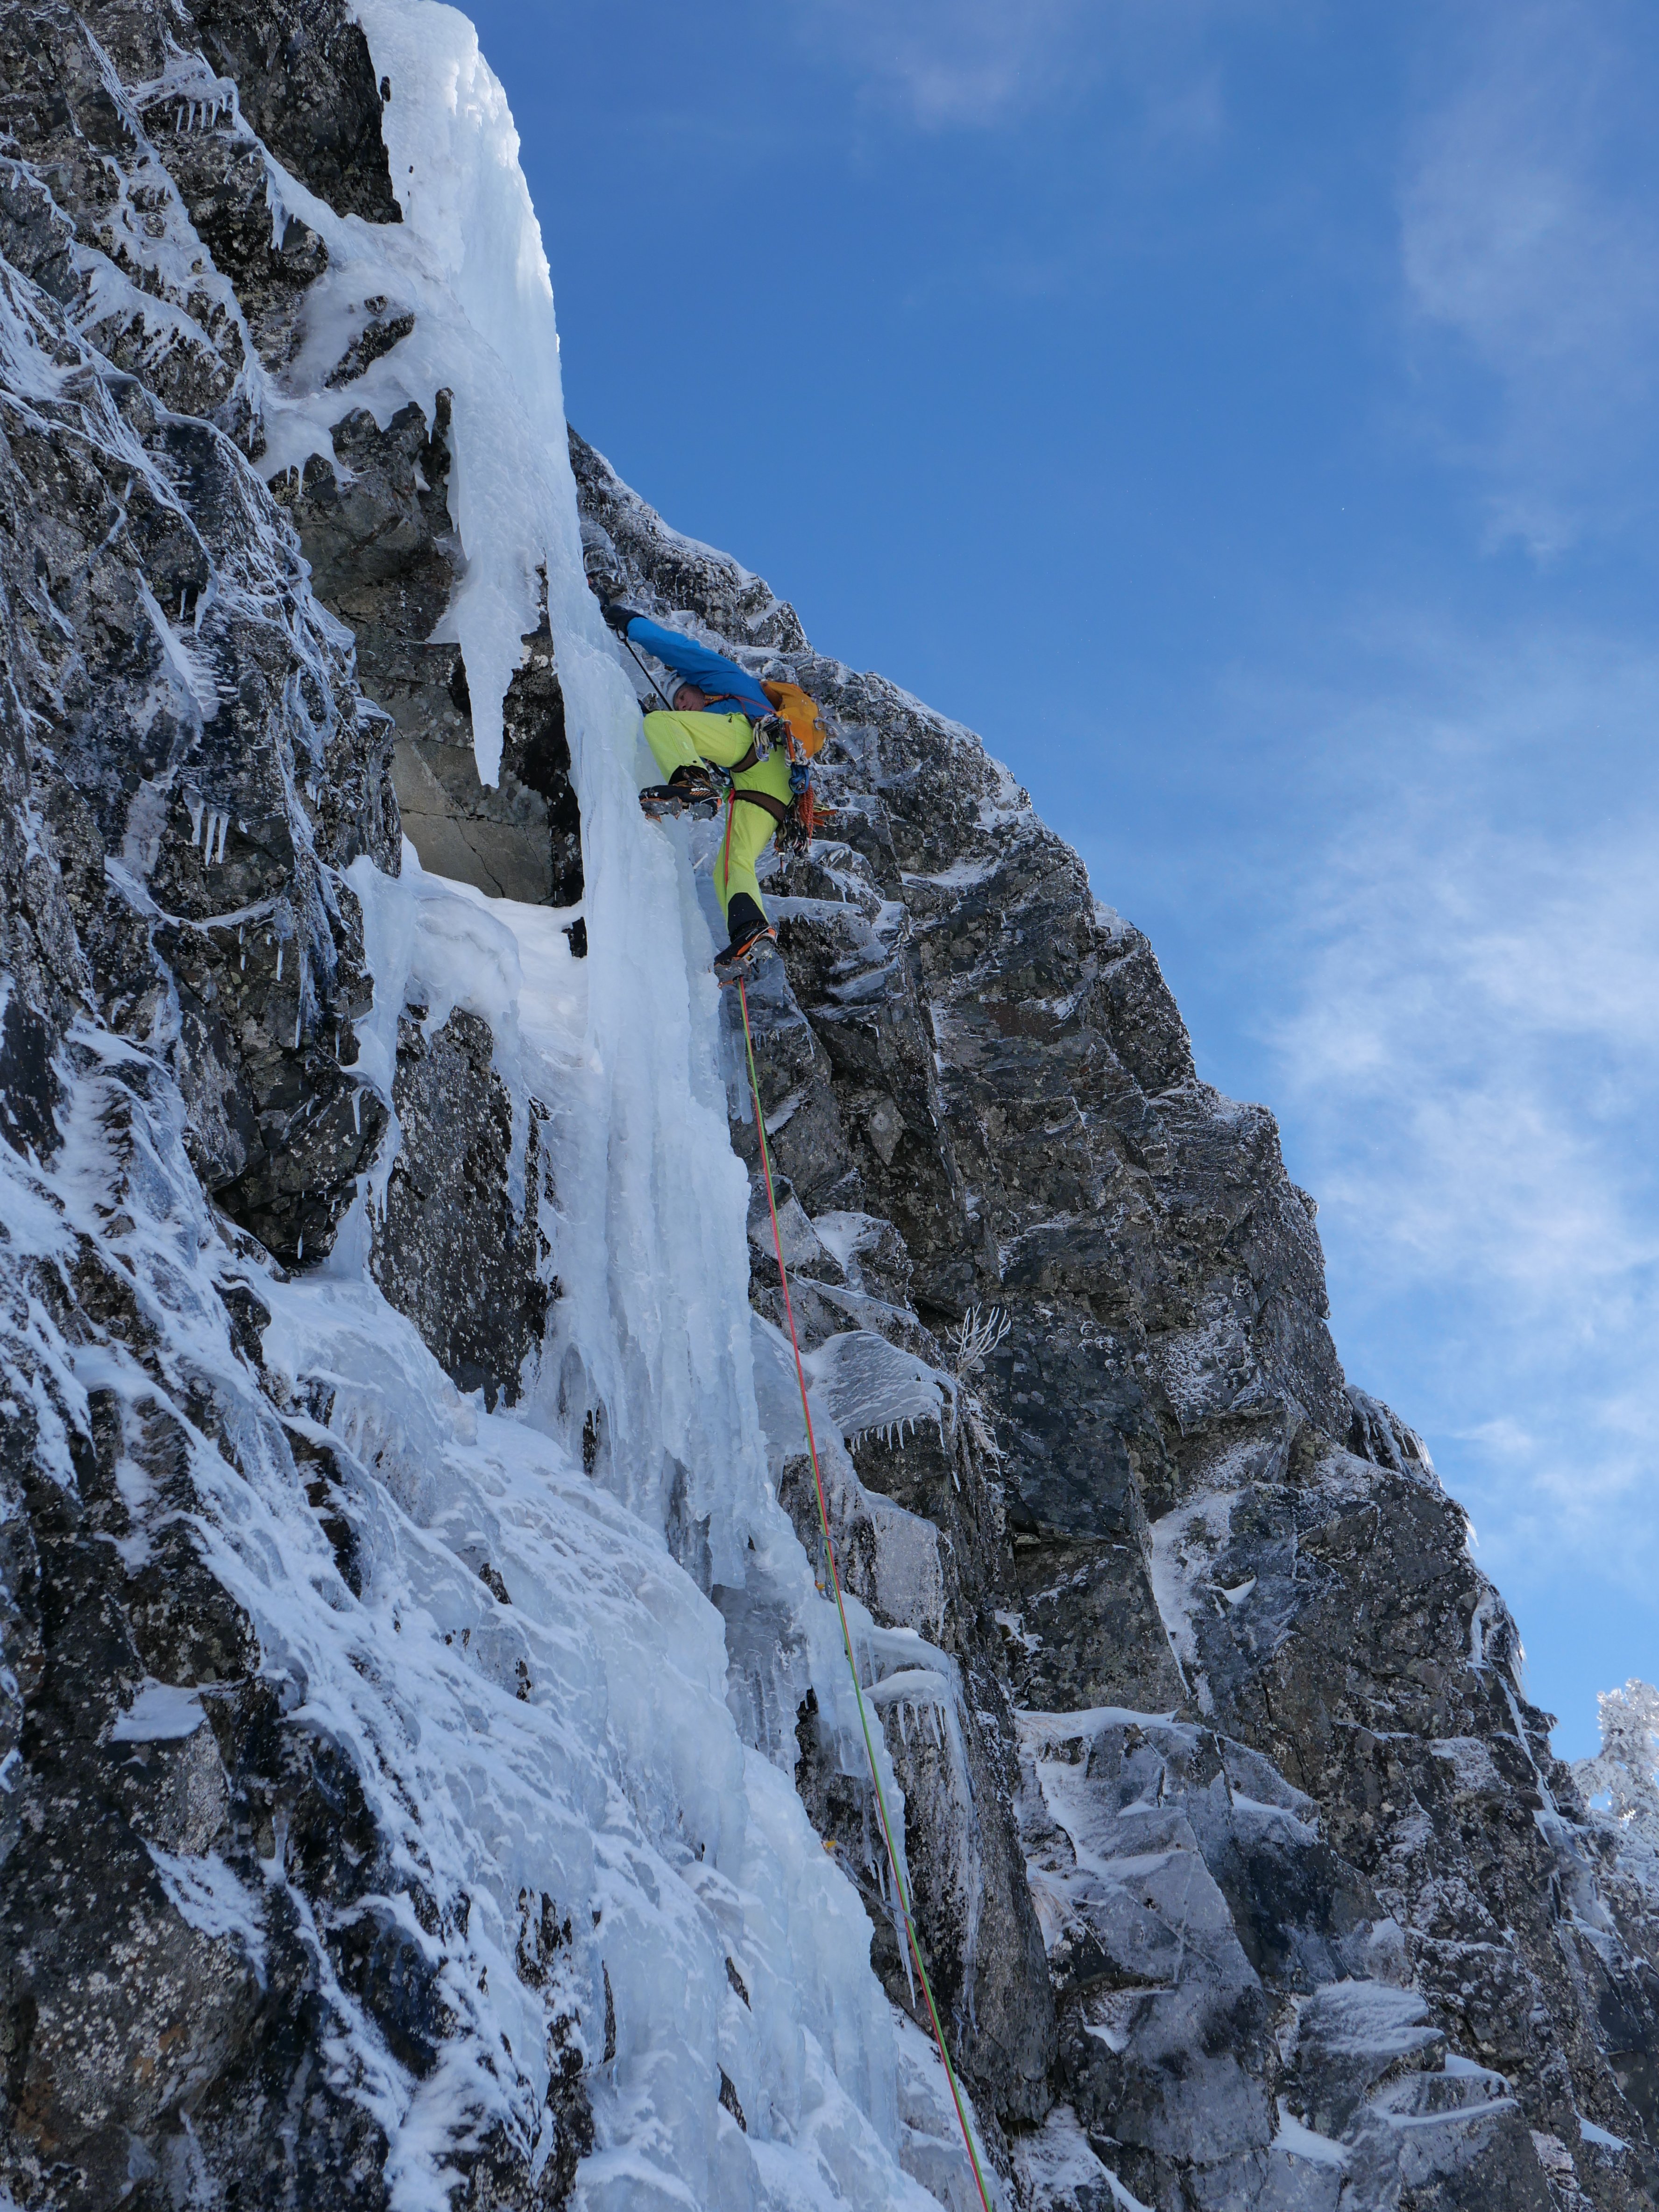
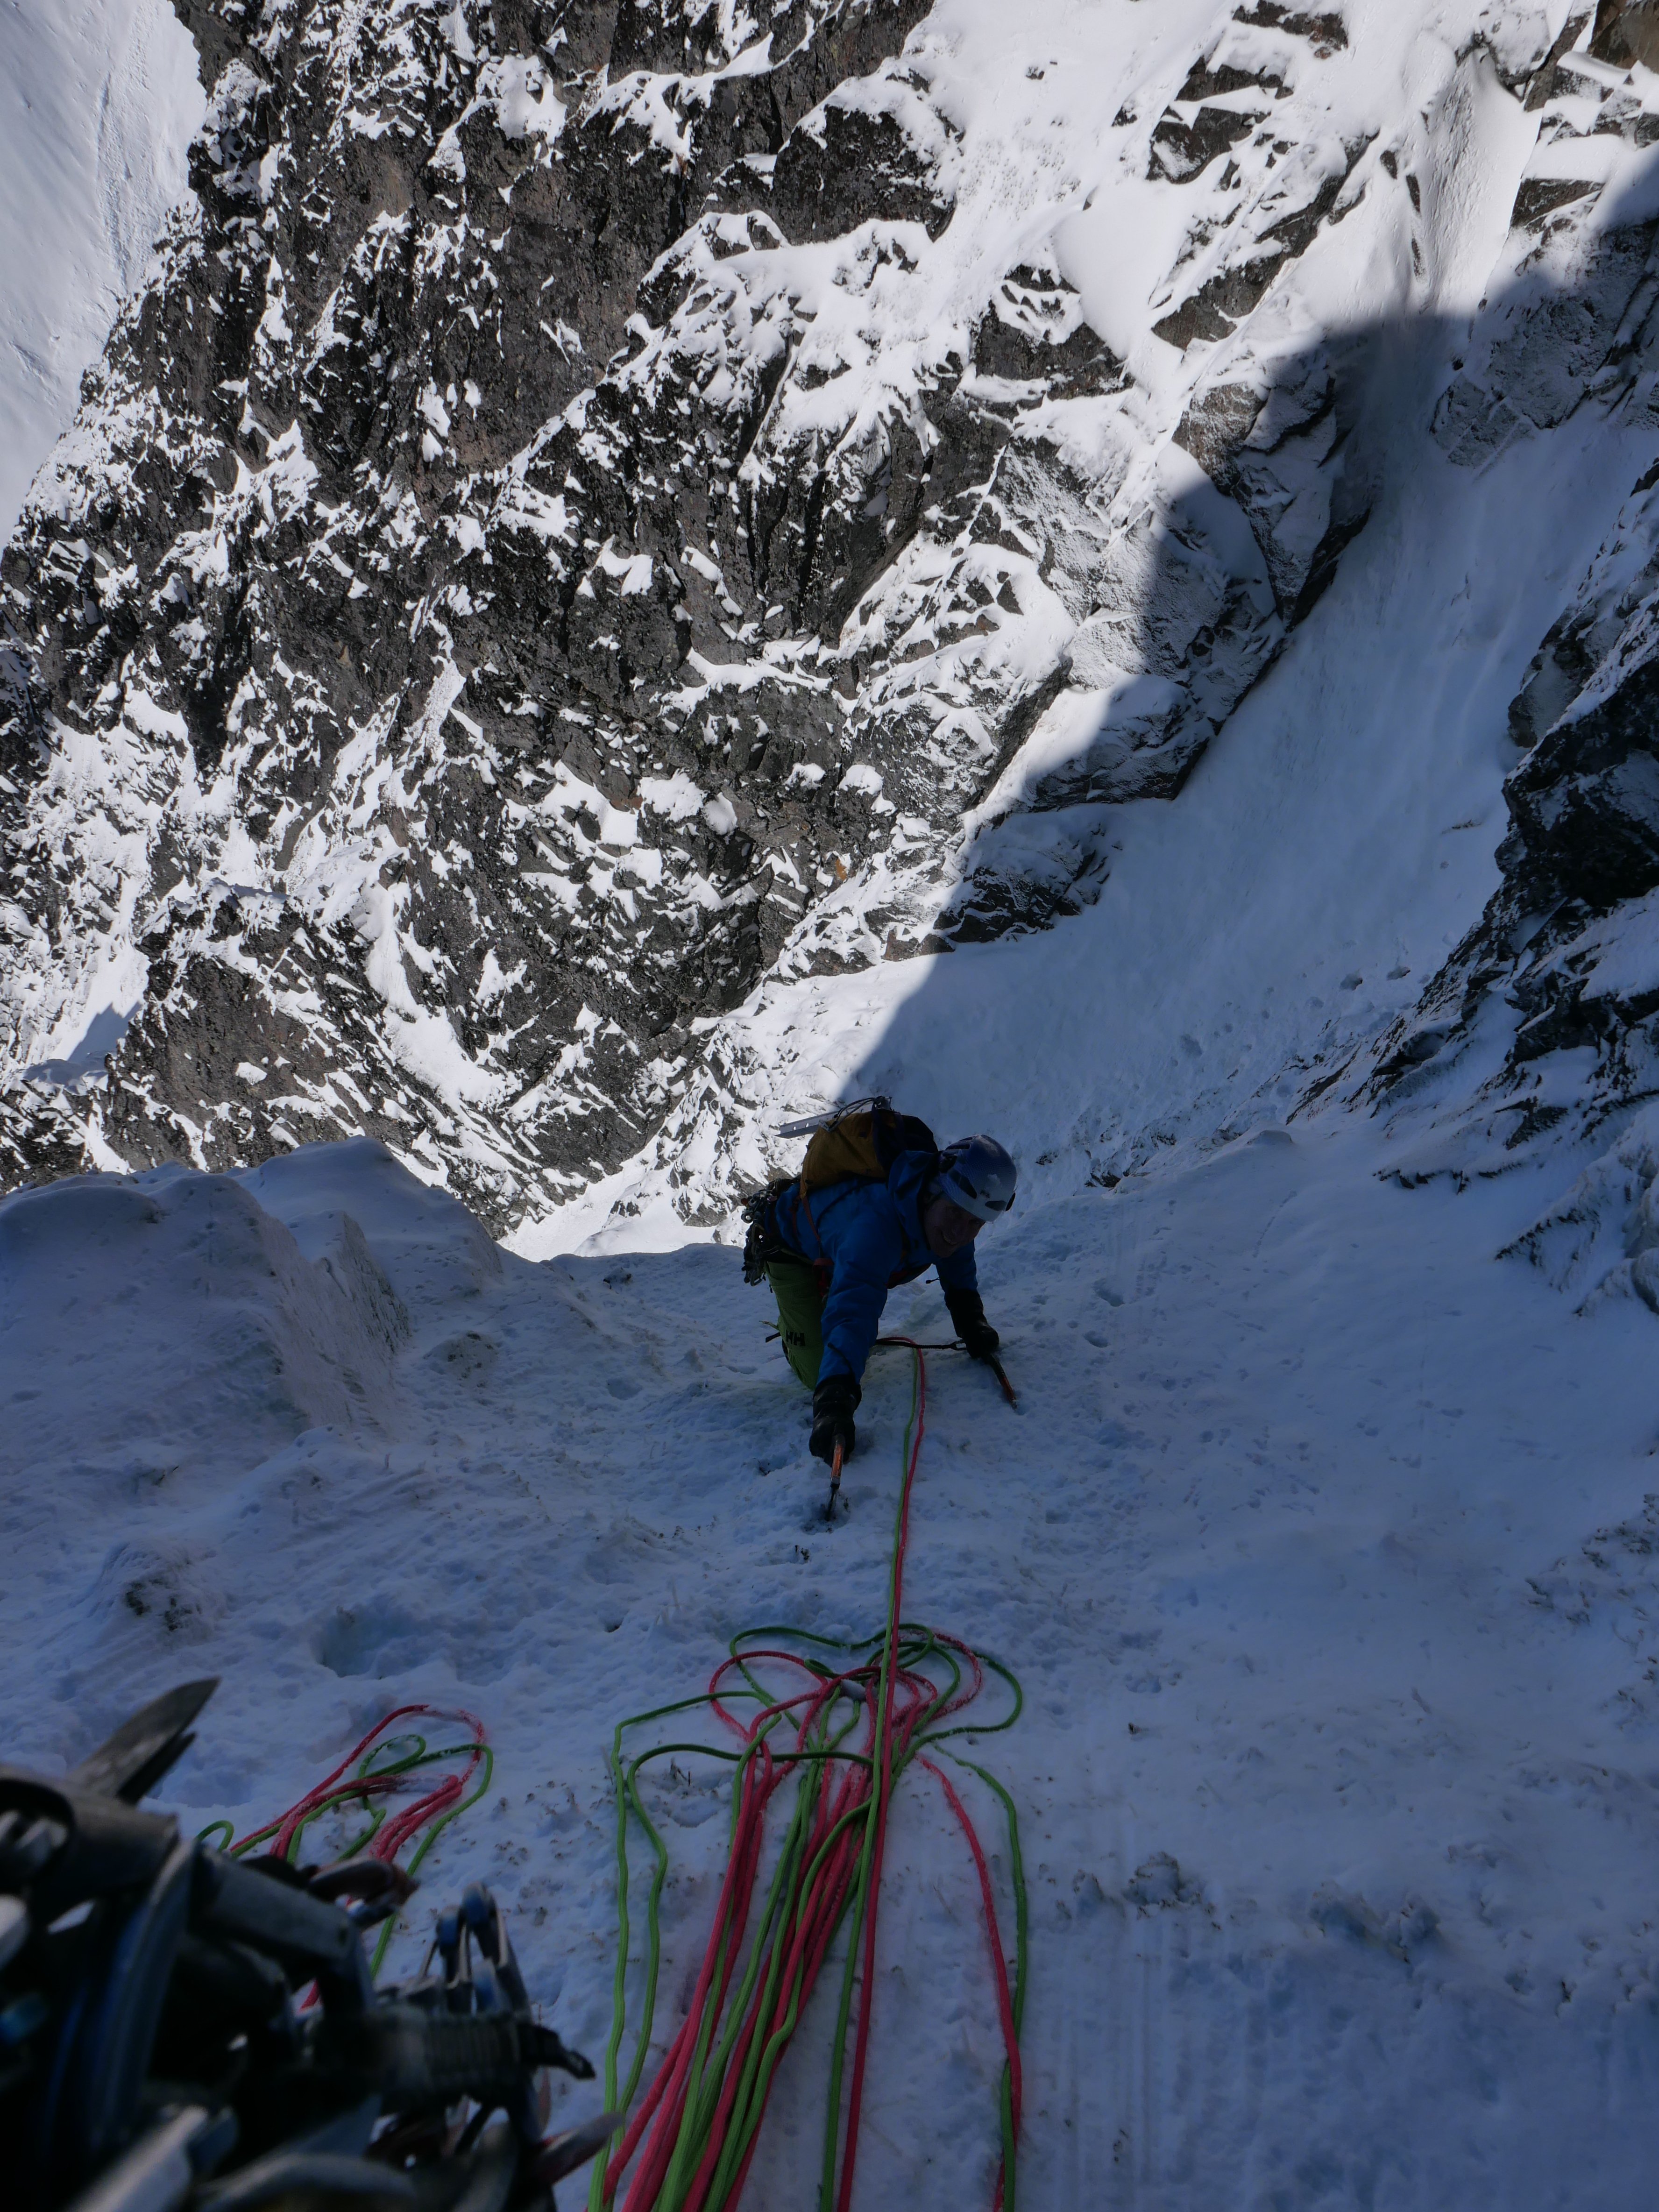
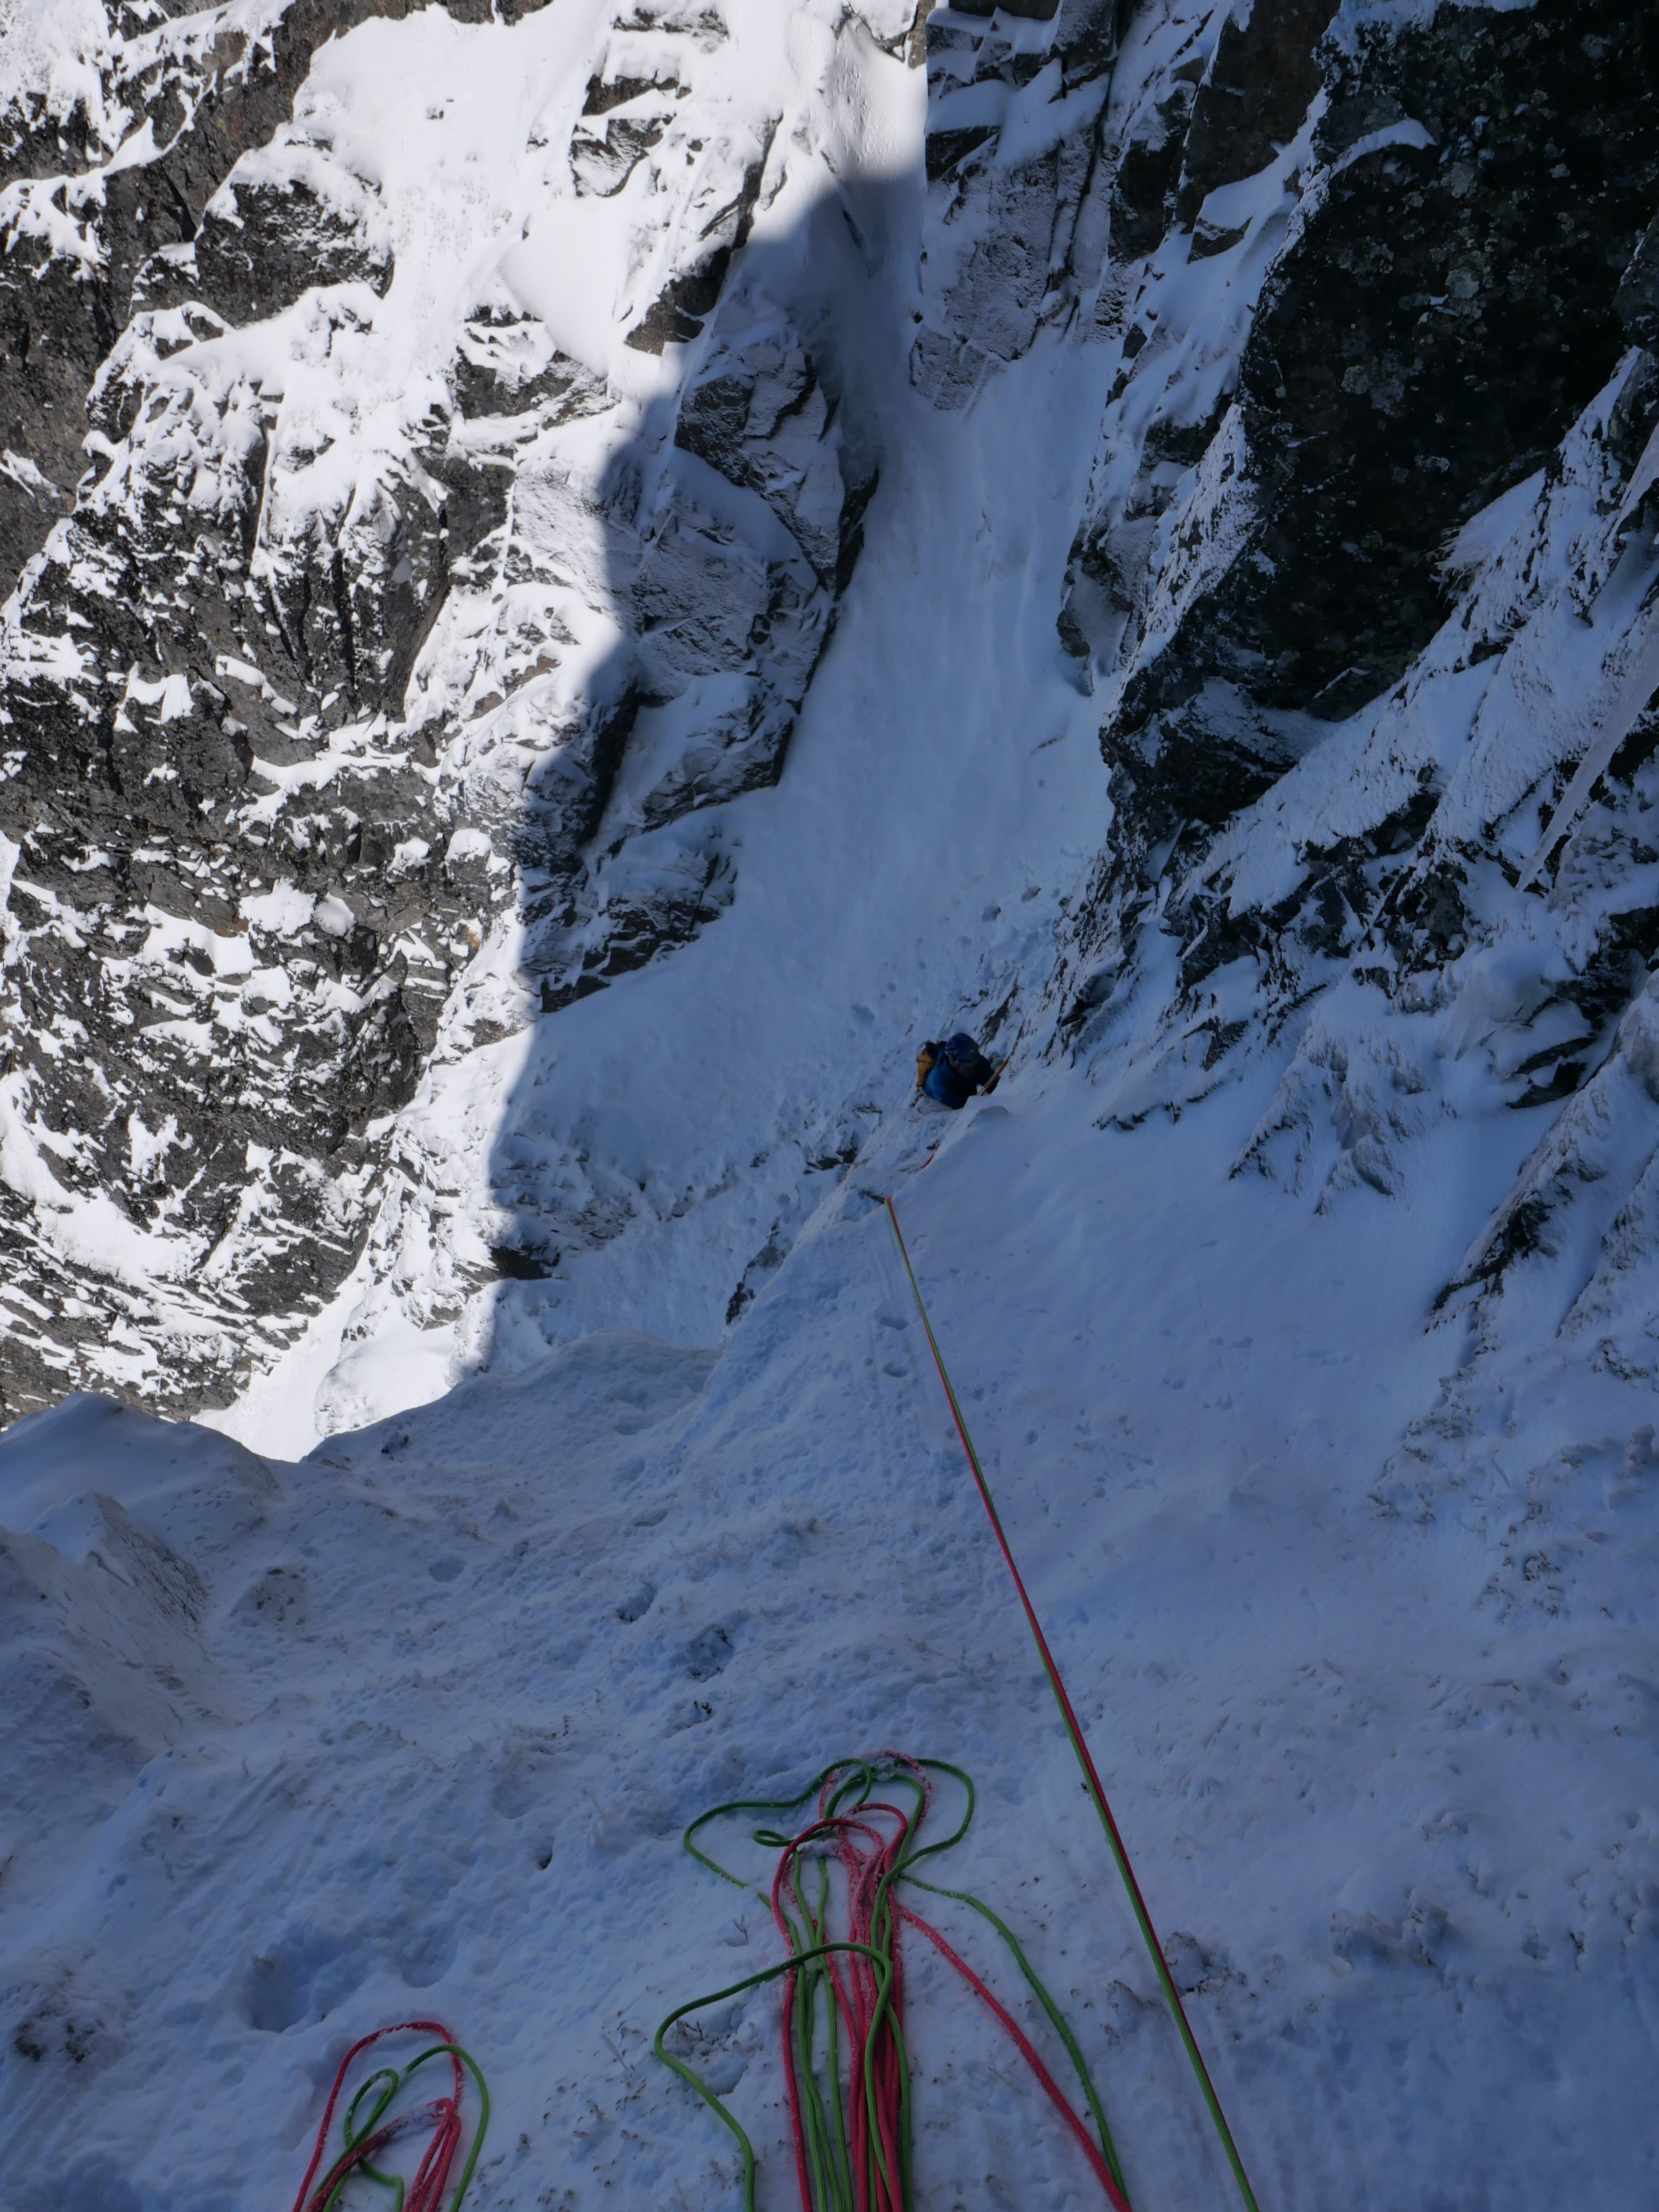
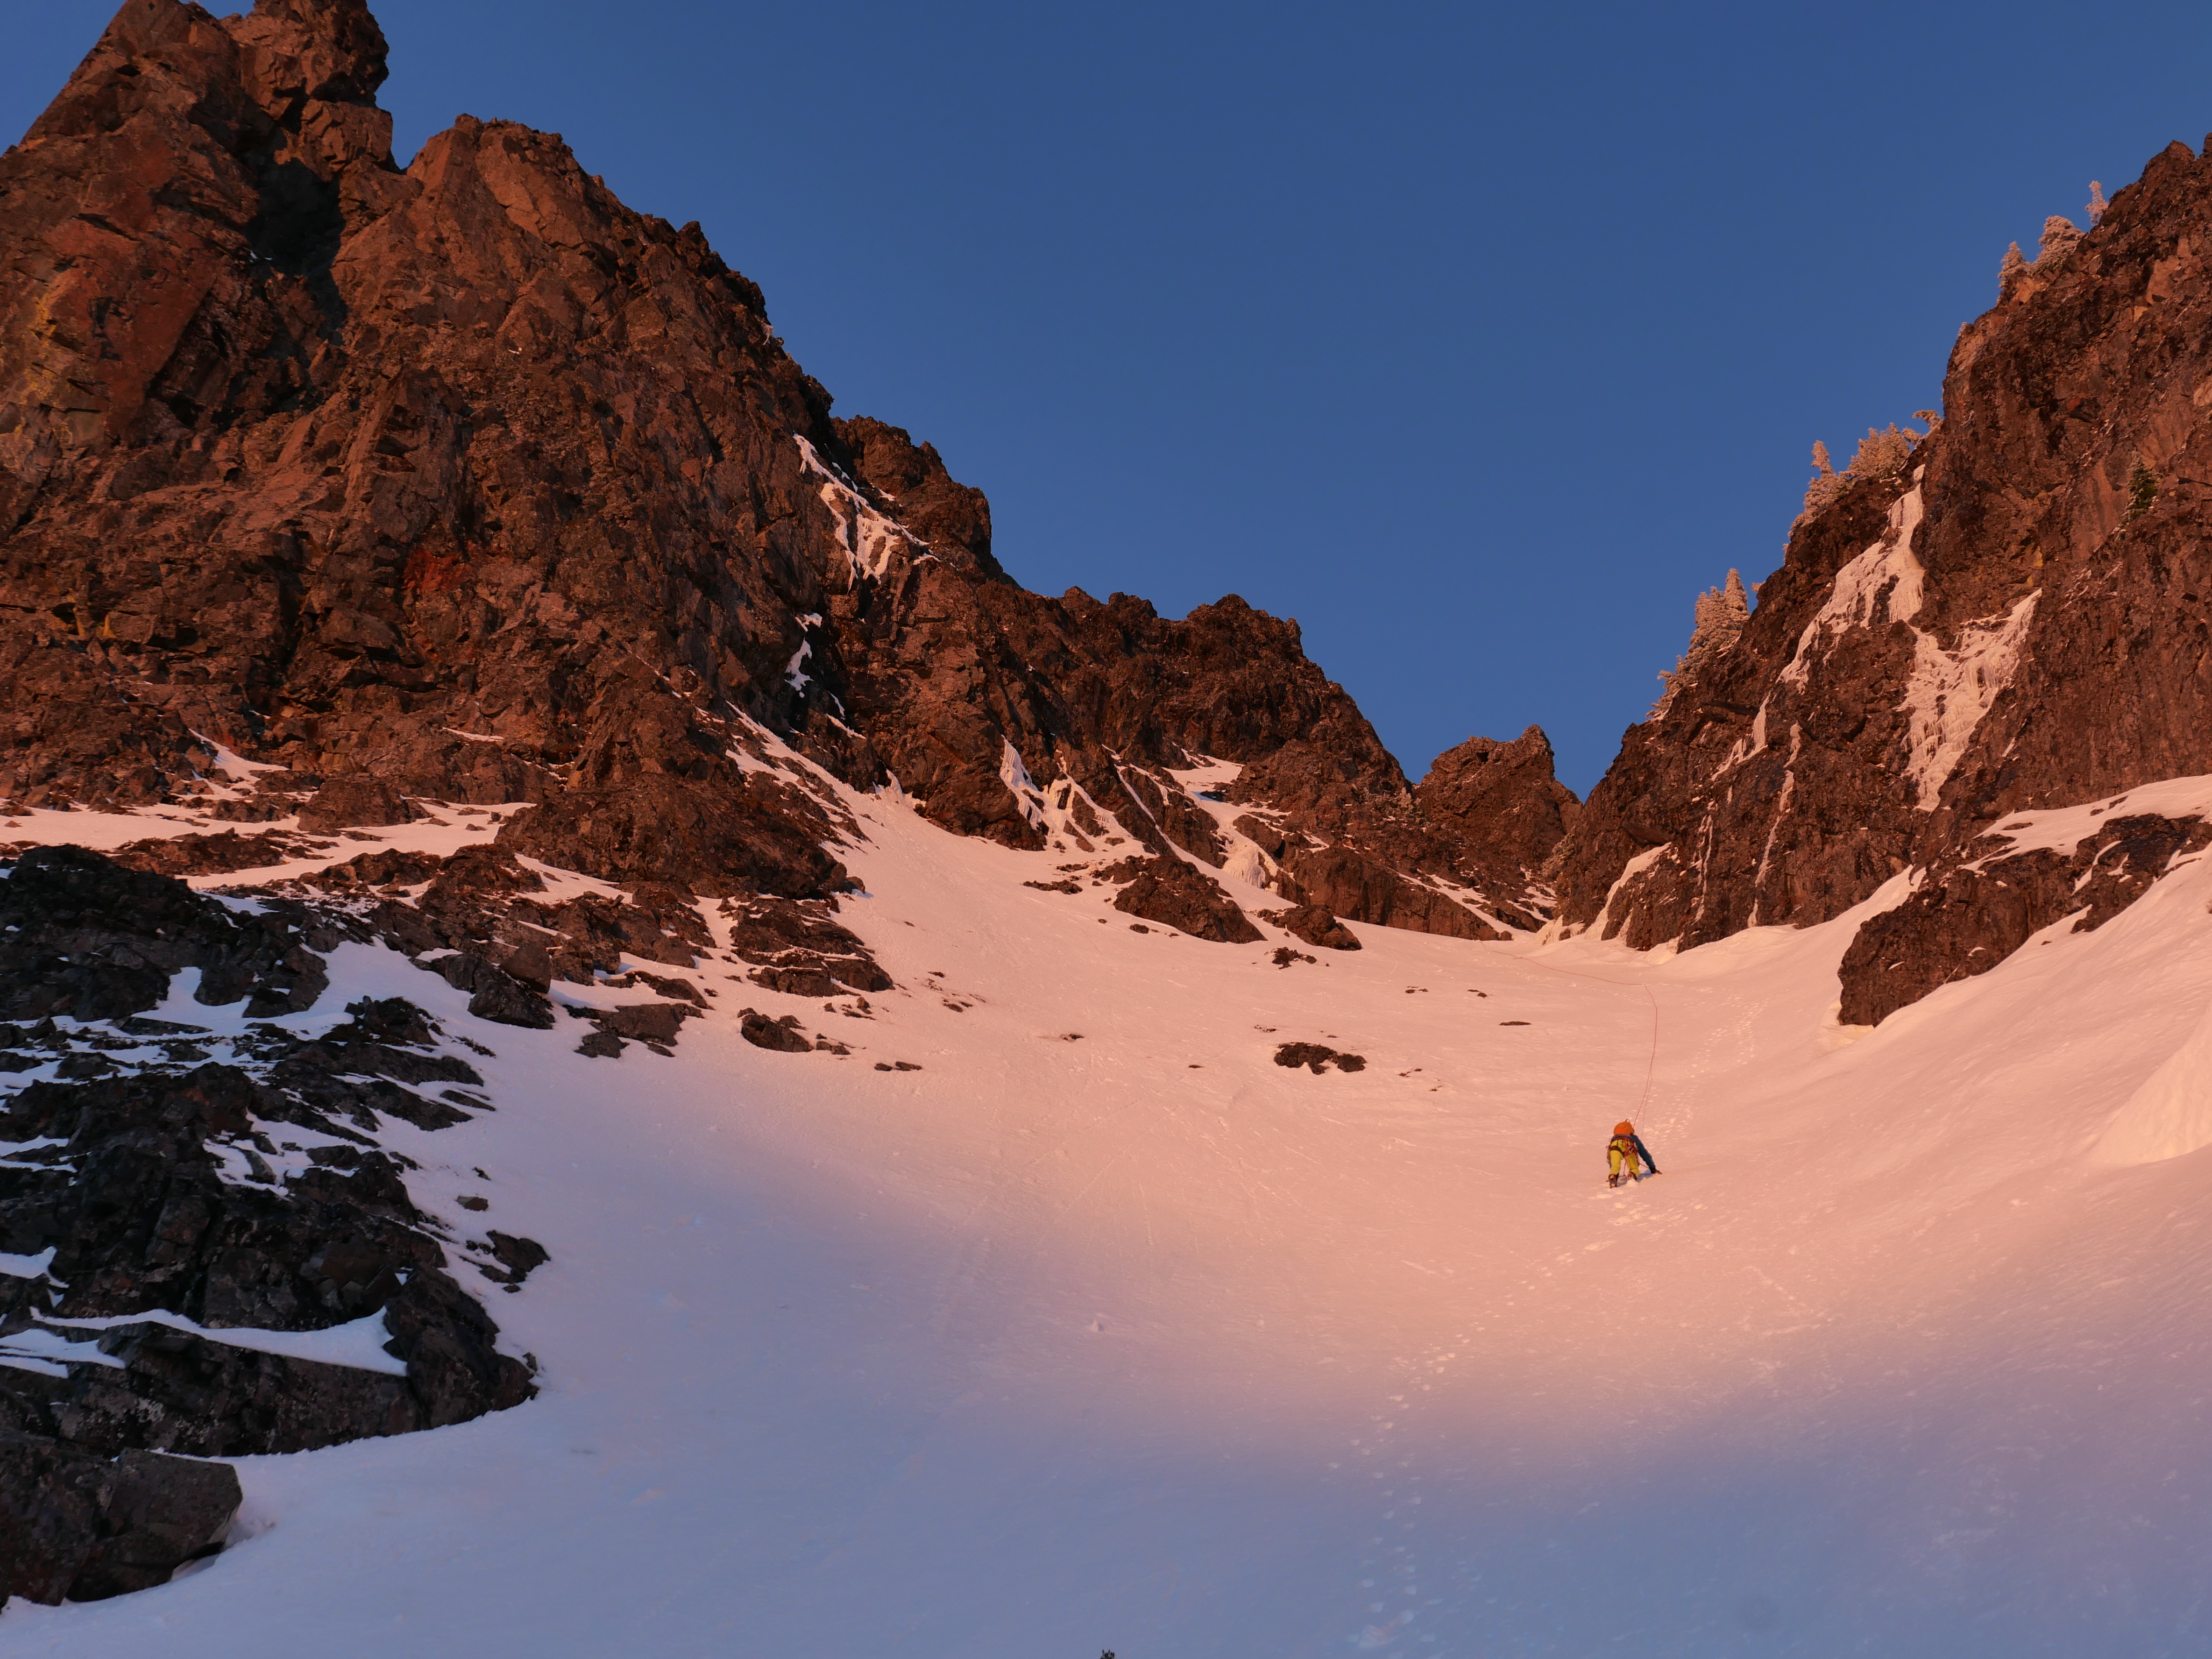
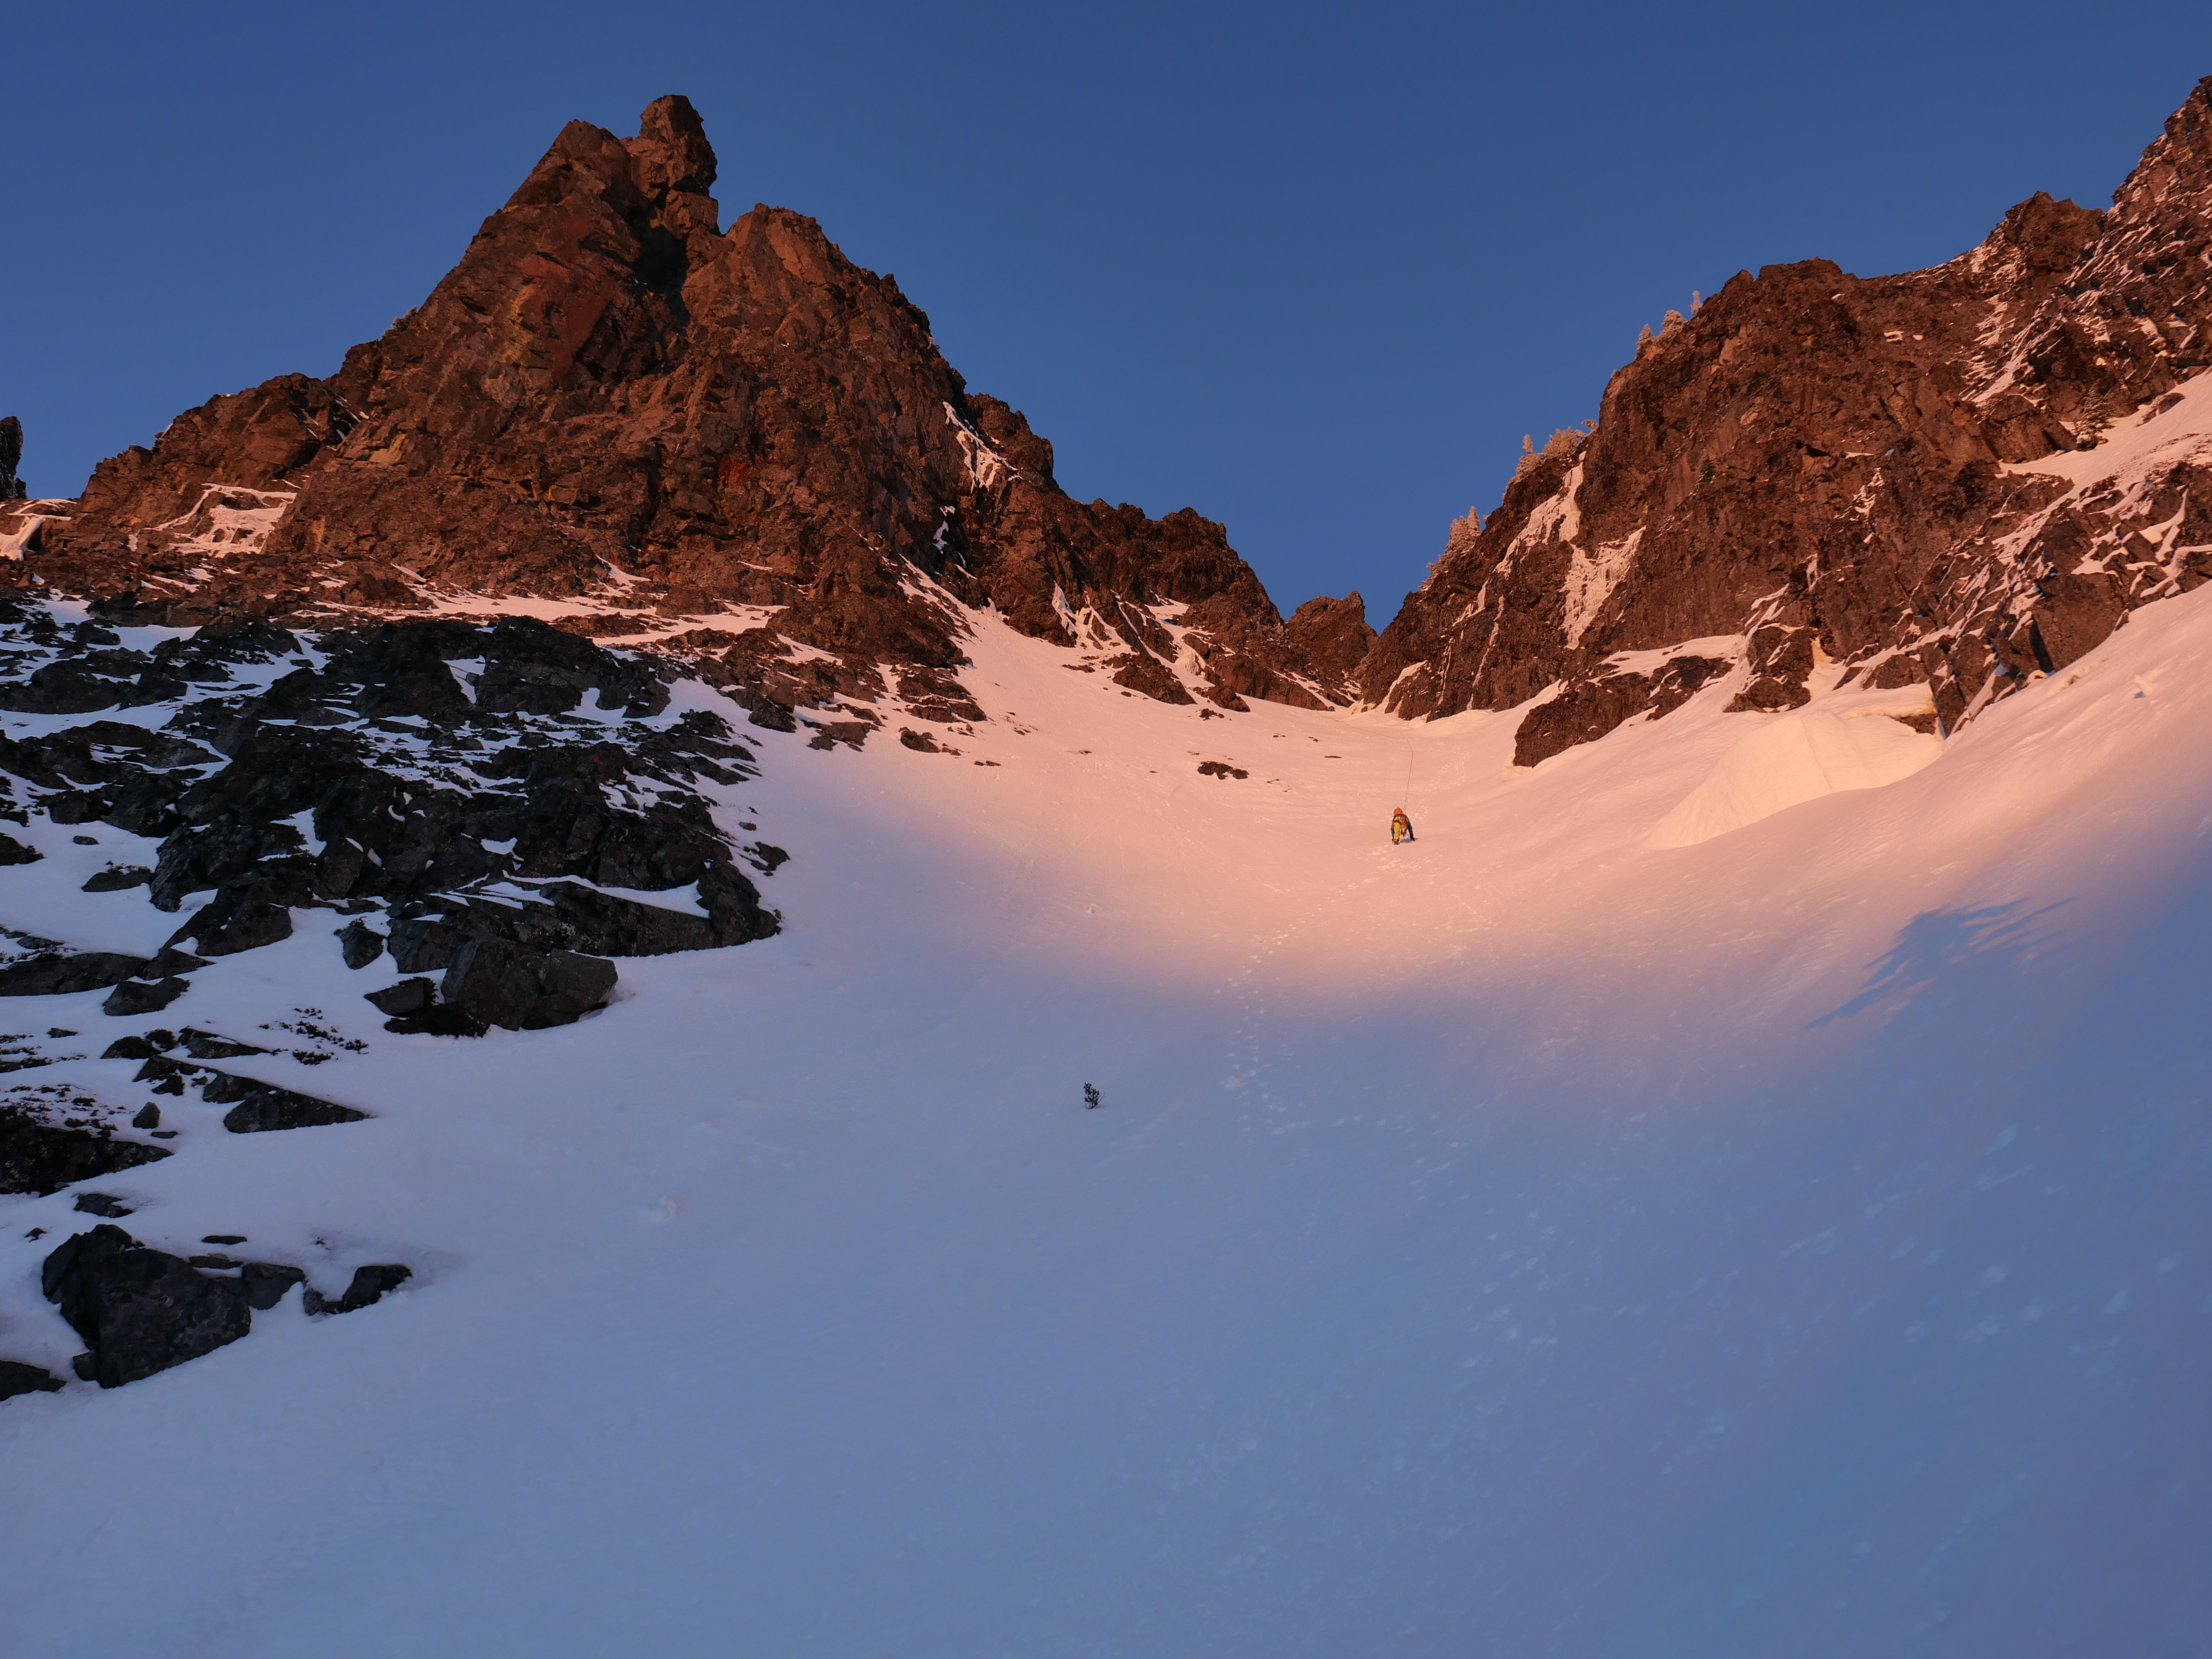
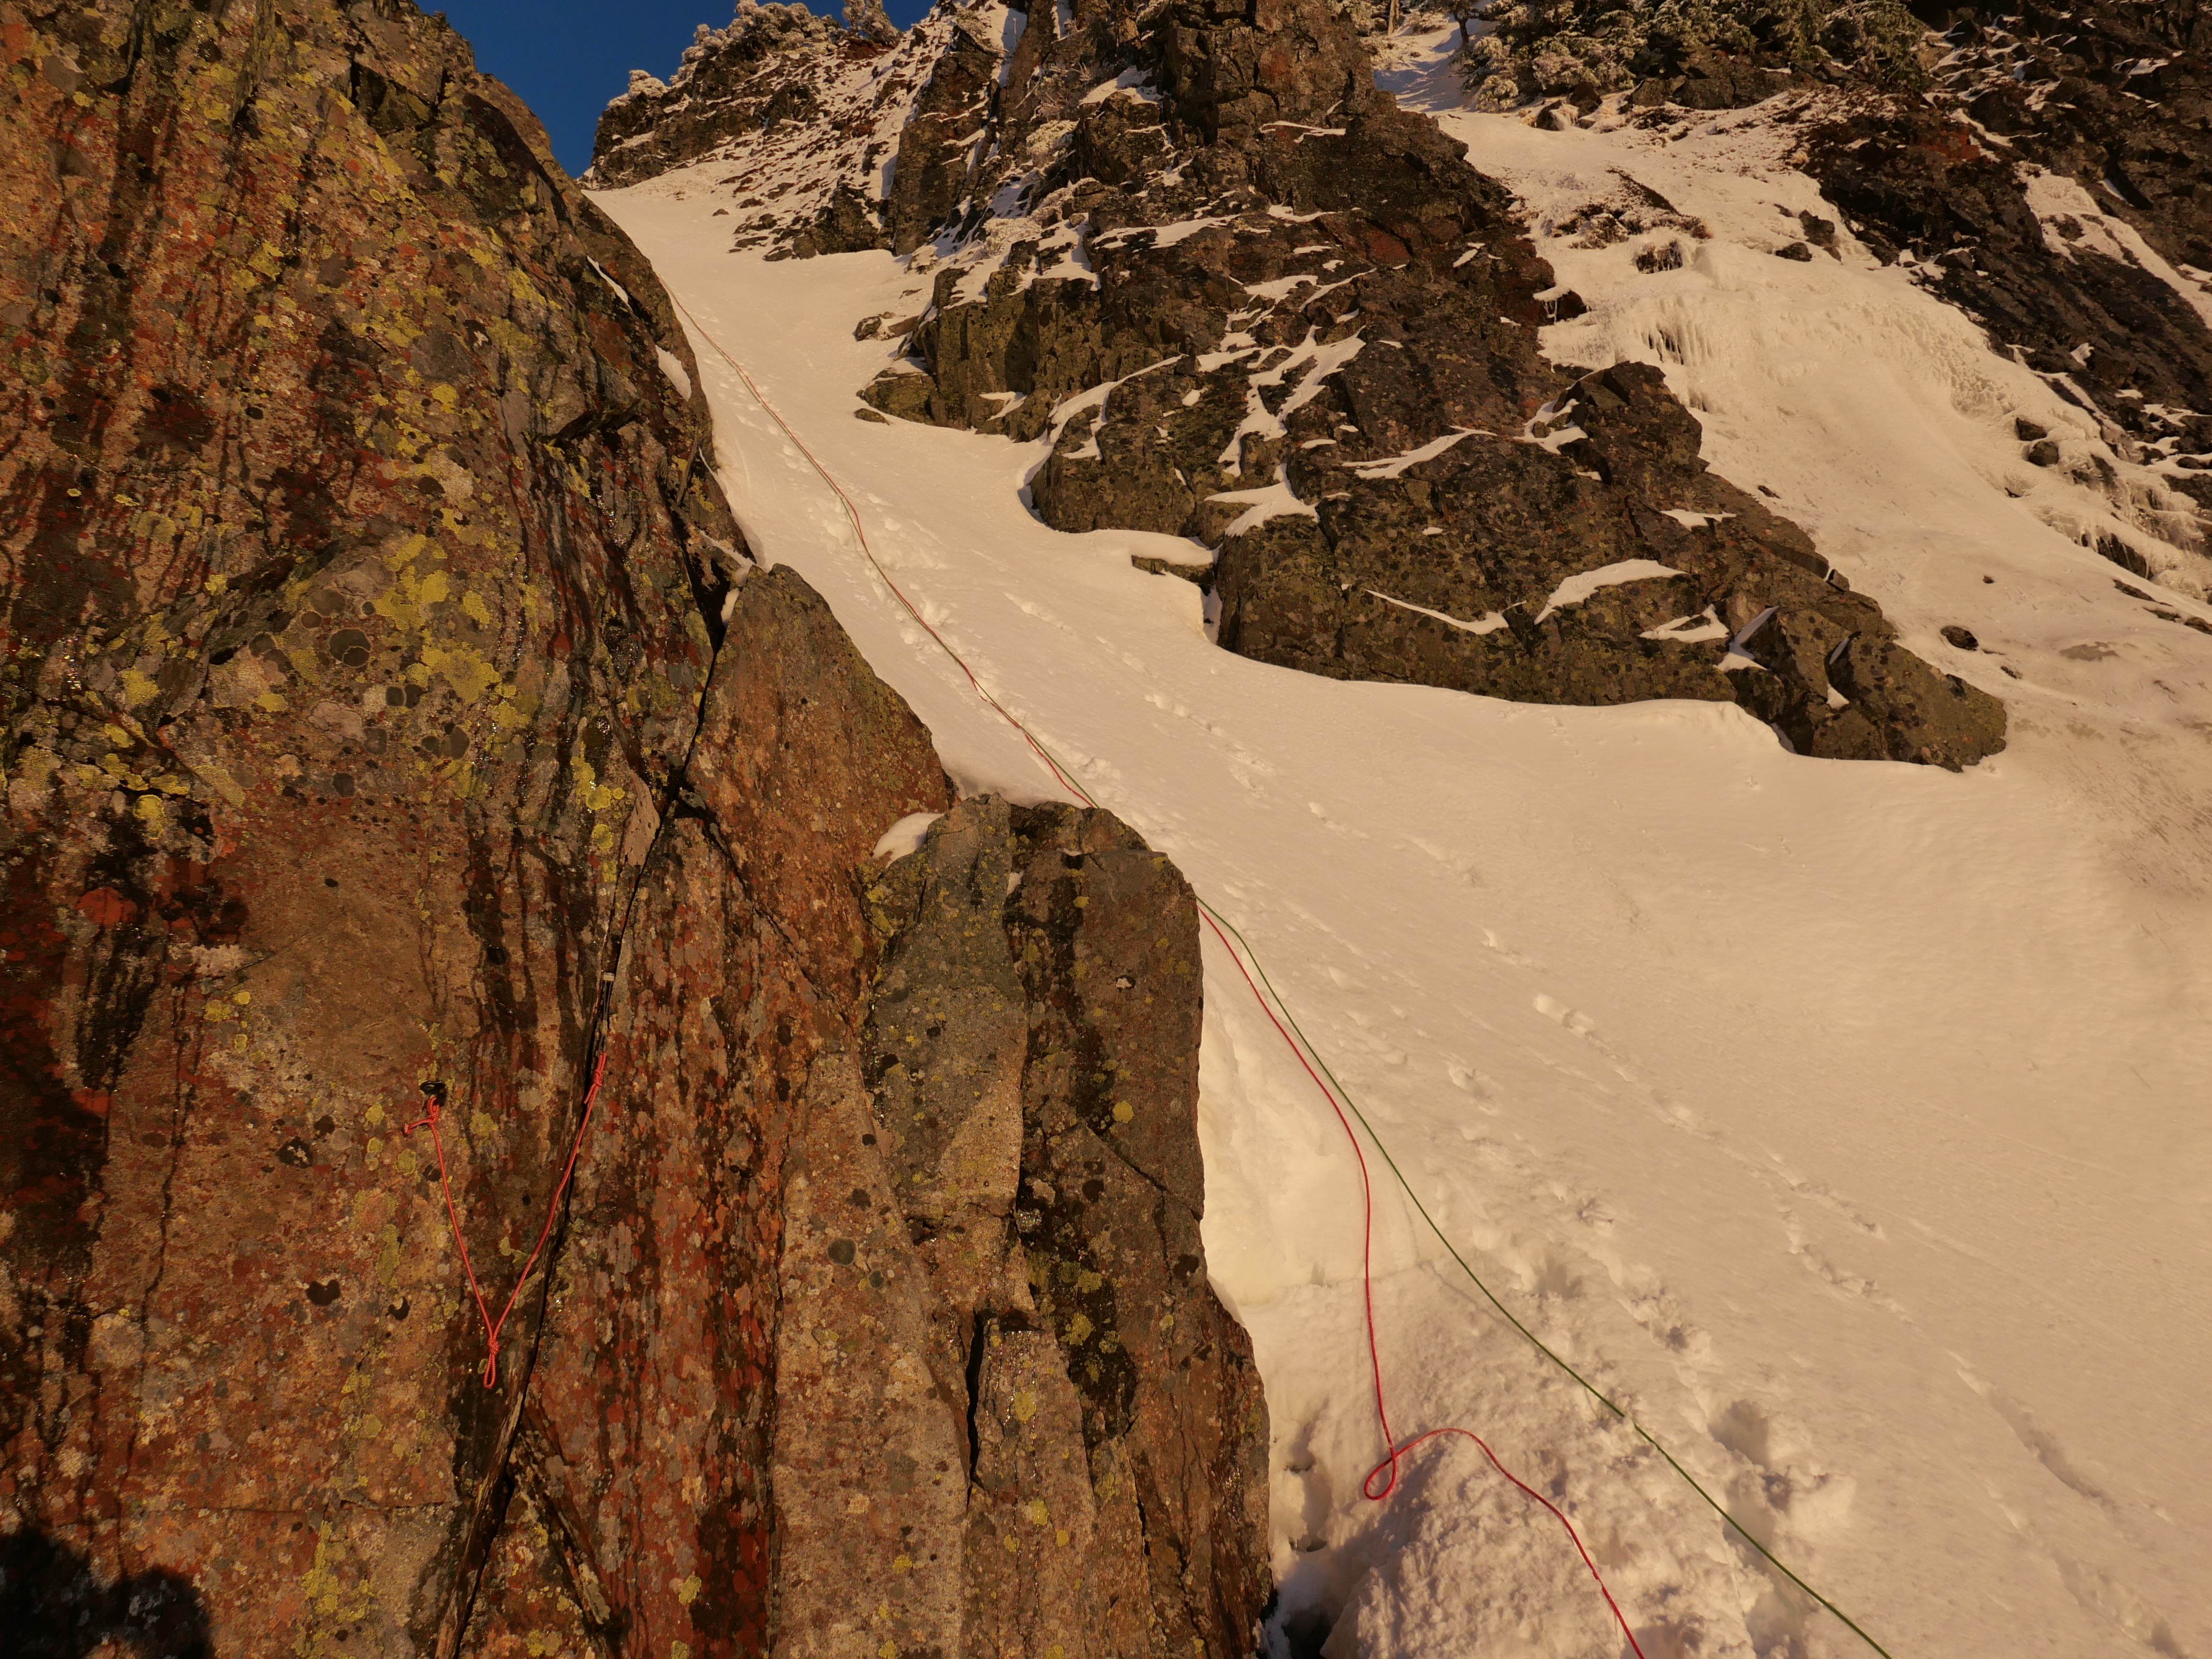

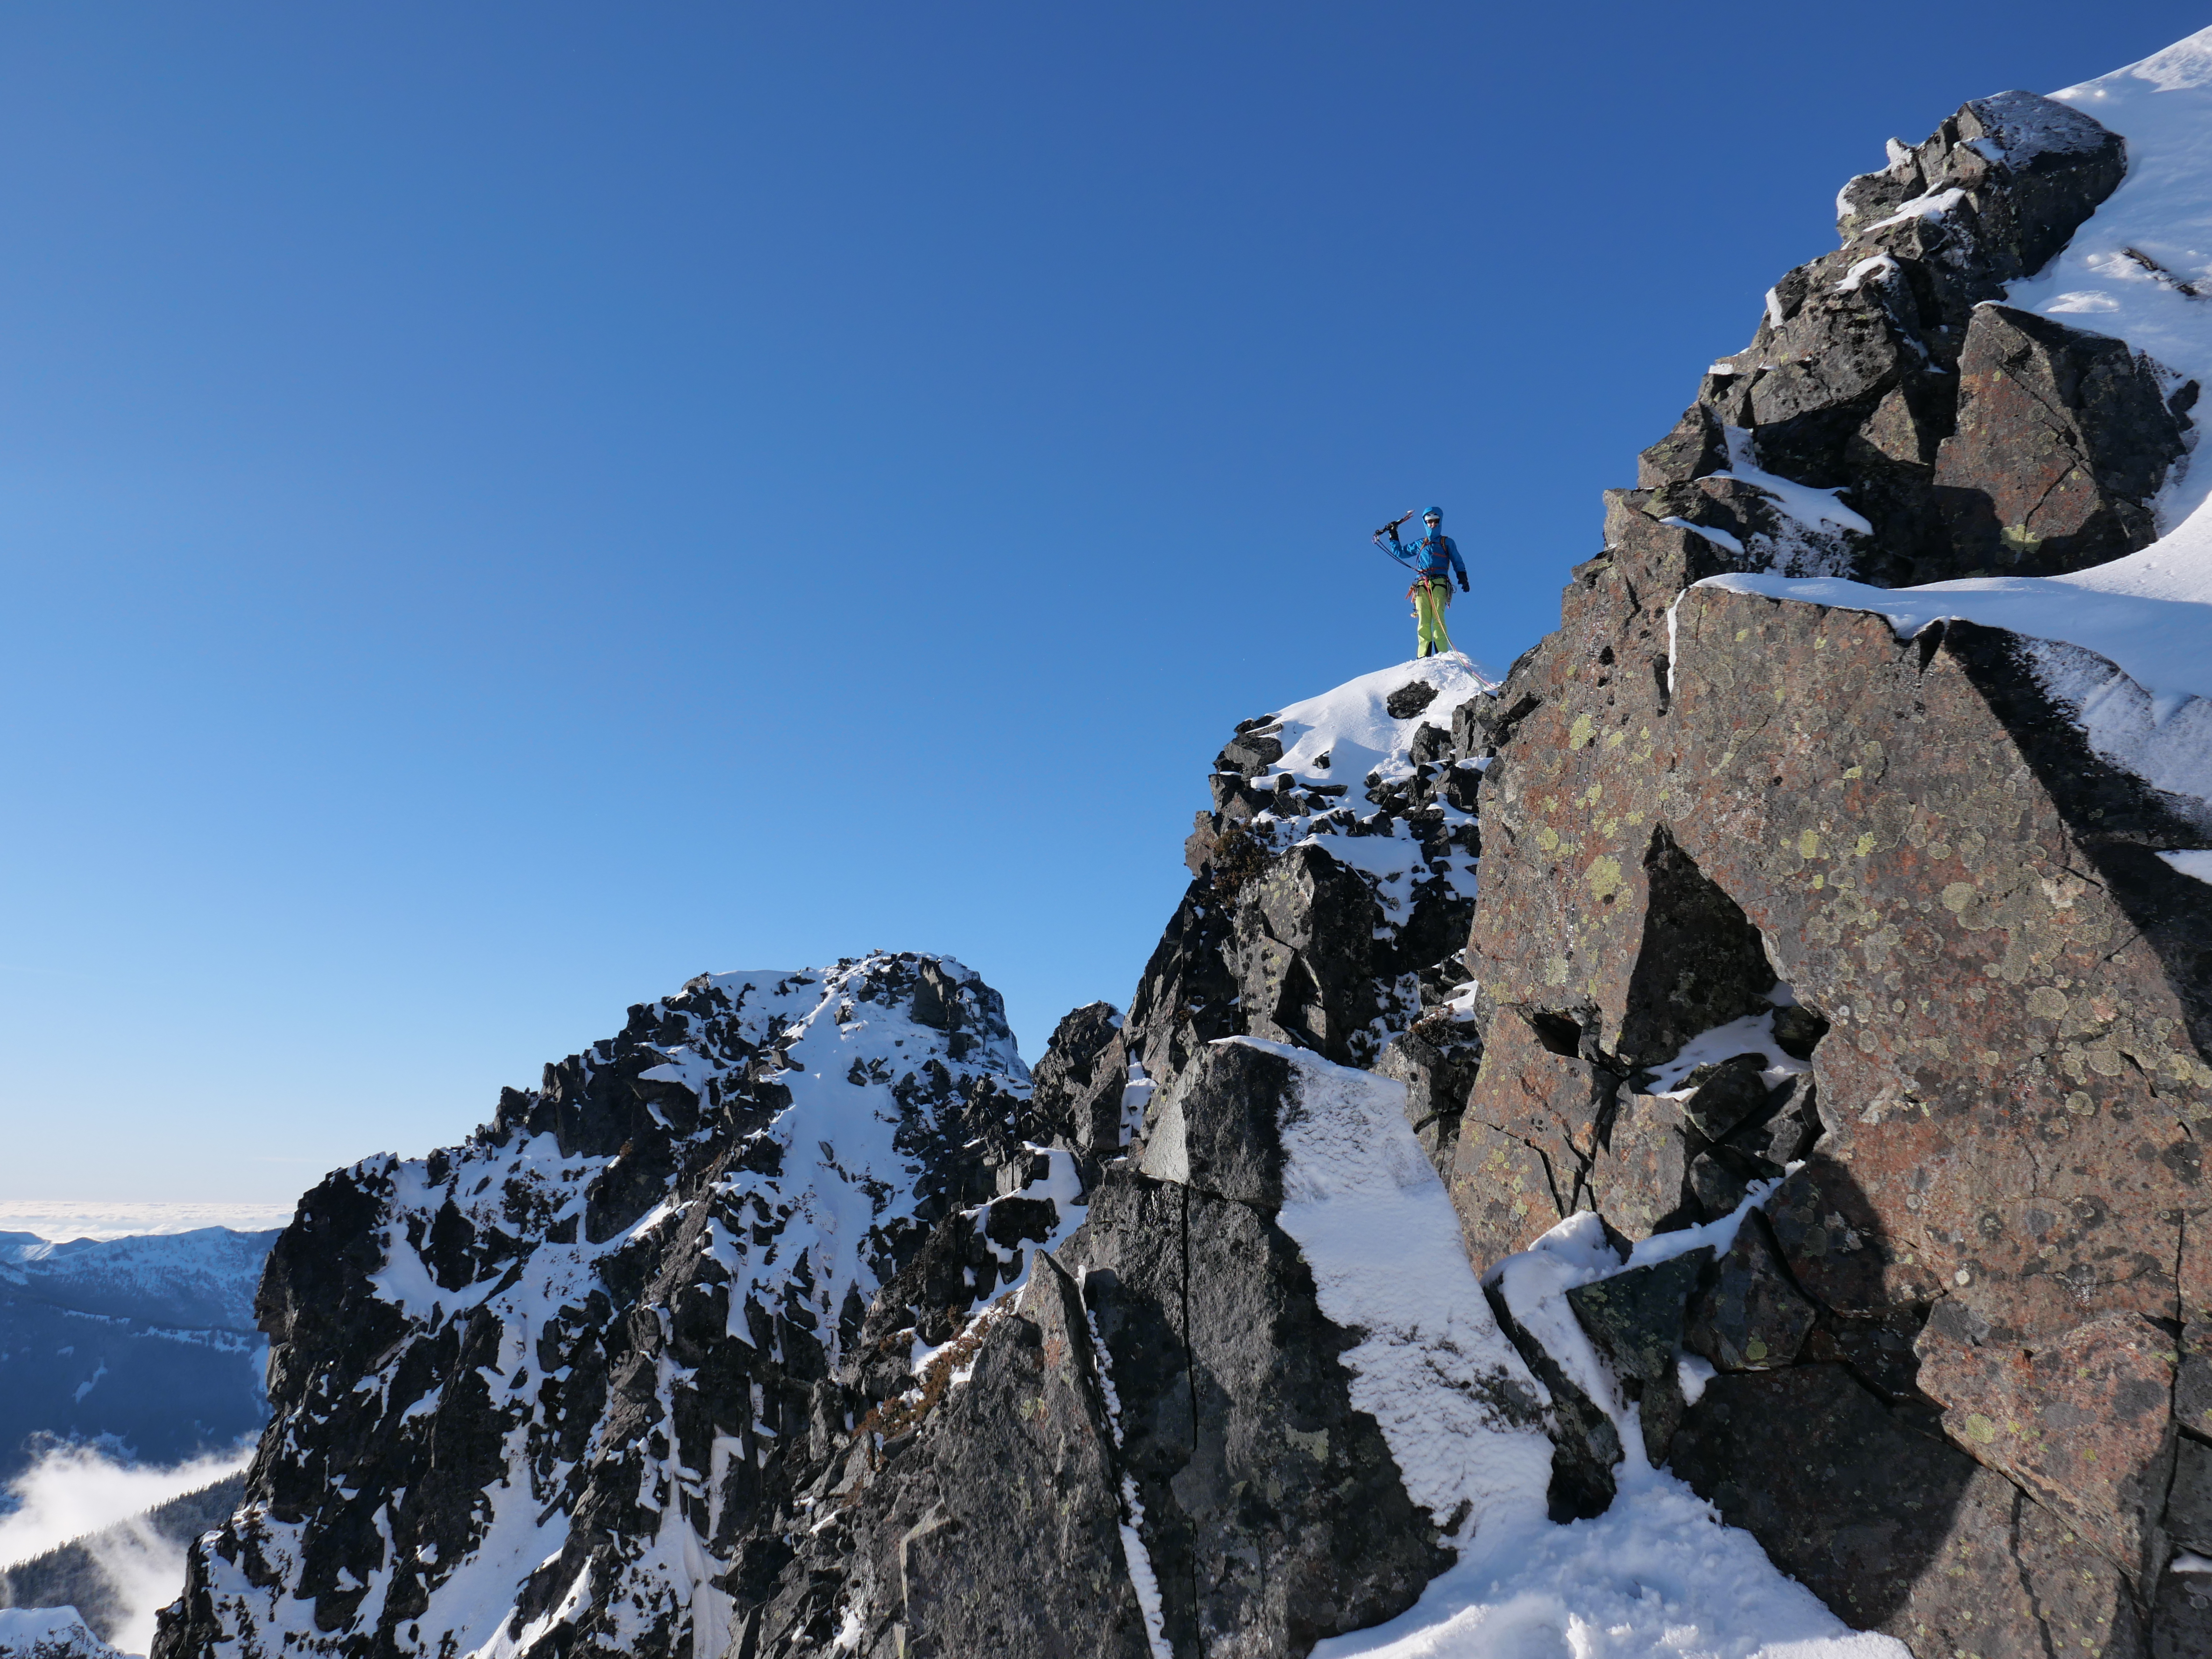
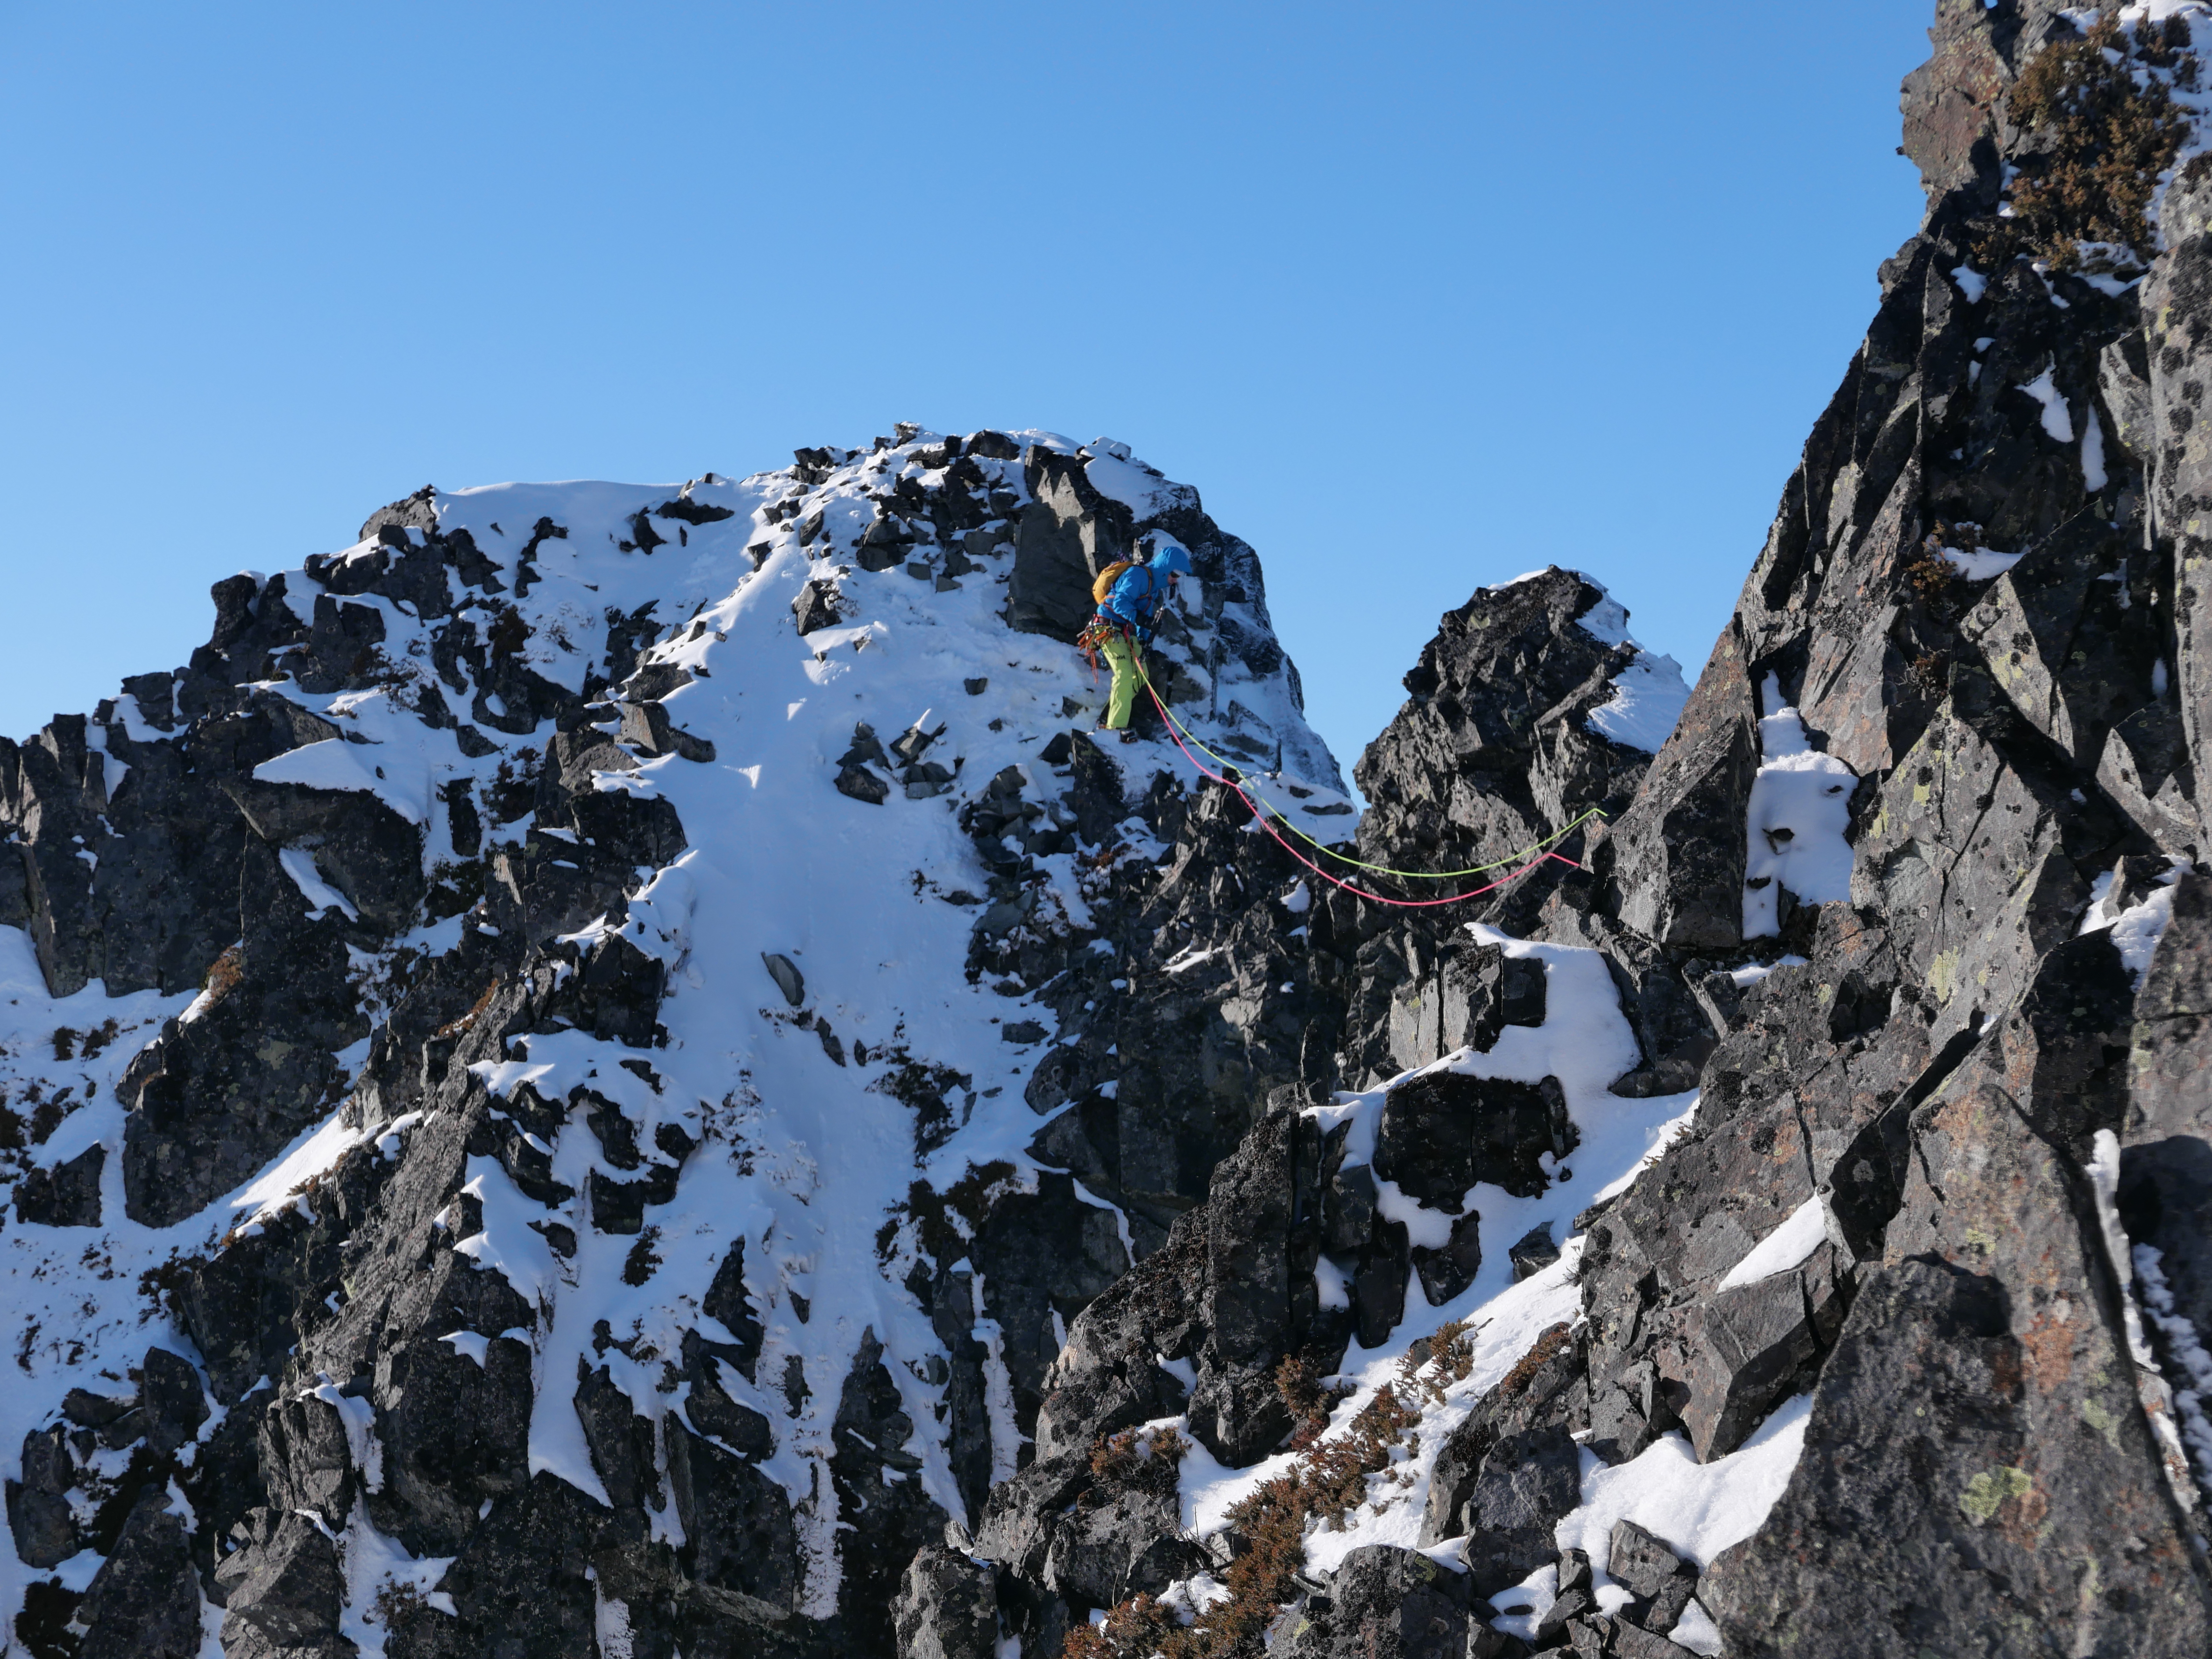
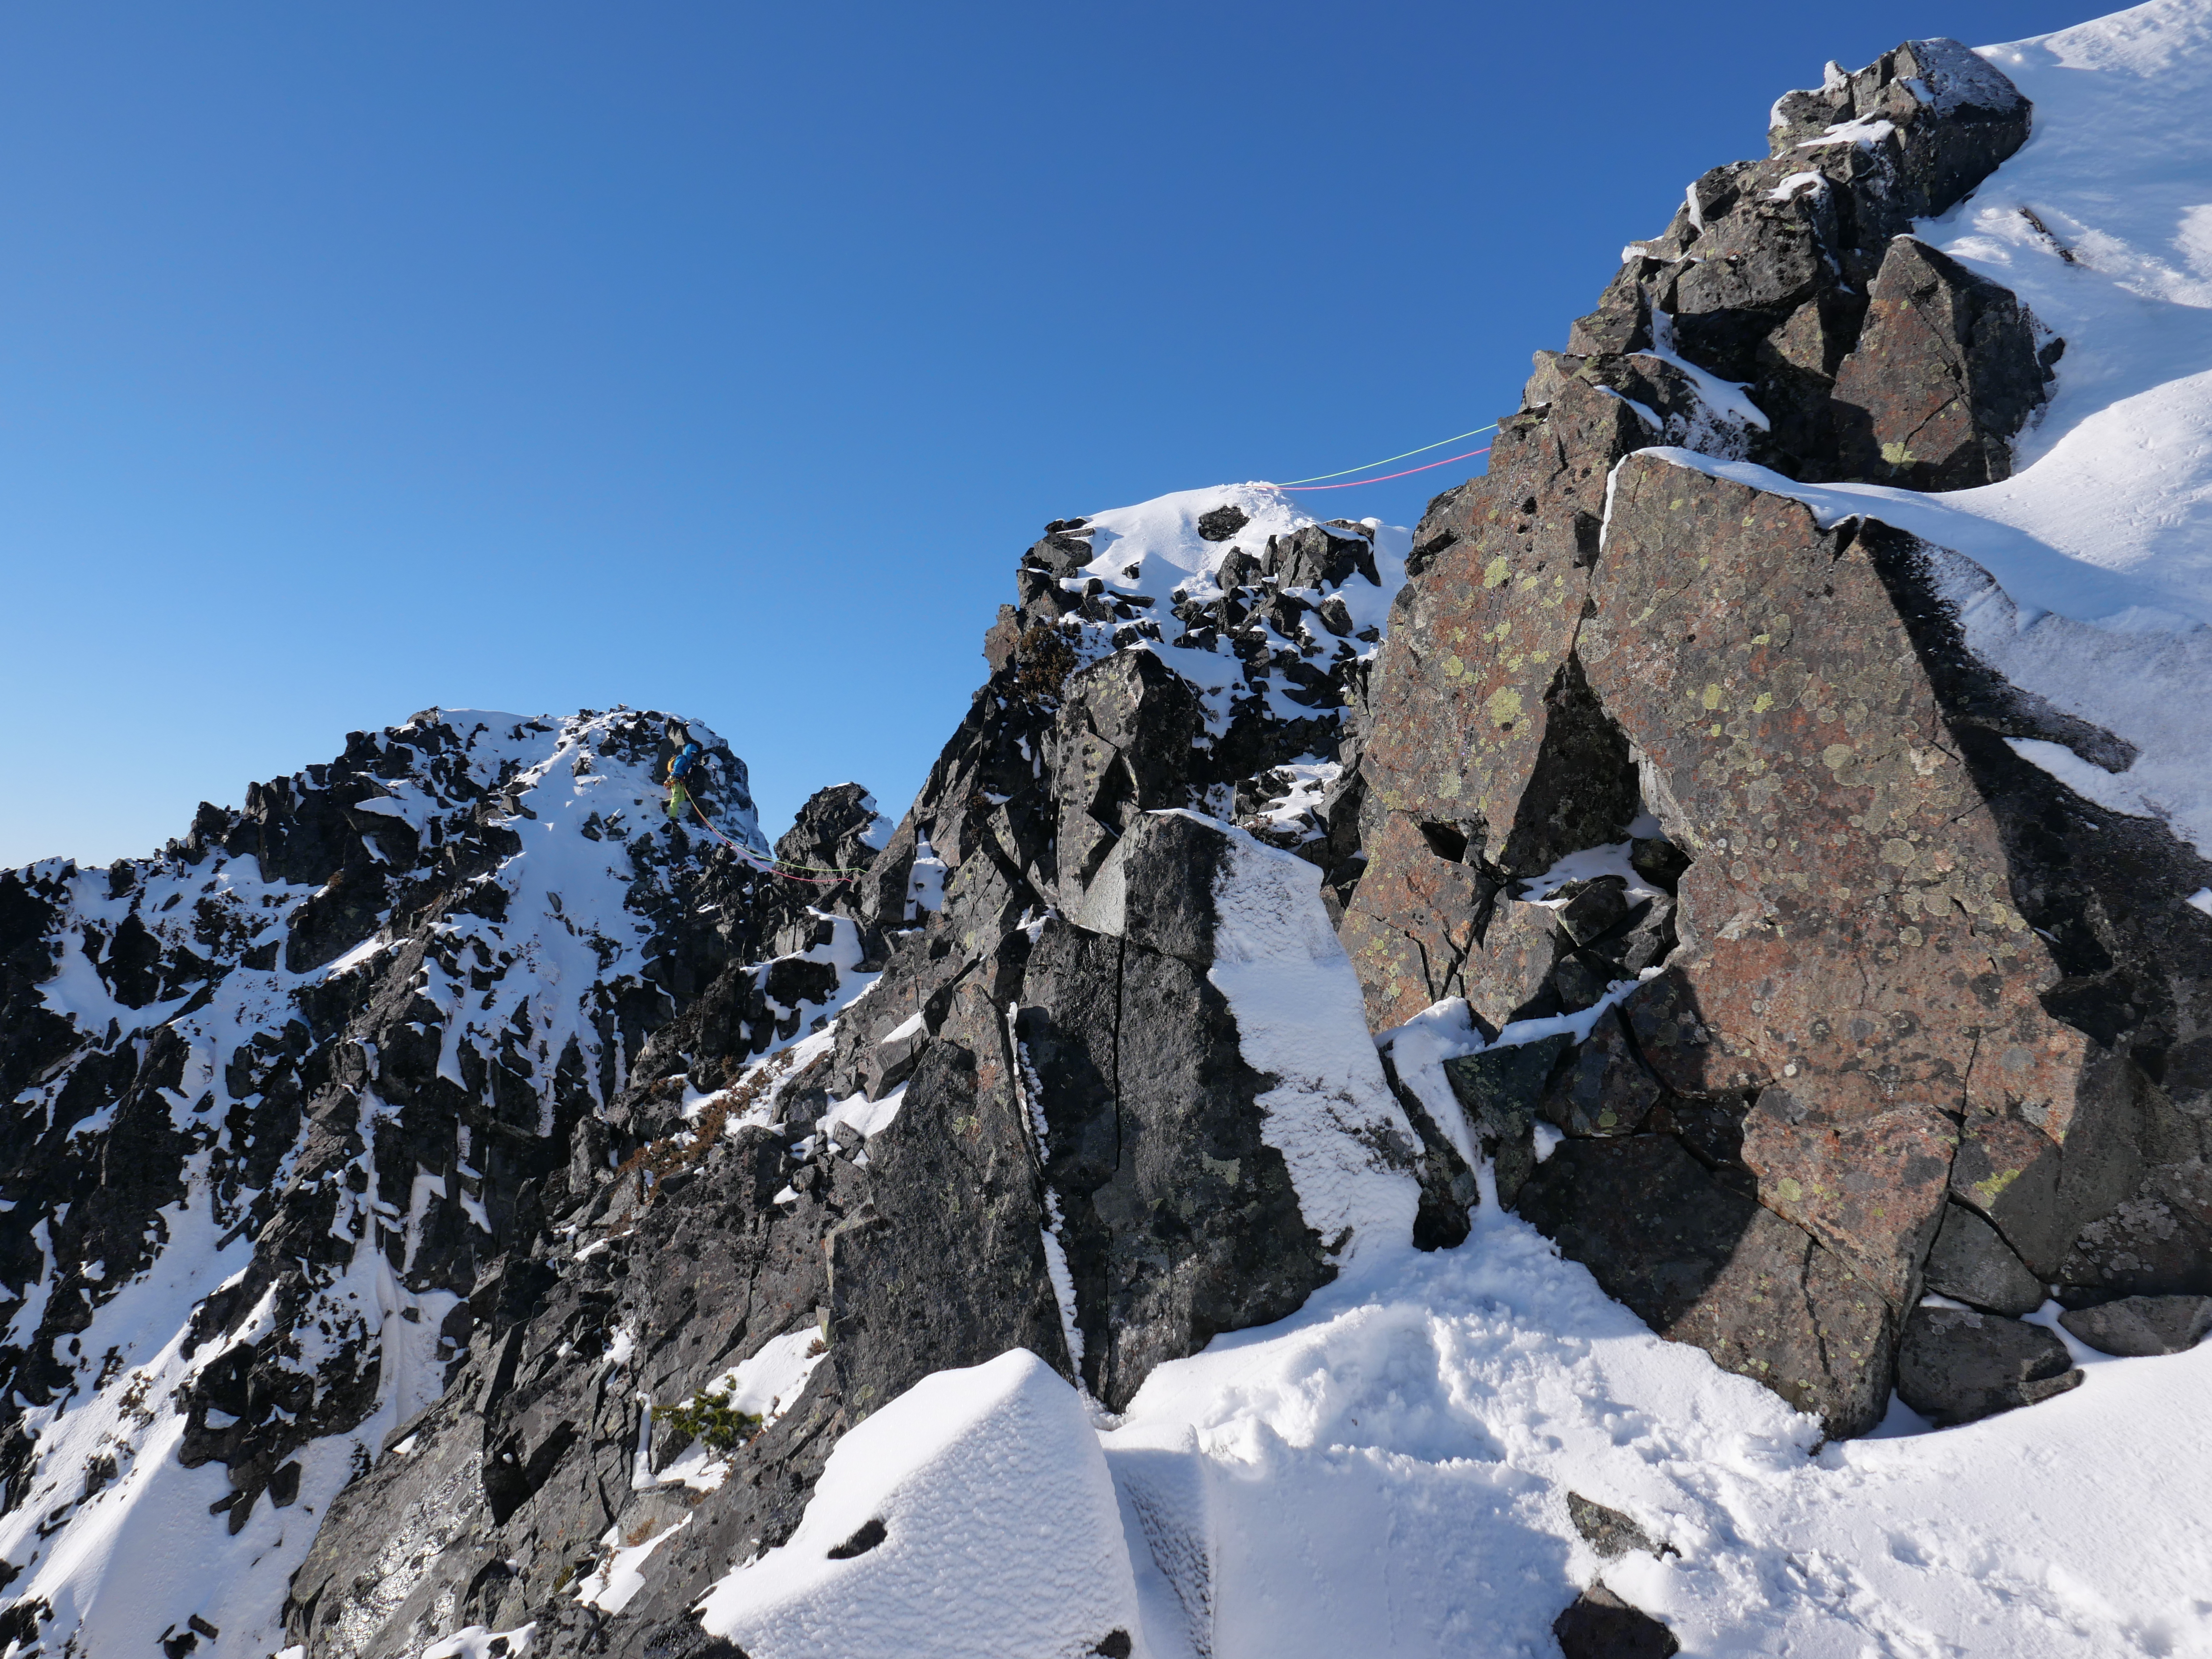
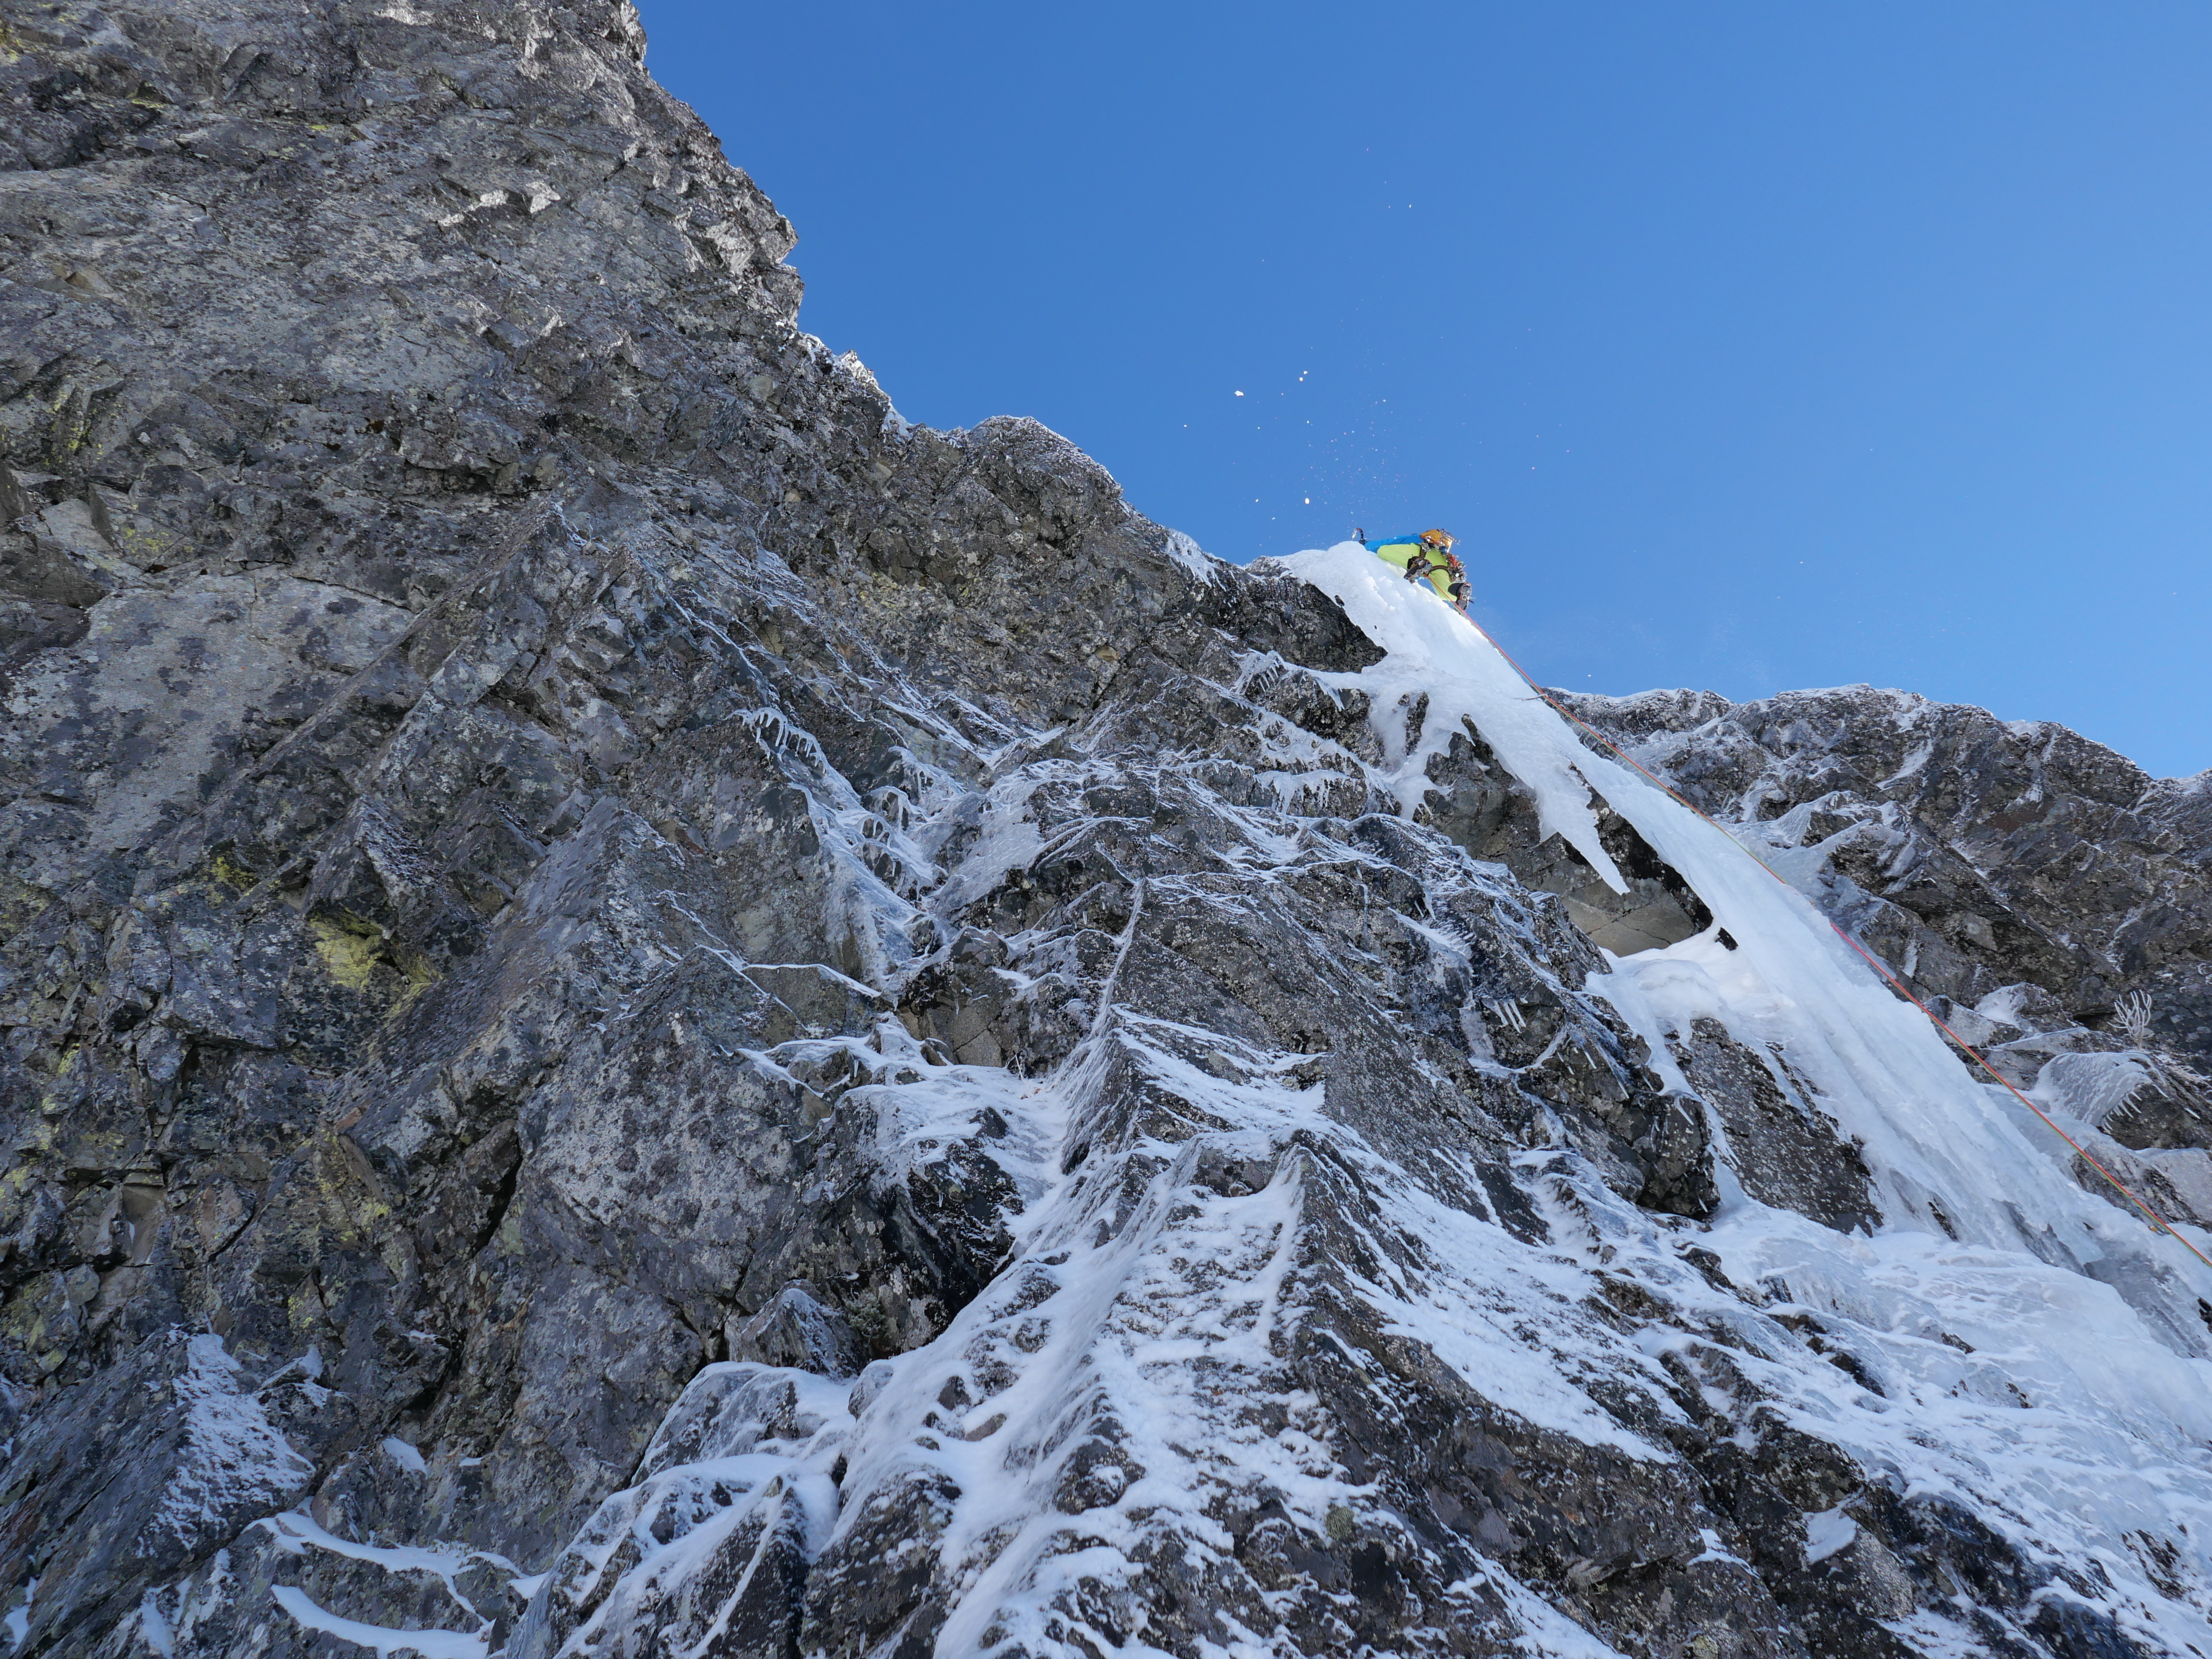
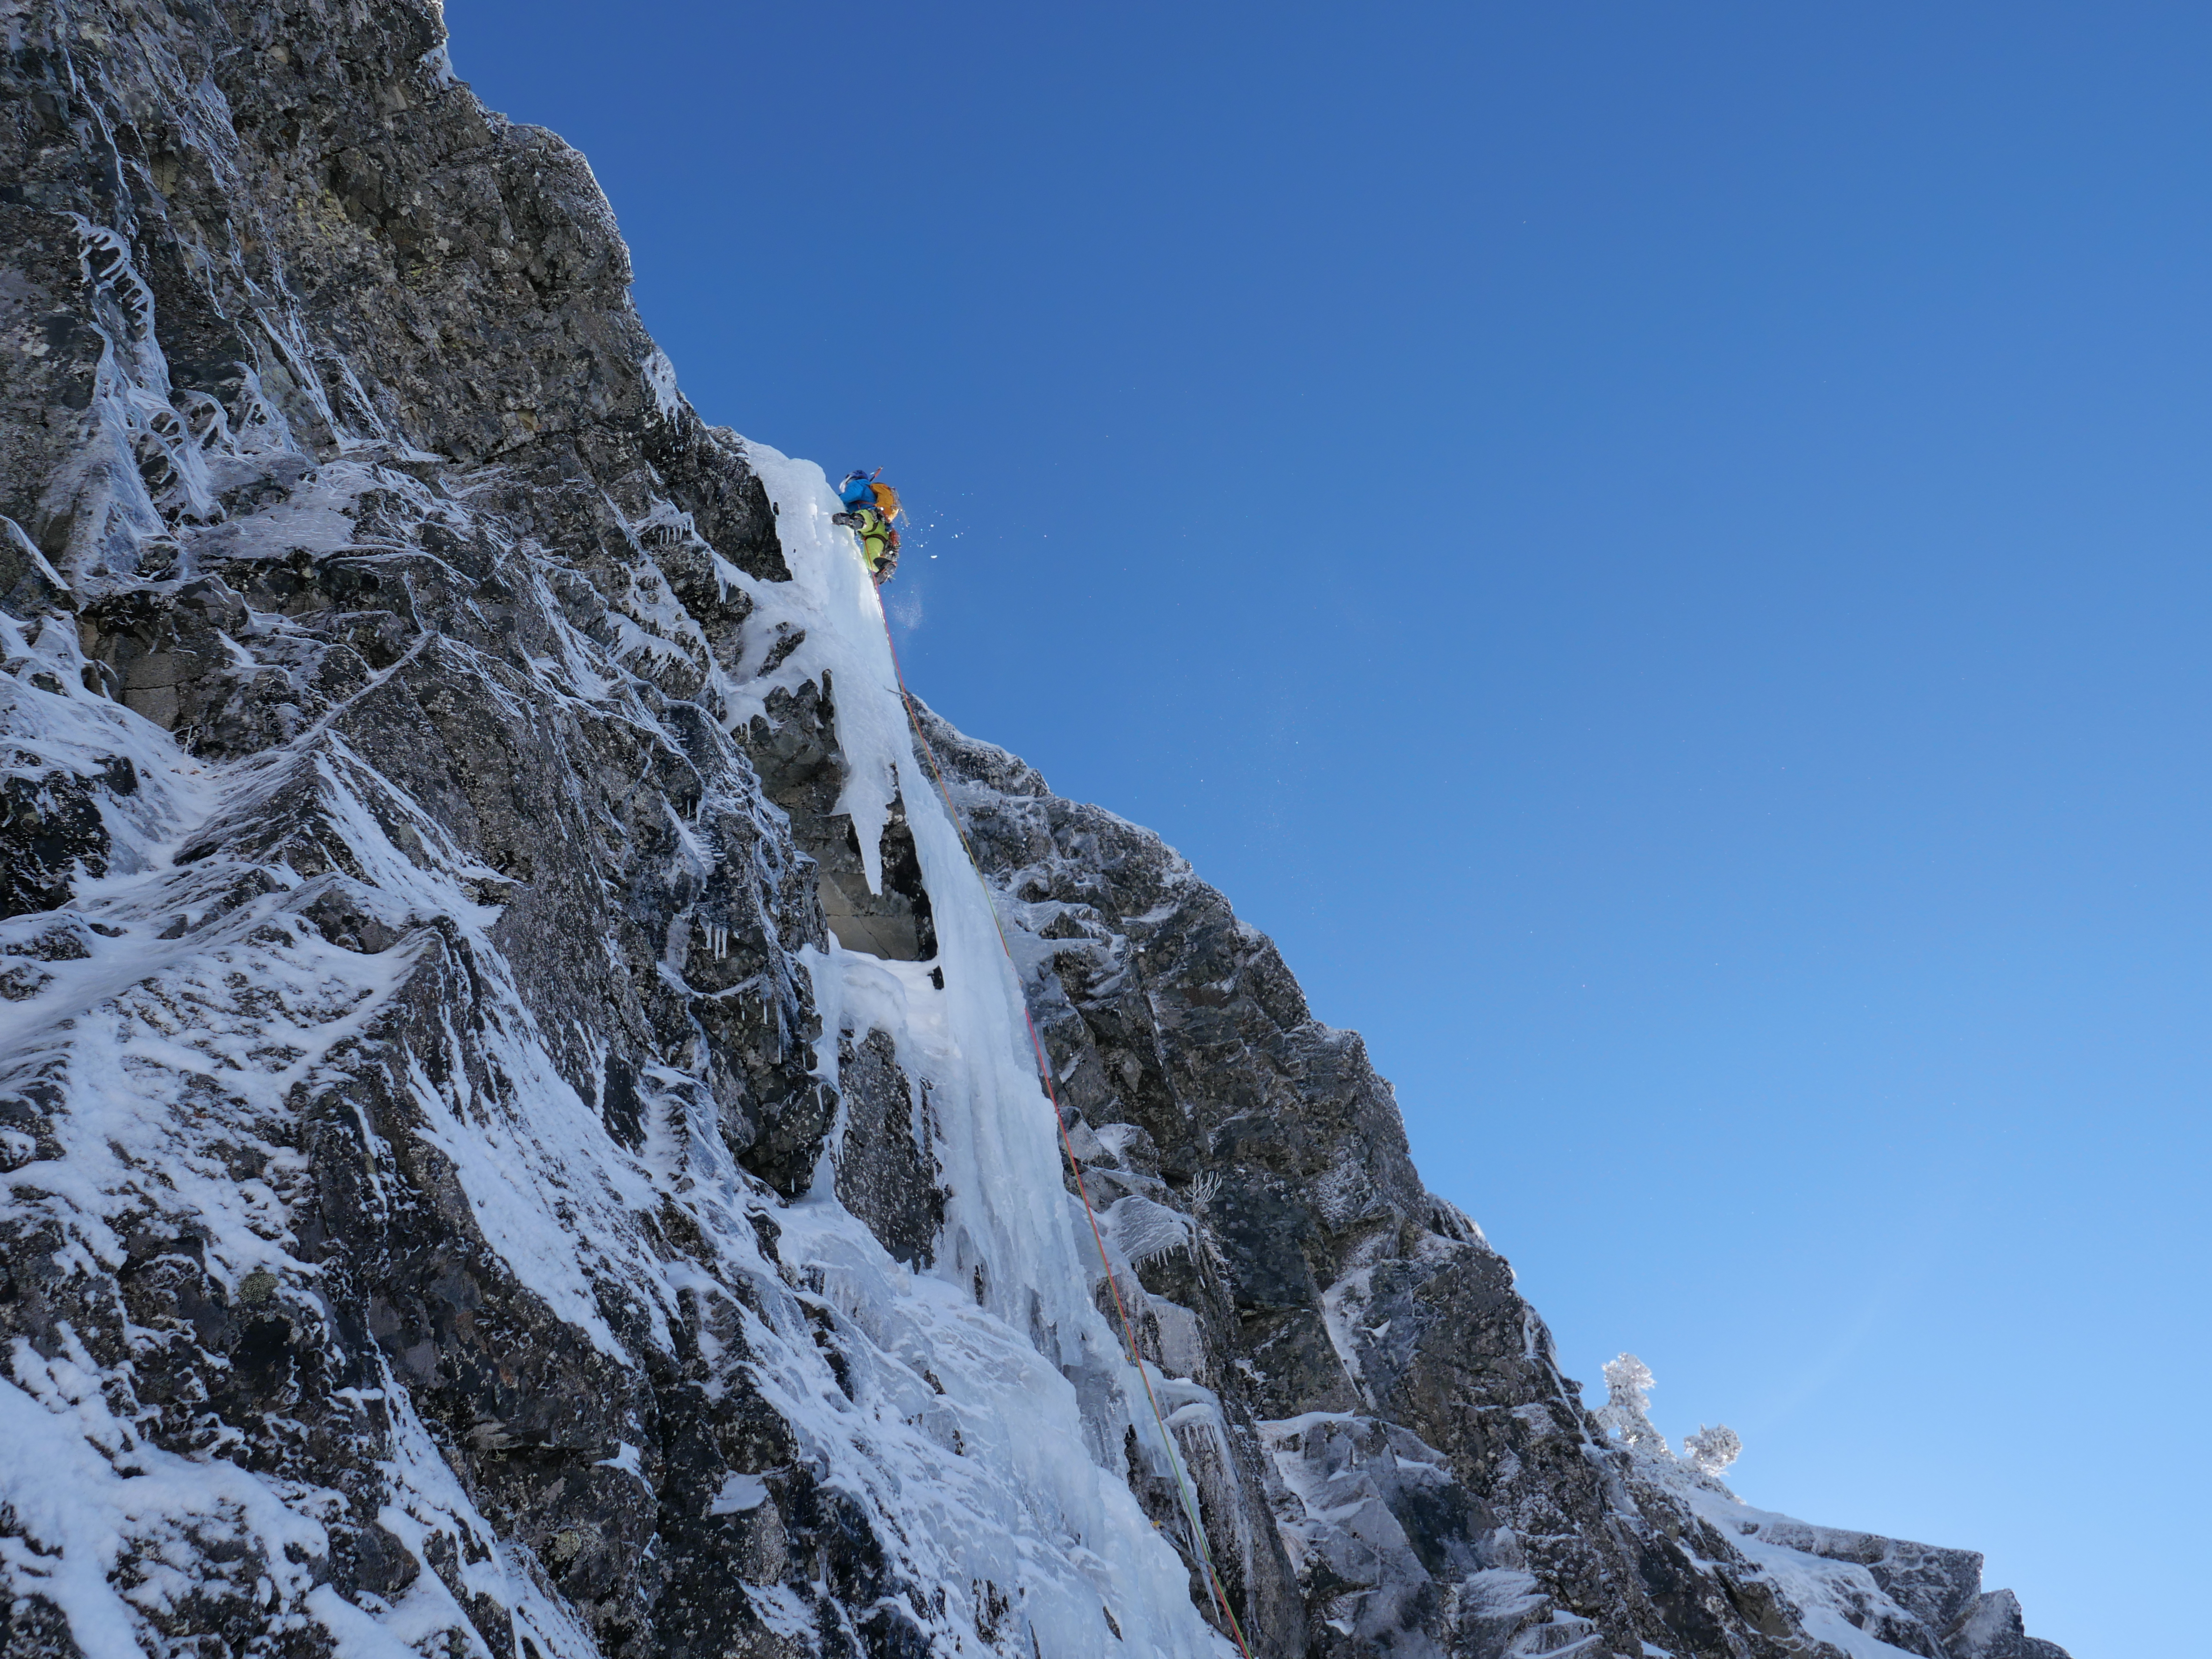
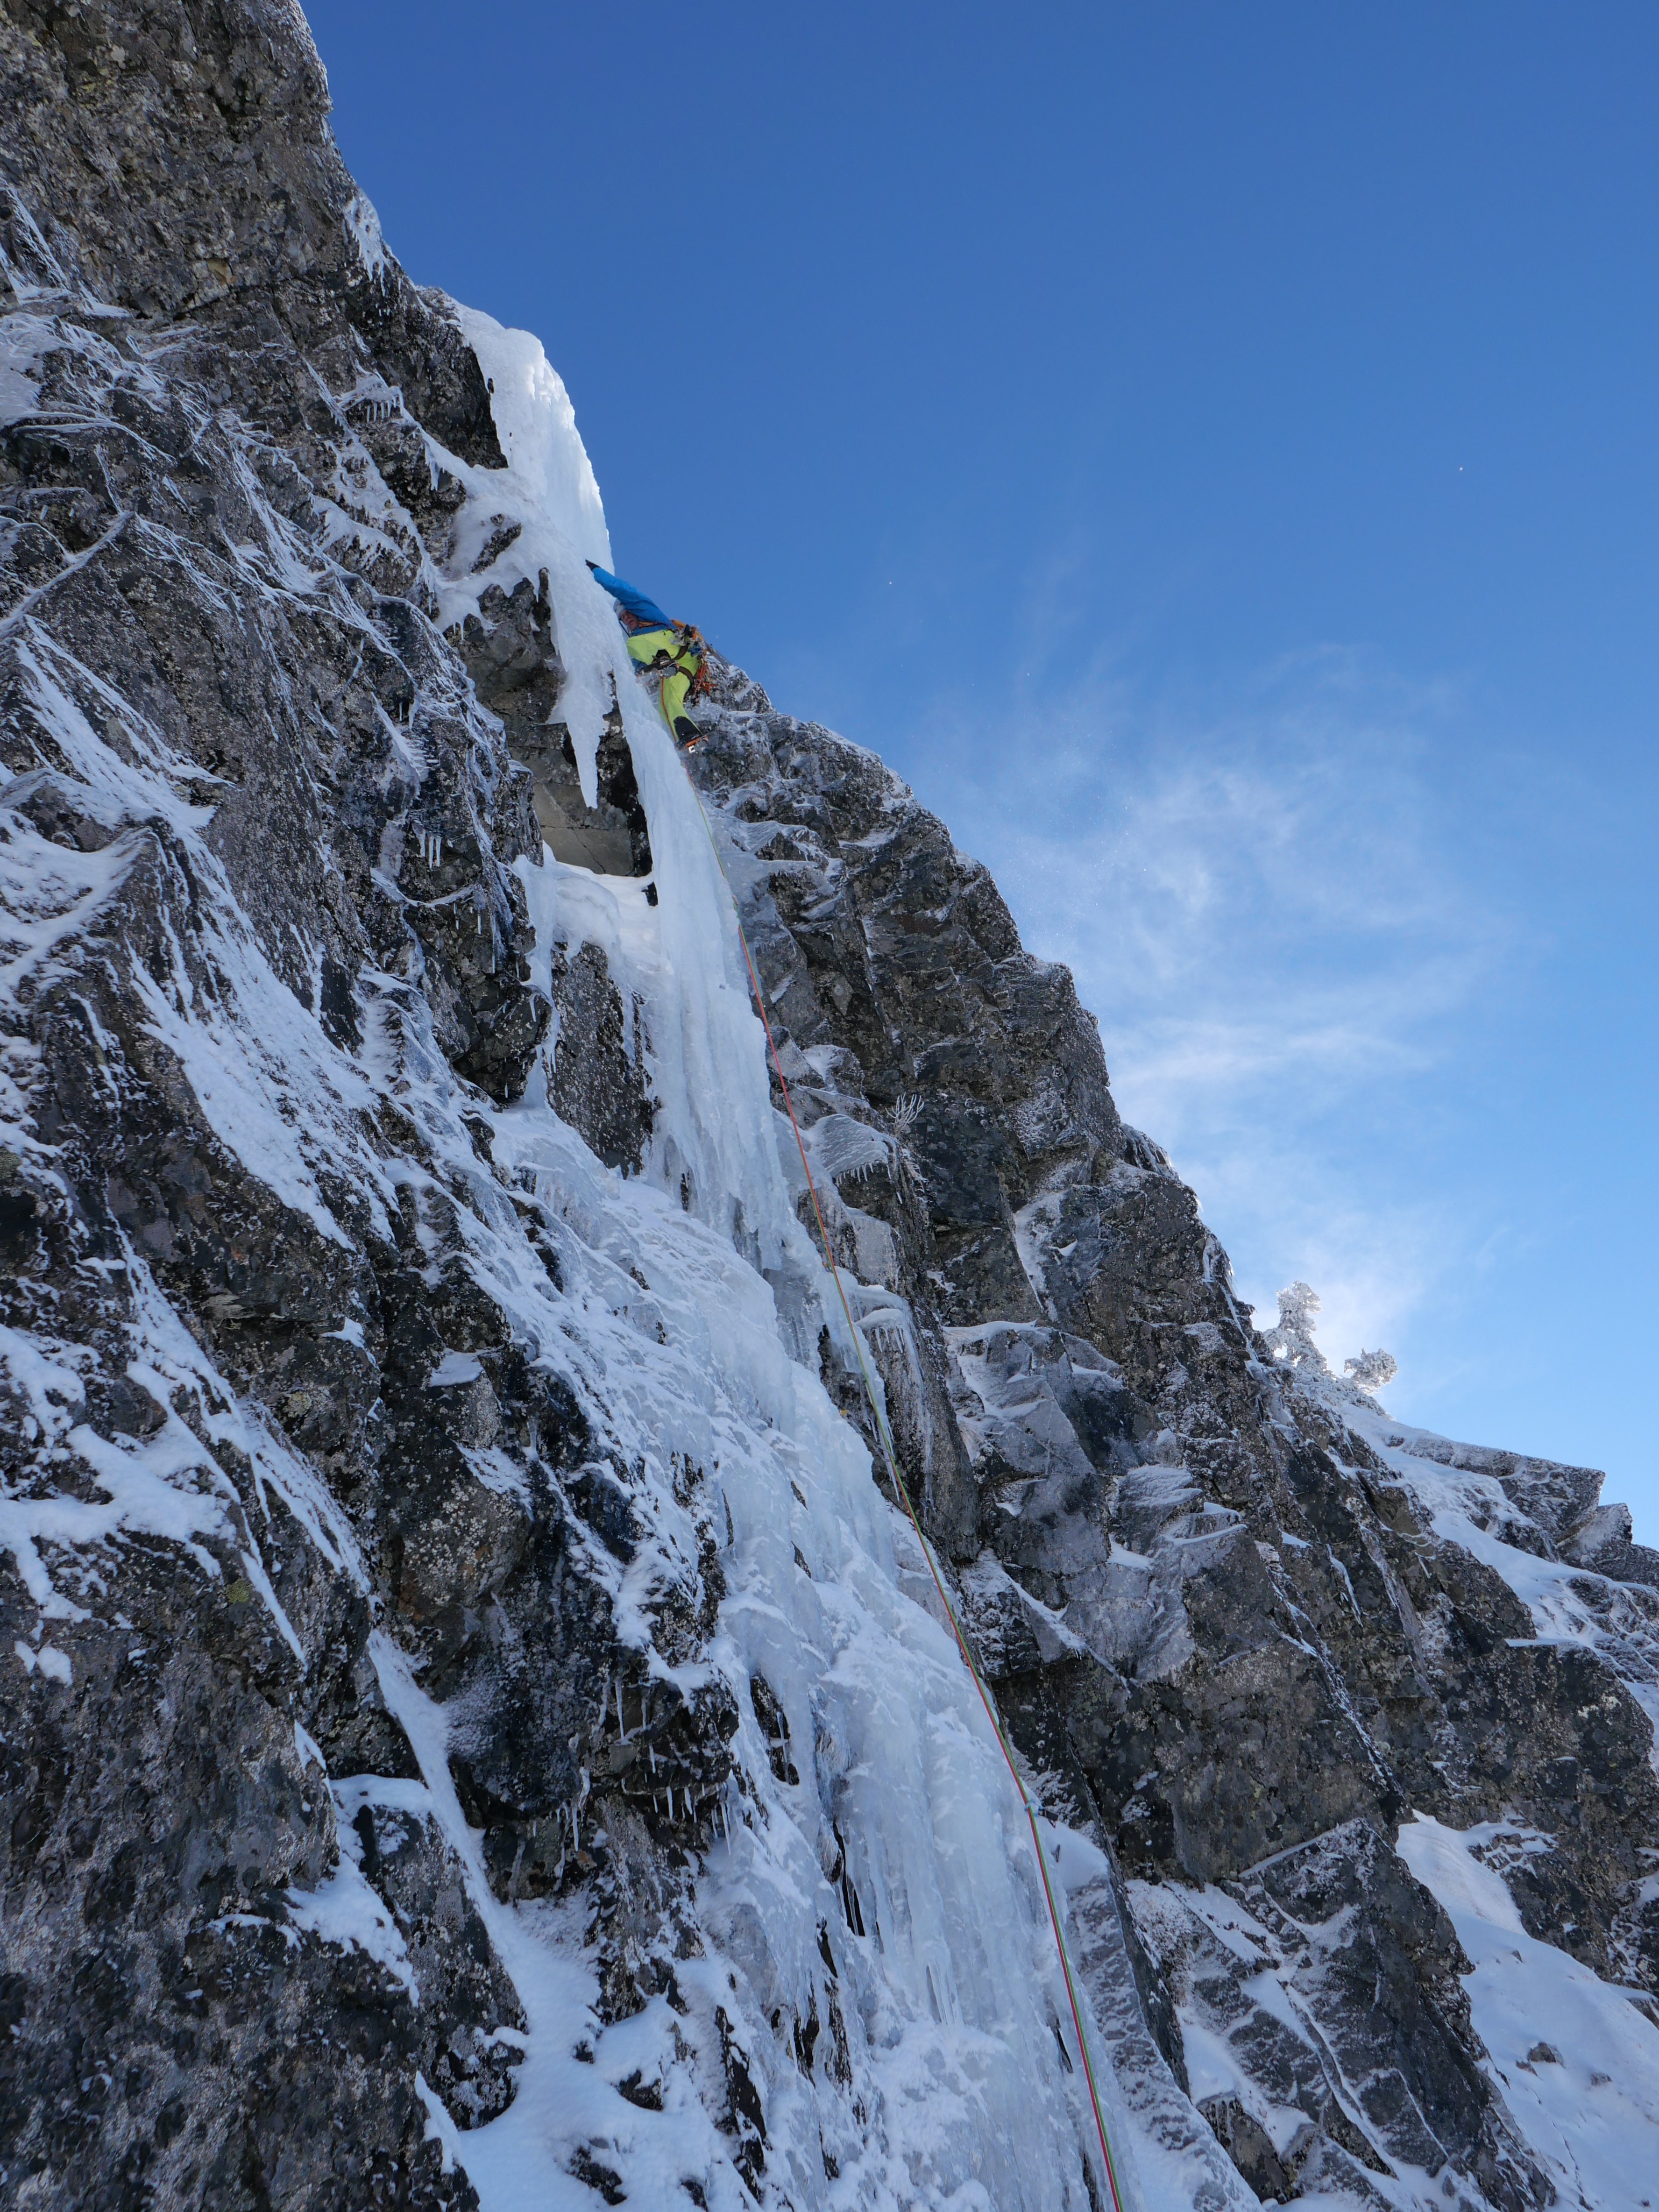

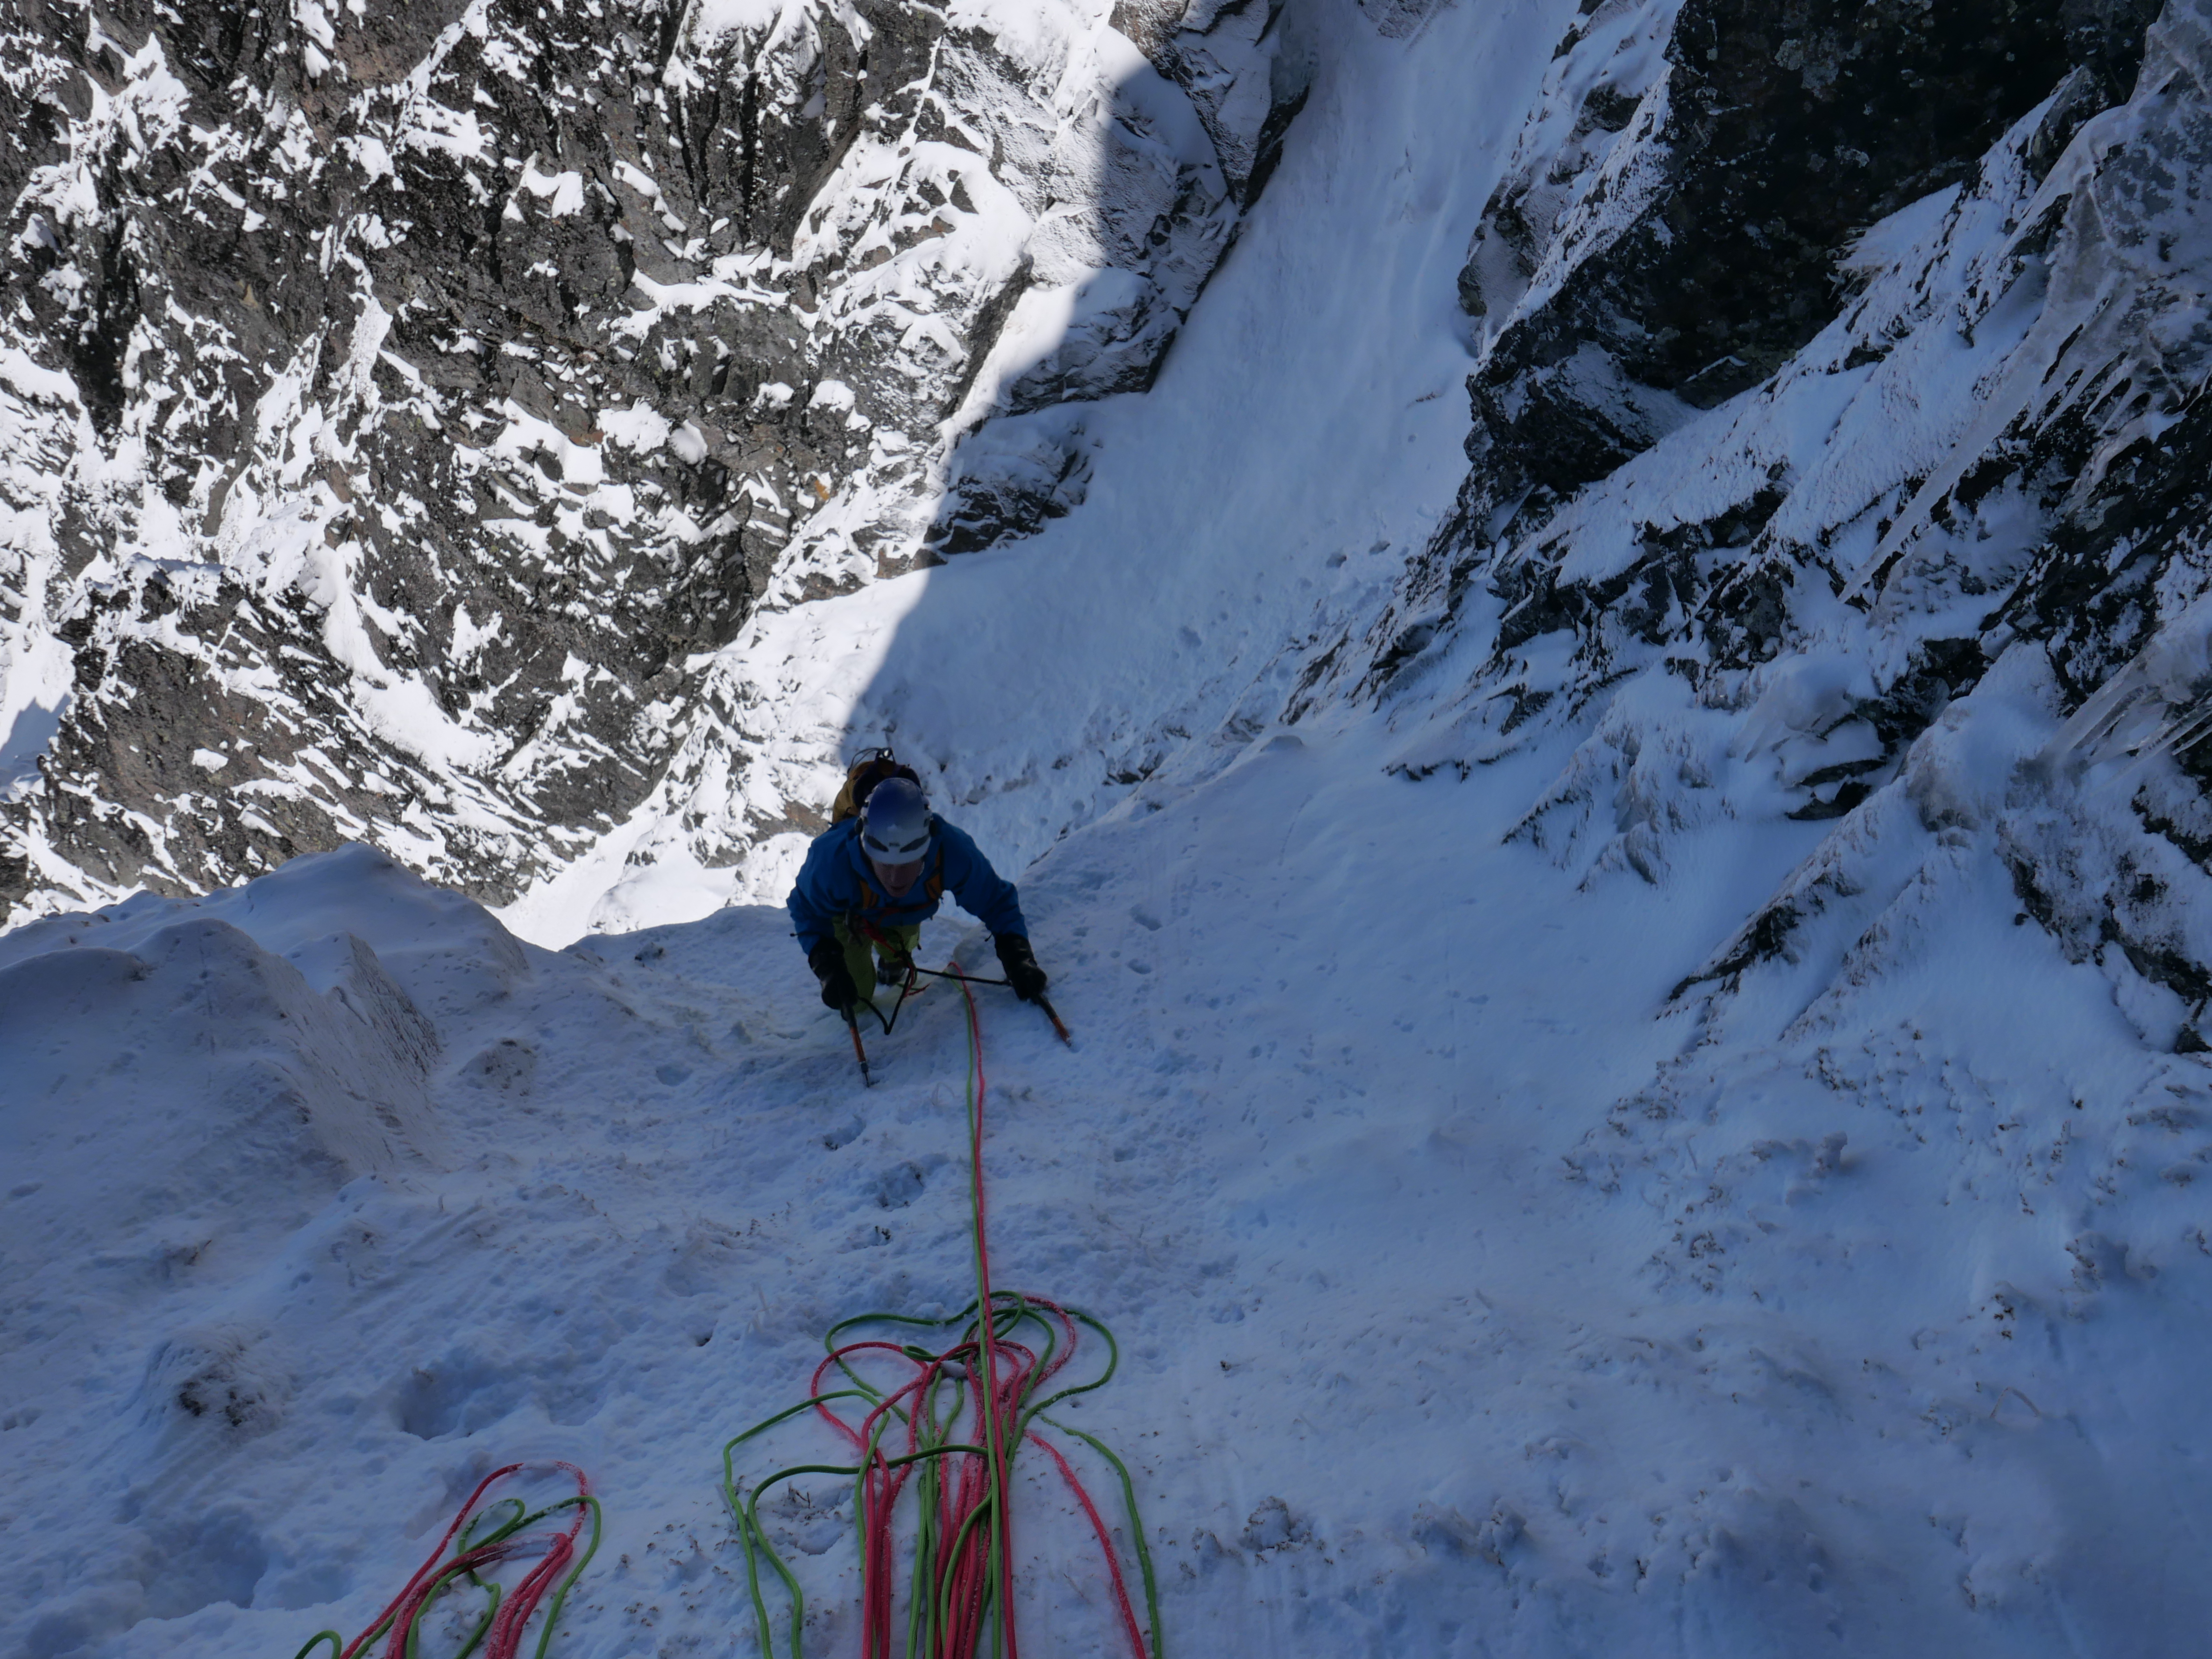
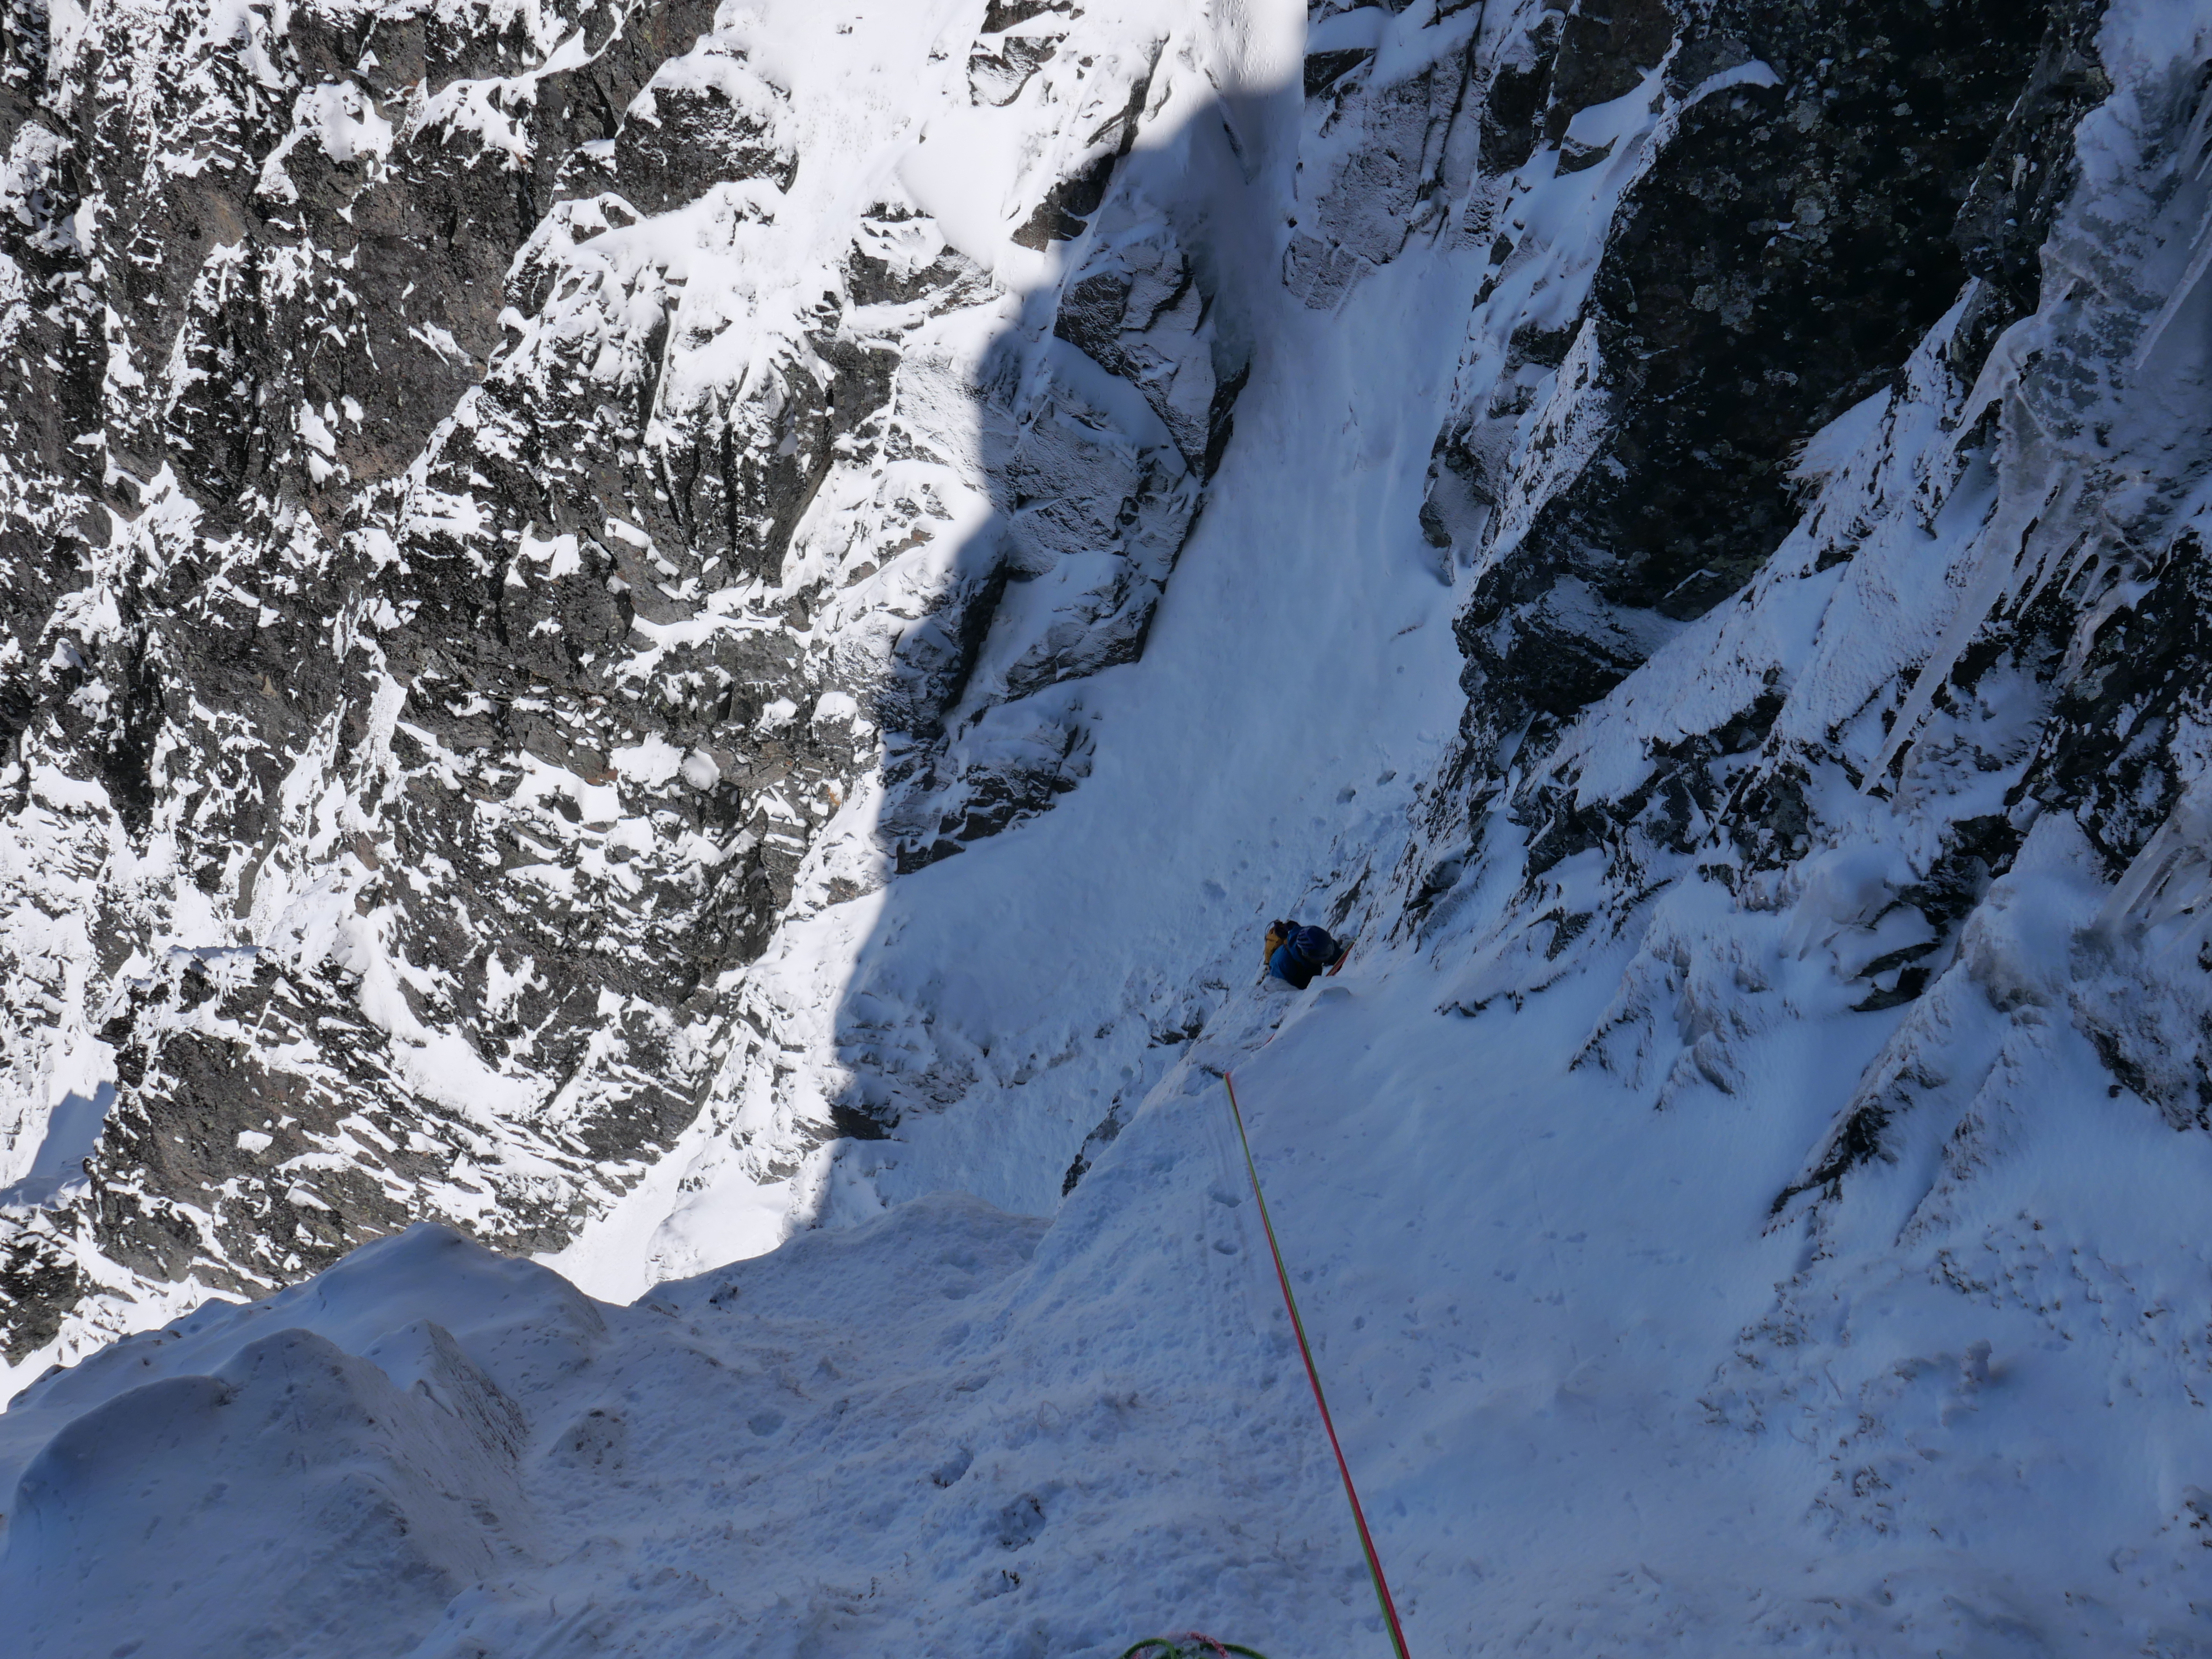

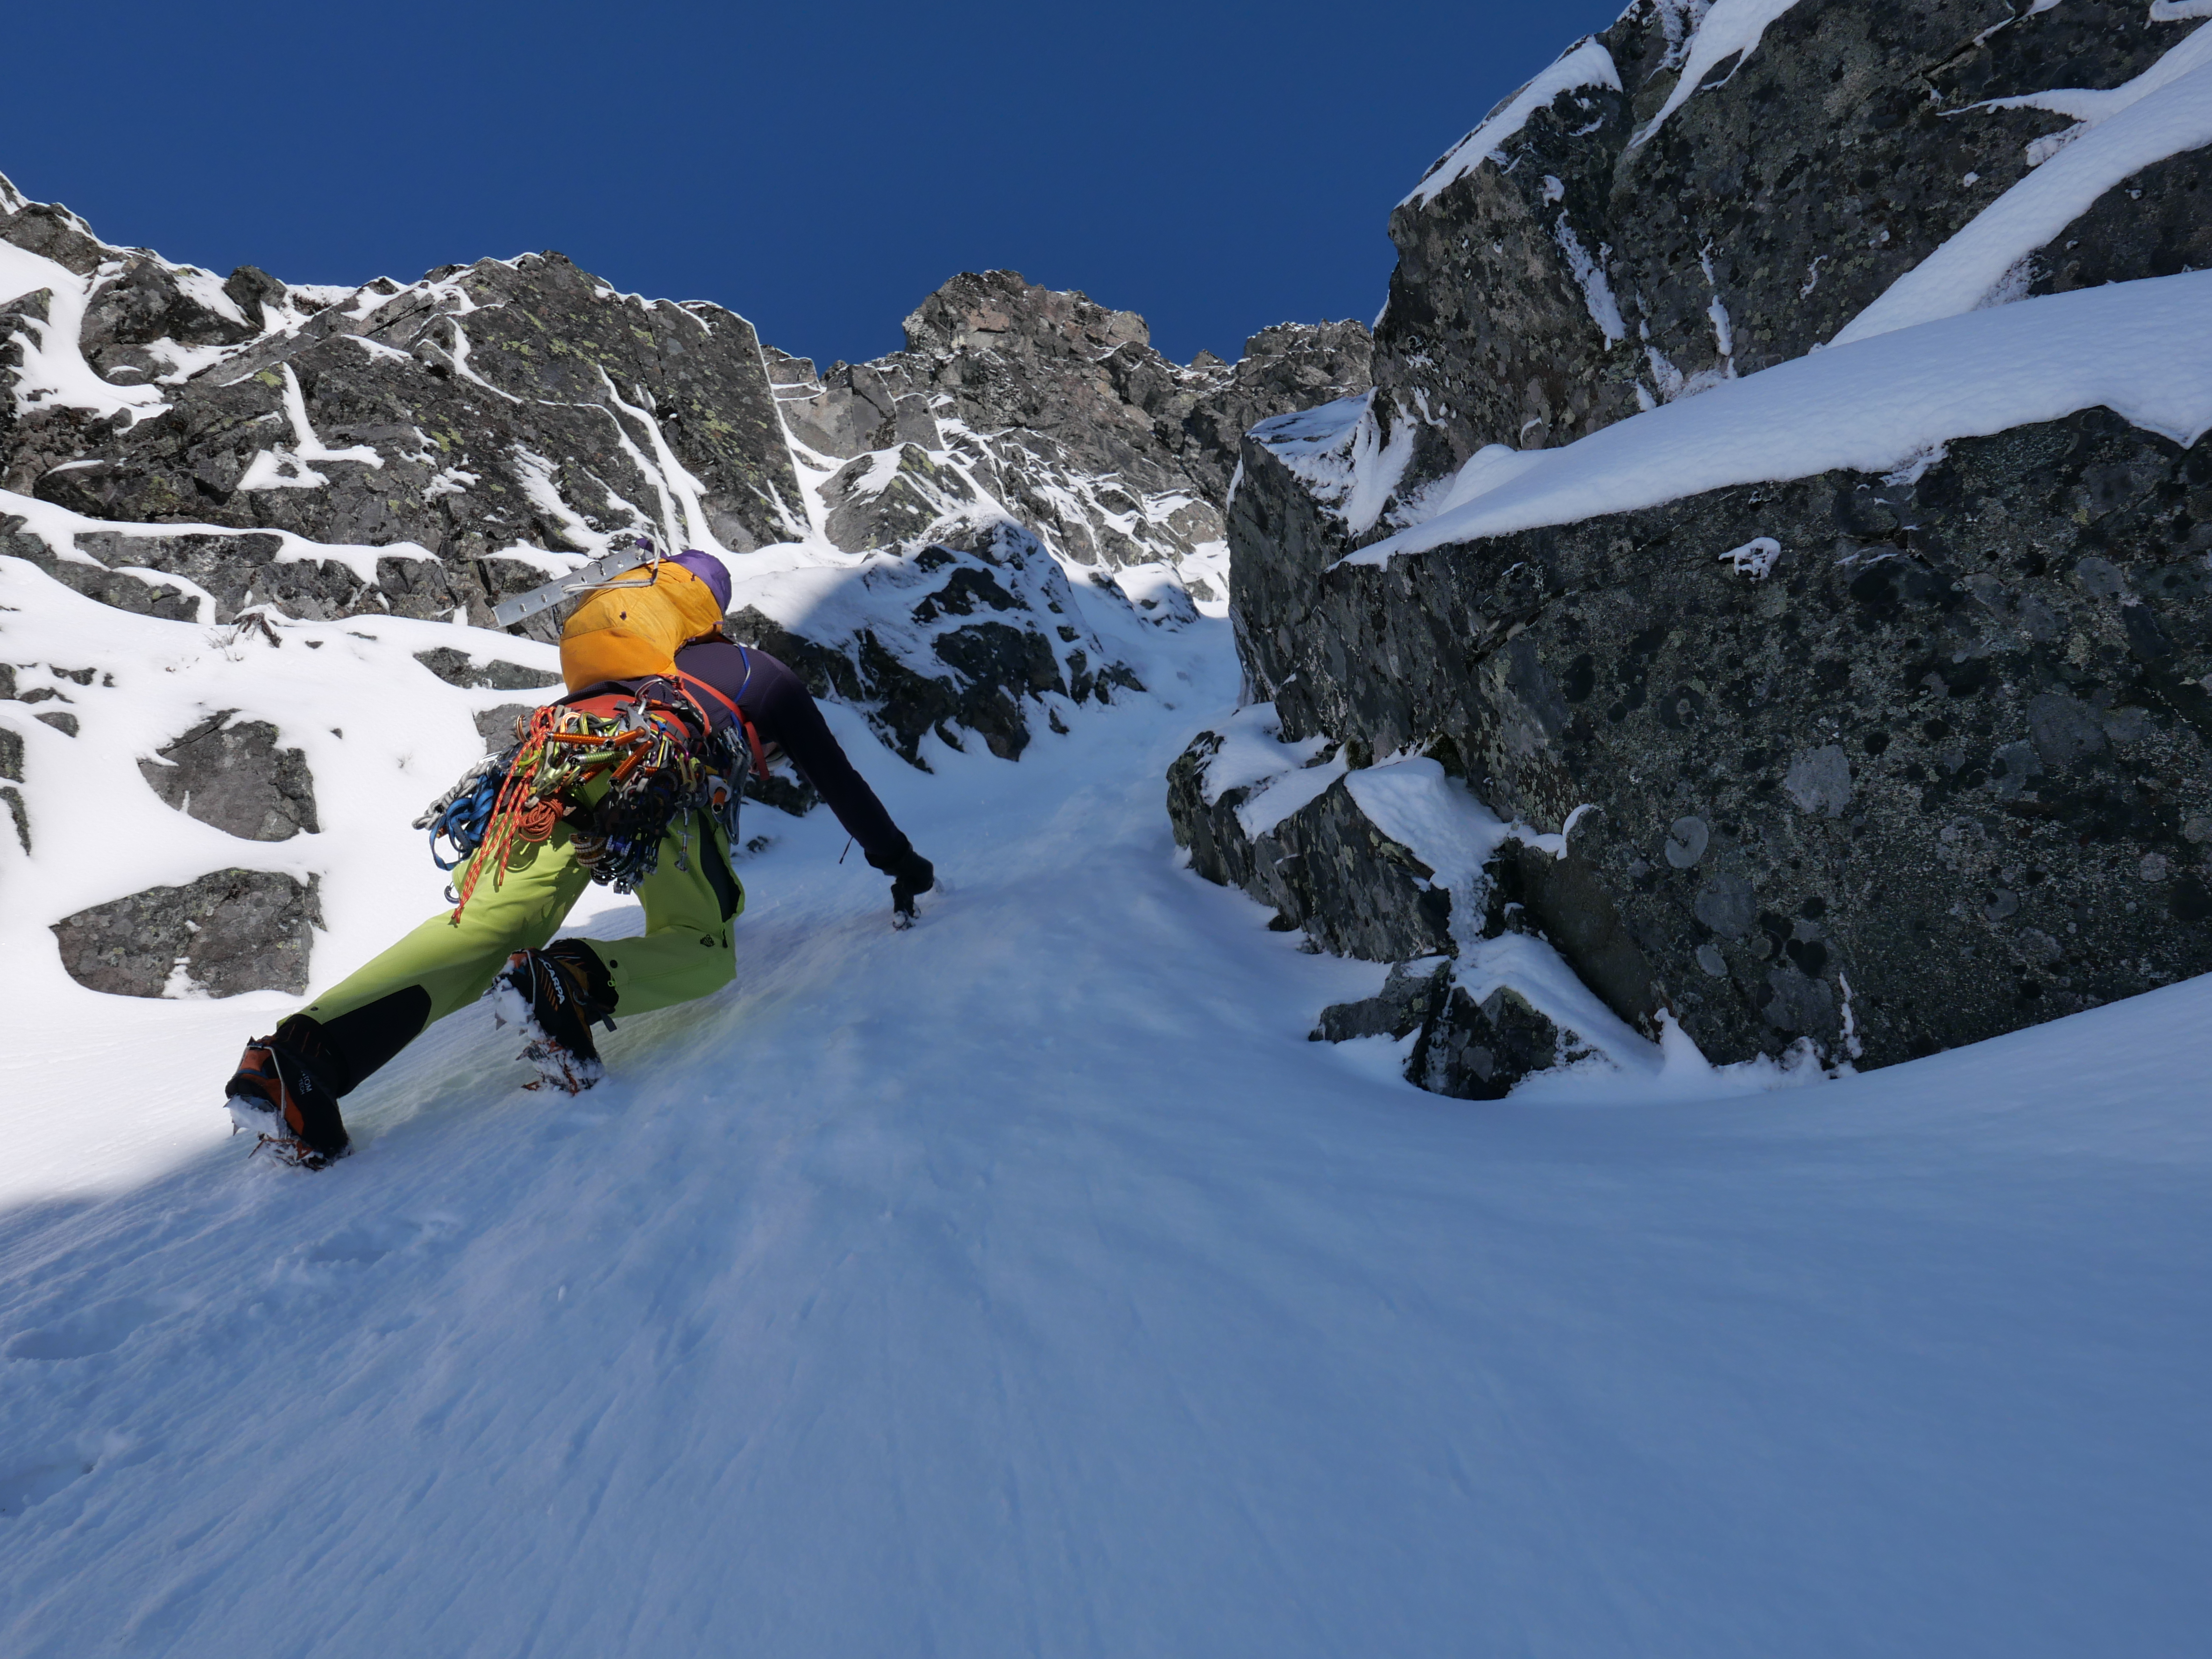
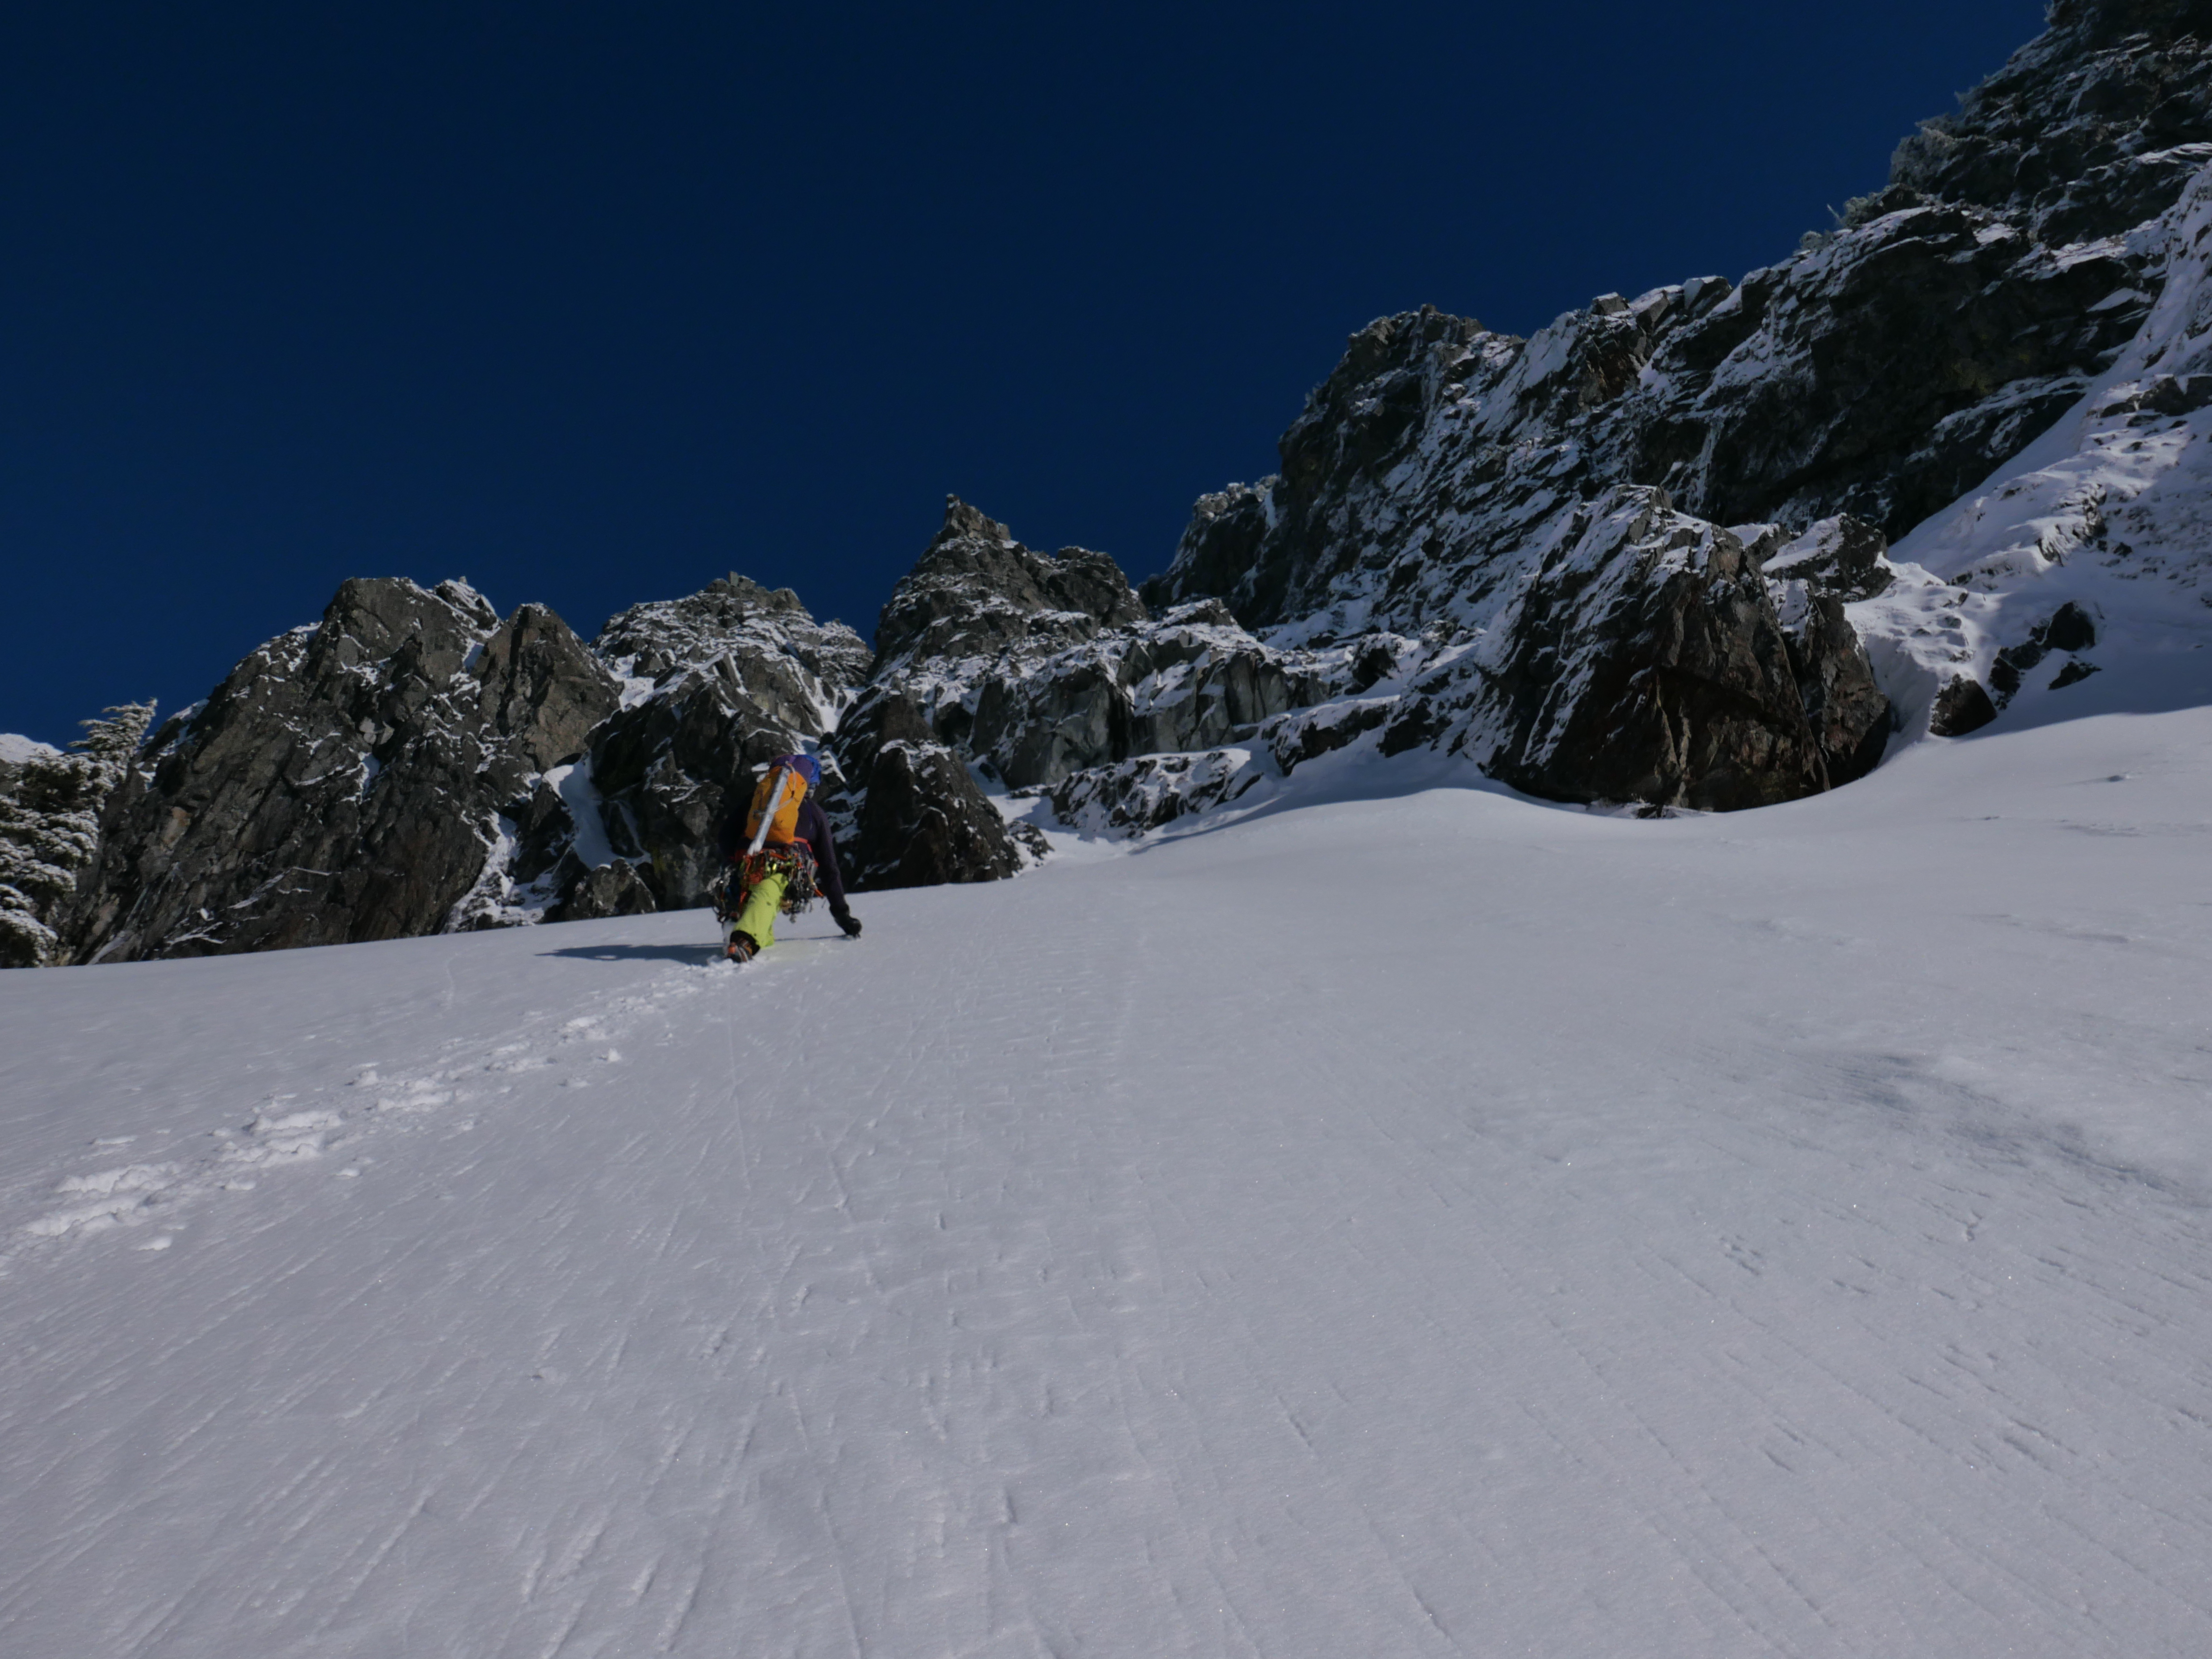
-
Trip: Little Tahoma - Lawless Trip Date: 03/03/2020 Trip Report: I first became interested in Little Tahoma talking with Matt Christensen (my step father) about his first ascent of the West Ridge with his climbing partner Paul Cook. We found it interesting that the third highest peak in Washington has had only a few significant ascents. I teamed up with my friend Jay, who had been wanting to climb something on the north side of the peak for awhile. On the third of March we started walking from camp at 3:30am, our starting elevation was around 8800ft on the Cowlitz Glacier. We crossed below Cathedral Rocks and got onto the Ingraham and started to head west up glacier. The Ingraham was covered in a thin windblown snow crust which made glacier navigation difficult. I punched through into a crevasse and went in up to my head. I remember looking down and seeing a lot of open space below my dangling boots. From that point Jay graciously took the lead. It took us longer than planned to navigate the Ingraham due to the weak snow bridges. Eventually, we made it to the termination of the West Ridge of Little Tahoma and descended the Winthrop Glacier to below the North Face of Little Tahoma. We encountered a significant bergschrund which took two rappels using v threads to get across and to the base of our route. By that time the sun was fully out. We didn't have too much beta to go off of as we scanned the north face for a weakness. We chose a line and went for it. The climb started out on lower angle snow and ice leading to the second pitch which was fun AI4 up a thin ice runnel. The next two pitches were AI3, M3-M4ish climbing and really enjoyable. Pitch five was more serious (at least for me). It was steep mixed climbing with a thin layer of snow cover on what, in appearance, was a cement mix with cobblestones protruding. I was able to find a pin placement low on the pitch, but the majority of the lead was unprotected. This was definitely one of the hardest pitches I've done due to the mental aspect, trying to keep the negative thoughts at bay. Jay took the sixth pitch, which was the crux. A short crack system lower on the lead led up to difficult moves pulling around an overhanging bulge. This pitch had some loose blocks and my belay was directly below and exposed. I had my fingers crossed Jay would not pull any off. At the top of the sixth pitch we started to gain the West Ridge. On the West Ridge we started to climb a series of gendarmes. At this point we were able to put away the ice tools and do some fun alpine rock climbing. There were a few large loose blocks, but most of the pitch was on good rock. From there we reached the last major gendarme on the West Ridge. We rappelled down into a notch between the gendarme and the final buttress of the West Ridge. By that time the daylight was gone and the weather had moved in causing whiteout conditions. We were not expecting to bivy and our gear was limited, which would have made a very cold night. We made the decision to bail on our original plan of climbing the distinct vertical chimney system that cuts directly up the final buttress to the summit. Instead, we traversed around the South Face until we found a large couloir. Pitch ten climbed the couloir up 65-70 degree snow leading us to a short pitch of AI3. From here we were essentially on the standard route up the east side. Even though we were close to the summit, being as exhausted, and frankly grateful to have made it as far as we had, the decision was made to descend. We got back to camp with a round trip time of almost exactly 24 hours. Grade V AI4 M6 5.8, 11 pitches Gear Notes: Single rack in rock pro .1-3 in BD, 5 ice screws, 7 pins, 2 pickets, twin 70m ropes Approach Notes: Approached from the North Face of Little Tahoma by going around the the terminus of the West Ridge.
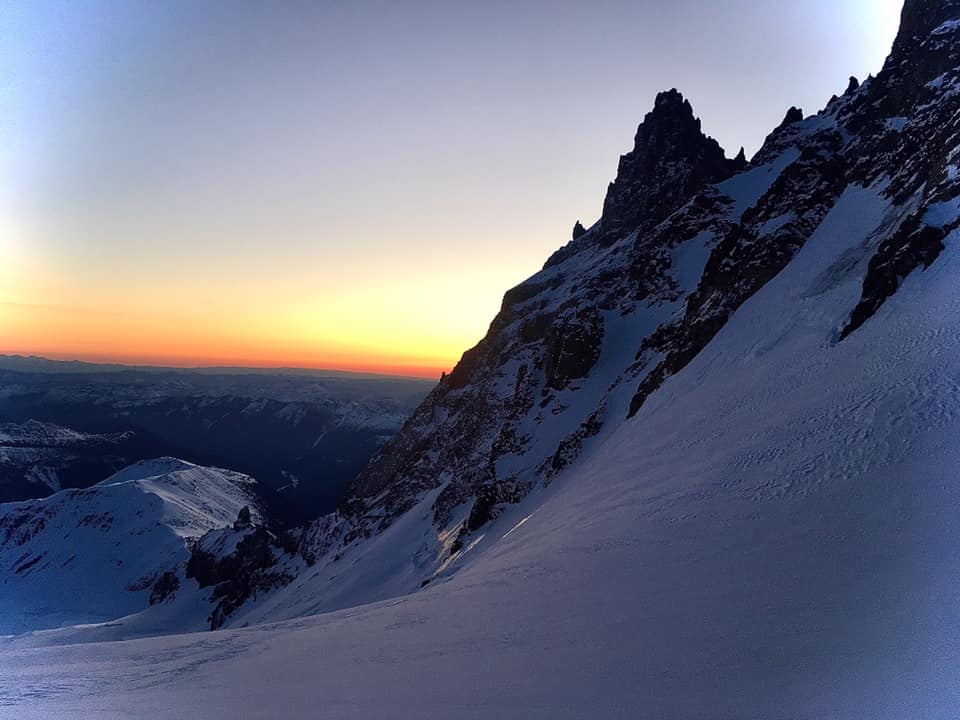

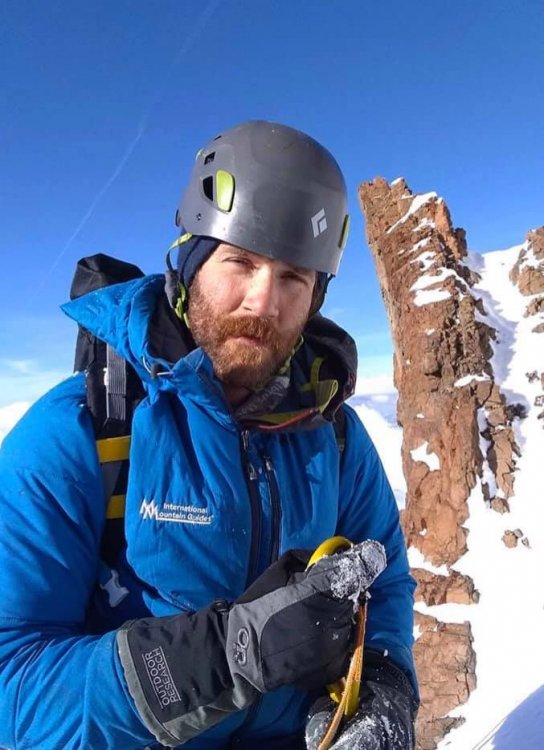
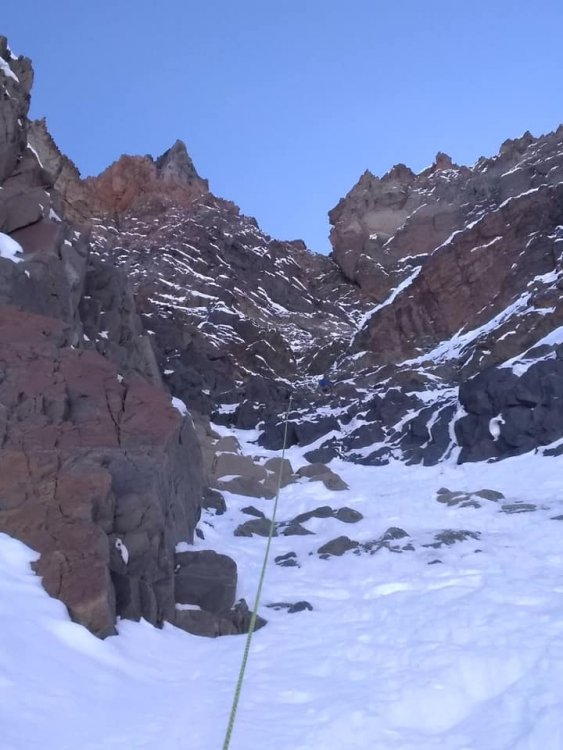
.jpg.3f675bc137993233946f4728b95b5a57.jpg)
-

[TR] North Norwegian Buttress - Jötnar VI 5.9 A3 08/01/2020
Sam Boyce posted a topic in Alpine Lakes
Trip: North Norwegian Buttress - Jötnar VI 5.9 A3 Trip Date: 08/01/2020 Trip Report: Whaddup maggots. The crew of vagrants and miscreants just got down yesterday from north Norwegian round 2. We completed our line to the top of the buttress. We spent 1 day fixing back to the high point then 6 days on the wall climbing in capsule style to complete the route. We are naming the line “Jötnar”, the race of god-like giants in Norse mythology. We unofficially started calling the Norwegian cirque Jötunheim, “the realm of the giants”. While only having one line up there might not give us “authority” to name something, I’m enamored with the zone and like the name, and no one else has to call it that... anywho, here’s a brief report of our experience, hopefully this inspires someone to follow in our footsteps, as it’s an incredible route. In June, we made our first foray onto the wall and found soggy conditions as our route runs through a water streak for a good portion of the lower buttress. Poor weather lead to poor conditions, if you read my previous trip report, you’ll remember we did not get far. In 4 days of climbing we completed about 700’ of the line. We left gear stashed with the intent on returning. Our window of time off about 3 weeks away. Prep for the route started a few days before our departure date. I headed over to kyle’s studio (For his gear business “high mountain gear and repair”) in Ballard to make some various things. One of those being an inflatable big wall hammock that we had been discussing in recent weeks. Kyle would test it out on this wall, likely the secret weapon for big wall alpine routes in the cascades. Kyle came up with the name “Taco” as a mockery of conventional portaledges. After making various things for the wall we set out on our own errands the next day then reconvened to shuttle a load up to lake serene. Fetching water was considerably easier than last time, the moat had opened enough to walk inside, being a whiteout day we decided it was safe enough to brave for 15 min to get water (better than hiking back to the lake!!) After unwrapping our gear stash we discovered a snafflehound gnawed on a rope! The backup lead line nonetheless. Another rope was needed, the volume of rope was becoming absurd. We told Lani to pick one up on her way down from Bellingham. Logistics here got weird. Kyle had commitments in the form of a bike packing trip during the start of the window we had to climb. So when Lani and I started climbing we would have to leave lines fixed to the ground for Kyle to use to join us two days into the climb! On the first day we got a ride to the trailhead early morning and moved with motivation all Day to fix lines the the high point on our route. The line climbed substantially better because of the cleaning we were able to do previously. Fixing high on the wall we descended to the base that evening to sleep on the ground and prep the load to haul. We woke up early again and started the manual labor. Moving faster that expected we were able to haul to the high point and get camp set up around mid afternoon. Plenty of time to start up new terrain. Lani started up the next pitch which would prove the steepest on route. She got about halfway up the pitch before deciding it was time for dinner. On day 3 she headed up the pitch and pulled through the massive steep band that blocked our view of the upper buttress. This would prove to be the only pitch that requires a fixed line for descent. I took over the lead on the next pitch and found cool expanding beak cracks that lead up to a surprise! We pulled into a band of bulletproof skagit gneiss that would run the whole middle part of the route, immaculate stone. I climbed up into a massive right facing corner and up an amazing #2 crack through the second massive roof on the route “the fang” as we had pre named it. Continuing up an easy flare I found a good stance at the base of a large slab. Lani was still feeling mega tired from the steep lead and told me to keep going, I quested upwards on the slab utilizing a mixture of hooks and rivets to reach a dike that proved discouragingly shitty. The dike however led to a good flake that rapidly turned not so good, the whole corner was a Jenga stack. Being on lead I reluctantly bat hooked the face around the choss. These bat hooks could maybe be avoided post cleaning, still chossy and expando in there though. I eventually put a bolt in to reach far and tension to the next small corner, which proved to be cruiser C1 to a good stance for a belay, post dirt removal this would likely be sweet 5.9-10. Here I called off belay while placing the anchor bolts and Lani zipped down to camp to start dinner. Meanwhile Kyle had started up the wall hauling the second half of the load solo, having to haul twice he only got to the bivy at pitch 3 and would camp here. Day 4 started with shenanigans to situate the ropes where they needed to be in order to fix higher. After we were able to snag an independent rope Lani and I again began the commute up the fixed lines to push the line higher while Kyle hailed up to camp. From the high point, Lani led up Inobvious but moderate aid to the crest of “the dude”. The biggest roof on north Norwegian, and an intimidating mega overhang. Incipient and creative low angle A3 led up and left under the roof and around the bushy corner to a small ledge. Reaching this ledge we figured we were far enough up to move camp, and thus Lani went down to assist Kyle in starting to haul while I started soloing the next pitch to the intended next camp. About halfway up my pitch I got a call saying there were technical difficulties at camp, we decided to reestablish camp and fix to the top my pitch. Day 5 would start super early with the big move. Myself and Lani would double counterbalance sky haul the pigs while Kyle cleaned the line below and brought up fixed lines. A few hours of hot manual labor brought us to the high point ledge. A grassy inset which seemed suboptimal for two portaledges, we spotted a good spot left of the buttress crest and concocted a creative plan to swing the bags over. I free climbed up to the top of a flake and put a good bolt in and lowered down (clipping the haul line to the bolt) to the intended spot. I drilled while Kyle and Lani prepped the bags. Once ready I took tight on the haul line with my gri gri and they kicked the bags over top rope style to me where I lowered them in place and docked them at the anchor. Shenanigans. After setting camp up I hugged up to my high point on the pitch and continued my lead. “The head wall” proved to be wicked exposed but I had to fight the features pulling us left into the chossy chasm and drill my way to a stunning corner on the buttress crest. Kyle and Lani came up to join me and Kyle started up the next pitch. Moderate free and aid led up through a tree to a roof. An inobvious ramp cut out left through some chossy bush. Kyle bulldozed his way up eventually running out of patience and drilling around some dangerous choss. Running low on daylight Kyle threw in a belay and called it a day. Day 6 started with a poor decision, only one gallon of water came up the wall... after jugging we were already dehydrated but didn’t think too much of it. We started on the e face and got good afternoon shade but the upper part of the route climbs the crest of the se ridge, and gets blazing sun all day. I got the the high point first and in the spirit of decluttering the tight stance I started free climbing. 50 ft up I hit an awesome ledge too good to pass up, so I added an anchor and moved the team up. Kyle in the mean time cleaned the previous bit to a state of being semi pleasant climbing!! At this belay our peril became evident, we were already spiraling into gnarly dehydration. Kyle was getting loopy, Lani unstoked, and myself crankerous. I would continue up with inobvious route finding. A long circuitous pitch of steep 5.9 led to another good albeit sun exposed ledge. We were closing on the summit, Lani encouraged me to keep leading while Kyle cleaned the route. A blueberry filled corner provided passage to the next tier, a pitch likened to the tree climbing on j berg!! One more mega ledge and we could smell it! A casual pitch of 5.7 led up to a short bit of heather clawing onto the summit of the buttress. We had read that it was easy climbing to the summit of middle index from here and it looked so. It also looked like a bunch of cascadian bush mank that seemed like it would taint our experience in our state of dehydrated madness. We descended to camp to smoke the joint we found in the parking lot and contemplate our descent. One or two puffs in I had this idea to lower Kyle with the bags down the whole face. We all became (mostly) convinced it would work and put wheels in the motion the next day. After wranglin the bags back to fall line we descended two pitches to the intended “drop zone”. We delicately stacked 1000’ of rope joined with edk’s, we would would bump em all through a munter. Kyle and the bags were probably closing on 400 lbs, we needed a gri and munter to control the load. The lower went smooth, and we were amazed! Bags were down!!!! So myself and Lani dropped all but two ropes down the face and Kyle started managing the clusterfuck. Our new friend River had responded to a Facebook call for porter help and met Kyle at the lake to take down 50-60 lbs of our load while me and Lani rapped the face and cleaned our gear. We touched down not too long after and started the soul crushing hike down, we had about 70-80 lbs a piece. I had called my parents again as it seems like all our friends are busy this time of year, they met us at the parking lot with a cooler of cold bubbly, fucking great climb. Shoutout to Lani for stoke, Kyle for his undying willingness to suffer and commitment to the manual labor and route creation, and River! For being willing to come up and help total strangers hump our stinky clusterfuck around. This route was certainly the effort of a village, and a wonderful big wall line that I hope people enjoy. Gear Notes: Double Rack micro to #4, Single 5, Single set of offset nuts (didn’t use rp’s), 4-5 each beaks, 2 small lost arrows, 10 rivet hangers. All bolts and rivets are stainless, one or two bolts didn’t take well in the wet mud, but could potentially be reset with a funk and tightented (all anchors have at least 2 good bolts). Some may need to be tightened up again after initial loading. No ledges big enough even for 1 to sleep, good portaledges camps at the top of pitch 3,6,9, and 12. Do not haul above 12. Bivies at 3,6, and side of 11 take 2 ledges well. Rap the route, some directionals need to be placed on a handful of pitches to get down, pitch 7 needs to remain fixed with an extra 35-40M rope (it could be possible to down aid the roof on rappel to get back to the previous anchor) Approach Notes: Scamper to Lake Serene while the tourons ask about your “paraglide” or “boats”. Easy talus walking to near the waterfall between the buttresses. Enjoy your stay in Jötunheim!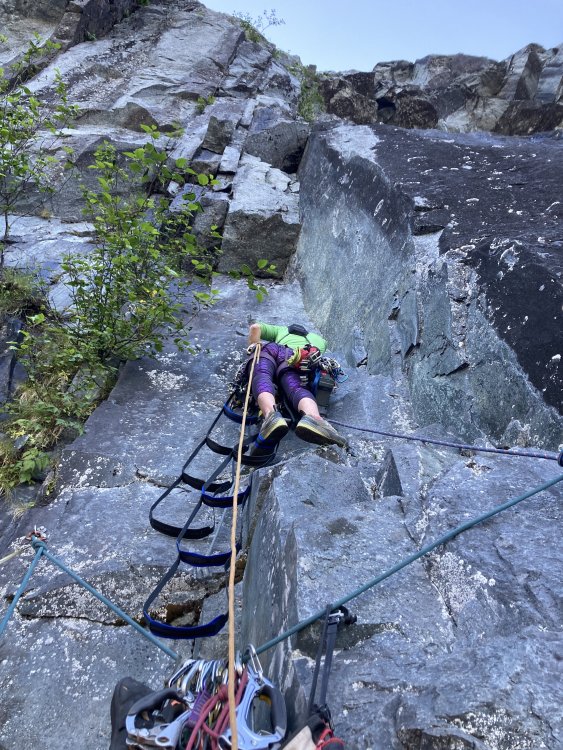
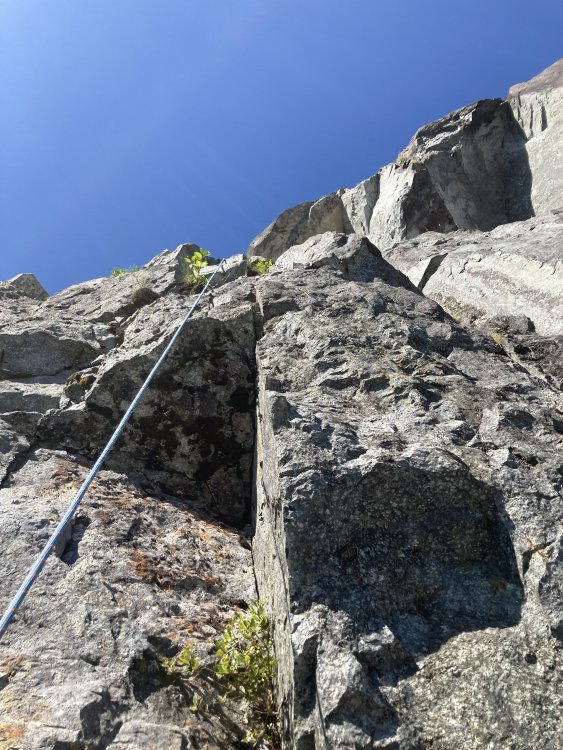
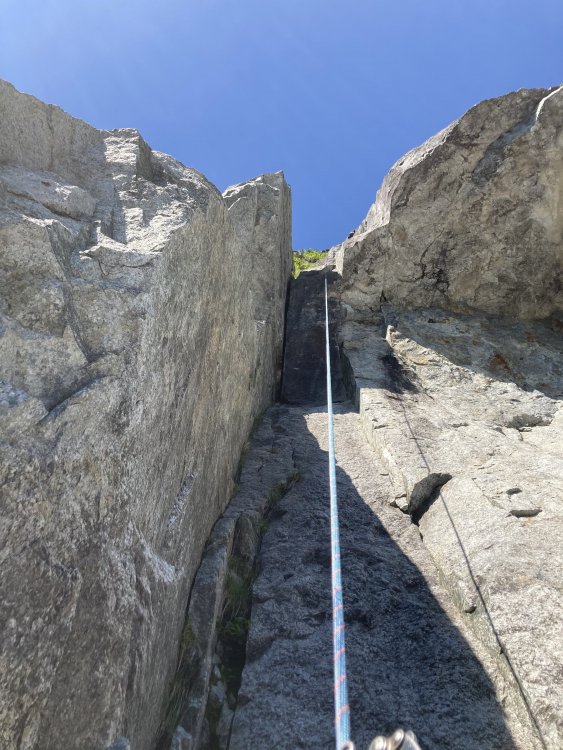
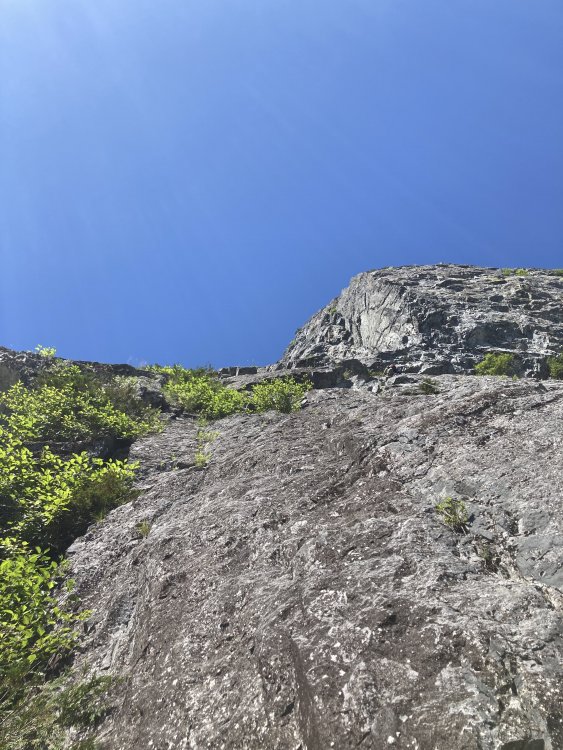


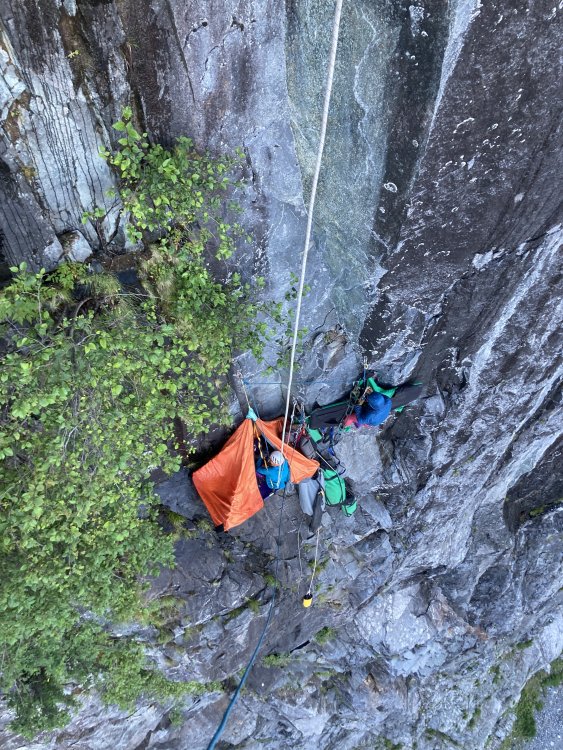
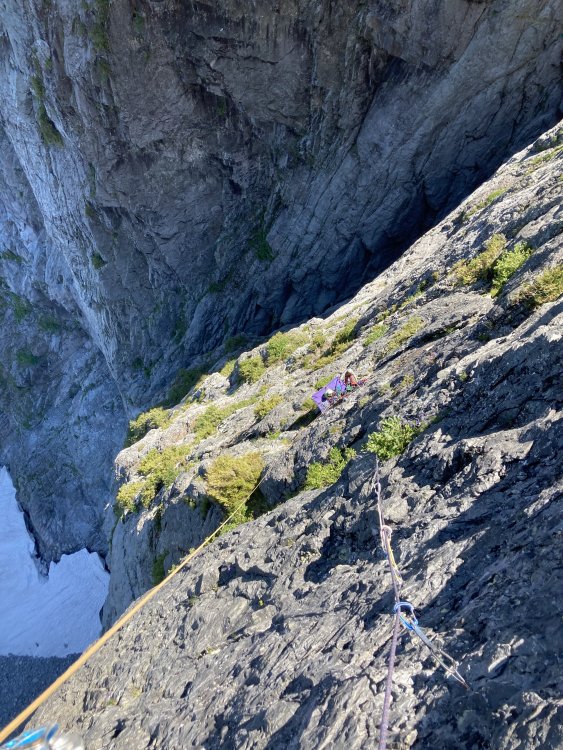
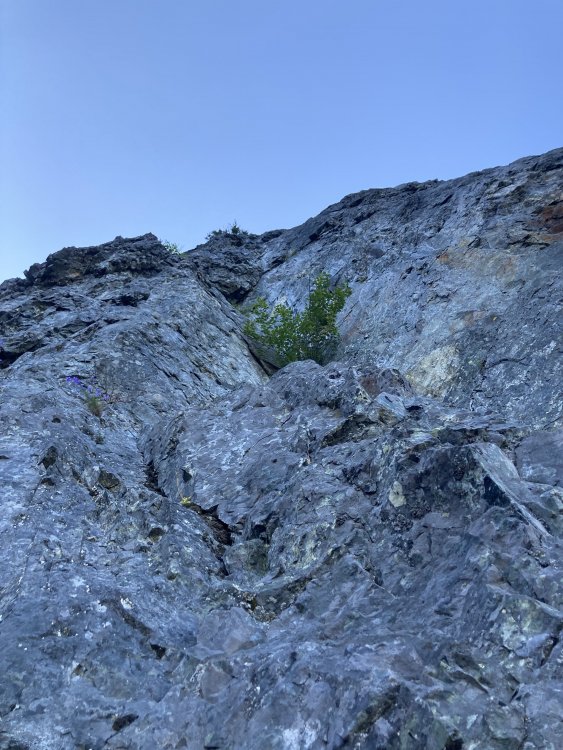


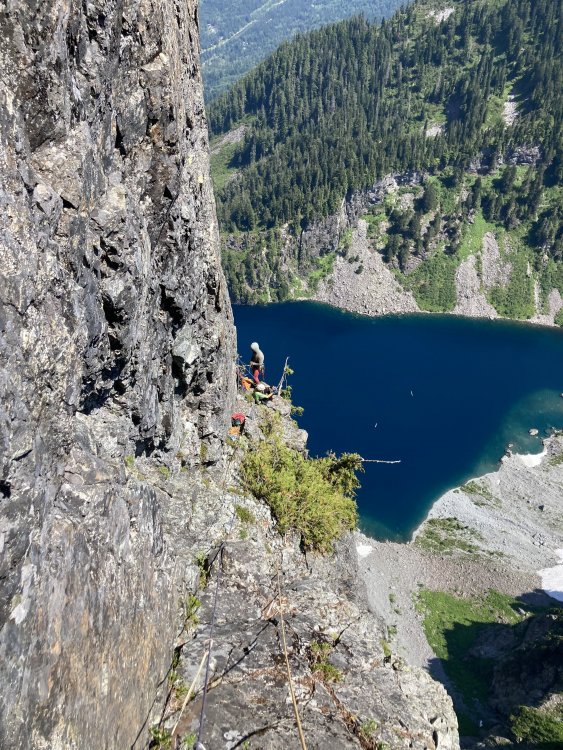
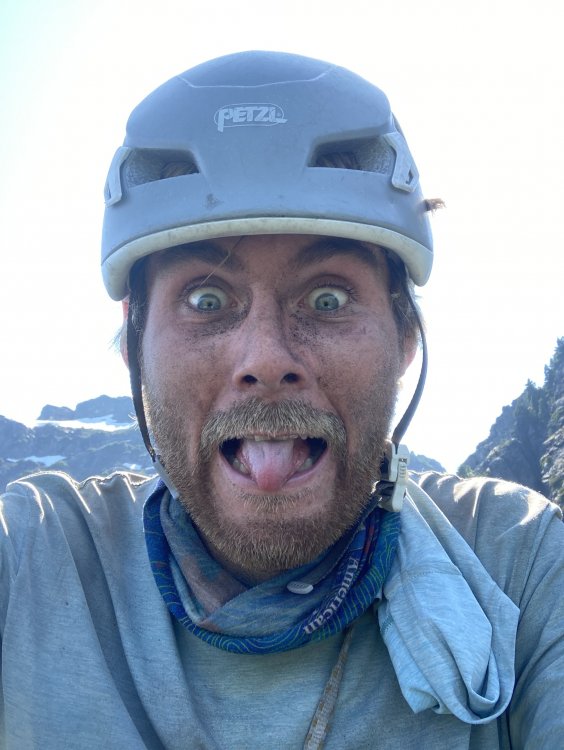

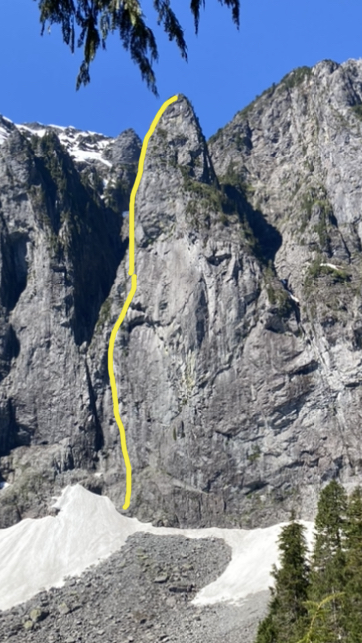
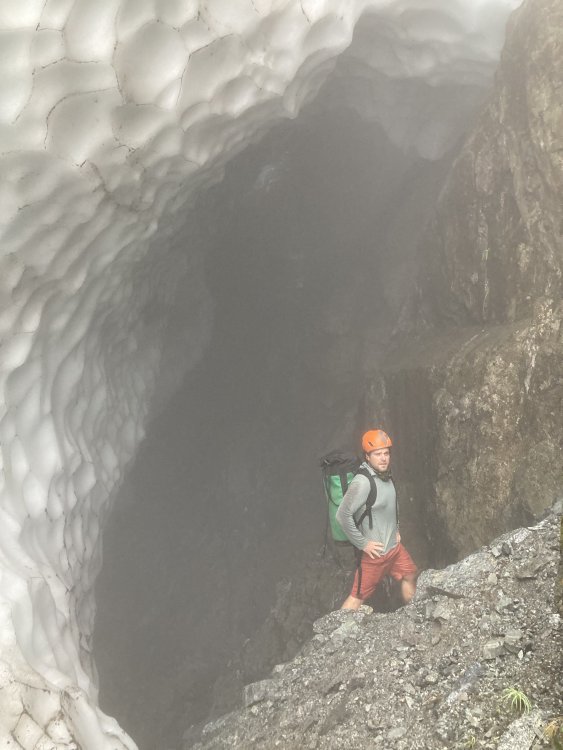
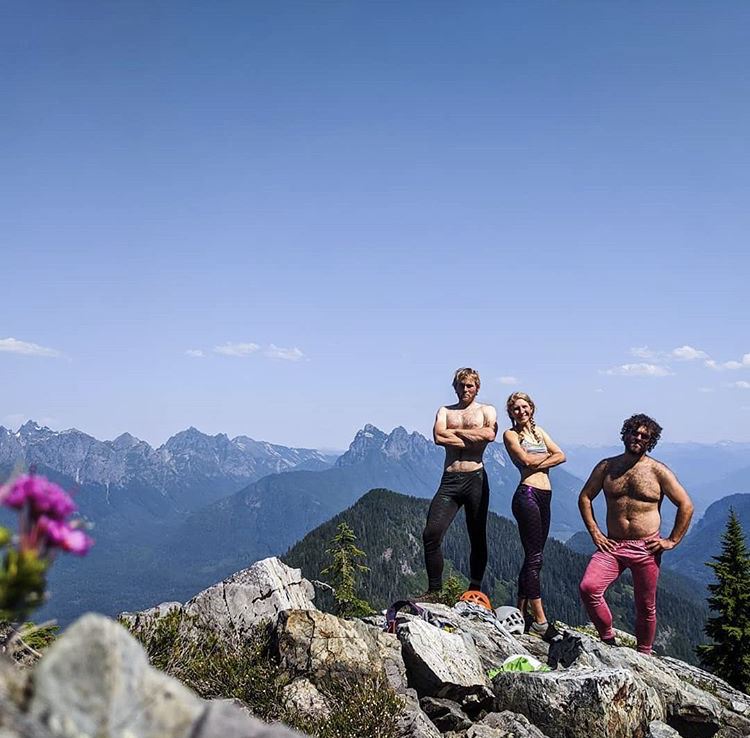
-
Trip: Little Liberty Bell - (Partial New route) Narcos, 5.9 600ft Trip Date: 07/11/2020 Trip Report: Yesterday I went up to try and do a new route solo on little liberty bell. It’s entirely possible that some or all of this route has been climbed before, I know for sure that the first and last pitch have been climbed, but I really couldn’t tell about the rest of the route. With that being said, I’m calling what I climbed Narcos. I’ll explain the name at the end. You may be able to approach straight up the basin from the road and cut off some distance but add some gain. P1, 5.7+—Start up the clean cracks up the big left trending ramp to the tree. If there is still snow you can climb up small corners and overlaps to the left that meet up about half way. This is what I climbed to avoid snow. Build a gear belay in a 1” horizontal below the tree, this is a much better stance. There were slings on this tree when I got there and some placements seemed to be cleaned out. On the last rappel. P1 follows the cool looking cracks up the ramp on the left. I ended up climbing the flakes to the left of the ramp to avoid the snow. P2, 5.9—Follow the horizontal straight right and up a bit. Follow good edges and cracks until you reach a nice looking finger crack, climb it up to some good ledges. From there follow ledges back left past a small tree (your last pro) and two large loose looking blocks sitting on the ledge, maybe don’t pull on them. Once you reach a good belay ledge, climb up a little further to a solid horizontal. Build your belay here and extend it down to the ledge if you can. There seems to be a more vertical option going straight up and right to a nice looking LFC. I didn’t climb this as I had intended on climbing new ground. It may have been climbed before. It is marked in blue on the topo. Looking up the improbable traverse on pitch 2. There is much more pro than in the picture. This is after cleaning the pitch. The 5.9ish finger crack, it's steeper than it looks. P1 visible below. The blocks I traversed across and tree I slung at the top of P2. P3, 5.7+ PG13—Go up the bush choked corner for about 15 feet until you can step left into good flakes that parallel the larger right facing corner. Follow these up to a series of ledges and a large chimney/flake. Chimney up the outside edge of this flake to avoid lots of pine needles and bushes until you can reach a cleaned out .75 crack, place something there. Down climb a little bit until you can step right onto a series of ledges/ramps. Follow these up the slab passing one Piton (my first pin placement on a route) and up the sharp arete. From the top of this climb back down left to a ledge below an arching right facing corner. Belay here on finger sized gear. This pitch could avoid the runout chimney and arete climbing in the future if the cracks were cleaned out. I had originally tried going straight up some solid cracks on this pitch, but after the cracks petered out and encountered some very hollow rock I left a nut and bailed on this option. Looking up P3. I only followed the bushy corner for a few moves before stepping left. This is after cleaning the pitch on the way down, the red c3 is a directional, not the only piece. Looking down the good flakes in the middle of P3 on the way back down. The runout chimney on P3 My very first pin placement, I had to document. There is no rope drag in the rope solo system, hence my sketch "quick draw" P4, 5.8+ —Climb up the fun arching corner and then right via hollow sounding but fun flakes (place nuts here not cams). Step right around an arete into a nice right facing corner, you are now on the Wright-Pond. Follow this up to a bolted belay. P5, 5.8, 45m—Same as P4 of the Wright-Pond. Description taken from MP. Climb the blocky corner/chimney up past a tree until you gain a low-angled slab. Head left across the slab to a wide hand and fist crack hidden in a left-facing corner. Exit the corner up and right on blocky but easy ground to low-angled ledges. Belay on a tree with slings. From here you can scramble to the summit. Descend via the Wright-Pond with 4 double rope rappels on bolted anchors. Good views of Silverstar & co! I think this route could clean up nicely and be a good 5.9ish option up the feature. It is hard for me to grade it accurately as the dirt, lichen, and self belay results in things feeling harder and scarier at times. I tried to grade it for someone who knew where they were going and had a hand on the break strand of their grigri. On the hike down I got a little off route (there is no route) and ended up in some pretty damn thick brush. While trying to force my way down the hill I stumbled upon a pile of white crystals under a small tree. My first thought was “wow, that’s a weird Fungus”, then I took another step and saw black canvas in the bush in front of me. My heart stopped as my first thought was I had found a dead body of a missing hiker, or murder victim. I got a better look and realized that it was a large black duffle bag, unzipping it I finally realized what it was. A 35lb duffle of crystal meth, street value of about $350k give or take. I dragged the bag to a slightly more visible location and marked the spot on my phones GPS. I drove down to Mazama the next morning to report what I’d found. I ended up leading some heavily armed cops up and helped them carry out the “package”. It’s possible that I made a very big mistake. I could have bought so many new skis! It was either a recent air drop with intent to pick up, or one of the bags from THIS event that happened last year. I will provide a topo/overlay soon if I get permission to use Chris’ photo. I'd be very curious to hear if anyone knows some history of ascents on this feature. Gear Notes: Double rack micro to #2, single #3 and 4. Single set of med nuts. 2 60m ropes. Crack Pipe. Approach Notes: Start as for Cutthroat wall by walking down the old road bed for 1/4 mile until you see an obvious double cairn on the left side of the trail. Enter the woods here and point it straight up until the terrain lowers a little in pitch. At that point you can start arching left to get to the ridge next to the wall. I highly recommend using the slope angle shading map feature on caltopo and trying to stay on lower angle terrain. it’ll make things a little more pleasant. From the ridge it is pretty self explanatory where to go.
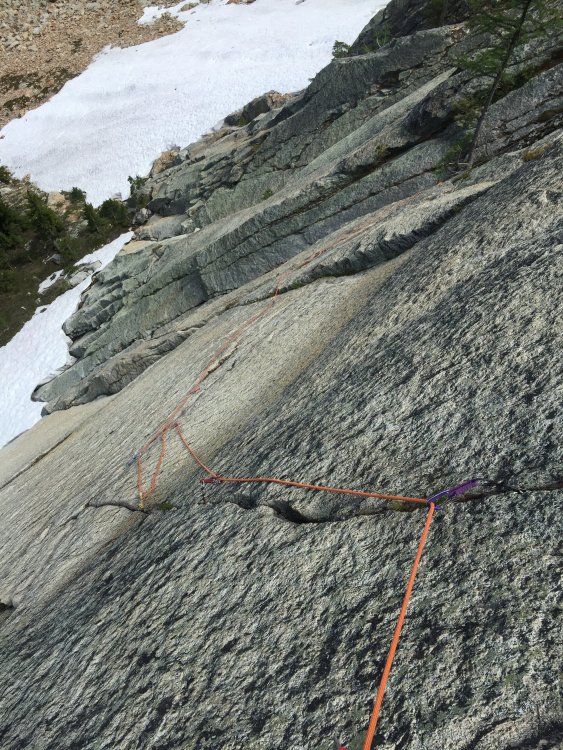


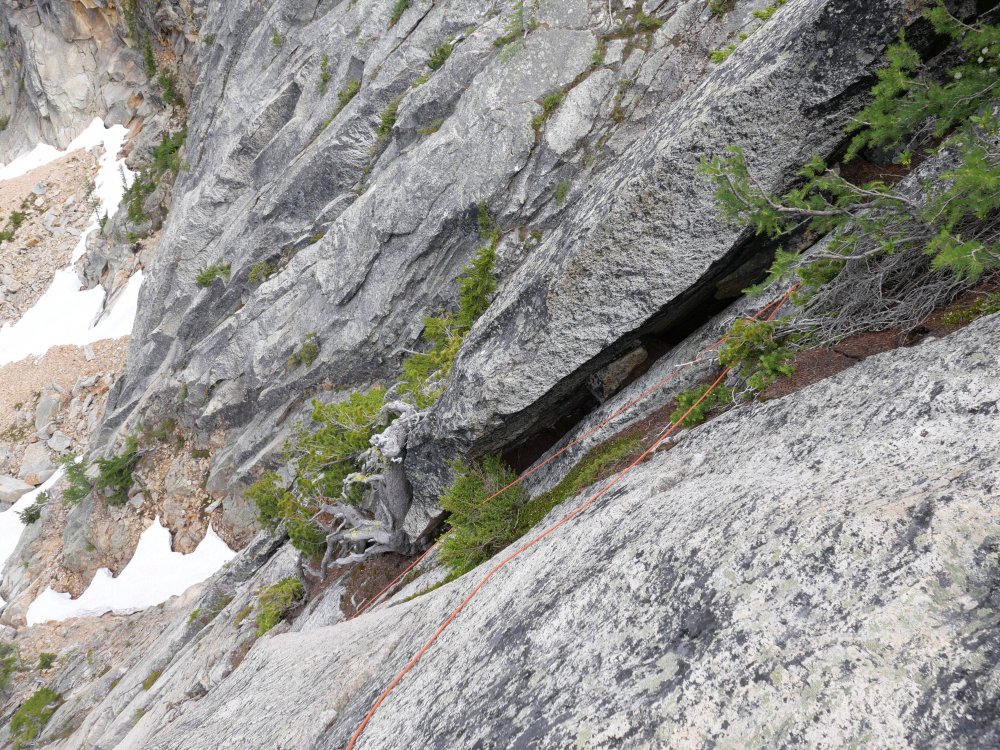
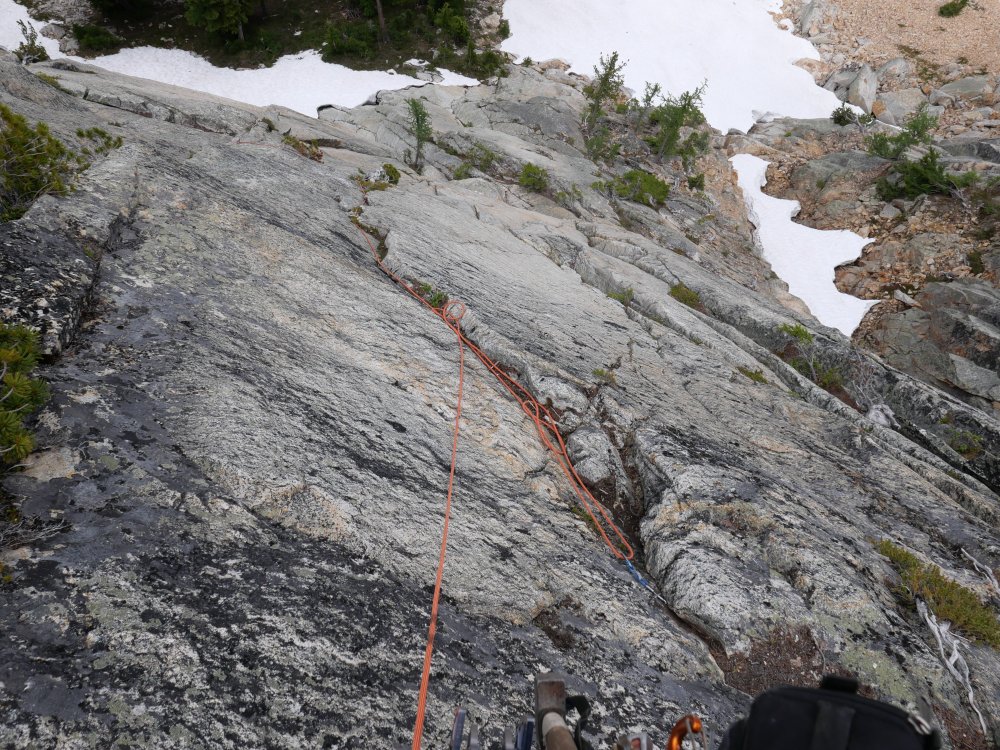


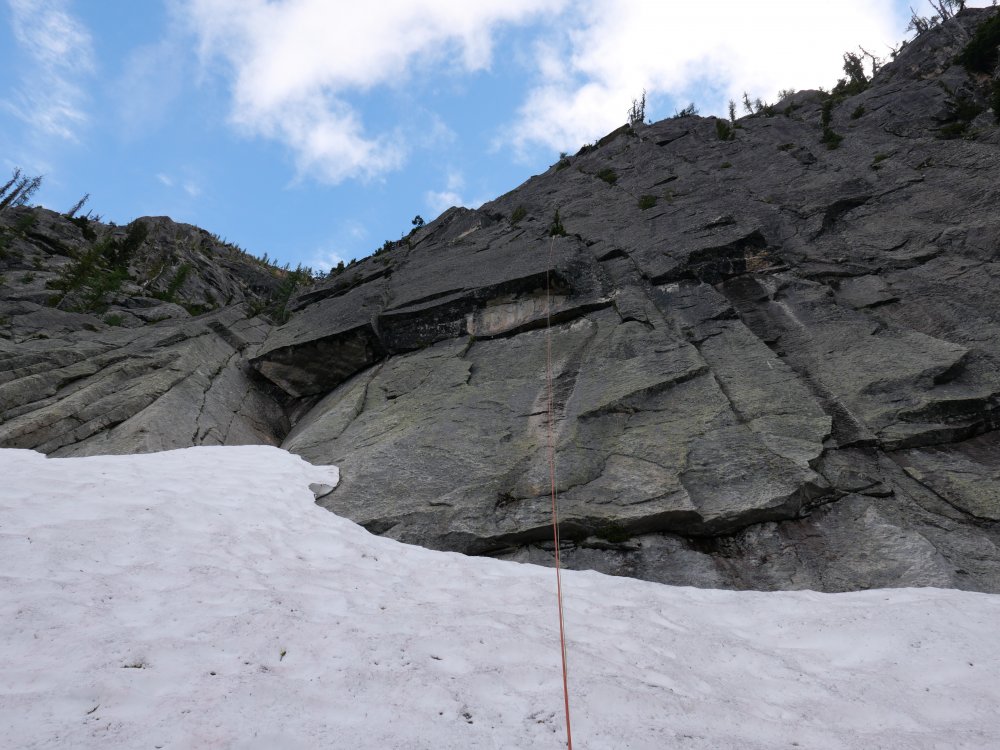
-
Trip: Sloan Peak - FA: Superalpine (WI3-4, 1000') Trip Date: 02/28/2020 Trip Report: On February 28th, 2020, @PorterM and I made what we believe to be the first winter ascent of the West Face of Sloan Peak. We climbed an incredible line approximately 1000 ft long of WI3-4 and steep snow climbing before our route joined the final 600 ft of snowfields to the summit. On the very final ice step, I suffered a short fall on rotten ice and a heinous top out and broke a few bones in the right side of my face. We bailed down the route and skied out. So technically, I guess we didn't finish the route, so say what you want about it. Our route started with a WI4ish pitch followed by hundreds of feet of stellar WI3 rambly flows in a gully just to the climber's right of the true west ridge spur on Sloan Peak. In our eyes, this was the only way up the true west face under WI4+/5. The whole face is loaded with huge free hanging daggers and wild lines. A competent WI6/M6 climber in the right conditions could send some absolute world class lines up there. I shared a lot more details, reflections on the accident, and route beta on my blog: https://climberkyle.com/2020/02/28/fa-sloan-peak-superalpine-wi3-4-1000/. Hopefully some others can get up there and finish this magnificent climb or poach some of the other unclimbed lines. Our route. up to where I fell. We were about to join the corckscrew route and head out. We climbed the gully on the right side of the photo. First pitch crux. Moving into the wonderful ice gully. Porter leading on that fat, fun, rambly WI3. The climbing in the gully was generally easy, sustained, and super fun! Incredible flows on the west face. Some helpful beta. Gear Notes: Screws, maybe a few small rock pieces and a picket. Approach Notes: Skin/hike forest service road 4096, then meander up Bedal Creek to the base of the west face.
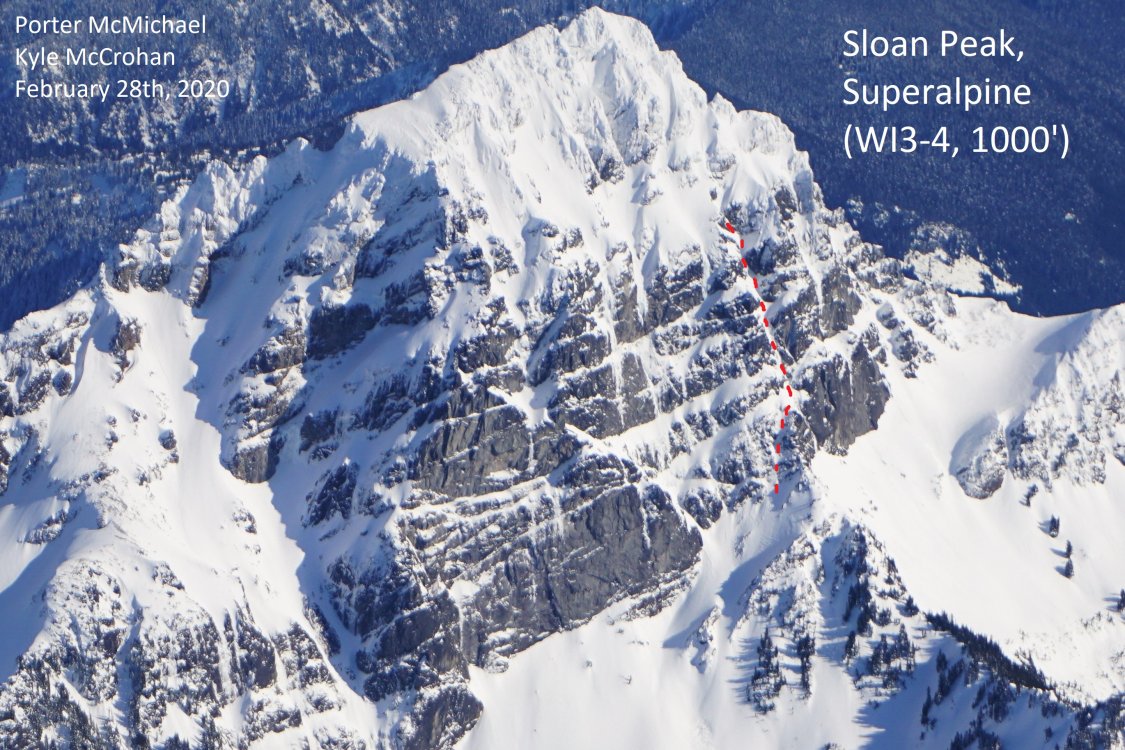
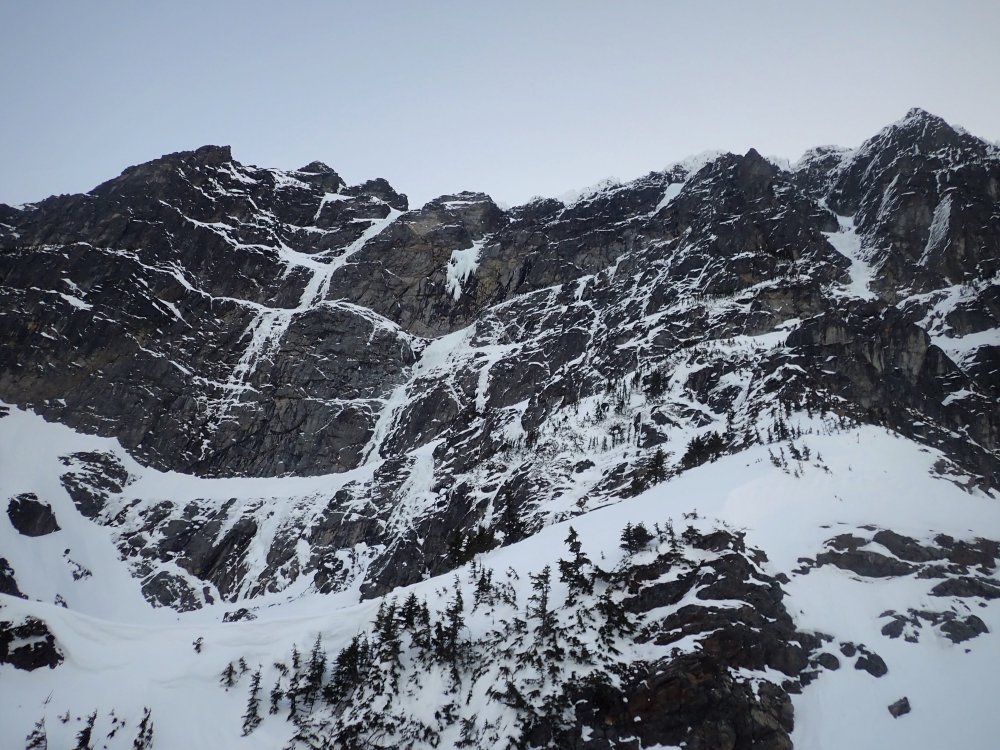
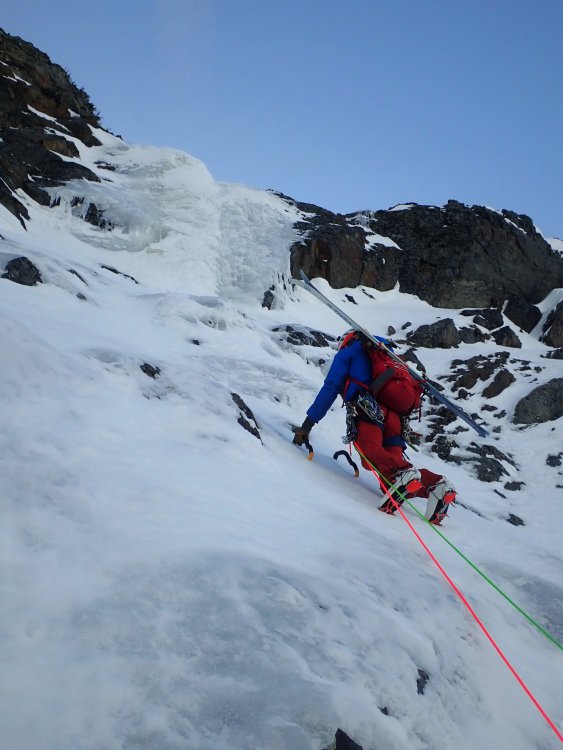
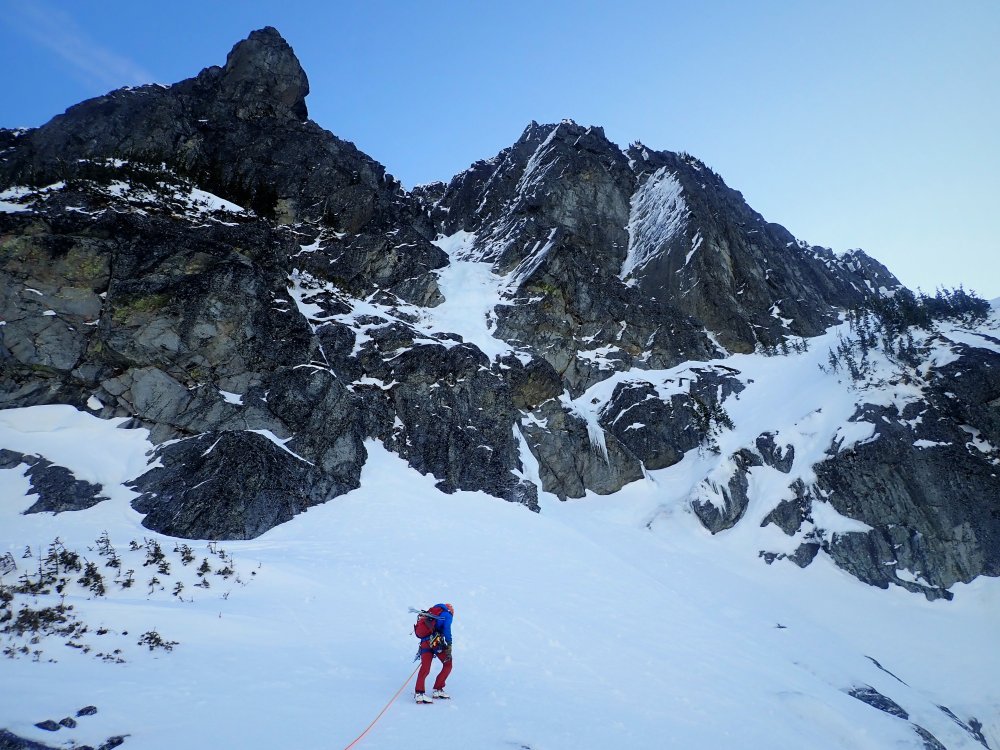
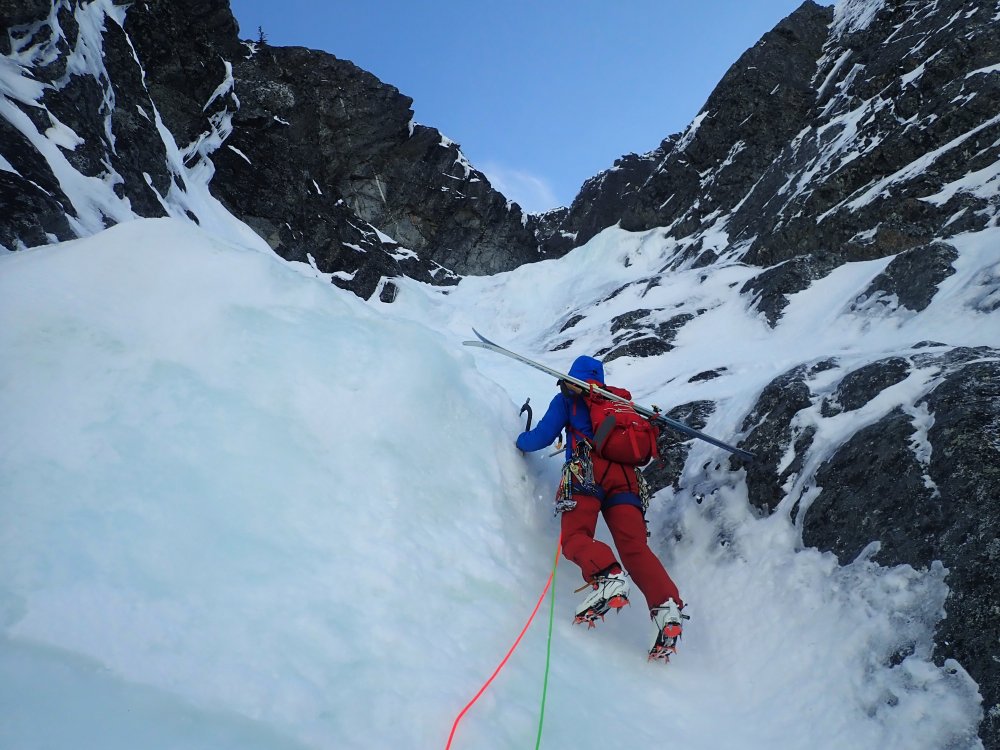


-
Trip: Mt Cleator - Tubby Needs Cheese 5.8+, 9 pitches, 1,000'+ Trip Date: 09/01/2019 Trip Report: It's been a spell since my last report; I offer a tale of an ascetic and a hedonist climbing yet another irrelevant obscurity in their quest for entertainment and raw truth. The weather forecast pointed them east, and Mt Cleator appeared to fit the bill. After a pleasant trail tramp past Buck Mtn and establishing camp, the dialectic duo scouted and debated a number of lines available, and provisionally settled on the cleanest looking one. The line emanates from near the main summit (not the N tower), and is a NW jutting rib that appears to share the granitic character of the pluton on nearby Berge--very little schist encountered. (Other options abound on the N side of this peak up to the N tower, but even these impaired codgers reckoned unappealing the primarily grubby schist on these longer lines toeing down more directly to Buck Cr. They agreed to buy beer for any whippersnapper climbing one of these lines.) For the full Cascades sub-alpinism experience, approach directly from a camp near Buck Creek, where the trail passes close to the creek. Romp up pleasant alp slopes to a band of cliffy terrain, then bunk-jungle up steep alder to pass a waterfall. This approach grants access to the upper basin and the several lines available on the northwestern quadrant of the mountain. For the descent enjoy the scenic trail tour return via Buck Creek Pass. Lots of wildlife encountered--bear, coyotes calling at each other (probably about the bear), deer, etc. The climb's more-technical and mental challenges are concentrated in pitches 2, 3, 8 and 9. (Unfortunately, not many climbing pics taken.) Pitch 2: while the self-styled epicurean showered his pathetic self with sod digging for pro and holds, the wannabe stylite laughed derisively. Pitch 3: the ascetic got his come-uppance, "I wanna go home", but eventually pieced together a lead to the crest of the rib. The middle pitches were more scrambly, mostly mid-fifth and easier. Pitch 8: a sweet, relatively steep and juggy corner. Pitch 9: interspersed short splitters and varied climbing, beautiful and exposed ridge rambling with steeper steps. P1: P3: P6(?), climber low center: On average, the over-indulger and the self-depriver make for a balanced human. In an alternate universe the roles could be switched, and maybe the pair would climb splitter cracks on impeccable stone; but in this one, they reconcile themselves to seeking new lines on inconsistent rock with their mercifully impaired memories. On this climb, a somewhat dirty beginning becomes more enjoyable higher (and with distance). It's difficult to get a well-defined shot of the line. Here's a flavor: Tubby Needs Cheese begins to the left of the shaded red streak on far right, a few hundred ft below that tiny spot of sunshine on the ridge, and continues up to and then on the right skyline. Tubby tops out in the horizontal strip of sunshine, or perhaps just out of view behind the pyramidal feature to the left of it. (The sunlit tower is in the foreground relative to the main summit.) Beckey's CAG vol 2 (2nd ed.) has a good pic of it along with Buck on page 160, swooping down from the main summit clearly marked MT CLEATOR. And from the west, hiking toward Buck Pass: A shot on the way home on Labor Day, TNC in the shade on right toeing down just left of the snow in the basin: More pics (recommend click on 'info' to see descriptions for many): https://photos.app.goo.gl/P2U5SJgB8jU1eQBo8 Gear Notes: Double rack through 3, a 4, some nuts. We didn't use our pins, but some folk might want to. Approach Notes: Park at Trinity. Buck Creek trail, etc. -- see above.
-
Trip: Humpback Mountain - Humpback Flows. Possible FA's on three ice routes - Champagne, 1p WI3, 65m. Don’t Forget the J-Thread, 2p WI3, 80m. Martinelli, 1p WI4, 25m. Trip Date: 02/07/2019 Trip Report: [TR] Humpback Flows, Possible First Ascents: Champagne, 1p WI3, 65m. Don’t Forget the J-Thread, 2p WI3, 80m. Martinelli, 1p WI4, 25m. Climbers - Raider Rob, Caleb Mallory, Alex Stolpovsky, Jessica Sagnella, Justin Pucci. View of Humpback Flows from I-90 Exit 47. Introduction: On my way back from ice climbing in Hyalite two weekends ago, my friends and I spotted what looked like ice up on the North Face of Humpback Mountain from westbound I-90 at Exit 47. I added this to my list of areas to check out and drove on… A few days later, my friend Chris Patrick posted a picture of the same thing on Facebook and several of us got into a conversation surrounding whether there was anything worthwhile up there. Thursday rolled around and the conditions appeared to be perfect, so my partner Jessica Sagnella and I decided we’d give it a try. Friends Raider Rob, Alex Stolpovsky, and Caleb Mallory were also planning a trip, so we decided to team up and lay siege to Humpback Mountain in the hope that we’d find something worthwhile to climb. We got to the Asahel Curtis parking lot off of Exit 47 at 7AM, geared up, and began the approach. There are no trails up this side of Humpback so it was a fun and interesting trailblazing and bushwhacking exercise to get to the ice. Climbing Area Descriptions: To get to The Steps or Hidden For Your Pleasure, ascend the avalanche path directly. This approach is approximately 600-800 vertical feet of steep no-fall zone snow up to 60 degrees, so please assess conditions as you go and use your best judgement. About midway up the avy path, you’ll see The Steps on the left and now the full lower tier of Hidden on the right. At this point, it becomes clear that The Steps is considerably steeper than the approach photo represents. It consists of a 15-meter wide gully with two nearly-vertical 5 to 8-meter ice steps separated by a snowfield. The top out appears to be protectable via anchoring to a large tree directly up the center of the gully. To get to The Sheet, traverse right from the tops of the bushes with very little additional elevation gain, but be weary of the final portion of the traverse to the base of the ice, as it is a no-fall zone on steep snow. The Steps Area from half way up the avy path. The Sheet Area from the lower boulder field with Champagne highlighted on the left. The Hidden For Your Pleasure Area showing the lower and upper tiers and the two lines we put up. The Sheet Area Champagne – WI3, 65m, possible FA by Alex Stopolvsky, Caleb Mallory, and Raider Rob. Avalanche danger: Serious. Approach: Traverse right from the tops of the bushes with very little additional elevation gain, but be weary of the final portion of the traverse to the base of the ice, as it is a no-fall zone on steep snow. Route: Climb the major flow on the right along the left side of the slab. There is a possible variation starting left up the first step and then traversing to the far right to what looked like fat ice. For a top belay anchor, sling the horn on a large slab just left of the route at the end of the pitch. Another 20 meters above the anchor is a protected cave with plenty of level ground. Descent: Rappel from the anchor or from here, you can get to the right side of the lower tier of Hidden For Your Pleasure by traversing 60-degree snow through the trees climbers left of the cave. Looking up Champagne from the base. Caleb following Alex on Champagne. The belay horn at the top of Champagne. The entrance to the flat and comfy cave another 20m above the top of Champagne. The Hidden For Your Pleasure Area Don’t Forget the J-Thread! – 2p WI3, 80m, possible FA by Justin Pucci and Jessica Sagnella. Avalanche danger: Serious. Look for signs of wind slabs as you ascend the lower section of the approach and loose dry surface snow in the upper section. Approach: Climb 50 to 60-degree snow up the avalanche path to the belay station tucked away in a shallow cave under the large rock outcropping on the left. Route: P1 - WI2+/3-, 40m: Start up climbers right from outside of the belay cave on a short step of near-vertical ice. Continue up the ice steps from here and look for spots to place stubbies (at best) as you progress. There are a couple of variations here depending on ice conditions and how you’re feeling. The left side of this line is thin and stepped with a couple of mixed moves off of a large flake (WI2+/3-) and the right side has interesting and fun blobs (WI3-/3). Be careful of knocking down the large, dinner table-sized ice sheets that look more like “snow patches” from below. Reach an obvious and wide shelf where you can build a screw anchor on the ice blobs and prep for the next pitch. P2 - WI3, 40m: Start up the blobs that make up the top of the belay shelf onto a small, but steep snowfield. You’re aiming for the curtains directly above you. Again, there are a couple of variations – the main line has a small slab of ice leading to a steep gully on the left or a steeper step with a large bulge at the top on the right. Both variations lead to a final 5-6m curtain of beautiful and featureless ice. The top-out can be tricky in the snow above the curtain. Anchor off of the trees or on the ice bulge above. Descent: Rappel both pitches via threads. We used naked threads on both raps. Looking out from the belay cave at the start of Don't Forget the J-Thread. Justin getting started with the first screw above the first step on p1. Justin reaching the belay ledge at the top of p1 on Don't Forget the J-Thread. The characteristic blobs toward the top of p1. Jessica getting ready to follow on p1. Looking up p2 of Don't Forget the J-Thread. Left variation on p2. Right variation on p2. A naked thread in beautiful and clear ice at the top p2. Martinelli – WI4, 25m, possible FA by Alex Stopolvsky and Caleb Mallory. Avalanche danger: Serious. Look for signs of wind slabs as you ascend the lower section of the approach and loose dry surface snow in the upper section. Approach: Climb 50 to 60-degree snow up the avalanche path to the belay station tucked away in a shallow cave under the large rock outcropping on the right or traverse climbers left through the trees from a top-out on The Sheet area. Route: This is the obvious line to the right of Don’t Forget the J-Thread and runs right up the middle of the wall. Climb a brief section of steep snow to the base of the wide ice sheet. Climb the sheet toward the small pine tree above. The top-out can be tricky in loose snow. Sling the small pine tree at the base for an anchor. Descent: Rappel off of the small pine tree (we left a sling on it). Caleb following Alex on Martinelli. Summary: The stoke was high on this trip and I have to say that it ranks as one of the best days I've had in the alpine in a while. Not only did we have an awesome adventure with friends, but it resulted in finding some amazing ice climbing that is so close to home! Between the three areas I have discussed in this report, we believe there is potential for another 15-20 lines to be put up depending on creativity and the conditions. The Sheet has lots of fat ice with plenty of interesting features to play around on. The Steps appears to have at least two or three obvious lines to the anchor trees at the top of the gully. The lower tier of Hidden offers from mild WI2 to thin and delicate WI4 with some mixed climbing potential too. Finally, the upper tier of Hidden is a real gem...some of the most beautiful and clear blue ice I've seen anywhere. It can be combined with some of the lower pitches as we did on J-Thread or you can climb to it, set up home base and choose which of the gullies, curtains, and pillars you want to send. Who's ready to get some?! Gear Notes: We brought 70-meter ropes, screws from 10-21cm, a set of tricams, and a few 24” pickets. While we didn’t use the pickets, I could see them being handy for the steep upper sections of the approach or on a couple of the steep snowfields depending on the snow conditions and how comfy you are in that kind of terrain. There were a couple of spots for tricams that I found, but didn’t end up using them. Aside from when we had the luxury of thick anchor ice, 10’s and 13’s were the screws of choice. An avy kit is absolutely mandatory in this area. Approach Notes: From the Asahel Curtis parking lot, follow the forest road past the gate and up to the hairpin turn. Go west beyond the turn up a rougher bit of road for another few hundred feet until you see a big tree stump (4-5 feet in diameter) on the hillside and enter the forest. Now just go up! After 400 vertical feet of steep moss, devils club, and other fun bushwhacking, you’ll hit the Palouse to Cascades State Park Trail. Use this as a good stop for layer checks and snacks and then continue up through another 600-700 feet of the same stuff until you hit a boulder field. Stay west of the obvious and large gully on climbers left and you’ll break out of the trees and into the lower basin where you’ll start to get a view of the ice. The next 200-300 vertical feet is on snow covered boulders and begins to steepen as you hit the big patch of bushes above the trees. From the top of the bushes, the terrain steepens substantially. You’re now standing at the base of a large avalanche runout from above and need to carefully assess conditions from this point forward. Looking around you from left to right, you’ll see a large rock wall followed by The Steps – a steep, two-step ice gully, then a small bit of ice way up high that is the second tier of Hidden For Your Pleasure, and finally, on the far right is The Sheet, a wide slab of ice topped by a steep snowfield. In total, the approach from the parking lot covers about 2200 vertical feet over one mile of ground distance. We hit this in perfect bluebird conditions…clear skies, temperatures in the teens, a slight breeze, and with very little snow on the ground down low. Once we got into the upper sections of the approach near the ice, the snow ranged from kick-steppable styrofoam to an icy crust perfect for fast mid-dagger climbing with patches of softer and deeper powder that allowed for kicking out a bit of a rest stop.
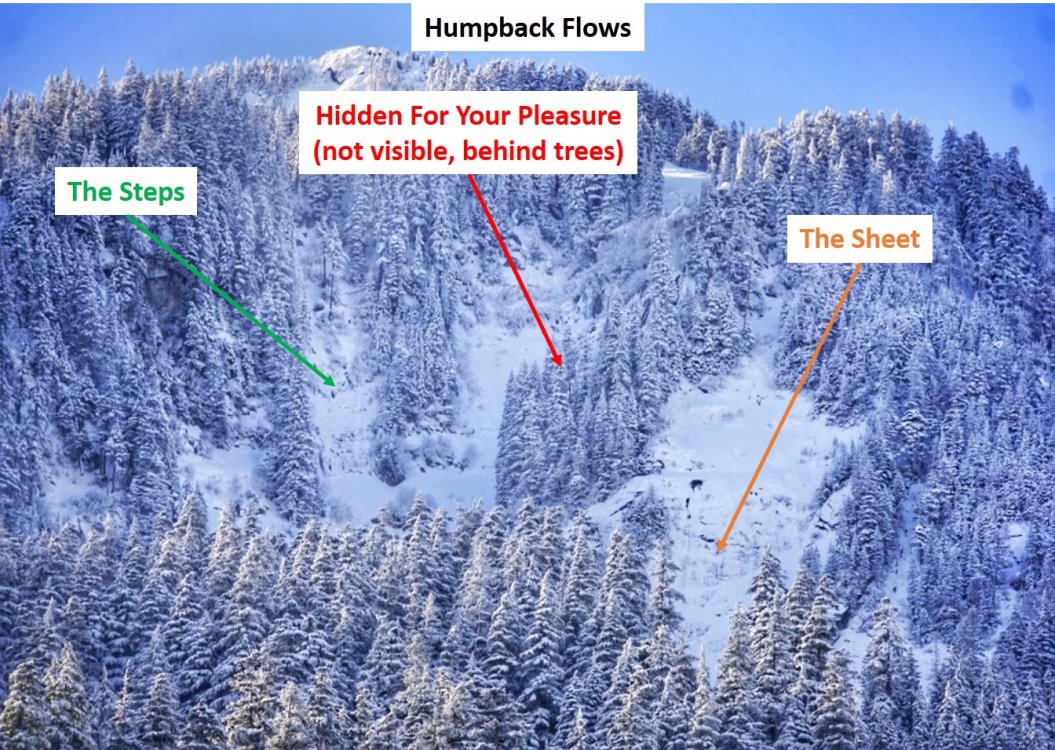
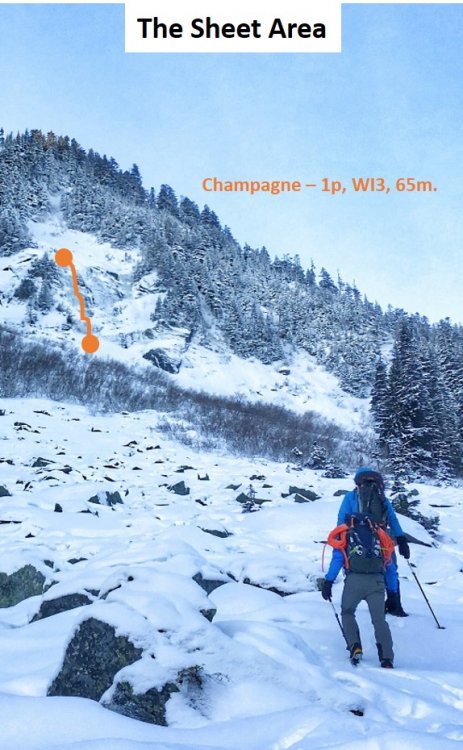
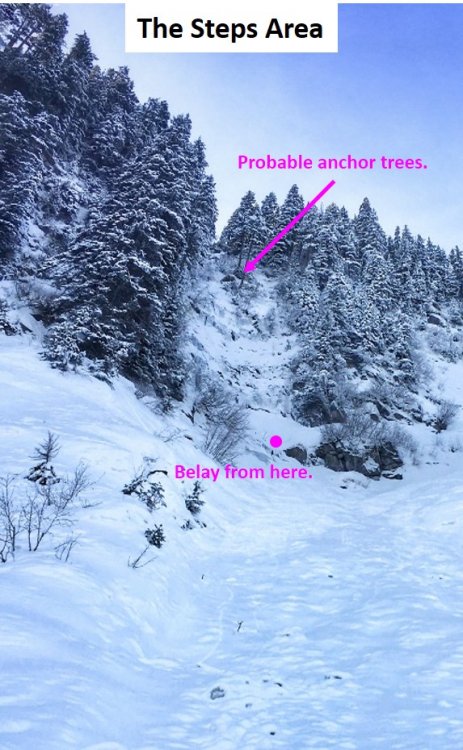
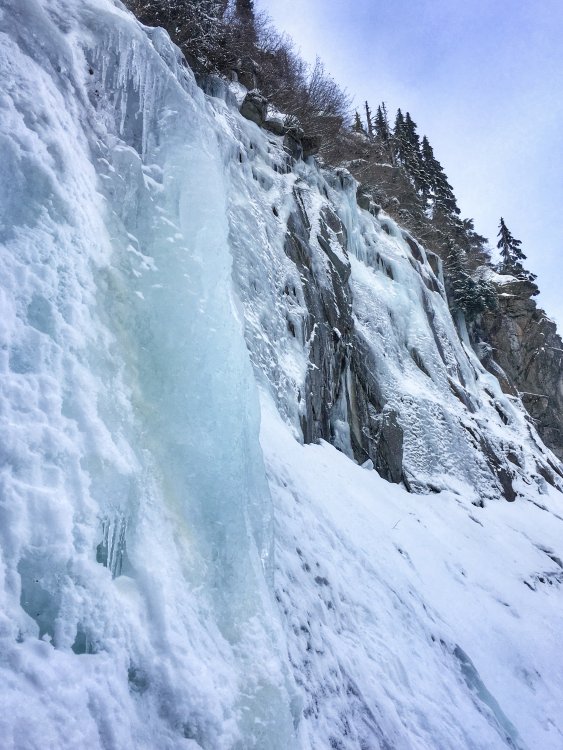


- 12 replies
-
- 5
-

-

-
- first ascent
- snoqualmie ice
- (and 2 more)
-
 Trip: Bryant Peak, Melakwa Flows - Possible FAs: Ice routes on West Face Bryant Peak (WI4, 60-70 degree snow) and Melakwa Flows (WI4-) Trip Date: 01/27/2019 Trip Report: On the warmest weekend of a warm winter here in Washington, Jacob Krantz and I set out to explore some undocumented ice lines near Snoqualmie Pass I had spotted earlier in the winter. We did some research on the internet, Beckey Guide, and WA Ice guidebook but found nothing about these climbs, so these are possible FAs or FRAs at least. We climbed an awesome 4 pitch route on the West Face of Bryant Peak to the summit and a fun 2 pitch route in an area I've been calling the Melakwa Flows. The Melakwa Flows are an incredible group of ice flows of varying grades near Melakwa Lake. It's mind boggling to think we could not find anything about climbs in the Melakwa Flows, considering they are probably one of the densest concentration of reasonably accessible ice climbs in WA, especially impressive considering the warm temps lately. Hot Tubbs (WI4, 60-70 degree snow) West Face Bryant Peak Although only 4-5 pitches, we thought this route was awesome, offering a substantial amount of moderate ice, steep snow, and wild exposed summit pitch. It packed a lot of punch for such a short and accessible route. We also managed to stay in the shade the whole time, starting around 10 am. We'd love to see others get after it and some other possible ice lines on the west face! P1: Climb thin low angle ice to the vertical WI4 curtain. Send the curtain then continue up easier terrain to set a belay in fat ice. P2: Climb up progressively steepening fat ice to a WI3+ bulge. Above, continue up another 20-30m on 45 degree snow to a group of trees for the belay. P3: This is a long pitch (~80 m). Simul climb up snow, trending left as the cliffs force you. Establish a belay on a snag at the notch on the spine of the North Ridge. Watch cornices here. P4: Traverse right across wildly steep and exposed snow (60-70 degrees) on the north face, using trees for protection. At the third and tallest tree, make a few thin ice or mixed moves up a slab and continue straight up another 10-20m to the summit ridge. Descent: hike down the west ridge a few hundred feet until it flattens a little, then make a single 60 m rappel off a big tree down to the bottom of the west face. Approaching the first pitch. Top of the flow is part of the second pitch. Jacob crushes the WI4 crux. Looking up at the second pitch. Navigating between the two pillars at the top felt like WI3+ to me on lead. The ice here was FAT! Simulclimbing bomber snow on the third pitch. Steep exposed snow traverse to start pitch 4 out onto the north face. It was super unconsolidated and unsupportive. Would have been terrifying if it wasn't for all the trees! Jacob finishes the last bit of steep snow to the summit ridge. Walking along the wonderful summit ridge of Bryant, Kaleetan and Chair in the background. The Line of Fire (WI4-) Melakwa Flows These routes are on a cliff band just north west of Upper Melakwa Lake, easily visible from the upper lake. They look like they have considerable avalanche danger above, so beware. Even though we approached in the dark from our camp Sunday morning at Melakwa, we still only got in one two pitch route before this face got blasted by the sun and snow started coming down. The ice was often pretty soft to take screws, but I imagine if you hit this area in a cold snap or even just normal temps it would be incredible! It is a total ice playground, with easily a dozen routes 150-300 ft long ranging from a rambly WI3 to free standing WI5 pillars! There were incredibly fat sections of ice by WA standards. We hope this inspires others to go explore this gold mine of WA ice climbs! P1: find your way through mixed terrain or thin ice up to the base of the FATT pillar. The pillar is vertical or near vertical for 15 feet and super bomber, WI4-. Make a belay in some thick ice across the snow ramp above. You could skip this first pitch by ascending the snow ramp to the right. P2: A long pitch (~150ft) of rambling WI2-3 terrain, with at least half a dozen WI3 steps one to two body lengths in height. It's choose-your-own-adventure here. Total type 1 fun. Except for at this point, I was on lead getting pummeled by huge clumps of snow. It was still awesome. We ended at a big tree anchor. Descent: Single 60 m rappel down to the steep snowfield ramp, down climb as quickly as possible to get out of the line of fire. Climbing steep snow to the base. We took the pillar in center right of the photo. Jacob led up this thin section to gain a ramp leading to the pillar. We don't recommend this start. There were other options to the left. Approaching the beautiful pillar. So big and wide. An abundance of options on the second pitch. There's even more rambly ice to the left out of this photo. Me leading some awesome WI3 fun. This was right before I started getting pummeled I believe. Looking down from the top of P2. It looks like mostly snow, but you cannot see all the little ice steps from above. It was very high quality. Approximate location of the flows. As temps cool down next week, I think these climbs will just get better and better. If there's awesome WA ice on a blistering hot weekend like this, it ain't so bad! So get out there and send, WA ice climbers! Want more beta and photos? Check out my full trip report at https://climberkyle.com/2019/01/27/new-snoqualmie-pass-ice-climbs/. Gear Notes: We used 9 screws of varying lengths (much of the ice is quite thick actually, but still bring the stubbies), 1 picket, 8 slings, a few nuts. Double 60 m ropes are nice for the rappels, but there are walk off options also. Prepare to make you own rap anchor if you don't fine ours. We brought cams and pitons also but never really used them. Approach Notes: Either approach up the Denny Creek Trail to Melakwa Lake or over Bryant col (north saddle of Bryant) via Great Scott Basin from Alpental like we did. It took us 3 hours with overnight packs from Alpental to the West Face of Bryant, and about 3 hours from the Melakwa Flows back to Alpental with similarly heavy packs. Note there is considerable avalanche danger on these approaches, so proper gear and training is recommended.


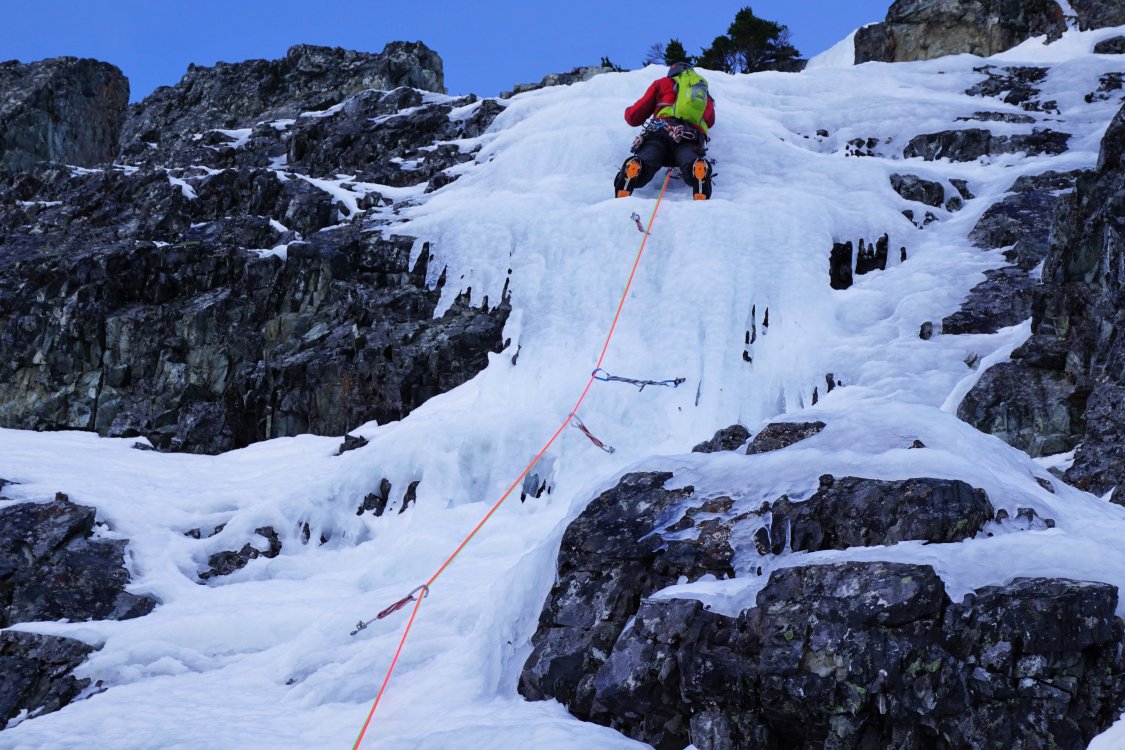
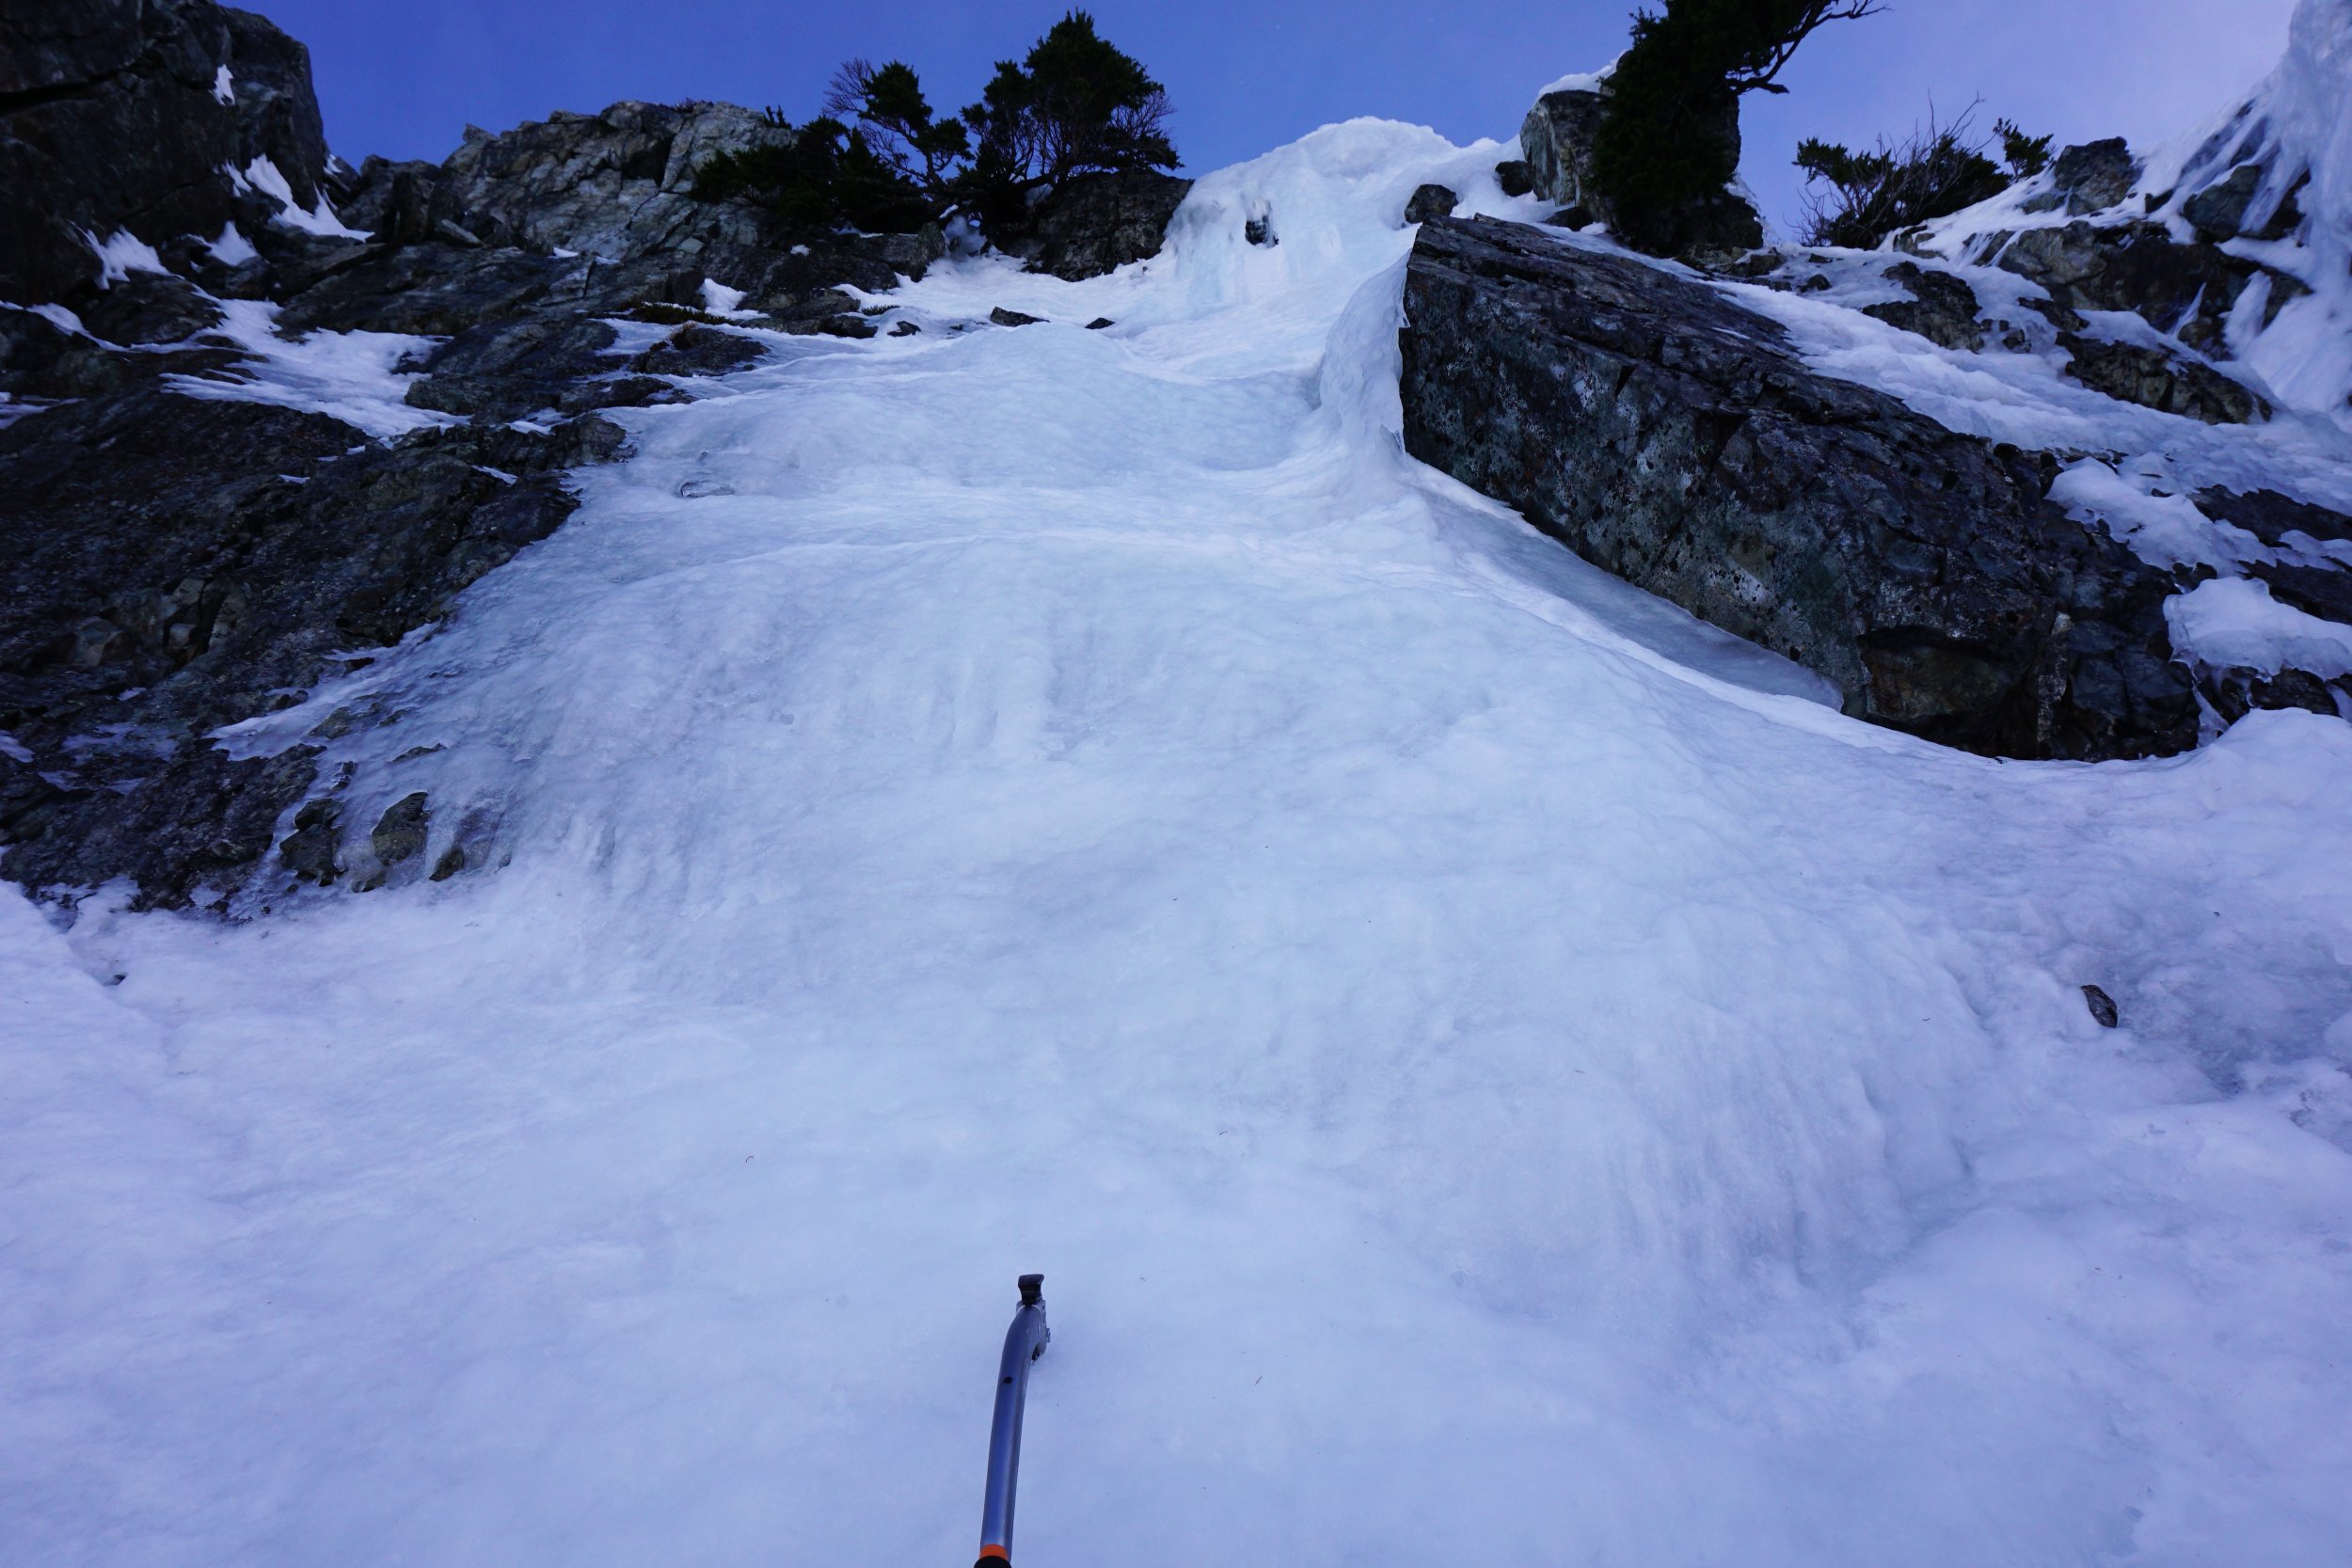
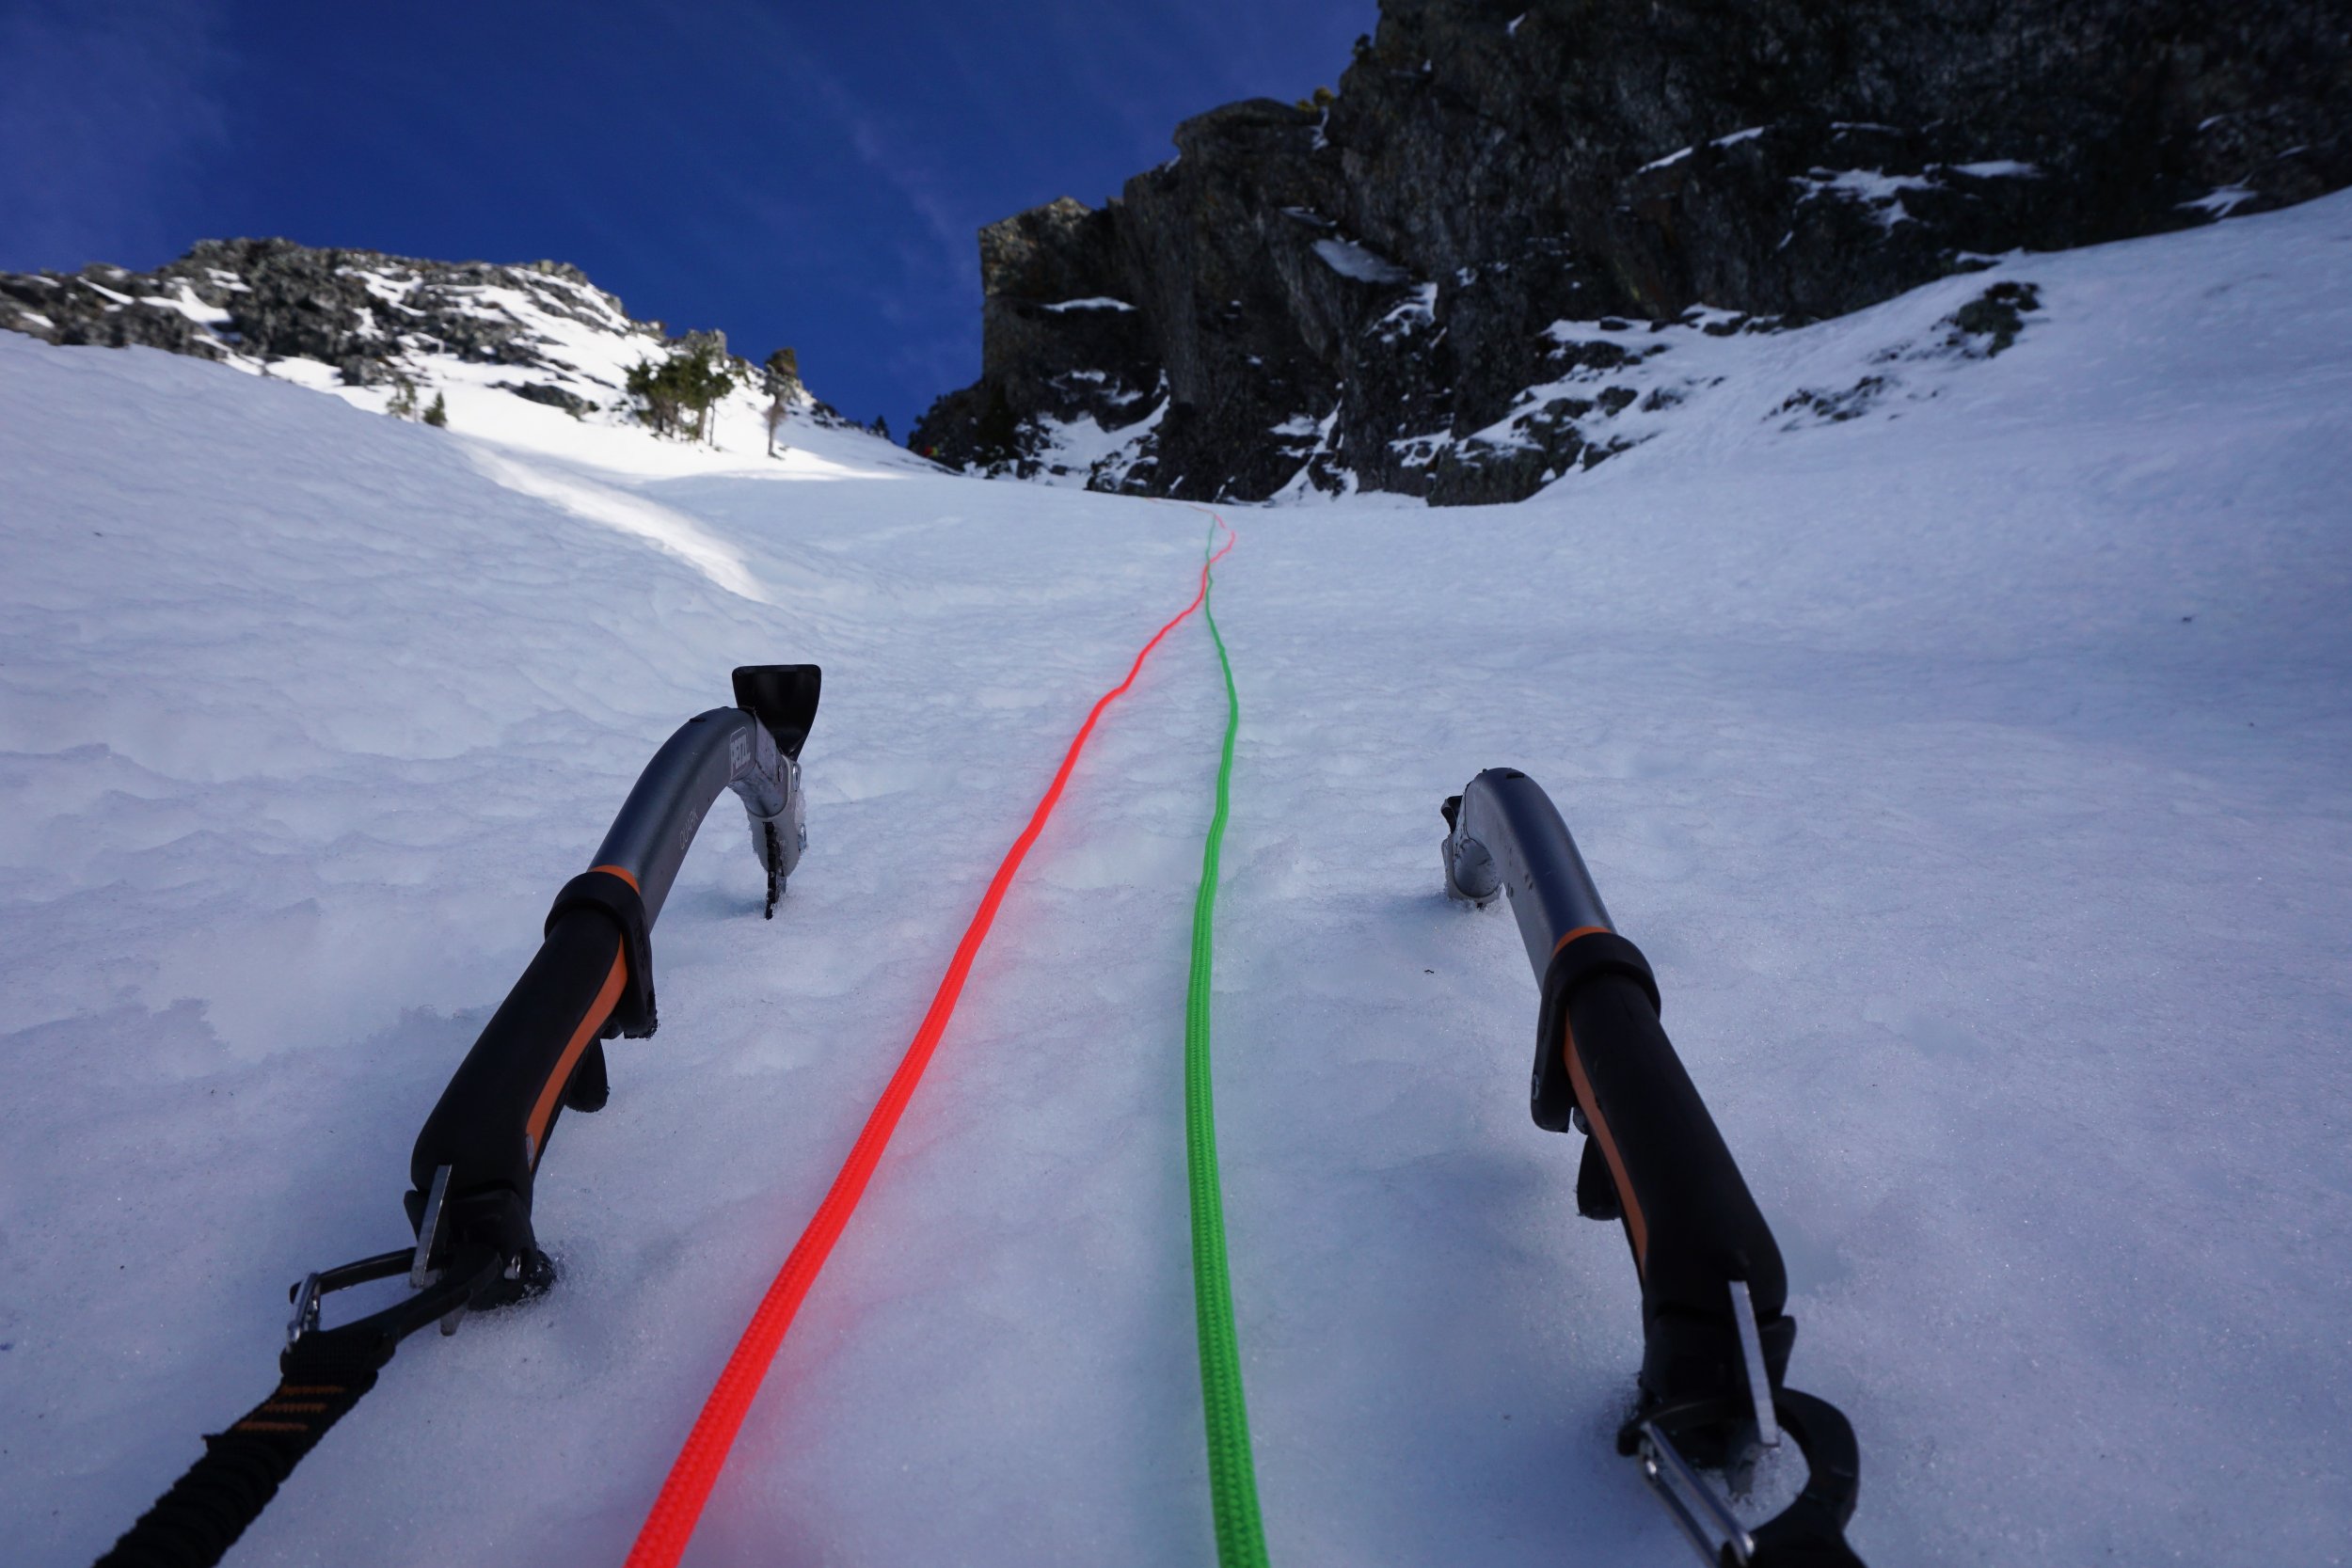

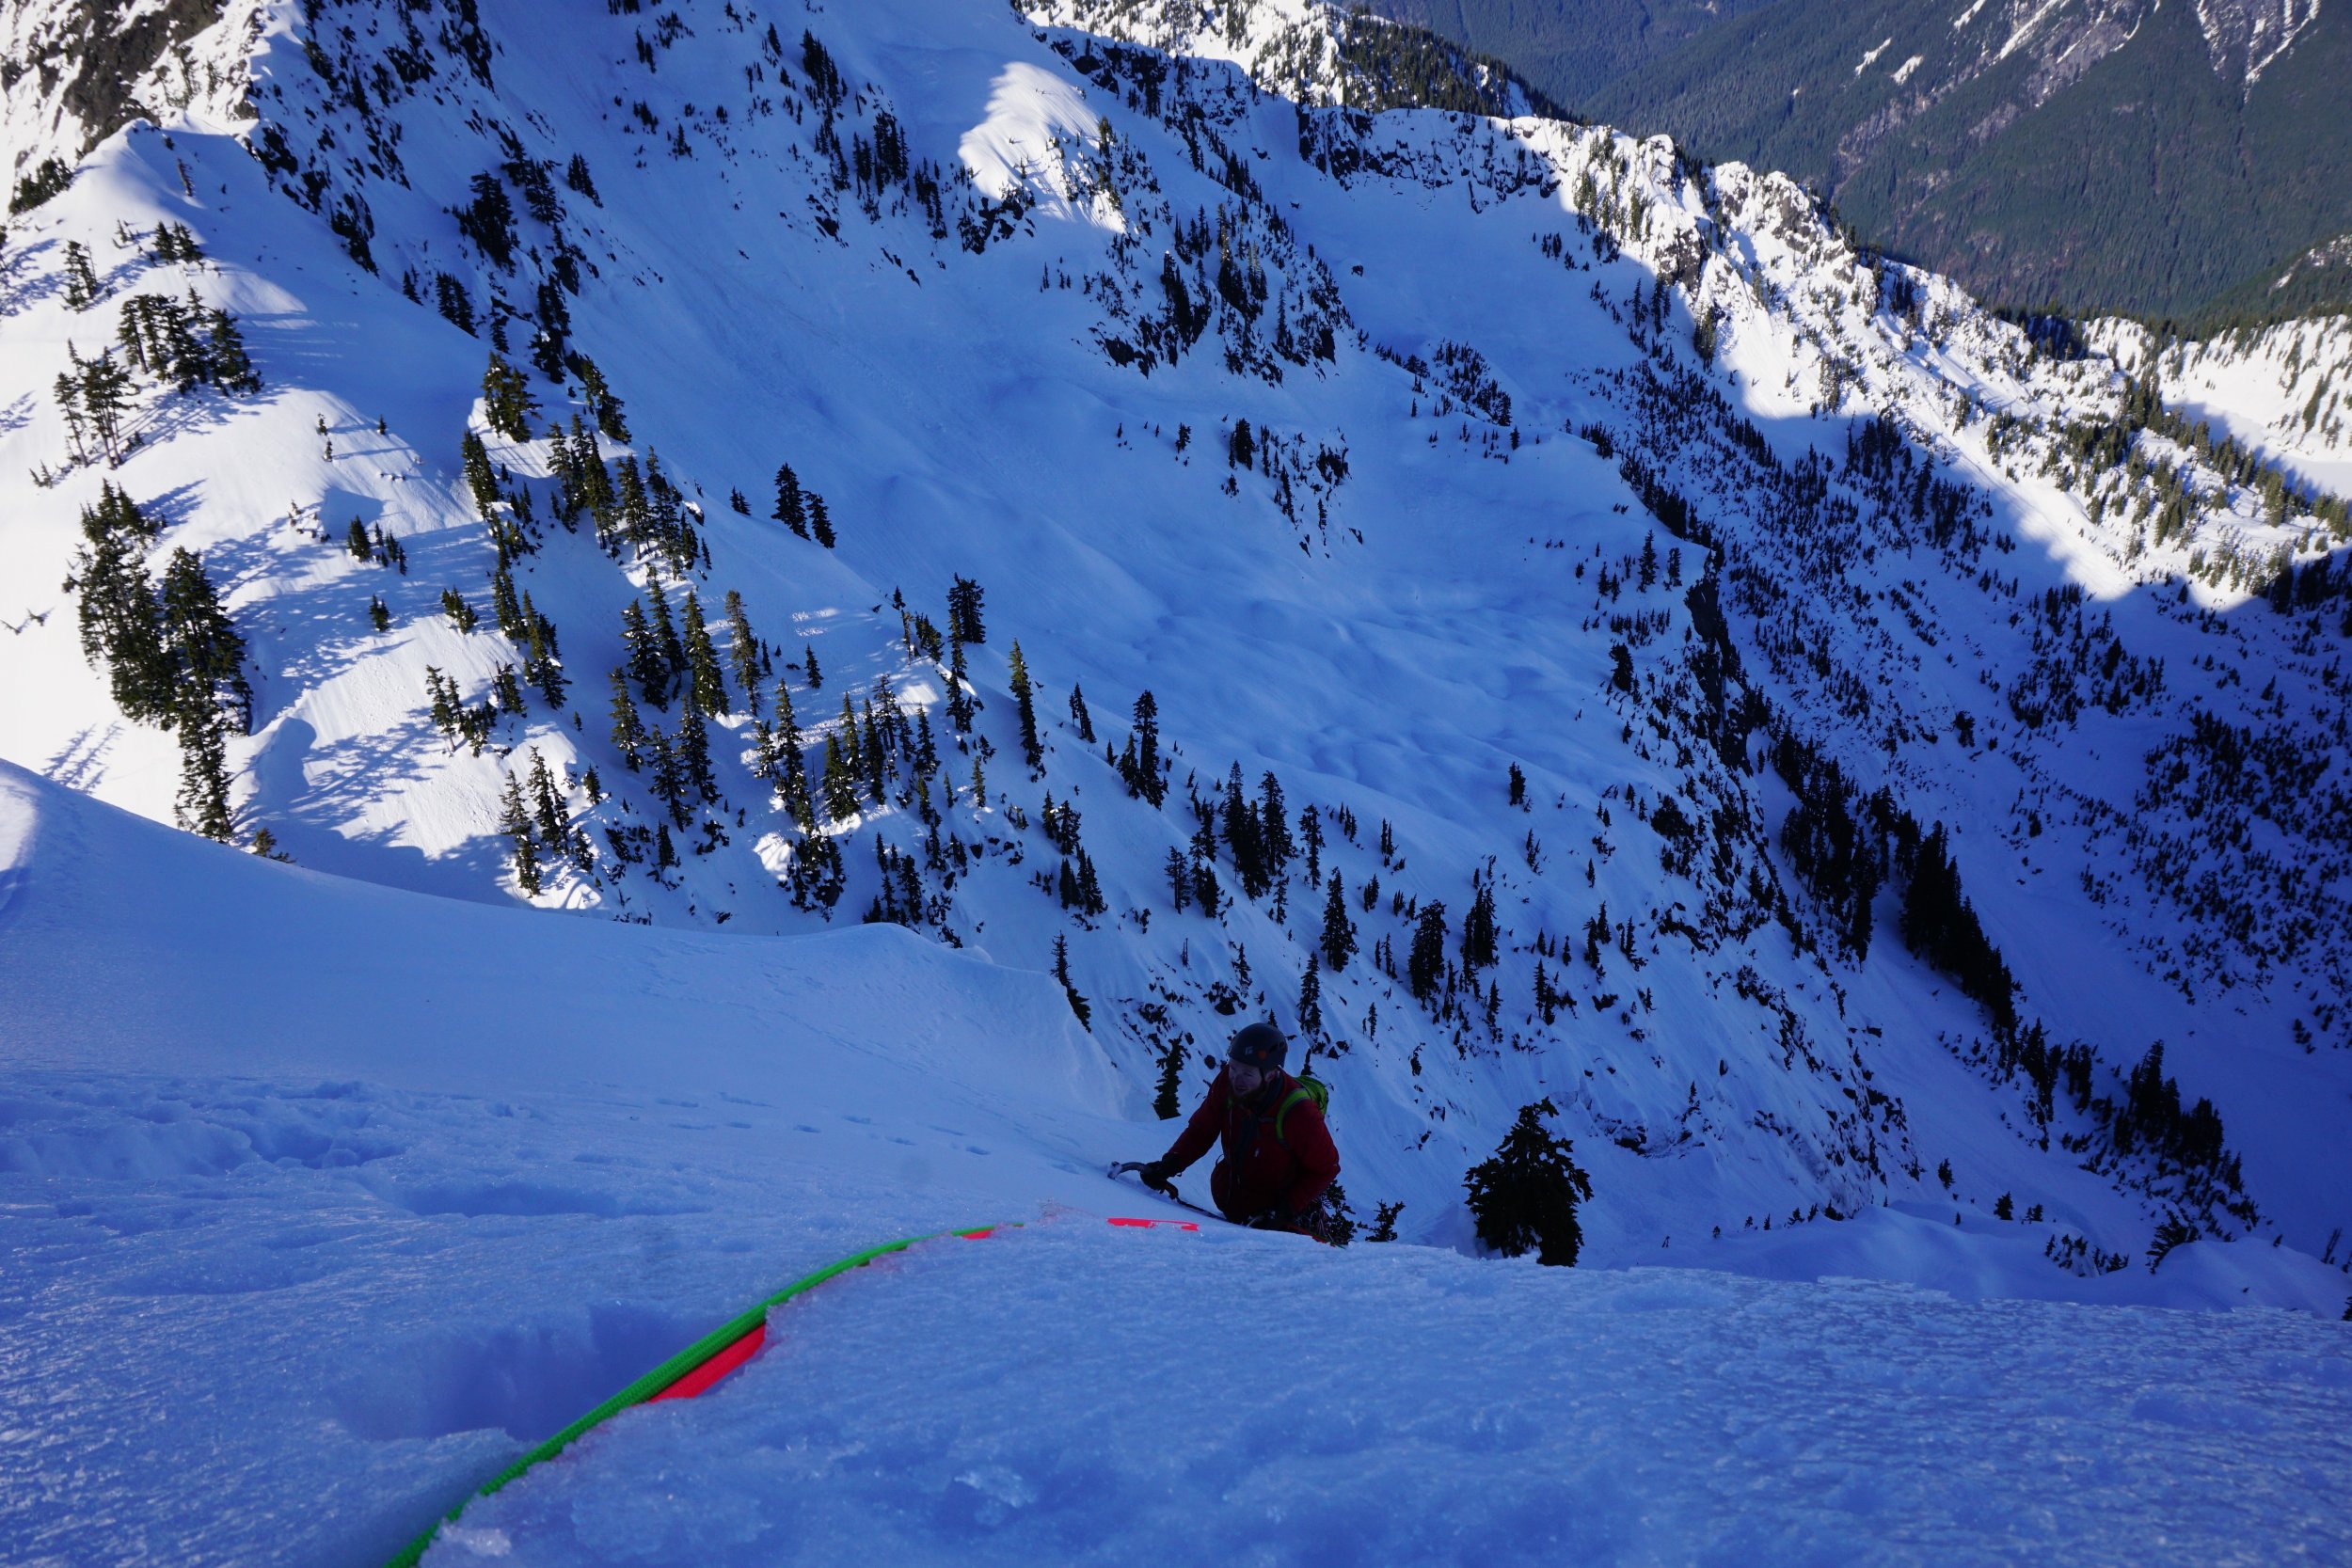
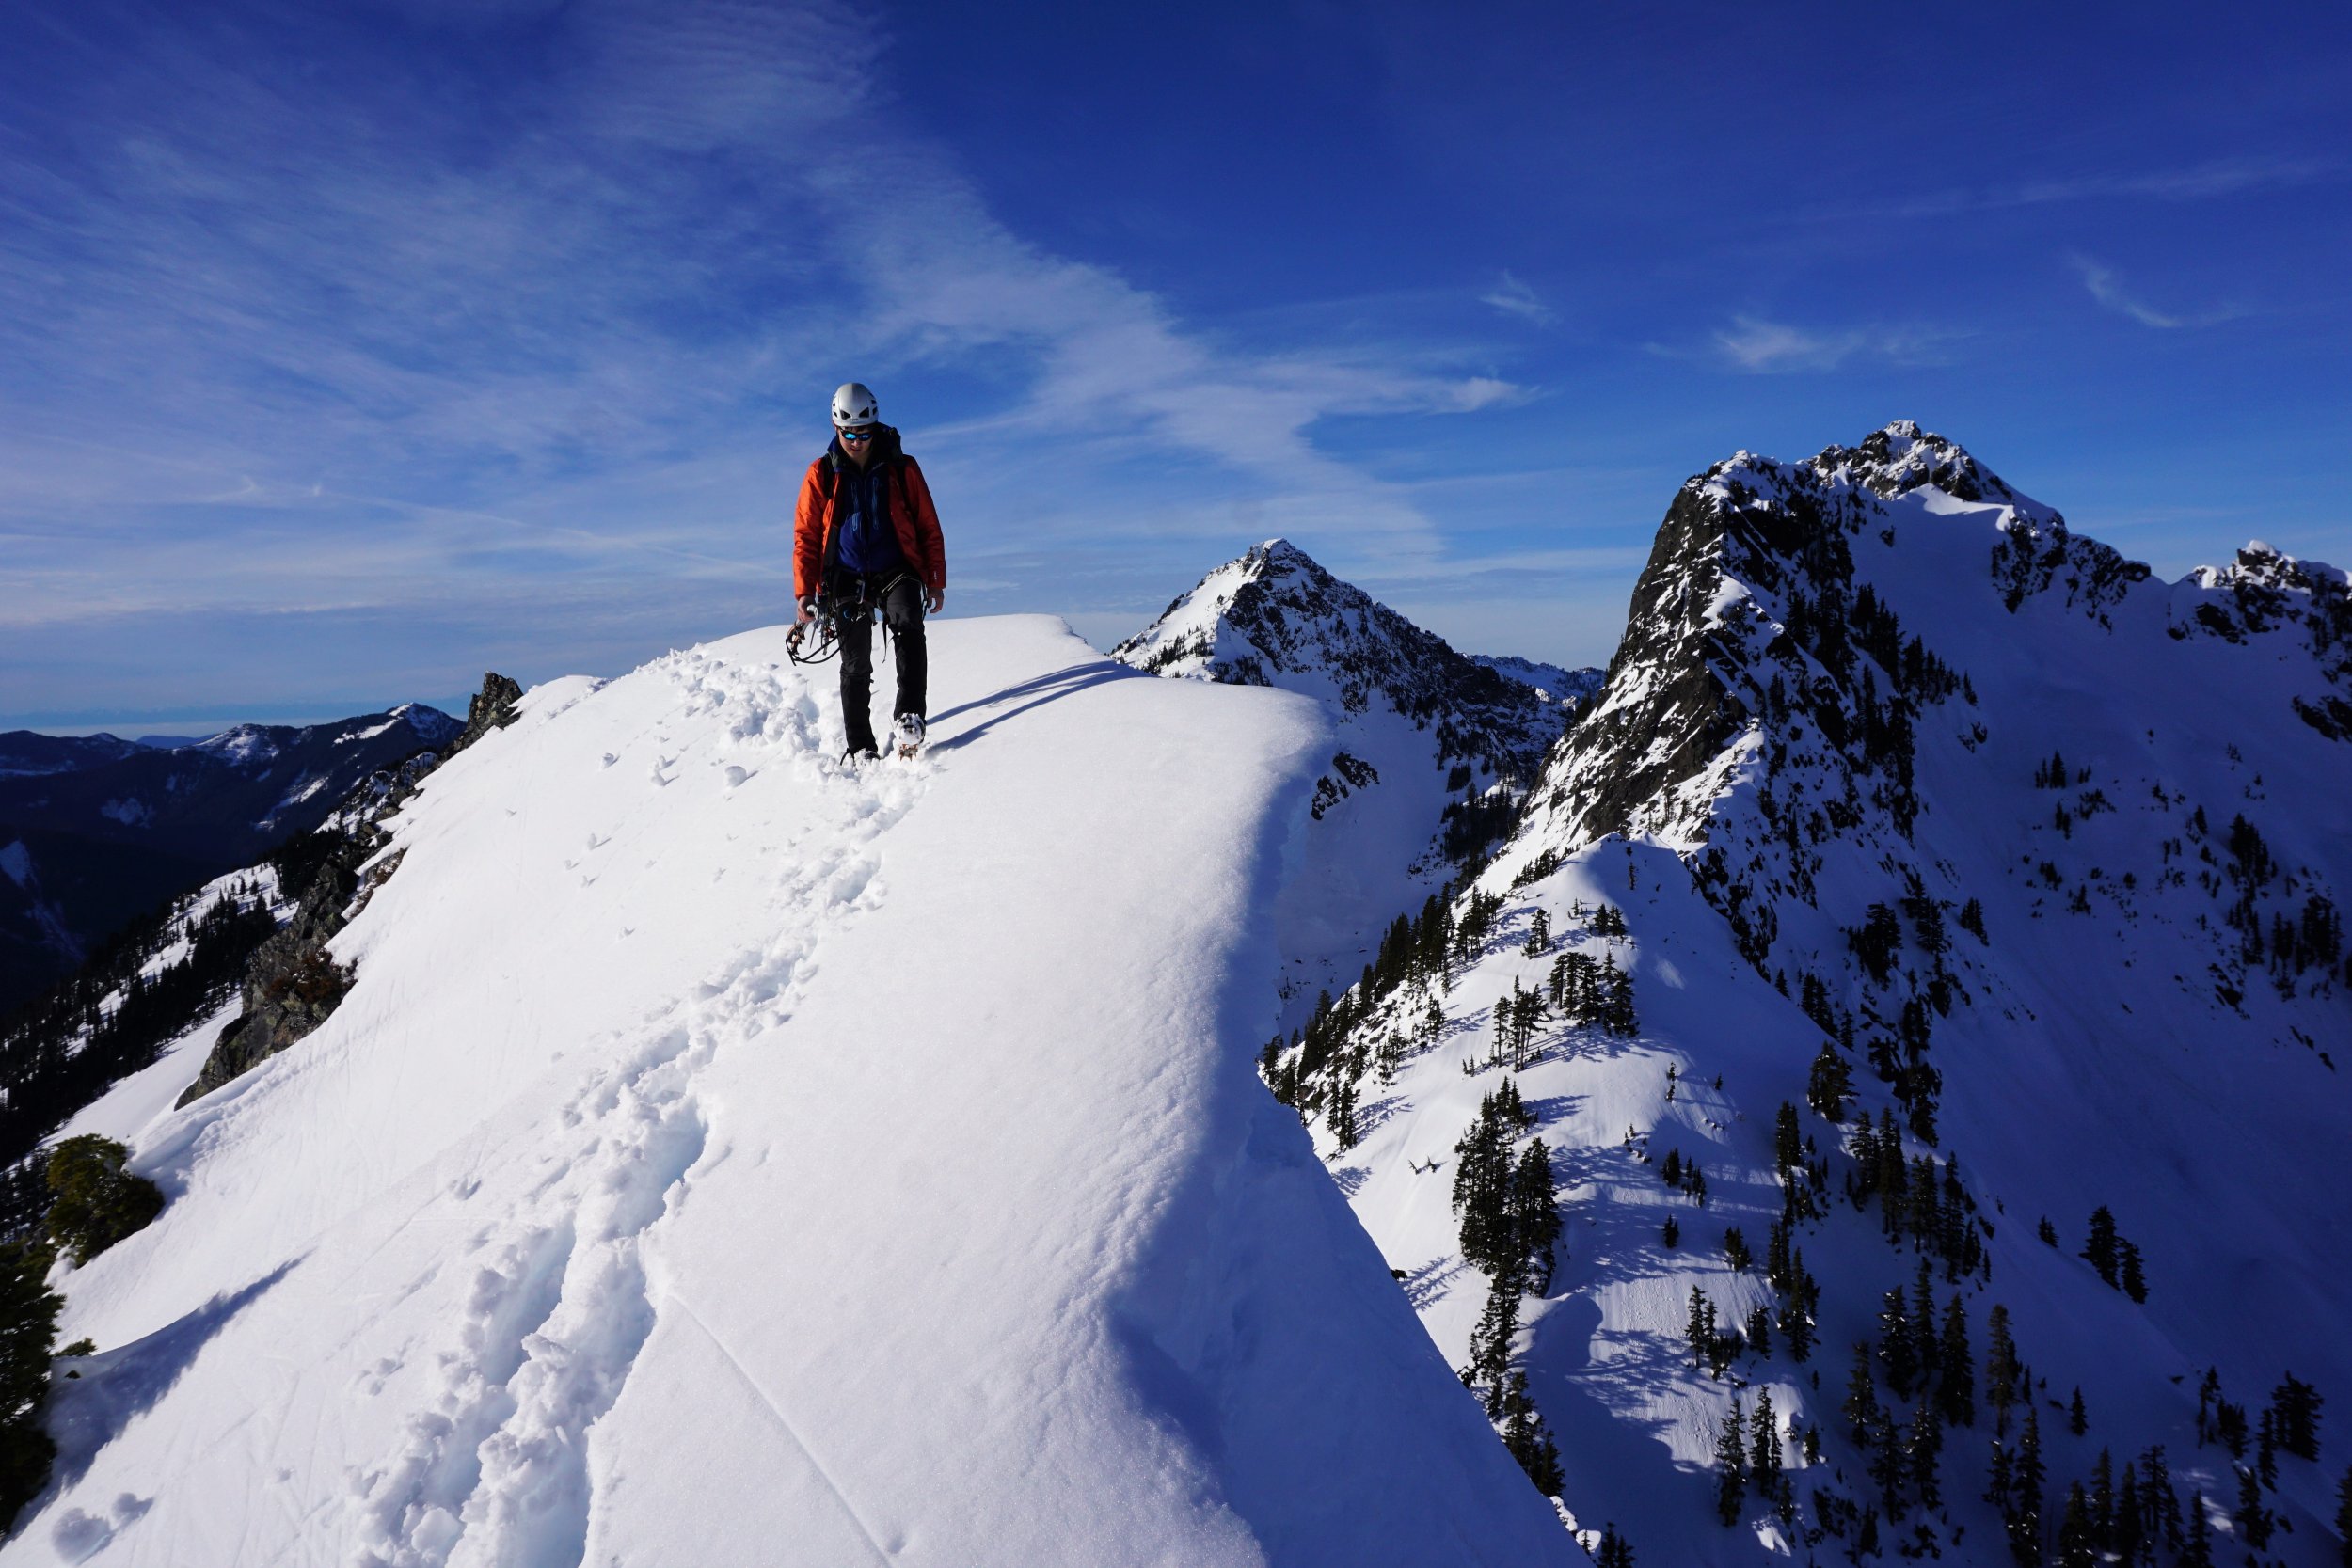
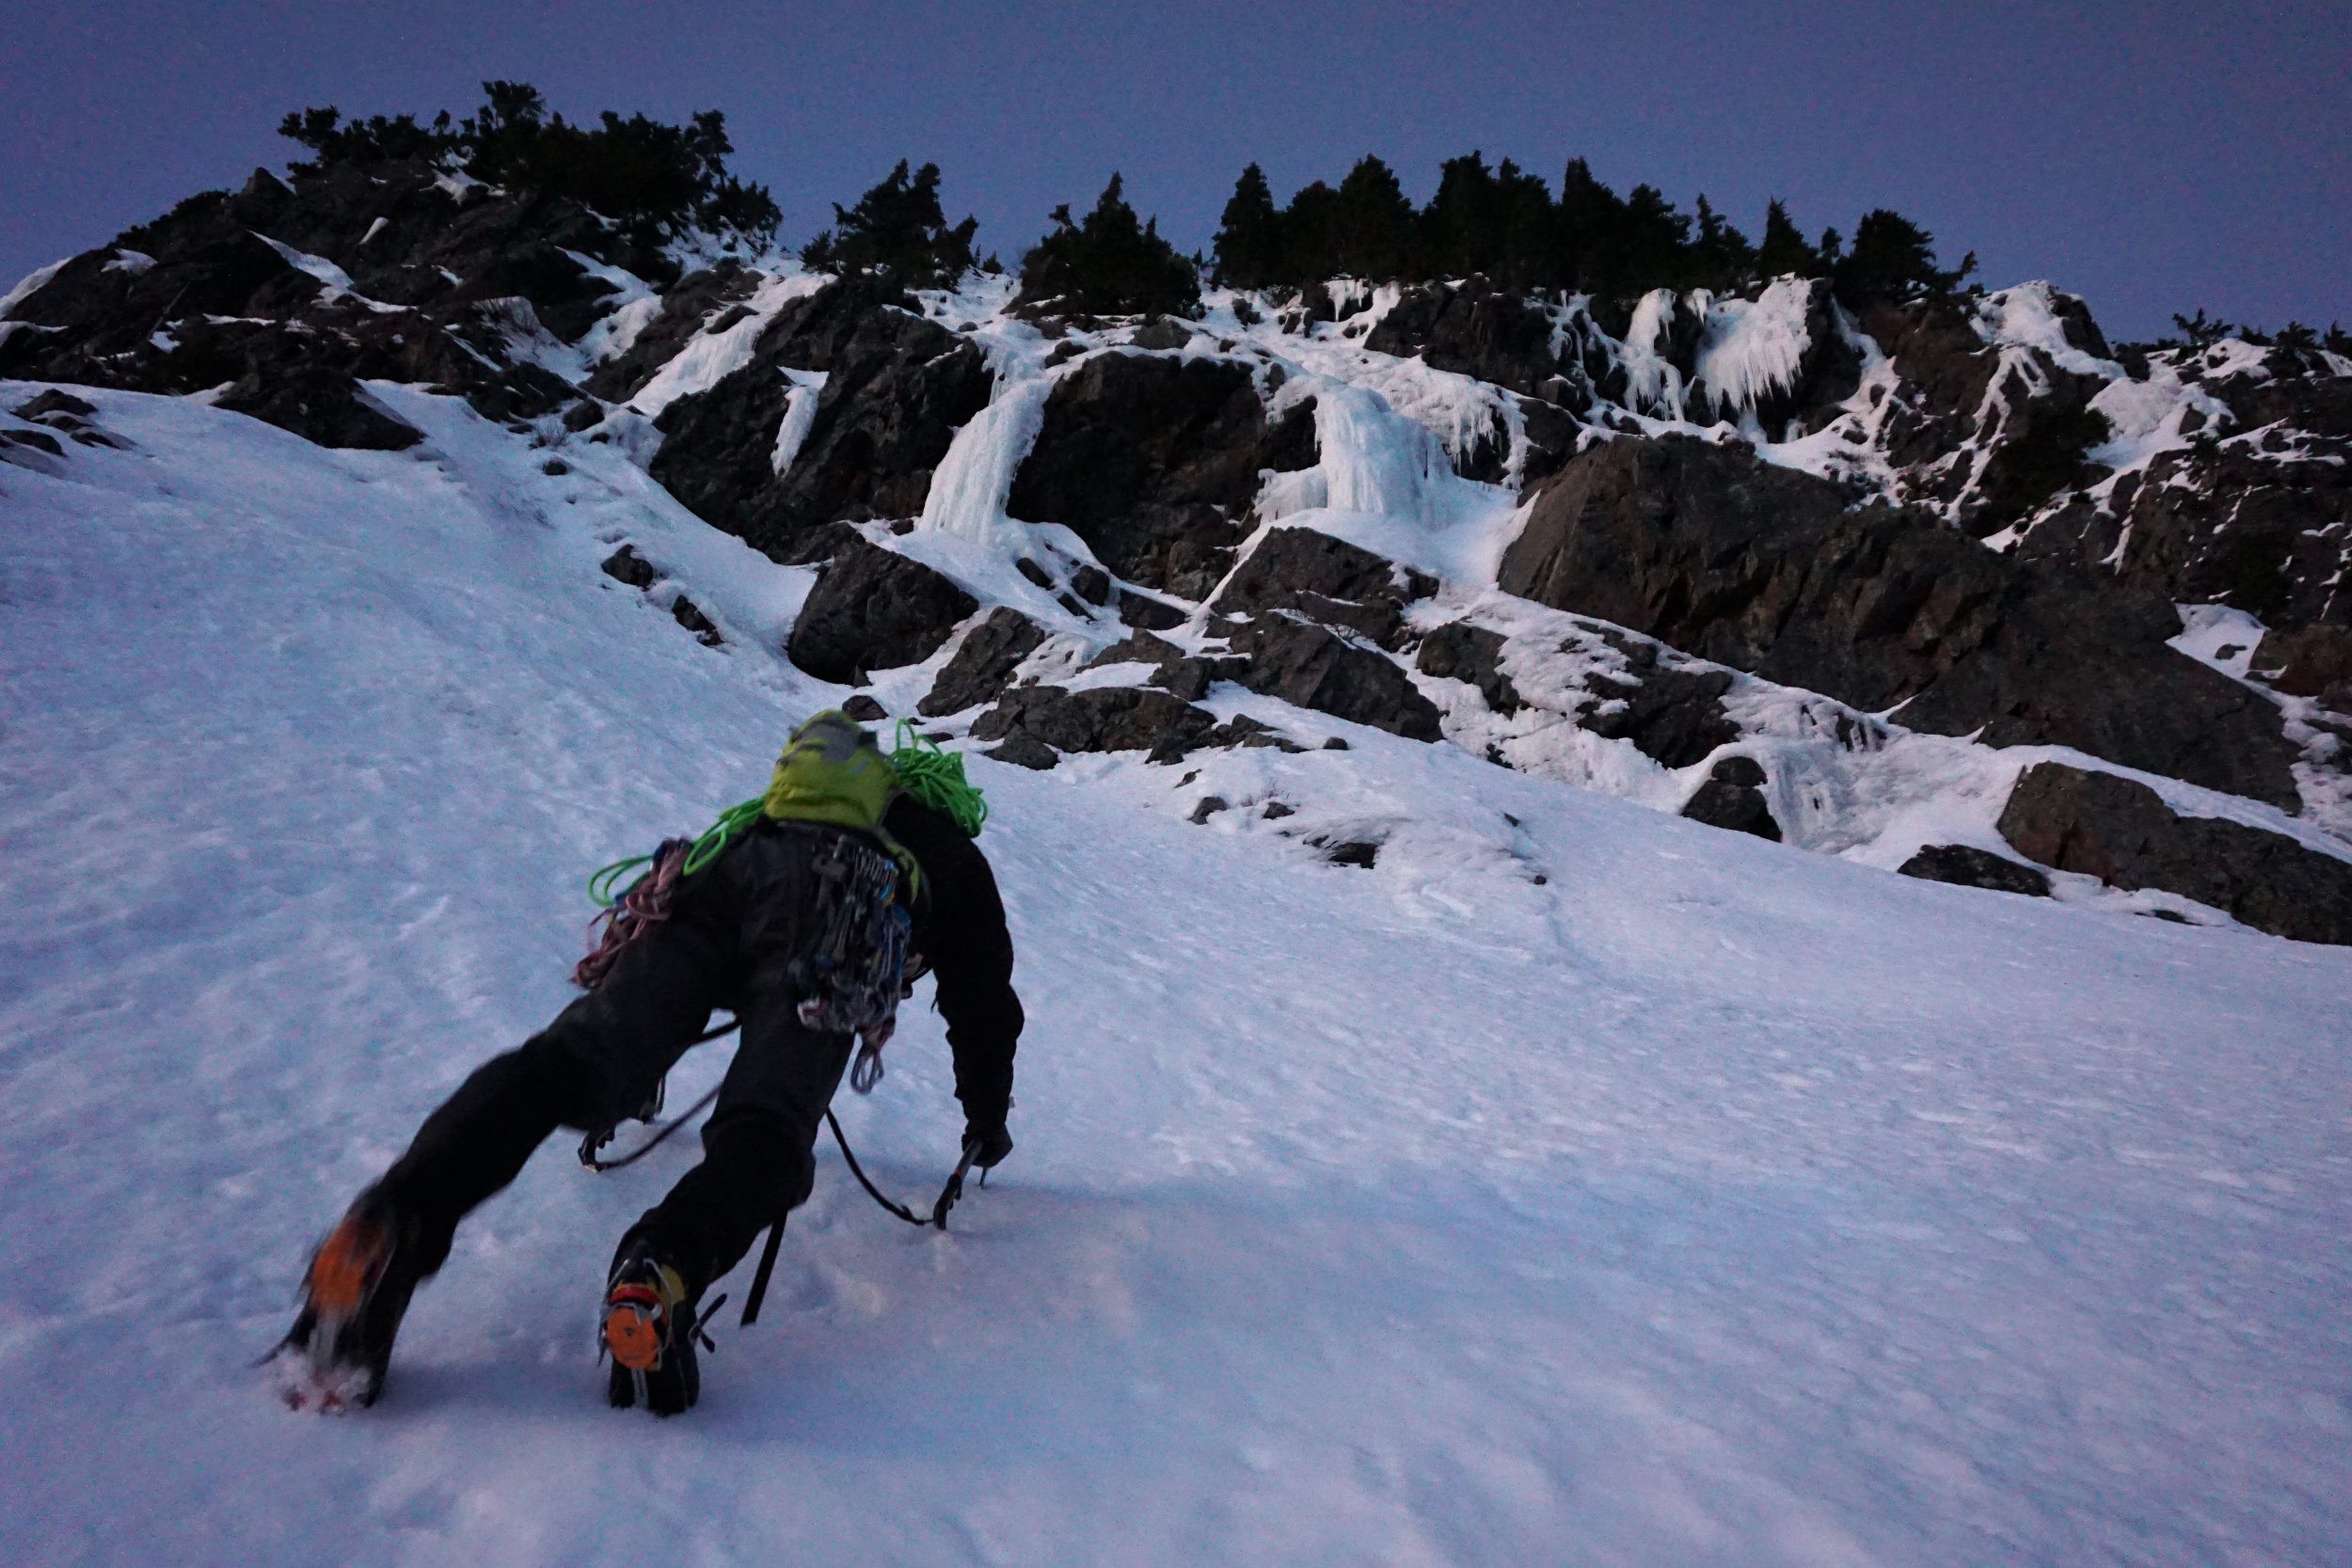
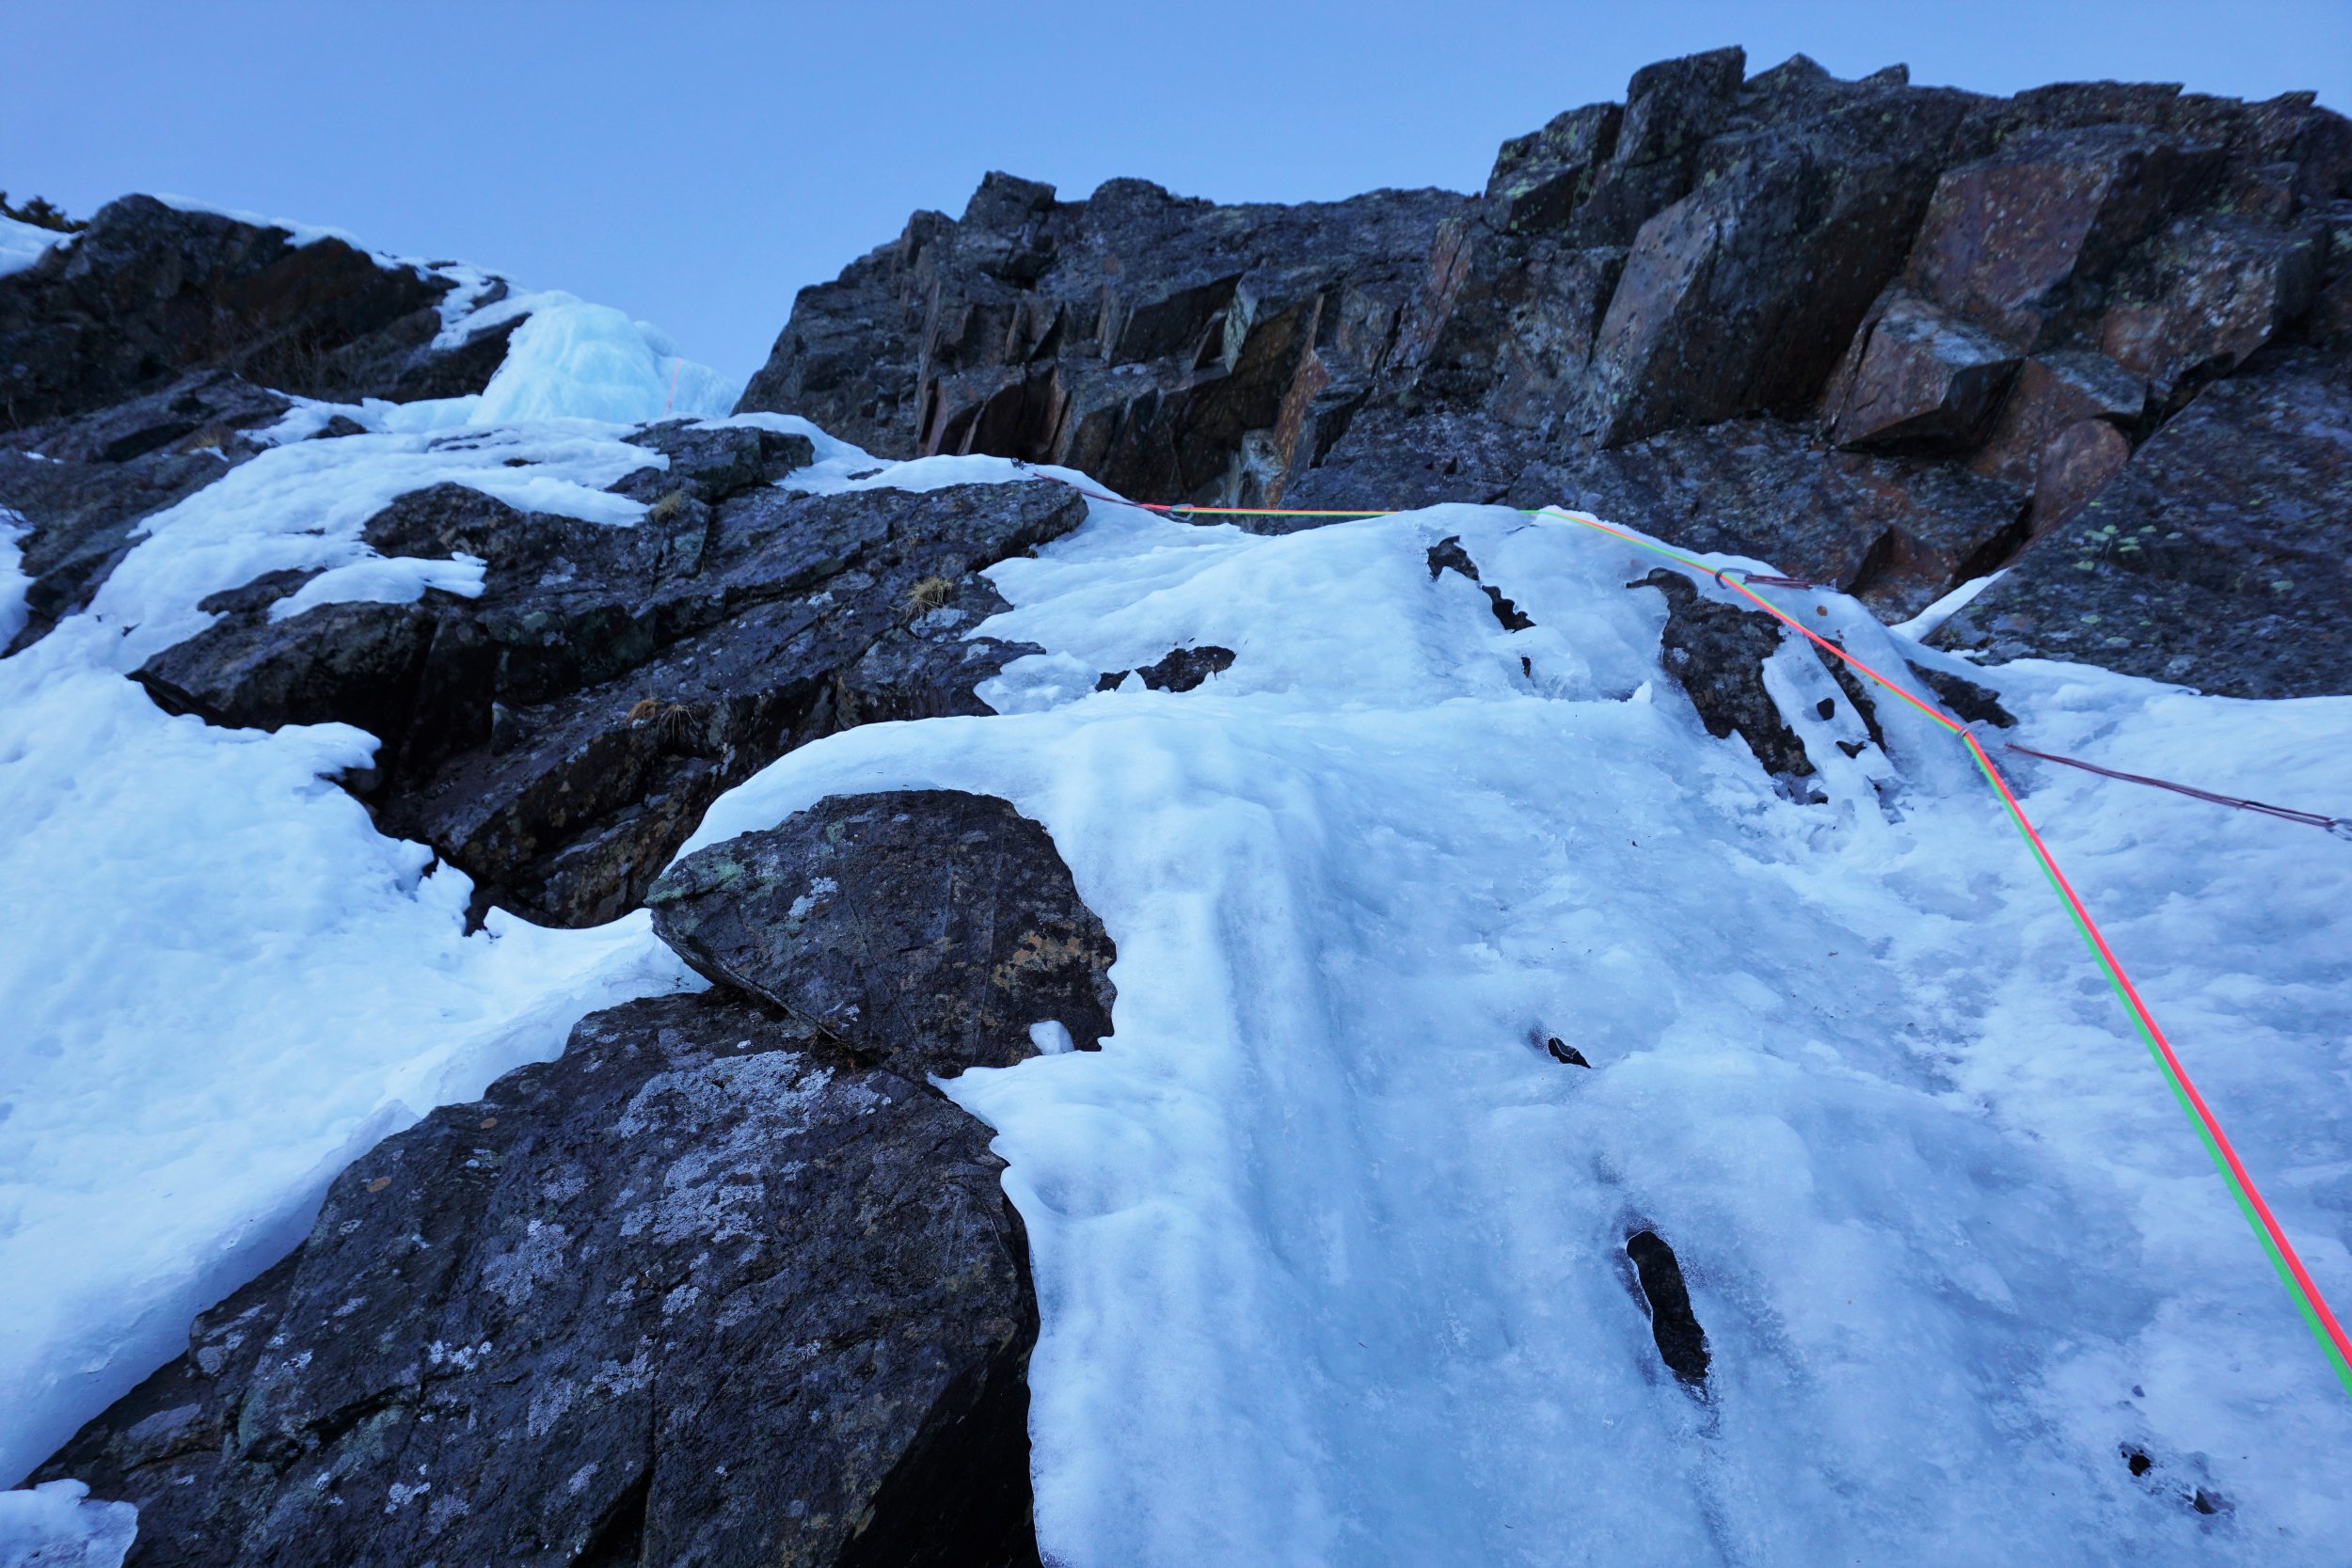
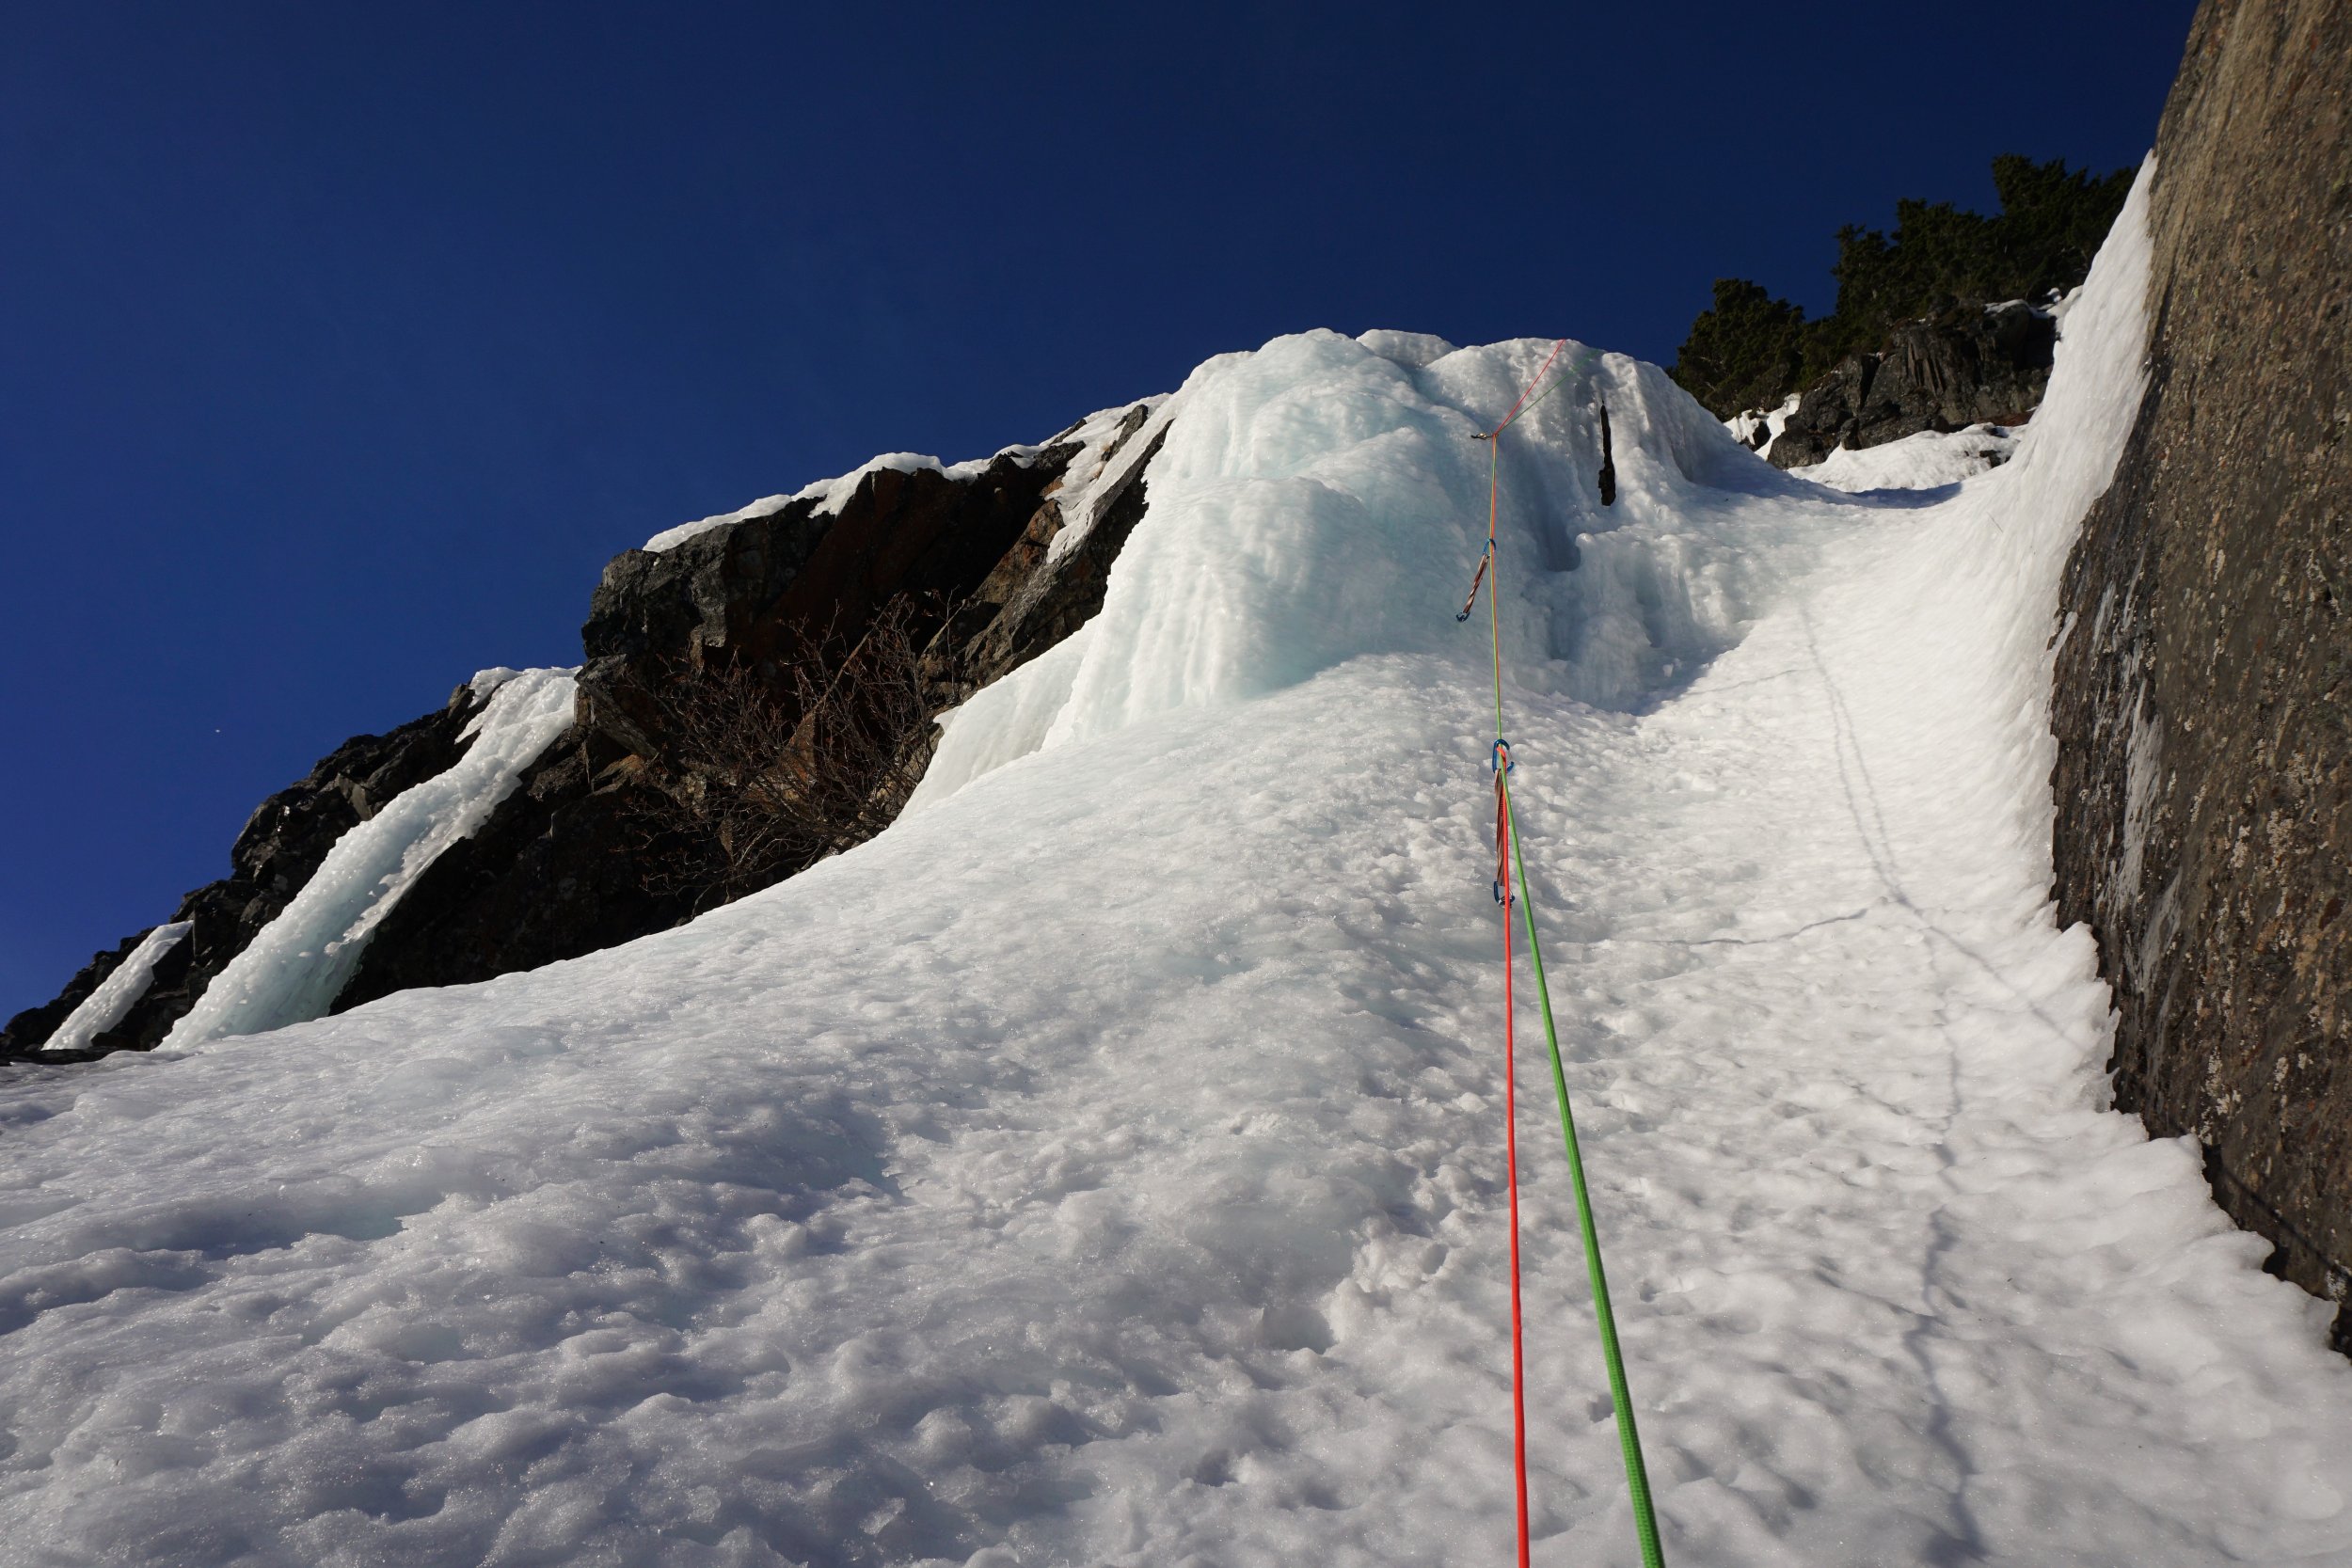
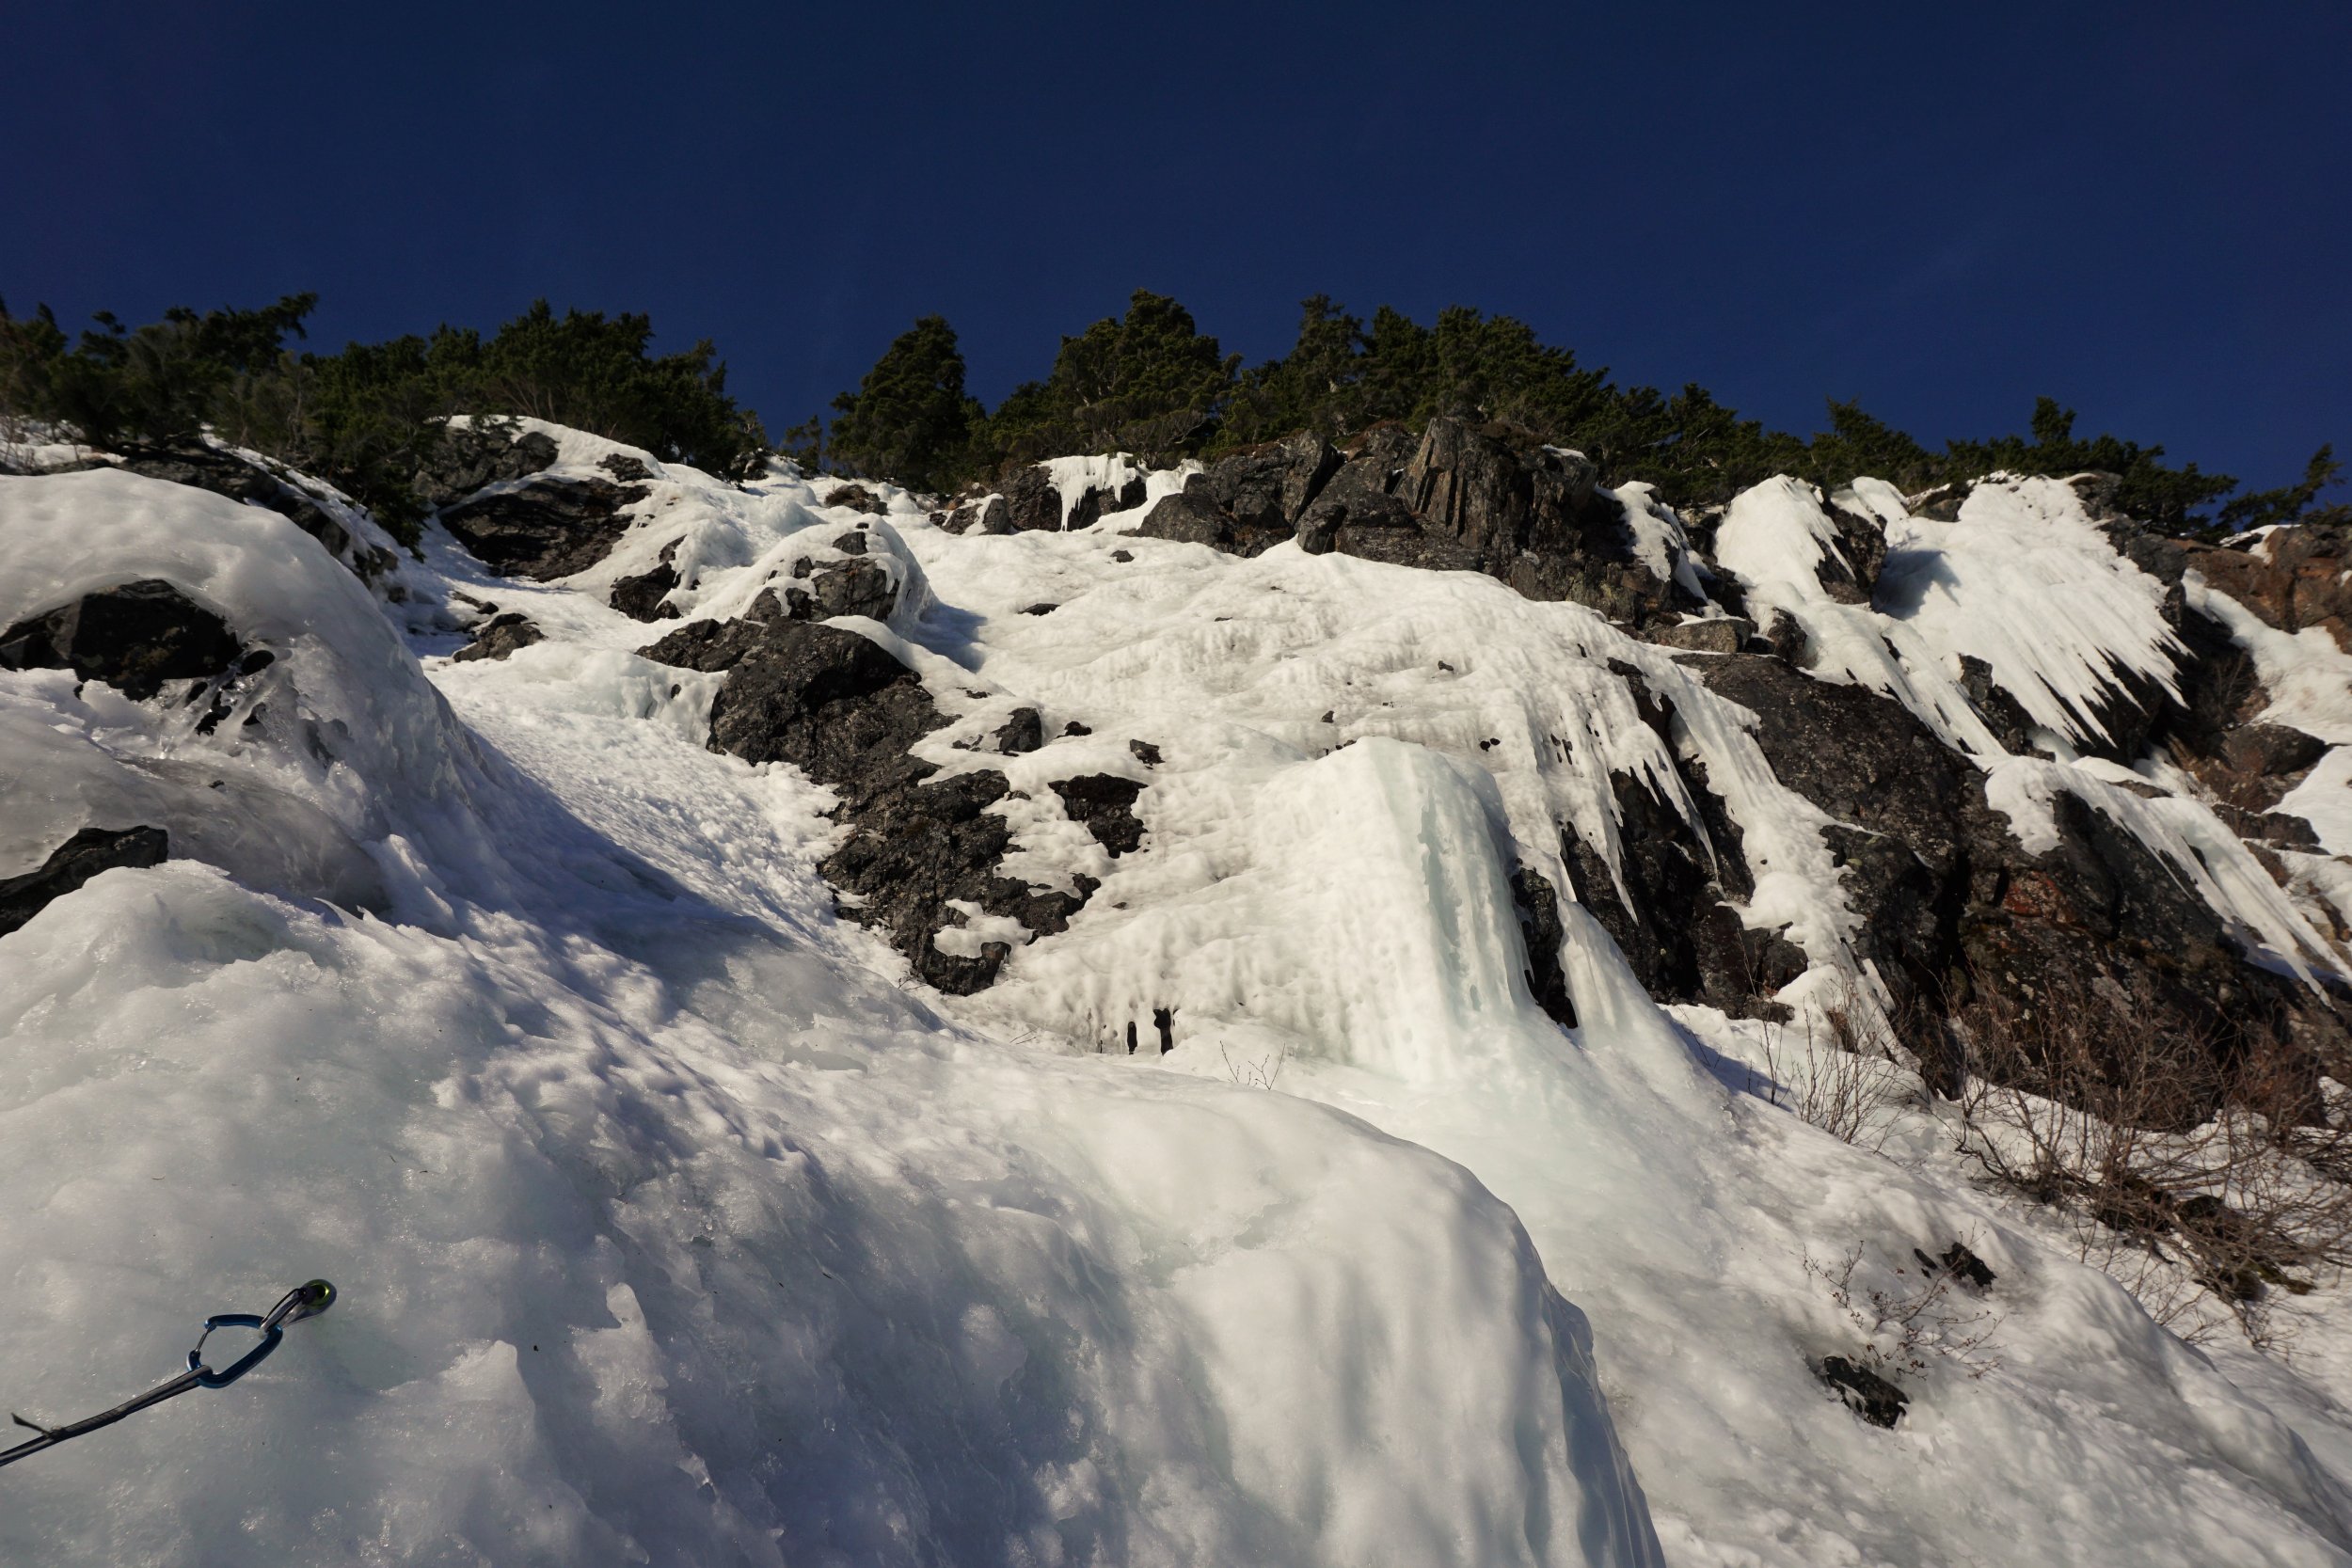
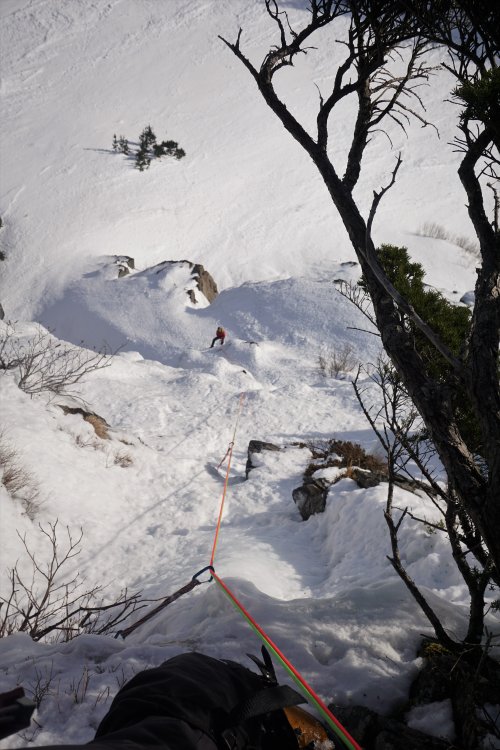

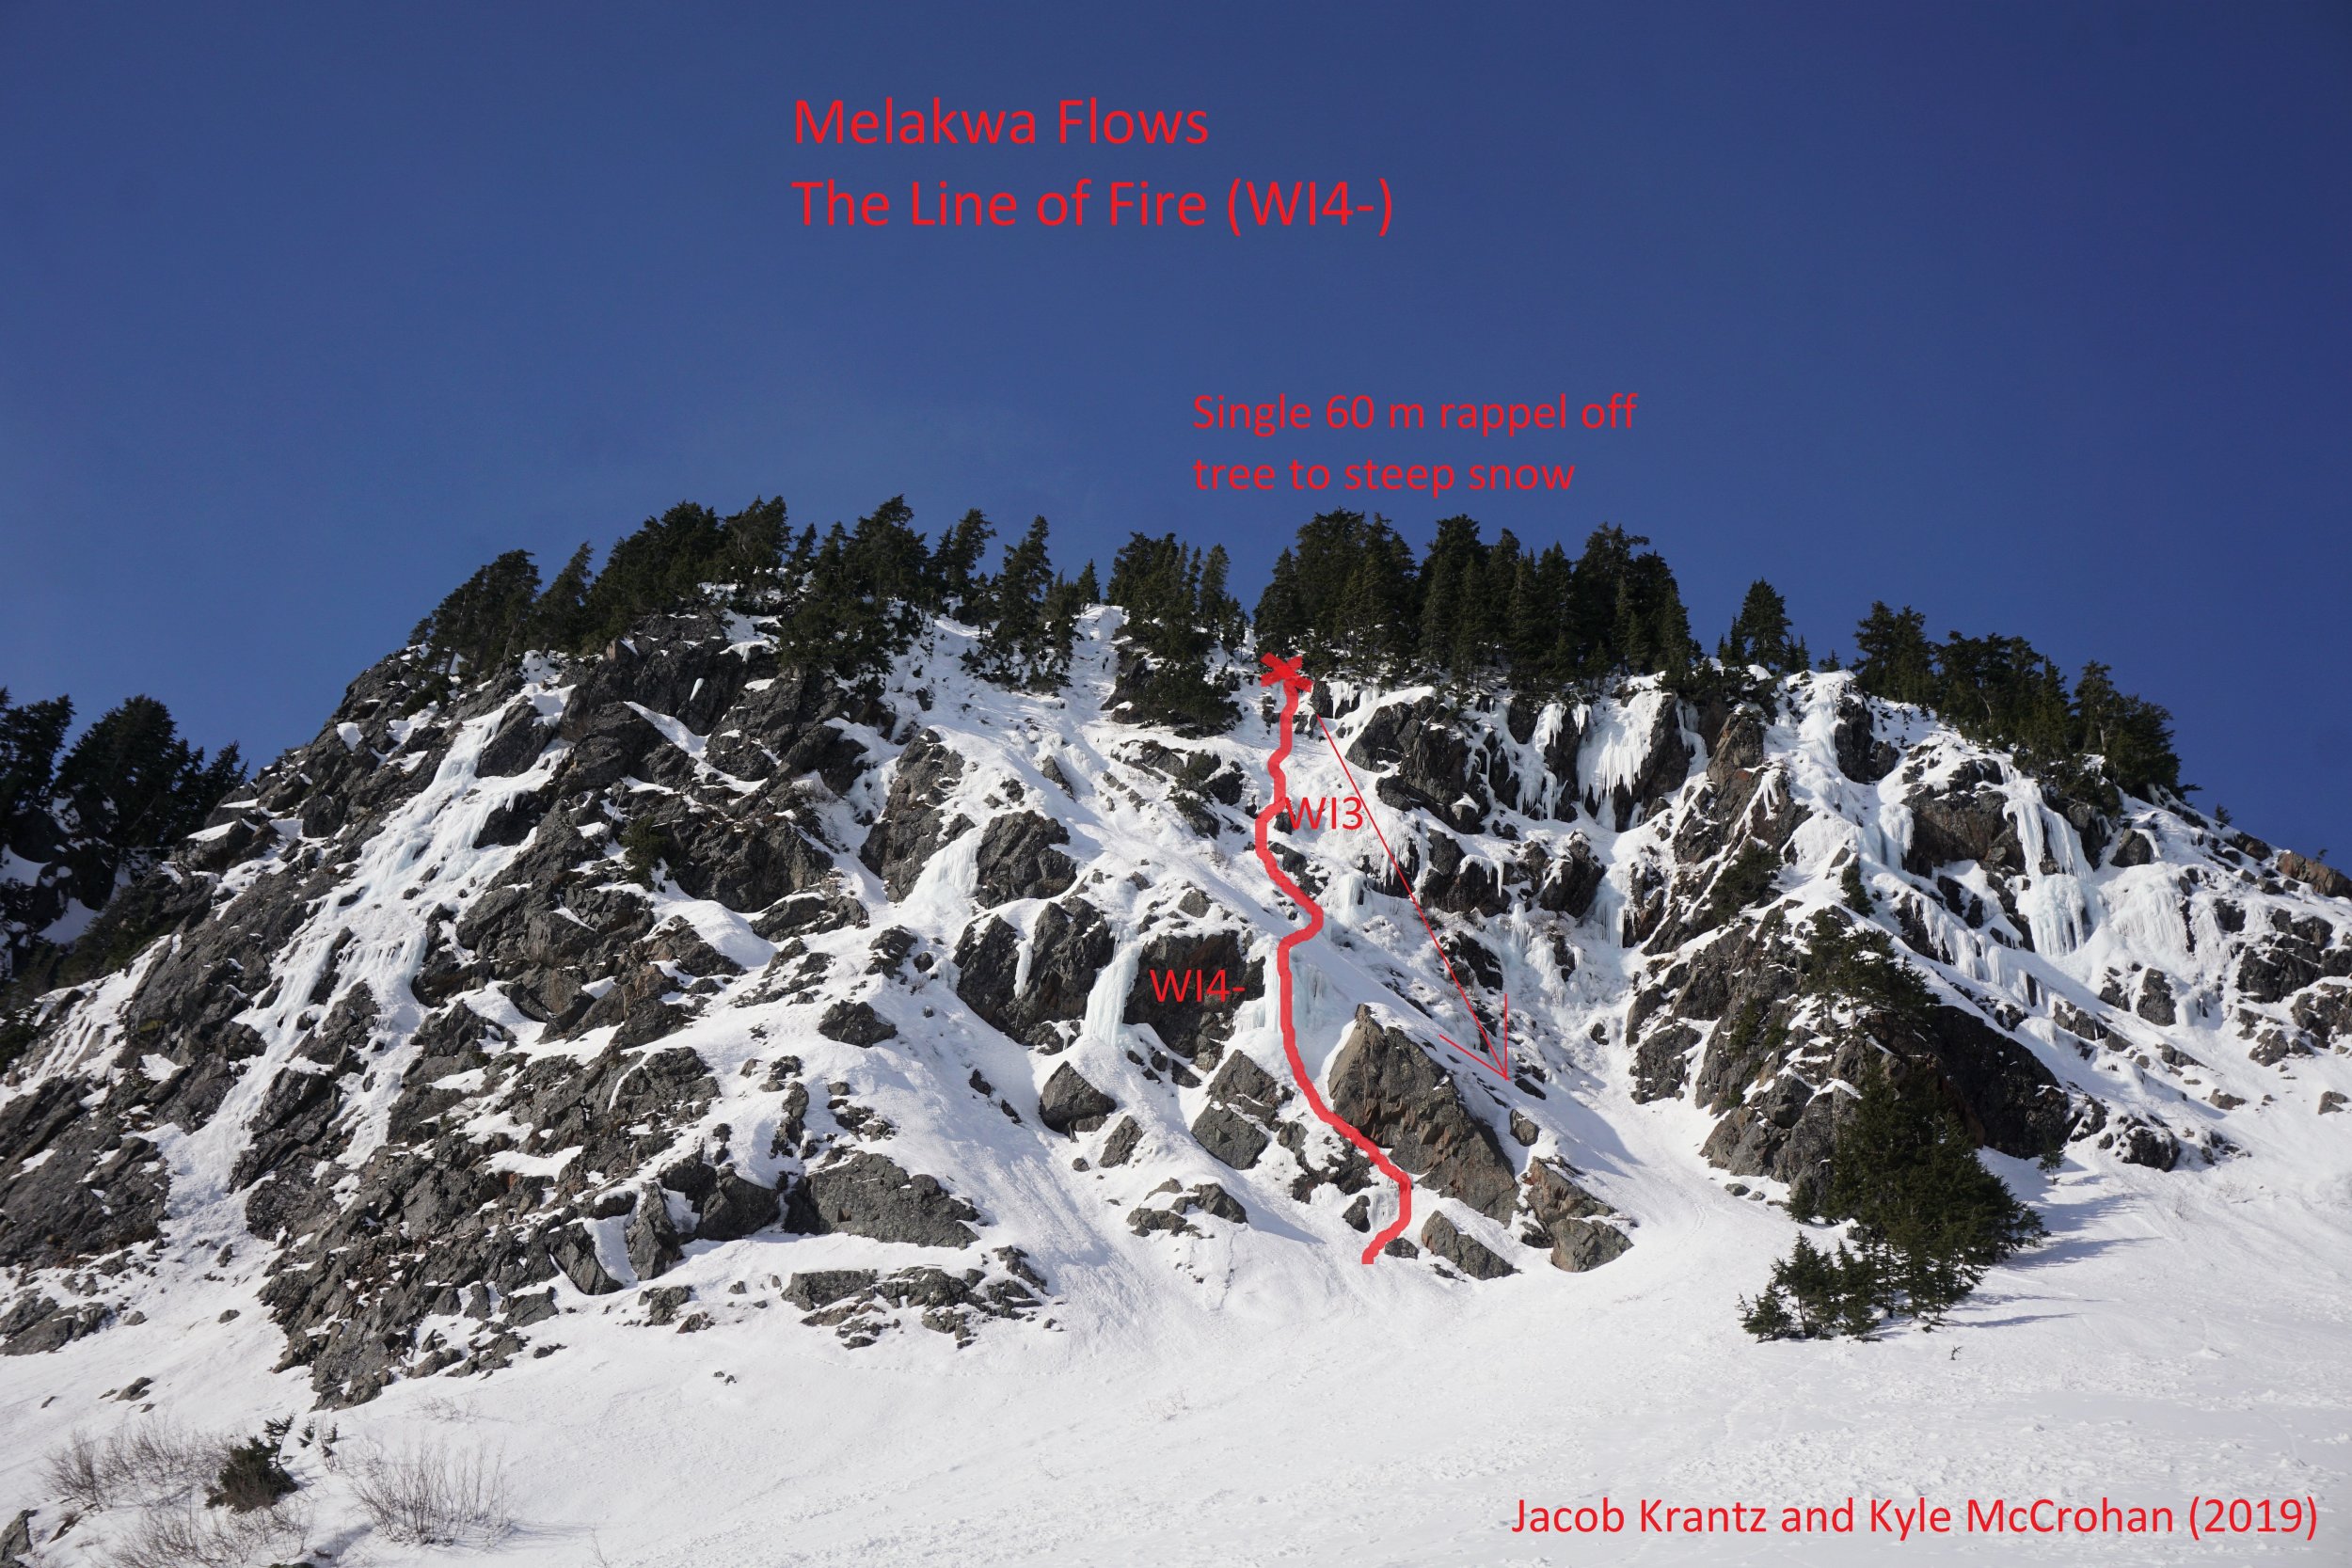
- 10 replies
-
- 5
-

-
-
- first ascent
- snoqualmie ice
- (and 1 more)
-
 Trip: Three O Clock Rock - Road to Nowhere, Mystery Tour Trip Date: 07/20/2018 Trip Report: Hey, a quick update about some new options up at 3 O’Clock Rock...for those that care. Year after year, it seems that over 95% of Washington climbers find zero appeal in hiking to easy slab climbs. But that just keeps the quiet experience for the dedicated regulars and newcomers. Andy and I added an easy (~5.3) slab climb a bit right of Silent Running that features two short pitches. Road to Nowhere has proven a fun outing for novice slab climbers. If you want more challenge, try it hands free (though the FHFA has already been done). You will need 5 draws and one 70 m rope to get up and down. If you’re up for a more difficult experience and/or other parties are lined up for Silent Running, continue another 4 pitches up Mystery Tour, which wanders to the right-hand edge of the North Buttress (topo below). The second pitch of Mystery Tour (5.9+) is the standout, featuring 58 m of very sustained slab climbing. From there, continue up the rounded buttress at 5.8 and then a shorter pitch that ties into Silent Running. More beta and gear details are below. Currently, the easiest descent is down Silent Running, though we hope to have a separate rappel route tuned up in the near future. Leah on Road to Nowhere, pitch 1 Matt approaching the rounded buttress on pitch 3 of Mystery Tour. Climbers below and left are one pitch up Road to Nowhere Route topo Gear Notes: For Mystery Tour, you'll want double 60s, a single set of cams to 2" and ~14 draws. About 80% of pro is bolts. Approach Notes: FS road #2060 to Eight-mile trailhead, then 45 minutes of easy uphill (standard 3 O Clock Rock approach)
-
.thumb.jpg.d8d6db40947cc944f6d3d87de772c58e.jpg) Trip: Central Cascades - NW Butress Sloan Peak FA Trip Date: 09/23/2000 Trip Report: Never did a trip report the mark b and myselfs first ascent of the NW Butress of Sloan peak, so I will do a short one now. Late September 2000 we started up the left side of the broad west face, on the dark rock slightly right of a sharp crest. first pitch is funky balancy climbing on not greatly protected rock(5.8+ish) heading for a dead tree near the crest. Pitches 2-4 climb up thru trees, a small rock step and a grassy gully(wet when we did it) topped by a large chockstone. climb up behind a huge rock pillar to a ledge to begin the teririble traverse rightward. luckily its short, until you can climb up blocky fun mid 5th rock to the top of the black rock.(great bivi) wish could have gone strait up the rock instead of the traverse but the rock looked hard (for us) and slabby. From the top of the black rock ascend just left of the pinkish, rotten rock slightly onto the northern face via easy rock, heather and small trees until you reach an obvious right facing corner/chimmney. starts easy(5.7) and gets harder as you go with the end being on small crimps with small cams for pro (5.9+ish?) Then follow the narrow heather bench rightward to the top of the steep west face(impressive bivi!) climb strait up the crux via cracks (fixed pin) to a small sandy ledge. From here it eases going up and rightish, many variations possible. We exited via a nice shortish hand crack (8+) to the upper mountain. scramble to sub-summit then the main summit. IV 5.8/9 It has 4-5 good pitches and 4-5 not very good ones, with 3rd and 4th class scrambeling Gear Notes: medium rock rack, small to 3 inches, 8-10 slings Approach Notes: same as for West face-Bedal creek
Trip: Central Cascades - NW Butress Sloan Peak FA Trip Date: 09/23/2000 Trip Report: Never did a trip report the mark b and myselfs first ascent of the NW Butress of Sloan peak, so I will do a short one now. Late September 2000 we started up the left side of the broad west face, on the dark rock slightly right of a sharp crest. first pitch is funky balancy climbing on not greatly protected rock(5.8+ish) heading for a dead tree near the crest. Pitches 2-4 climb up thru trees, a small rock step and a grassy gully(wet when we did it) topped by a large chockstone. climb up behind a huge rock pillar to a ledge to begin the teririble traverse rightward. luckily its short, until you can climb up blocky fun mid 5th rock to the top of the black rock.(great bivi) wish could have gone strait up the rock instead of the traverse but the rock looked hard (for us) and slabby. From the top of the black rock ascend just left of the pinkish, rotten rock slightly onto the northern face via easy rock, heather and small trees until you reach an obvious right facing corner/chimmney. starts easy(5.7) and gets harder as you go with the end being on small crimps with small cams for pro (5.9+ish?) Then follow the narrow heather bench rightward to the top of the steep west face(impressive bivi!) climb strait up the crux via cracks (fixed pin) to a small sandy ledge. From here it eases going up and rightish, many variations possible. We exited via a nice shortish hand crack (8+) to the upper mountain. scramble to sub-summit then the main summit. IV 5.8/9 It has 4-5 good pitches and 4-5 not very good ones, with 3rd and 4th class scrambeling Gear Notes: medium rock rack, small to 3 inches, 8-10 slings Approach Notes: same as for West face-Bedal creek -

first ascent [TR] Mt Shuksan - No-Fo-O-Fo Ridge 07/14/2018
dberdinka posted a topic in North Cascades
Trip: Mt Shuksan - No-Fo-O-Fo Ridge Trip Date: 07/14/2018 Trip Report: Ok maybe the name's just a personal joke. Call it the complete southeast spur of the mountain. With a day off and the desire to wander around in some alpine ambiance I was extremely fortunate to cross paths with Chris Martin (Cfire) who was amiable to my somewhat weird idea of climbing the entirety of the ridgeline separating the Sulphide and Crystal Glaciers. The finish of this feature is the frequently climbed southeast ridge of the summit pyramid. Access was a harrowing traverse underneath the terminus of the Sulphide Glacier. Seracs, debris piles, rushing water and thin fields of snow over downsloping slabs. We ran and Chris still managed to take a sizeable block of fortunately slow moving ice to the thigh. The ridge itself was a lot of fun. Generally good rock along some choss. Lots of 3rd and 4th class along with a stretch of very exposed 5th up an intimidating tower. Some down climbing, a rappel and a particularly incredible “a cheval” section. Of course the views down into the chaotic bases of the Crystal and Sulphide Glaciers were the highlight of the day, creaking, groaning with the occasional collapse both seen and unseen. Recommended for the incredible position as well as some pretty nice climbing on the lower and upper sections of the ridge. Looking down the crux pitch. Another view of the same with Sulphide Glacier in background. The amazing a cheval stretch. Photo doesn’t do it justice. Top of the second part. Description III 5.6 Start just right of the toe. Solid 4th class rock and a short bit of 5.0 choss is followed by a transition to grey shist(?) below a steep tower. Traverse to the base then follow a ramp back up left to the skyline, a short blocky bit leads to a decent belay ledge below the slabby headwall. Start on the left then traverse right (5.6?) to a hand crack then easier terrain. From the summit of the tower traverse an amazing a cheval section then downclimb a steep, featured 4th class slab to a notch by snow. Continue scrambling up the ridge line until a 40’ rappel drops onto the Crystal Glacier. Bypass a small nunataq then climb the second stretch of the ridge by its left skyline. Looks chossy but turns out to be reasonably nice 3rd class rock. From the tip of this feature a steep downclimb on snow leads to the broad bench below the summit pyramid. Follow the excellent SE ridge to the summit. Gear Notes: Small rack to 2”. A doubled up skinny 60m rope was adequate. Approach Notes: Traverse below Glacier will be slow and (more) dangerous once snow melts off rock slabs. Go early summer most years.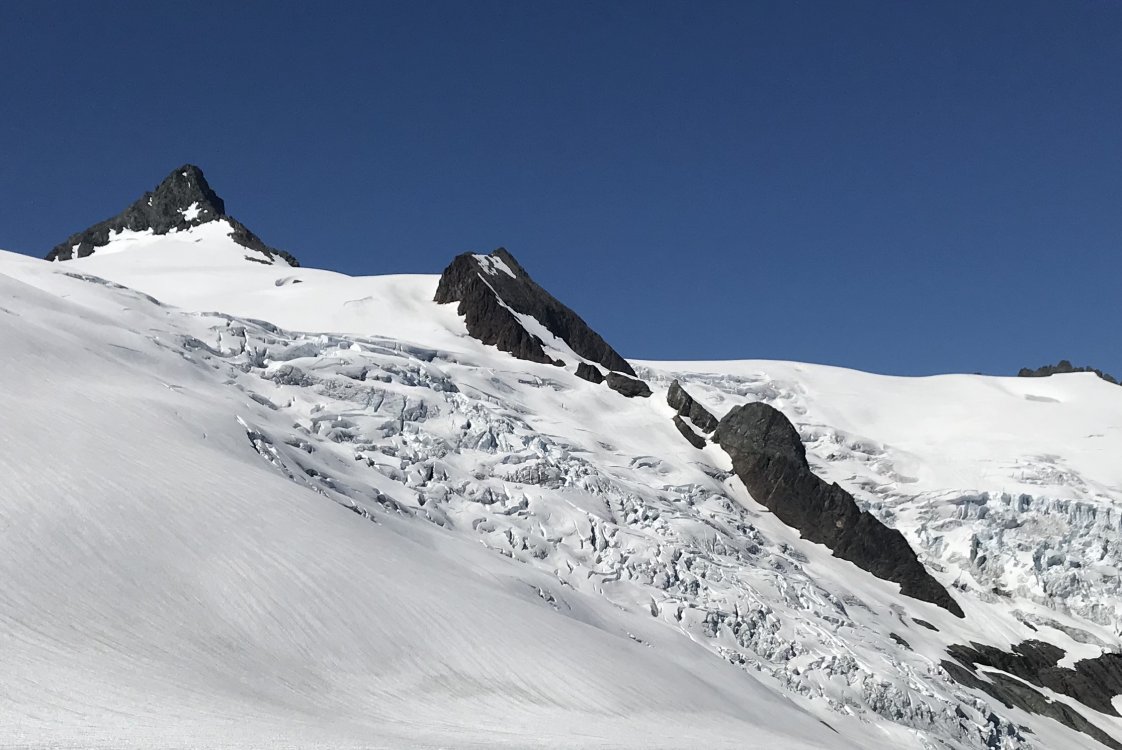


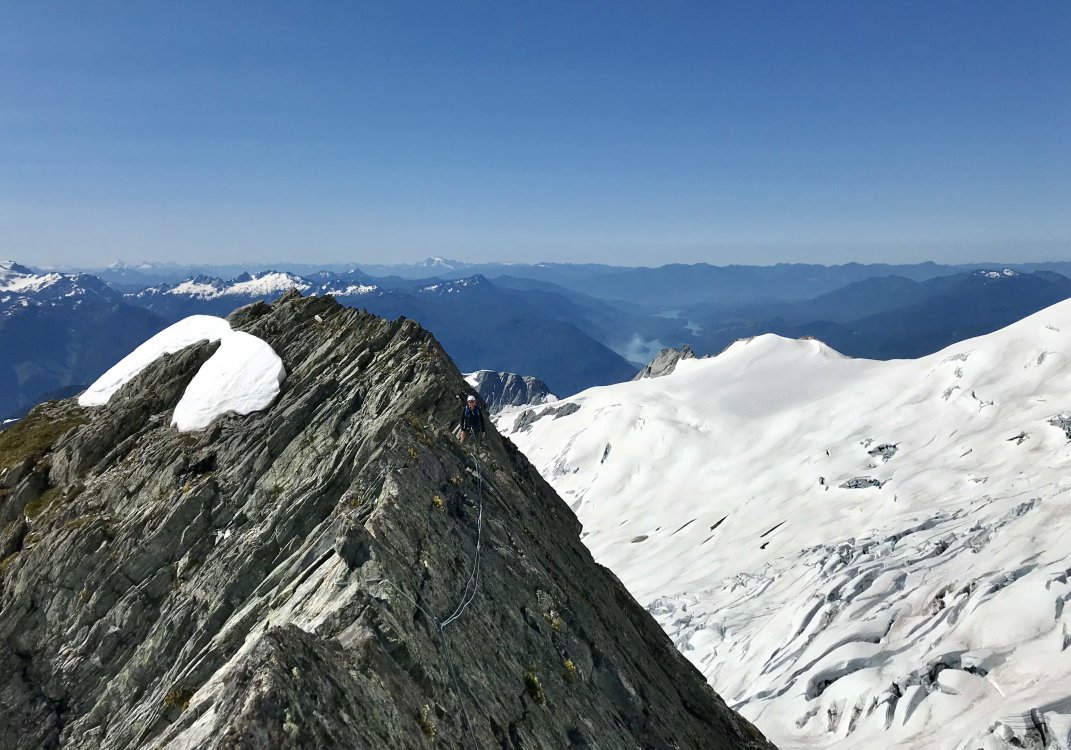

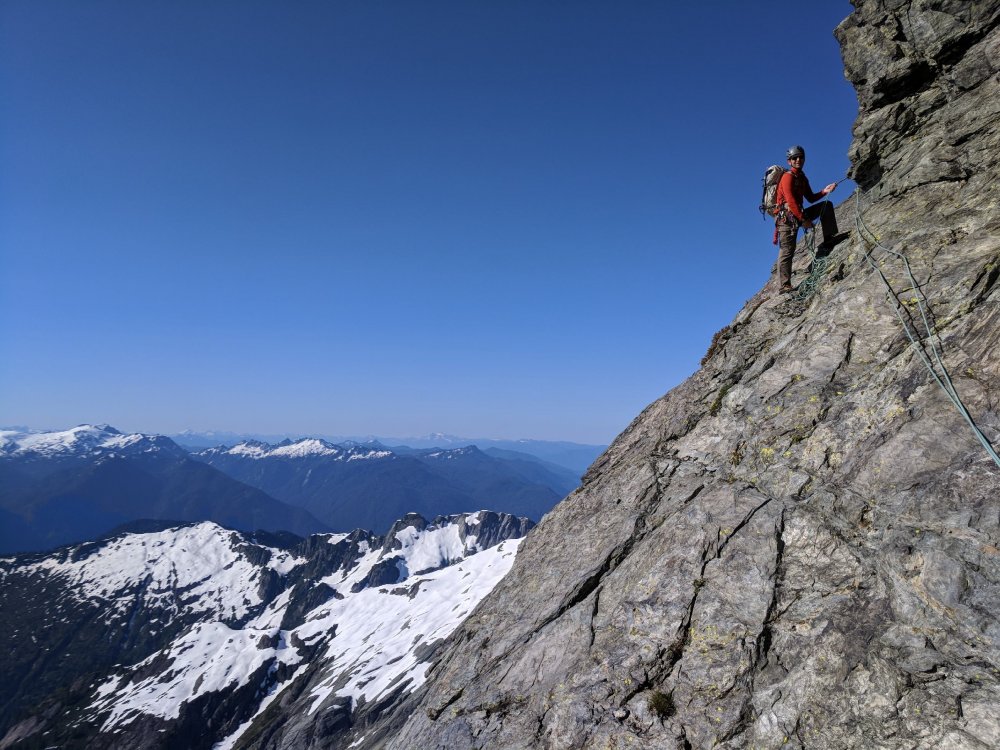
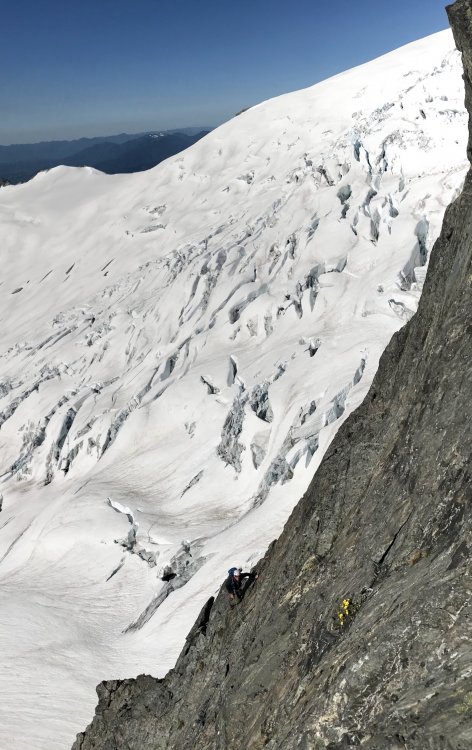
-

first ascent [TR] Strobach - Jatinga (FA) 01/30/2018
John Frieh posted a topic in Ice Climbing Forum
Trip: Strobach - Jatinga (FA) Trip Date: 01/30/2018 Summary: First Ascent of Jatinga WI4 35m John Frieh and Joel Campeau January 30 2018 Details: Joel and Jen did a recon trip the weekend prior and baited me with photos of what appeared to be unclimbed ice climbers right of "First on Right." Even better it looked extremely similar to the Hyalite classic "The Thrill is Gone." Two days later Joel and I returned and made good time to the base drafting the trail he and Jen had punched in a few days prior. I saddled up and with a cool head and creative ice screw placements was able piece it together before finally getting good rock gear higher up. Finally "interesting" thin climbing (classic Strobach) guarded the top out. We rapped off a tree climbers right of the top out. Joel followed and we then ran a lap on what apparently was the very first route ever climbed at Strobach "First on Right" which we both found to be very steep off the ground before easing higher up. Joel and I did some recon hiking after that and found some other possabilities that Jen and he climbed the weekend after that. Hopefully they post a TR soon! Shout and a BIG thanks to Alex Krawarik for always being willing and able to answer all my Strobach questions! You the man! Gear Notes: Rock gear + stubbies recommended (required?) Approach Notes: Washington Ice: A Climbing Guide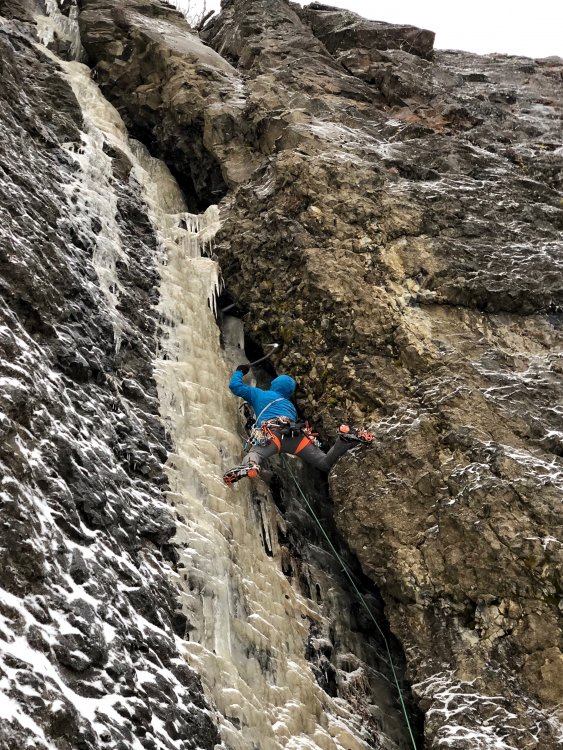
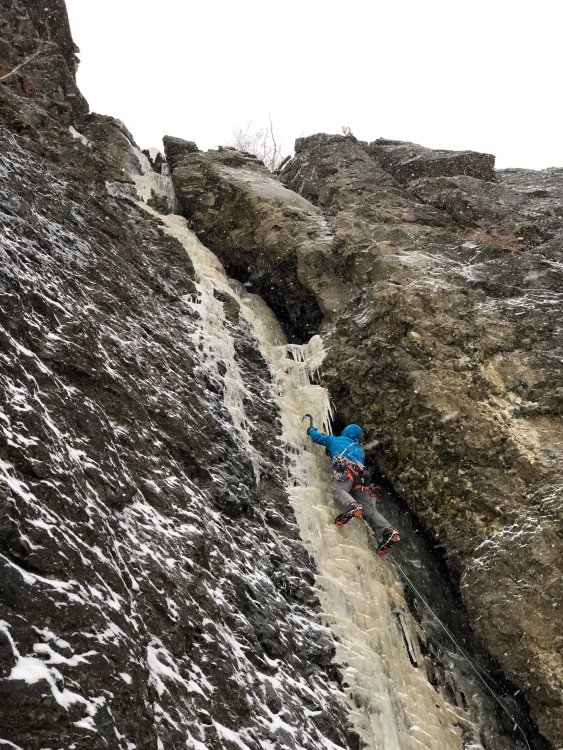
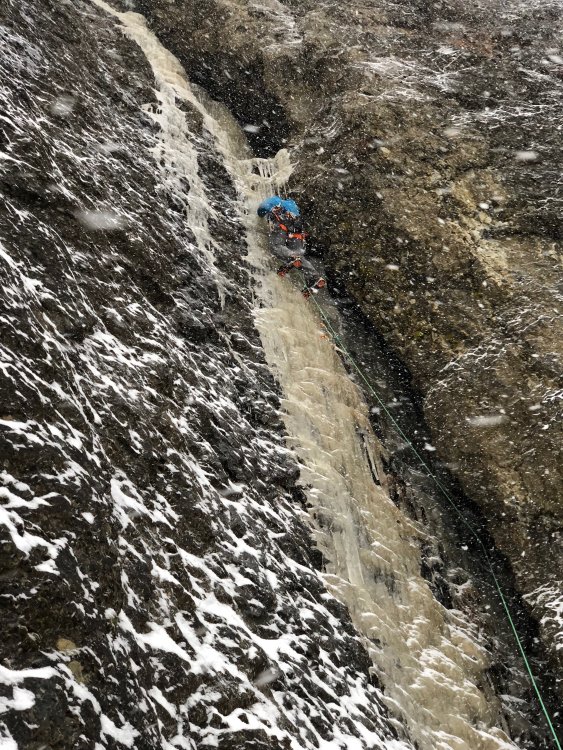

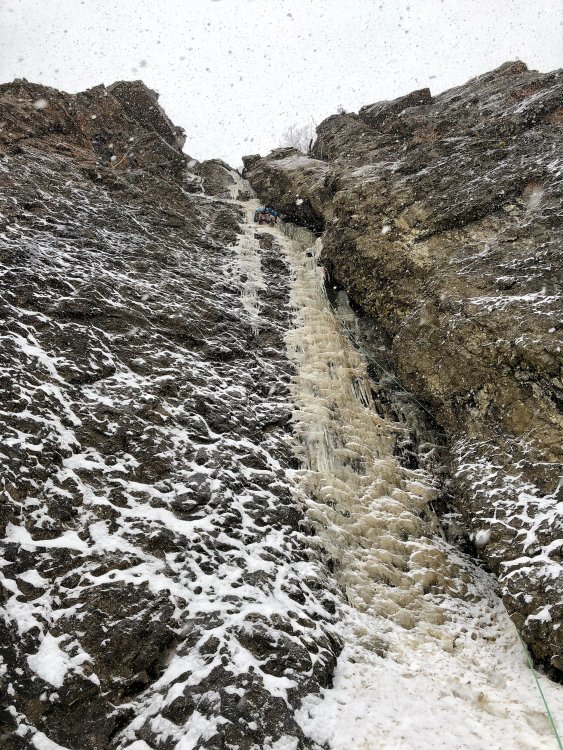
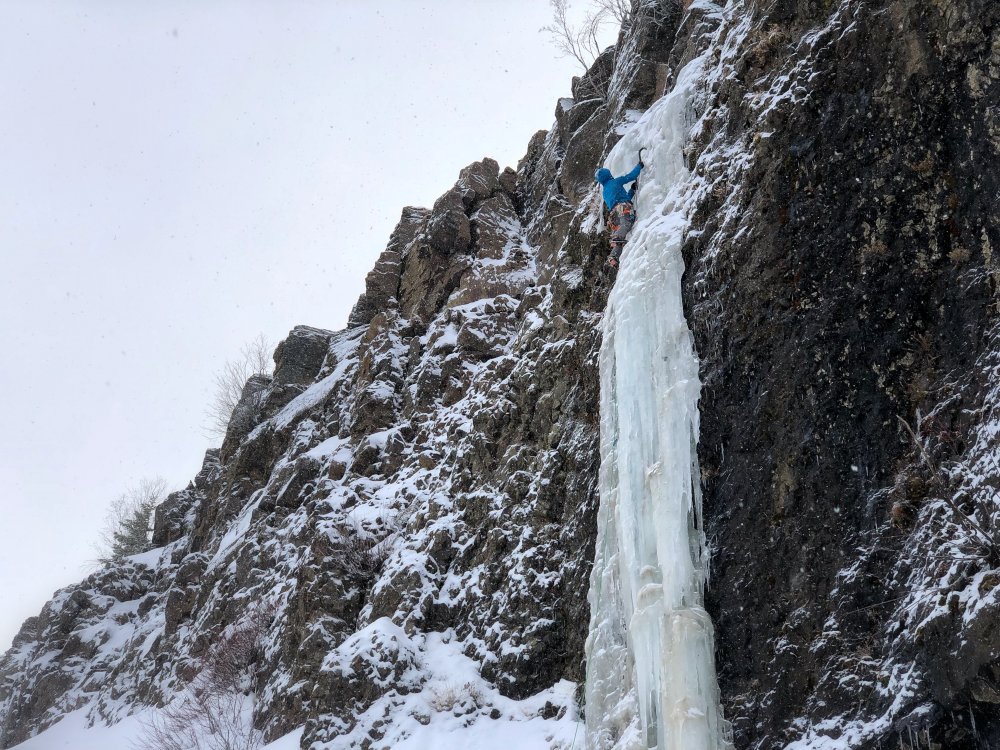
-
 Trip: snoqualmie mountain - possible fa: the turf testament Trip Date: 03/31/2018 Trip Report: marko and i went kickin', scratchin', 'n stabbin' yesterday and unearthed a previously unheralded book of the bible: the turf testament. start a few hundred feet up the slot couloir at the large right facing book. pitches 1-2: two 60m pitches up rock & turf in the corner and some thin ice on the right face. pitch 3: climb a short corner, move easily left to the next book, & climb it to tree belay (<50m). [pitch 3 alternatives: a. possibly rightward escape on a treed ramp (may dead end on the ridge bordering the slot), or b. finish directly up very difficult looking roofs above.] pitch 4: climb up shallow right facing book with overlaps to difficult exit moves overlooking the roofs directly above the second belay (30m). [pitch 4 alternative: straight up through a short squeeze chimney to a difficult looking roof in main corner.] hike up the ridge between the slot and crooked couloirs to the summit rock band. pitch 5: up central chimney/gully to exit immediately left of cornices (30m). a pretty good photo of this route appears in martin volken's "backcountry skiing: snoqualmie pass". the route is very obvious to anyone skiing the slot so i would not be surprised if it has been climbed: any info would be appreciated. the route cannot be seen from the start of pineapple express. however, a party could climb the first 4(?) of p.e., then scope the route from there. if interested, they could cross the slot to the turf testament. if not, continue up p.e. are you ready to testify? Gear Notes: rock gear to 4"; screws to 13cm (for us); your choice of turf gear; a few pins (not used) Approach Notes: best via standard approach to nw face. dropping down the slot may work but has drawbacks (can't scope the route, pissed off skiers).
 -
 Trip: Mt. Hood - Three Little Monkeys - New Route on The Black Spider Trip Date: 03/31/2018 Trip Report: “Three Little Monkeys” New Route on the Black Spider, Mt. Hood OR WI4+ M5R Michael Getlin and Walter Burkhardt I was chatting with Wayne a few months back and he mentioned that there was some unclimbed potential on the left side of the Spider. A quick scouting mission showed a beautiful and long ice line between the existing Fric-Amos route and the Elder-Russel summer line. A fat long ice line it was not, but it seemed to have smears in all the right places so we gave it a go. We left Timberline at 5am with perfect high cloud cover that promised to keep the sun off the east-facing, concave wall. We crossed the bergschrund at 8:15 and started right in on what we thought would be the crux pitch. A few vertical mixed moves brought me to the hanging, detached ice dagger which proved fragile and delaminated. It was a type of fragile water ice climbing that I have never seen on Mt. Hood. It was strikingly similar to the first pitch of "Mean Streak" in Cody (we bailed). WI4+ (Not Mt. Hood grading) I brought Walter up and then set off to try and connect to another hanging dagger directly above but huge unsupported snow mushrooms guarded it. After sending one down on Walter I decided to try right. This proved to be the crux pitch of the route as rotten snow over near vertical mud lead to two distinct vertical mud chimneys. The second one was protectable, the first was not. It turns out though that in a pinch, the rock/mud takes decent sticks. Several times when I thought I was getting in trouble, I just wailed away at the rock face and my picks stuck like magic! Gotta love volcanoes. M5 R For the third pitch I jogged left again, trying to get back on the plumb line which proved a good guess as we found sound rock with interesting mixed moves and wonderful water ice that took good screws. WI3 M3 After bringing Walter up, I climbed up a narrow ice gully hoping to veer left and drop into the upper bowl through which the Fric-Amos route finishes. At this point it was getting late and we were looking for a quick exit. But to my surprise the bowl was guarded by a vertical snow fin that would have involved about 50 feet of unprotectable down climbing, so I veered right and then straight up, finding a path through wild gold-colored gendarmes that rose like turrets over the upper face. We popped into the sun and knew we were home free. WI3 In all we climbed five full length pitches, the last of which was mostly steep snow. I was lucky to share this experience with Walter. He was a great mentor to me when I first started going to the mountains and I owe him a good deal of credit for keeping me safe and motivated over the years. Note: In retrospect, it’s worth mentioning that the face was pretty dry when we climbed it. The start or Arachnophobia and the visible parts of the center drip looked more like rotten snow than solid alpine ice. I think when the face is fat, the line would be a very reasonable outing. I was surprised at how direct, steep, and sustained it was. I would love someone to give her a go in better ice conditions and see if that little kink in the second pitch could be ironed out. Our line in yellow Looking at the start from below - the face seemed dry to me but it was my first time up there so I don't really know. Approaching the line (Straight ahead) Mid way up the first pitch Walter Following P3 Looking up at the start of P4 Gear Notes: We brought a single 60m, 2 Pickets, 5 screws, 4 pins, and 4 cams (.5-2). We could have used a few smaller cams and a rack of nuts would have been nice Approach Notes: Timberline to top of palmer. Dropped our skis and crossed the white river at about 8800ft. 3:15 car to schrund in good conditions.
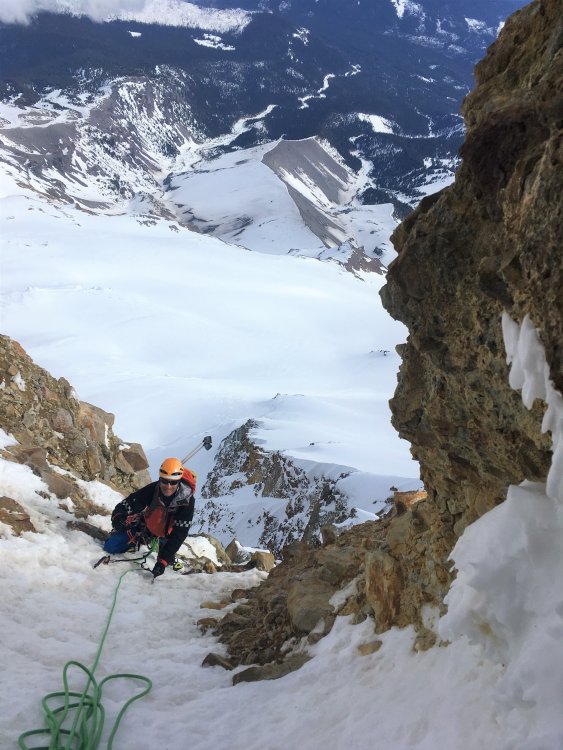


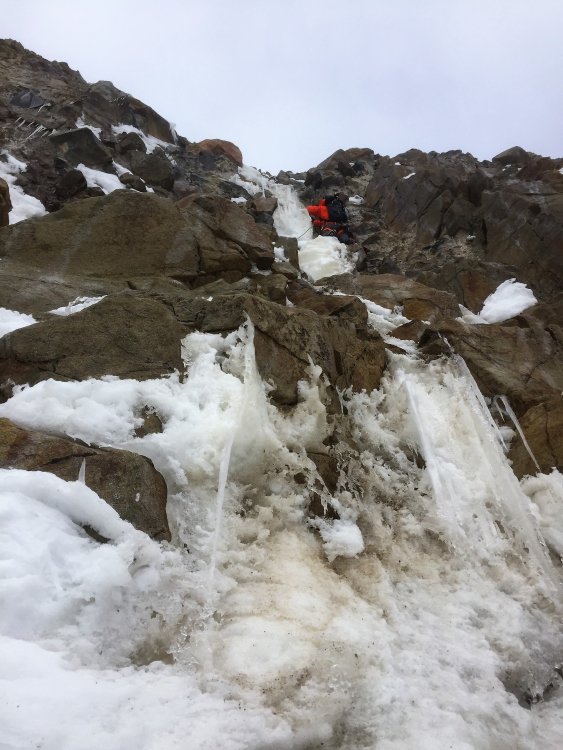
-
 Trip: Bridge River near Lillooet - Bitcoin Billionaire Trip Date: 01/07/2018 Trip Report: Steve Janes, Danny O'Farrell and I climbed a new route off Bridge River on Jan 7/2017. After working in the area for a few years Danny noticed an attractive flow of ice high up the valley that had yet to be climbed. After driving by the previous day we knew that top pitch was in, and looking good. Photo Credit: Steve Janes After a 90 minute approach we were surprised to see another curtain of ice slightly off what we thought was going to be our start point- with the grade 4 ice looking good we started the climb there. Here's Danny belaying me on the first pitch. Another view of the first pitch which felt like a WI4- pitch. We were pleasantly surprised and excited to see this ice so low on the route. Going in we thought we'd be mixed climbing our way to the upper tier. Steve Janes dealing with the first difficulties on the memorable second pitch. Once we got going things only got better- after the first pitch we were drawn into a tight chimney and climbed thru some difficulties in the M6 range. Here's Danny making his way, or squeezing his way up the memorable 2'nd pitch. Here's Danny nearing the top of the second pitch. Once out of the chimney we climbed thru some easy grade 2 ice and one tricky M4 slab section before finding another M6 chimney. Here's Steve Janes dealing with the first tricky section of this pitch. Photo Credit: Danny O'Farrell Once above the second Chimney we pitched out a short 25 meter grade 2 ice pitch before climbing the WI 4- upper tier of ice. This was a really enjoyable day out with great company, this route has an alpine feel to it and is worthy of repeat climbs! Bitcoin Billionaire: WI4-, M6, 325 Meters P1- 55 meters WI 4- First Pitch P2- 55 meters WI3/M6 The Fun Chimney P3- WI2/M4 65 Meters The snow slope that had the low 45 degree slab (tricky) need to simul climb a short distance in order to reach a tree belay. P4- 30 Meters WI2 P5- 55 Meters WI3/M6 The roof pull then second Chimney P6- 25 Meters WI2 Quick Pitch to the upper curtain P7- 45 Meters WI 4- The wet upper pitch Here's a view of the route from the Bridge River road. Gear Notes: Rack of screws- heavy up on 13's, good idea to have a couple 10's as well, Rack of cams to #3, some pins knifeblades, half ropes Approach Notes: Approximately 43.5 km from the turnoff in Lillooet or 6.5 km before Terzaghi Dam. The route lies between the already established routes Salmon Stakes and A New Leash on Life” along the highway on the east side of the river.
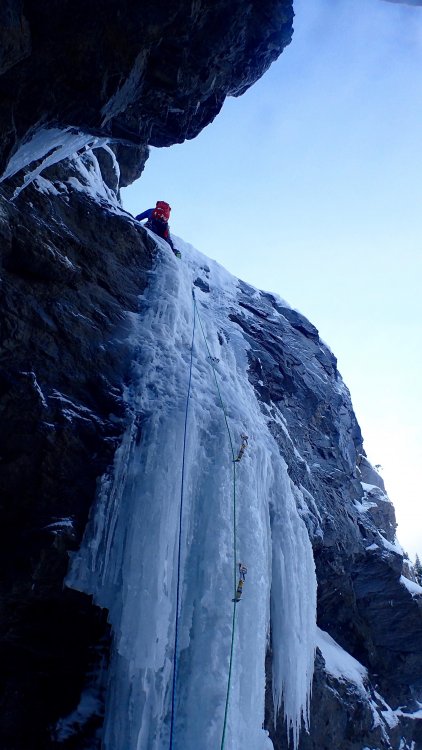
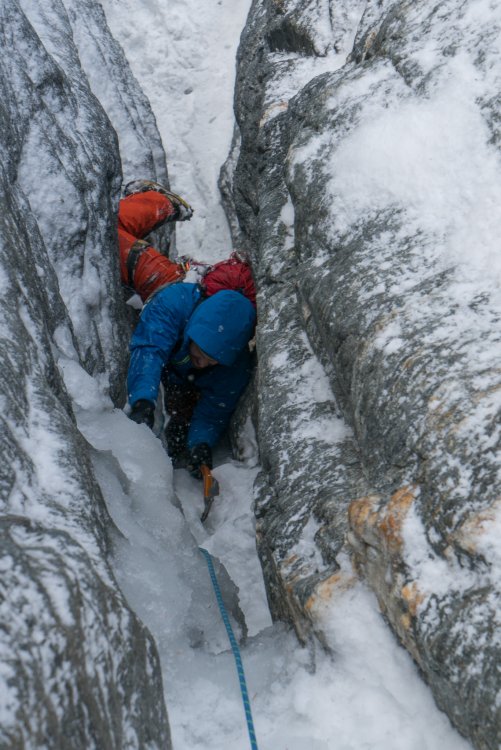
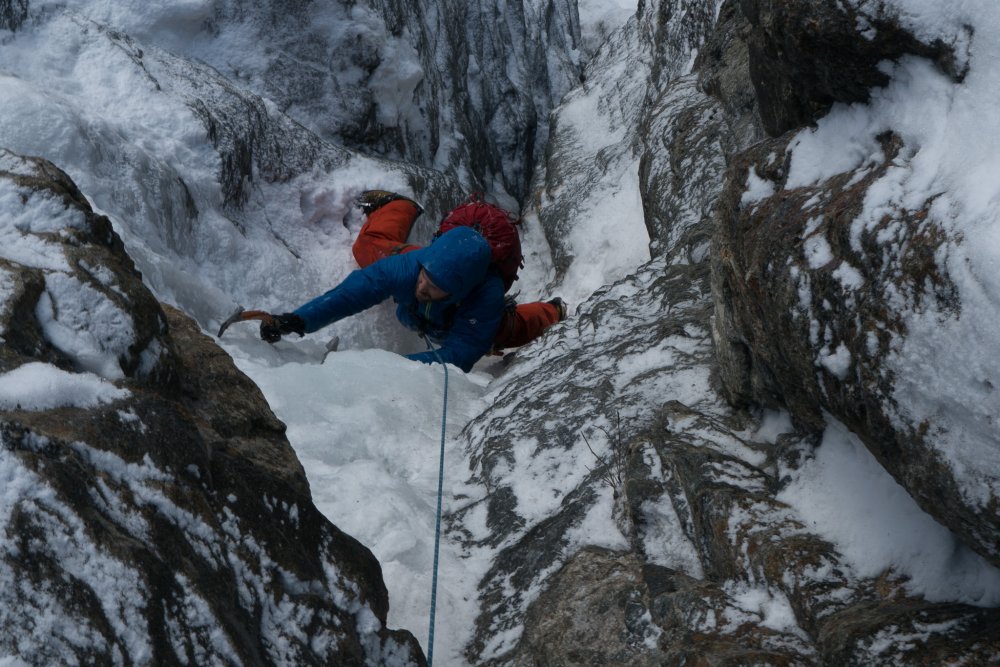


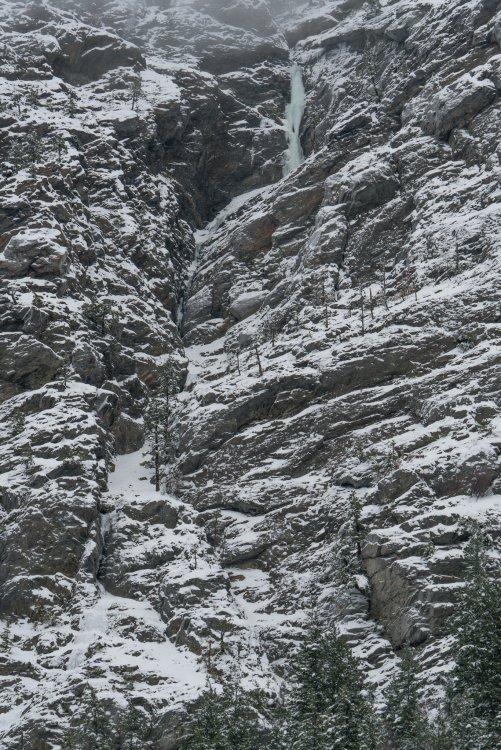

-
Trip: Vancouver Island, Mt. Harmston- Northern Lights Trip Date: 12/22/2017 Trip Report: With a climbing friendly weather forecast Malcom Nicol, Ryan Van Horne and I plucked Mt. Harmston's unclimbed North East face out of the "to do bucket list" and made our way into snowy Strathcona Park on December 21/2017. Access to the eastern side of Strathcona park has been problematic the last few years, fortunately political pressure on forest companies to open up access for public recreation has resulted in a lot more open gates than we've been accustomed to. Once at the col between the Comox glacier and Iceberg peak we scoped out the options for the following days climb- two options presented themselves with one looking a grade or two harder than the other. Without seeing the harder route from a different perspective we couldn't determine for certainty if the line was in. With the uncertainty of the harder route hanging over us we opted for the sure thing. With with Winter solstice one day behind us, we knew we needed to maximize every minute of day light available, after hearing the alarms go off at 5:15 I felt like I needed a stick of dynamite to get out of my cozy mountain of down and face the frigid temps outside my bivy. The cool morning played havoc on the stove of choice for this trip, the trust worthy Jetboil melted the morning snow so slowly that Ryan and Malcom opted to skip a hot breakfast. Looking back we should have packed in one of our white gas stoves, canister stoves always seem to have issues once it's -15 celcius or lower. With a hasty breakfast finished we left camp in the dark @7:15 and unable to see our route as fog/cloud had enveloped the area over night. Photo Credit: Ryan Van Horne Once across Milla lake the lower section of the route opened up. After a quick gear sort on the frozen lake we were on our way. Photo Credit: Ryan Van Horne Here I am on the sharp end leading the first pitch. Photo Credit: Ryan Van Horne Here I am on the sharp end of the second pitch- one of the crux's of the route, a grade 3 step with little to swing into above it. If the route was filled in I think it would be a great grade 3 climb, but with the marginal conditions and dodgy protection options we had I'd give it a WI 3+ on this day. Here's Malcom dealing with the 4'th pitch. As with the other pitches this day, this one had a spicy early season feel to it. Here's Ryan on the sharp end of the 5'th pitch. The ramp to the right was initially our intended objective, once we were closer the gulley to the left presented itself and appeared to be in better climbing condition. Here's Ryan Van Horne coming up a tricky section on the 6'th pitch that definitely had a west coast feel to it- pull on whatever there is and yard your way up! Photo credit: Ryan Van Horne After 8 pitches of climbing we found ourselves on the upper snow field. With good snow conditions we were able to plod our way to the upper mountain without too much concern. At the top of this snow field we were greeted with a near vertical section of snow/ice and an overhanging cornice- fortunately we were able to body saw our way thru the cornice without too much swearing. After 12 hours of climbing we found ourselves on the summit of Mt. Harmston. With clear skies we were treated to views of the Comox Valley, the lights of Mt. Washington, a couple of the North shore ski resorts and the glow of Vancouver on the horizon. With descent off the hill looming I was struggling to recall the exact location of the summer descent line off the mountain- fortunately we had a couple phones with us and were able to look at the guide book. With a little uncertainty still clouding our exact bearing we tried calling a couple local climbers (as we had reception atop the mountain) who we knew would have the beta we needed, unfortunately both Philip Stone and Lindsay Elms weren't home, though we did leave messages wishing them the best of the season. To make the descent a little more interesting my headlamp died a minute after leaving the summit, fortunately I was worried that might happen and opted to carry a little 22 mA charge and the cable required to link the two devices. This lack of illumination made the first two rappels a little more memorable for me. To make things even more interesting Malcom's head lamp died after the 2'nd rappel leaving us with one working head lamp for 3 of us in the middle of bailing off one of the biggest mountains on the island! With events looking more and more epic for all the wrong reason I pulled my headlamp and the charger it was plugged into out of my coat and was relieved when it turned back on! Malcom, who is more resourceful than I turned into McGiver mode and duck taped his iPhone to his chest and finished the descent with it lighting the way off his chest- good times indeed... Northern Lights: 8 Pitches, 700 Meters, WI 3+, M3, TD- P1- WI2, 45 meters P2- WI3/3+, 50 meters P3- M1 (We simulclimbed this pitch) 45 meters P4- WI3+, 45 meters P5- WI 3, 45 meters P6- WI2/ M3, 60 meters P7- M1, Mostly a snow ramp, 50 meters P8- WI2, (Short section simulclimbed then belay off tree at top of pitch) 70 meters Gear Notes: Half/Twin Ropes, rack of screws (2-10's, 6-13's, 4-17's,1-22), cams to #3, 4 pins, bird beak, alpine runners and quick draws, 2 screamers. Approach Notes: Approach via Kweishun Creek as described in Philip Stone's "Island Alpine Select"
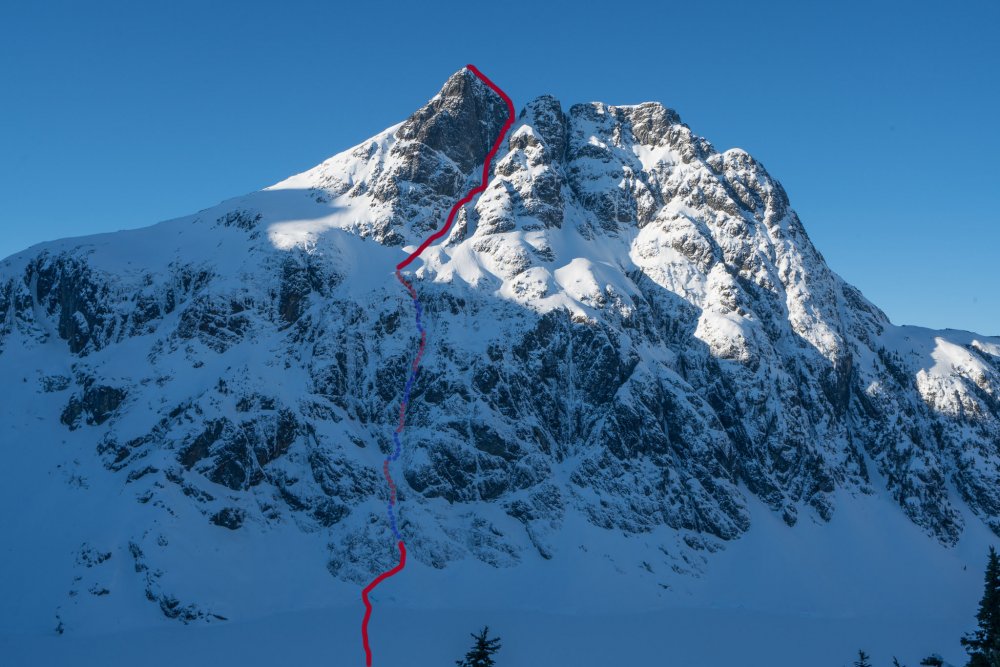

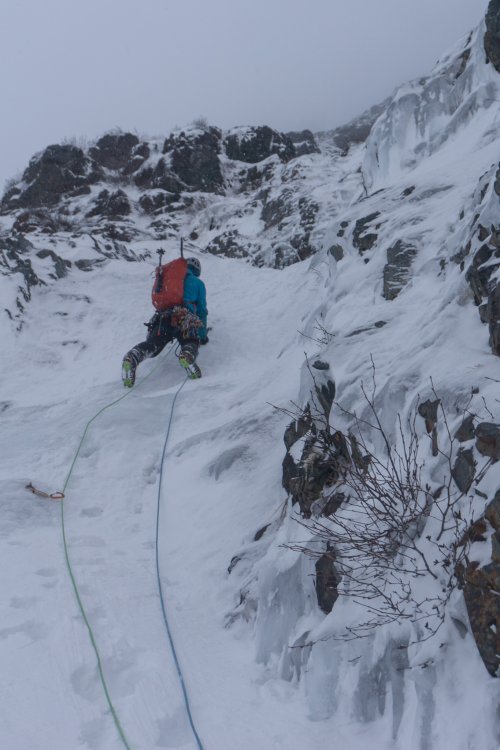


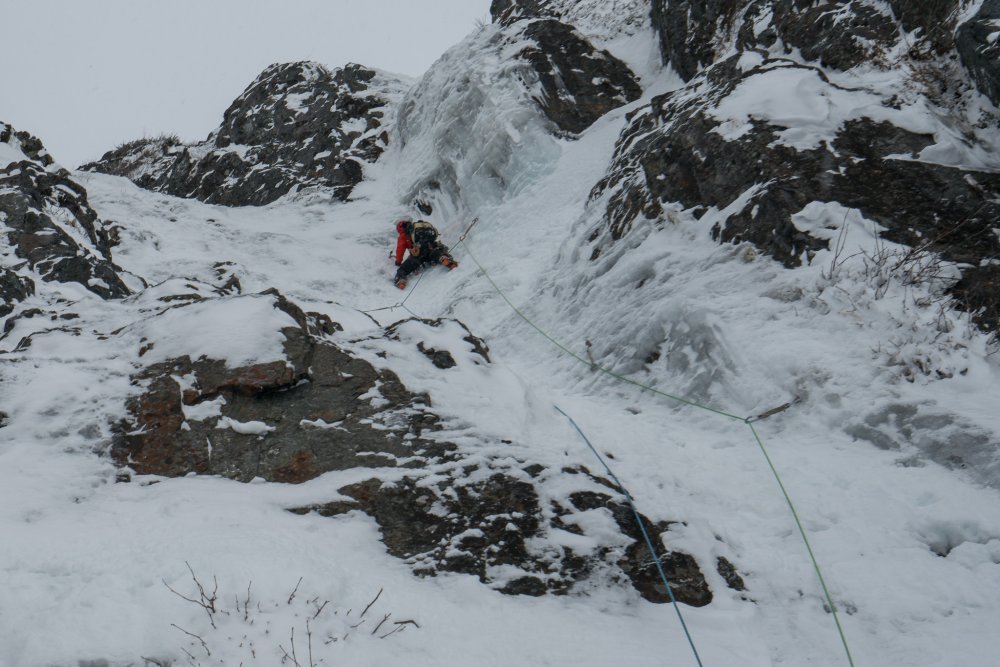
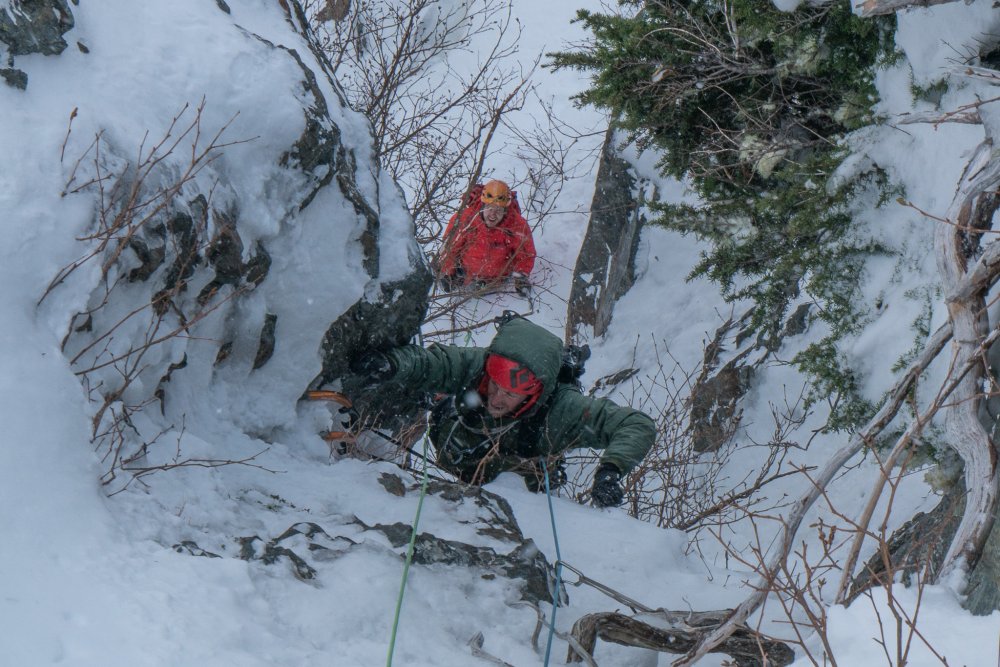

-
 Trip: British Columbia - Coquihalla Honey, Clyde & Isabelle Trip Date: 09/30/2016 Trip Report: Two new routes on Yak Peak. Somehow the memory of an obscure Cascade Climbers trip report had eventually soaked into my brain and I realized that Yak Peak in British Columbia might be worth a visit. Google was telling me it was the same drive time as Washington Pass and the internet was telling me that there were oceans of slabs within sight of the road! Despite my general lack of enthusiasm for border crossings I convinced Bill Enger to join me for a look and we dug out our passports, vacuumed the car, and headed for the border. Once out of the Great Bear Snowshed the highway trends to the east and the huge bulk of the thing almost hovers above the little ribbon of road. From the rest area we gaped at it with binoculars and spent our Looney’s on espresso and egg wraps from the welcome food truck! Bill did the bloodhound thing back and forth along the shoulder for half an hour and ultimately sniffed out the start of the west-side access trail. An hour later we stumbled out of the forest squinting at the sparkling little snowfield and sweeping slabs. We sat and grinned in the sunshine like an internet date; trying to decide if the pictures matched the reality. There were no bumps or knobs, no cracks or corners just a sea of low angled granite that gently steepened for a long, long ways! In July of 2015 I returned with Natalie Merrill. I was convinced that there were good routes to be done if I could only adjust my thinking enough to see them. Still, it took three pitches with some wandering before I backed up, removed a few anchors and finally committed myself to the plumbline. For Natalie it must have been like waiting for a fish to speak latin. It wasn’t even hard climbing, it was just blank and looked intimidating. I had made up my mind that we were gonna bolt our way over the roof and hopefully find something I could climb on the uphill side. Surprise surprise but the “roof” turned out to be 12-feet high and more of a short wall than any kind of real roof. It looks like a roof from just about anywhere except right under it. There are four aid bolts and then it’s back to the slabs. Carl, Natalie, Bas, Nick and Zack came up with me in the next month and I managed to establish pitches seven through nine. The off season is long when it comes to Yak Peak. In 2016, I was starting my third season of dancing under a maple leaf. Clyde & Izzy remained one pitch from completion. I got Zack Krupp to help me get the jump on rappel bolting a new line to the right of Clyde’s. We were underway at last! At the end of the weekend we had three and half pitches in place. Nick Roy joined me a week later. This time we climbed Clyde & Izzy for eight pitches and then rapped sideways to find a place for the Honey. A full pitch above the roofs we started down the big black streak so obvious from below. Still later Carl Delica and I again rapped from the same height and I got a chance to take a second look at the pitches before we added the final bolts. I was almost there; two seasons of travel, gas, partners and money and by mid-august both routes stood one pitch from completion. Late in the season we got it done; Natalie led the existing pitches and I jugged along behind with a big bag of bolts, chains, drills and beverages. At 3:30 I was racked up and ready to lead the final pitch on Clyde’s. Ten days later we were back. I lead bolted the last pitch on the Honey and it was done! Thankfully, we got all our gear down before the snow hit. Natalie on Pitch 4, Clyde & Isabelle Clyde & Isabelle 5.8, A1, 10 pitches, all bolts, 2-ropes required Coquihalla Honey 5.9, A1, 8 pitches, all bolts w/optional 1” & 1.5”, 2-ropes required Gear Notes: All protection is fixed on both routes, 11 draws, 2x60m ropes. Approach Notes: west side approach trail
 -
 Trip: Glacier Peak NF Beartooths - Catch-a-Sunrise 5.9 PG First Ascent Trip Date: 08/18/2017 Trip Report: This was an exceptionally memorable climb that I did with Elaine, which was her first trip into Montana's Beartooths. Myself; I have been coming to this mountain range many times since 2012, and have seen enough corners of it to hold my own against any of the local Montana Beartooth stompers, however this climb was exceptionally significant because it was on Glacier Peak. This was the last Montana 12er I had yet to summit, and I had been putting it off until the right time came where I could climb the North face Beckey Couloir Route. This is a rarely climbed route straight up the rugged north face of the mountain. I could have easily tagged its summit by walking up the talus from the Aero Lakes Basin, however I wanted this peak to be something more than that. Knowing the conditions dictating everything for this route, I had to find the perfect time, and as chance would have it, Elaine and I had that chance in mid August this year just a few days before the total solar eclipse (which we saw in Wyoming!). As an aside, for anyone wondering, yes I am still working on that Beartooth Guidebook. We had both just finished a successful climb of the East Ridge of the infamous Bears Tooth earlier in the week (see link above) and we were ready to tackle the main objective. The trip started on August 16th by driving up to the Goose Lake 4WD road from Cooke City and parking at the start of the 4WD road. It was a 4ish mile walk along the road to Goose Lake. We were hoping we would run into someone heading up willing to give us a lift but since that never happens, it didn't happen haha. Our late start of about 2:30pm also probably didn't help. We however hiked around the beautiful Goose Lake, and onward to the broad saddle between Iceberg and Sawtooth Peaks under beautiful sunny skies. Looking at Sawtooth Ridge from Goose Lake really inspired both of us to return one day to traverse that ridge. At 5pm we reached the saddle, and I remembered the last time I was here on a quick solo venture to Iceberg Peak and to get a firsthand look at the west face of GlacierPeak. The wind forced us to continue the cross country walking over loose talus and the occasional snowfield east towards Glacier Peak. We passed alongside the stunning Iceberg Lake until we reached the point where we started descending steeply down loose scree onto the large rock glacier that extends off to the north of Mount Wilse. It was a long and mostly uneventful walk as the sun was setting into the boulder strewn valley at the base of Glacier Peaks west face. The ankle twisting loose rocks on the rock glacier was somewhat slow going, and I knew we would not be able to reach the base of the Beckey Couloir before dark, so I began looking for a place to sleep for the night. The towers and monoliths that surrounded us in this valley were awe inspiring, with the added sunset effect really making the evening magical in an otherwise heinous walk, which now exceeded 10 miles. As my luck would have it though, right as dusk set in and headlights would have become mandatory, we got to the edge of the rock glacier, and shortly after dropping off found a beautiful little flat grassy meadow, with a small stream nearby that we could lay down for the night! This wasn't the first time this year that I got extremely lucky finding a place to camp right as total darkness was setting in. To save weight on what we knew was going to be a carry-over, and since we each already had ice tools, crampons and big boots, we didn't bring a tent. We simply threw the pads and sleeping bags down on the grass (or sedge, as it is apparently properly called according to Elaine) and cooked a nice dinner and quickly went to bed. With the perfect weather, we couldn't resist stargazing and looking for meteors for quite some time that first night, and thinking endlessly about the climb that lie ahead. I admit I was a little nervous mainly because I had been waiting to do this climb for years. Little did I know I was about to make probably the worst navigational error I have ever made in my climbing career. The next morning we started as soon as enough light broke the darkness of night, and continued hiking along the bottom of the west face, traversing the large talus fields until we could round the corner to the right and enter the basin below the north face. We hiked around a small tarn along the steepest part of the face below the northwest flank, and ascended once again until we reached a large snow couloir. It was roughly 8:30 in the morning when we reached the start of the couloir, and we took a nice snack break and switched into our mountaineering boots, put crampons on and layered appropriately. The climb was about to begin. We started soloing up the snow, and actually both felt comfortable remaining solo until we reached the upper end of the steep couloir, which felt like it had a max steepness of about 60 degrees. For her first steep snow climb, Elaine did amazing and felt confident the whole way. I recall thinking the couloir ended rather quickly as it felt like we only ascended about 600 feet before we hit rock but I didn't think much of it. All I knew is I was looking for a rib that bisected the couloir and it was 5 pitches of rock up to 5.7 up this rib directly to the summit. Well, as we were standing in the small moat at the top end of the couloir we were in, I saw what looked like a rib heading just above us, but the couloir didn't extend to the left of it, only continued up to the right. I figured the left side finger had dried out and started scrambling steep and loose 4th class up this feature as Elaine carefully followed. After maybe 100 feet we reached a nice ledge system and traversed leftward until I hit a 5.7 rock section. We finally busted out the rope and cams and I led this short pitch in my boots to a "ready to explode" ledge just below a 5.8+ hand crack that I wasn't comfortable leading in my boots. To save weight, I left my rock shoes thinking the route was only going to be 5.7, and just in case, Elaine brought hers, so she led up this 20 foot 5.8 crack and cut right into a large chimney. Since I didn't have any idea as to what each of the 5 pitches of the Beckey Couloir route entailed, I assumed we were on route, since the chimney wasn't too hard. Halfway up the chimney, Elaine made an anchor and belayed me up. She then continued up another pitch in the chimney to a huge ledge, which upon reaching myself, I really started to get confused. I still didn't know we were WAY off to the right of the actual Beckey Route, but upon looking up at how much more rock climbing we had to do, I was beginning to wonder. So we decided that moving left looked better, and Elaine led another pitch up somewhat runout 5.6 slab to a ledge, then I led up a somewhat garbage pitch on loose 5.4 to another ledge. We were now 5 pitches up from where we started roped climbing, and no end in sight. Rather than worry about how we might be off route, I continued focusing on the task of safely getting up this face. Elaine continued up our 6th pitch on now more difficult 5.8 terrain with less pro. I was glad she brought her rock shoes and she led these pitches beautifully. As she started up a short 5.8 7th pitch, we started seeing considerably harder, slabby terrain above us, and she found herself in an alcove with nowhere to feasibly climb. I climbed up to her to scout out what lie ahead and it didn't look good. Up and left was impossible, and a delicate traverse to the right was the only feasible way. I took over leading, leaving my pack with Elaine and started making the traverse laterally to the right, where it appeared we could enter a long easier ramp system that would hopefully take us to an easier looking rib off above us that appeared to go towards the summit. Lots of speculation I know, but knowing we only had one option at the time we had to traverse right. I managed to safely traverse across, but not without plenty of cursing, and make a good anchor. There wasn't much pro though so Elaine was rightfully hesitant to make the traverse knowing a fall would impose a large pendulum swing, especially doing it with two packs! I was able to talk her through it, despite not being able to see one another, however one move that required every bit of my long reach was very scary for her. I am amazed she pulled through. Once we both got past the traverse, I led up a long 60 meter pitch up an easy 4th-low 5th ramp and kept a watchful eye on any climbable spots above up to our left. I was able to definitely confirm that the easier looking rib above and left of us would lead to the summit area, however we needed to get on that rib, which was 70 feet above us and looked improbable. We decided since we couldn't see what was at the very top of the easier ramp we were currently on, as it curved left, it would be best to go as high as we could and see what was up there. Elaine continued up a right facing dihedral in a seam along the base of the steep wall that blocked easy access to the rib above. It was easy until she entered that left curving area, where she continued to mention small car sized loose blocks. At this point I couldn't see her, and after she spent 15 minutes or so contemplating it she went for a move, then fell. All I remember is hearing screams and watching her slide down the ramp on her pack popping two cams then stopping on her own (rope didn't end up weighted) as her pack got wedged into the dihedral she had climbed. Amazingly, she was ok despite taking a 30 foot fall, and after talking things through, she was able to calm down enough to build an anchor where she was, and allow me to go up and see what we were up against. When I got to the place she fell, I could see the large blocks she was mentioning, and found a spot to put one small nut and a 0.4 cam. That was going to have to do as I belayed her back up to me. I could see easier terrain and a ledge merely 20 feet above us, but that 20 feet was the scariest moment in both of our climbing careers. Since neither of us wanted to or was able to climb this section (mainly because we could not feasibly touch anything) I straddled the open book weighting the two pieces I placed, and with Elaine on belay, I pushed her up as high as I could until she could grab a solid hold above the two 7 foot long loose blocks. Thankfully she found something solid and was able to crawl onto the ledge just above. The scariest part of all this was that as this was all happening, I watched the nut I placed start to come loose, so as Elaine was midway up with huge rocks teetering right at my chest I also had to re-set that nut. This should have terrified me to absolutely no end, but I held my composure incredibly well...almost too well now that I look back. With Elaine now on a good ledge, I climbed up to her, which was a solid 5.9+ when I wasn't able to touch anything along the seam of the open book we were in. It was even harder in boots. We took a nice rest here, and realized we were not out of it yet. Another 25 feet of vertical improbable terrain was left until we got to easier ground. I saw three seams above me, and none of them looked good or offered much pro, but around a bulge to our left looked like a potential route, so I left my pack with Elaine and led out stepping out over some serious air and around the bulge, and found a beautiful 20 foot 5.8 hand crack that I just told myself I will climb regardless as to what was on my feet. I mustered up the energy to basically pull up on just hand jams with next to no help from my feet since those huge boots were not jamming in any crack! It was right when I reached the top of this crack that I realized we were going to actually top out on this face. I let out a huge sigh of relief and walked back right to a point where I was directly above Elaine and pulled my pack up, then belayed her up. I was very thankful I remembered to take a few photos of the sunset because it was truly spectacular, especially with Granite Peak (Montanas highest) staring at us from across the valley. Elaine continued on past me since I wasn't perched in the most comfortable of spots. It was quickly getting dark and I was really hoping we could get to the summit before dark. I led up one more pitch (now about 12 total), hoping this would be the last one, and I did reach the crest of the small rib we were looking up at all afternoon and was immediately blown away as to how suddenly it dropped off into a deep gash on a different part of the north face. It was very eerie coming up to this narrow, wildly exposed rib crest right as near darkness was setting in. Then I looked across this gash and saw another 200 feet of dead vertical rock silhouetted against the twilight and yelled out a loud "Oh sh##" Then I looked to my right and saw the rib continued up on easy terrain, and was thanking the heavens lol and I continued until I ran out of rope, hoping I would find some kind of flat spot to bivy for the night. When the rope ran out I came to a spot on the rib that was at the very least flat, but not very big. I didnt take a very hard look at it yet and quickly belayed Elaine up this last pitch. When she arrived, it was too dark to see what remained of the climb, and upon further inspection, we agreed we could both fit in the spot we were in for the night. We doctored up the area a bit and made a spot long enough for me and a second spot right next to it just big enough for Elaine to fit. I built a small rock wall on my outer side to keep me from falling off the rib at night, secured our packs with a couple cams, and put down the sleeping bags (thank goodness we had them!). We were not planning to spend a second night on this trip, as we originally were planning to climb up and over Glacier Peak and hike out the second day, so we didn't have any food to make. We both ate one clif bar from our snack reserves, and stared up at the starts for a long time, contemplating what we were doing. We were both thrilled and relieved to have mostly completed the route, and were confident there wouldn't be much more climbing to reach the summit. We gazed at the dark, moonless night sky contemplating life and admiring the stars. It was a crystal clear, warm and calm night...perched on a very narrow rib with huge drops to both sides of us. We were alone, free and in a state of euphoria. At this point I was nearly 100% sure we were doing a new route, and were walking on untouched ground. That was one of the best nights I have ever known, and made even more amazing to share with someone as amazing as Elaine. To add to the incredible nature of our bivy, as the night waned, and twilight gazed over the mountains, we watched a sunrise for the ages right over Granite Peak. We could finally really enjoy the views that surround us, as we were too intently focused on the climb the day before. We emerged from our perch shortly after sunrise and packed up our gear, which I then led up just one more 4th class pitch which dumped me onto the summit plateau!! I couldn't believe it, and let out a scream of joy. Elaine came up and we congratulated one another, had a quick break and packed away the rope. I looked up to the left and saw easy class 2 boulders that led to what looked like the summit just 40 feet above us. However, when we saw that the summit was a 10 minute walk to the south, up an additional 200 feet, I was at that point 100% sure we did not do the Beckey Route, and more than likely put up what would be both of our first, first ascent. When we finally reached the summit, I saw the top of the Beckey Couloir, and the whole route leading down directly below us. Elaine commented something along the lines of "Matt, that route looks so much easier!" along with a few joking criticisms that I have no idea where I am going etc etc...after all it was my fault we climbed the wrong route. I simply assumed the first couloir we came across on the approach was the Beckey Couloir, but take note...that is NOT true. The Beckey Couloir is much, much wider and longer than the couloir at the bottom of the route we climbed. My friend Vince from Bozeman pointed out after we returned from the climb that the couloir we climbed is called "Catch-a-Fire" Couloir, which had actually been skied some time ago, but after consulting with a few local climbers no one had known of the route we did above the couloir so we believe it's safe to claim this FA. In respect of whoever named that couloir before us, we named the route "Catch-a-Sunrise" to remember that gorgeous sunrise we witnessed from our bivy. See the topo below, and notice the much larger couloir well off to the left. THAT is the Beckey Couloir! k Back to the summit...I pulled out my bag of Oreos that I was saving for the summit, which was the only food I had left. We shared them and celebrated as I had finished my last Montana 12er in spectacular fashion. I knew we had a long walk out though, so after a 30 minute stay, and some awesome photos, we started down the south slopes towards Upper Aero Lake, and hiked all the way out and getting back to Bozeman in time to meet up with my friends Josh and Vince. Josh had taken a Greyhound over from WA to join us for the Eclipse in Wyoming, and we ate a nice dinner at Montana Ale Works. Shown below are photos we took from the summit and on the descent. A couple days later on August 21st, we had a group of 7 people atop Union Peak in the northern Wind River Range to watch the total solar eclipse, which capped one of the best weeks of my life. The experience of the solar eclipse was unlike any other experience I've ever had. During totality, you really are drawn to it in a non-explainable way, to the point where it was kind of mesmerizing, and mind-altering. Awestruck might be a good way to put it, but in a way that you cannot fathom unless you actually witness it. In the seconds leading up to totality, the lighting on the landscape turns a very strange, mostly colorless grey with a very off level of brightness. When the last rays of light do finally disappear, it turns way darker than I would have thought. There was actually sunset lighting in all directions, and a black hole in the sky. All I know is that I cannot wait to see the next one! Gear Notes: One alpine ice tool per person, crampons, mountaineering boots, rock shoes would have been nice to have... Also had two racks to 2" (one ultralight), single 60m rope, helmets! Approach Notes: From Cooke city, up the Goose Lake Jeep road to Goose Lake, over pass between Iceberg and Sawtooth Mountains, down valley below west face of Glacier Peak and around into basin below North Face. Lots and lots of talus!
 -
UKC article Nice work gents!!
-
Trip: Victoria Peak- Vancouver Island - New Route: Summit or Plummet, 5.10a, Aid 1 Date: 8/10/2017 Trip Report: A quick discussion at the Victoria Valhalla store about an unclimbed face one Tuesday afternoon and the next thing you know Karsten Klawitter and I were driving up island late one Wednesday night with thoughts of what could be on the horizon the following day. I had attempted the climb a few weeks back with Andreas Hinkkala- On the initial attempt we climbed three pitches up the face before getting weathered off, so I knew the approach and the first 3 pitches would go quickly. Here's Karsten getting his stoke on while we rack up. There are a few options on how to get off the main ramp and up to a vegetated area above. We climbed the gulley behind Karsten here- a couple 5.4 moves and one more low fifth bulge will get you on your way to the large gulley system that makes up pitches 2-(5.6) and 3-(5.7/5.8 depending on line taken). Once atop pitch 3 you'll find yourself on a large ledge system that connects the West Ridge and Sceptre gulley. The natural line that holds you to the middle of the face is half a rope length to the right of where you top out of the 3'rd pitch. Another large open gulley is an option on the left as well as another crack system to it's right. If a party wanted to avoid the 10.a pitch they could possibly enter the Sceptre gulley and return to the face higher up, furthest right in this picture. Pitch 4 has a little scrambling with a few 5.7 moves- 35 meters out you'll find yourself on a nice hidden ledge looking up the first business pitch the route has to offer. Pitch 5 was a solid 5.9 pitch with a couple moves that felt 10.a. Here's Karsten lower down on pitch 5. Once up the 10.a corner we opted to sneak out right, avoiding the short upper gulley. Here we once again had options as to where we should climb. The natural line as seen from below took us up a dihedral crack into some steepness. Here's a picture as seen from the ledge below- we were both shocked as to how steep this corner was. A nice 30 meter pitch of 5.8 landed me on a small one person only ledge. We set up shop here for the difficulties above. Once past the anchor pitch 7 gets real, really fast. Thin face moves along side a finger crack in the corner had us aiding pretty much from the anchor onwards. Here's Karsten dealing with the roof on pitch 7. After aiding thru and my attempt at climbing the pitch on top rope we both felt this pitch would go free in the 5.11a or 5.11b range. Once past the difficult aid section we scooted out right. Pitch 8 went at 5.7 and led us to let another ledge system that connects the West Ridge and the Sceptre gulley. With the upper headwall in mind we plotted a route up and left looking to gain the West ridge below the upper head wall. Here's Karsten on lead climbing pitch 9 (5.8). Here's Karsten coming up to the anchor on pitch 10, which went at 5.7. Karsten pulled his camera out and snapped this view up pitch 11, which had some memorable moves in the 5.9 range. Here's Karsten topping out on pitch 11. Once on the upper head wall the North Glacier came into view making for a memorable alpine pitch. Pitch 12 was short and had us packing up our climbing shoes and looking to simul climb some easier terrain en route to the summit. Little did we know but there was one more short section that required a belay. Pitch 13 had an airy 5.8 traverse on a slopping ledge- once past this we scrambled our way to the summit. All in all it took 12 hours to climb the route. With night fall closing in on us we opted to down climb the south face and make a long traverse down the South ridge then bushwhack our way back to the high logging roads. If we had half ropes I think we would have rappelled down the Sceptre gulley, but we were tired and looking for the path of least resistance. Summit or Plummet- 13 Pitches, 5.10a, Aid 1, 600 Meters Gear Notes: -Single Rope -Half set of nuts -Cams to #3. (doubles 0.4 thru #3) Could have plugged a #4 numerous times though not critical Approach Notes: Detailed approach maps and beta for this side of the mountain are found in Island Alpine Select, by Phillip Stone. http://www.wildisle.ca
-
A few weeks ago, Eric Wehrly and I headed up to Half-Moon to attempt some sort of squeeze job between routes that already exist on the NW aspect. One of them, Digging for Dreams, made it into Cascades Rock and we were curious what else might still be lingering (see: http://blog.alpineinstitute.com/2012/04/first-ascent-diggin-for-dreams.html). Of course, Eric and I didn't make it to Half-moon because of our short attention span. We cut off early to Wallaby and climbed what may be new terrain (or really old terrain - we were not sure based on what I remember being Fred's non-descript descriptions, or maybe Stecks?). Regardless, it was an adventure for the soul. We left no trace of our passage, so the line's next 'first ascensionists' should have just as much fun as we did. One photo I captured makes the climb look worthwhile: During our adventure we spotted some interesting terrain on Half-Moon that I do believe is was climbed. I went back this weekend with Jimmy to check it out. We probably should have been concerned that the gaping Bombay flare would block passage to the stellar looking pitches above, but alas, we are young and stupid. With big cams in tow, Jimmy and I wandered up to the base of the West ridge of Half Moon beneath this feature. We climbed an approach pitch that turned out to be both harder and most interesting than expected. From here, Jimmy then embarked on his quest for glory up into the gaping flare, henceforth known as "The Maw." The Maw: Disintegrating footholds and a suspect nut placement that nearly pulled off the block when tested led to some decent small cams that allowed Jimmy to reach the roof. He then stemmed, crawled, and tunneled his way towards the light. After plugging the #5, Jimmy then "rode the sail" so to speak - exiting the chimney required placing full trust (both hands and feet) on a refrigerator door sized flake. Miracles worked themselves and around the corner he went to bring me up. Following this with a pack was not easy. In the end, our route ended up shorter than the neighbor next door to the left ('Digging...'), but we still found adventure to say the least. Beyond the Maw we found 3 more pitches of fun finger and hand cracks. P1: 5.8 (20m) Belay beneath the Maw in extremely suspect rock. It quickly turns to higher quality stone offering fun a fun thin hand crack. Belay on 1-2" cracks between glued flakes and blocks in the back of the flare. P2: 5.10- (25m) Enter the Maw. Climb right from the belay up past a few delicate horn features to find a few small cams in the broken face. Continue up into the upper reaches of the flare, then climb towards the light. Exit past the flake and belay on the second ledge beyond. P3: 5.10- (30m) Climb up a seamy crack to the right of the rotten chimney via delicate lay-backing of the arete. Continue up to wide cracks and a belay on the slab on large cams. P4: 5.10- (40m) Aim for the middle of the three cracks (finger-size), climb this, and continue up amazing finger and hand pods to a belay under a roof. P5: 5.9 (40m) Traverse right around the corner, and then up small hands leading to a #3 crack to the top. At the hand-traverse that finishes with a mantle on a rotten block, continue traversing right to reach the top of Choi Oi Tower. Though Eric didn't join us on this adventure, he was there in spirit. Because of the nature of the climbing and because we are skeptical of his boyish blond hair at 50, we've decided to name the route: "Uncle Wehrly's Toupee." It may share part of one pitch with Digging for Dreams, specifically the start of our pitch 3. More photos here


.jpg.74a83e32c23ede1e3e1945d3180392fb.jpg)
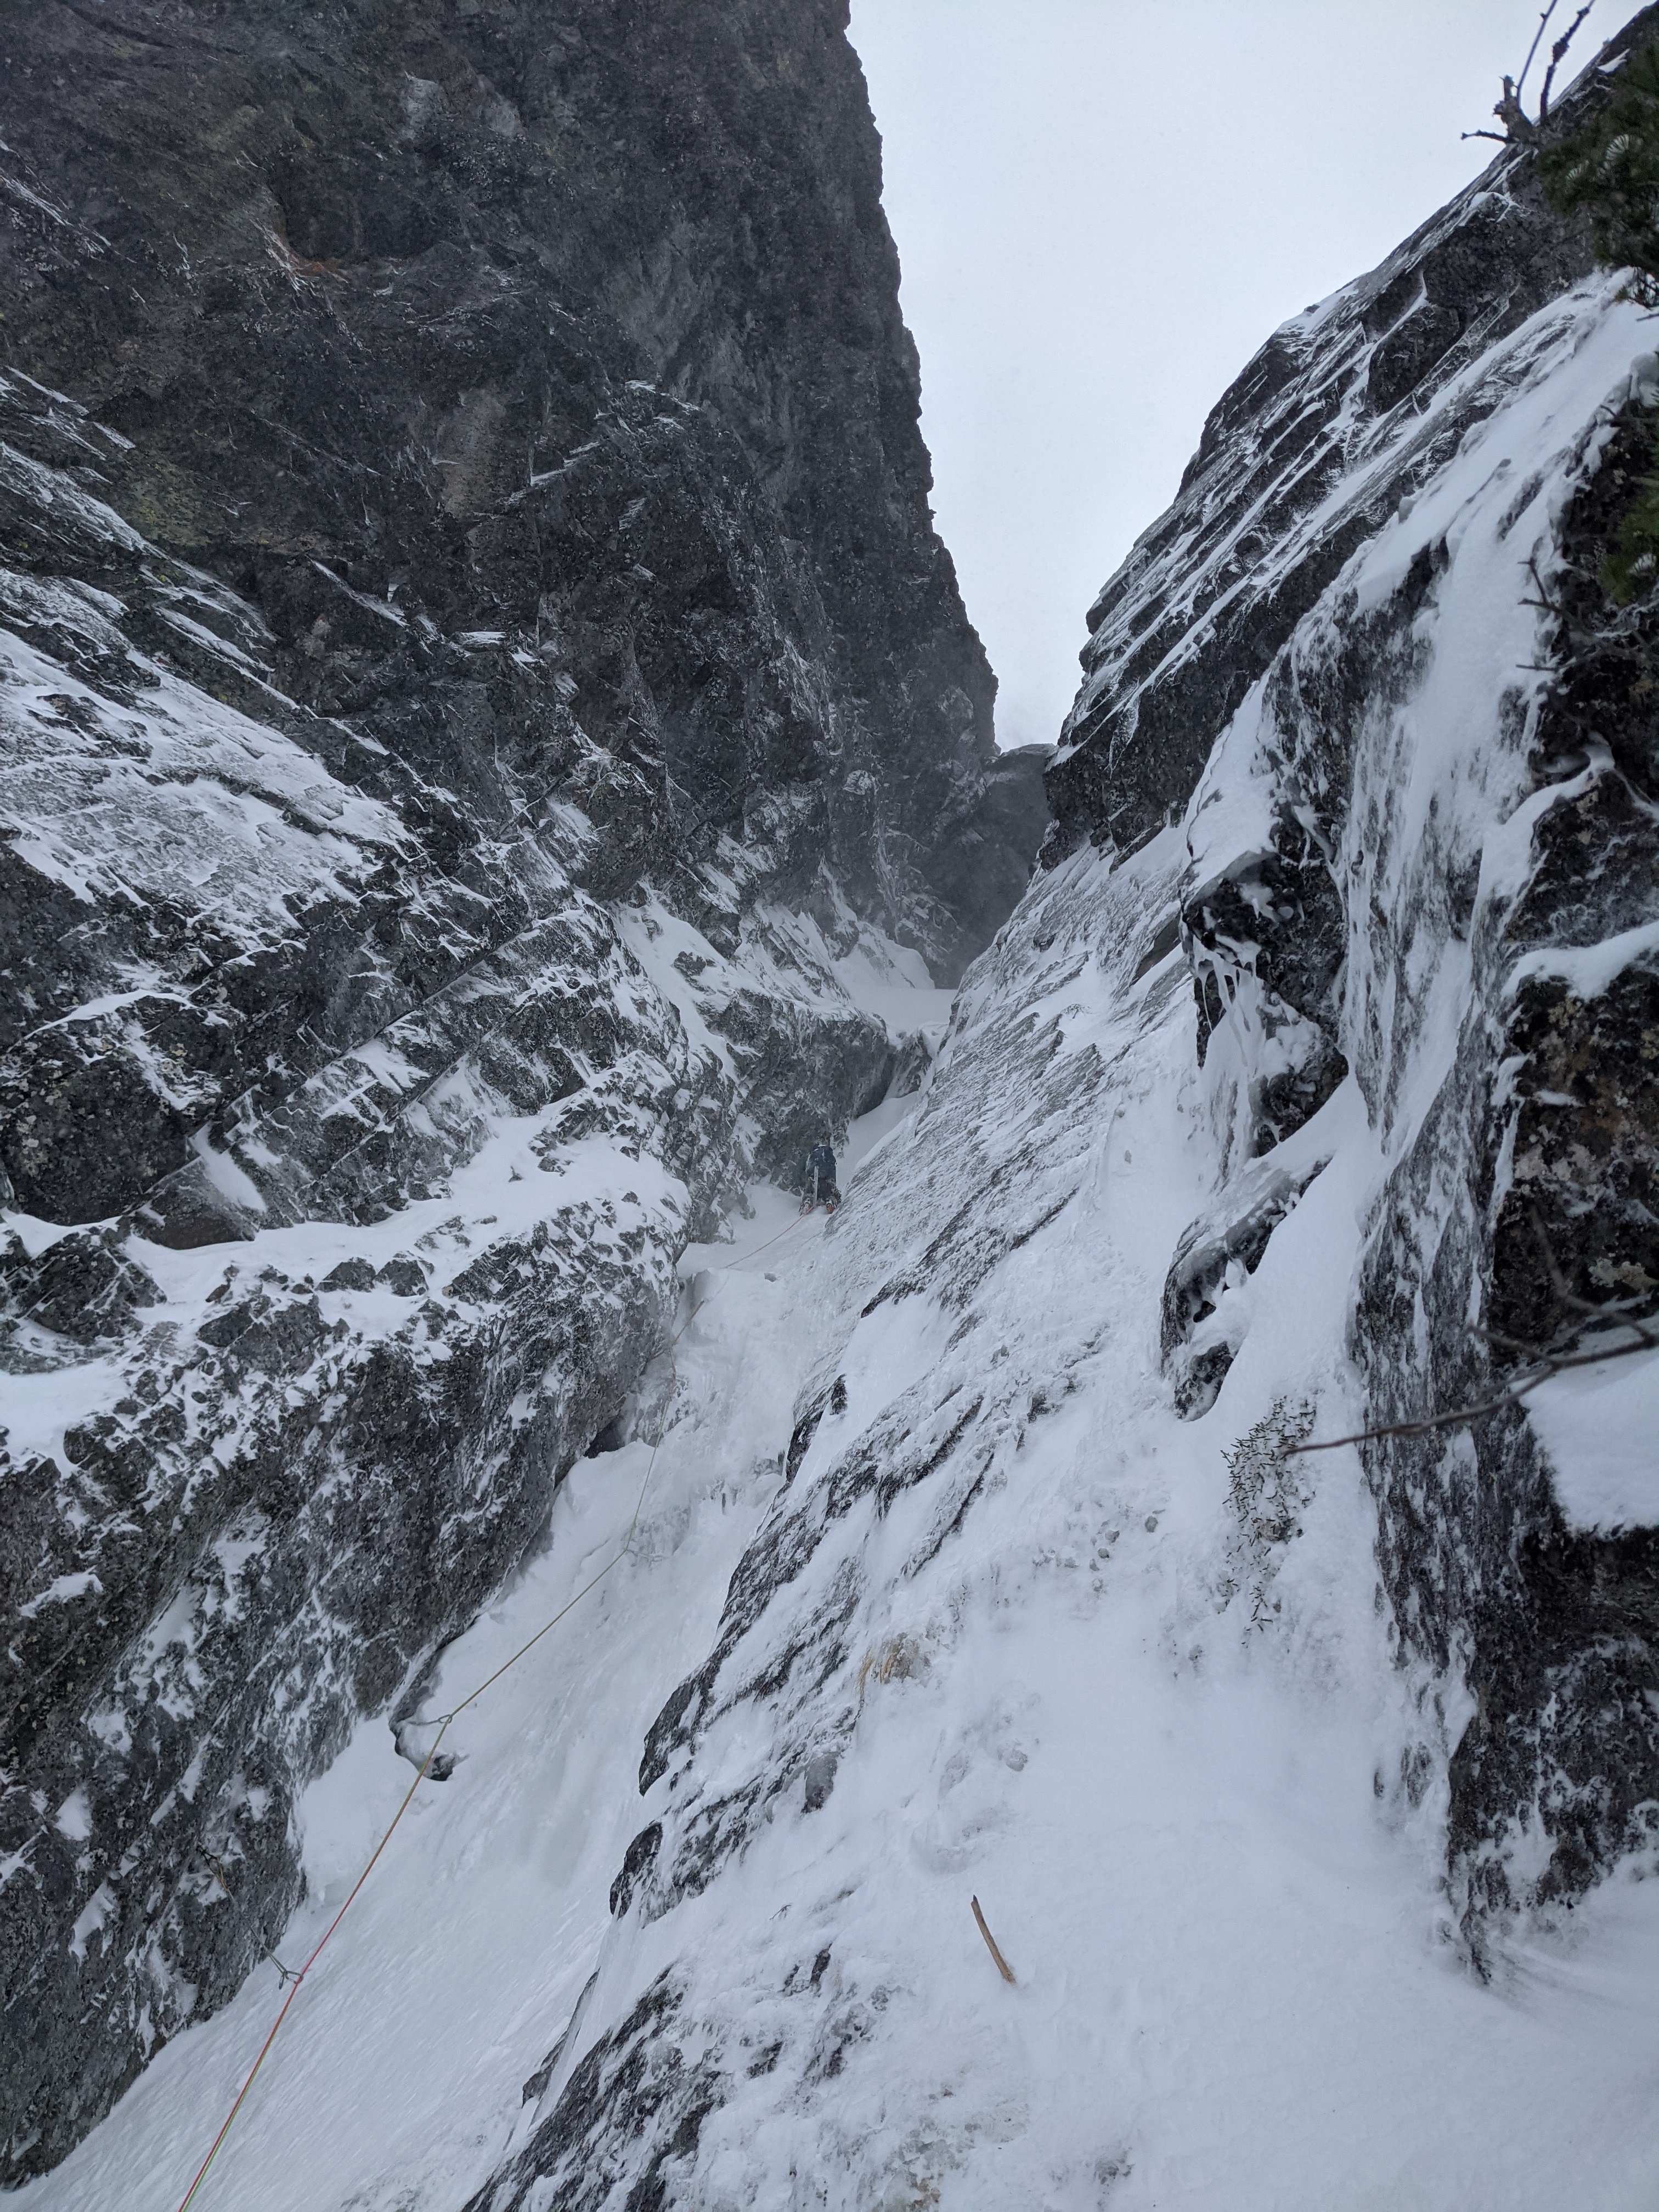

.jpg.84468862a10371d548dd223cb4792971.jpg)
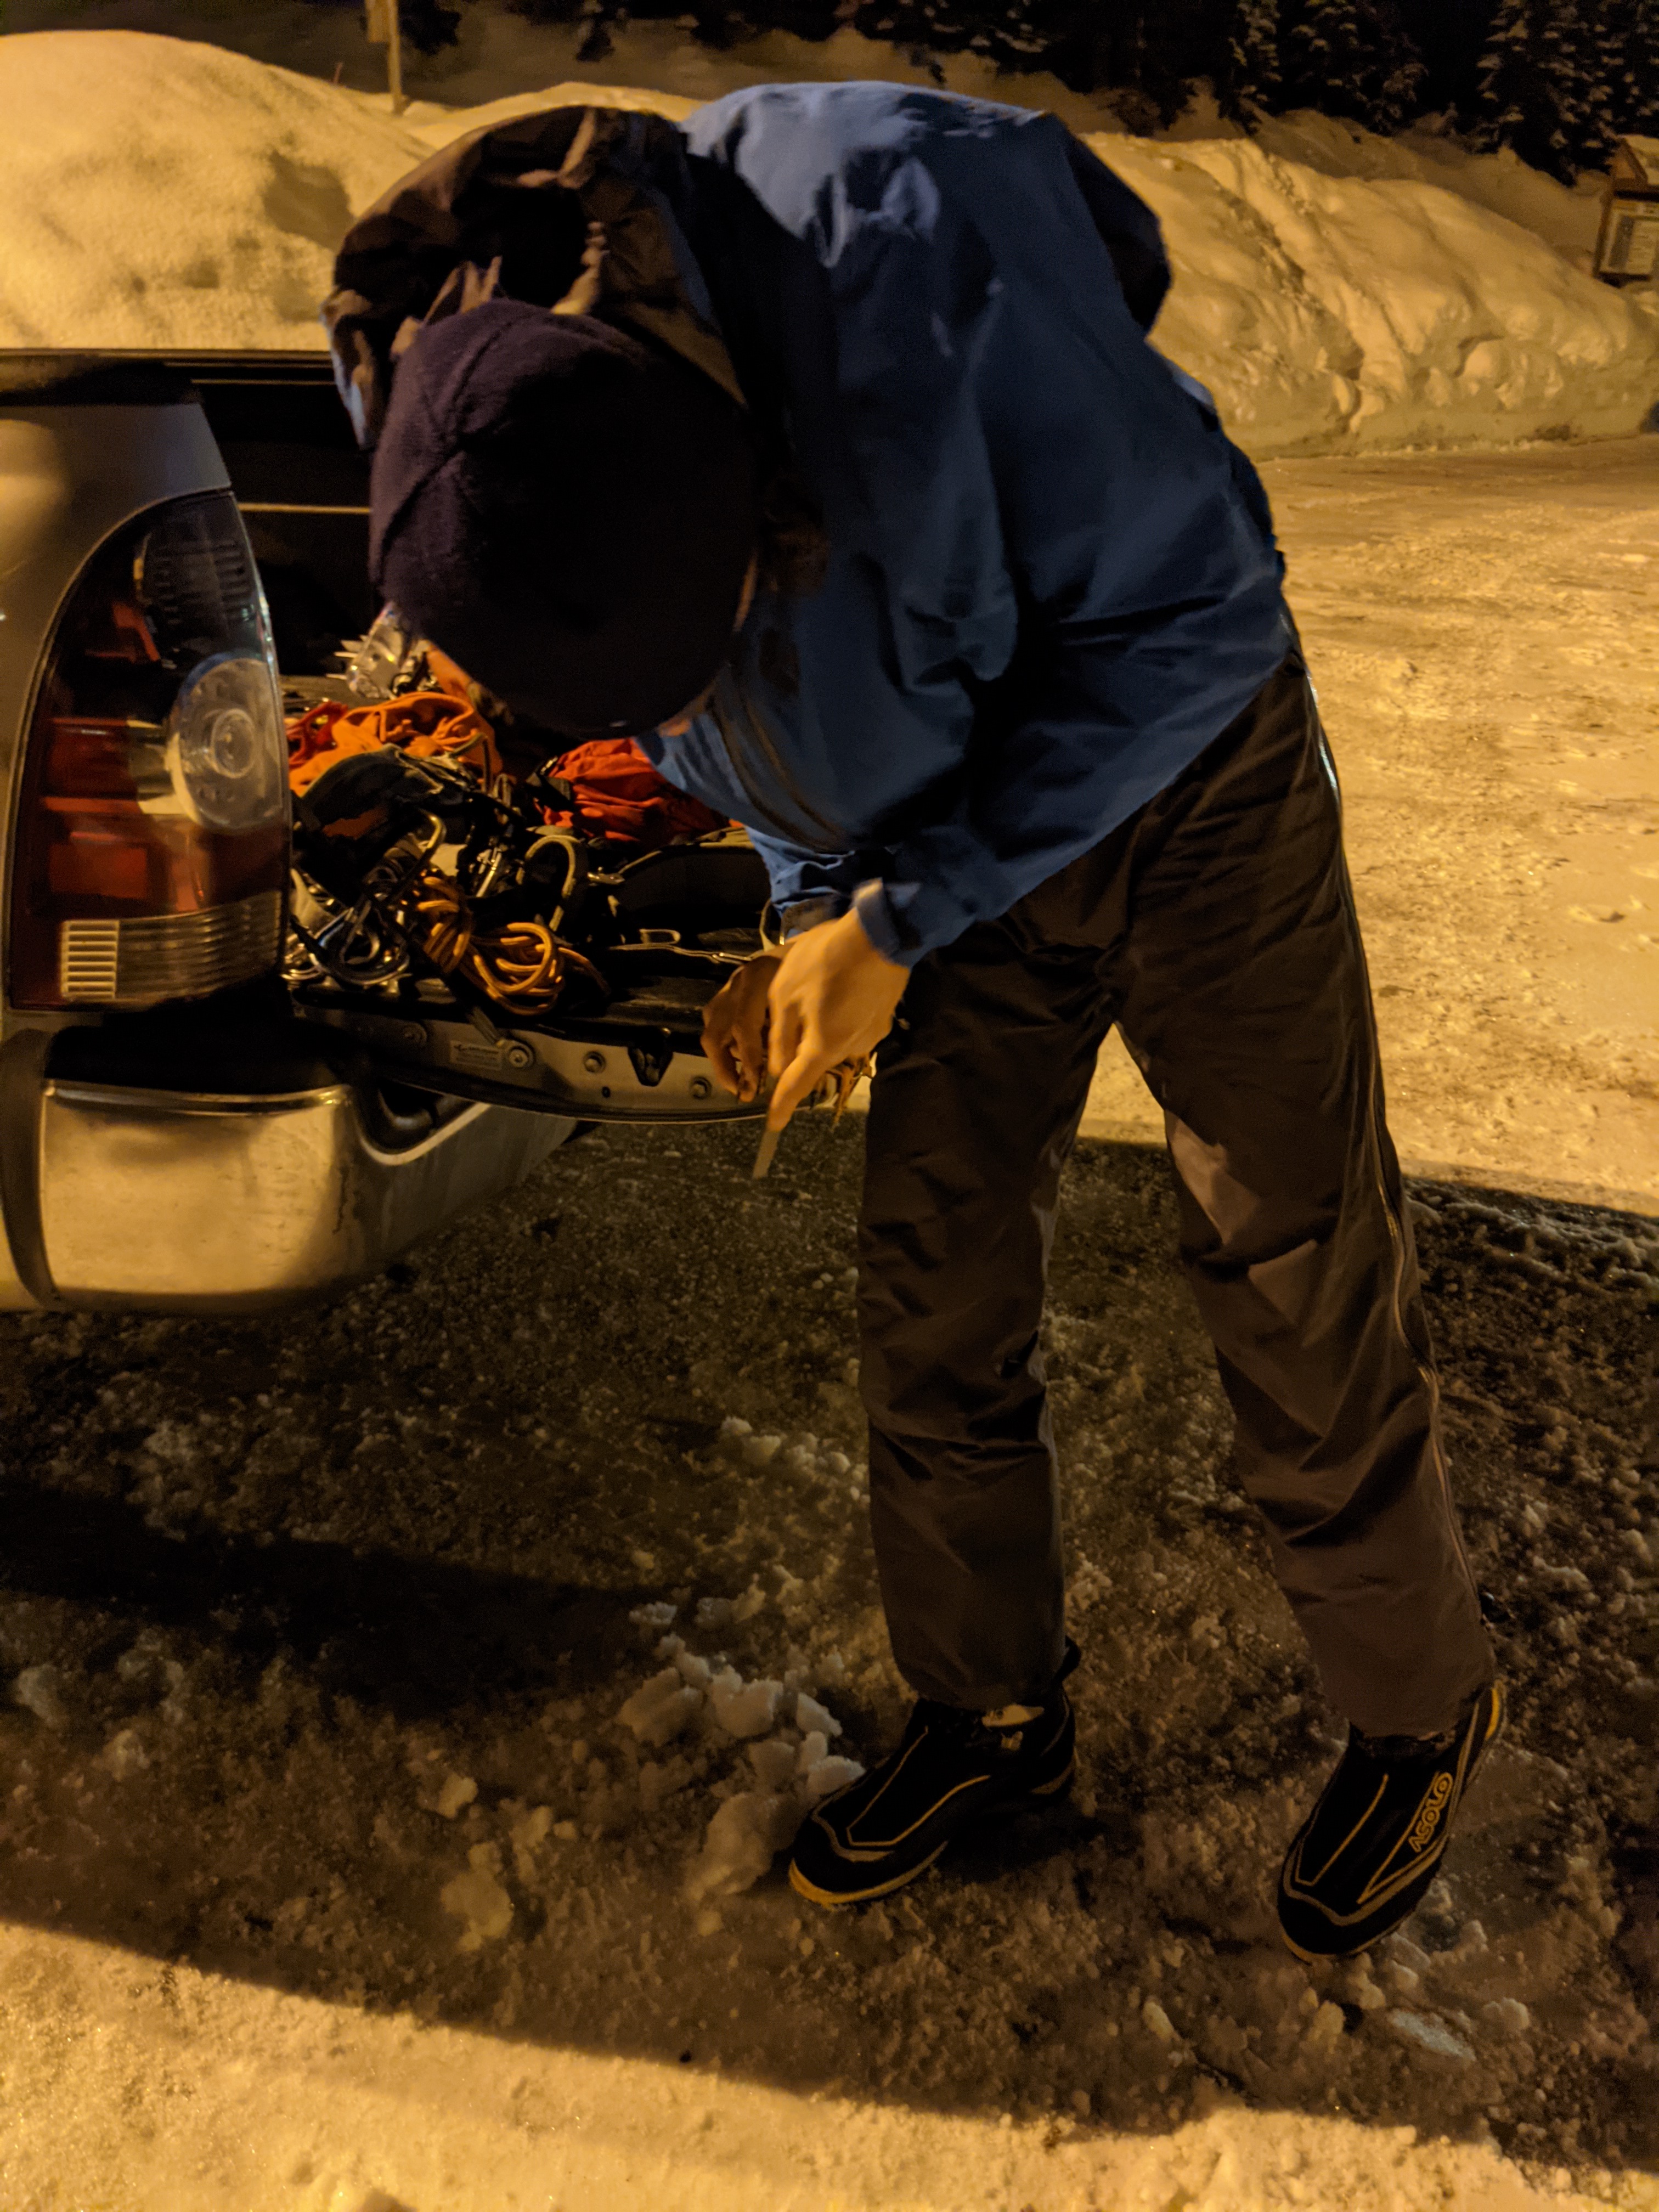
.jpg.ff631c467872d4b316c759bed0ddf9d0.jpg)