Search the Community
Showing results for tags 'cctripreport'.
-
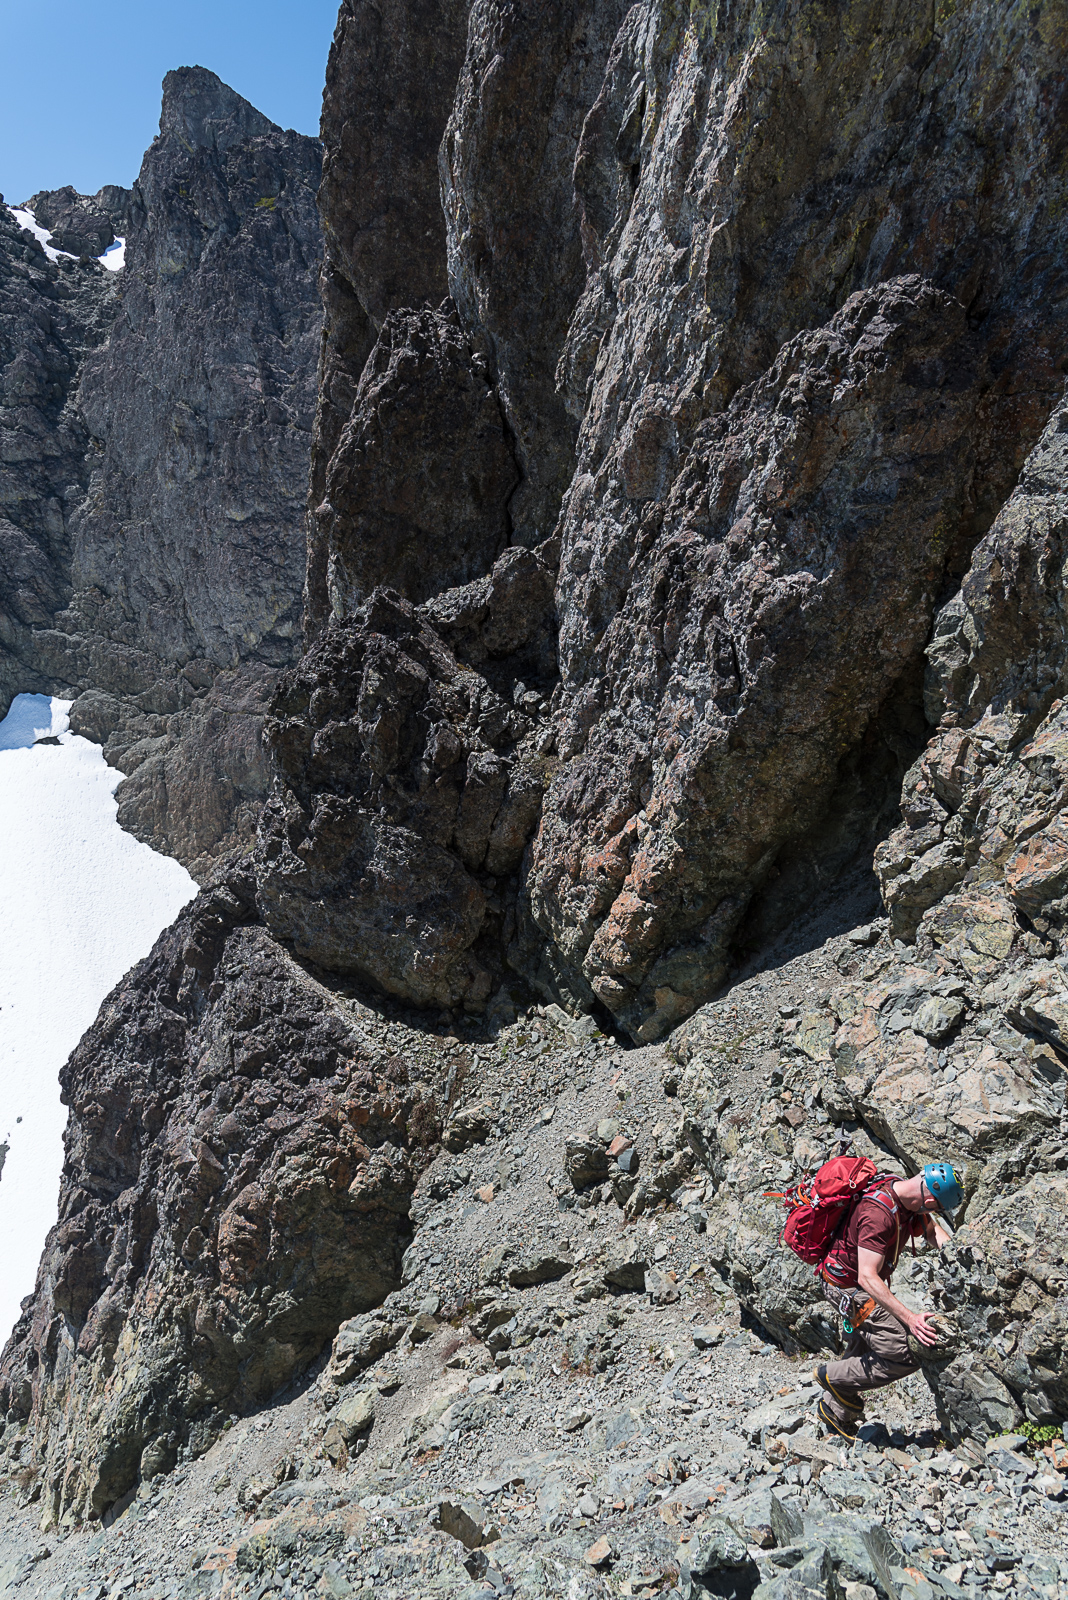
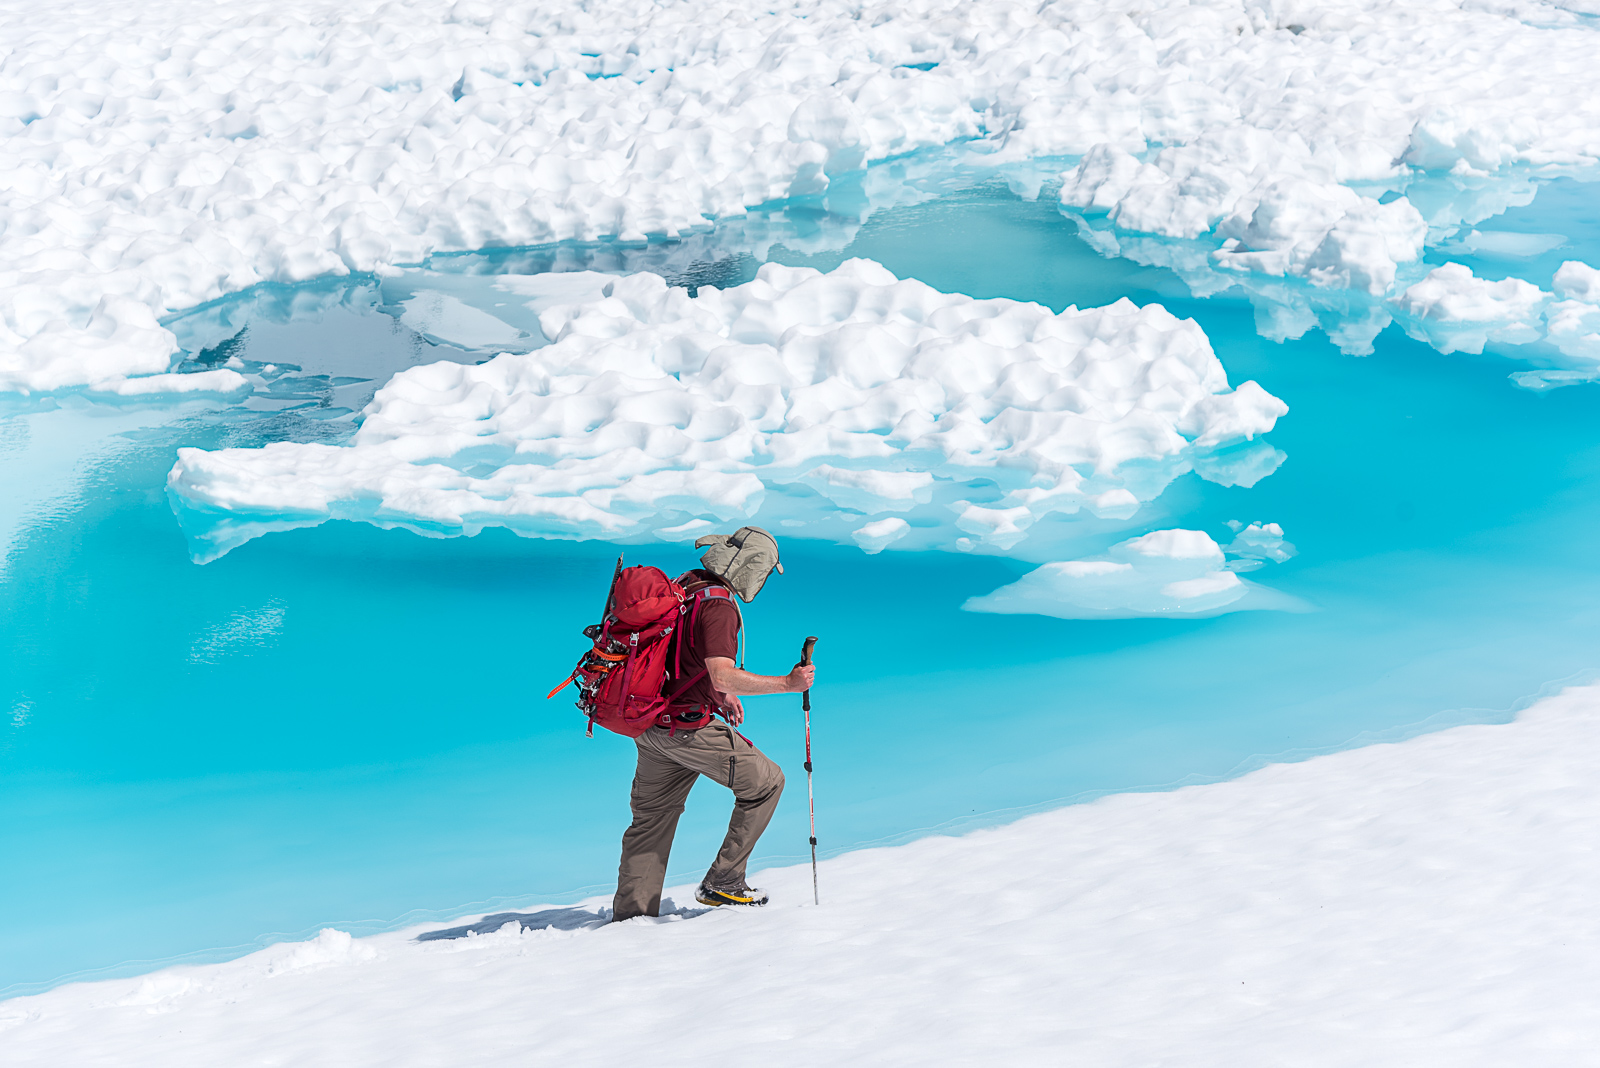
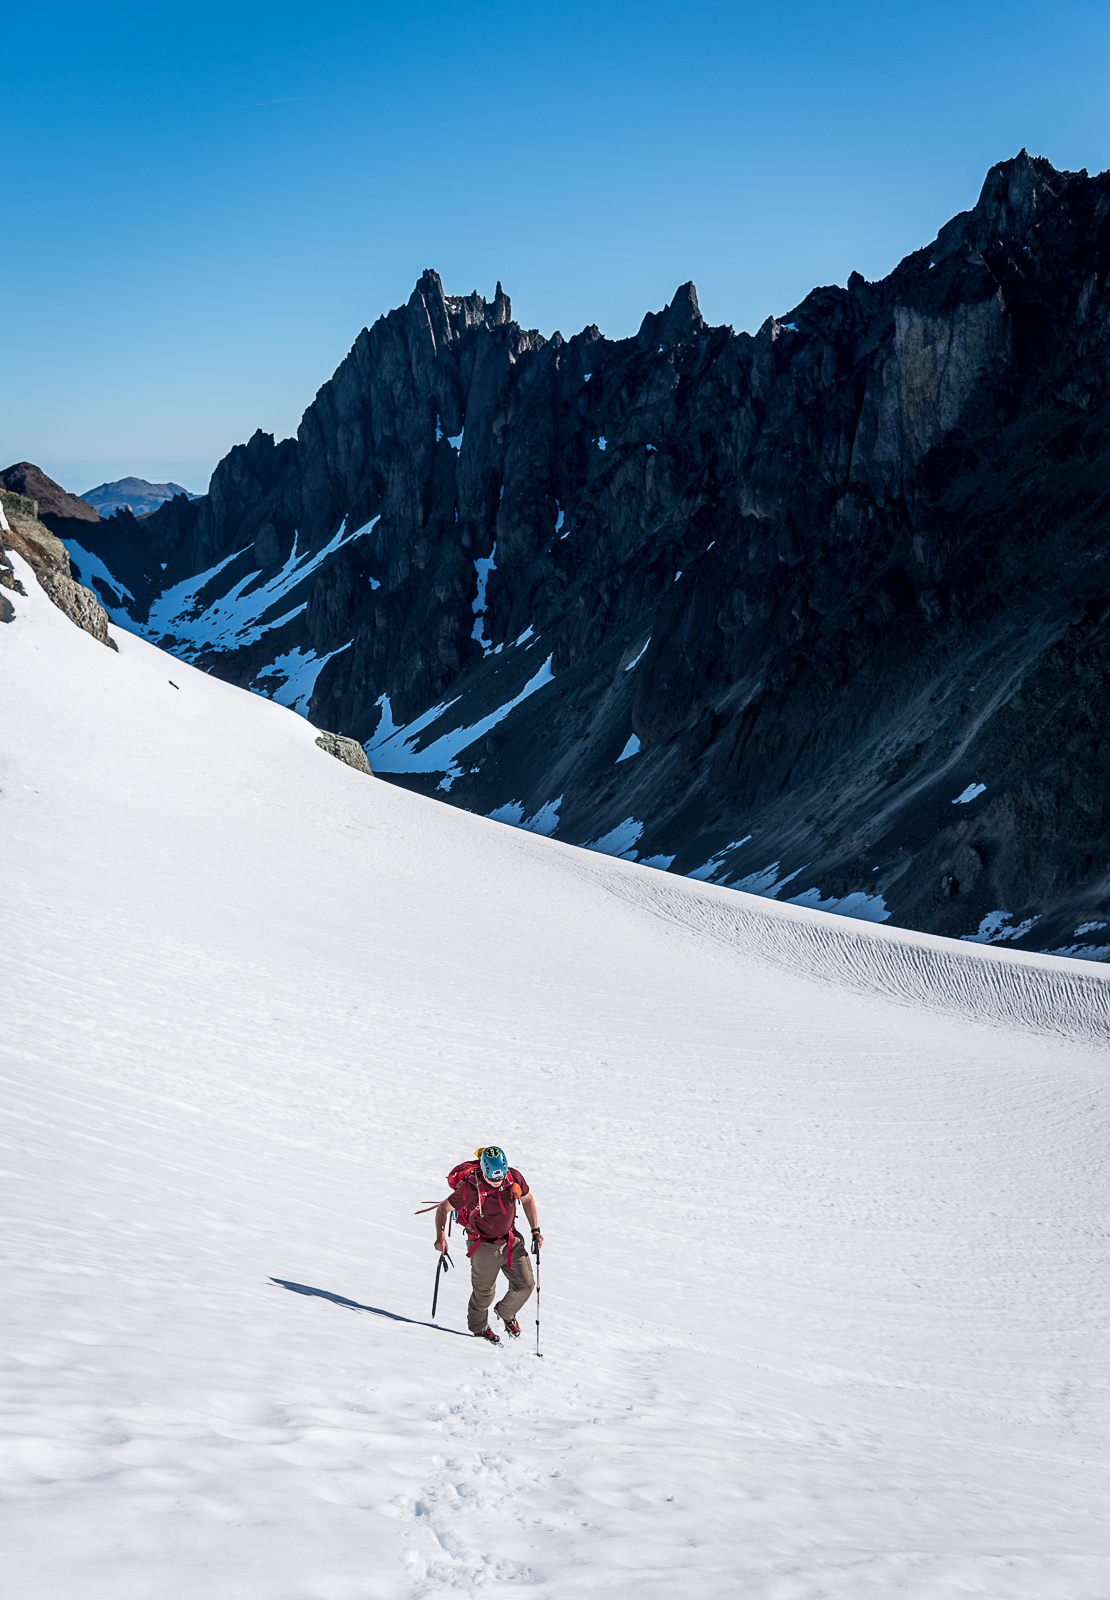
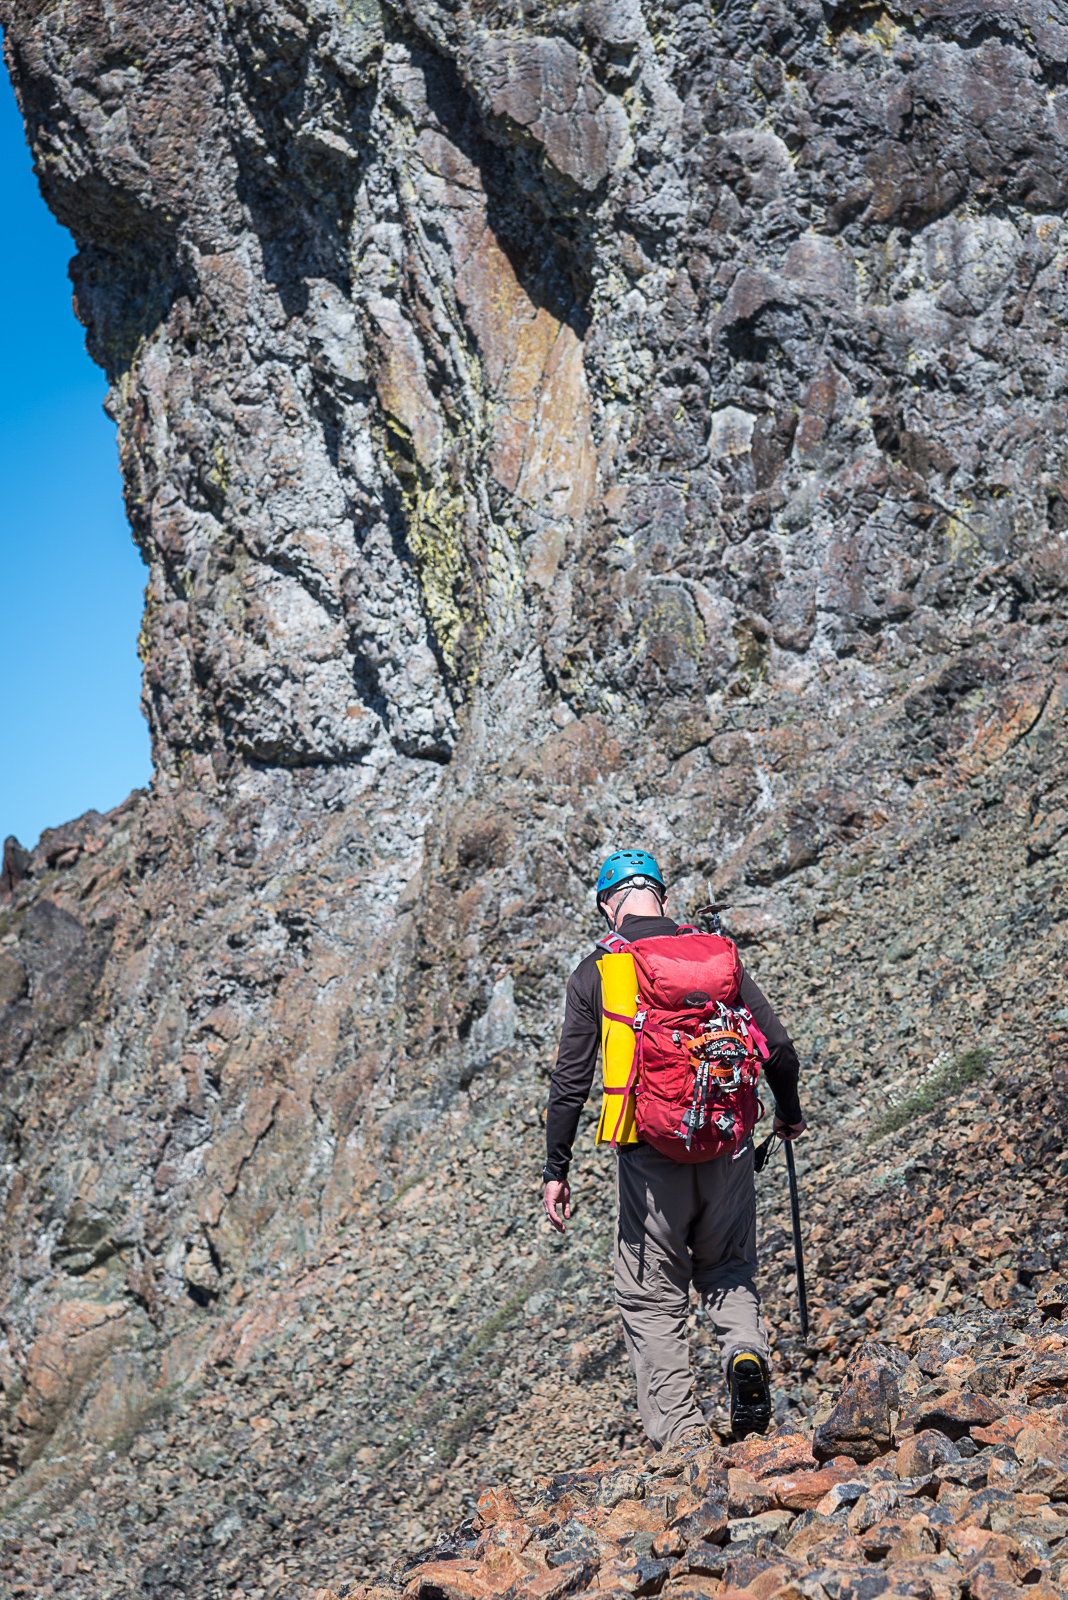
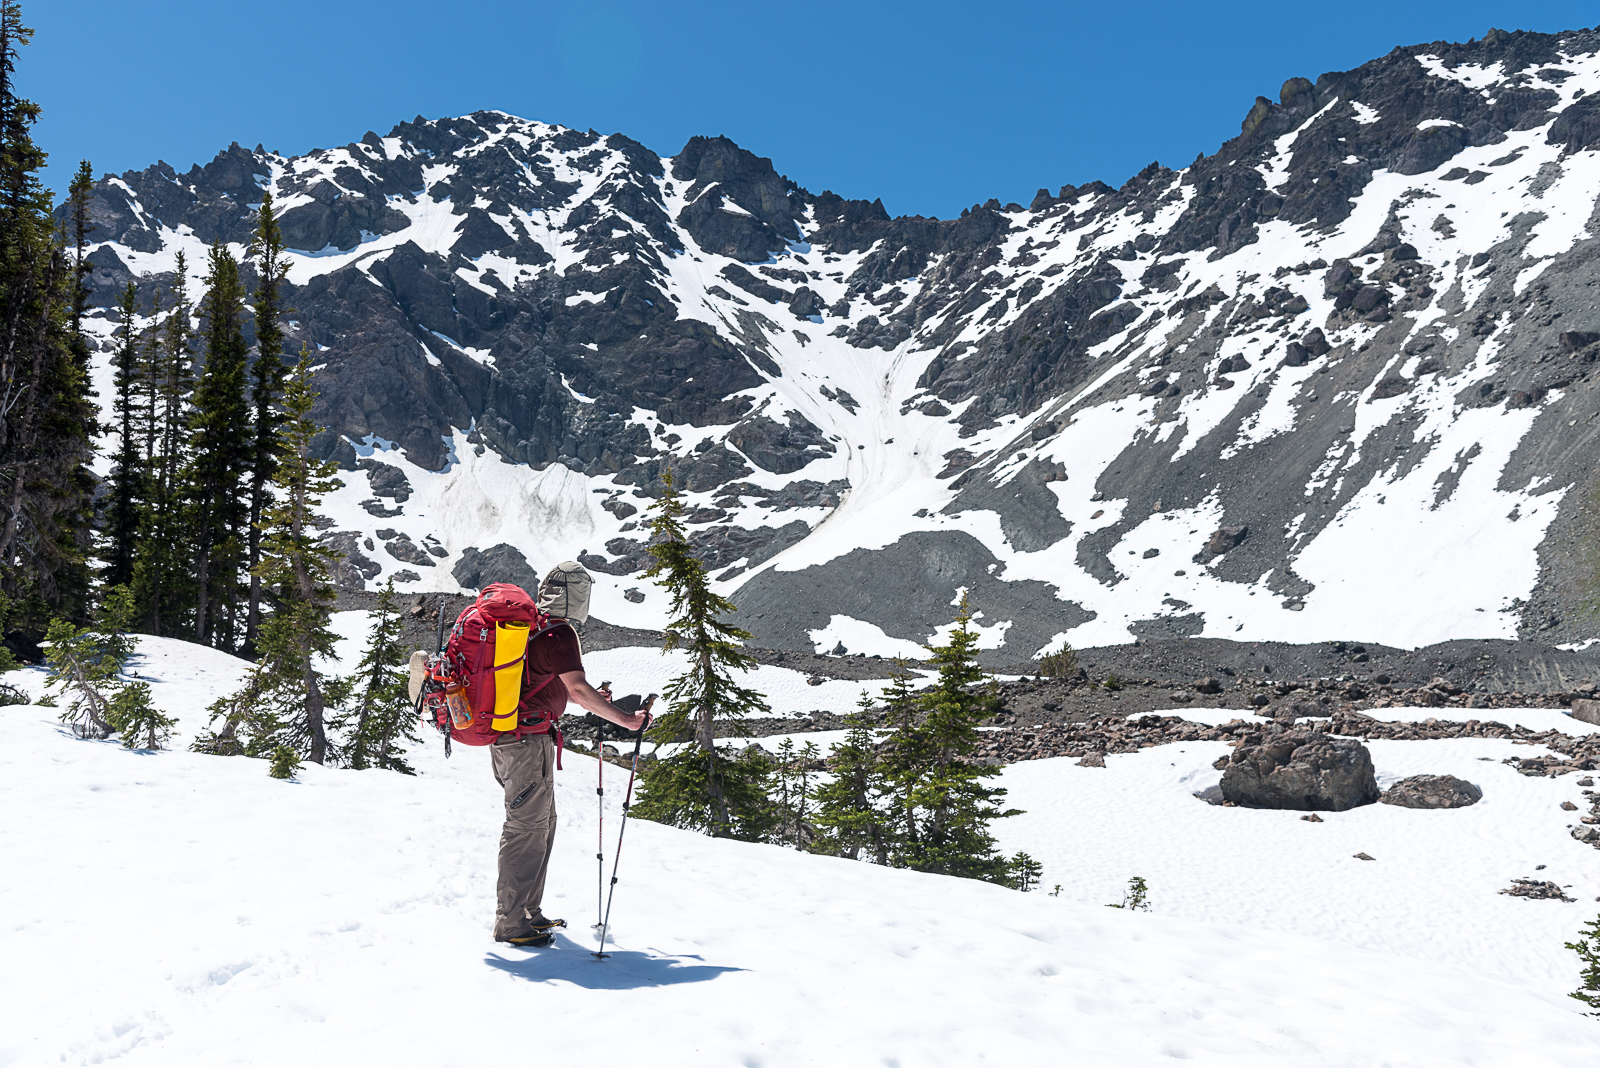
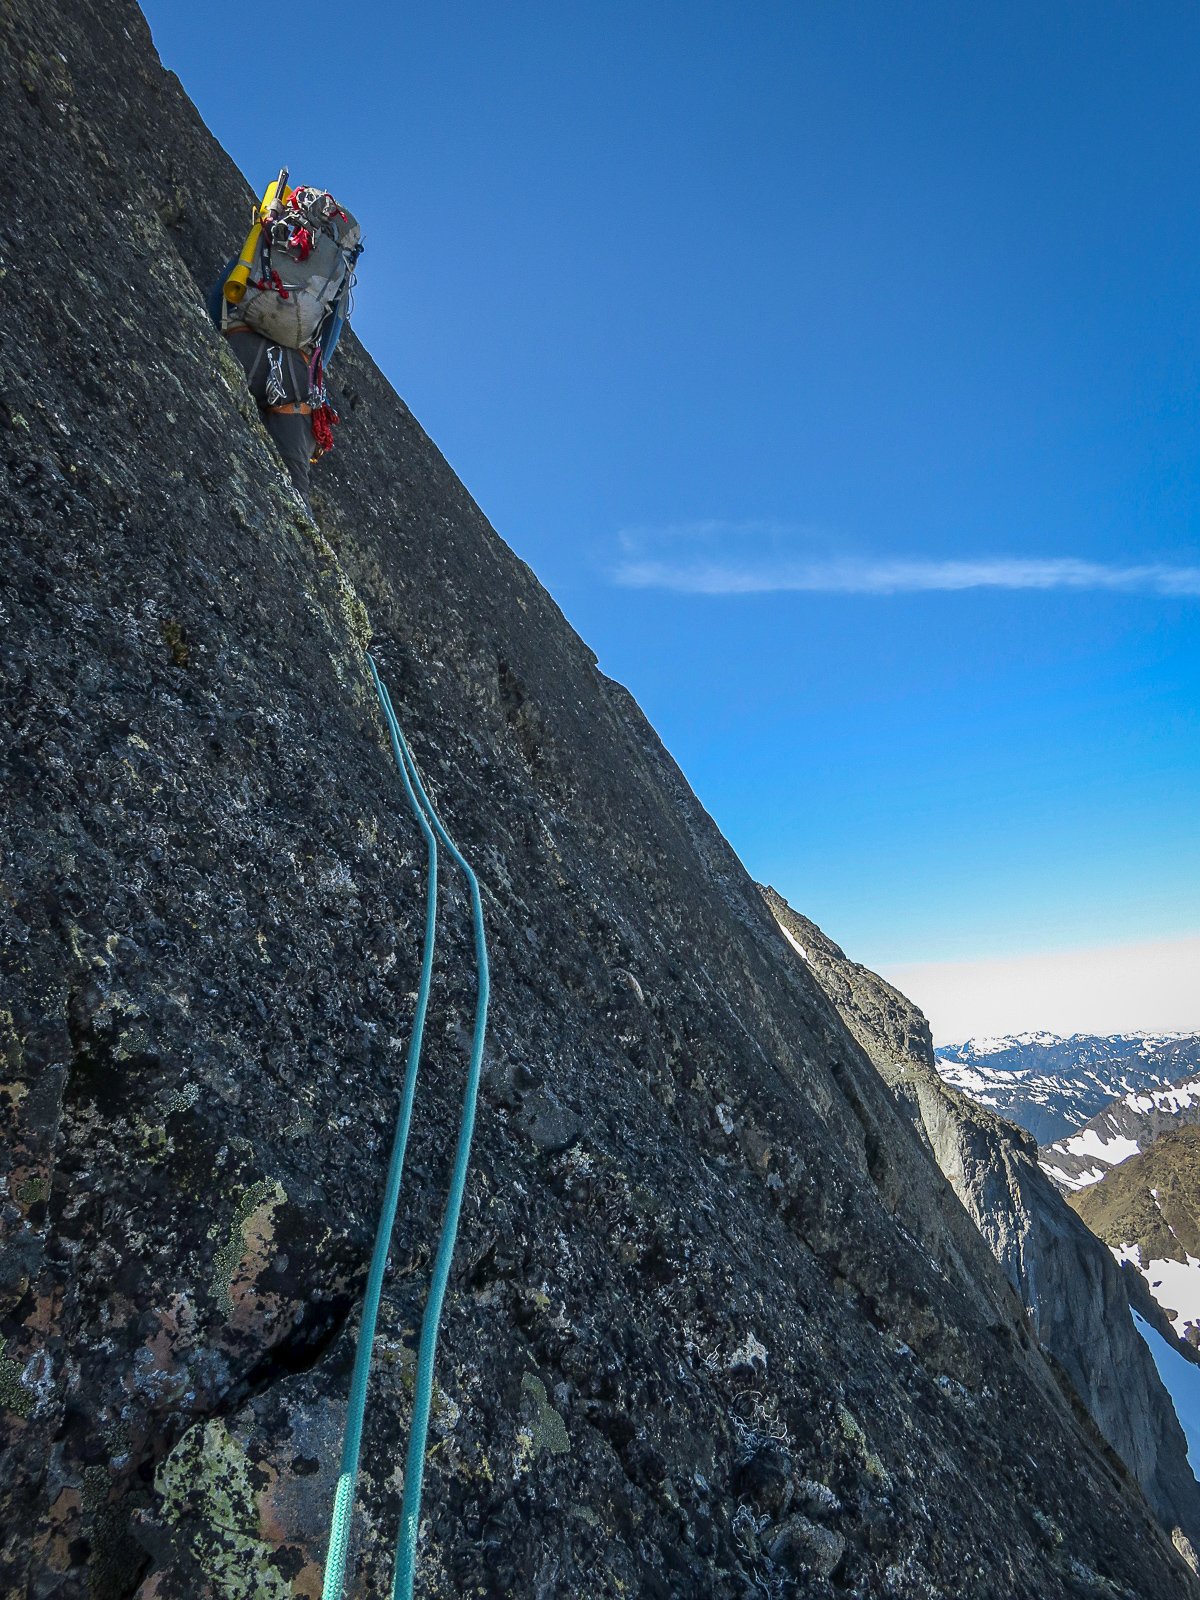
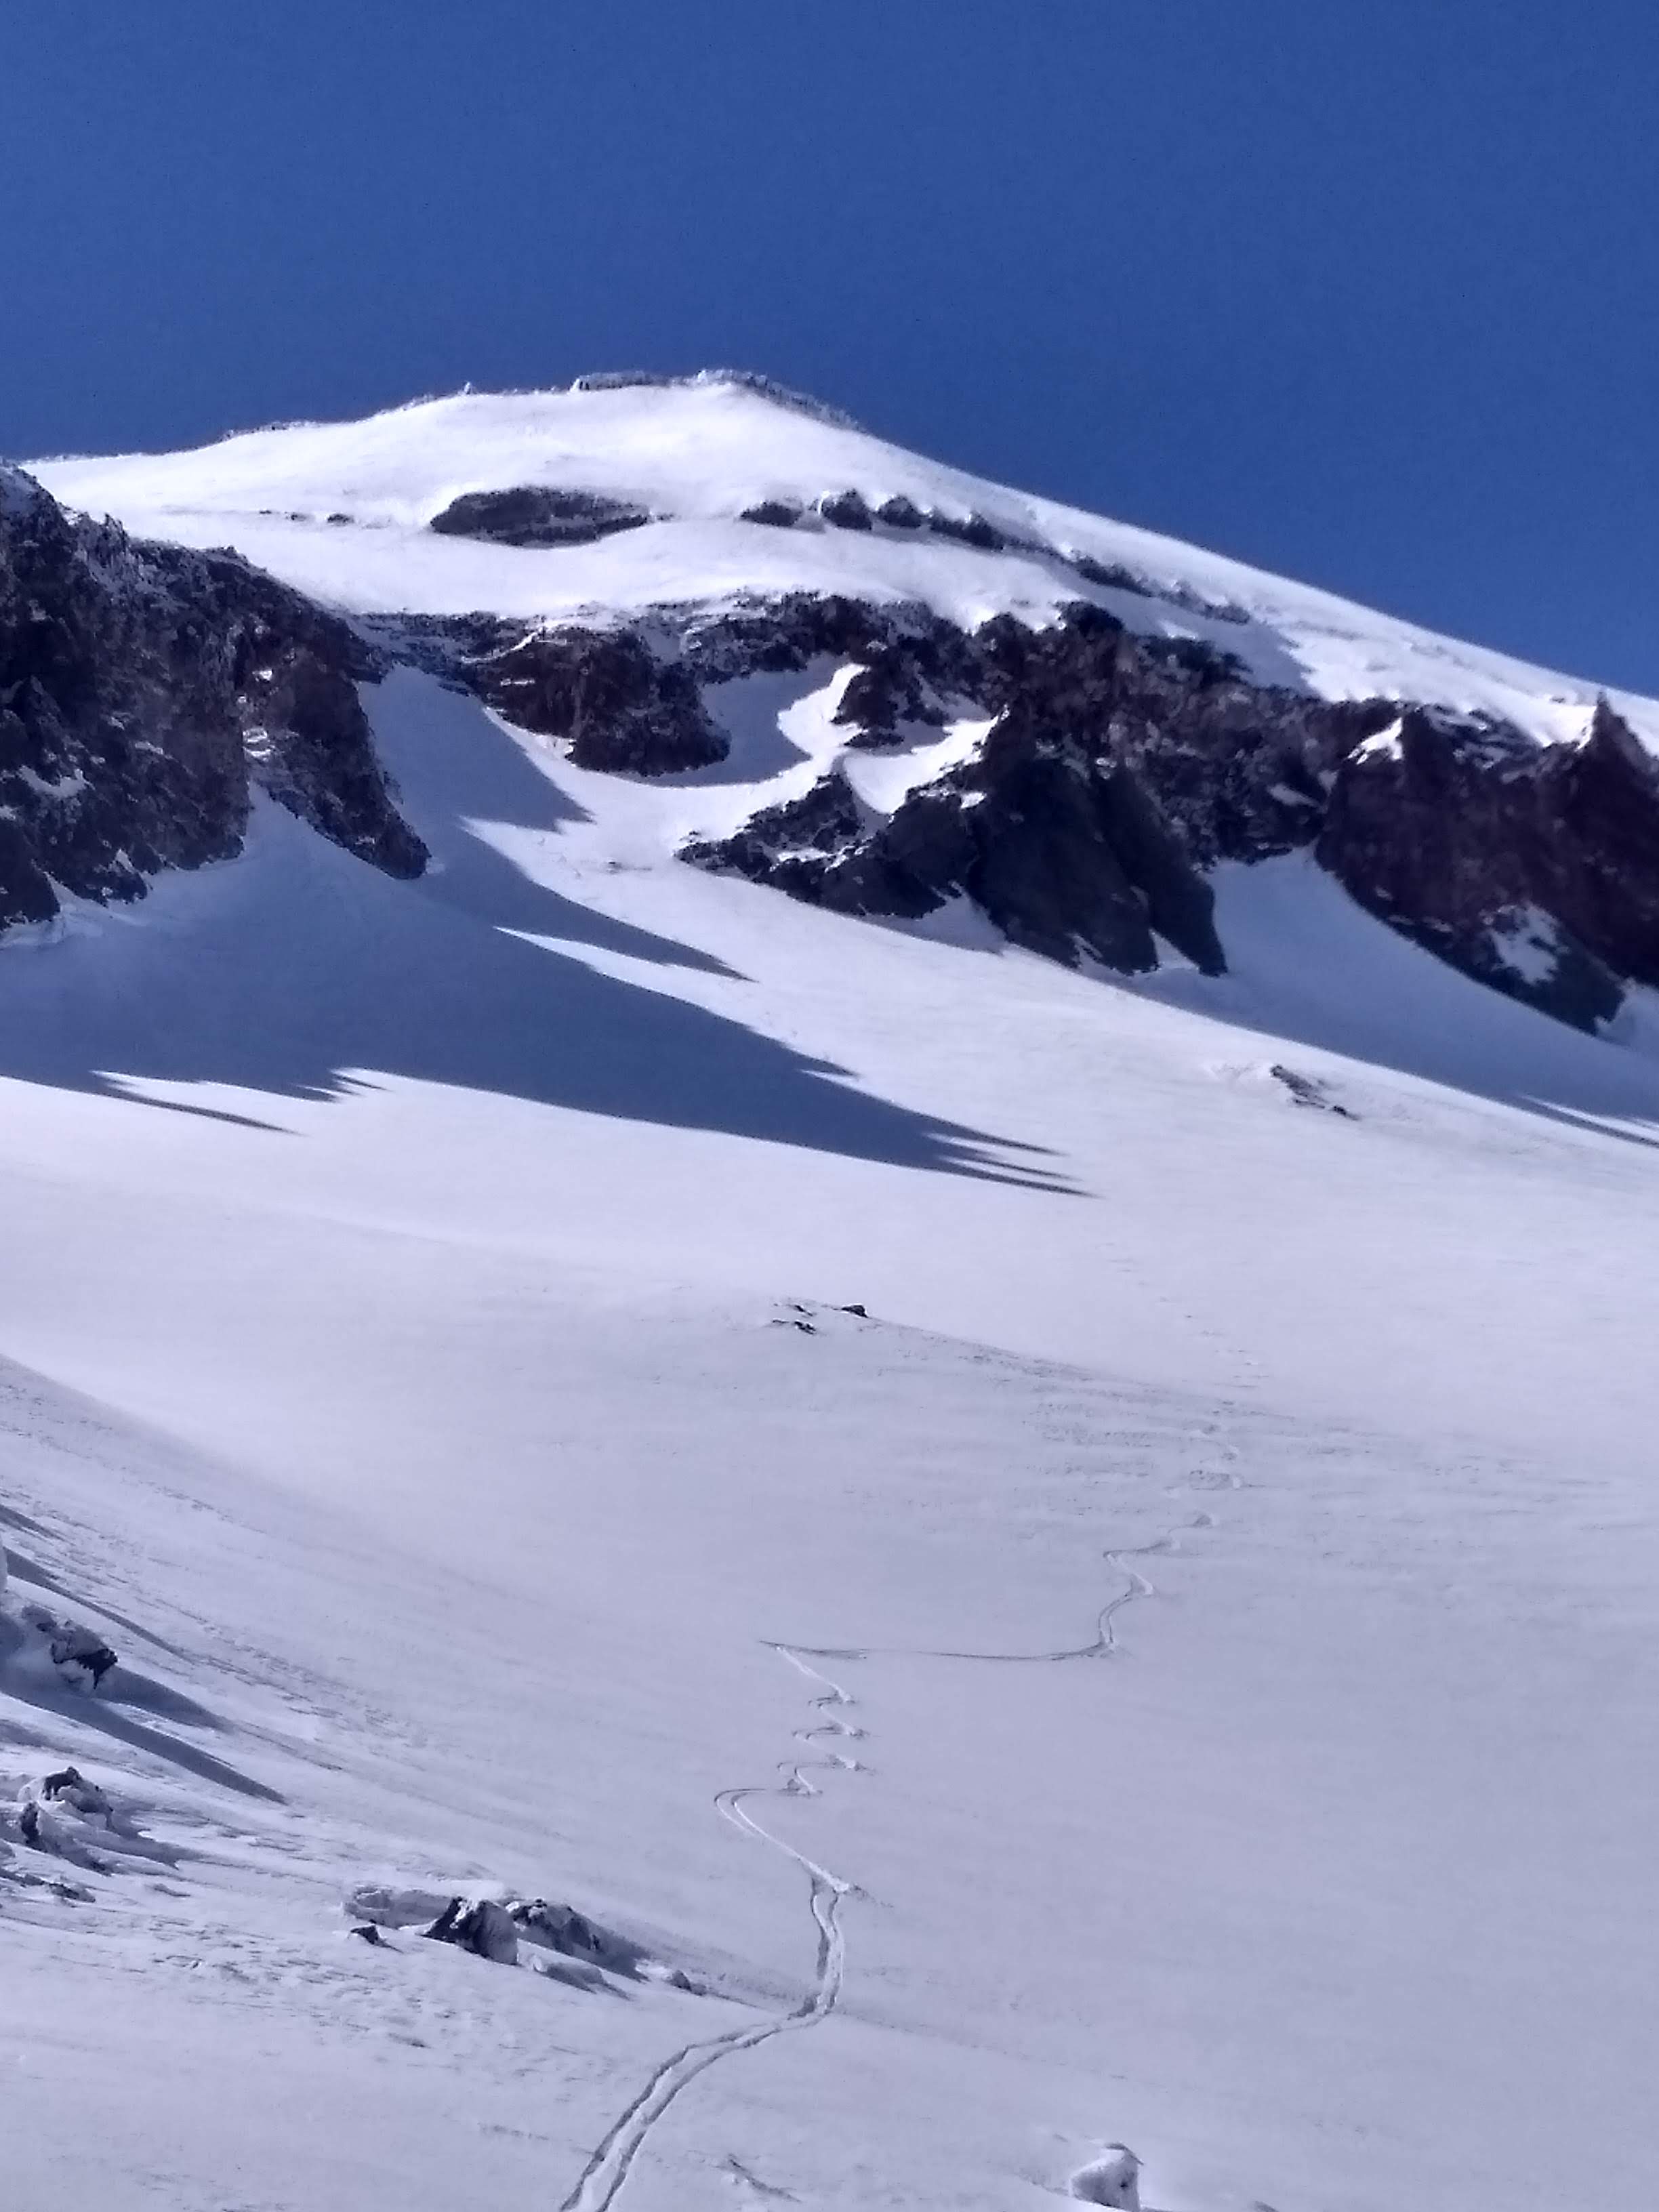
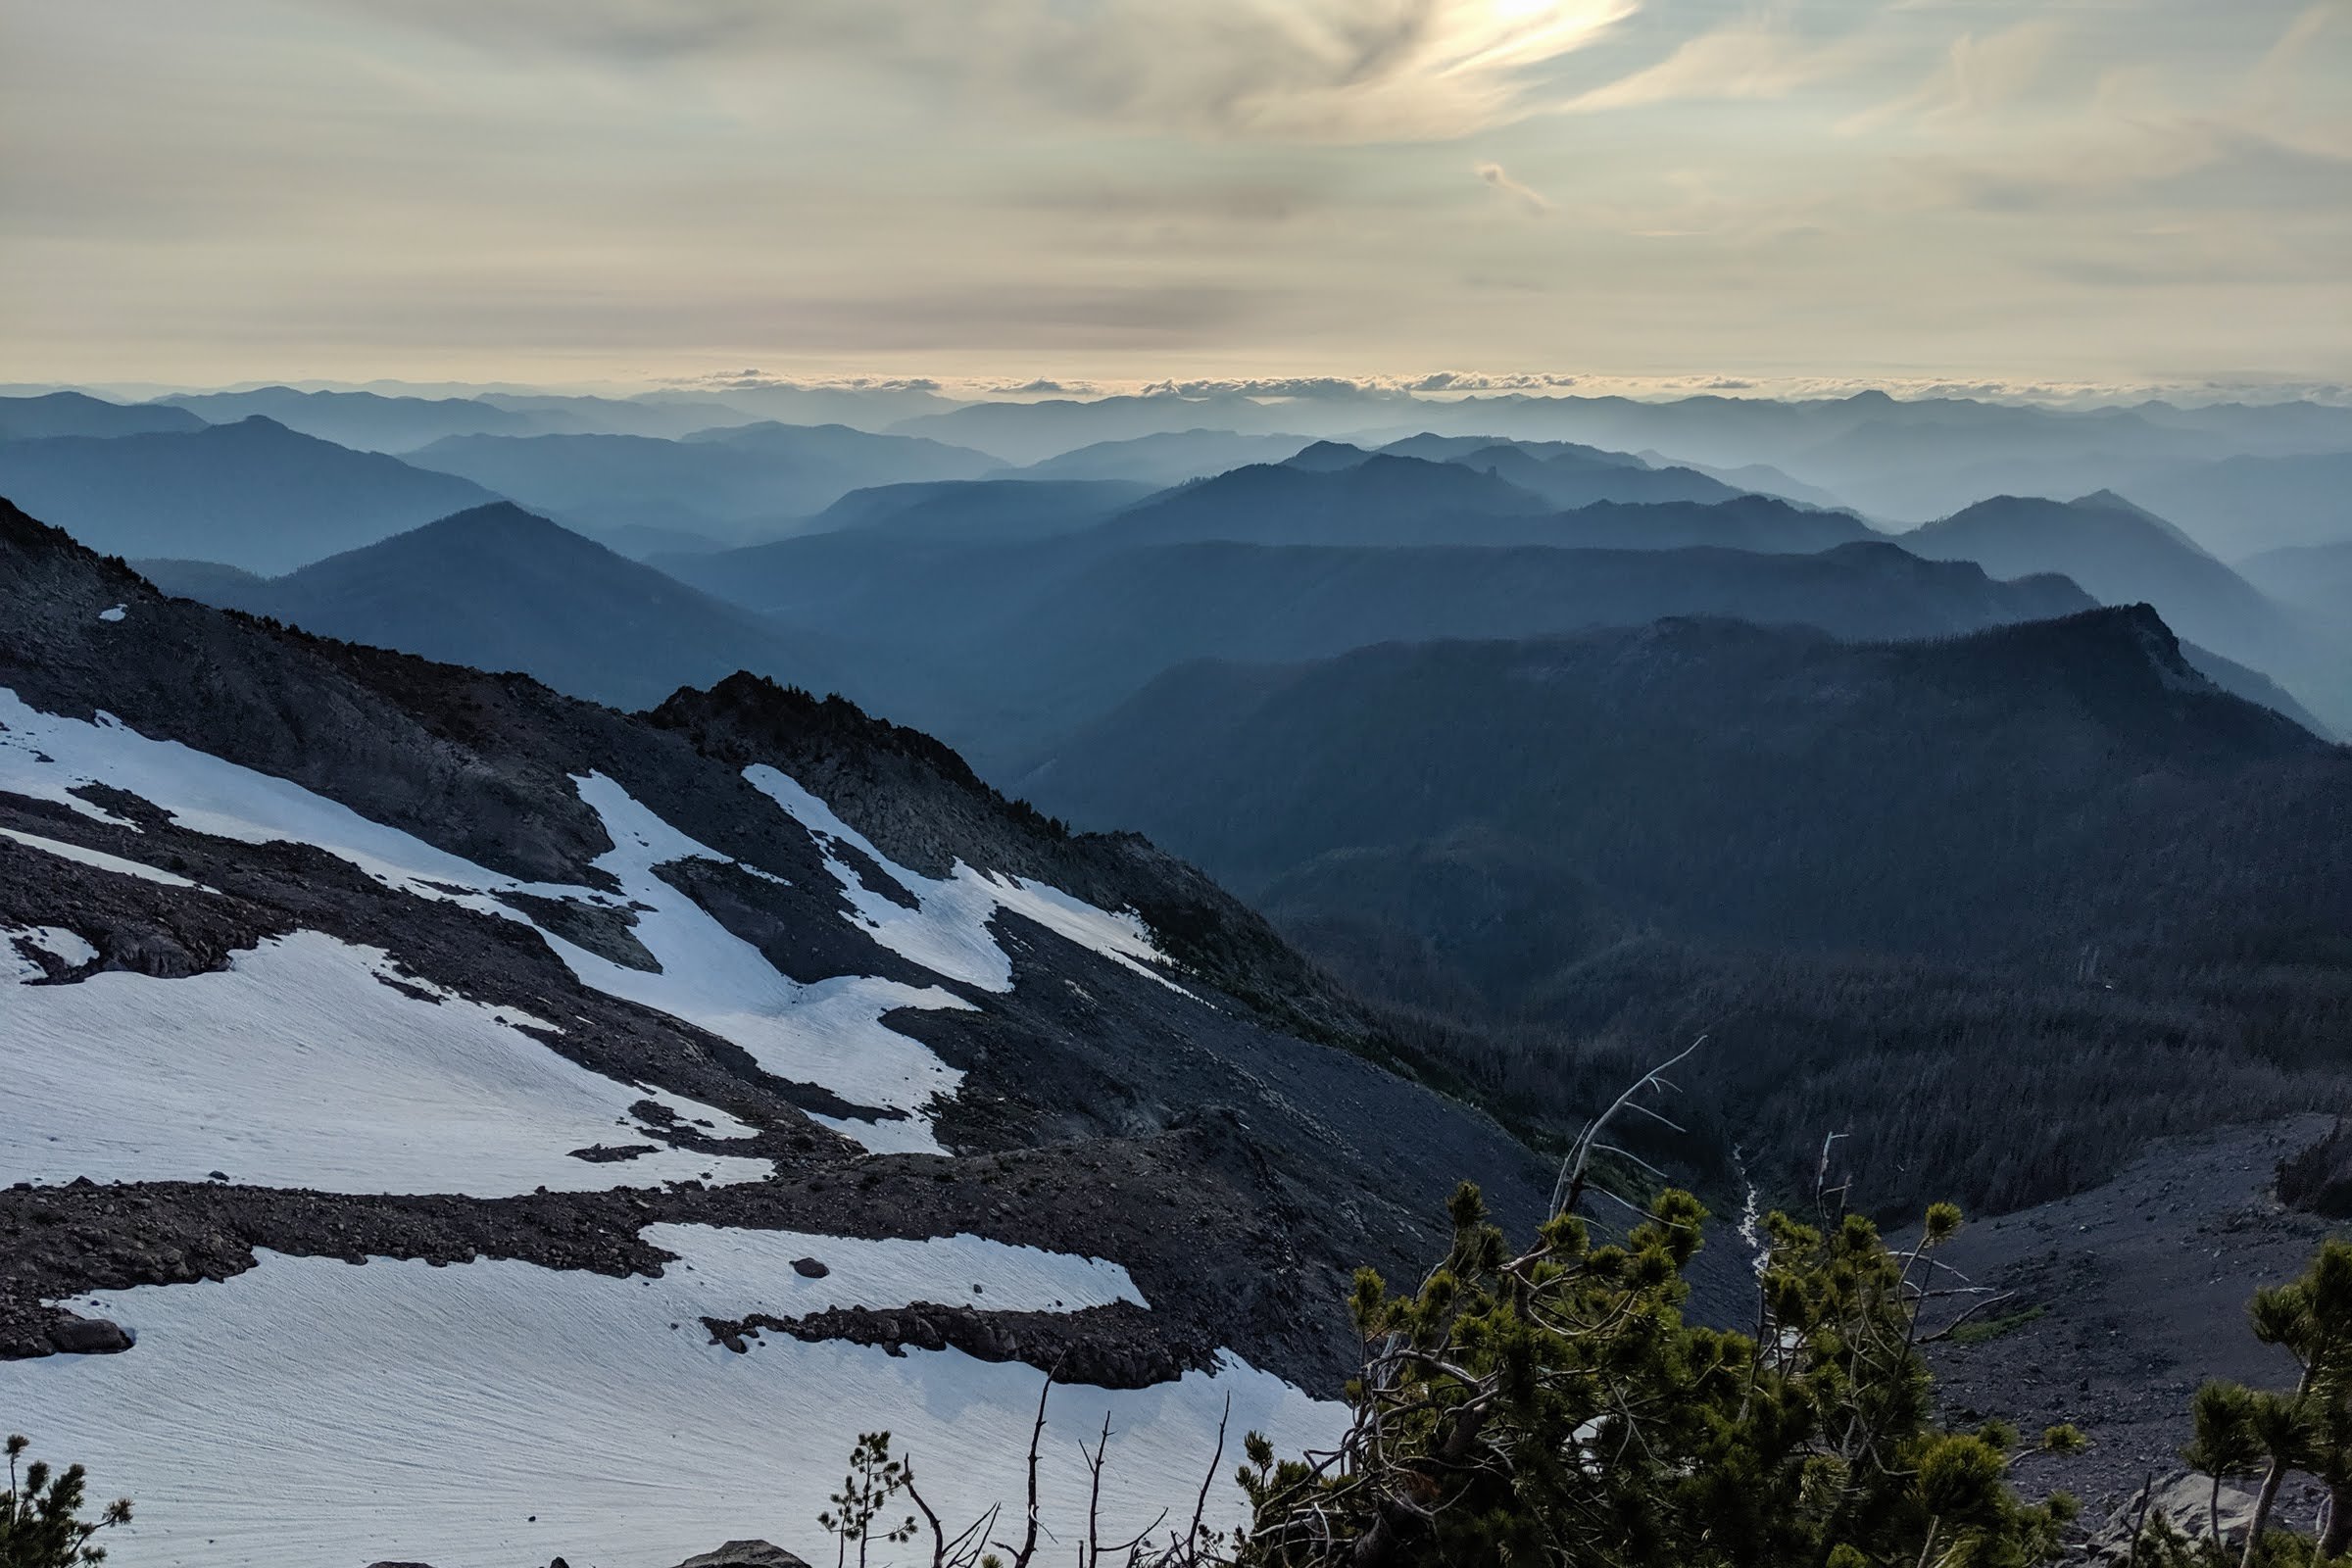
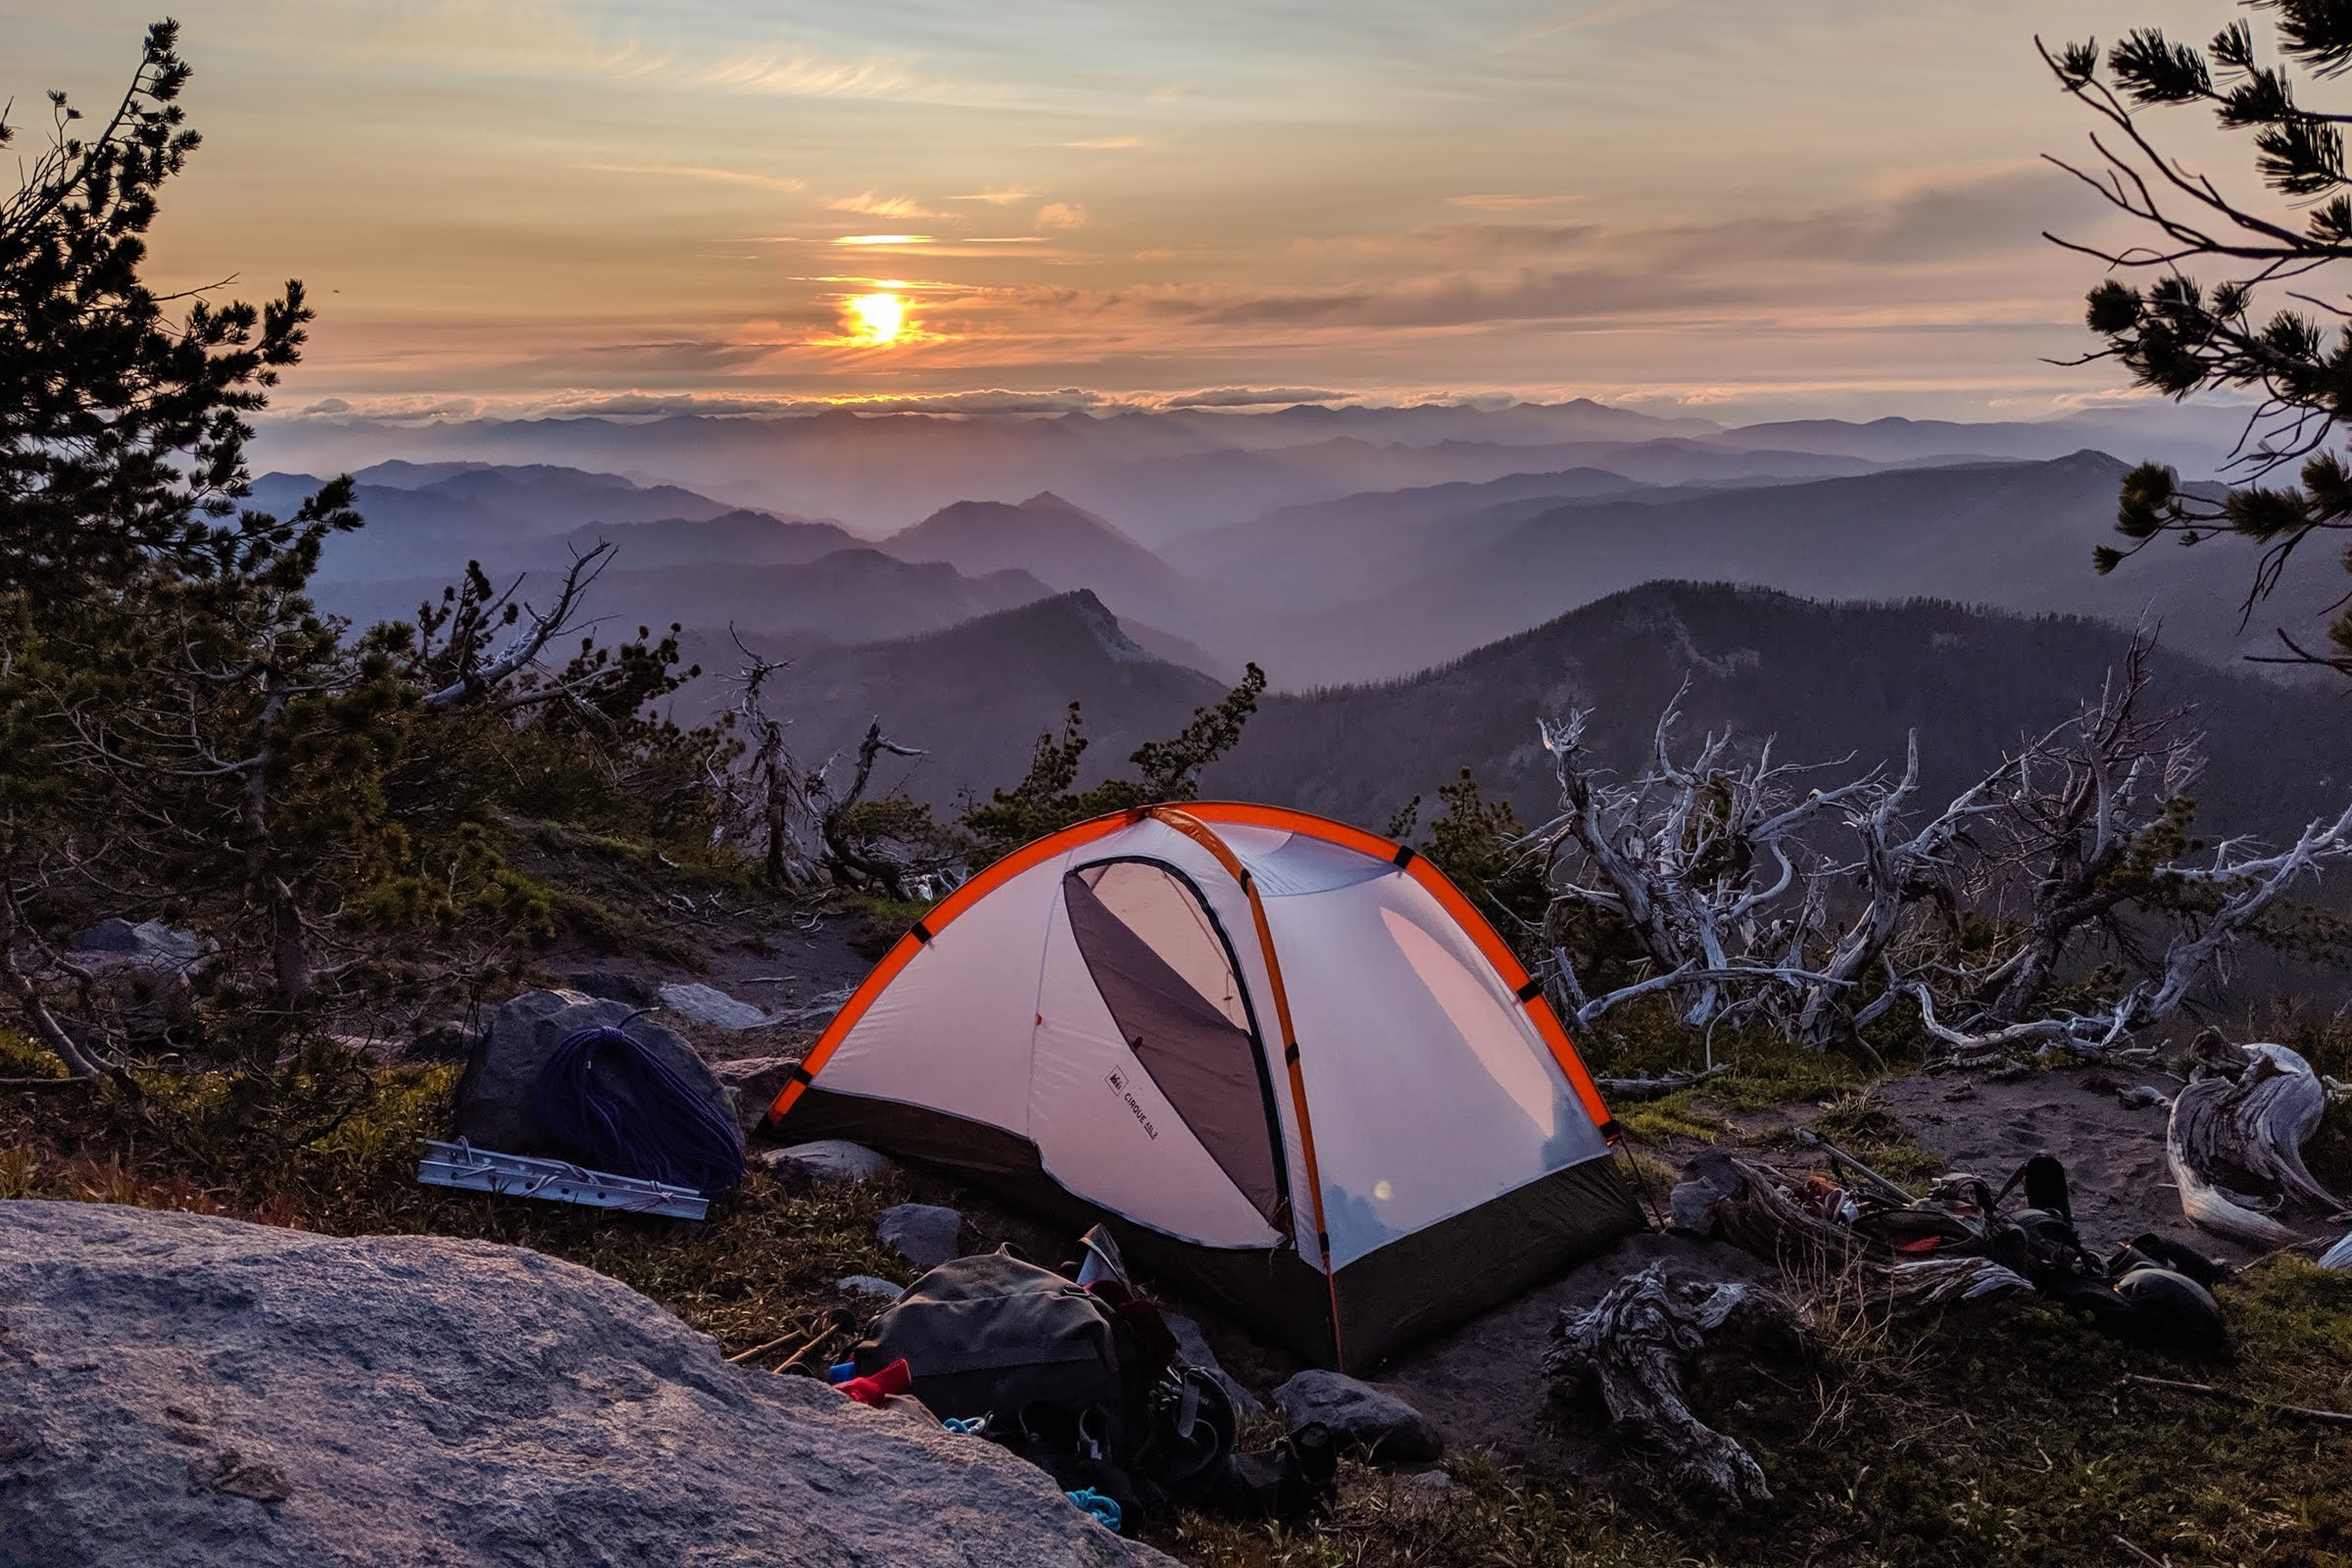
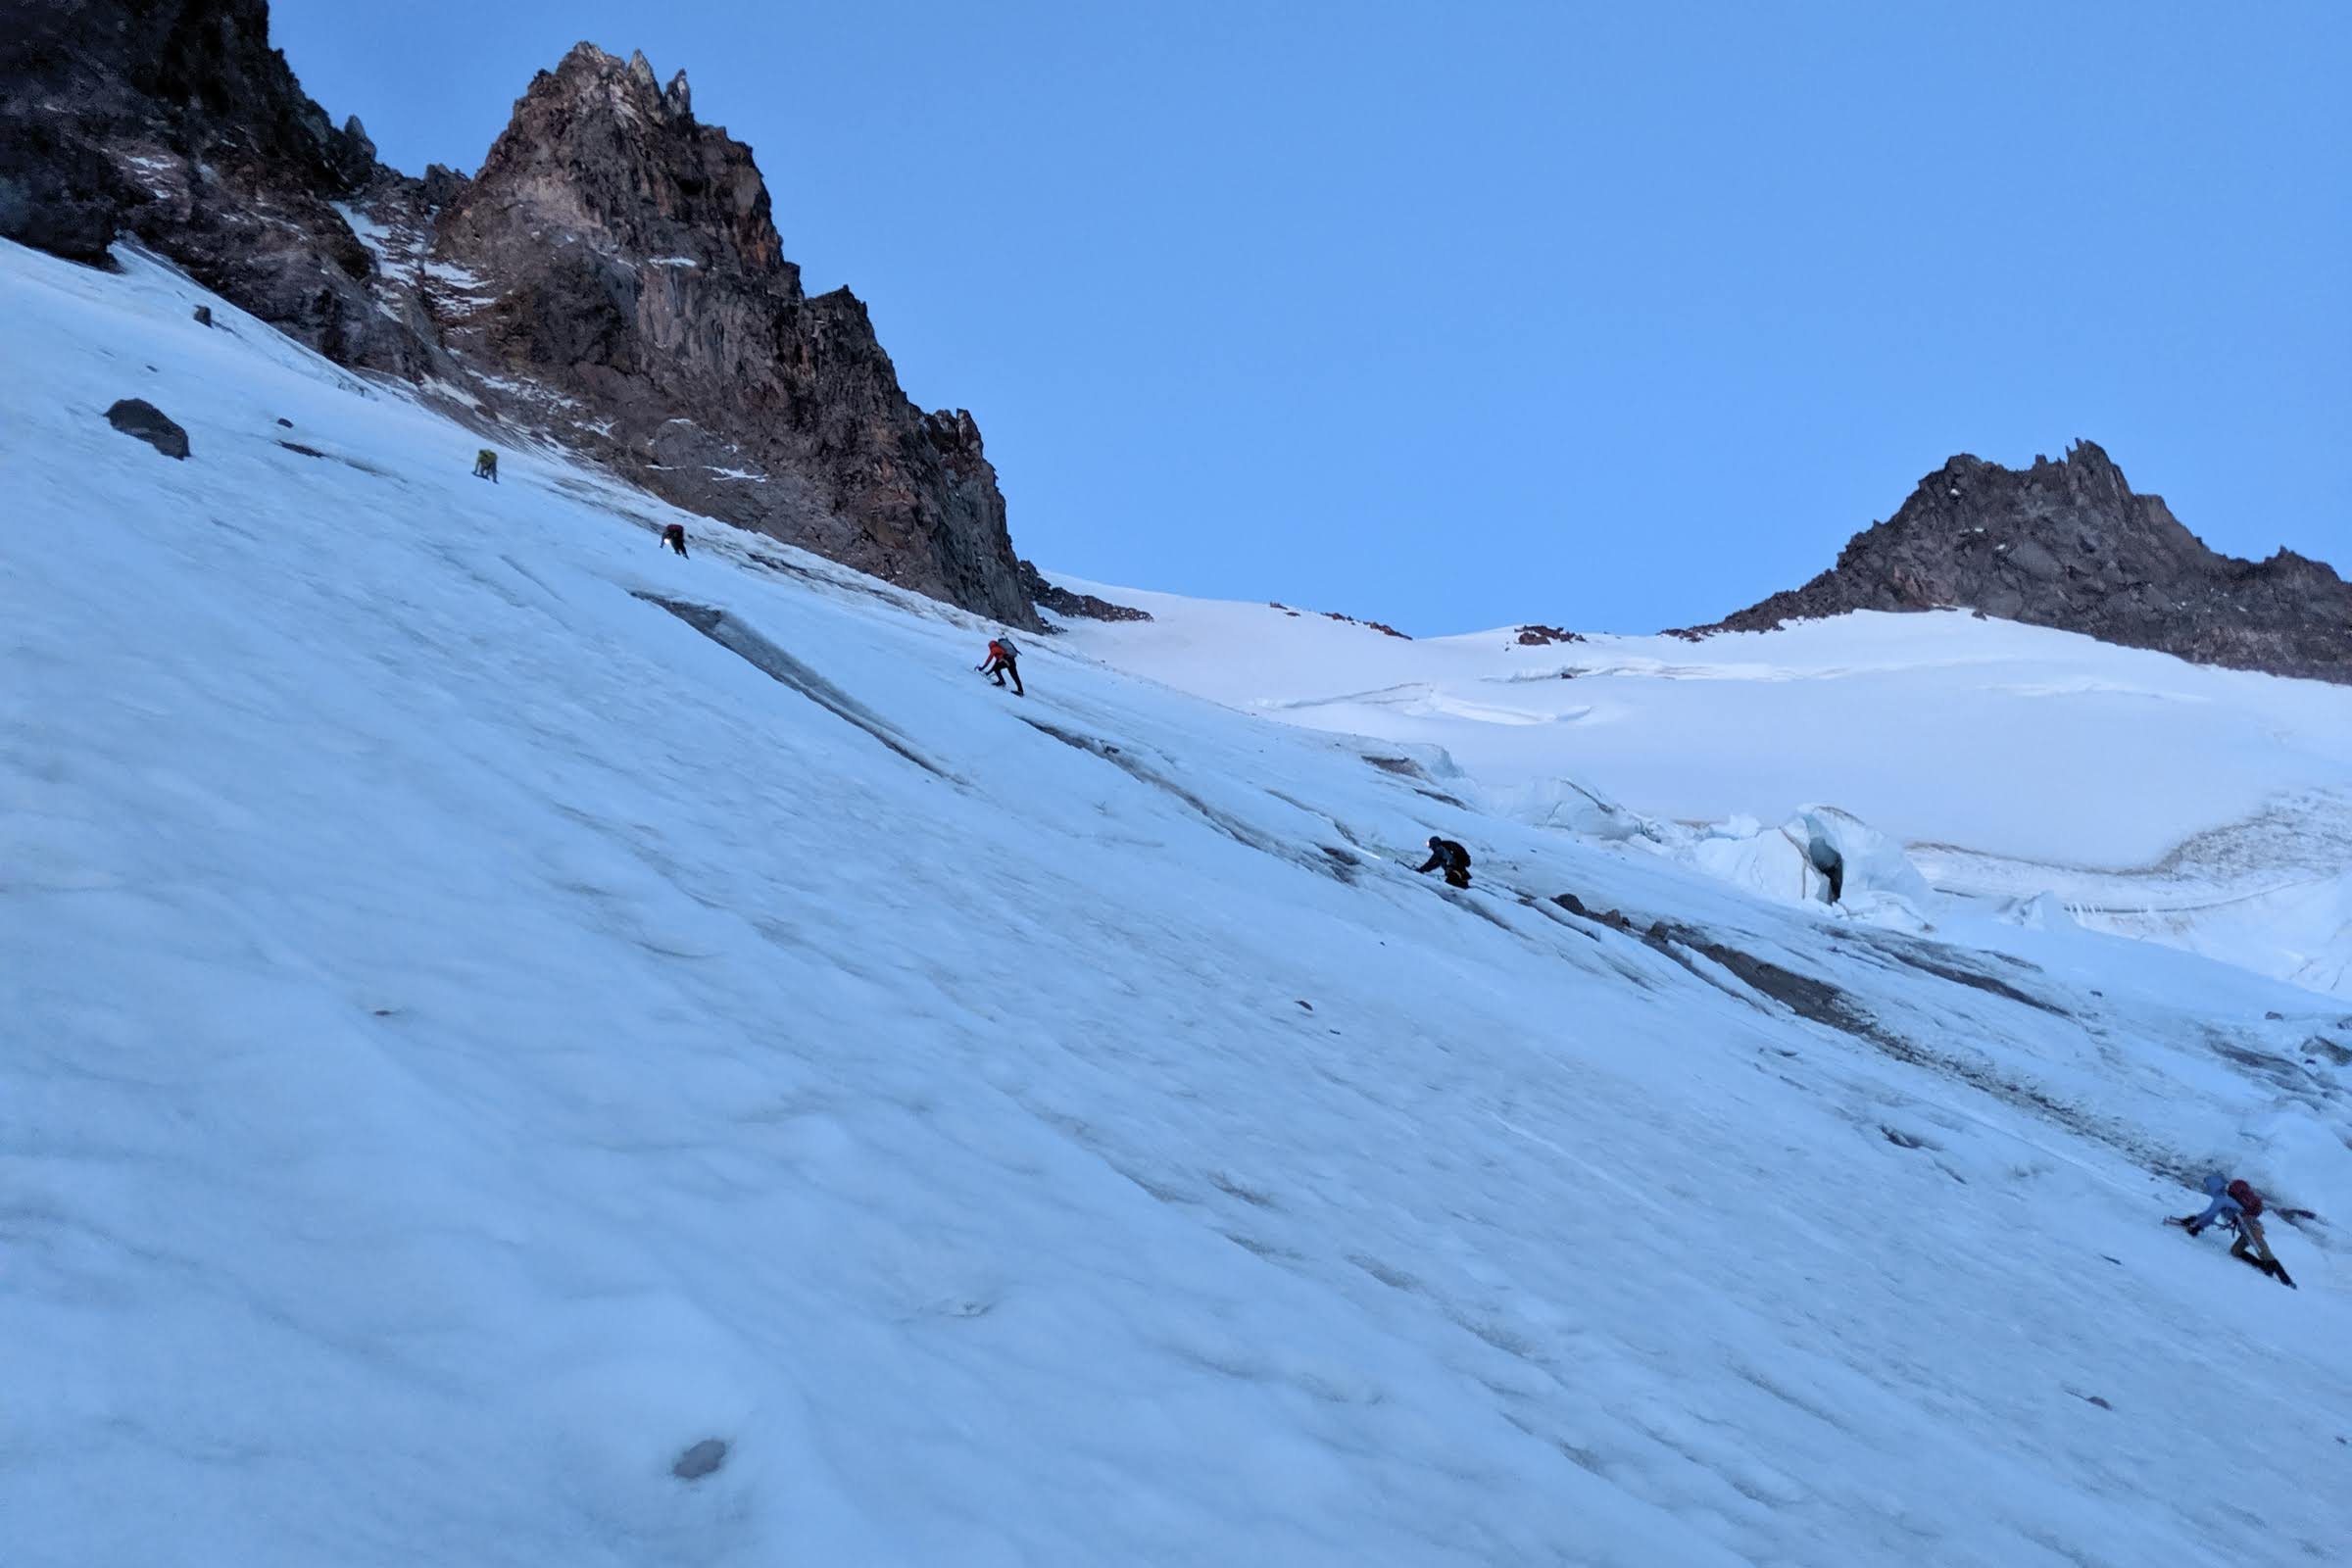
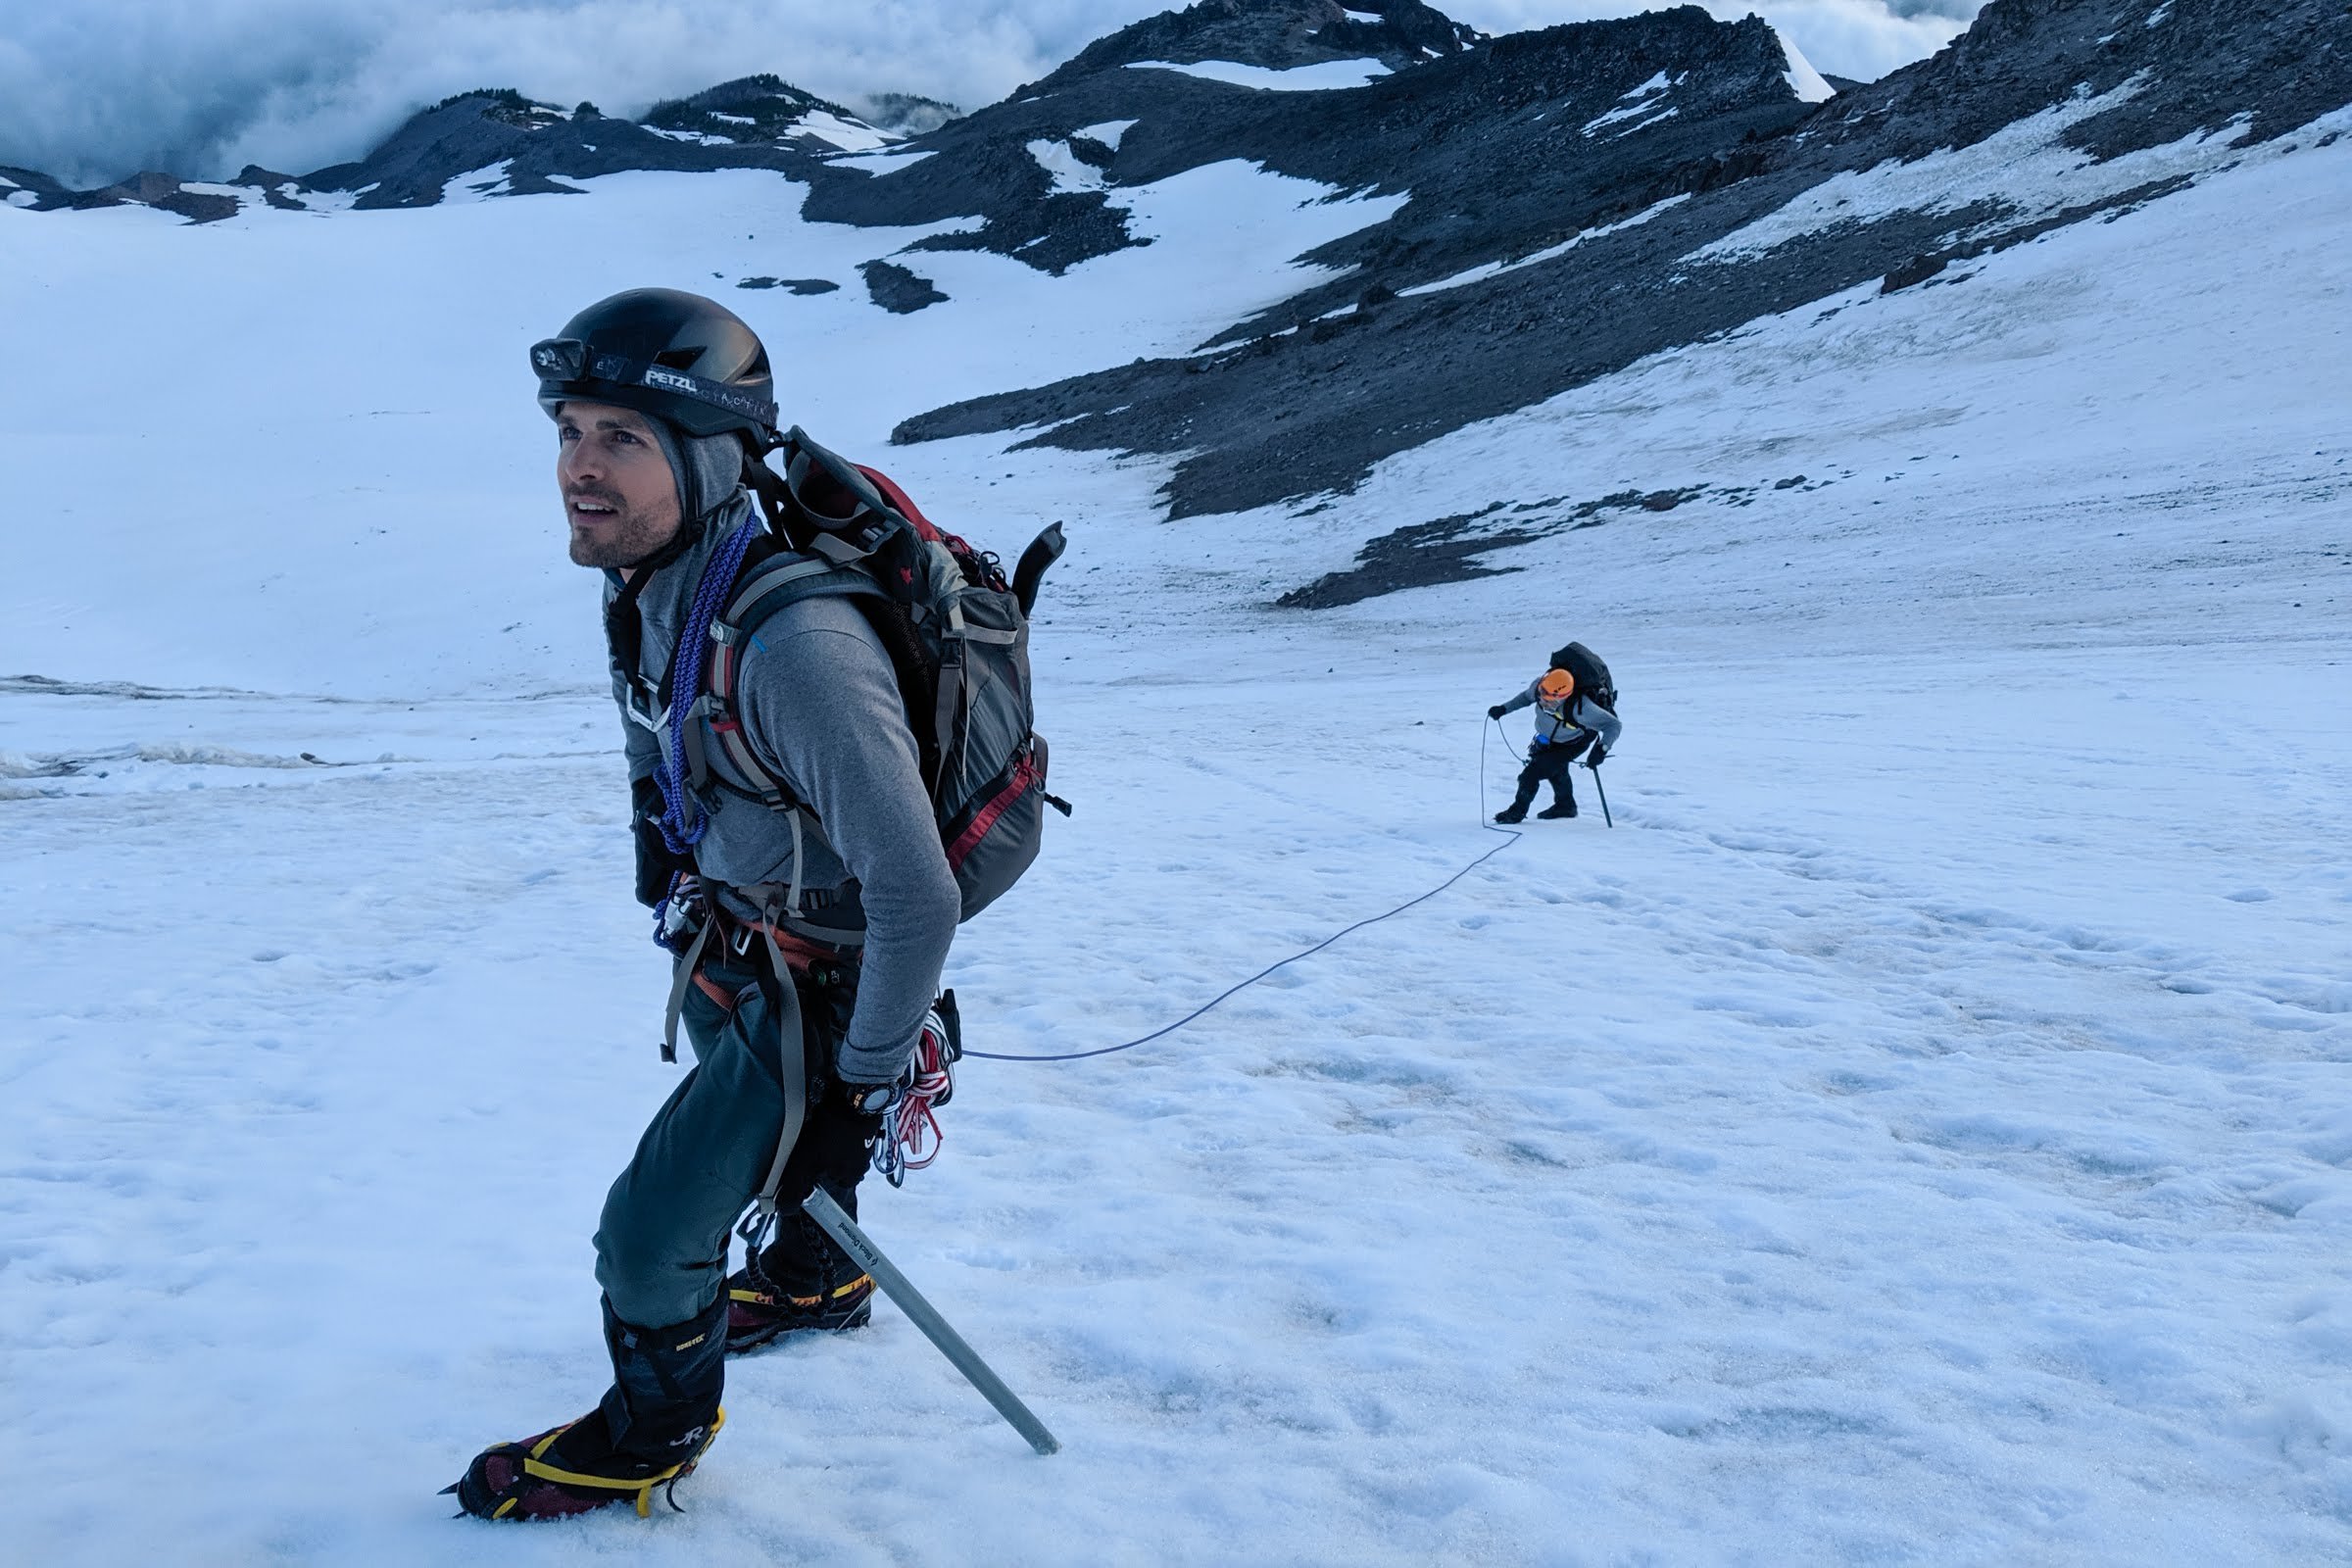
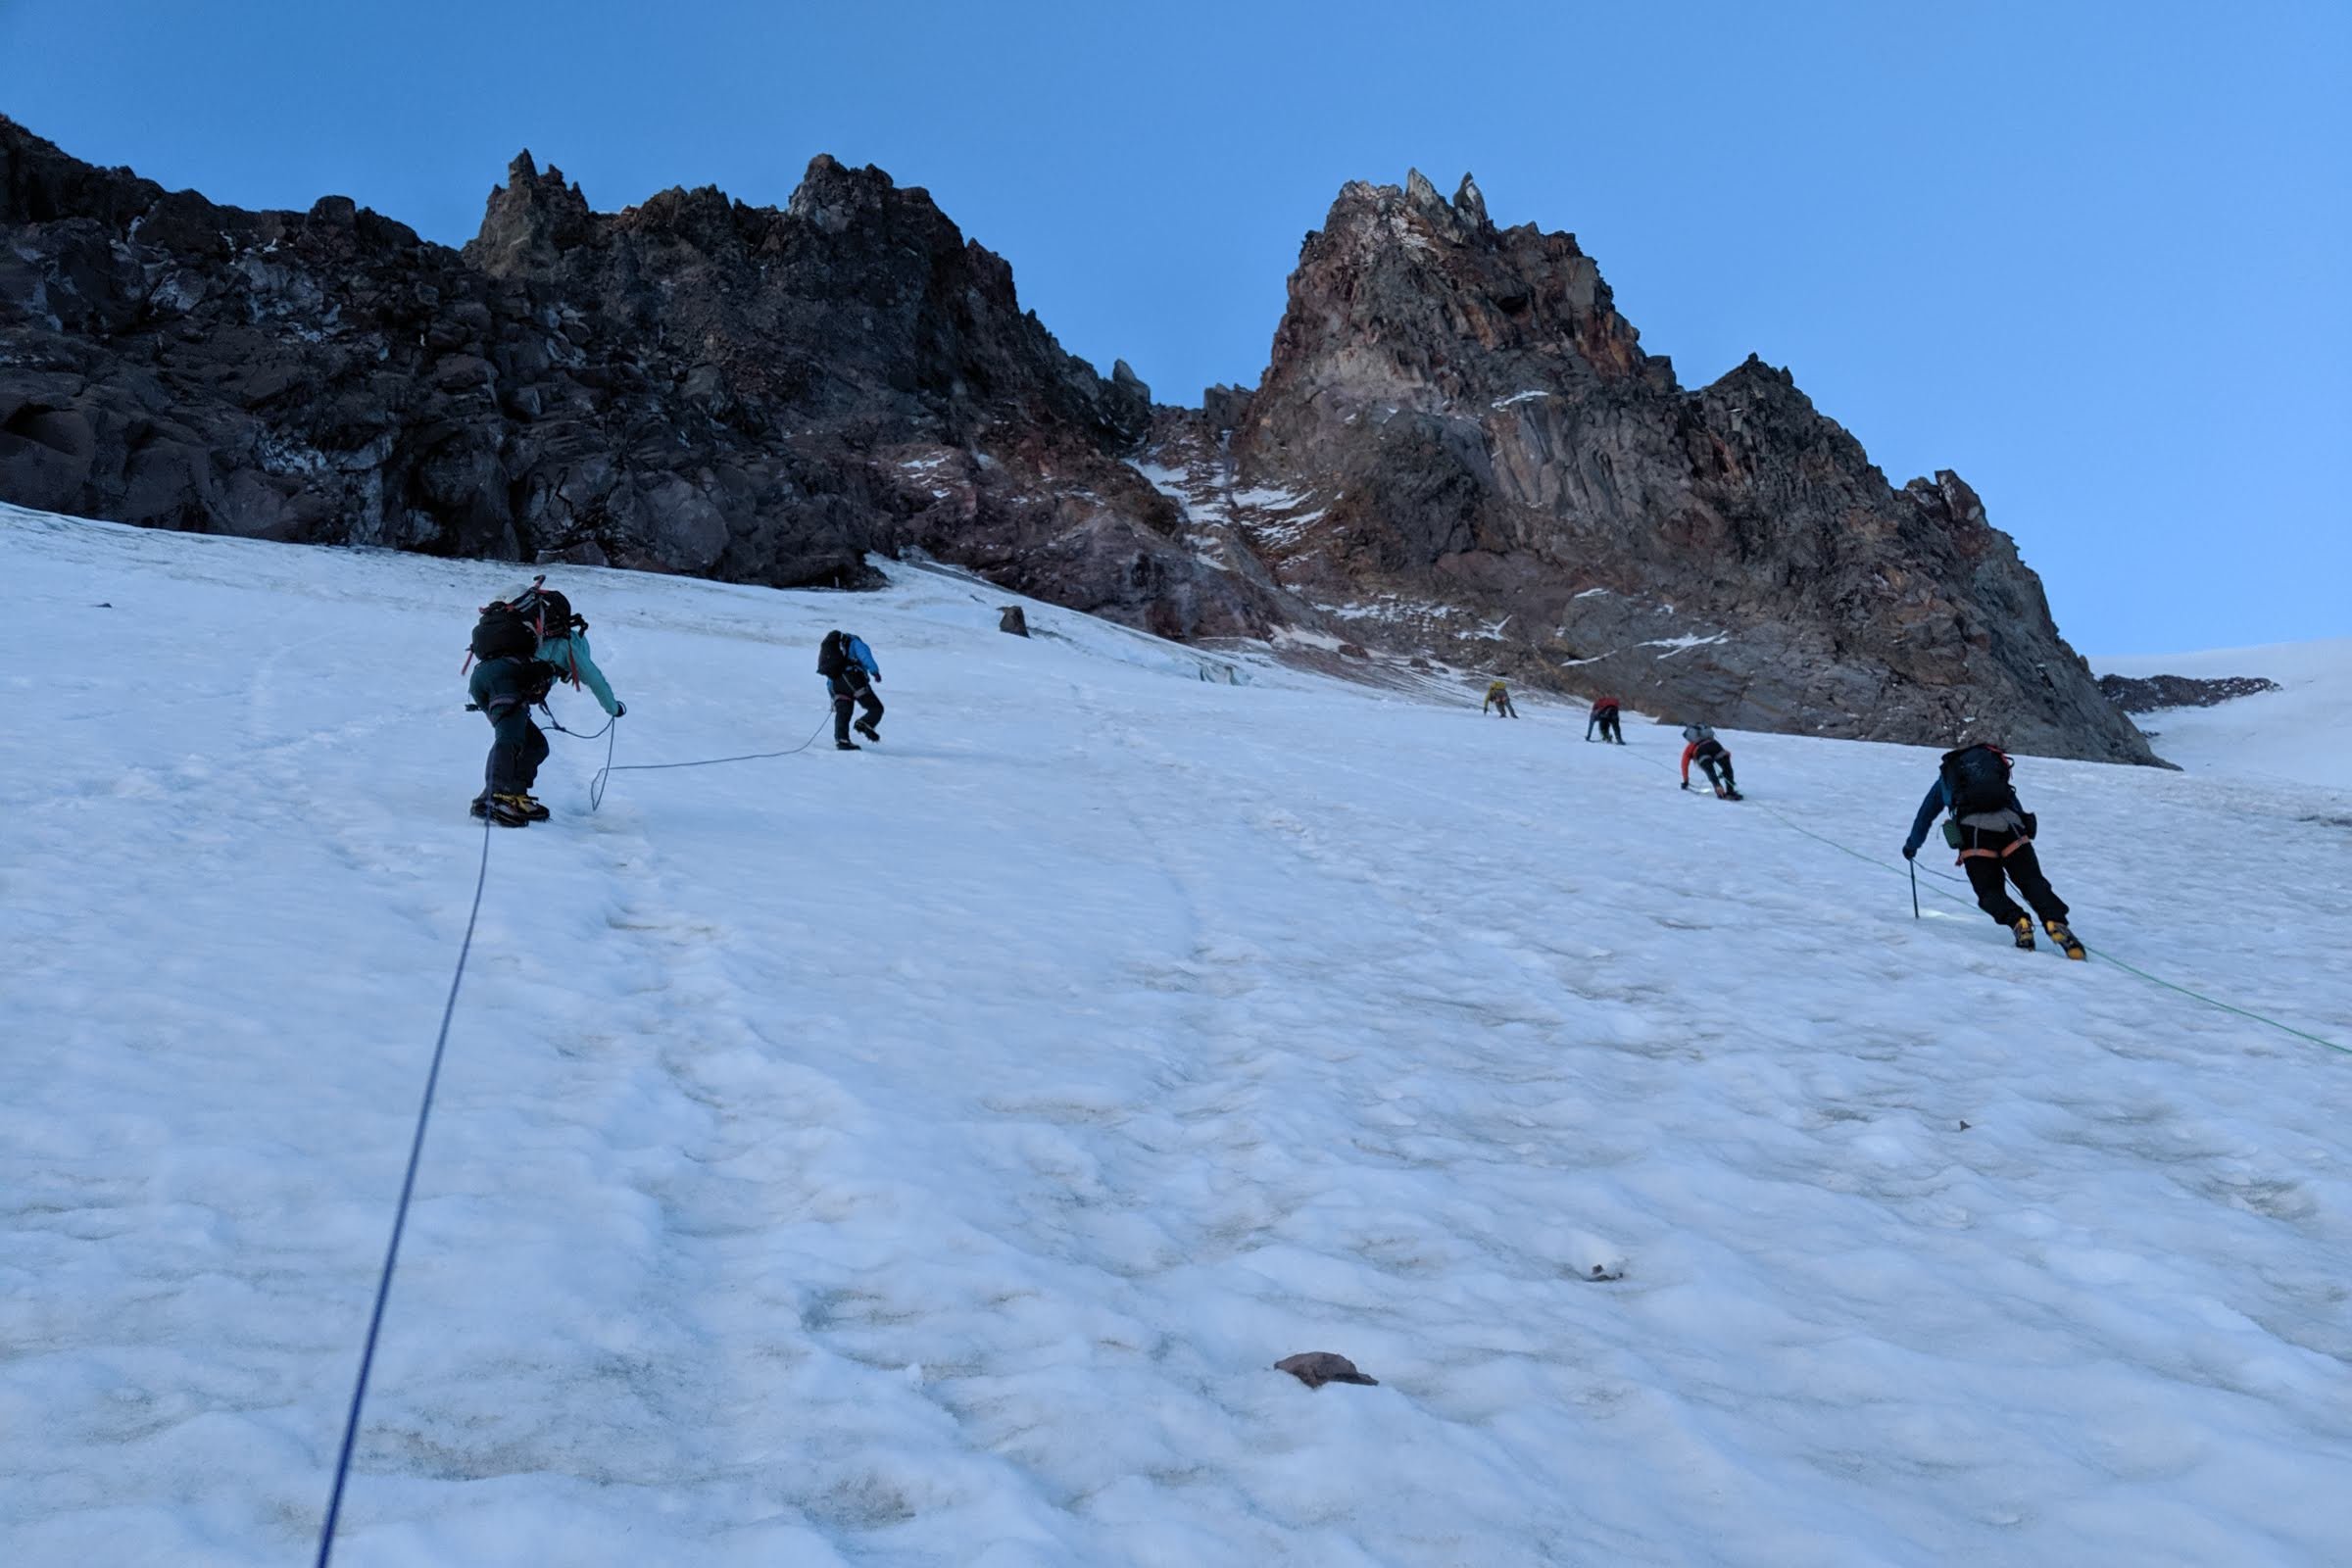
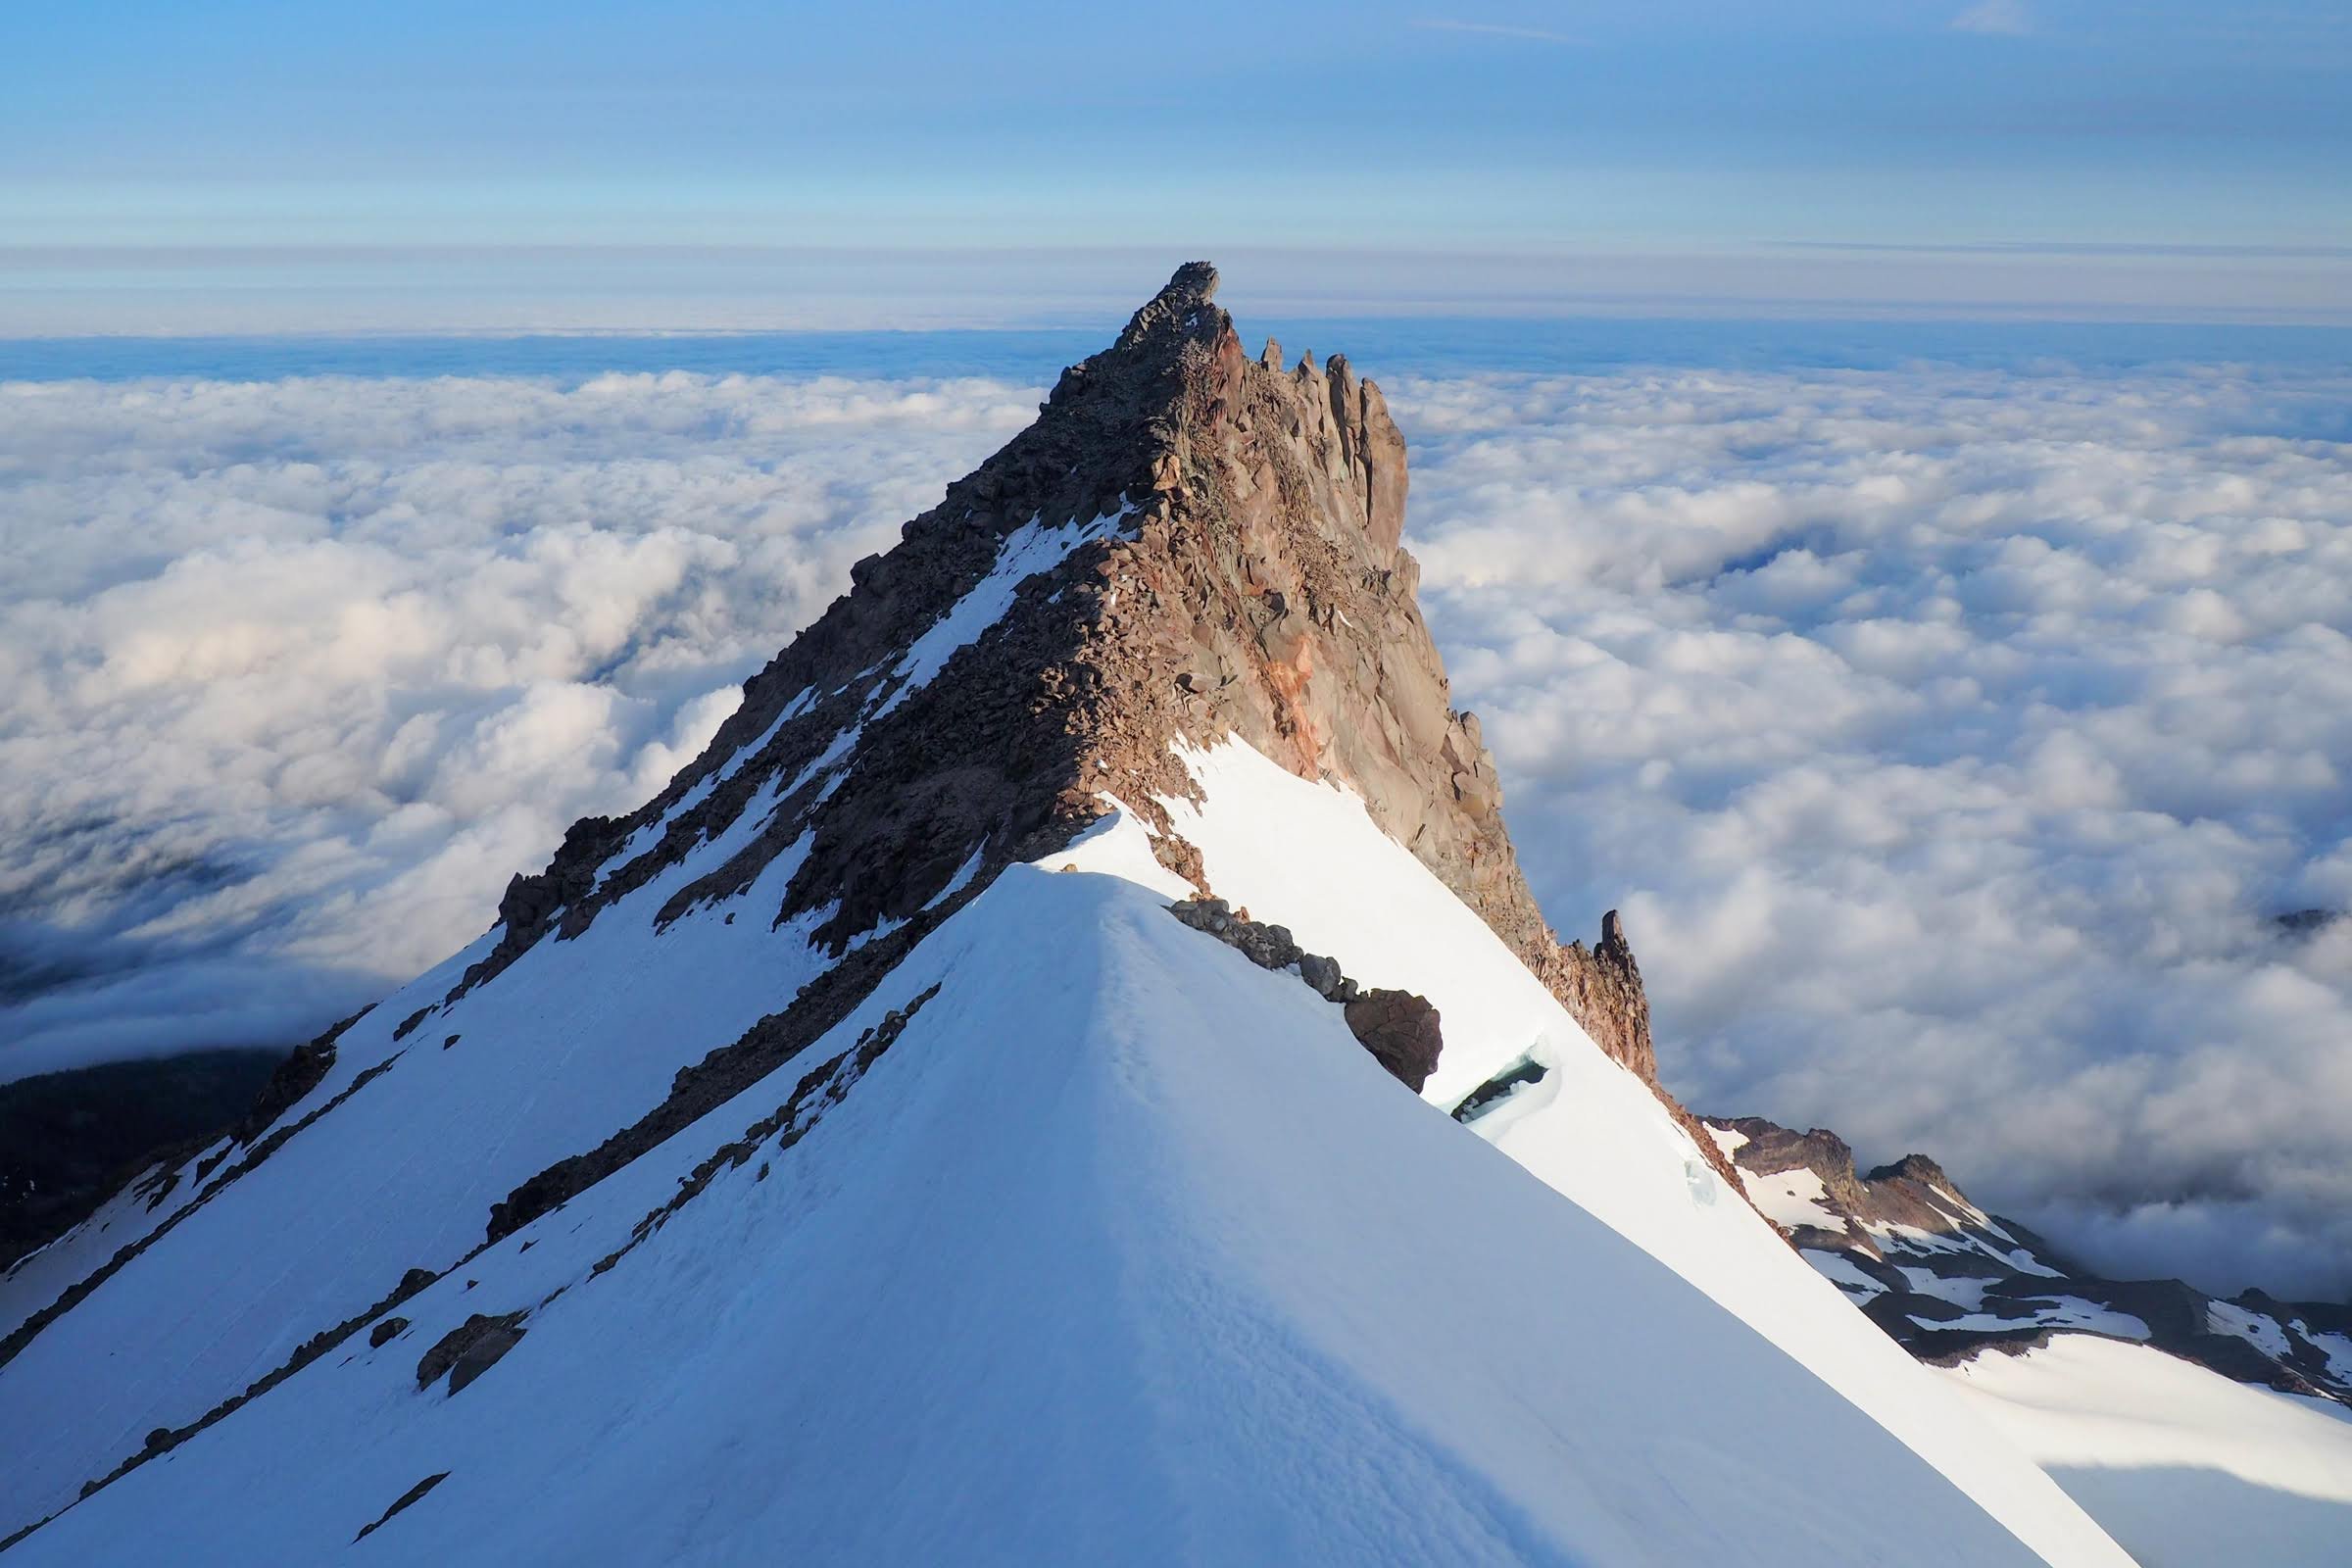
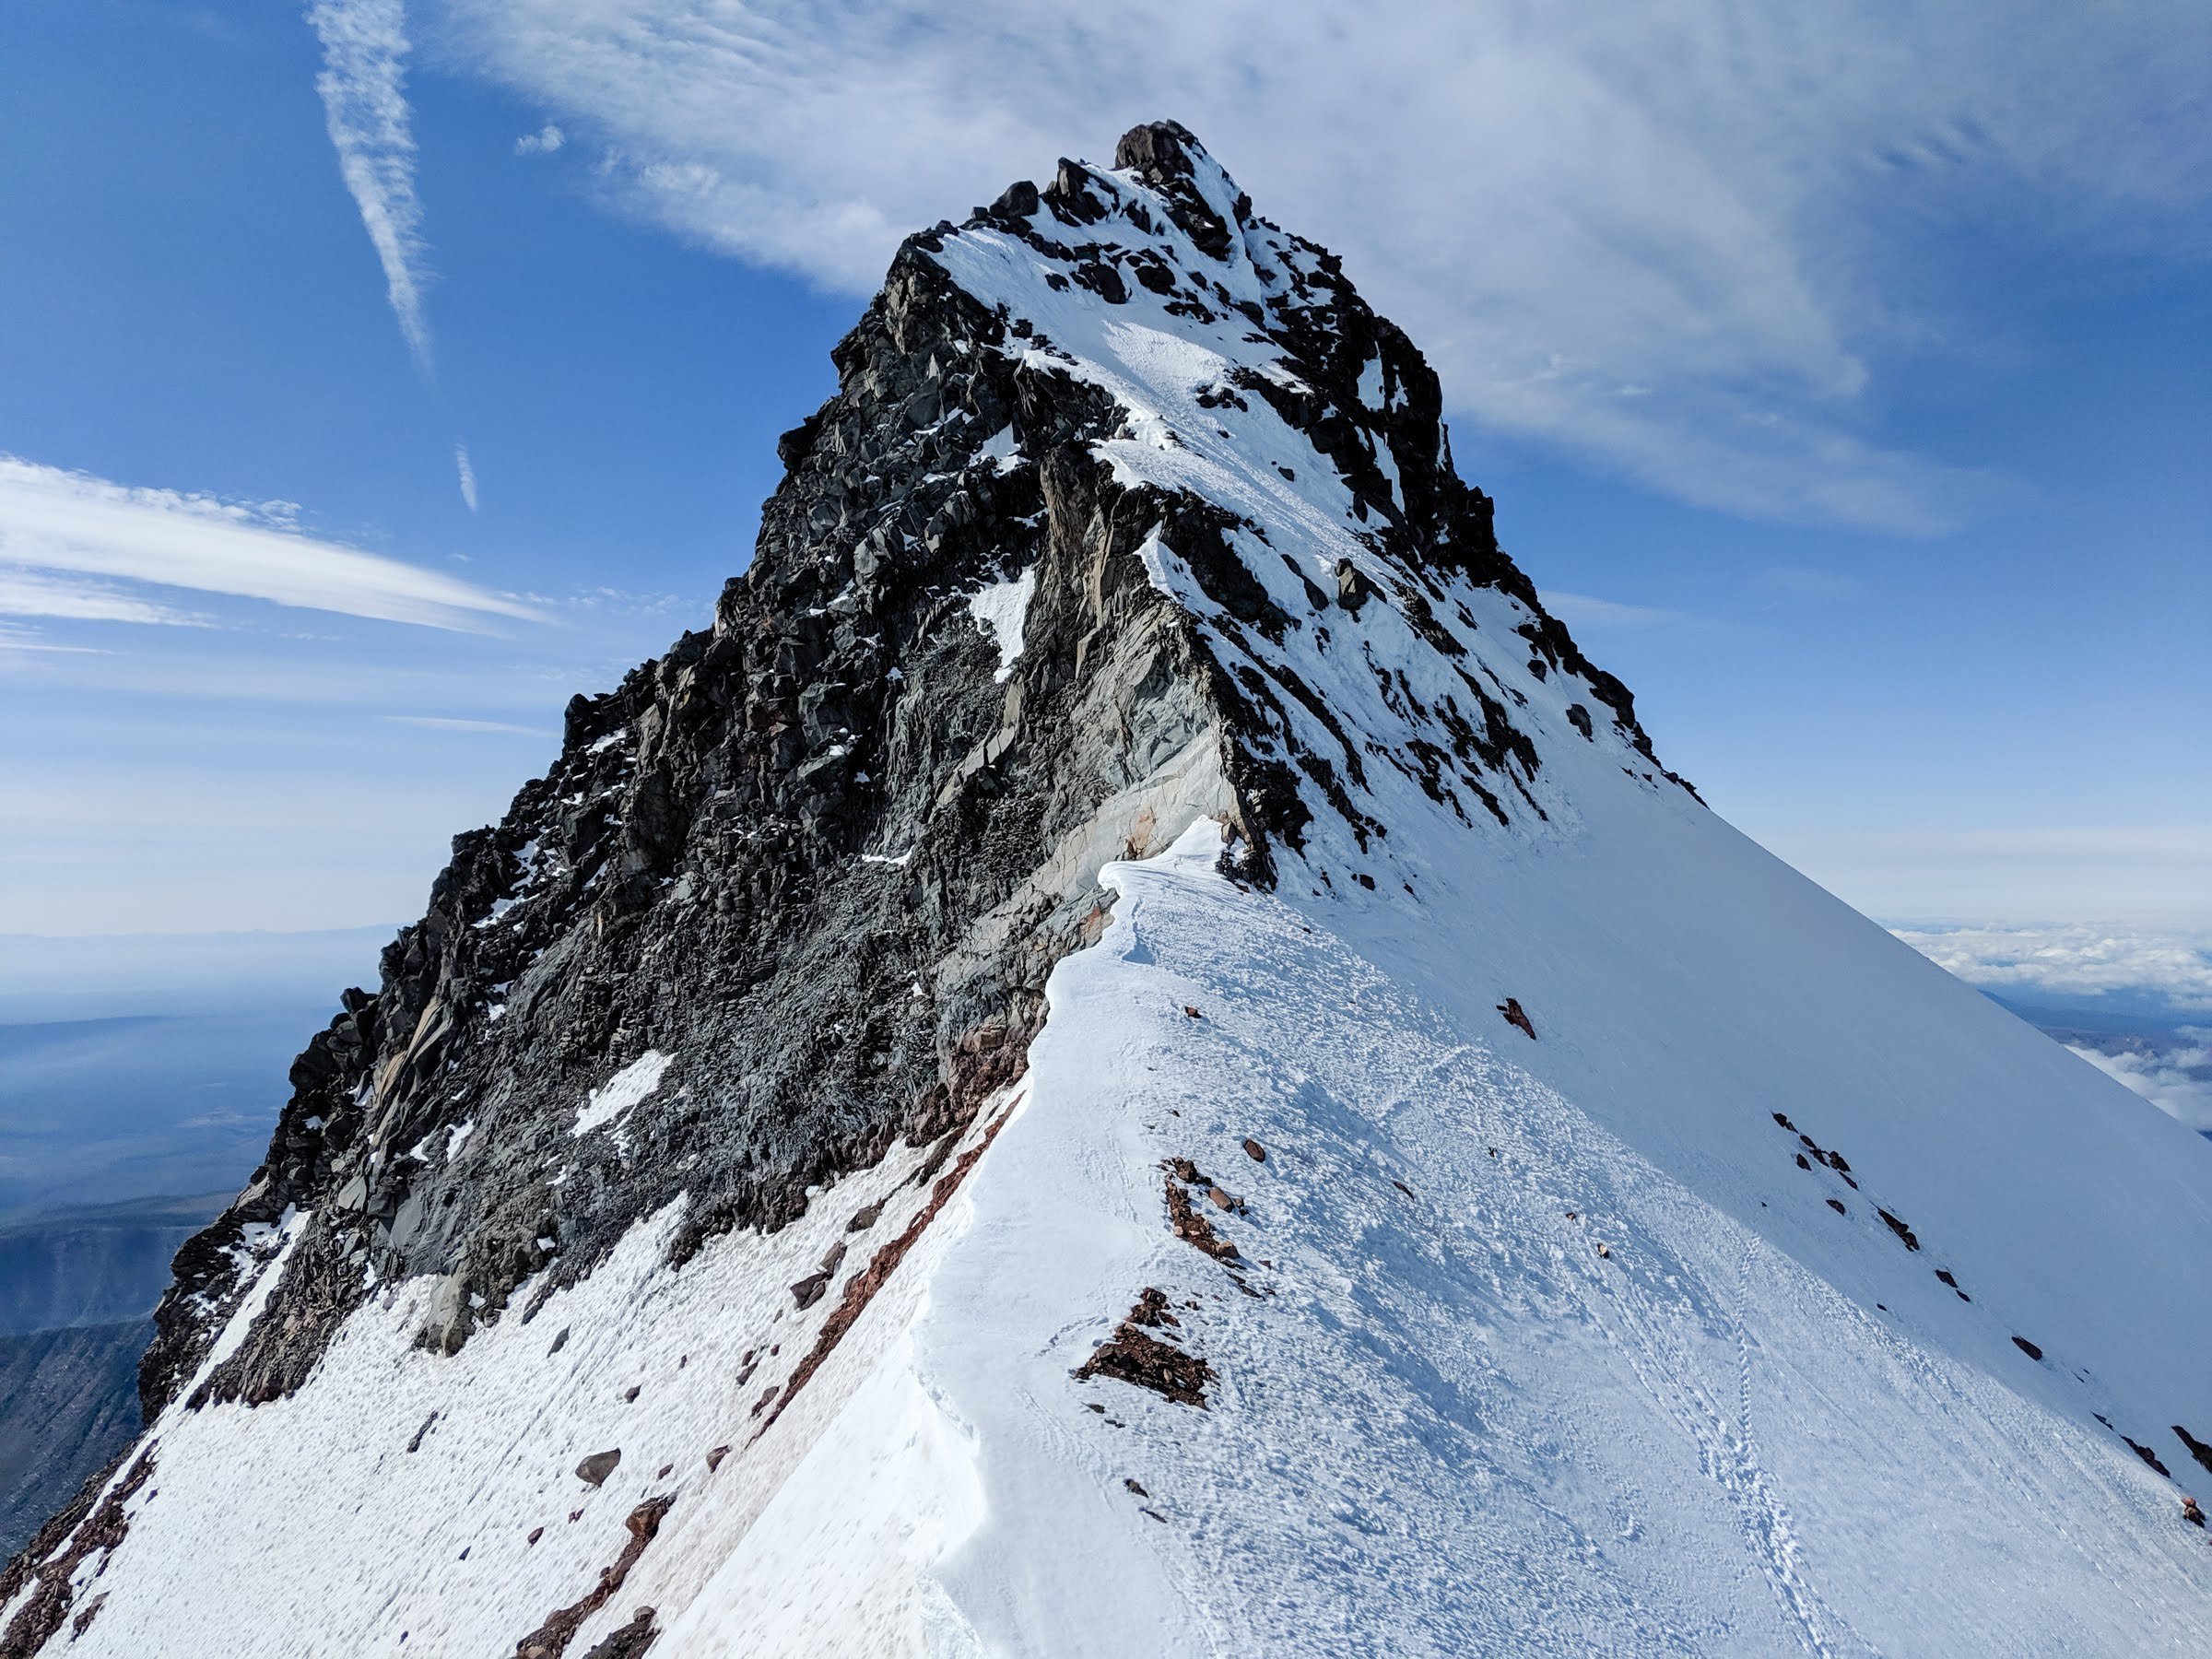
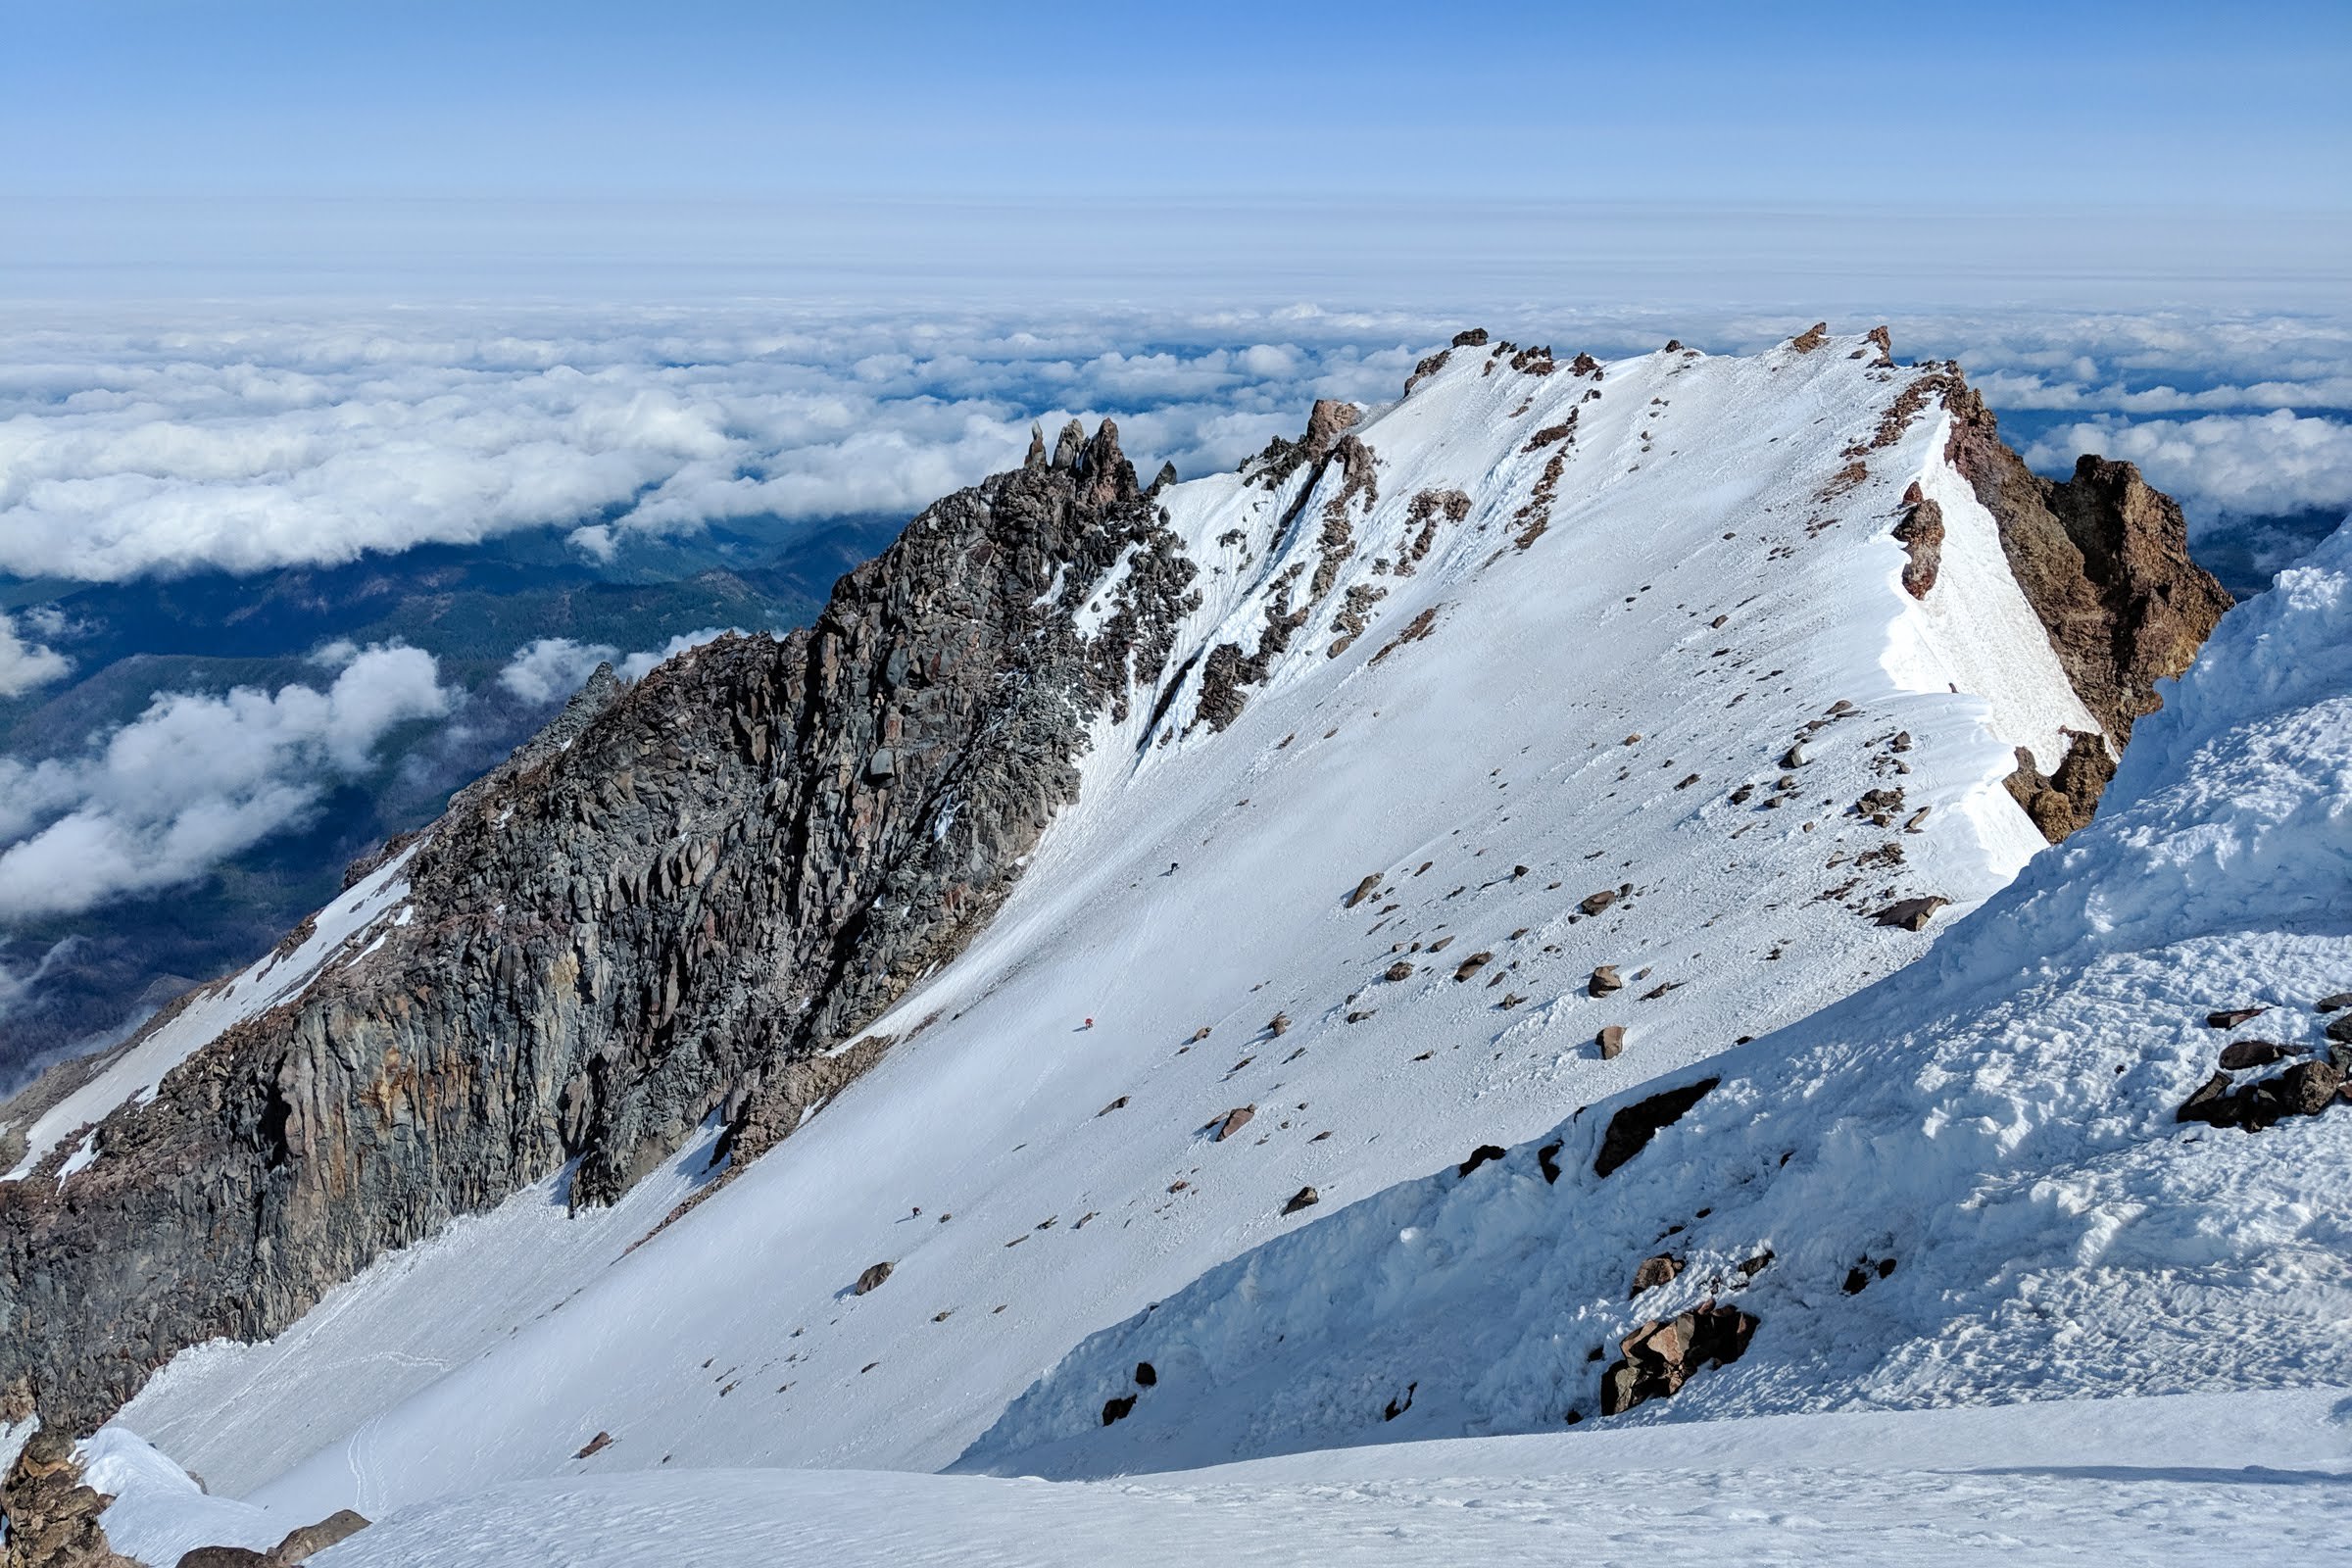
Trip: Mount Jefferson - Jefferson Park Glacier Trip Date: 07/05/2019 Trip Report: Jefferson Park Glacier was in our sights, but warm weather in the forecast made us a bit wary. The freezing level was around 13k with overnight temps on the summit in the low 40s. Glacier Peak was also on our list, so we opted to play it safe and plan for that instead. However, as the weekend approached the weather forecast was improving slightly for Jefferson and turning poor for Glacier Peak. Jefferson it is! I was excited since this would be my first climb in Oregon. On Friday afternoon, five of us met up at the Woodpecker Ridge trailhead. On the drive in we took note of conditions on the north ridge and the summit block. The ridge looked completely covered and the northwest face of the summit pyramid was a mix of snow and rock. Now the question was what the Jeff Park Glacier looked like and what we would find on the narrow ridge connecting the top of Jeff Park Glacier and the north ridge. At around 14:45 we took off on the trail in the direction of Jefferson Park. We considered camping at Jefferson Park, but discussed knocking off another 1000' and camping higher on the ridge so we could get a better look at the glacier in daylight. The skies were clear with the occasional cloud and the absence of trees on the trail made for a warm approach. Shortly after reaching the Whitewater Trail junction, we turned uphill for the ridge that sits east of Russell Creek and leads up to the toe of Jefferson Park Glacier. It seemed like 6800' was a common area to camp so that's what we aimed for, though there were also accounts of camping at 7400'. At this point we were still unsure of our descent route (Russell or Whitewater), so we planned to camp lower to avoid any unnecessary climbing back up to camp if we returned too low on the ridge. There was the occasional patch of snow on the way up the ridge and eventually we found a good spot around 6900'. It seemed like we were the only group up on the ridge. The lower shrund was long and extended well east under the active rockfall area, but looked easily passable. It was hard to tell what the upper shrund looked like so we would have to until morning to find out. With warm weather still in the forecast, we planned for a 0200 departure time so we could start getting some daylight as we approached the cracks on the glacier. The forecast also called for some breezy conditions the next day which we were beginning to experience at camp. After melting some snow we retreated to our tents with alarms set for 0100. It was 50°F when we woke up with clear skies and a light breeze. We gathered our gear and at 0200 were off, heading up the ridge. Shortly after, we passed a small bivy site at 7400' and then were standing on the glacier where we geared up as a team of 2 and 3. Still all by ourselves, we picked a direction and started uphill in the dark. Not too long after, we saw headlamps appear on the ridge to our left. A team of 5 was moving along the ridge and I thought they were heading up the north ridge route, but eventually they descended and joined us on the glacier at nearly the same elevation. We found out later they were camping in Jeff Park. They were moving pretty quick and passed by. The snow was in great shape, not too soft and not too hard which made for easy steps and good purchase with the crampons. There was a thick enough crust that you wouldn't punch through but it was still possible to drive your axe shaft all the way in to self belay as the grade steepened. As the other group reached the crevassed area below the shrund with a hint of daylight, they roped up and began placing pickets and simul climbing. This slowed their progress a little bit and we climbed to their left to avoid any ice debris from them, but unfortunately we didn't give them a wide enough berth. A large dinner plate sized chunk of crust released from their party and started falling between the two groups. We tracked it in the low light and at first it looked like it would miss us like some smaller ice pieces that fell before, but this chunk moved differently. The piece whizzed by me (2nd to last) less than 10' away and struck the last person in our party. He saw it coming and was able to somewhat shield himself where it hit his chest and arm, but it still took him off his feet and knocked the wind out of him. After a short rest and assessment, he just had a sore arm and ribs and nothing appeared to be broken. It could have been a lot worse... We continued towards the lower shrund, moving a bit further climber's left to avoid another incident while keeping an eye out for rocks above. The grade steepened to about 35° as we skirted around the lower shrund, but with the great snow conditions we felt very comfortable. The 2nd tools remained stowed and we didn't place any pro. Once we were above the lower shrund and traversed under Mohler Tooth we finally got a good look at the upper shrund to find a small crack that was easy to cross. Here we took a break while we waited for the other party to climb this section since it would have been a little crowded. After the other group was clear, we crossed the shrund and cruised up to the saddle between Smith Rock and Mohler Tooth. It was around 0700 at this point. The ridge looked to be snow free, so we stowed our crampons and waited for the group to get out in front of us so we weren't right on their heels. The ridge climbed nicely. Our lead did place a few cams and slung a few rocks along the way since we brought them, but it really didn't feel entirely necessary if you're comfortable with scrambling. I feel like I've climbed more exposed terrain that was classified as 4th class. The last part of the ridge before joining the north ridge was still covered in snow/ice, so maybe that portion is the low 5th class climbing I read about once it melts out. We put our crampons back on and finished the ridge to reach the north ridge. The group in front of us decided to descend down a snow gully to the glacier instead of finishing the snowy part of ridge, so we were finally able to get past. Now on the north ridge, we started the trek south to the summit pyramid. The snow was still firm and there was an old boot pack, so we made quick work of the ridge. The summit pyramid was a mix of snow, ice, and rock like we saw the previous day from the drive and it looked like the route to the summit was all snow/ice. At this point we grabbed our 2nd tools and the group of 3 lead the way. The first portion was a fairly steep (~60°?) mix of snow and ice, but we were able to make good purchase with the tools and crampons. A couple cams were placed and there was good ice for a screw. This first portion topped out at a rappel station at the base of the large snow patch, about a third of the way up the summit block. This was probably the toughest section to climb, but looking back at the pictures we likely could have made things easier by traversing a short ways under the summit block before heading up. But it was still fun climbing nonetheless! We then hiked up the snow and began a traverse south, underneath and to the west of the summit. The route would continue south and eventually turn east to wrap around the south side of the summit. This was the second portion of steep climbing, albeit easier than the first. Once again we protected this with a couple cams and a screw before reaching the plethora of slings at the summit. We made it! The summit was just big enough for the five of us to hang out and take in the views. From here we contemplated our descent route. The Whitewater Glacier was our default and there looked to be a nice rappel off the south of the summit down to snow which could then be easily downclimbed to the Whitewater (compared to making the traverse underneath and to the west of the summit pyramid to Red Saddle). The Russell Glacier was also an option, and with the still firm snow conditions and a good bootpack heading down the Mill Creek Glacier, we decided to give that option a go. We rapped off the west side of the summit, down to the snowy traverse section, and then downclimbed to the rappel station we first encountered on our way up. At this point the other party was beginning their climb up the summit pyramid. Another rappel and we were off the summit pyramid and heading down the Mill Creek Glacier. We followed the tracks and had a rough idea where we were heading based on views from the summit and a GPS route, but soon the tracks disappeared and we were left just making the steep snow traverse toward the Russell. We took the path of least resistance and soon found ourselves crossing a scree field before eventually reaching the Russell at 8600'. I think we took a pretty good route to the Russell. Perhaps earlier in the season with more snow one could traverse higher and enter the glacier at a higher point, but with the current conditions we found ourselves at a good spot on the Russell. Higher up there was a lot of exposed scree and the rockfall was very active. The next challenge was to descend the Russell and find a good traverse back to camp to avoid hitting the ridge too low and having to climb back up. Scree was the theme of this portion. We descended the Russell on snow, but soon had to start traversing which led to plenty of scree fields separated by snow patches. Again, we took the path of least resistance while aiming high. Eventually we found ourselves to the west of our ridge with only about a 300' climb back up to camp. Not ideal, but I think we took the best route we could all things considered. If we did it over again this time of year, I think we would opt for the Whitewater descent. I think the Russell earlier in the season with more snow coverage would be a good option, but once the scree starts to show it makes it a bit of a pain especially since most of it is a traverse. After a rest at camp, we packed up and headed down the ridge and out to the trailhead. It was a long day but a great day! A good mix of glacier, rock, and ice. Excellent weather and stellar conditions. I'm happy to put down Jefferson as my first Oregon volcano! Time Stats: DAY 1: (time, duration, split time, elev, total gain, leg gain) 14:45, 00:00, 00:00, 4500', +0', +0', Woodpecker TH Start 18:10, 03:25, 03:25, 6900', +2400', +2400', Arrive Camp Day 1 Splits: 03:25, TH to Camp Day 1 Total: 03:25 ----- DAY 2: 02:00, 00:00, 00:00, 6900', +2400', +0', Leave Camp 02:30, 00:30, 00:30, 7450', +2950', +550', Start Jeff Park Glacier 06:50, 04:50, 04:20, 9950', +5450', +2500', Top of Jeff Park Glacier 09:05, 07:05, 02:15, 10180', +5680', +230', Gained North Ridge 11:00, 09:00, 01:55, 10495', +5995', +315', Summit 14:50, 12:50, 03:50, 8580', +4080', -1915', Gained Russell Glacier 17:00, 15:00, 02:10, 6900', +2400', -1680', Arrive Camp 21:00, 19:00, 04:00, 4500', +0000', -2400', Woodpecker TH End Day 2 Splits: 09:00, Camp to Summit 06:00, Summit to Camp 04:00, Camp to TH Day 2 Total: 19:00 Day 2 Splits (excluding major breaks/waits) 06:20, Camp to Summit 05:00, Summit to Camp 03:00, Camp to TH GPS Route/Track: Our route can be seen and exported from here: https://caltopo.com/m/GB6S Photos: Woodpecker trail approach: Jeff Park Glacier: View from camp: Other party ascending Jeff Park Glacier (below lower shrund): Skirting lower shrund (Mohler Tooth to the right): Upper shrund (Smith Rock to the right): Smith Rock: North ridge and summit: Summit pyramid: Looking back (north) at the north ridge: First pitch on the summit pyramid: View from summit: First rappel: Traverse to Russell: Heading down the Russell: Gear Notes: Glacier gear, 2nd tool, light rock rack and a few screws. We had one 60m rope and one 30m rope. The 60m was nice to have for the rappels. Approach Notes: Woodpecker Ridge Trail


-
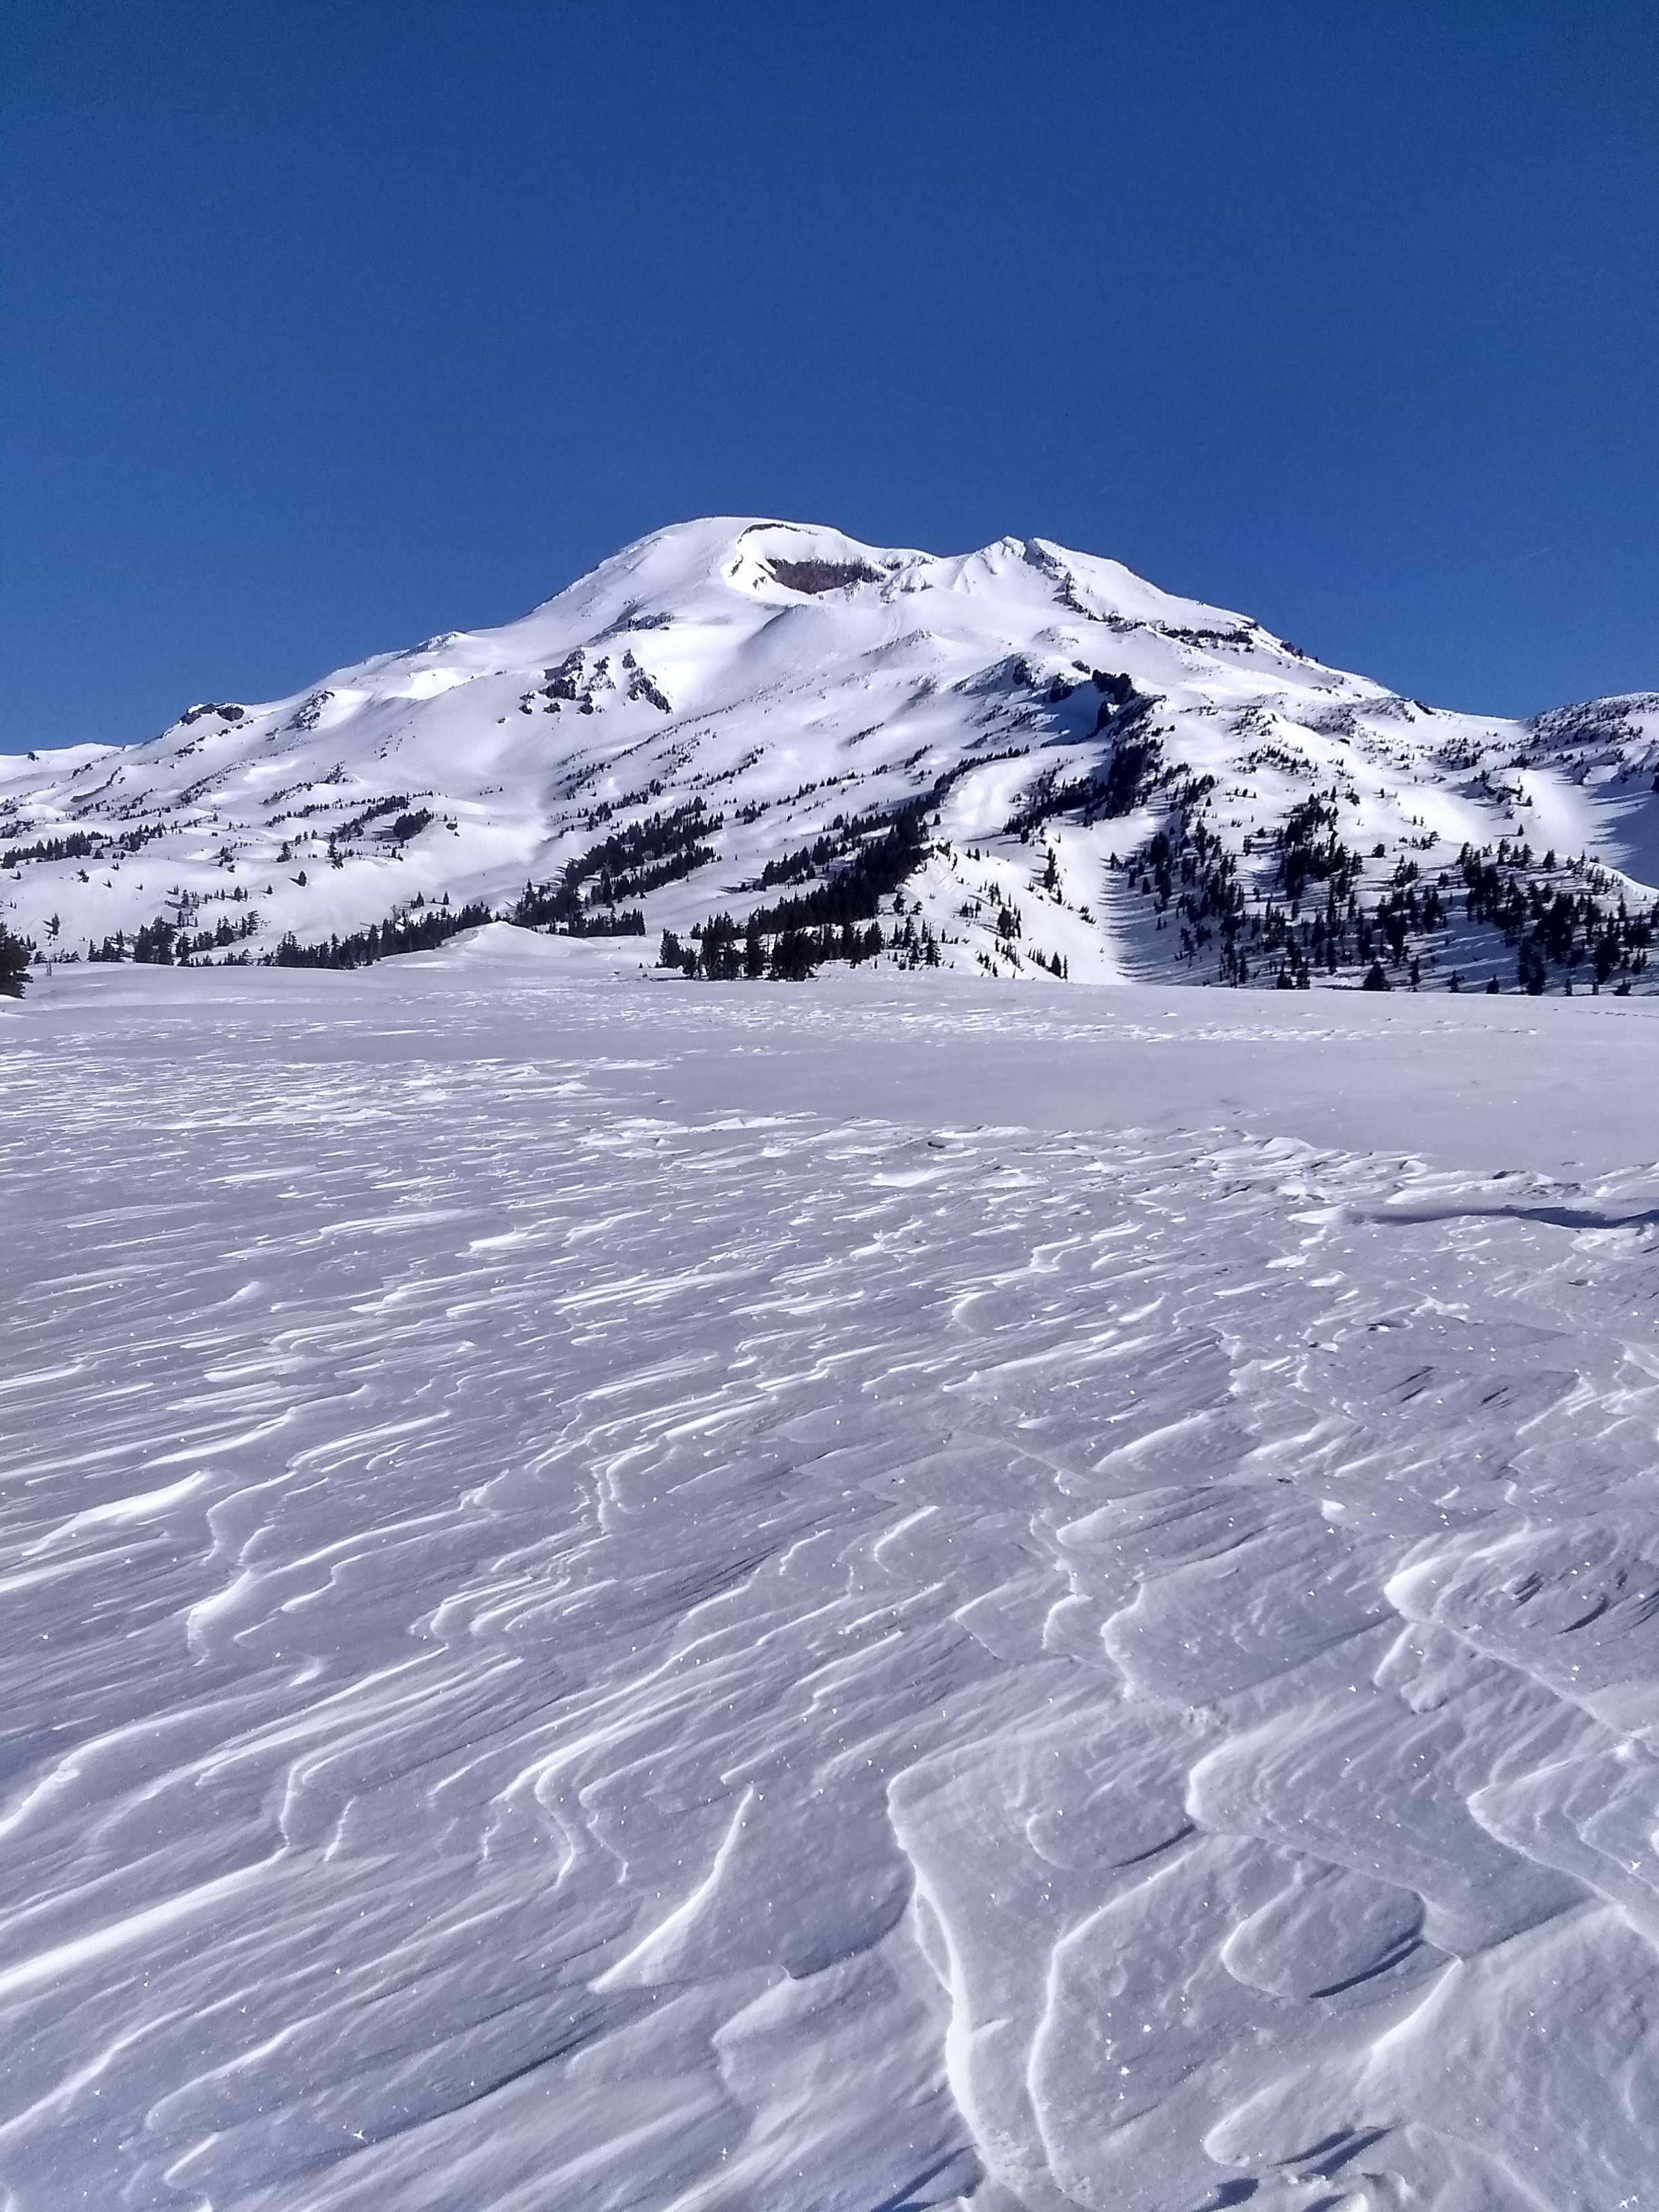
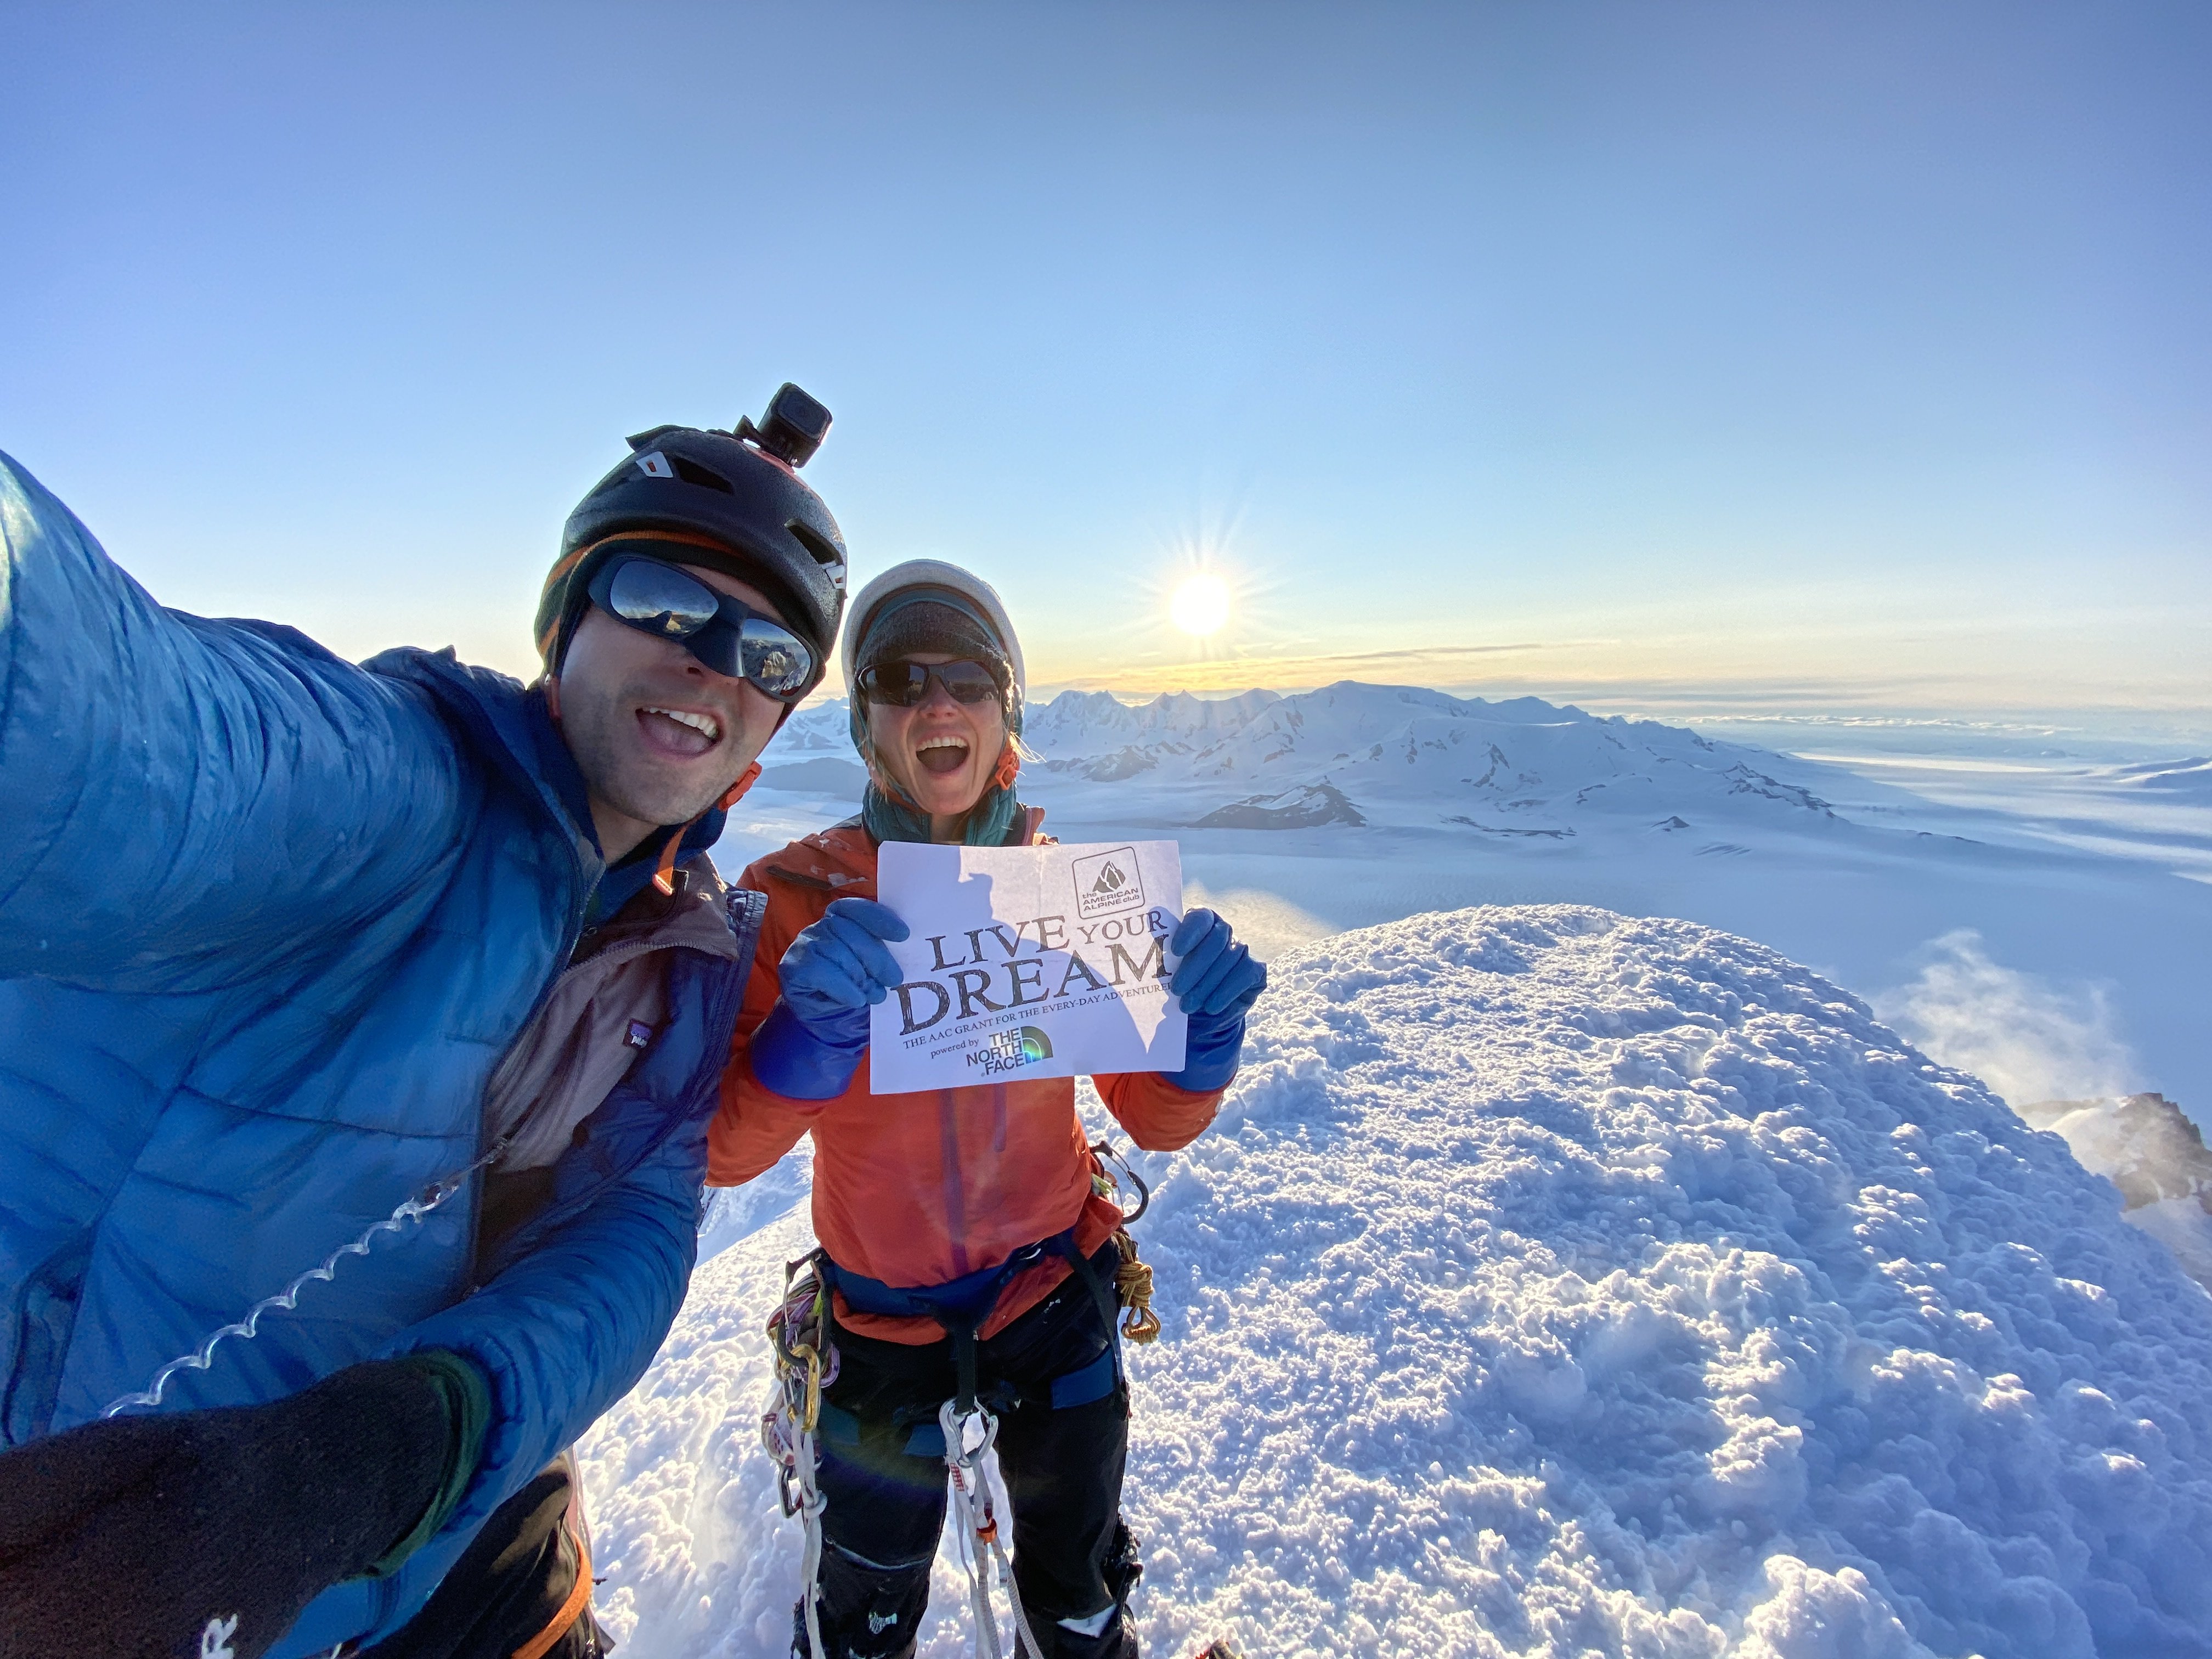
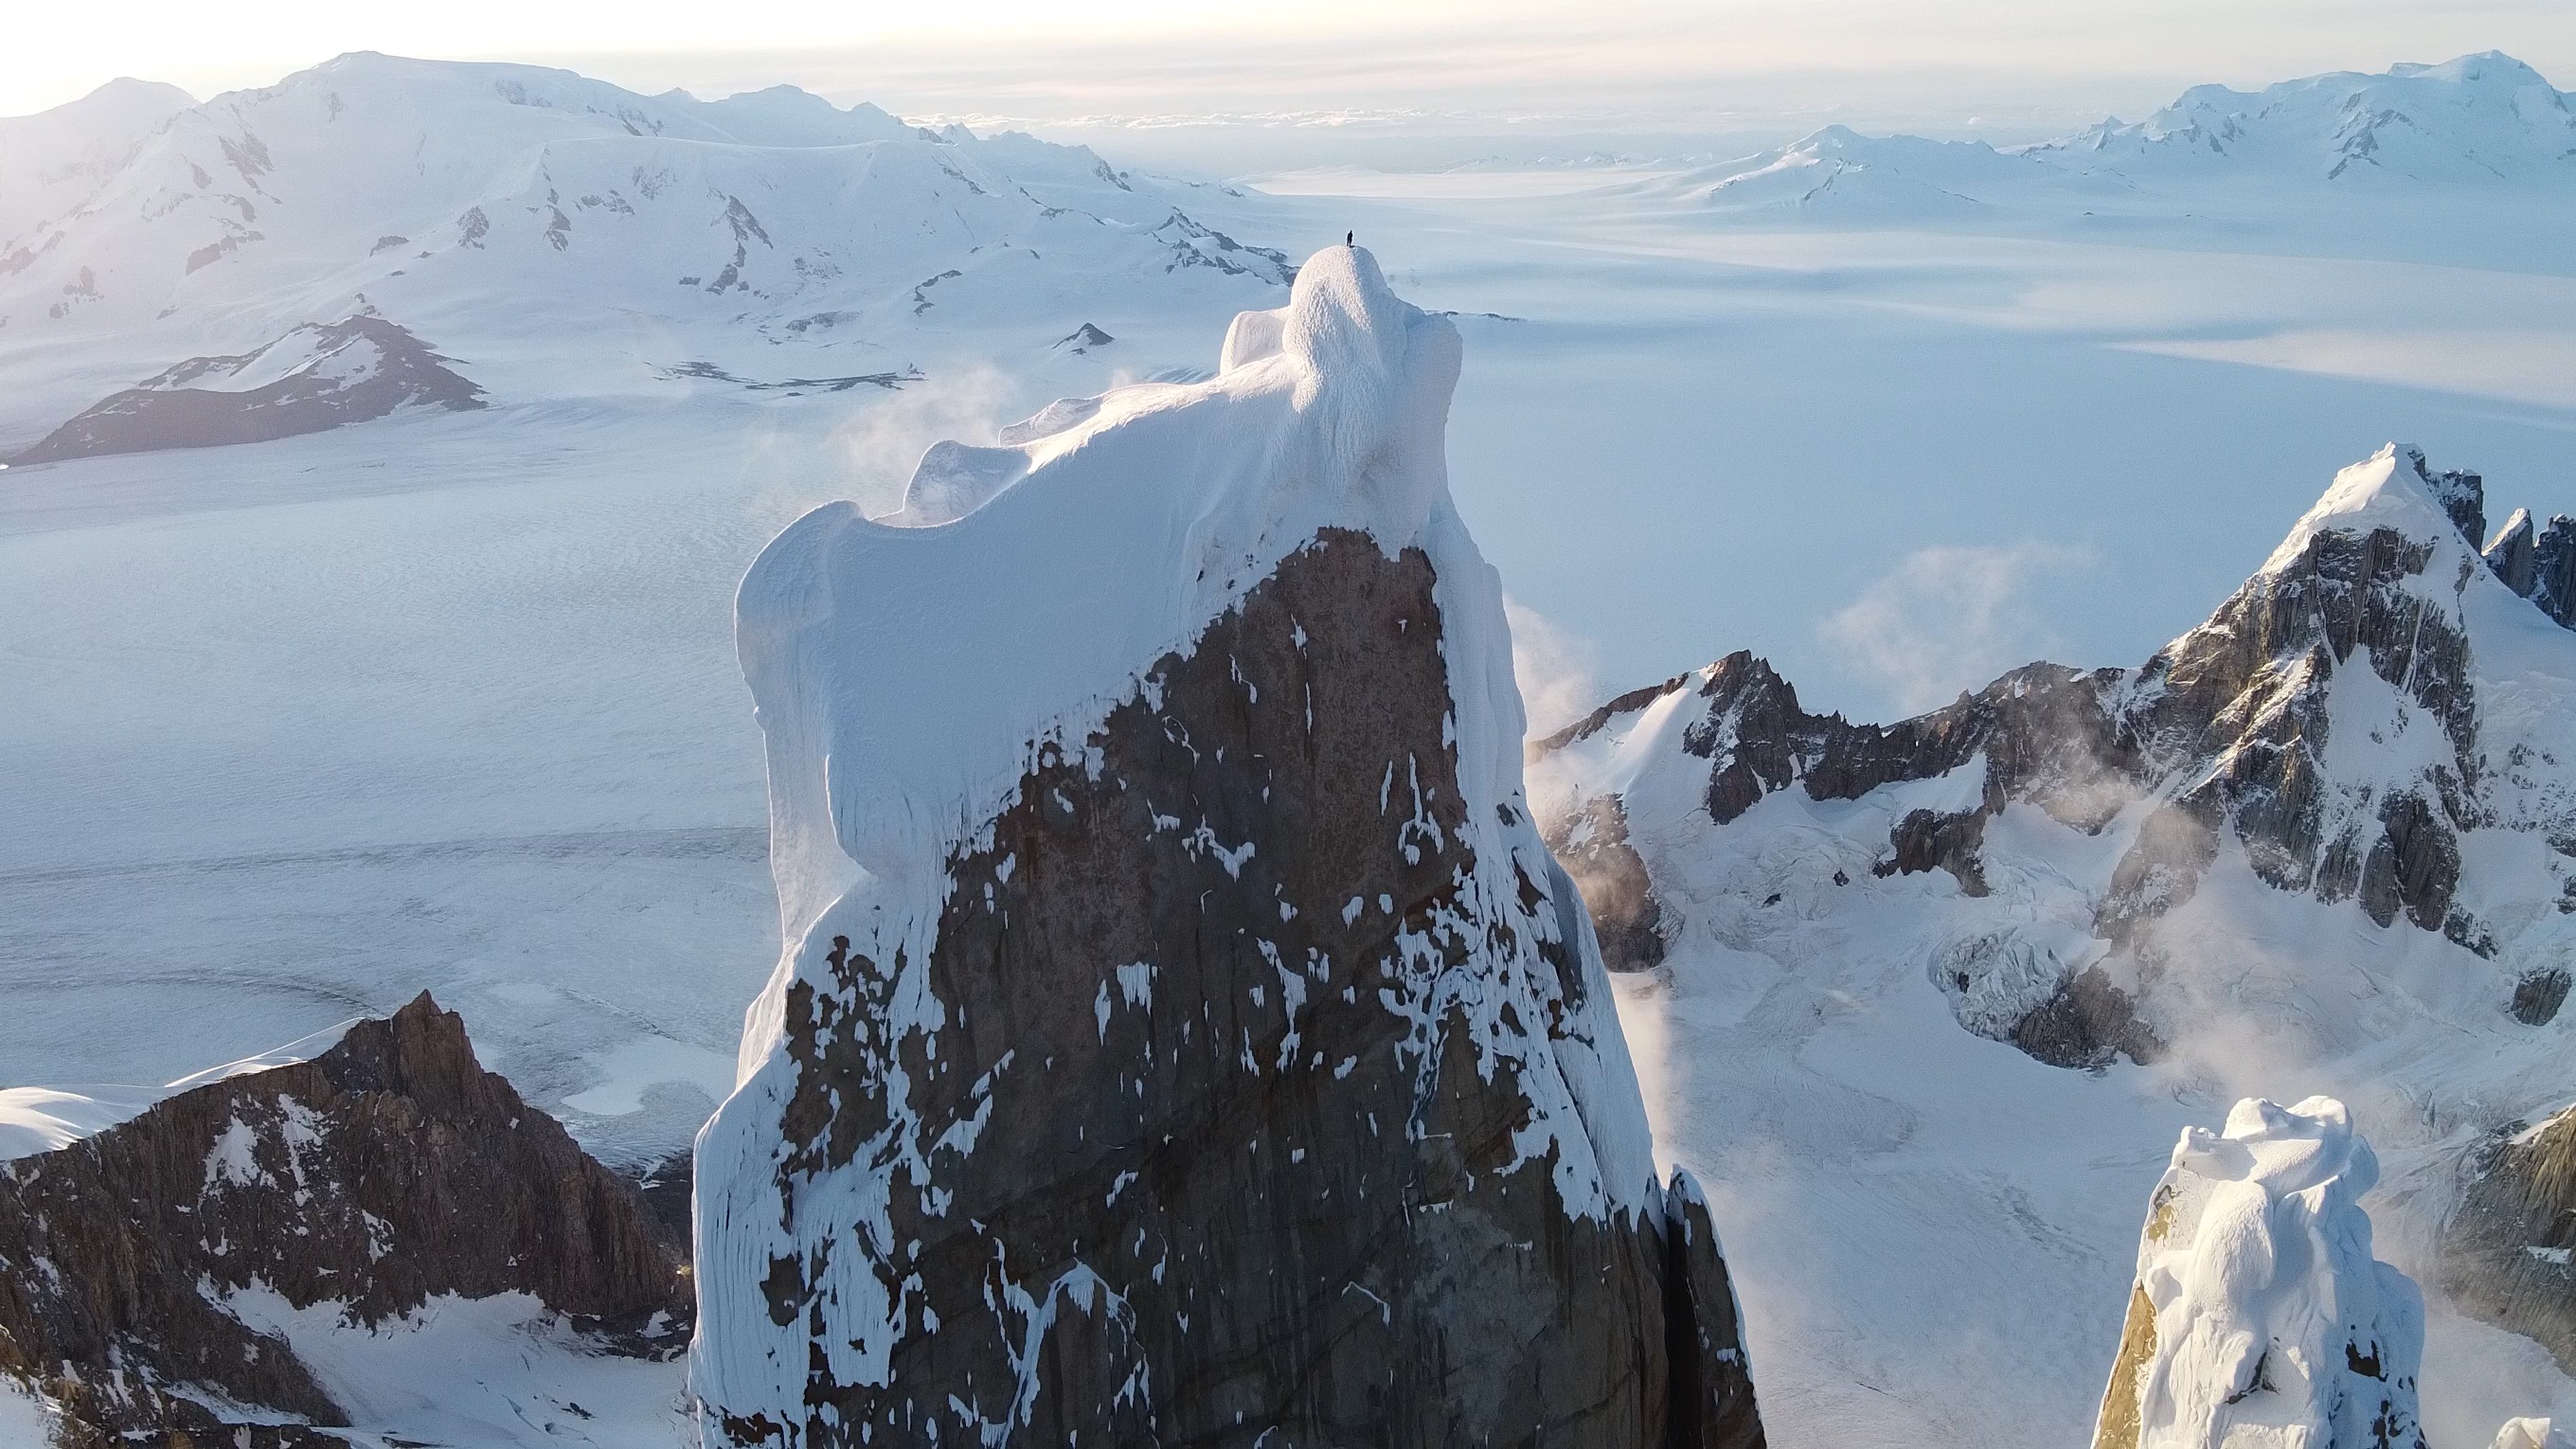
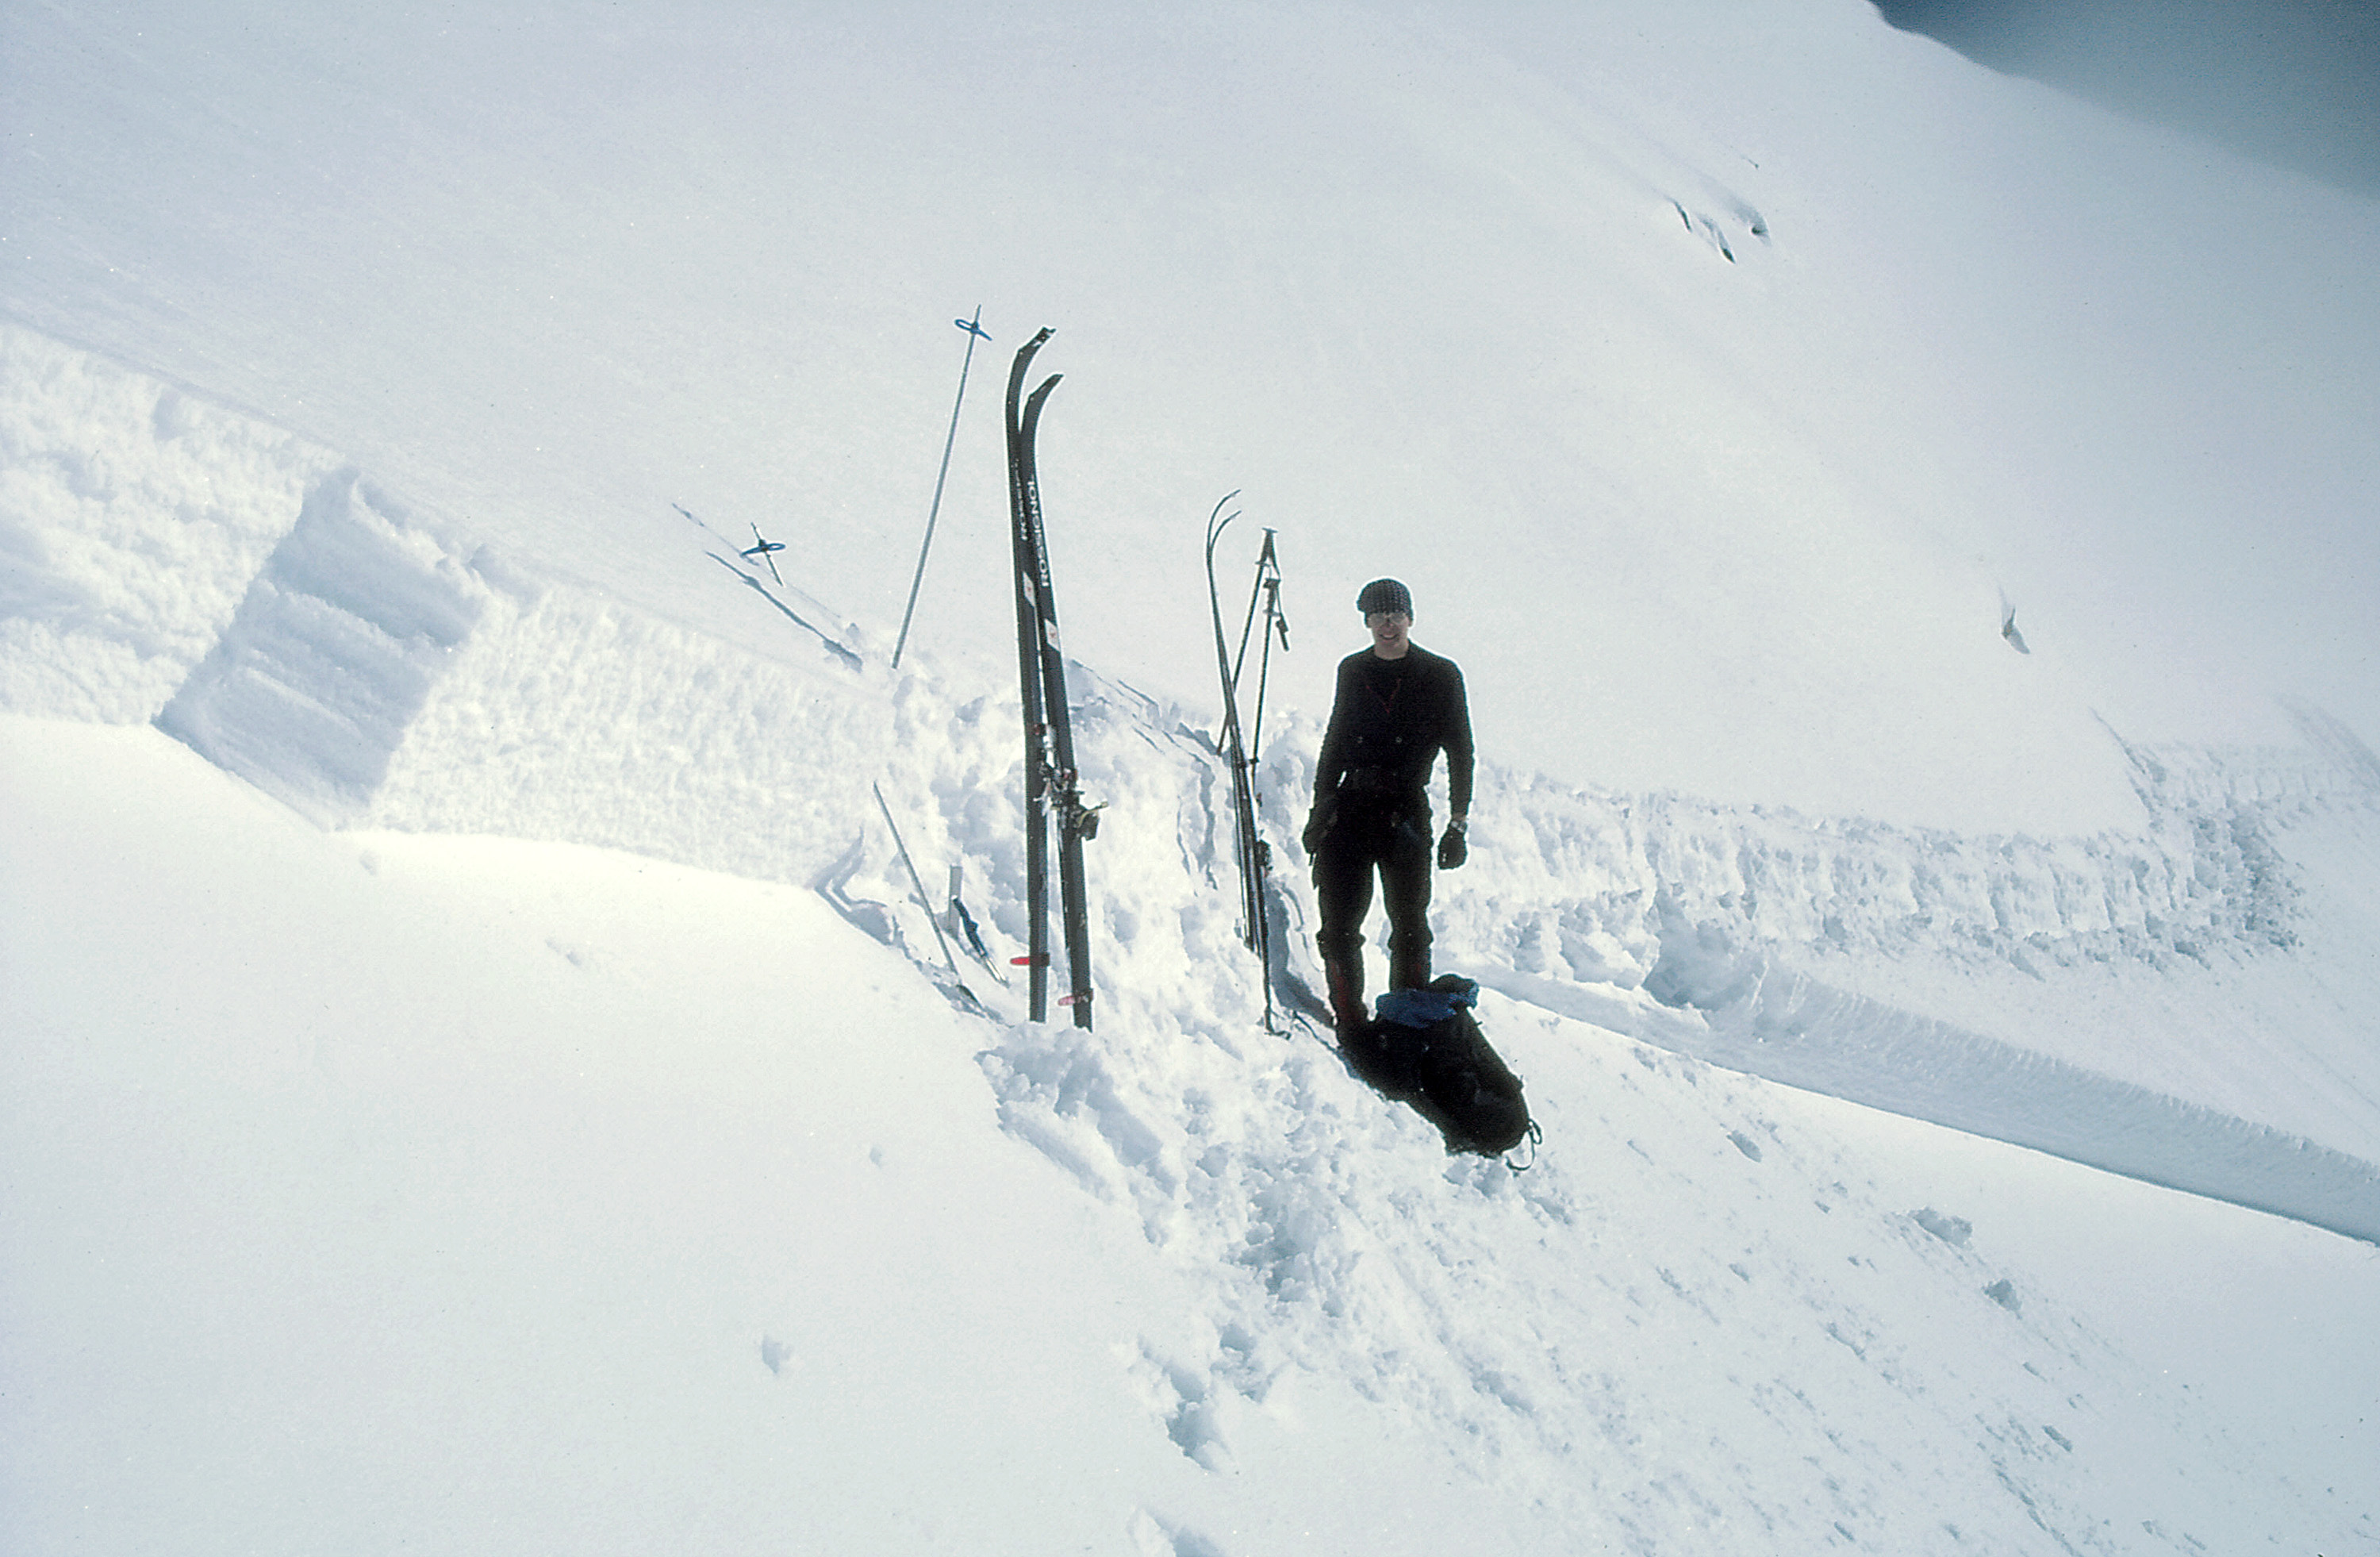
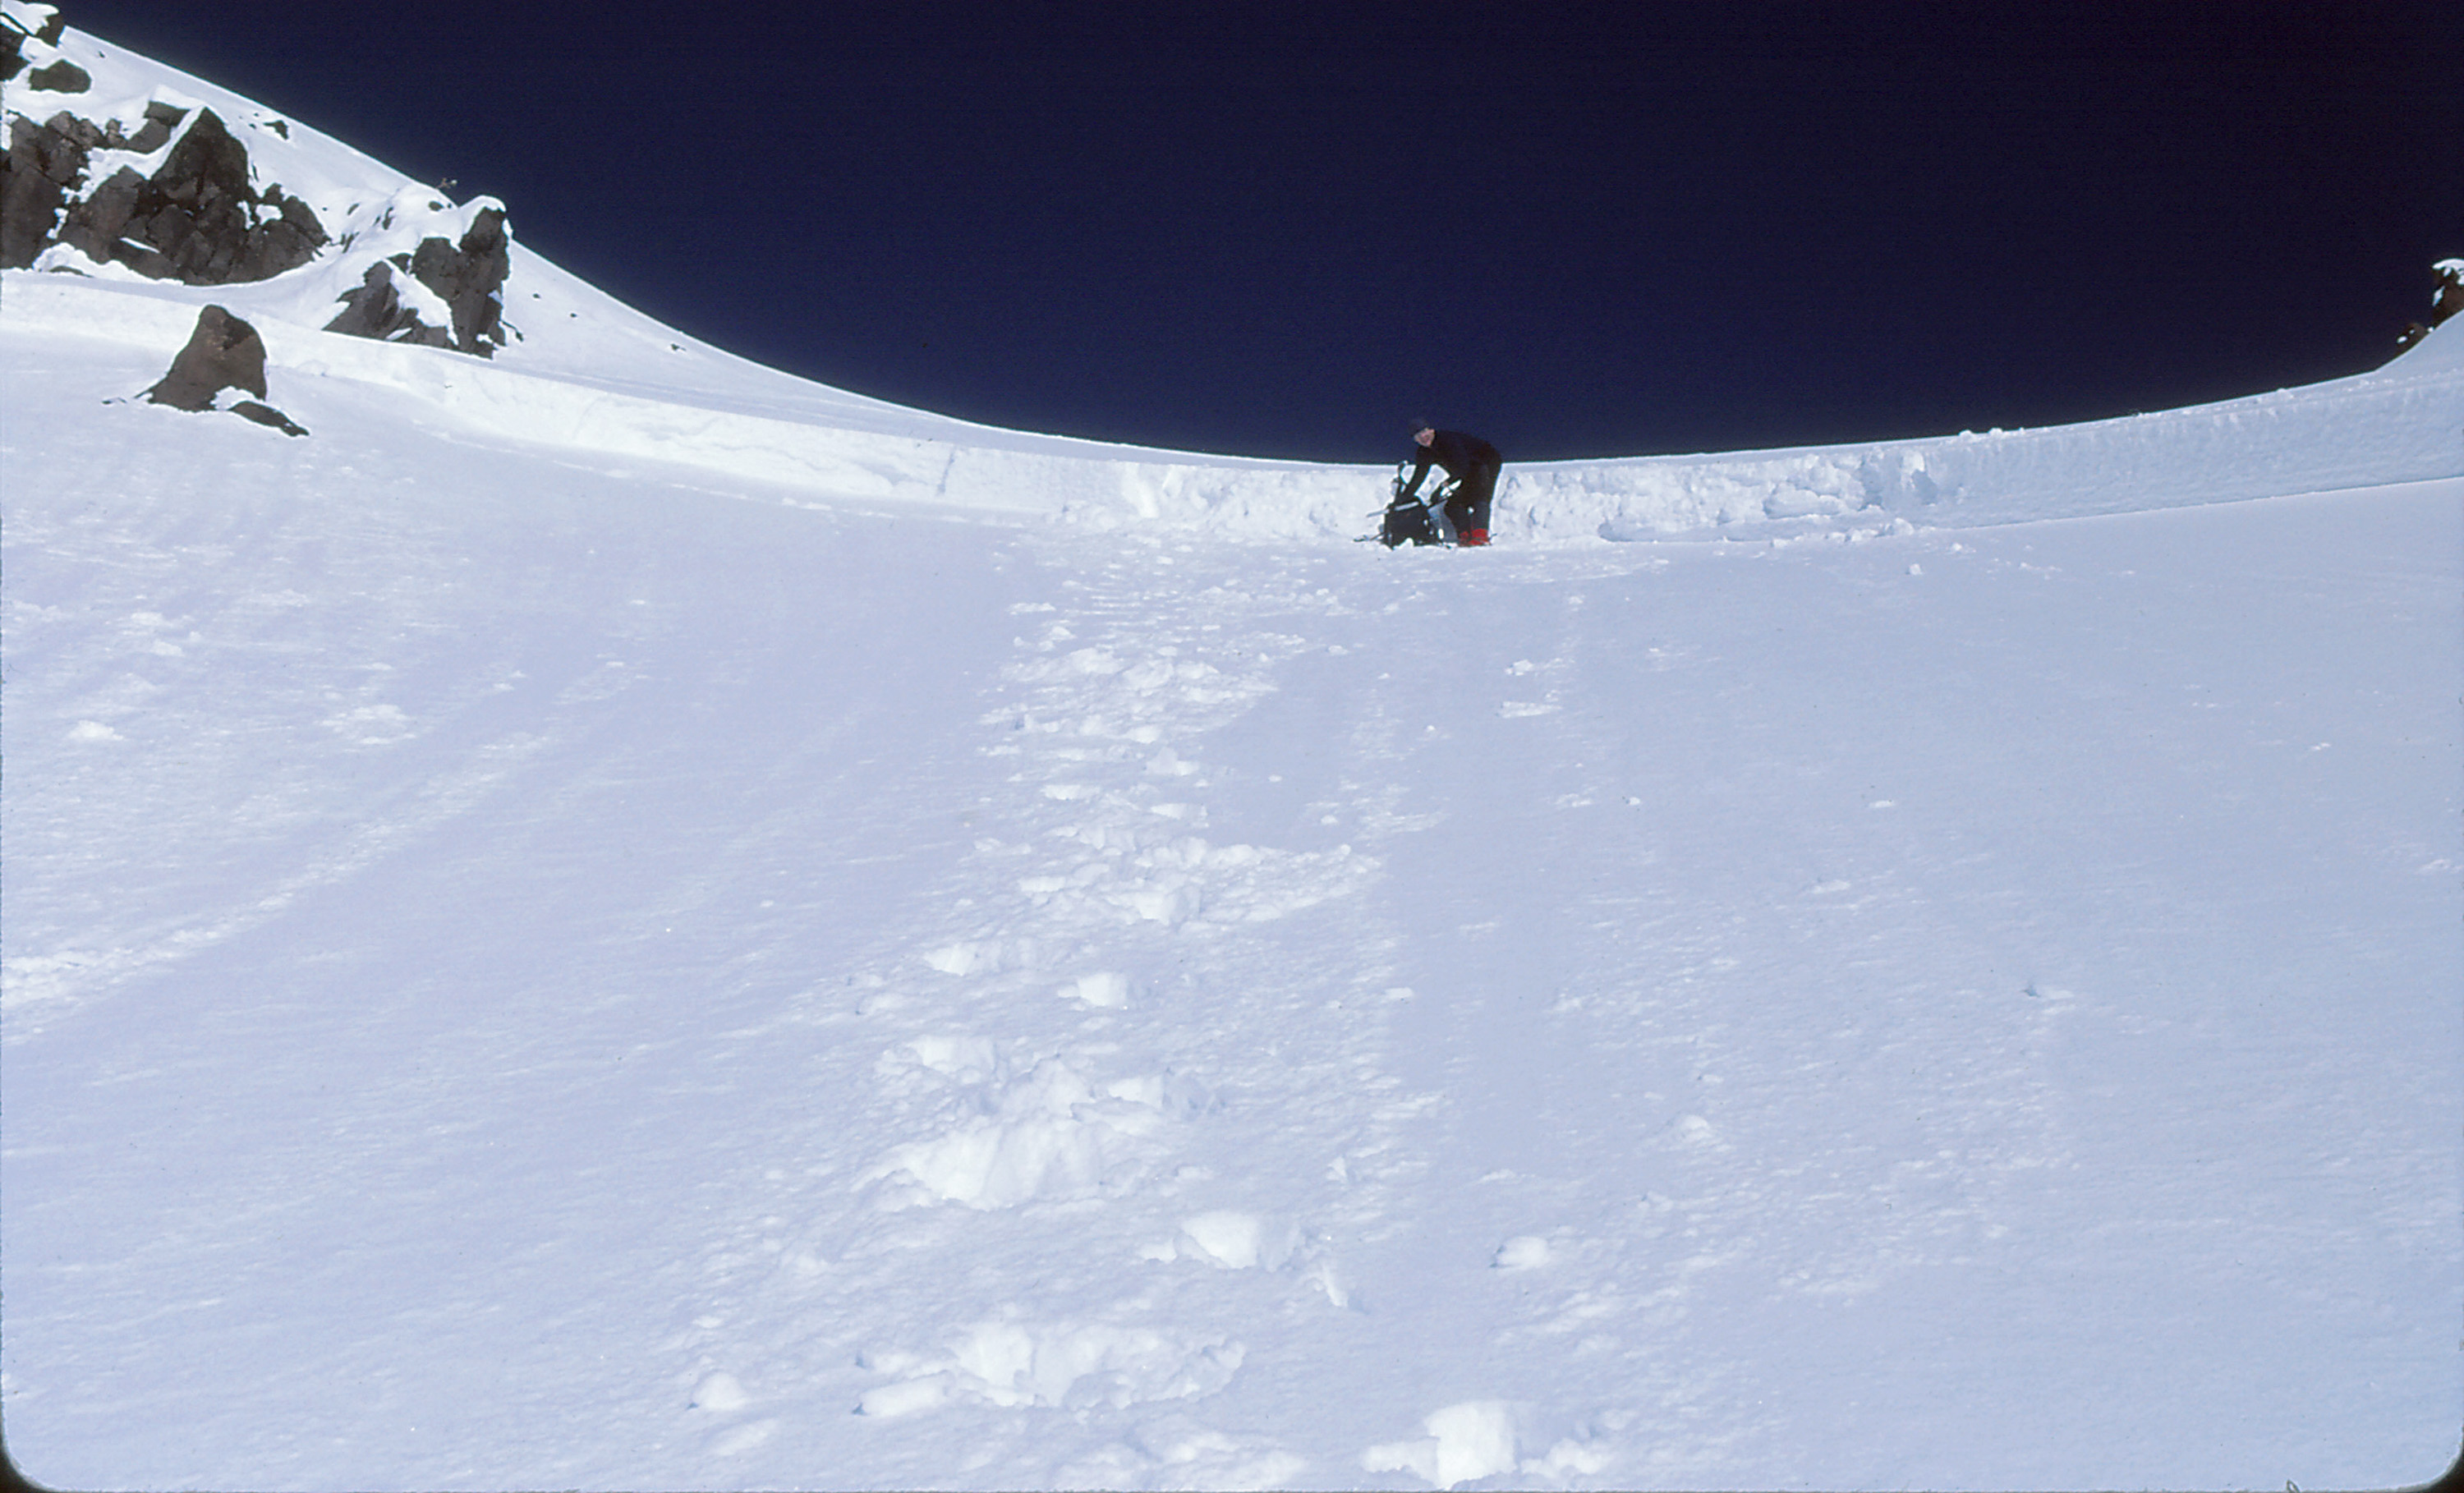
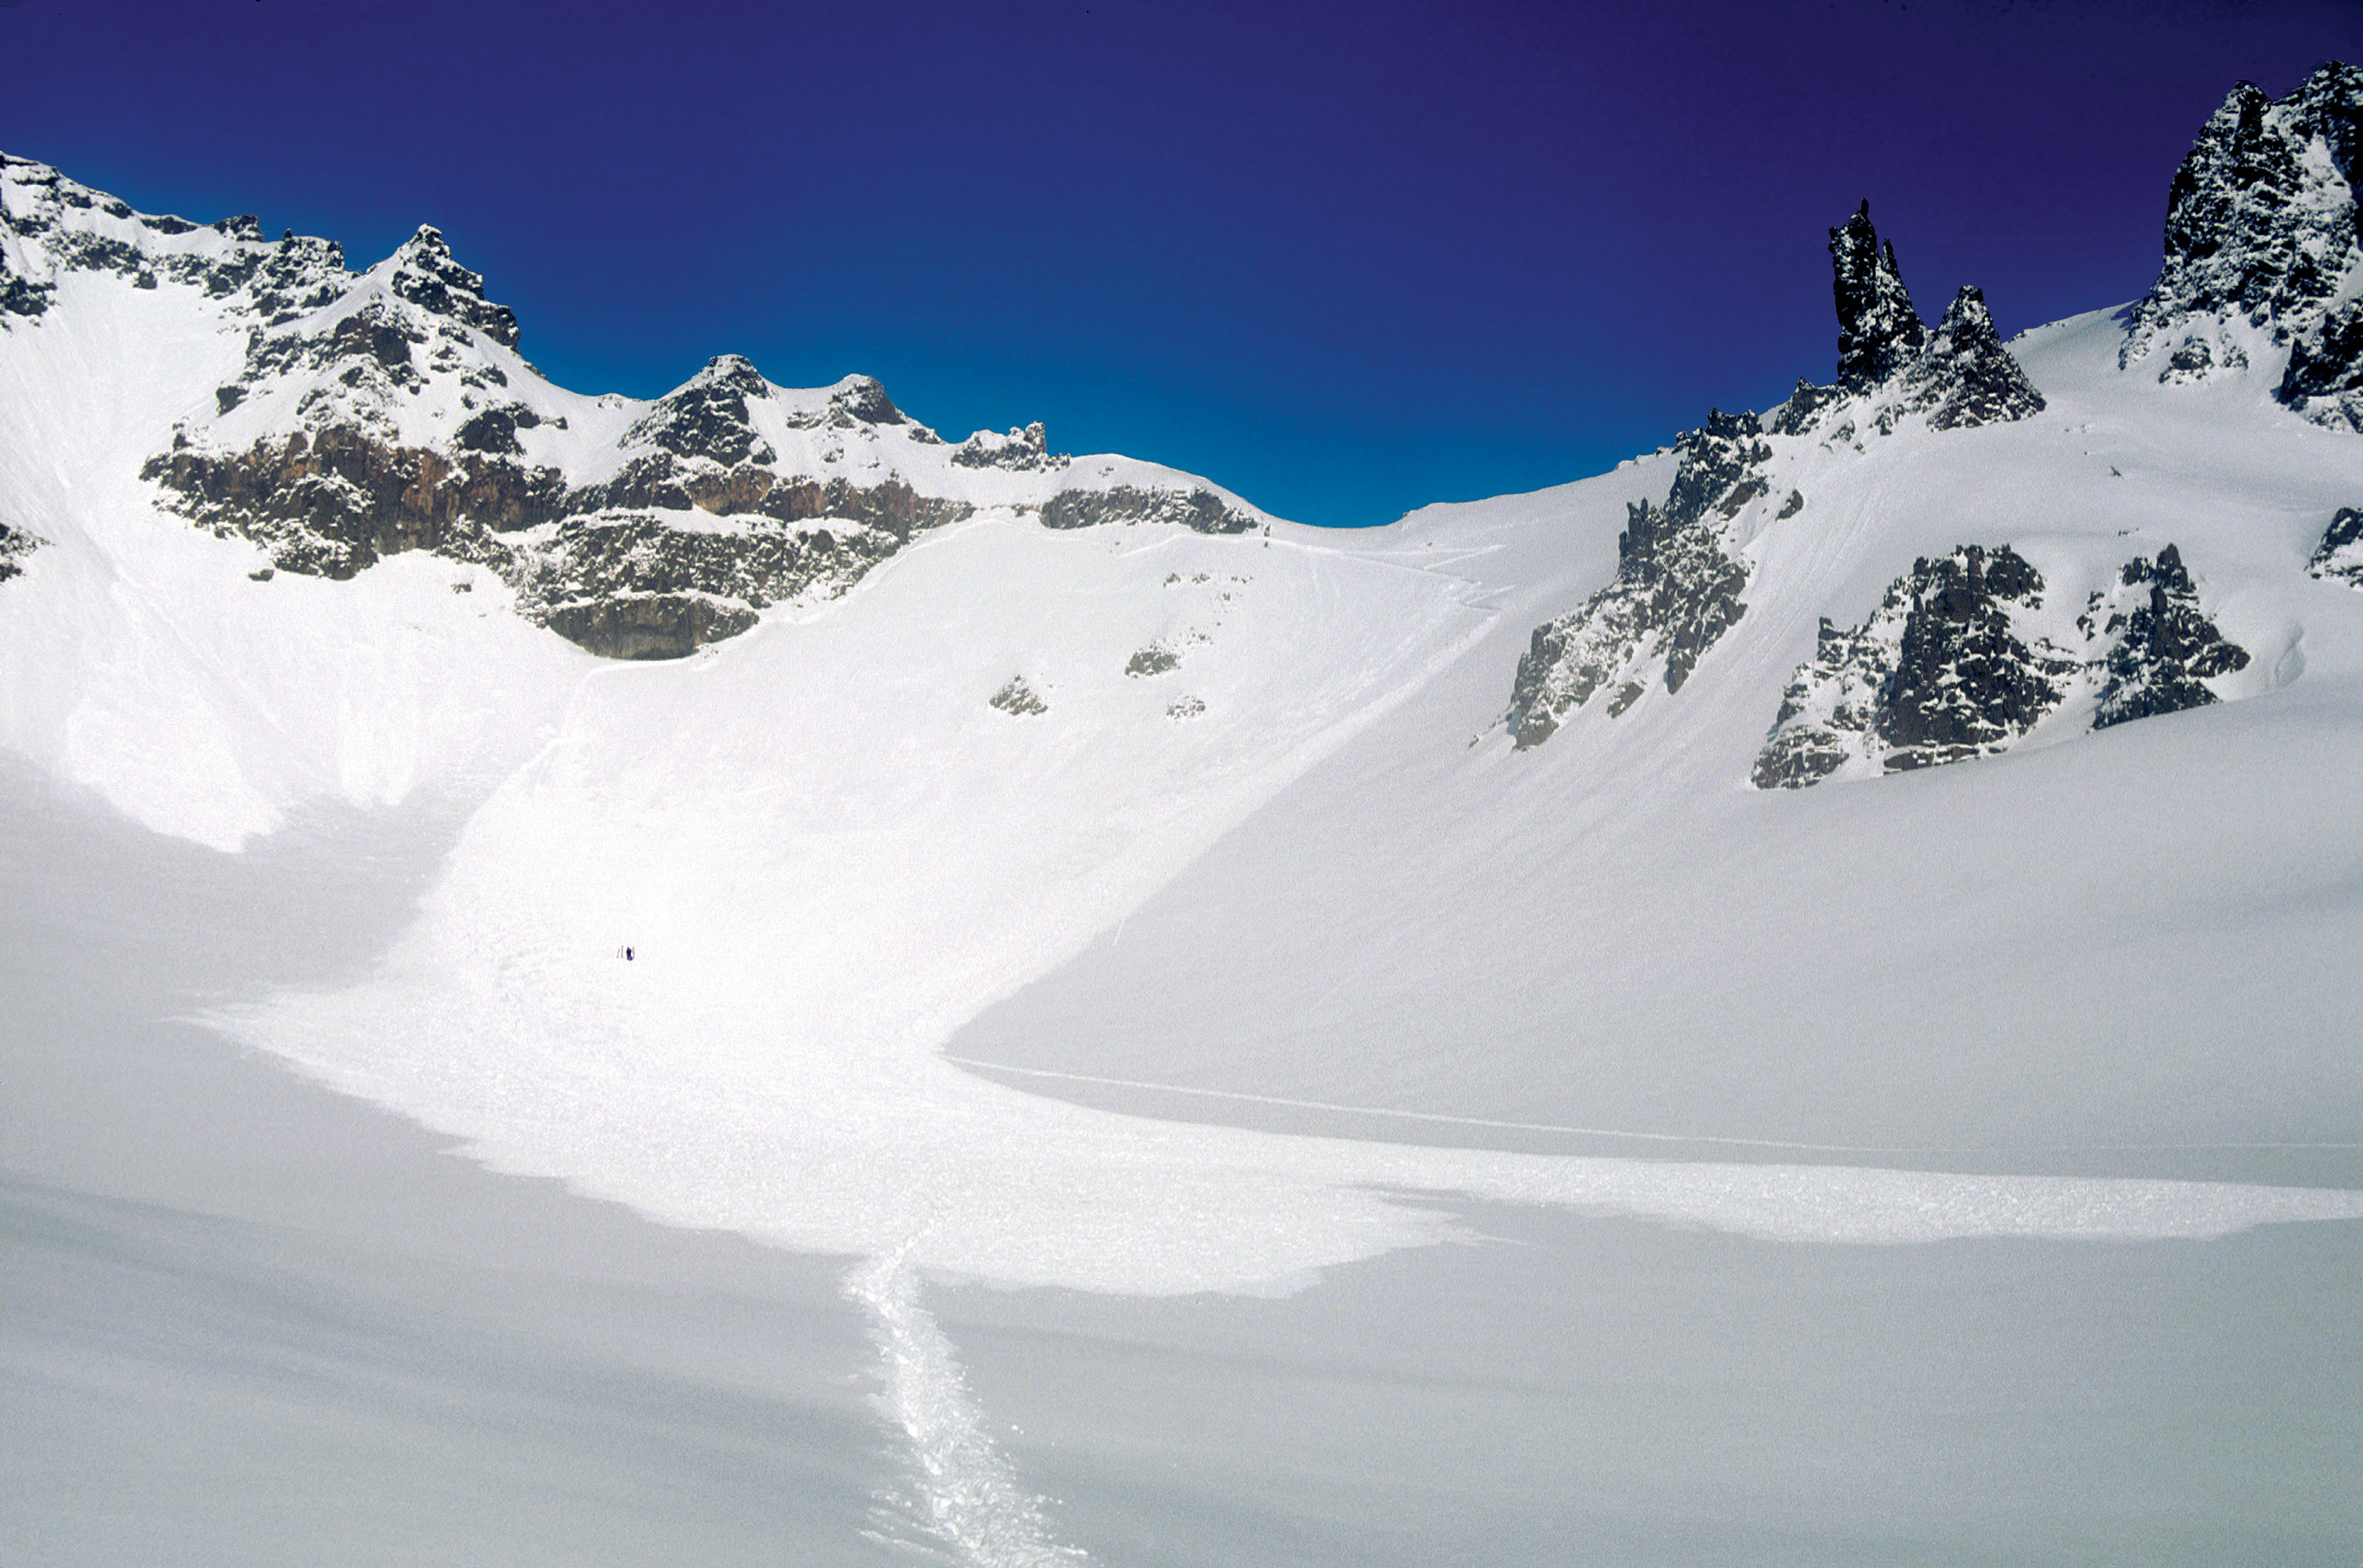
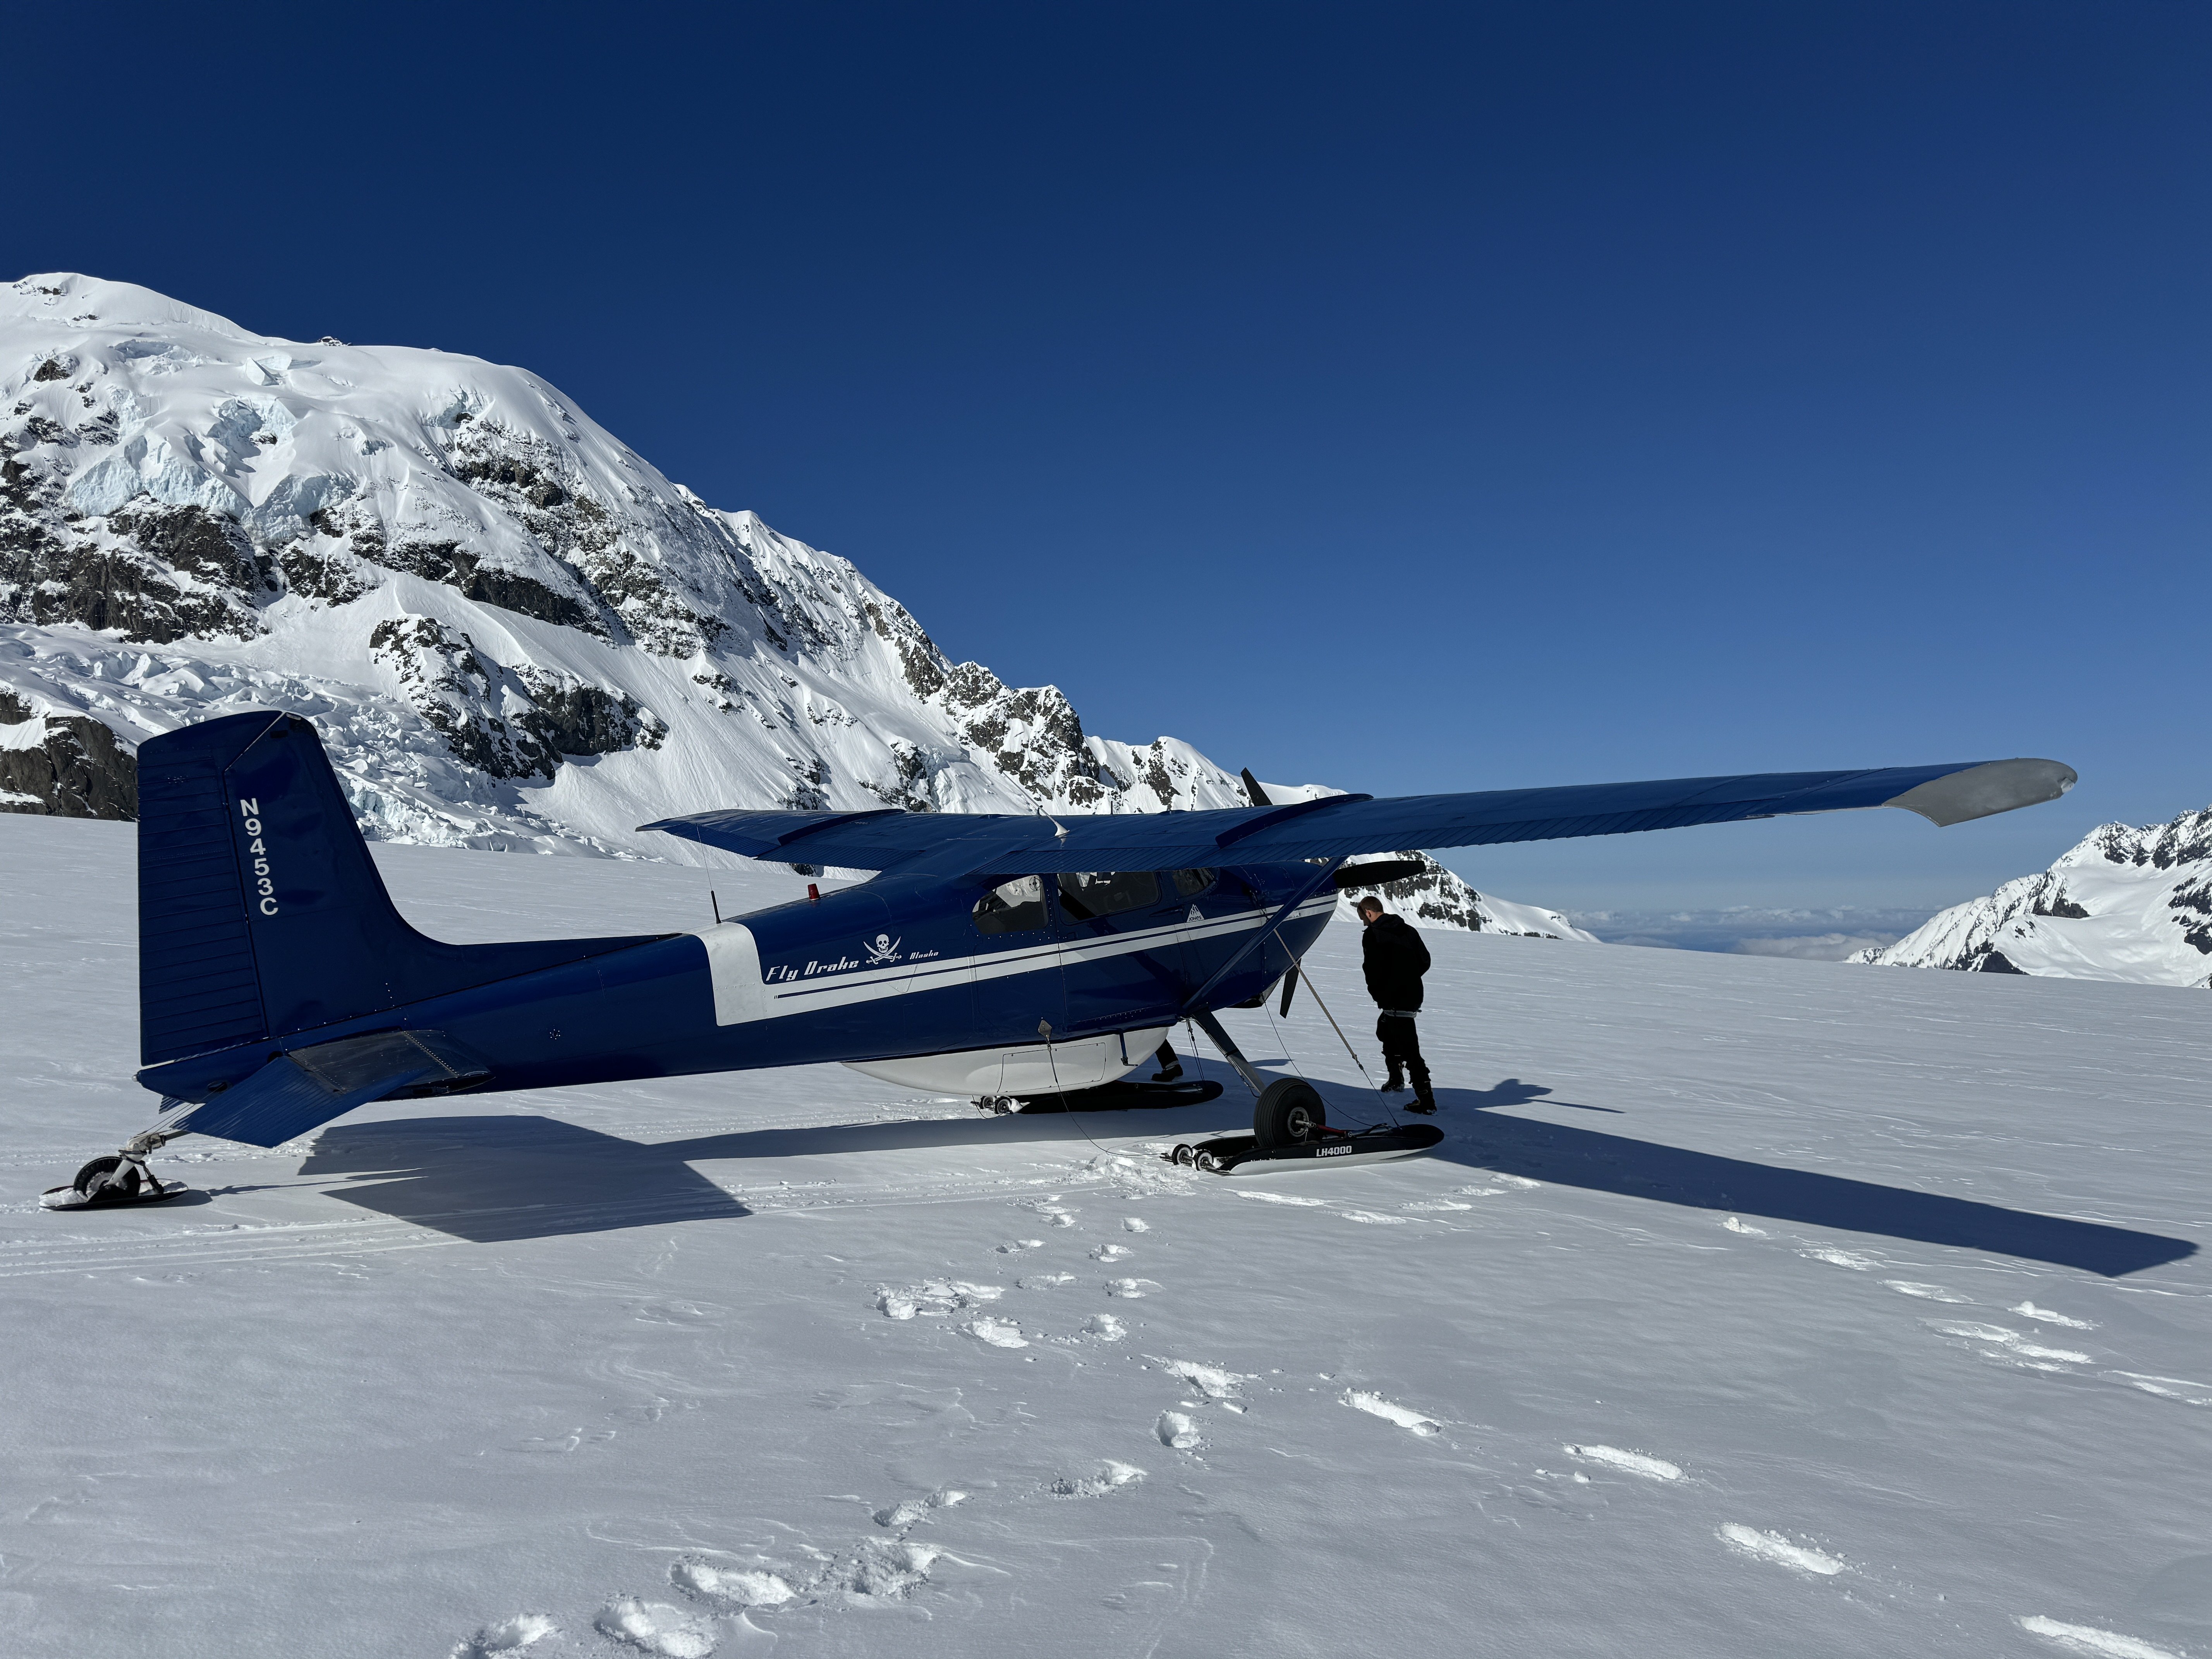
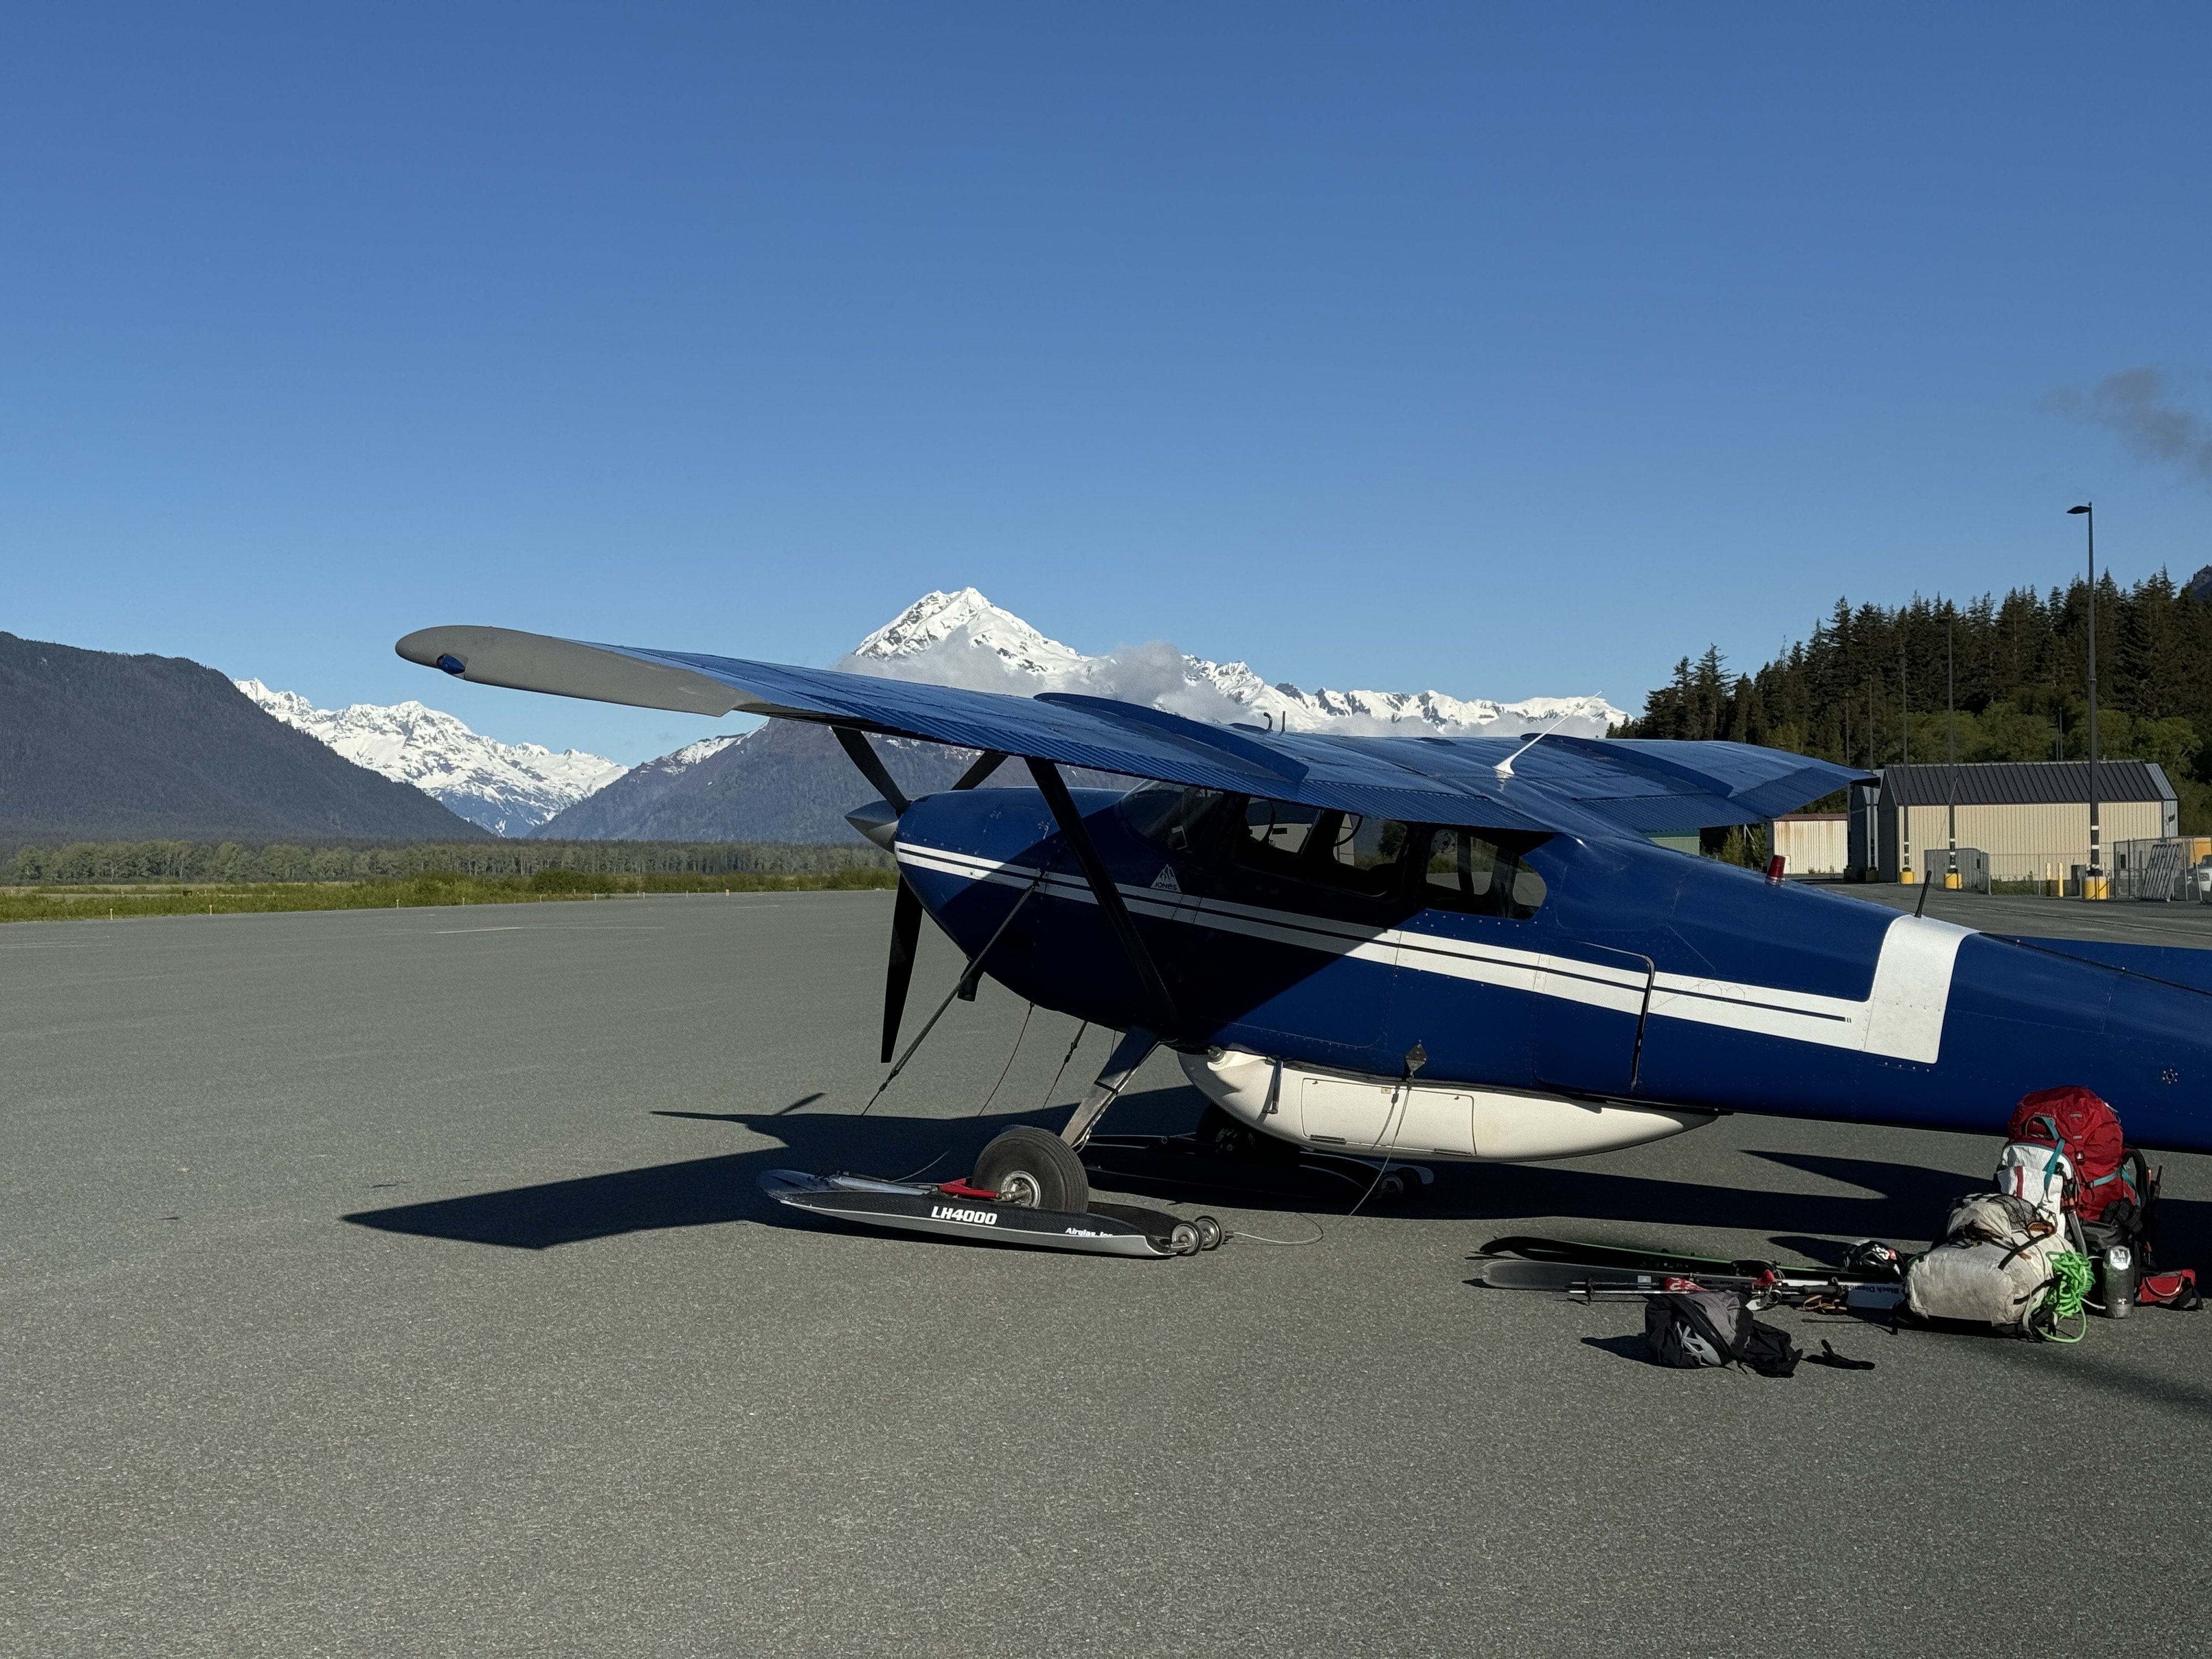
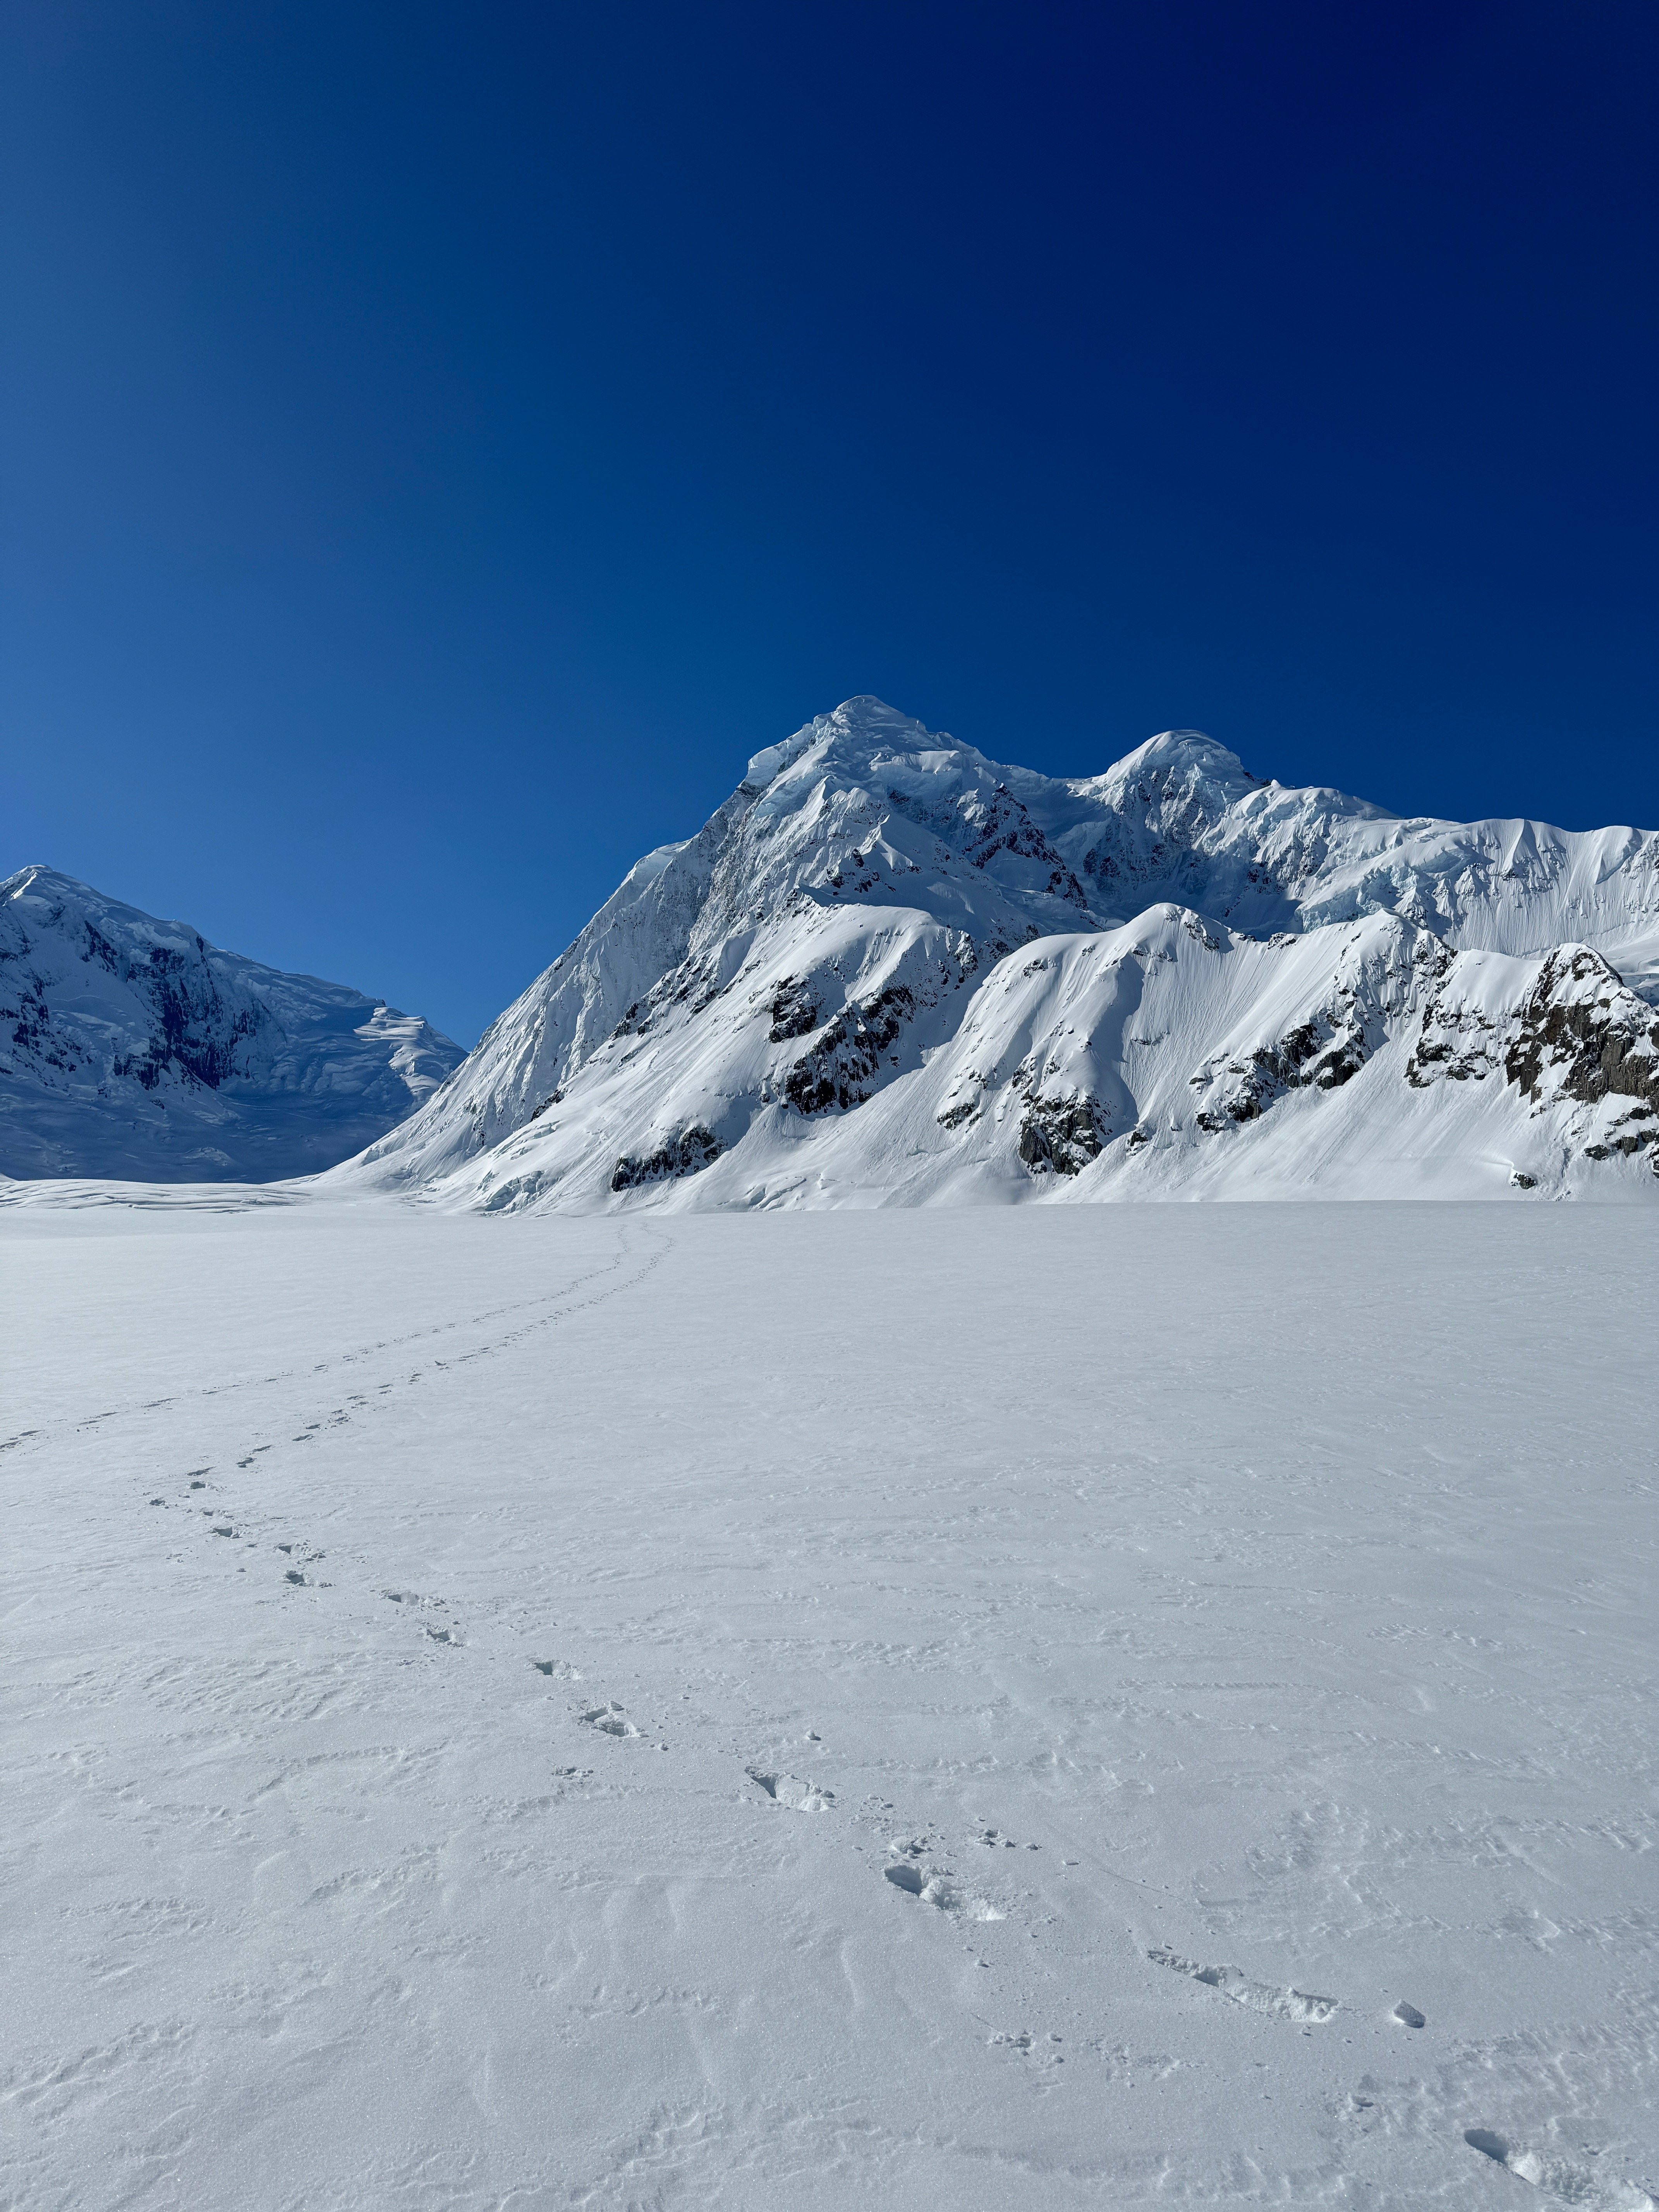
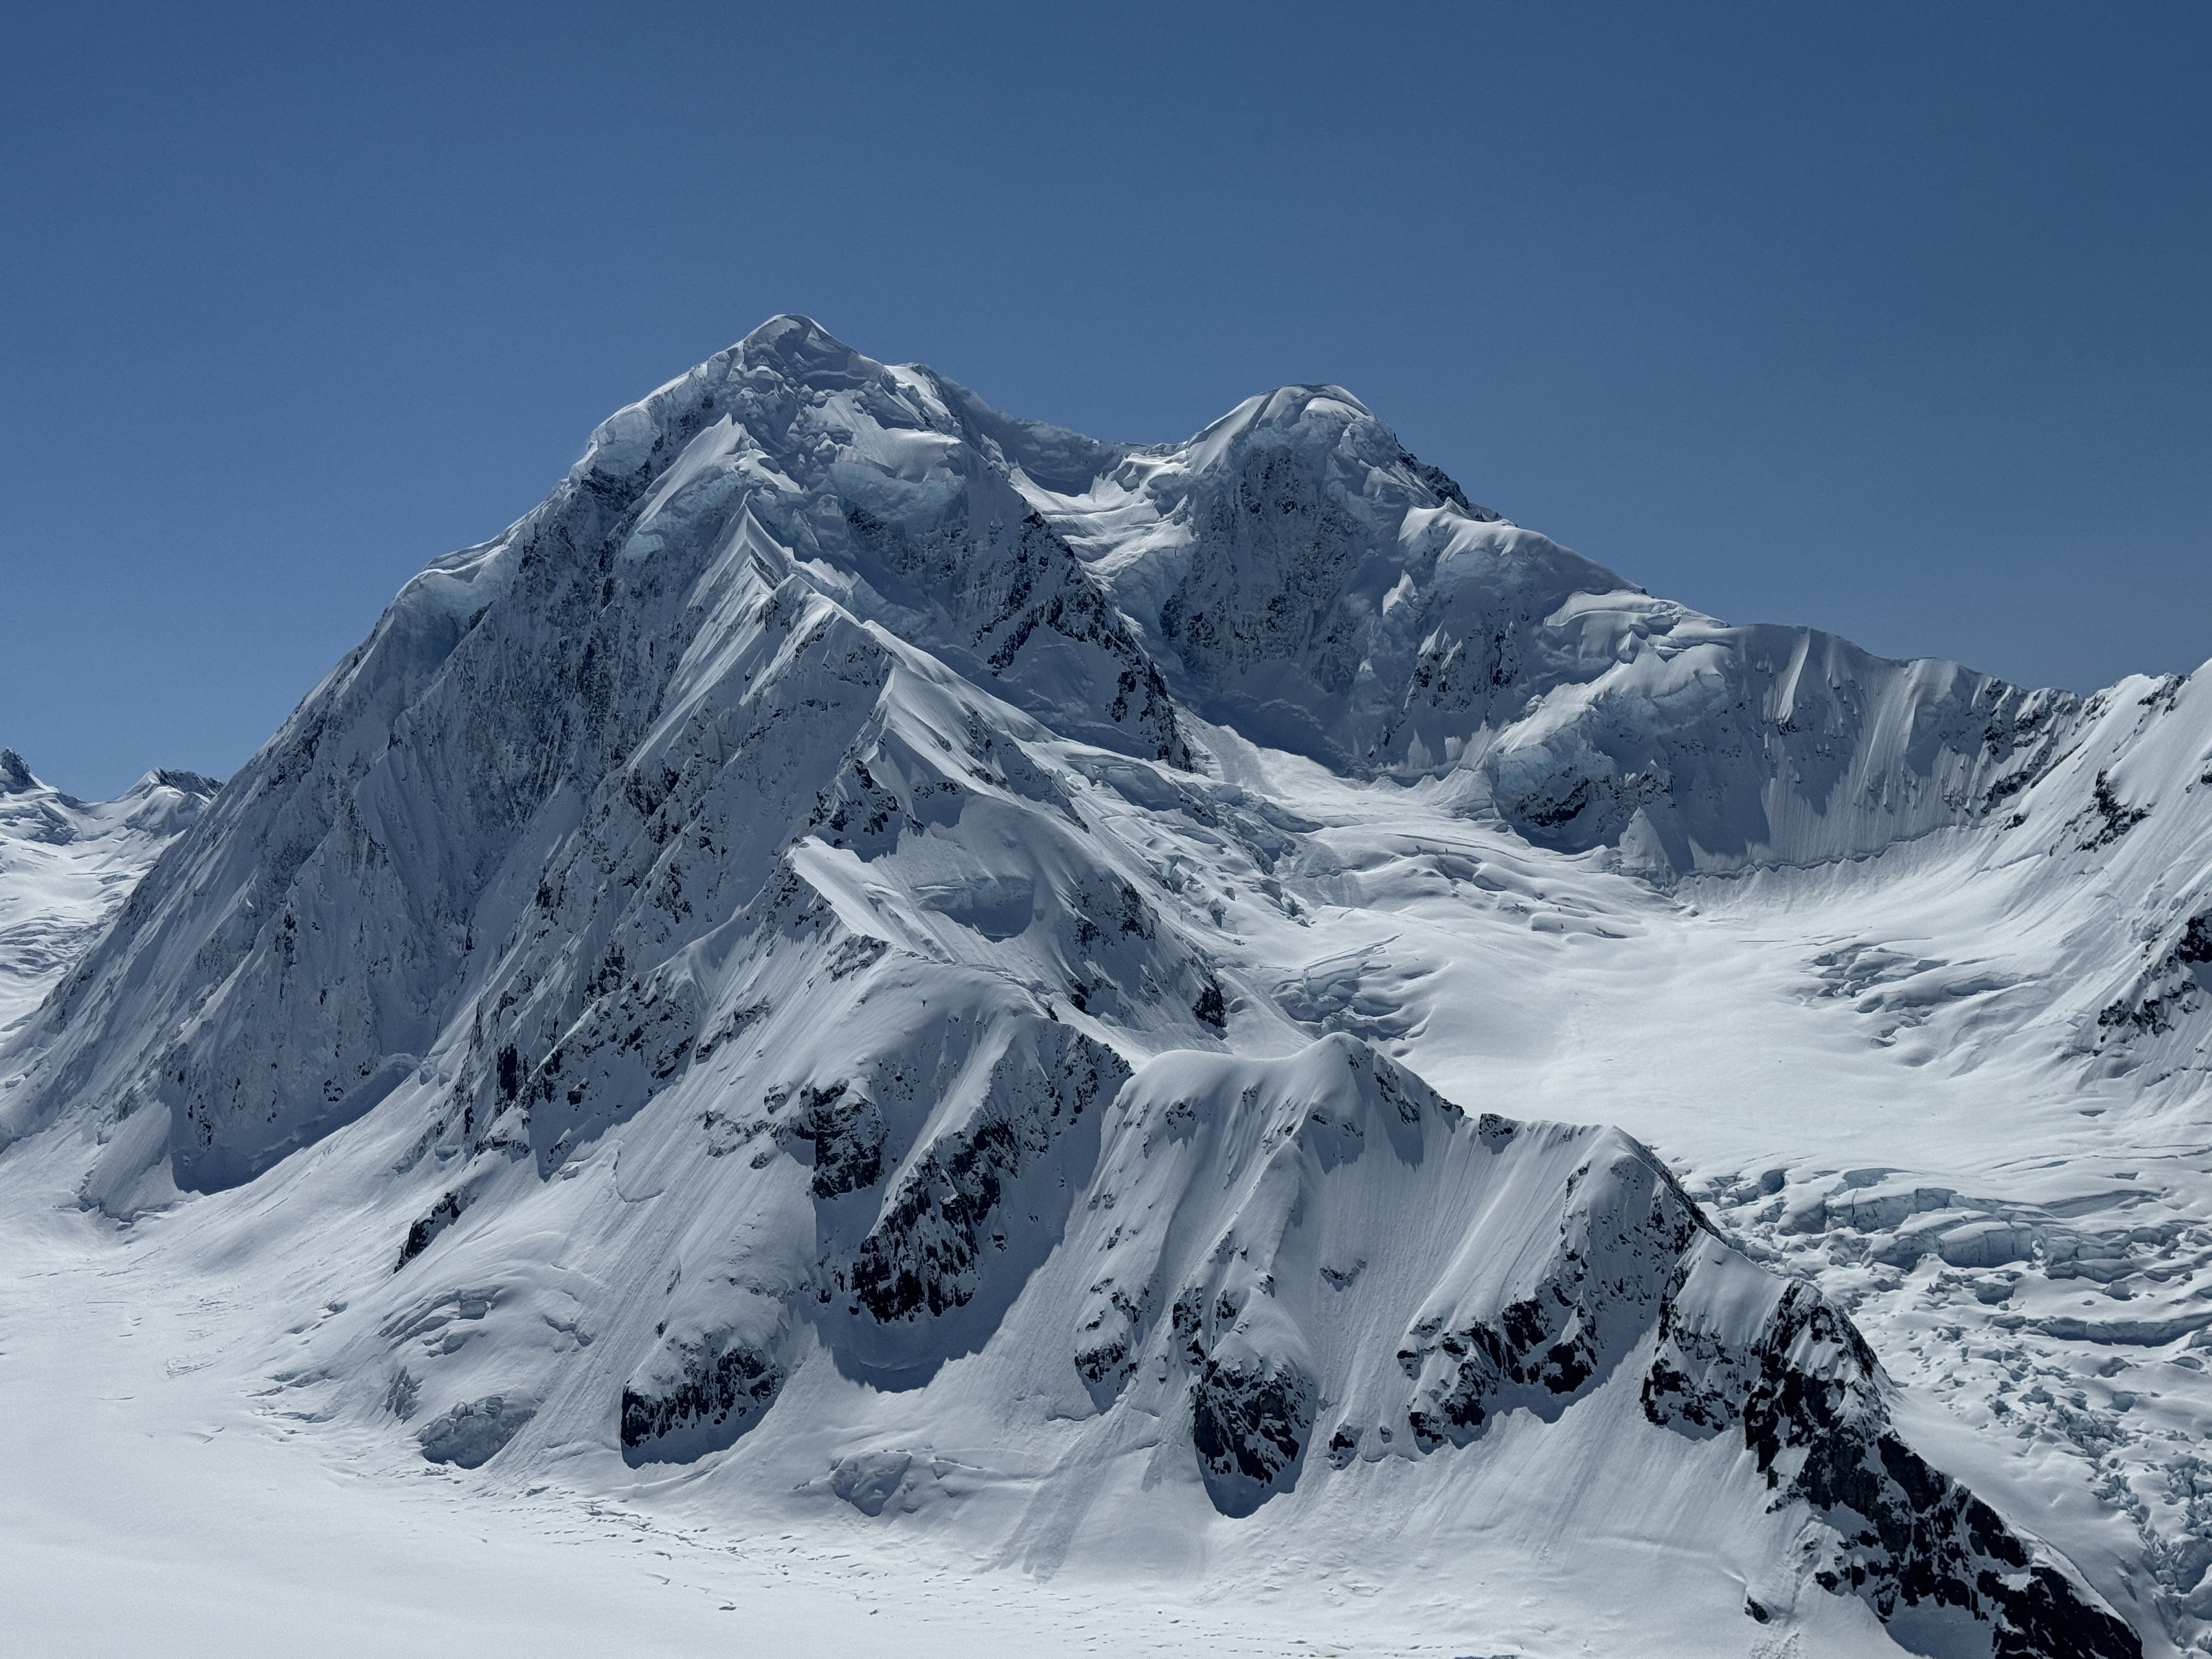
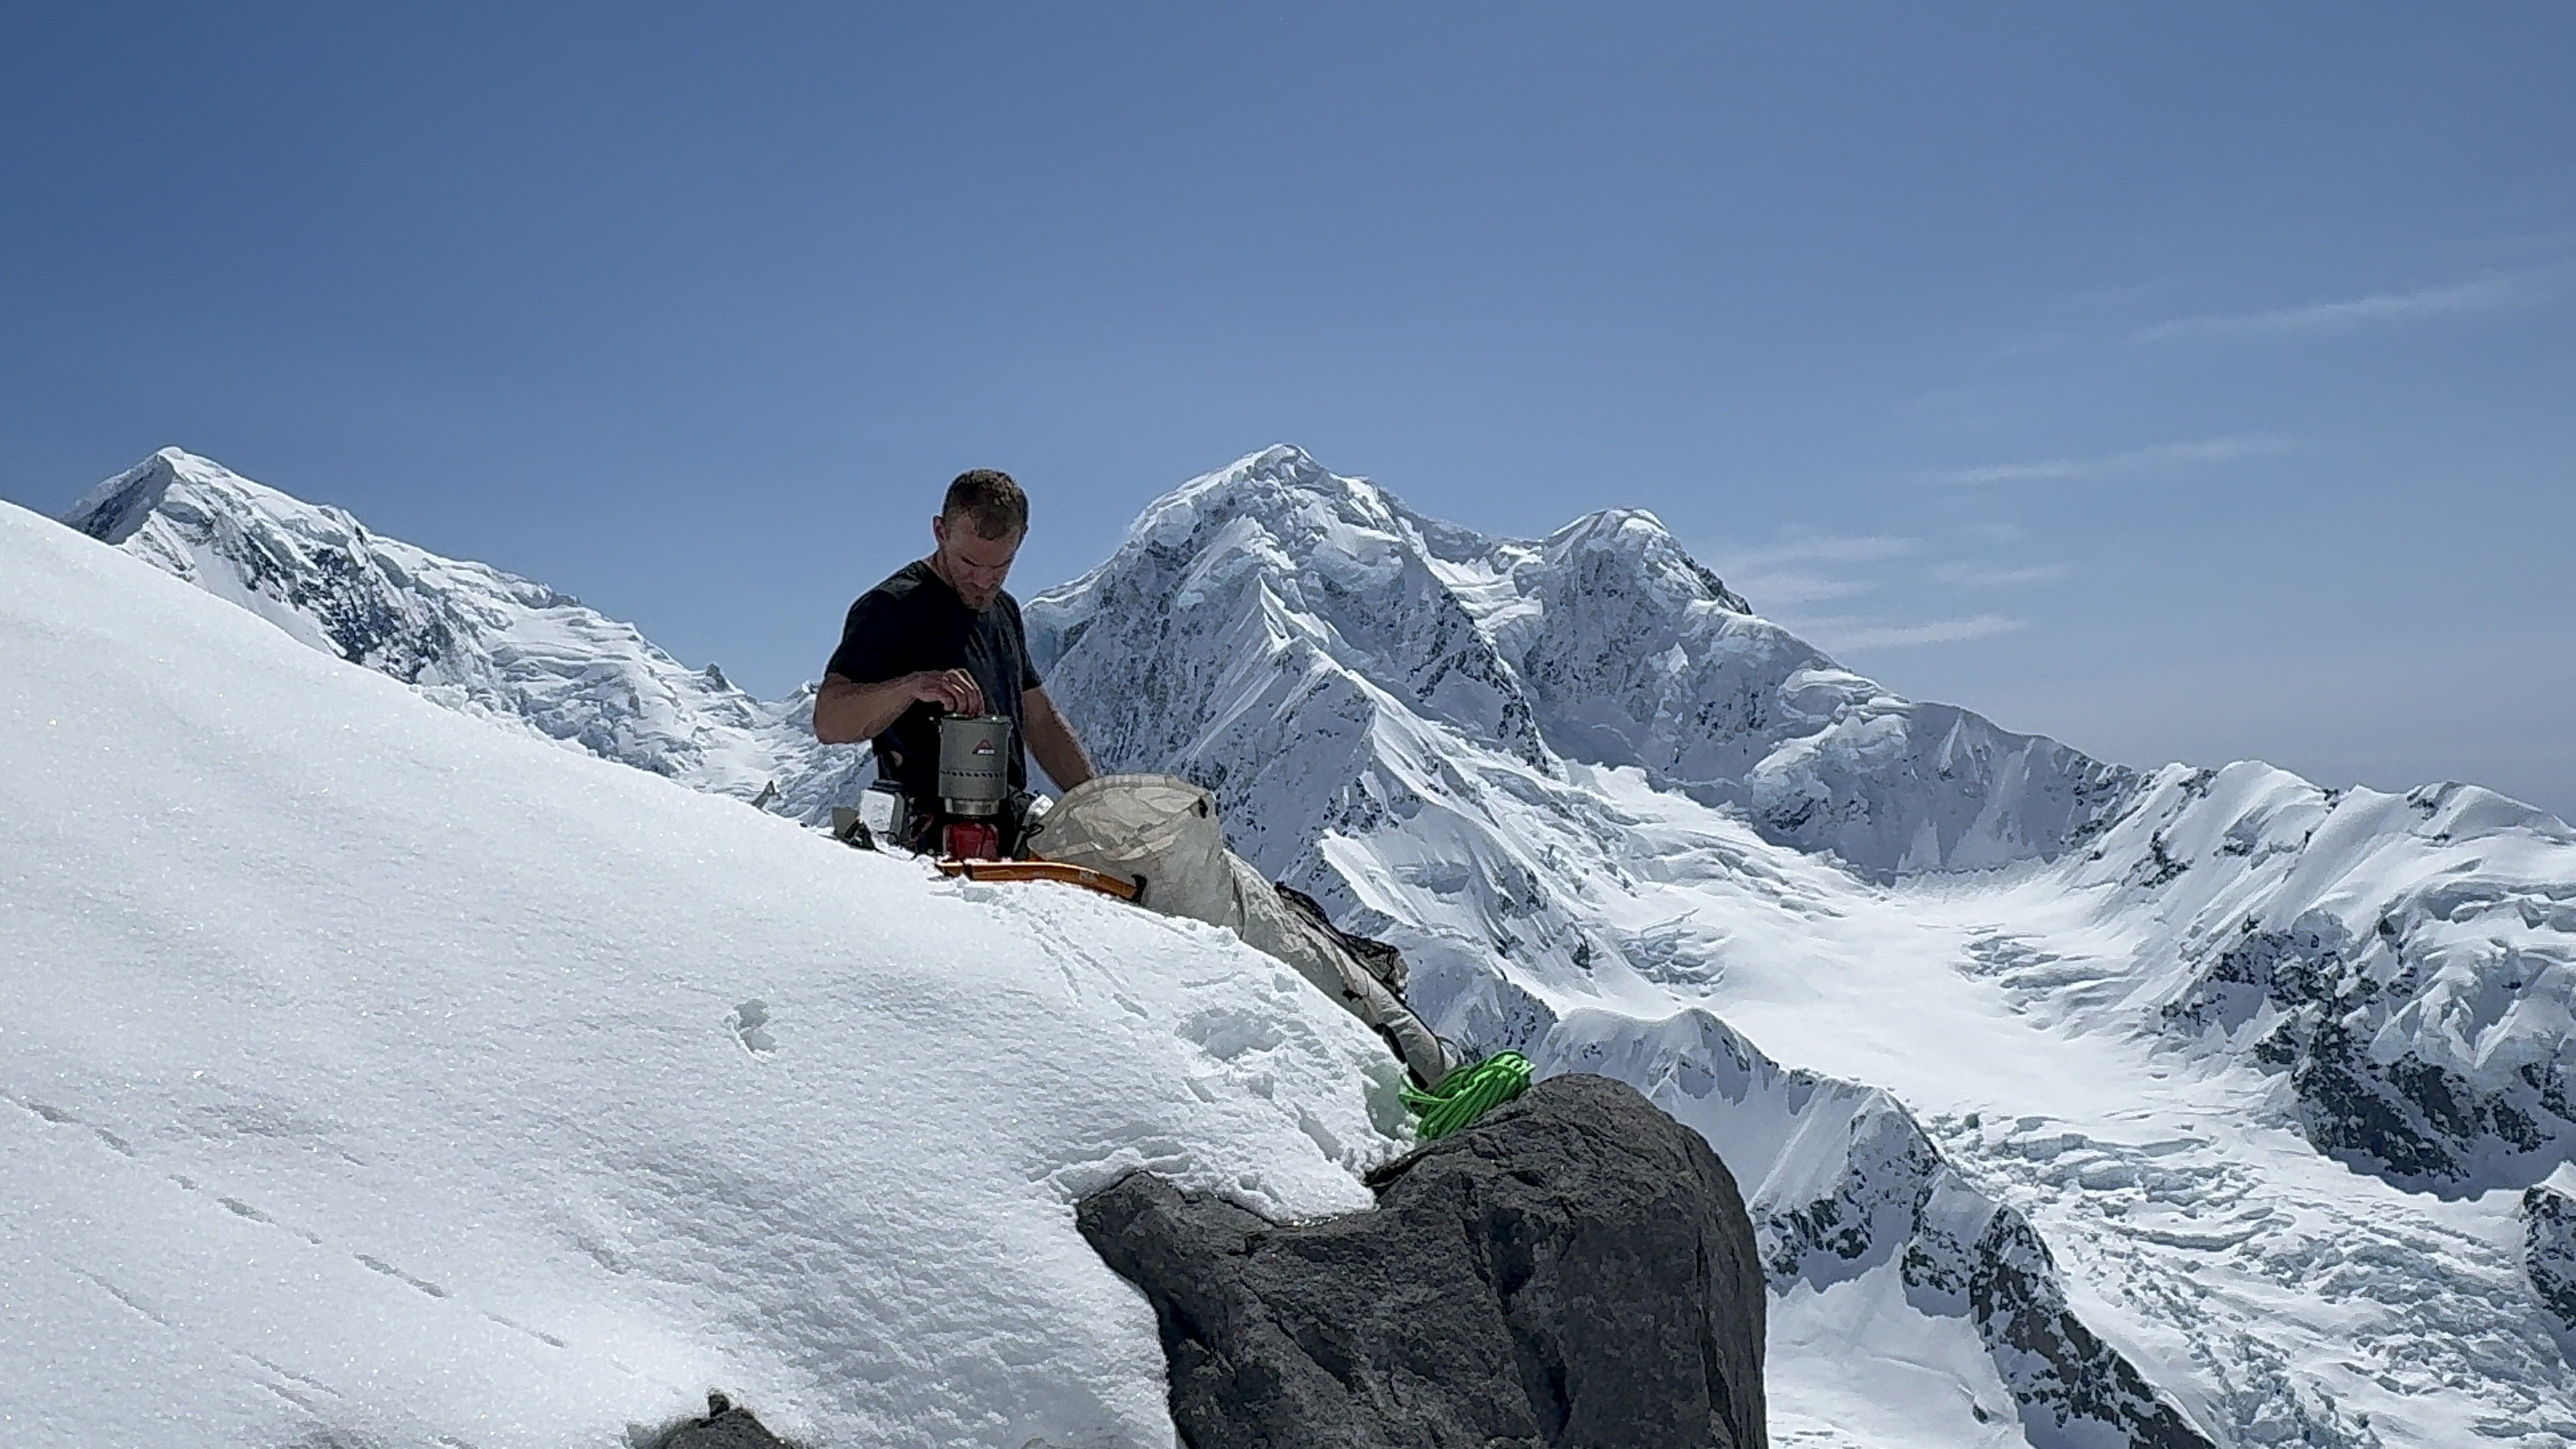
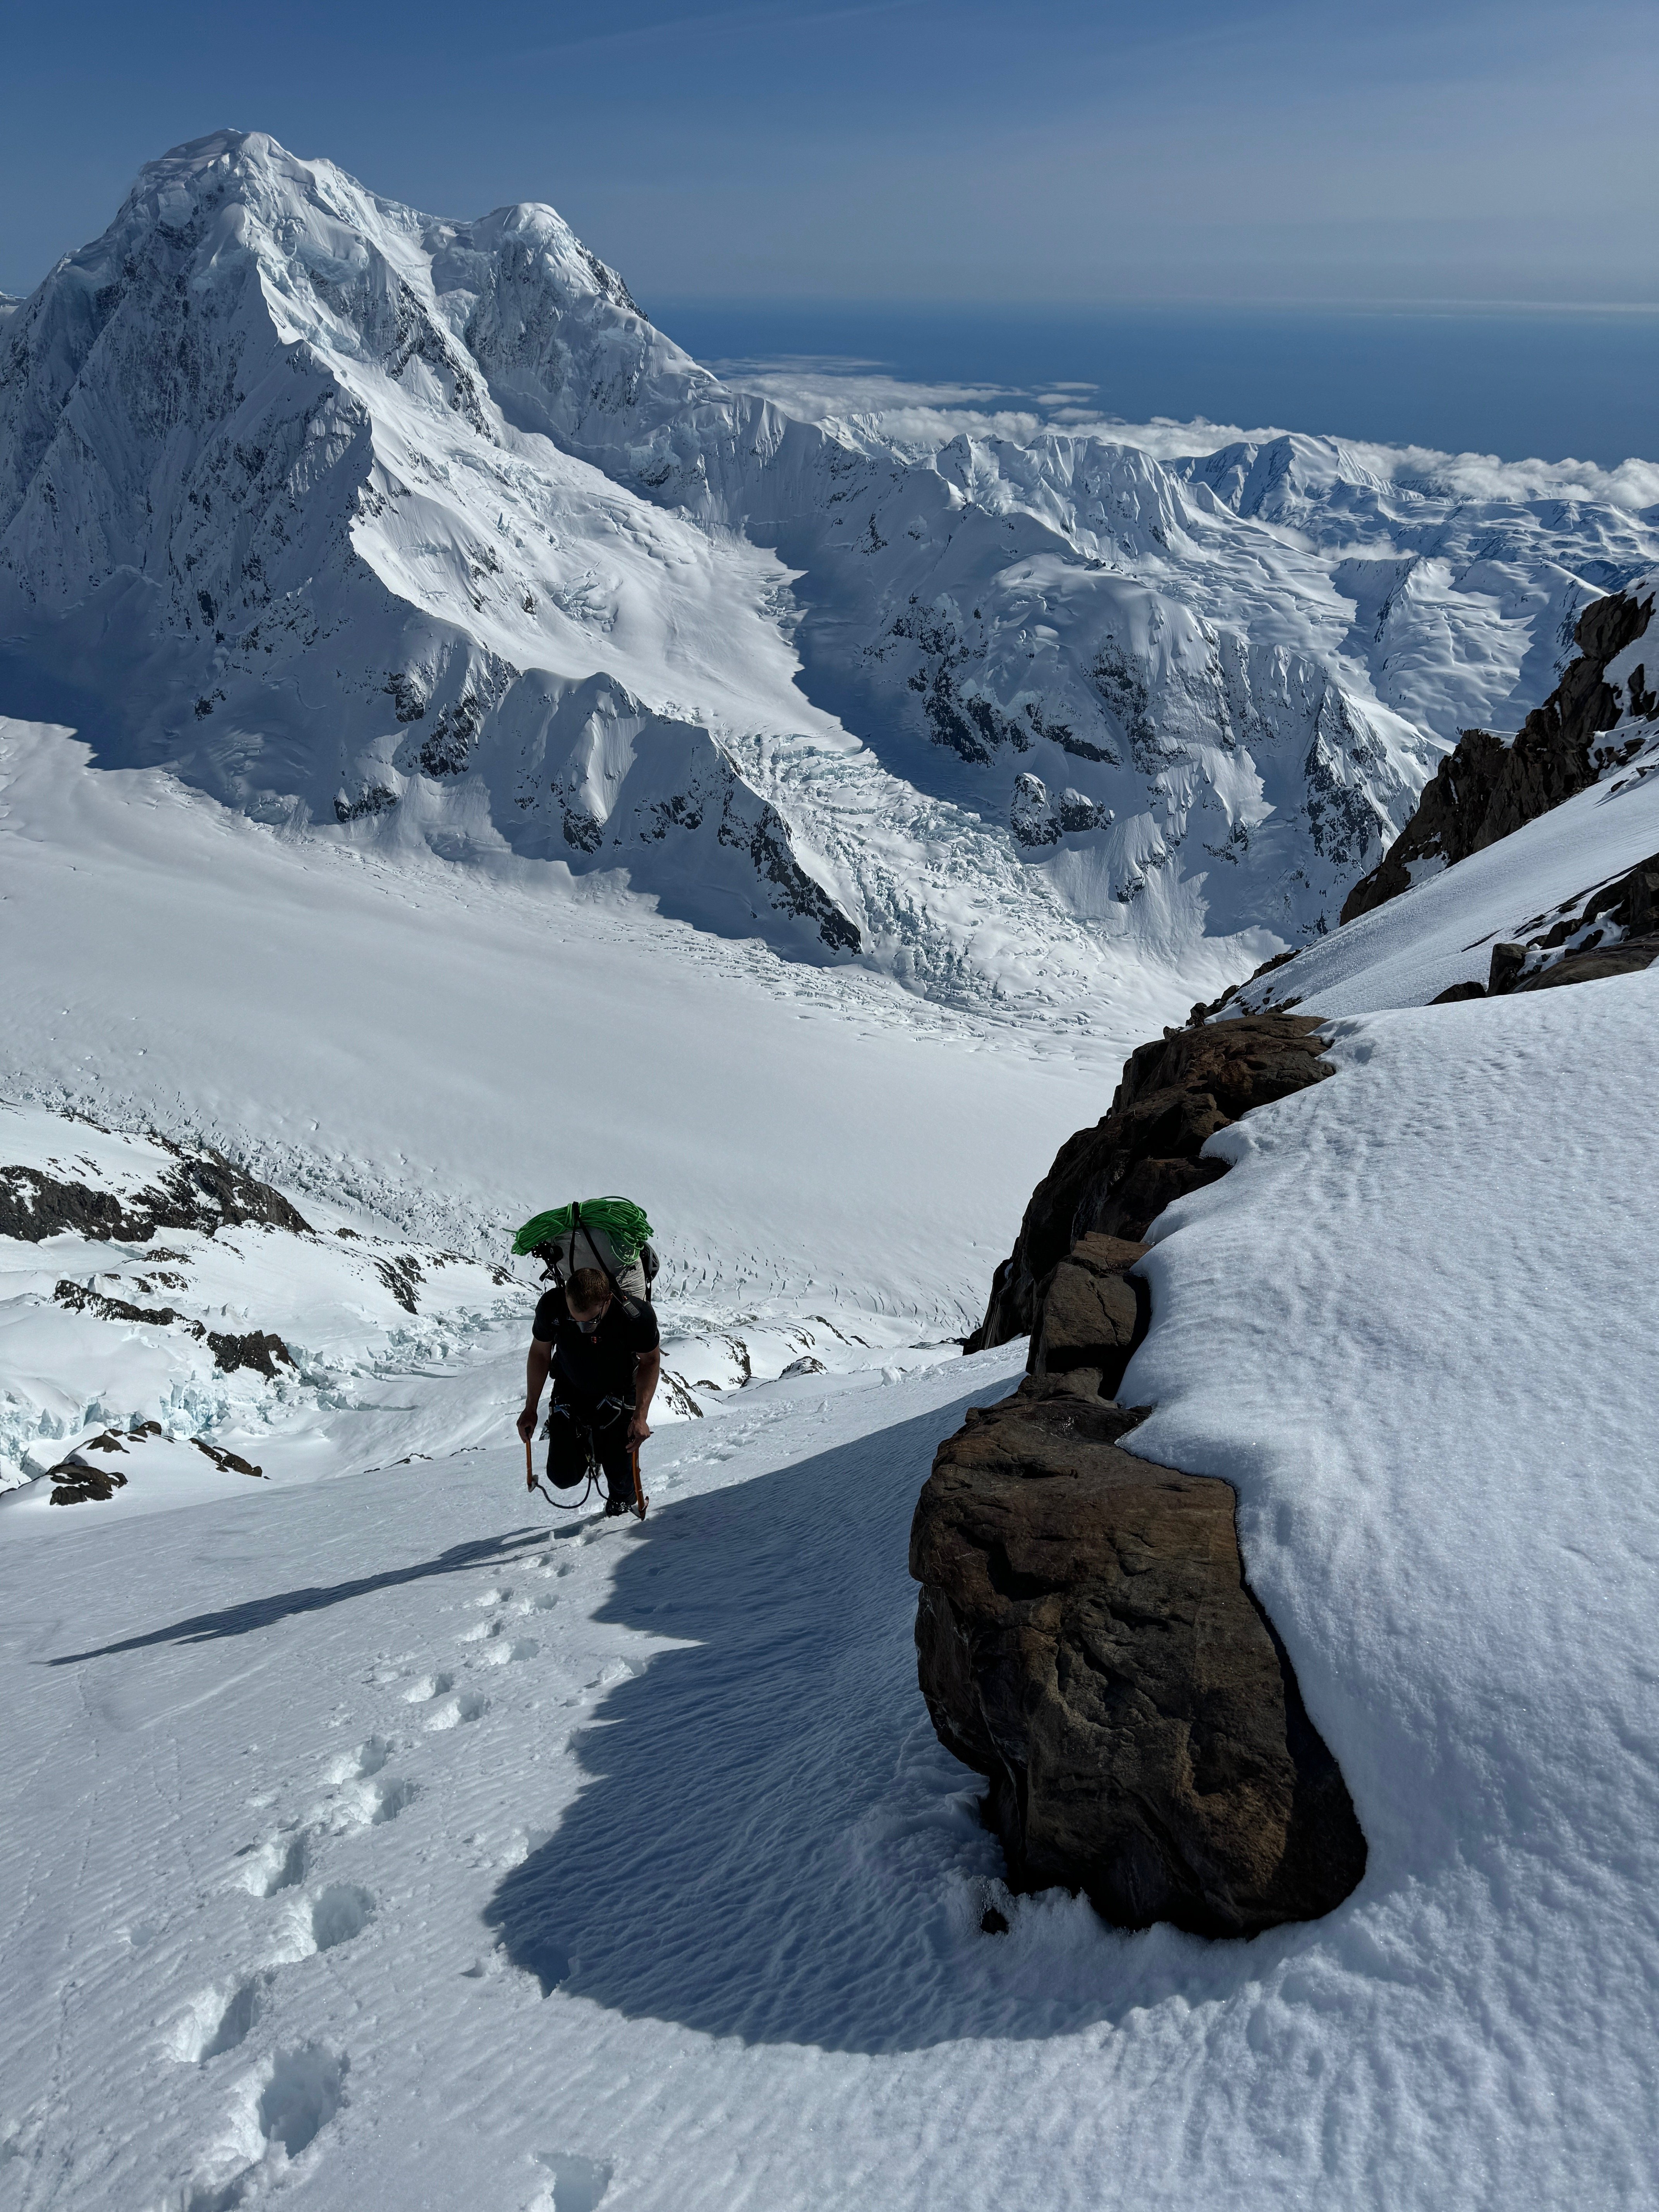
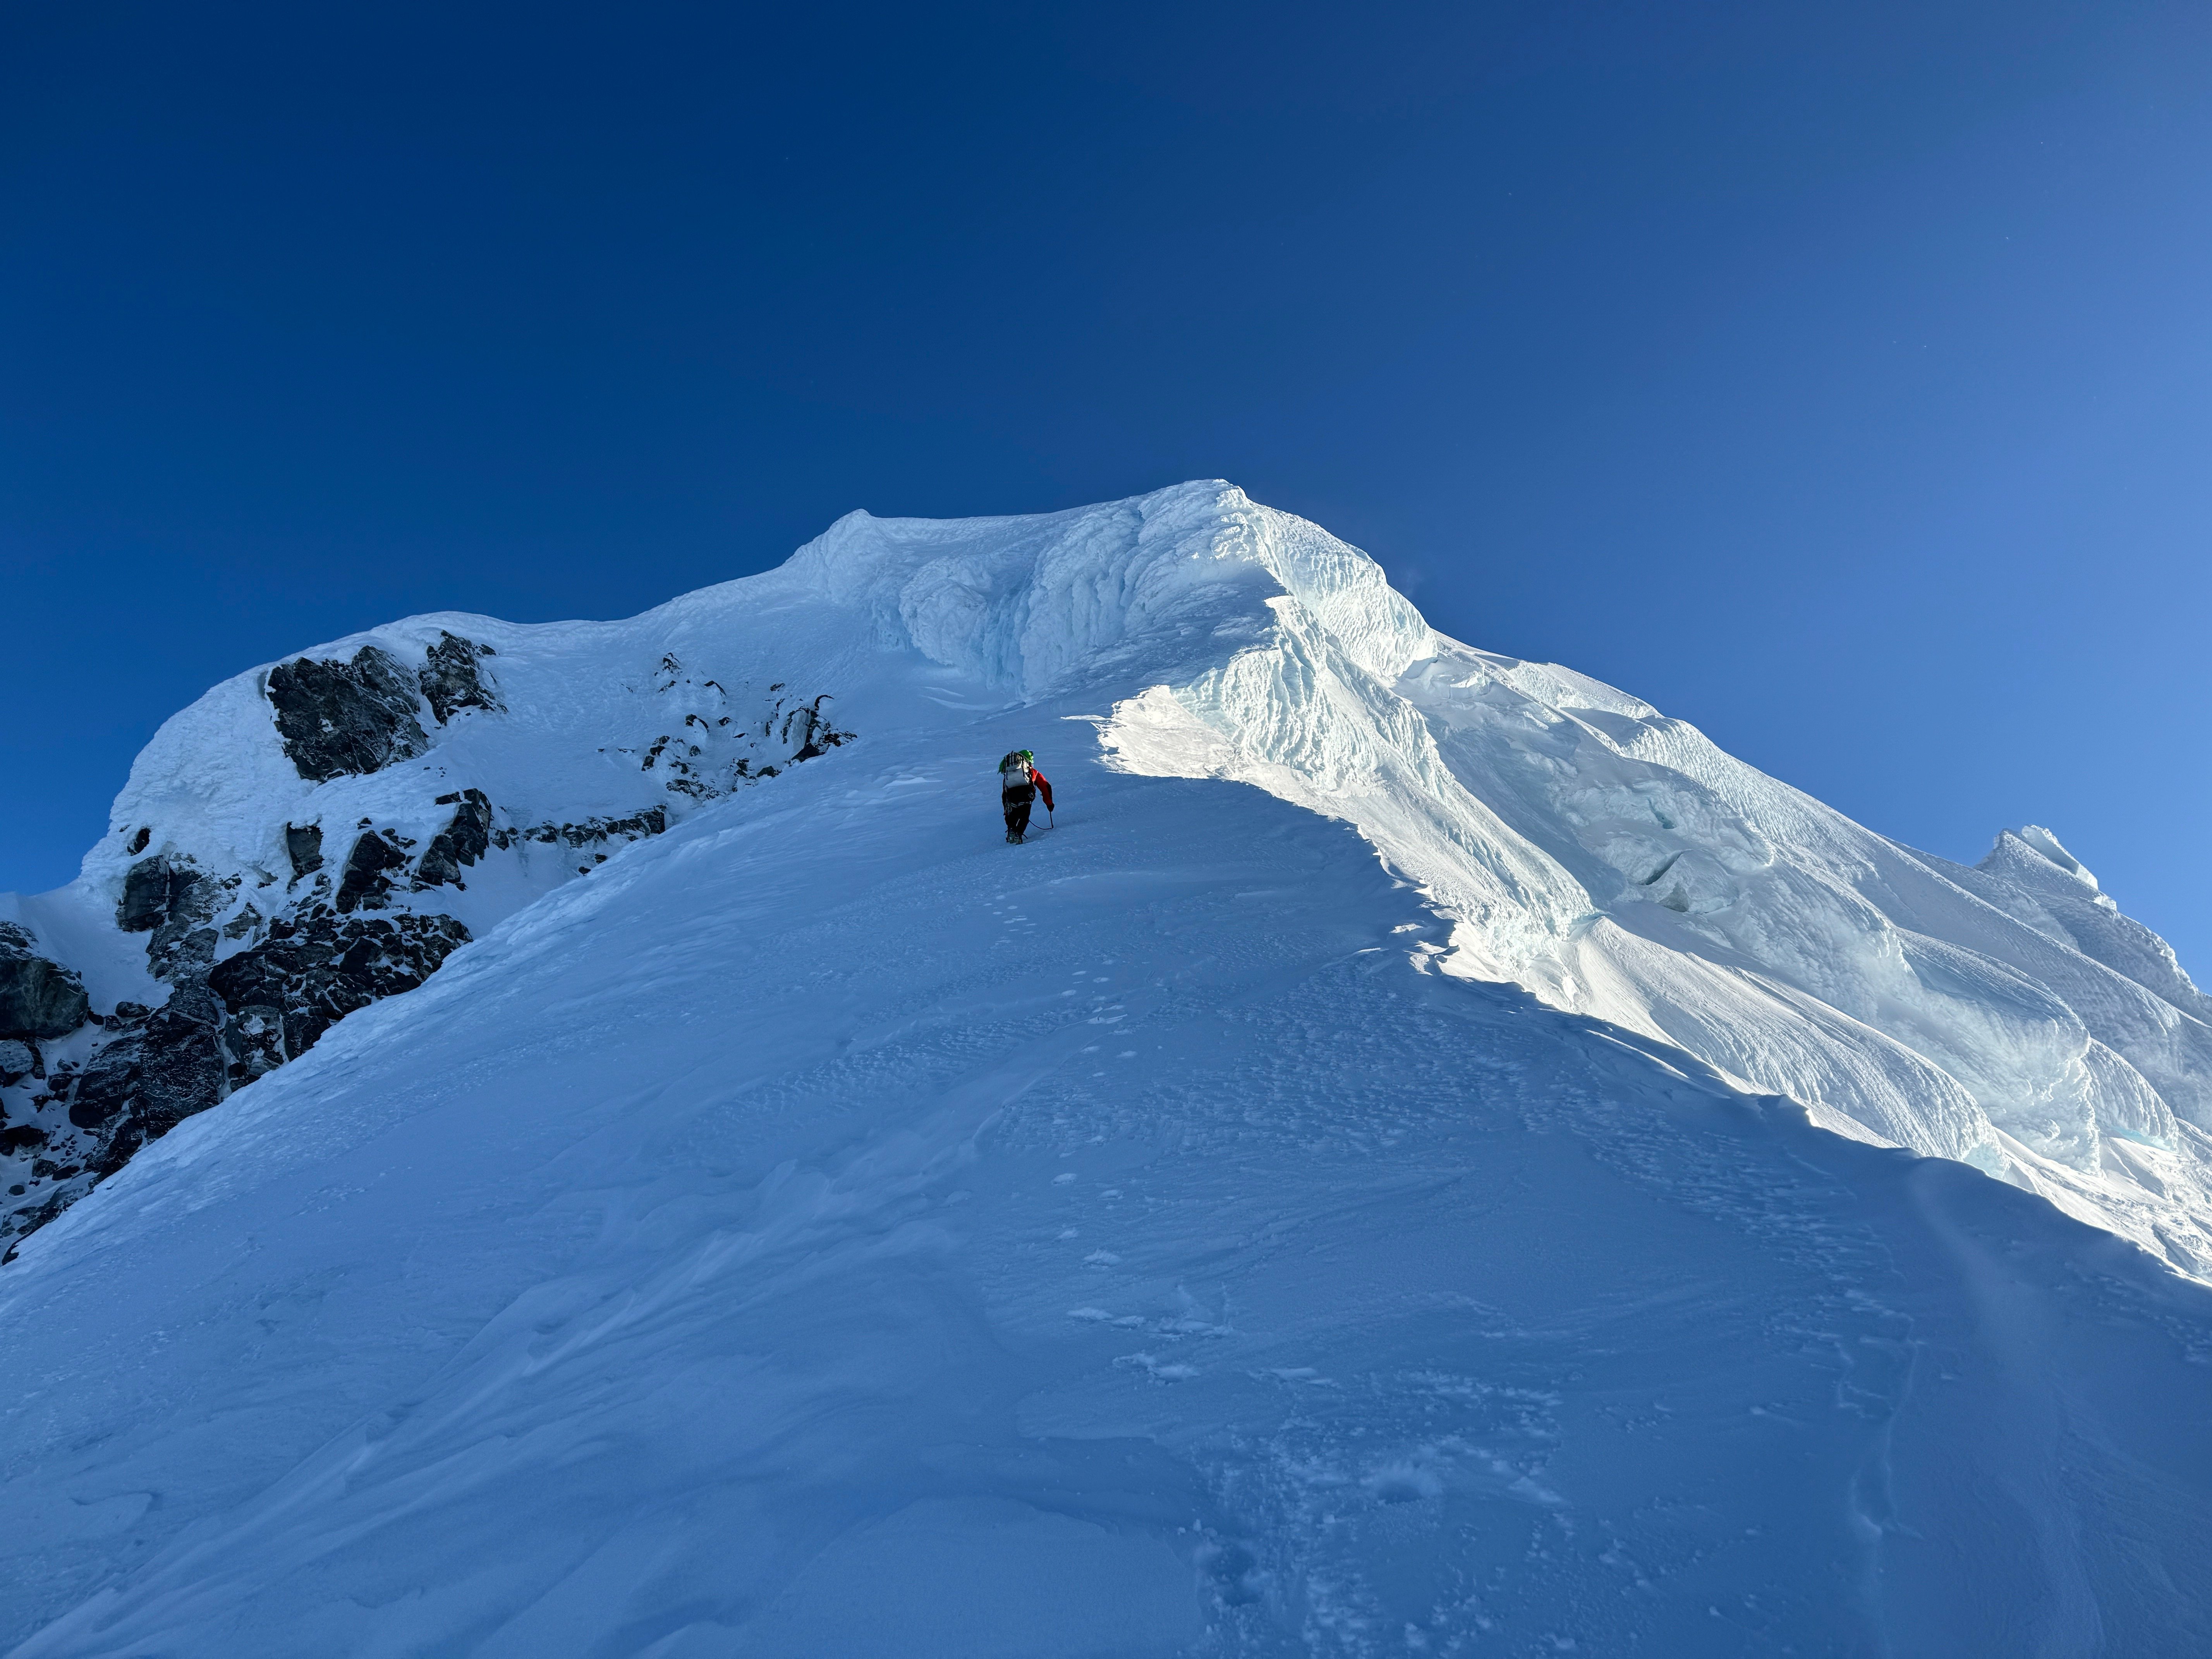
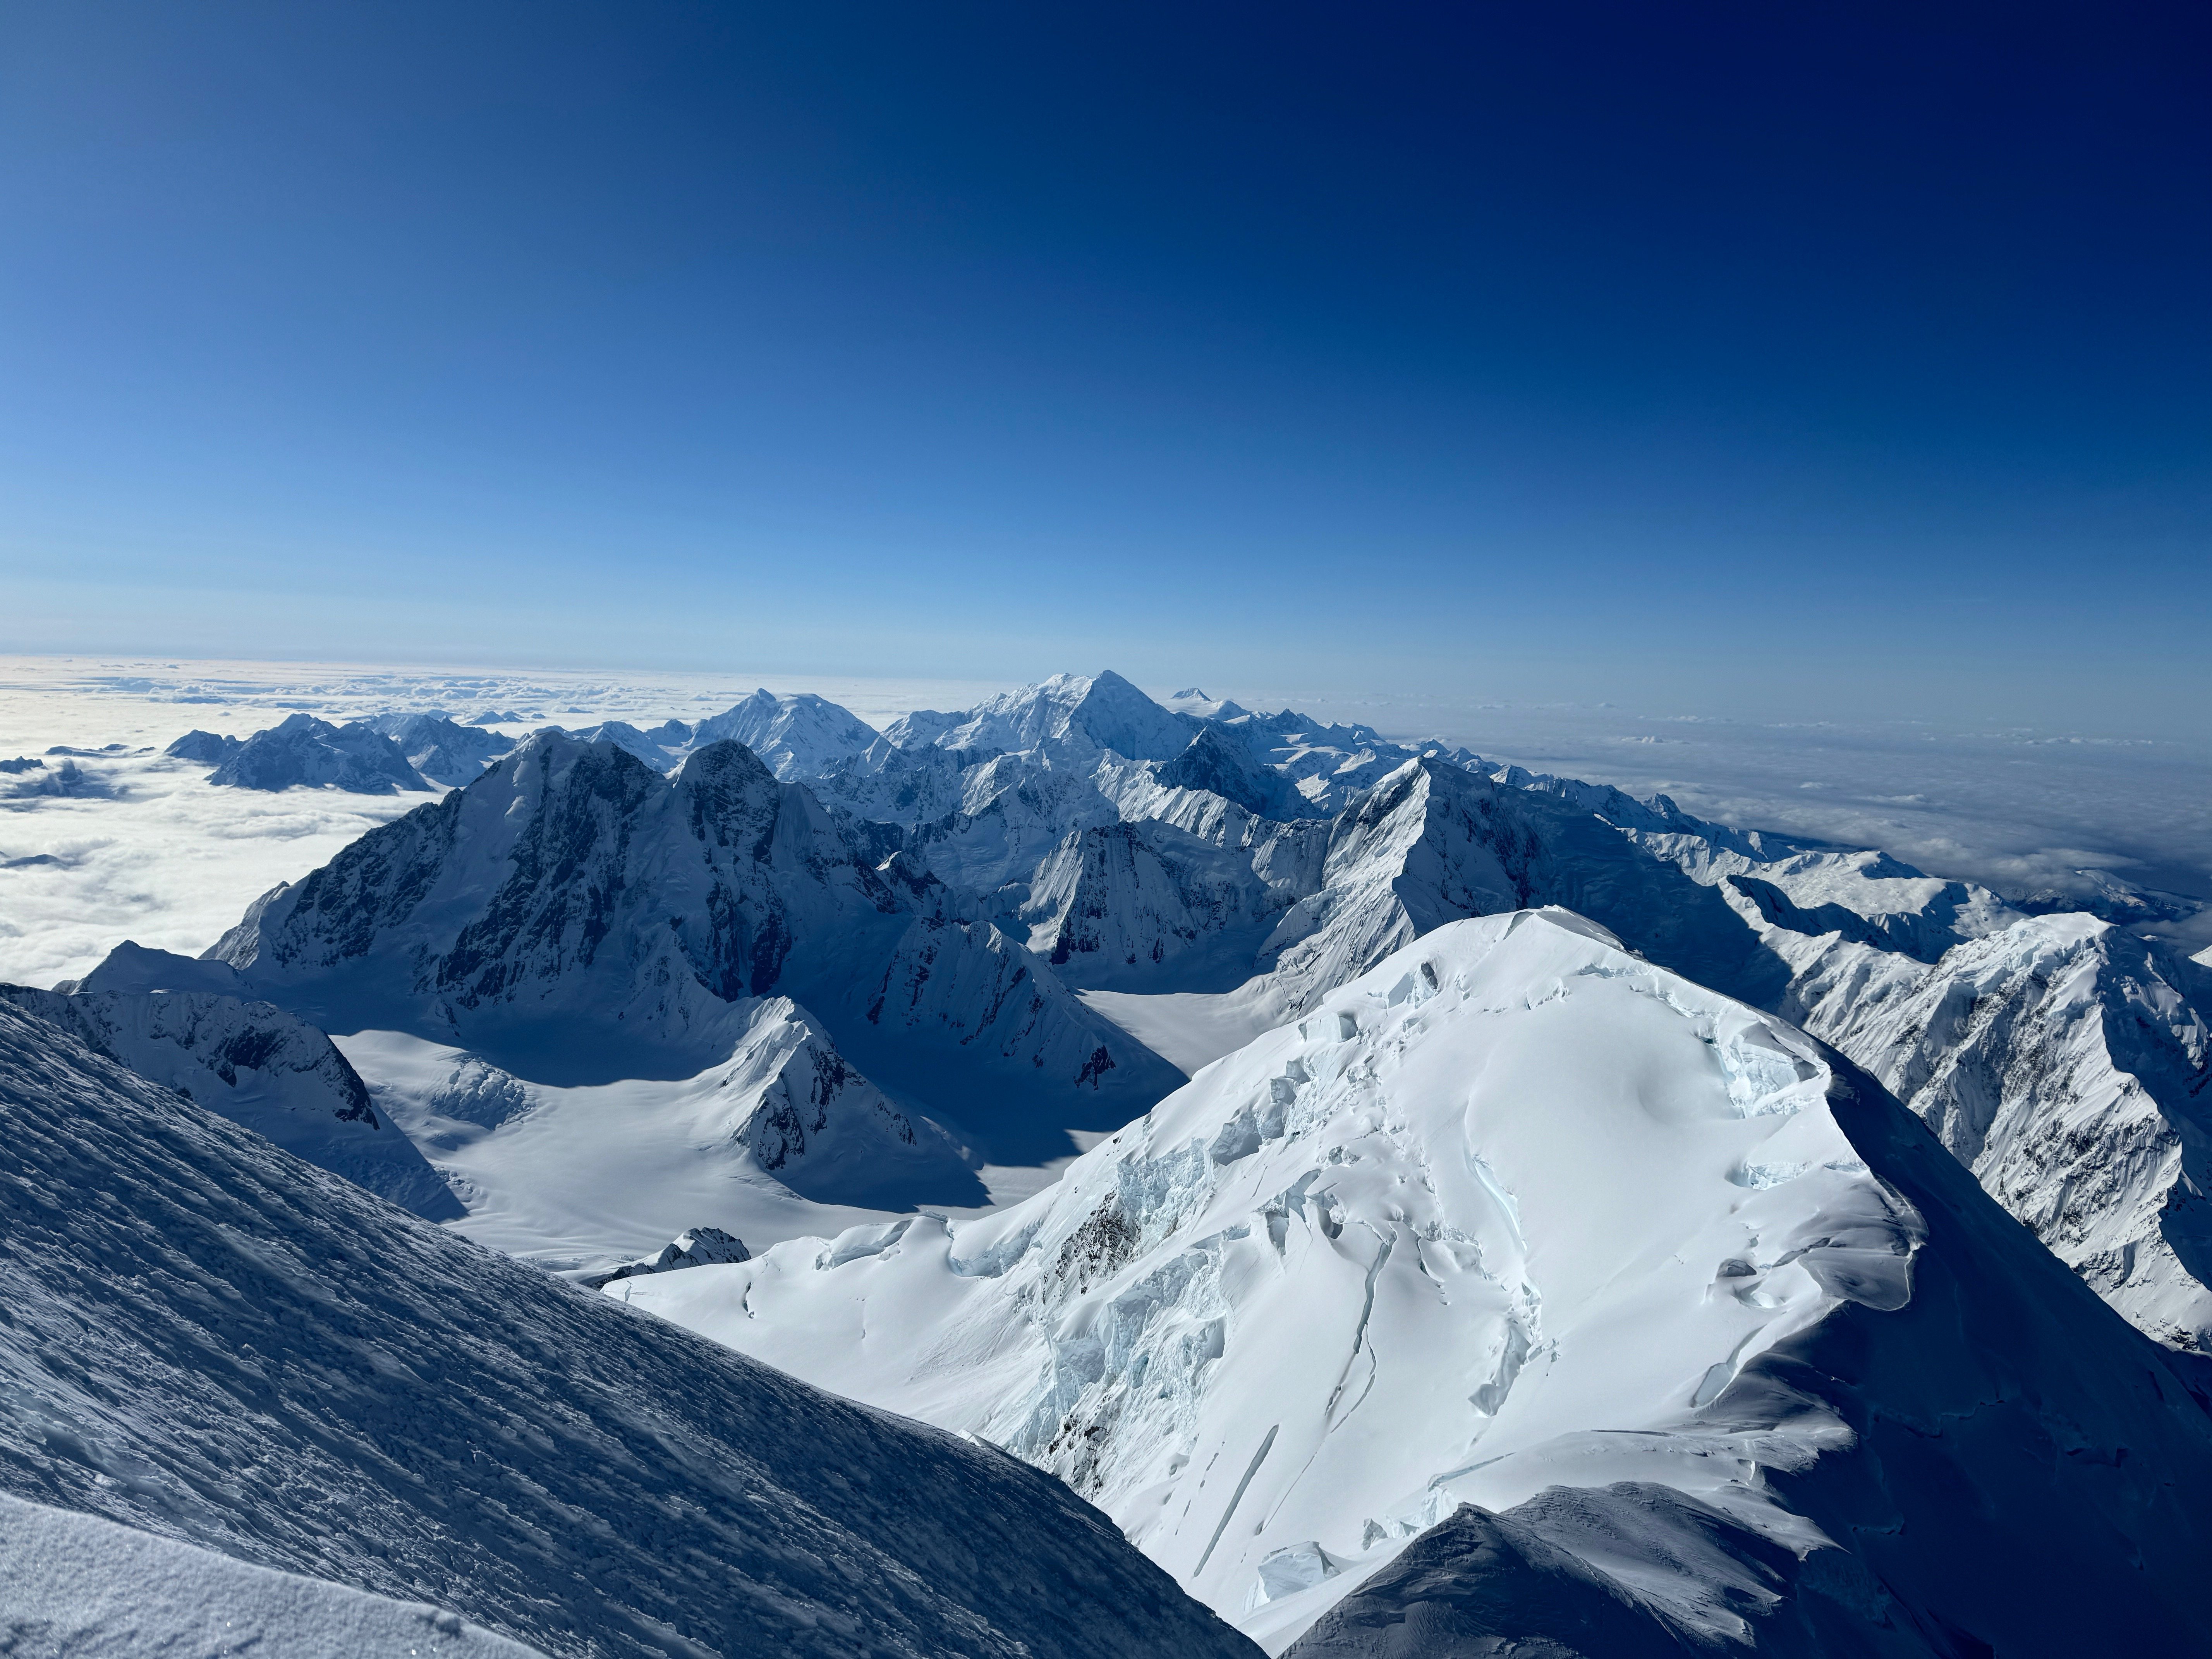
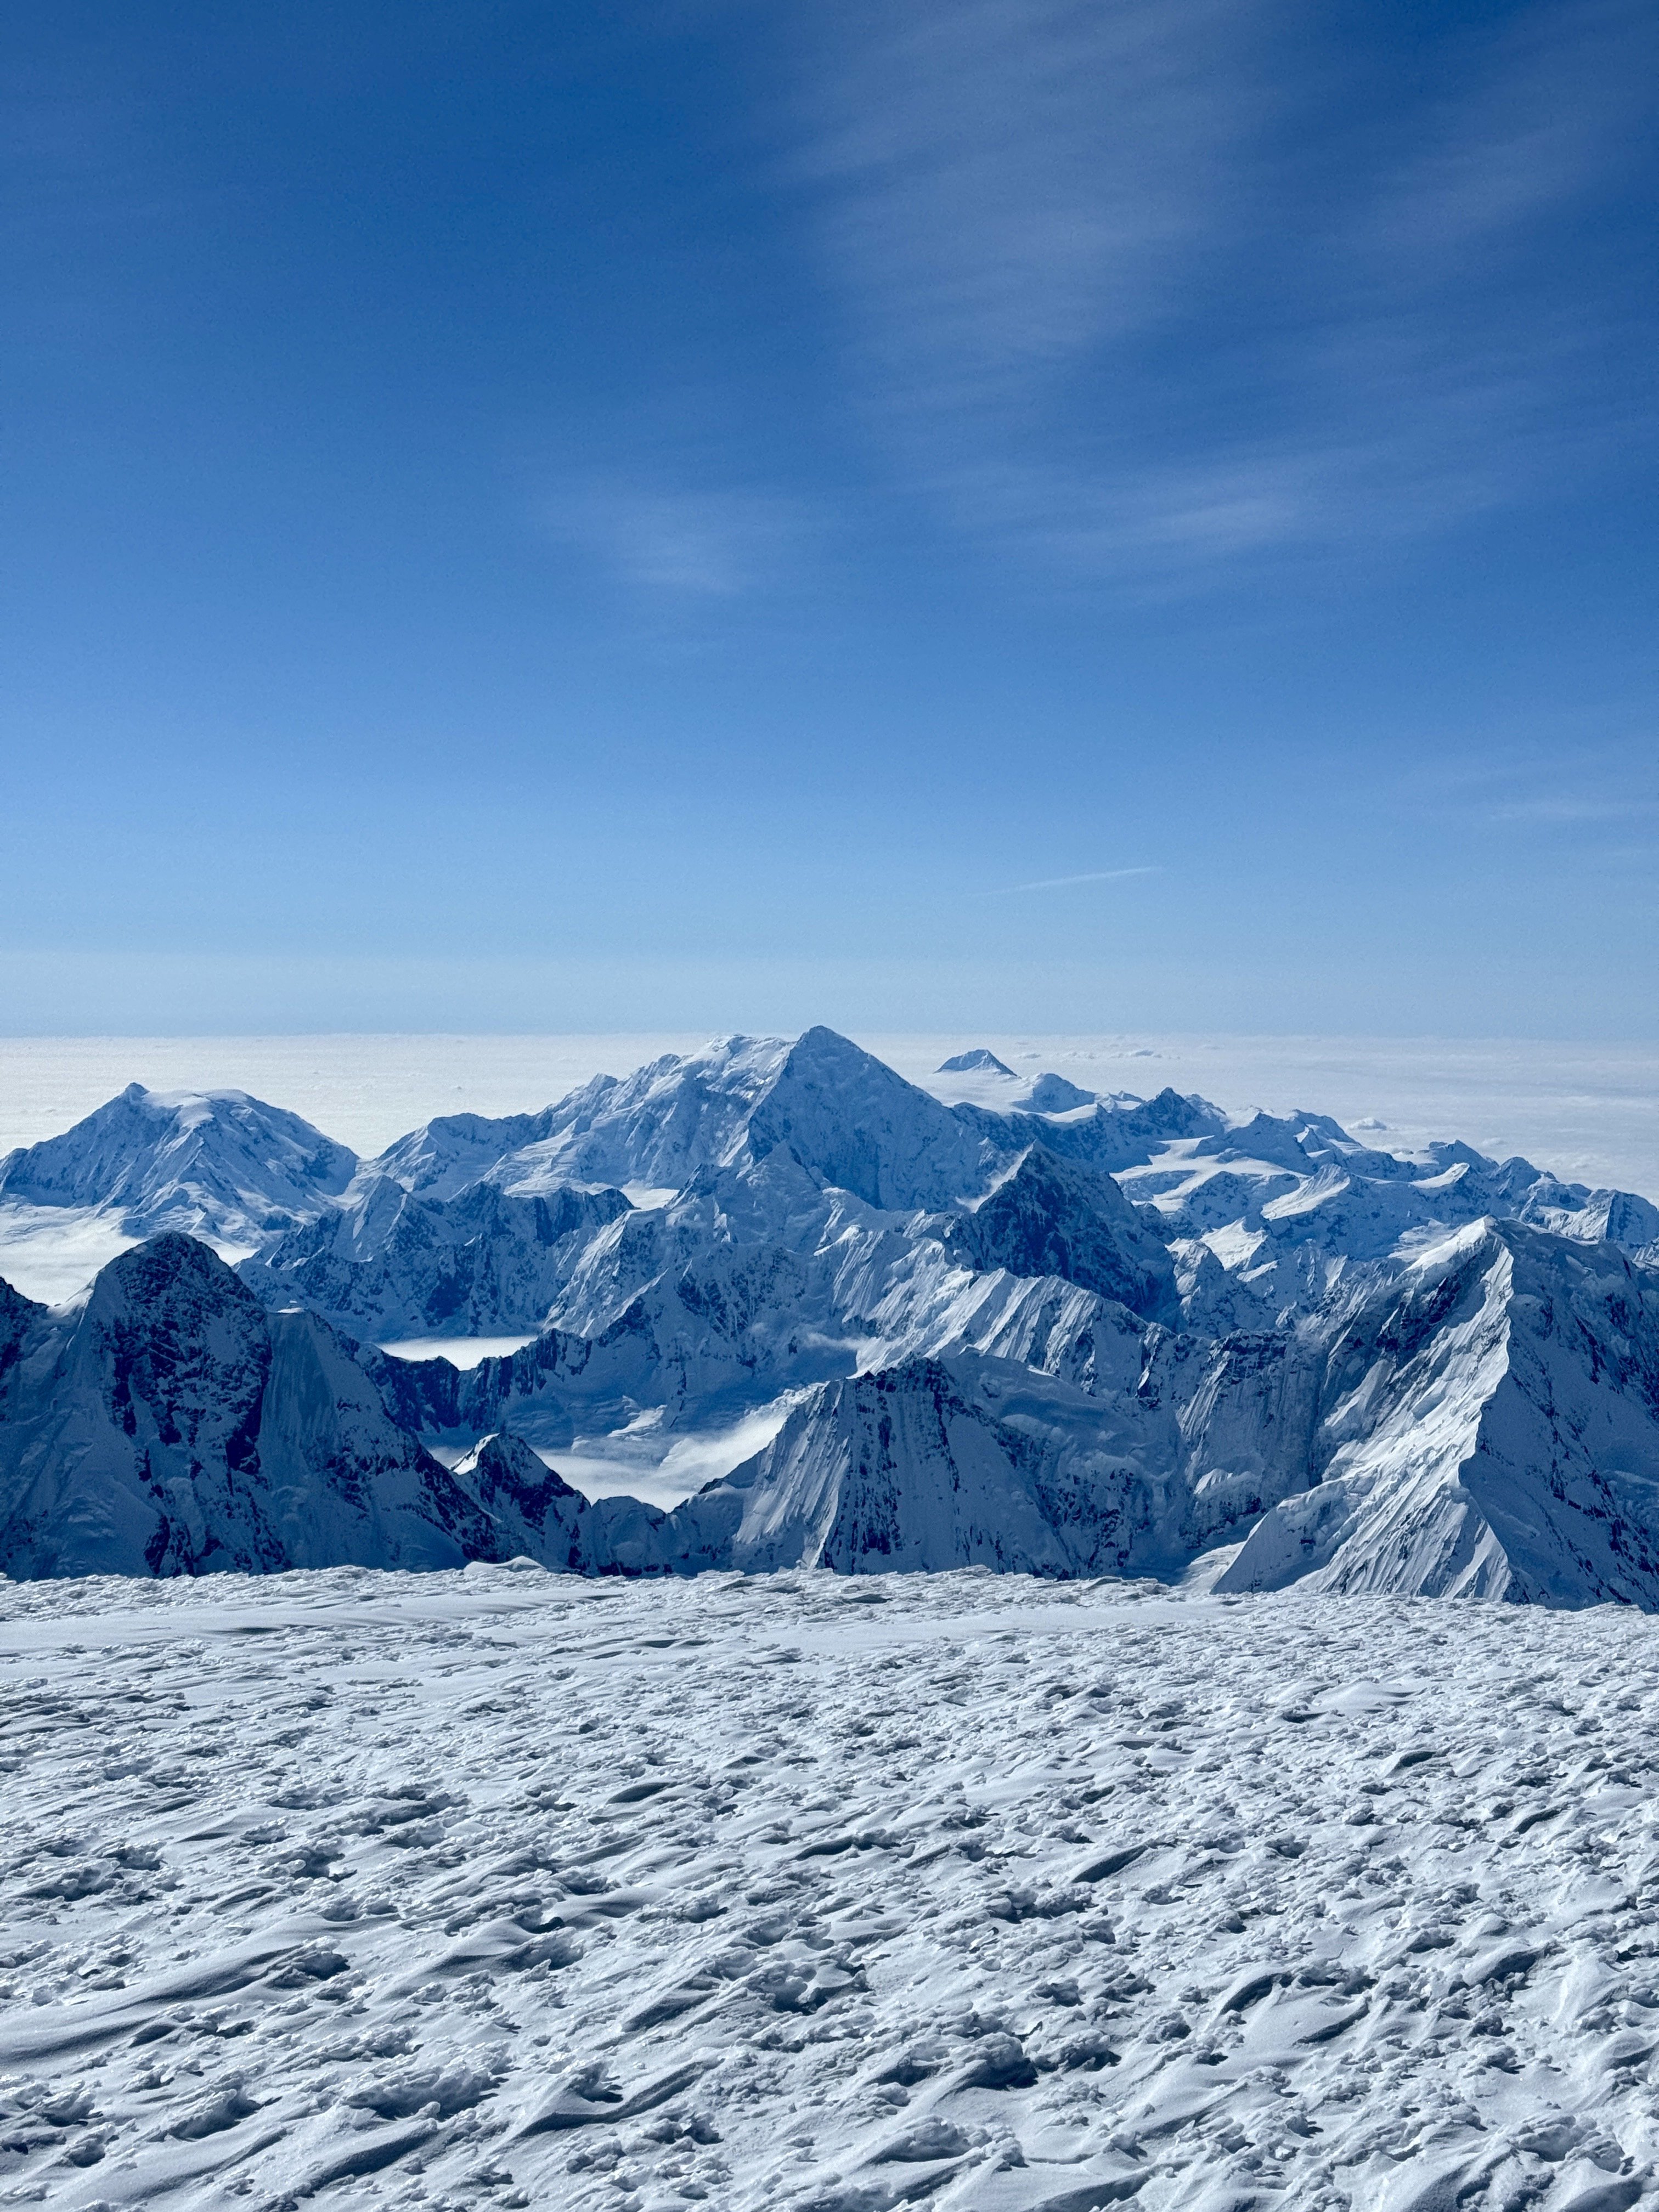
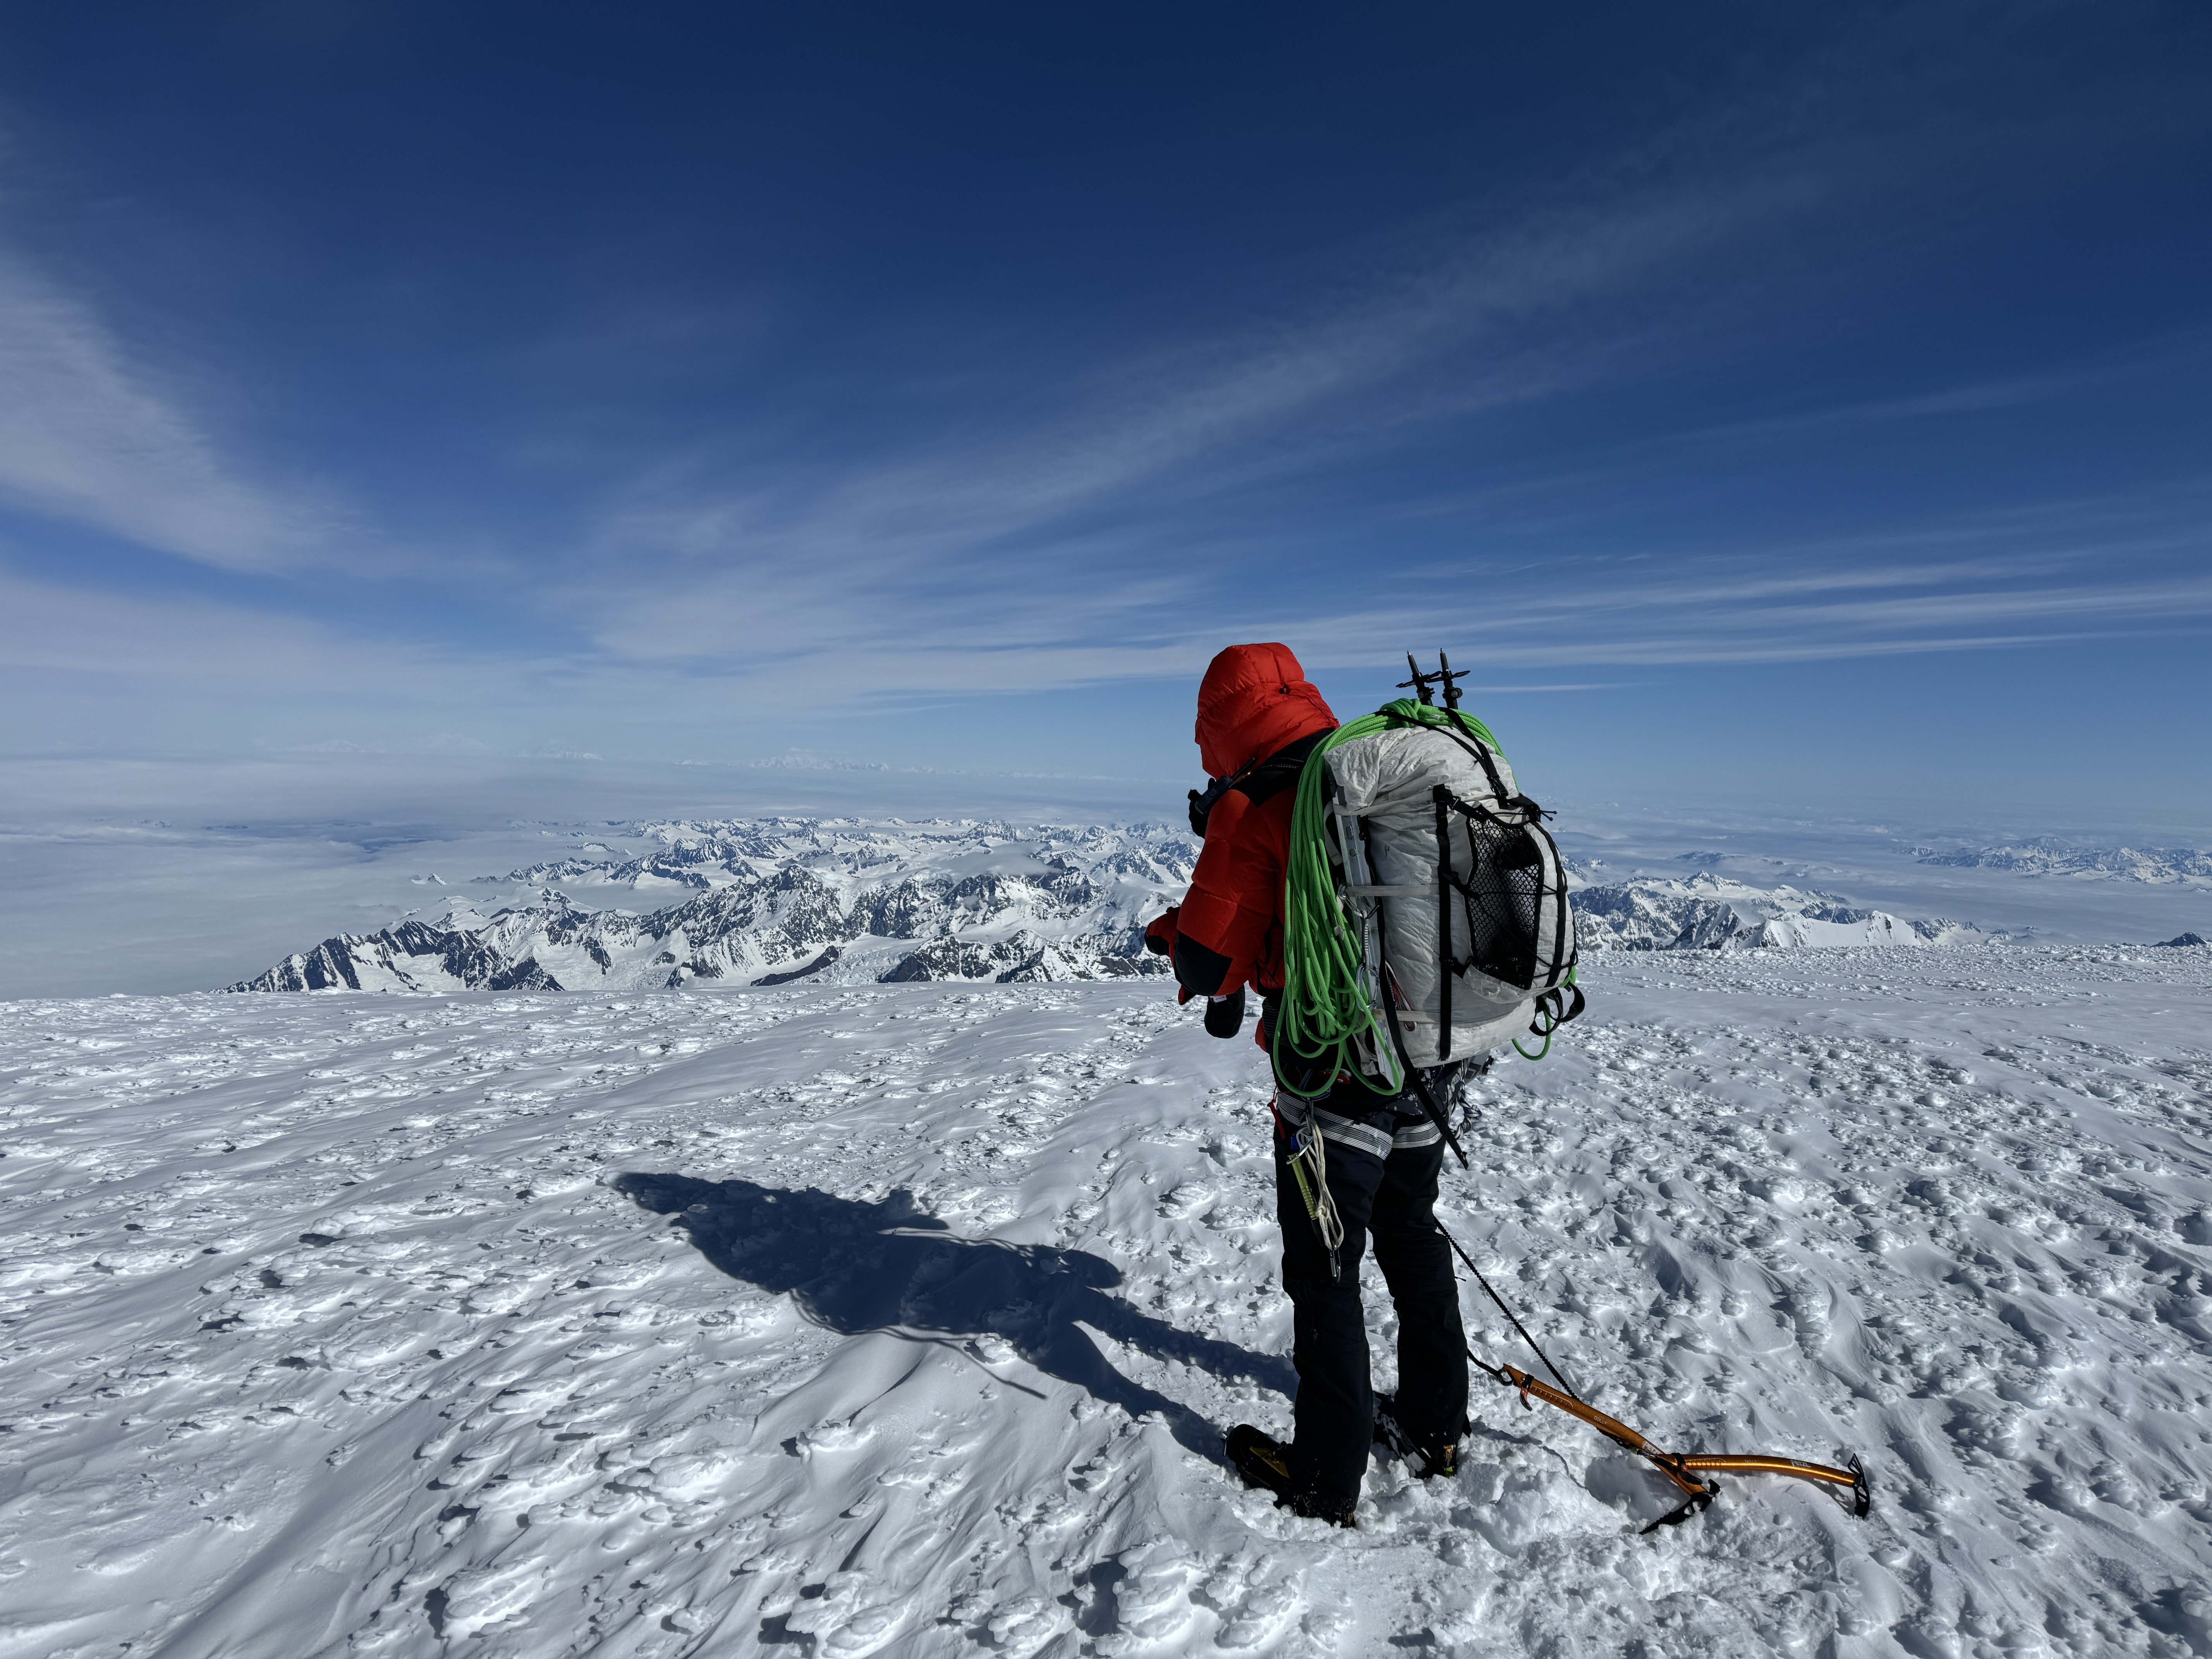
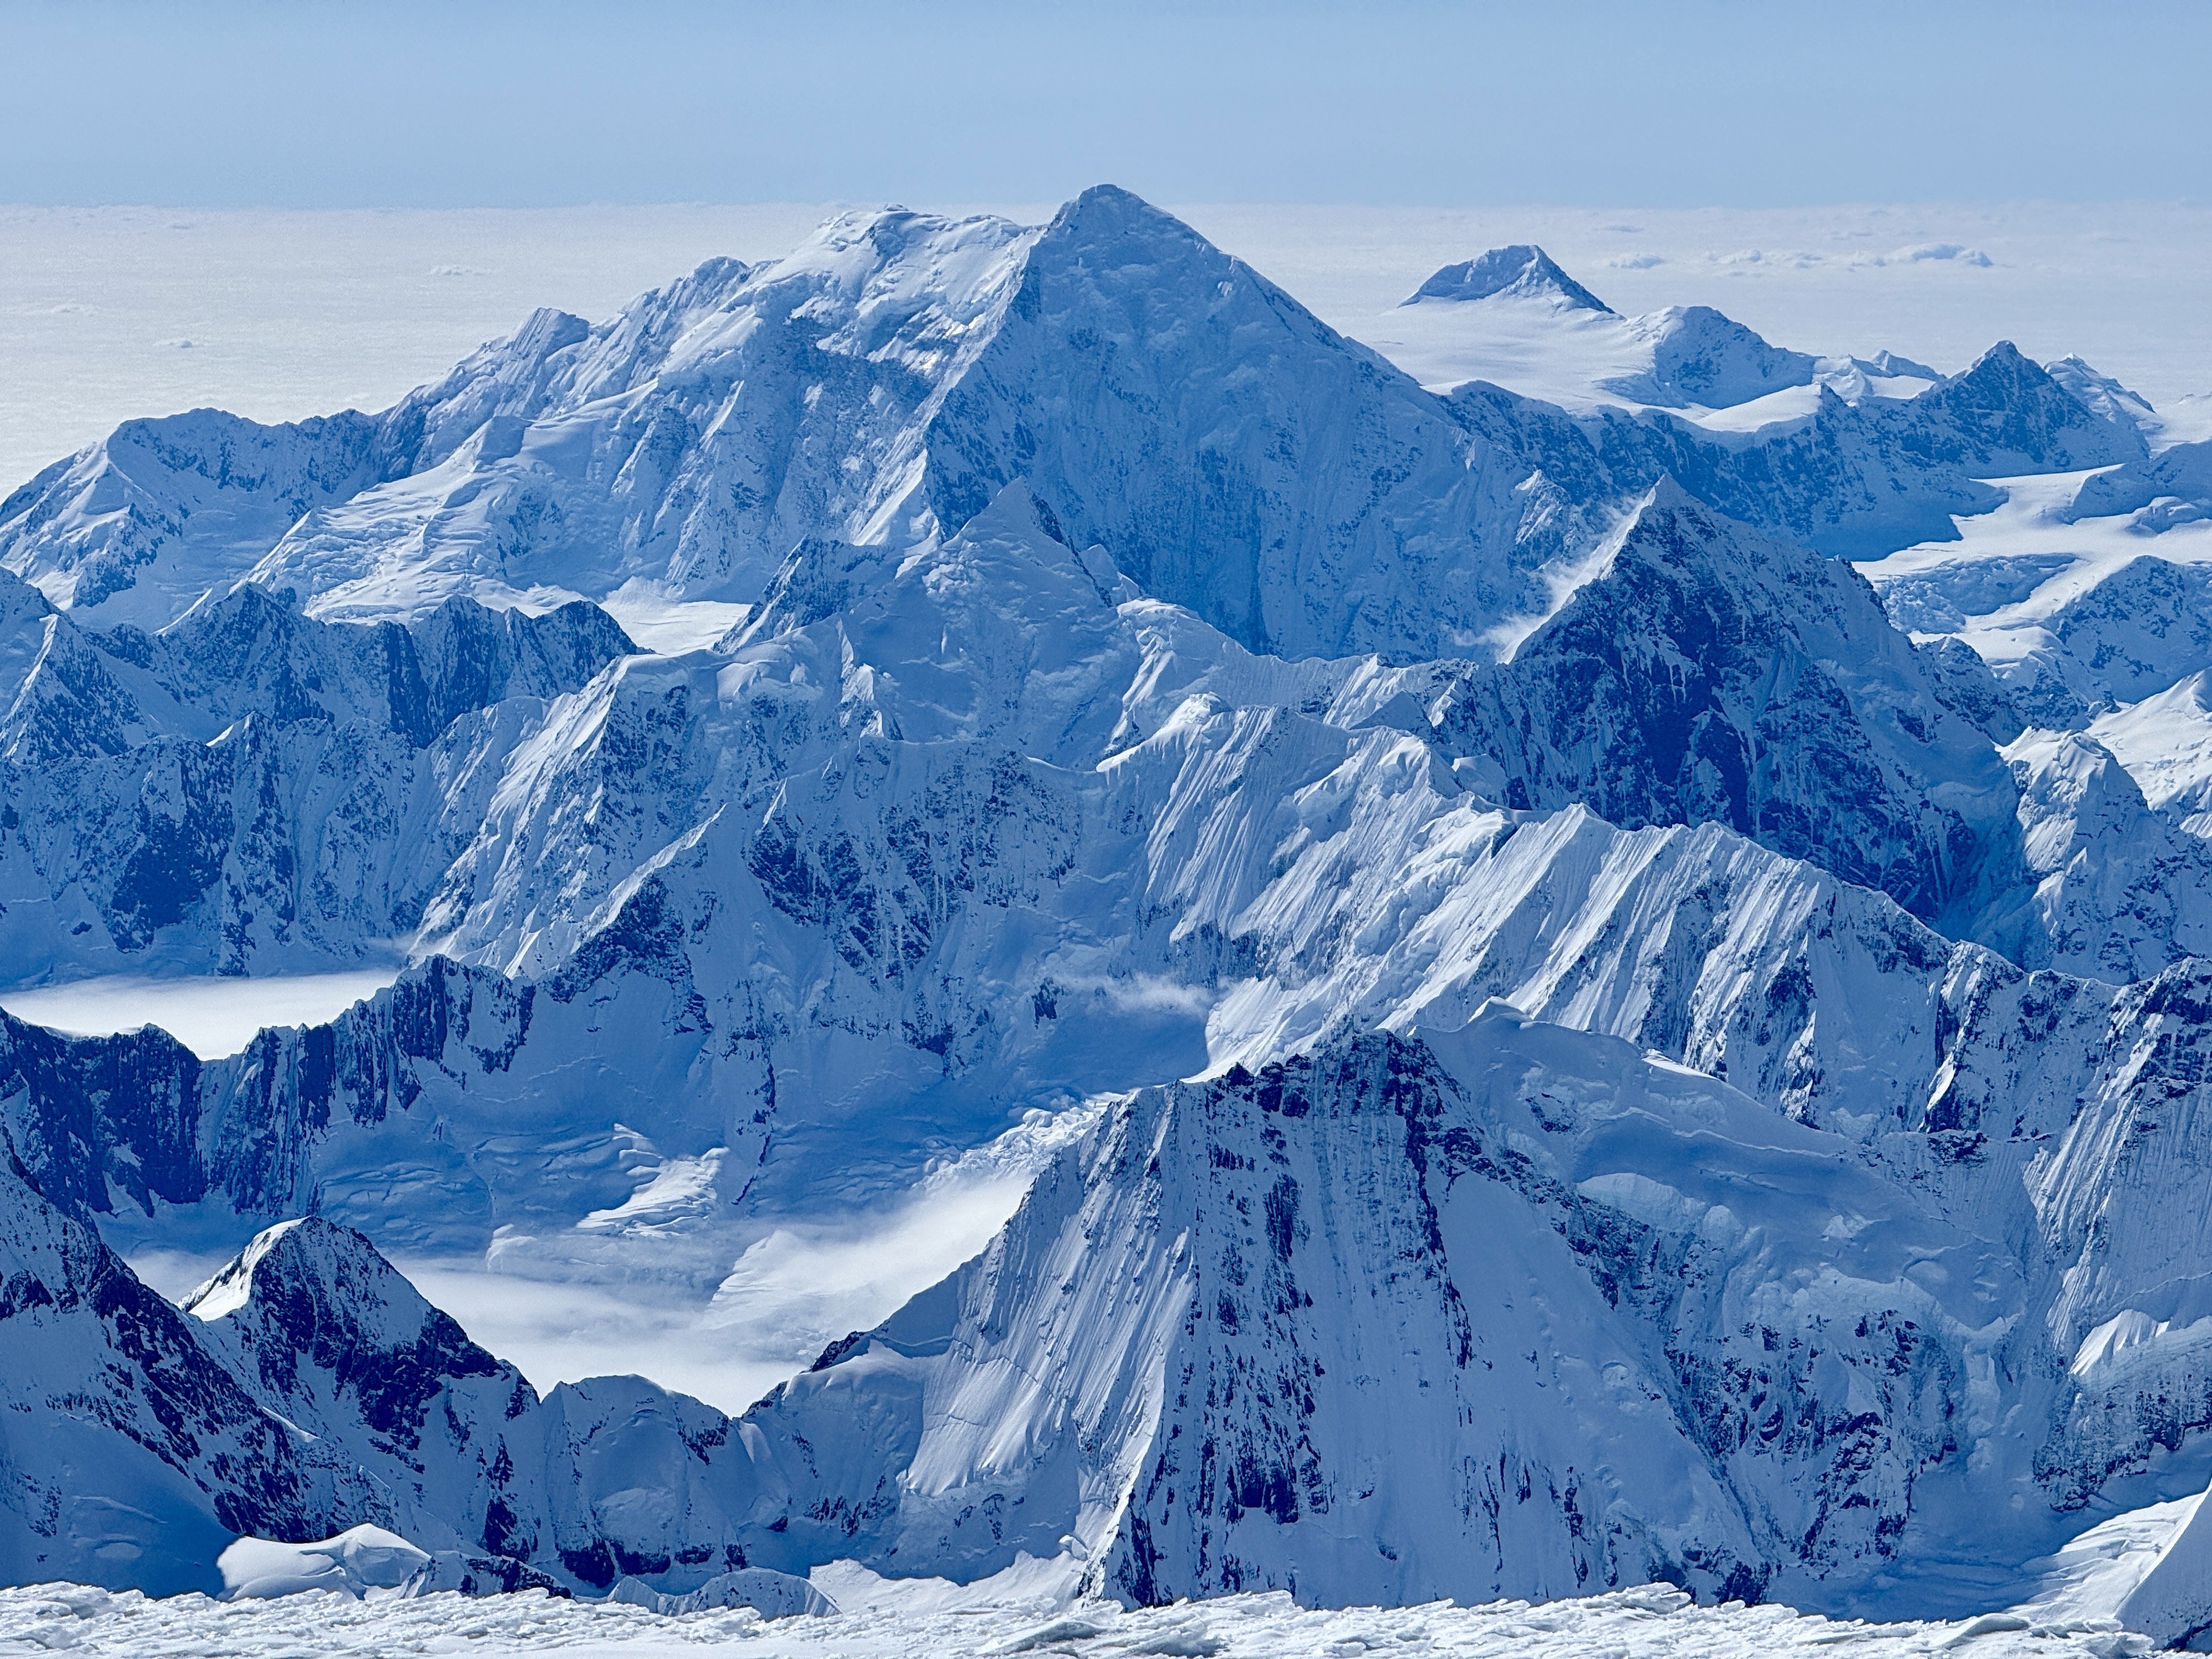
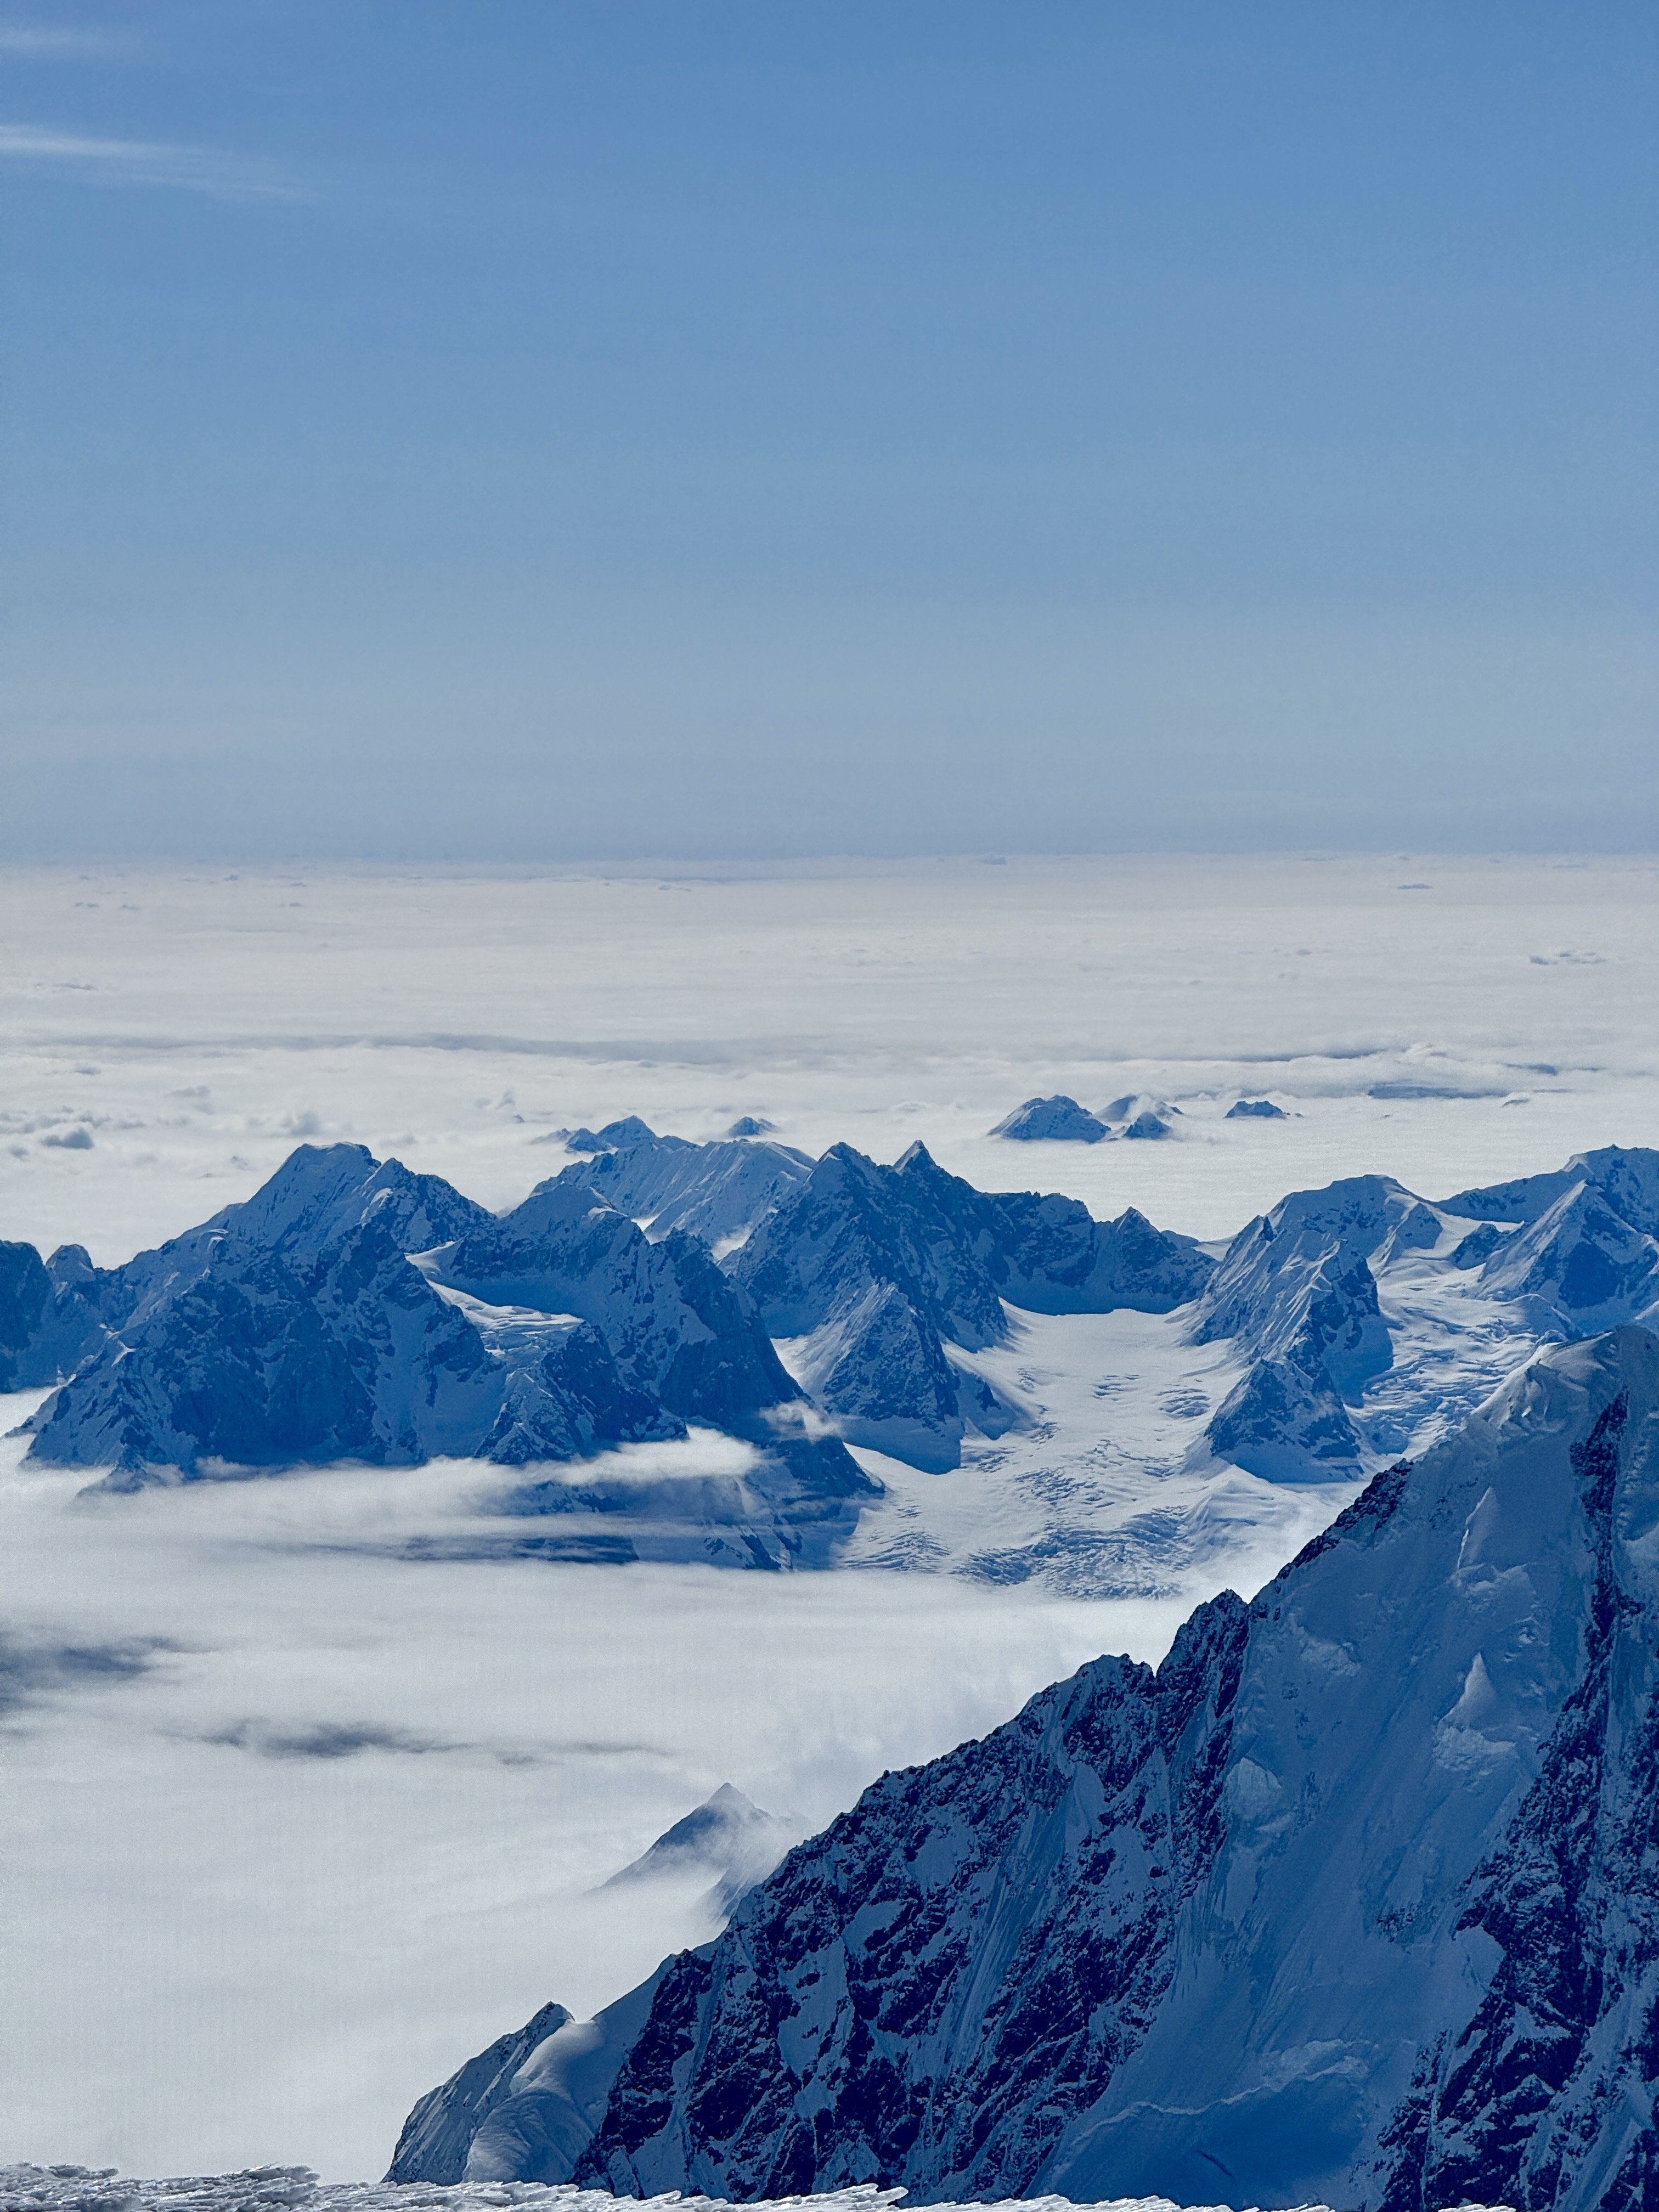
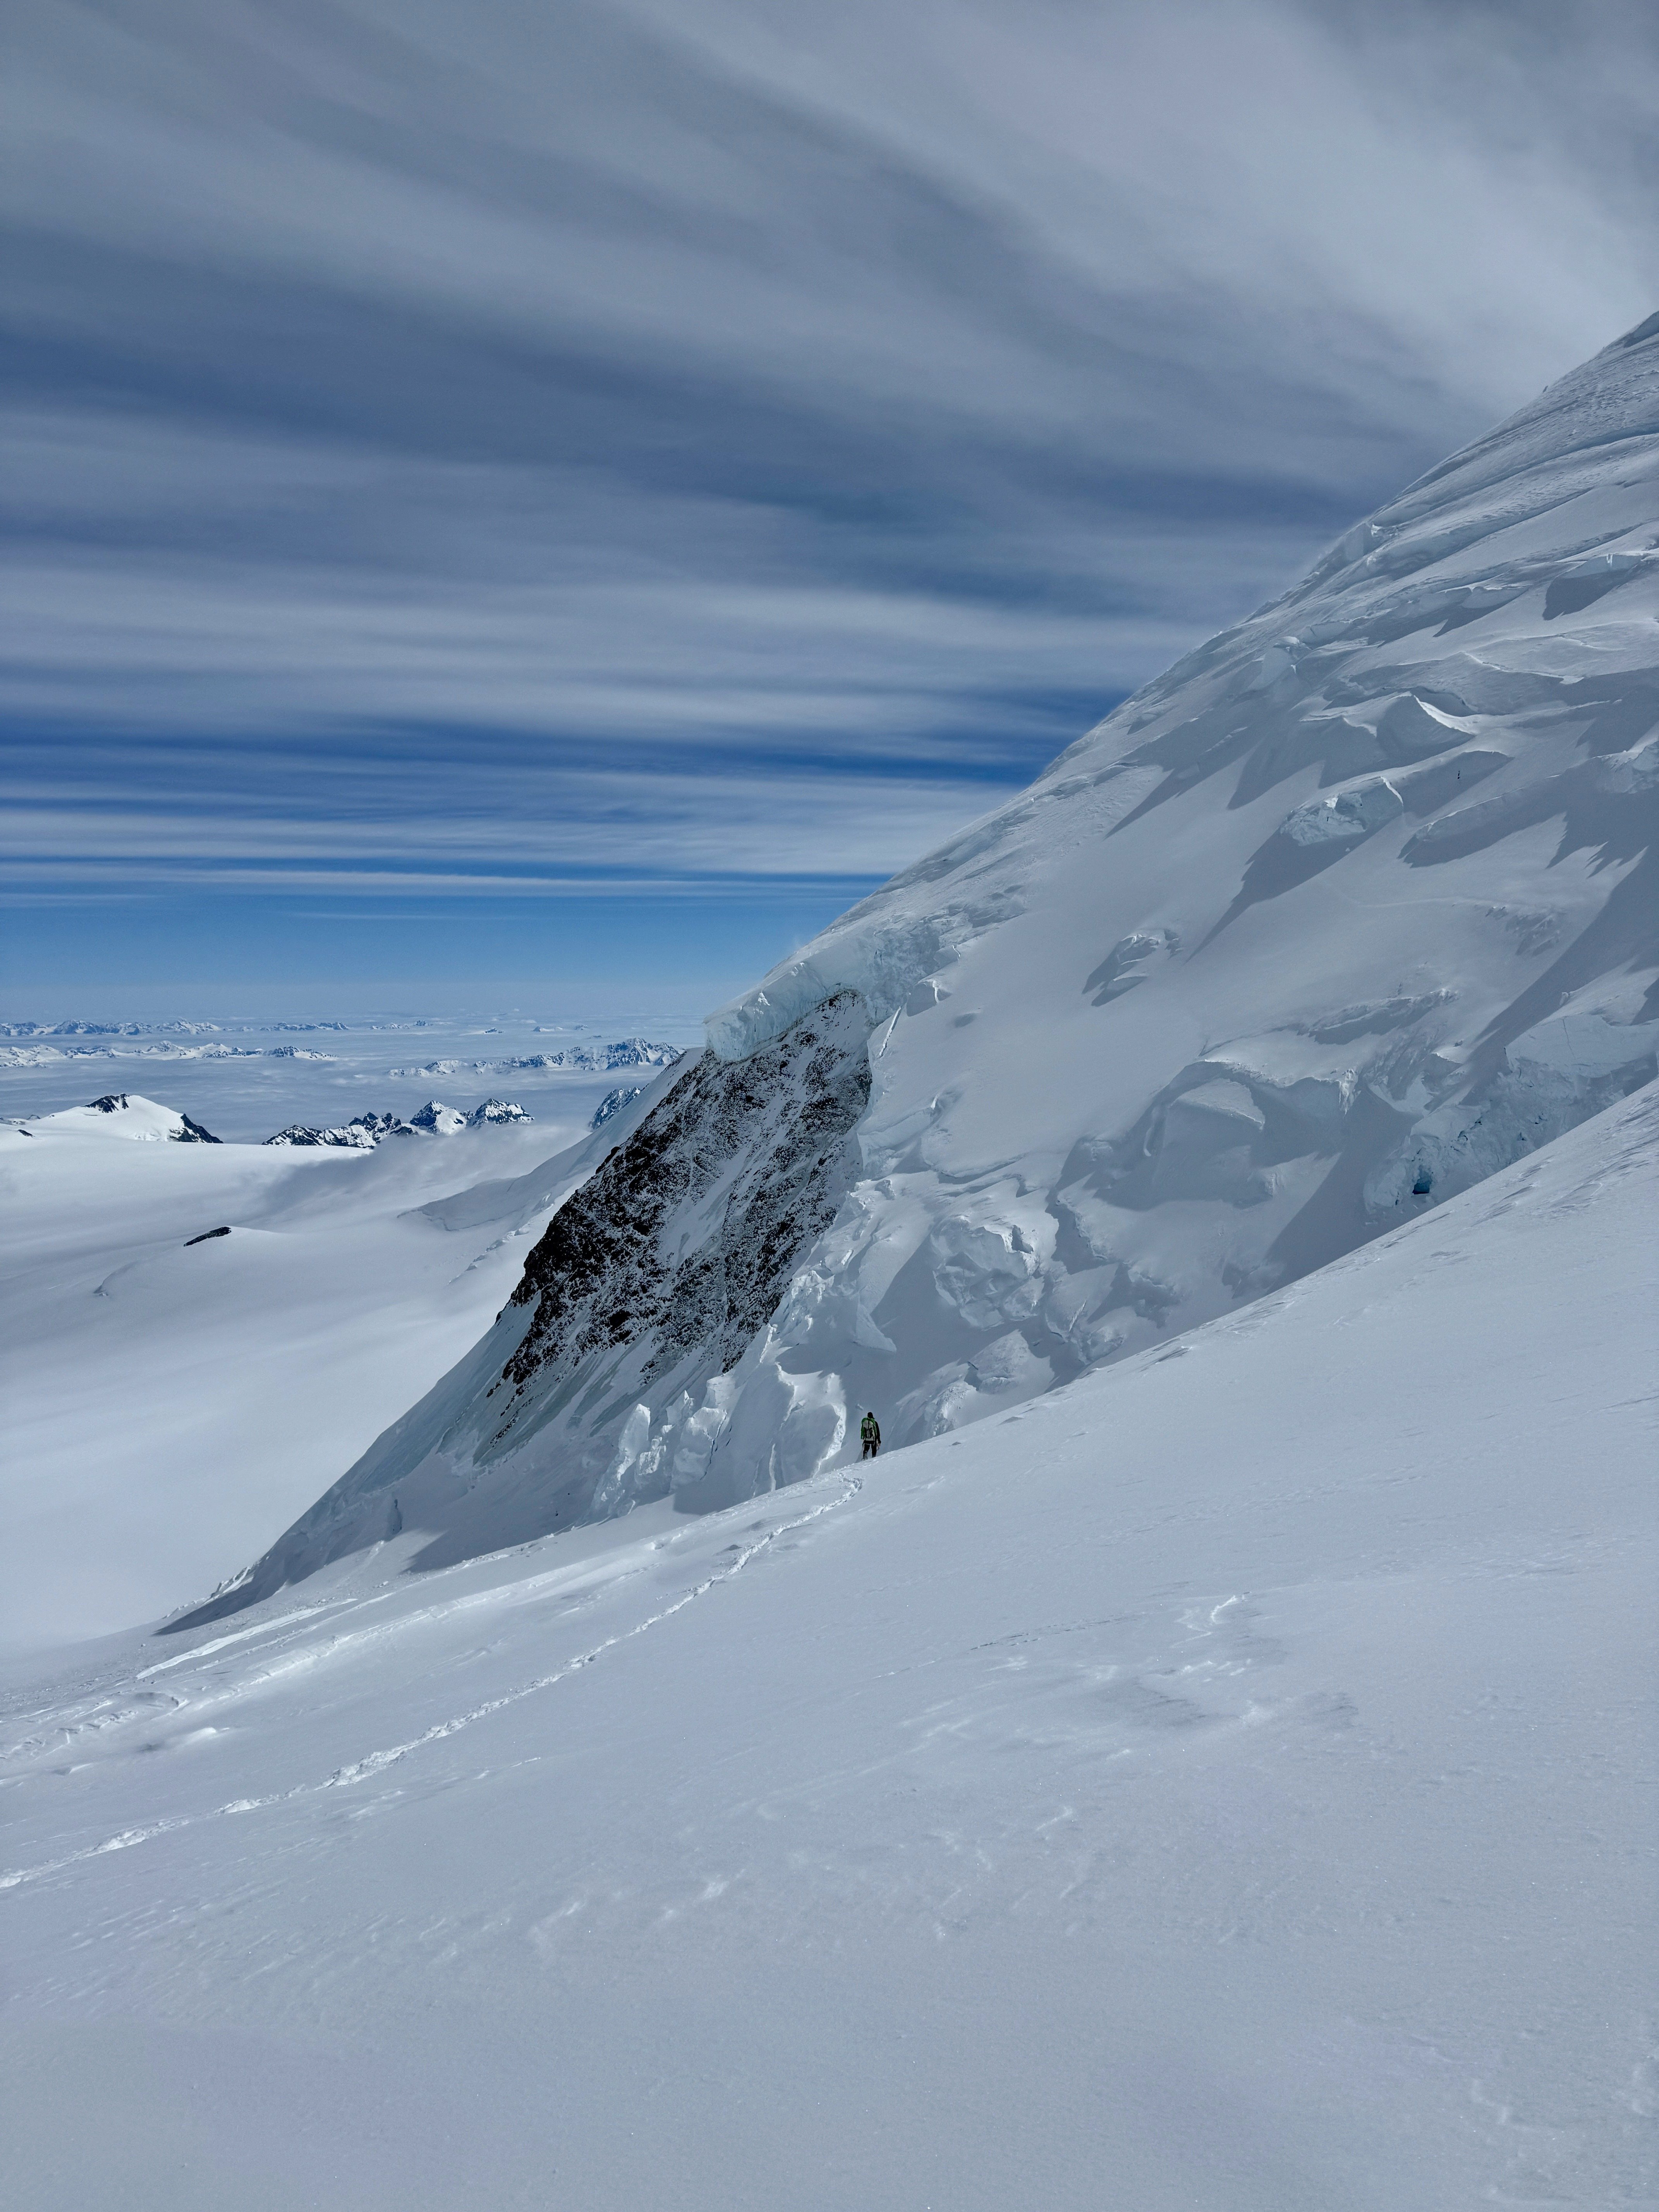
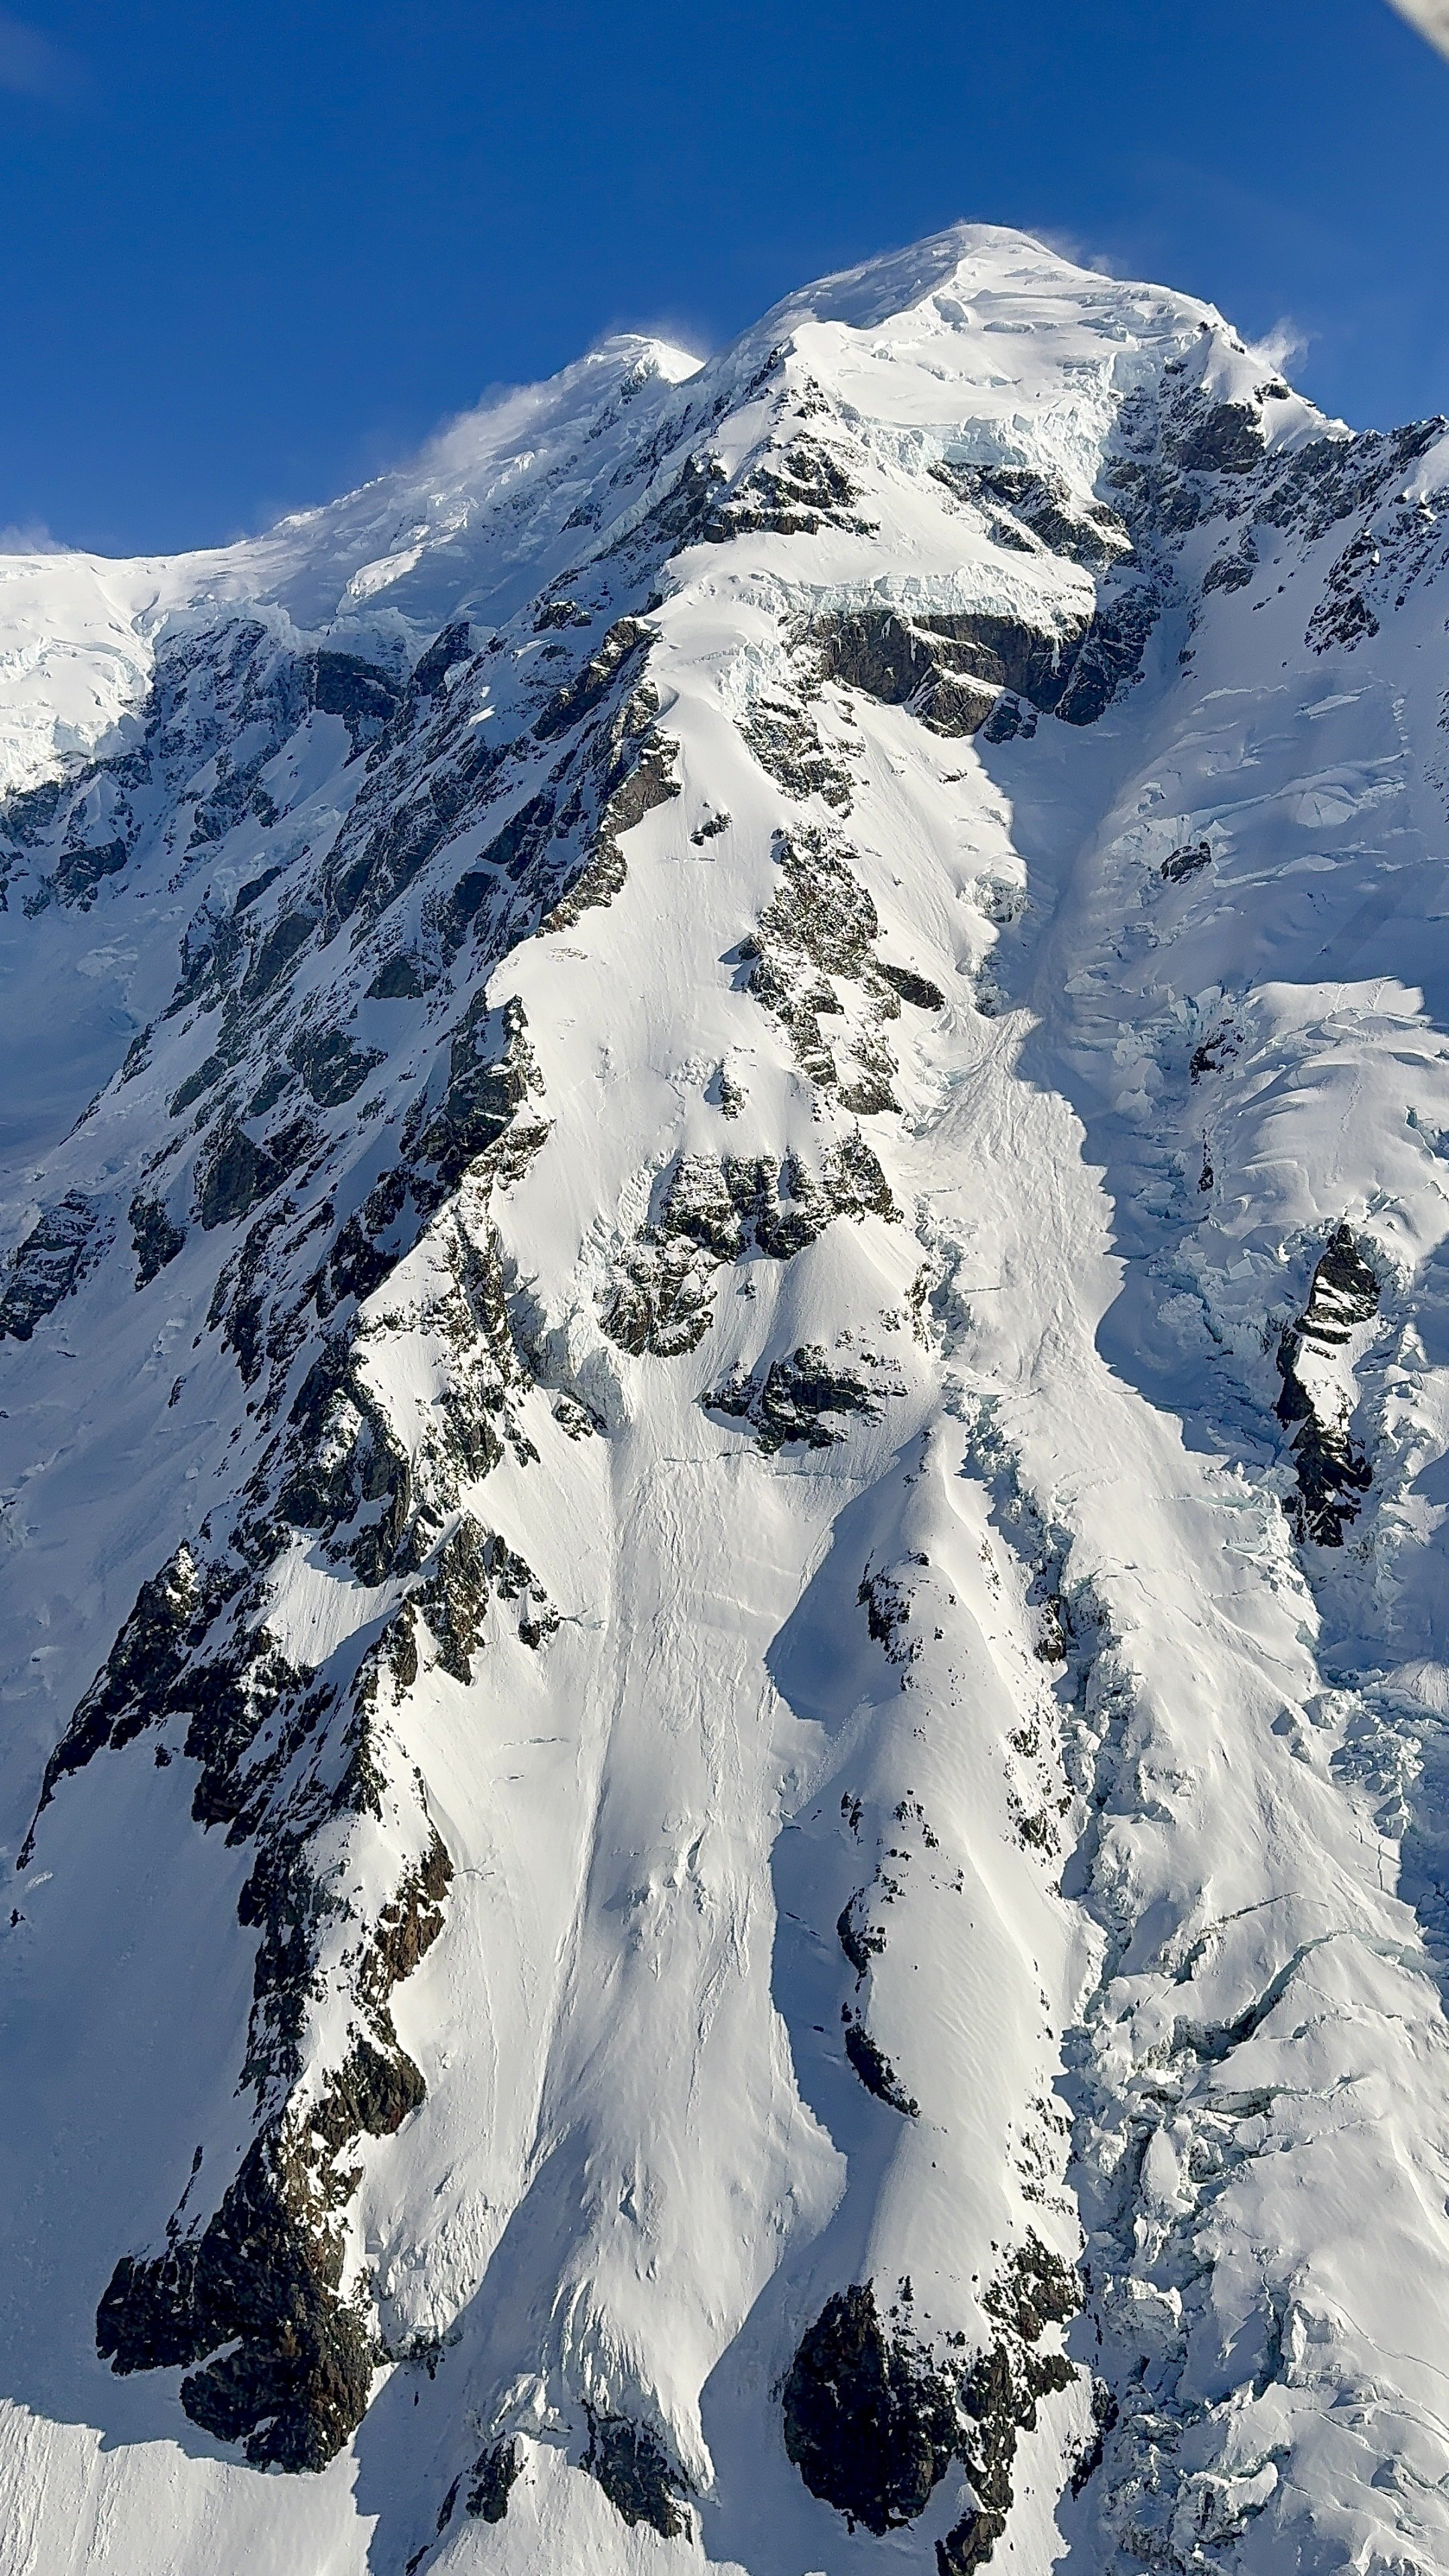
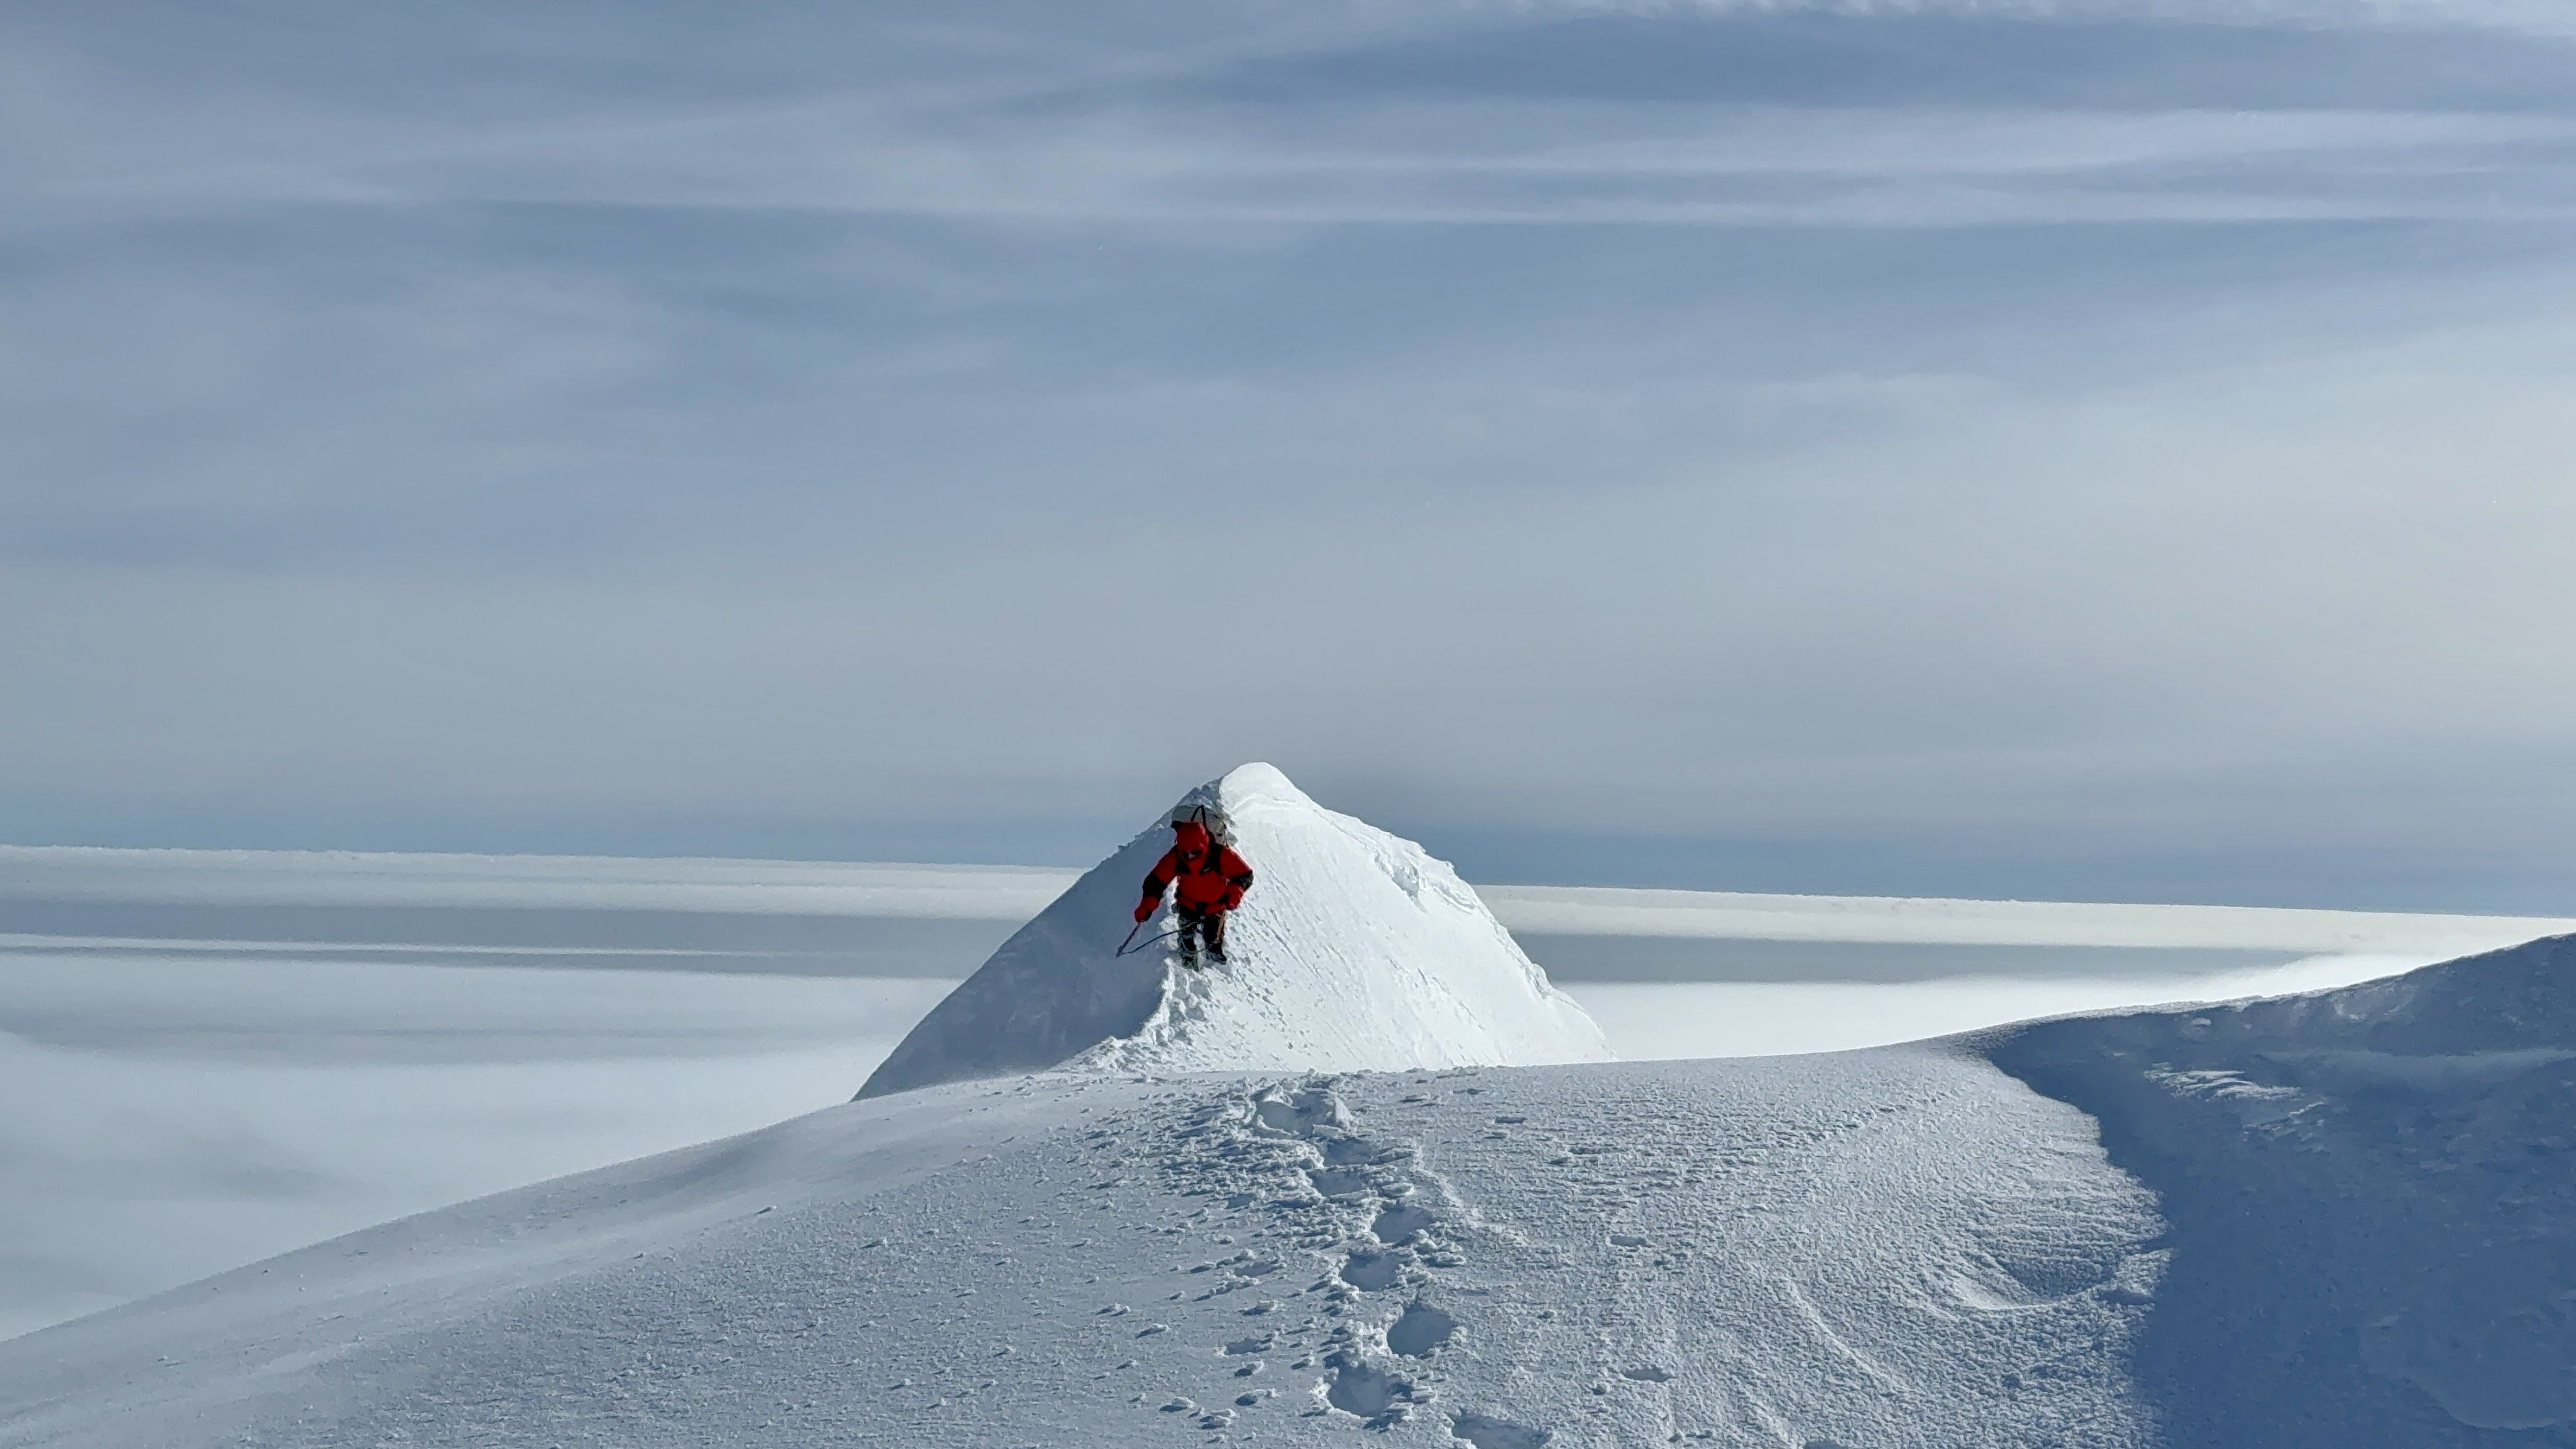
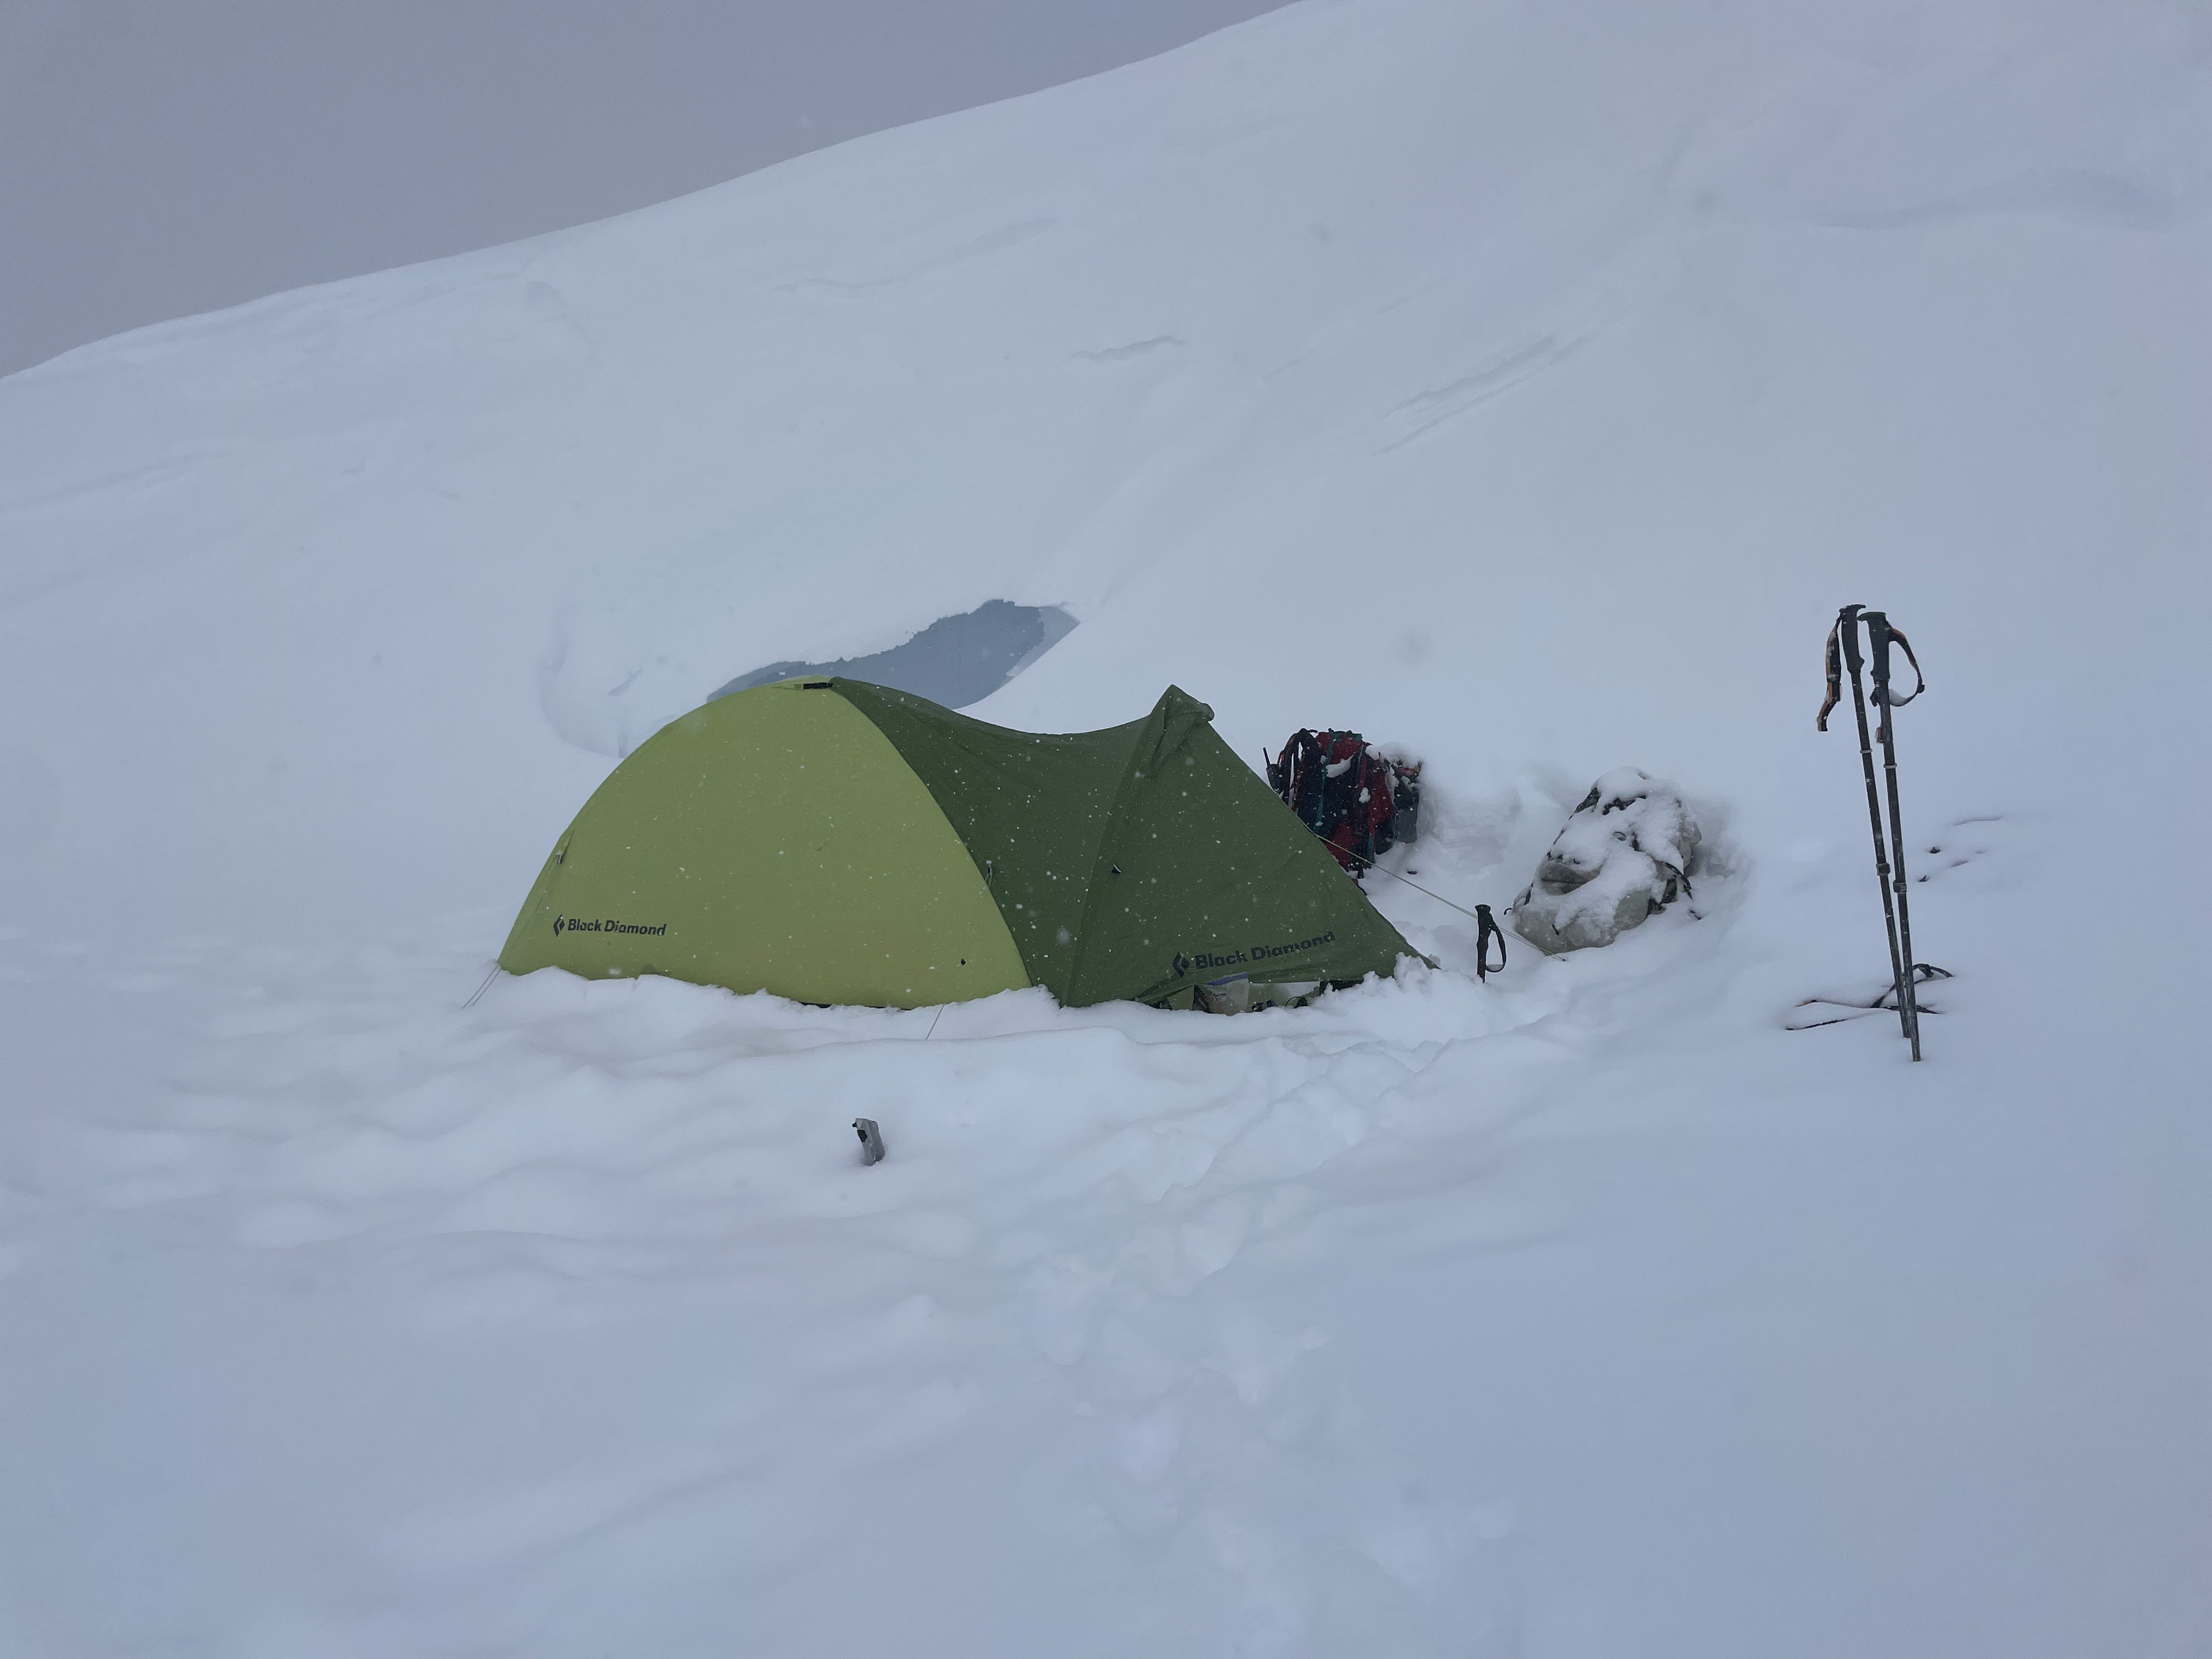
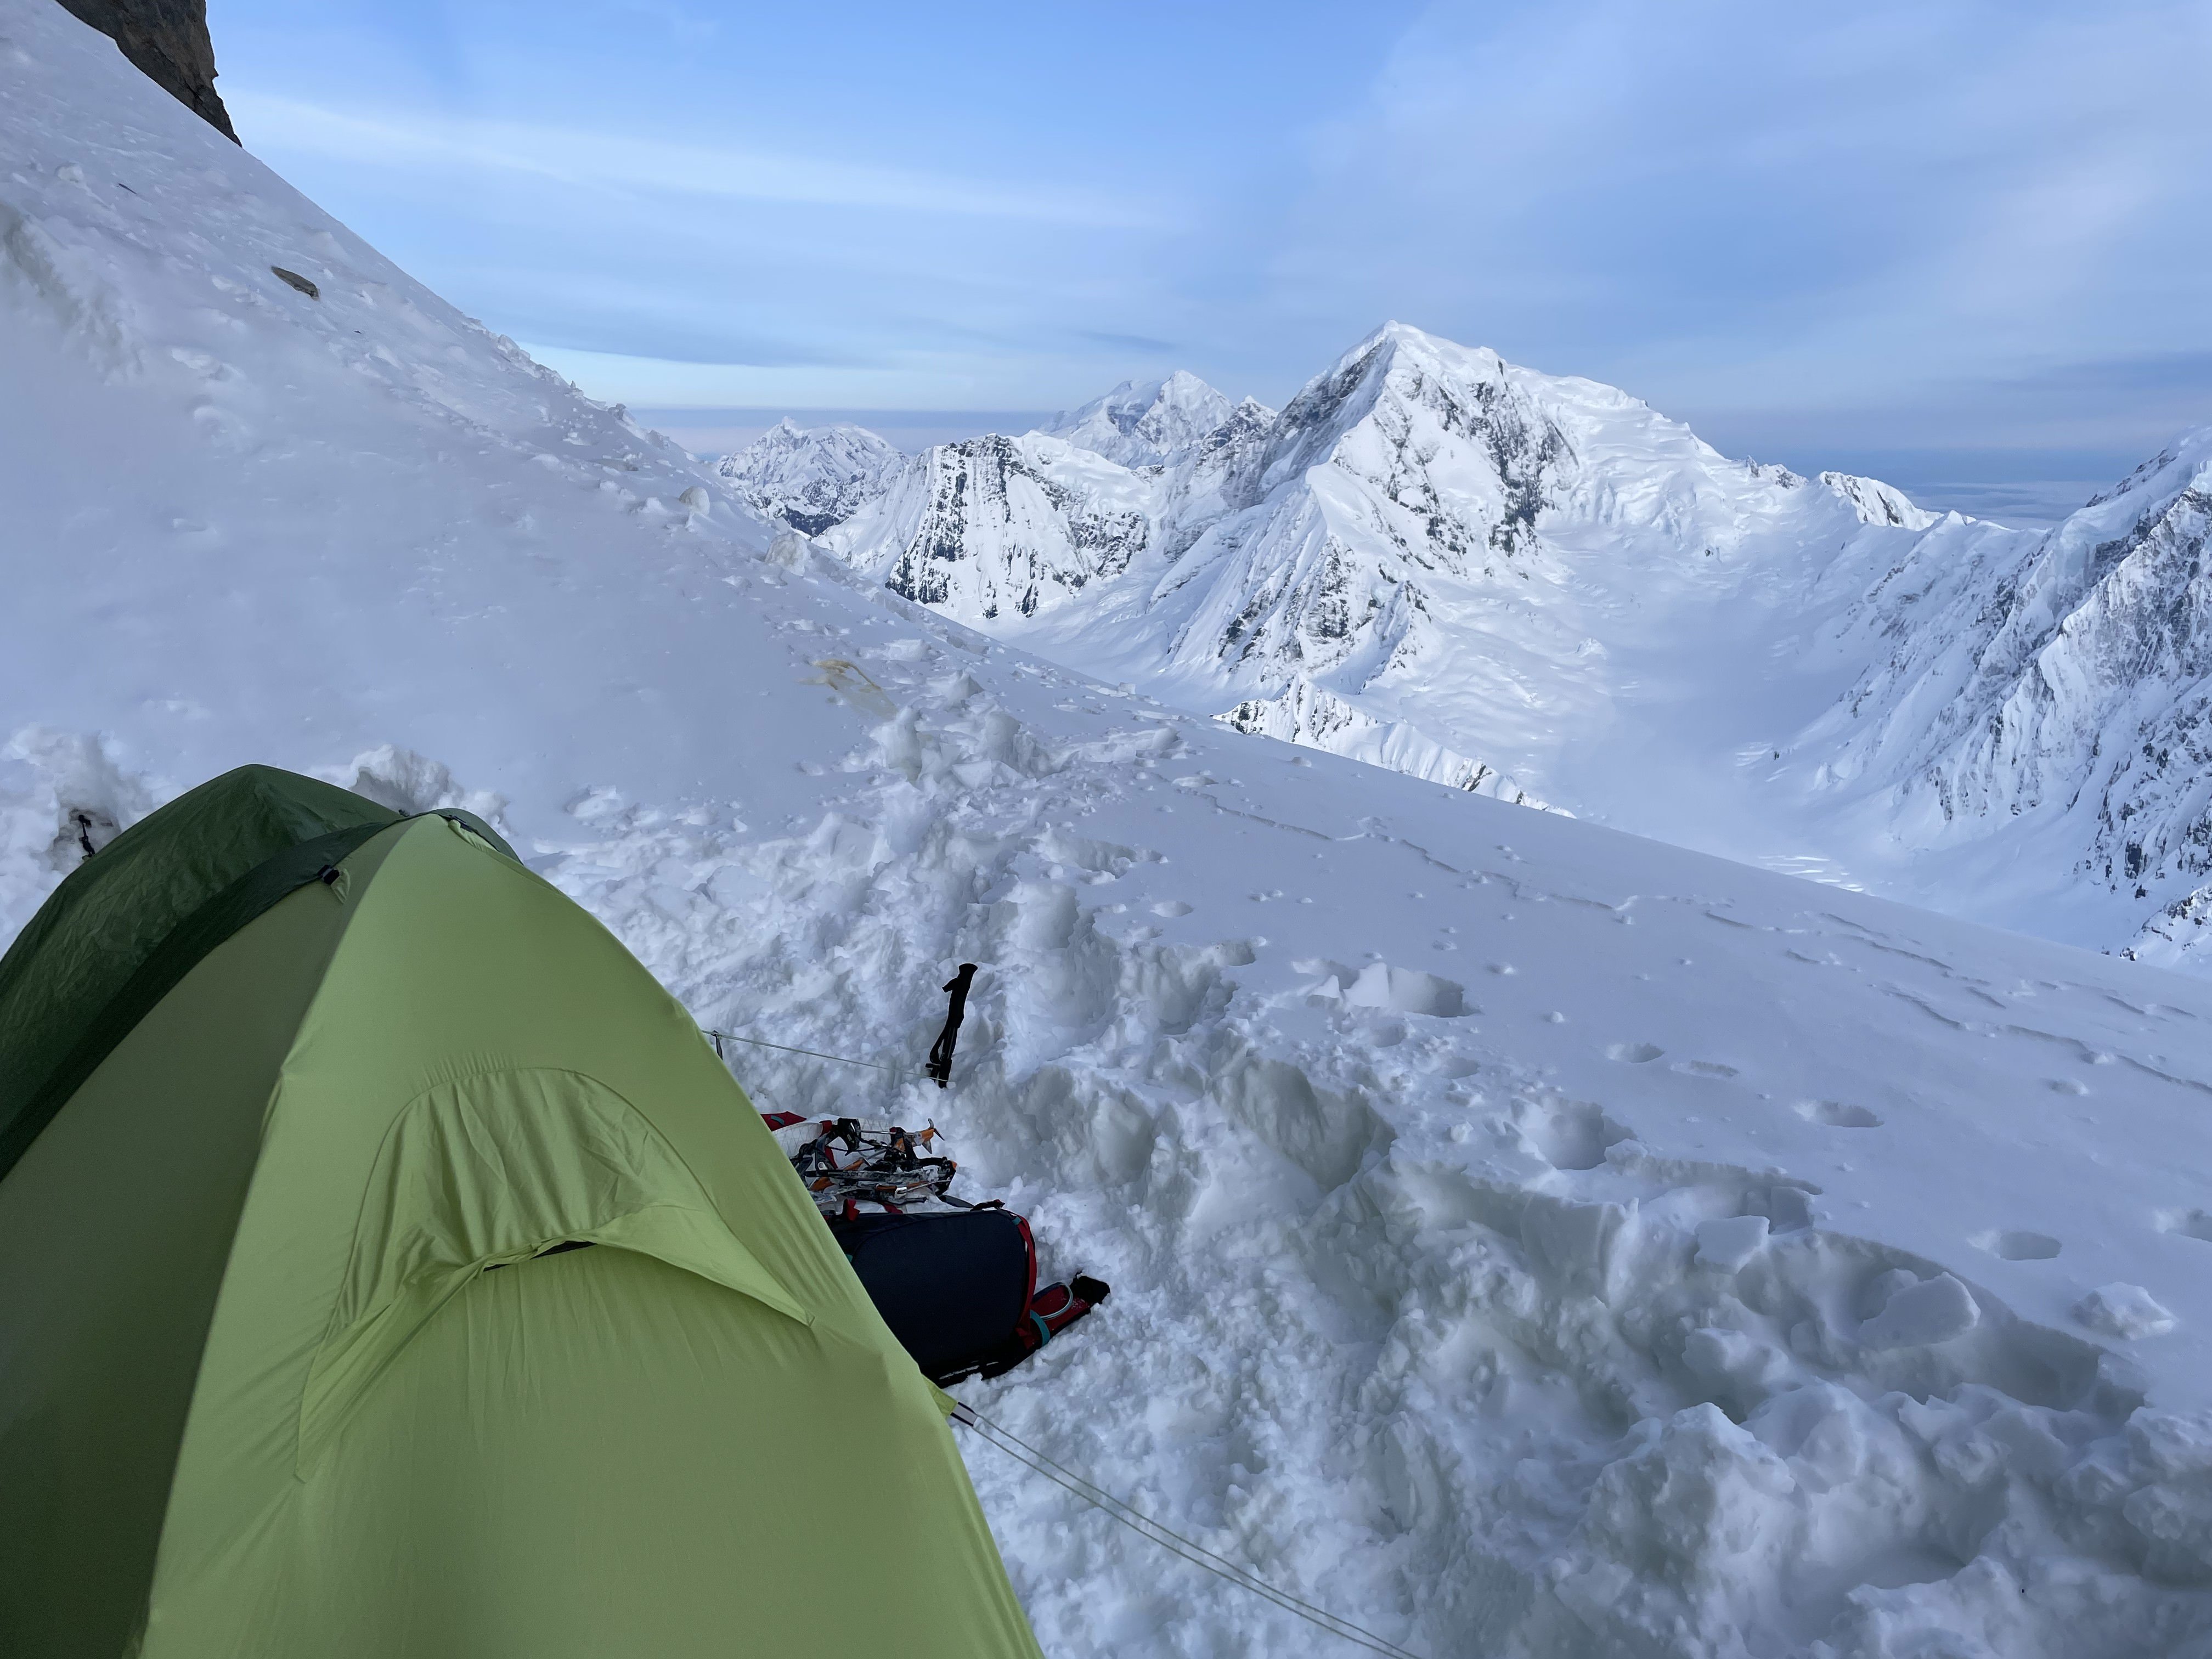
“The horse is made ready for the day of battle, but victory rests with the Lord.” Proverbs 21:31 After packing gear on Sunday and making final preparations, Ian and I left my house Monday afternoon 5/20 and drove over to Seattle for our flight to Juneau. We hired an Uber from the Juneau airport to the ferry terminal, and took the midnight boat arriving to Haines at 4:30am. From there, we caught a taxi to the Haines airport and organized/packed gear. The famous “Fly Drake” arrived around 7am and we took off around 8am with “Bad to The Bone” playing over the headsets. I had been coordinating with Drake for several months, and have found him to be very experienced, and a well-known figure in the climbing community. I tried to eek out what advice I could regarding weather, gear, and strategies without coming across as a completely inexperienced noob. At one point I suggested going fast-and-light up the Carpe Ridge and down the other side to Grand Plateau Glacier, which Drake seemed to think was a reasonable idea although he did not know of anyone who had done it before. At the time I liked this approach. It has two huge advantages: much shorter non-technical descent, and potential better conditions for Drake to pick us up. Its disadvantages included not being able to set up a base camp with extra fuel, or any sort of luxury items. Even the bare essentials for a climb of this magnitude added up to 55lb packs each, and we are always trying to improve on that number. No base camp means less supplies, and less supplies puts Drake in a tough situation. I have heard several stories of Drake taking a risk to pick up climbers who are out of fuel, food, or just scared in a difficult situation (often due to their own unpreparedness) even though he shouldn’t be obligated to. The guy certainly takes a lot of personal responsibility for the people he flies into the range, and I’m sure that is mentally taxing considering the inexperience and risk involved with some of his client’s activities. I did not want to be one of those clients, and we took in enough food for 5+ fat days. That might seem on the very slim side, but I am very confident in Ian and I’s ability to climb fast when we need to, and also stretch food out if needed. On Tuesday 5/21, weather was perfect for the glacier flight. That is a rarity in the Fairweather range. I had booked everything months in advance, but kept the door open to change flights at the last second if needed to take advantage of changing weather windows. Luckily, things worked out on the exact days we had planned them. The flight to Fairweather Glacier was spectacular. The surrounding peaks are huge, due to the fact that they rise from a very low base elevation. Our views from the air revealed the Carpe to be in excellent climbing condition. Mostly snow travel with a few easy looking rock steps. We landed at 4,700’ and evaluated snow conditions. We decided to leave skis in the plane to save weight. This turned out to be the right choice, as skis would add another 6lbs to our 55lb packs. We immediately started walking across the glacier to the base of the ridge, roping up and avoiding a few very large crevasses. We accessed the ridge via a snow ramp on the right. This lead up around 1,000’ until we reached a low 5th class rock gully. We climbed this (in ski boots, not our forte) for a few hundred feet until it dumped us onto the snowfield below the first of four sarac hazards. It is important to mention that this route is massive. Over 11k' long, I found it helpful to mentally divide the route between 4,500’-11,000’ into four sections. Each section has a serac at the top that we would have to bypass. A lot of our route decisions were based on avoiding the fall line of these seracs as much as possible. Especially considering how clear and sunny it was on our way to camp 1. The first serac we bypassed on the right, then we continued up just outside the fall line of the second serac, passing it on the right as well. There was a rock band that was about even with the second serac that had some 4th class rock scrambling, which we solo’d. We then ascended another steep snow field to the base of the cliffs that make up the ridge crest between 9-10,000’. This takes you to a lower angle snowfield just on top of the 3rd serac wall. We made our first camp at 10,500’ at the base of some formidable looking cliffs that blocked our route up the ridge. This was a flat and somewhat sheltered camp spot, but it was in between two shallow crevasses which made for limited space. We went to bed around 9pm just after it started snowing. It snowed/slushed all night and the next morning through very warm temps. While we were stuck in the tent, we studied some of Ian’s excellent arial photographs and determined our best chance of getting around the cliffs would be to traverse horizontally about 1/2 mile to the right, and climb a steep snow gully past the 4th and final serac wall. My brother Noah sent us a forecast showing a clear weather window for a few hours in the afternoon/evening, so we used that time to push up to another great camp site at 12,200’. On day 3, it again snowed lightly all night and the next morning/afternoon. Around 4pm, the snowfall slowed and we decided to make another short push. We ascended the seemingly endless steep snow up toward the false summit, with Ian breaking trail much of the way. We were both starting to feel the altitude, and were moving much slower than we usually do. The combined vertical gain of the route over slushy snow conditions, high altitude, with heavy packs really had a cumulative effect and we felt very fatigued. Just before reaching the false summit, we started the long leftward traverse and descended down to the col at 13,600’. The ridge here was wide, but had massive cornices. Some of them starting to break away from the ridge leaving huge cracks for us to avoid. From the col we got our first glimpse of the “ice nose”, and realized it would certainly be the crux of the route. In the interest of saving time on Friday, we pushed up a bit further to 13,800’ and camped at the saddle just below the ice nose before that night’s high winds set in. The next morning, we were up at 3am and on our way towards steep ice at 5am. We went back and forth trying to decide whether the ice nose was better passed on the left or right, but eventually decided to follow the 50 Classics guidebook advice and go left. I would not say it was bypassed easily however. We swapped leads for 3 pitches of 70 degree blue ice, then popped out on the upper snow fields. Finally success was assured, and the summit was in sight. We weaved our way through the crevasse maze of the upper mountain and popped out on its rounded summit just before 10am. Unfortunately, there was an undercast around 3000’ hiding the iconic ocean views, but we could see Mount Logan and St. Elias to the North. Weather was windy, and I would estimate ambient was around -10 degrees. I was cold even in my big parka. After taking photos, we started back down the standard route towards the Grand Plateau. The descent route was less steep than the Carpe, but is also covered in crevasses forcing us to zig-zag quite a bit. We punched through a few crevasses up to our knees or waist, but they all seemed to be mostly filled with snow and ice still this early in the year. Once we reached the col at 13k, I messaged drake via inReach and let him know we were only a couple hours from the landing zone. Unfortunately, the snow below the col was consistently shin to knee deep all the way down, and was slow going. By the time we reached 11k we were very tired. I sent drake some more conditions information and he said he was on his way. It was at this point I realized that we never set up coordinates for an exact pick up location. I messaged him asking if the flat area at 10,500’ was sufficient, but it was too late. We waited just below 10,500’ and as Drake was arriving, wind was picking up and the undercast clouds were quickly rising. Drake managed to land nearby, but he was not pleased with our pick-up location choice. Lesson learned, I should have been more thorough with my questions prior to getting on the glacier. We quickly threw everything in the plane, and Drake really seemed to put his pilot expertise to the test getting off the ground. It took a long time, especially with a direct tail wind, to get airborne. We finally lifted off just as we passed over a massive crevasse that could have easily swallowed the plane. Once we were back up in the air, we were incredibly relieved. We all agreed that is not a situation that we would like to repeat. We landed back in Haines around 2:15pm and quickly packed gear, called a taxi, and made it back to the dock for the 3:15 ferry. We then reversed the rest of our travel itinerary and arrived back in Wenatchee at 3pm on Saturday. In summary, I think Carpe Ridge is a desirable climb due in most part to its sheer size and position. There are some other huge ridge climbs in the Fairweather range that look quite appealing, but none of them can compete with the Carpe for sheer size. I’m glad with the general ease with which this trip worked out, and thankful for the positive conditions we experienced. We learned a lot, and certainly affirmed a lot of our gear decisions and tactics that we can now put to the test on bigger objectives. On this climb even more than others, I had the persisting feeling that God provided for us a beautiful setting and orchestrated the weather for us to witness his creation. I am also starting to realize that God has given Ian and I a narrow skill-set that is uniquely applied to alpine climbing. There is just something about putting all the tools in my toolbox to use in a high consequence environment that leaves me with an incredible sense of accomplishment. Of course, in the end God will always have control over our successes and failures, but he has certainly granted Ian and I a great success on this trip. AllTrails: https://www.alltrails.com/explore/recording/afternoon-hike-a3ec6dd-353?u=i&sh=emzgdu Pack Wizard https://www.packwizard.com/s/7x5UAWS Wondering if I should retro-actively post a few of our other trip reports here on CC? Or would that be bad form? I have been struggling to create an account for a while now and finally got it to work.


-
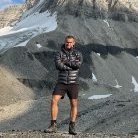
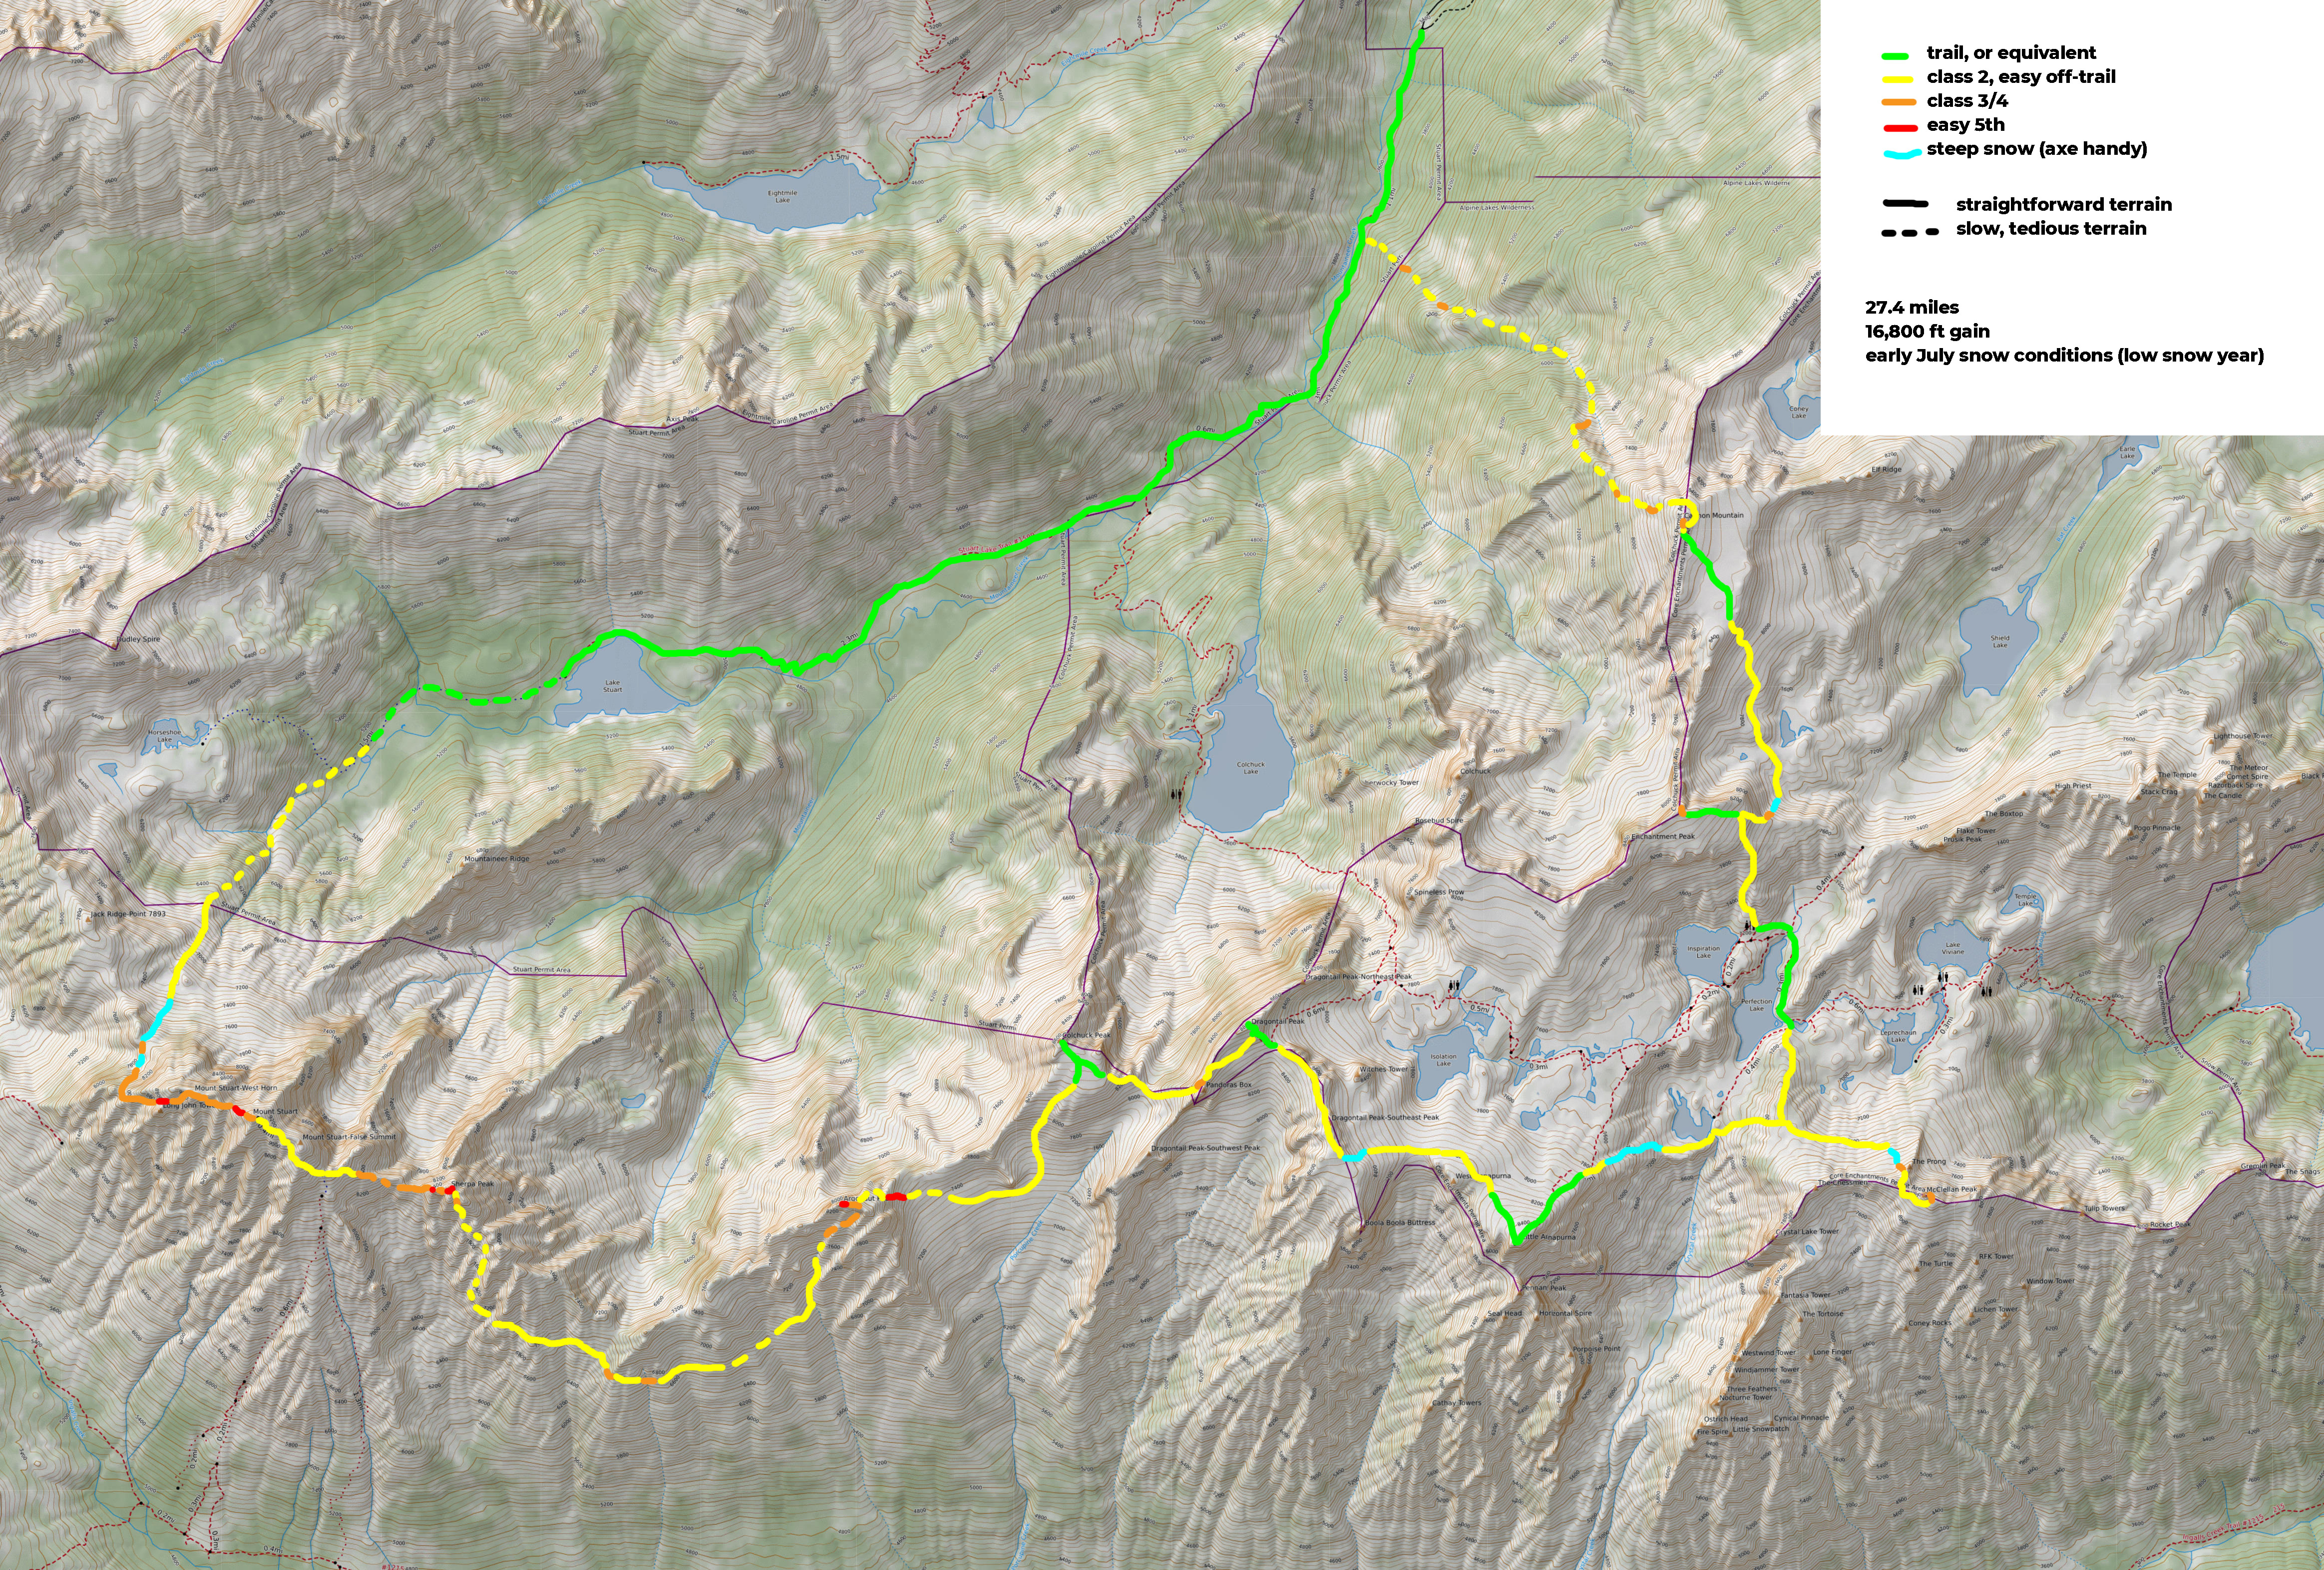
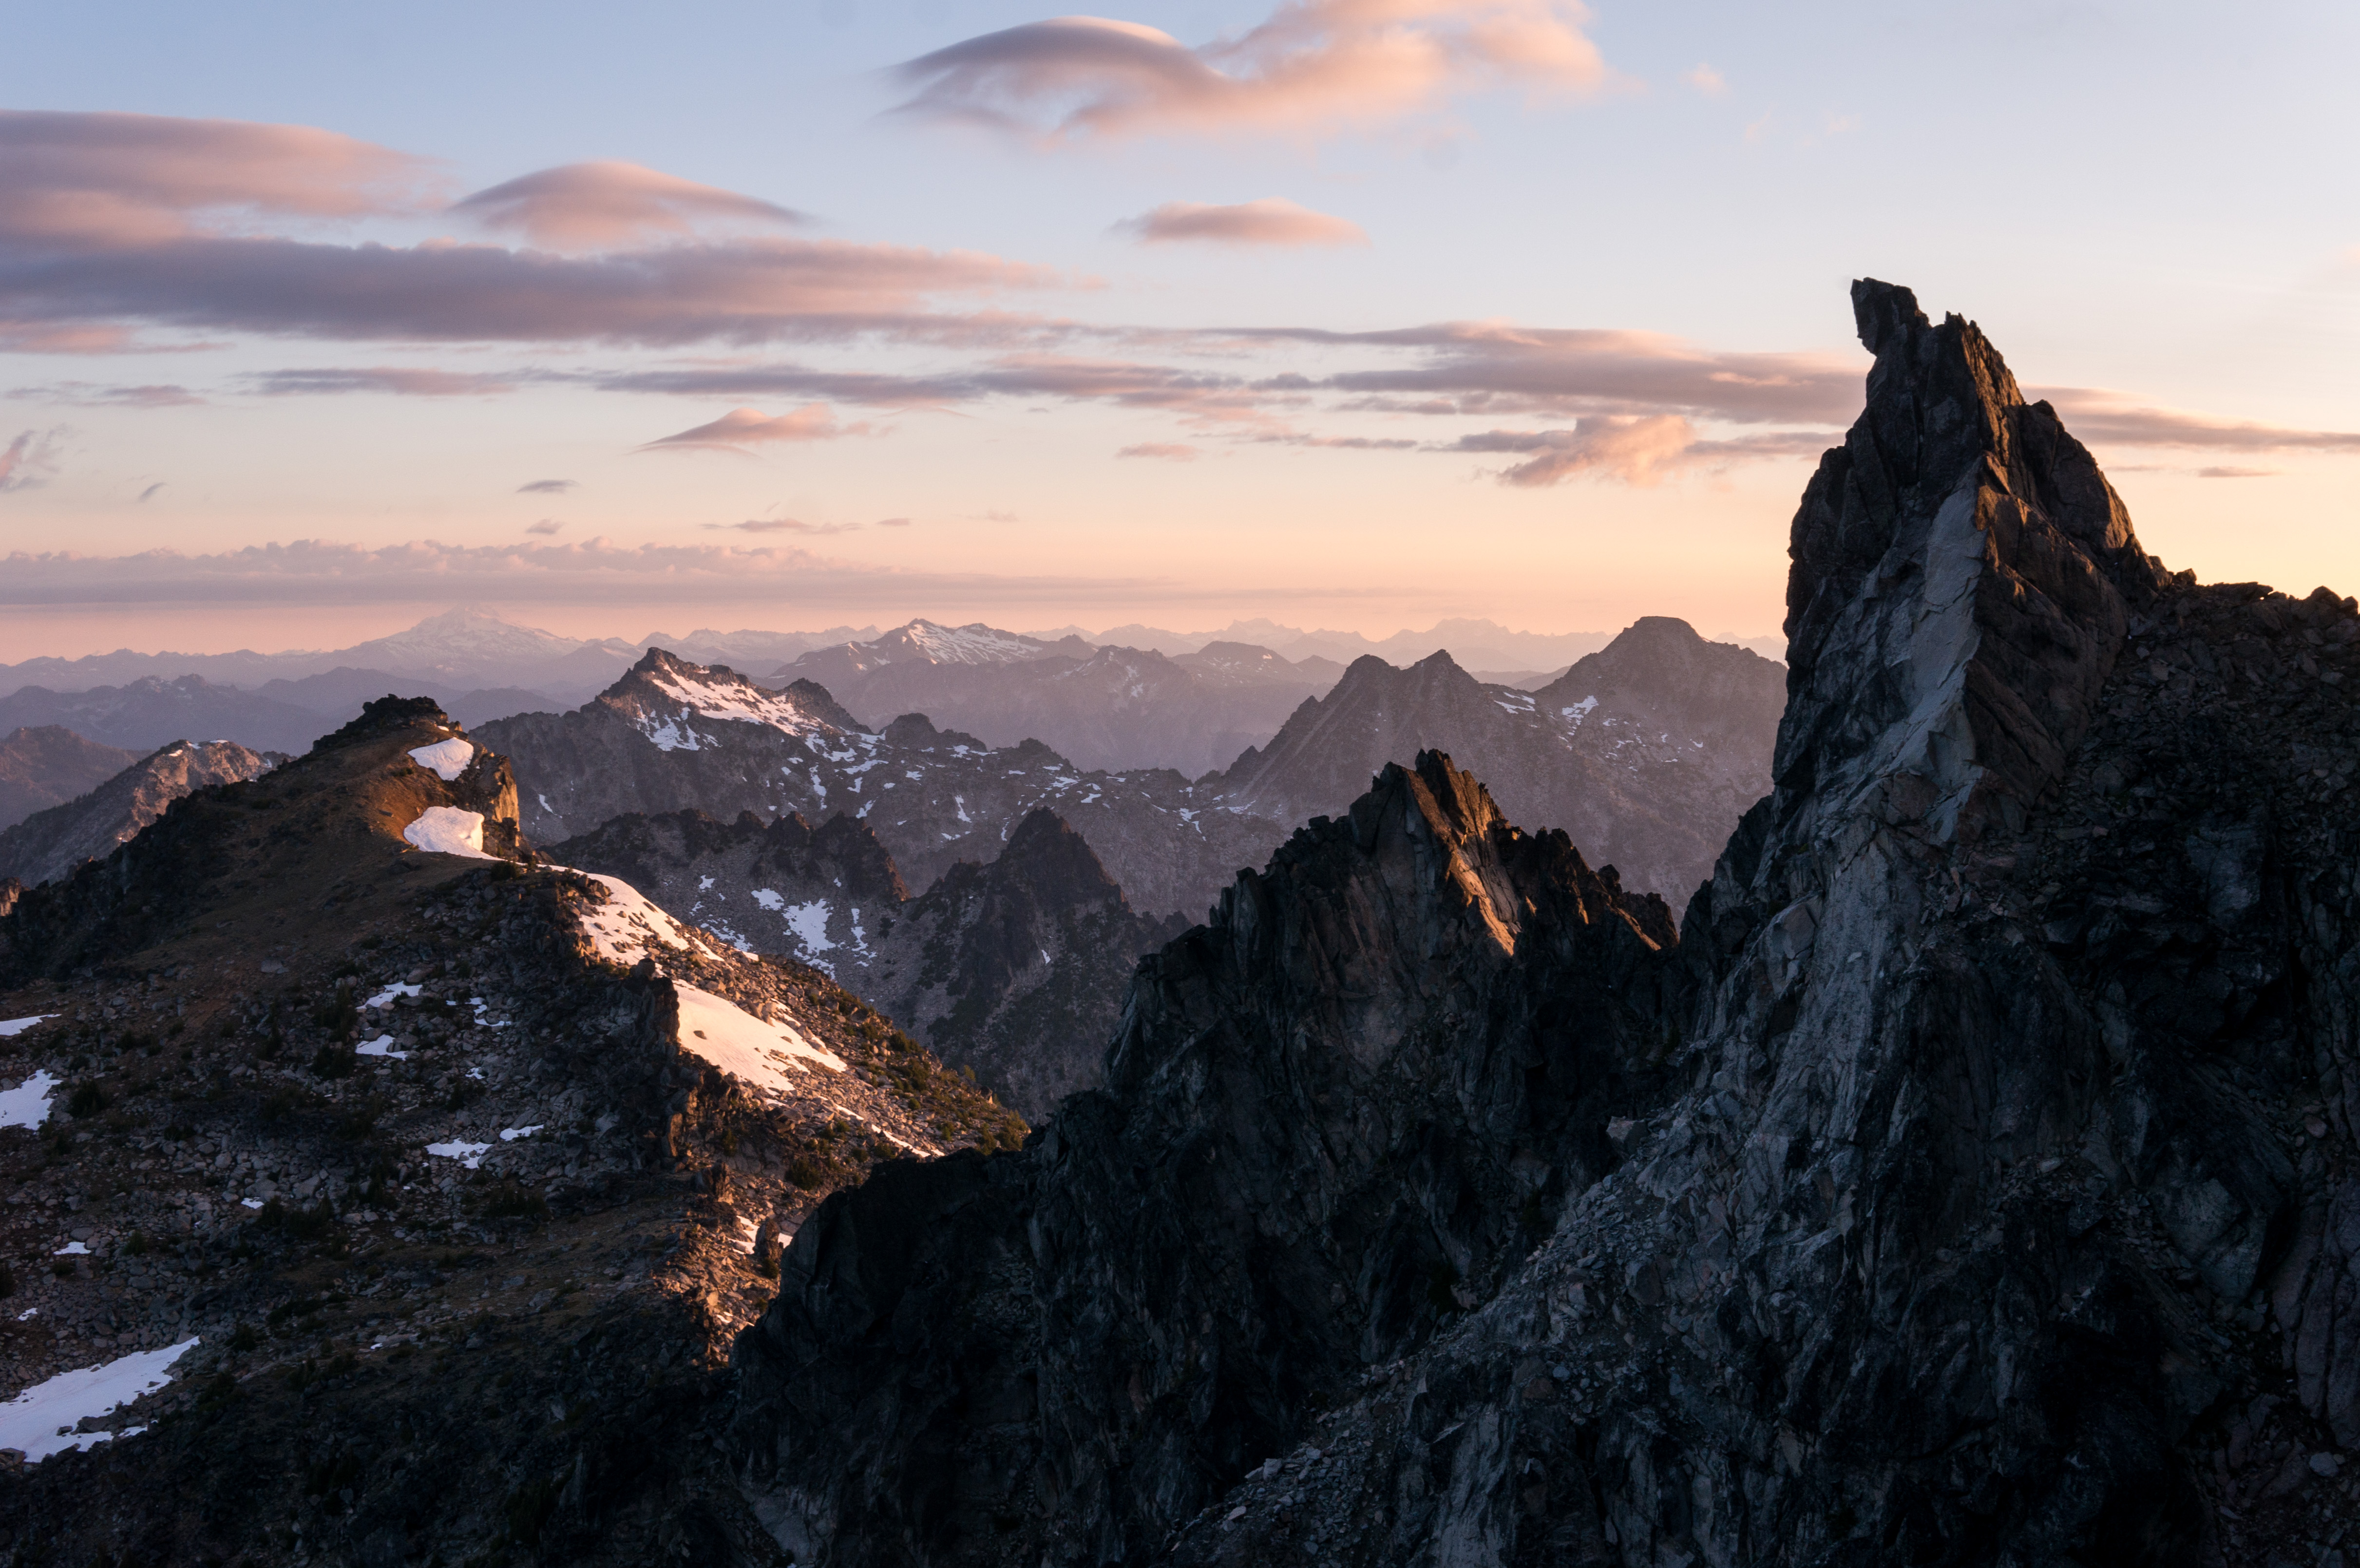
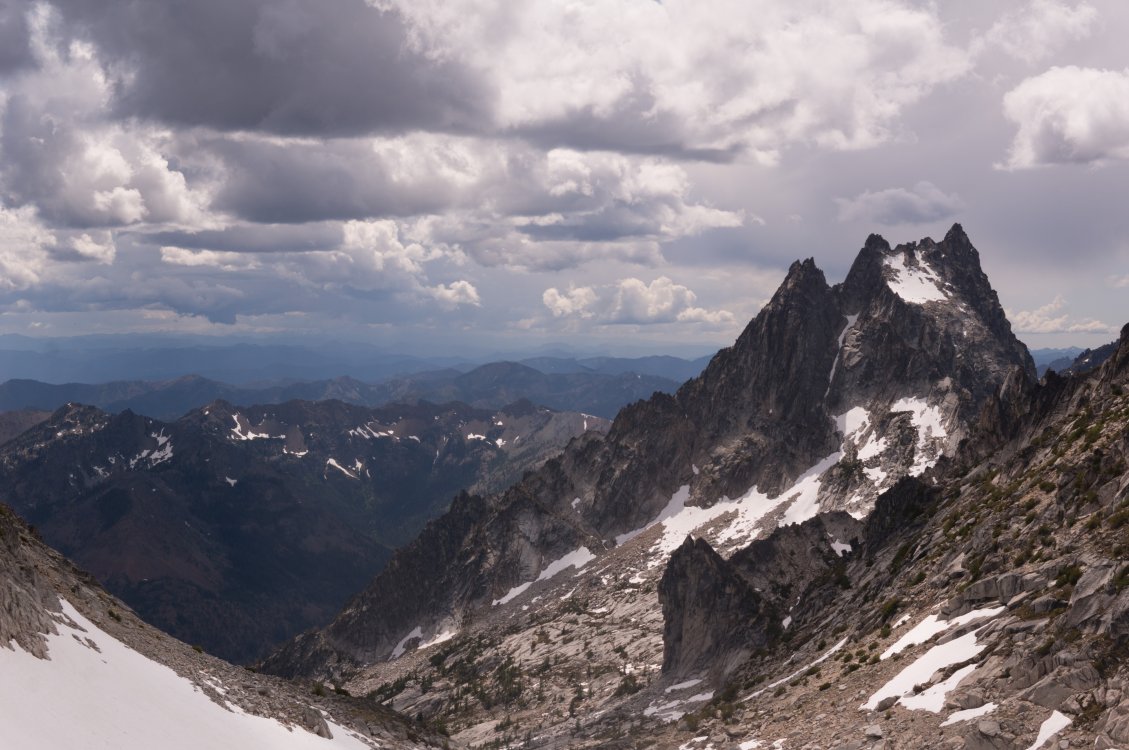
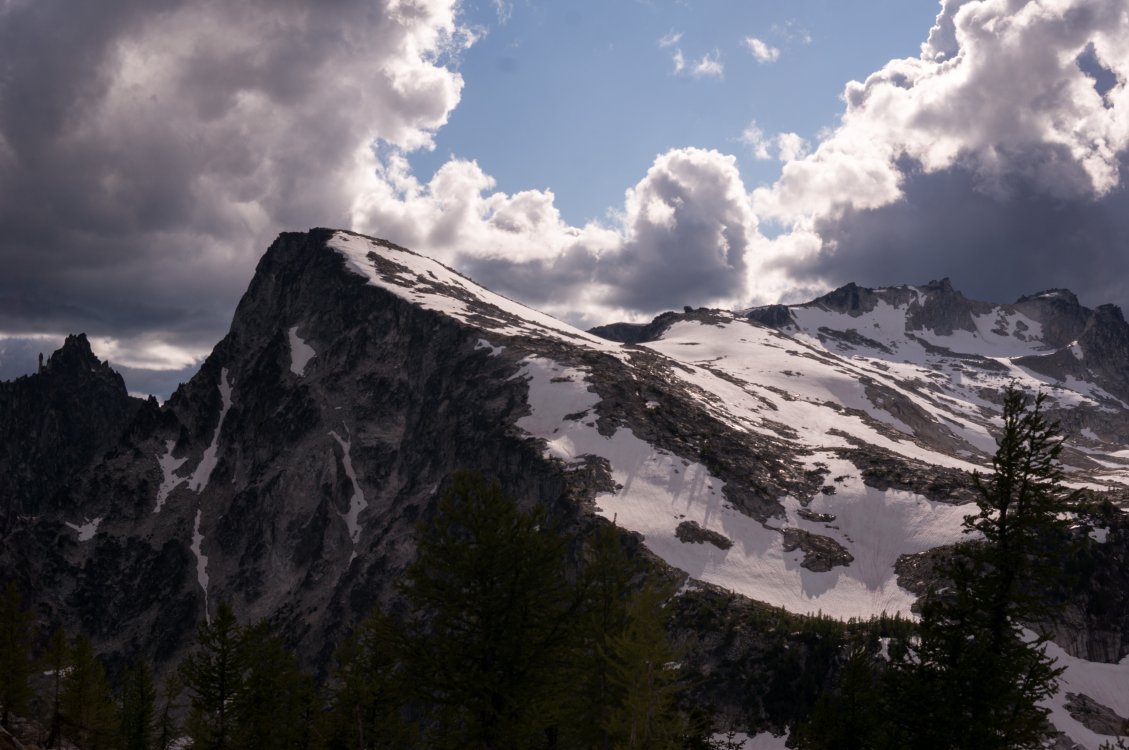
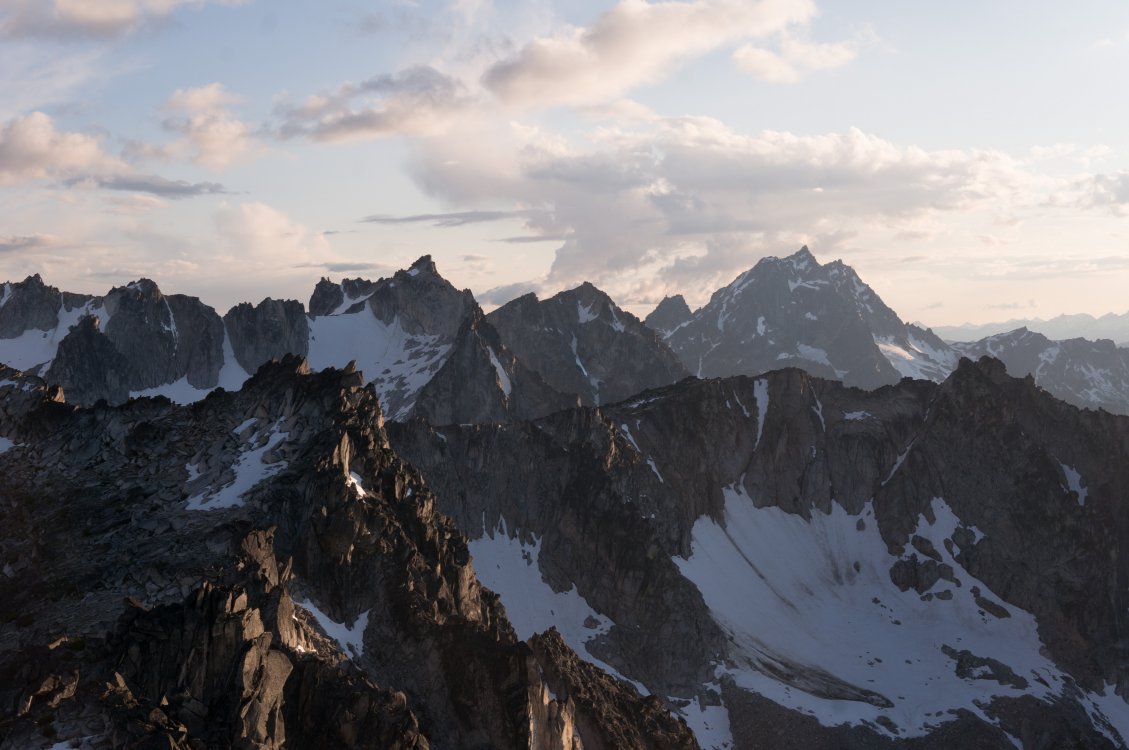
 Trip: Stuart/Enchantments - The Enchanted Enchainment Trip Date: 06/30/2019 Trip Report: On Sunday June 30th, I managed to complete a whirlwind tour of the Enchantments' 9 tallest peaks. I think "enchainment" is the right word, since I did not stay true to the ridge crests like a "traverse" would imply. Ever since my route through the Core zone last summer, ticking off the 7 major peaks from Mclellan to Cannon to Argonaut (and also Prusik), I’ve been pondering the feasibility (and stupidity) of adding Stuart to the list. I'm no Peter Croft, so I'd start with Stuart's west ridge. Much route-planning was done. At first I was considering an approach from the south side, to facilitate an easier romp up Stuart, but I think the mileage for that route would be too much for my non-trail-runner legs. So I settled on the Stuart Lake approach and hoped I would be able to find a shortcut to Stuart’s West Ridge (since the West Ridge is almost always approached from the south). Jake Robinson and his buddies did a 3 day trip, ticking the same peaks and provided helpful beta. The ridge from Stuart to Sherpa is fairly straightforward, but I knew from them and others that Sherpa to Argonaut was gnarly. I considered dropping all the way down to the valley trail after Sherpa, but decided I would try a high-ish traverse to save some calf-burn. The only other route-planning decision was to drop straight off Cannon to the car. It is just so friggin alluring!! Cannon is such a slog via the normal route, and the fact that it is geographically so close to the trailhead was too much for me to pass up. Future Tyler be fucked, I suppose. I created an illustrated route overlay of what went down (with actual gpx data), using fancy color-coding and dashed lines to indicate difficulty and tediousness of terrain. (gpx file here). Cause information and maps are fun. I started my pilgrimage at 1:30am, in order to have some light once it got steep on Stuart. I pandered my way through the burned stuff past Stuart Lake and managed to ascend the slopes toward Long Pass without too much difficulty in the dark. I encountered some steep snow to get up to the 7950’ notch on Stuart’s NW face. From the notch I dropped down a bit and traversed some more snow to get to the shortcut gully. The gully had continuous snow, but I was sick of the hard snow in my cramponed approach shoes, so I scrambled up class 3 rock to the right. All in all, shortcutting the west ridge was pretty straightforward and required no technical climbing whatsoever. ^ the view back toward the 7950 notch Everyone and their uncle has posted their version of the west ridge, so I won’t dive into that. I reached el primero cumbre at 7:40am, a bit behind my self-prescribed schedule. From Stuart I meandered down the Cascadian and stepped off toward the Stuart-Sherpa Col. I encountered a short 4th class downclimb, and didn’t reach the col until 8:40am. ^ Fun clouds from the top of Stuart Sherpa’s west ridge was great fun, and I was almost suckered into a beautiful splitter crack before I more responsibly found easier terrain off to the left. I reached Sherpa summit around 9:10am, looked auspiciously at the balanced rock, and decided to save it for another day. The descent off Sherpa was quite straightforward after reading beta on folks descending from the north ridge. A short 4th/5th downclimb followed by trending skier’s left into a scrambly gully until I reached a big-ass vegetated ledge at about 8100 ft, and then more leftward traversing to a broader gully, which I took all the way down to 7200 ft. From here I began the long, much-not-looking-forward-to traverse to Argonaut. In actuality, it was not bad at all, and perhaps even vaguely enjoyable! There are some huge swaths of granite on these high slopes, many of which are littered with fun knobs for easy scrambling. The rest of the terrain was quite straightforward goat-trail meandering. Time-consuming, but not god-awful by any means. I eventually reached Argonaut’s southern gullies and ascended easy terrain until right below the east ridge where I climbed a probably unnecessary section of easy-5th. From there I scampered to the summit (at 12:30pm), with a bit of apprehension as storm clouds began rolling in. From Argonaut, I descended a rap route on the east face, which I had done the summer before. I had found some unused webbing/rings on Sherpa, and used the rings as a nut placement to aid down a somewhat tricky section near the base of Arg (for the next party wondering what the heck is going on there). From here, spirits were high, as I knew I had completed most of the tedious stuff and would be on fairly well-traveled terrain for the rest of the day (not including the hail-mary off Cannon at the end of my route). ^ Looking back at Argonaut A few splits: Colchuck – 2:30pm Dragontail – 3:40pm Little Anna – 4:30pm Mclellan – 6:20pm Enchantment Peak – 8:10pm (I only tagged the NE summit, which may be lower than the SW?) Cannon Peak – 9:40pm ^ Into the core... ^ Stuart & friends from the Enchantment Peaks ^ Stuart & Enchantment Peaks & friends from Cannon Managed to top out on Cannon with a bit of light to admire a hard day’s work (damn Stuart looks so far away!) From Cannon I was feeling pretty good about making it down before my 24 hour goal. After all, the car was only 2 miles away… In the weeks prior, I had done some route-planning using satellite imagery and a topo to figure out the least-bushy way off Cannon. This was helpful but not a perfect solution to the hell-hole that is the 5000 vertical feet of bush, dirt, rock, bush, scree, and bush. Maybe I’m exaggerating, as I was quite delirious at the time and it was dark. The first 3,000 ft were fairly straightforward, with a few cliff-bands to avoid but mostly loose dirt/talus. The next 2,000 ft of vert went from bad to worse. Many cliff-bands were not hinted at by my topo map, and where I had previously plotted a viable line through rocky terrain (while comfortably sipping tea in front of a computer at work), was not actually viable terrain. So into the bushes I went and I didn’t arrive at the trail until around 1:00am. From the trail it was a short, but damn-did-my-feet-hurt, hike to the car. Roundtrip was 23 hours and 35 minutes, 16,865 ft of gain, and 27.4 miles. Frankly, those numbers seem pretty small considering, which I attribute to all the little (and big) shortcuts I connected to make quite an aesthetic loop through some beautiful country. I hope some of this beta is helpful for those looking to enchain some peaks out there or just get some damn good exercise. Gear Notes: Axe, crampons used. Approach Notes: Stuart Lake


-
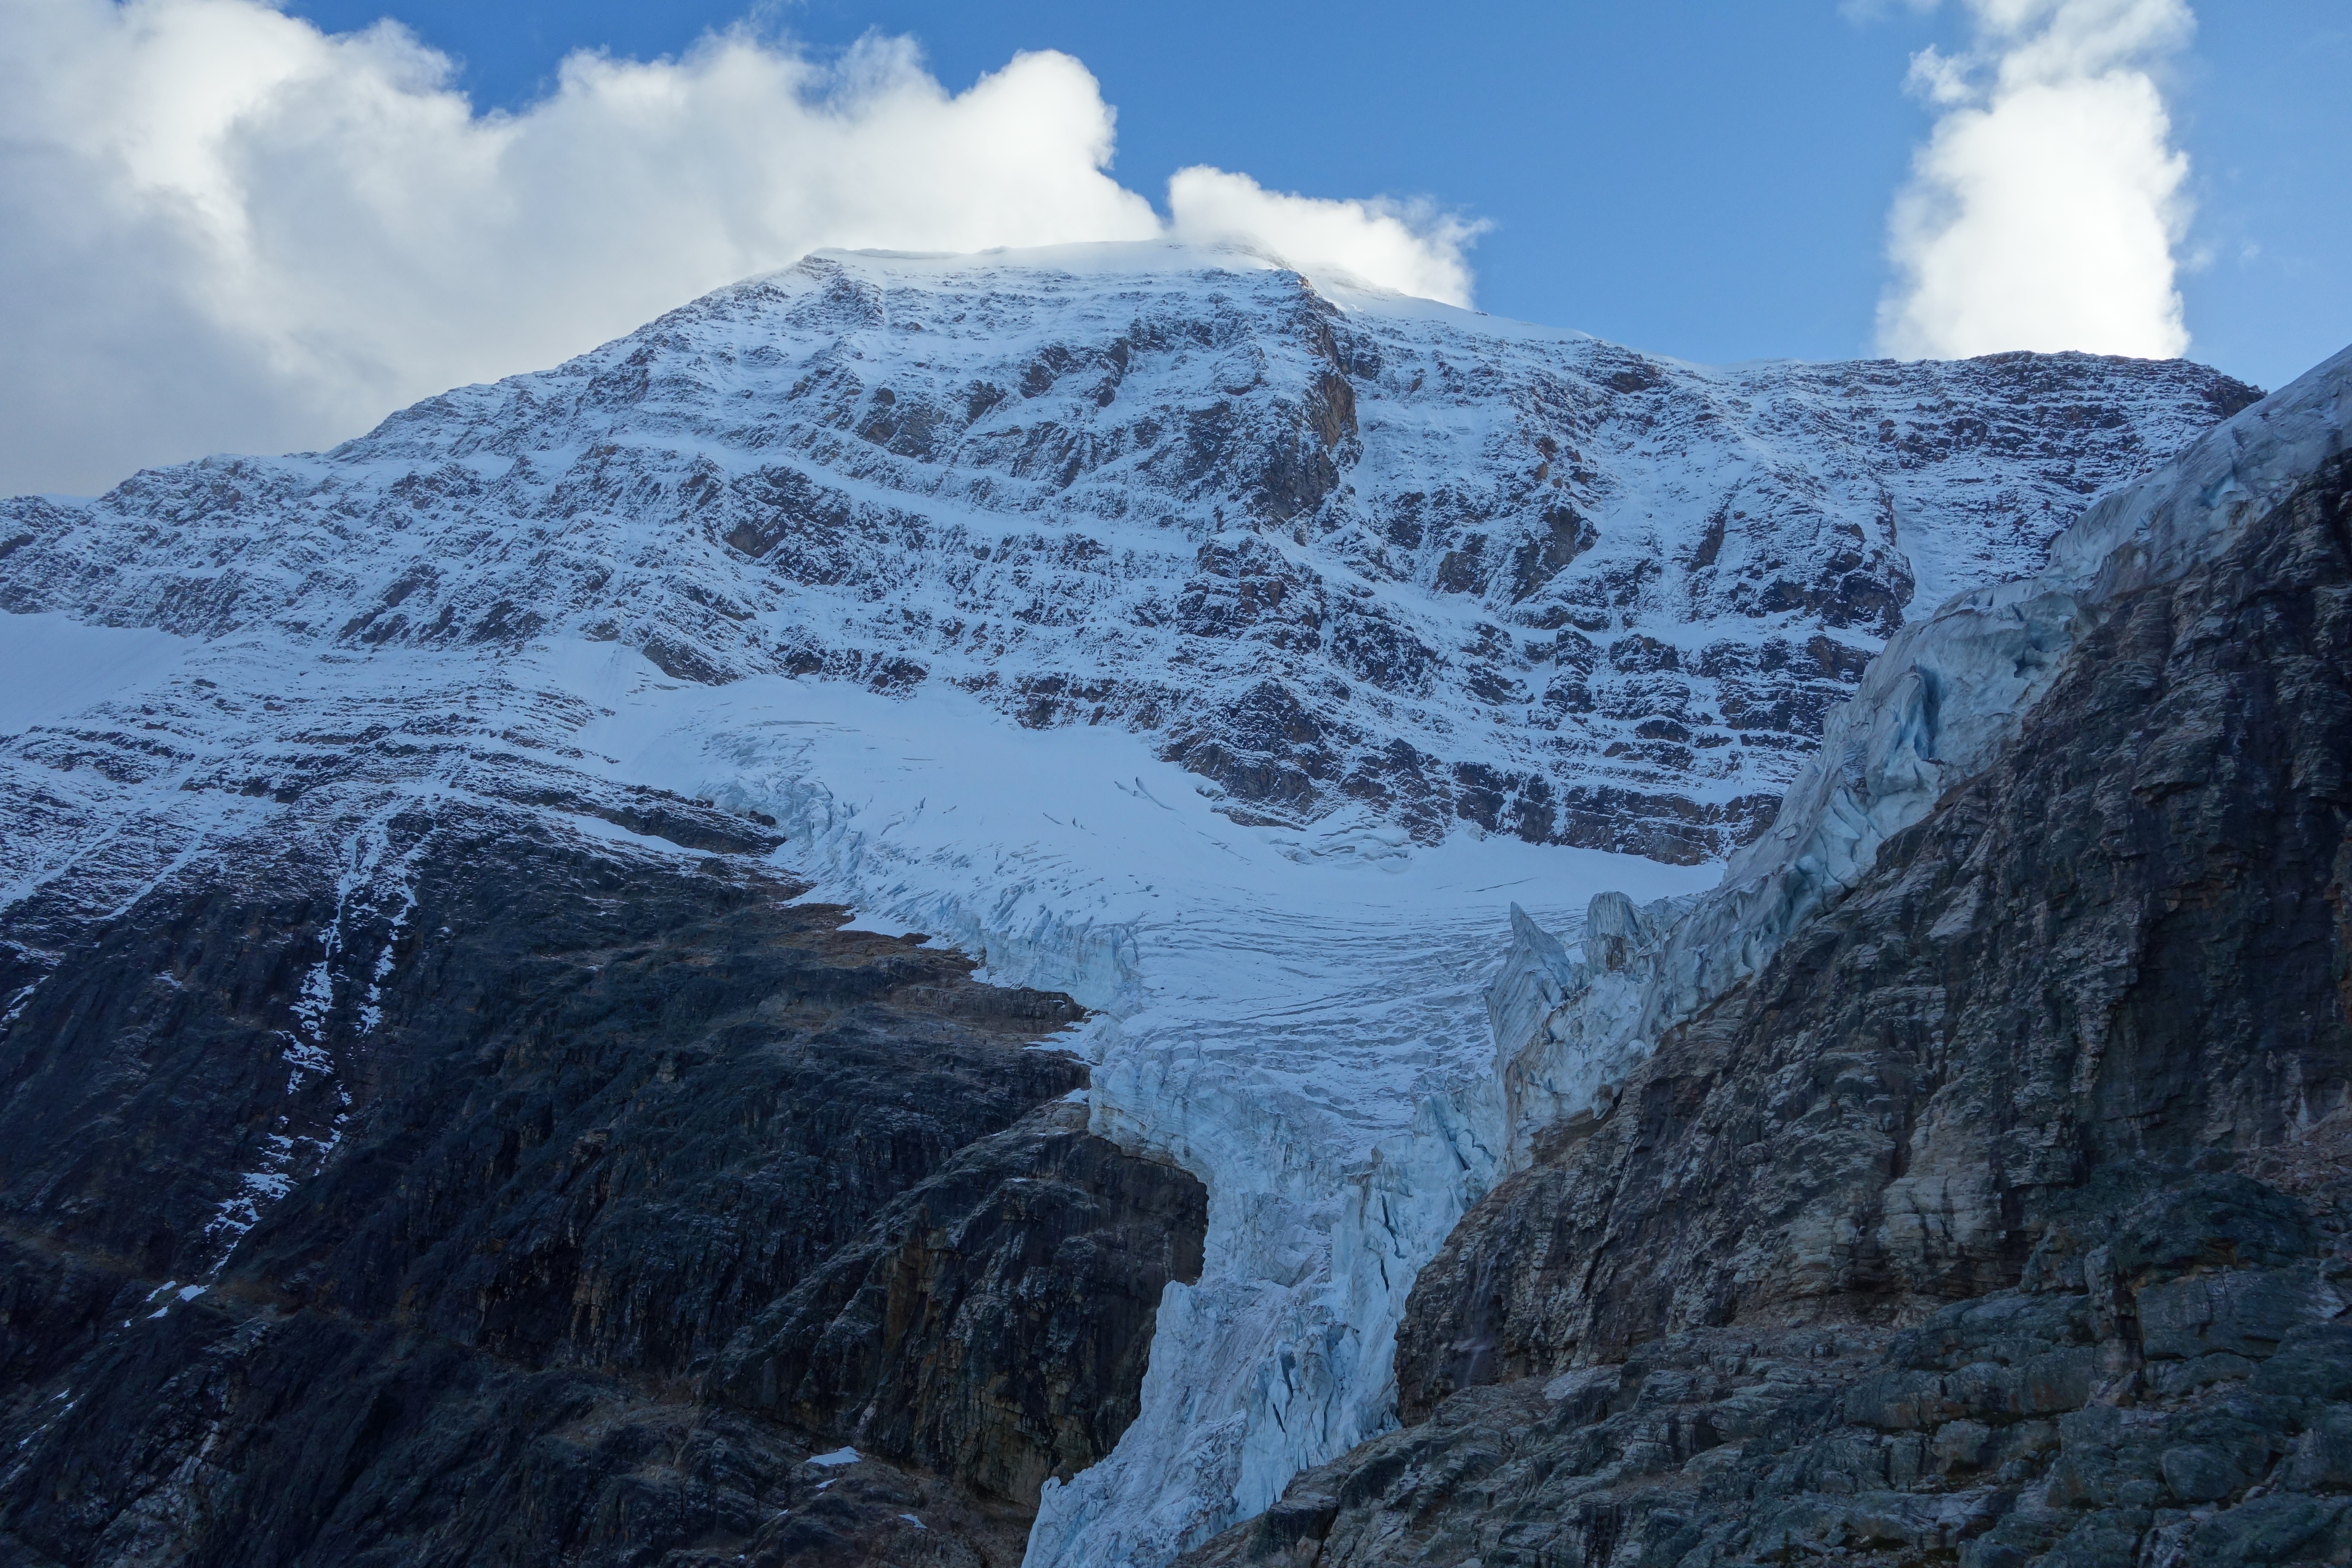
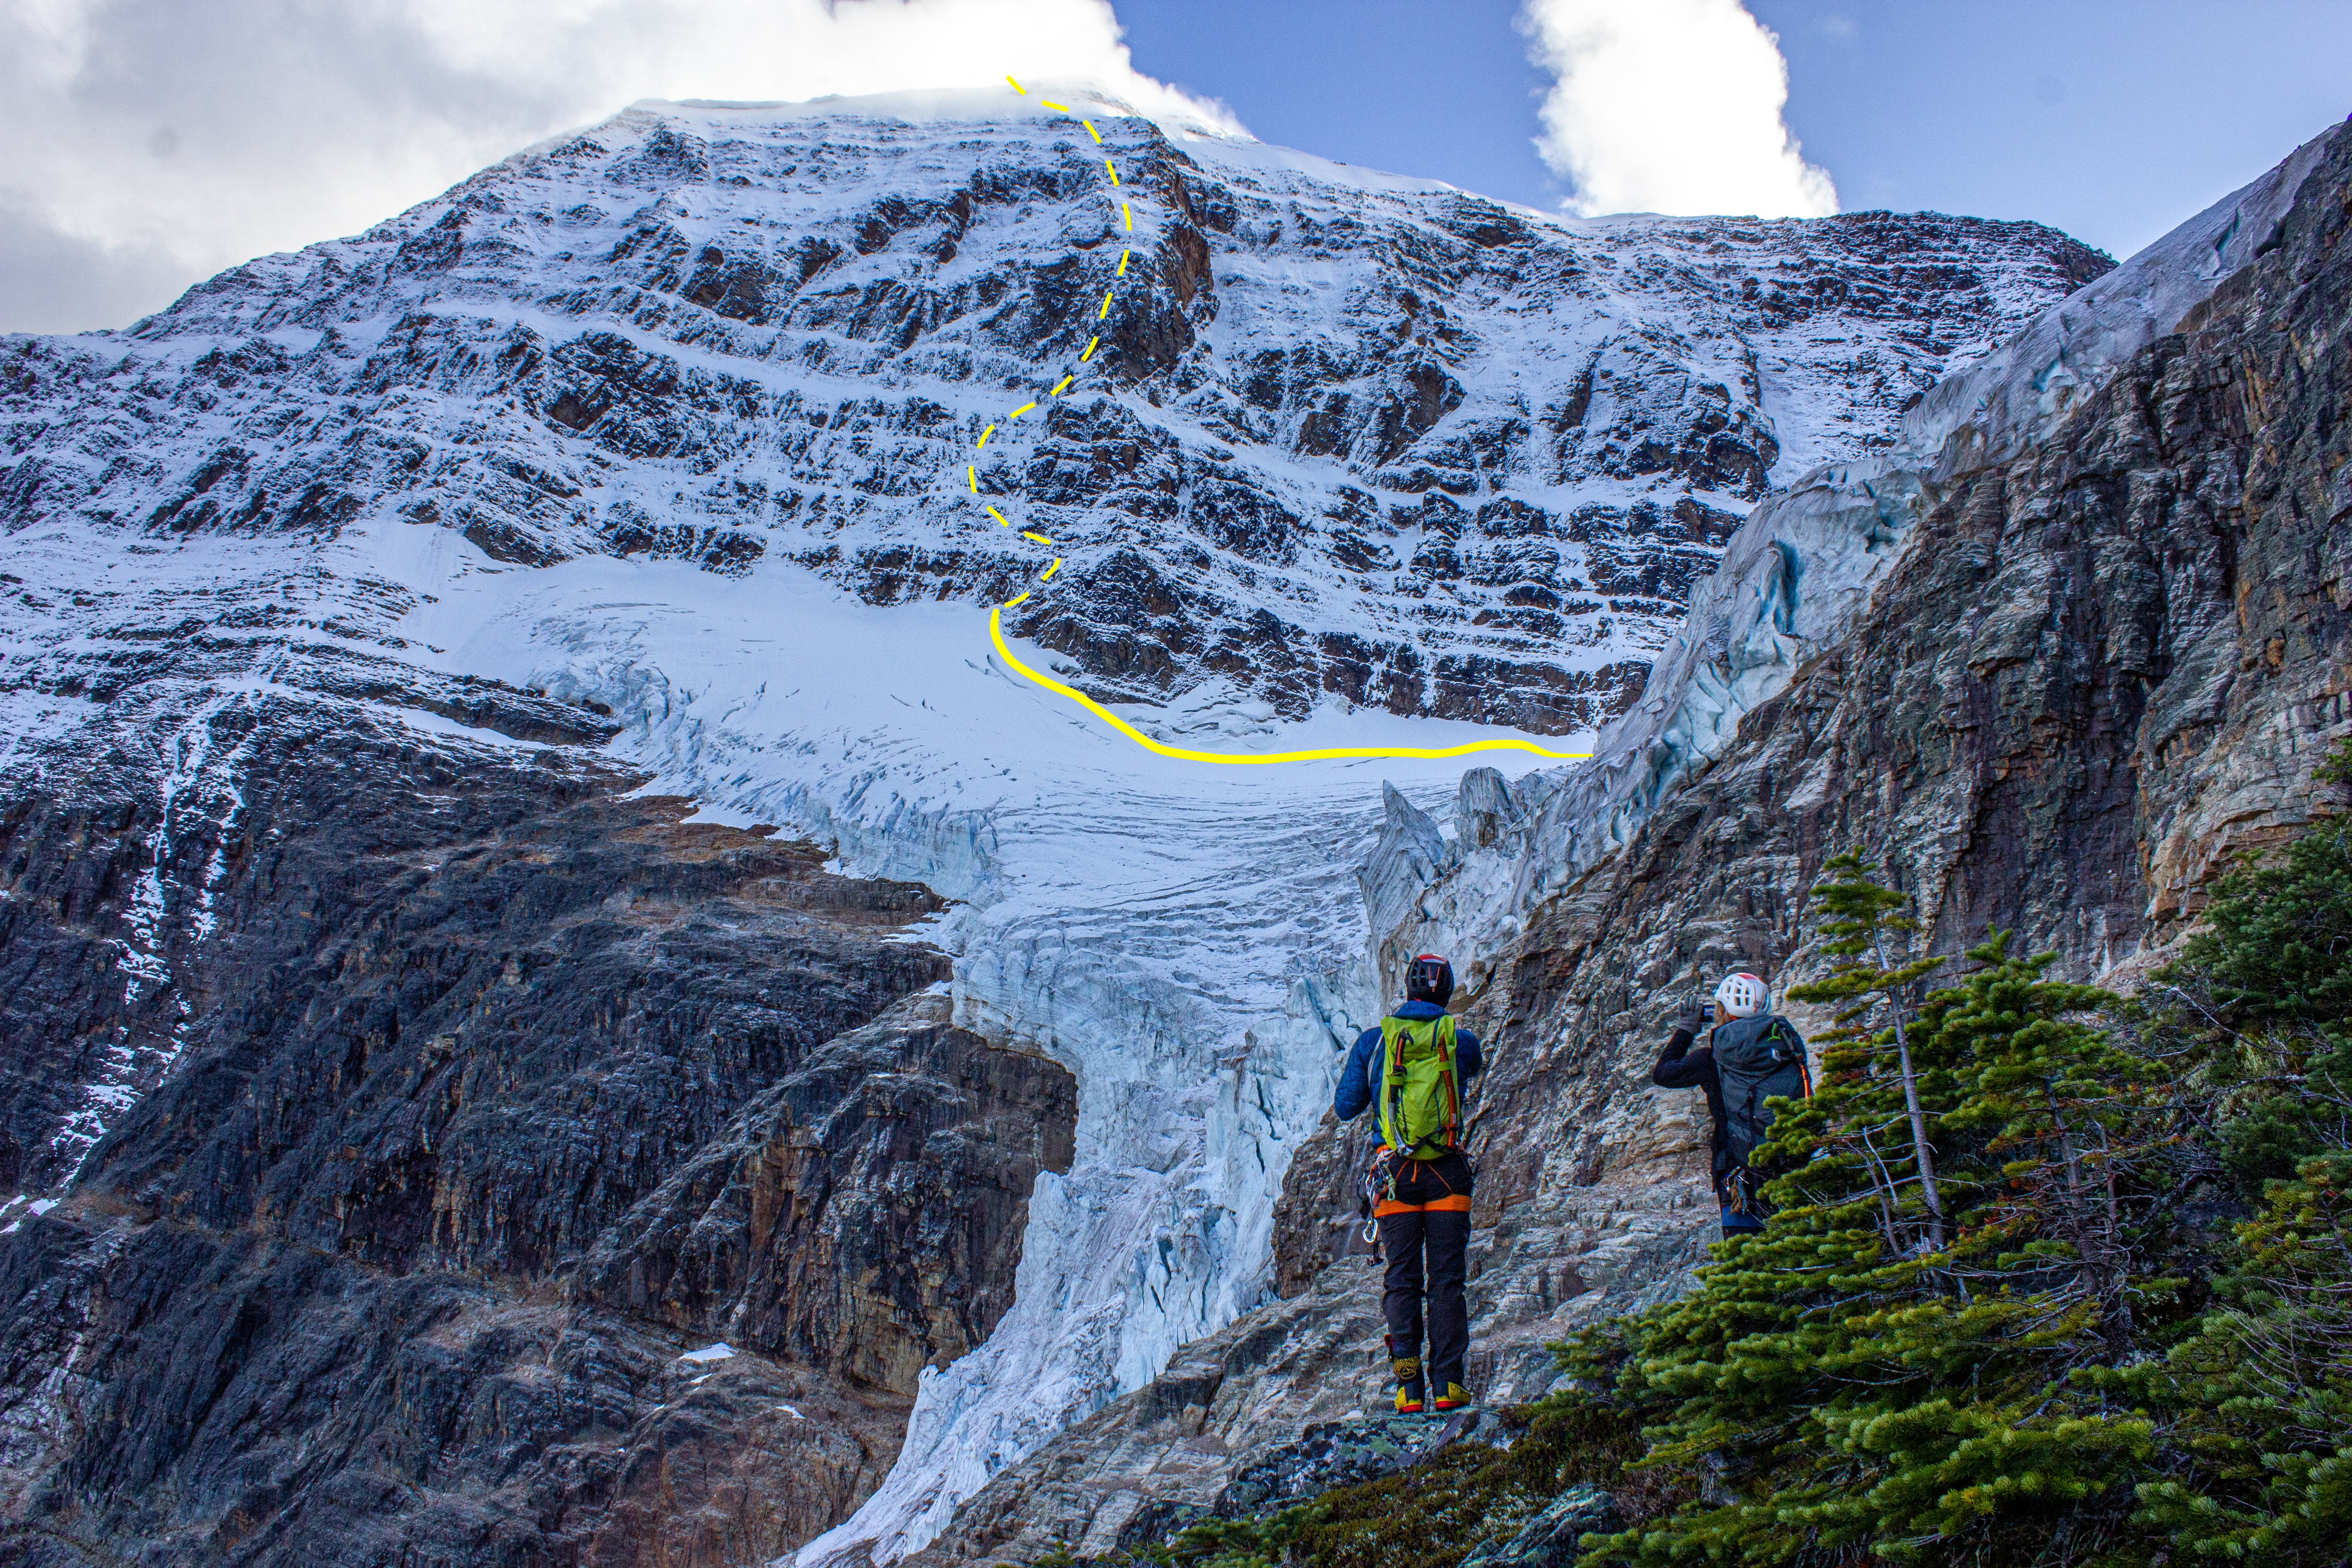
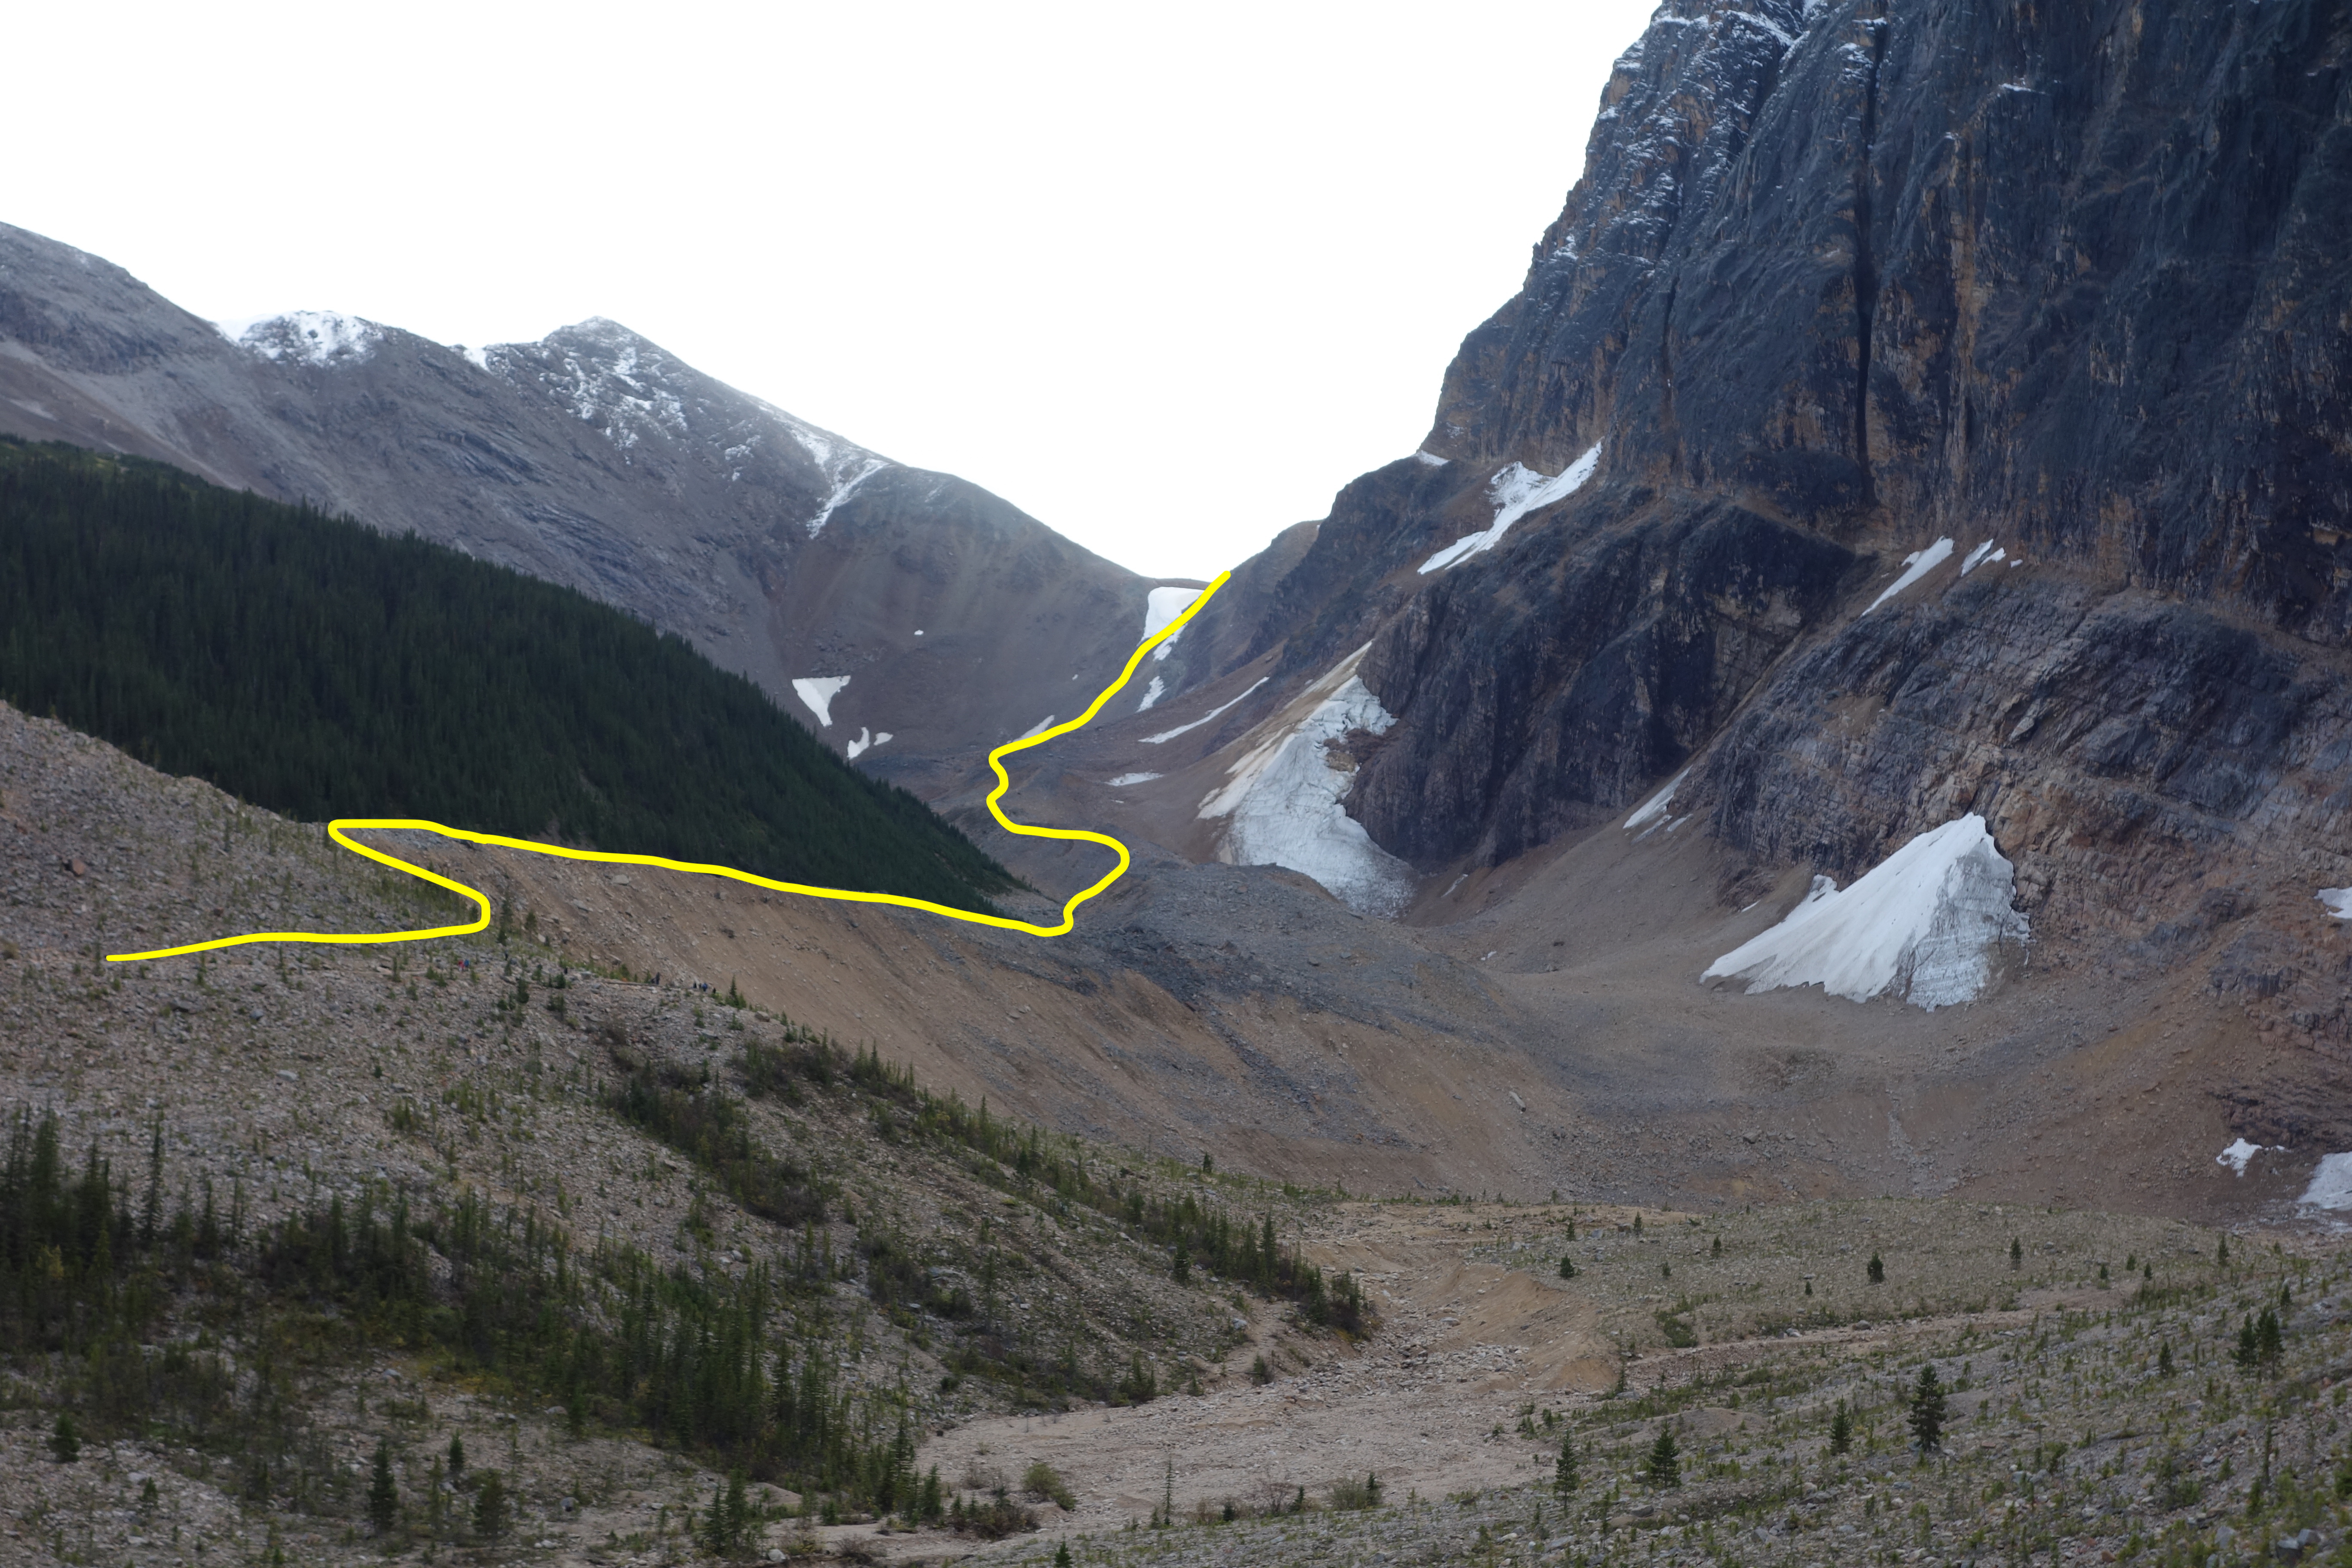
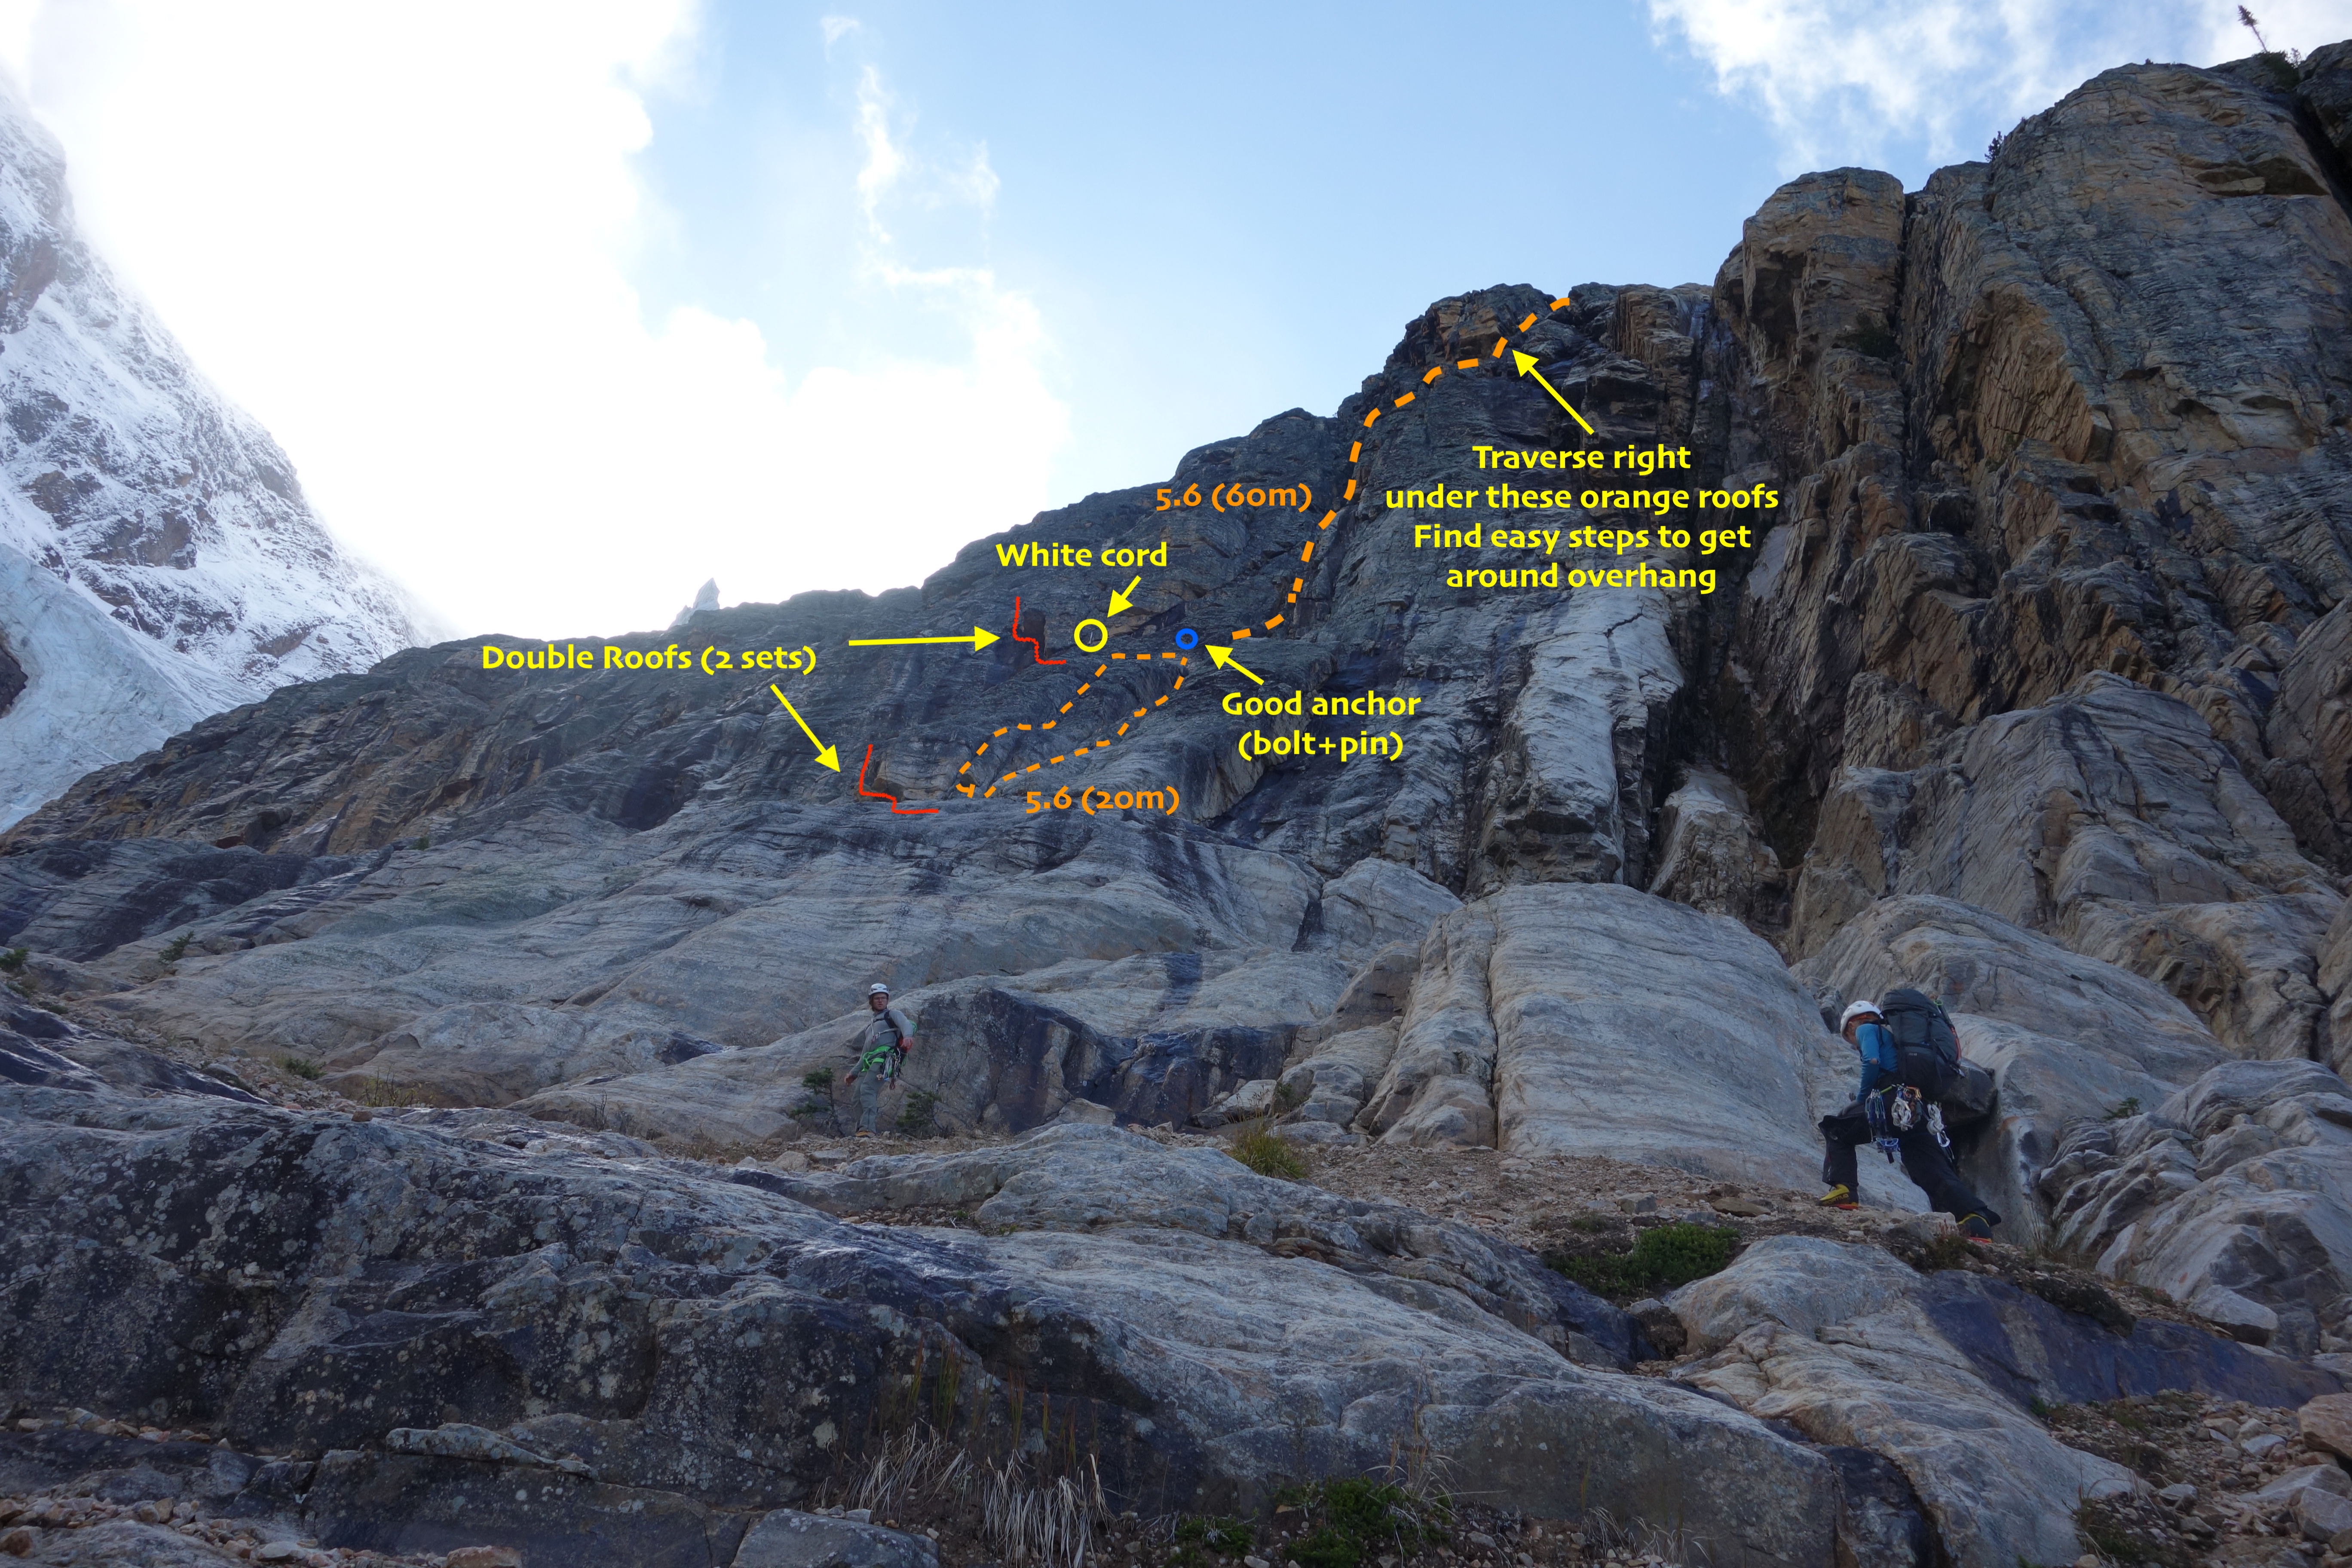
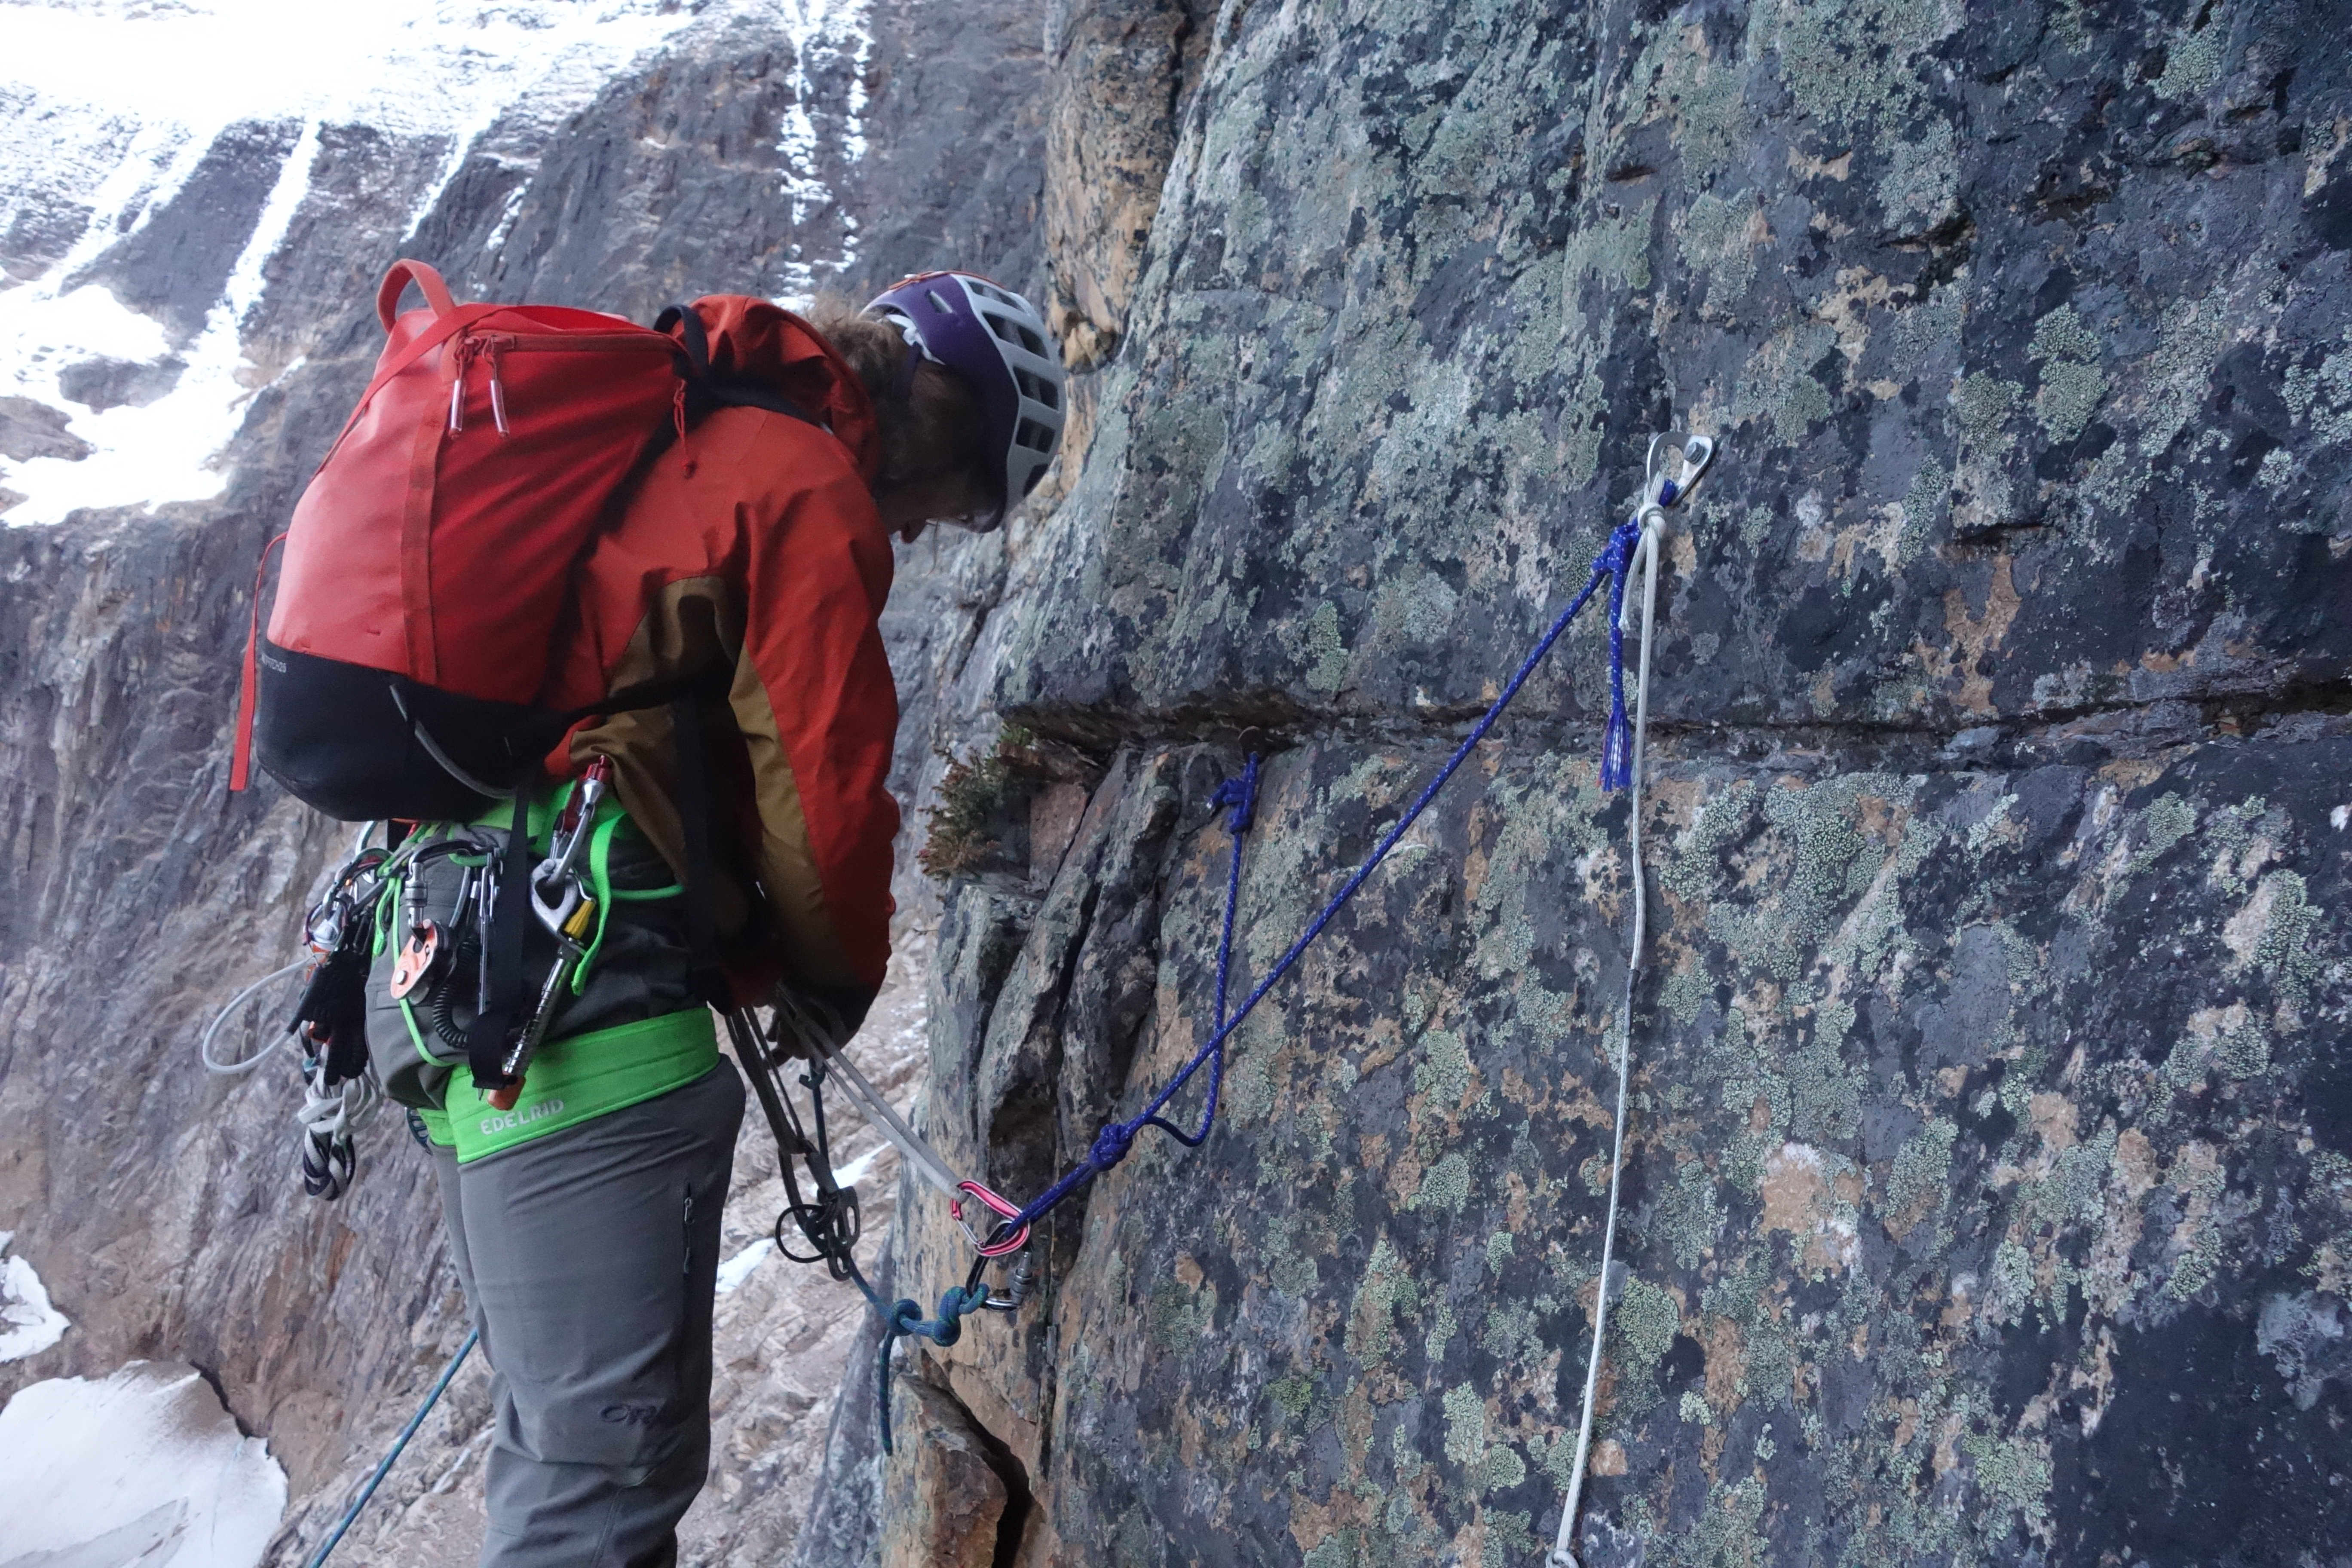
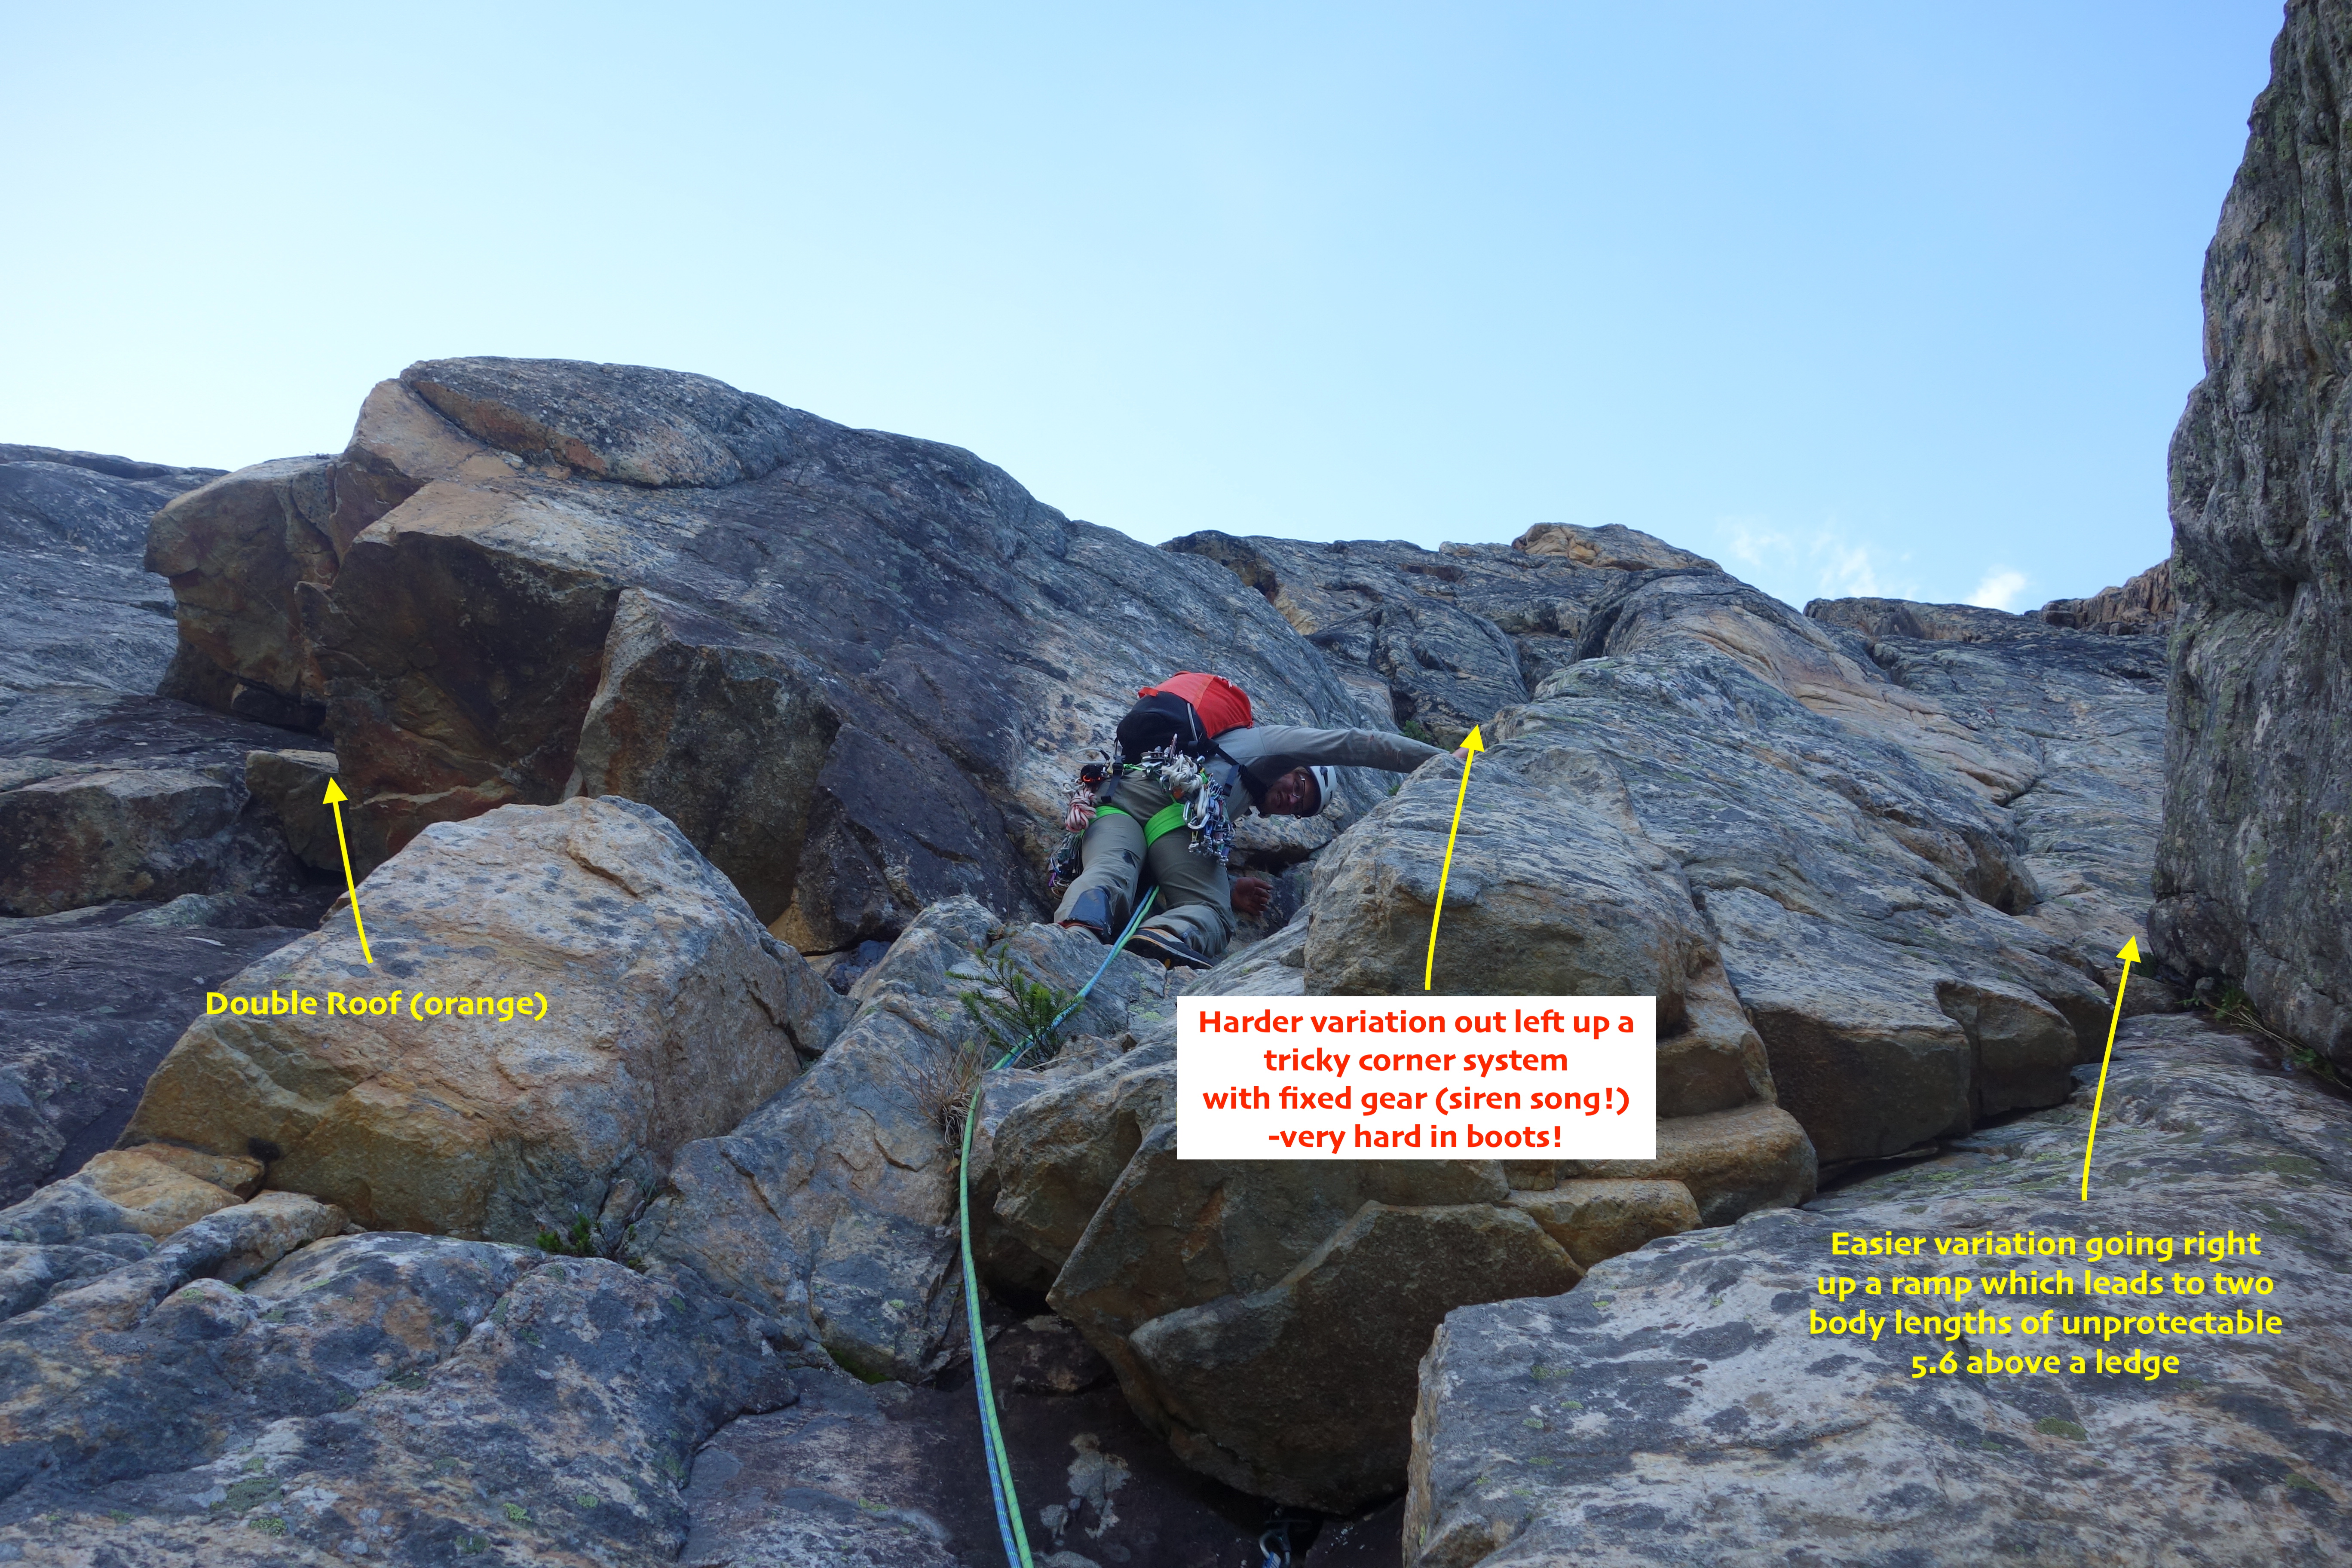
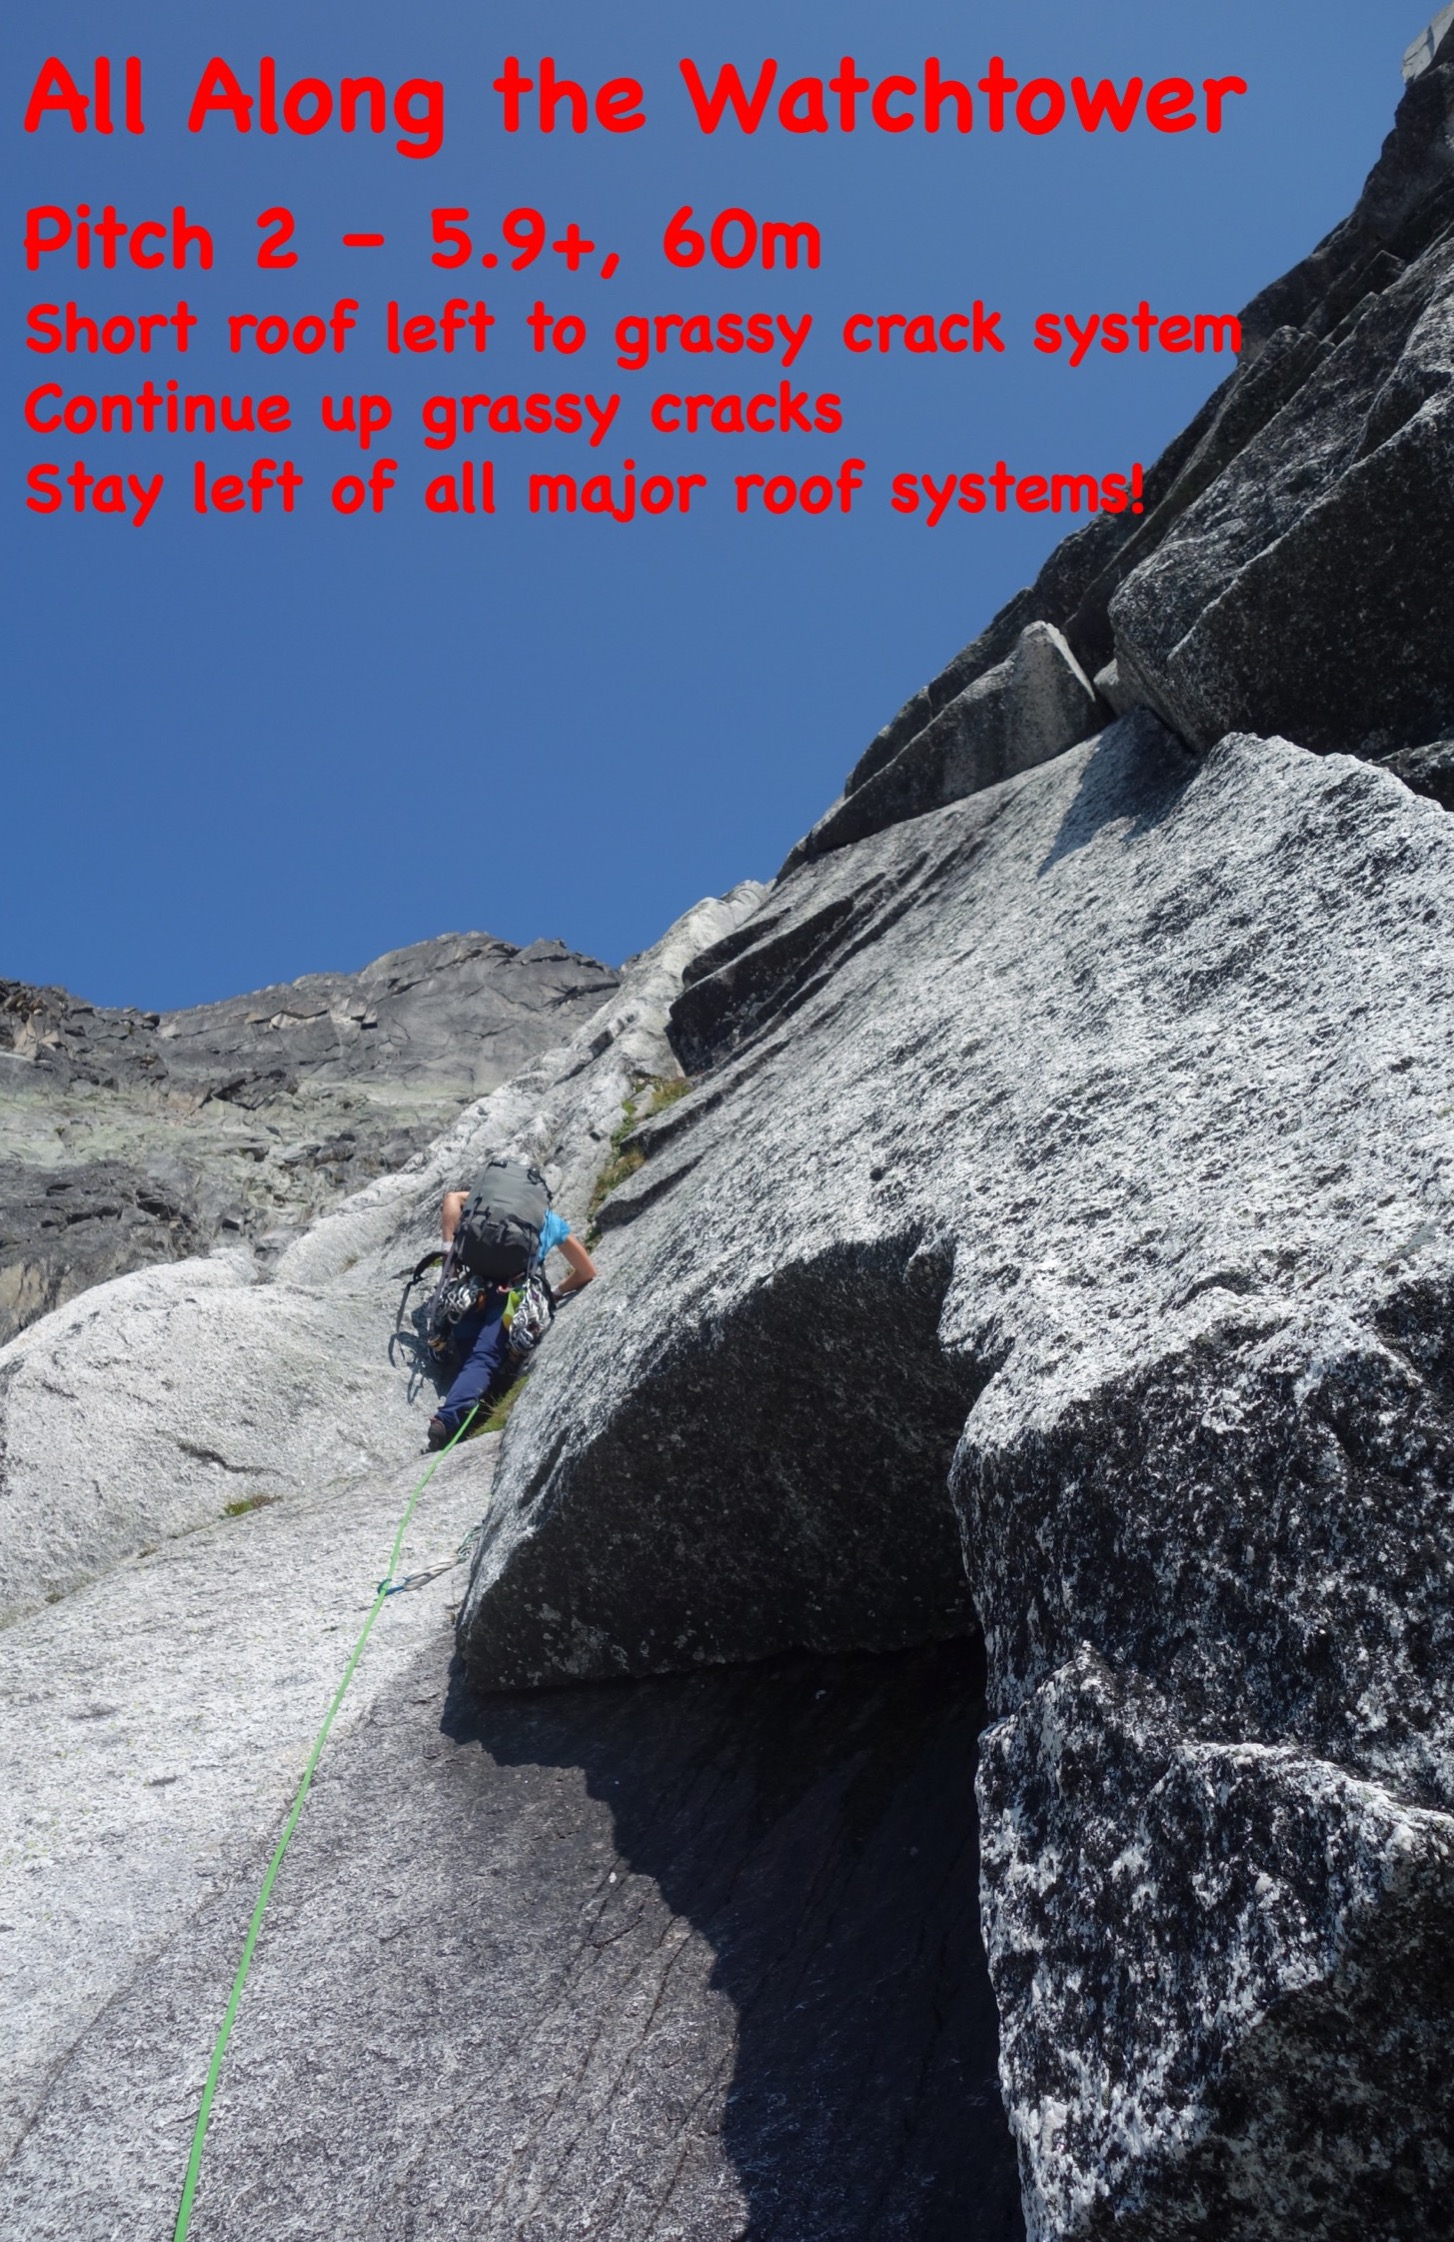
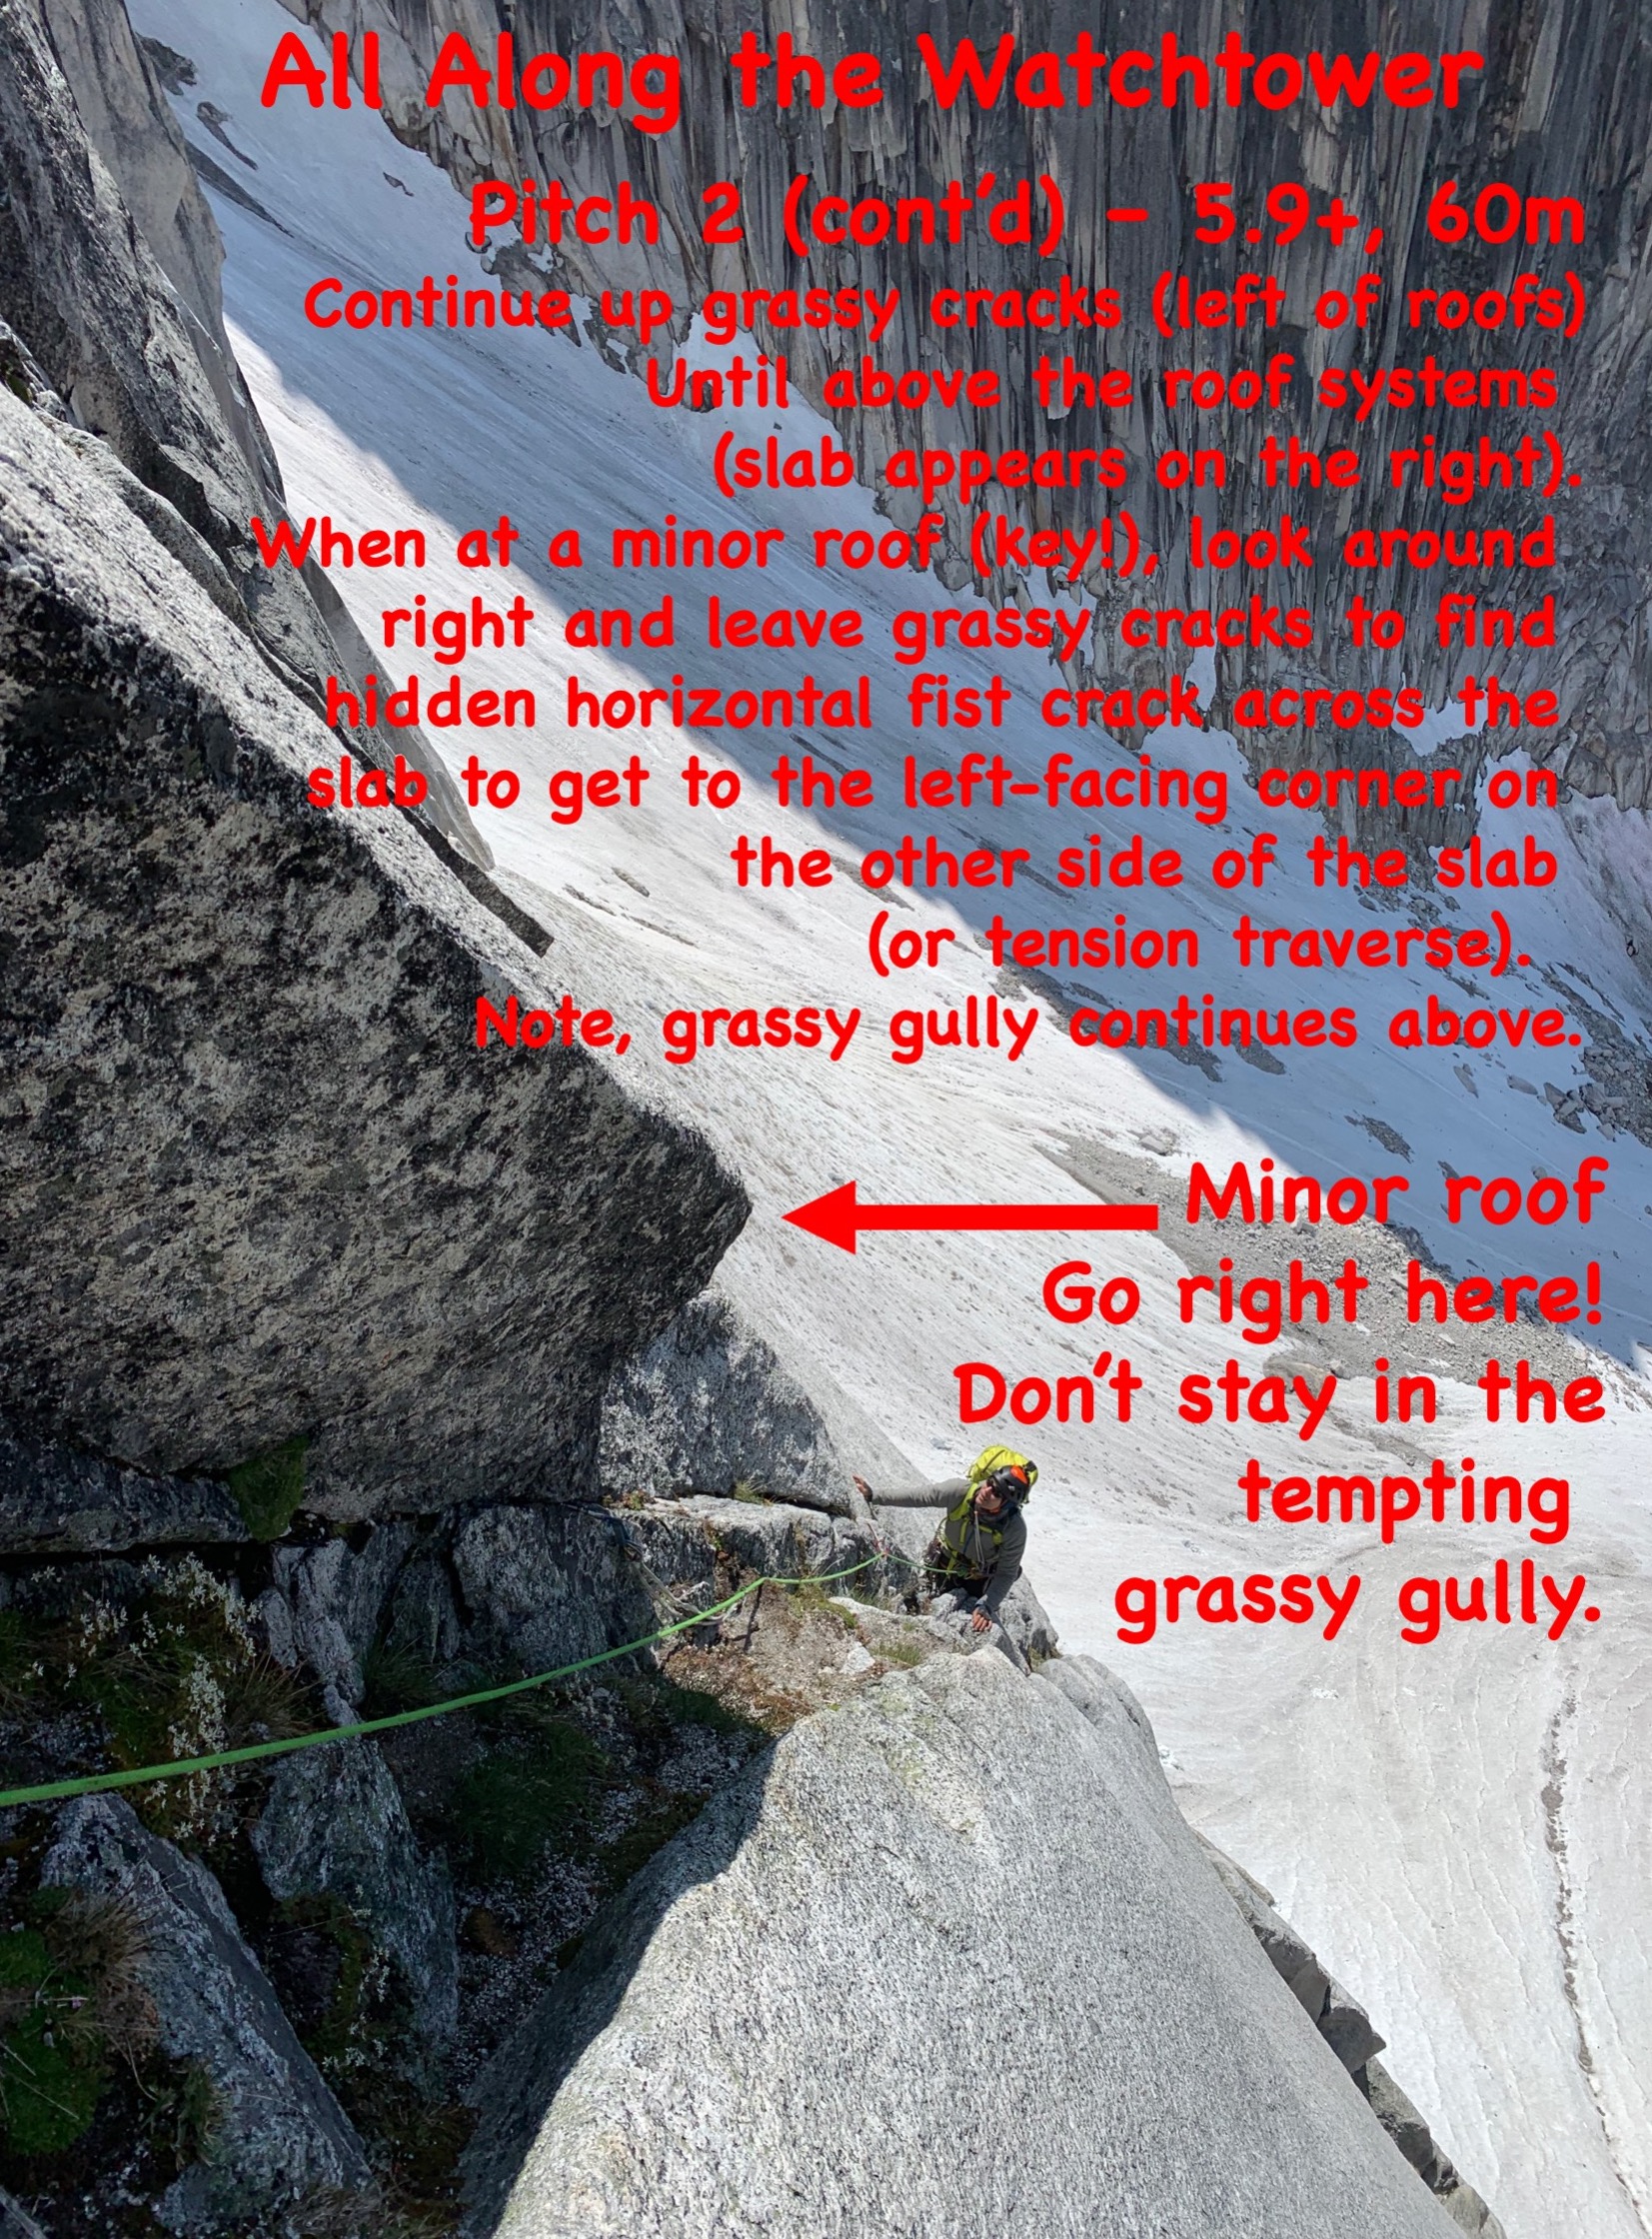
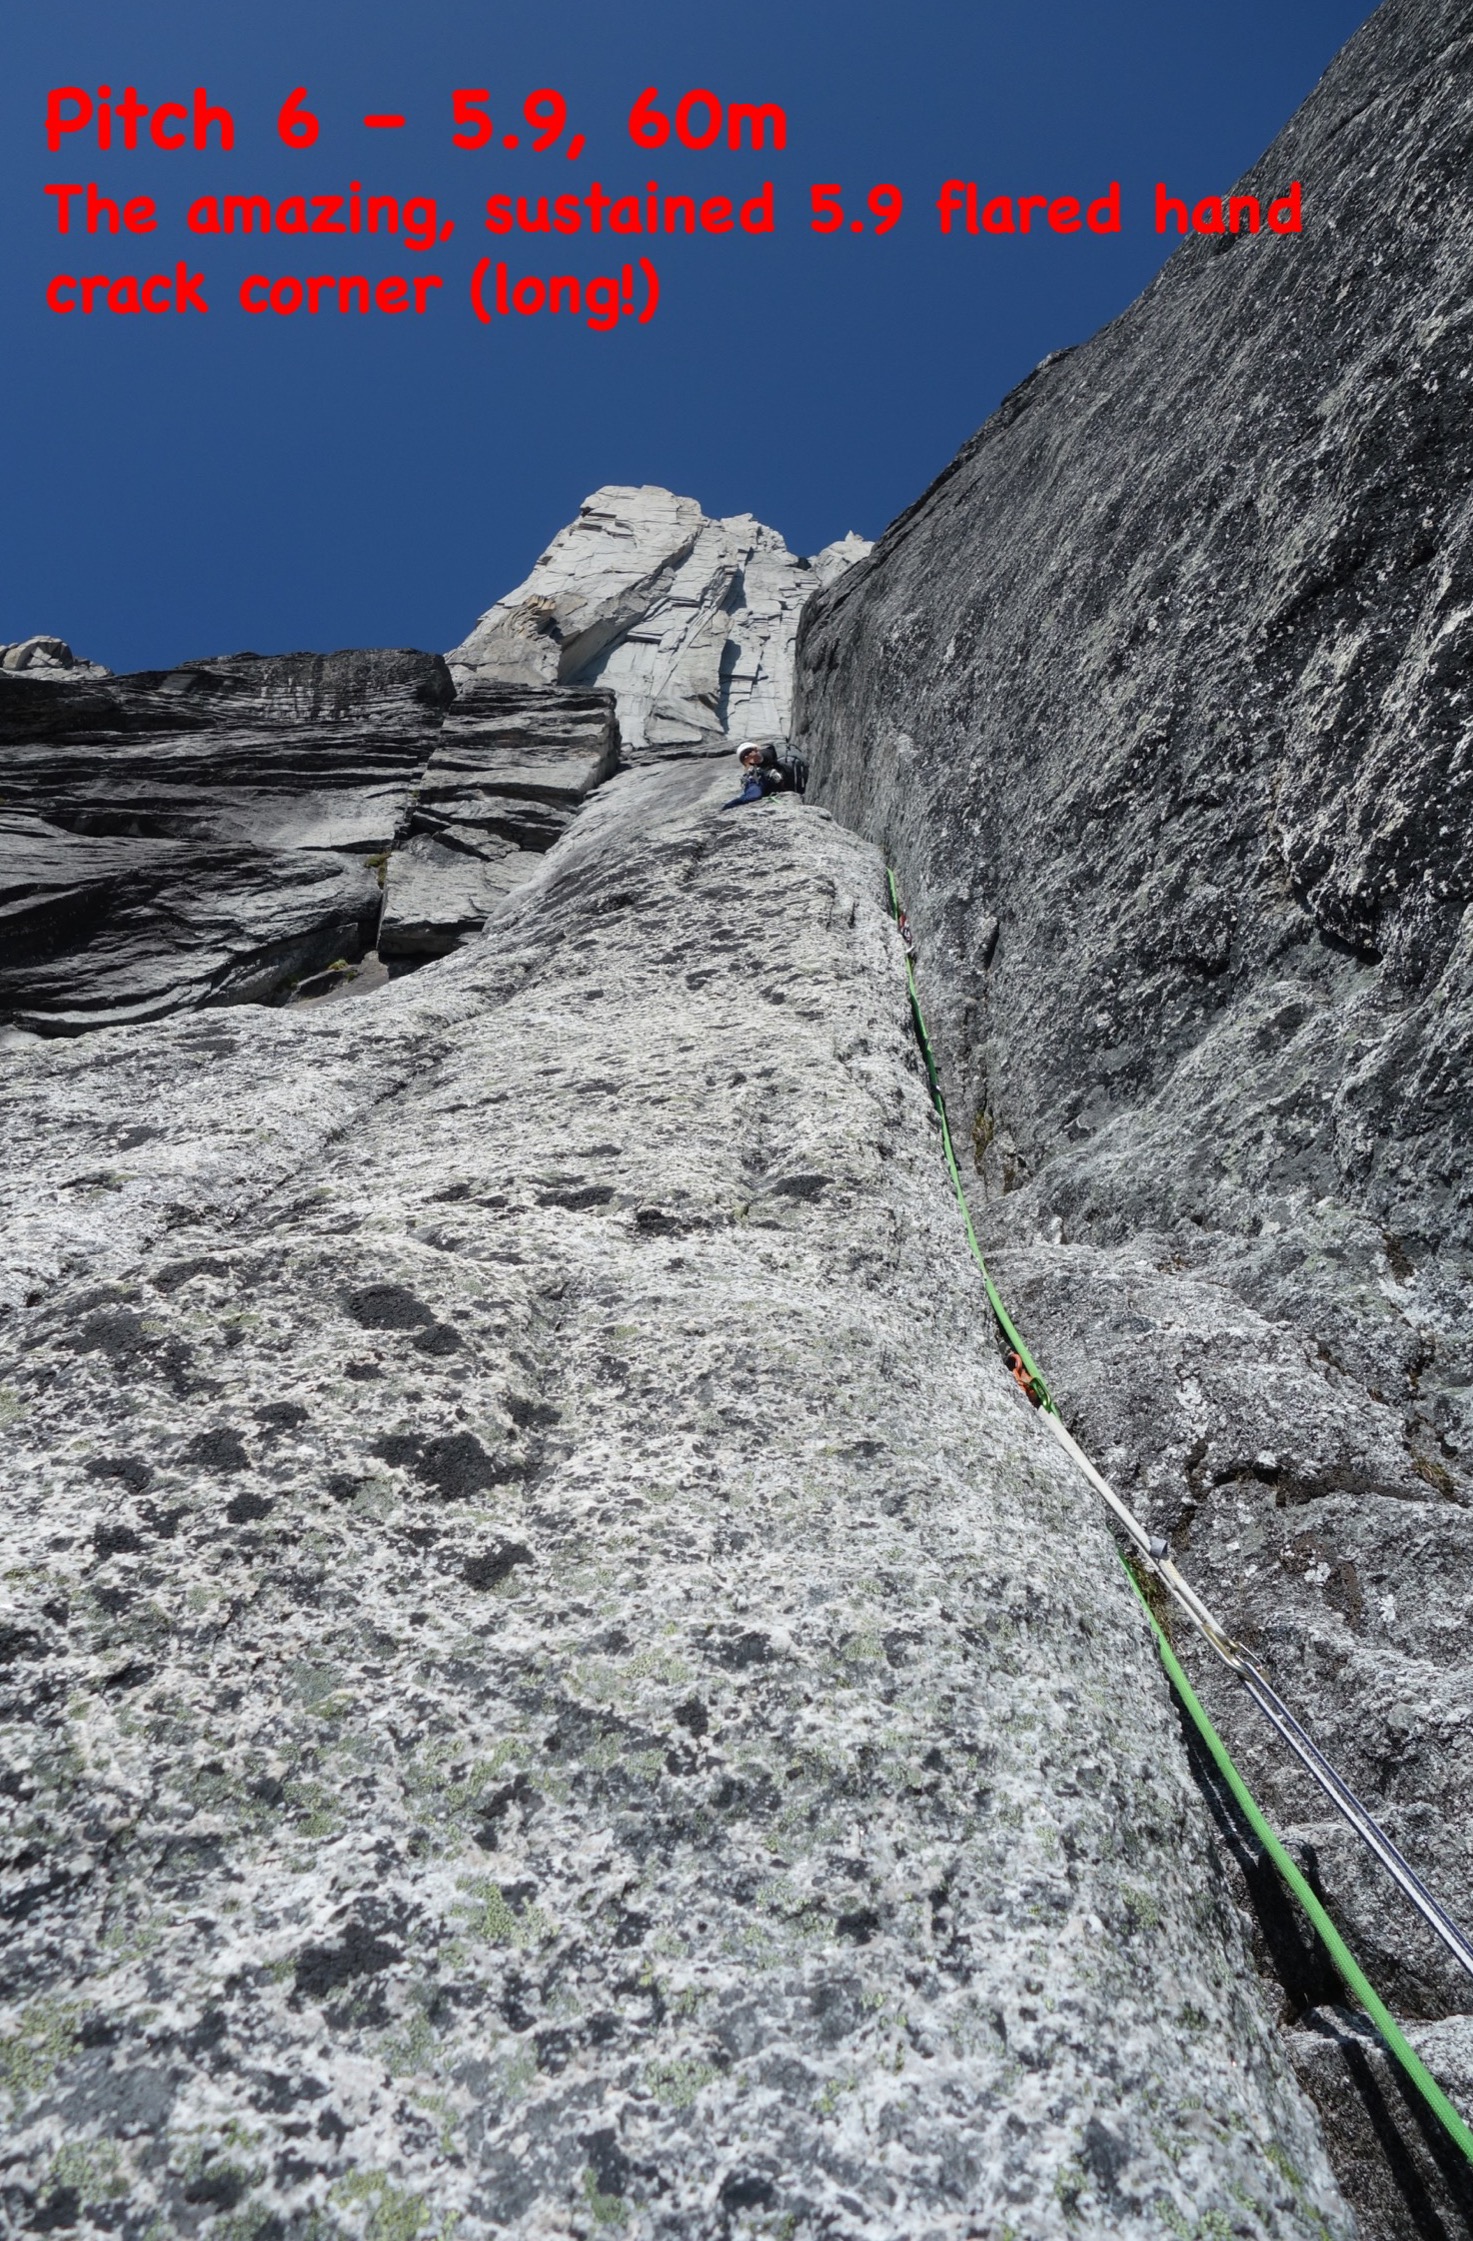
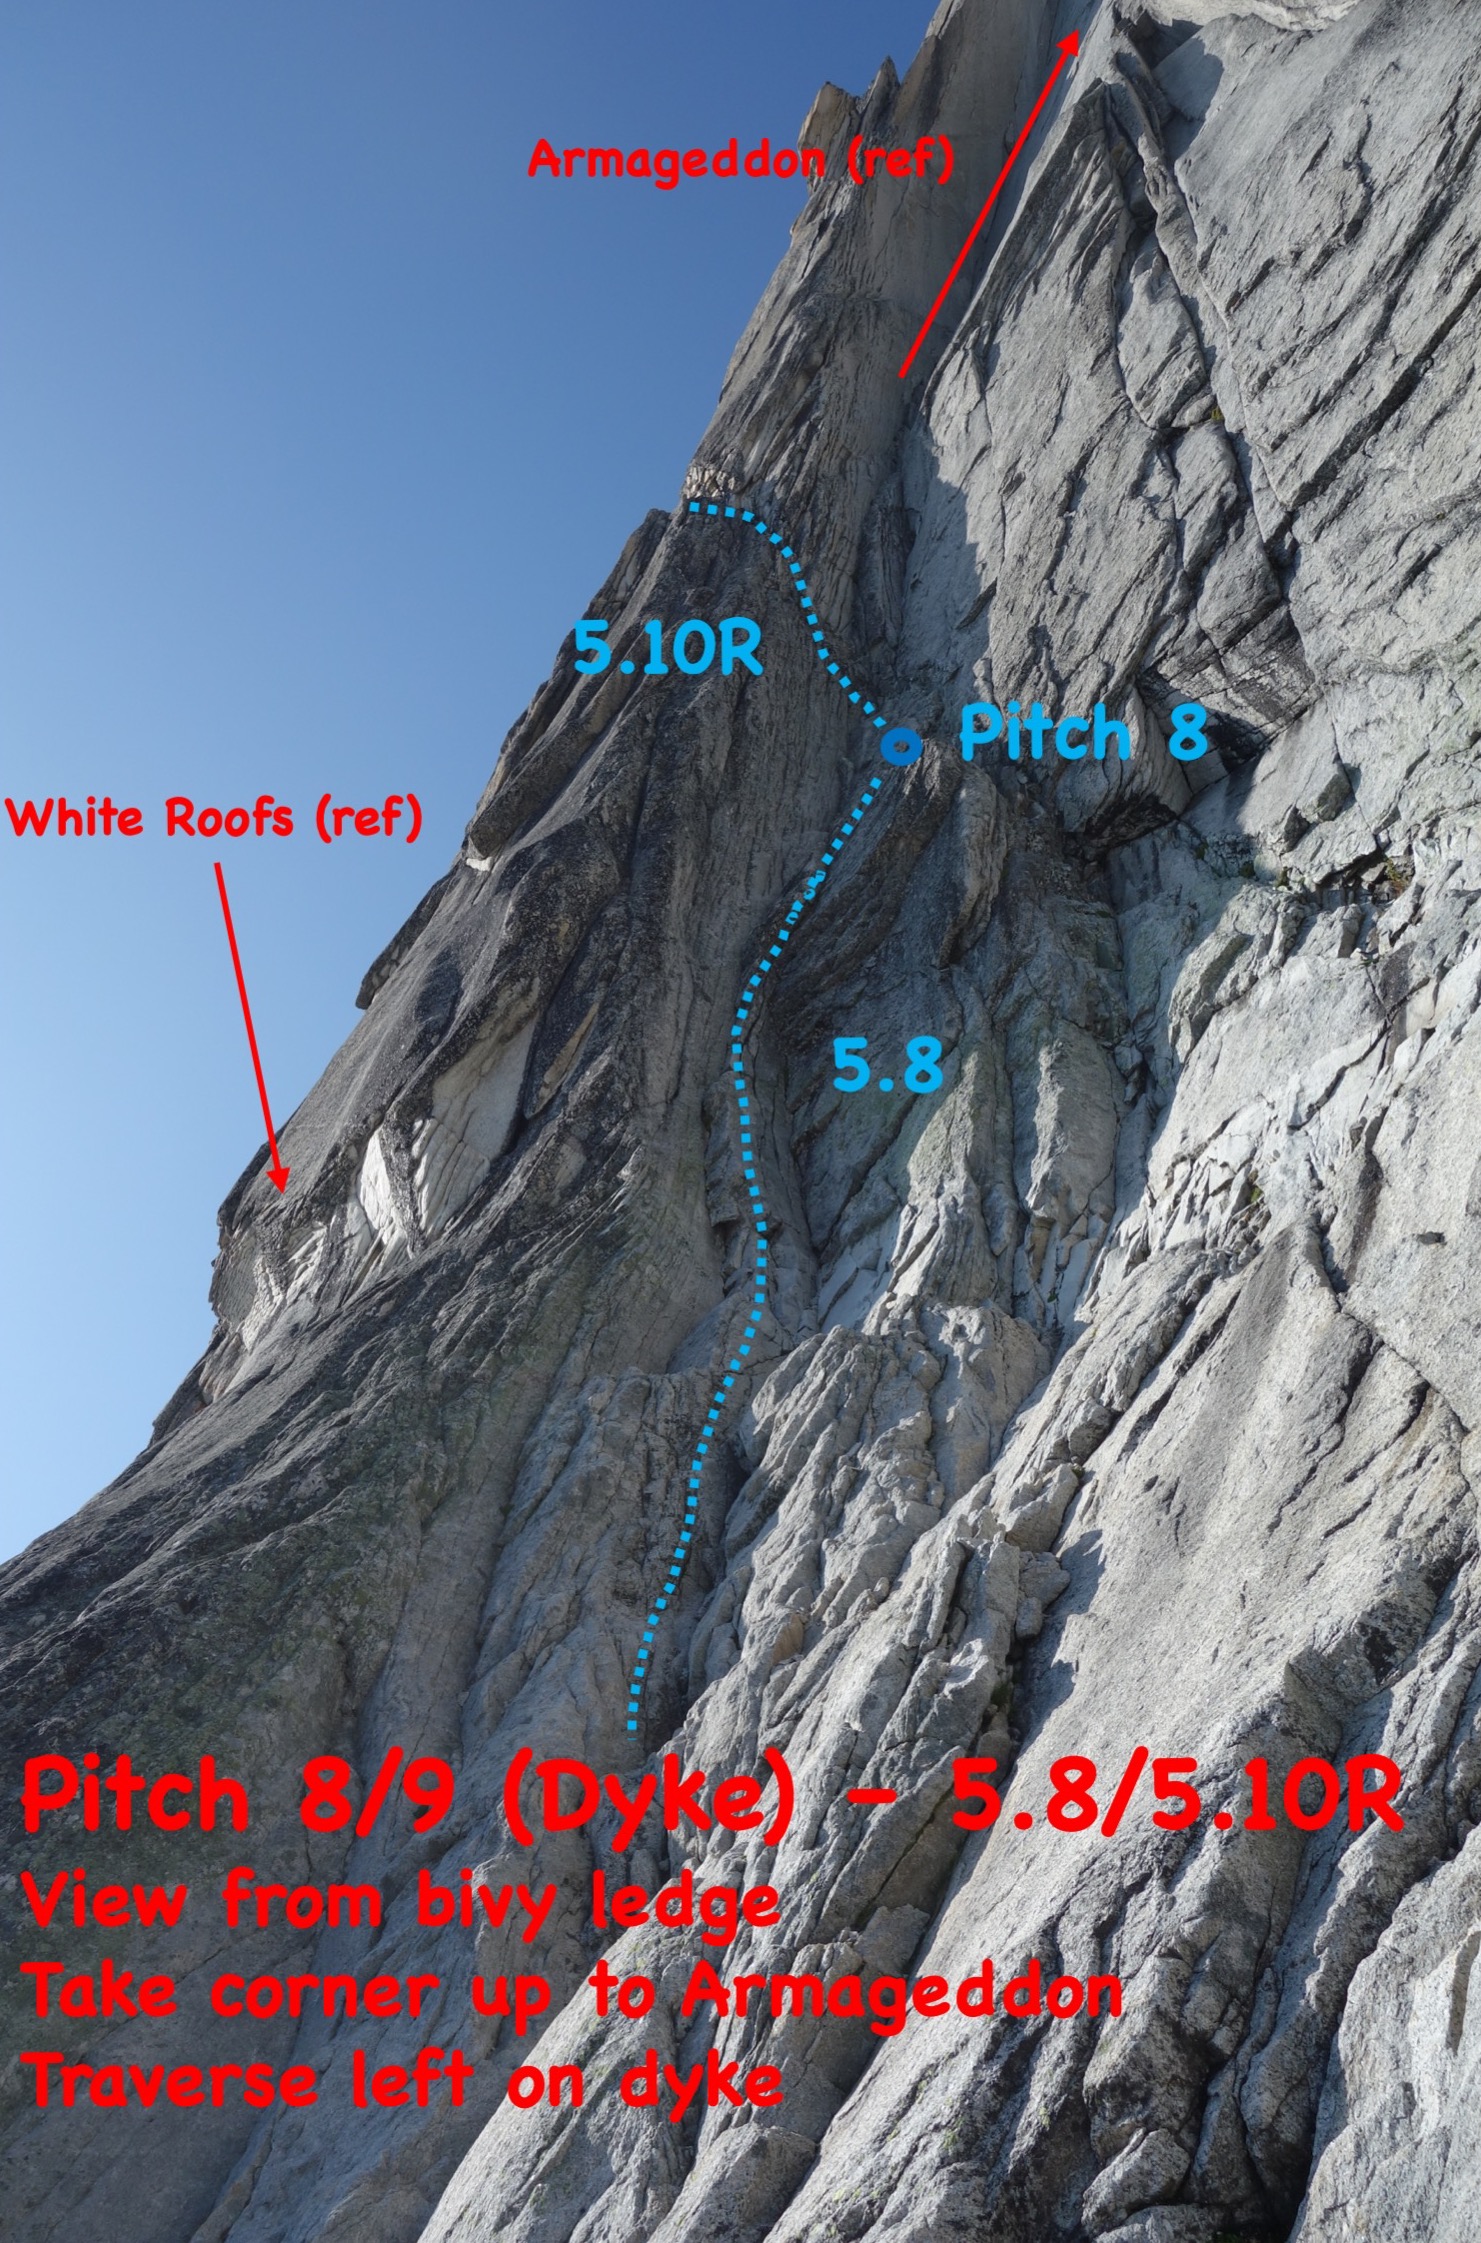
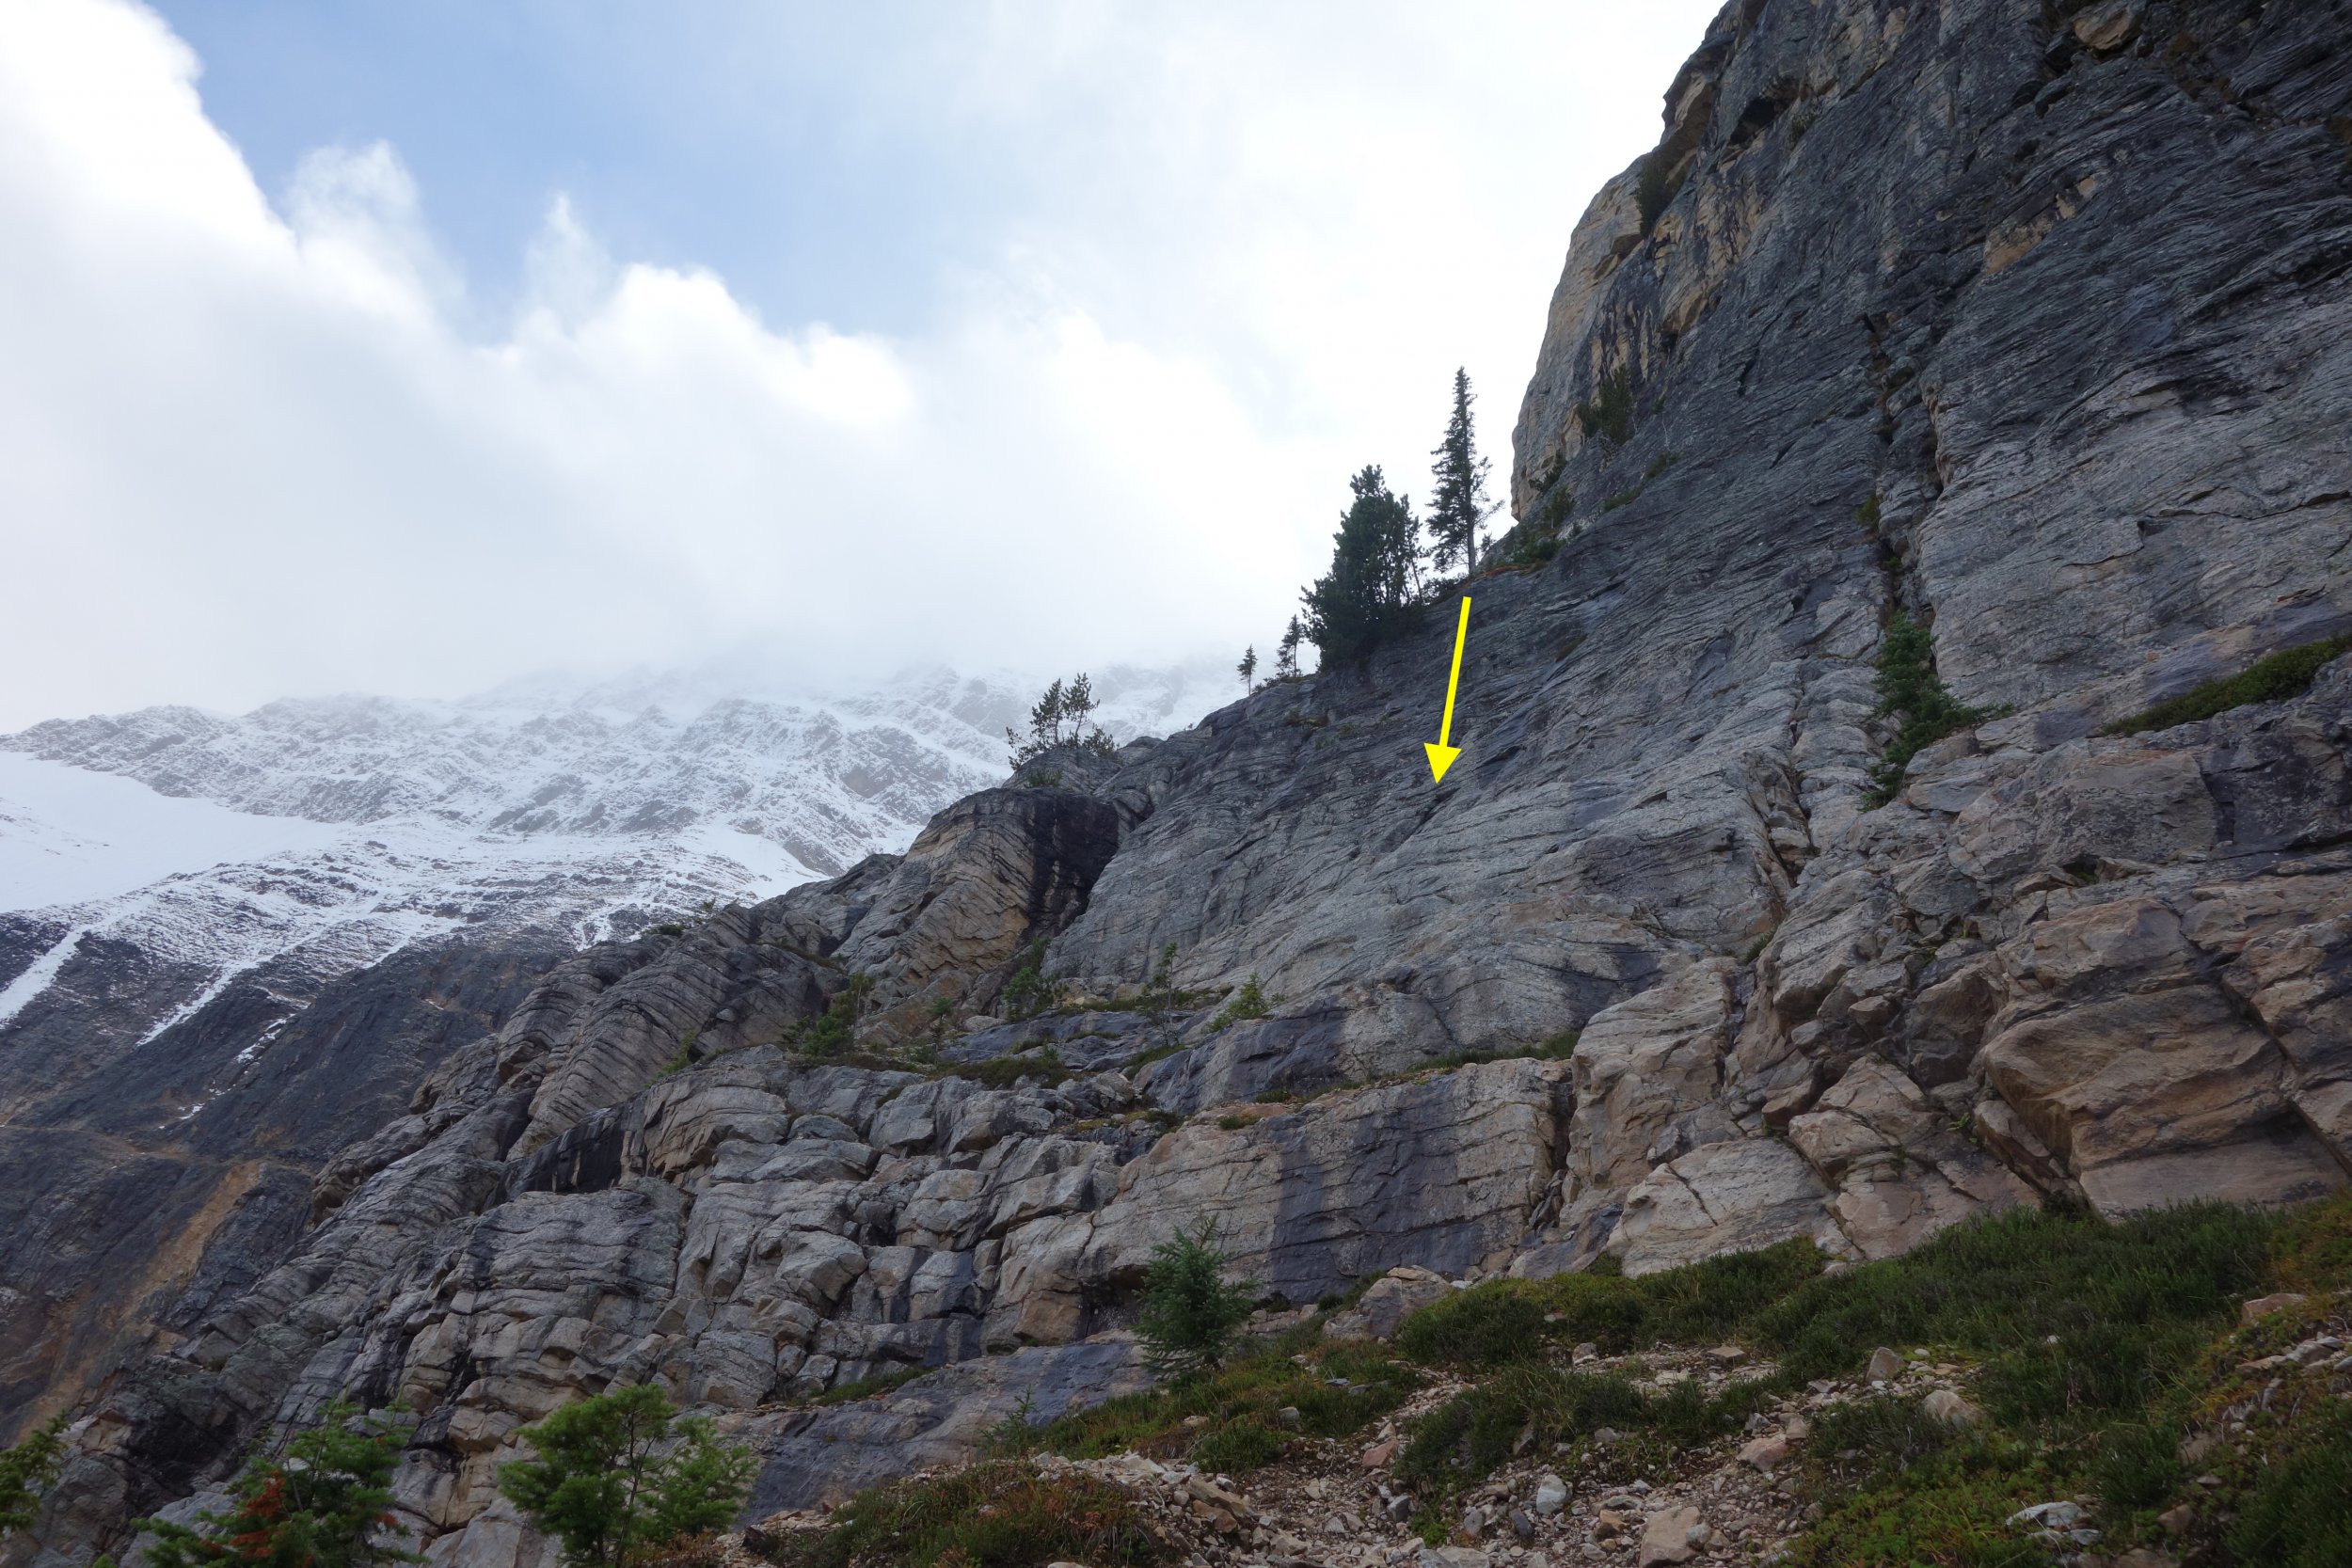
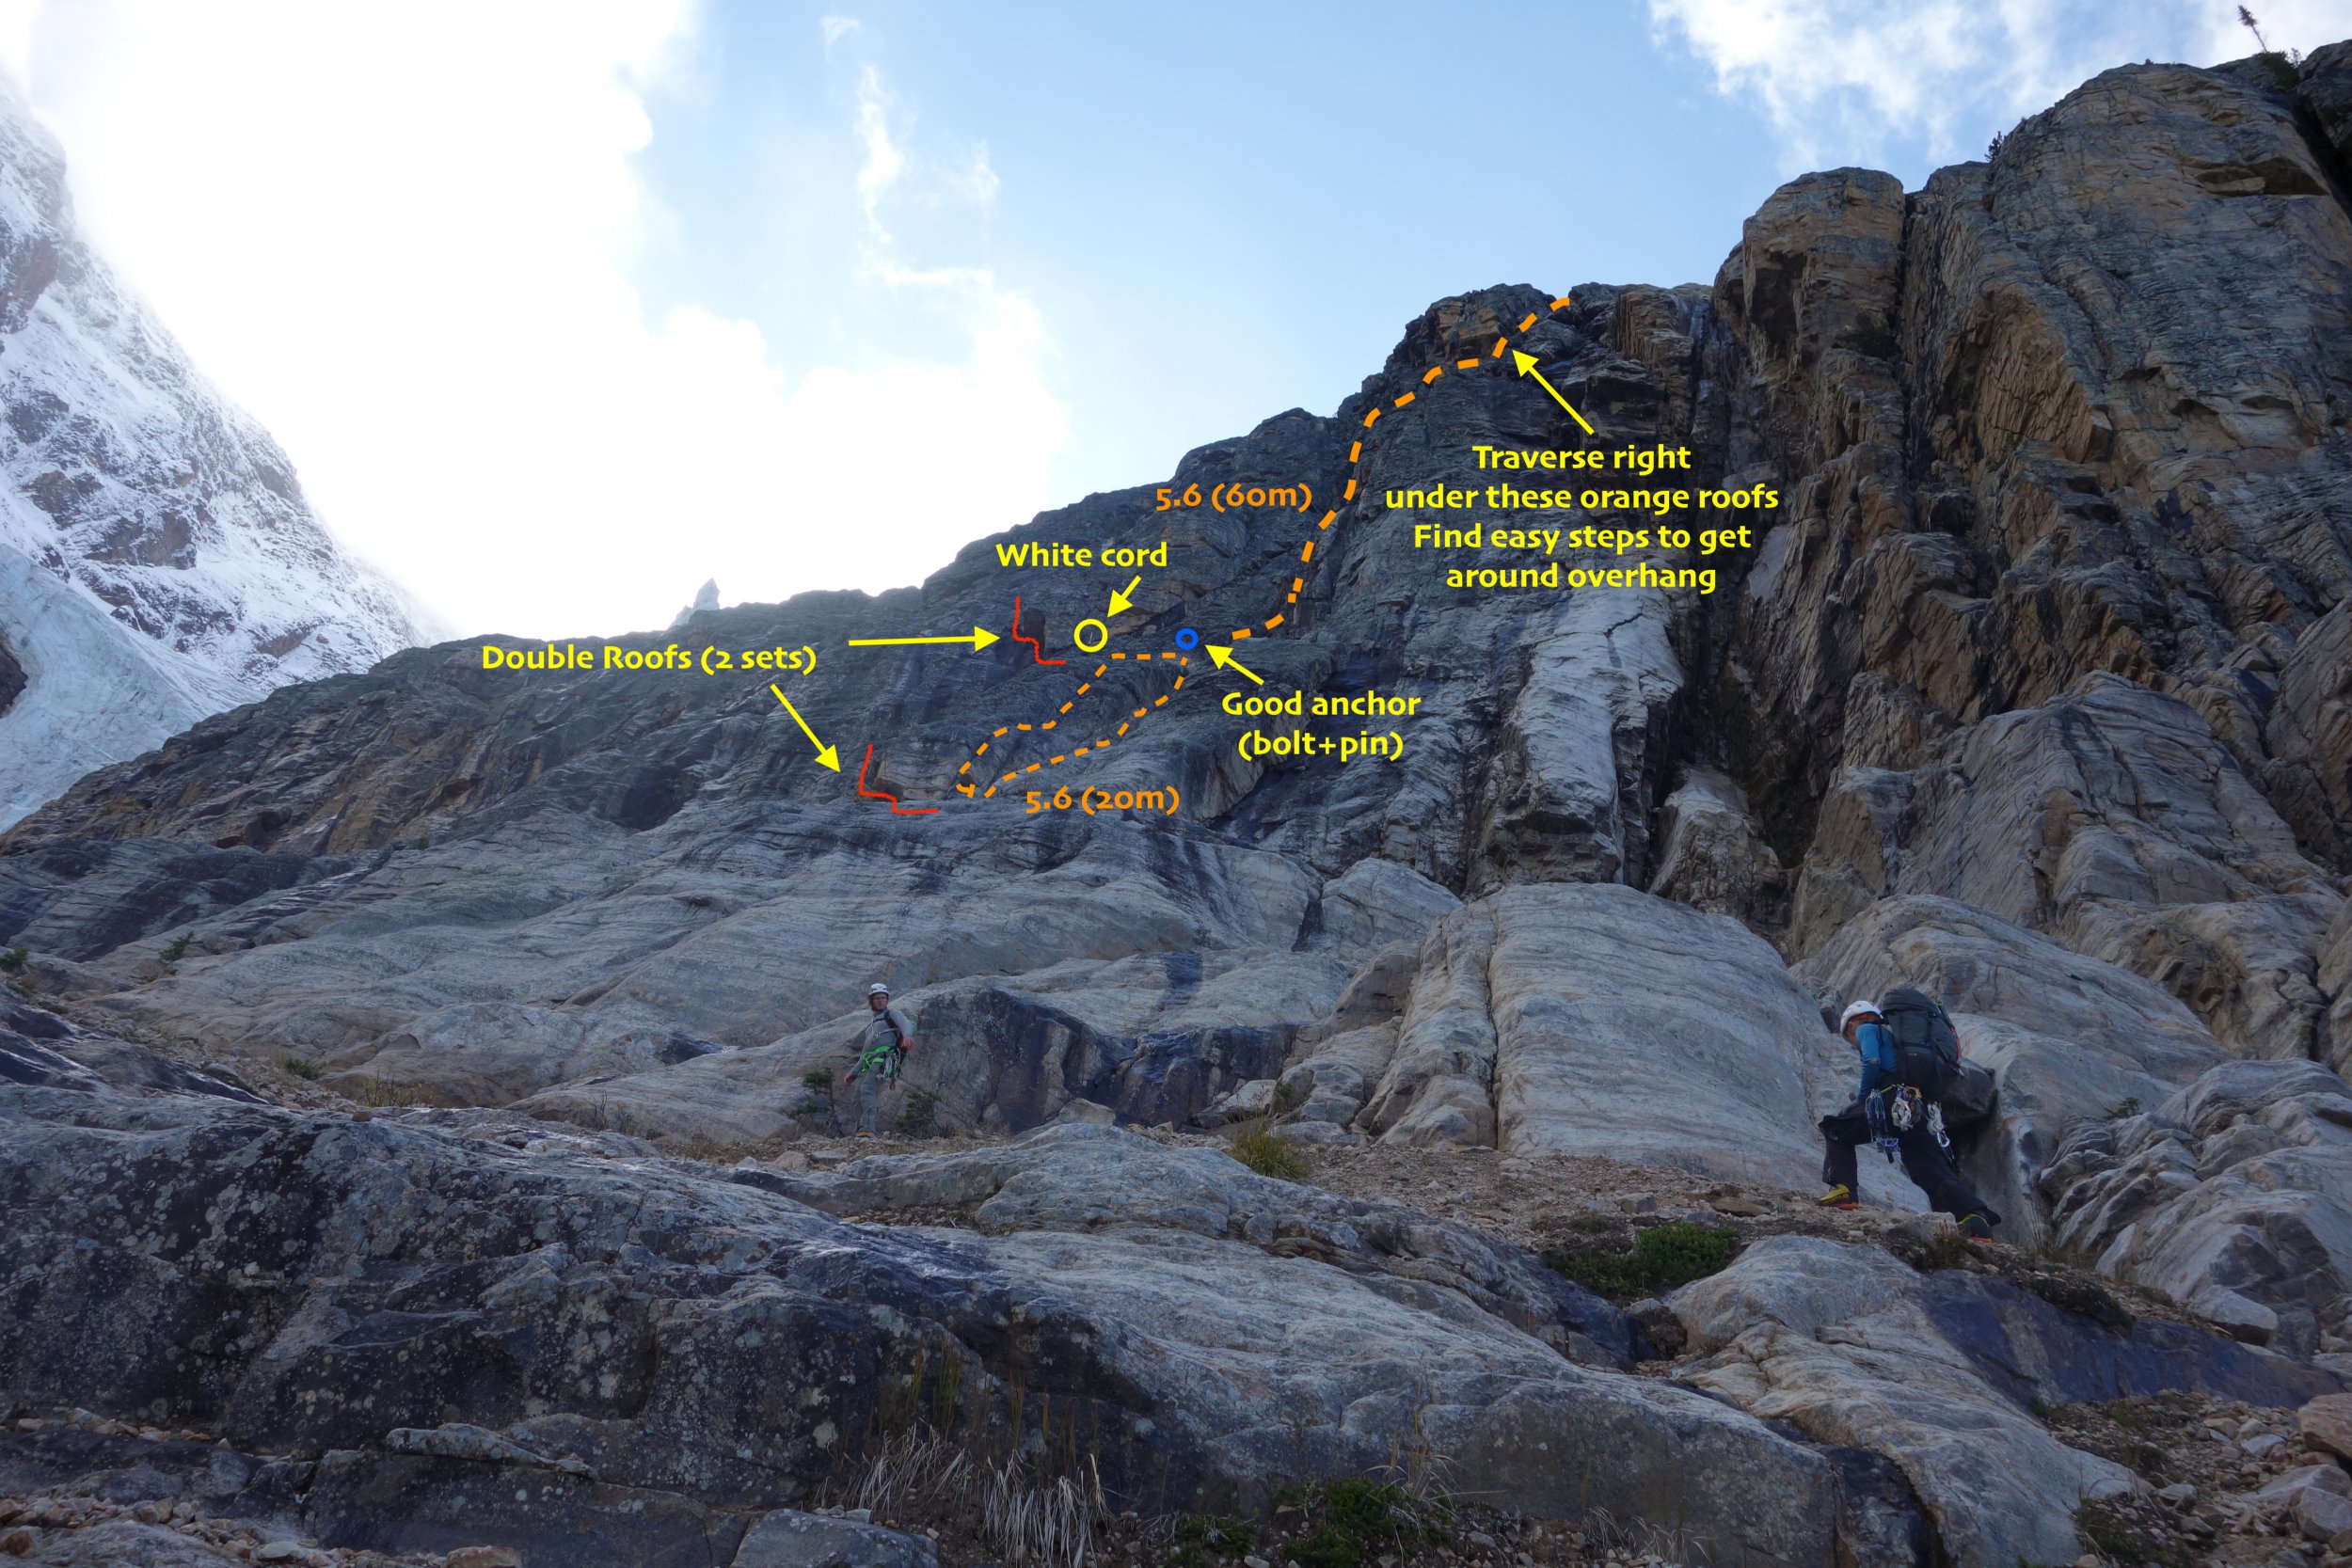
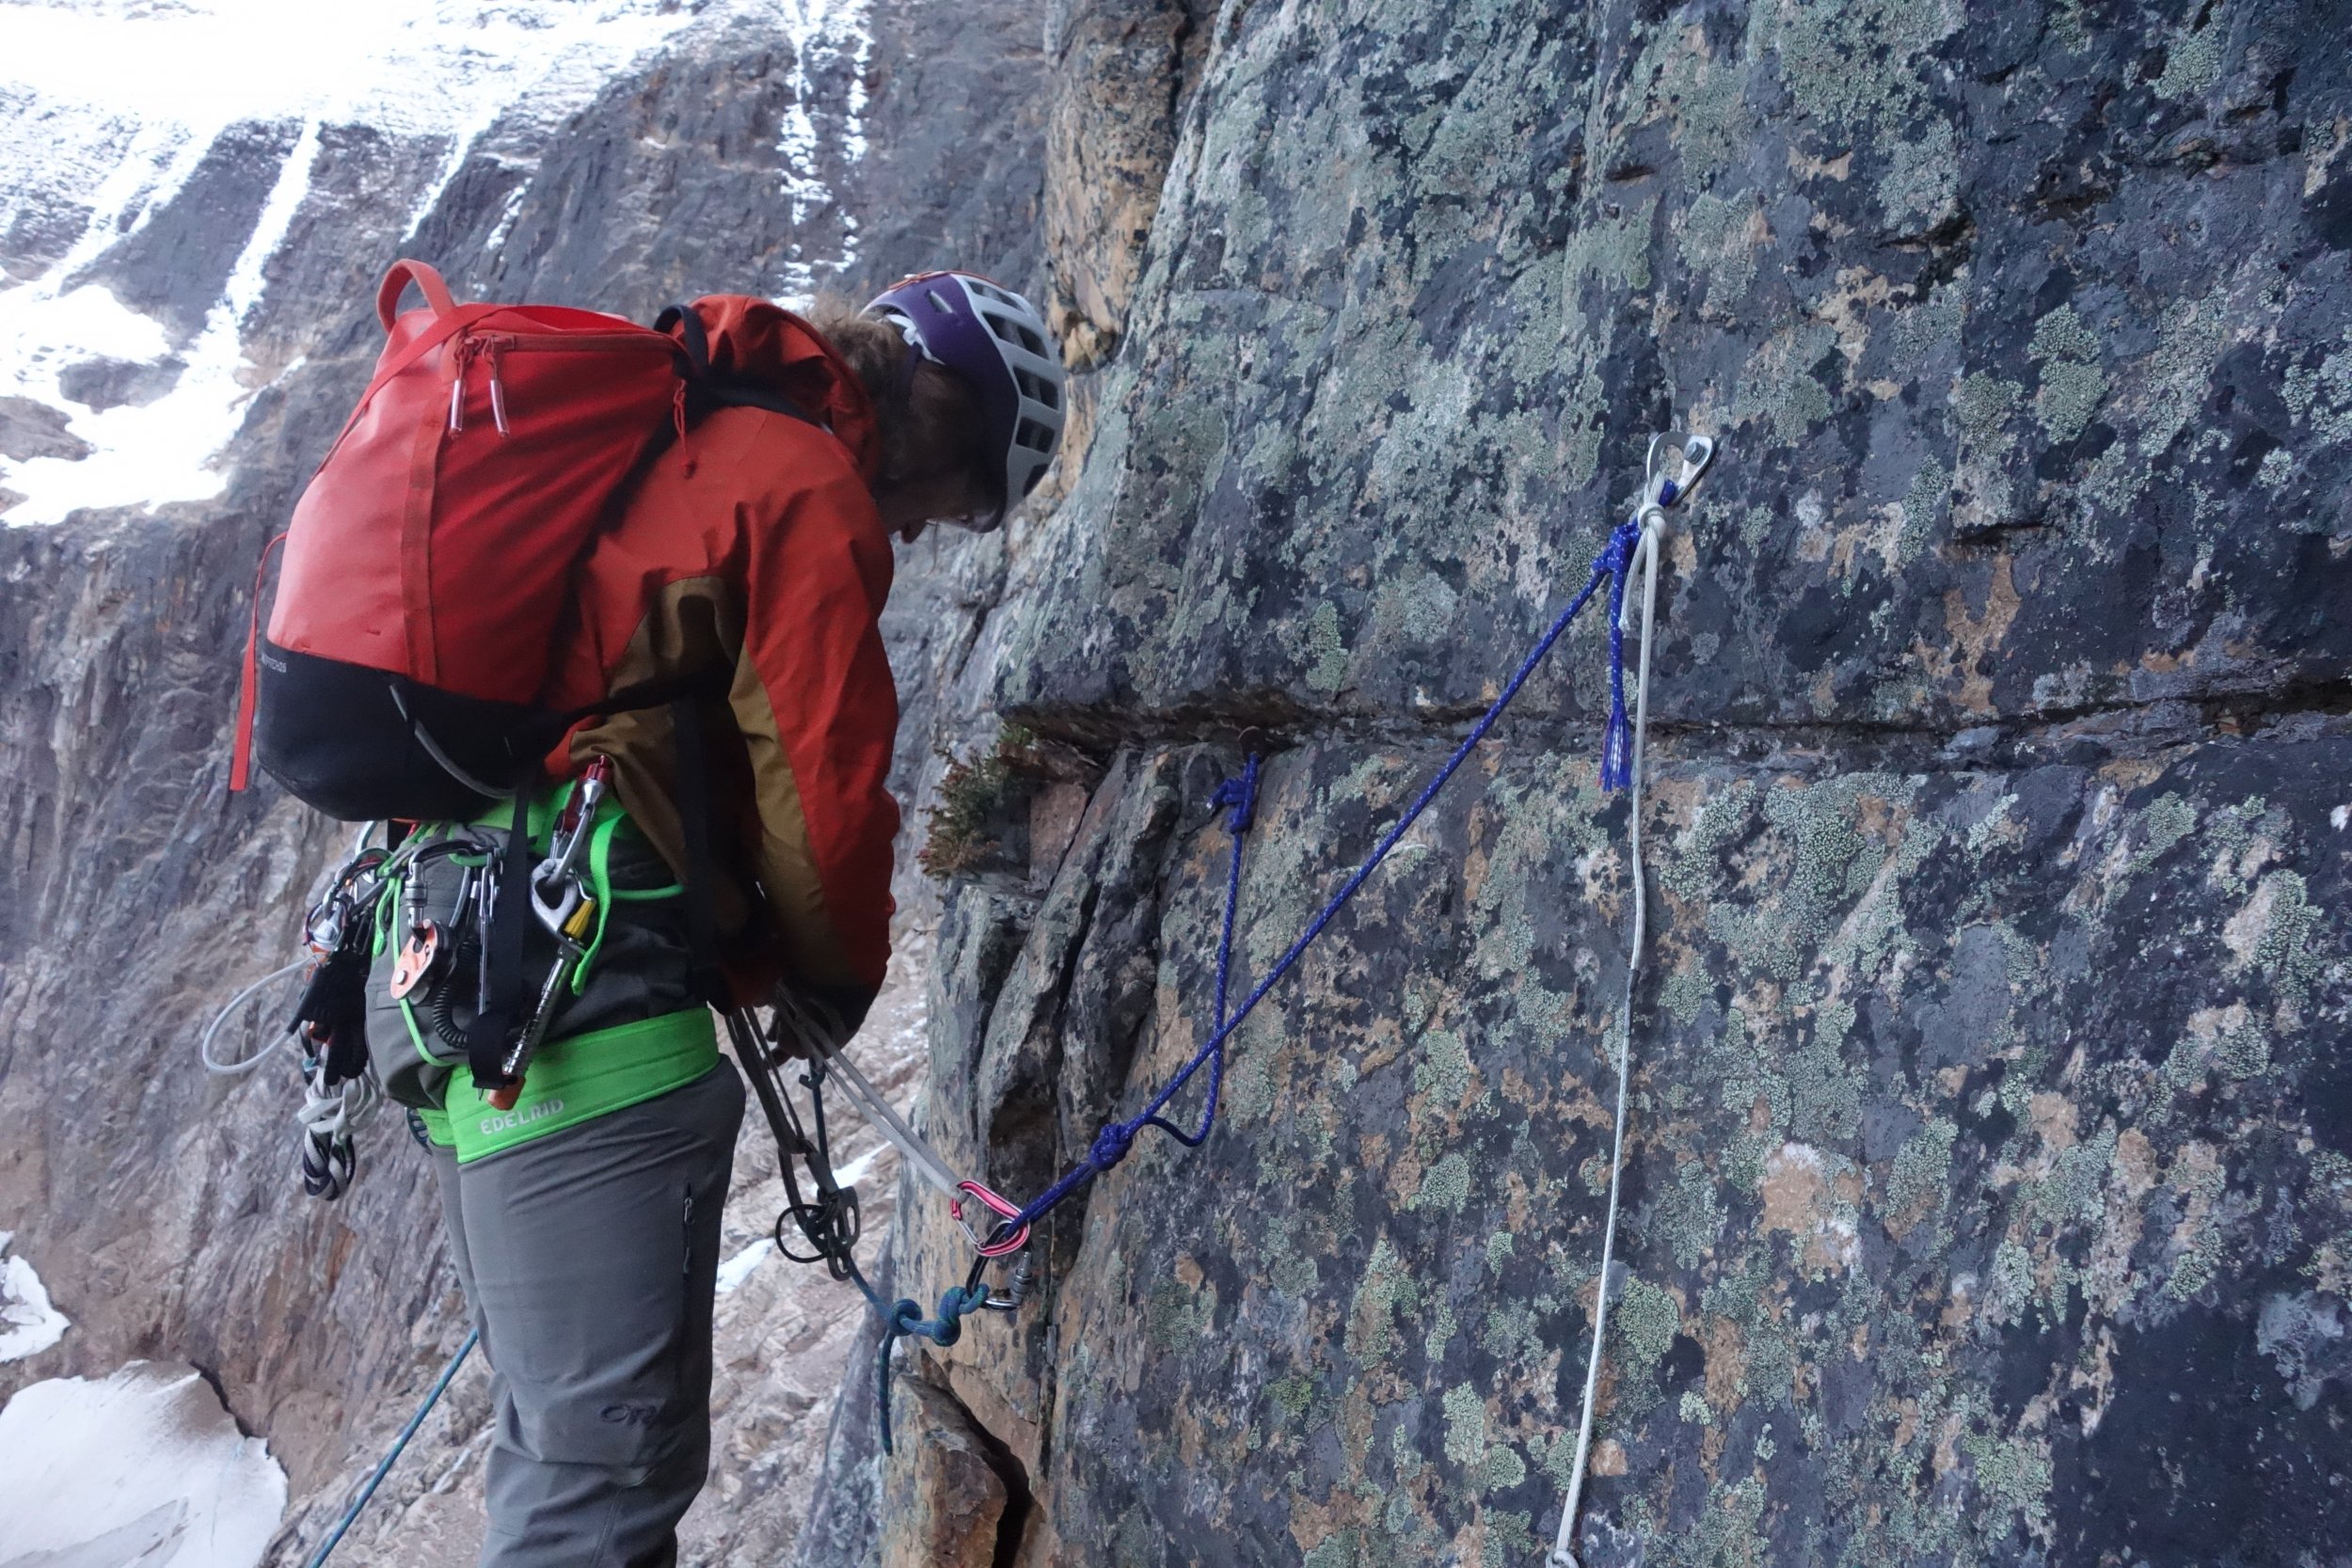
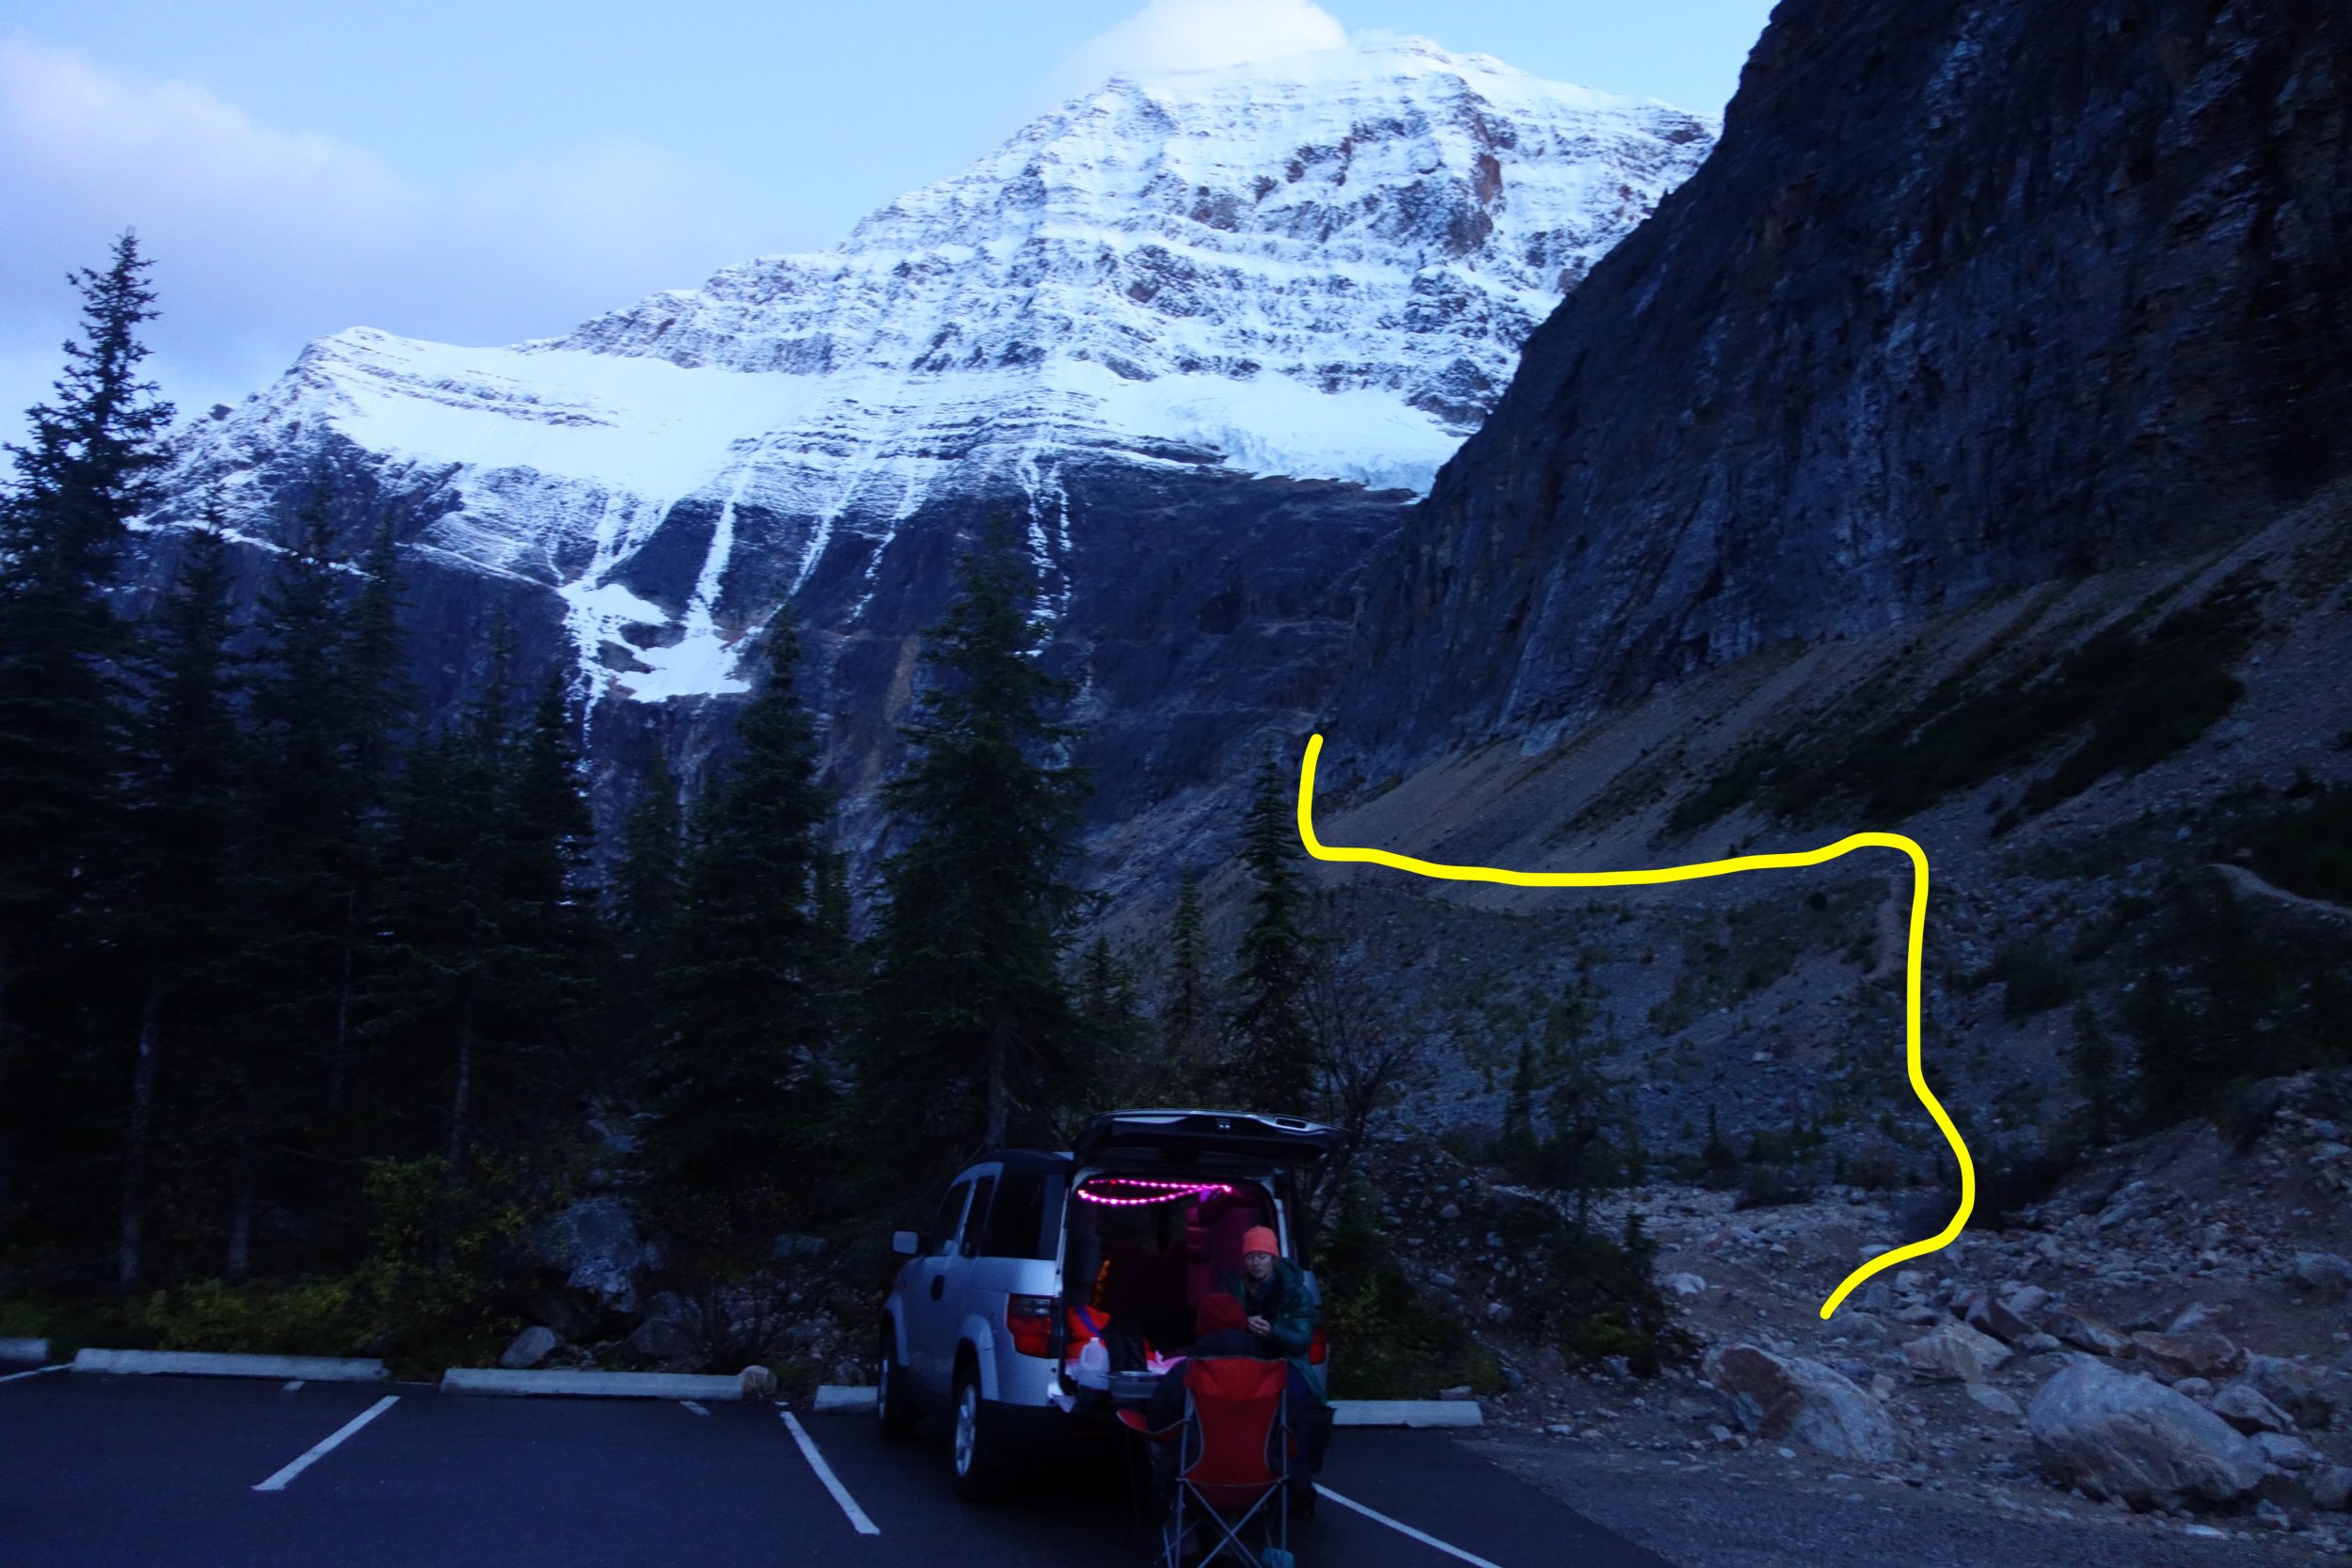
 Trip: Mount Edith Cavell - North Face (Chouinard/Beckey/Doody) - Attempt Trip Date: 09/22/2019 Trip Report: Climbers: Jeff and Priti Wright, and Dane! High Point: Bergshrund at the base of the wall, above the Angel Glacier One of North America’s great mountain faces. The original North Face route on Mount Edith Cavell (near Jasper, Canada) takes the central line up the face to the summit. This was a Smash n Grab attempt from Seattle after watching weather and conditions for a month. I think we nailed it on both counts, which alone was a good lesson. We were joined by our friend Dane who has been climbing in the area for a month long trip and whom we met while climbing All Along the Watchtower this August. We got up to the base of the wall above the Angel Glacier bergshrund and were forced to turn around due to a crampon toe bail failure. None of us had brought spare crampon toe bails (lesson!). We're stoked to come back and try it again, now that we have the approach beta dialed. It was still a grand adventure! The typical style (which we followed) is to do the approach in a few hours by daylight to practice the routefinding on the complex 5.6 rock route up to the Angel Glacier to get around the hanging seracs. Then, come back to the car, sleep, and start over again at O-dark thirty to go for a car-to-car push in a day. This avoids bringing bivy gear up the wall. It was humbling and awesome just to get up to the base of the wall, stand on its bergshrund, and look up into the dimly moonlit vertical darkness with packs full of metal and desire. On the attempt in the dark, it took 4.5hrs to get from the car to the bergshrund. We had left two fixed ropes and top rope solo'd to avoid re-leading it. If I came back with a single rope, I would fix the 60m single rope from above the chimney (leave an anchor) to get all the way to the bottom of the 5th class start, then re-lead the final 25m again in the dark. The route is commonly climbed in July and August, which brings two hazards: 1) rock fall, and 2) a band of exposed, loose, unprotectable shale near the summit ridge. By waiting until late August-October, the rock is more stable, and the band of shale is covered in snow and/or ice. The downside is that snow on route makes the climbing mixed, and icy cracks can make it difficult to find protection. By late September, the approach is still dry, 5.6 rock climbing (which we did in boots). The wall, however, was all snow-over-rock, which makes the 5.7 rock on the wall a mixed experience in crampons and ice tools (instead of rock climbing with rock shoes in the summertime) . This TR only describes the approach. The original route took 3rd class terrain to the left of the Angel Glacier ice flow. But hanging seracs now threaten much of the wall, and a new 5.6 approach route goes way right of the ice flow to gain the Angel Glacier. This route is totally safe and stays well away from the hanging seracs. The picture above is our high point along the Angel Glacier to the bergshrund, and the approximate North Face route is a dashed line (which we didn't get to do). We followed the hand-drawn topo on Mountain Project, and it was REALLY useful! https://www.mountainproject.com/photo/107268014 From the parking lot, cross the small stream and immediately gain the lateral moraine (shown above) which eventually leads up to the wall. As you approach, take note of 25m tree rappel (above your head) shown in the topo which is an alternate descent to down climbing the 3rd/4th class approach. Continue traversing on a 3rd class path for quite a ways, step across one stream from a waterfall, and continue until it forces you to start ascending up and right to a large ledge (shown in the topo). This is the same ledge which leads to the optional tree rappel descent (this tree is easy to find and is all the way climber's right along this ledge). The approach is left of a small waterfall and right of the larger waterfall (as shown in topo). Below is a picture of the tree from which you can make a 25m rappel, if descending. From the large ledge, continue up 3rd/4th class terrain (unroped) and look up for two sets of double roofs. The lower set is orange and you belay just below this. The upper is black, and has and a white cord hanging from a pin just to the right of it. This white cord is a crummy anchor, or (more likely) a redirect to the better anchor further right (one pin, one bolt). There are two options for the start, if you take the easier option (right), you won't pass by this white cord at all. Two pitches gain the upper 3rd/4th scramble. Recommend making the 1st pitch a short, 20m pitch and stopping at the bolt anchor to avoid an awkward belay further up in the chimney. The second pitch goes up a chimney (no actual chimney moves, nice feet and hands abound), and is a 60m rope stretcher with a short overhang section. Both pitches are just left of the corner waterfall shown in the picture below. The picture below also shows Priti and Dane on the big ledge (the same ledge where the tree rappel is). We had twin ropes and fixed one long 60m rope from the top of pitch 2, then fixed a short 20m rappel from the bolt anchor. This allowed us to top rope solo the route in the dark the next day with a micro traxion and skip having to re-lead it in the dark. Watch out for snafflehounds in the summer! The picture above is looking up from where you first rope up. Above is the bolt/piton anchor above the first pitch on a good ledge. If you take the right variation on the first pitch, it leads directly (and obviously) to this anchor. The second pitch looks a little different than what the topo describes (beware). Start up a chimney (shown above) for 20m to a scrambling section. Then cross right on easy terrain under large orange roofs (don't keep going up a ramp straight up, shown above). Then a short overhanging move with good feet and hands (5.6) to a large ledge with a 2-pin anchor (may require a few meters of simul-climbing to reach this anchor). You can add in a good black Totem to this anchor to back it up. From this ledge, you can unrope. You are not yet on the large ledge shown in the topo which crosses the waterfall; this is still above you. Continue straight up from the anchor on easy 4th/low-5th until you find the large ledge. Cross back right across the waterfall and continue to a large left-facing corner. Easy ledges take you well up the corner system until you can exit right on easy 3rd class steps. Don't leave the corner too early! Pass through a patch of small trees, then across a grassy patch to look up and see a large, obvious notch (easy to pick out in moonlight). Continue up scree slopes to this notch. Once at the notch, the topo recommends descending 15m, then ascending a gully. We did this, and we do not recommend!!! Loose, hard, and scary. Instead continue up a right-facing corner straight up from the notch; this looks difficult, but there are good feet to stem. Once above the corner, traverse way left to get onto the Angel Glacier. Whew! Water plan: Here you will find an optional bivy site and running water. Allegedly there is also running water at the East Ridge col. You can start from the car with just half a liter of water, fill up a couple liters at the bivy site, then fill again at the East Ridge notch (maybe). The Angel Glacier is heavily crevassed near the seracs (obviously) so you can make a wide sweep to get away from the edge. It gets a little steep when you approach the wall, but not too bad. Some reports mention that it gets tricky to cross the bergshrund in summertime. The East Ridge (recommended) is way shorter and takes you straight back to your car. This is the descent recommended to us by the Smileys. The West Ridge is much longer, with complex routefinding on easy 3rd class terrain, and forces you to walk back up the road to get back to your car. The East Ridge is mostly 3rd/4th but stays mainly on the ridgeline (shouldn't be too hard to find your way in the dark) and has a crux 5.2/5.3 section that some parties rappel. This 5.2/5.3 section is located just above the shoulder, halfway up the ridge. Below is the easy descent from the East Ridge col which takes you along the lateral moraine to a trail and back to the trailhead. Gear Notes: Pickets for the summit snow field, 4 screws (various sizes), rack to #3, nuts, 2 KB's, 2 ice tools each Approach Notes: Read above
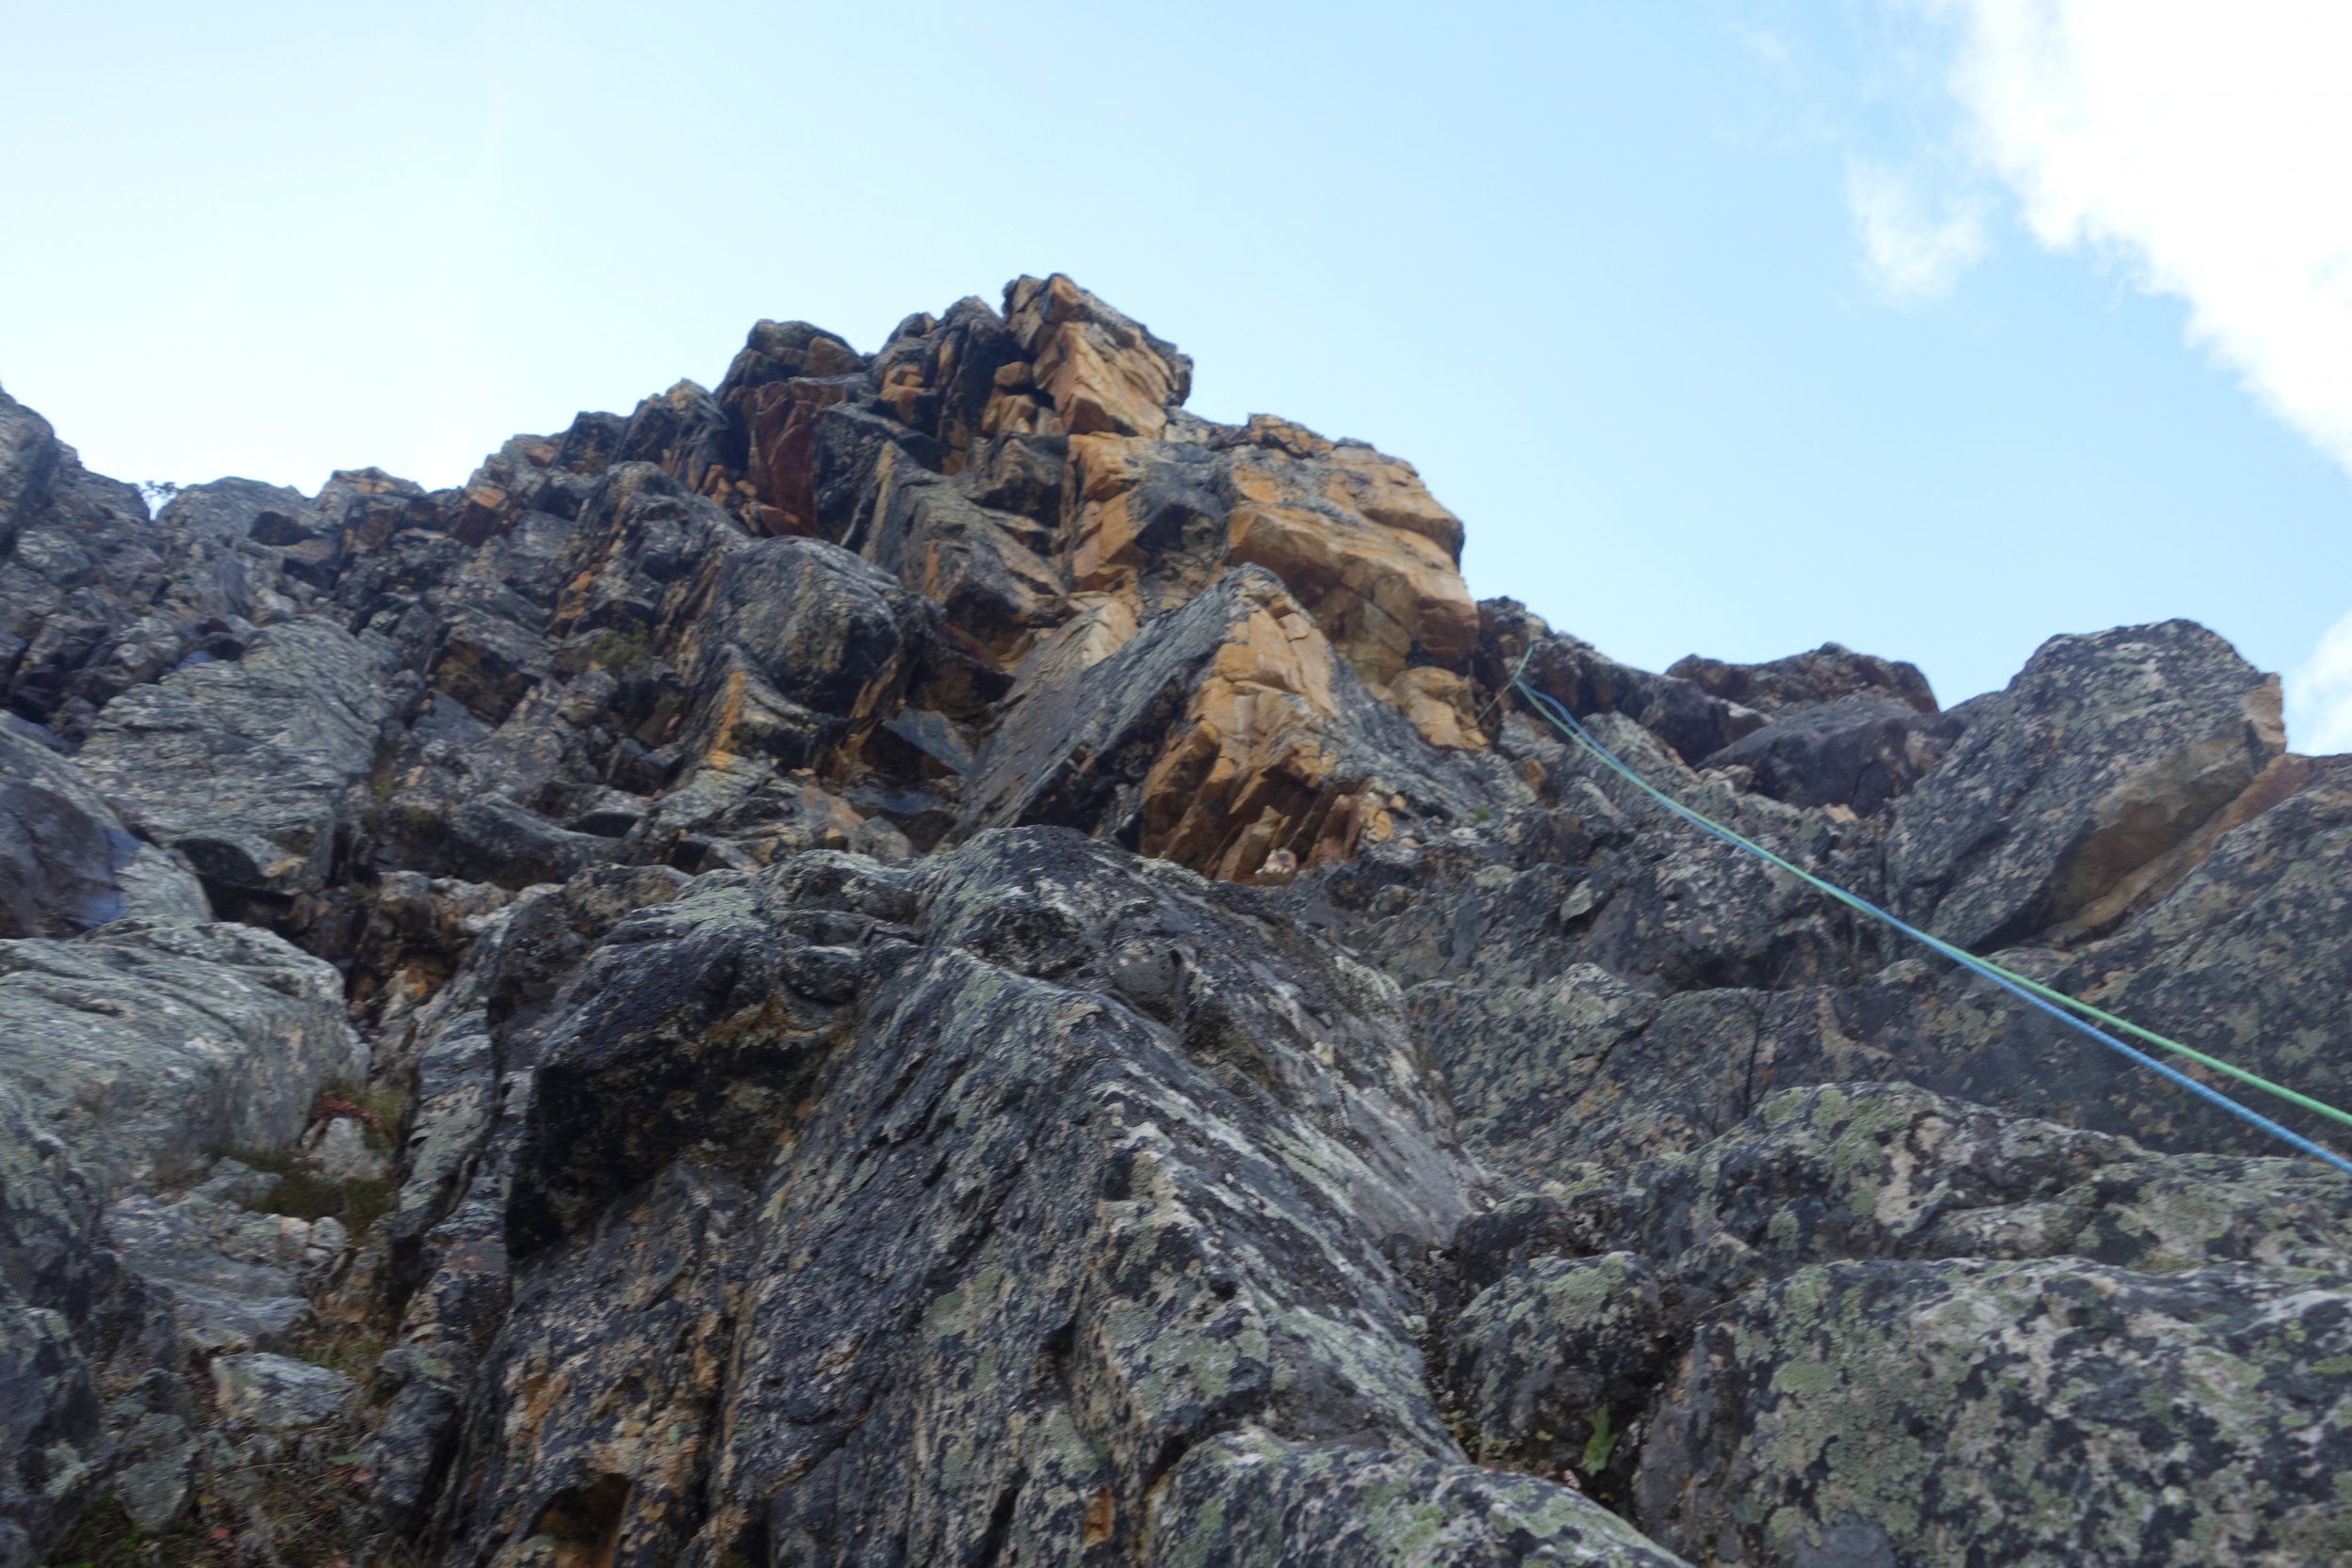


-
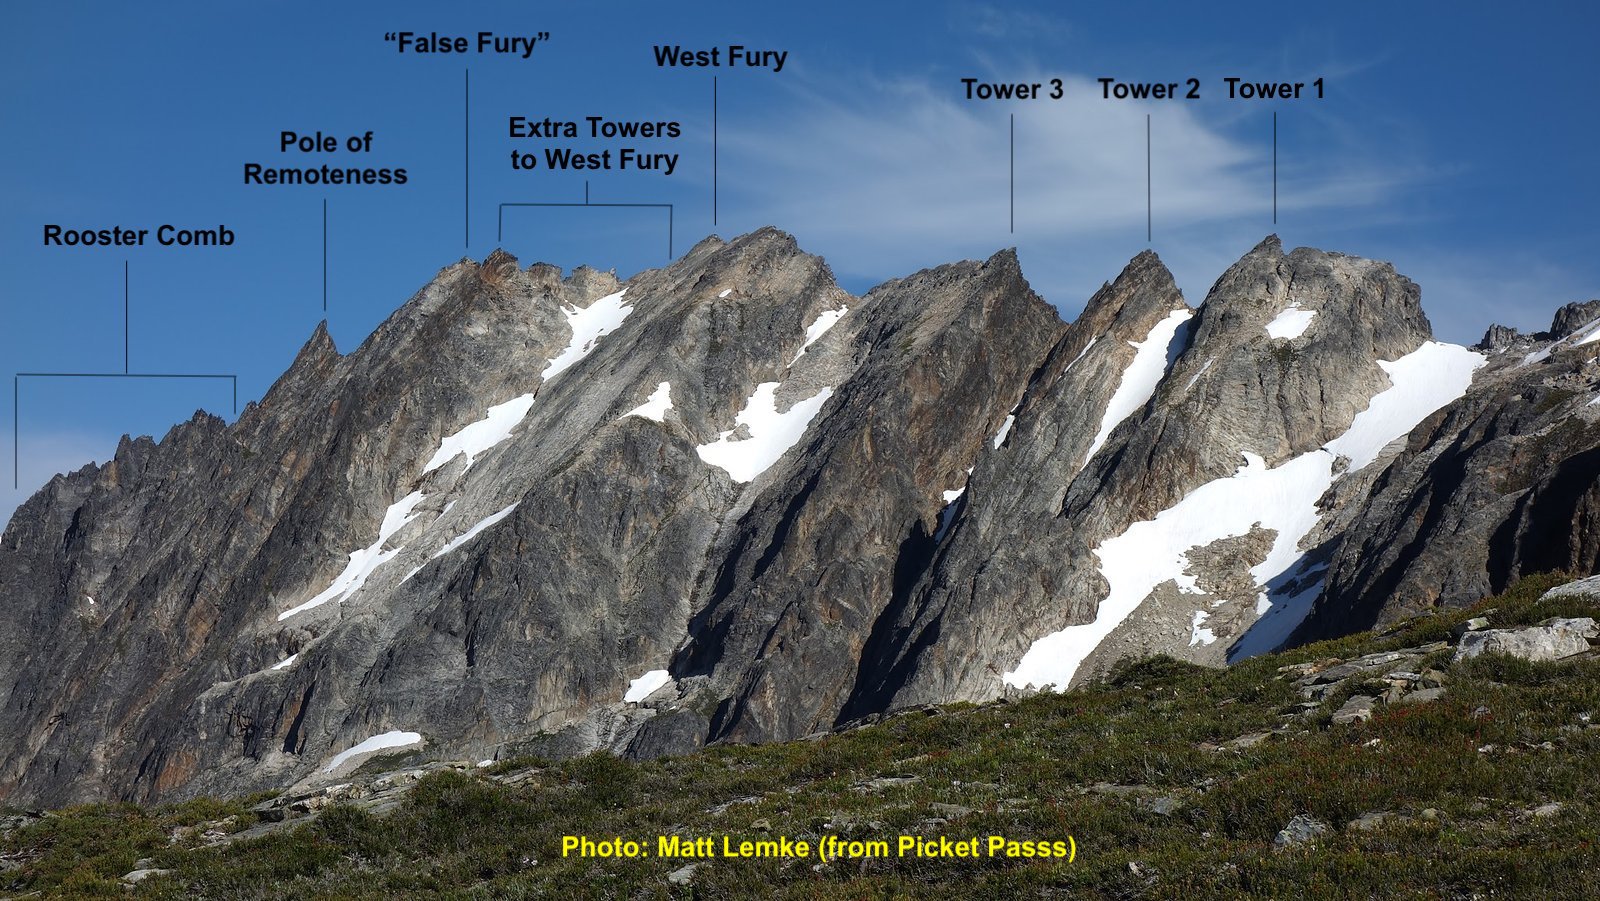
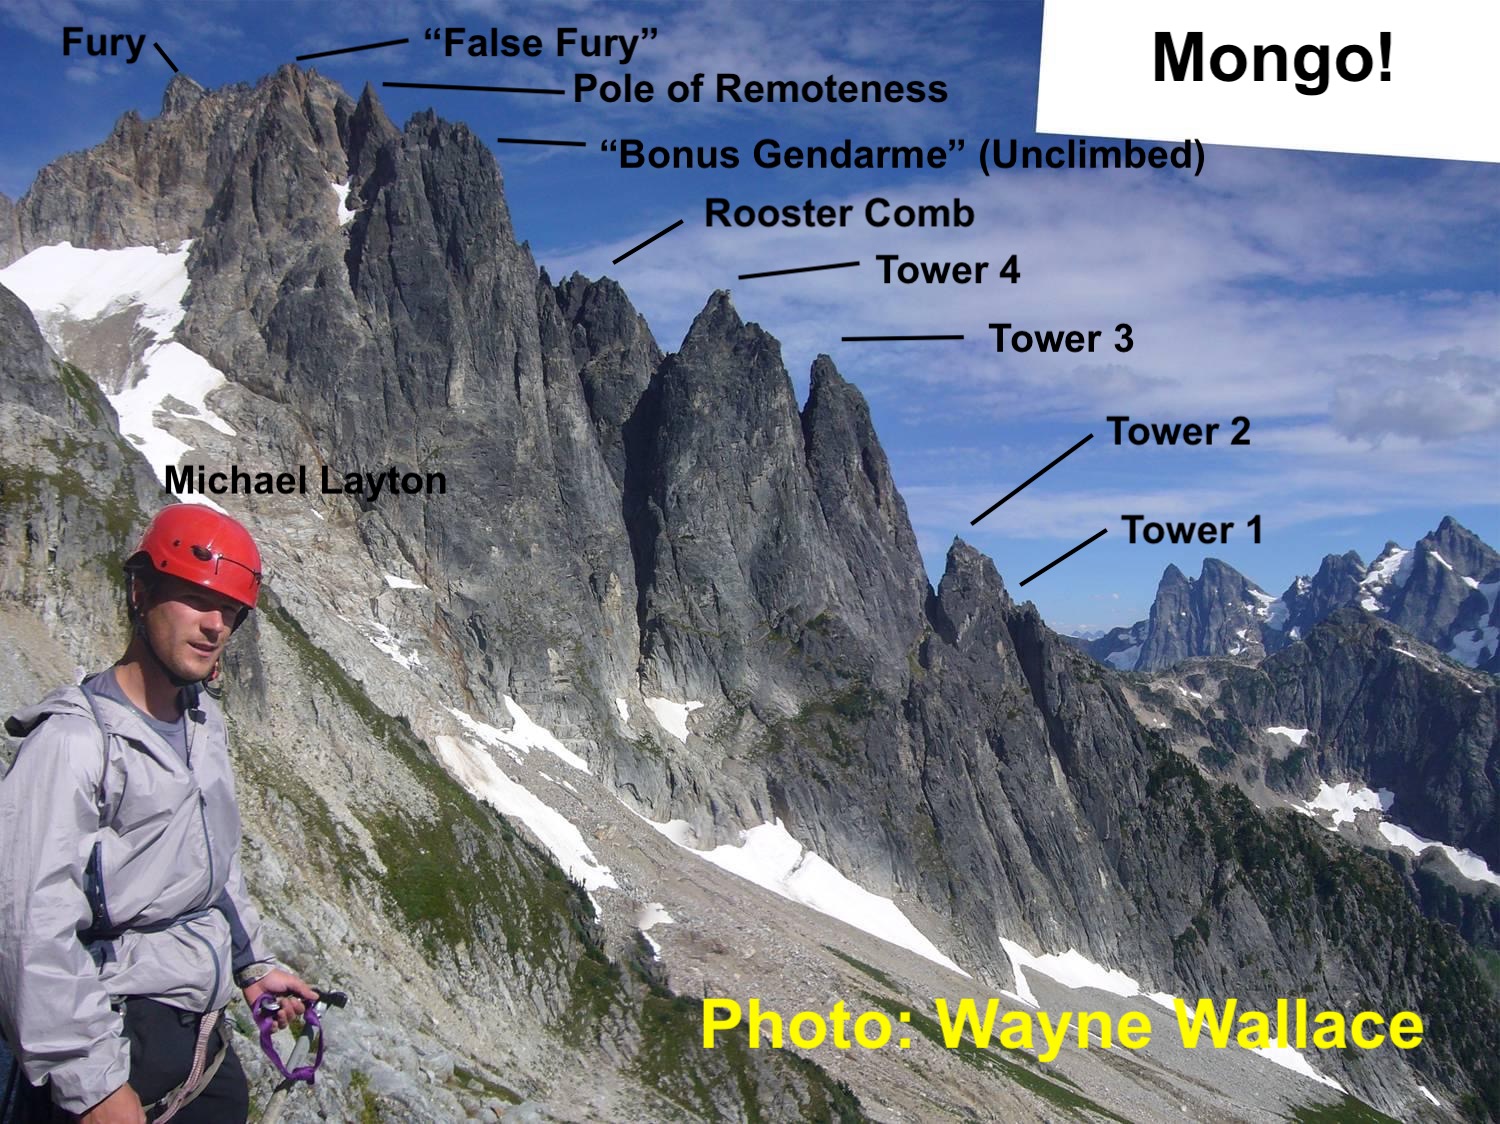
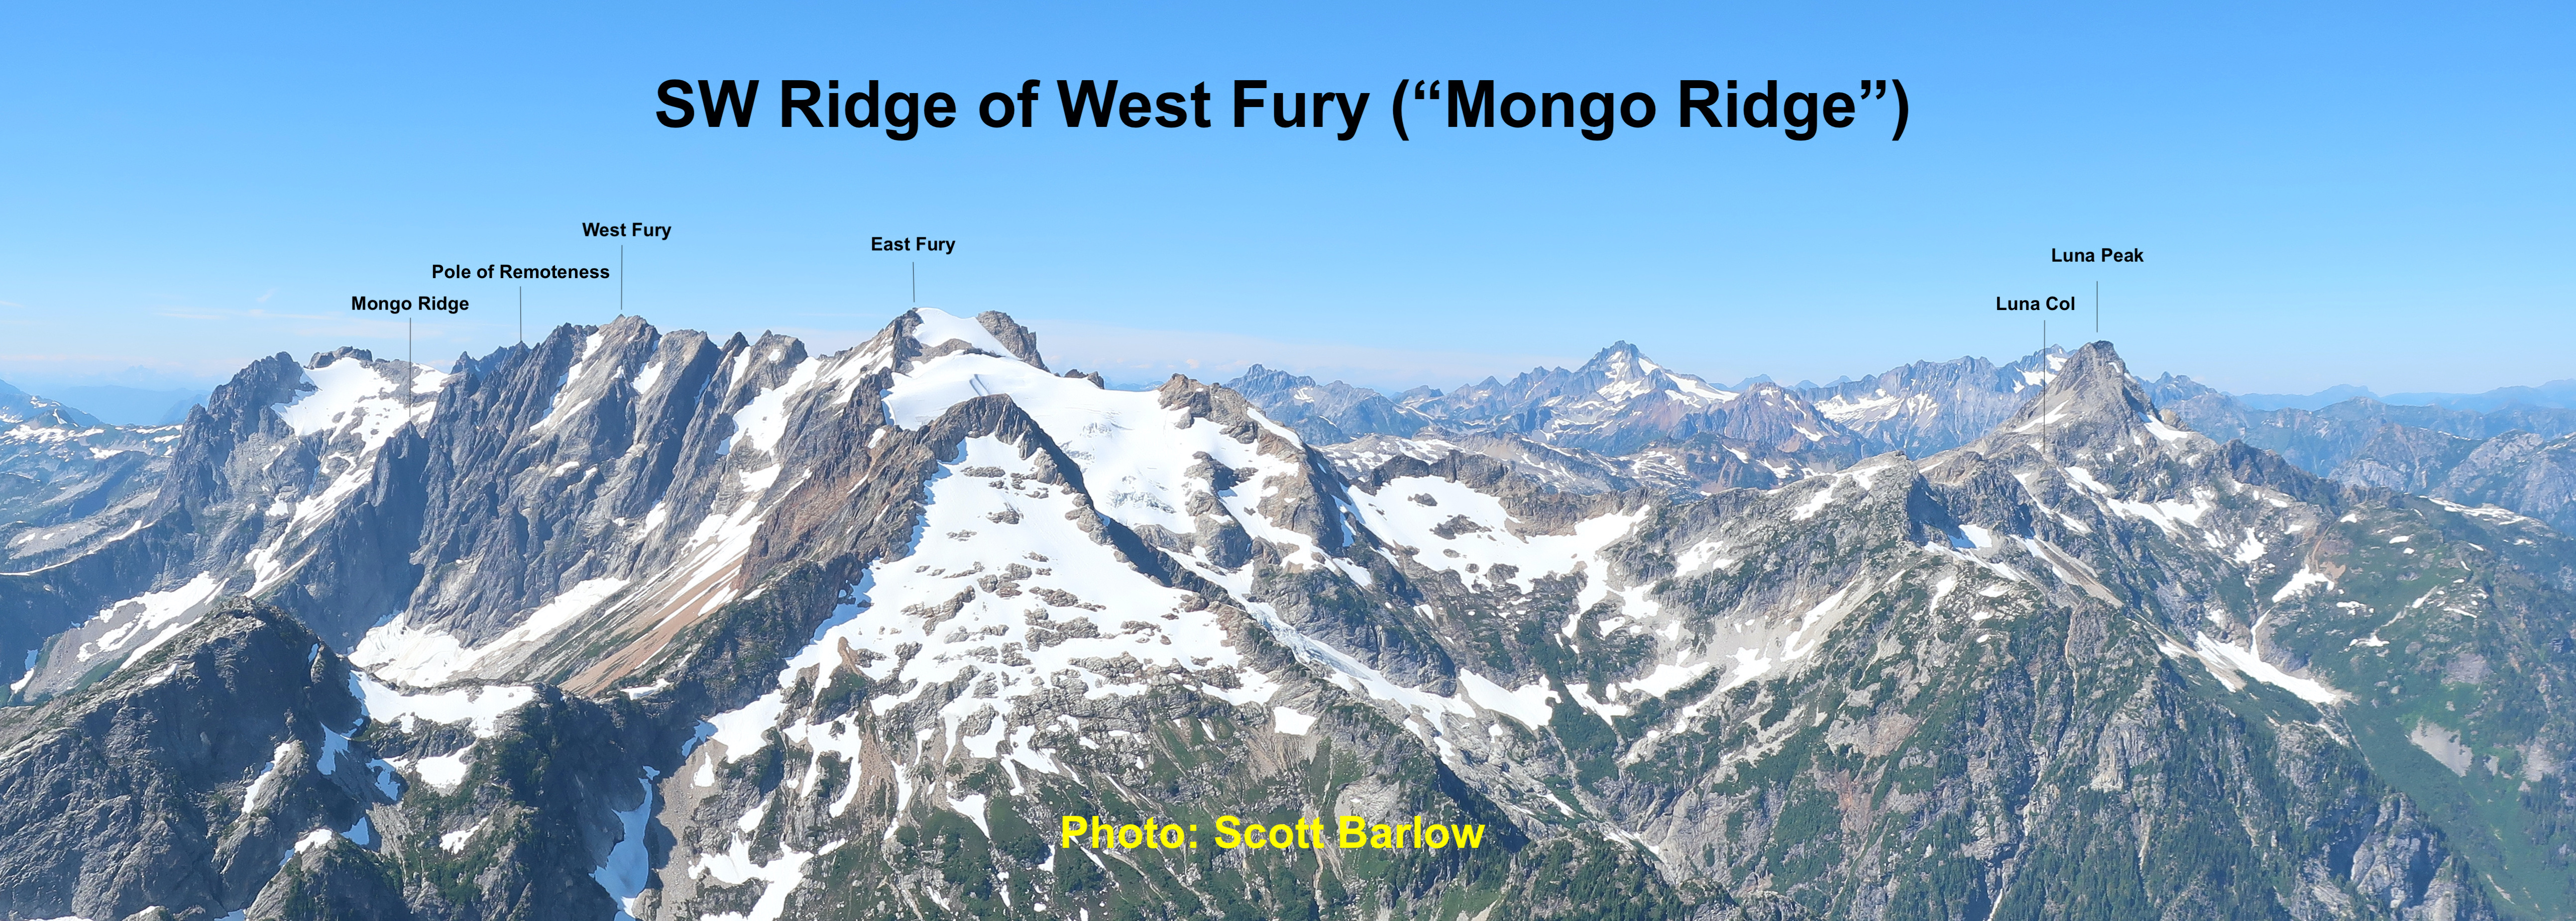
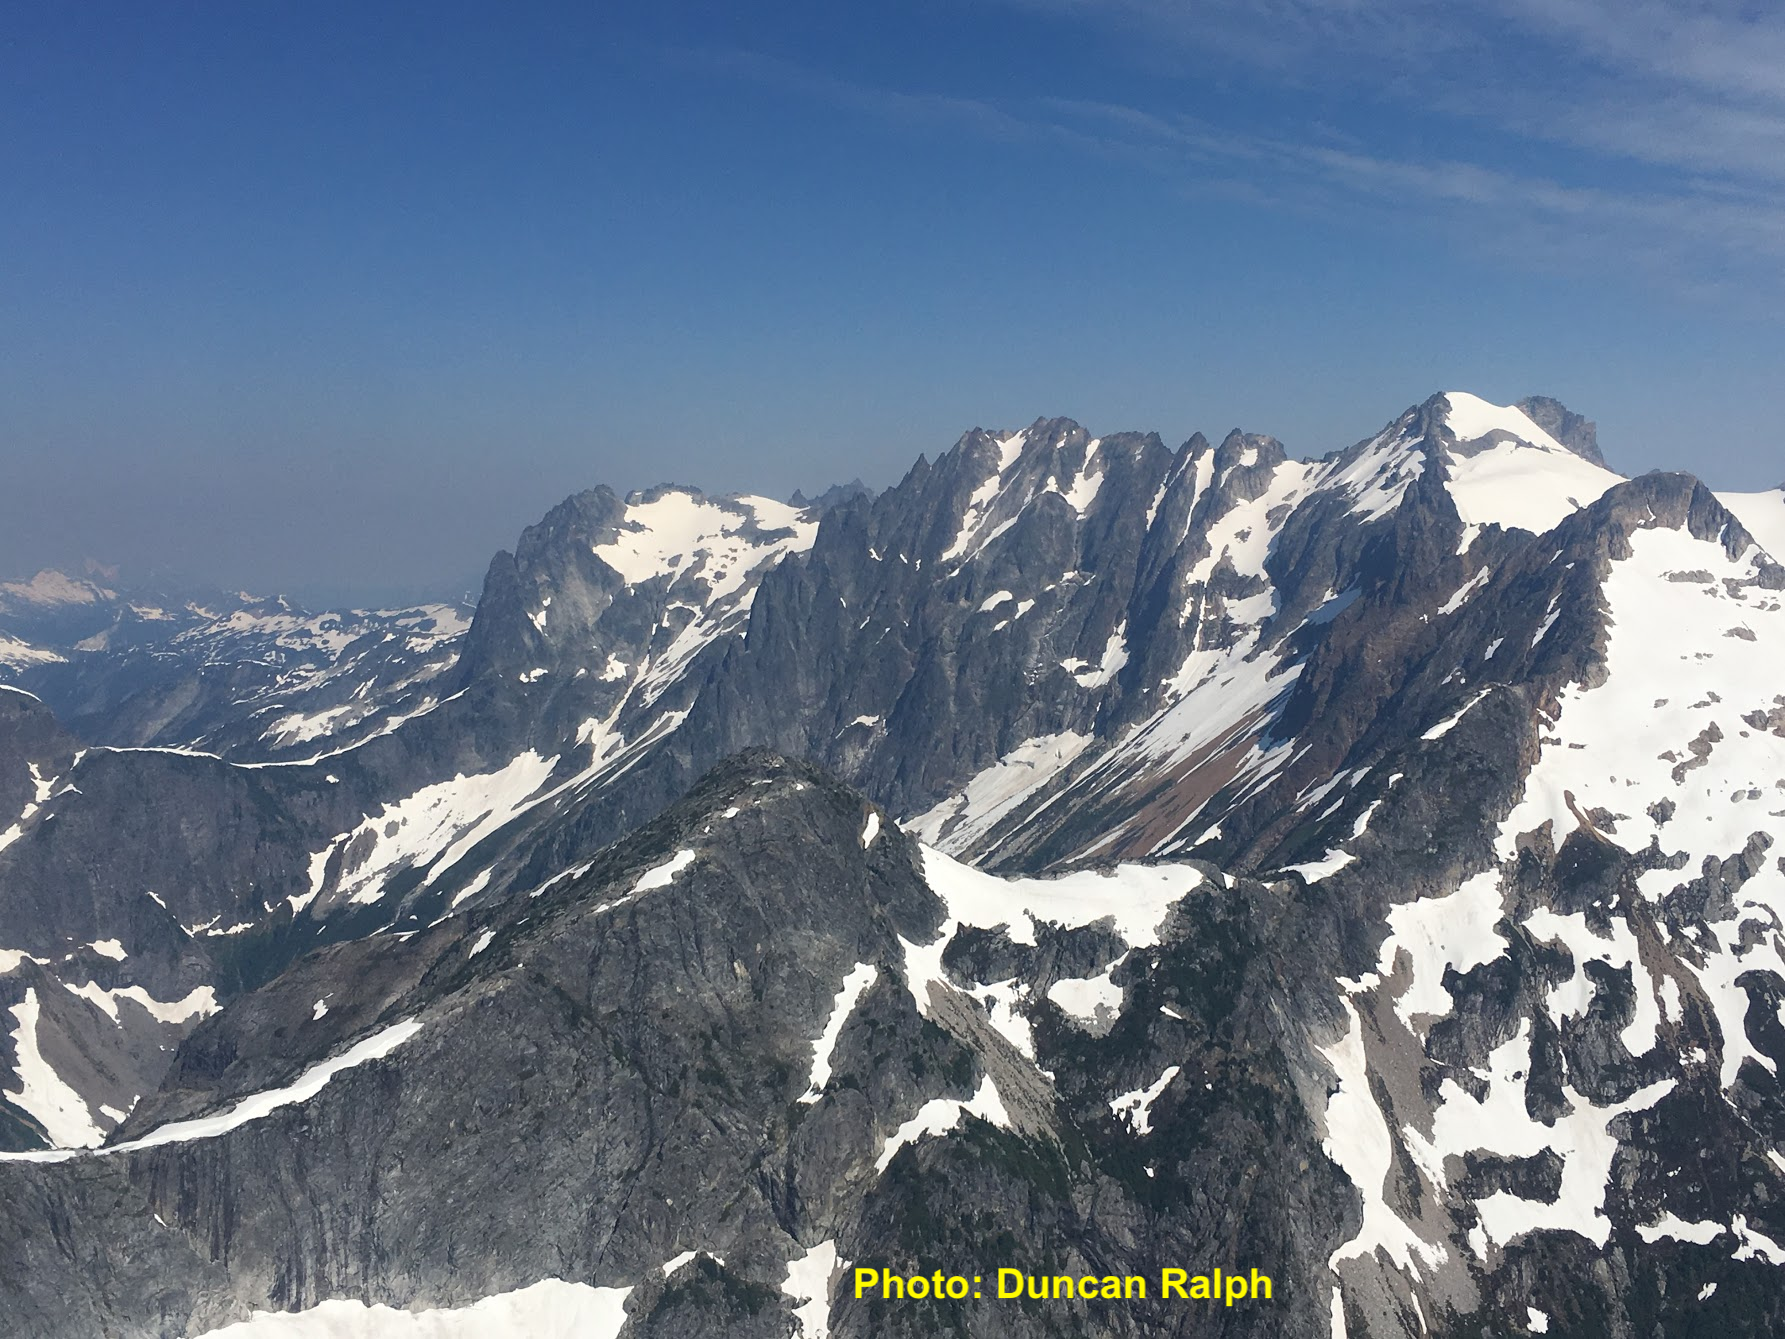
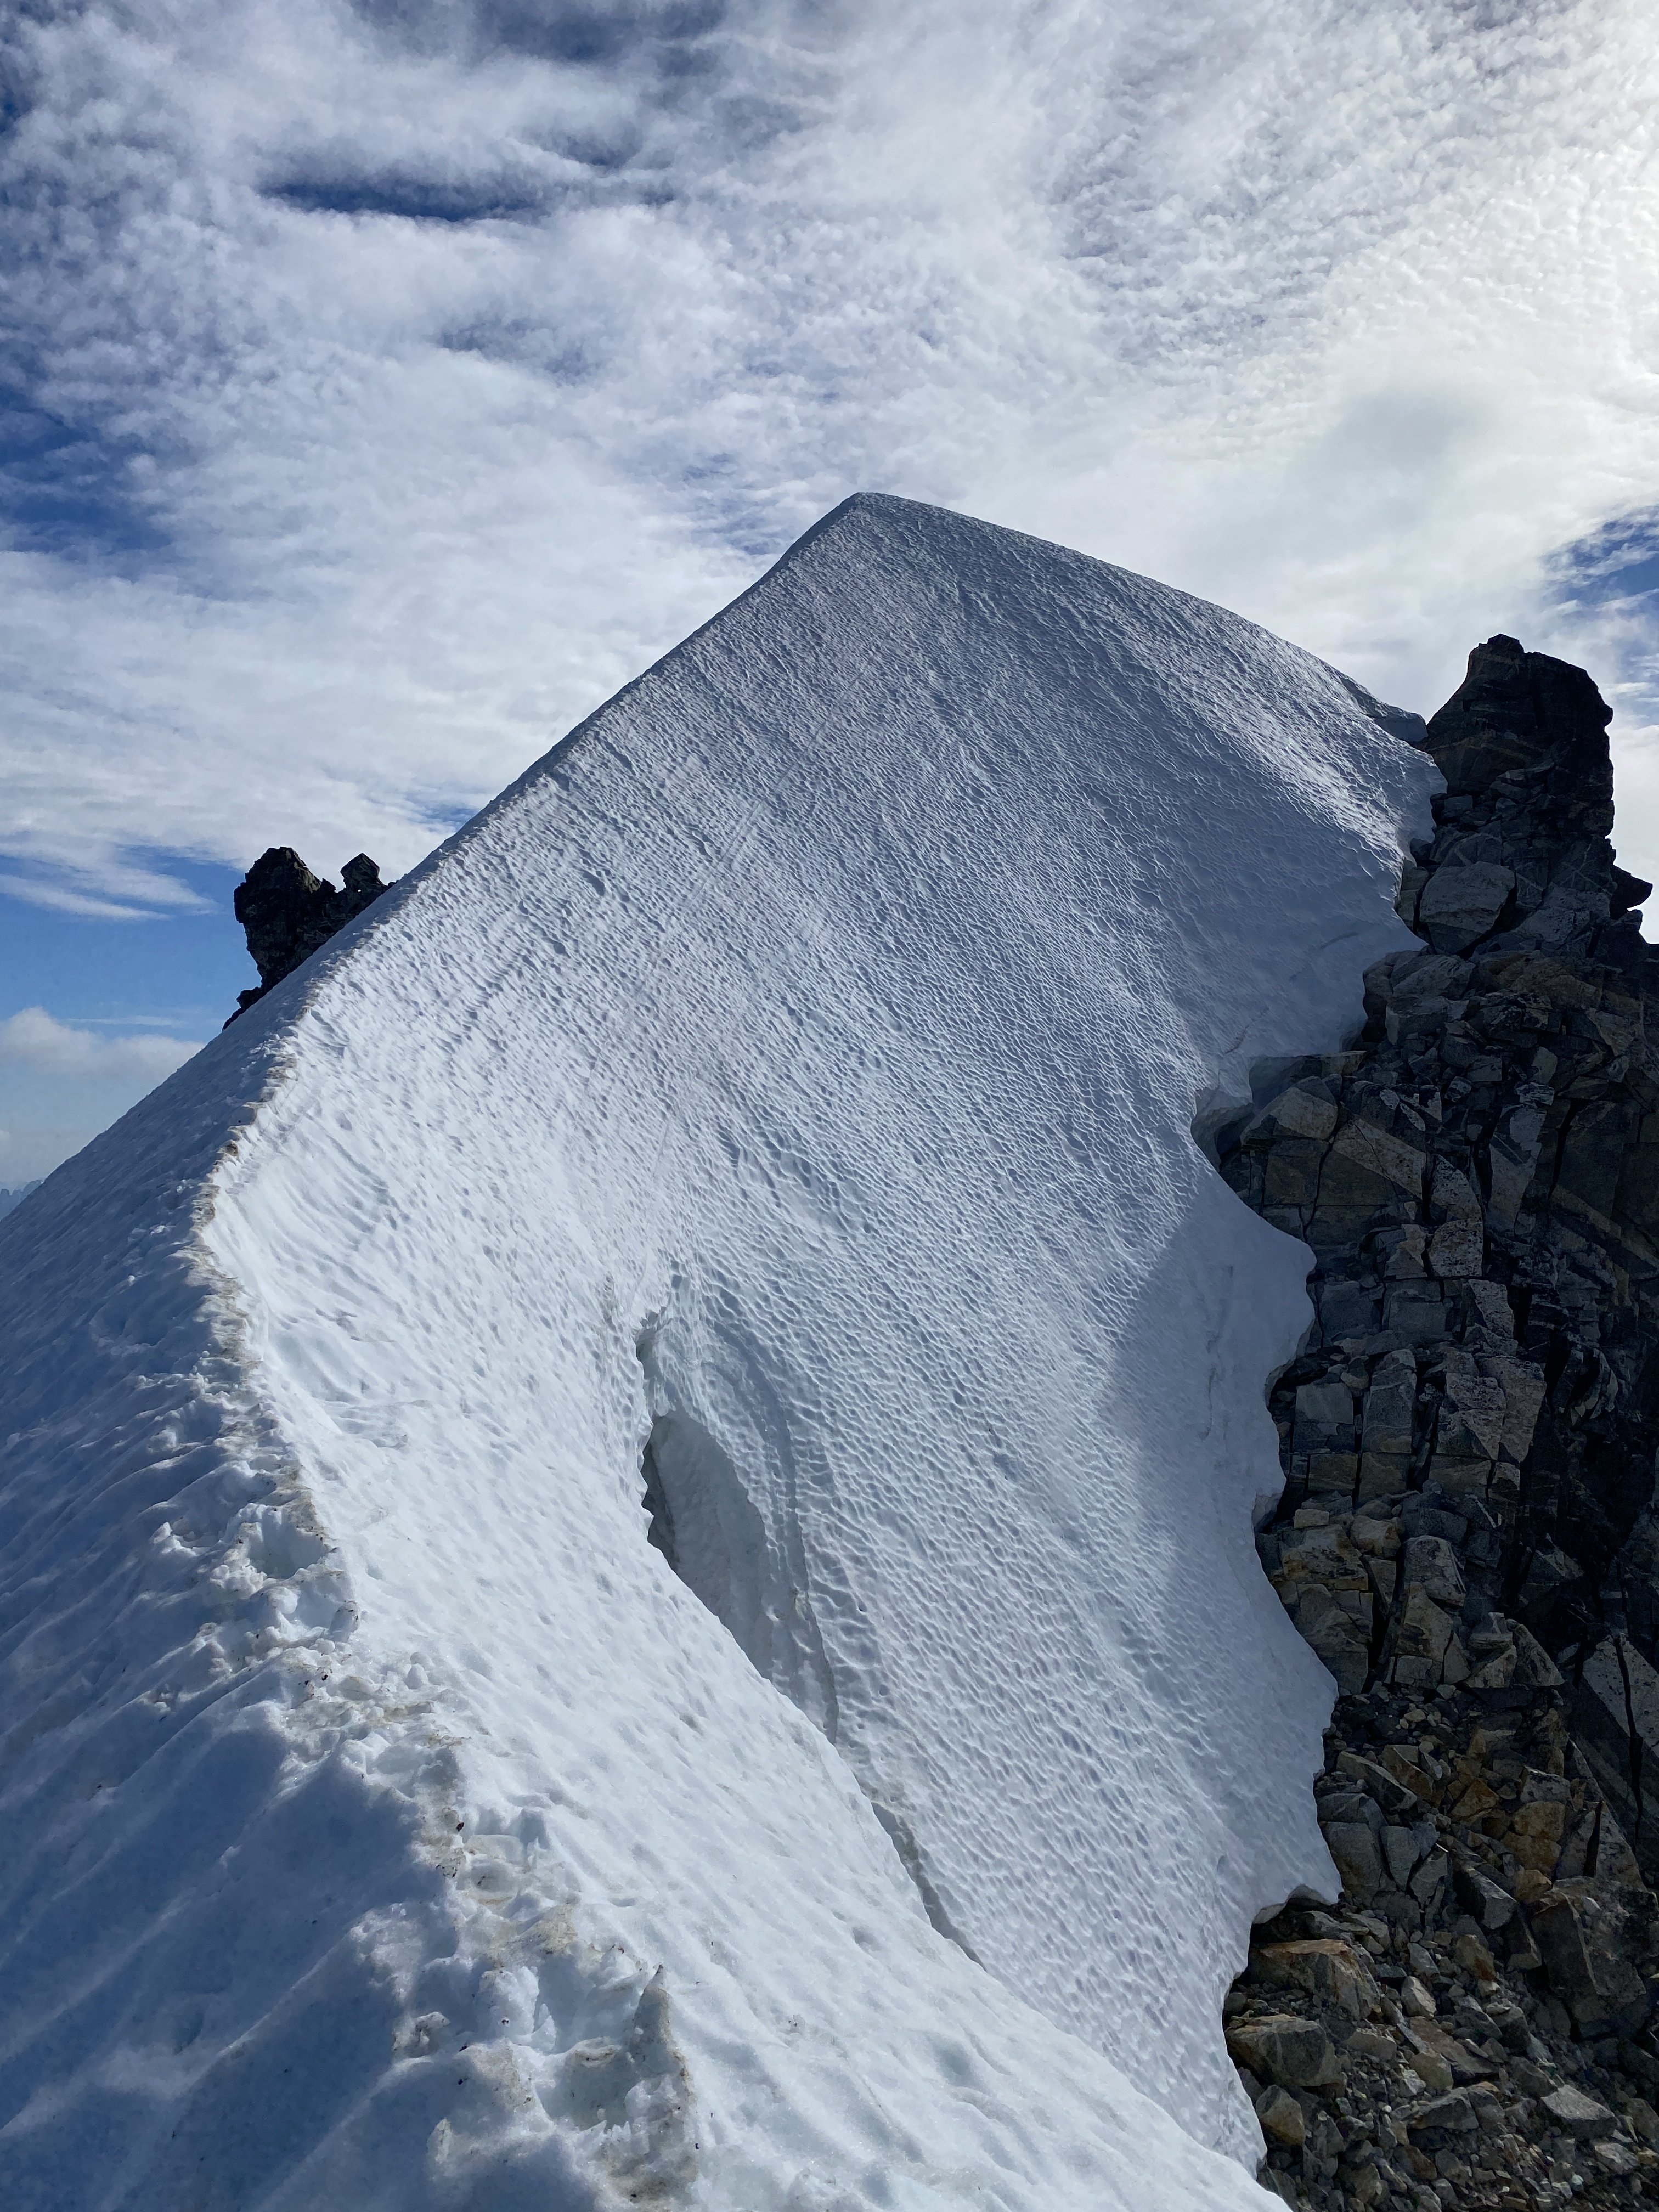
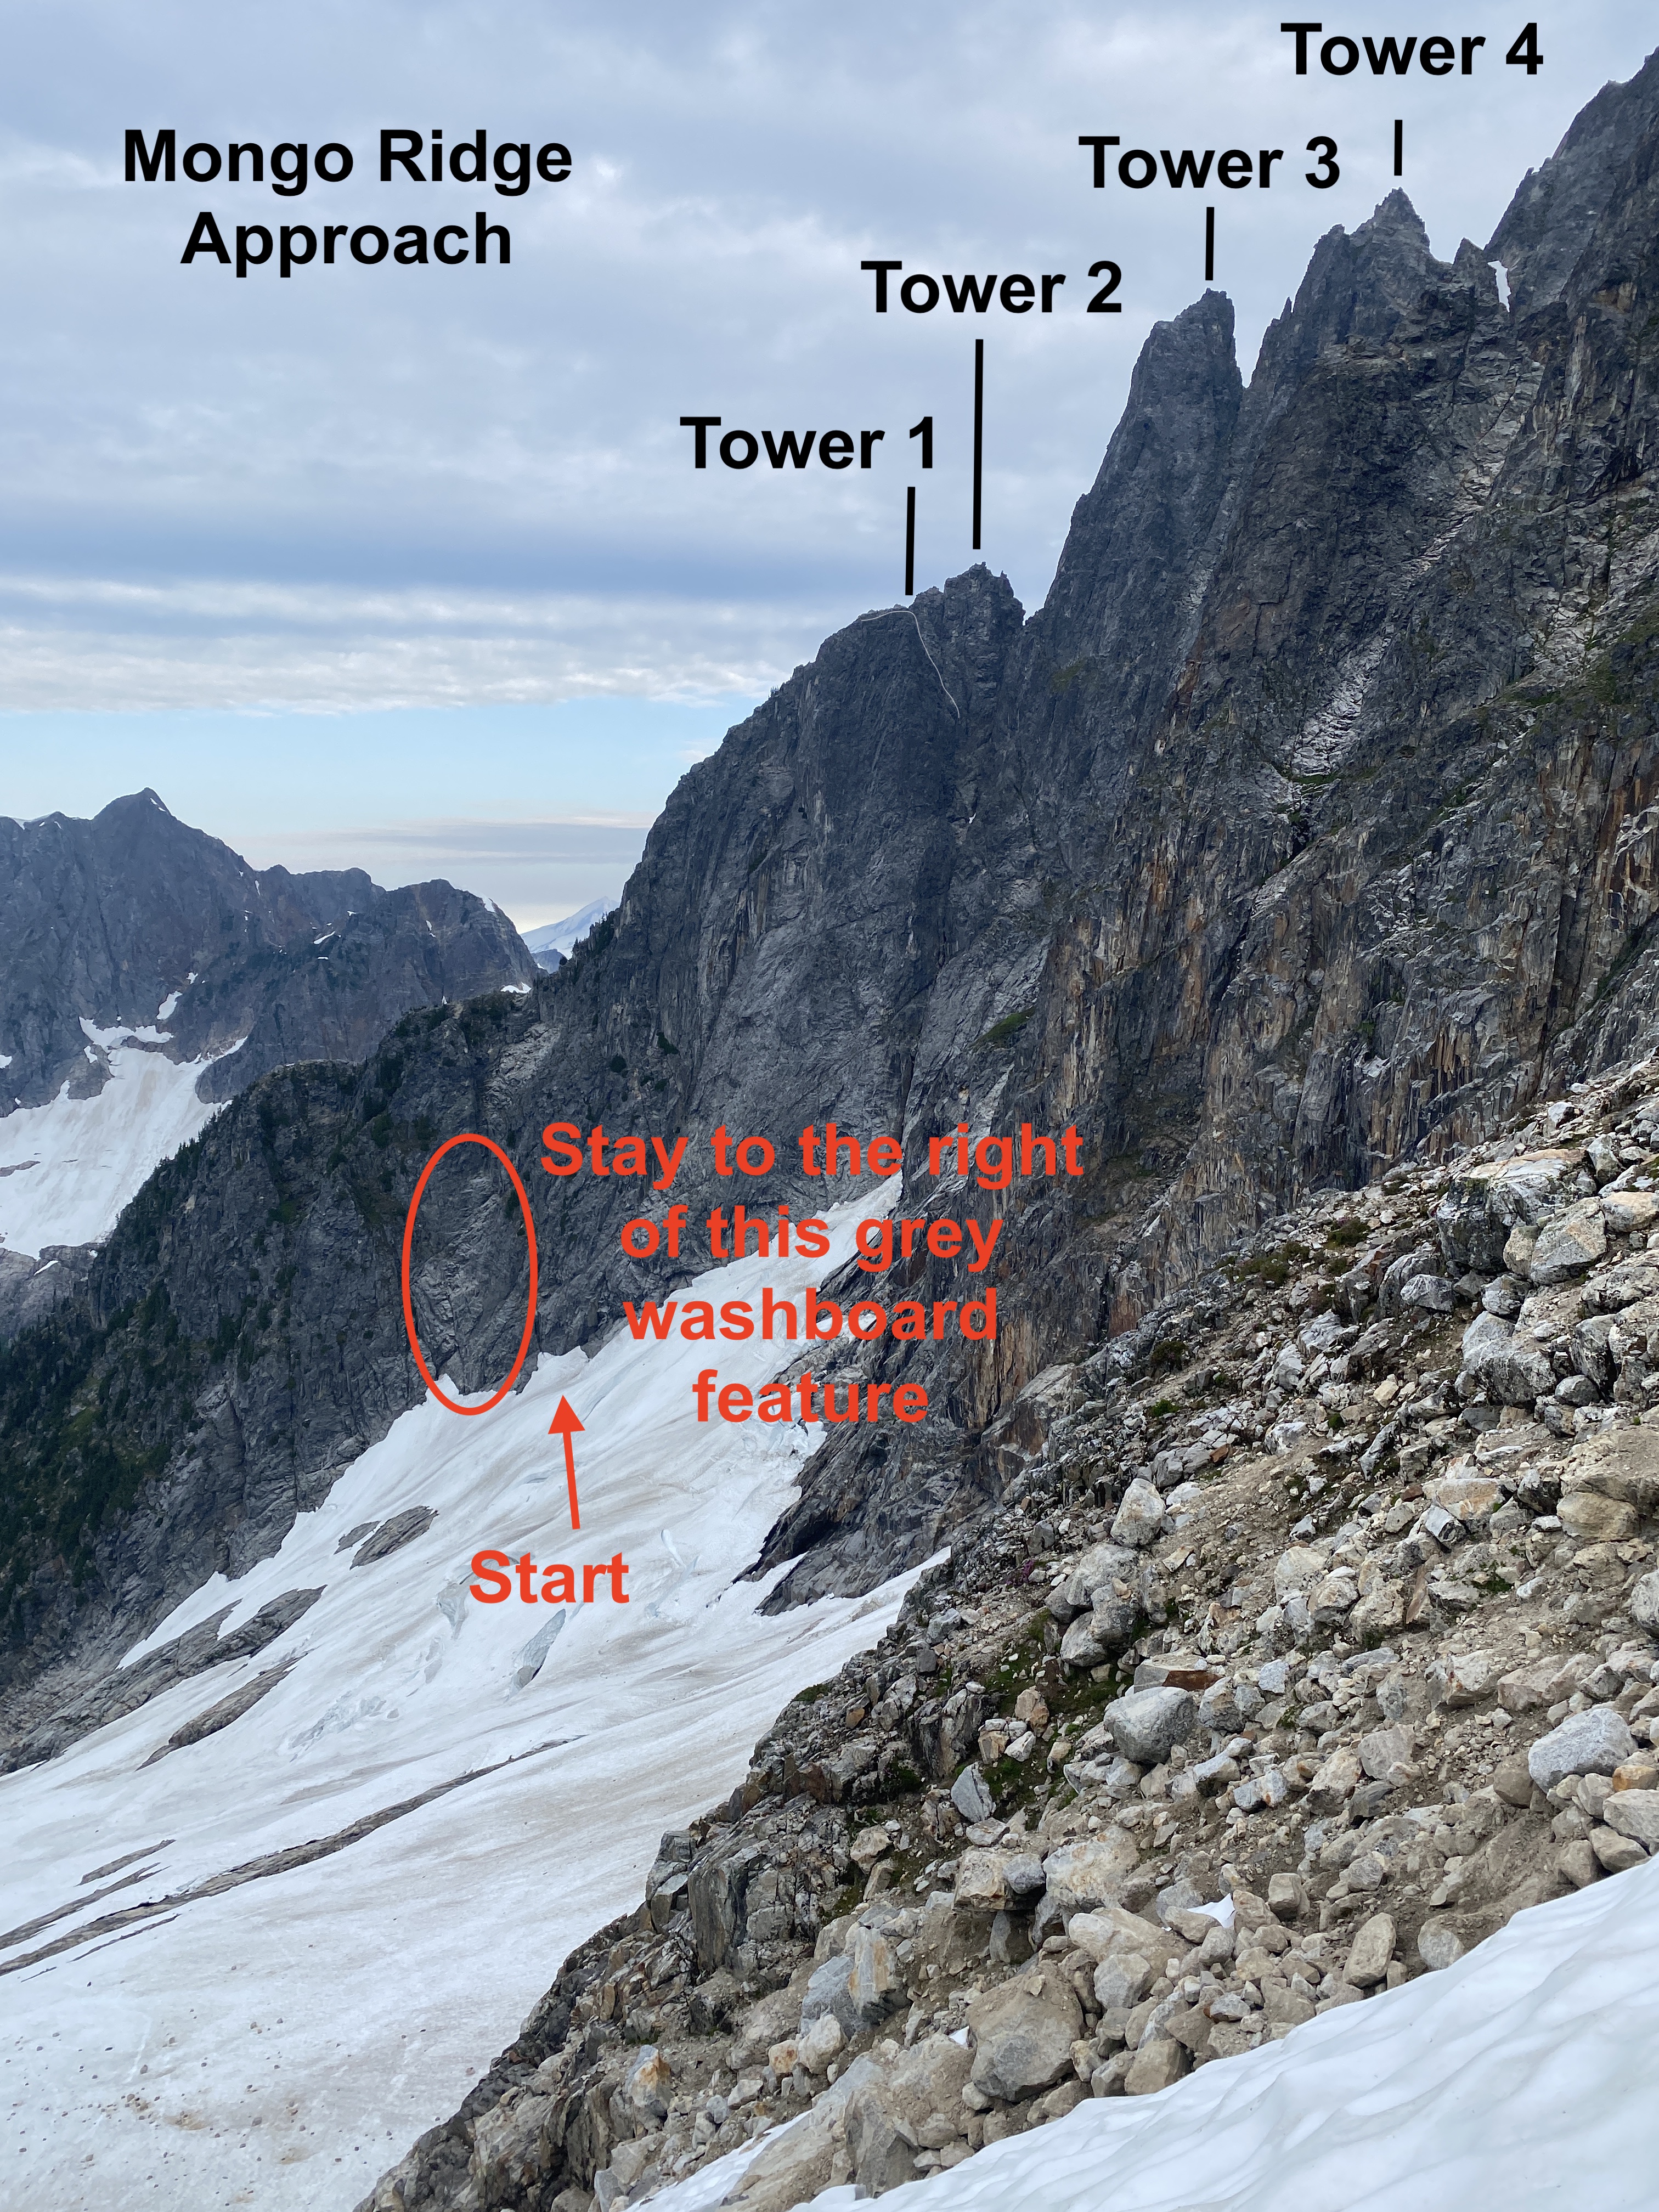
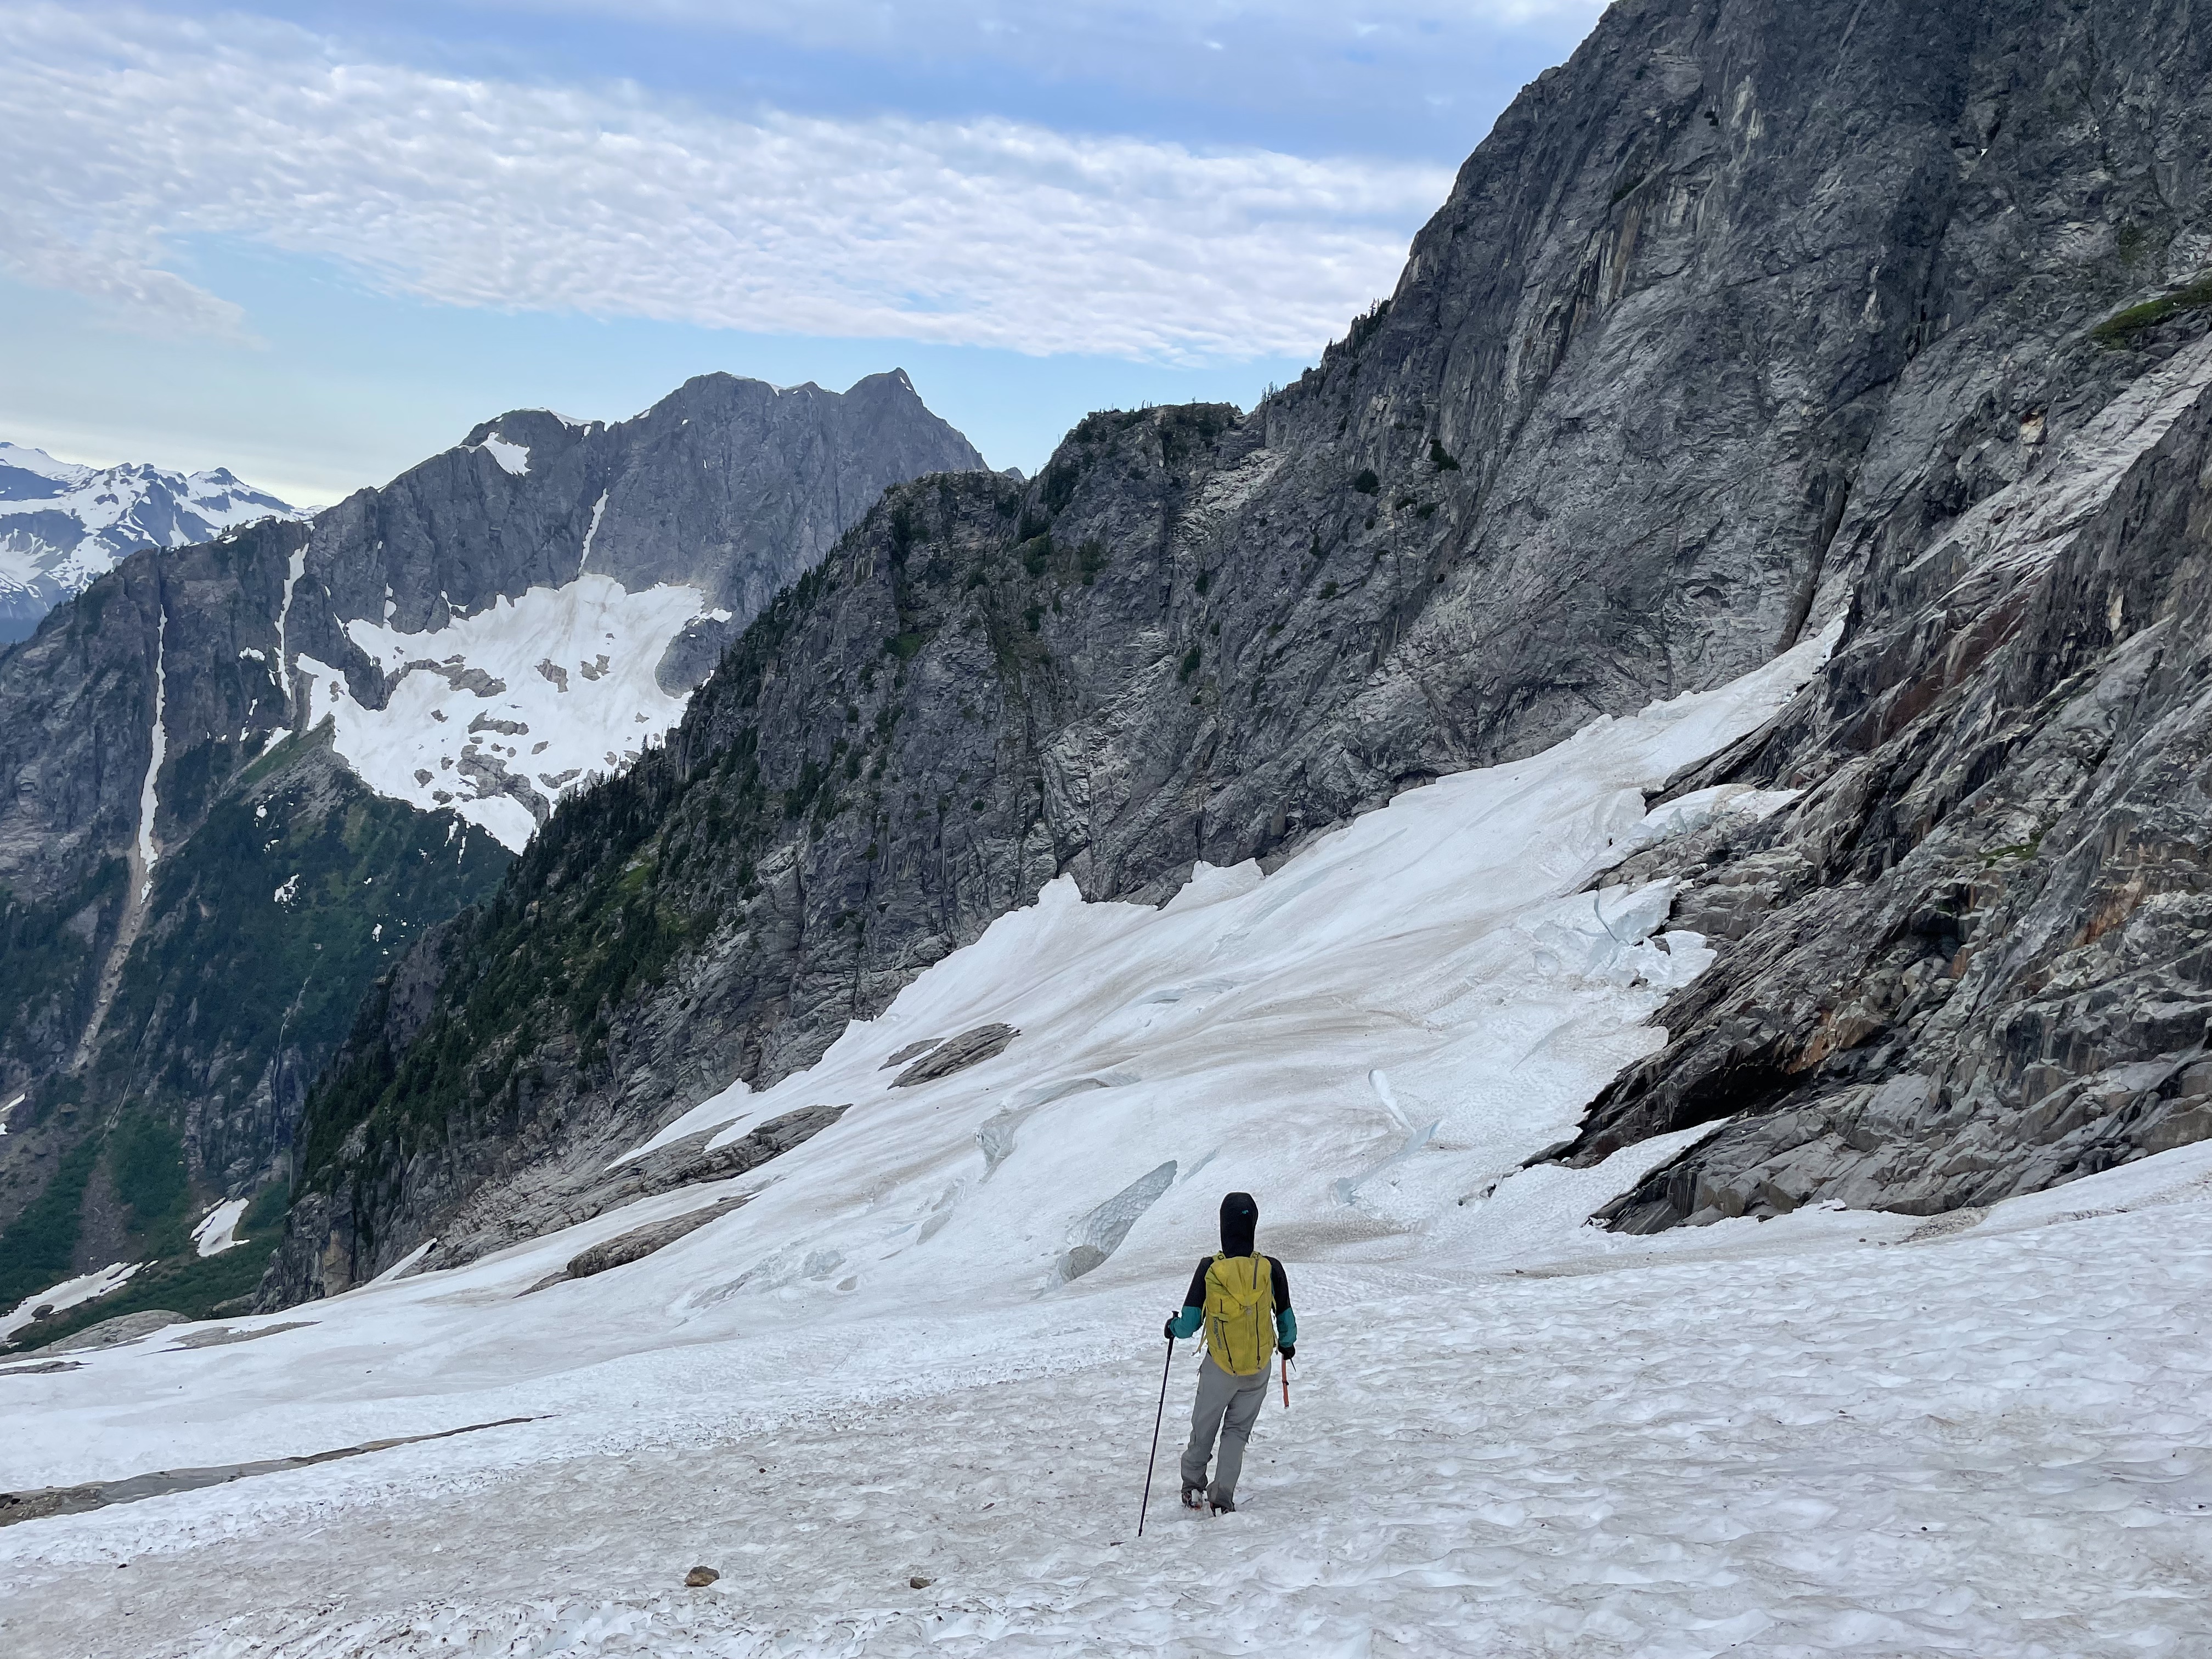
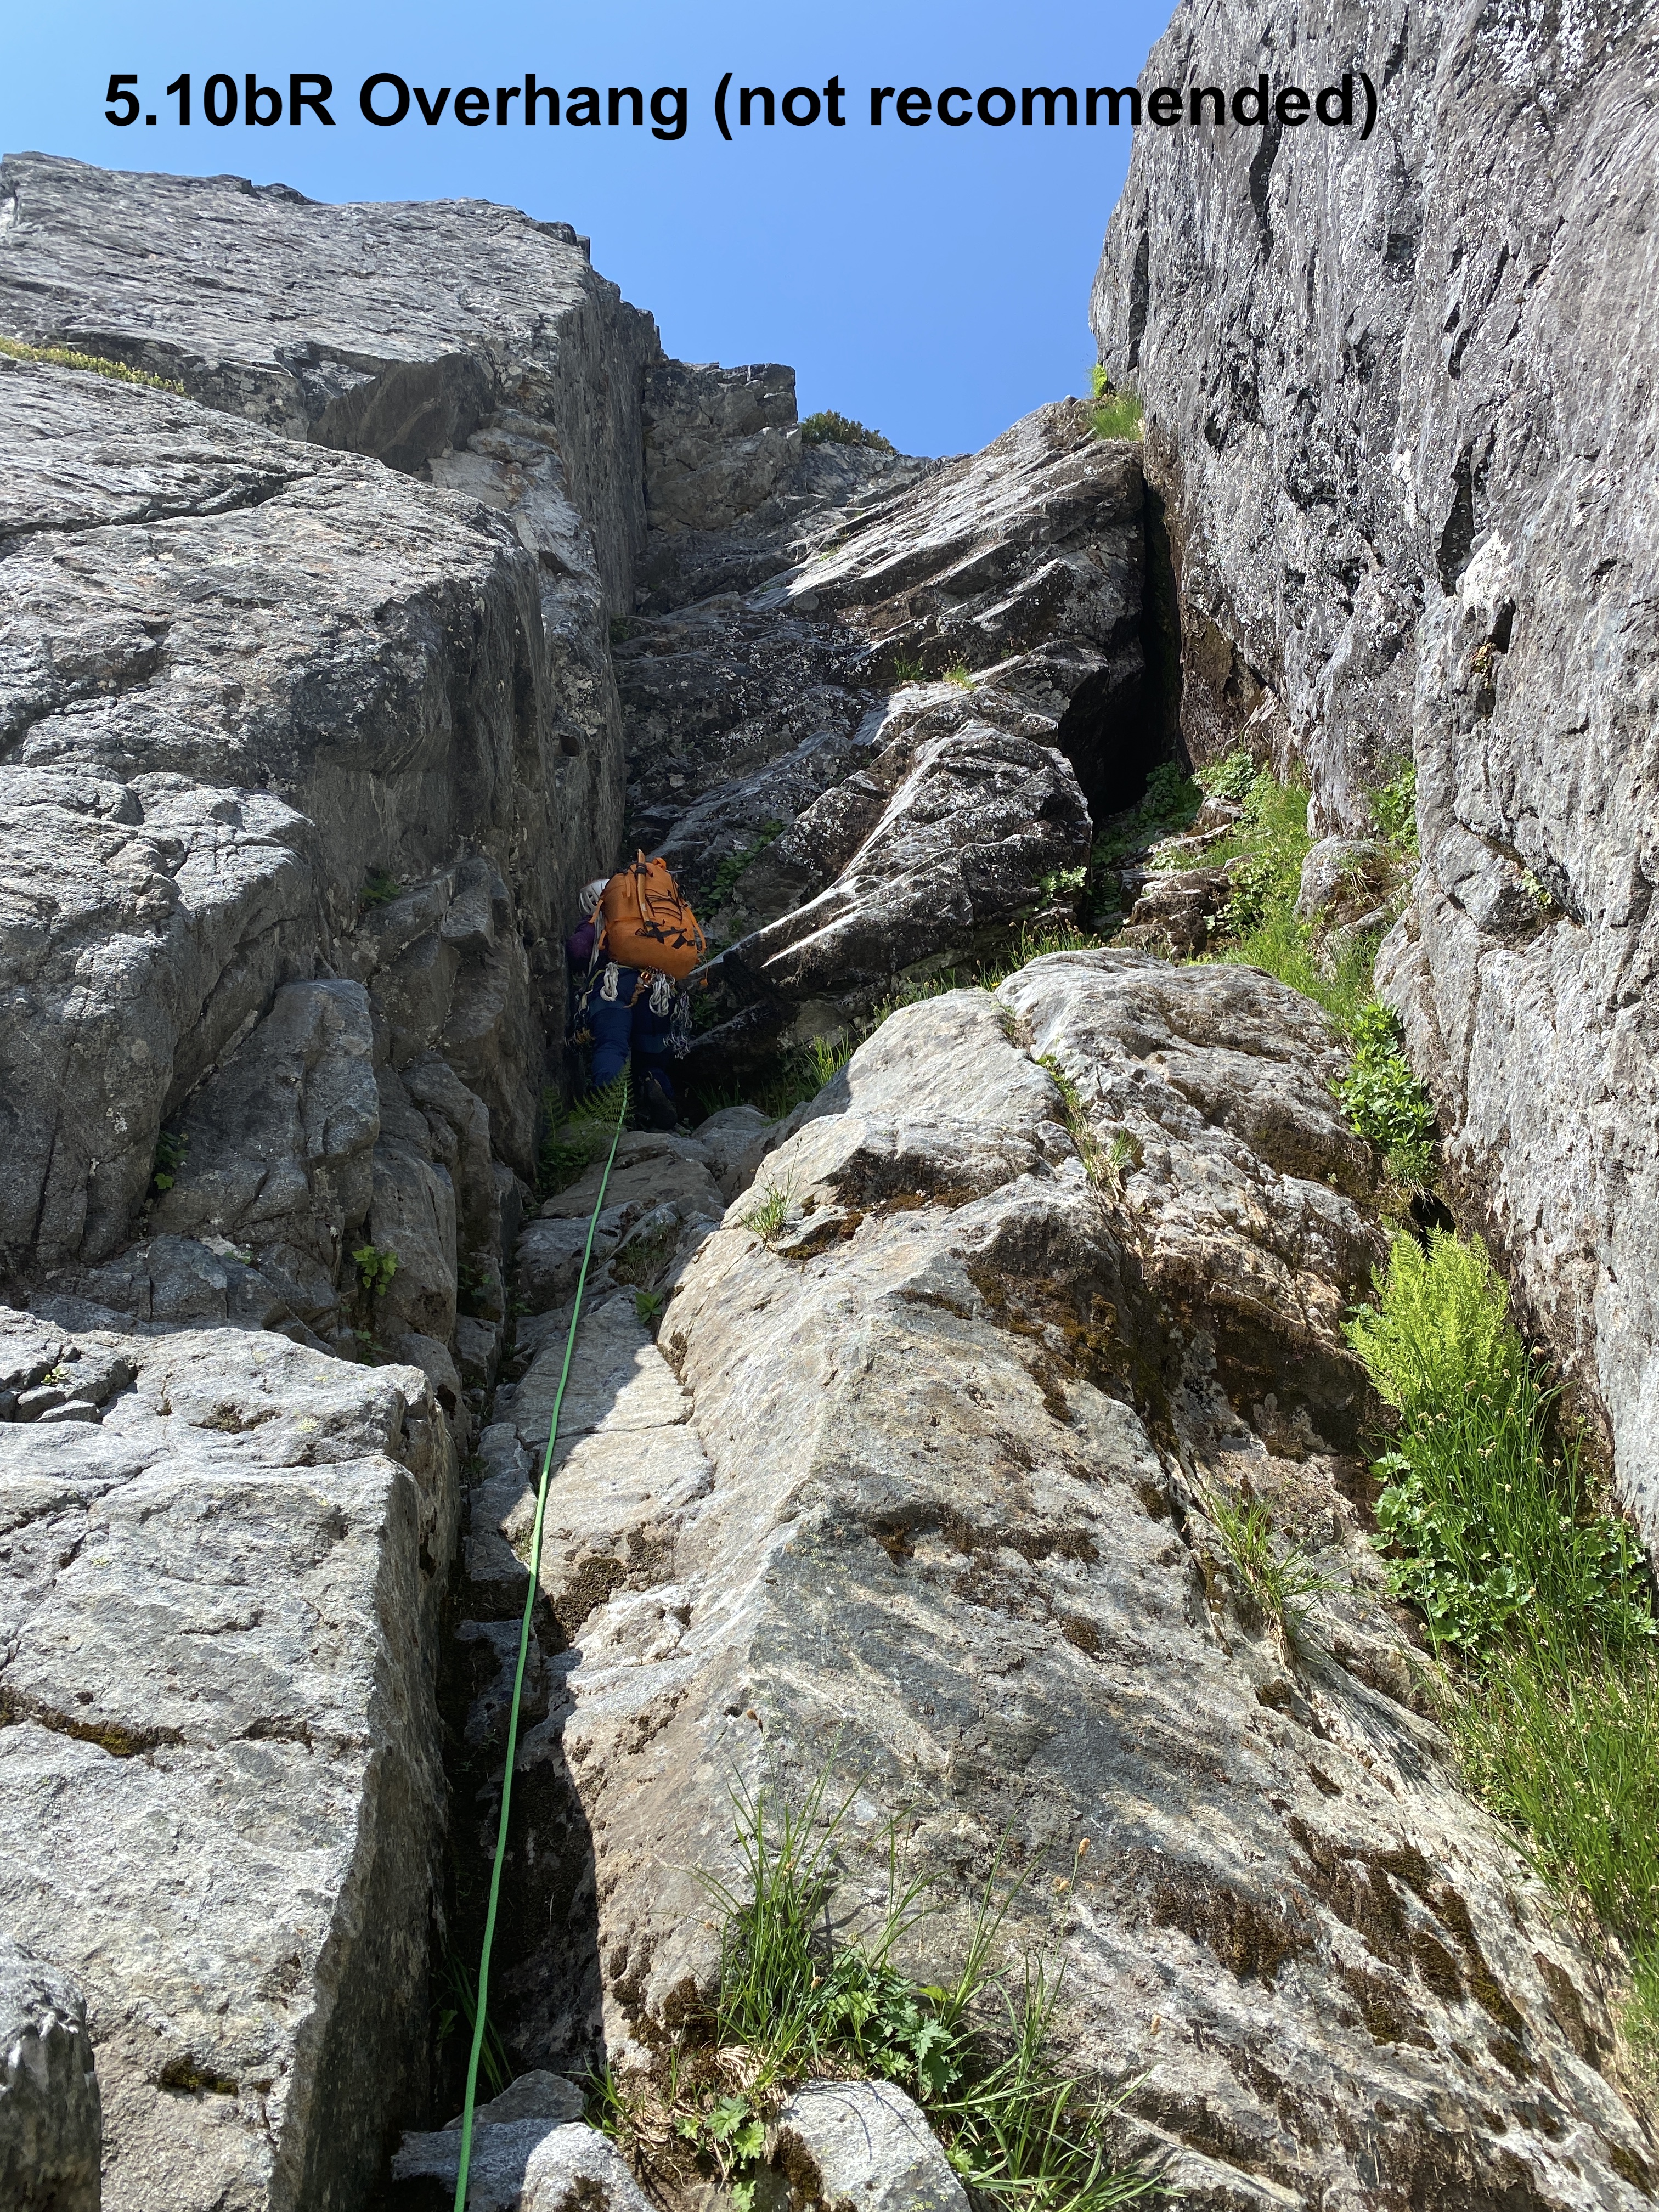
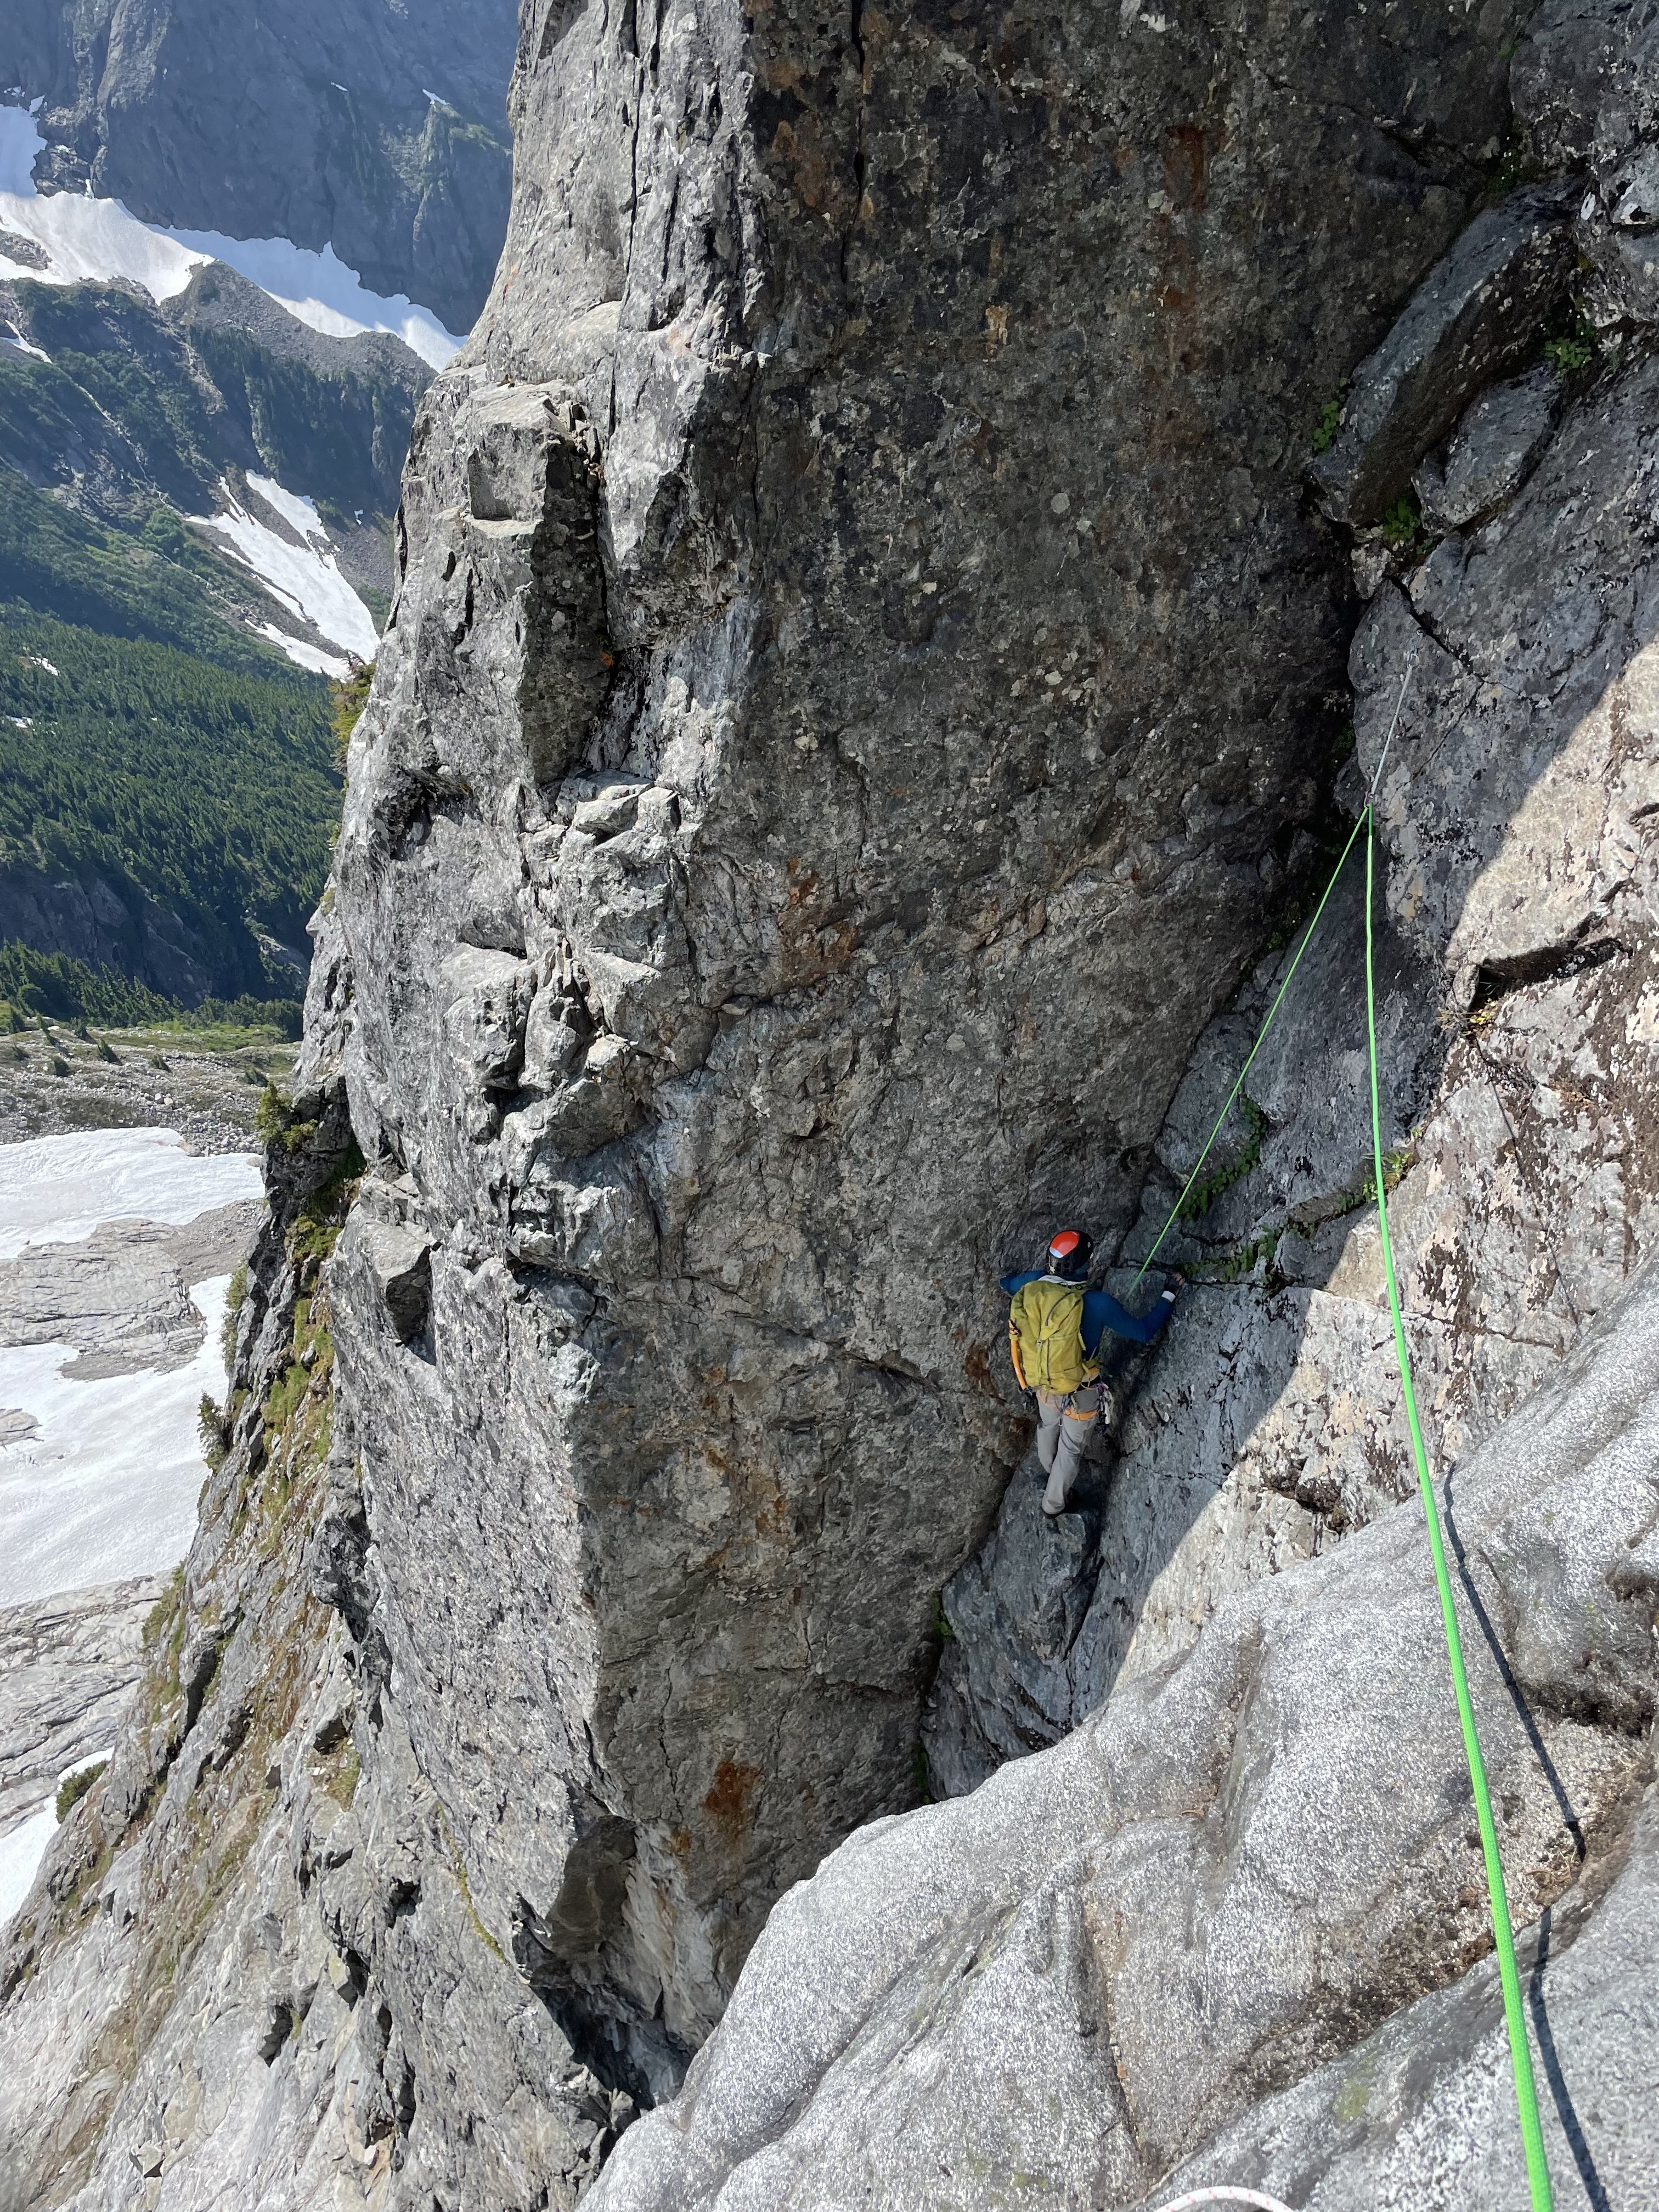
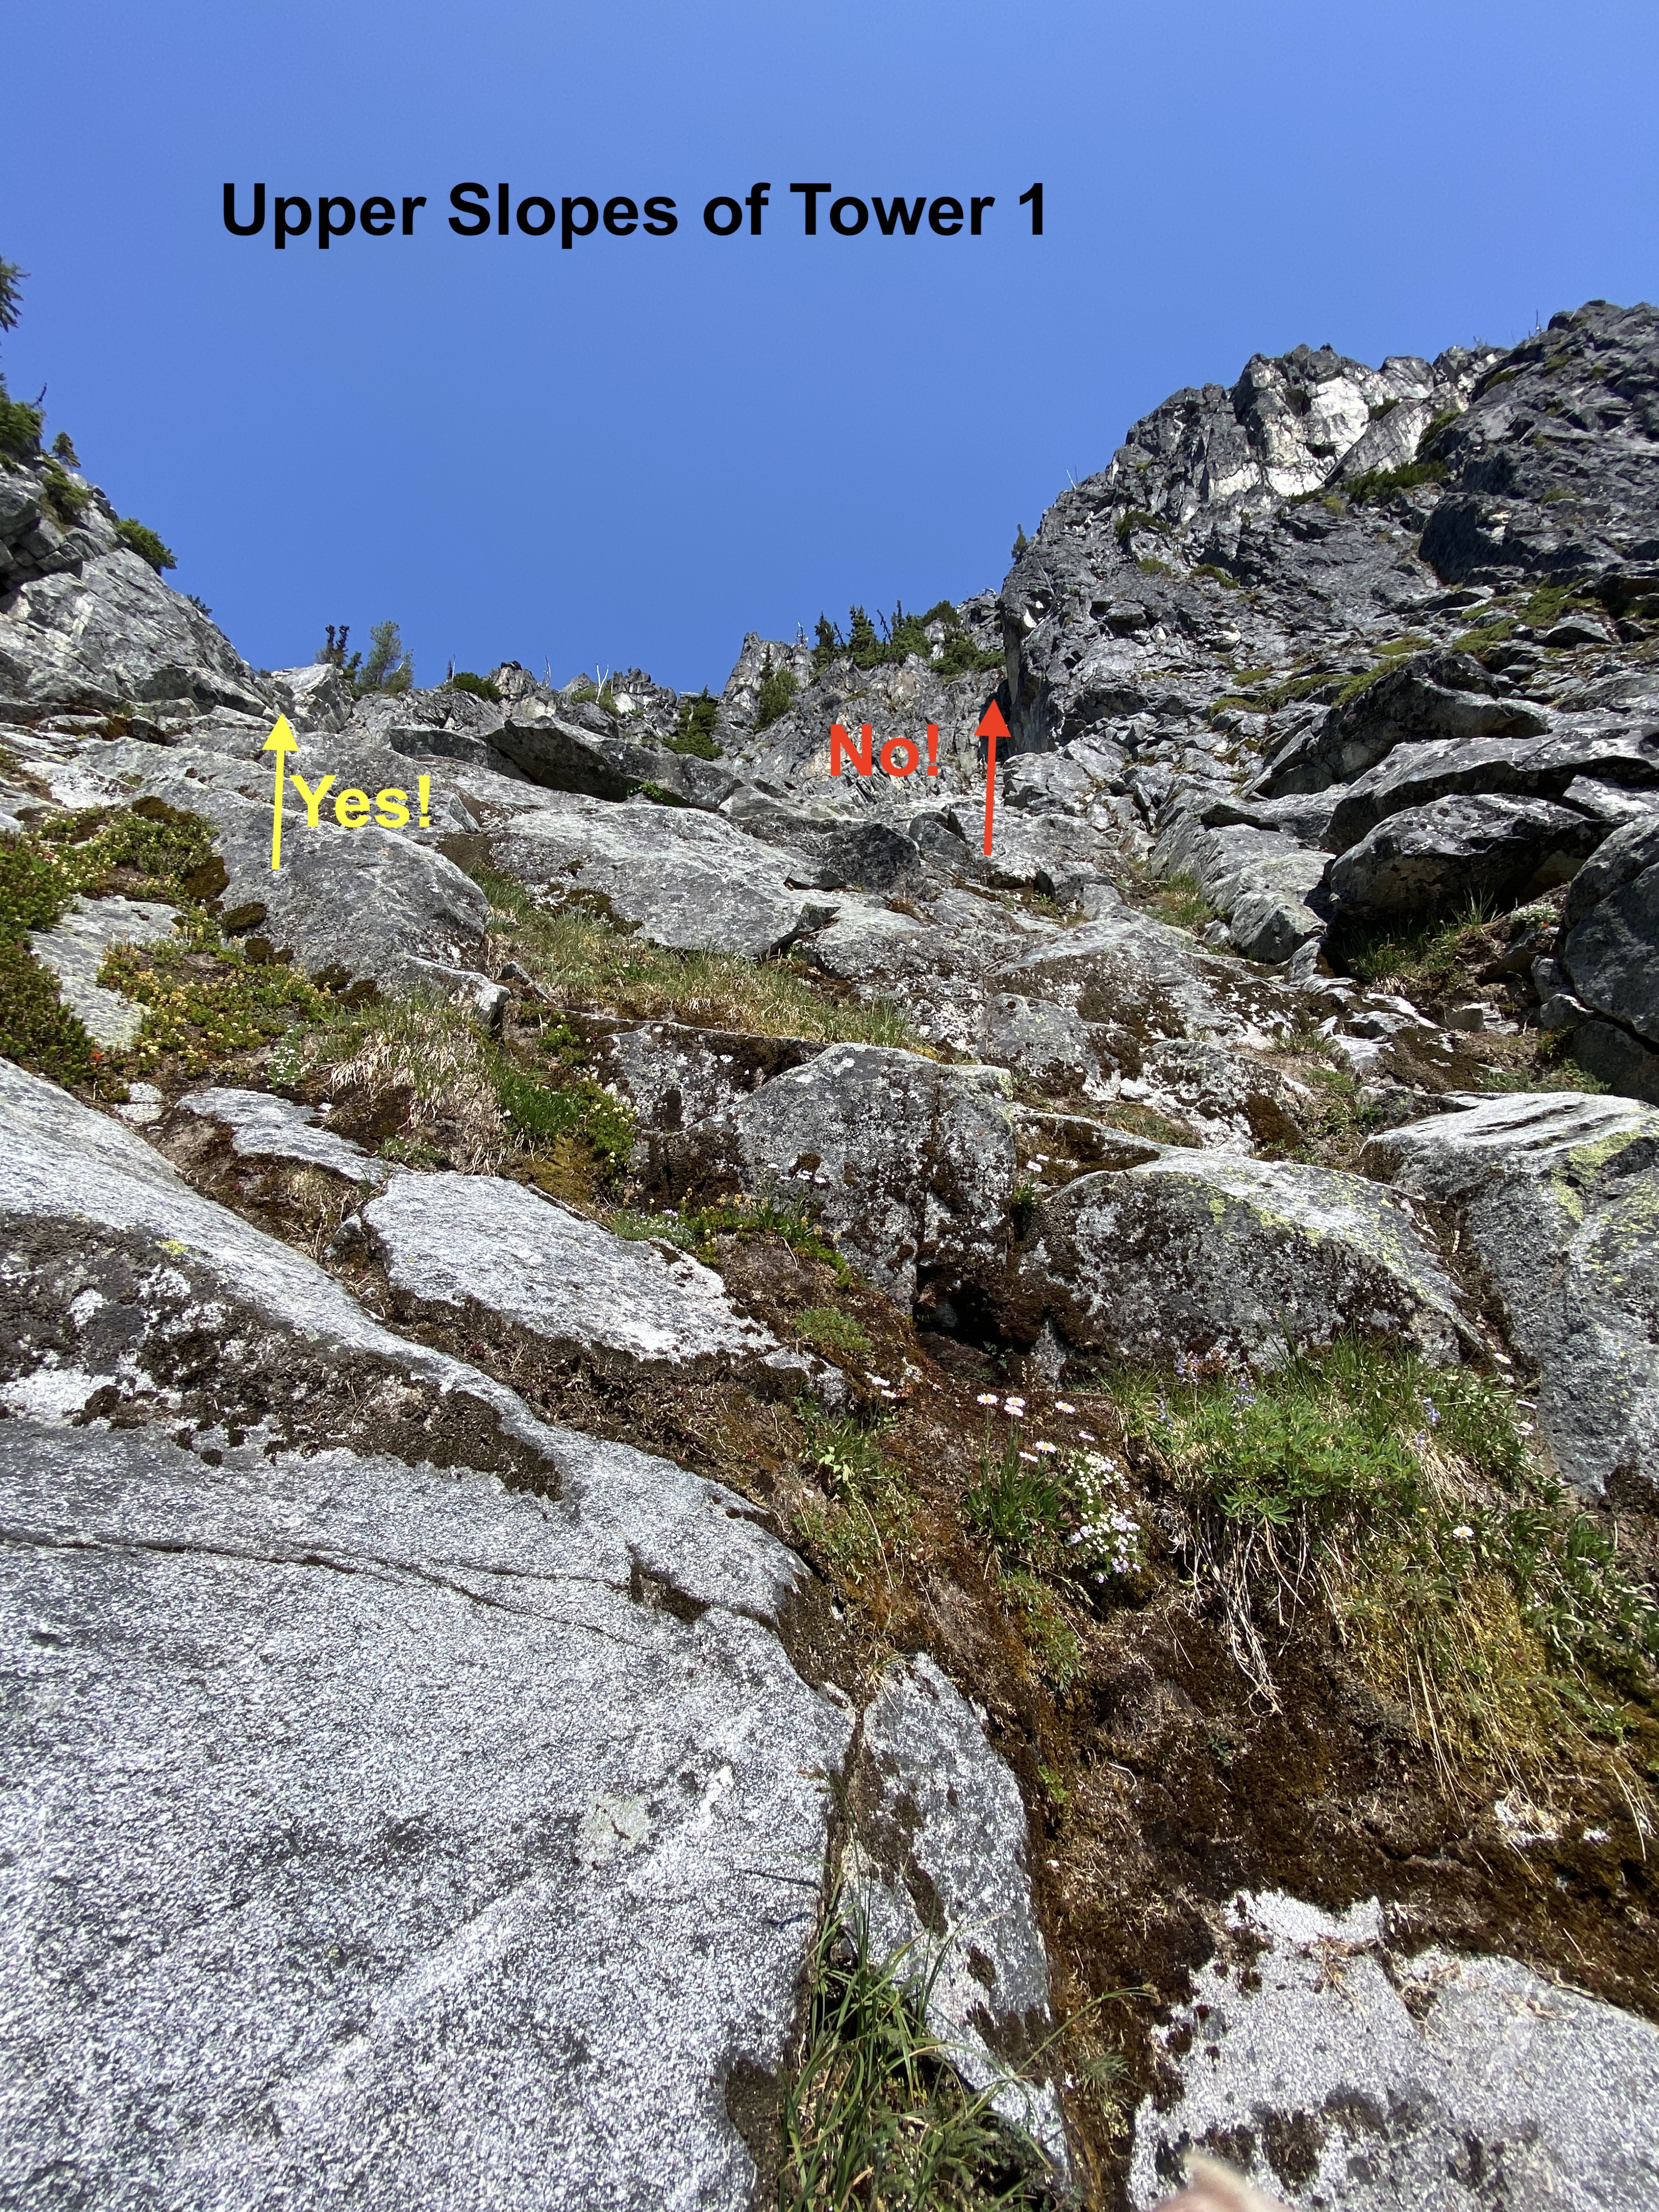
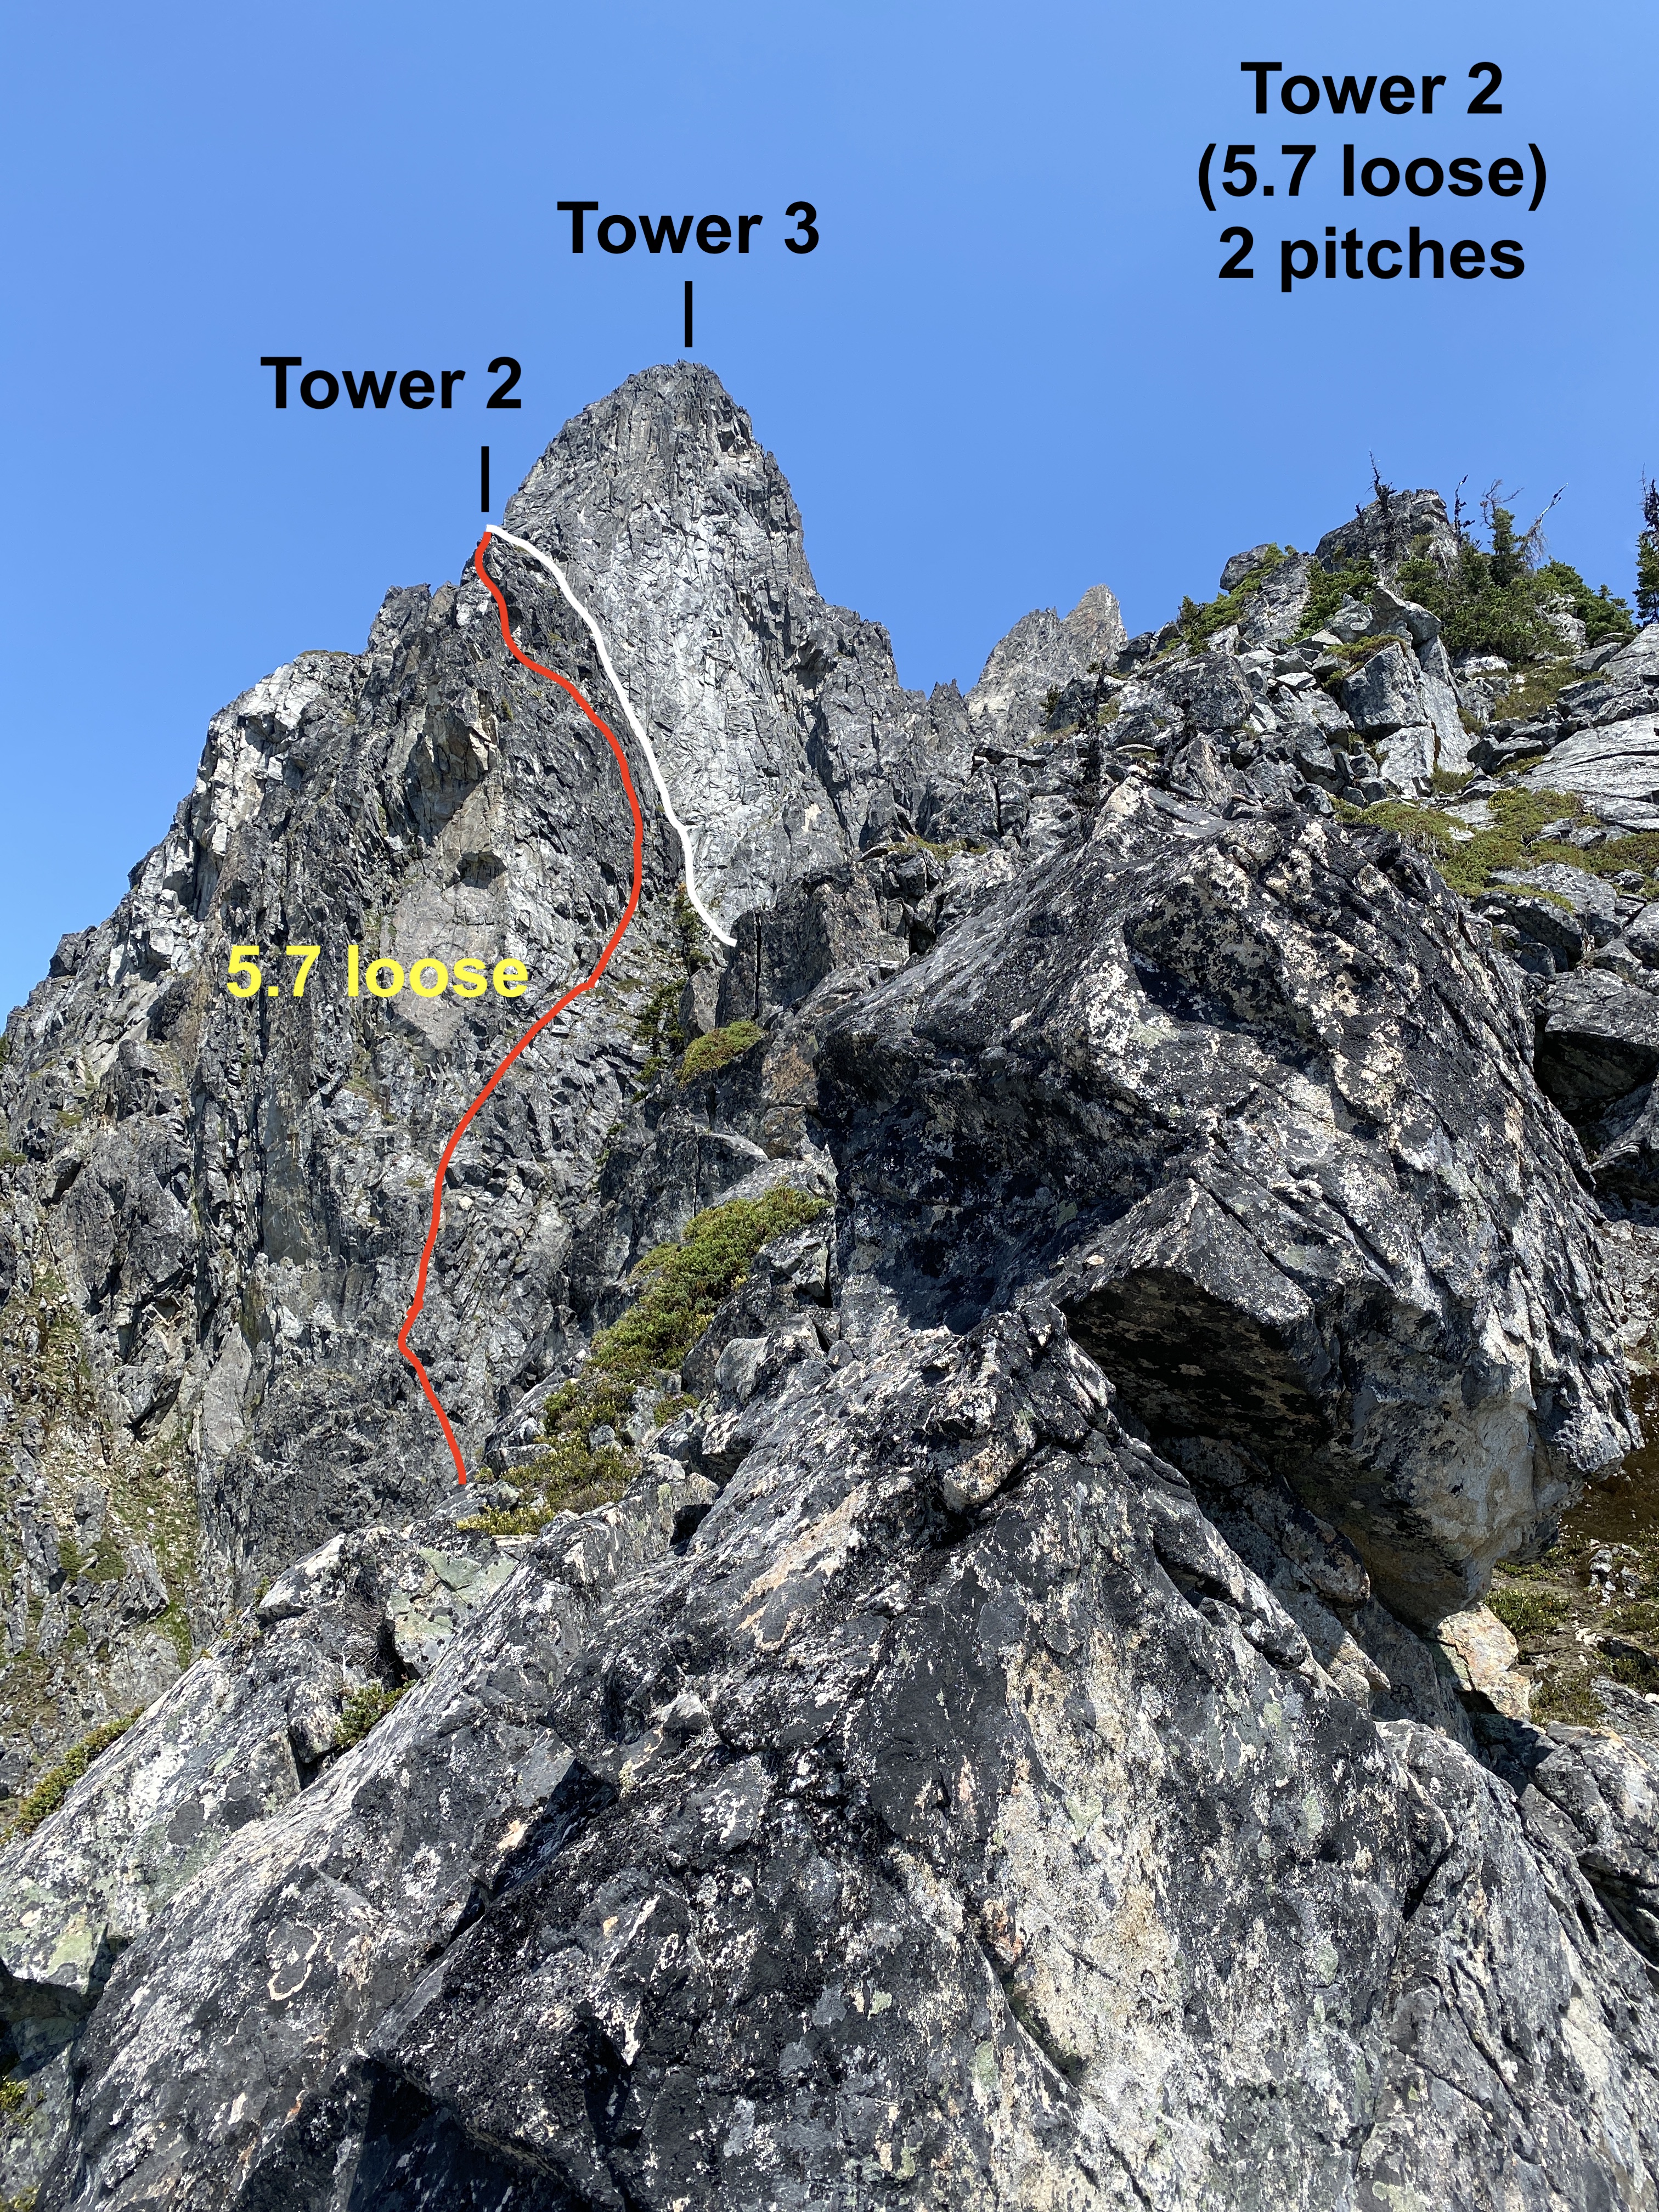
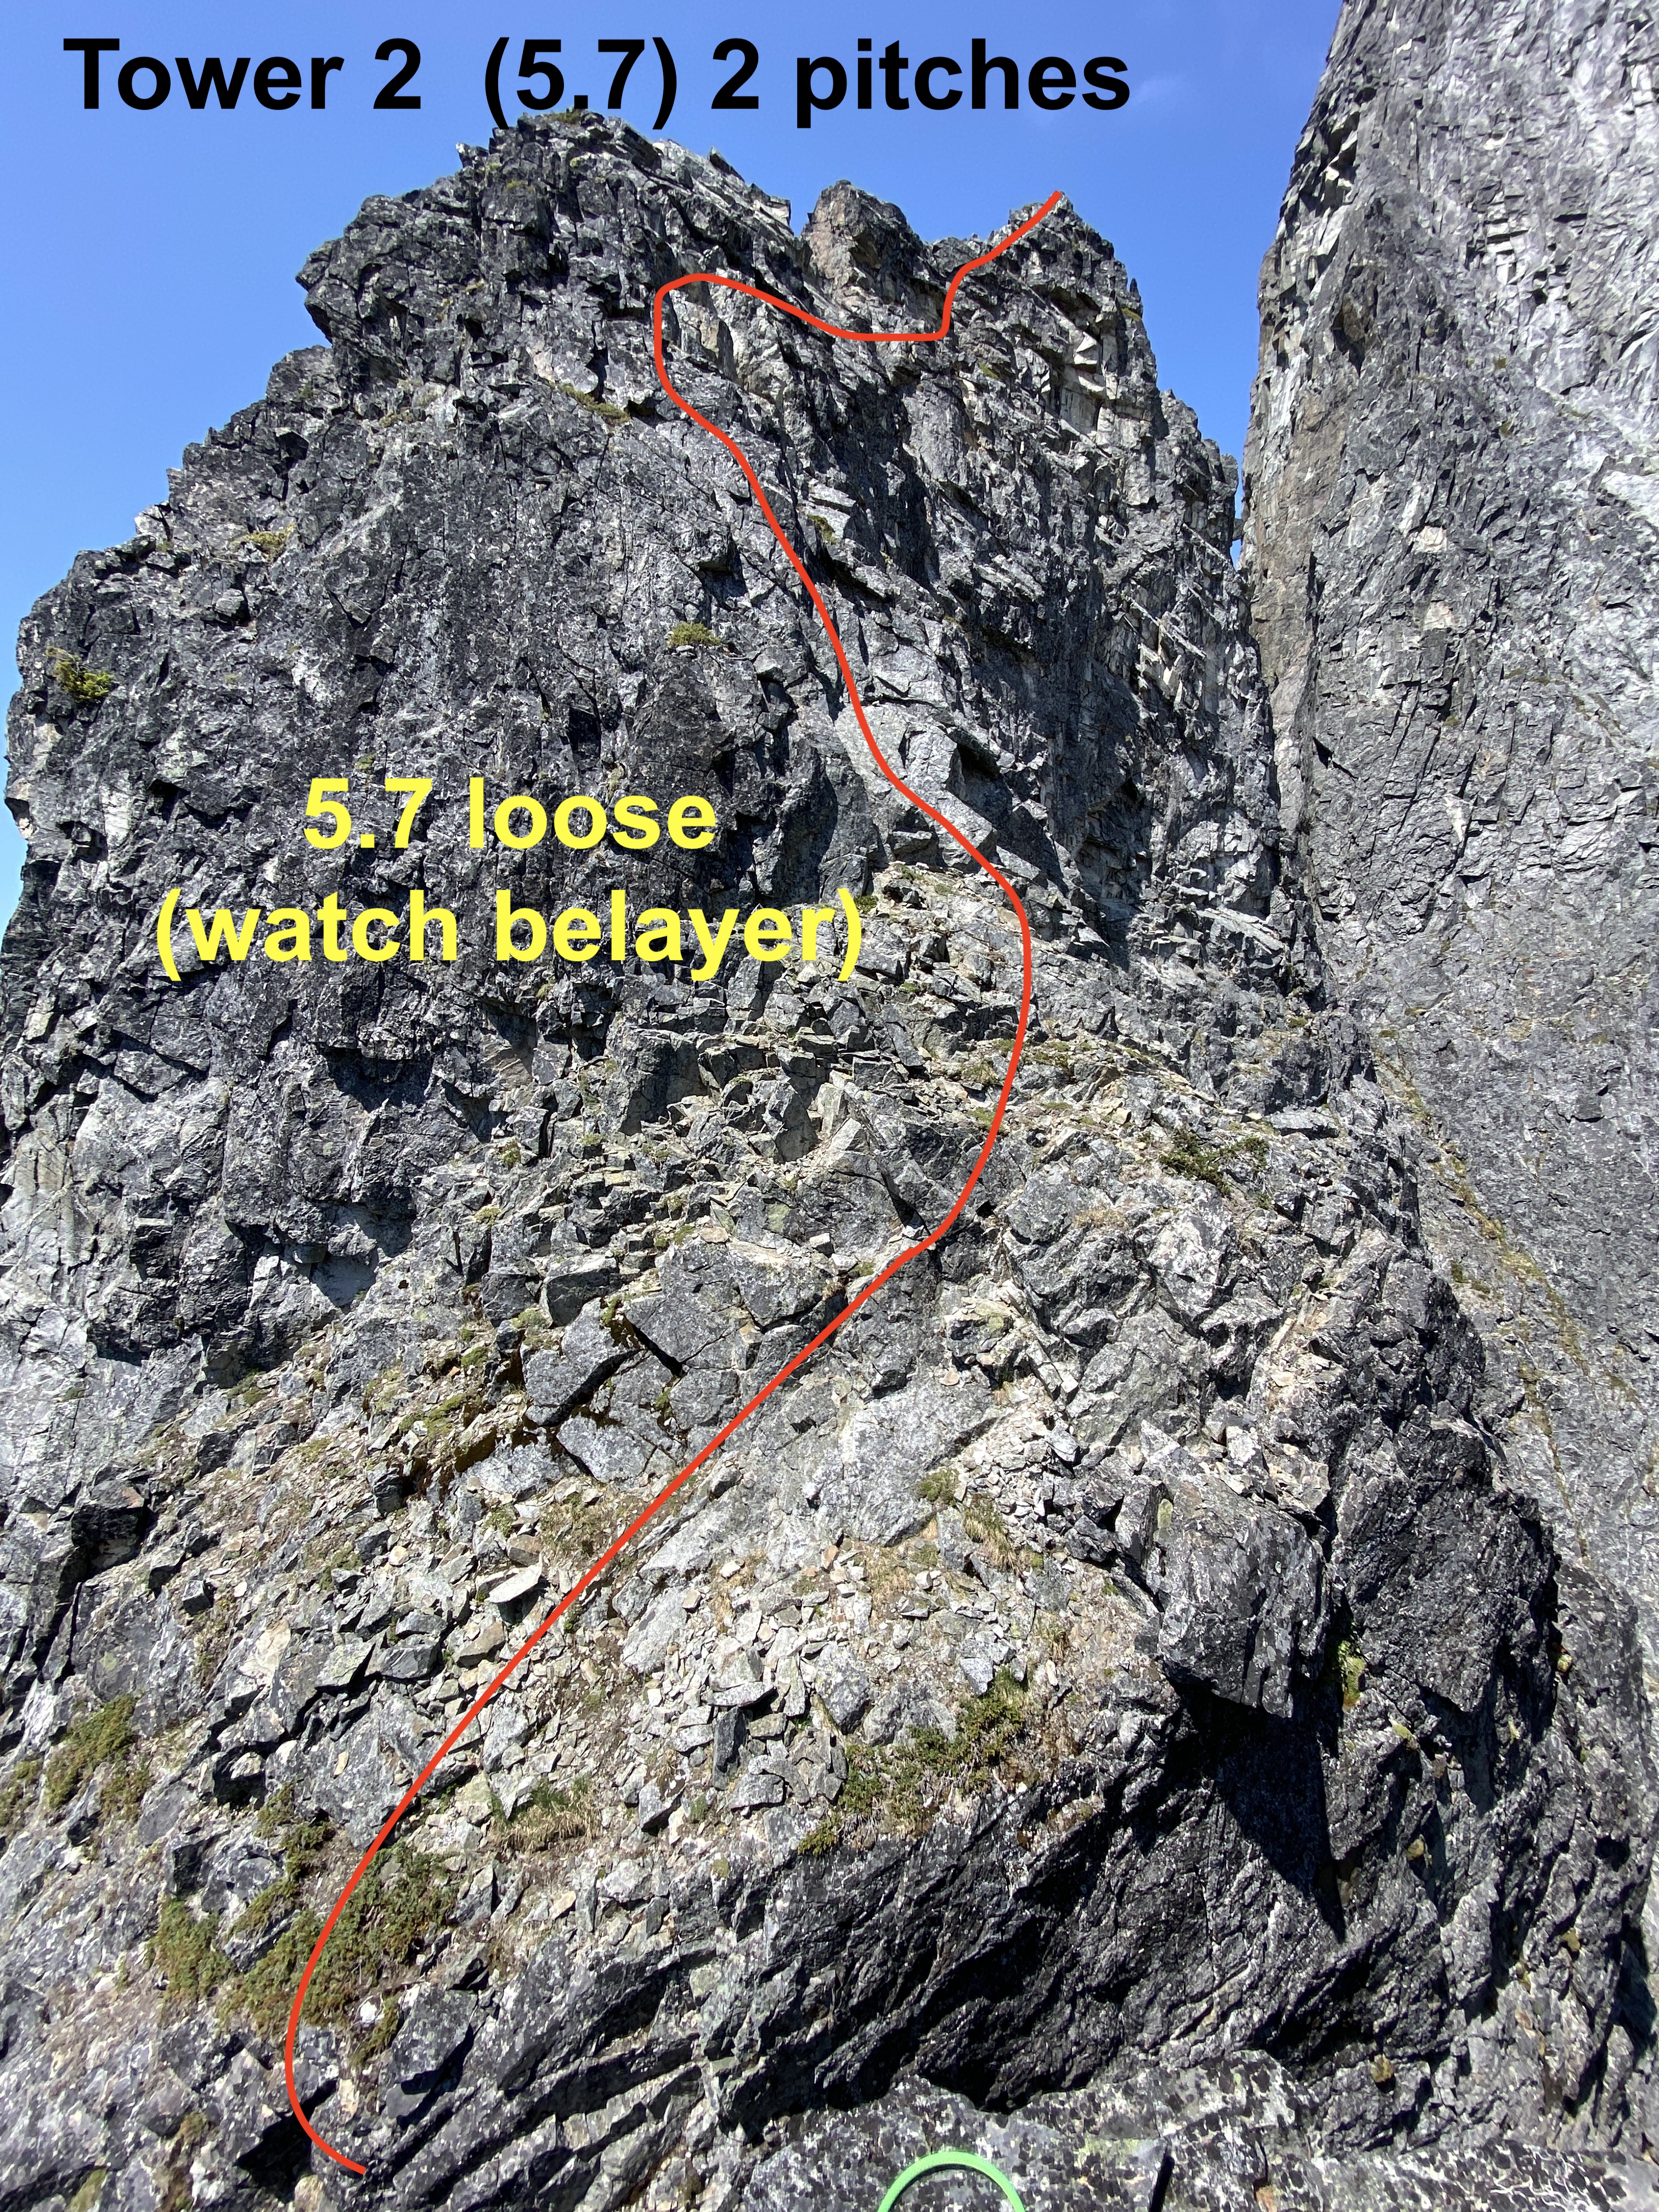
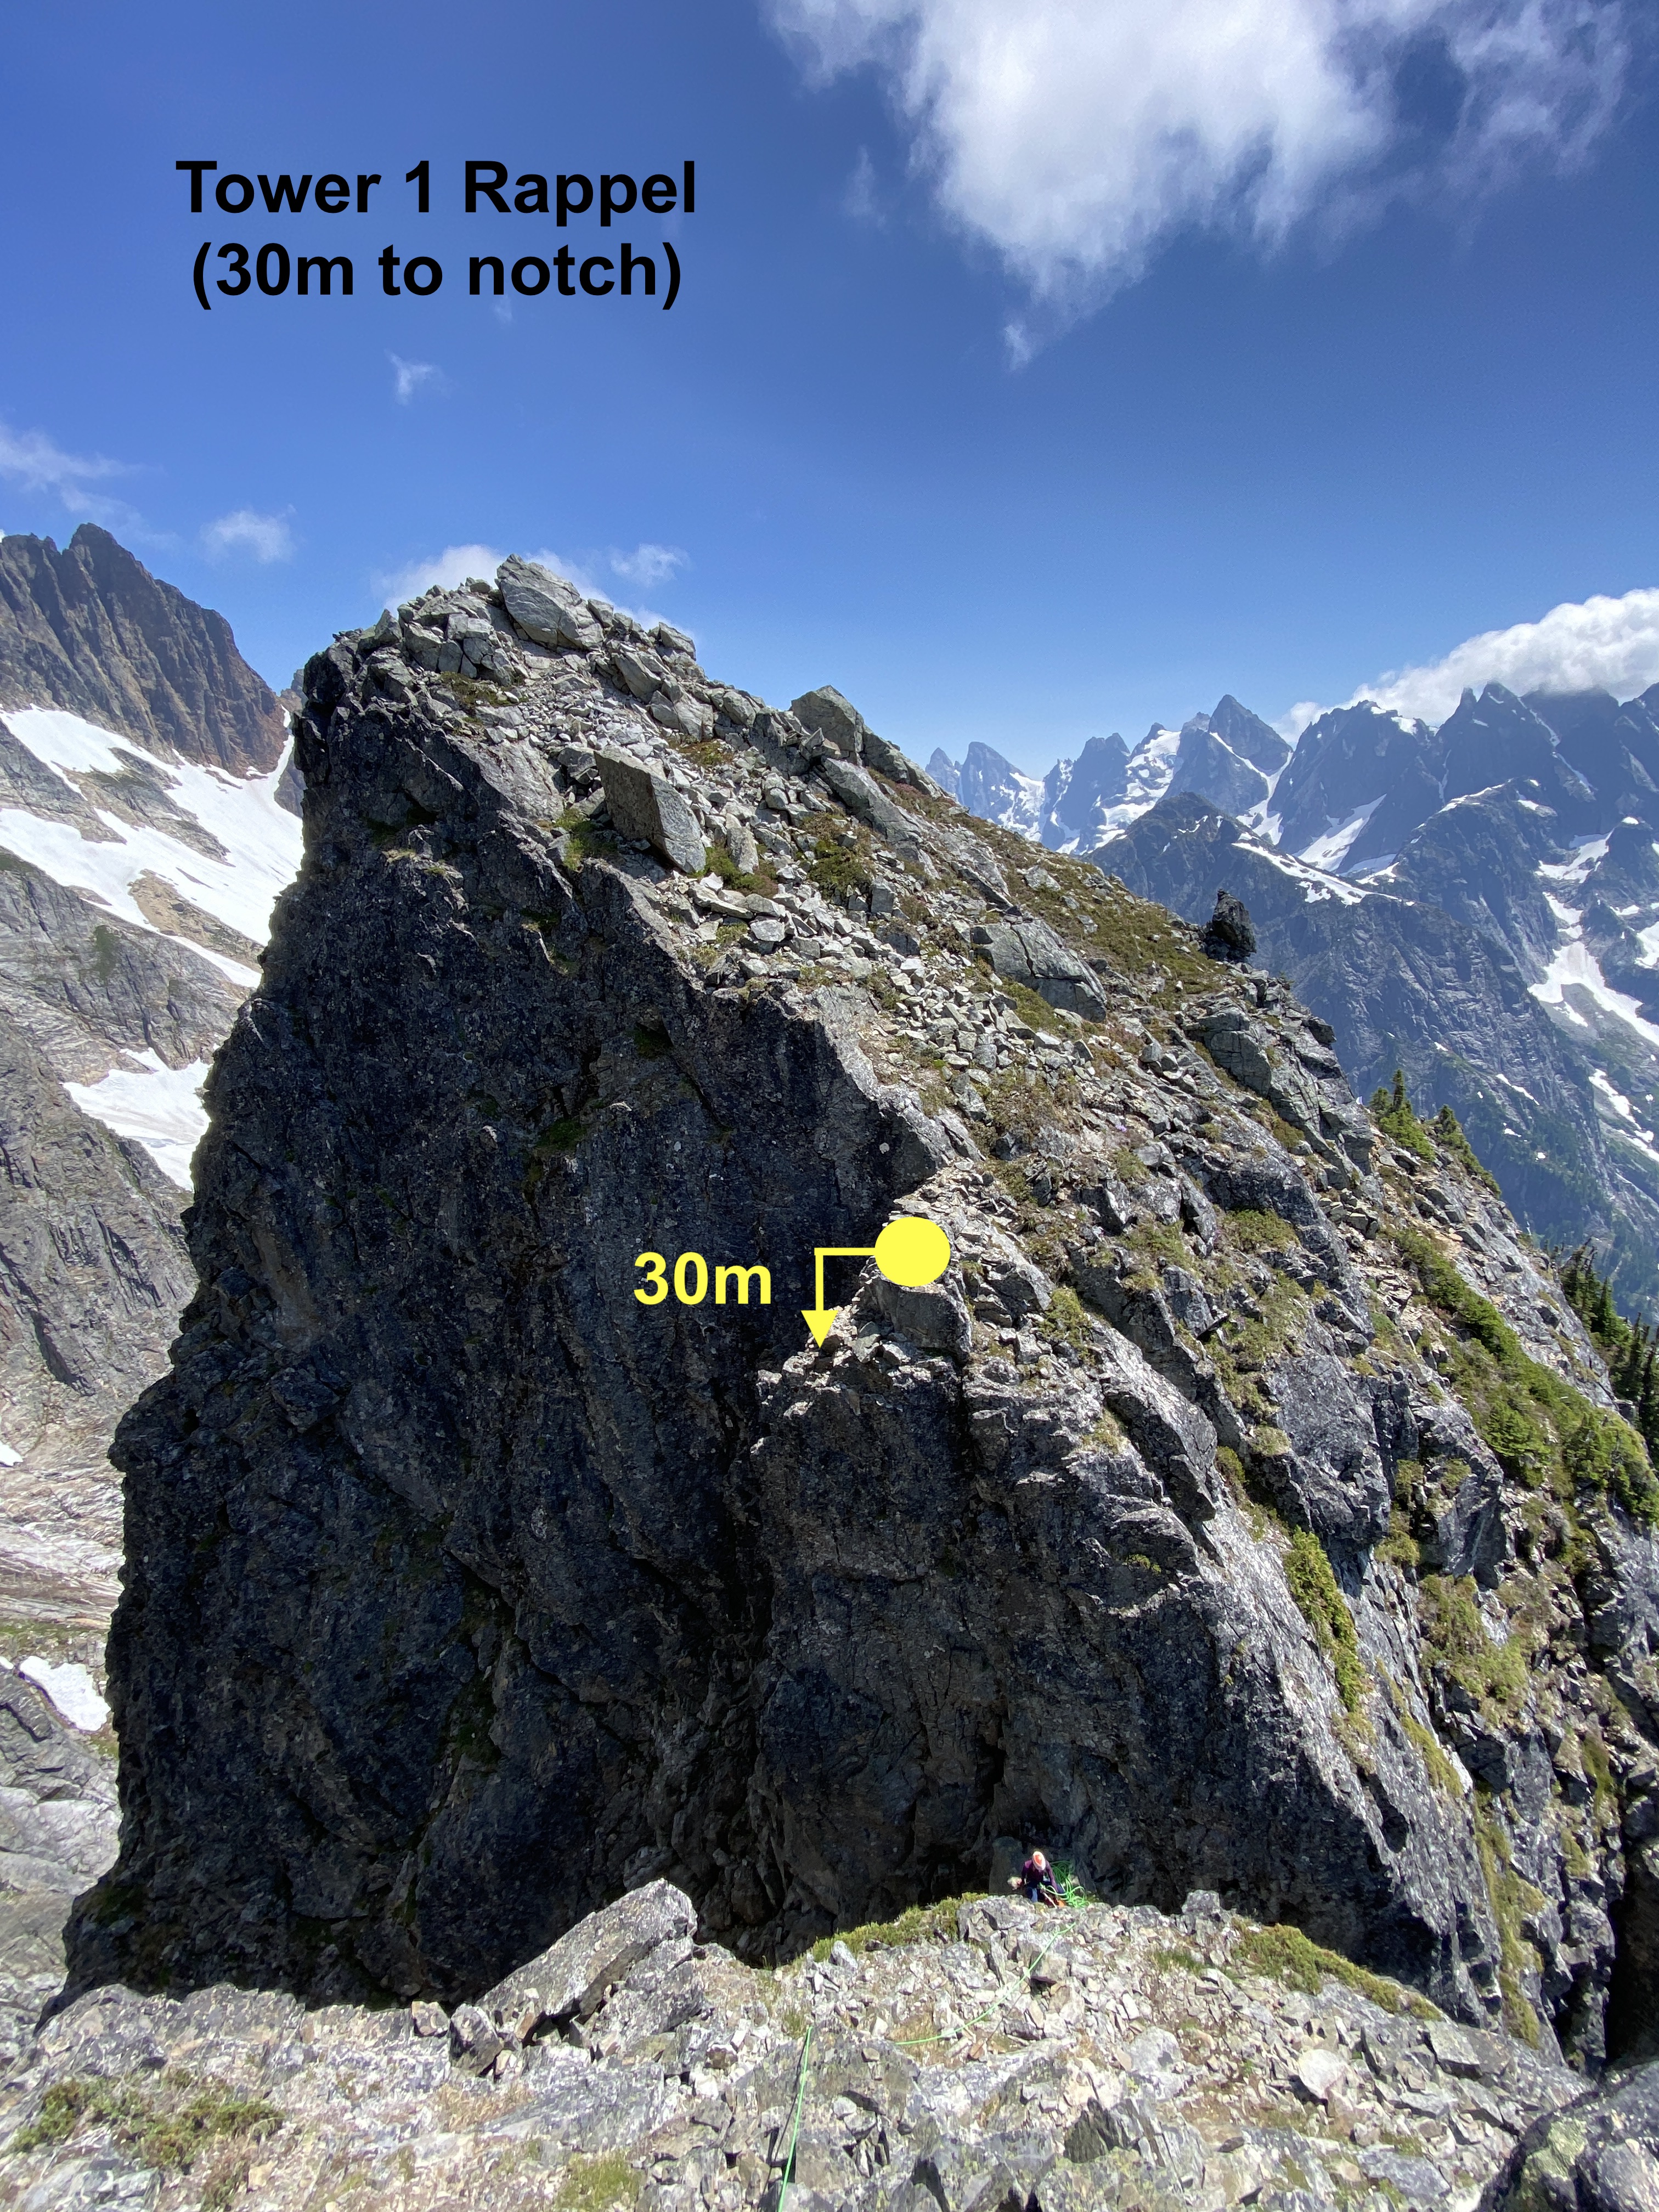
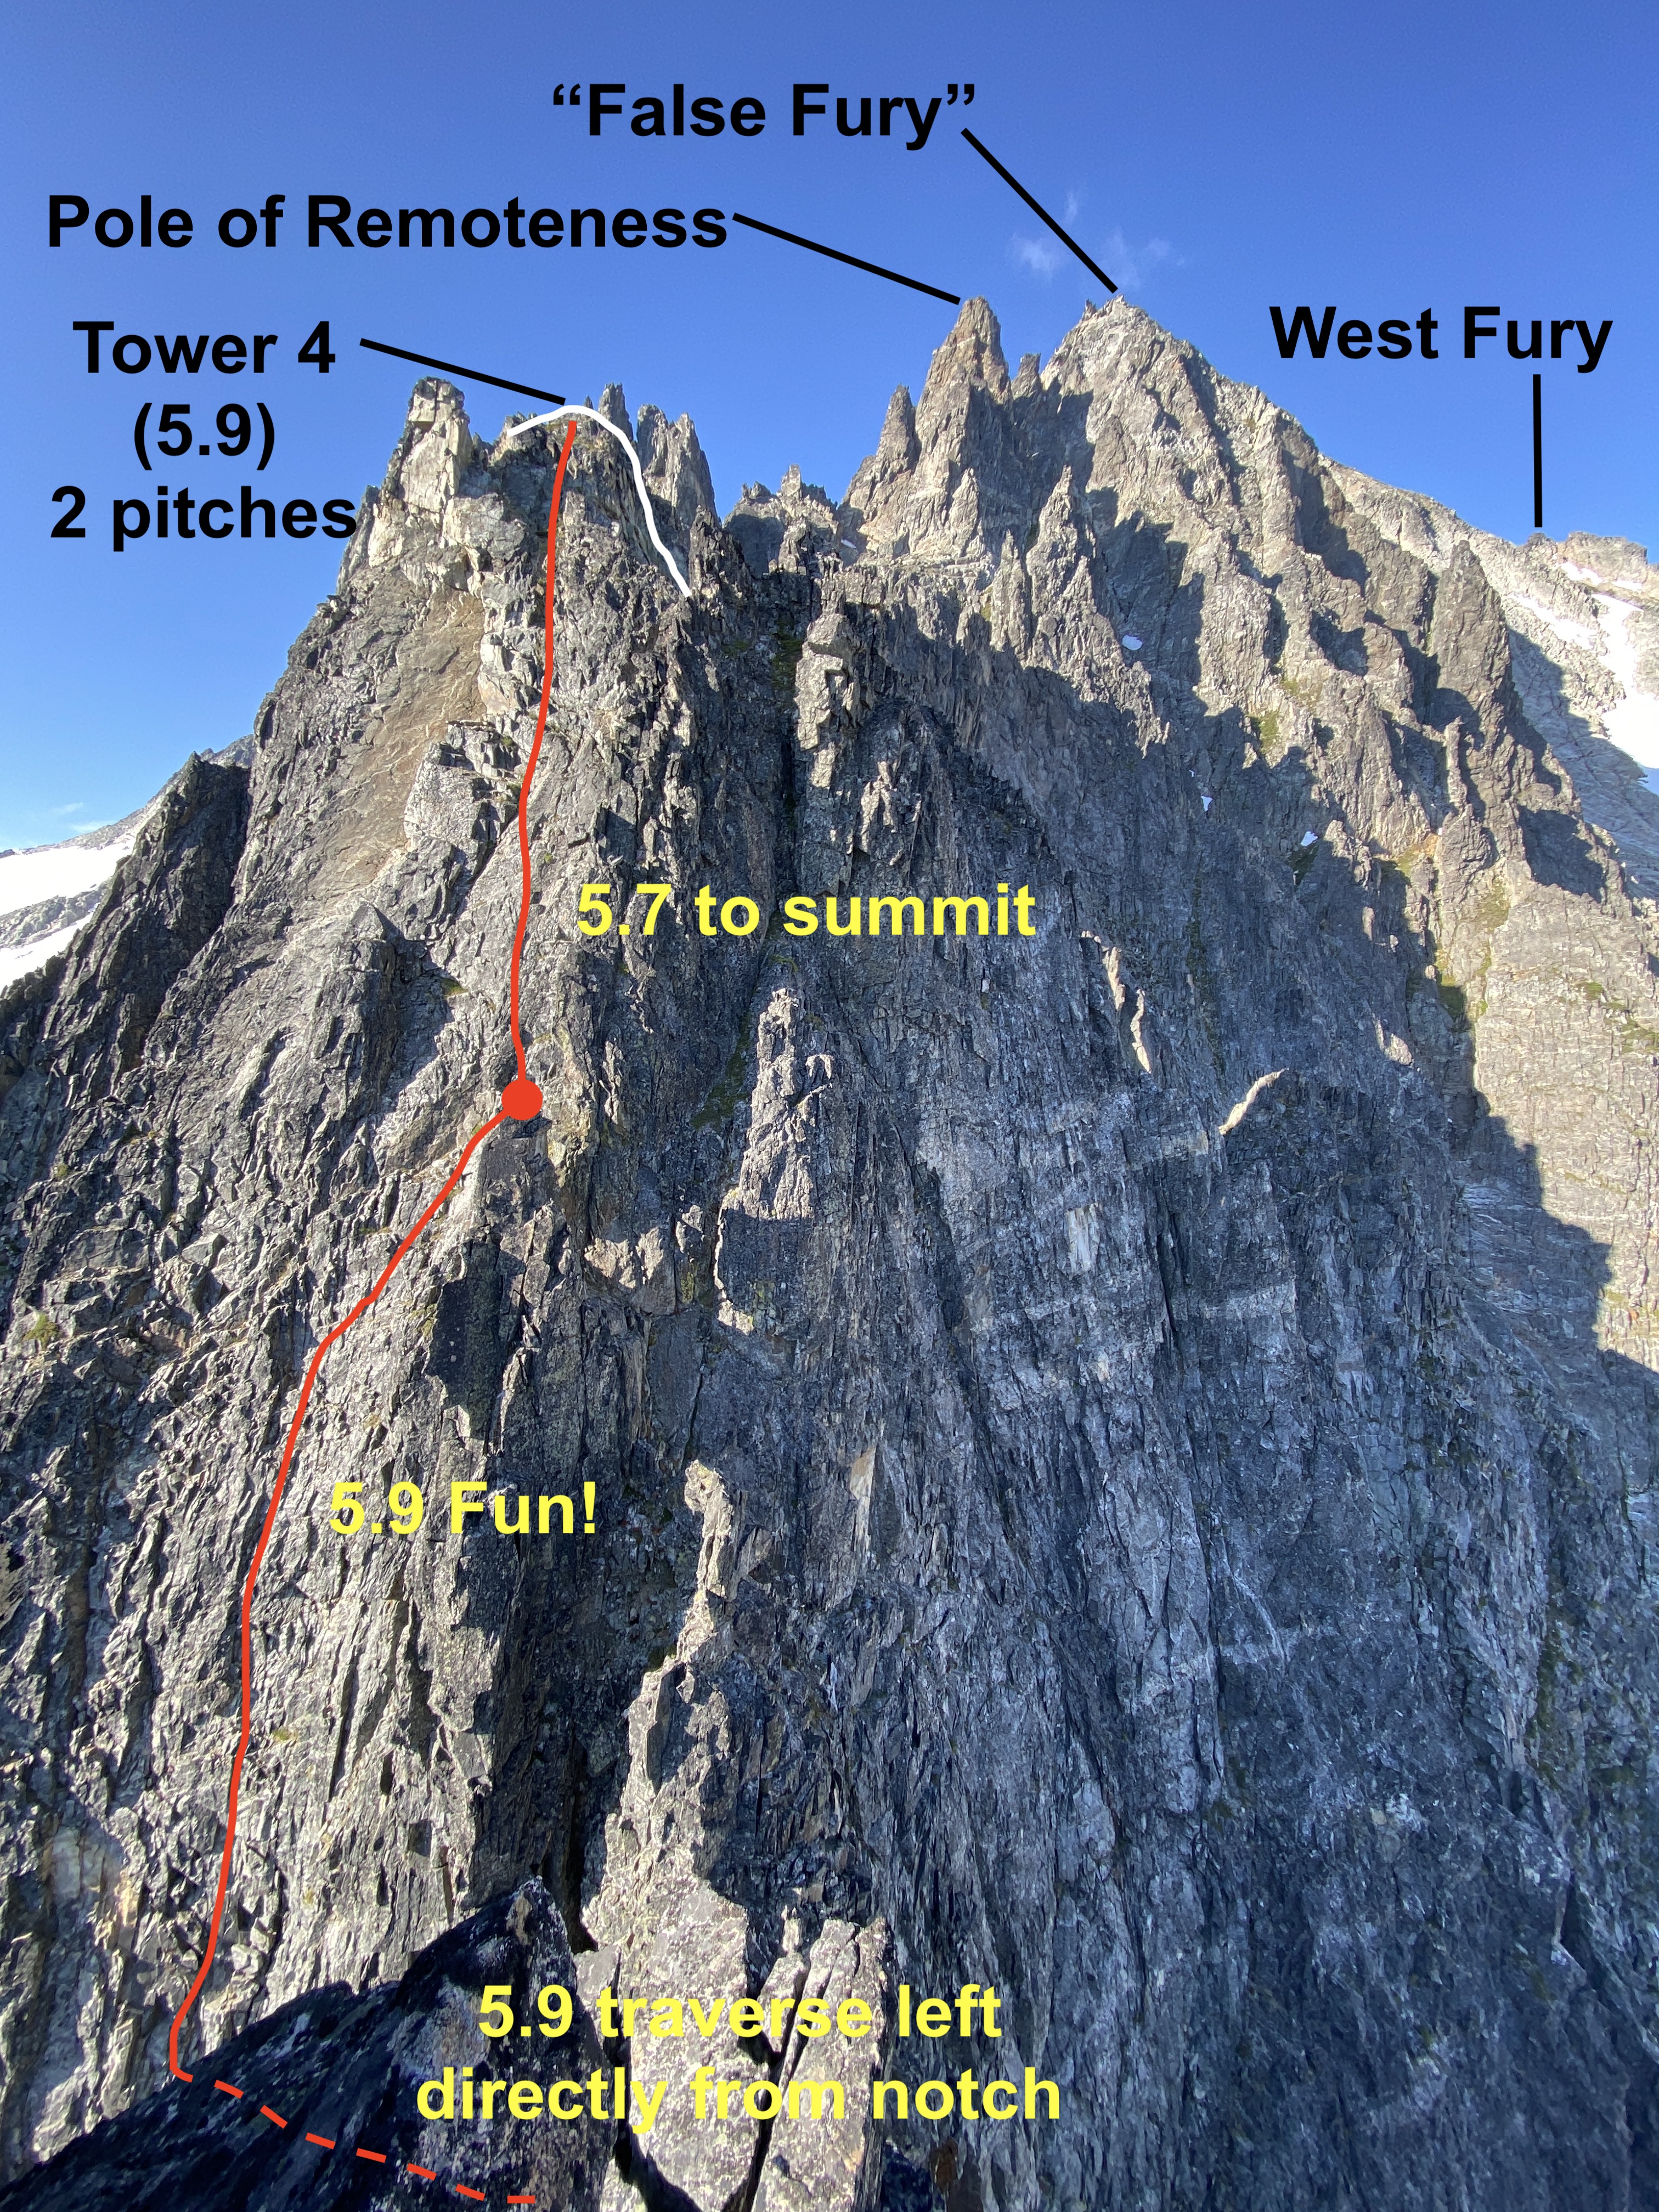
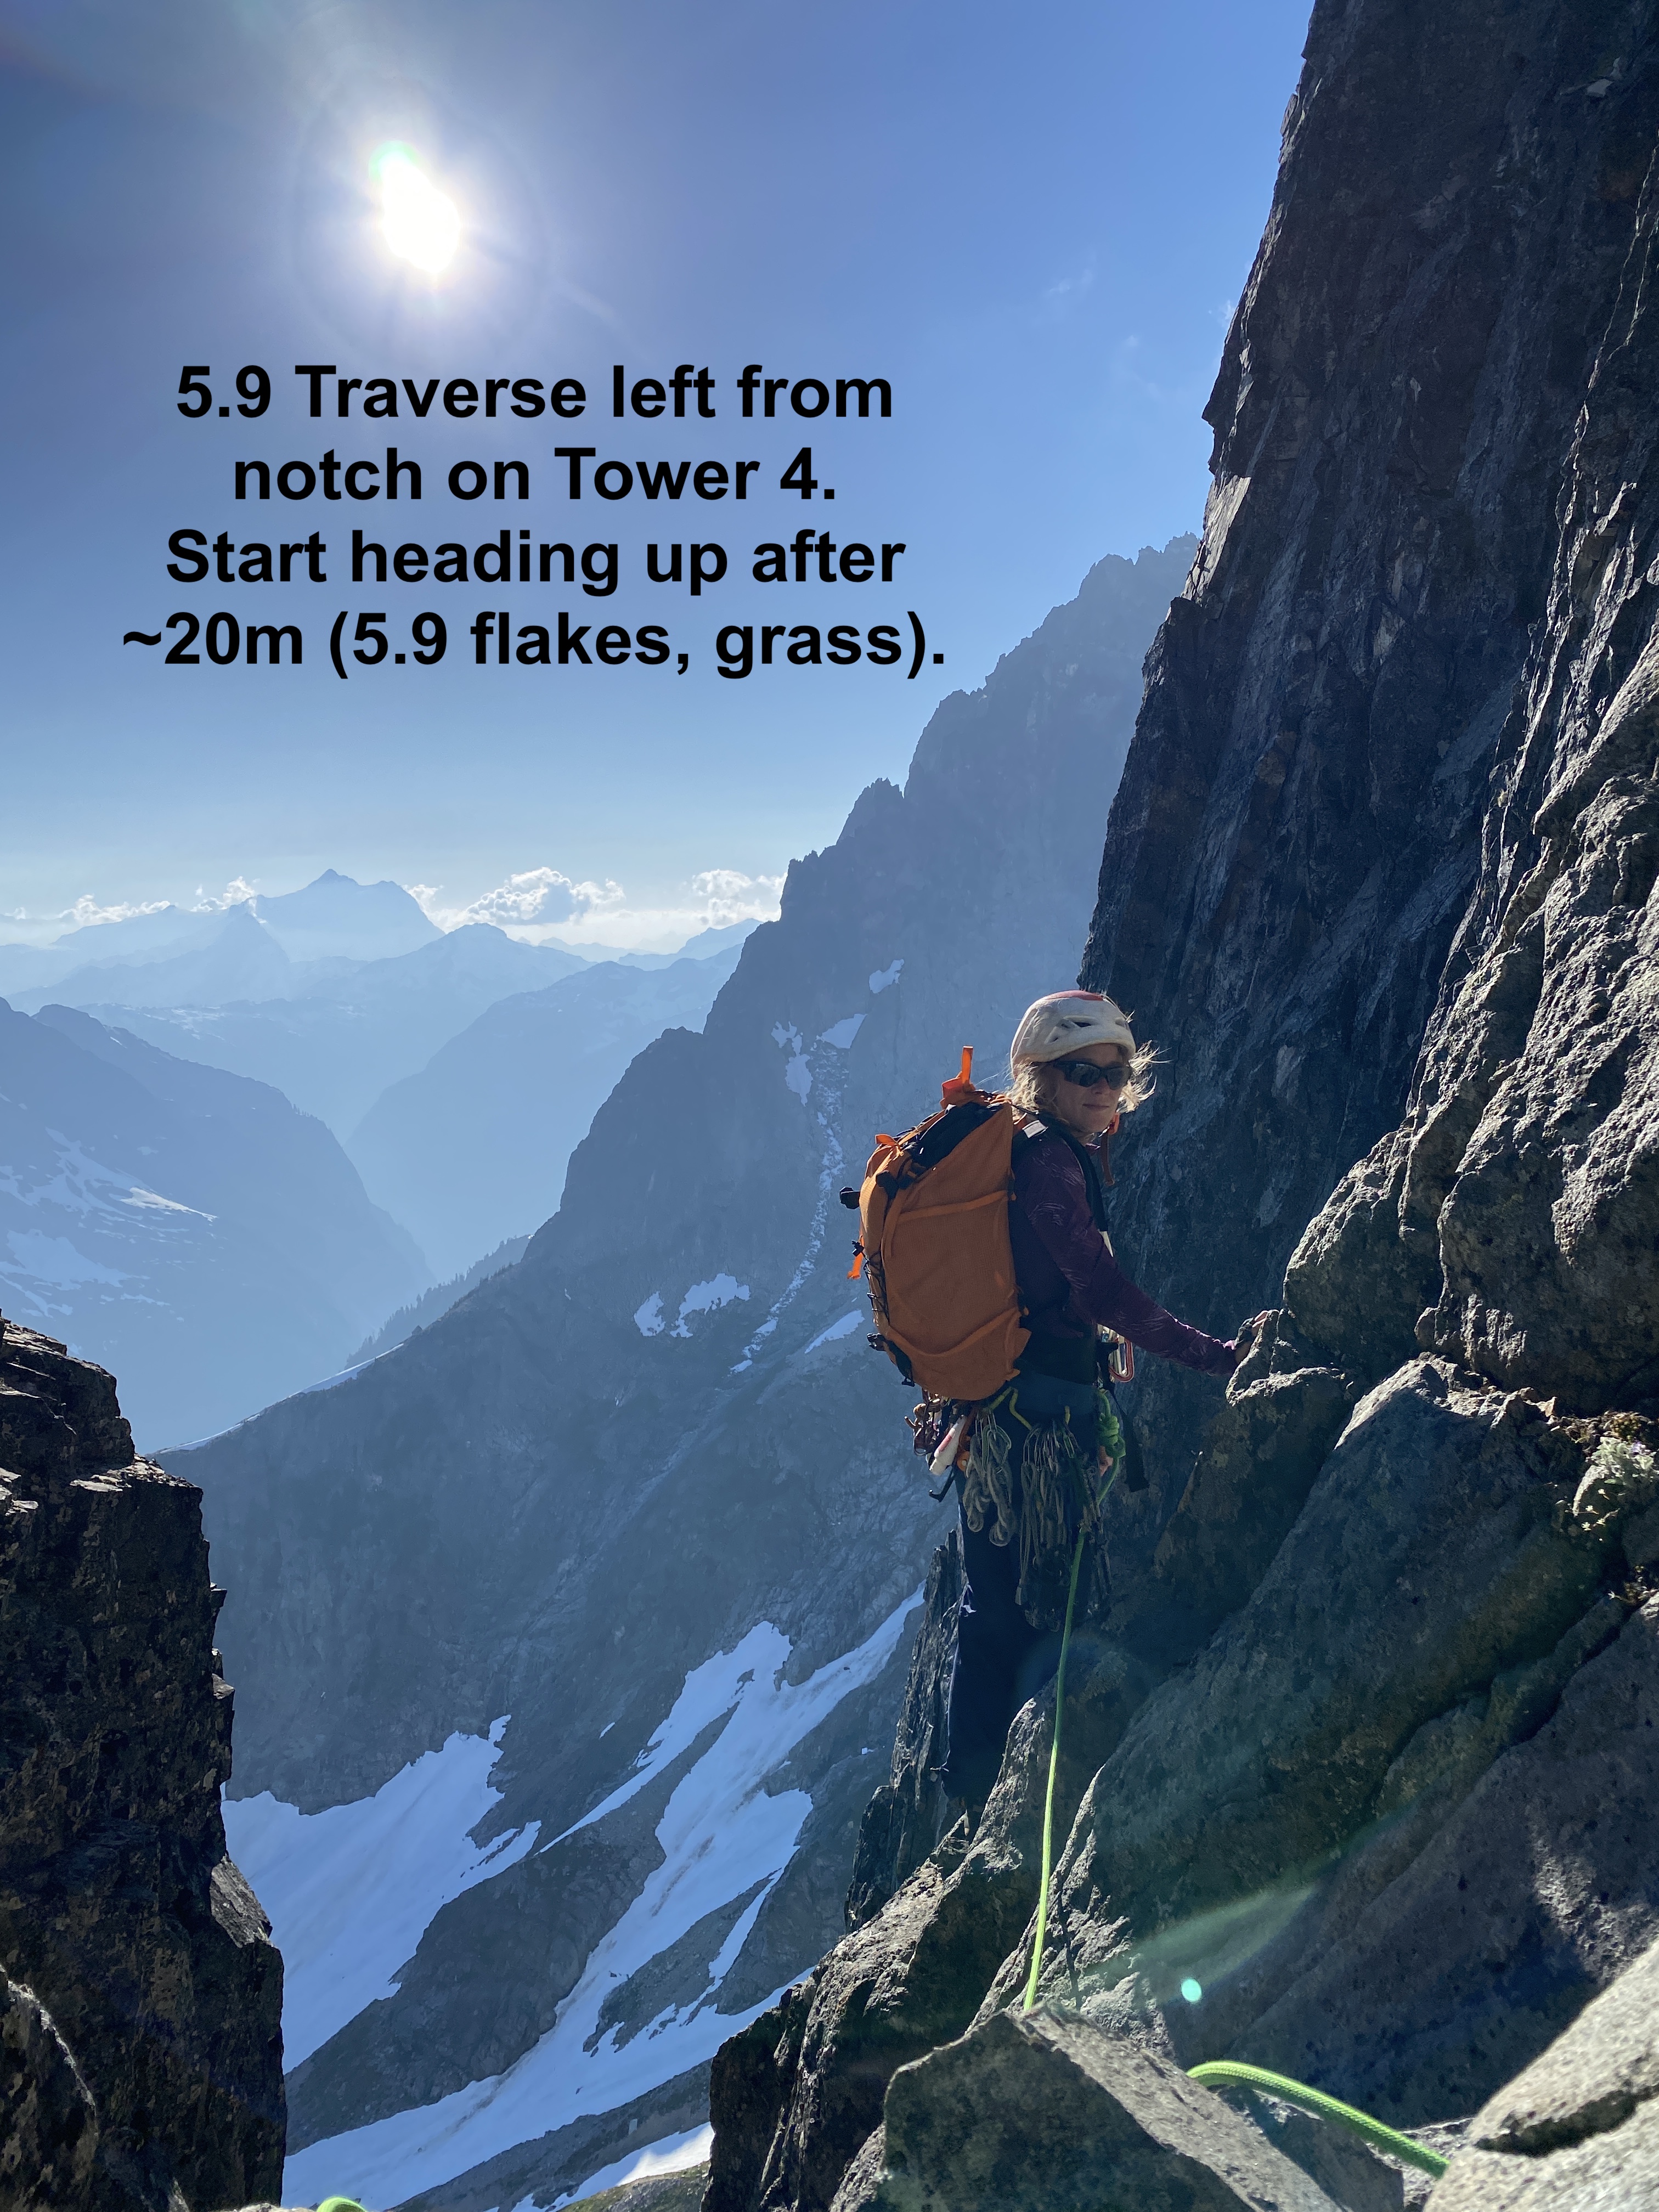
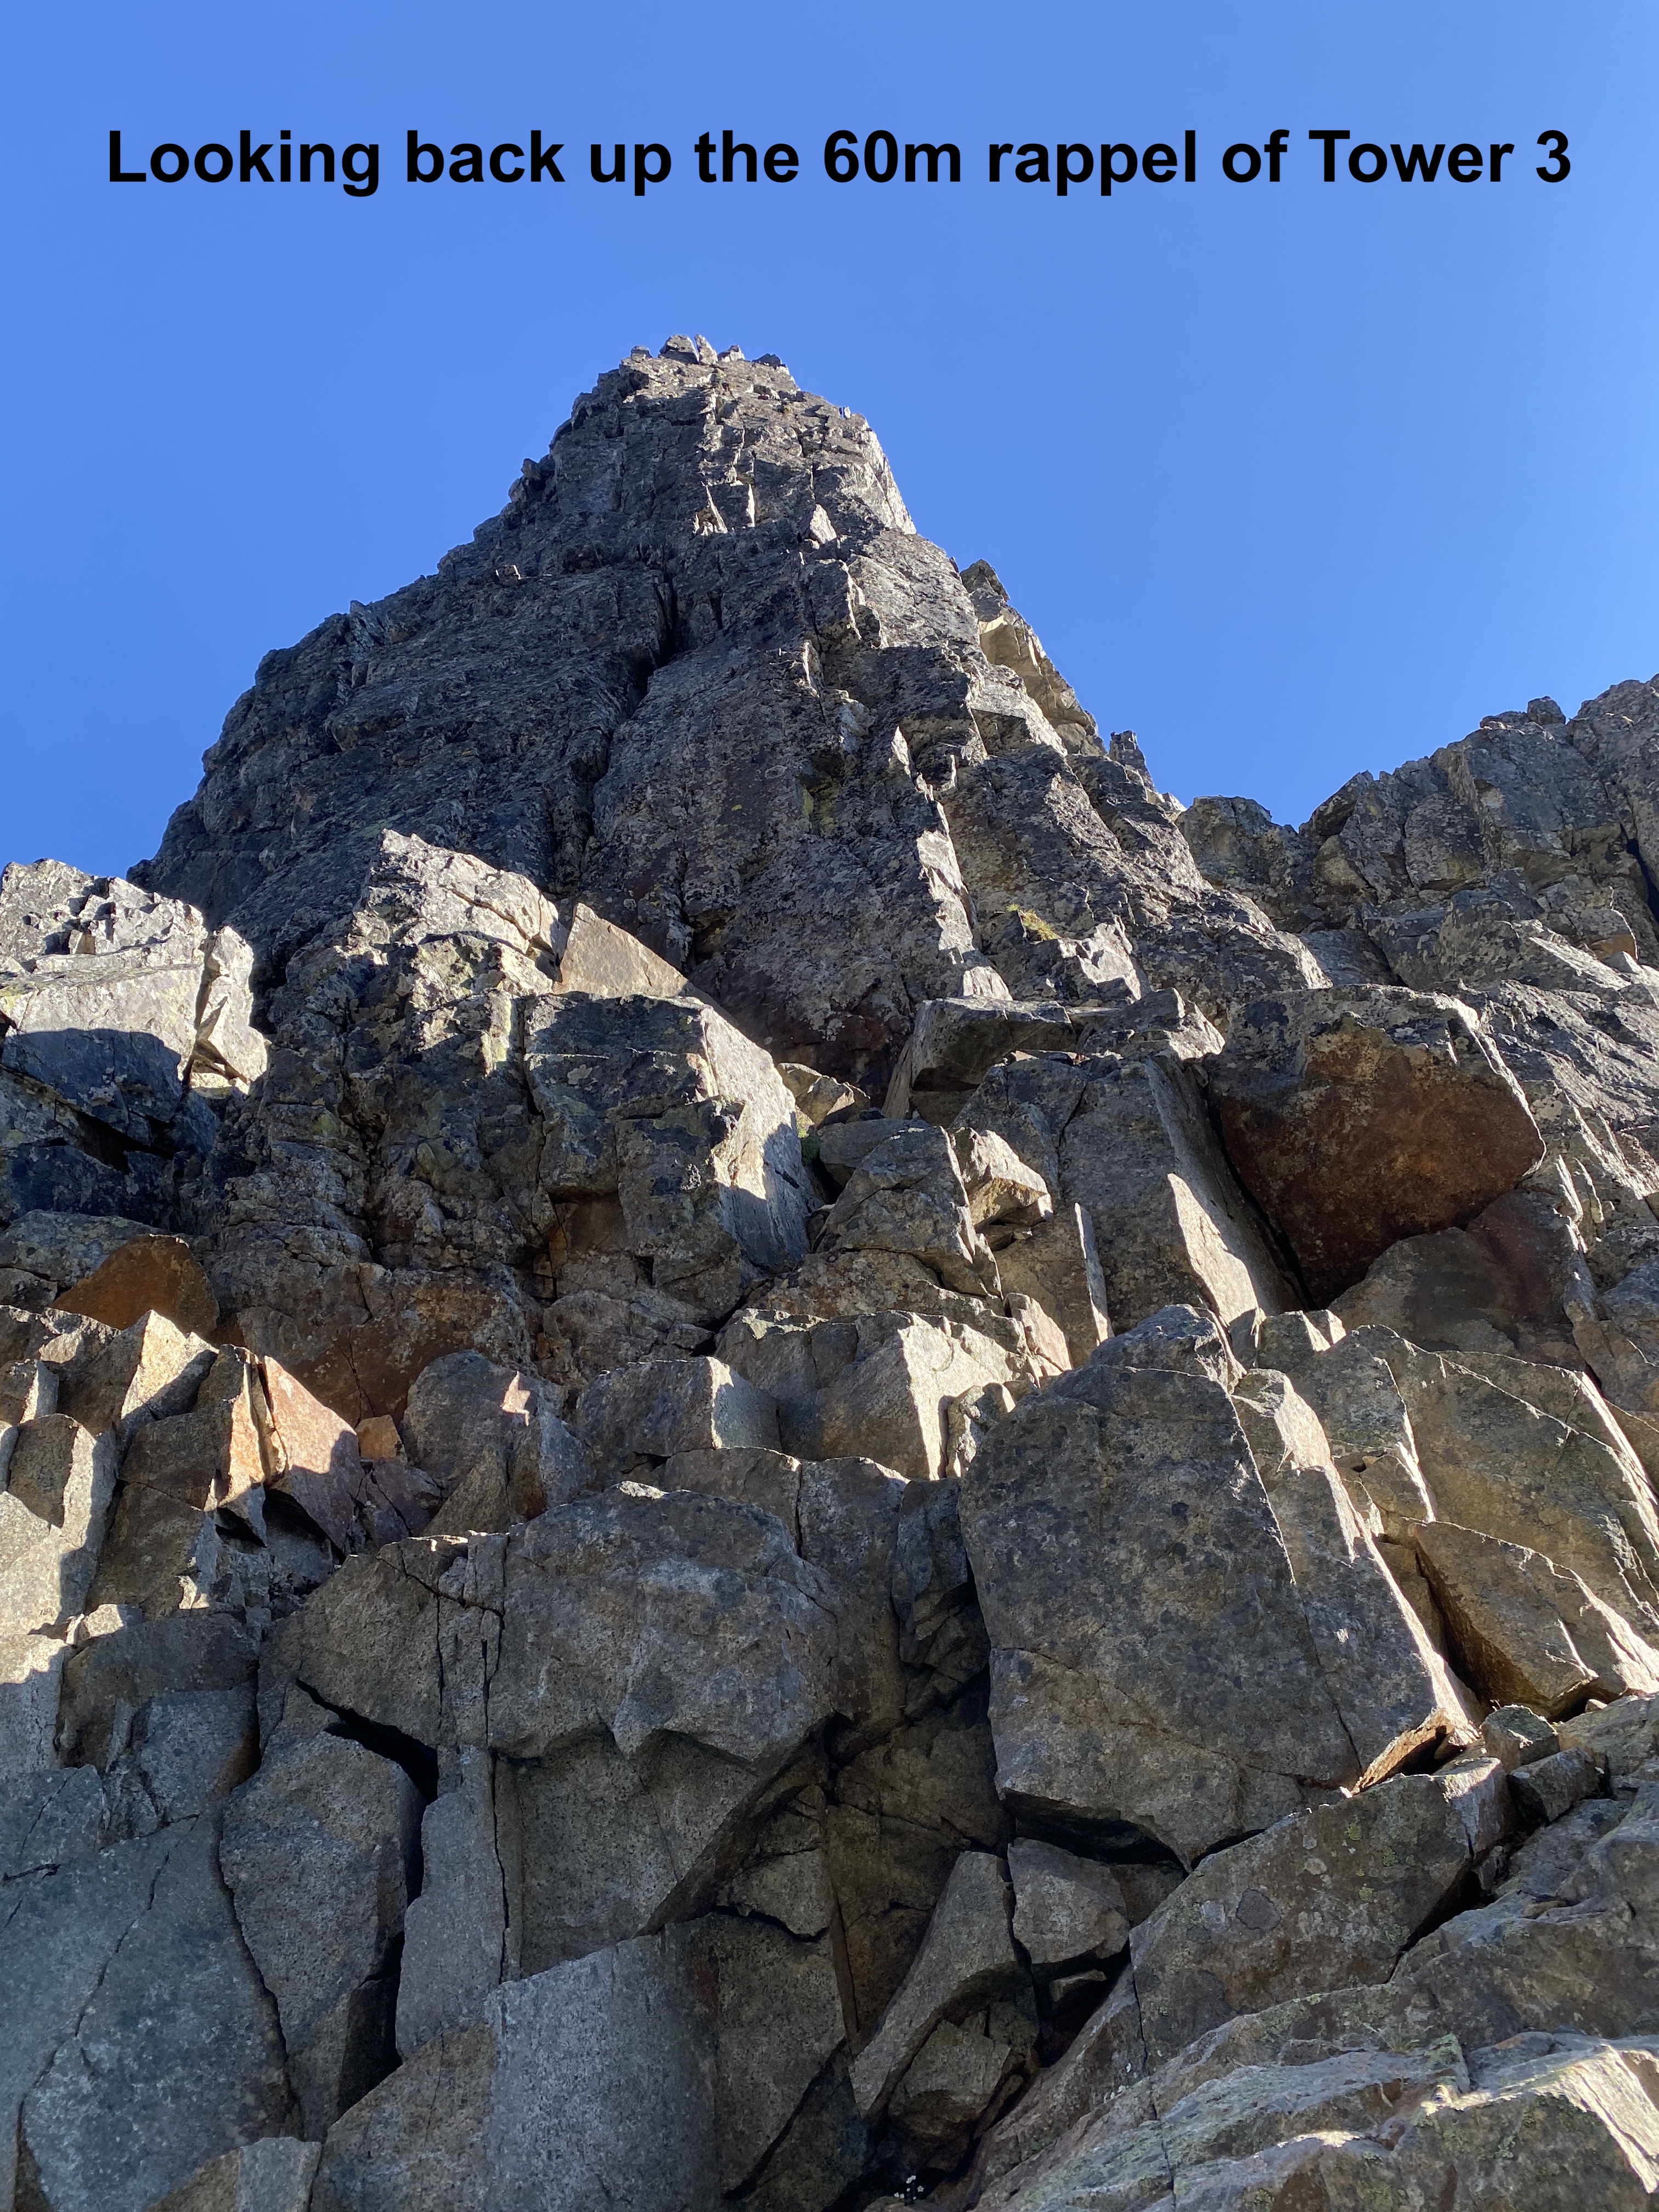
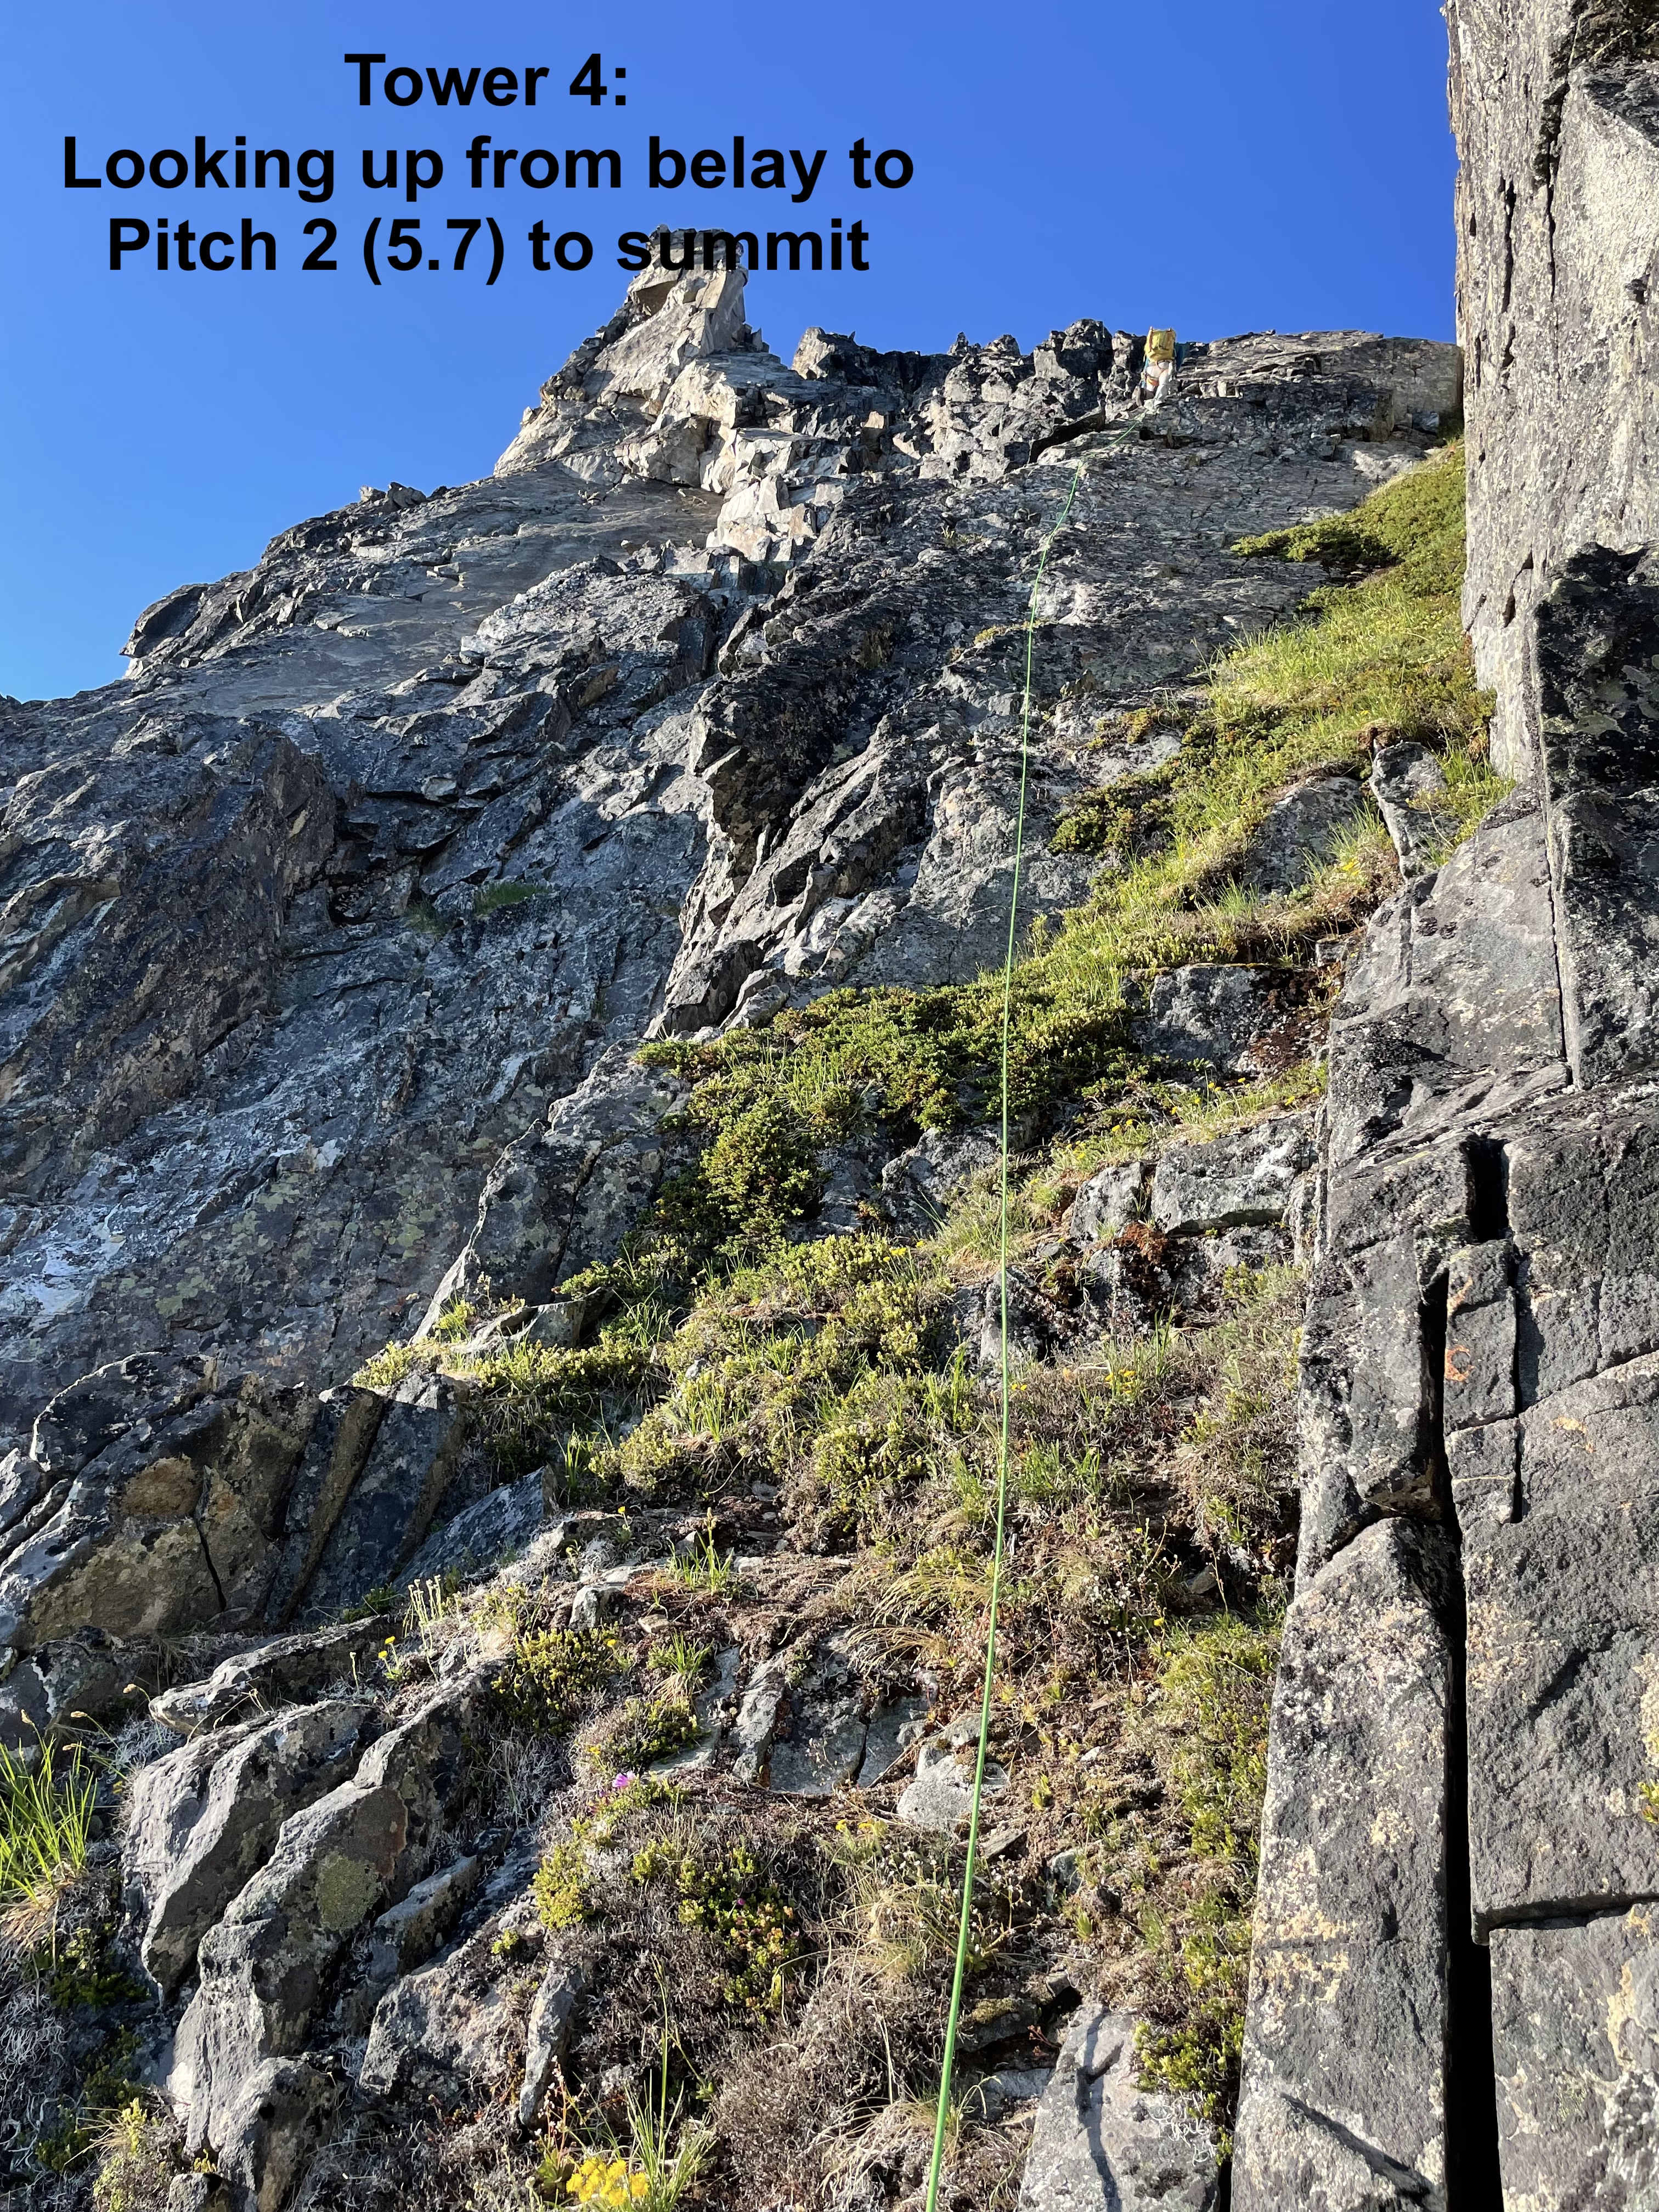
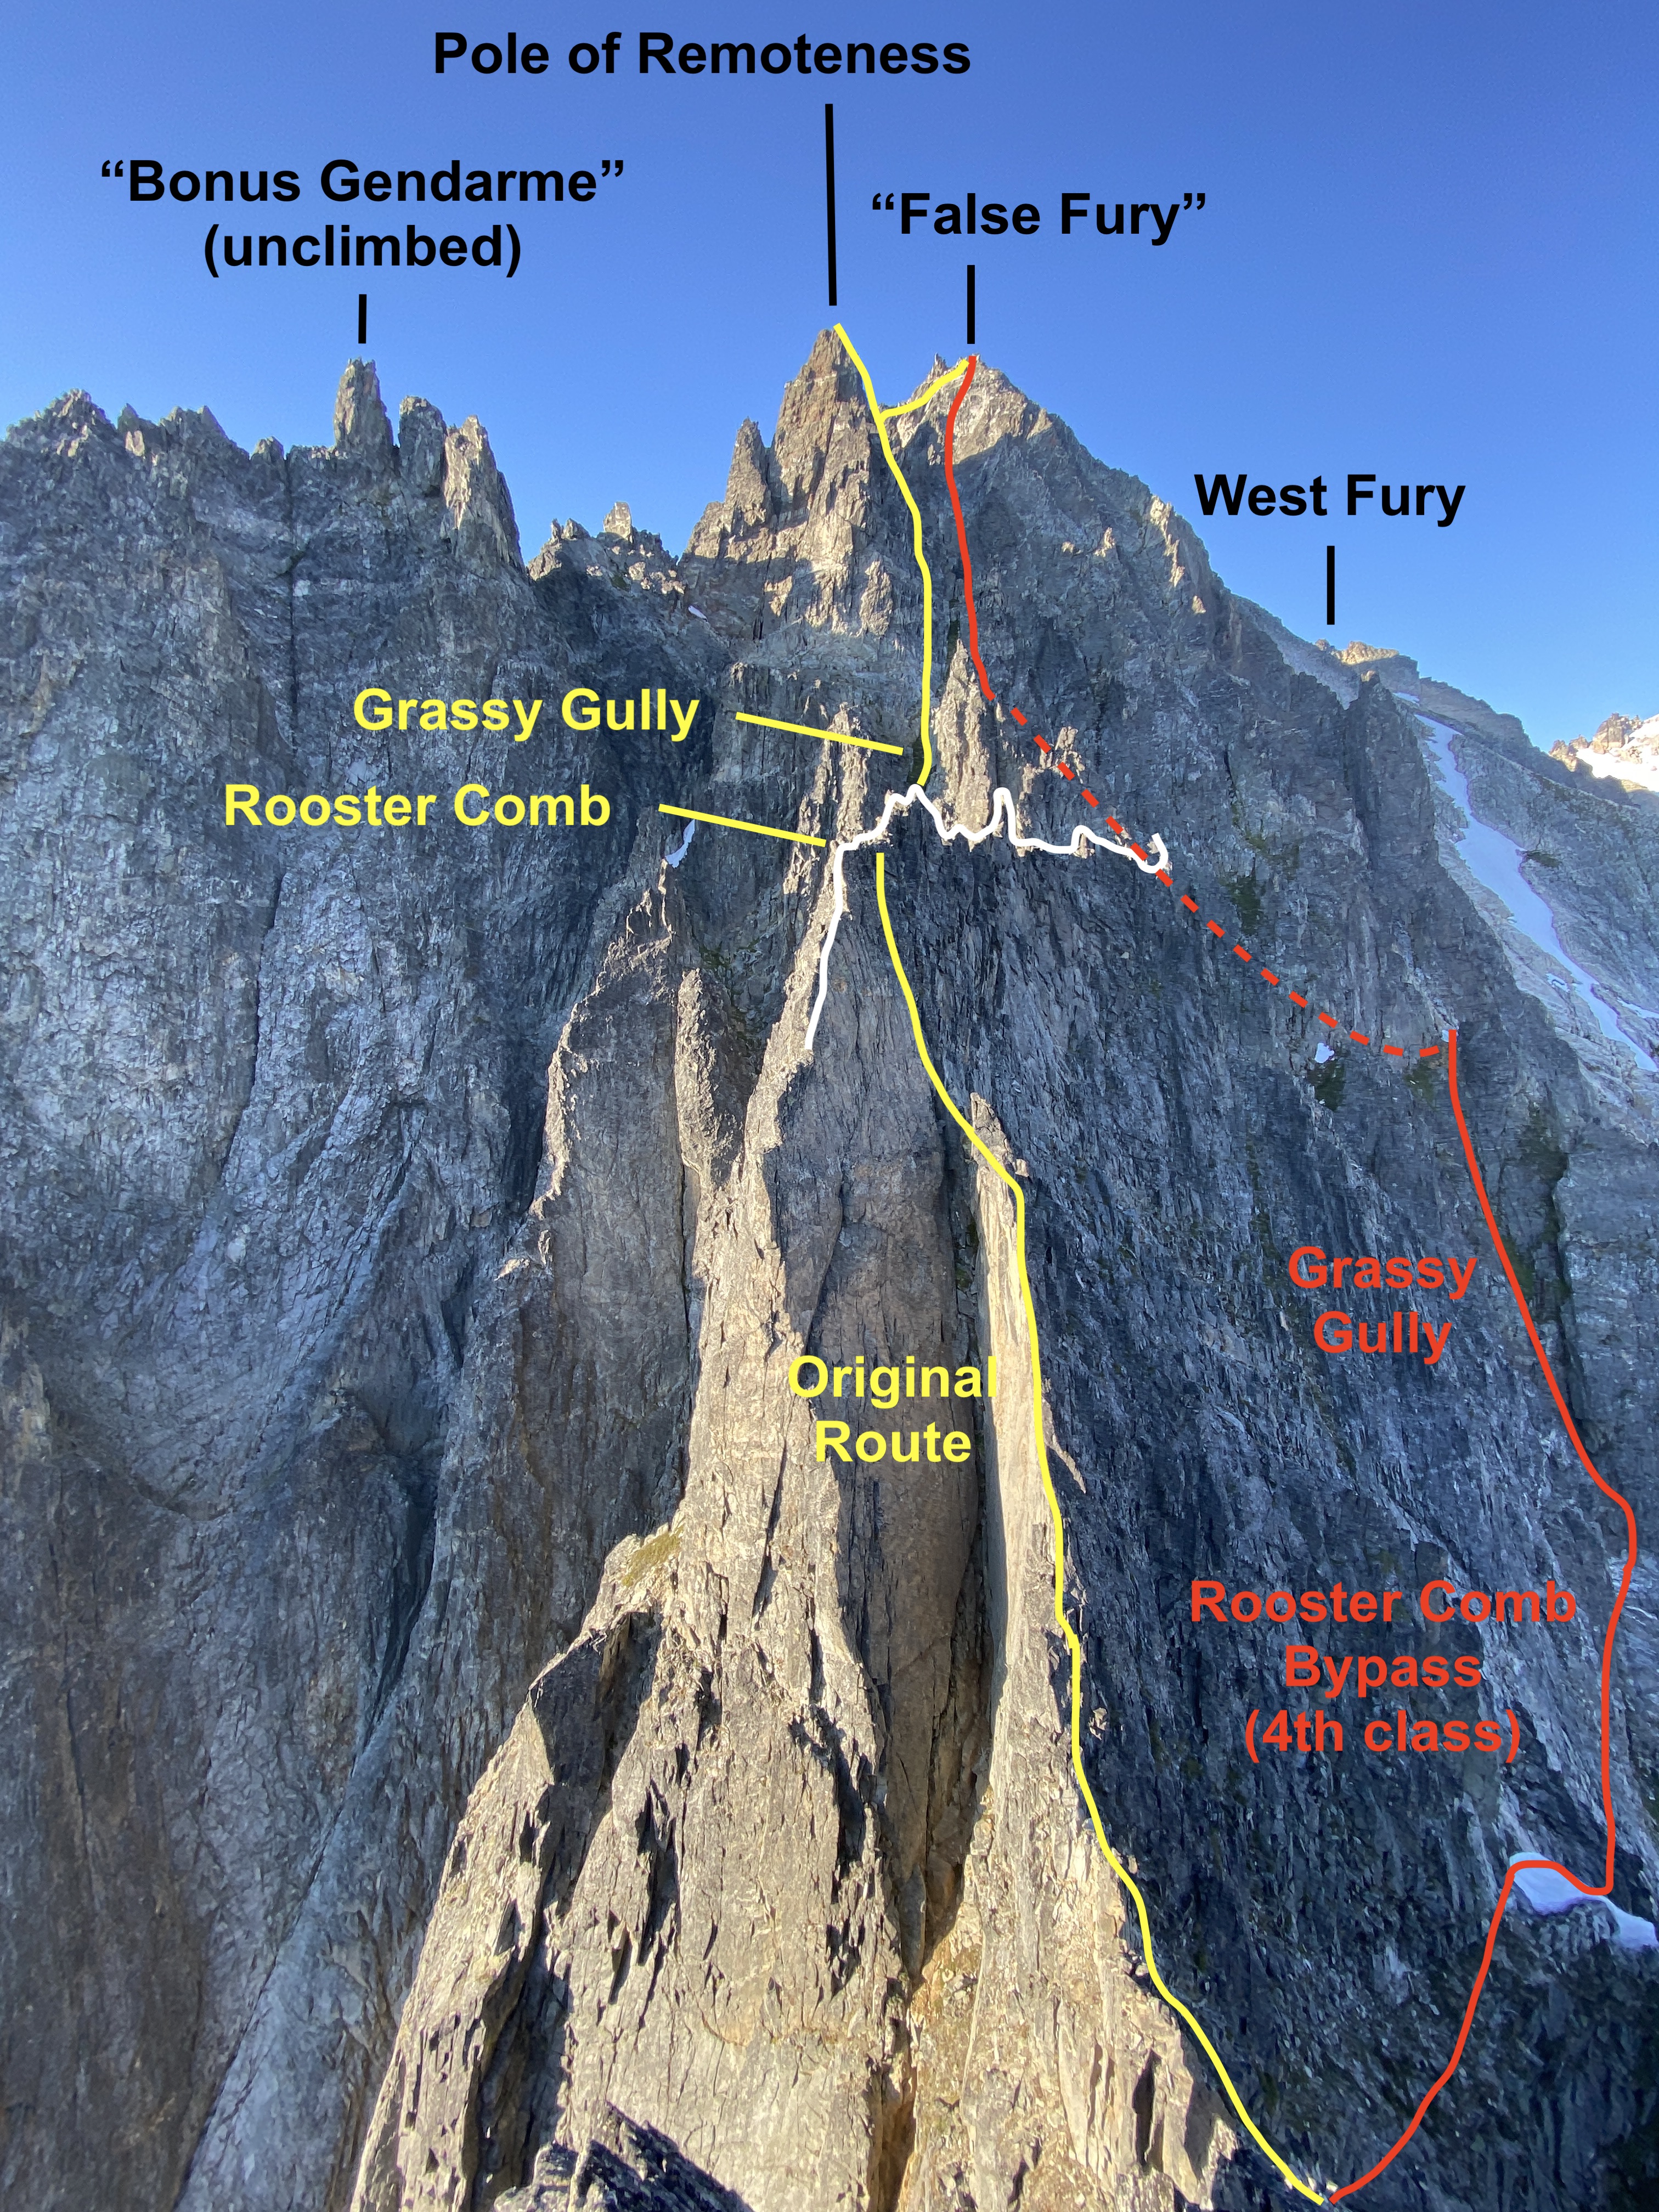
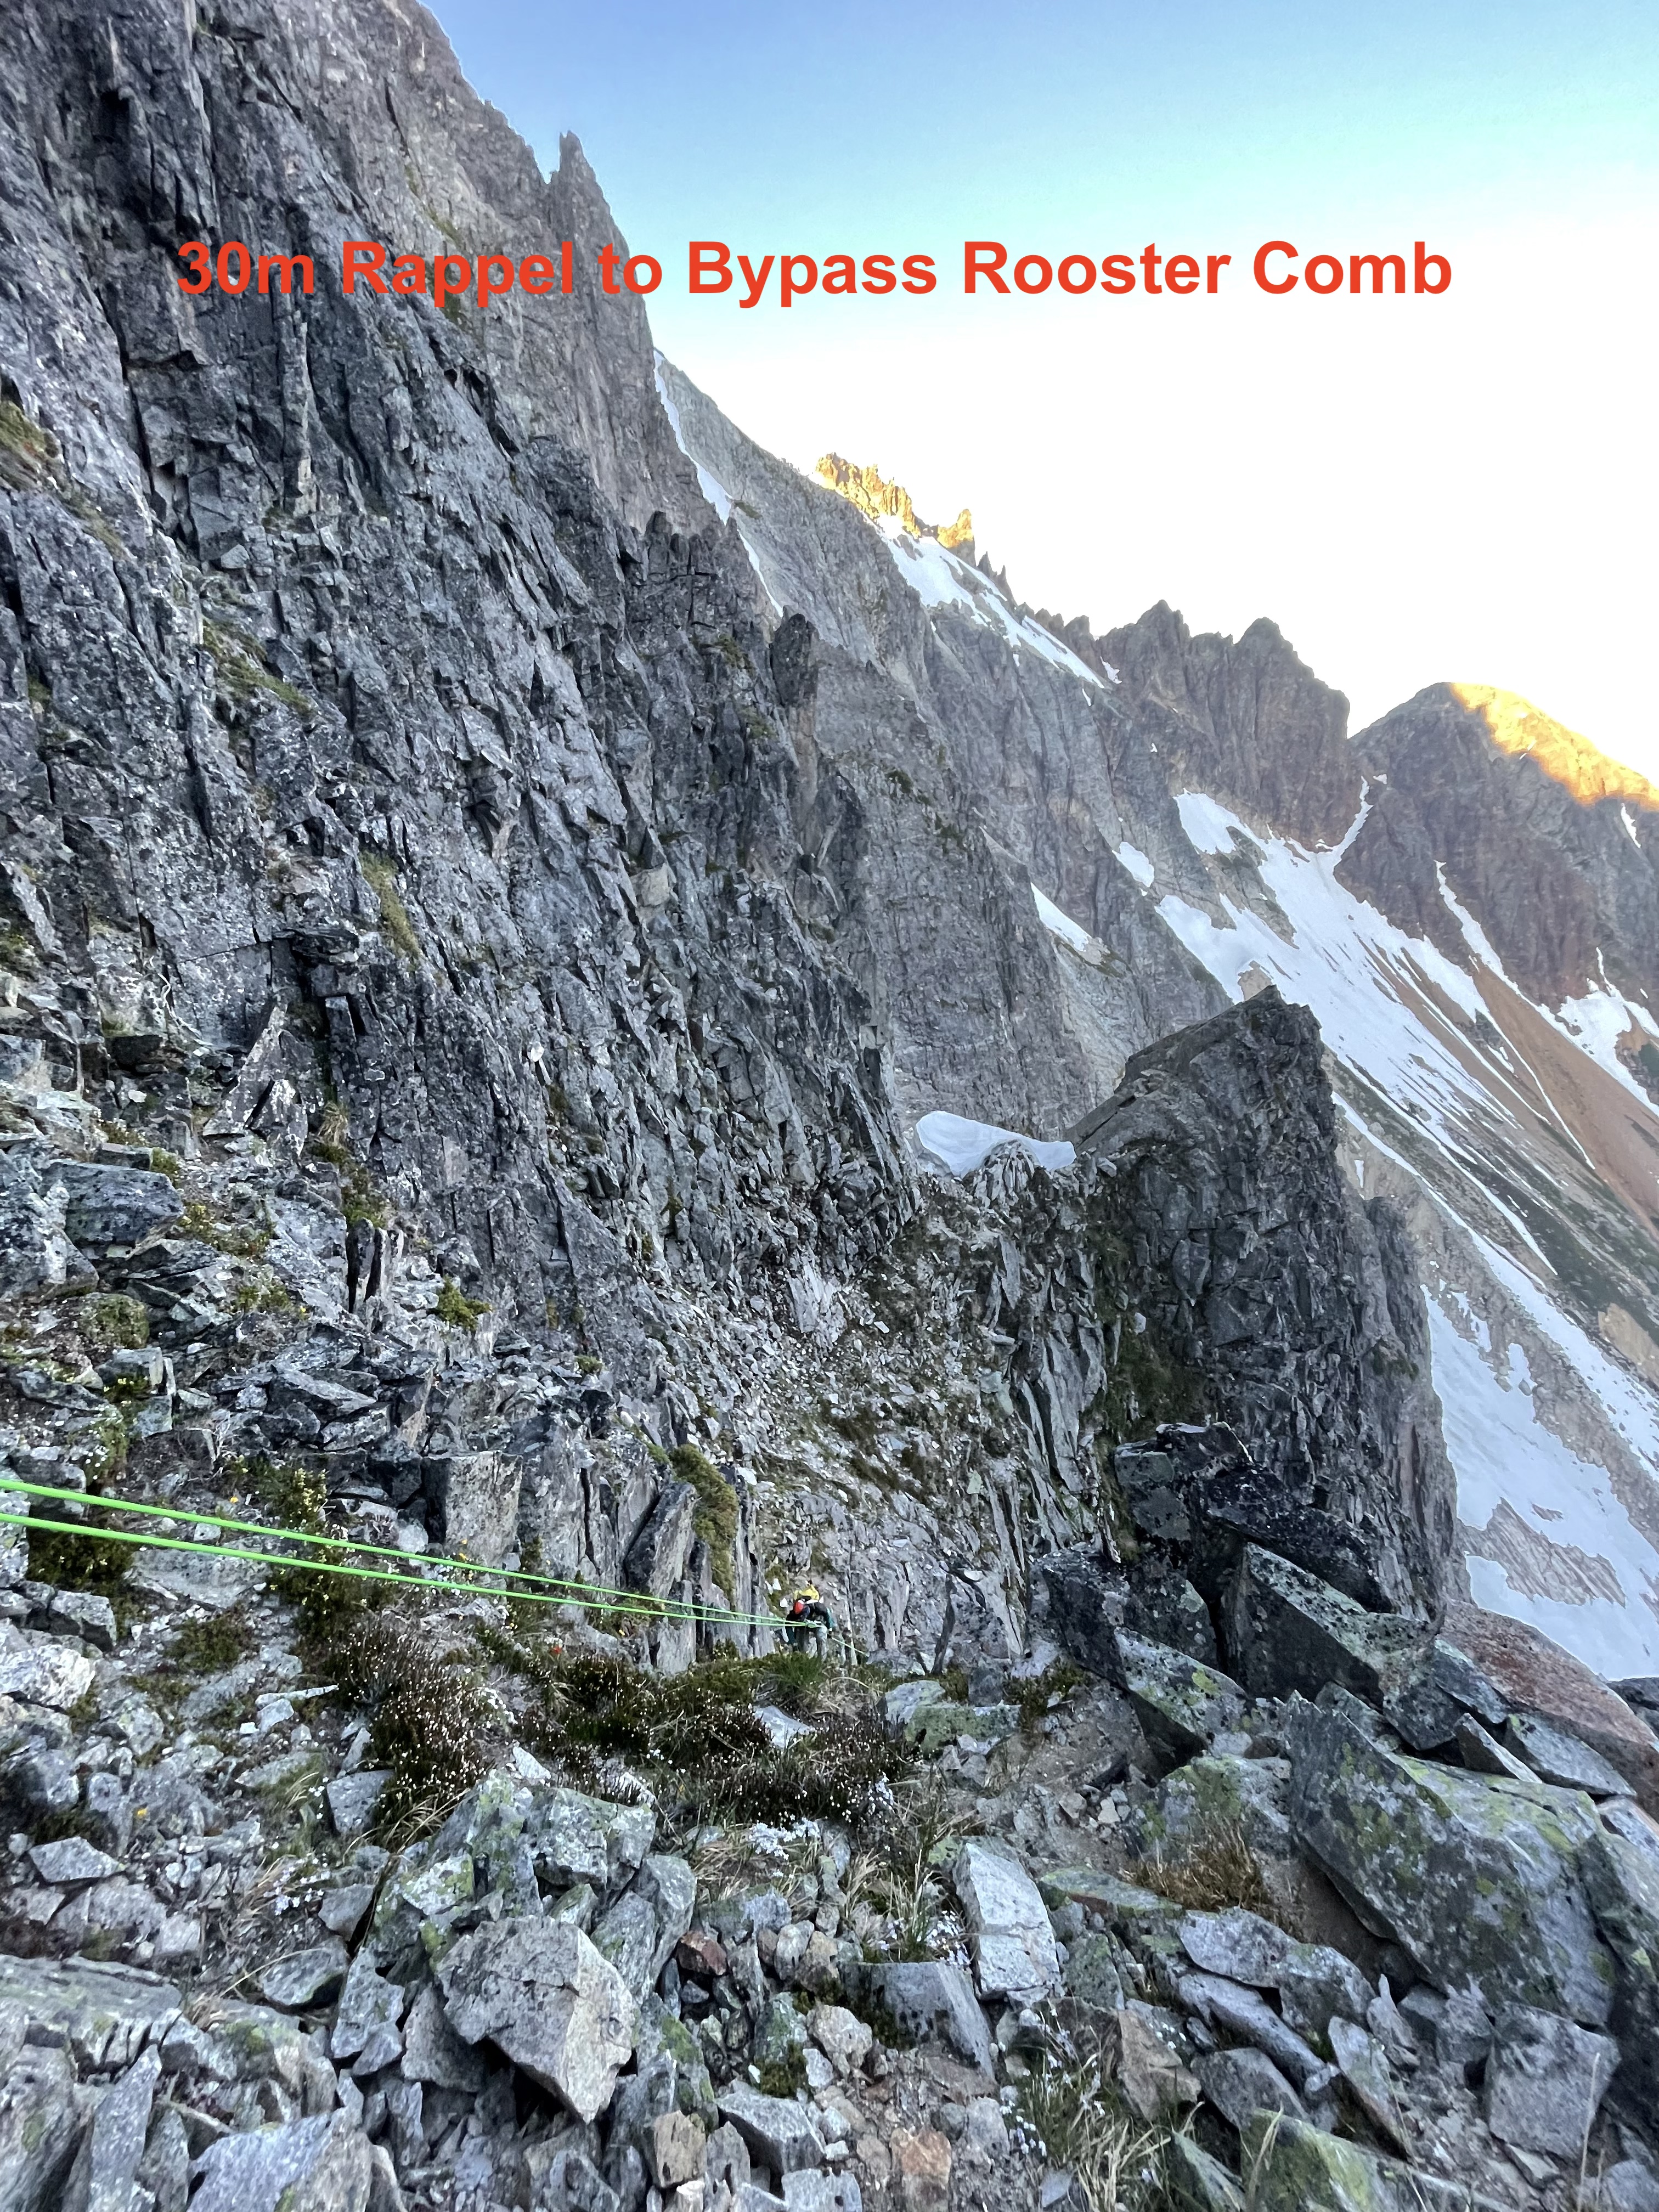
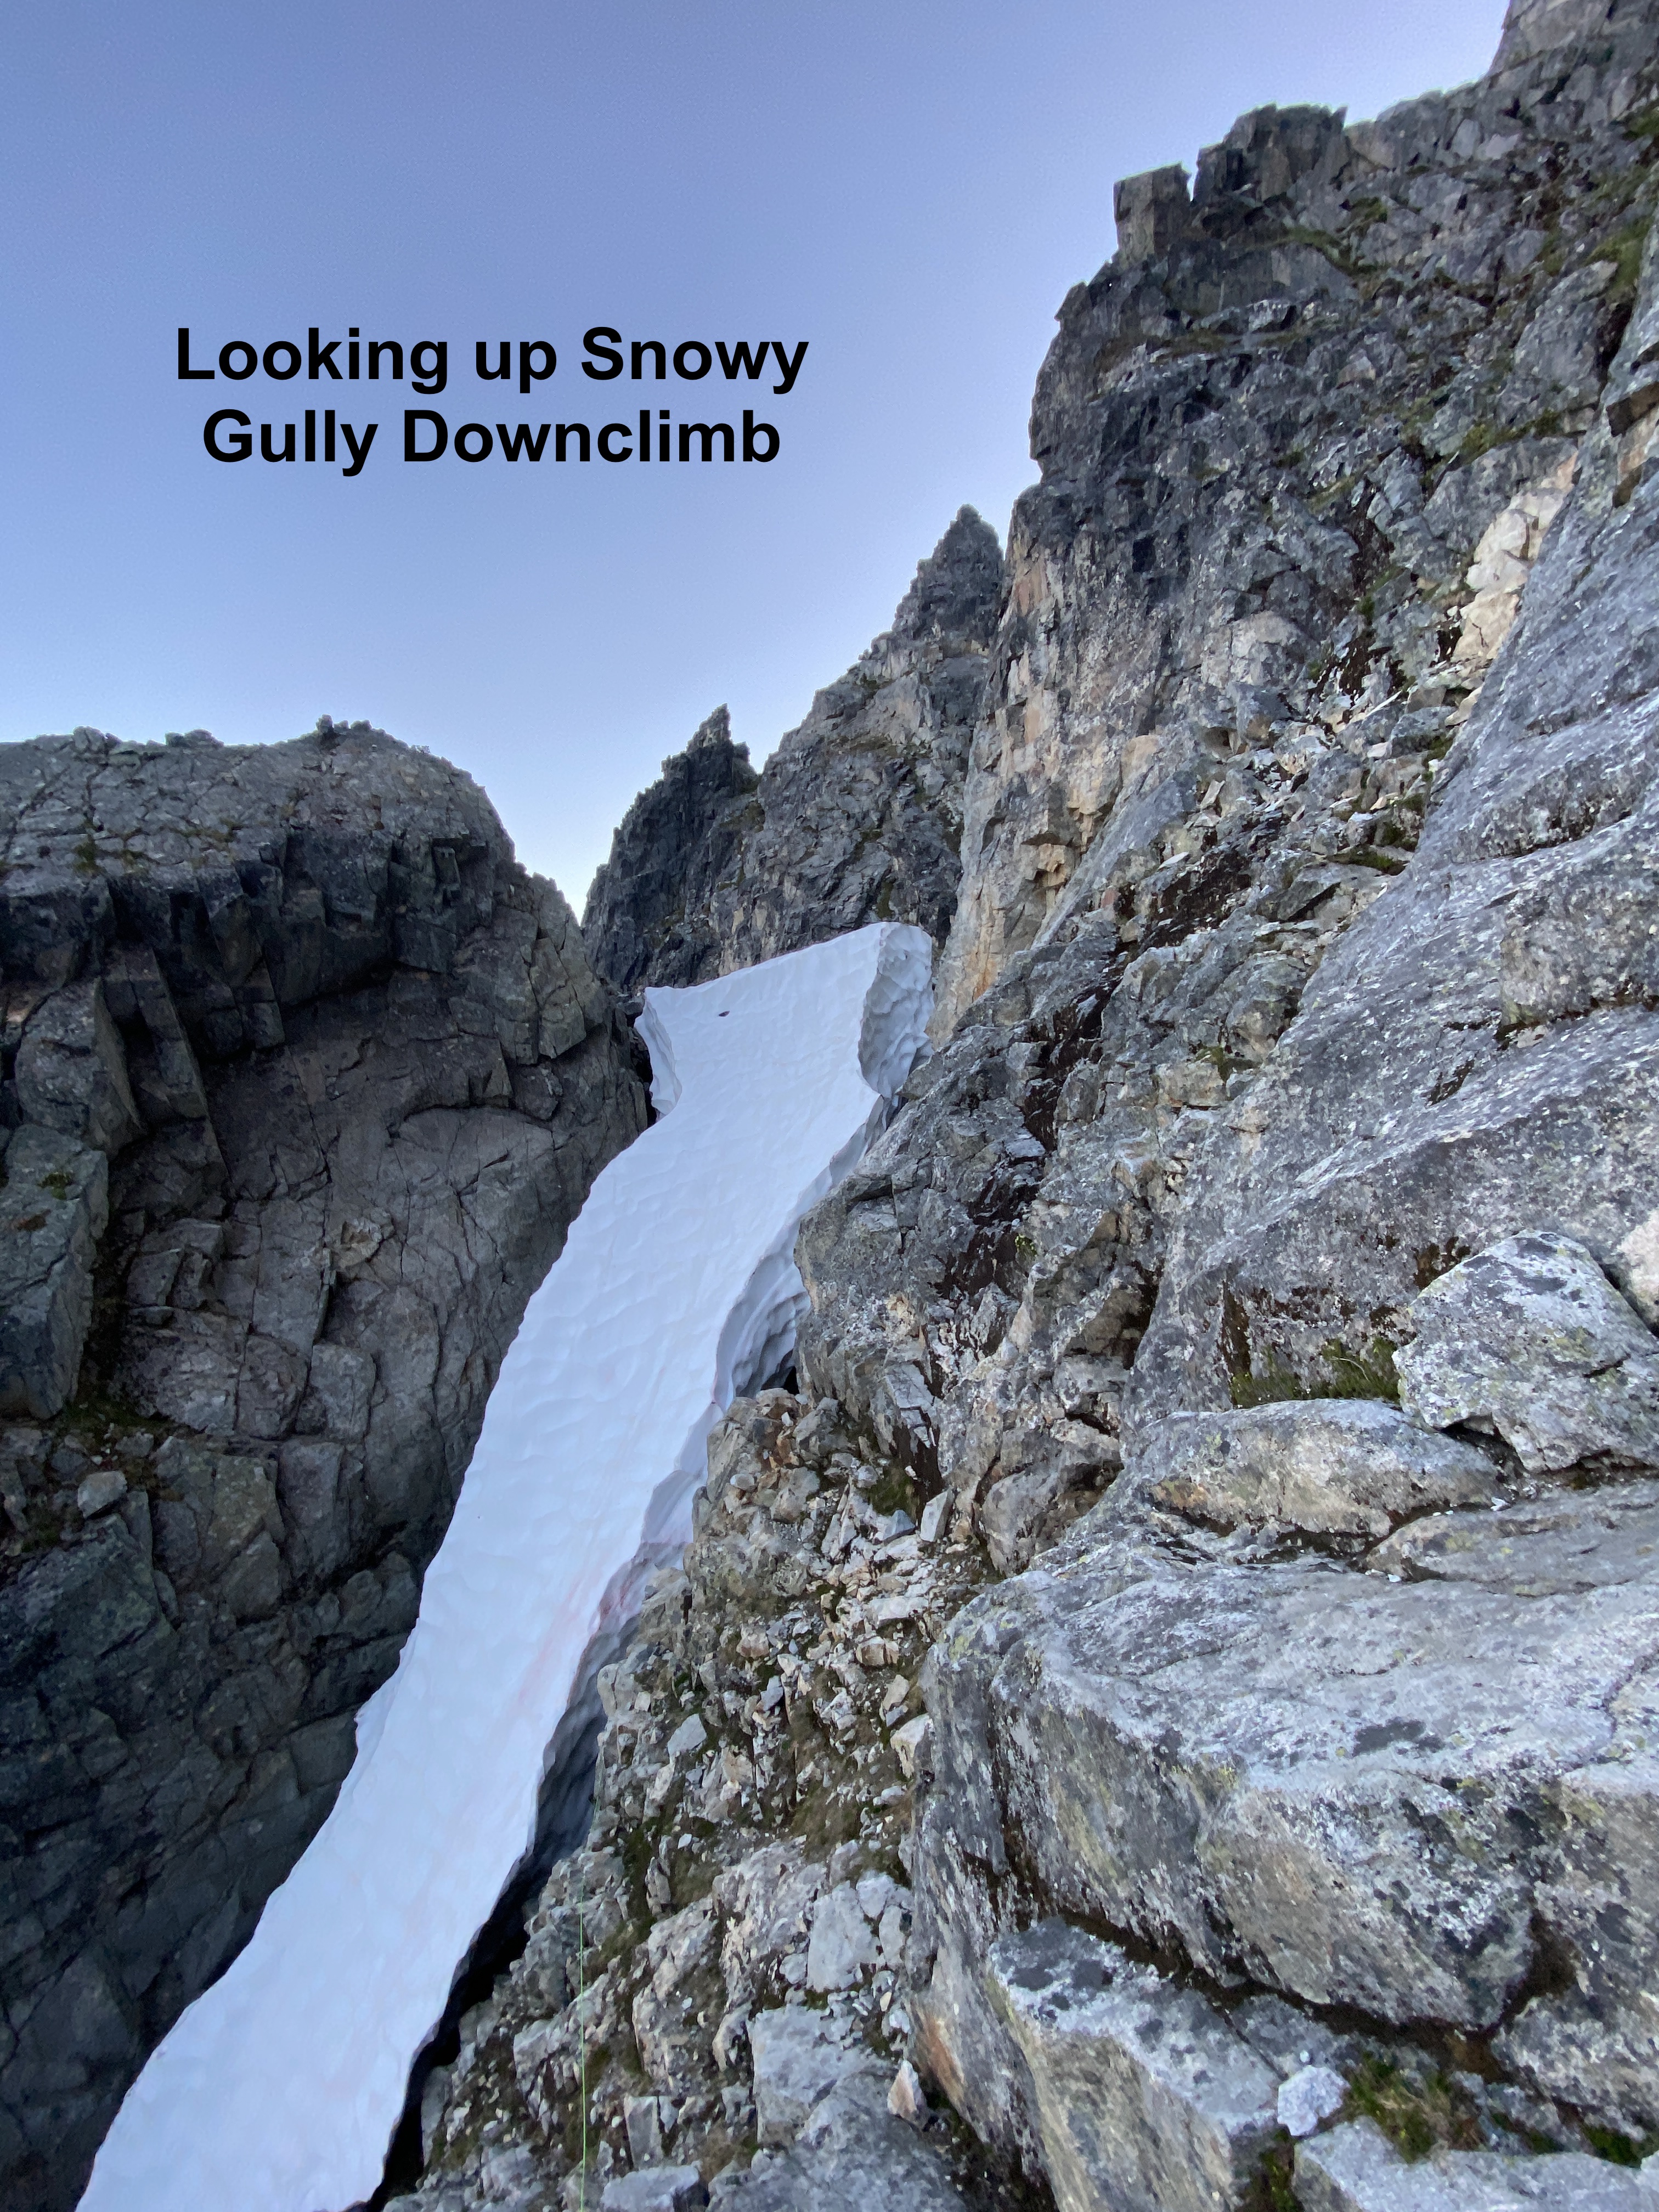
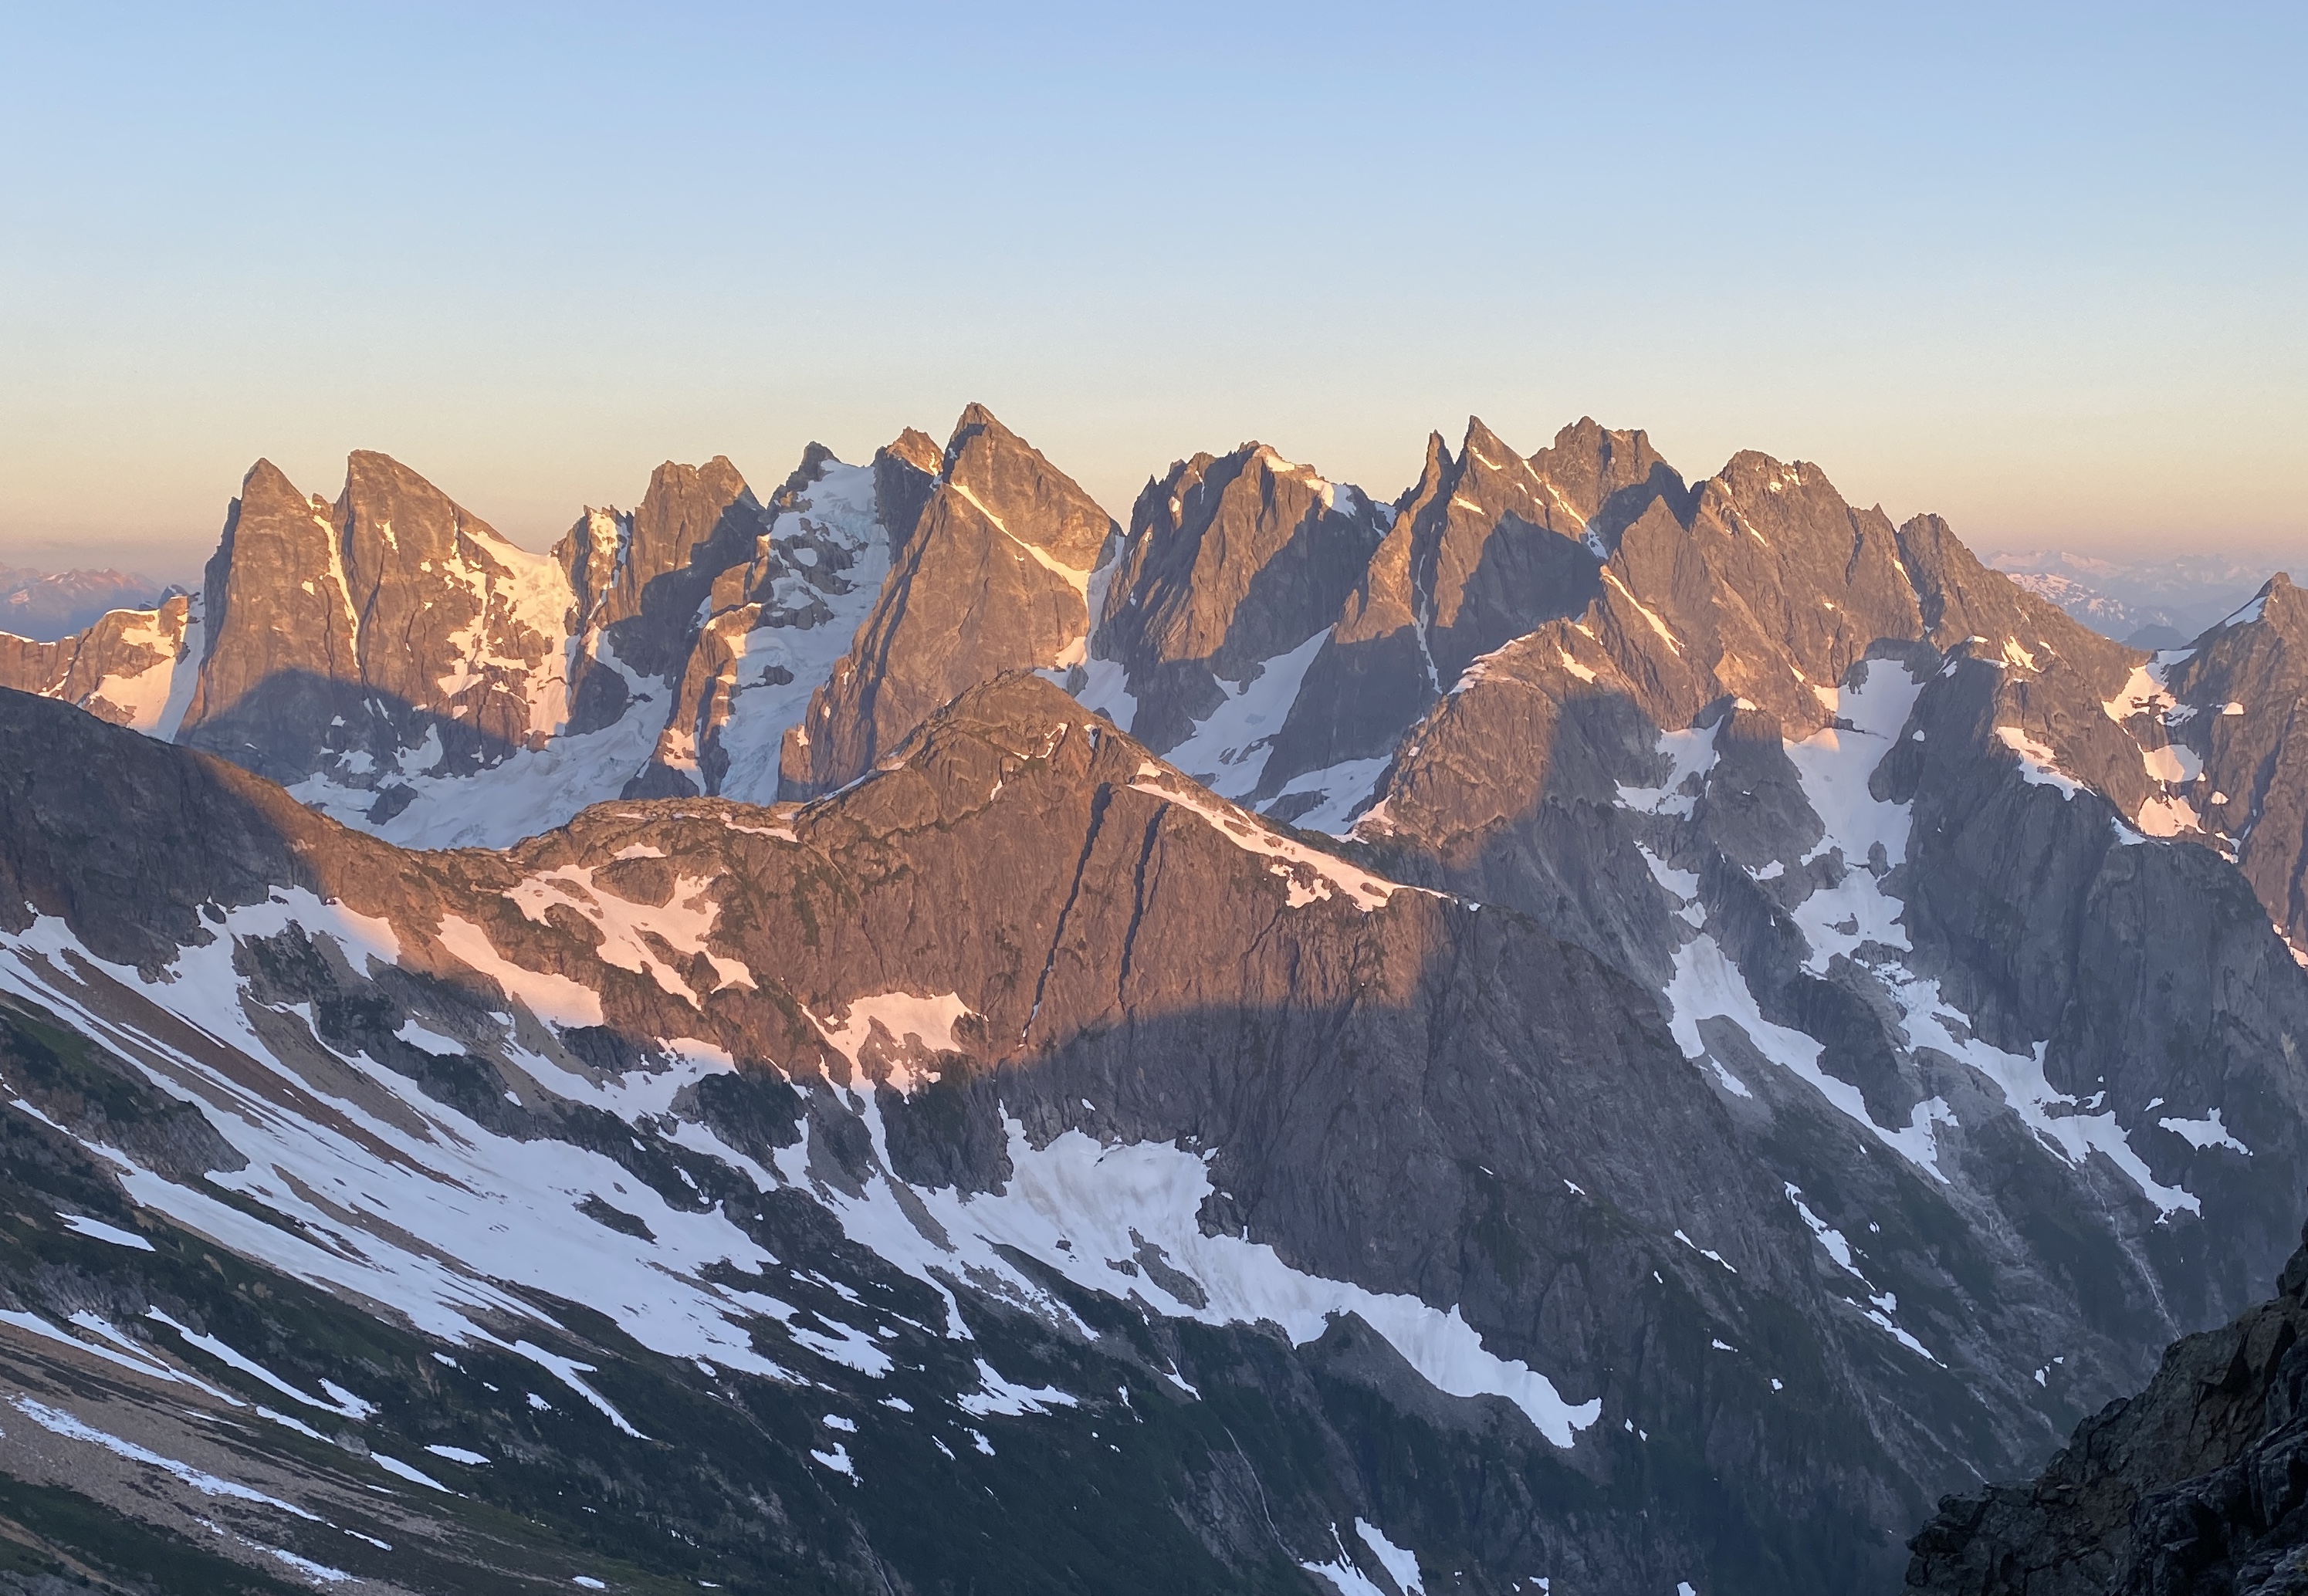
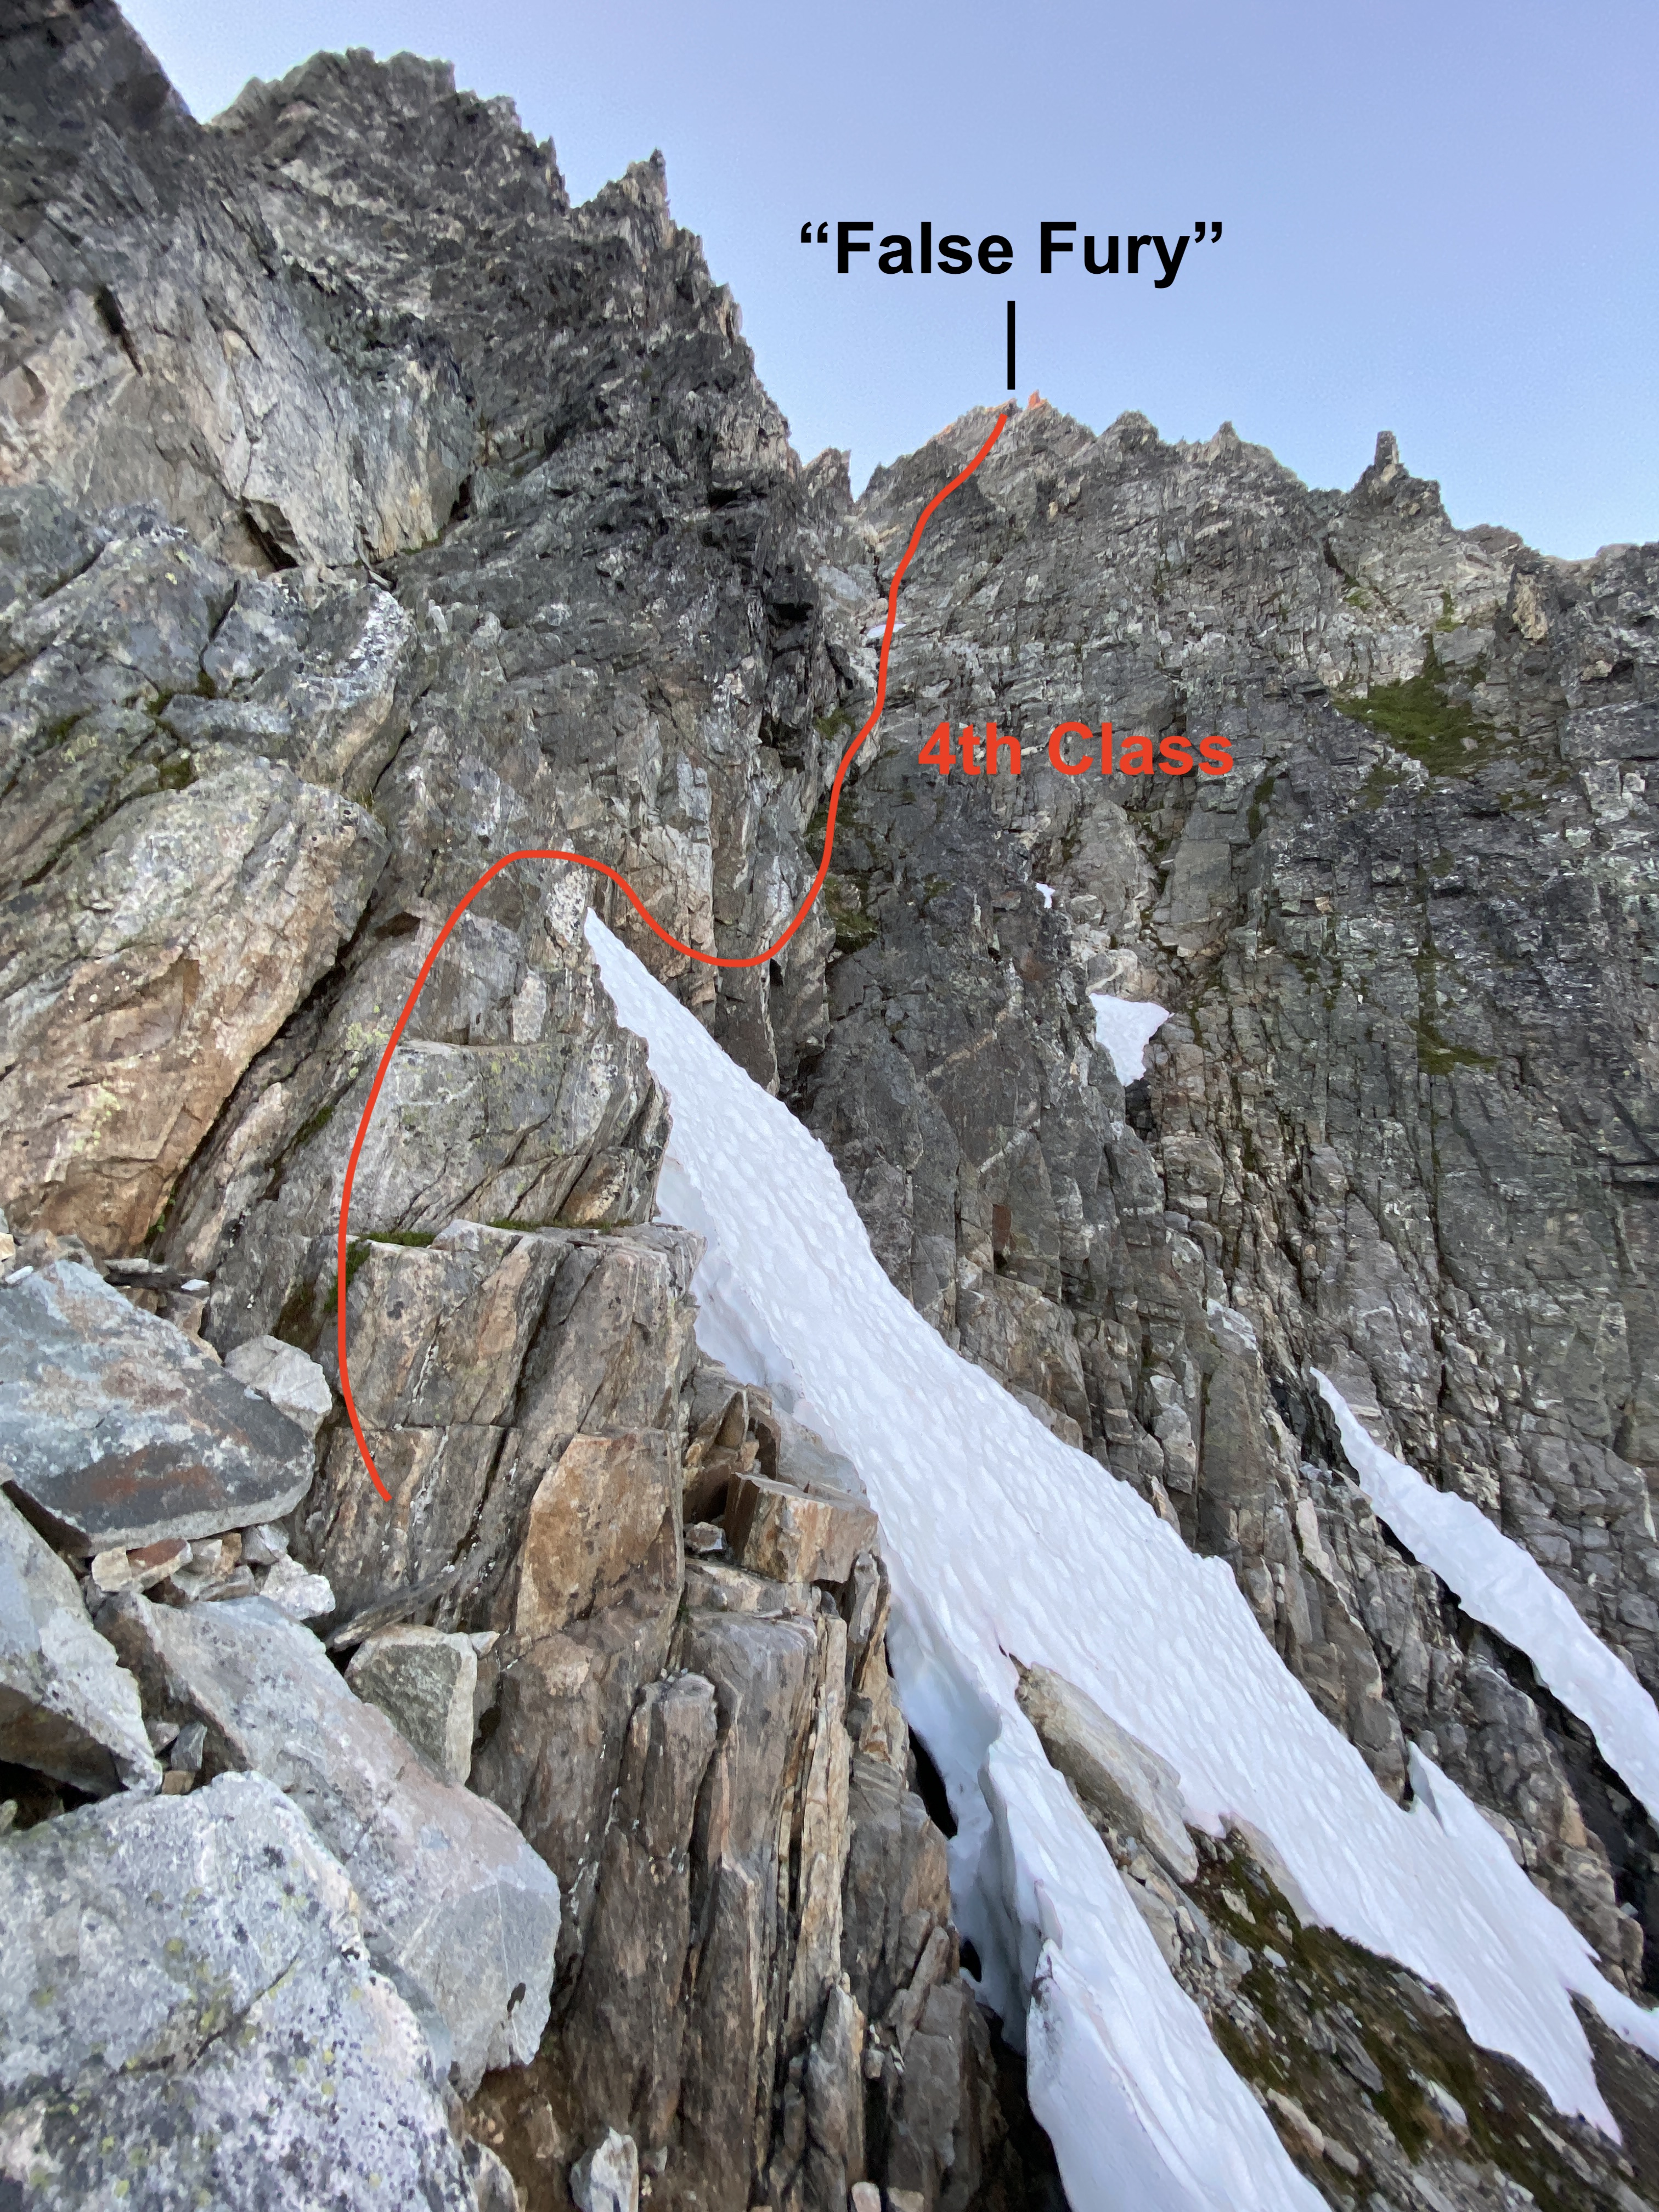
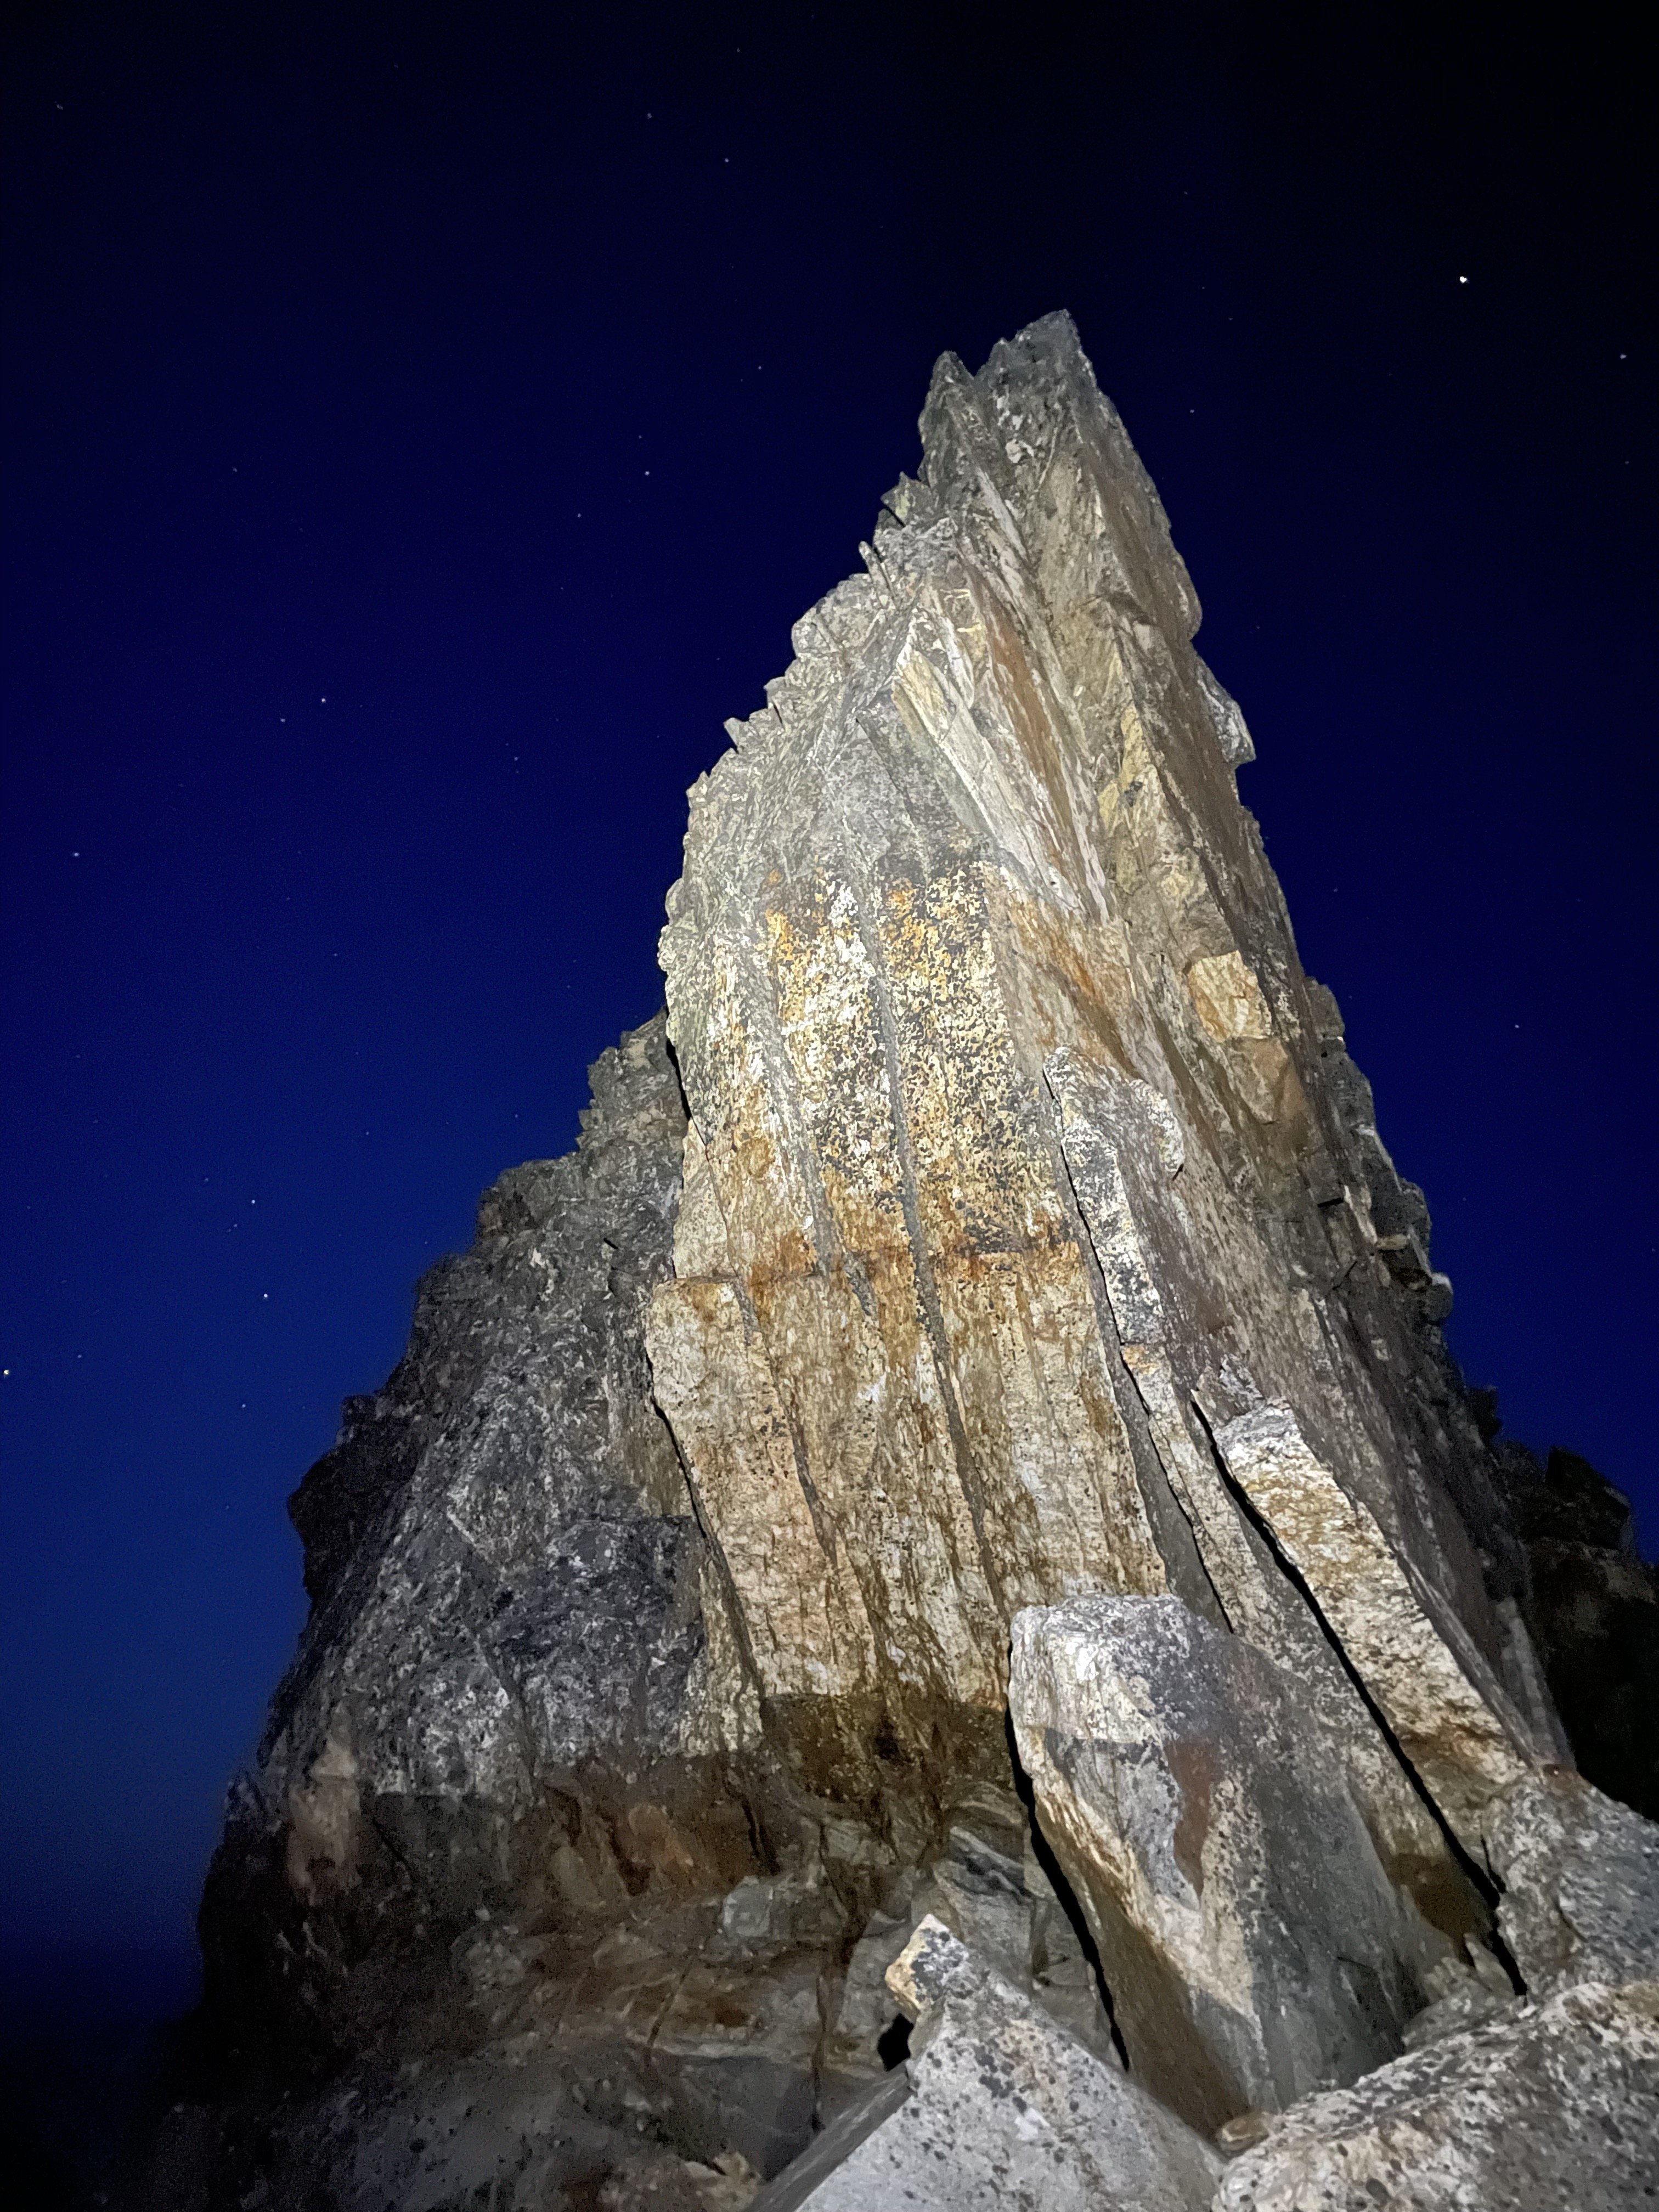
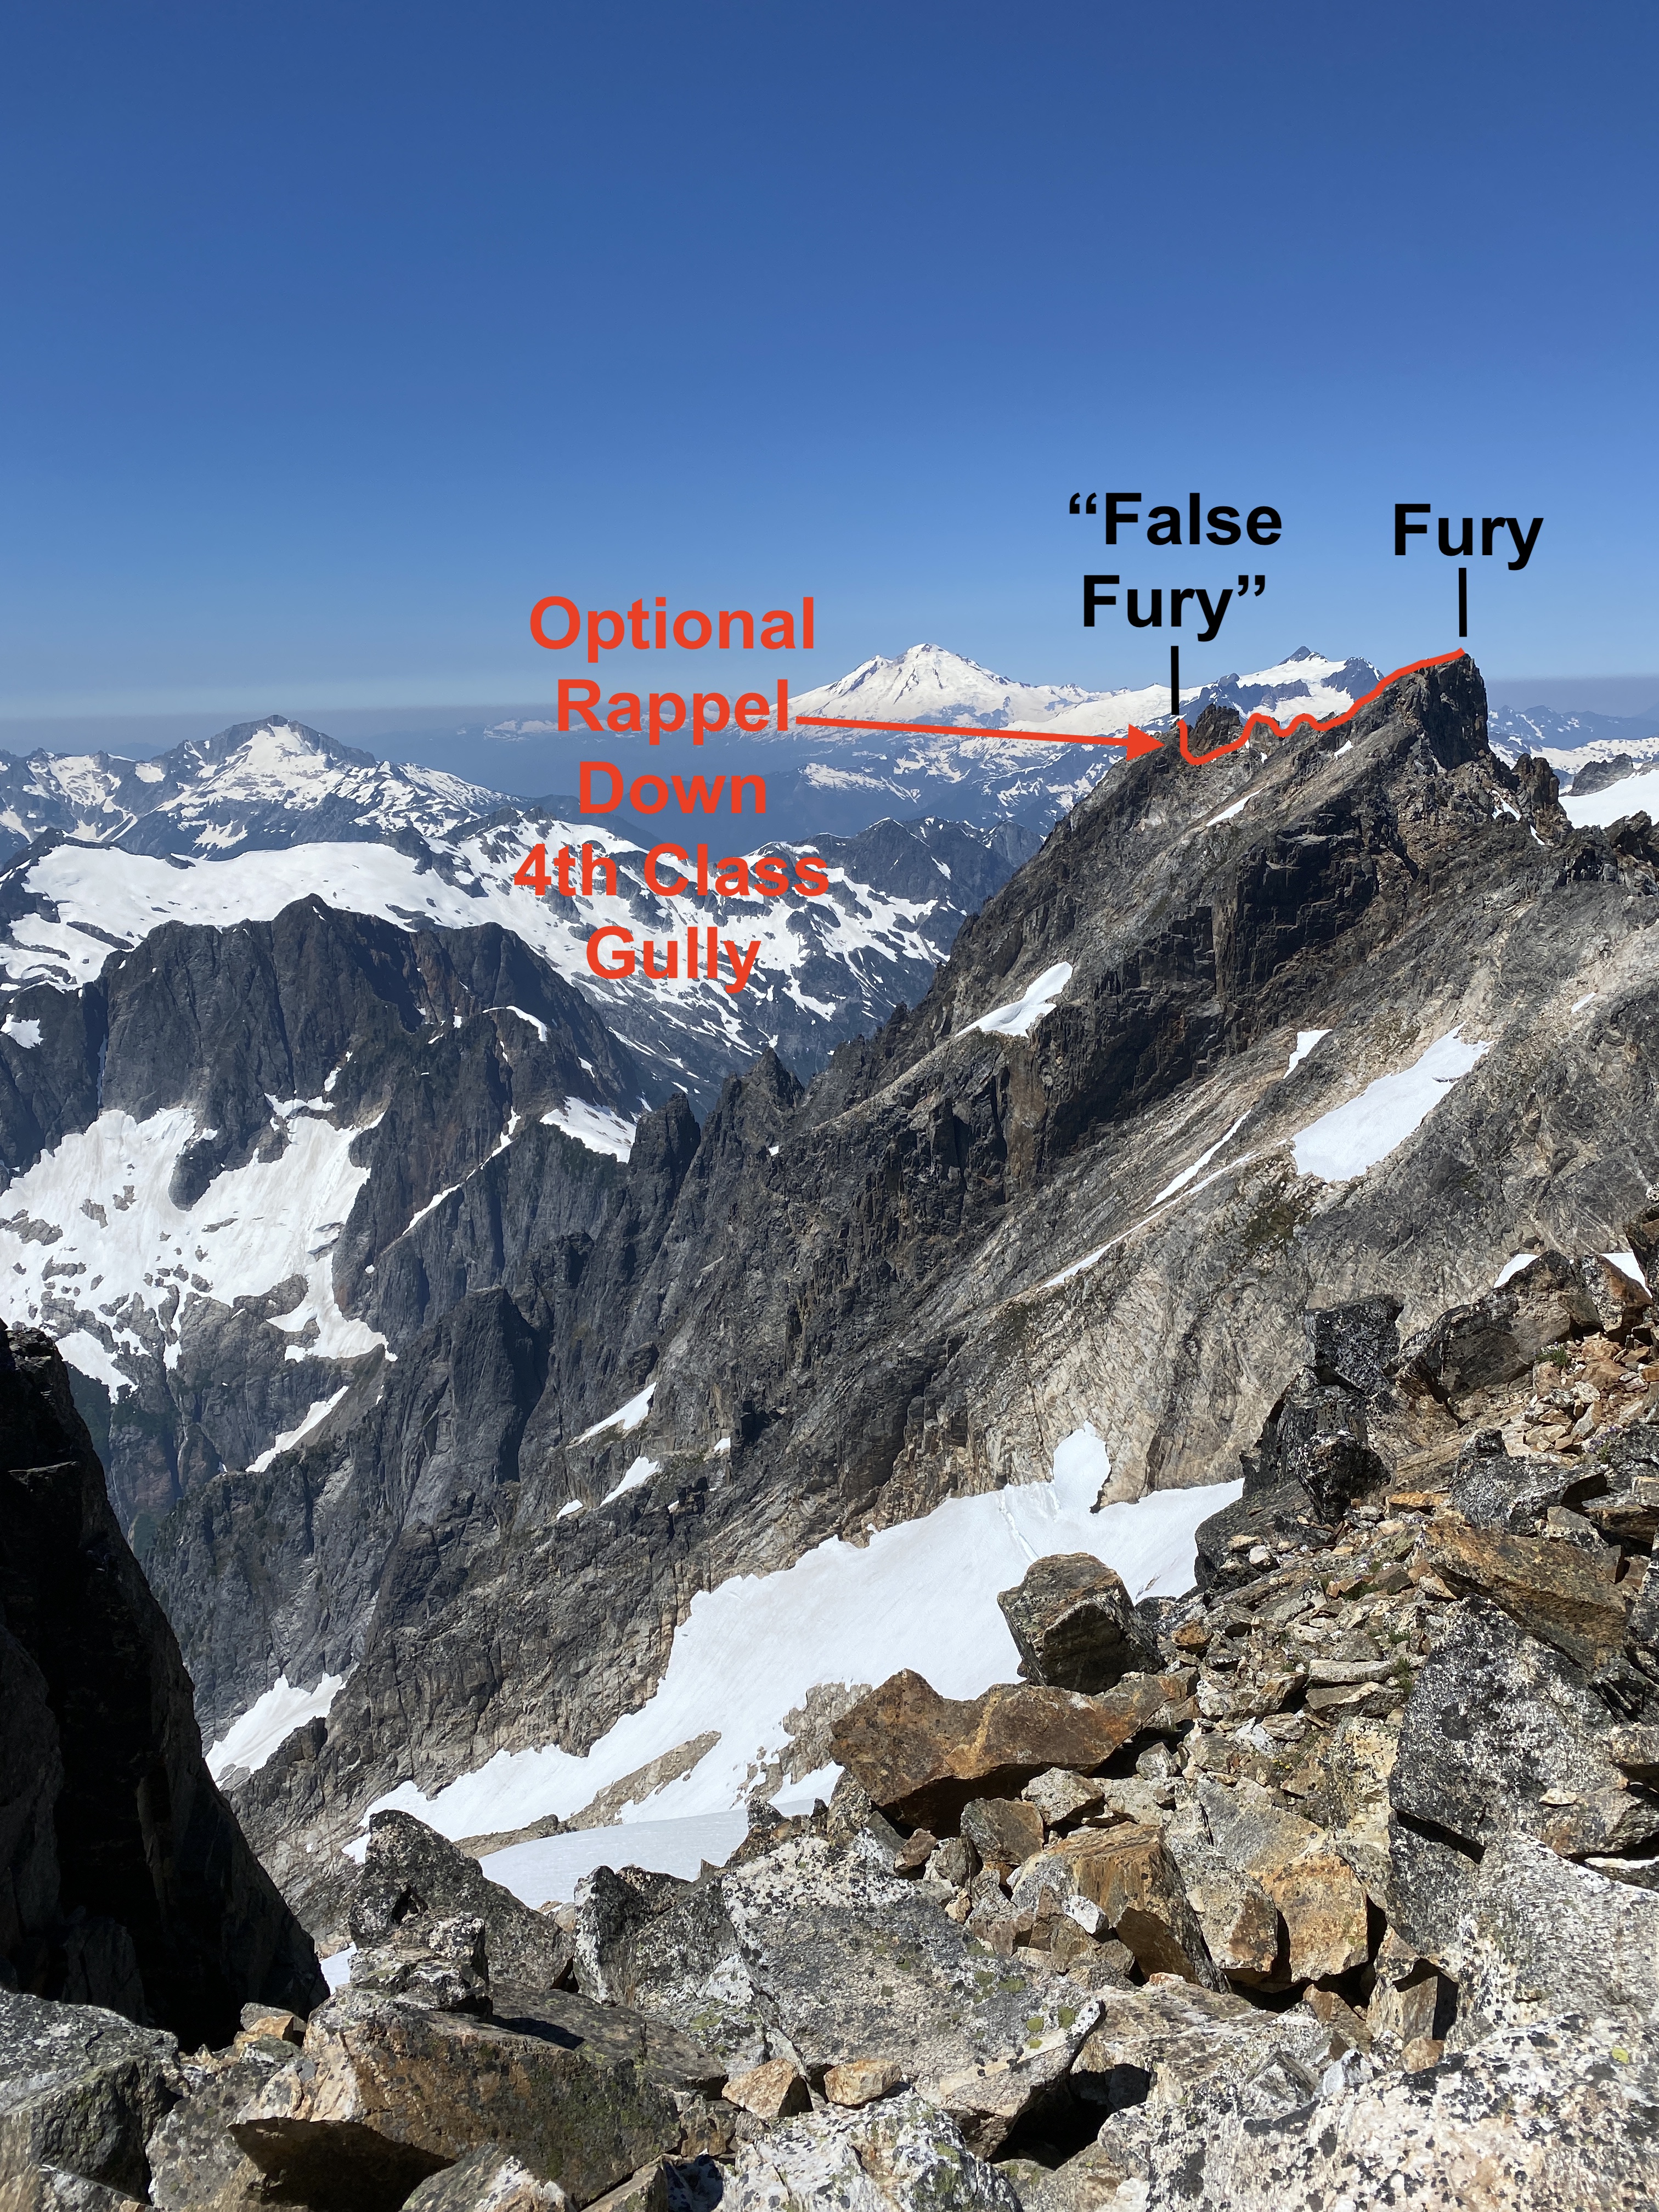
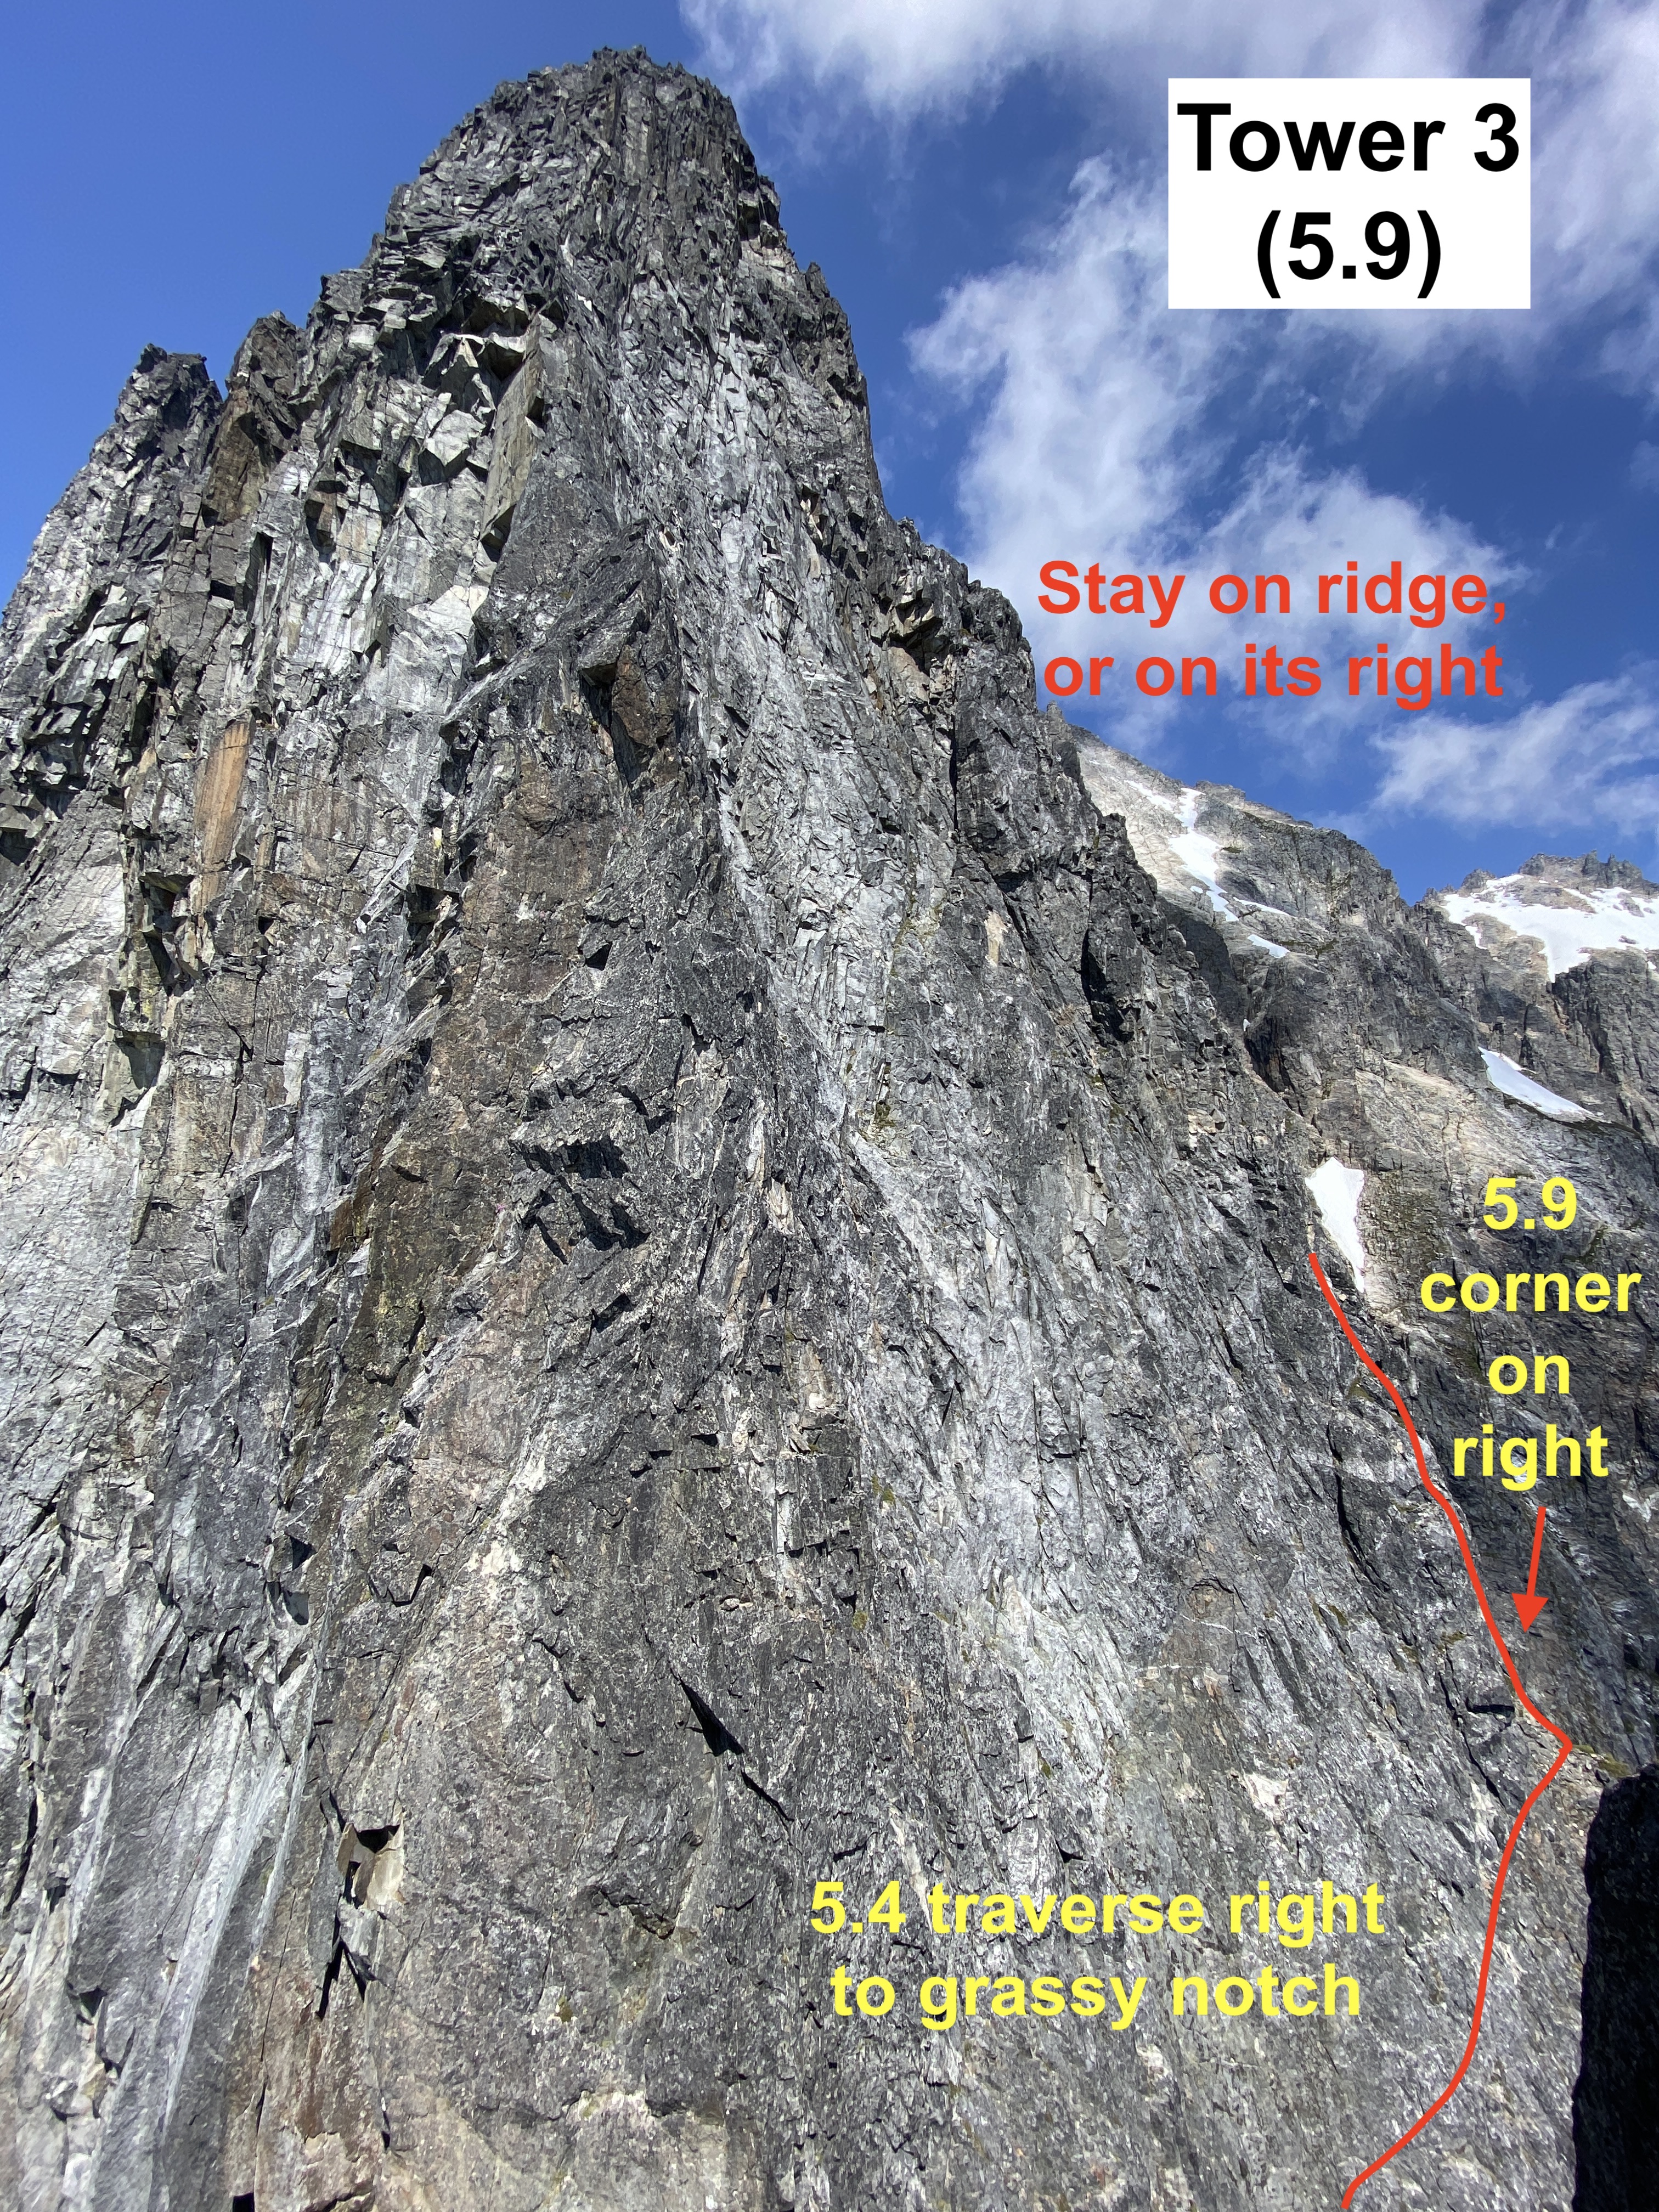
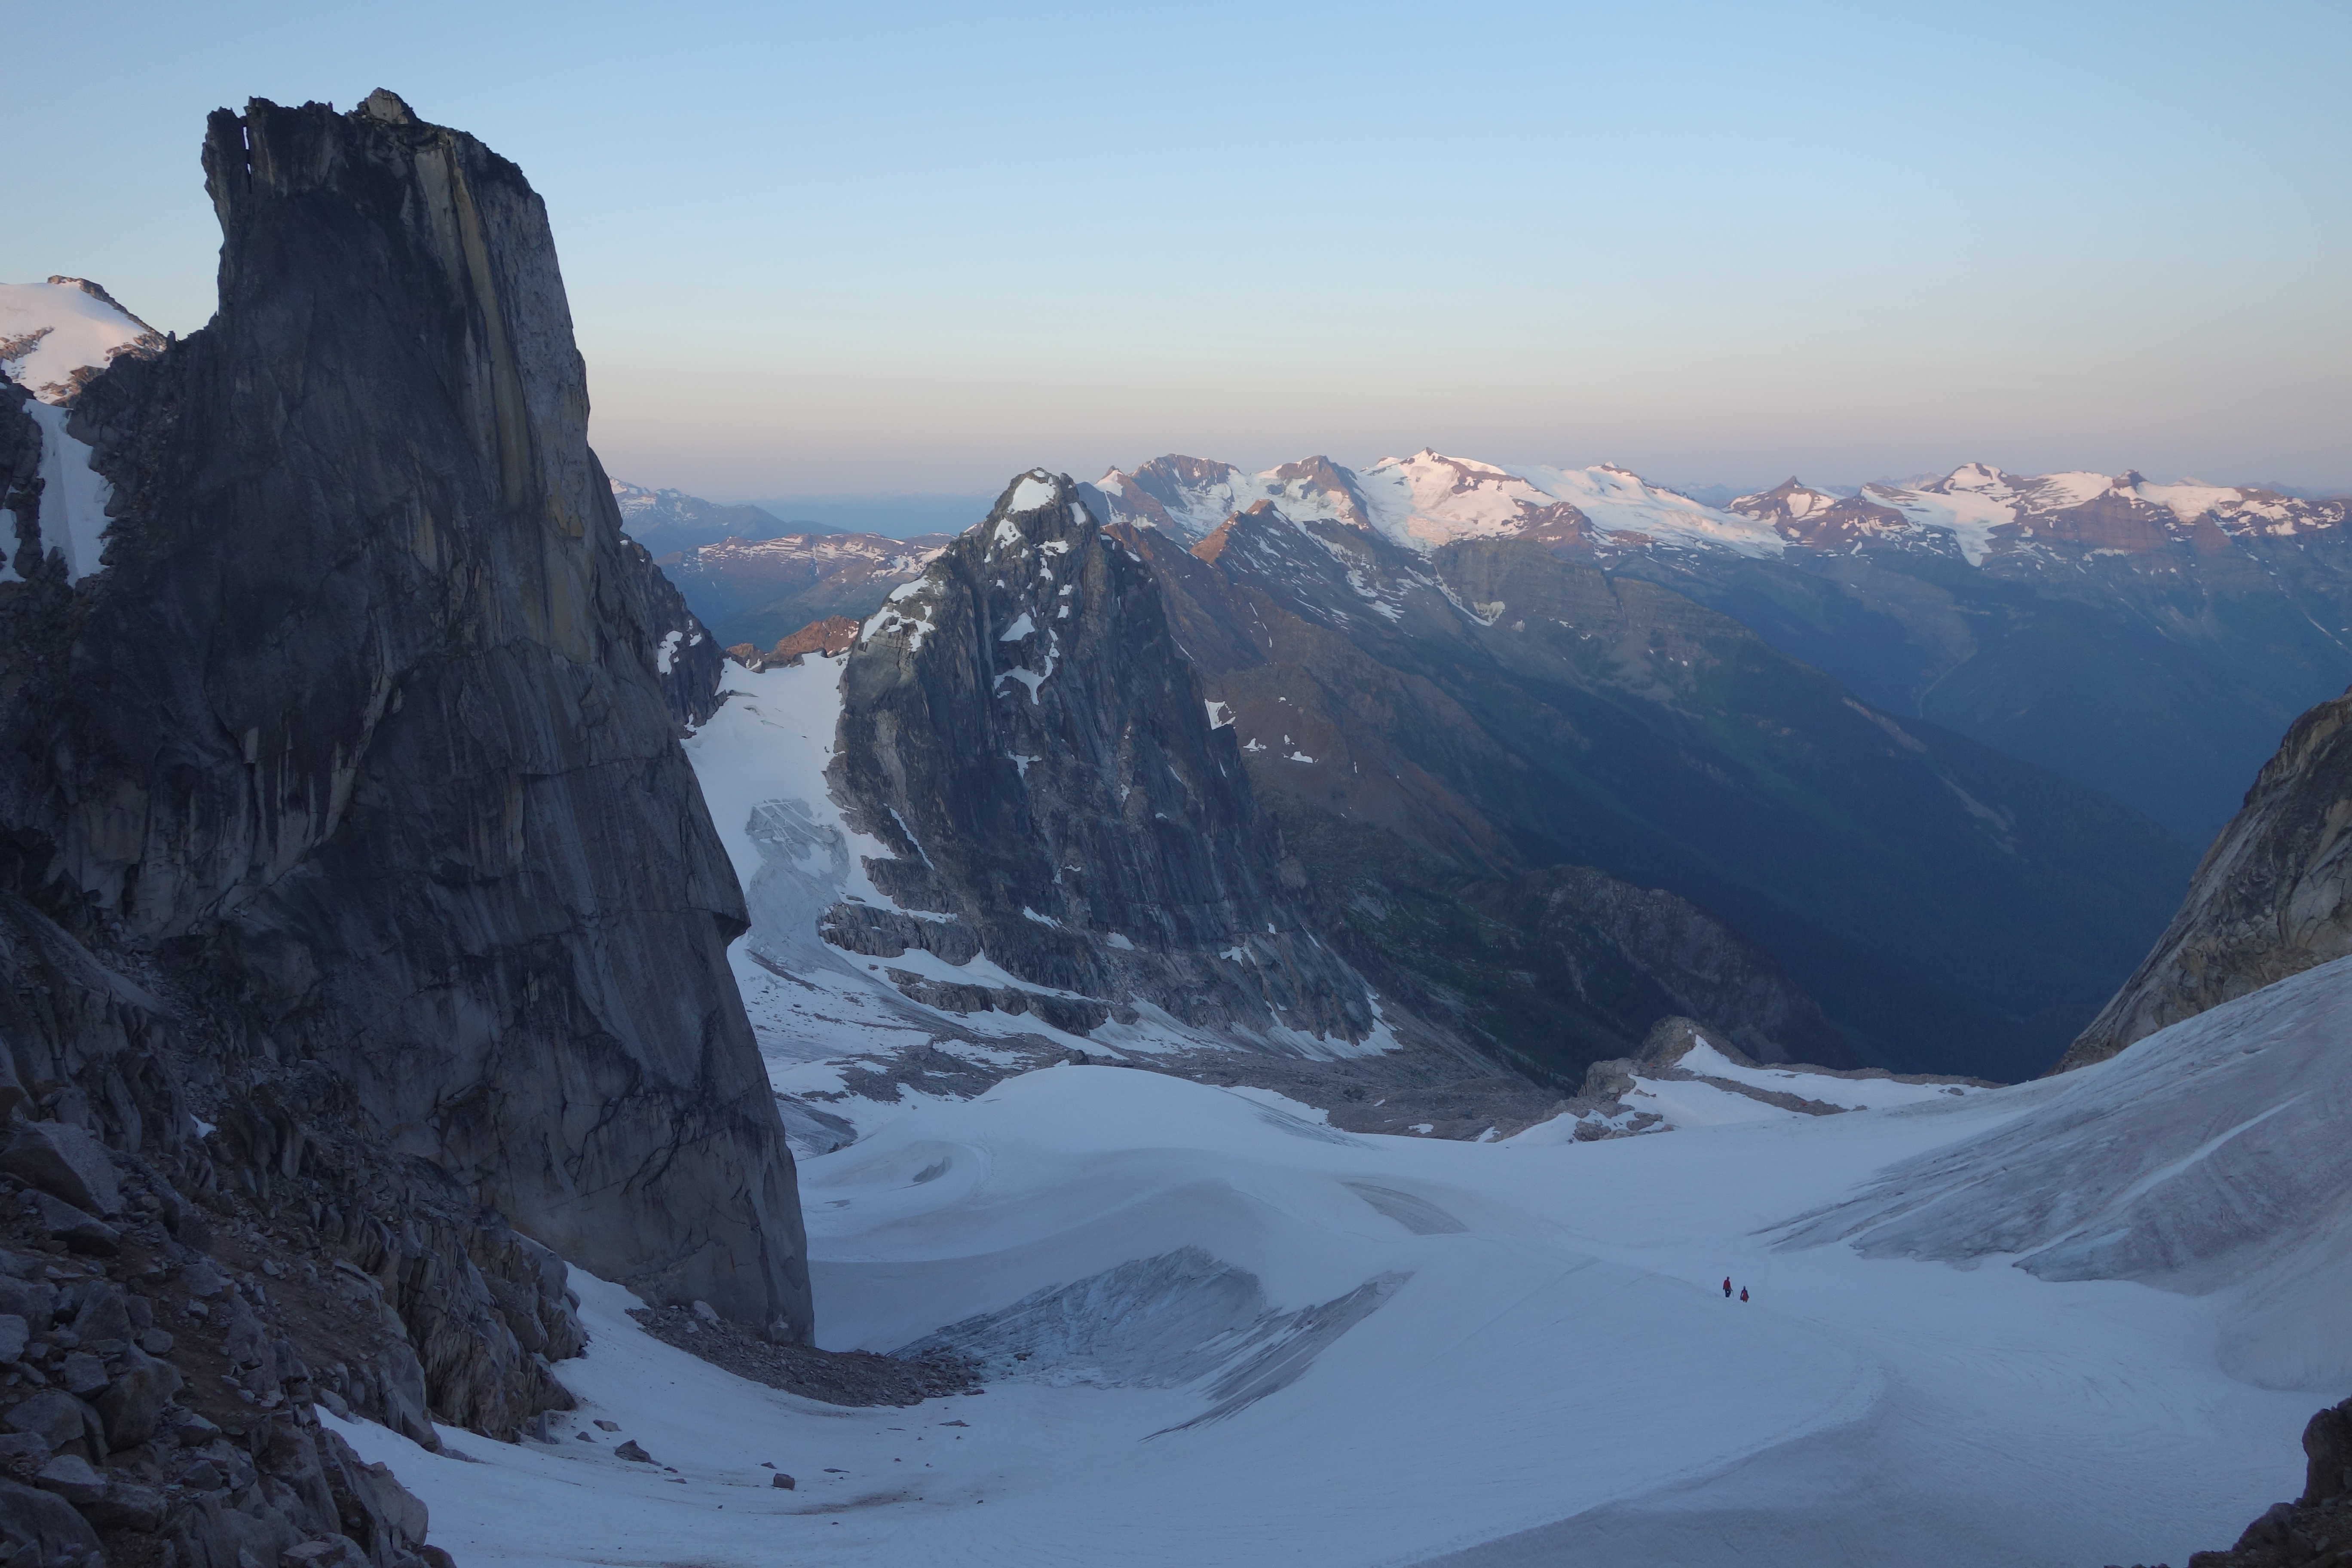
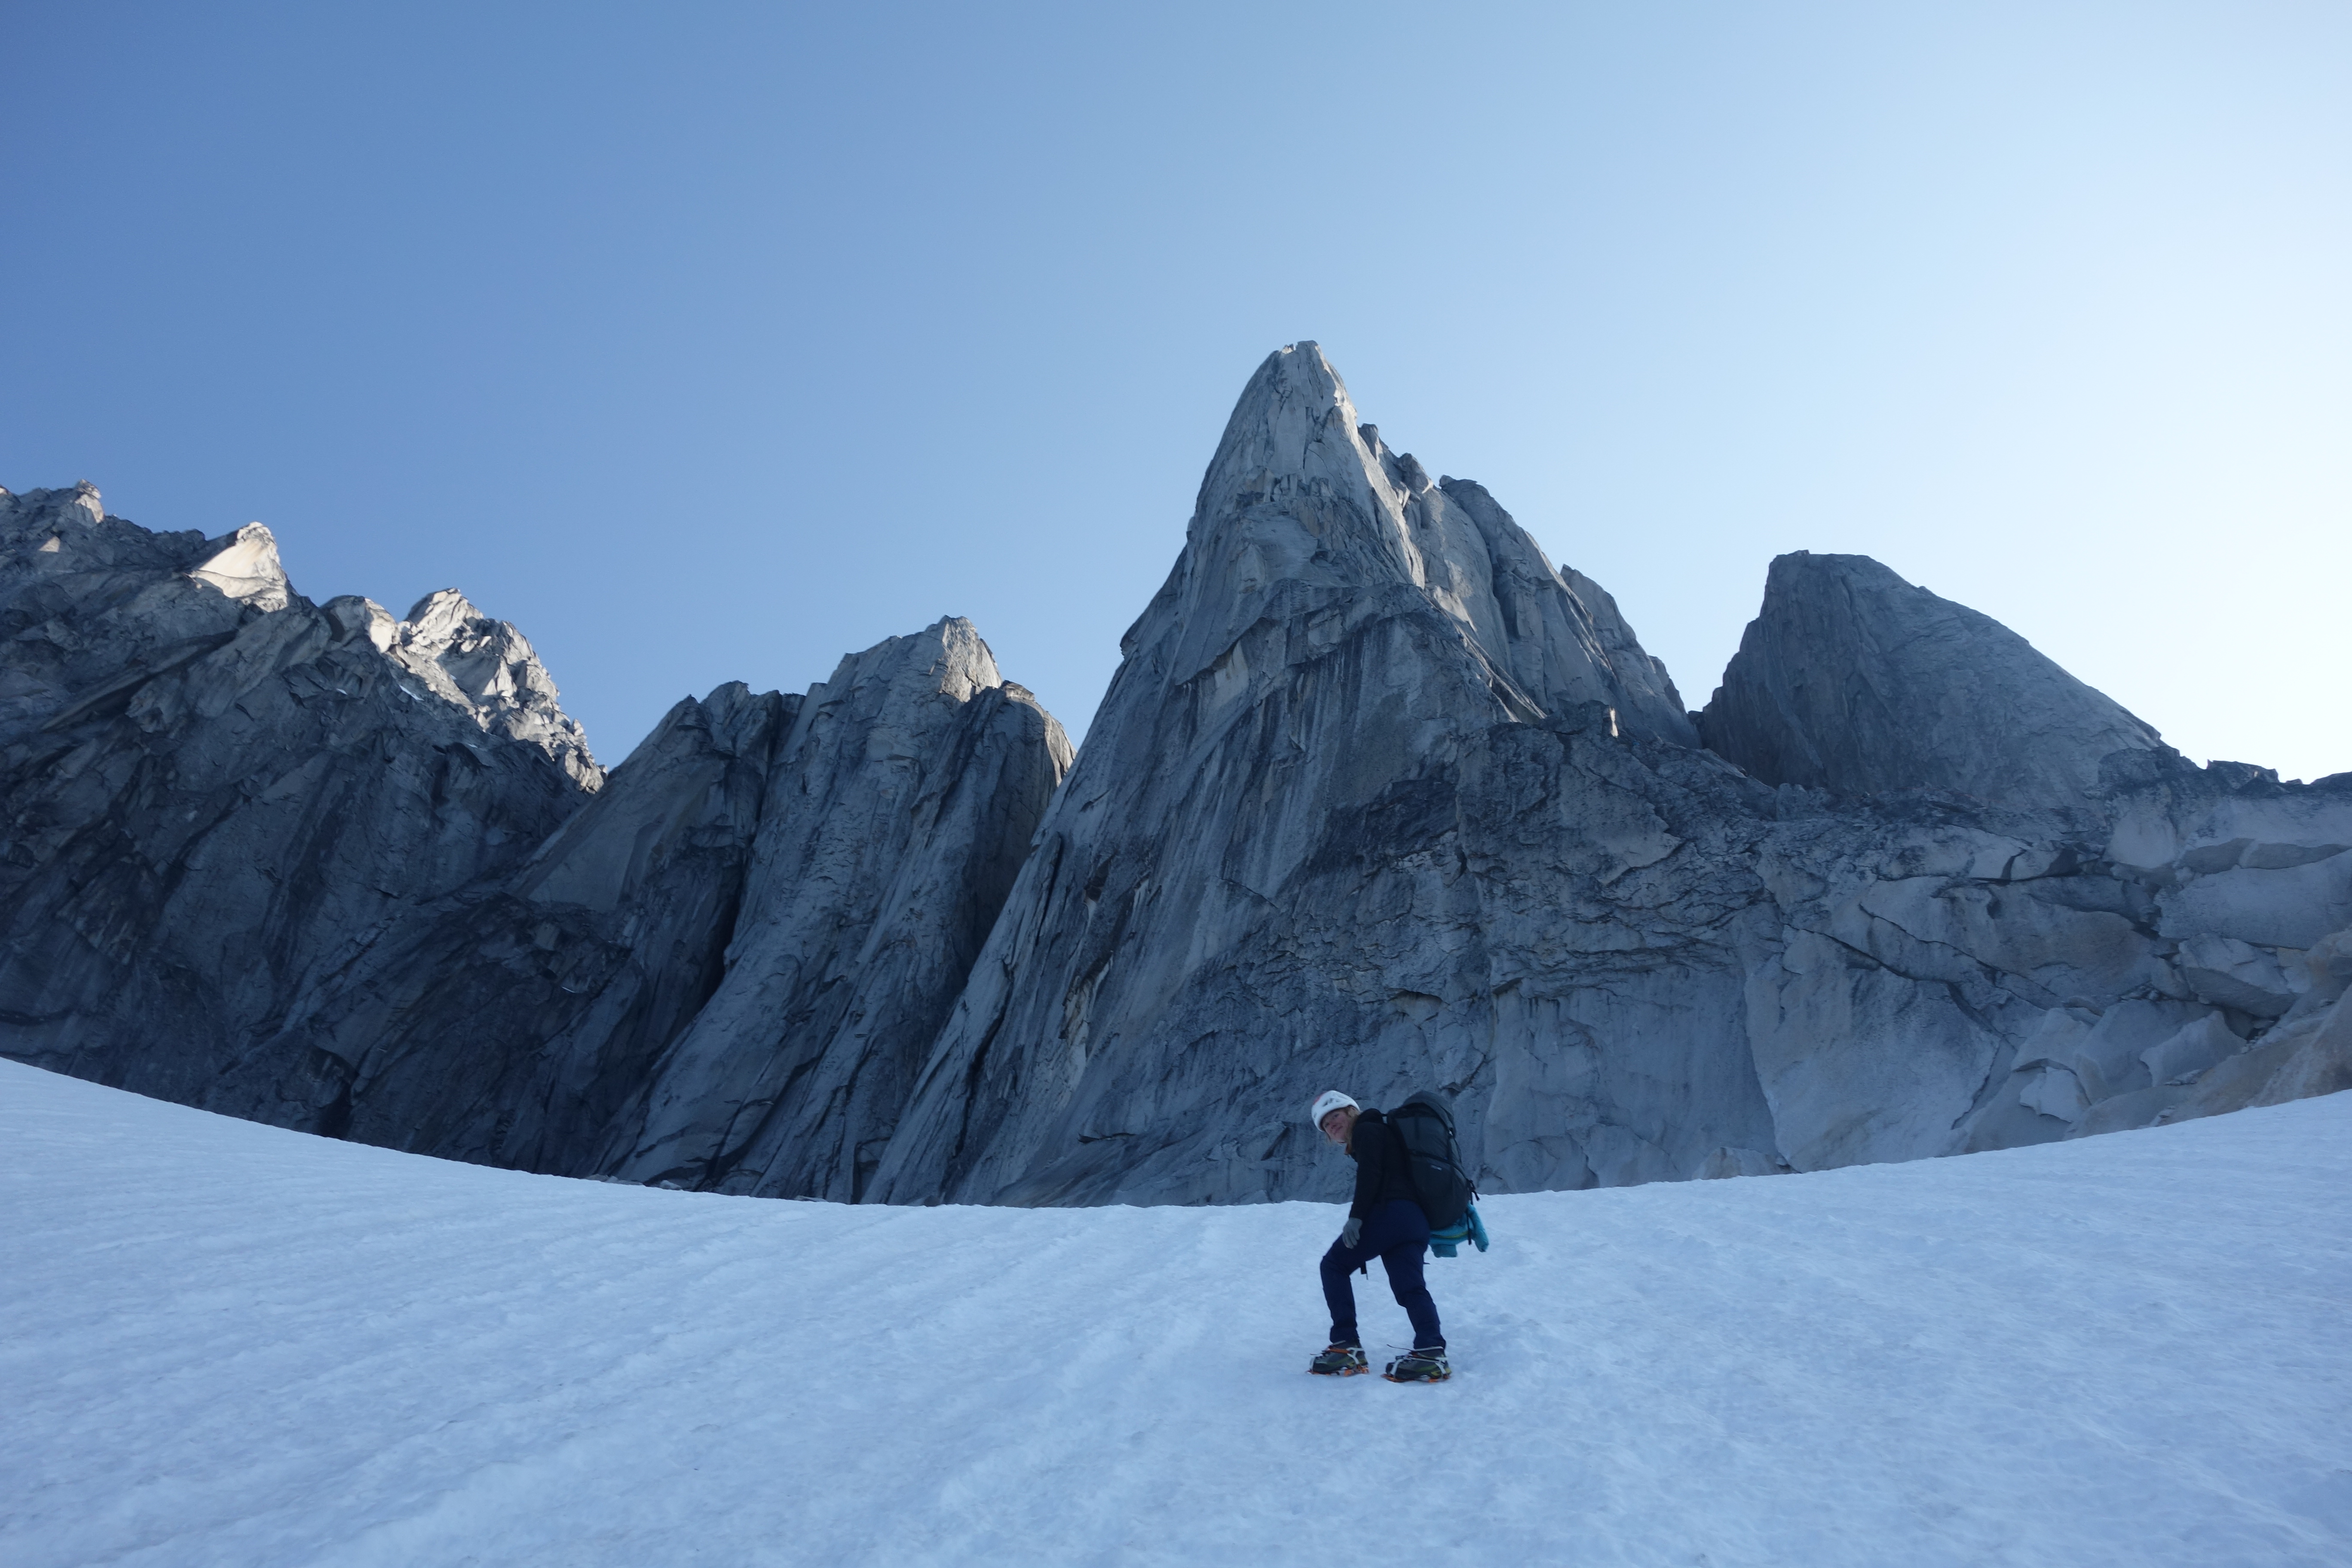
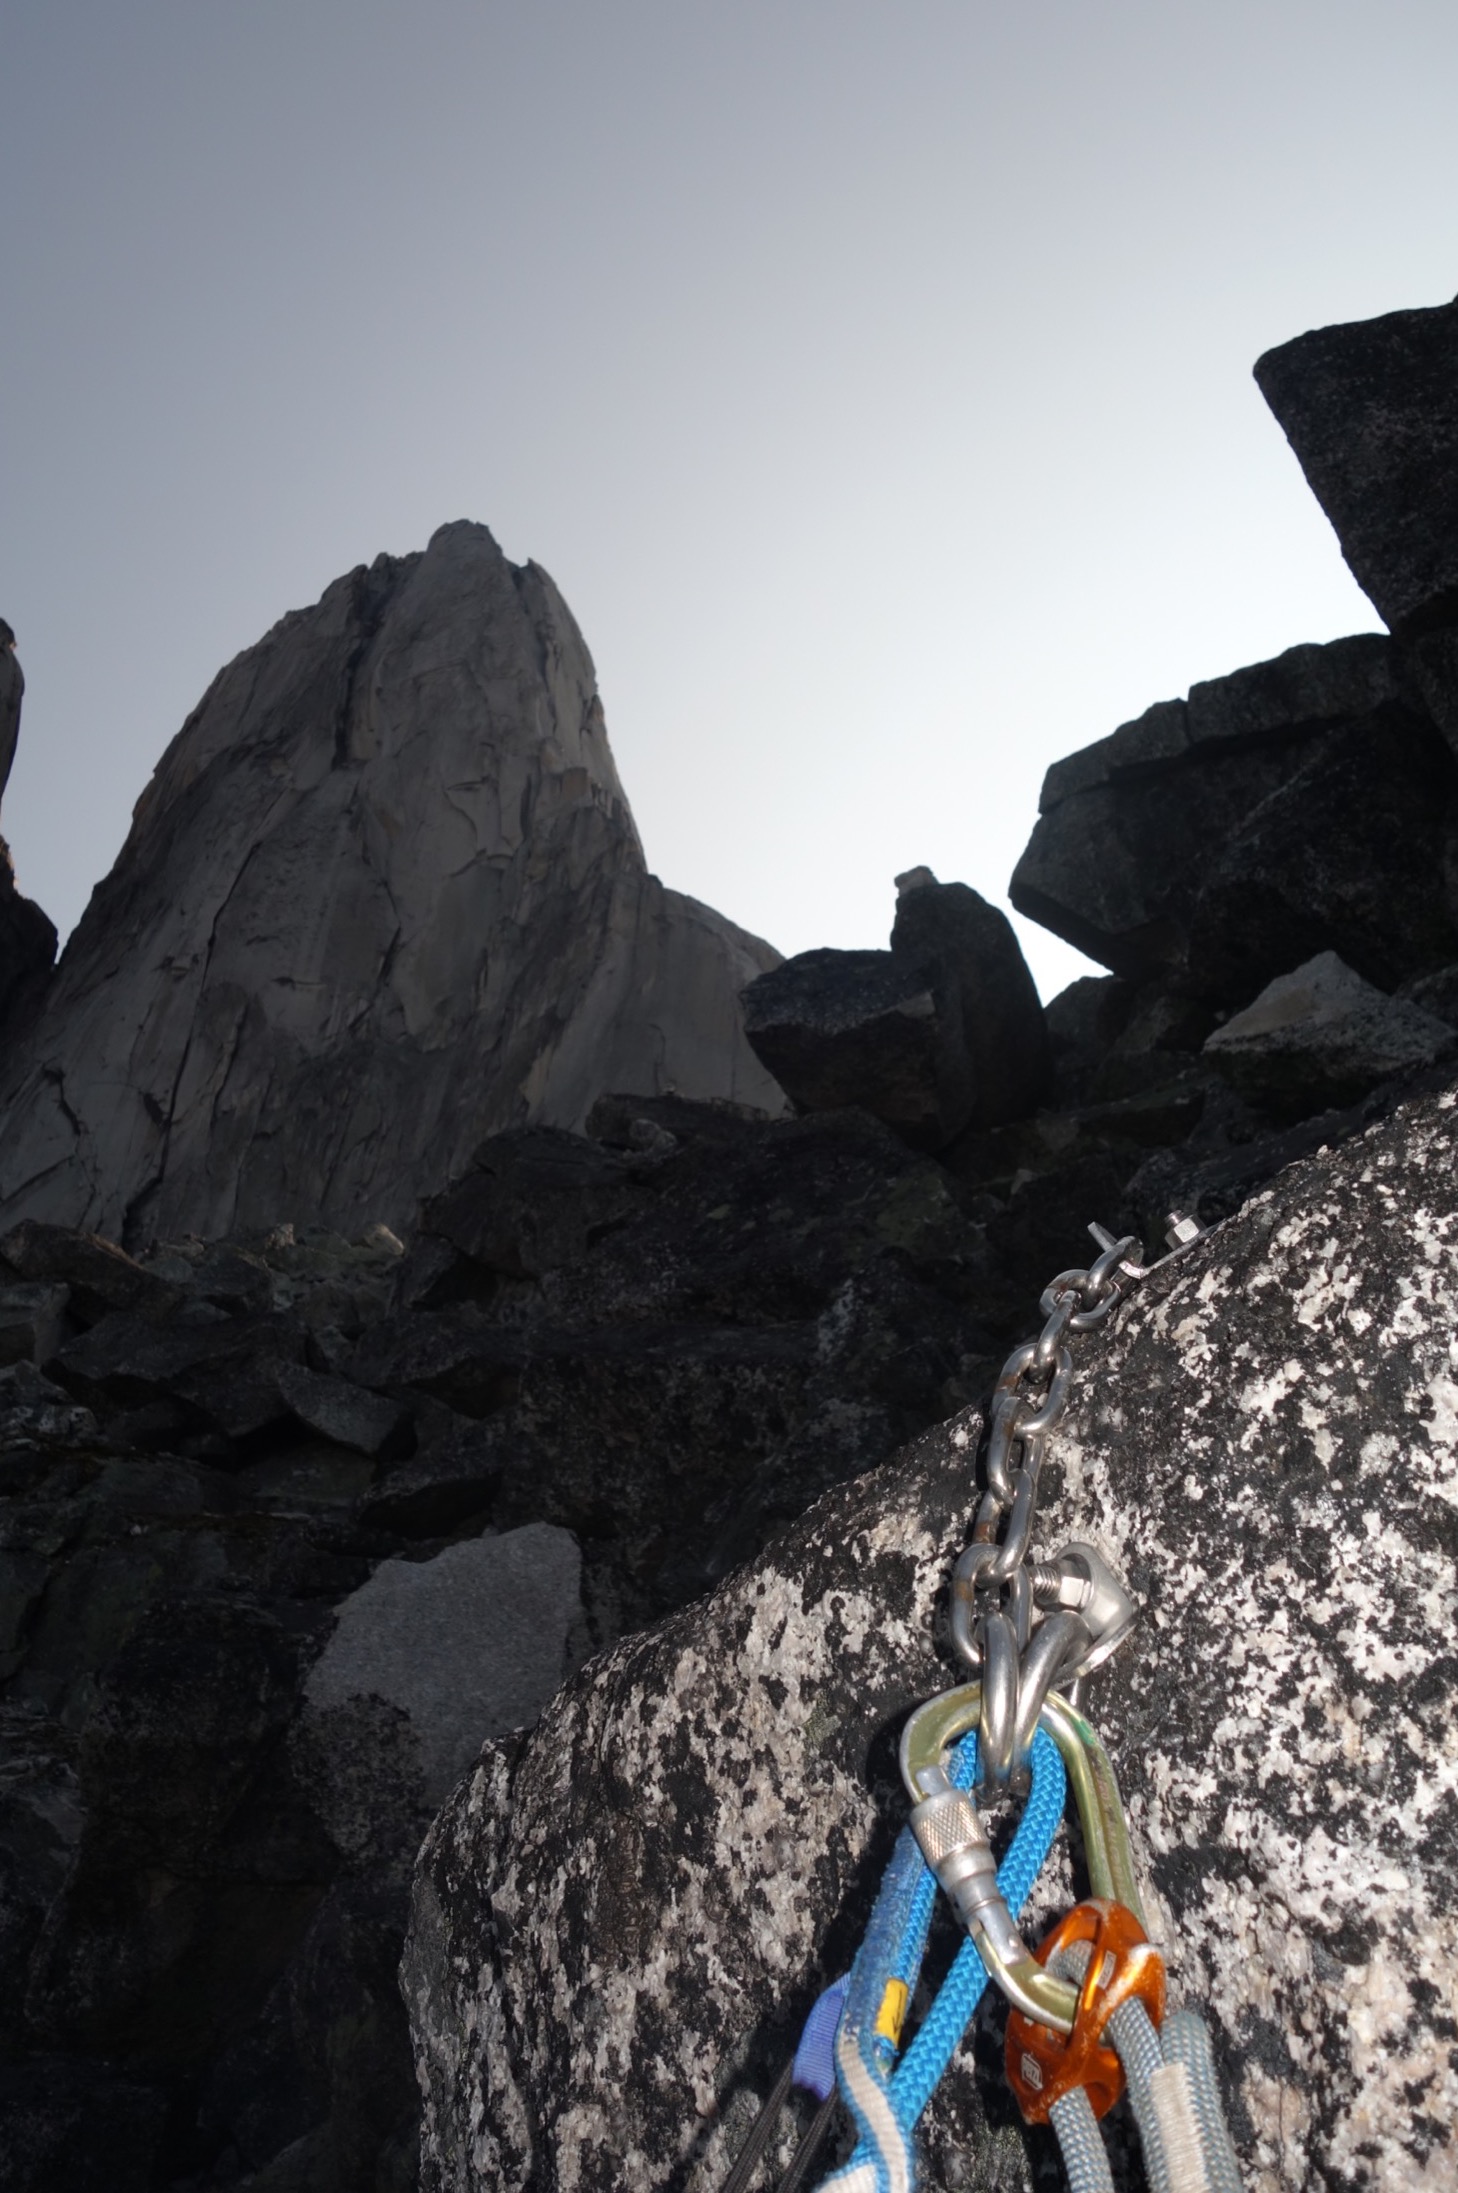
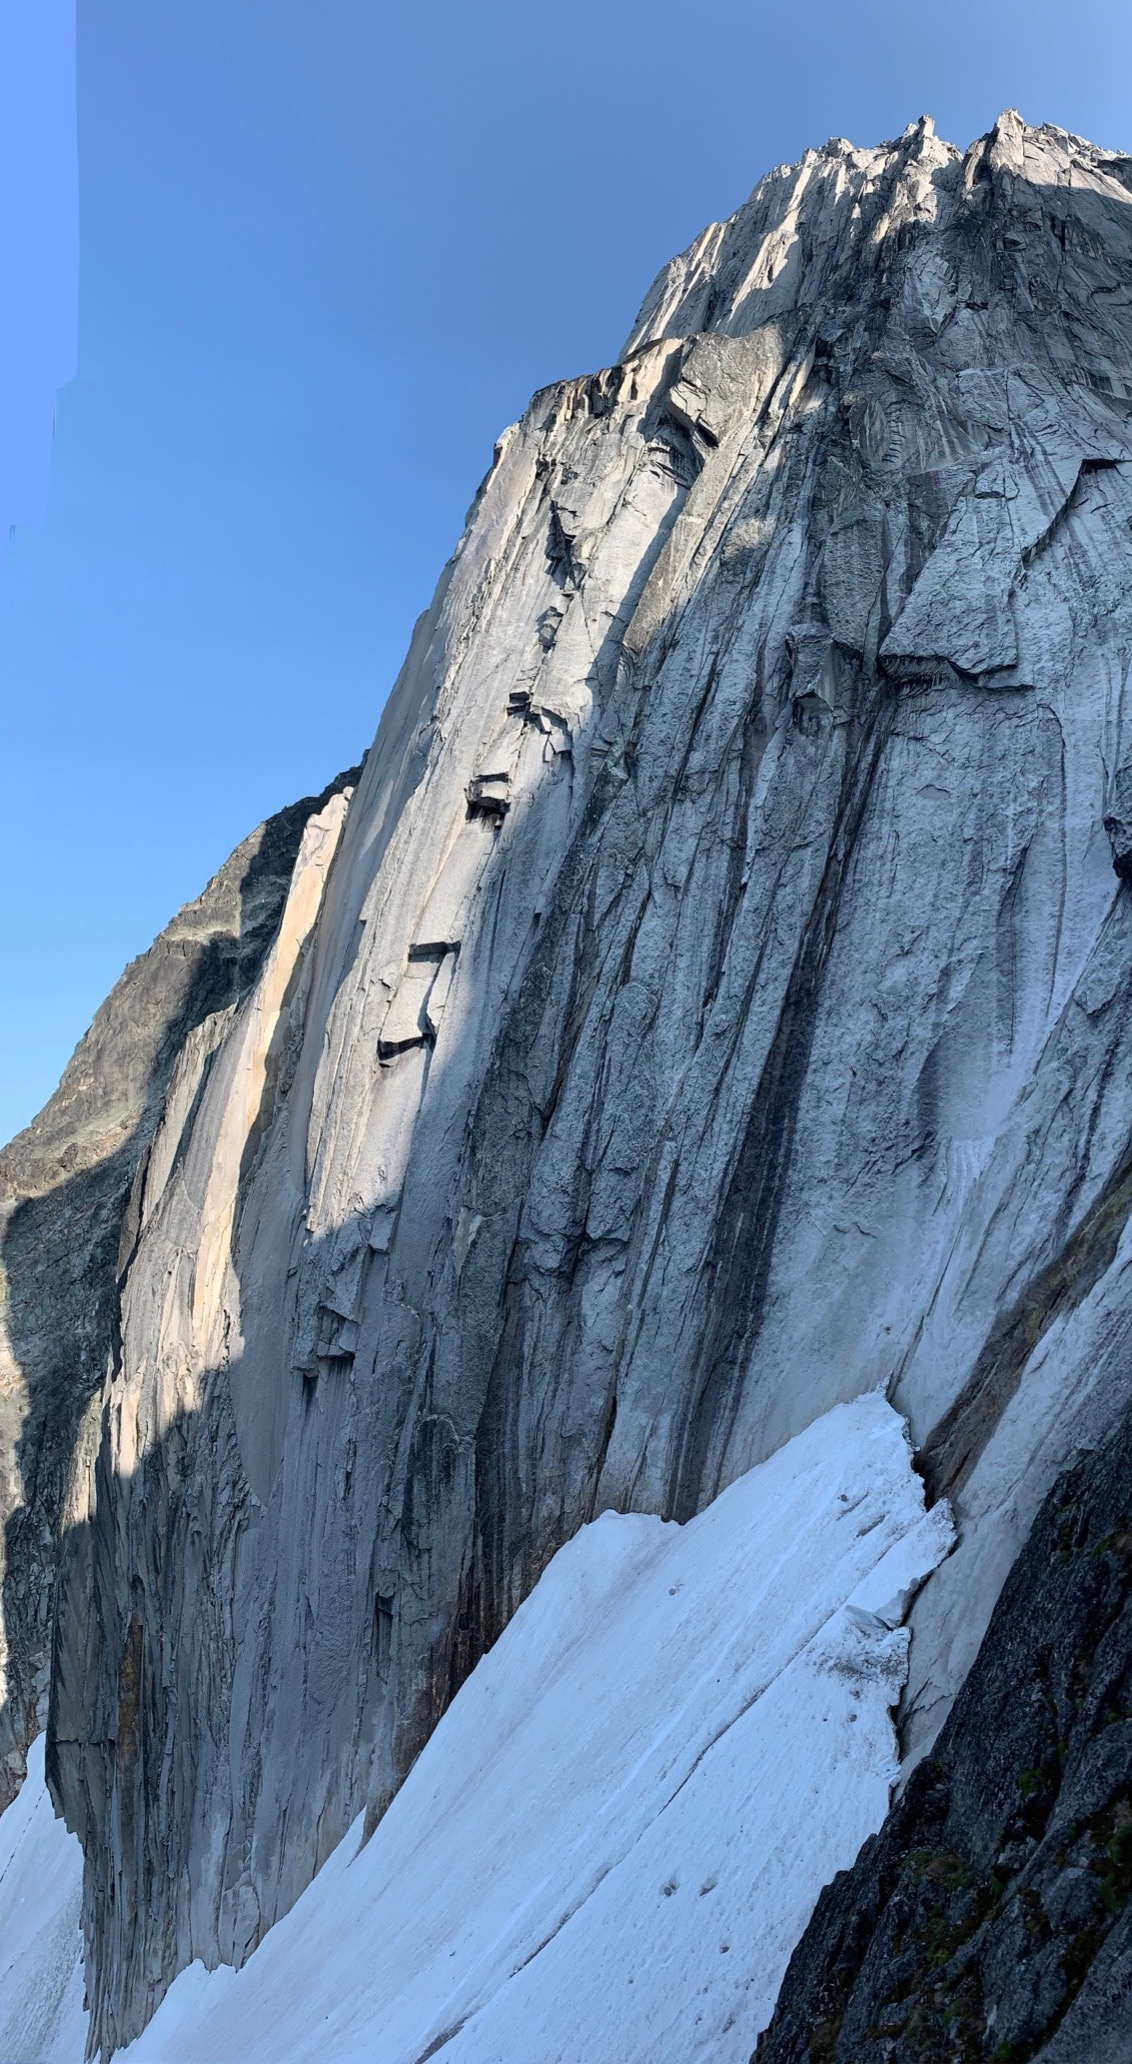
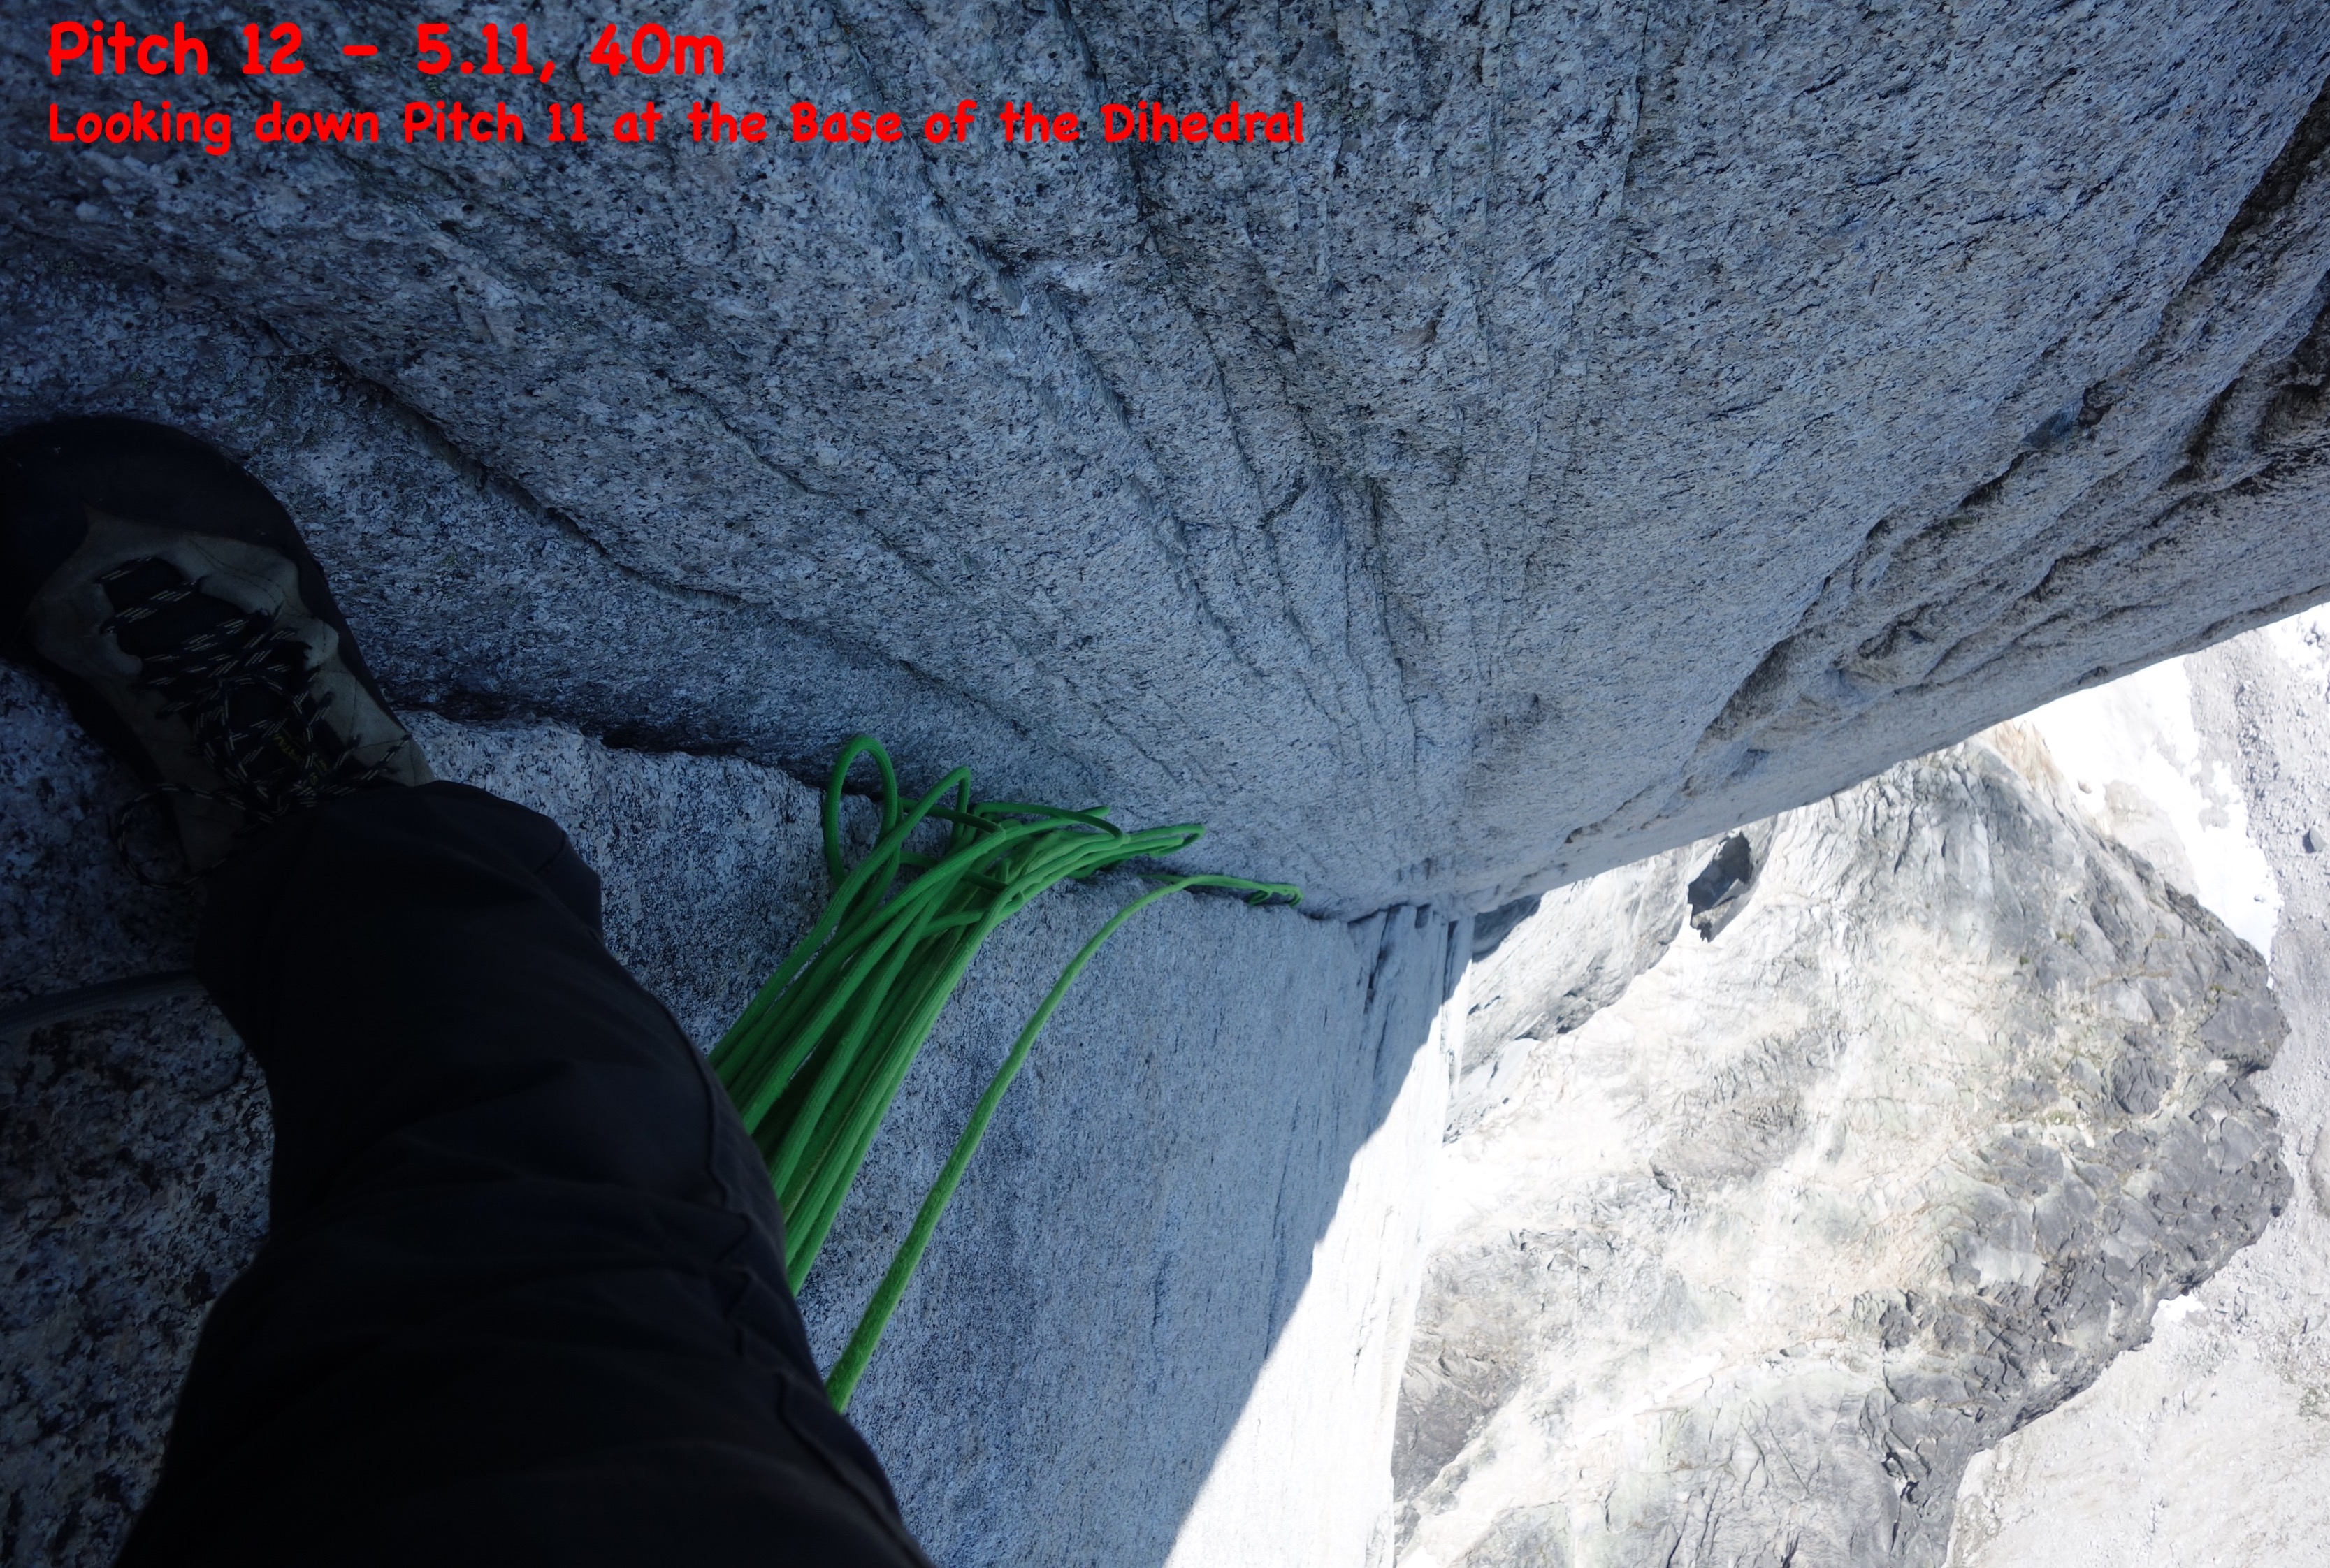
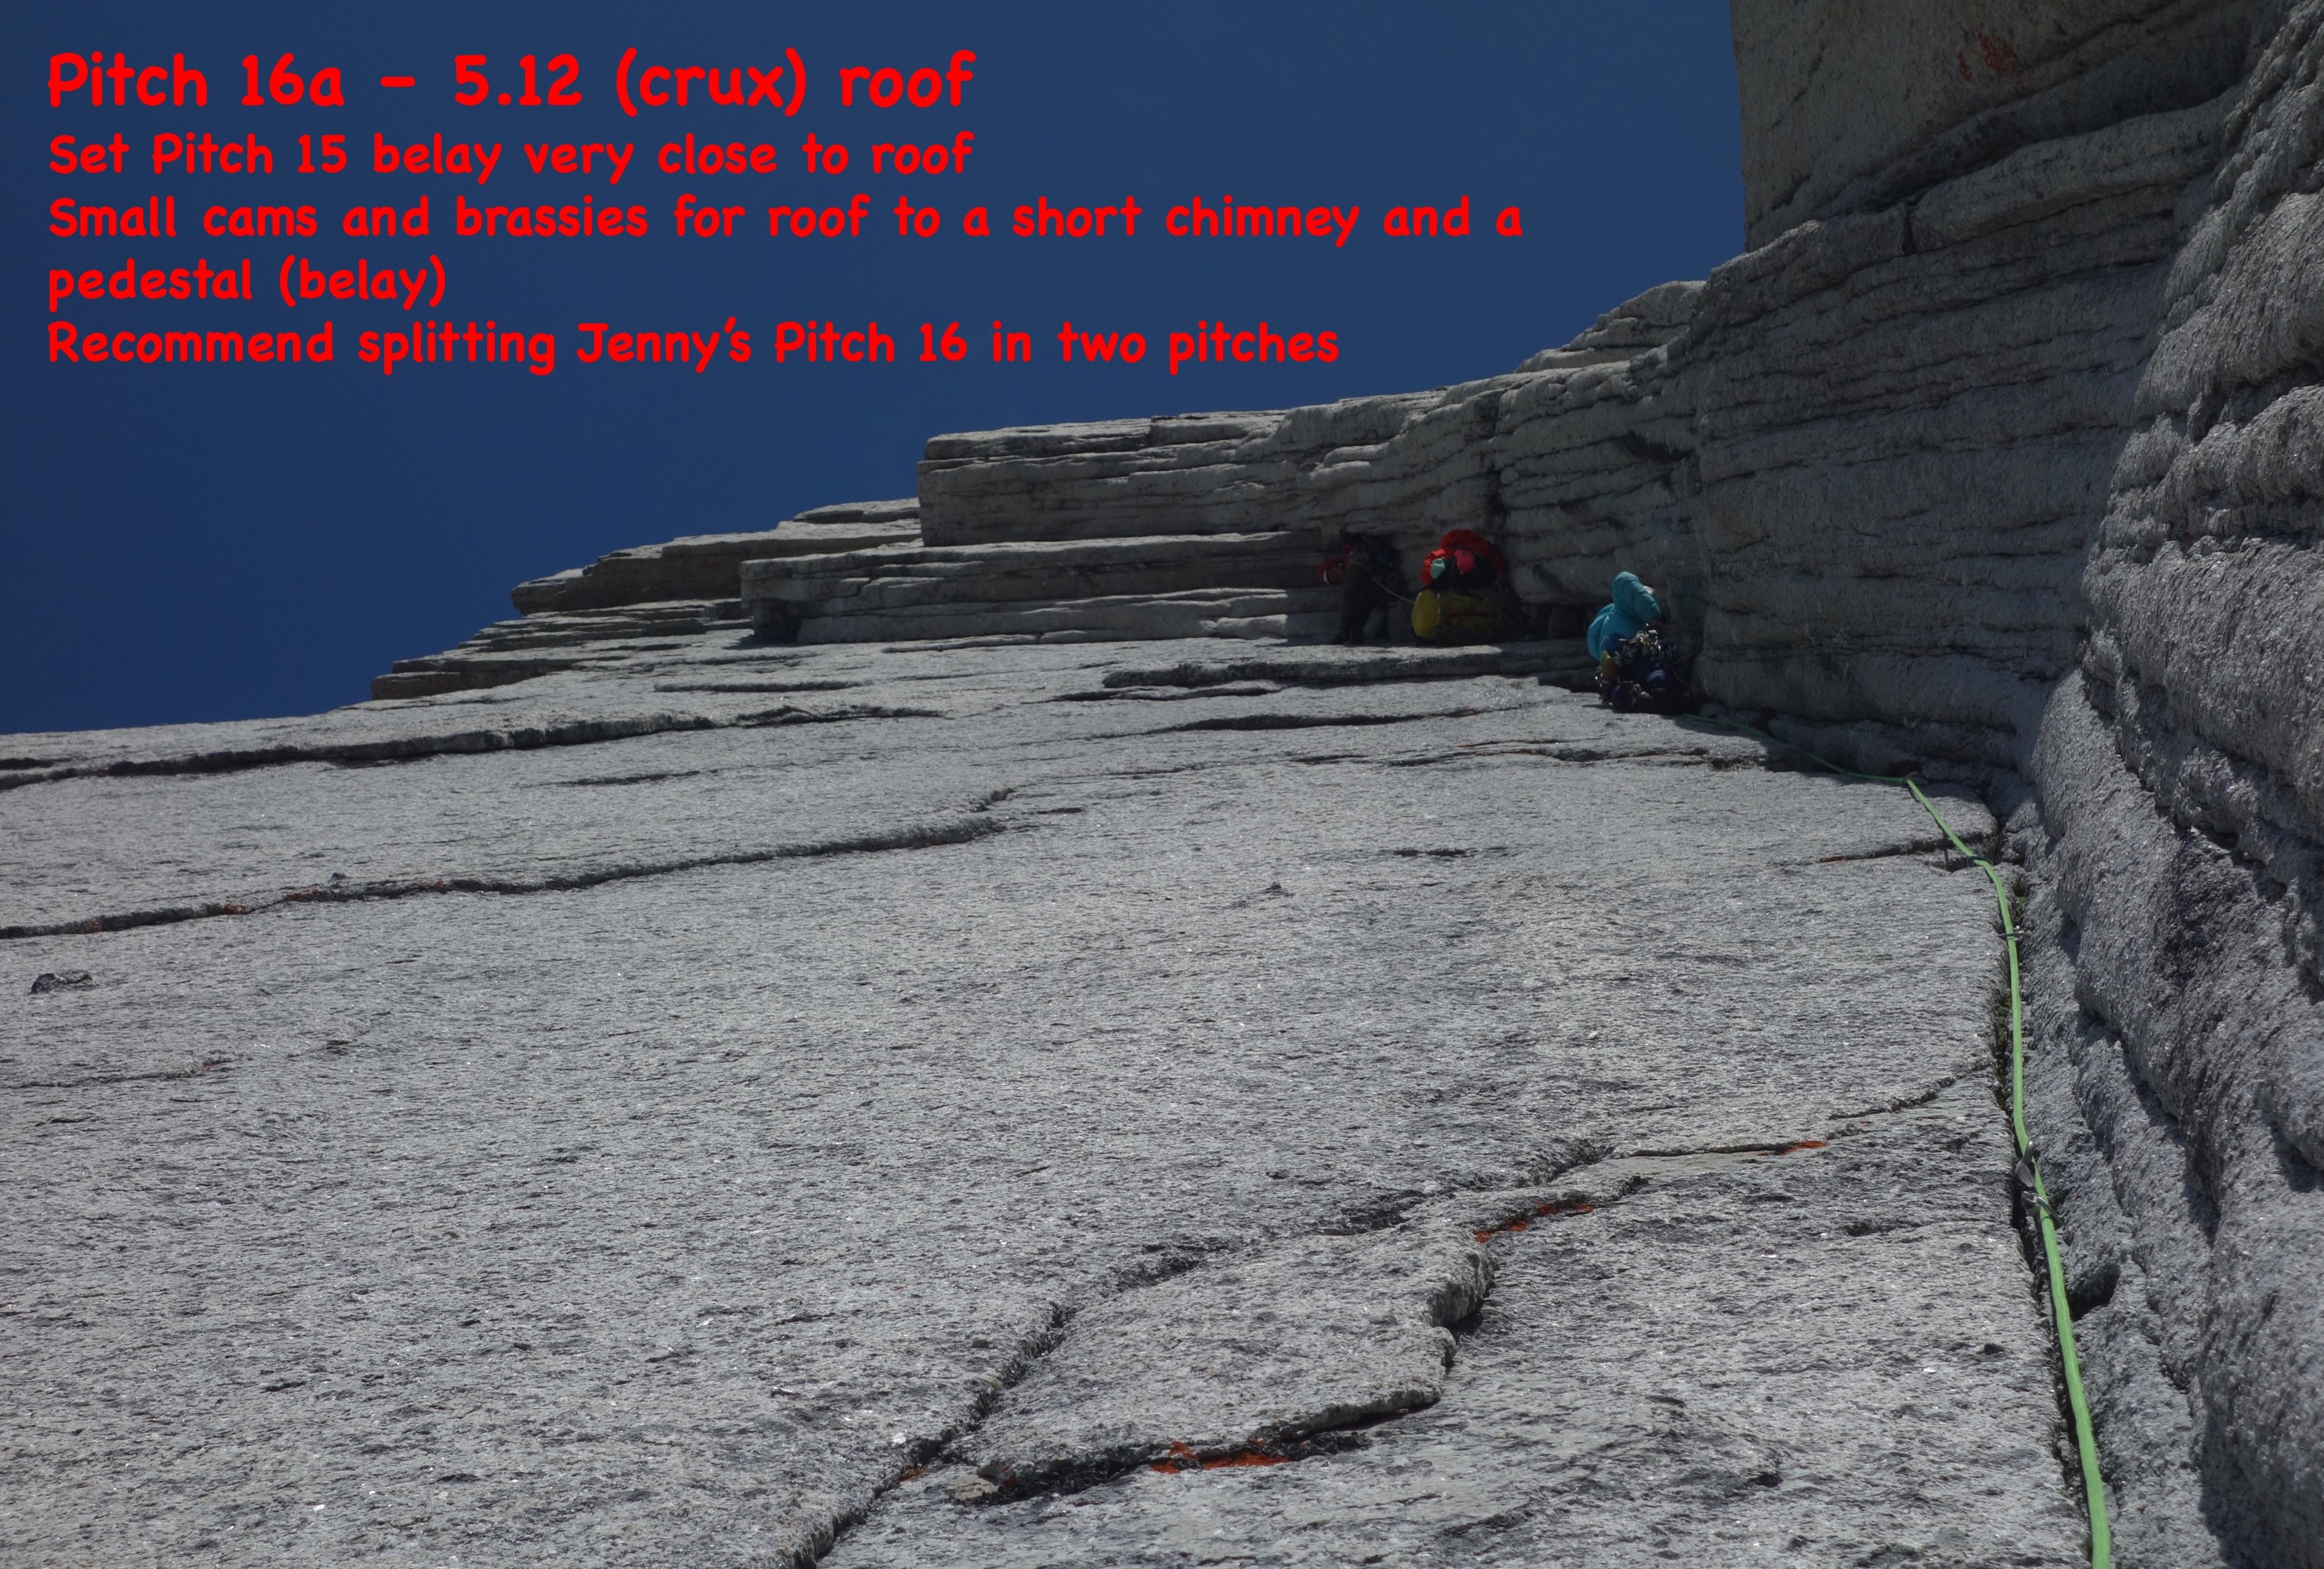
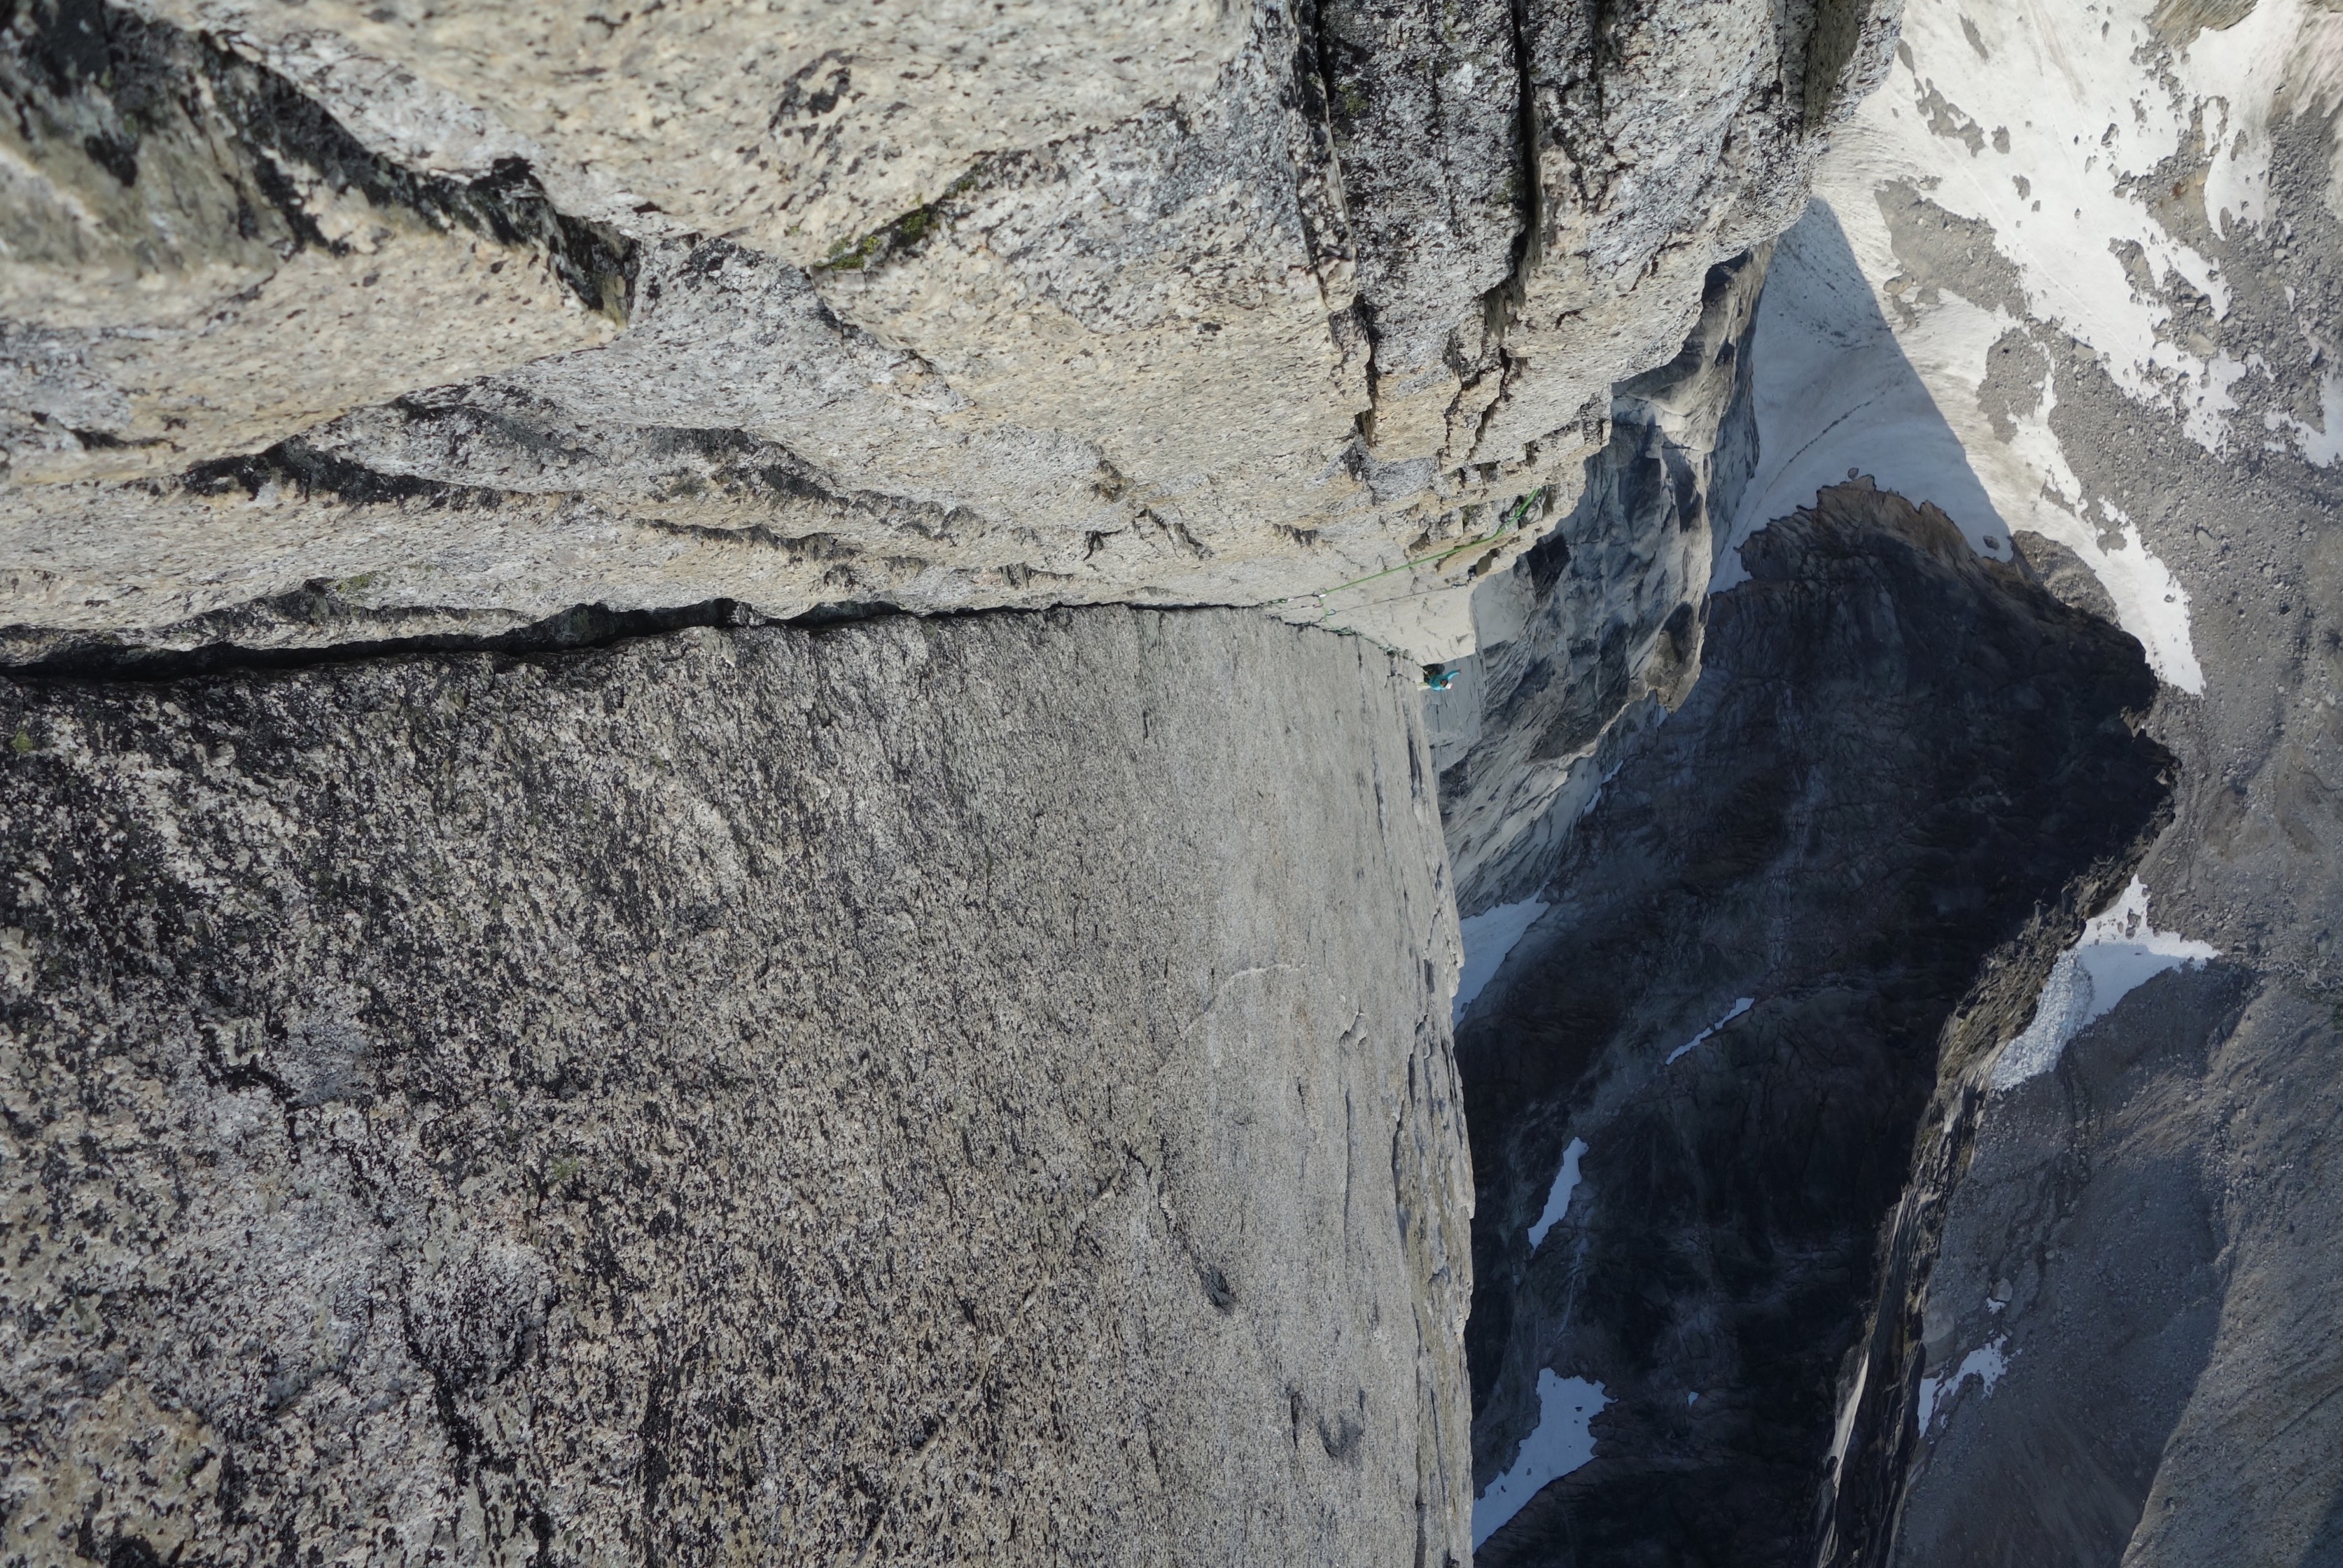
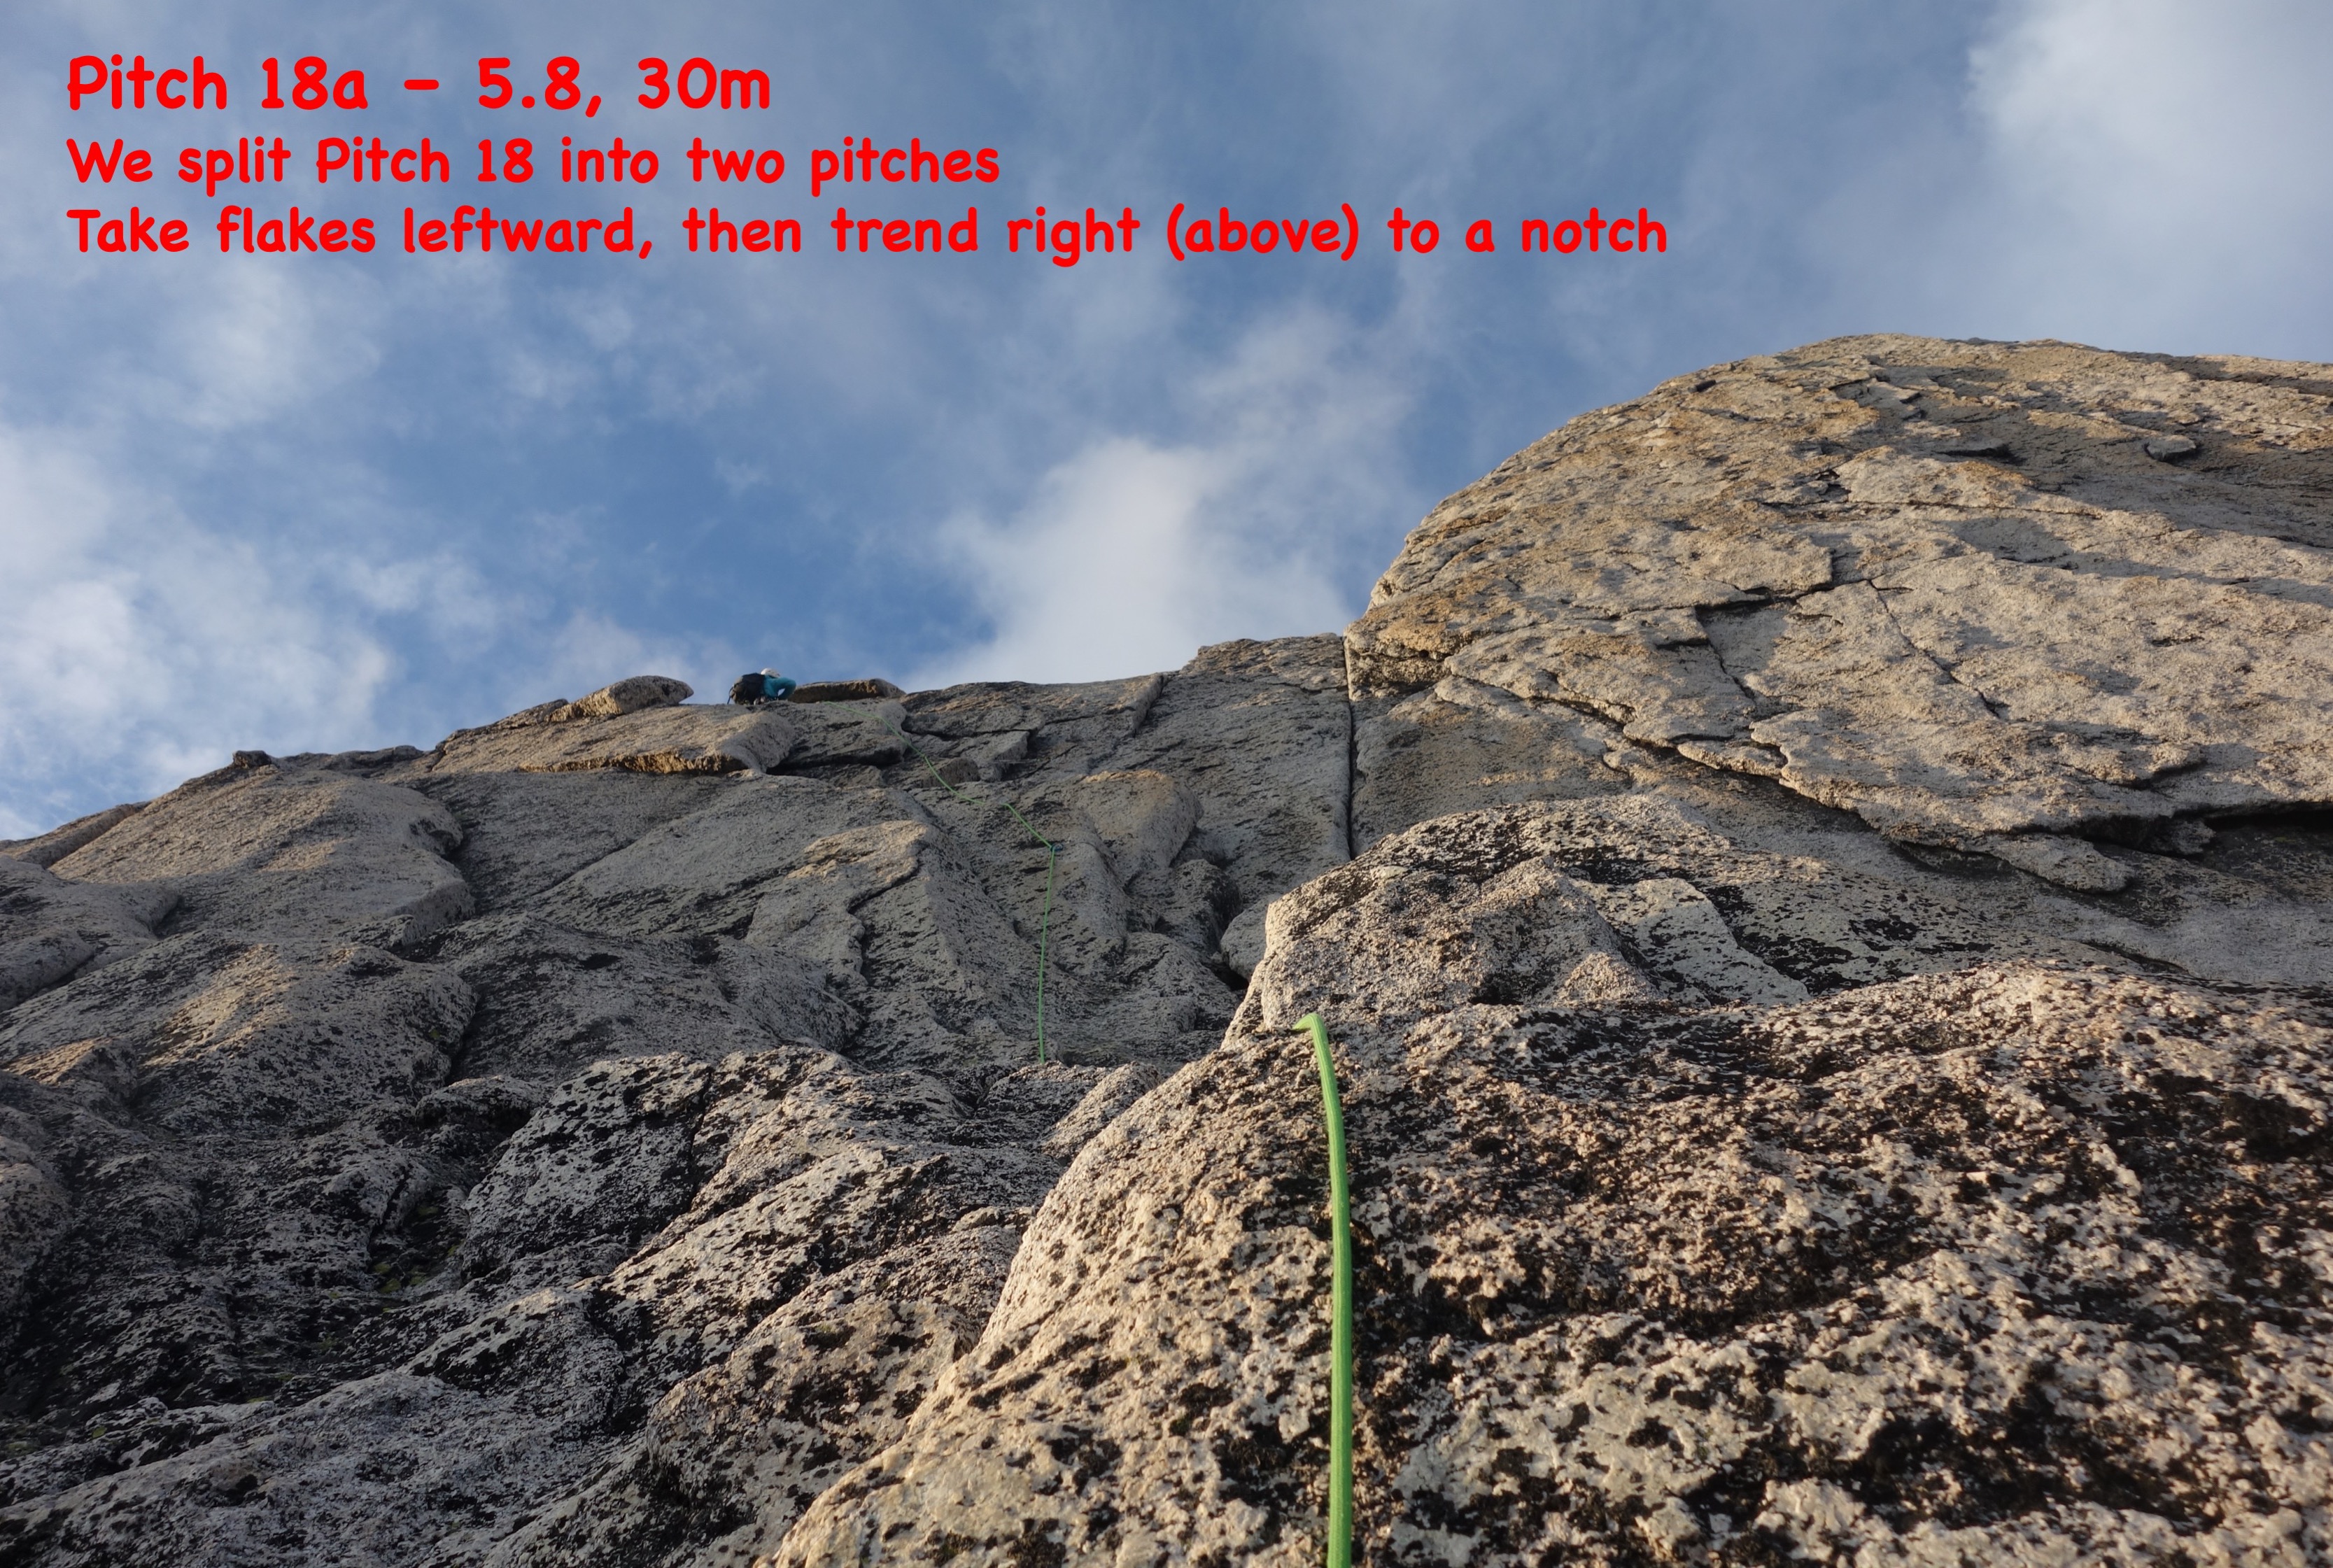
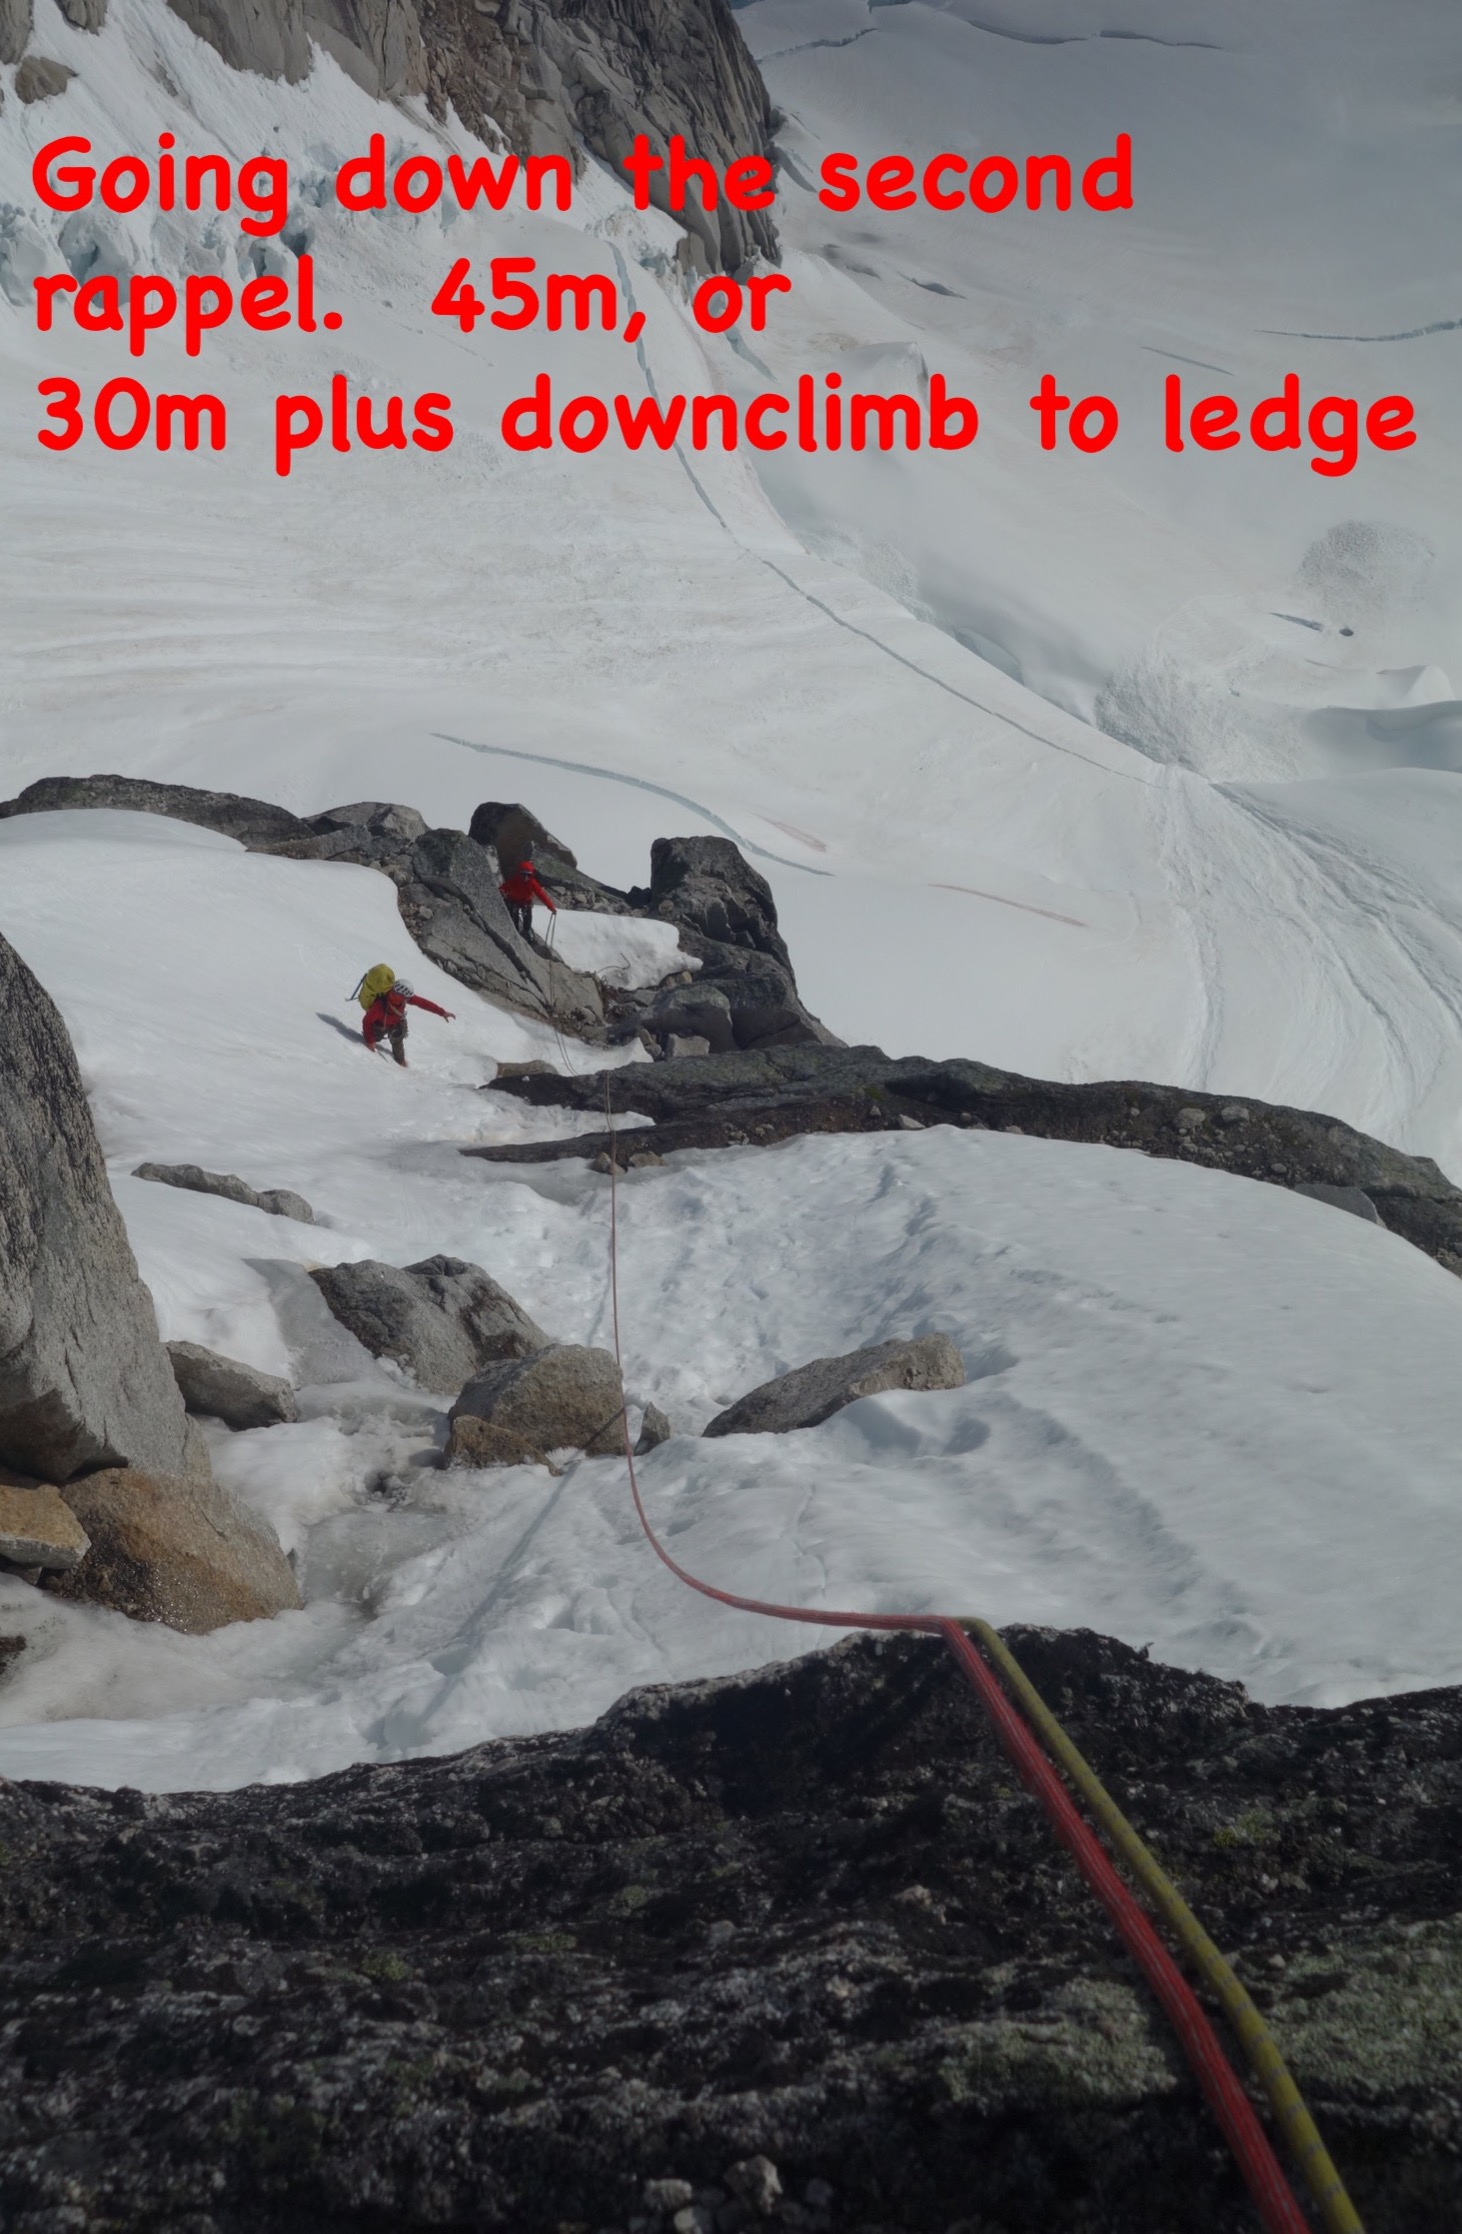
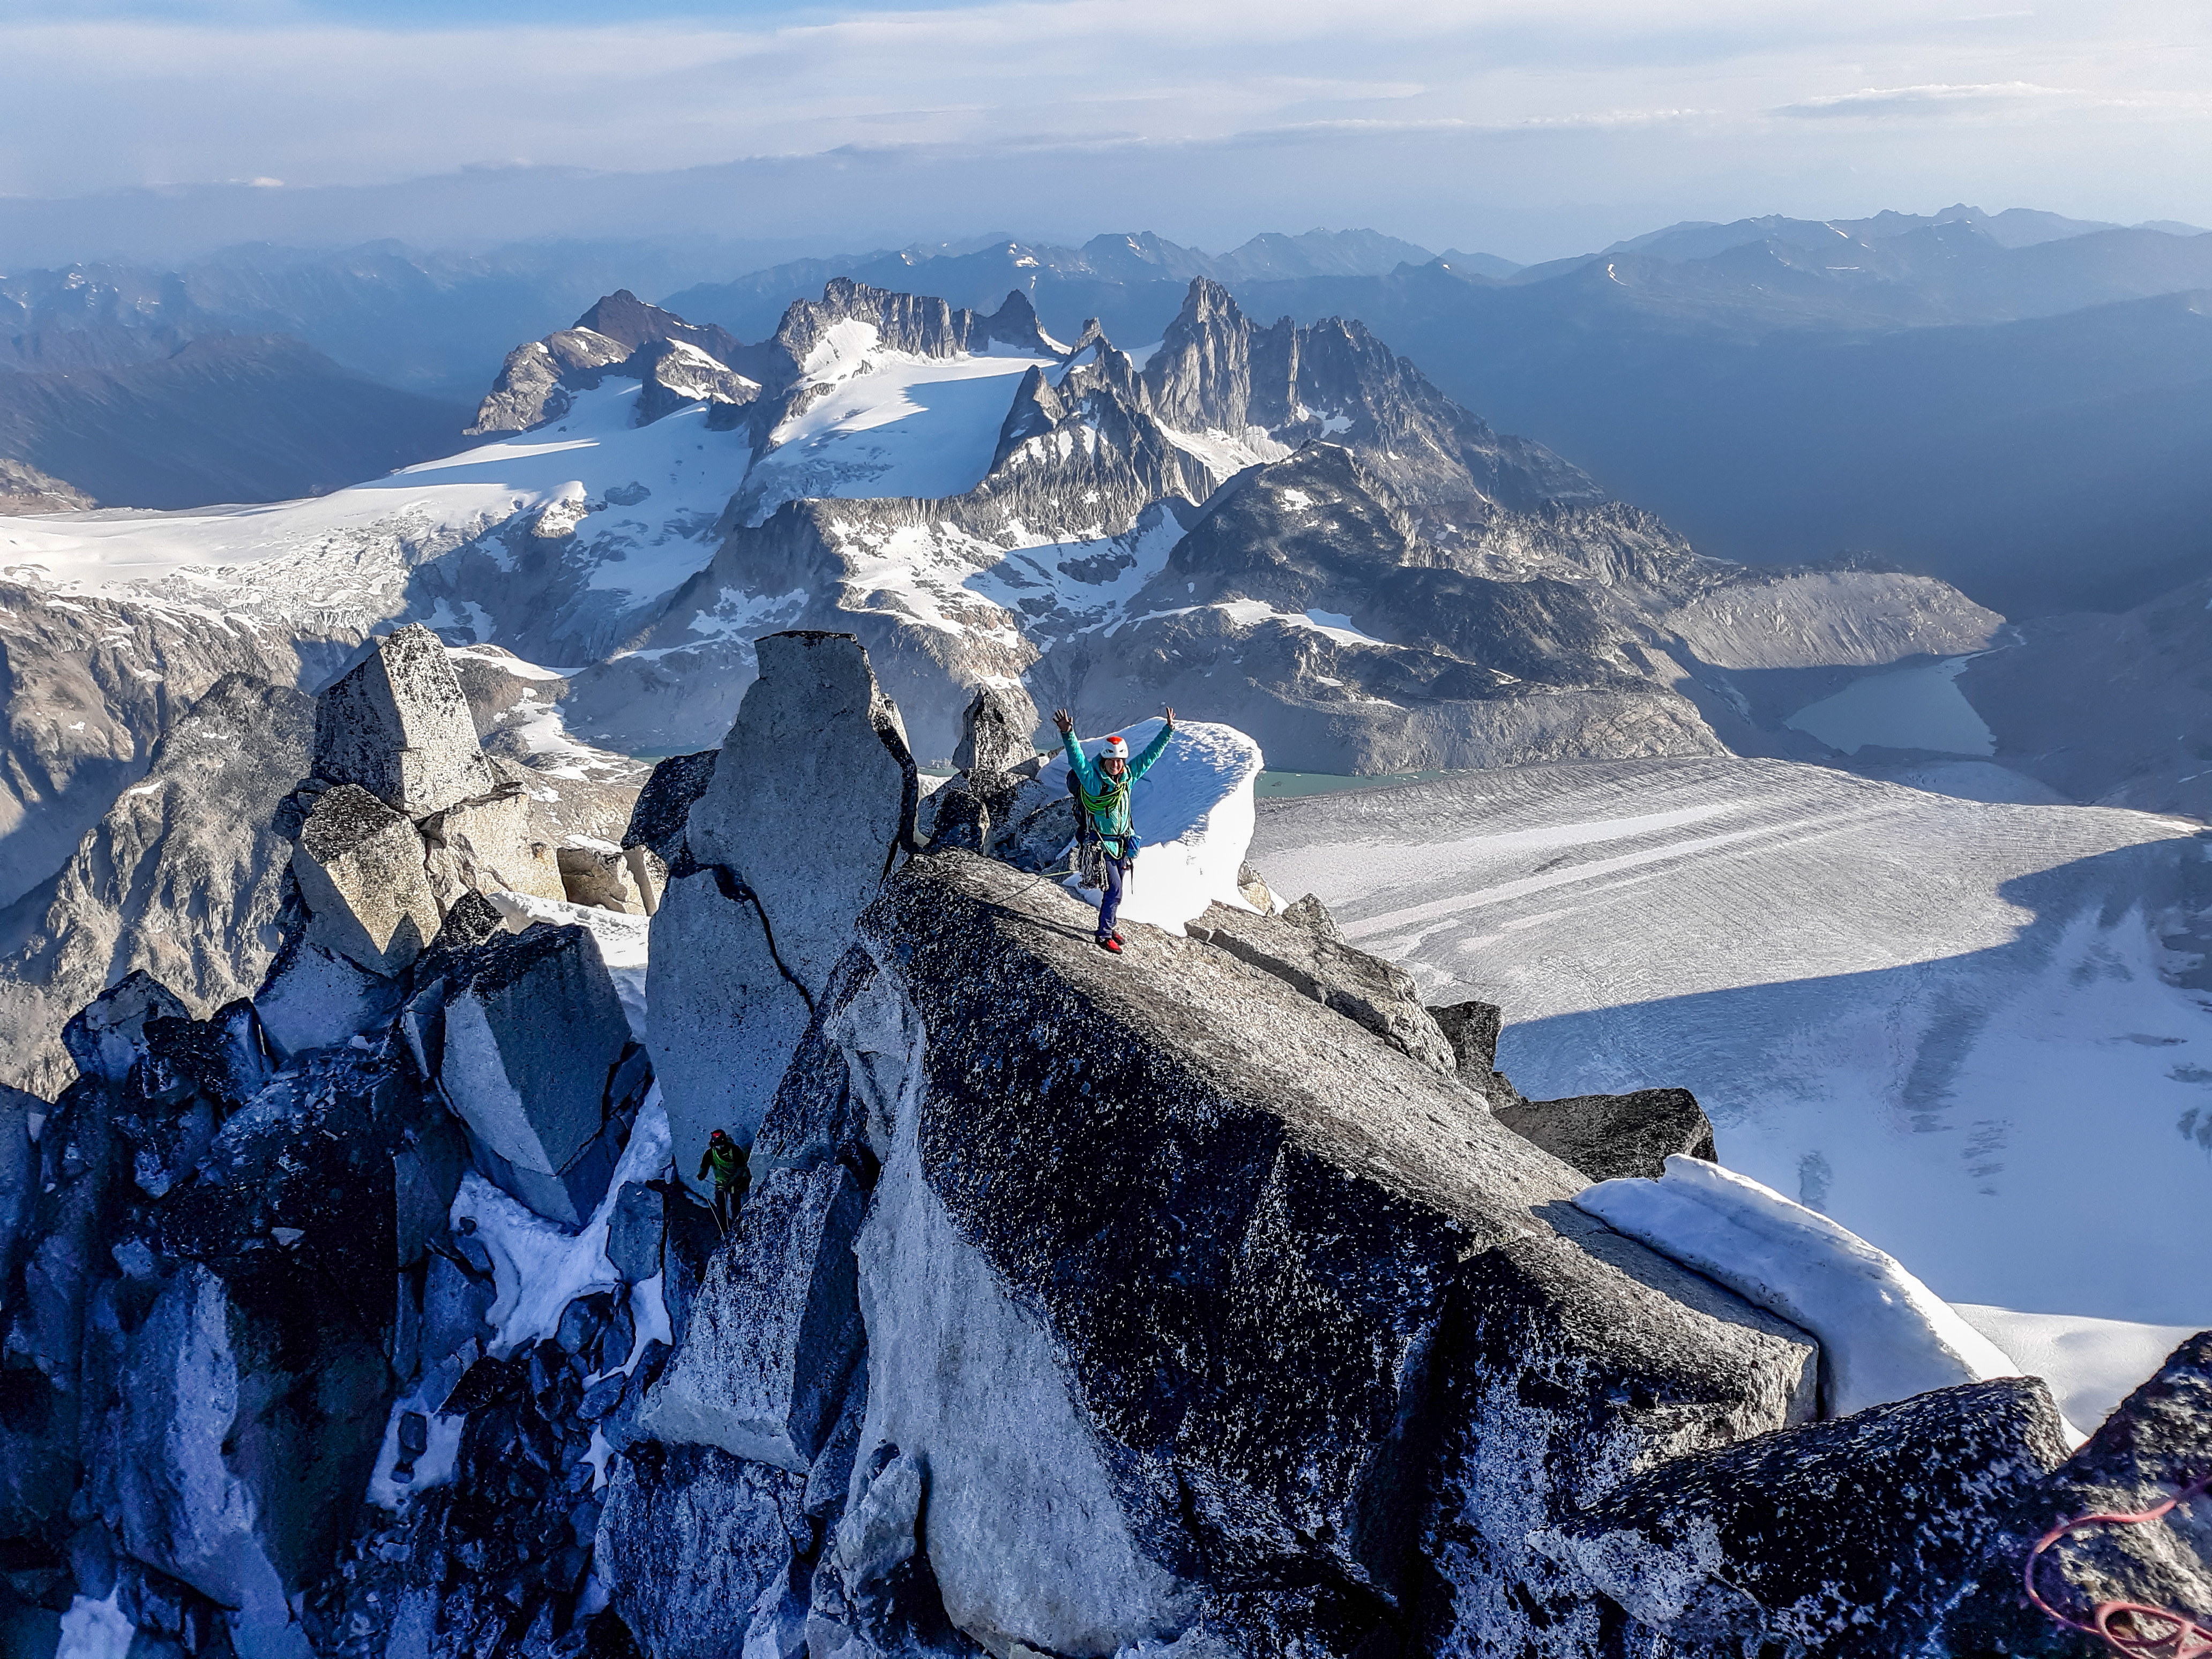
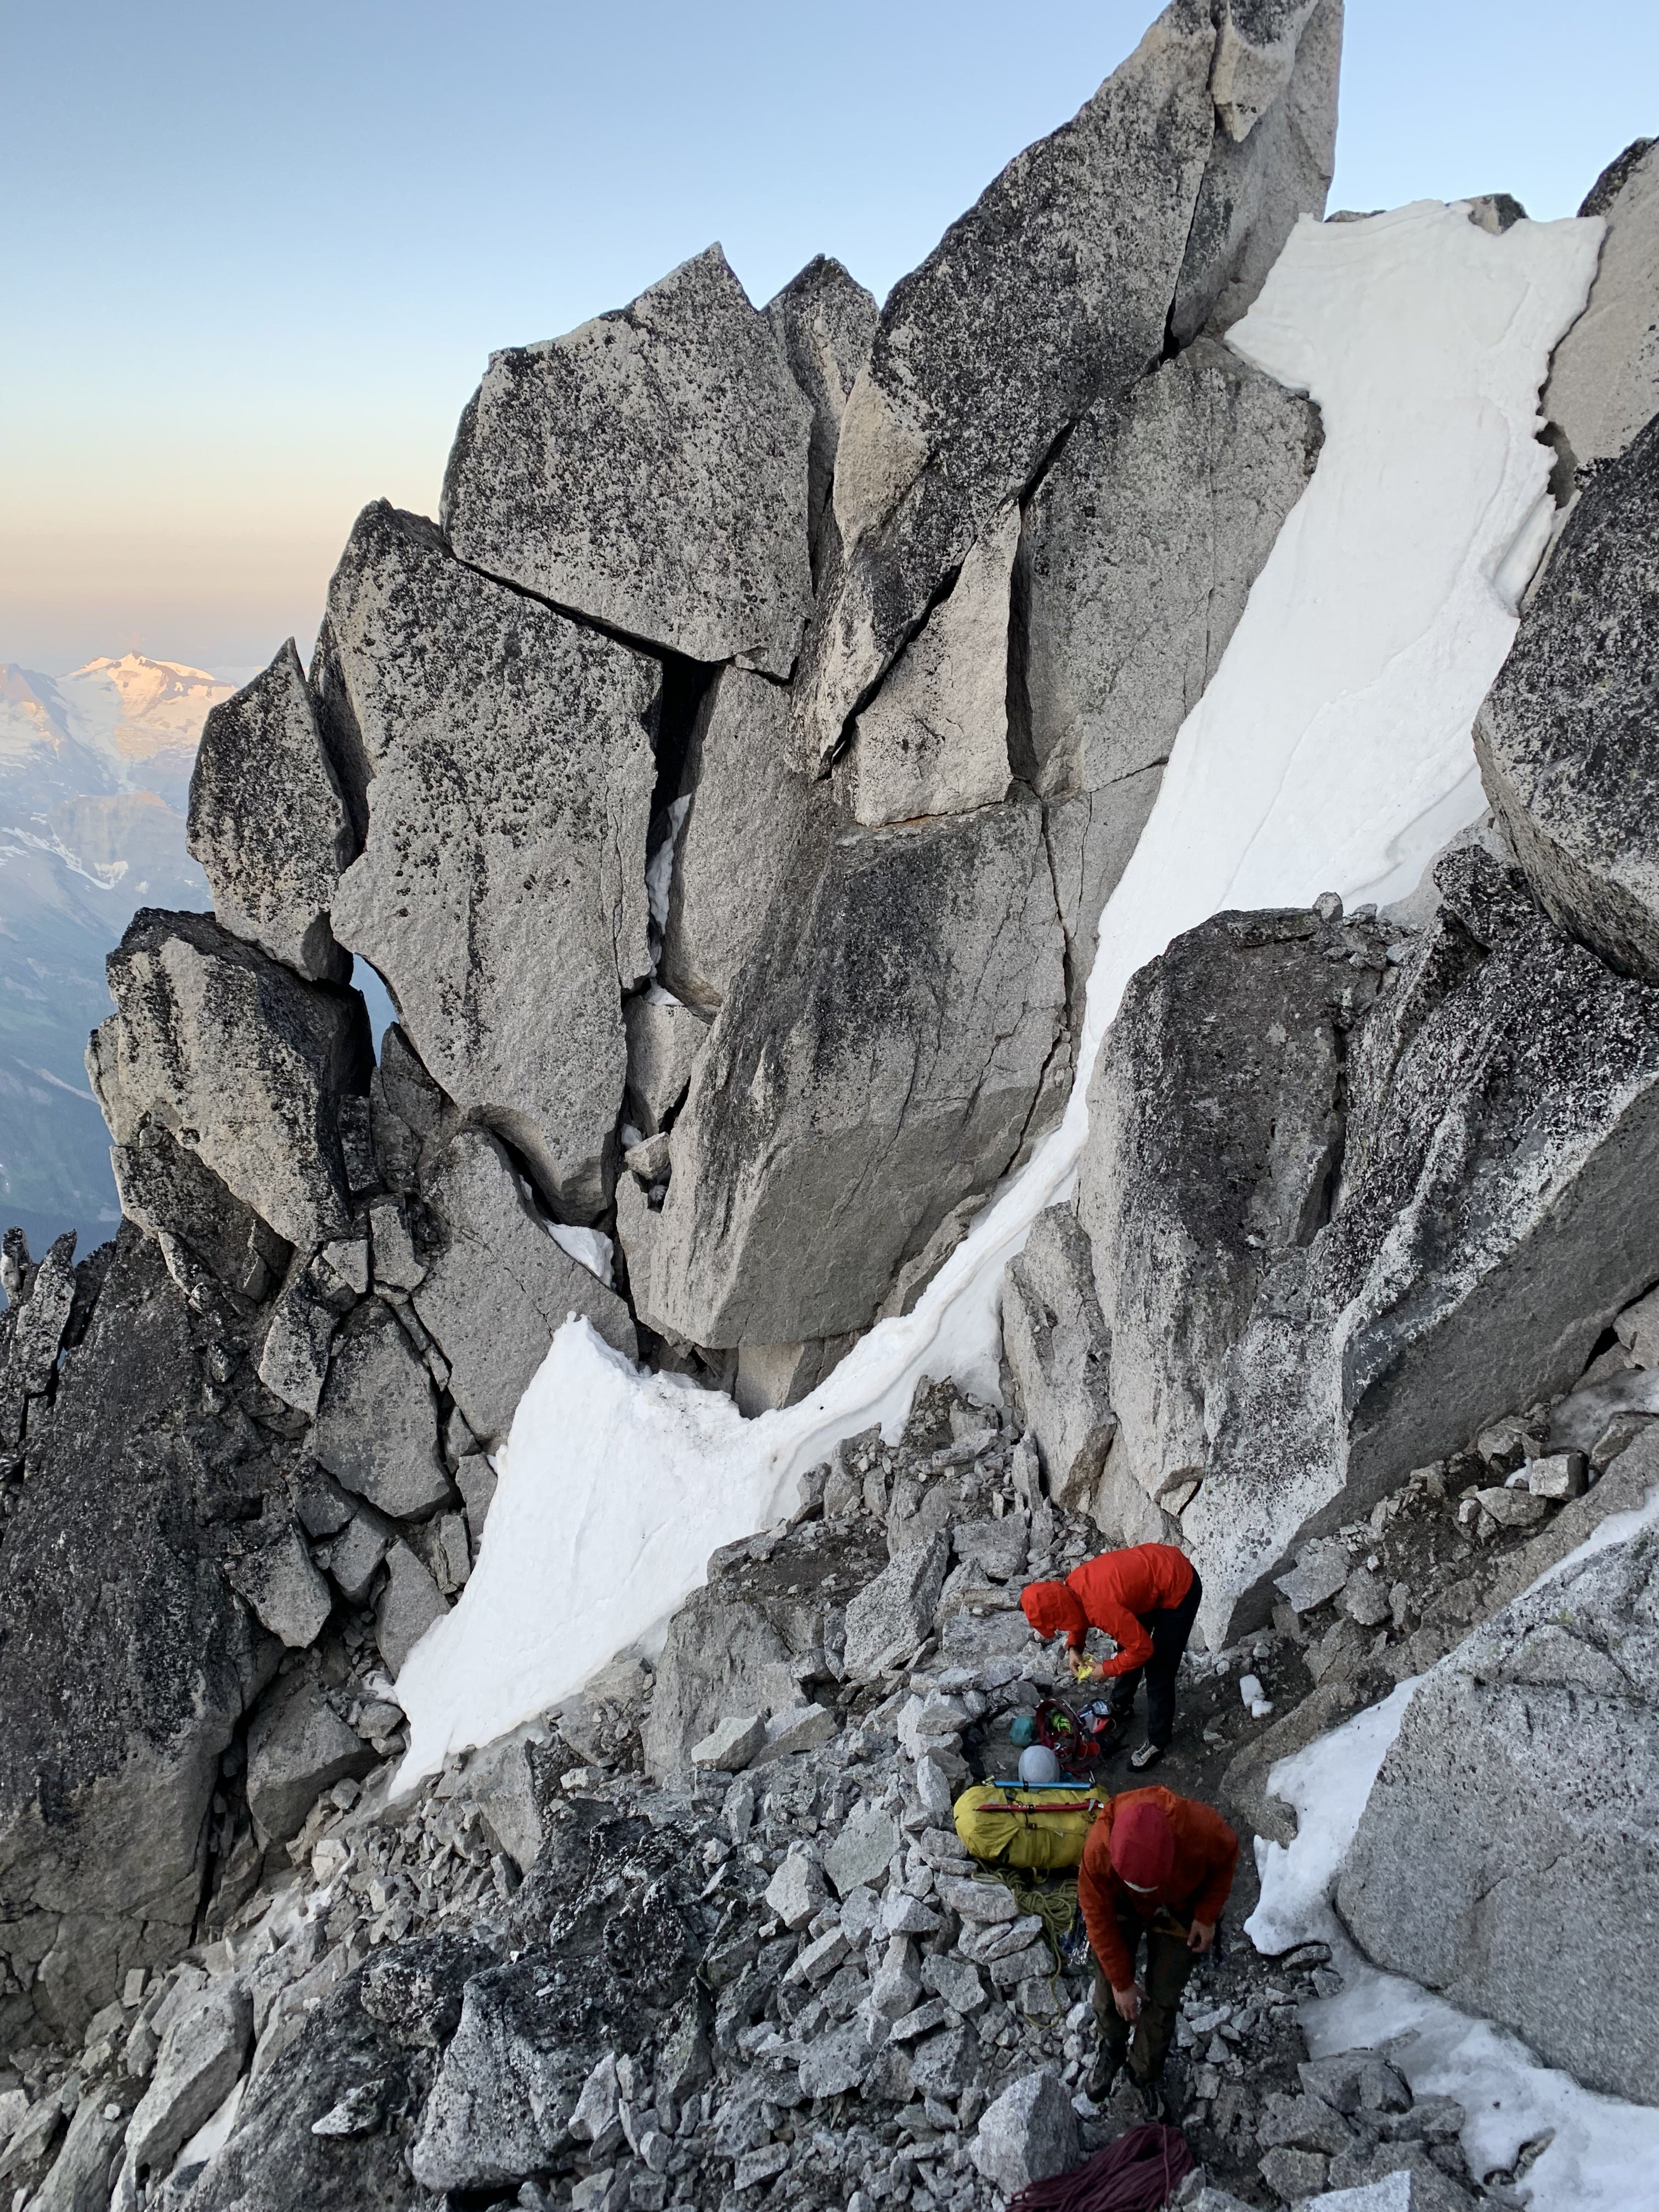
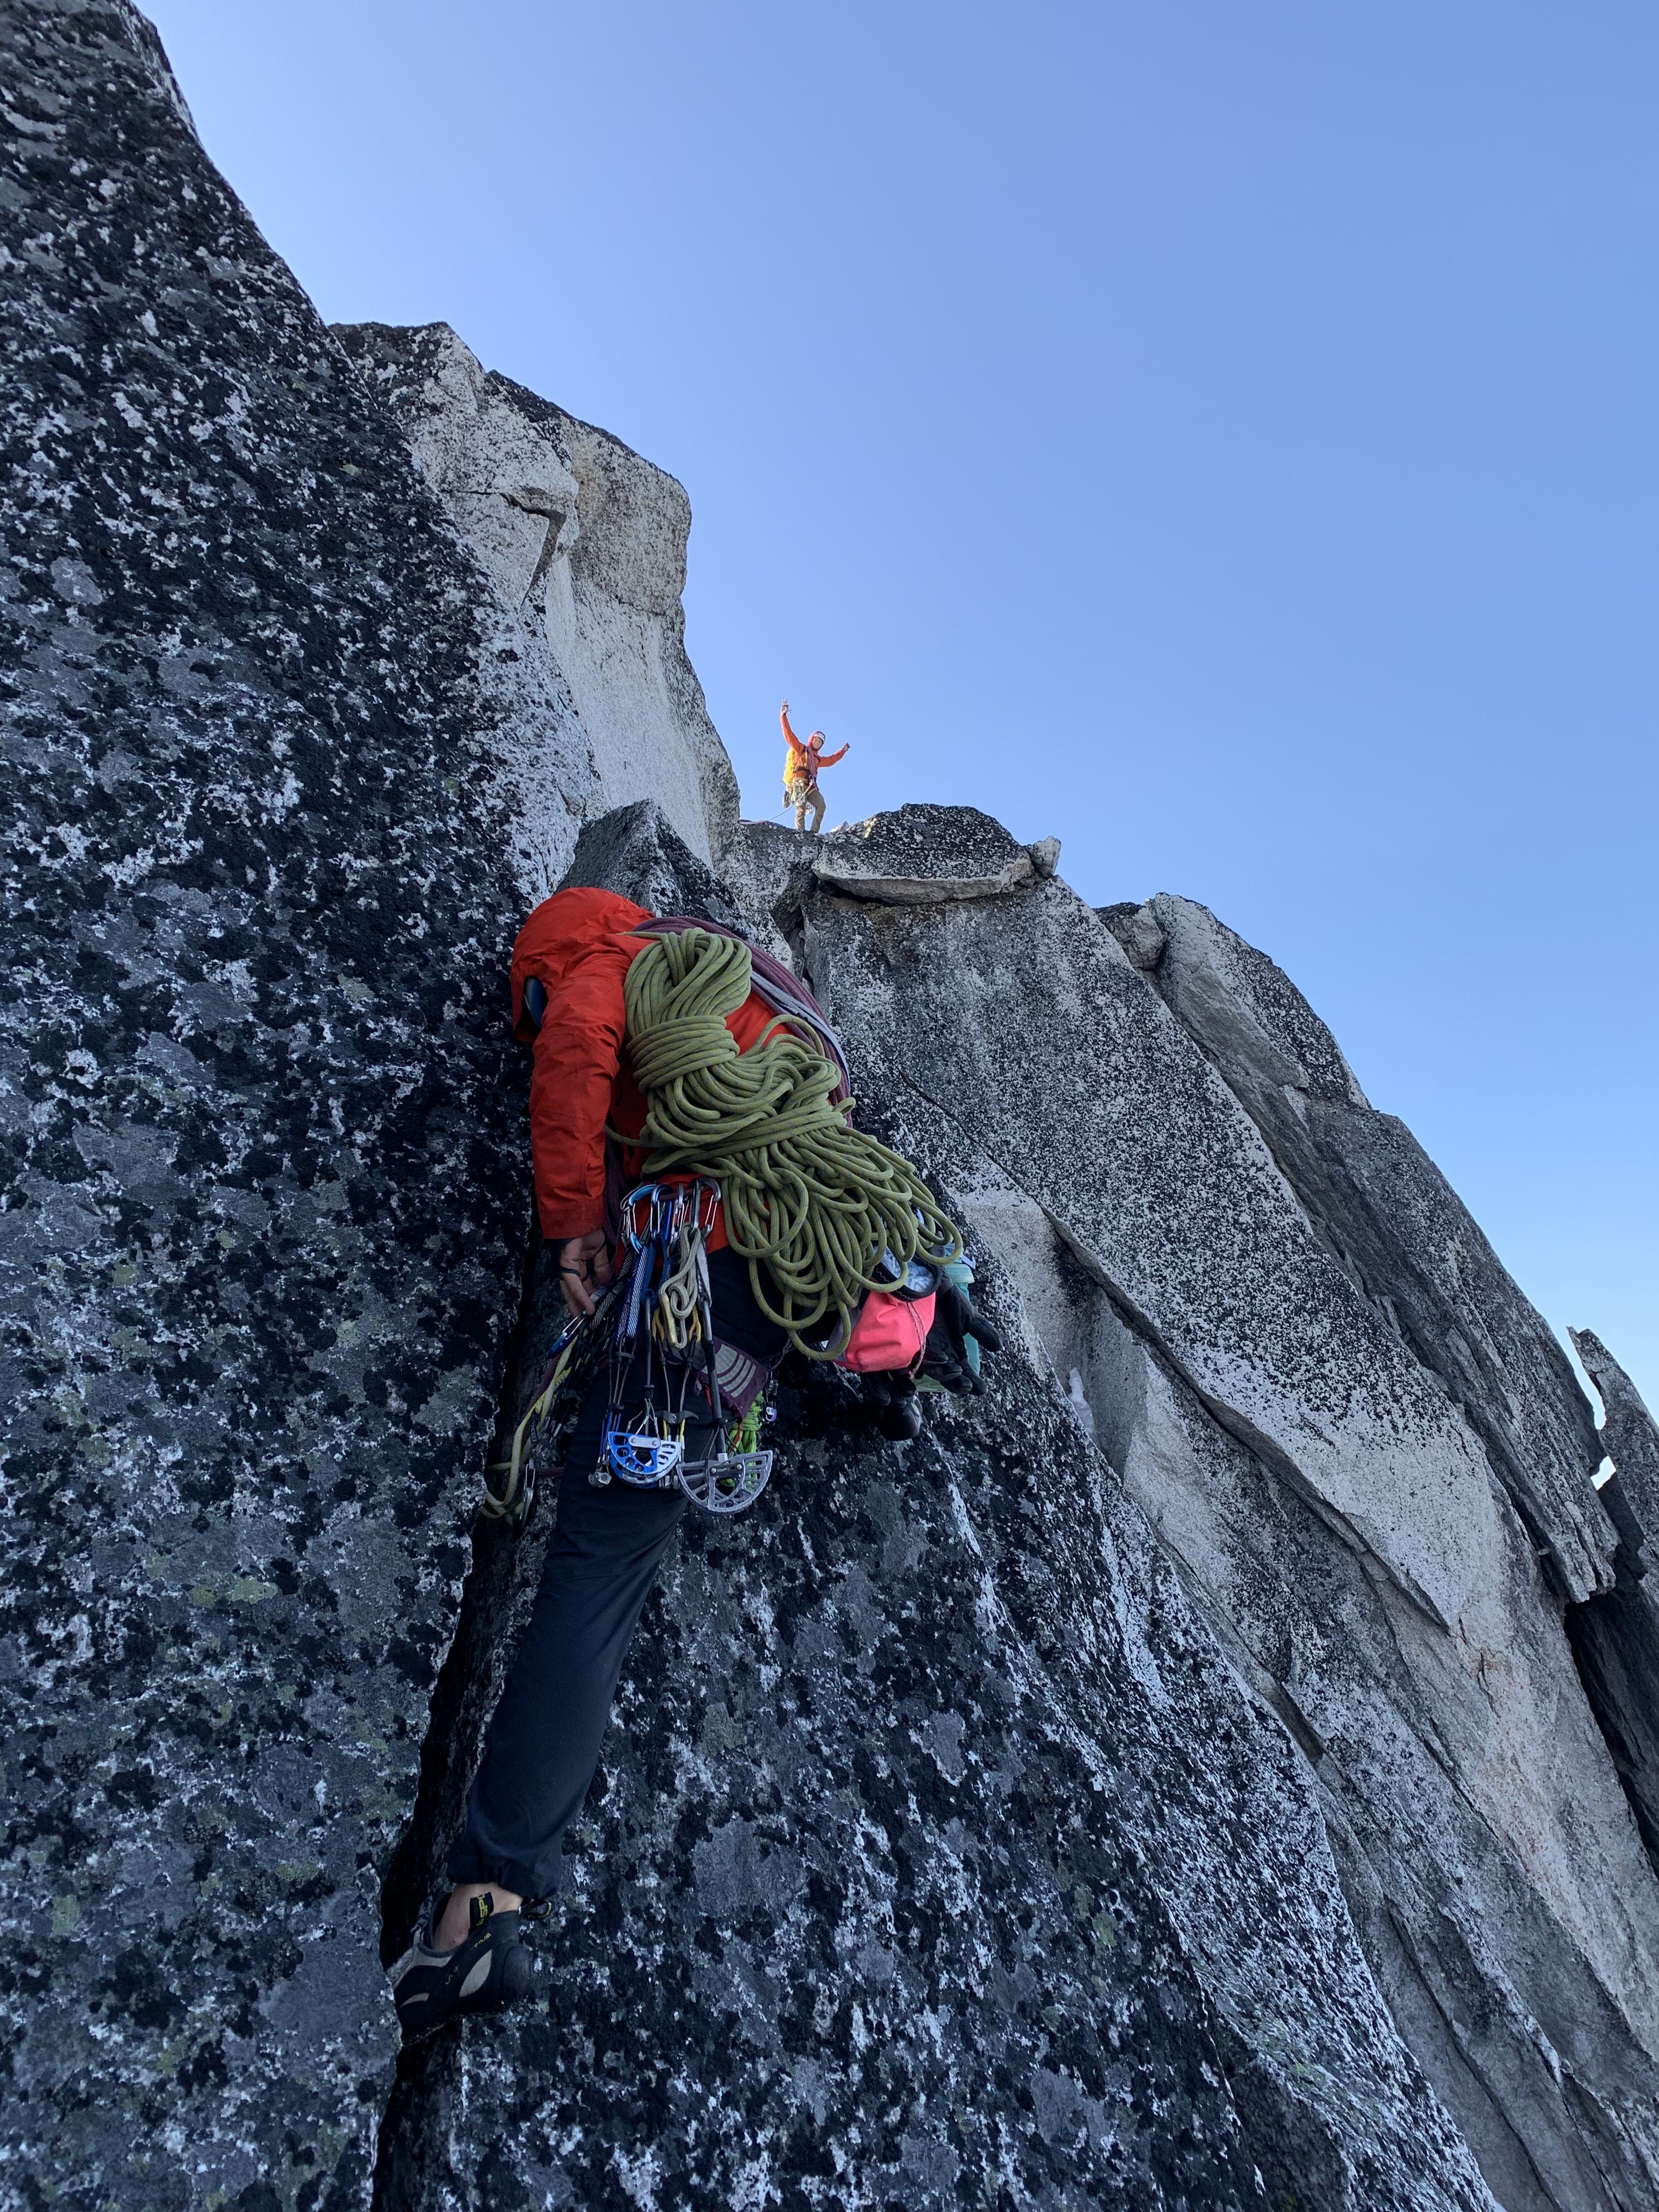
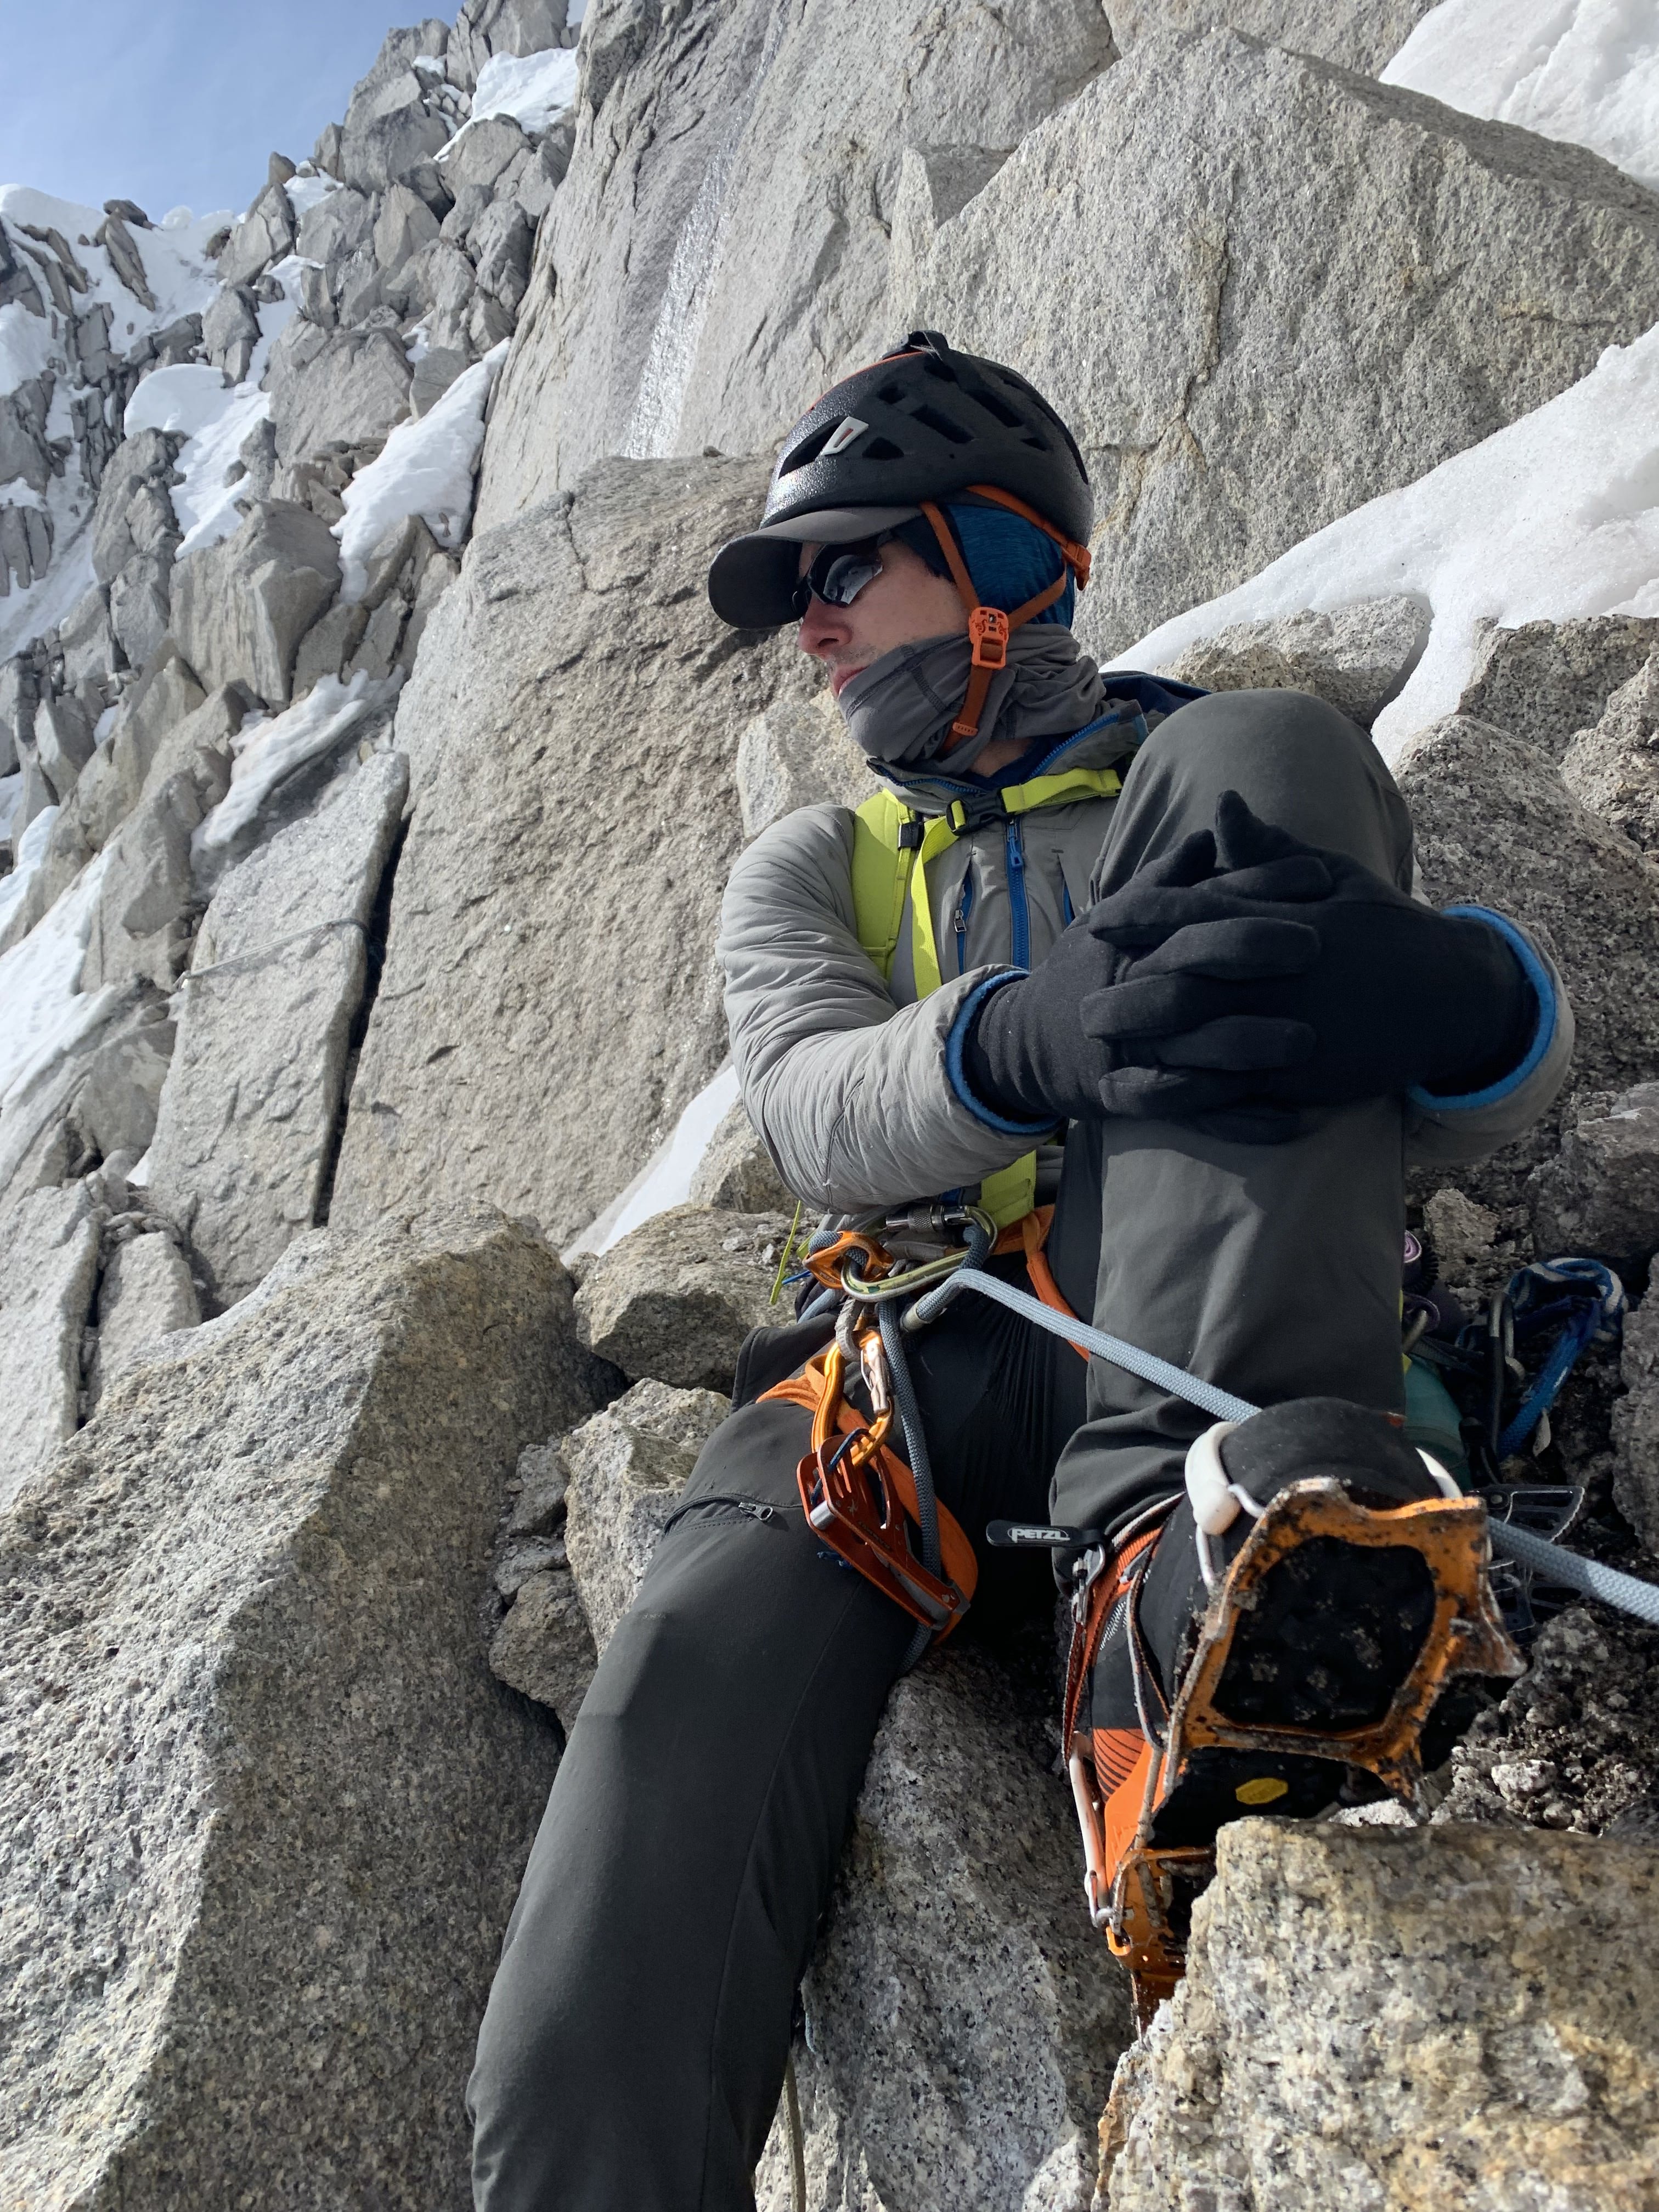
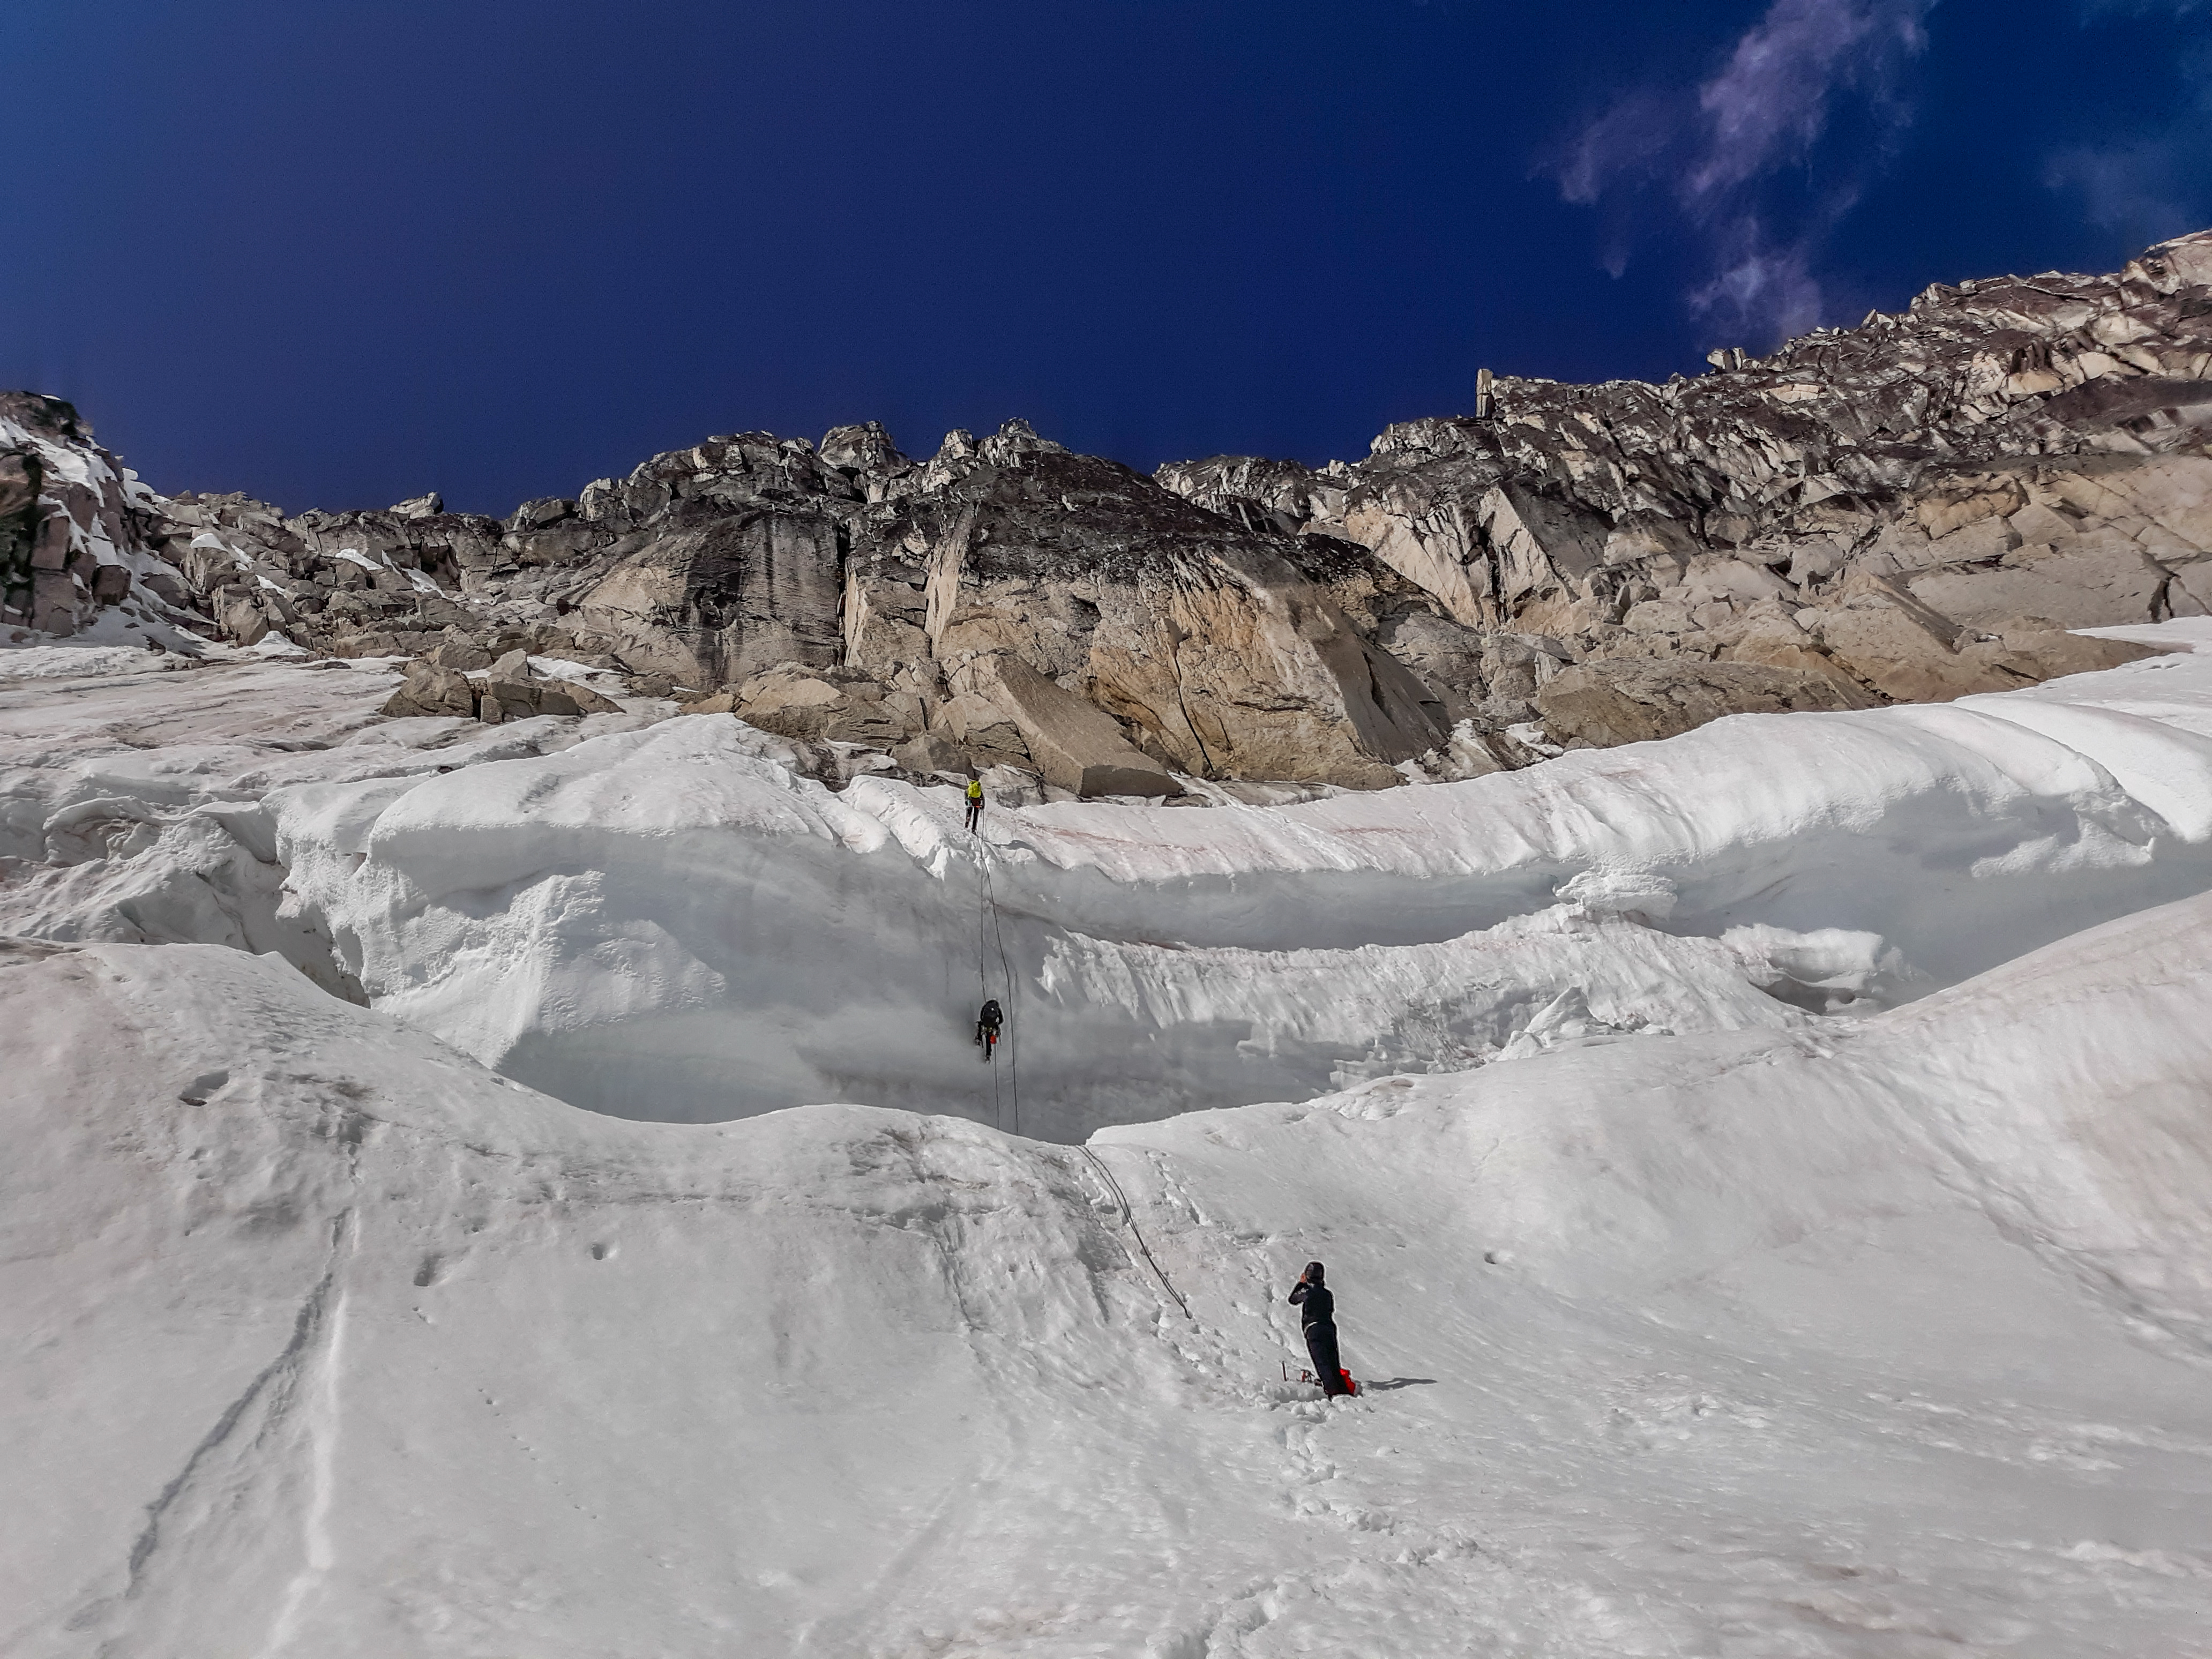
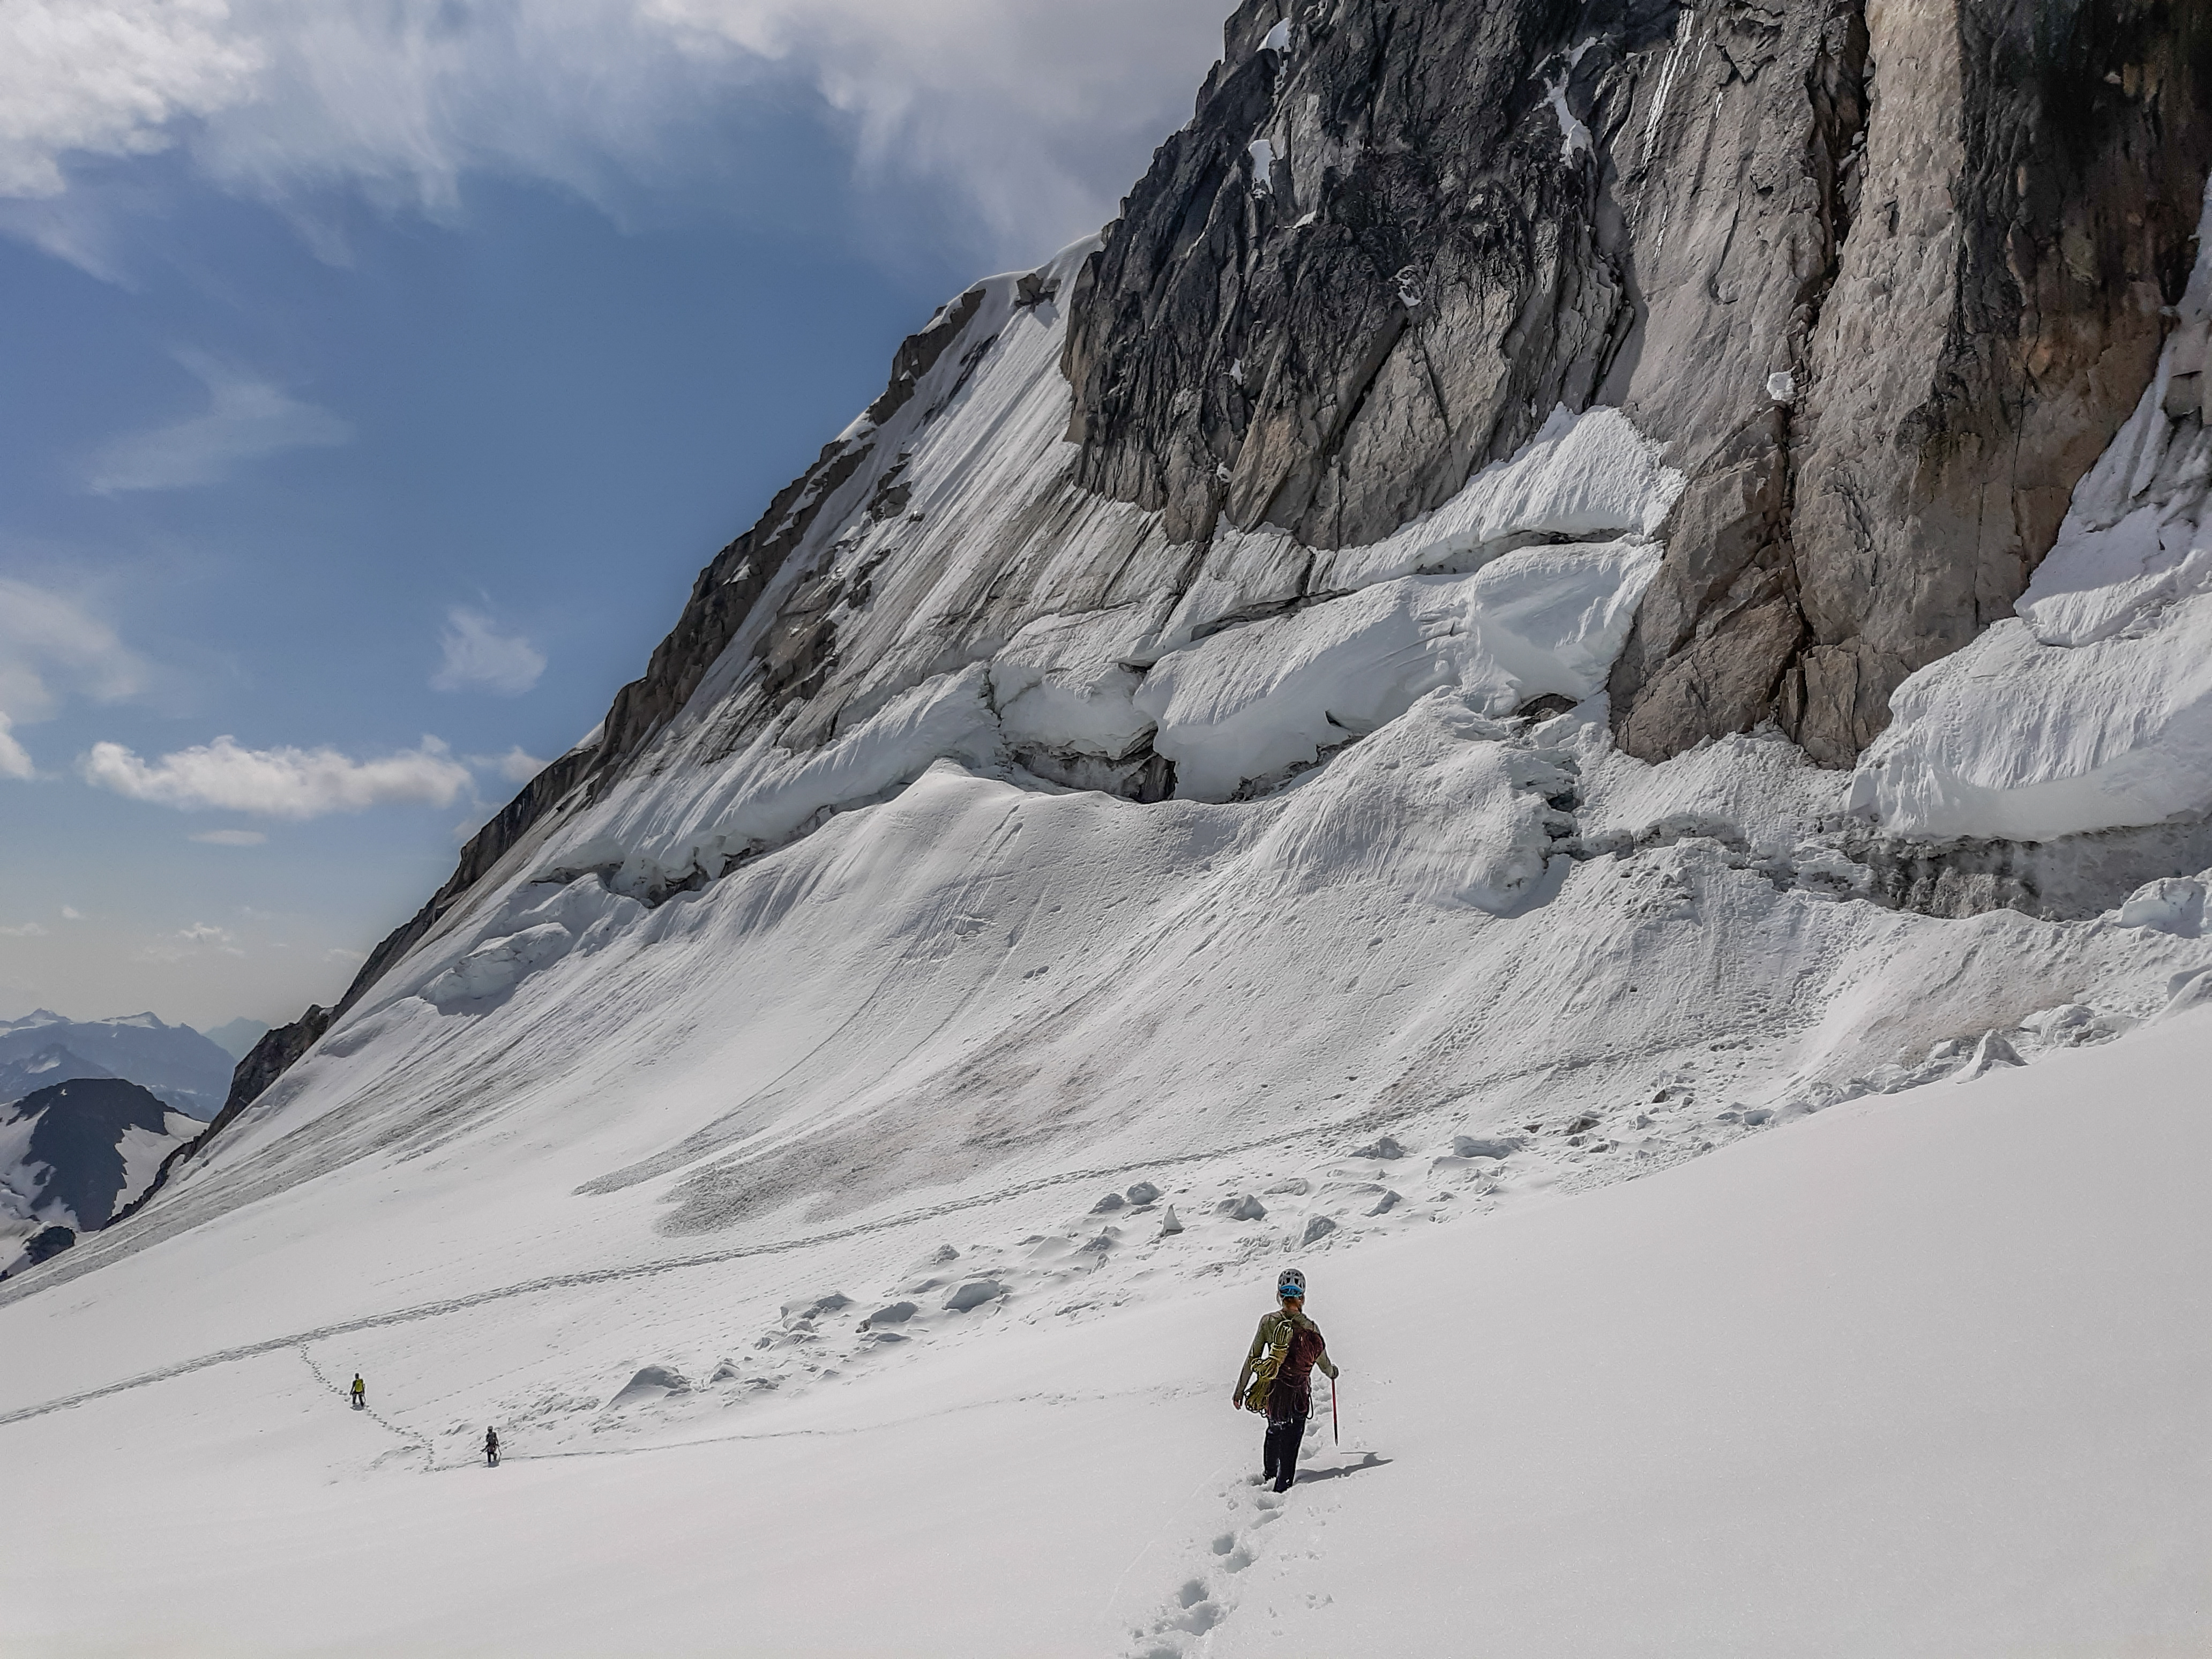
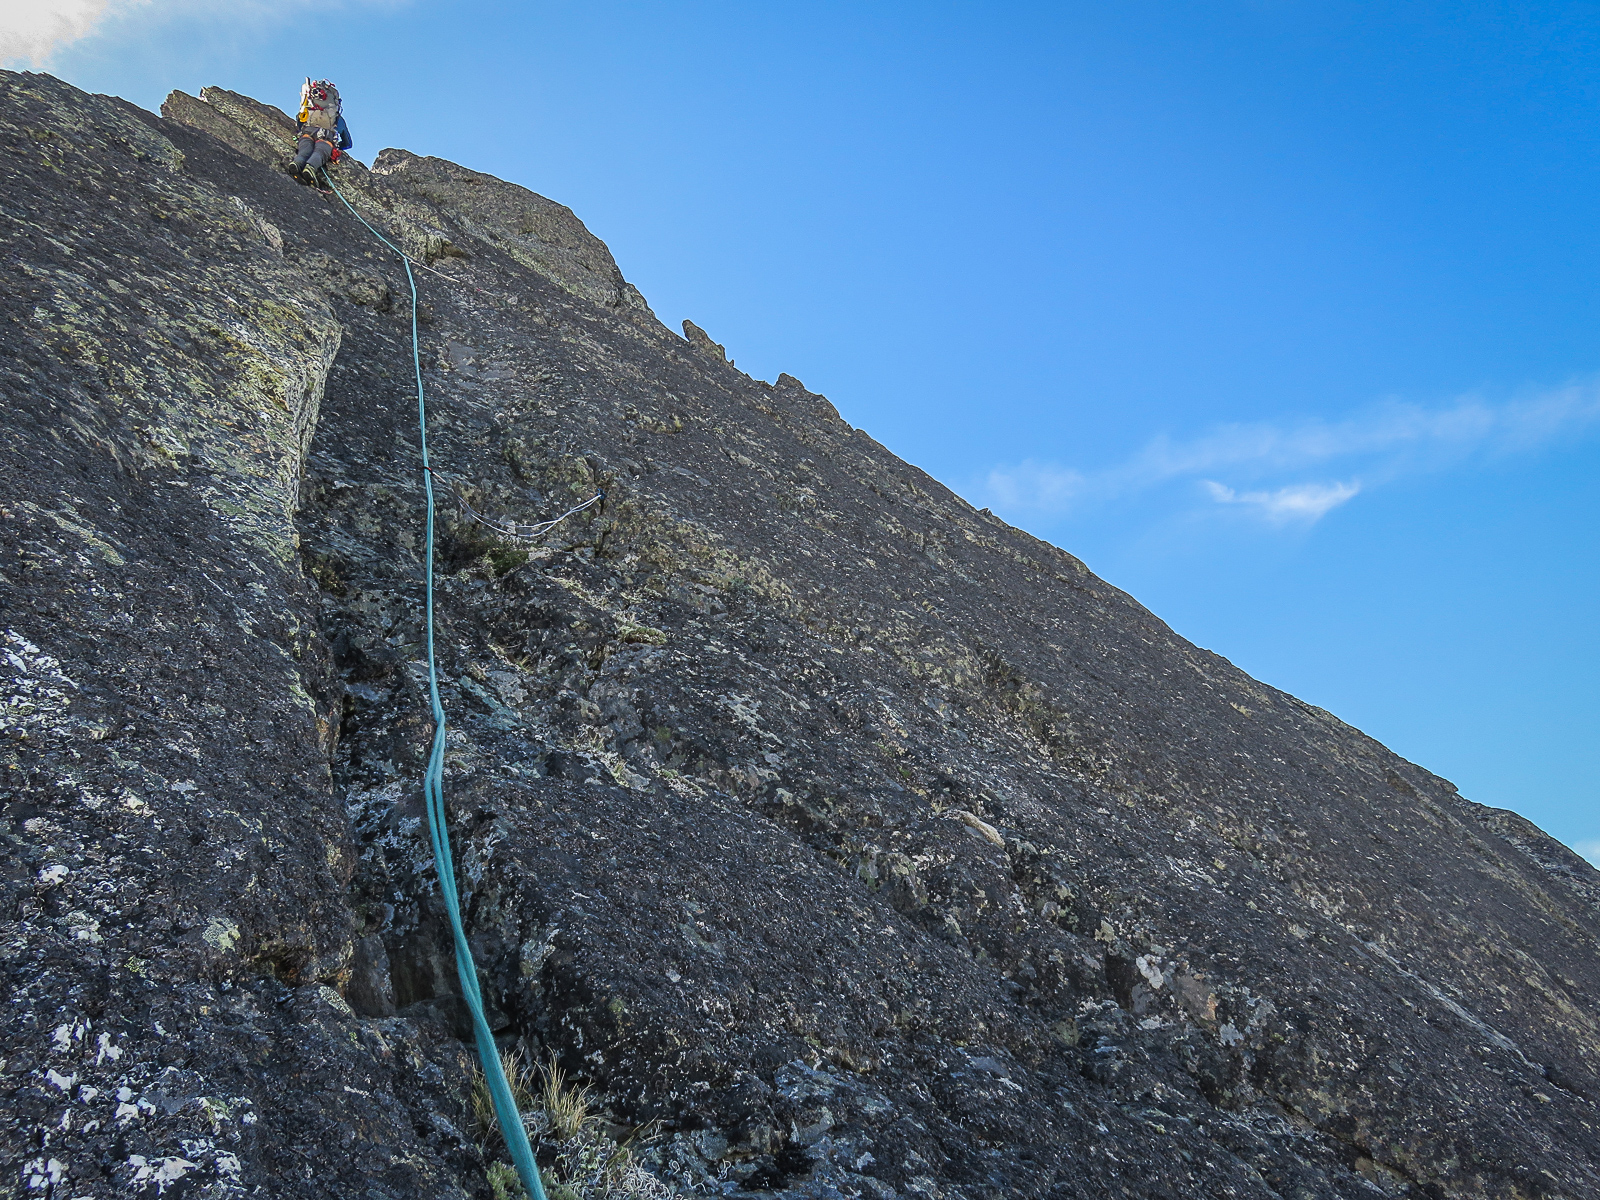
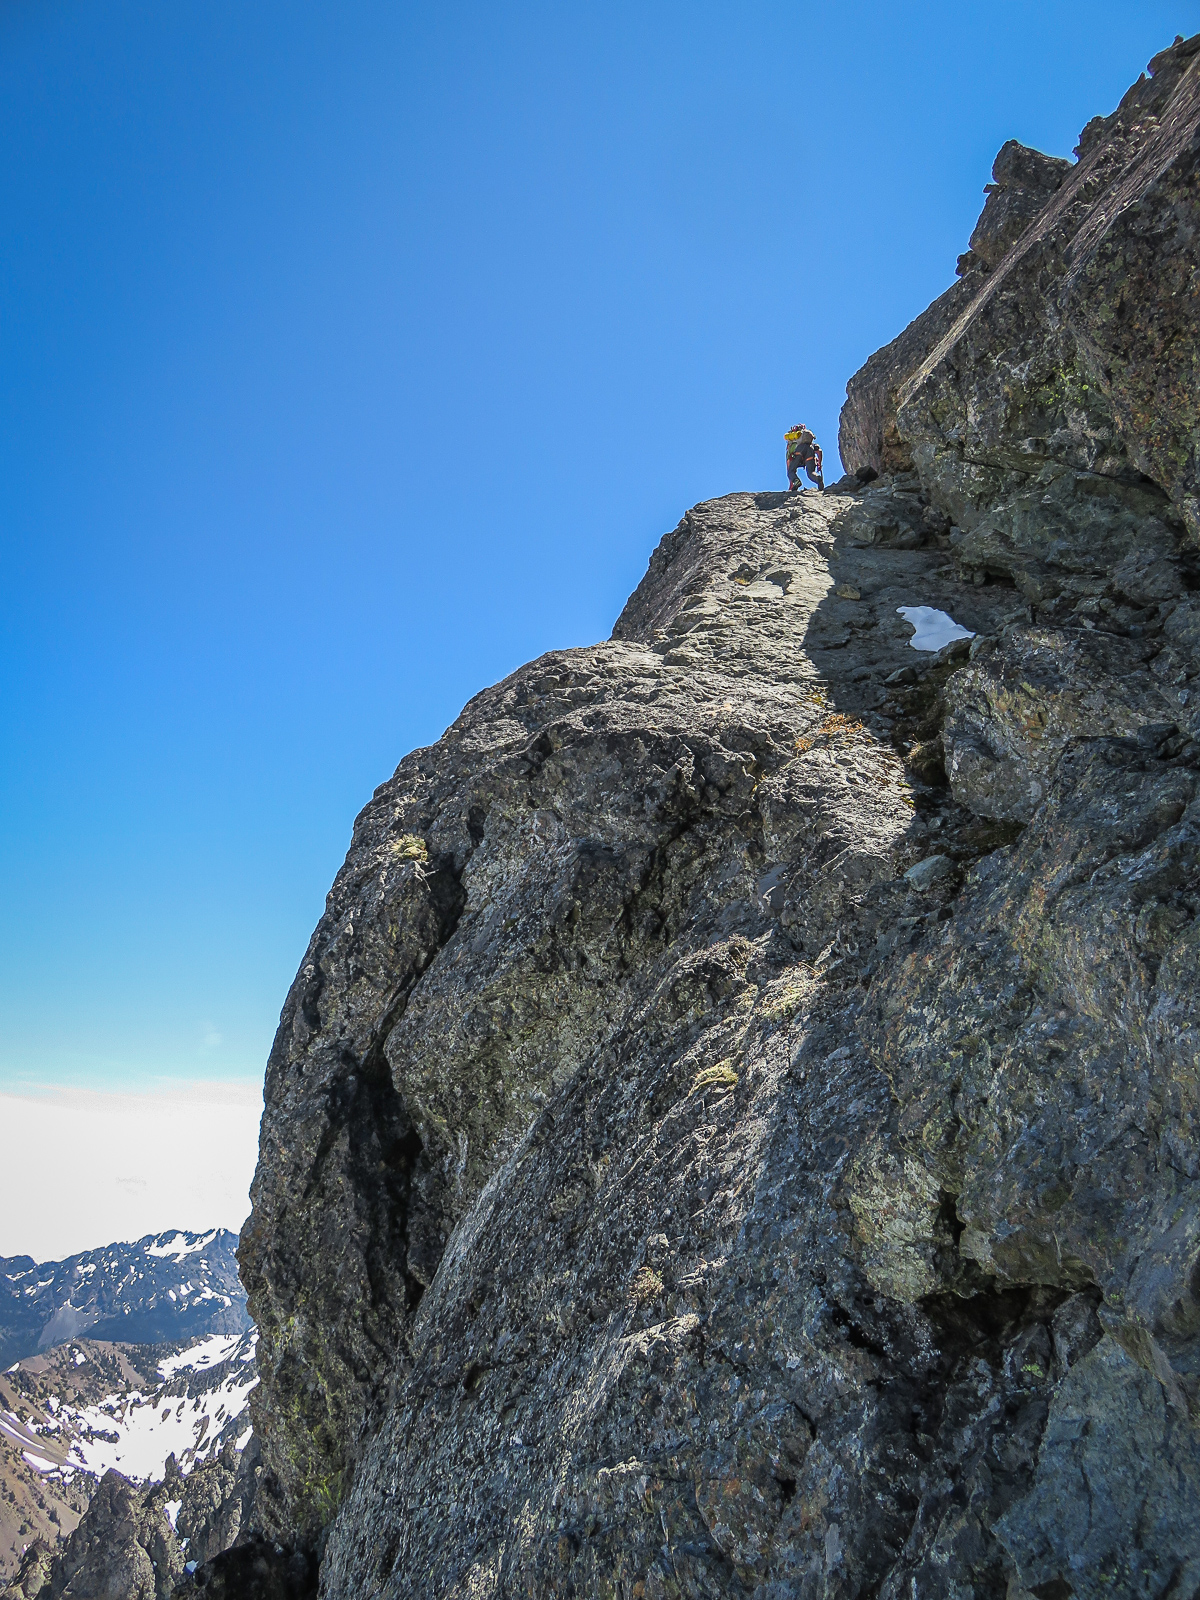
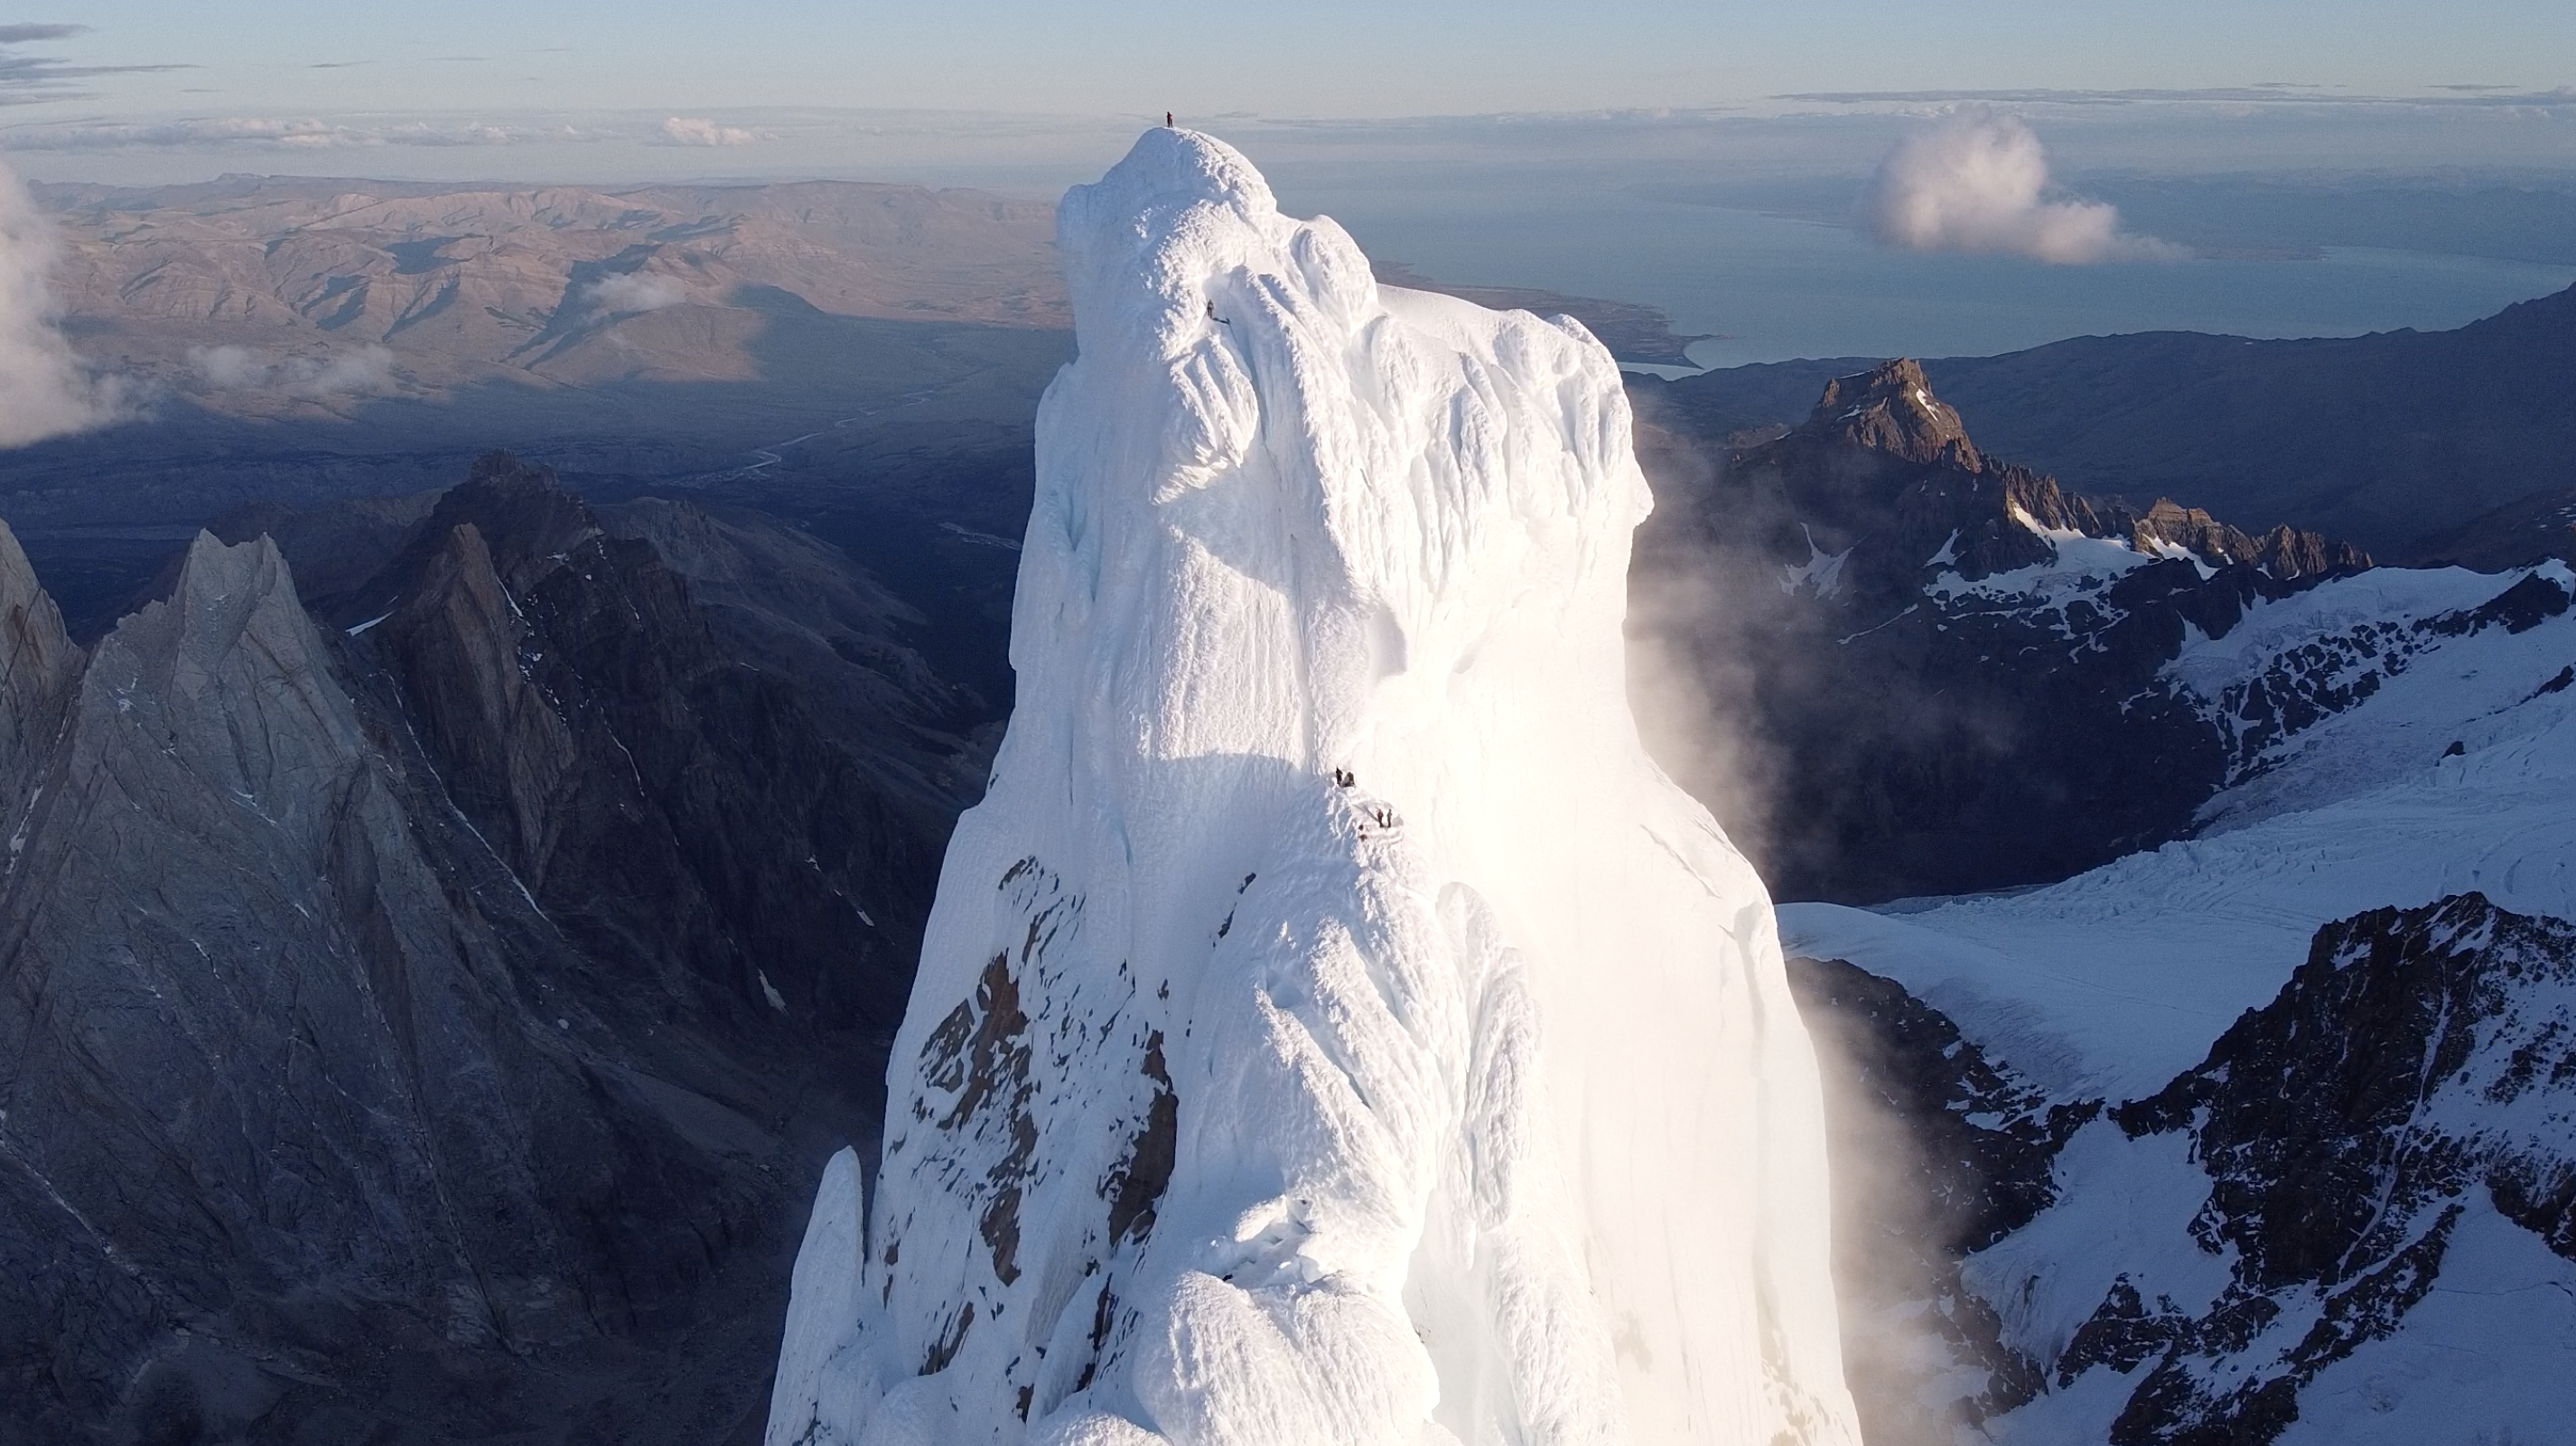
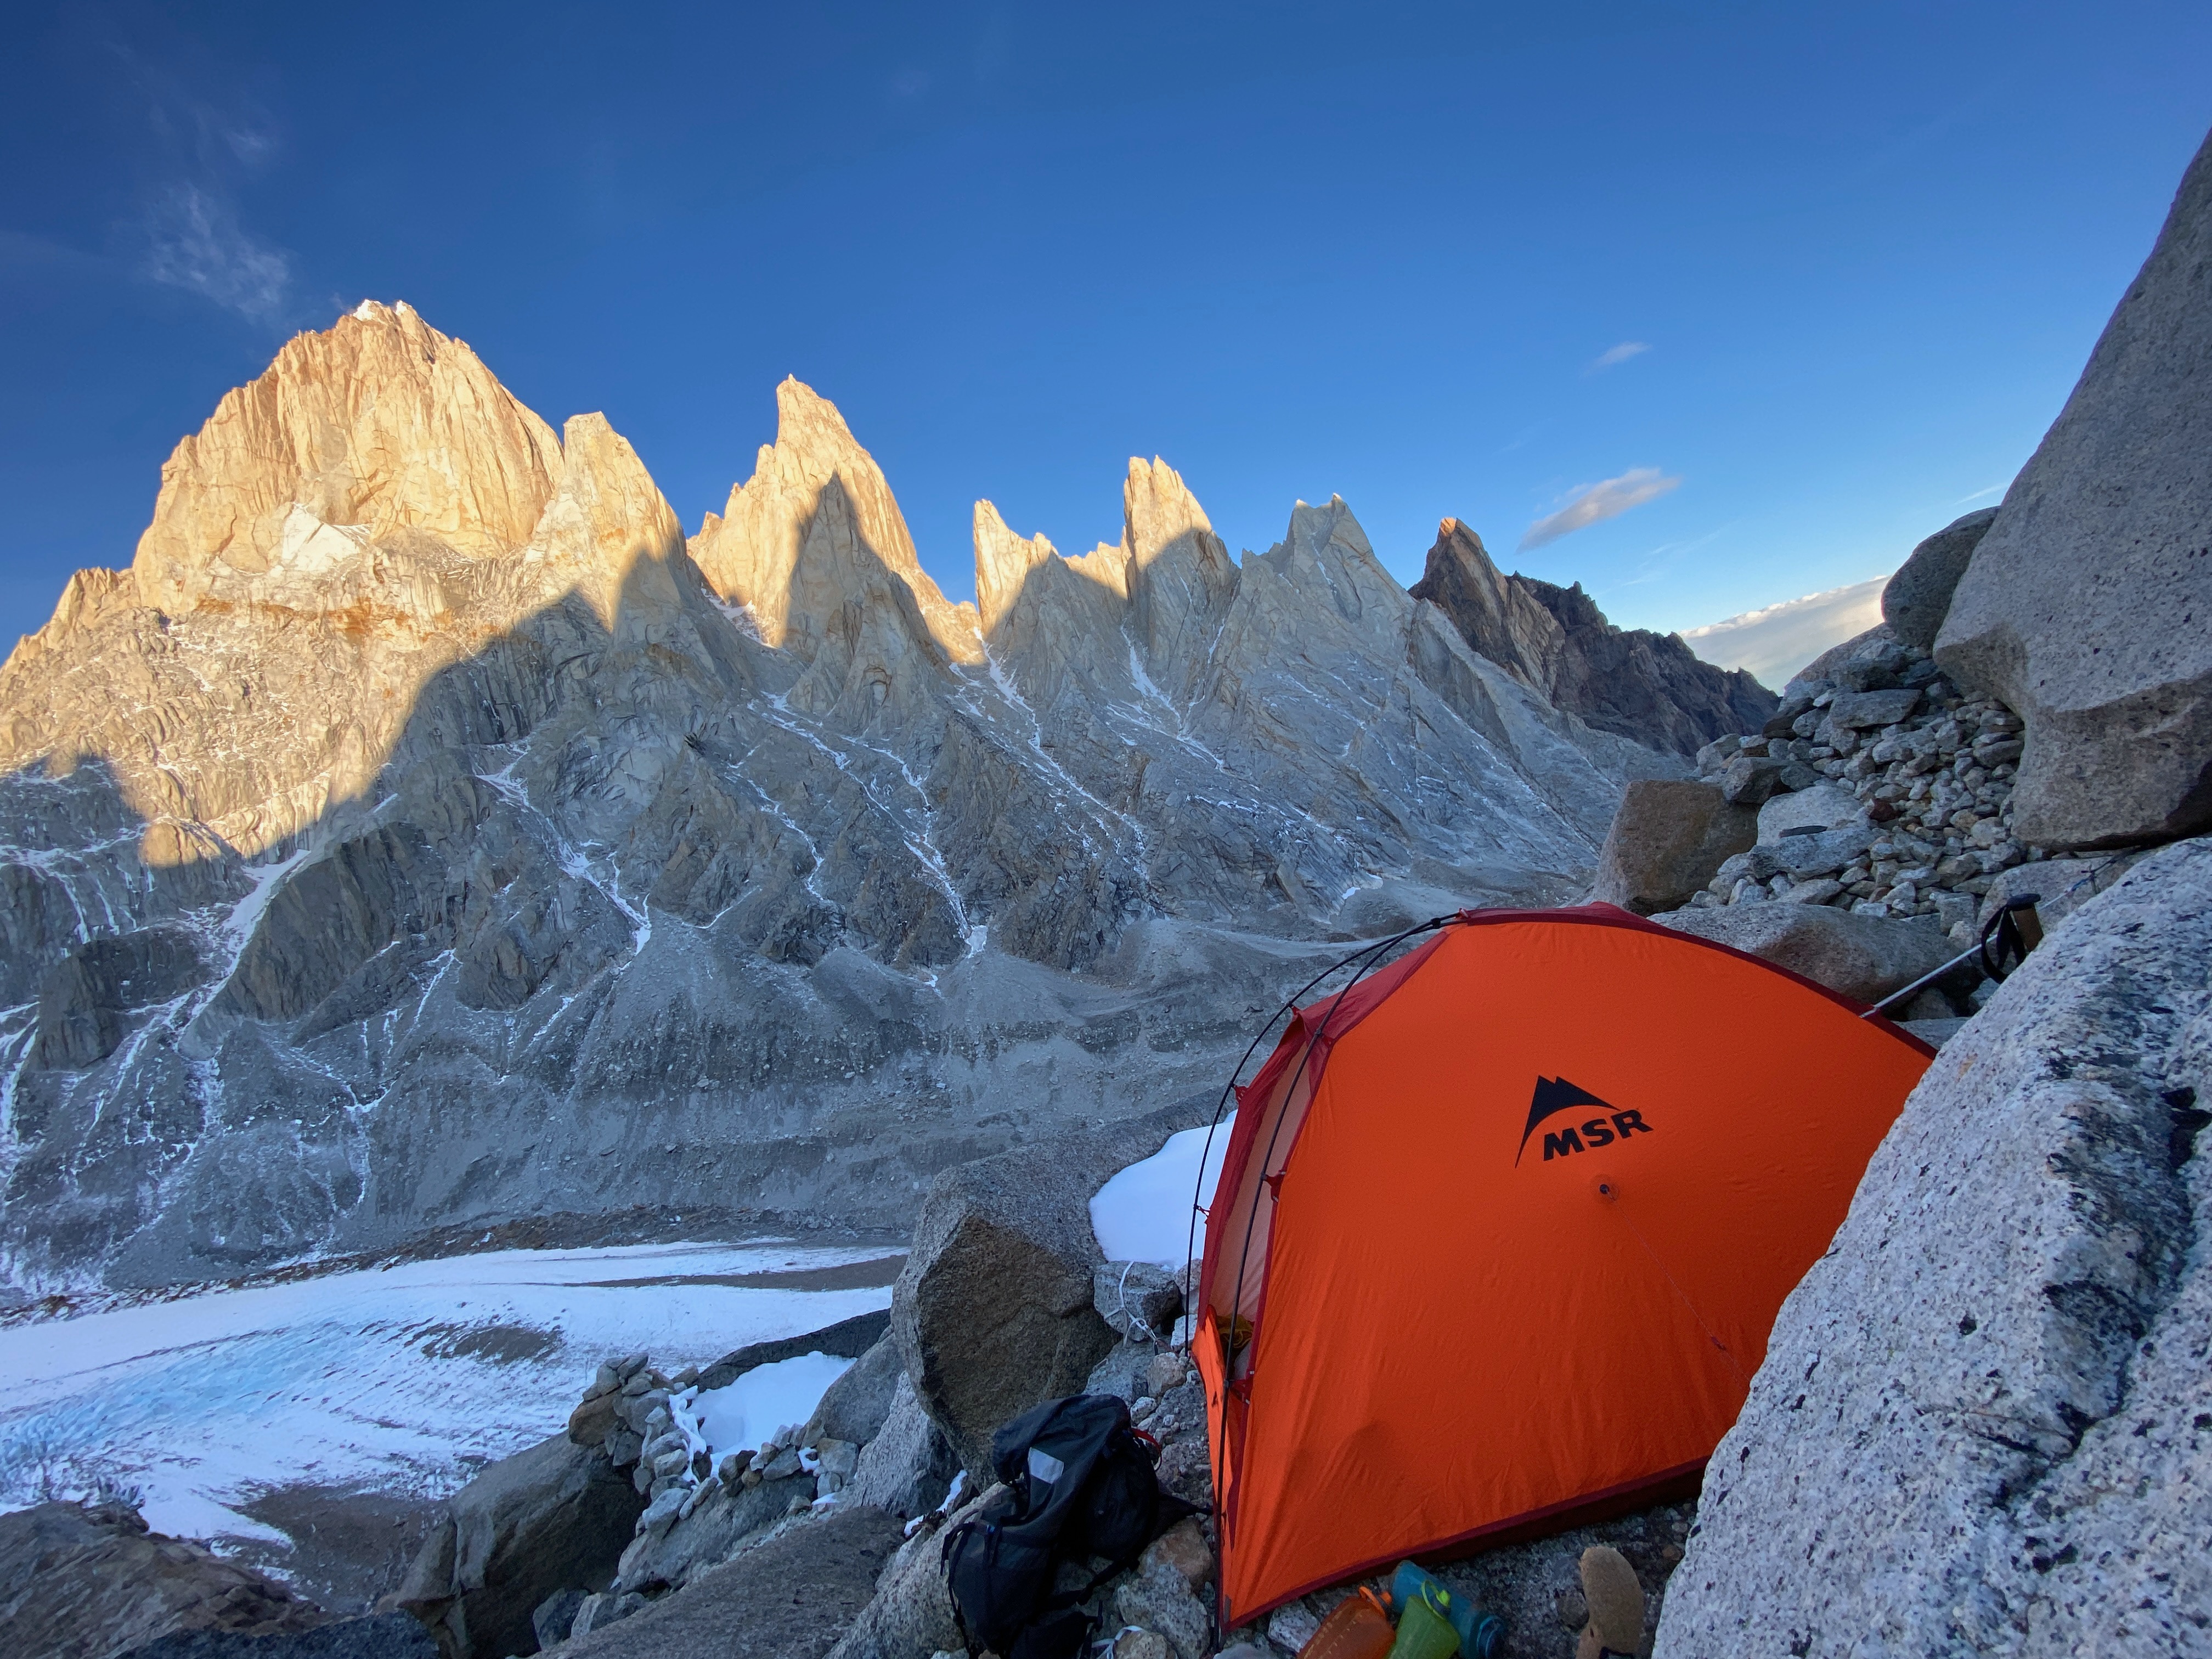
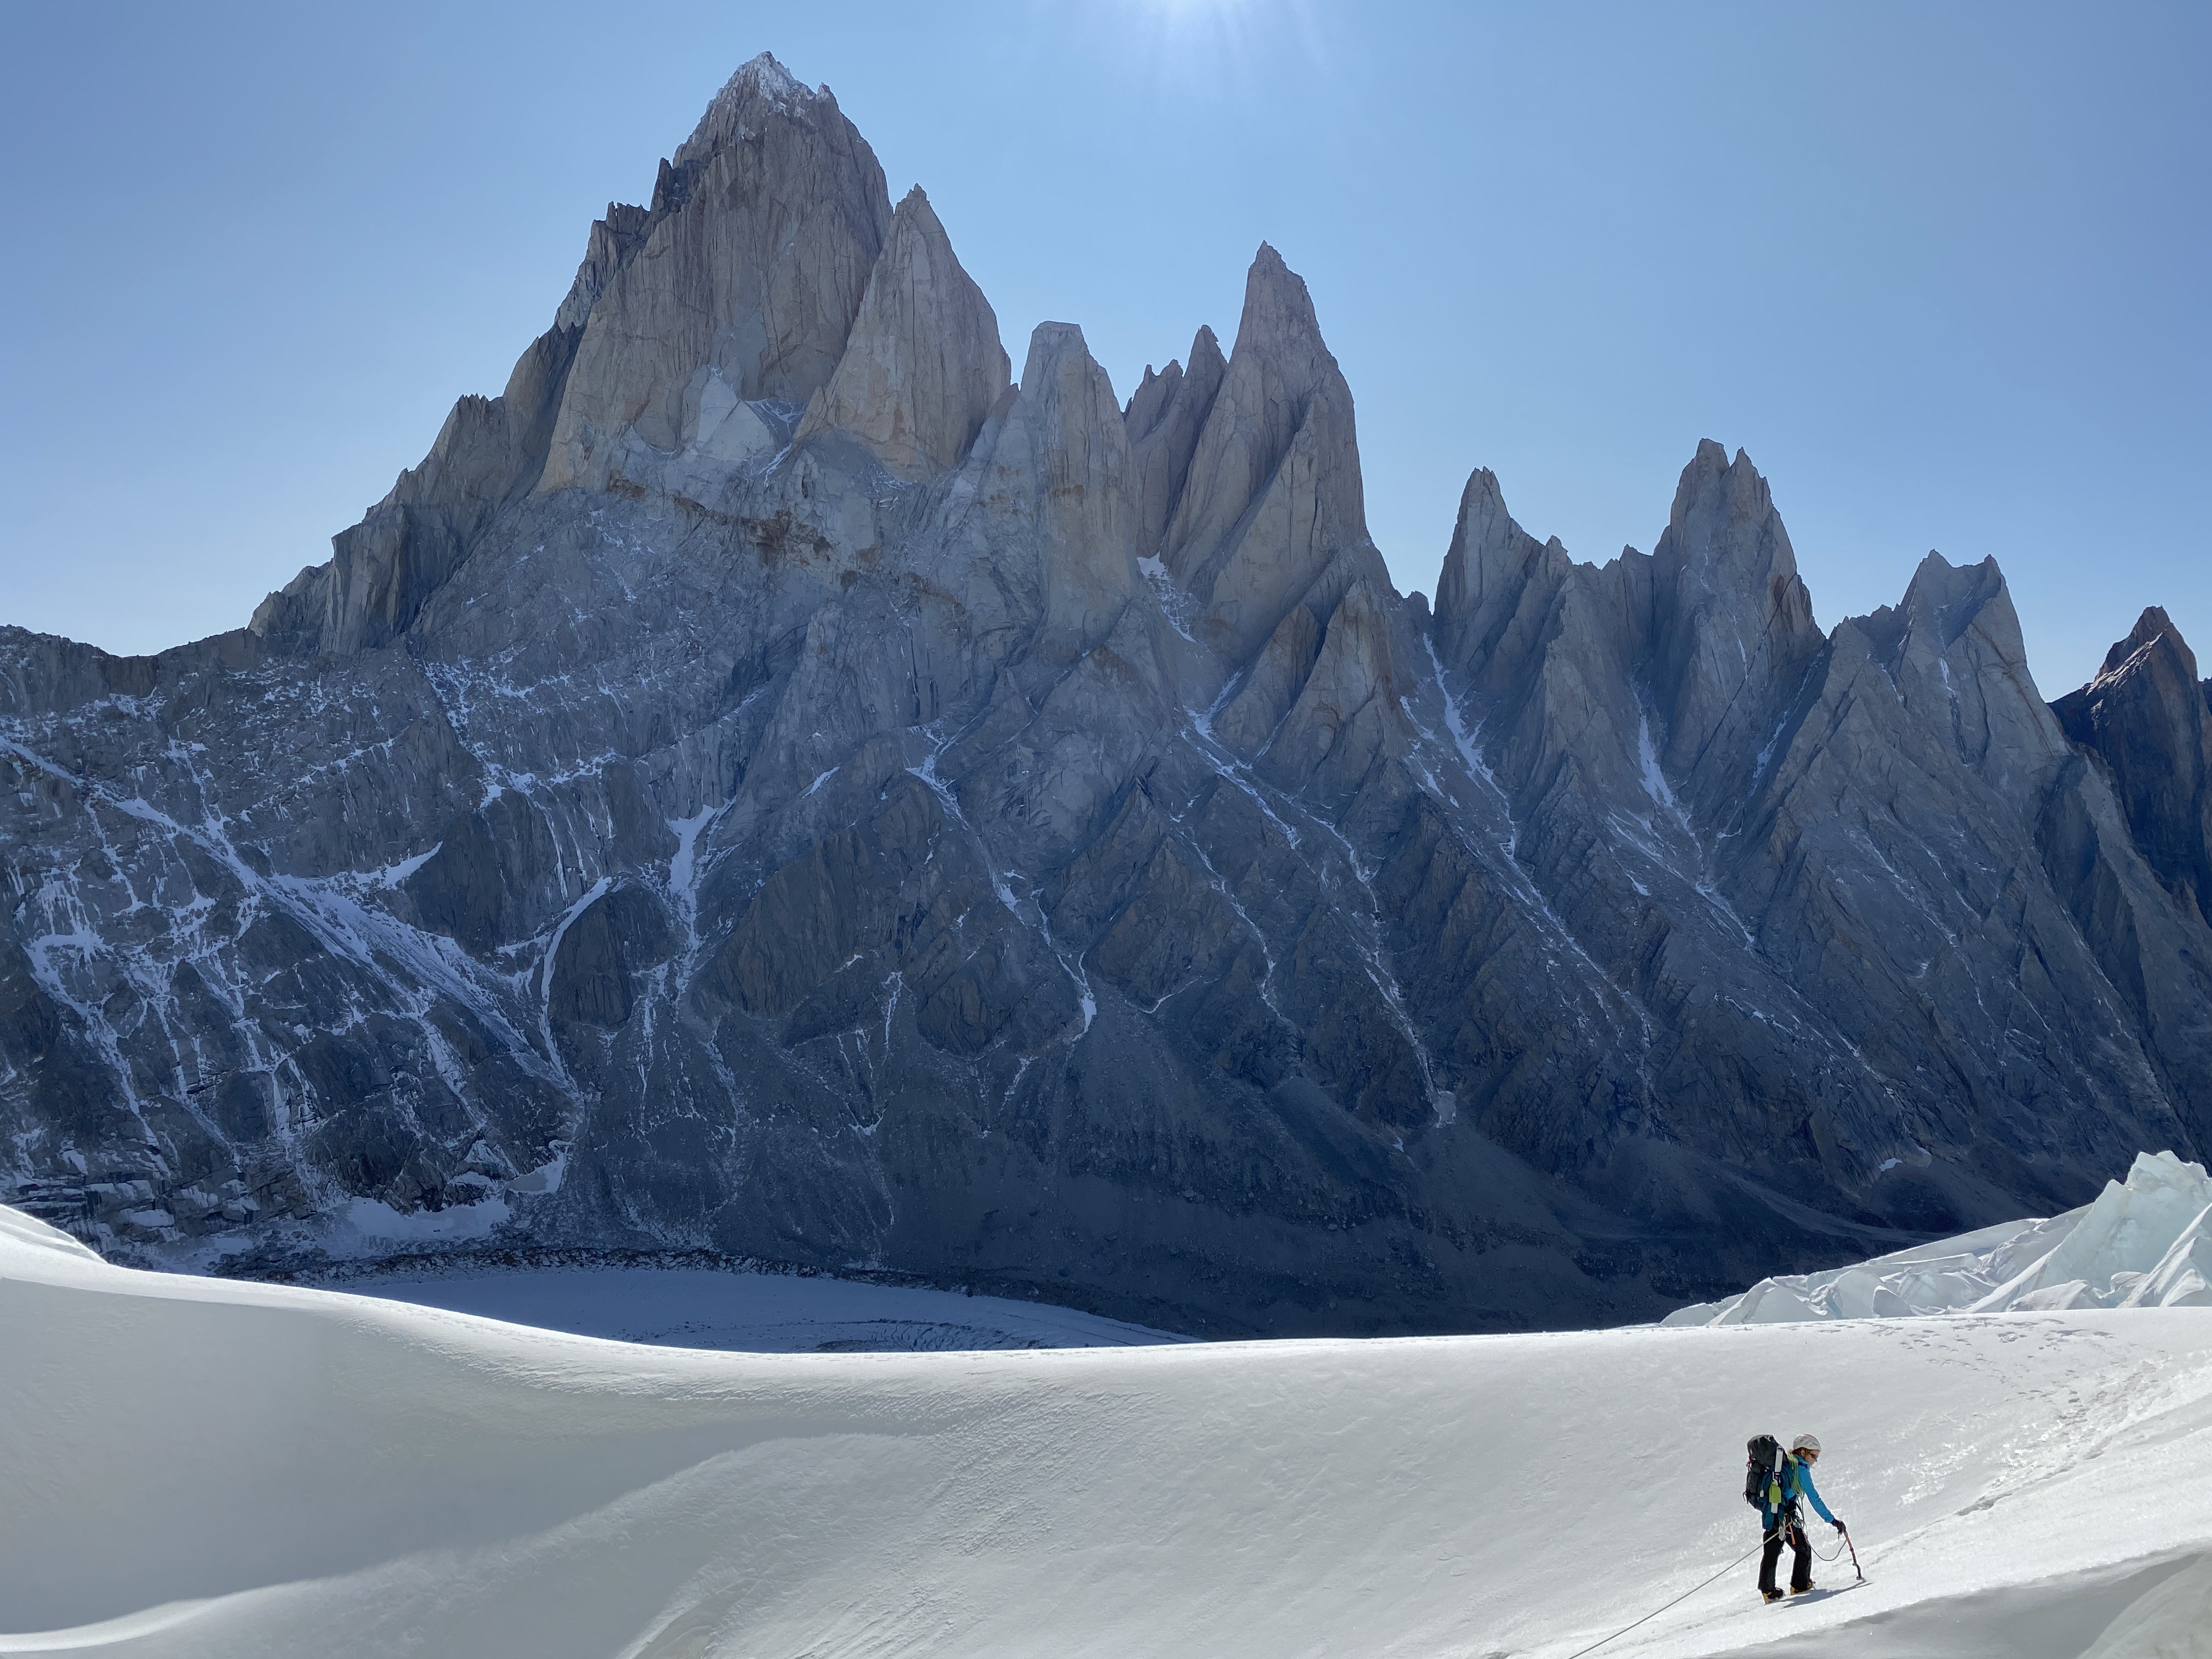
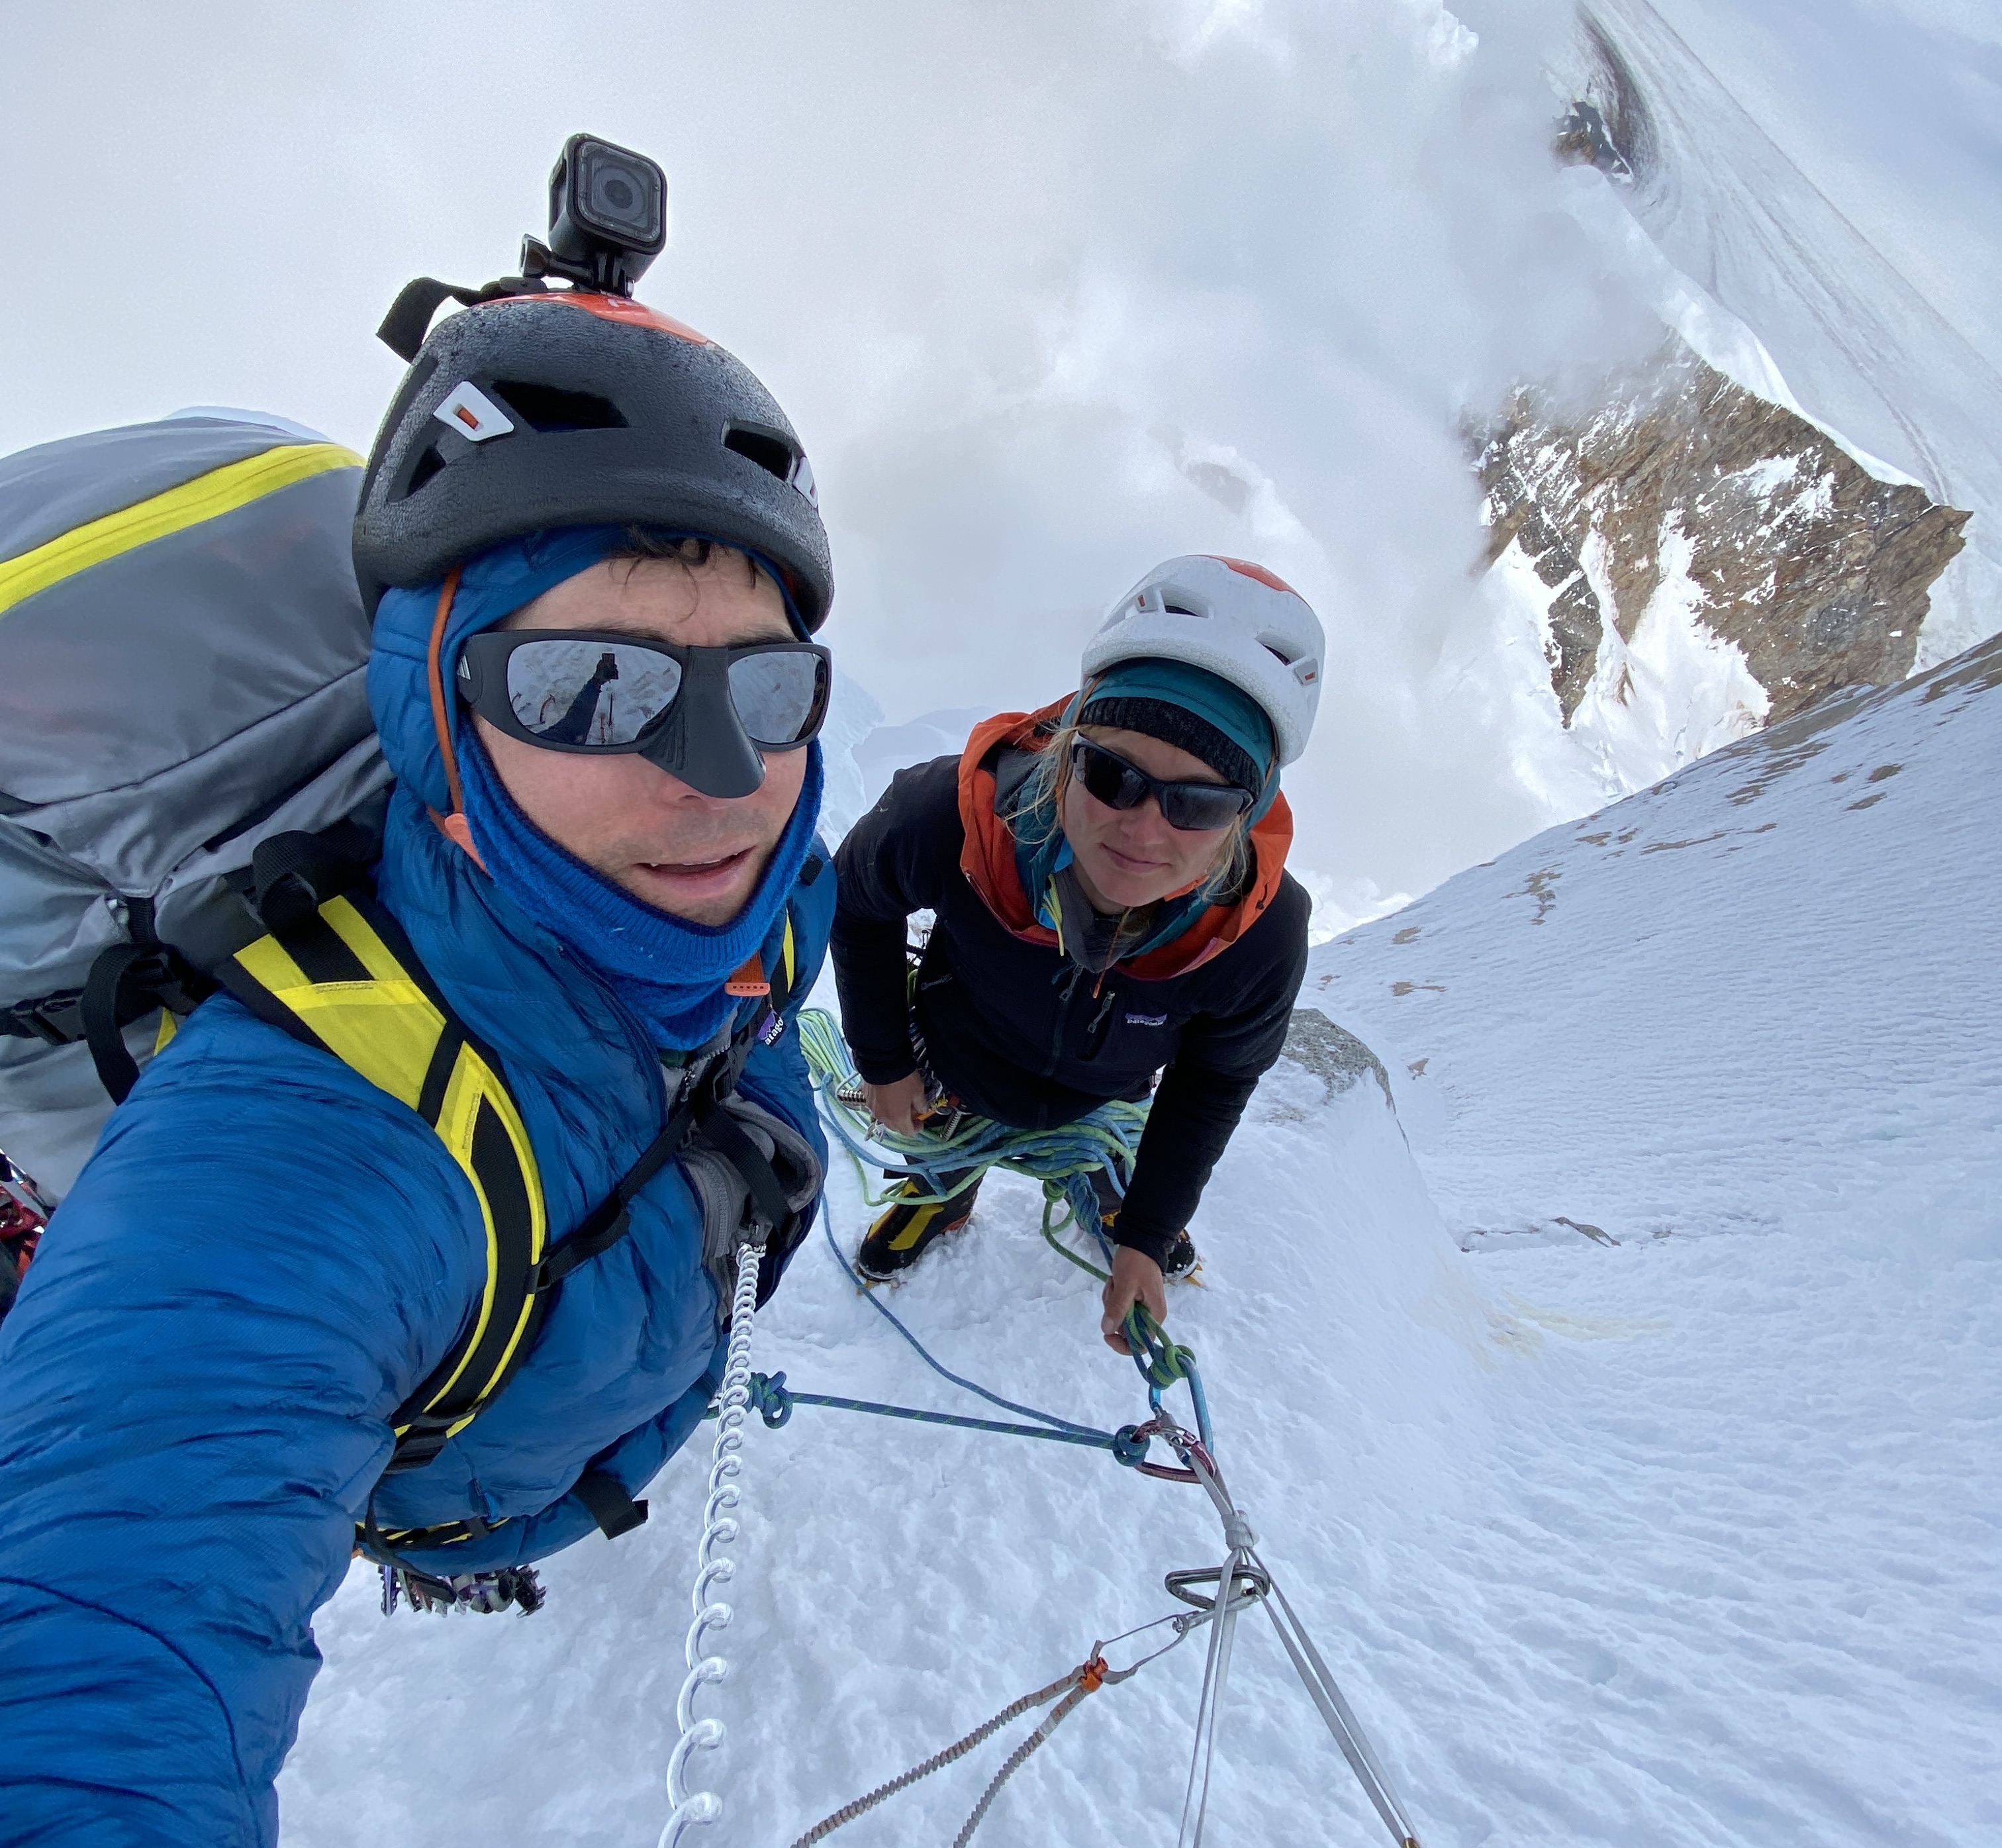
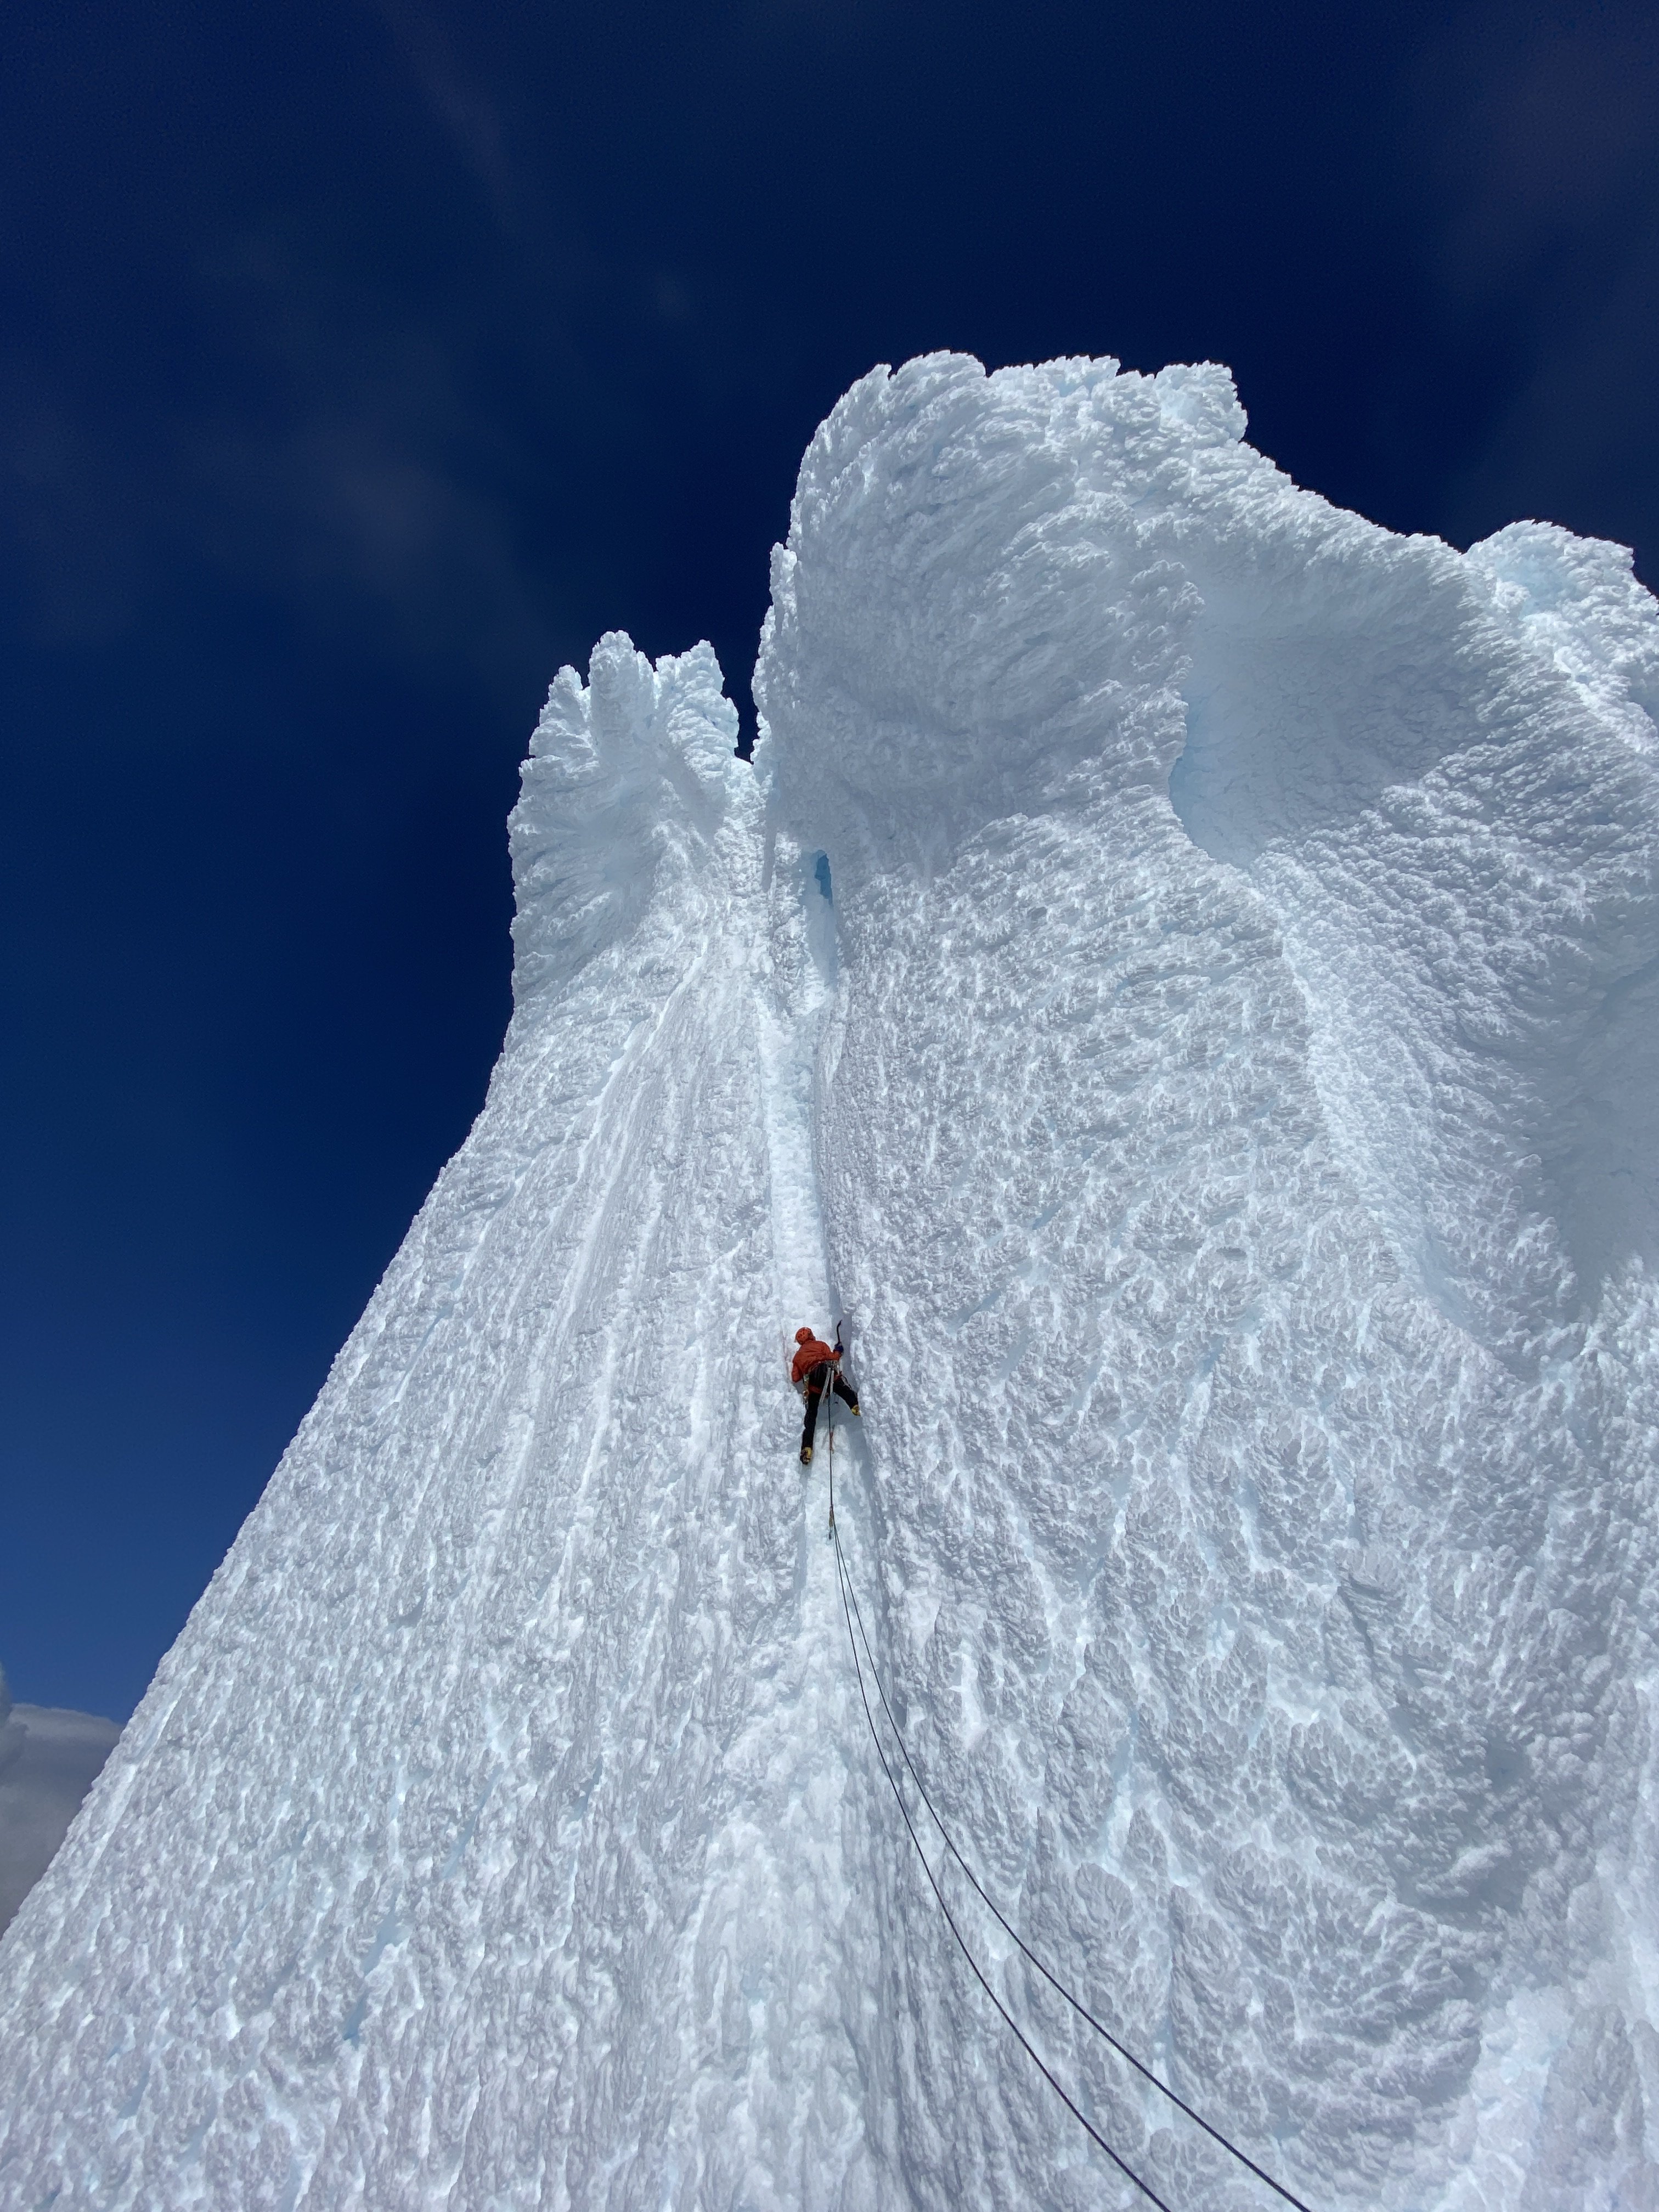
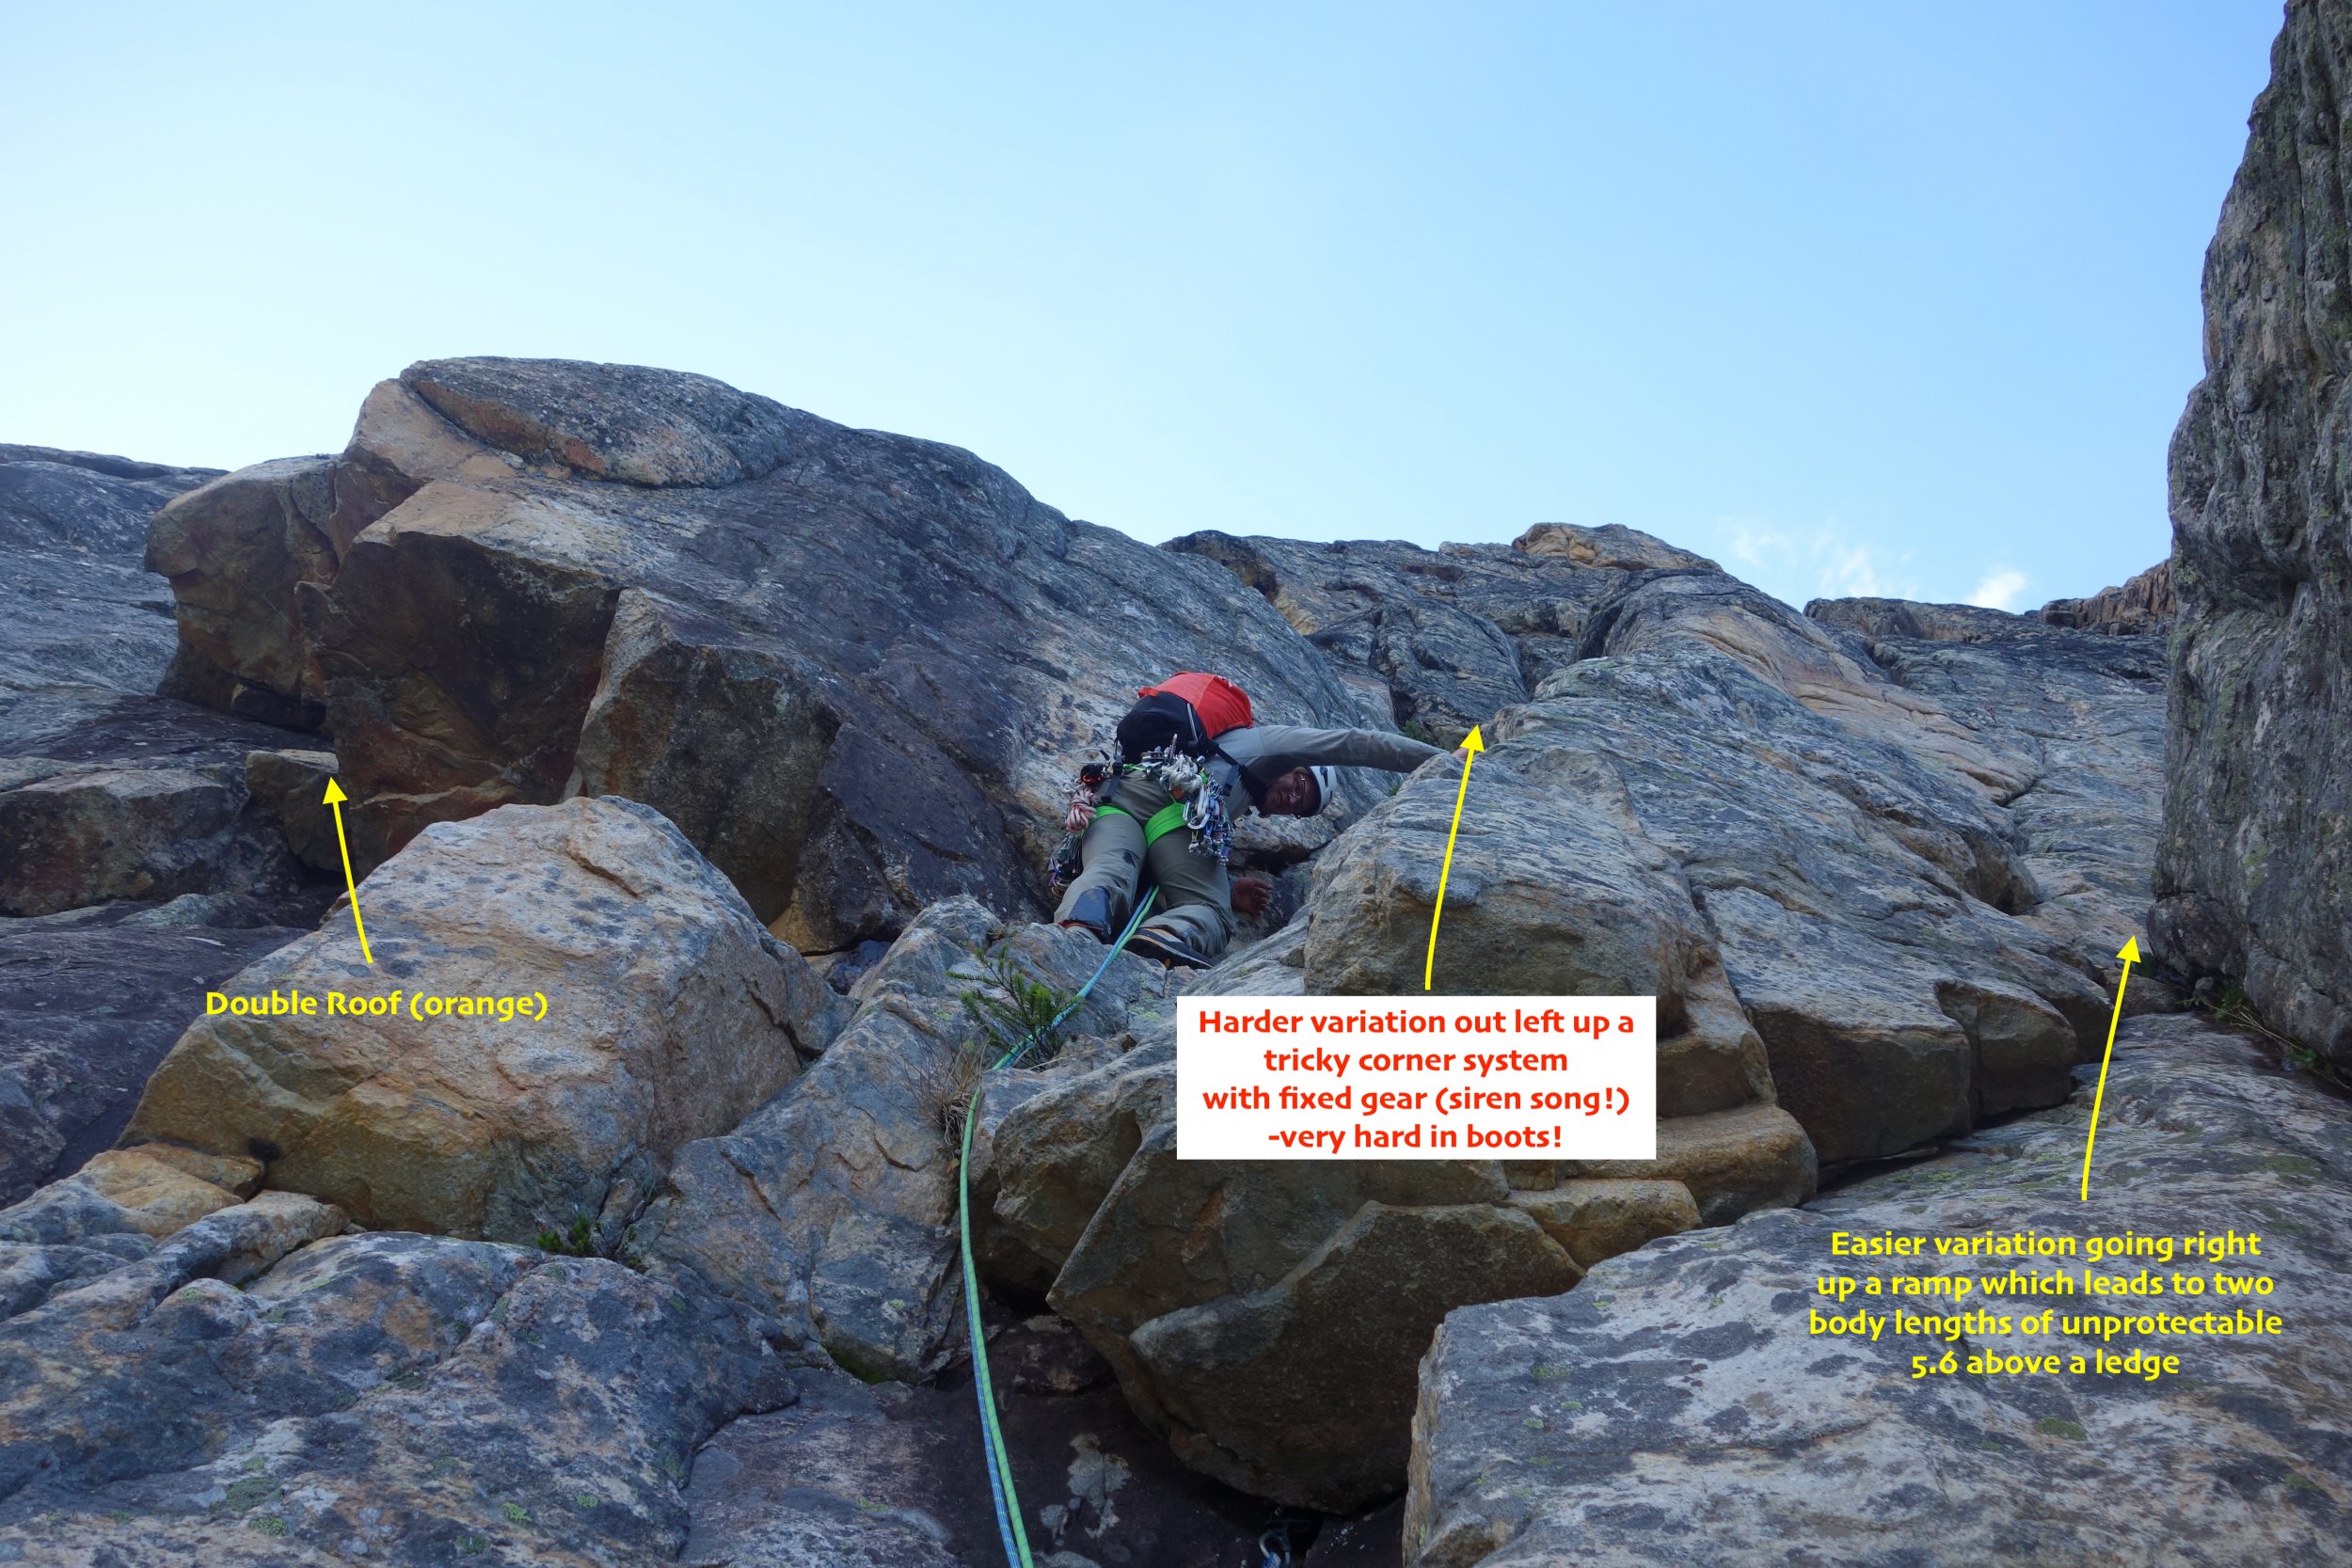
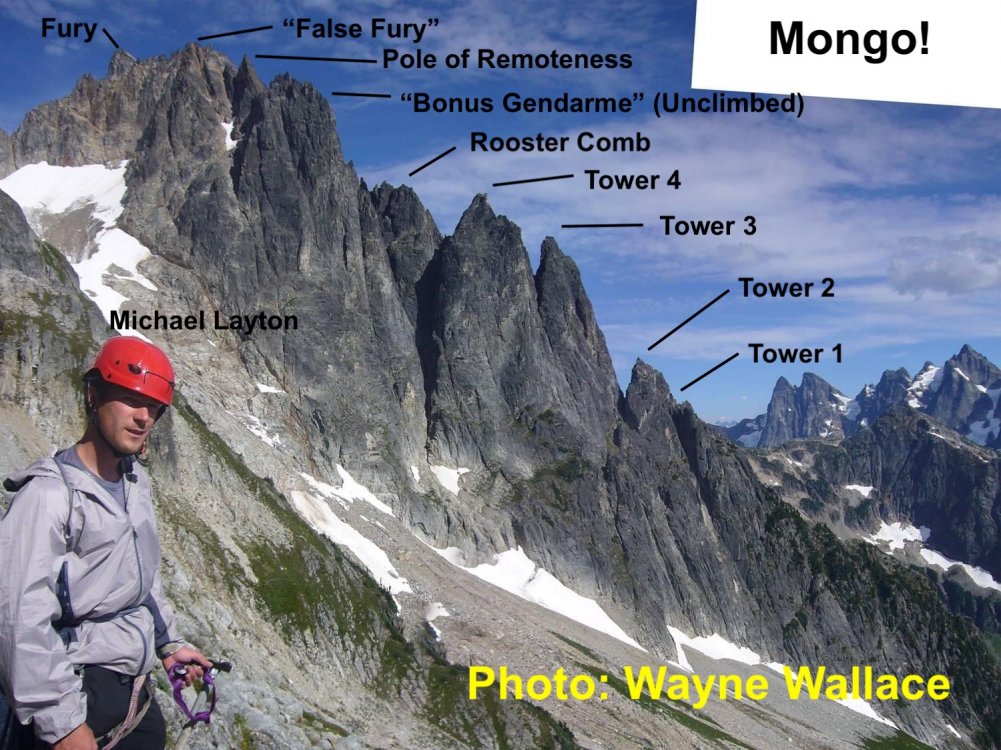
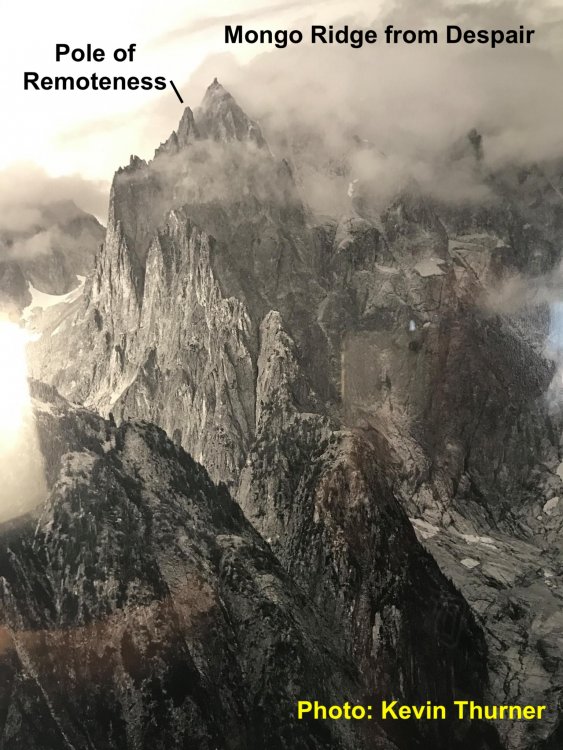
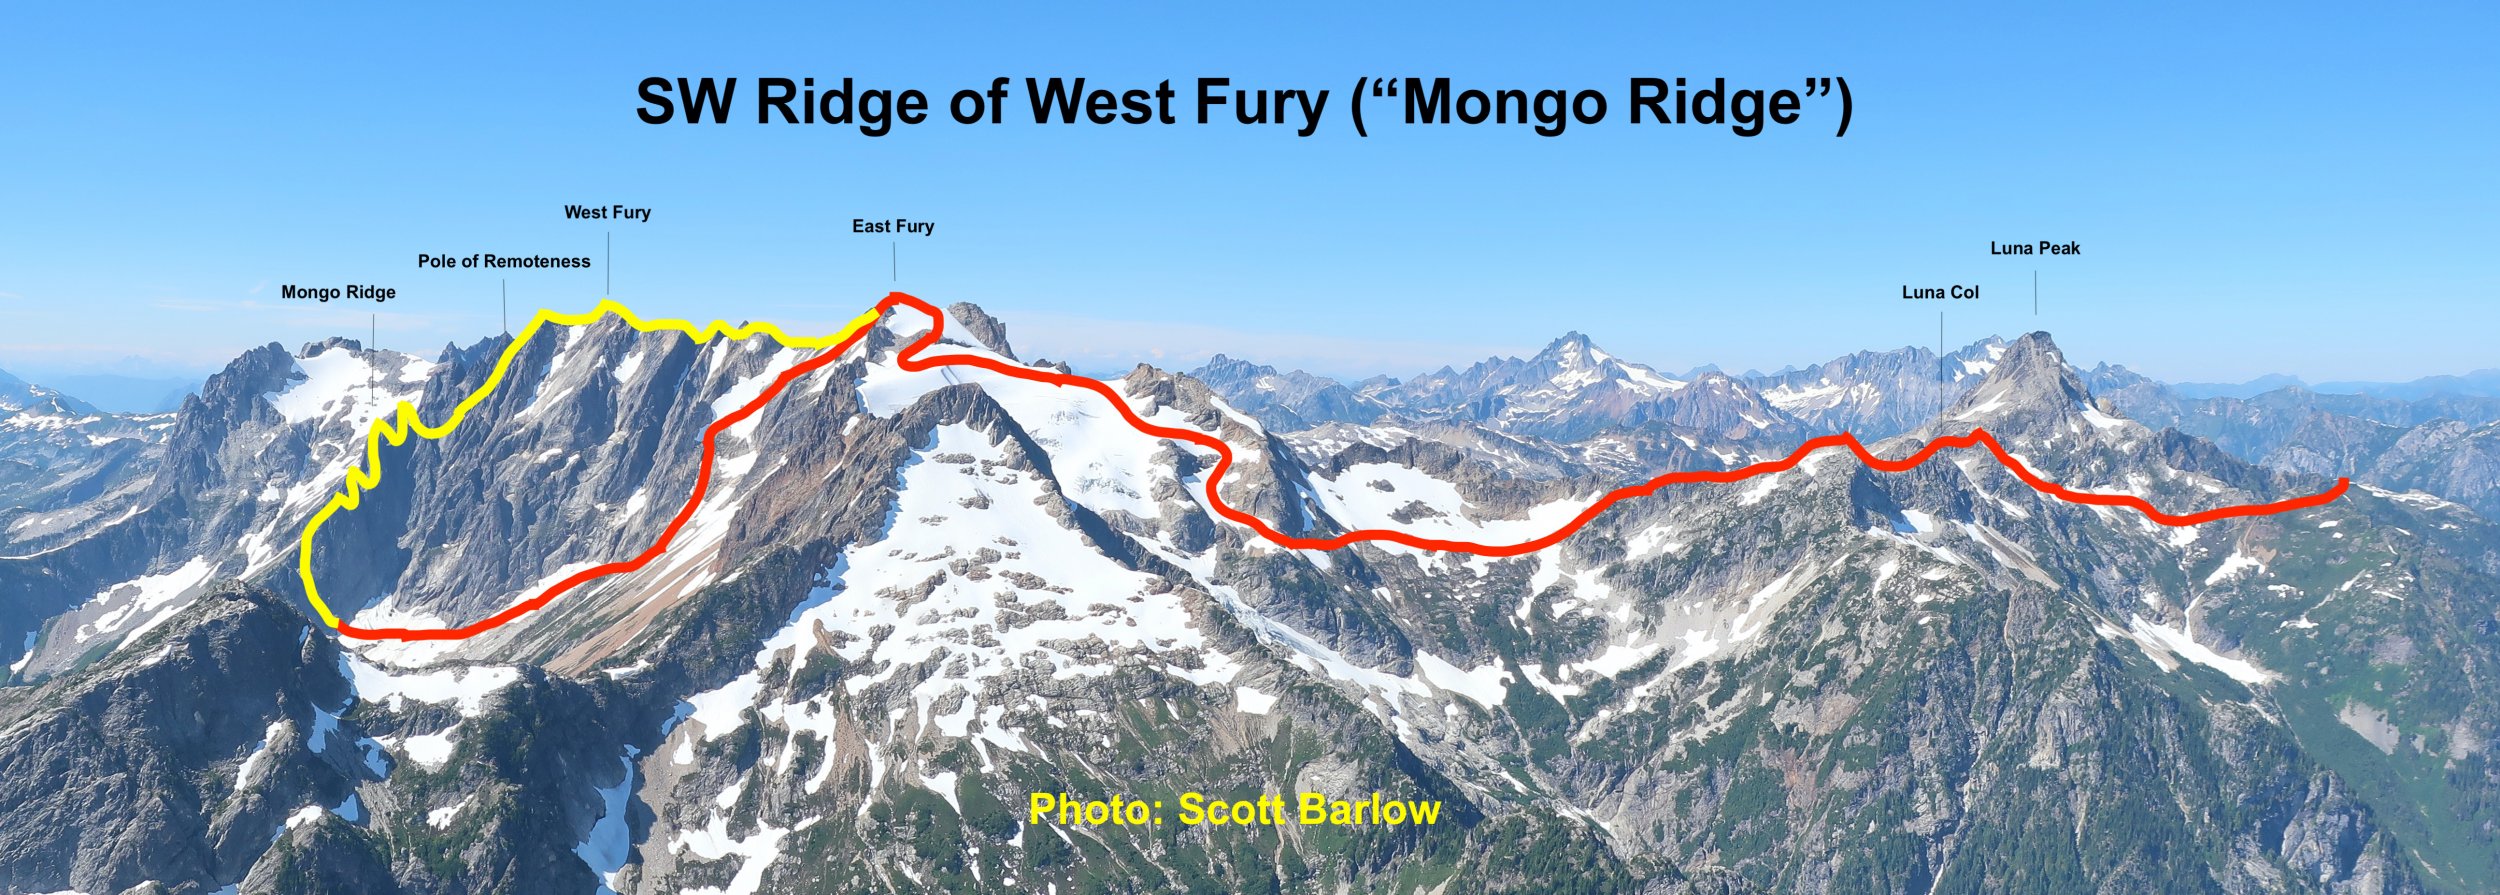
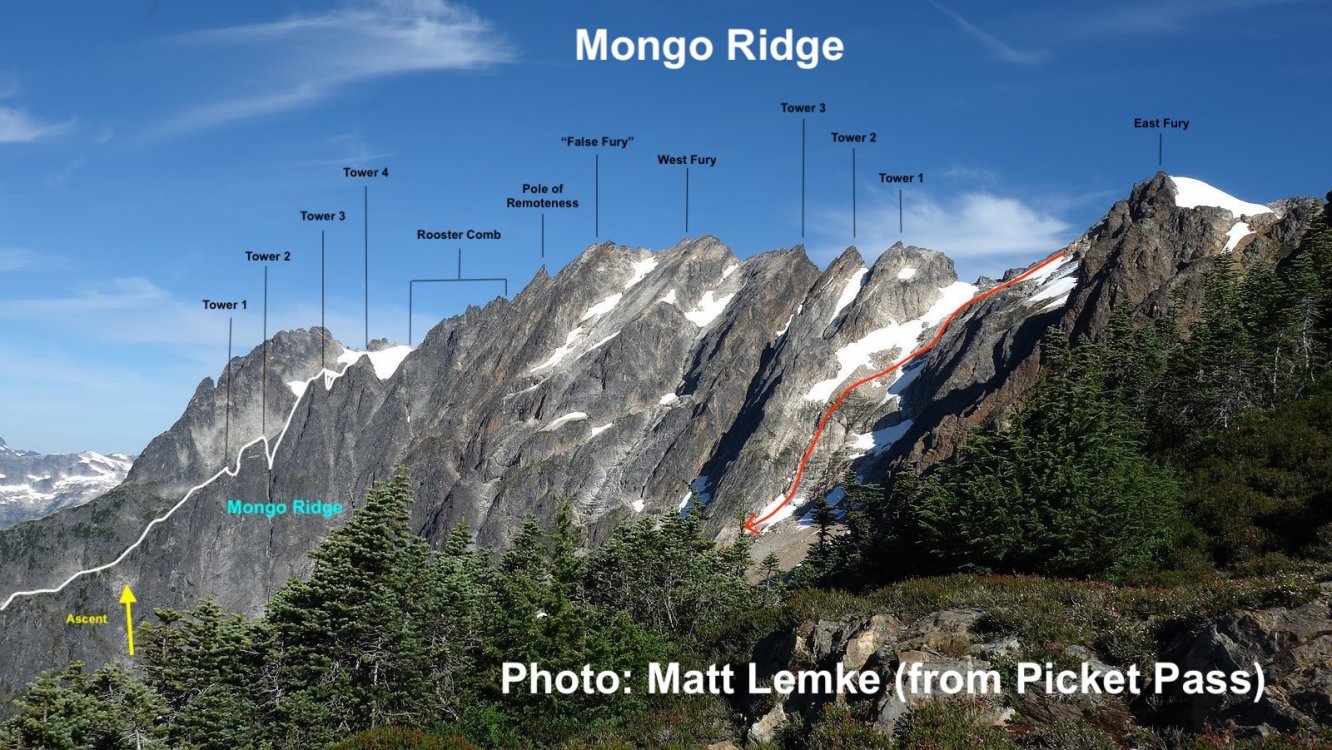
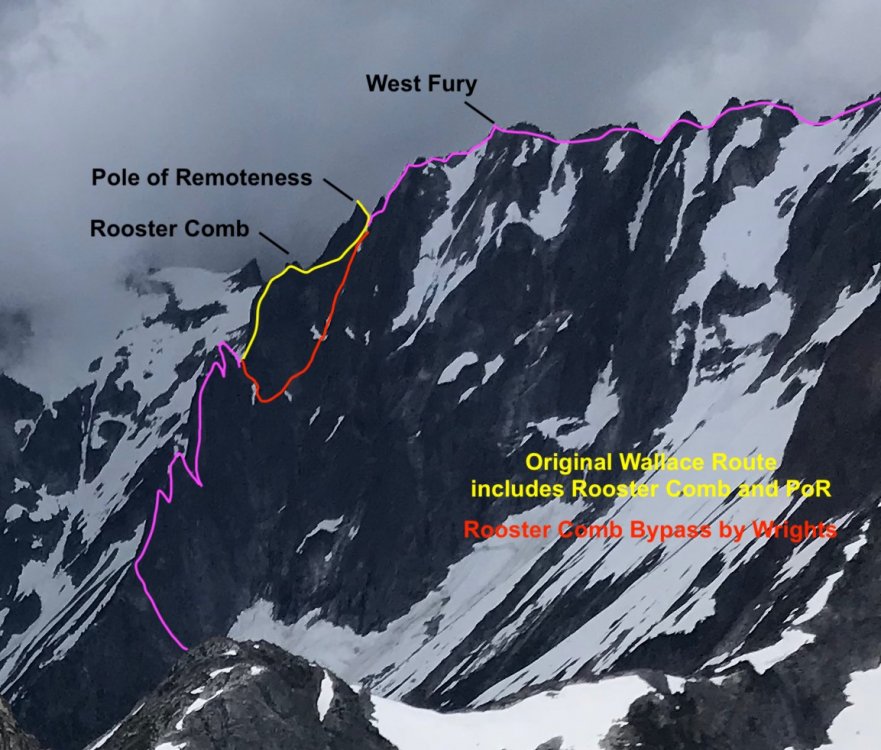
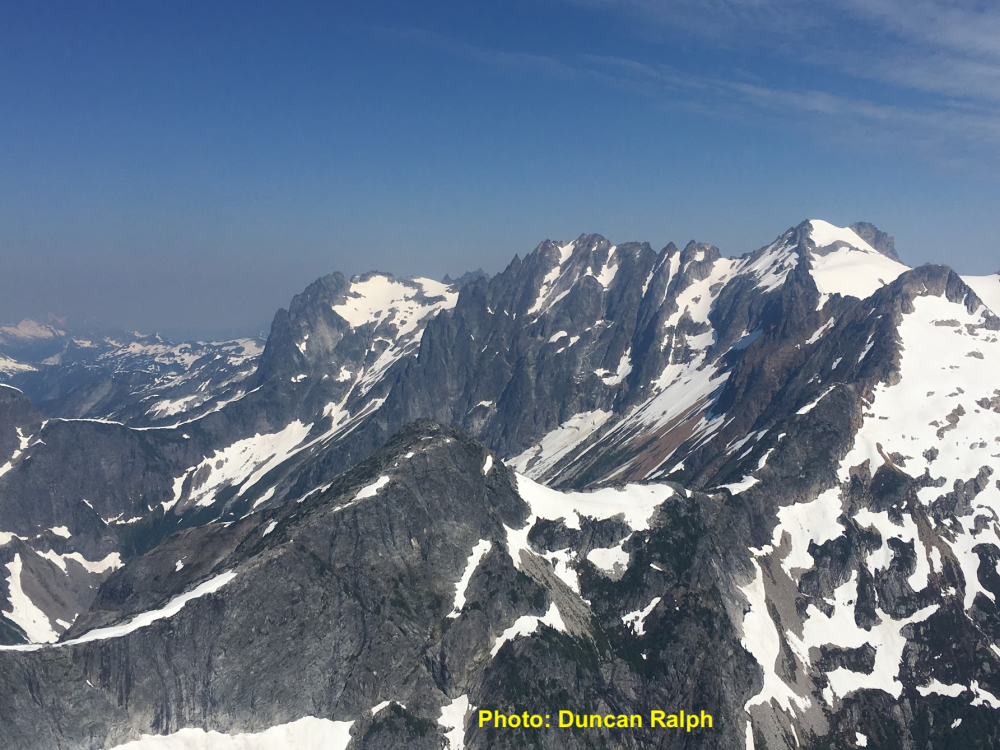
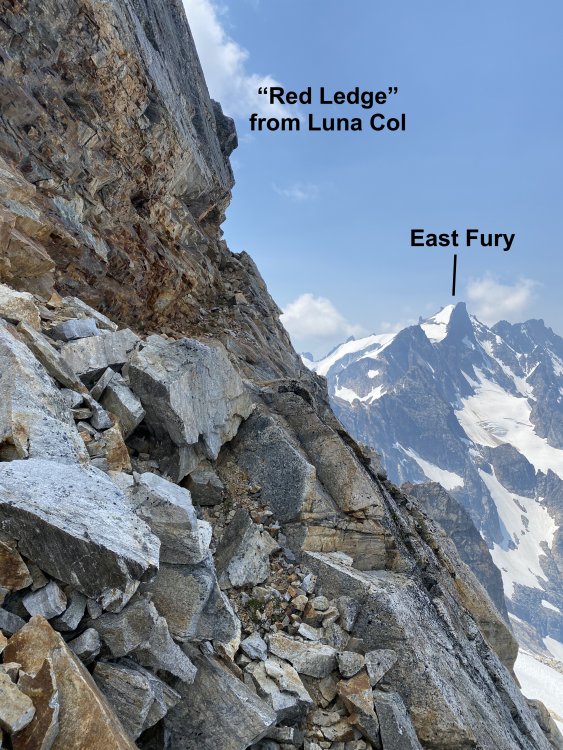
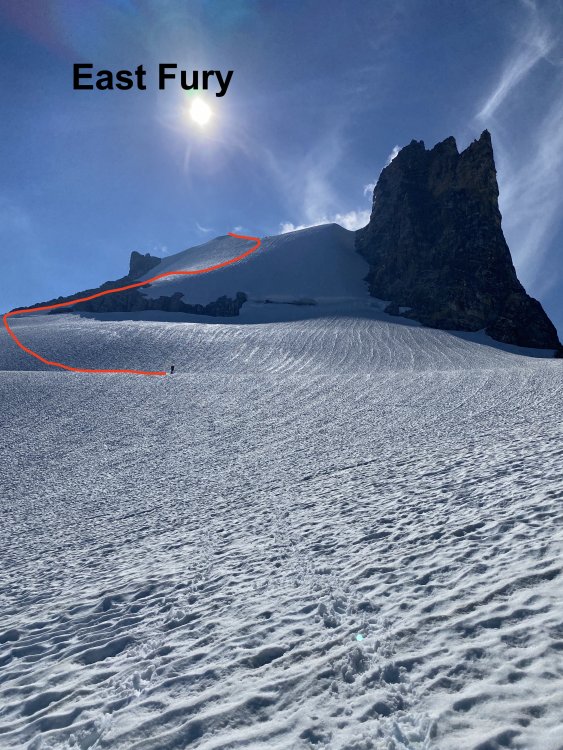
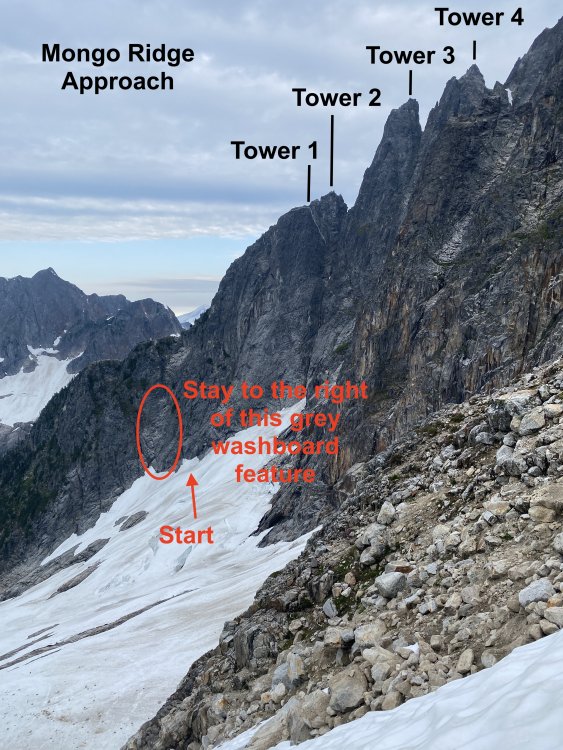
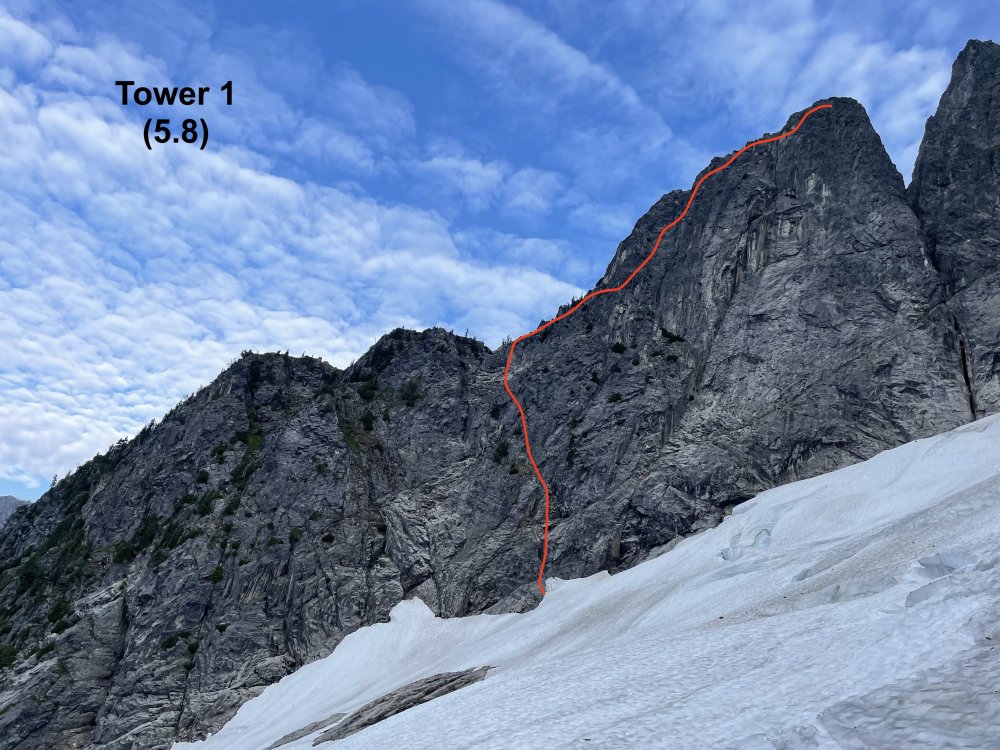
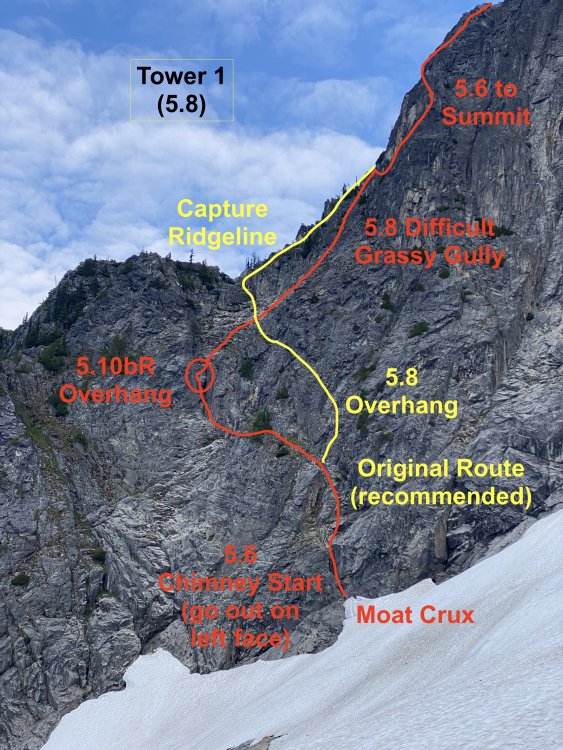
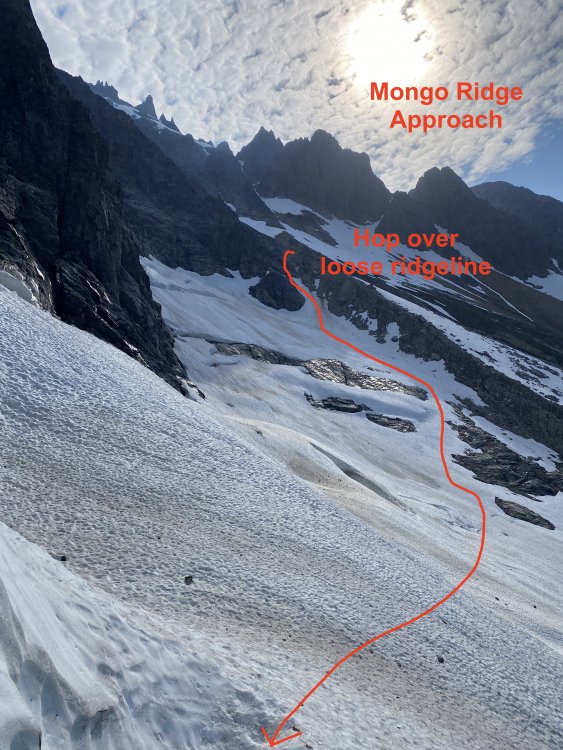
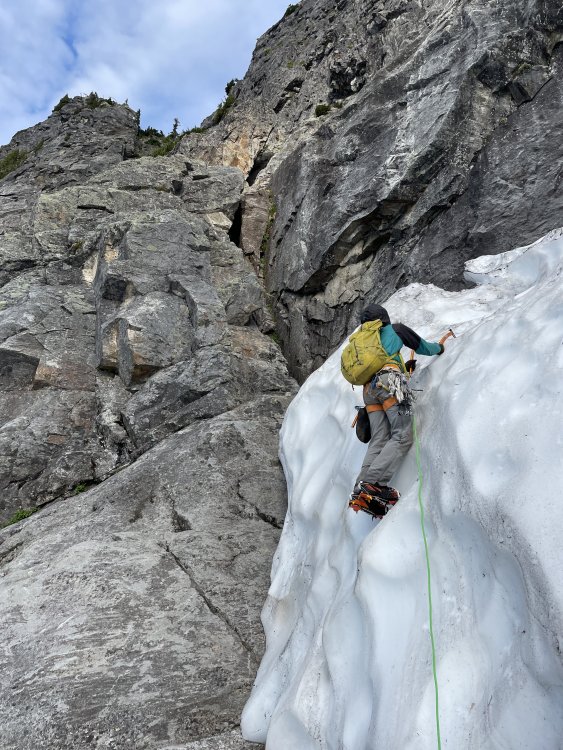
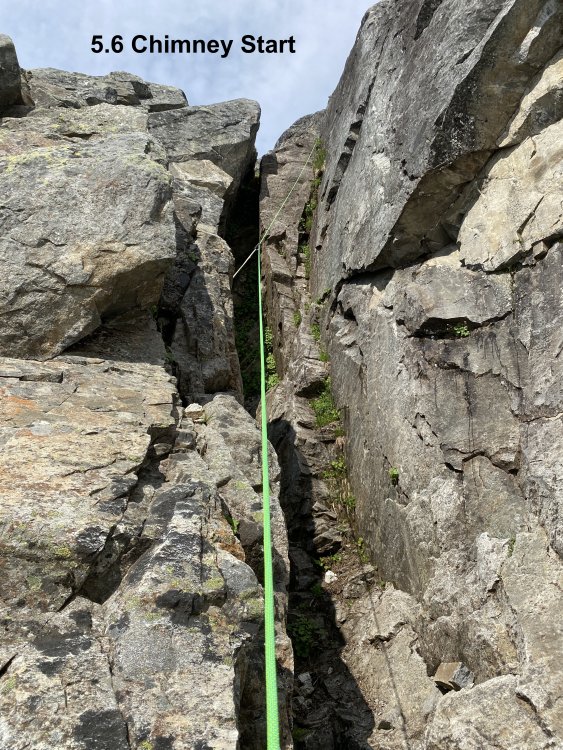
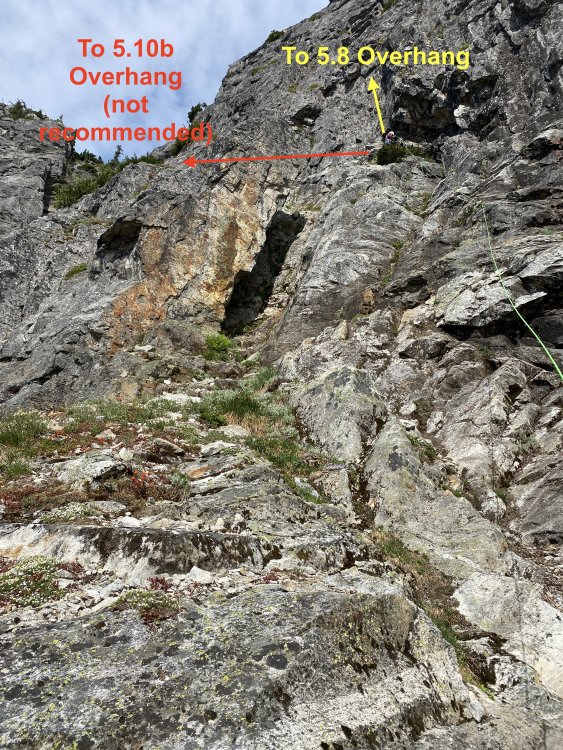
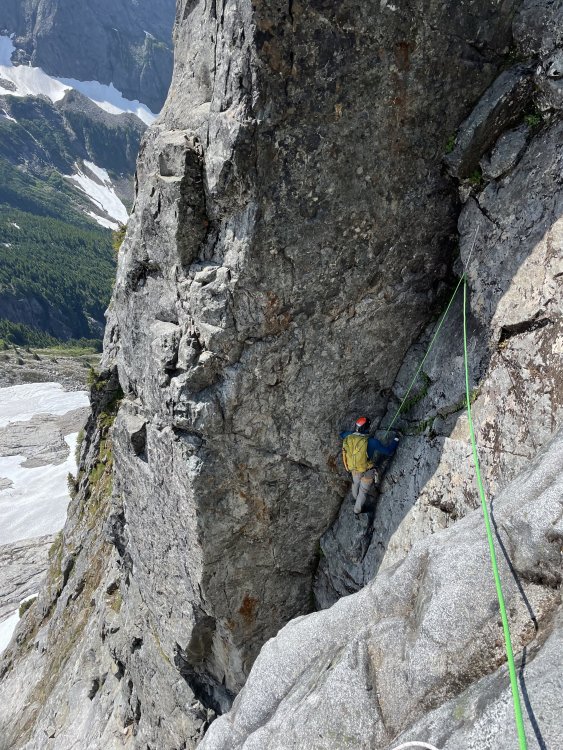
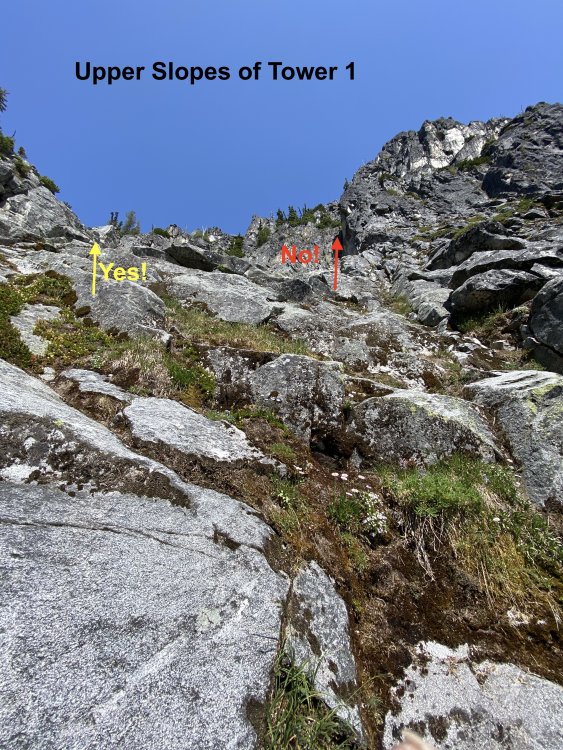
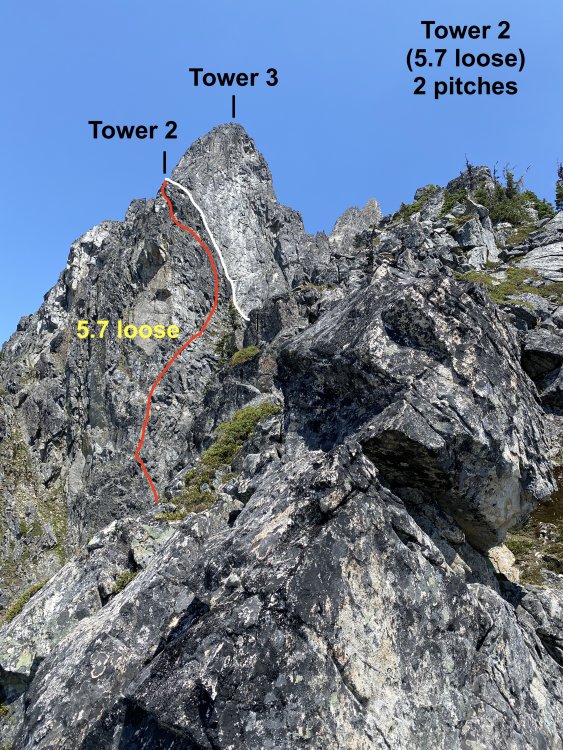
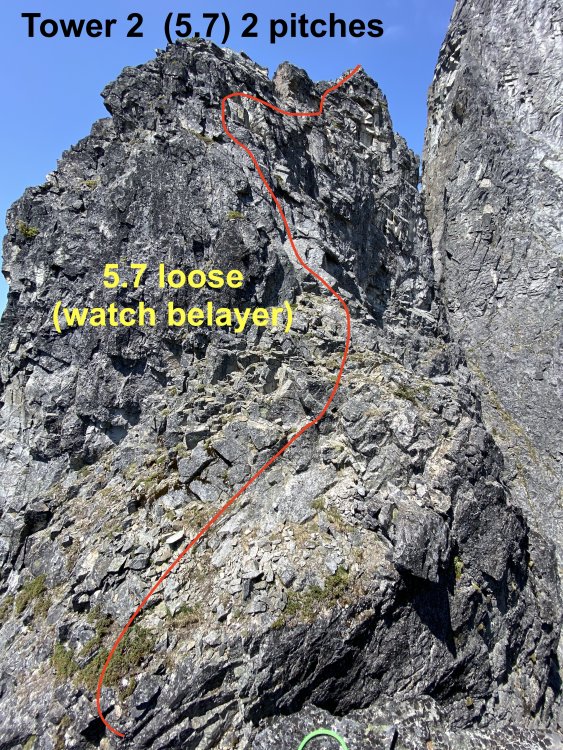
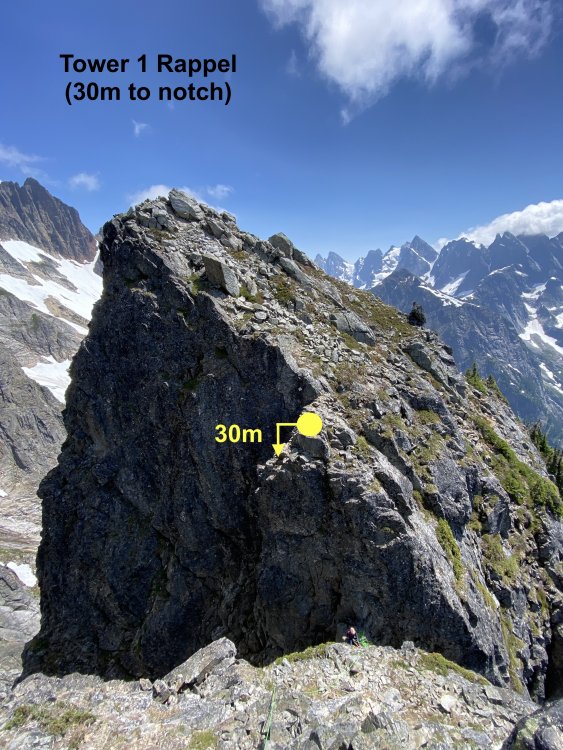
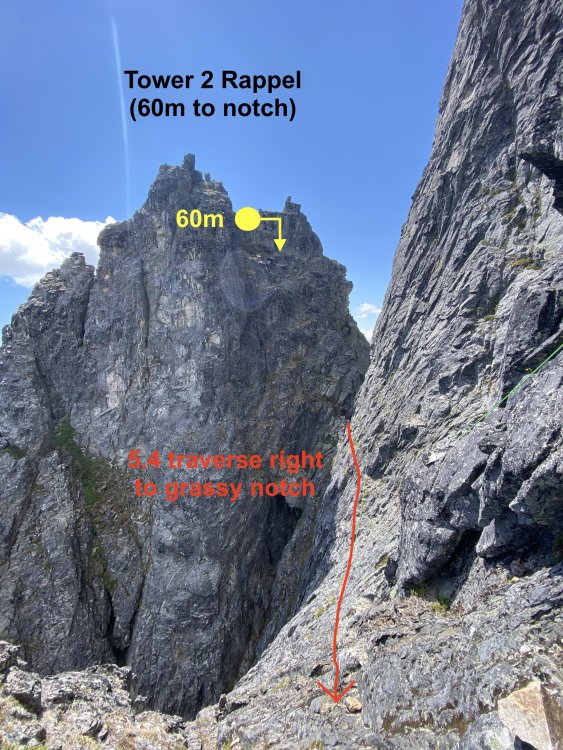
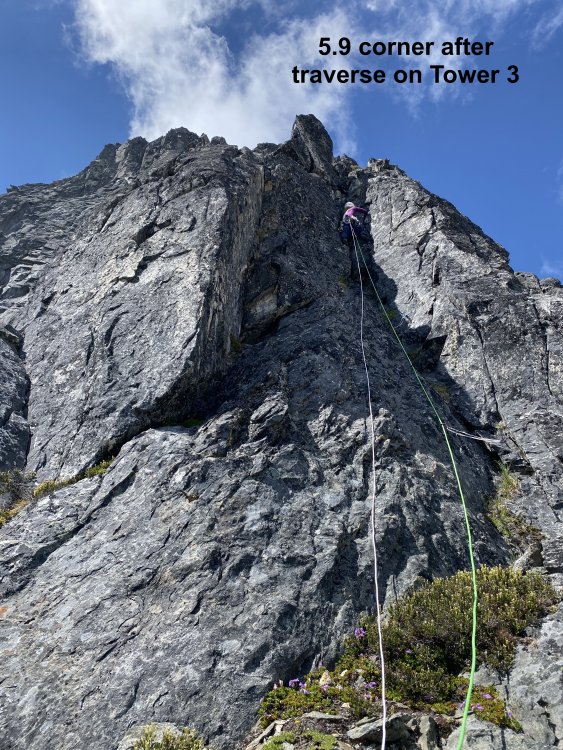
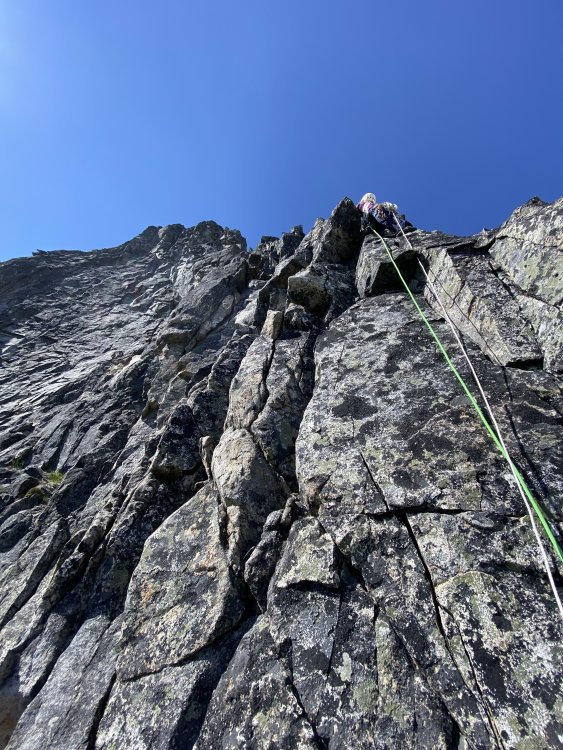
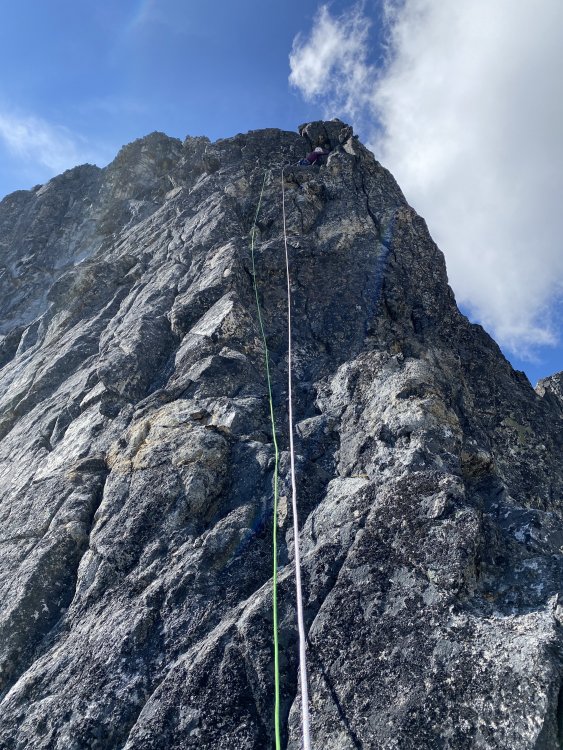
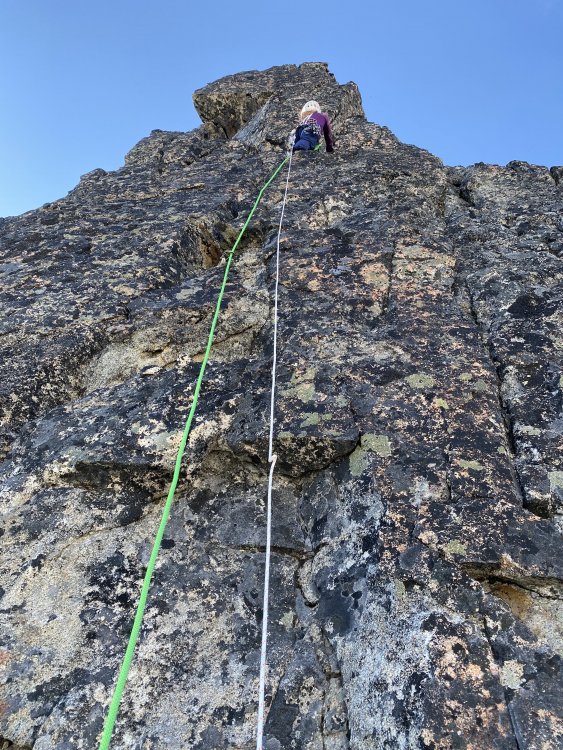
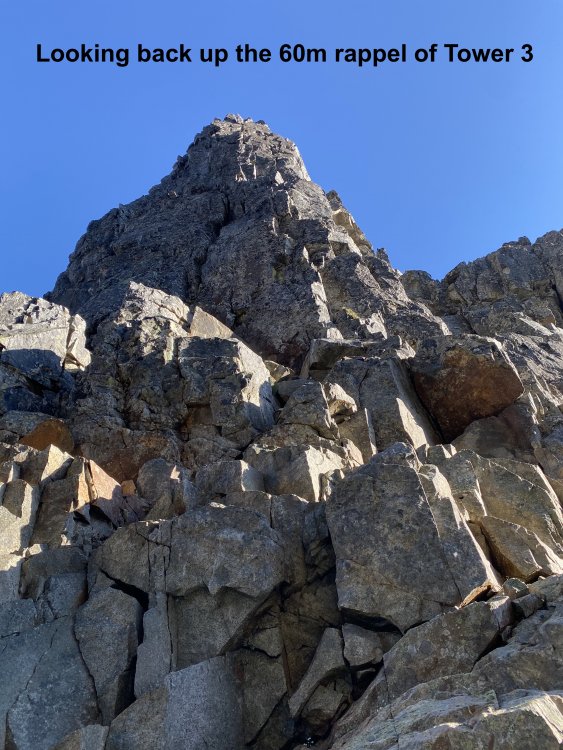
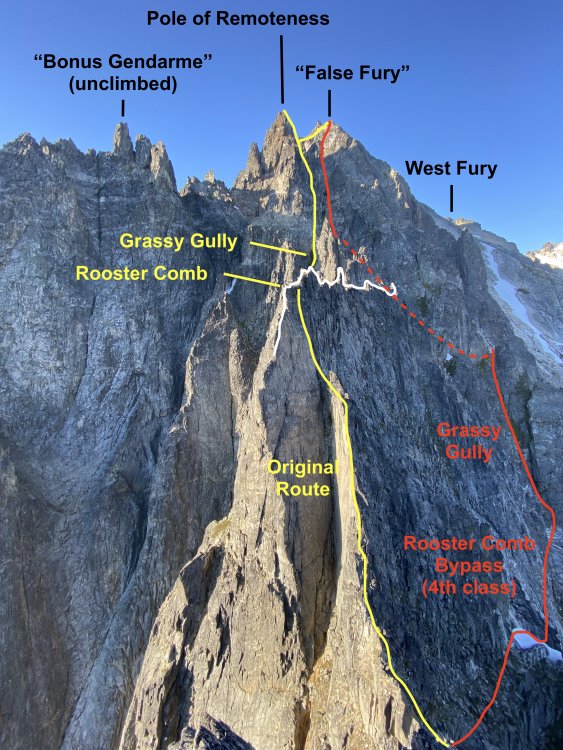
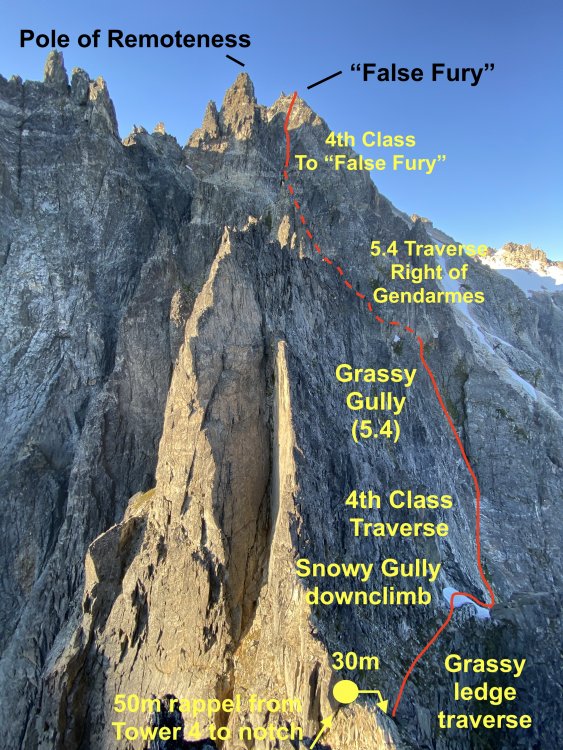
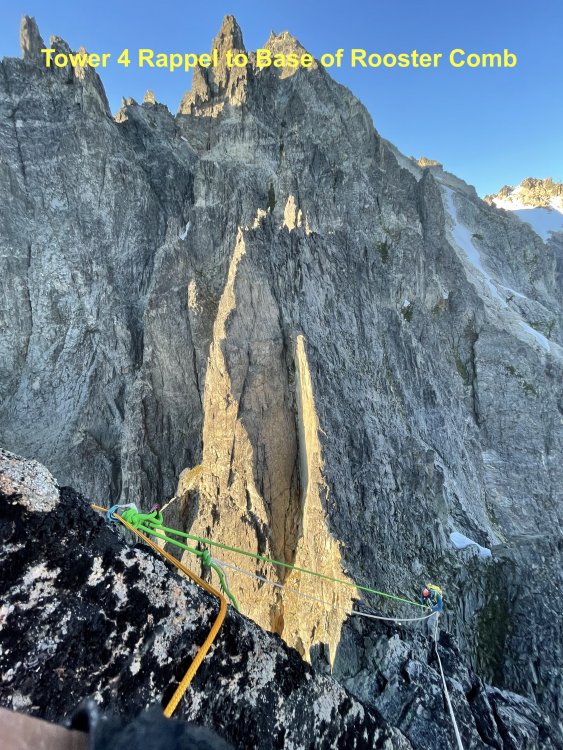
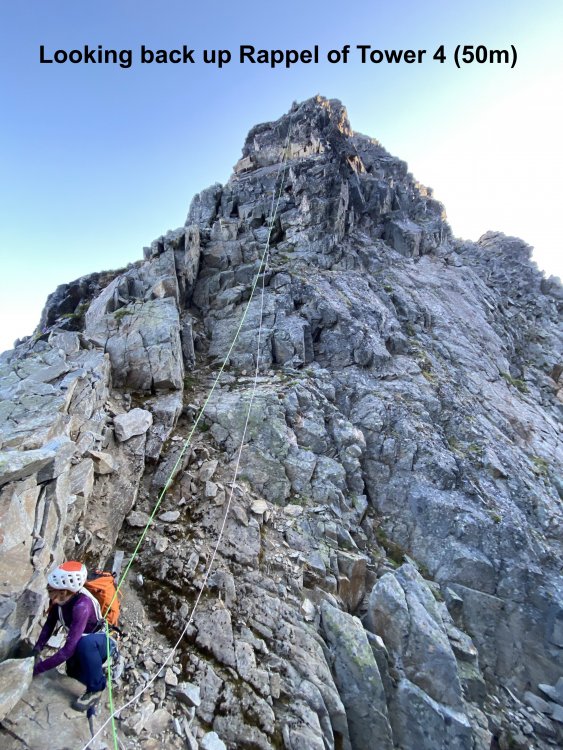
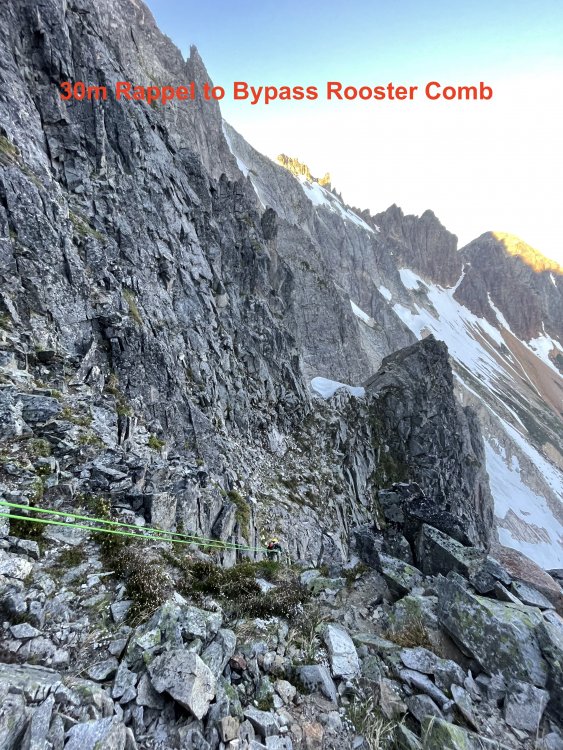
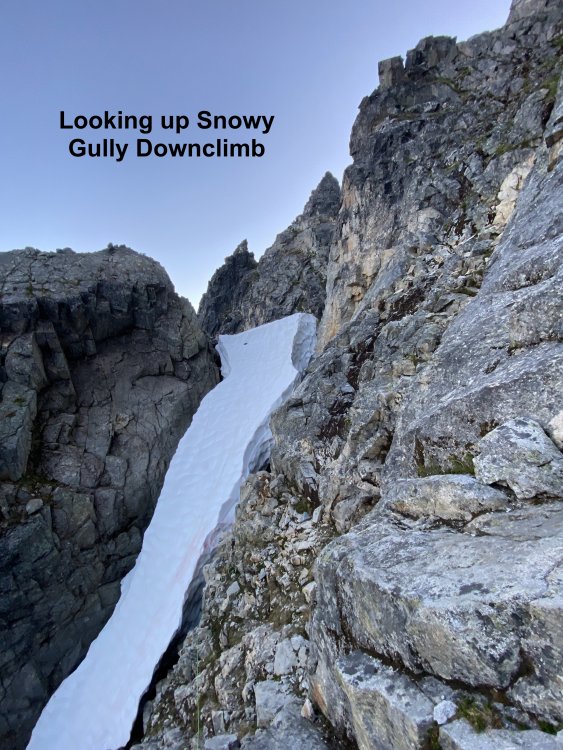
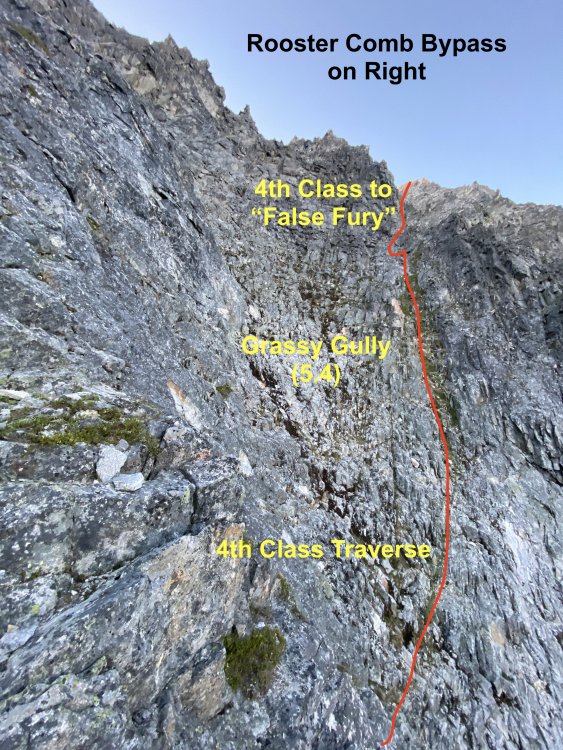
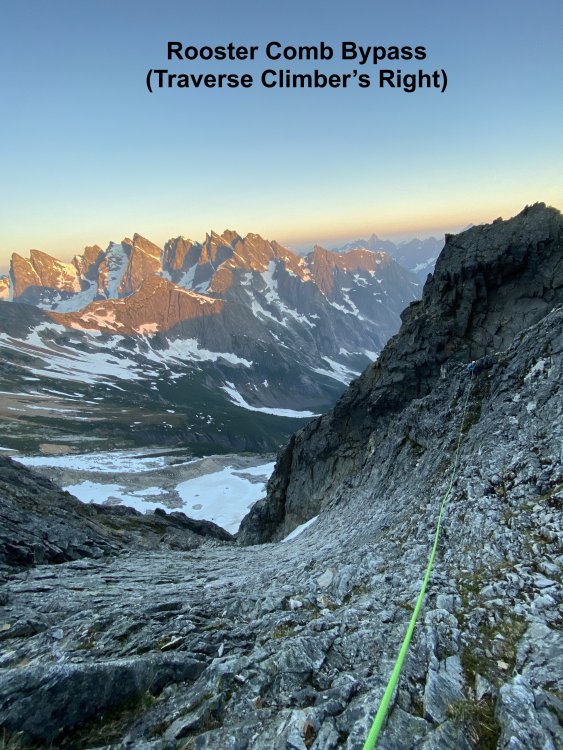
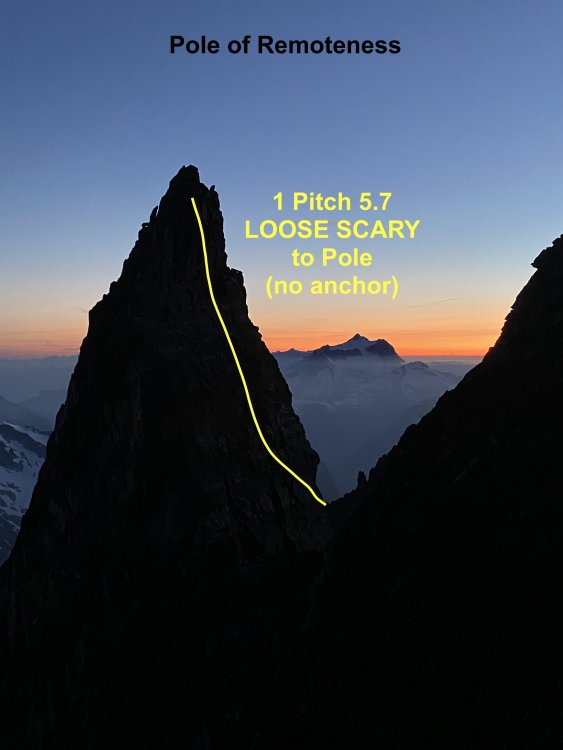
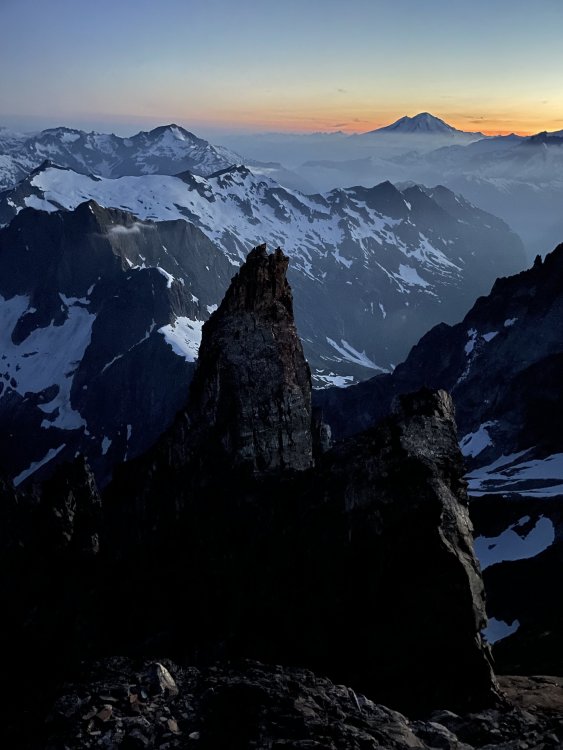
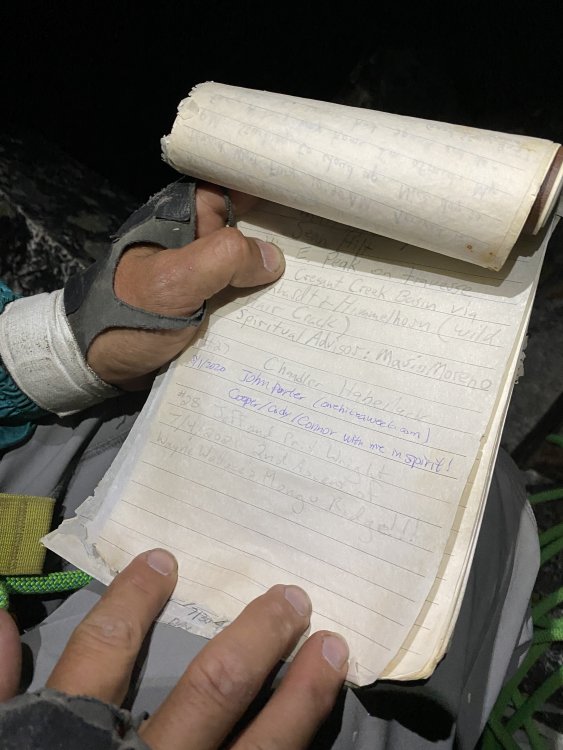
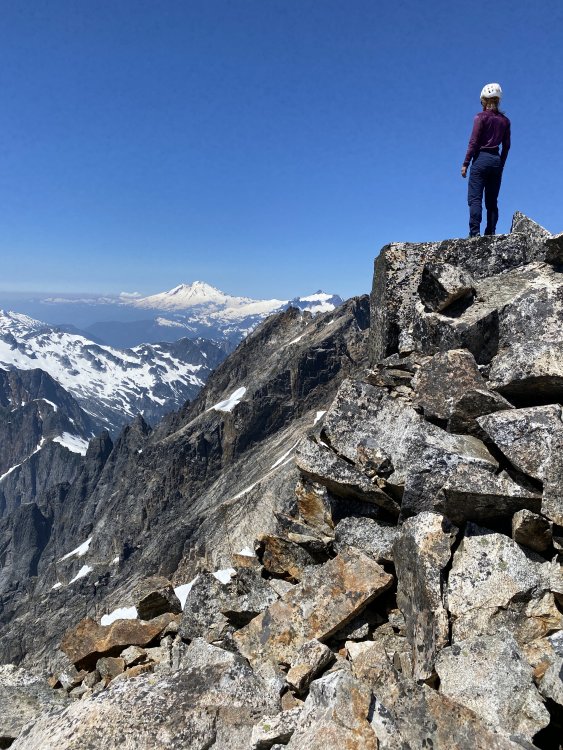
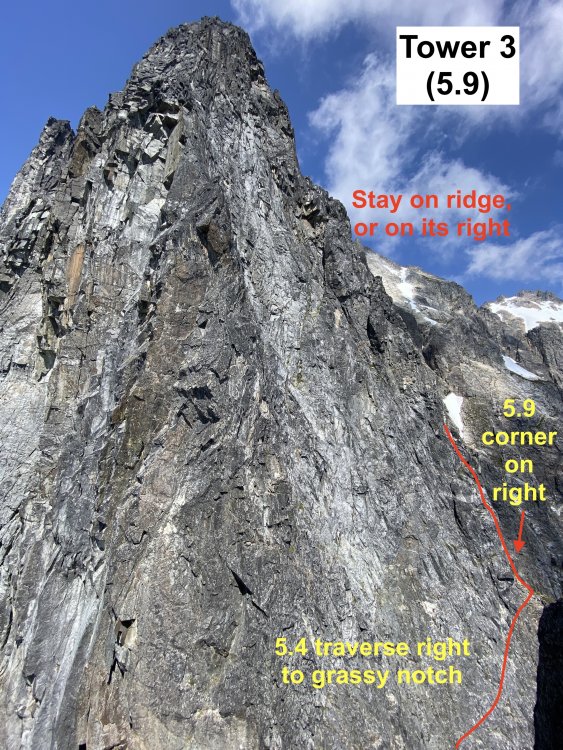
Trip: West Fury - Mongo Ridge Trip Date: 07/05/2021 Trip Report: In our relentless pursuit to ride the coattails of THE Wayne Wallace, Priti and I made the second ascent* of Mongo Ridge (the SW Ridge of West Fury in the Northern Pickets of the North Cascades). It is a Stegasaurus ridge which rises 4,000ft over a mile from Goodell Creek punctuated by thick clusters of gendarmes that look like they’re straight out of the Karakoram. [*2024 Update: Since our ascent, two more parties have ascended the SW Ridge of West Fury (total of four ascents as of July 2024, detailed below)] August 26-27, 2006: Mongo Ridge First Ascent Wayne Wallace (solo) making one bivouac past the Rooster Comb and Pole of Remoteness (with all of the route's technical climbing completed). Legend! https://waynewallace.wordpress.com/2014/05/ July 5, 2021: Jeff and Priti Wright make the Second Ascent of SW Ridge of West Fury, following Wayne's line of ascent but bypassing both the Rooster Comb and the Pole of Remoteness. They did not bring bivouac gear on route (bad call), and they did not make any bivouacs on route. Camp-to-camp in 23hrs from the summit of East Fury (base camp). July 11-13, 2022: Sam Boyce and Lani Chapko make the Third Ascent of the SW Ridge of West Fury, following Wayne's line of ascent, taking Jeff and Priti's Rooster Comb bypass, making the second ascent of the Pole of Remoteness (following Wayne's approximate 5.7 line), and making two biouacs on route (base camp at Luna Col). https://www.theclimbingguides.com/post/mongo-ridge-and-the-pole-of-remoteness-7-09-2022-7-14-2022 Early July, 2024: Emilio Taiveaho and Adam Moline make the Fourth Ascent of the SW Ridge of West Fury, following Wayne's line of ascent including the Rooster Comb (second ascent) and the Pole of Remoteness (third ascent, and by a new line of two pitches of 5.9R) making them the Second Complete Ascent of Wayne Wallace's Mongo Ridge! https://cascadeclimbers.com/forum/topic/107832-tr-mt-fury-wayne-wallace’s-mongo-ridge-second-ascent-of-the-rooster-comb-and-new-line-on-the-pole-of-remoteness-07072024/?fbclid=PAZXh0bgNhZW0CMTEAAaZGeT7NzsHS7Pk4D4-BEz-9Fi4D7NGD8mzAiVTHkasQ-41sIDl0dhUtNzM_aem_PLTVnZmmLRYxsTBP00Ynuw#replyForm We first heard about Mongo when Wayne came to speak for a BOEALPS - Boeing Employees Alpine Society Banquet in 2015 and regaled a captive audience with his bold adventures. We warmed up Wayne's feature presentation with a talk on our trip to Patagonia climbing Aguja de l'S. Then Wayne came on stage talking about Mongo, making de l'S look like a mole-hill. Wayne climbed this route in 2006 SOLO, like a boss, questing into unknown terrain that easily could have landed him into mandatory hard free climbing. With vertiginous cliffs on both sides, he knew that bailing from the route was not an option and that he had to climb whatever the mountain presented. The difficulties on the route were up to 5.9, with an additional 5.10b pitch (a routefinding error), but the towers presented possibilities up to 5.11 if we weren’t lucky enough to have Wayne’s beta. The first ascent is one of the legendary, mythical ascents of the Cascades and even of the climbing world. After 15 years, only a handful of folks to my knowledge have even considered attempting it again. The bottom half of the ridge has four narrow towers which require you to summit and rappel in order to make vertical progress on the ridge. Long, double-rope rappels and hard technical climbing discouragingly makes it take hours just to ascent 100ft at times. Above these four towers are the “Rooster Comb” and the “Pole of Remoteness” (named by John Roper who figured it was the hardest place to get to in the lower 48). After Tower 4 and before the Rooster Comb, we scramble traversed low around each of these features and did not summit the Pole of Remoteness since it was getting dark and we did not bring bivy gear. At Wayne’s suggestion, we planned to climb camp-to-camp which was situated at the summit of East Fury. This means that while we did ascend the topographic feature of Mongo Ridge to the summit of West Fury, we did not truly climb “Wayne Wallace’s Mongo Ridge” in the manner that he climbed, including many more pitches of technical terrain. When we talked to Wayne in 2019, I told him that “Somebody needs to repeat this route, just so the world can understand what you accomplished.” It’s impossible to understand the scale of this route without being on it, competing as “one of the largest features on any mountain anywhere.” “You have to climb a major mountain [East Fury] just to start a most major climb.” Even with Wayne’s pictures and descriptions, we were still filled with dread as we attempted to route-find up each tower. While I am proud of what we did accomplish, I am still shaken at the boldness and audacity of the first ascent. Our tale should be considered a celebration of that event. Wayne called it Alpine Grade VI, but Beckey downgraded it to V deeming it (incorrectly imho) similar in commitment to Slesse NE Buttress (ref. Cascade Alpine Guide Book 3, pg. 118). We concur with Wayne's Grade VI rating, although I won't be even slightly offended if anyone wants to challenge the grade while ensconced in sofa cushions. Our itinerary: -7/3/21: 2PM boat ride from Ross Lake Resort to Big Beaver TH. Bivy in Access Creek basin. -7/4/21: Access Creek Basin to East Fury Summit. Left summit bivy in situ. -7/5/21: 23hr day camp-to-camp including Mongo Ridge and the traverse from West Fury to East Fury. -7/6/21: East Fury to Access Creek Basin -7/7/21: Access Creek Basin to Big Beaver TH. 2:30PM boat back to RLR. Here are collected links regarding Wayne's FA, for reference: https://waynewallace.wordpress.com/2014/05/ http://www.alpinist.com/doc/ALP19/climbing-note-fury https://www.nytimes.com/2006/10/21/sports/othersports/21outdoors.html http://www.alpenglow.org/nwmj/07/071_Mongo.html http://publications.americanalpineclub.org/articles/12200713002?fbclid=IwAR0iS9vNBvJ1XUQPOTPIXy8eymiTsuWFHI5TJtuAvLJUNb5LknfgeYgTriI Scurlock Picture: https://www.pbase.com/nolock/image/65948954 I won't go through too much detail on our approach to Luna Col and East Fury, since it is detailed well in many other places: https://onehikeaweek.com/2020/08/02/mount-fury/ http://www.nwhikers.net/forums/viewtopic.php?t=8021967 (specifically useful here is the traverse from East Fury to West Fury) Since we planned to do the route camp-to-camp (situated on the summit of East Fury), we studied the traverse from West Fury to East Fury in detail since we figured we'd be onsighting it in the dark to get back to camp. I will point out the "Red Ledge" (pictured above) just past Luna Col is reached by staying directly on the ridgeline from the col to begin the traverse over to East Fury. Past the Red Ledge, the next tower (called "Crux Tower" in some reports) is ascended directly via 4th class ledges and short 5.4 steps. A rope and gear would not be useful here. There is significant foreshortening here, as the route looks much more accessible as you get closer. Unless you're climbing in Winter or Spring, you will not be able to get across the bergshrund (as shown in the Beckey overlay), but instead will traverse left then right to reach the summit arête. Furthermore, the approach to the base of Mongo Ridge from East Fury's summit as discovered by Wayne is the easiest approach. While it is possible to reach Mongo's base via Picket Pass (either by navigating over Outrigger Peak "Southeast Peak" or Otto-Himmel Col), these approaches would be significantly more effort...or bushwhack for days up Goodell Creek. As you approach, notice the grey washboard streak with an overhanging gully. The route will start to the right of this feature. The 4,000ft descent from East Fury's summit may involve a lot of slab if the snow levels are low. We regret not bringing bivy gear on route. An alternative itinerary could be: -Day 1: Big Beaver TH to Luna Col -Day 2: Luna Col to Mongo Ridge Tower 1. Option to leave stove and tent on East Fury Summit as you pass by. There are no good bivouac sites on route. Just bring a sit pad and a sleeping bag and open bivy if splitter forecast. -Day 3: Tower 1 to either East Fury or Luna Col. A note on weather: The Pickets have notoriously unpredictable weather. Even with a splitter forecast, you can still have rain or even storms. Consider a tarp as backup shelter. Crossing the moat is the first crux. The moat is huge! Only found one place where it touched the rock slightly. On the approach, don't come down anything you can't go back up! Here I had to cross a giant moat (unprotectable compact snow), using both Gully tools (then passed the tools down to Priti). A picket here would have been very useful...but that's a big cost. Might have to bury a tool and rap/swing across the moat. Tower 1 was a TIME KILLER! Wayne reported a 5.8 overhang crux which we did not find. Instead we got suckered into a runout 5.10b overhang in the grey washboard gully. Recommend future parties to avoid this gully completely, and instead stay on the face to its right. Our second mistake was getting suckered into a difficult 5.8 grassy gully. Wayne later clarified that he immediately captured the ridge first, then went straight up the ridge (recommended). We started in an obvious chimney (5.6), gaining the face on the left then going right (many variations). After the chimney, we went left to the 5.10b overhanging grey gully instead of going up. It looked harder to gain the face above, but it is 5.8 if you can find Wayne's Way. The slopes to gain the ridge are all STEEP. We breathed a sigh of relief once we were on situated on the upper slopes of Tower 1, but route finding continued to be a challenge. A 30m rappel took us down to the notch between Tower 1 and 2. It seems possible to bail here back down the glacier and back up to East Fury. Perhaps the last legitimate bail option, so we considered the time and knew we would be climbing through the night. Tower 2 is only 2 pitches of 5.7 with no real route finding difficulty and went pretty quickly. The rock is REALLY loose however, so I was careful not to knock anything down on my belayer. Route lines are all approximate by the way! The first double rope rappel from Tower 2 led to the notch between Tower 2 and Tower 3. Tower 3 is the technical crux of the route and another TIME KILLER! It takes hours just to gain 100ft elevation. Once atop, it's demoralizing to look down and see the top of Tower 2 so close. Wayne reported a 5.10a bulge which I think we avoided by staying on and just right of the ridgeline. From the notch between Towers 2 and 3, a 5.4 traverse gains a grassy belay with 5 more pitches above ( 5.9 30m, 5.9 30m, 5.9 30m, 5.9 50m, 5.6 65m). Priti stopped whenever she found a good belay spot. We also hauled packs on 4 pitches expecting 5.10a climbing at any moment. It was real 5.9 climbing, consistently on decent rock for four pitches. Next time, instead of hauling just load everything into the follower pack and leave the leader with a mostly empty backpack instead. We took two backpacks on this climb to evenly distribute weight and bulk while simul-climbing. This was a good method. We consistently trended right above the belay. Higher Hiiiiiigher Hiiiiiiiiiigher Another 60m rappel deposited us to the notch between Towers 3 and 4. Finally, we got through the technical crux and we were losing sun fast! We knew we were in for an open bivy or a heartbreaking omission of the Pole of Remoteness. Tower 4 is another quick one. Two pitches, 5.9 then 5.7. It looks like really hard climbing going straight up! Instead we followed Wayne's advice and traversed out right for ~20m on 5.9 terrain with decent protection, then up following flakes and grass to a good belay. As you start climbing up, the climbing doesn't ease up, but instead is engaging, fun 5.9. Then 65m simul-climb to the summit. A final 50m rappel down to the base of the Rooster Comb. We were a bit confused here since the terrain opened up into a minefield of gendarmes. The Pole of Remoteness was indistinguishable among all of the towers. We knew we had to boogie so we took all the shortcuts that we could find. We noticed that the Rooster Comb could be bypassed on the right on low-5th terrain by taking another 30m rappel, then down climbing and traversing its Eastern flanks to a grassy gully. Wayne went up and over the Rooster Comb, not realizing there was a bypass. The Rooster Comb is very complex with several small flagpoles that required rappels. Wayne describes the final rappel off the rooster comb as a "diagonal rappel" that you can redirect off of horns, after which he flicked the rope to retrieve. There are at least two more intermediate gendarmes between the Rooster Comb and the Pole of Remoteness that we skirted around. Wayne found himself on their left side while we were on their right side. Wayne captured the upper 4th class slopes via a grassy gully (shown above). From here it's all 4th class to the "False Fury" summit. I coin the label "False Fury" because we stared at this point almost along the entire route thinking it was the West Fury Summit, but instead is fairly far from the true West Fury summit. Above is pictured our Rooster Comb bypass route which required an additional 30m rappel (or easy down climb). This was the first time we encountered snow on route, but don't count on it being there! Bring 4L water each. Southern Pickets in all their glory. Wayne traversed around the right side of the Pole of Remoteness to reach the col and summit it from the backside. To climb it directly would probably be 5 pitches of hard, loose climbing. From the notch between "False Fury" and the Pole of Remoteness, Wayne reported 1 pitch of 5.7 to reach the summit of the PoR. There is no anchor on top, so he threw a rope around a loose block and solo downclimbed, using the rope as a backup. If you are a team, consider downclimb-belaying. We sadly felt the need to skip the pole since it was total darkness by the time we got to the notch with a lot of traversing left to go. Once atop "False Fury", we couldn't find the summit register and realized that the real West Fury was maybe .25miles away separated by 4 more gendarmes, first downclimbing (or rappelling) down and right and traversing around the first gendarme, then weaving up, over, and around the others to finally reach the real West Fury summit. Glad to have put in the time to memorize the traverse beta between West and East Fury, it went off slowly but smoothly. One piece of key beta was at the end of Tower 1 (the last tower between the Fury's), you can find a secret 4th class ramp around to the North (climber's left) to find the rappel station that leads to the final push up the slopes back to East Fury. This is a 30m rope stretcher rappel, by the way! Thanks to Wayne for all of your support and encouragement! I think this route is more of a classic in the way that Hummingbird Ridge is a classic. We should really just sit back and marvel at the first ascent. It's a true Picketeering adventure, but loose rock, lack of bail options, and lack of bivy sites is pretty discouraging. The Pole of Remoteness still needs a second ascent, however! But it would a pretty doable day to get to PoR in-a-day from your East Fury bivouac by traversing high along the ridge and scrambling down from "False Fury", then reversing the route. Gear Notes: Single Rack .1 to 2, doubles .3-.75, small cams (TCU 00, TCU0). We like small cams in the Pickets! Small rack of nuts. 1 screw and 1 V-threader for glacier (didn't use). 60m single rope, 60m pull cord (three long rappels + optional pack hauling), 1 Petzl Gully (technical light ice axe) each, 10 single alpine draws, 3 double alpine draws, 1 quad, 50ft 5mm cord for rap anchors (used it all), left three caribeeners on rappel stations, steel horizontal front-point crampons. Approach Notes: Boat from Ross Lake Resort to Big Beaver Creek - Access Creek - Luna Col - East Fury - 4000ft descent on South side - Mongo Ridge - West Fury - Easy Fury


- 16 replies
-
- 12
-

-

-

-
- tripreport
- cctripreport
- (and 1 more)
-
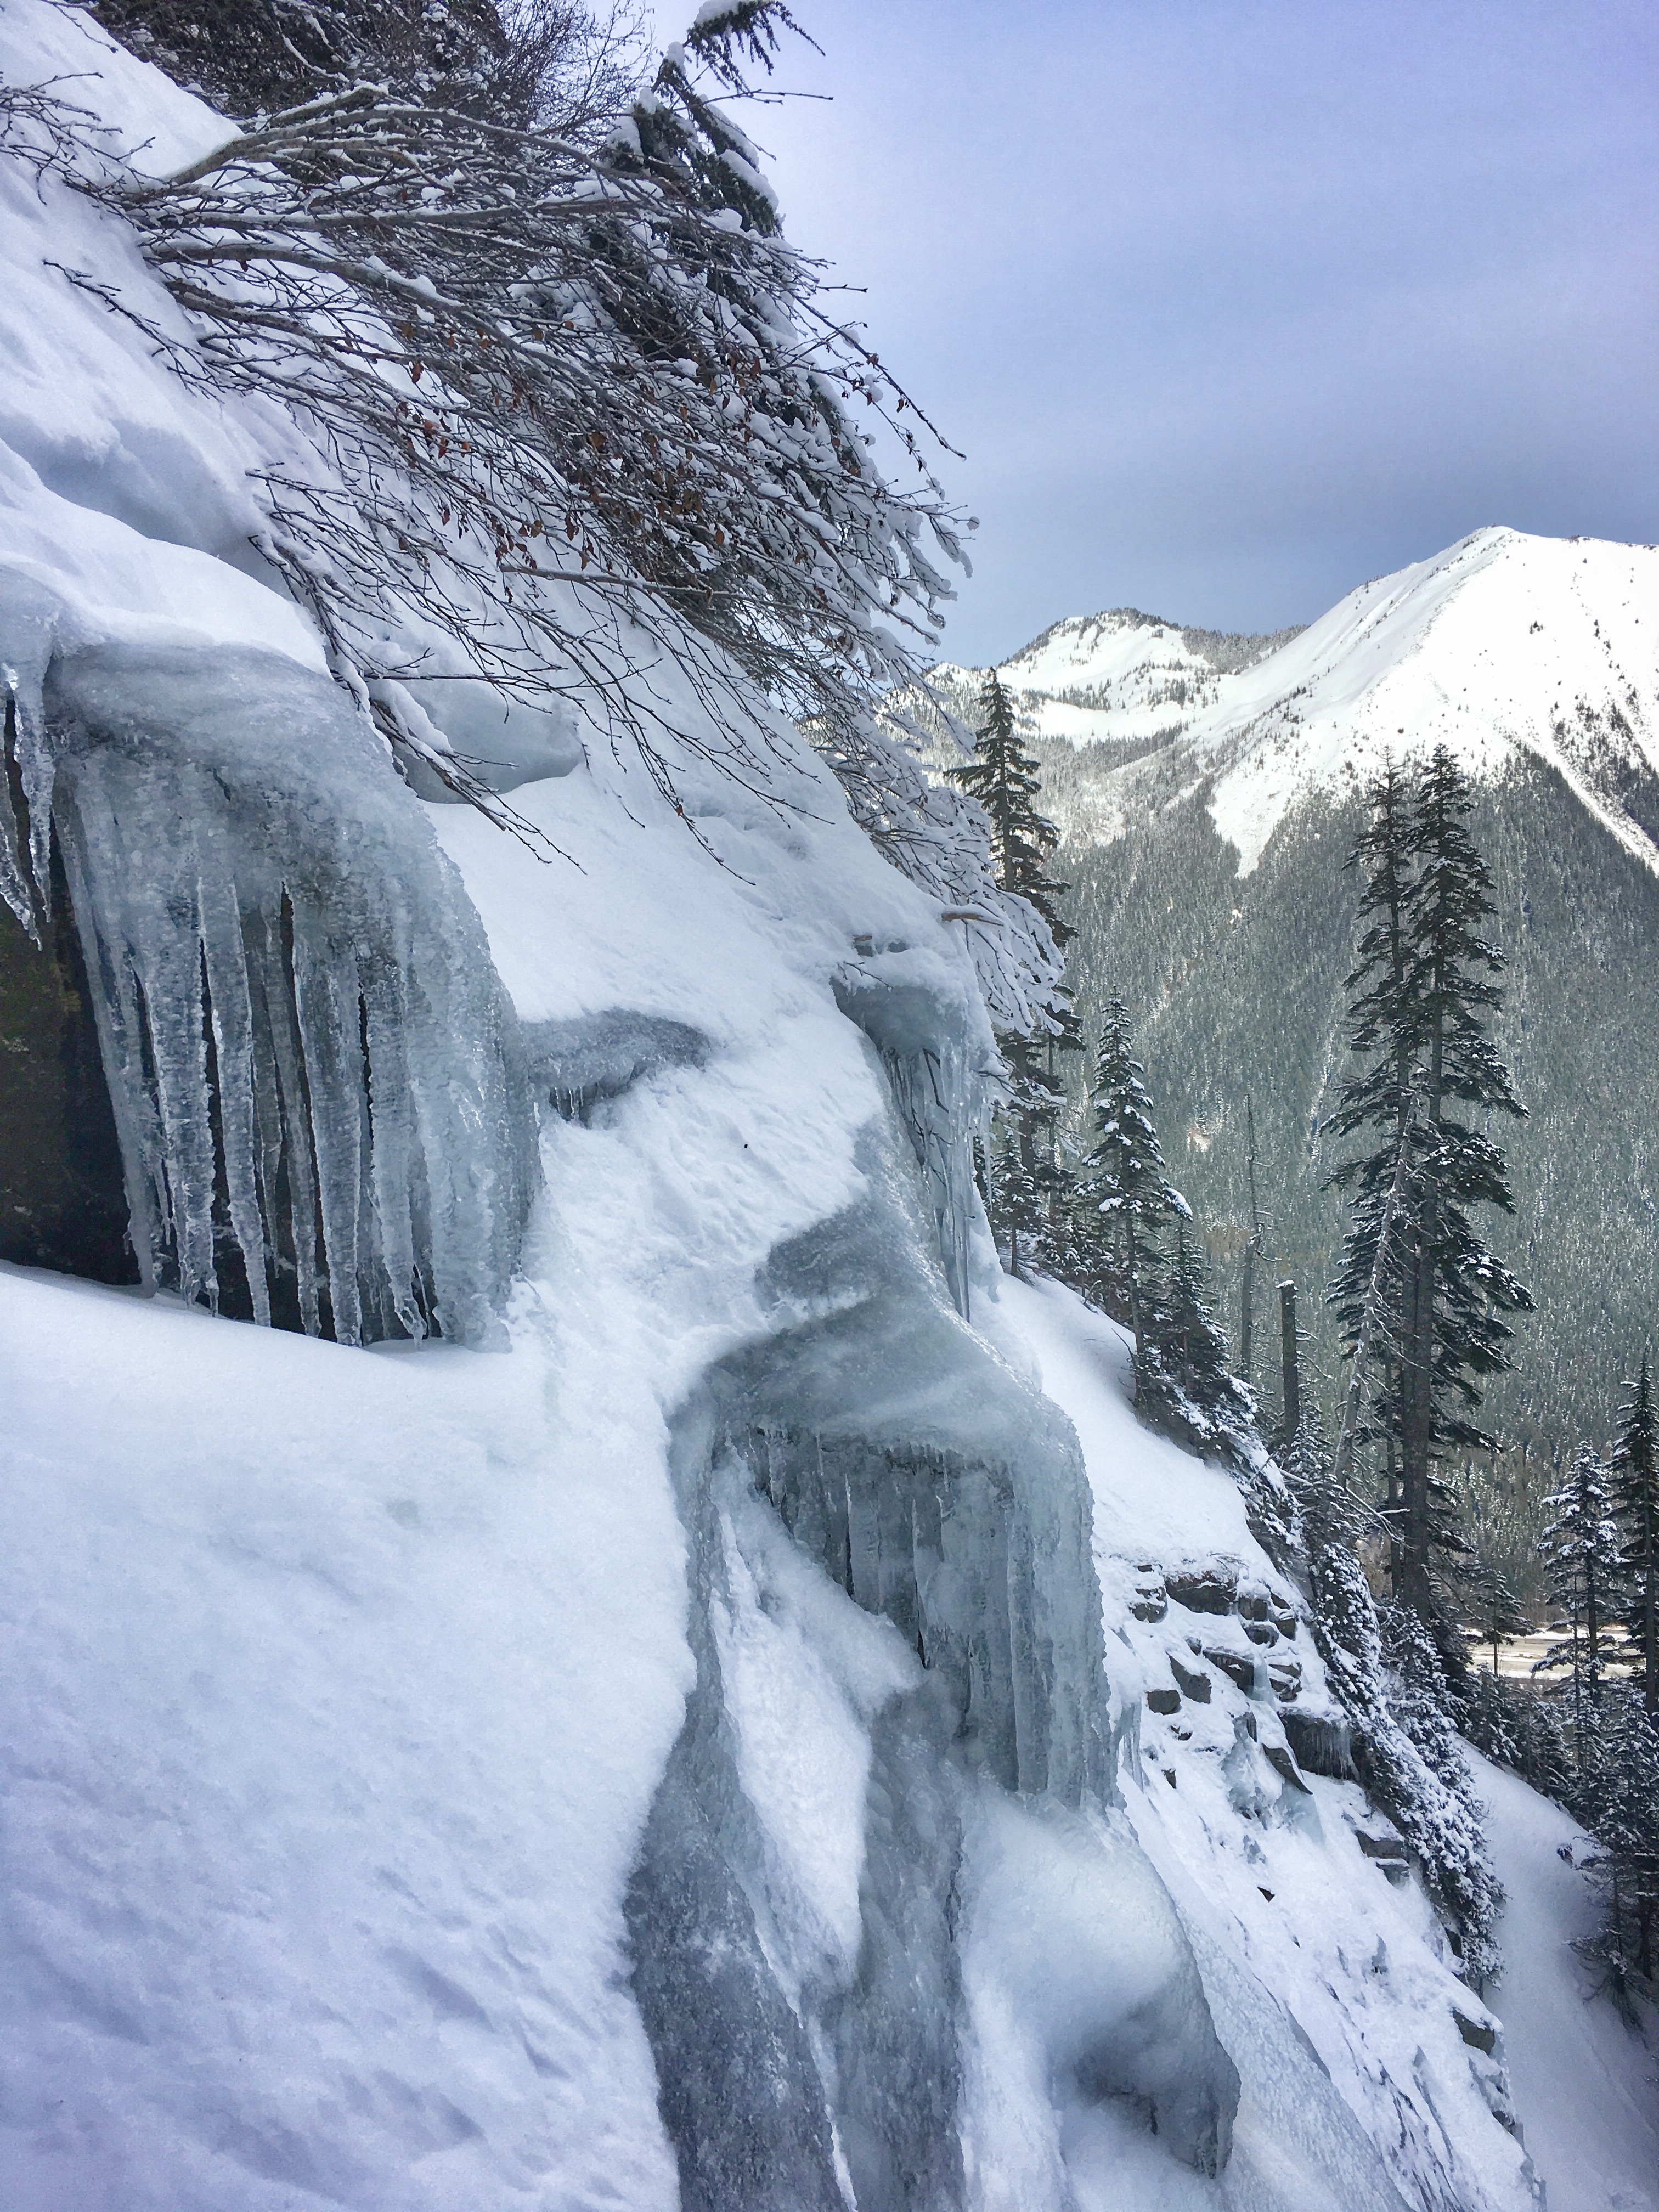
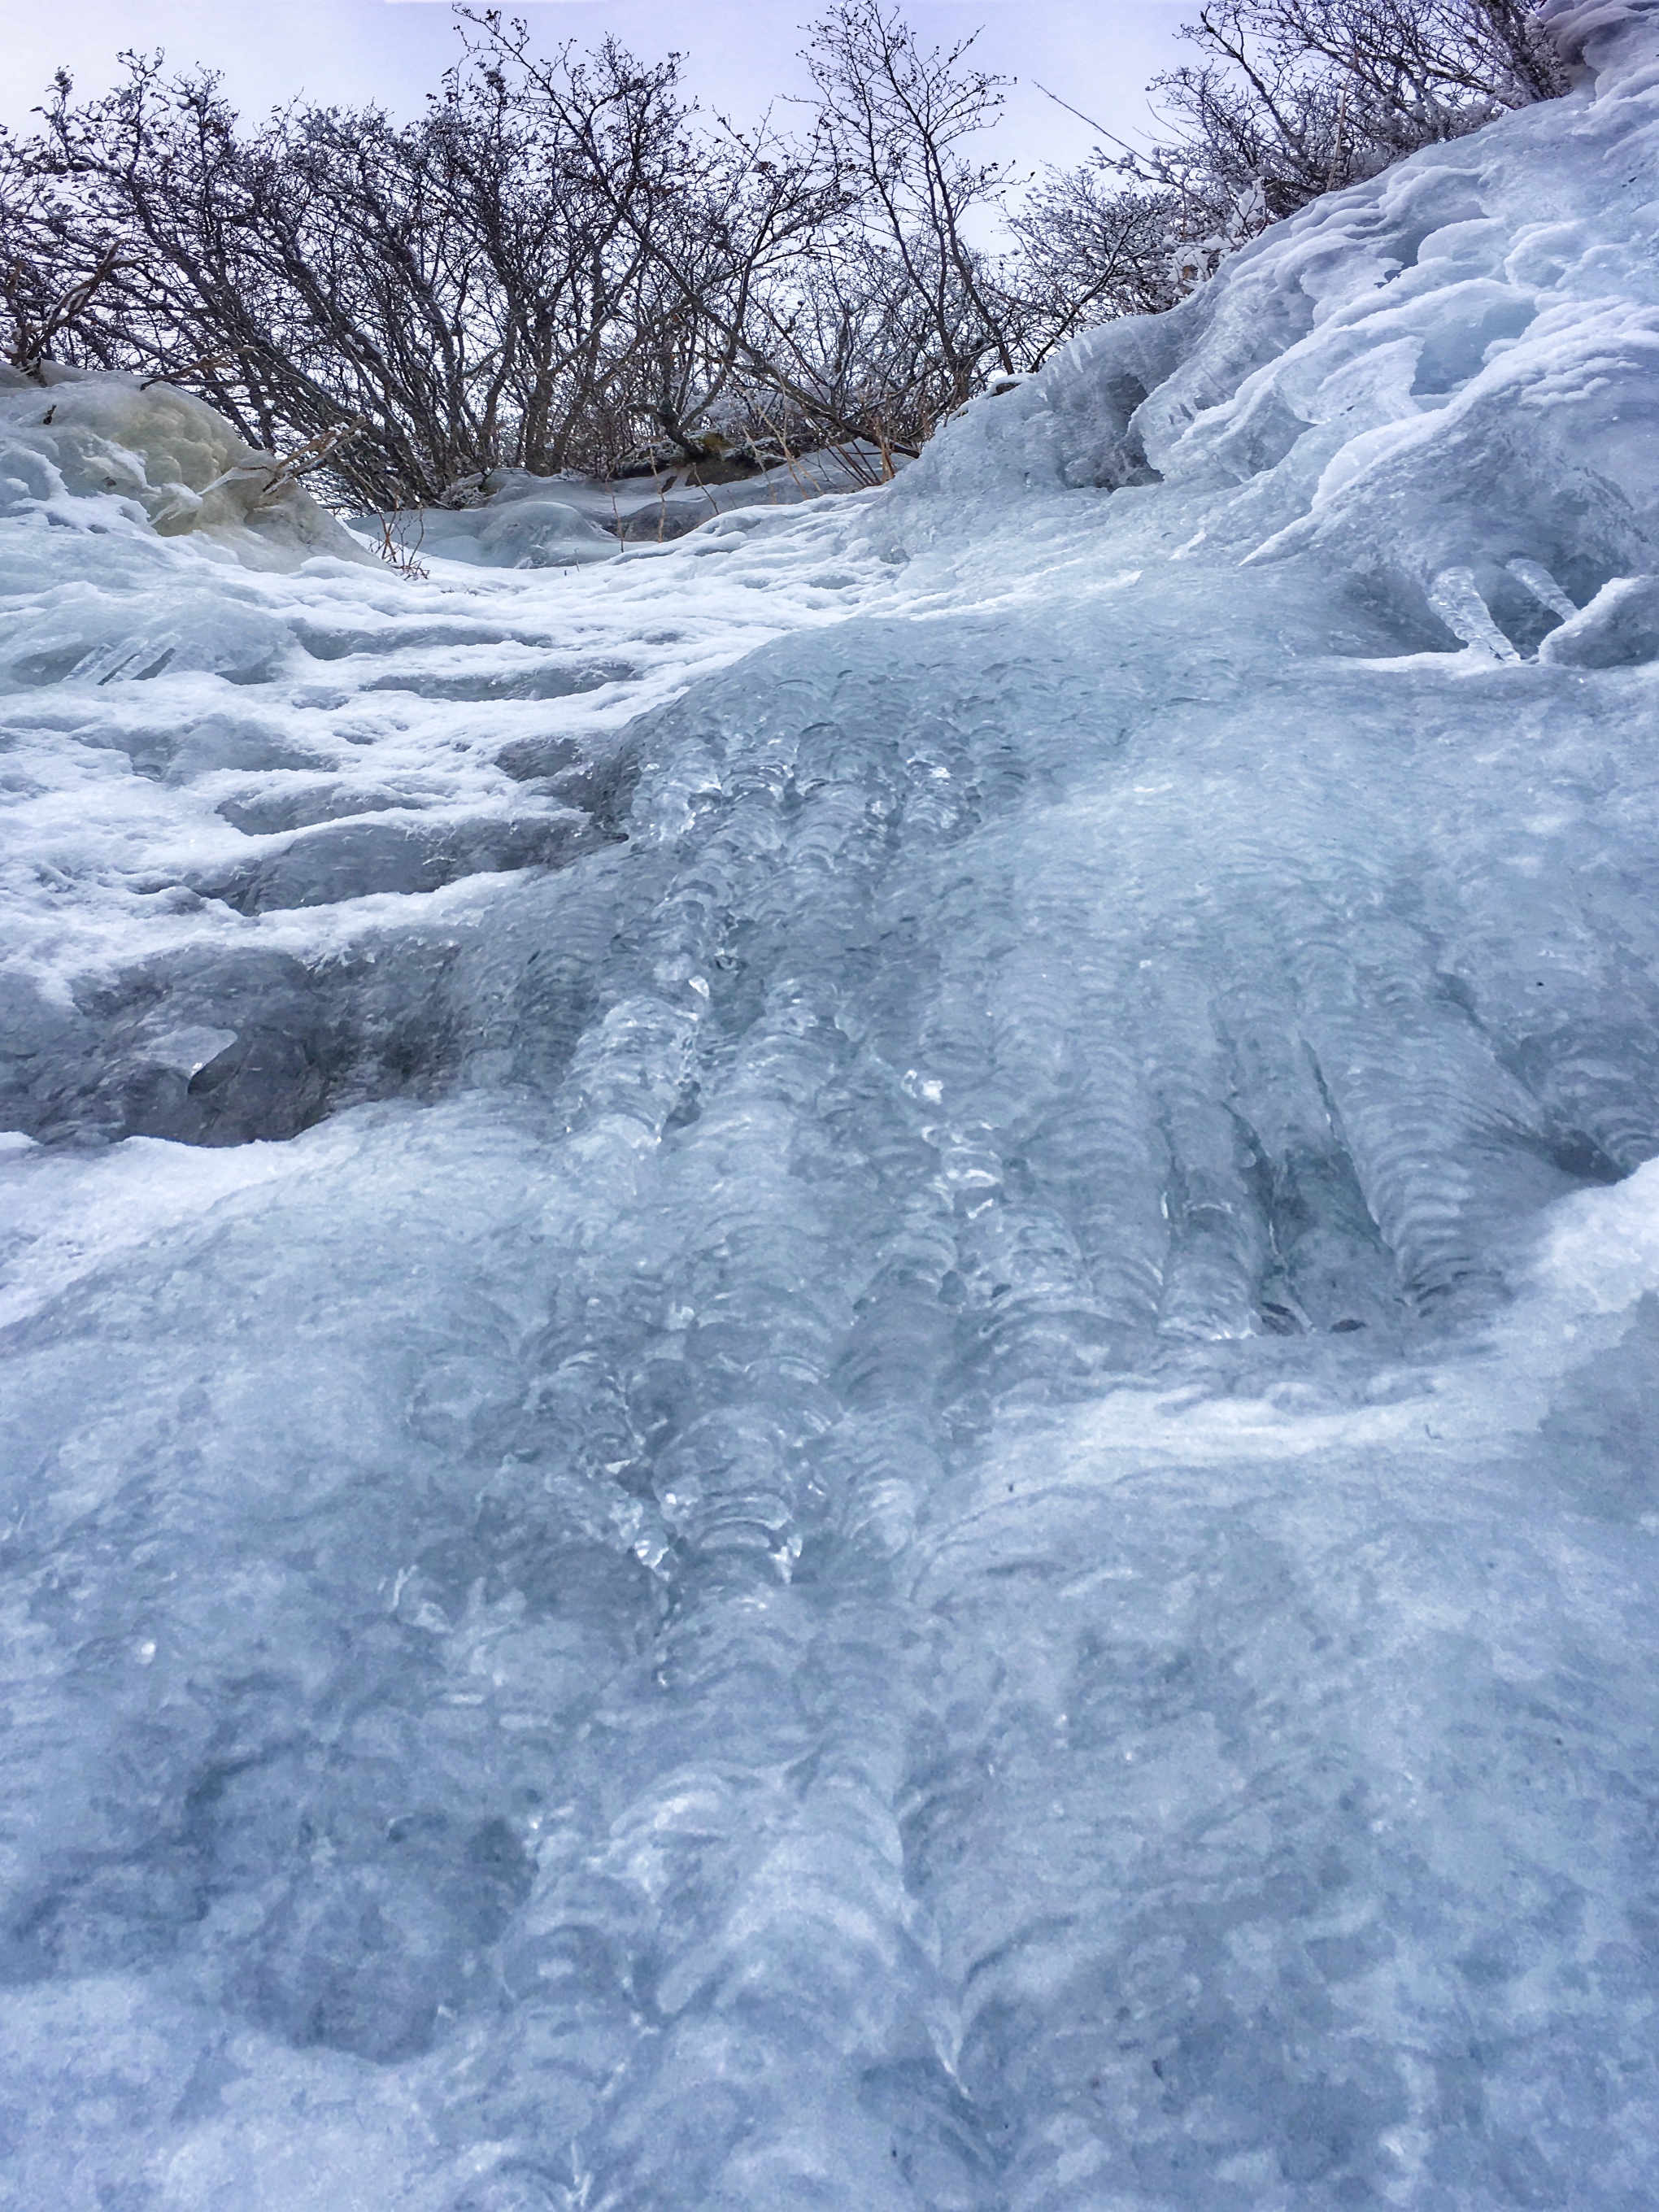
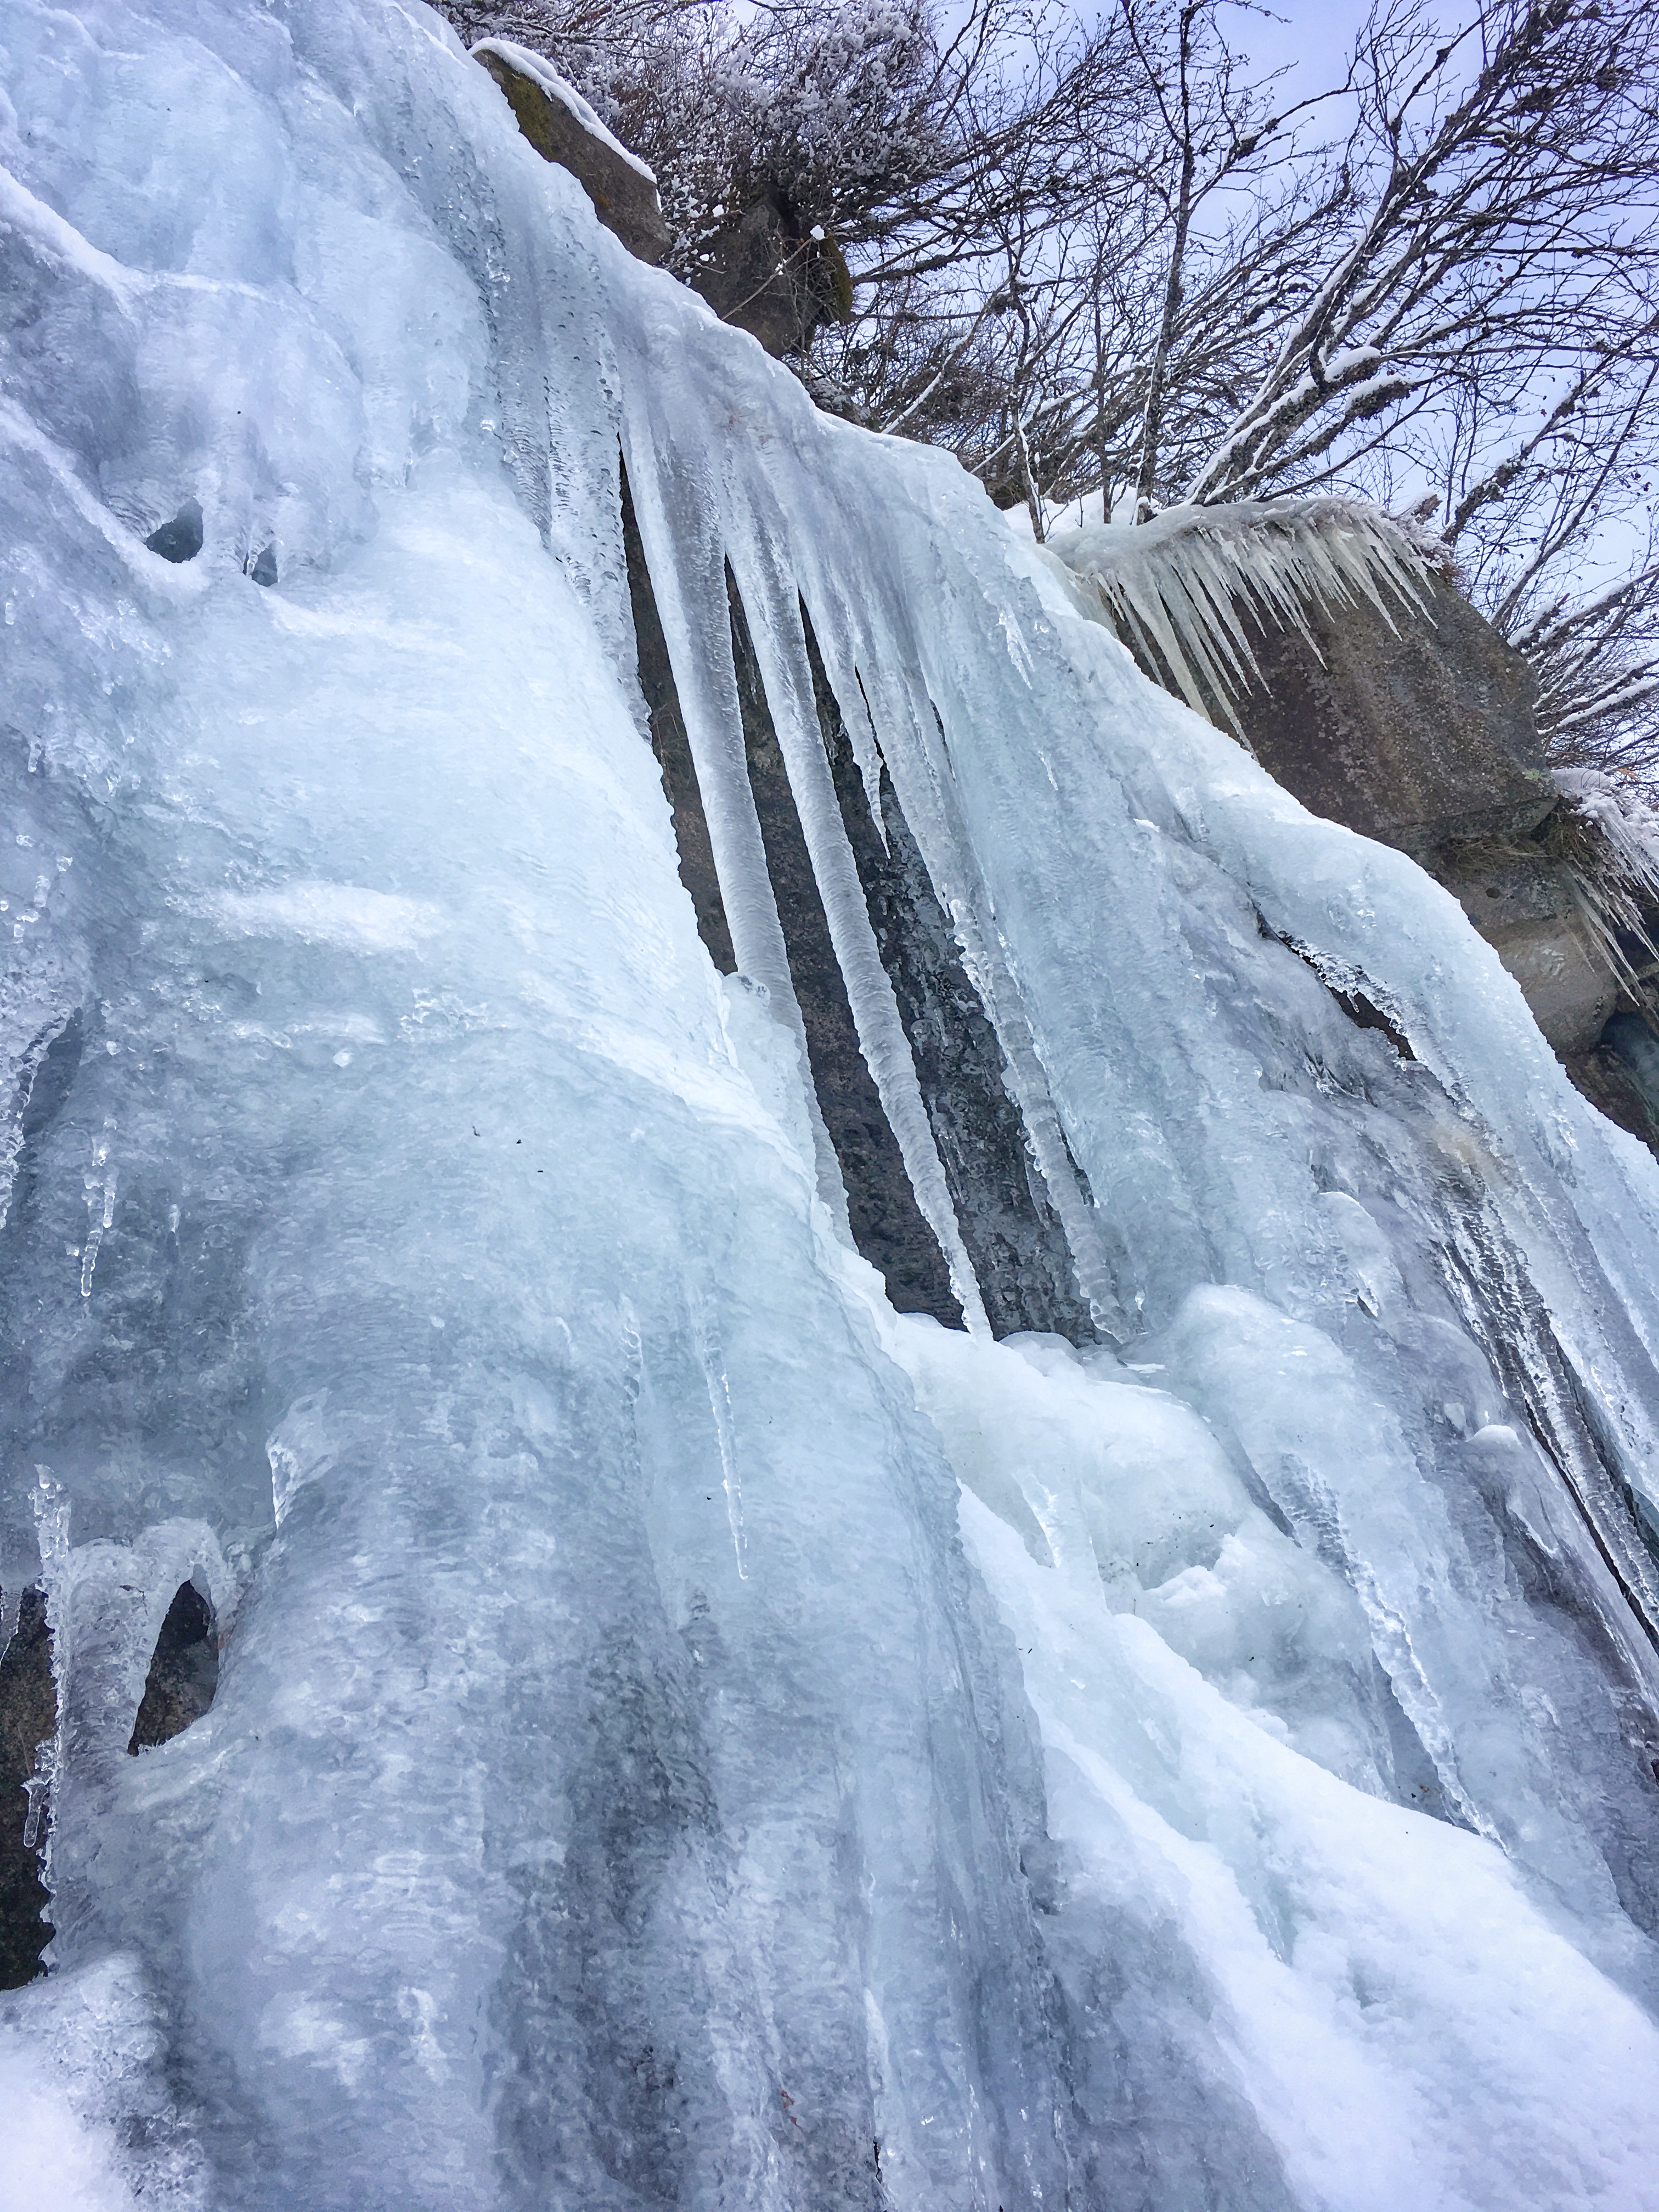
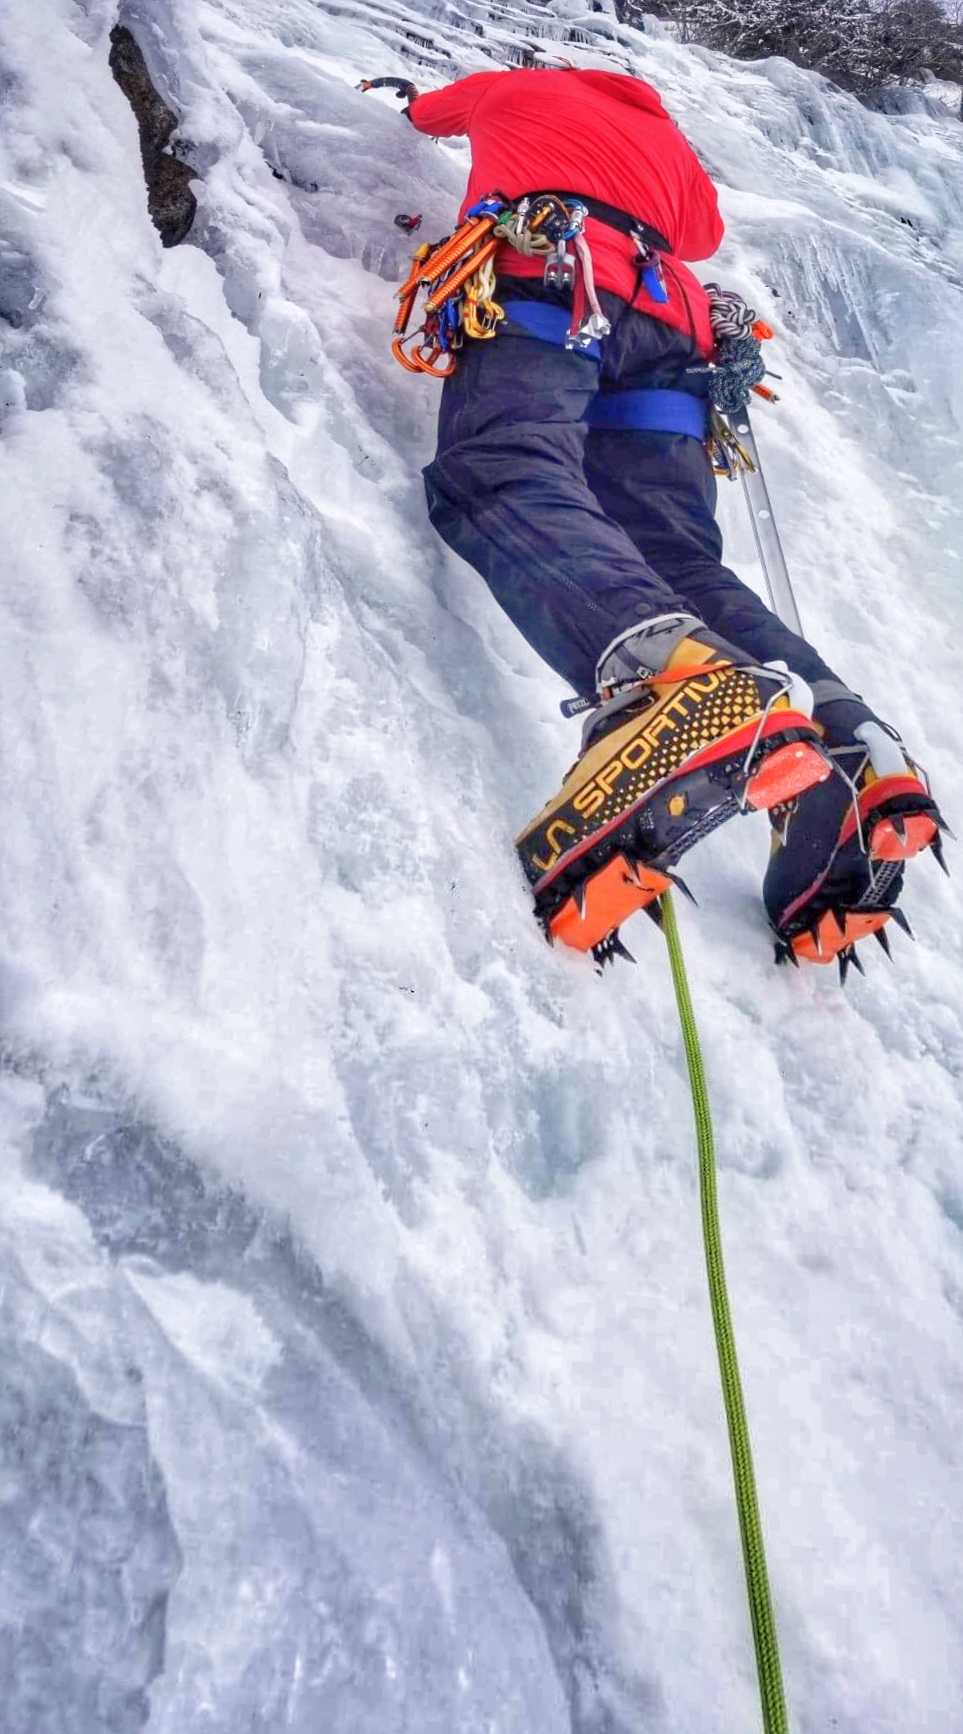
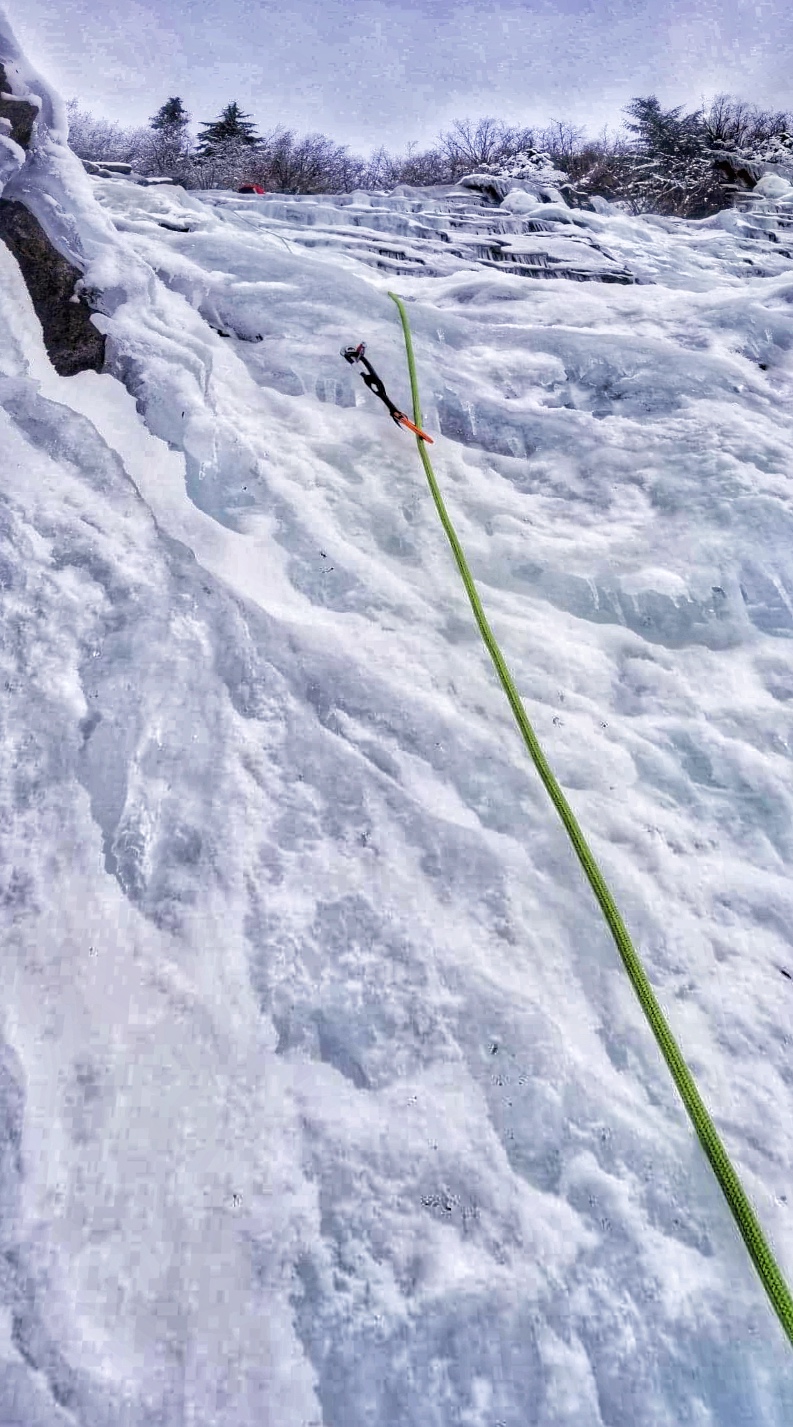
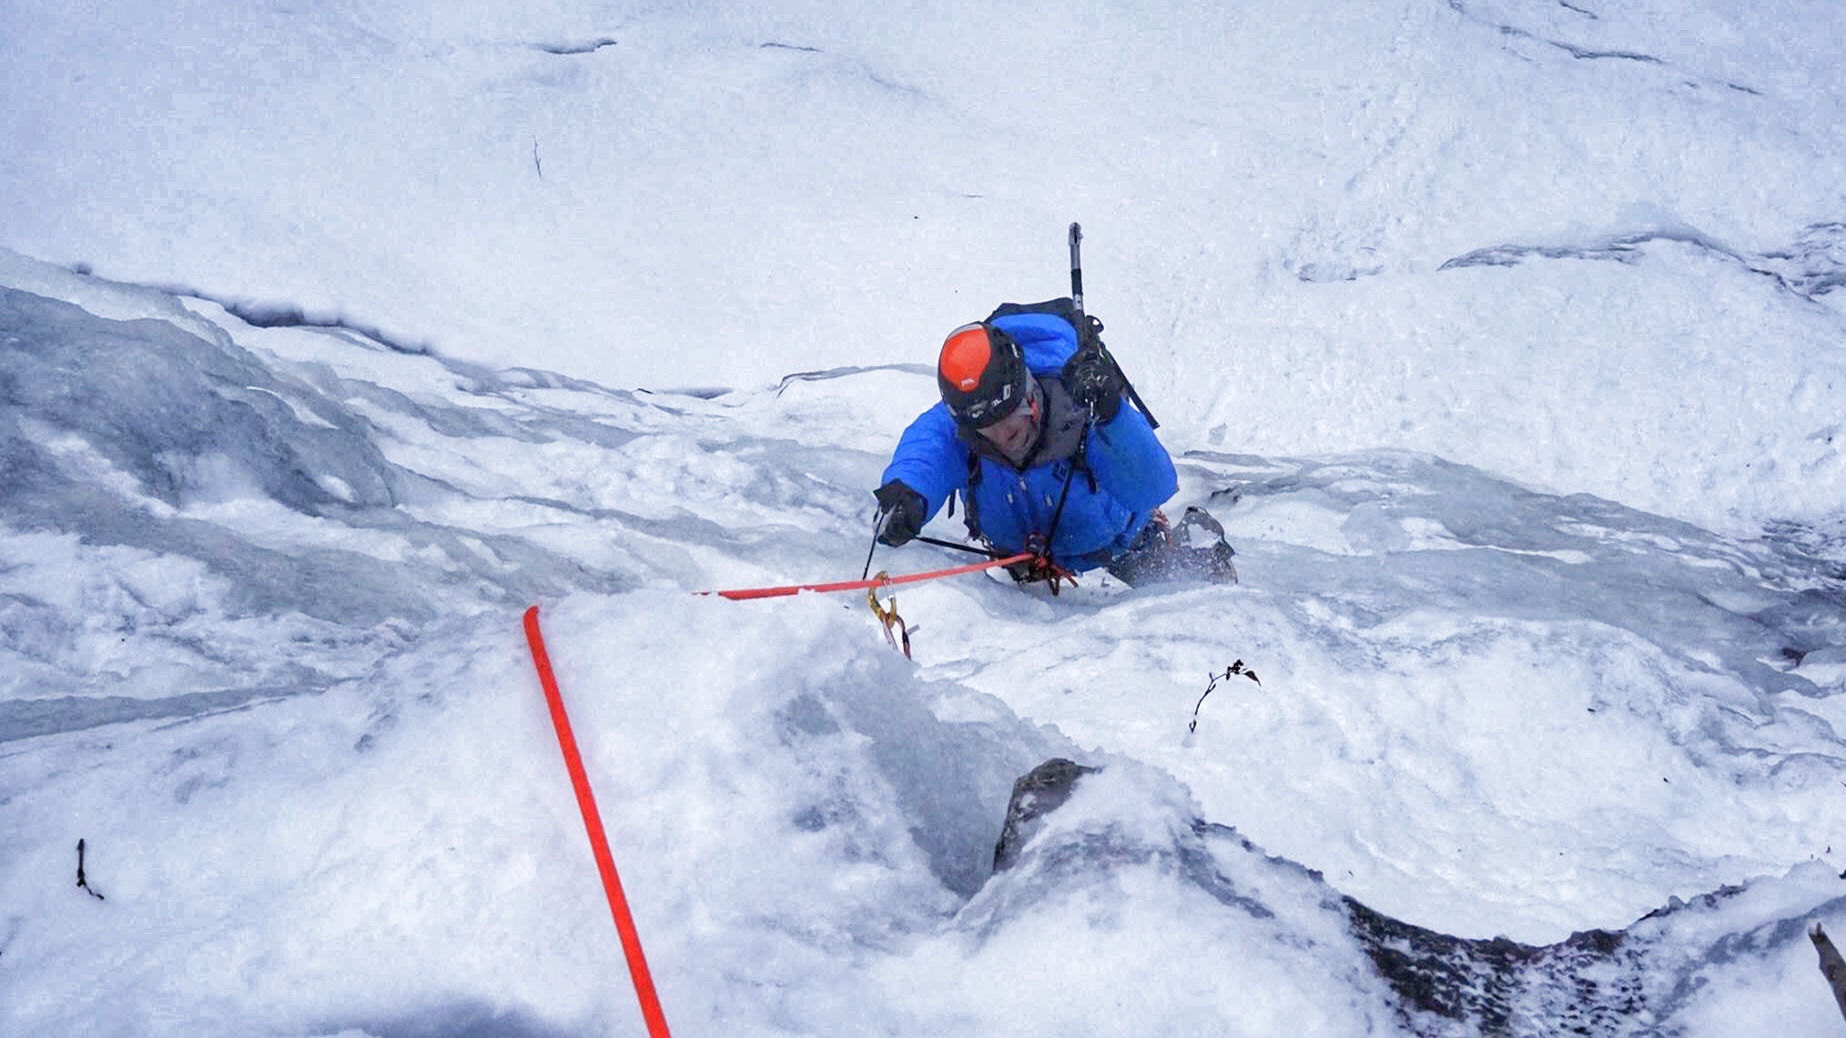
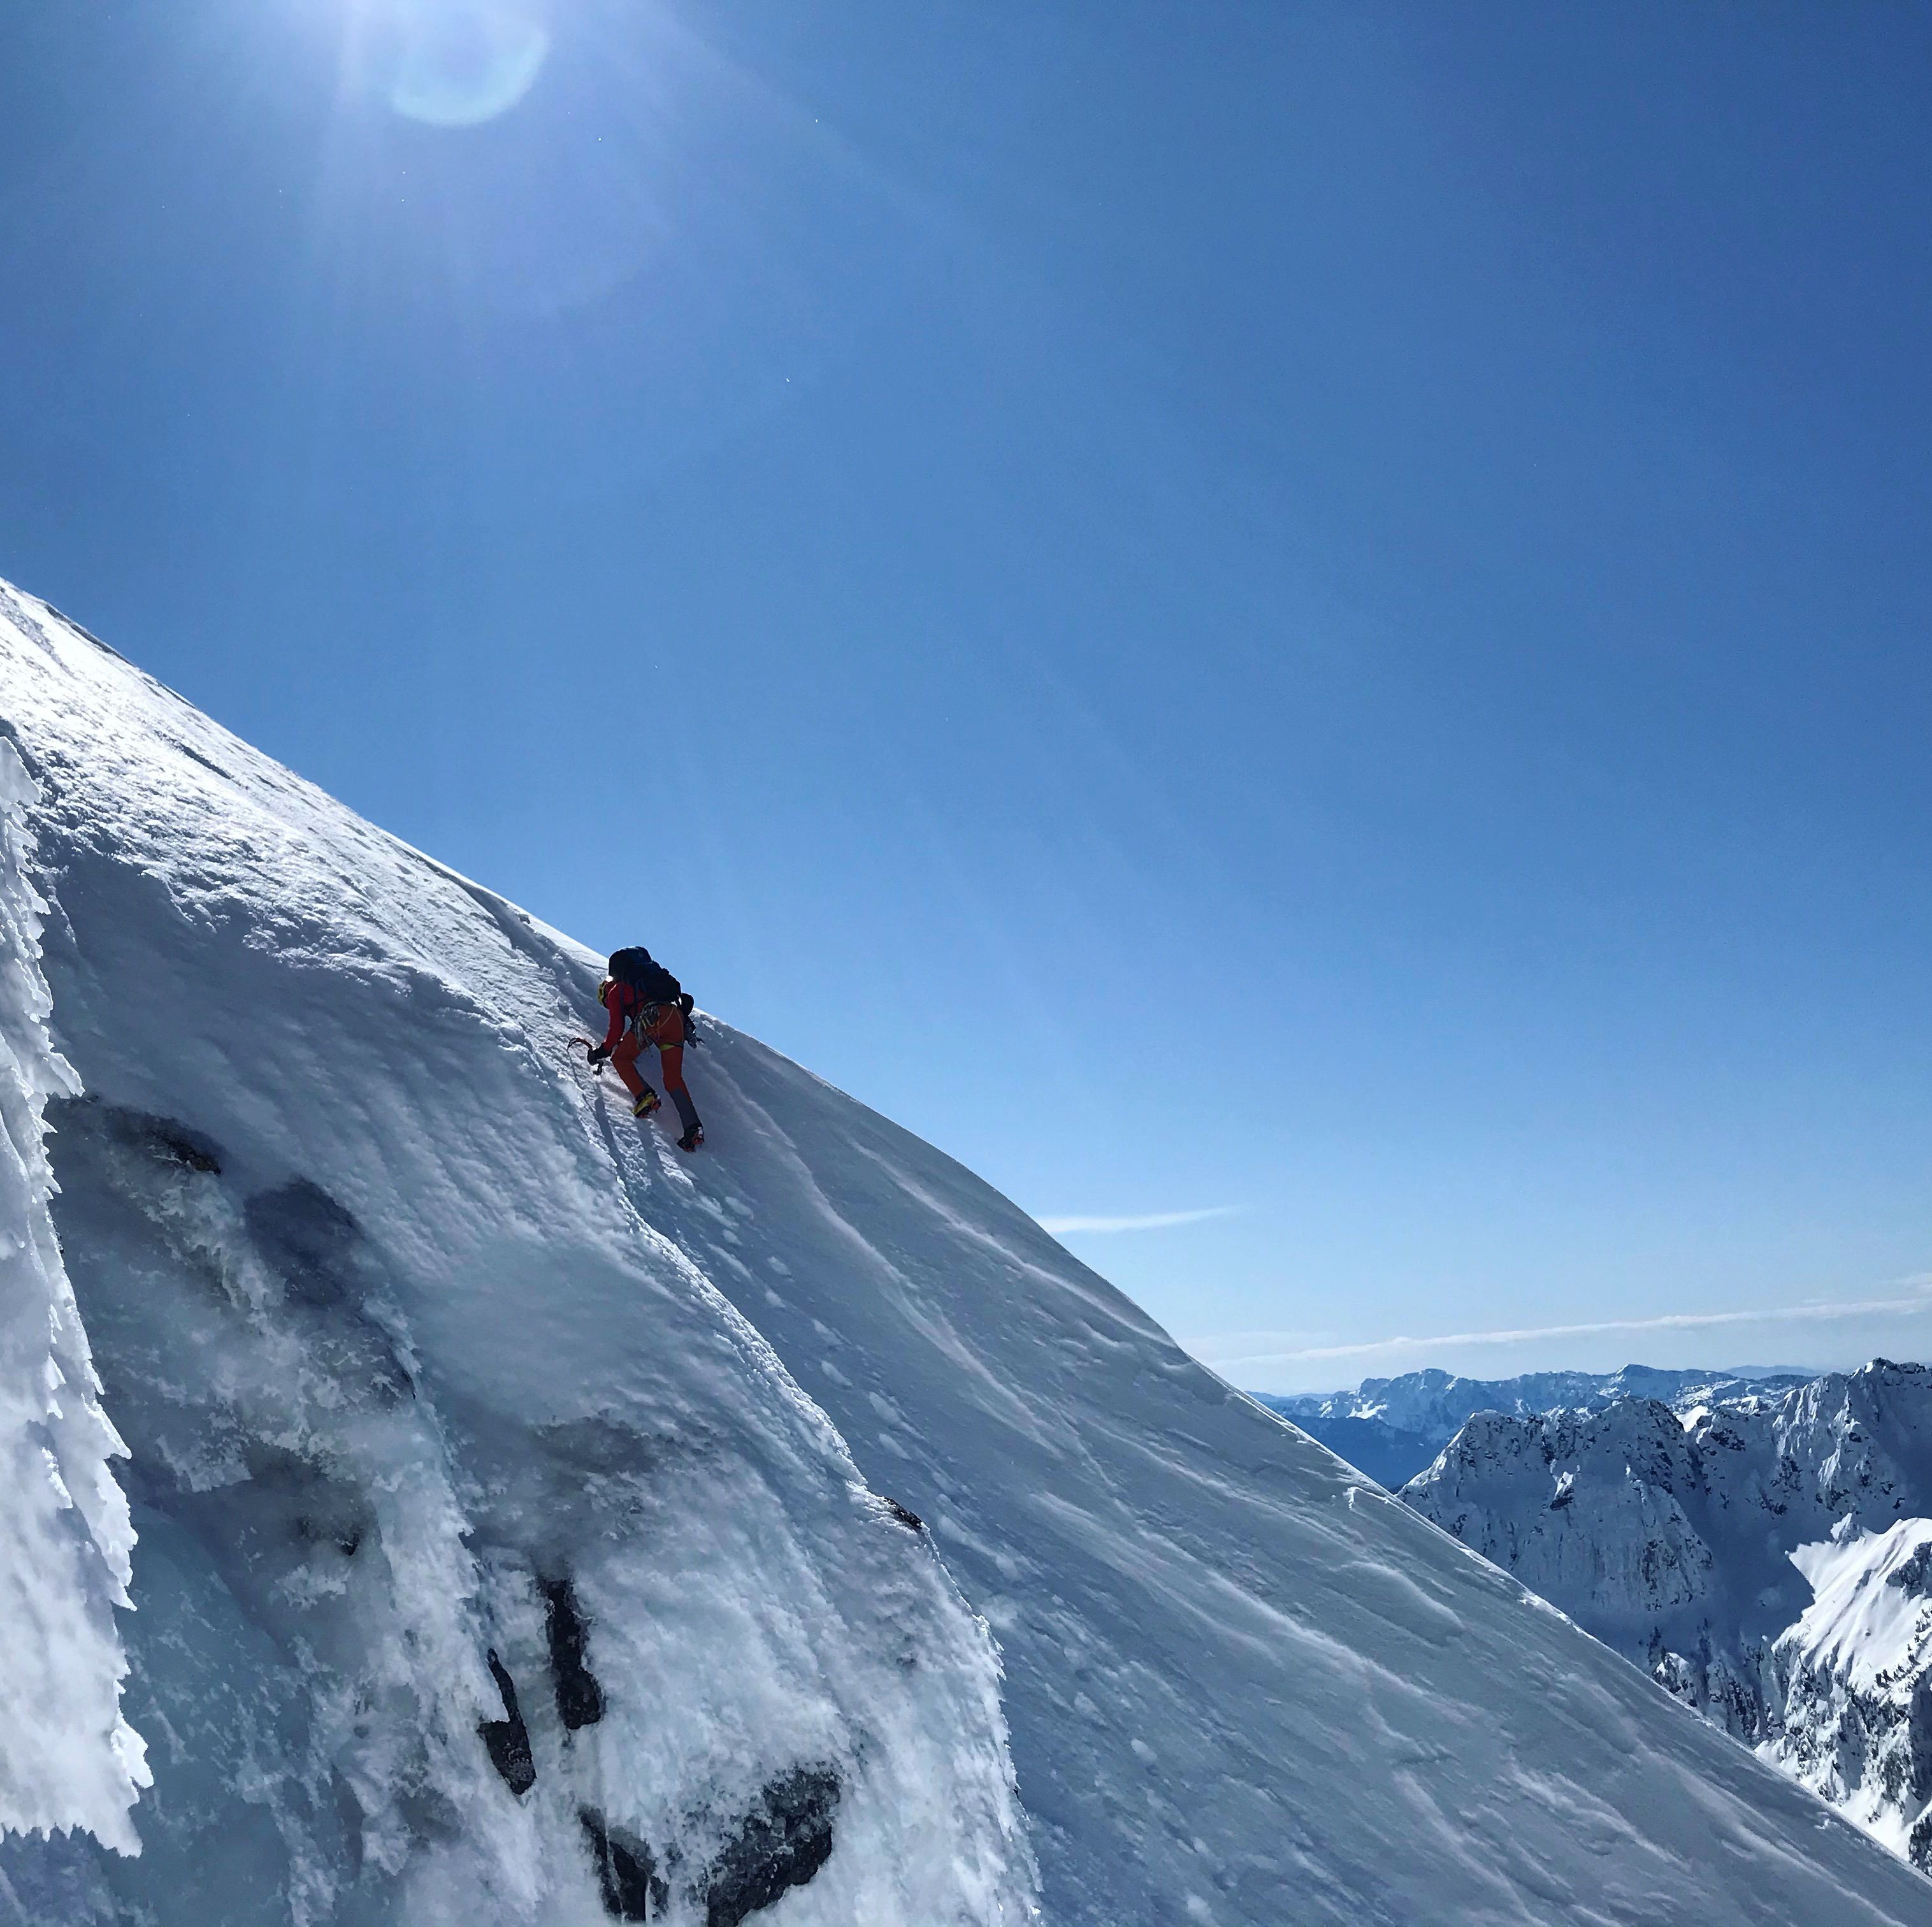
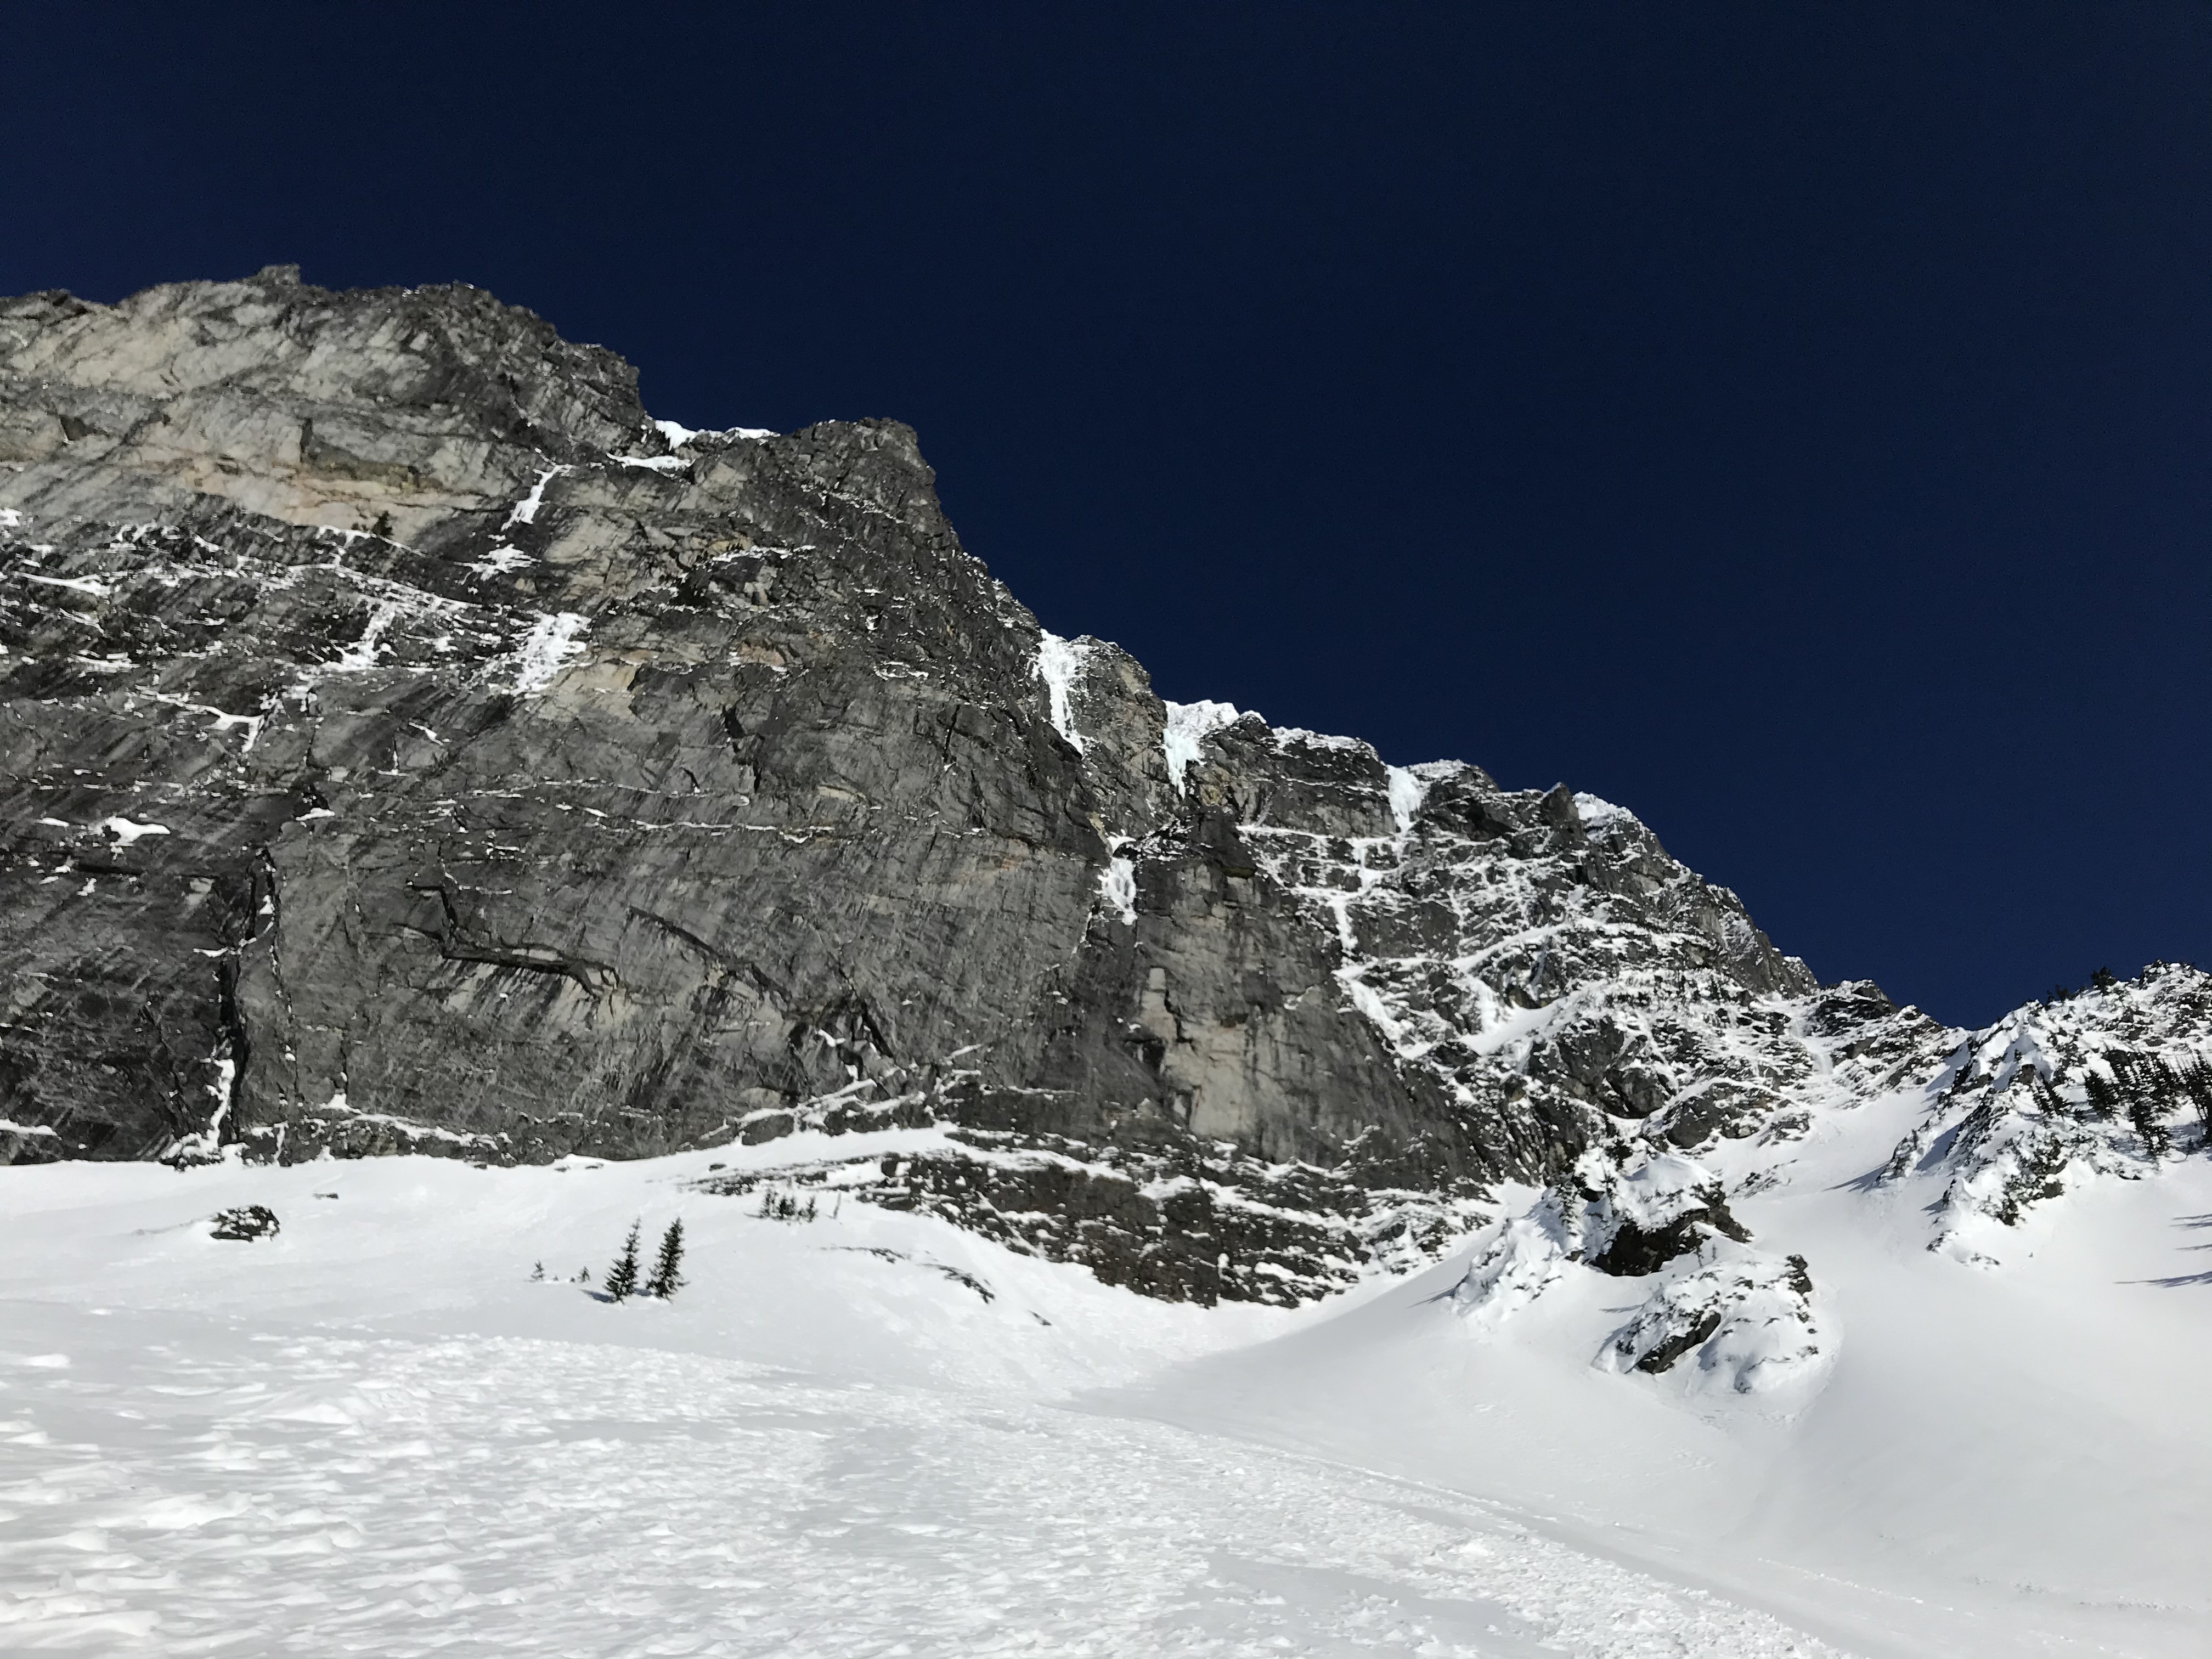
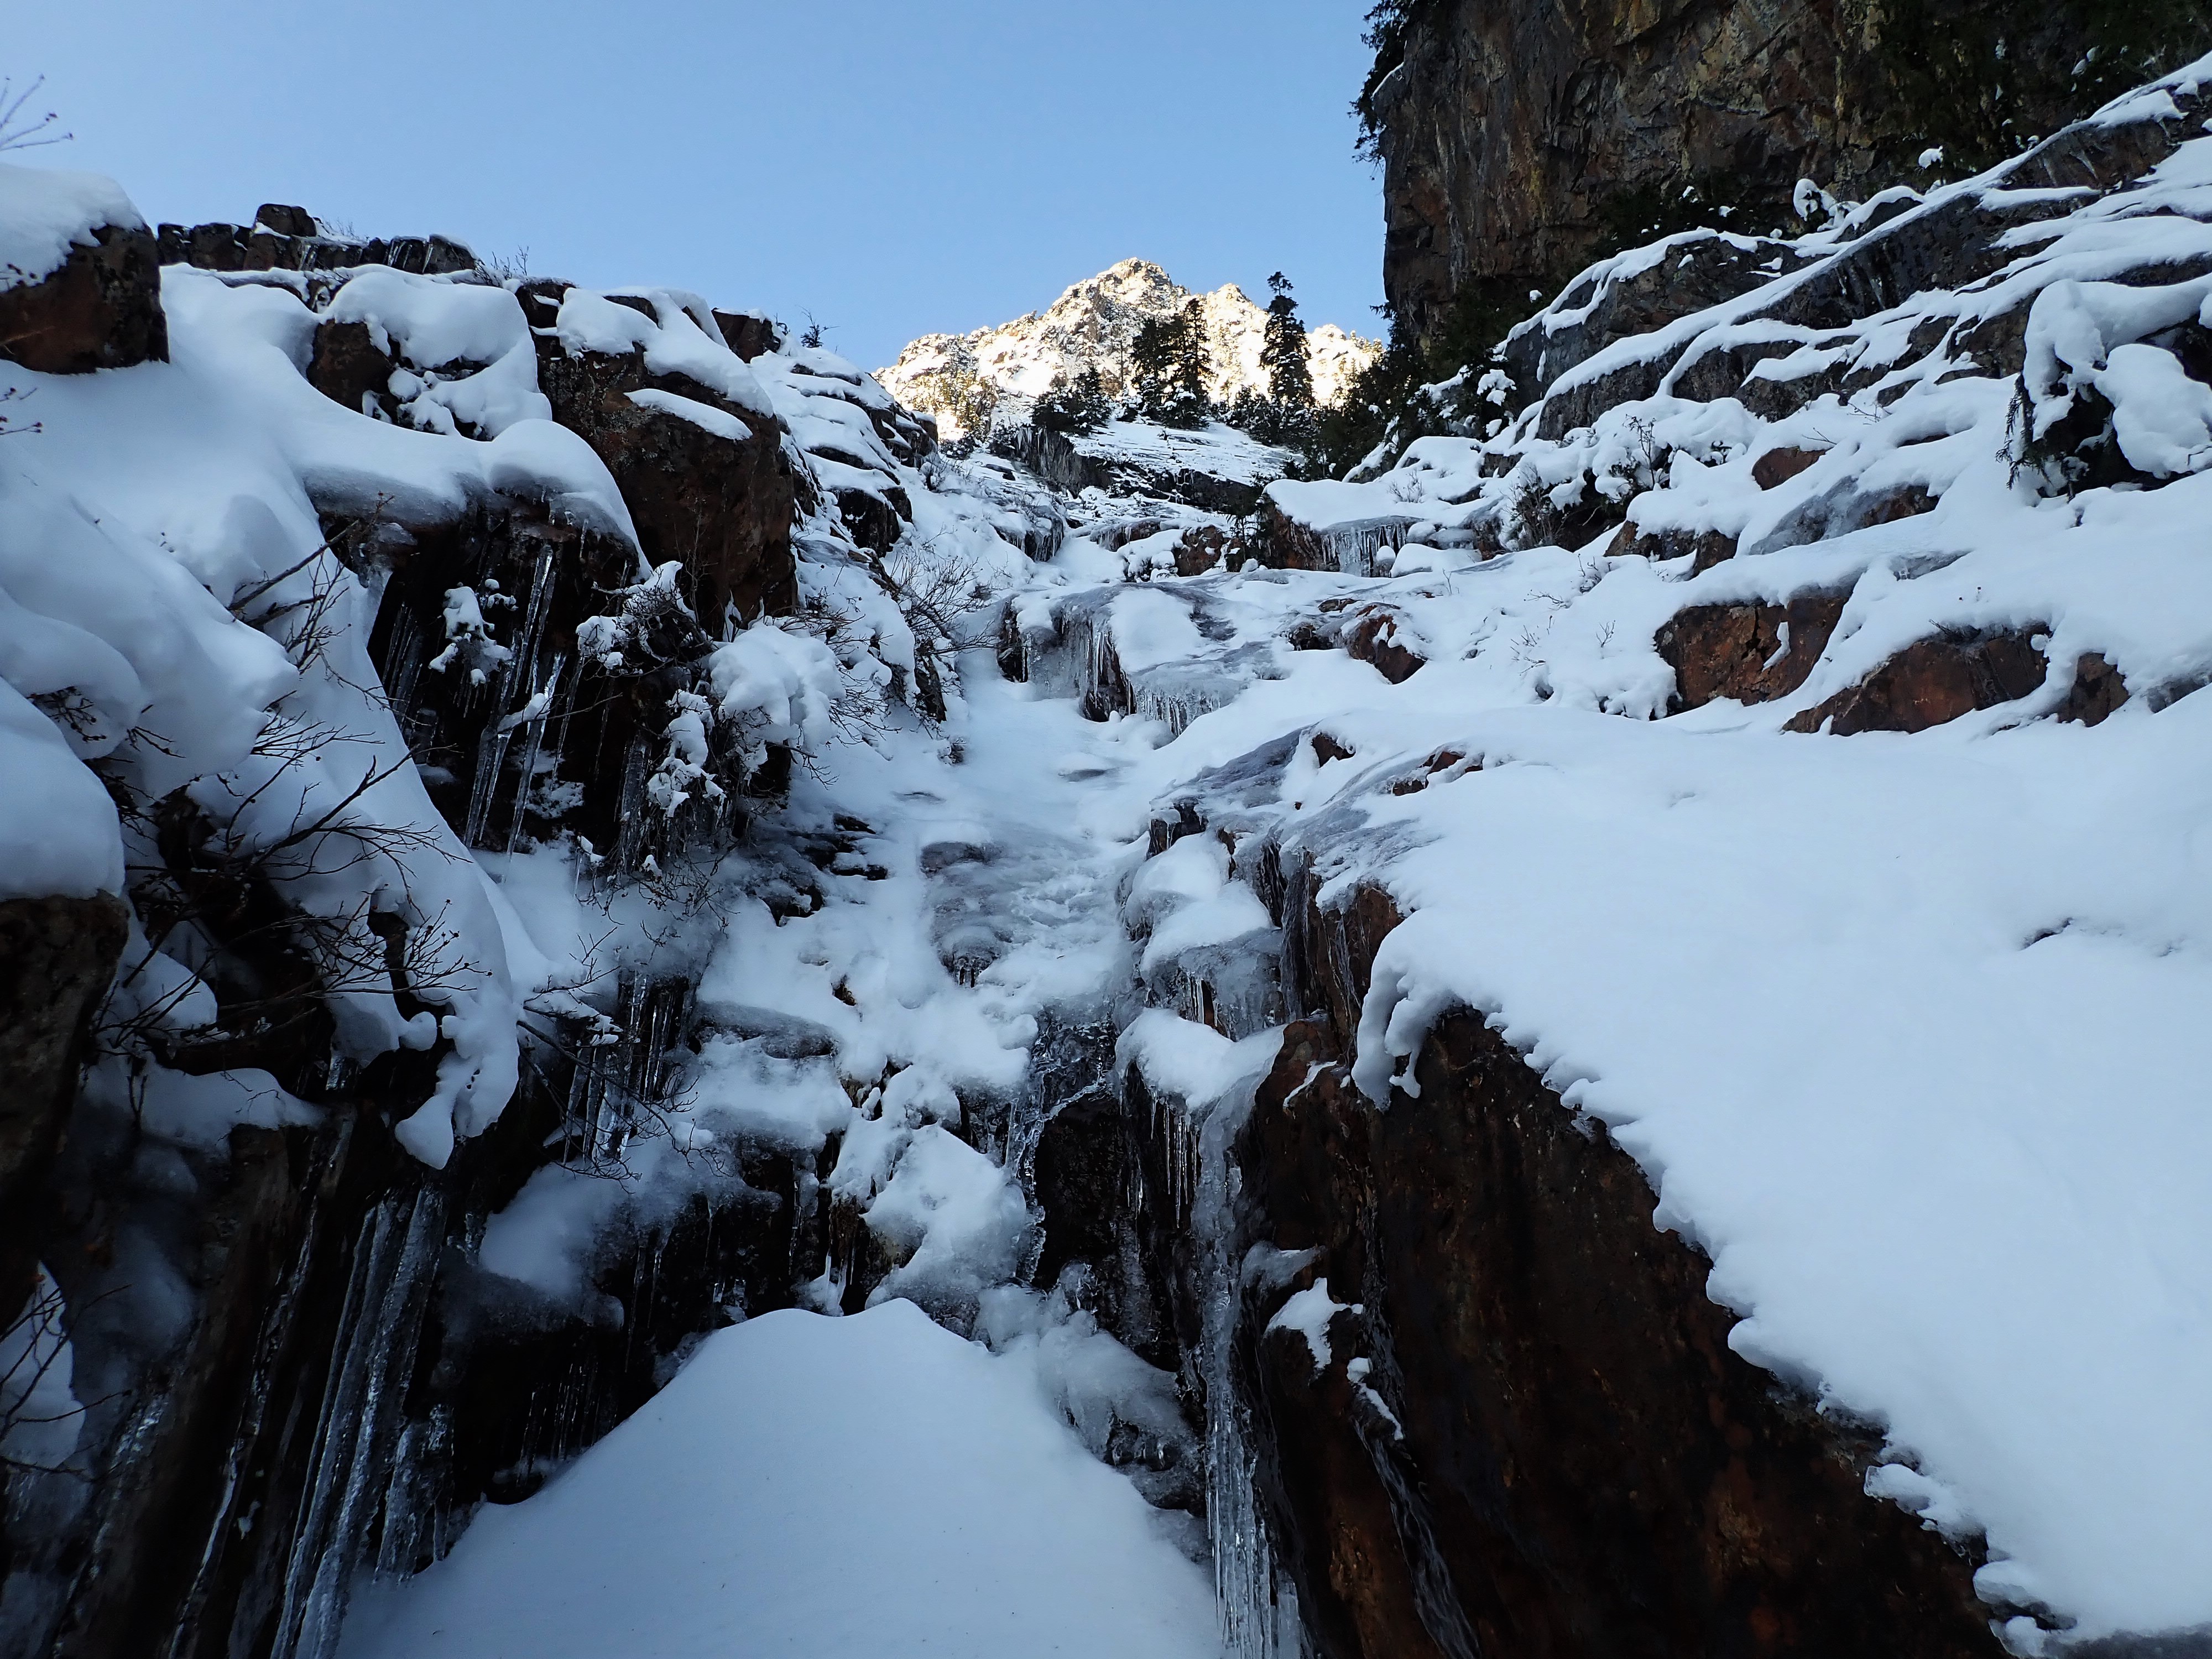
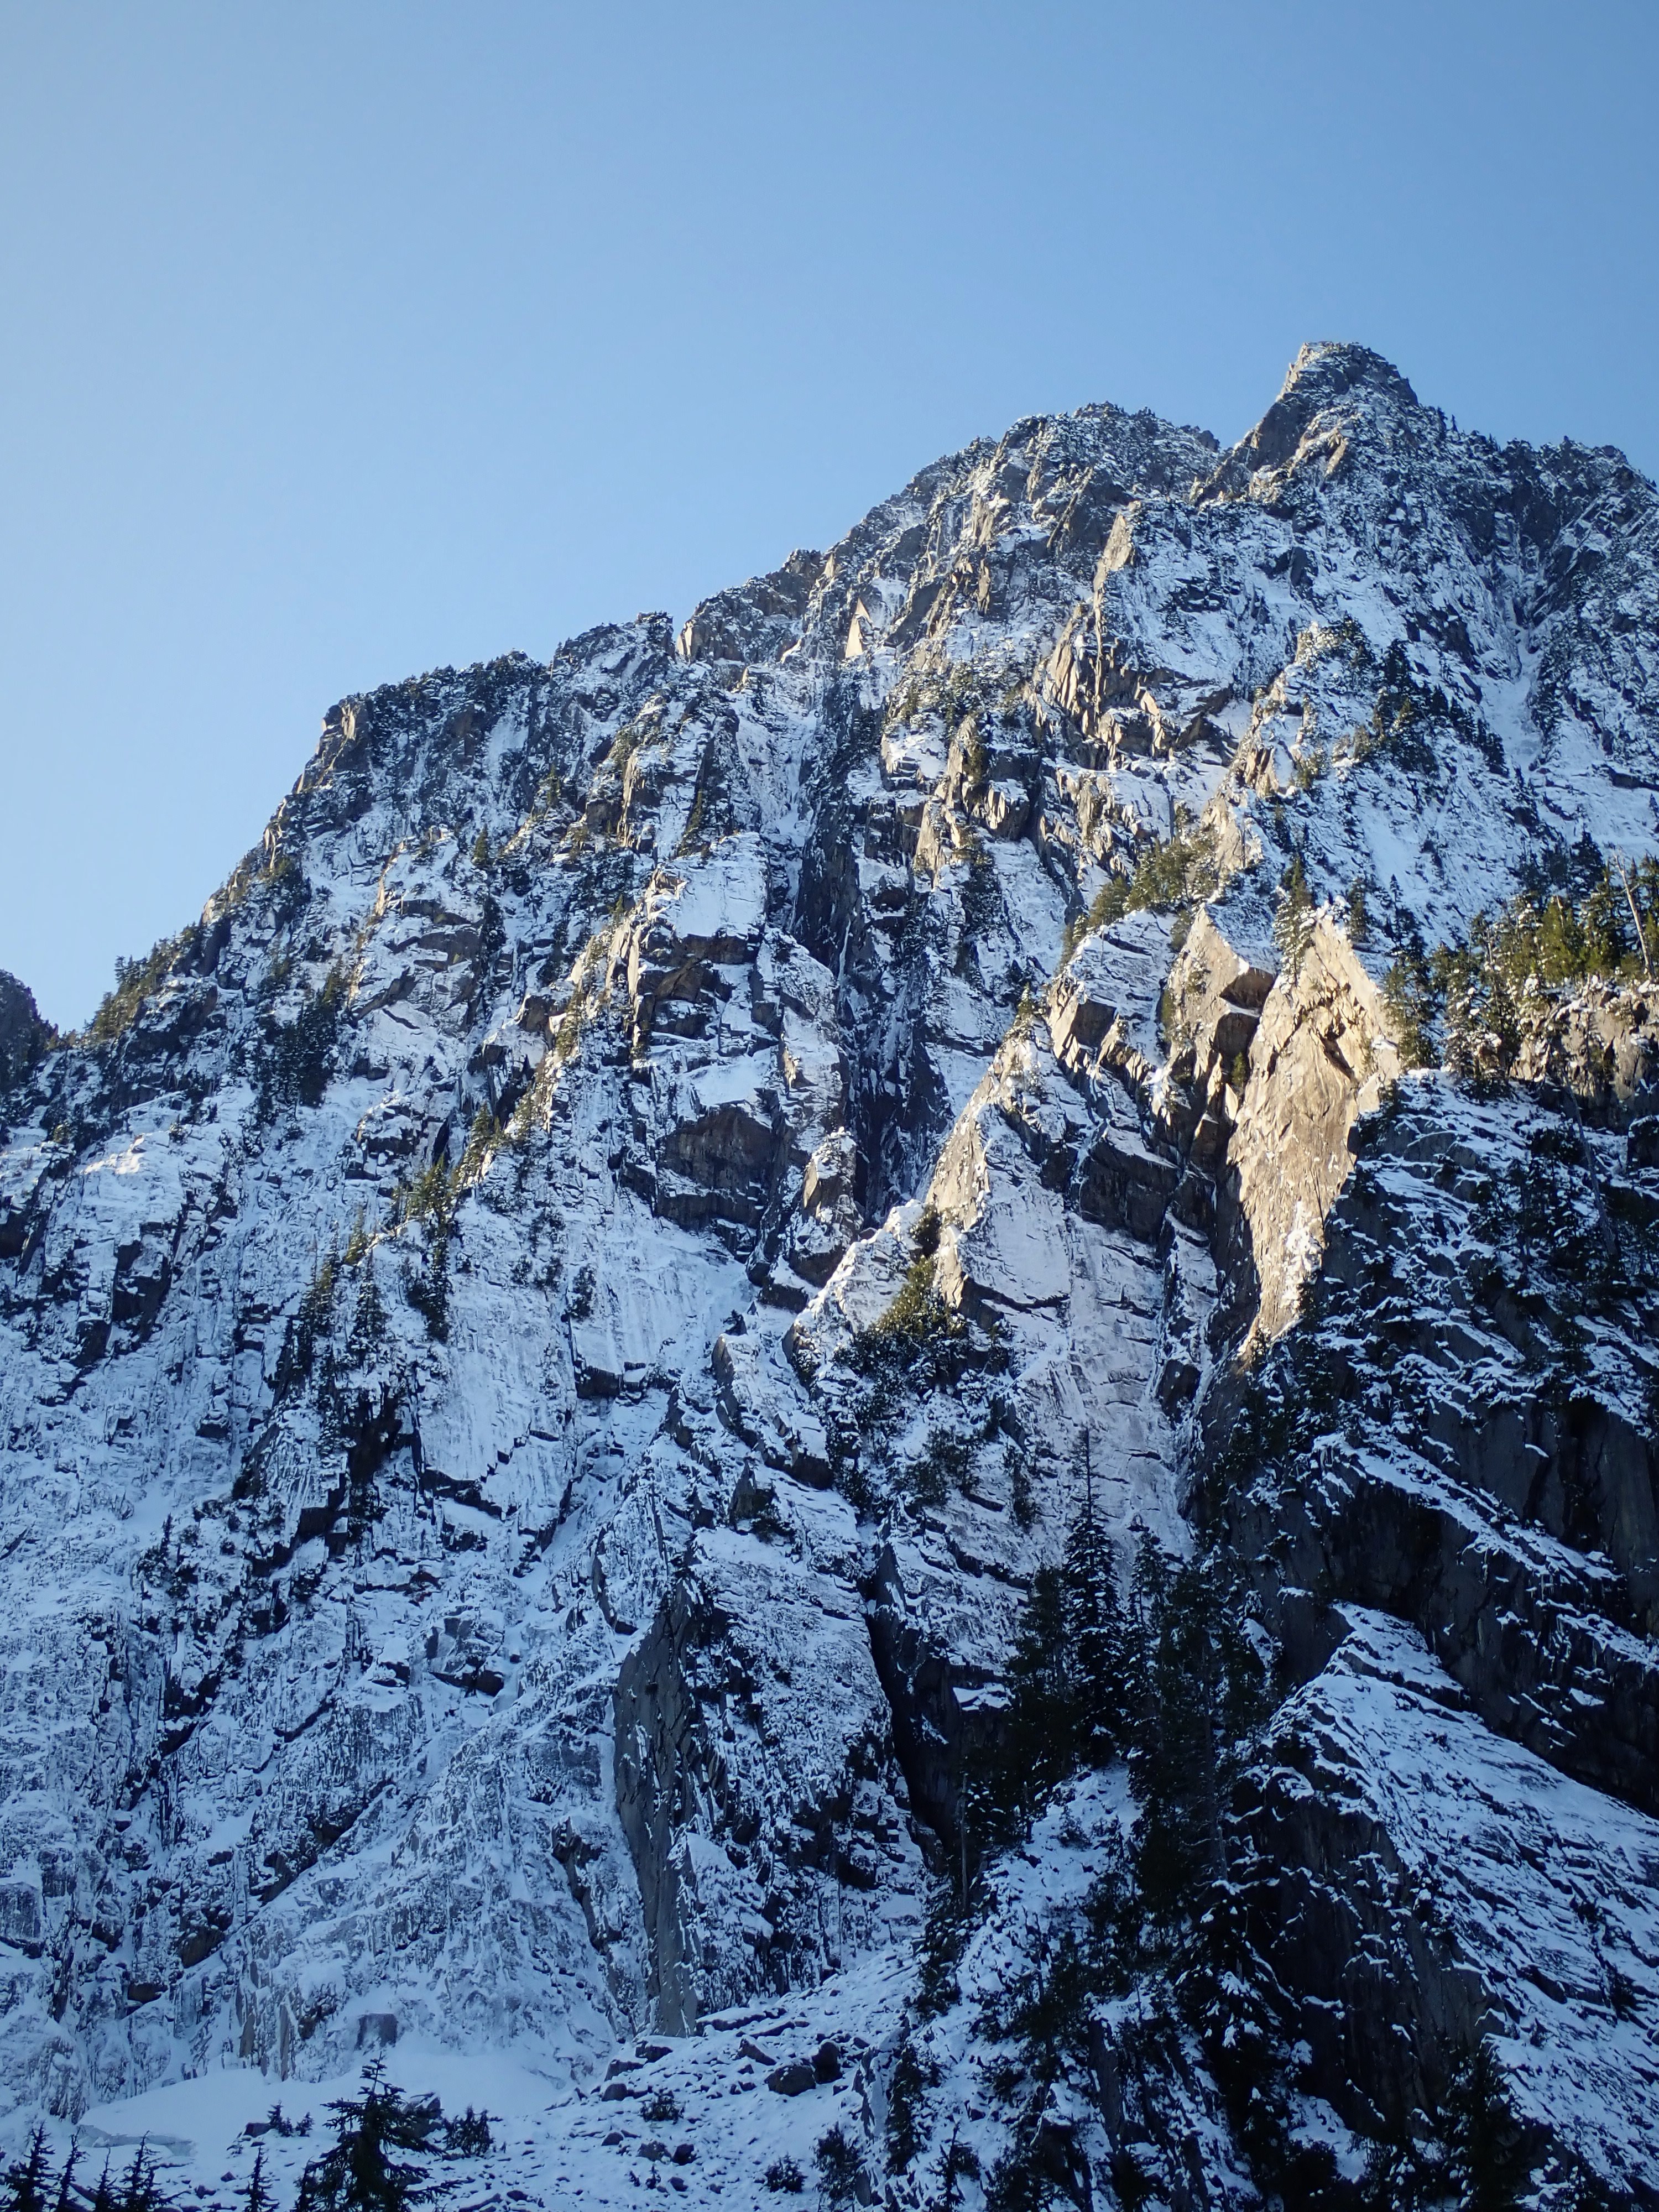
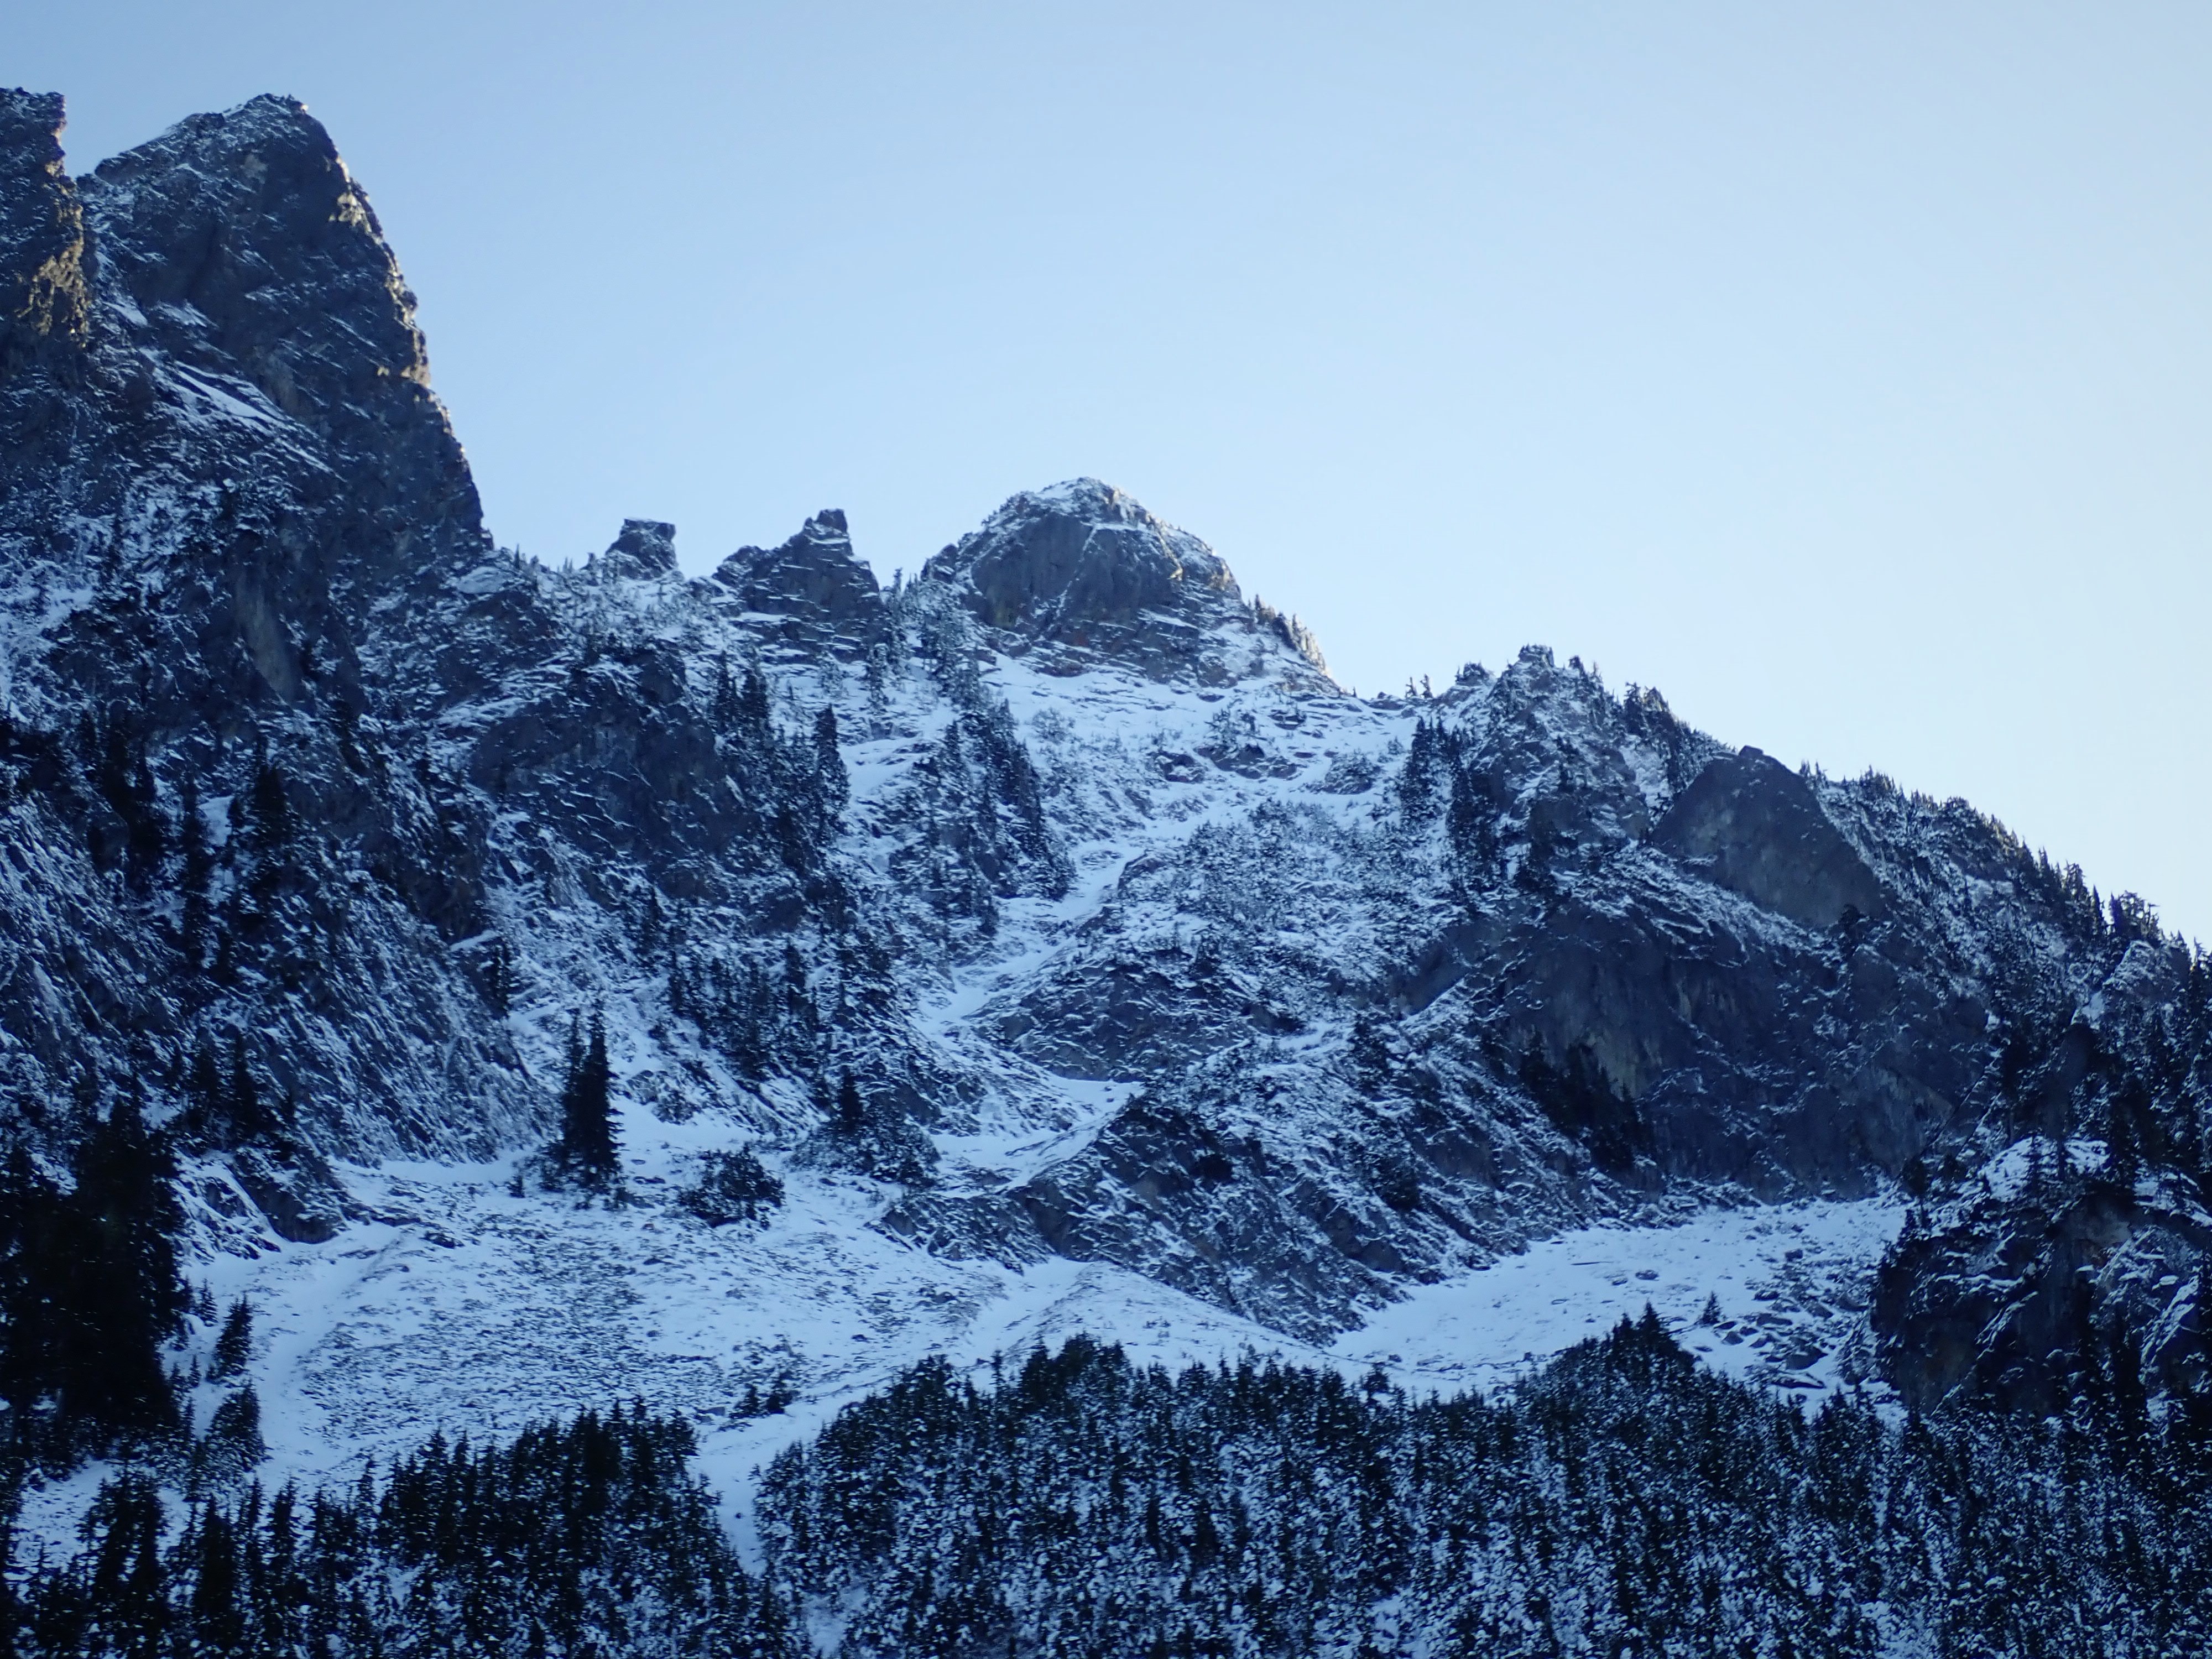
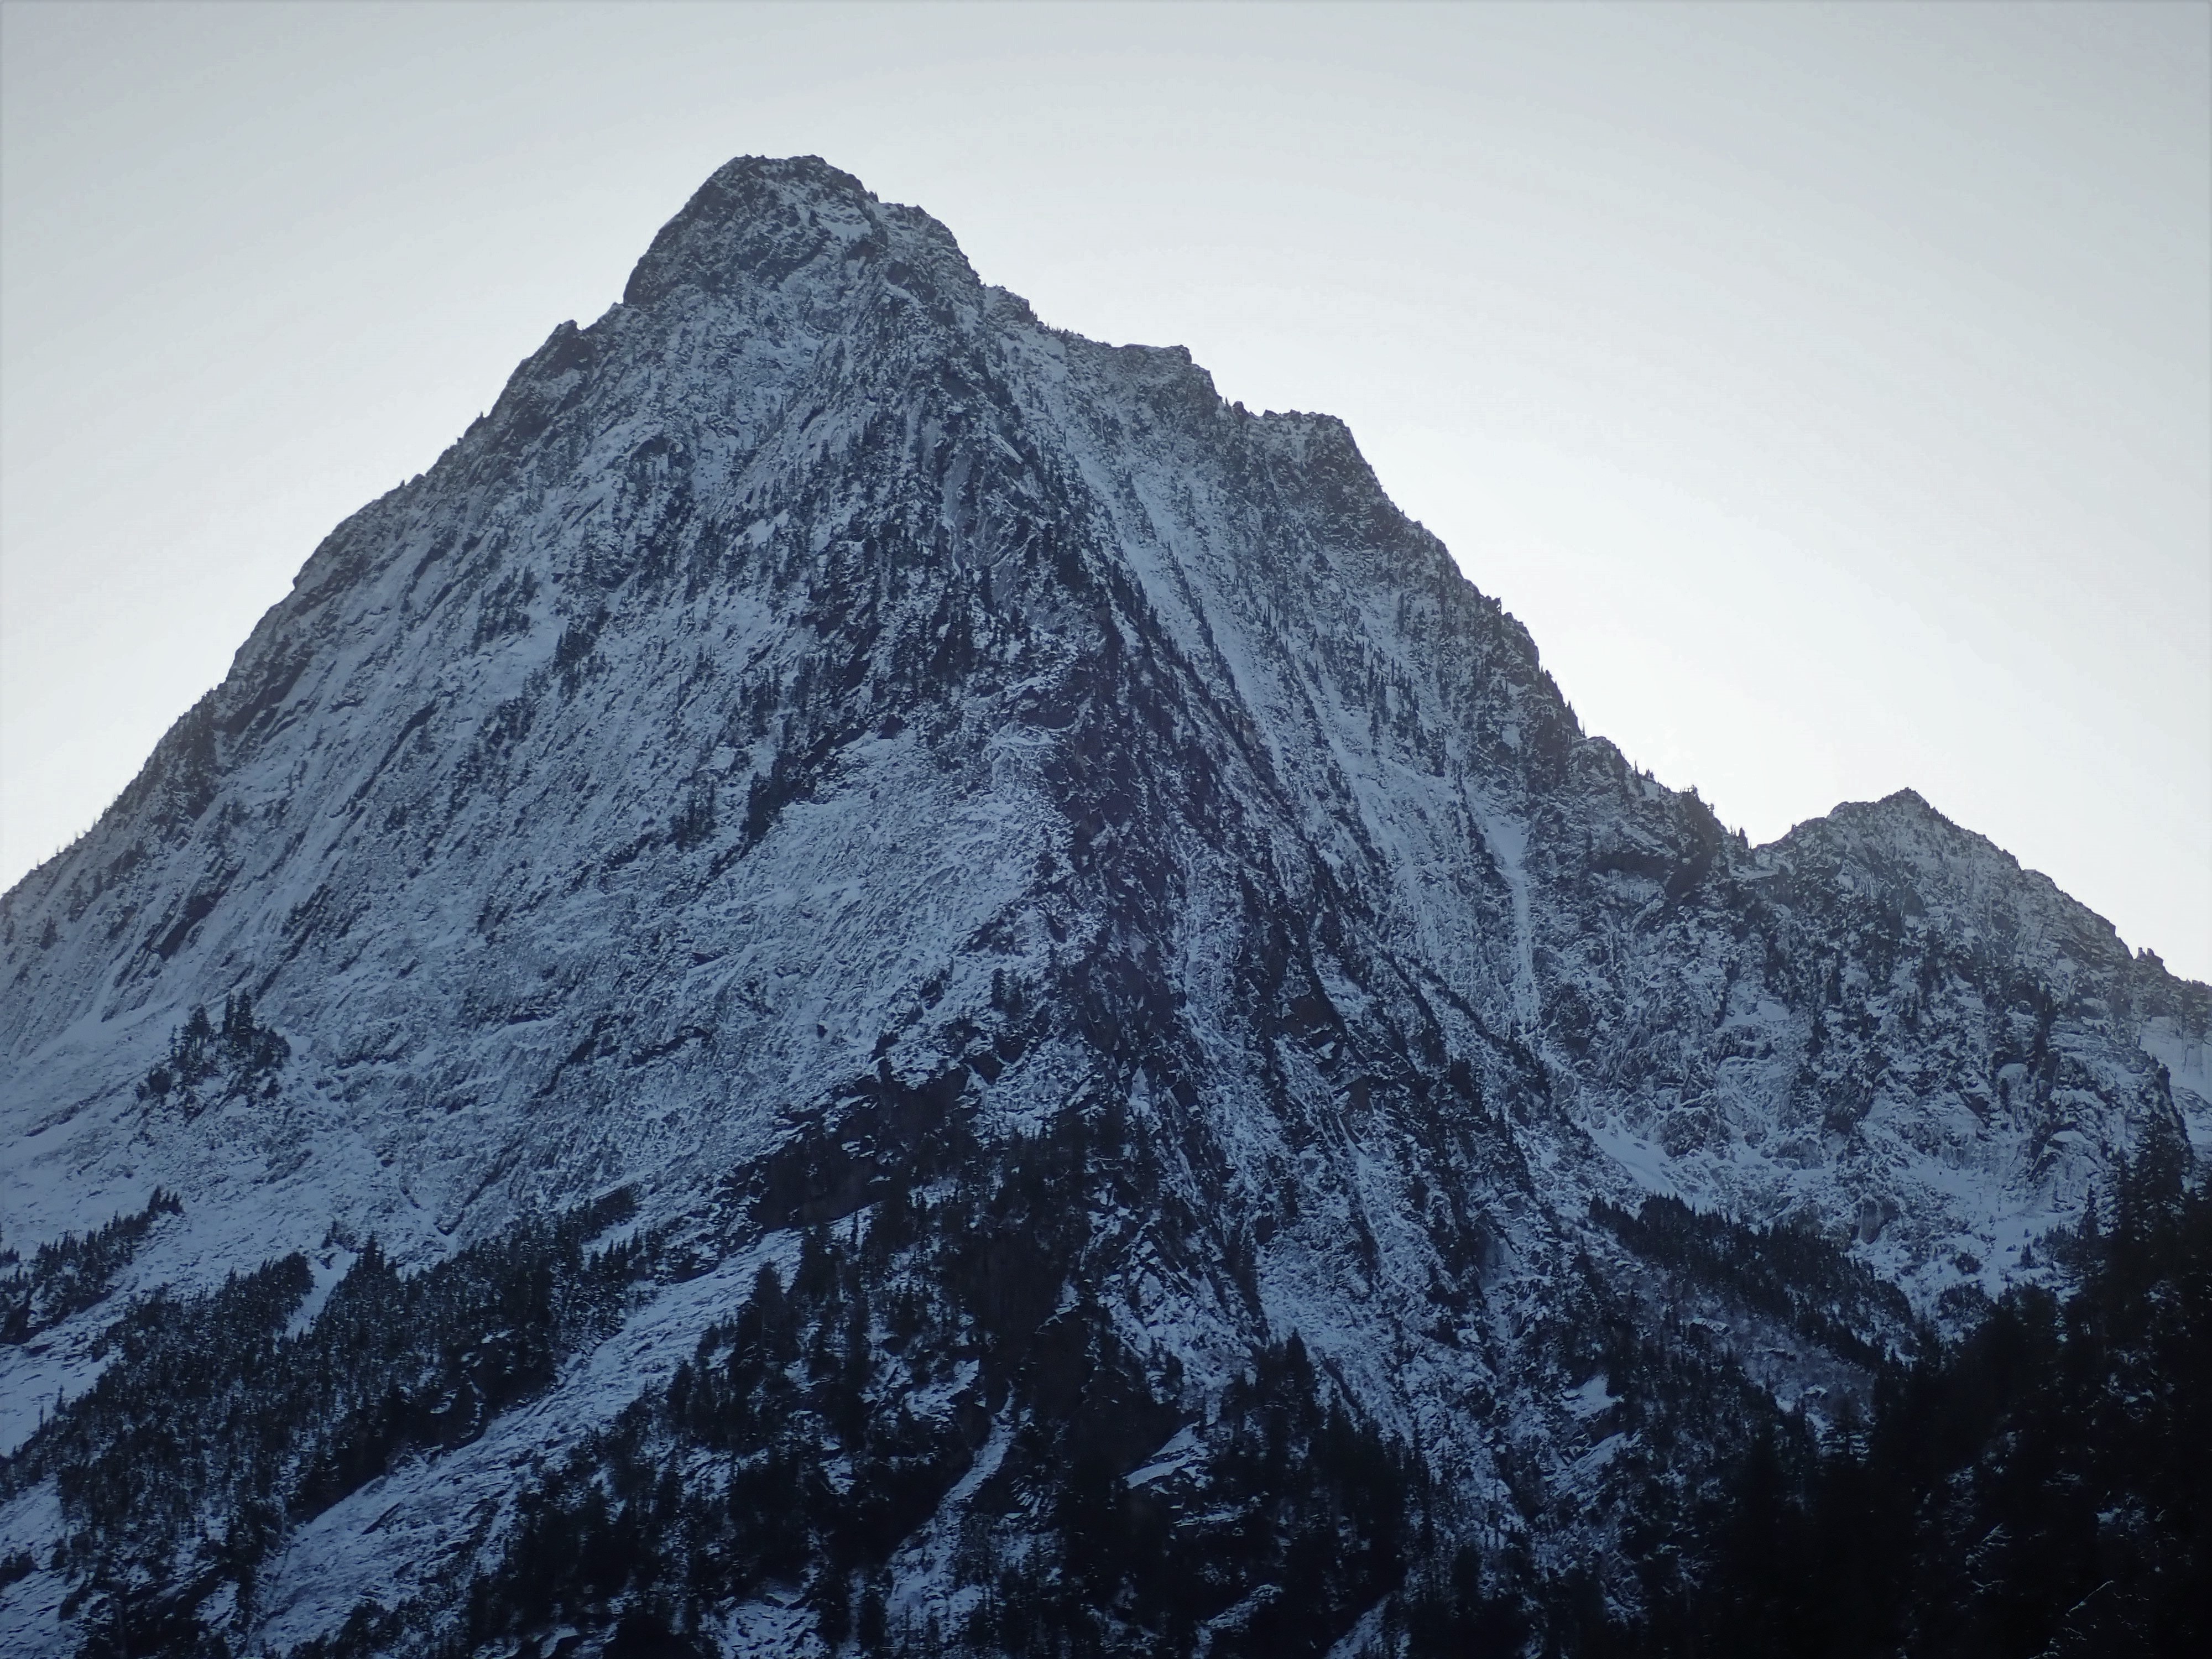
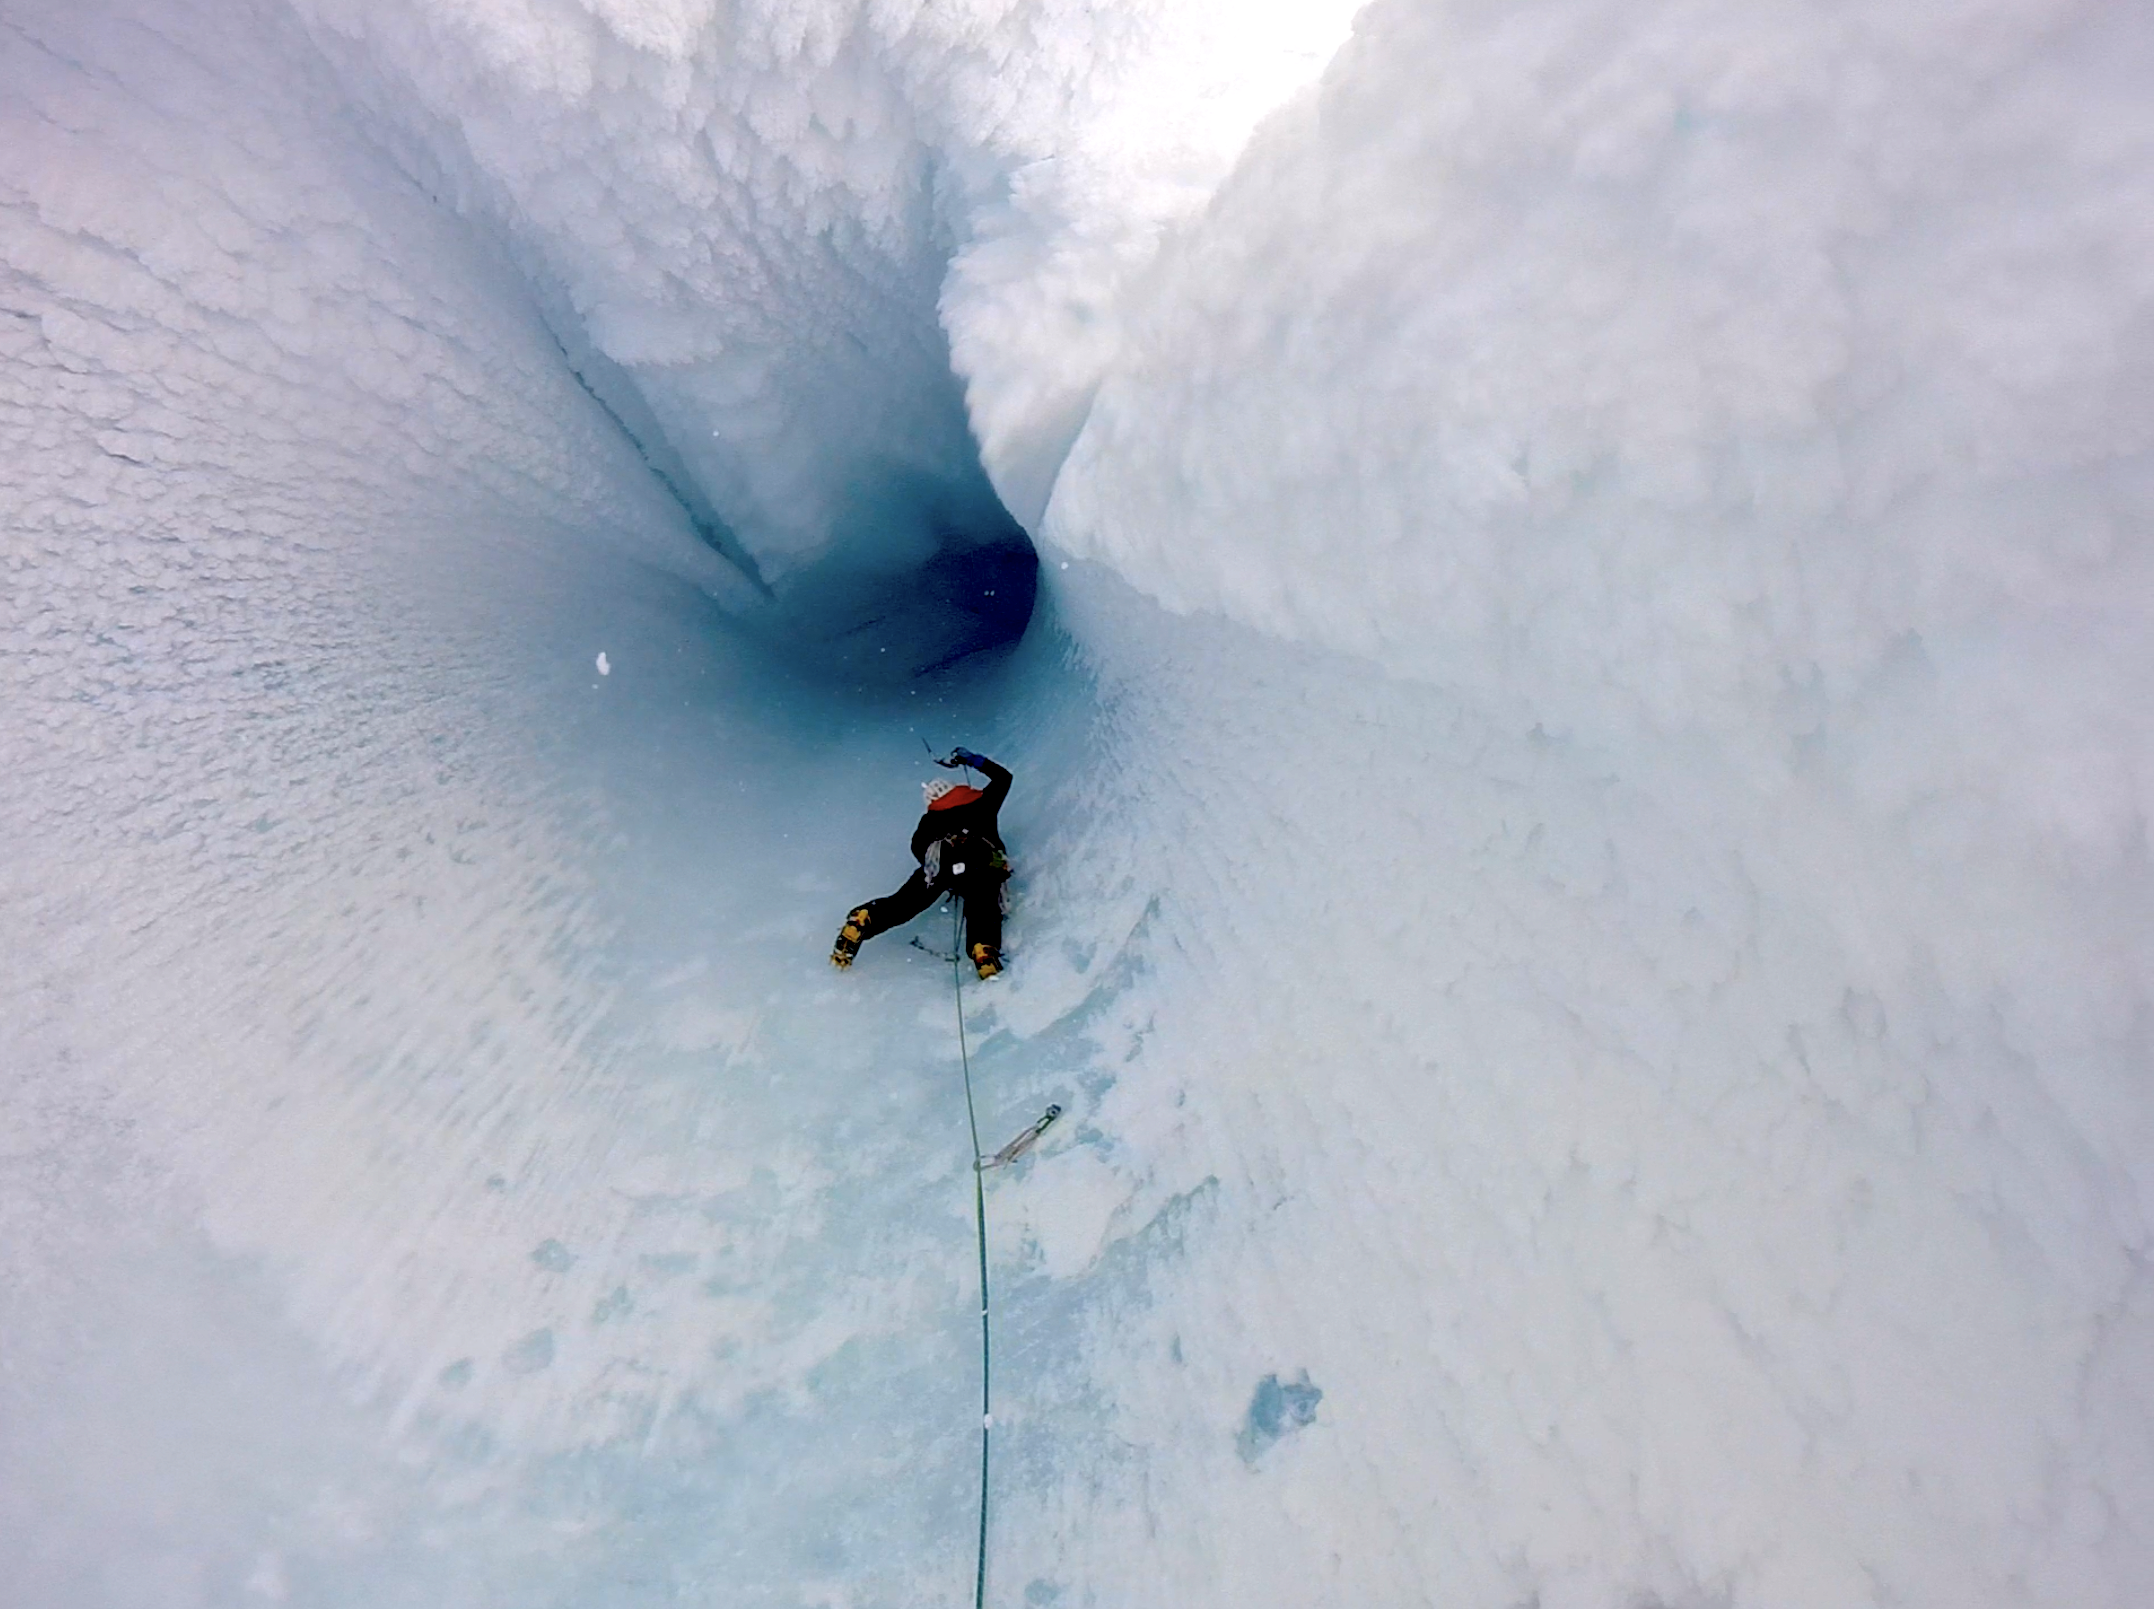
Trip: Cabinet Mountains - Multiple Trip Date: 03/21/2020 Trip Report: I just wanted to share some photos and descriptions from the last couple ice seasons in the Cabinet Mountains. Anyone who got the 2019 AAJ or Alpinist 64 might have already seen pictures of the area. There have been a handful of Spokane area climbers putting up routes over the last couple seasons. All the climbing has been done out of Granite Lake which is near Libby, MT in the Cabinet Mountains. The climbing is quite varied, from single pitch WI3 to 1000ft hard ice and mixed routes. The area has been divided up into 3 big areas….A Peak, The Thunderdome, and Three Tiers. A picture is worth a thousand words so I will just resort to numerous pictures instead of more text……let the stoke begin for next season!! Looking across Granite Lake with A Peak towering 4000 feet above. The Thunderdome is the large sub dome in the center of the picture. The Thunderdome!! Some of the best ice routes anywhere around. Scott Coldiron and Matt Cornell on the first ascent of Mad Max, WI5+ (8 pitches). Nate Kenney climbing a steep skinny pillar called War Boys, WI5+. Scott Coldiron climbing a crazy pitch called Underworld, WI3. This route is 20m long and entirely inside an ice cave 500 feet up the Thunderdome! Another view of the spectacular A Peak and the upper wall of the Thunderdome. The big ice in the center of the wall is Road Warrior, WI5, M5 (8 pitches). Looking up the huge gash on A Peak. Scott Coldiron and Jess Roskelley put up the route Canmore Wedding Party AI5, M7, 750m, which ascends this central gash. The climb got nominated for a Piolet d'Or in 2019. Note: the large sheet of ice on the bottom rock band is still unclimbed as of 2020. Looking up the wide start to the "Blaster Routes". Blaster, WI4 is five pitches of ice while Master Blaster WI4, M5, (10 pitches) continues to the top of the Thunderdome. Looking up from the lake at the "Three Tiers". These cliffs have about 20-25 ice and mixed routes that have been done. A closer view of the the ice (during a fat season) on the center of the 2nd Tier with the 3rd Tier above. Scott Coldiron on the first ascent of Toast, WI5 on the 2nd Tier. Zach Turner leading The Dag, WI3 on the 2nd Tier......a super fun mellow corner. A shot of some of the 3rd Tier routes. Gyro Captain, WI4, goes up the ice on the right while Pig Killer, WI3, takes a line up some of the ice on the left. Multiple possibilities exist for mixed routes connecting the lower ice flows in the center up through the rock to the hanging ice above. Zach Tuner rappelling off Max's Bloodline, WI4, with the impressive routes on Thunderdome in the background. Jonathan Klaucke climbing funky ice on Cheedo, WI3-4, on the 2nd Tier. Looking across at the right hand end of the Three Tiers from the Thunderdome. The wide flow in the center is the start of Tomorrow Land, WI3+, 3 pitches, while the ice up on the right is Devil's Brownies, WI4, 2 pitches, and then farther right is Scales of Justice, WI4/5. Zach Tuner on the skinny pillar start to Splendid Angharad, WI5. The flow farther left is called Capable, WI4. Looking up the 2nd pitch of Tomorrow Land, WI3+ on the first ascent. This fat climb called Nightrider, WI4, 3 pitches, is on the far left of the Thunderdome. It is a bit longer of a hike from the lake but the route is a stellar moderate! Scott Coldiron climbing the crux 2nd pitch of Nightrider, WI4. Brian White starting up the classic Toast, WI5 on the 2nd Tier. The ice beyond him is the route Cheedo, WI3-4. Zack Turner on the sharp end during the first ascent of Grease Rat, WI4....a really fun route on the 3rd Tier. Matt Cornell working through the crux of Sarcophagus of Lies, M6. The route continues up and left until you can stem between the rock and the ice dagger above. This is a stellar line on the 3rd Tier with "quality climbing as good as Come and Get It" according to Matt. Brian White putting up a short route called Mystery Gas, WI3 on the 3rd Tier. Syd Atencio and Nate Kenney climbing up Devil's Brownies, WI4, on the Three Tiers. Granite Lake and the surrounding basin in the background. I think one of my favorite things about the climbing here is the views....it just never gets old!! Every time I walk across Granite Lake I have to pause and just look up. Hopefully this will get some people stoked about climbing up there because it is a beautiful spot with fantastic climbing. Happy to answer any beta questions or run them through Scott. Gear Notes: Ice screws......rock gear for mixed routes. Approach Notes: All climbs are best accessed from the Granite Lake trailhead. In winter it is a 9 mile hike/skin into the lake with about 2000 ft of elevation gain. Count on 4-9 hours depending on conditions. From downtown Libby, take Highway 2 east one mile to Shaugnessy road. Take a right and follow this for .7 miles before turning left onto Snowshoe road. After 1/2 mile take a right turn onto Granite Lake road. In .8 miles stay left on Granite Lake road and continue for 4 miles. This is the end of the pavement and where the snowplows stop in the winter. The Granite Lake trailhead is still another 3 miles but you will have to walk/skin/snowmobile that distance in the winter. There is usually plenty of room to park several cars just be mindful not to block the road or any of the neighbor’s driveways. From here follow the snow covered road for 3 miles to the actual Granite Lake trailhead. The road is mostly level with a few gradual climbs (400 feet of elevation gain in 3 miles). From the trailhead hike/skin the trail 6 miles up to the lake.
-
Trip: Mt. Hood - Infinity Loop Trip Date: 06/21/2019 Trip Report: After a hard day and a half in the mountains, I'm stoked to report the Mt. Hood infinity loop goes! The past few weeks I was busy with graduation stuff and couldn't get on the mountain. Finally, on the 20th, the weather looked alright and I decided to head up to attempt the loop. My plan was to climb up Cooper Spur, run half of the Timberline trail, climb Cooper Spur again, and then run the other half of the Timberline trail. Knowing how much gear I needed, I cached some food, water, and clothes by Timberline Lodge before I started up. The rest of the supplies I would hike up with and stash at Cloud Cap Campground. At around 4 or so I arrived at the trail head to go to Cloud Cap Campground. The gate was still closed so I hiked up the trail to camp in about an hour and half. The weather was pretty nice despite some wind and clouds surrounding the summit of the mountain. I was all alone at camp which is always welcome. After eating some dehydrated pad thai, I was asleep before the sun set. The beautiful approach hike 4 am rolls around and my alarm goes off. I throw some food in my small pack and head up trail. Everything is going pretty good until I start the switchbacking up to the route. Visibility could have been better, the wind was howling, and I was pretty cold. The tee shirt plus R1 was probably not the best clothing choice for the conditions that day. When I got to tie in rock, I hid behind it and warmed up for a few minutes. Having never been on Cooper Spur before, I was surprised at the type of climbing. The first few thousand feet were basically a moderately steep snow slope, however, the last 600 or so involved thin ice climbing, mixed moves, and lots of exposed rock. I was glad I decided to bring 2 tools. After about 3 and a half hours I was on the summit. There still wasn't any visibility but the wind was gone. I cruised down the old chute and was at Timberline by the early afternoon. Part of the trail up Summit selfie When I got to my cache, I put on running shorts, ditched the boots, crampons, and stocked up on more GU and water. I decided to take the west side of the Timberline Trail first, the west side was longer and would provide less down time before the second summit. The first few miles of the trail were pretty snowy but after Paradise Park it was largely dry. It was pretty wet and fog obscured any scenic view. I think I made it to camp around 7 pm that night, the first climb slowed down my pace on the trail significantly. At camp, I was no longer alone. Apparently the gate opened that day! I was stoked because I could hitch a ride down after my trip instead of hiking back out. After eating some apples and changing into climbing stuff again, I was off on the second lap. This time conditions were absolutely perfect. Clear skies and no wind allowed me to enjoy the stars and see the lights of the city. That view will never get old. This time it took me about 6 hours to reach the summit. I took liberal breaks because I didn't want to be tired for the mixed section. At 2:30, I was on the summit for the second time in 24 hours. It was quiet, clear, and very enjoyable. This time, the descent was harder. The hard snow put a number on my knees during the descent. At this point, the lack of sleep was catching up to me. Cool rock I saw The stunning, but haunted Ramona Falls Creek crossing with huge carin Enjoying better conditions later in the day When I made it back down to Timberline, I had 16 more miles to go. My legs felt surprisingly fresh when I headed out. The first 6 miles or so were cruiser, however, intermittent snow slowed me down on the last little bit. I made it back to the parking lot after 32 hours, 28 minutes, and 8 seconds. This trip was one of my favorites in recent memory. I hope the infinity loop catches on on Mt. Hood. I would love to see some hardmen knock down the time. In total it was 56.65 miles and 20,445 feet of elevation gain. Get after it Gear Notes: Tee shirt and R1 Approach Notes: Road to Cloud Cap is now open
-
Trip: North Howser Tower - All Along the Watchtower Trip Date: 08/06/2019 Trip Report: Climb Date: August 4-6, 2019. Summit August 6, 2019 Climbers: Jeff and Priti Wright Climb: All Along the Watchtower (Grade VI, 3000ft, 32 pitches, 5.10/C2- or 5.12) Style: Follower jugged every pitch in the Dihedral with micro traxions and runners. Heavy French/Aid utilized by the leader in the Dihedral. Two packs brought. Leader climbed with light pack, except in the Dihedral (where follower jugged with one pack on, trailing the other). Two bivouacs (one at base of Dihedral and one on the Summit ridge). With so little beta out there on the route, we found the route finding tricky. This post is intended to be a beta sheet to help with route finding. All Pitch numbers are per Jenny Abegg's topo which was very useful (https://jennyabegg.com/climbing/trip-reportsbeta/all-along-the-watchtower-north-howser-tower/). Pitches 2 and 3 were confusing and we split each of these into two pitches. If you stay on route and watch rope drag, you can avoid splitting these up. They are both full-length pitches. Pitch 3 is so wander-y that rope-drag might be unavoidable - recommend splitting this into two pitches. Pitch 16 (5.12 crux roof) in the Dihedral was only pitch where we thought it was mandatory to disobey Jenny and split into two pitches. Topos Jenny's topo was pretty spot on. Pitches 8-11 on Jenny's topo are the dyke variation that Westman/Haley did (on accident) which ascends directly up from the bivy ledge. Jenny's topo does not show the original route option, which splits off 30m below the bivy ledge. If you wanted to get snow at the bivy ledge and continue on to the original route, you have to rappel or down climb 30m 5.7 to meet back up with the original route. The party behind us did the dyke route and we did the original route. After talking to the party who did the dyke route, it's very safe to say that the dyke is better way to go. The Mountaineer's guidebook (the green book) topo shows both the original route and also the dyke route options, but the High Col topo shows only the original route. The High Col topo is not accurate at all, so be careful. Keep a copy of Jenny's and the Mountaineer's topo on you. Bivy sites: -We didn't see any good bivy sites until atop Pitch 7 (flat, walled, snow in early season). Some descriptions said there was one atop Pitch 3, but it's more of a sitting bivy. -Another good bivy site is out-of-the-way, about 20m left of the base of the Dihedral (flat, walled, no snow). Some descriptions said this was 4-person, but it fit the two of us pretty snug. To get from here back to the base of the dihedral, you have to down-climb 10m (5.7) then ascend 10m (5.7) to the base of the Dihedral. -Some bivy options along the ridge (four of us stayed at one, very snugly, about halfway on the summit ridge above the seventh rifle gully). -A flat, walled bivy spot on the summit (lots of snow throughout the season). When we saw it, it had thick snow/ice on it, so you'd be sleeping on top of snow. Photo Credit above: Tim Banfield Descending down to East Creek from the Pigeon-Howser Col. Left to Right: North, Central, South Howser Towers, Minaret. Priti is just below the Beckey-Chouinard Route From East Creek descend until you can scramble up to the ridge. Stay low on ledges if you want to cross over into the gully ("B" in picture, not recommended, loose scree and hard ice). Recommend staying on the ridge (climber's right side, "A" in picture) as if approaching for Beckey-Chouinard on South Howser Tower. From the base of Beckey-Chouinard, it is easy to scramble down to the snow to traverse high over to the North Howser Bivy Rock. This is a big, obvious boulder just at the next ridgeline. There is a luxurious, sheltered, covered bivy cave here (recommended instead of East Creek if you only have bivy gear and you want to get an early start for the route in a push). Four rappels (two hangers, chains, rap rings) take you to the snow below. The first rappel is heavily cairned and easy to find (even in the dark), requiring a bit of down-scrambling to get to the lip of the ridge. The rappel line is straight down. Each rappel is easy to find and on obvious ledges. You'll want crampons and ice axe for the snow below, on the way to the base of Watchtower. We used a Beal Escaper for the rappels which worked like a charm... we did not bring a pull cord on this trip. Note: rappels shown in picture above are approximate (just use cairns to find the first one, then take the plumb line). The picture is not intended to help you find the rappels. The first rappel. Crossing the moat. Another party of rappelers above. The approach snow after the approach rappels. You're committed now! Looking up North Howser Tower. Approach at the base all the way left to big ledges just before the large, obvious gully. Take ledges all the way left to dihedrals. Pitch 4 (above), 5.10, full 60m: a striking dihedral (protect on the face on the right) which starts as an easy stem/chimney and ends in an overhanging, difficult off width. Photo credit: Dane Steadman Bivy site along ridge. Looking down the ridge from the summit. Photo credit: Dane Steadman "Hand crack on the right side of crest". Party on the summit. Photo credit: Dane Steadman Simul Rappelling over the bergshrund. Photo credit: Dane Steadman Joining up with the Beckey-Chouinard steps. Photo credit: Dane Steadman Gear Notes: Double Rack to #3. Single #4. Triples in finger sizes for dihedral. Offset nuts, brassies. Did not bring offset cams (did not think they were necessary). No aid gear. 1 sleeping bag to share. 1 bivy sac to share. 1 Jetboil. Beal Escaper for rappels. We did not bring a pull cord. Recommend a pull cord to 1:1 haul packs in the Dihedral. Approach Notes: Started from Kain Hut, ended at car.
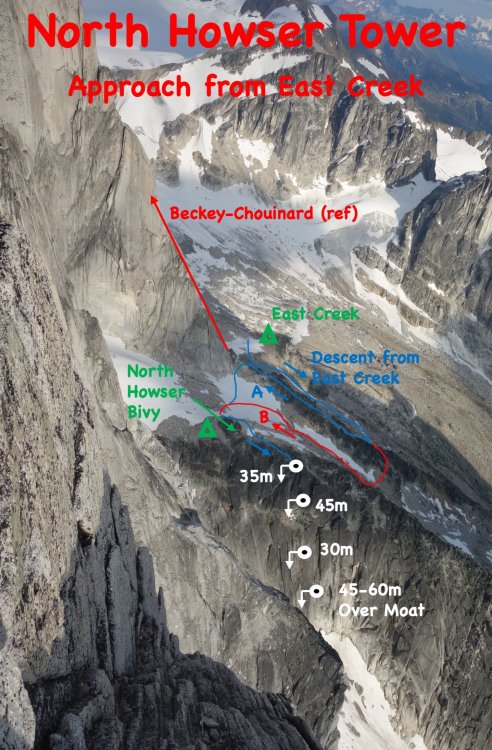


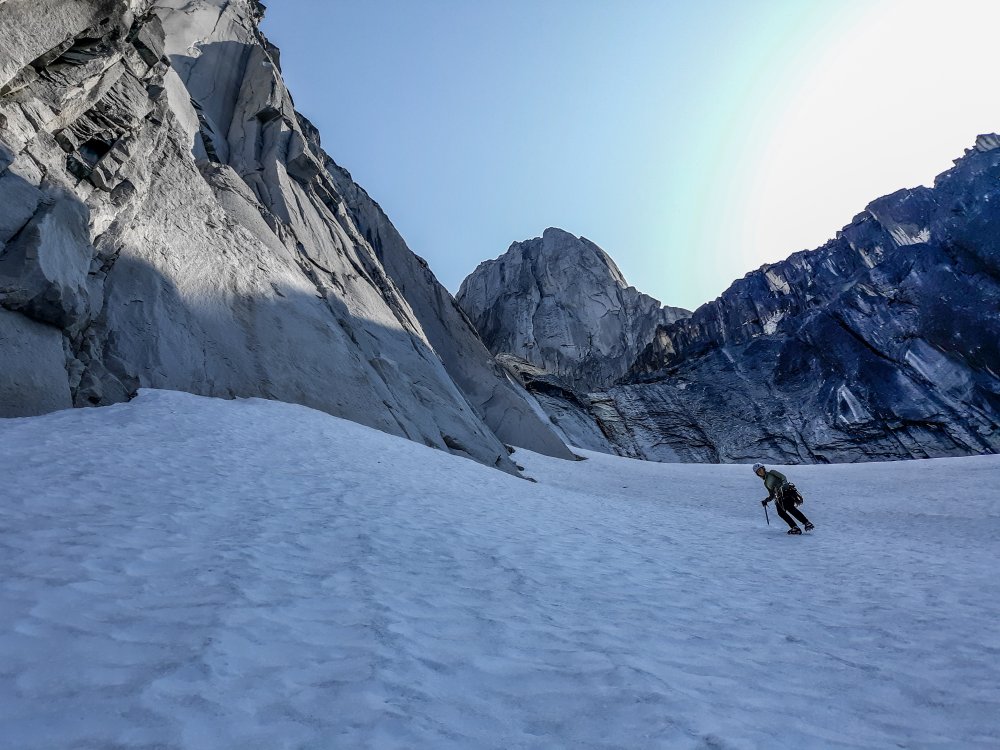

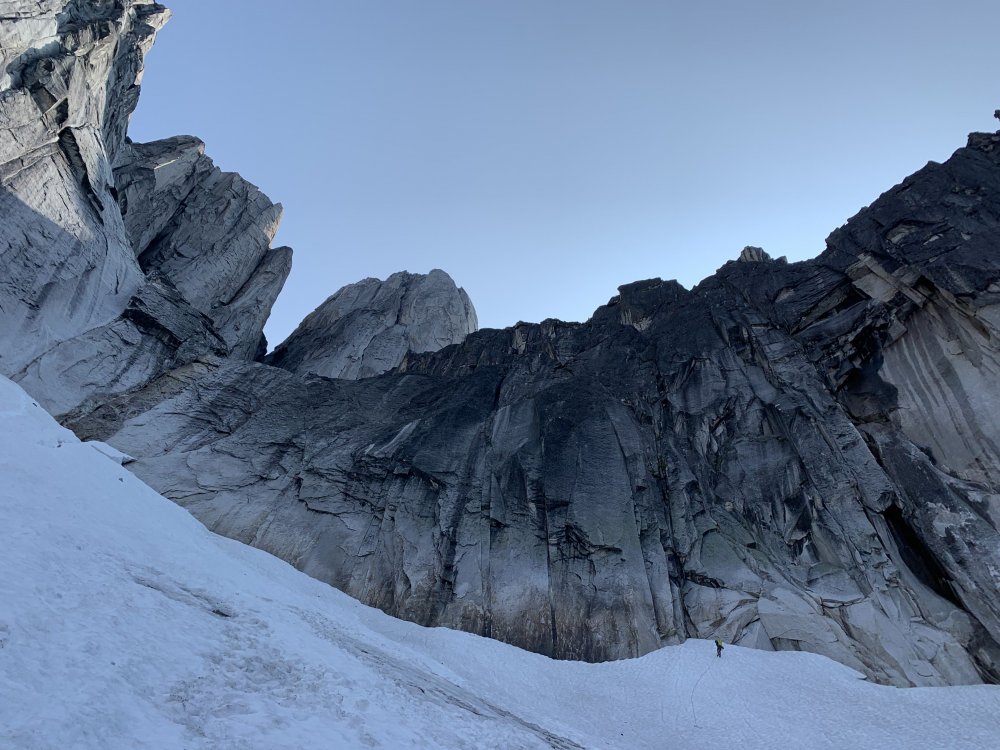

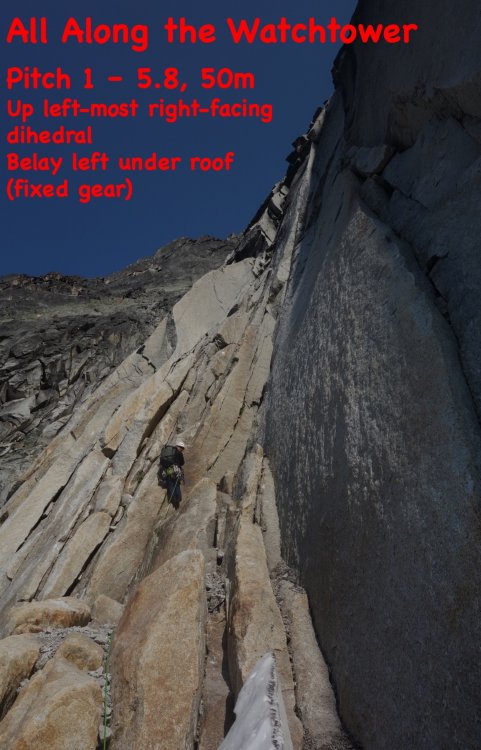


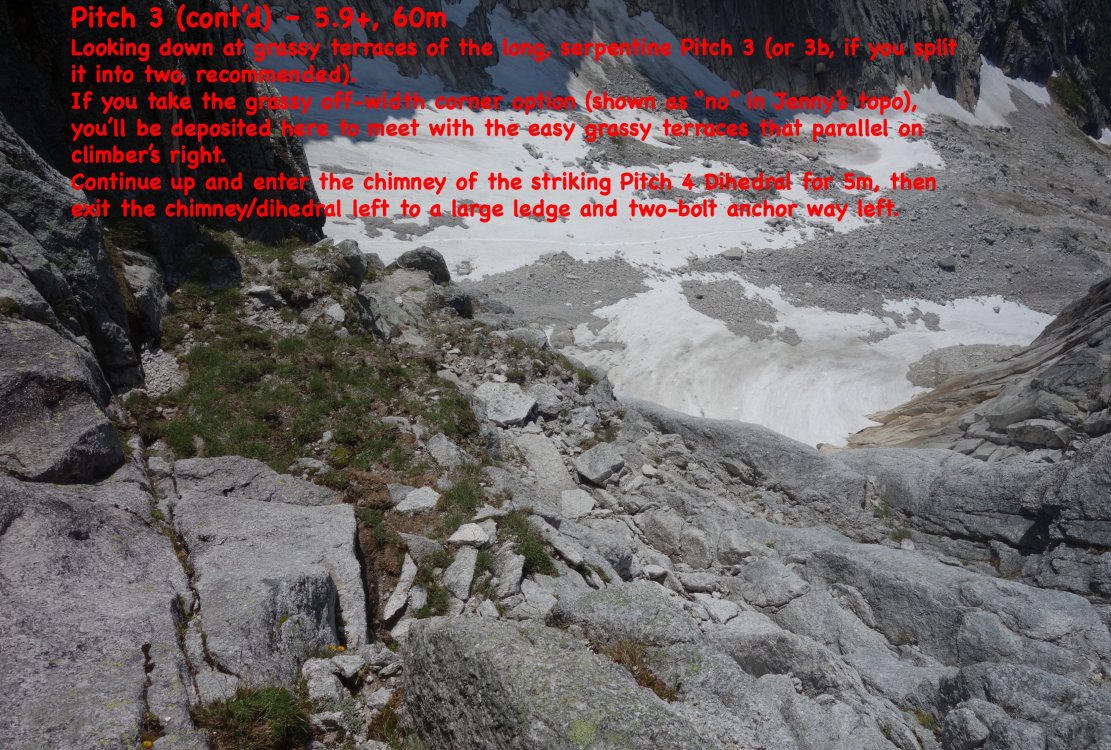
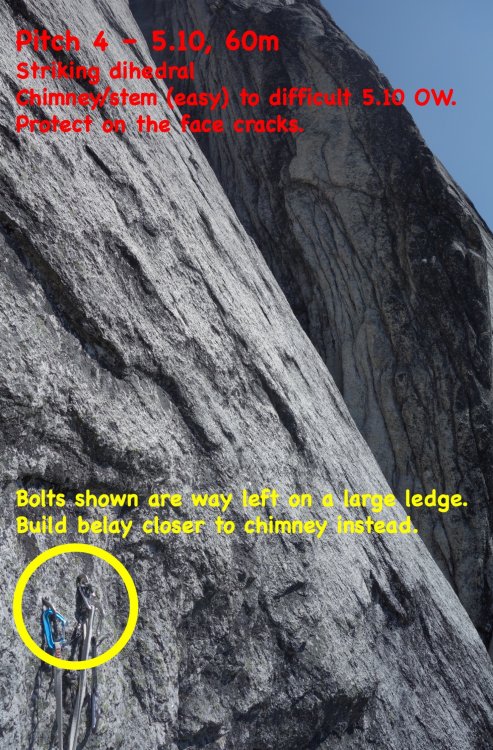
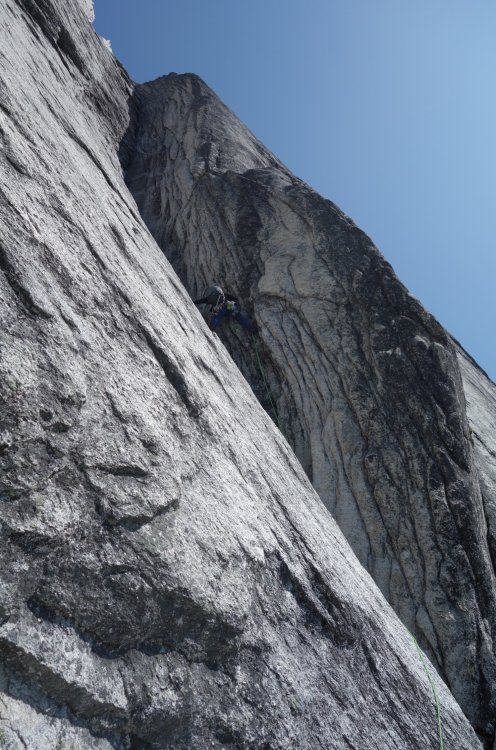
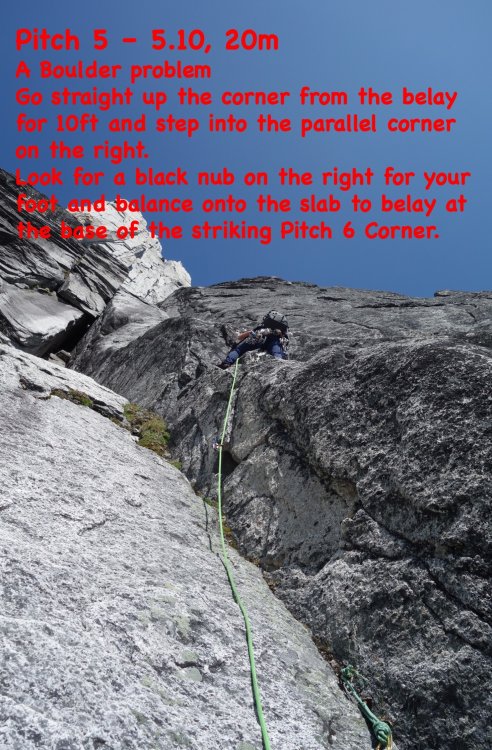
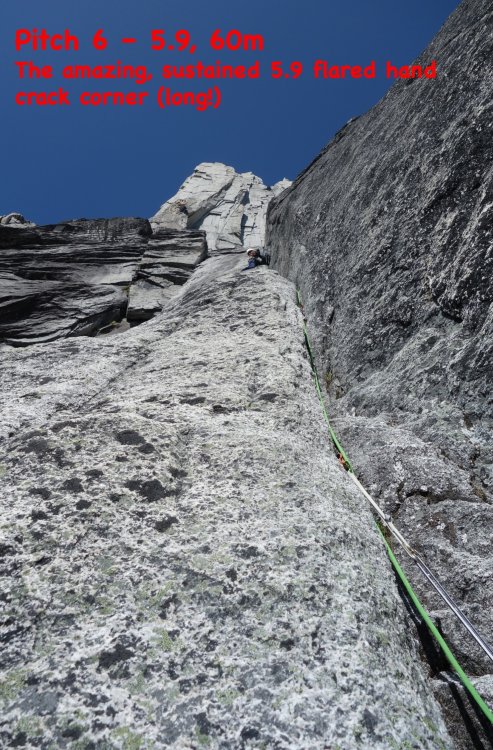
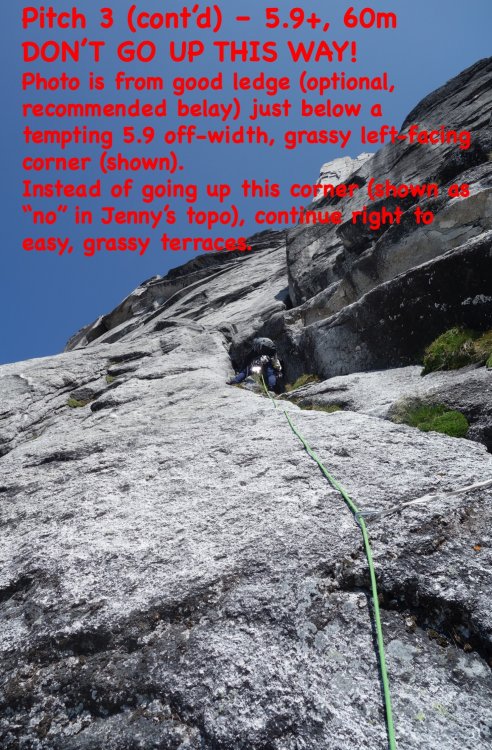

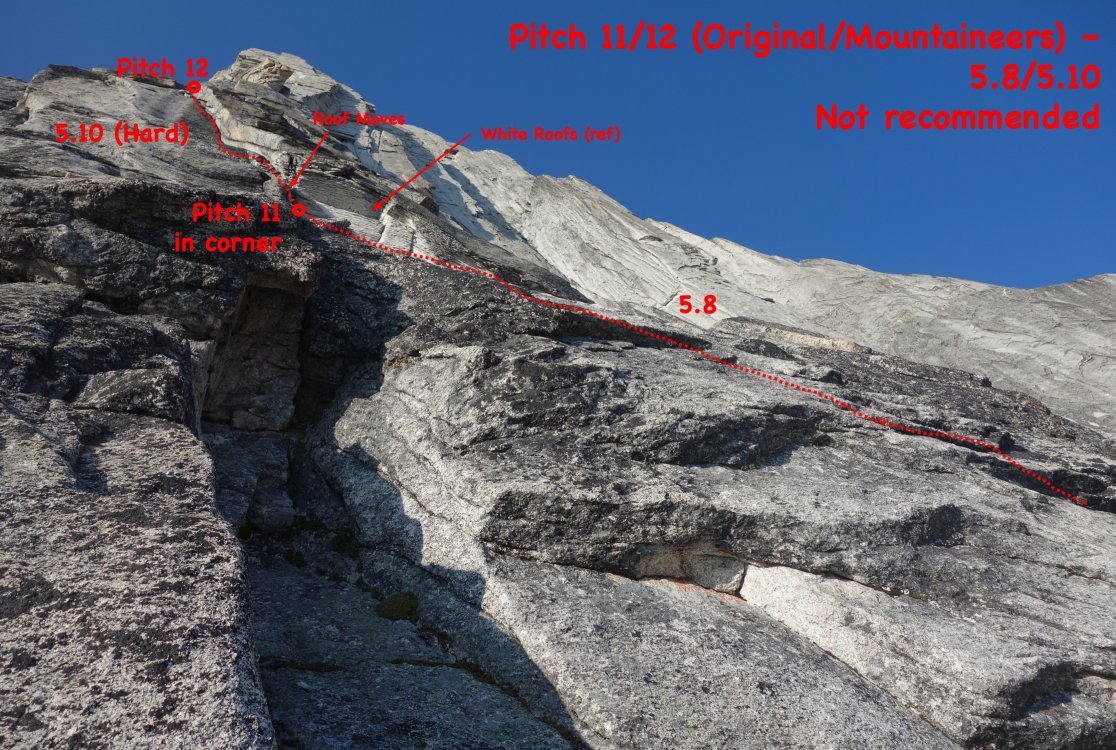
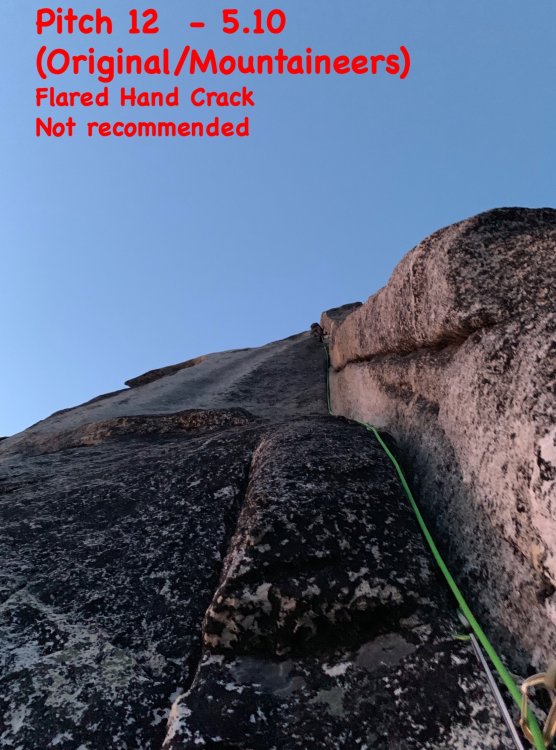
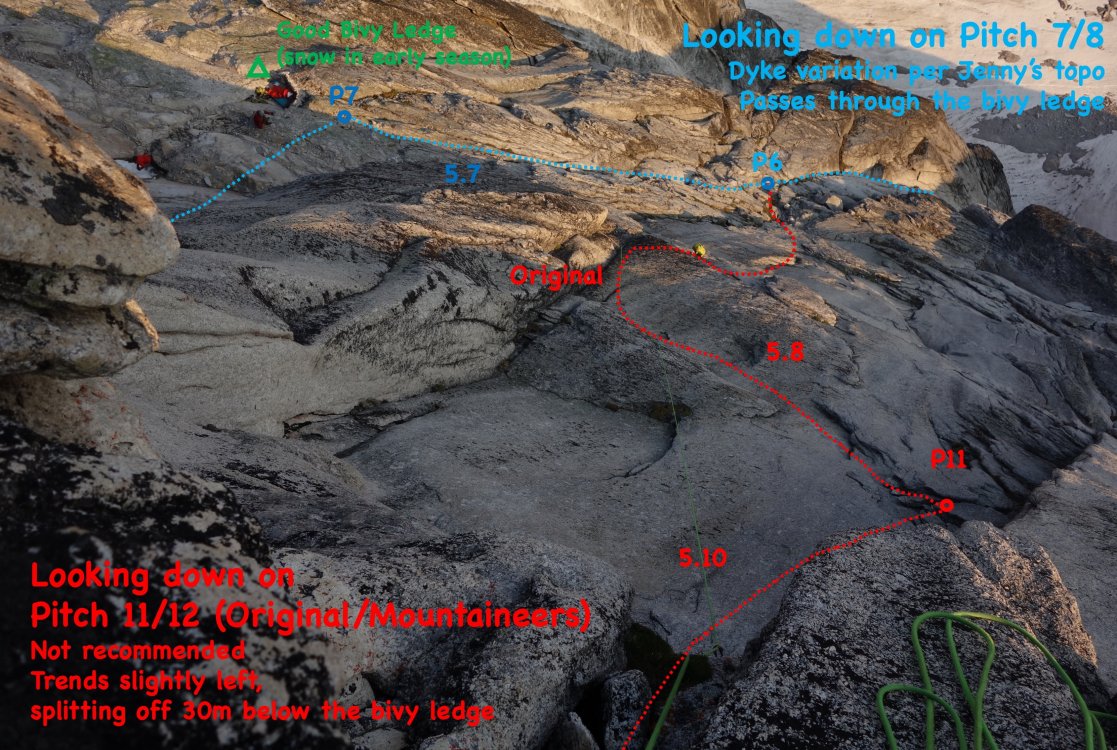
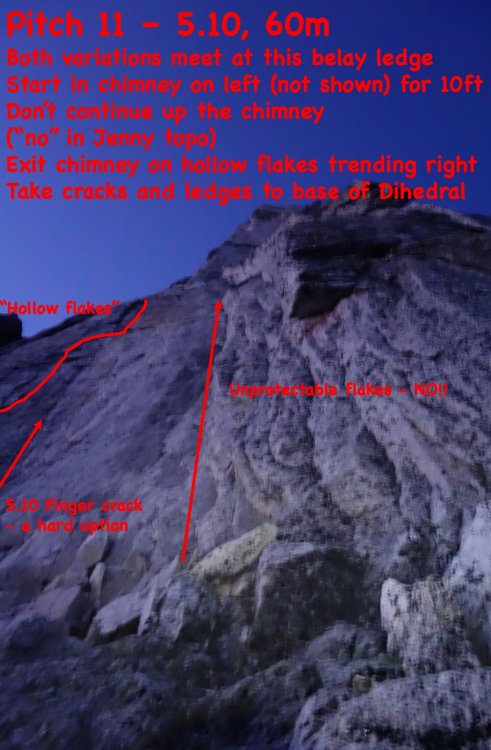

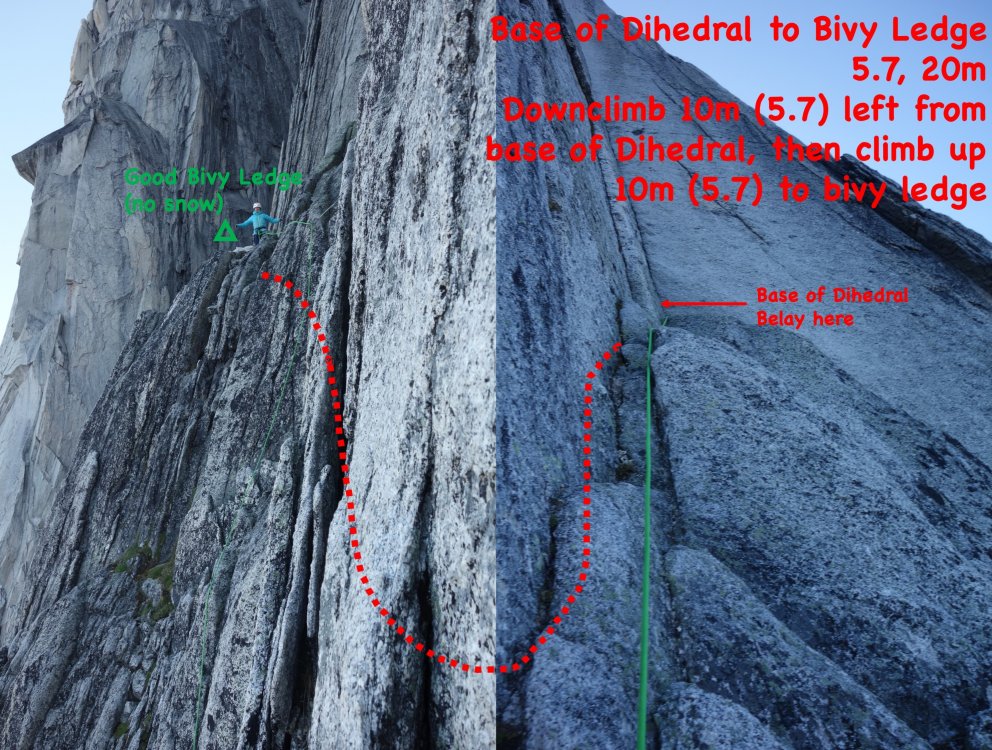


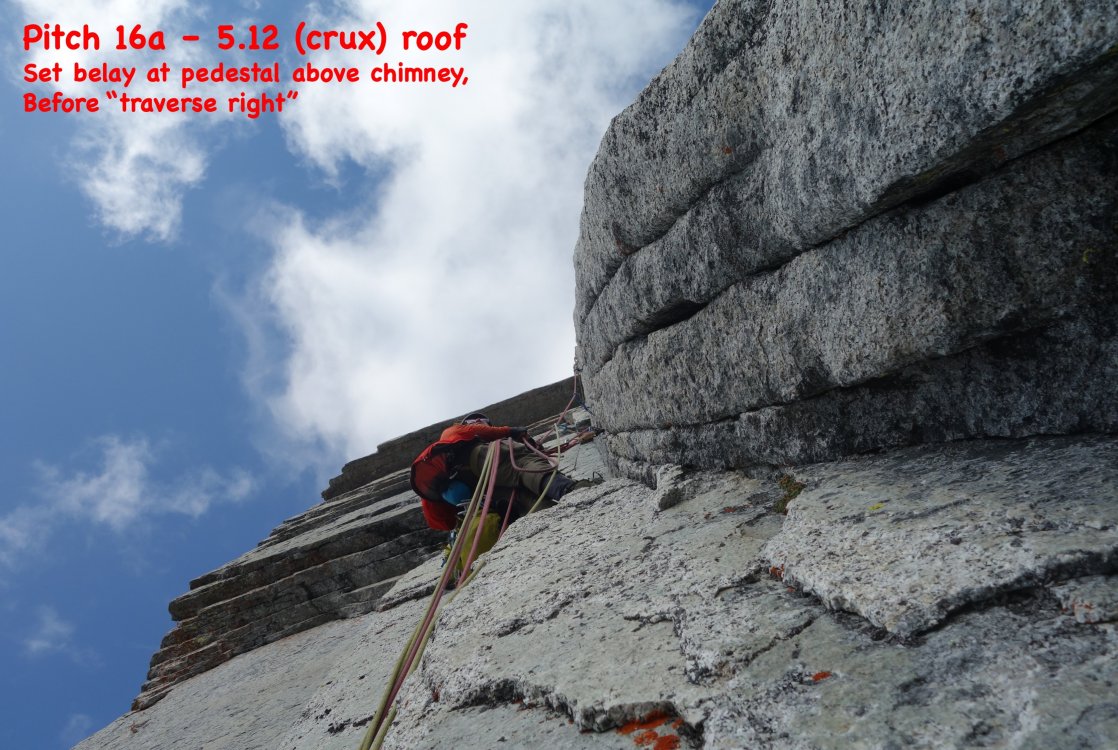
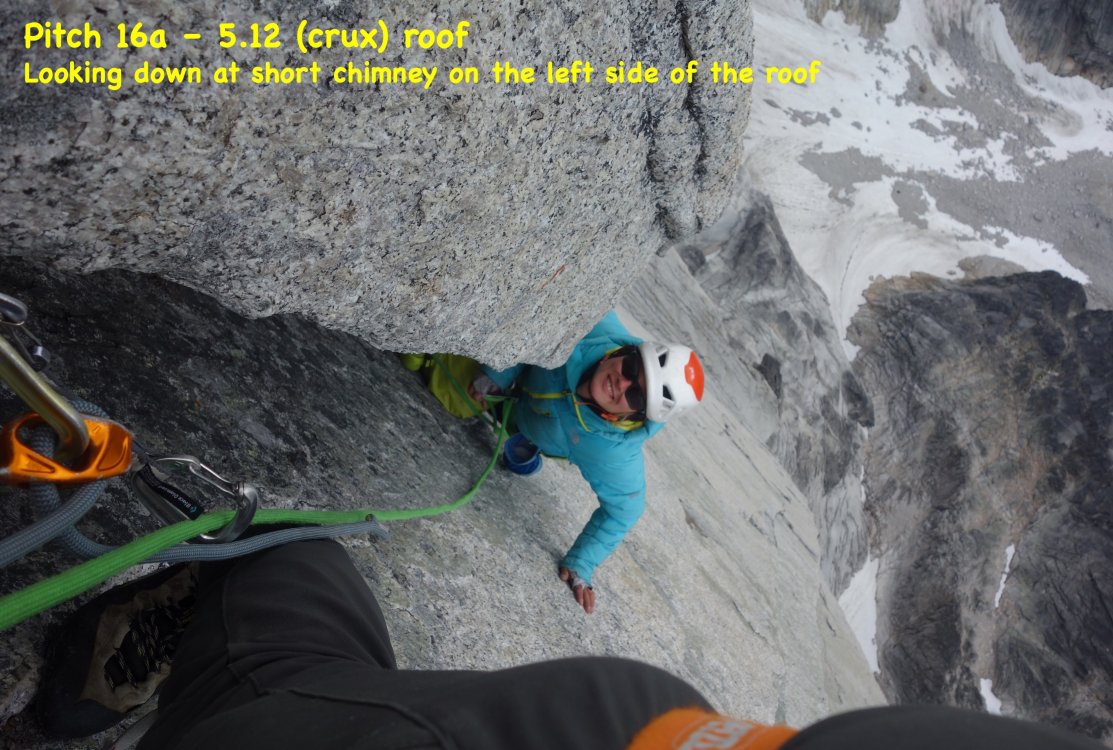
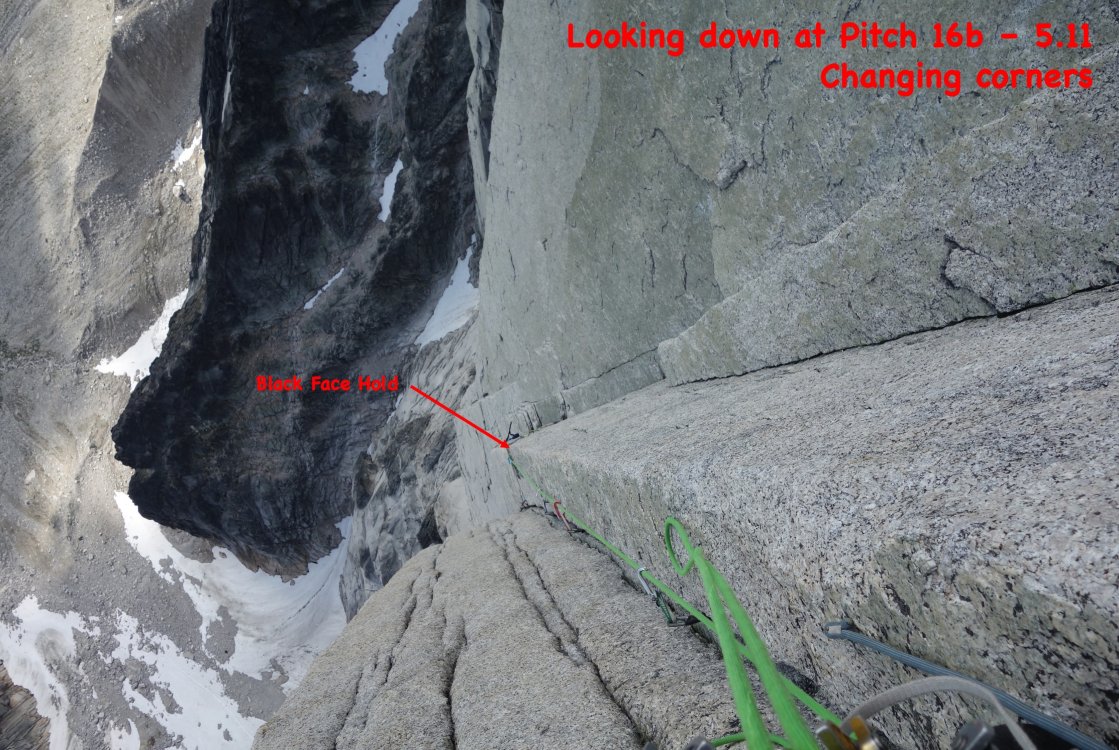

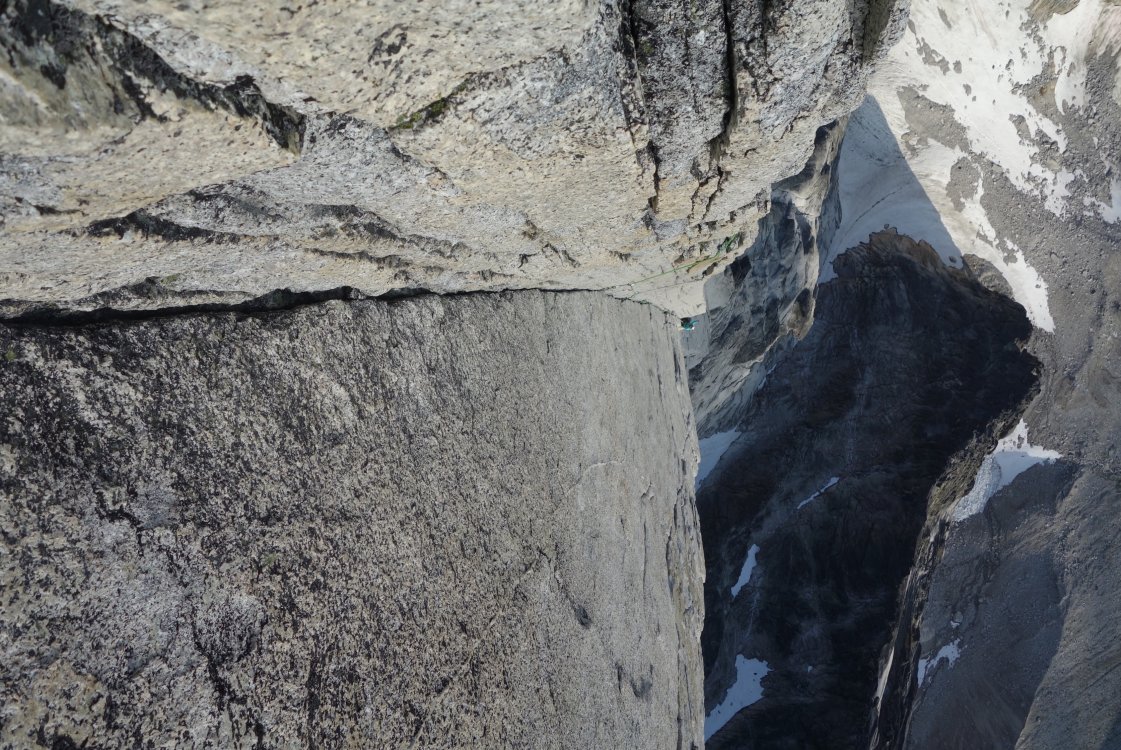

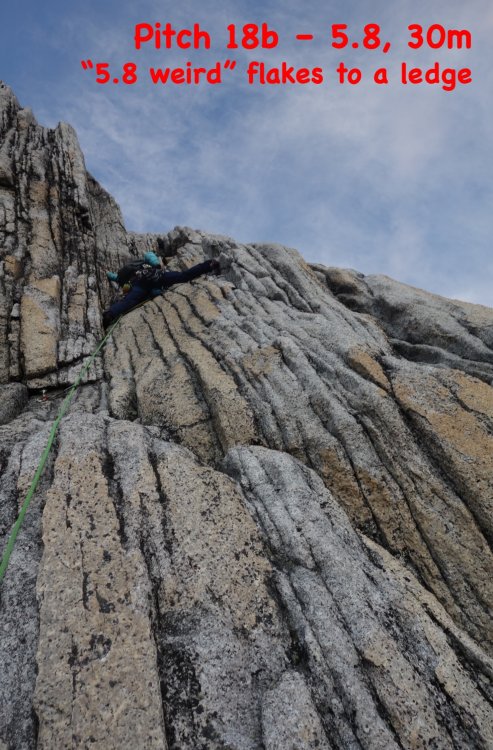

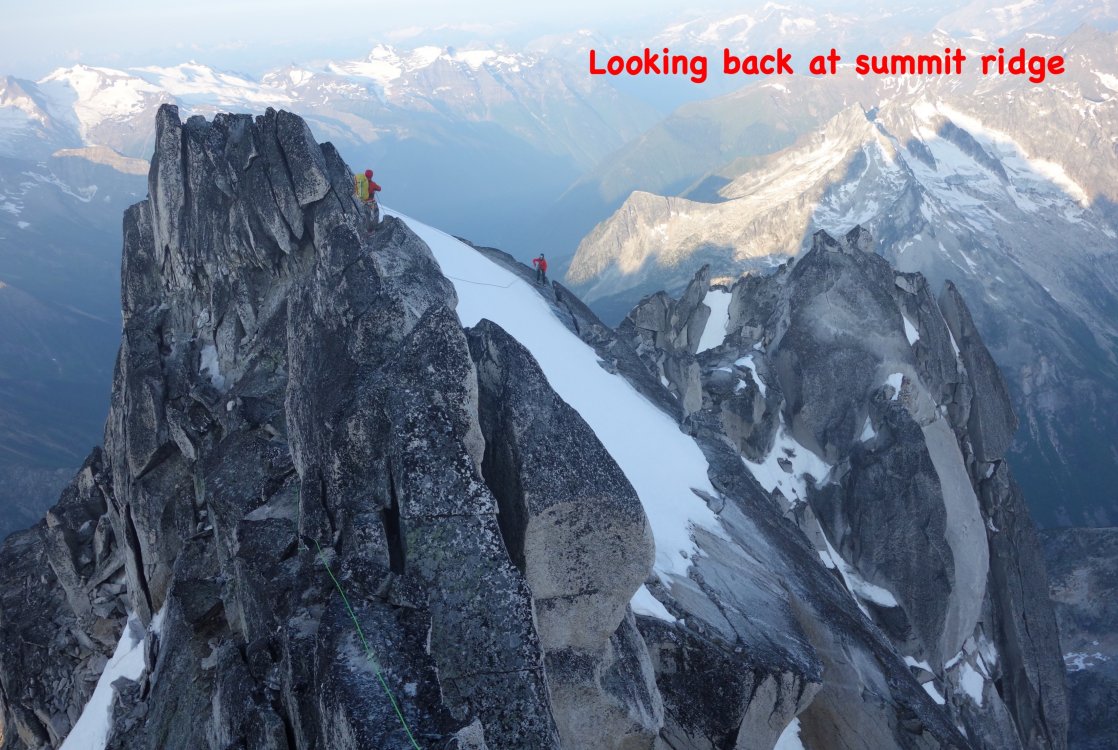


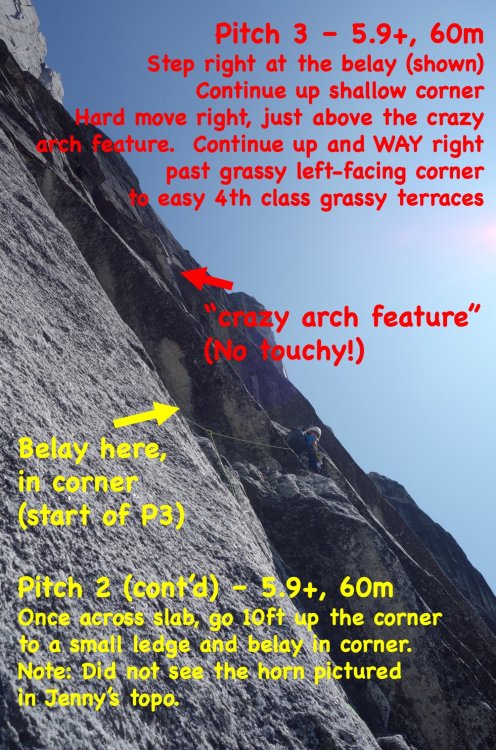

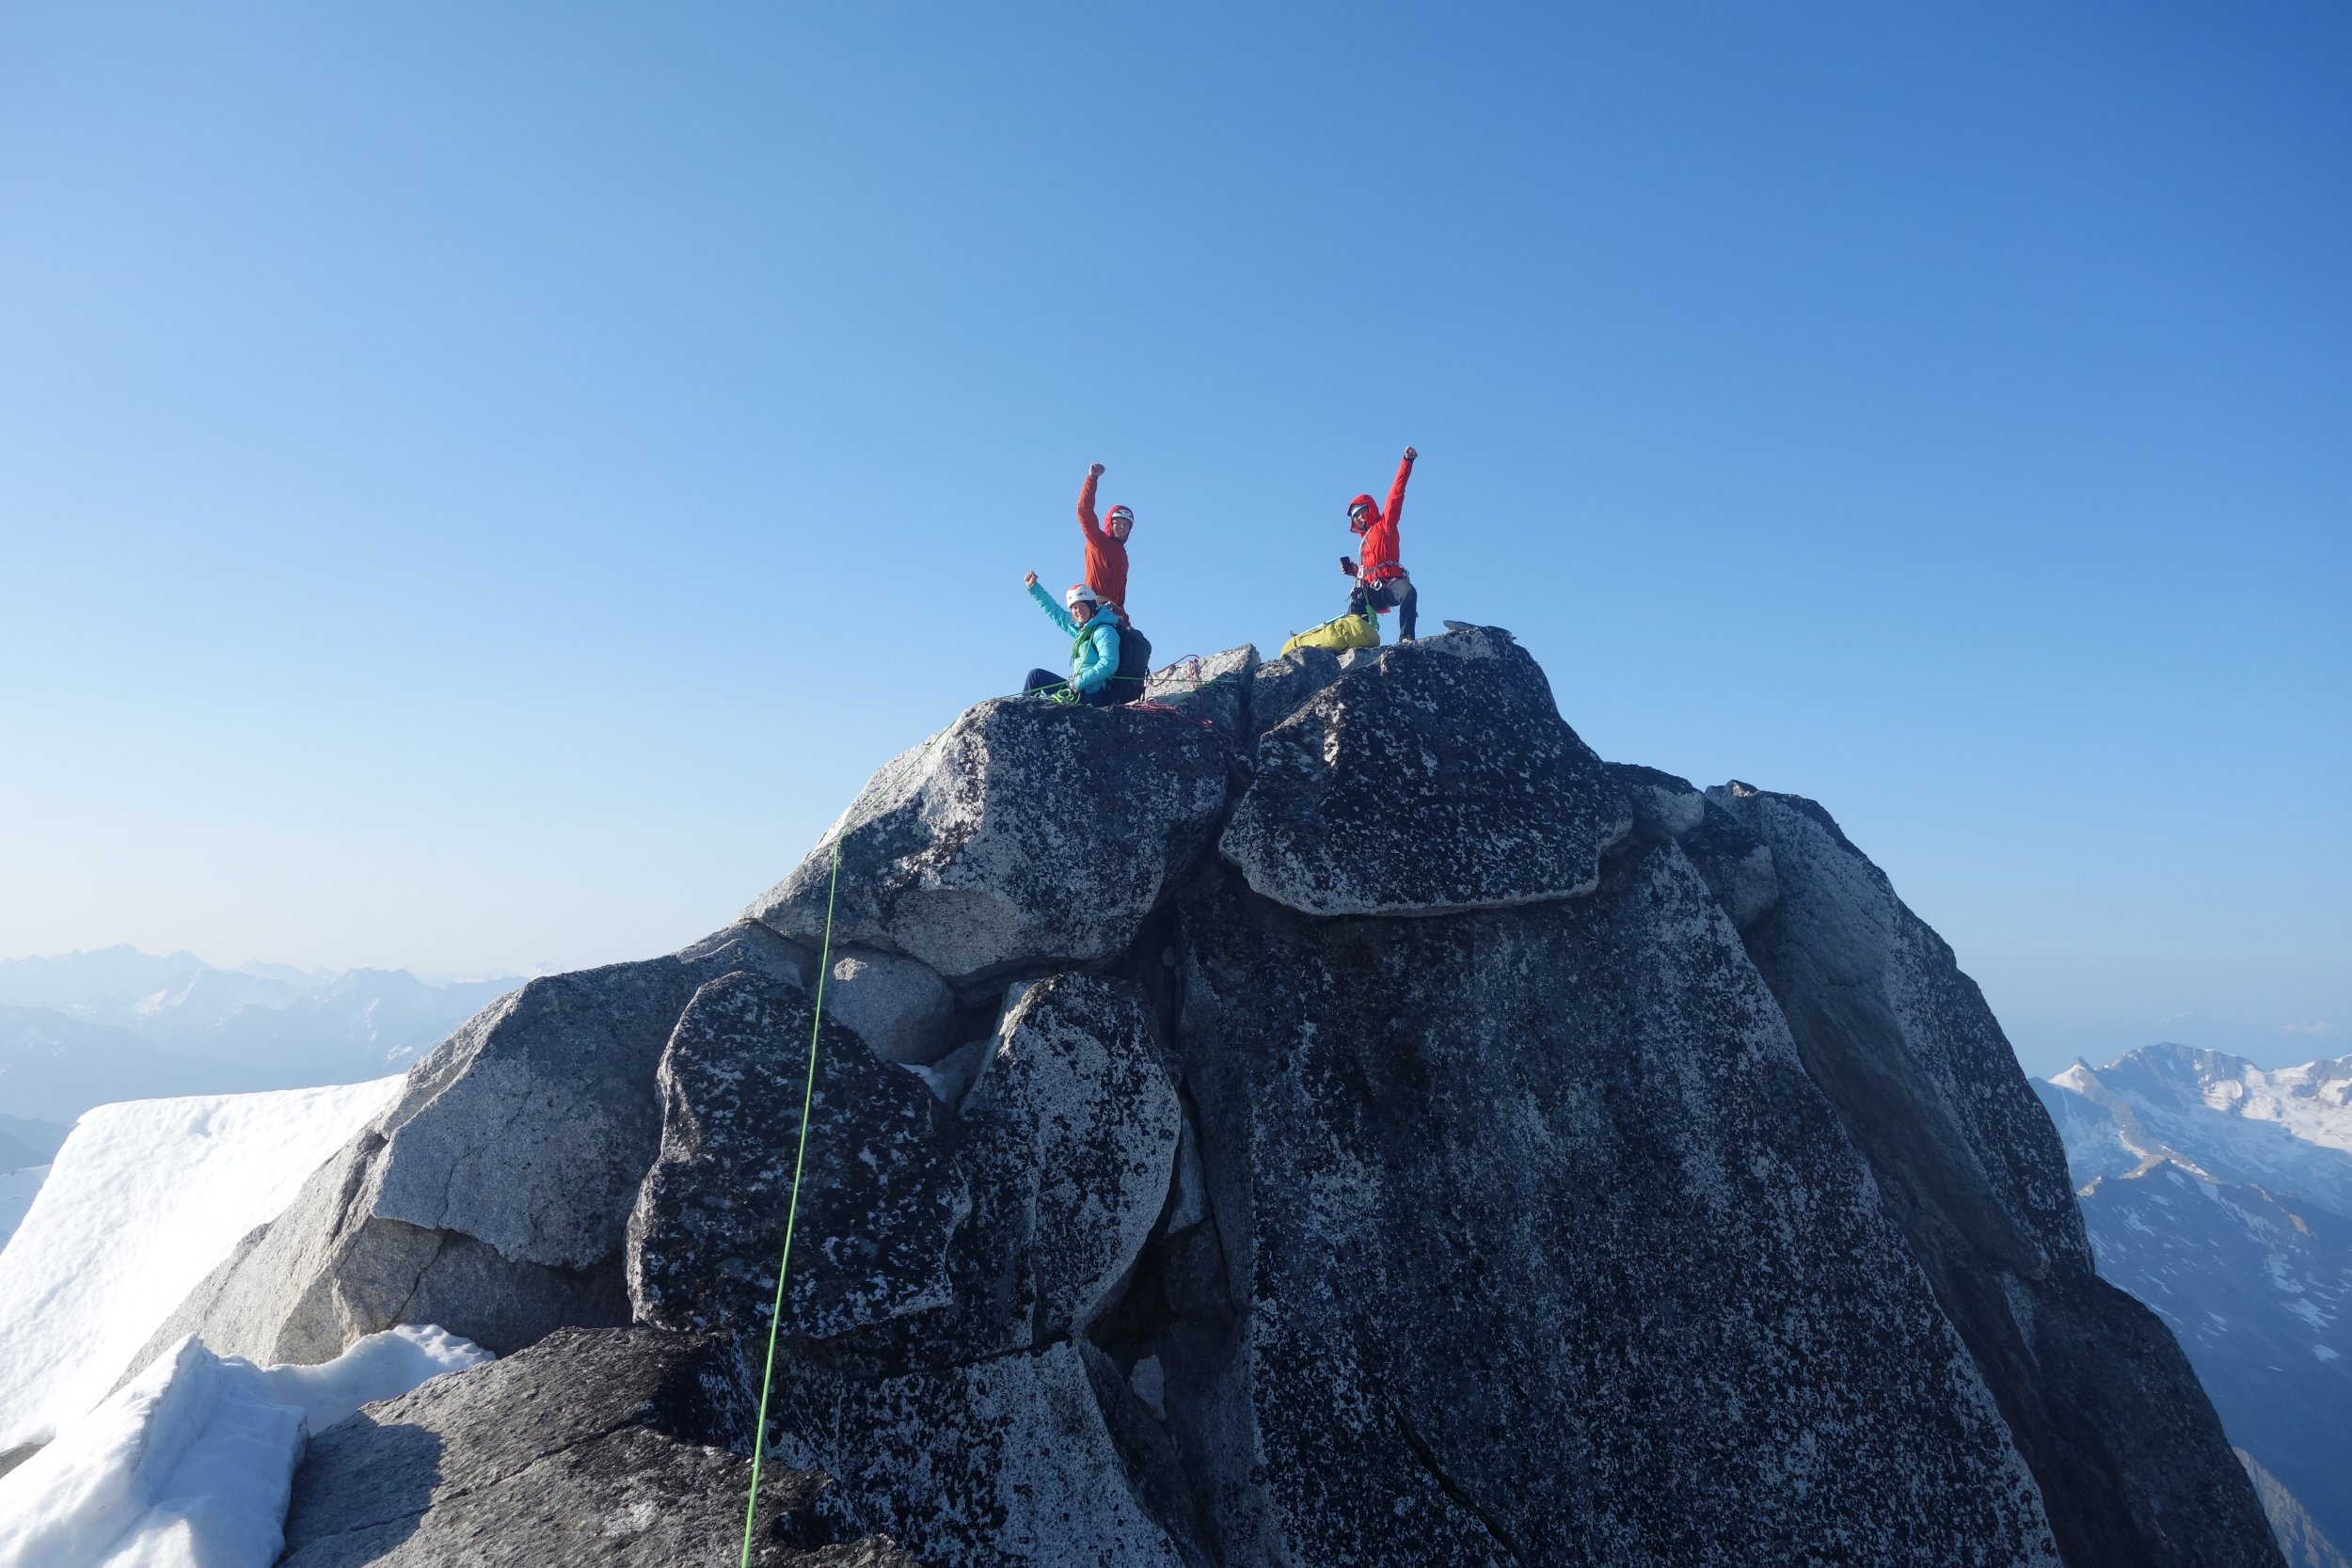
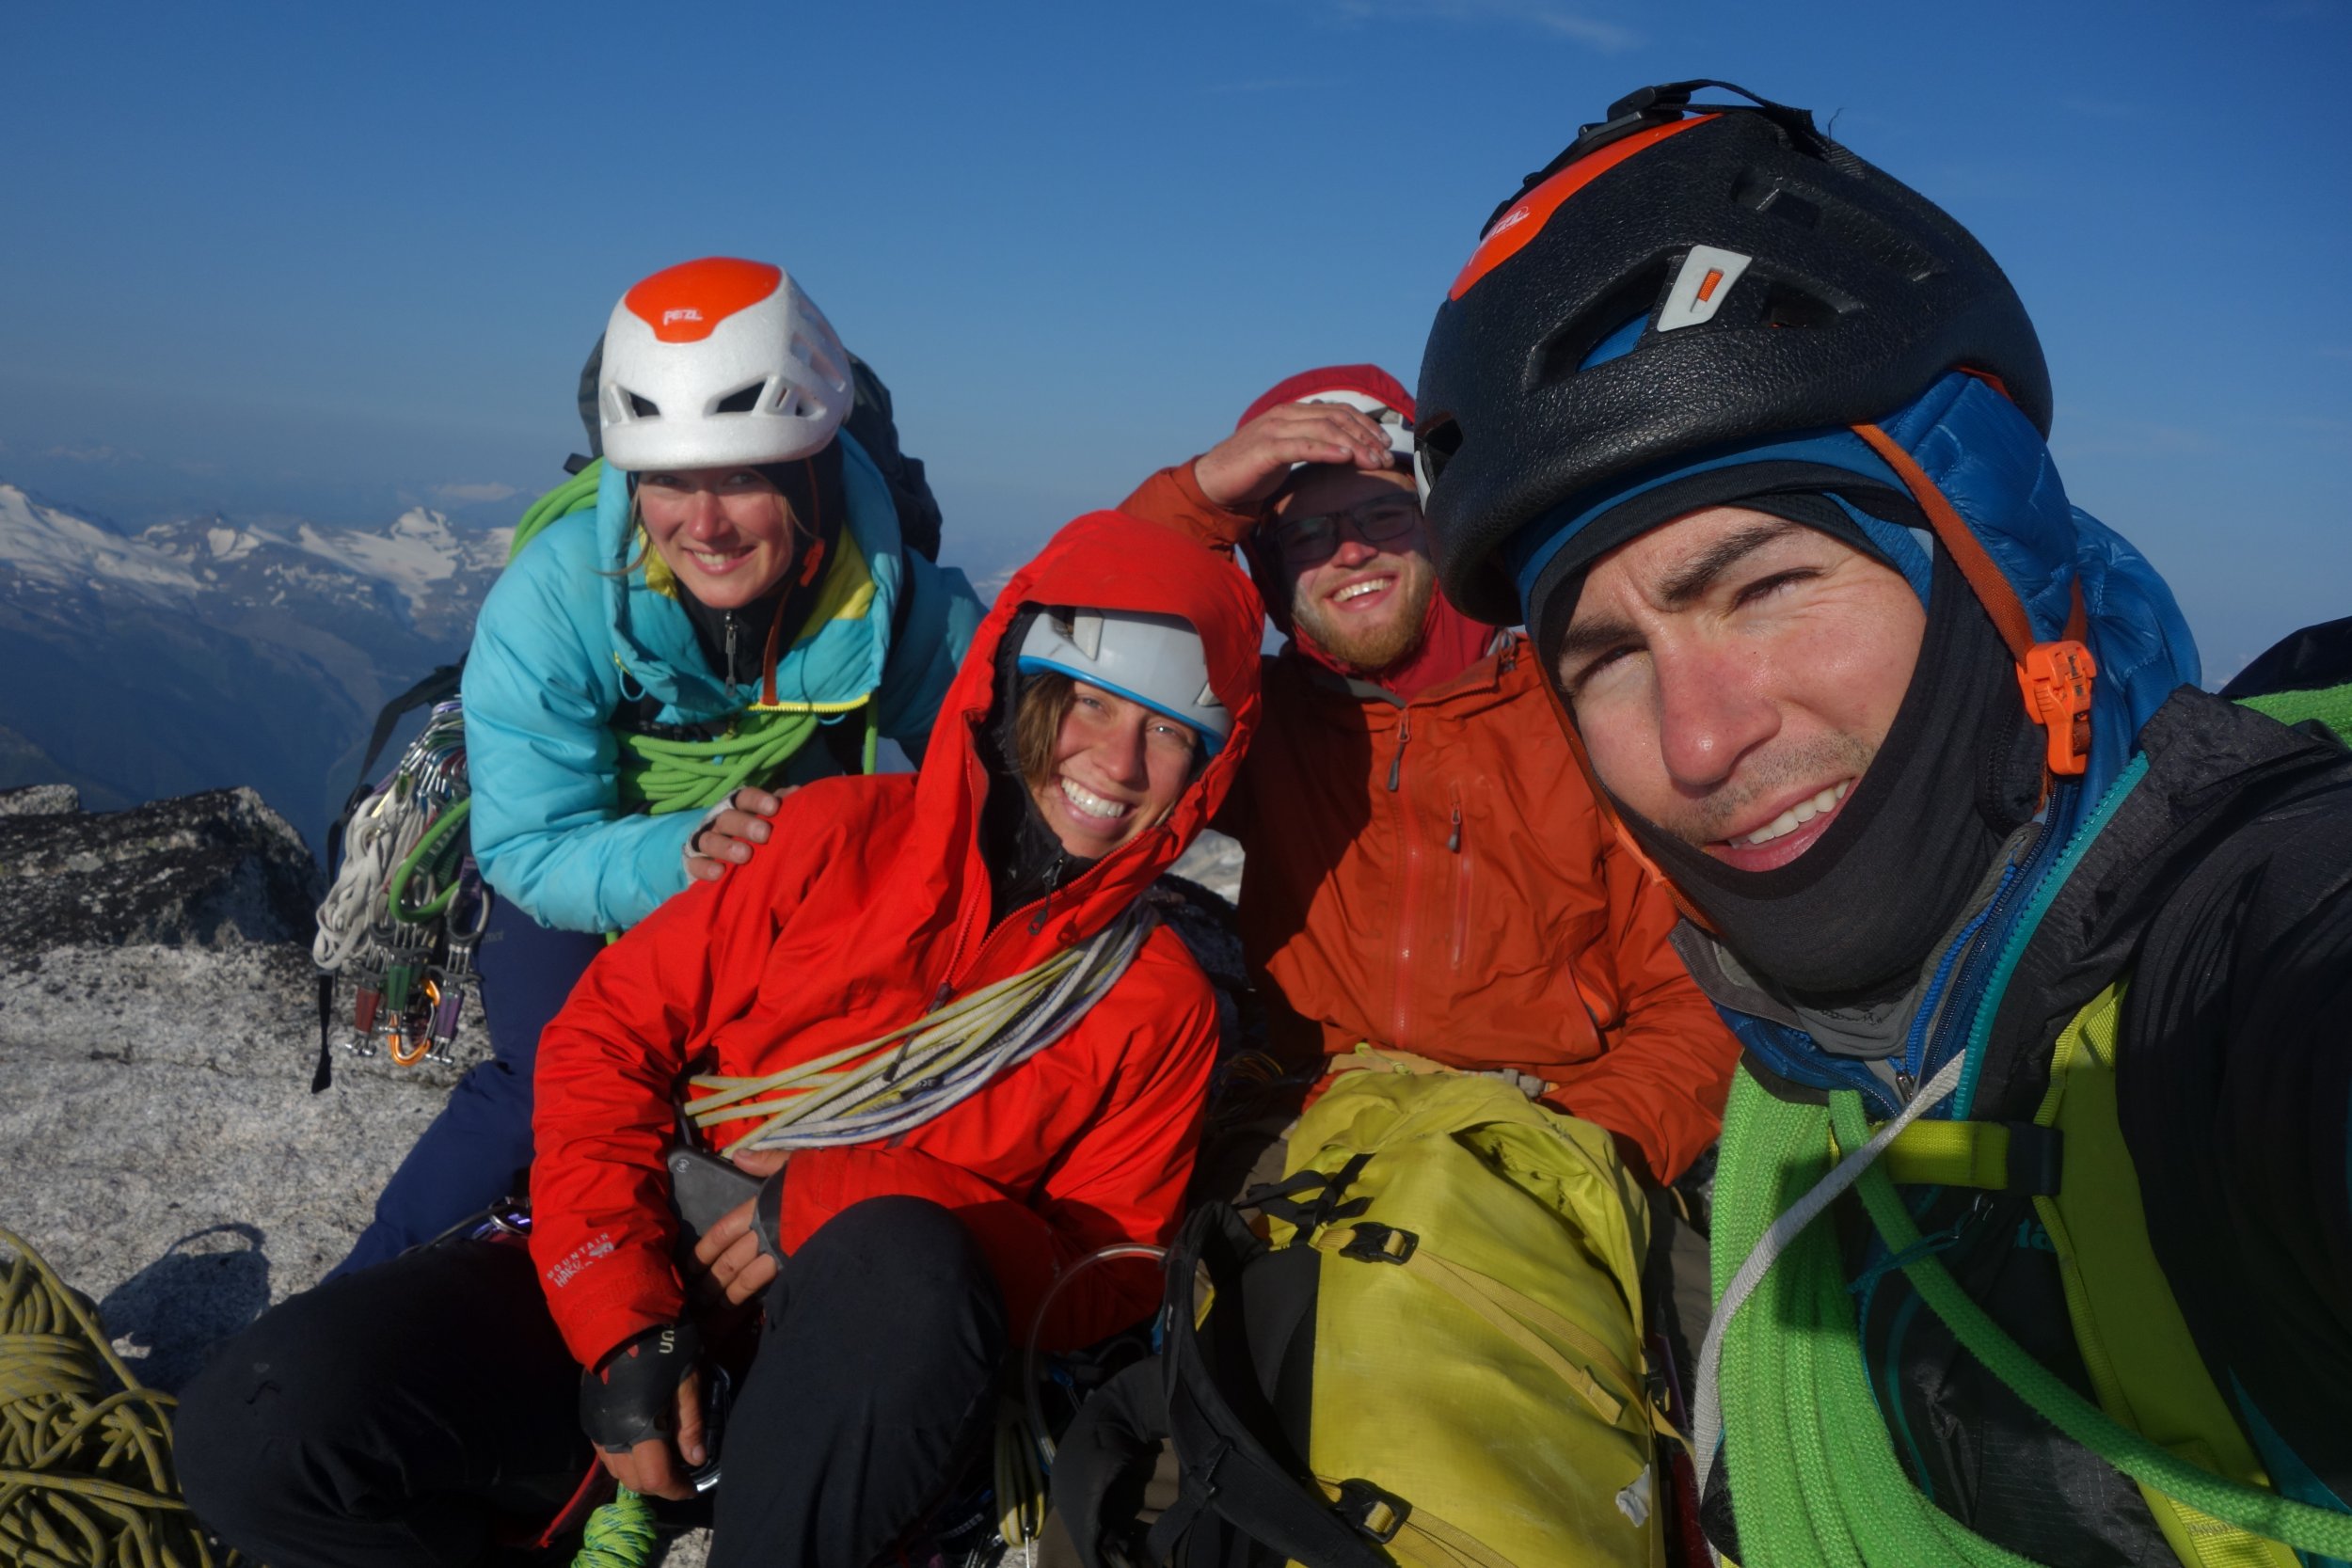
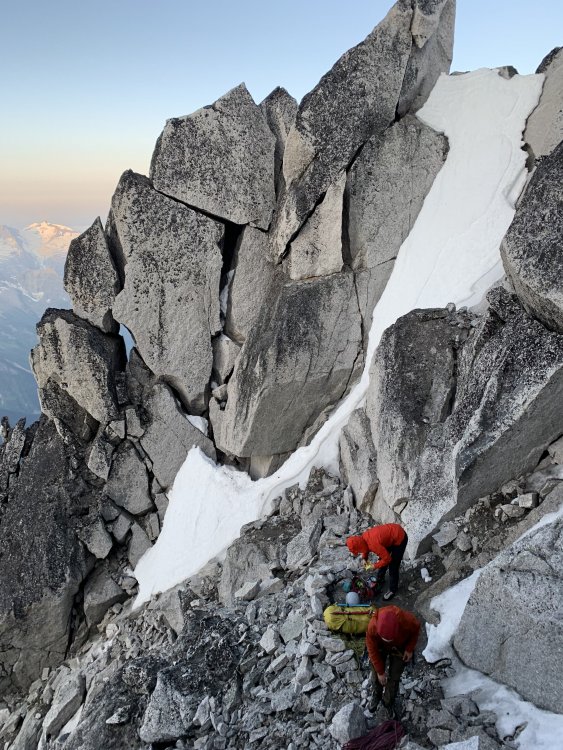
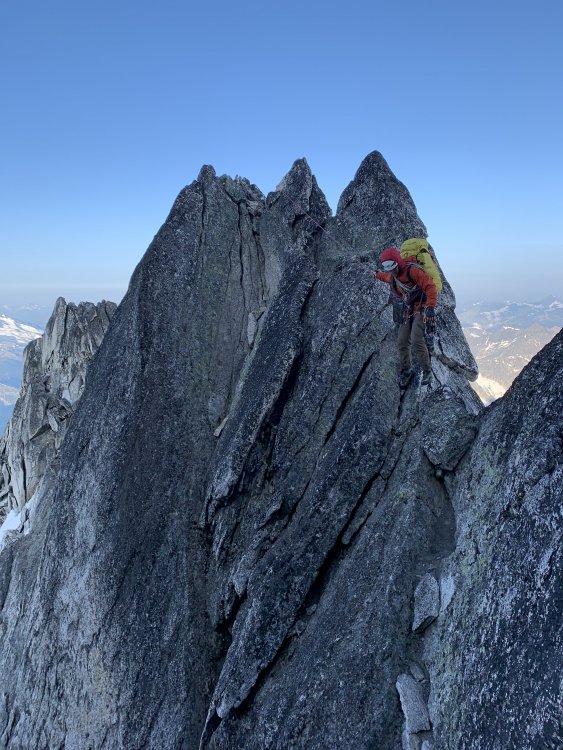
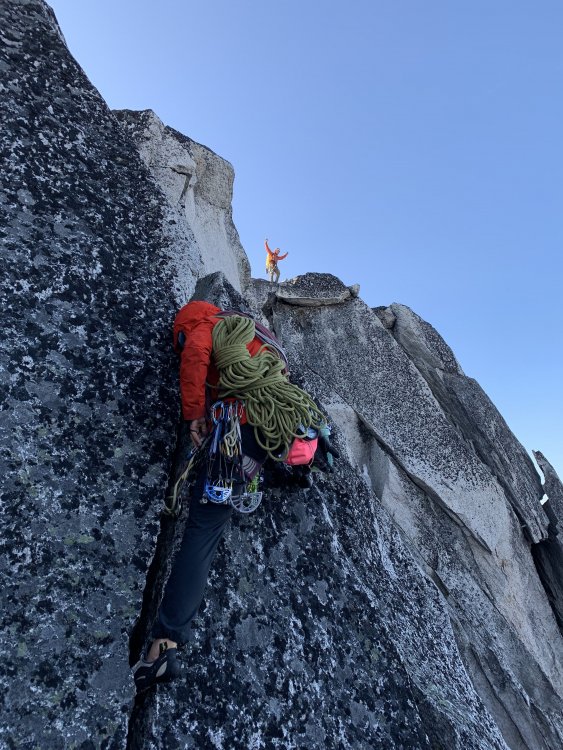
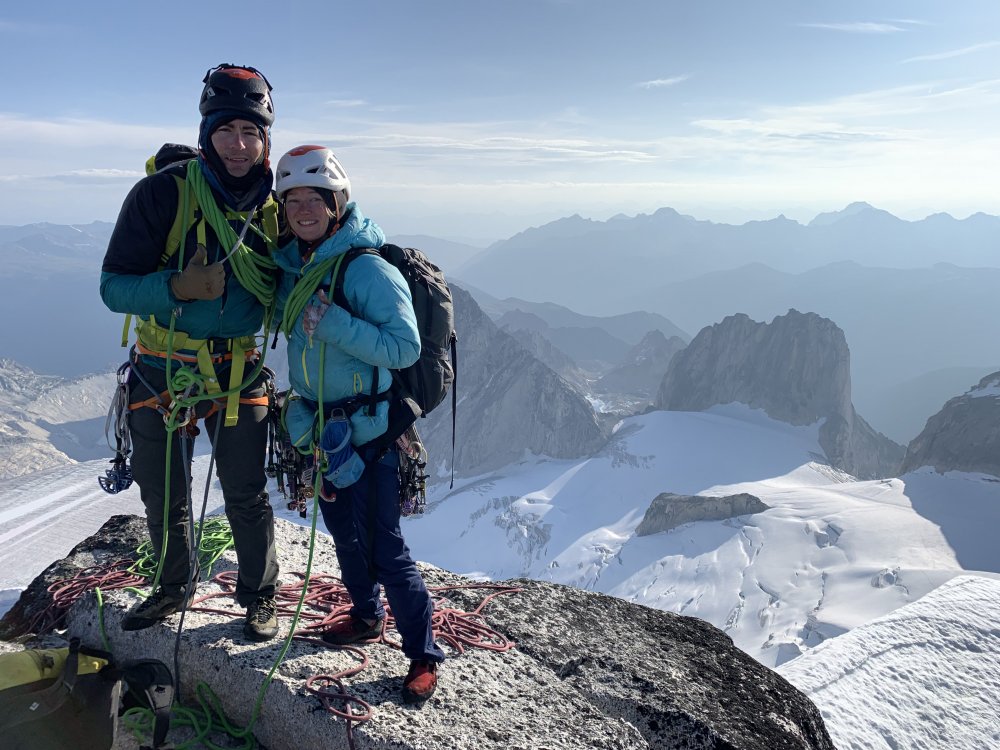


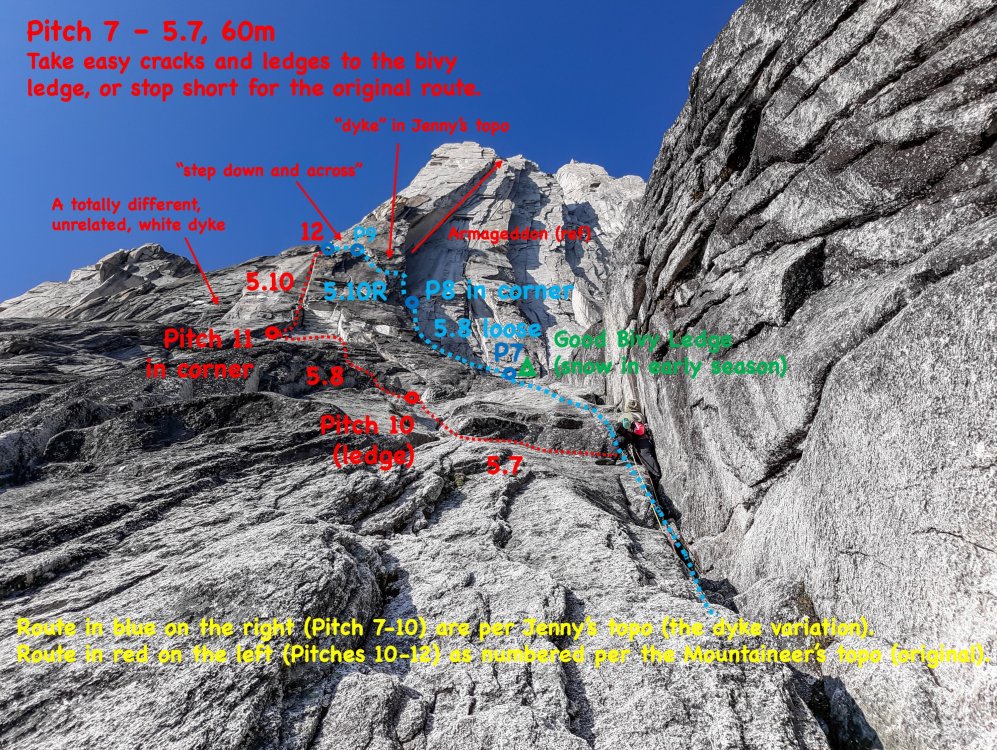
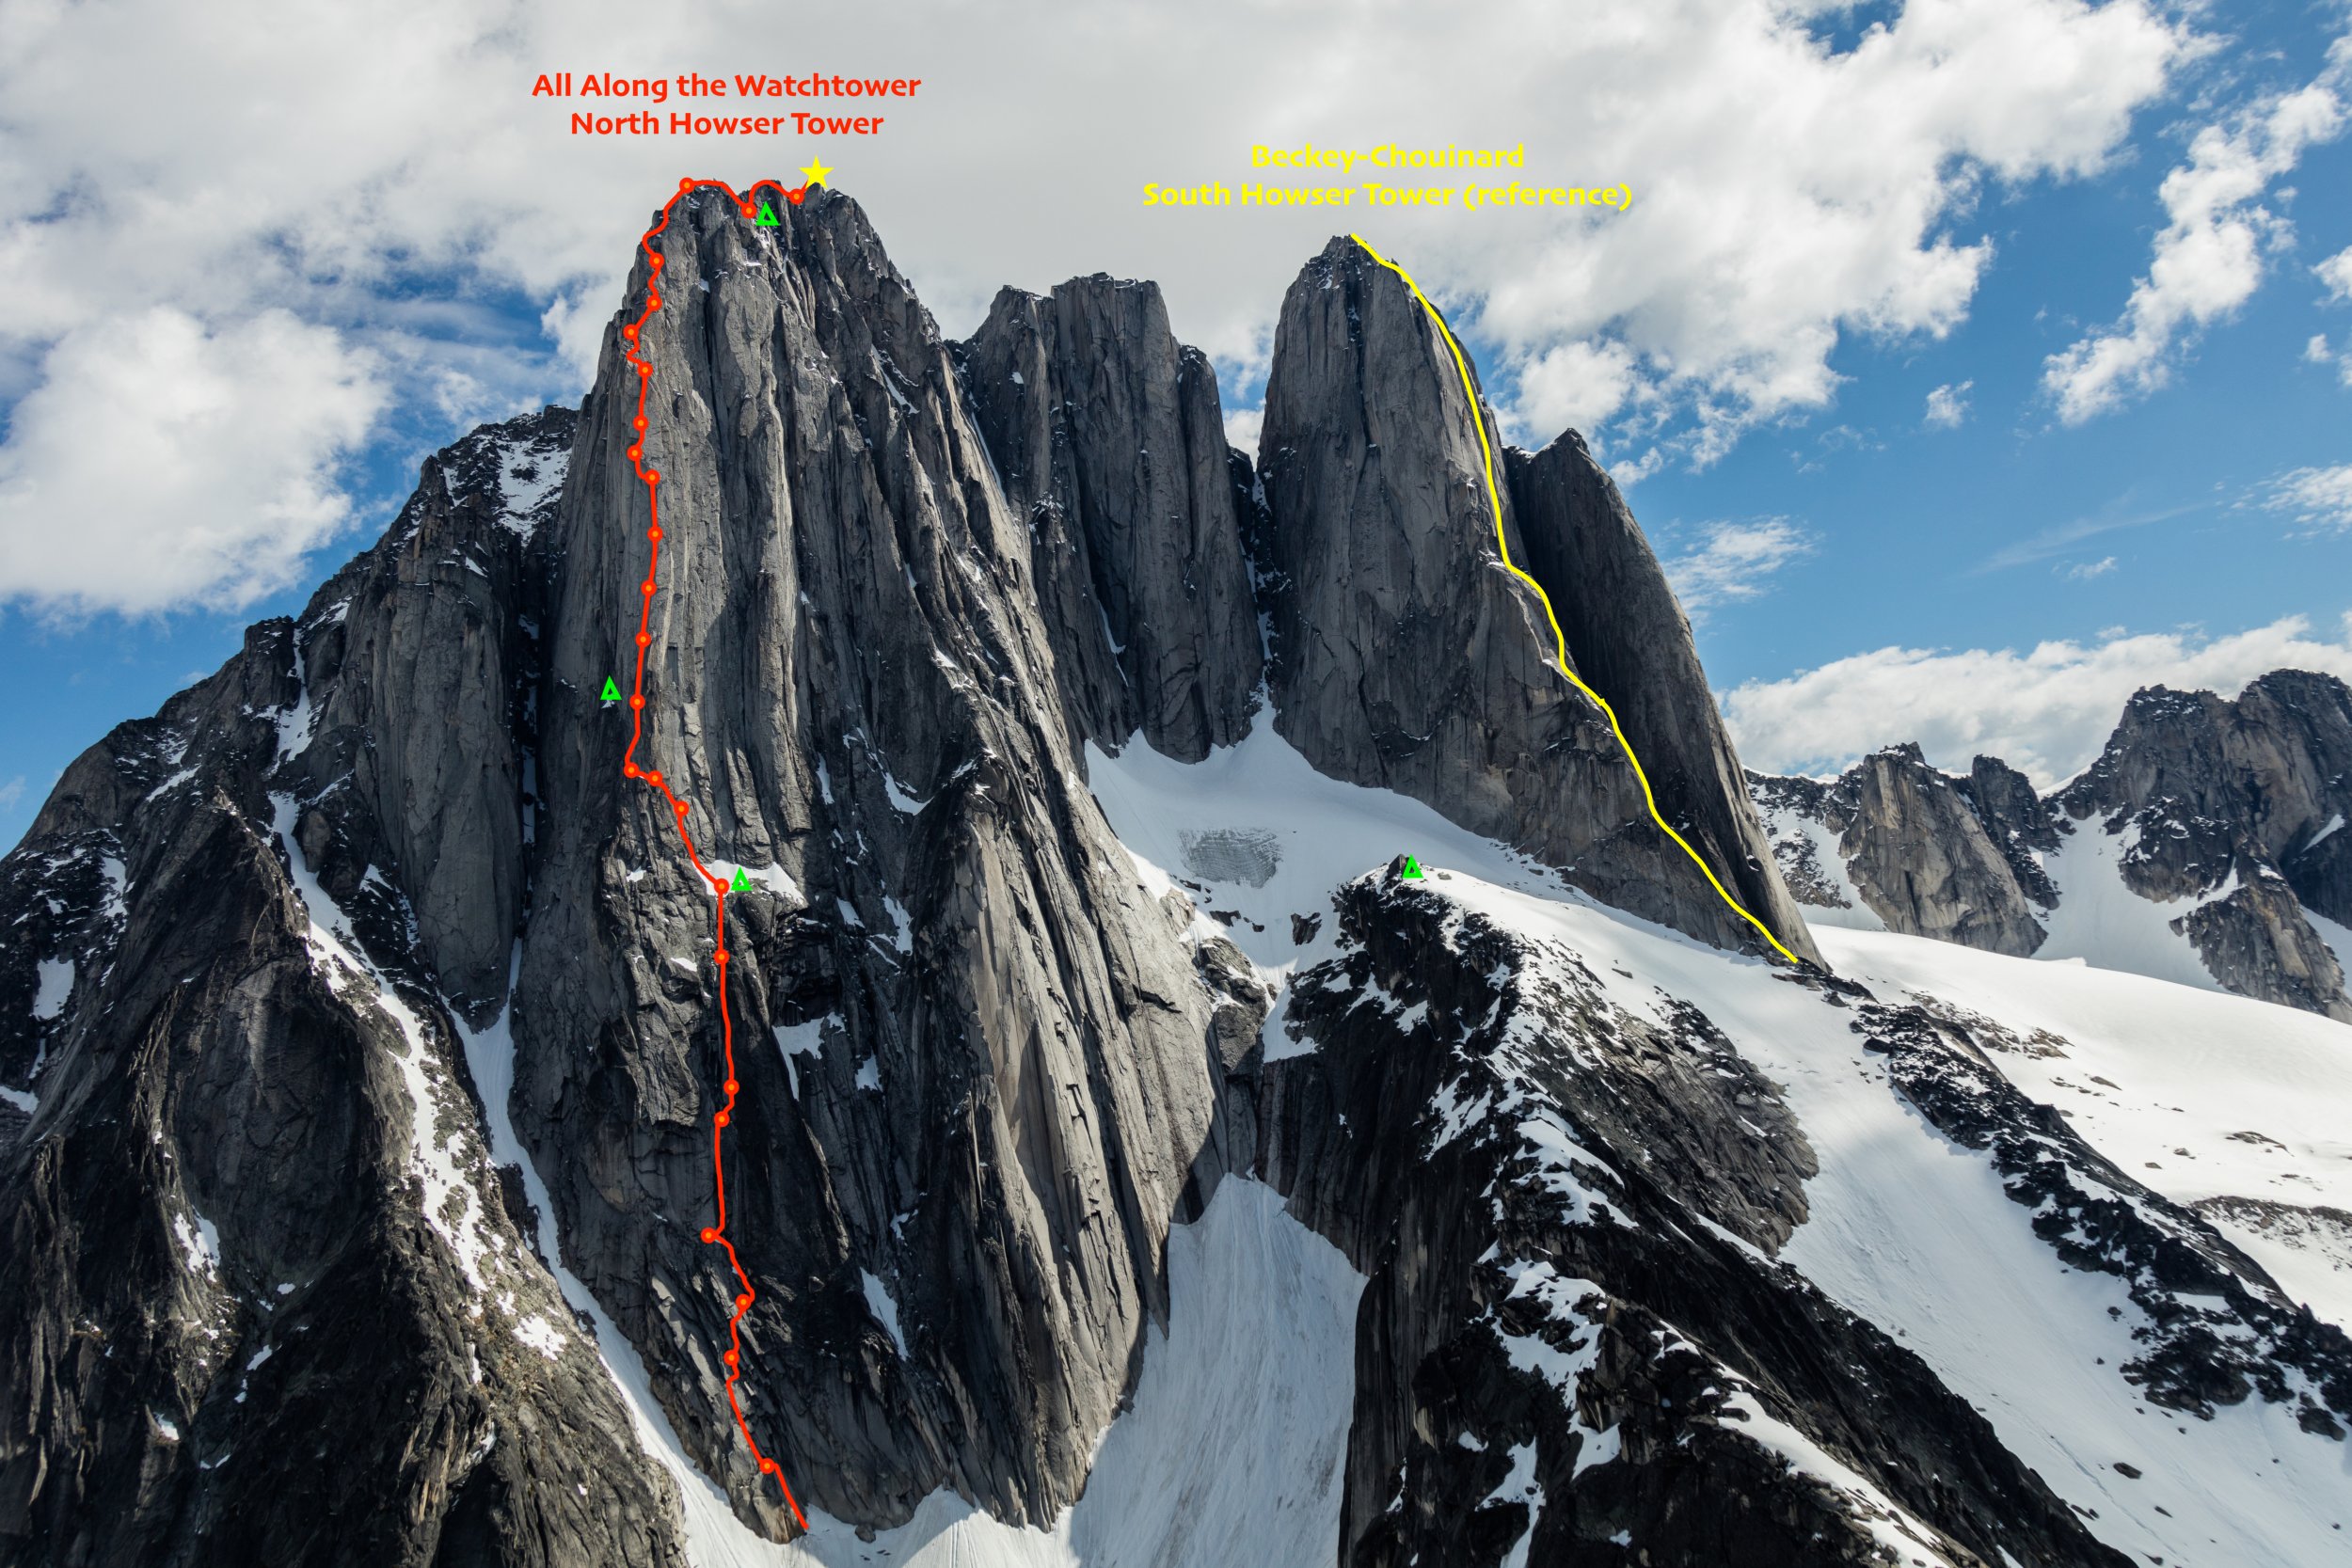
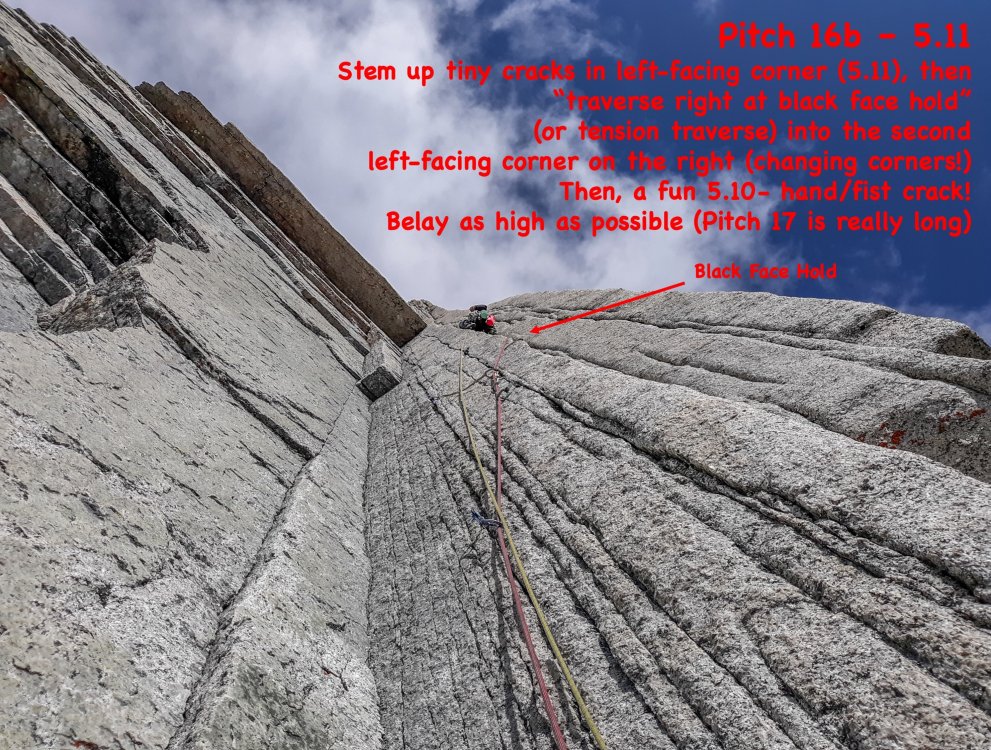
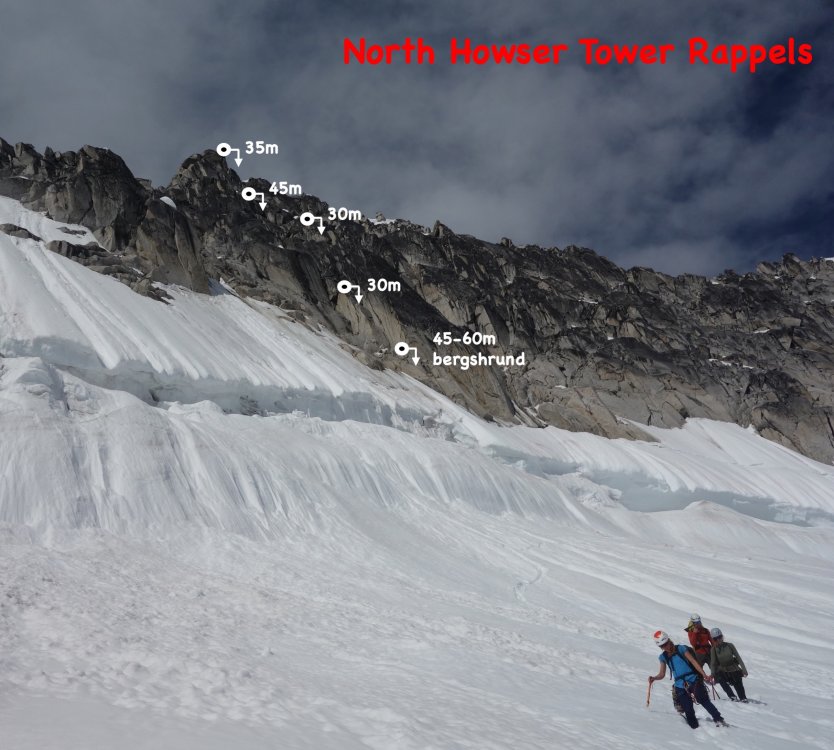
-
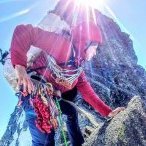 Trip: Mount Constance - South Chute & Finger Traverse & FT Bypass Trip Date: 08/03/2019 Trip Report: SummitPost wasn't kidding saying Mt Constance is one of the most challenging peaks to climb in the Olympics. Its the peak seen from Seattle that has the biggest prominence on the horizon. We did a "Leisurely" 3-day trip (24 miles & 9400ft gain) to climb Mount Constance in the Olympics. We figured it would be a 20+ hours of hiking and climbing and pushing bikes up the approach would only make the hot day hike in harder only to shave maybe an hour off the whole thing. In the end we were just fine having not brought bikes. Its a quick enough and easy hike out they really aren't needed. That said the rangers did warn us if we were taking bikes to hide them as people even 5 miles in will strip bikes of parts and just leave the locked frame behind. After picking up our permit we did the 8 mile hike and 3rd class tree root scramble on Friday to get to Lake Constance in 5 1/2 hrs. Maybe a bit slower than usual but it was hot and humid so we took our time since we really weren't in a hurry. Great campsite right at the lakes edge and not a bug to be seen. 6am start on Saturday, returned to camp 6pm. 6.5 hours up and 5.5 hours return. Great to not feel rushed trying to pack it into 2-day or even car to car. This would be a 20+ hour day trying to do it in a day and with it mostly melted out its a huge amount of boulder, scree and loose rock scrambling which would probably added some hours vs if it had been more snow covered. Did the Finger Traverse Bypass route on the way up which was some interesting navigation around a hidden ledge and chimney system around the backside of that block of rock. If you find two tiny rock bivy site rings near the start of the Finger Traverse you are pretty close to finding the drop down to a ledge that looks like it cliffs out, but if you work your way down a narrow 10ft chimney you almost have to wedge yourself into it drops onto another ledge that works its way around and spits you out on the other side of the Finger Traverse. No running water on the route once we left the camp but were able to refill water bottles from snow patches along the way and wound up with plenty of water. On the way back we soloed the first half of the Finger Traverse then broke out the rope to lead around the corner considering its a literal finger traverse with not much in the way of foot holds if you are short with a monster runout over a cliff. You can setup a belay about halfway across in a nice alcove with a boulder to sling. Then sling a horn on the way over, place a #1 cam, then around the tricky corner there is an easy to miss rusty piton as you angle back up to where you can setup a multi-point gear anchor. A solo climber we passed planning on doing the route in a day on our way out was planning on soling across the Finger Traverse but wound up turning back once he saw how exposed it was. We also saw a pair on our way out around 8:30am still an hour from the lake who were carrying light day packs planning on doing the route in a day but they were hours behind where they should have been to get out of the technical terrain before dark. If you like scree surfing coming down was a fun run down 3 long scree fields. I wouldn't want to do this route in wet conditions. We had great weather and everything was dry. I think this one set the bar for the most amount of scree, loose rock and boulder hopping we've ever done in a day. And a lot of twists and turns navigating a complex route. While it wasn't high on the technical scale its a beast stringing the whole thing together. Over 20hrs moving time between the climb and hikes in and out. Gear Notes: ice axe, crampons, light alpine rack (#1 and a couple smaller cams & a few nuts), 40m rope (the one that used to be 60m before a snaffulhound on Mt Cruiser chewed through it...) Approach Notes: boulders, scree, more scree, boulders, scree, little bit of snow patch, more scree.... don't under estimate the amount of scree, loose rock scrambling and boulder hopping once its melted out.
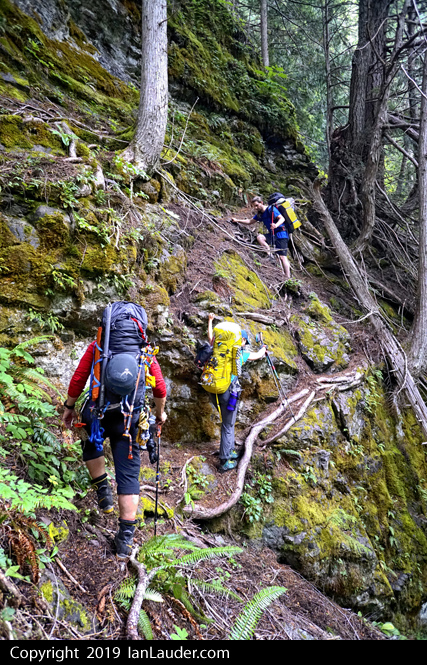
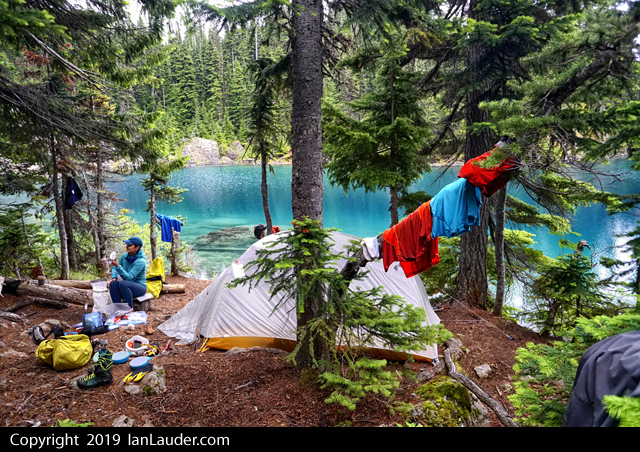
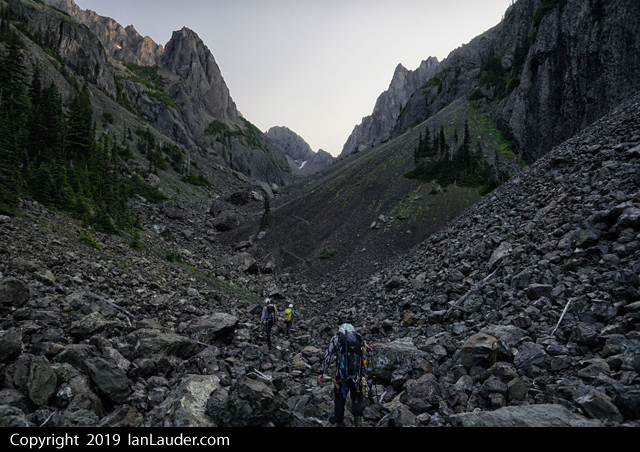
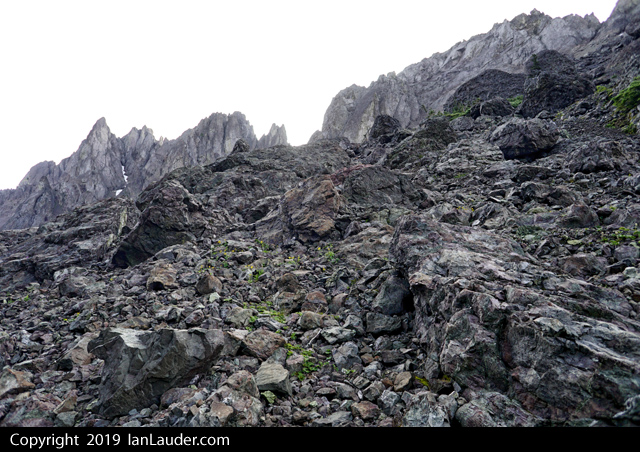
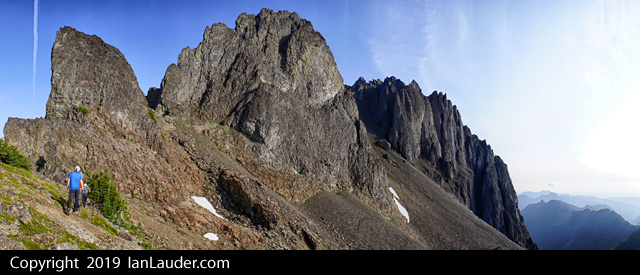
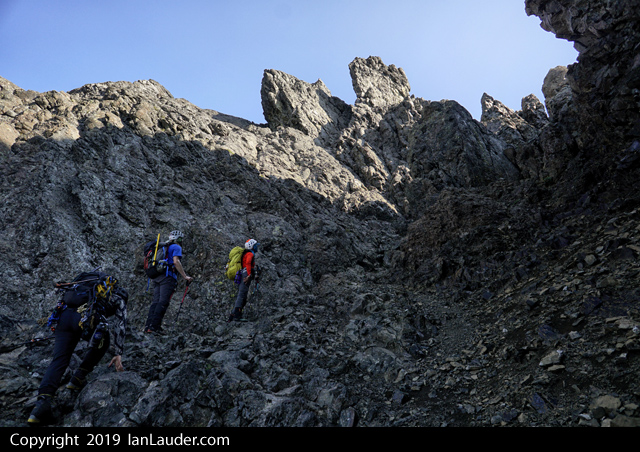
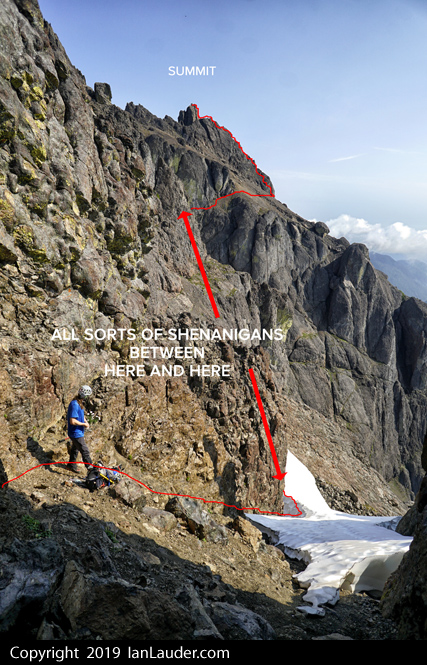
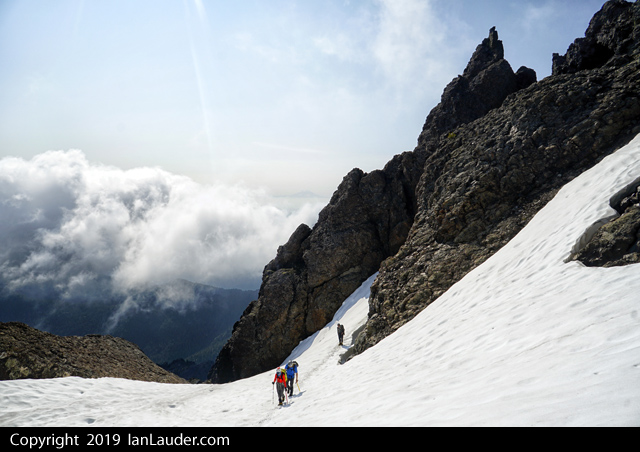
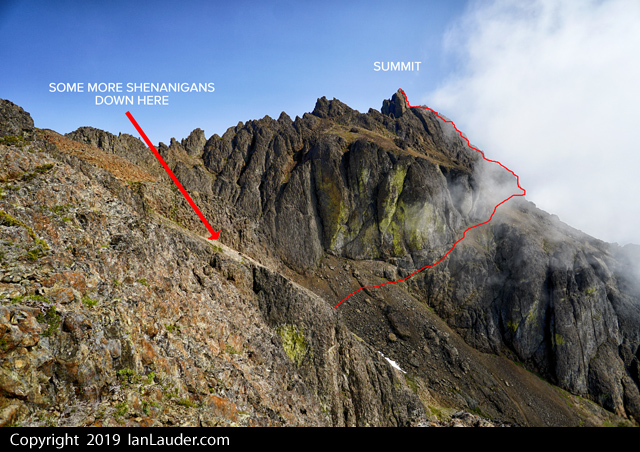
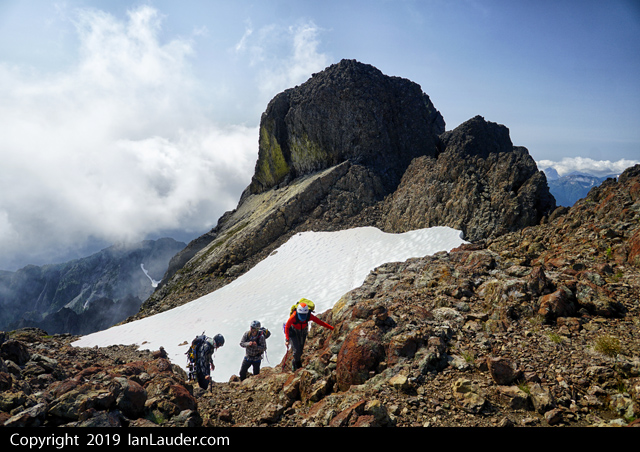
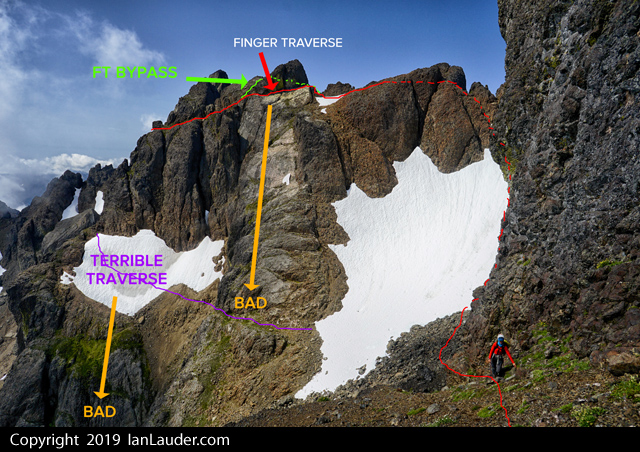

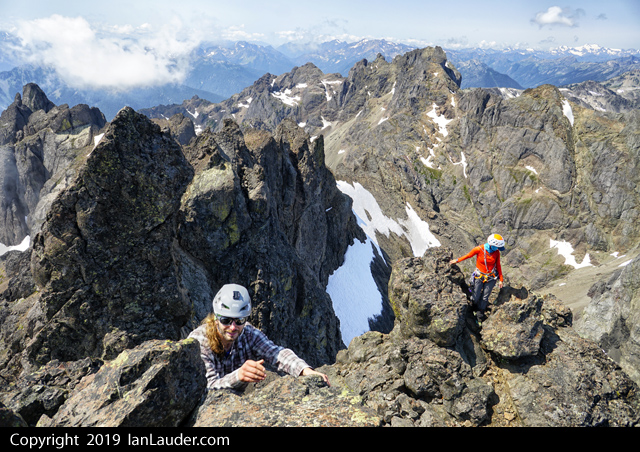
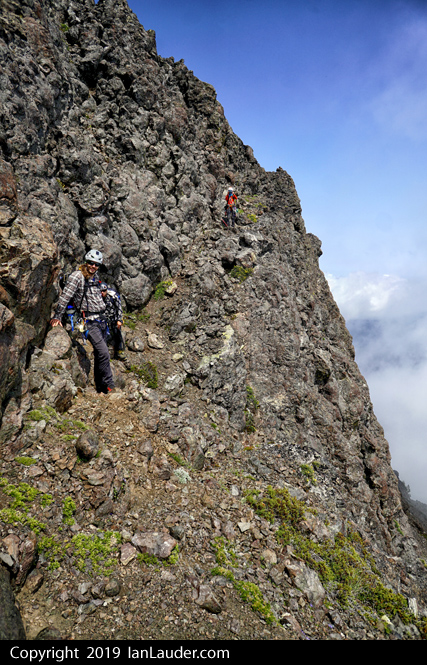
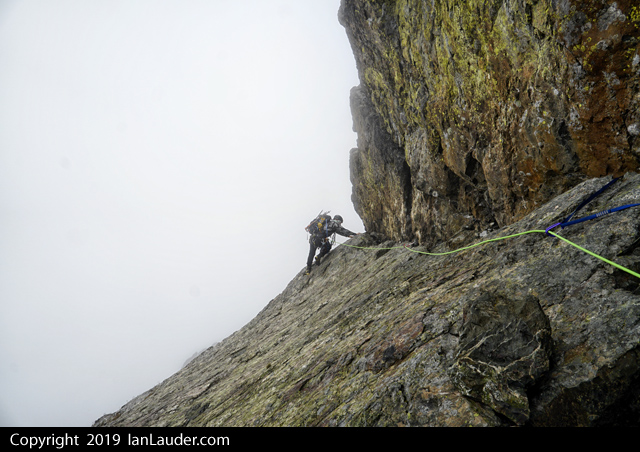

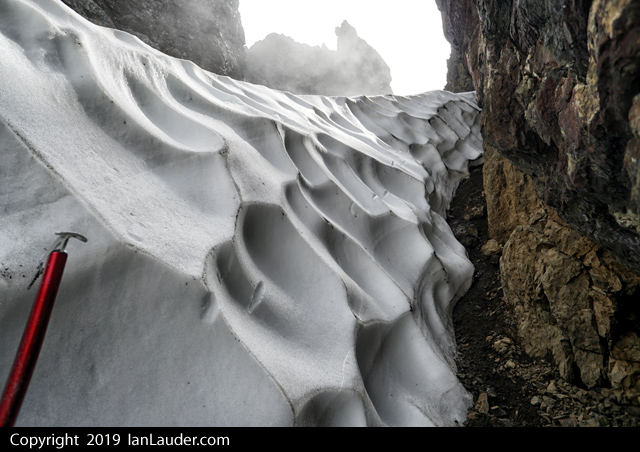
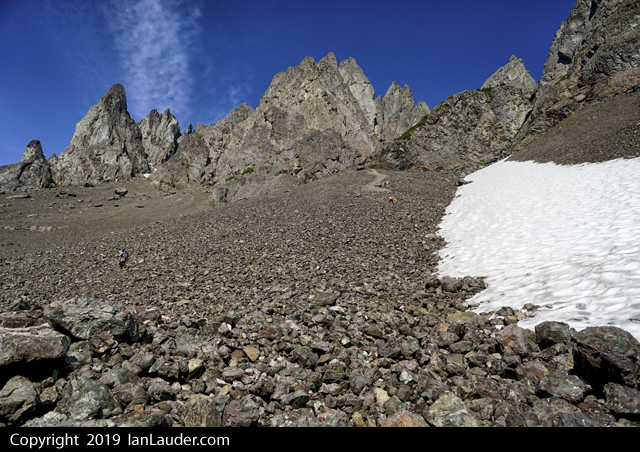
-
Trip: Humpback Mountain - Humpback Flows. Possible FA's on three ice routes - Champagne, 1p WI3, 65m. Don’t Forget the J-Thread, 2p WI3, 80m. Martinelli, 1p WI4, 25m. Trip Date: 02/07/2019 Trip Report: [TR] Humpback Flows, Possible First Ascents: Champagne, 1p WI3, 65m. Don’t Forget the J-Thread, 2p WI3, 80m. Martinelli, 1p WI4, 25m. Climbers - Raider Rob, Caleb Mallory, Alex Stolpovsky, Jessica Sagnella, Justin Pucci. View of Humpback Flows from I-90 Exit 47. Introduction: On my way back from ice climbing in Hyalite two weekends ago, my friends and I spotted what looked like ice up on the North Face of Humpback Mountain from westbound I-90 at Exit 47. I added this to my list of areas to check out and drove on… A few days later, my friend Chris Patrick posted a picture of the same thing on Facebook and several of us got into a conversation surrounding whether there was anything worthwhile up there. Thursday rolled around and the conditions appeared to be perfect, so my partner Jessica Sagnella and I decided we’d give it a try. Friends Raider Rob, Alex Stolpovsky, and Caleb Mallory were also planning a trip, so we decided to team up and lay siege to Humpback Mountain in the hope that we’d find something worthwhile to climb. We got to the Asahel Curtis parking lot off of Exit 47 at 7AM, geared up, and began the approach. There are no trails up this side of Humpback so it was a fun and interesting trailblazing and bushwhacking exercise to get to the ice. Climbing Area Descriptions: To get to The Steps or Hidden For Your Pleasure, ascend the avalanche path directly. This approach is approximately 600-800 vertical feet of steep no-fall zone snow up to 60 degrees, so please assess conditions as you go and use your best judgement. About midway up the avy path, you’ll see The Steps on the left and now the full lower tier of Hidden on the right. At this point, it becomes clear that The Steps is considerably steeper than the approach photo represents. It consists of a 15-meter wide gully with two nearly-vertical 5 to 8-meter ice steps separated by a snowfield. The top out appears to be protectable via anchoring to a large tree directly up the center of the gully. To get to The Sheet, traverse right from the tops of the bushes with very little additional elevation gain, but be weary of the final portion of the traverse to the base of the ice, as it is a no-fall zone on steep snow. The Steps Area from half way up the avy path. The Sheet Area from the lower boulder field with Champagne highlighted on the left. The Hidden For Your Pleasure Area showing the lower and upper tiers and the two lines we put up. The Sheet Area Champagne – WI3, 65m, possible FA by Alex Stopolvsky, Caleb Mallory, and Raider Rob. Avalanche danger: Serious. Approach: Traverse right from the tops of the bushes with very little additional elevation gain, but be weary of the final portion of the traverse to the base of the ice, as it is a no-fall zone on steep snow. Route: Climb the major flow on the right along the left side of the slab. There is a possible variation starting left up the first step and then traversing to the far right to what looked like fat ice. For a top belay anchor, sling the horn on a large slab just left of the route at the end of the pitch. Another 20 meters above the anchor is a protected cave with plenty of level ground. Descent: Rappel from the anchor or from here, you can get to the right side of the lower tier of Hidden For Your Pleasure by traversing 60-degree snow through the trees climbers left of the cave. Looking up Champagne from the base. Caleb following Alex on Champagne. The belay horn at the top of Champagne. The entrance to the flat and comfy cave another 20m above the top of Champagne. The Hidden For Your Pleasure Area Don’t Forget the J-Thread! – 2p WI3, 80m, possible FA by Justin Pucci and Jessica Sagnella. Avalanche danger: Serious. Look for signs of wind slabs as you ascend the lower section of the approach and loose dry surface snow in the upper section. Approach: Climb 50 to 60-degree snow up the avalanche path to the belay station tucked away in a shallow cave under the large rock outcropping on the left. Route: P1 - WI2+/3-, 40m: Start up climbers right from outside of the belay cave on a short step of near-vertical ice. Continue up the ice steps from here and look for spots to place stubbies (at best) as you progress. There are a couple of variations here depending on ice conditions and how you’re feeling. The left side of this line is thin and stepped with a couple of mixed moves off of a large flake (WI2+/3-) and the right side has interesting and fun blobs (WI3-/3). Be careful of knocking down the large, dinner table-sized ice sheets that look more like “snow patches” from below. Reach an obvious and wide shelf where you can build a screw anchor on the ice blobs and prep for the next pitch. P2 - WI3, 40m: Start up the blobs that make up the top of the belay shelf onto a small, but steep snowfield. You’re aiming for the curtains directly above you. Again, there are a couple of variations – the main line has a small slab of ice leading to a steep gully on the left or a steeper step with a large bulge at the top on the right. Both variations lead to a final 5-6m curtain of beautiful and featureless ice. The top-out can be tricky in the snow above the curtain. Anchor off of the trees or on the ice bulge above. Descent: Rappel both pitches via threads. We used naked threads on both raps. Looking out from the belay cave at the start of Don't Forget the J-Thread. Justin getting started with the first screw above the first step on p1. Justin reaching the belay ledge at the top of p1 on Don't Forget the J-Thread. The characteristic blobs toward the top of p1. Jessica getting ready to follow on p1. Looking up p2 of Don't Forget the J-Thread. Left variation on p2. Right variation on p2. A naked thread in beautiful and clear ice at the top p2. Martinelli – WI4, 25m, possible FA by Alex Stopolvsky and Caleb Mallory. Avalanche danger: Serious. Look for signs of wind slabs as you ascend the lower section of the approach and loose dry surface snow in the upper section. Approach: Climb 50 to 60-degree snow up the avalanche path to the belay station tucked away in a shallow cave under the large rock outcropping on the right or traverse climbers left through the trees from a top-out on The Sheet area. Route: This is the obvious line to the right of Don’t Forget the J-Thread and runs right up the middle of the wall. Climb a brief section of steep snow to the base of the wide ice sheet. Climb the sheet toward the small pine tree above. The top-out can be tricky in loose snow. Sling the small pine tree at the base for an anchor. Descent: Rappel off of the small pine tree (we left a sling on it). Caleb following Alex on Martinelli. Summary: The stoke was high on this trip and I have to say that it ranks as one of the best days I've had in the alpine in a while. Not only did we have an awesome adventure with friends, but it resulted in finding some amazing ice climbing that is so close to home! Between the three areas I have discussed in this report, we believe there is potential for another 15-20 lines to be put up depending on creativity and the conditions. The Sheet has lots of fat ice with plenty of interesting features to play around on. The Steps appears to have at least two or three obvious lines to the anchor trees at the top of the gully. The lower tier of Hidden offers from mild WI2 to thin and delicate WI4 with some mixed climbing potential too. Finally, the upper tier of Hidden is a real gem...some of the most beautiful and clear blue ice I've seen anywhere. It can be combined with some of the lower pitches as we did on J-Thread or you can climb to it, set up home base and choose which of the gullies, curtains, and pillars you want to send. Who's ready to get some?! Gear Notes: We brought 70-meter ropes, screws from 10-21cm, a set of tricams, and a few 24” pickets. While we didn’t use the pickets, I could see them being handy for the steep upper sections of the approach or on a couple of the steep snowfields depending on the snow conditions and how comfy you are in that kind of terrain. There were a couple of spots for tricams that I found, but didn’t end up using them. Aside from when we had the luxury of thick anchor ice, 10’s and 13’s were the screws of choice. An avy kit is absolutely mandatory in this area. Approach Notes: From the Asahel Curtis parking lot, follow the forest road past the gate and up to the hairpin turn. Go west beyond the turn up a rougher bit of road for another few hundred feet until you see a big tree stump (4-5 feet in diameter) on the hillside and enter the forest. Now just go up! After 400 vertical feet of steep moss, devils club, and other fun bushwhacking, you’ll hit the Palouse to Cascades State Park Trail. Use this as a good stop for layer checks and snacks and then continue up through another 600-700 feet of the same stuff until you hit a boulder field. Stay west of the obvious and large gully on climbers left and you’ll break out of the trees and into the lower basin where you’ll start to get a view of the ice. The next 200-300 vertical feet is on snow covered boulders and begins to steepen as you hit the big patch of bushes above the trees. From the top of the bushes, the terrain steepens substantially. You’re now standing at the base of a large avalanche runout from above and need to carefully assess conditions from this point forward. Looking around you from left to right, you’ll see a large rock wall followed by The Steps – a steep, two-step ice gully, then a small bit of ice way up high that is the second tier of Hidden For Your Pleasure, and finally, on the far right is The Sheet, a wide slab of ice topped by a steep snowfield. In total, the approach from the parking lot covers about 2200 vertical feet over one mile of ground distance. We hit this in perfect bluebird conditions…clear skies, temperatures in the teens, a slight breeze, and with very little snow on the ground down low. Once we got into the upper sections of the approach near the ice, the snow ranged from kick-steppable styrofoam to an icy crust perfect for fast mid-dagger climbing with patches of softer and deeper powder that allowed for kicking out a bit of a rest stop.
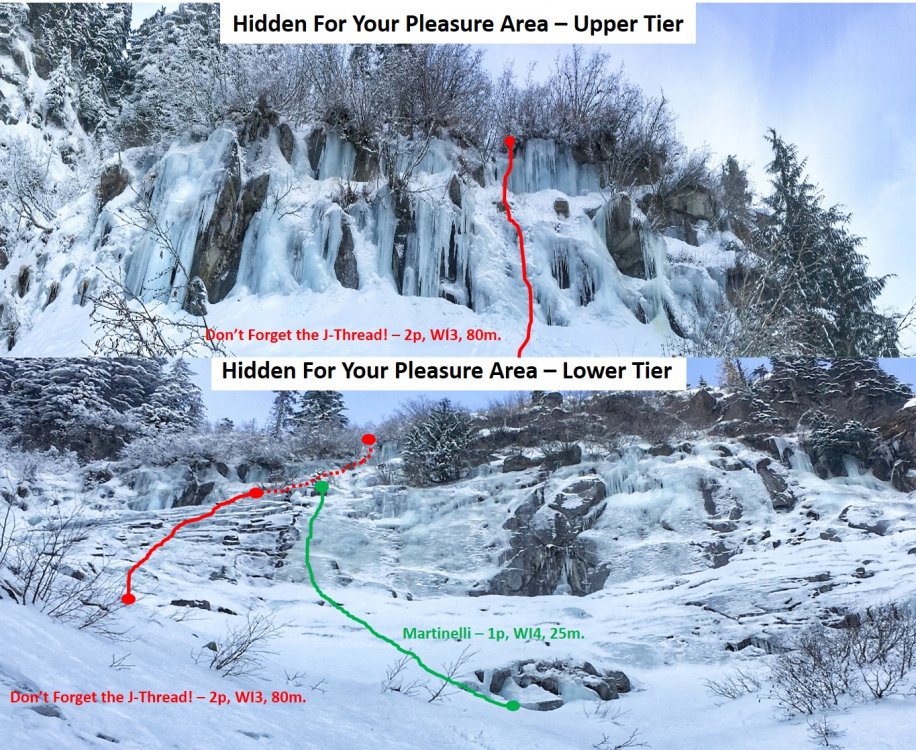
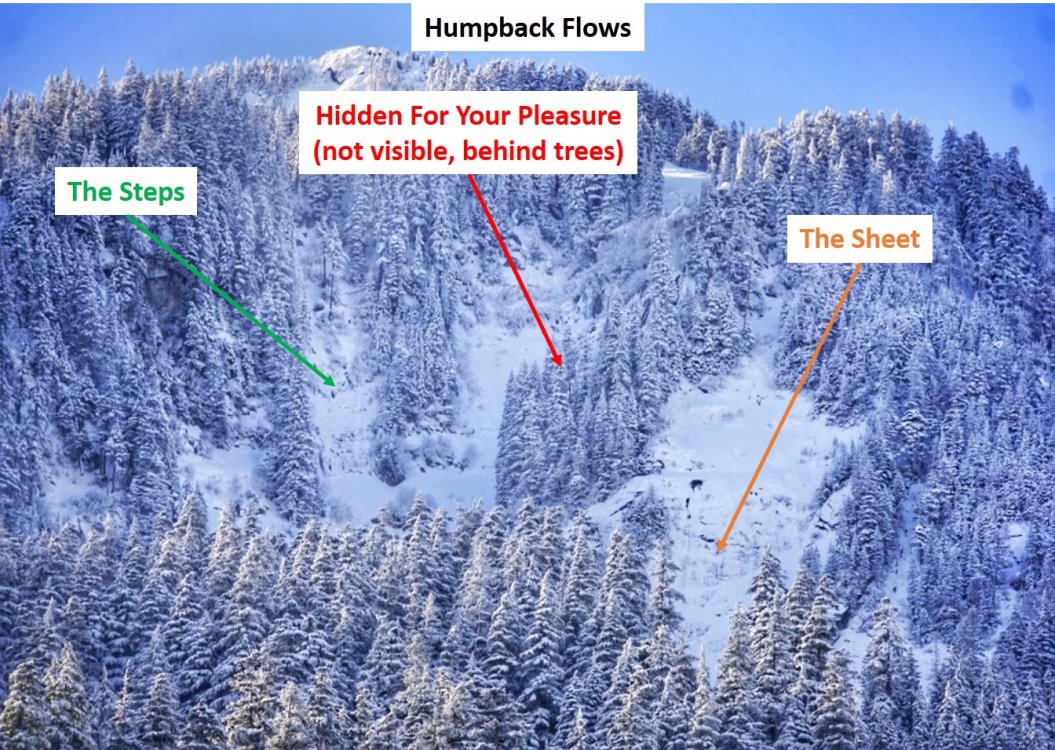
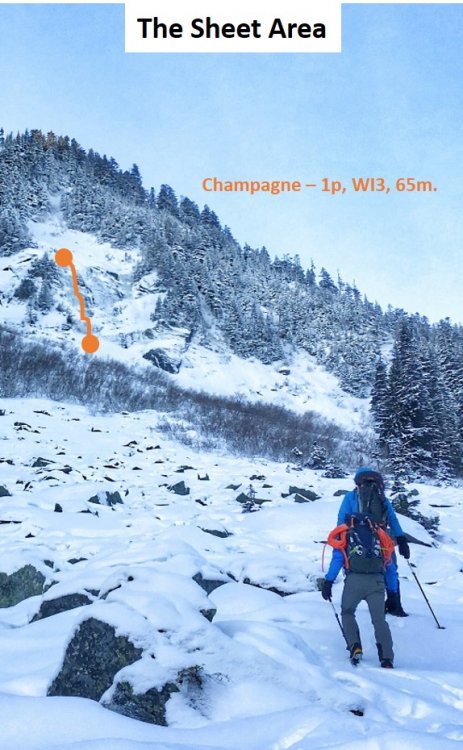
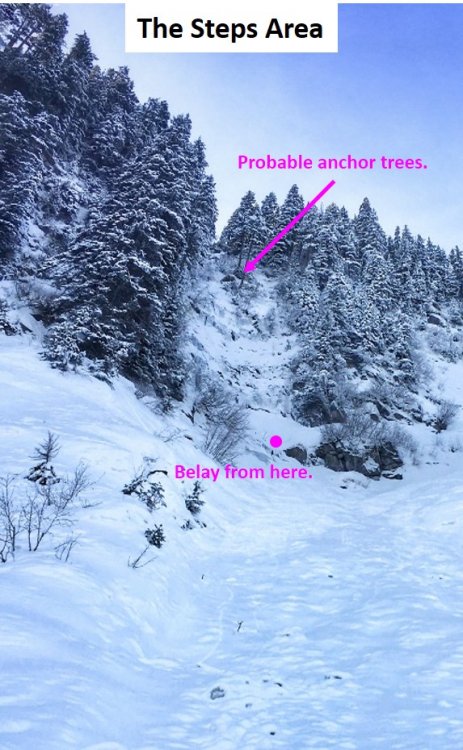
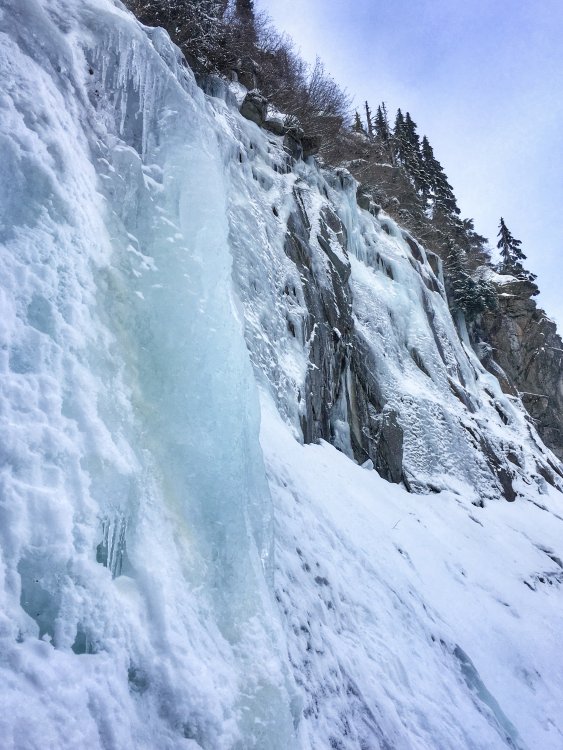
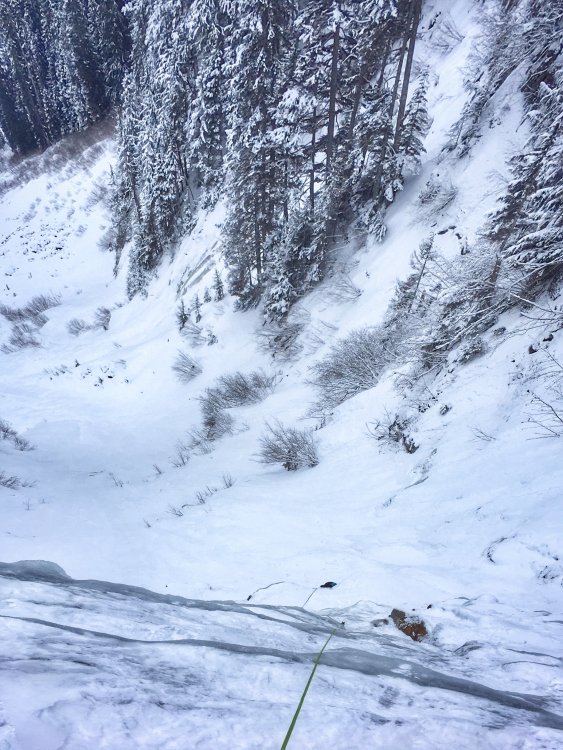


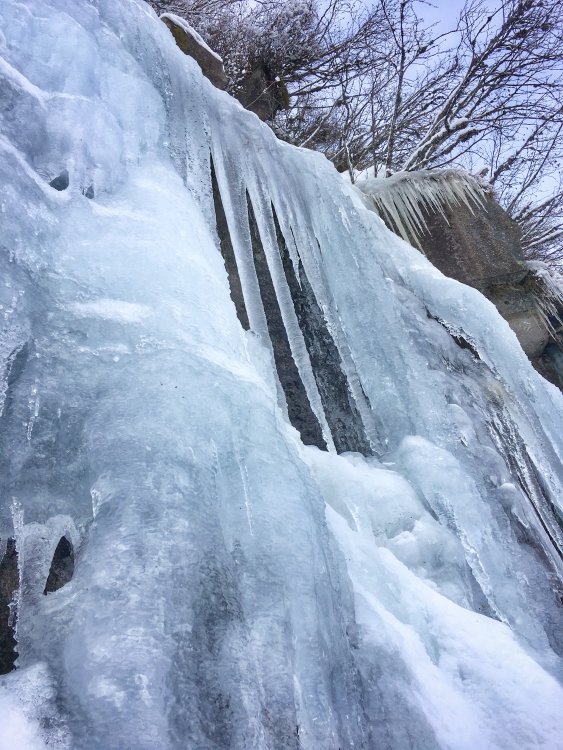
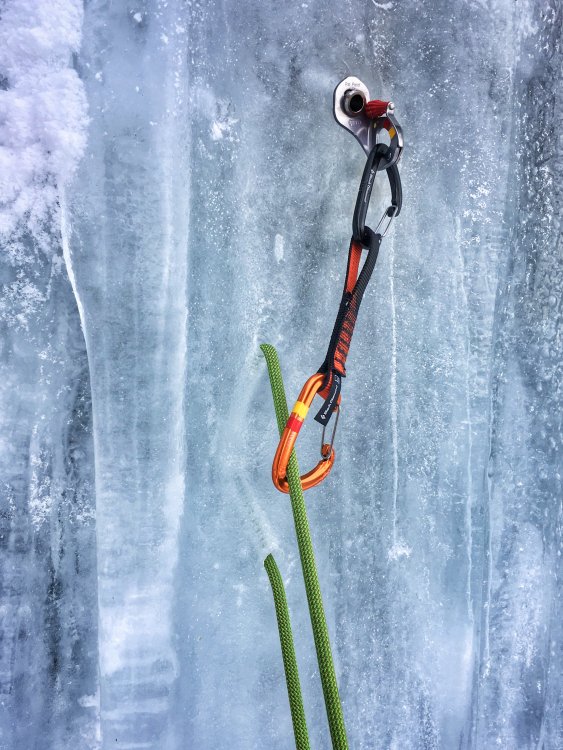
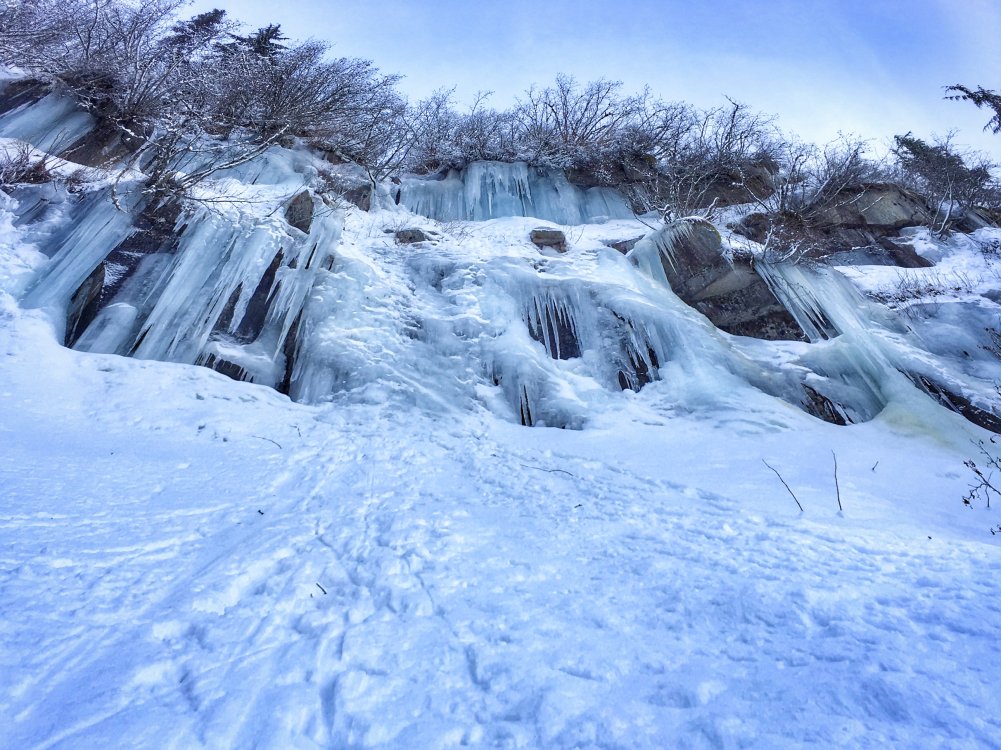


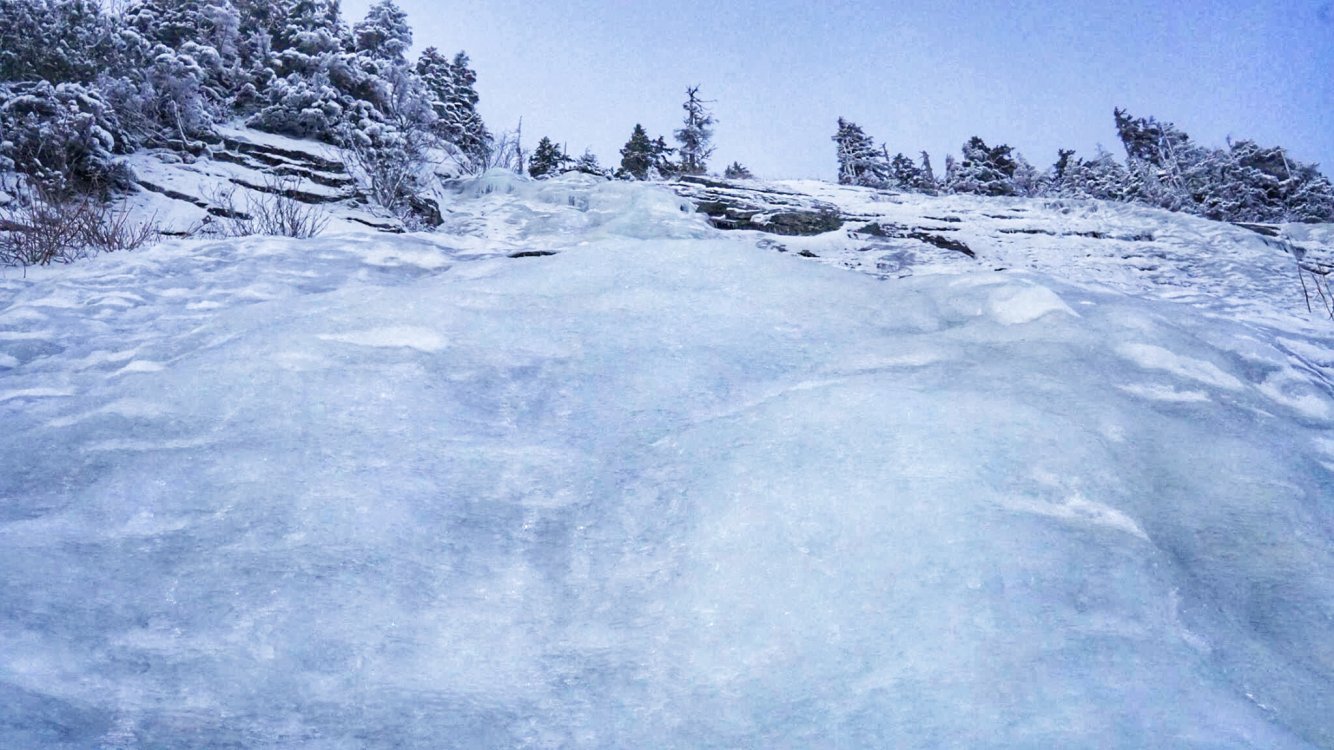
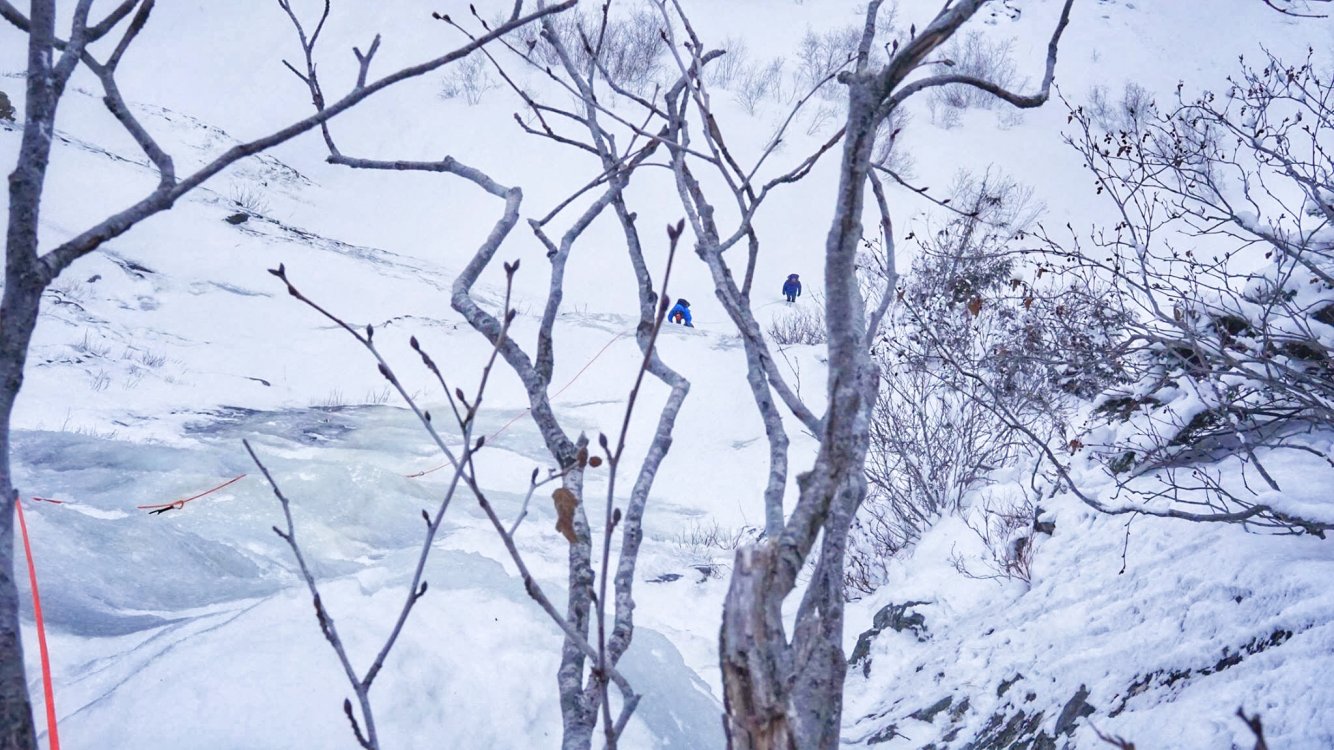
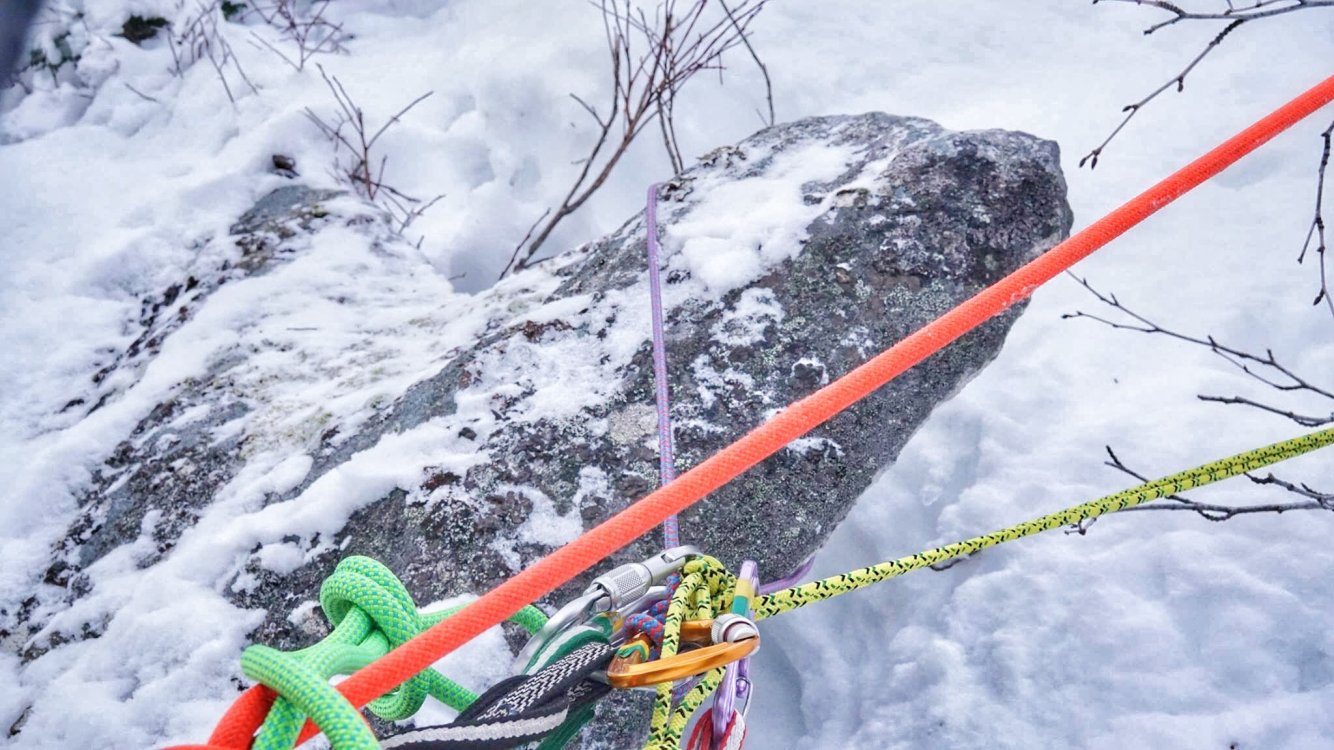
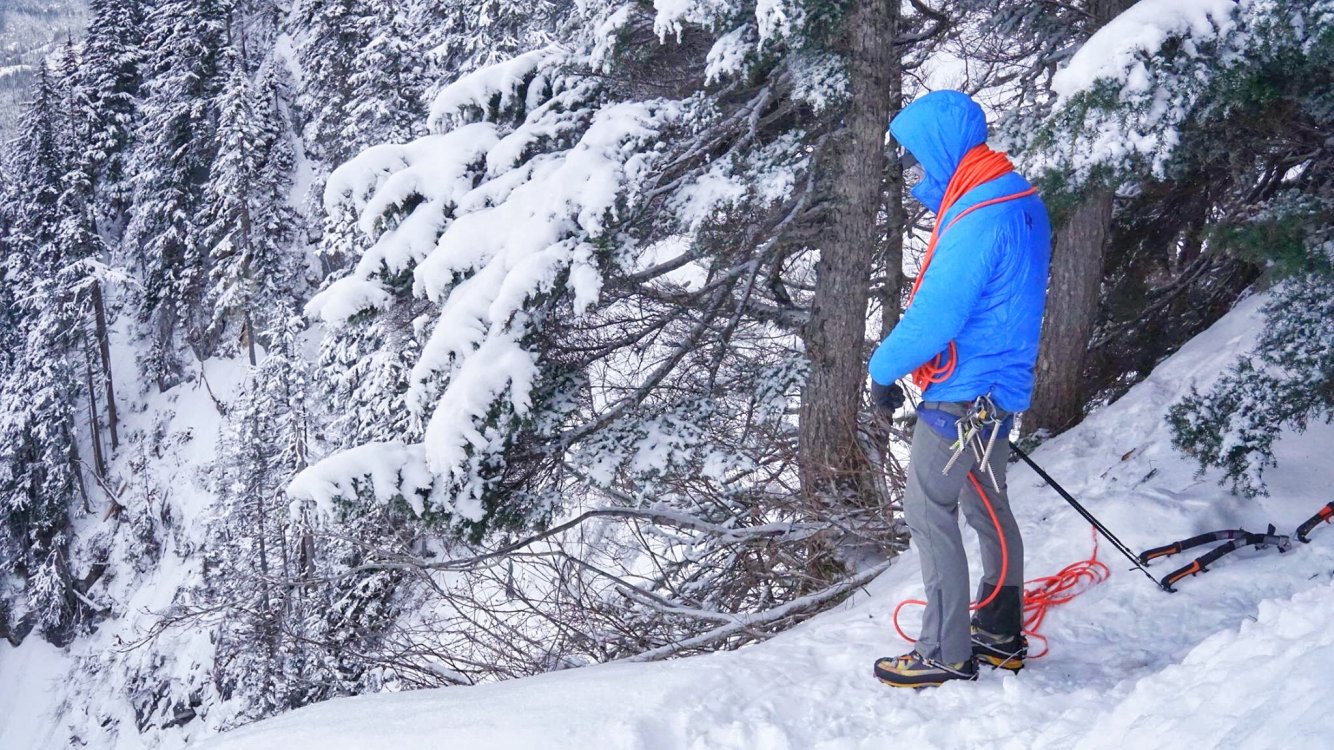
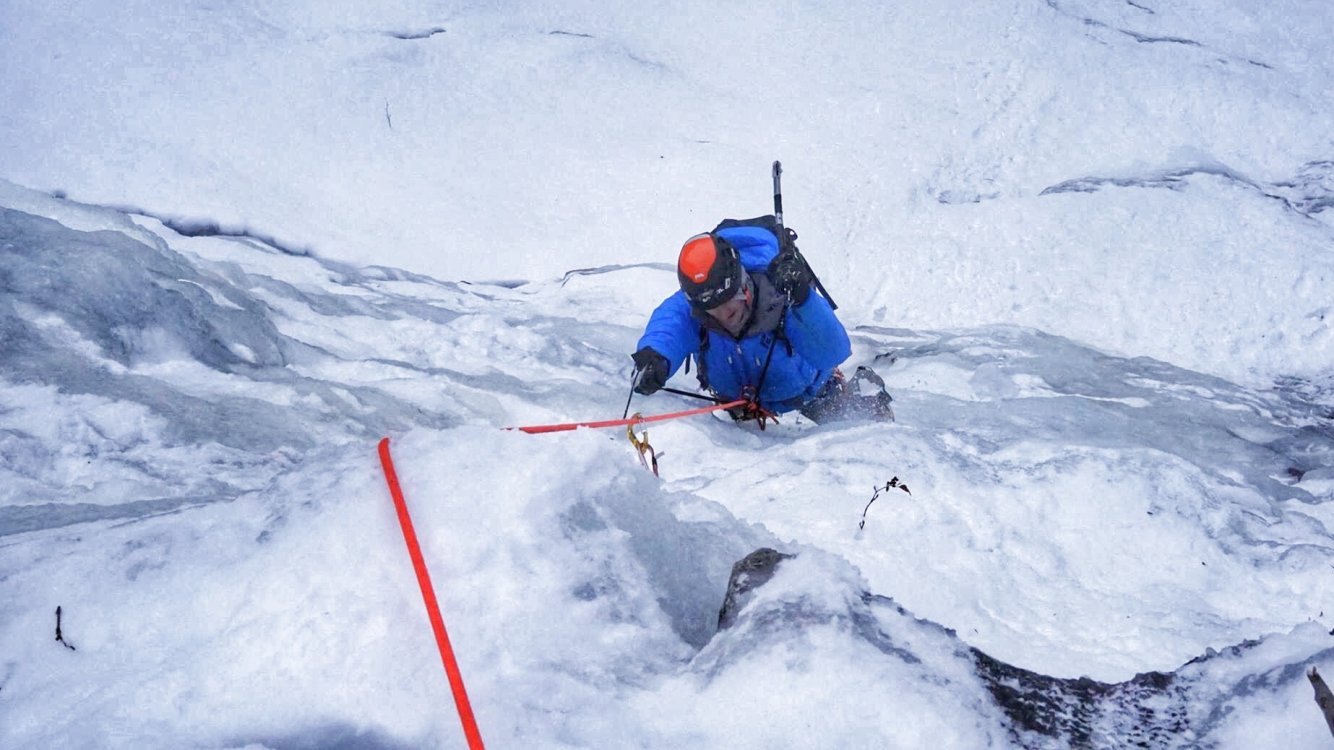
- 12 replies
-
- 5
-
-
-
- first ascent
- snoqualmie ice
- (and 2 more)
-
Trip: Sloan Peak - Superalpine Trip Date: 03/15/2020 Trip Report: This past Sunday, Tavish and I climbed Superalpine on the west face of Sloan. After the incident last time I wanted to get back and climb the route to the top. We didn't quite tap the top due to wind slabs on the upper face. I'm going to mix up the order of this one and put all the route details first so those who are looking at climbing the route can use this page for reference. Kyle also has a great page about our first climb of this route with excellent photos and maps. https://climberkyle.com/2020/02/28/fa-sloan-peak-superalpine-wi3-4-1000/ Approach: Both times I've climbed this route we parked at the spot where 4096 merges from Mountain Loop Highway. 4096 had deadfall and snow which made it undrivable but if you can drive up a bit before there's too much snow or deadfall then that will cut off some distance. Follow the road (easy skinning or walking) to where the Bedal Basin trail forks off to the left. Take this trail through the trees for a few miles to where a slide path up to the left becomes obvious. This slide path leads to the base of Full Moon Fever. Skinning up this path is straight forward and takes you to the base of the West Face. A long traverse to the south will bring you to a ridge that leads to Superalpine. Here, options exist. Assuming you're on skis, I recommend leaving them at the base of the route and descending the route. There is also the option of descending the corkscrew route and wrapping around the south side to meet that ridge (it would be heinous to boot) or carry skis and descend the glacier to the North East that will eventually allow you to meet back up with road 4096. The ridge can be tricky. Once you decide your strategy, the ridge will still be engaging. It's not scary, just steep with deep snow. The Route: However you opt to get to the base of the route, you are first presented with 2 (or 3) options for pitch 1 to access the couloir itself. The first time Kyle and I climbed a WI4 step on the climbers left. It was vertical for 2-3 body lengths and fairly thin. This past time Tavish and I thought it looked even thinner so we scrambled the ridge further up (M2-3) then did one pitch that wrapped around to the second step of the first pitch and ended at the same place. Either way, you need to get to the bench at the base of the obvious weakness in the wall. A third option may exist to the climbers right of the ridge. Perhaps it's even easier (if so it would bring down the grade of the route to Wi 3-3+). Pitch 2: This money pitch leaves from the bench and provides a full 60m of steep sustained Wi3. Protection was generally good for this pitch. Make sure to go a full 60m if you are planning on simul-climbing higher on the route. Pitch 3: This middle section of the route was lower angle and about half snow and half low angle ice (wi2) for us. We found good pro every hundred feet or so. This section makes a lot of sense to simul-climb. Both times we did a 100-150m block. There was good ice at the top of a chimney-like feature, or, if you've saved enough screws, the next step had good ice on the right for us. Utilize rock gear to conserve screws through this section. Pitch 4: From the end of the last pitch, this is the last section before exiting to the face. Depending on where you belayed, you’ll either have a steep snow slope to a curtain or be climbing right onto the curtain. This curtain is where Kyle fell on our first attempt. This past time, I found a sub-vertical weakness (wi3/3+) on the right side of the curtain (not the smear further right which provides a good belay). However, when Kyle fell, there was spin drift blasting the section I climbed so he went further left where it is more like Wi4 with a heinous top out with sugar snow and hollow ice over sugar. I found good protection in the weakness but Kyle didn’t find good pro further left. Approach this pitch with caution, don't be afraid to back down. I found a great ice screw belay on the right about 20ft above the curtain. Another option to avoid this pitch if it is unclimbable is a snow ramp to the left. See photos to spot this snow ramp. This would avoid all of the upper curtain and put you on the upper face, however, it is steep and exposed and unprotectable. As with the whole route, use your judgment. This isn't just alpine climbing…. It's Superalpine! The steeps above: Look at photos of the big face above the route (and have them with you). There are a variety of options that exist to climb this large feature (700 vertical feet). When I climbed it most recently, we found deep unconsolidated snow, wind slabs, alpine ice, and rime features. This section is shared with the corkscrew route and is very committing. There are a lot of ways to get lost, falling is never an option and it's mostly unprotectable. Very reminiscent of the upper slopes of the Cosley-Houston on Colfax. If the snow is consolidated and secure, it would be a total blast to climb, if not, then maybe it should be avoided. On the first attempt we bailed due to injury, and on the second attempt, we bailed halfway up the face, after converging with the corkscrew route, due to thick cohesive wind slabs. The descent: Descending should be straight forward. Downclimb the steep snow, and rap the route. We took 5 or 6 raps to get down the whole route each time. There is no down climbing once you’re back down to the top of the curtain pitch. Each rap is a full 60m and ends at good ice, providing plentiful V-thread options. Other descent options exist as mentioned in the approach section but this option is quick and straightforward. Ski out the way you skinned in. Rack: In the conditions we found, 8 or 9 screws including a 10cm or two makes sense. Rock pro isn’t super plentiful and there is a lot of ice so we took 4 cams, 4 nuts, and a pin or two. This is probably what I would recommend. If you try it earlier, then beef up the rock gear side of things, the rock is quite solid in places. Hopefully, people get out and climb this thing! It is like the NW Ice Couloir on Eldorado but way bigger. Lots of ice, great setting, not too heinous of an approach. Tavish and I did 17hrs c2c. We were not rushing but we weren't lollygagging either and we were ~350ft from the top. Kyle made this topo with the options. My opinion remains to descend the route. Good to know your options. Here is a topo I made on a John Scurlock photo of Sloan from February 2005 (low snow/ice year). Red dots show the route (note the three options for the first pitch). Yellow is the tricky ridge. Green is an approach that could avoid the tricky ridge. Aerial photo from Shane in February 2020. The ramp to avoid the curtain is obvious in this photo. Now, onto the story from yesterday. Tavish picked me up at midnight in Bellingham after an hour or two of restless sleep. We drove through Darrington and onto Mountain Loop. His Prius handled the road like a champ and by around 2 am we were packed up and walking up the road. I was in crocs since I forgot running shoes, they did the trick (they're the next big thing in climbing for sure! Breathable, waterproof, sorta, ultralight, cheap, comfy, and climb 5.12 with ease.) Anyway, we started skinning after about a half-mile and cruised up to the Bedal Basin Trail in about 90 minutes. There was a fresh half-inch of snow showing bobcat (?) tracks following the existing impression of skin track. From there we encountered a mix of booting and skinning in the trees, mostly skinning but lots of skis on skis off. There was a slight impression of the existing skin track (probably from Michael Telstad, thanks!) that we followed and got us where we wanted to go. We skinned up the slide path below Full Moon Fever and the snow transitioned from a few inches on a crust to a nasty wind board. I knew it would be bad since I skied the white salmon the day before but I was hoping to find wind scraped, not wind loaded terrain on this aspect since it would be indicative of the upper slopes. We continued to the tricky ridge as it got light, left our skis there and put on actual boots (last time I climbed in ski boots, this was better). While we transitioned, we got pretty cold. We brought big puffys since the freezing level was 0ft and it was probably 5 or 10 degrees. Fortunately, the sky was clear and there wasn't a breath of wind. We hurried through that transition and started booting up the ridge in all our clothes. Bobcat? Not a dog, not very big... It was slow going and I punched through to my hips or deeper at several points. We were toasty warm by the time we were at the base of the route. The left-hand variation Kyle and I took last time looked much thinner so we opted to climb the ridge above us and see if that would go. We soloed up easy rock to an impassable wall. Luckily we could traverse left and rejoin the first pitch from last time. Tavish led that and gave me a meat belay to the first bench. I led the next pitch which provided a full 60m of sustained ice. Very fun! Tavish took off from there and we simuled around 150m. It's so fun to move quickly, especially when it's that cold! We got further on this simul pitch than last time and I got worried that Tavish was going to get to the spot Kyle fell before I could warn him of the dangers. Luckily, he didn’t. He belayed from a thick clear smear, right of the curtain. I led the curtain up a weakness on the right and it wasn't too bad. Above that, there was an ideal ice bulge on the right to belay from. This was great because it provided an easy spot to transition from climbing to soloing and eventually to rappelling. I rigged a V-thread while Tavish soloed up the snow above. After threading the ropes, I took off after him. I caught up and he looked concerned. I could also feel the snow was not ideal. We could see snow plumes ripping over the ridge above us and the snow we were on was a cohesive wind slab. We downclimbed a bit and then went up further left through some tight constrictions and ice. Above that, there was another wide-open snow slope and we found two distinct layers in the snowpack. The top here was about 6in thick styrofoam-y feeling wind slab. Bellow that was another 4in thick older windslab, and below that was sugar. We had probably already gone too far but we decided to call it here and started down. Me on the second pitch (SO GOOD) Tavish getting to the top of pitch 1. Tavish taking off into the simul section. Tavish on the upper slopes It's hard to turn around so close but we were certainly riding a fine line with zero margin for error, given what was below our feet. Down climbing steep snow isn't fun but we got it done and got to the ropes. The raps went smoothly and we found great ice at the base of each 60m rap. The last pitch had to be broken into two raps last time, both off pretty small trees, so this time we tried another option. We went off a little more south off a slightly bigger tree and did an exactly 60m rap down rock that got us on to snow. We post holed in wet sun affected snow to our skis, and the rest of the descent went smoothly, albeit, pretty slow since we were tired. We got to the car before dark for 17hr c2c. Tavish on the final rap. Lots of ice above Full Moon Fever... Anyone interested?? That's it for now! Feel free to reach out with more questions! Sorry, I don't have more photos from on the route it's self. I hope everyone is staying safe and healthy. Gear Notes: See Rack Section Approach Notes: See Approach Section
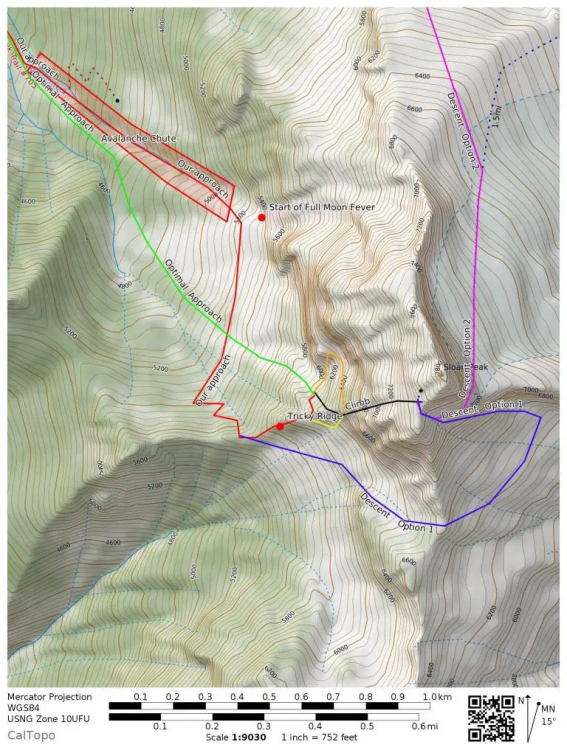
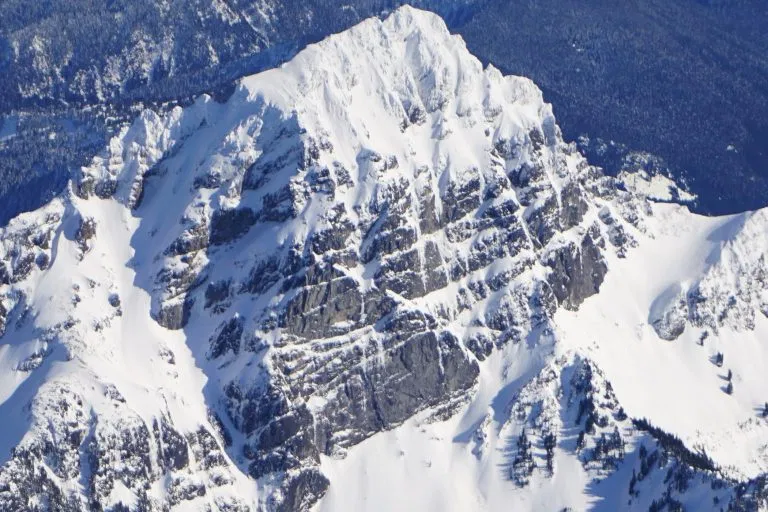
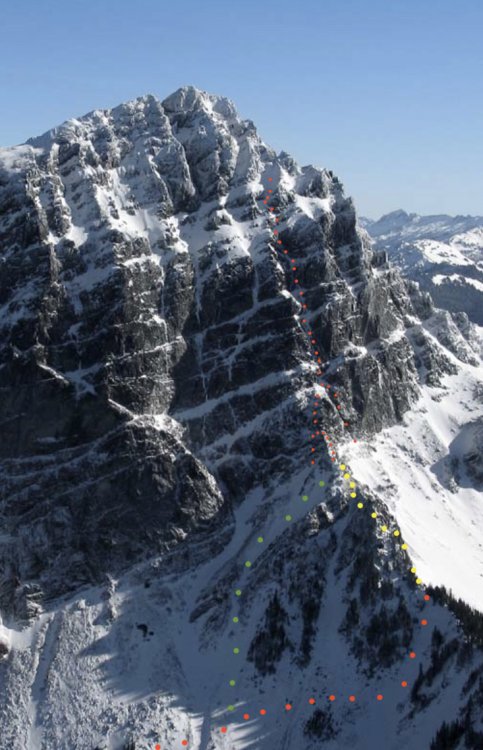

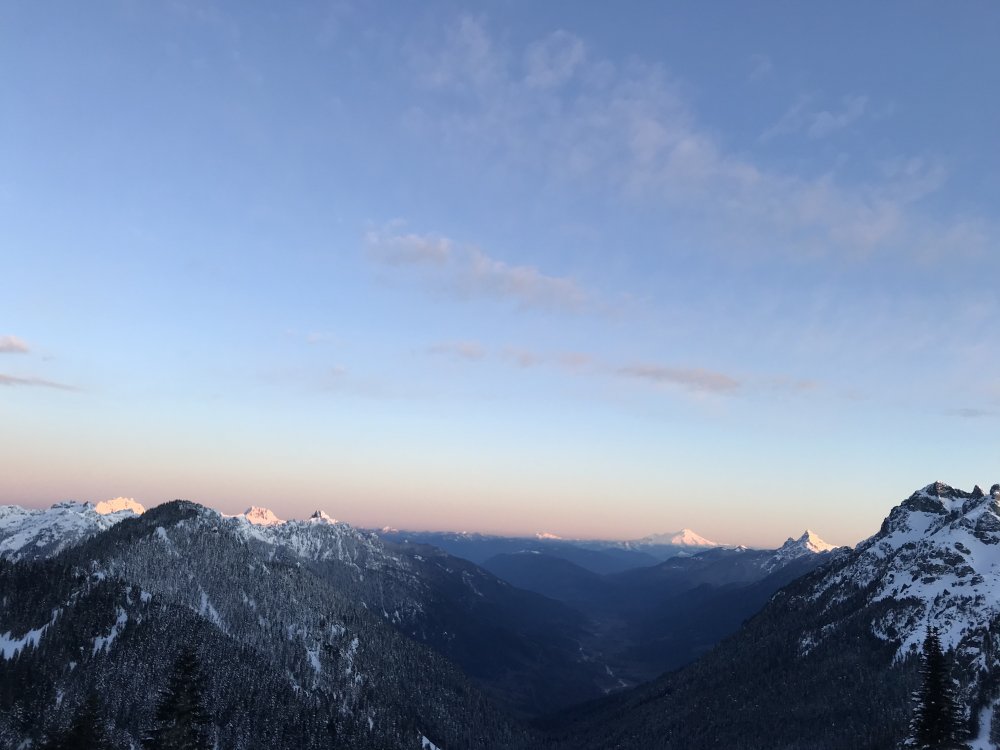
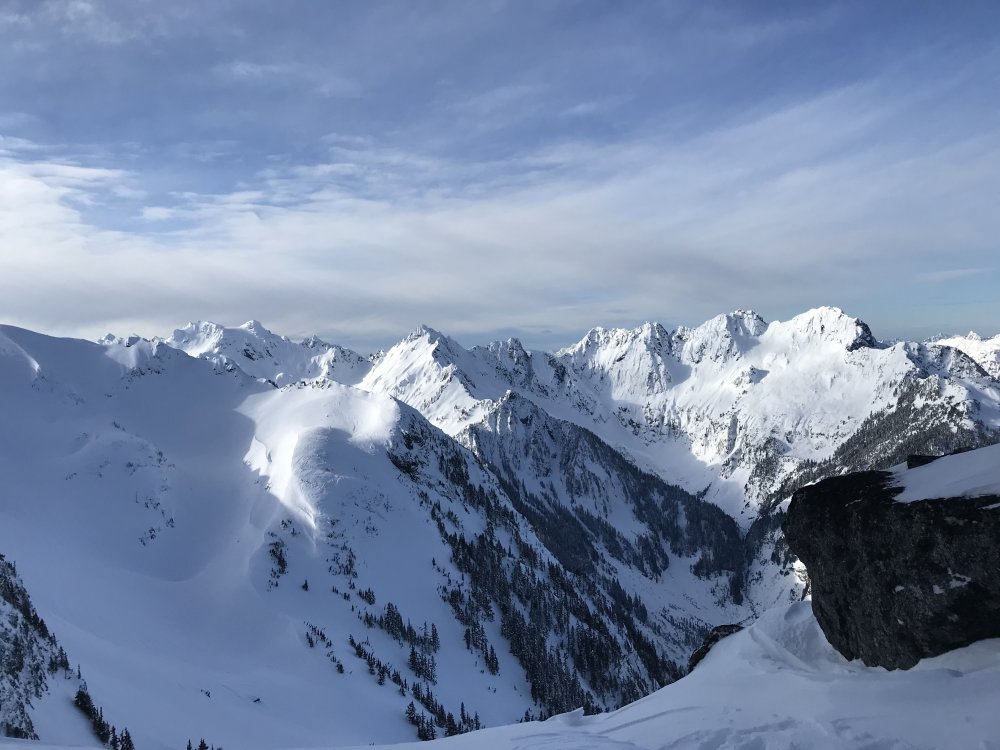
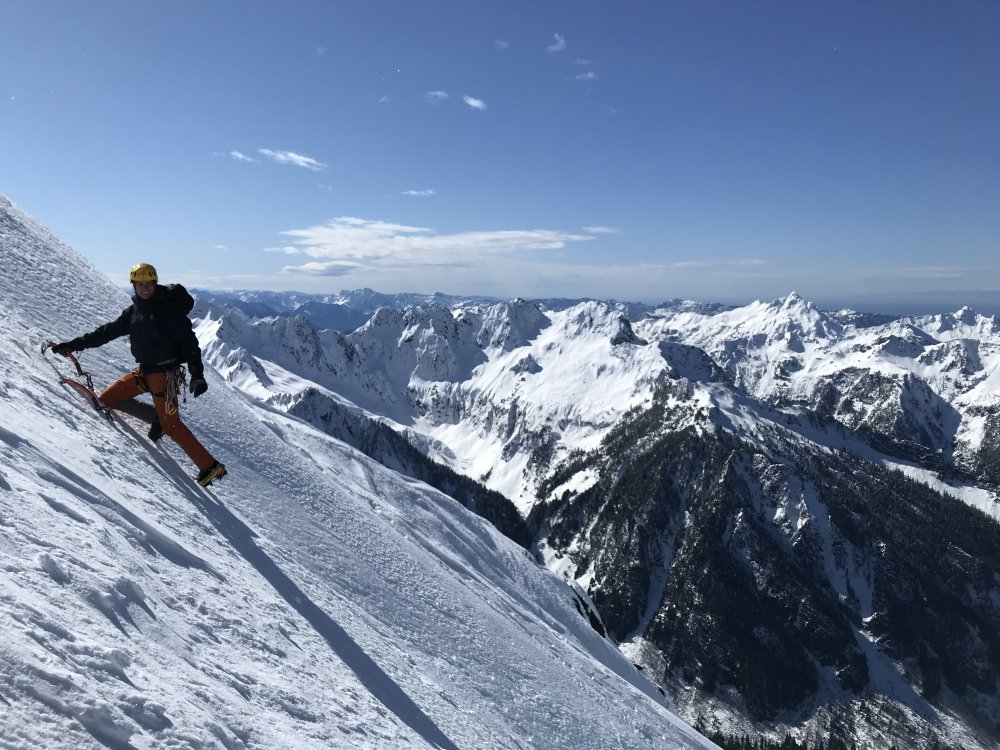


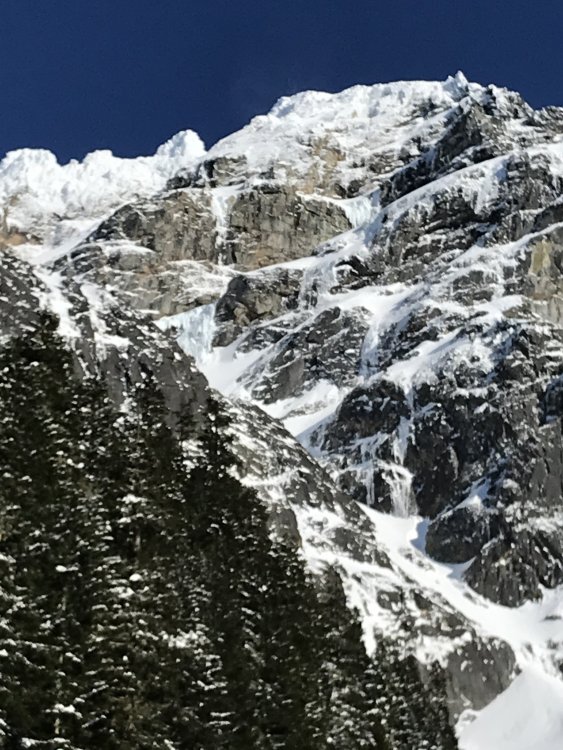
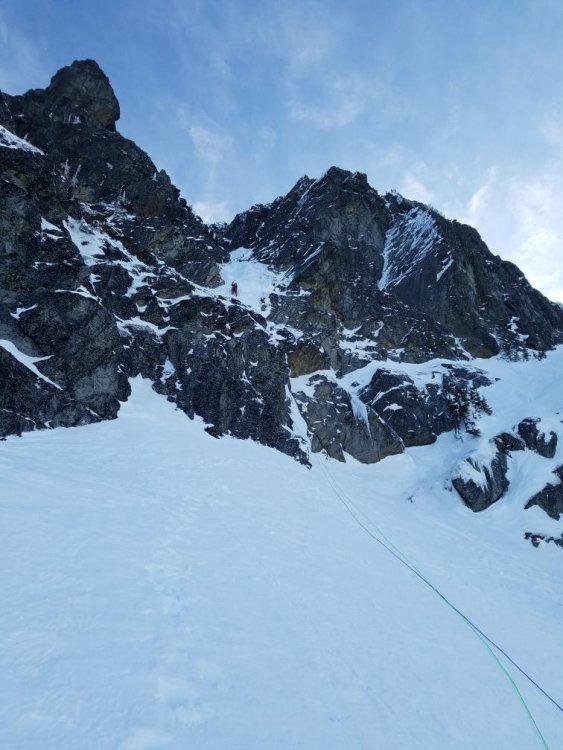
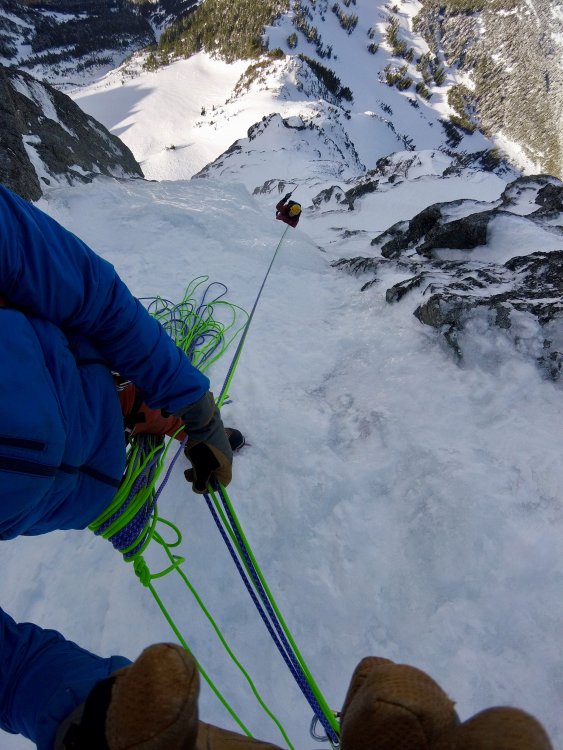
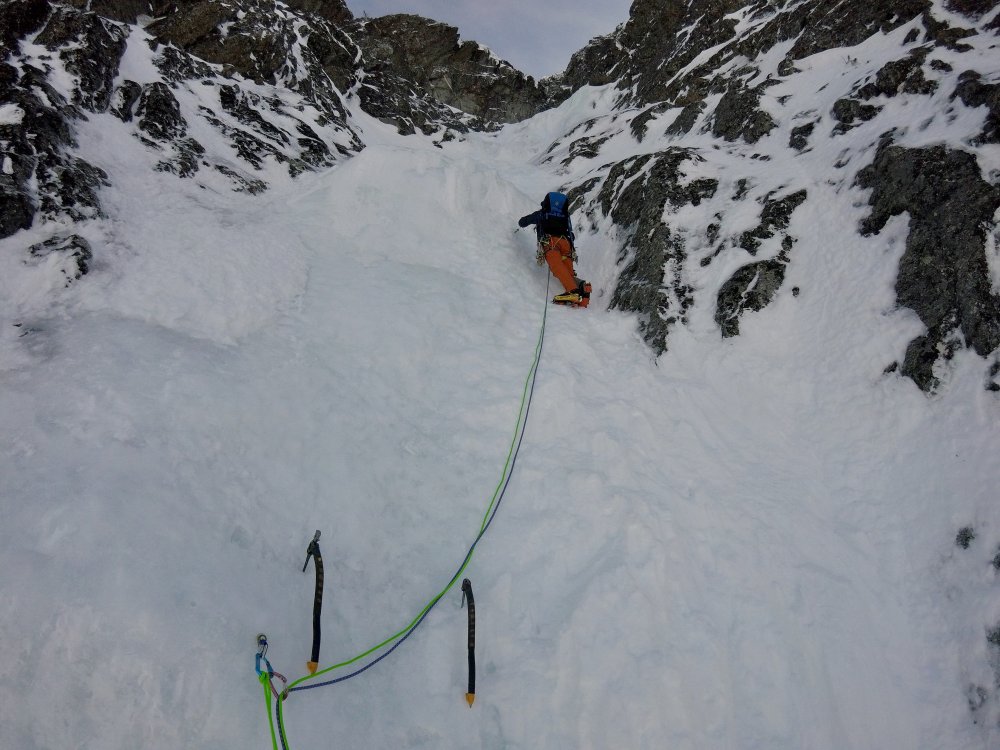
-
 Trip: Mt Rainier - Central Mowich Face (IV, AI2, 60 degrees) Trip Date: 07/13/2019 Trip Report: @nkimmes and I climbed the Central Mowich Face on Rainier July 13 - 14, 2019. We left the skis at home for once and sent it in a two day push from Mowich Lake to White River. Approach from the Mowich Lake campground was straight forward for the early miles. The trails winds up through wooded hills toward spray creek and eventually gains a large, open alpine landscape. The trees gave way to alpine brush and small talus that undulated with the movement of glaciers long gone. After a fairly long cross country section we reached the benign Flett Glacier. This permanent snowfield is situated low on the flanks of the mountain under Echo and Observation Rocks. Our path took us between them, close to the east side of Observation. Visibility was not good. Low hanging clouds roiled over the rocks and the landscape around us. The glacier seceded to loose volcanic rock. Our footsteps sank with each stride to gain Ptarmigan Ridge. This point marked the end of the easy terrain. From this point we knew that previous parties had found a fairly heinous down climb/scramble over steep, loose rock to the glacier below. Some beta also indicated that there might be a permanent snowfield. Ultimately we decided to drop off the side of the ridge at just over 8200 ft. It was loose as promised, but overall the slope was not treacherous. Eventually we did run into a snowfield that made downhill travel a bit easier until we reached the outer edge of the North Mowich Glacier at 7200 ft. We roped up for the first time and travelled through a beautiful jigsaw of monster crevasses. We took a direct line toward the base of the route, instead of circumventing the core of the glacier out toward the Edmund Headwall as described in the guidebook. One crevasse was crossed by down climbing the wall on one side to access a depressed, knife edge bridge about ten feet below the lip of the crevasse. We tiptoed across and climbed back up the other side. After 12 hours on the move we reached a rock band at 10,200' above the double bergshrund guarding the route. We pitched the tent, melted snow and attempted to drink sand filled water and made funny videos condemning Jet Boil for being shit in the wind. Sleep did not come easy. The wind had picked up substantially and after a brief 30 minutes in my sleeping bag, heard a large crash from up high on the mountain. Seconds later, from the darkness of the tent, my heart sunk as a massive boulder plummeted past our perch to the glacier below. Sleep didn't come at all. The alarm went off at 1am and we started up at 3am. Conditions were perfect. We rolled out of the tent to clear skies, no wind and cruiser neve except for a small vein of AI2 near the top, at the start of the grade IV variation that leads out onto a ramp above the EH instead of traversing left through the rock band at the top of the CMF. We felt secure and free solo'd the entire 3000' face to 13,200'. From there it was slow going as we slogged through high wind up Liberty Cap and over the plateau to summit on Columbia Crest. After an involuntary nap looking out over the top of the DC, we traversed the mountain with a descent dow the Emmons Glacier. It had been a big trip. We were wrecked and stoked that it had gone so smooth, especially since i was supposed to catch a flight to Boston the next day. Cheers! The route as seen from the road to Mowich Lake. The early part of the North Mowich Glacier after the descent from Ptarmigan Ridge. Monster crevasses that could eat a semi-truck. 10,200' bivy sunset was something else. @nkimmes on the main face as the horizon started to get light. Perfect other than my crampon kept falling off. Near the top of the face at the AI2 vein. No words necessary. Stoked! Summit! Gear Notes: Pickets, couple screws Approach Notes: Mowich Lake TH
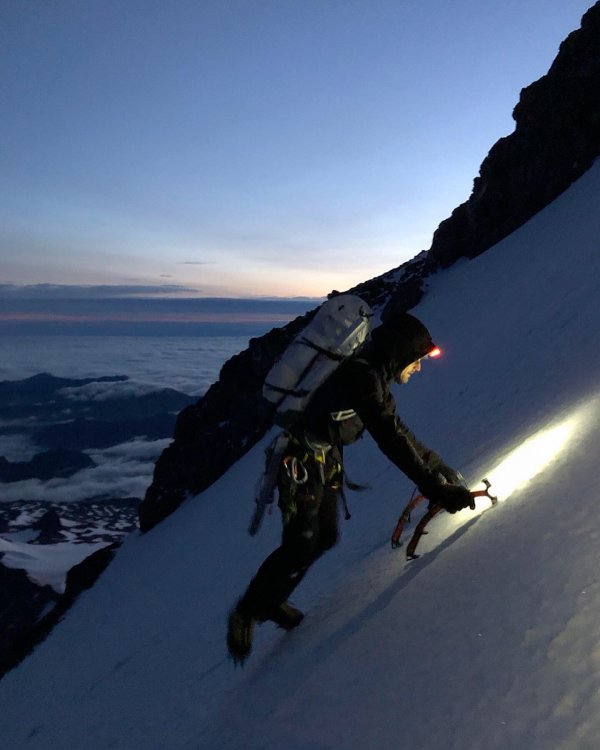
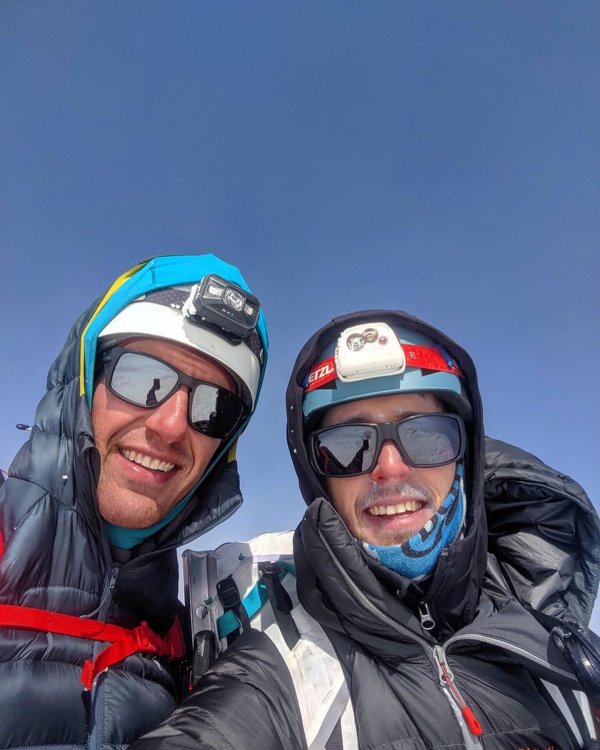
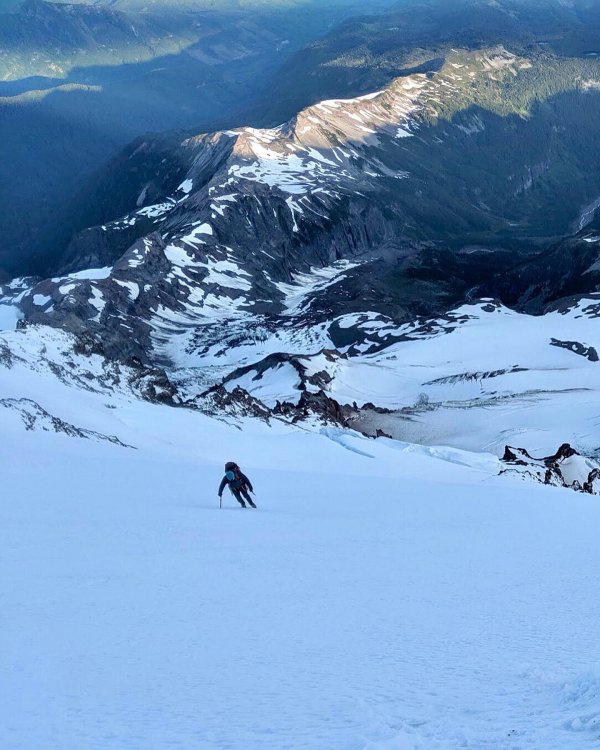
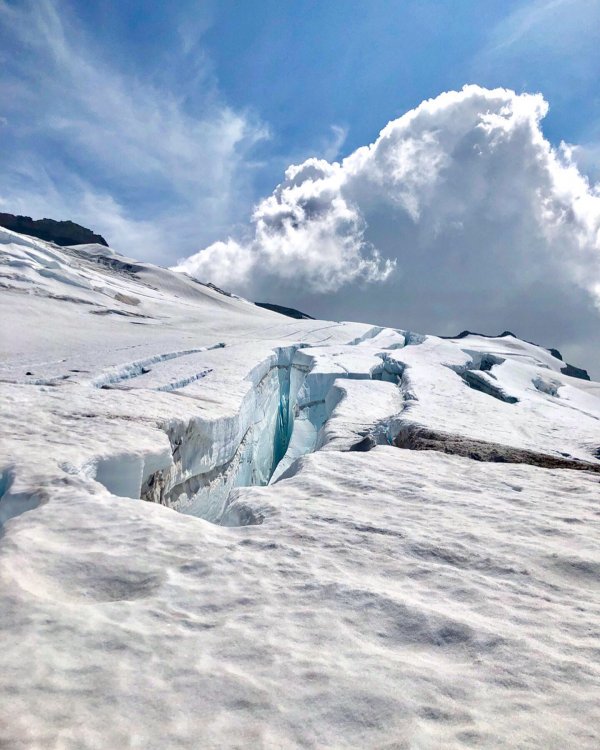
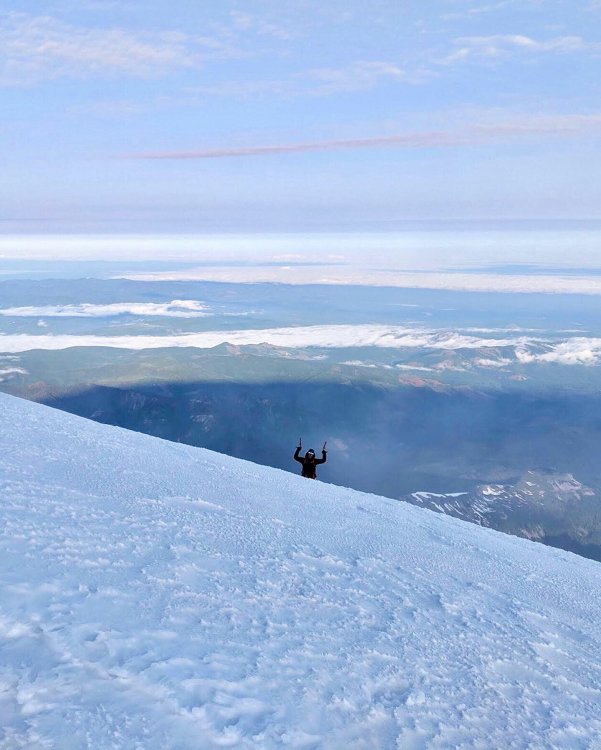

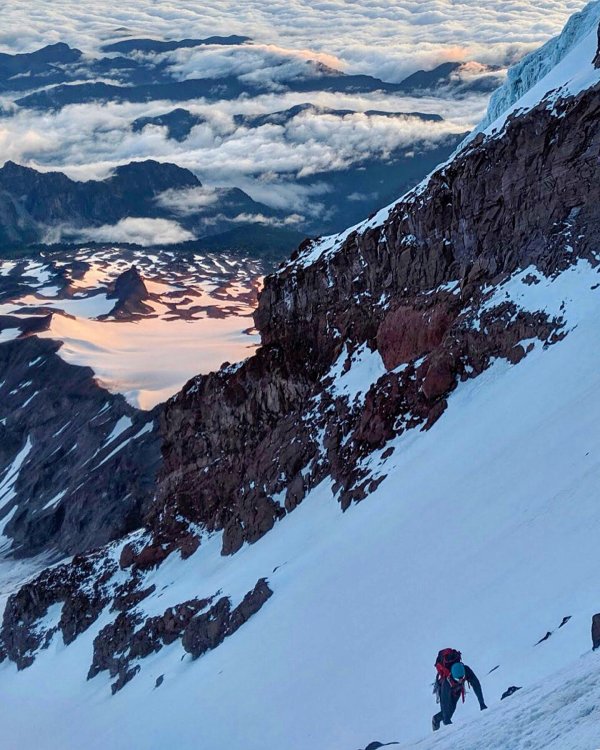
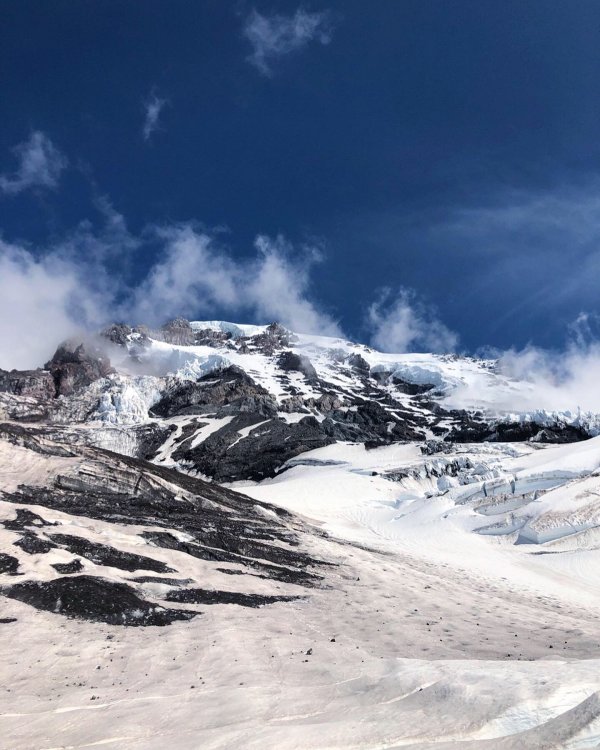

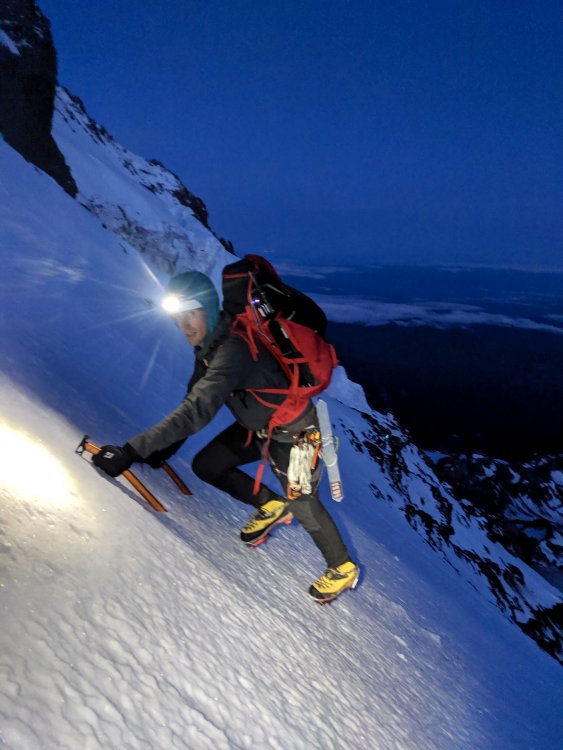
-
Trip: Das Toof - The Tooth Fairy, 5.9+ Trip Date: 08/15/2019 Trip Report: Got out Friday on this new(ish) Nelson/Whitelaw route; if you're looking for a quick alpine hit you should give it a try. To find the start, go past the SW Face trad route and continue a short distance to a low angle corner with bolts. Easy to find. The route is generously bolted, no need for gear. It's seven 30m pitches -- we combined 6&7 and you could easily combine 3&4 as well, but I think running 1&2 together would give you some unpleasant rope drag. I skipped or unclipped a couple of bolts on P2 and still had a little drag at the end of the pitch. P5 is the crux. Rap the route with a 60 or downclimb the South Face and circle back around for your gear. Fun day out and as I'm told "it's a good training route for anything on Hozomeen." We ran into Jake the Brit as we were downclimbing the South Face, he said I should post a TR and he'd nag Whitelaw for a topo. You really don't need one though, just follow the bolts. Action shot looking down P2: Gear Notes: 13 draws, rope Approach Notes: the usual
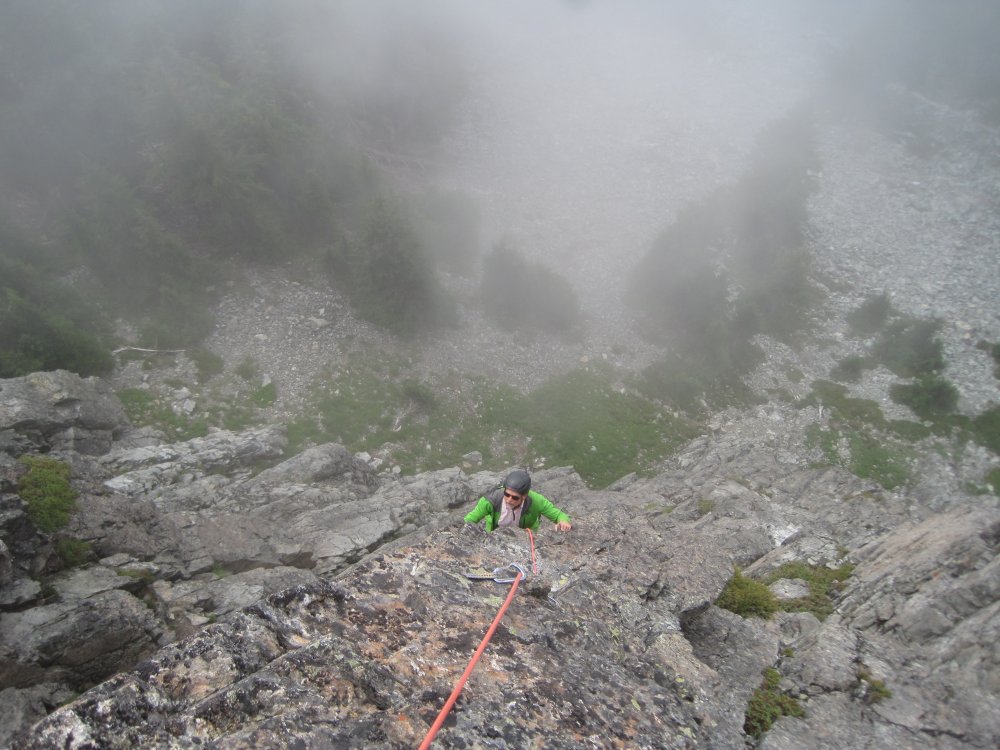
-
 Trip: Royally Smooting - North Ridge of Clark, Deception, from Royal Basin Trip Date: 06/15/2019 Trip Report: Who else out there is working through the Smoot book? C'mon, it's OK to admit it, Jeff came up with a great list of peaks that will get you to the corners of the Cacades and the Olympics. Take Royal Basin, for example. I wouldn't have thought of dealing with the hassle of ferries, permits, and bear cans if it weren't for that long out of print tome. And, I would have missed out on a great adventure with @ZakG. I'm continually reminded that there is a lot to recommend in that book. If you do go Royally Smooting though, you may not want to haul all the gear necessary to climb the North Ridge of Clark (as recommended by Smoot). While supposedly the "best" climb in the Needles, Zak and I thought that it wasn't THAT classic. The regular scramble route is interesting enough and easily passable with no rope, harness, or pro. On Deception, you'll want enough snow to cover the amazing amount of loose rock that this peak is known for. Shoot for when Royal Lake is snow free but the upper basin is still snowed in....like we did. It was just about as good of conditions as you could ask for. Captions refer to the photos below...... You know you're hiking in the Olympics in the spring when you see rhododendrons on the trail: Shelter Rock is aptly named: First look at the Needles, Johnson and the Sundial (L-R): Hiking up to Clark with Deception behind: Clark. The North Ridge is the right skyline: Mount Johnson: Leading up the North ridge of Clark. Lots of lichen and mediocre rock. Good, I guess, for the Olympics: Summit views from Clark looking across Royal Basin to Warrior, Constance, Inner Constance, Stone(?), Mystery, and Deception (L-R): Descending Clark, don't go this way. Up and right from where the photographer is instead: The regular route on Clark is impressive and actually pretty pleasant, despite appearances: Mount Mystery: Gray crested rosy finch, lord of the high alpine: Heading up the regular route on Deception with Johnson behind: Gilhooley Tower: Last look at Deception leaving upper Royal Basin: The classic finish to an Olympics trip. Waiting for the ferry at Kingston: Gear Notes: Light 40m rope, small rack of nuts and tri cams, helmet, crampons, ice axe. Approach Notes: Royal Basin, the permit is key. Go early in the season before they allow for advance reservations. We had no problems securing one, although we started on a Thursday and finished on a Saturday.
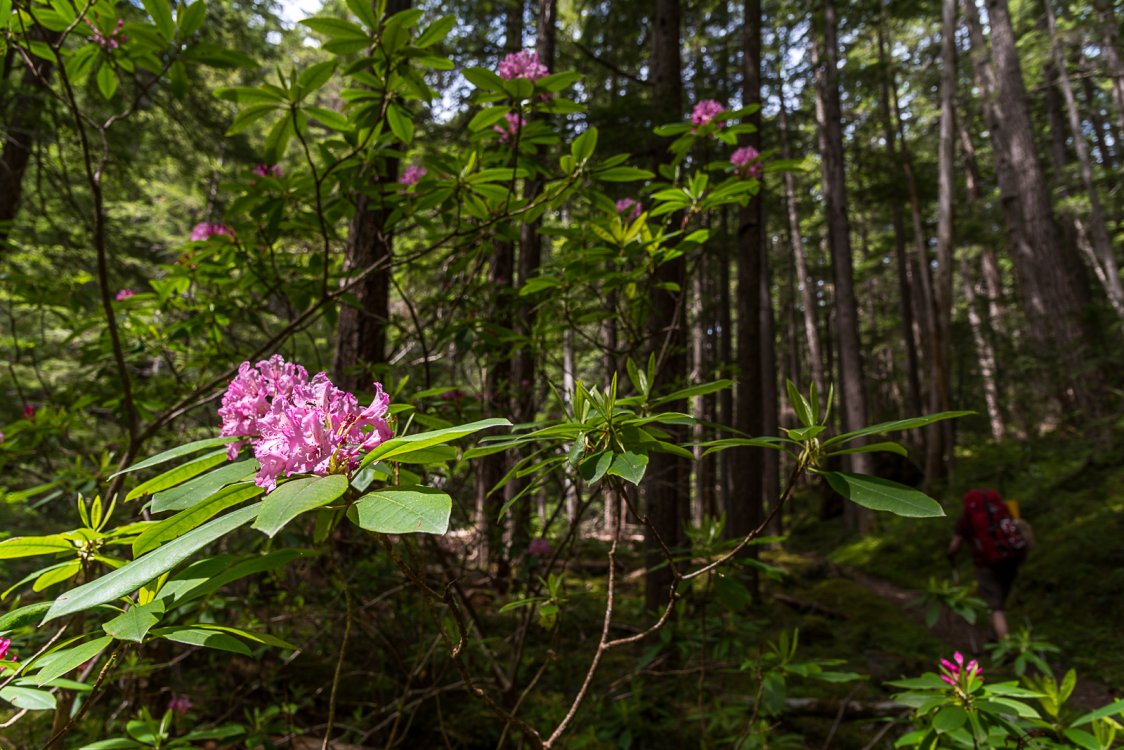

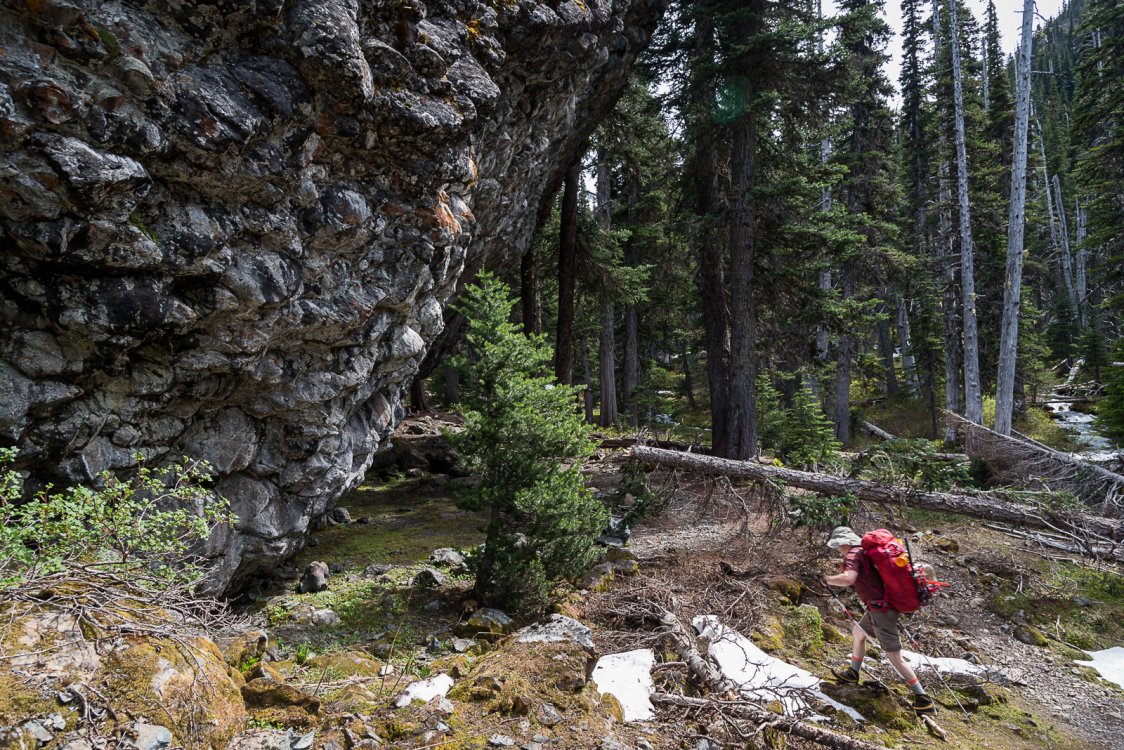
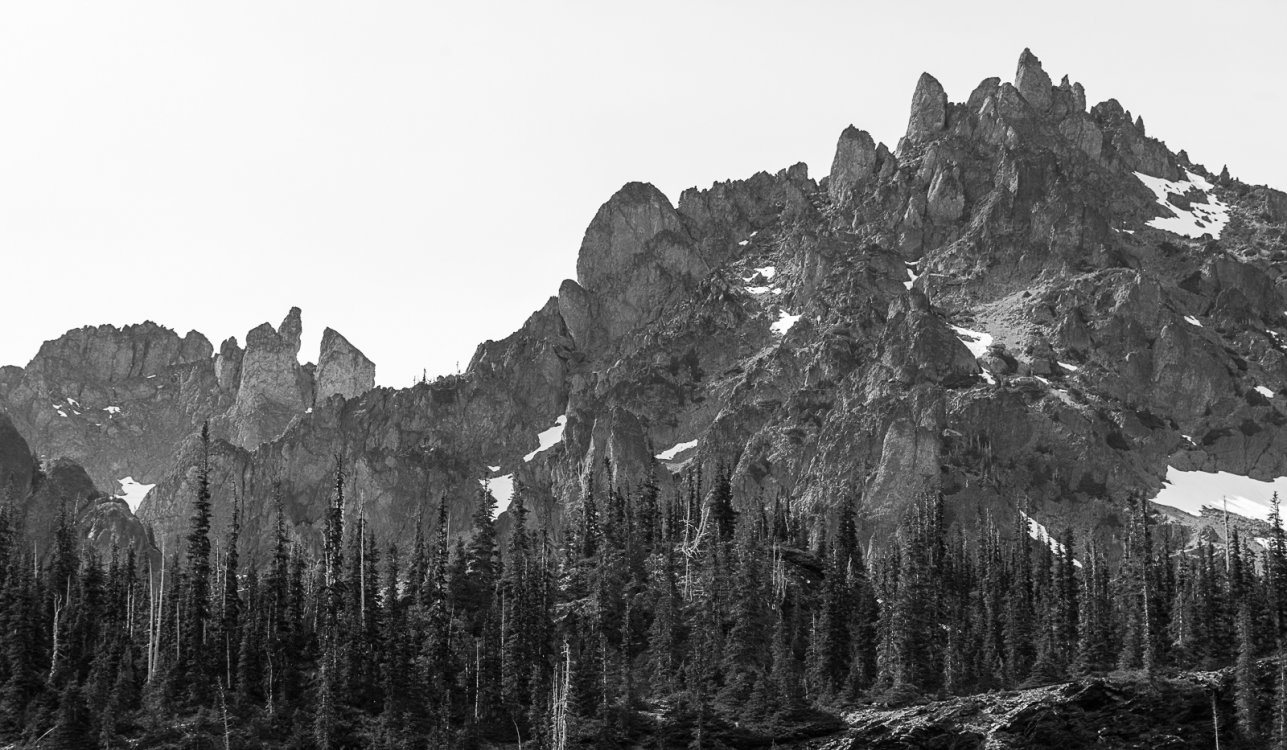
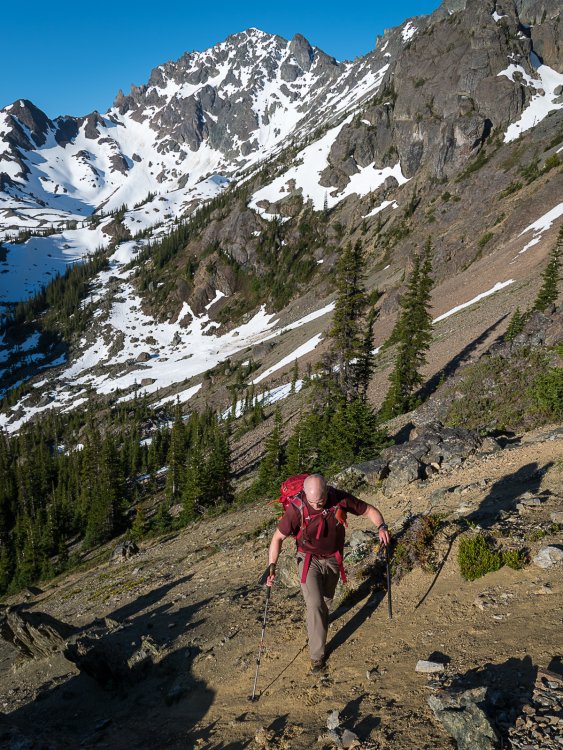
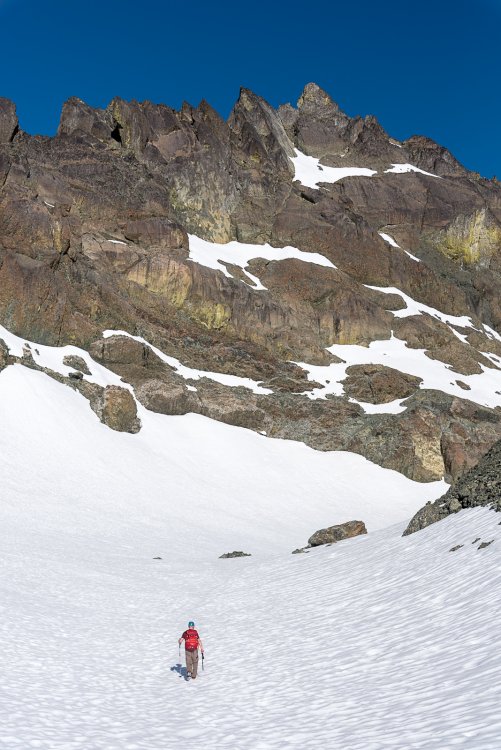
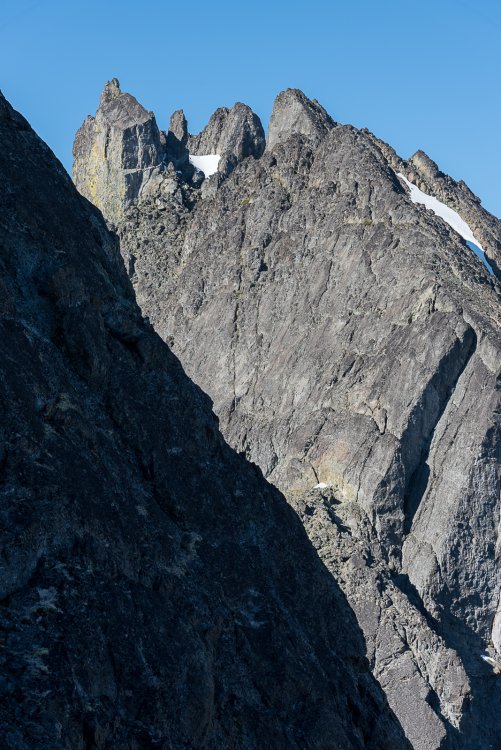
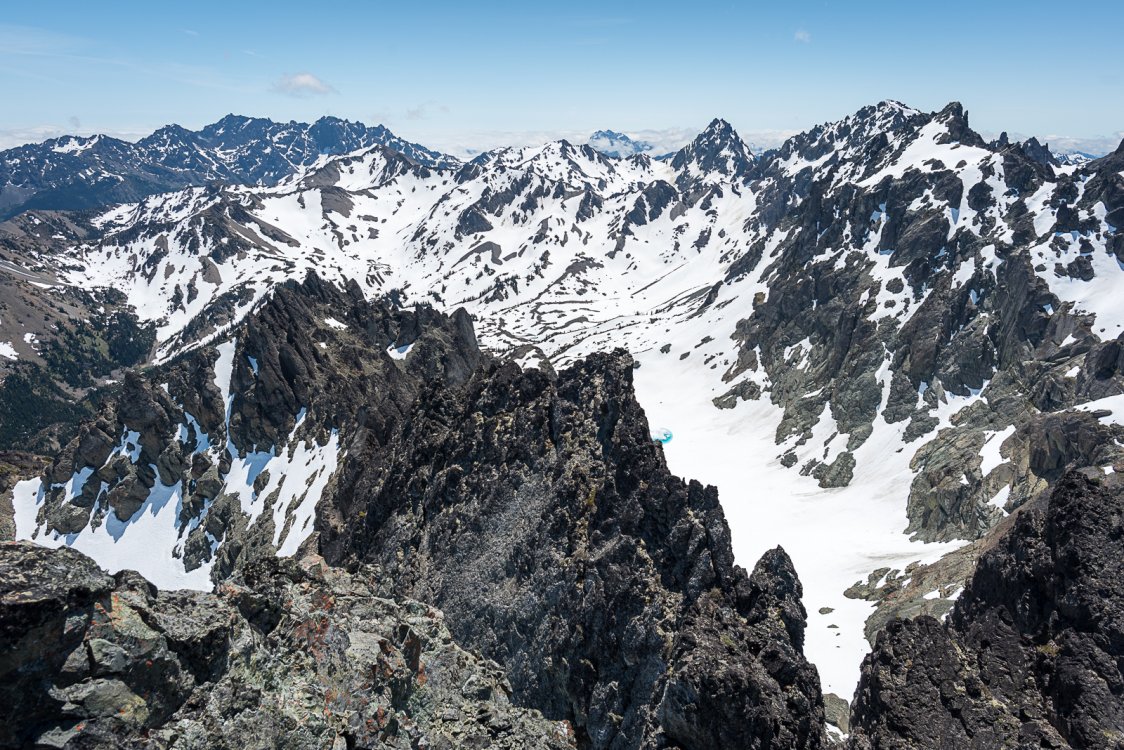
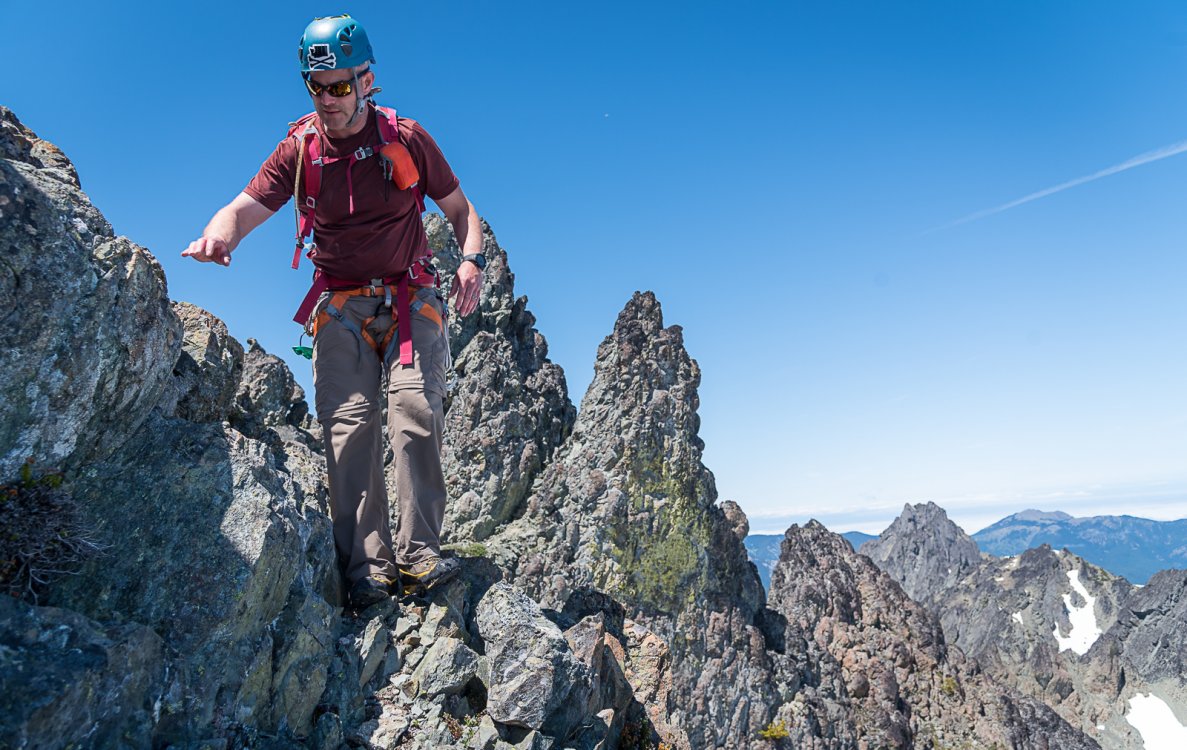

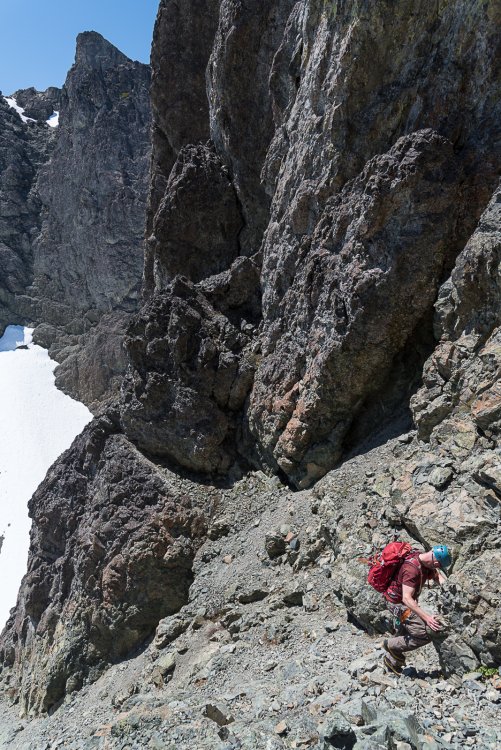
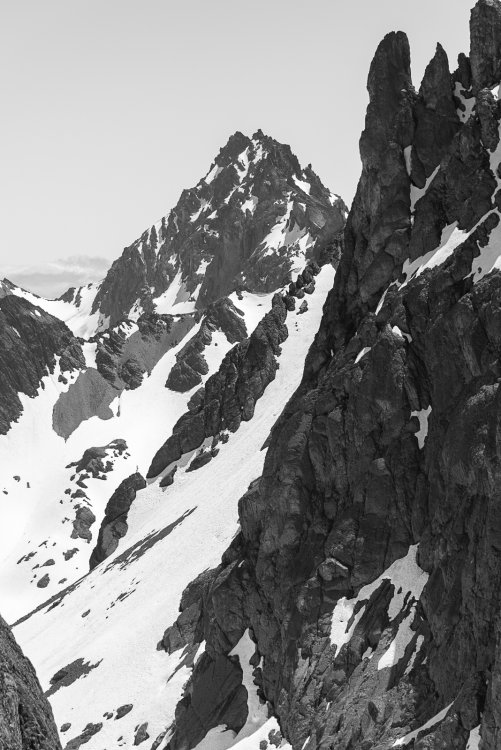
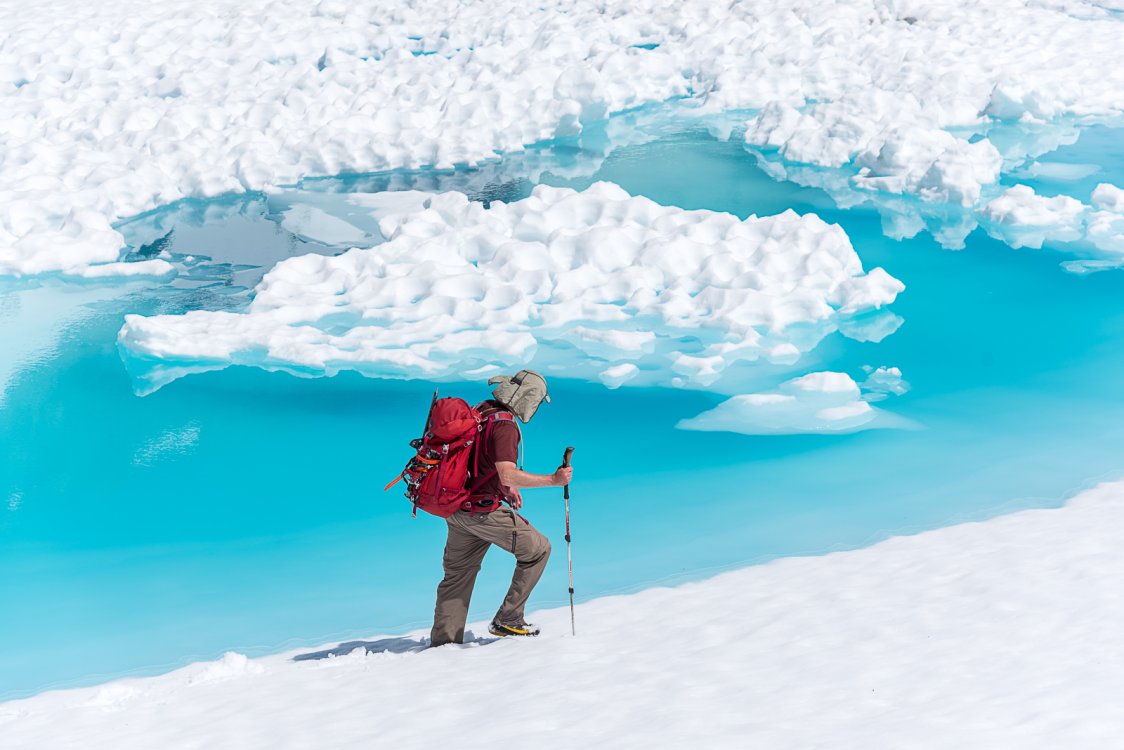

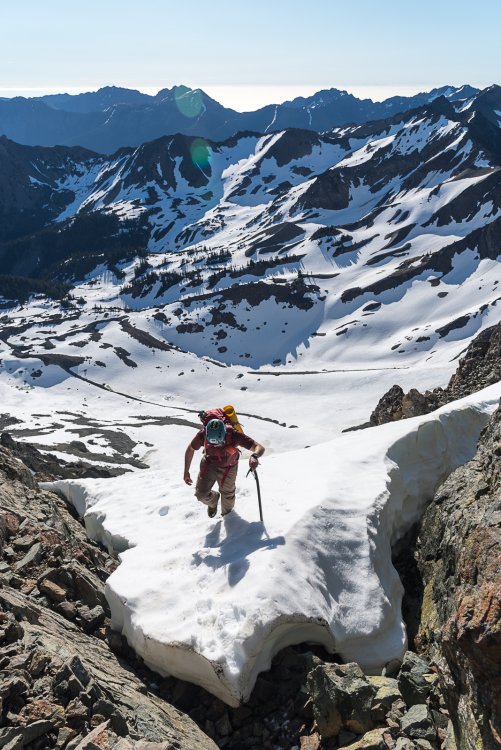
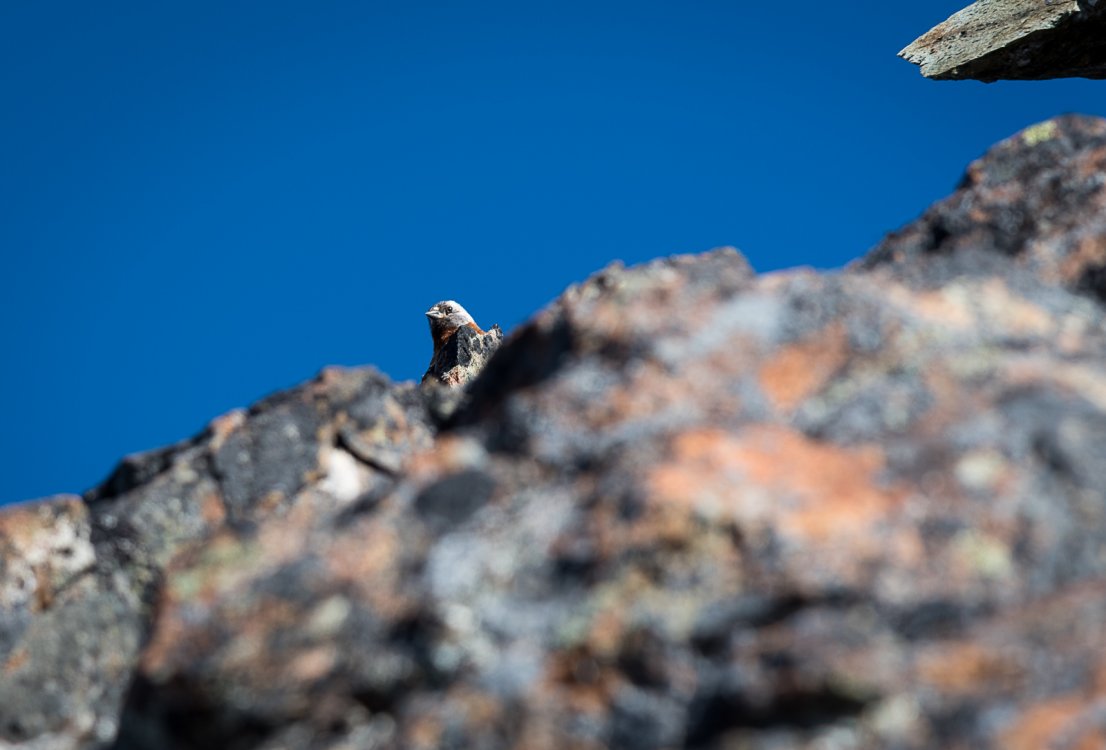

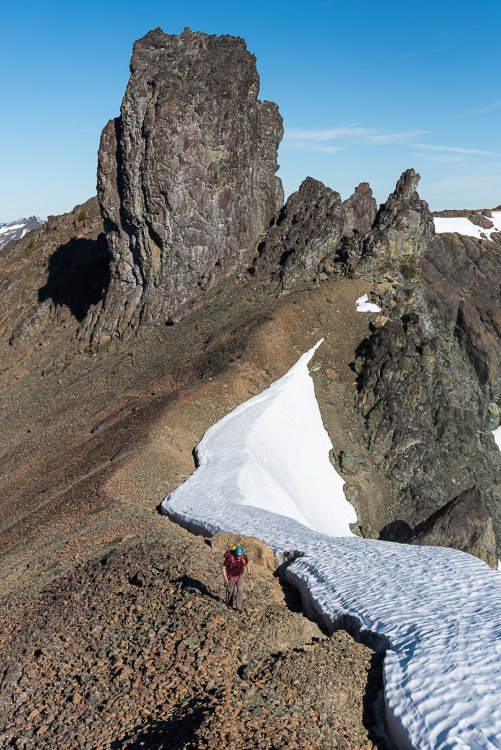
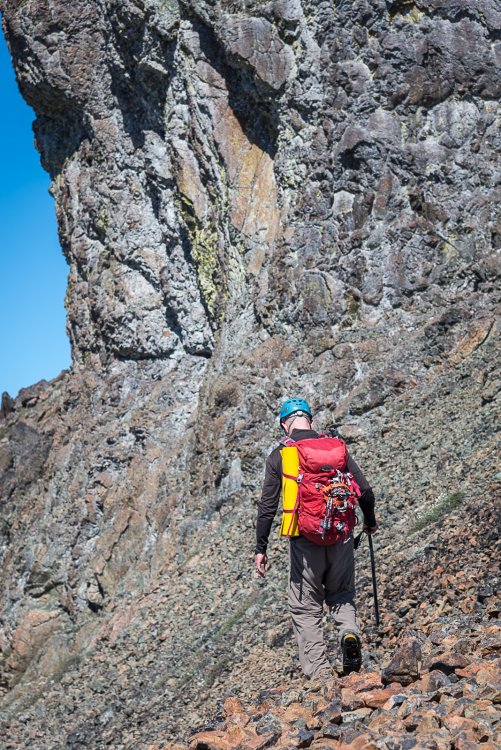
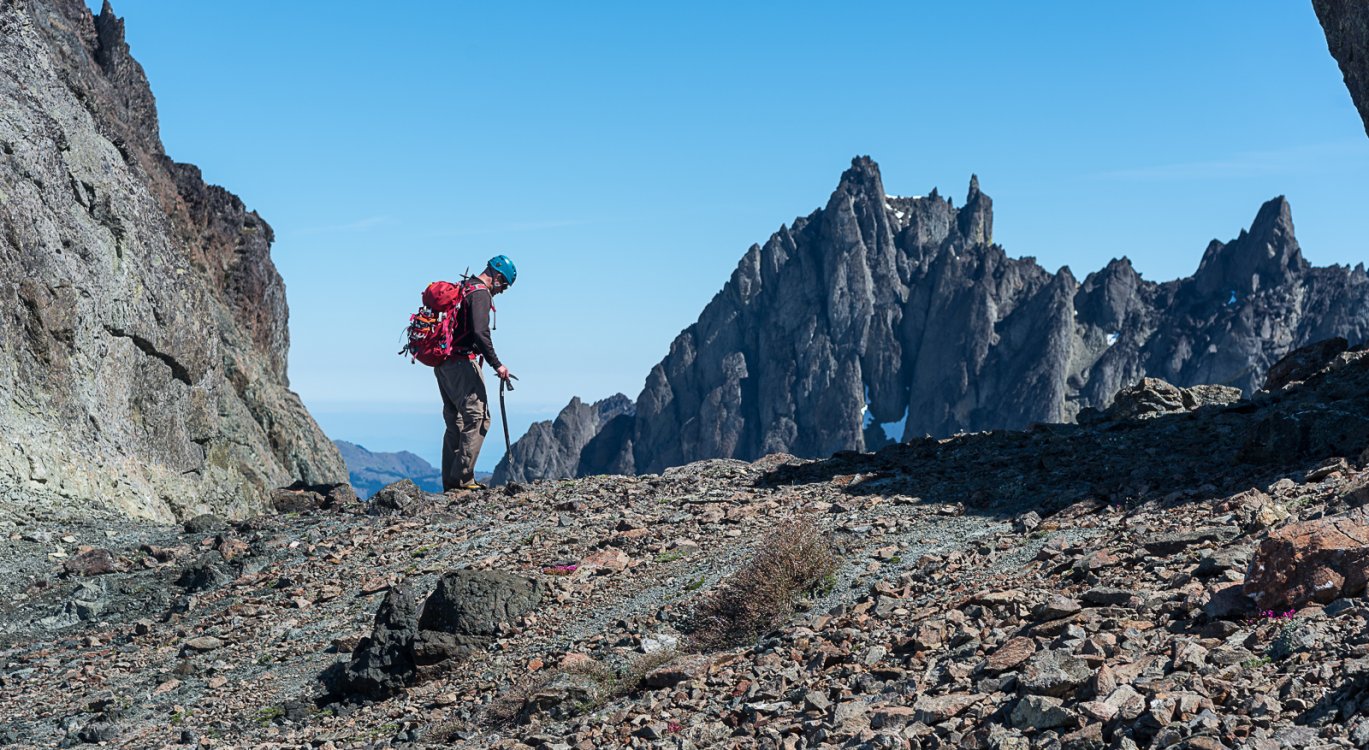

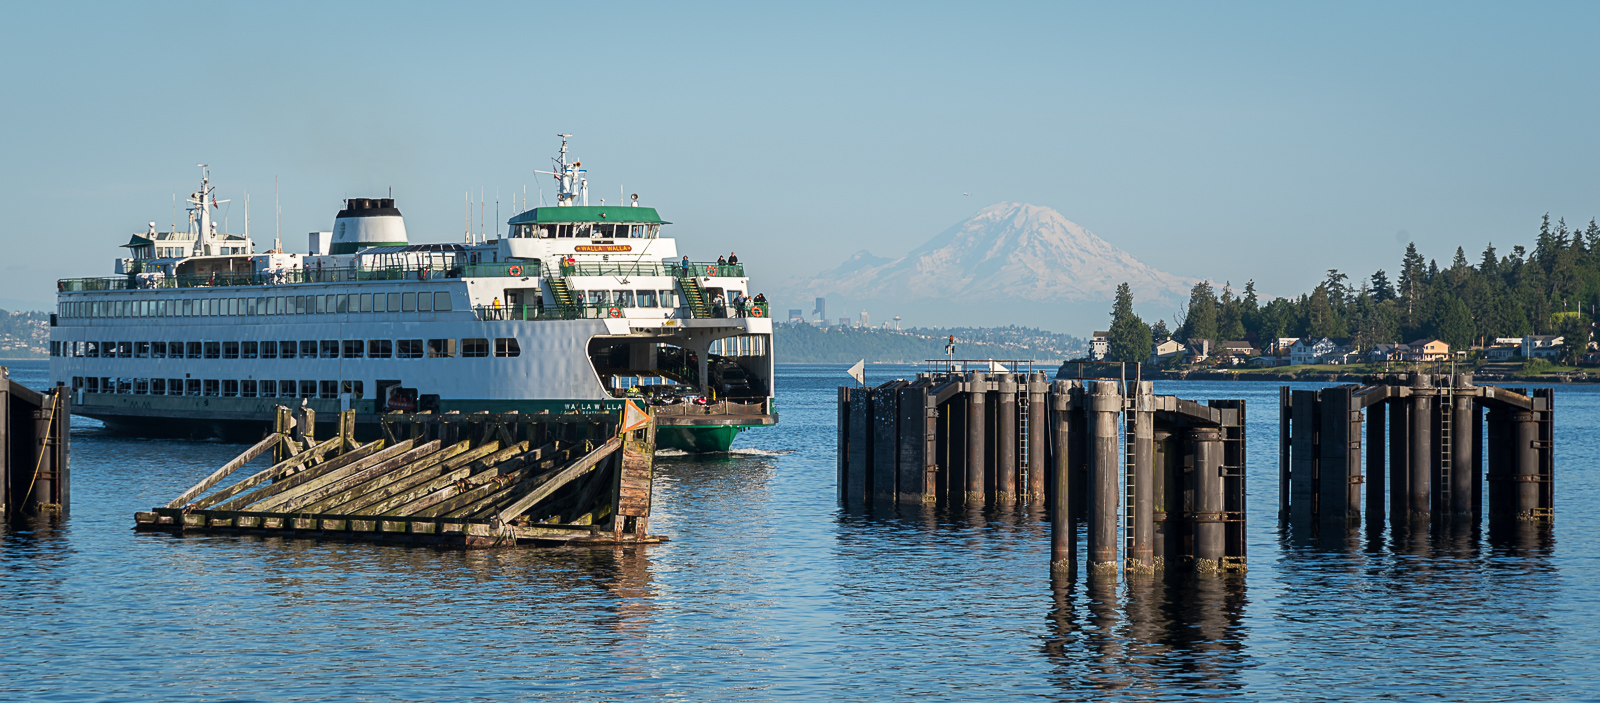


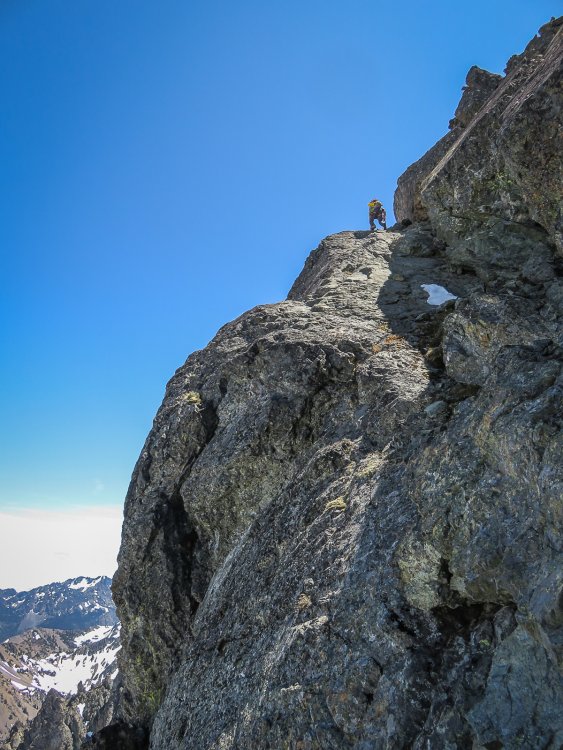
-
Trip: Sperry Peak - East Face Gully Attempt Trip Date: 11/29/2019 Trip Report: Sorry I didn't post this for a few months, but basically I was scared of others going up there, turning around and seeing the massive ice flows on Sloan, and poaching our prize. But what's done is done so now I want to share what I learned from an attempt of the East Face Gully of Sperry over Thanksgiving 2019. This trip report (http://www.nwhikers.net/forums/viewtopic.php?t=7980139) caught my attention and Sperry became the focus of my fall alpine efforts. The east face is a beautiful 3000 ft wall with just an hour approach! This gully looked absolutely sweet, like some moderate mixed/snow/ice route. This was the only report I could ever find, so it was hard to know what to expect. Fall 2019 was very dry for us. At elevations below 5000 ft, there was no snow come mid November. Then, right before Thanksgiving, it dumped about a foot down to 3000 ft and got extremely cold (highs in the 30s in the lowlands). Good for ice right? Sperry. Approach slabs on the left. Gully obvious in the middle. Daniel and I drove up to the trailhead and hiked into Wirtz Basin around sunrise. We could immediately tell we were in trouble. The 3rd to 4th class approach slabs looked like they were covered in thin verglass and fresh powder. We started up them, but decided we wouldn't be soloing them (Daniel was pretty new to ice climbing at this point) so we tried going through the dense trees to the right. This was impossible, running into steep cliffs and powder on no base. We bailed back to the slabs. Typical climbing in the approach slabs. We broke out the rope and I led up the right side of the slabs on WI1-2 R where sometimes your crampons would bust through to the rock. It was very insecure, albeit easy. Just not what Hyalite prepares you for. I belayed Daniel off a small bush and then we scrambled up higher. Then to the right there was a little WI3 near vertical step for 20-30 ft that might have taken 6 cm screws. I now realize this was the "little icy step" Jim referred to in his trip report. Damn, those guys were tough. Another veggie belay brought Daniel up. The next section involved climbing atop branches while getting soaked in powder. Then we traversed across more 3rd class slabs covered in fresh powder in crampons. My crampons were brand new and suffered dearly. Finally, we were staring up the gut at the gully, around 4000 ft. It was near noon and the strong sun was causing snow to constantly cascade down the gully. It looked absolutely icy and beautiful! Certainly one of the most beautiful gullies I've ever seen, but we were too late to continue. The powder would have been heinious. We stopped here. But the ice looked so good! Sloan, with the lines already forming. We rapped off trees back down to the valley floor. We took a walk further up Wirtz Basin and admired the incredible geometric features of Sperry. It is truly one of the underrated great mountains of the North Cascades. There were all of these cutting edge mixed ice routes that went 1000 ft up the SE face in the deep chimneys and cuts, but then they just petered out into nothing. There were even some chimneys like hundreds of feet deep and perfectly angular. I could just imagine Colin Haley deep in the darkness, climbing some great new route. I'd love to come back in the summer and climb one of the huge 2000 ft rock routes Beckey mentions that never get climbed anymore. I think the east face gully could be a great summer scramble, 3000 ft of scrambling with basically no approach. This is an incredible mountain. This looks like an incredible route. We'll be back! Inspiring SE side of Sperry. I've seen another mountain like it. Serious ice potential further up the valley. Cool easier ice potential up on Morning Star. Great north face of Sperry. Wonder if that route has seen a repeat? North face Big Four. Lessons learned: * this is a tricky route to nail in proper conditions. If that low snow hadn't fallen, the approach slabs would've been dry (like they were for Jim), but would the gully had been filled in? Probably not this year. We needed more snowfall above 4000 ft. Or if just a bunch of snow falls to 3000 ft and consolidates, but you can still drive to the trailhead, that'd work also. Or just climb this route in mid winter consolidated conditions with a sled access. * The approach slabs are really the only way to go. Don't try to go around. * those old timers are tough mothertruckers. Gear Notes: A few screws, some rock gear. Approach Notes: Short, probably one hour if you can drive to the trailhead. But the slabs can be cruxy...
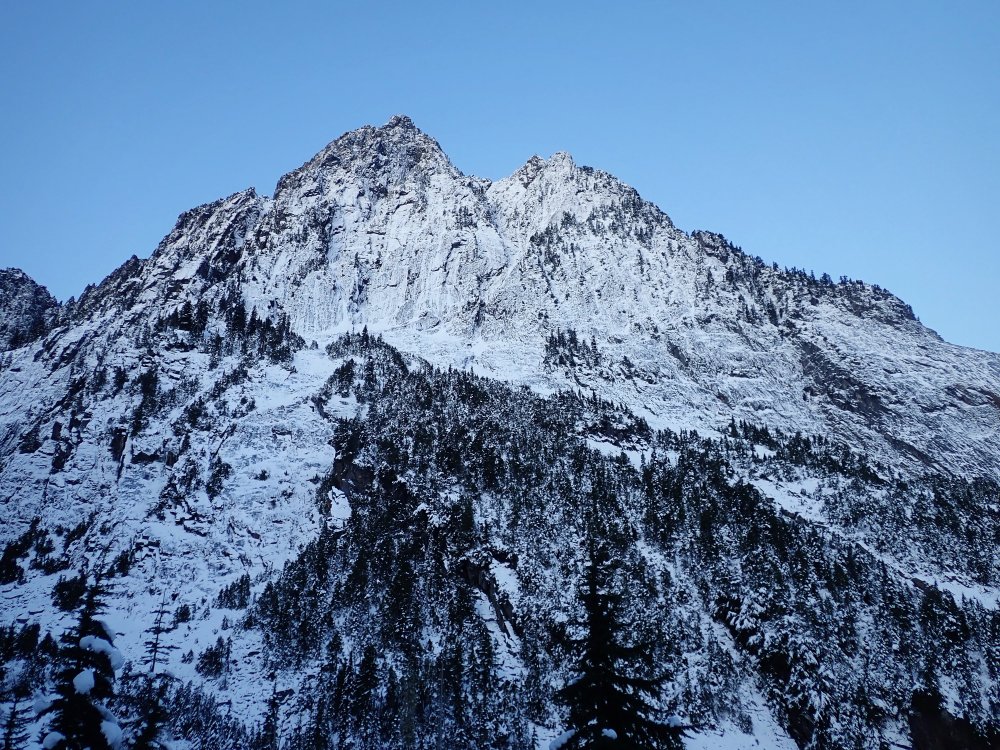
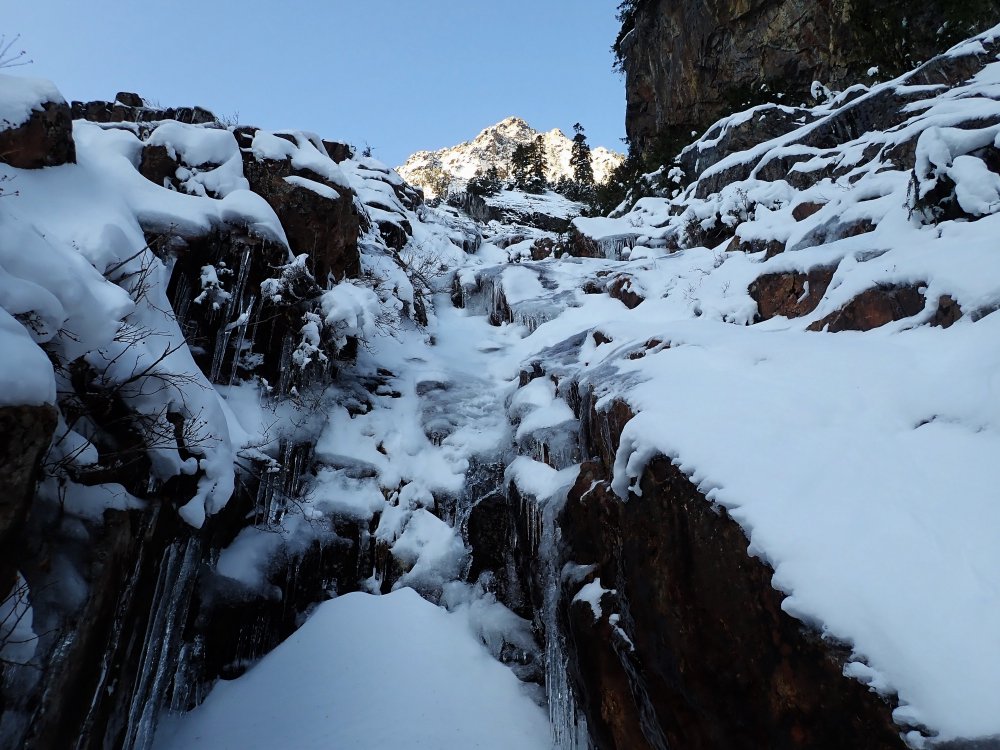
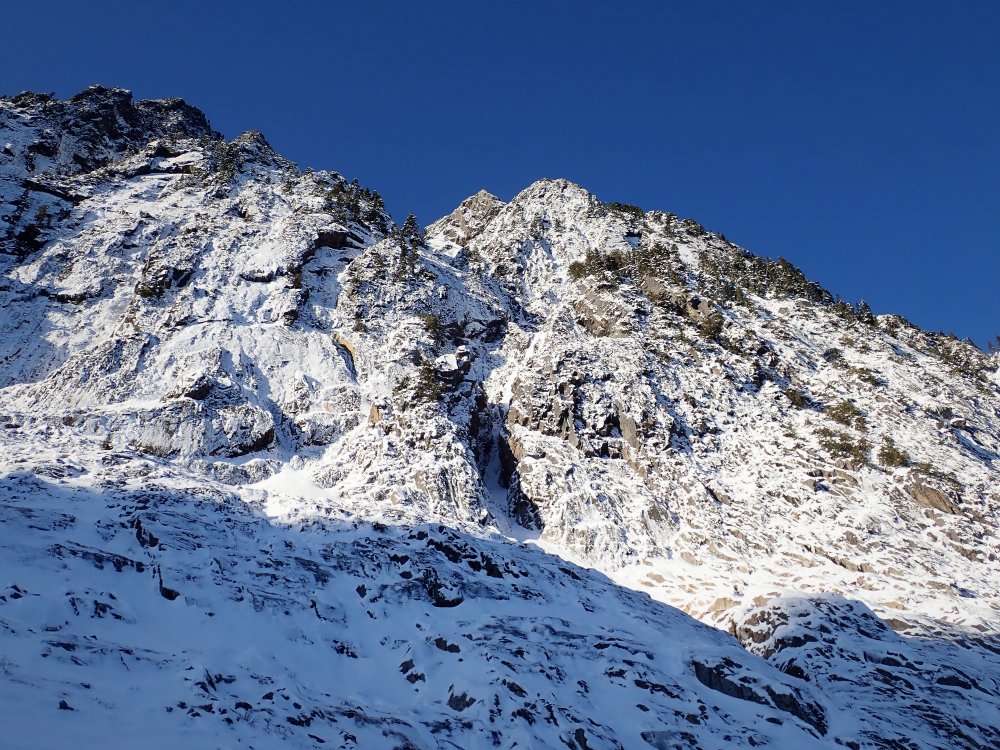
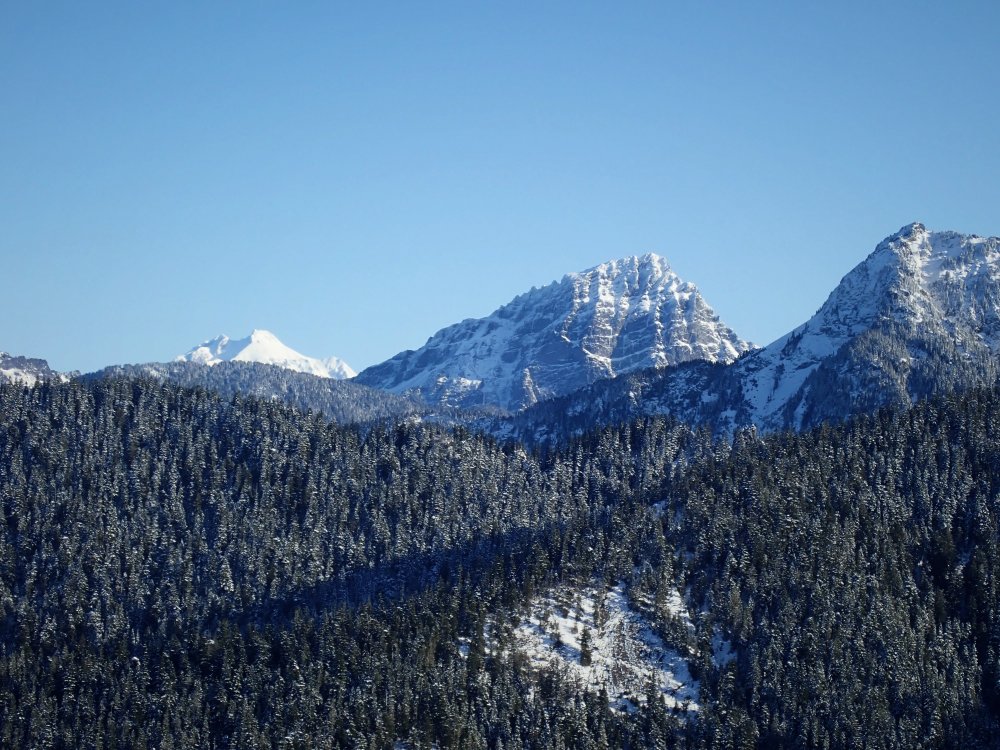
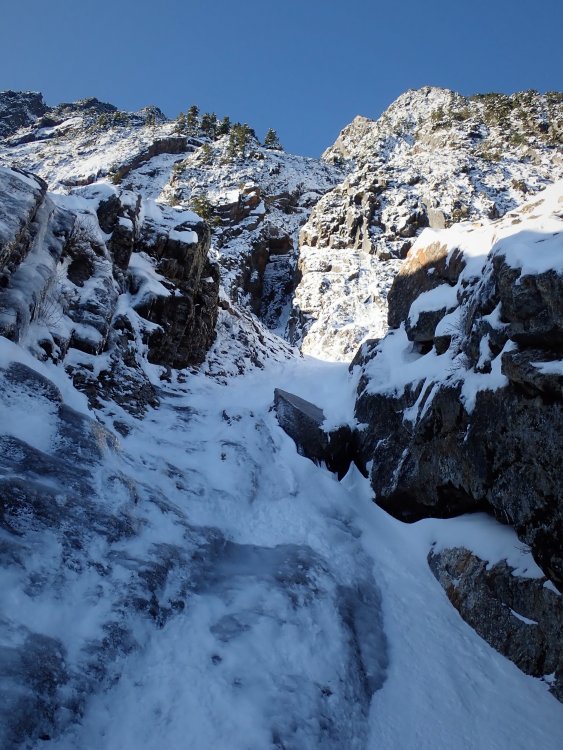

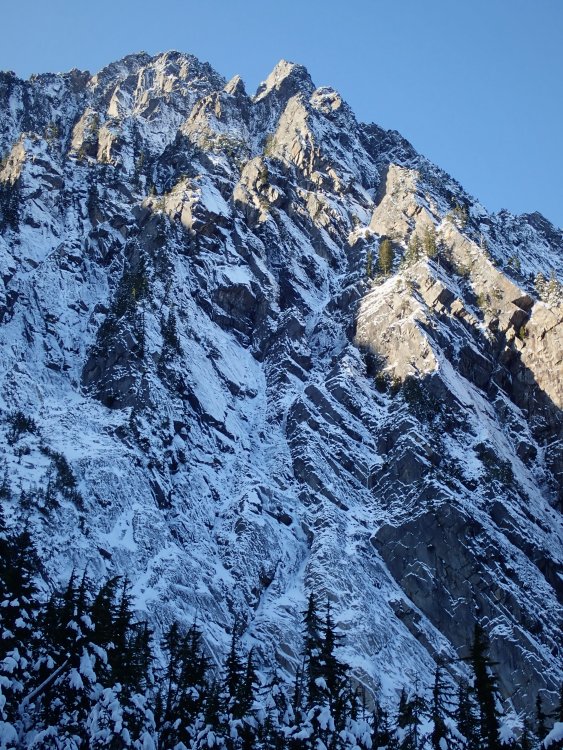
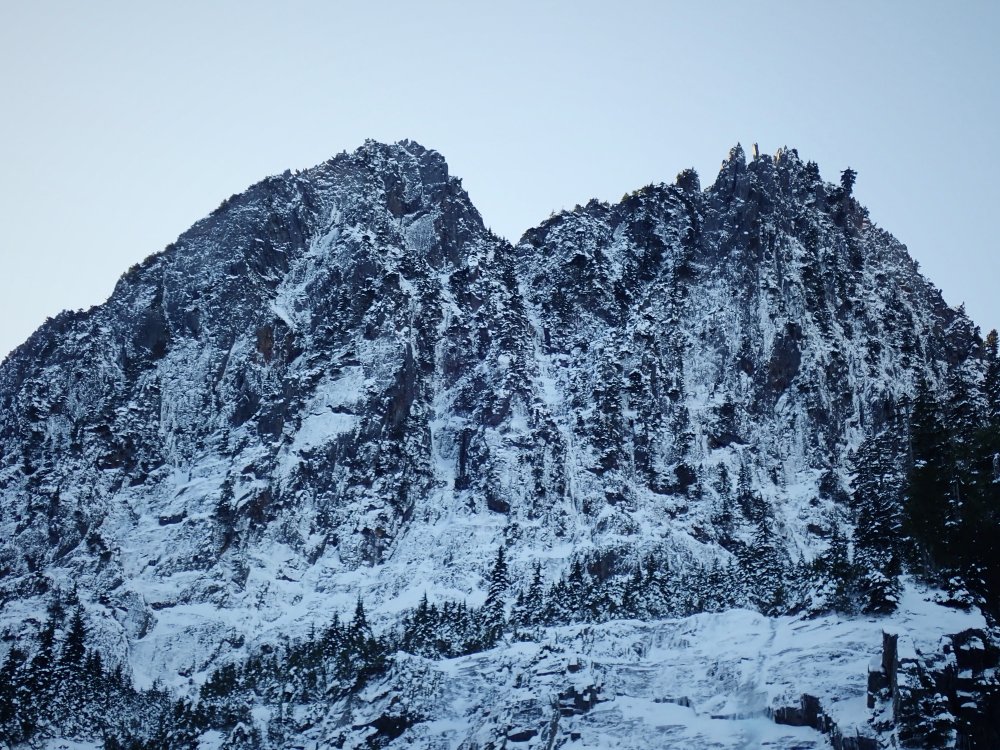


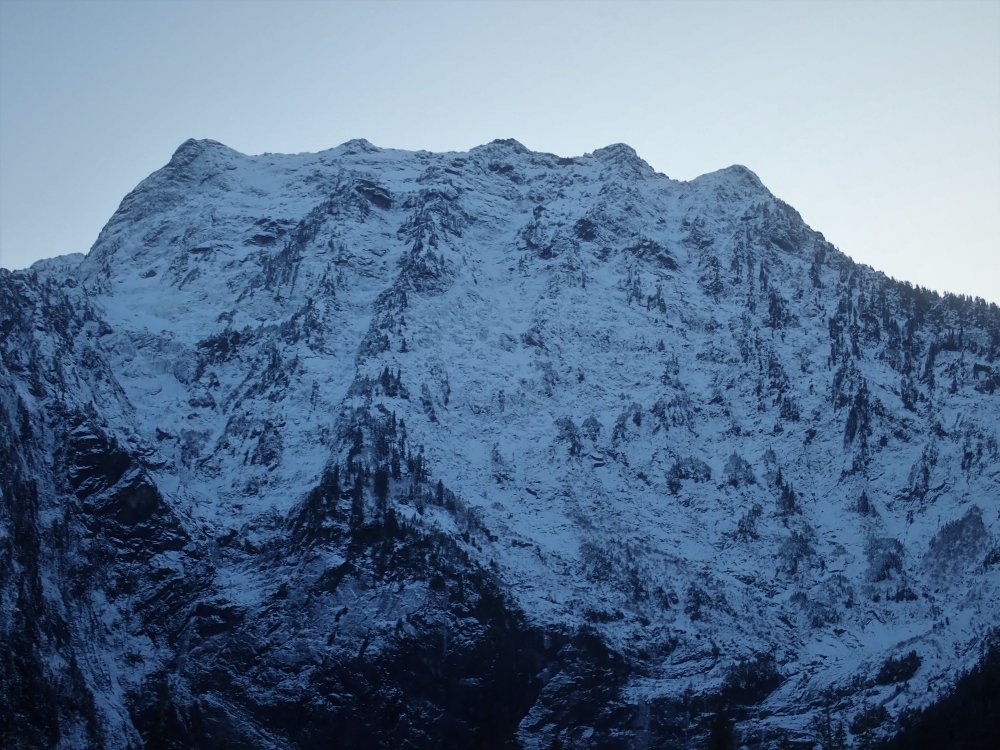
-
Trip: South Sister - Prouty Headwall Trip Date: 03/19/2020 Trip Report: Feeling grateful to have days like these right in my (new) backyard. I parked at Dutchman Flat, therefore having about 6 miles of pleasant road skinning to get to the usual Devil's Lake trailhead. The day started out cold and humid, but there were no winds and by the afternoon things felt like spring. I was able to skin to about 9000 feet (without ski crampons), traversing all manners of frozen mank along the way. Booting to the summit involved rime, a little blue ice, and icy hardpack that didn't even pretend like it would soften into corn. The summit was clear and beautiful, and a raven greeted me when I arrived. Wanting to avoid the ice I climbed up, I dropped into sheltered ENE facing slopes above the Prouty Headwall. Though it at times threatened to get icy, I was mostly skiing shallow, creamy, windbuffed pow. The standard lines through the headwall (that I had seen detailed elsewhere) were all out, with low tide and large rock bands. I couldn't see the exit, but a steep couloir directly below Hodge's Crest tempted me. I dropped in on the same soft snow as above, which soon became less and less edgeable. Below, I could see it transitioning to water ice and rock at the couloir's exit. Fortunately, a mellow ramp cut left at this time, dropping me perfectly onto the broad, powdery lower headwall. Hero turns ensued. I've been in Patagonia since December, so this was day 3 on skis for me this year and my legs were burning as I skied through the seasons from high alpine pow all the way down to a warm spring snowpack at Green Lake. I found the perfect spot to lay in the sun, doing my best not to think too much about the long, flat walk out. Back at the car a few hours later, I saw the first other humans I'd seen all day. Social isolation achieved. Gear Notes: someday I need to actually purchase ski crampons. Approach Notes: aerobic.
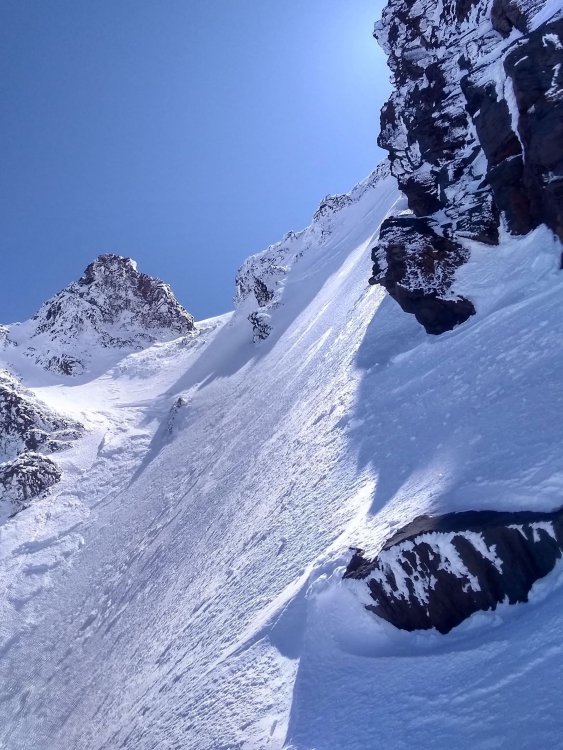

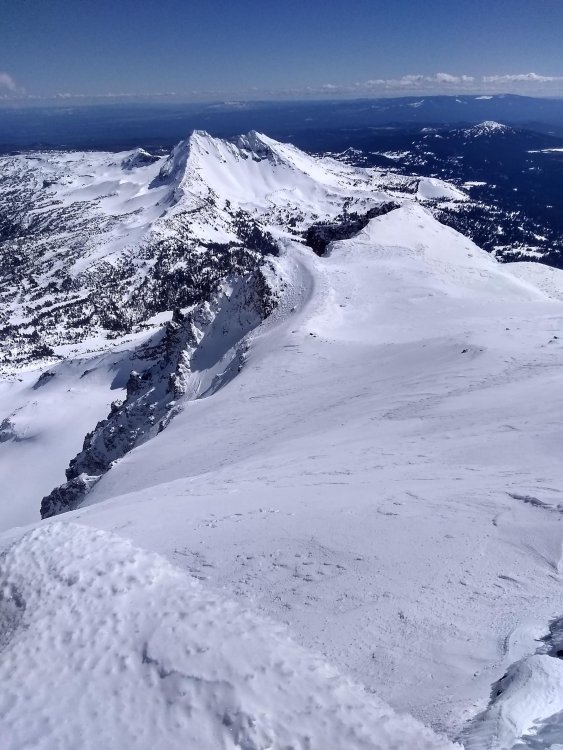
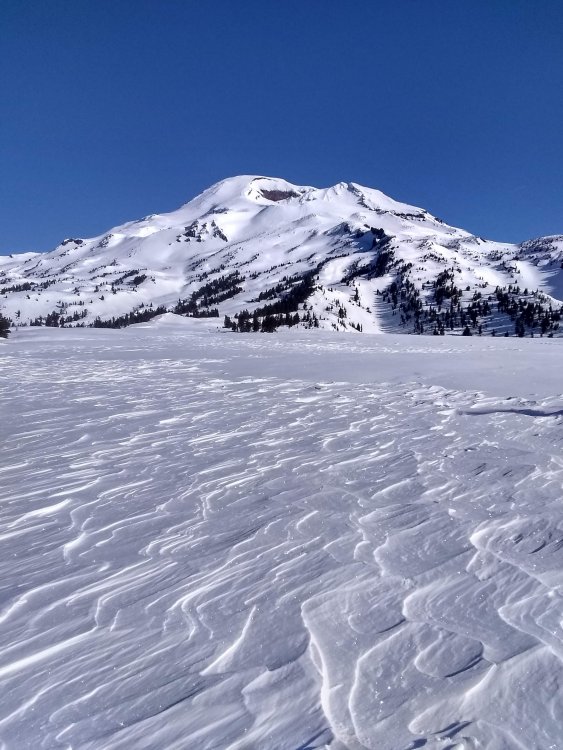
-
Trip: West Fork Ruth Glacier, Alaska - The Rooster Comb, DIrect North Buttress Date: 4/15/1980 Trip Report: OK, this all happened a long time ago, so here it is, to the best of my rapidly aging recollection: In late April 1981, Keith Royster and I had been camped on the West Fork of the Ruth glacier with a couple of friends for two weeks. We were waiting for a weather window long enough for a 3-day alpine style ascent of the unclimbed North Buttress of the Rooster Comb. The pattern had been 2 to 3-day periods of stormy weather separated by a day of clearing. We knew from our experiences of the previous three seasons spent on the Ruth that if we were patient that pattern would reverse, and we could expect a 3 to 4-day period of fine cold conditions. Rooster Comb routes Bivy sites We both had climbed other Rooster Comb routes on those earlier expeditions. Scott Woolums and I had bagged the first ascent of the Rooster Comb’s main summit in 1978 via the SE Face. In 1979 Jeff Thomas and I made an ascent to the NW summit from the top of the col between the Rooster Comb and Mt. Huntington. In 1980 Keith and Leigh Anderson climbed a new route up the NW Face to the NW summit. Each year we looked at the North Buttress and vowed to come back and give it a shot some day. That day was rapidly approaching for Keith and I, but the current weather was less than perfect. It WAS good enough for a bush pilot from Talkeetna to land on the West Fork just above our camp and drop off two British climbers, Nick Colton and Tim Leech. They post-holed over to our camp, introduced themselves and announced that they were going to climb our route the next morning. After the brits left to set up their camp we convened a hasty war council. We could beat them to the base; our gear was packed and we had skis. In a footrace we could move much faster that the post-holing brits and get on the route ahead of them. But we knew the weather, and it wasn’t going to be good. We had seen the lower buttress disappear under enormous avalanches more times than we could count. At best there would be continuous spindrift for most of the route. It was a huge decision… did we want the first ascent or the best ascent? In the end we decided to wait for the weather. We were climbing for fun, we told each other, not glory. Five days later Nick and Tim were back from their epic. Or maybe it was just a typical day on the crag for them, being crazy brits and all. The constant spindrift had slowed them down dramatically in the lower third of the route, and they had bypassed the crux section of the gully by aid climbing around to the right. If we couldn’t be first, maybe we could score some points on style. Now finally the weather was becoming settled, and we hoped most of the new snow had fallen off the route, because we were going to go that night. It seemed to us that, after weeks of watching the face over the past three years, the big avalanches cut lose in the mid-afternoon. By starting the climb at 10pm, we could be out of the lower gully before noon. Even in late April there is plenty of light for gully climbing at night. We blasted off right on time, leaving our skis at the base of the route. The lower gully was classic, with excellent snow and ice up a twisting gully, perfect granite on both sides. We climbed together, moving fast, the leader placing pro until out of gear. Sometime before dawn we switched leads at Nick and Tim’s first bivy platform, set dead center in a wide section of the gully. I was nervous just stopping there to belay. It must have been a nasty bivy in the conditions they were climbing in. Keith in the lower gully By 10am we were feeling like we were in safer ground, with most of the lower gully below us. About that time our friend Jim Olson was at the base to retrieve our skis. From the center of the West Fork he watched a massive avalanche fall into the gully below us. A cornice had let go from high above and it scoured the gully, then washed out halfway across the West Fork. A half-hour slower and we would have been right in the firing line. As it was, we were blissfully unaware of our close call. At about the halfway point, the gully becomes discontinuous as it runs into a prominent 500-foot rock band. We set our first bivy where the snow and ice of the lower gully met the rock band. It was a very small platform, maybe two feet wide, but well protected by the overhanging bulge of rock above. We spent the night in sleeping bags and bivy sacs at –20F. I had a miserable night, not cold, but cramping up on the narrow snow ledge. Even my facial muscles were cramping, locking my eyes shut. About 30 feet right of our platform, the next pitch began with a 30 foot section of vertical rock, beyond which the gully picked up again, though quite a bit more steep than it had been. Keith made quick work of the rock, and led up the gully a ways before bringing me up. I got a really sweet lead up the gully to the base of the crux pitch. This is the point where Nick and Tim had climbed out to the right, bypassing the heinous, rotten vertical ice hose that the gully had just become. I was not unhappy that it was Keith’s lead! Keith led up some beautiful gully ice to the foot of the overhanging 40-foot chimney partially filled with some really crappy looking ice. He put in an ice screw that MIGHT have held a light fall, and headed straight up. It was mostly a very scary looking stem, with his backpack and right shoulder against the rock wall on the right and his feet kicking holes into the rotten ice curtain on the left. It was a monster effort, and I was sweating bullets for him until he finally pulled over the top. Definitely a no fall situation! Keith on the heinous crux pitch Keith continued on easier vertical mixed ground and banged in a belay. I jugged past the heinous chimney, thinking all the while what a scary lead it must have been. I lead off from Keith’s belay, first traversing left to follow the remnants of the gulley, now degenerated into vertical ice-filled cracks. Protection was scarce, and my first piece after traversing left was a number 1 stopper. I climbed up another twenty feet of ice-covered rock, heading for a three-inch wide runnel of ice. At the base of the runnel I was REALLY looking for a placement, and there in the base of the crack was a fixed pin left by Nick and Tim. I hit it a couple of times with my north wall hammer. It rang true and I and clipped in. WHEW! I set my axe and north wall hammer into the ice of the runnel and grabbed hold of the sling I had clipped to the fixed pin to lean back for a good look up the ice runnel. Suddenly the rock broke, the pin pulled, and I was forty feet lower, upside down over 2000 feet of air. Hanging from the number 1 stopper, I watched my snow shovel fall back to the glacier. I looked over at Keith as I slowly rotated in the air. He told me, “Stop screwing around Kerr, I’m freezing over here!” I got back on the rock, and looked up to see my ice tools waiting for me, still stuck in the runnel. The pitch had been hard with tools. Climbing back up to them barehanded was “interesting”. Once reunited with my tools, I banged the pin back in and scampered up the ice. For the first time in two days I climbed into the sun. I anchored in and brought my frozen partner up. In a couple more easy pitches we were above all difficulties and built a commodious bivy ledge. The next morning we kicked up the summit snowfield and pulled out the flask for a quick summit celebration. The weather was still holding perfect, and we enjoyed the 360-degree view for a few minutes before starting down the ridge that led to the col between the main summit and the NW summit and plateau. The descent to the col was exciting ridge climbing, ending in a long free rappel into the col. The climb up to the NW summit ridge was not difficult and we walked west across the plateau to the top of the wide gully that leads down to the Huntington/Rooster Comb col. It was late and we decided to bivy in the bergschrund before descending to the col. Unfortunately, we were out of food. After we dug our way down into the crevasse and set up our bivy, I told Keith I was going out to find us some dinner. He looked at me like I had been smoking too much pot. I crawled out of our cave and crossed the top of the descent gully to the base of a large rock. I dug at the snow and rock for a few minutes, then reached into a hole in the rock and retrieved the bag of food and fuel that Jeff Thomas and I had left there the year before. Keith was suitably impressed with our foresight when I returned with a huge meal for two and a pint of stove fuel. We started down early the next morning, and made two rappels down the gulley. We were crossing the giant cornices of the col barely an hour after we started down, working our way across to the west side, and the safest descent route to the West Fork. I knew the way down from the Huntington/Rooster Comb col really well. I’d made two round trips over the col in 1979 on our way to Mt. Huntington’s SE side, and one round trip in 1980 to gain the East Ridge of Mt. Huntington. It’s straightforward snow and ice climbing, made a game of terrifying Russian roulette by the huge cornices and seracs that threaten every part of the face. This is definitely not a place to stop for a picnic, and Keith and I fairly flew down the face, reaching the glacier in about two and a half hours. Crossing the Huntington/Rooster Comb col on the descent We felt great after the climb. We had managed to cut a full day off the first ascent time, climbed the crux gulley pitch, and done it in a spell of perfect weather. The North Buttress is the most classic line in the West Fork, in my book, and I put it at the top of my personal list of achievements. Some days after we got back to base camp, Nick and Tim returned from climbing a new route on the West face of Mt. Huntington. You had to hand it to those two; they really maxed out the possibilities on their visit to the West Fork. Two years later Keith and I skied back into the range from the North, destination: the Colton/Leech route on Mt. Huntington. But that is another story… Since our ascent in 1981 this route has only had one other successful ascent. Gear Notes: Lightweight alpine rack (screws, one picket, assorted pins), 160m double 9mm ropes, sleeping bags/bivy sacs, MSR stove, 3 days food/fuel
-
Via dei Ragni: Grade VI, 95deg snow/rime/ice, M4, 1000m Scribe/Photos/Climbers: Jeff and Priti Wright Google Street View: Cerro Torre Summit 360 Panorama https://youtu.be/nZ4O199GfAo?si=Kr-etK2F4MSCGxVn https://youtu.be/RNNtXFuI_RQ?si=DDMqTiOcCEcDAJGP https://youtu.be/iRWR_DQoL3A?si=ebEbe75BW4pbSuKz We’ve had a picture of Cerro Torre on our desktops, phone wallpapers, and posters above our bed for the past 5 years. It was the reason we took up ice climbing in the first place. In February 2016, we made our first attempt on this route, hoping to at least get a glimpse of the scale of the mountain and understand what it took to climb it. The weather was too hot by then for the climb, and after three days, our high point was below the hard technical climbing. Previous trip report: The road to El Chaltén The Fitz Roy Massif These past two months were our fourth (and longest) climbing trip to the Chaltén Massif, and sixth year of watching the Patagonian weather patterns. We wanted to return to attempt Cerro Torre again, but the next two seasons were not possible because of bad weather. Last year, at the beginning of February, we saw a fantastic weather window, and the stars aligned. We flew down to Patagonia in a 9-day magical whirlwind of constant movement, and summited Fitz Roy via the Franco-Argentina route. While on the summit of Fitz Roy, looking down at the surreal summits of the Torre, we were determined more than ever to come back the following season. Day 1. We arrived in El Chaltén on New Years Eve, the last day of a 4-day weather window (brecha)…we missed it! Since then, January was filled with short stints (8-12hrs) of good weather in the mountains, and the arrival of a 6-day mega window in early February sent an electric buzz throughout town. We were a couple of bats out of hell with our 40lbs packs each as we set towards Laguna Torre. The plan was to pass through the Niponino base camp in the Torre Valley and bivouac at the higher Noruegos (Norwegian) bivouac, which would put us closer to Col Standhardt (the next day’s objective)…the passageway to the West Face of Cerro Torre where the Via dei Ragni route begins. Our bivy site at Noruegos Day 2. From the Noruegos bivy site high on the slopes of the Torre Valley, we traversed near the base of the Torres, under the celebrated SE Ridge (perhaps the greatest climb in the world) and also the 1959 Maestri line to the triangular snowfield where so much history and controversy took place. From the East, all of the Torres stand impossibly steep and impassable. To get to the Ragni route on the West side, we would climb up and over the Col Standhardt where an implausible car-sized chockstone sits interminably between the col’s steep walls. From the col, one gets the first glimpse of the Southern Patagonian Ice Cap (Hielo Continental), a massive expanse of ice 200mi long. On a rare, clear day such as this day, we could see green Chilean fjords across the Ice Cap between large, snowy volcanos. A Lighthouse Several rappels deposited us down to the Circo de los Altares (Cirque of the Alters), an impressive crescent of white-capped peaks and toothed spires. From there we headed up another glacial ramp on Cerro Torre’s West Face to a high camp, 150m below the Col de la Esperanza (Col of Hope), first reached by Walter Bonatti in 1958 who hoped that this col would one day blaze a path to the summit. It wasn’t until 1974 that a team of Italians from the Ragni di Lecco (thus the name “Via dei Ragni”) completed Bonatti’s vision. Circo de los Altares Steep snow climbing and easy mixed terrain led us towards the camp at Col de la Esperanza, the camp we hadn’t reached on our last attempt. As we hiked past our previous high point, our hearts soared. This time around, the climbing felt much easier with 4 more years of climbing experience under our belts. Day 3. This day was a rest day of sorts. To set ourselves up for success on summit day, we were moving to the highest camp a few hundred meters up: El Elmo (“Helmet”), a prominent plateau below the steep, technical climbing. Those who were faster and stronger than us had gone straight to the highest camp the day before and were now going to do the hard work of battle-axing the bullet-hard blue ice and cleaning the cotton candy mushrooms of the summit. As we came over the Col of Hope, we entered an otherworldly expanse of mangled rime towers and precarious exposure. These deformed blobs of ice towers with icicle branches and feathery leaves seem like something only God or Dr. Seuss could conjure. It’s something so beautiful and terrifying at the same time. We were face to face, looking up at thisbeastly Tower. A spectacular nightmare. Day 4. Summit Day! We were pretty antsy to get going on the summit push. Falling snow greeted us when our alarms went off at 2:00AM as the mountain was enveloped in a cloud. All over camp, alarms went off and were snoozed as the precipitation discouraged movement. When the stars finally came out again, we were the first to muster our strength and get to work. Walking up to the base of El Elmo in the darkness, the first overhanging rime ice mushroom of the route, we gave a sigh “ah, breakfast!” The last 10m didn’t actually have any good protection (besides maybe a horizontal picket), and it was a sequence of cutting the feet loose, campus’ing from questionable tools, and shoving knees into the soft rime to make upward progress. Once at the top of El Elmo, a crowd had formed at the base, chomping at the bit. All of camp was finally up. The snooze button had proved an epic failure of our collective, strategically staggered alarms. We all watched in awe and gave whooping shouts from this low perch as our friend, Fabi Buhl, paraglided from the summit in the wee hours of the morning, slowly swirling in front of the spectacular sunrise over Lago Viedma. He was the first ever to fly off the summit of Cerro Torre having climbed the mountain first (and not dropped off via helicopter). After El Elmo, the mixed pitches zig-zag through a maze of rock and ice up to the base of The Headwall. Two pitches of blue, overhanging, bullet-hard ice. The final pitches mount three tiers of giant rime mushrooms facing the Ice Cap. This high ridge gets pummeled by the wet, freezing storms that race around the Southern Ocean to create these crazy rime formations. The first and second rime mushrooms had formed spectacular, natural blue-ice tunnels created by vortices of wind spiraling up the ridge, clearing a path through the thick outer layer of soft rime ice. Climbing into this vertical subway tunnel for 60 meters felt like entering a portal into another world. It eventually funneled up to an elevator shaft and spat us out of a squeeze tube. For the second and third mushrooms, we attached Petzl prototype “wings” to our ice tools to make purchase in the soft, overhanging, cotton-candy rime. These wings are horizontal plates that bolt onto the picks of our ice tools like Dilophosaurus gills. The Final (Summit) Mushroom was a beast. The previous day, it had taken the other parties many hours to clear a natural half-pipe, then dig a tunnel through the steepest part for many hours. Their line then exited their manufactured tunnel out onto the overhanging summit lip. Walking up to the steepest point on Cerro Torre on a perfectly still, clear day was absolutely surreal, basking in the bright orange-red glow of the sunset. The 200 miles of the Continental Ice Cap stretched before us and the Pacific Ocean now clearly visible. Behind, on the other side of the Torre Valley, small, wispy clouds hovered over the summit of Fitz Roy. We were lucky to get perfect lighting to fly our drone around for 30 minutes alone before we headed back down to our tents at El Elmo for the night. Days 5 and 6. To get back to town, you can reverse your way up Col Standhardt (M7 shenanigans), or take one of two trekking passes along the Ice Cap. We had experience taking the Northern pass (Paso Marconi) which was now in really bad shape. We opted for the Southern pass (Paso del Viento) to try something new, and hopefully be able to turn our brains off for a few days (sadly, this was not the case). The Hielo Continental spans 50mi across and crawls 200mi north to south across Southern Patagonia. It looked so beautiful and serene from our climb. Now, face to face with this beastly crocodile, it was the stuff of horrors. Canyons after canyons of impassable crevasses, we zig-zagged our way in no logical direction under a bright, unhelpful, full moon. From the air, our tracks must have looked like the random scribbling of a toddler on a massive, blank white floor. A sun dog greeting us after our descent. Finally reaching the pass and seeing people again after such a mental test of sanity was nothing short of jubilant. A popular trek is to take the pass South to Lago Viedma: the Huemul Circuit. We were now on a delightful trekking path and could now…finally… turn our brains off and just put one foot in front of the other for a mere 14 miles back to ice cream and showers and safety. Thanks: We had good confidence in the forecast and the length of the window, but it’s still important to have daily weather updates to anticipate the inconsistencies between each day. We’re so grateful for our weathermen who sent us updates to the inReach and gave us both confidence and peace of mind each day that we spun ourselves further from civilization: Dan Berdel, Devin Monas, and Rolando Garibotti. We’d also like to thank Dave Burdick (Alpine Dave!) for his support, inspiration and beta on the route. Also thanks to the American Alpine Club Live Your Dream Grant for supporting this trip. Recommended Reading: The Tower, Kelly Cordes Patagonia Vertical, Rolando Garibotti Enduring Patagonia, Greg Crouch Gear Notes: 13 ice screws (including 3 stubbies) 1 Picket (to place horizontally in vertical rime!) small set of nuts (Wildcountry Superlight) small rack of cams (Black Diamond Ultralight cams .4-1, Metolius Mastercam 1-3) 2 Petzl Nomic Ice Tools + Petzl prototype wings (rented from Viento Oeste gear shop in town) Petzl V-link Umbilicals 2 stuff sacks (gear management in pack, and also to leave for snow anchors) The North Face Phantom 50 backpack 4 double-length Petzl Pur'anneau runners with 2 Camp 22 biners each 2 double-length Petzl Pur'anneau runners with 1 Camp 22 biner each 7 single-length Petzl Pur'anneau runners with 1 Camp 22 biner each (can’t have too many runners) Patagonia R2 Jacket Patagonia Micro Puff jacket Patagonia Macro Puff jacket Patagonia Kniferidge hardshell jacket (didn't use)...also, it's now the "Ascensionist Jacket". Mainly wore the Micro Puff for outer layer Patagonia Nano Air Pants Patagonia Softshell pants (bibs) Patagonia base layer (top+bottom) Platypus 2L soft bottle Garmin inReach Mini (love this little guy!) Petzl Dart Crampons 2x Mammut Twighlight Twin Rope (7.5mm) Petzl Sirocco helmets Petzl Sitta harness (for him) and Arc’teryx harness (for her) Metolius Feather Nut Tool (each) Mammut Smart belay device (not the Alpine Smart) 3 lockers for group: Grivel Tau K12L, Grivel Lambda HMS, Grivel Plume 2 medium fuel canisters Jetboil Sol stove Safety ‘biner (each) – Edelrid 19g caribeener, Petzl Micro Traxion, short Sterling Hollowblock, Trango Piranha knife Bivy setup – Full Length Thermarest NeoAir XTherm sleeping pad, Exped Air Pillow UL, Feathered Friends Spoonbill sleeping bag MSR Advance Pro 2 Tent (amazing!) La Sportiva TX4 Approach shoes La Sportiva G2SM boots Petzl Reactik headlamps (each) + 3 extra AAA batteries + Petzl e+LITE headlamp Other things: 1 long spoon to share, chapstick to share, small Joshua Tree sun stick to share, Frog's Tung phone leash, lighter, whistle, duct tape, Thermarest repair patches, Voke tabs, Nuun, pain killers, 1L Platypus soft water bottle (for her) and 750mL HydraPak Stash (for him), warm headband, glove liners, 1 pair thick long socks (each), sunglasses, ear plugs, WRFA emergency form, small pencil, cotton handkerchief, wad of toilet paper, ID, Credit Card 1 Swix alpine pole (with snow basket) Arcteryx ball cap Adidas Sunglasses (with nose sun guard), no longer available iPhone 11 Pro (with route beta downloaded) GoPro HERO 5 Session (with helmet mount) DJI Mavic Mini Drone (remote and drone stored in USPS Tyvek bag) Dinner: 2 AlpineAire meals, 3 Near East Couscous boxes repackaged with small olive oil packets in ziplock bags, salt Day food was mostly bulky, yummy snacks: vegan jerky, dried mango, nuts, Cheese-Its, sesame sticks, Gu, nut butter, etc Approach Notes: Approached via Col Standhardt. Also possible to approach via Paso Marconi (currently in difficult/sketchy conditions) or Paso del Viento (long). We came back via Paso del Viento, but it's also possible to climb back over Col Standhardt (M7 shenanigans with old fixed ropes here and there).
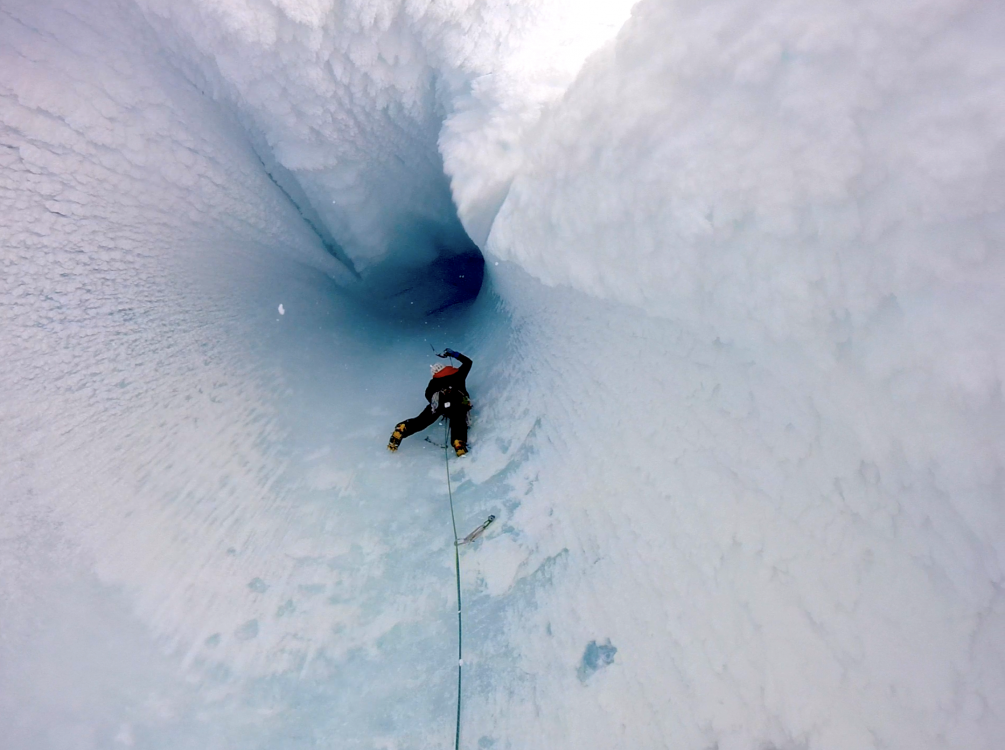
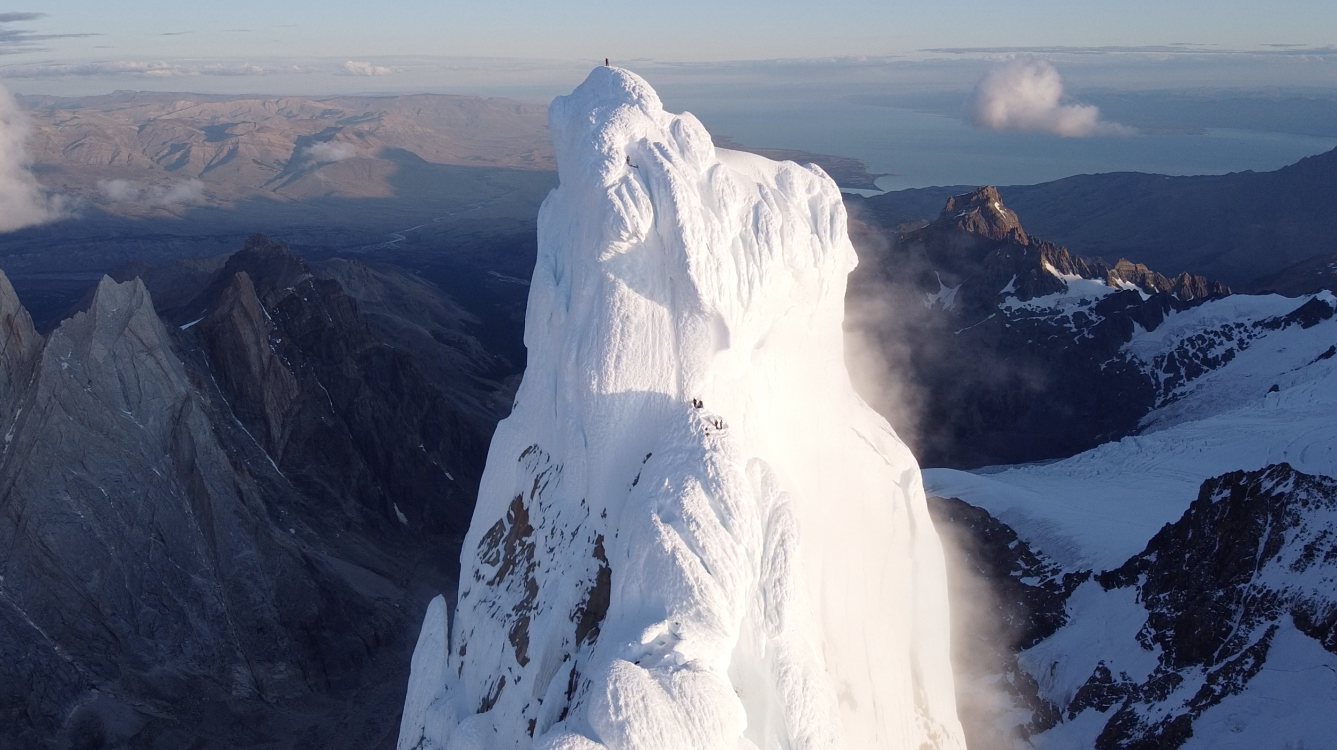
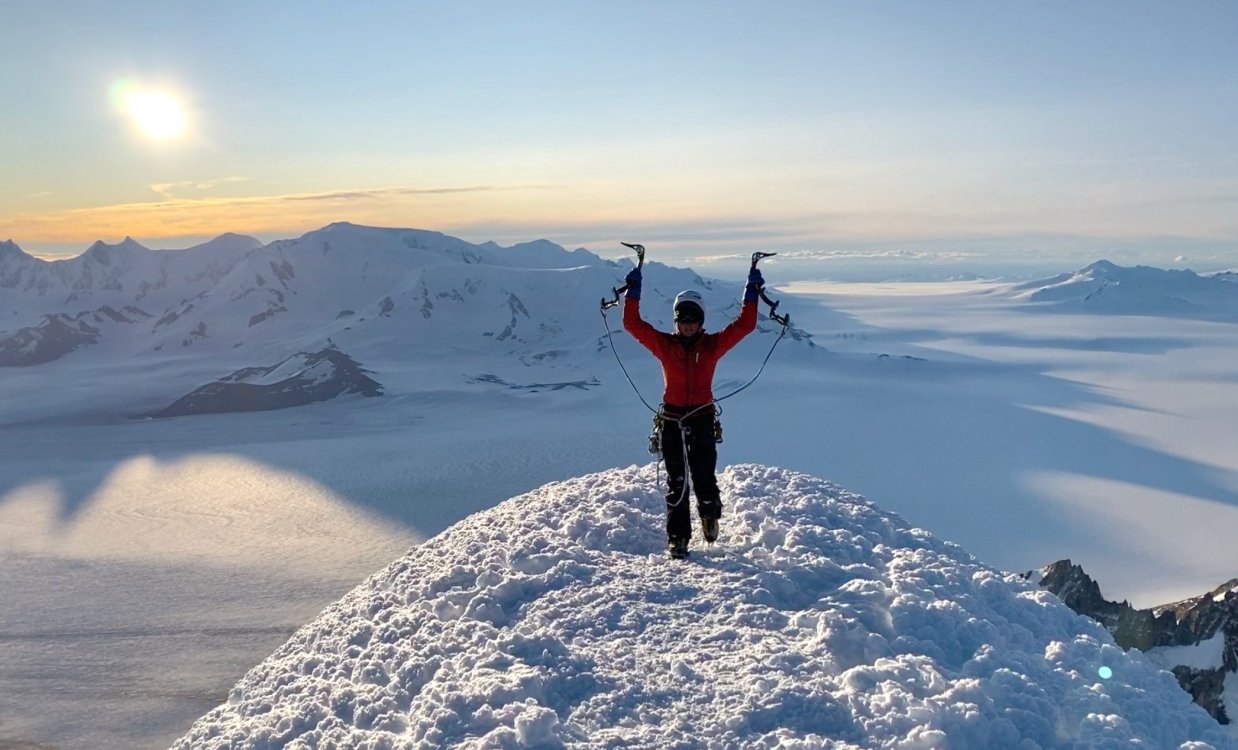
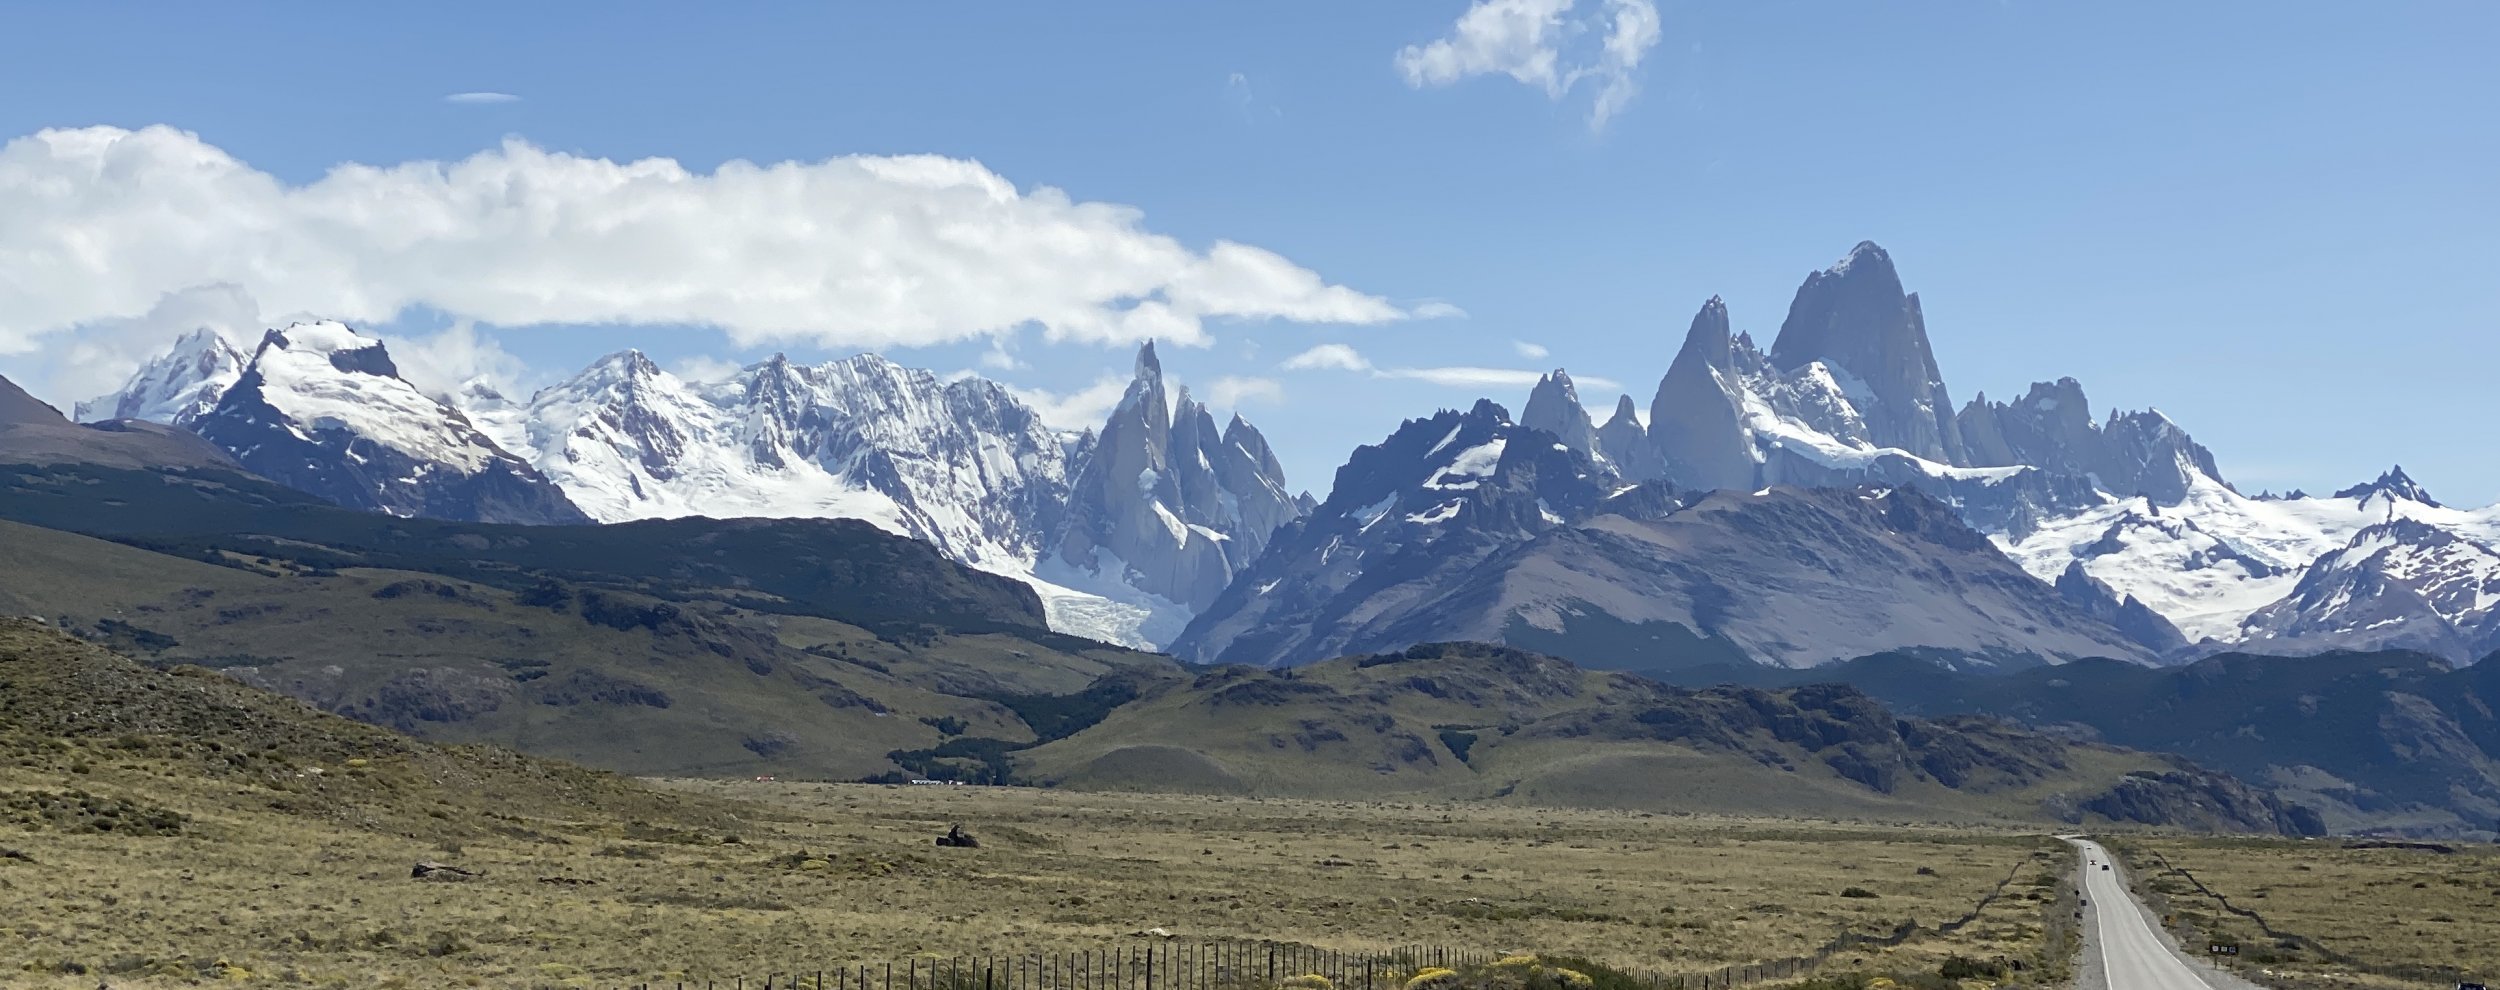
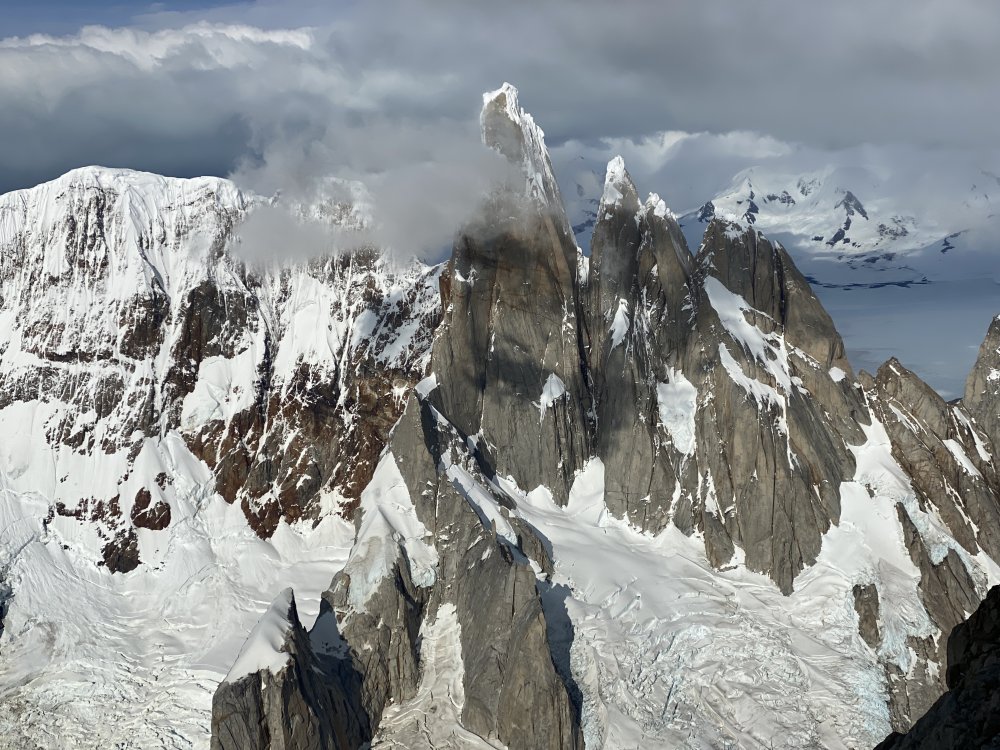

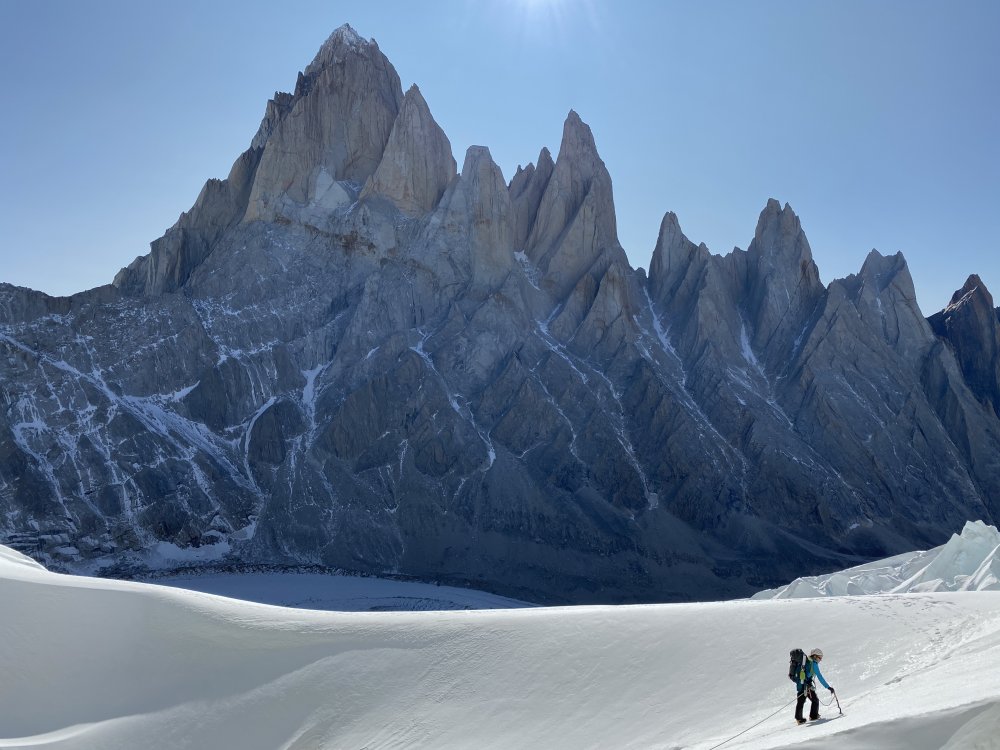

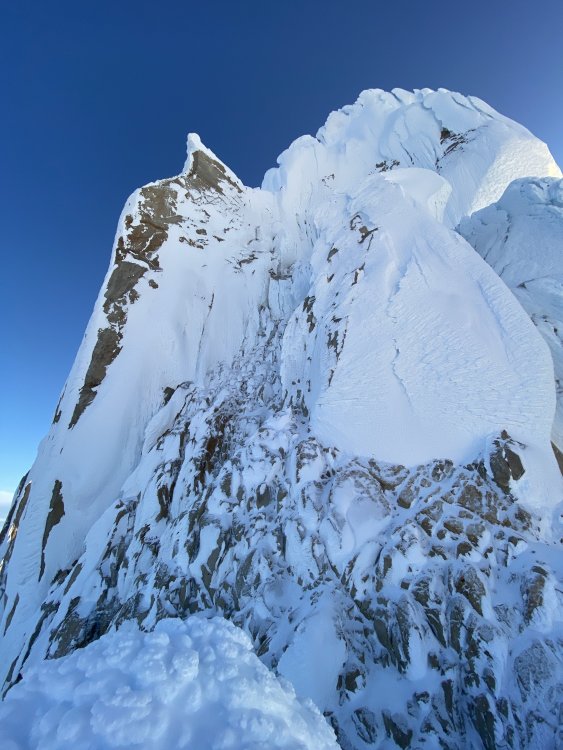
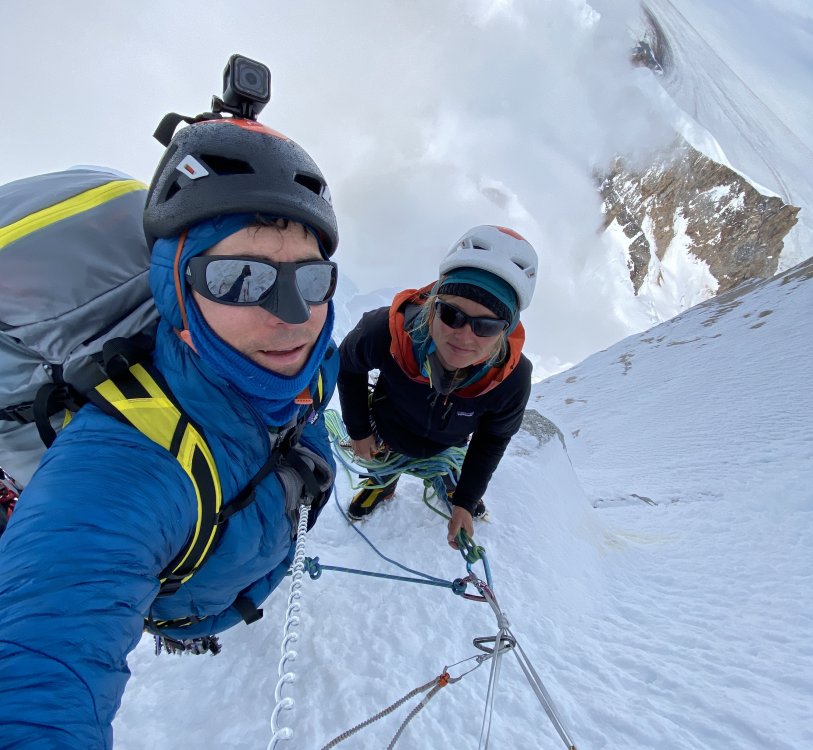

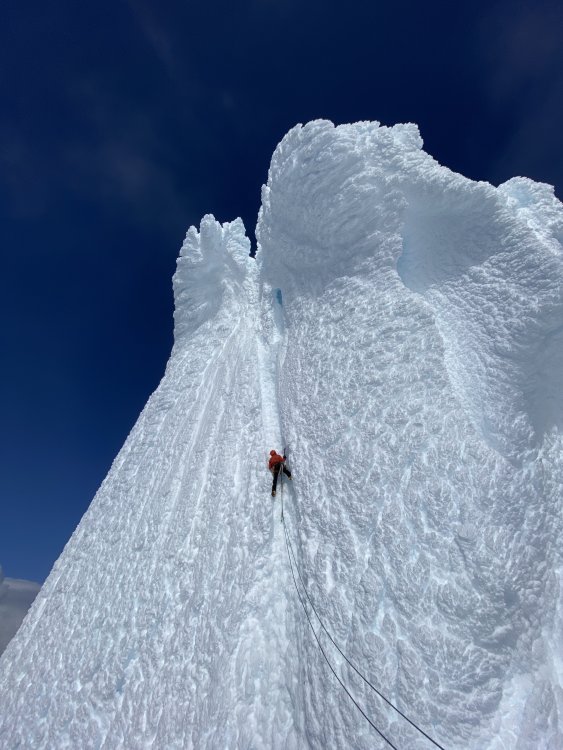


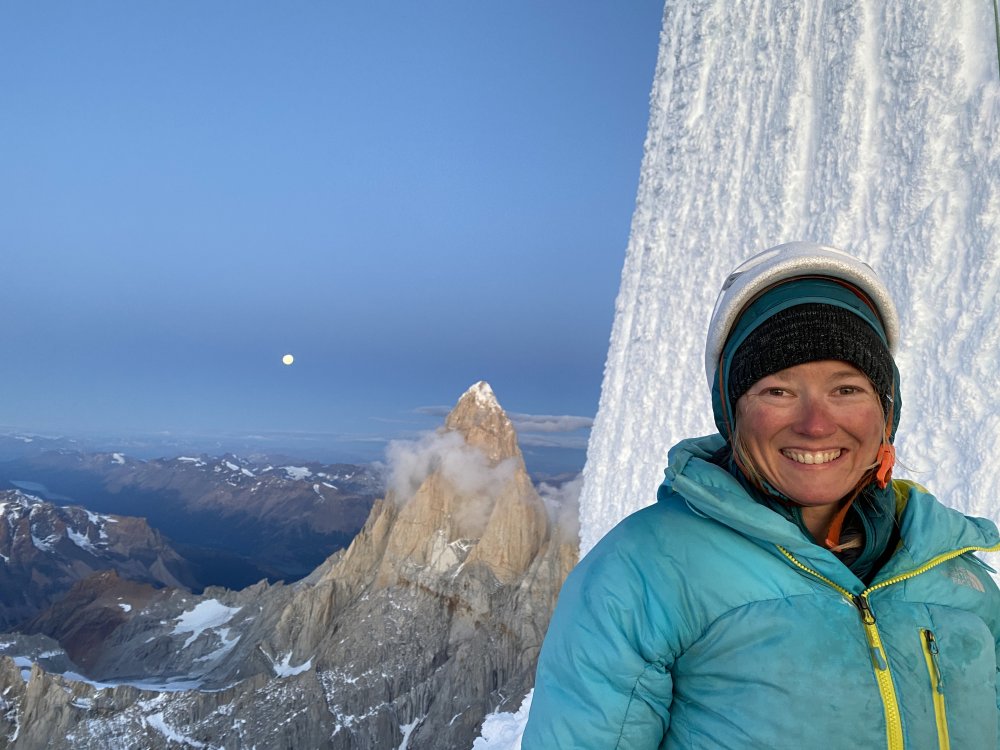
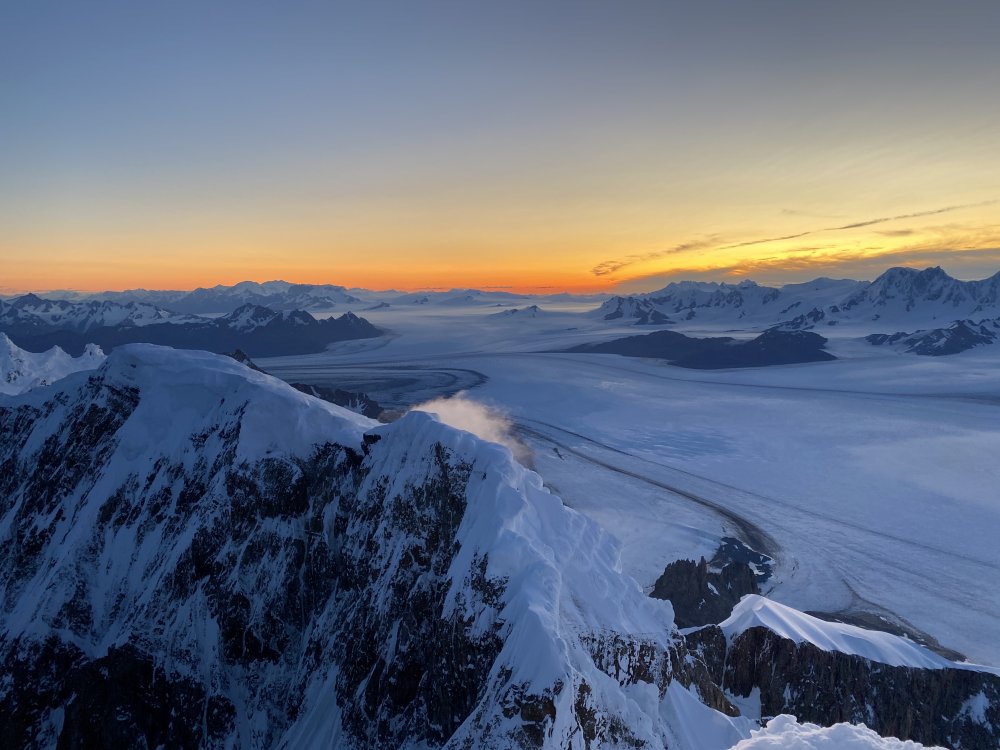


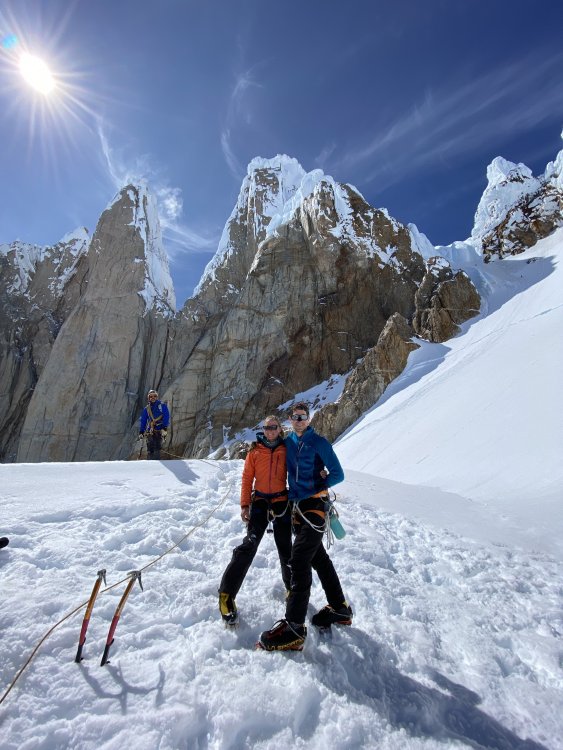


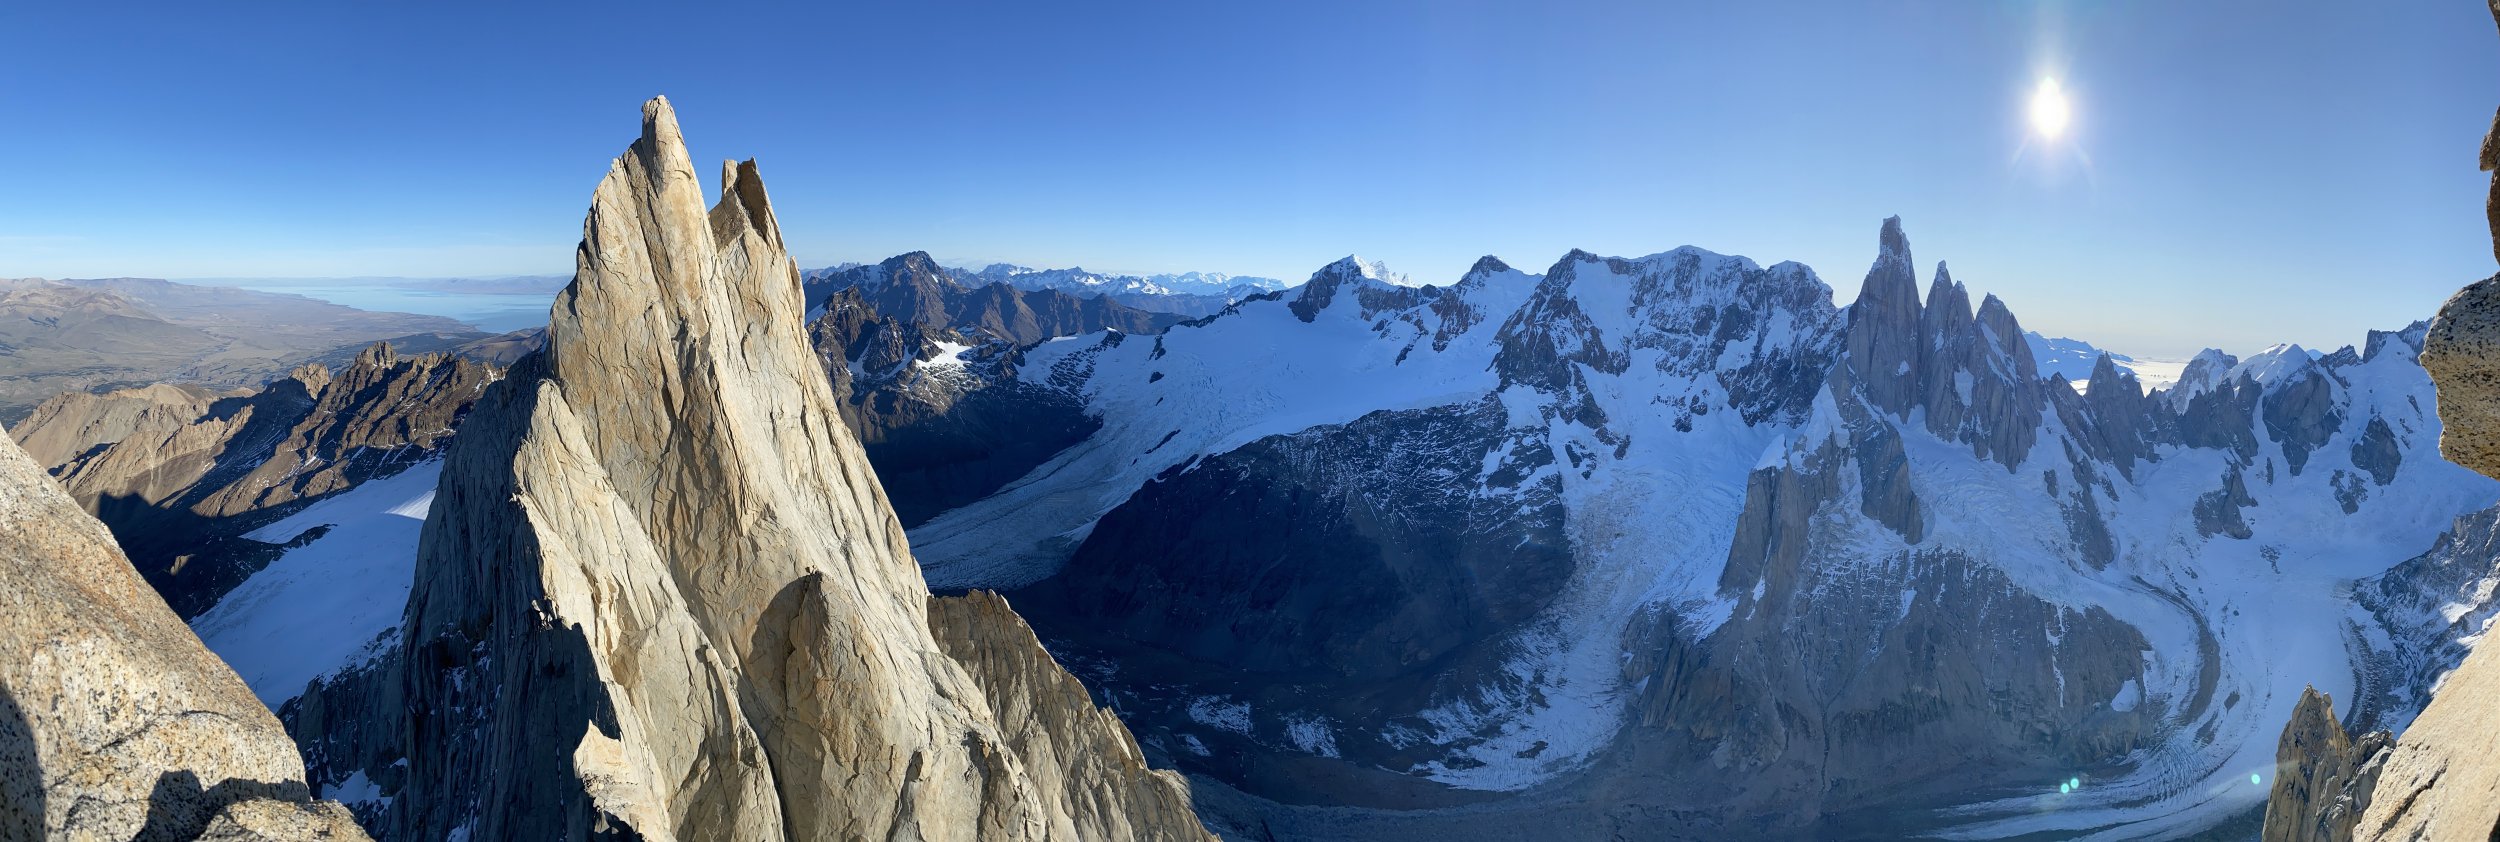
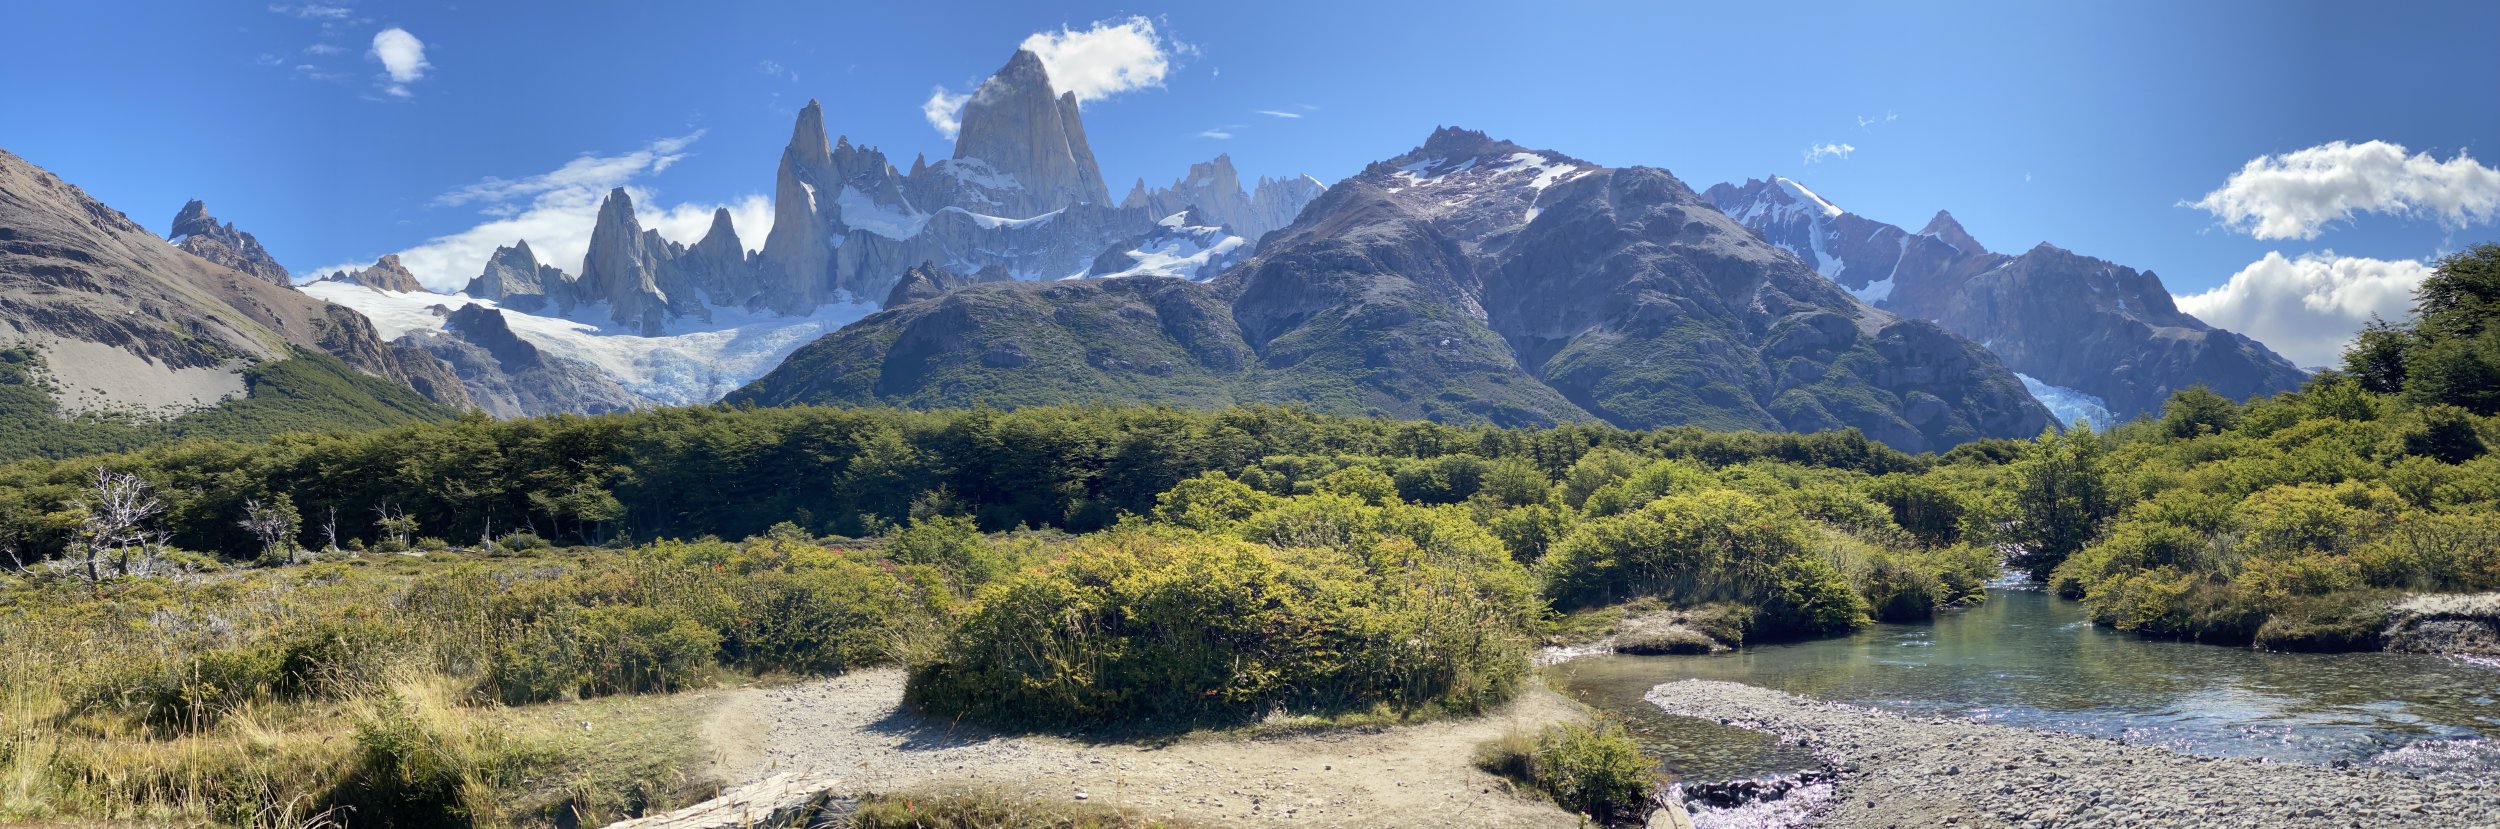

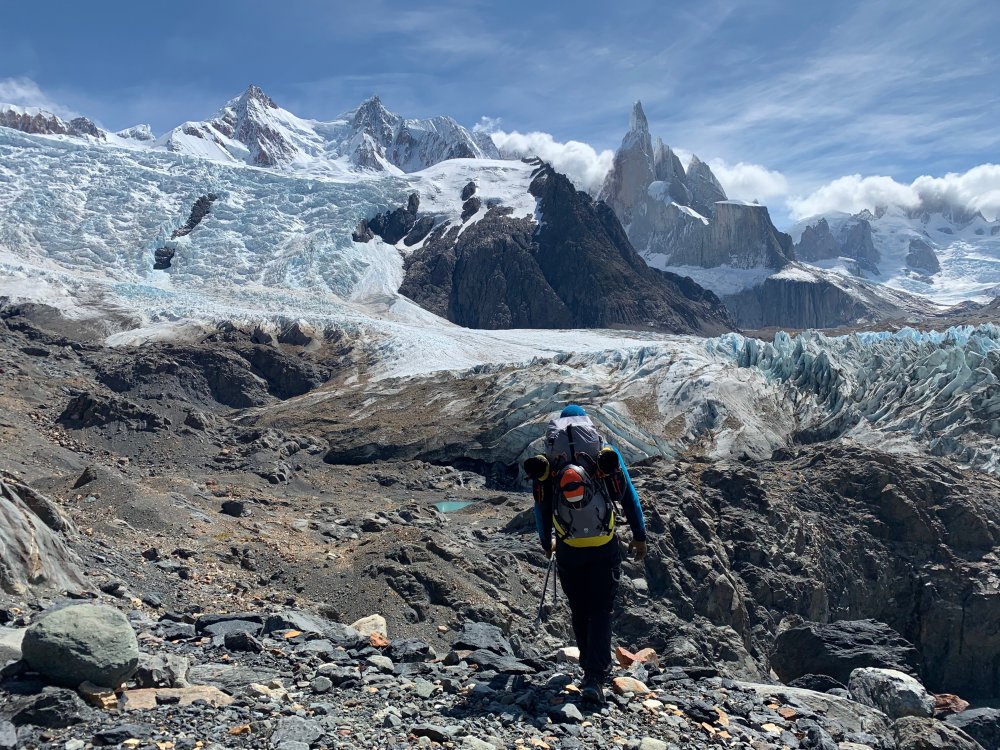
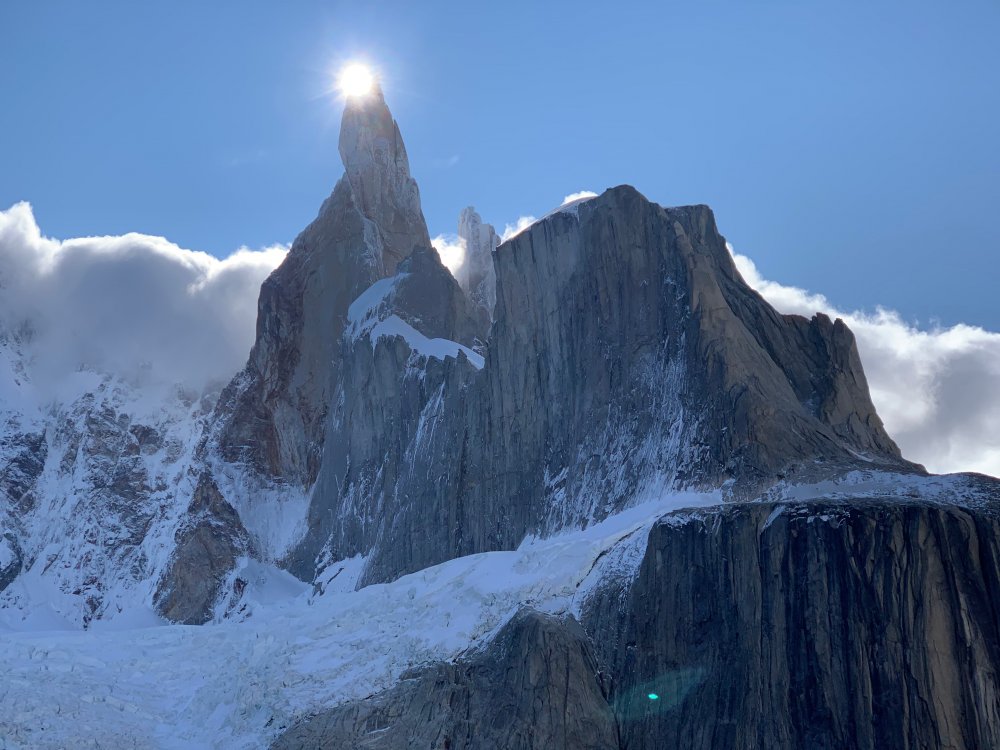


-
Trip: Mt Baker - Coleman Glacier Headwall Trip Date: 03/18/2020 Trip Report: I’ve come to expect three things when climbing with Peter. First, we won’t wake up too early. Second, our packs will be light. And third, we will move fast and take almost no breaks. With those thoughts in mind, I was looking forward to getting up on Baker with him. We started climbing together years ago with next to no experience and have grown a lot climbing together. We had a wide variety of ideas of things to do and while heading up and seeing the Coleman Glacier Headwall, we decided that’s what we would do. We left Bellingham bright and early at 7:30. As we drove the road, we never saw that classic sign that says to stop driving there so we just drove all the way to the parking lot on compacted snow. We left the car around 9:30 and we were soon skinning up grouse creek. We didn’t stop until the saddle into the heliotrope area, both feeling a little sluggish. We followed a skin track across the traverse and dropped down onto the Football field. We skated across this flat and dropped another hundred feet onto the Coleman Glacier. Here, we put skins back on and scoped our route. We found our way through the broken glacier without much trouble and soon we were standing at the base of the Coleman Glacier Headwall. From this angle, it looked small and easy, but we both knew it was a pretty big undertaking. Last spring we bailed off it after a lot of rock fell and in the process of skiing down, I fell and cut my thumb pretty bad. This time, we were hoping for things to go better. We switched out skis for crampons and poles for axes below the face. There was a sizable debris pile we wanted to stay clear of so we transitioned further back. We started up the headwall around 12:30 and quickly ran into trouble. It looked like crossing the bergschrund was going to be tricky but when we got to it, it looked almost impossible. Significantly more involved than last year. We ended up doing a pitch where I traversed out left, over a snow bridge, up a vertical snow bulge, and onto vertical glacier ice. From here, I got a screw and traversed right off the glacial ice and onto water ice. One more snow bridge took me to more serac where I belayed Peter. Fro here, he stayed on belay and tested one more snow bridge that stood between us and the main funnel of the route. It held him so he untied, coiled the rope and took off to catch up. We tried to move quickly through this main debris funnel, as it was here was saw big rocks come down last year that scared us off. Today, I had seen a fist-sized rock or two come down. We got through that constriction on a little bit of AI2 and traversed left, out of the majority of overhead hazard. After this we had about an hour of steep snow, kind of crusty, that brought us to another sketchy crack. After a short belay across that, we continued up and left. As we approached the last steep pitch we ran into a lot of smaller cracks with thin snow bridges between us and that last steep roll to the top. Peter put me on belay as I started poking my nose around the cracks, looking for a way through. I punched an arm or a leg through into air a few times. Eventually, I found a snow finger than I literally crawled across and a big step took me on to the upper face as the finger shifted under my feet. Now I was on the upper but still needed to find a belay for Peter. We had taken to one person testing crossings on belay and then coiling the rope. But this one was bad enough to warrant a belay. I found an exposed rock and cut a bollard around it in the rime. It seemed like an ok anchor but I wasn’t about to hang on it so I sat on my front points and told Peter to not fall in. Peter got over the crack and up to me. We were in an awkward spot so I untied and Peter continued, tagging the rope. Another relentless 55-degree slope took us on to the summit plateau. It was almost 4 and we had no interest in crossing the flat to climb another 15ft so we took a quick break, finished our food and water, slapped the skis on the feet and dropped down onto the Roman Headwall. We got about 10 very high quality turns on wind buff before hitting the rime. It’s been windy and the rime on the headwall is fist-sized and doesn’t ski great (it doesn’t really ski at all). We didn’t take our skis off, instead, we rattled our teeth and tried to stay upright. Once we got down to where w dropped right toward the glacier, the snow improved a lot. It was great wind-affected cold snow. We skied fast toward the col to enter grouse creek. From that col the snow became very good and just got better and better. We had a blast until the trees where the snow got soft. We got back to the car around 5:30. A few thoughts on the route: This is a pretty full-on route, despite that, it wasn’t terribly fun to climb. Peter and I agreed that none of the climbing on the route was particularly fun and there was a sense of unease the entire time as well. I’m glad to have climbed it, the day overall was very fun, especially since there was no wind and no clouds. We brought a 30m double and three screws and a 30m thin dyneema line. This rack worked well for how we did the route. Here is the line we took (have you checked out FATMAPS??) Polish looking pretty fat.CH looking very difficult right now Gear Notes: 3 screws, some skinny 30m ropes Approach Notes: Grouse creek is great right now.
-
 Trip: Broken Top - Oh to be young and dumb - Crater Trip Date: 02/16/1985 Trip Report: For fun I thought I would post a trip report that happened 35 years ago. A friend recently sent me scanned versions of his slides so I thought I would post them up with the story. We were both in college at OSU, me finishing my undergrad, and Andy finishing his masters. My girlfriend had an invite to spend the weekend skiing at Mt. Bachelor so we decided to go along and climb Broken Top as neither of us had been on it before. So that Friday night we left Corn Valley for Bend, she dumped us off at the end of the road that evening and we skied in a ways and camped. The next morning we skied in into the Broken Top crater. Andy and I discussed various ways to gain the rim. We finally decided on a route up but not one that I was to my liking as I wanted to take a less direct but I felt safer route. But I deferred to Andy as he was more experienced than me. At this point I will let the pictures tell the rest of the story. Mt Bachelor in the background. Hmm, 30" crown and well we are still on top. I think walking down is the preferred option. Hmm, nice debris field and damn near wall to wall. WTF were we thinking??? The dot in the middle of the debris field is me putting my skis back on. Epilogue: As our ski tracks are visible, we had nearly gained the ridge when we set off the avalanche. We were both on the same cut when the ground went out from under us and we dropped a couple of feet to the bed surface. Both of us just stood there and watched as the avalanche ripped down the crater. Had either of us been caught we would have been dead. Not withstanding the fact that back then few people had transceivers or could we afford them as students. I saw Andy a few years ago when he gave me these images. He admitted that his decision making that day was not the best. Oh to be young and dumb. Gear Notes: A functioning brain Approach Notes: Go long from Mt. Bachelor
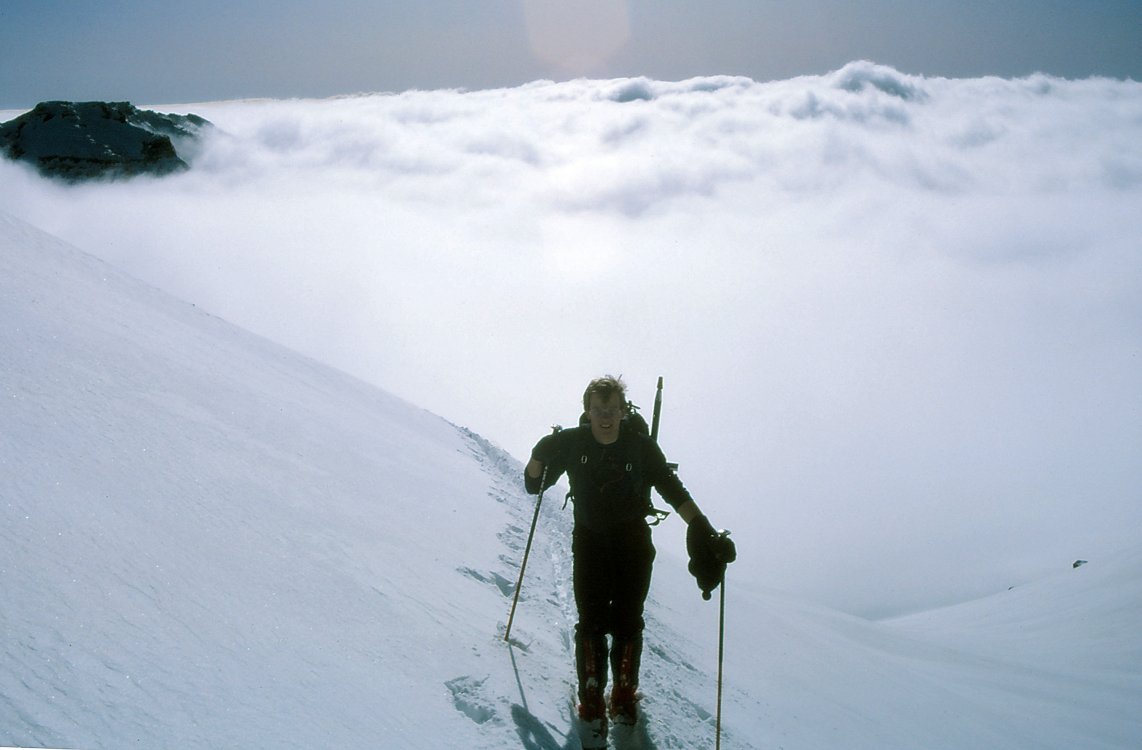
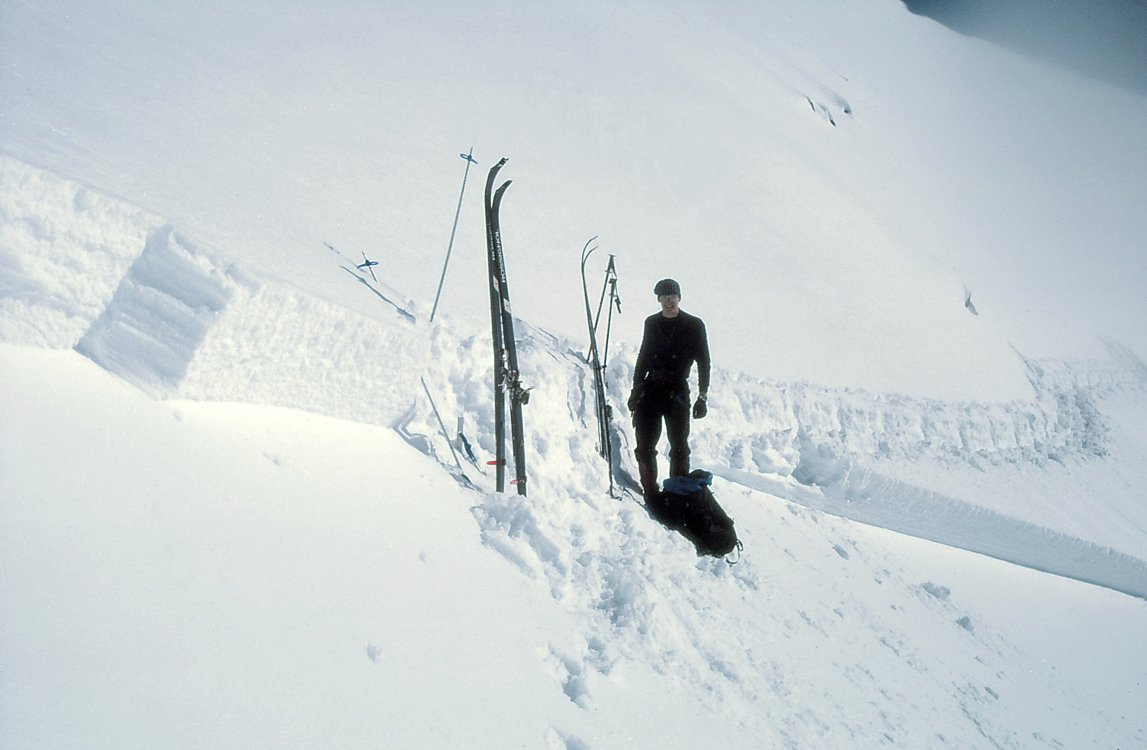
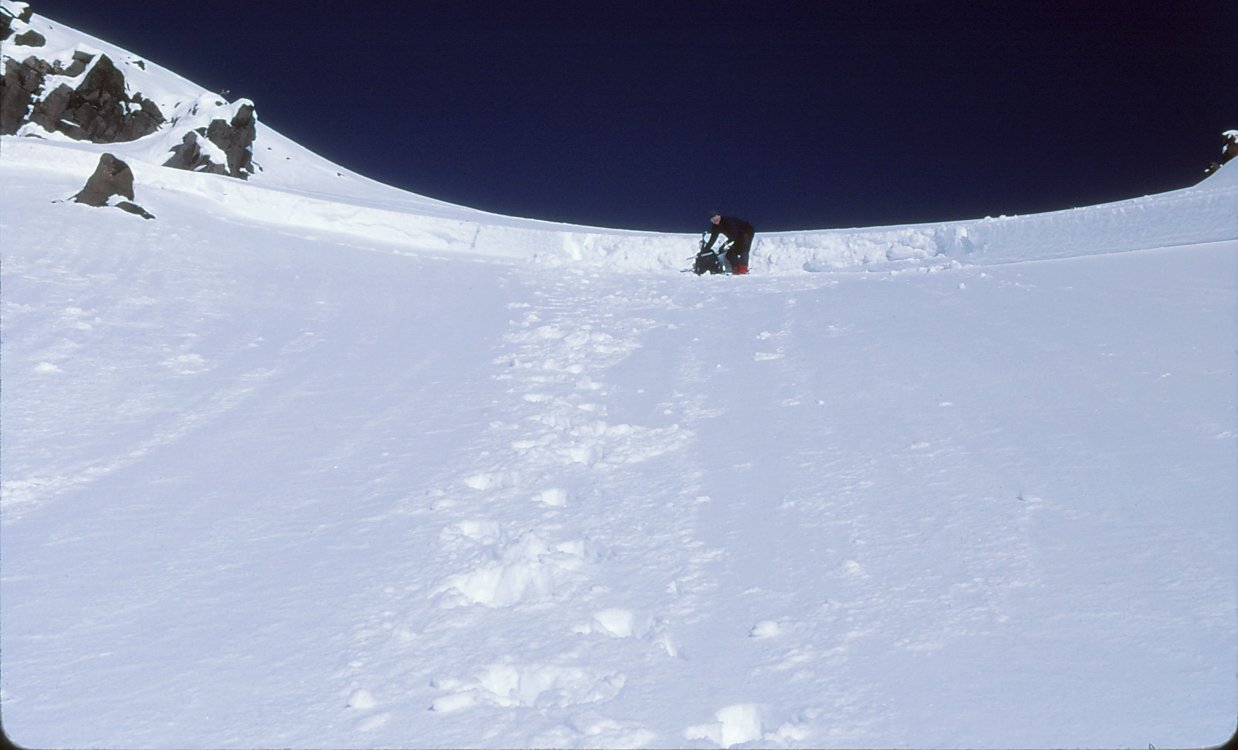
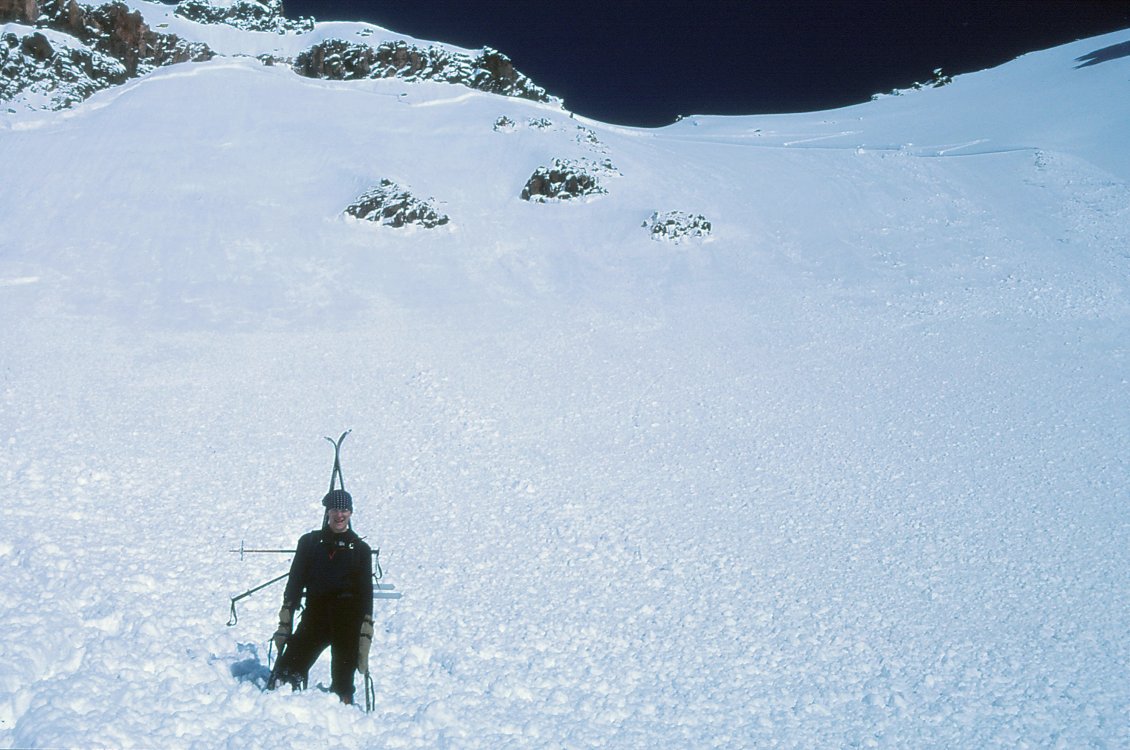
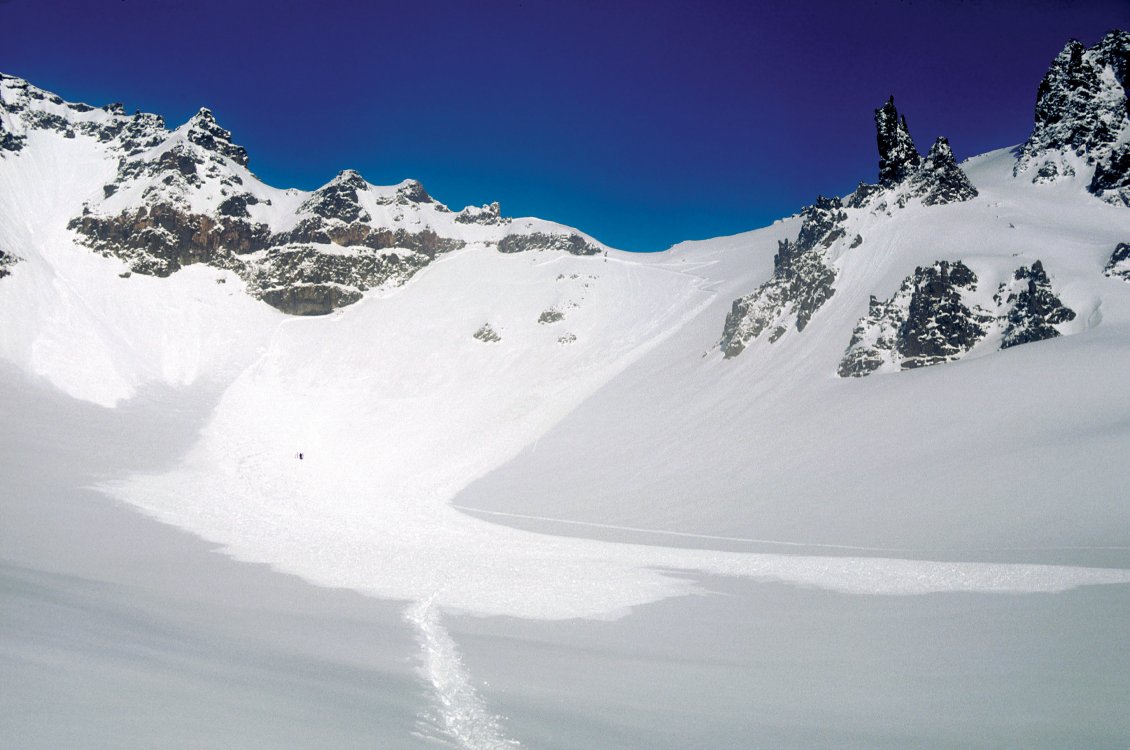
-
Trip: Mt. Hood - Yocum Ridge Solo Trip Date: 03/21/2020 Trip Report: "It's not my imagination, I've got a gun at my back!" -Revenge, Black Flag Yocum Ridge is the first route I ever thought about climbing. I remember looking at the striking line from the bus stop in my elementary school. Even though I knew nothing about climbing at the time, the sheer beauty of the route captivated me. As I have accumulated some knowledge about climbing, I learned the route wouldn't go down so easy. Something about the jagged ridgeline dulled by rime gives Yocum a special sense of beauty. Today I set out to realize a childhood fantasy of mine. 3:00 and I'm starting the slog up the mountain. My morale is already low because I forgot my headphones. This damn climb is going to make me absorb the sounds of nature! Two hours or so of walking takes me up to Illumination Saddle. Here I lay eyes on the silhouette of Yocum ridge by headlamp. Nerves turn to excitement as the clock strikes 5:00. The glacier crossing was easier than I expected thanks to all the action the route has seen over the past few weeks. The footprints take me to a headwall a little to the right of where the guidebook says to go. The squeaking and ringing of my ice tools puts me into a trance. After about 150 feet of steep-ish climbing, I gain the ridge. Yocum starts off with a tease. An easy and welcoming rime stepped staircase obscures the rest of the ridge from view. I'll play your game. When the first gendarme comes into view, I have to fight thoughts of doubt coming into my head. At first sight, the rime covered sentinel looks steep and unforgiving at every point. The closer I get however, the clearer the line becomes. My cold helmet feels like a gun against the back of my head. I know it's time. I start to the right of a cave and quickly cut left. The ice feels solid and I flow through a steeper gully. 30 meters or so in, I arrive at the crux. Solid snow and ice turn to dead vertical swiss cheese. Through delicate movement and prayer, I fire through the crux. Each stick felt like a weak handshake. The section required commitment to tools placed in an unknown mixture of snow/ice with dubious feet. Finally, I reach the top of the first gendarme. My blood pressure drops slightly as I soak in the beauty of the bladed ridge that lies in front. Here I am extremely grateful for the groups before me who did the heavy rime clearing and bollard building. From the bollard at the end of the gendarme, I downclimb while on rappel to traverse across an exposed section to a big ledge. This beta worked well for me and seemed to alleviate problems some other groups were having. As I started the traverse pitch to the second gendarme, I felt something fall out of my pocket. I turn my head just in time to see my phone fly down the snow slopes and disappear into the glacier below. Perhaps my phone was the sacrifice the route required. Better phone than blood. Then, like clockwork, a raven swoops by me and perches itself on the tip of the first gendarme. We stare at each other for a minute and I thank him for allowing me to experience this route today. I know that I'm just a guest in the mountains. From here on I felt as if I had permission to continue my journey, hopefully my dues were already paid. The ridge widened the further I traversed down it. Passing the second gendarme was the most secure I felt since getting on route. More slogging took me to another bollard (this time with tat!) off of the third gendarme. I chose to rap north to avoid more thin ridge fuckery. Walking along the steep snow slopes took more energy than I thought. My calves burned and cursed me for bringing two single ropes to rap with. More training I guess. Even though some exposure was still present, I began to meditate with the route. Every swing, foot placement, and movement just felt right. As crawled back over to west side, the sun reared its ugly face, and I began to sweat my ass off. I followed more good tracks around to the right of the final buttress. The last buttress is like a fortress full of impassible walls and sneaky gullies. The first gully I started up took me about 150 feet and ended with impassible rime towers. I downclimbed and again, moved right. Here I could see tracks going to Leuthold from Yocum Ridge. Now I knew I was no longer under the gun. One of the rightmost gullies brought success. I tormented my calves up a few hundred more feet until I topped out the buttress at around 12:30. From the top of the buttress, one final ridge traverse took me to the Queen's Chair. 6 year old Landon would be proud. Looking down the ridge I could see all the minute details that made this route special. Negotiating the route was digging into the alpine bag of tricks and executing. I chose not to tag the summit because I wanted to search the base of the route for my phone (spoiler alert: the phone disappeared into a different dimension). Hiking down Leuthold gave me time to absorb the mountain more. Striking blue accents on rime towers, weird ice formations on the glacier, and the forest just miles away all presented themselves. Days like this make me question the future. I'm sure one day I'll find something that will bring me peace. I often think about Mark Twight saying that climbing can be "too much but never enough." Yocum Ridge was one of, if not the best alpine routes I have experienced. Although it wasn't technically difficult, the sheer volume of spectacular movement truly makes this one of a kind. On the way down I wept. For some reason this route had a different impact on me. Maybe it was the feeling of complete peace and isolation, maybe it was the sheer beauty of it all. Maybe I'm just emotional. I stumbled into the Timberline at around 4:00 and unlocked my car. With the clicking of the lock, my reality had become just a memory. Gear Notes: Basically a sport climb Approach Notes: Attack the ridge at about 8800ft
-
Trip: Sloan Peak - FA: Superalpine (WI3-4, 1000') Trip Date: 02/28/2020 Trip Report: On February 28th, 2020, @PorterM and I made what we believe to be the first winter ascent of the West Face of Sloan Peak. We climbed an incredible line approximately 1000 ft long of WI3-4 and steep snow climbing before our route joined the final 600 ft of snowfields to the summit. On the very final ice step, I suffered a short fall on rotten ice and a heinous top out and broke a few bones in the right side of my face. We bailed down the route and skied out. So technically, I guess we didn't finish the route, so say what you want about it. Our route started with a WI4ish pitch followed by hundreds of feet of stellar WI3 rambly flows in a gully just to the climber's right of the true west ridge spur on Sloan Peak. In our eyes, this was the only way up the true west face under WI4+/5. The whole face is loaded with huge free hanging daggers and wild lines. A competent WI6/M6 climber in the right conditions could send some absolute world class lines up there. I shared a lot more details, reflections on the accident, and route beta on my blog: https://climberkyle.com/2020/02/28/fa-sloan-peak-superalpine-wi3-4-1000/. Hopefully some others can get up there and finish this magnificent climb or poach some of the other unclimbed lines. Our route. up to where I fell. We were about to join the corckscrew route and head out. We climbed the gully on the right side of the photo. First pitch crux. Moving into the wonderful ice gully. Porter leading on that fat, fun, rambly WI3. The climbing in the gully was generally easy, sustained, and super fun! Incredible flows on the west face. Some helpful beta. Gear Notes: Screws, maybe a few small rock pieces and a picket. Approach Notes: Skin/hike forest service road 4096, then meander up Bedal Creek to the base of the west face.
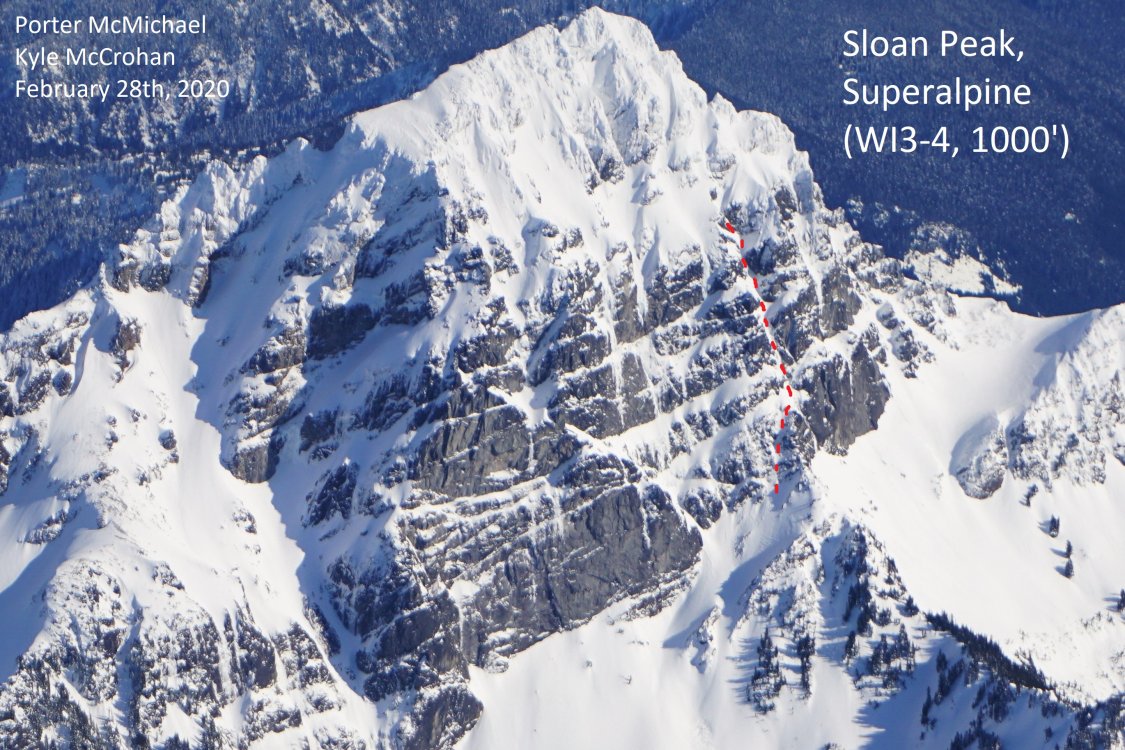
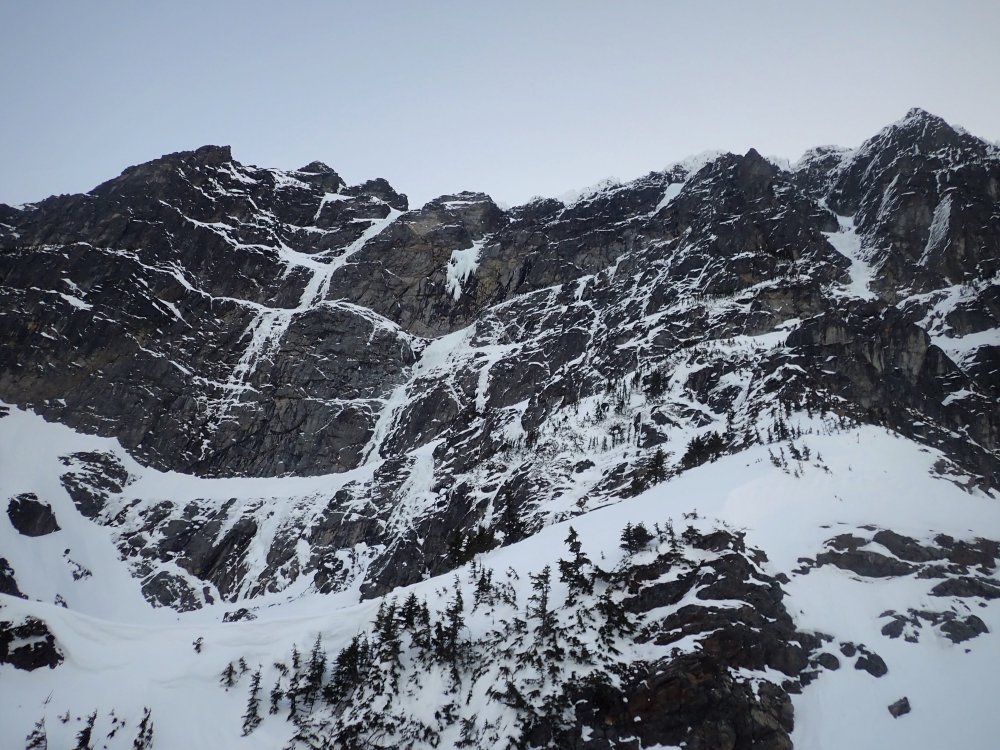
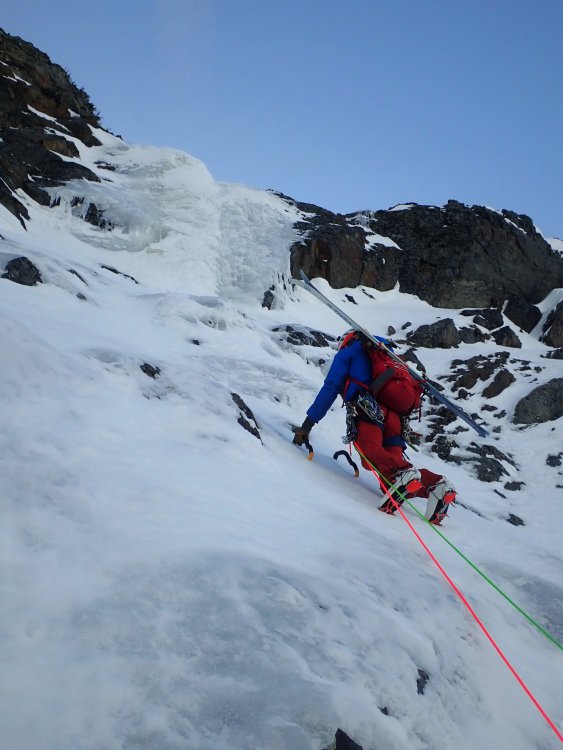
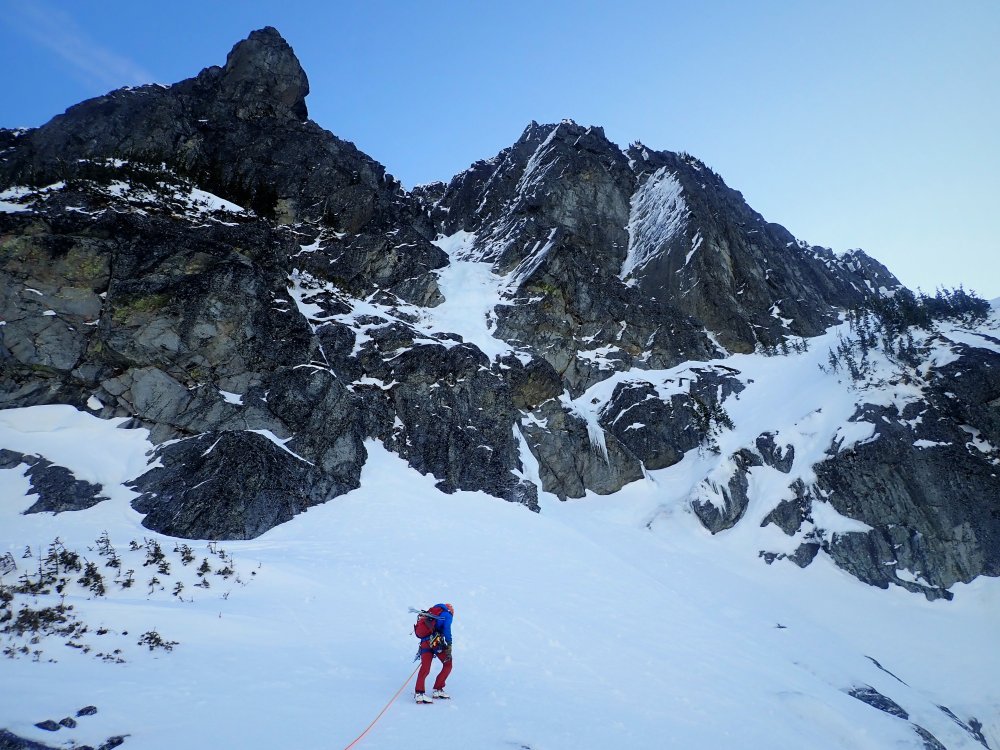
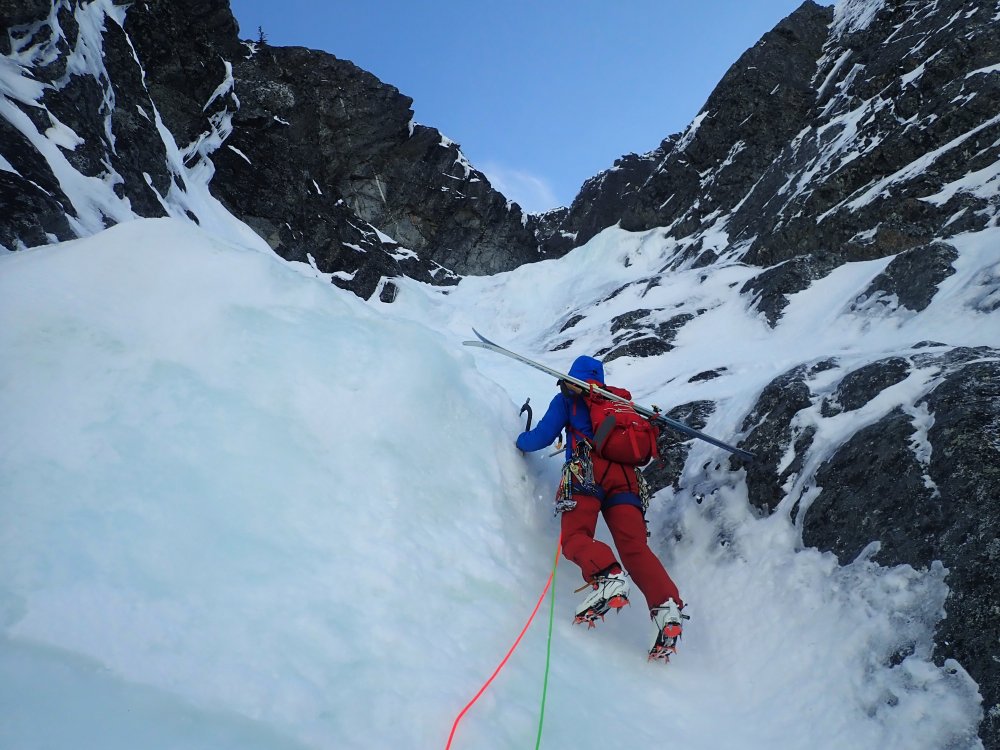


-
Trip: Mt Hood - Yocum Ridge Trip Date: 03/12/2020 Trip Report: Got on Yocum Ridge with one of my most solid partners on Thursday, March 12 2020. You can read my full trip report and blog post on my site, Spokalpine. Here's some additional notes for potential suitors: This is a wild climb! Sustained moderate technical difficulties from bottom to top with a few cruxy sections means that you need calves of steel. Nerves of steel certainly help too, because protection is very limited on the hard pitches. Being able to comfortably solo AI3/WI3 is a huge asset and probably necessary to get up this thing. I'm not talking about what gets passed for WI3 in the PNW, either... think legit WI3 with bulges and vertical sections. I've talked to a few people who think the route could earn an AI4 rating but I don't think there was anything sustained enough to earn that grade. Not that it matters, because it seems impossible to grade rime ice on the typical waterfall/alpine ice scale. It's so unstable and difficult to protect... this isn't the place to use your perfect A-frame technique that works so well on waterfall ice. Distributing weight between your tools and foot placements is required. If you swing more than once or twice into a placement, the whole placement likely disintegrates and you're left trying to find somewhere else to swing. As I was placing a screw on the first crux, the tool I was hanging off of pulled 4 inches through the shitty ice before it hit a blob of blue ice that would support me. This was especially hair-raising considering the massive exposure on either side of the first gendarme. My experience on Yocum Ridge was intense and satisfying. After the climb, Kyle hit the road back to Portland and I drove to Hood River to stay the night. After a good dinner and some galavanting with new friends from the local bar, I sat alone in a park along the river. 24 hours earlier, Kyle and I had left Timberline for our climb. The famous Nietzsche quote "...if you gaze long enough into an abyss, the abyss will gaze back into you" bounced around my mind. After staring into the very literal abyss on either side of Yocum Ridge, I was more focused on the figurative. Yocum Ridge took most of what I had to give - and in return, it gave back to me. The mark of a truly challenging and worthwhile climb. Gear Notes: Three pickets, six screws (3x 10cm, 2x 13cm, 1x 17cm), pitons, small cams (used up to .75), nuts (tiny to medium sizes). I would not get on this route without a rope system that enables long rappels. We did one rappel that was 55 meters. Approach Notes: Easy as it gets
-
Trip: Marble Creek Cirque - Lost Marbles Couloir Trip Date: 03/09/2020 Trip Report: Wow, what a feature! And what an outrageous setting! But just be sure that the avalanche danger is reasonable, and expect that the snow in the couloir will likely be the worst on the entire tour. Be thankful if it is, actually. Because if it isn't, there is a much greater chance that you will have a quick trip into the cirque. So much hanging over your head! Thanks to @skykilo for bringing this gem to the masses and to @geosean for jogging my failing memory. Lastly, thanks to @therunningdog for being a true friend and breaking trail for my sorry ass most of the way in and out. If you have ever gotten out with him you know that his fitness is legendary and remarkable. Fun to be the beneficiary, yet again. All I can provide are these photos..... Early Morning Spire and Dorado Needle above @therunningdog It has to begin somewhere. And here it is. Oops. Not off to an auspicious start. Not a place to be in considerable or higher avy danger Whew! 20 mins down and 3 hours up! North side of Triad I still care that you tele @therunningdog Gear Notes: don't you dare bring snowshoes Approach Notes: Parked at ~1900' on HLL road. Plan for a 10 hour day with stops.
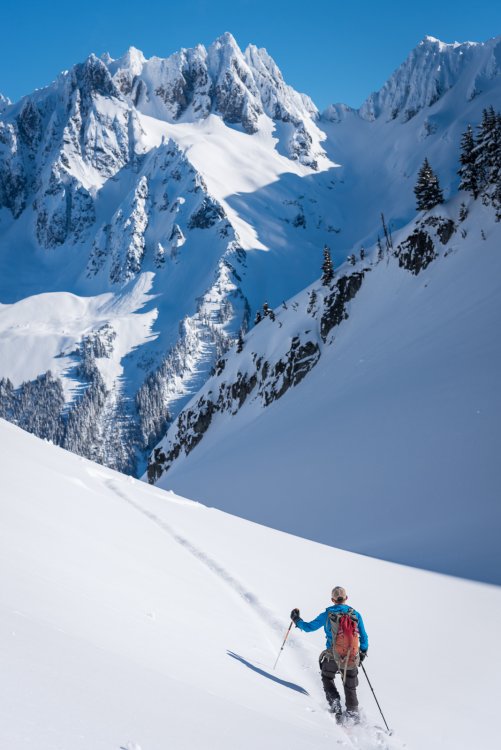
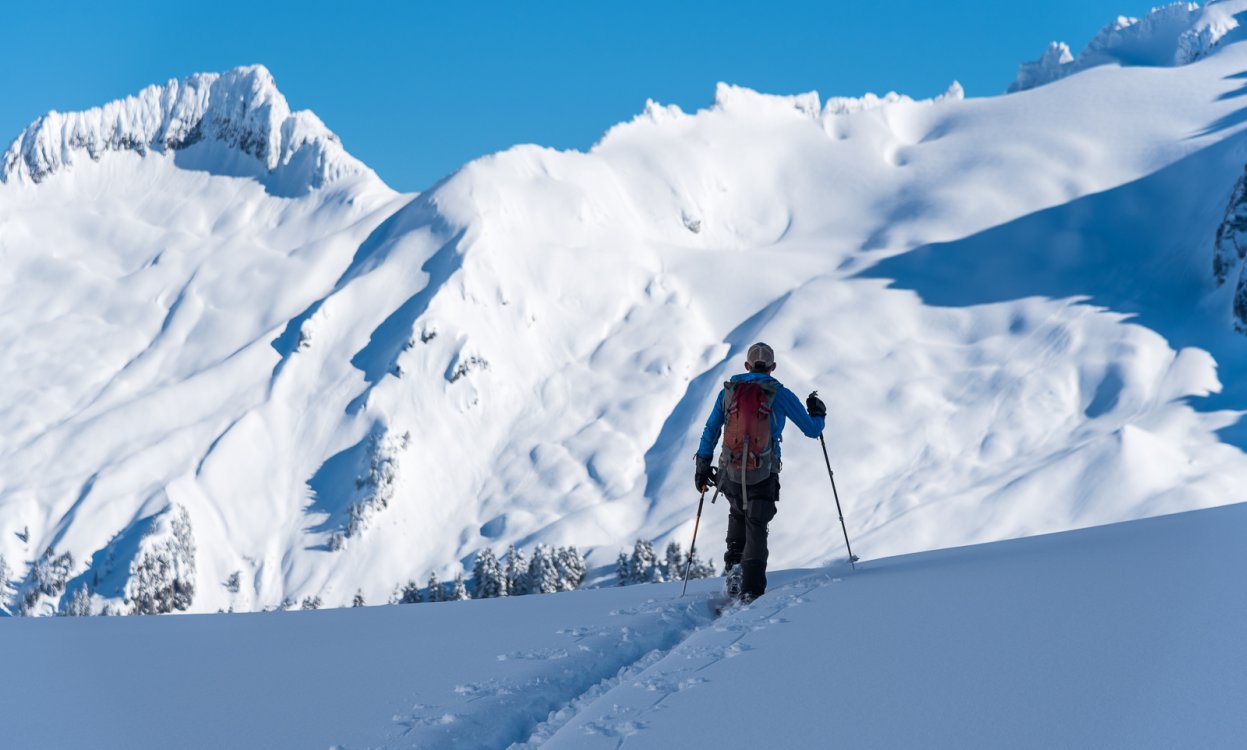

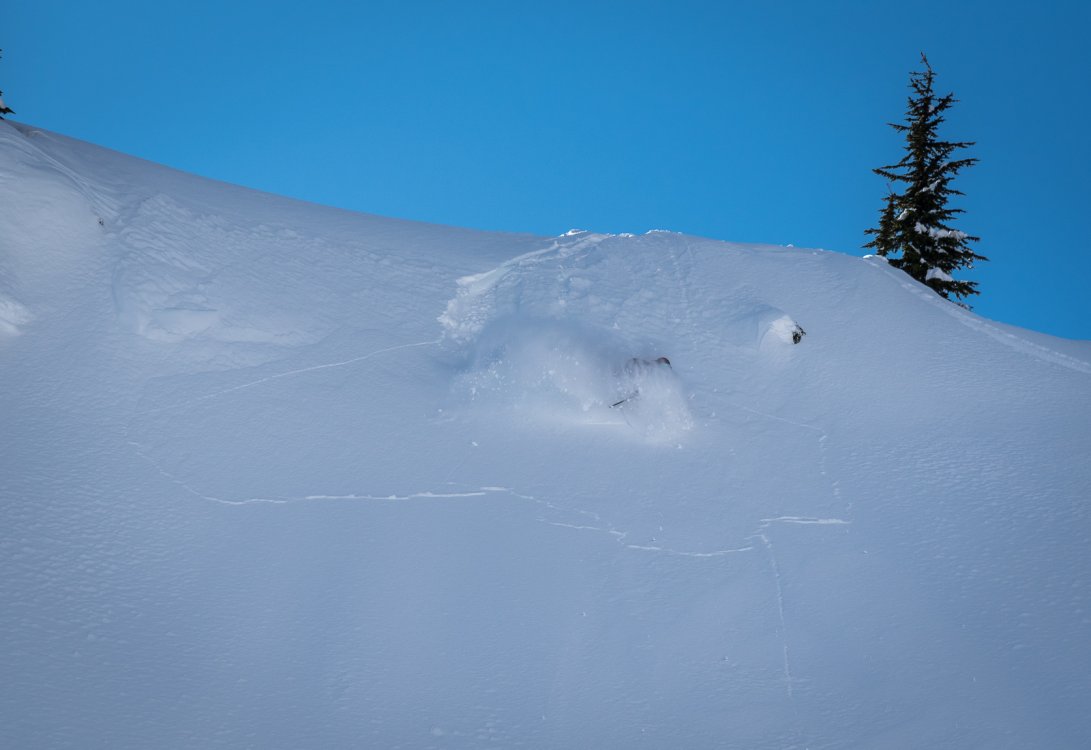
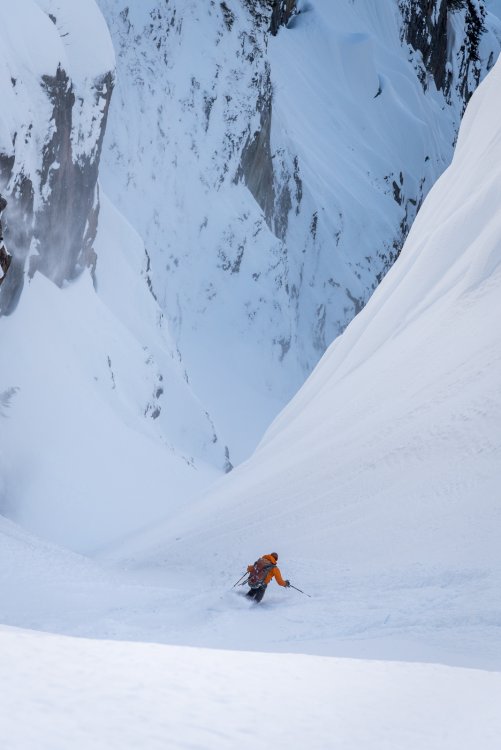

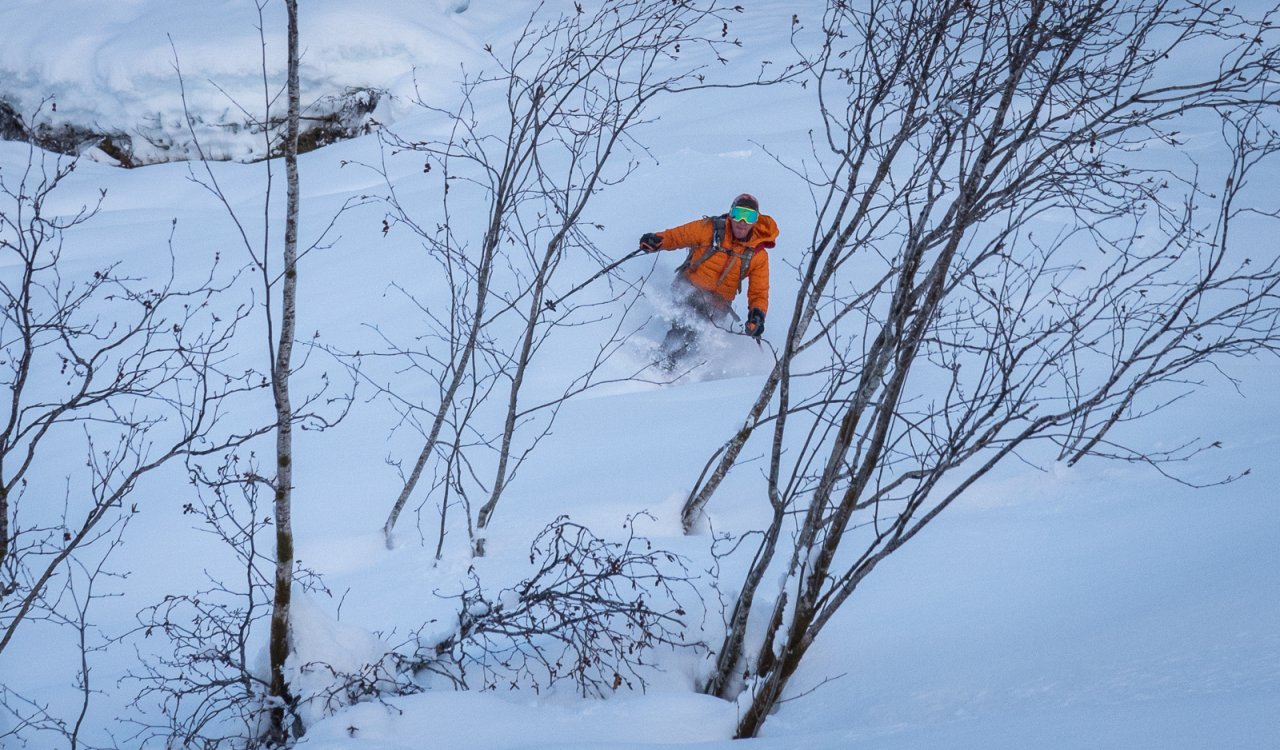
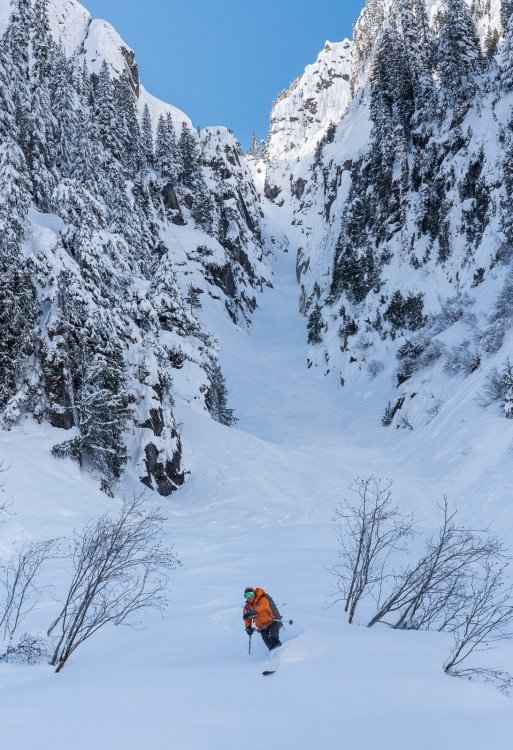
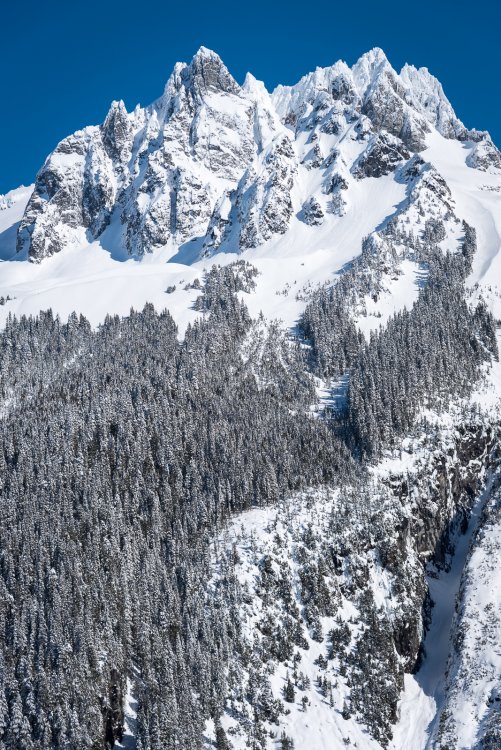
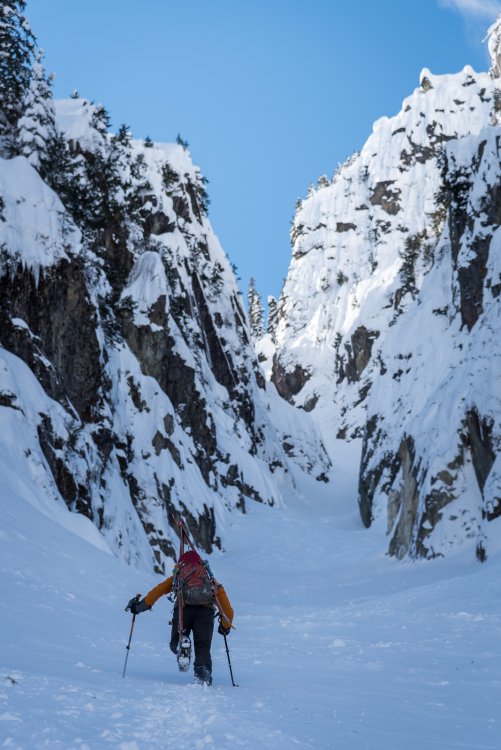
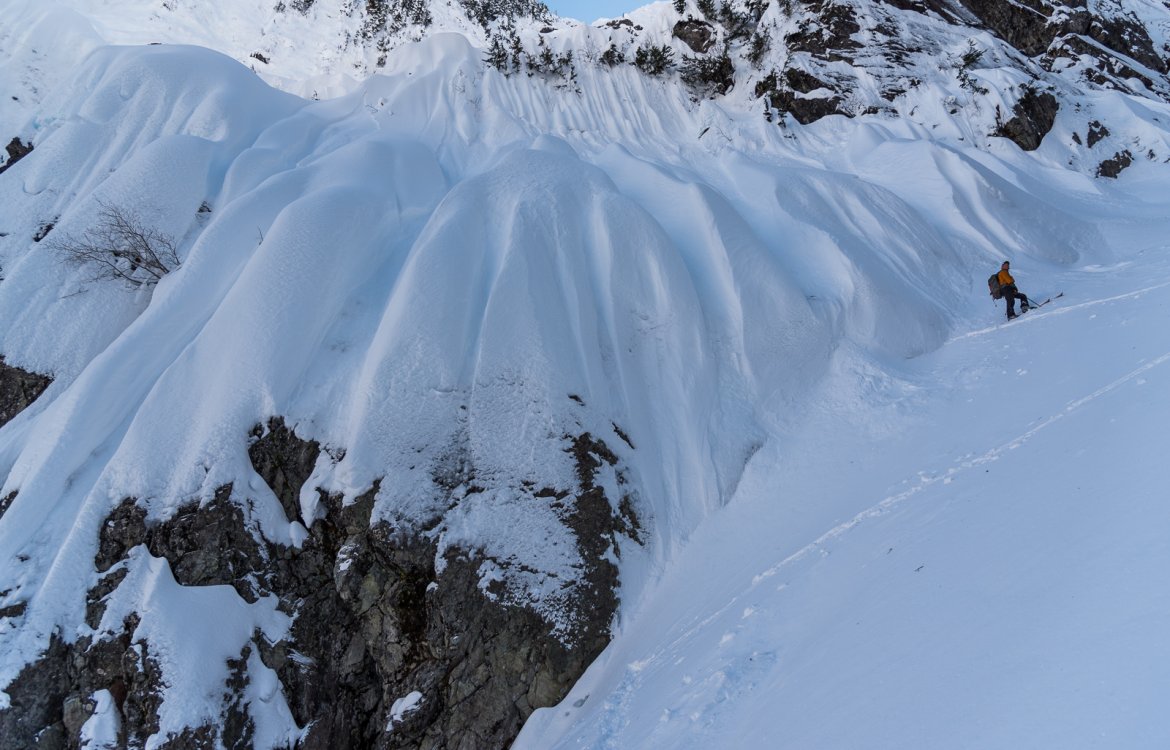
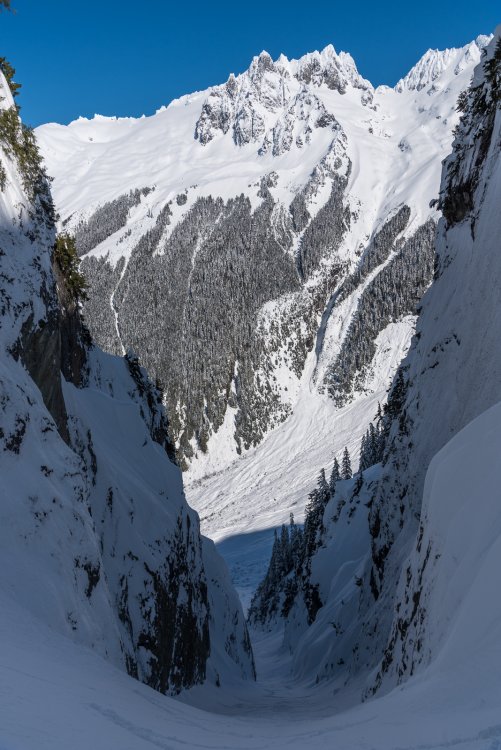

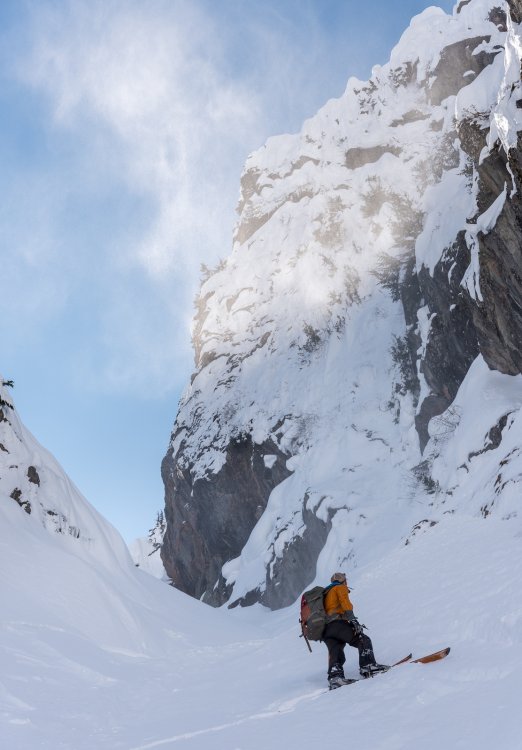

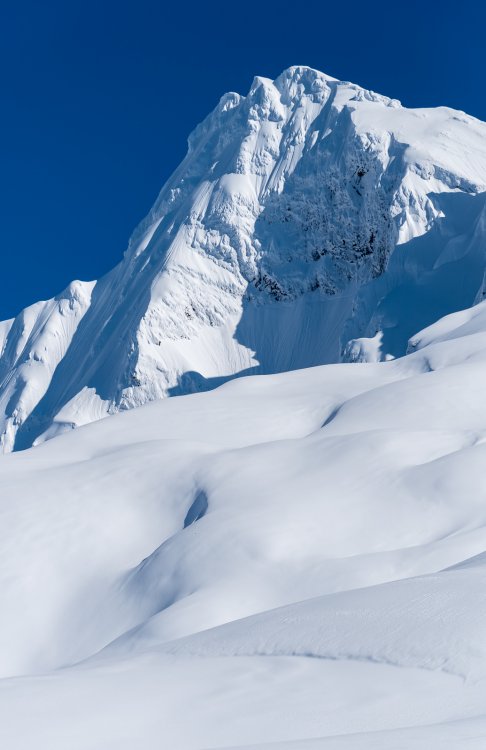
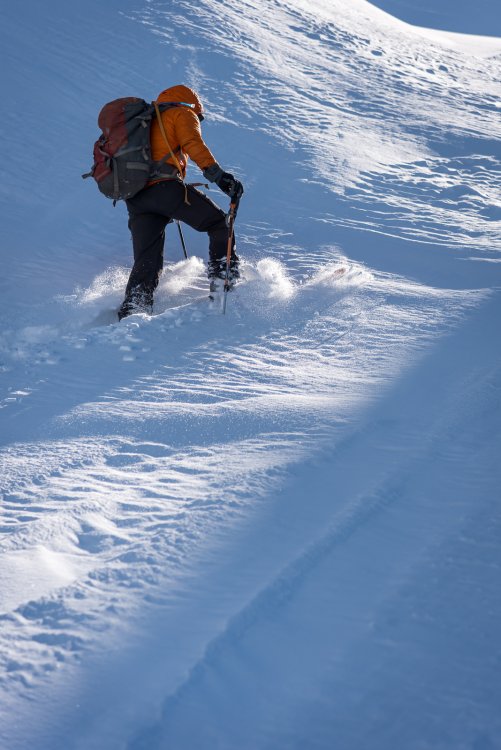

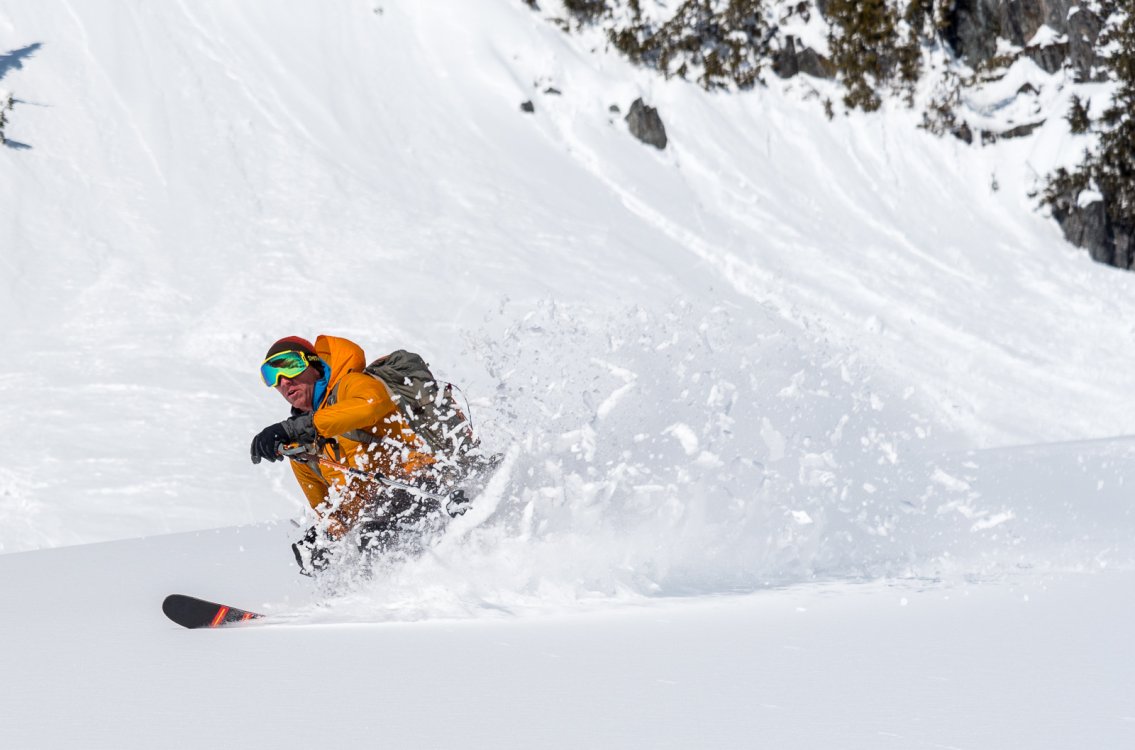
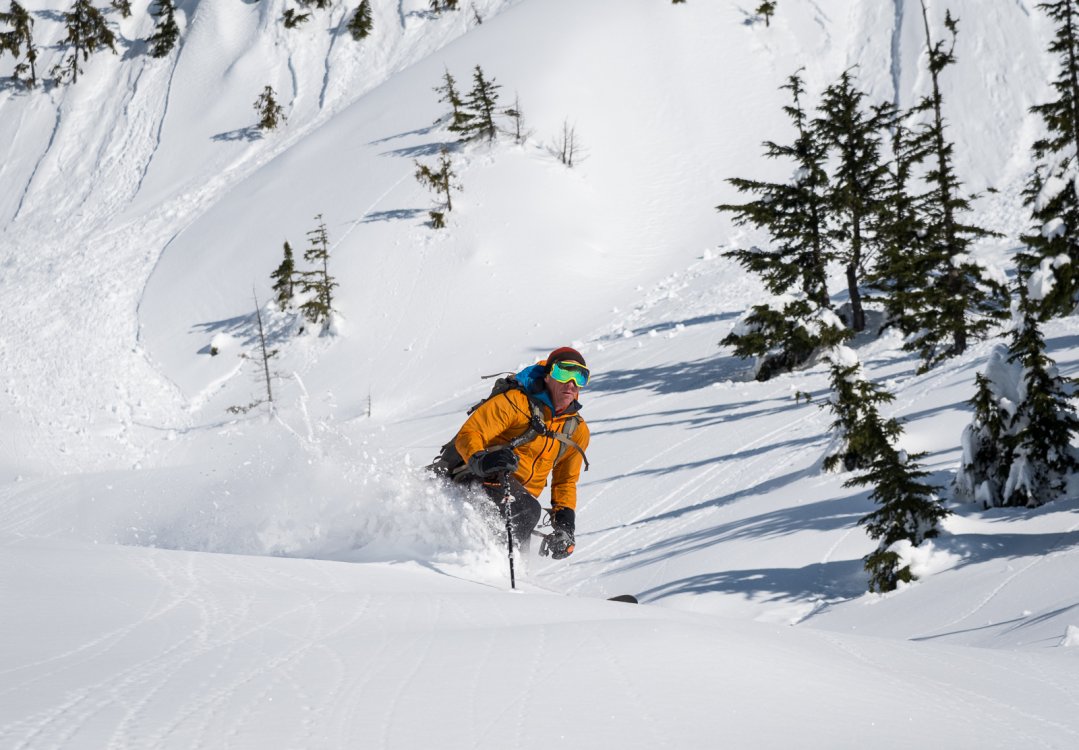
-
Trip: Mount Snoqualmie - New York Gully Trip Date: 03/15/2020 Trip Report: http://www.gorobets.com/New_York_Gully_2020_03_25.html Gear Notes: 2 half ropes 2 pairs of tools per climber A set of cams from 0.2” to 3” wth doubles in small range. Used most of them. A set of nuts. Not used. 10 runners. We should take 12 in retrospective. I almost run out of runners on pitch 3. 4 pitons. Used 1. BD Spectra. Used. 4 ice screws – not used. 2 pickets –1 would be enough. Approach Notes: No flotation used.