Leaderboard
Popular Content
Showing content with the highest reputation on 03/05/20 in all areas
-
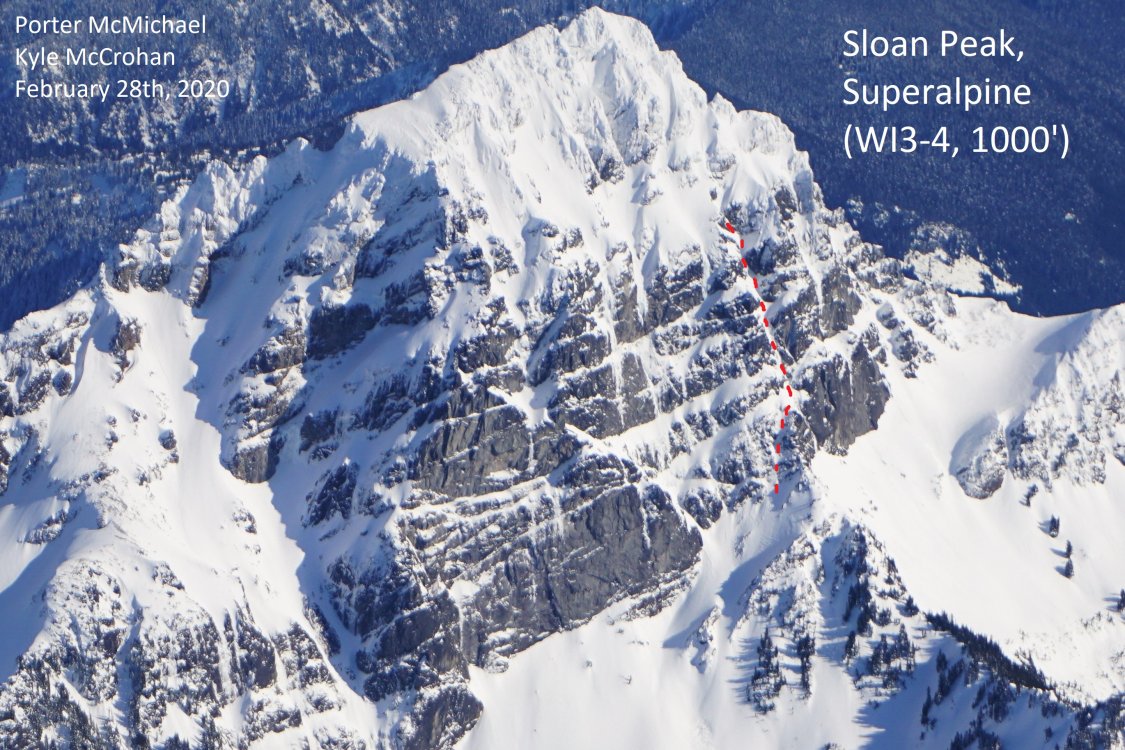
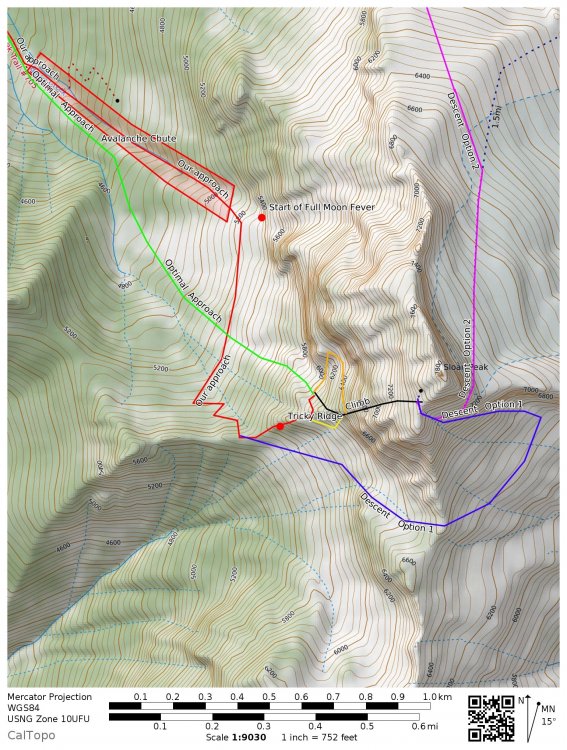
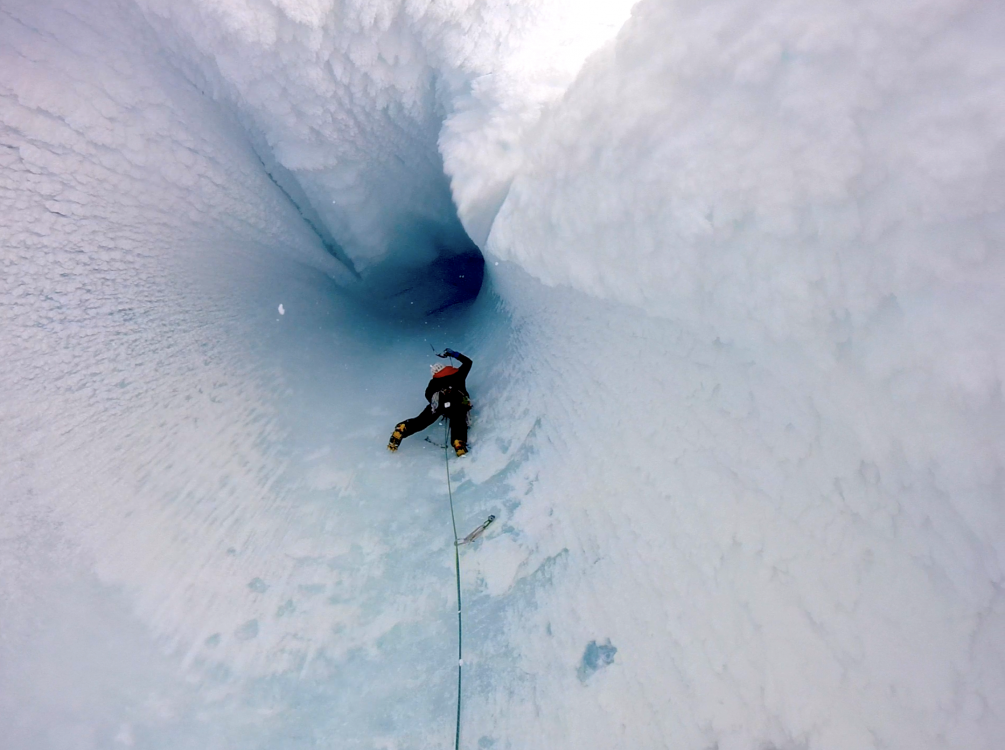
Trip: Sloan Peak - FA: Superalpine (WI3-4, 1000') Trip Date: 02/28/2020 Trip Report: On February 28th, 2020, @PorterM and I made what we believe to be the first winter ascent of the West Face of Sloan Peak. We climbed an incredible line approximately 1000 ft long of WI3-4 and steep snow climbing before our route joined the final 600 ft of snowfields to the summit. On the very final ice step, I suffered a short fall on rotten ice and a heinous top out and broke a few bones in the right side of my face. We bailed down the route and skied out. So technically, I guess we didn't finish the route, so say what you want about it. Our route started with a WI4ish pitch followed by hundreds of feet of stellar WI3 rambly flows in a gully just to the climber's right of the true west ridge spur on Sloan Peak. In our eyes, this was the only way up the true west face under WI4+/5. The whole face is loaded with huge free hanging daggers and wild lines. A competent WI6/M6 climber in the right conditions could send some absolute world class lines up there. I shared a lot more details, reflections on the accident, and route beta on my blog: https://climberkyle.com/2020/02/28/fa-sloan-peak-superalpine-wi3-4-1000/. Hopefully some others can get up there and finish this magnificent climb or poach some of the other unclimbed lines. Our route. up to where I fell. We were about to join the corckscrew route and head out. We climbed the gully on the right side of the photo. First pitch crux. Moving into the wonderful ice gully. Porter leading on that fat, fun, rambly WI3. The climbing in the gully was generally easy, sustained, and super fun! Incredible flows on the west face. Some helpful beta. Gear Notes: Screws, maybe a few small rock pieces and a picket. Approach Notes: Skin/hike forest service road 4096, then meander up Bedal Creek to the base of the west face.7 points
-
Super job! Doesn't matter if you summitted, only that you accurately report what you did and have fun with it all!4 points
-
Your face!!!!! Gaaaaaahhhhhh. Glad you survived, wow.2 points
-
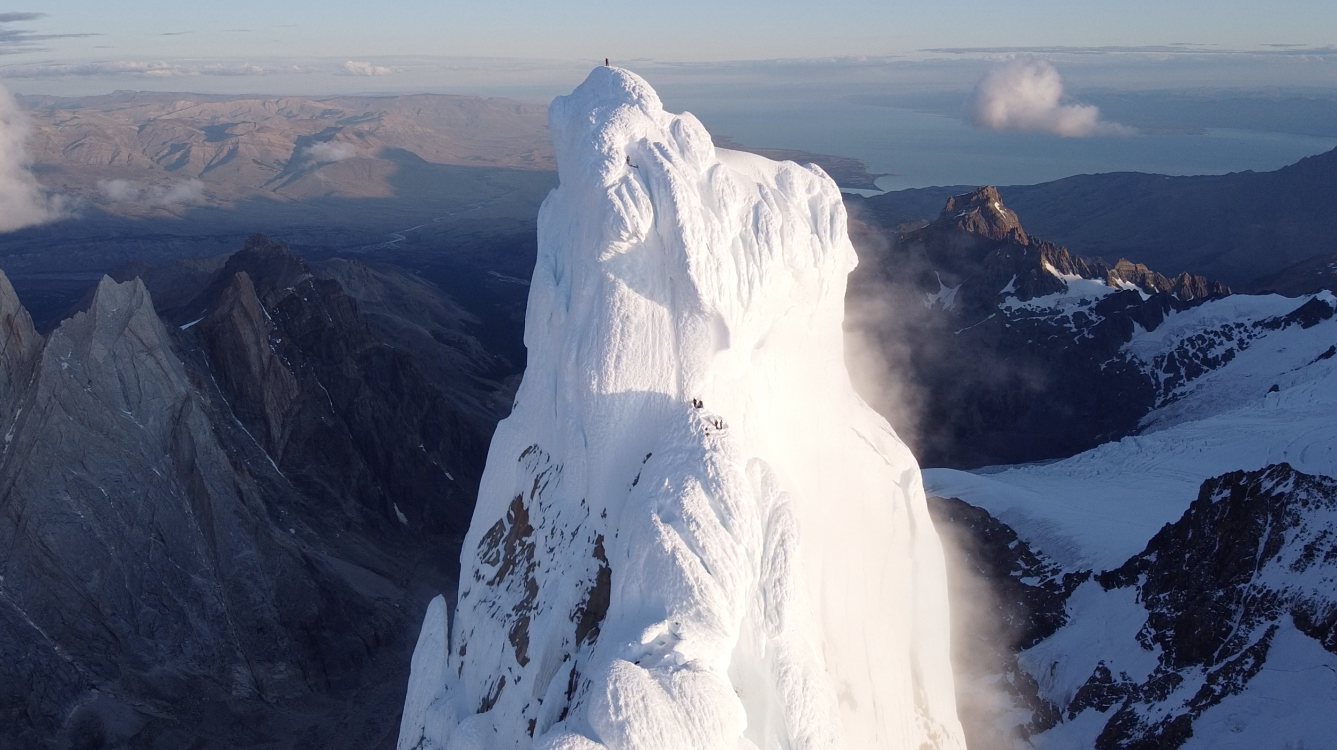
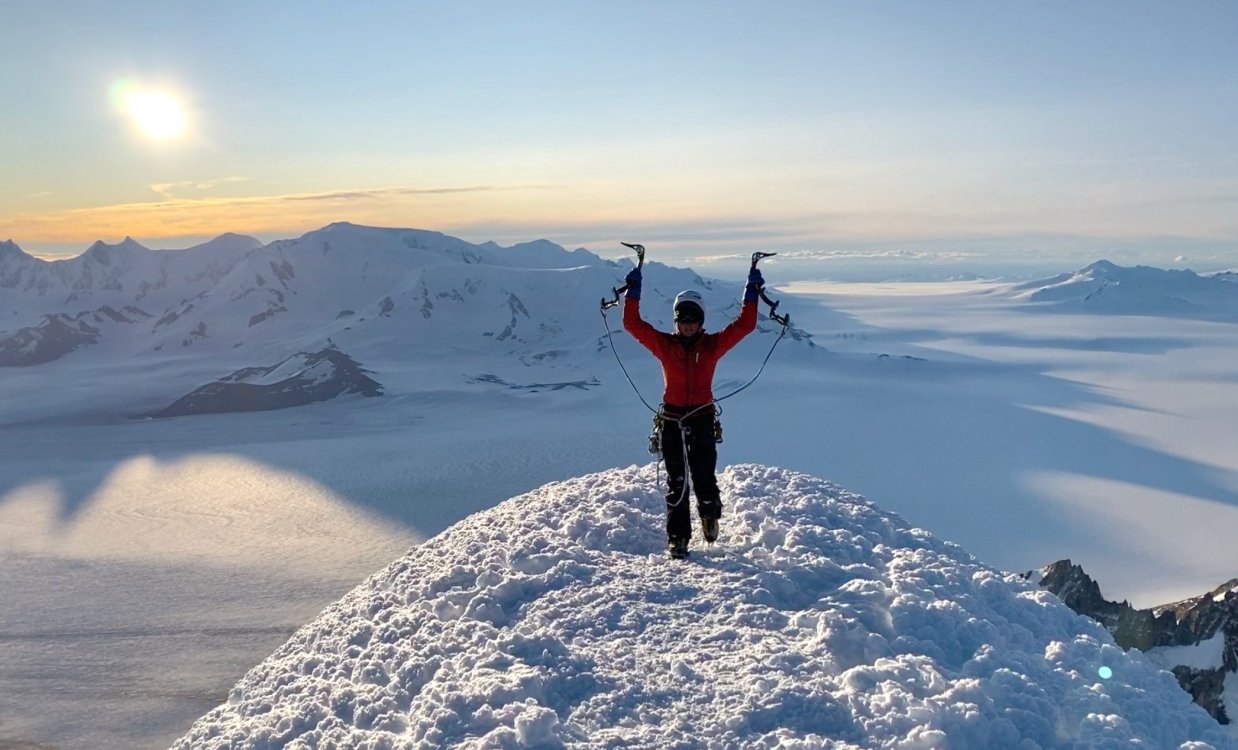
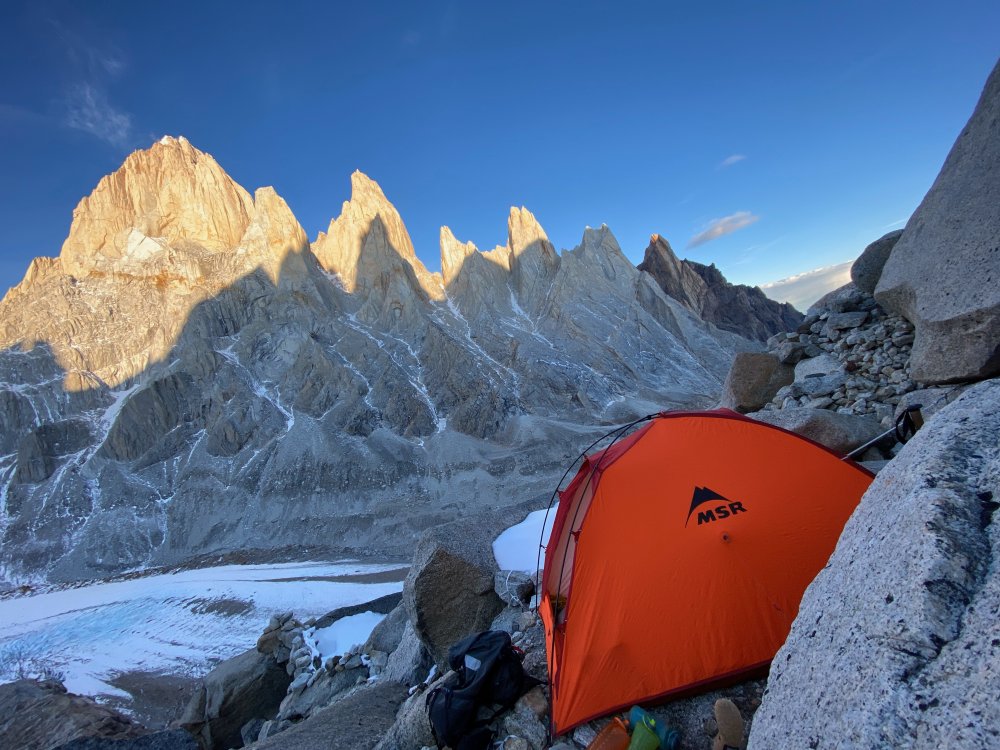
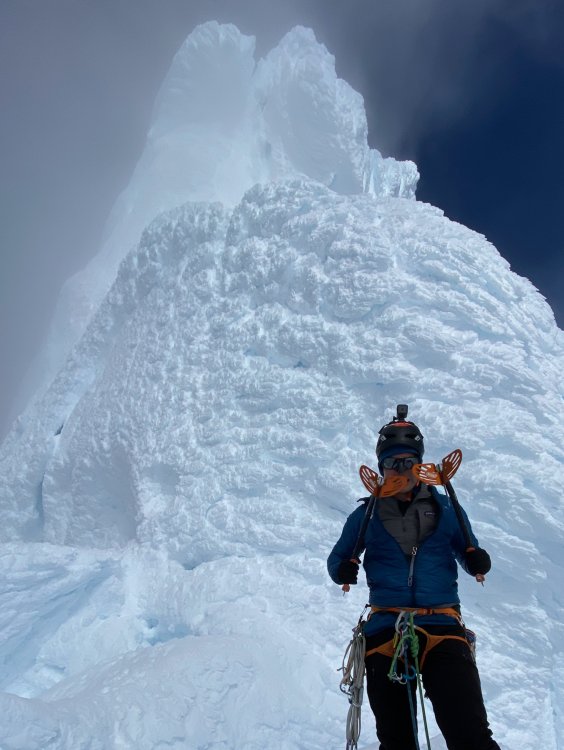
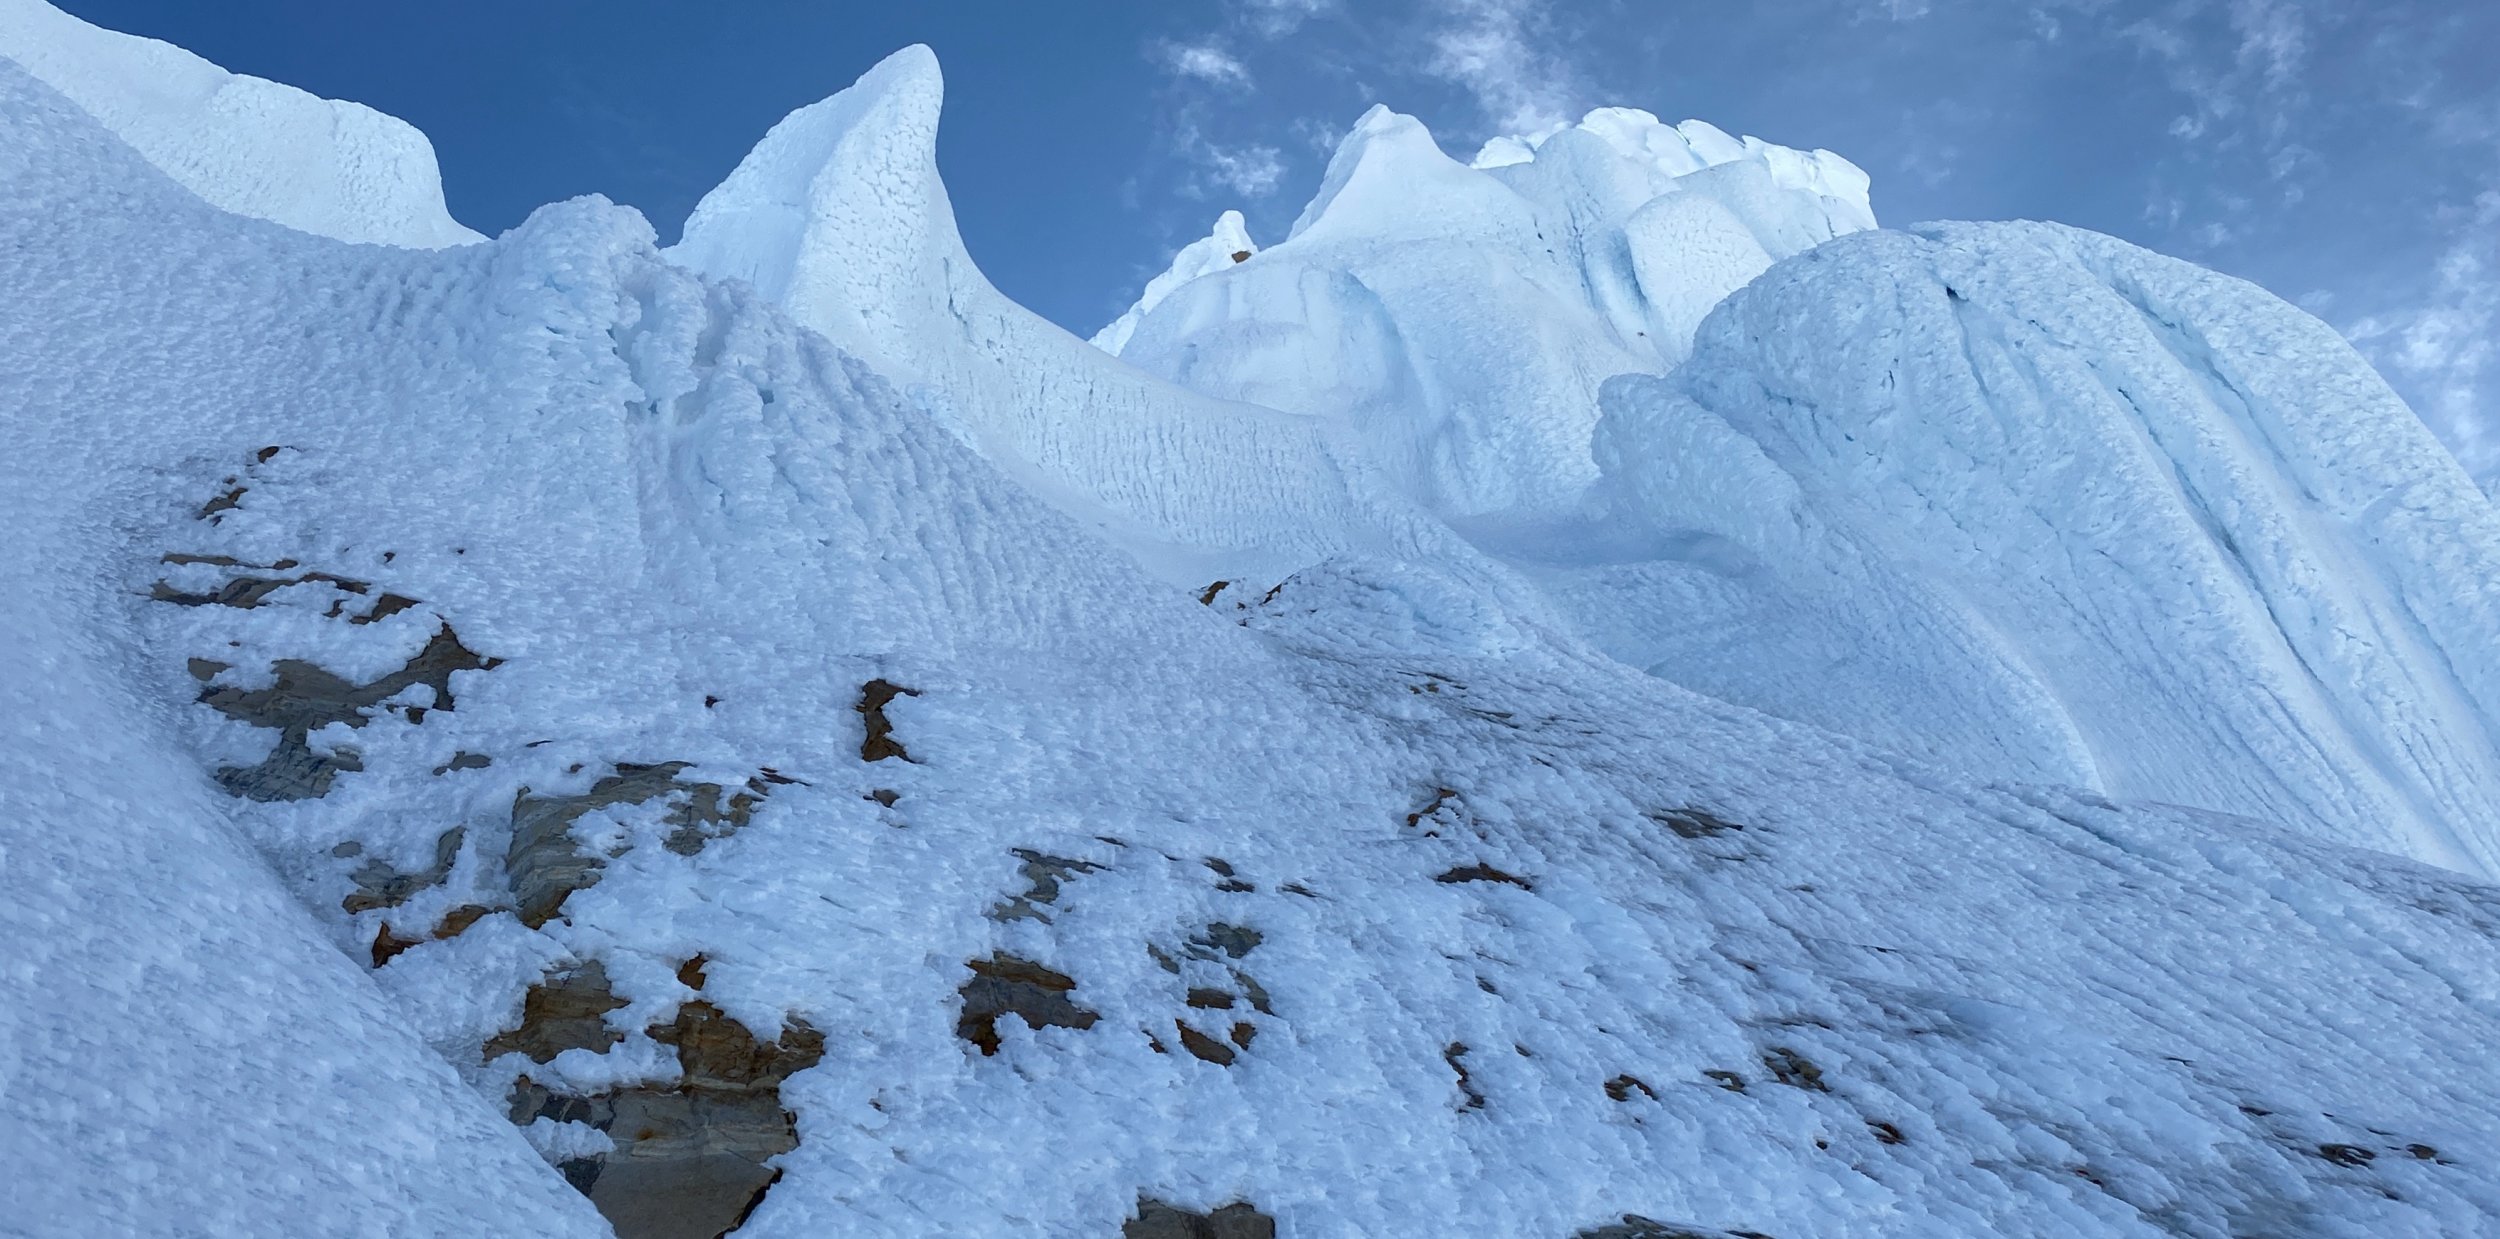
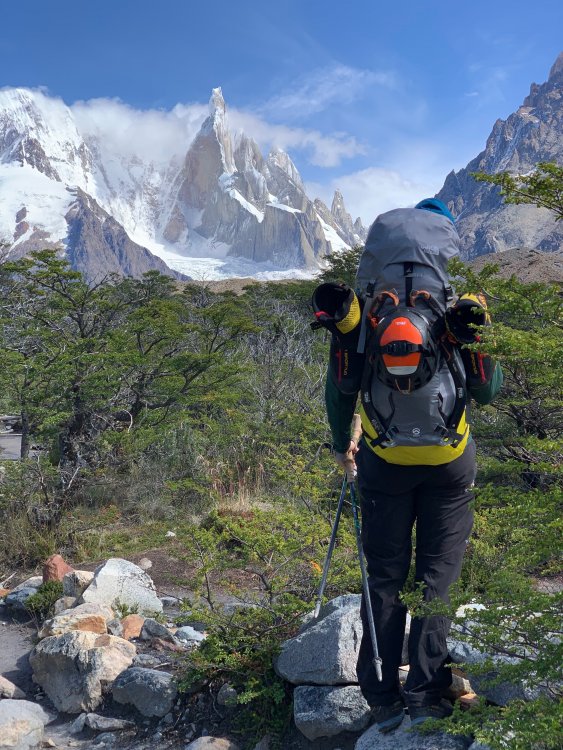
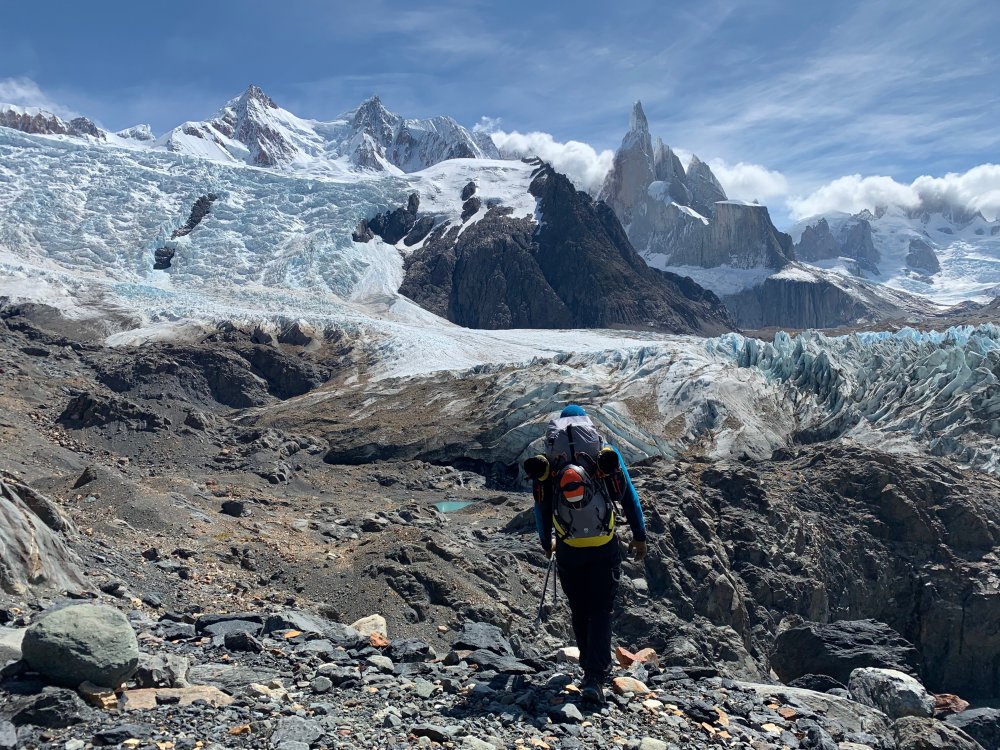
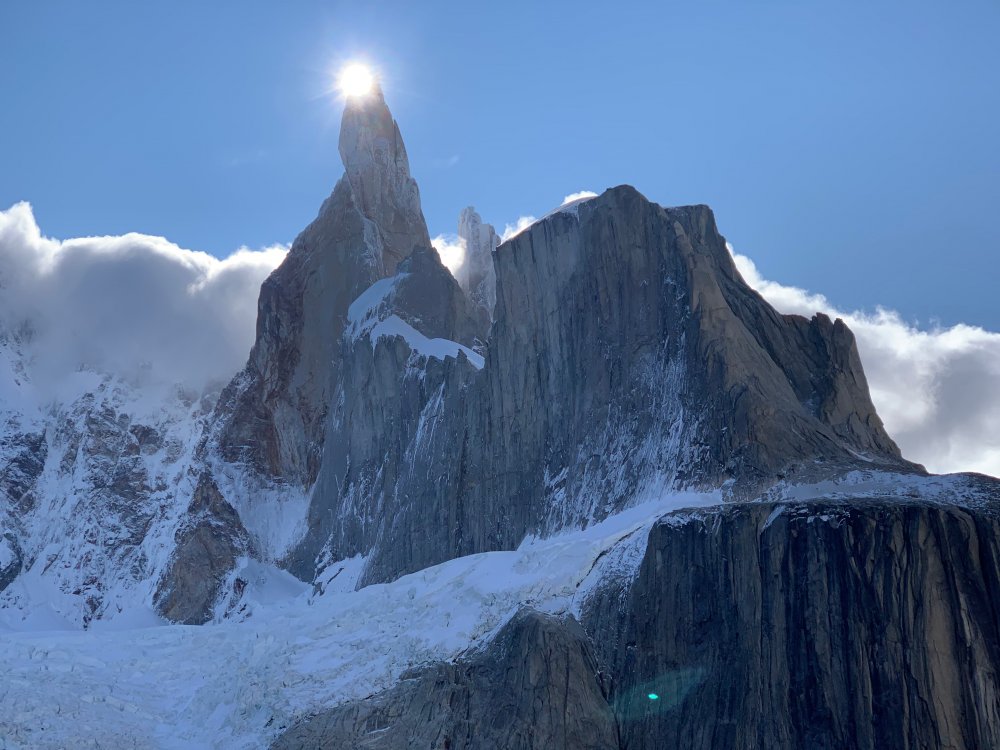
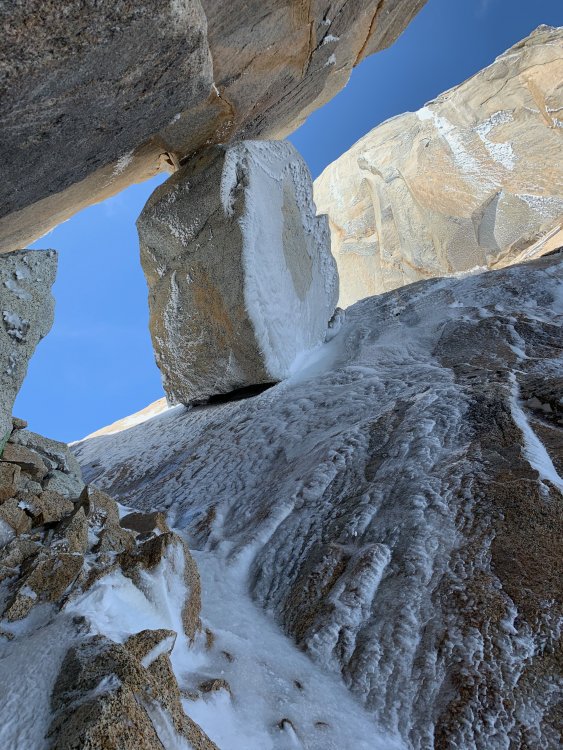
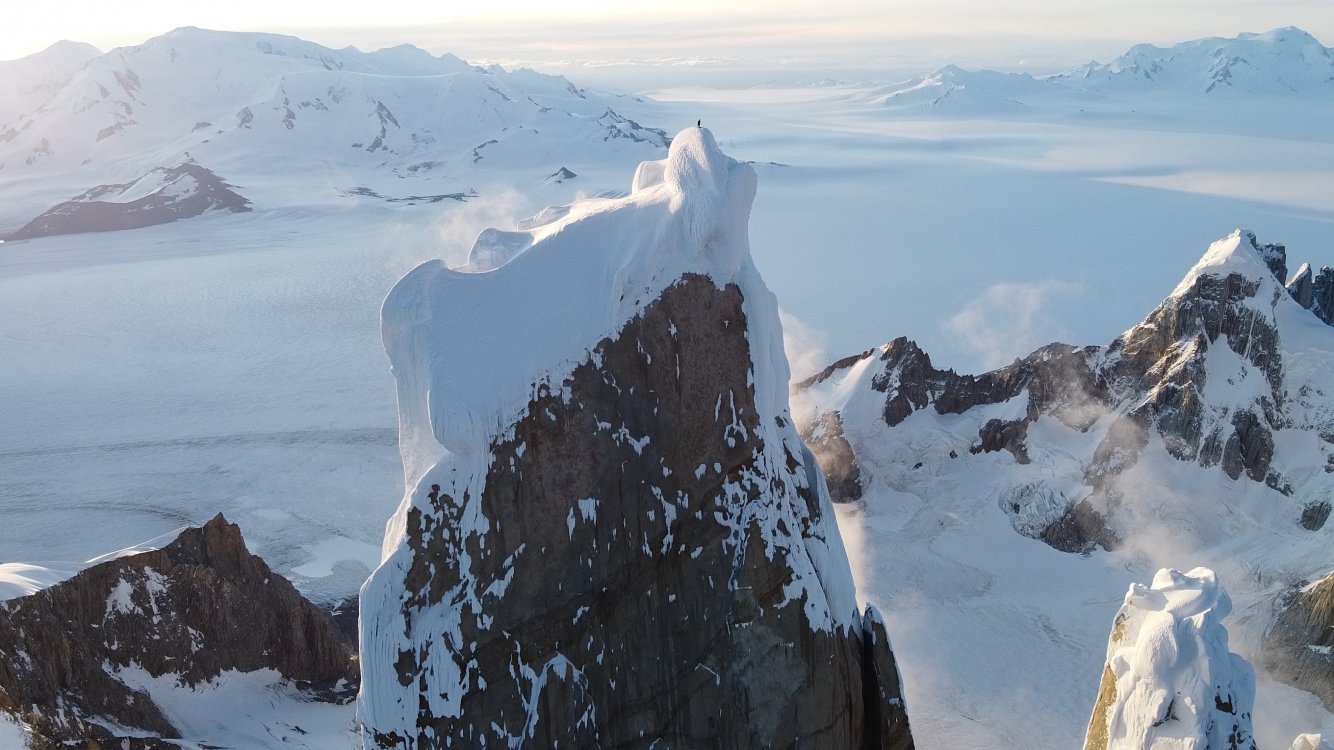
Via dei Ragni: Grade VI, 95deg snow/rime/ice, M4, 1000m Scribe/Photos/Climbers: Jeff and Priti Wright Google Street View: Cerro Torre Summit 360 Panorama https://youtu.be/nZ4O199GfAo?si=Kr-etK2F4MSCGxVn https://youtu.be/RNNtXFuI_RQ?si=DDMqTiOcCEcDAJGP https://youtu.be/iRWR_DQoL3A?si=ebEbe75BW4pbSuKz We’ve had a picture of Cerro Torre on our desktops, phone wallpapers, and posters above our bed for the past 5 years. It was the reason we took up ice climbing in the first place. In February 2016, we made our first attempt on this route, hoping to at least get a glimpse of the scale of the mountain and understand what it took to climb it. The weather was too hot by then for the climb, and after three days, our high point was below the hard technical climbing. Previous trip report: The road to El Chaltén The Fitz Roy Massif These past two months were our fourth (and longest) climbing trip to the Chaltén Massif, and sixth year of watching the Patagonian weather patterns. We wanted to return to attempt Cerro Torre again, but the next two seasons were not possible because of bad weather. Last year, at the beginning of February, we saw a fantastic weather window, and the stars aligned. We flew down to Patagonia in a 9-day magical whirlwind of constant movement, and summited Fitz Roy via the Franco-Argentina route. While on the summit of Fitz Roy, looking down at the surreal summits of the Torre, we were determined more than ever to come back the following season. Day 1. We arrived in El Chaltén on New Years Eve, the last day of a 4-day weather window (brecha)…we missed it! Since then, January was filled with short stints (8-12hrs) of good weather in the mountains, and the arrival of a 6-day mega window in early February sent an electric buzz throughout town. We were a couple of bats out of hell with our 40lbs packs each as we set towards Laguna Torre. The plan was to pass through the Niponino base camp in the Torre Valley and bivouac at the higher Noruegos (Norwegian) bivouac, which would put us closer to Col Standhardt (the next day’s objective)…the passageway to the West Face of Cerro Torre where the Via dei Ragni route begins. Our bivy site at Noruegos Day 2. From the Noruegos bivy site high on the slopes of the Torre Valley, we traversed near the base of the Torres, under the celebrated SE Ridge (perhaps the greatest climb in the world) and also the 1959 Maestri line to the triangular snowfield where so much history and controversy took place. From the East, all of the Torres stand impossibly steep and impassable. To get to the Ragni route on the West side, we would climb up and over the Col Standhardt where an implausible car-sized chockstone sits interminably between the col’s steep walls. From the col, one gets the first glimpse of the Southern Patagonian Ice Cap (Hielo Continental), a massive expanse of ice 200mi long. On a rare, clear day such as this day, we could see green Chilean fjords across the Ice Cap between large, snowy volcanos. A Lighthouse Several rappels deposited us down to the Circo de los Altares (Cirque of the Alters), an impressive crescent of white-capped peaks and toothed spires. From there we headed up another glacial ramp on Cerro Torre’s West Face to a high camp, 150m below the Col de la Esperanza (Col of Hope), first reached by Walter Bonatti in 1958 who hoped that this col would one day blaze a path to the summit. It wasn’t until 1974 that a team of Italians from the Ragni di Lecco (thus the name “Via dei Ragni”) completed Bonatti’s vision. Circo de los Altares Steep snow climbing and easy mixed terrain led us towards the camp at Col de la Esperanza, the camp we hadn’t reached on our last attempt. As we hiked past our previous high point, our hearts soared. This time around, the climbing felt much easier with 4 more years of climbing experience under our belts. Day 3. This day was a rest day of sorts. To set ourselves up for success on summit day, we were moving to the highest camp a few hundred meters up: El Elmo (“Helmet”), a prominent plateau below the steep, technical climbing. Those who were faster and stronger than us had gone straight to the highest camp the day before and were now going to do the hard work of battle-axing the bullet-hard blue ice and cleaning the cotton candy mushrooms of the summit. As we came over the Col of Hope, we entered an otherworldly expanse of mangled rime towers and precarious exposure. These deformed blobs of ice towers with icicle branches and feathery leaves seem like something only God or Dr. Seuss could conjure. It’s something so beautiful and terrifying at the same time. We were face to face, looking up at thisbeastly Tower. A spectacular nightmare. Day 4. Summit Day! We were pretty antsy to get going on the summit push. Falling snow greeted us when our alarms went off at 2:00AM as the mountain was enveloped in a cloud. All over camp, alarms went off and were snoozed as the precipitation discouraged movement. When the stars finally came out again, we were the first to muster our strength and get to work. Walking up to the base of El Elmo in the darkness, the first overhanging rime ice mushroom of the route, we gave a sigh “ah, breakfast!” The last 10m didn’t actually have any good protection (besides maybe a horizontal picket), and it was a sequence of cutting the feet loose, campus’ing from questionable tools, and shoving knees into the soft rime to make upward progress. Once at the top of El Elmo, a crowd had formed at the base, chomping at the bit. All of camp was finally up. The snooze button had proved an epic failure of our collective, strategically staggered alarms. We all watched in awe and gave whooping shouts from this low perch as our friend, Fabi Buhl, paraglided from the summit in the wee hours of the morning, slowly swirling in front of the spectacular sunrise over Lago Viedma. He was the first ever to fly off the summit of Cerro Torre having climbed the mountain first (and not dropped off via helicopter). After El Elmo, the mixed pitches zig-zag through a maze of rock and ice up to the base of The Headwall. Two pitches of blue, overhanging, bullet-hard ice. The final pitches mount three tiers of giant rime mushrooms facing the Ice Cap. This high ridge gets pummeled by the wet, freezing storms that race around the Southern Ocean to create these crazy rime formations. The first and second rime mushrooms had formed spectacular, natural blue-ice tunnels created by vortices of wind spiraling up the ridge, clearing a path through the thick outer layer of soft rime ice. Climbing into this vertical subway tunnel for 60 meters felt like entering a portal into another world. It eventually funneled up to an elevator shaft and spat us out of a squeeze tube. For the second and third mushrooms, we attached Petzl prototype “wings” to our ice tools to make purchase in the soft, overhanging, cotton-candy rime. These wings are horizontal plates that bolt onto the picks of our ice tools like Dilophosaurus gills. The Final (Summit) Mushroom was a beast. The previous day, it had taken the other parties many hours to clear a natural half-pipe, then dig a tunnel through the steepest part for many hours. Their line then exited their manufactured tunnel out onto the overhanging summit lip. Walking up to the steepest point on Cerro Torre on a perfectly still, clear day was absolutely surreal, basking in the bright orange-red glow of the sunset. The 200 miles of the Continental Ice Cap stretched before us and the Pacific Ocean now clearly visible. Behind, on the other side of the Torre Valley, small, wispy clouds hovered over the summit of Fitz Roy. We were lucky to get perfect lighting to fly our drone around for 30 minutes alone before we headed back down to our tents at El Elmo for the night. Days 5 and 6. To get back to town, you can reverse your way up Col Standhardt (M7 shenanigans), or take one of two trekking passes along the Ice Cap. We had experience taking the Northern pass (Paso Marconi) which was now in really bad shape. We opted for the Southern pass (Paso del Viento) to try something new, and hopefully be able to turn our brains off for a few days (sadly, this was not the case). The Hielo Continental spans 50mi across and crawls 200mi north to south across Southern Patagonia. It looked so beautiful and serene from our climb. Now, face to face with this beastly crocodile, it was the stuff of horrors. Canyons after canyons of impassable crevasses, we zig-zagged our way in no logical direction under a bright, unhelpful, full moon. From the air, our tracks must have looked like the random scribbling of a toddler on a massive, blank white floor. A sun dog greeting us after our descent. Finally reaching the pass and seeing people again after such a mental test of sanity was nothing short of jubilant. A popular trek is to take the pass South to Lago Viedma: the Huemul Circuit. We were now on a delightful trekking path and could now…finally… turn our brains off and just put one foot in front of the other for a mere 14 miles back to ice cream and showers and safety. Thanks: We had good confidence in the forecast and the length of the window, but it’s still important to have daily weather updates to anticipate the inconsistencies between each day. We’re so grateful for our weathermen who sent us updates to the inReach and gave us both confidence and peace of mind each day that we spun ourselves further from civilization: Dan Berdel, Devin Monas, and Rolando Garibotti. We’d also like to thank Dave Burdick (Alpine Dave!) for his support, inspiration and beta on the route. Also thanks to the American Alpine Club Live Your Dream Grant for supporting this trip. Recommended Reading: The Tower, Kelly Cordes Patagonia Vertical, Rolando Garibotti Enduring Patagonia, Greg Crouch Gear Notes: 13 ice screws (including 3 stubbies) 1 Picket (to place horizontally in vertical rime!) small set of nuts (Wildcountry Superlight) small rack of cams (Black Diamond Ultralight cams .4-1, Metolius Mastercam 1-3) 2 Petzl Nomic Ice Tools + Petzl prototype wings (rented from Viento Oeste gear shop in town) Petzl V-link Umbilicals 2 stuff sacks (gear management in pack, and also to leave for snow anchors) The North Face Phantom 50 backpack 4 double-length Petzl Pur'anneau runners with 2 Camp 22 biners each 2 double-length Petzl Pur'anneau runners with 1 Camp 22 biner each 7 single-length Petzl Pur'anneau runners with 1 Camp 22 biner each (can’t have too many runners) Patagonia R2 Jacket Patagonia Micro Puff jacket Patagonia Macro Puff jacket Patagonia Kniferidge hardshell jacket (didn't use)...also, it's now the "Ascensionist Jacket". Mainly wore the Micro Puff for outer layer Patagonia Nano Air Pants Patagonia Softshell pants (bibs) Patagonia base layer (top+bottom) Platypus 2L soft bottle Garmin inReach Mini (love this little guy!) Petzl Dart Crampons 2x Mammut Twighlight Twin Rope (7.5mm) Petzl Sirocco helmets Petzl Sitta harness (for him) and Arc’teryx harness (for her) Metolius Feather Nut Tool (each) Mammut Smart belay device (not the Alpine Smart) 3 lockers for group: Grivel Tau K12L, Grivel Lambda HMS, Grivel Plume 2 medium fuel canisters Jetboil Sol stove Safety ‘biner (each) – Edelrid 19g caribeener, Petzl Micro Traxion, short Sterling Hollowblock, Trango Piranha knife Bivy setup – Full Length Thermarest NeoAir XTherm sleeping pad, Exped Air Pillow UL, Feathered Friends Spoonbill sleeping bag MSR Advance Pro 2 Tent (amazing!) La Sportiva TX4 Approach shoes La Sportiva G2SM boots Petzl Reactik headlamps (each) + 3 extra AAA batteries + Petzl e+LITE headlamp Other things: 1 long spoon to share, chapstick to share, small Joshua Tree sun stick to share, Frog's Tung phone leash, lighter, whistle, duct tape, Thermarest repair patches, Voke tabs, Nuun, pain killers, 1L Platypus soft water bottle (for her) and 750mL HydraPak Stash (for him), warm headband, glove liners, 1 pair thick long socks (each), sunglasses, ear plugs, WRFA emergency form, small pencil, cotton handkerchief, wad of toilet paper, ID, Credit Card 1 Swix alpine pole (with snow basket) Arcteryx ball cap Adidas Sunglasses (with nose sun guard), no longer available iPhone 11 Pro (with route beta downloaded) GoPro HERO 5 Session (with helmet mount) DJI Mavic Mini Drone (remote and drone stored in USPS Tyvek bag) Dinner: 2 AlpineAire meals, 3 Near East Couscous boxes repackaged with small olive oil packets in ziplock bags, salt Day food was mostly bulky, yummy snacks: vegan jerky, dried mango, nuts, Cheese-Its, sesame sticks, Gu, nut butter, etc Approach Notes: Approached via Col Standhardt. Also possible to approach via Paso Marconi (currently in difficult/sketchy conditions) or Paso del Viento (long). We came back via Paso del Viento, but it's also possible to climb back over Col Standhardt (M7 shenanigans with old fixed ropes here and there).1 point
-
Trip: Lost Marbles Couloir - Hidden Lake Peaks Area - Lost Marbles Couloir Trip Date: 03/01/2020 Trip Report: Tim did a nice write up on TAY, for our ski descent and boot-up of the Lost Marbles Couloir. Link To Report Here Does anyone know if this is a commonly done trip? It seemed too good for the almost total lack of information online. I'm mostly posting here because I love Cascadeclimbers and don't want it to fade into oblivion. BTW that's what will happen to your trip report if you post it on Facebook. No one will ever hear about how awesome you are, nor will others benefit from your beta in years to come. Gear Notes: Skis Approach Notes: Hidden Lake Trail route to around 4800'1 point
-
Wow! Scary and inspiring all at once. I'm really glad you're going to be OK. Doing a self-rescue from a serious injury that high on a face is something you should be proud of, and perhaps will be in time. It seems you guys did a lot of things right. Many years ago, in early fall Alex and I ascended a rock line right around where your red line is. The rock climbing was super fun and solid and moderate, but the line meandered back and forth, ascending from ledge to ledge, so the aesthetics weren't quite so great. The upper half of Sloan is like a multi-tiered wedding cake. I can only imagine how beautiful it would be with winter frosting. I'm glad to see someone get up there. Great job and thanks for posting!1 point
-
Yikes! I just read the blog post and saw the photo. I hope that doesn't leave a mark! Reminds me of some idiot that managed to fall off the Girth Pillar.1 point
-
Damn that looks like it hurt. Glad you're alright! Great write up, thanks for posting.1 point
-
Really impressive that you and especially Porter were able to keep your wits. After looking at your injury and being 1,000' up an alpine route with a storm coming in, I would be needing a change of underwear.1 point
-
Glad you're okay! Going to read the blog post now...1 point
-
Wow, fantastic work! Hope you have a speedy and uncomplicated recovery. Thanks for the compelling write-up and thoughtful analysis in your blog post too. There are a few take-away lessons for me, and I appreciate the opportunity to reflect.1 point


