

chris
-
Posts
1482 -
Joined
-
Last visited
-
Days Won
2
Everything posted by chris
-
I notice people carry too much - my cordellettes are only 3m/18ft long, and I utilize 7mm cord or 6mm powercord (sterling). Whether I carry one, two, or any cord at all depends on the route - lines like IB or Prime Rib of Goat have two-bolt anchors for ascending and descending, so its not necessary. If I'm climbing a trad route with big belay stances (i.e., R&D), I may bring one cordellette for ease of some anchor building. Then on full alpine routes, or trad lines with small or hanging belay stances, I'll bring make sure we have two cordellettes that alternate anchors - its just less hassle, more versatile, and makes for quick and immediate rap anchor material if we're bailing in an emergency (this has happened to me twice).
-
I agree with other posts that advocate for switching to lighter boots like the TLT and dynafit bindings first, then consider your skis. Personally, my experience with the lite-weight end of the spectrum in skis has convinced me that adding a little bit of weight is worth it, so I'm riding on K2's. Not the lightest ski in the market, but I think the best compromise between savings grams and performing. I only went down a size for my spring/mountaineering ski, which is 82 underfoot. My midwinter and powder boards are both my "regular" preferred length. If you're trying to go for a quiver-of-one, I wouldn't recommend getting a shorter ski than normal. You'll hate it mid-winter, and won't notice the difference in the spring.
-
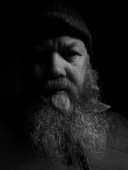
Trip: Mt Logan - Kings Trench Date: 5/16/2012 Trip Report: Came wicked close to reaching the summit - 700m elevation, 7km away - but turned around due to quickly deteriorating conditions, poor forecasts, and determining that we did not have the supplies to wait out the weather for another attempt. Day 1 - Arrive at the American airstrip (2570m), and travel to the Canadian airstrip (C1, 2700m) Day 2 - Move to C2 in the King's Trench, caching enroute (3290m). Day 3 - Back carry to C2. Day 4 - Rest day. Day 5 - Carry to Kings Col (C3, 4110m) Day 6 - Move to C3 Day 7 - Rest Day 8 - Carry to the Football Field (C4, 4840m) Day 9 - Move to C4 Day 10 - Rest Day 11 - Weather Hold Day 12 - Move to C5 on the Plateau (5230m) Day 13 - Wx deteriorating, descend to C4 Day 14 - Rest day Day 15 - Descend to C3 Day 16 - Descend to C1 Day 17 - Traverse to the American aistrip, and picked up that afternoon. The weather forecast called for a clearing day with moderate winds on day 13, but a return to storm conditions until day 17, and we realized we would be 4-6 overdue if we attempted to wait out the weather. Our team was pretty average in strength, and we were to shattered by the move to C5 to make a summit attempt in the morning as planned (a Canadian an Alaskan team, younger and stronger, did summit that day). Our descent was epic - we climbed back up the col to exit the plateau in 50kph winds and -40C temps. The descent to C3/Kings Col was in 10-30m visibility, requiring compass and gps navigation through the greatest crevasse hazards on the route, covered by +30cm of fresh snow. The temps and conditions improved greatly as we descended from Kings Col, and the promised weather clearing made it possible to be picked up that afternoon. Approach We flew in from the Alaska side of the range with Ultima Thule. I've flown with them twice before and can recommend them without hesitation - Paul's one of the best pilots I've ever flown with. A second option is to fly from Kluane Lake. The contrast is that the Kluane Lake pilots are using Cesna's and have to fly over the range to reach the Canadian airstrip, while Paul is flying a Turbo Otter (bigger, more powerful), and has an easier flight up-valley. We had to wait two days to be flown in - that same day Kluane Lake was finally getting in after 10 days. The negative - US Customs refuses to allow flights originating in the US from landing at remote airstrips outside of the US, meaning Ultima Thule has to land on the Canadian/US border, and teams have to travel an additional 8km (one way) to reach the "start" of the route at the Canadian airstrip. Equipment This is the coldest I've been in a long time! I had an overstuffed -20 bag that worked fine. We used sleds (provided by Ultima Thule) to drag to C3/Kings Col, then carried after that. This is a great mountain to ski - not that the skiing is great, but they make a huge difference on the descents and the skiers on our team simply had more energy at the end of the day then the snowshoers. Conclusion This is not Denali. When we left, 10 people in 3 teams had summitted, and approximately 60 people had attempted. One pair of Anchorage climbers and a team of 4 Polish had waited on the summit plateau for 10 days for a summit - the Alaskans attempted once and the Poles 3 times without success. Perhaps 2/3's of the teams made it above Kings Col. There was still a team of four Canadian's on the plateau when we left, who looked strong enough and well enough supplied that I expected them to summit as well. Camp walls are necessary from Kings Col and above, and the low numbers mean you don't get to just move into someone else's camp. There is no such thing as a rescue from the mountain - anyone injured or sick will have to be taken all the way to the Canadian airstrip for evacuation, and you could have to wait for an extended length of time for that evacuation to take place. That's it! It was an awesome three weeks, and now I'm stoked to be finishing the ski season and get to the rock! More information and photos can be found on my blog at Climb | Ski | Sleep | Repeat. Here's the photos I promised. [img:center]https://lh5.googleusercontent.com/-E8ImA9c-yWA/T86cHooEAiI/AAAAAAAAQVI/aNLWgFdxVnQ/s800/DSC01556.JPG[/img] [img:center]https://lh6.googleusercontent.com/-LocR0QrFyqA/T86cJOB3LuI/AAAAAAAAQVY/ZGs1y9DlVM0/s512/DSC01559.JPG[/img] [img:center]https://lh6.googleusercontent.com/-68ul7hA_nf0/T86cOXC2wLI/AAAAAAAAQV4/hUYj-kidYUg/s640/DSC01568.JPG[/img] [img:center]https://lh3.googleusercontent.com/-9Bw84SpUMVI/T86cSaU_laI/AAAAAAAAQWg/XVTHa5Nm_8E/s640/DSC01584.JPG[/img] [img:center]https://lh3.googleusercontent.com/-wv9-_6a1jZ8/T86cV0E9YXI/AAAAAAAAQXA/Bpf1rV9PYGs/s512/DSC01595.JPG[/img] Self portrait, Day 15
-
Consider using 5mm cord or dyneema slings and a kleimheist instead of a prusik. EDIT: A Garda hitch for your waist is useful too, especially if you want to leave excess gear at home.
-
I disagree - 30m is perfect for 2-3 people. 10-15m between climbers, excess rope carried by the first and last climber on the team (if necessary). Have "stopper" knots for a two man team. Voila!
-
I worked for SP from 2003-2011, and this is news to me! But, in my experience is that kiwi coils are best used on terrain where the rope length will change occasionally - glacier to rock, 3rd to 4th to 5th class, etc. For dedicated (all day) glacier travel, I'll do a mountaineer's coil that can live on top of my pack, clip in with a locking and non-locking biner (with equal spine length), or a single double-action locking 'biner (depends on the trip), on a figure-8 bight. Kiwi coils don't work so well if you want/need to take all the coils off and back on (like at breaks). Mountaineer coils work better in that circumstance. Edit: since a kiwi coil is tied off on the belay loop (or a biner clipped to the waist/legs), it does NOT substitute for a chest harness. In fact, if the loops are too small and the kiwi-tie-off is not clipped to the harness, the direction of pull can make a crevasse-fall arrest MORE difficult. Just my 2 cents.
-

So I want to take up Ski Mountaineering / Touring
chris replied to mplutodh1's topic in Climber's Board
I'm very biased, but my advice is: hire a guide. Take an Intro to Backcountry Skiing (or whatever the company calls it), rent gear for the first time, and afterwards you'll have a much better idea of what you want and don't want. Maybe go out a few times with a few different setups to settle on your boots/bindings/ski preferences. My opinion - and it is very, very biased - hiring a guide is the best bang for your buck. Just like ski lessons at the resort. Yes, you can learn from your friends. And you can take group lessons with 3 or 4 other people with a variety of ski abilities and bc experience. But for the fastest learning curve, hiring a guide 1:1 will get you the fastest results. -
Post title pretty much says it all. Can anyone recommend a Subaru mechanic near Green Lake?
-
Just my two cents - I use Picasa in order to have a centralized online photo cache for all applications. When I do add photos to a TR, I've learned how to do so from my Picasa url instead. I don't use the CC.com gallery simply because having my photos on multiple sites is time consuming. I'm trying to bump up my TR writing, but any changes to the photo procedure on cc.com isn't likely to change my behavior about TR's. I only bump over to the gallery when someone uses an interesting photo in a post that I want to look more closely at.
-
Since I moved here in 2000, I've gotten to live in Ashford, Seattle, Bellingham, and after a hiatus to California I'm back in Seattle. Index, Leavenworth, Mazama or North Bend would be my first choices, but finding work is hard. Mazama is also three times as hard to reach in the winter than in the summer, which can be a real problem if you need to leave town in order to make money. Still, it's on my short list for property. Bellingham is a great place to live, but equally hard to find work, and the mountains aren't as close as they seem (1:15 to Mt Baker, 1:30 to the ski area). Heading anywhere else requires driving south and making a 90 degree turn east - no cut-off routes. I either want to be in the city or in the country, not suburbia, so Bellevue's out. Seattle's centrally located with good access out of the city in all directions, and plenty of work opportunities.
-
Trip: Alpental Valley - East Chair Basin, Bryant Couloir Date: 4/6/2012 Trip Report: After yesterday's shut-down, I emailed Paul and Amir and reminded them, "bring your ski crampons." The climb up the Phantom had been bullet proof crust. I had a tour planned, but really didn't think I could make it happen in the condition we saw on Thursday. What a difference a day makes. It was snowing lightly in the parking lot, dusting the ground. At Source Lake, there was 2cm. But when we finally stopped climbing at 5450' in Chair Peak's East Basin, there was 20cm! It made for fantastic skiing back to Source Lake. From there, we headed up towards Pineapple Pass, turned right to climb over Bryant Shoulder to Bryant Col, but stopped at the final boot-pack. We waited about 30 minutes for the flat light scatter and definition to return, then skied down the gut of Bryant Couloir, and on out to the parking lot. 3700' gained in climbed and skied in a casual 7:30 hours. At the parking lot our cars were bare - beers down at the lodge before the drive back to town. Photos of the tour are on my blog.
-
Trip: Granite Mountain - South Slopes Date: 4/5/2012 Trip Report: I was last at Snoqualmie Pass two weeks ago, and at that time I thought Granite was looking good for a tour. So when a friend and I pulled together a Dawn Patrol, we agreed on going big and climbing and riding the main South Bowl by 10am. Rain showers as we left the Mercer Island Park and Ride dampened our enthusiasm, but by North Bend it was bone dry. No snow at the trail head, but we were ready for a bit of a hike and went for it, headlamps glowing. 30 minutes and 500 feet later, it was light enough to see and we had reached the lower end of the avalanche chute exiting the South Bowl. I have never made it this far on the trail for a winter ski tour. Normally I'd follow an indistinct up route between the SW shoulder and main avie path, but it was bare of snow and the Cascade under-story put a stop to any thoughts of pushing through. We attempted to follow the avie path for another 250 feet before we agreed that there was no way we'd make the speed we needed to reach any decent skiing - we could see at least 500 feet above us and the view was dirty and snow-free. What to do? If we drove home, we'd face the morning rush hour. So we bumped up to Alpental, climbed a quick 1500' on the Phantom Slide in firm crust conditions, and had an uneventful descent back to the car. Lesson: Granite Mountain's south slopes are snow free to approximately 3000 feet elevation. Better off going to the pass, or to McClellan Butte.
-
There was snow there as of yesterday evening.
-
I don't carry stakes summer or winter. I've added guy-lines to the vestibule and tail (back-vestibule) points - for my Firstlight, I've added them to the four corners. In the summer I use rocks or logs to tie down the tent. In the winter time, sectional ski poles, ice axes, snow pickets brought for crevasse rescue, skis, and snowshoes can all be used. Since the primary purpose is to hold down the tent, two or three lines can share an anchor. If I'm leaving the tent behind (like on summit day), I make sure the lines holding the vestibule and tail end are completely bomber, and leave at least central guy-line anchor point on each side. If I can't do that, I'll pull the poles out from the ends, let the tent collapse, and pile enough snow blocks on it that I'm confident it won't fly away. Setting it back up and re-establishing the anchor points is a quick exercise at the end of the day.
-
Arguably the most popular/ecumenical/universal/fitting mountaineering binding on the planet, a pair of Silveretta 404's are sitting upstairs at Backcountry Essentials in Bellingham. $99.99. I saw them today at about noon.
-
Its a factor of toe height and rocker - most randonee boots have a bit of rocker incorporated into the vibram sole, eliminated the effectiveness of alpine toe pieces to release. Often, this rocker gives the toe a higher or thicker dimension if measured from the top of the top welt to the ground, and many alpine bindings can't be adjusted enough to accomodate this height. Anecdotal-ly, a shop tech at my old ski area demonstrated all of this too me when I asked him to remount my new alpine boards for my randonee boots. He showed me how the toe piece wouldn't release because of the vibram sole friction, and I could visibly see my toe piece bend forward to try to accomodate the toe height. He said he had witnessed toe pieces breaking because of this kind of pressure. Visions of my bindings exploding mid-turn on the area's double-black terrain was enough for me - I went home, dug around the extra-ski-bits-box, and found the alpine boot soles that came with the boots. Problem solved.
-
Joseph v Kev & Steve...so much for a spray-free zone. This is my take on Joseph as well. The words he uses on cc.com and other web discussions are totally different than his behind the scenes actions. Which are now coming to light.
-
Rad, what did your research turn up? What did they quote you?
-
-
I just re-read my last post and realized how crazy it was to describe foot-traffic from Hercules Inlet to the South Pole as "normal".
-
I wanted to add that I don't carry quick links 90% of the time. On popular routes, I anticipate there being a lot of junk that I can scavenge and use. For me, quick links are useful when I anticipate needing to replace/beef up existing anchors.
-
Here's my take-away: Cordellettes: Blake finishes with, "If you expect having to build multiple belay stations, some 6mm or 7mm cord is a great choice, but as a must have item for all multi-pitch climbing, the cordellette doesn't fit the bill." (Emphasis mine) I'd add: especially on multi-pitch climbs with bolted anchors. I'll carry a single 5mm for ski mountaineering, glacier travel, and rescue/bail cord on multi-pitch bolt-anchored climbs; a 6mm for multi-pitch trad. I like using the rope/slings to build anchors, but since I lead more often in blocks or entirely, keeping the rope out of the anchor system is necessary. Rap Rings: Stopped carrying them when I decided that quick links were more versatile. Daisy Chains/PAS: I hate these. I can do everything these items accomplish with a rope and/or quickdraws, which I'm already carrying. They add clutter and confusion to my harness, and my partner's harness, and do not increase my security more than the techniques I use without them. Quicklinks: On multi-pitch routes, I typically carry my own nut tool and a headlamp tied off, each on its own leaver-biner. Both of these are currently wiregates that I found on other routes, so they're lite-weight as well. Since I didn't pay for them, I won't miss them. BUT, if I know that I'm going to be passing through a lot of established rappel stations I'll carry one, two, or even more quicklinks - its easier to thread than a rap ring. Almost every quick link on the NE Ridge of Triumph is from my 2006 ascent. I know this because I climbed the route again last summer. Bulk webbing: I think Blake is referring to the 1" webbing that many of use remember being the standard in 1990, and still found in various forms of organization on many climber's harness today. Sewn runners are cheap, pack and organize tighter, and are useful for other things, like climbing. Blake called it right - save this for the slack line in camp. Lockers: If you're belaying the second(s) off the anchor, you'll need three - one to anchor yourself in with, one to hang the belay device, and one to belay. Coincidentally, you'll also need three to do multiple rappels - one to anchor with, one to rappel with, and one for your autoblock back-up. Sometimes I'll bump it up to four for the leader - a quick anchor is two quickdraws with a locker as the anchor point. I prefer the biggest pearabiner for my belay device, and the smallest, lightest lockers for everything else (although that fourth biner is often something like an attache). The real take home lesson? Use your judgement. Look at the route description, the topo, whatever. Consider the descent - you often don't need extra gear for emergencies, since, being emergencies, you'll be willing to use/toss/destroy the gear you actually need for climbing to get the job done getting down.
-
The best advice I heard for a new route setter was to map out their favorite outdoor climbs in a notebook, with move-to-move topo and beta, then try to transfer that climb - or the best part of it - directly to an indoor wall. Its a bit time consuming at first, but it helps maintain variety!
-
This year there was a motorized traverse from Hercules Inlet as well as the normal foot-traffic. The mechanized supply traverse from the South Pole to McMurdo has been long established, follows the most direct route, and is a logical route to follow.
-
I think you're asking about Stellar Falls. Page 195 of the Washington Ice guidebook.