Leaderboard


Popular Content
Showing content with the highest reputation on 09/14/18 in all areas
-
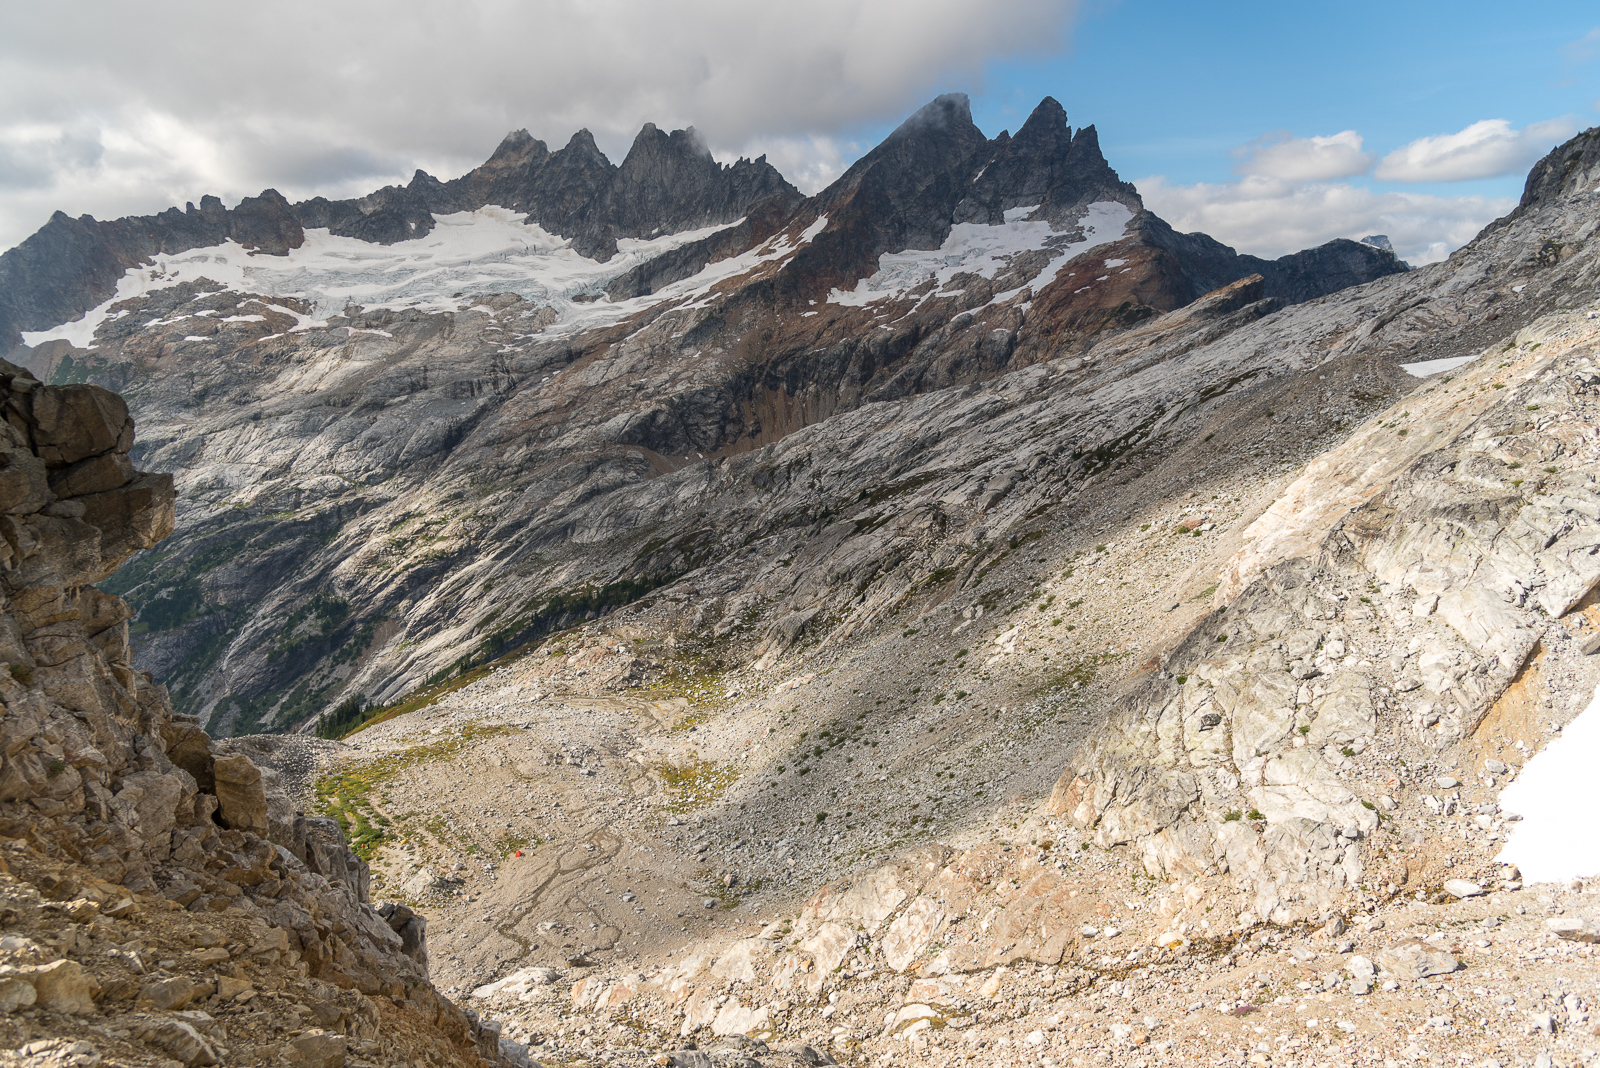
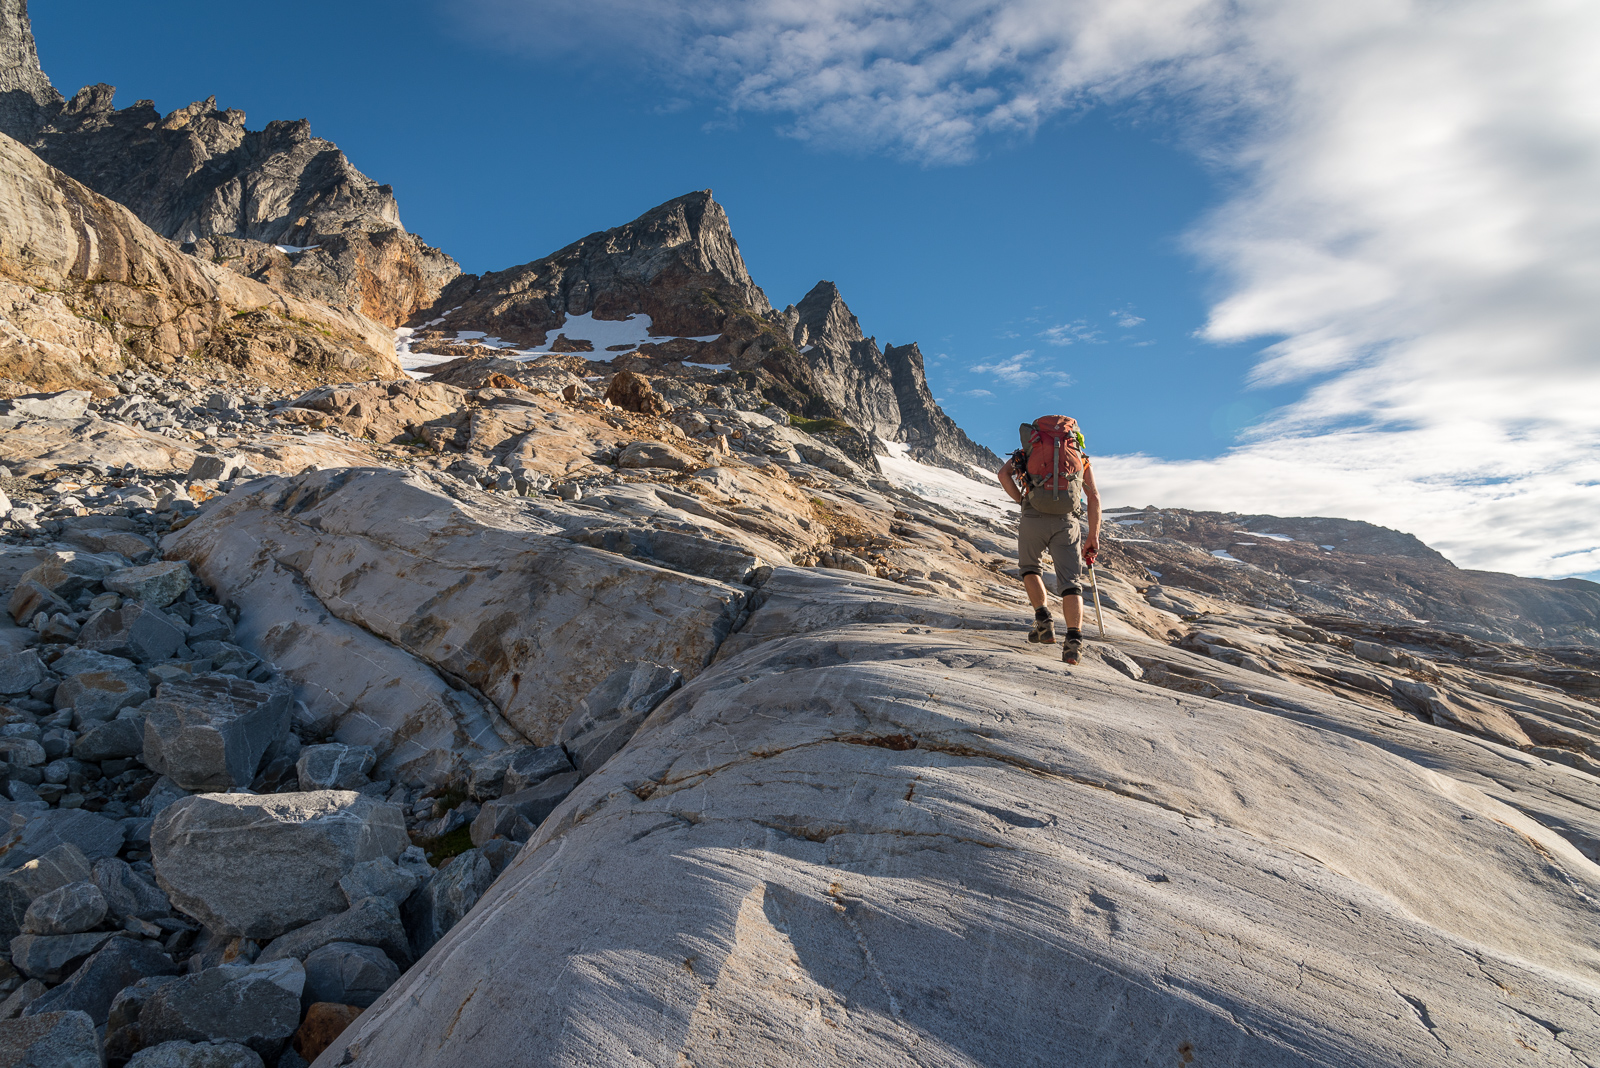
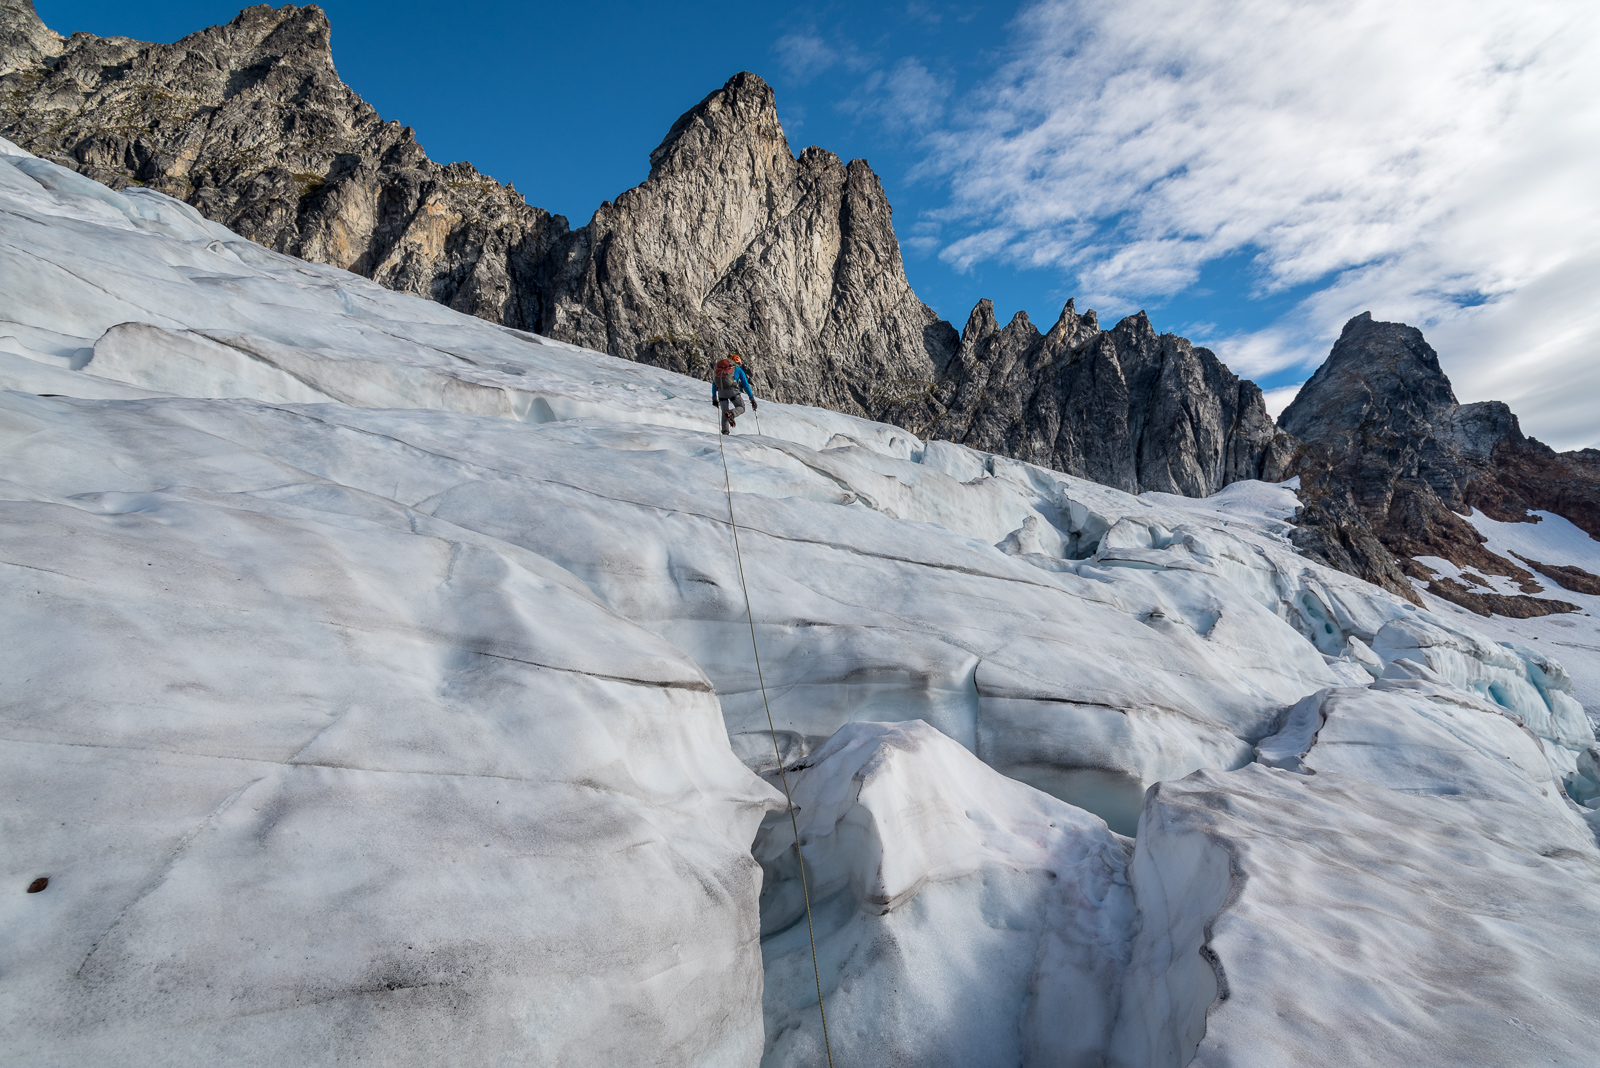
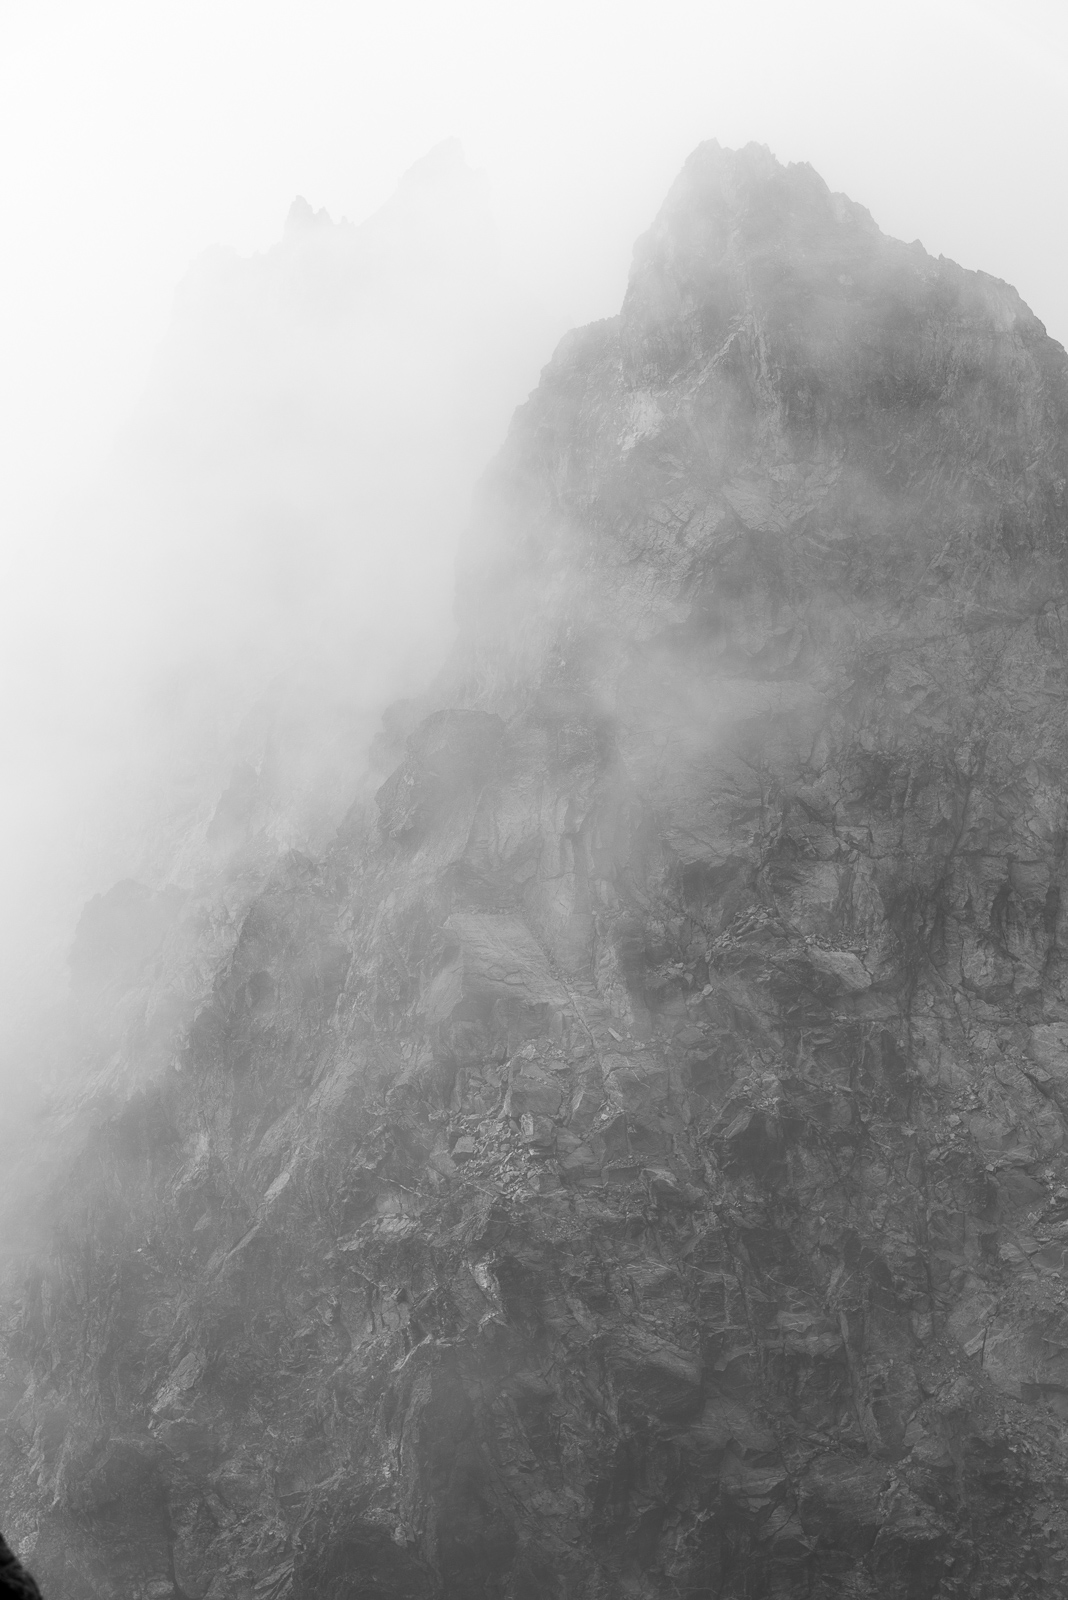
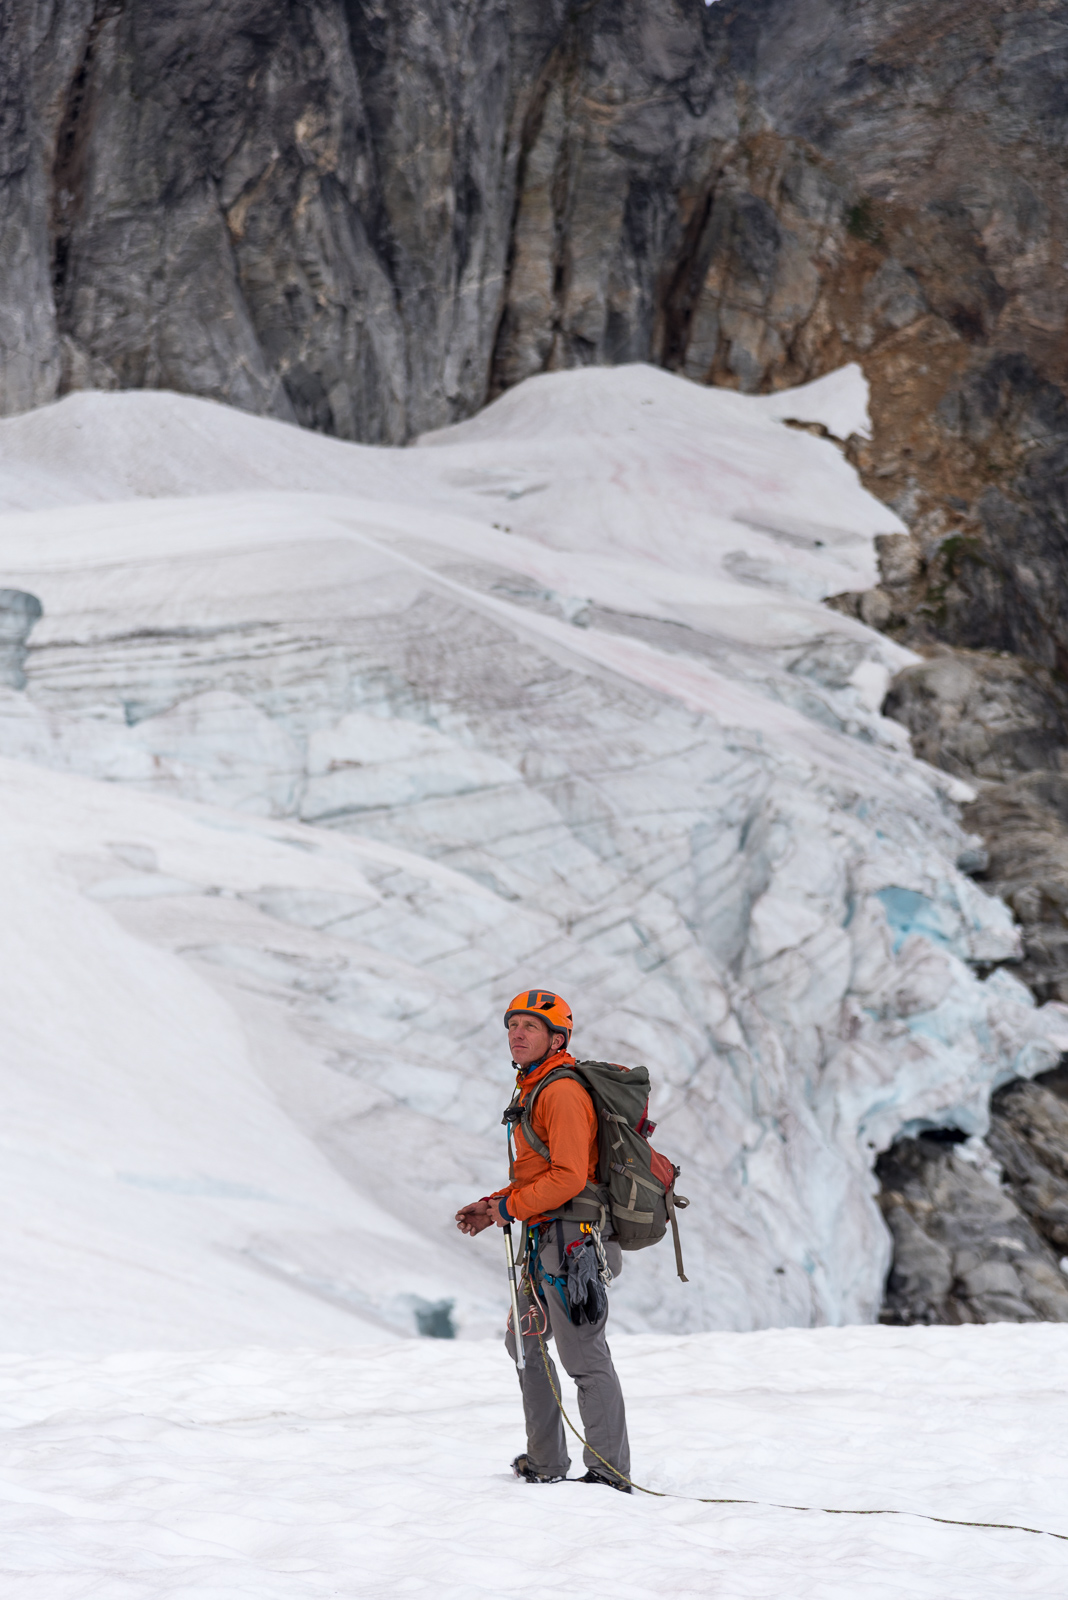
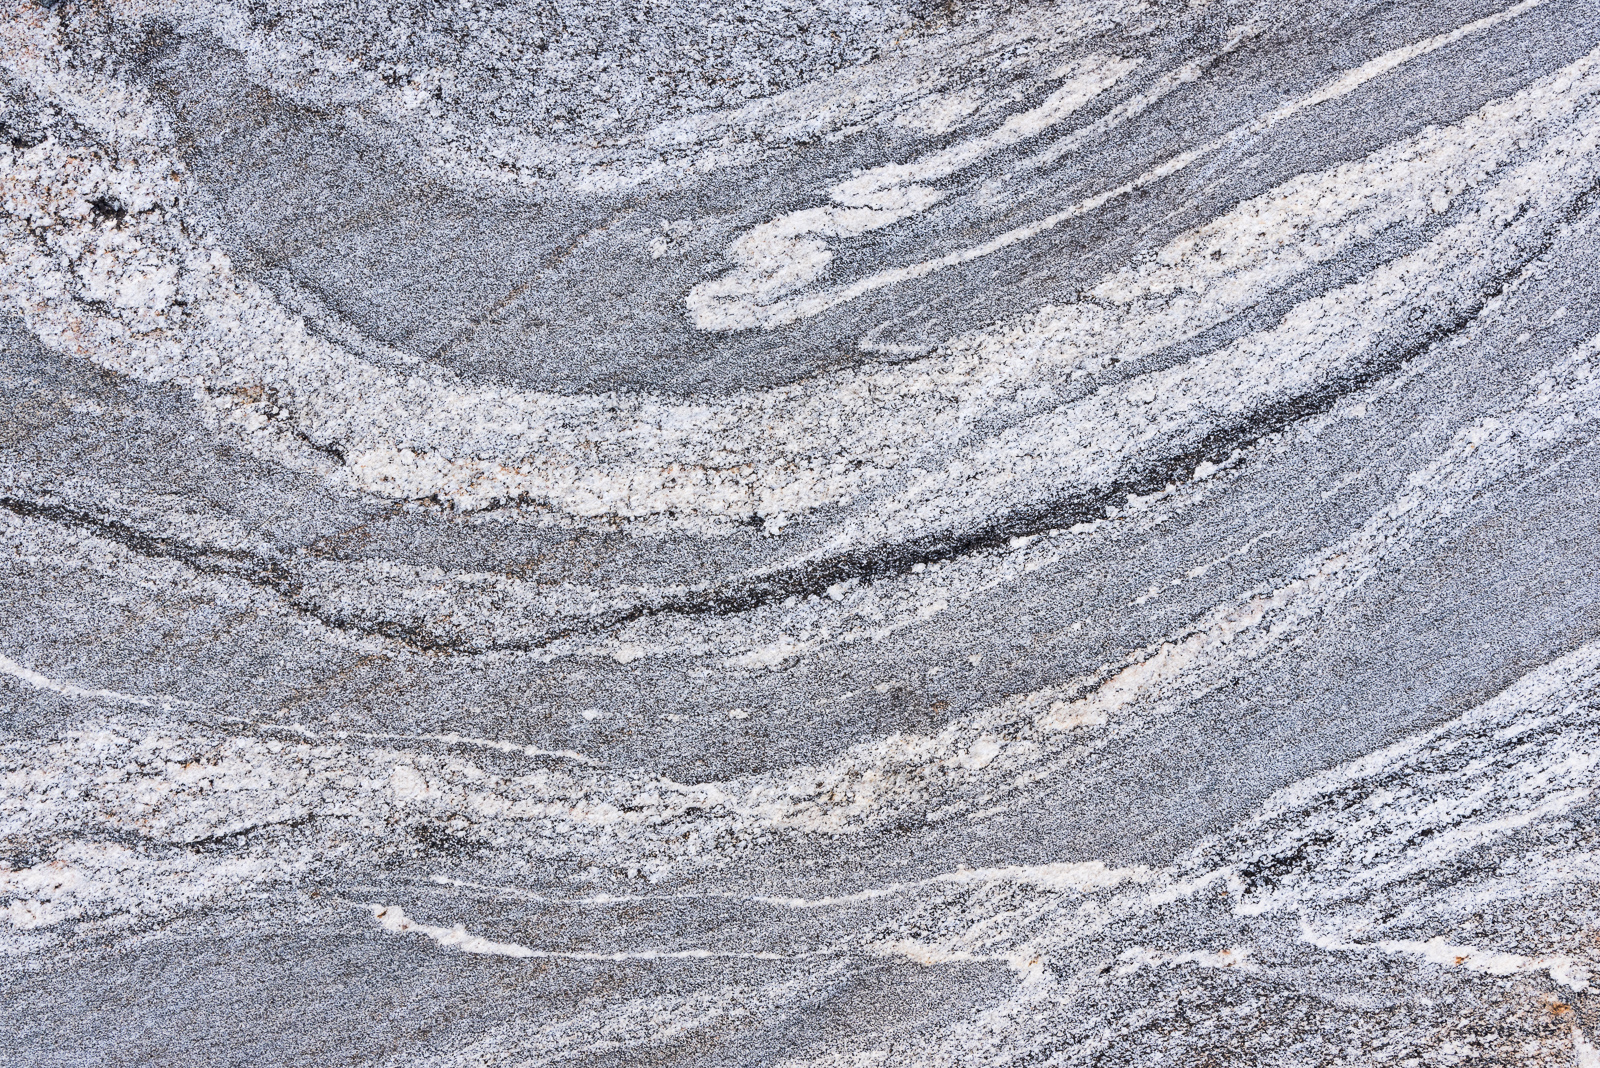
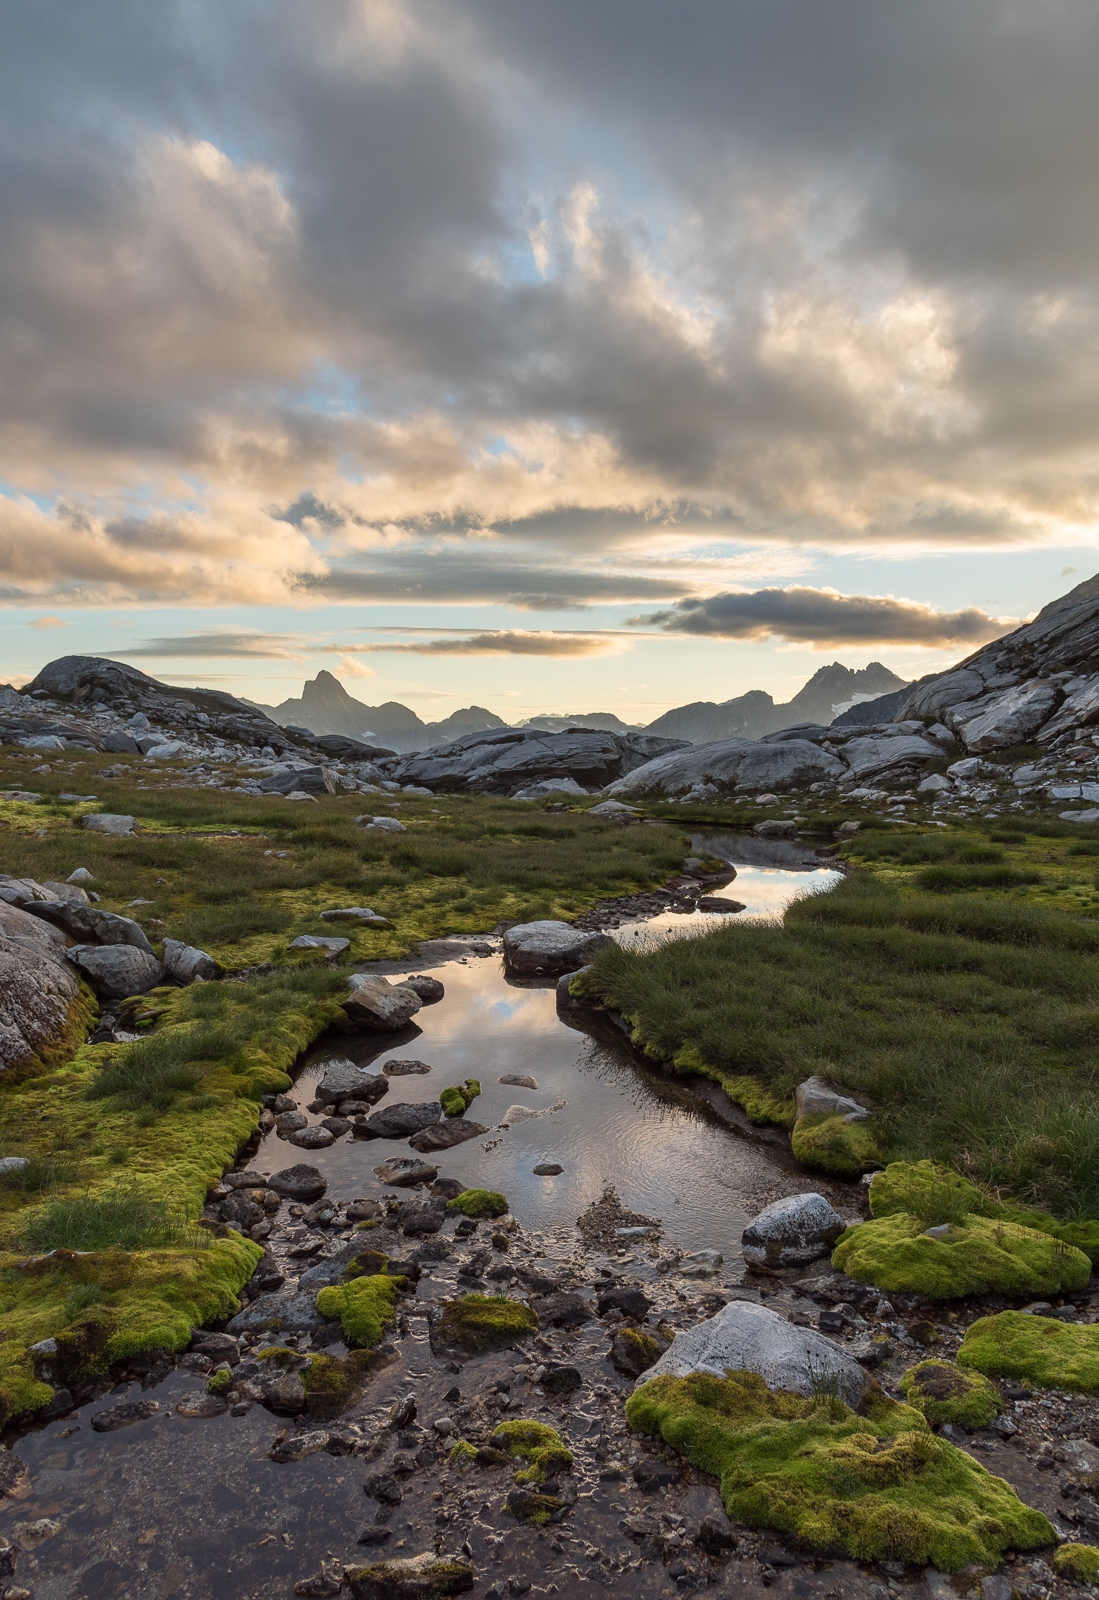
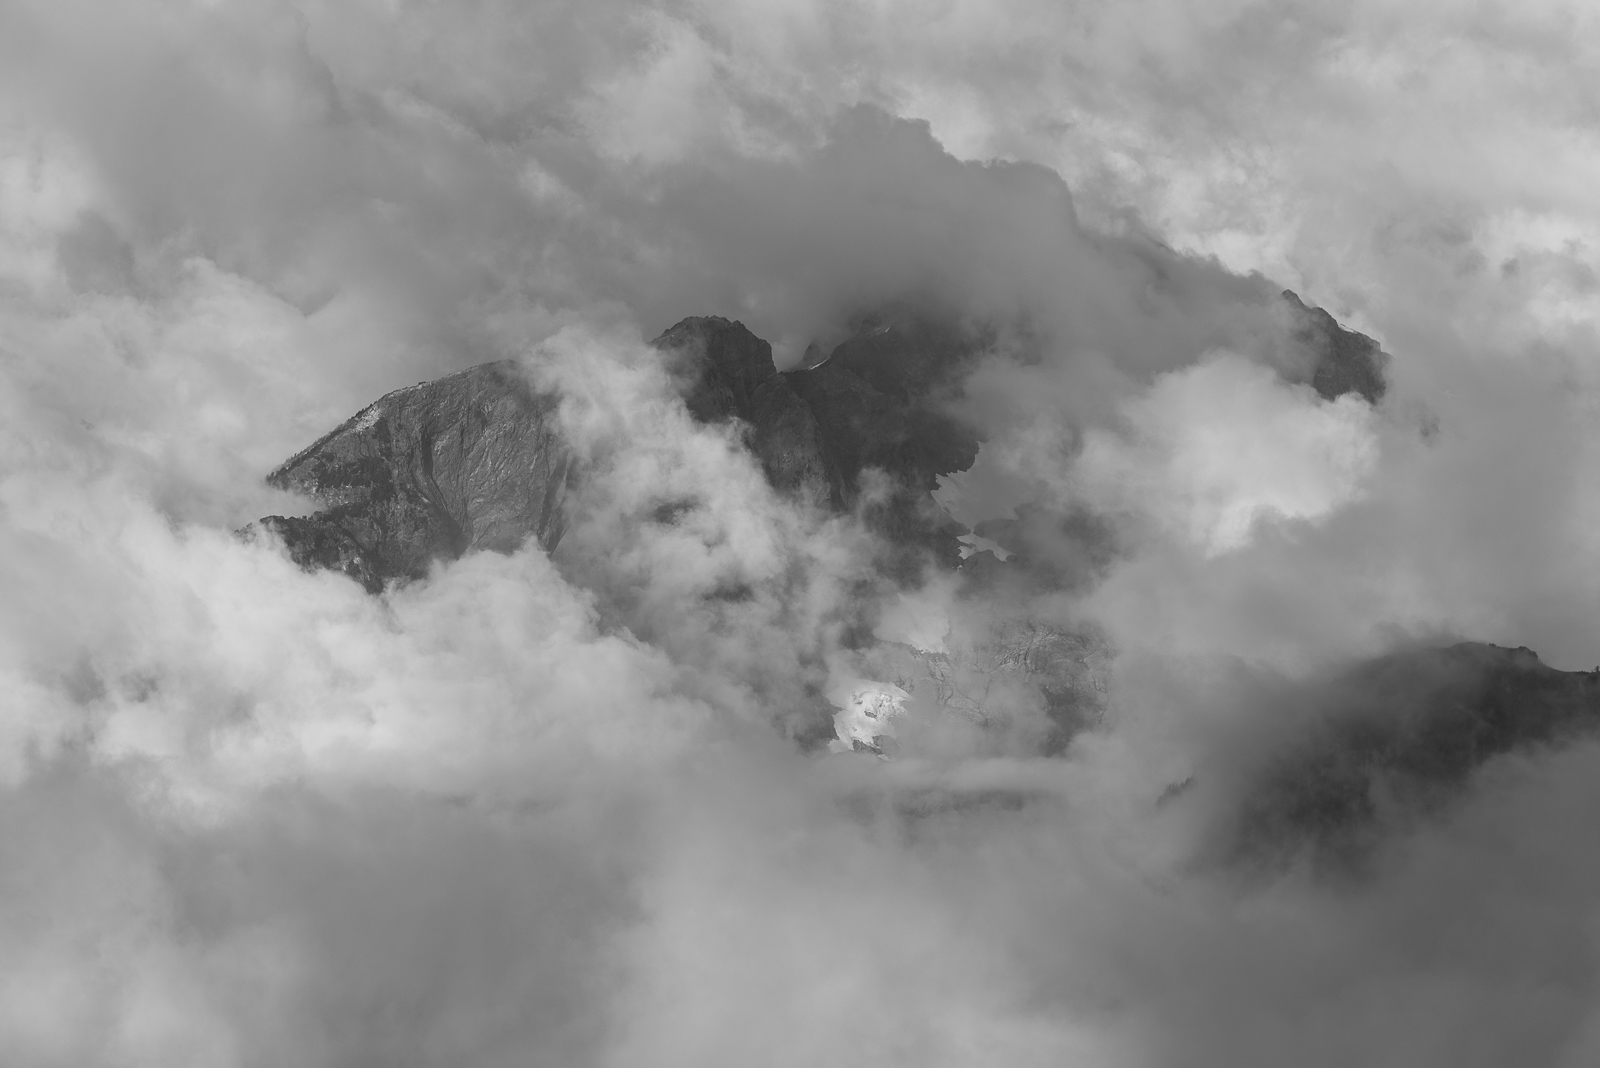
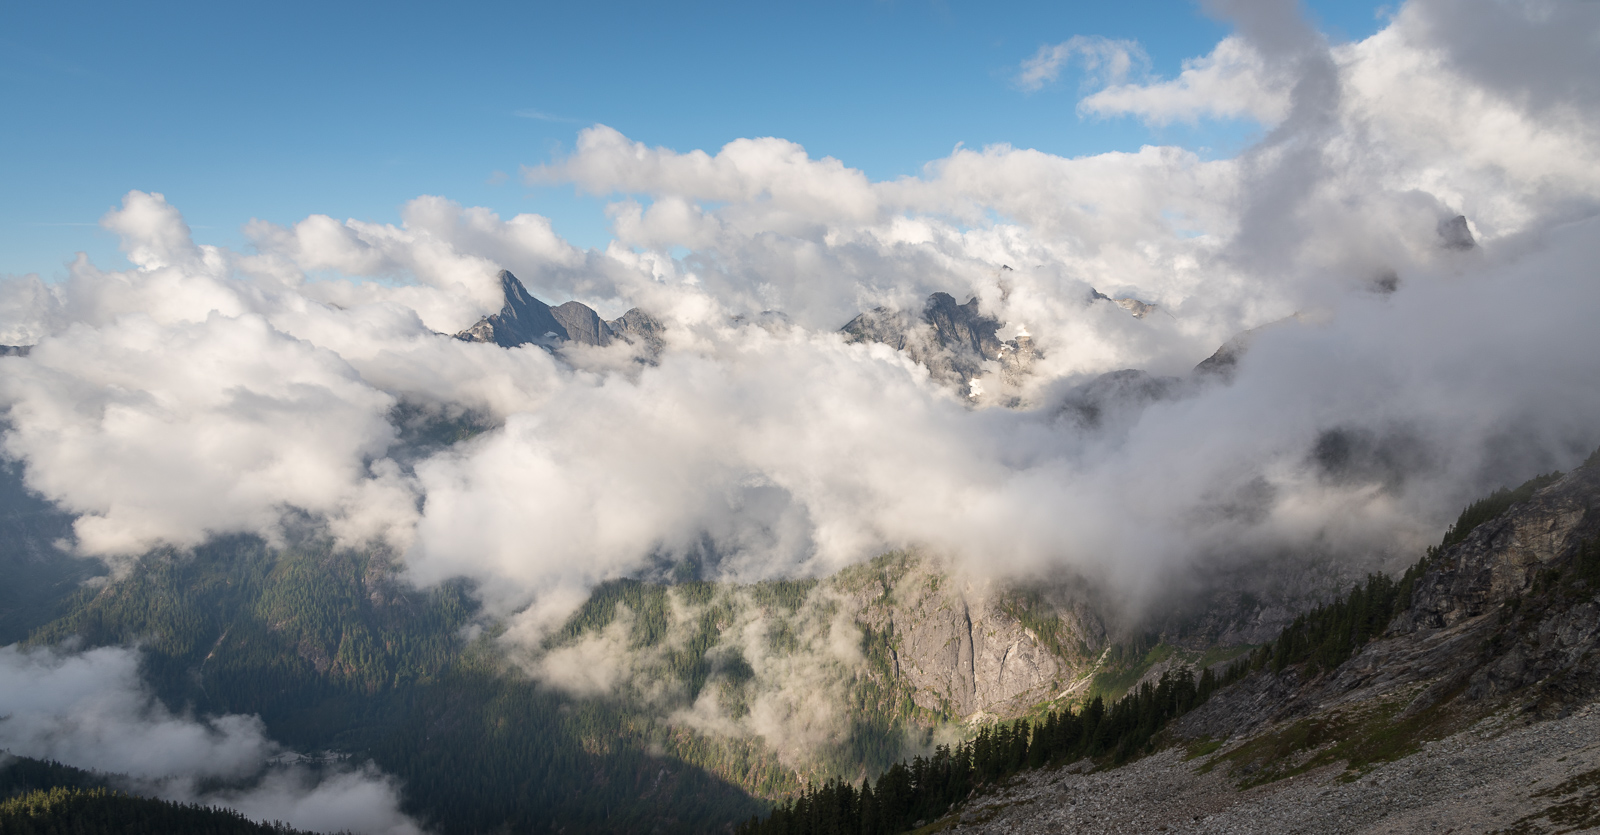
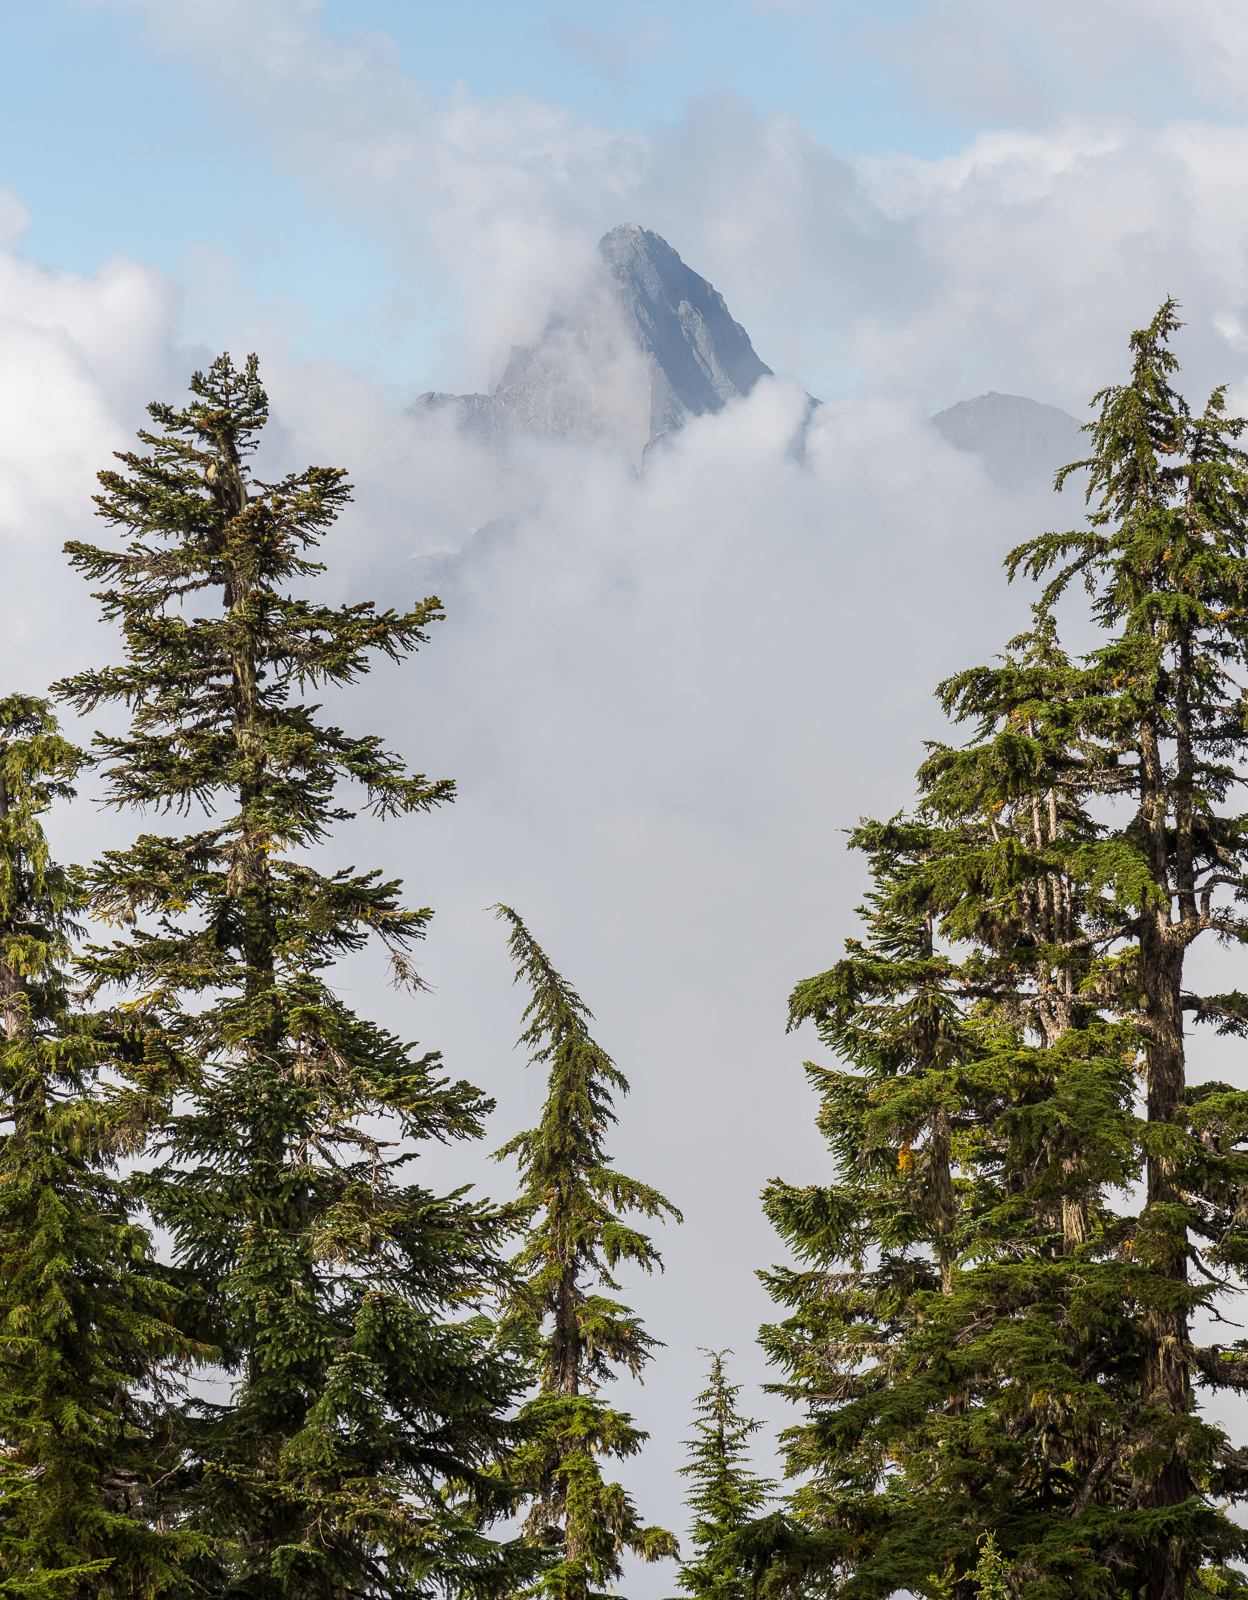
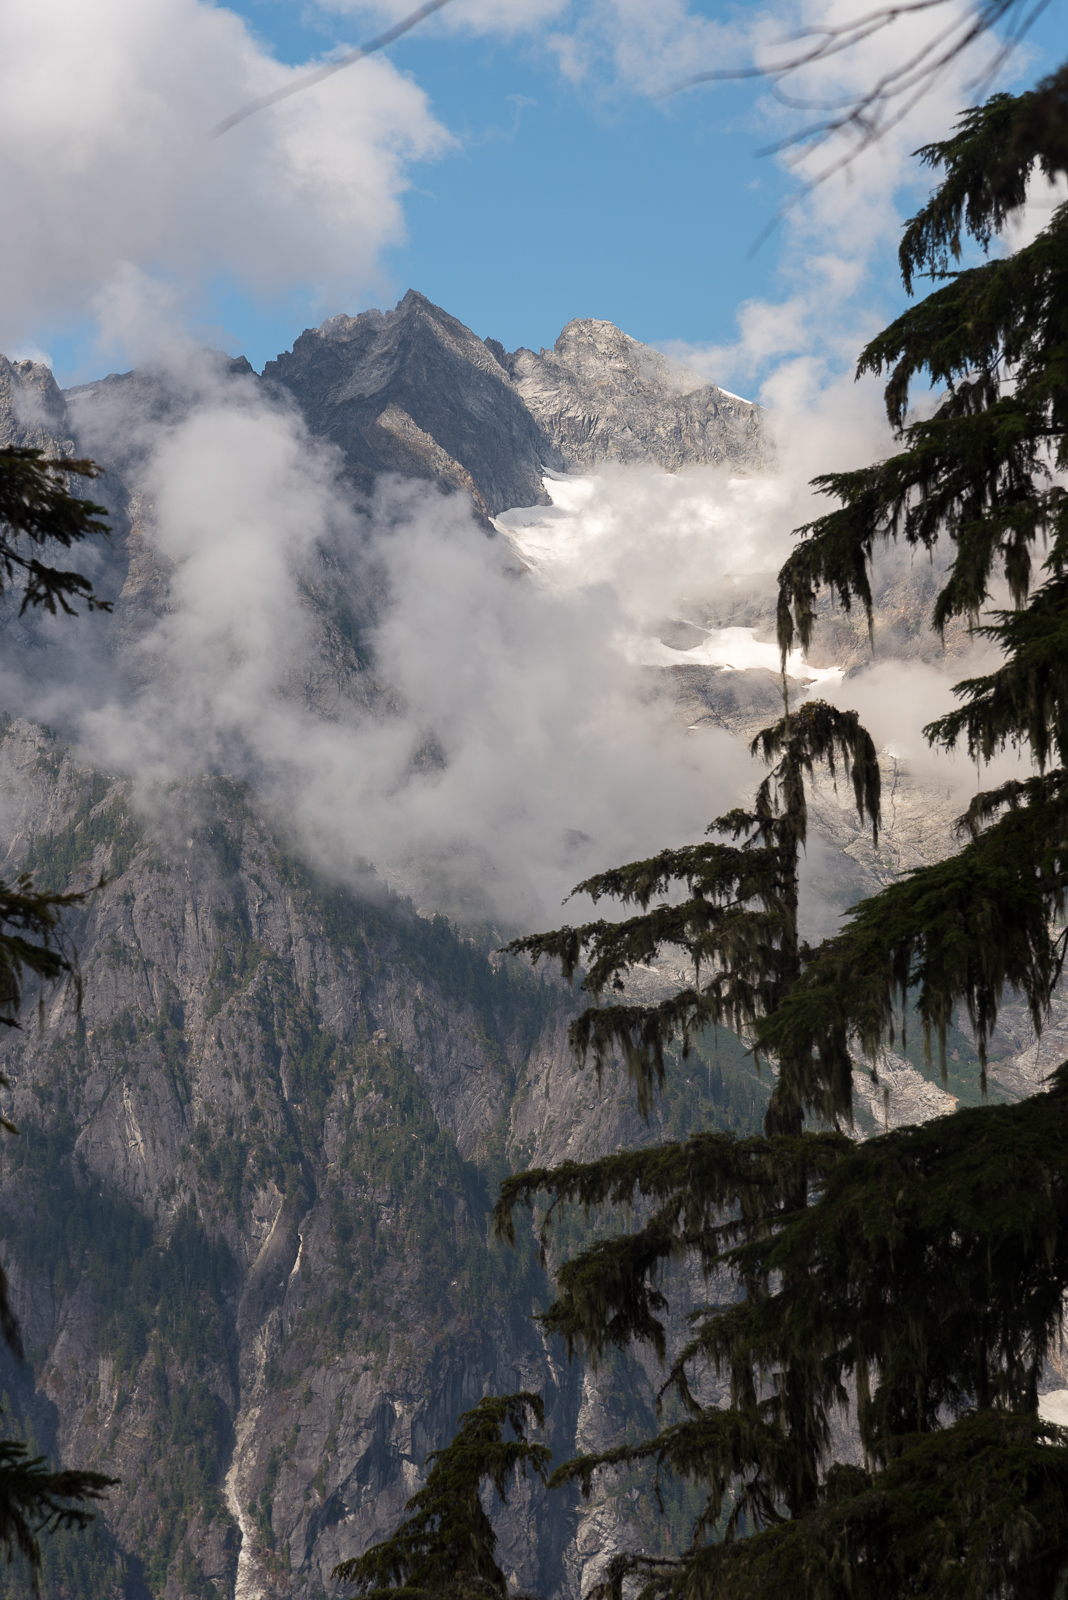
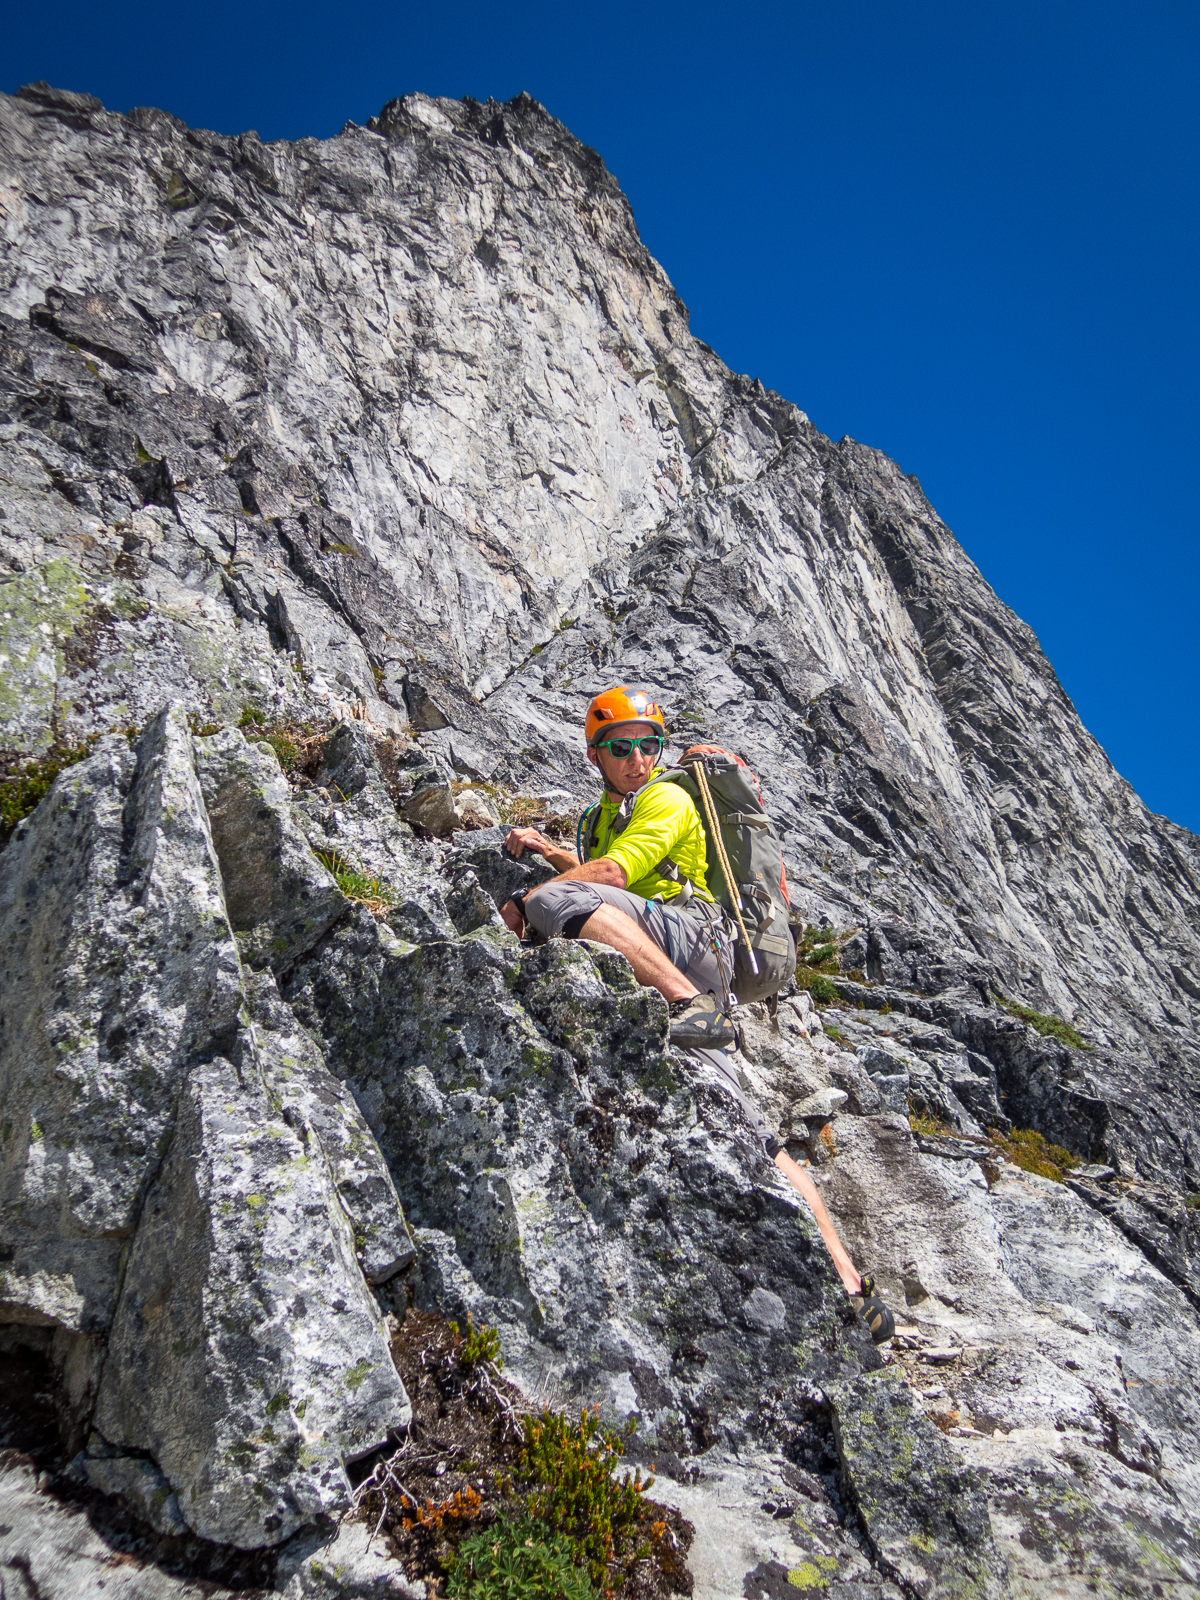
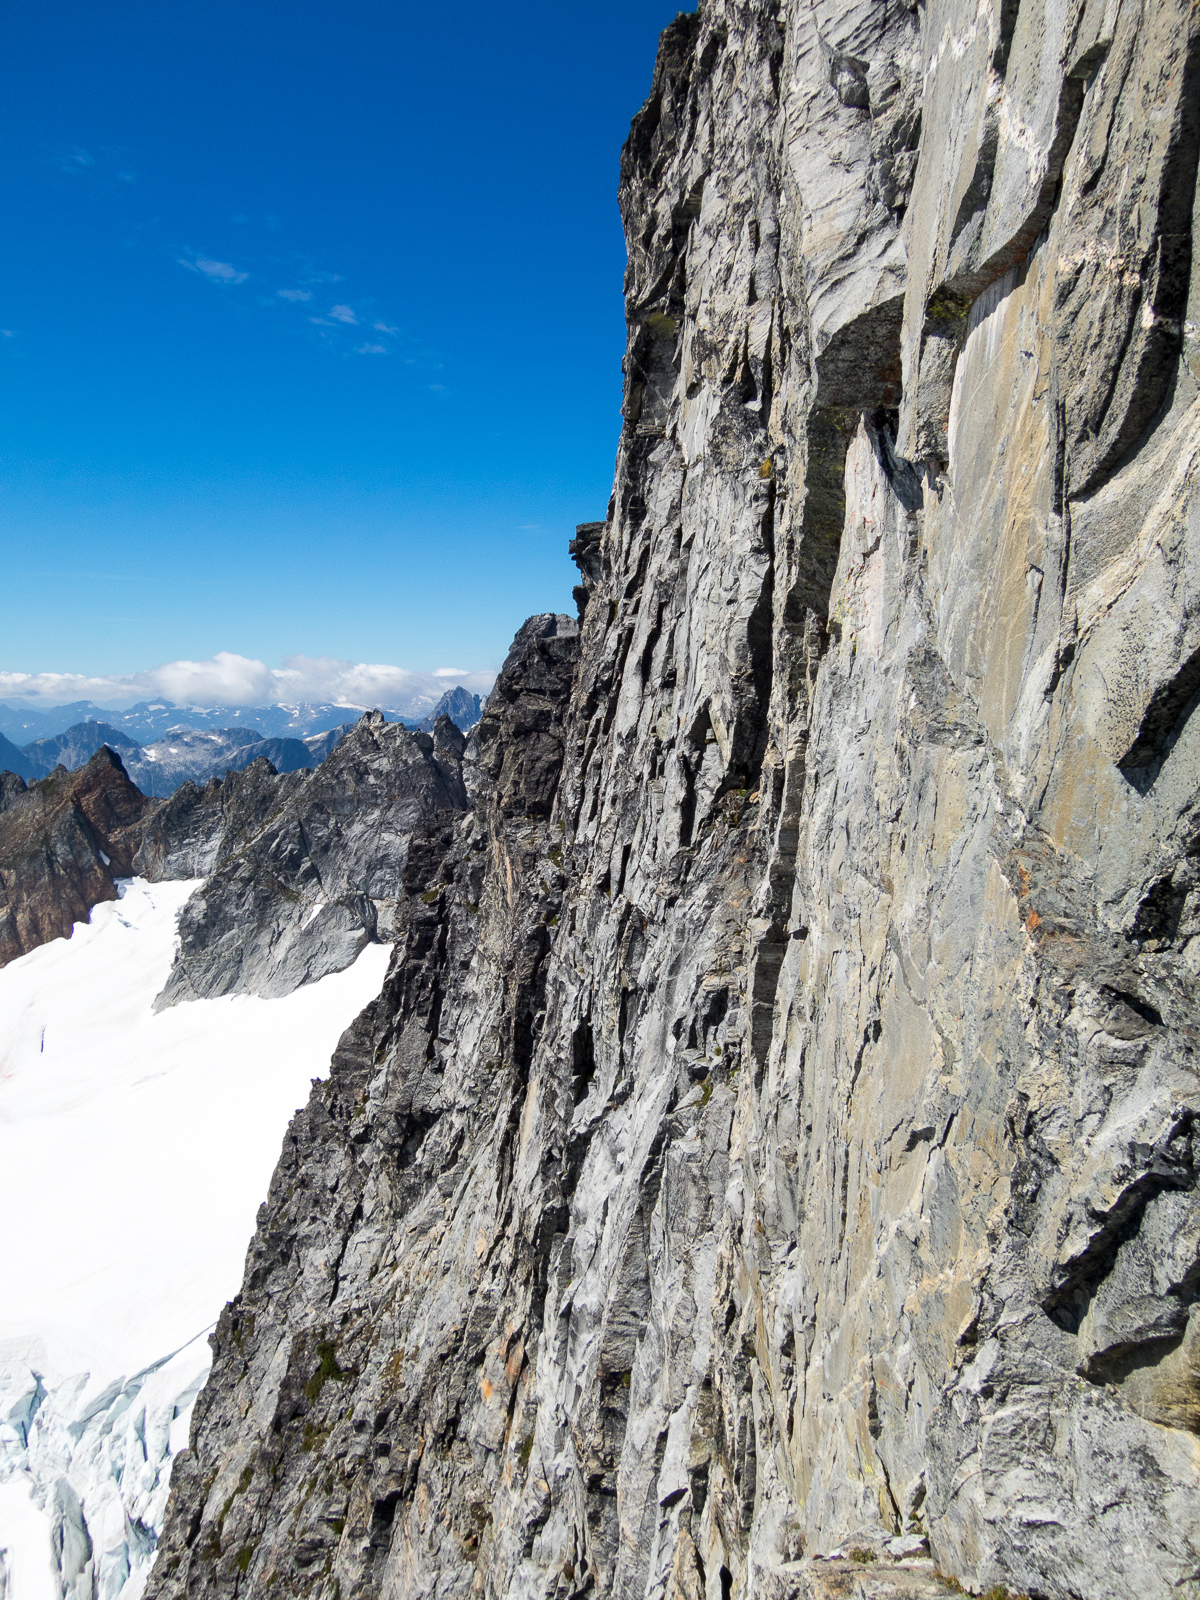
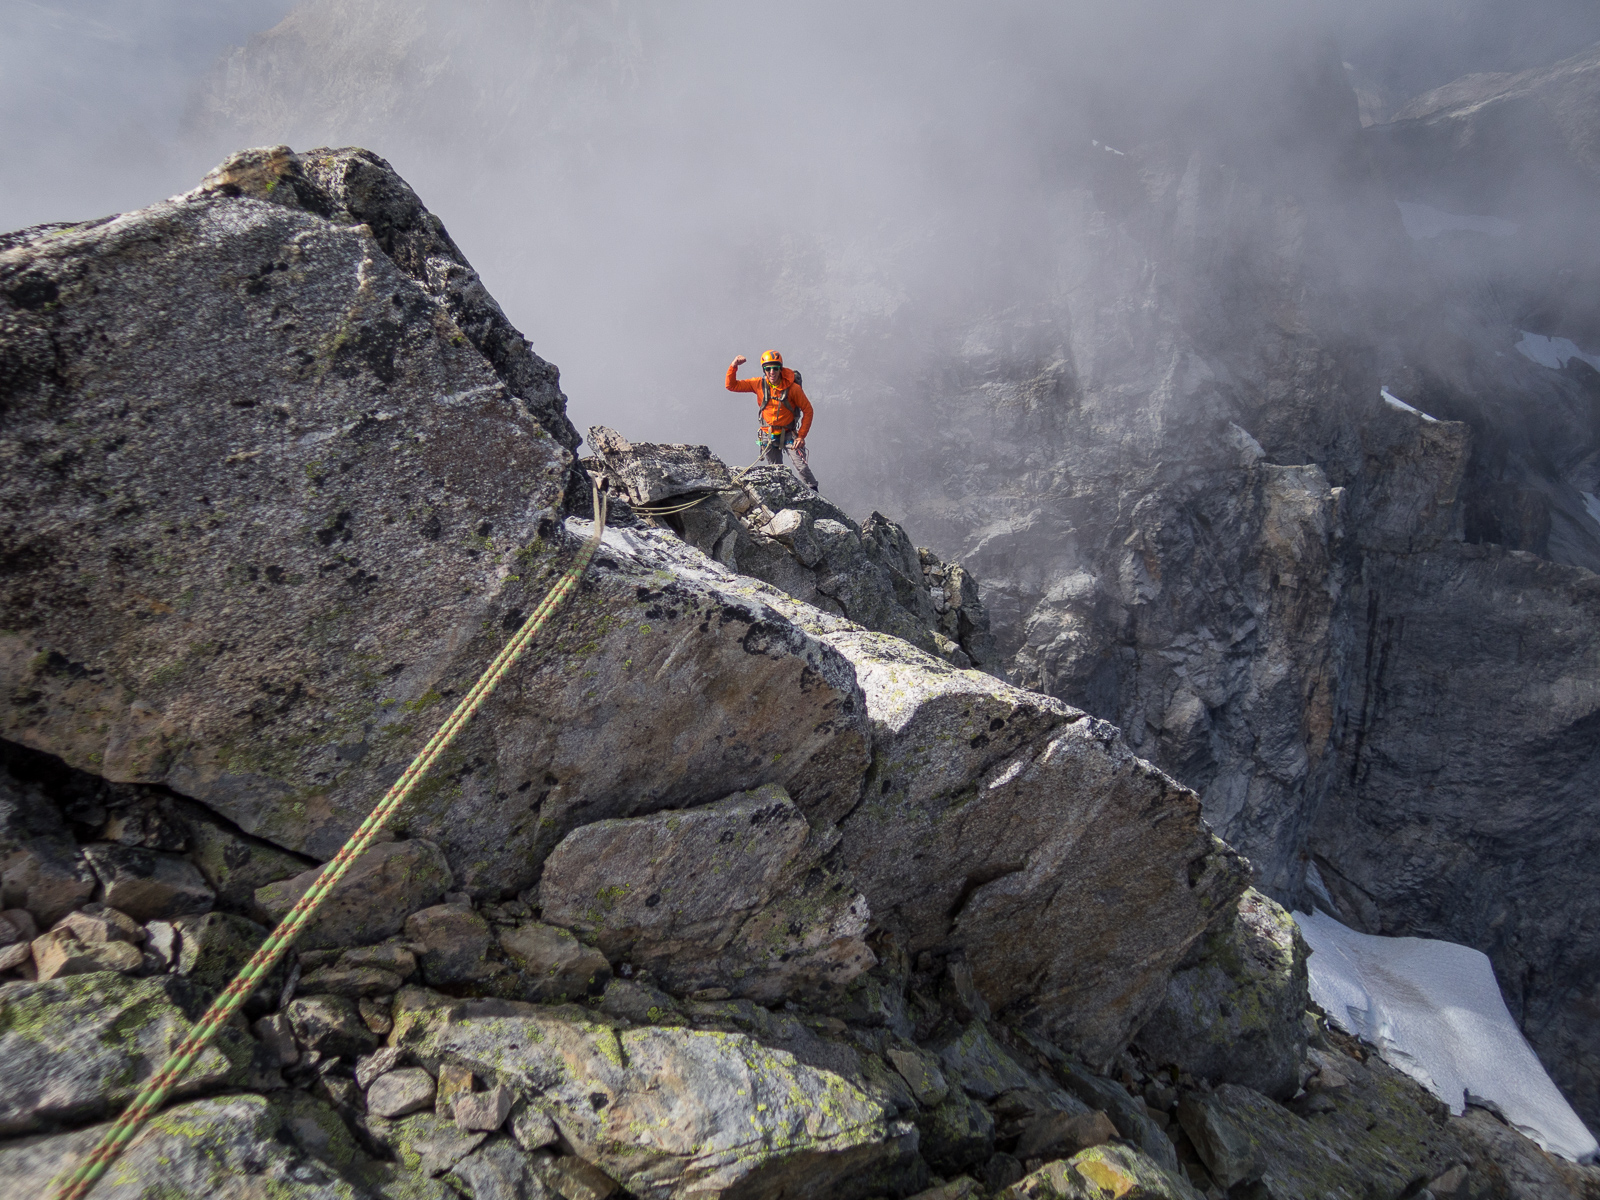
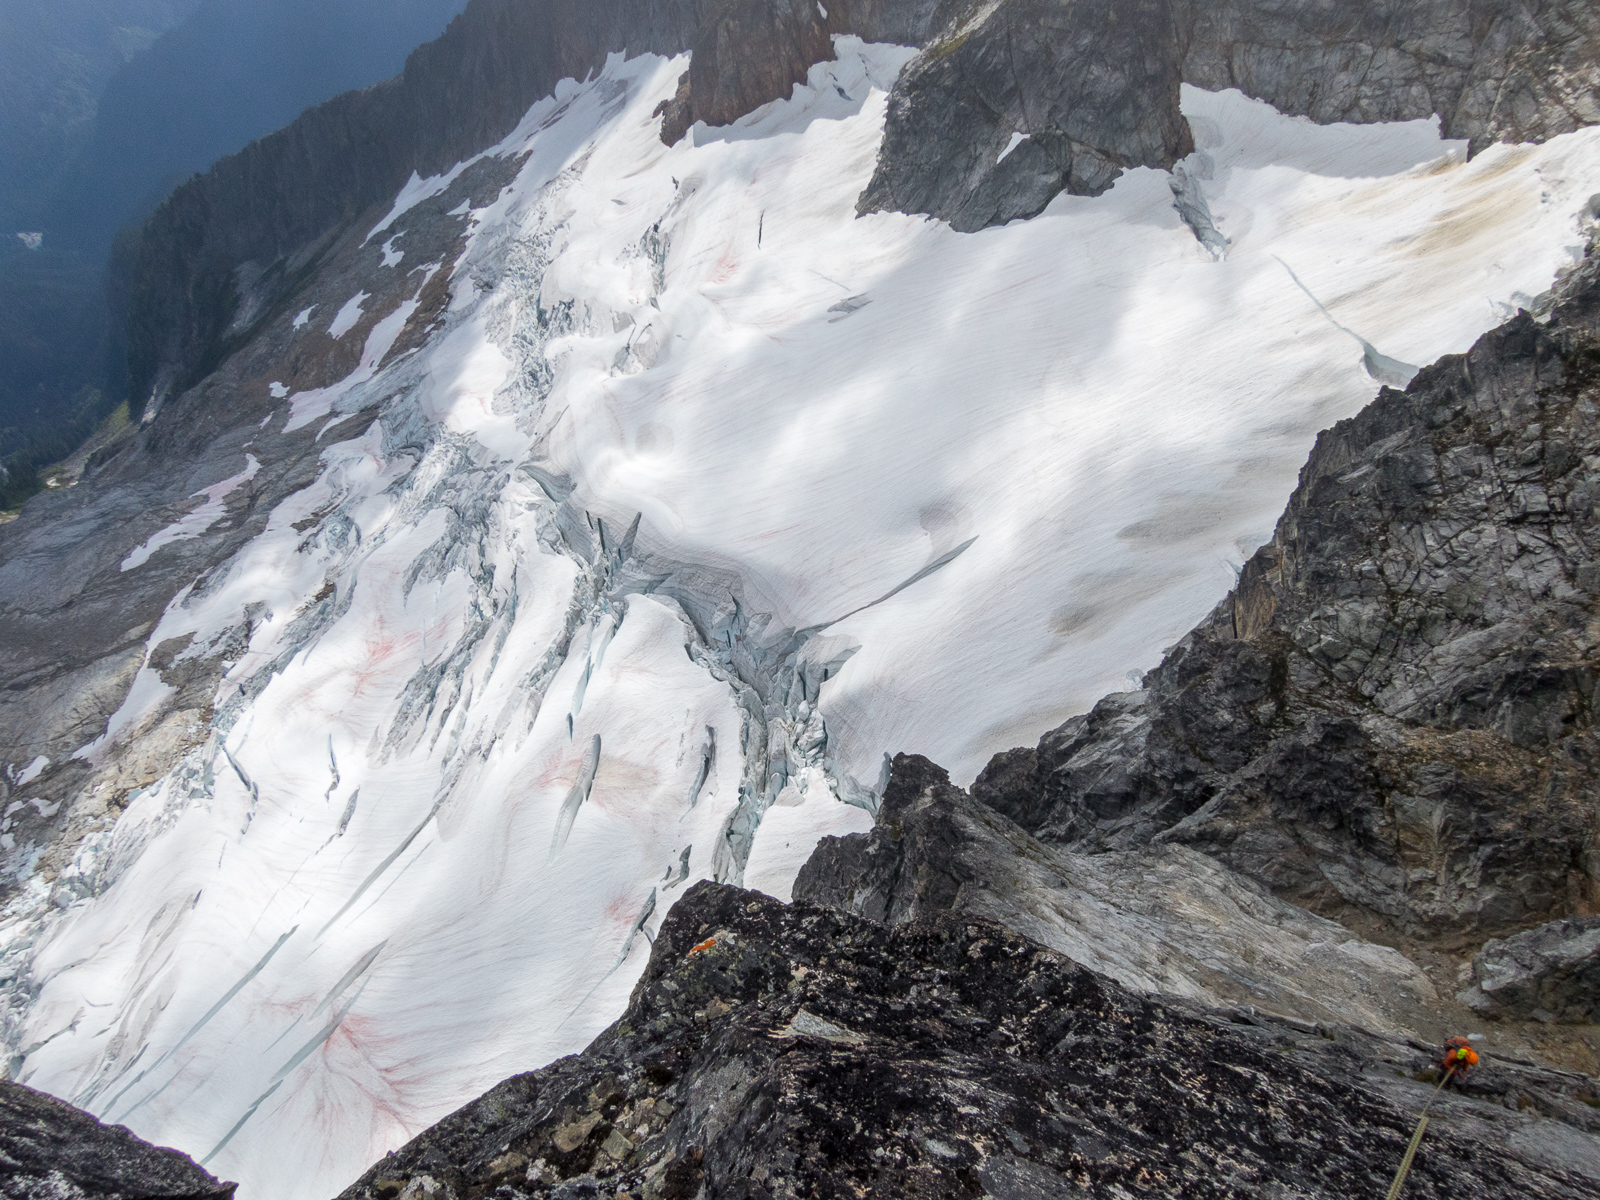
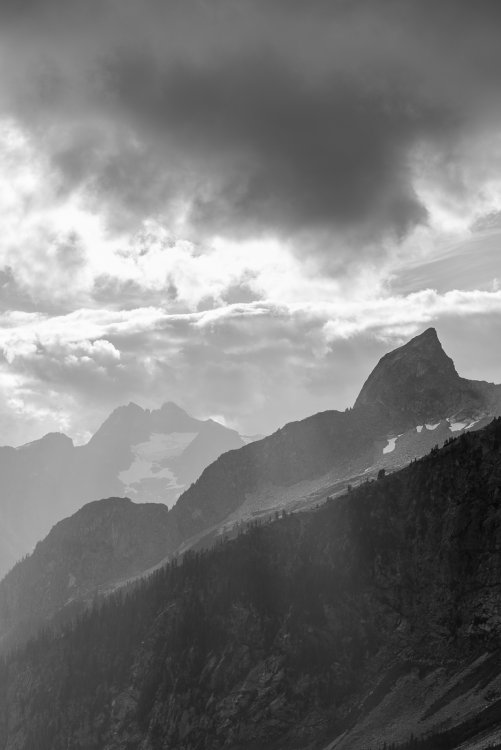
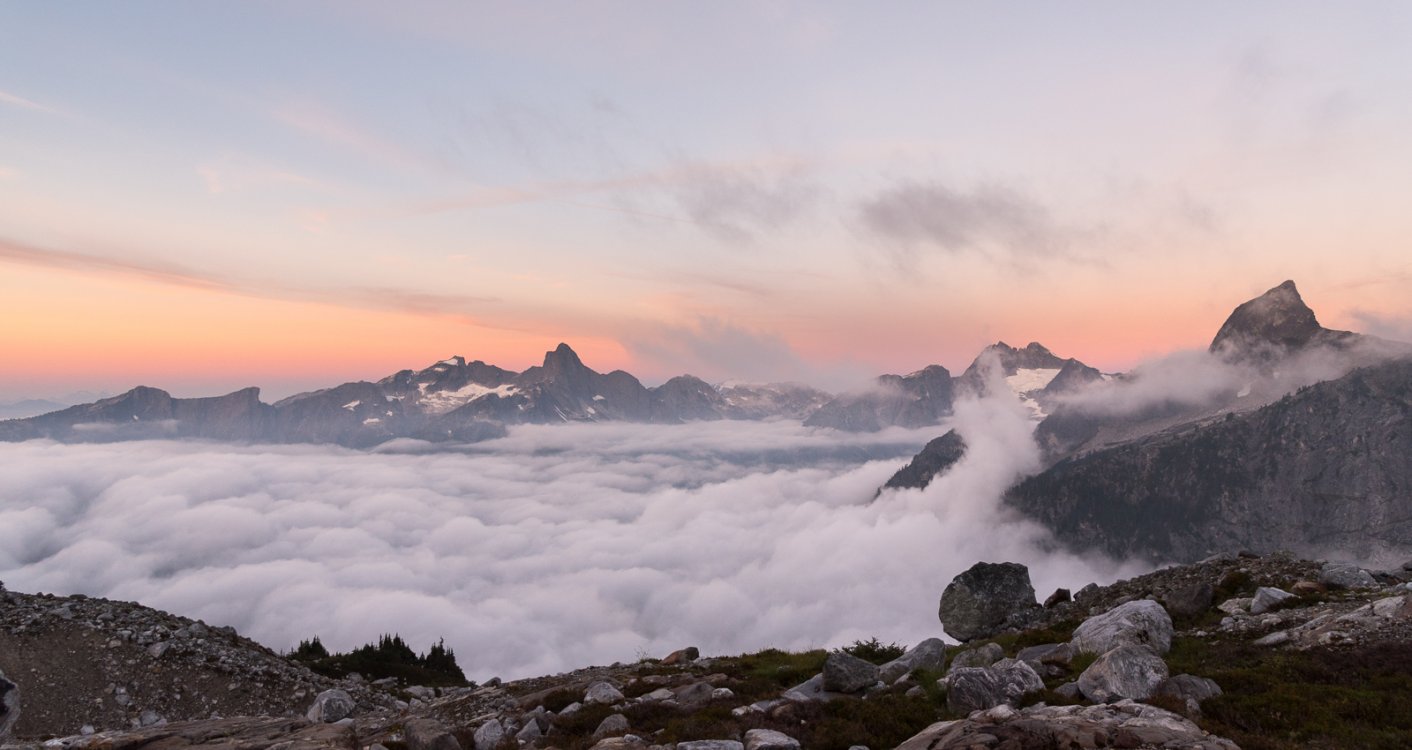
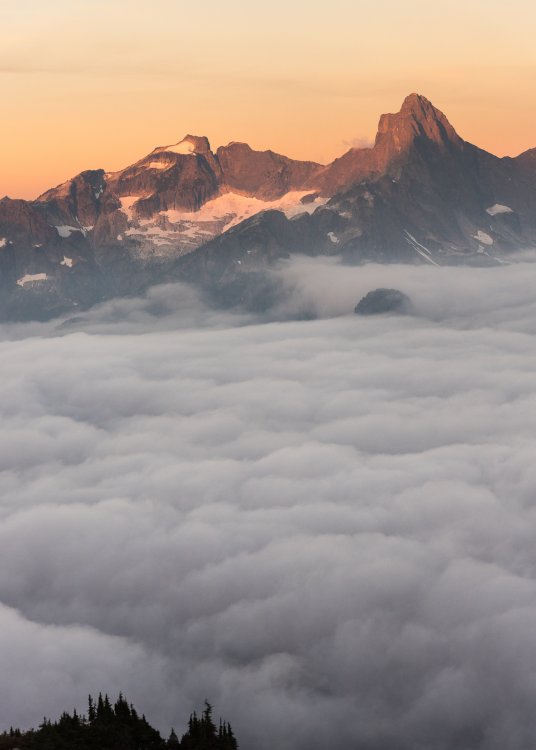
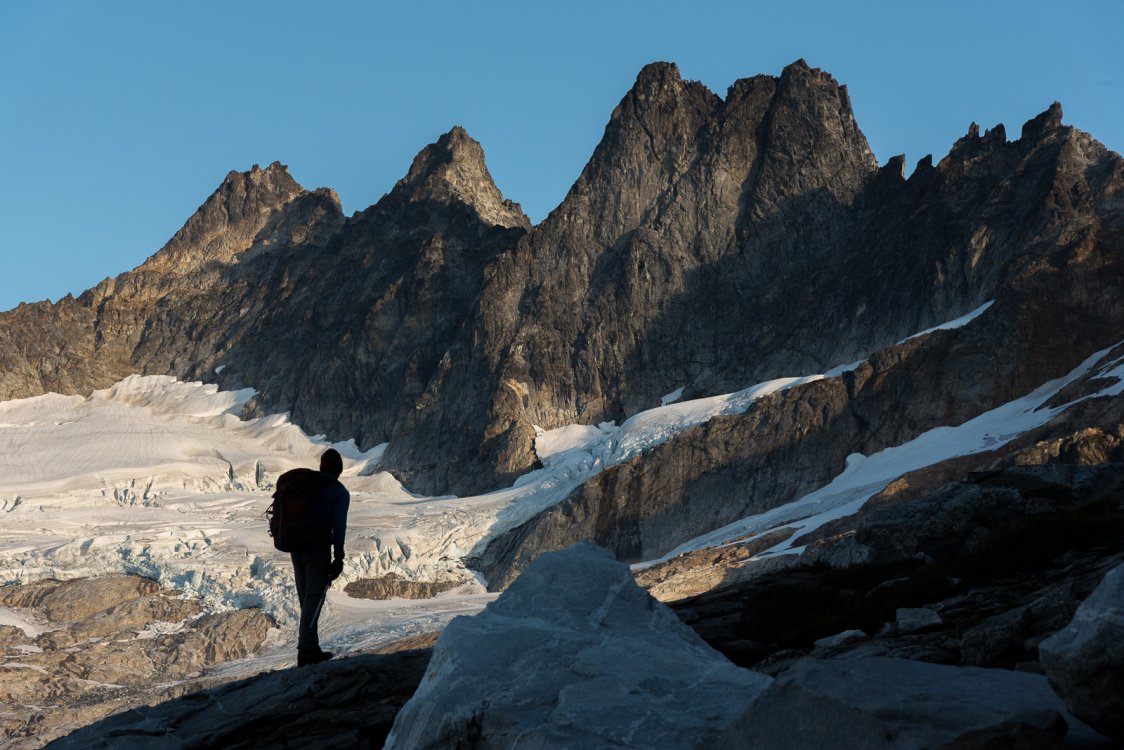
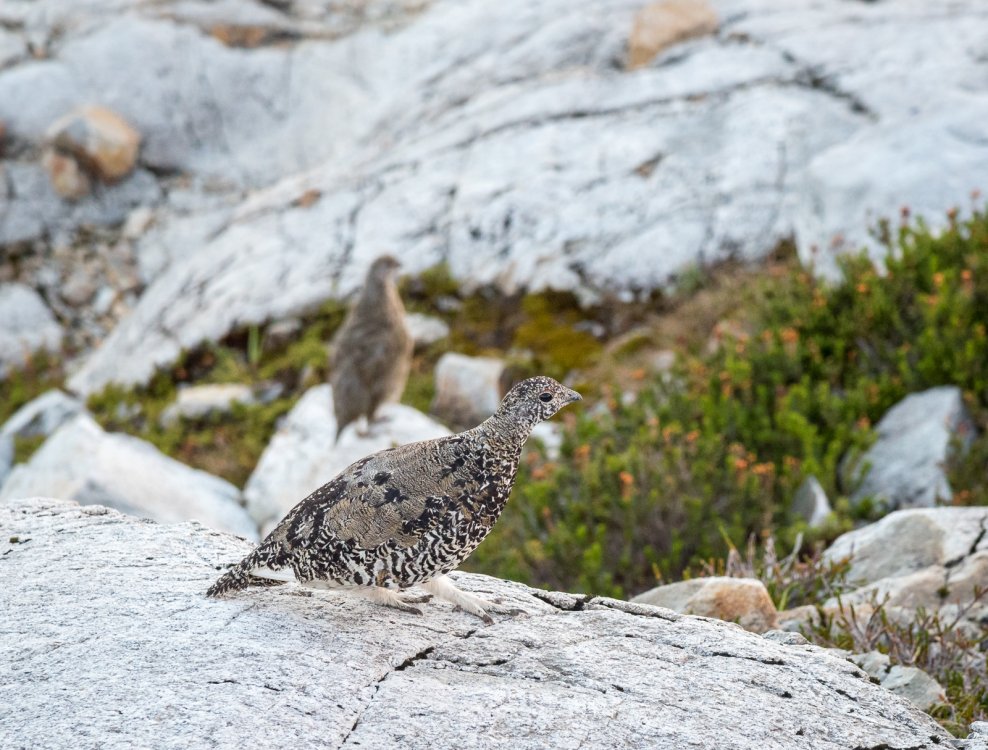
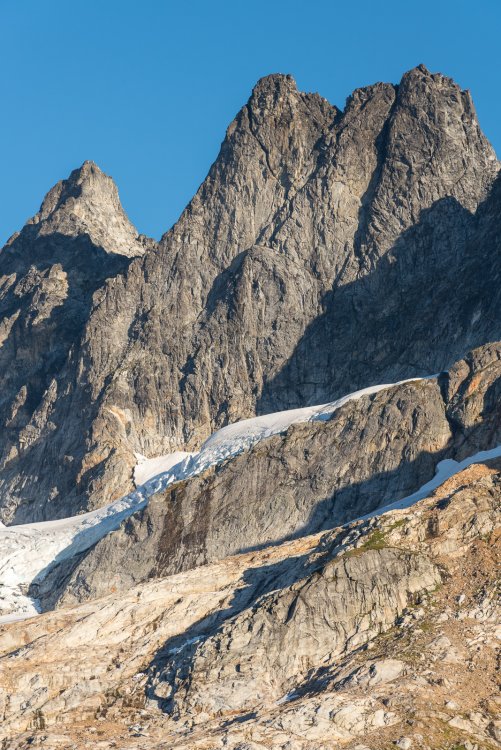
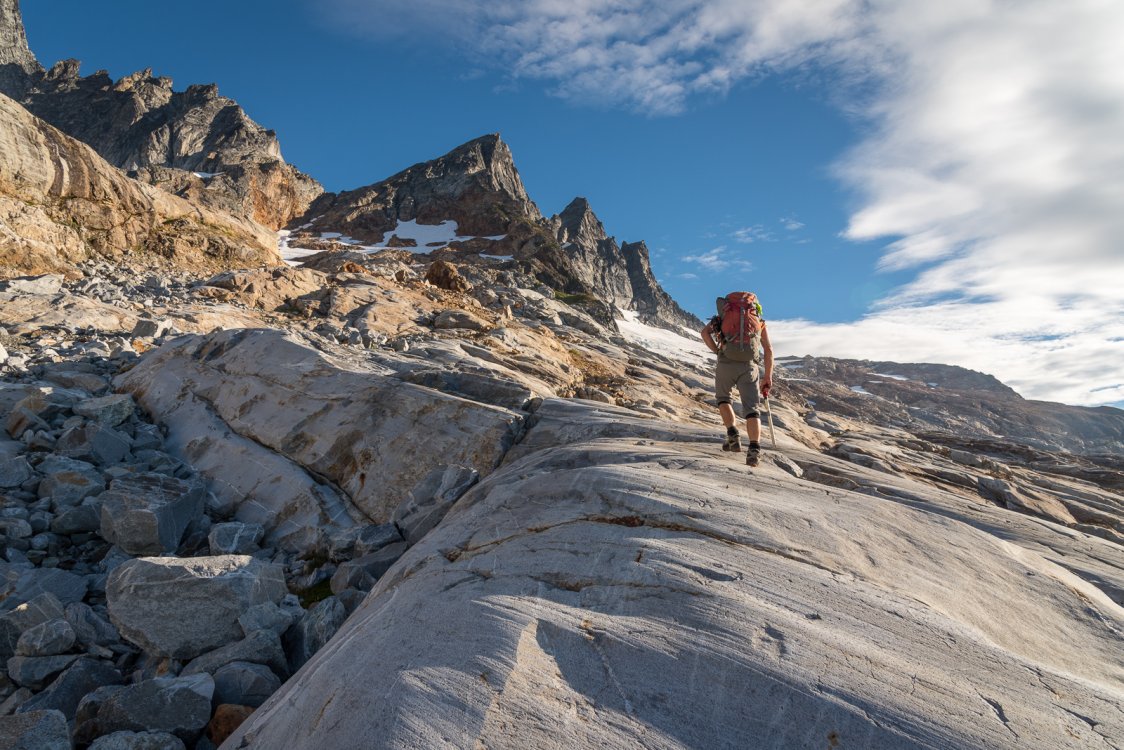
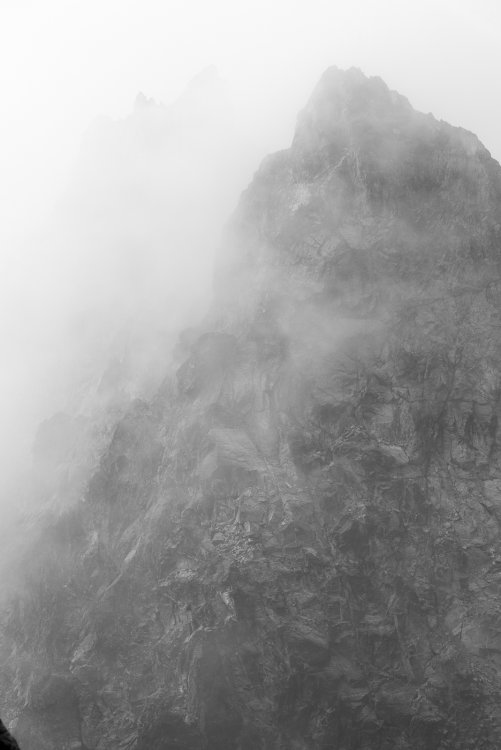
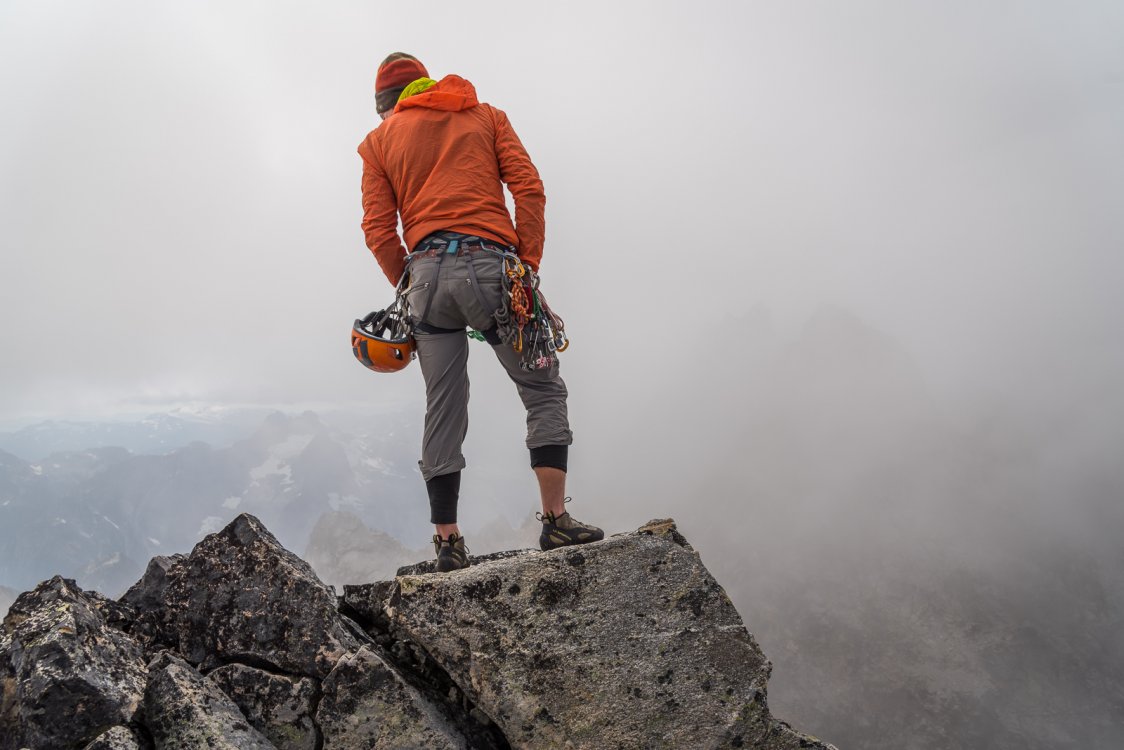
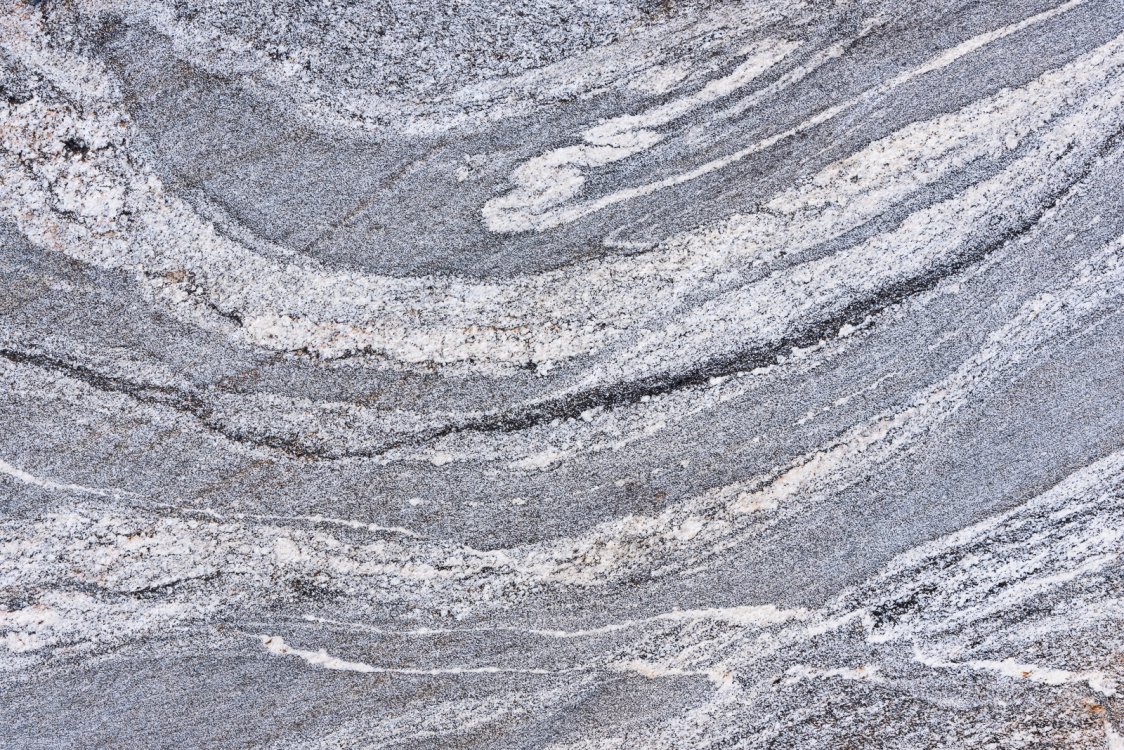
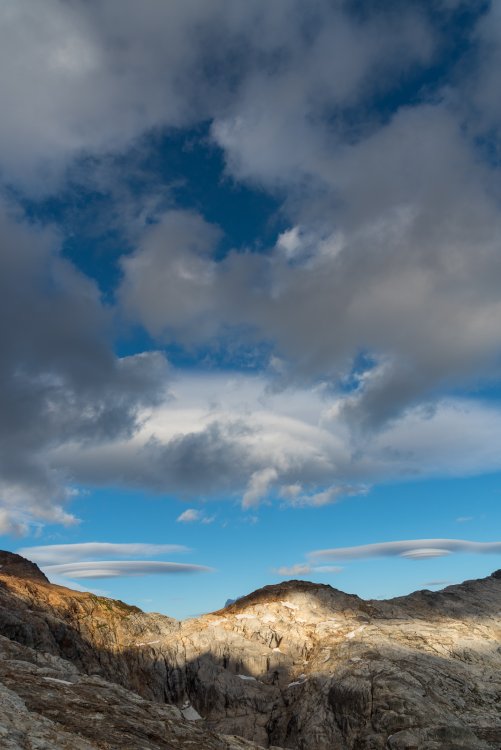
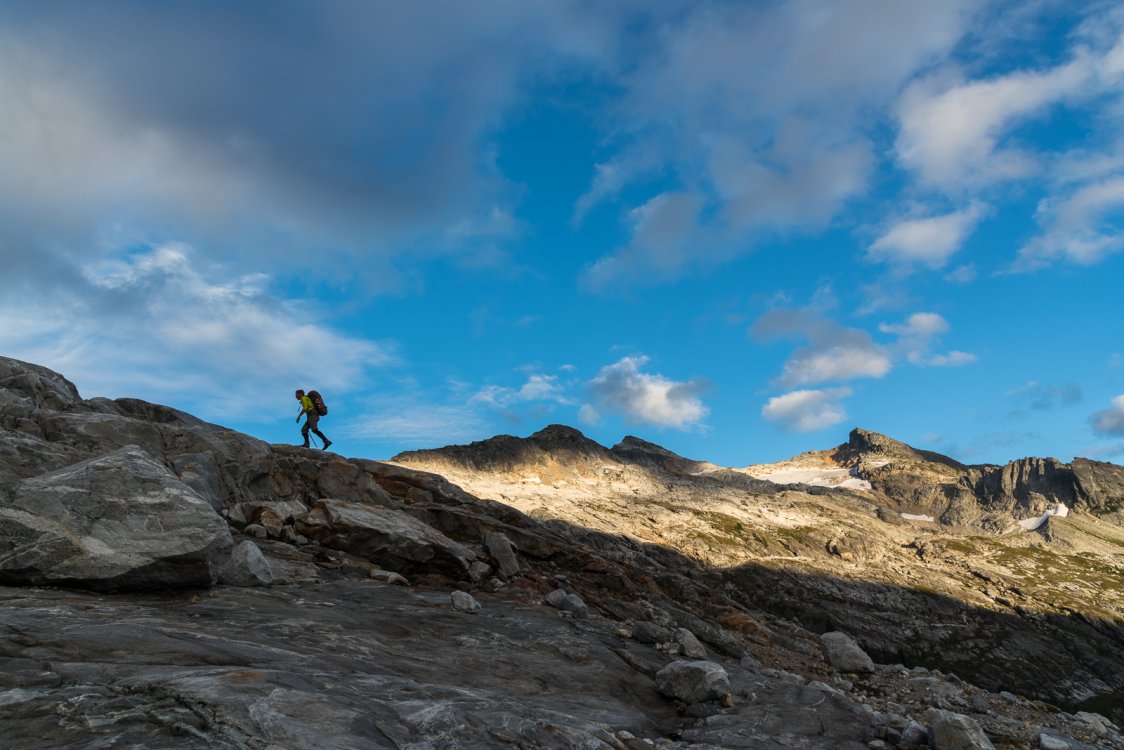
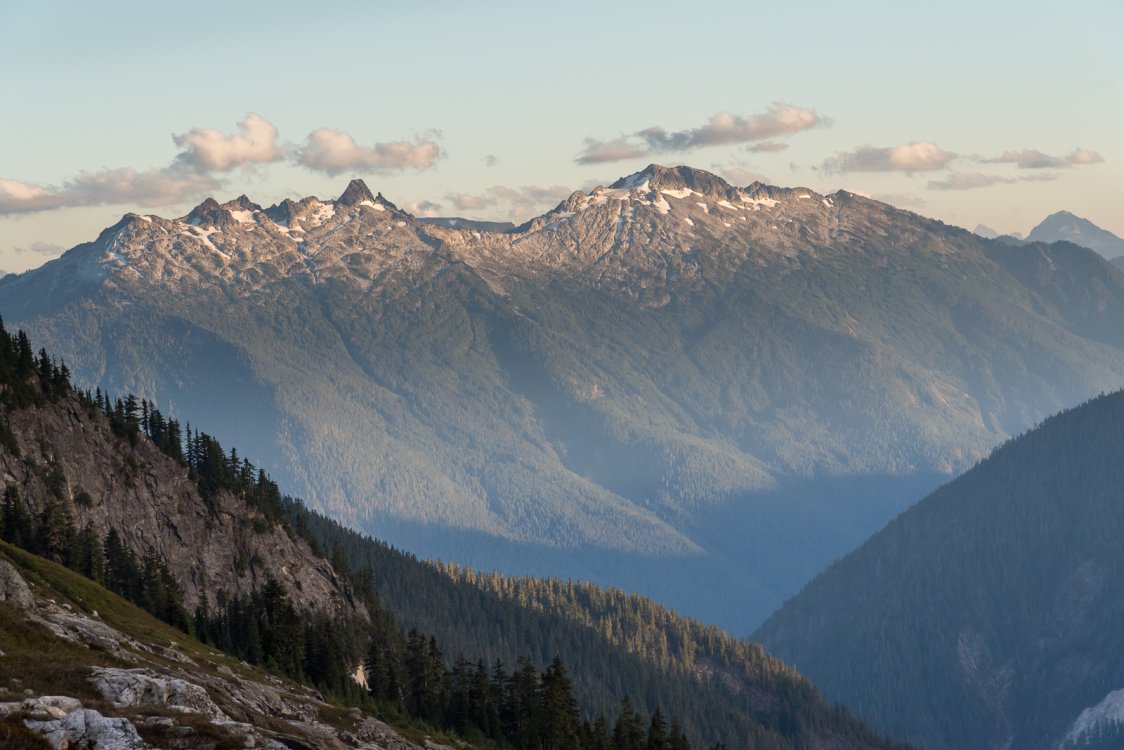
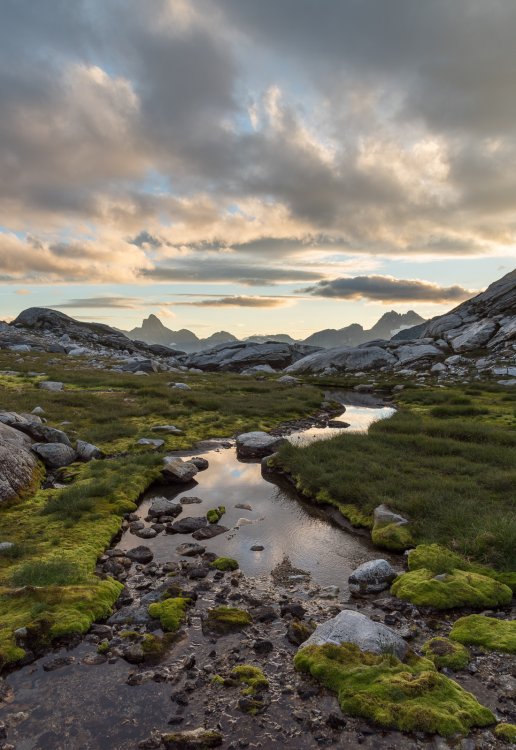
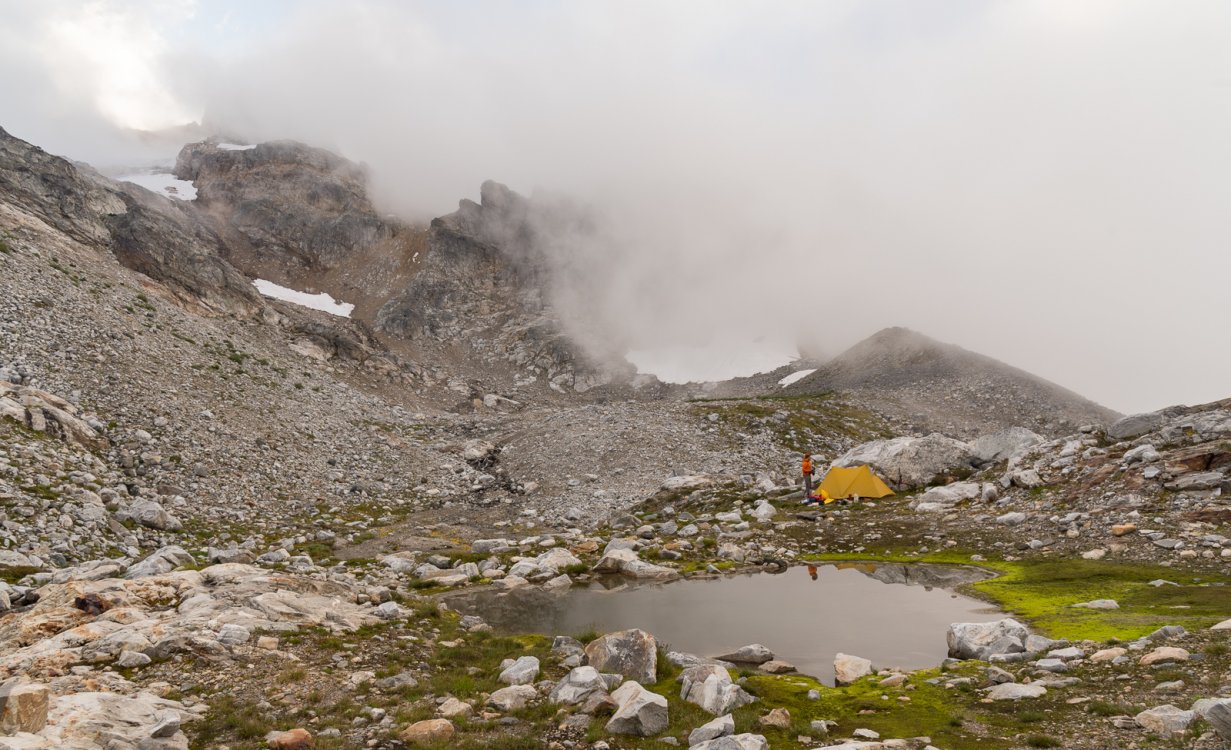
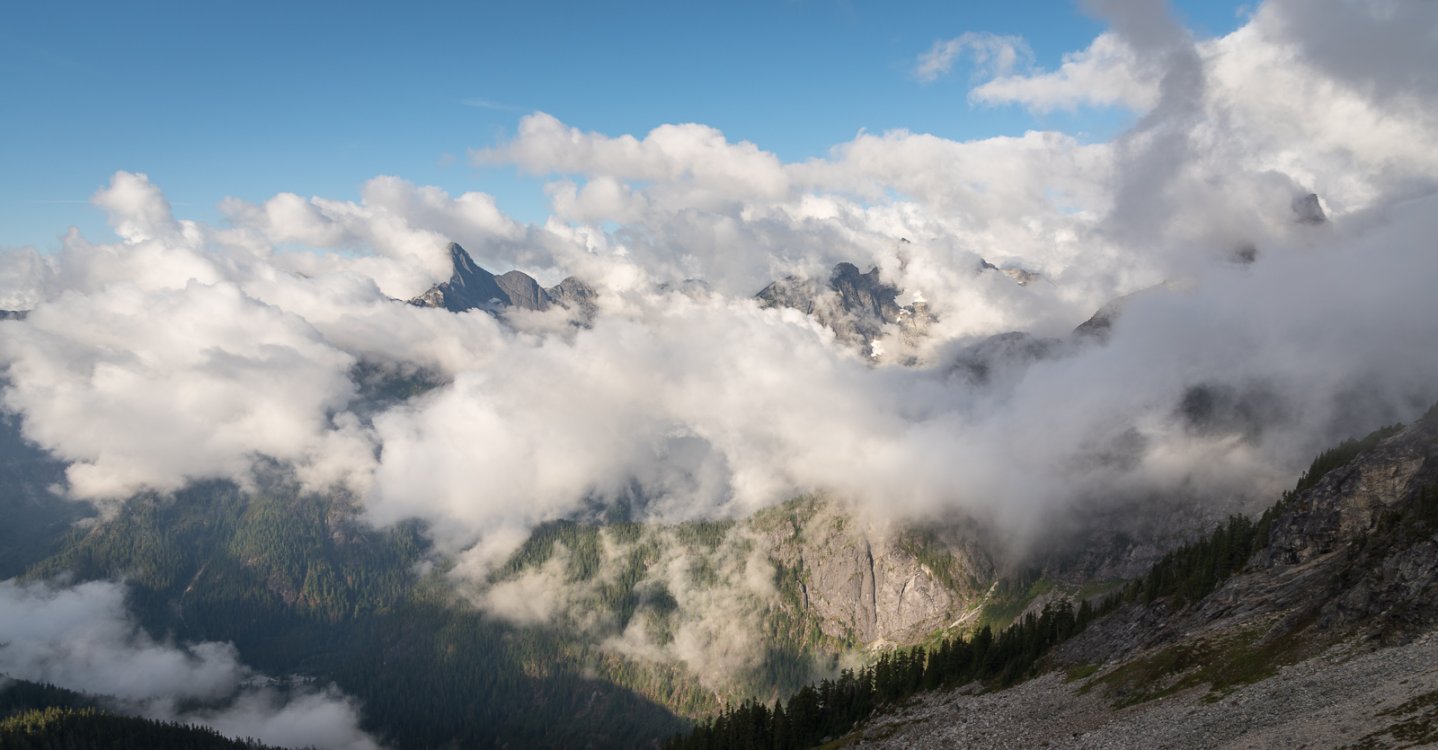
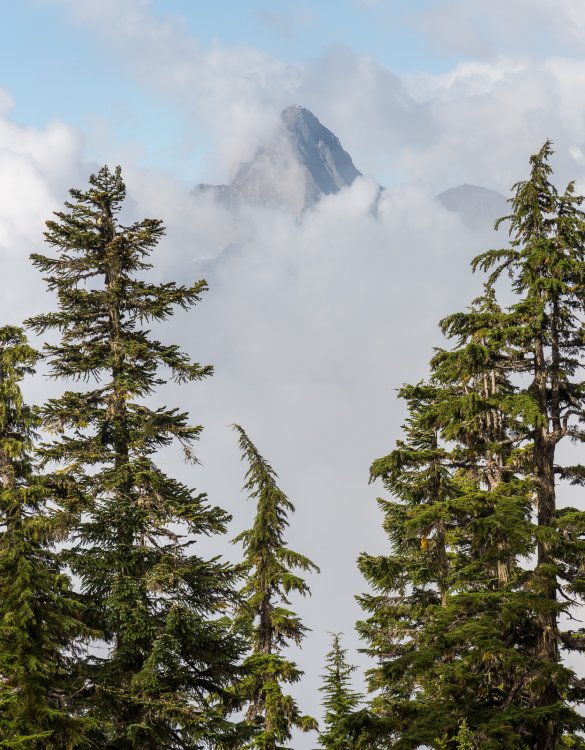
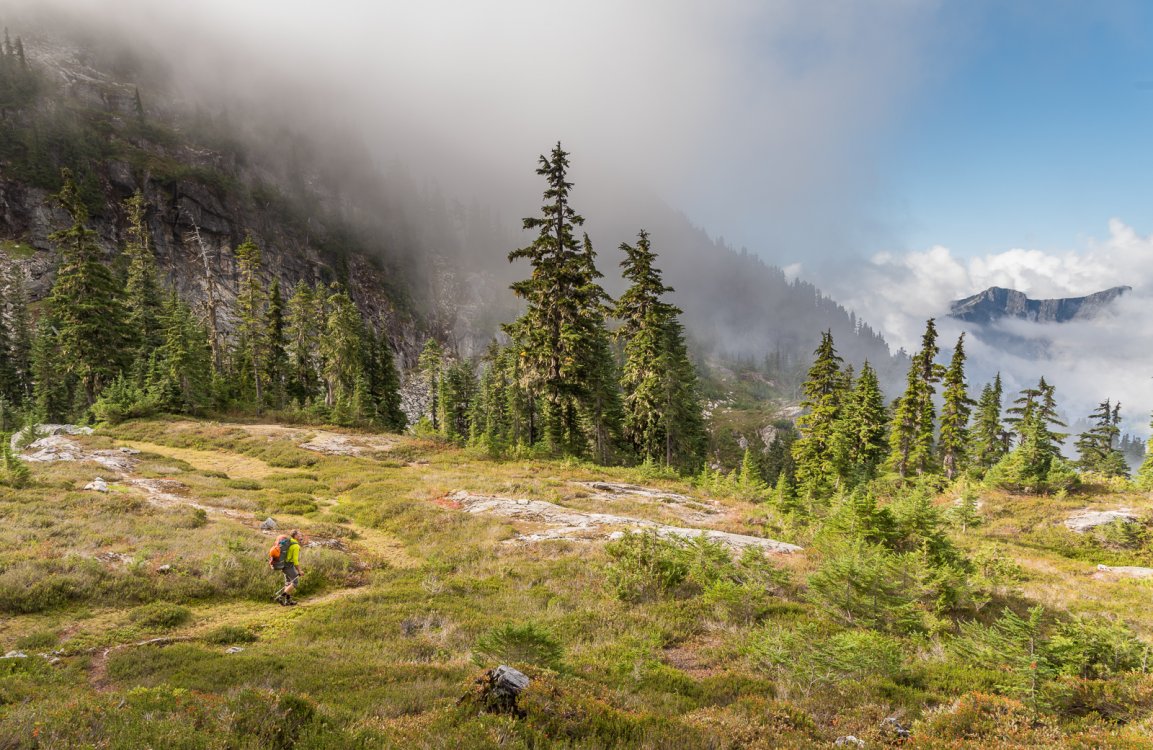
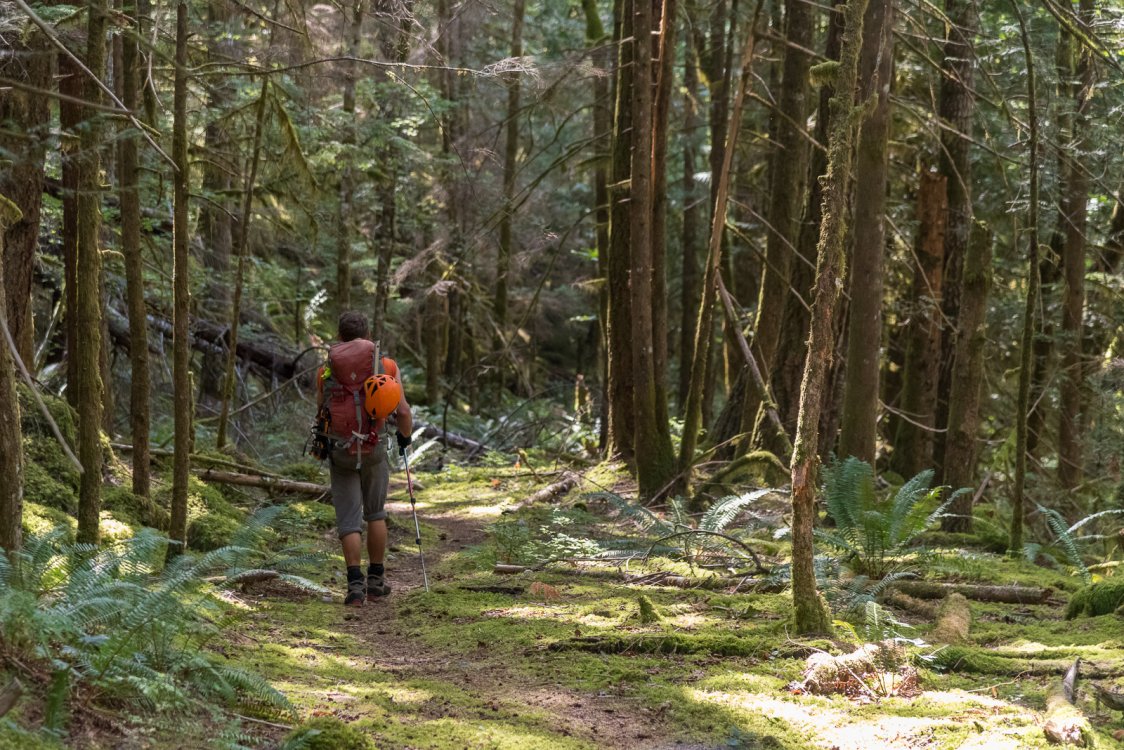
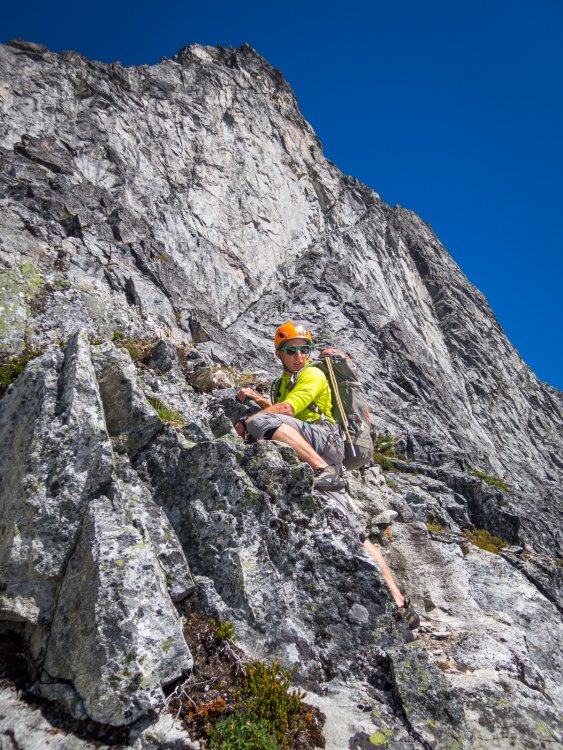
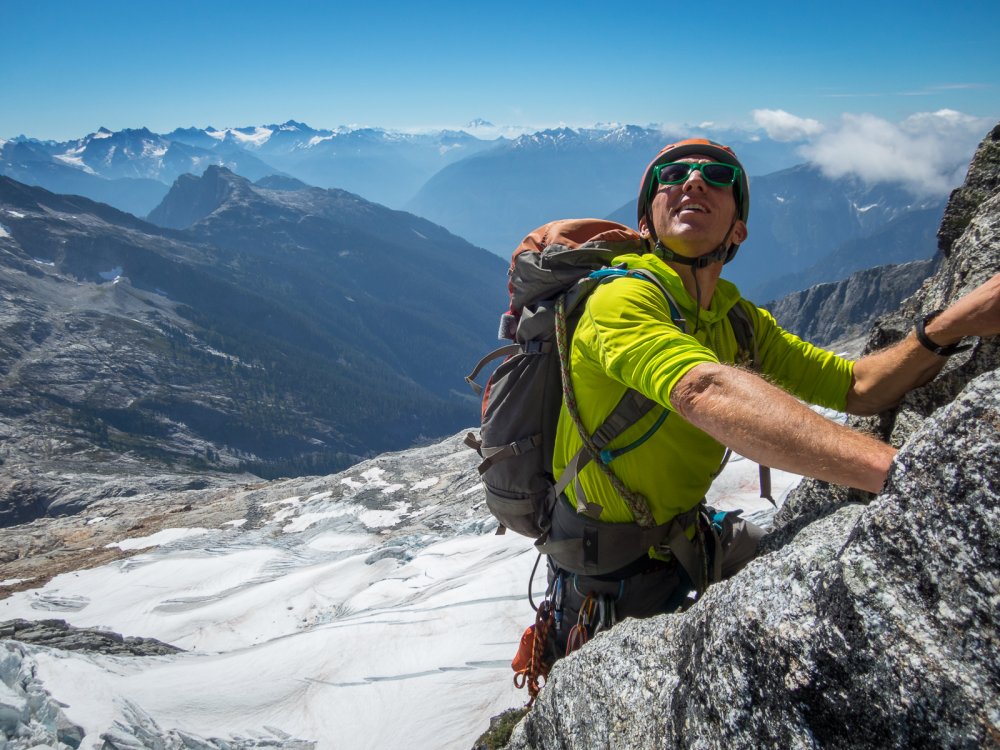
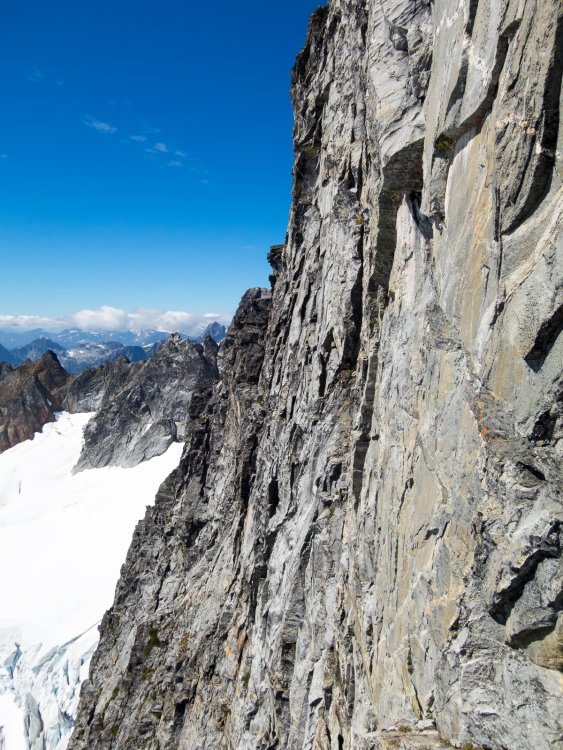
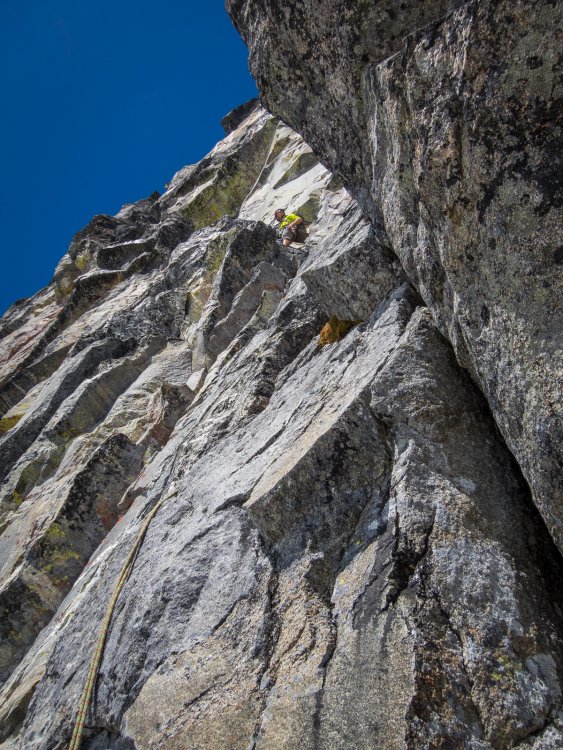
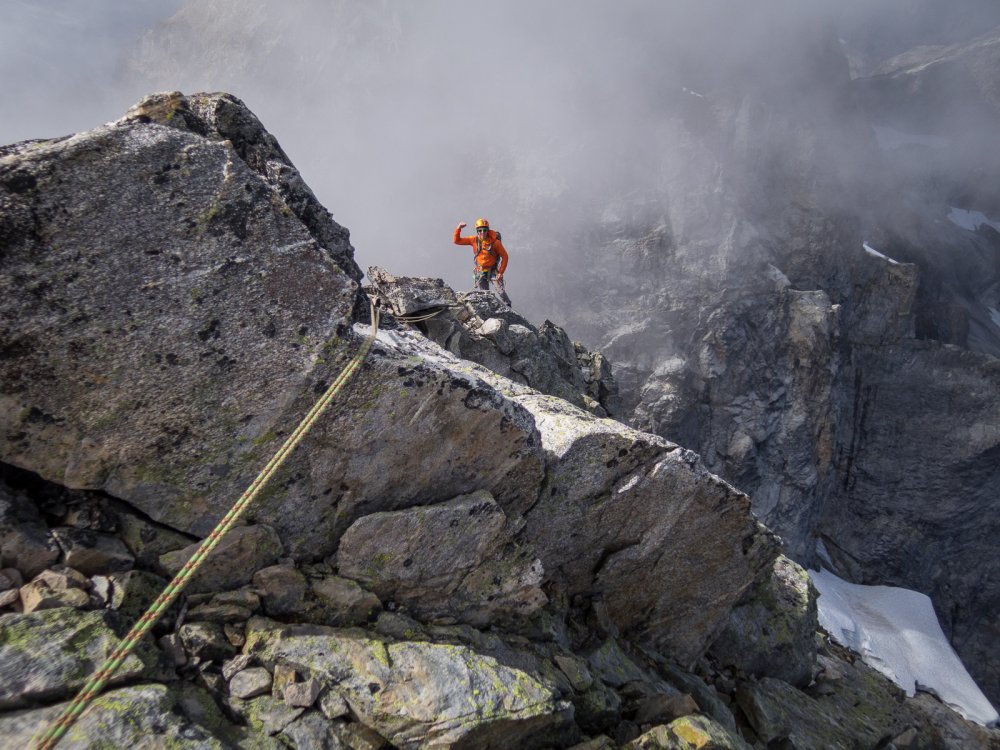
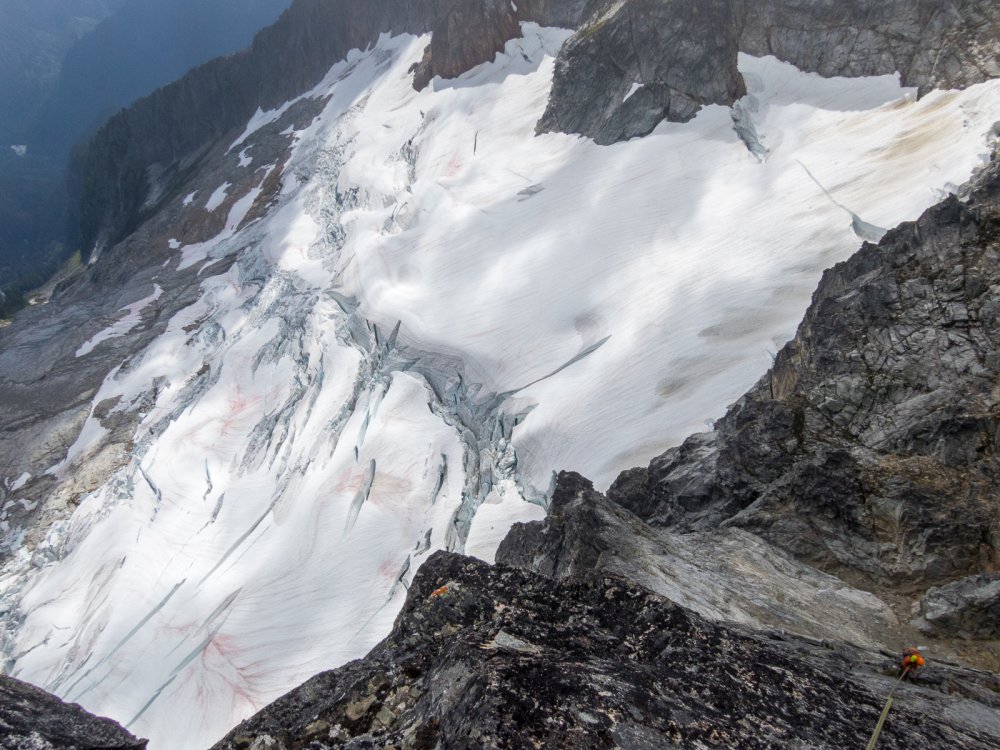
Trip: Inspiration Peak - South Face Trip Date: 09/02/2018 Trip Report: Before last weekend I hadn't been to Terror Basin in almost 10 years. Back then we had spent a week in the Southern Pickets, only seeing one other party in Terror Basin. How times have changed! This past weekend there were three other parties for a total of a dozen people in Terror Basin. Thankfully all the others were headed for West McMillan Spire so we had the decidedly unpopular South Face of Inspiration all to ourselves. However, like Alan Kearney, I really think it should be more popular. It is quite a route! But it is also not for the faint of heart. Steep, intimidating, with a bit of scruffy rock and so-so pro - it would have been a challenge back when I was in good rock climbing shape. And I am most certainly not in good rock shape these days! Luckily I had @therunningdog to gun my sorry ass up it. And gun he did, leading all the gash pitches. But there was plenty to keep my mind humming below- a chaotic glacier with some delicate bridges, slabby rock right off the glacier (should have put on rock shoes earlier), and an increasingly exposed 4th/low 5th class ramp that terminated in the intimidatingly steep "Great Gash". And thenn once you are on the summit, the involved descent awaits. 4-5 raps down the West Ridge, some ridiculously exposed scrambling, and then more steep rappels down the south face. It was about 12 hours camp to camp. But what a place. Even more beautiful than I remembered, perhaps due to the changing weather and swirling mists? The best pictures are never during the best weather, perhaps the same is true of our memories? I'll be back, but I won't wait another 10 years this time. Looking down into Terror Basin from the "trail" in: Looking out to Triumph, Despair, and the Chopping Block (L-R): Despair and the Chopping Block: Thornton Peak and Triumph at sunrise: The Southern Pickets!! Morning light on the South Face of Inspiration: Ptarmigan and grown chick: I should draw the line on this but basically you climb up the buttress to the left of the face to the prominent ramp that is followed right a long ways to the start of the "Great Gash", which shoots steeply up and left to the upper West Ridge. A pitch on the ridge finishes the climb. The Descent follows the left skyline to the col then down the steep face/buttress to the glacier: The glacier approach proved challenging, but we found a way that will go into the fall this year: No super dad friendly. Scrambling a lot of 4th and low 5th to the belayed pitches up the gash. I should have taken more photos but I was pretty focused on not screwing up! @therunningdog in his element! Did I mention that the South Face of Inspiration is steep? @therunningdog coming up the final bit to the summit: It is an exposed descent as well. Rapping the West ridge: On the first set of raps, before you drop off the South Face: Whew. Down on the ice! Or should I say gneiss? TEEBOOOOOOOOOOOOOOOOOOOOONE! Despair in the mists: Triumph: Despair: This felt good after the punishing descent: Gear Notes: 60m half rope, medium rack to 2", ice axe, crampons, helmet Approach Notes: Terror Basin trail from Goodell Creek. 6 hours to camp. From camp follow the climber's path toward Inspiration and West Mac, picking the best line up the glacier to the toe of the buttress just west of the South Face. We roped up here for a bit until we gained the prominent ramp where we packed the roped and scrambled. It seemed about 5.6-5.7 for one ptich to gain the ramp, with low fifth below that. The "Great Gash" is about 3, 30m pitches, to ~5.8. I think we did about 12 rappels down the west ridge and west edge of south face right back to our boots. Stations are established for a single 60m rope. Bring tat since the route isn't climbed regularly.


 2 points
 -
Trip: mt whitney - mountaineers route Trip Date: 06/14/2018 Trip Report: Whitney Via Mountaineers Route Tallest Peak in the Lower 48 Being the tallest mountain in the lower 48 states, Mt. Whitney was a must-do in my list. I was looking for somewhere to go climb in the beginning of summer and after a quick search it became obvious the 14,505’er was to become my next objective. I sent a text with the idea for the trip to the two guys I knew would join me, Yen and Carlos. Within a week we where booked and ready to go. Id done plenty of hiking and camping with Carlos but he had never been on an actual climbing trip. He is very well versed in all things survival but lacks the technical knowledge that goes along with climbing. On the other hand, Yen had been with me to Shasta but has done far less hiking and camping. Needless to say we where a match made in heaven ready to have a blast on a week long adventure that would take us through Death Valley, climbing on Whitney, not showering for days on end only to finish the trip in a 5-star hotel in Las Vegas. We where in for a true adventure. Its June 11, I had spent the last 2 months training my ass of and growing my mountain mustache. My training had changed a bit going into this trip. Carlos and I had spent countless hours in our local climbing gym, working on our holds and making our way to 5.11’s(we had nice blisters and calluses to show for it). This along with our stair master of death challenges (more on this at the end of the article) was to be our arsenal to conquer Whitney. Pre Climb At about 11am I had gotten home from the office, finishing up some paper work that had to get done before I left. My wife was waiting for me with all the gear and bags stuffed in the trunk of the car. We picked up Carlos, then Yen and we made a last minute stop at Bass Pro Shops to buy some missing items before being dropped off at the air port. It was a long and uncomfortable flight in a budget airline to Las Vegas Nevada. We arrived at 11pm with neck Kinks and headaches but there was no time to waste, we where on a tight schedule. We picked up our rental car, stopped at Sonics for some refueling before hitting the road to death valley…The road seemed never ending with nothing in sight but the head lights of the car and the sky littered with stars as far as the eyes could see. The further we got away from the Vegas lights, the brighter the stars got till at one point I asked Yen to stop the car only to step outside and see the Milky Way towering over us. It was like something out of a National Geographic’s Magazine. After a few minutes of star gazing we hopped back in, windows down, music blasting and kept rolling through the Valley all through the night. About 3 hours in we all hit a wall. Not sleeping for the last 24hrs caught up to us and just as we are entering the national park we decided to pull over by the big “welcome to death valley” sign to try and catch some Z’s before the sun came up. It didn’t take long before the heat of the dessert woke us. We where sleeping all contorted in a car, 3 men full of camping gear in a small Toyota Rav 4. We looked like we’d been hit by a truck with bags under our eyes, hungry and smelly. We decided to drive and pull up to the first eating spot we could find. After a nice meal, and some freshly brushed teeth we continued our drive to where our climbing journey would begin. Our plan from the start was to arrive at Lone Pine and find a place 9,000’+ where we can camp and acclimate before starting the climb. We poked around and talked to the locals until we where directed to Horseshoe Meadows (approx. 10,000’). We drove up the winding roads and arrived at this beautiful camp site. Carlos and I set up our hammocks (Yen would sleep comfortably in the car) where we would sleep. We spent the day hiking and hanging out with the fluffy little marmots. After staying up till the night fall to do some star gazing, it was time to hit the the hammocks. When it was time to get in It took me about 10 min before I thought I was settled only to spin around and flop right onto the ground. By this time, it was dark and cold and I was just craving a good nights sleep after having spent the previous night in the car. A few moments after I was able to get tucked in, I head a loud “ Thump!”. You guessed it, that was Carlos getting a good feel for the ground after loosing his balance on the hammock as well. I had a good laugh knowing I wasn’t the only one. Quickly after that I was out cold, or so I thought. Carlos ended waking up a good 10 times to urinate limiting my sleep to 30 min spans.The next morning, we packed up all our gear and headed down into town for the day. We stayed at a bunk house that night where we could shower and have a nice warm meal. We also went ahead and planed our nutrition for the climb. It consisted of nothing more that three 12” subway BLT’s which we would have for lunch and dinner for the next 3 days. At the moment it seemed like a better alternative to freeze dried mountain food. The following day we met with what would be our team on the mountain as well as the guides. Quickly went through everyone’s gear, checked food and reviewed poop bag instructions. Gear was packed in the cars and we set off to the trail head. Upon arrival, we rushed to the scale where we would compete amongst each other and see who packed the lightest. I won by a pound but that came by sacrificing layering in order to stay light and move quickly. Day 1 of Climb It was 7 of us at the start, we began moving quickly through the Whitney trail before arriving at the fork where we would break off to Lone Pine Creek. This trail would take us through a series of creeks where keeping your balance on the slippery rocks was critical if you wanted to keep your feet dry. We would then get to the base of the valley where we would climb some steep ledges which offered amazing views of Lone Pine and the monstrous granite walls. The ledges have some exposure and if your afraid of heights it will prove a difficult crossing. From here we hiked through some beautiful meadows and while walking up a steep granite slab, Terry one of our team members slipped. A nearby stream had been spilling water on to the slab making it extremely slippery. Terry hit the ground hard and pulled his hamstring badly. Luckily we where only a couple hundred feet from the where we would spend the night. We spread some of his heavier climbing gear amongst each other and Matt would throw Terry’s pack over his own, carrying the lions share of the weight. With a slow and steady pace, we all made it to upper boy scout lake. This would be our camp for the next two nights. Upon arrival we where all instantly mesmerized with the amazing views of the jagged peaks that surrounded us and the incredibly crystal clear lake full of fish. Of all the campsites I’ve ever been too, this one stands above all the rest. After exploring a bit and getting a quick bite, we broke off into our tent groups and began to settle in in our spots. The next day was to be the summit push so in an effort to be as rested as possible we went to sleep early. Summit Day It was 4am, and unusually warm for an early summer summit push. Our packs where practically empty except for some food, water and our crampons. We began the approach to the chute scrambling up the rocks at a hurried pace in order to maximize our opportunity of making the summit. There was not the slightest breeze and the sunrise created an alpenglow on Whitney, it really was a sight to be seen. Up until now everything was according to plan and the summit seemed almost guaranteed…When we made it to the chute and it was time to slap on our crampons, there was an over sight by the guides and they assumed Carlos’s boots would be fine even if they where not proper mountaineering boots. They where not rigid and would flex under minimal pressure. Even though the crampons fit, the fact that the boots where not the least bit stiff rendered them practically useless. Regardless we decided we would push on and Carlos would try his best. Then we ran into our second problem, given the warm temps the snow was very soft and slushy. This meant that for every 3 steps forward you where sliding one down and for Carlos it meant he would be sliding onto all fours and having to pick himself every time. As the hours went by, the chute that seemed like it would be a walk in the park proved to be a greater challenge than anticipated. We where making very little progress with the sloppy snow. We eventually reached the notch but our summit window was closing and we still had another steep section of the chute to climb. Carlos was beyond exhausted due to his less than ideal boot set up and the snow was getting sloppier by the hour. We ultimately made the decision to turn around, it was a tough choice to make because the weather conditions where perfect and I still had a lot of energy left in my tank but given the circumstance it was the right choice. We then took advantage of the sloppy snow and glissaded a good portion of the chute before reaching a very rocky section near the bottom. All in all, we where in good spirits and we quickly made it back to camp safely. We spent the rest of the afternoon exploring the area and organizing our gear for the hike out the next morning. After a nice dinner with the group we shared some stories by the “kitchen” and then called it a day. The Descent 7am we where all out of the tents packing our gear and breaking down camp. It was a pleasant hike down, I spent most of the time talking to the guides picking their brains for climbing tips and tricks. We loaded up all the gear back into the cars and drove back into town. We all cracked a few beers open before saying our good byes and heading our separate ways. For Yen, Carlos and I, that meant the final phase of our get away. We ate our last meal in lone pine and in the same clothing from the past 3 days on the mountain, we hopped in the car and started our drive back to Vegas. The whole road trip was spent talking about the great time we had on the mountain, regardless if we didn’t summit and before we knew it we where pulling up to the bright lights of “Sin City”. Not showered in three days and still dressed in mountain ware we pulled up to the Aria, a 5 star resort. To say we got some funny looks would be an understatement. We where hungry and tired from the long day, went to the first restaurant we can find to have a meal and then went straight to the room for a nice hot shower. From spending the last few days on the mountain sleeping in a tent, to staying in a suite on a 5 star resort was a hell of a transition. We planned to take a quick nap, get dressed and check out the night life. Turns out there was no gas left in the tank, as soon as our heads touched the pillows we where out for the night. The next day we explored the city, went to the casinos and took the day to just rest. After Thoughts: Looking back, it was damn good time. I would have liked to summit, and I figured the weather conditions where perfect but certain situations made it difficult. I had trained my ass off as usual and it was the first climb I did where I was already partnered with the HERO Foundation. But the good thing is that the mountain will still be there and I can always go back and give it another shot. Suggestions: Make sure you have the proper gear, especially boots. They can make or break your climb as you can see on this trip. Its not that hard of a mountain to climb but it is beautiful and definitely worth the trip. Gear list: Lower Body- - La Sportiva Trango Cube Boots - Point 6 Light weight socks - Mountain Hardware Chockstone Pants - Black Diamond Crampons Upper body- - Bight Gear Solstice Hoody Men's (base layer) - Men's Alpha Ascender Hoody (soft shell) - Marmot Wind stopper Glove Climbing Gear- - Julbo Tamang Glacier Glasses - Black Diamond Climbing Helmet - Black Diamond Couloir Harness - Black Diamond Raven Pro Ice Axe - Osprey 85 Pack - Mountain Hardware 3 degrees Sleeping bag Logistics: The closest airport to fly into is Las Vegas AirPort. You rent a car and drive through Death Valley for 4 1/2 hours before getting to Lone Pine. In town there are plenty of store where you can purchase last minute gear. The bunk house is a great place to stay before and after the climb. Cost Break Down: - SWS Guide Service- $950.00 (+tip for guides) - Food (we ate subway)- $32.00 - Bunk house- $35.00 - Misc.- $100.00 Total: Approx. $1,117.00 Notes: * Stair Master of Death - this is where me and Carlos would go head to head on a stair master, carrying a 25lb plate to see who can climb the most steps in 15 minutes. By the time your done you are either noxious or your legs feel like jelly. * Mountain food - its not a good idea to eat the something for three days in a row on a mountain like I did. Its hard enough to eat at altitude. Best advice is to take lots of snacks the you personally enjoy and eat the nutrient rich food provided by the guides or in the case of climbing without a guide, research a proper climbing diet to make sure you are consuming the appropriate amounts of fats, carbs and protein. Read more articles in my blog: www.brandonclimbs.com Gear Notes: In article Approach Notes: in article1 point
-
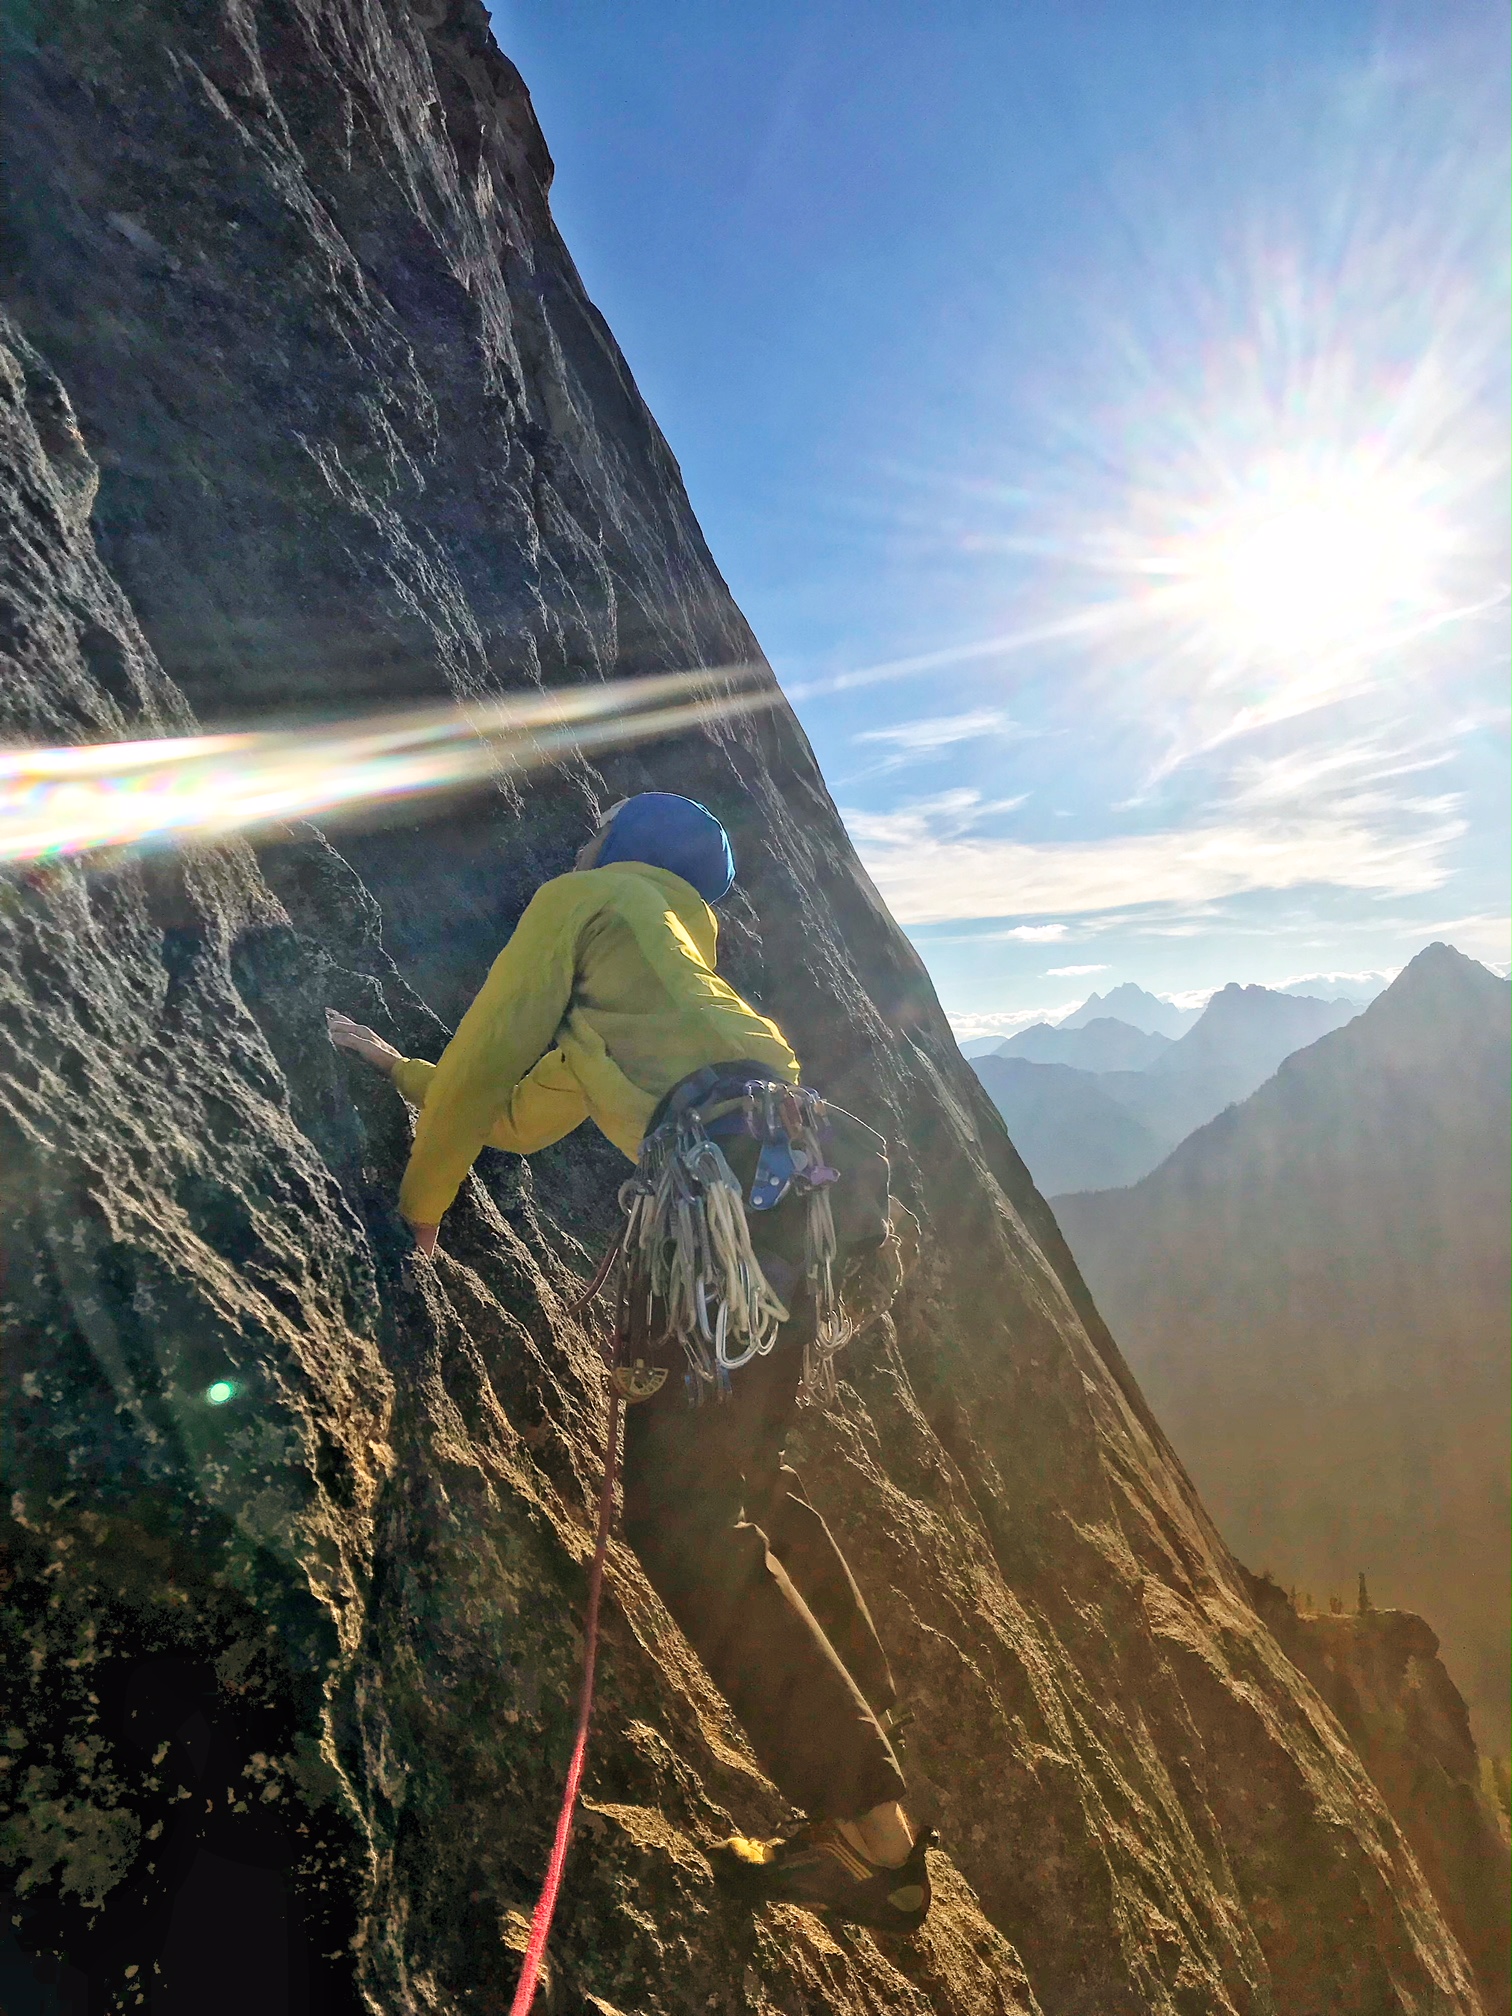
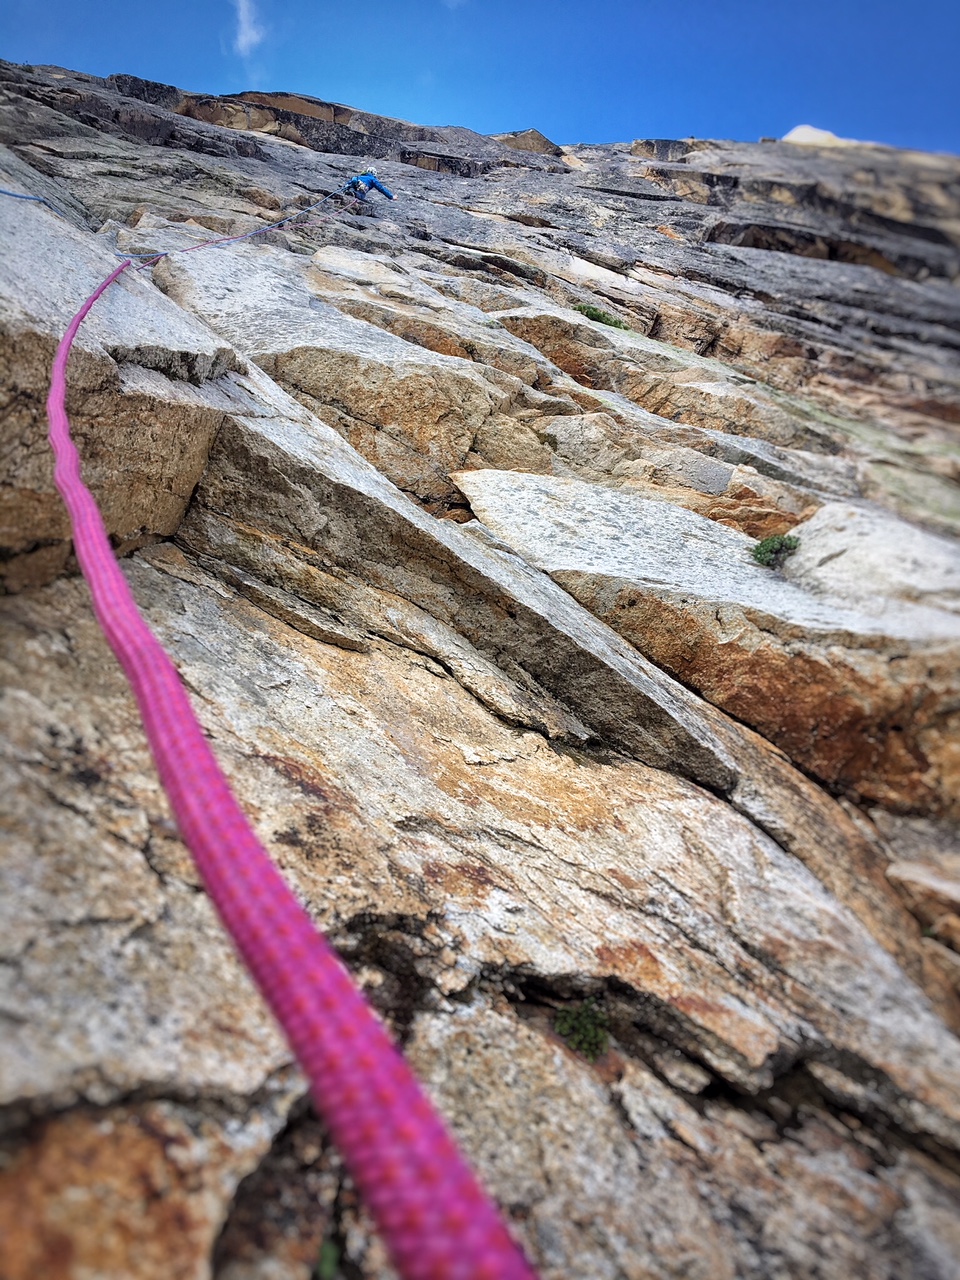
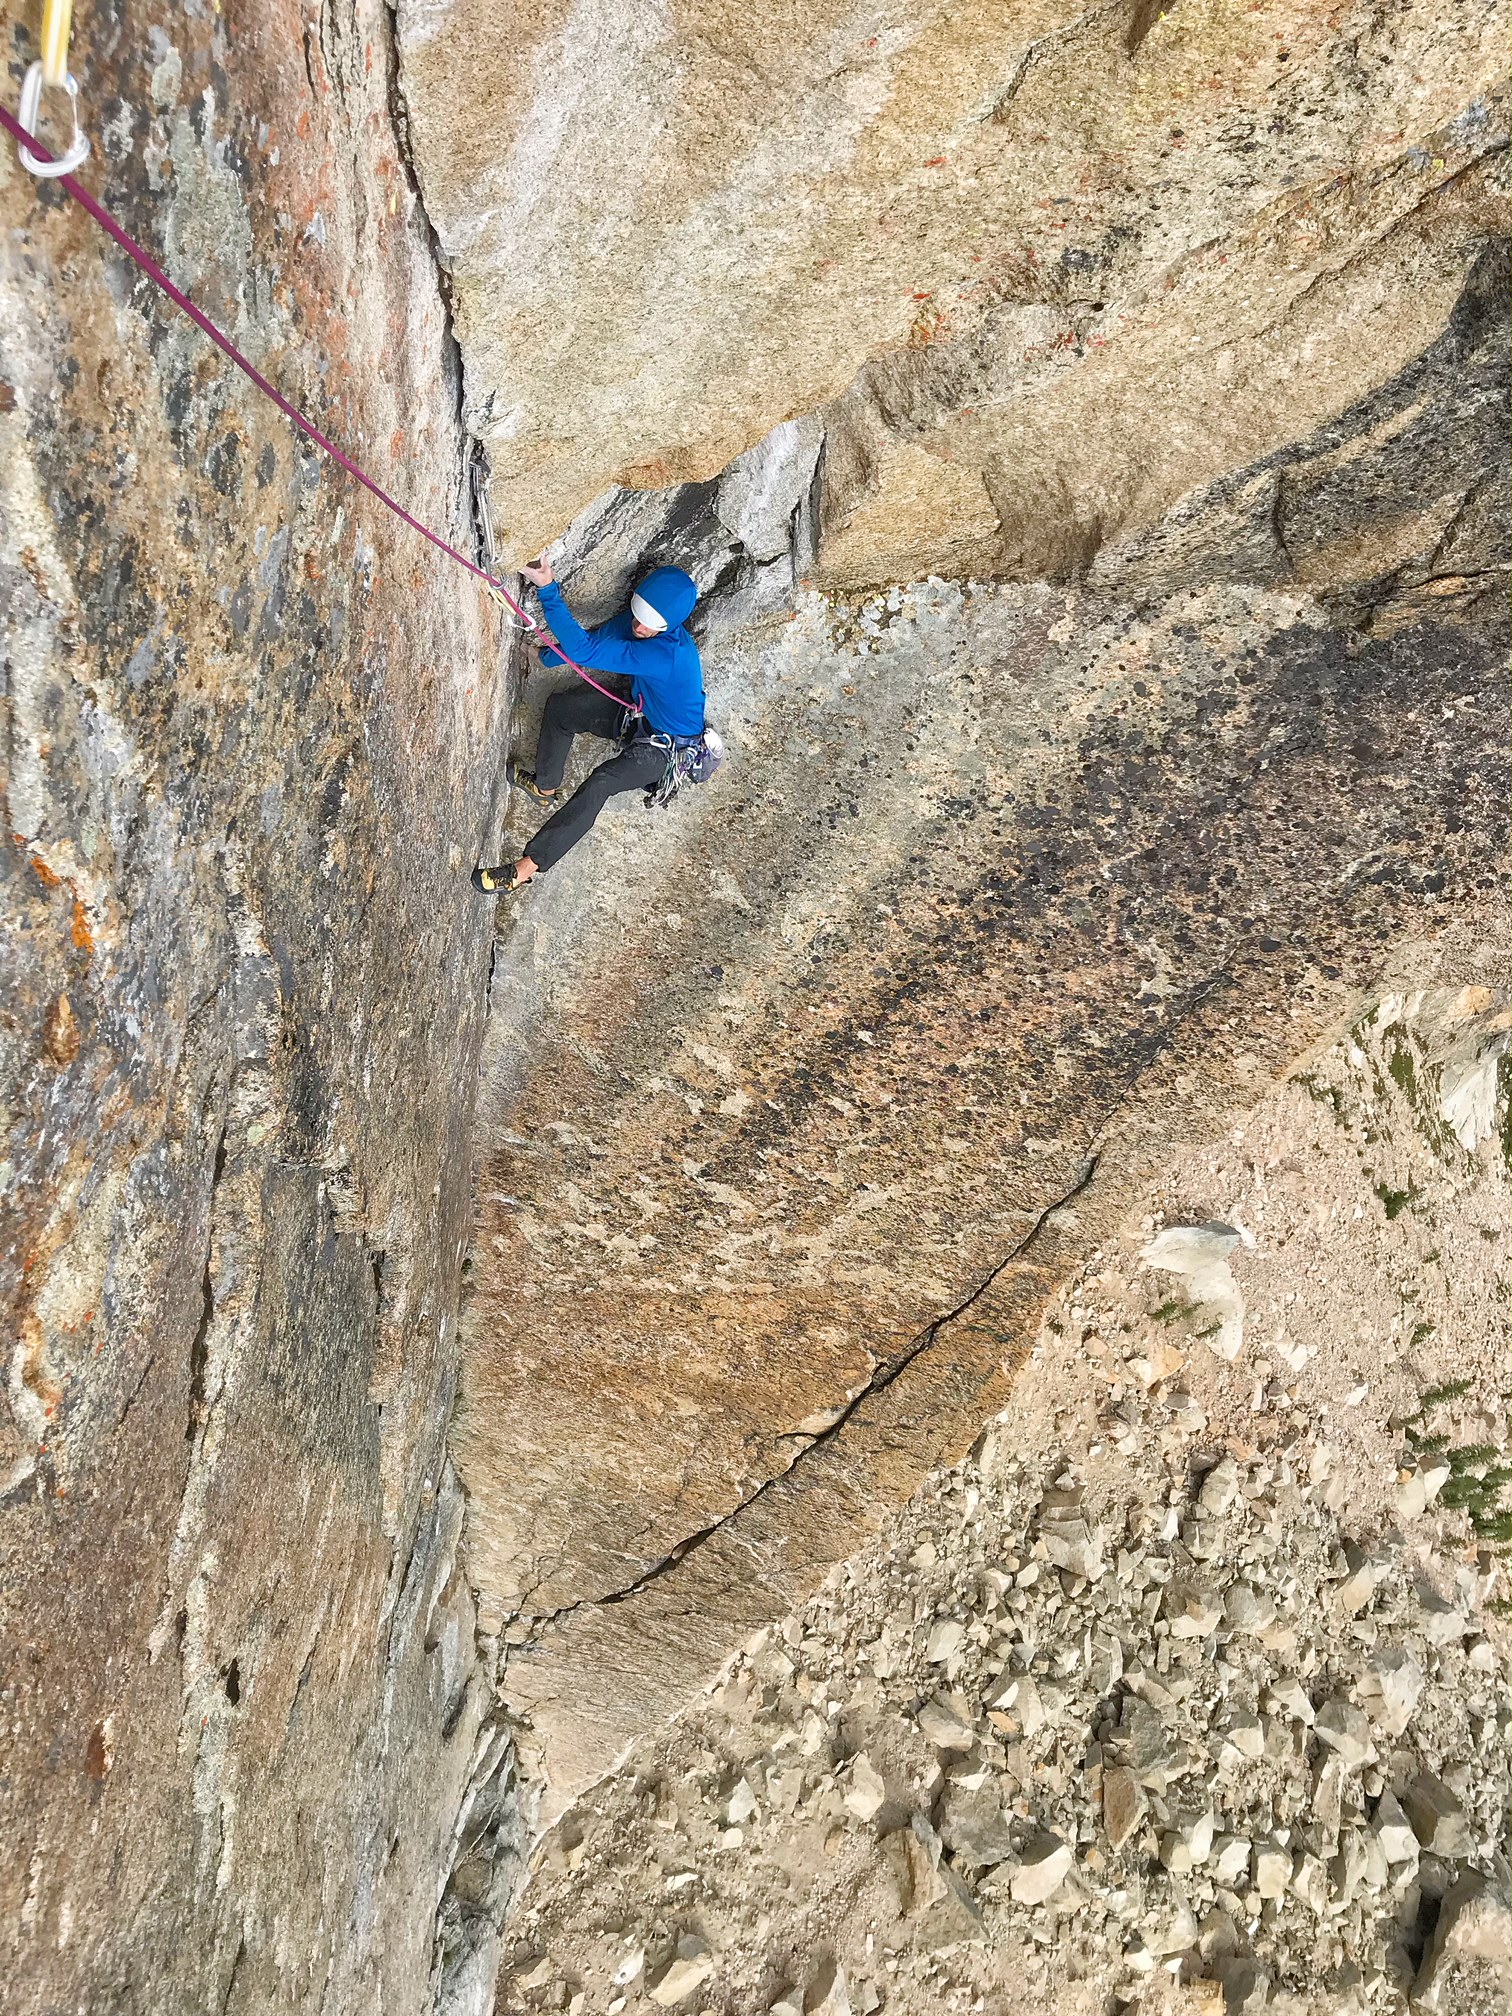
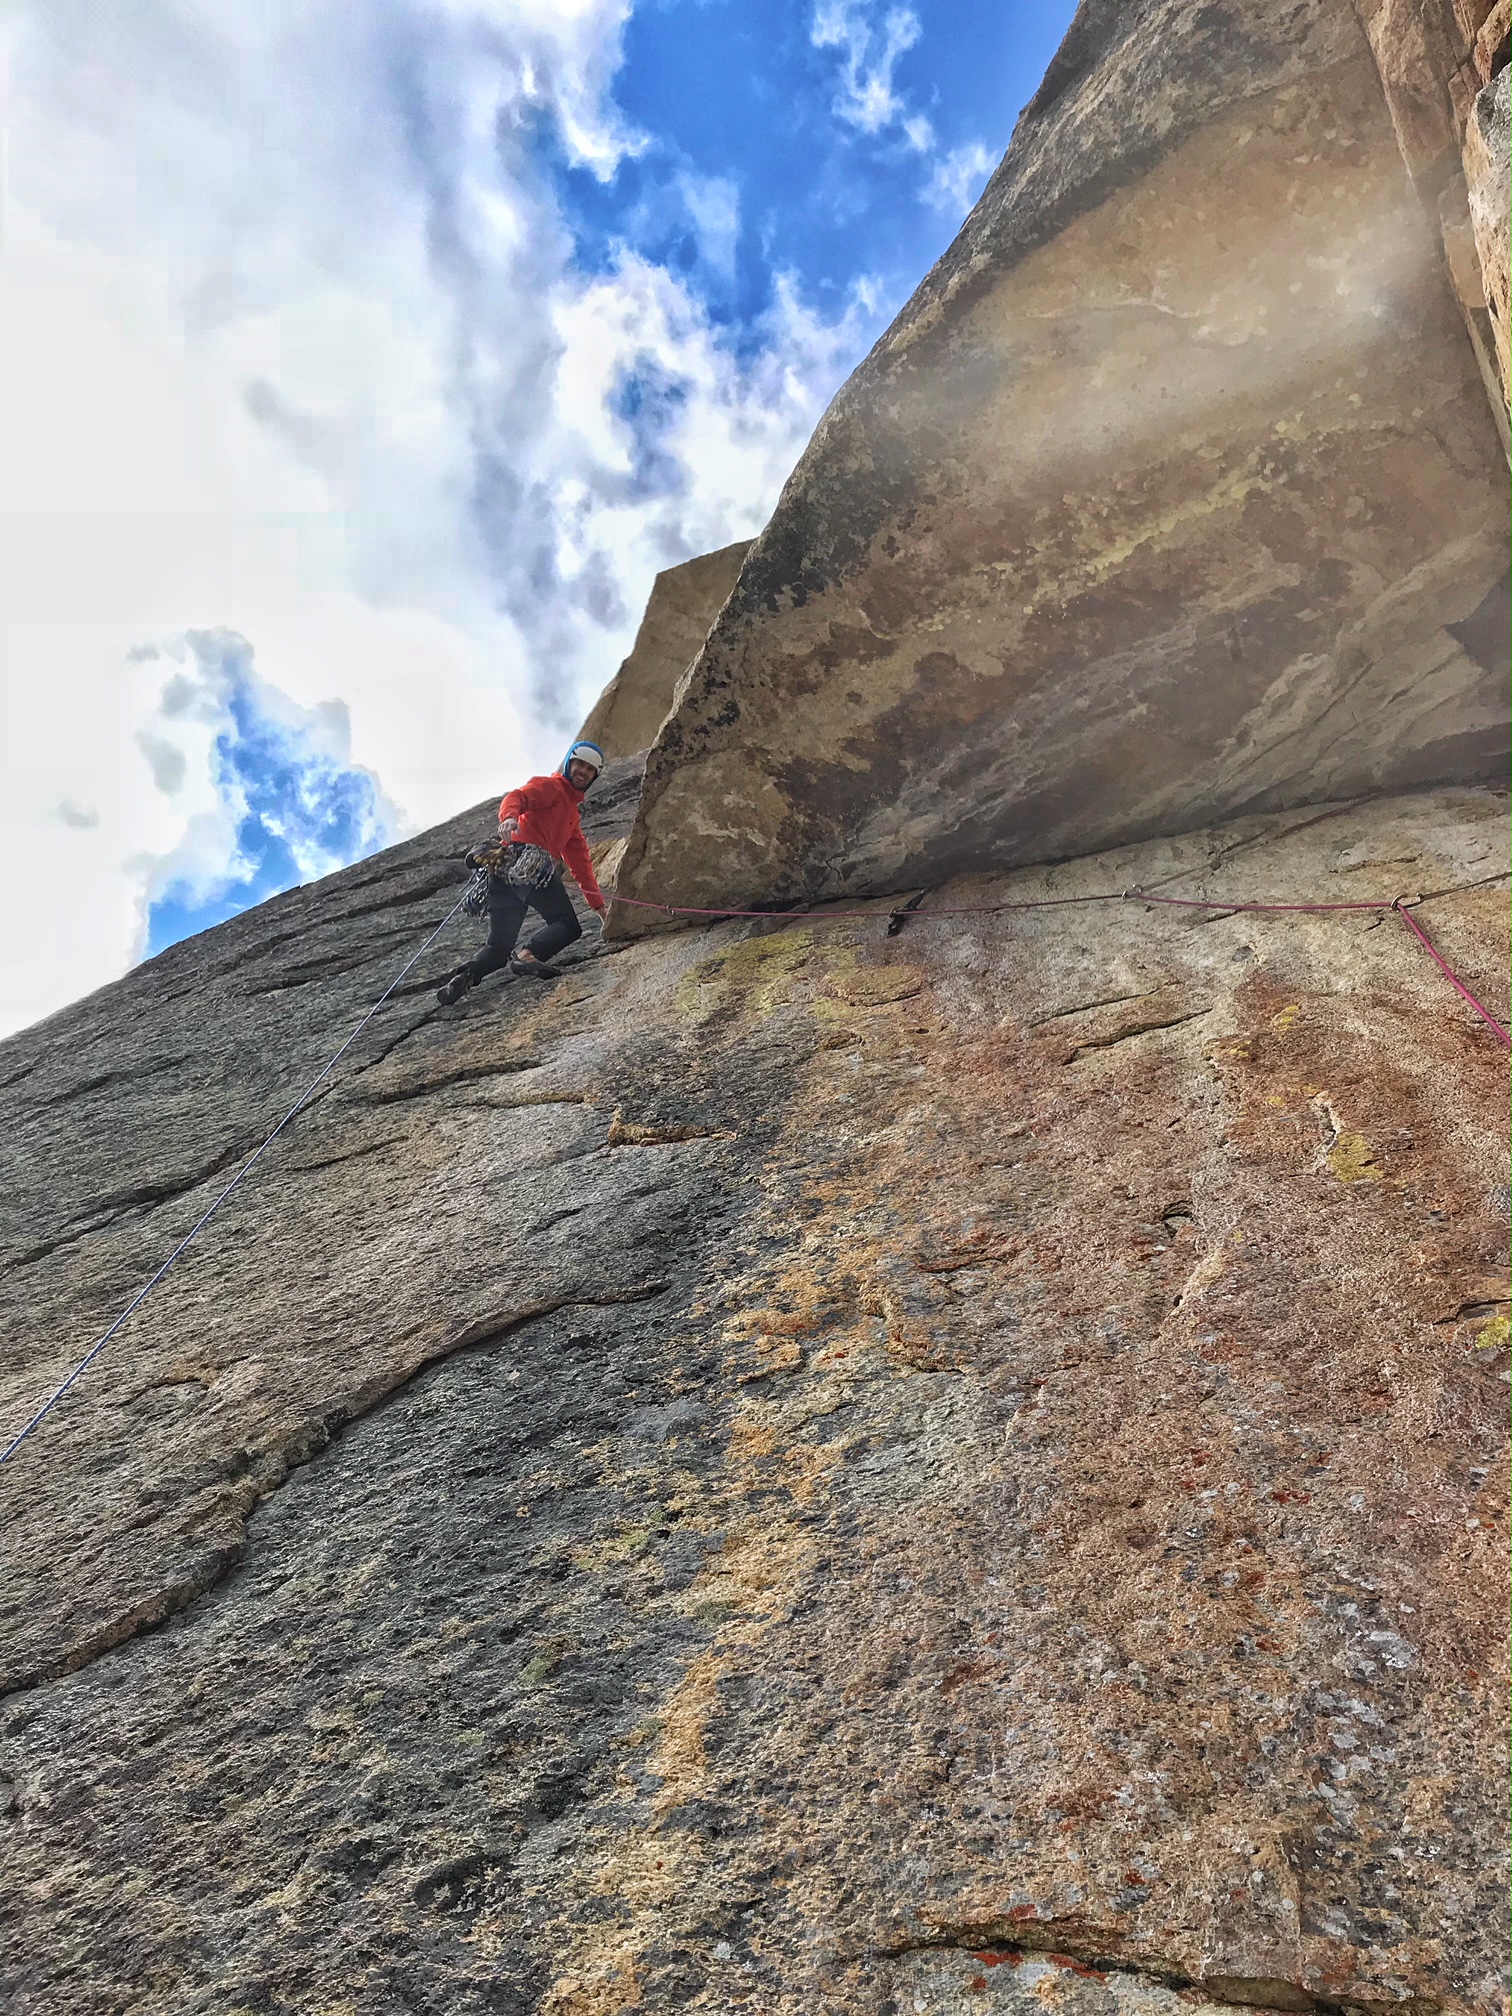
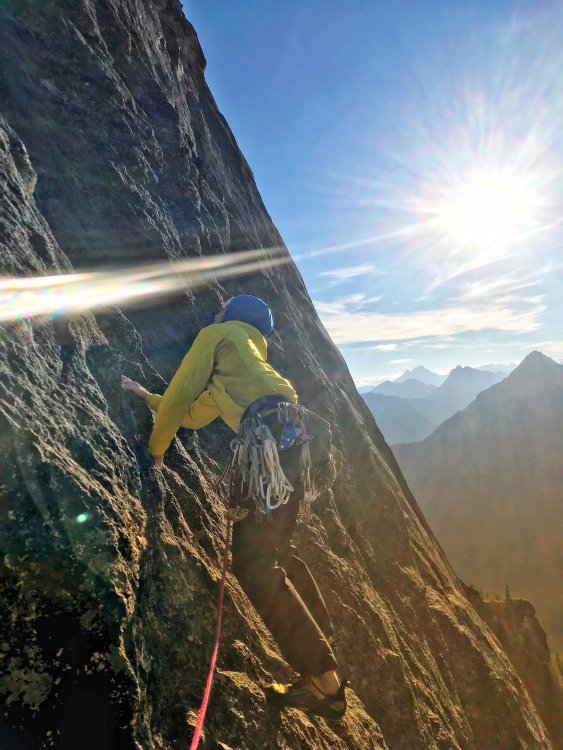
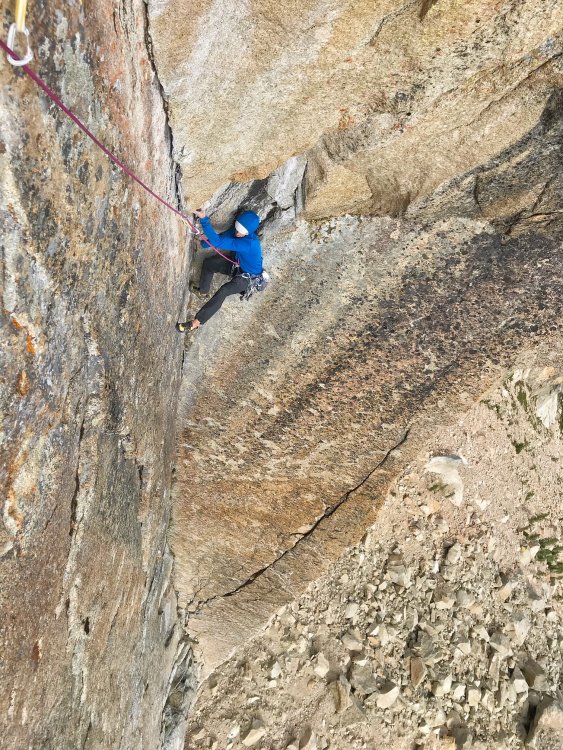
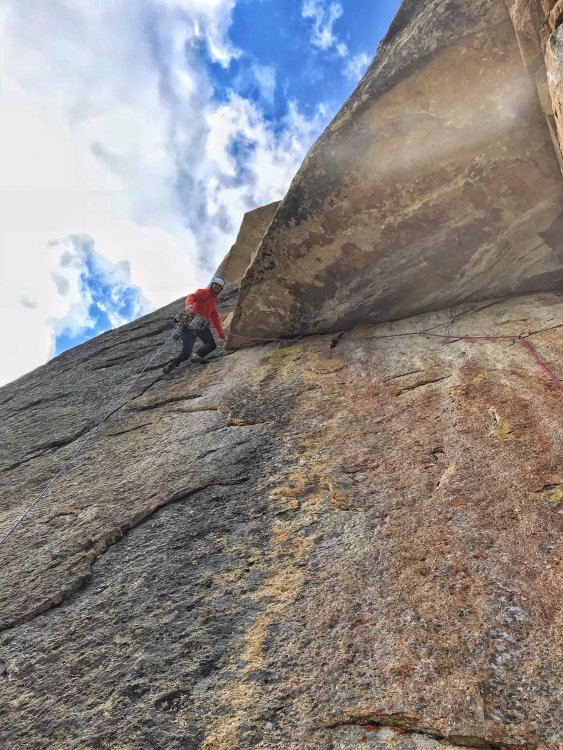
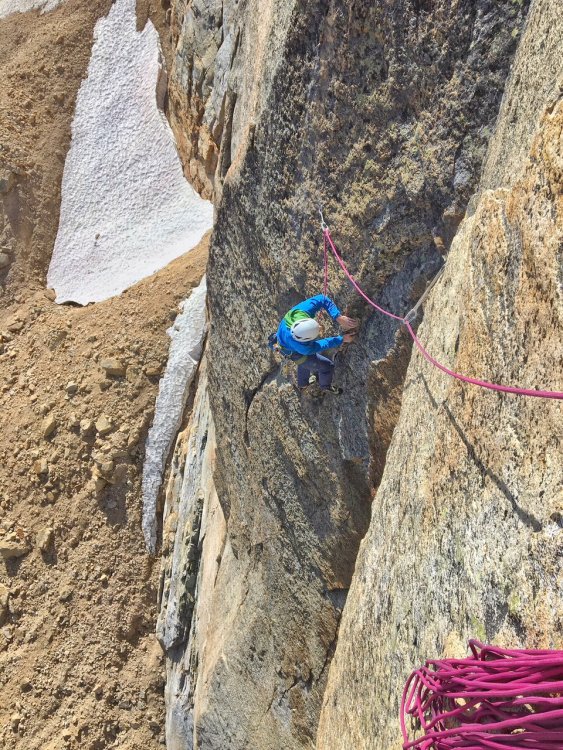
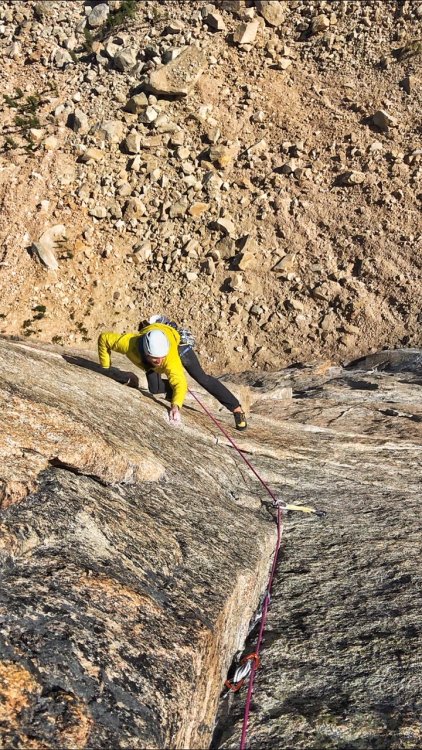
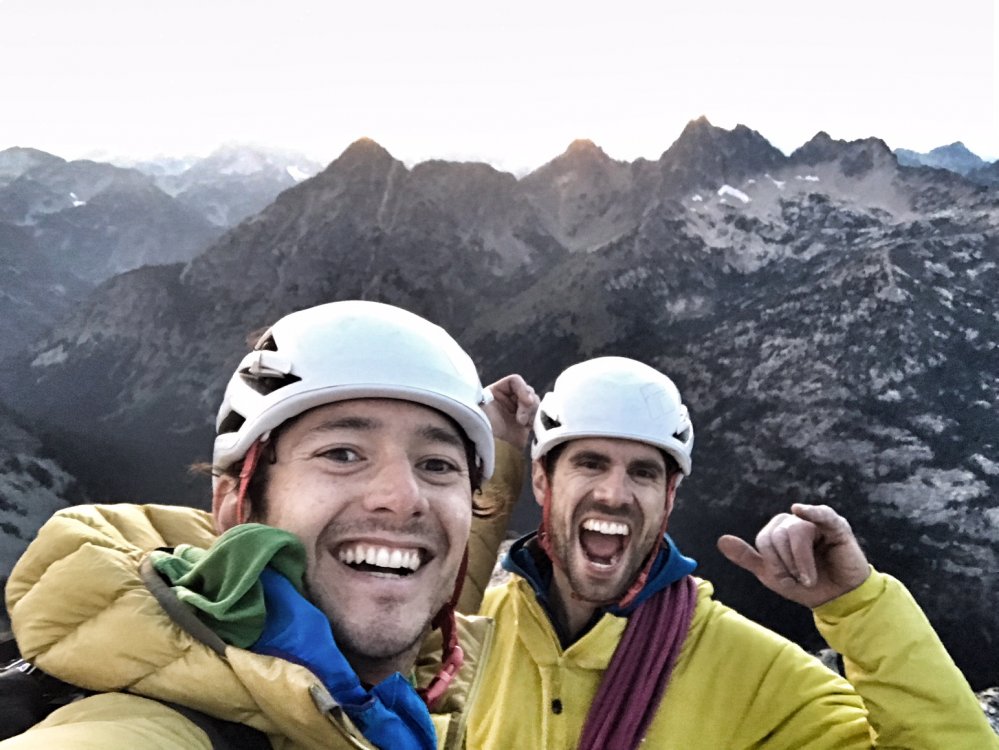
Trip: Washington Pass, Liberty Bell - Thin Red Line Trip Date: 09/01/2018 Trip Report: My buddy Andy Traylor and I had set this as a goal route to free for the summer season. Neither of us had really approached a bigger route like this with a redpoint mentality before and weren't sure exactly how to do it. With many different ways to consider an ascent "free," we settled on what we believe is a pretty commonly followed set of rules. We wanted to swing leads, and either redpoint or follow cleanly on every pitch, lowering back to the belay if necessary. Our plan was to spend one day and check out the first six pitches to get a feel for the moves and the gear then try and send the next day. On day 1 we took our time climbing the first six pitches, with no real pressure or time crunch. We TR'd the cruxes a couple times and feeling pretty good about going for it the next day, rapped off and headed down for a big dinner. The next day we set out a little nervous, but also feeling good about our chances. Once we were on the route we were moving and climbing well. Thoughts on the pitches for anyone that cares (some gear beta here so purists need not read on): P1. Straightforward crimping and edging straight up to the anchor. I actually headed right after the last bolt, going more directly to the anchor on day 2 and thought that was slightly better. Andy getting all artsy with the iPhone on P1 P2. Short pitch. Boulder problem over the bulge through the mini changing corners. Good pro and the pin at the end of the crux seemed in good shape, not tested. Belay on gear. P3. Awesome and memorable pitch I thought, shorter than it looks in photos. Super thin edging and stemming in the dihedral leading to a roof with wet holds that allow you to exit the corner and gain a stance. I basically punched myself in the face popping out of the wet locks first go round. Pin in the corner seemed good, I tested it and it held. Mostly finger sized cams. Belay at full on hanger. Andy in the corner/roof that ends the crux on P3 P4. Fixed gear in the roof seemed only ok, hard to tell with the tat and I didn’t spend much time examining it, but you probably won’t come off under the roof anyway, clip and go. Andy exiting the roof on P4 The last bit traversing back toward the anchor we both found a little awkward and harder than it seemed it should be. On the traverse back to the belay on P4 P5. Business #1. Super fun 5.10 traversing and edging to the corner. Corner gets progressively harder with the real business starting at the bolts. I will say on my initial go I was not super happy to have left basically all the rack at the belay, expecting only a few pieces then bolts. I'd take mostly finger sizes, but I was happy to have a black Metolius and a #2 C4 (certainly not necessary but provided me with some mental fortitude to try hard). Bring lots of slings, I think I had like 14 and ran out somehow, placed too much gear I guess. The crux moves are technical, a little powerful, desperate and amazing. The last move, while not the hardest, has the potential to be a heart breaker and I can only imagine being very desperate if you’re under, say, 5’9. Belay on medium sized gear above the bolts, significantly better stance. Andy sticking the last move, he never fell once climbing this pitch over the 2 days. P6. Business #2. No picture. First roof is super casual. Leading up to the second roof the climbing gets less secure but good small finger gear is there between pins. The boulder problem is powerful, but pretty straightforward cranking (V4ish?) on pretty good holds. We were a little confused by all the talk about a necessary and specific red C3 placement. We couldn’t find anywhere by the beak, or below the roof for that matter, where this would go. Any clues? However that piece or a blue Metolius or equivalent went in bomber just above the lip. If that’s the placement everyone is talking about, then there is no need to scavenge around for a red C3 if you don’t have one. We left it out in favor of a blue Metolius on round 2. Climb past the bolts (if not rapping from here) and belay on the better sloping ledge with hand sized pieces. P7. Only dog pitch on the route. Thought the rock was poor quality, basically a connector pitch. Ends on the scary looking “how is it still hanging there” block creating the ledge. P8. Another techy and pretty thin 11+ pitch. Really really good. Looks super thin but there is gear to be had and both the head and pin are in good shape, Andy tested both and approved. Some small hand sized gear higher. P9. Excellent and fun 10+ climbing again builds as you get higher. Looks like the seam dies out at the top, but keep going up instead of traversing left. That’s probably super obvious but I was getting tired and moving more timidly by this point. P10-12. Progressively easier climbing. Nice to have Scott's topo for P10 to know where to get started. The last belay sits basically on the arête between the east and north face, we came back into the sun here. There are brand spanking new bolts here instead of the pin/fixed wire combo some guide mentions. Maybe it’s obvious, but the climbing heads left up the lighter colored dihedral. This looked too steep to us to be the 5.7 climbing, so Andy headed out right on the lower angle terrain and we had a bit of an epic on the easiest and last pitch of the route. The rock quality deteriorated into kitty litter, so Andy tried to sling a chockstone to lower back to me, only to get the rope got stuck forcing even more shenanigans (face palm). All in all we wasted some hours and all hopes of pizza. Once corrected we soloed to the top without further incident. Don't go this way. Why is this photo so big? All in all, neither of us fell following any of the pitches. On lead, some of the pitches took a try or two, but in the end we pulled it out and nabbed a free ascent. We learned a lot about climbing in this style and really enjoyed the process. Thanks to Mikey Schaefer for figuring this out, it provided one of my all time favorite experiences in the mountains so far. Psyched for the next one! Gear Notes: Doubles from purple Metolius to .75 BD, singles to #3 BD. Our second set of cams were Metolius offsets. They worked amazing (as always for granite) and I always carry them as doubles, but far from necessary. Nuts. Placed 1 RP but probably not necessary. Lots of slings, like ~16. We used a 40M tag line and hauled the bag on most pitches. Approach Notes: Most casual "alpine" approach ever. Like 25min from the car.


 1 point
 -
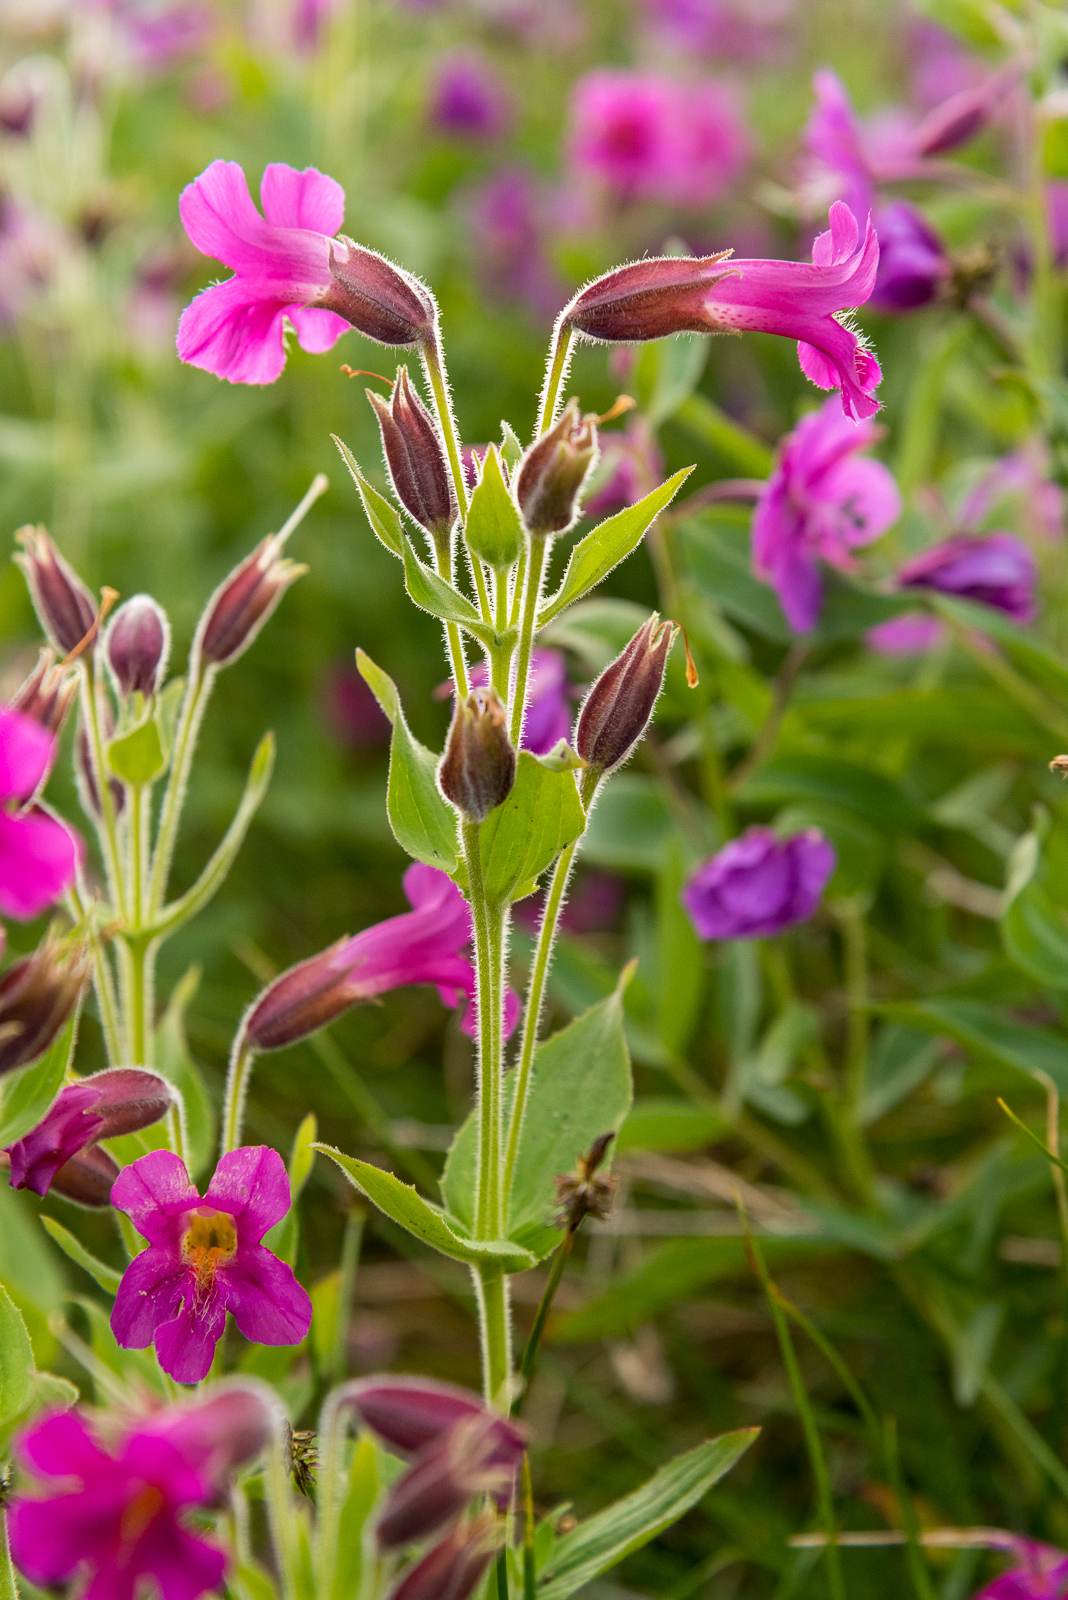
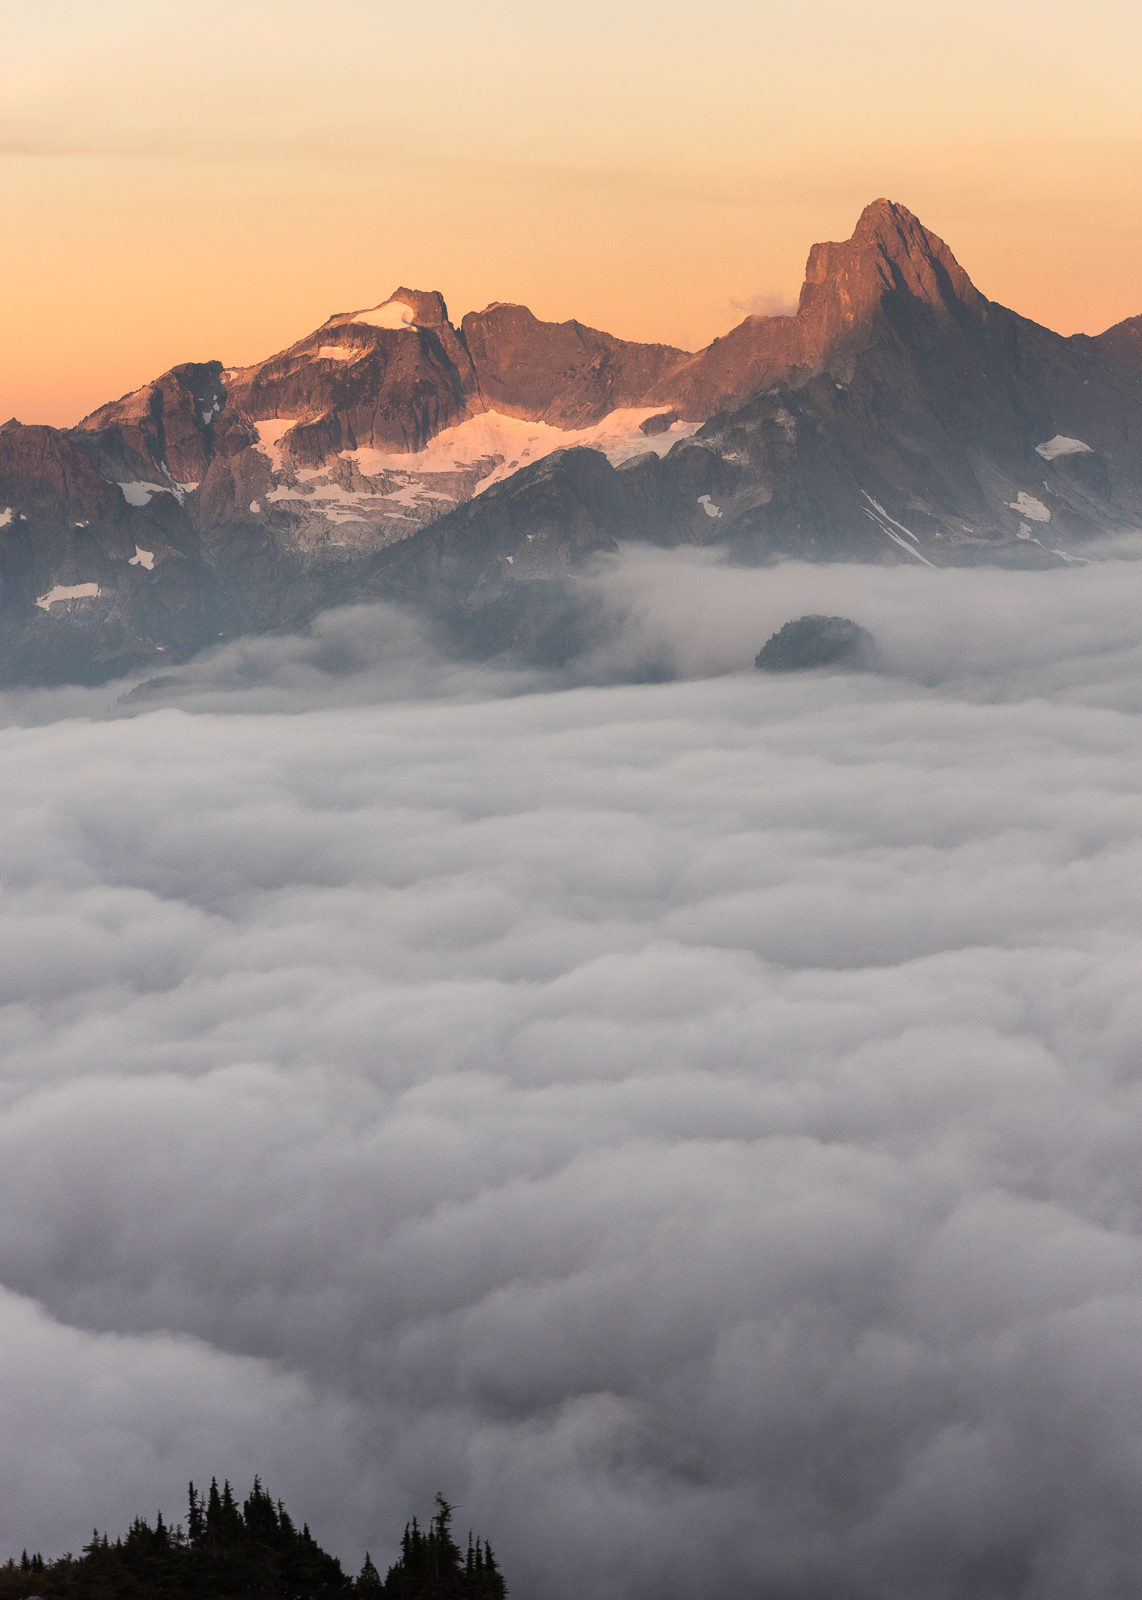
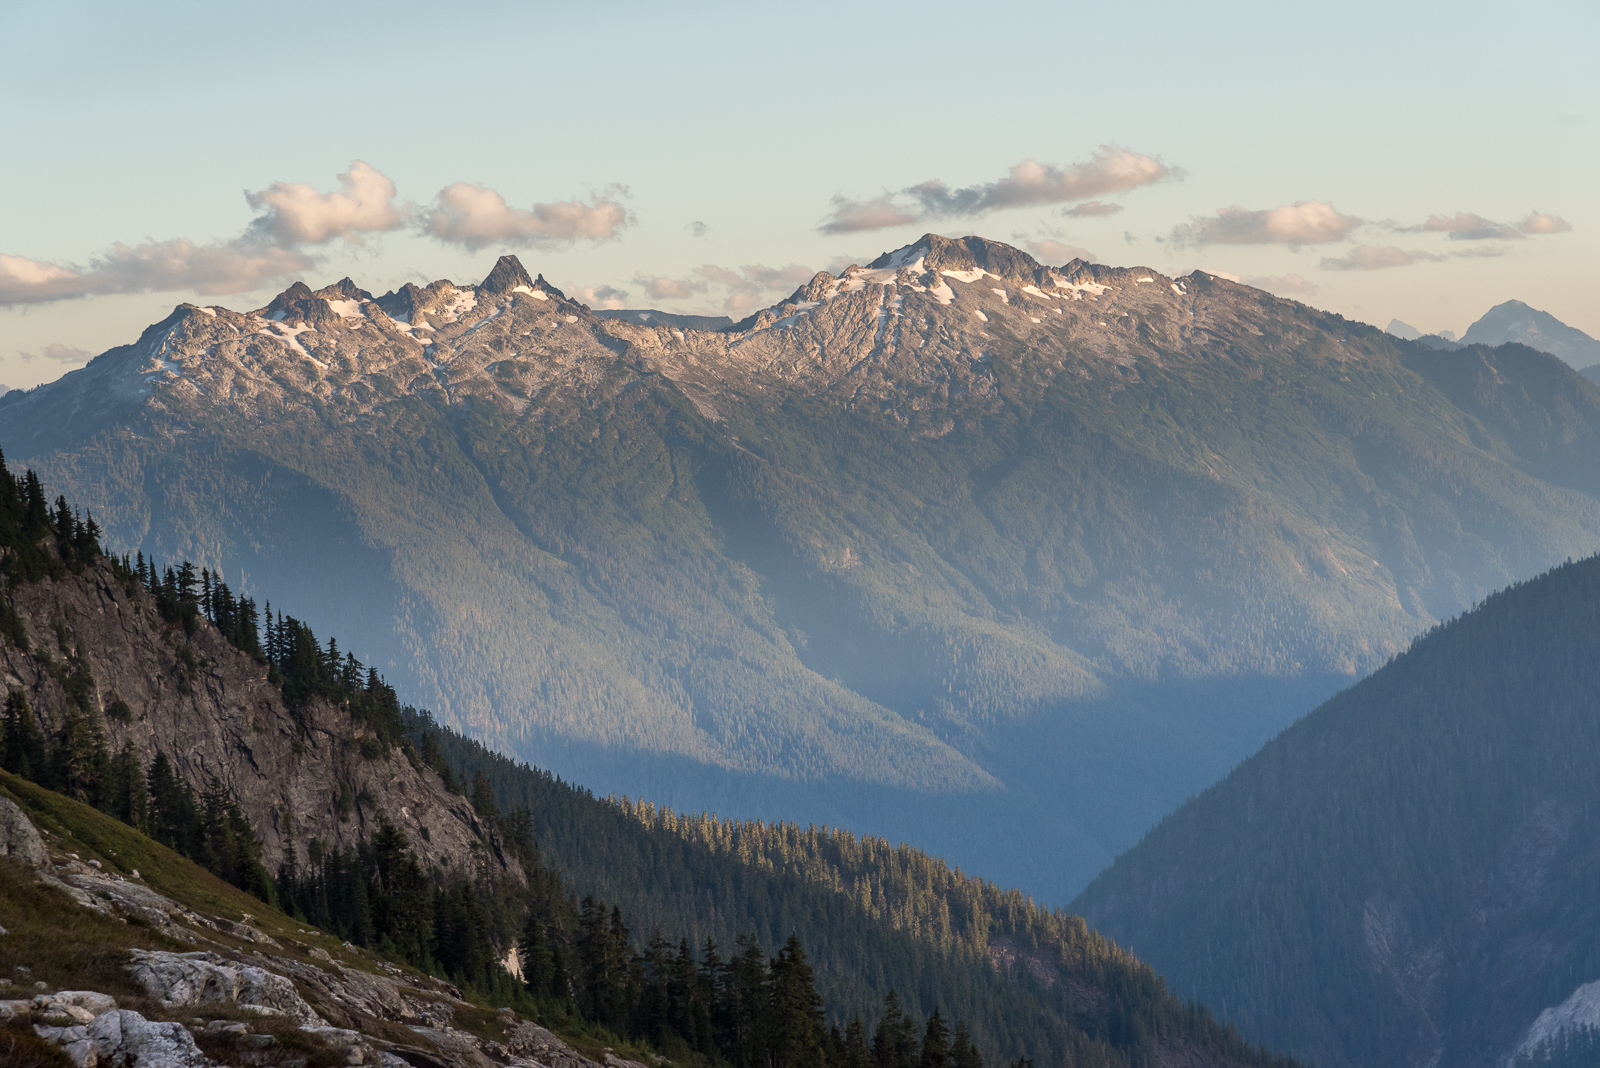
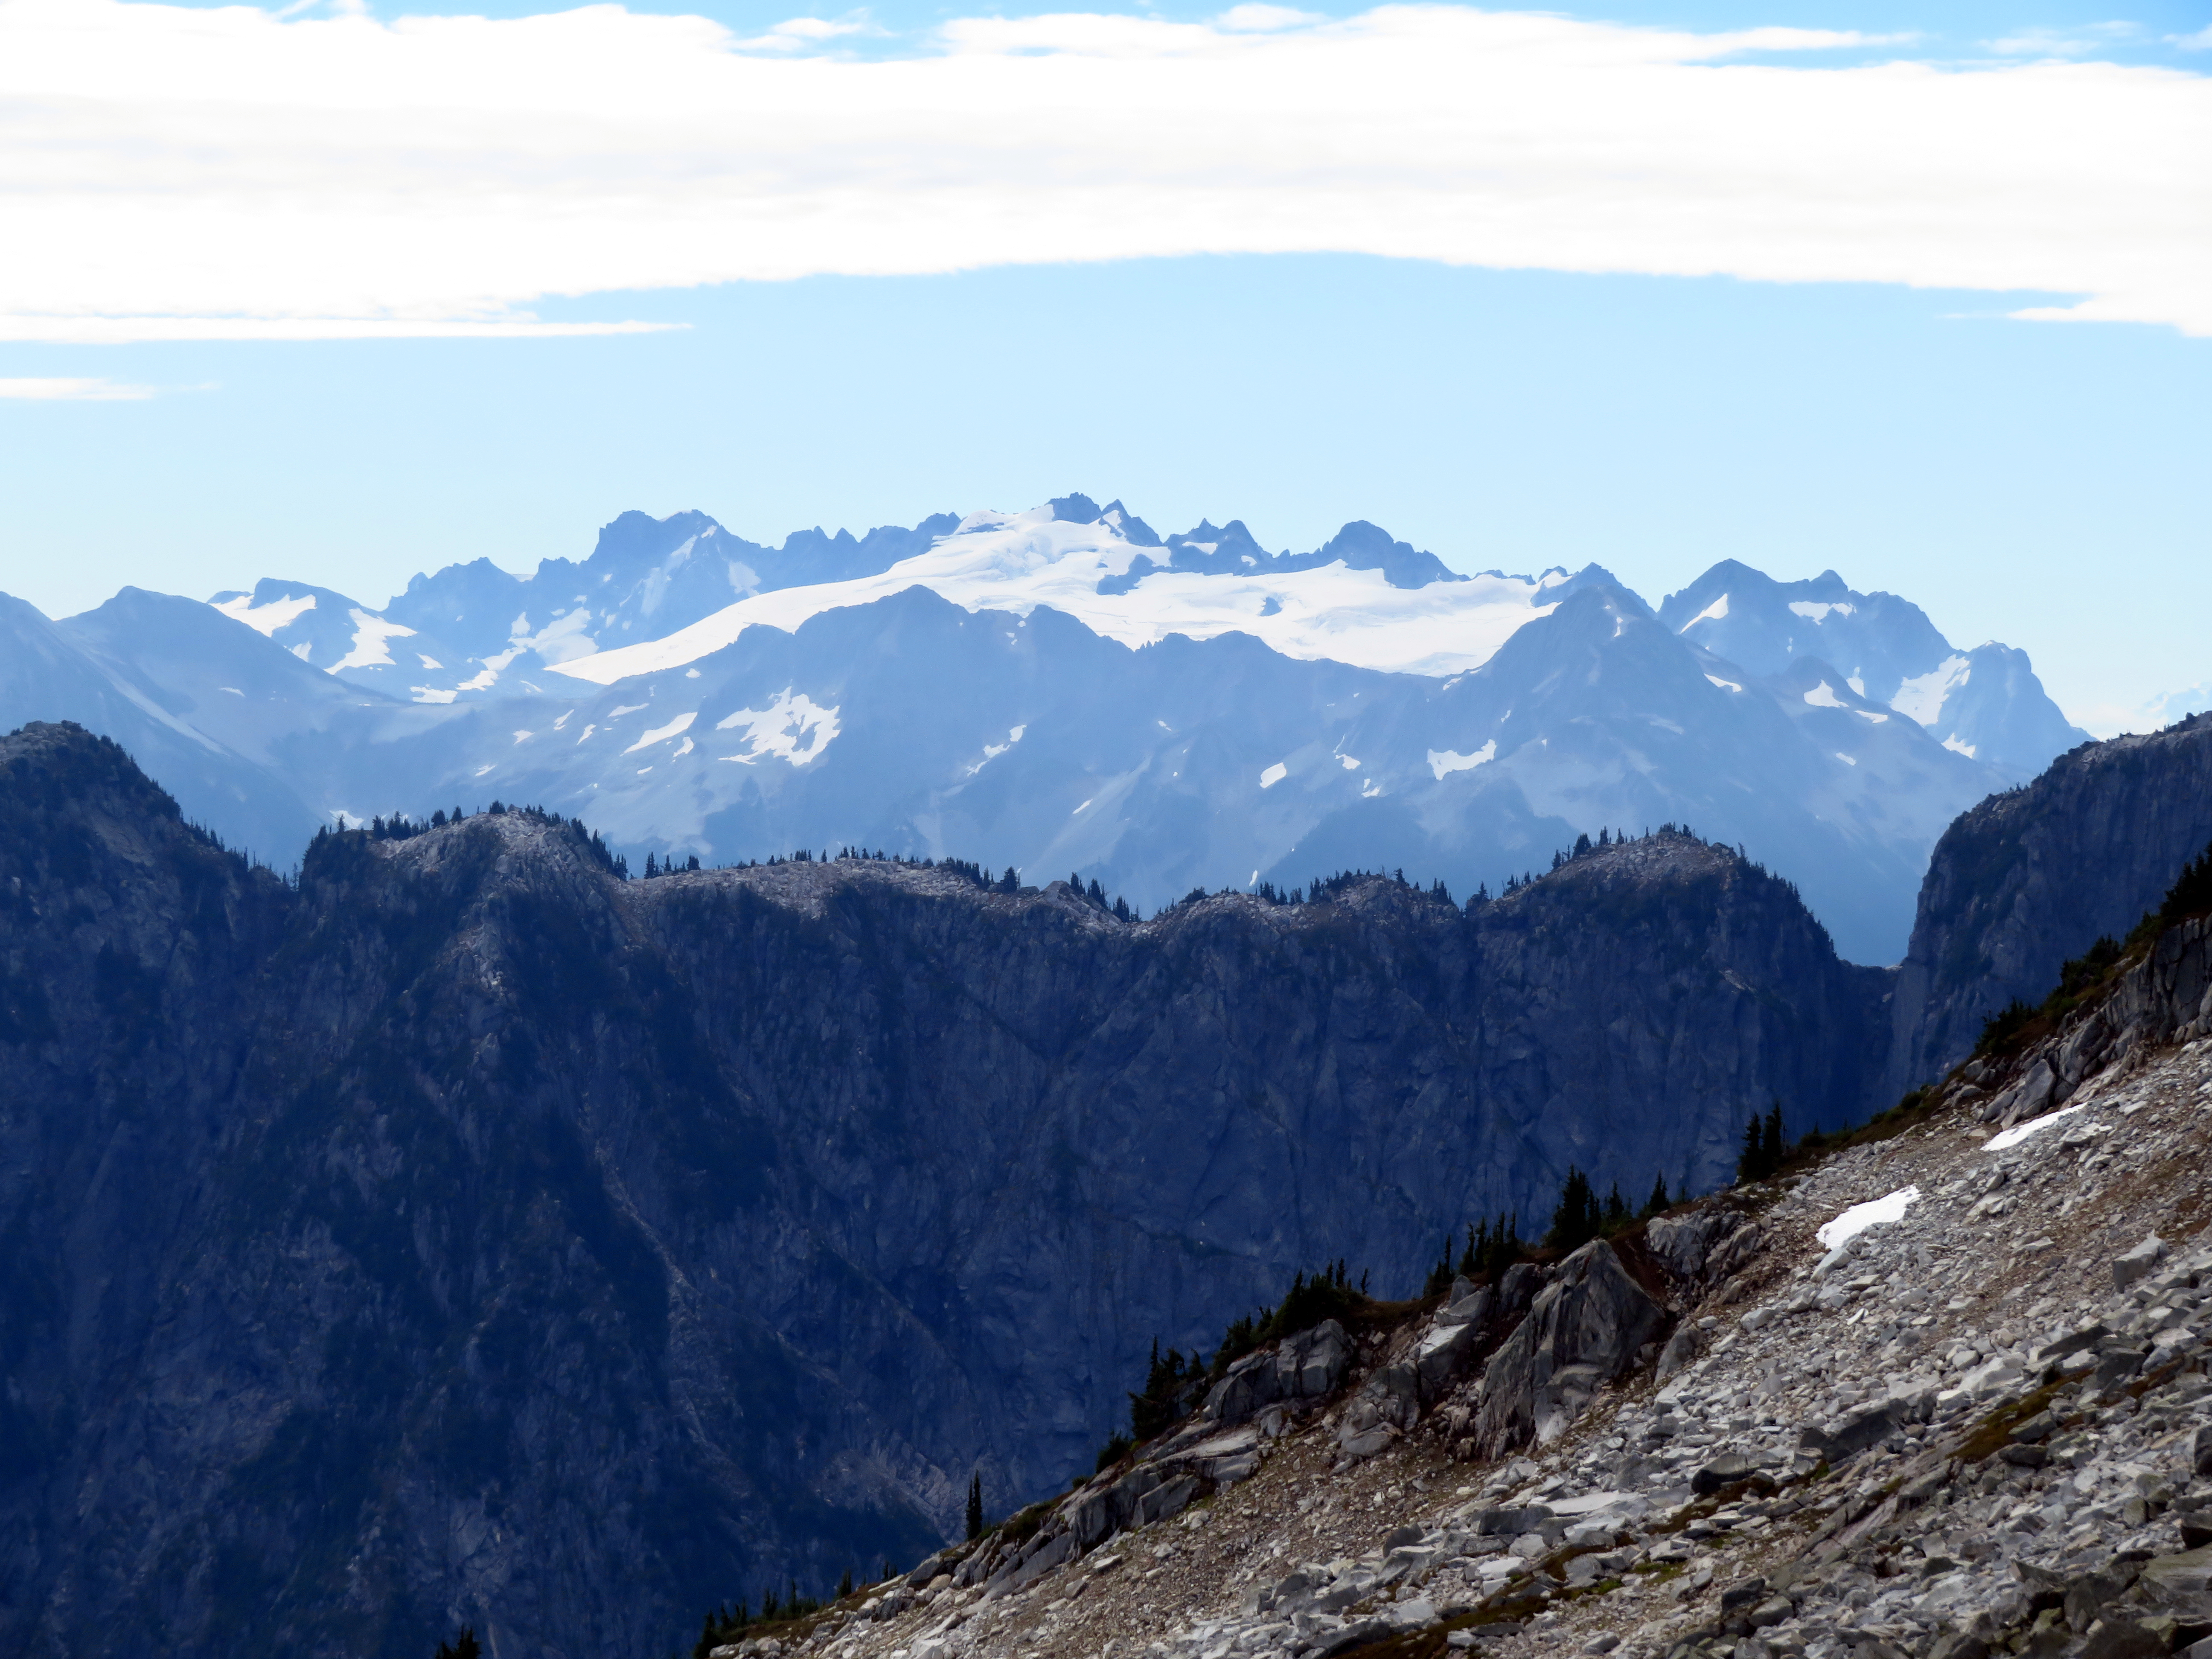
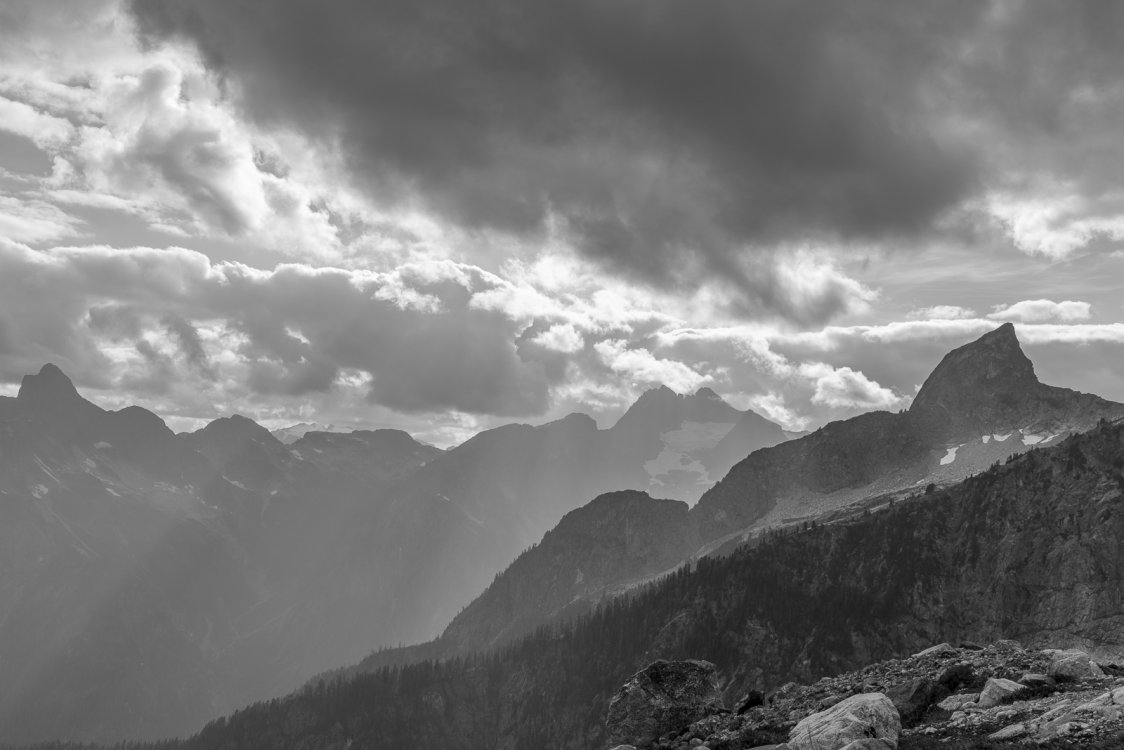
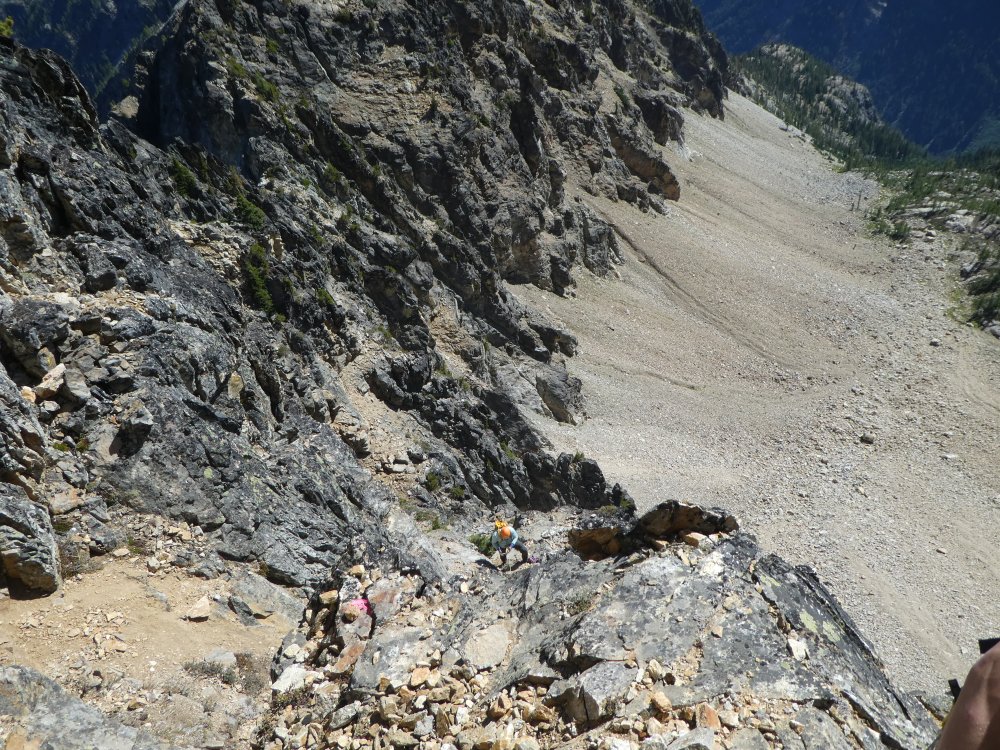
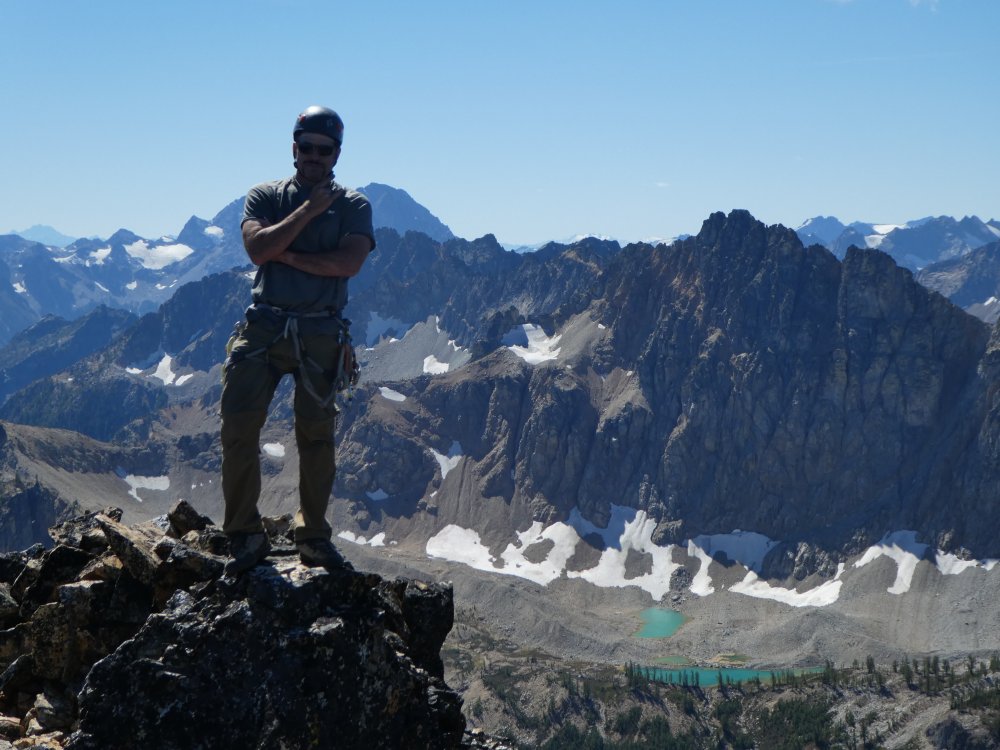
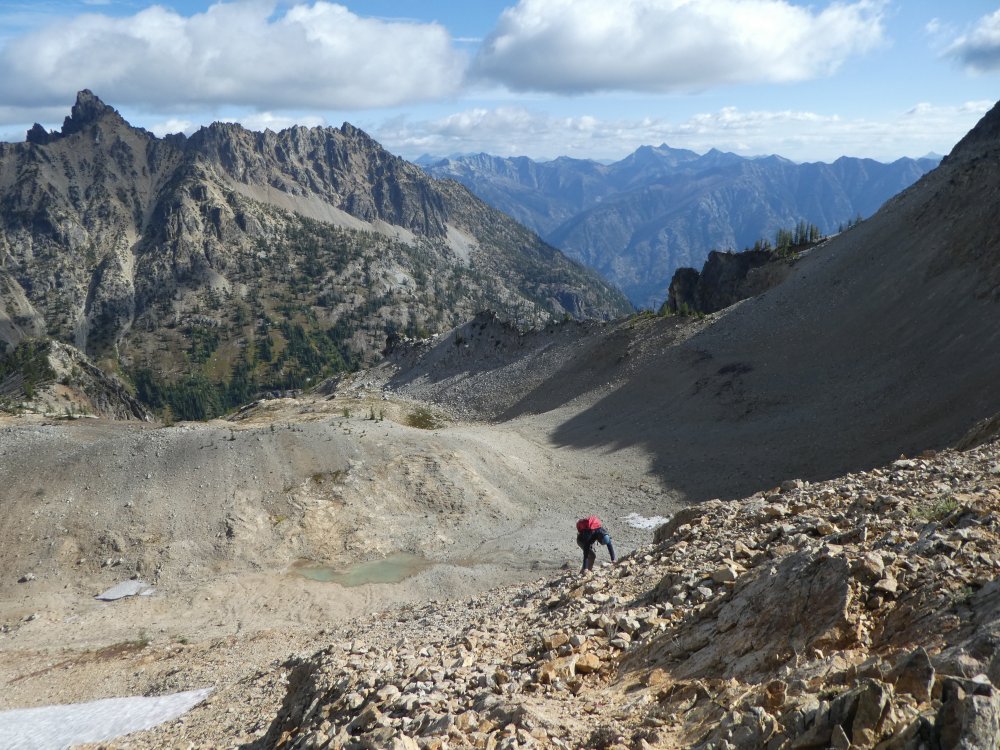
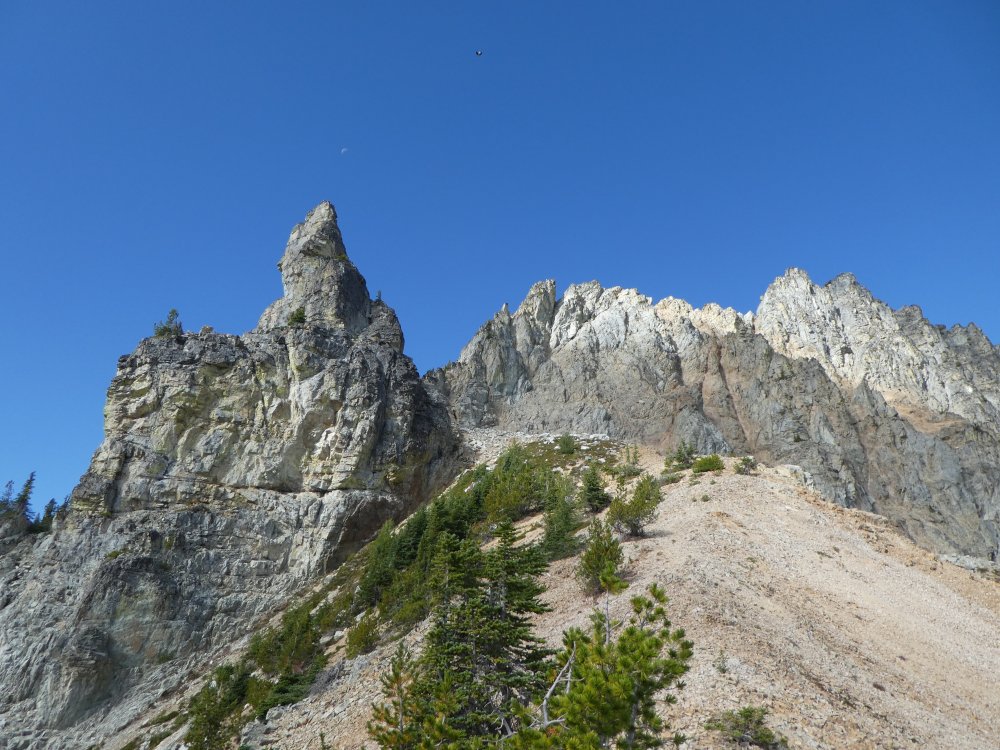
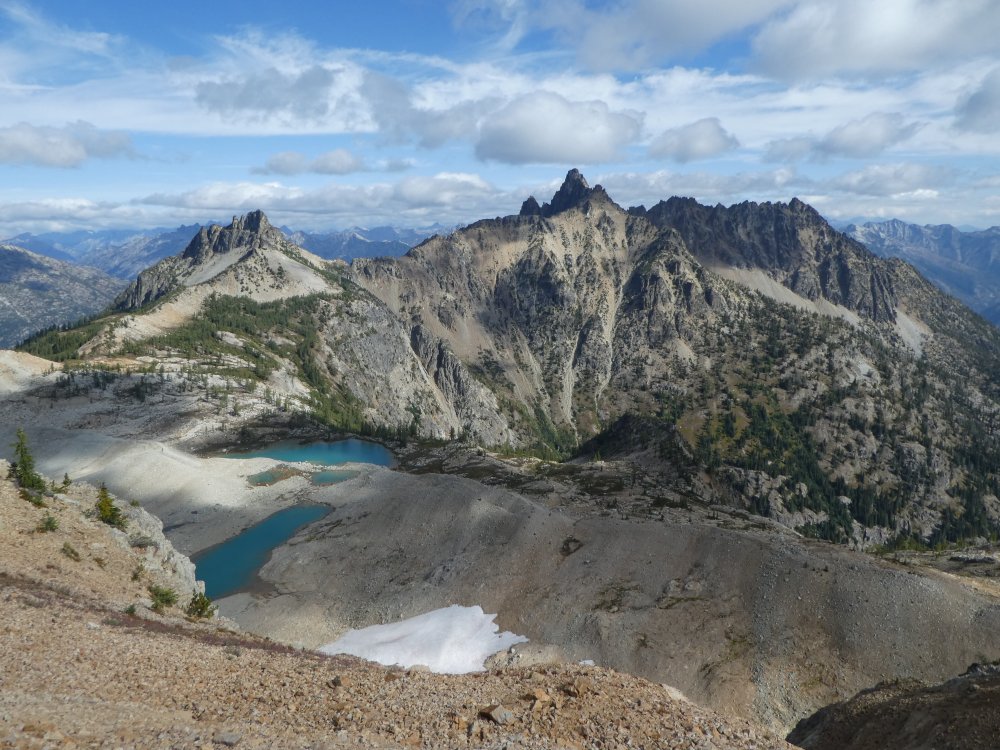
Trip: Thornton Peak - SE scramble Trip Date: 08/05/2018 Trip Report: Triumph is a well-known peak, and for good reason. With one of the more classic ridge routes around (the NE), it gets a lot of traffic. But immediately next door lies a fantastic scramble (Cl. 3) to the top of Thornton Peak. Due to a variety of factors, our planned ascent of Triumph morphed into a scramble of Thornton which, it turns out, makes a great destination in its own right. Or, as we saw with another team of ladies we met on the summit, Thornton can serve as great backup to Triumph in case of weather/time constraints. And, since it is so close to Triumph and the Pickets, the views aren't half-bad either. Just make sure you bring a tent with the proper poles and fly if it may rain. @cfire enjoyed a bit of a refreshing evening the night before we scrambled Thornton. Like the tough SOB he is though, it didn't seem to dampen his enthusiasm the next day. Ah......... the yin and yang of the North Cascades! Thornton Lakes on the approach. Thornton peak lies just to the left of Triumph: Chris, working his way around middle Thornton Lake (above). Lower and Middle Thornton Lakes (above). The wedder approaches: Kim and Chris - "Do you think it is going to rain Jason?" Triumph: Ptarmigan: Upper Thornton Lake: Triumph: Me, the Lovely Kim, and Chris on the summit of Thornton: Chris heads for home while Kim and I stay to enjoy another night up high: The Lovely Kim descending back to camp: I'll take it: I had bats flying around me eating moths while I took this shot of Triumph and the Big Dipper about midnight: I want the story of whomever was up at midnight at their camp below the Ottohorn-Himmelhorn col? Smoke, smoke, and more smoke. The story of 2018: Looking from camp across the Skagit trench at the North end of Teebone Ridge: The Lovely Kim surveys the way down to the upper Thornton Lake. She said, "Why can't we take trails like normal people do?" A parting look at Triumph: It's sort of a trail, isn't it? "No". Gear Notes: Footwear of some kind. We were able to stay off snow for the most part and the rock isn't too bad where you feel like you need a helmet. Approach Notes: Use the approach to Triumph col and take a left. Descent camps a bit above the pass without much water late season1 point
-
Hell yeah! Heading out tomorrow in search of some!1 point
-
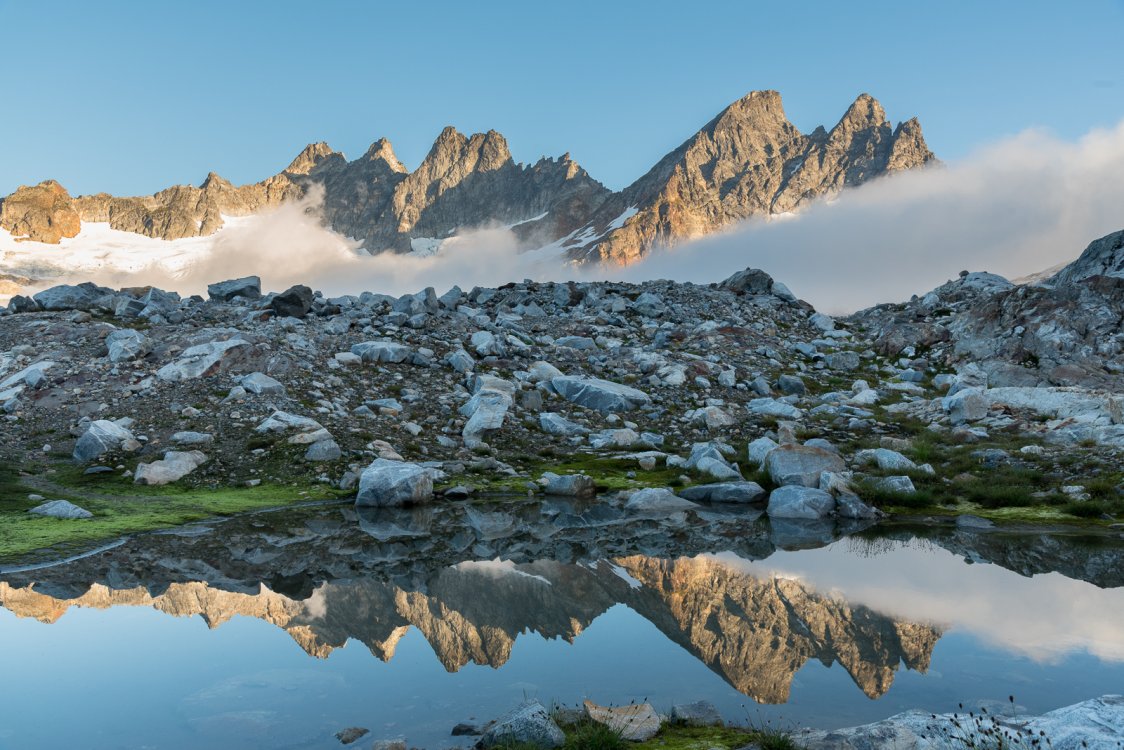
Nice shots, J! I really like the one with the lake that shows the reflection of the peak! Where do I purchase?! I do have some good memories of this route. The raps off the S Face are certainly better than that nasty W Gully. (Yuk) The great gash (the feature, not the climber!):
 1 point
 -
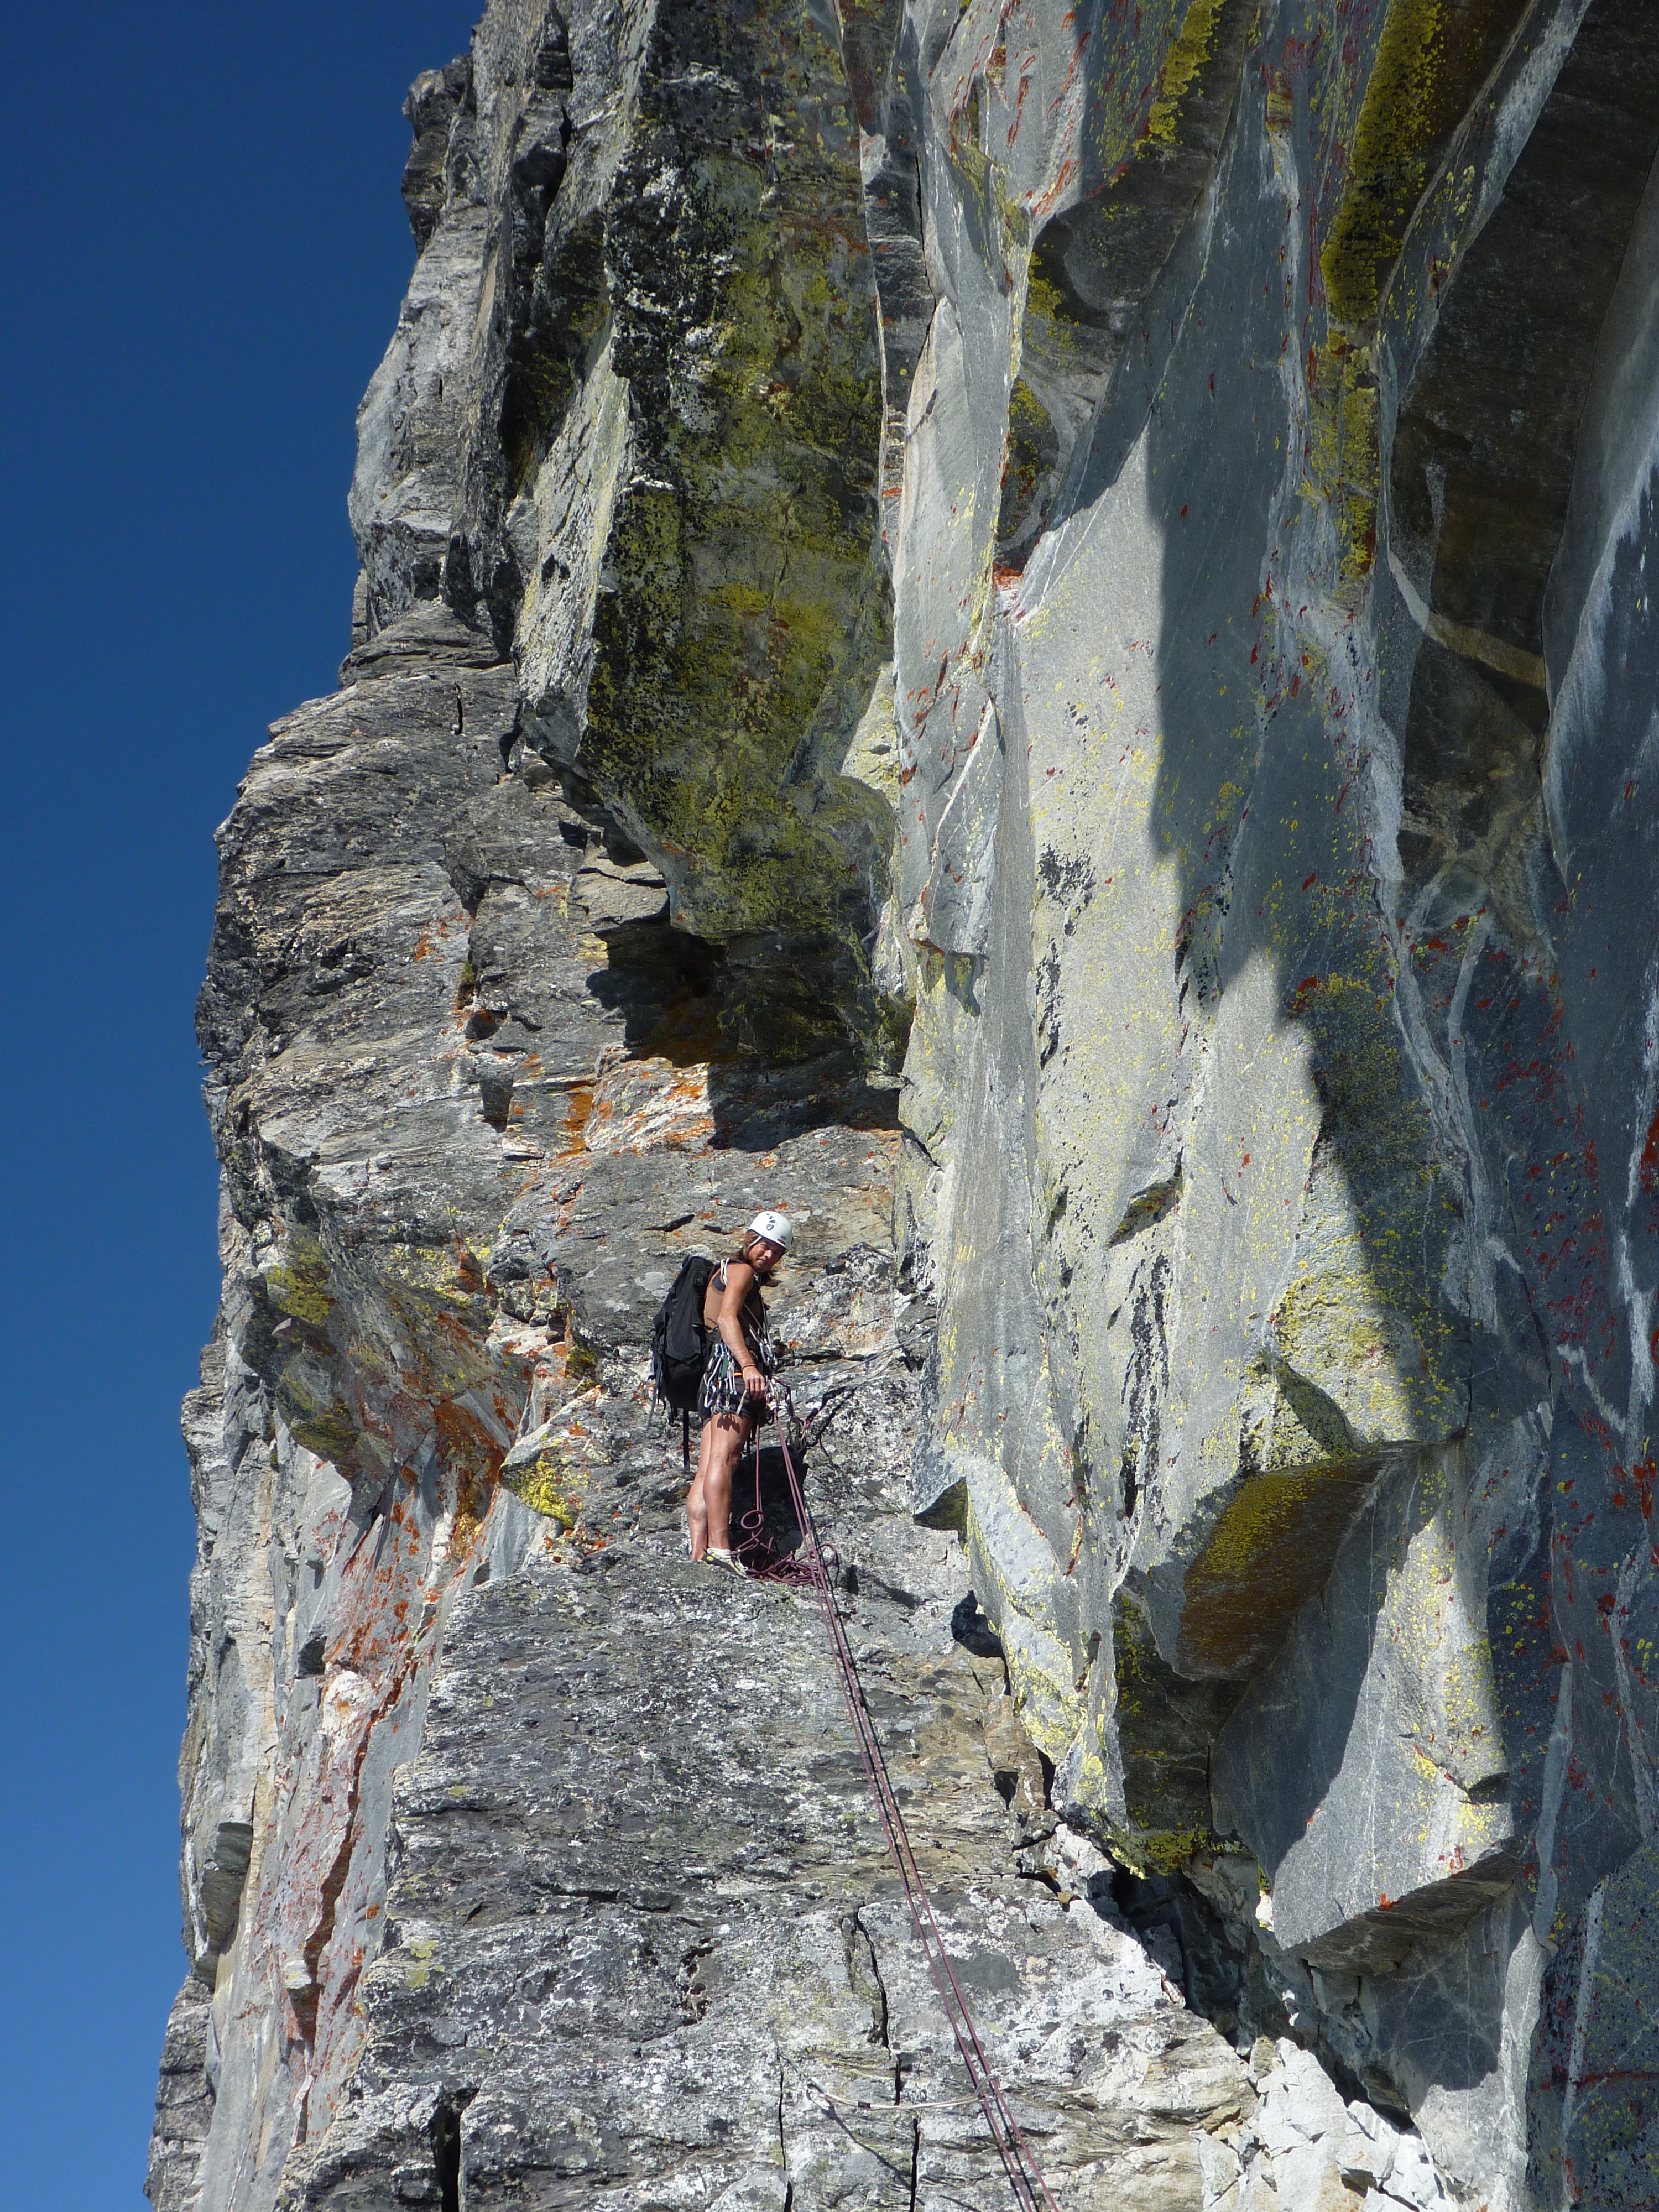
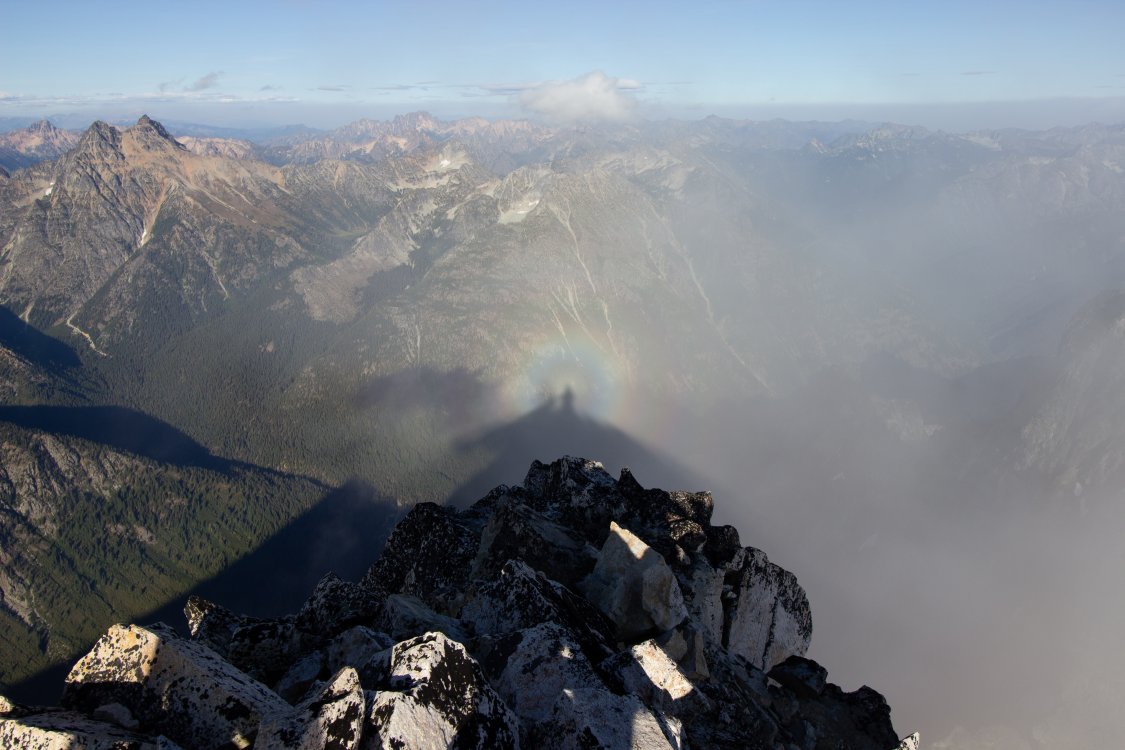
Trip: Tupshin and Devore - SE Routes Trip Date: 09/01/2018 Trip Report: This year I decided to celebrate an extended Labor Day weekend near Stehekin. For a bonus, the recent rains had cleared out the smoke we've been engulfed in and the forecast showed no rain. On Saturday we rode a very crowded Lady Express from Field Points Landing to Stehekin. We then caught a late (30 min) but almost empty Red Bus to Harlequin Bridge and hiked up the Stehekin River Trail and Devore Creek Trail to Bird Creek Camp. From here we turned uphill and schwacked our way to flat terrain around 5400' and camped. Time to camp was just under 7 hours. Sunday we arose pre-dawn (which is late and luxurious these days) and hiked straight uphill over towards Tupshin. At about 7000' we attained the ridge leading to the basin below Tupshin's SE face. We crossed the talus fields and ascended to about 7600' and the base of the route. There was no snow whatsoever on our approach which made for a lot of tedious travel, but fuck, it is September! We scrambled the first bit of the SE face and tied in just below the minor block that marks P1. I opted to lead the exposed class 3 around the 5.2 block and flipped my rope over the top of the block before proceeding to a 4th class quasi-chimney. P2 was mostly scrambling. P3 and P4 were more interesting, each with a nice (but short) low-fifth section (5.4-ish). At the top of the fourth pitch, we untied and scrambled to the summit. Although there is a ton of loose rock, the ascent seemed mostly safe and secure. The descent - not so much. We ended up rappelling five times, including the section at the bottom that we had scrambled. It was a constant fight not to knock rocks down and move carefully to stay out of each other's fall line. Once off the route, we made our way back to camp. There whisky awaited me, and I drifted off to sleep happy to finish this one off safely. On Monday we ascended to the 5800' basin below Devore and hiked up the steep gully leading to a basin. From here we ascended the steepening basin to rock bands that we scrambled to the edge of the lakes at 7000'. We ascended some horrible shitty choss to the shoulder of the ridge (7500'). then ran the ridge to a large gendarme. To compensate for the choss-slog we were treated for some of the most spectacular views I've seen: Our route descriptions said "do NOT go around the S side" (of the gendarme). We ended up wasting 2 hours trying to get around the N. The snow patch here was too melted back and icy (rotten ice). Eventually we gave up and I checked out the S side. It went! From there it was a quick shit-slog through choss up and right about 300' to a notch in the ridge, a short ridge traverse to a 4th class step and finally a scramble finish to the summit. We did 2 rappels down (both short) and retraced our steps to camp. Everyone was tired and wanted to head out the next day so we set our alarms to allow for plenty of time to get to the bus in time. Tuesday was an easy hike back to Harlequin where we all rinsed off in the river and relaxed waiting for the bus. We got some goodies at the bakery and a beer on the boat. By that morning the smoke was back in force so we were not too sad to save Flora for another trip. Gear Notes: 60m rope, small alpine rack, helmet Approach Notes: Open forest with some schwacking
 1 point
 -
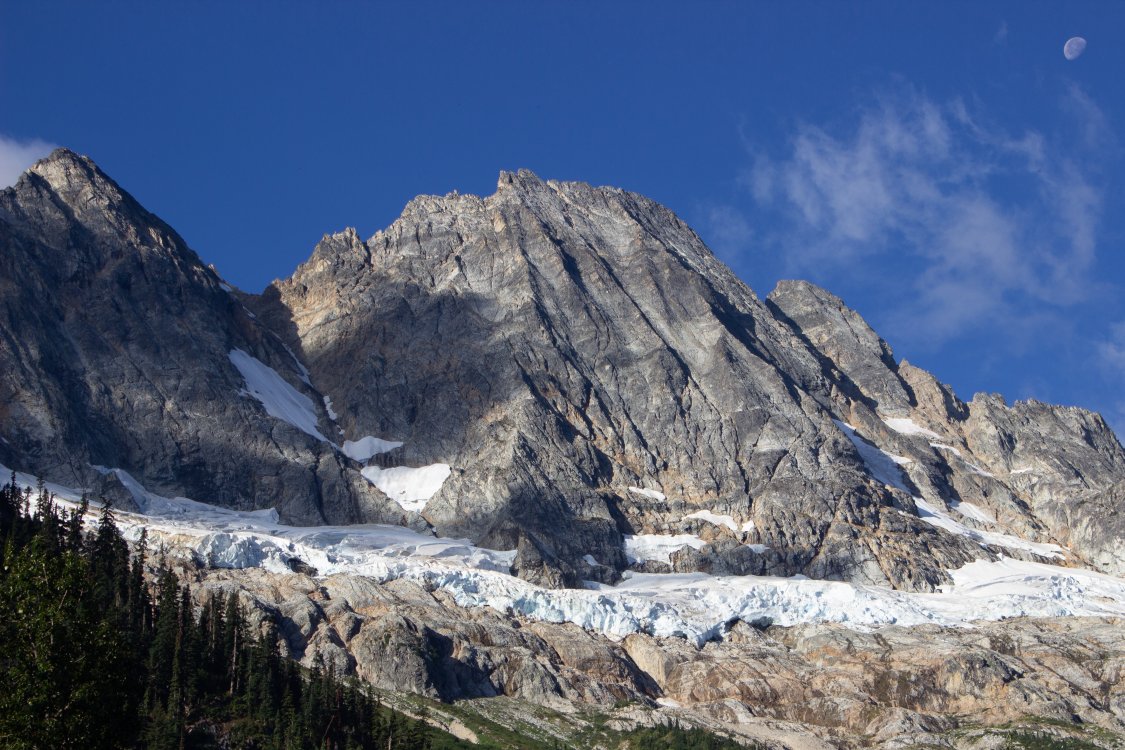
Trip: Mount Challenger - Easy Ridge to Challenger Glacier Trip Date: 09/03/2018 Trip Report: Fred and I did Challenger in 3 days over the Labor Day weekend via Easy Ridge. Simple conditions/bragging report is all you will get since the route is pretty straightforward and well documented. Good trails and cool weather made 15.5 miles and 6500' vertical melt away to camp on Easy Ridge just before point 6553'. The next morning we descended and crossed the Perfect Impass. This was easy, ascend 150' up from the base of the buttress, boot tracks will aid you; follow a faint self system. The climb back out was better than it looked up to come red rap tat (sketchy to rap off of)! The Steph Abegg beta photo is only good when the Impass is filled with snow which it was not. We cruised over Perfect Pass and traversed the glacier to the NE ridge of Challenger. The various moats and bergschrunds appeared to be impassable so we took the rock to the left, scrambling in crampons, then up the steep snow arete to near the summit rocks. The top out was easy, 4 pitons and a fixed cam, a ridiculous amount of pro for 30' of 5.5 and a couple of scramble moves. 12 hours camp to camp. Down to camp again and out the next day in the fog, perfect timing on the weather. Easy Ridge Trail down low, it improves higher up: Challenger Glacier from Perfect Pass: Fred on the glacier: Looking up to near the summit from the ridge. Luna Cirque: Fred's awesome summit shot of me, thanks!: Hiking out the next morning: Gear Notes: Glacier Gear, 4 slings Approach Notes: Trails all in good condition, Chilliwack River was an easy ford, attaining Easy Ridge was better than many "maintained" trails.1 point
-
Nice trip report and pics. I love that climb! The summit picture is a classic, so much so that it's the cover of Nelson's Selected Climbs vol 1.1 point
-
Trip: Goode and Storm King - NE Buttress Trip Date: 09/02/2018 Trip Report: Nate and I climbed the NE Buttress of Goode and Storm King then took a scenic exit via Park Creek Pass and Easy Pass. We started from the Bridge Creek TH at 11pm on Thursday 8/30 and exited at the Easy Pass TH a couple hours before sunset on Sunday 9/2. Getting onto the Goode Glacier was difficult, and the bridge across the moat on the left side of the NE Buttress won't be around for much longer. I wouldn't recommend the route at this point in the season. I wrote up a full TR on my site here: https://www.laneaasen.com/2018/09/goode-ne-buttress-storm-king.html Gear Notes: Approach shoes, crampons, ice axes 8 small nuts and 5 slings for NEB 60m half rope, doubled for simuling Approach Notes: Approached from Bridge Creek TH, exited via Park Creek Pass and Easy Pass
 1 point
 -
I took a summit shot of you as well. You're pretty small though
 1 point
 -
www.Brandonclimbs.com Most people don’t go out and chase their dreams. That’s a sad fact. In today’s world once you get caught up in the “rat race” you usually sacrifice what you’ve always wanted for what every one expects you to do. Life then gets more and more complicated as you get older and your window of opportunities to do certain things, starts closing. There is nothing wrong with having a family and a great career, the issue begins when it comes at the expense of your dreams, goals and aspirations. I am a firm believer that you can do it all, as long as you have the correct balance of work, family and adventure. My passion is climbing mountains. I live in Miami FL, as far as possible from anything worth climbing. That means anytime I want to go out and do a climb I have to get on a plane and go away at least a week, I do this a few times a year. In order for me to do this there are a few things that need to be in order, to make the trip as enjoyable as possible: 1. The business has to be running smoothly 2. My wife has to understand what I am doing and the risk associated with it 3. I had to have sufficient training to make the trip worth while The business (work): I am fortunate enough to have my own business, this gives me certain monetary and attendance flexibilities. But it also comes with great responsibilities, tons of stress and usually insane amount of hours dedicated to growing the business and making sure everything is always running smooth. I choose this over having a traditional job just because it gives me the control to work when I want and be able to take days off as I see fit in order to go out and climb as often as possible. Having a business also gives me a platform where I can build and structure a work force that would allow me to reap monetary benefits, that makes a lot of these trips more accessible. In the case where you don’t own a business, I recommend speaking to the owner or your boss and let them know your priorities. In the long run it will pay off. It will be a lot worse if 20 years go by and you left an opportunity of a lifetime to go to Everest or climb Denali on the table just because you didn’t want your boss to be upset. As a business owner and adventurer my self, I listen to my employees and more often than not give them the “go ahead” on extended trips. I believe most people are understanding and if possible, let you take the time off. When I was younger I worked full time as a manager for a catering company, usually 80 – 90hrs a week. I was a pretty integral part of the operations. But I always made it clear I had ambitions to travel and have a life outside of work. In one 6-month period I took 5 trips to Argentina, most of them between 5-14 days (one was for 20 days) and I always had my job when I came back. What I always made sure to do was to be the hardest worker when I was present, to be proactive and do more than what was required from me and to always have good communication with my superiors. In other words, make my self irreplaceable. This always made the conversation to ask for time off much easier. I’ve also always been a forward thinker. I’m not the kind of guy to put all my money into one trip or expedition to then come back and figure out how I’m going to pay for food. Not that there’s anything wrong with that but I like to set my self up for success not just for the present moment but also for what’s to come. As ambitious as I am in my adventures, I always make it a priority to plan for what’s to happen when I come back, how can I position my self for financial freedom and how I will fund my next trip. My Wife (family): For me this has always been the toughest part of my journey. Since the moment I met my wife, she knew I was a hardcore dude. But she never imagined I would become a mountaineer, leaving for weeks at a time, putting my self in situations where I’m risking my life and doing it as often as I do. It also meant taking less vacations together and a rigorous training schedule. At first it took a toll on our relationship but over time I have spoken to her and she has been able to understand what drive’s me and why its so important to me. I am now a firm believer that communication cures all. Before I used to spend hours by myself planning my trips and organizing my goals, now I make it a team effort and have her join me in my planning. It gets her excited to be a part of it as well. Even though she wont go and climb herself, she knows what I am doing, where, with who and for how long. On the flip side I also encourage her to pursue her passions with a vengeance! I support her and make sure she’s going after her dreams. I push this message with all my family. My goal is to inspire those around me to go out and chase their dreams regardless of their age. I took my 73 year old grandmother to NYC recently so she can get to know the big city before she gets too old and I convinced my mom to make her dream trip to Bali and explore beyond her comfort zone. The best part is that once you get your family and friends to go after what they love, they will undoubtedly understand why you do what you do. For me it makes me sleep better at night to know that those I care about support what I do. My mom and sister in Bali With my grandmother in NYC Training: This where the balancing act really comes into play. Run a business, keep my wife happy (happy wife, happy life) and train hard enough to enjoy my time in the mountains. This is just as important as the other two, if you’re not in shape you will suffer like hell on the mountains and you might ruin the trip for those climbing with you. That being said one needs to be very disciplined in their training. Somewhere between the time you work and the time you spend with your family, you have to squeeze in your training, even if it means giving up the hour you usually spent sitting in front of the TV. 1-2 hours a day is the minimum amount of training you should be doing. I prefer to train right after I leave my office. It segments my day and I know once I get home, its family time for the rest of the night. It also gives me a break mentally from the problems at work. The important thing here is creating habits, make it clock work. During the week I usually do Crossfit, this means all I have to do is show up. I don’t have to come up with a fancy work out plan because the coach already does it for you and they make sure you leave drenched in sweat and trying to catch your breath (you can read my Crossfit article for more on this). I usually then get home and go for a run with my wife and my dog. Afterthoughts: To summarize, you can do the things you love while building a life for yourself. For me its all about efficiency and communication. When I’m at work, I’m 100% focused on getting the important things done and being productive, during my training I make sure my crossfit coach understands that I need to get my ass kicked every time I step inside the gym and when I get home I make sure to be present and give my wife the attention she deserves. The old saying goes “ its about the quality not the quantity” and I believe this to be true in every aspect of life. Its better to spend 2 hours with your spouse having great, solid interaction and communication than to spend 6 hours sitting on the couch watching TV while she is in the other side of the house scrap booking. The same goes for training, if you are a notorious gym talker (goes to the gym to work out with a buddy and ends up talking more than exercising) then ditch your friend and get your self a trainer that is going to be in charge of getting you in shape. There is nothing more satisfying than having a balanced life. Learn to immerse yourself 100% when you tackle each part of your life, you’ll realize you have more time than you had ever imagined. I’m also a big proponent of personal development, you need to have time to make your self better. This can take 10 – 30 min a day. Whether it is reading a book or meditating. There’s enough time in the day to do more than you can imagine. It all starts with stripping away the things that aren’t important, prioritizing what matters and what’s going to take you to where you want to be in life. Learn to say no to the things that aren’t productive to you, build self discipline because the life you want is waiting for you on the other side. You can read more of my articles at www.brandonclimbs.com0 points