Leaderboard
Popular Content
Showing content with the highest reputation on 05/29/18 in all areas
-
Trip: Mt. Rainier - Sunset Ridge Trip Date: 05/25/2018 Trip Report: Geezers on the Go or Fading into Sunset Ridge. Having done routes from Carbon River, White River, and Paradise I have always wanted to do a west side route. Two of my partners from many years joined in on the fun. The average age was 62 with a combined over 120 years in the hills. We did the usual hike from the West Side Road via the no longer maintained Tahoma Creek trail. From the along Emerald Ridge which we never saw cause we ascend into the clouds we gained the terminus of the Tahoma and crossed it somewhere. Eventually we broke out of the clouds and camped below Puyallup Cleaver at around 6800 feet. In the morning we gained the cleaver and followed it to around 8500 at which point we bailed left and crossed until the South Mowich. We roped up but the crossing was very straight forward and we headed up initial lower slope to 9500 feet. At this point there is a bergshrund across the whole of the lower apron/ridge. We crossed more to the left. Again straight forward but sloppy snow. We bivied at the bergshrund. The next morning hoping to have an overnight freeze which did not occurred we launched upwards. The climbing was at around 45 degrees. The higher up the firmer the snow got. We pretty much side stepped the vast majority of the route. We stayed mostly to the climbers left and found several places to rest. Including one great spot with 60-70 foot high conglomerate walls just waiting to pitch bowling ball sized rocks down. From here a few hundred feet more of climbing and we gained the ridge proper and had great views of Sunset Amphitheater. Until this point we had climbed roped or unroped sans any gear. Once on the ridge proper we followed it until we need to down climb around a short 30 foot section of bare rock (by passed via snow). This lead to the finial pinnacle which forces one out on to the Mowich Face. Here again the climbing was straight forward we stayed more climbers right (two pitches), traversed left (~one pitch), then gained the ridge (~one pitch). Overall 45-55 degree climbing with pickets. My one partner did most all of the leading, my excuse for not contributing was being tired having climbed S. Sister a few days before. Our other partner is just a geezer. After that we traversed the ridge to Liberty Cap which was good fun cause we could see where in the past we had topped on either the Central or North Mowich headwalls, Ptarmigan (including an infamous bivy), Liberty and Curtis Ridge. So it was a bit of nostalgia for all. Especially for me since Sunset Ridge was my 10th different route on the hill and exactly 35 years to the weekend since my first attempt on Rainier. Overall conditions were a bit soft at the mid elevations. The approach was manageable even in the clouds. Route finding was straigtforward. On the other hand, we slept warm - including the last night less than 100 feet below Columbia Cap. I'll add some photos soon. Oh, being from out of the area we stayed at Gateway Inn and Cabins which is right before the Park entrance before and after our climb. The folks are very accommodating so I'll give them a plug. Gear Notes: 3 Pickets and 3 screws (the later not used). Two tools 60cm axe and 50 cm hammer. Approach Notes: West Side Road via Tahoma Creek3 points
-
Trip: Mt Rainier - Liberty Ridge Trip Date: 05/28/2018 Trip Report: Below is the text of my trip report for Liberty Ridge. To see the full trip report with photos and strategy/gear notes, please visit my site: Spokalpine. Kyle, Zach and I climbed Liberty Ridge on May 26th-29th, 2018. Together, we achieved a collective dream - a dream that felt too intimidating for me to imagine just years ago. Liberty Ridge is an exceptional line in an absolutely wild setting, splitting the North Face of Mt Rainier between Willis Wall and Liberty Wall, two of the most dangerous alpine walls in the lower 48. According to the National Parks Service, the route sees around 100 climbers making attempts each year, with a 30-60% success rate depending on the year. We found varied conditions on consistently steep, varied and technical terrain. After getting our permits at the White River Ranger Station on Saturday morning, we casually started hiking toward the mountain. Today was going to be a easy day, and conserving energy was a key part of our strategy. We lollygagged up the trail, through snowfields, and over St. Elmo's Pass. Once we dropped onto the Winthrop Glacier, we roped up. Crossing the glacier was straightforward and we did not need crampons in the soft snow. Soon we found our way onto Curtis Ridge, where we caught our first view of the route. All three of us sat down on Curtis ridge and gawked at the climb. It is huge, steep and scary looking! The first thing I noticed, however, was how broken up the Carbon Glacier looked. There appeared to be no access to the right side of the ridge - where the route normally goes, given that the right side of the ridge is lower angle than the left. We could tell that the Liberty Ridge itself was already in mid-late season conditions, with significant rock melted out low on the route and blue ice glaring in the afternoon sun above the Black Pyramid. This was not going to be a snow slog. After a nap, we set up camp and watched a team start up the Carbon Glacier alarmingly late in the day. The terrifying seracs (ice cliffs) that cap Willis Wall threaten the Carbon Glacier with significant avalanche hazard, and the wall itself is constantly shedding rock. The team placed their tent on the Carbon Glacier, directly in the path of anything that came off the wall, but at least they weren't right underneath it. At one point, I poked my head out of the tent to watch a D3 (massive) avalanche rip off of the Willis Wall - the debris cloud came very close to the bivy site that the team chose. That seemed akin to playing Russian Roulette, but I guess that everything is a matter of degrees. There were two smaller avalanches later in the evening. In the morning, we dropped onto the Carbon Glacier at about 7200' and started moving toward the ridge. This was a gnarly glacier! I could see hundreds of crevasses, and you never know what's lurking under the surface. There's always a moment when you step or jump over a crack when you can see into its depths - many of these crevasses simply faded to black because they were so deep. Thankfully, there was a good boot pack from previous teams, which we followed in a circuitous path to the toe of the ridge. Here, we scrambled up a "boulder problem" that felt spicy given that we were wearing crampons, had 30 pound backpacks, and still were roped up for glacier travel. What really made this exciting was the extremely poor nature of the rock on Mt Rainier - I don't think any of the holds we used were actually attached to the mountain. A high right foot was key. Finally, we were on Liberty Ridge! Once we gained the ridge proper, I coiled up the rope and stuffed it in my pack. We cruised upward on alternating snow and rock. Normally, climbers take snow slopes on the right side of the ridge, but we stayed on or near the ridge crest. There was another exciting boulder problem before we reached Thumb Rock on snow slopes. We arrived at Thumb Rock around 9:15am - it had been a short morning of climbing, but we knew the next day would be massive. We ate, drank water, and napped like it was our job. Eventually, we had dinner and went to bed early. Unfortunately, my inflatable sleeping pad popped and no longer held air - so I slept on the rope, which I coiled onto the floor of the tent. To add insult to injury, the winds picked up and kept me awake all night. When the alarm went off at 2am, I was ready to get up. We packed our bags and started soloing upward on the steep, hard snow. The wind was absolutely blasting but the skies were clear. After passing through the constriction above and to the left of Thumb Rock, we encountered more easy mixed climbing. The sun was starting to rise and we realized just how high (and exposed) we were. Soon, we had covered 2000 vertical feet and climbed around the Black Pyramid. We roped up here, agreeing to simulclimb the consistent 55-60 degree ice. Kyle did a fantastic job leading 800+ feet of ice in two simul blocks with one ice tool and one ultralight mountaineering axe - beastly! As we were nearing the top of the ice, we heard a massive rumble. We glanced over to the Willis Wall and watched an absolutely massive avalanche rip. Zach actually saw the serac collapse that started the event - he estimated that the ice block that released from the serac was 300 feet by 100 feet in size. This was without a doubt one of the most impressive things I'd ever seen. Kyle, Zach and I could hardly believe that we had a front row seat to such massive natural destruction. We spoke with an avalanche trainer on another climbing team who called it a D4 avalanche - huuuuge. Humbling. We stayed roped up after the ice pitches, climbing steep snow and névé through the bergschrund which offered no technical challenge. The wind was getting especially brutal at this point, making it even more difficult to breathe than normal at 14,000 feet. Several times, I was knocked off balance by a gust of wind - classic Mt Rainier conditions! Finally, we reached Liberty Cap (14,112') which is the logical end of the Liberty Ridge climbing route. We discussed going to the true summit at 14,401', but we'd already done what we came to do. I led us down the Emmons Glacier to camp Schurman with only a few helpful suggestions from my partners on route finding and glacier safety - thanks guys. They both have experience on the Emmons glacier, but it seemed like a good opportunity for me to practice glacier travel and navigation. I feel like a pretty knowledgeable climber, but there is always more to learn. This was a worthy outing for my first climb on Mt Rainier - an undisputed classic. Gear Notes: Extreme Alpinism Approach Notes: Don't fall in a hole3 points
-
For a full report go to my website: http://stevensong.com/lincoln-peak This is my first ever post on Cascade Climbers and figured some of you might be interested in this trip. Matt Lemke and myself timed it right and climbed Lincoln in perfect condition on the morning of last Saturday. Approached from Middle Fork and drove to the second switchback. Camped at the last flat spot with a strip of moraine of dry ground. Cloudy whole day on Friday but cleared at evening and temperature dropped (just as expected). Snow started to freeze only 10 minutes after being out of the sun and by the time we started at 3 am the snow was rock hard so crampons from camp. Crux being the first bergschrund where the only possible attack required a pitch of 70-80 degree jug of snow piece. Matt soloed it and kicked in some steps. I used his steps and soloed it afterwards. Then we had to solo another short pitch of serac type of ice before able to traverse 45-degree towards the pillbox. Lots of front pointing and at least 10 smaller runnels had to be hopped across. Another couple huge runnels as we traverse a steeper pitch into the first gully and the first gully was easy by comparison. Just front-point up the middle of an "ultra runnel". Then climbed the snow arete to the top, traversed the uber-airy upper bowl and into the upper couloir. Another couple gigantic runnels and two patches of rocks had to be crossed. I asked for a belay on the second patch of rocks. Front-pointing again all the way to the col and then scrambled rock to the summit. 10 double-length rappels to get off. We did 11 because we screwed up teh second-to-last rappel and had to climb back up the rope. The last one, waterfall rappel was quite an interesting one... 5.5 hours up, 6.5 hours down, 0.5 hours at camp, 2.5 hours hike-out something like that. 15-hour Day 2. Matt's trip report: http://www.nwhikers.net/forums/viewtopic.php?t=80271643 points
-
Trip: Nesakwatch Spires - SW ridge North spire Trip Date: 05/27/2018 Trip Report: Thanks to G-Spotter's Slesse Conditions report from two weeks ago, Tess and I were inspired to skip the Squamish crowds and go check out the Nesakwatch spires over the long (for us Americans) weekend. On Saturday morning we made the surprisingly easy drive in to the valley after nearly being sent to secondary for trying to take an apple over the border. Thanks to my mediocre off roading skills we almost got stuck twice in the first washout we hit along the road, but Zoe the 2011 forester pulled through. Not wanting to get stuck in the next real washout we opted for the road walk instead. The washout in question. From there the road is pretty manageable all the way to the actual bad washout. Which lasts for about a quarter mile and would need a pretty serious rig to navigate. There were fresh tire tracks so clearly it is not impossible. This new signage is pretty sweet, though i'm not sure it's totally necessary. After the road walking the trail pretty much just goes straight up. The trail was pretty much snow free up to the base of the rock wall at 5100ft. Tennies were really nice up to that point. Two guys were working on a new line on the rock wall below the spires. If anyone knows them I'm curious to hear how the route turned out. The snow made for very easy travel through the boulder fields. And it also made camping much much easier. The Bivy boulder is almost completely snow free but we didn't find it until we had already set up camp. So we used this boulder instead. The clouds gave quite the show on Saturday night, nothing beats this view. We woke up to grey skies and a cold wind so decided to wait a bit in hopes that things would warm up a bit And warm up it did. The splitter headwall cracks. Felt like easy 5.8 to me. Wish they had been longer. Summit! There was quite a bit of snow sticking around on the NE faces and some decided to rip loose from the ridge in the left of this picture. In order to avoid steep rotten snow on the standard descent we found a rap route down the S face. This particular station was a little cramped. There is still a lot of snow up there but that shouldn't discourage anyone from making the trek. Most of the easy routes appear to be holding a lot of snow but the steeper stuff like Dairyland looked to be in great shape. Go out and get it folks! Gear Notes: 2x .4-2 1x 3,4 nuts Boots & axe may be nice but no need for crampons Approach Notes: Tennies up to the rock wall (5100ft) Boots the rest of the way. Washouts at 2.3mi and 3.3mi depending on your vehicle.2 points
-
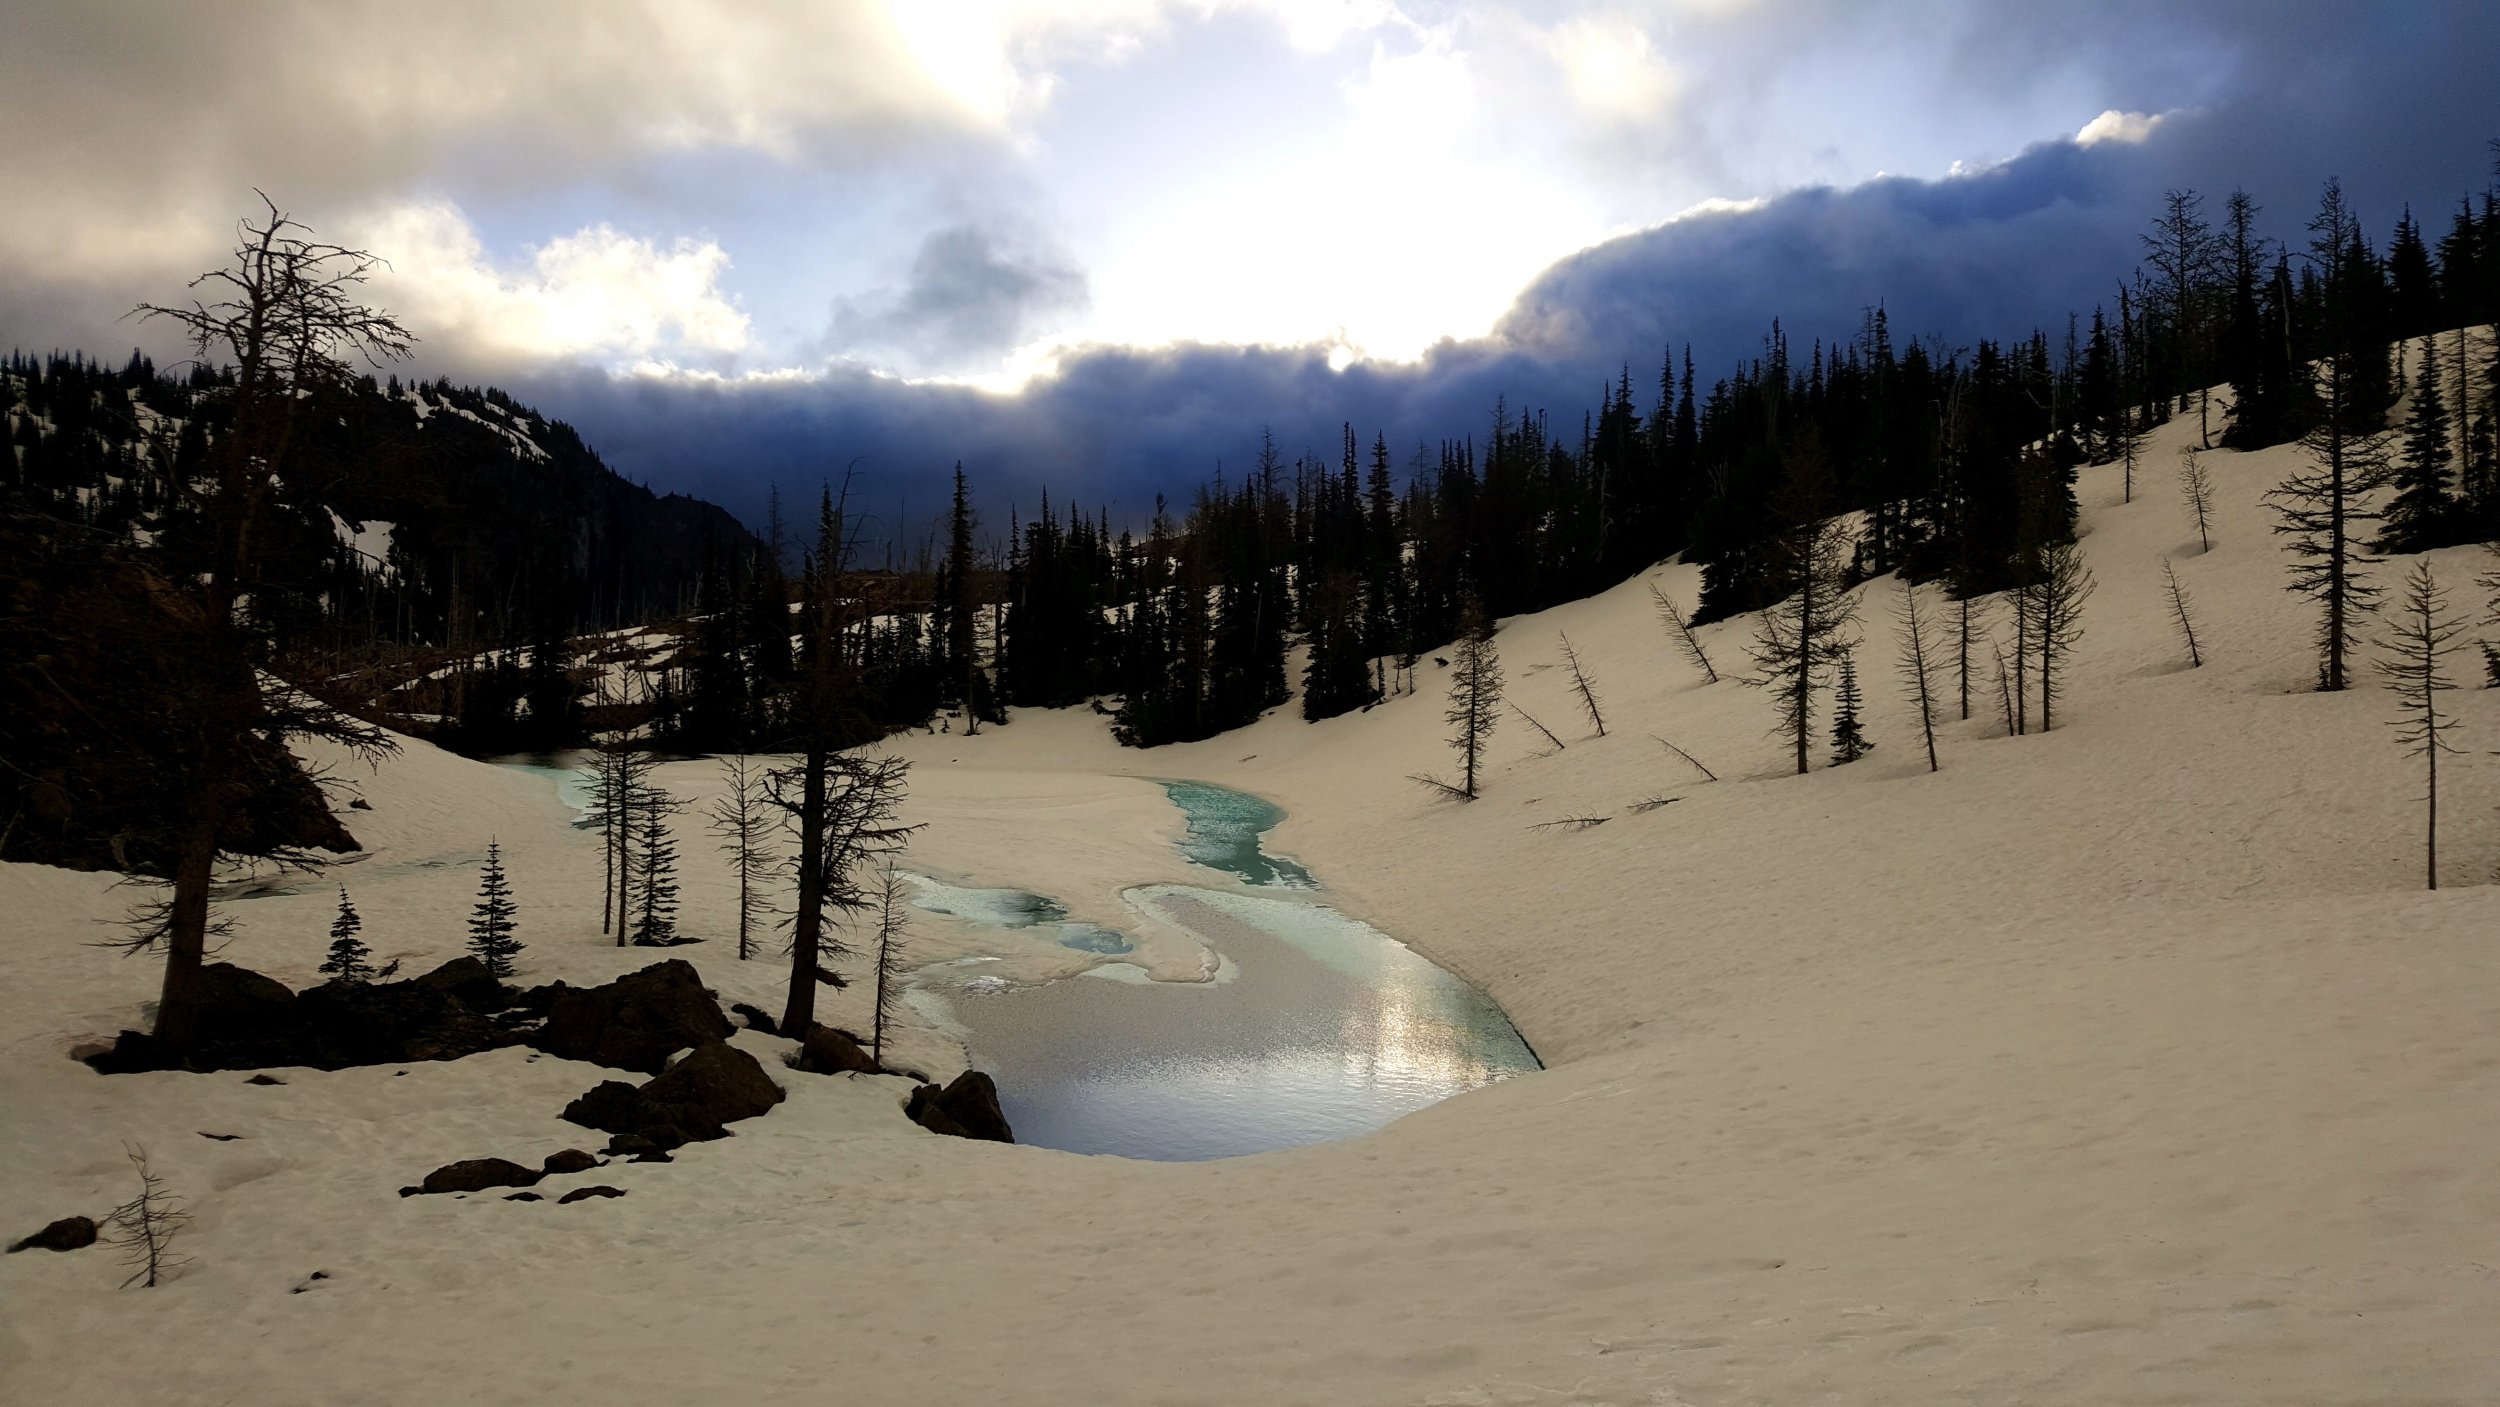
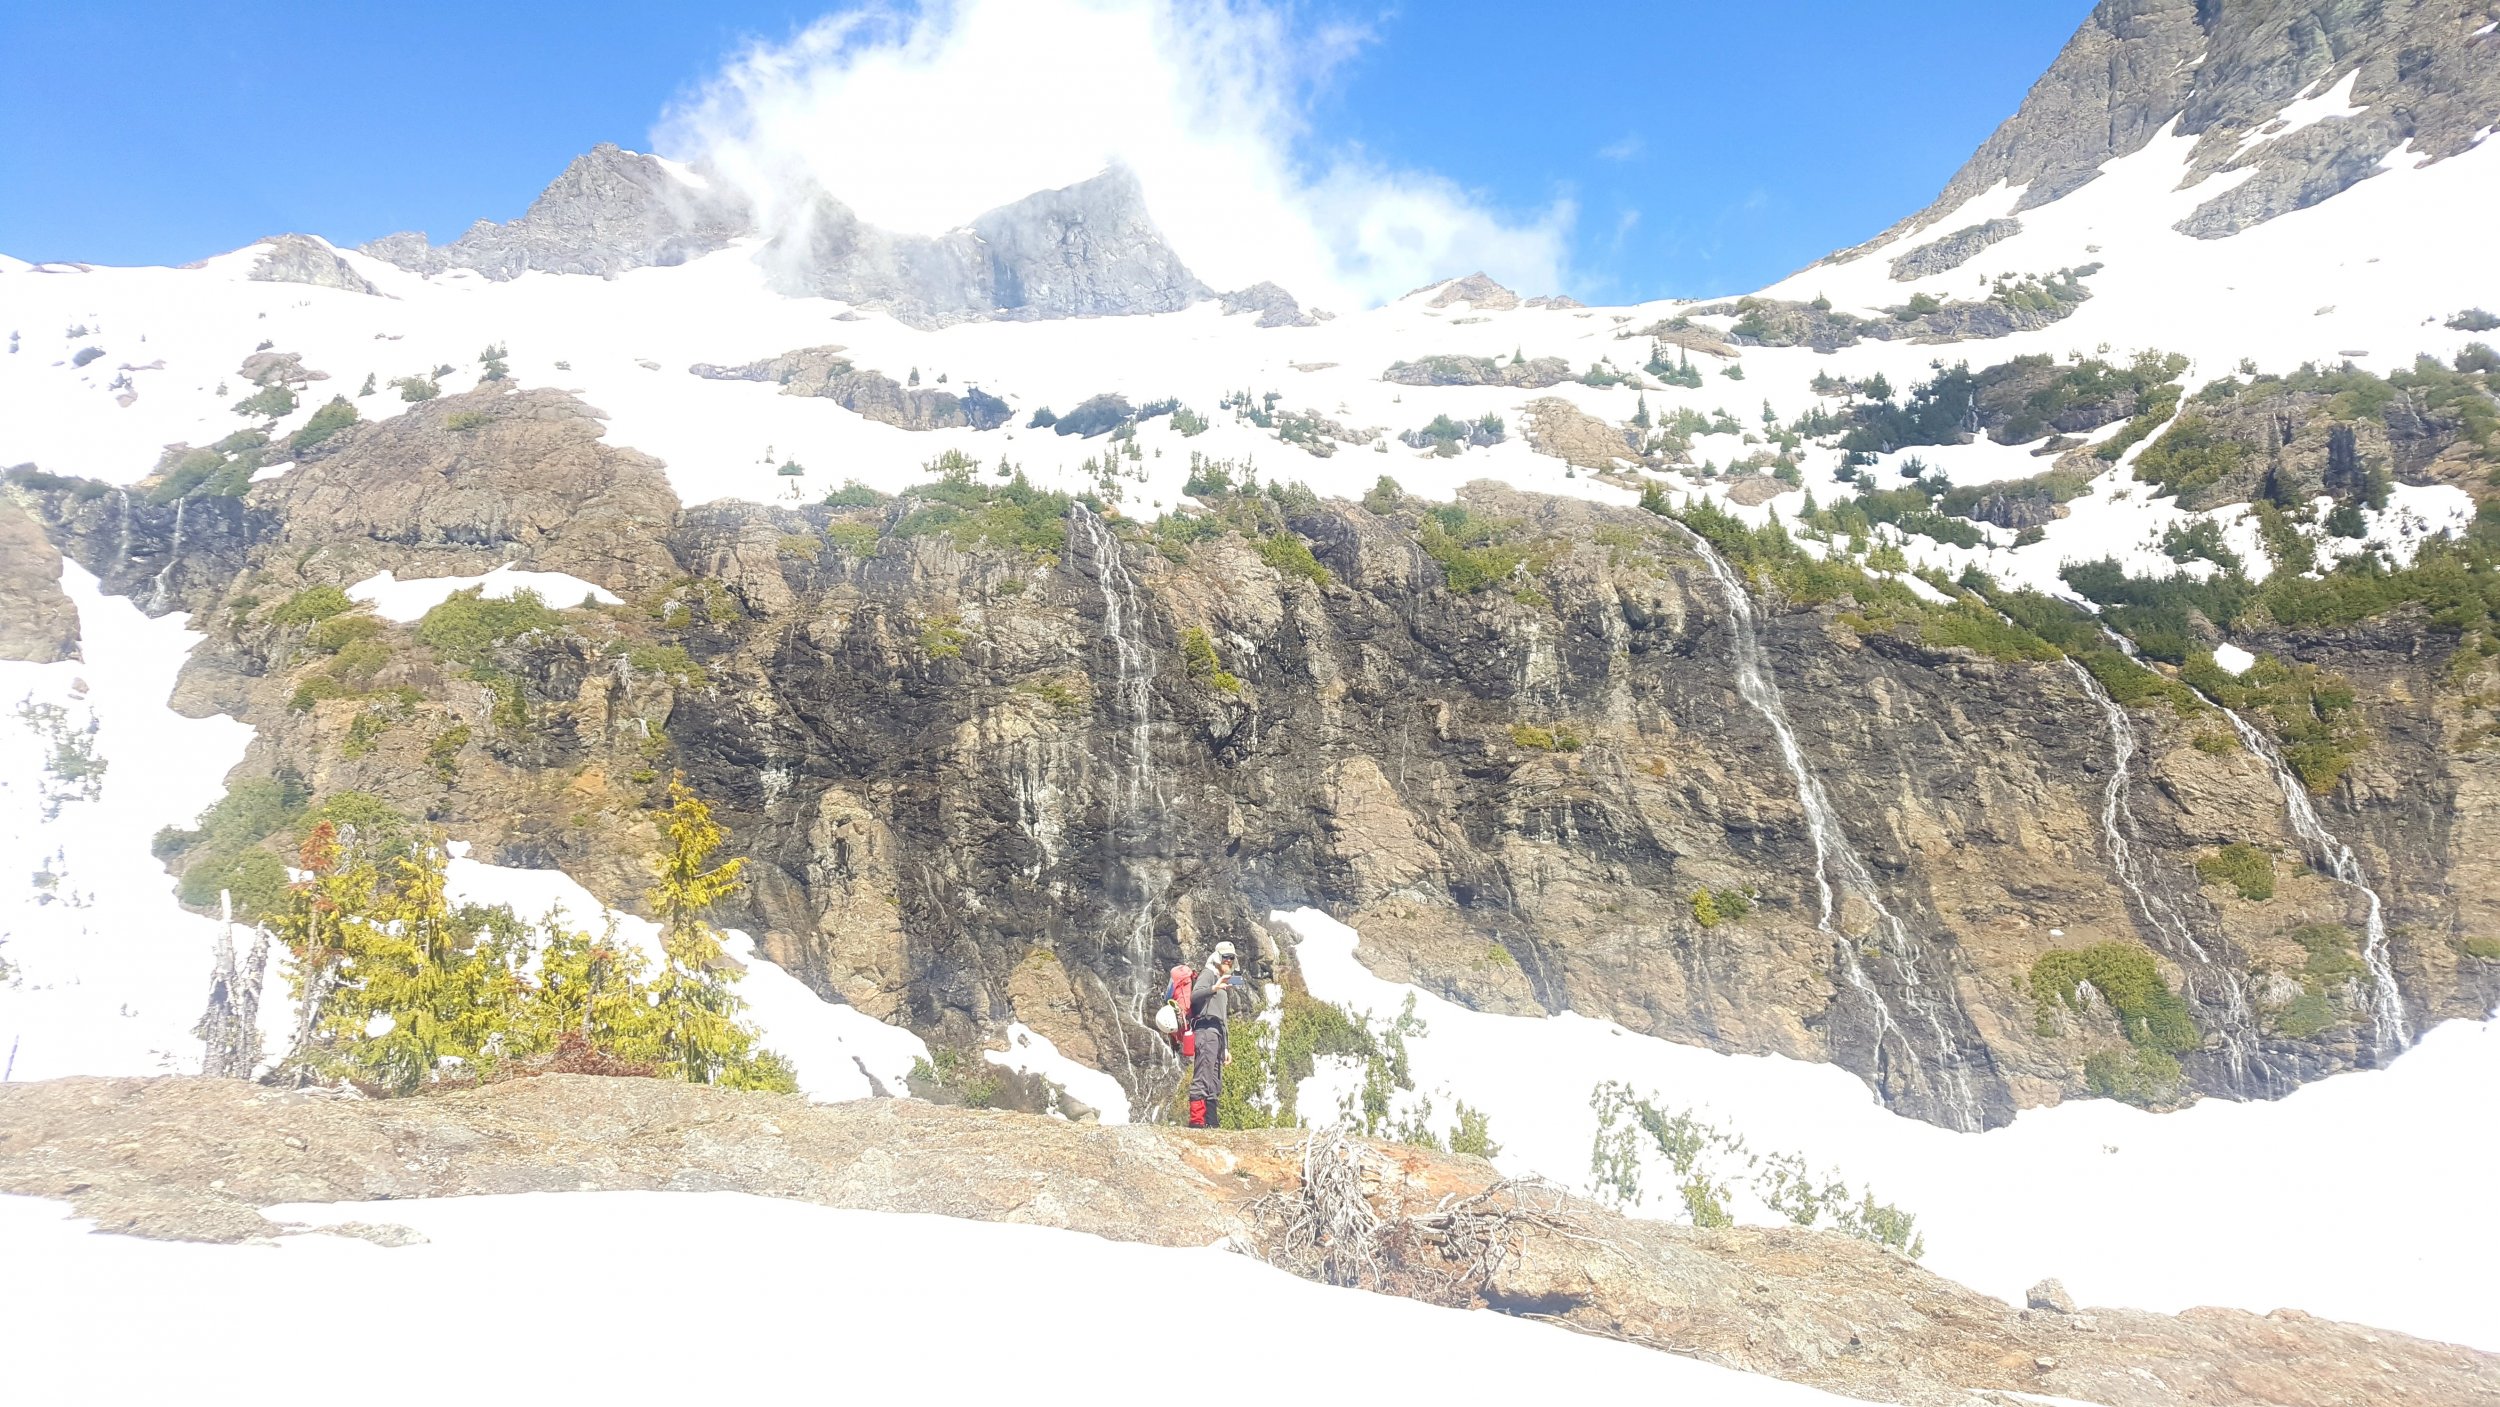
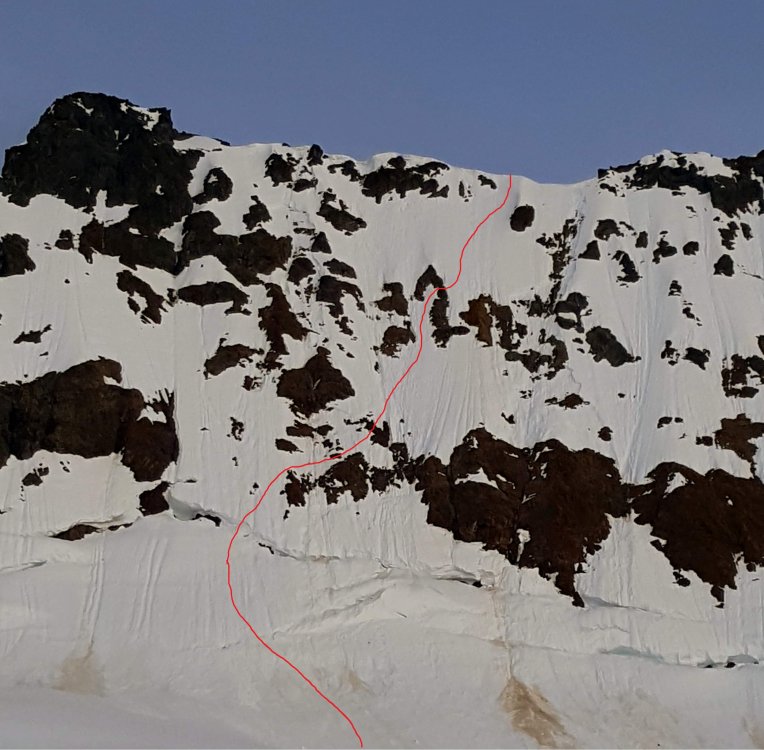
Trip: Jack Mountain & Crater Mountain - NohokOmeen Headwall & South Ridge Trip Date: 05/26/2018 Trip Report: Fred and I had amazing plans for a (for us) heroic trip... The Great Jack Off. Along the East Bank Trail, up the Nohokomeen Headwall of Jack, down the south face, with Crater to boot. The trip reports we read from the party on the Nohokomeen on the 12th helped with the scant beta a lot, thanks! This route isn't even in Beckey if you can believe it! For purity of the trip we hiked car-to-car the loop starting from the East Bank Trailhead at Panther Creek. Other reports have enough info on the approach I figure so I'll keep it to the basics. Not much brush - none really by Cascades standards; the hillside to gain the May Creek Basin was brutal though. We pushed on and camped at about 7600' on the Nohokomeen Glacier. This made it about 12 miles and 7100' vert of gain on day 1... whew! Forest uphill from the East Bank Trail: Our first view of the headwall from near the toe of the glacier was not encouraging, but we knew we had to take a look at least. Headwall from camp: Hozomeen from camp: It got cold that night, there was frost on the tent and the snow was very solid. We left camp at 0600 and had only a short walk to the base of the wall. We found a route up, over a bridge in the 'schrund and through the manky rocks. My calves were killing me so Fred led the whole wall both of us soloing. It felt steep! It's amazing how the slope changes when the snow is frozen and you can only get front points or an inch of boot at the most. It was definitely about 600' of "don't look down" terrain for me. Softer snow would have mage it a lot more secure and easier, but we made it. Approximate route, it looks like a lot more traversing than it felt like. Maybe it's just perspective: We were on the summit by 0800 I think. It was breezy but not bad. We were worried the downclimb on the south face would be too solid so we waited around for a while identifying peaks and enjoying being off our feet. Down climbing the much softer snow on the south face was a piece of cake after the Nohokomeen; until we got to the cliff band at about 8000'. We didn't know the route and had only a 30m rope so it took some looking but we nailed it. We did two 15m rappels off a crappy loose boulder with like 10 pieces of tat on it down onto snow again where we could traverse out to easy ground on the SE ridge. We took a loooong lunch break and rested our brains in the warm sun. Basically all the ground from there until 4800' on the Crater Mountain Trail was snow covered with the exception of the Crater scramble section. We camped at Jerry Lakes early on day two and had a leisurely afternoon. Day three was a tame snow walk and easy 3rd class scramble up Crater and a slog out down the trail and along Ruby Creek to the car. We could have hitchhiked the last 3 miles or so but we are purist and completed the loop - my shoulders were pissed. Tarn near Jerry Lakes camp: Lake and waterfalls below Crater Mountain. We gained the trail shortly after here: Maybe Fred will post some more photos, he was a lot better about taking them than I was. Gear Notes: 30m rope glacier gear 2 axes aluminum crampons trail shoes celebratory brandy Approach Notes: All the trails in the lowland were in good shape, a bit of blowdown on the Crater Mountain trail. Lots of creek crossings, all dry on the East Bank Trail, one ford on the Crater Mountain Trail. Crews were out working on the trail near Granite Creek.2 points
-
Trip: Sahale Mountain/Peak - Quien Sabe and Sahale Glaciers Trip Date: 05/27/2018 Trip Report: What a trip! What a day! We got excellent conditions and fantastic weather, we got Boston Basin all to ourselves, and we got to ski from the bottom of the snow-free summit pyramid to within a 3-minute walk to the Cascade Pass trailhead. Amazing! Cascade River Road is still gated, so we parked at the gate and at 4:15ish in the morning, set off up the road to the Boston Basin trailhead. Carrying skis through the downed trees and minor bushwack was not the best part of the trip. Crossing Midas Creek was not bad. Got up onto the ridge right before Boston Basin and switched to skinning (finally!). The morning's low clouds began lifting, creating some beautiful effects. Skinning conditions were perfect, styrofoam snow with good ski crampon bites. The Quien Sabe Glacier was in great shape, very few open crevasses (especially our route) so we picked a line that never had us above any open ones. We felt comfortable being unroped until we got up to where it steepens before the Boston-Sahale col; here we switched to crampons/axe/rope/glacier mode. Definitely some more open ones up there, although peering over the edge, it appeared to be more like a big sink-hole with a not-too-deep bottom, but I wasn't about to jump in and test the "floor." Up at the col, we were dismayed to see the giant cornices. Hmmm. Hmmm. We've seen the diagrams of cornice "roots" and we know the danger of cornices. Cornice on one side, steep snow on the other with moats and scary things down below. We weighed the options and talked about the risks, the concerns, the (excellent firm) snow conditions, the (now over the horizon) sun. In the end, we chose what was not the absolutely most conservative decision. I'm still thinking about this one. We picked our way up and as far away from the cornice as possible, getting excellent axe and whippet bites, excellent secure feet. We took our time -- no-fall zone. We got up and over that slope, and could clearly see the summit block now with some less-steep snow and the rock scramble. The snow here was less firm and so I deadmanned a picket before stepping up onto a snowpatch, and then used my 5 slings to protect the rocky section as we continued up. I think we summitted around 11:45 am. The summit views were AMAZING!!! We hung out on top for around 30 minutes, then made the one rappel down to the soft snow of the Sahale Glacier. It was a full 30m rappel to the snow. Few crevasses, nice snow, and some fun terrain had us hooting down the glacier and then the Sahale Arm. Saw my first marmot of the season (!) lounging and enjoying views of Johannesburg. We were able to stay in the drainage out Cascade Pass and there was continuous snow almost entirely to the Cascade Pass parking lot! Incredible. Got back to the car around 2:50 and drank beers and smorgasborded. The worst part was finding out at home that my skis now, too, have become victims of the sticky pollen! I had just waxed them, too. Gear Notes: approach shoes, ski crampons, aluminum axe and crampons, crevasse rescue gear, 60m half rope Approach Notes: Boston Basin trail with skis...type 2 fun2 points
-
Trip: Little Tahoma - Fryingpan Glacier Trip Date: 05/27/2018 Trip Report: Did a ski tour of Little Tahoma on Sunday, May 27 on one of the most spectacular May days I've had in a while. Thought I'd post so information for those considering making the trip. Approach via Summerland trail is basically snow-free for the first mile and then switches to snow with sections of dirt thereafter. From the final bridge, snow is continuous. On the ascent I booted and did not bother with skis. From the flats beyond the bridge it's a straight shot up to the left to gain Meany Crest. Meany crest is snow free and lots of good camping available. No running water at this point, so plan to melt. I booted to Meany Crest and then skinned up Fryingpan keeping to the right of the glacial bulge. Crevasse problems are minimal, though there is one crossing that could probably be avoided by trending to climbers right and downhill. Despite the warm weather and soft snow, I skinned the bridges without issue though I could see where someone had punched through earlier in the day. From Fryingpan kicked steps up to Whitman Crest and then set out across the Whitman Glacier. There are two open crevasses on the Whitman that can be avoided by skirting them to the right. Whitman is ~30 degrees up to a bench on the ridge at 10,300 feet. From there you can ascend on steeper snow (~40 degrees) either to the left or right of the ridge. If you go right, expect steep, crappy, downward sloping rock at the exit onto the ridge. Descent was same as ascent, but on skis. Yay! Travel Times: Left car at 7:15 AM Meany Crest at 10:45 Summit at 2:00 PM Car at 5 PM Gear Notes: Ice axe, crampons, helmet. Glacier gear if desired Approach Notes: All snow after the last bridge Meany Crest Camp Fryingpan Glacier Mt Adams from Whitman Crest Little T and Big T from just past the final bridge2 points
-
1 point
-
I think the route will be fine for a while. The approach is very straight forward (probably more so if not in the clouds). The bergshrund at the base had several crossings on the left side. So I would not hesitate to say you would be in fine shape for 2-3 more weeks.1 point
-
WD-40 will strip the pollen off @Alisse, or a true base cleaner. Nicely done, Sahale is a great summit in any season!1 point
-
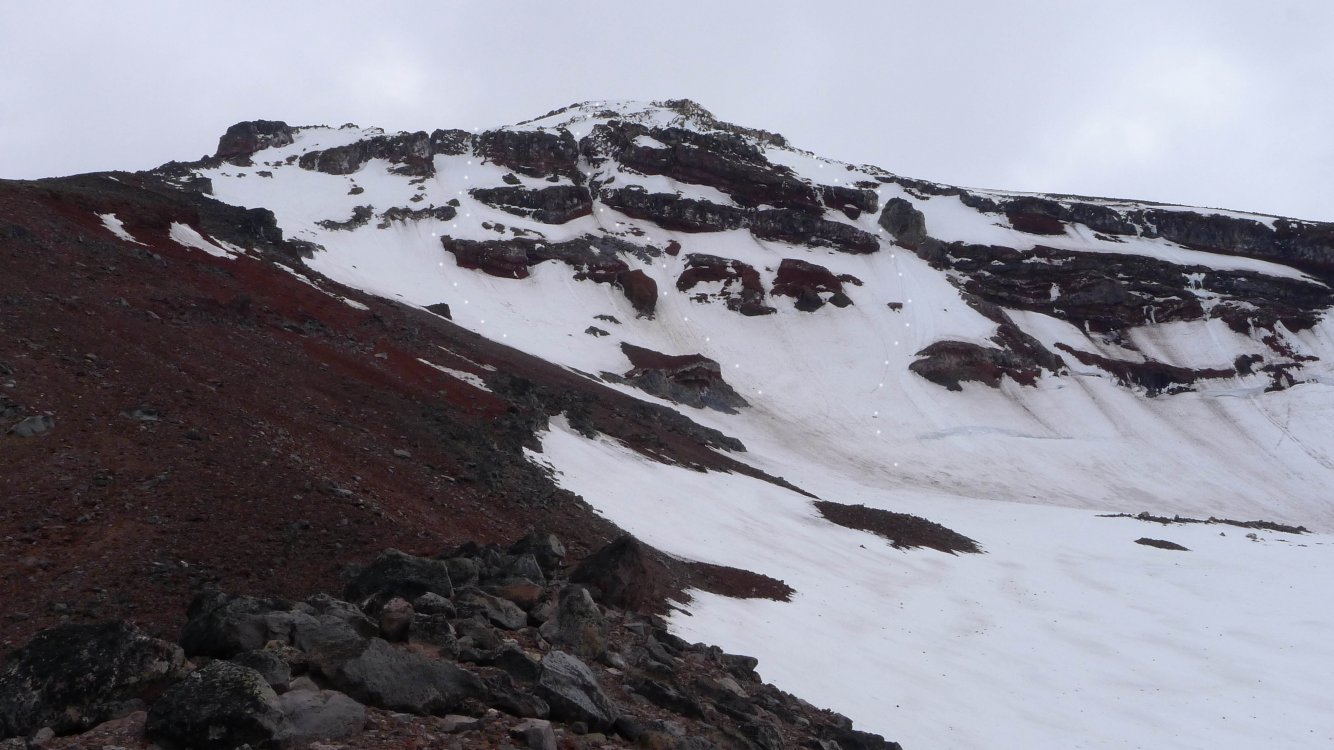
Trip: South Sister - North Face Trip Date: 05/22/2018 Trip Report: Edit: See post below by Drocka on a June 2011 ascent which I believe should be credited as the FA. Sometime ago I noticed a blank spot on the map on the north face of South Sister. If one looks at Oregon High on page 109, there are two routes on the face, the Silver Couloir (22) and North Face Couloir (23). Further to the west is the Northwest Ridge (24). The blank spot is between the North Face Couloir and the Northwest Ridge. As such, on Monday I decided to ski over for a look about. I started up via Green Lakes and the Prouty Glacier, traversing at around 8200-8400 foot level of the glacier til the North Ridge. Unfortunately, it did not have as much snow as I hoped so I carried my skis for the last bit til I reached the Skinner Glacier which sits below the face. The lack of snow was an issue because I had planned to ditch my skis and bivy gear, descend the north ridge, and ski back out. As such the option was now to carry everything up and over. Which in hindsight worked out but at the time I did know if such idea was going to be amicable given the route was a blank spot. In the morning after a crack of dawn start, I skied up to the base of the face, swapped out skis and poles for crampons and ice axes and started up. Initially it was nevé and canning, then plunging picks, to eventually swinging tools. Overall the slope was 45-50 degrees with a short 10 foot ice step just below the gap. The gap is the critical bit and cannot be seen on some photos. After the gap, I traversed up and left until it was possible to gain the Northwest Ridge which I followed for the last 300 feet or so to the summit rim. Had there been more snow one could probably continue up and left even more. But given I was climbing solo (in tele boots) and carrying skis I did not want to have to deal with crappy rock or rotten rim ice. After reaching the summit, I hung out for a bit before going down the south side. I descend til I was on the Lewis Glacier where the snow soft enough to be enjoyable skiing. I skied out until about the last mile. Where a couple picked me up and shuttled me back to the Green Lakes Trailhead. One photo of the routes and one from my bivy - sorry there are not more. I have marked all three routes on the face. From left to right Silver Couloir, North Face Couloir, and what I did. As you can see for May there is not a lot of snow.. Gear Notes: Crampons, two tools, screws and pickets if climbing roped Approach Notes: Via Green Lakes and Prouty Glacier1 point
-
Trip: Mt. Rainier - Liberty Ridge Trip Date: 05/14/2018 Trip Report: Hello! The climbing rangers on Rainier wanted to know about conditions on LR, and since we did the route the long way we did a lot of movement on the mountain and the Carbon River Trail/Wonderland on the way. I had to work last night after pushing the last 14 miles out in the morning, and have to work again today so I am trying to crush this and I’ll addend it later to get all the pictures as I get them. Here we go! Valerie and I met on Monday early and discussed more in depth our gear selection, ended up being 4 pickets and 5 screws. Fortunately the 1000 ft of hero ice and my trips to the Canadian Rockies worked well as two screw belays and one screw for pro saved time, and the extra picket helped set up the tent quickly! Be aware that if you start from the Carbon River, you cannot purchase your Rainier Climbing Pass there, it must be done somewhere else or online first! I swear I’ll send in my money on Monday, thank you to the Park Service for accommodating us. We left the Carbon River TH at 11am, and made it to 6800 ft at Curtis Ridge camp. We camped on dirt and used rocks as anchors to set up the Betamid, which it the first time I have used one and it was AWESOME. This seemed to be fine for accessing the Carbon Glacier. There is a crossing on the trail to which we had to on the way up take our shoes off and wade a little as several of the log walks are washed out. It is kind of an adventurous approach as you can imagine this time of year, but as someone mentioned to us on the way out “They probably didn’t find the trail too difficult if they climbed LR” Haha! On the way back, we chose to leave our boots on at a crossing because the water was even higher. If this happens, I’d suggest one person using shoes to wade across and attach a rope and ferry dry packs across, there’s a hand line across the way. Day 2 we found the Carbon to only have a couple of bridges to navigate, and Valerie deftly led us safely across to the right side of the Ridge. At this point Valerie had reservations about leading the route, and I assured her I would lead all of it if I needed to. This is in no way a detriment to her contribution to completing the climb, I needed her to help in all the glacier travel and navigation, positivity, and her extra pizza. The woman brought in 2.5 fully cooked pizzas. She knows her stuff. It took us 3 or so hours to move across the Carbon to the right side base, probably because of the long approach and our increasing lack of sleep and long days. At 1030 or so I started up the third snow band and over a very easy covered shrund, and the snow to Thumb Rock was pretty shitty ranging from ok to plunge step to wallowing in crotch deep sugar. Our anticipation was that it was supposed to get colder the next evening and we would have good conditions to the summit. It took us a whopping 9-10 hours to get to thumb rock, as we had to pitch out some sections because of the warm snow and I started taking the rock bands to save energy. Occasionally I could protect the rock bits with a deadman picket, but all other anchors were quite marginal and I ended up using seated hip belays or terrain belays off of boulders. I assume if the snow is good this time could be halved and soloed. Start very early or when the snow freezes. We sat in the sun and tried to dry out as best we could at thumb rock and hydrate. We dug a platform with a shovel, it would likely fit a 2-3 person tent well and just out of way of the rock falling off Thumb Rock. There’s enough dry rock to sit on and relax up there. Day 3 The Business. We awoke to still and excellent conditions. I started up at 330am to the left as it looked more direct, the WI3 straight up is completely non-existent. We simuled in 800-900ft blocks with a picket every 190-230 ft, I have never mid-daggered so much in my life. Occasionally whenever we needed to simul solo to get to a good picket or resting spot, I would end up in a sugary 10 ft band of garbage. Vertical pickets were pretty good today. Somewhere after the second block to pass over to the left, we came over a lip of snow and built a belay with an axe while standing on dirt and rock. From this belay I did a traverse of rock for 30 ft or so with a marginal picket to get to the left. I believe we did a rising traverse lower than usual to the left to access a wide long gully with some rockfall when the sun came out. Miraculously, as I had to chose my path the clouds covered it just until we were both out of harm’s way and then the sun came out and the rocks started falling again. My suggestion is if you go this way that you go up and right a bit around a few small rock outcroppings then cut immediately left to avoid rockfall if the sun is out. Either way move fast. We pushed this simul up to the ice face, and I belayed off of two screws in the bottom of the ice. At this point Valerie had some issue with her toe, and she may have stubbed it hard somewhere, and was feeling a bit rough. Valerie is pretty dang tough, so it might have even been broken. We had not stopped and ate or hydrated much, as we kept having some serious routefinding and objective hazards and that distracted us. The ice looks shorter than it is! I led 3 200 ft pitches, at the first belay I hammered her adze in to the hilt and connected it to the anchor and left her with a one screw anchor. I didn’t know what the next pitch of ice would feel like, she trusted me but expressed some concern with this. My standard mountaineering crampons were great and single swing half or to the hilt swings had me moving very efficiently up the pitches, placing a screw half way and two for the anchor. After 3.5 full pitches of ice, I belayed Valerie up to a flattish area and she was doing poorly. Albeit she rallied each time with courage since we were in a very committing position. The hanging belays sucked and her toe was hurting. At this point this got a bit colder, and the clouds would come in and out and obscure our view. We discussed bivying early around 13100, but she expressed from her experience is better to camp near Liberty Cap and I thought having the difficulties behind us would be better. I led up through the clouds as we spied at a moments clearing the correct way, traversing far right for a bit and up a very easy filled in bergshrund, travered up 45 degree snow ocassionally protecting with pickets while simulclimbing. I was out of pickets but started finding ice to place screws in every 150-200 feet up the last headwall to Liberty Cap. This was technically the crux, but it was hilariously fun for me and should not concern anyone really in it current state. Two hero ice tool placements above shrund, cut feet heel hook left foot and swing tools higher up 150 ft of mixed snow and ice to ice screw belay. Just before this belay Valerie got the screaming barfies on the overhang, and as she arrived to the anchor most of me was covered in rime and snow. 300 feet up more ice/snow to low angle terrain and Liberty Cap. At this point if we had stopped for longer than 20 minutes we may have been hypothermic with 30-40 mph winds. We were moving too slowly at this point to reach anywhere else, we quickly set up the Megamid pickets and tools, and I set to work digging in the sides. We slowly recovered and feet and hands warmed up, and the mood became a bit less serious and the awesomeness set in we were doing fine at 14k and howling winds, and we had made it up a very proud objective. As it turns out the Zip Jet boil is a bit finicky about being warm, but we passed out until midnight until we got the thing working or even cared about it. Imporant points before I leave you hanging... Descent of Emmons, boot path done to Shurman. When crossing Winthrop if doing LR, be careful of following our tracks, we were in a complete fog and were trying to go down not over. Might be looking to do the Kautz May 28-30 if someone is down, or whatever route is fun. TBC... Need to go climb some granite. Be Back out Wednesday night. Gear Notes: 5x screws, 4x 24" pickets, slings. 3 pickets and 6 screws might be better since theres more ice than i anticipated. Approach Notes: Carbon River is fine if you're in shape and want better conditions on route VS shorter approach if that is the current time of the season. Coming back down from Dick Creek. Valerie showed me how to wade, I was a little unsure of how to do it. Valerie's skillful untracked descent of the Emmons Above the 800 ft. ice face, still a pitch of ice above this. First full pitch of ice. Day 2 headed up to Thumb rock, conditions not the best. Entrance to the ridge from the Carbon Glacier1 point

