All Activity
- Past hour
-
 Helen_ joined the community
 -
Looking for some folks to climb mt.Adams in July. Prefer to start 3 am.
- Today
-
[TR] Argonaut Peak - NW Arete 06/14/2025
Alisse replied to Christopher Fisher's topic in Alpine Lakes
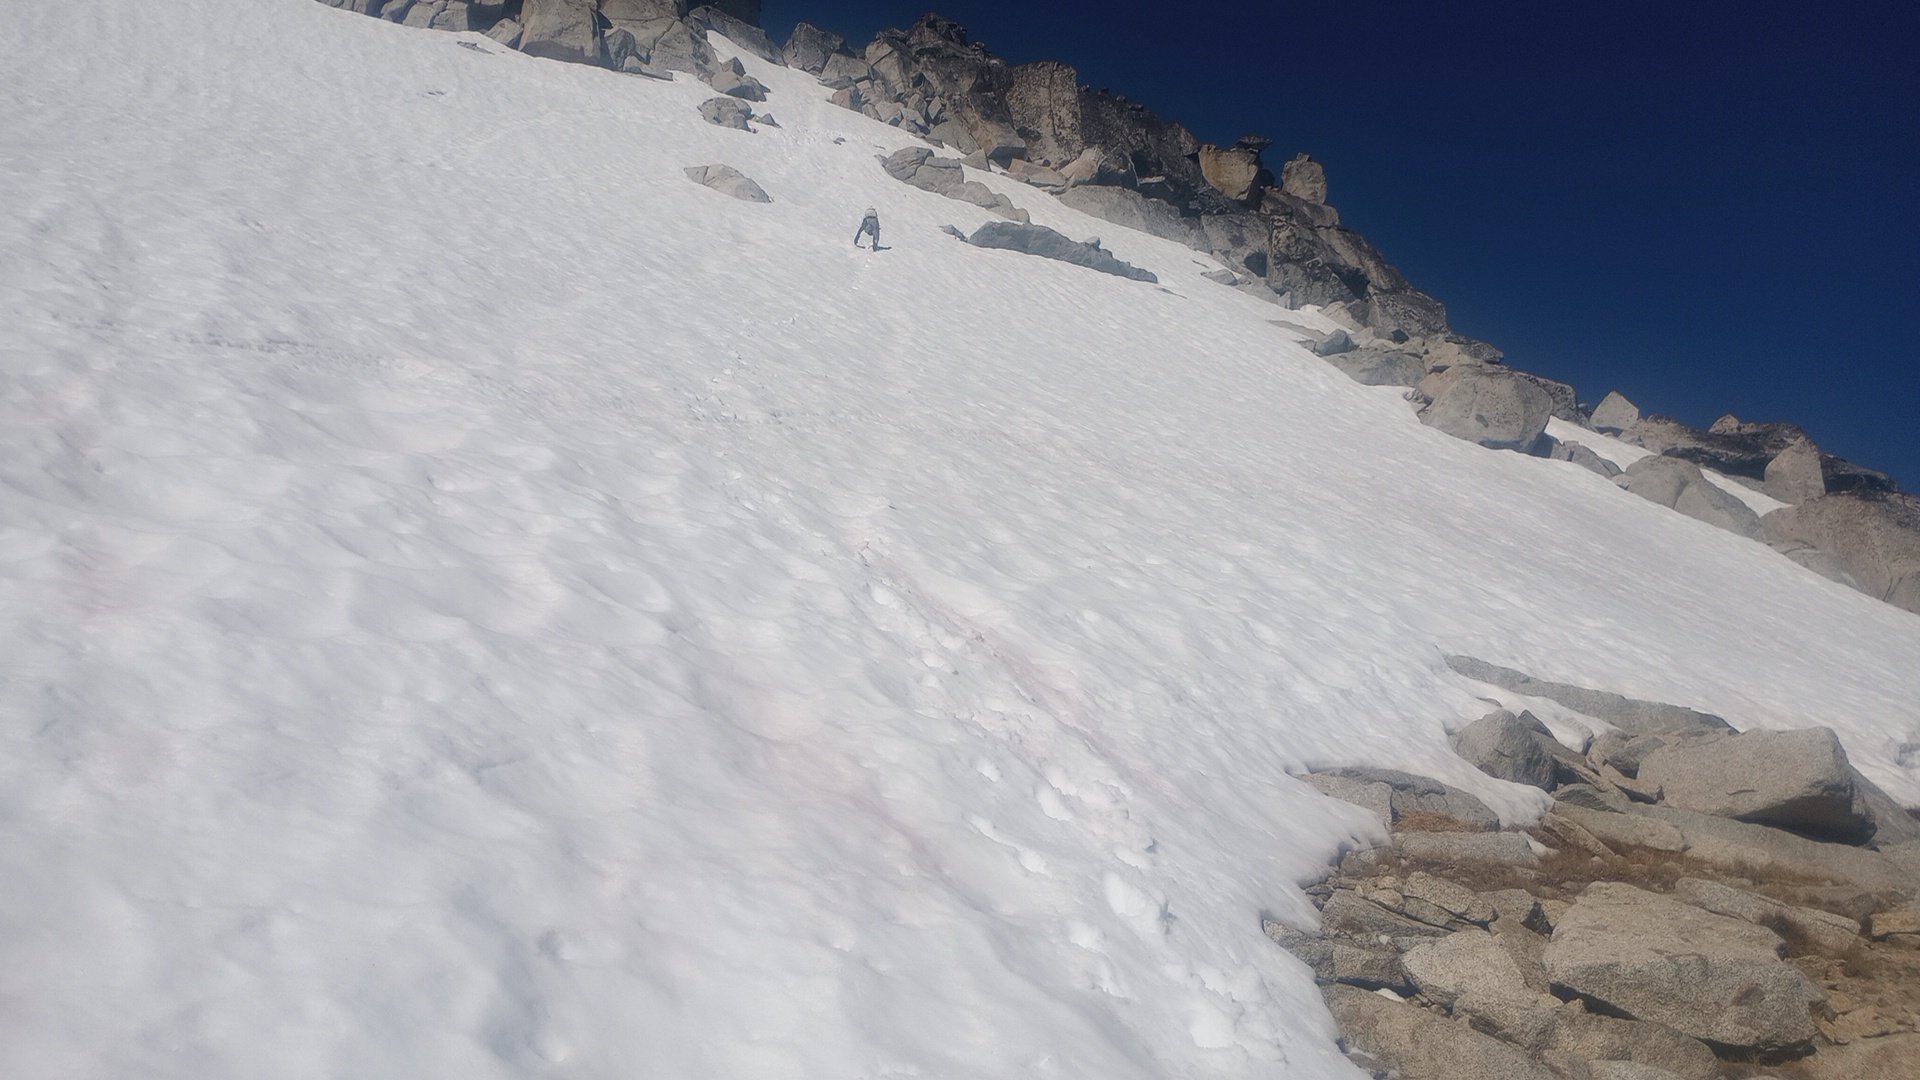
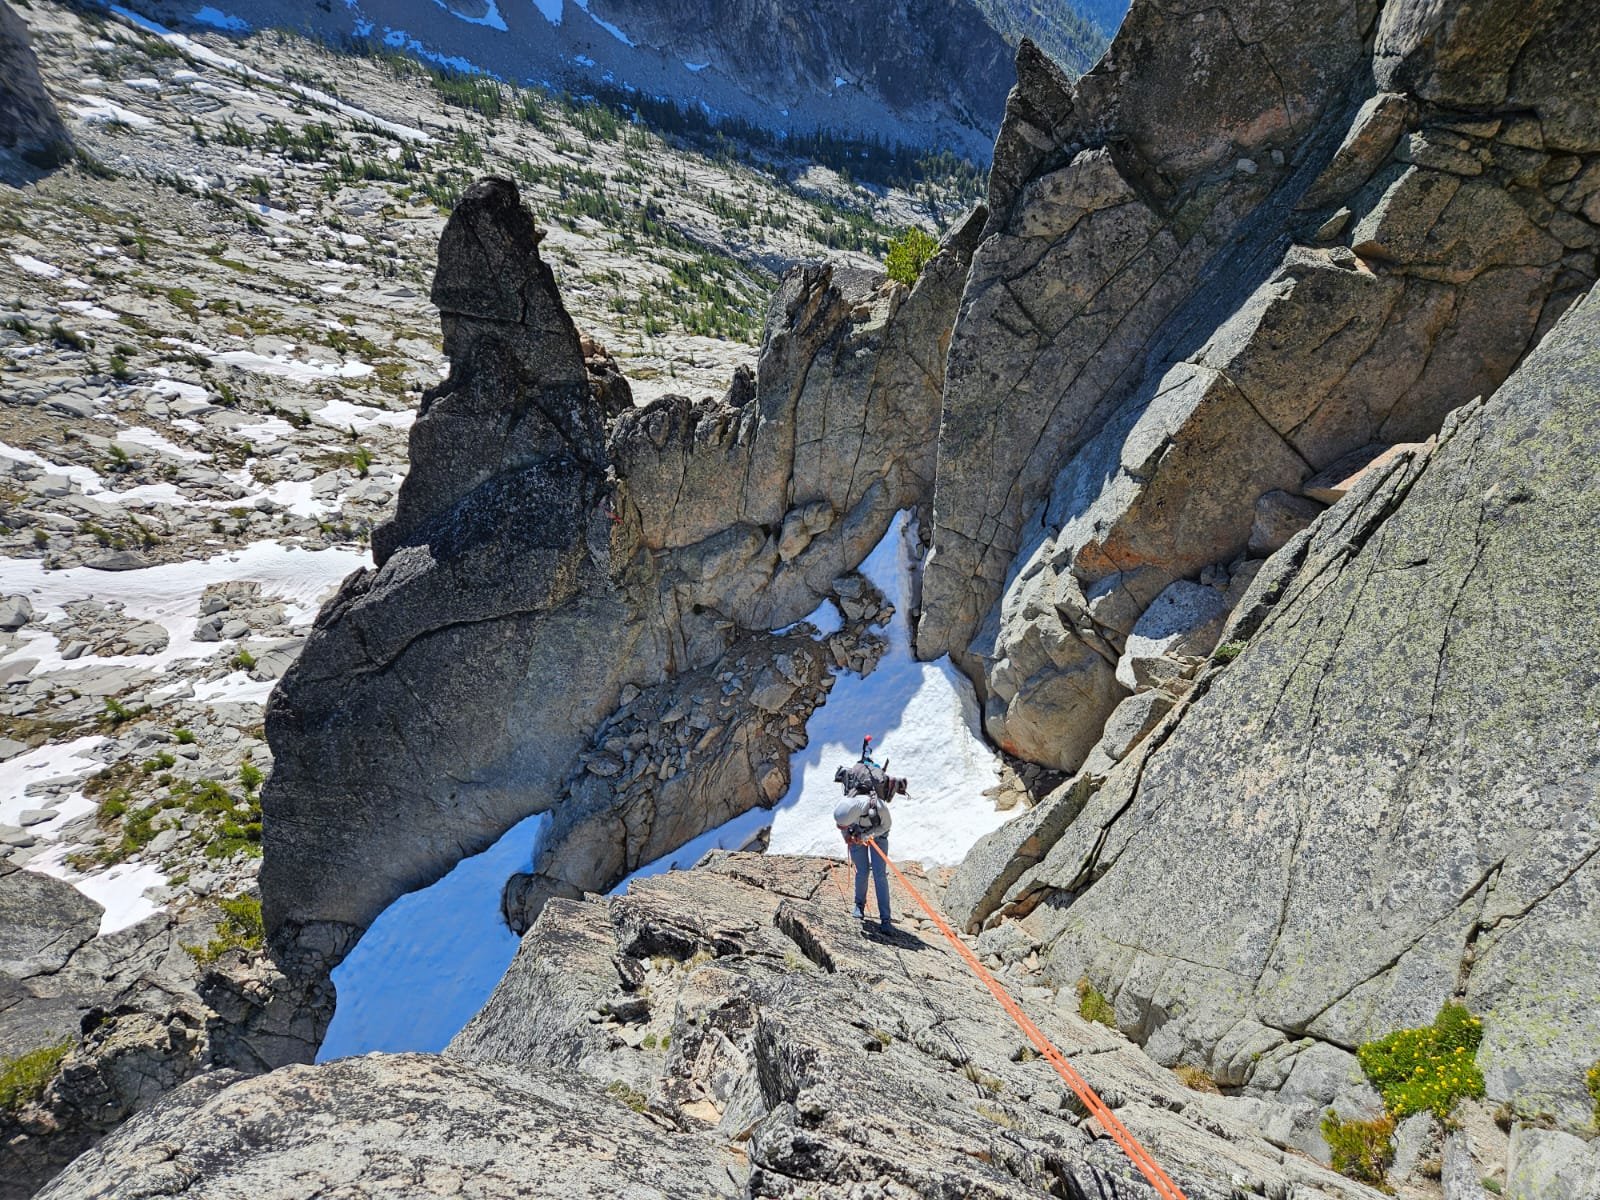
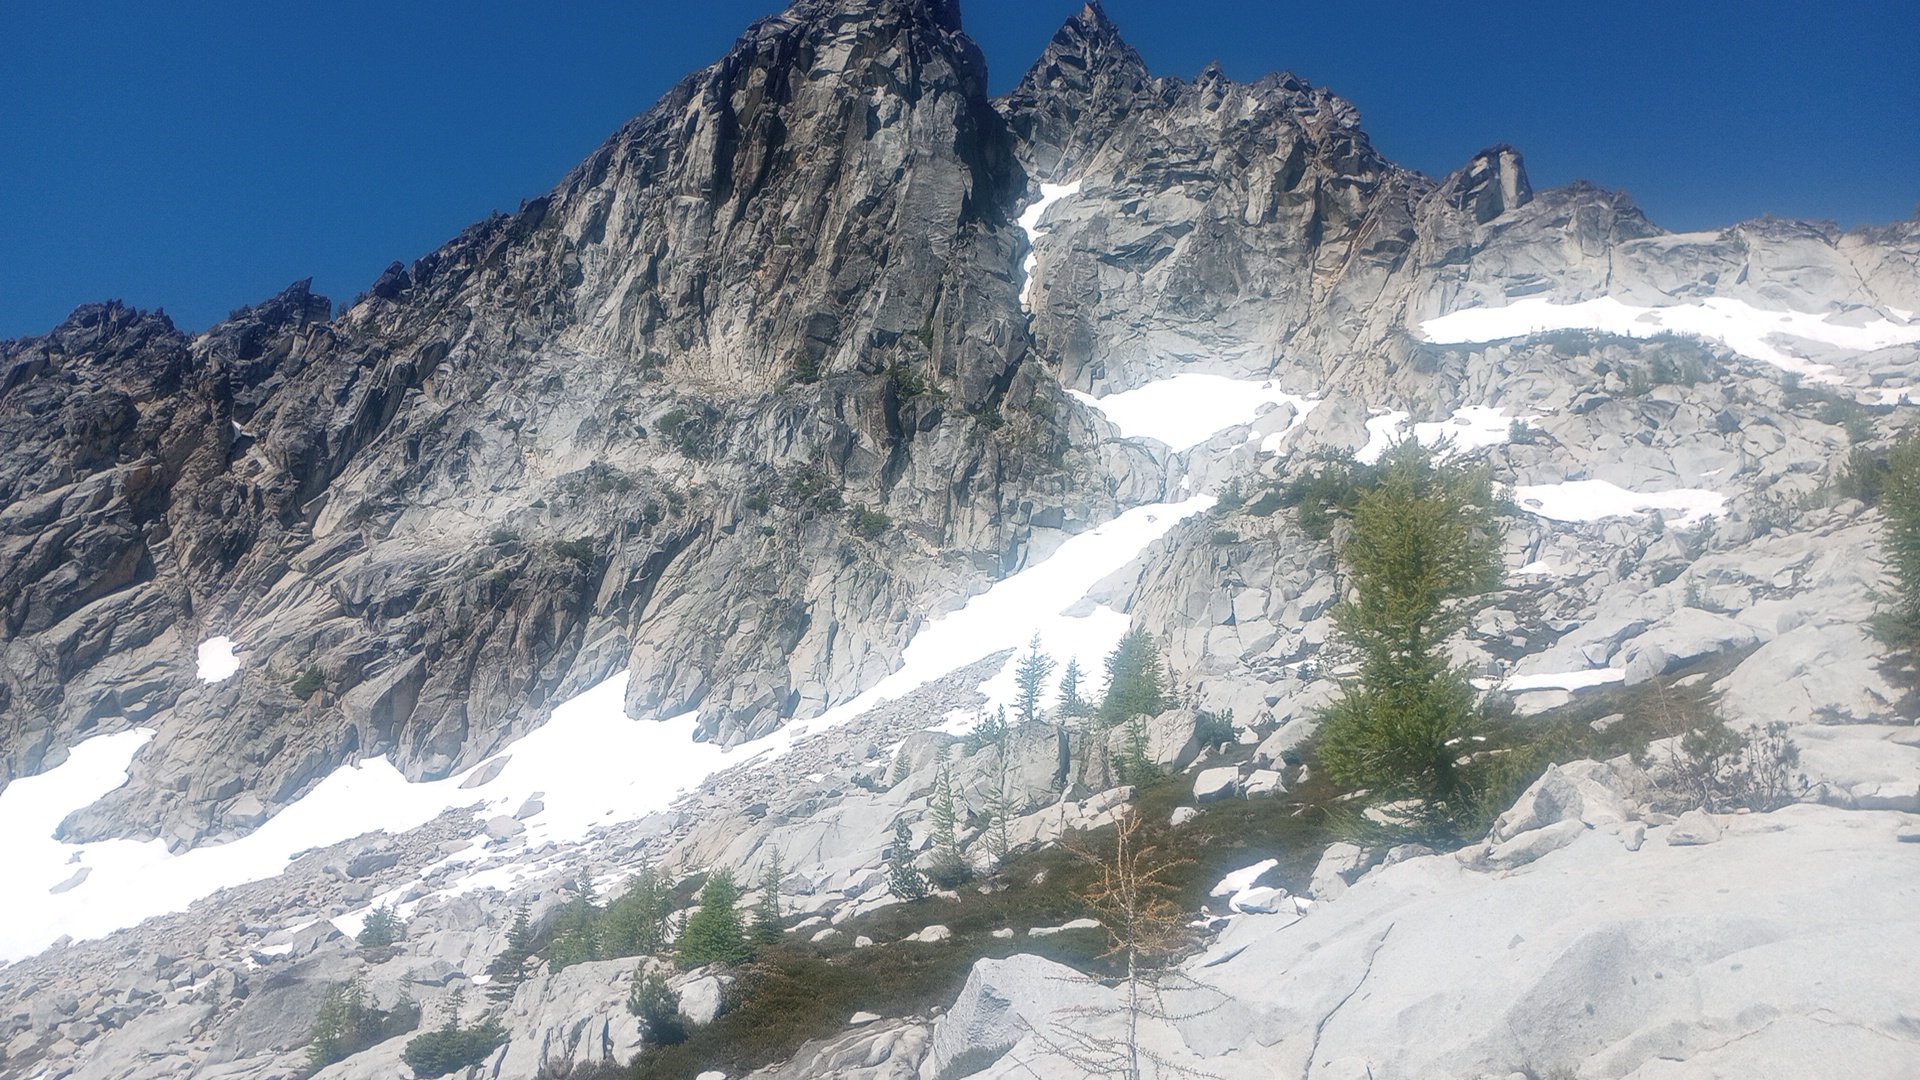
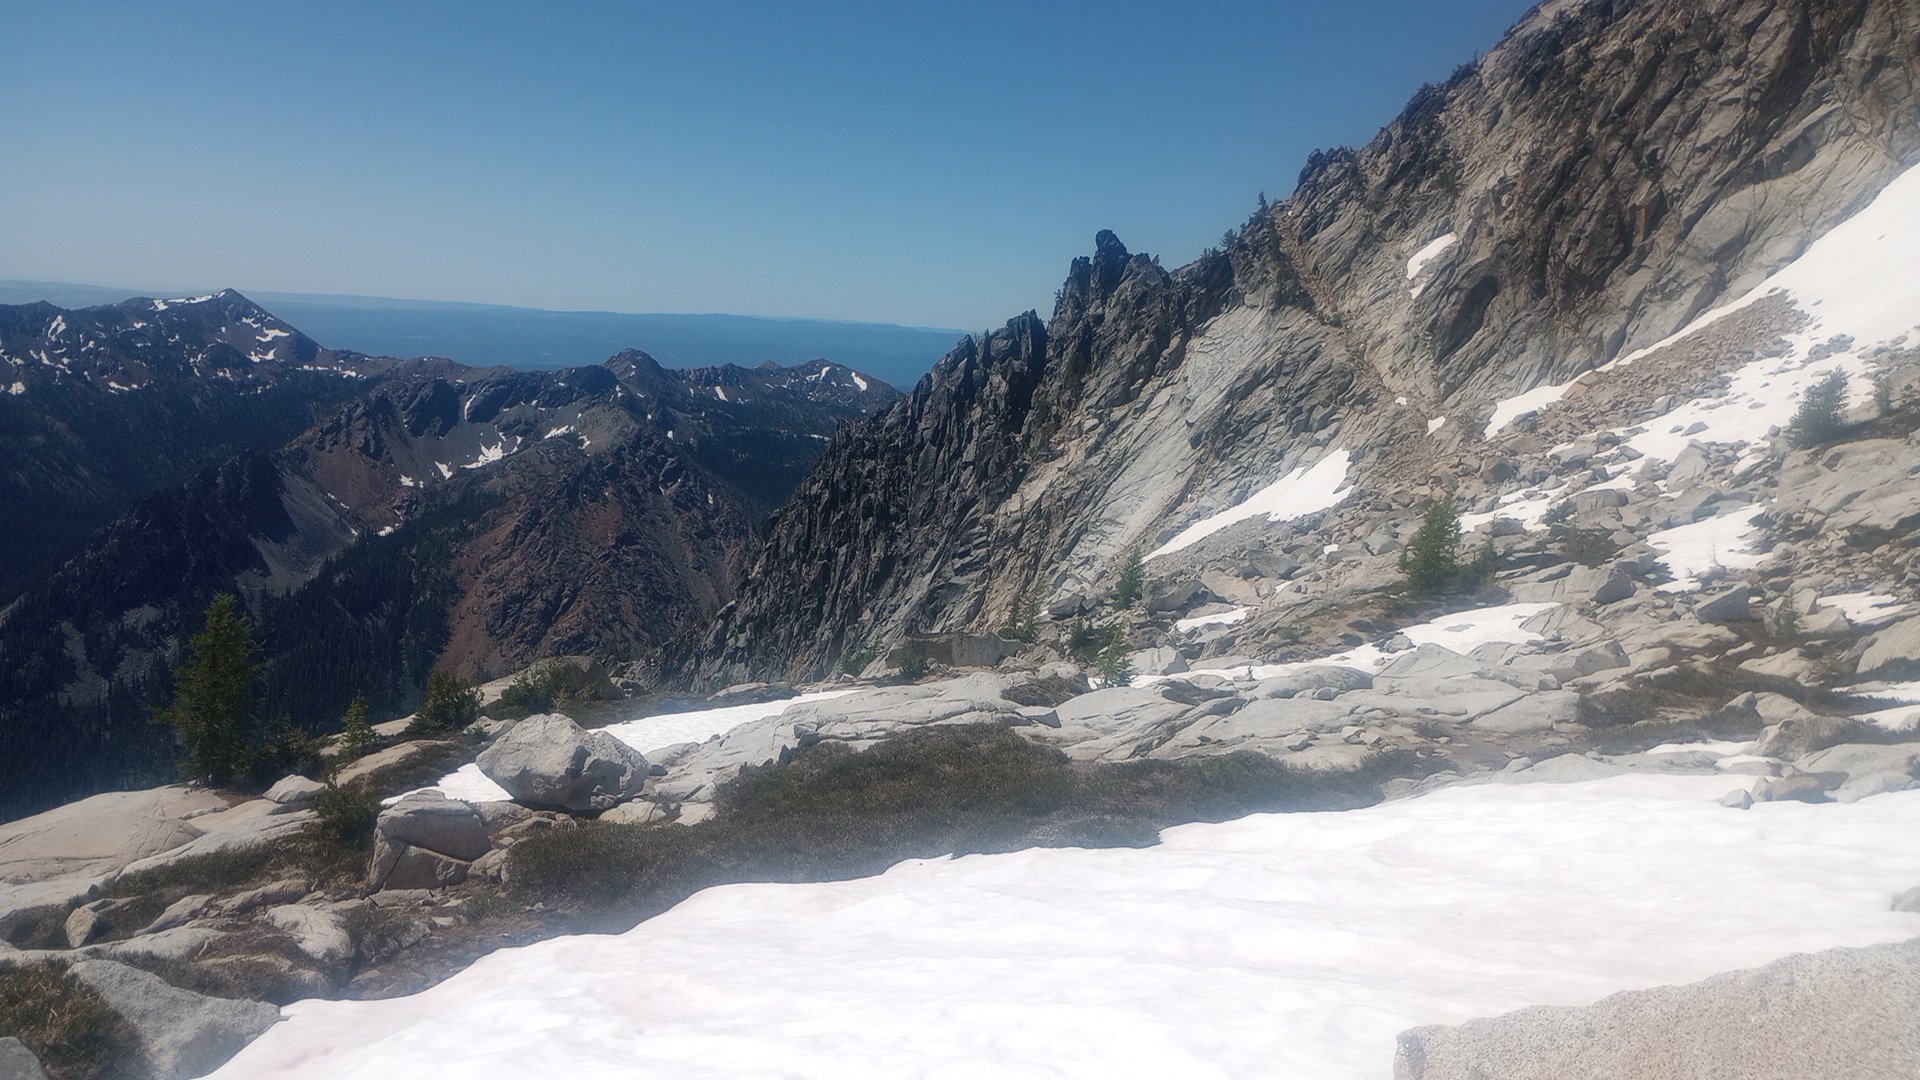
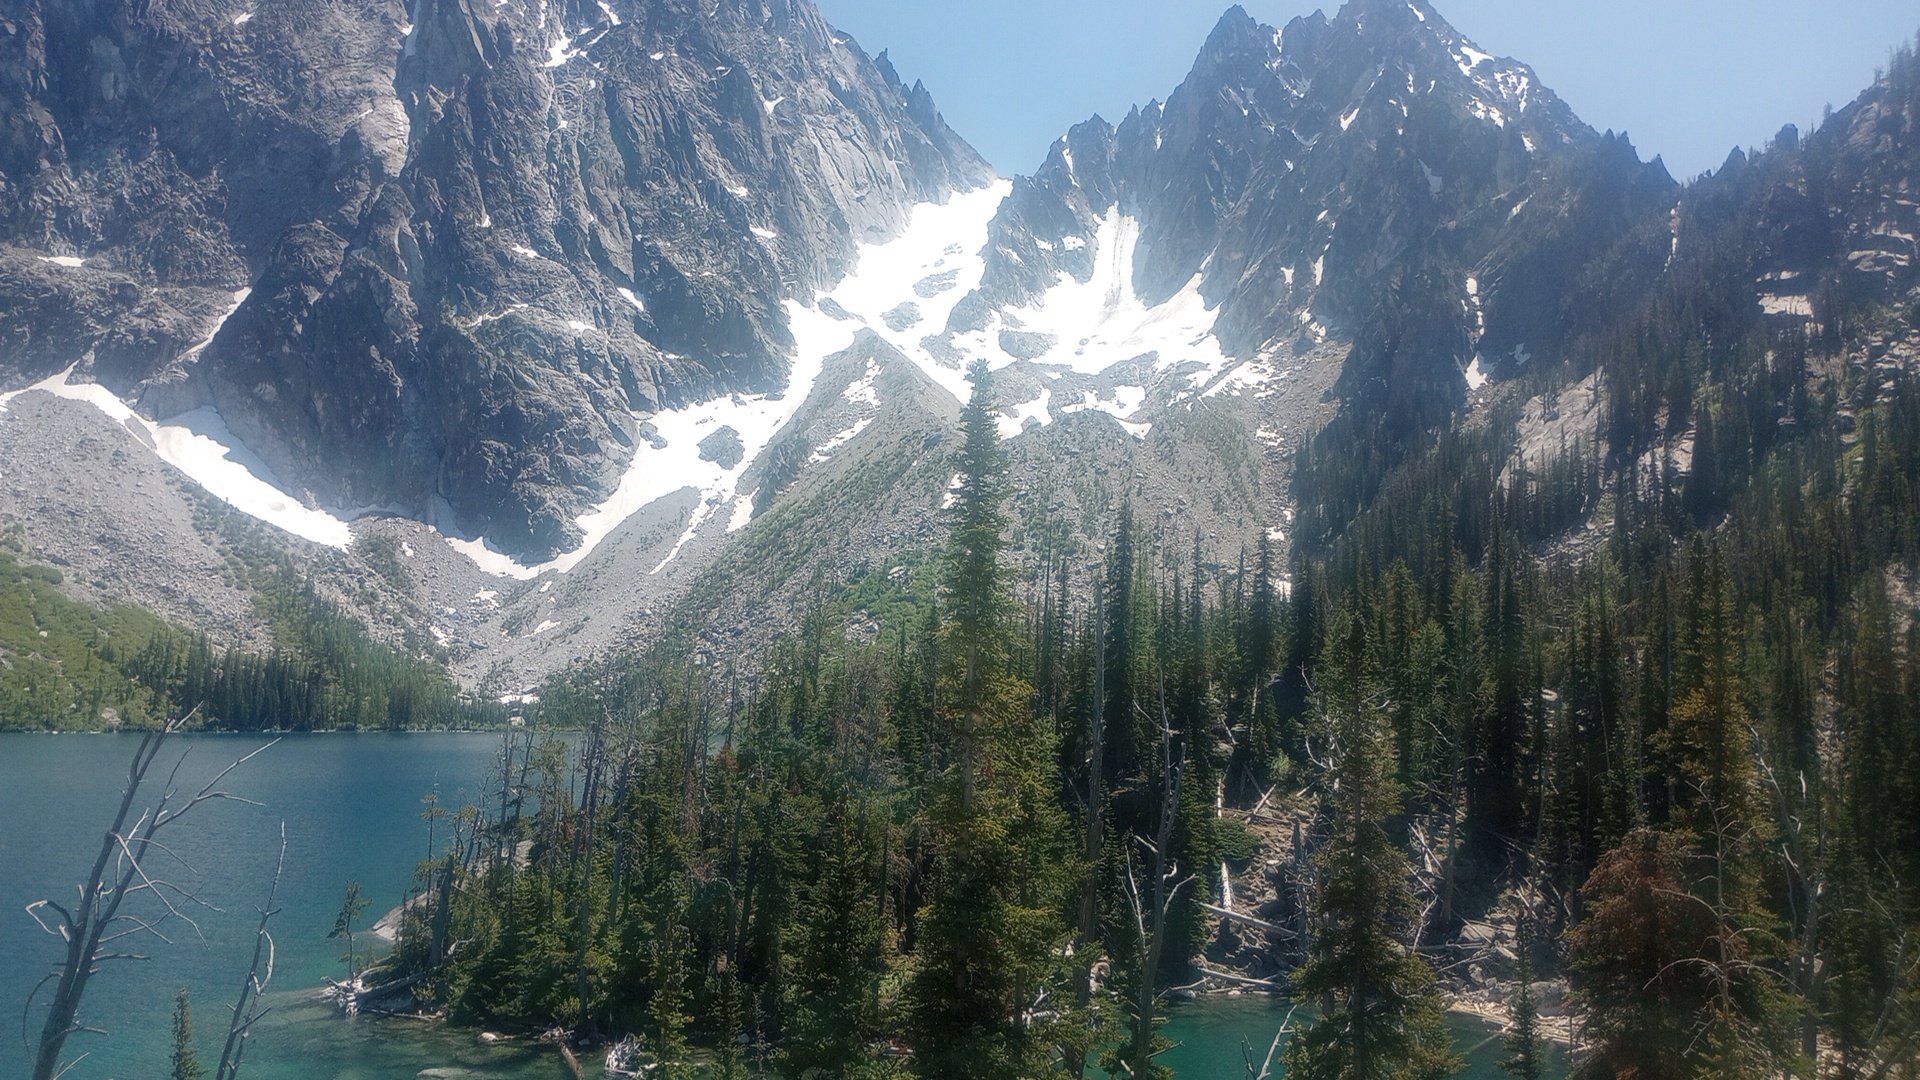
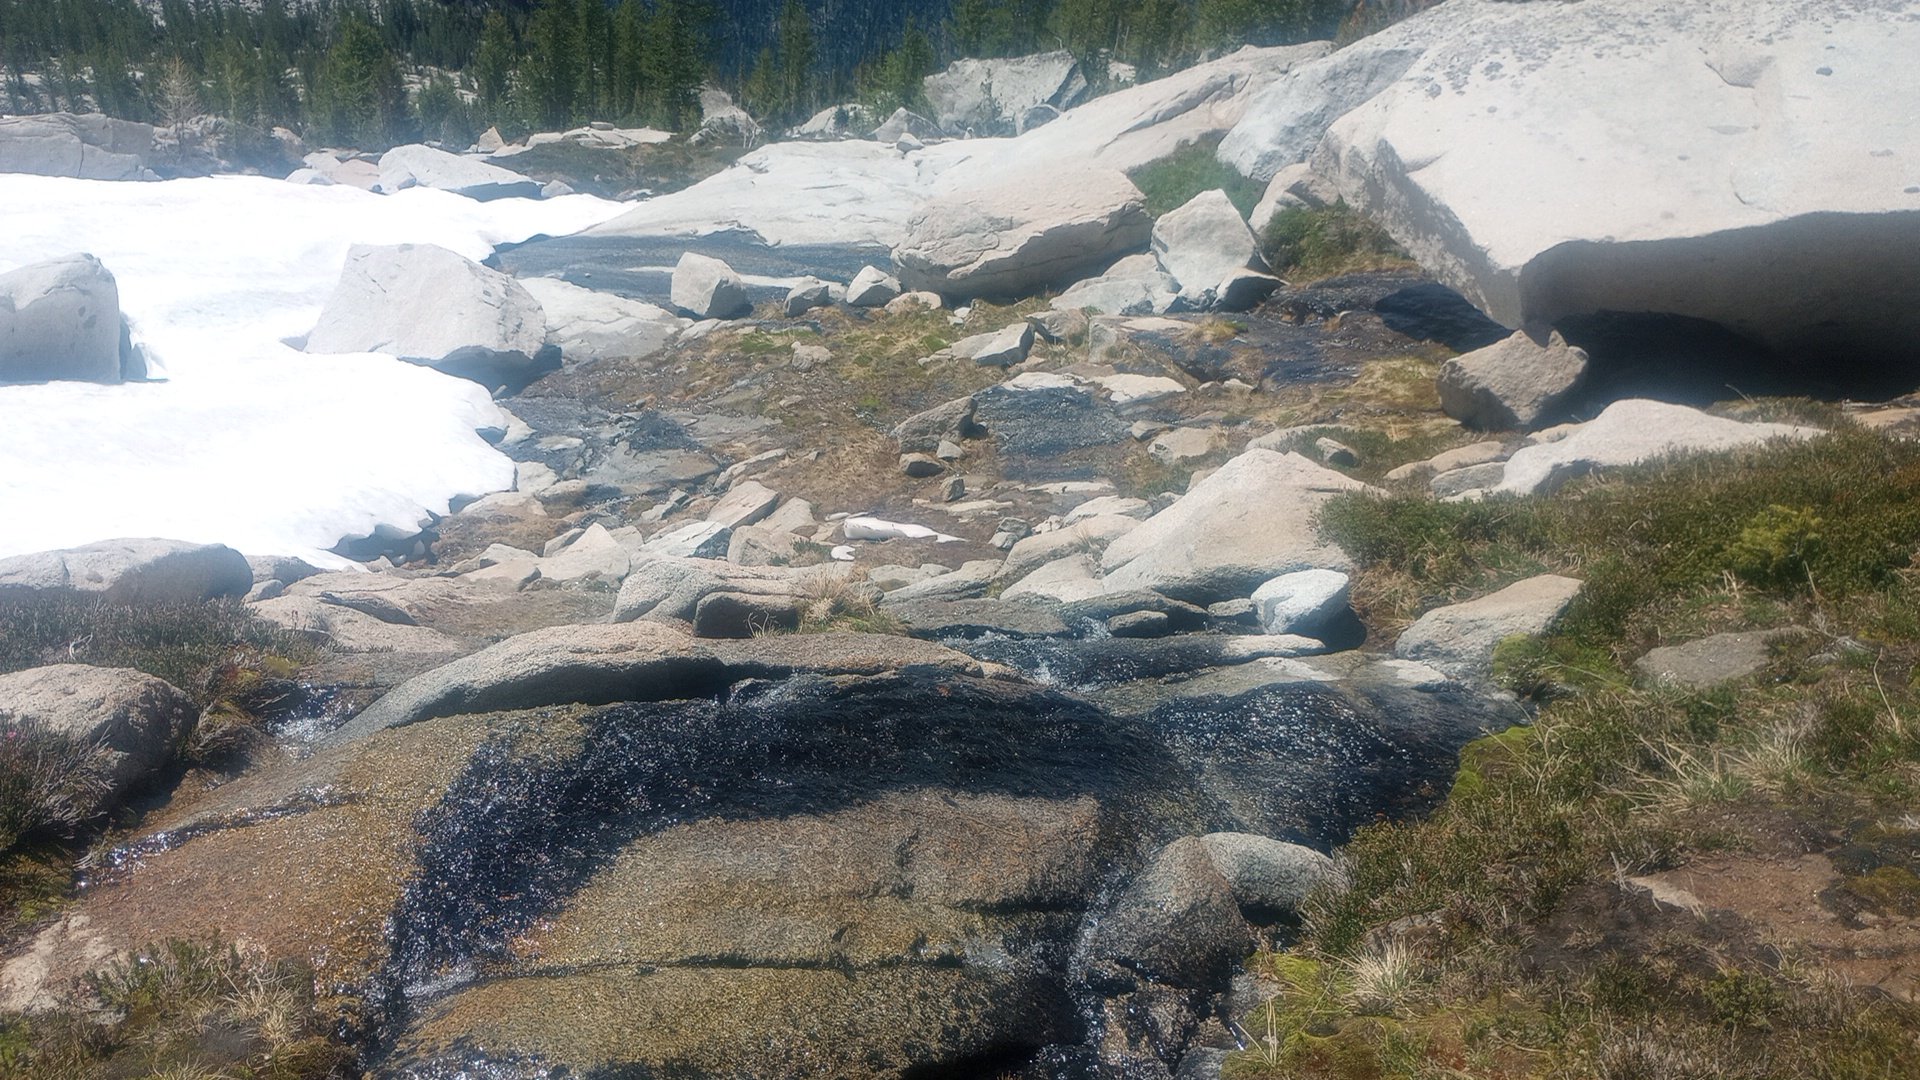
Thanks for your TR, Christopher! Dan and I had our own alpine adventure on the NW arete of Argonaut this past weekend, approaching and climbing to the summit on Saturday, sleeping near the summit, and descending Sunday. I am definitely glad we did it this way -- it made for two relaxed days without any need for headlamps and the snow on both approach day one and post-rappels day two was great for climbing, never too firm or icy. We thought the climbing was really fun and the whole trip had good adventure factor. I felt silly wearing trail runners and carrying light mountaineering boots AND rock shoes but it worked well for me; I think if I'd been climbing a whole lot of 5.8 recently I'd probably have felt good in approach shoes/not needing a third pair of footwear. We brought a single rack and that worked for us for 5 long pitches with a tiny bit of simuling. We were able to avoid MOST of the slide alder but luckily we weren't carrying skis and it wasn't the "trap you in place" variety so the handful of minutes of it didn't feel too tuff. We both switched to rock shoes for the "slab crossing" before the snow finger. The rock was sticky and great. The descent made us think a little bit, but there are a lot of rap stations and trees and lots of beta. We did three single rope rappels and some 4th class downclimbing that could have been avoided... Here are our pics in case they're helpful for people heading out soon or hoping to check snow conditions in the area (high-quality photos are Dan's): Snow finger (that's a false top to it) Snowfield on the descent before starting rappels: Our second single rope rappel into the gully, we walked across 4' of flat snow then butt scooted/au chevalled the moat to get to the notch, rapped off tree on other side for third rappel: The traverse from the bottom of the raps over to the south side of the Colchuck Col was BEAUTIFUL: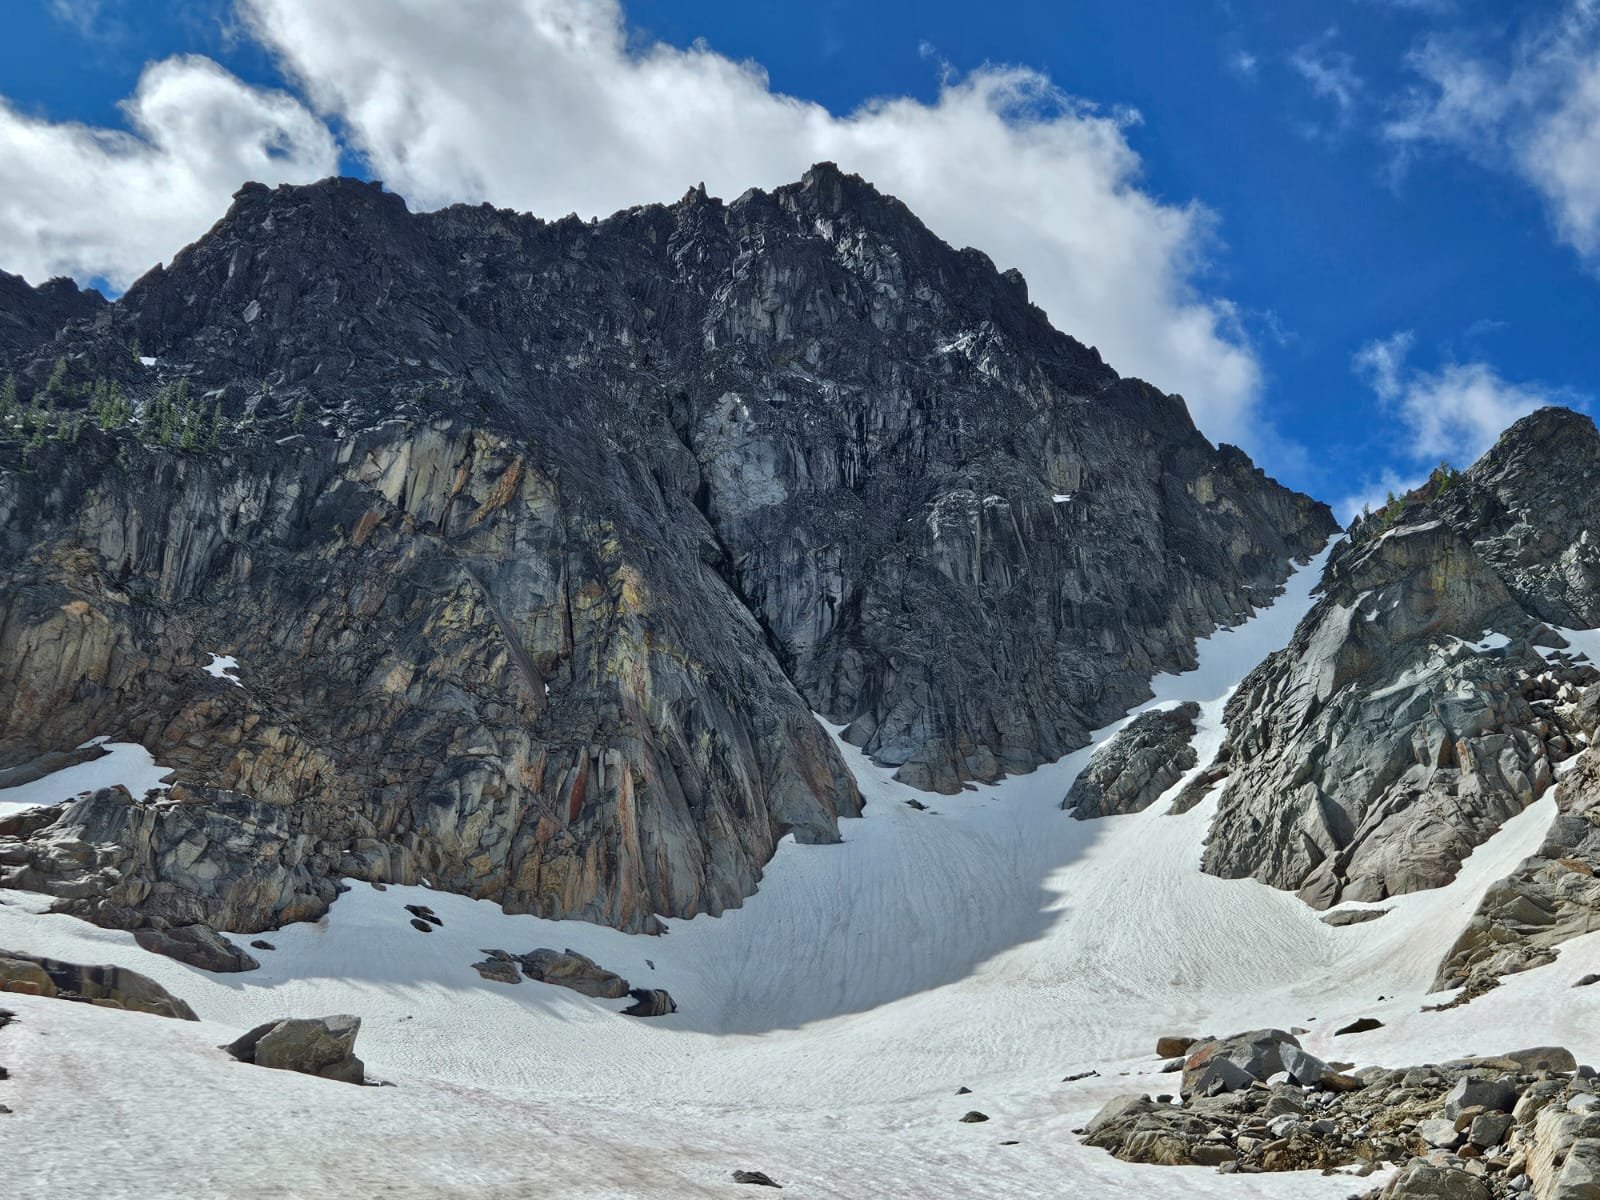
-
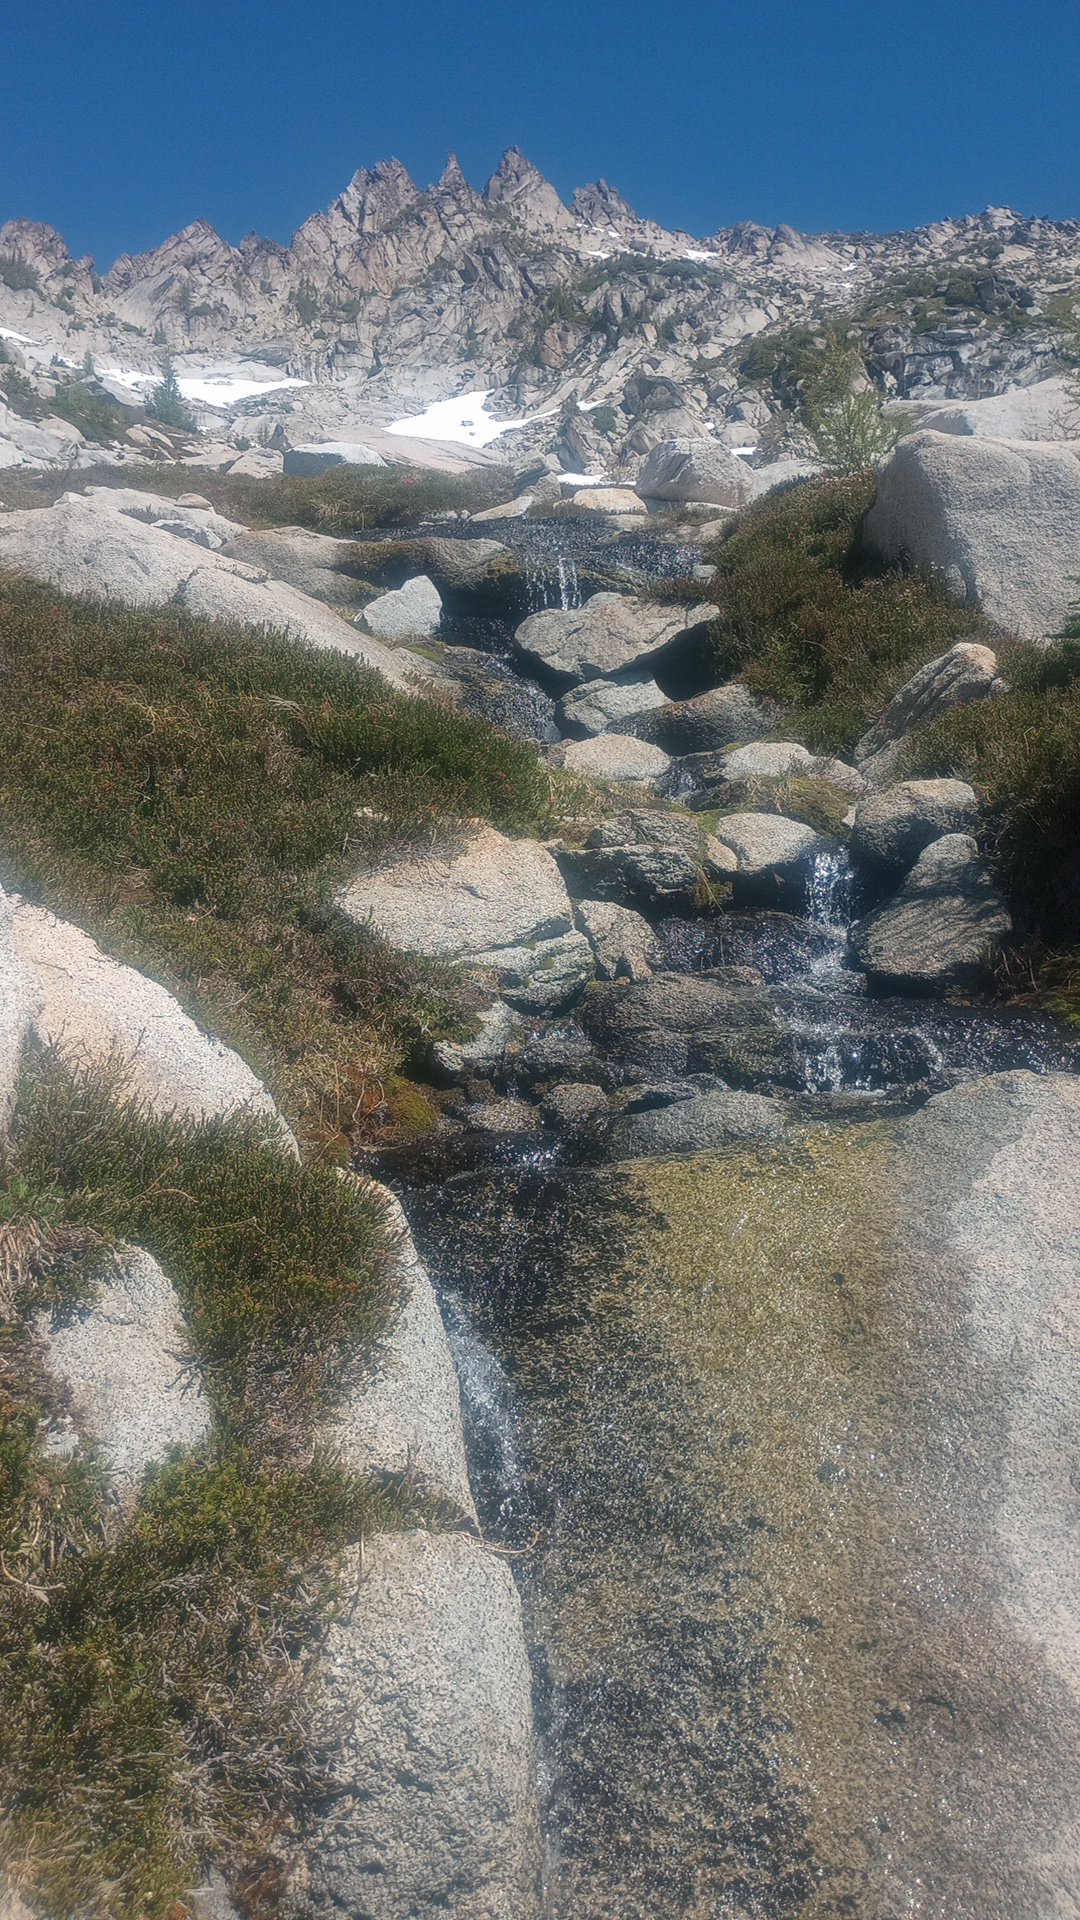
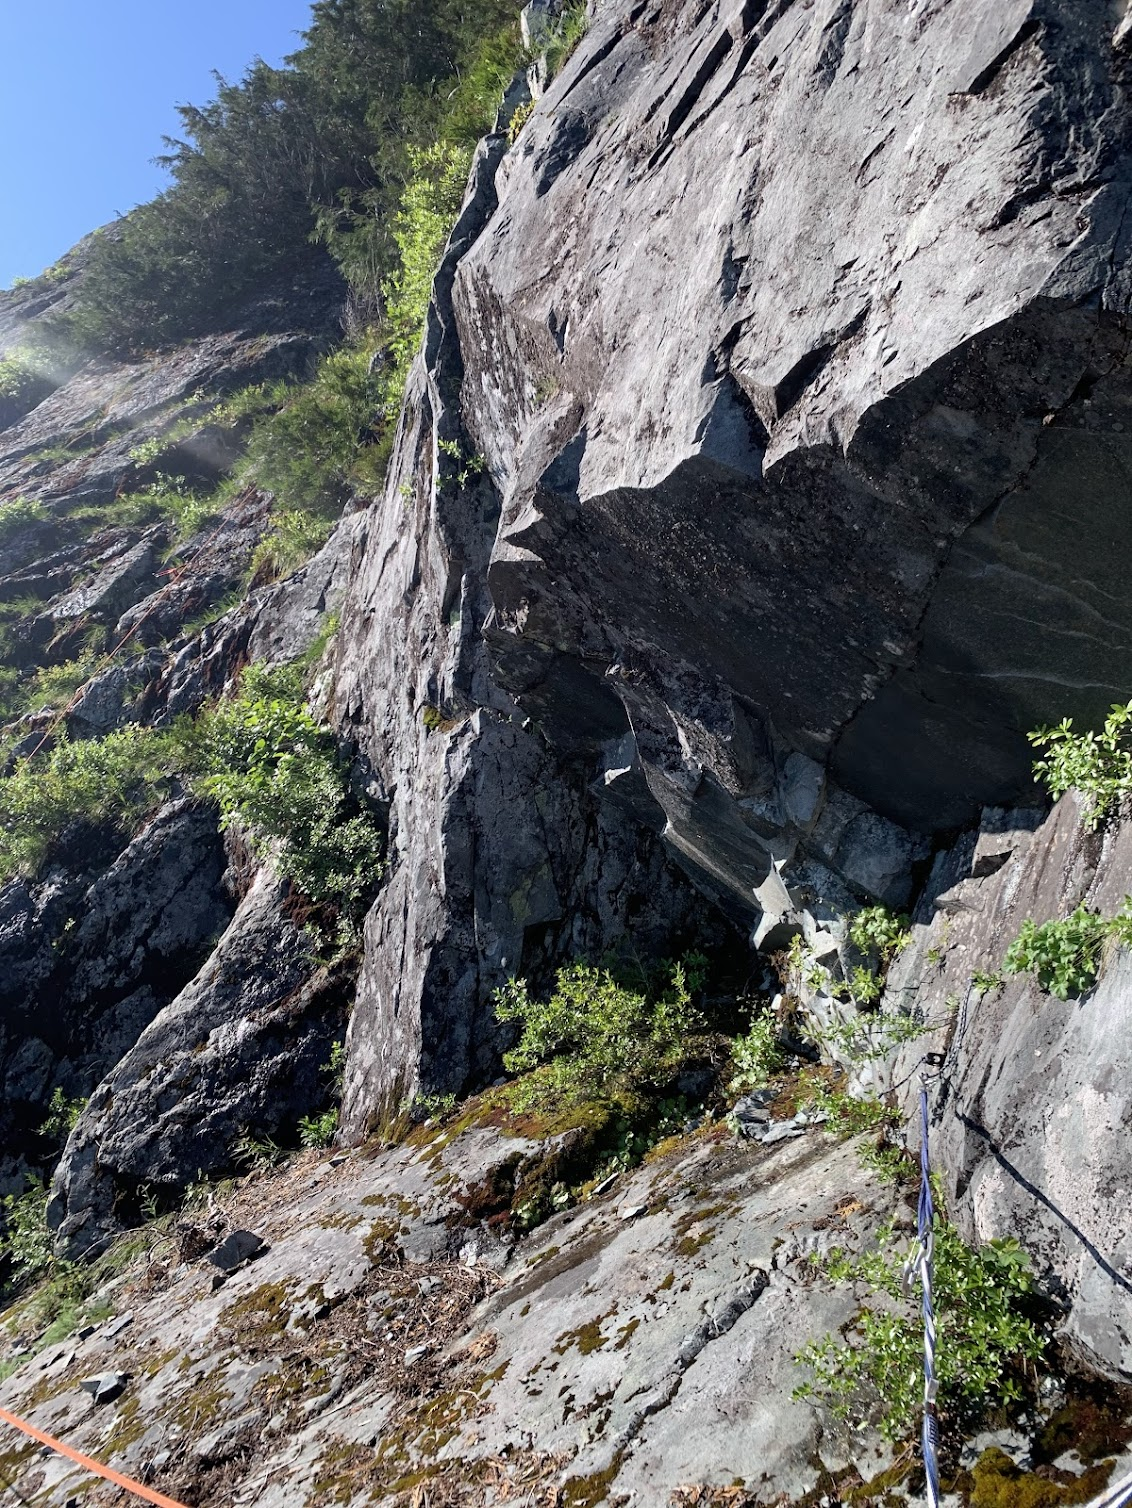
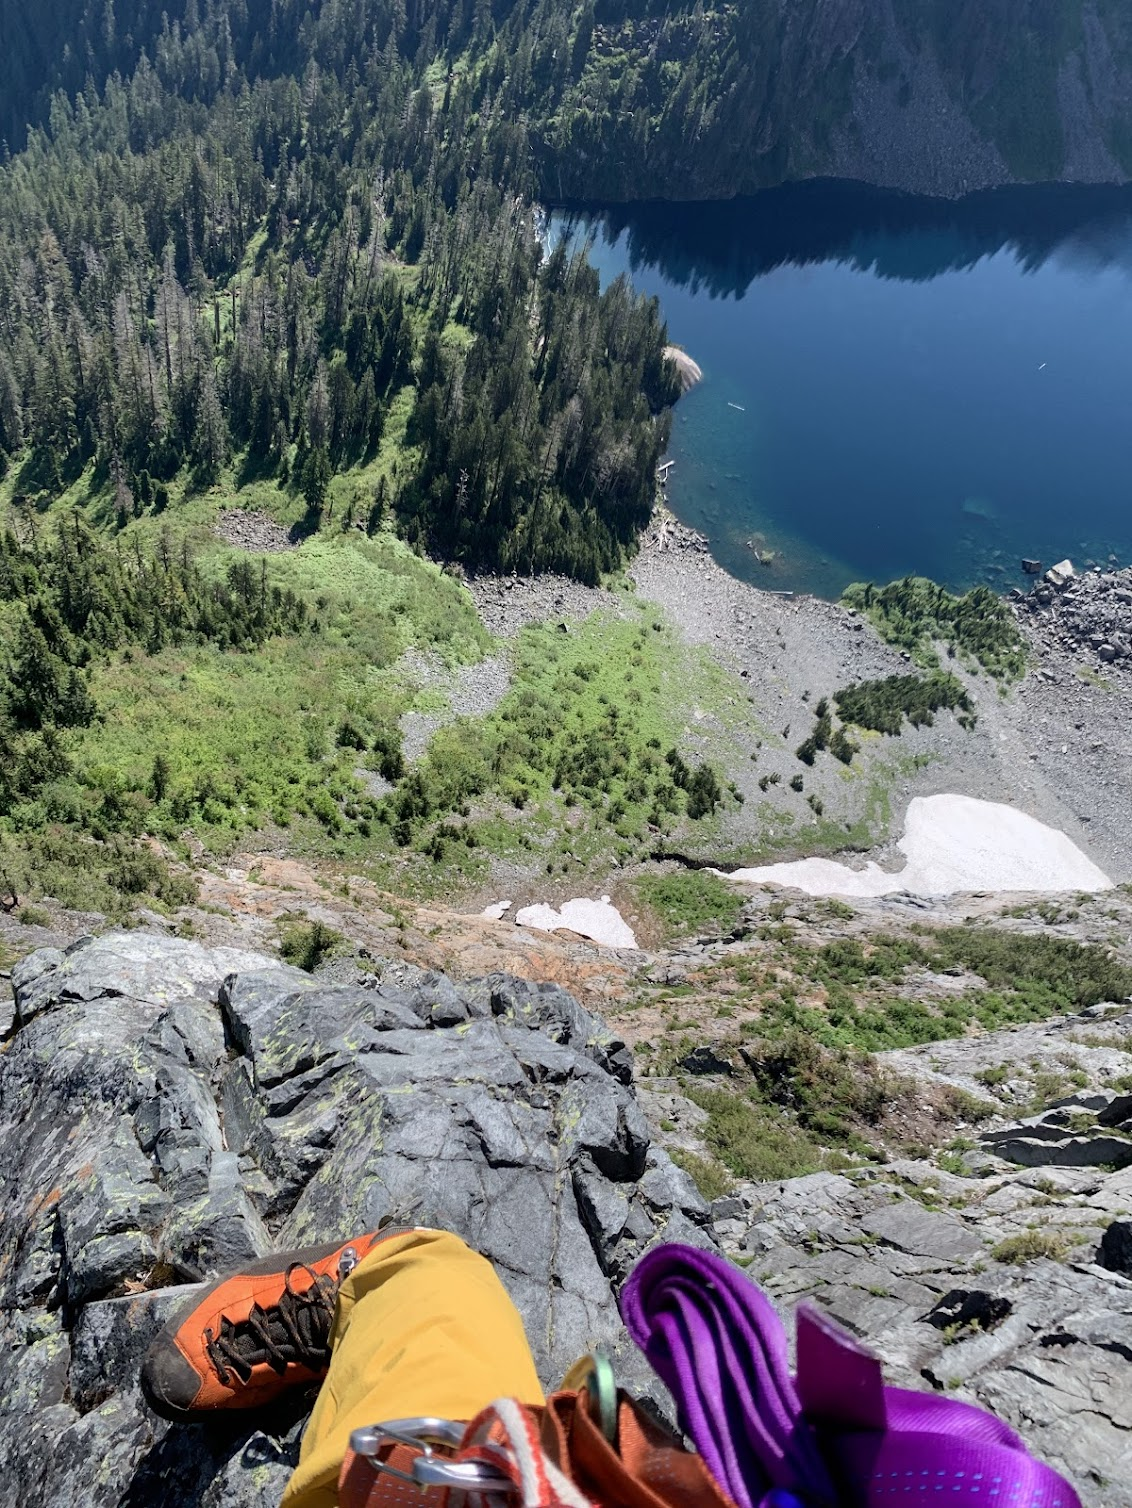
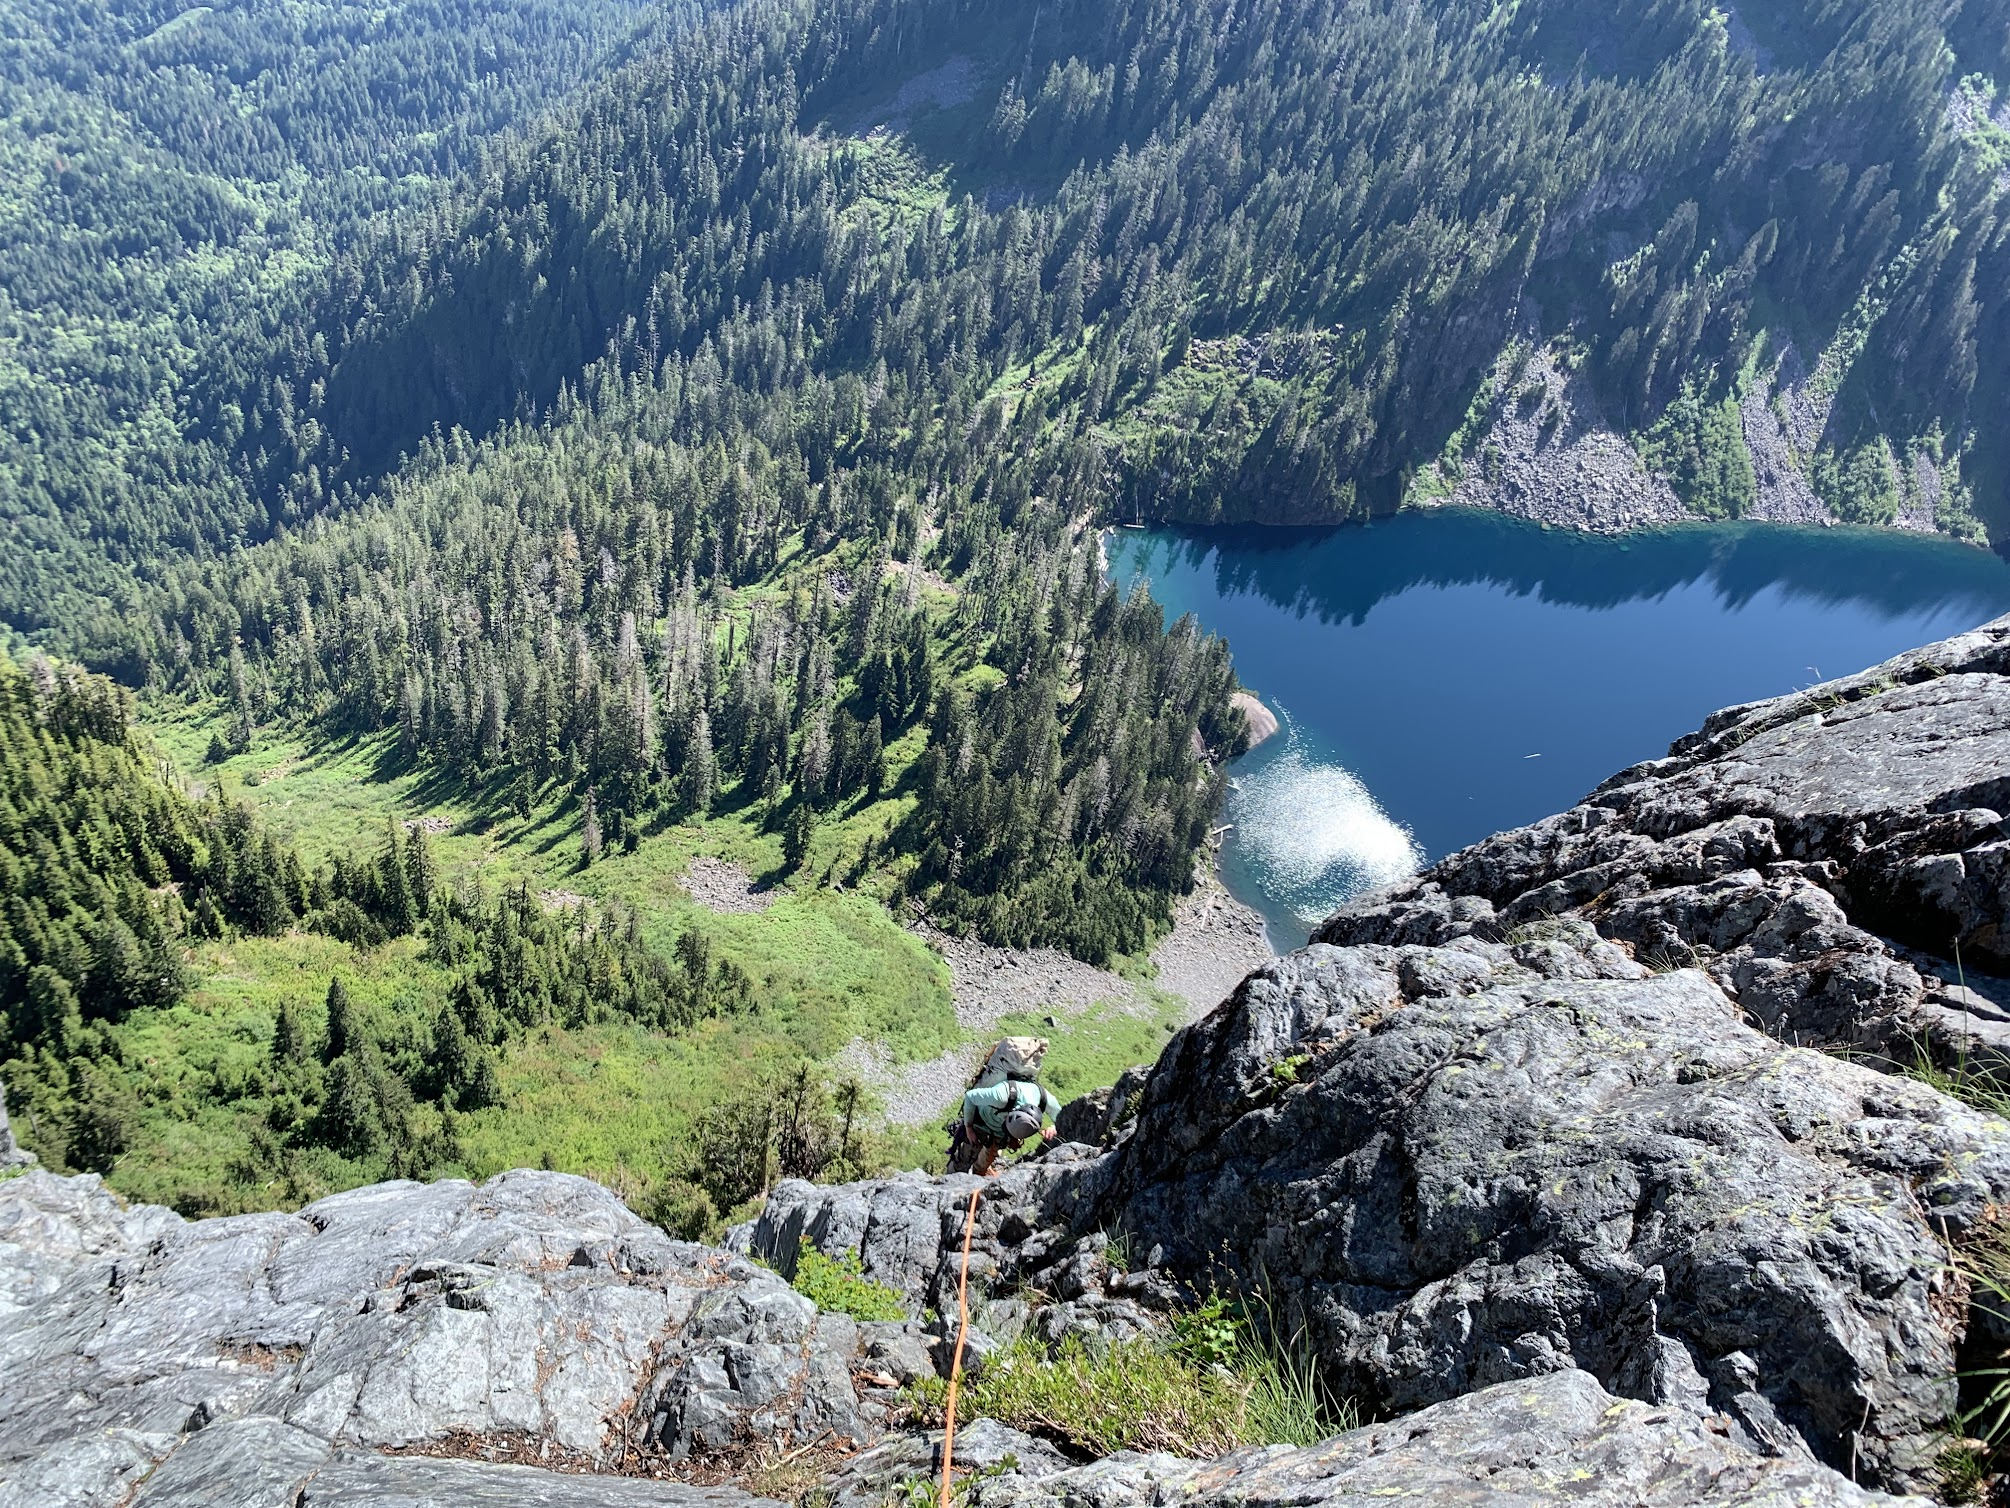
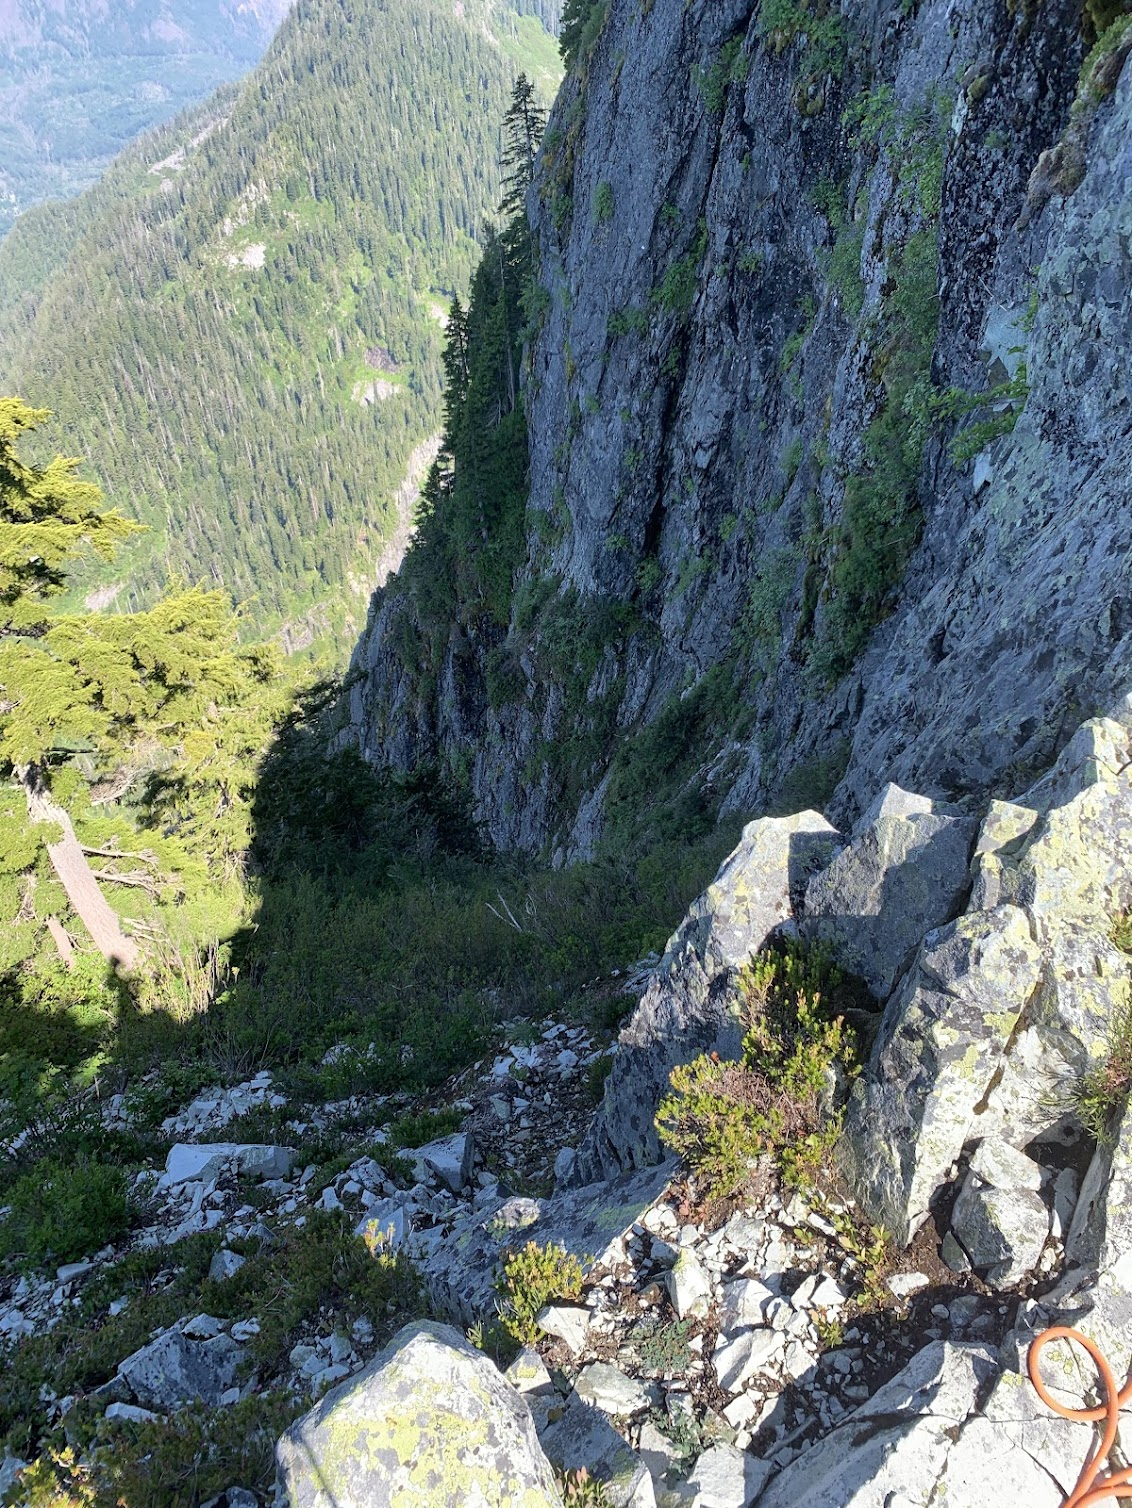
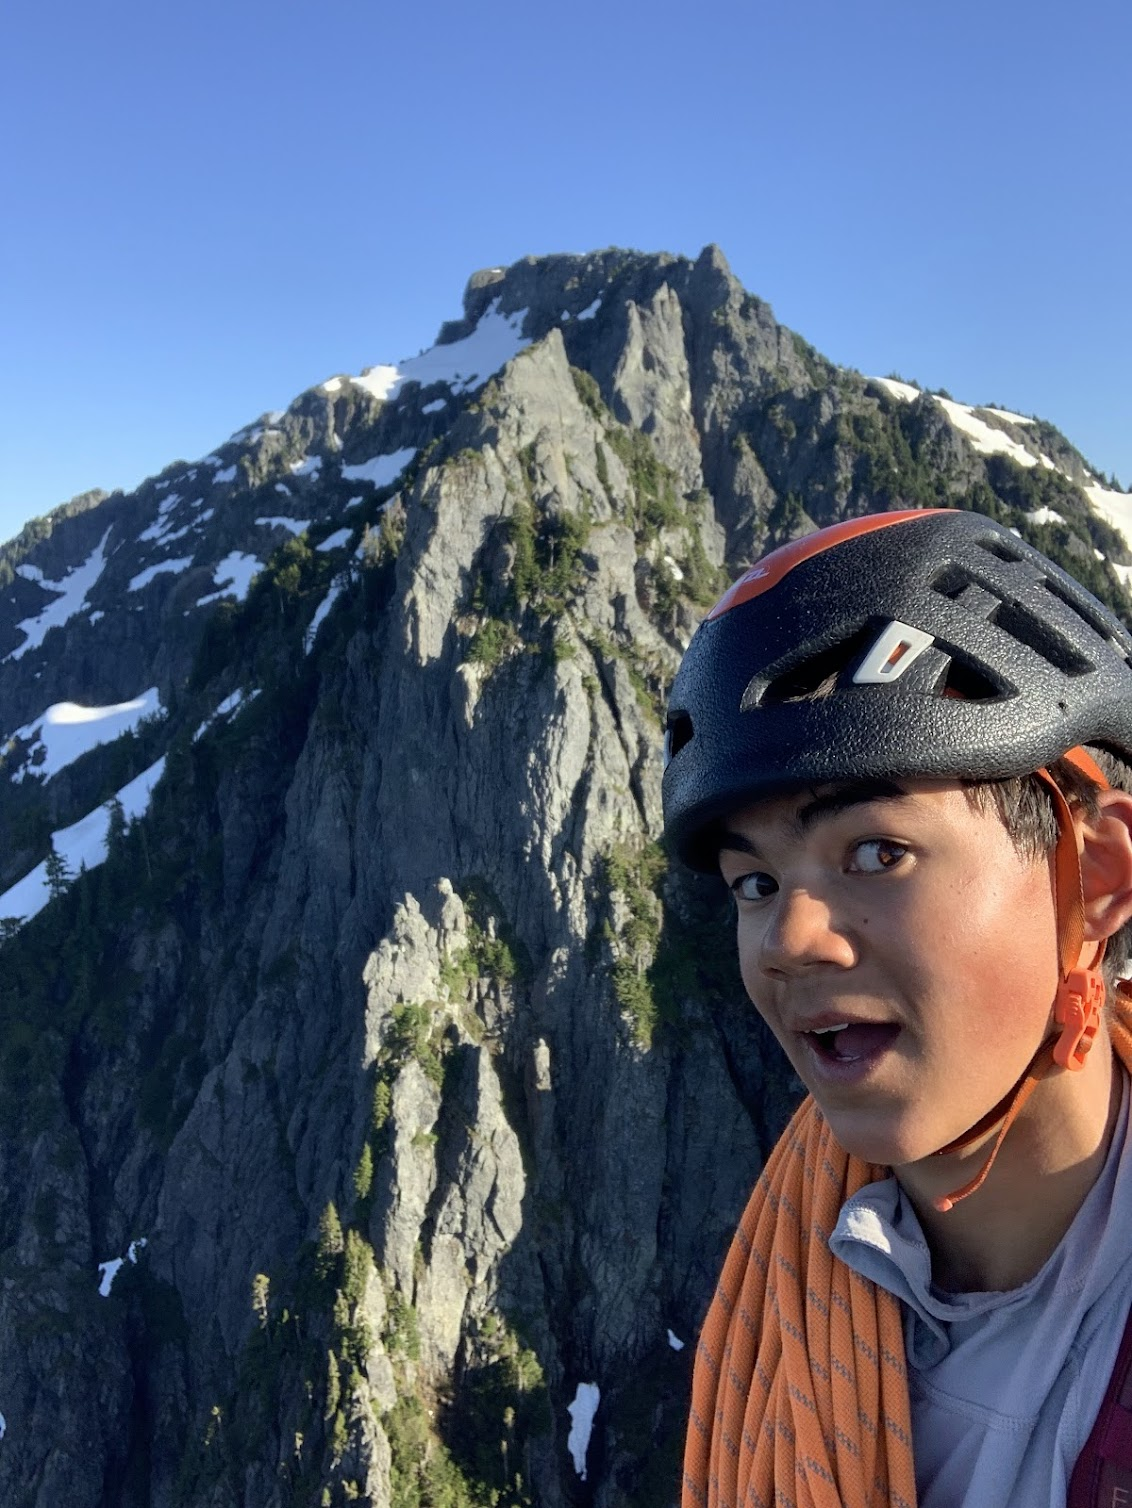
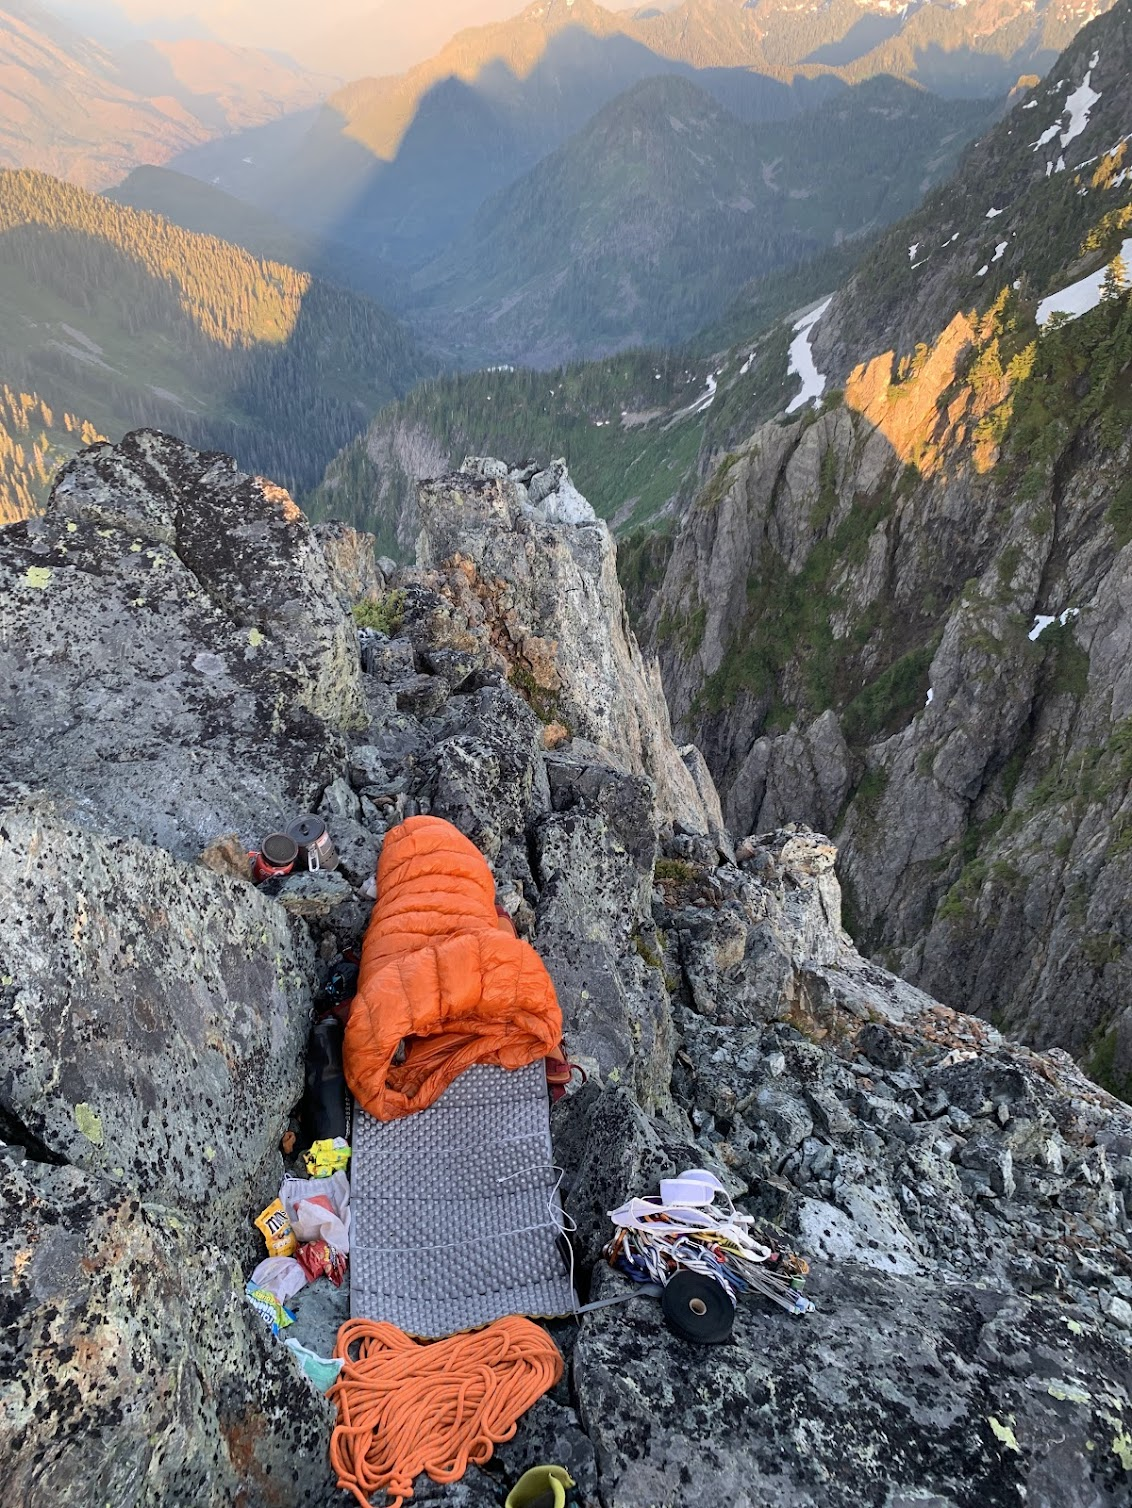
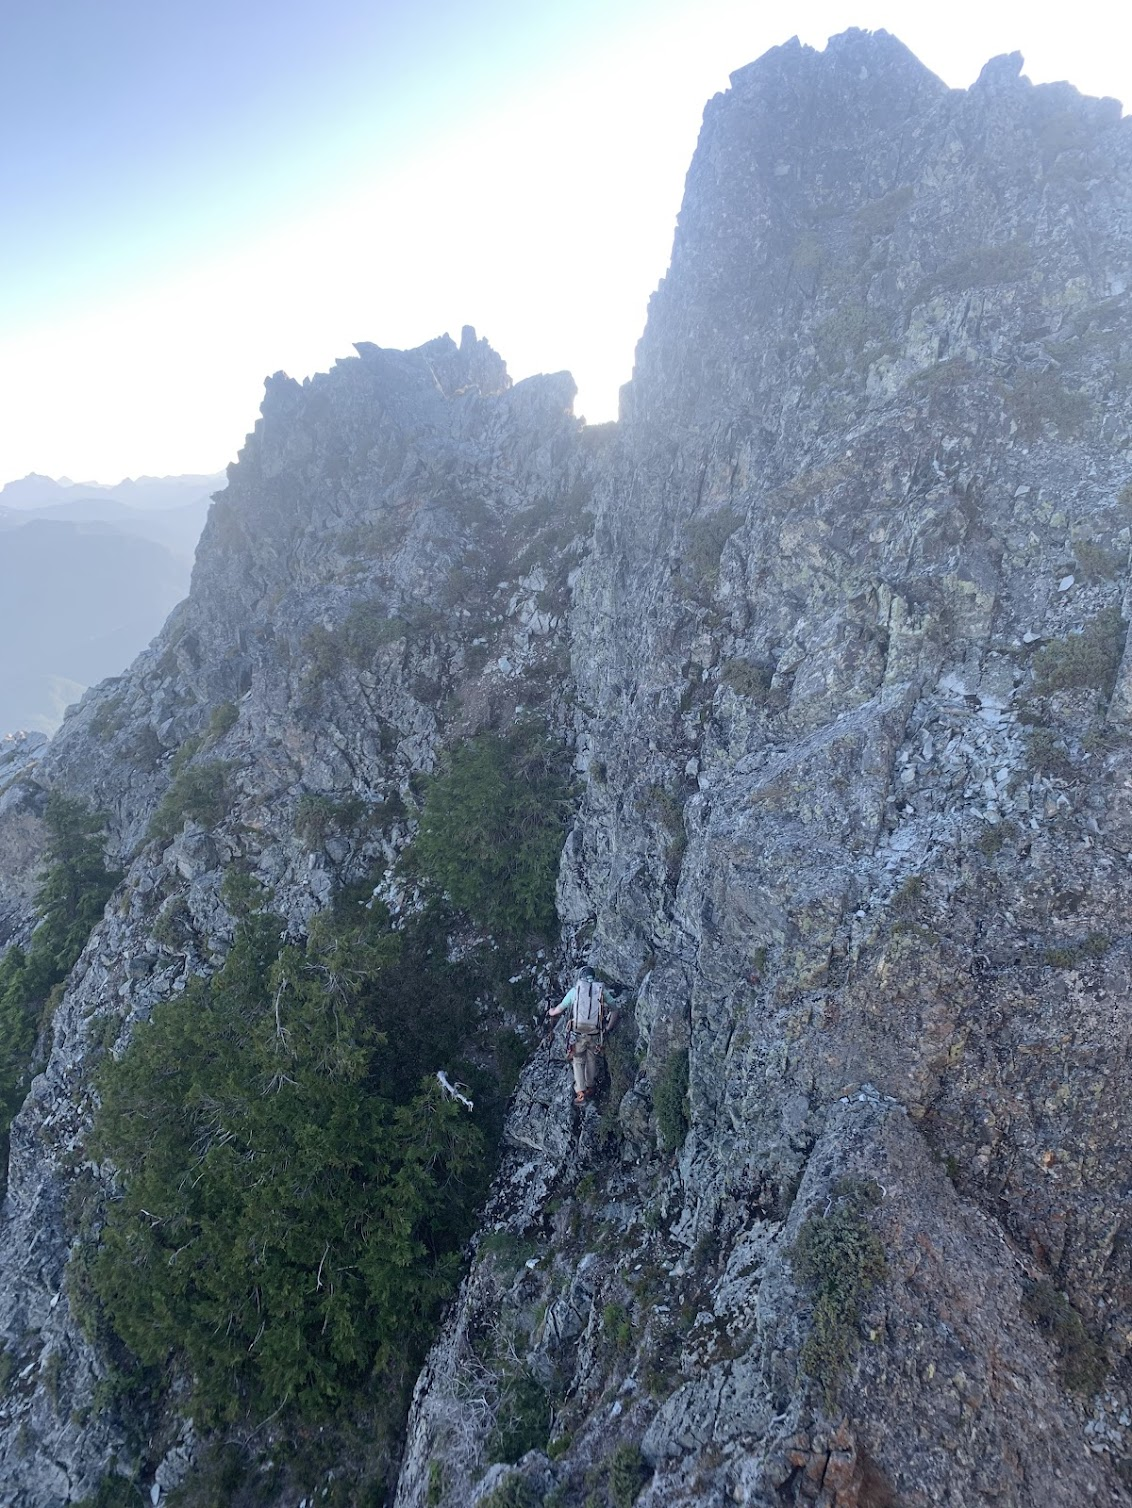
Trip: Mount Index - North Face Trip Date: 06/29/2025 Trip Report: Kinda tired but figure I should write some stuff down while it’s fresh in my mind. I’ll split this into two parts, the story and the beta. The Story is pretty simple, me and a partner decided to go for the Index traverse on Sunday and Monday. We had extra time on saturday so we hiked into lake serene to make for an easier morning. Without light on Saturday night, we made the mistake of trying to bivy at the flatter spot in the topo on the north of lake serene. This is very schwacky. Don’t do it. It wasted a lot of time. Anyways, Sunday am we worked our way up the talus and then up to the ridge. It was still a little wet and loose so we decided to rope up. Halfway up, my partner bonked and our pace slowed considerably. We made it to the summit late and decided that in his condition it wouldn’t be safe to commit ourselves to the rest of the traverse. A nice summit bivy ensued and then 16 rappels + downclimbing the next day. We chilled in by the lake and hiked out at a reasonable time. In the descent we also realized it was prolly a good idea we didn’t commit ourselves to the traverse. It fingers were beat and the rock was so warm that touching the rock was truly painful. Wouldn’t be fun to be forced to climb in that. My partner has a brain and realized this blue collar suffer climbing aint for him, but if anybody wants to get on something suffery with me, let me know. I got a lot of time this summer and like to put my head down and work. Anyways on for the beta Beta: Approach via Lake Serene. Take the trail around the lake to the talus field. Follow the talus field up, eventually getting near the cliffs on the left but not on them. Eventually you will be forced into the bush to the right of the cliffs where there is a faint climbers trail. At times it can be decent but often, its only marked by the fact that you can see the ground every once in a while. Bushwack 4th class up onto the NE Ridge, pulling on lots of branches. Eventually you’ll get out of the schwack and onto the ridge. Take the easiest looking route up, roping up if you feel necessary. Climb this until you reach a slab with two pitons under a roof. Once here take the leftward brush filled ramp for about 50ish meters until you reach a short E facing exposed rock rib. This is a great pitch with exposure above lake serene. It will quickly ease up into a nicer gully below an open book feature. Climb to the treed ledge on the left side below this open book where you’ll find the crux pitch of the route. Start up on left side of the open book before traversing right on smaller holds to get to the easier gully above the open book. Here you’ll find a block with a lots of slings for a nice belay. At the block, climb hard right out of the gully and then climb straight up the steep trees and brush until it gets too steep. Here you should see a small hidden ledge going around right. Take the narrow, exposed ledge around the right skyline where you’ll finally see the North Bowl. Traverse, pulling steep brush, to get into the open bowl. Once in the bowl, the route goes up the steeper long gully on the left. Work your way up this thing, staying on the right side of it for most of the time. Eventually, before the gully turns right, you’ll find yourself on a nice ledge to the right of the gully with a slung tree and a piton + nut anchor above it. Climb up here and then to the left back into the gully. From here(when the gully turns right) it is 60 meters of steep bushwacking up to the toe of the North Rib. The North Rib is the highlight of the route. Stay right on top or barely(a few feet) to the right the entire time. This can be led in 2-3 pitches or one easy simul. It is exposed, but the holds are great unlike the rest of the route, and the location is amazing. Once at the top of the ridge, quickly climb up the small slabs onto the summit ridgeline. Scramble this, along, or slightly to the right for most of it until you reach the summit. slab with pins below roof. Ramp off to the left great exposure on E facing rib topping out of open book looking down rightwards turn at end of gully filled with steep branches. Taken from toe of N. Rib ig I'll have to come back for these guys summit bivy summit ridge scrambling(taken on way back) Gear Notes: Double rack to #2 but a single would probably be fine. Bring lots of double length slings, you'll be slinging a lot of shtuff. Approach Notes: Lake Serene -> boulder field -> Shwack
-
 Thanks Jason! Yeah, can't go heavy on a carryover route with 5k' of technical climbing regardless! 😂 Though I definitely would have liked some trekking poles on the descent and warmer bivy kit on night two... oh and more food! You can always have more food!
 -
Yeah, for sure, though summiting the Grand in a whiteout right after several loud thunder strikes was definitely more than I wanted in that moment!
-
 huwhatwhen changed their profile photo
 -
 That is an impressive week for anyone, dads or not! I guess SUP vs. canoe rental is one way to force yourself to go light.
 -
 Awesome! Looks like you nailed the conditions.
 - Yesterday
-
Looking for 3rd member to join our climbing party! Previously committed member had something come up and can no longer go. We will be climbing Mt. Baker via Easton glacier on July 22-23, 2025. We have some extra climbing gear you can use (ice axe, helmet, etc) and some flexibility with the dates if that affects your decision to join. About me: Avid backpacker who wants to continue practicing mountaineering. I have climbed Mt. Baker three times, twice via the Easton glacier route. Basic glacier travel experience. Please reach out if you are interested or have questions!
-
 Very cool. Thanks for sharing.
 -
Kev - Like Jason said, Index is what you are looking for if it's granite crack climbing. It's world class, but you need to learn the area a bit before setting up a rope solo system. Start a grade under what you usually would. Index grades are not soft.
-
Anyone know how to make videos work? Nevermind, they just needed to load a bit.
-
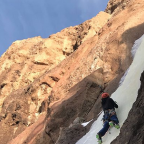
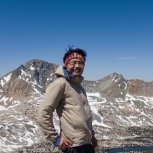
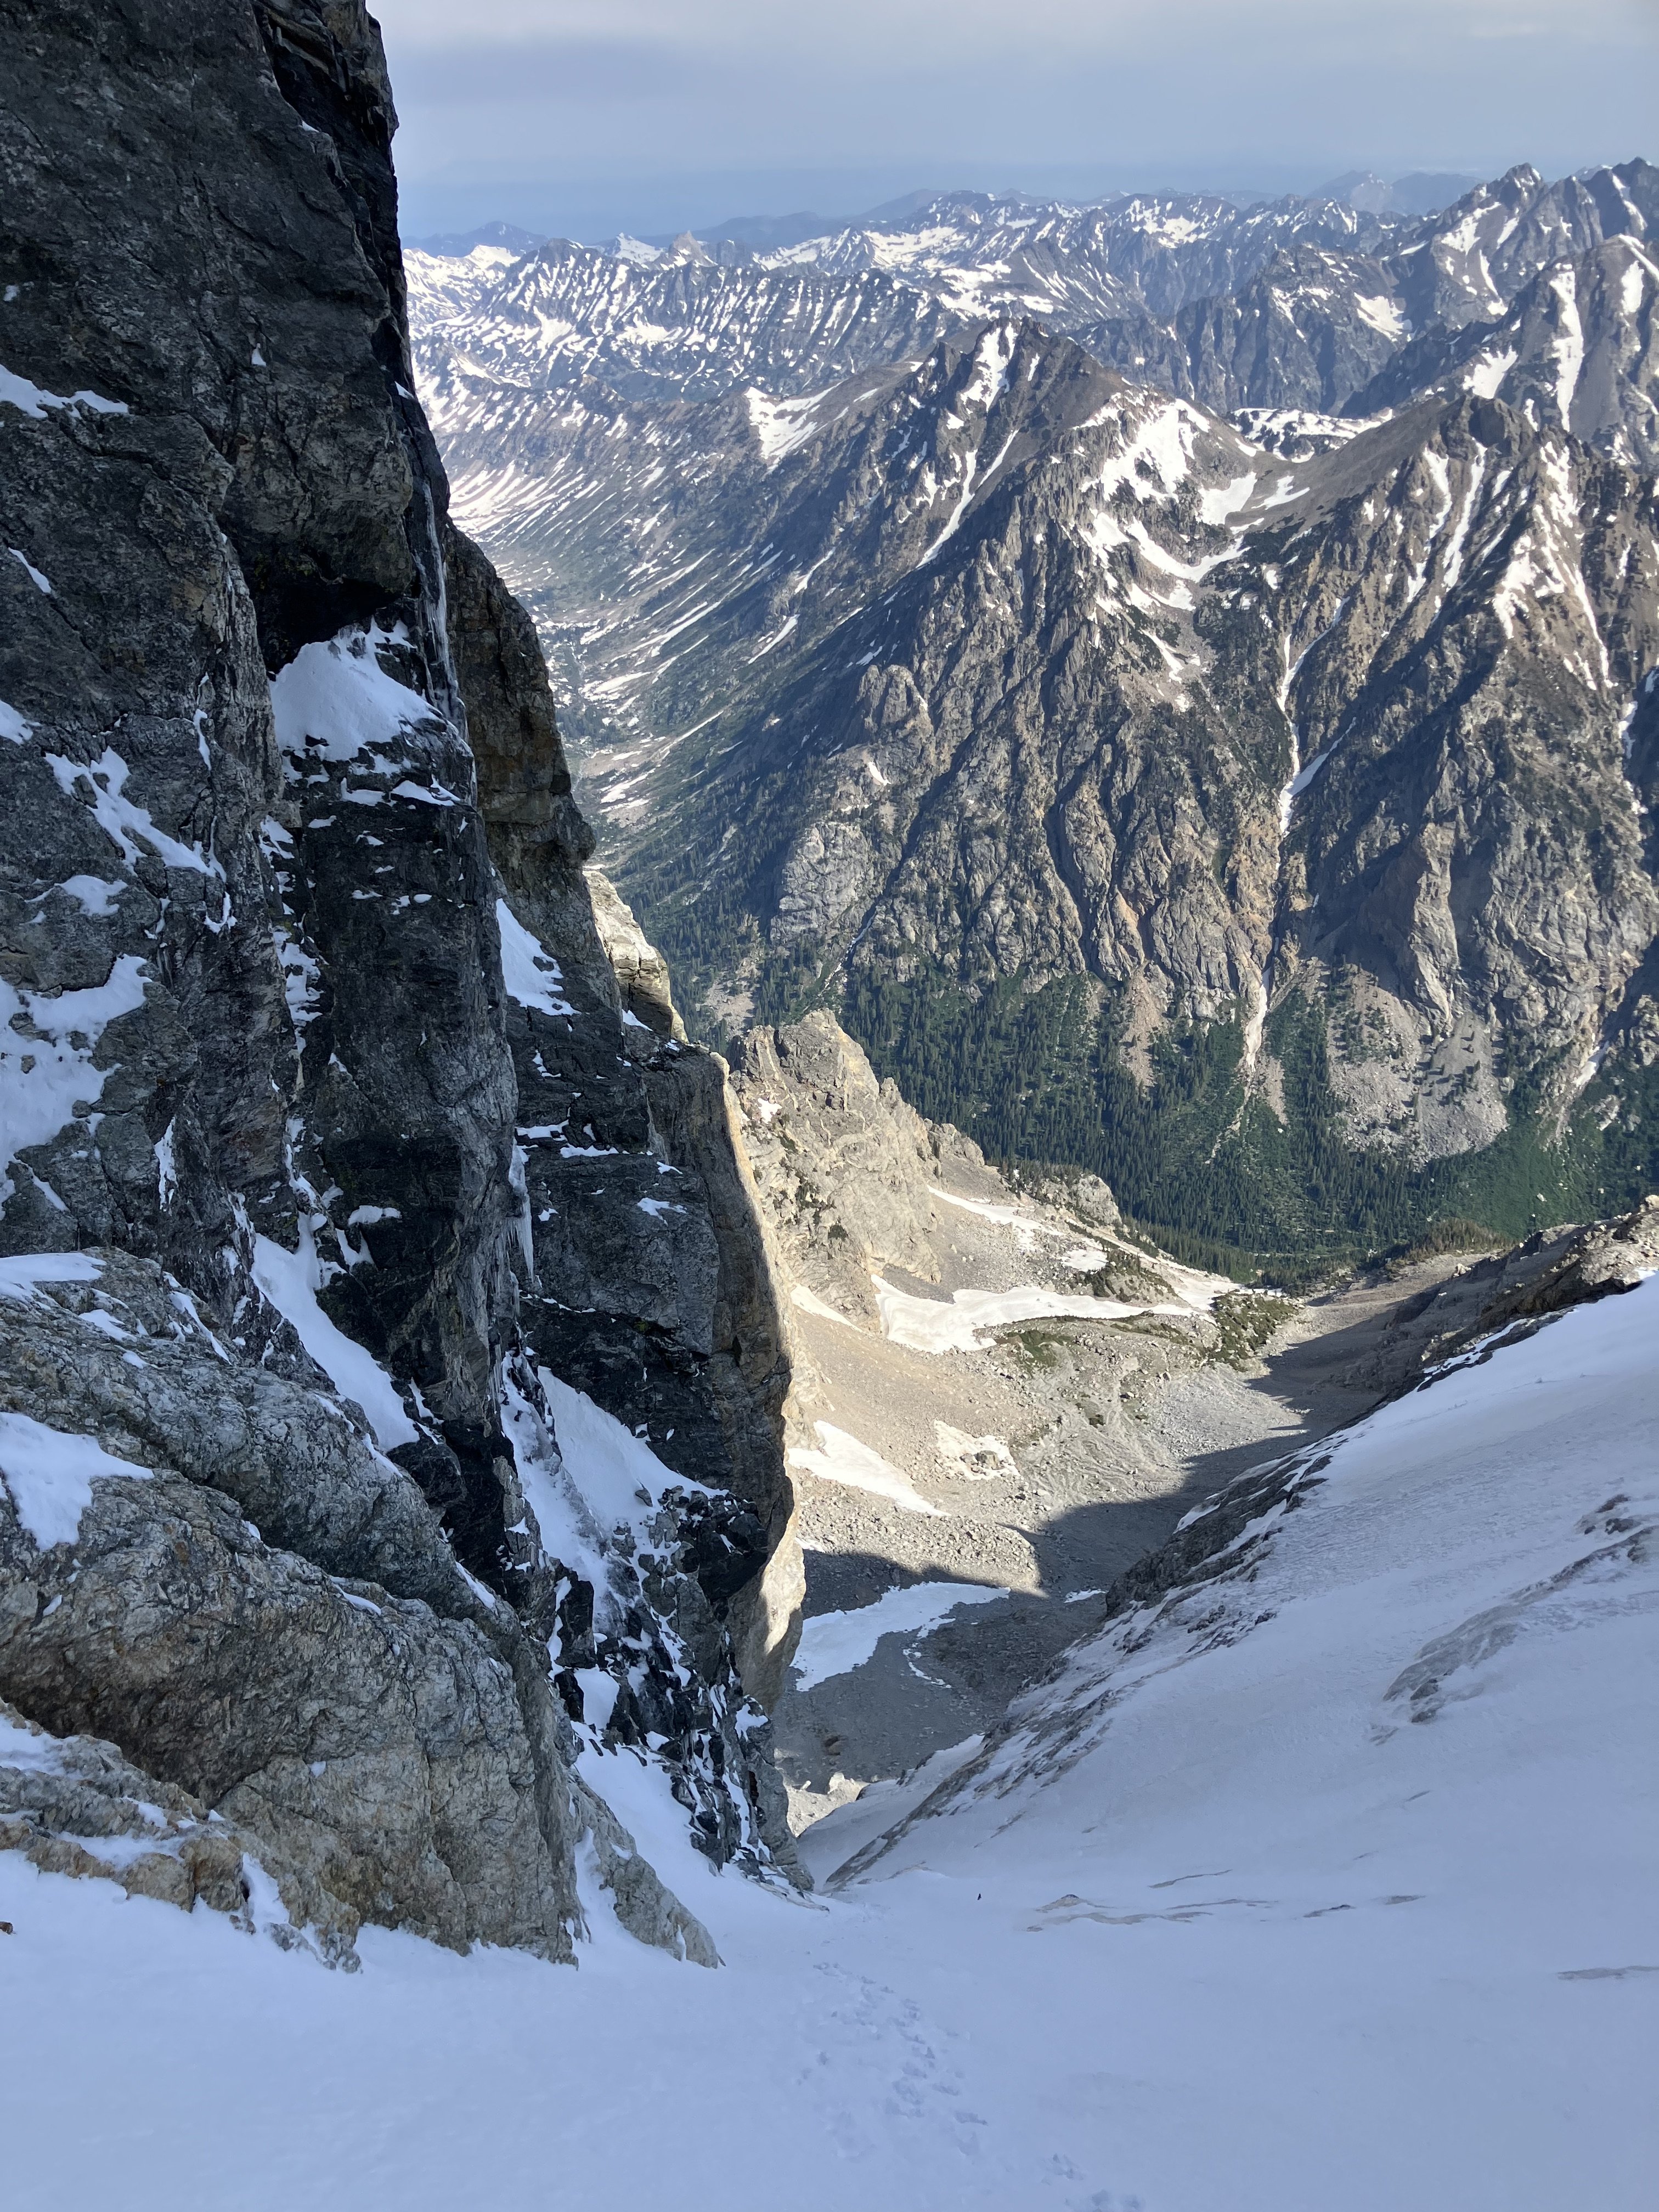
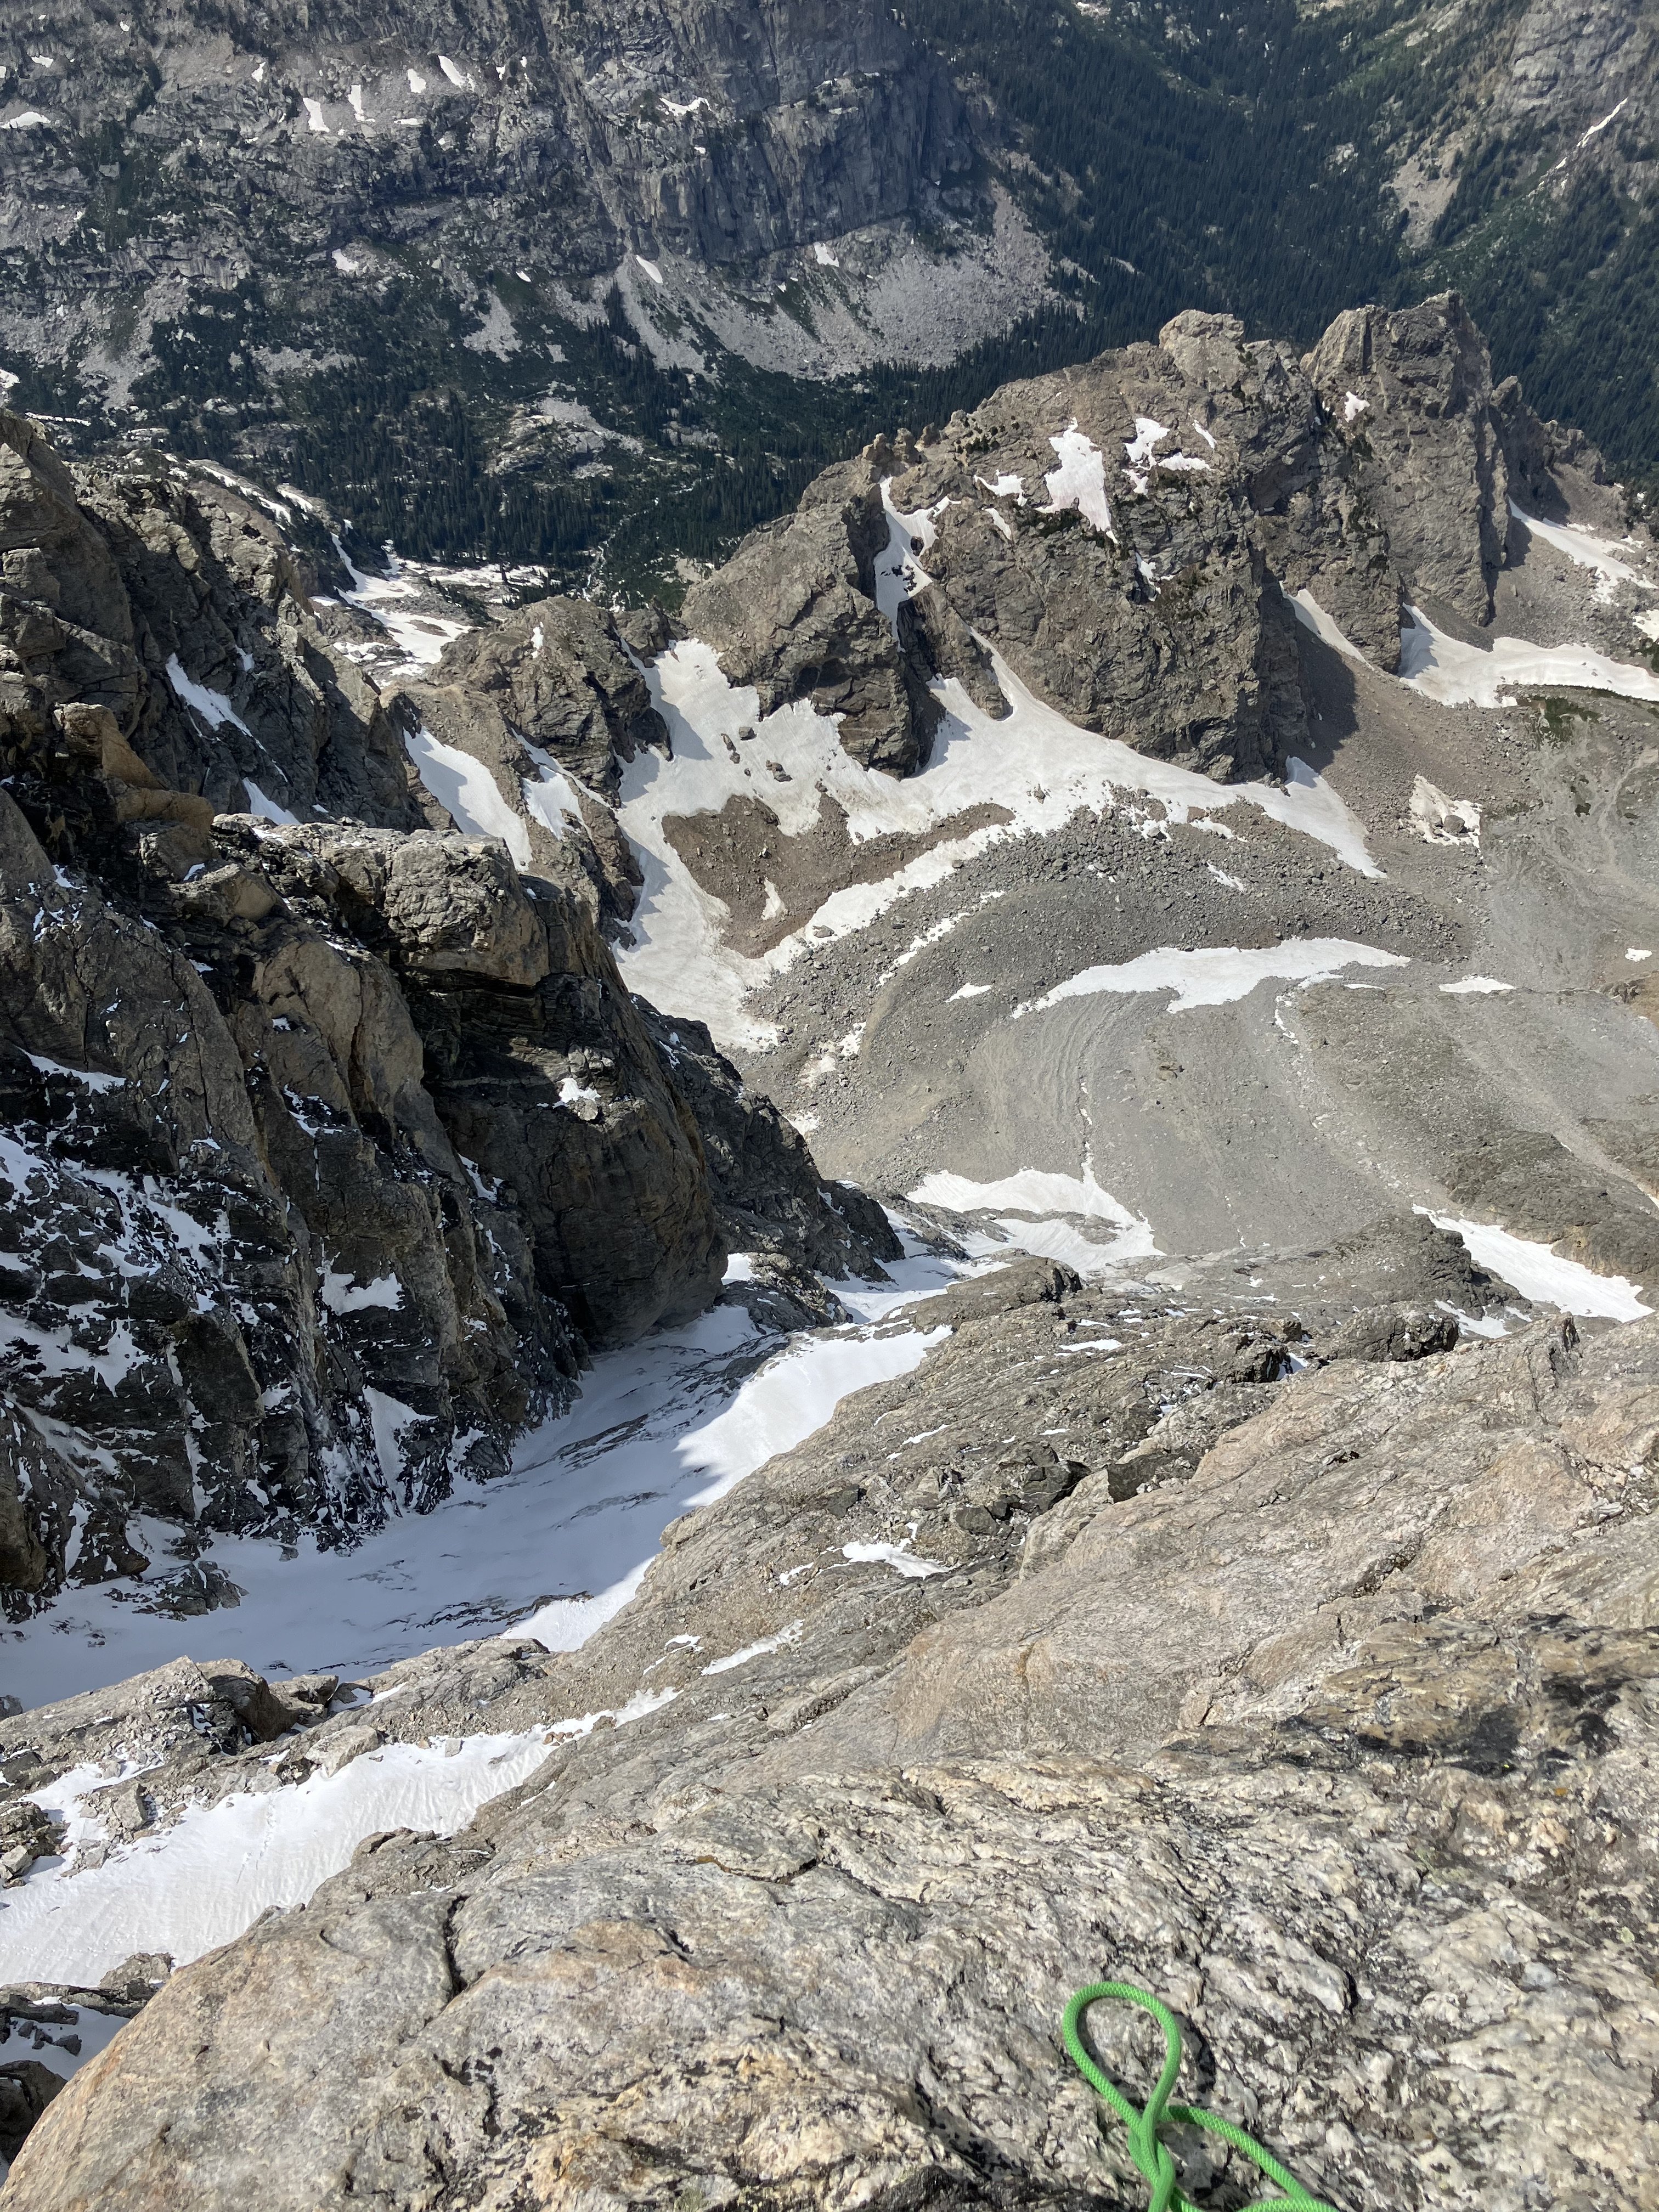
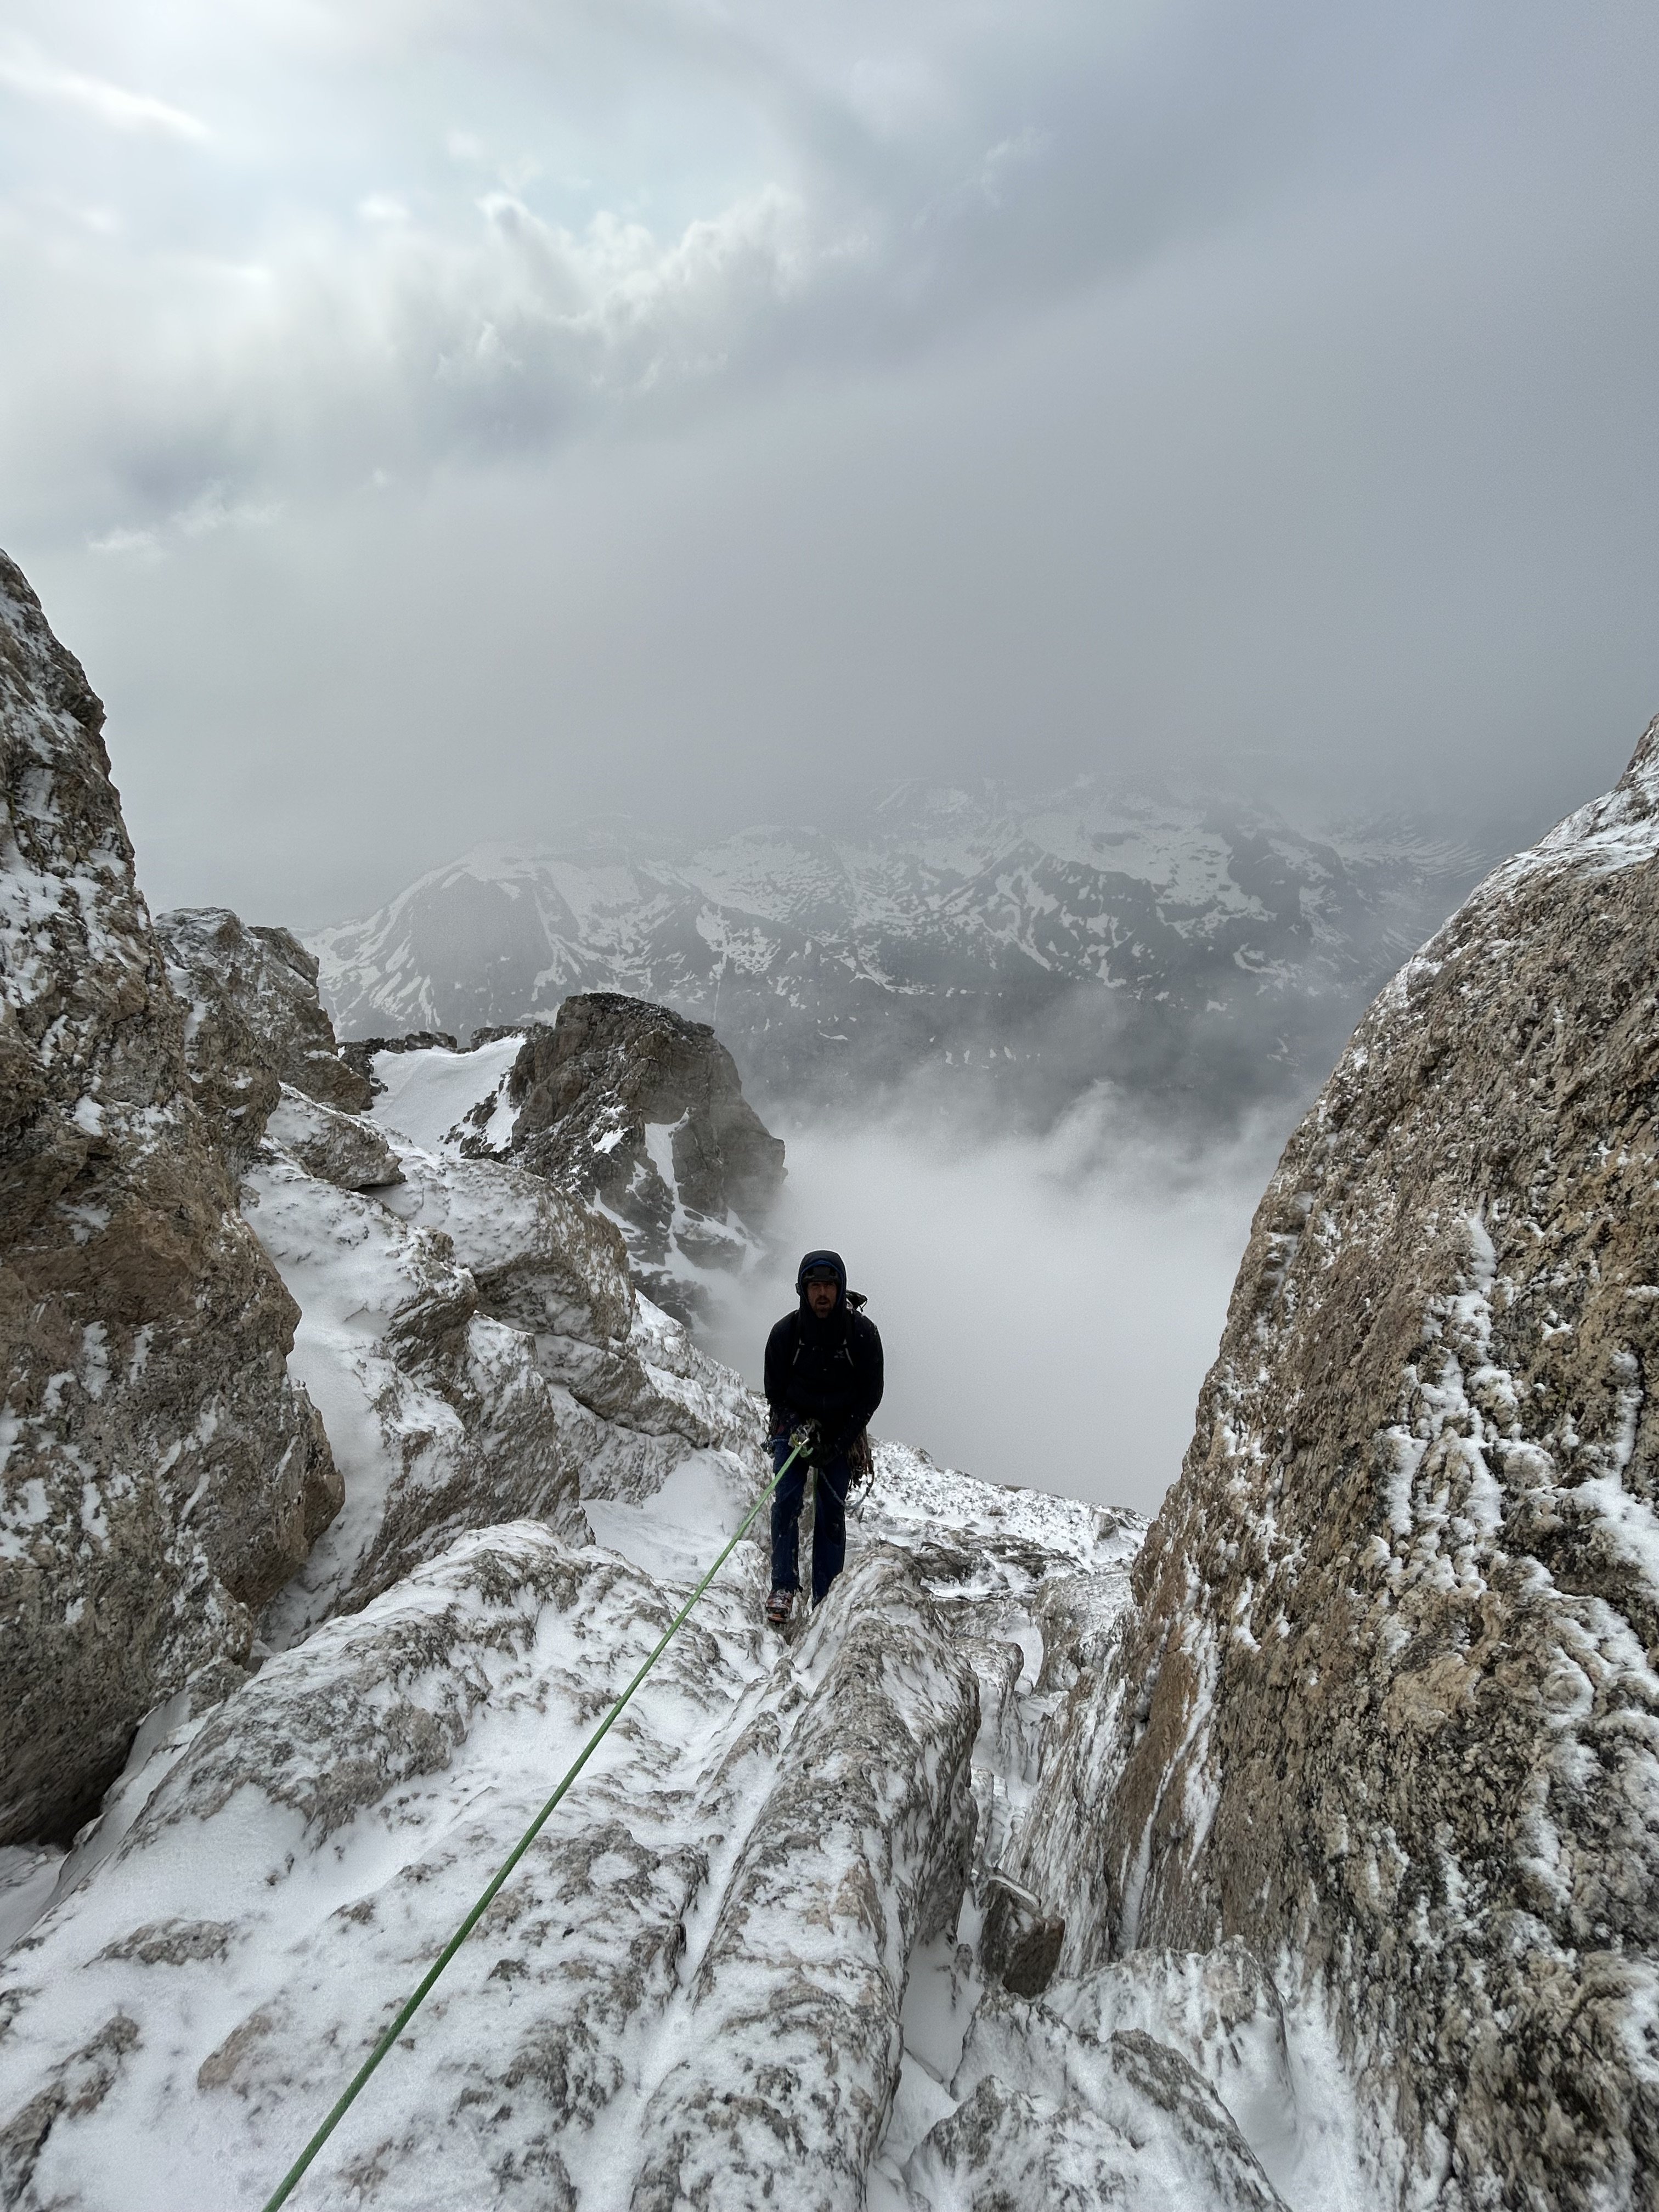
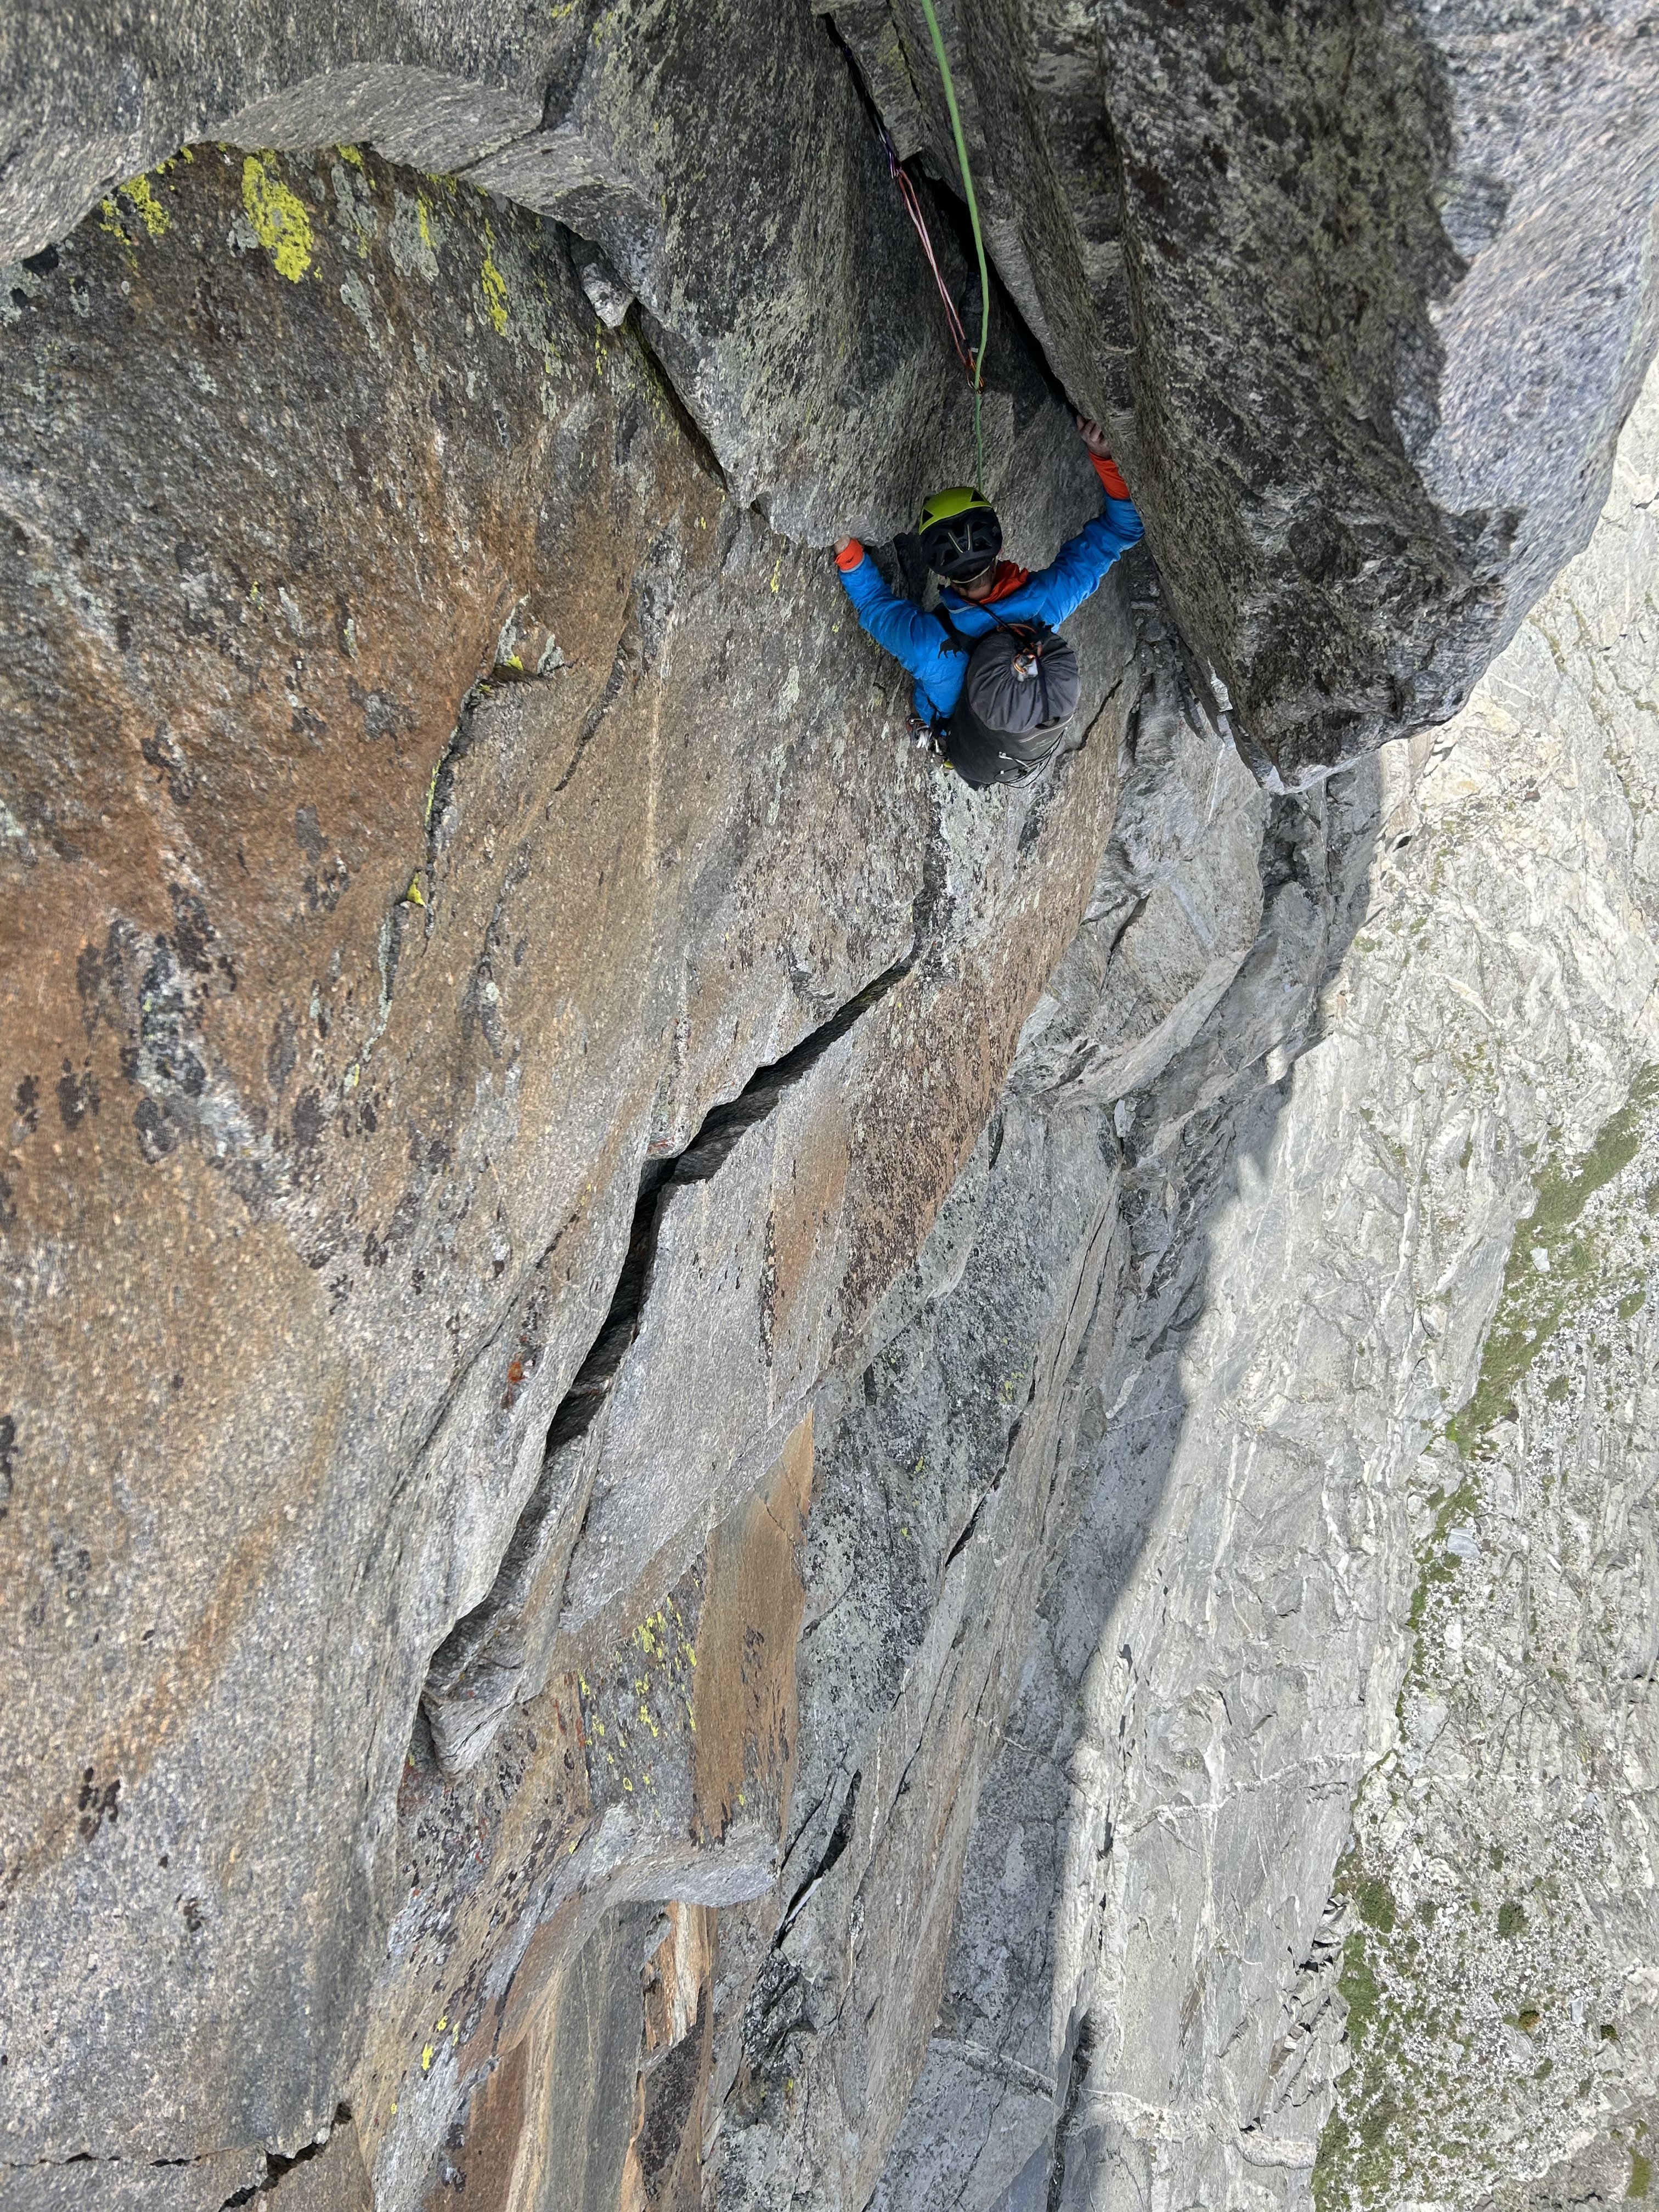
Trip: Tetons - Black Ice Couloir to West Face on the Grand; Direct South Buttress to the summit on Moran Trip Date: 06/23/2025 Trip Report: Dallin and I had gotten skunked by climate change two summers ago in Canada, so this year we decided to book a week together in late June and go wherever the weather looked best, with the goal of climbing long routes to summits. We were just starting to get really excited for Roger's Pass when the weather changed and we bailed to a more southerly range, the Tetons. The week was starting cold so we decided to prioritize ice routes. We had reliable intel that Run Don't Walk was out, but Black Ice had seen a mixed ascent 10 days prior and temps/precip seemed to suggest it would only grow. Wanting to do all the things, we hiked up to the Lower Saddle prepped to link into the West Face. The Black Ice/West Face linkup is George Lowe's pick for the 50 Favorites book. In his topo he cuts left on a snow field to the West Face, missing the crux of BIC. Since BIC is hard to find in condition in this age, we opted to climb BIC through the crux if it looked good and then cut out left higher, if possible. This strategy worked out well. The crux of BIC was thin ice on slab to neve sticks above a chockstone, very fun. A long, snow covered slab/ledge system allowed us to traverse out onto the West Face, starting with the rock climbing on pitch 4. We only brought a single pair of rock shoes, so Dallin lead everything and I followed in full shank boots, making the old school 5.8 traverse pitch quite exciting. After 5 difficult (for me in boots) and wandery pitches we reached the end of the difficulties on the Lowe topo. At this point the weather came in, snowing and thundering. After dead ending a couple times on the scramble to the summit I downclimbed into a snow filled gully, reattached crampons, and climbed a tenuous verglassed slab to snow only to find it was powder on featureless slab. Luckily, a leaning flake crack provided a good torques and we topped out in a white out. The sun poked out again just in time to allow a quick navigation of the raps. After a night at a friend's house in Jackson, we repacked for a sunnier objective. That afternoon we paddle boarded over to Leigh Canyon and bushwhacked up the drainage until we were under the South Buttress of Mt. Moran. We bivied on cleared camp spots in some cottonwoods next to the creek. At 4am we rolled out of bivy bags and headed up through the brush and scree to the Direct South Buttress route. We had heard the first pitch of Blackfin was the preferred first pitch which accessed the second ramp. However, after looking at various options and downclimbing off one horror show of stacked blocks, we just scrambled higher on the first ramp and did the original low 5th start. More route finding difficulties slowed us and ate up time, but we persisted and gained the main line of pitches up nice cracks which appeared to be a lovely white granite in places. The traverse pitch and crux was not too bad, we opted to simply pendulum and aid at this point in the day. We reached the hanging bowl at 3pm and thought maybe we could still do the remaining 3000' to the summit before dark (oh hubris). Wet and vegetated slabs, sandbagged old school climbing, and extremely exposed tower ridge traversing in high winds saw us reach some good bivy sites in the second hanging bowl with a little bit of daylight left. We cut our loses and settled in for a cold and windy bivy. The next morning we were up and moving by 5am. Many more route finding difficulties lead to an off-route, overhanging, bomb bay chimney that ended with a mantle on to the summit plateau. We tagged the summit at 1:30pm and had a quick snack/water break before descending the CMC route. Neither of us had climbed the CMC or Moran before so this made for some interesting and surprising situations as we down-simuled and rappelled, culminating in realizing we had to rap into the Drizzlepuss notch and climb up the peak on the other side to escape. Once over the annoying DP, we raced down to the lake and paddle boarded leisurely back to the car with a beautiful sunset until hoards of mosquitoes found us. A dunk in the cold water and shivering night drive into Jackson with the windows down let the bloodsuckers escape. We got late night pizza slices and then had to drive 2 hrs around through Alpine to reach Driggs because Teton Pass was closed for construction... always one more problem to surmount! I passed out in the back of my car in Driggs at 2am and drove home the next day. Thanks to our families for letting the dads go big for a week! Double rainbow in Driggs was a good omen. Dawn on the Valhalla Traverse to reach BIC. Dallin on Valhalla Dallin finishing the Valhalla traverse Dallin's pic of me leading the mixed pitch to access the BIC Lookind down the BIC before it started getting more icey. Crux on BIC Dallin switching to rock shoes on the West Face Me following on the W Face Looking down the W Face on the BIC IMG_4881.MOV Dallin's video on the summit in a whiteout First rap off the Grand Enclosure with the clouds blowing off. Below the DSB on Moran Dallin's pic of me catching Z's below the DSB, I'm too soft to go with the rope bivy these days. Myself following one of the better pitches on the DSB Dallin's pic of me leading the penji to aid crack pitch. Dallin getting ready to follow the crux/aid pitch This is the "5.5" exit pitch from the DSB... friction slab feet and a jug rail... 5.9 in Squamish for sure and pretty consistent for the grades on this route. Endless 4th/low 5th on the upper SB. Dallin getting water at the second bowl before going looking for a good bivy site. Dallin cheesing when we thought it was almost over. Dallin leading what we thought was the last hard pitch... turned out to be a few more and lots of shenanigans. Myself following said pitch... quite good. IMG_3646.MOV Summit of Moran, finally! Gear Notes: All the toys... really, all of them. Approach Notes: Standard beta available on the interwebs.


-
 Danny K joined the community
 -
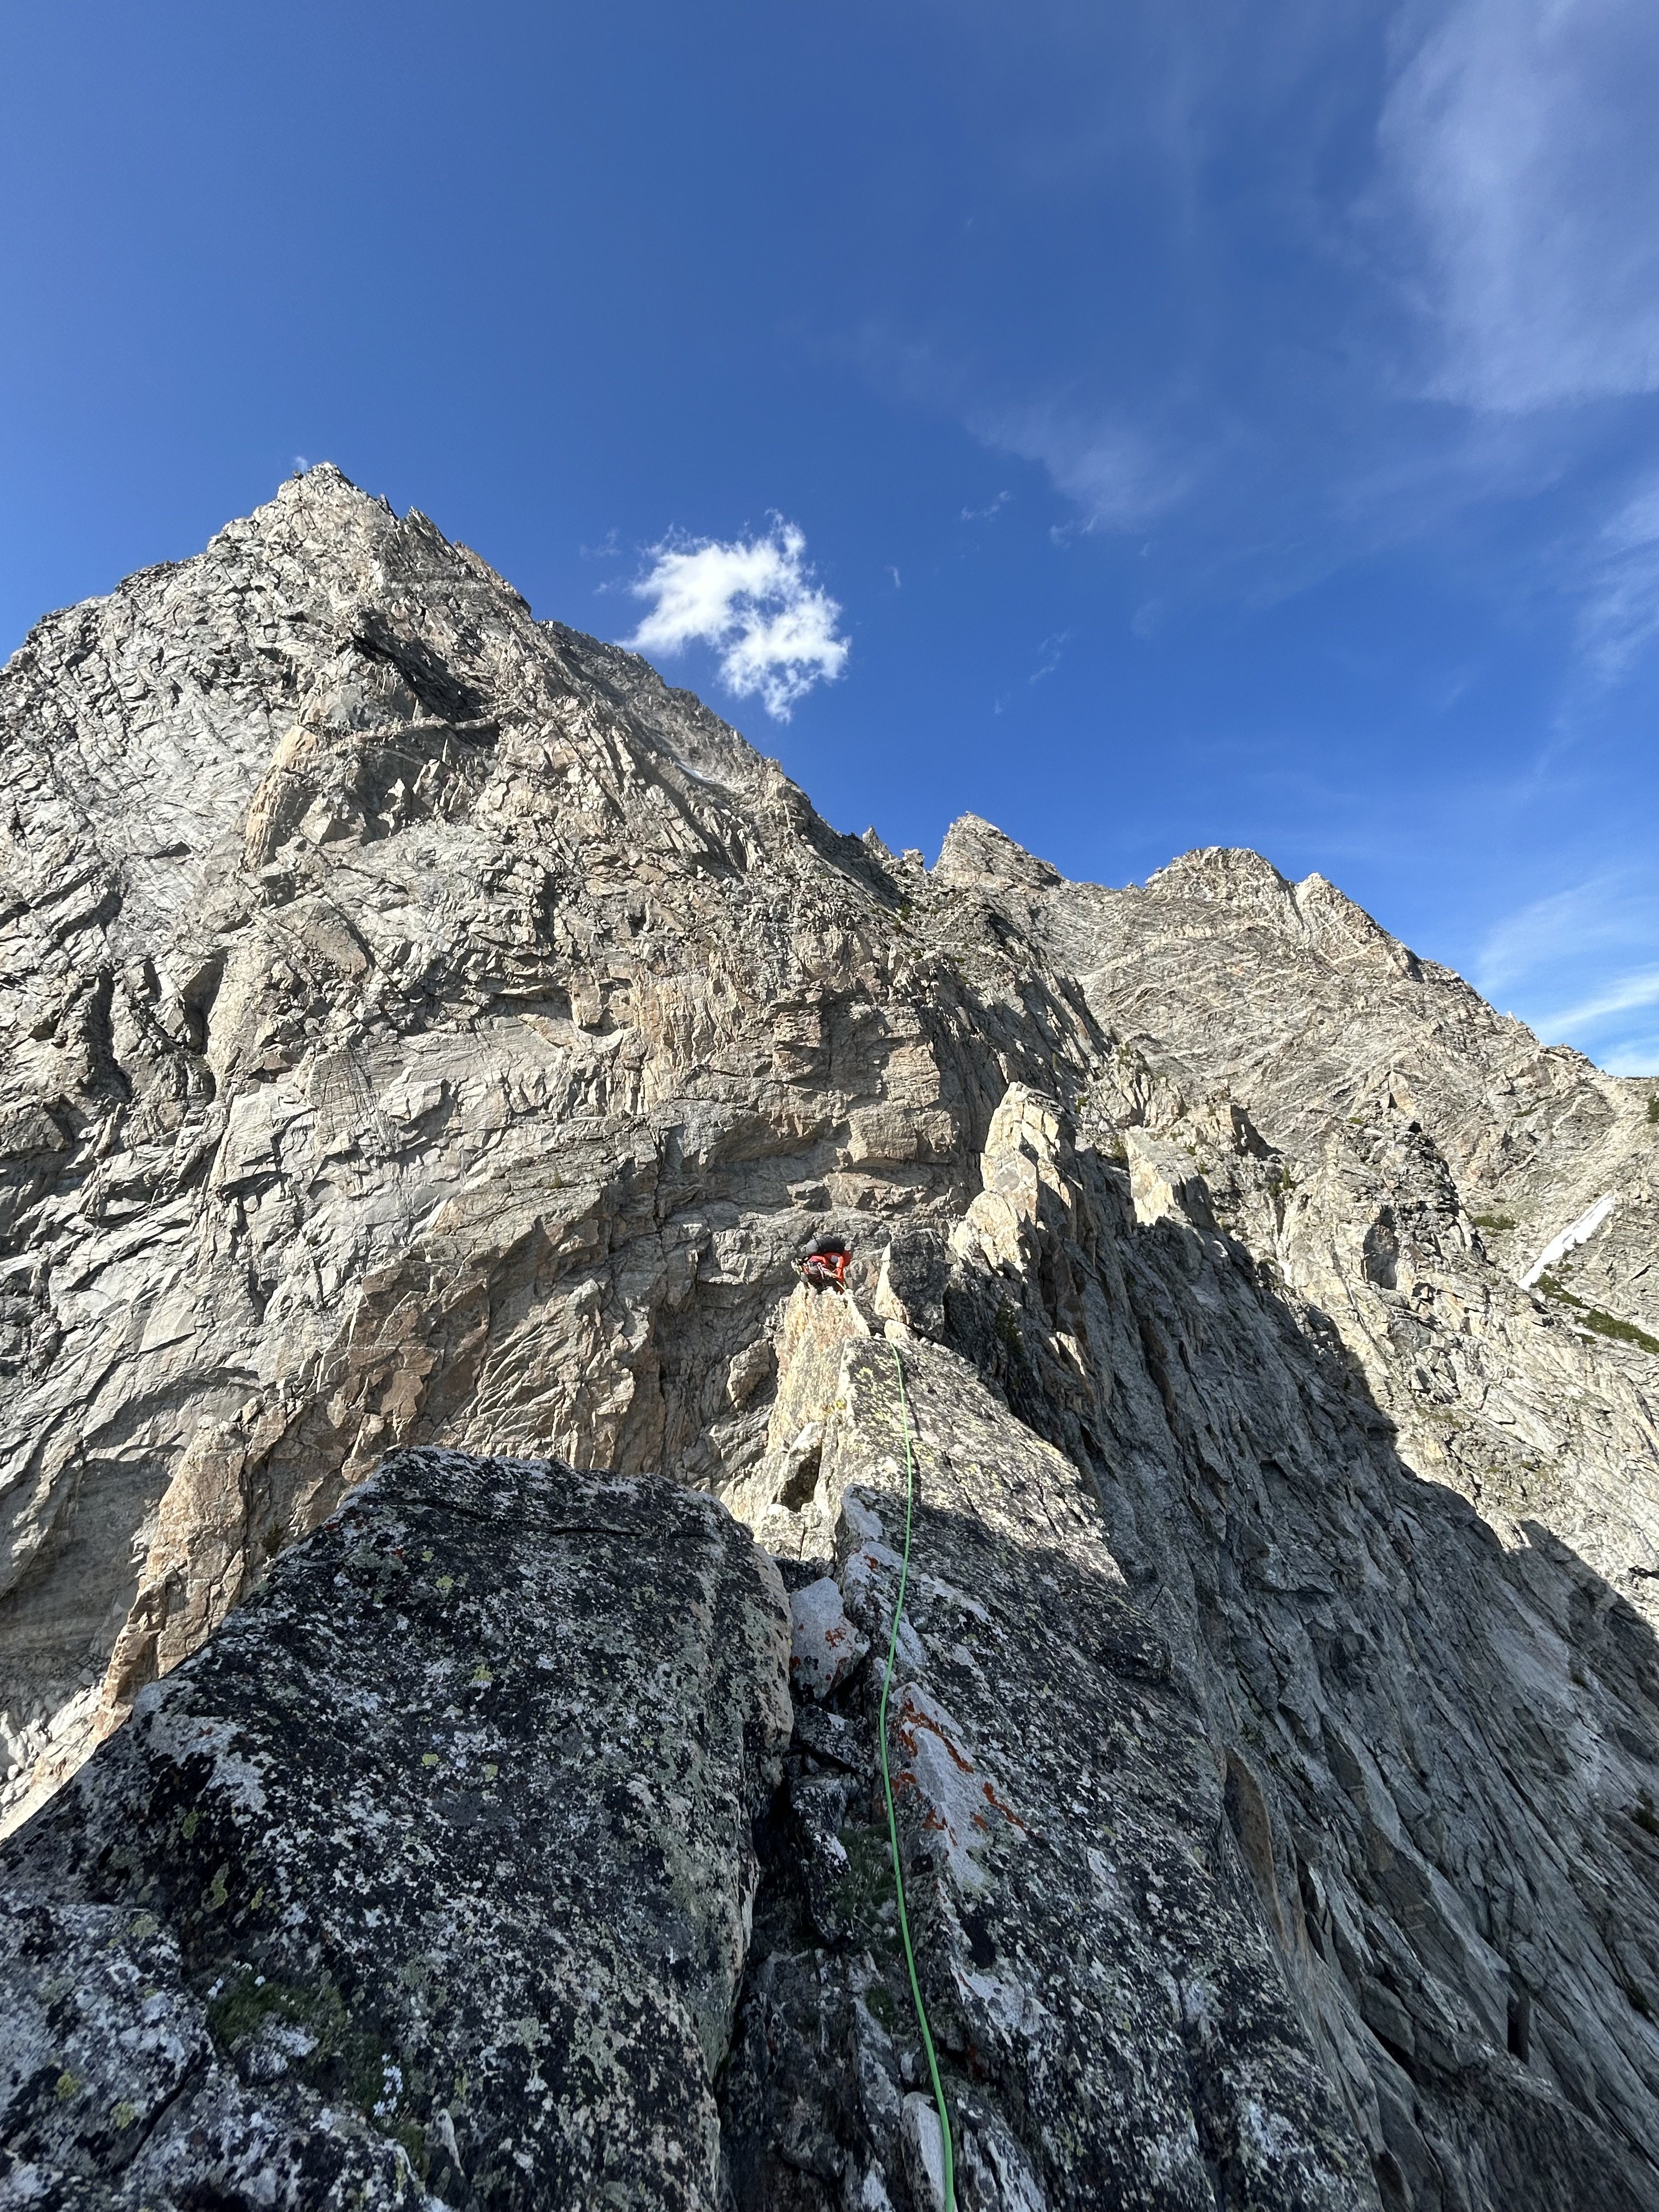
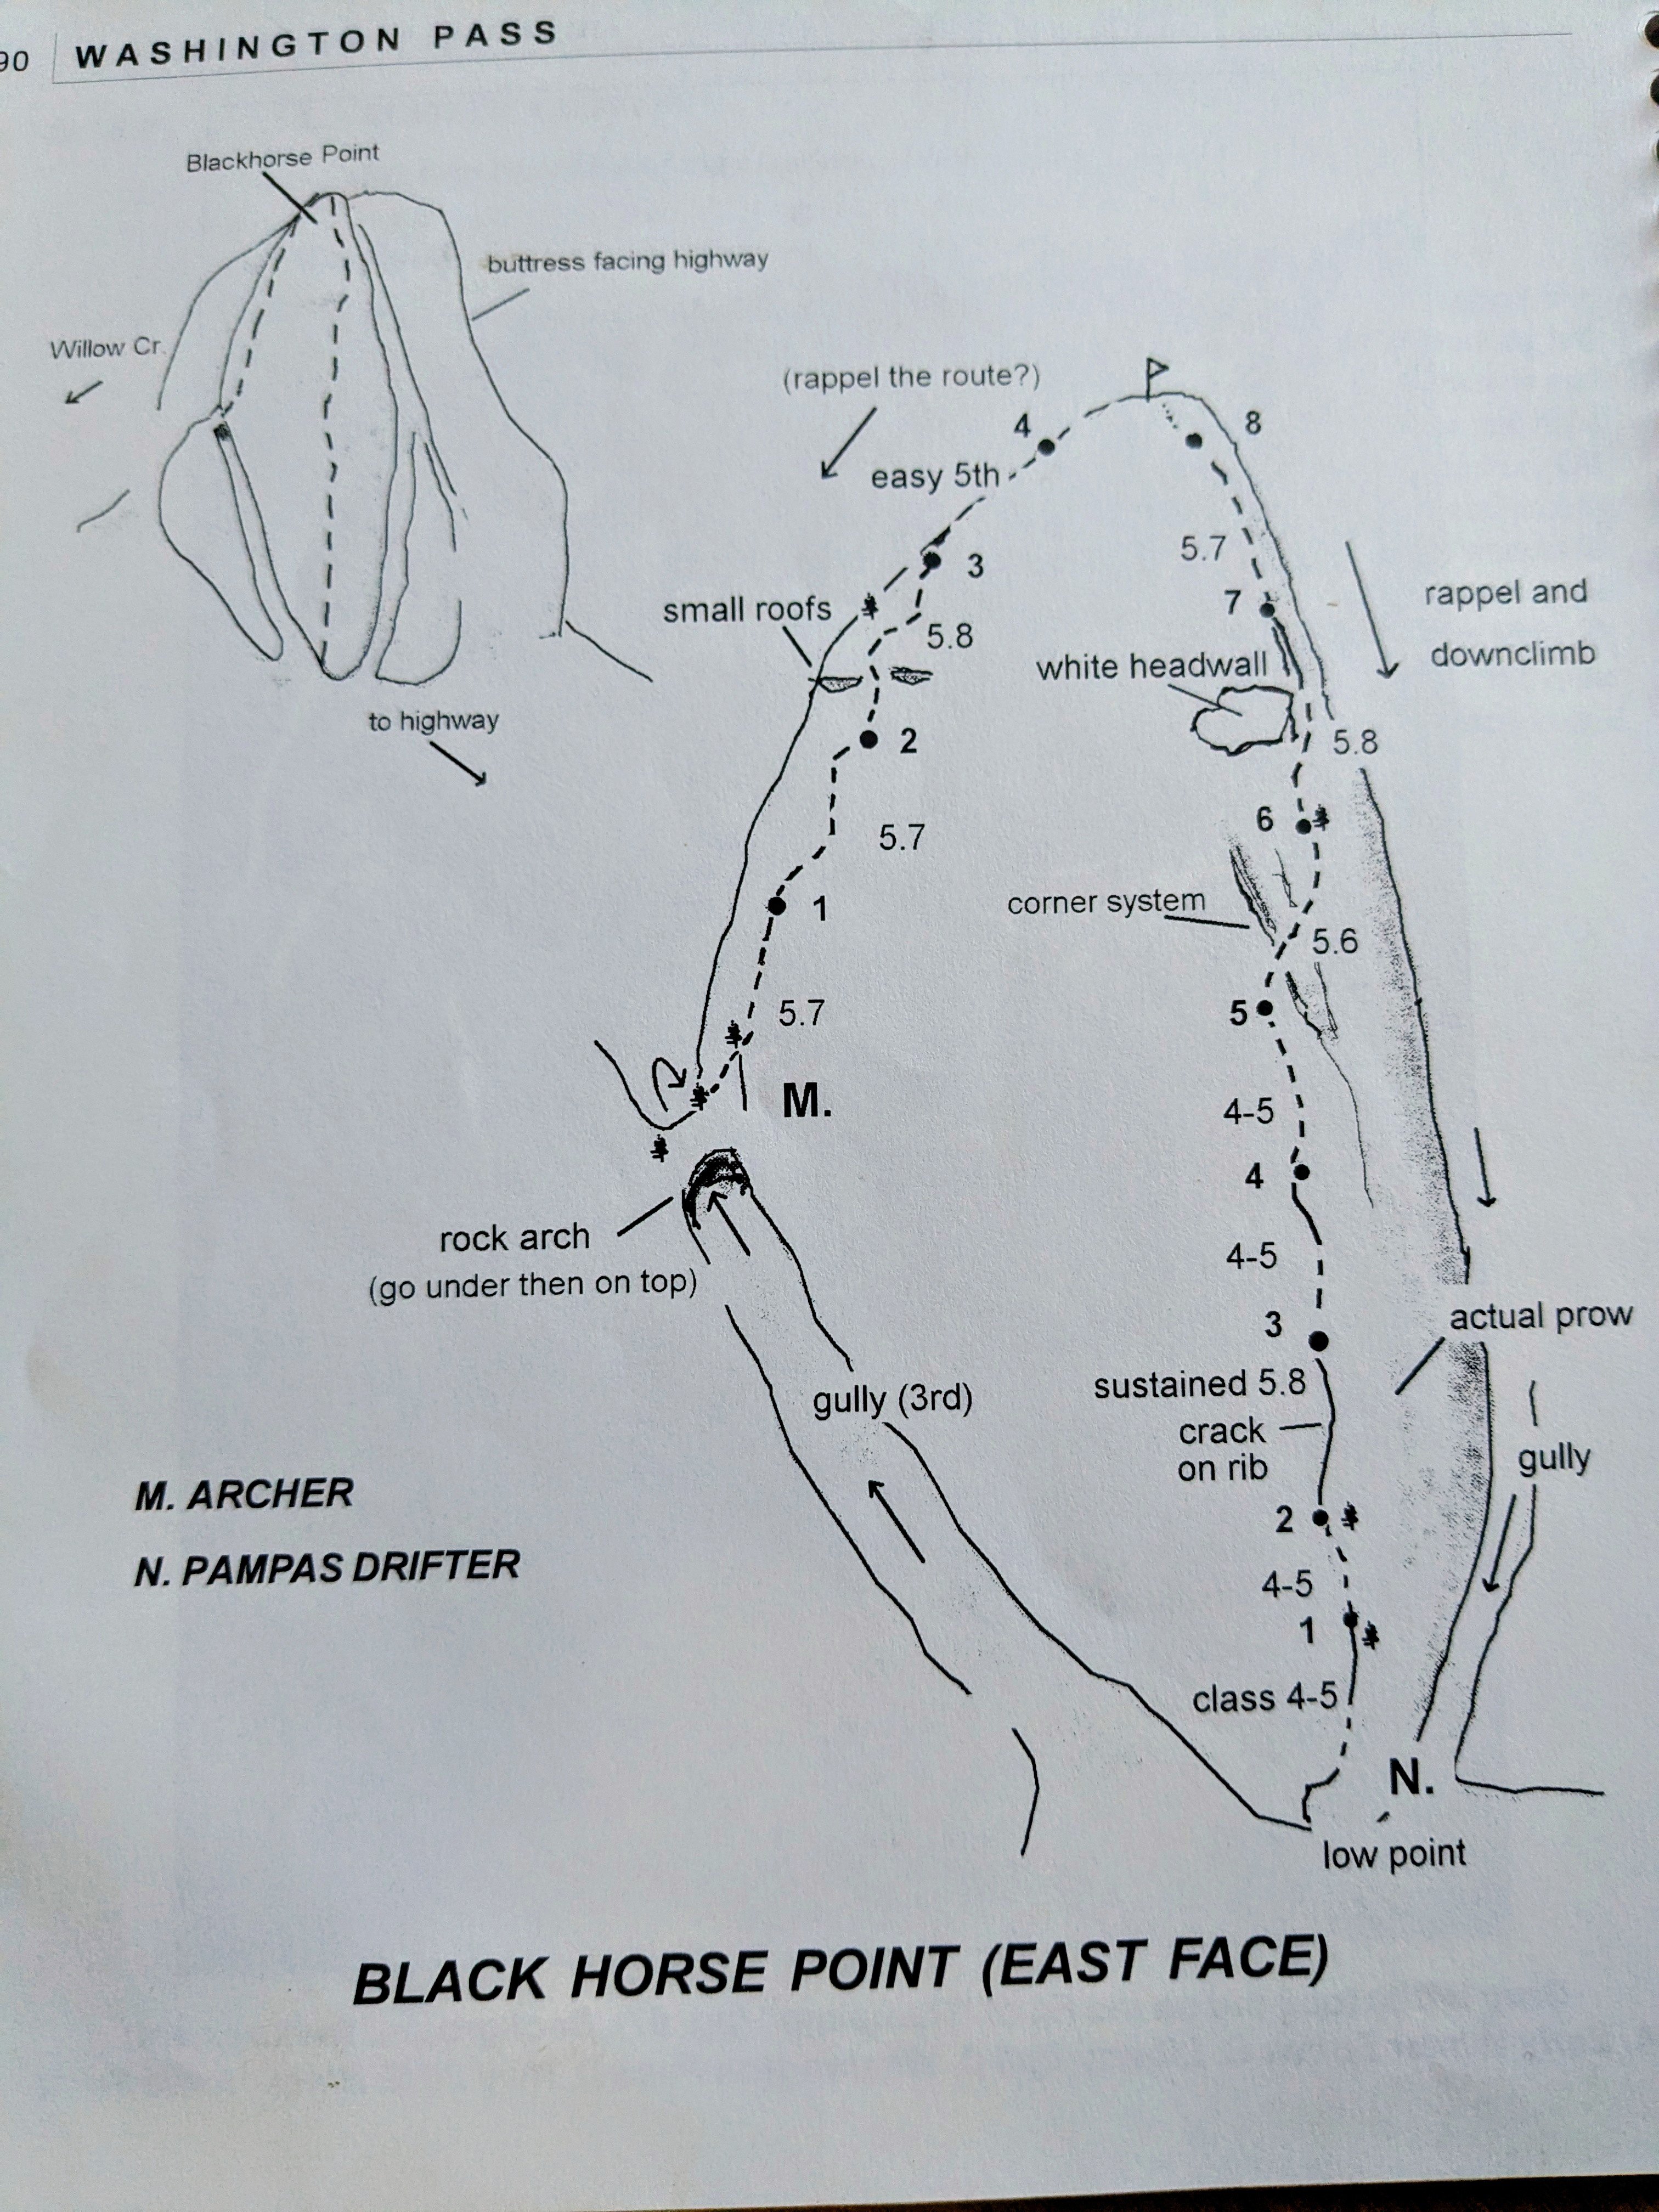
Ah, fantastic, thank you so much for sharing these pictures of that book!! I've been so curious, and I'm really glad to finally see it!! I really appreciate you sharing this!! Okay, so, Pampas Drifter. Now that I know of it, I'm trying to make sense of how much our recent line does vs does-not overlap Pampas Drifter. It's a route close to the prow of the buttress, and our route is pretty close to the prow of the buttress, so the chances for overlap do indeed seem probable. Some initial thoughts: I'm so glad to see the pages of that book! The book's detail is indeed a little sparse. Man, where exactly the line of "Pampas Drifter" is relative to landmark features on the actual rock is still pretty darn vague. "Corner system" and "white headwall" quite ambiguously could refer to a lot of different possible specific-locations on that buttress. Wow, there's even less out there on the internet when I google for more information on "Pampas Drifter" than there is about Black Horse Rock or Archer. No wonder I was having a hard time finding information. It looks like there is not a single internet trip report at all about that route. The "white headwall" --> Maybe that refers to the intimidating-large headwall with the leftward-arching clamshell crack/chimney that our pitch 6 goes left to get around. Or maybe that refers to the next imposing white headwall that our pitch 7 easily skirted on the right. If it is either, I somewhat think our pitch 7 is the more likely match, since there we indeed experienced that "a dramatic turn to the right of that feature led to easier ground." But it also could be some completely other third white headwall elsewhere. The text description in the book says "eventually angling right to a dihedral below the obvious white headwall." Neither our pitch 6 or pitch 7 involved a dihedral below their respective headwalls. Our pitch 8 did involve an obvious dihedral, but well above any white headwalls. So I'm not quite able to make sense of where the specific "white headwall" in the Pampas Drifter diagram is. The "corner system" on Pampas Drifter's pitch 6 --> Our pitch 5 moves to the right and crosses a corner system. Those things do rather feel like a match. So was our pitch 5 the same as Pampas Drifter's pitch 6? Maybe and I'm tempted to say yes… but since I can't make sense of where the "white headwall" above is, and my best-guess is that it's white headwall along our pitch 7, making Pampas Drifter's pitch 7 and our pitch 7 the same pitch-number, then things don't add up with the corner system being diagramed as right below that as Pampas Drifter's pitch 6, yet being the same terrain as our pitch 5, with no accounting for the terrain that our pitch 6 represents. Either the "white headwall" doesn't match, or the "corner system" doesn't match, but I don't know which. The "sustained 5.8 finger crack on rib" --> Oooo interesting!! Well, I can say for sure that Pampas Drifter's pitch 3 is different than anything we climbed, since we were never on a sustained 5.8 finger crack. Not that that gives us much information about how much overlap there may or may not be between the route on other pitches, it only conclusively tells me that pitch 3 is different. But now I also want to go find this "sustained 5.8 finger crack", that sounds like it would be a really fun pitch to climb! Eh, so I'm still left with open questions about how much or how little the two routes overlap. Maybe what we climbed is the majority of Pampas Drifter?? But with quite a few details not quite adding up, maybe the routes are mostly separate and distinct after all? I'm still trying to figure this out. If anyone has more information on Pampas Drifter & its specifics (especially a link to an old trip report, or photos taken while actually on route,) I'd love to see it. In any case though, clearly our pitch 6 (our crux pitch) is new and unique, at least! Thanks again for sharing the photos of the book. That really helps!!
-
Duplicate post
-
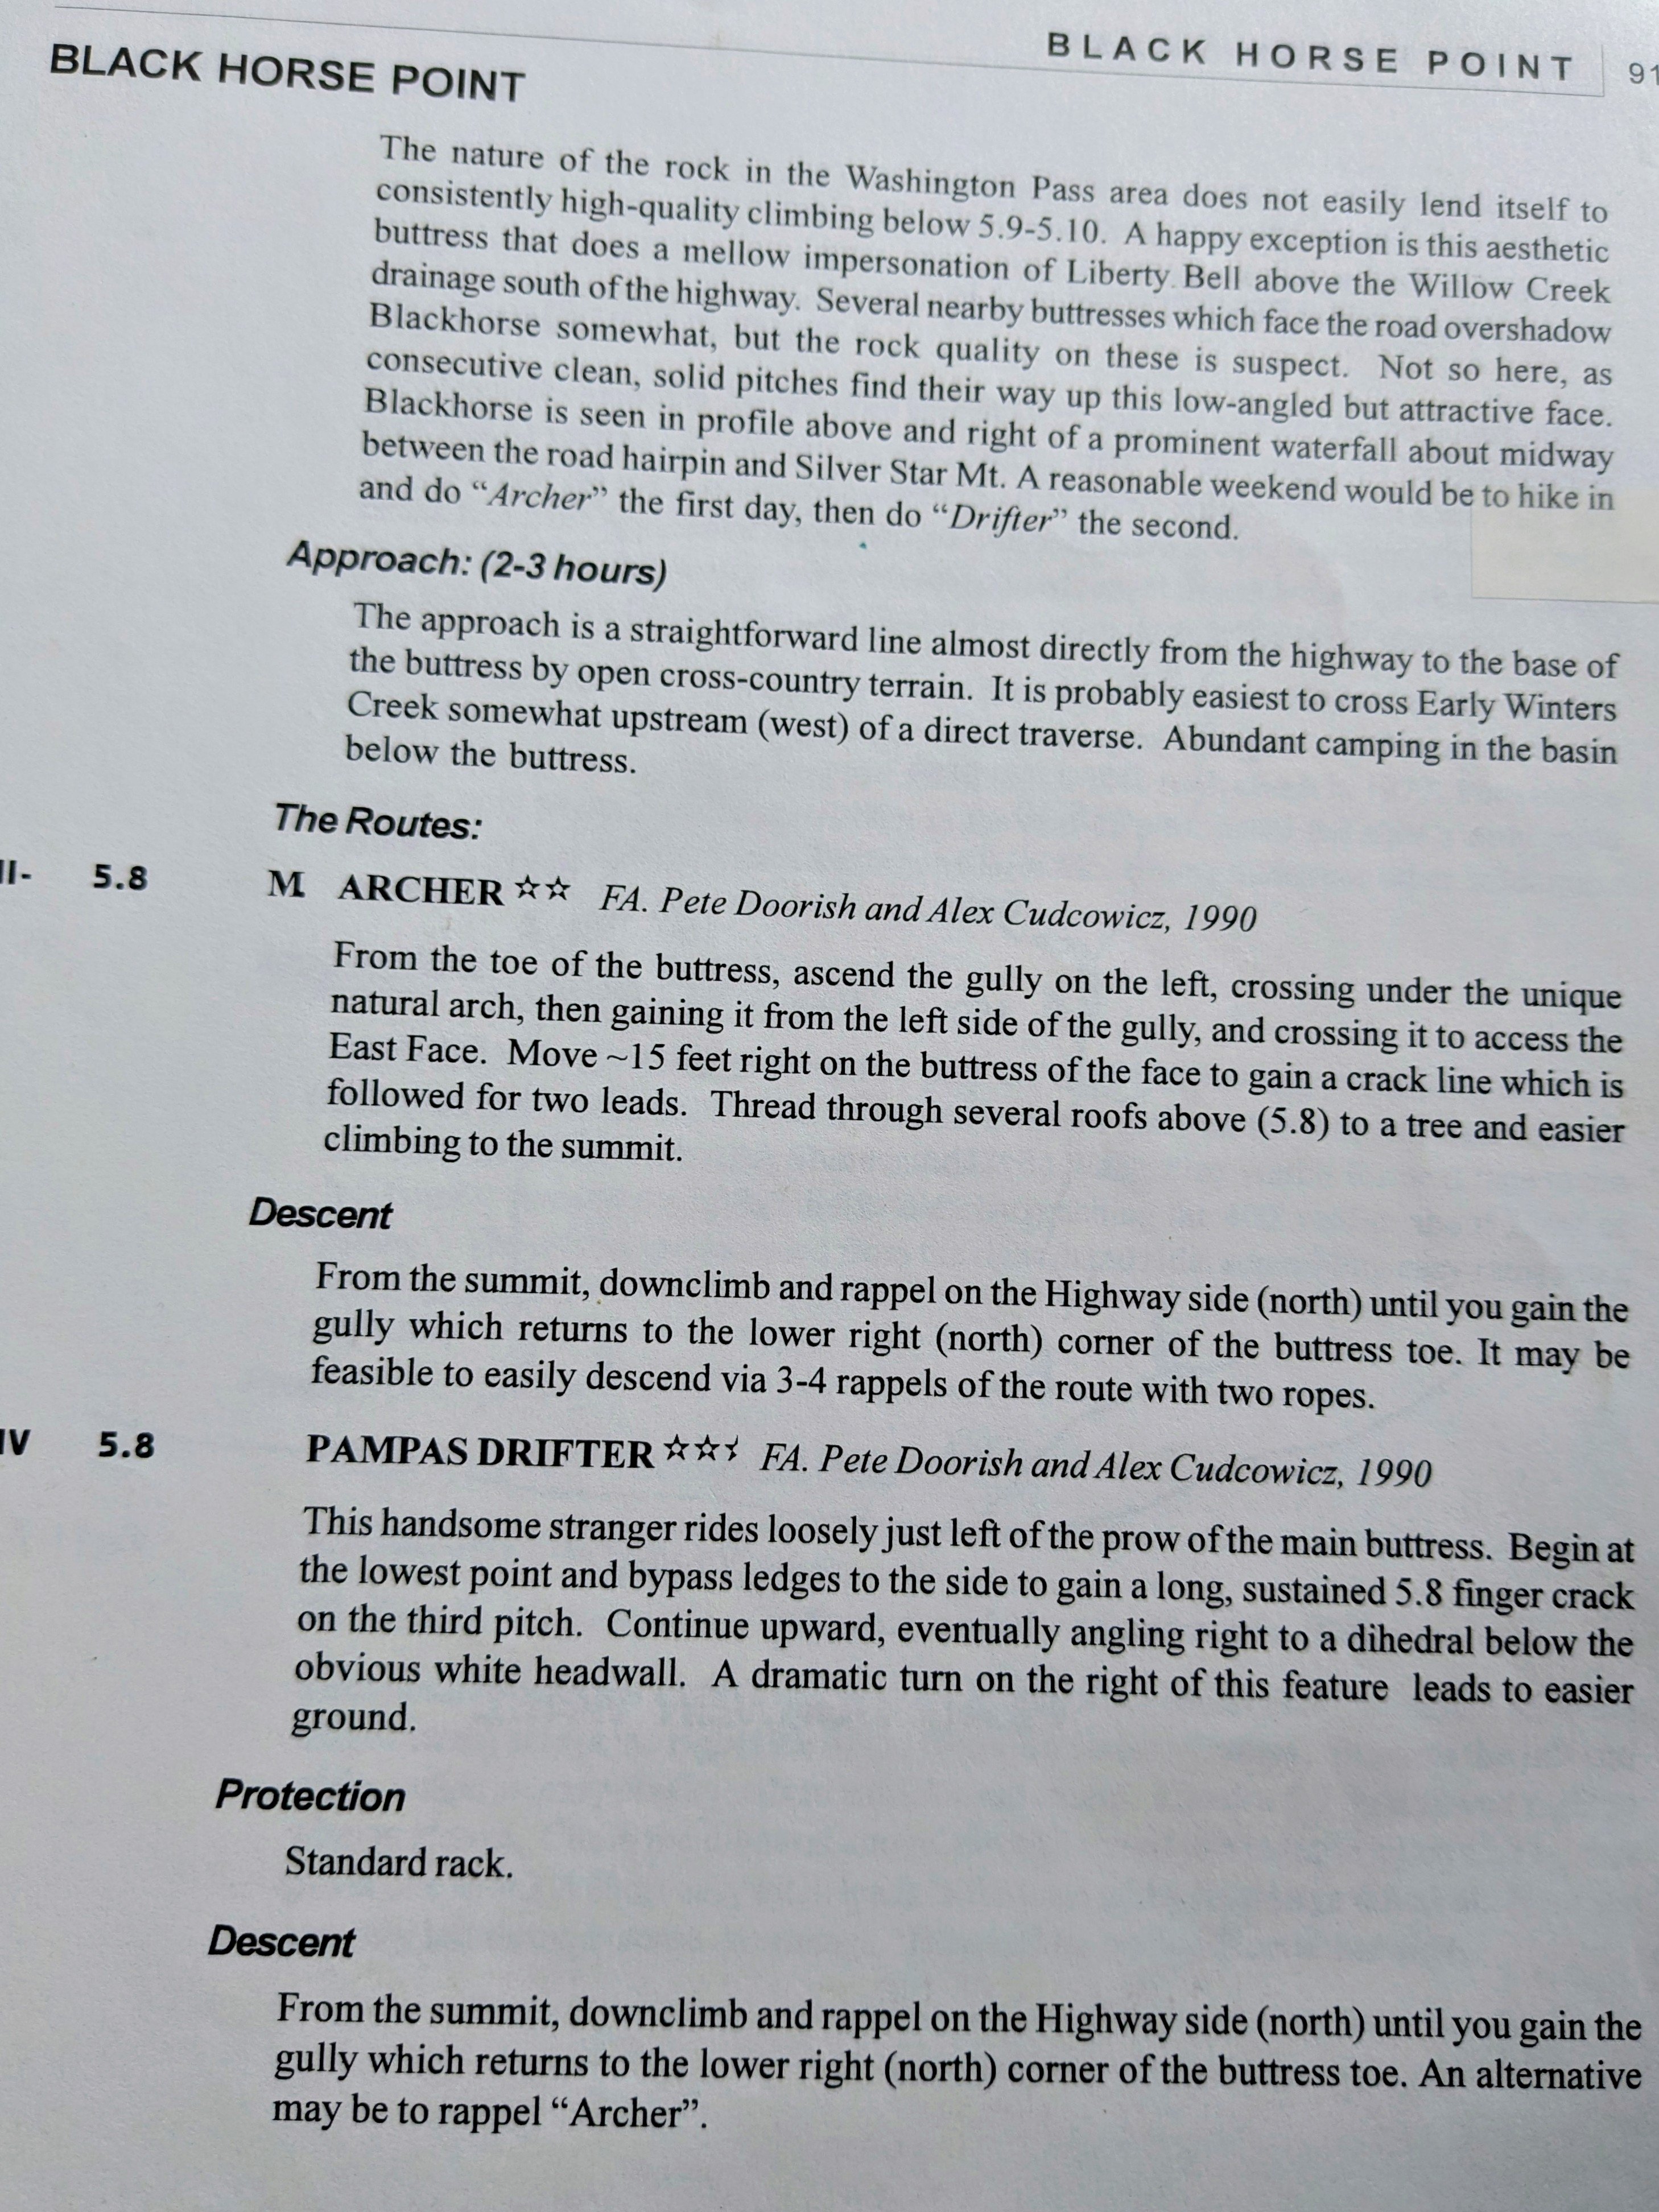
I have a copy of that Burdo guide and it looks like the route you climbed follows a fair bit of "Pampas Drifter" (5.8, Grade III-IV). FA was by Pete Doorish and Alex Cudcowicz in 1990. Not the greatest pictures, but the topo and (brief) description are attached. That team also had the first ascent of "Archer", which Dale Farnham told me was named after a dog Pete had at the time. I think the main difference is that you jogged left under the "white headwall" and Pete and Alex kept to the right? Regardless, I have been really curious about this route (and Archer) since I came across it in the old Burdo guide. Hope that your TR puts some more traffic on it. Nice work!
-
 bpolagye joined the community
 -
Tahoma Glacier - 6/21-24/2025 - with crevasse fall
JasonG replied to mthorman's topic in Mount Rainier NP
Strong work! I just walked out from the Tokaloo area today after not liking the looks of a very boney Sunset Ridge. I saw your tracks and wondered what the team was up to. It looks like a pretty serious route, crevasse-wise, and even worse now than in your photos. Good work getting a group up and down that safely, especially with a deep crevasse fall! Thanks for the detailed write-up as well, all good things to think about! - Last week
-
Hello! I’m from Colorado and in Eugene for 2 weeks. Done a variety of peaks out here and looking to do TFJ this time but would prefer to have company for this one instead of alone since the last bit looks a little exciting. I tend to move pretty quickly but am flexible with just about everything. if anybody has any time and would like to get out let me know!
-

Tahoma Glacier - 6/21-24/2025 - with crevasse fall
olyclimber replied to mthorman's topic in Mount Rainier NP
Wow! Thank you for sharing all your thoughts and experience. Great pictures as well. Glad everyone is ok and I’m sure the whole party learned a lot from the experience. -
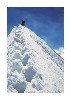
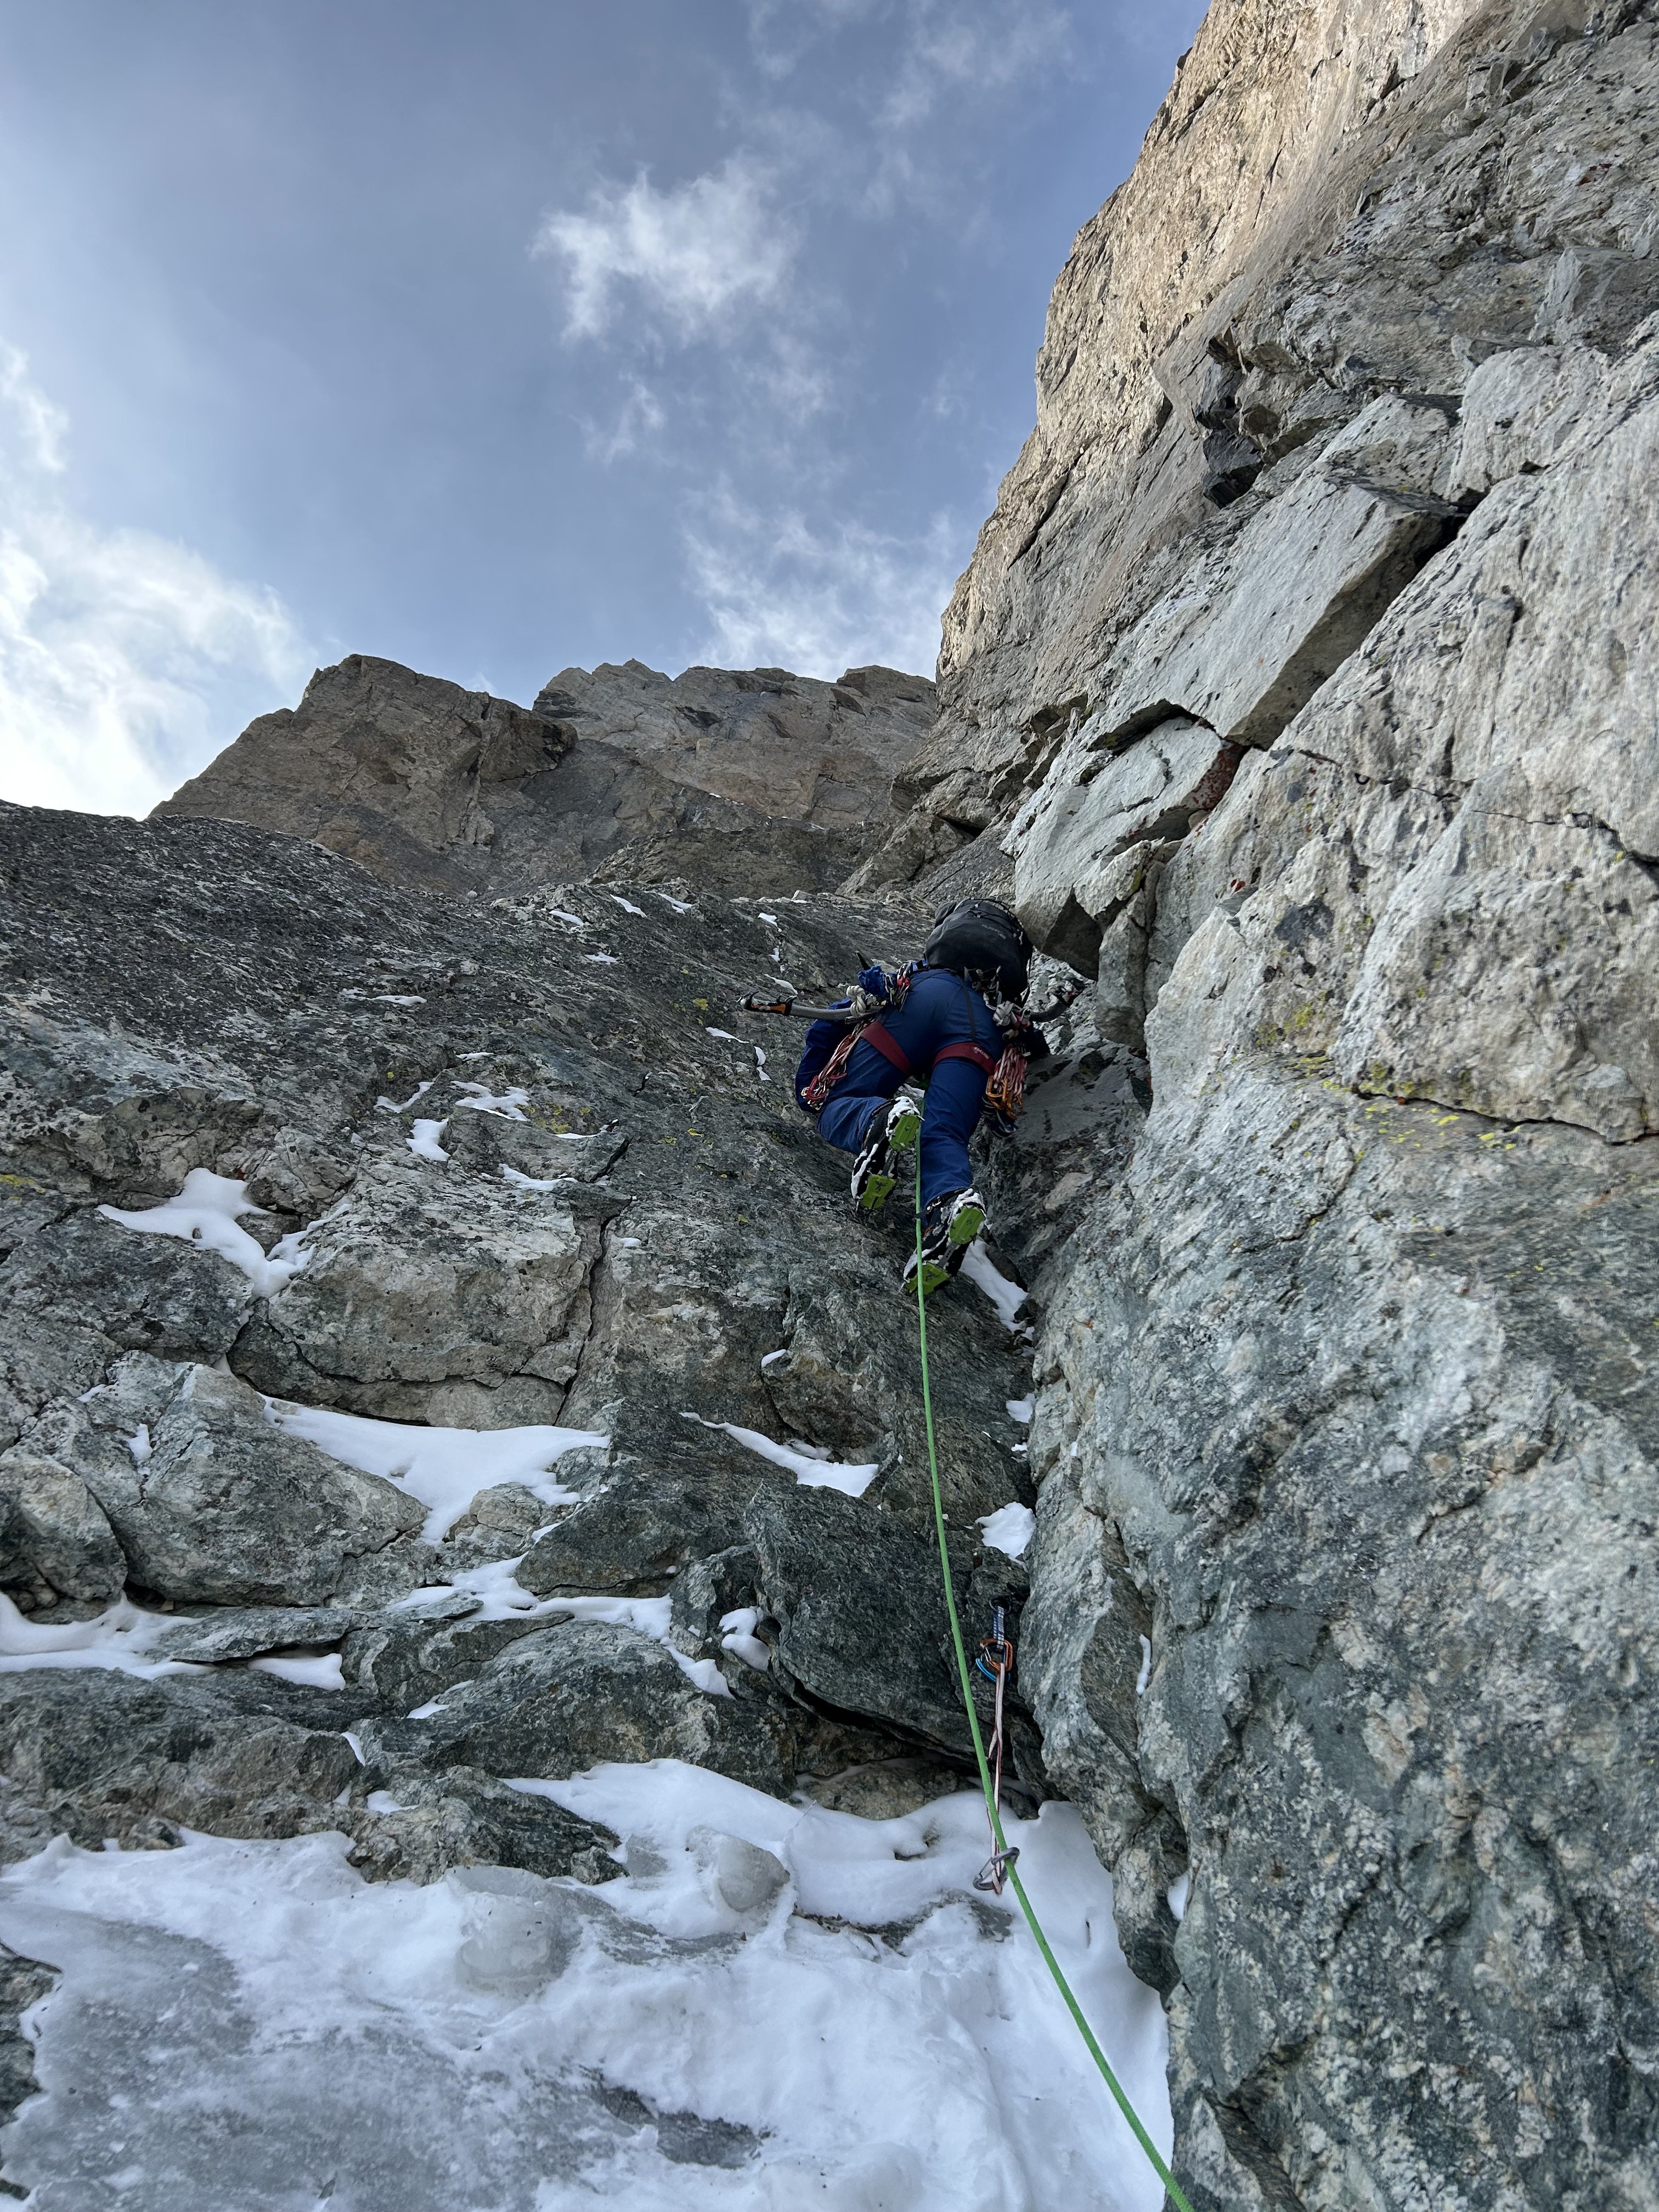
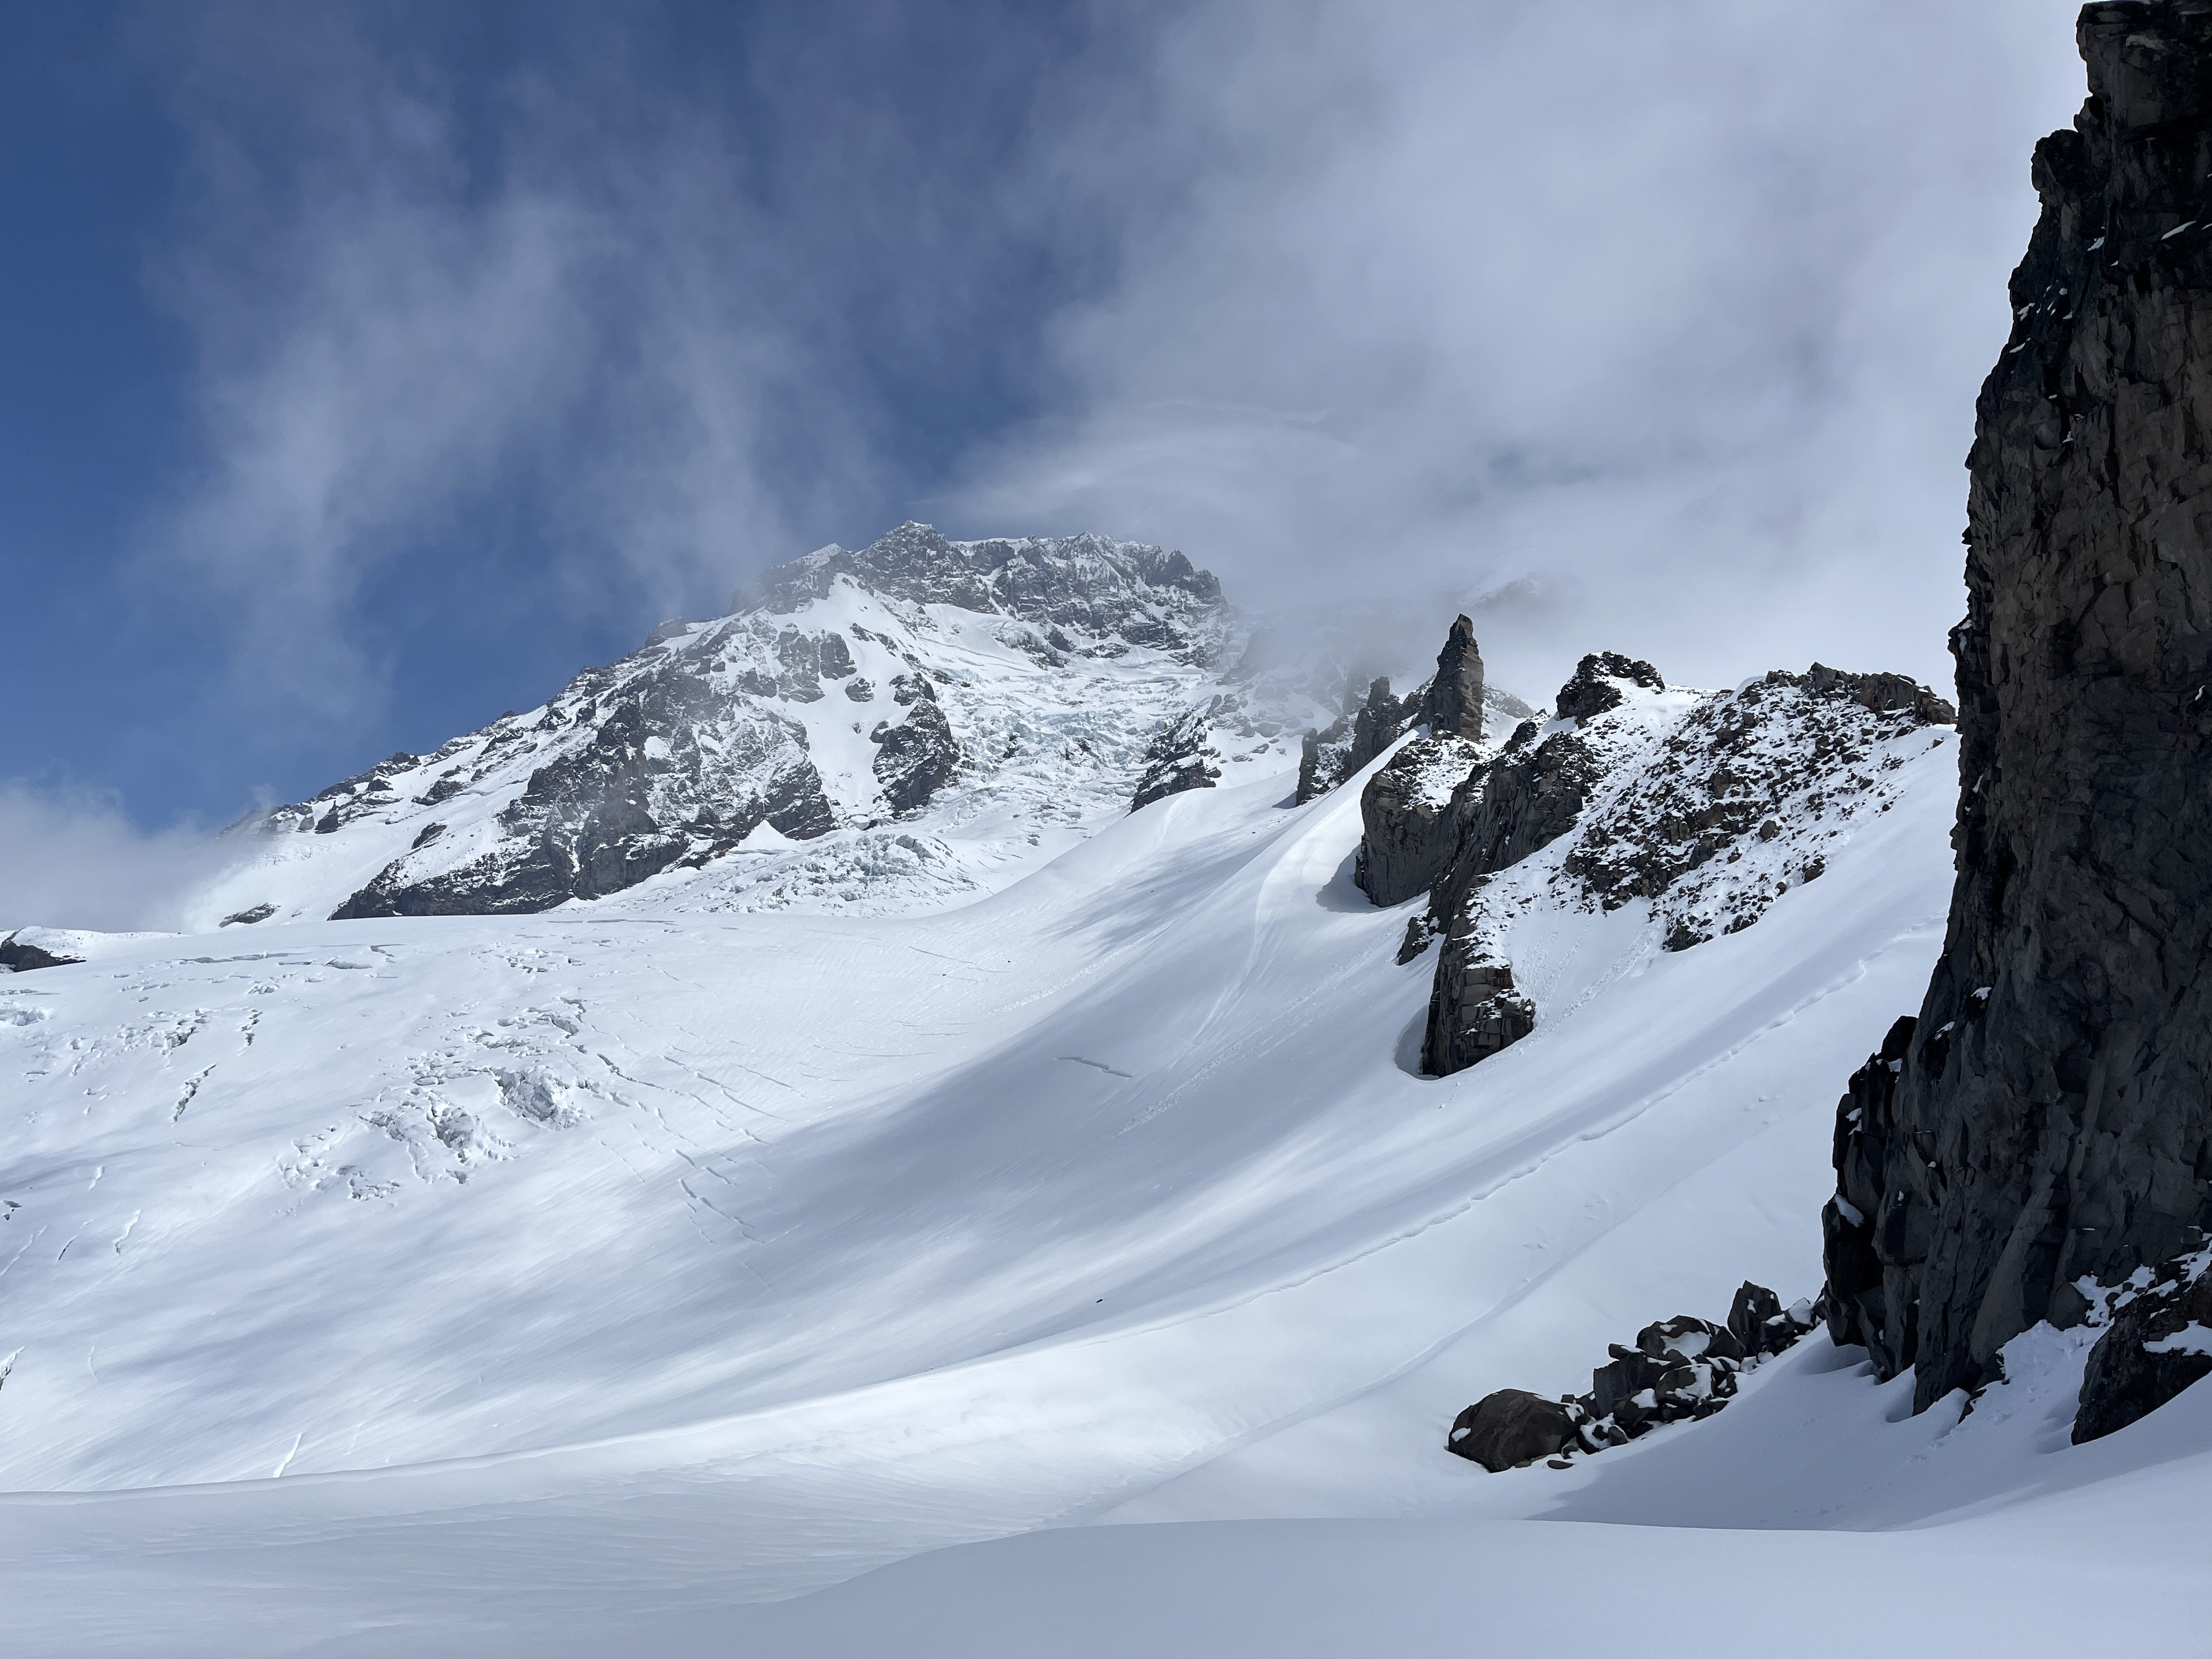
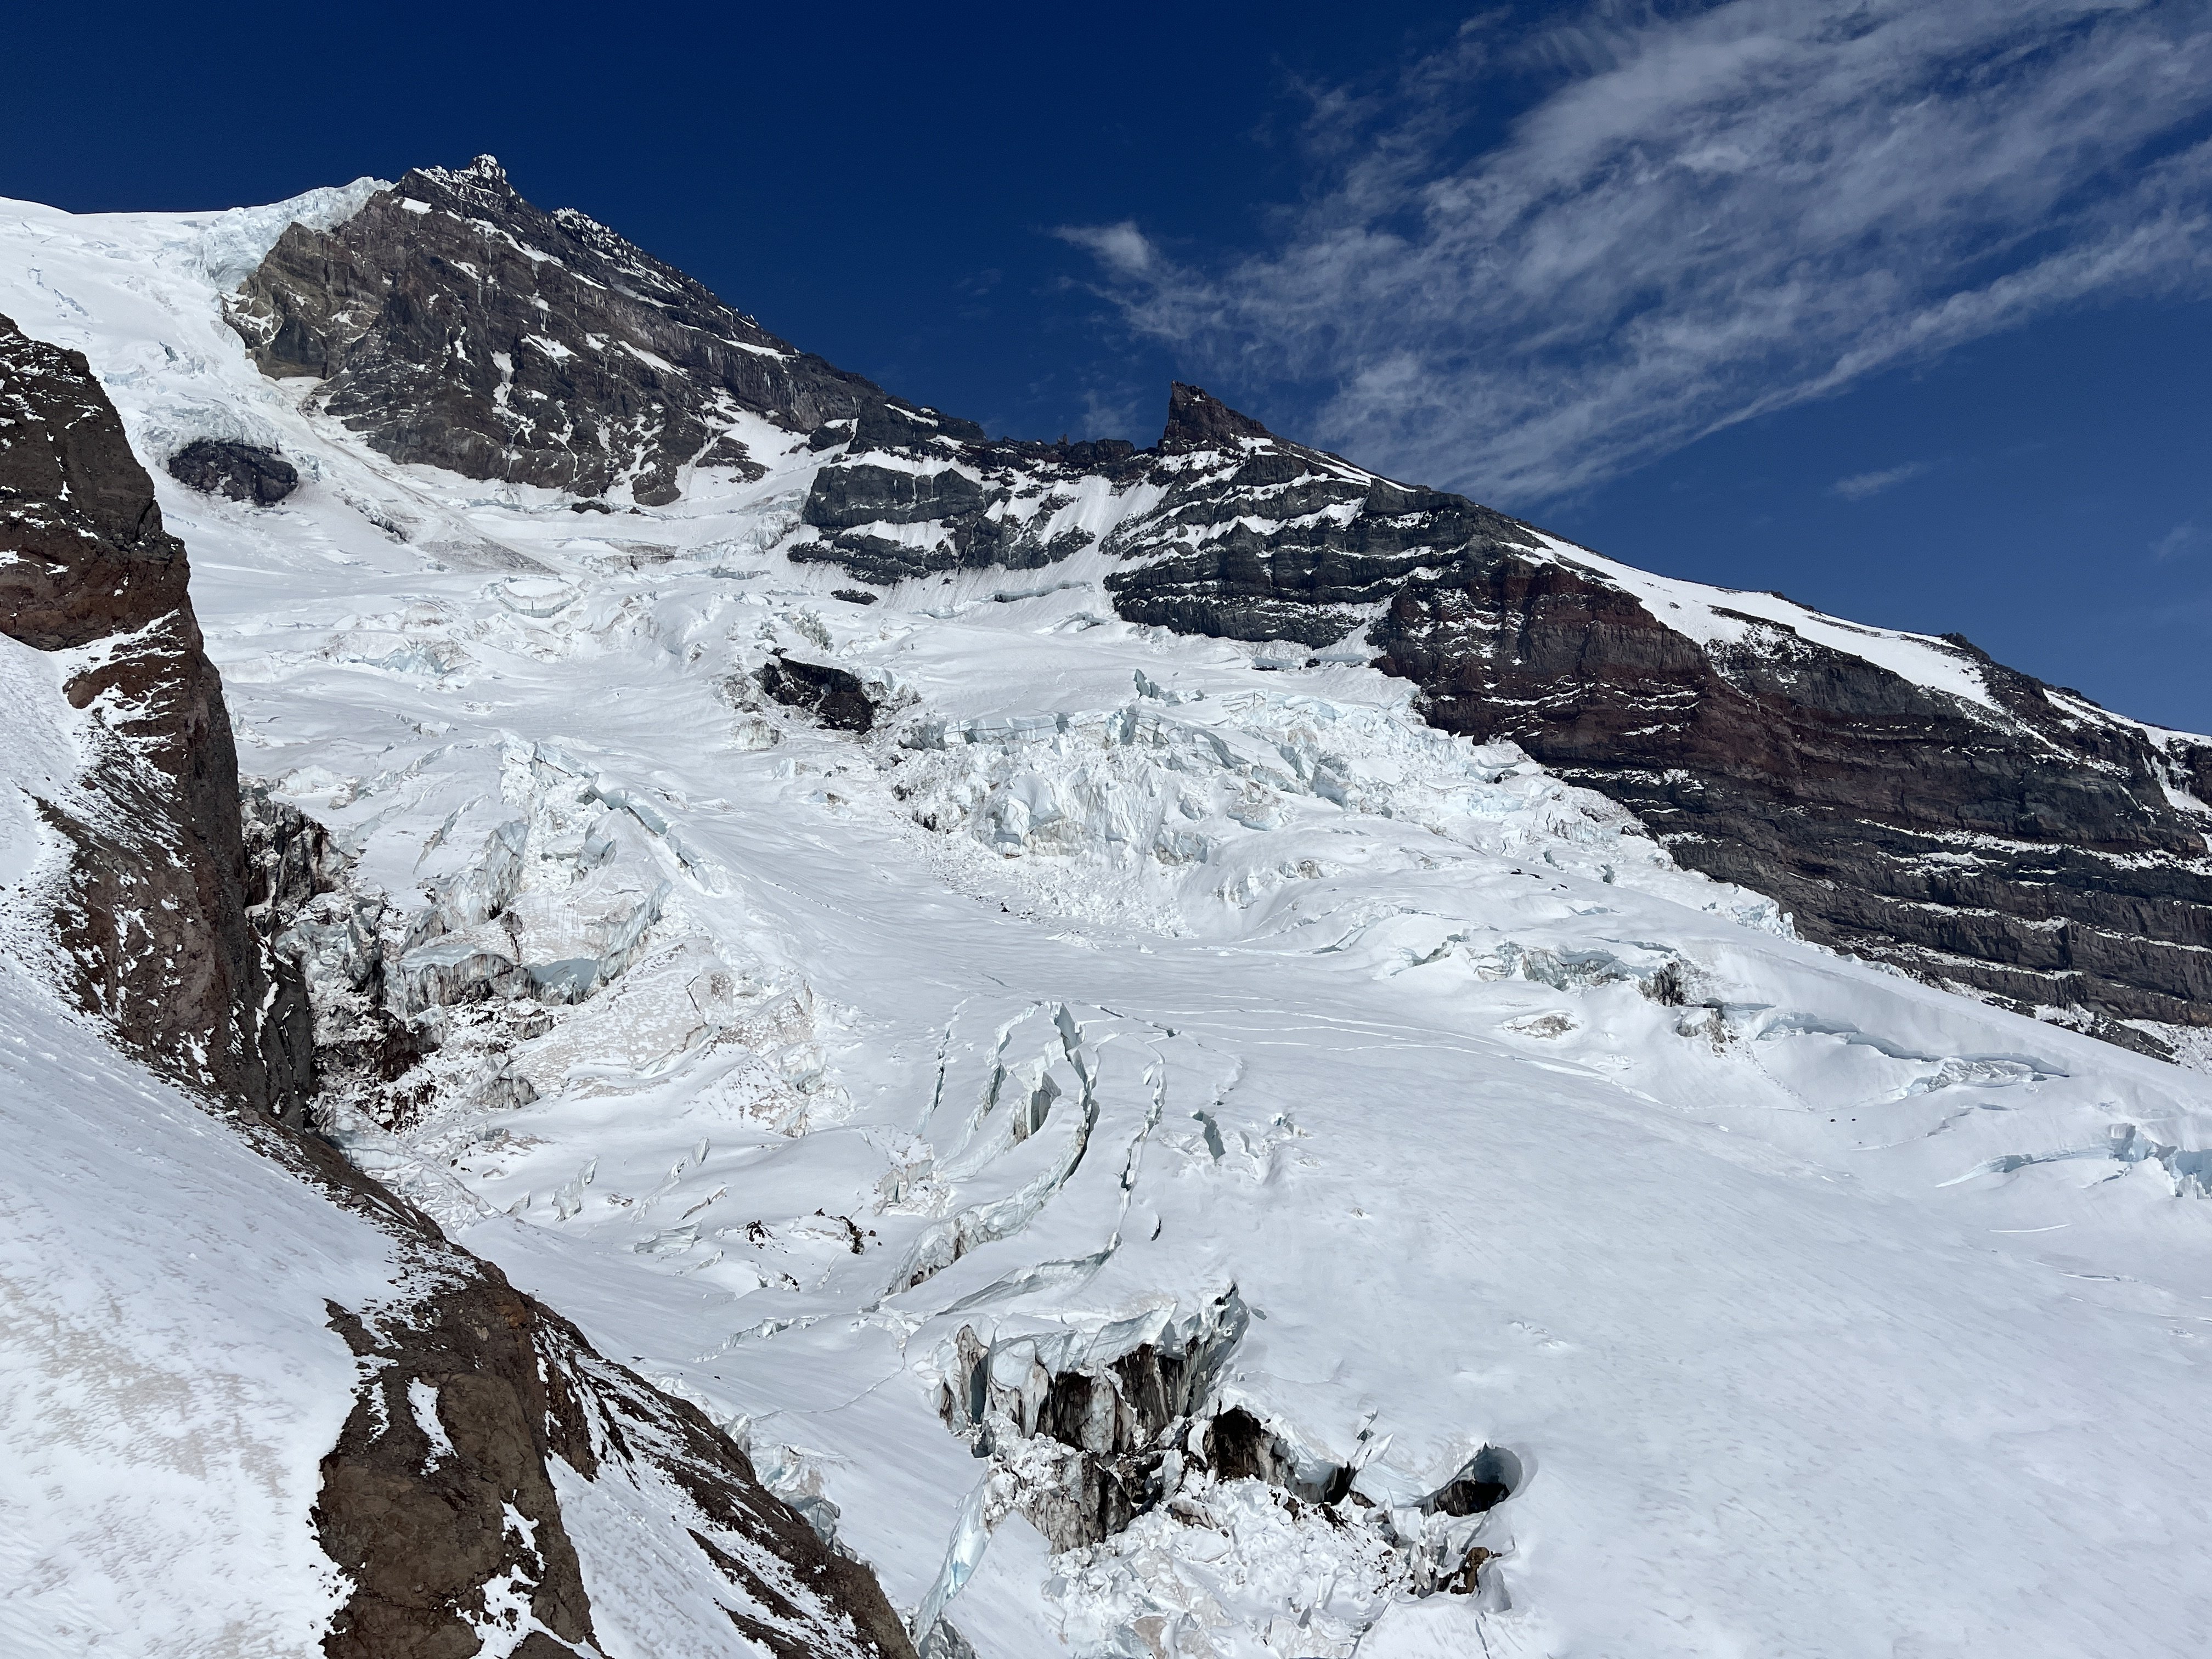
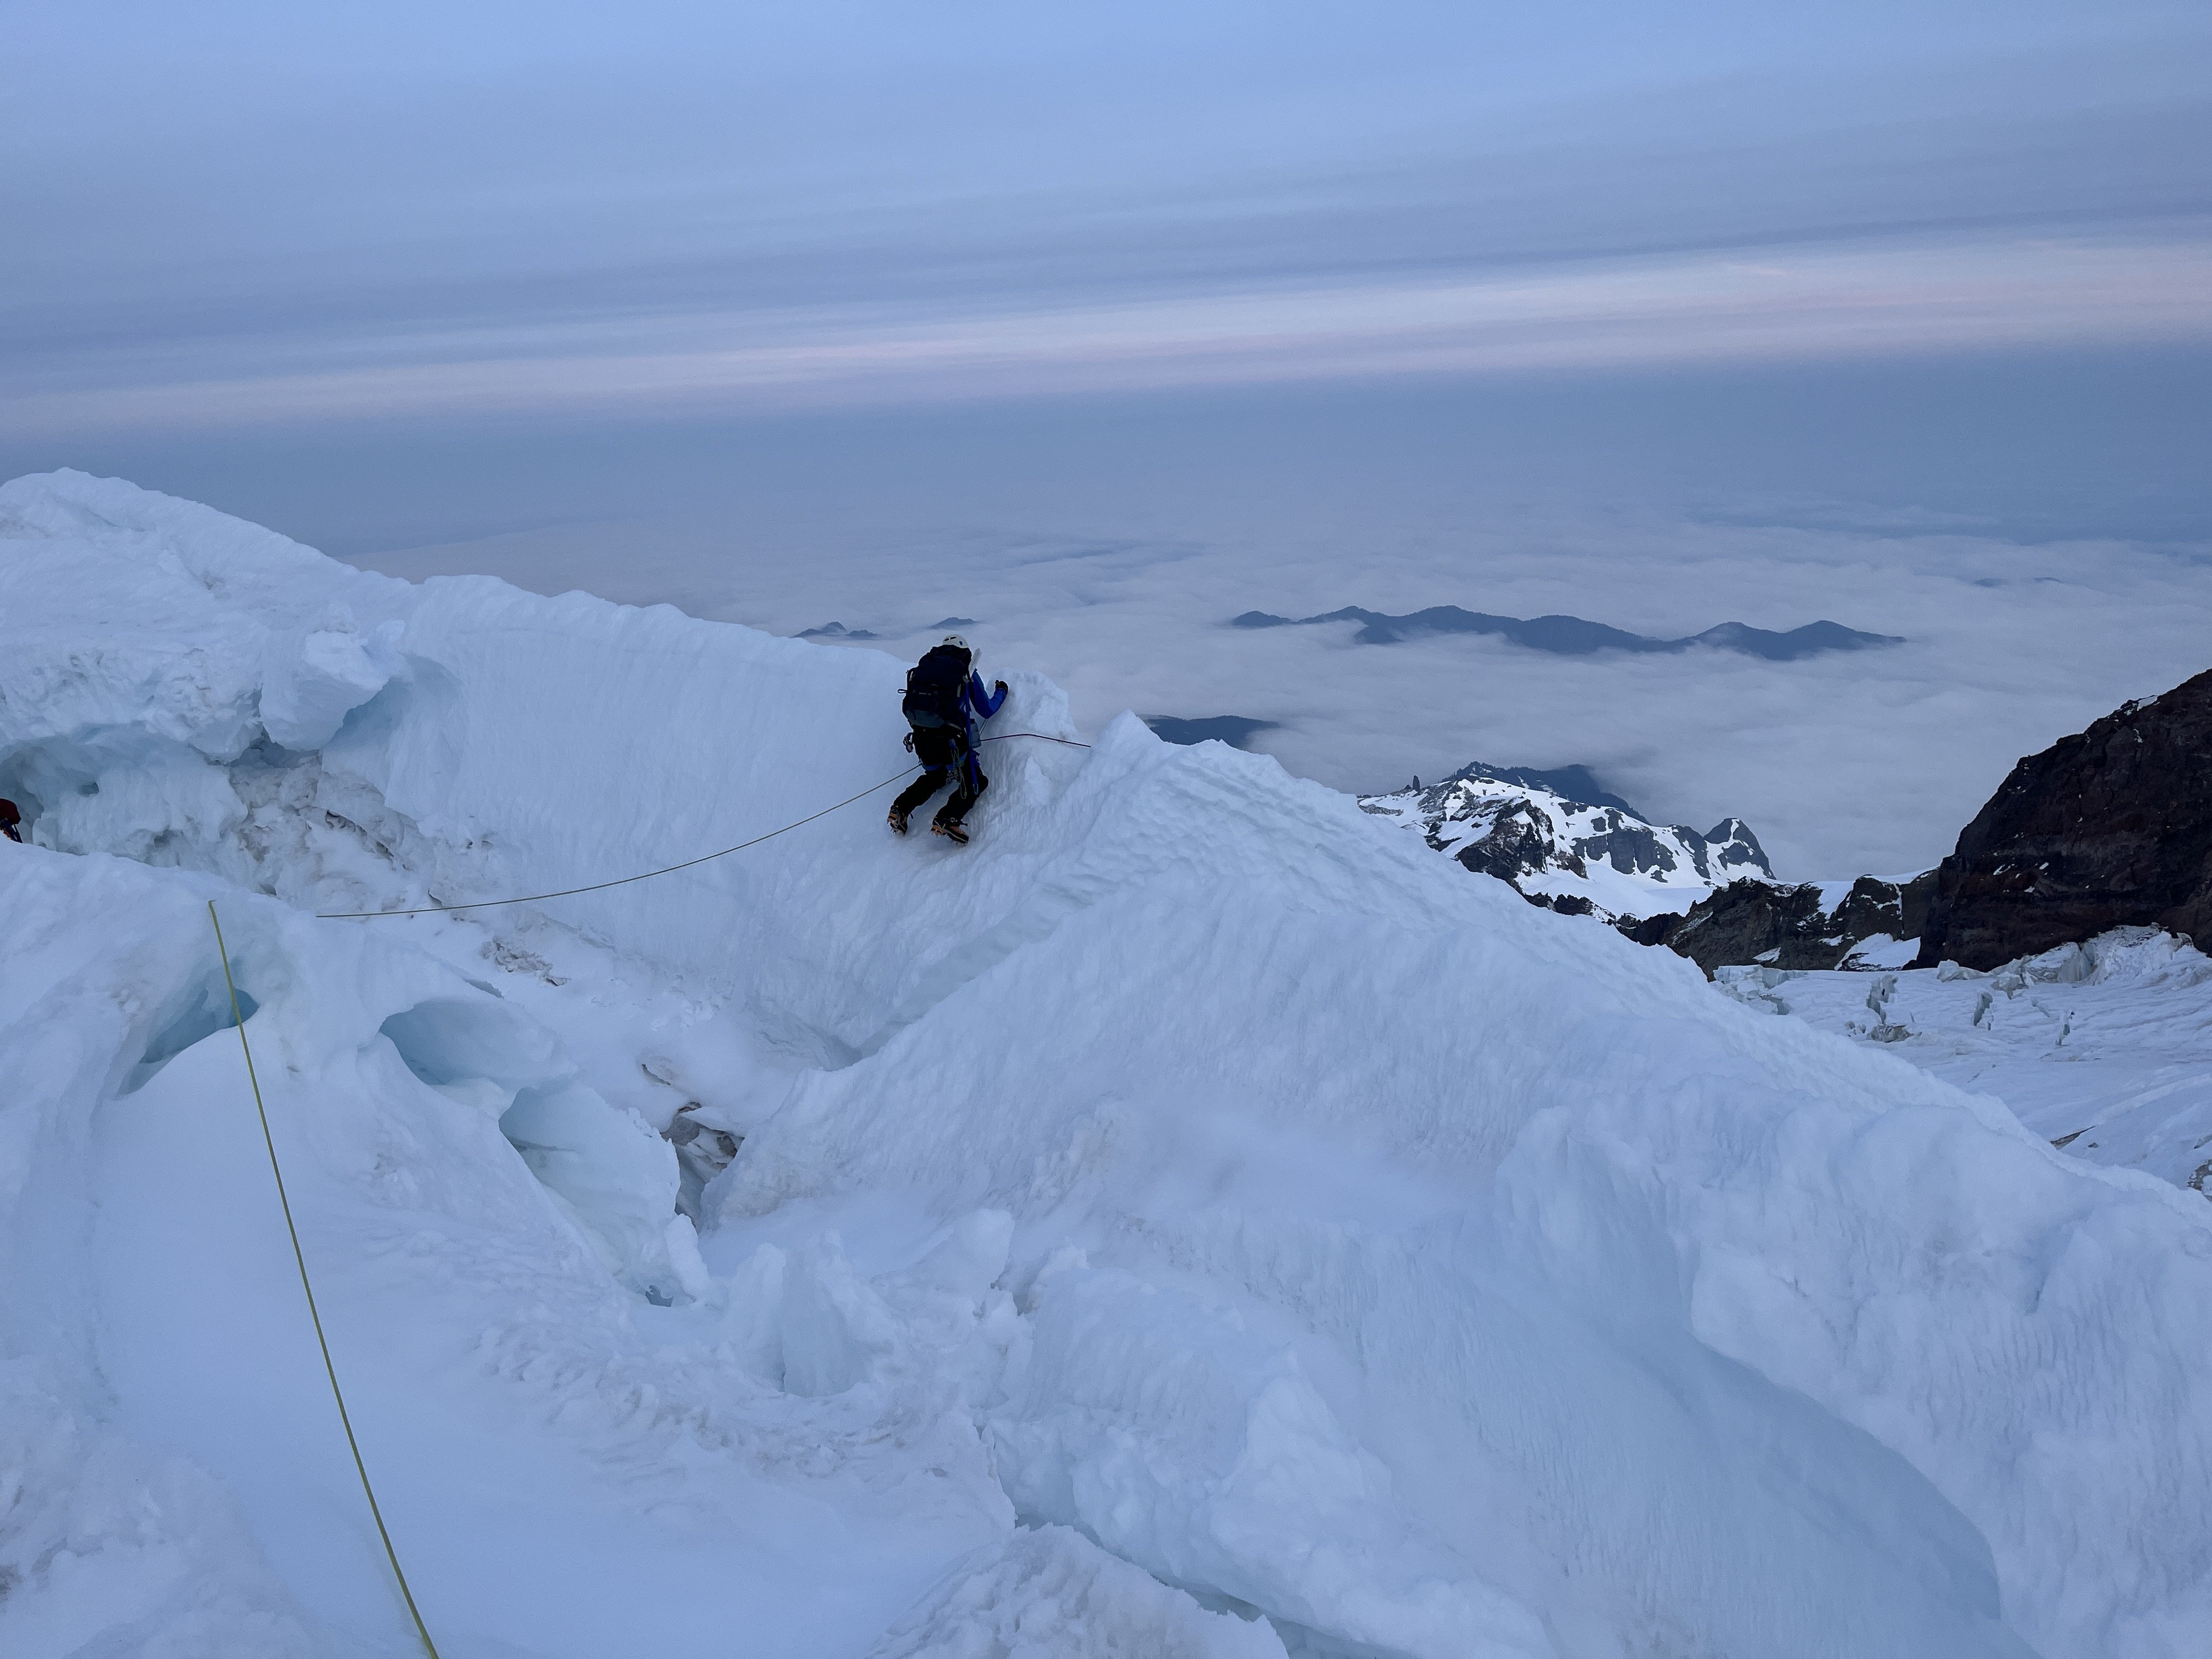
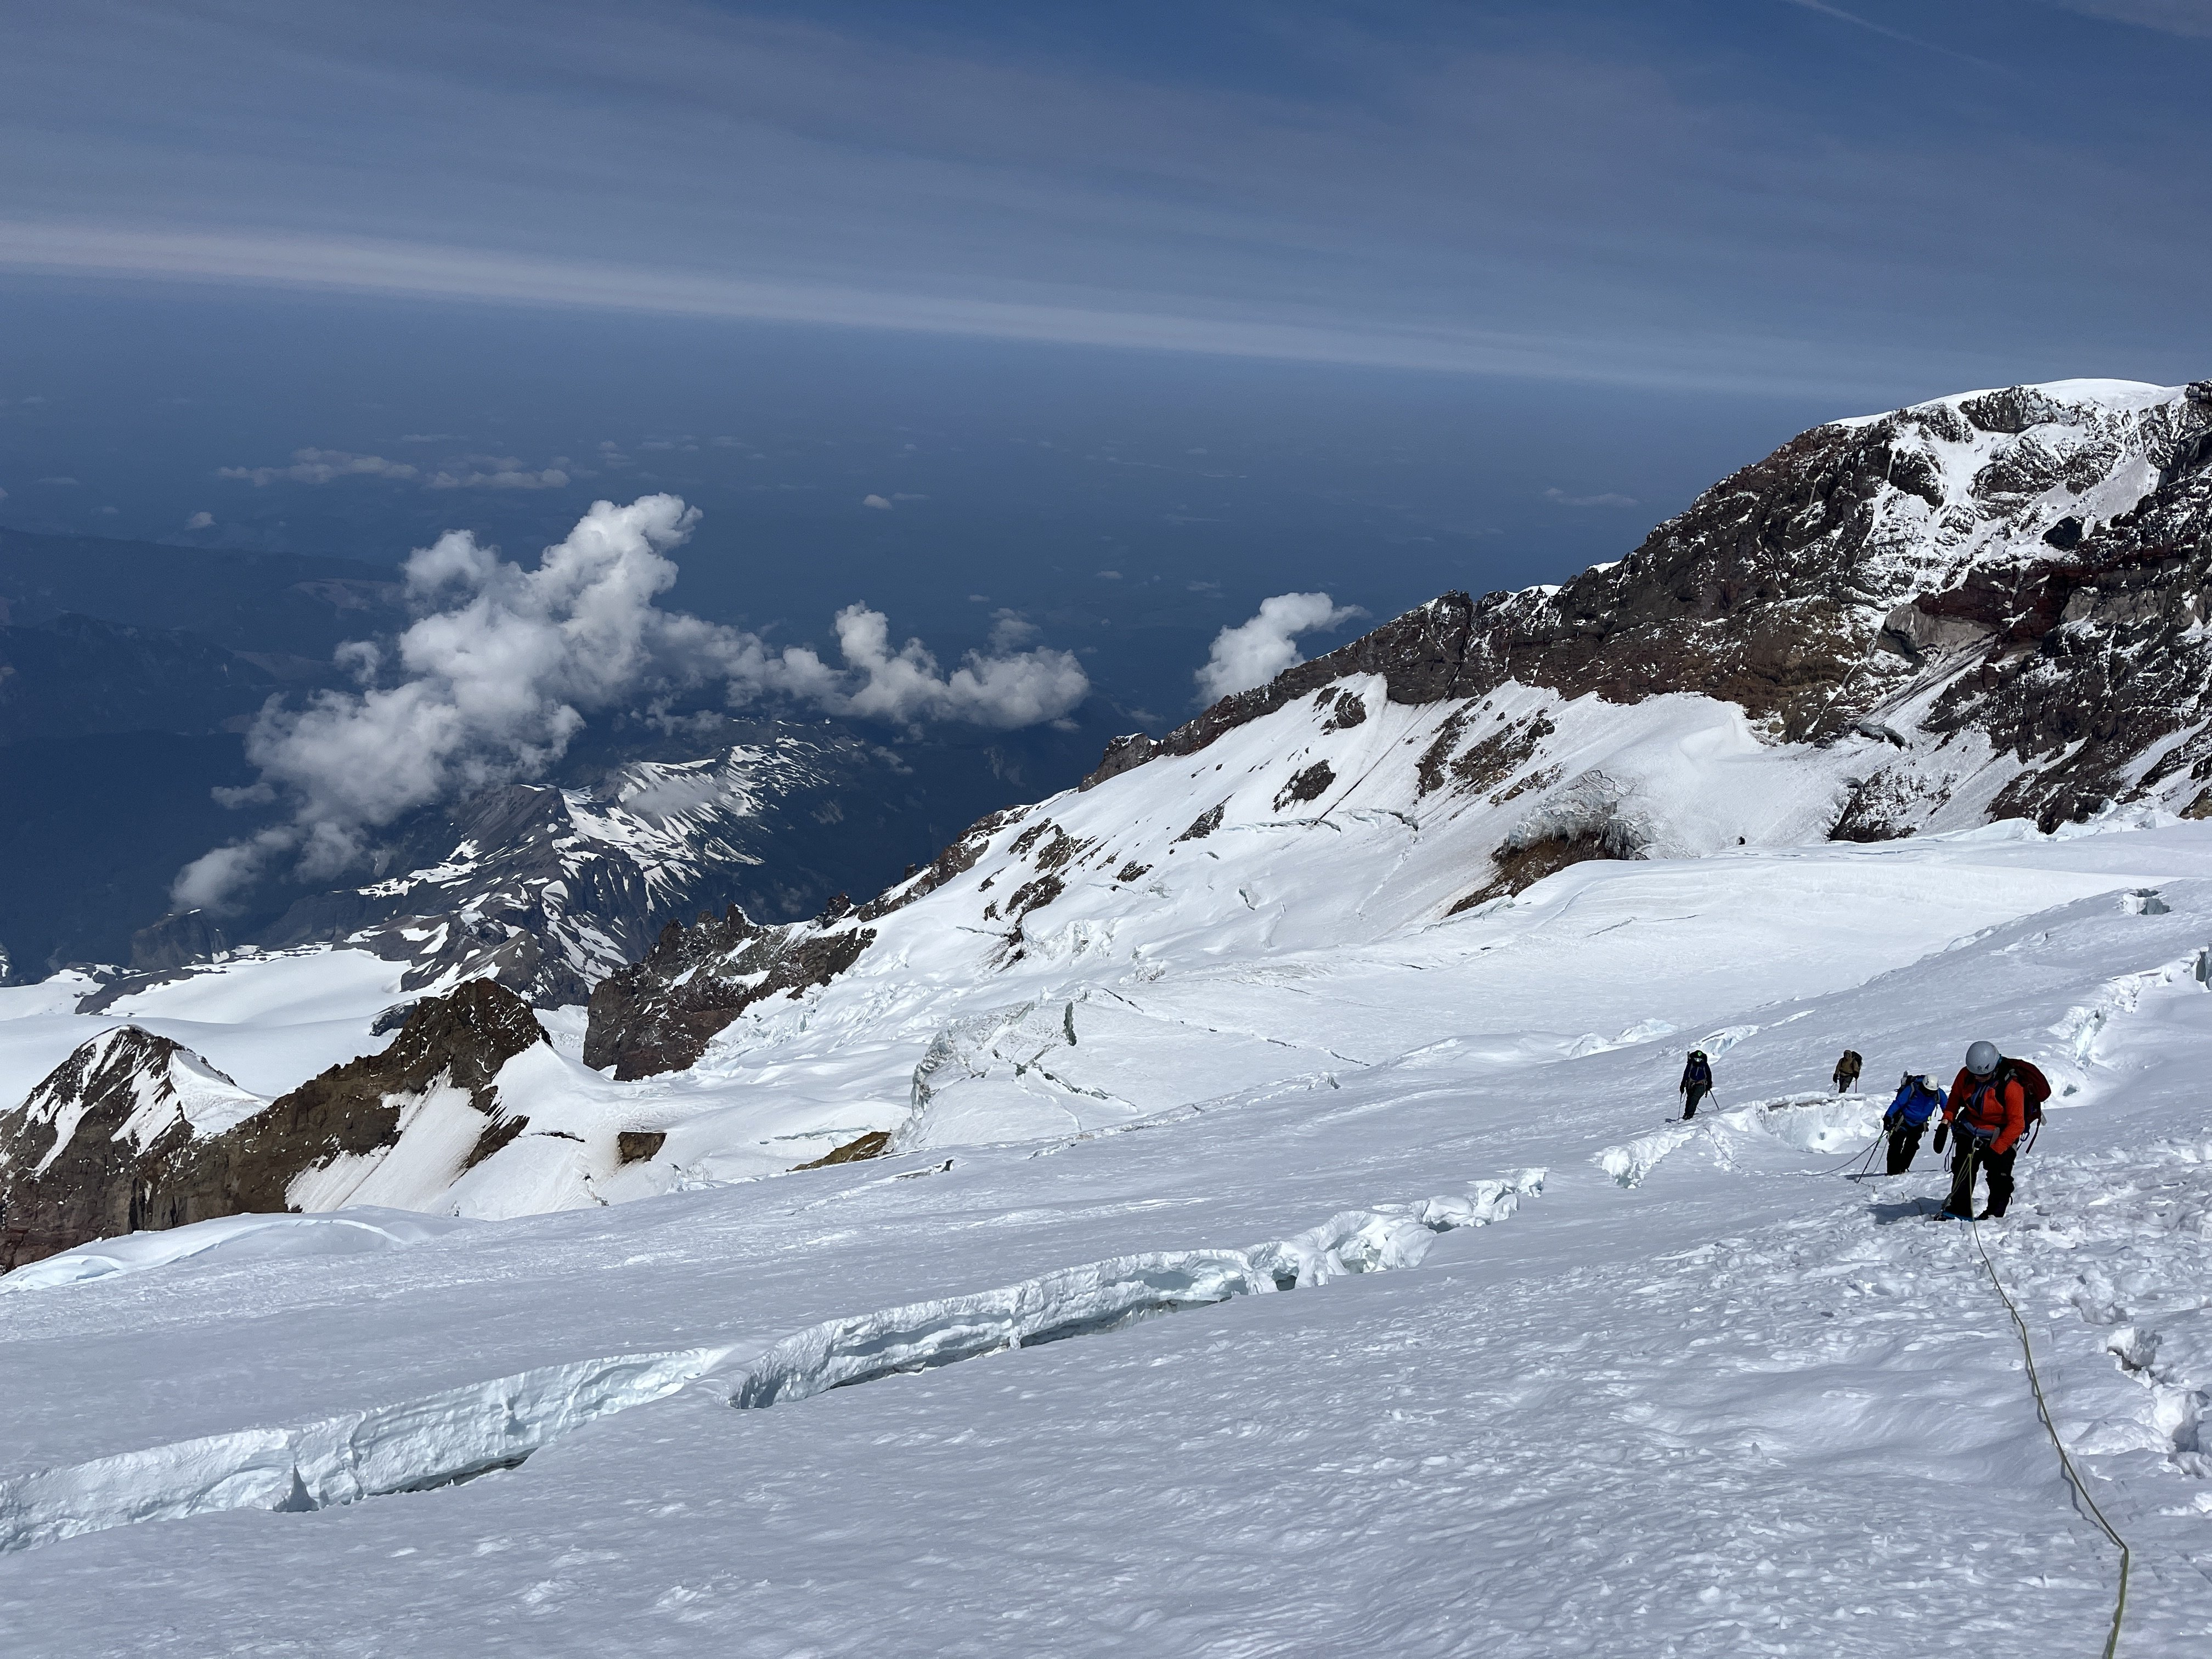
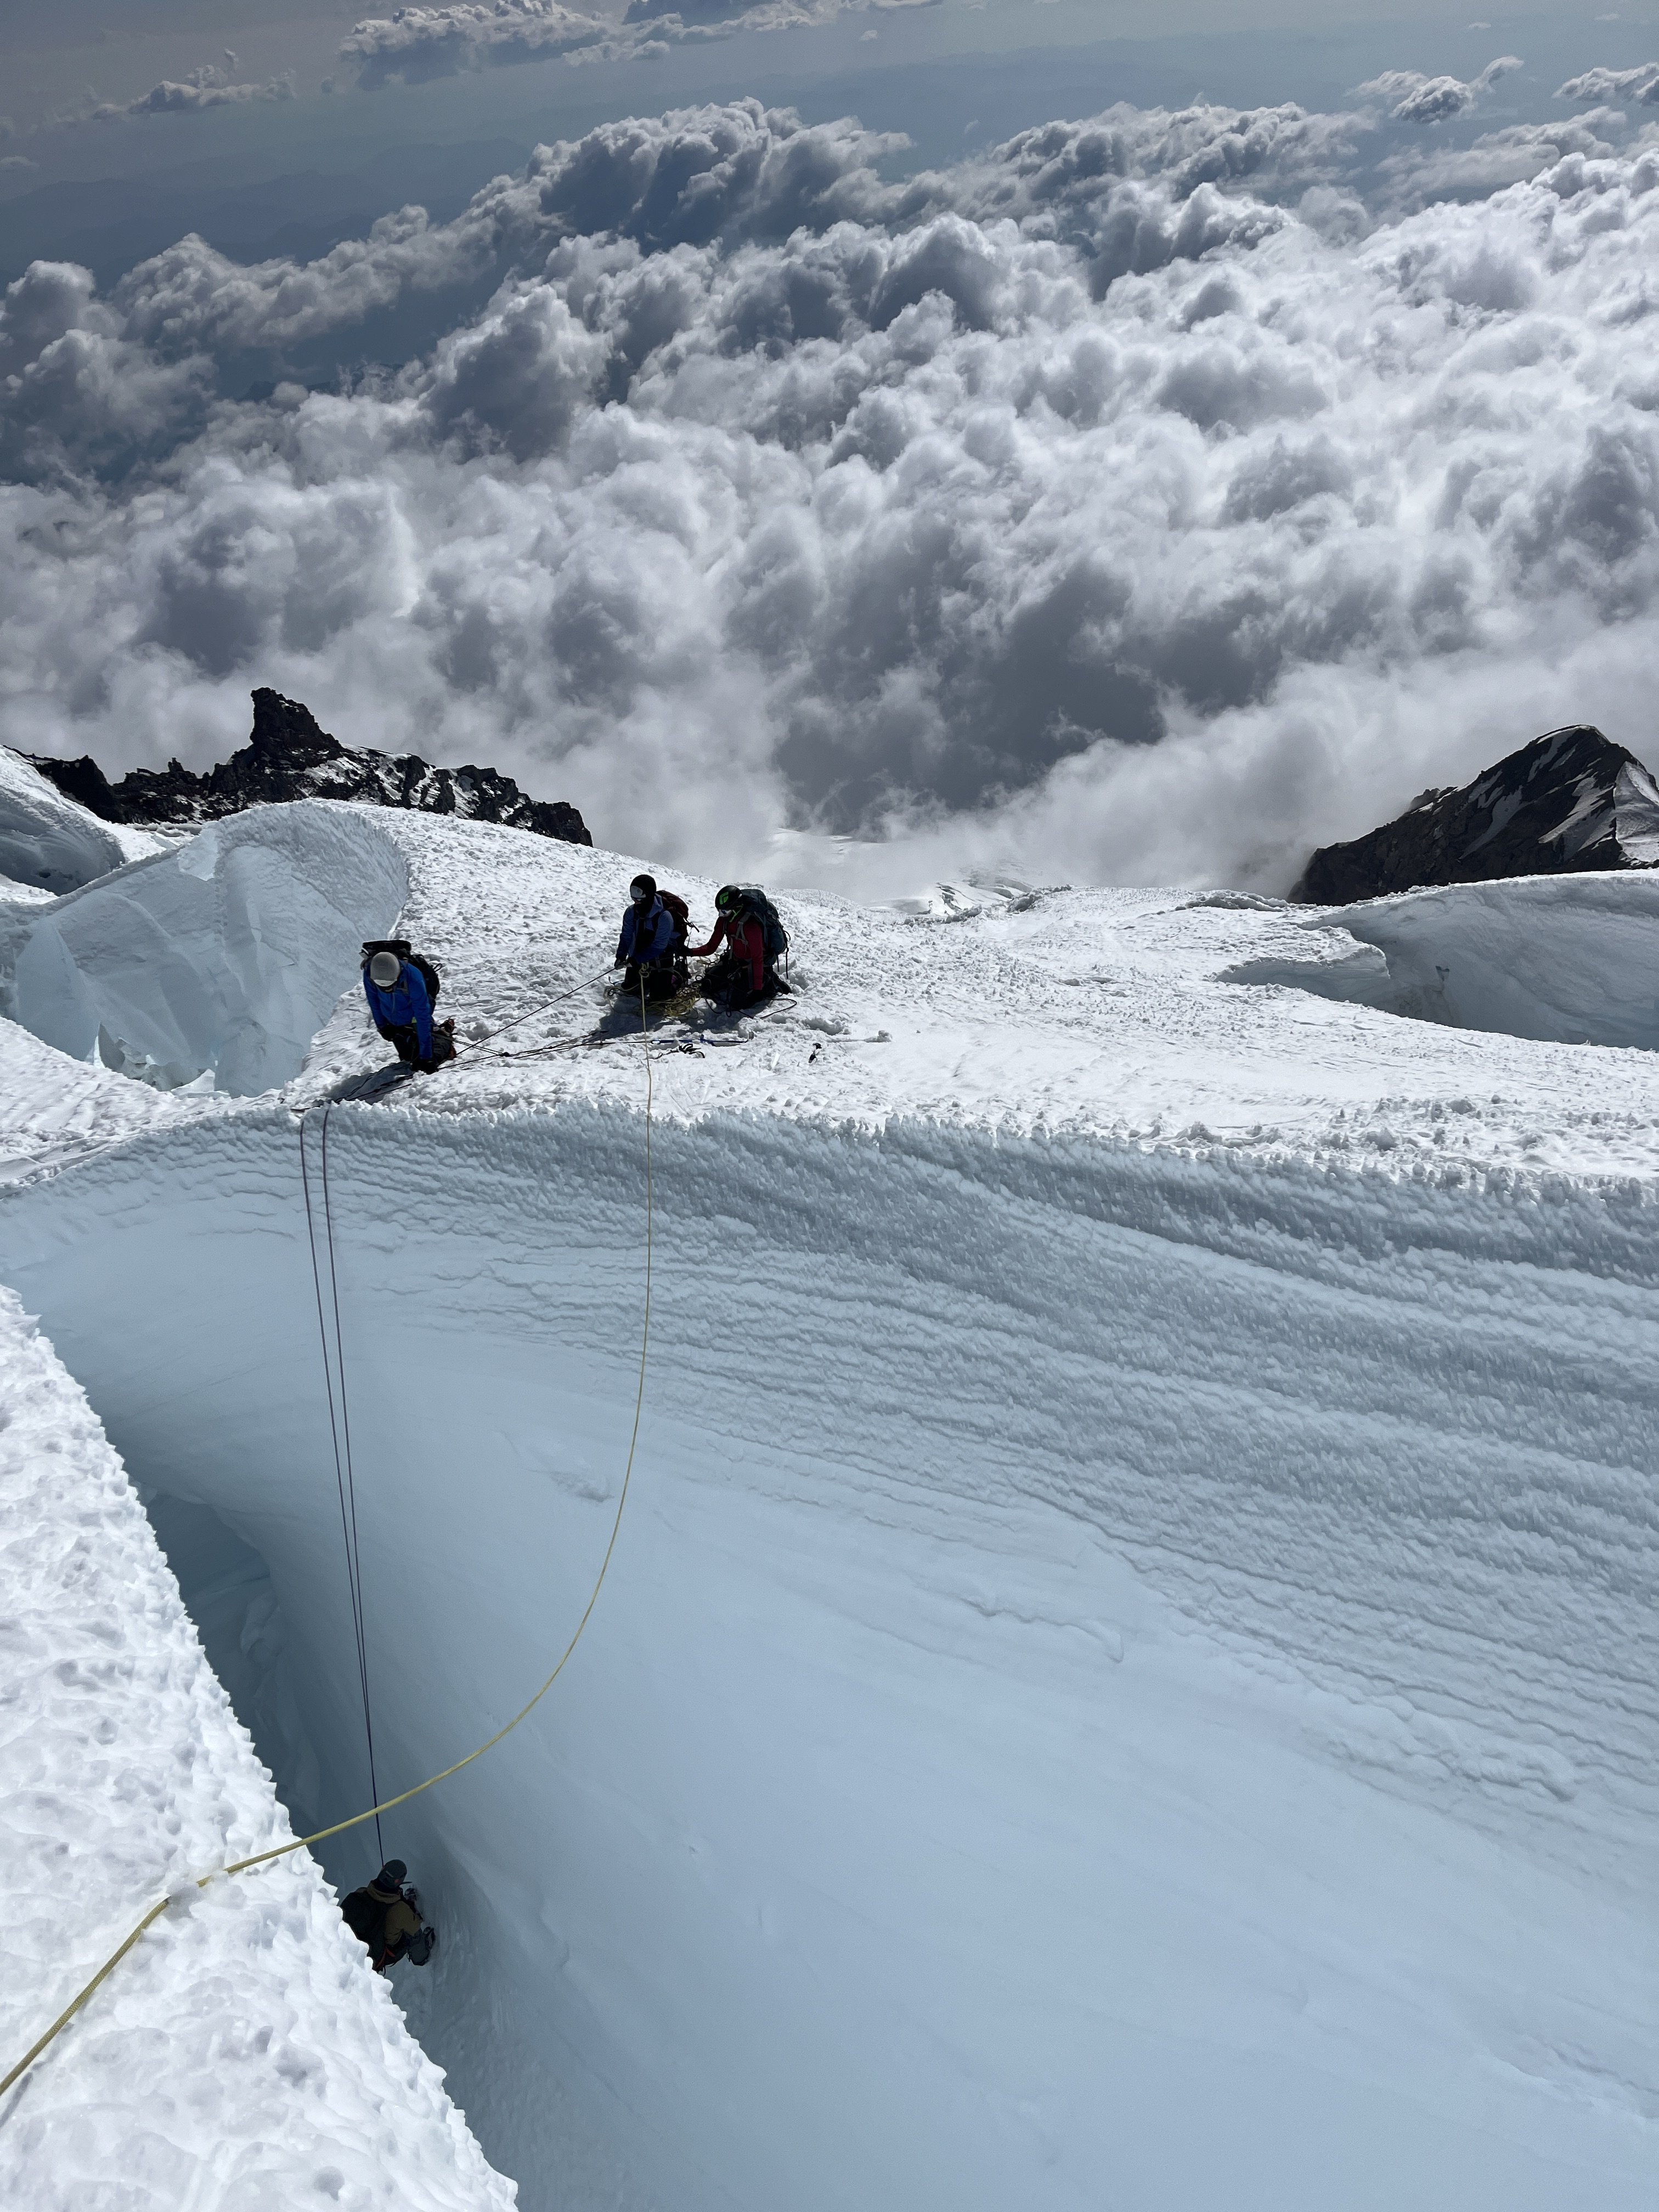
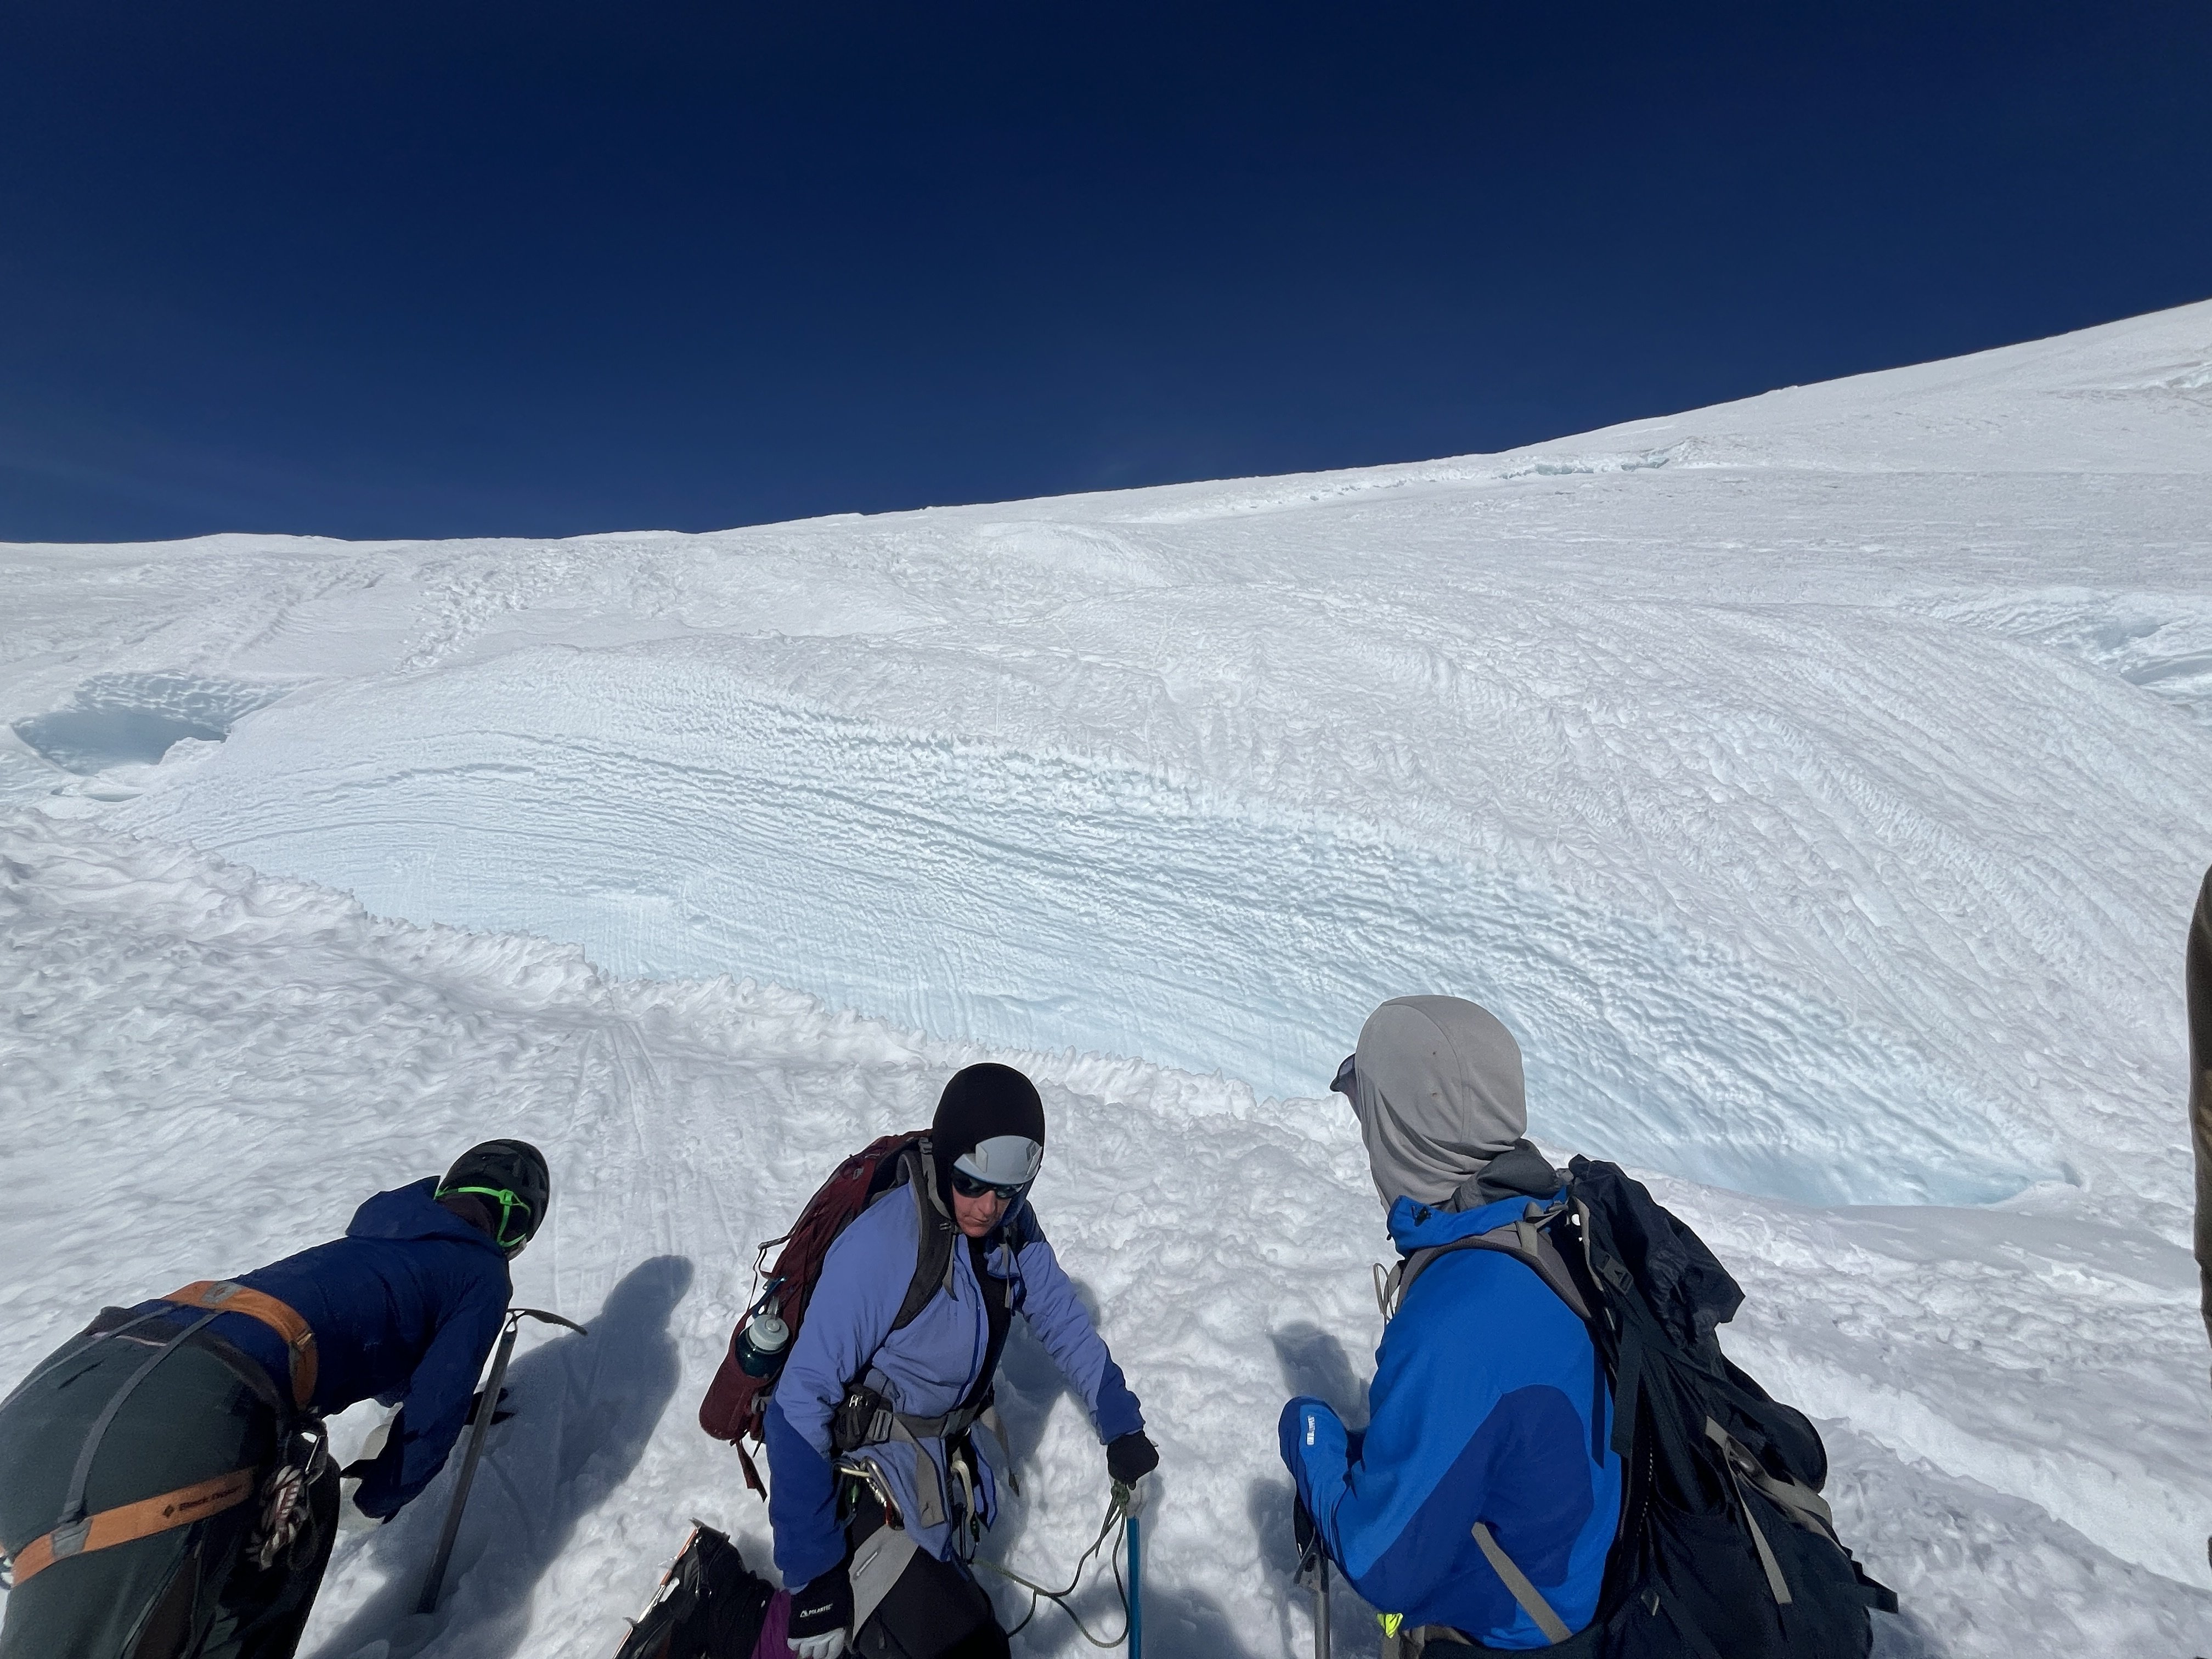
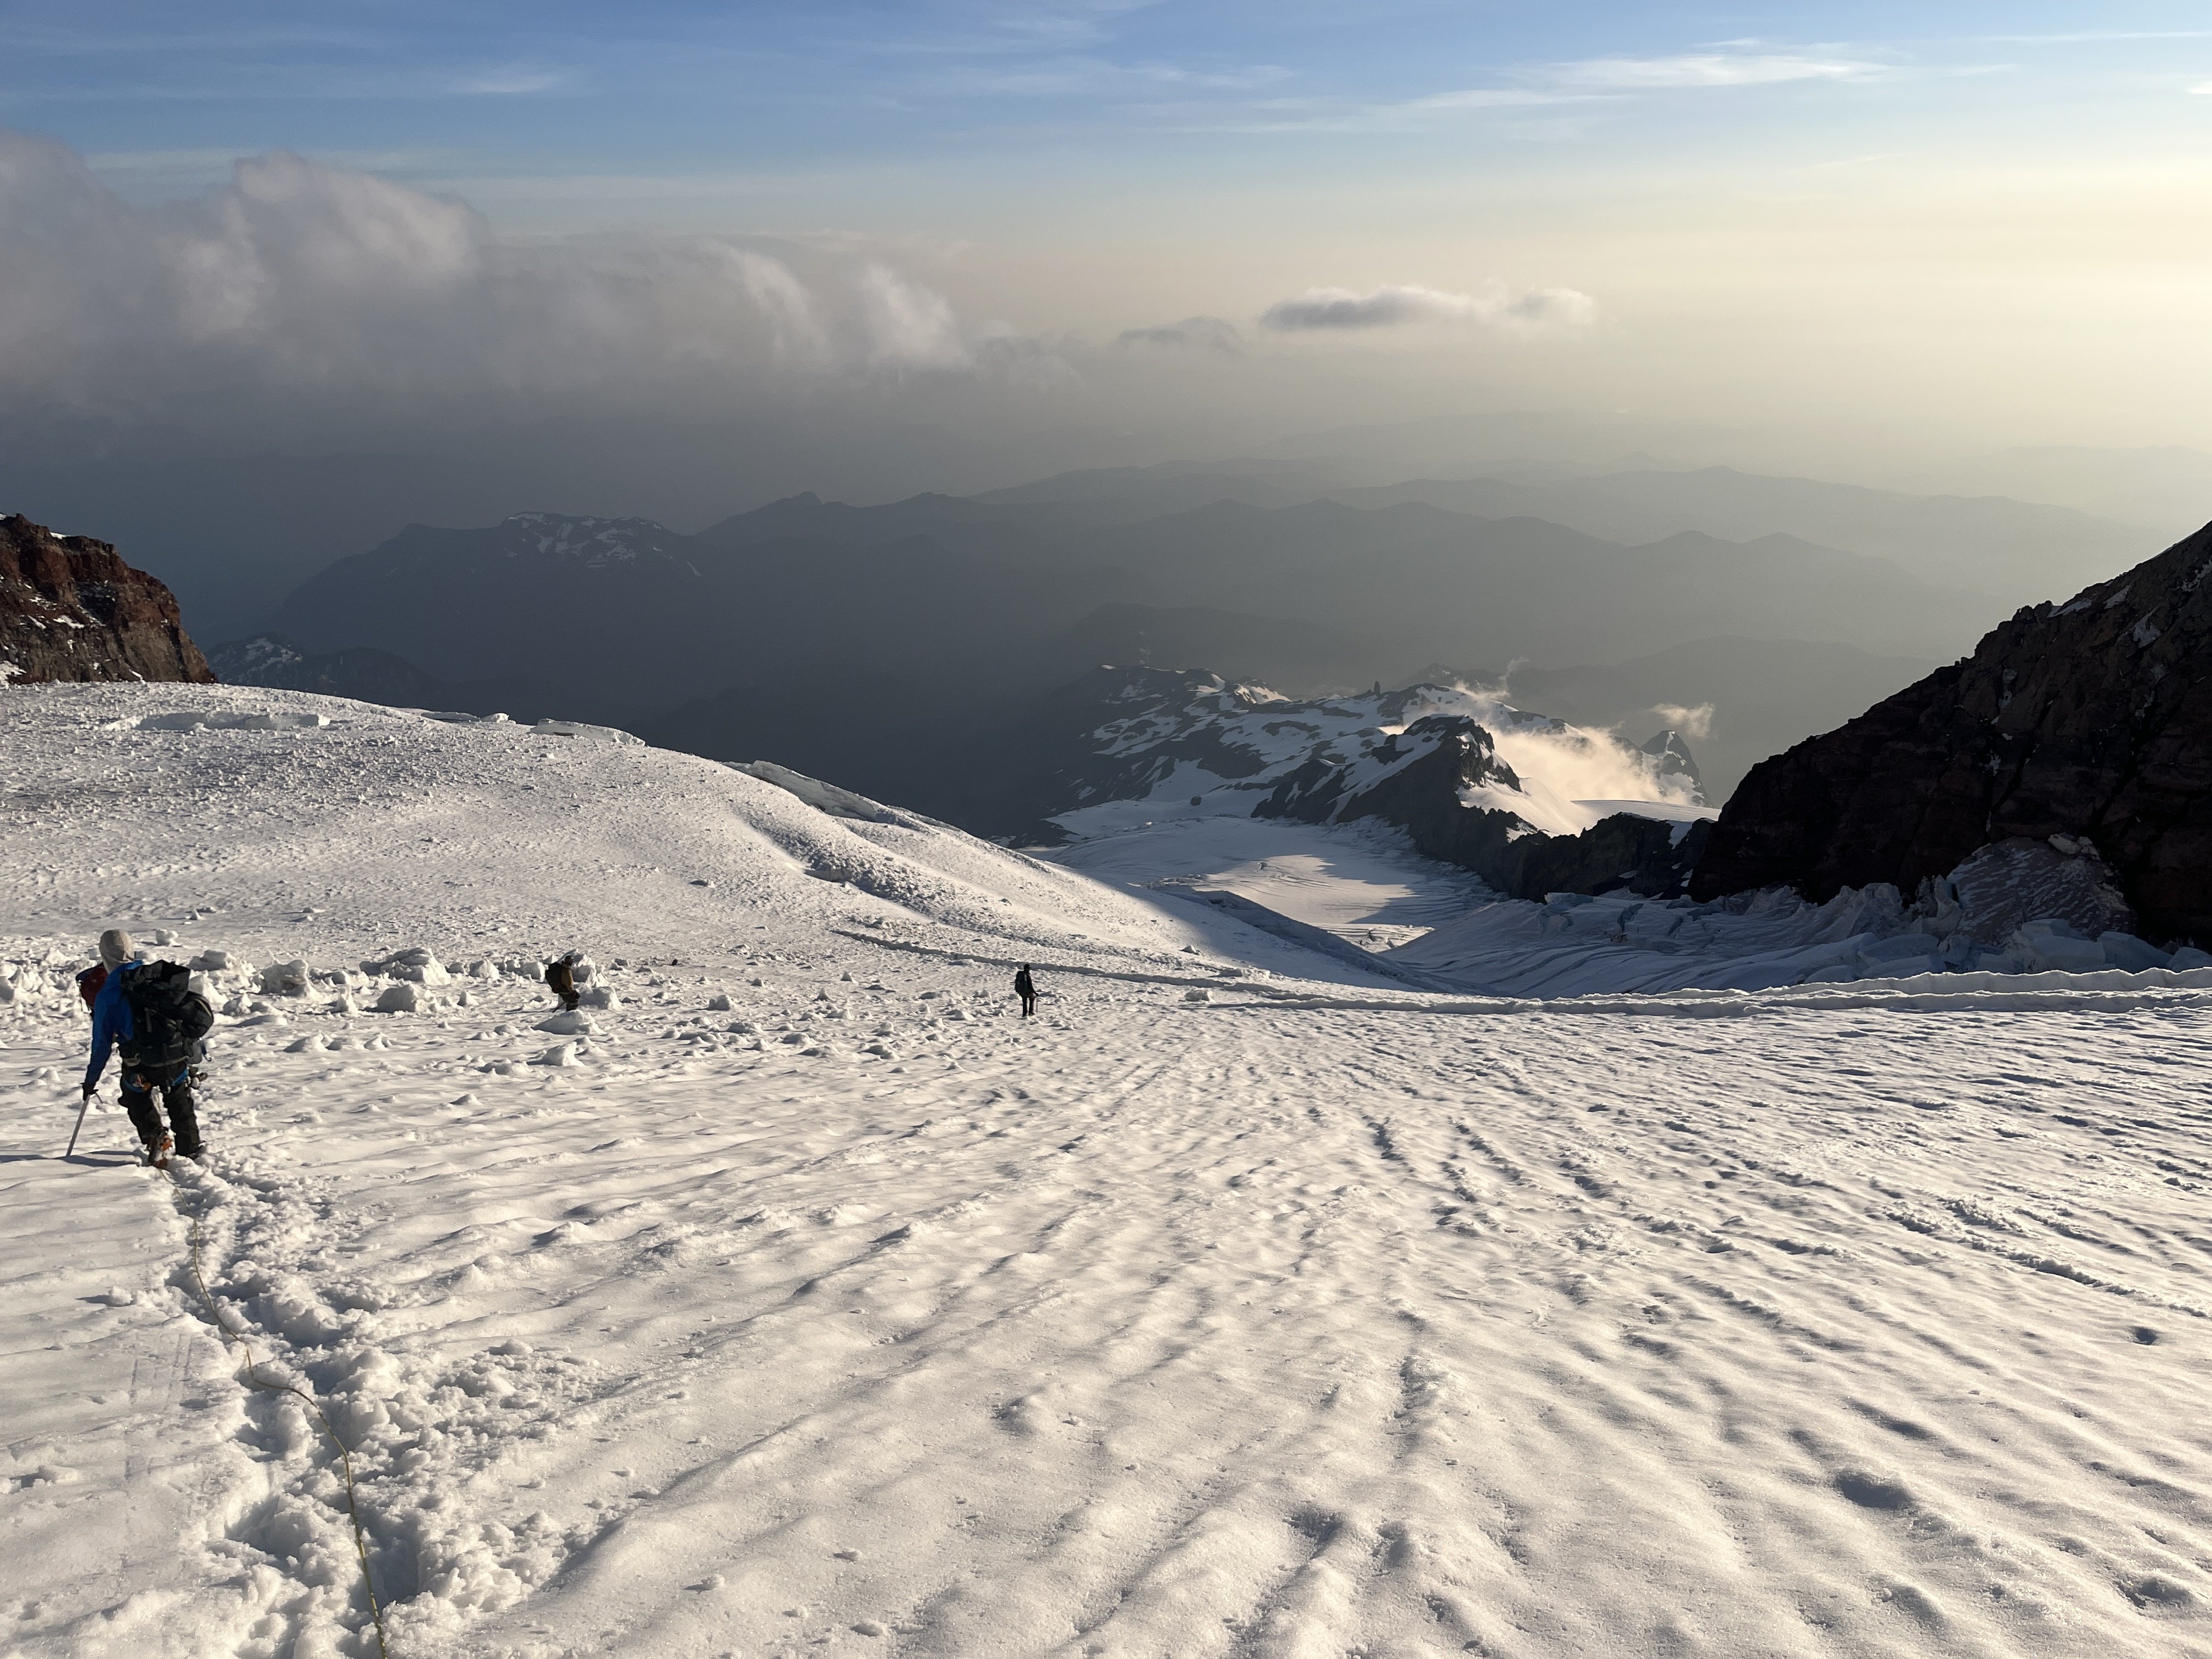
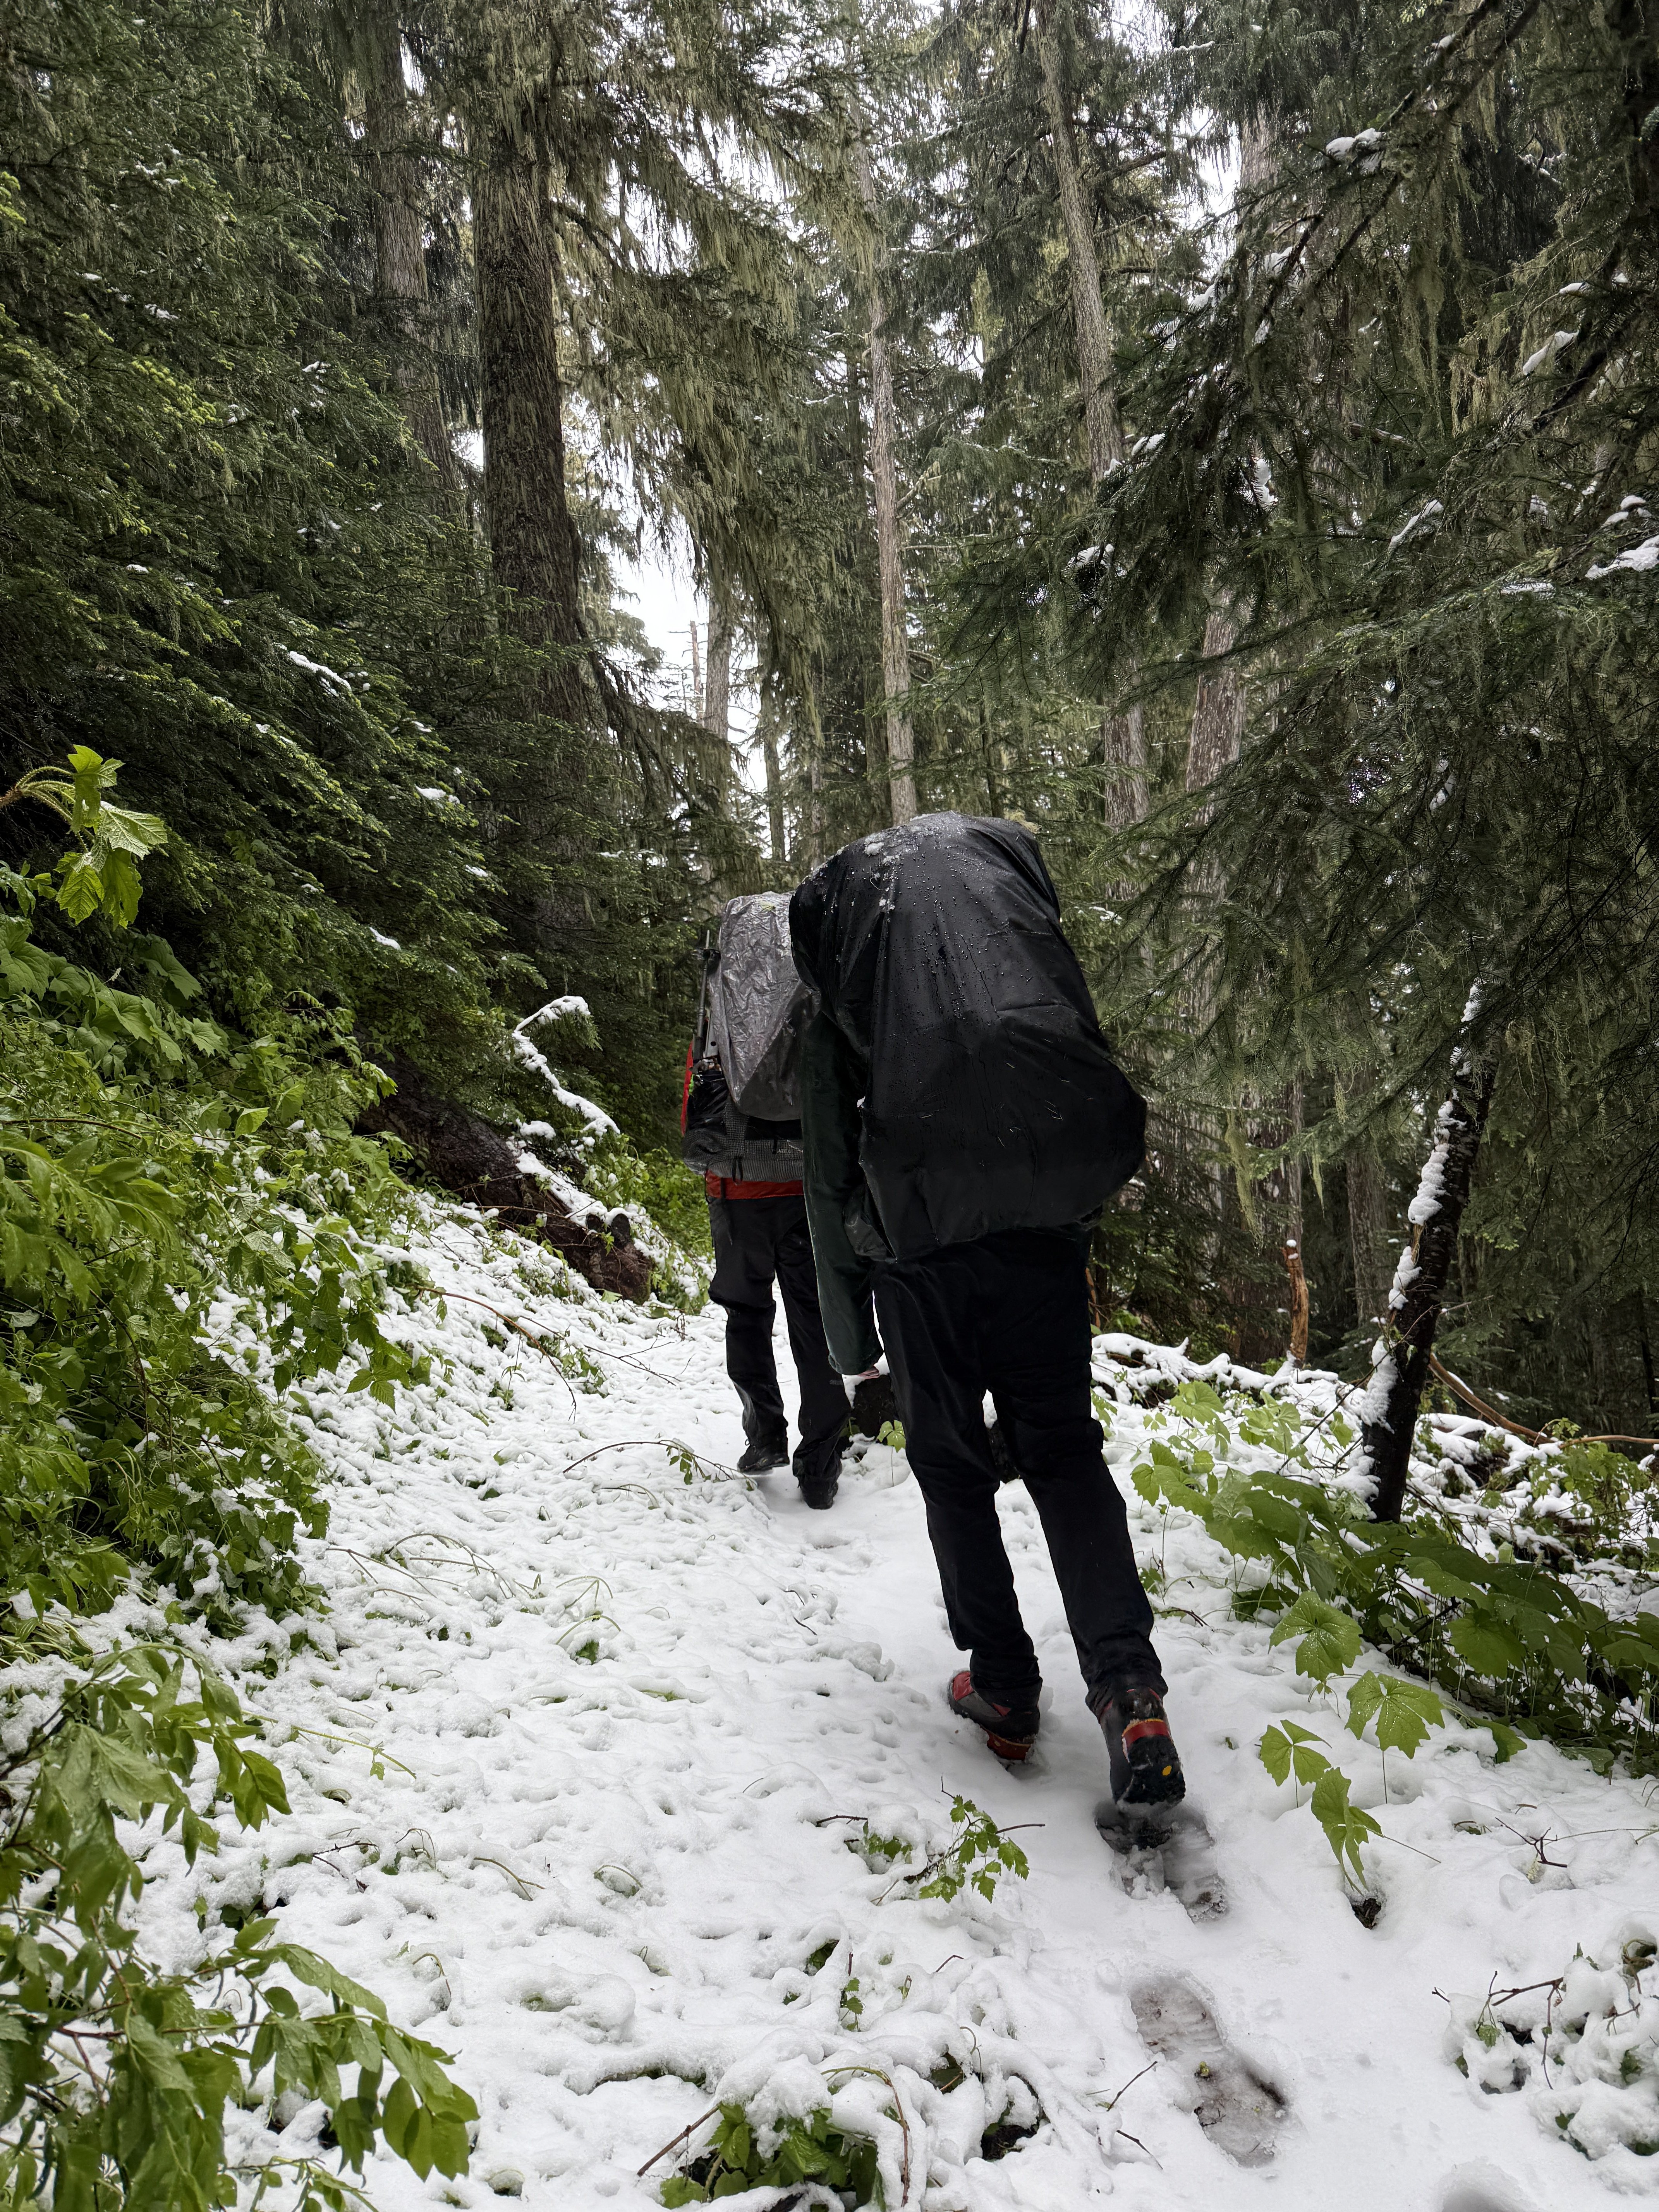
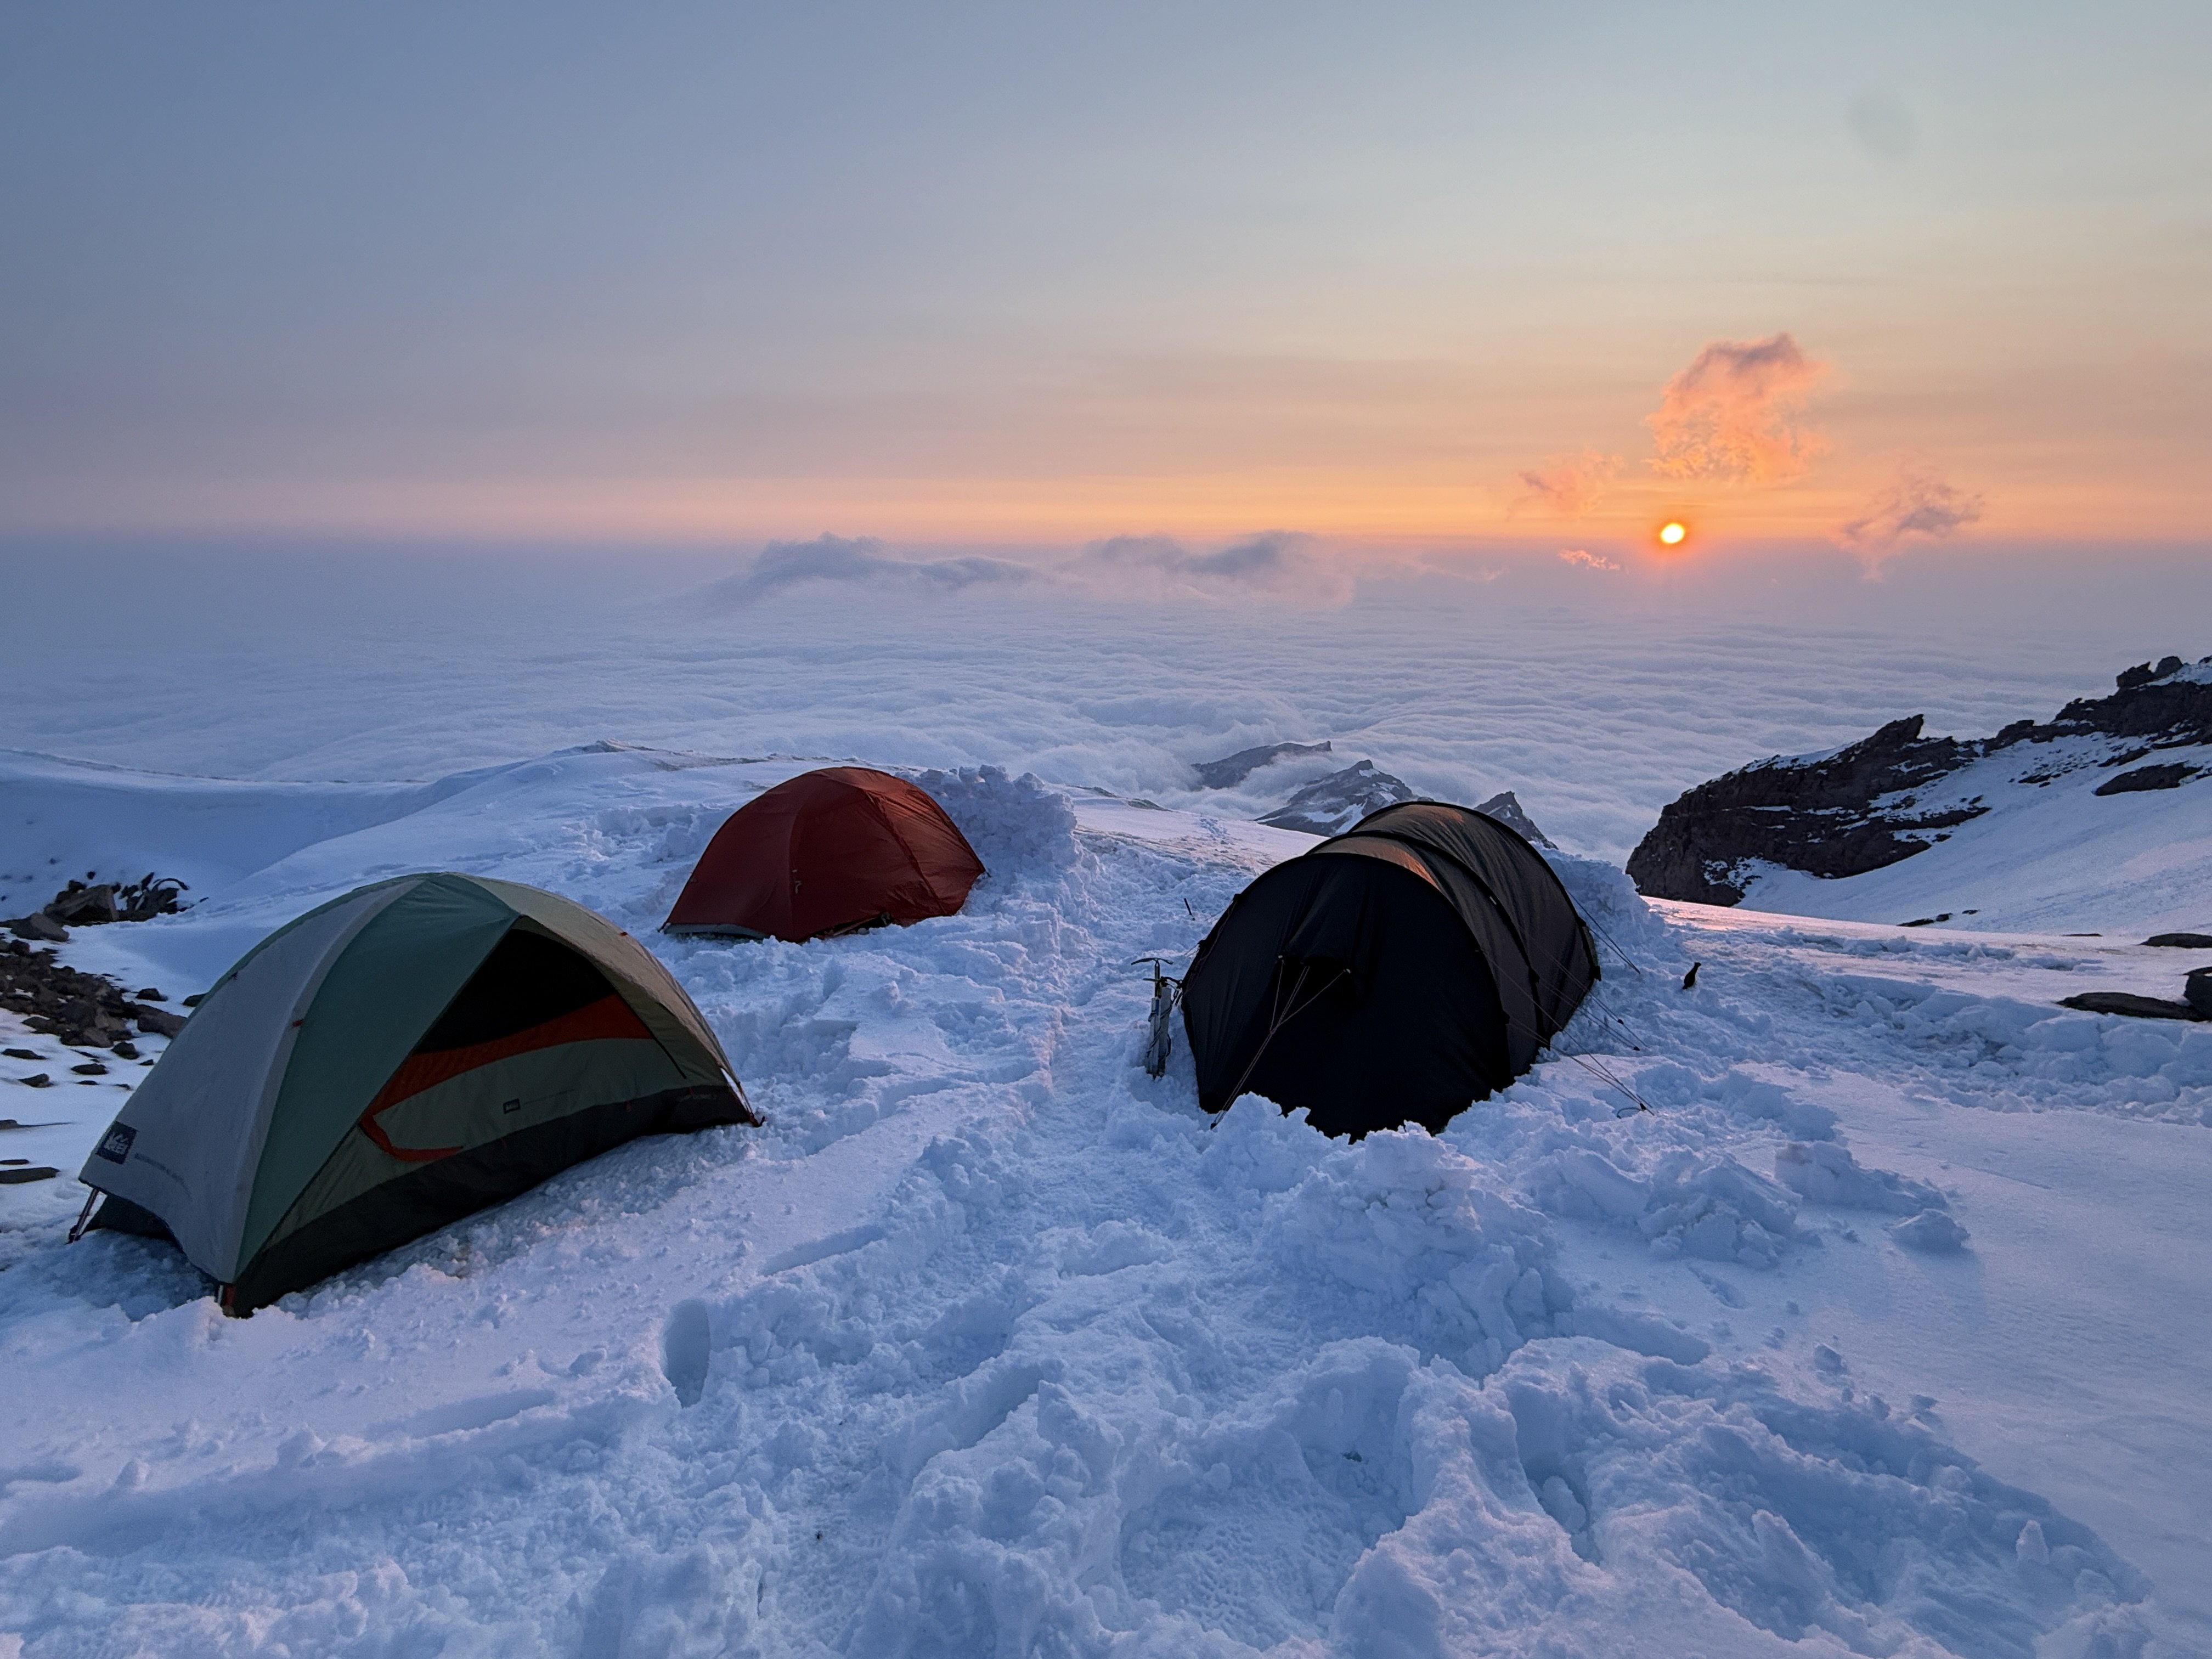
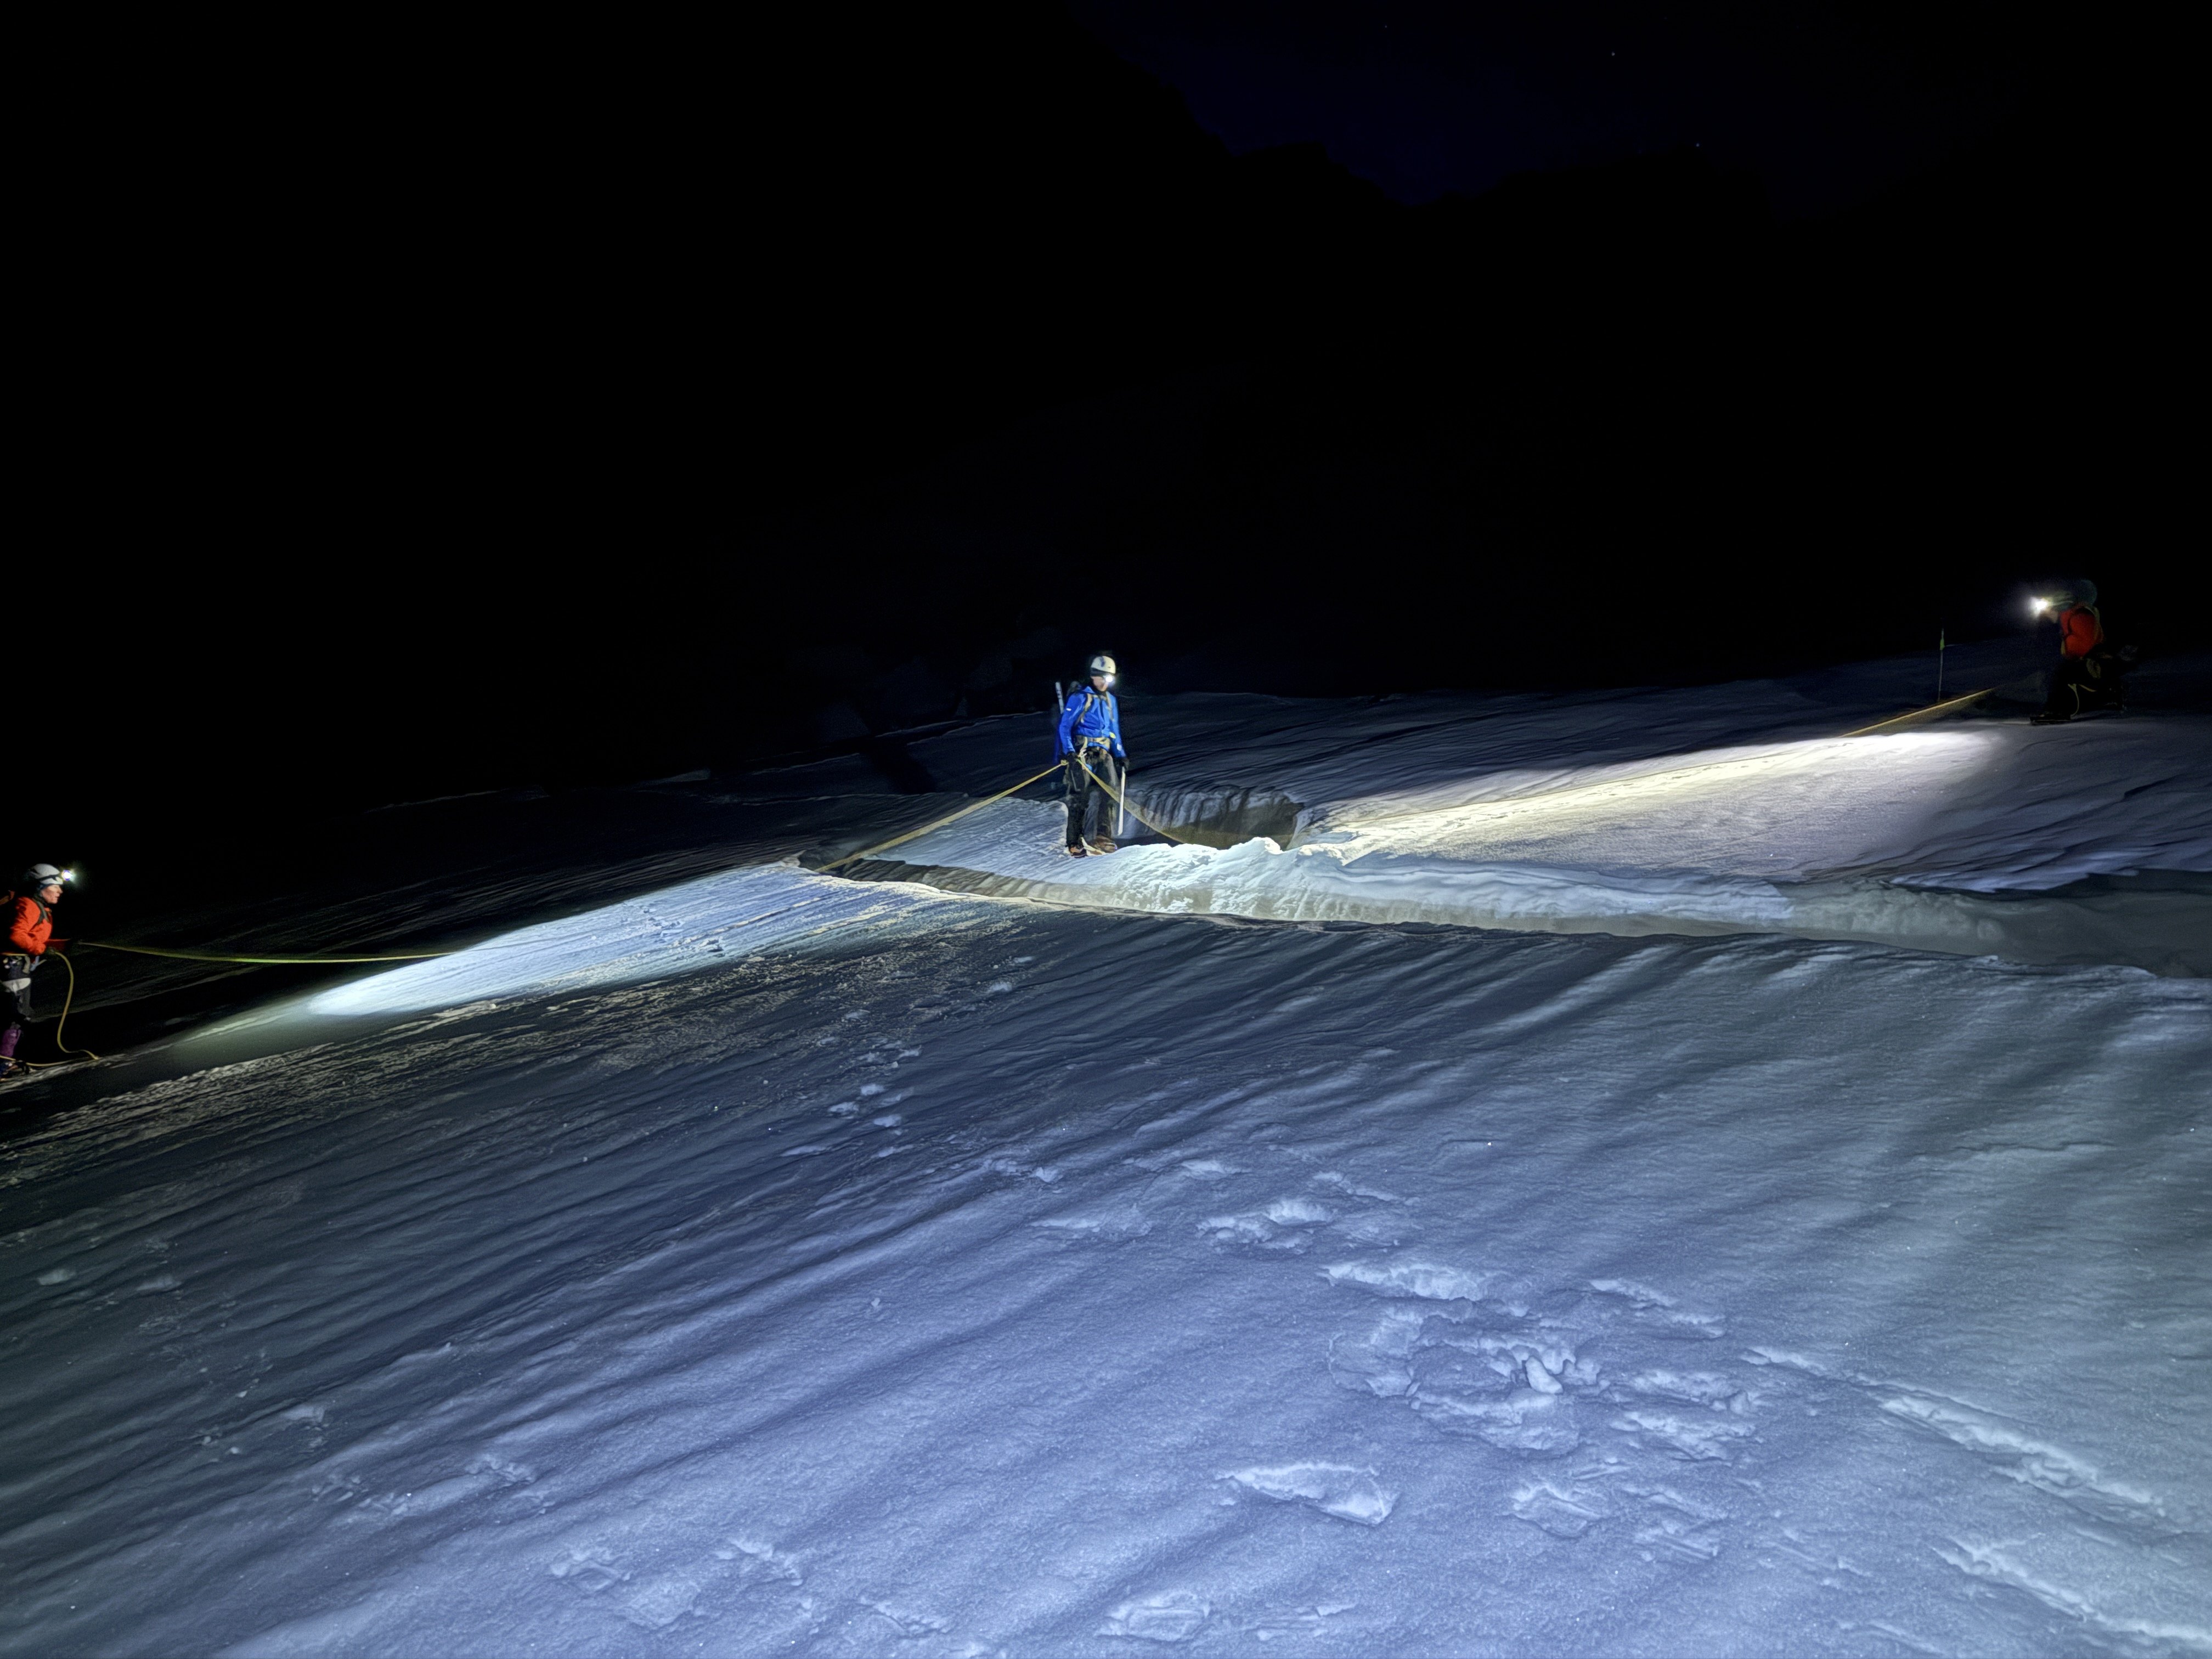
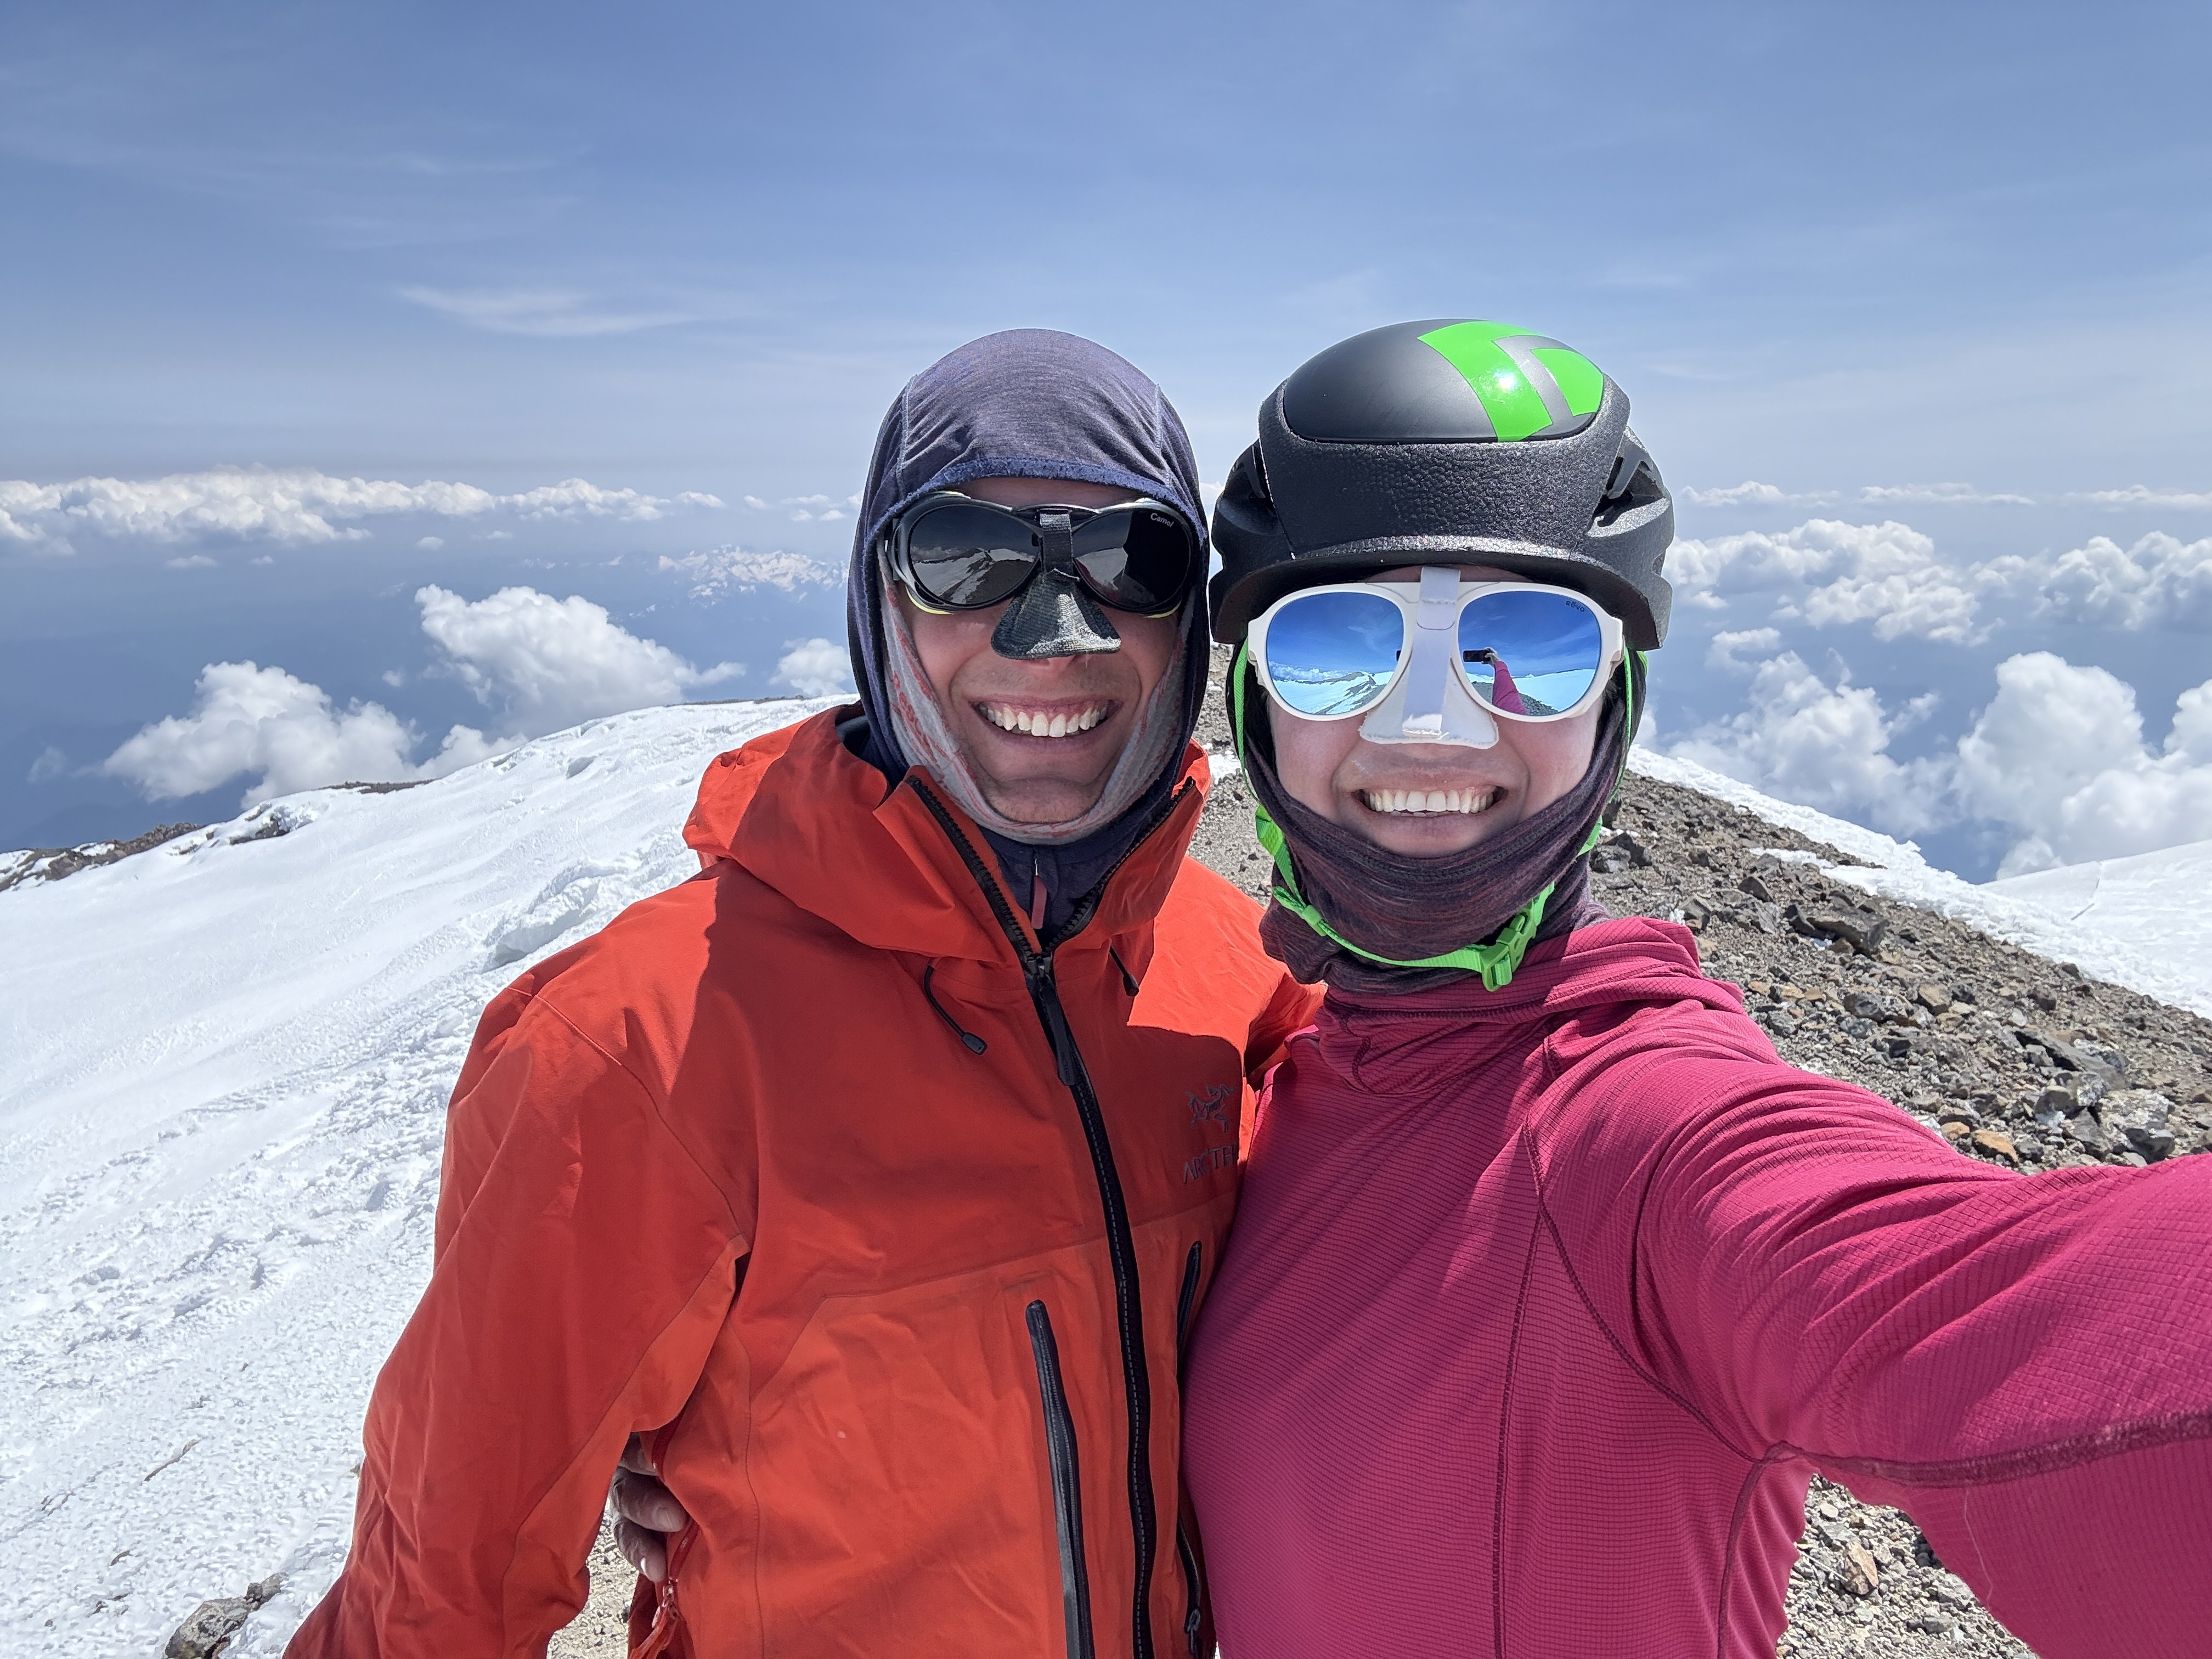
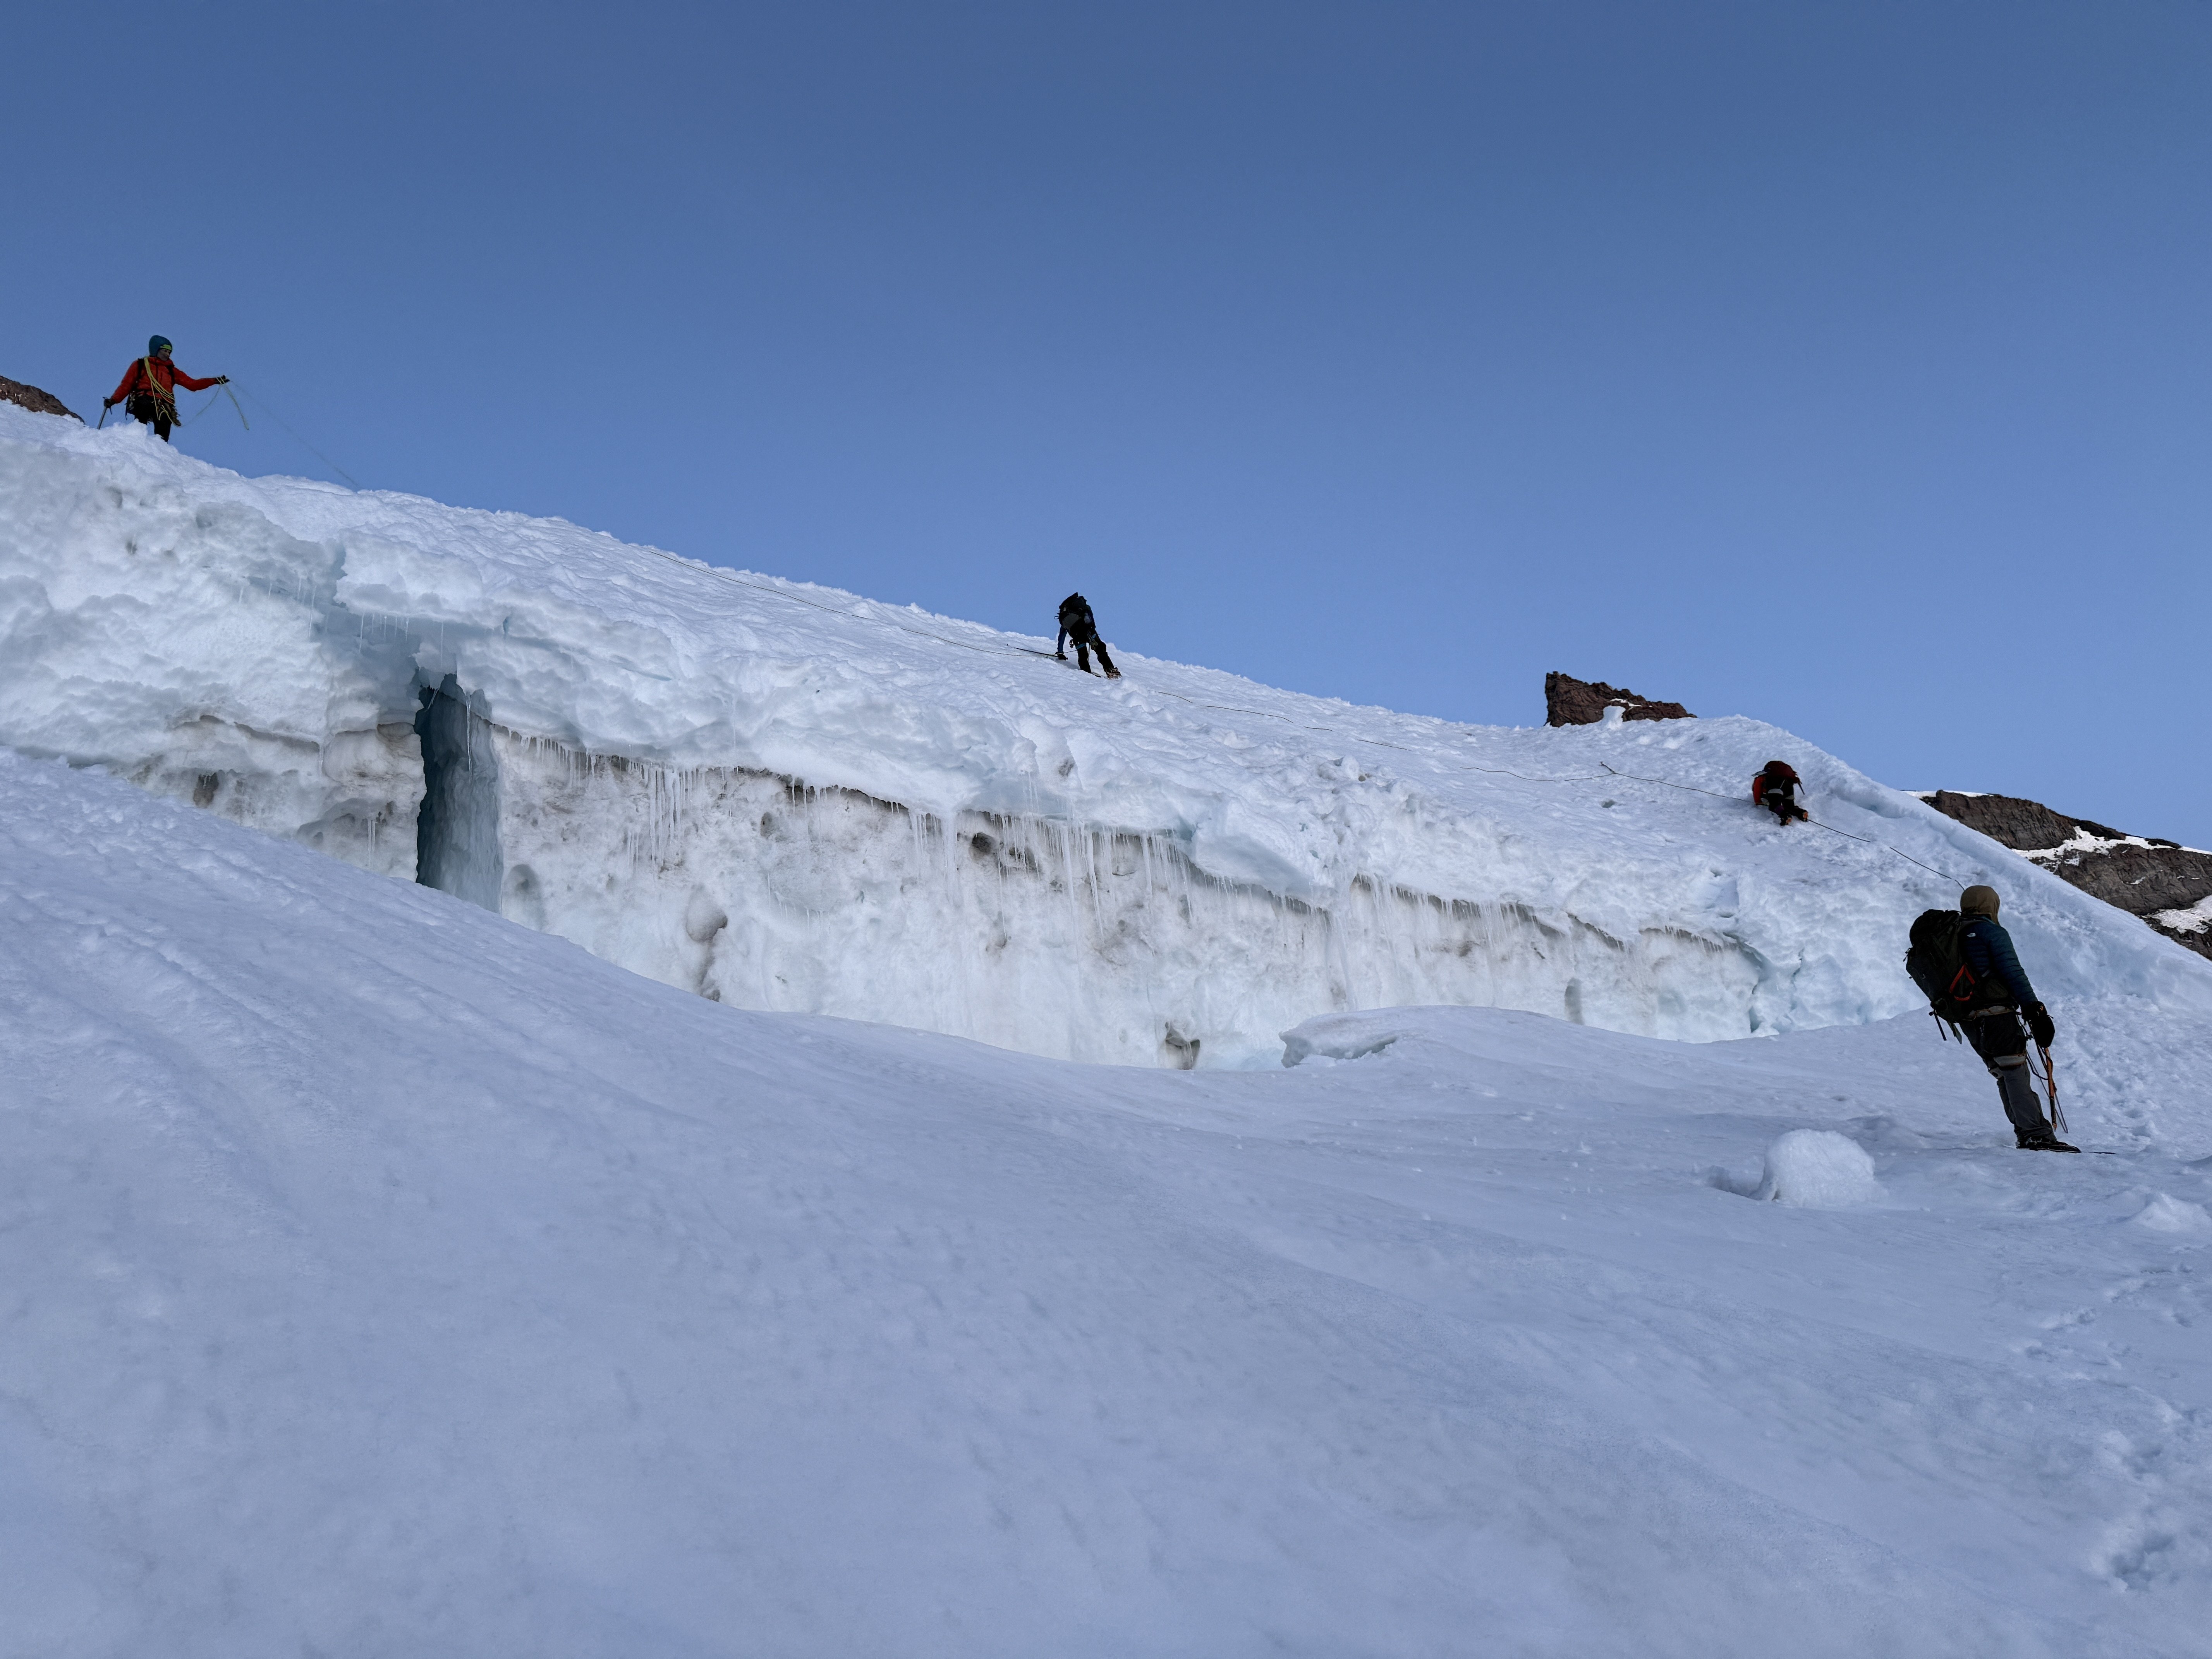
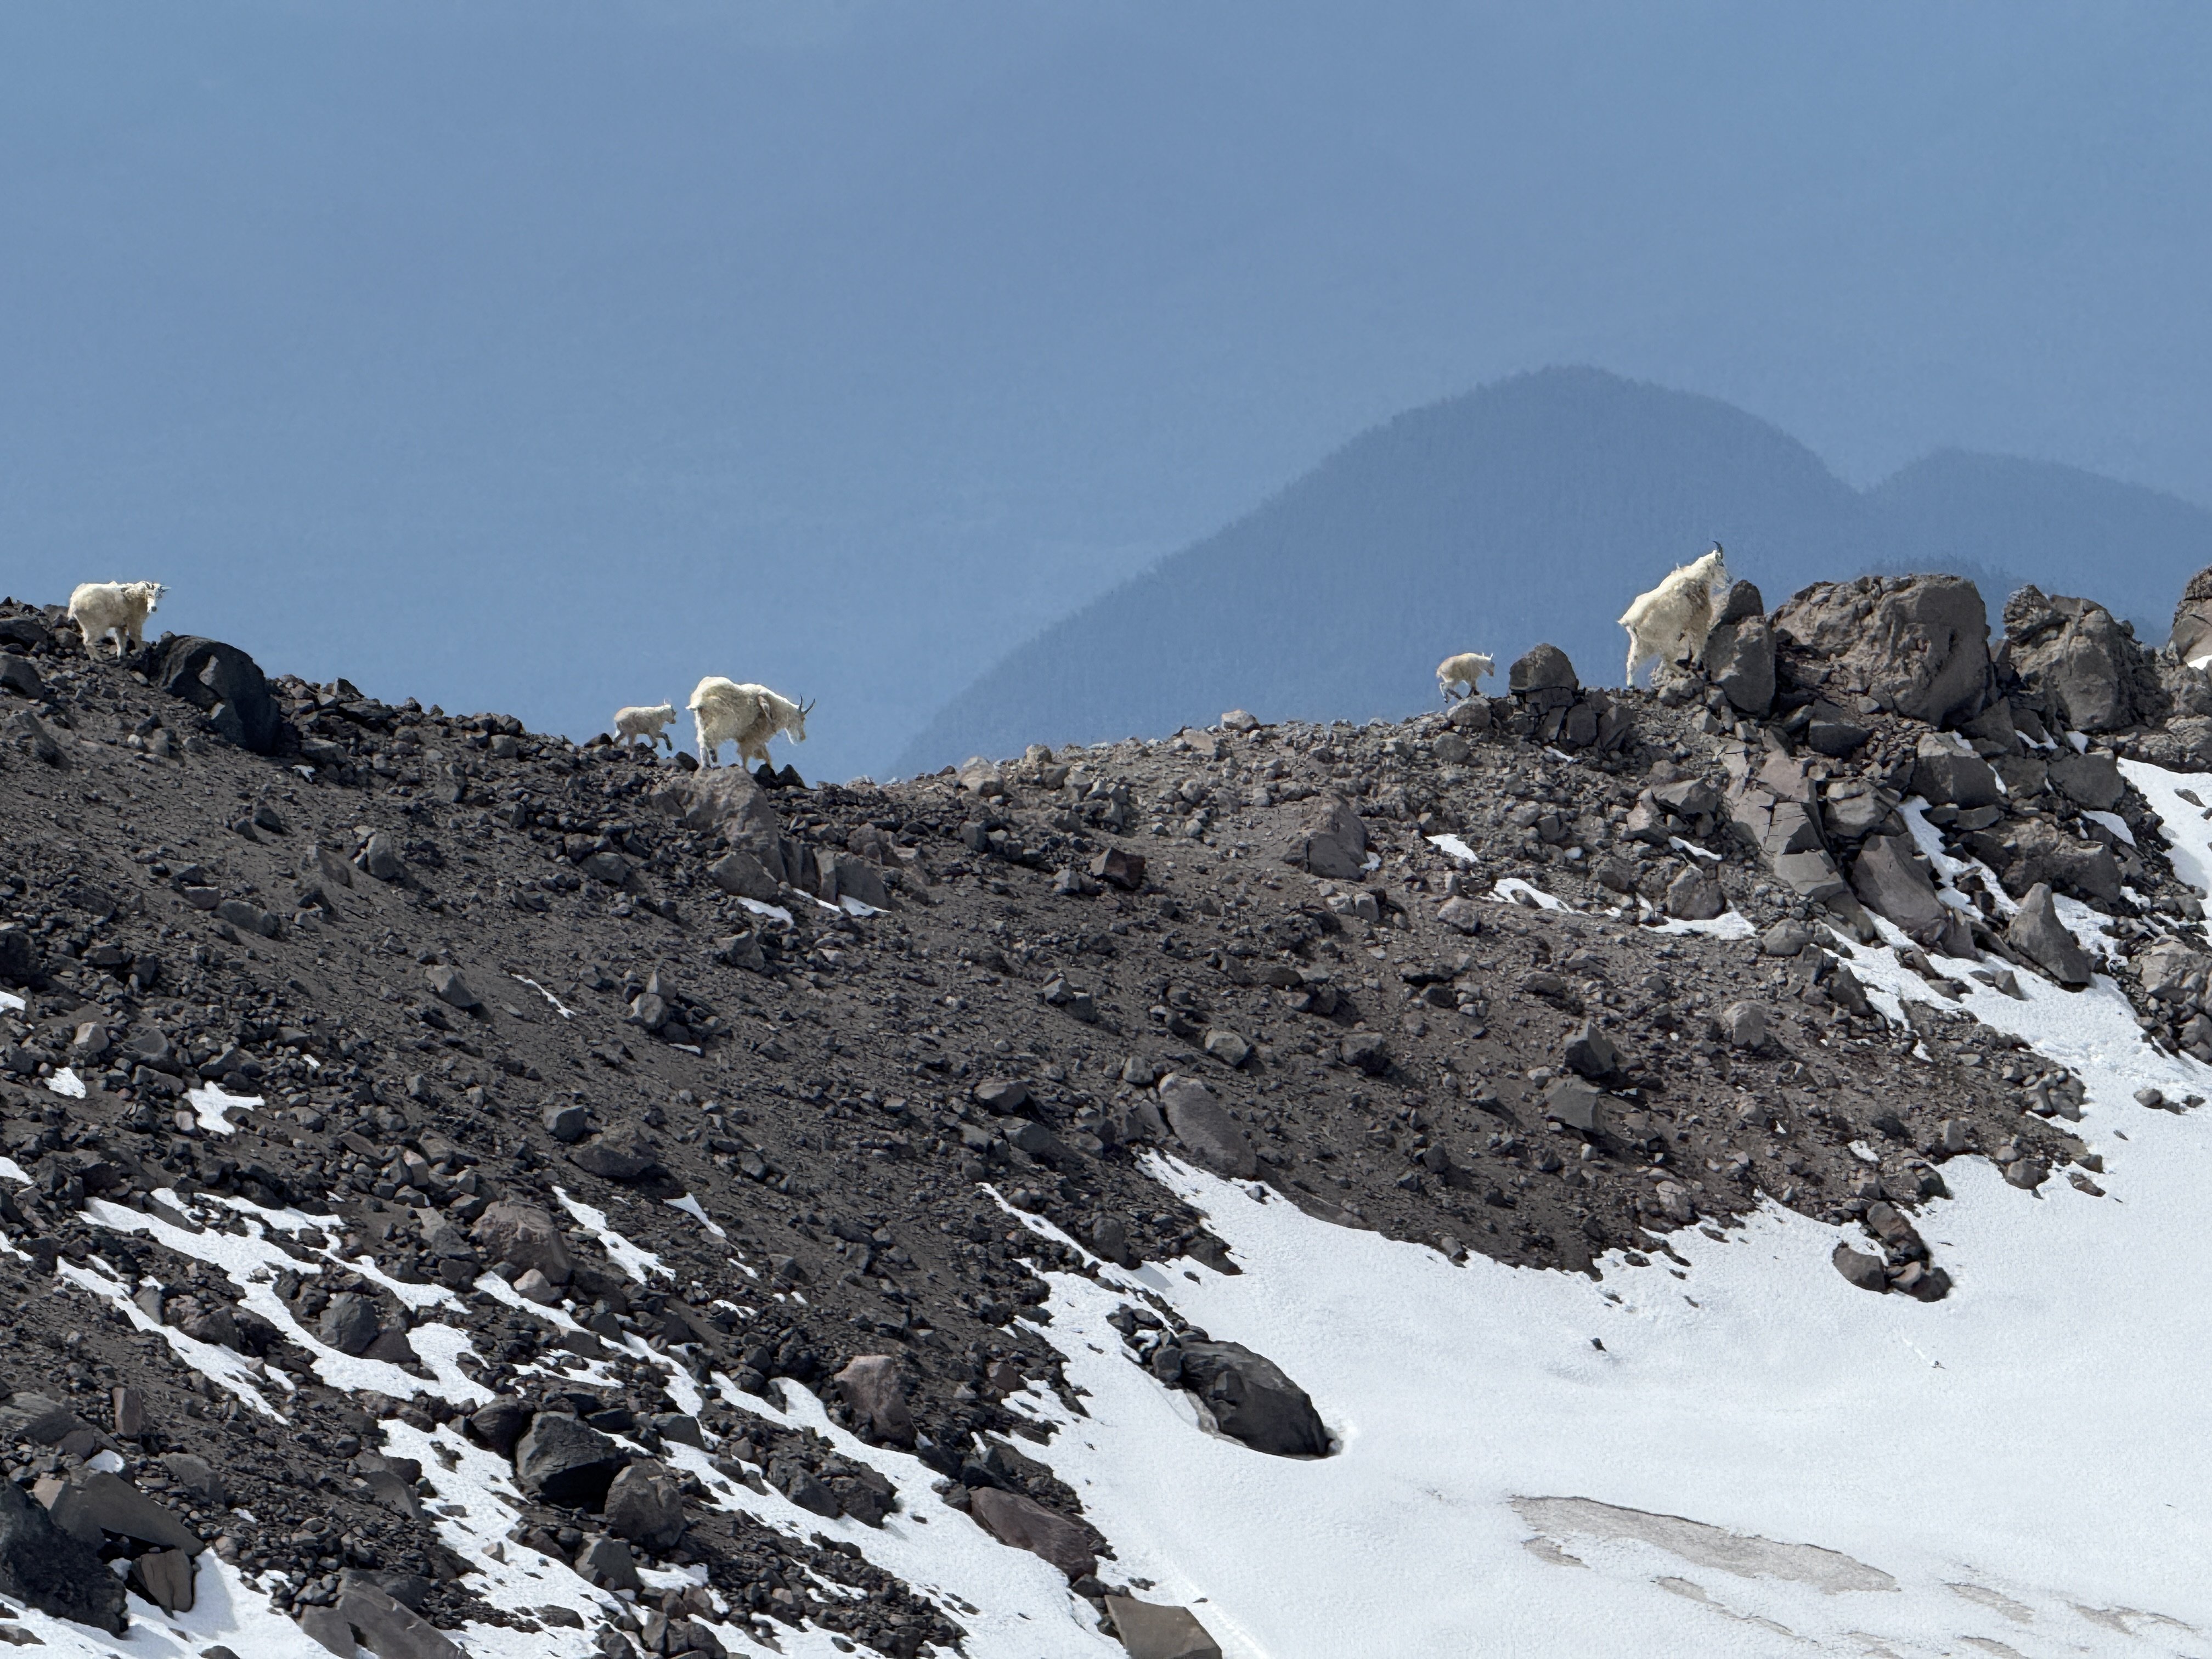
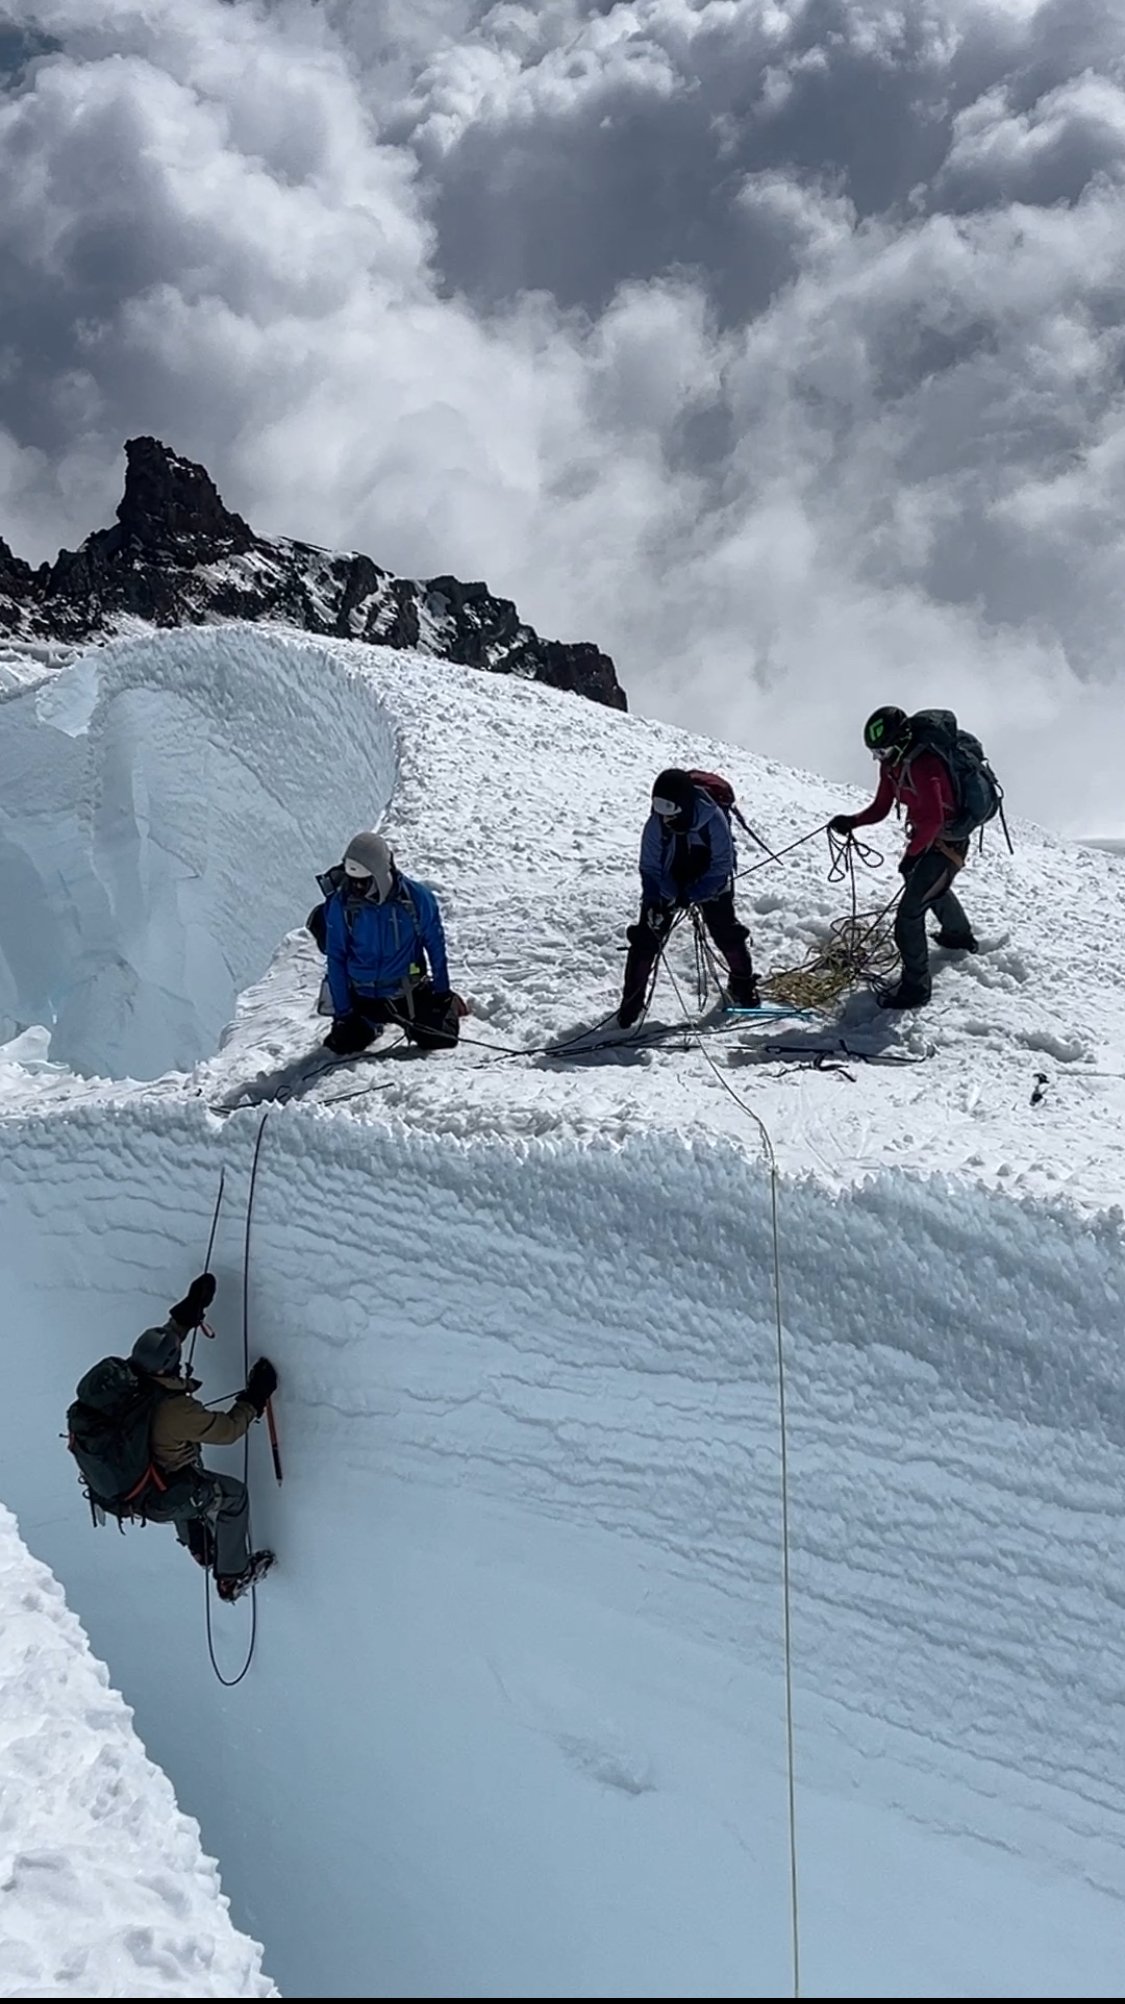
There are plenty of trip reports out there about the Tahoma Glacier, so I won't elaborate too much on the route. Last year we had planned to climb this route but with a very terrible forecast during our dates we postponed it a year. This year we braved the rain on day 1 in hopes of the promised good weather for summit day. Thankfully it paid off. Leaving the trailhead Saturday morning in the rain. (Photo by my wife) Found fresh snow from the previous night that was now a sloppy mess.....still raining. (Photo by my wife) Rewarded with this view on Day 2. We moved from Camp 1 at 6,200 ft up the Puyallup Cleaver to high camp at 9,800ft at the base of Saint Andrews Rocks. Looking at the Puyallup Glacier. It was well filled in and easy walking up to high camp at 9,800ft. Looking down at the Tahoma Glacier from high camp. You have to drop down the ramp to reach the glacier proper. Sunset at Saint Andrews Rocks at 9,800ft. (Photo by my wife) Early morning crevasse navigation. (photo by my wife) Some more crevasse shenanigans in the broken up sections. More crevasse zigzagging. (photo by my wife) The team nearing the top of the route approaching 14,000ft. The summit with my wife and I. At 13,100 feet on the way down our 2nd person (out of 5) had a sliding fall into a crevasse. I have always said that if you keep your intervals tight you shouldn’t have to worry too much about crevasse falls. And over the last 15 years this has proved true in both the PNW and AK. With multiple small punch throughs over the years nobody has ever gone farther than their armpits. But this time was different. This is because if you punch through a snow bridge you will likely go up to your waist or backpack but then be tight and climb out on your own. I think this is true for typical crevasse falls….bad snow bridge, or winded over crevasse. These are times were you are surprised and fall right in. There is an entirely different type of crevasse fall. This is when you take a fall in steeper terrain and are unable to arrest that fall prior to the crevasse. I never really thought much about this because I feel really confident on crampons and look at those short locations as “do not fall” sections. But clearly with a less experienced group I need to take those sections a little more seriously. Our #2 guy on the rope was very tired on the way down which I am sure contributed to the fall. He fell in just such a place on a traverse above a crevasse on terrain I would call “no fall zones”. He fell off the upper lip and into a big open crevasse. The rope wasn’t super tight but there wasn’t an excessive amount of slack in the system. It was in difficult terrain where there were multiple obstacles stacked right after each other so team members were navigating different technical obstacles all at the same time (not ideal). Looking back I think I could have potentially avoided the incident by the use of running protection. I just felt so secure in those sections that I didn’t really think it necessary. But when taking newer people out it is better to take a couple minutes to add running protection than a hour to pull someone out of a crevasse. Lesson learned for sure, and I am just really glad he was ok. When the fall occurred, my wife who was leading the rope team had just finished all the technical obstacles and was on the lower lip of the crevasse. #2 was working across a traverse 8 feet above the lip of the crevasse and then had a 10 ft down climb to a narrow snow bridge. #3 had just finished a down climb and was just making a step across a thin snow bridge and onto the traverse. #4 was at the beginning of a down climb. #5 (myself) was anchoring the back on the slope above. When #2 fell he was unable to arrest in those 8 feet and so fell off the upper lip. He stopped about 30 feet below the lower lip and just above a sloping snow ledge. The rope never came tight to my wife (#1) because #2 fell towards her creating slack. #3 was pulled off her feet across the snowbridge onto the traverse. She was able to arrest. #4 was pulled off his feet and into the down climb. Myself in the back was able to arrest and hold the fall helped by #3 on the traverse. Thankfully #2 who fell in was uninjured. We were able to give him a little slack so he could get his weight on his feet onto the sloping ledge and then we started working on a plan. It took a bit of time to get things setup since the terrain was complicated where most of the team had arrested the fall. But in the end we were able to get everyone except for myself to my wife's position on the lower lip where there was a great spot for rescue. They were able to equalize 2 pickets (1 deadman and 1 end SLAM) and then used a 3:1 system with an ice ax at the lip to keep the rope up. Once the system was set 2 people were able to haul out the climber in less than 5 minutes. Having various different levels of experience on the team we spent a few minutes afterwards discussing and debriefing the incident. Here were a few lessons people found helpful. Place anchors further from the edge so there is more room to haul. When moving downhill keep walking down past the obstacle (body belay) vs. a hip or ice ax belay. This allows you to quickly run downhill should someone slide towards you creating slack. You need room to walk around at the anchors when performing a rescue. If in a safe spot think about just being out of the system. If not then use cord or the back end of a rope. Both the first 2 rescuers got pretty pinned into short tethers that prevented much movement initially. Have 1 person take lead on patient care and tell the person in the hole to put on warm clothes…even in best case scenarios it is going to be 15-20 minutes in the cold crevasse. If there is a ledge in the crevasse consider giving slack to get the person off the rope and onto their feet. Use the rope for backup should the snow give way again. Think through all the steps that need to get accomplished and try to figure out what can be done concurrently to speed up the process and gain efficiency. Here is the rescue in progress from the top lip of the crevasse at the beginning of the traverse. I ended up be "stuck" on the high side and only helped through directions. I felt the team plenty competent and taking the time to get me to them would just delay pulling out the fallen climber. One more shot as the fallen climber nears the lip. A shot looking up at the top lip of the crevasse and the traverse above. You can see the top of the upper down climb above the traverse on the left. The thin snowbridge is hidden behind the traverse on the left. The final down climb and narrow snow bridge are on the far right after the traverse. The whole incident took about an hour from the time of fall to having everyone out and gathered up at the lower lip. From there we continued down the glacier without further incident. Although people's nerves were a bit shot and any steep terrain encountered further down was negotiated with slow care. This resulted in a very long but safe day. Farther down the glacier at about 11,000ft. We hiked out the next day in beautiful sunshine and tired bodies. But got to see some goats in the process. (photo by my wife)

-
IMG_20250628_110739_4.heic
-
 pavelpnw joined the community
 -
 Tate Hughes joined the community
 -
Hi everyone! I’m planning a trip to the Waddington Range this August and was looking for the book “The Waddington Guide.” Seems pretty coveted, but if there was one someone was looking to sell, I would be very interested.
-
How much are you wanting for it?
-
"Rescued" While Vlogging on Chianti Spire?
Kameron replied to Fairweather's topic in Climber's Board
Rad is right "Old men yell at young woman" -
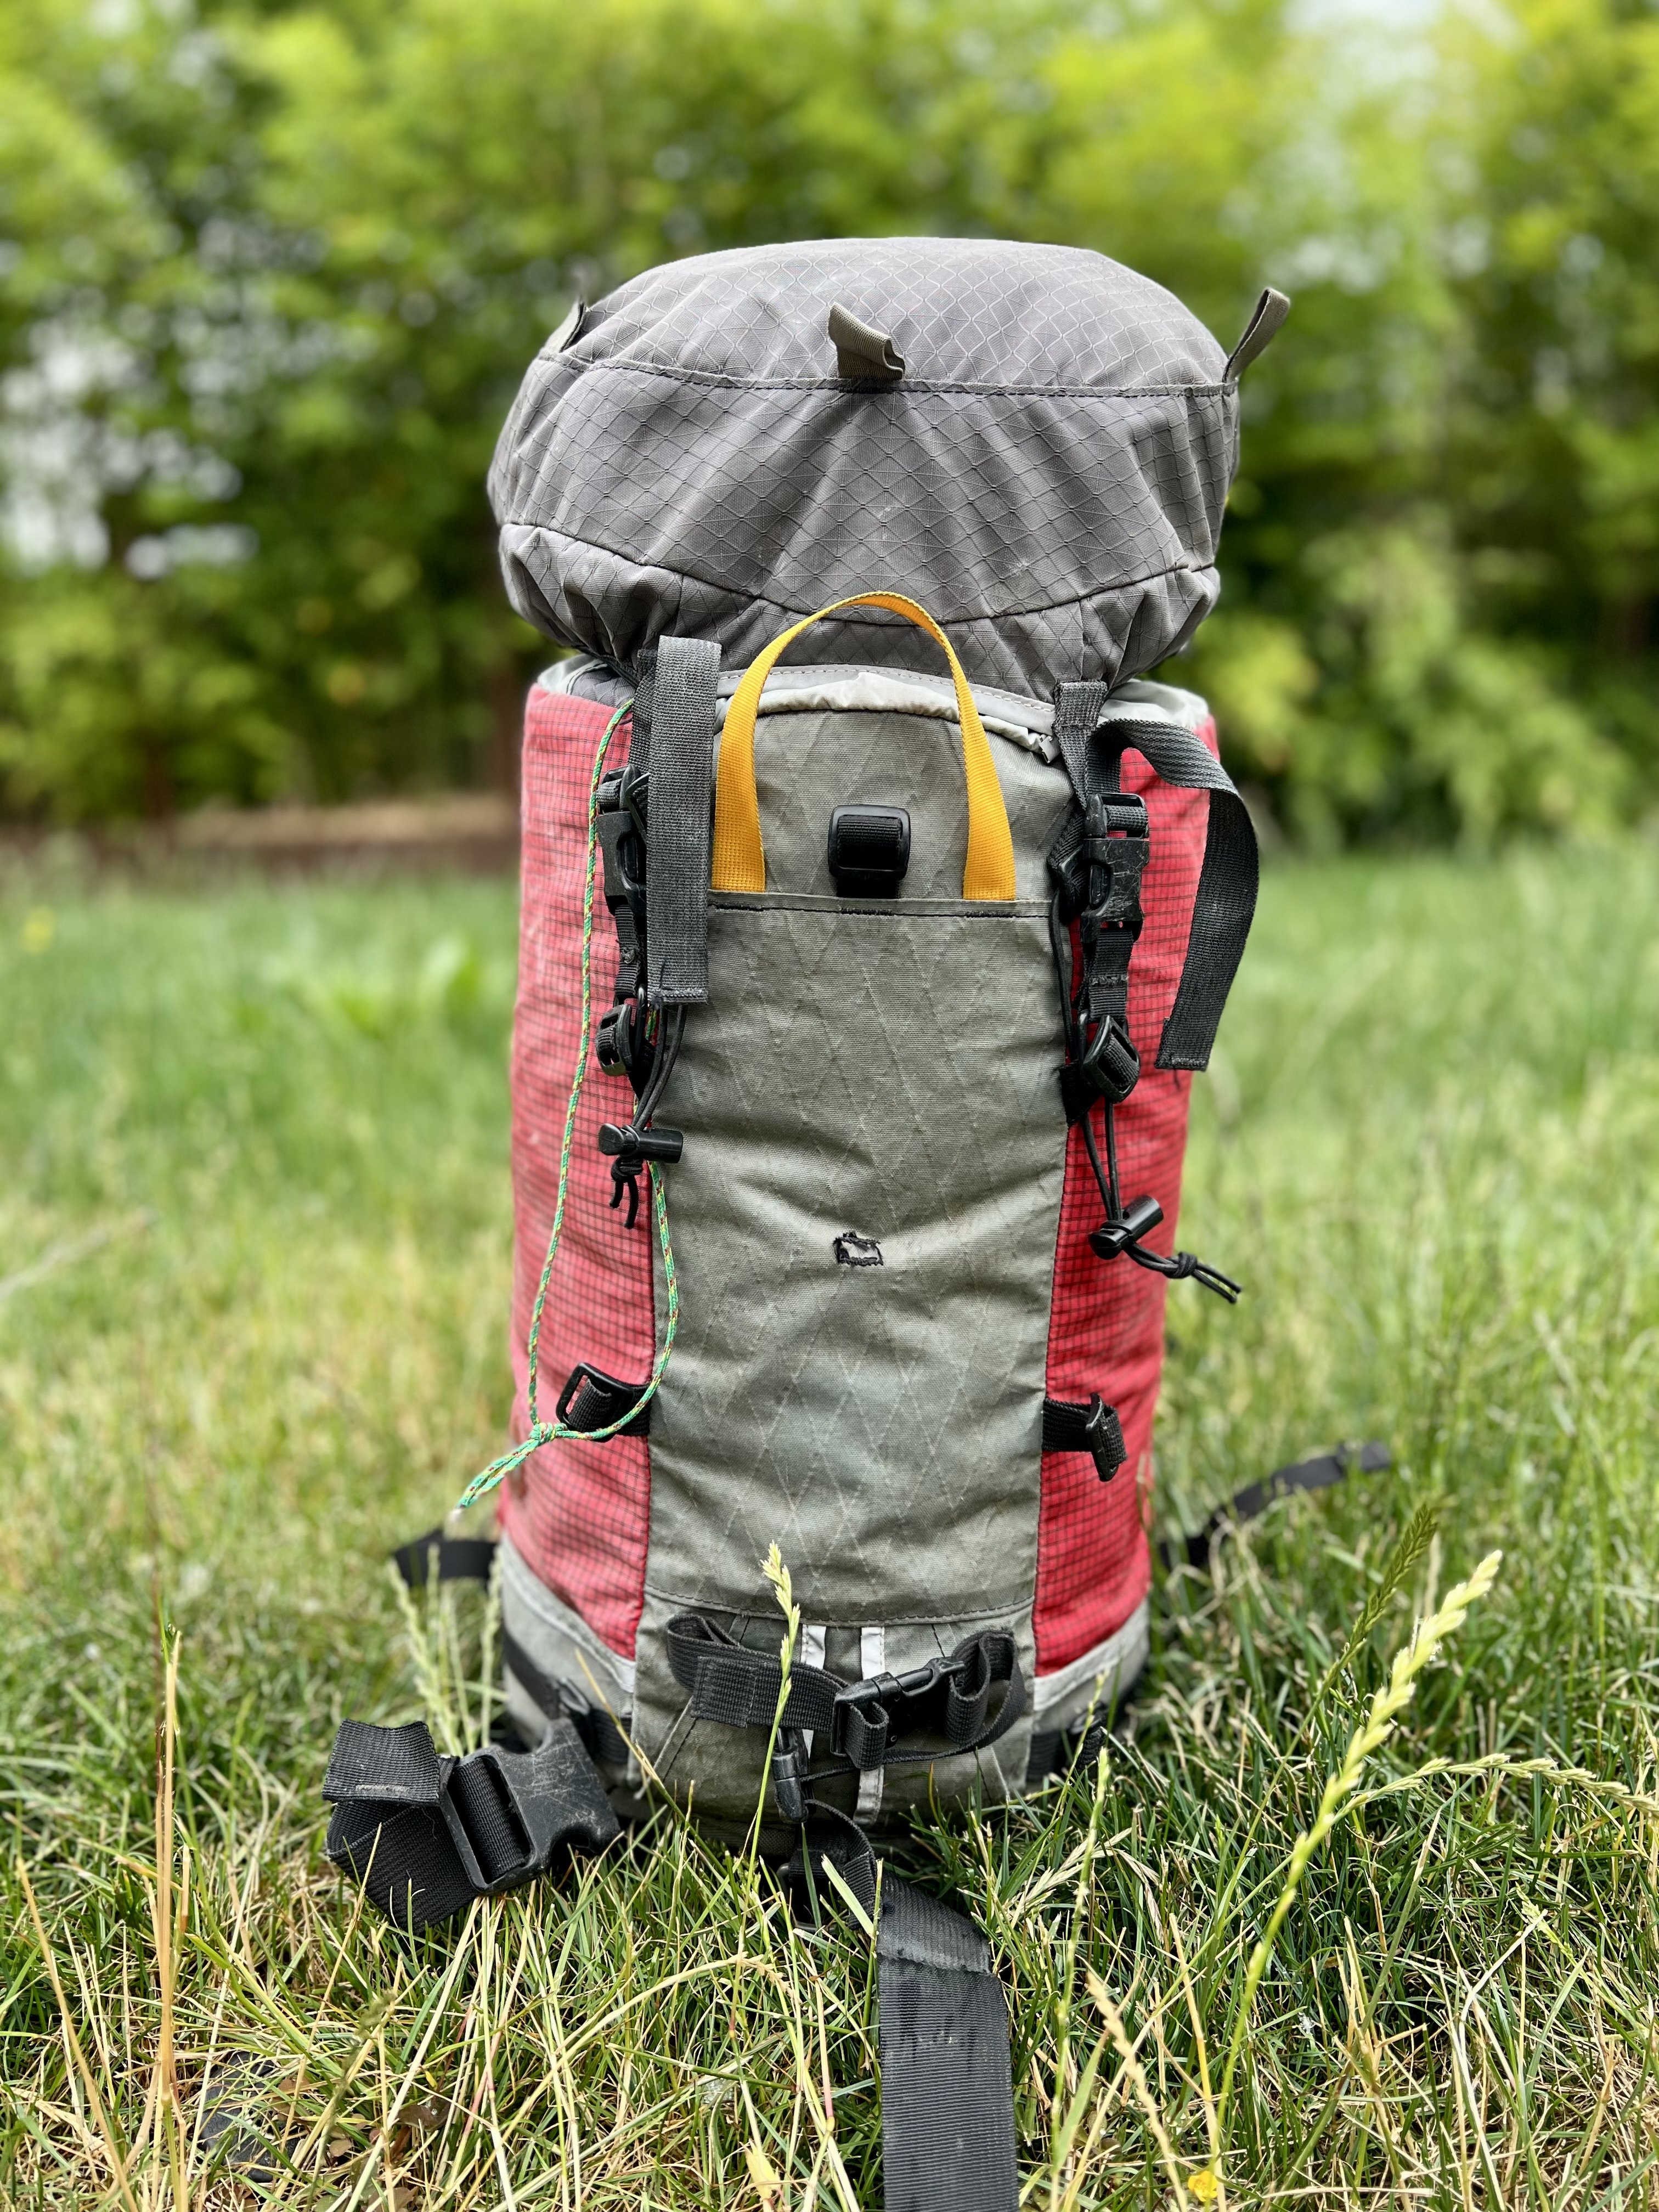
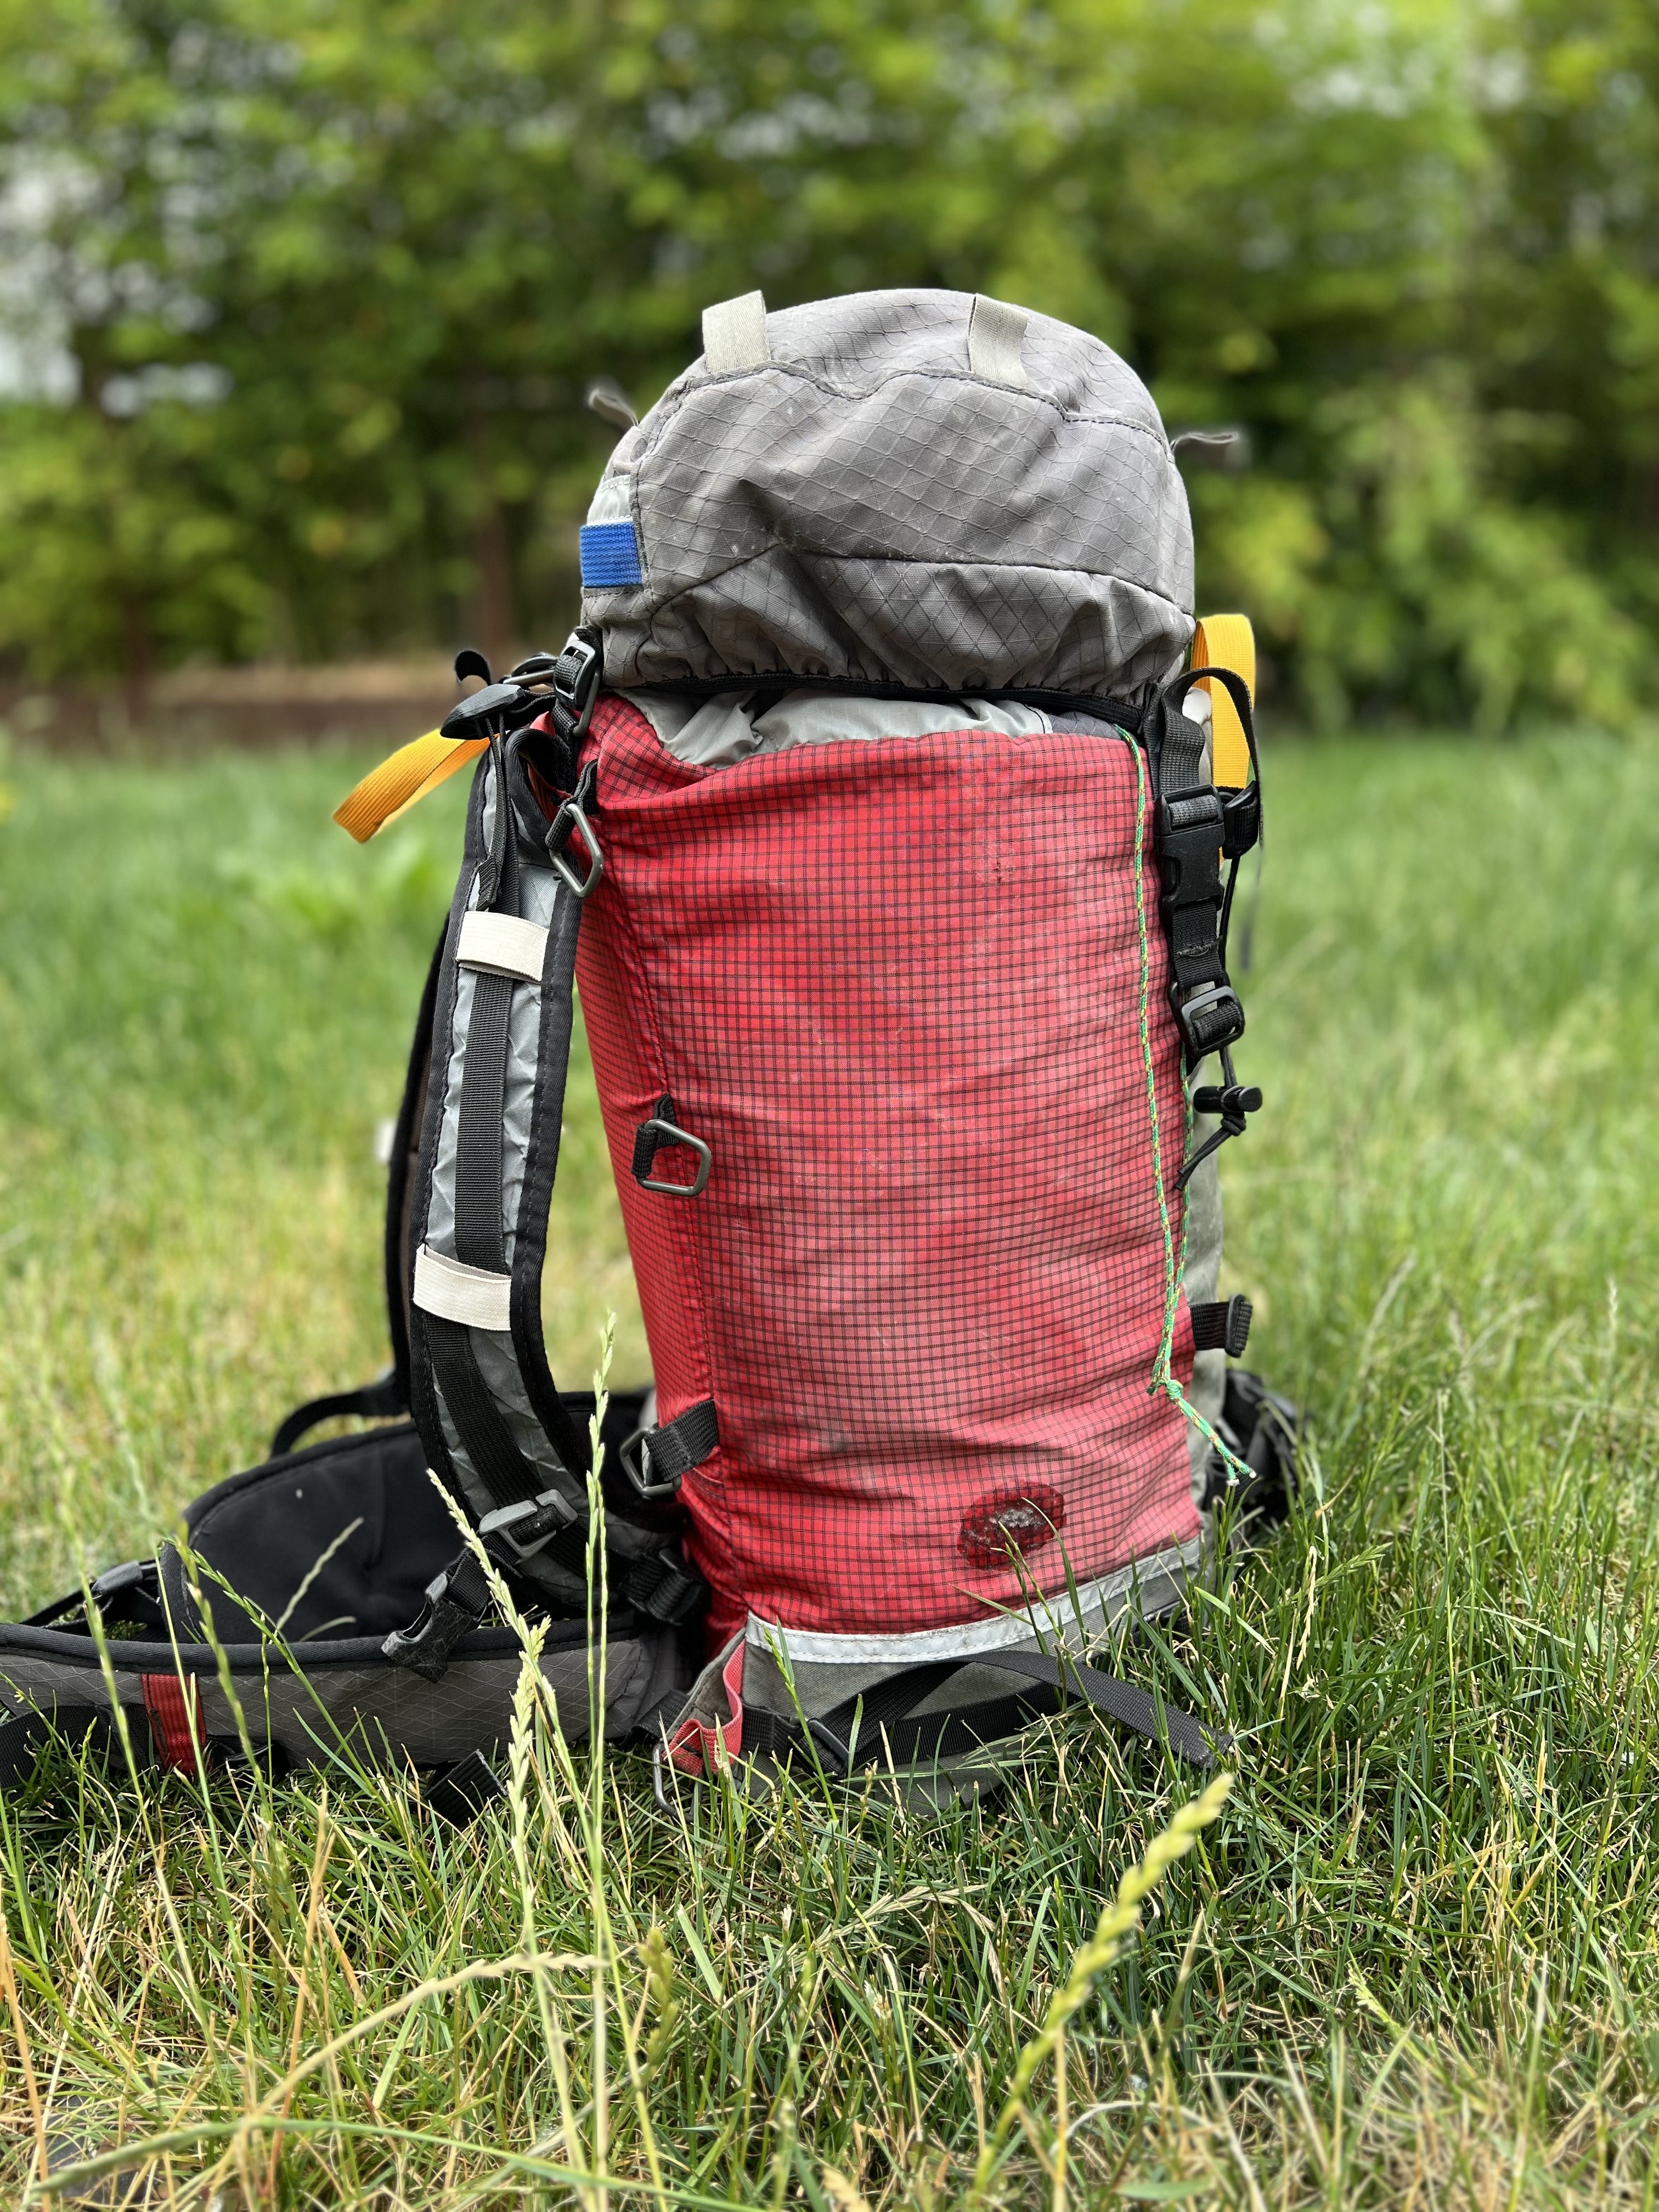
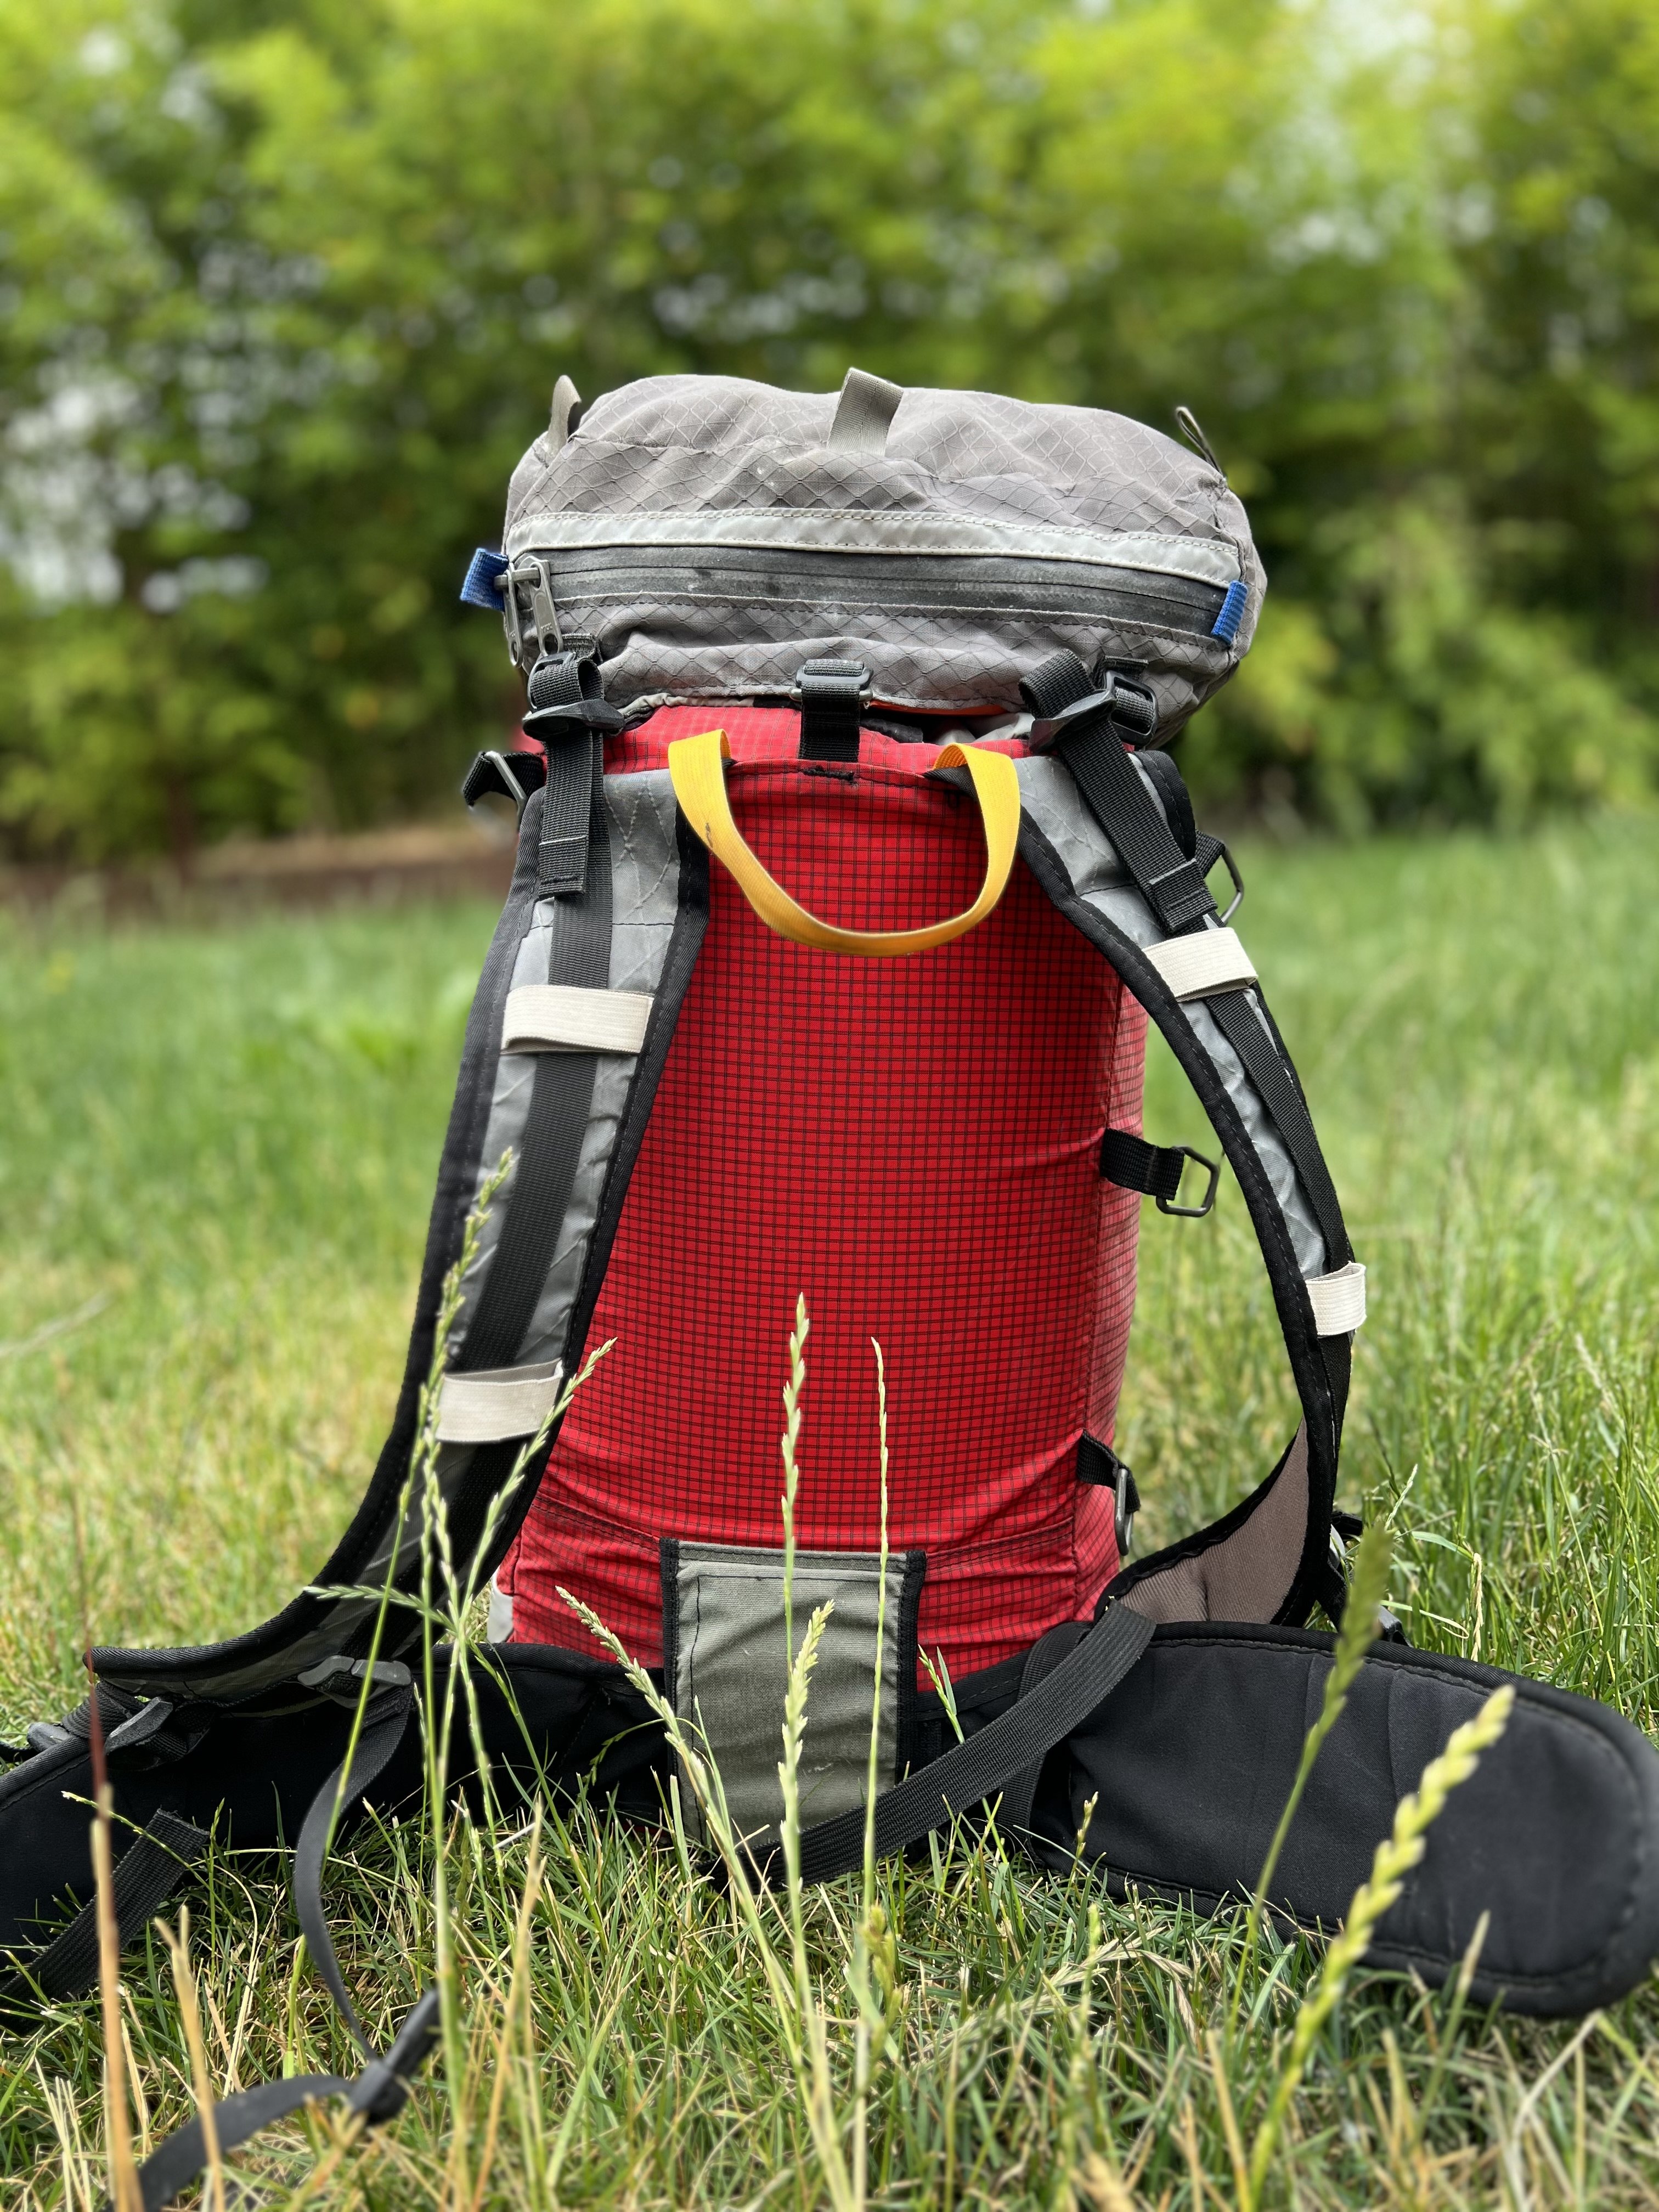
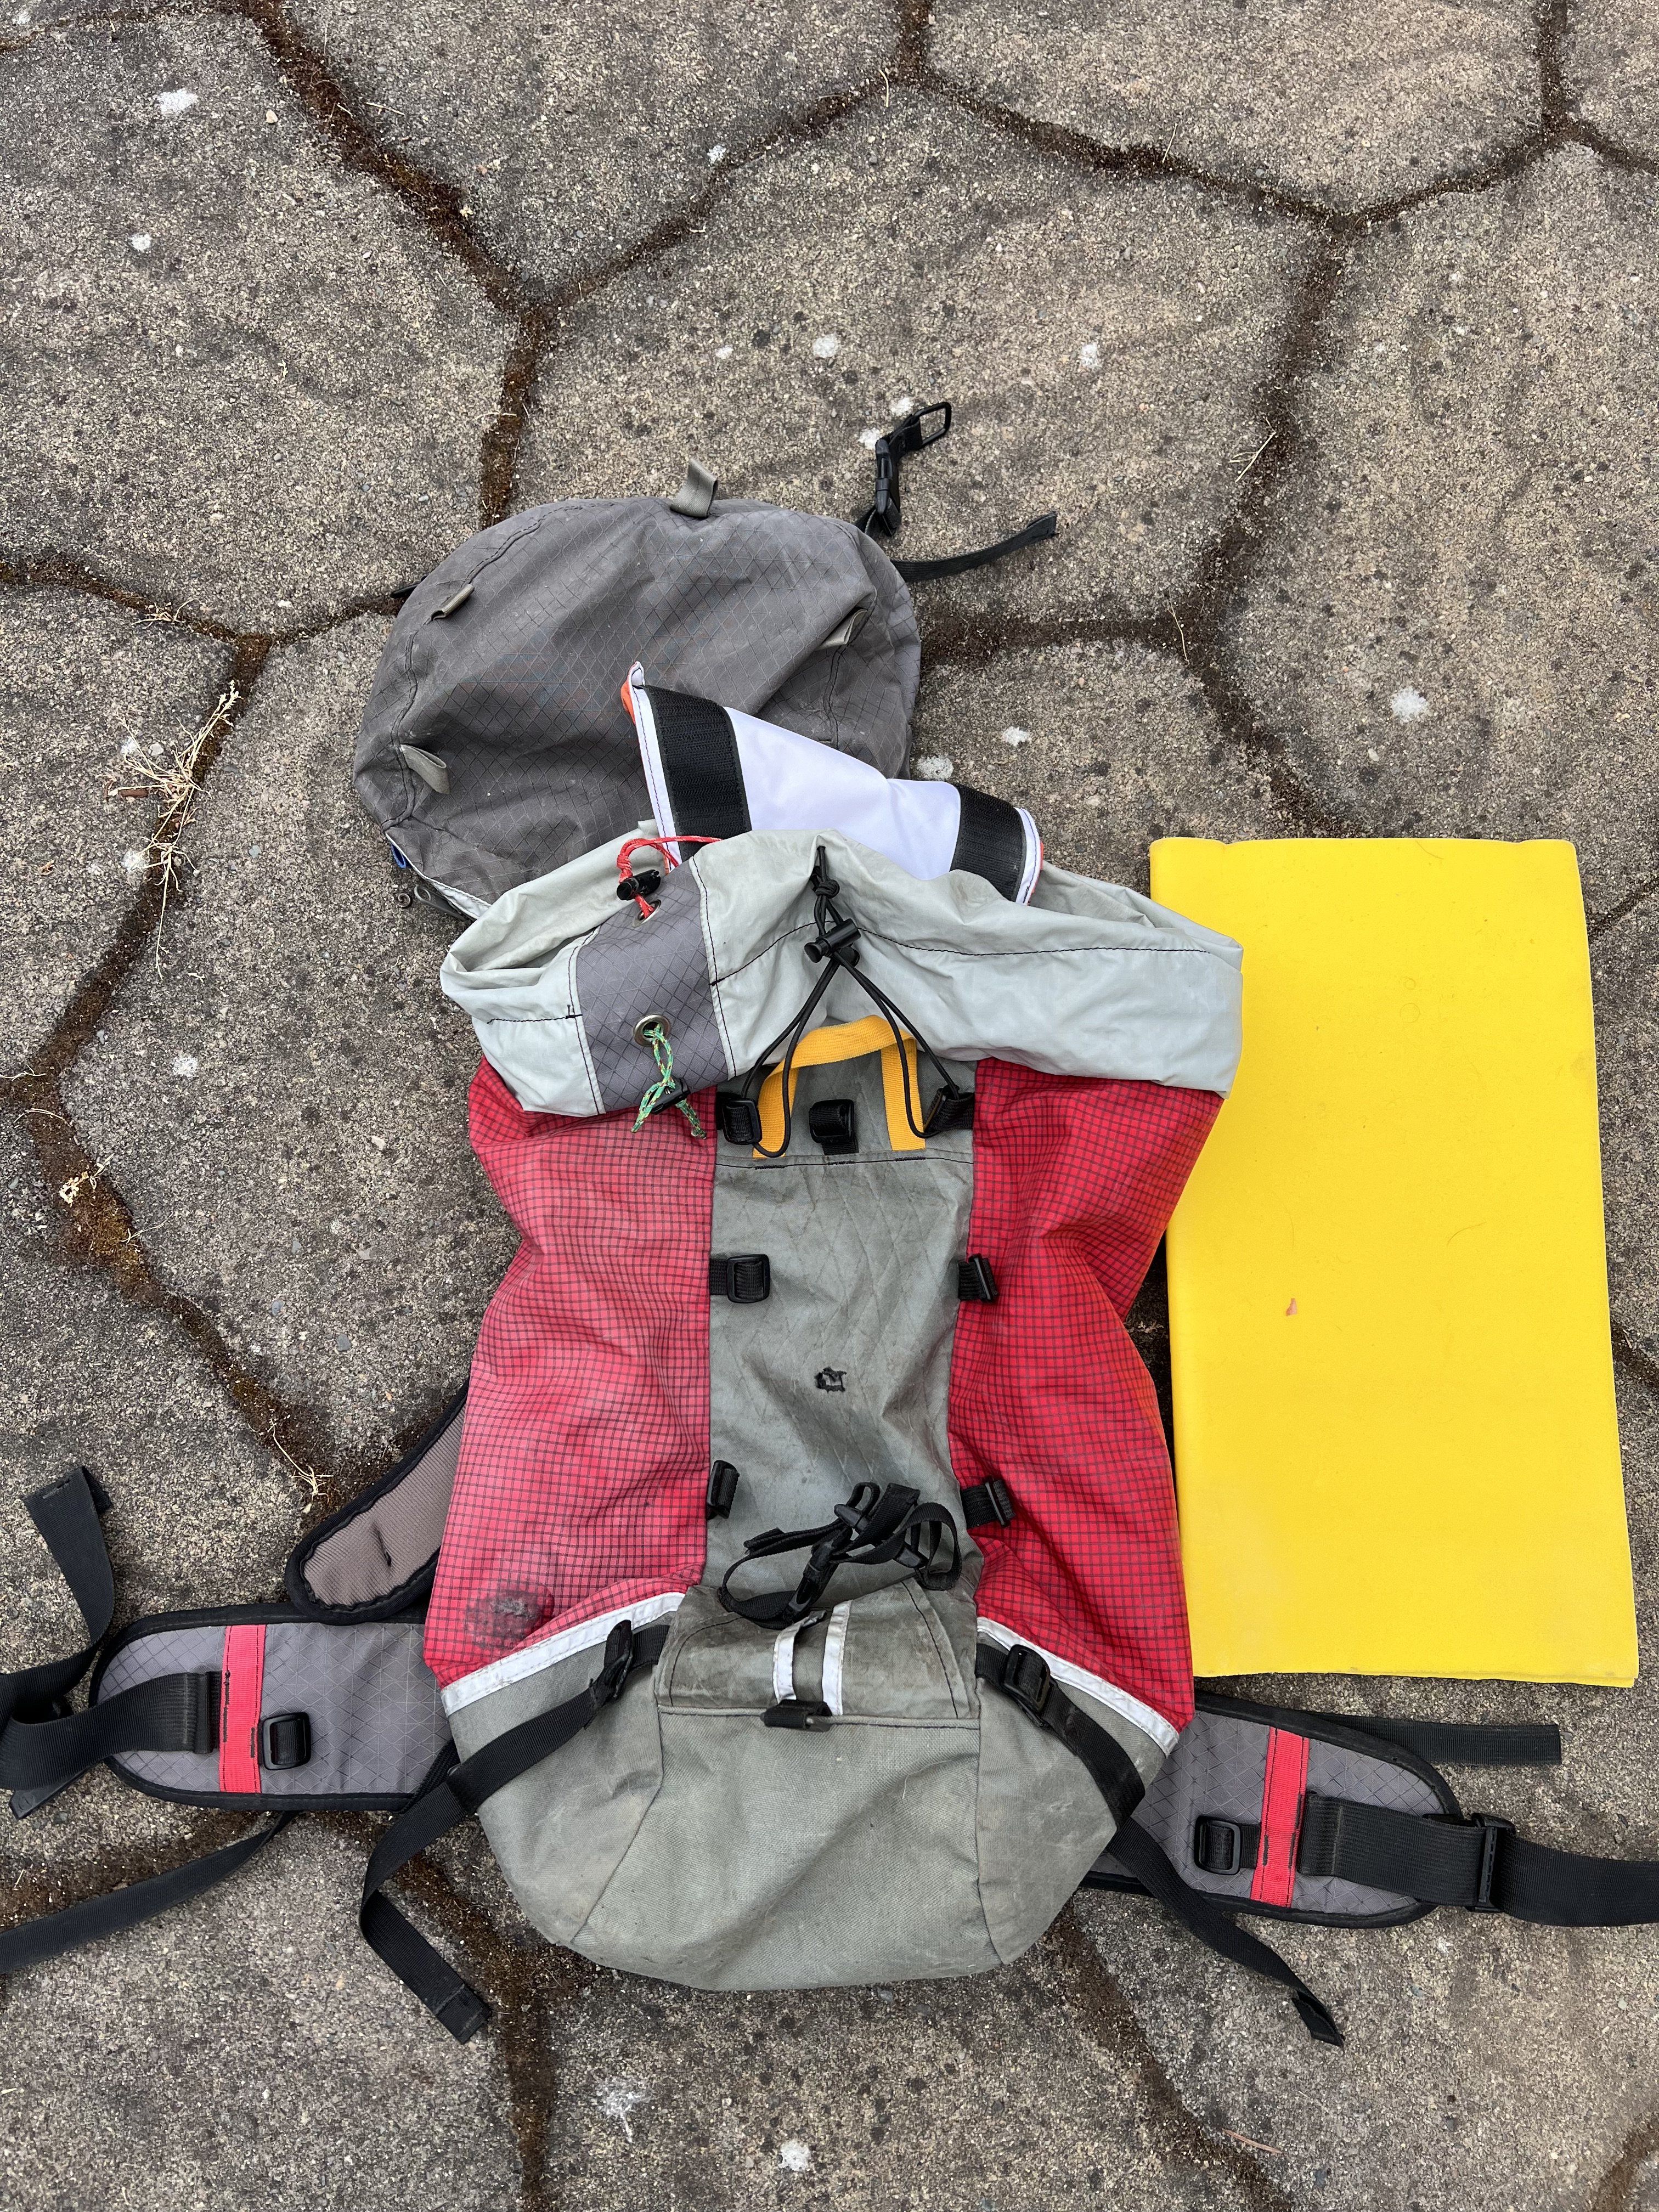
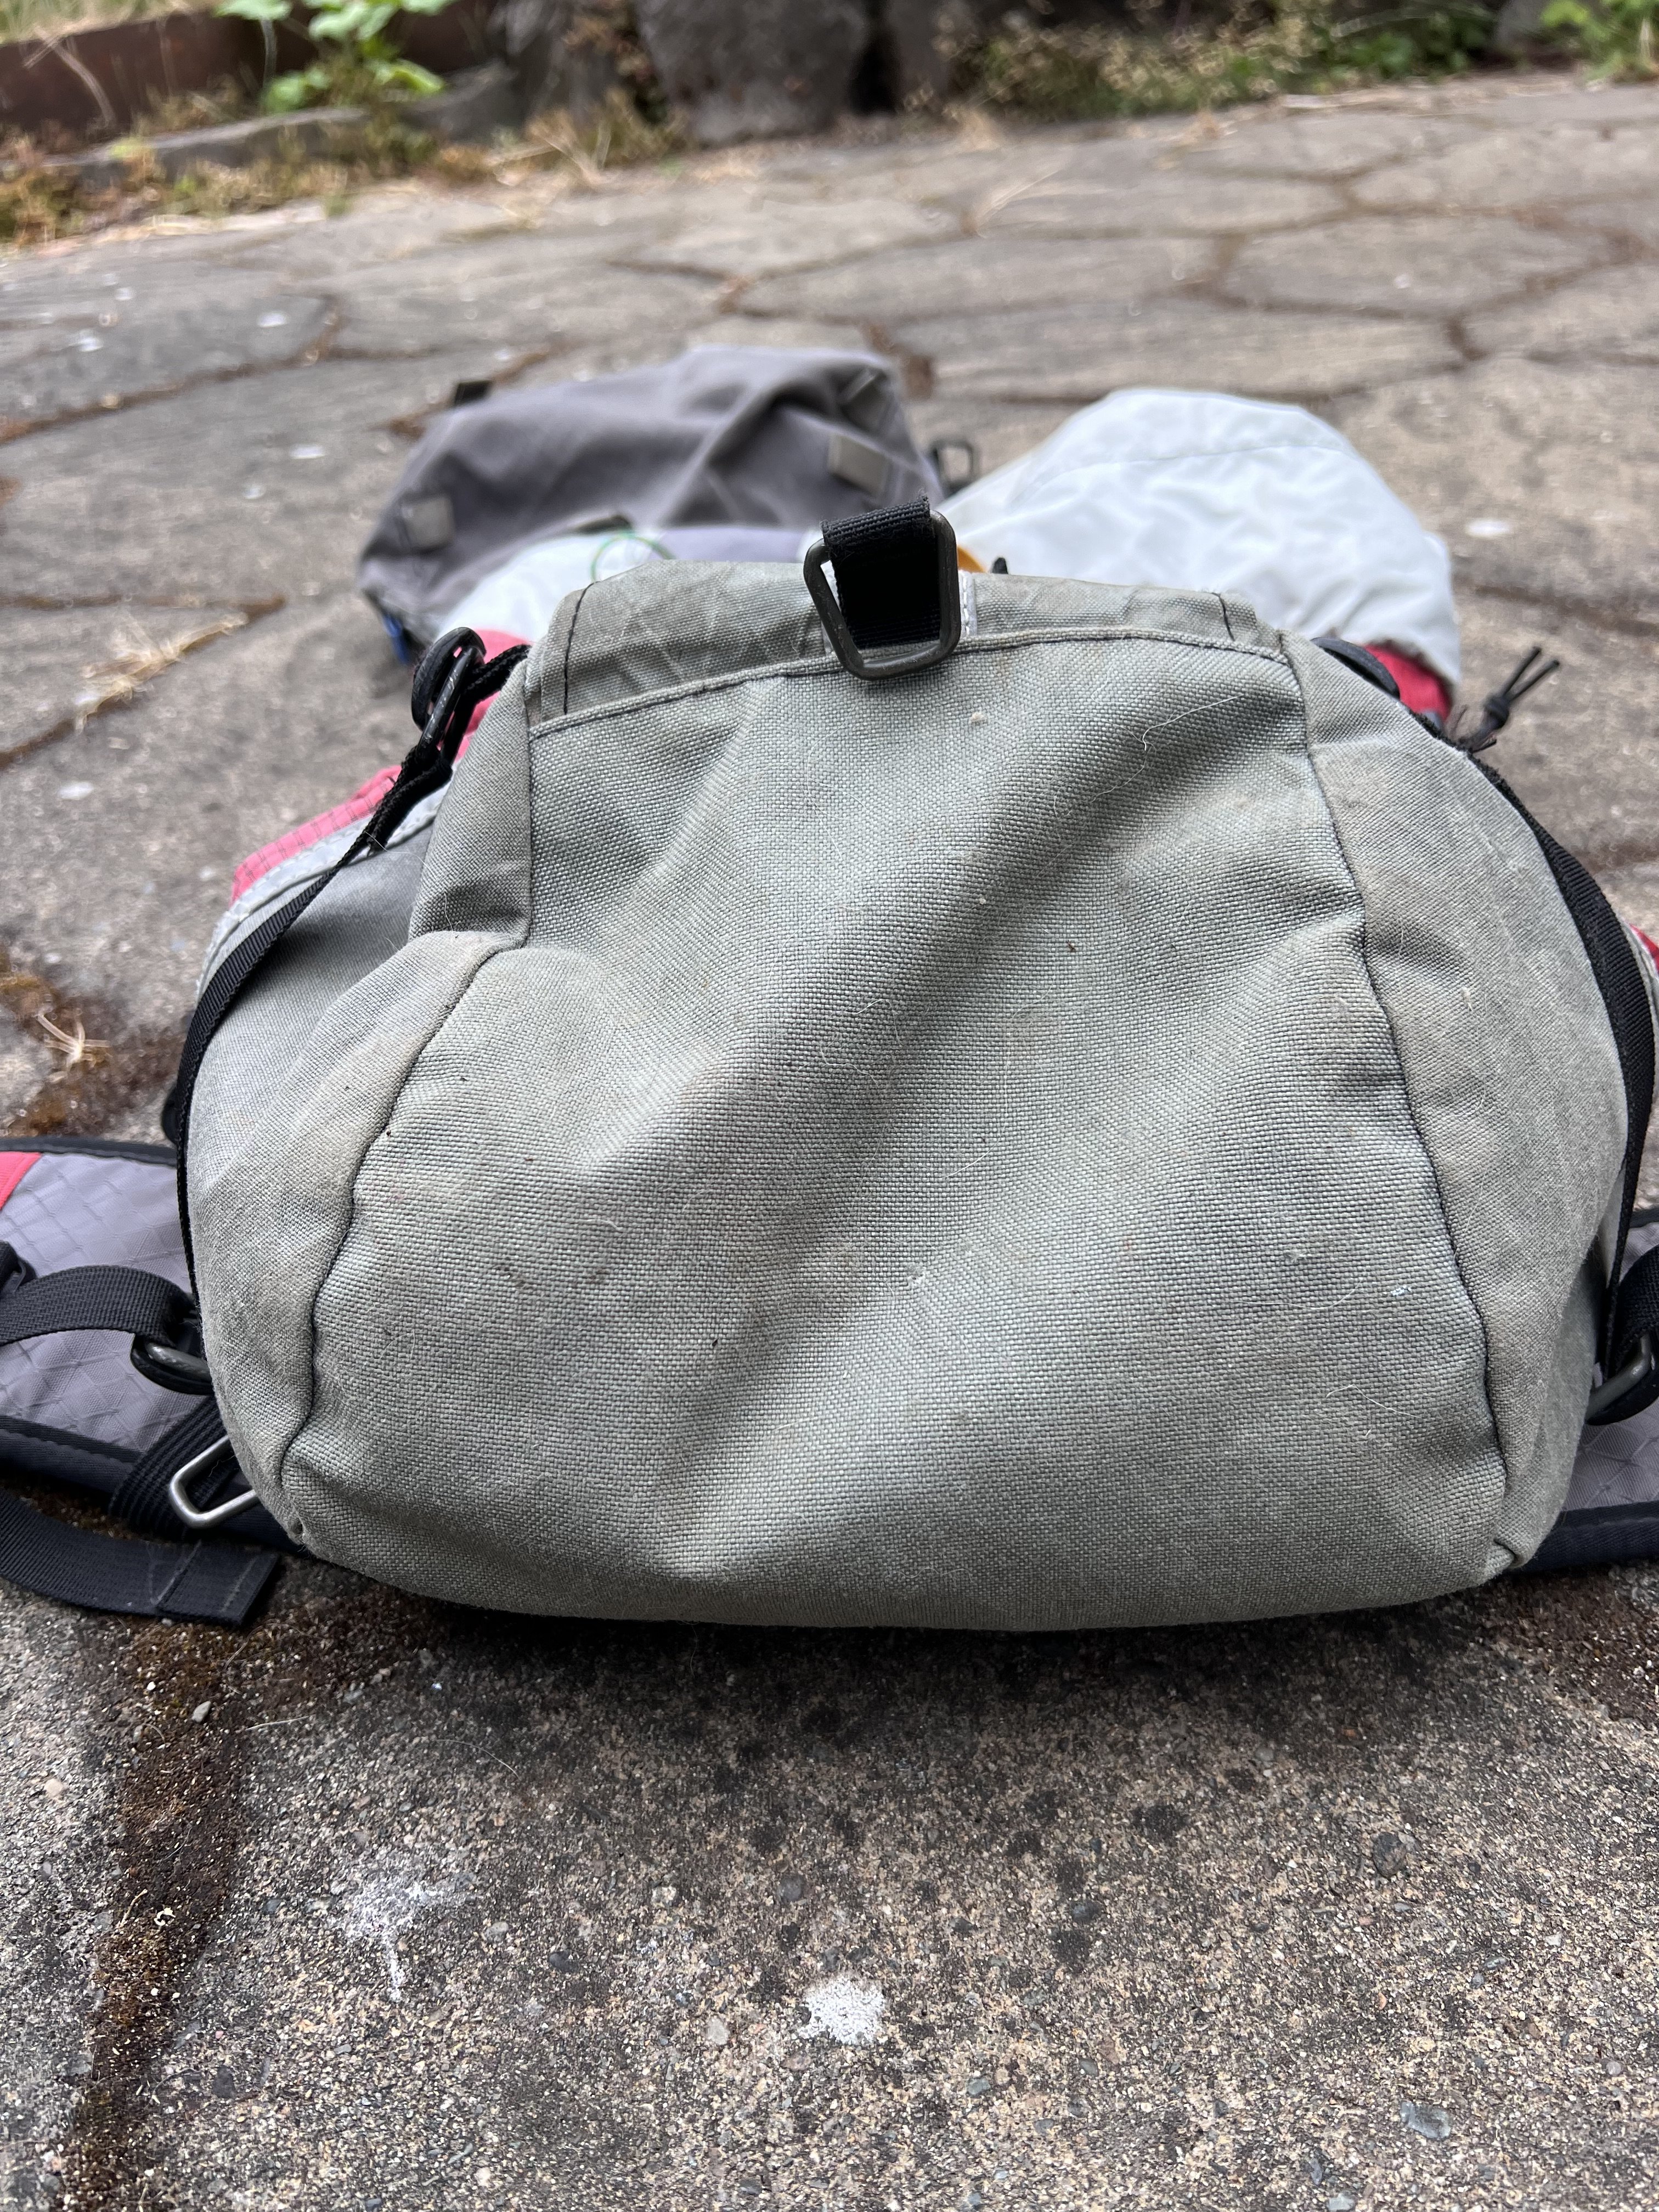
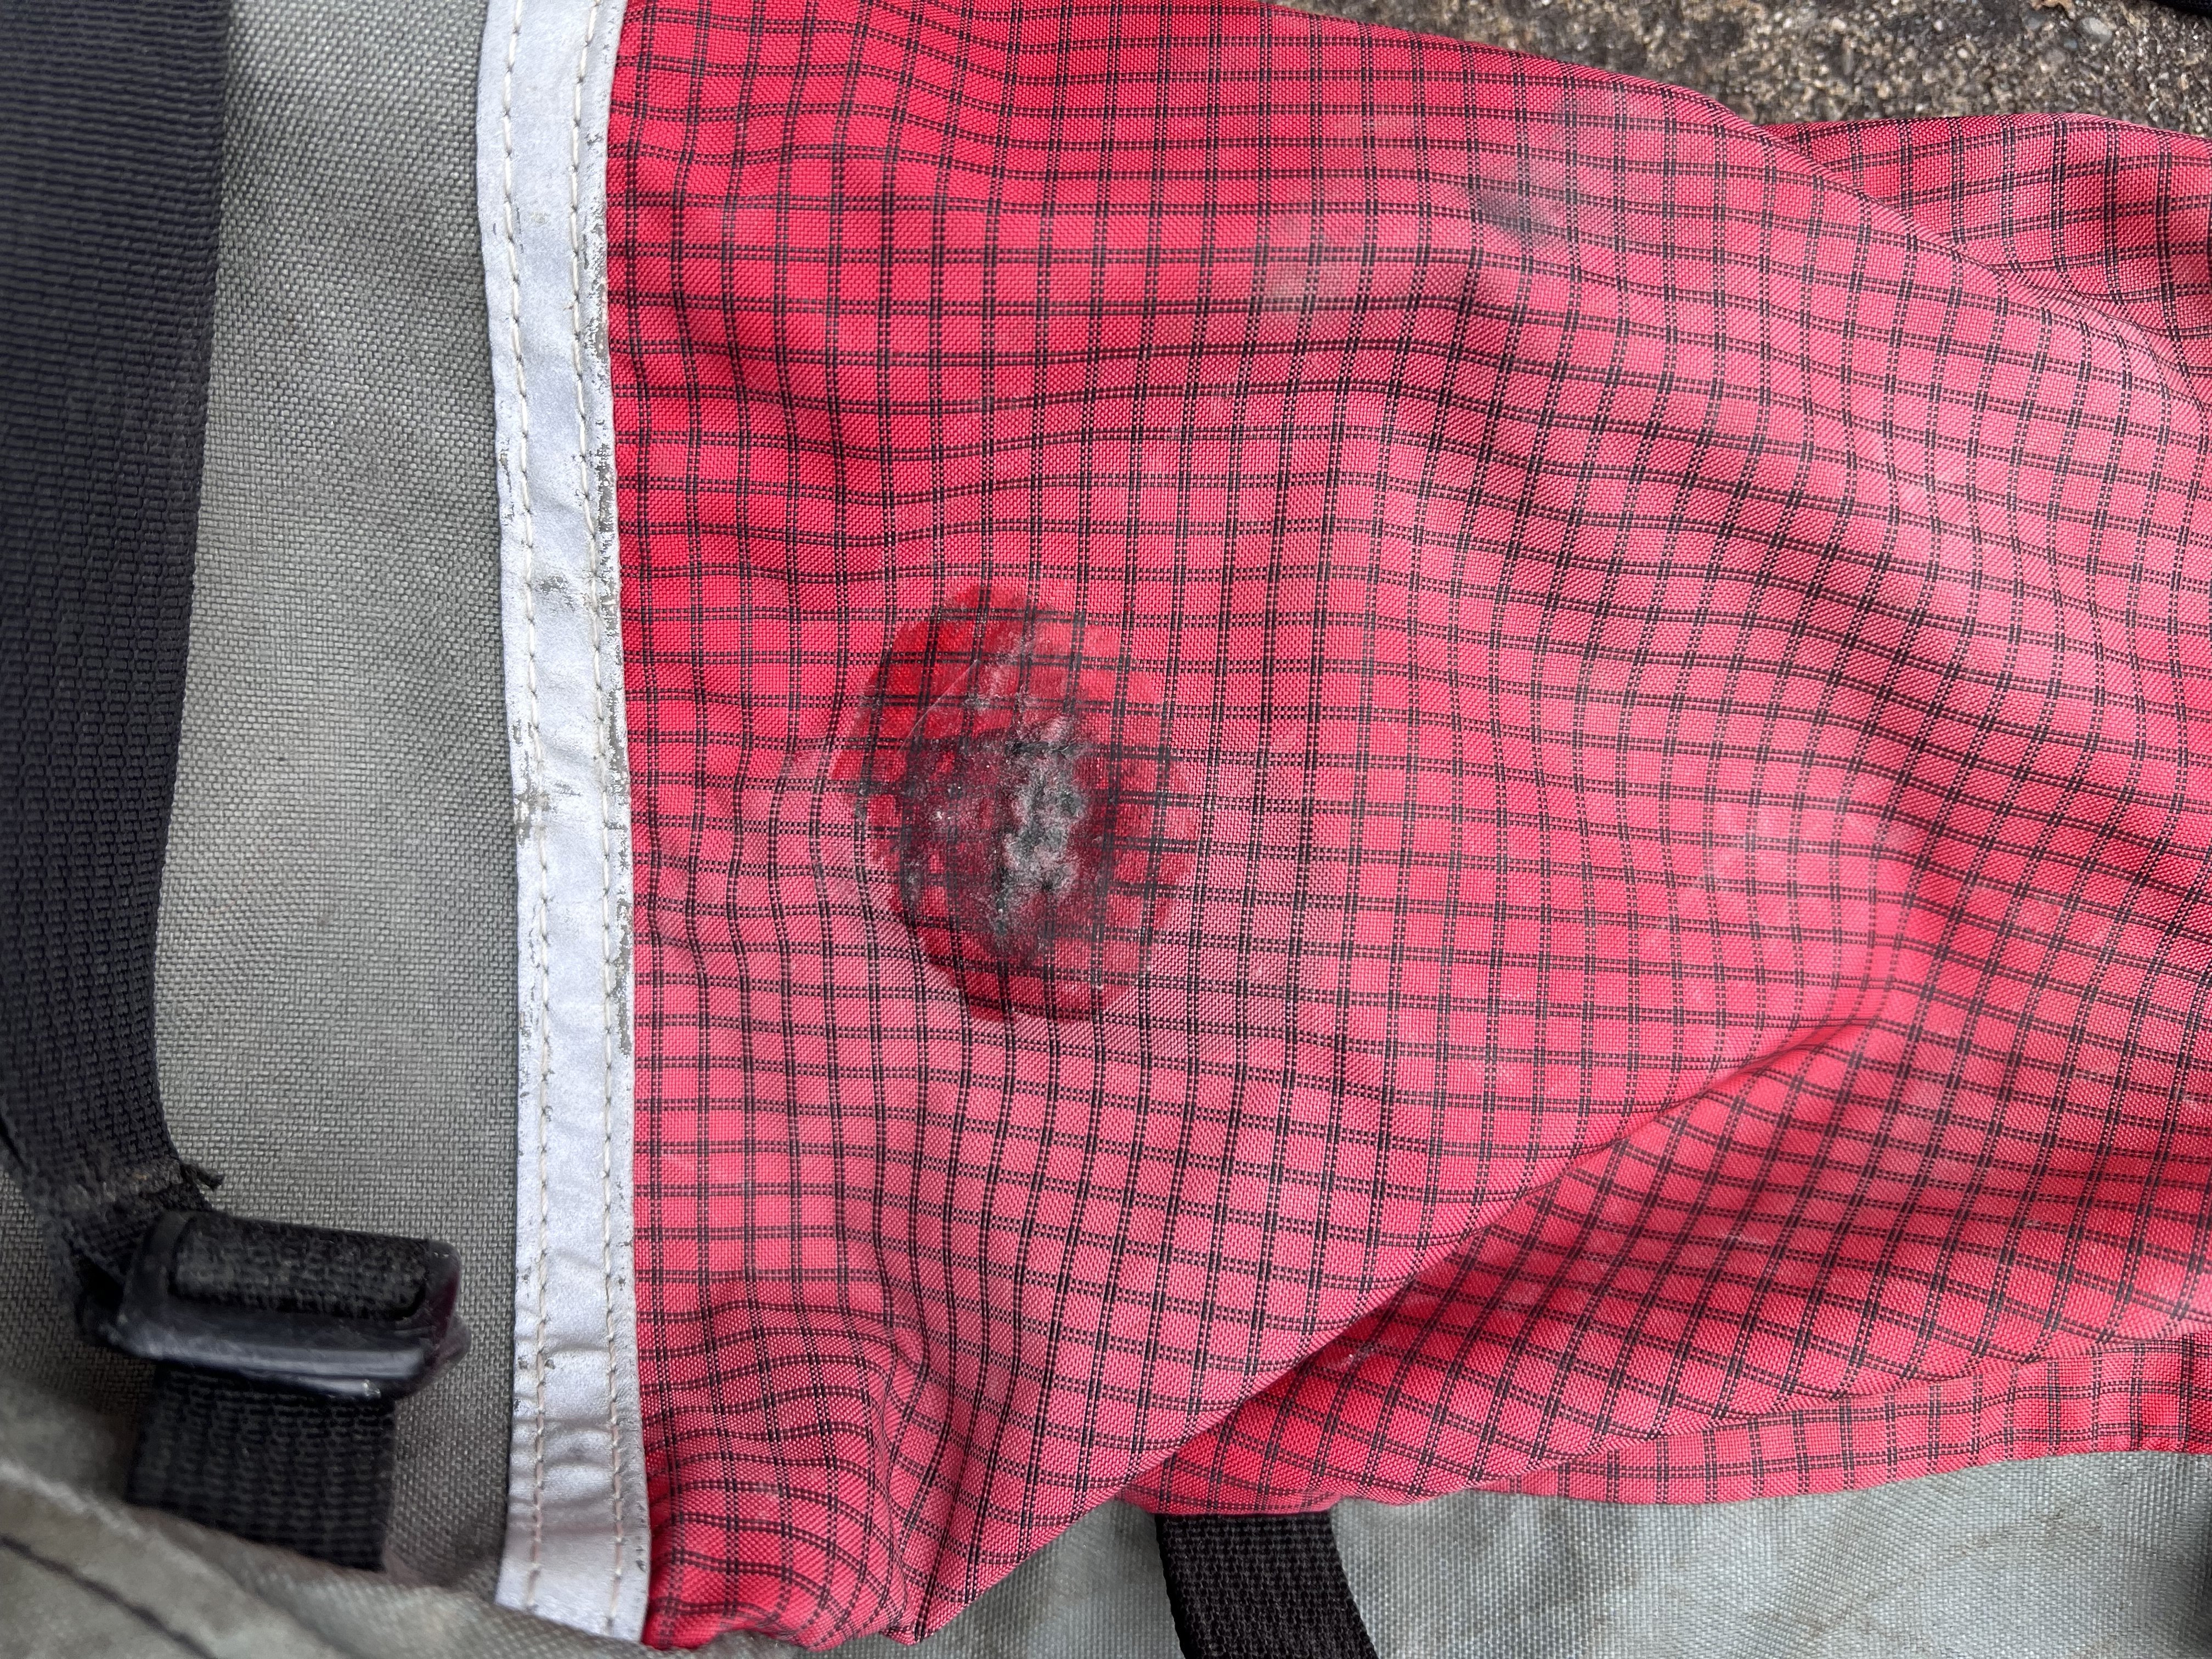
I'm a mountaineering guide selling my duplicate climbing gear. This pack has seen summits and valleys and has a lot of life left. A small hole has been patched on the red panel, as shown in the photo. 17.5 length torso. They dont make this pack anymore so jump on this deal. From Cilogear The 3030 Guide Service (GS) Worksack delivers guide-appropriate burliness to a lightweight backpack that excels at 48-hour daytrips. The 3030s are a 40ish liter capacity pack with the suspension of the 30L hence the ridiculous name! The 3030 Guide Service still strips down to a super light summit pack that climbs really well. The same EvaZote foam as in the 30L pads the shoulder straps and hipbelt. This resilient foam cushions your shoulders and hips without weighing you down and provides the best possible load carry. If you know you need more space than the 30L, and you want a burlier pack, the 30:30 Guide Service is the pack for you. A single drawcord extension, the 3030 GS is extremely light. The 3030 includes the hallmark Cilogear features: Ninja Pocket, internal compression strap, removable bivy pad, lid, sternum strap and hipbelt. Volume Range: Normal: 35L | Expanded: 45L | Compressed: 20L | Closed: 10L Weight and Sizing Specifications: Pack bag: 700g(1.6lbs) | Hipbelt: 120g | Lid: 170g | Strap set: 200g | Bivy Pad: 100g | Total: 1290g(2.8lbs)

-
Not sure what the benefits/drawbacks/utility of a detachable penis would be as I haven't given it much thought. There are some questions I'd want answered first.