
Leaderboard


Popular Content
Showing content with the highest reputation on 07/14/23 in all areas
-
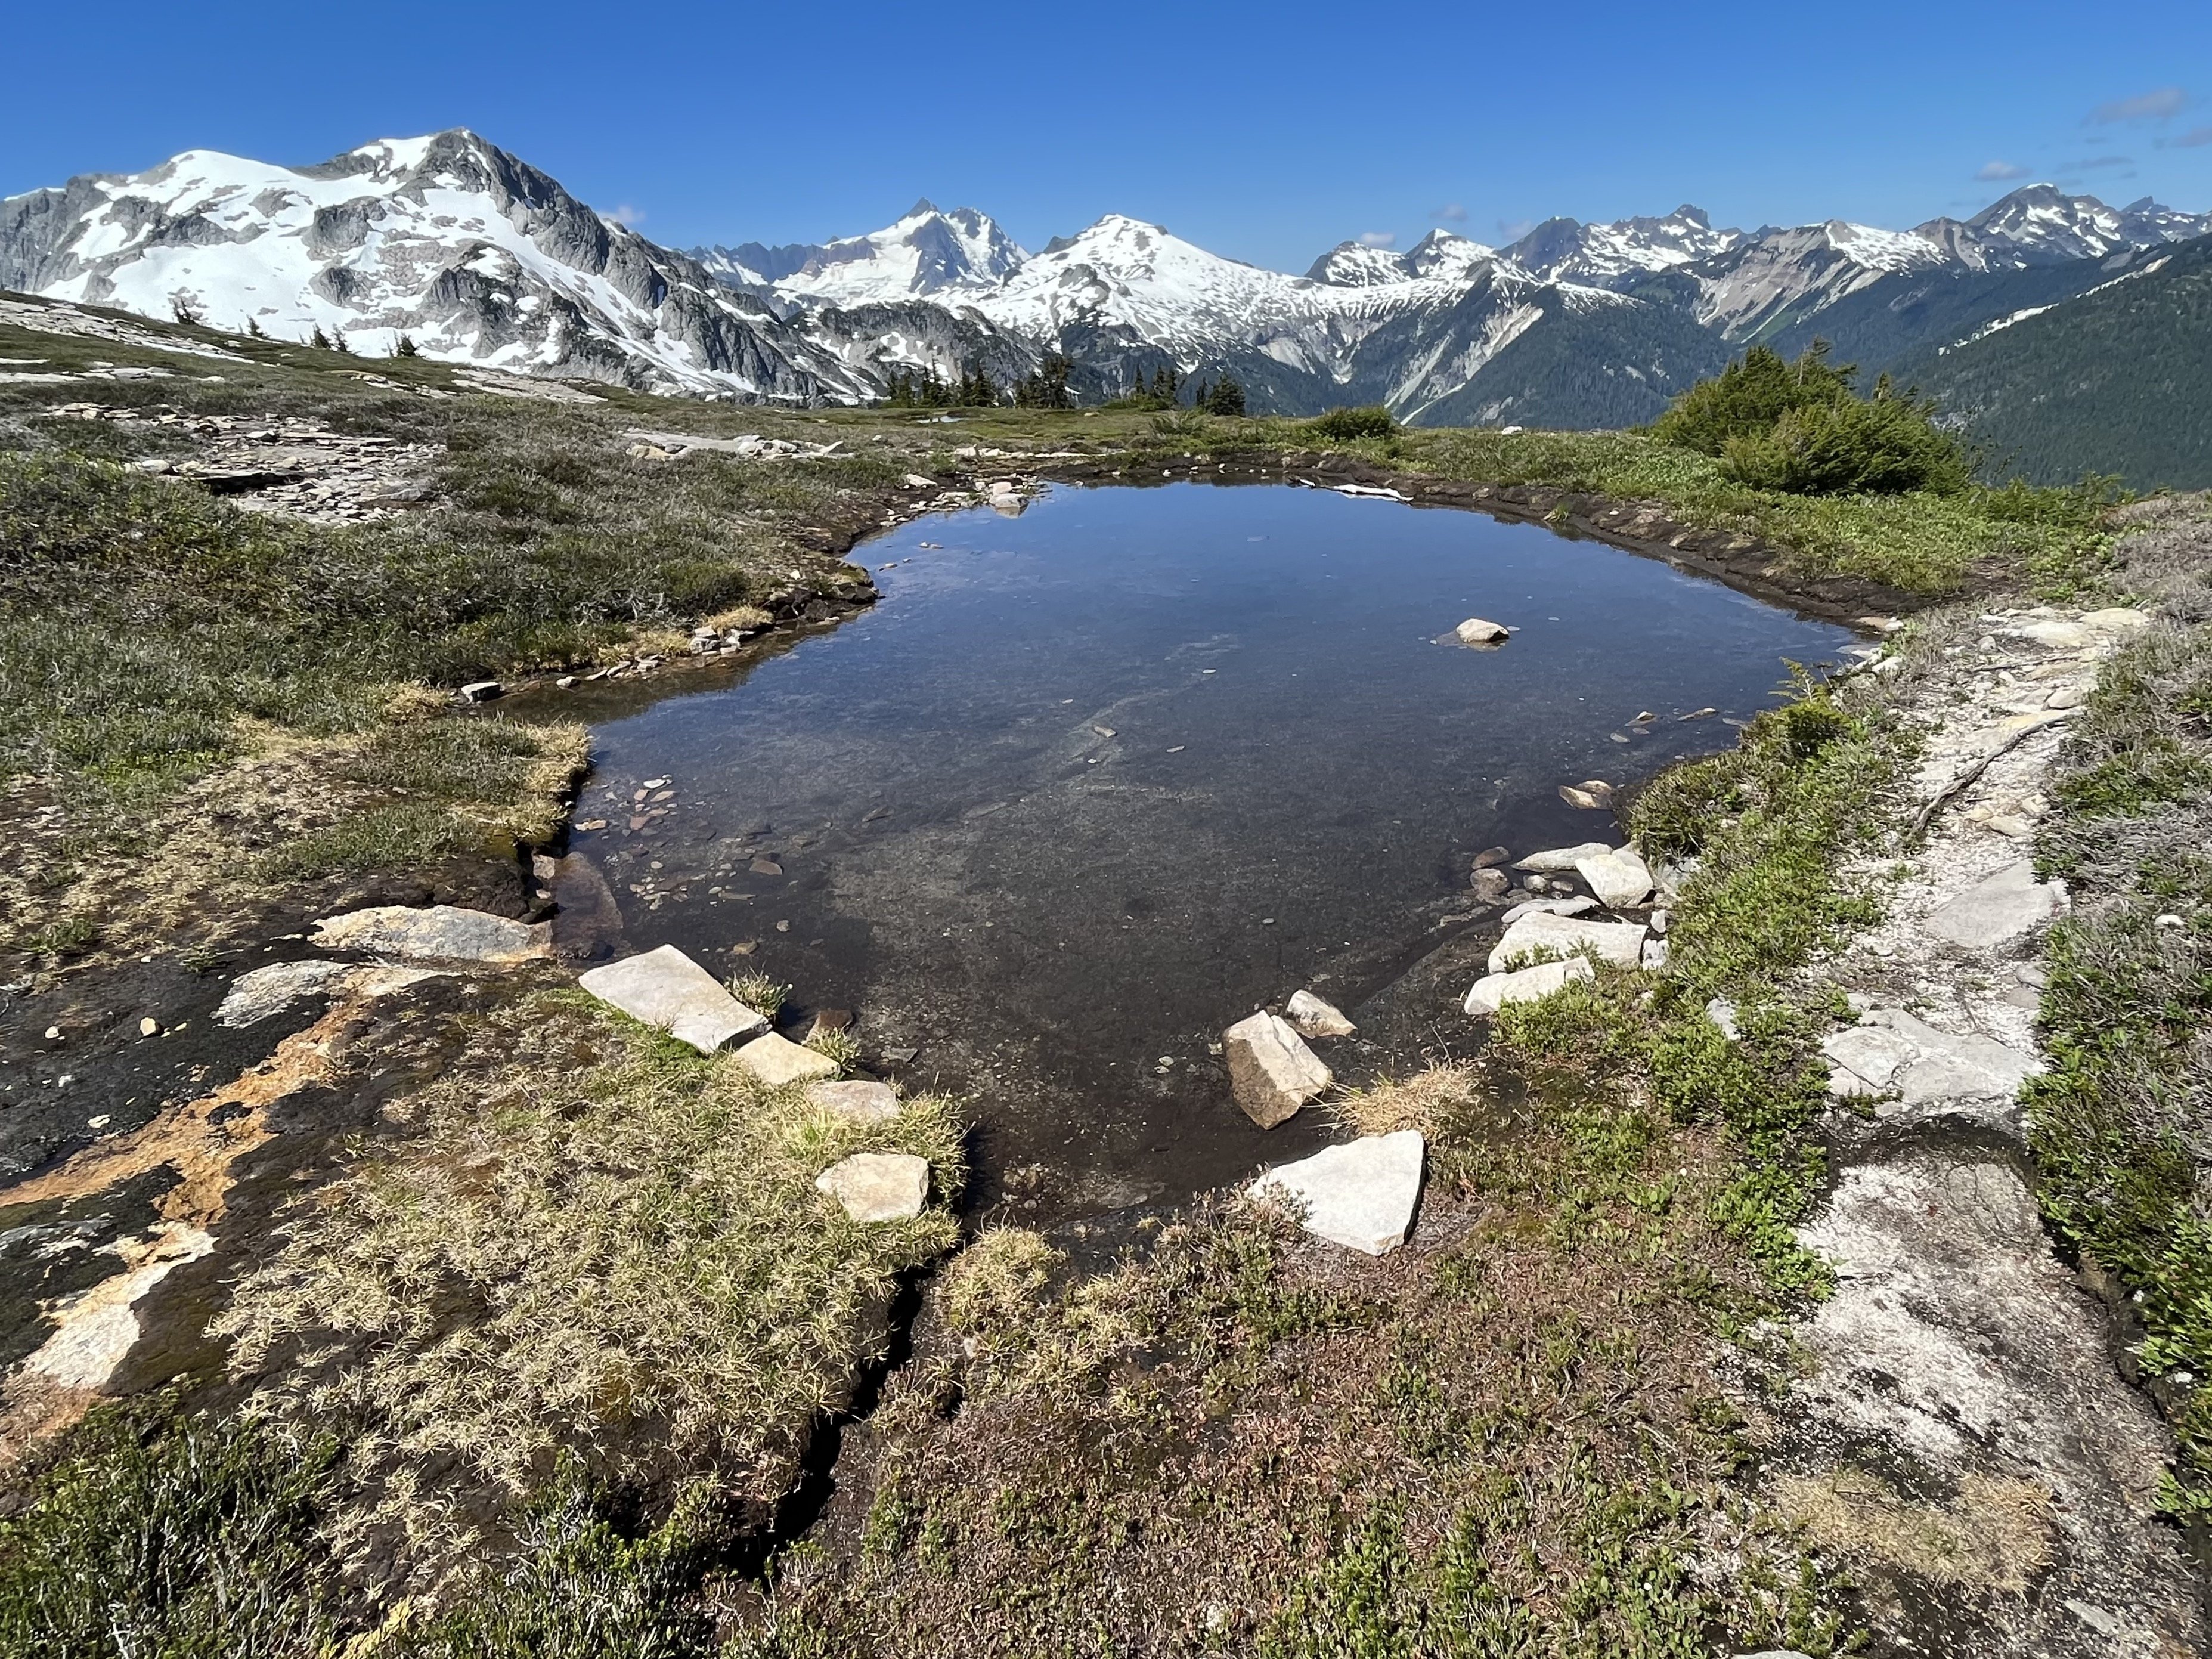
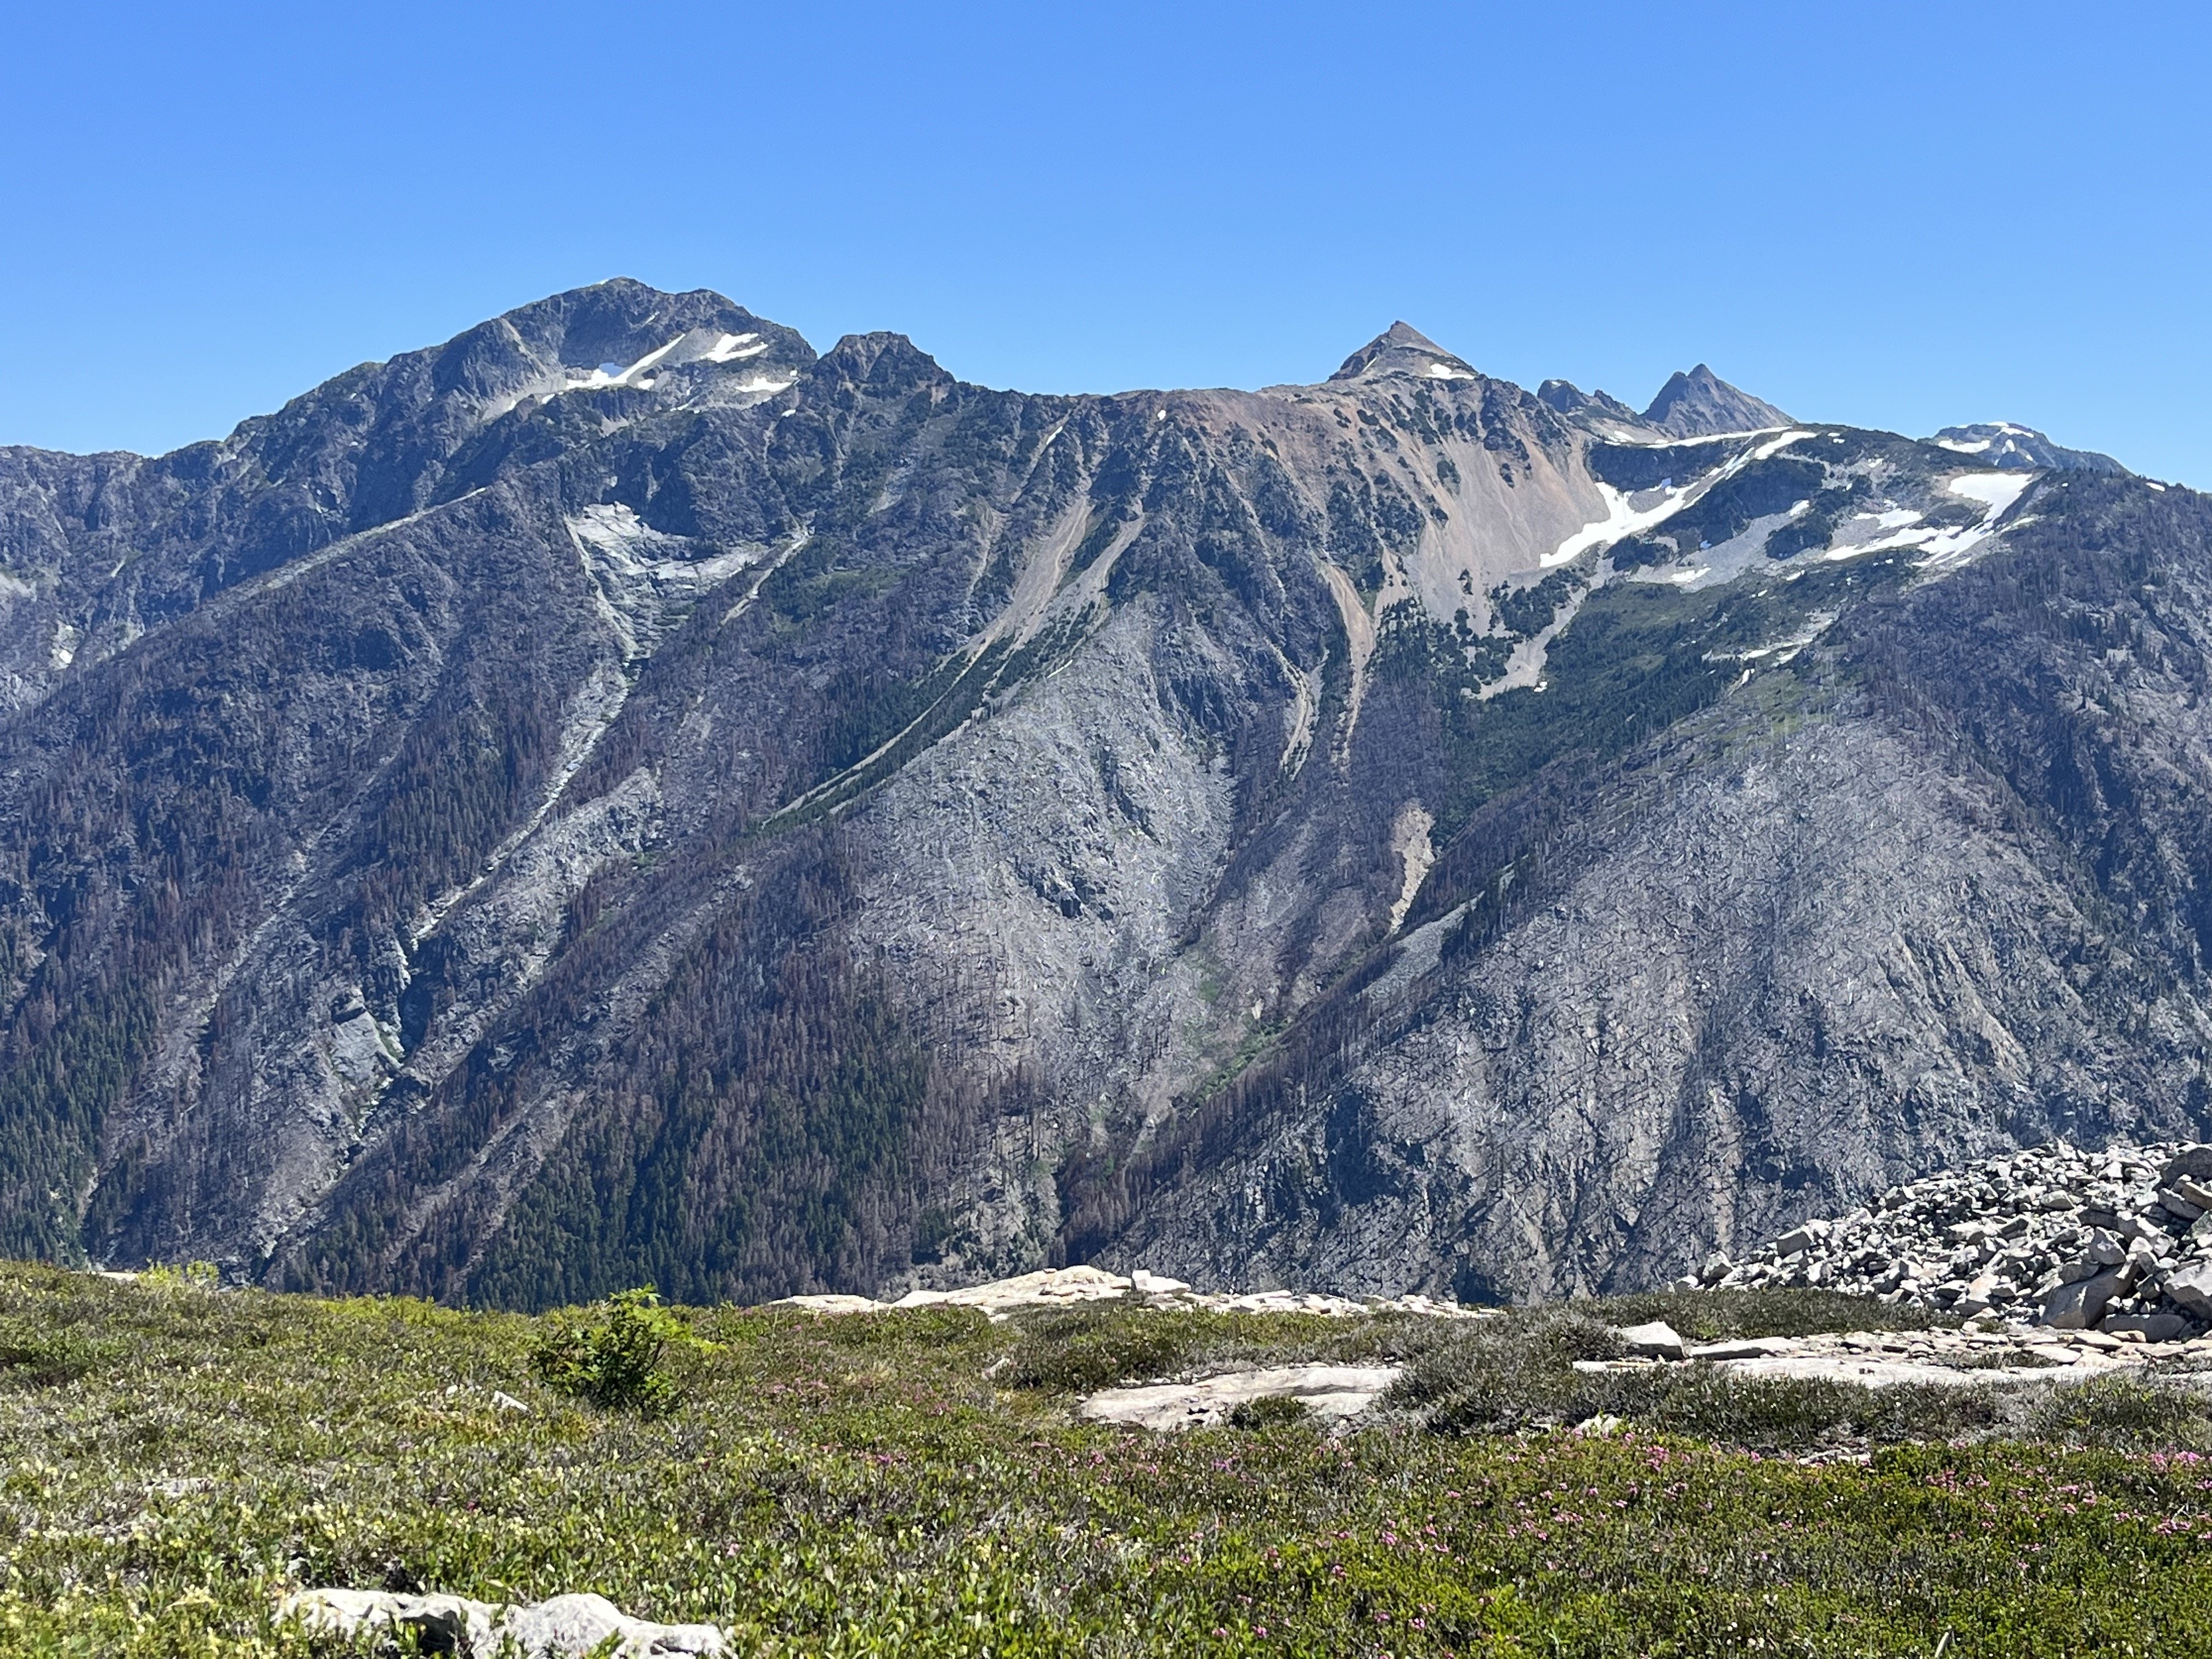
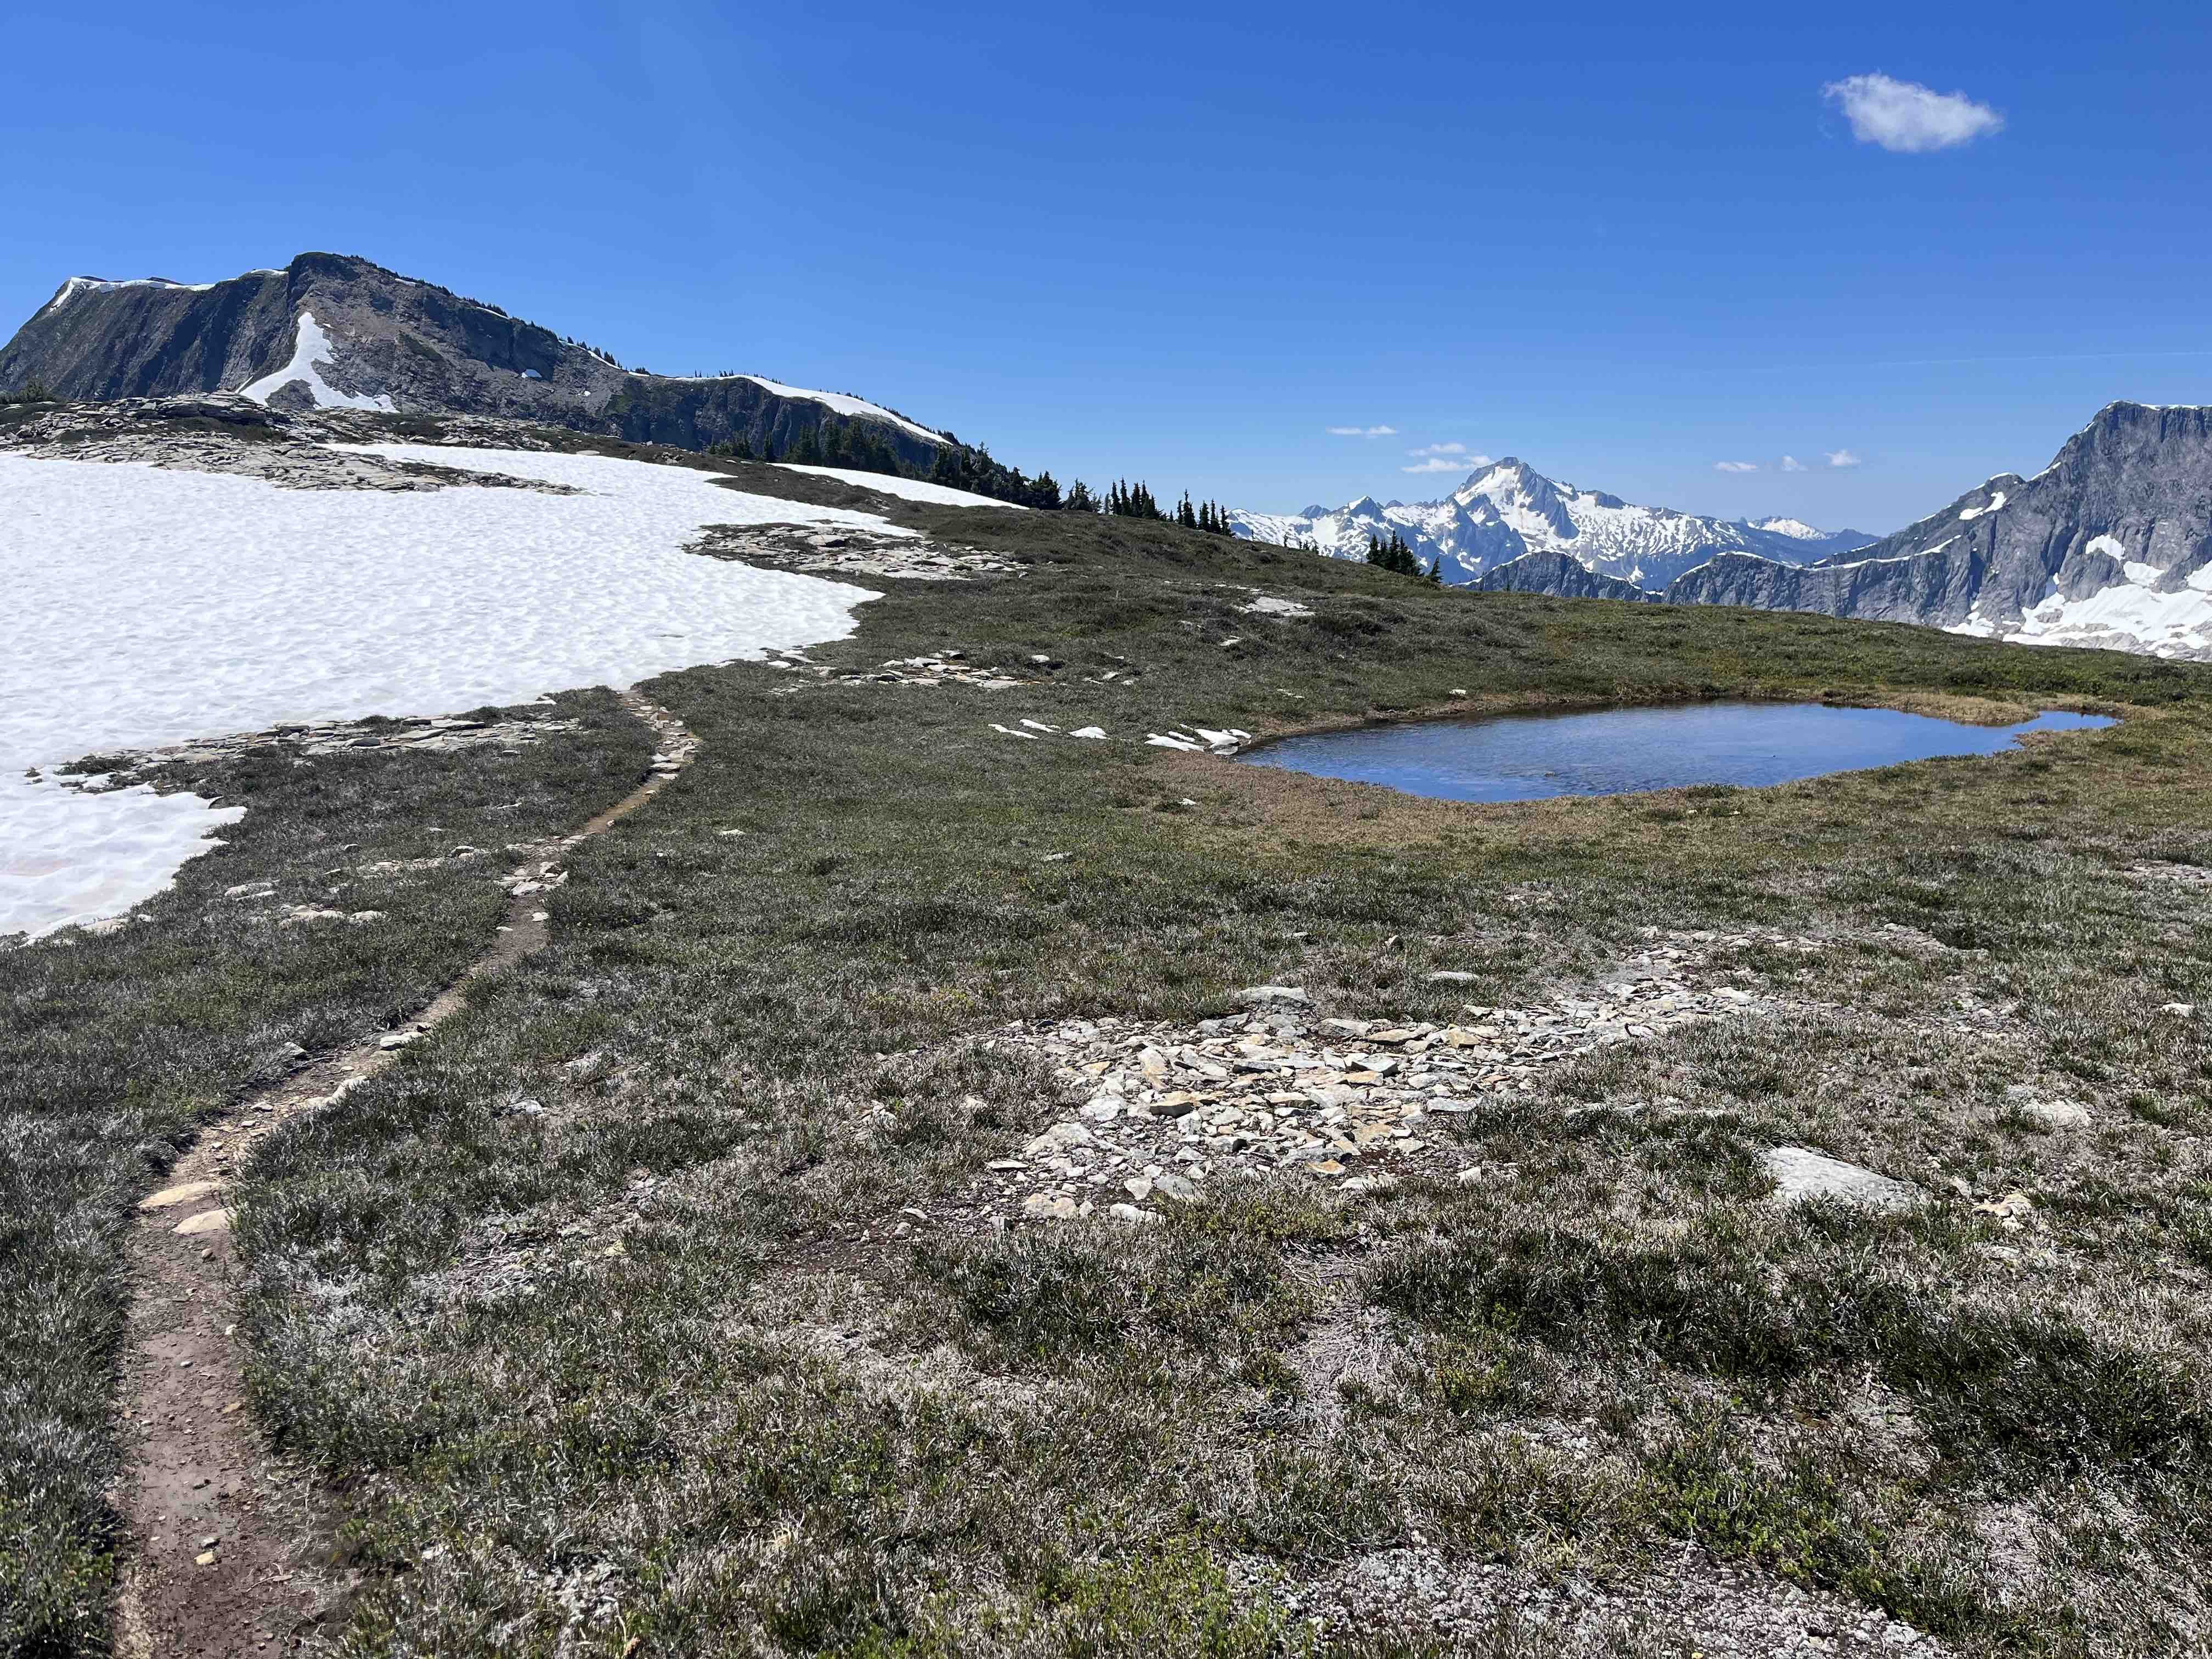
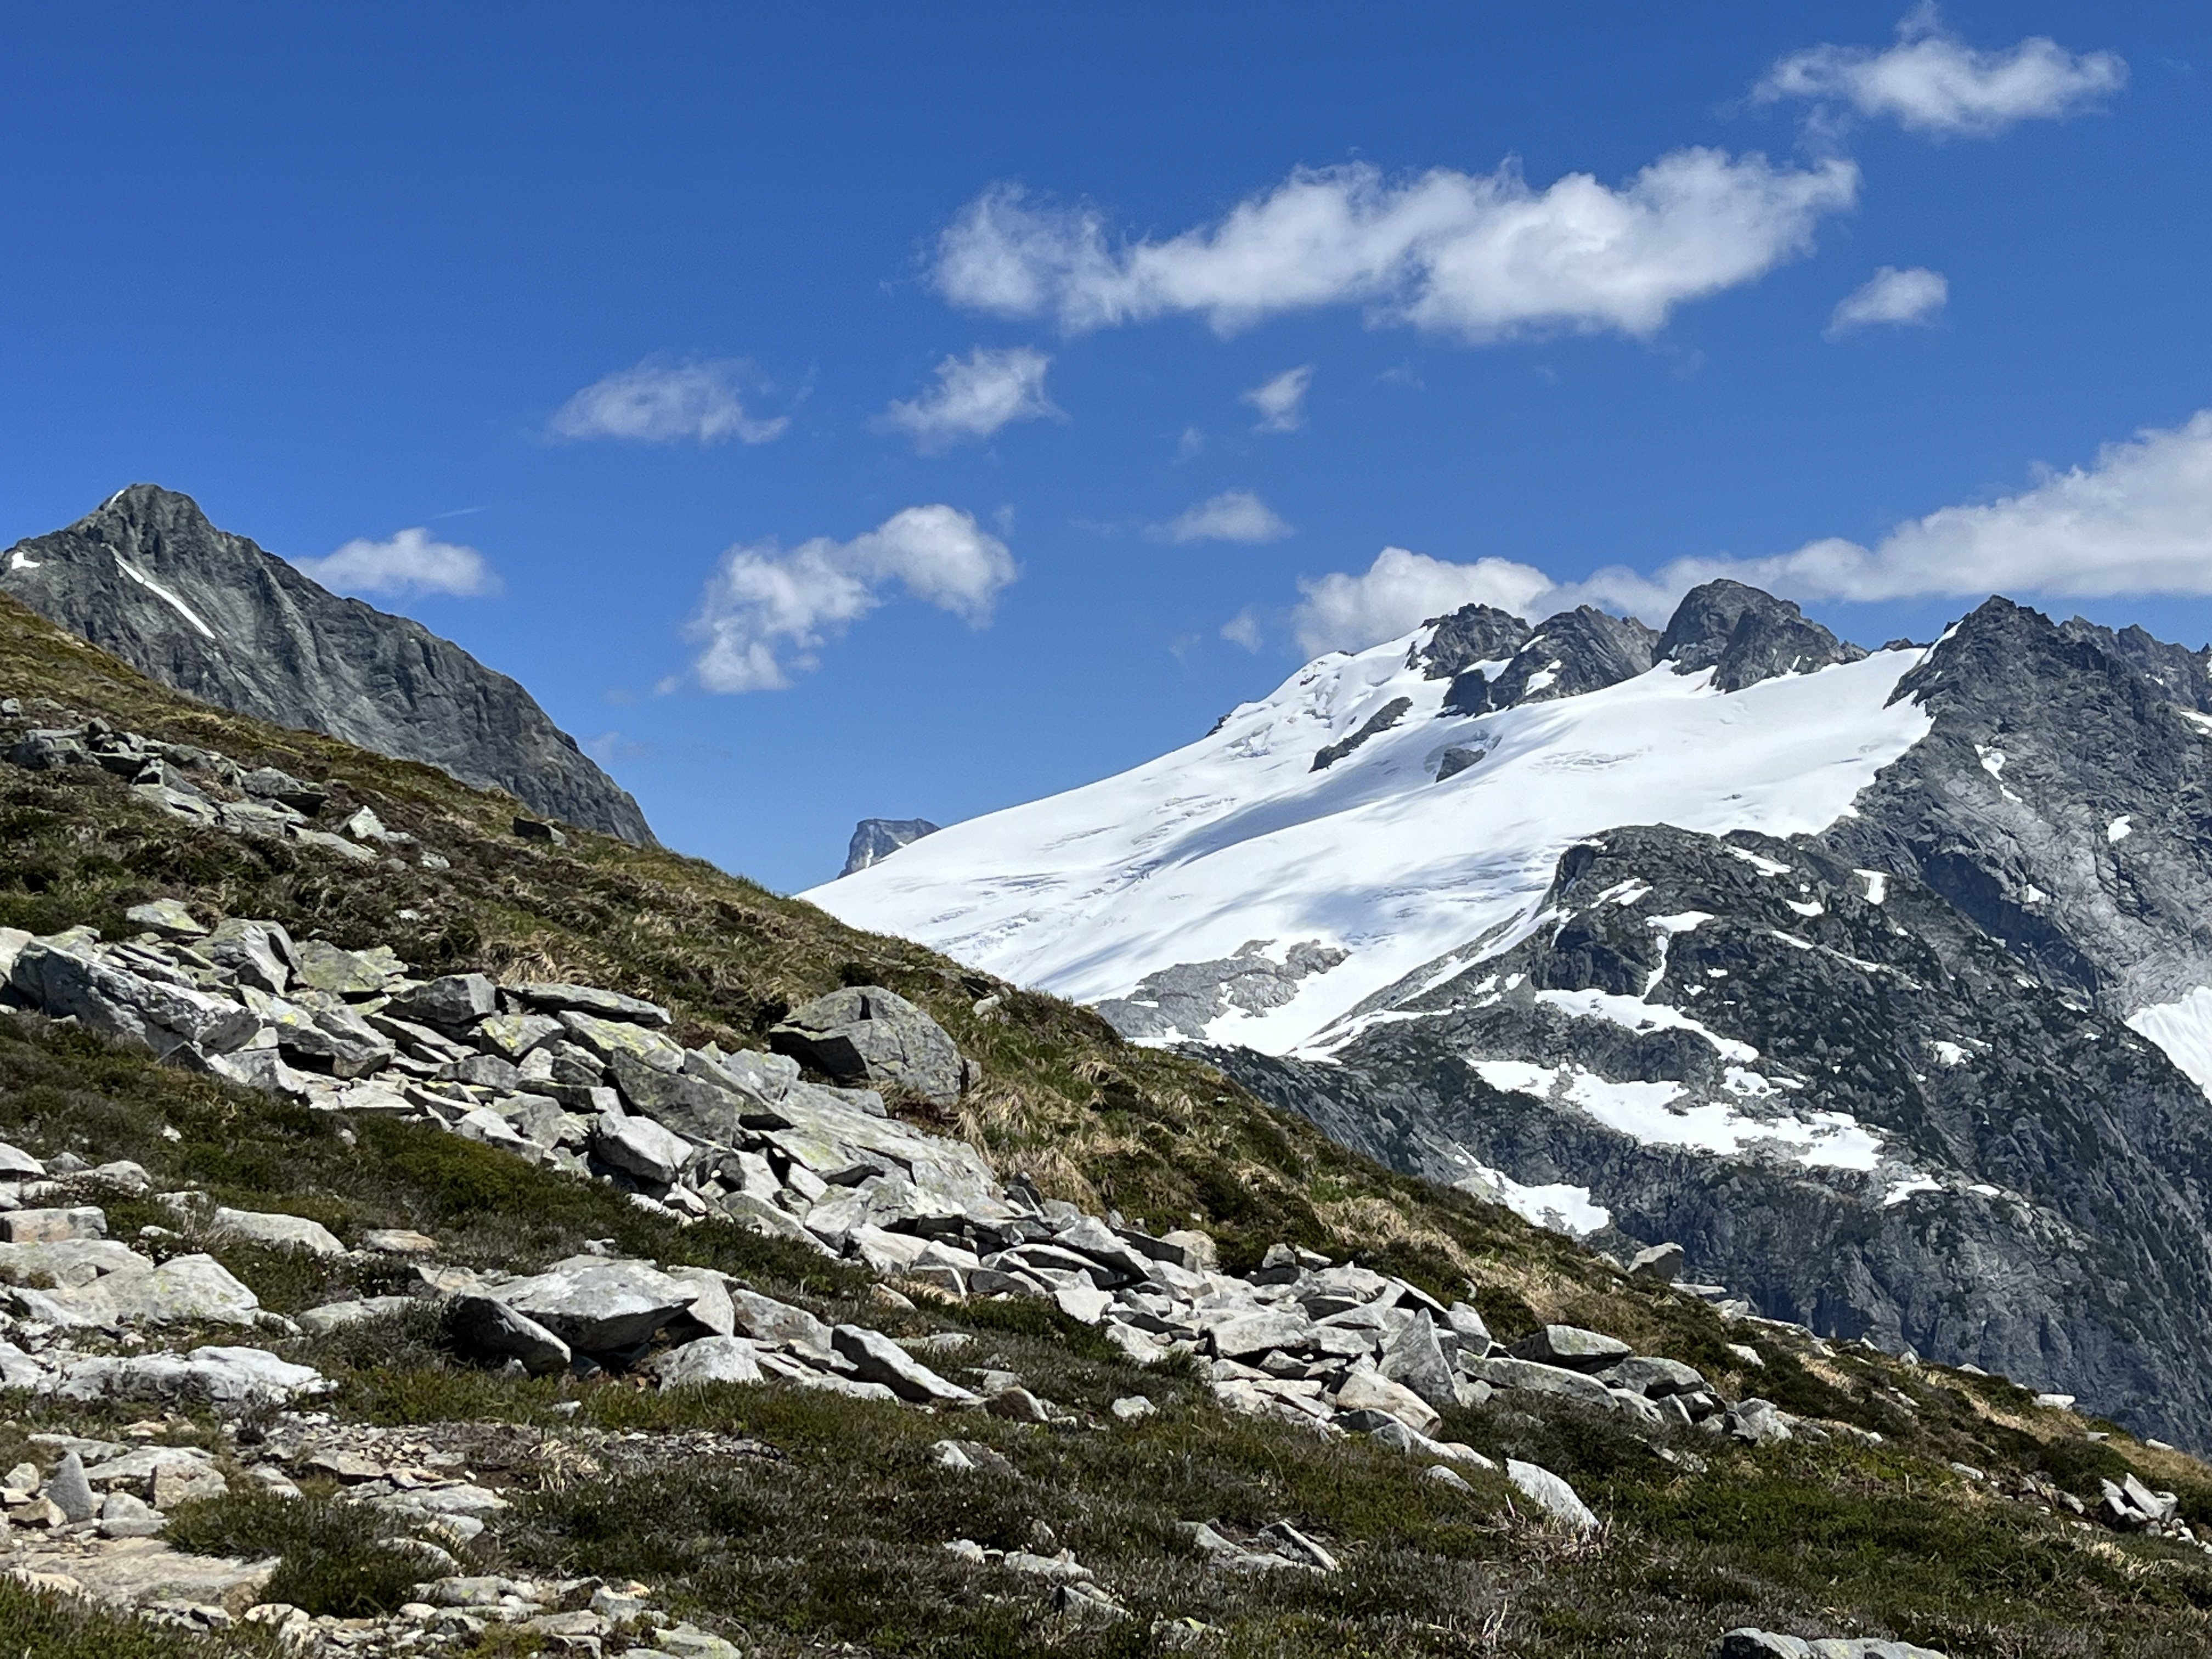
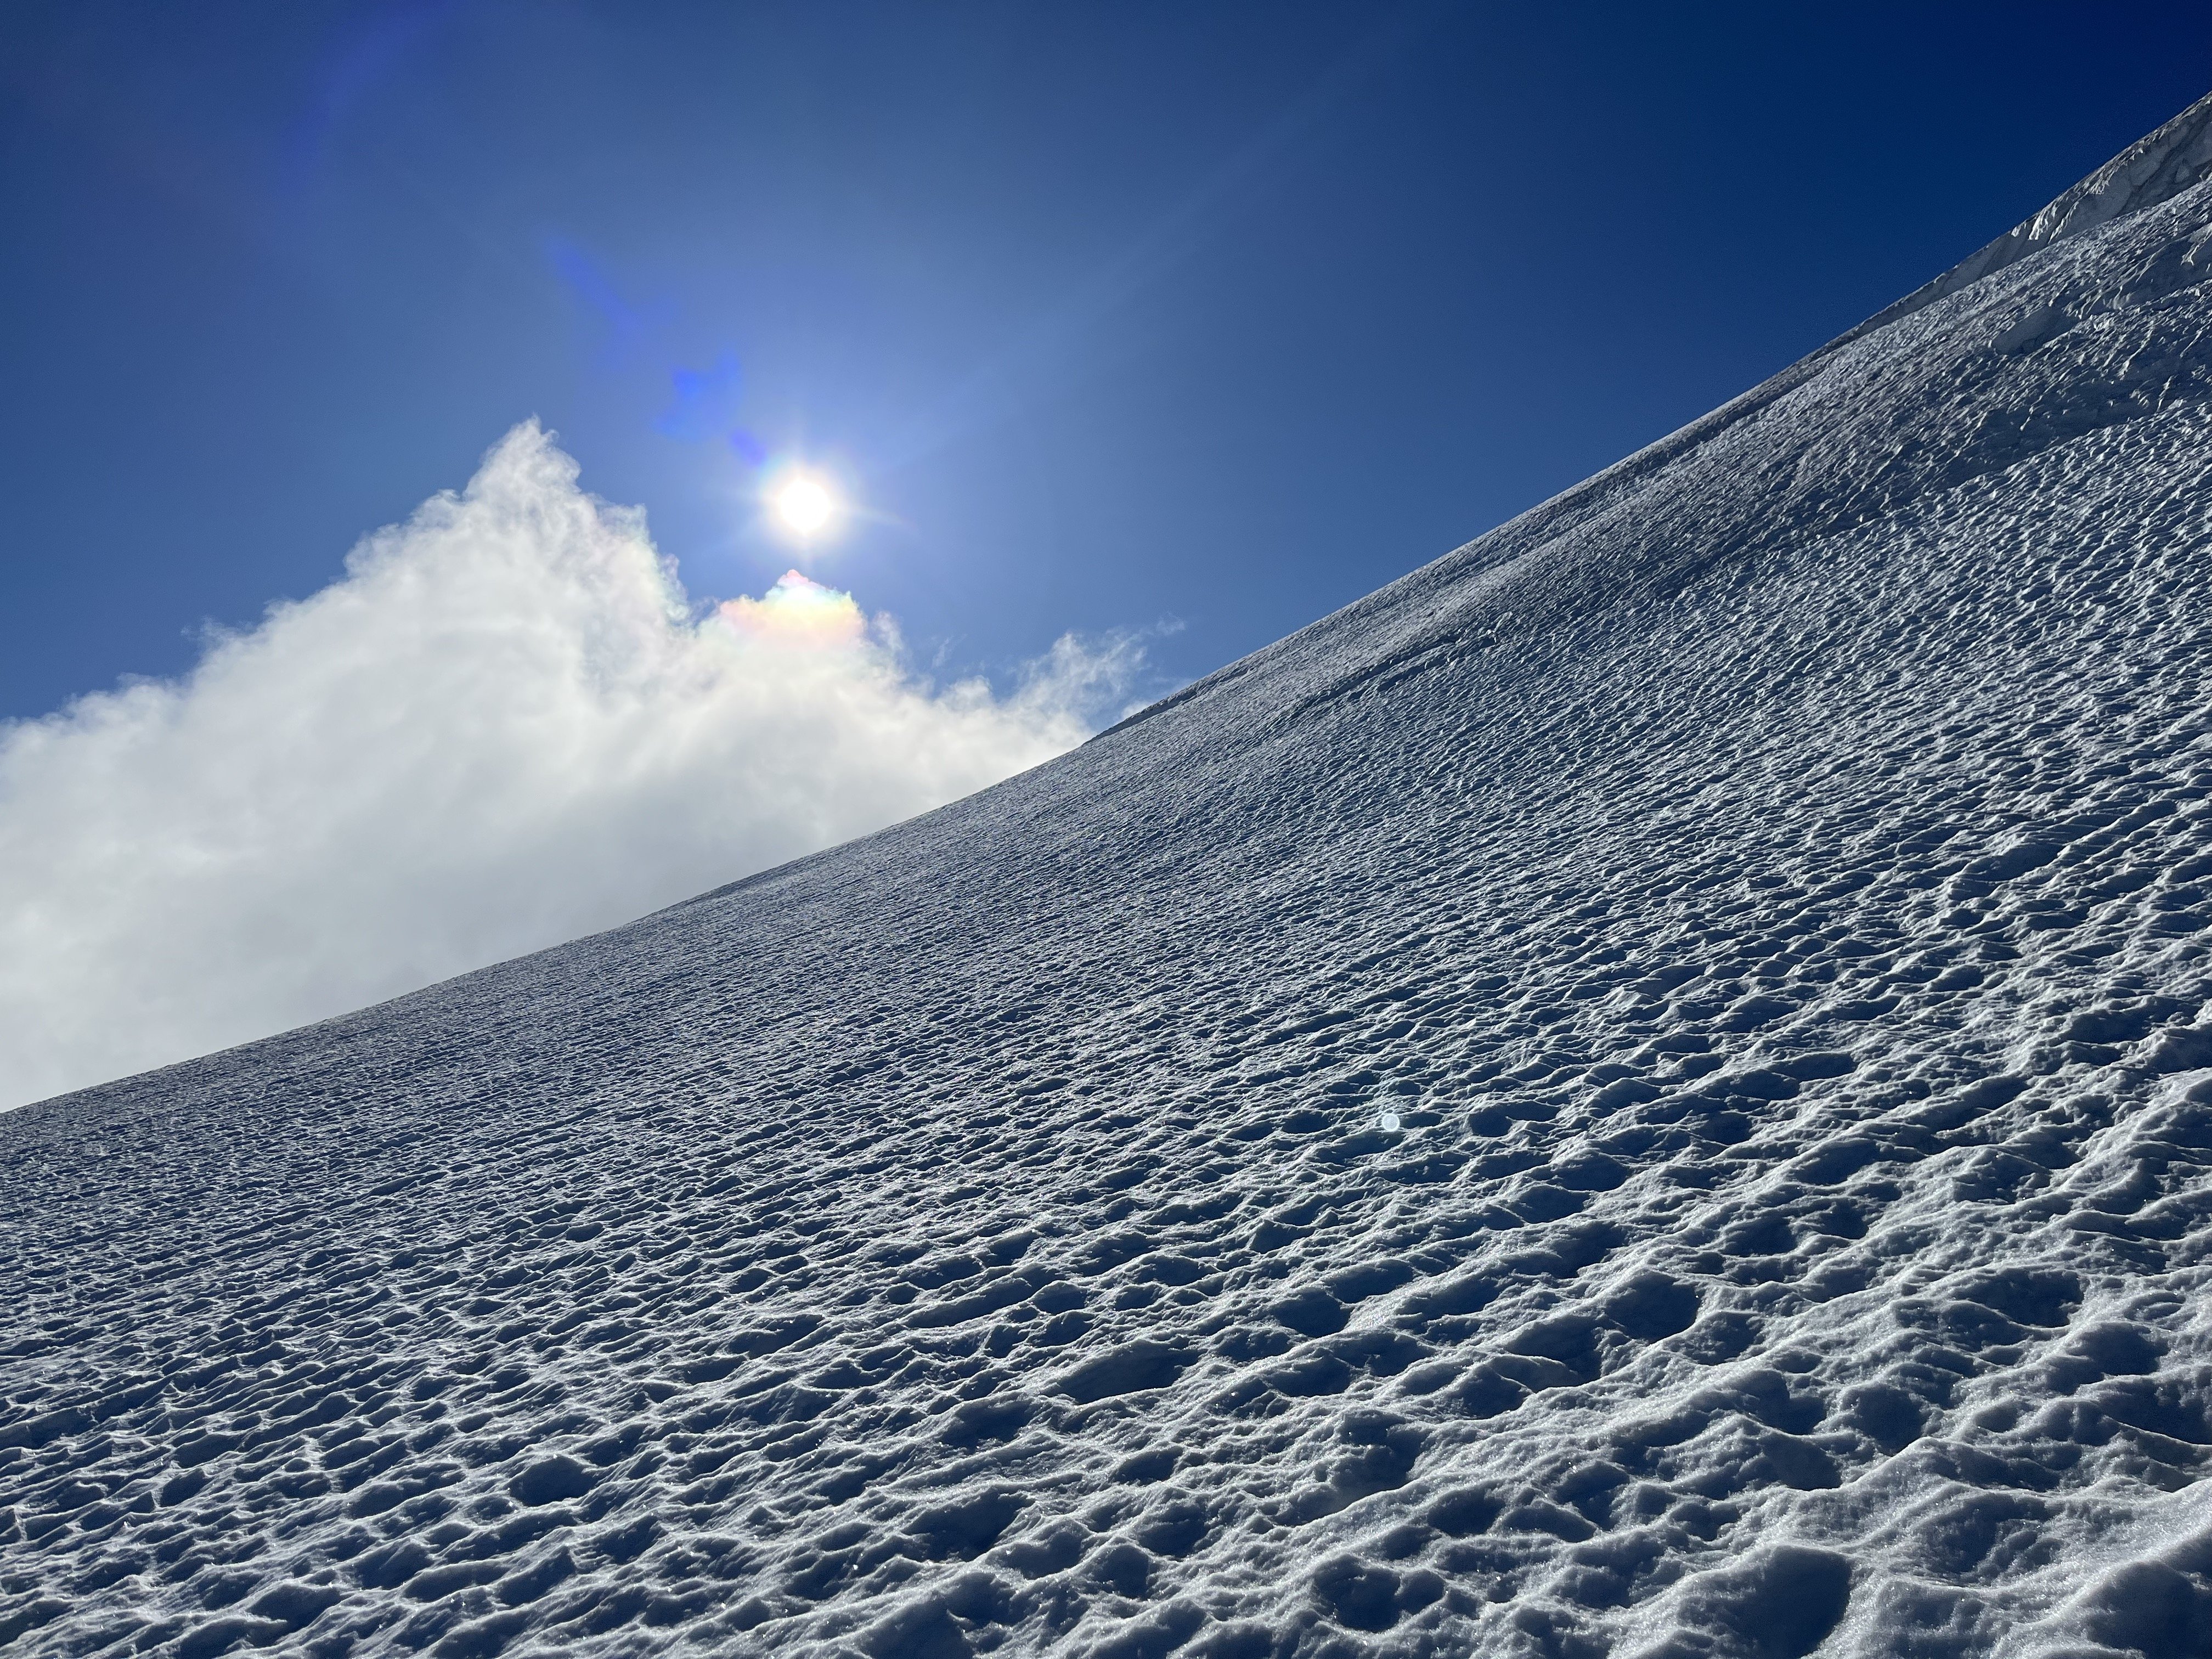
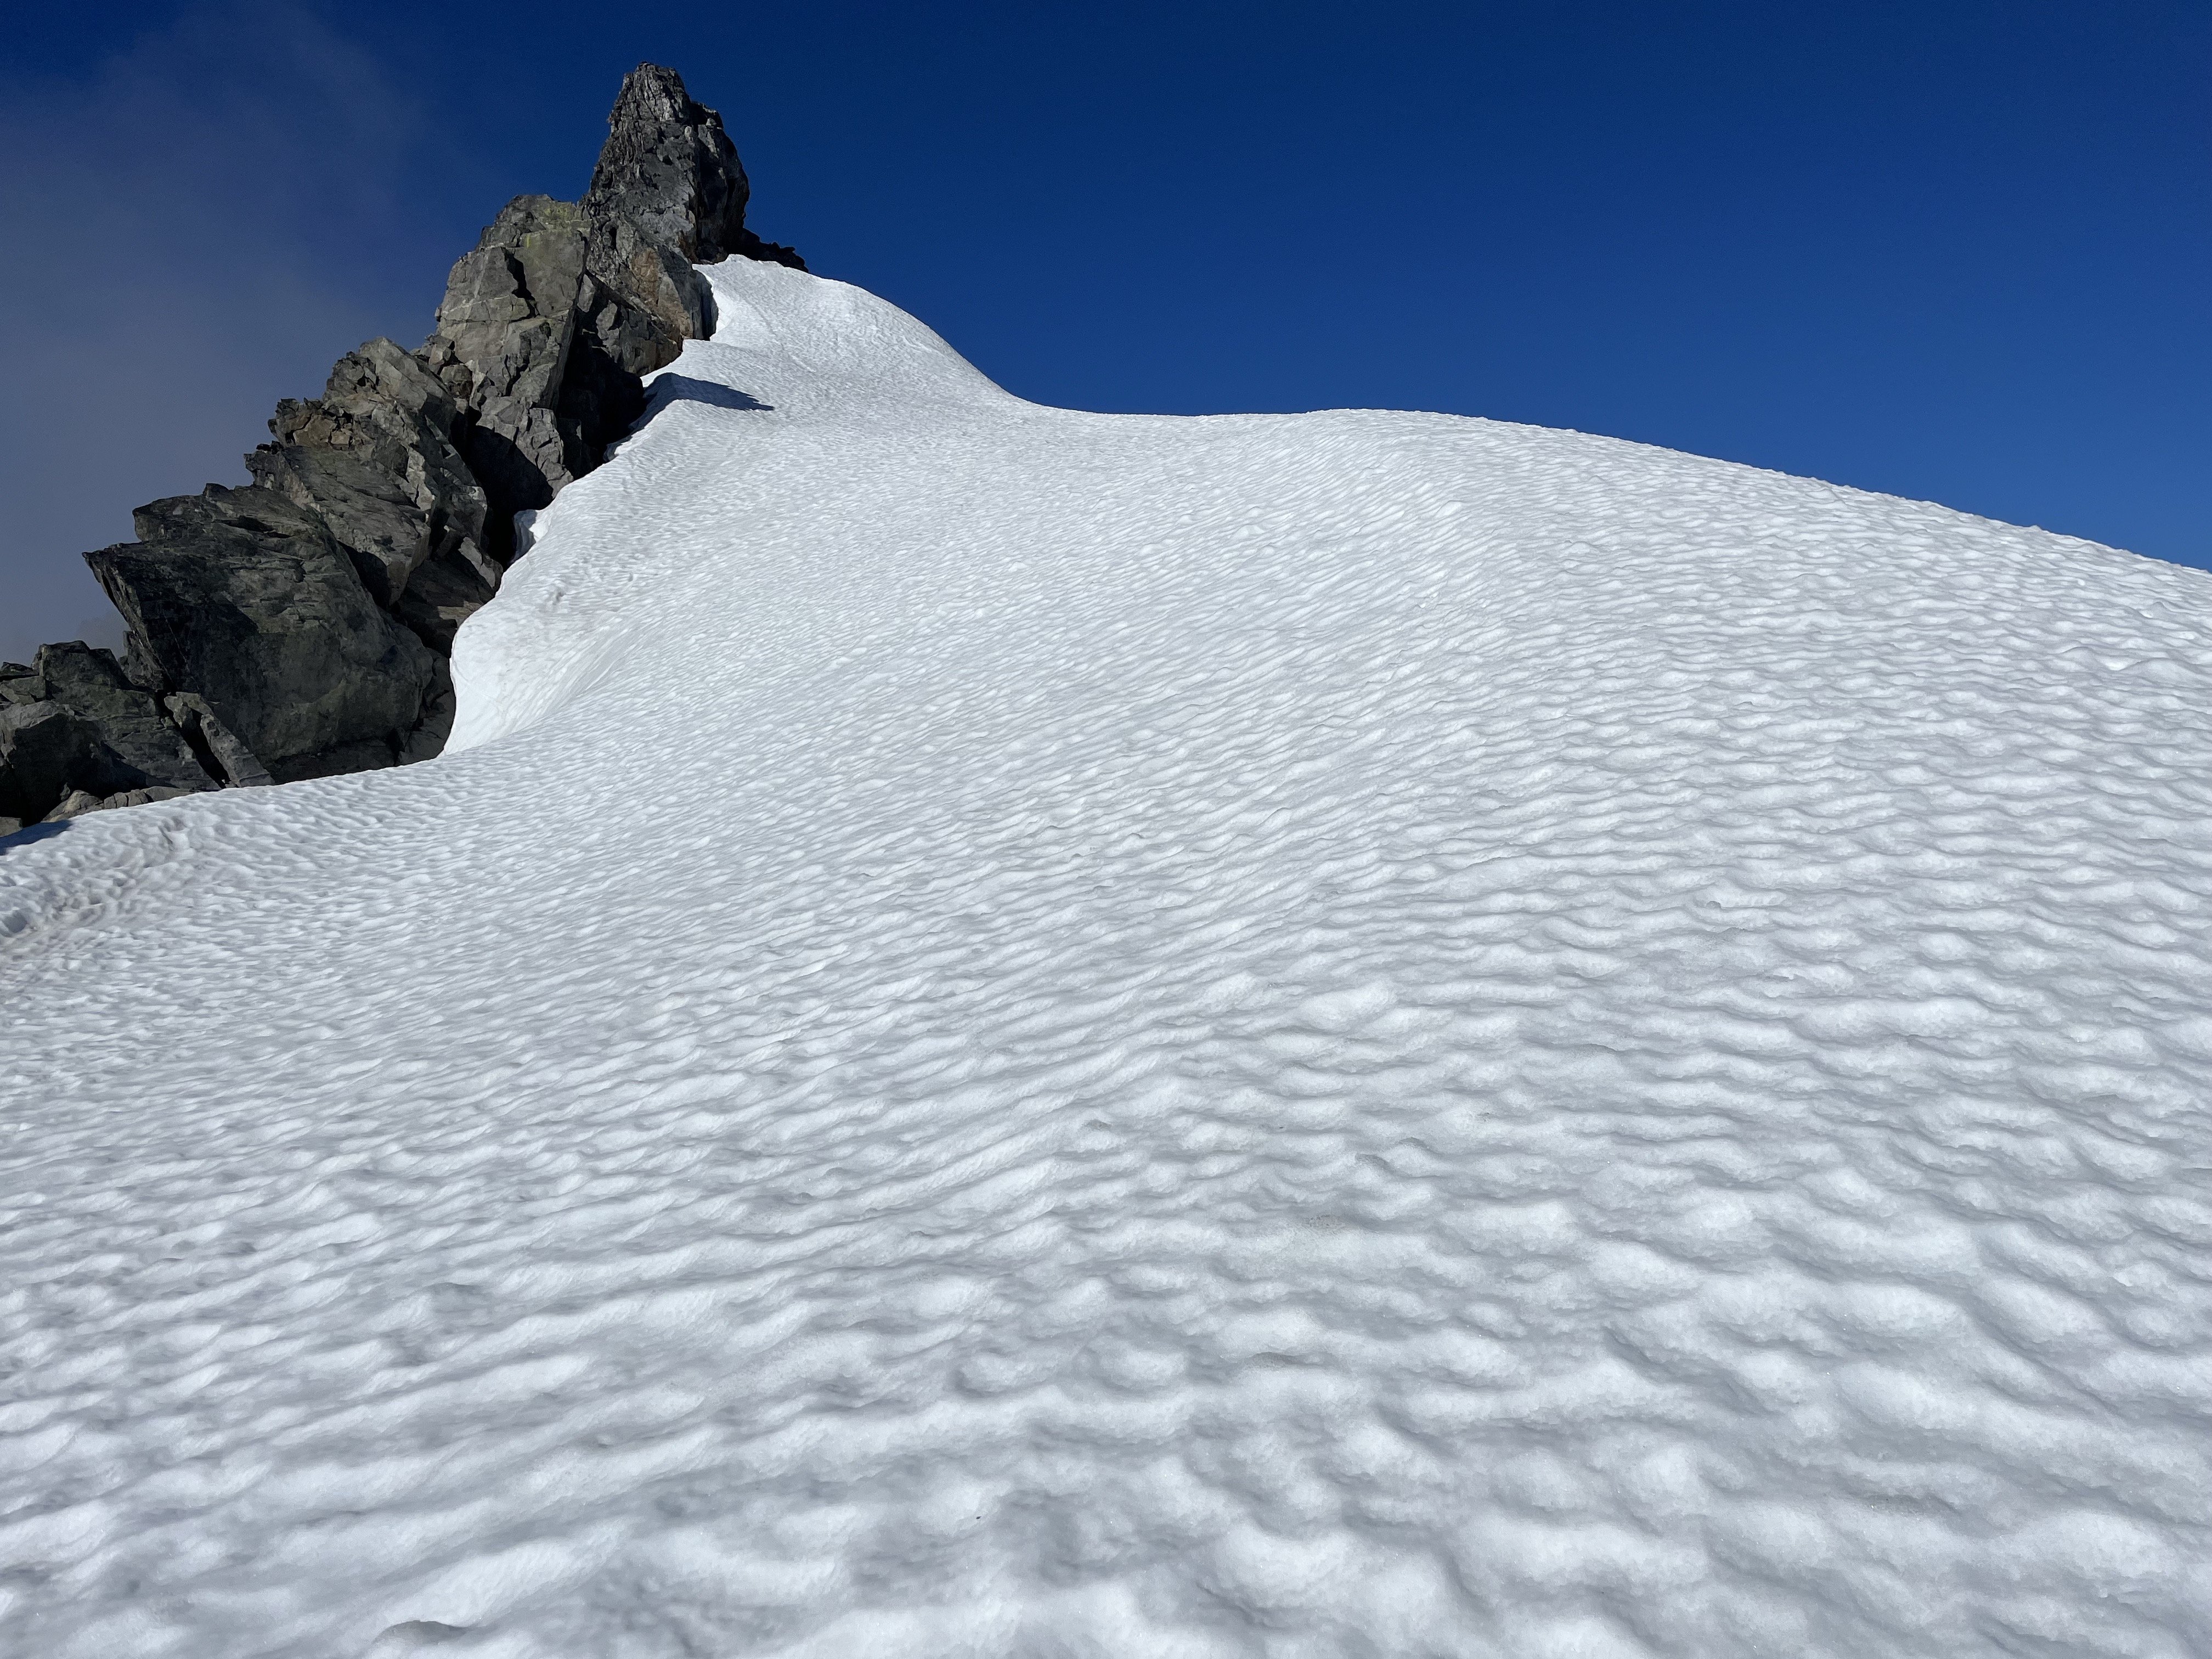
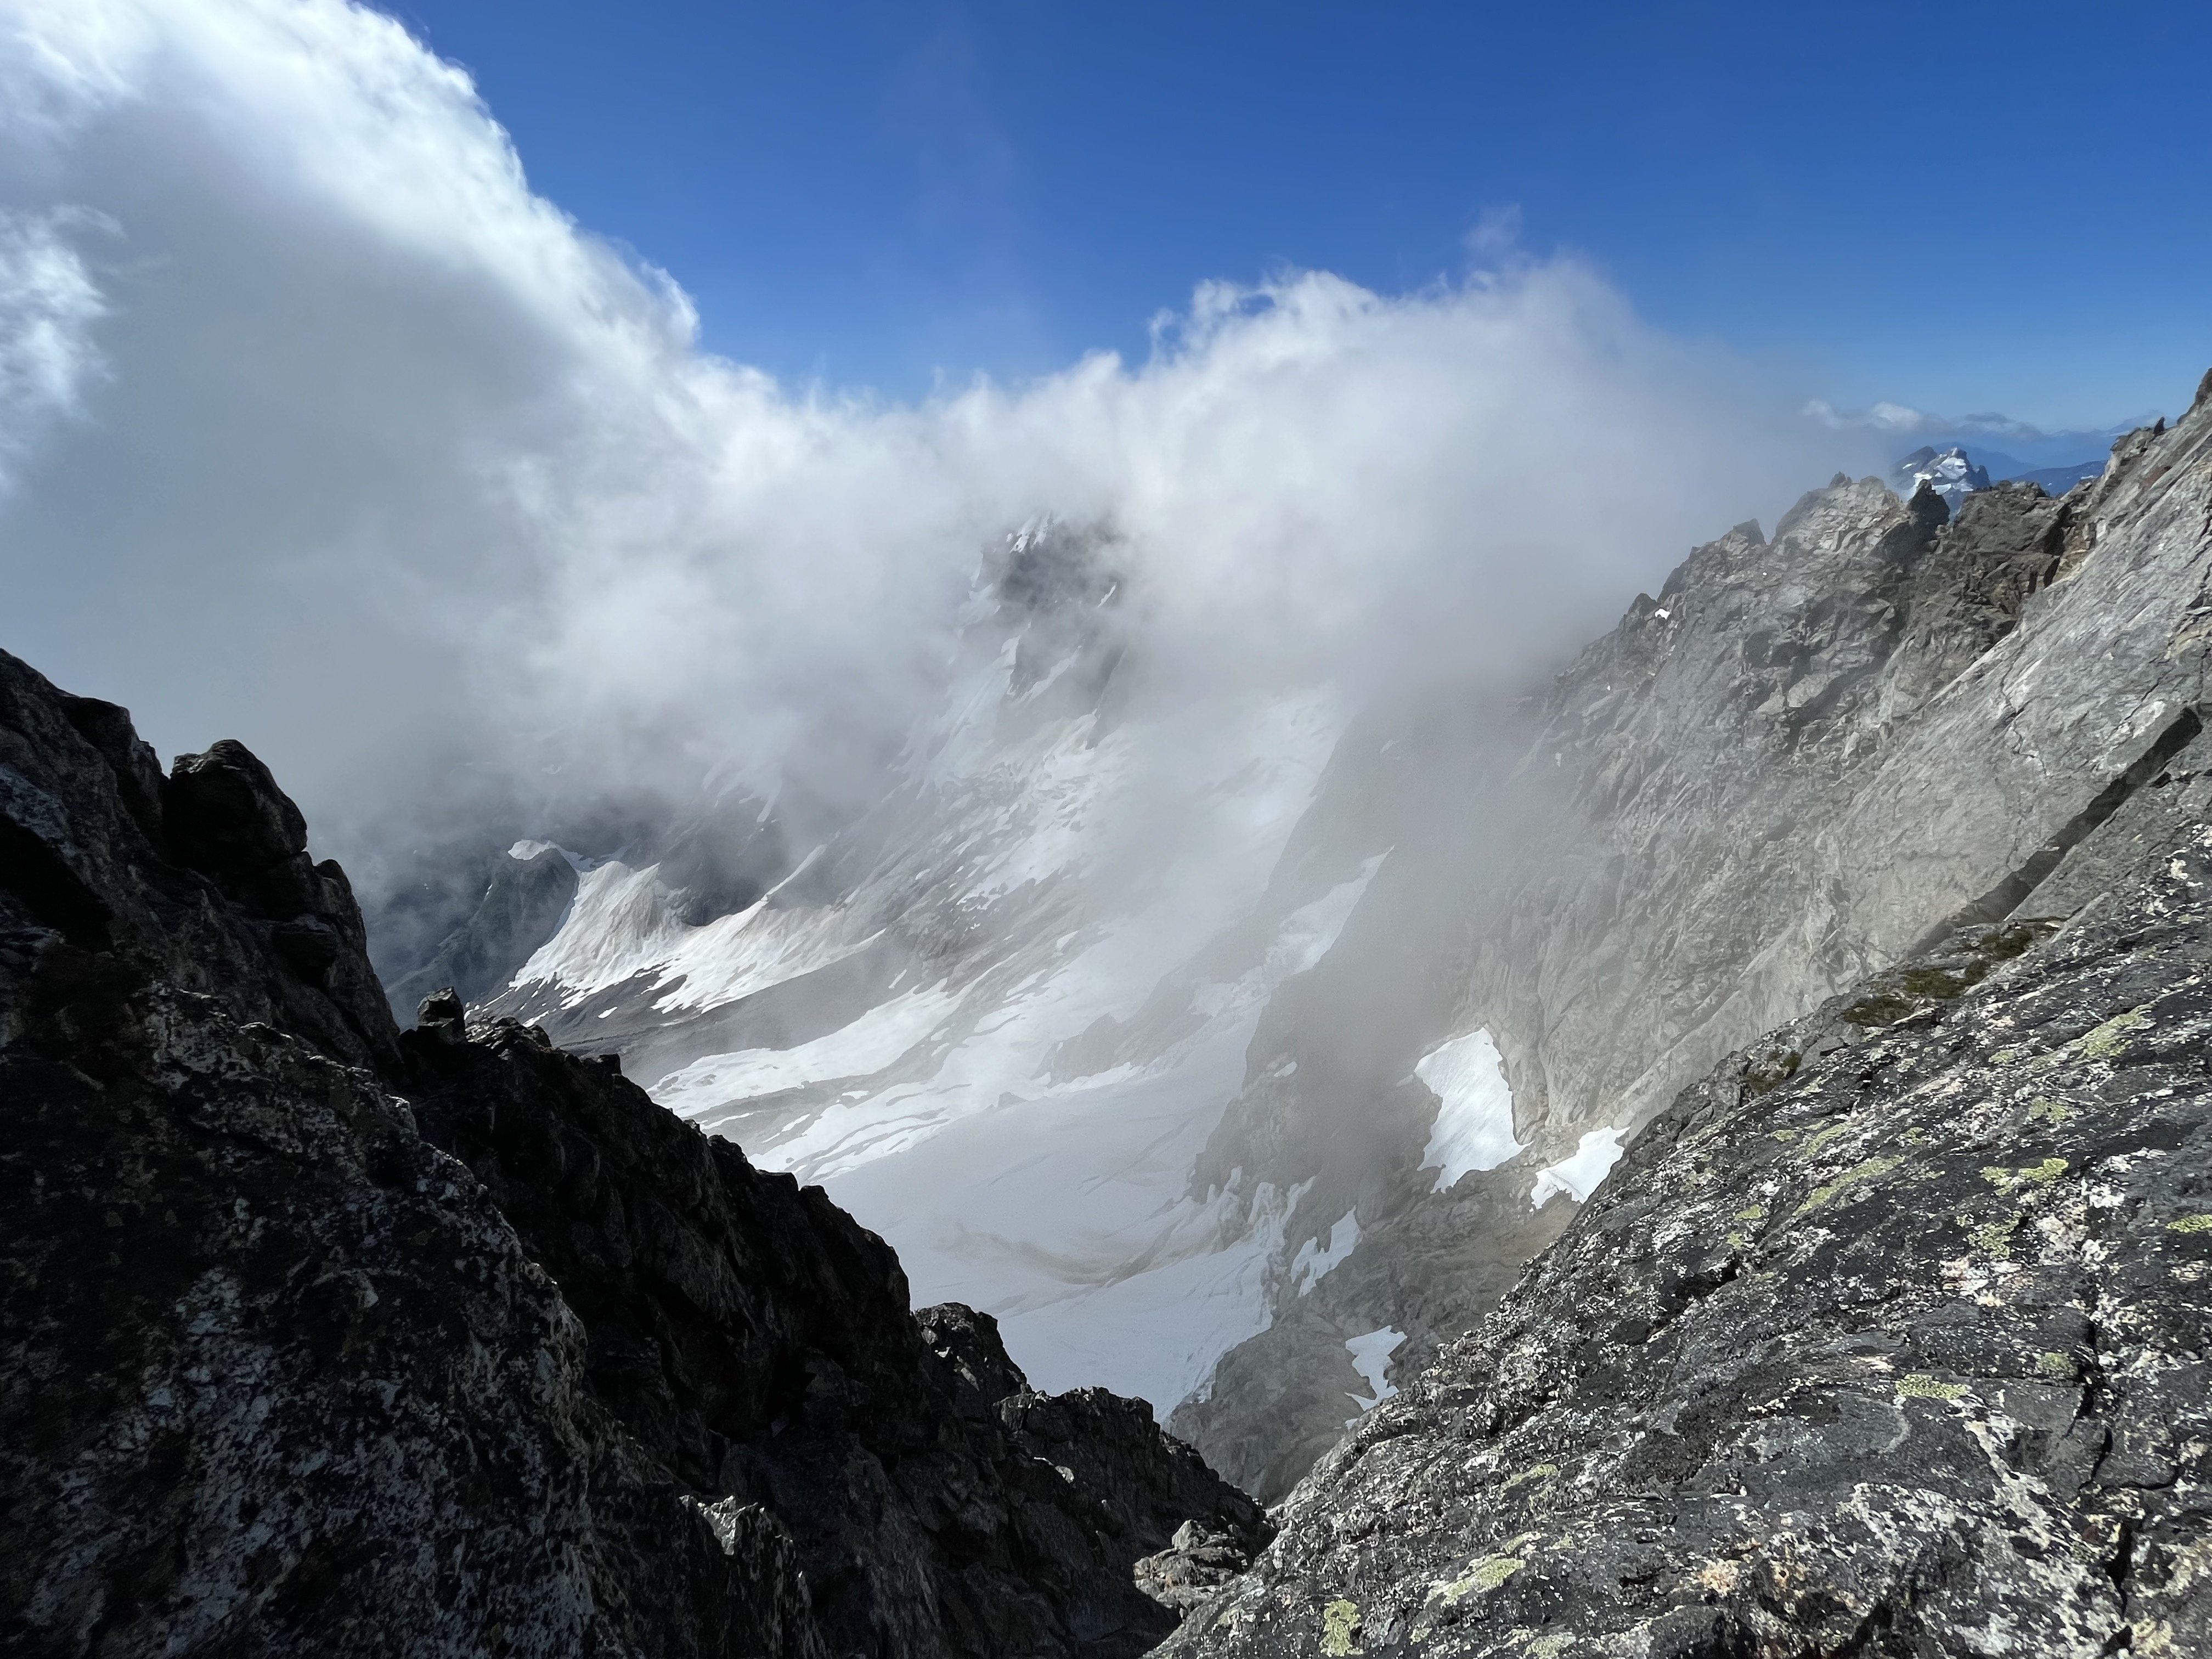
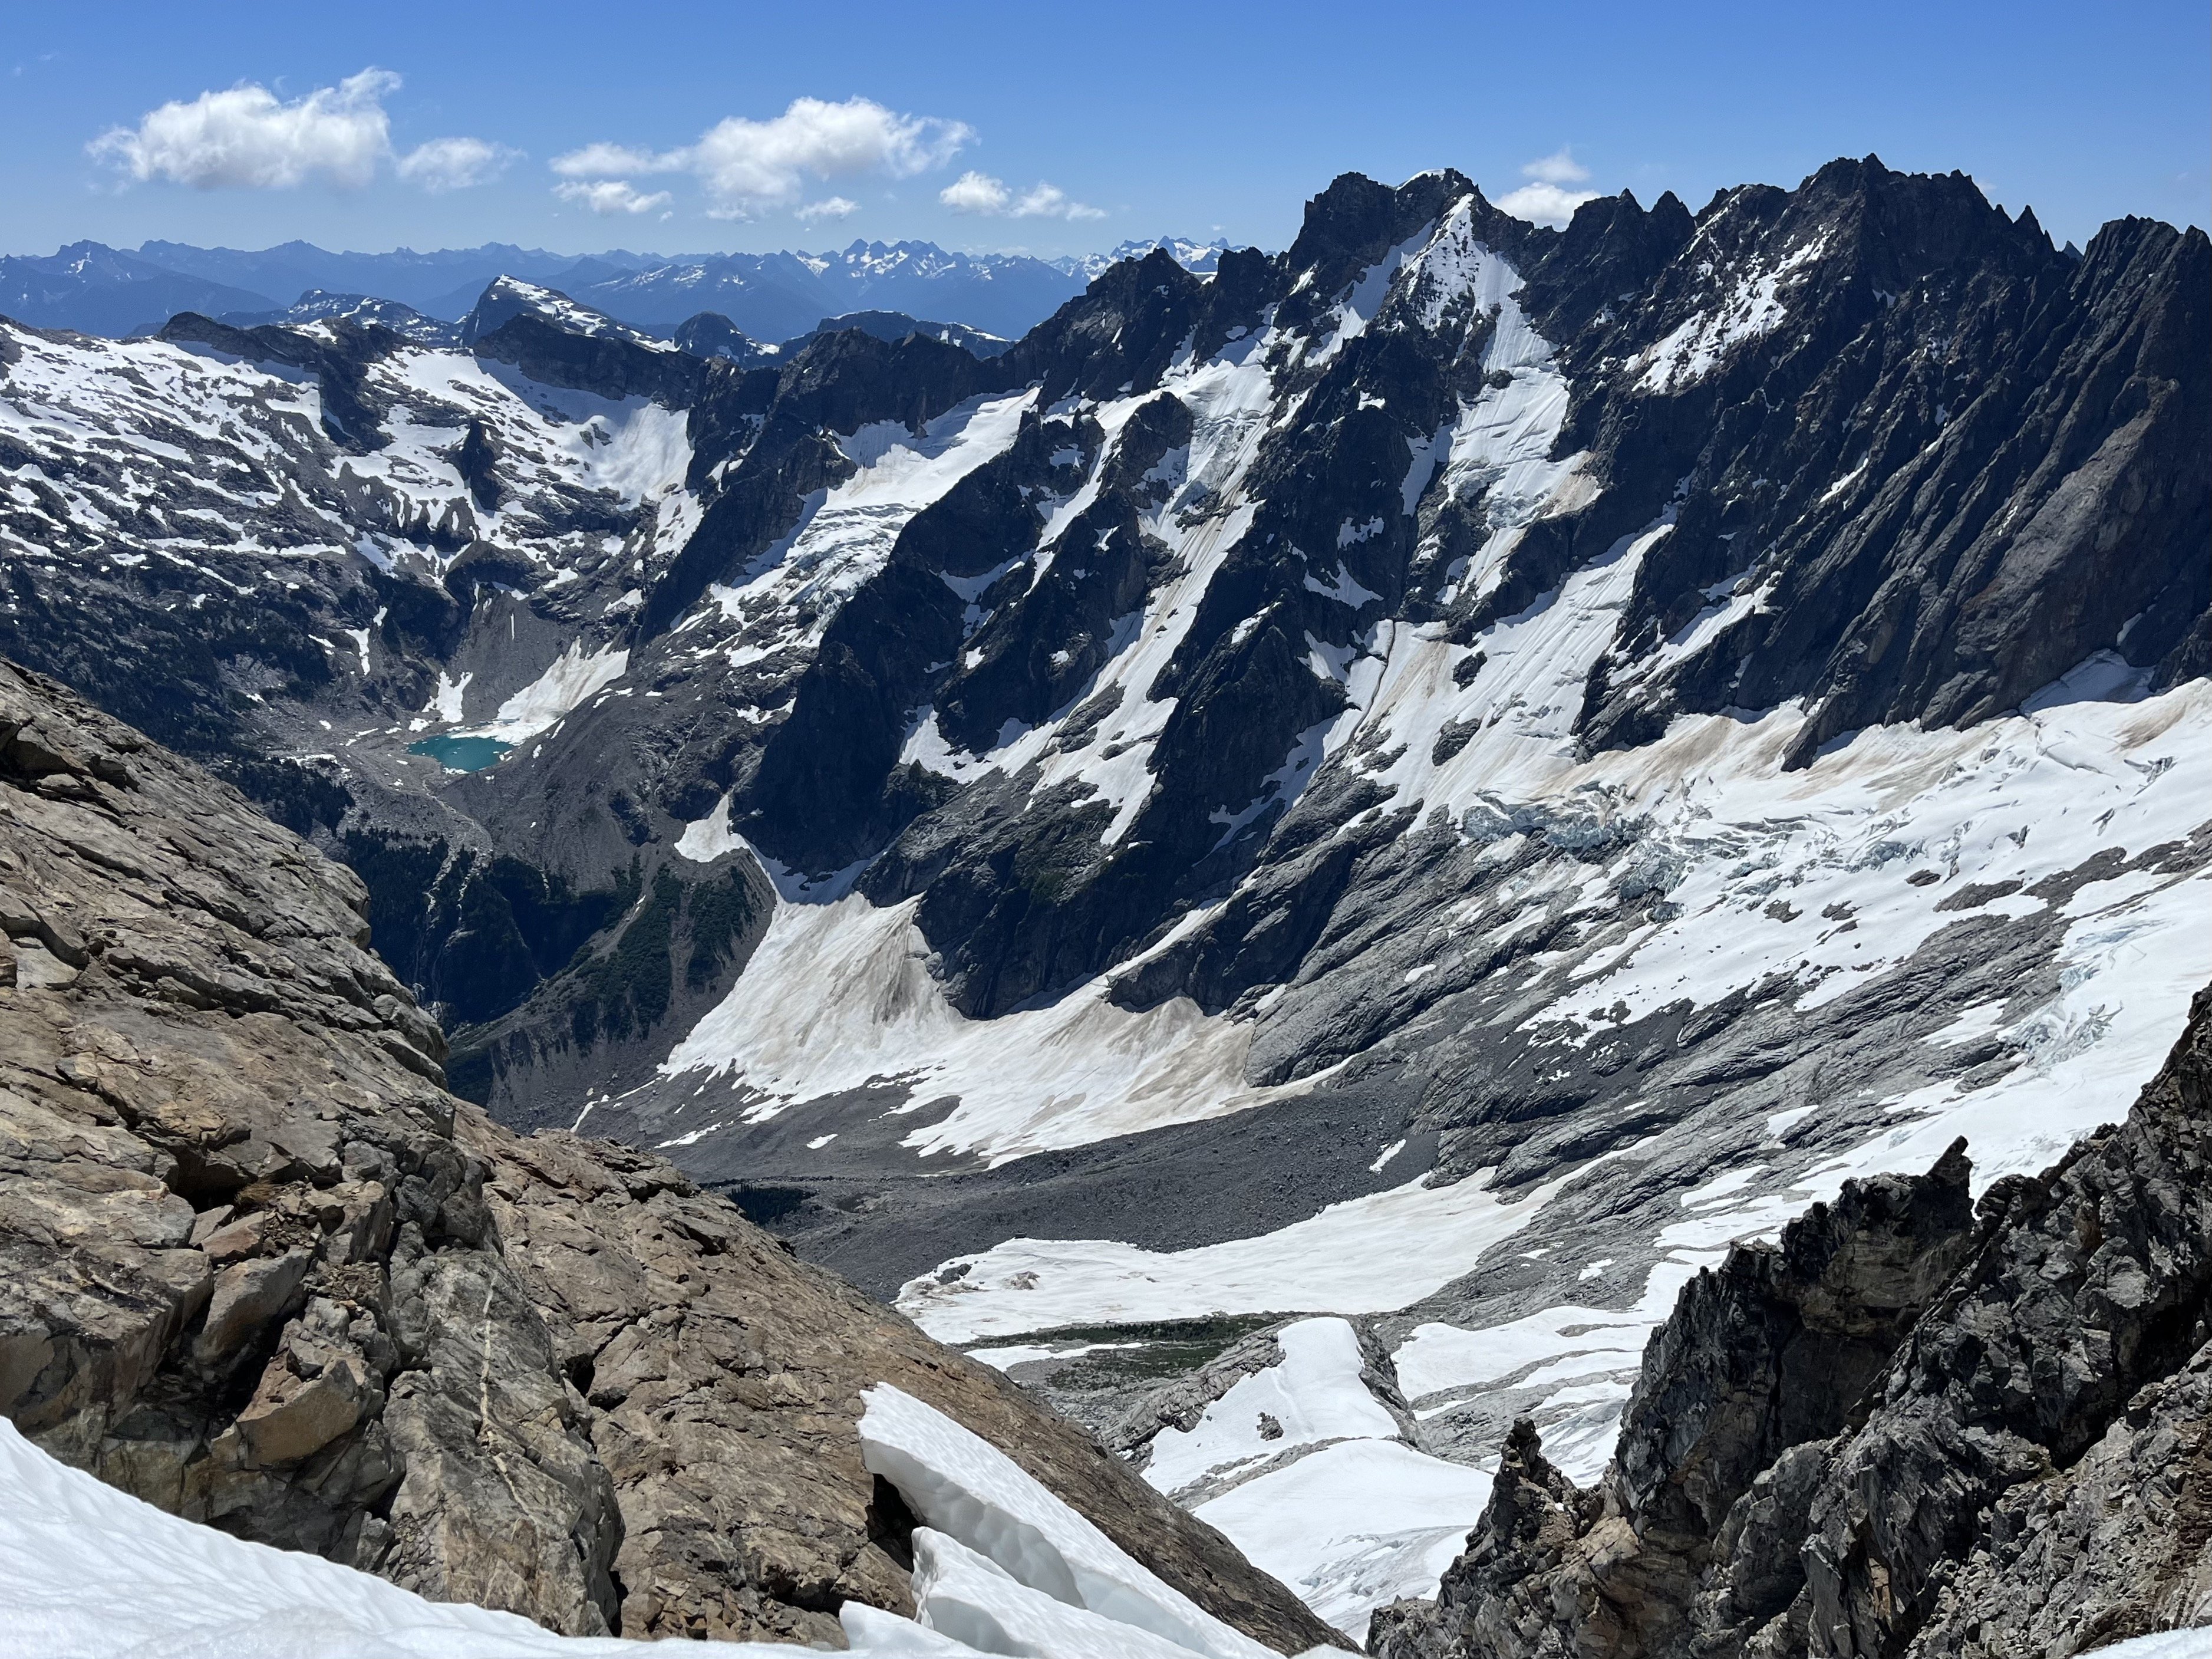
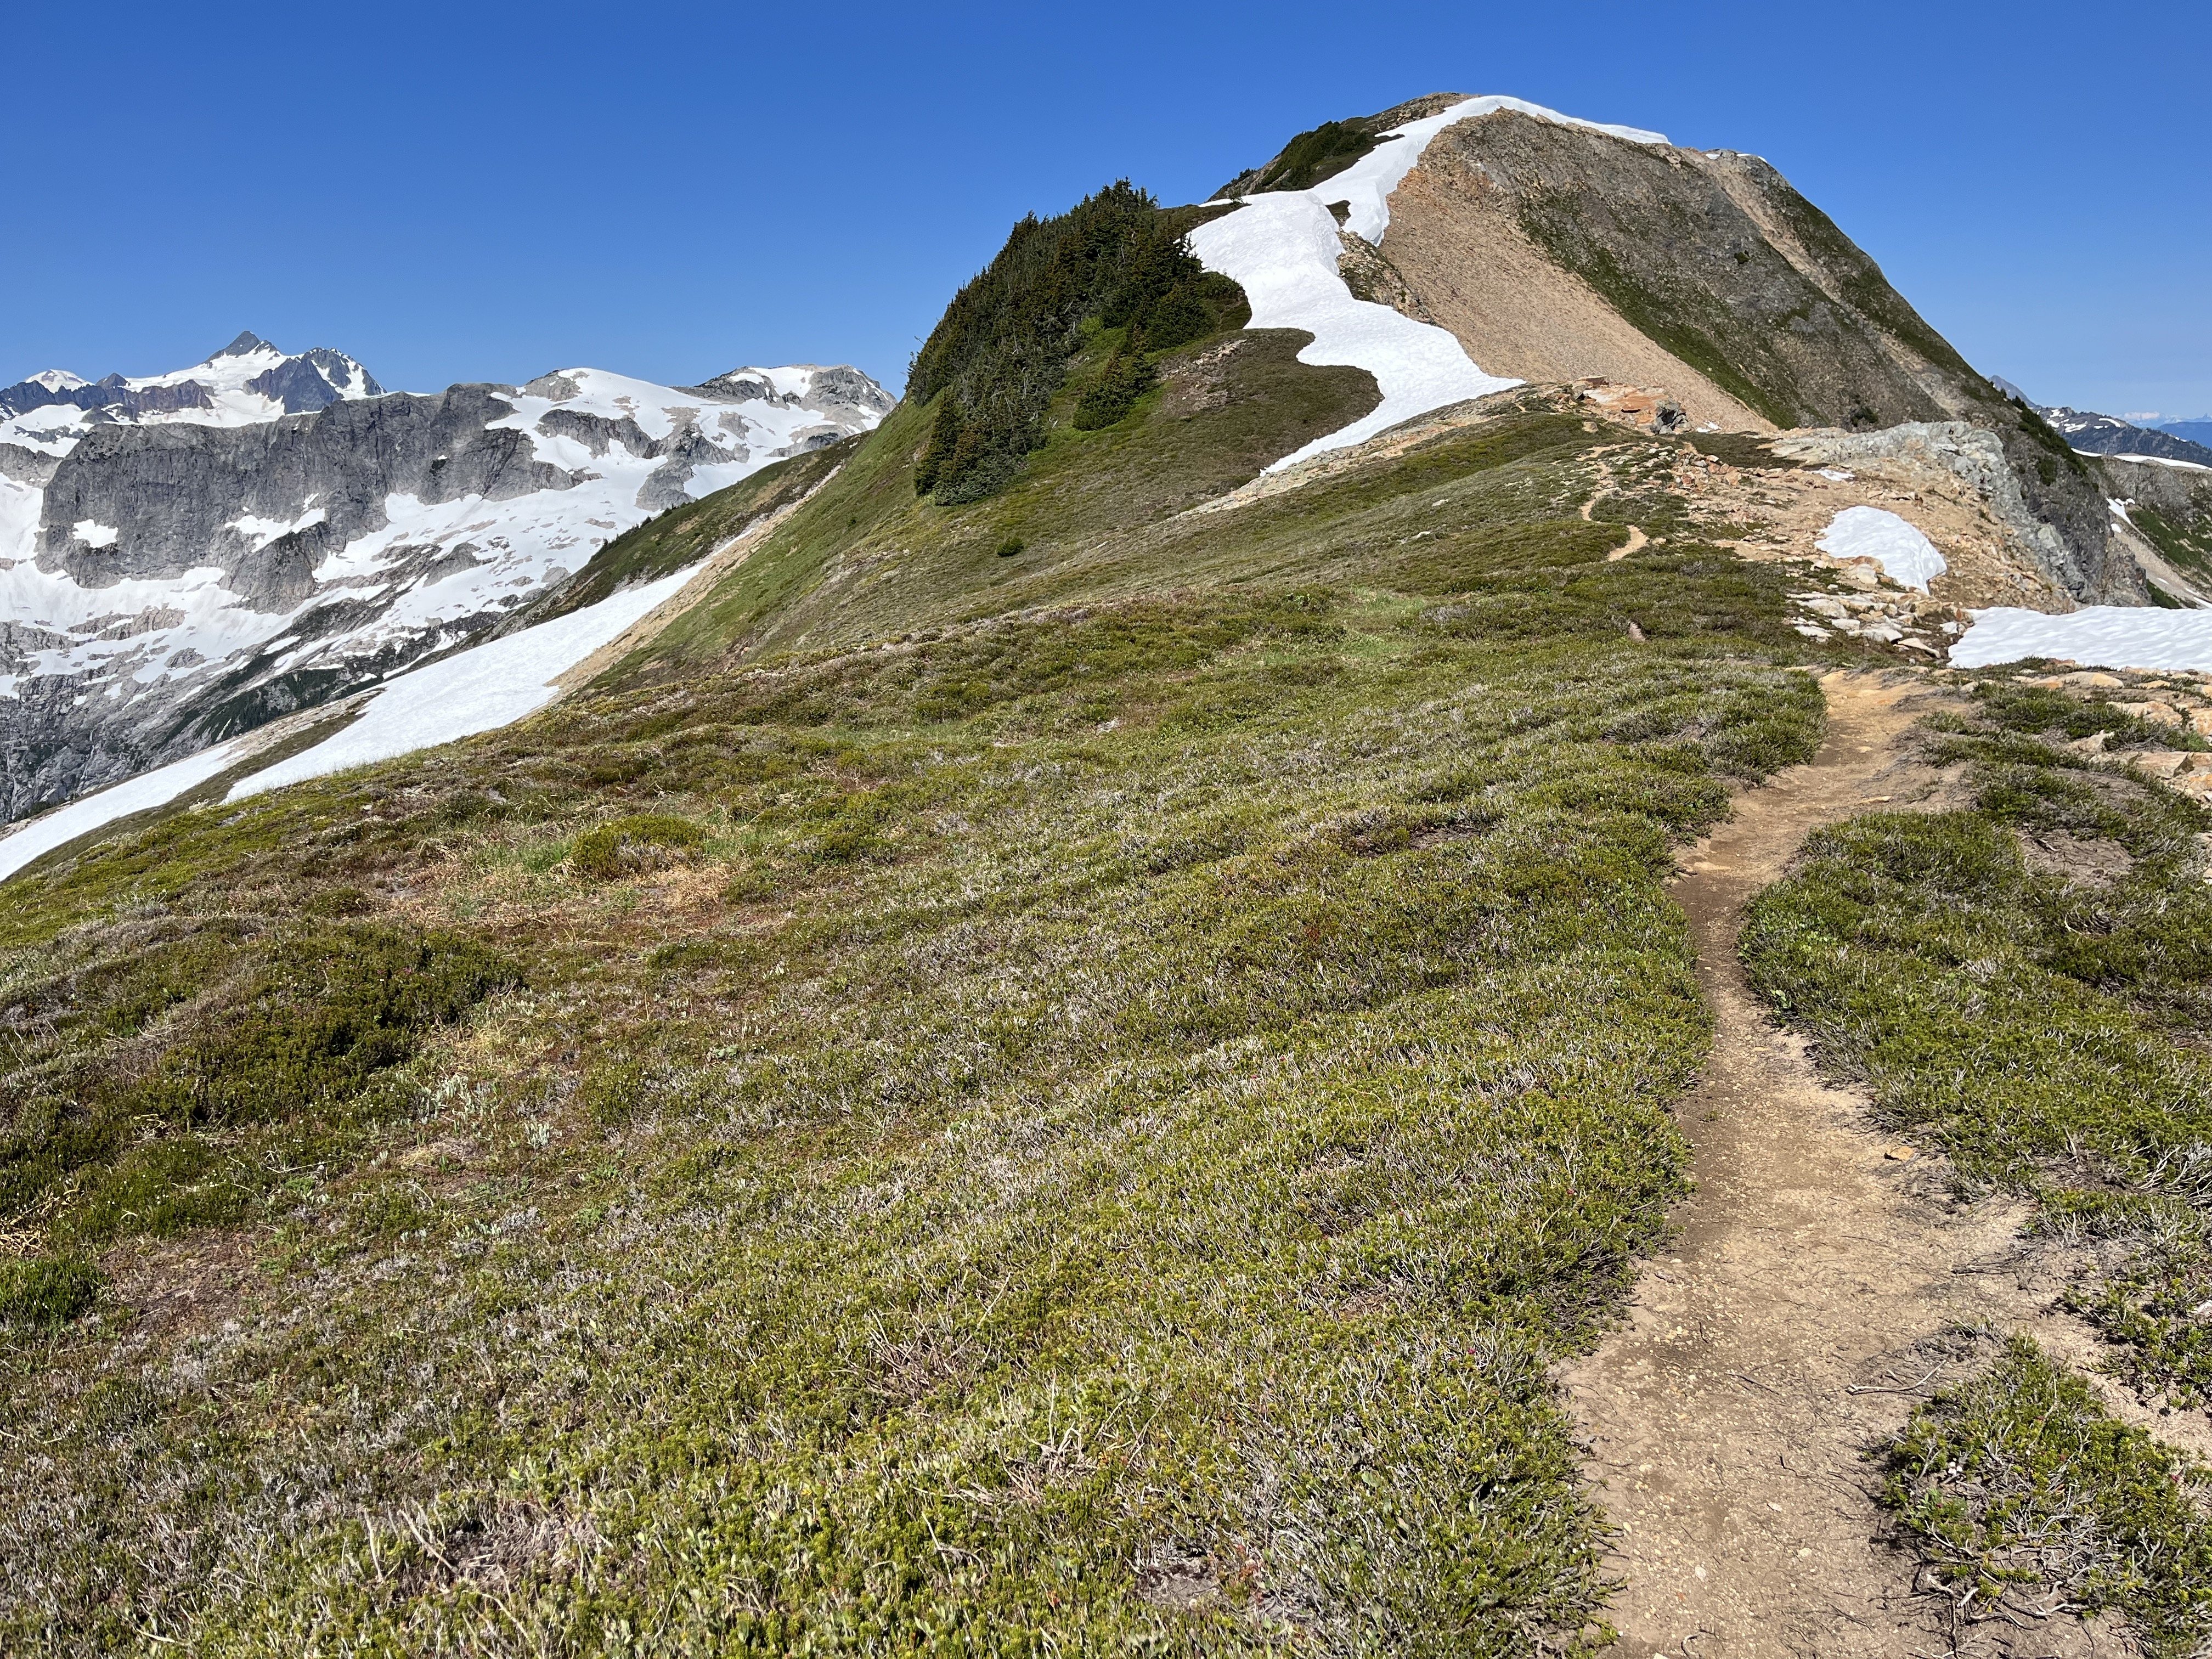
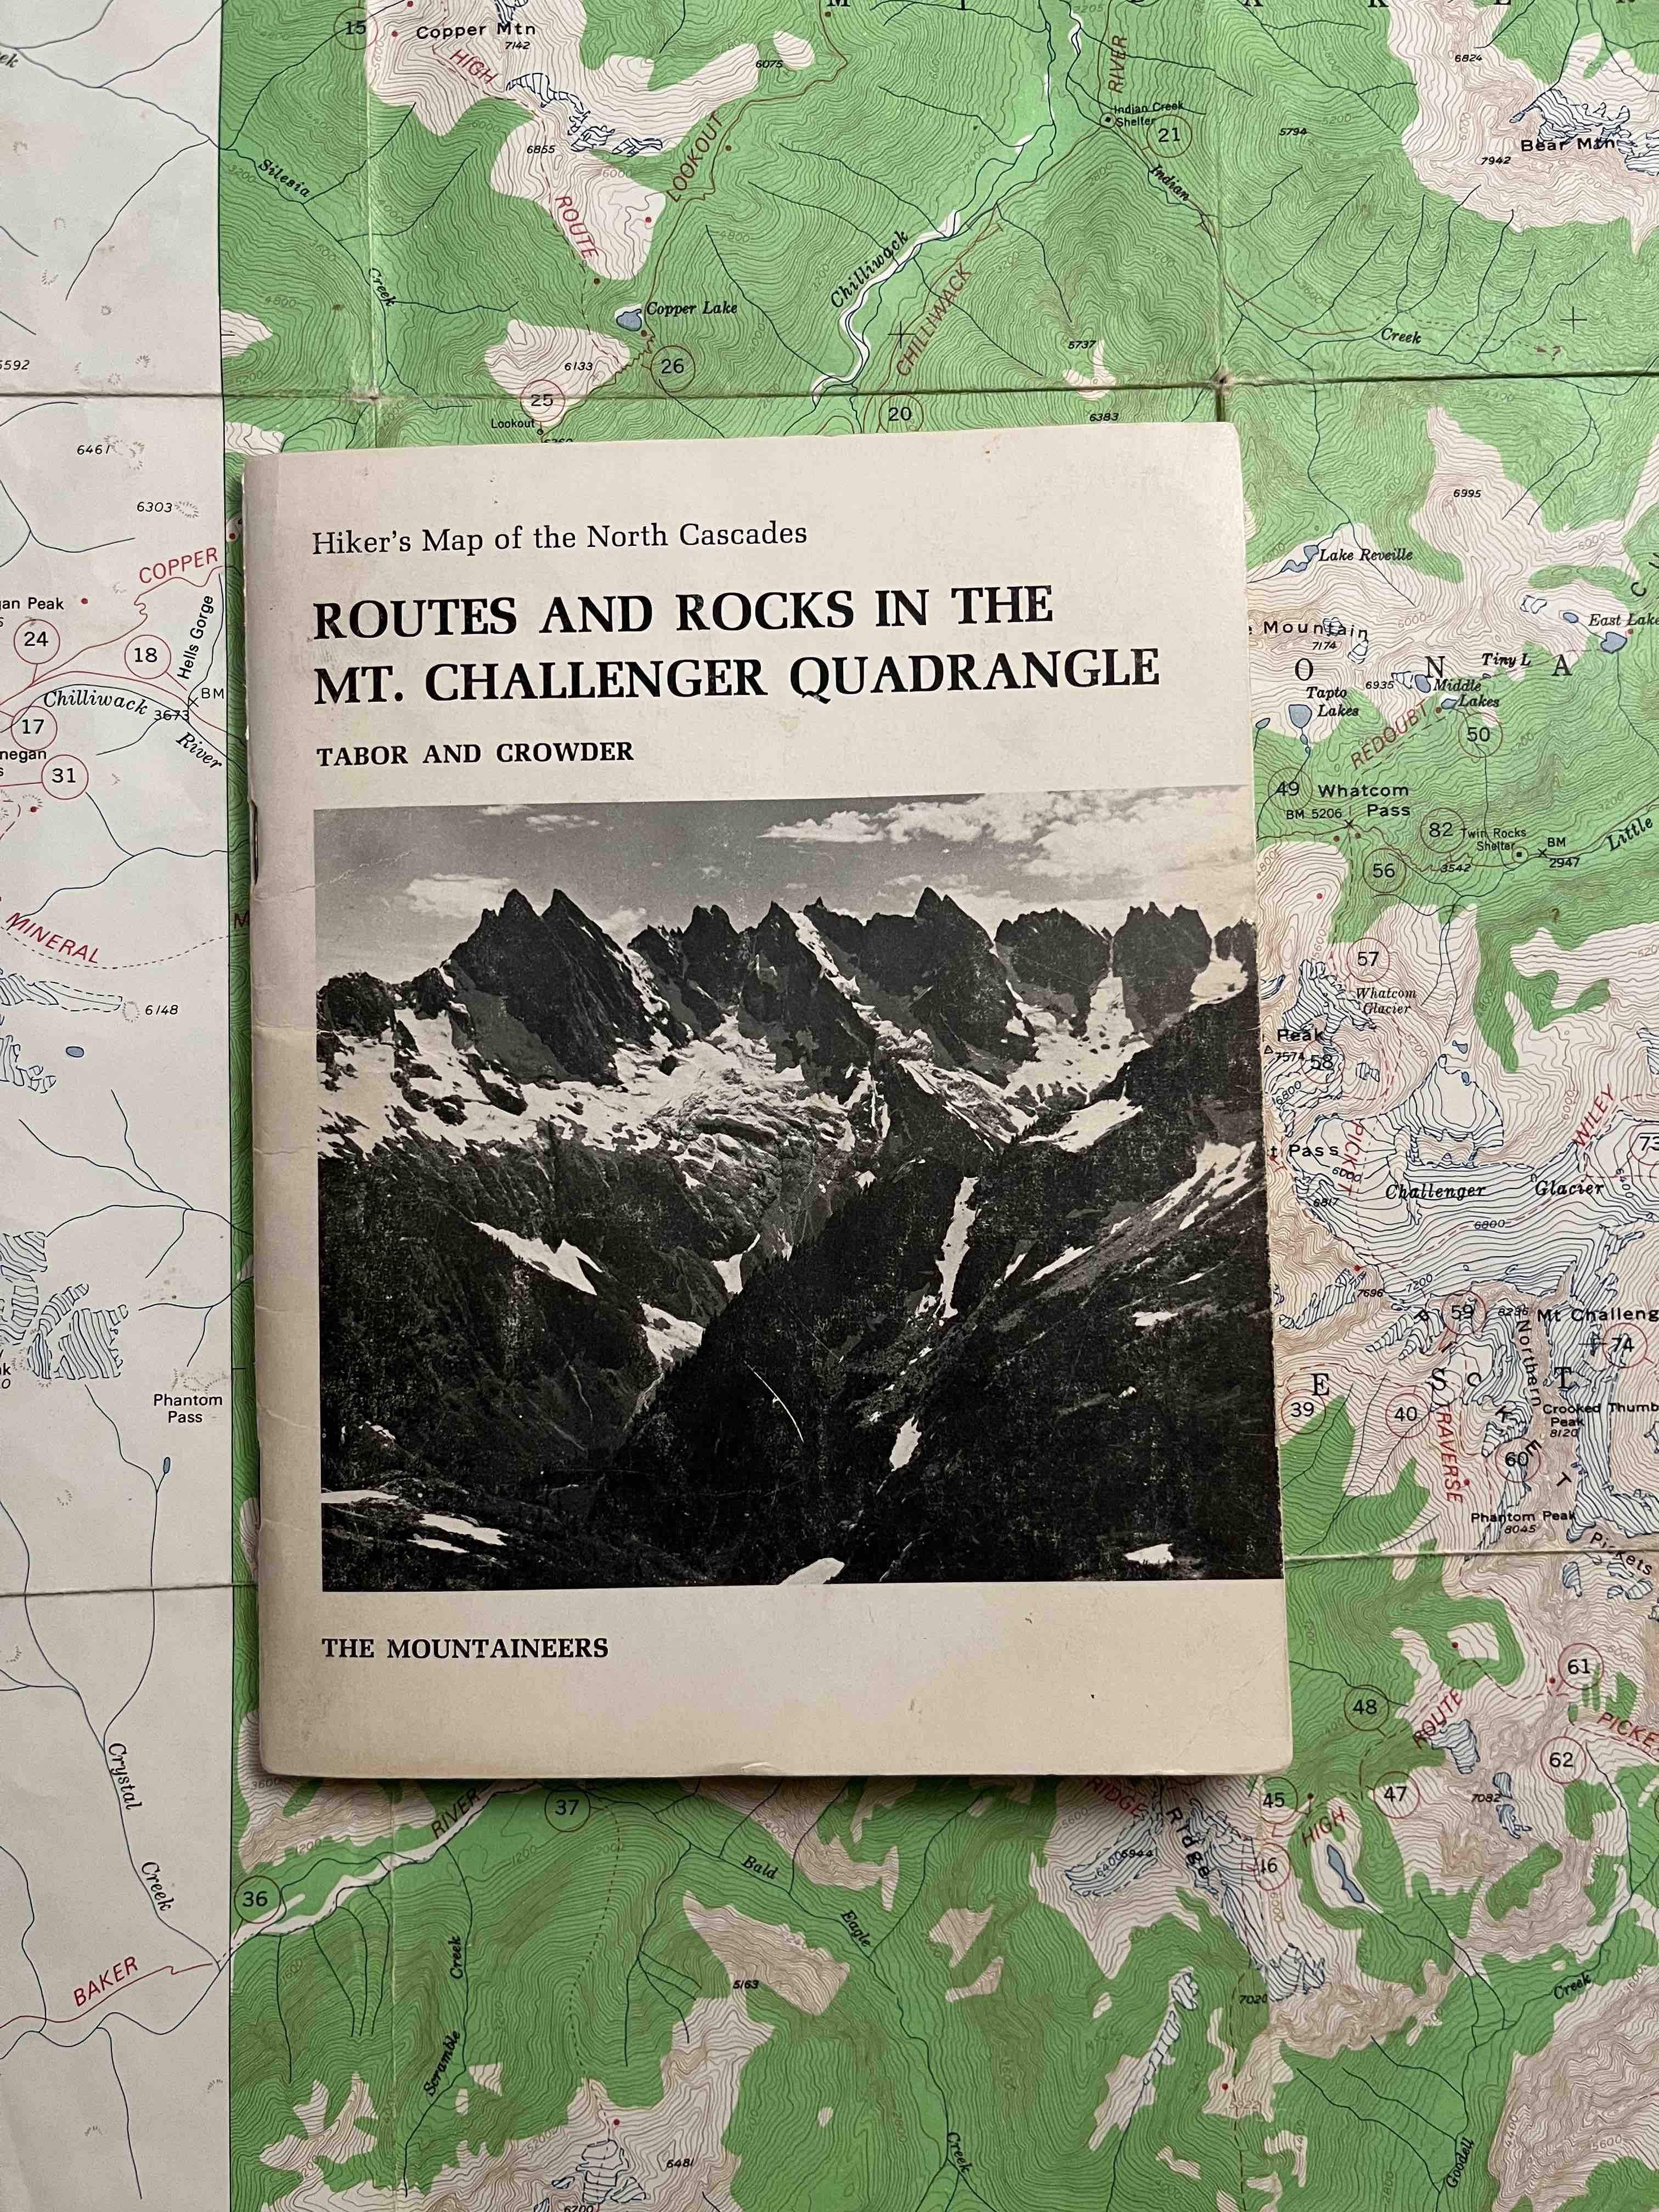
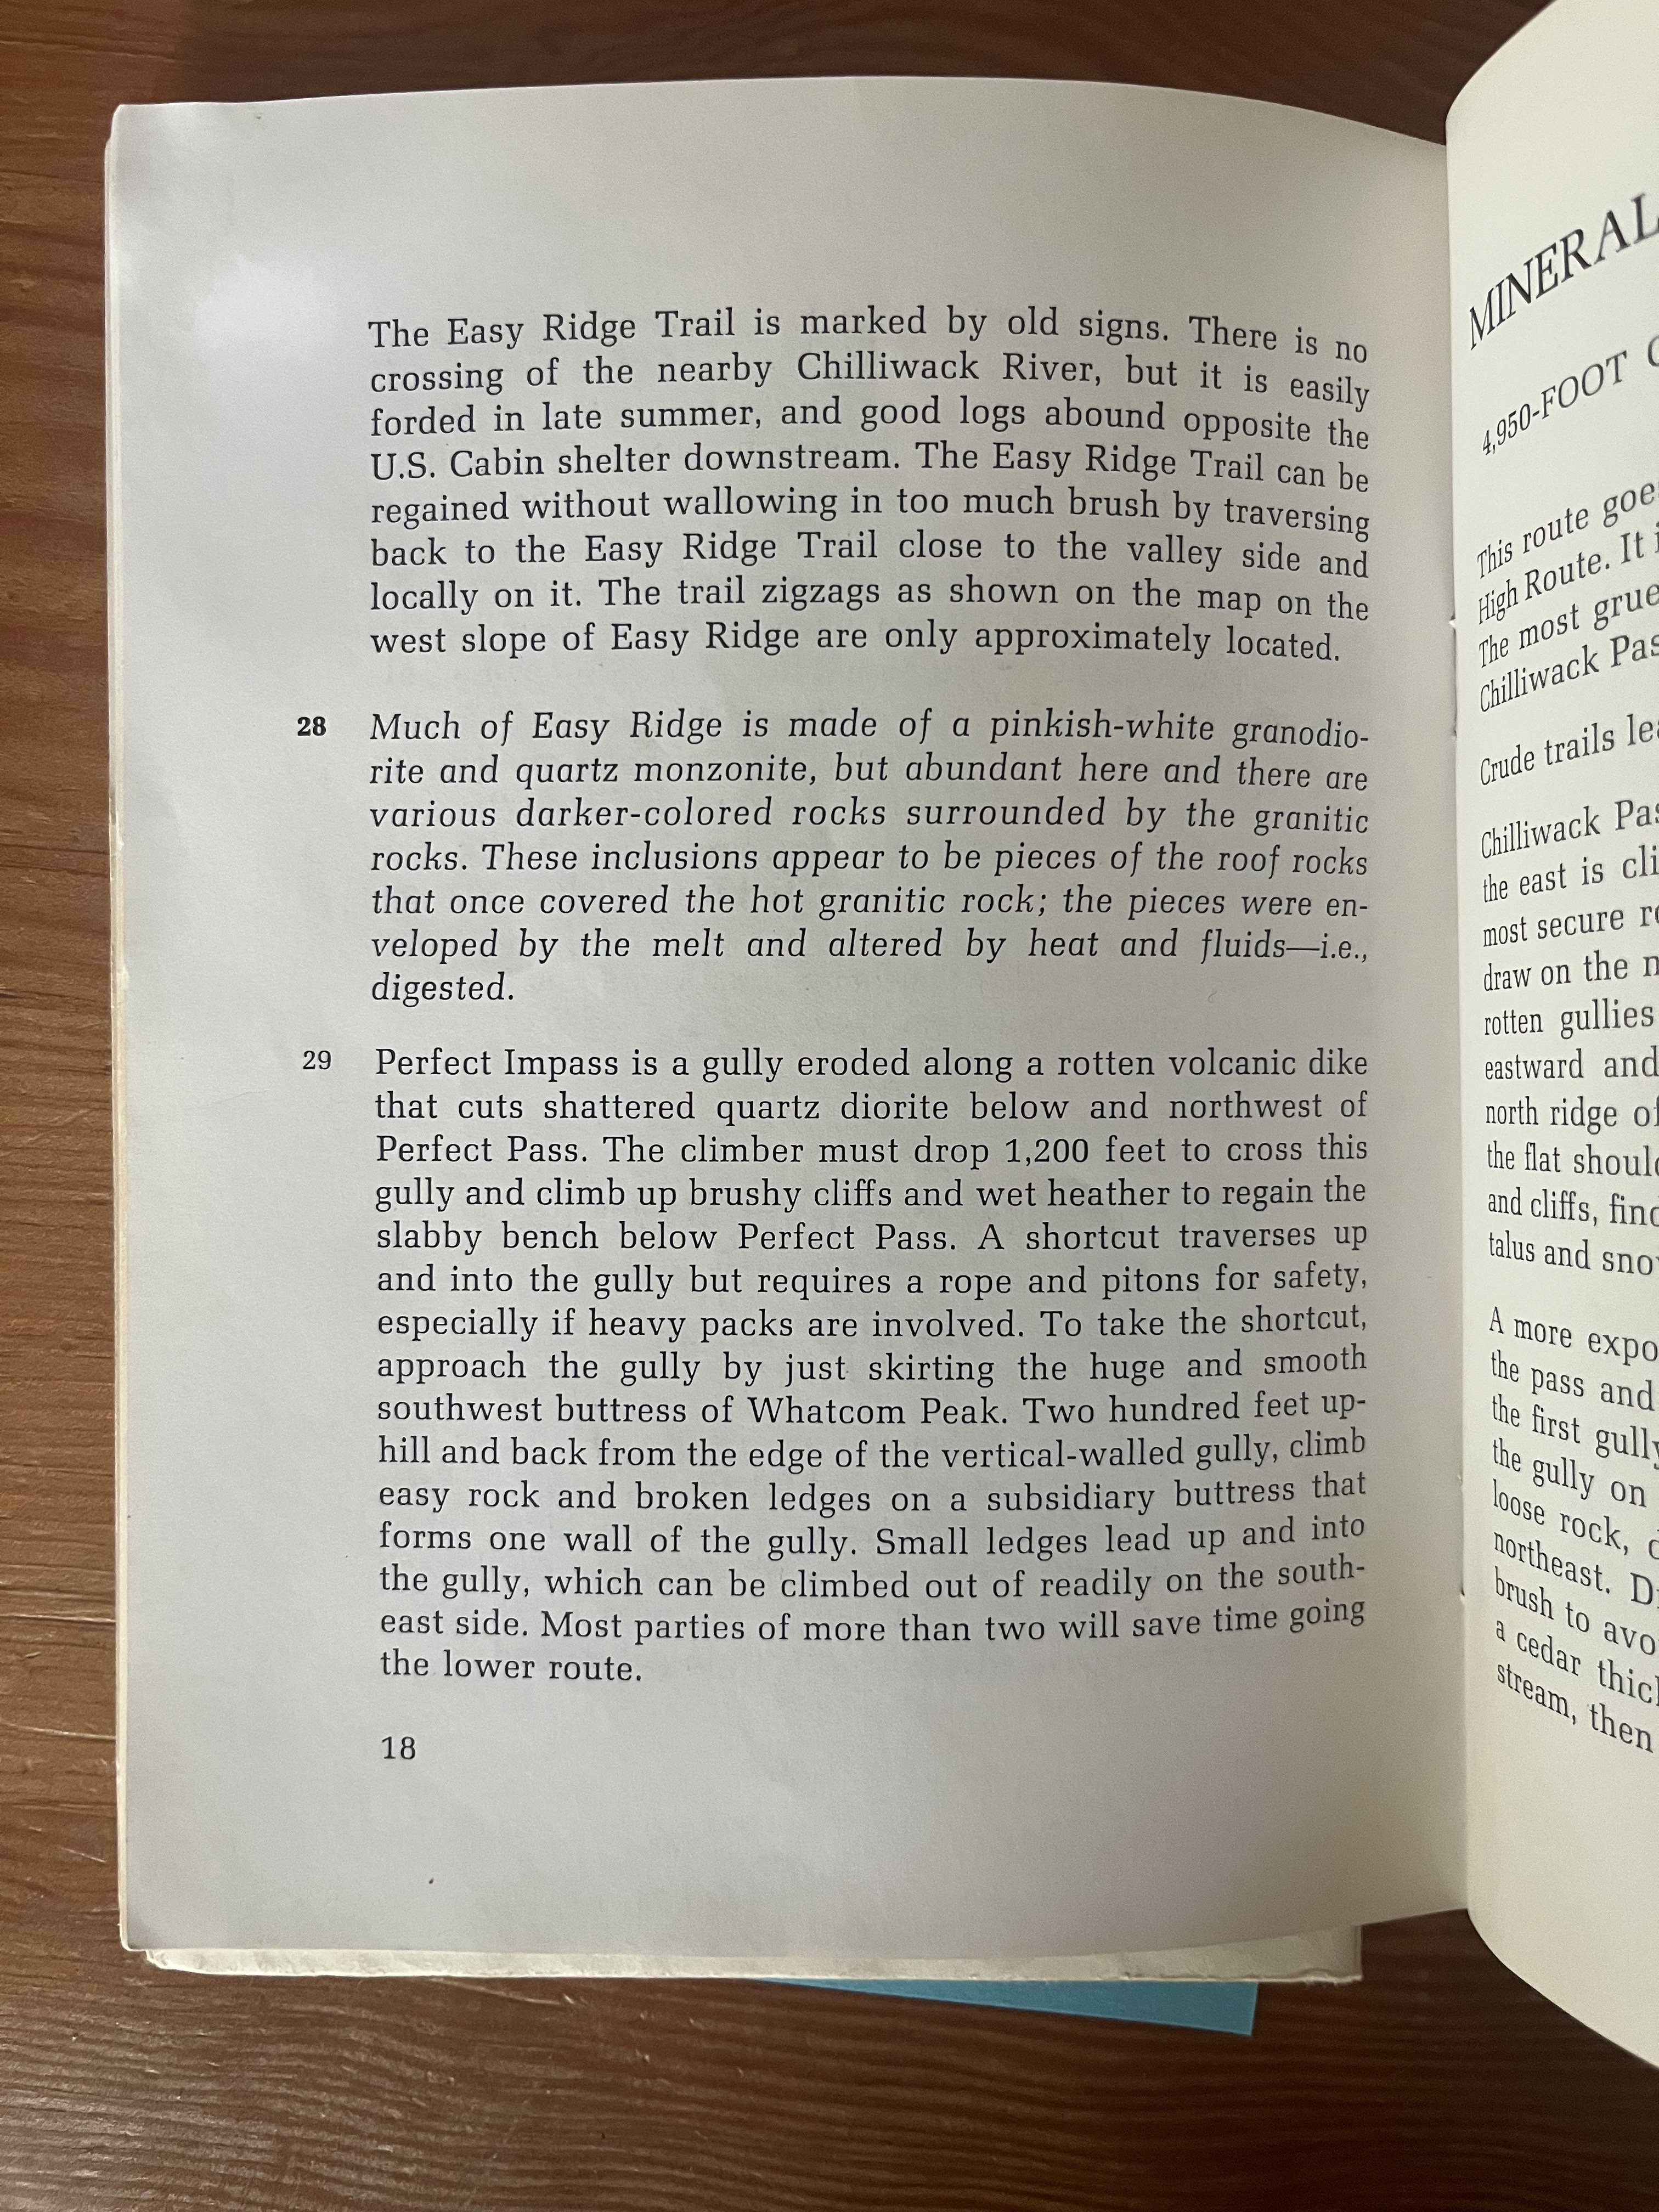
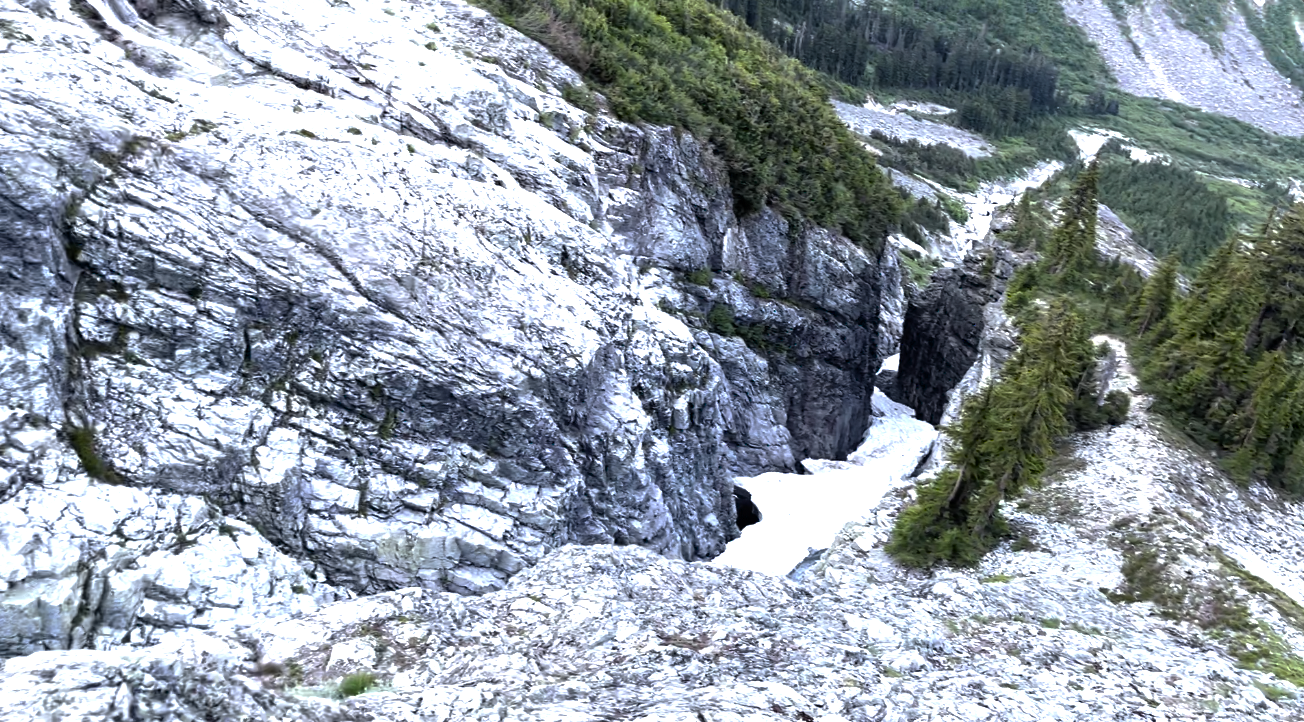
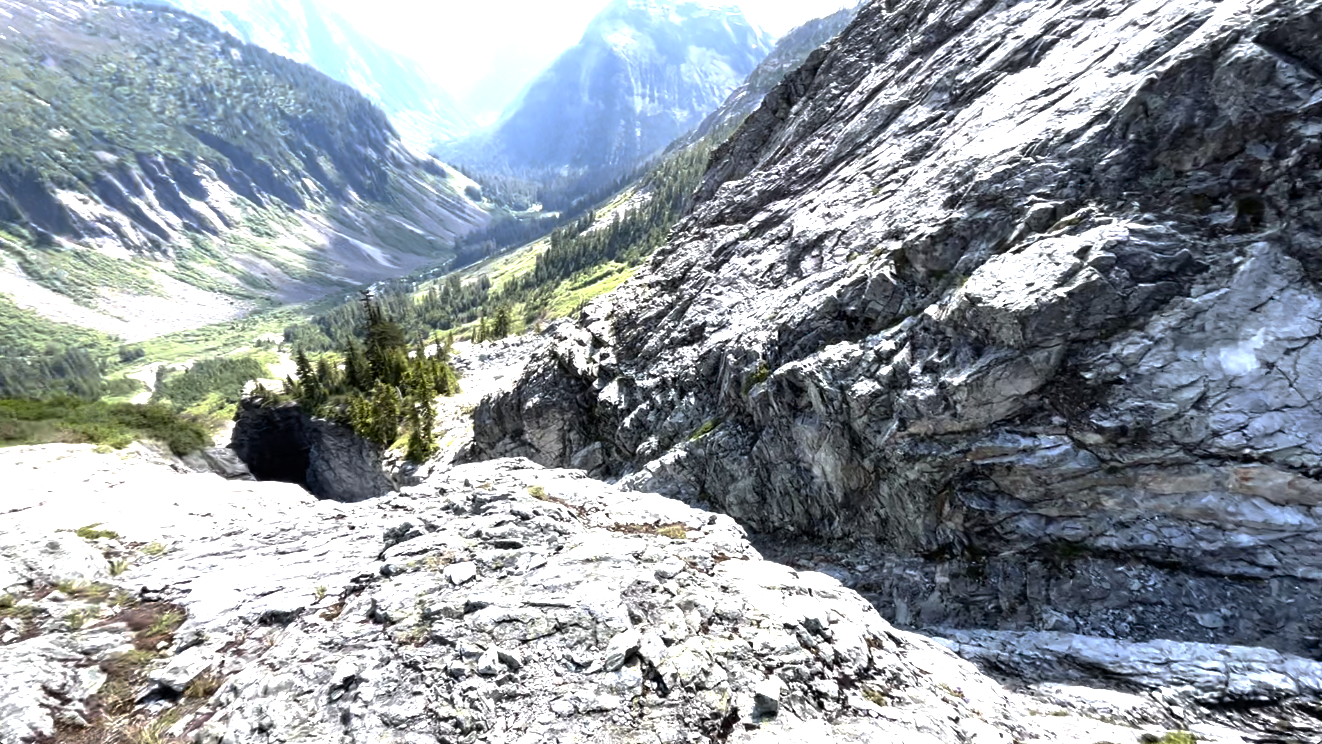
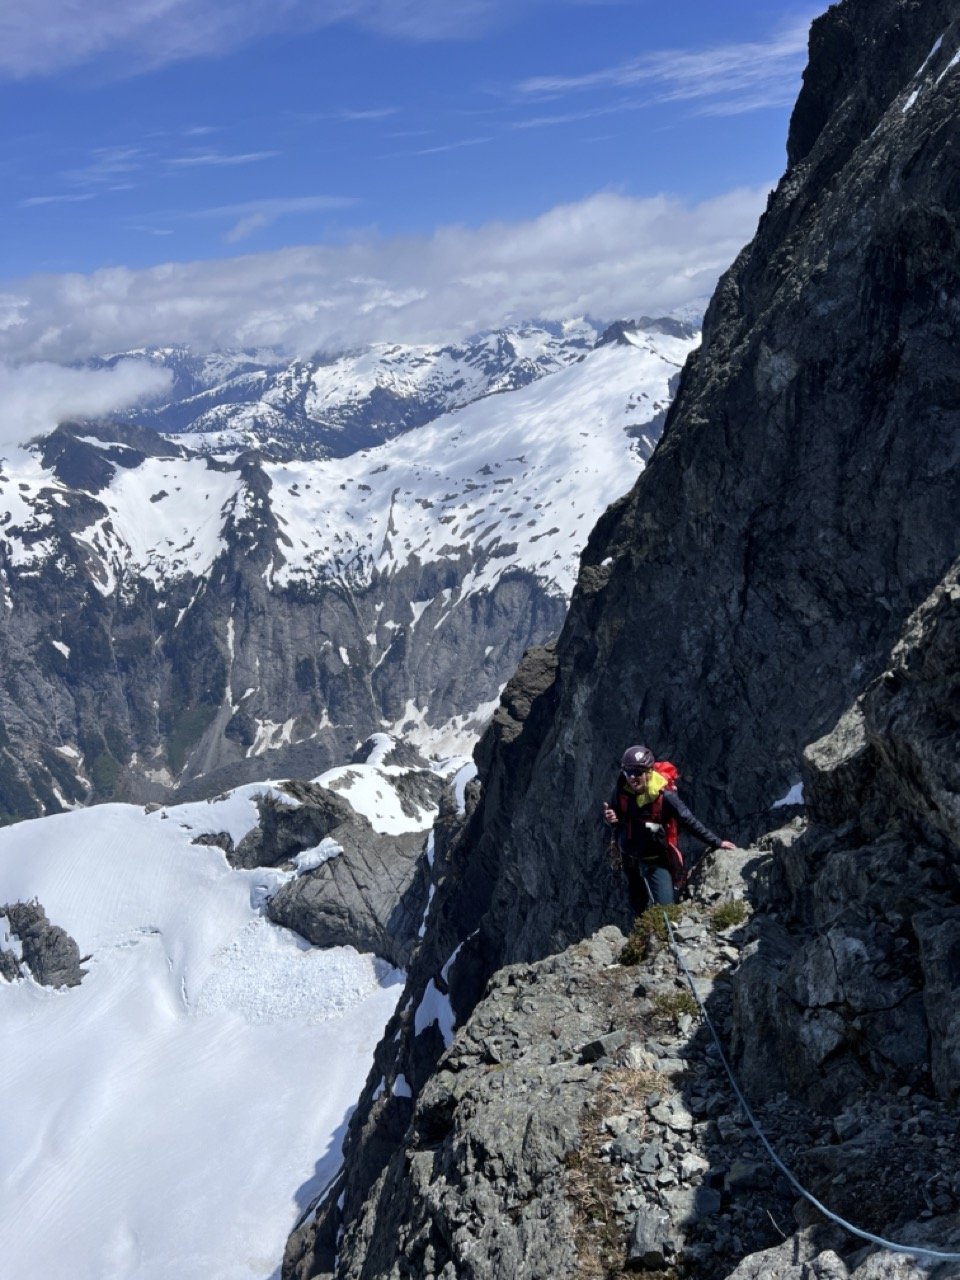
Trip: North Cascades NP - Mt Challenger via Easy Ridge High Route Trip Date: 06/30/2023 Trip Report: Over a period of four days, I solo climbed Mt Challenger, approaching from the Easy Ridge High Route. Three years ago, I clambered up to Tapto Lakes and was awestruck by the sight of Mt Challenger. I have always wanted to climb it since. In climbing Challenger, I had to use almost everything in my backcountry and climbing toolkit. The trip felt like a culmination of all the outdoor skills I have learned so far. Day 1 Permits I arrived at the Glacier service center at around 3pm. According to the ranger, I would be the first person to make my way up to Perfect Pass this season. As I explained my itinerary and possible goal of climbing Mt Challenger, he became even more excited about the trip than I was. In reality, I still felt unsure if I would actually make it up there, so I didn’t want to hype myself up too much. There would be so many factors standing in my way: the river crossing, the route-finding and bushwacking, the infamous impasse, and ultimately the glacier conditions. I sheepishly told the ranger I would be happy just to make it up to Perfect Pass. Hannegan to Copper Creek It took me about 3 hours to reach camp. This would be my fifth time hiking Hannegan Pass so I was in familiar territory. When I arrived at Copper Creek, I met a ranger camped out on the over side of the creek. He asked where I was heading next. When I told him I would possibly go up all the way to Mt Challenger, he was stoked (again, even more than I was). Day 2 Crossing the Chilliwack The next morning I broke camp at around 5:30 am and made my journey up to Easy Ridge. The Chilliwack river crossing was not as bad as I had thought. I found a short, shallow section to cross, the water only coming up to my ankles. My crocs definitely came in handy here. There really was no trail once I reached the other side of the river. Eventually, I linked up with the trail by going in the general direction of Easy Creek (listen for it) and upwards to Easy Ridge. For the most part, the trail was straightforward and never too steep. Other than maybe the first section, I would not really consider it bushwacking (that would come later). The overgrowth was all just blueberry bushes anyways, not nasty things like devil’s club. Easy Ridge Eventually the ground got rockier and the trees became shorter and fewer. The trail flattened into a meadow dotted with pools of melted snow. I had reached Easy Ridge. Further along, I was finally able to see sweeping views on all sides. To the left, I sighted Red Face mountain and knew Tapto Lakes was nested in the cirque hidden below it. To the front, I got my first view of Mt Challenger and was already plotting my route across the glacier. For the most part, the Easy Ridge trail was indeed easy but there were still some notable obstacles. Snowfields still clung onto parts of the trail. In one section, I had to take out my ax and change into my boots and crampons to manage a steep snow traverse. A slip here would have resulted in tumbling down hundreds of feet down into the valley. There was also an unexpected scramble up loose rock and scree right before reaching Easy Peak. The Nearly Perfect Impass As I reached a snow covered saddle near the end of the ridge, I knew I had to descend into the valley and then confront the infamous Perfect Impass. My descent was in steep snow. Looking back now, I should have descended earlier before the saddle, which would’ve made the descent gentler and snow-free. While descending, I also wasn’t sure the exact location of Perfect Impass. I kept thinking it was sooner than it actually was. As a result, I maintained my elevation and refused to descend even more like I should have. My route was harder and full of scree by not descending properly. You can’t miss Perfect Impass. It cleaves the valley in two and literally stops you in your tracks. When I finally reached it, I first tried to find a way to bypass it lower down, but halfway up the chasm were unstable snow bridges. Since I didn’t want to descend the supposed 1000’ to circumvent the impasse, the only other way was higher up. I don’t remember the exact movements but roughly speaking I climbed high, down climbed, made an exposed traverse, then down climbed again into the gully. From there it was an easy climb out where I encountered a rappel station and a cairn marking it. Routes and Rocks In The Mt. Challenger Quadrangle (1968), Tabor and Crowder (East side of Impass looking back) Perfect Pass Now, I had to descend even further and make my way around a buttress. The way was dotted with snowfields, which provided a welcome relief from the heather, scree, and slabs. The snow was still firm and I never punched in.After rounding the buttress, I finally reached a point where I could see the way up to Perfect Pass. For some reason, I did not climb up the heather and dry rock to the left and instead went up wet slabs scabbed with slippery lichen. All the slipperiness made for a slow climb up to the pass. I finally reached Perfect Pass at around 8:00 pm and set-up camp, trying to get to sleep as quickly as possible for tomorrow’s summit day. Day 3 Challenger Glacier Next morning, I woke up a little late at 5:30 am. After an hour-long breakfast of ramen, I lazily made my way across the Challenger Glacier, easily avoiding the obvious crevasses. The snow was firm and gave good traction. Partway across, I encountered a steep ramp that gave more direct access to the Challenger Arm. I decided to take this supposed shortcut, but after climbing three-fourths of the way up, I encountered a huge bergschrund blocking my way. I was pretty dispirited at this point and even considered turning back. There was no quick way around the bergschrund so I had to downclimb and continue traversing the glacier to the lateral moraine on the leftmost part of the arm. I carefully downclimbed, trying not to think of the crevasses below. As I continued my way to the arm, mist started spiraling out from Luna Basin. I thought it would subside, but soon it crested even higher, blotting out the sun. Wave after wave, the mist now rolled onto parts of the glacier arm. When I finally reached the arm, I saw that the steepest part of the climb was ahead of me. At first, I could crossover step my way up. Eventually, I had to high dagger up the slope. Moraines gave me good spots to rest and calm my nerves. Once on top of the arm, I saw that path flattened out to a mild snow ramp up to the summit blocks, which was now obscured by waves of mist. When I reached the base of the summit, the mist subsided back into Luna Basin and the summit towers emerged again. Summit Block and Descent In my excitement to get to the summit, I immediately started climbing high. I then realized that I had to downclimb and scramble to the right in order to access the actual summit block. The climb up the summit block didn’t look too bad. I saw several pitons and a stuck cam. For me, the crux was at the second piton. I had to think through where to put my feet and hands, but I got over it in one move. At the summit, I could see Baker and thought about how I stood on that summit exactly a week ago. I wondered how difficult it would be to climb Shuksan, its summit pyramid now bare rock. Covered in mist, the Northern Pickets were all still a mystery to me. I took a few more minutes to take it all in. It wasn’t windy and I wasn’t too pressed for time. Since I didn’t feel like downclimbing and had a 30m rope, I rappelled down. There were two rappel stations, one at the summit block and another further down. Two aged cordelettes made up the first and several pieces of webbing made up the second. When I reached the top of the arm again, the mist disappeared from Pickets, and I could finally see the Northern Pickets in all its glory. The way back was largely uneventful–I just followed the same route back. Surprisingly, my bootpack across the glacier had already faded into a faint imprint. It was around 1 pm when I made it back to Perfect Pass. The snow had already started to slush around noon, so I was glad to be off the glacier. When I thought I had finally made it to camp however, I encountered two ptarmigan chicks and their mother guarding the last little hill to my tent. I tried to go around them at first, but apparently the mother felt I was a threat. She lunged at me and herded me down the hill with her mid-air flourishes. I waited a few minutes for her and her chicks to descend down Perfect Pass. When I finally got to camp, I ate some lunch and took a long, several hours rest under the shade of some wind-twisted trees. Imperfect Bypass After getting over Perfect Impass the day before, I vowed not to do such exposed climbing again. I felt I had already tempted my fate several times already, so I wanted to find a way to bypass the impasse lower down. This was a critical mistake. I ended up bushwhacking through dense clumps of trees (or rather they were actually whacking me). I lost my approach shoes and one of my crocs in the process. I was stopped by steep cliffs every time I whacked through. With daylight quickly fading, I gave myself an 8pm stop time. I made one last attempt to find a safe way down but was again blocked by steep cliffs. I was frustrated that I lost several hours wasting so much energy trying to find the bypass. In exhaustion, I decided to just confront Perfect Impass head-on. When I reached it, it was nearing 8 pm so I thought the safest way would be to tackle the impasse after a night’s rest. I was already tired and didn’t want to be stuck in the gully after sunset. Fortunately, near the rappel station, I found a flat rocky spot and quickly set-up camp, scarfed down some food, and went to sleep. Day 4 Perfect Impass The next morning, I woke up at 5 am and dragged myself to confront the last obstacle of the trip. At the edge of the chasm, I plotted my route. There seemed to be two options: traversing or climbing high. Both options didn’t look safe. Climbing high seemed safer, but I couldn’t see what the downclimb would be like. I figured I would climb high first and if the descent was too steep, I would downclimb and make the traverse instead. I rappelled down into the gully and climbed a little further down. All sizes of broken rock were strewn all around, which really demonstrated Perfect Impass’s description as a “rotten volcanic dike.” I saw a clear way up from the bottom of the gully. As I climbed, I had to break away loose rock to make extra sure that every hold was stable. The crux for me was a two move dihedral that I had to mantle out of. I sighed with relief when I saw that the descent from the high-route was relatively safe 4th class scrambling. (West side of Impass looking back) Exit It was a long slog in my mountaineering boots back up to and along Easy Ridge, down to the Chilliwack, and up and down again to the Hannegan trailhead. I ended up using up all daylight hours to make my way back. From Perfect Pass, I corrected yesterday’s mistake and descended on the heather ledges located on skier’s right. And instead of steeply ascending onto Easy Ridge, I decided to approach it from a low angle that eventually bisected the ridge. I still could not find any trail as I approached the Chilliwack after descending from Easy Ridge. I crossed the Chilliwack again, but this time only with one croc. Copper Creek Camp, Boundary Camp, Hannegan Pass–I noted each landmark as I passed them. I tried not to think about the distance and time. The wildflowers were a useful distraction but they also slowed me down as I stopped and admired each new variety. The four mile hike from Hannegan pass to the trailhead seemed to take forever. Right after the pass, my energy started flagging. I then unexpectedly met a group of hikers heading to Boundary Camp. One hiker’s sound recording device caught my eye, and we chatted for a bit about recording soundscapes, ambient music, and strategies for creativity. For some reason this encounter renewed my energy and I pressed on. The sun had already set when I was about a mile from the trailhead. The world shifted into a more mystical register. Having hiked this trail many times, I felt like I was walking back through the past. I thought about how each time I passed through here, I was a better hiker and climber than before. Each time, my objectives grew bolder and more challenging. I wondered when I would walk this path again. How would I grow as a climber next time? I arrived at my car around 10 pm. Driving back to Seattle, I saw fireworks were already being set-off the night before The Fourth. Cops were frantically speeding down rural highways. It seemed like I would be returning to civilization on a night of full-moon anarchy. Gear Notes: Mountaineering boots, ice axe, crampons, 30m double rope, crocs, approach shoes Approach Notes: don't underestimate the route-finding challenges you can descend and ascend Easy Ridge on a gentle angle when going up Perfect Pass, stay climbers left on the heather ledges a 30m rope is sufficient for rappelling from summit and into the Perfect Impass Challenger Glacier gets hit with sun right when it rises, so plan accordingly


 1 point
 -
Kind of on my own topic here but I just wanted to say: I saw they changed the language of the bear notice on the NOCA website and it is definitely better. Maybe they read this thread! Anyway I'm grateful that someone did that, I think people are more likely to listen and understand.1 point
-
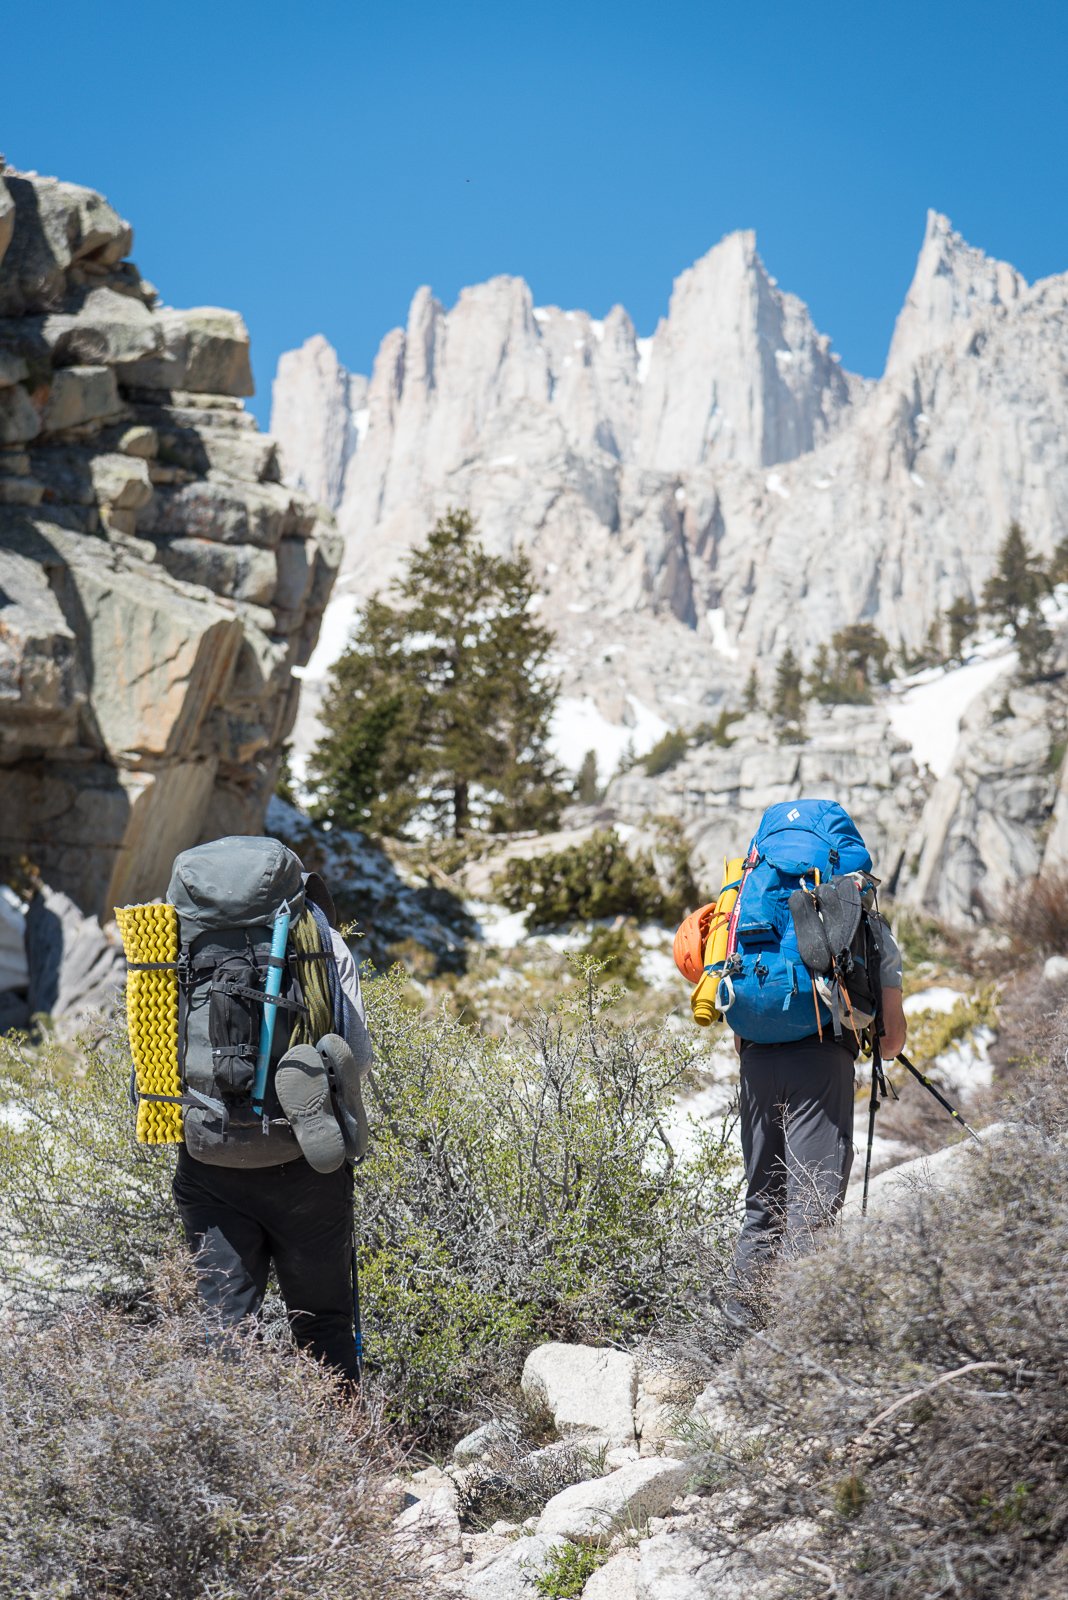
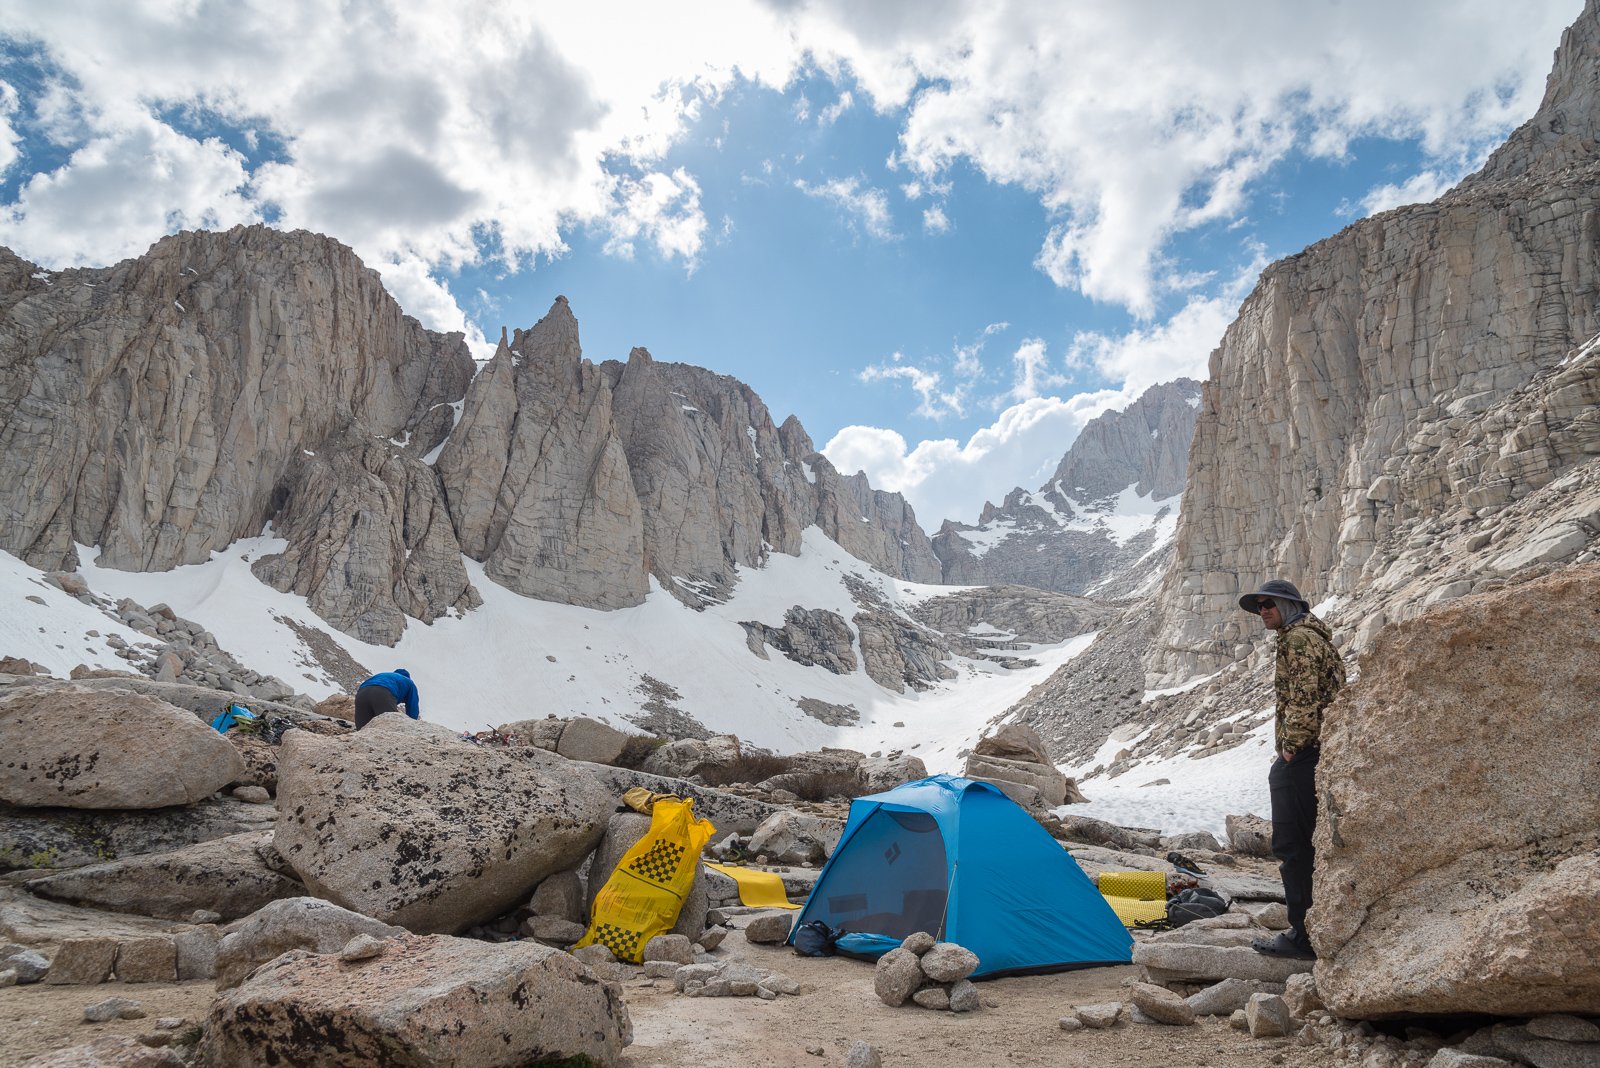
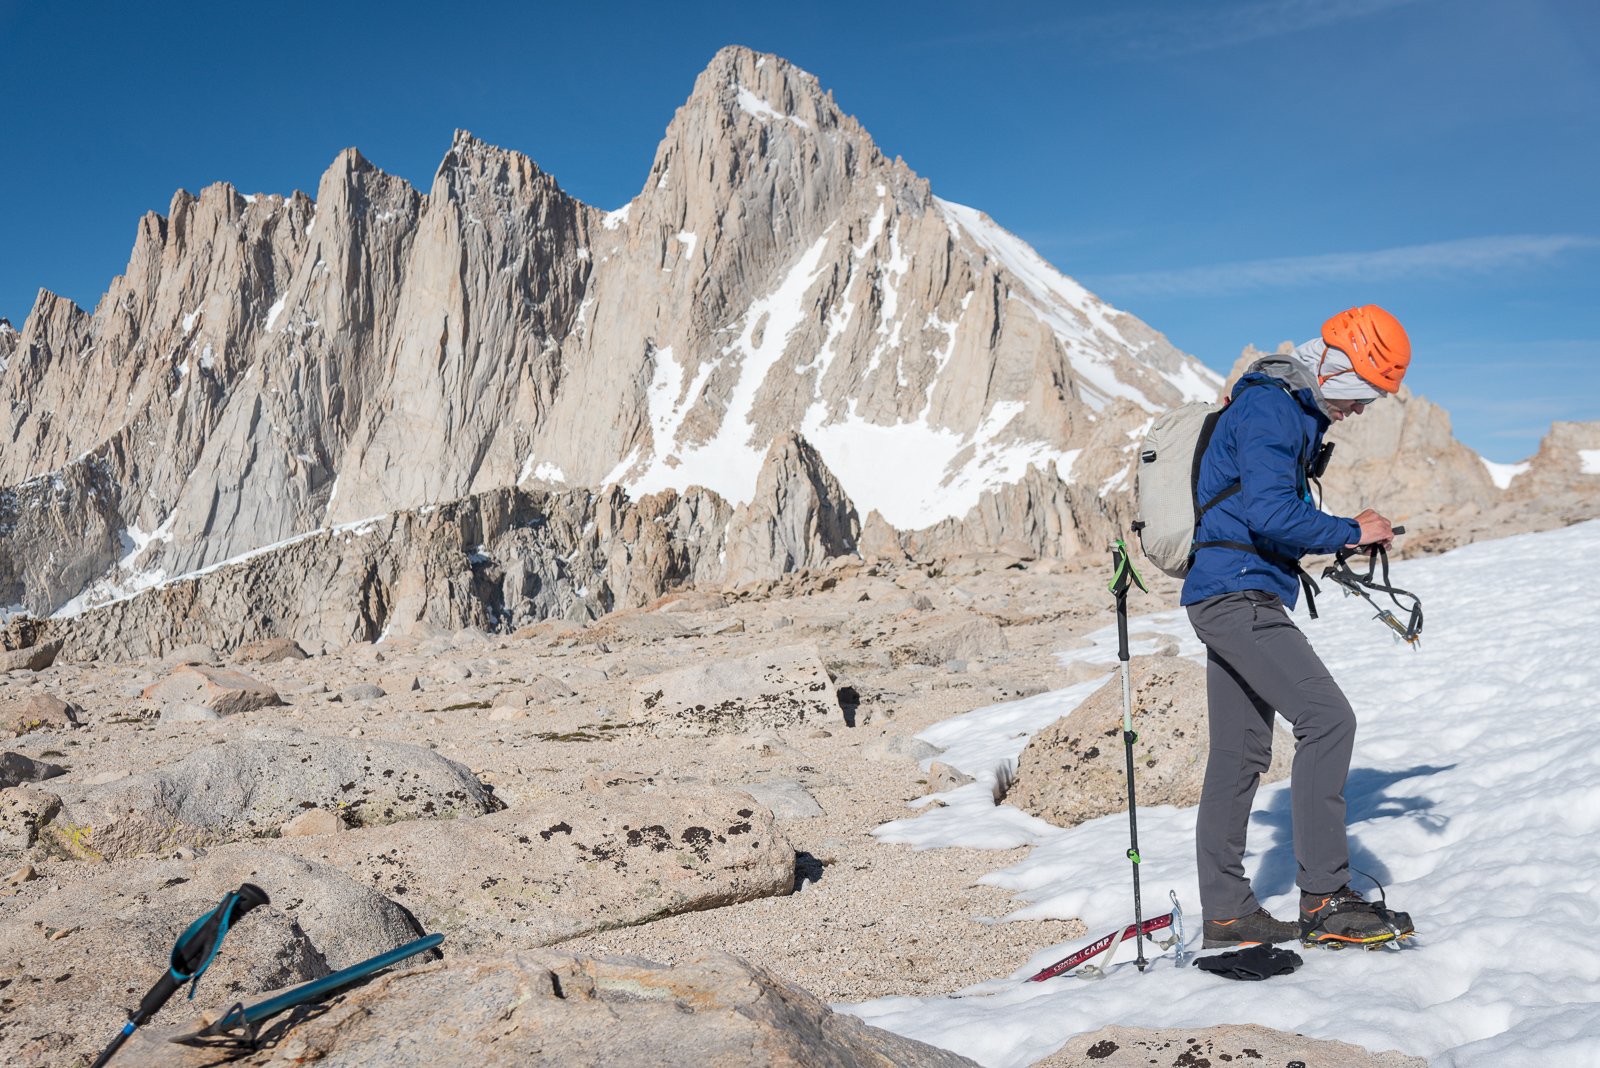
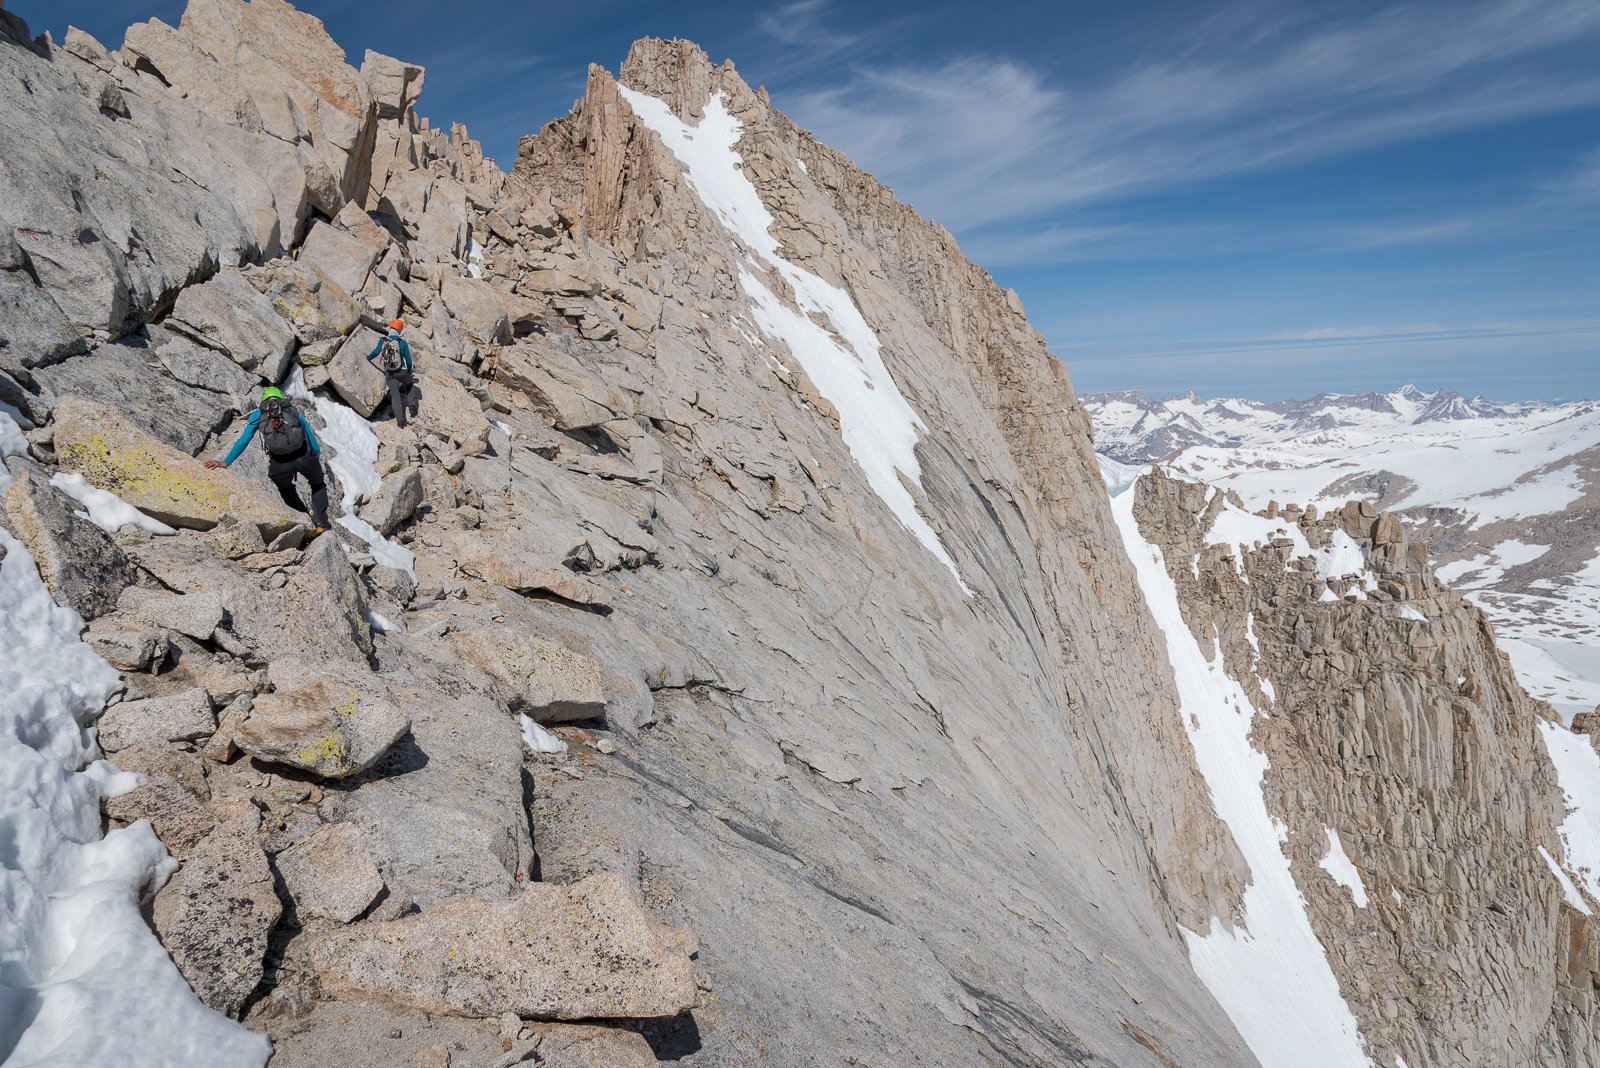
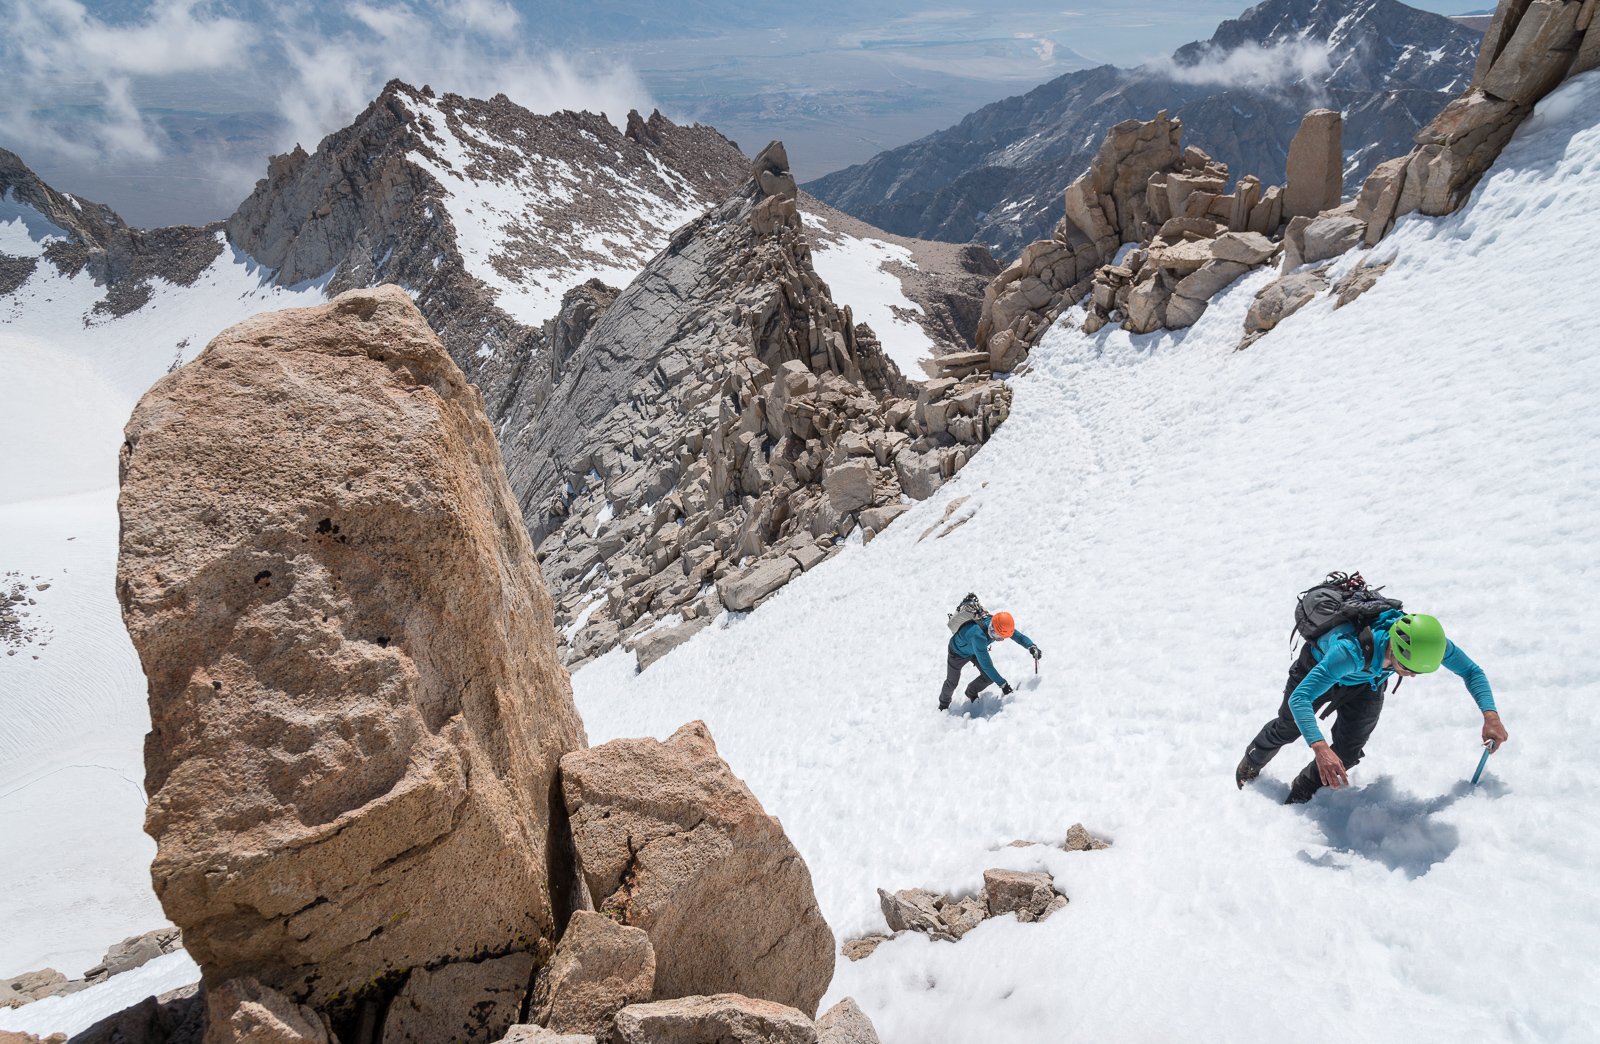
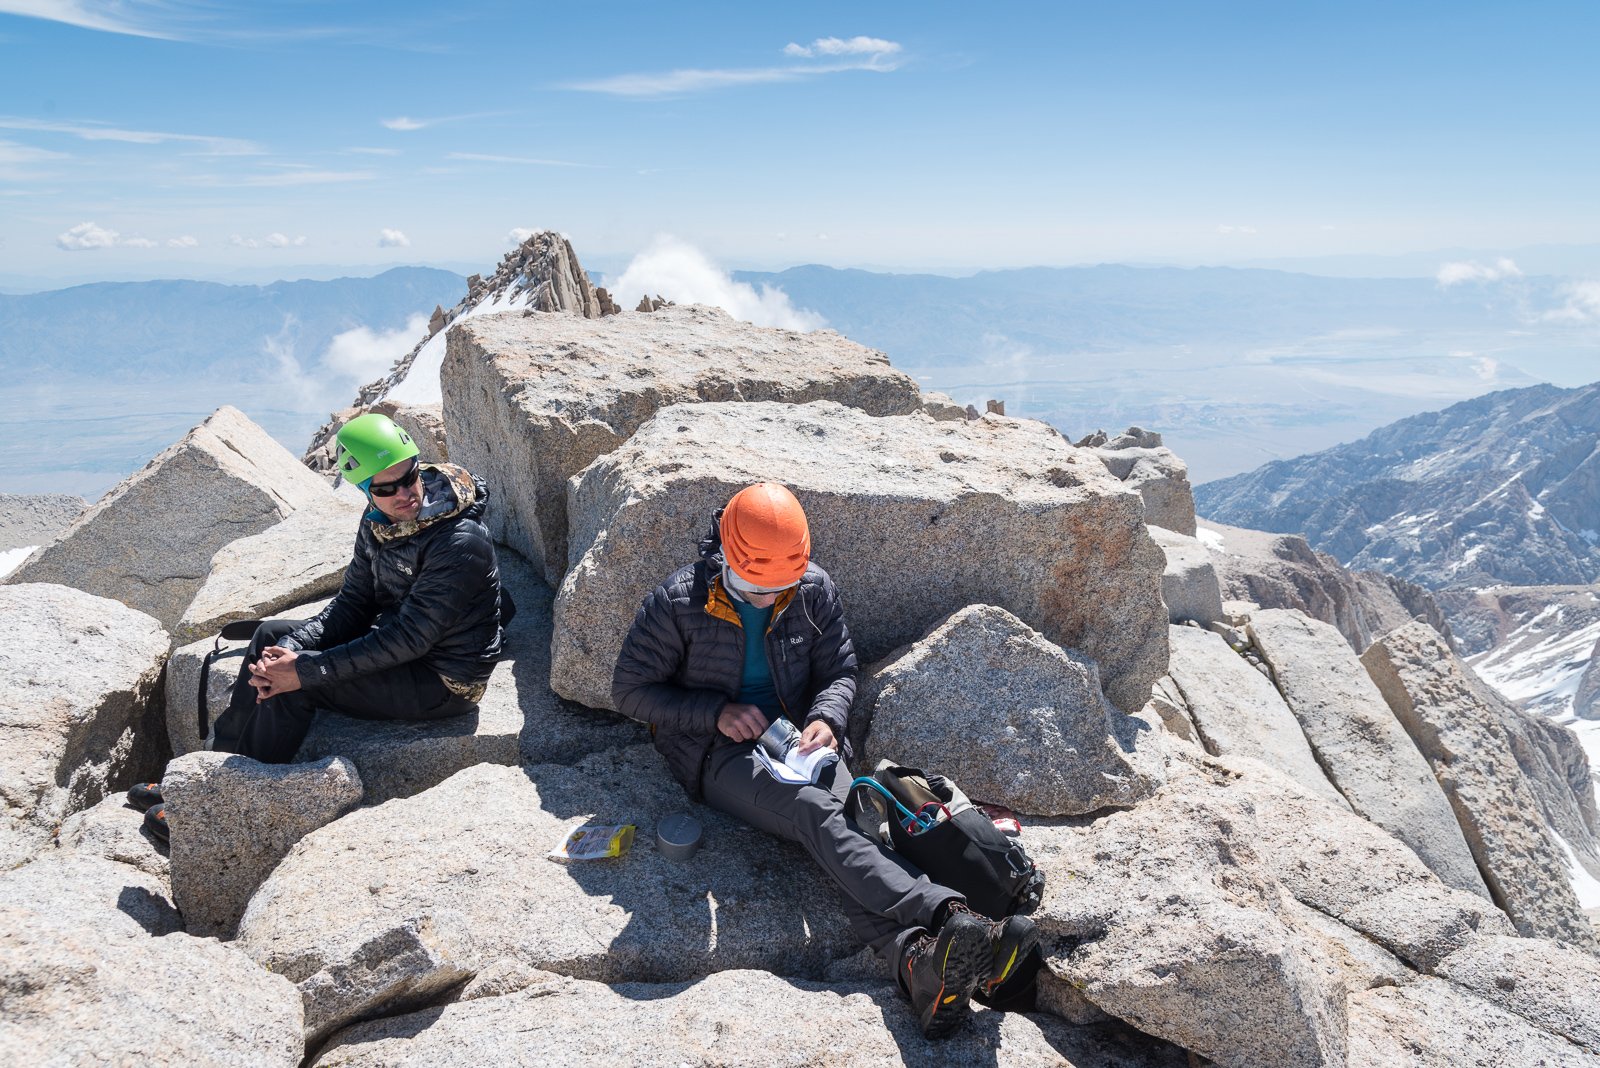
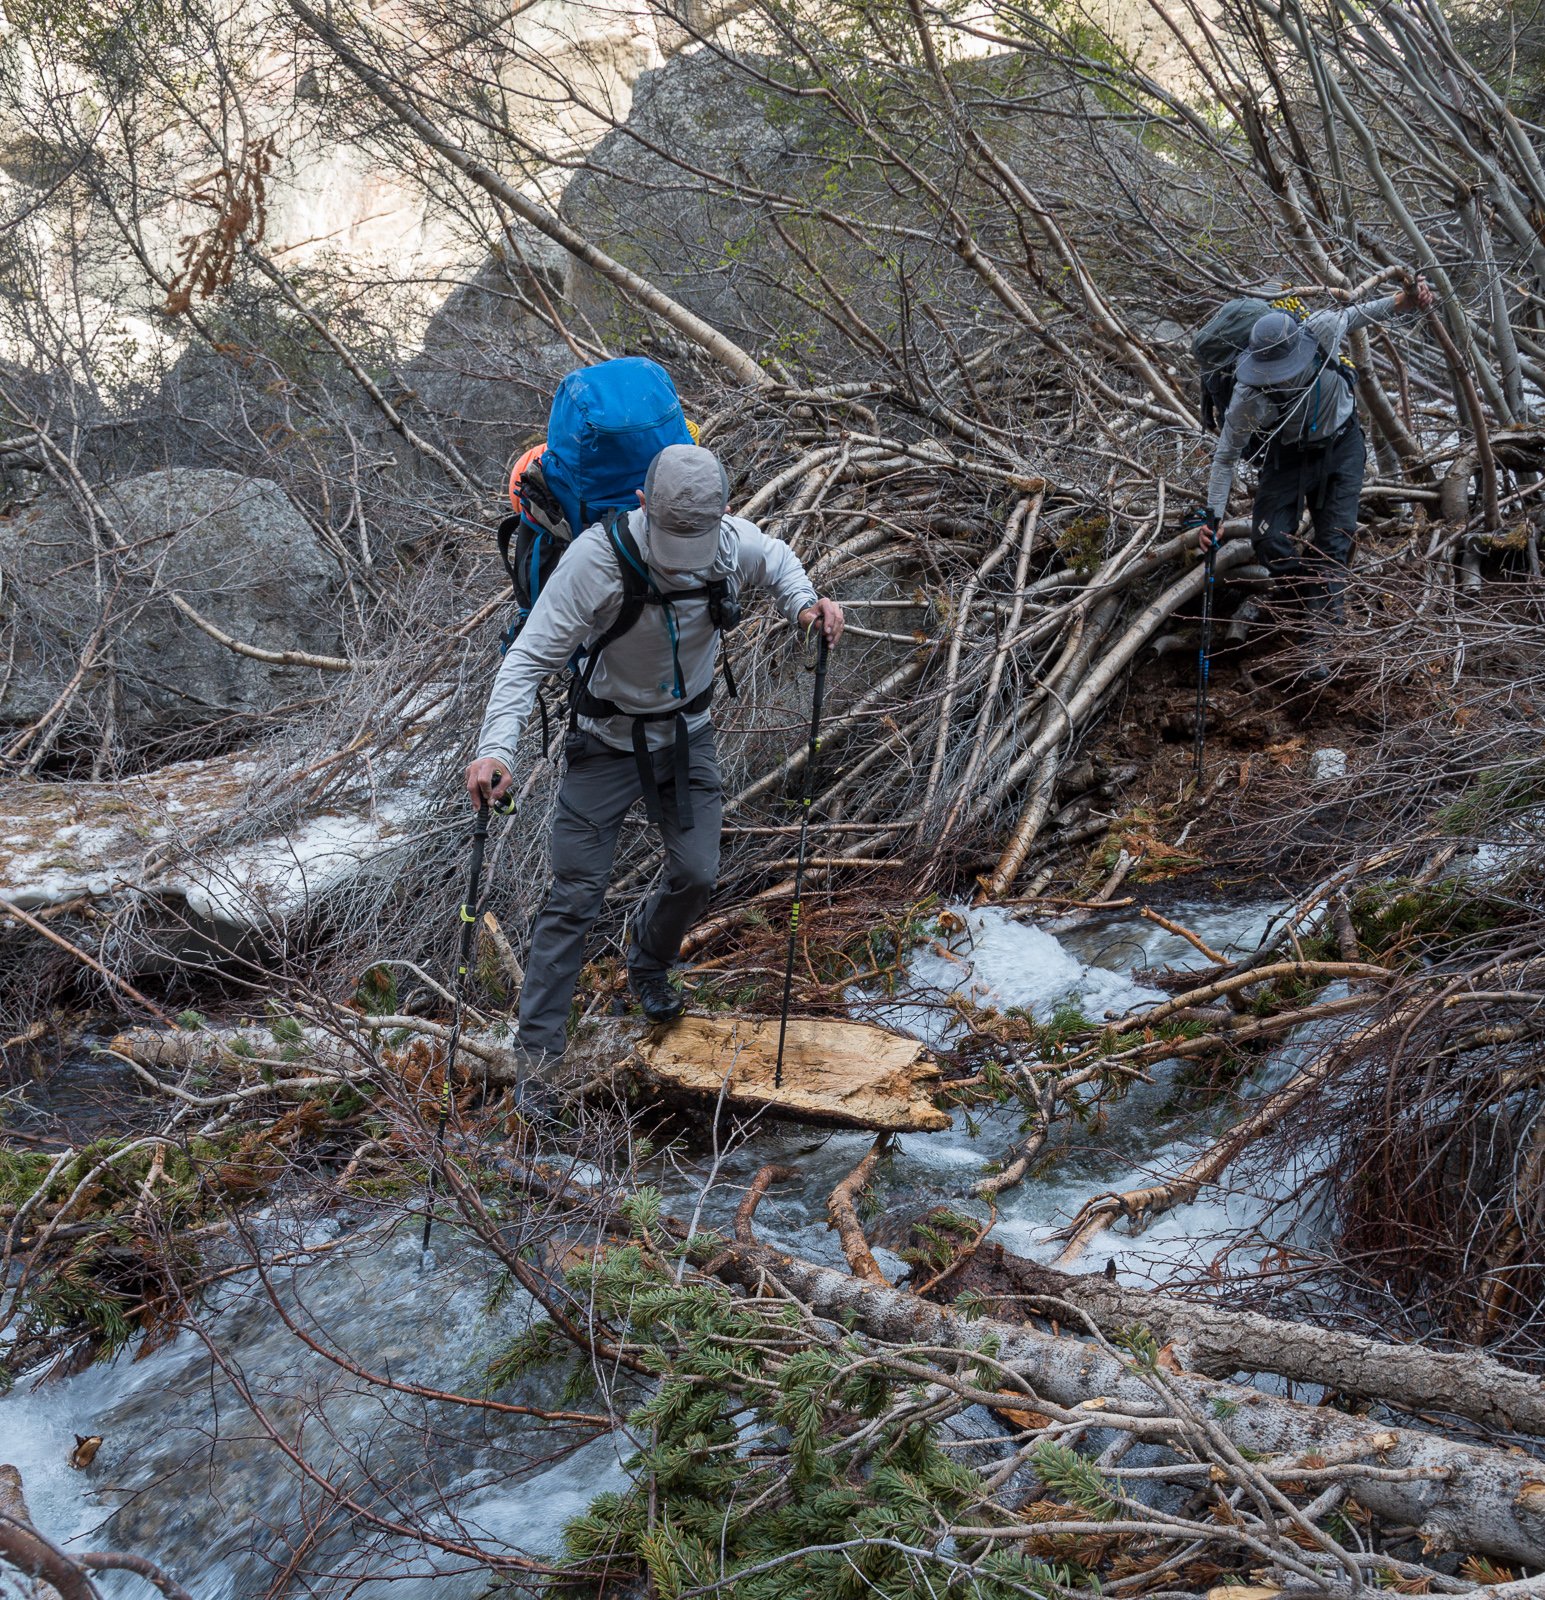
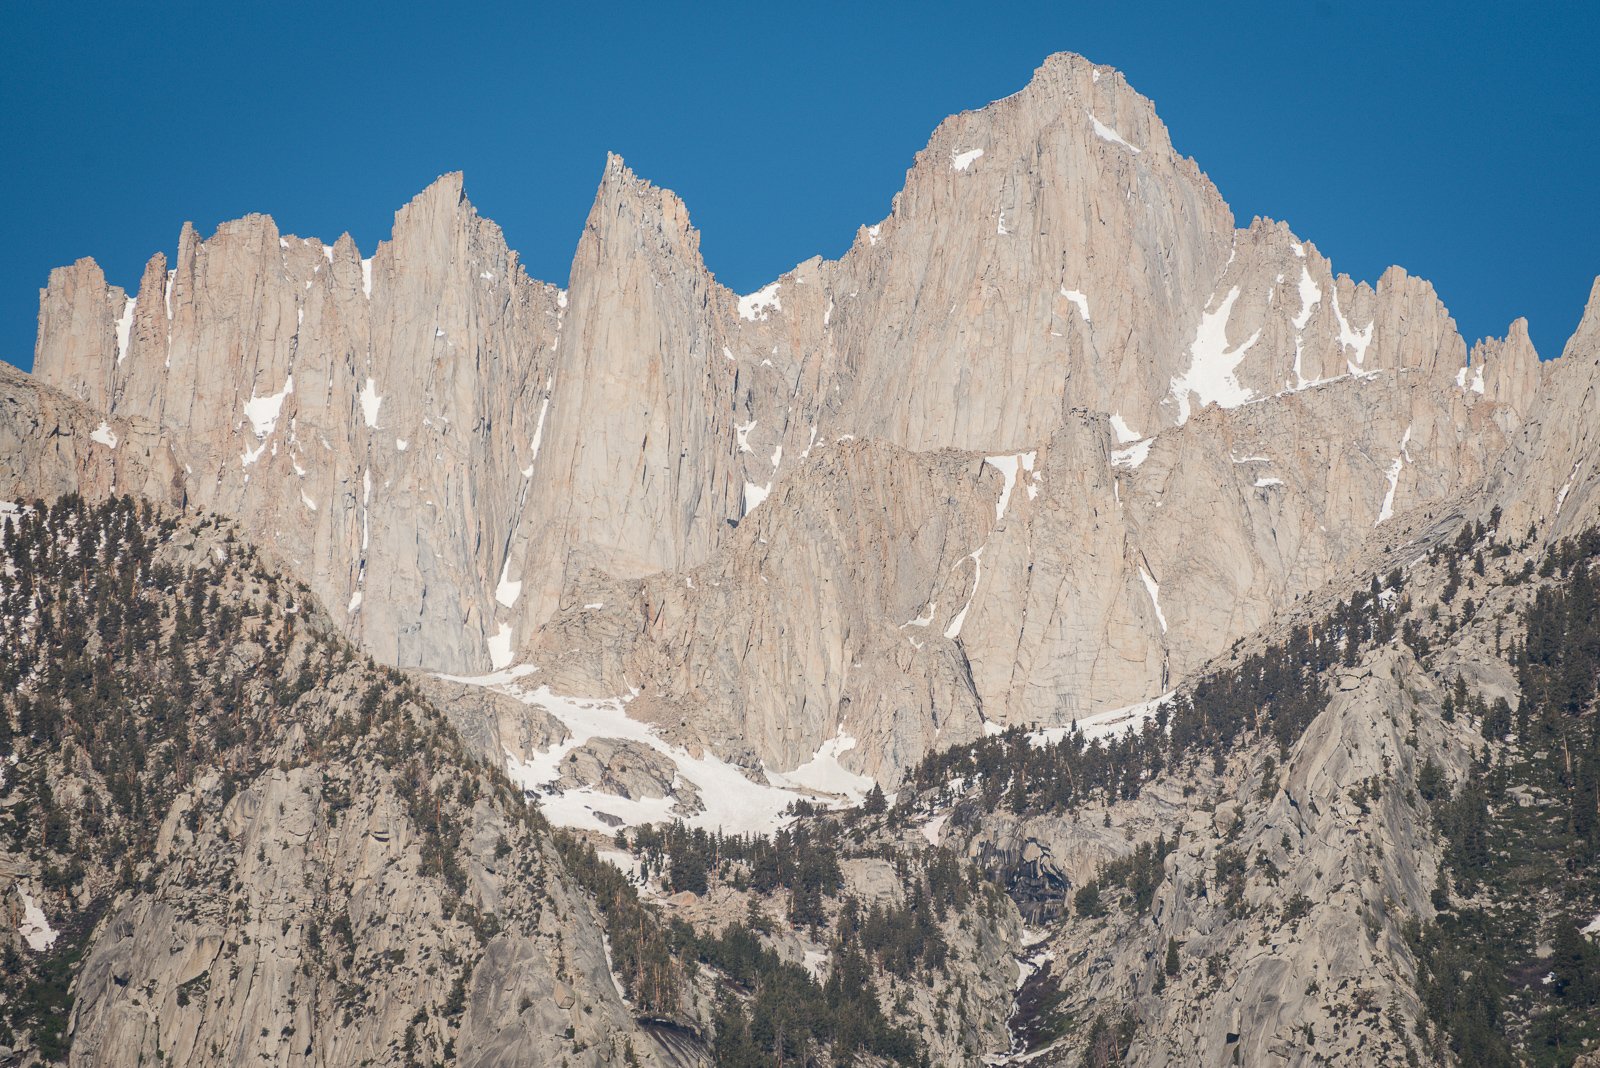
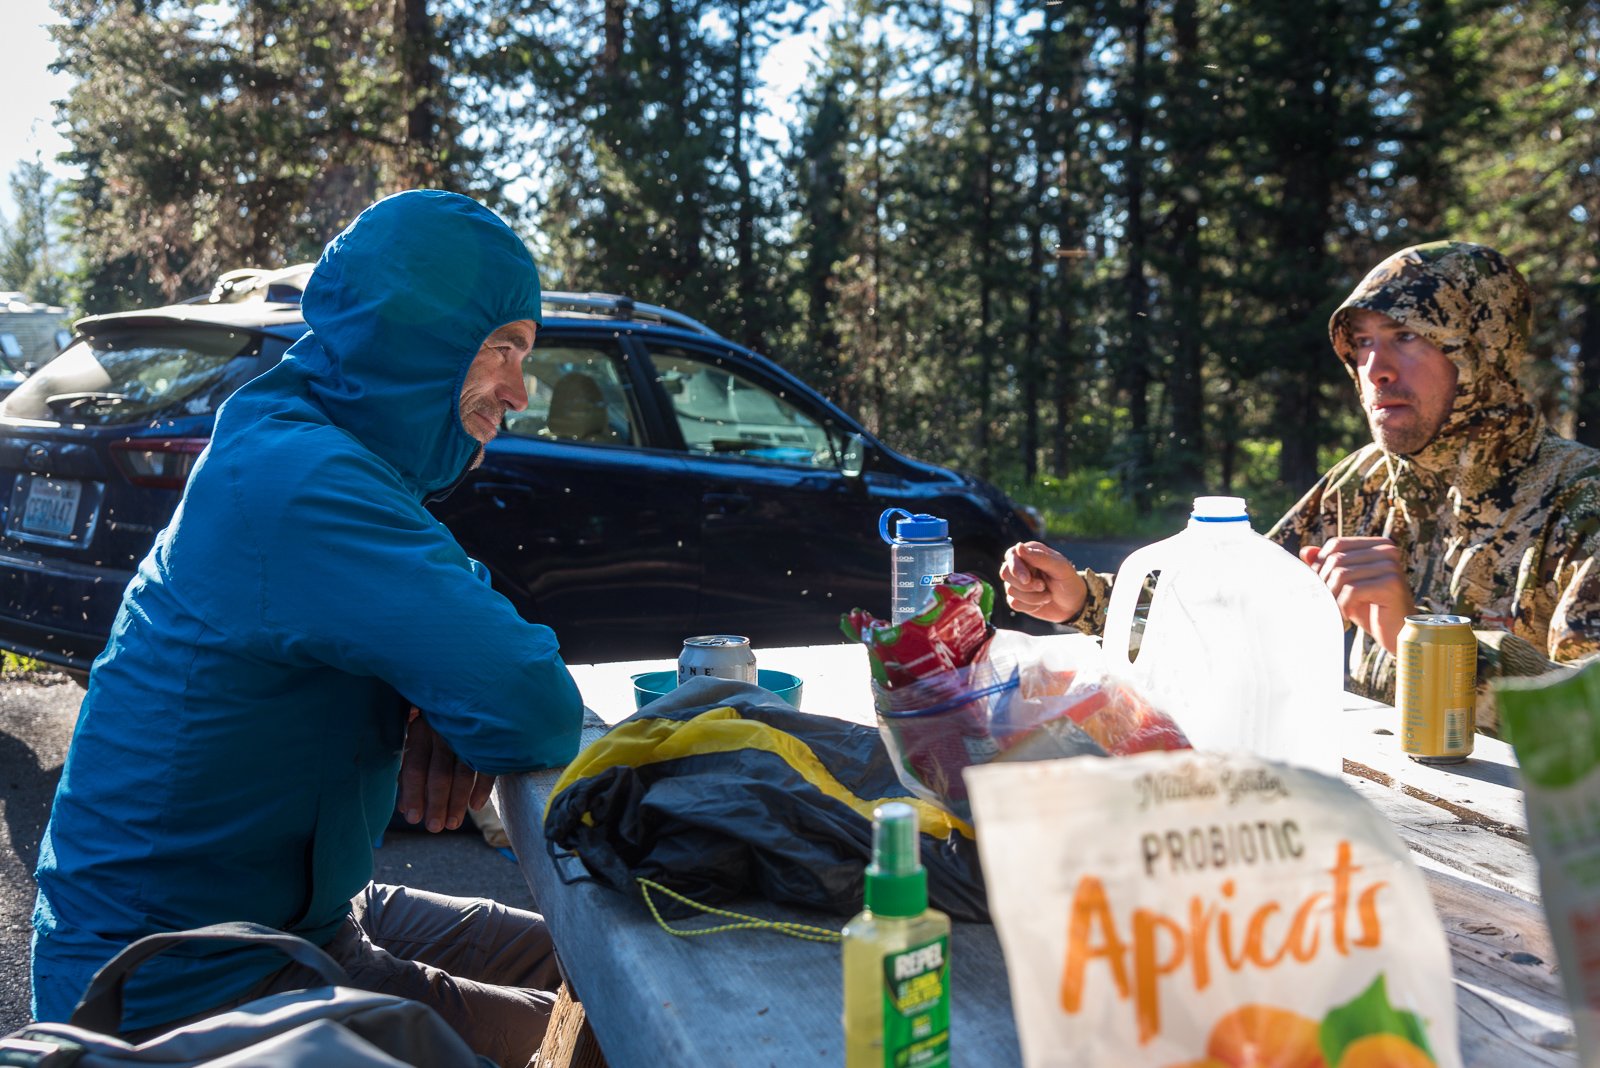
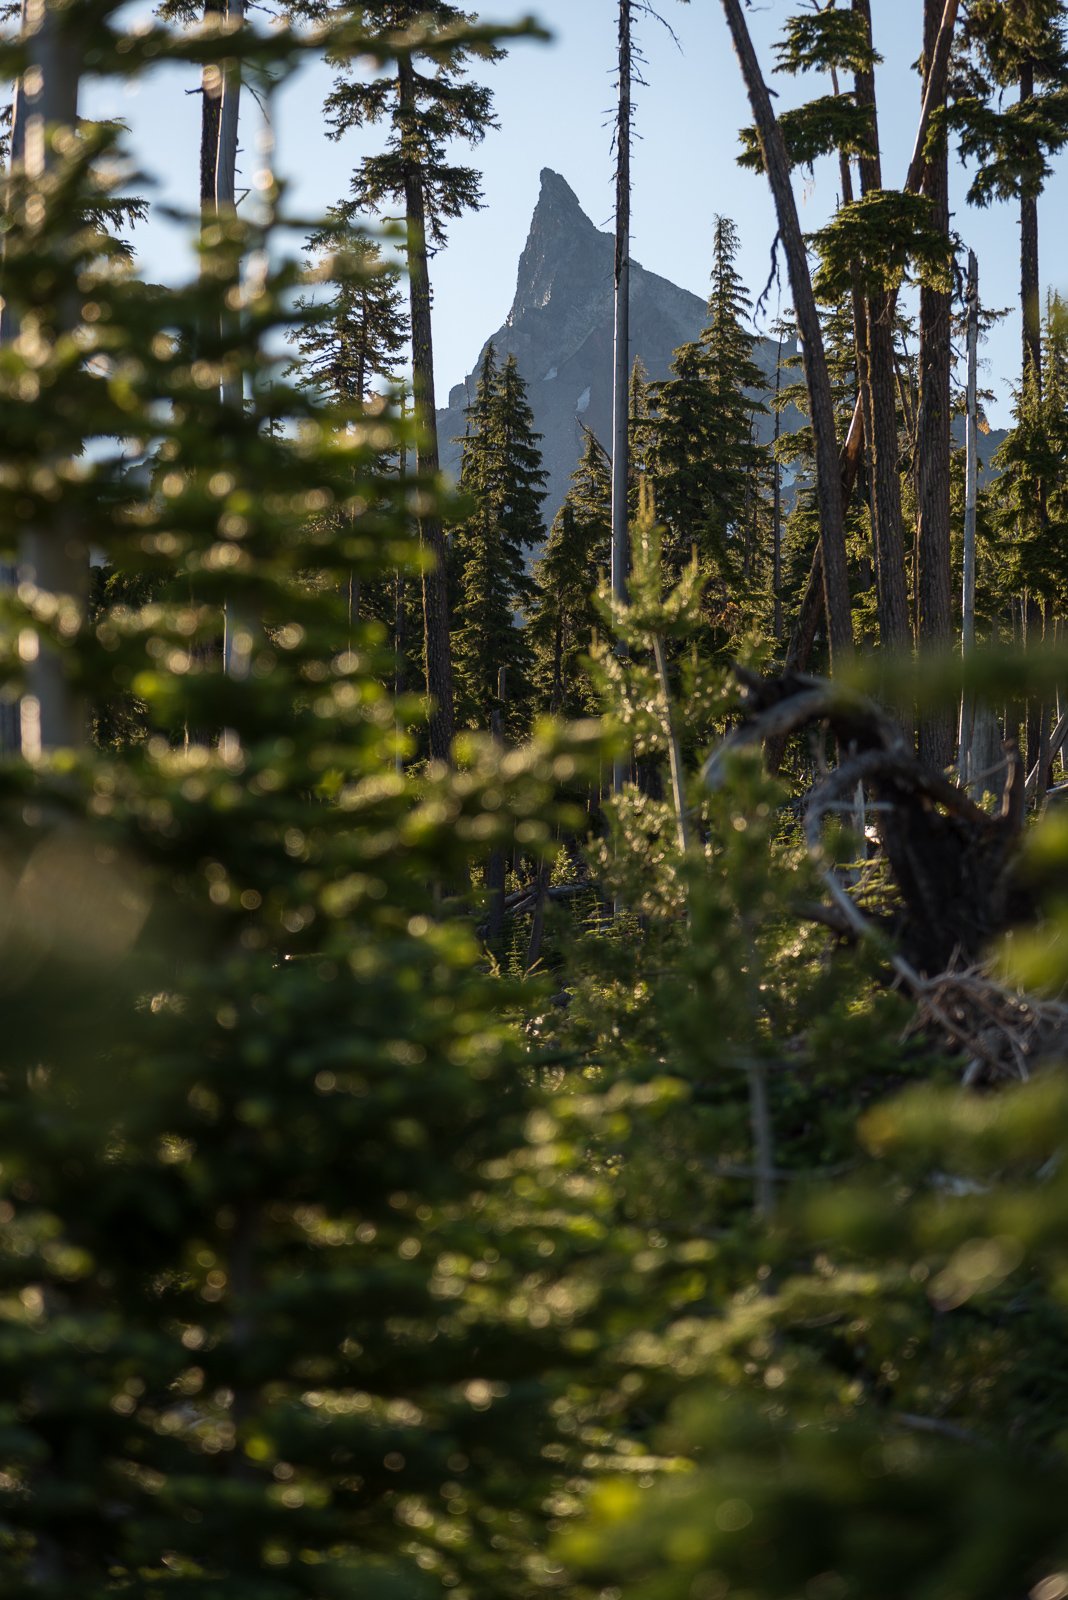
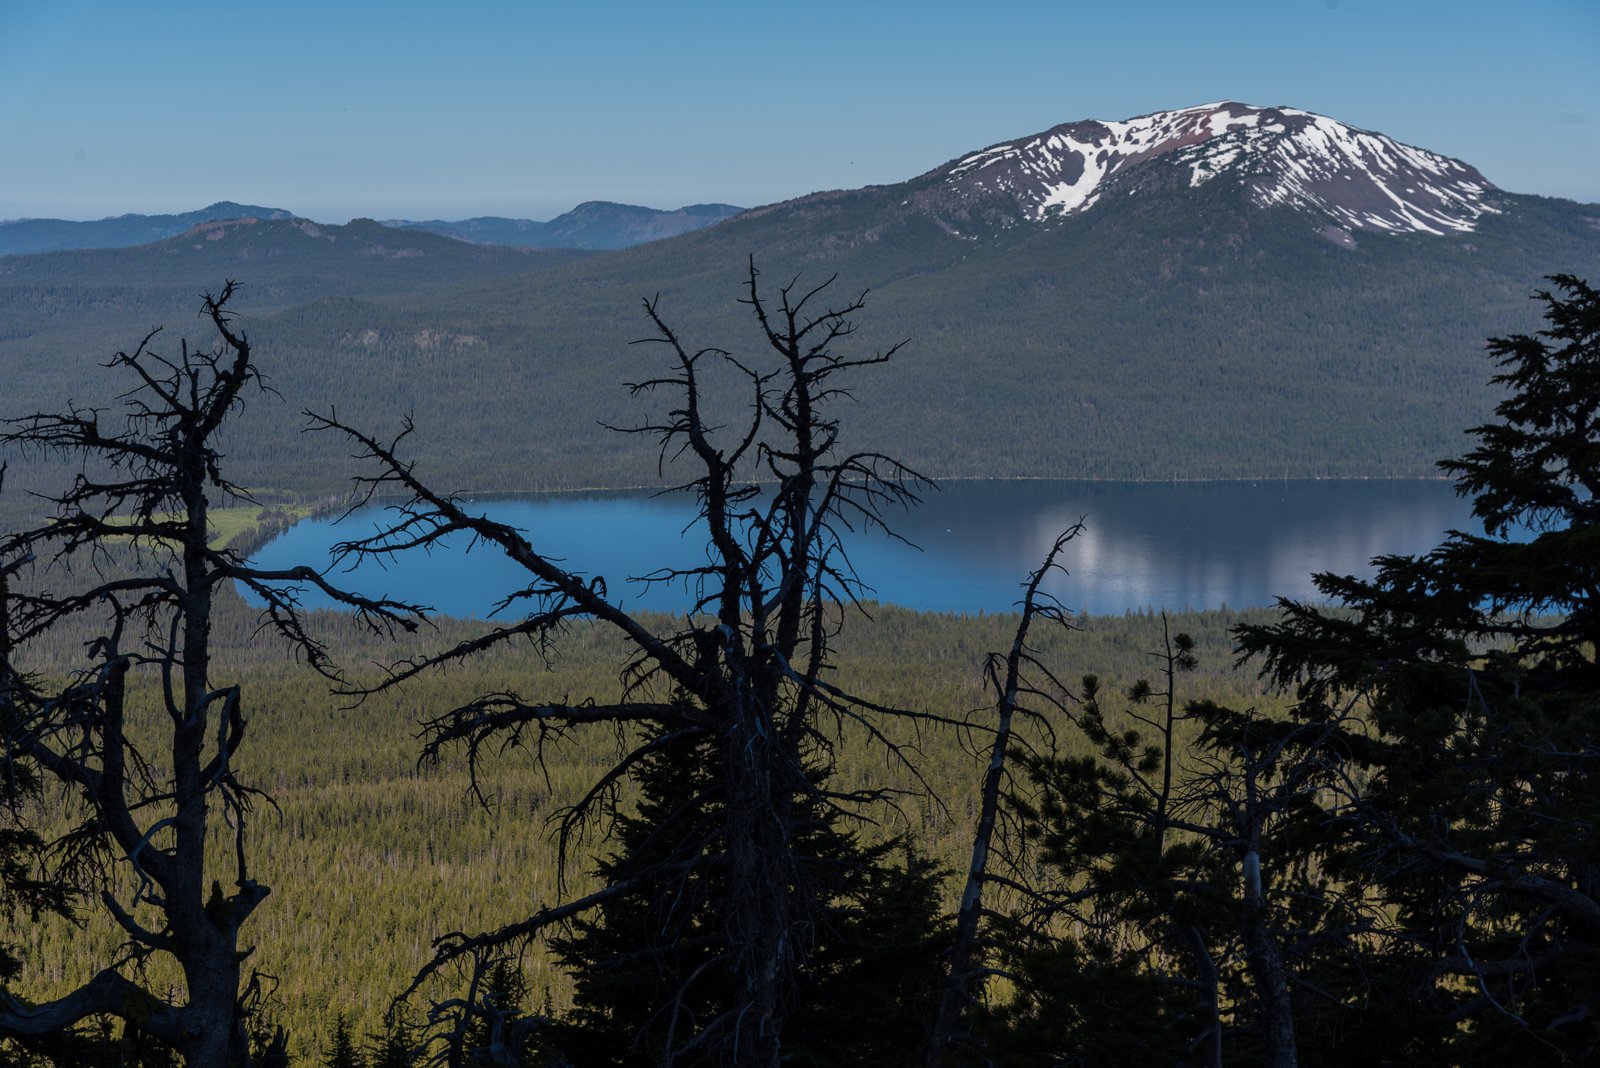
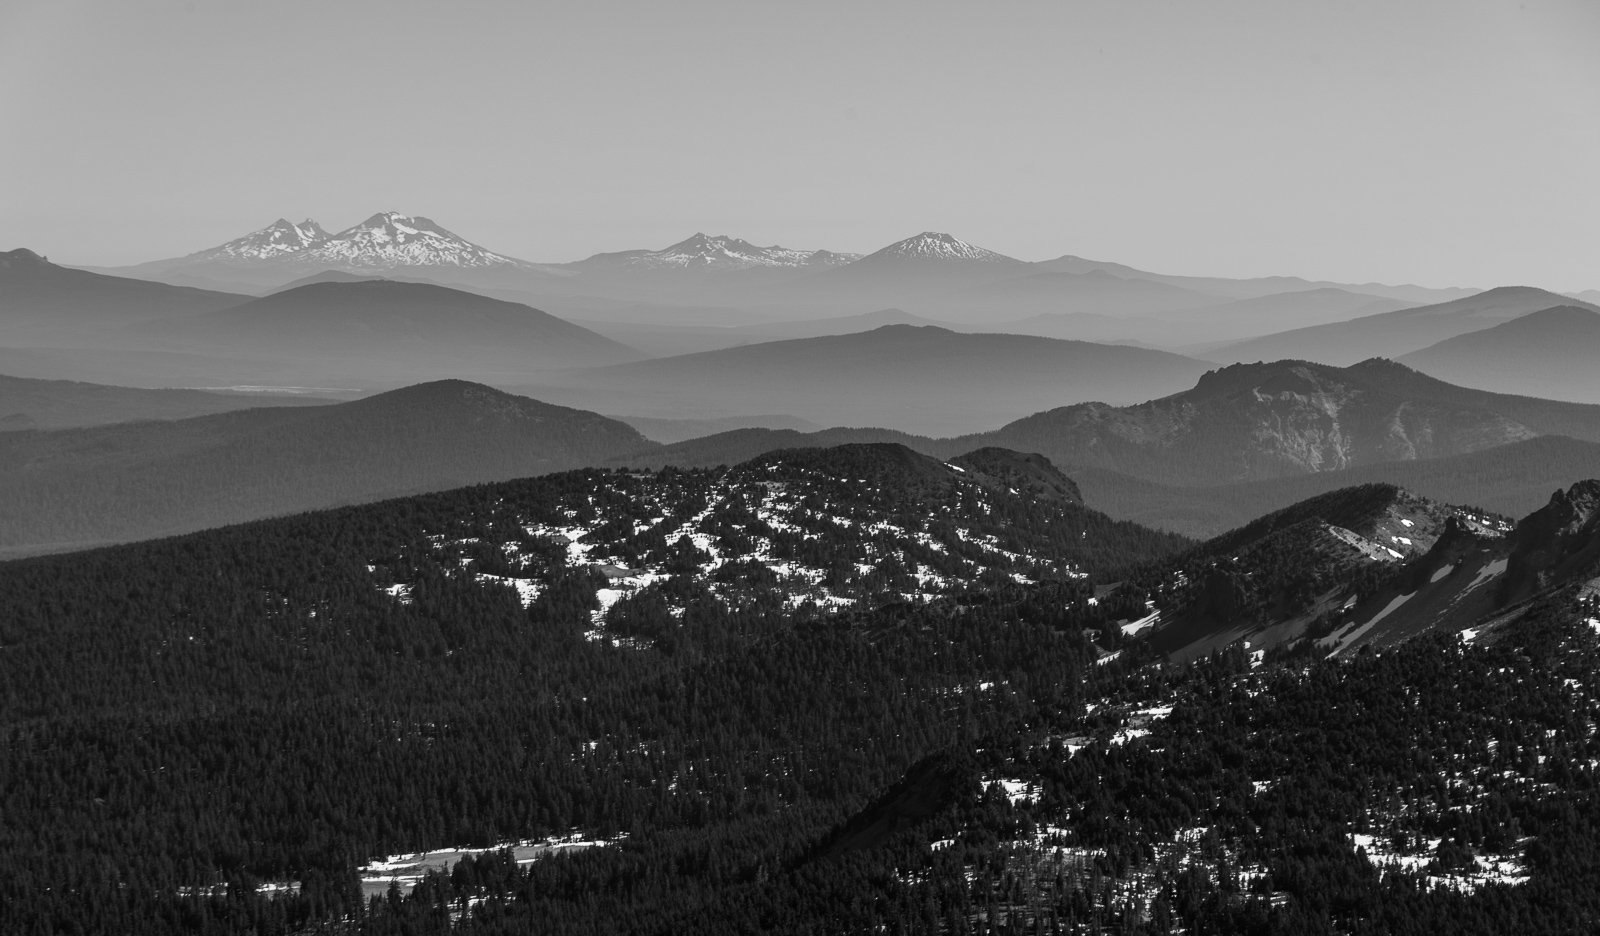
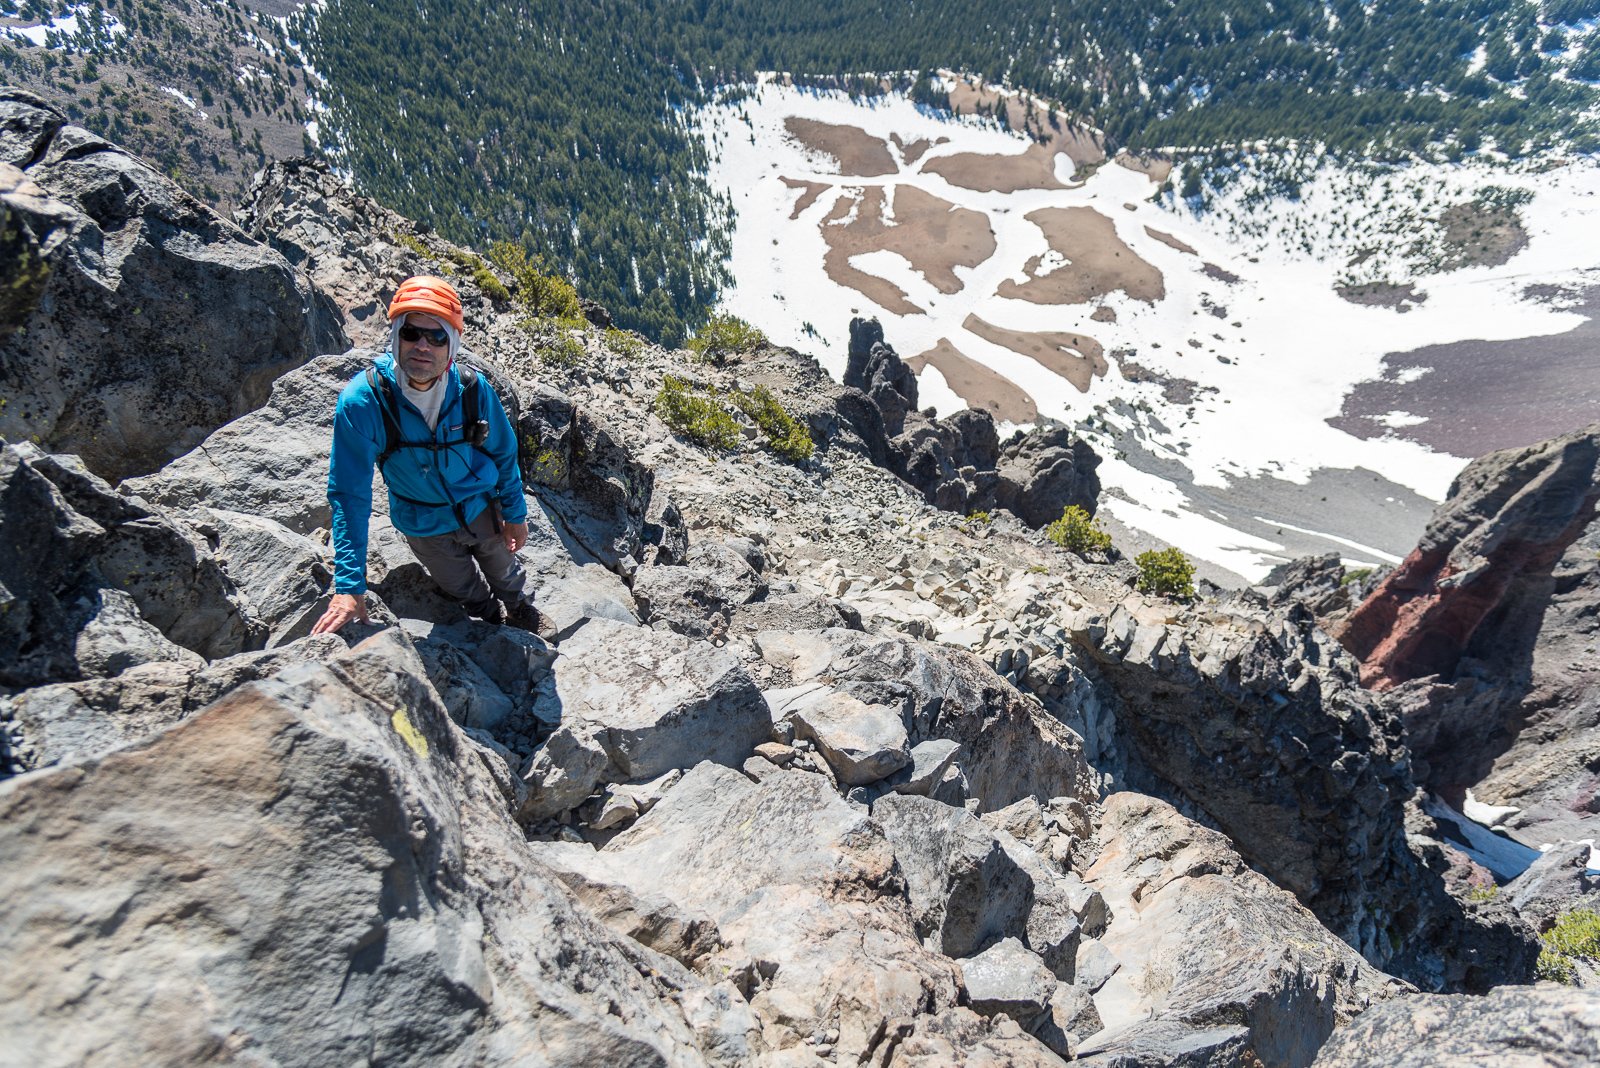
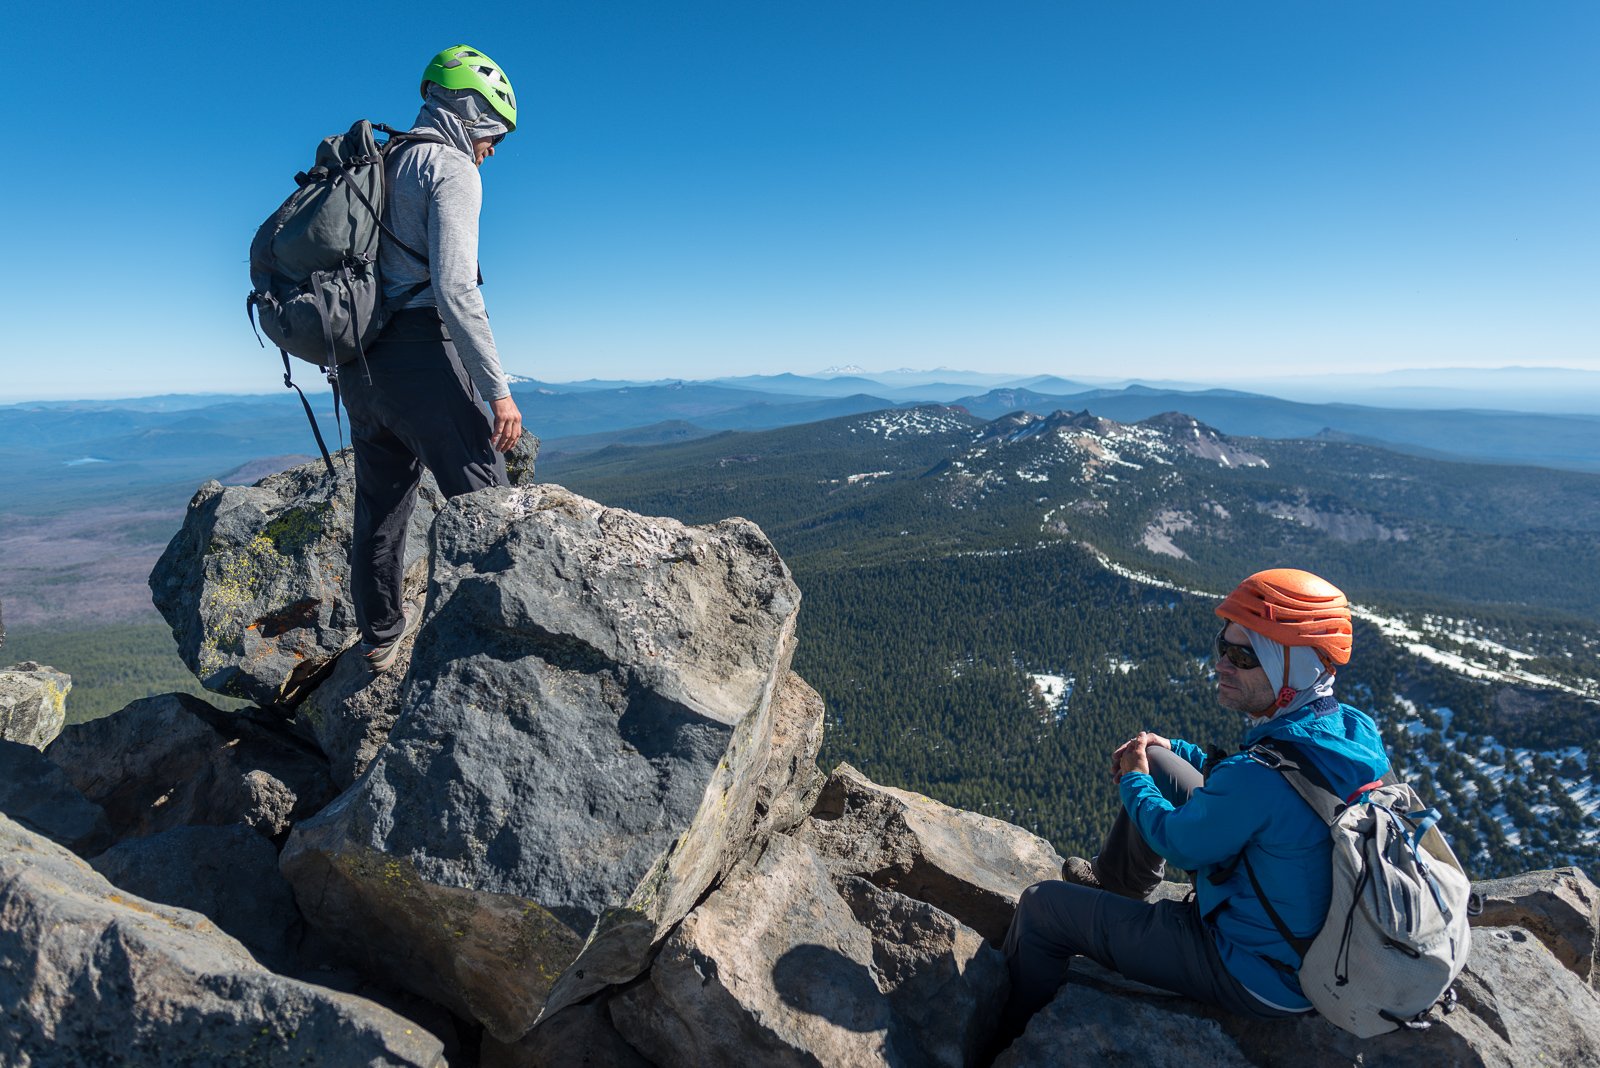
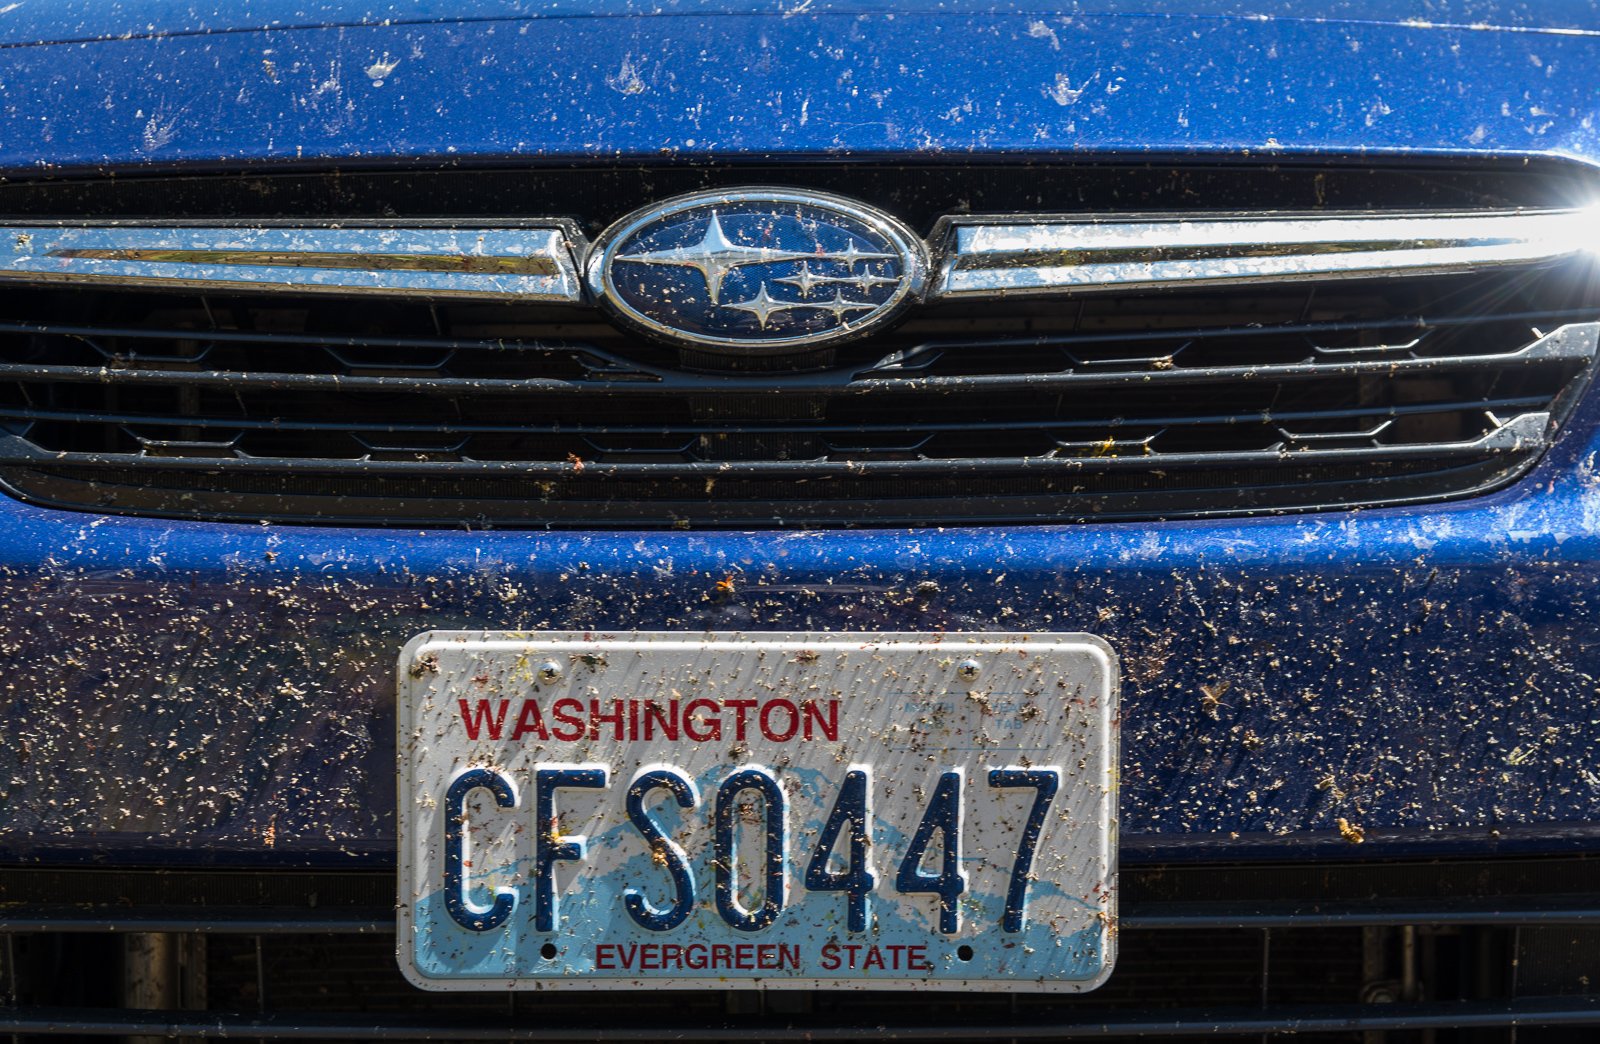
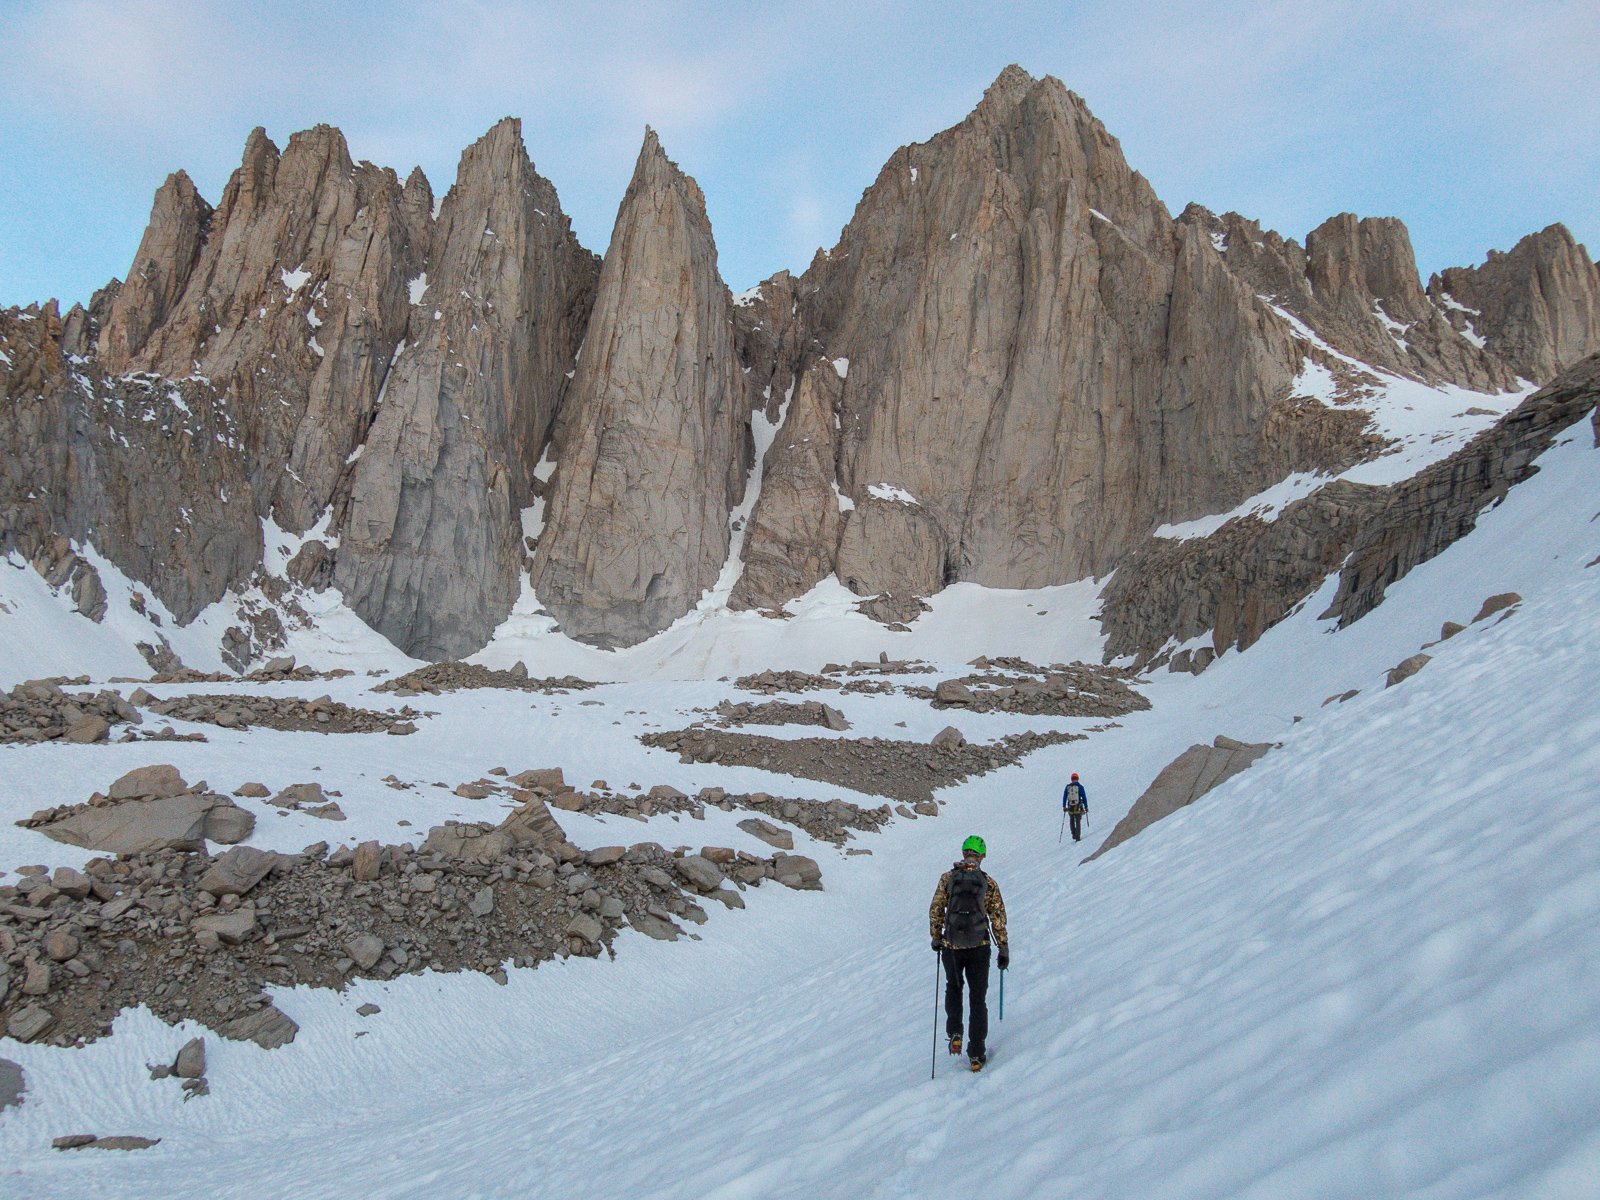
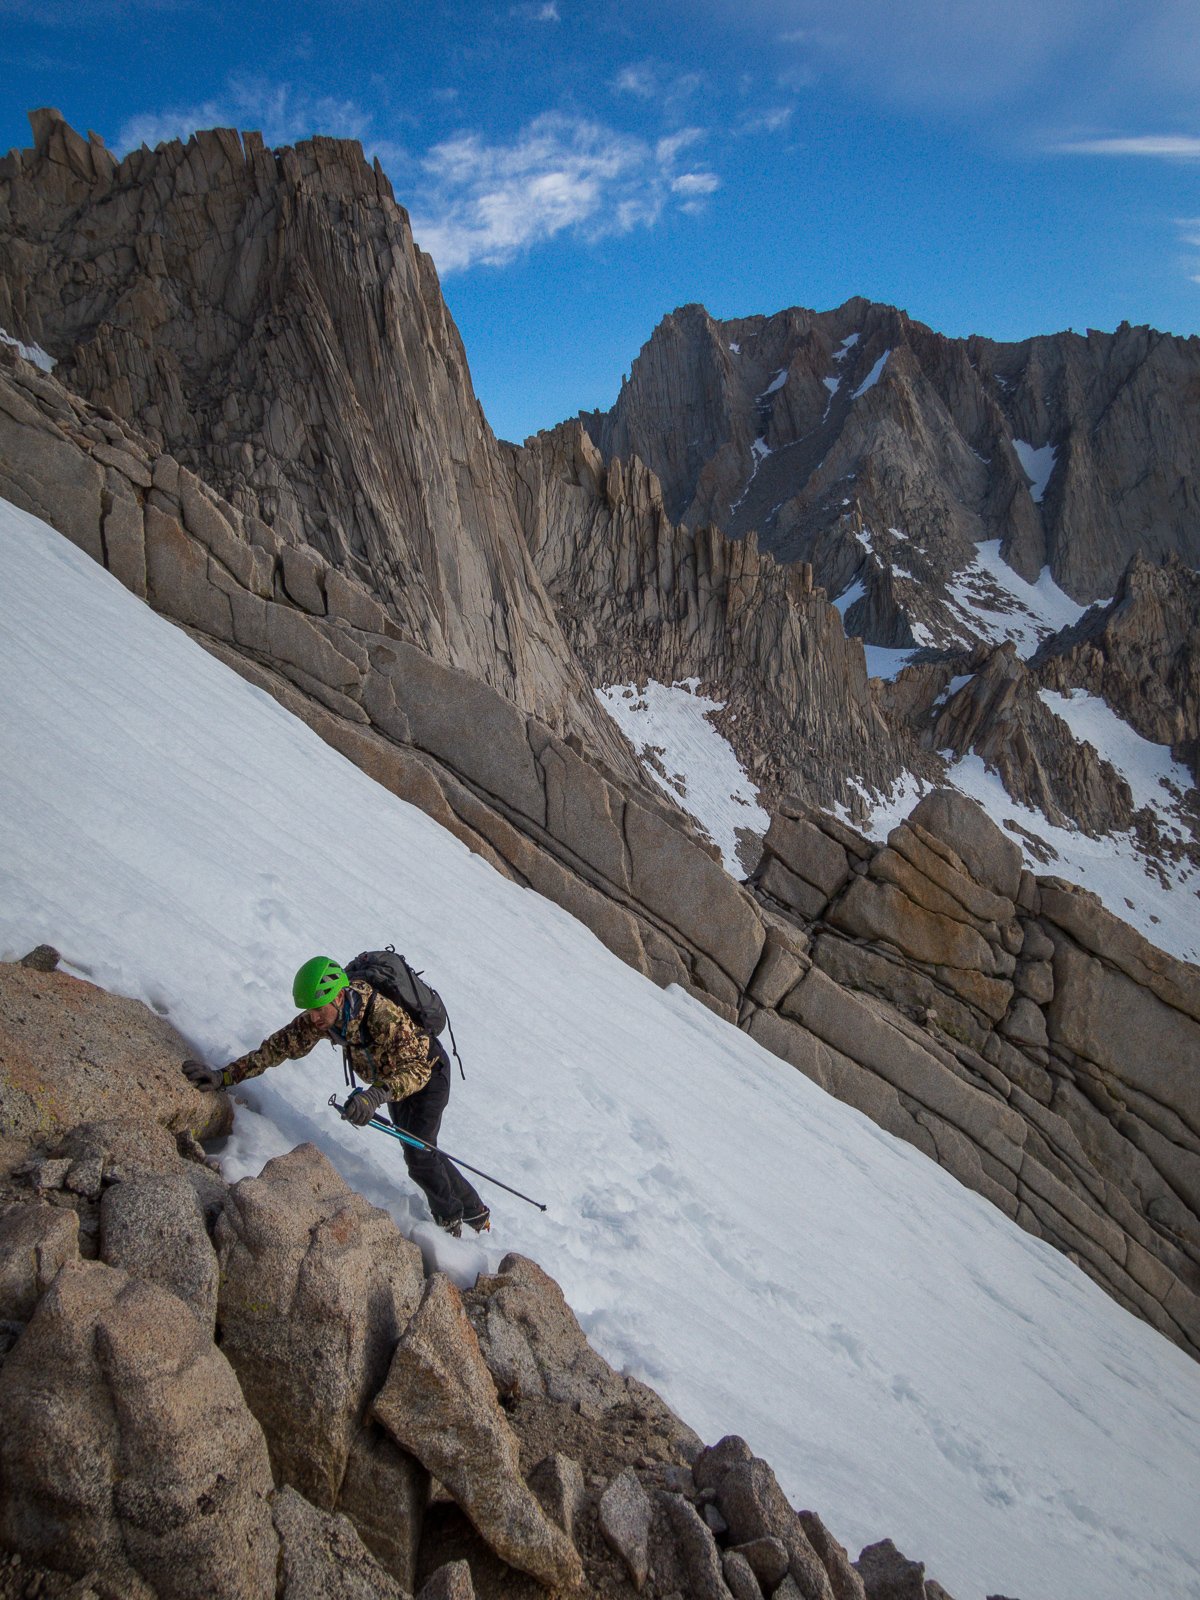
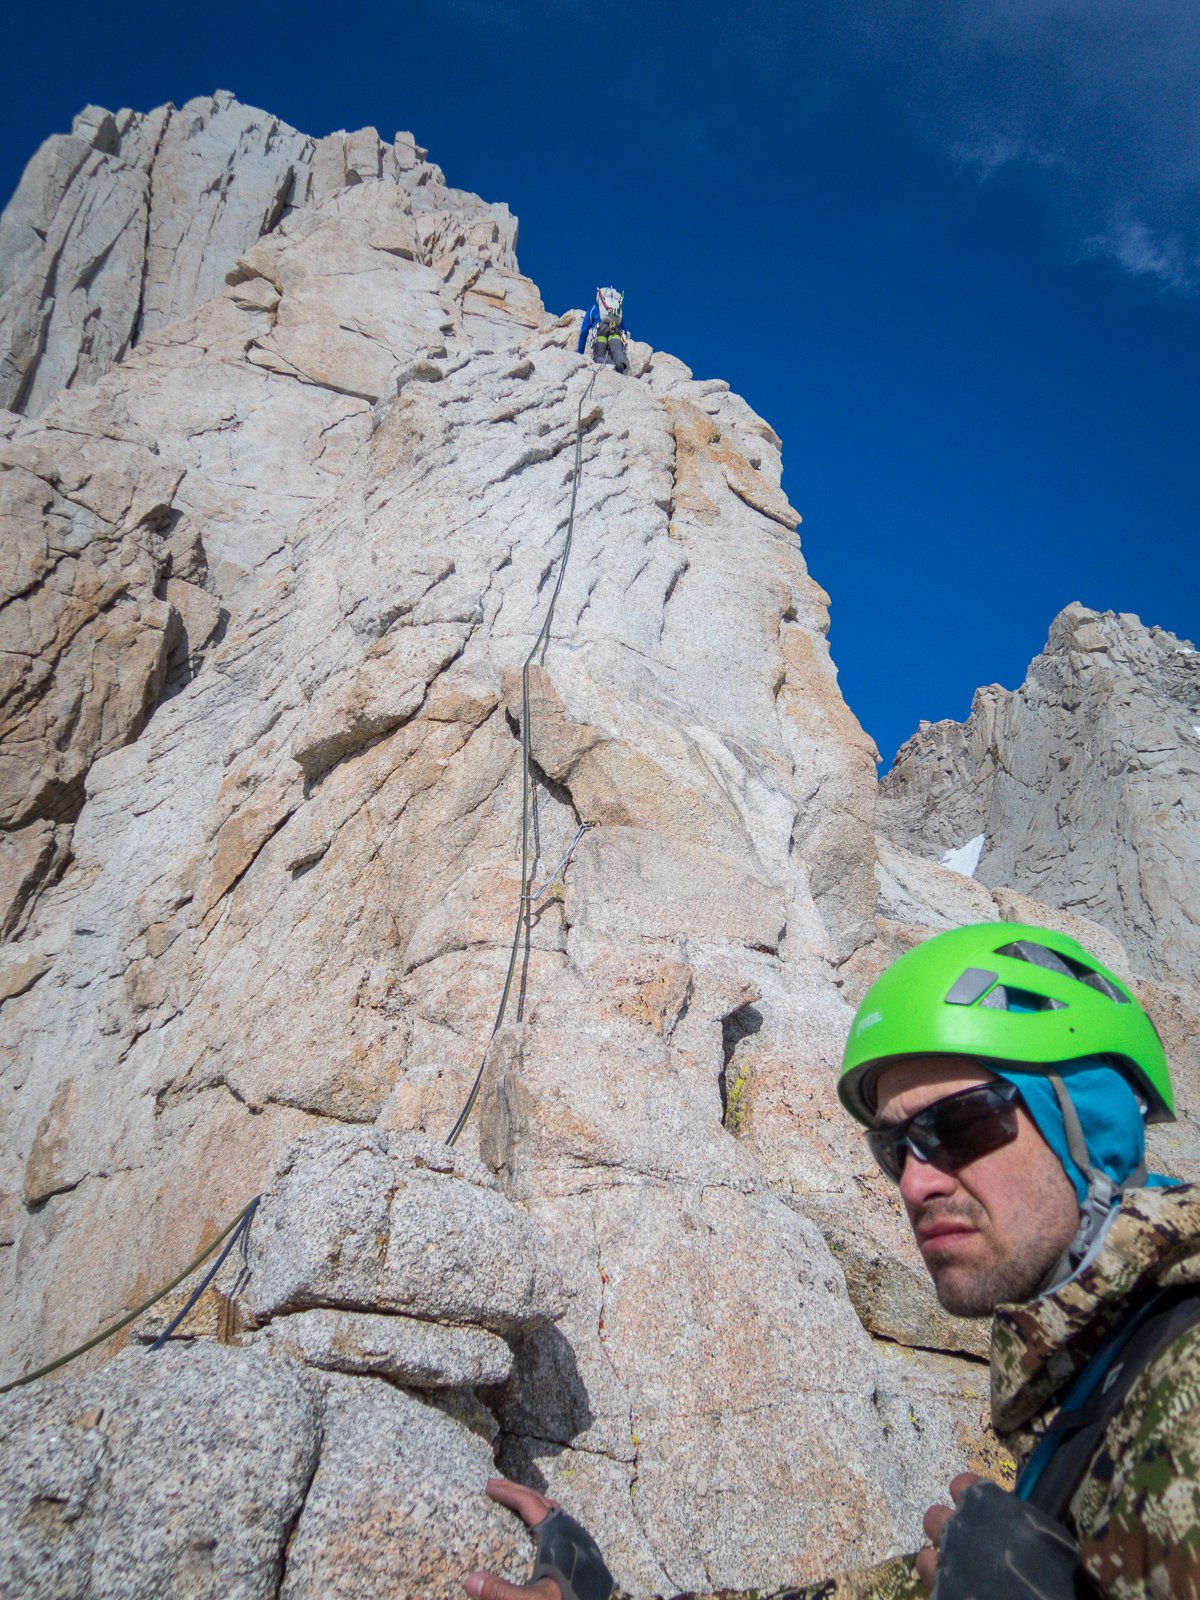
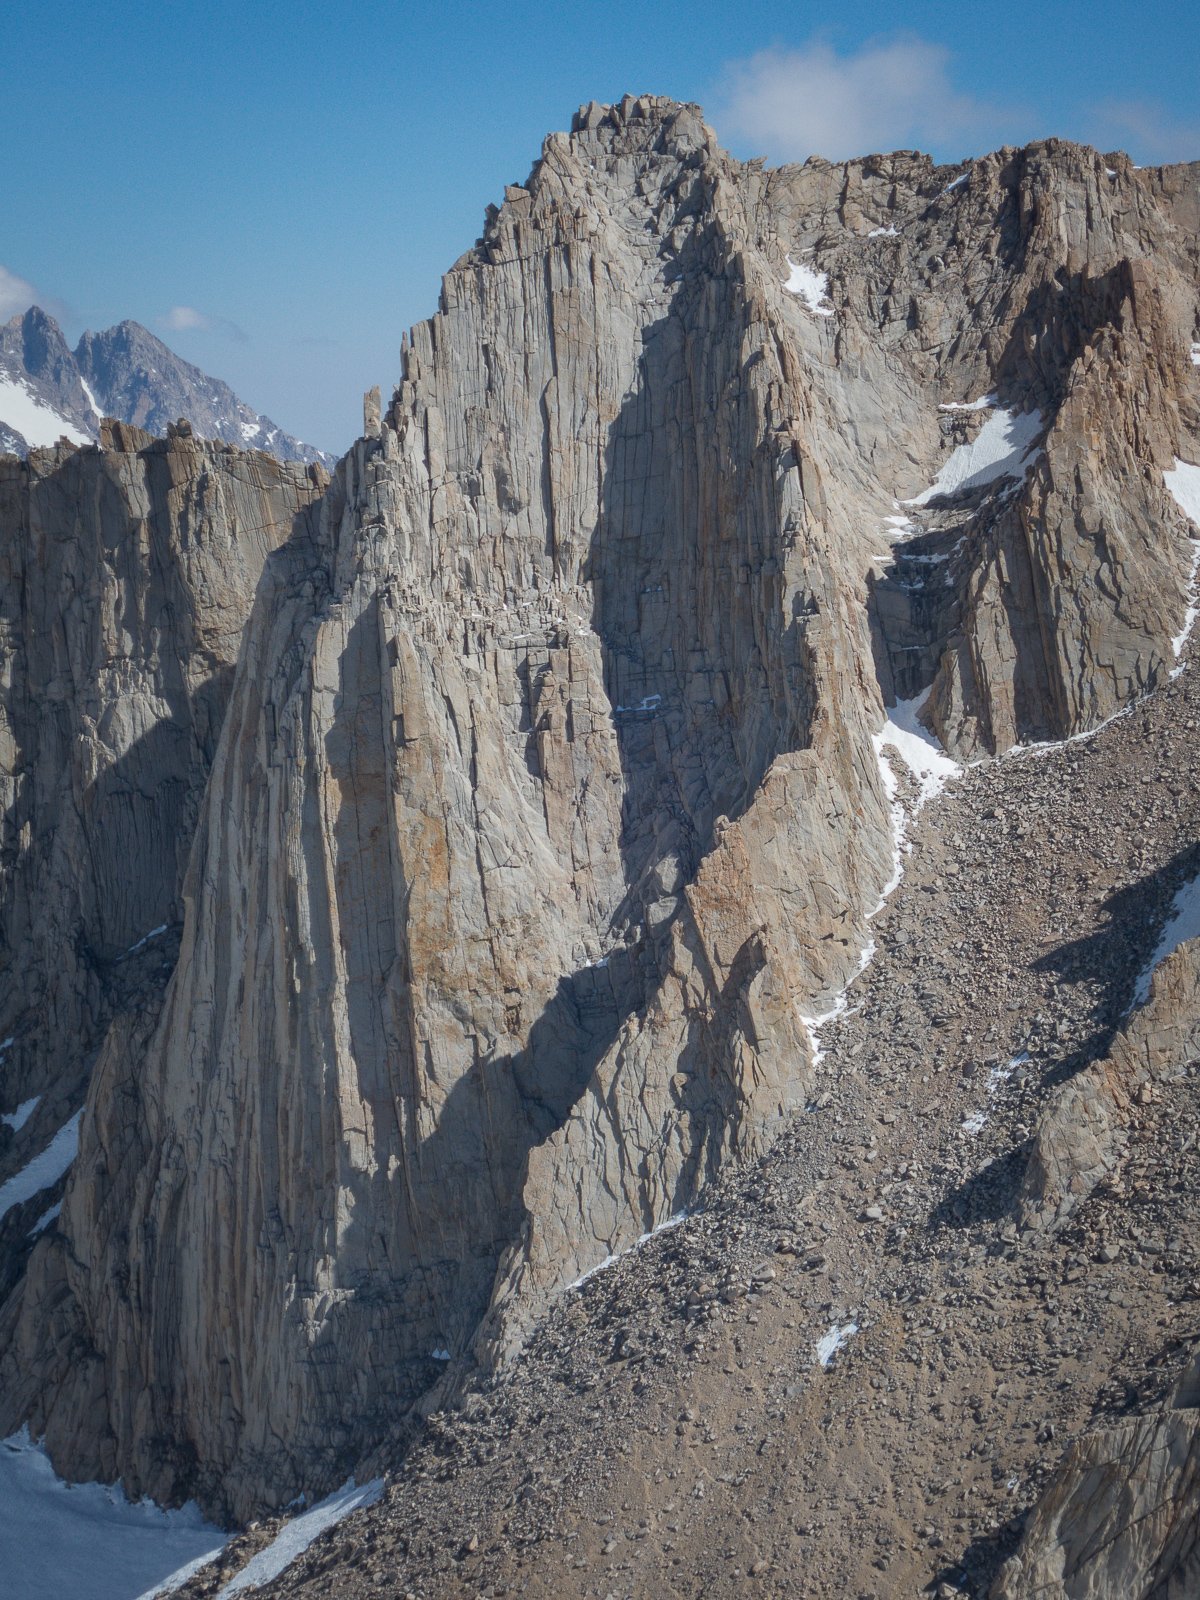
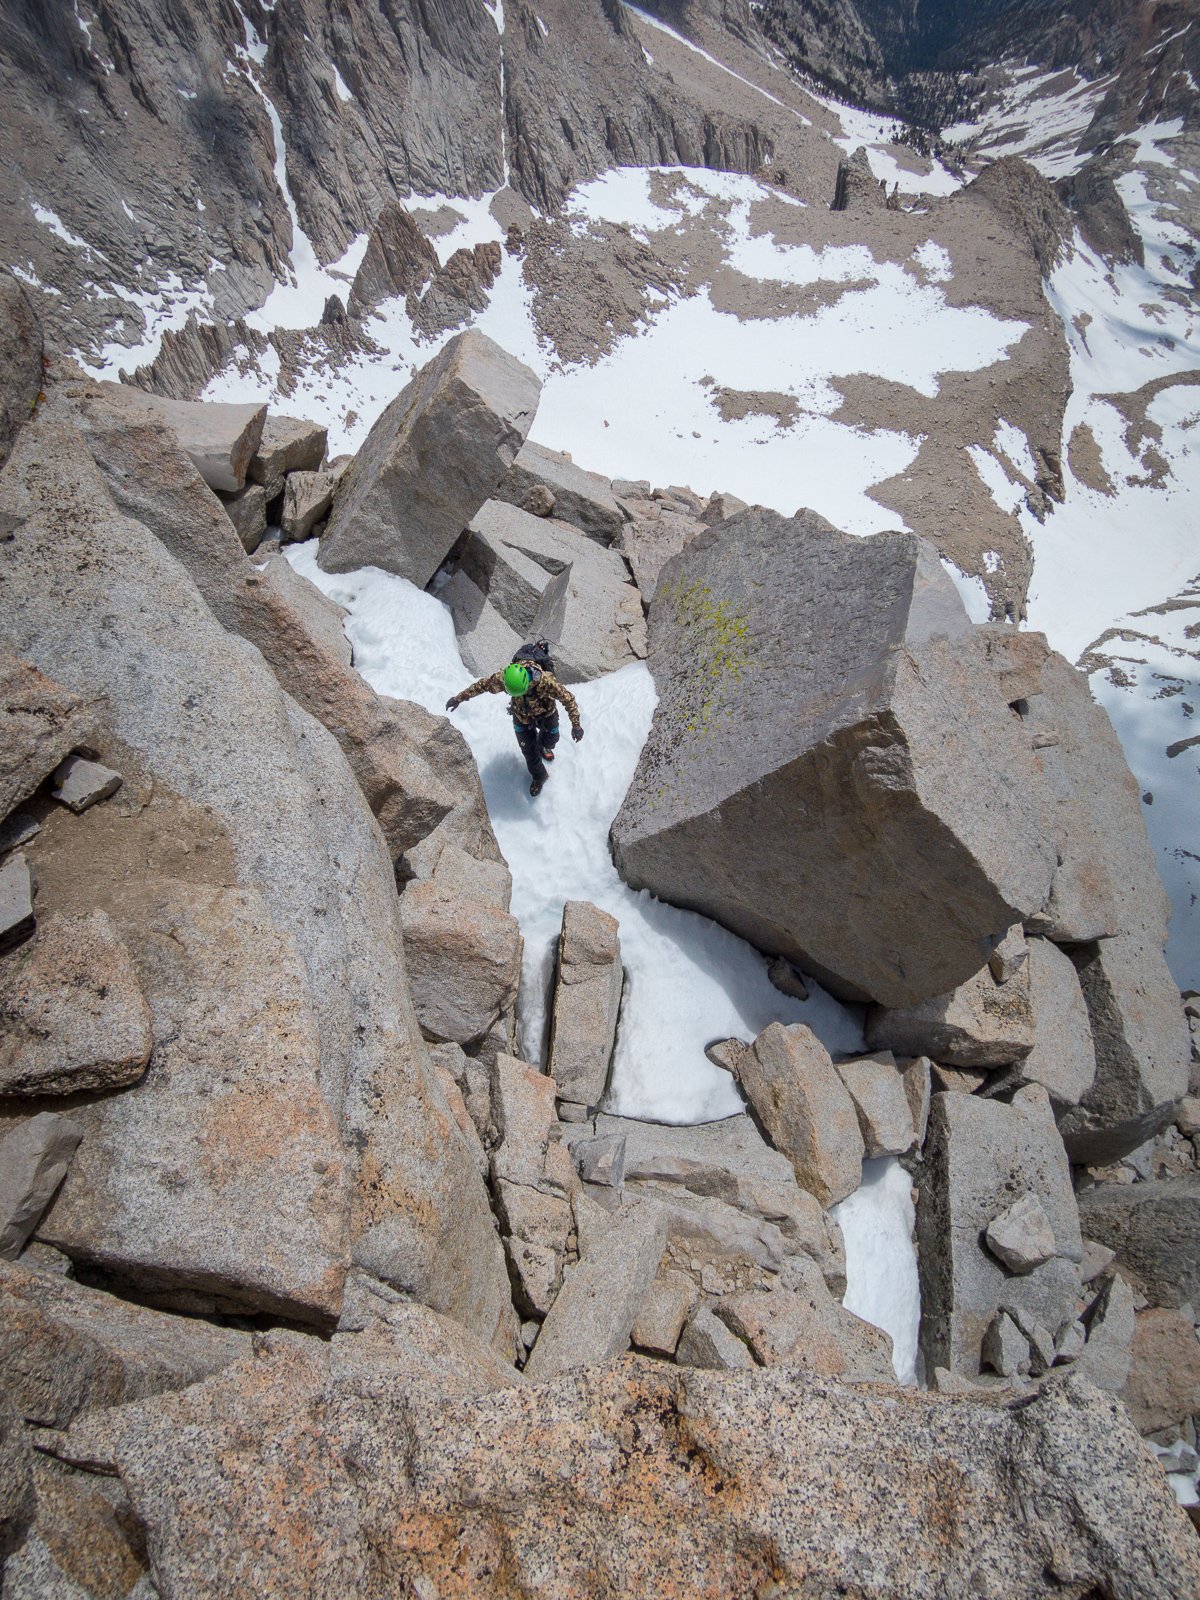
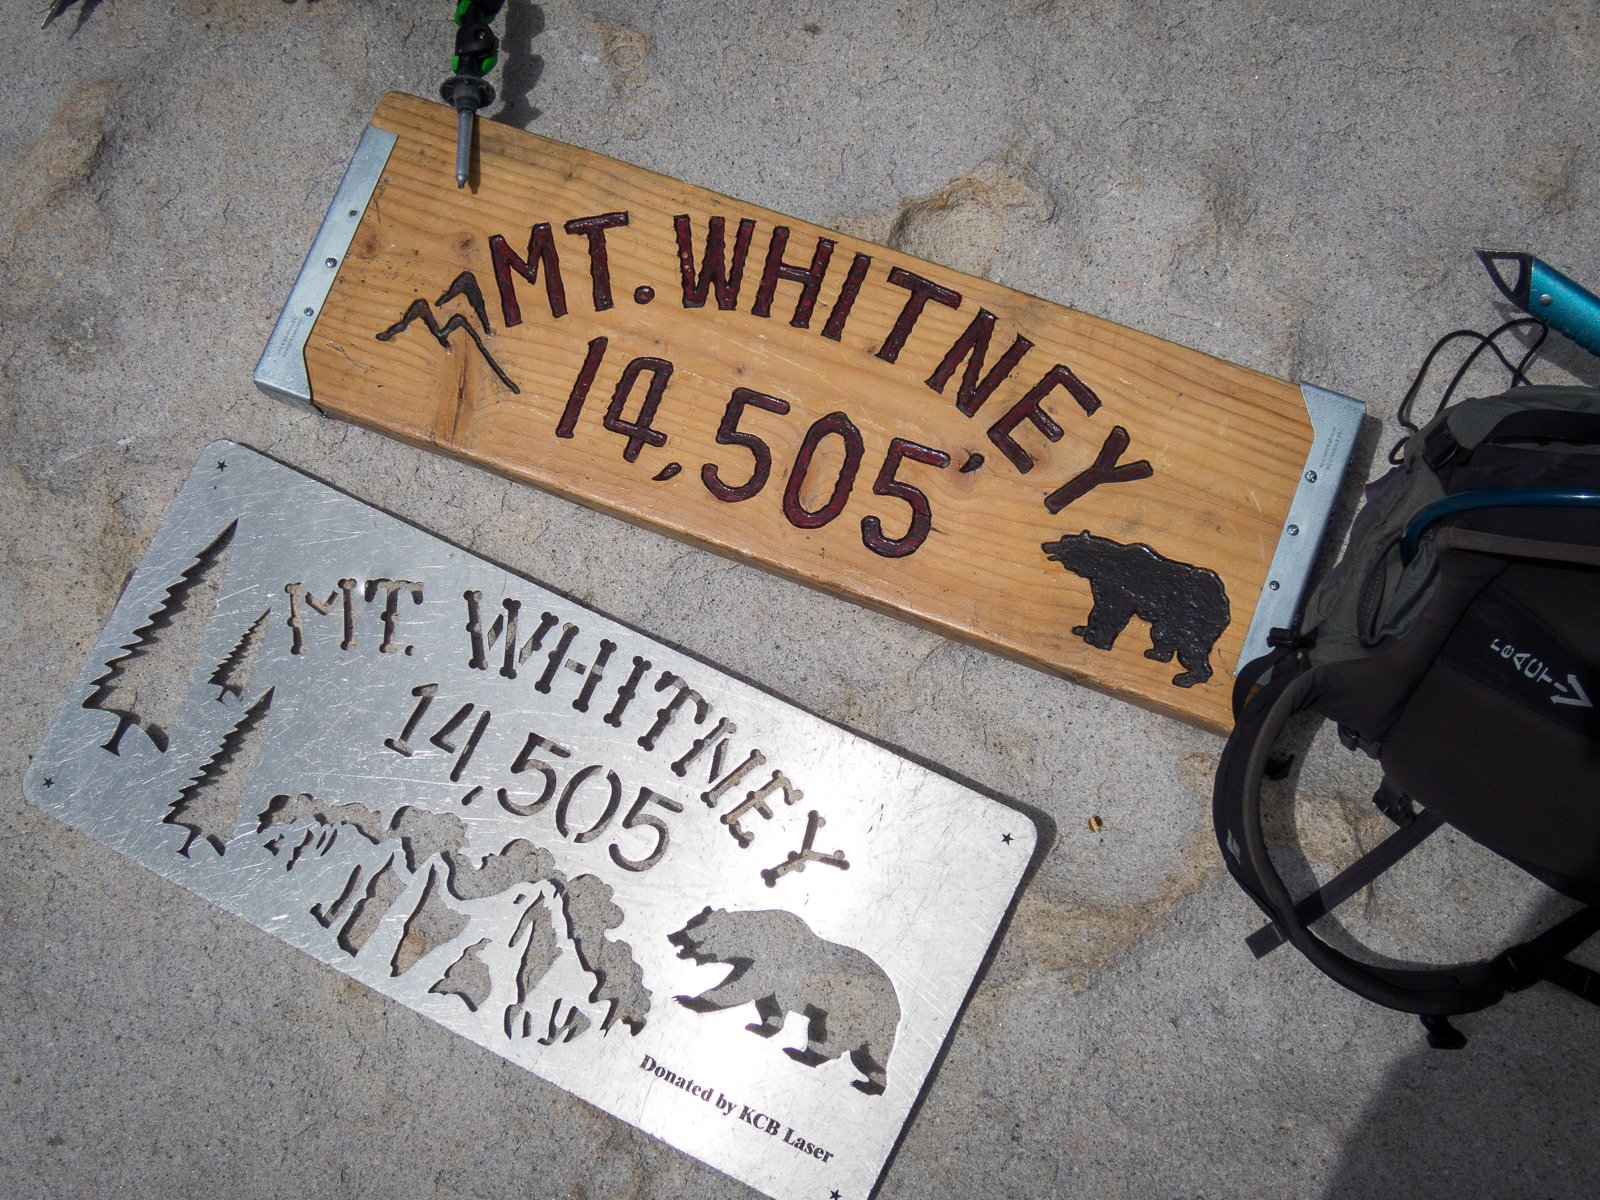
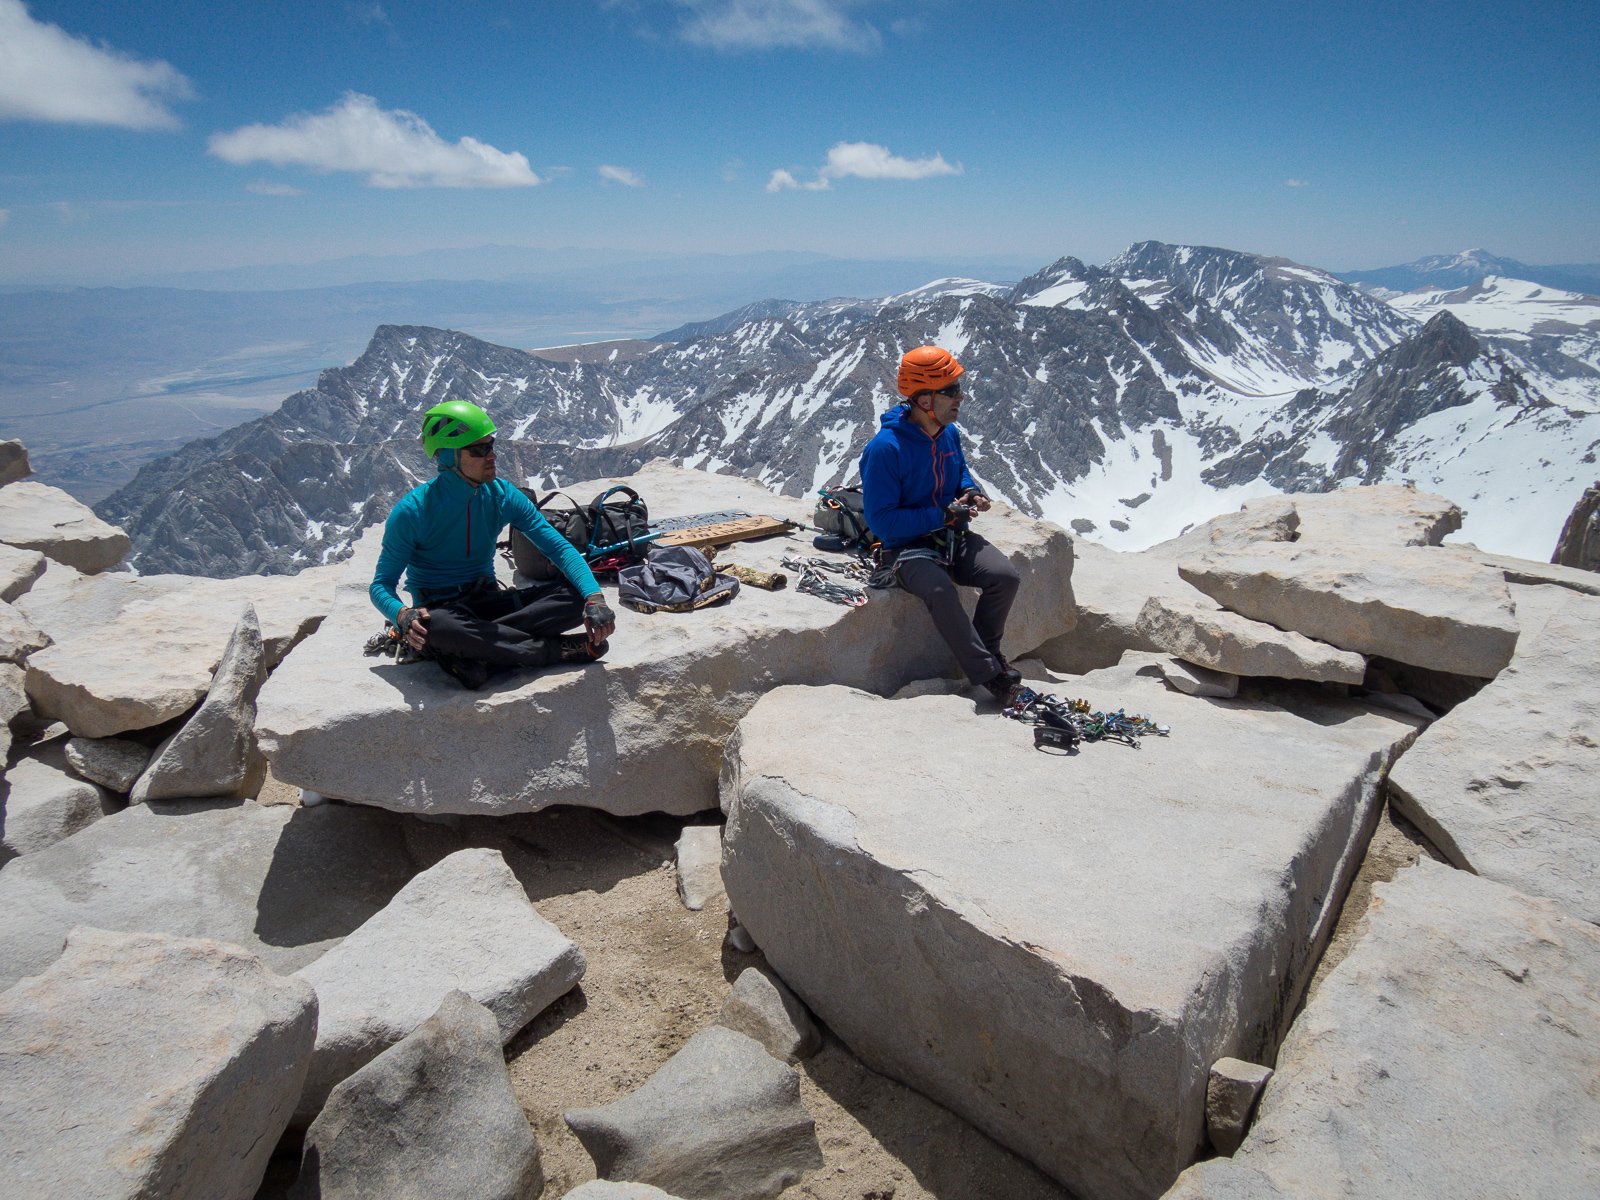
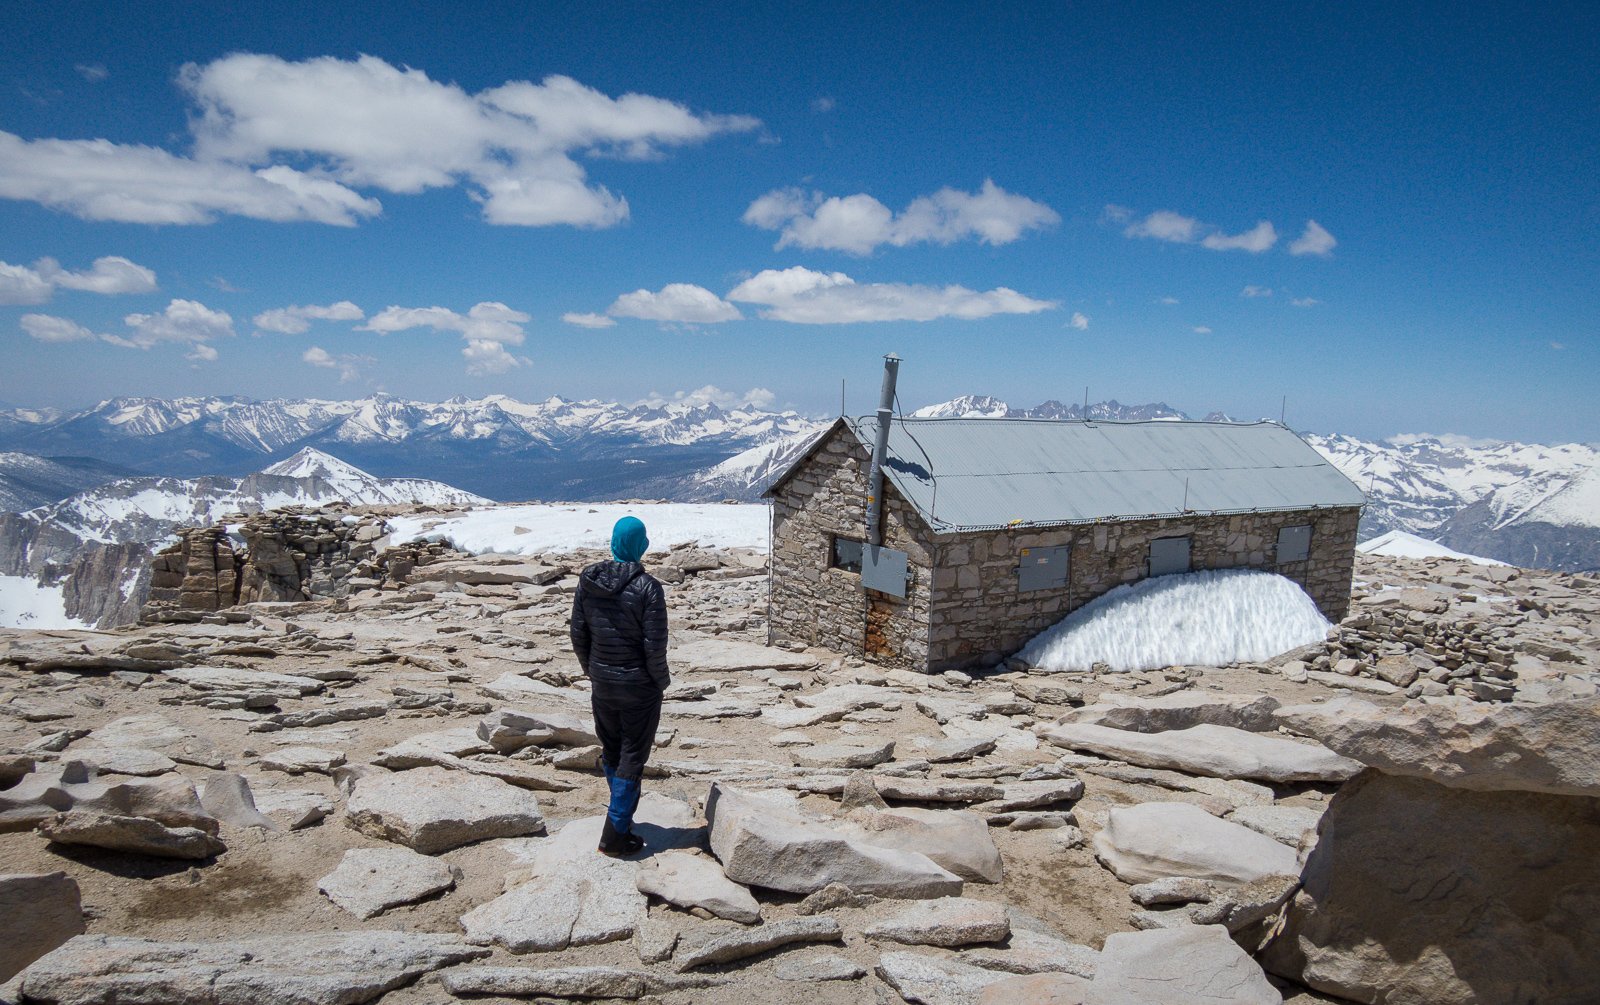
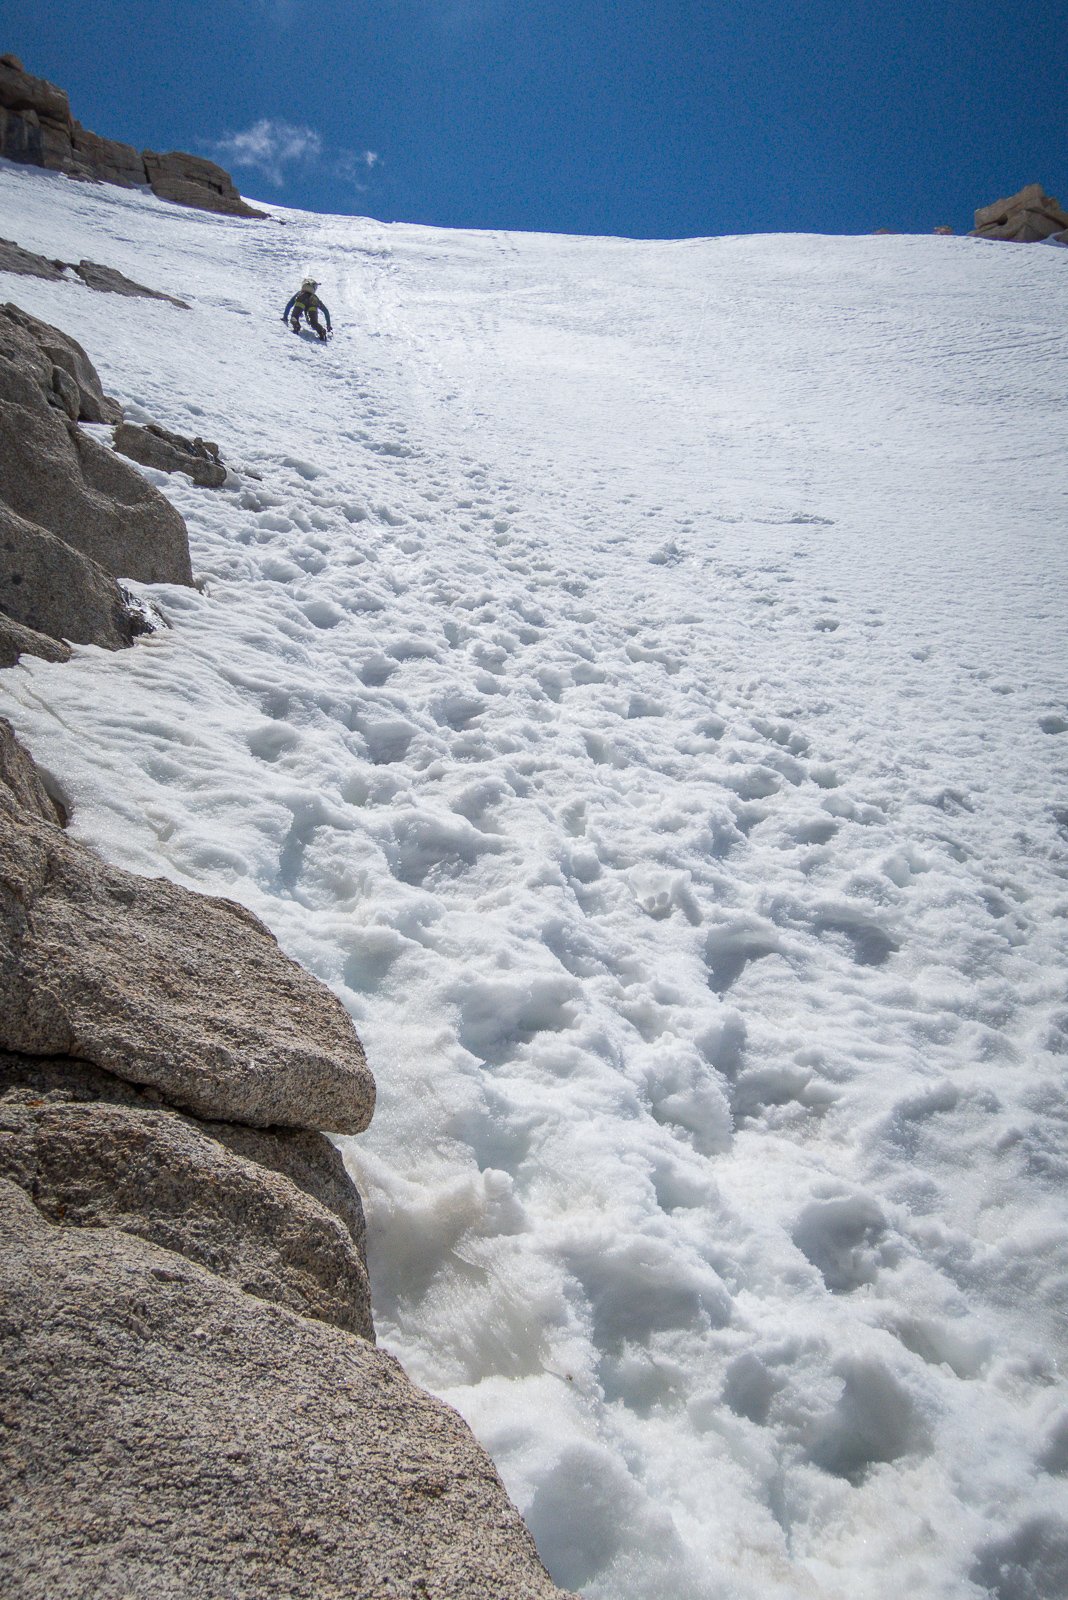
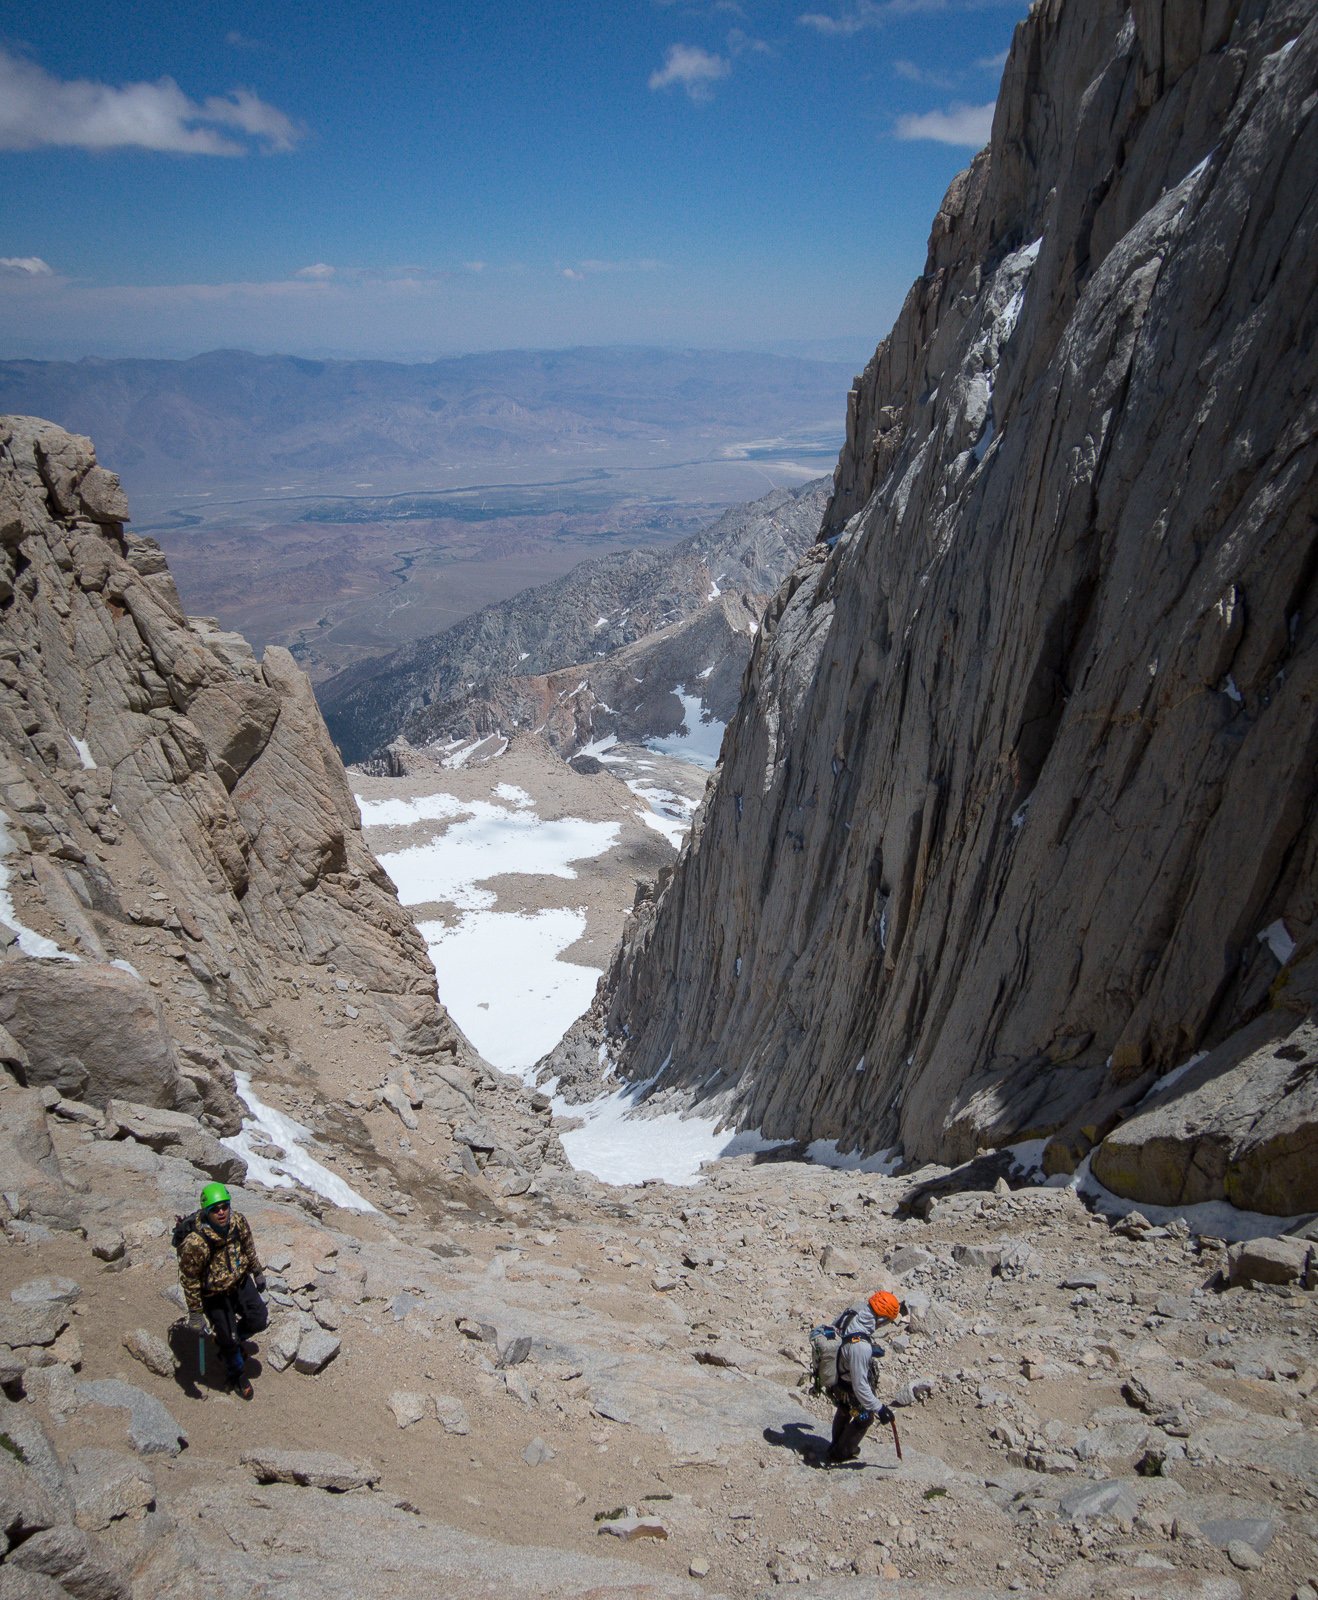
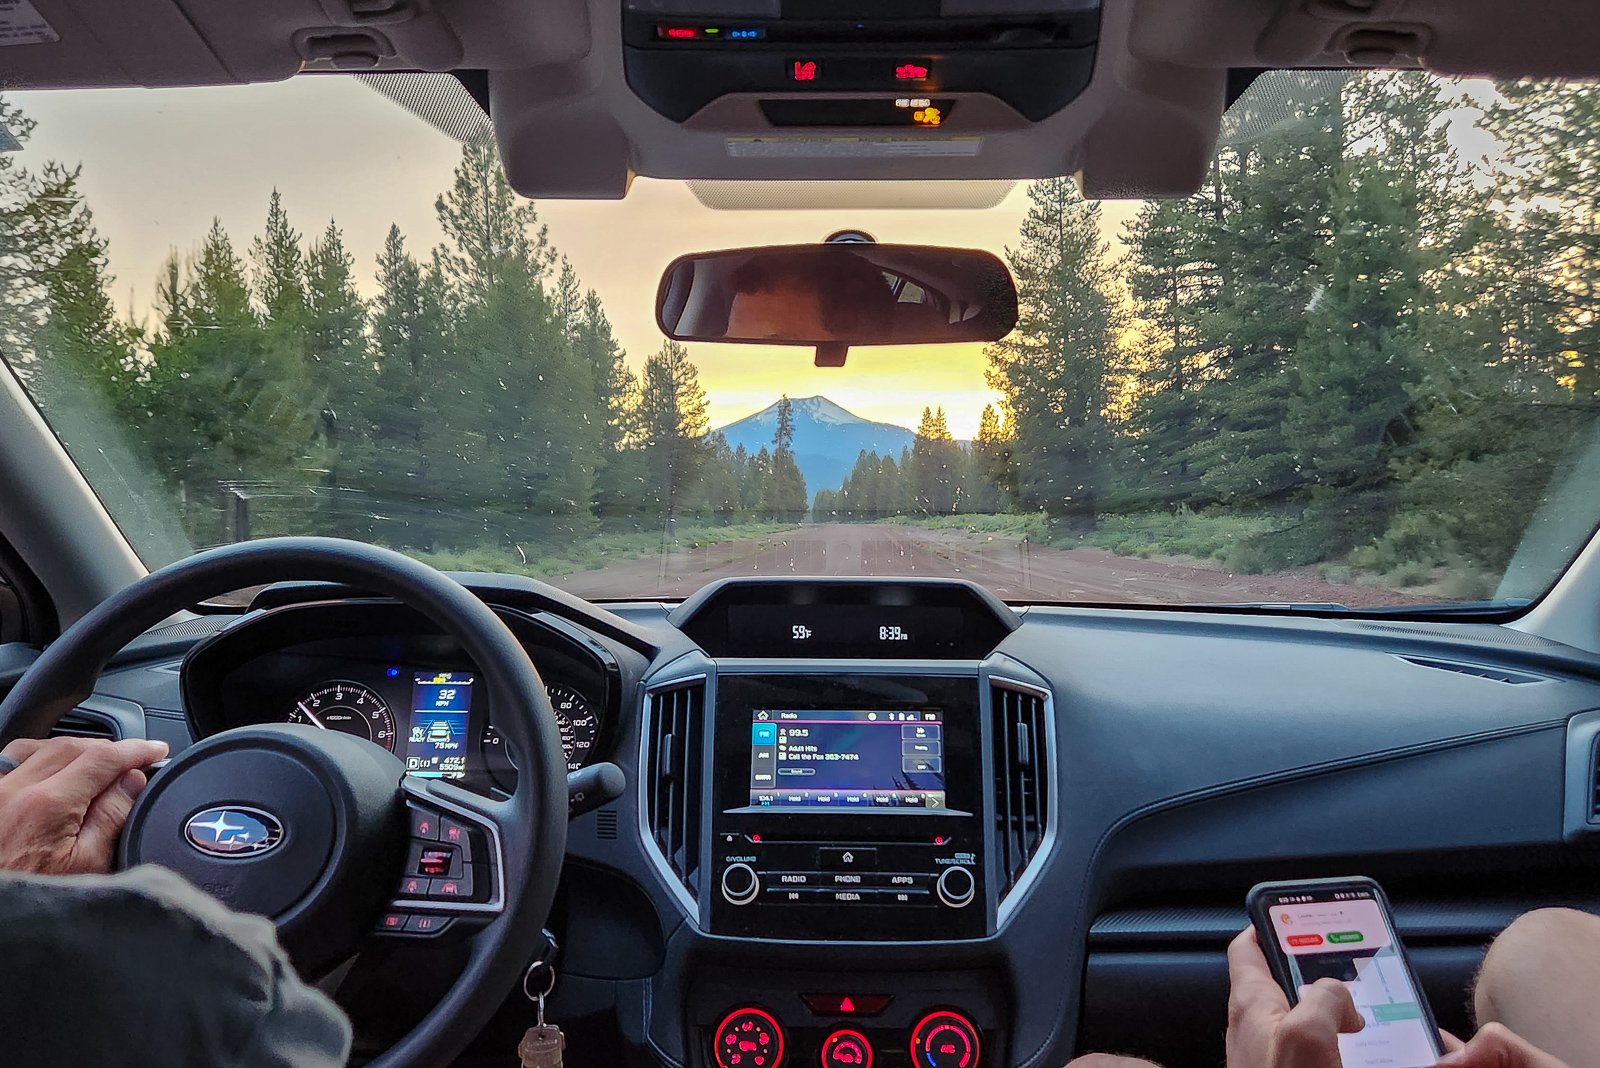
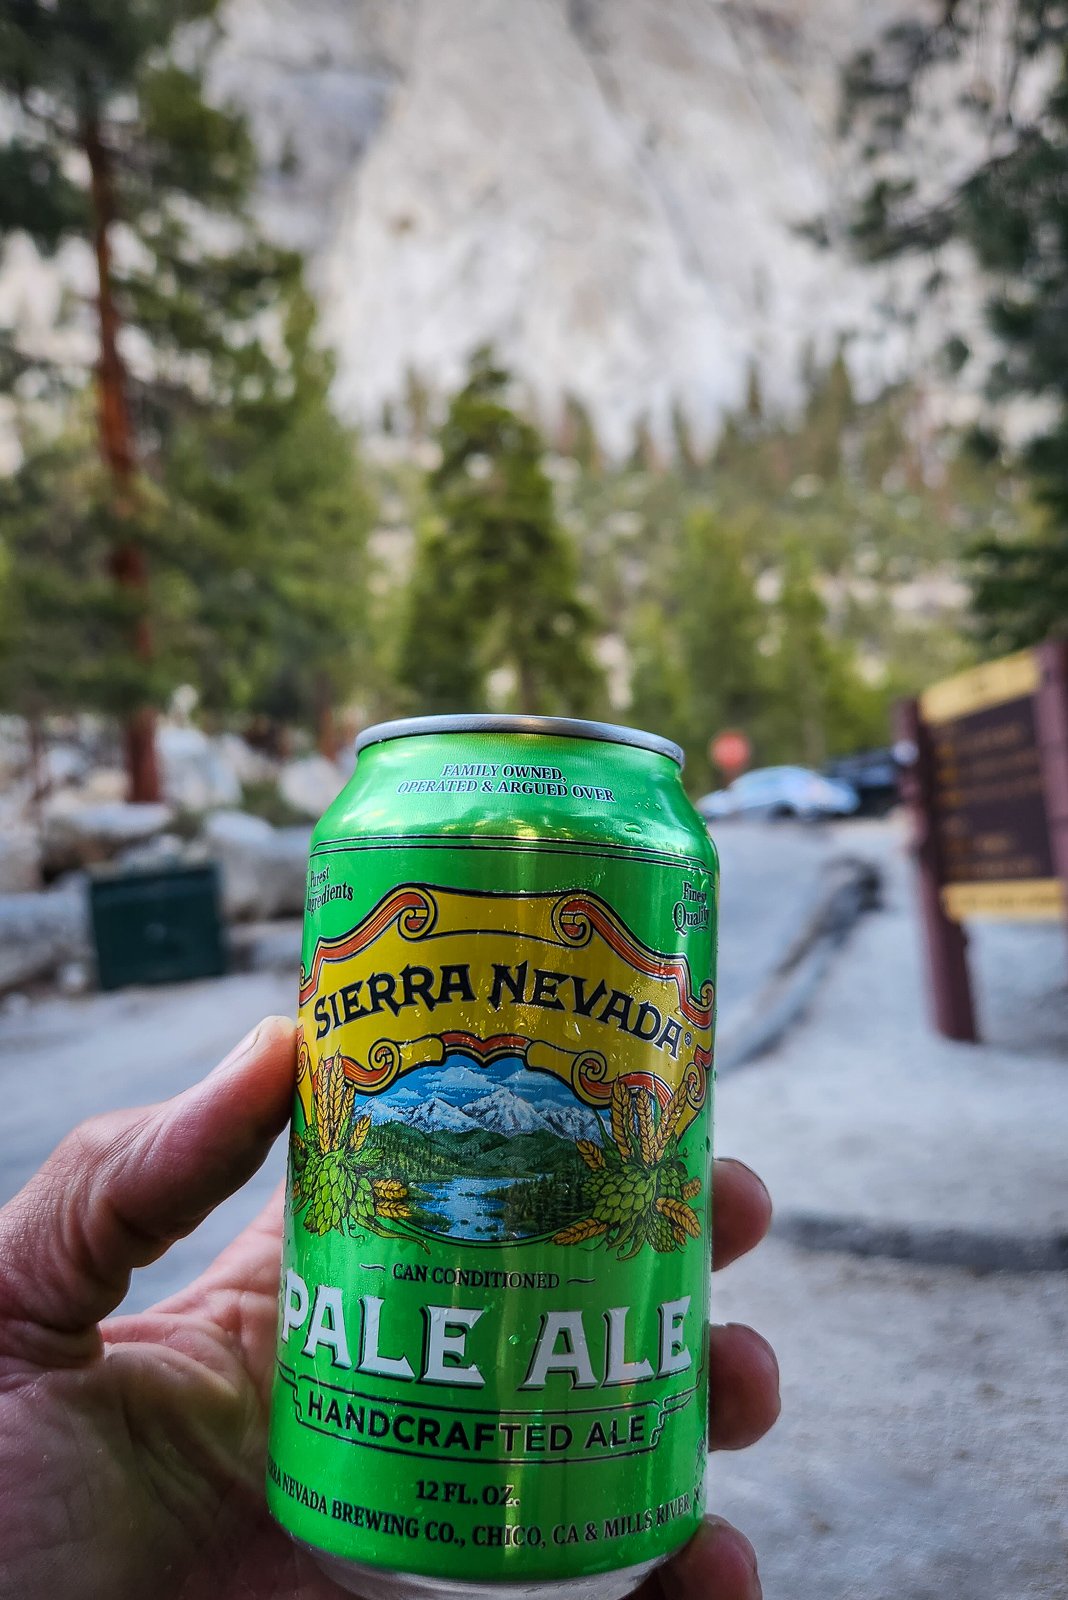
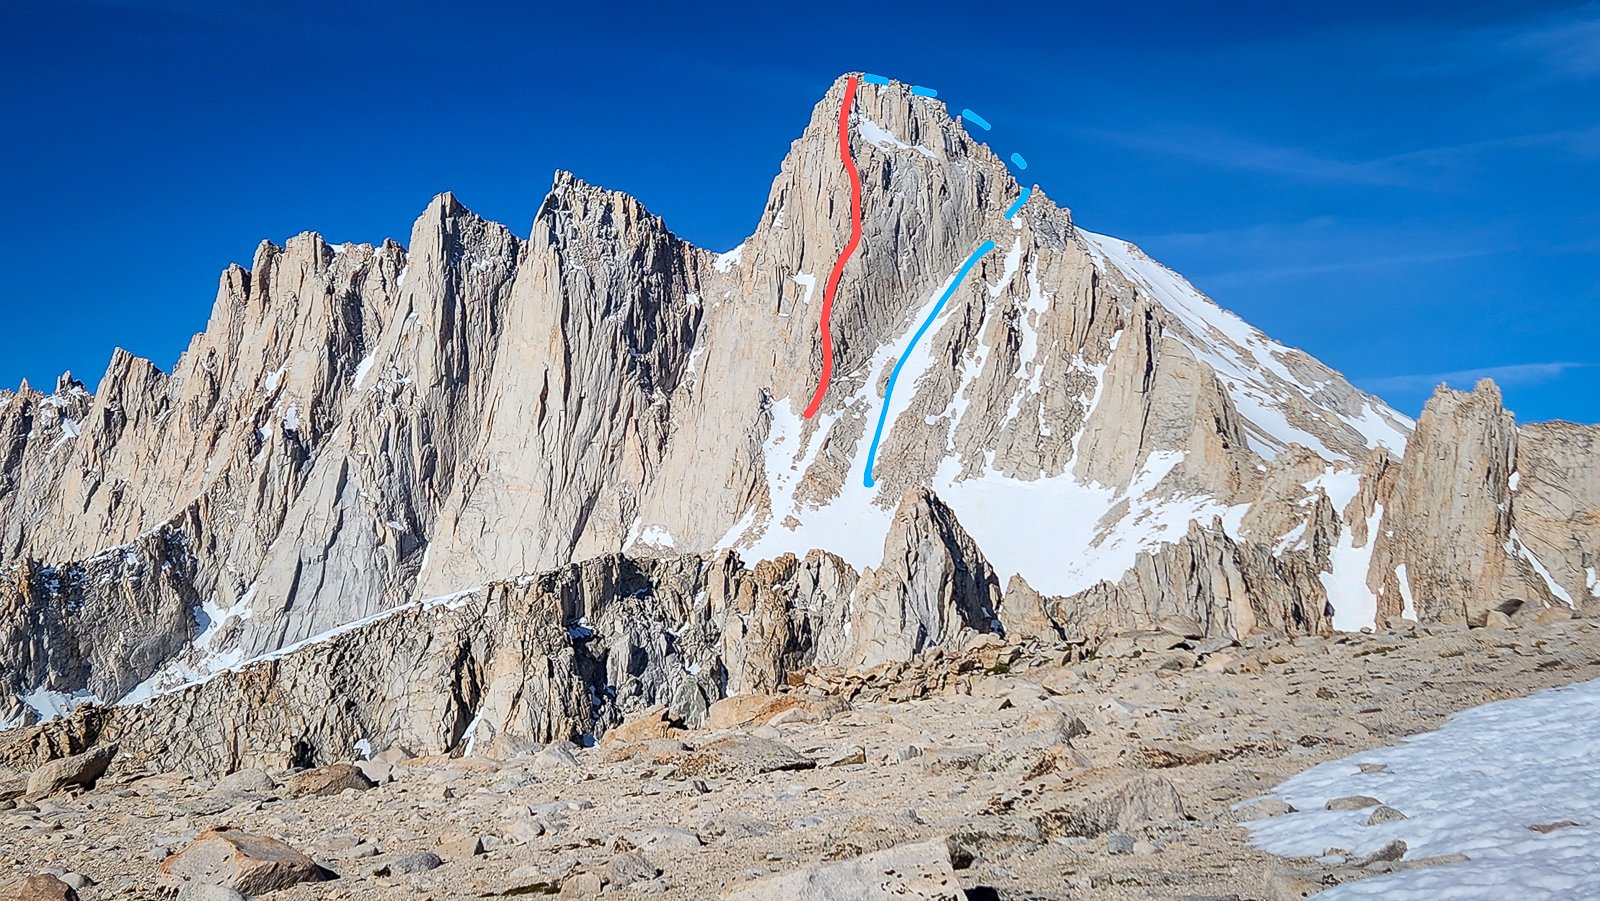
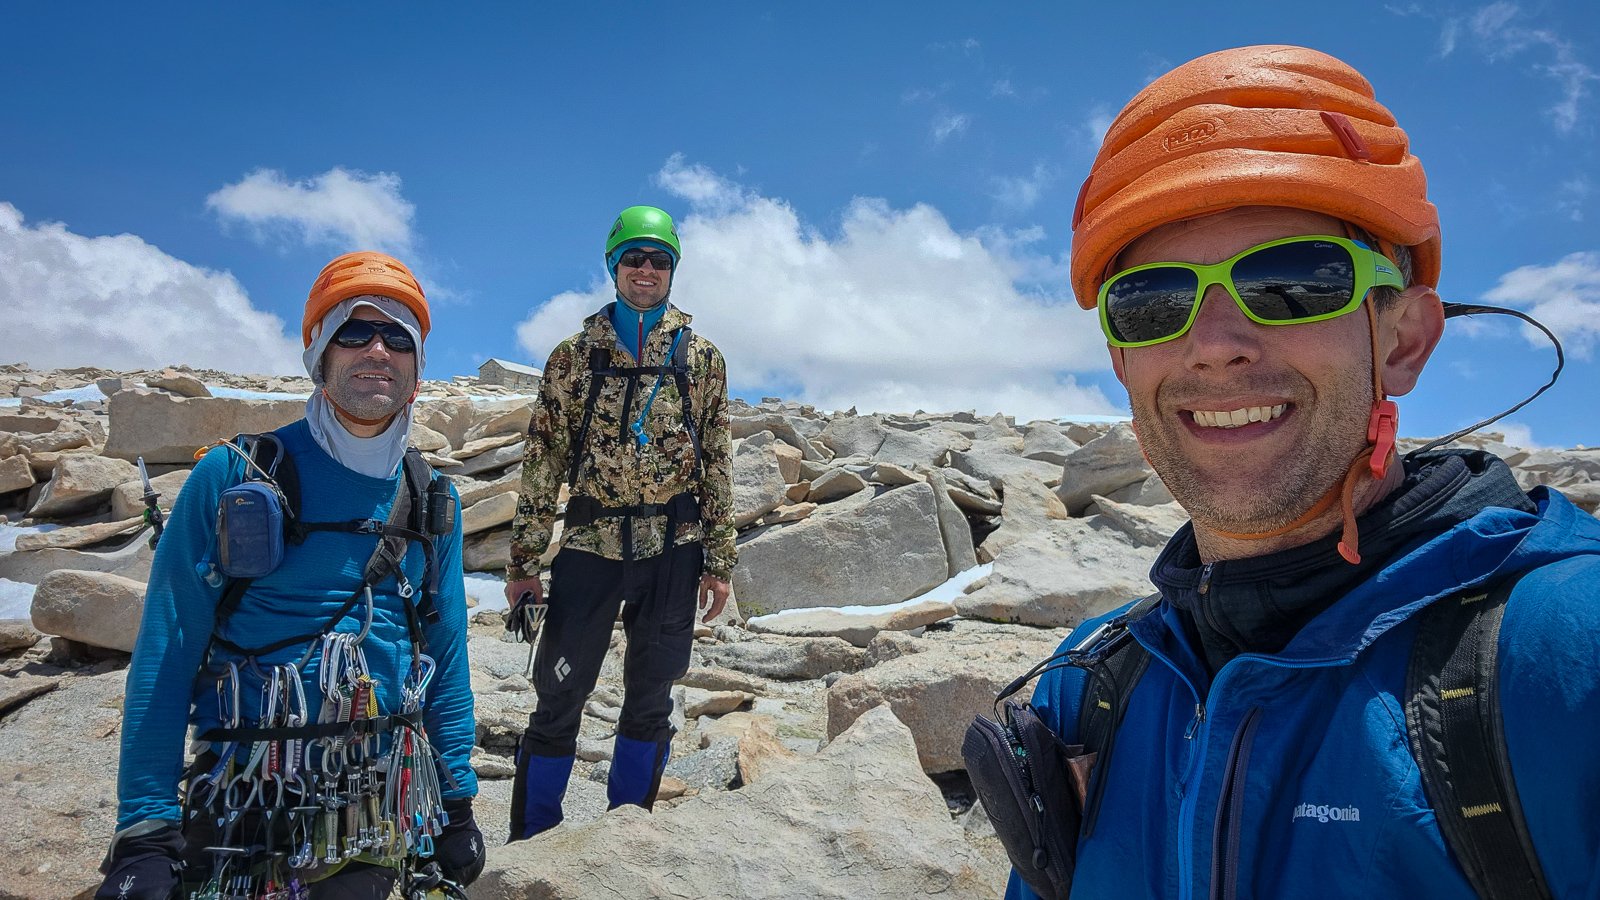
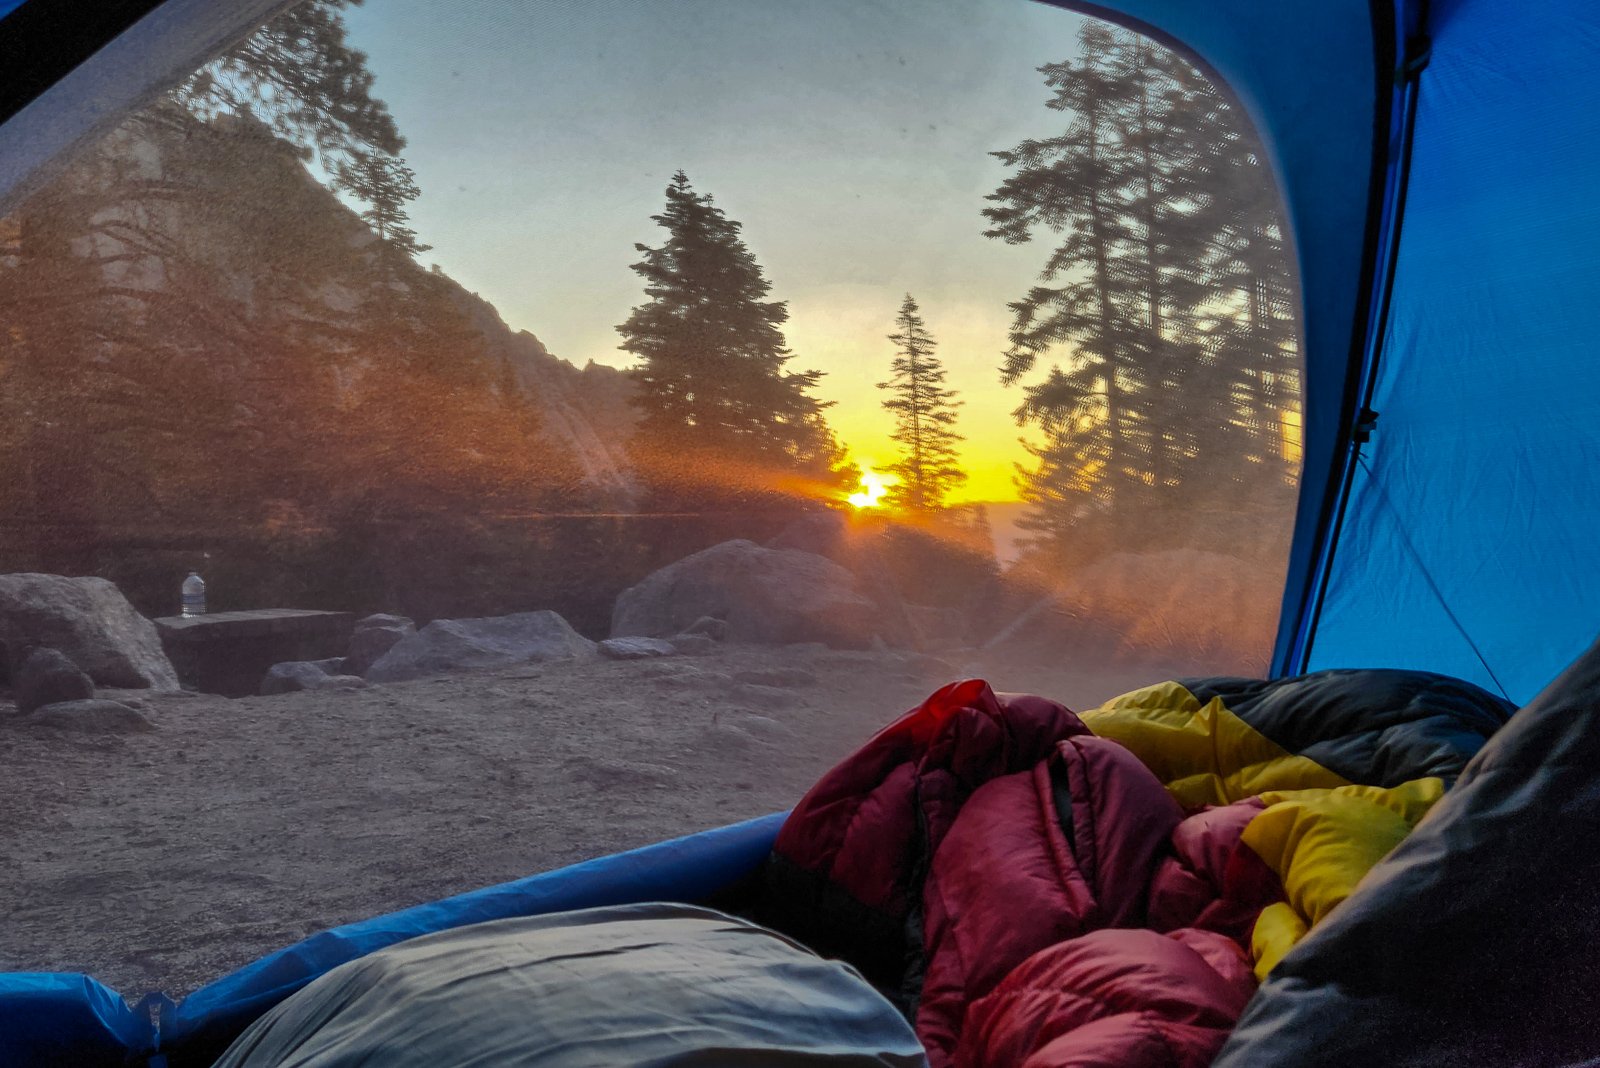
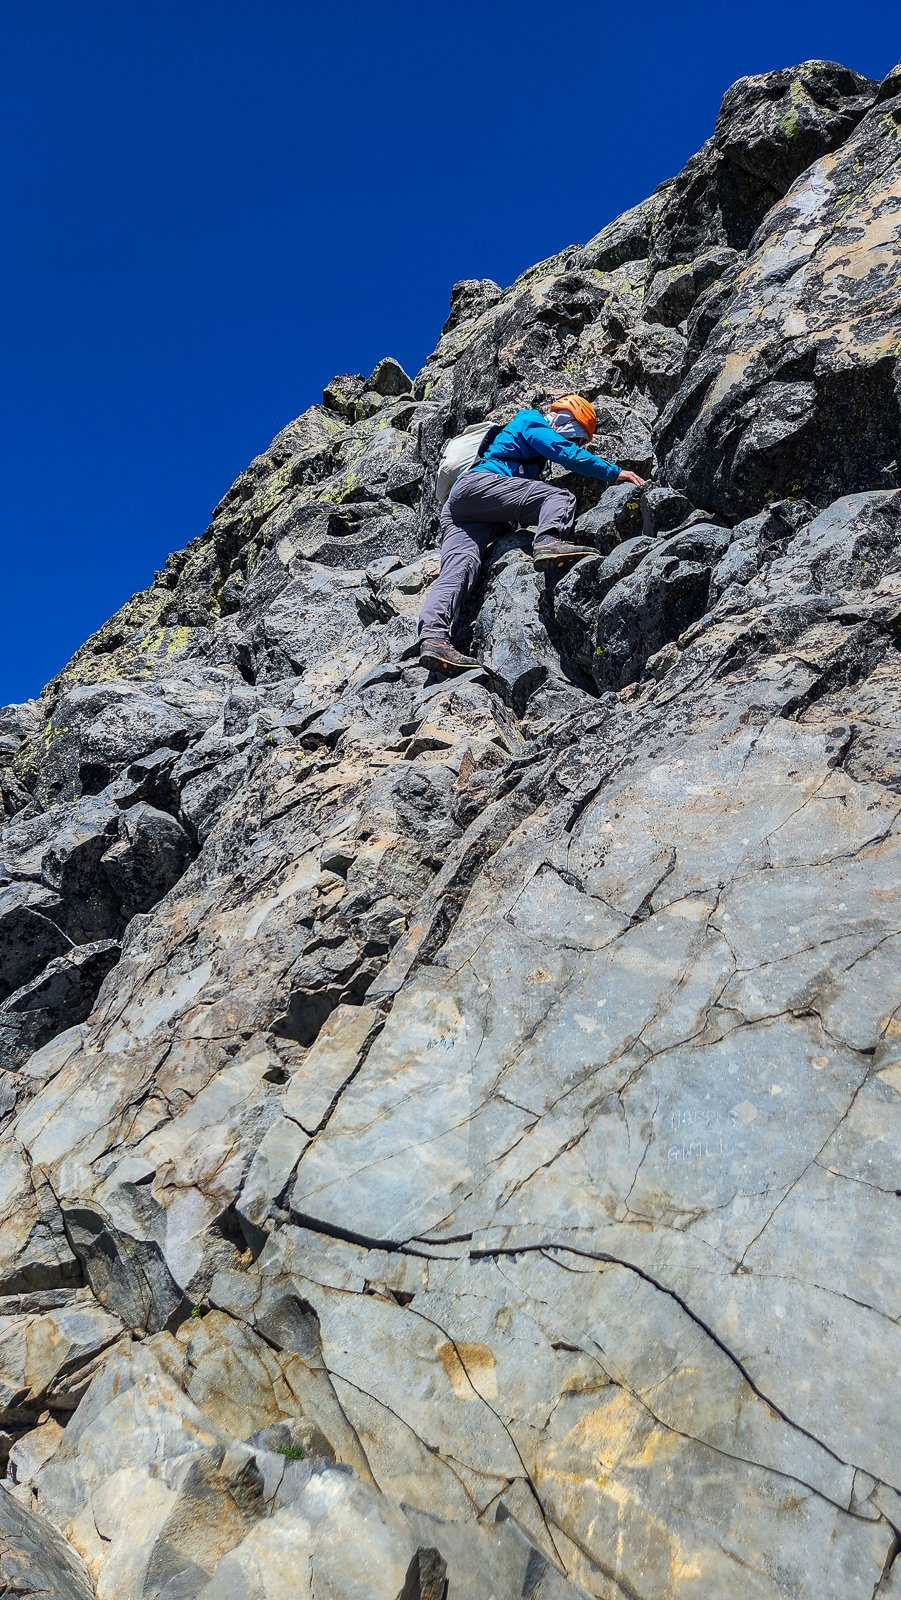
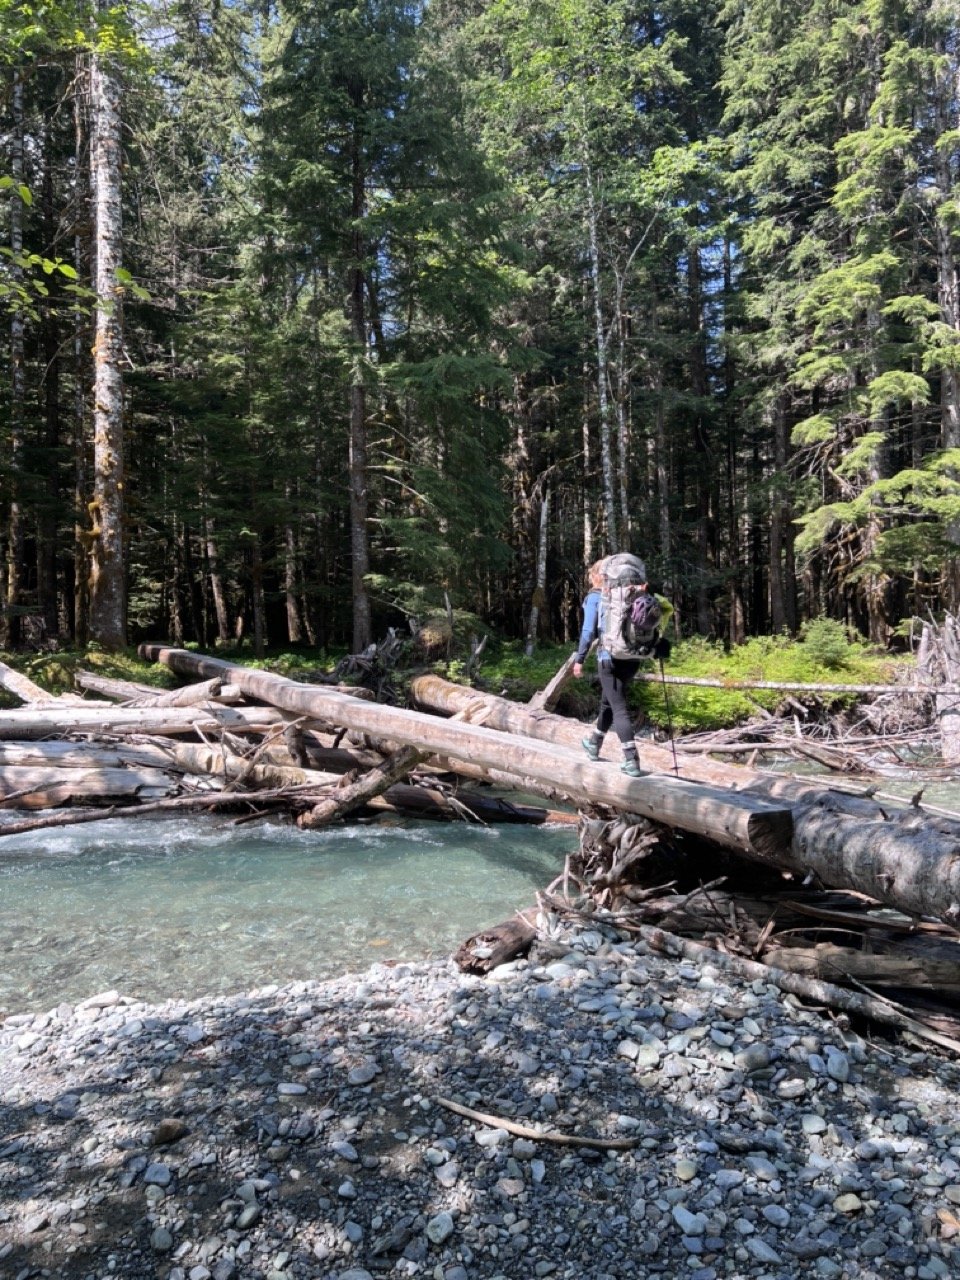
Trip: CA/OR road trippin'- Whitney, Russell, and Thielsen - East Buttress- Whitney, East Ridge- Russell, Standard scramble on Thielsen Trip Date: 06/28/2023 Trip Report: Since @Trent and @cfire were going to be gallivanting around Europe in July, we had to move our annual climbing trip up to June (John joined as well early on, but @cfire had to drop out unfortunately). Normally, June isn't the month to be climbing in the Cascades and so we picked the High Sierra many months ago, not realizing that they were going to accumulate the biggest snowpack in many decades. This would complicate things somewhat (more on that later), but the weather was solid, and so south we went.....and went. It is a long drive to Whitney Portal from the Skagit! We broke it up over two days, communing with the mosquitos in OR the first night, camping at Whitney Portal to start acclimating the second night (decent sites that are first come, first served at the TH, $20. camp closest to the river to avoid be woken by late arrivals). The next day found us sorting gear and hefting our loads to begin the slog to Upper Boy Scout Lake. Our plan was to hike up to UBSL the first night, resting in the afternoon of our arrival. Day 2 would be the scramble of the East Ridge of Russell (an excellent Cl. 3 route per Peter Croft, and I had no business jumping on Fishhook Arete so convinced Steve and John to set their sights lower) to further our acclimation efforts. Day 3 would be the East Buttress of Whitney, followed by a descent of the Mountaineer's Route, packing up camp and heading to the car. And that's what we did. I would like to spin some yarn about the pain of the approach, tricky routefinding, vicious wildlife, etc. but it pretty much went off without a hitch. We had a bit of avy debris/carnage to contend with low down on the climber's trail and a lot of snow up high, but it was pretty much a standard Cascadian approach, with a little bit of altitude thrown in. I think it took us about 3.5 hours or so to UBSL. And there we lounged for the rest of the day. The next day was clear (I think they are always clear in the Sierra) and we set off on a leisurely ramble up the East Ridge of Russell. It was extra leisurely since we had to stop and pant every few hundred feet. 14k was still 14k, but the grand views, good rock, excellent company, and zero crowds made for a pleasant day. Highly recommended! Then it was back to camp to ready for the main event. The East Buttress of Whitney! It definitely lived up to the hype, perhaps one of the finest alpine rock routes I've climbed. Eight engaging pitches, almost no loose rock, and no crowds (just one other guided party of 3). Plus an interesting descent in the Mountaineer's route (at least when snow and ice covered). Again, highly recomended! I'd also recommend two fine partners like @Trent and John who led two blocks to get us past the difficulties. I just sat back, took pictures, belayed, and enjoyed the view. Super fun! And just like that, in 3 days we were out of the Whitney area looking for a day trip on our way back to WA (we spent another night at the Whitney Portal TH campground). Lone Pine Peak (very close by) looked to be too big of a day for us after Whitney, Tuolumne was blocked by snow (Tioga pass closed) and so....what to do? I threw out Mount Thielsen in OR. We saw its impossibly steep choss horn and there was something poetic about the contrast between High Sierra granite and OR volcanics. Thielsen it would be. And so we drove up to Diamond Lake and gave a pint of blood. And wondered how Thielsen hadn't fallen over yet. But truly Thielsen turned out to much more enjoyable than expected (ignoring the mosquitos, bring DEET). Good trail and solid rock on the final 80' bit to the summit (exposed legit 4th class, you may want a rope to rap it but we scrambled up and down without mishap). Perfect weather too, and the summit to ourselves! What's not to like? And then, 11 hours after standing on the summit of Thielsen, we were home. Gear Notes: SuperTopo High Sierra Guide and Croft's The Good, the Great, and the Awesome has it all specified. We used a single rack to 3, crampons, ice axe, and helmet on Whitney. Crampons, axe and helmet on Russell, Helmet on Thielsen. Approach Notes: Git in yer car and drive!


 1 point
 -
Well, this is, indeed, a unique pleasure! I never would’ve thought this would have seen a repeat attempt, and of course this is the first one I’ve heard of. I am so glad you enjoyed it. Such adventure !! I grew up climbing on choss, so that rock actually felt pretty solid to me, but we probably varied our lines from in our respective route fighting efforts. Cheers again to you, and we are running out of climbs of mine that haven’t seen a second attempt! I can only think of a few left at this point.1 point
-
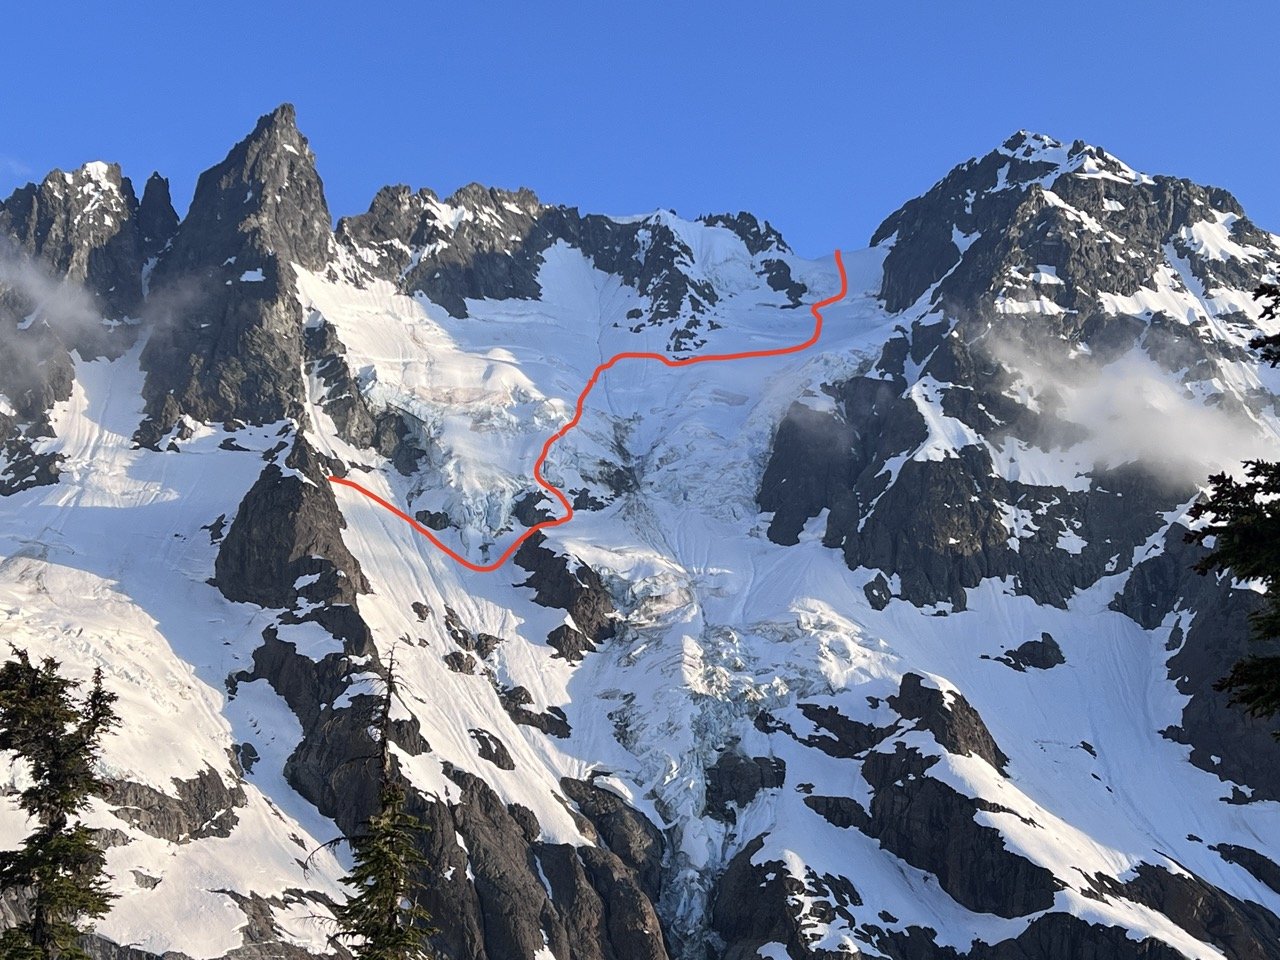
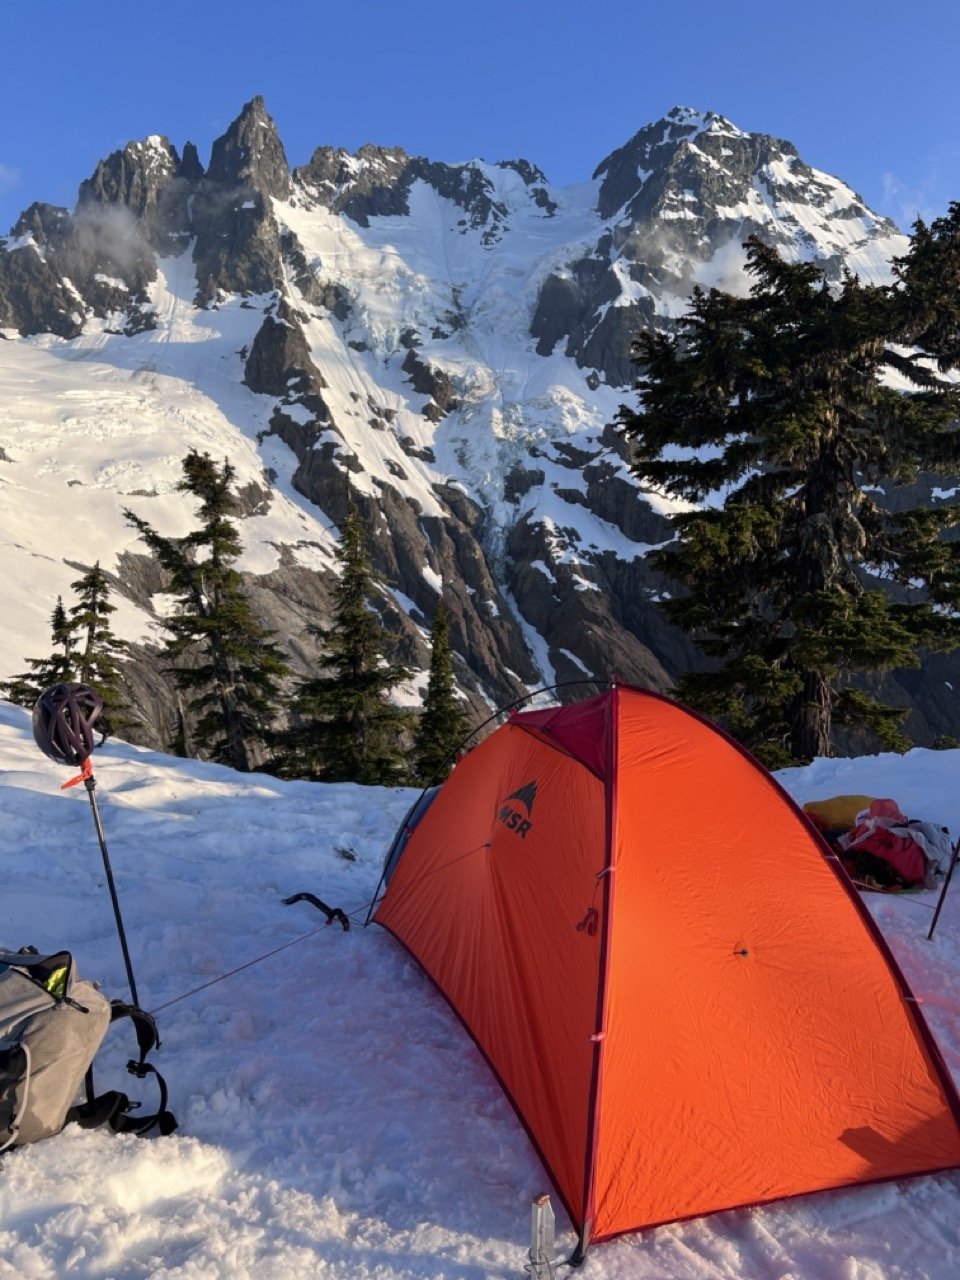
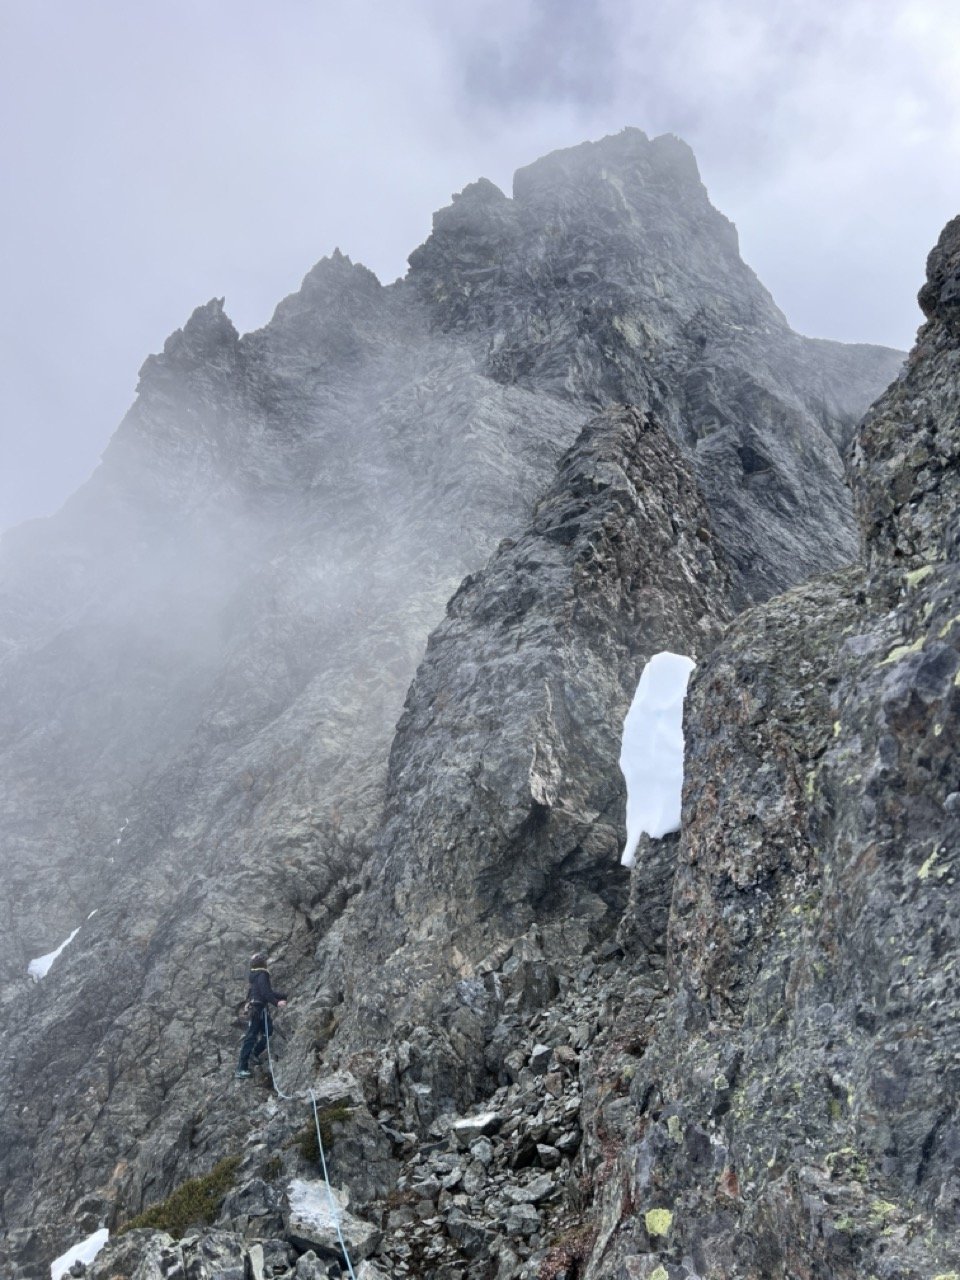
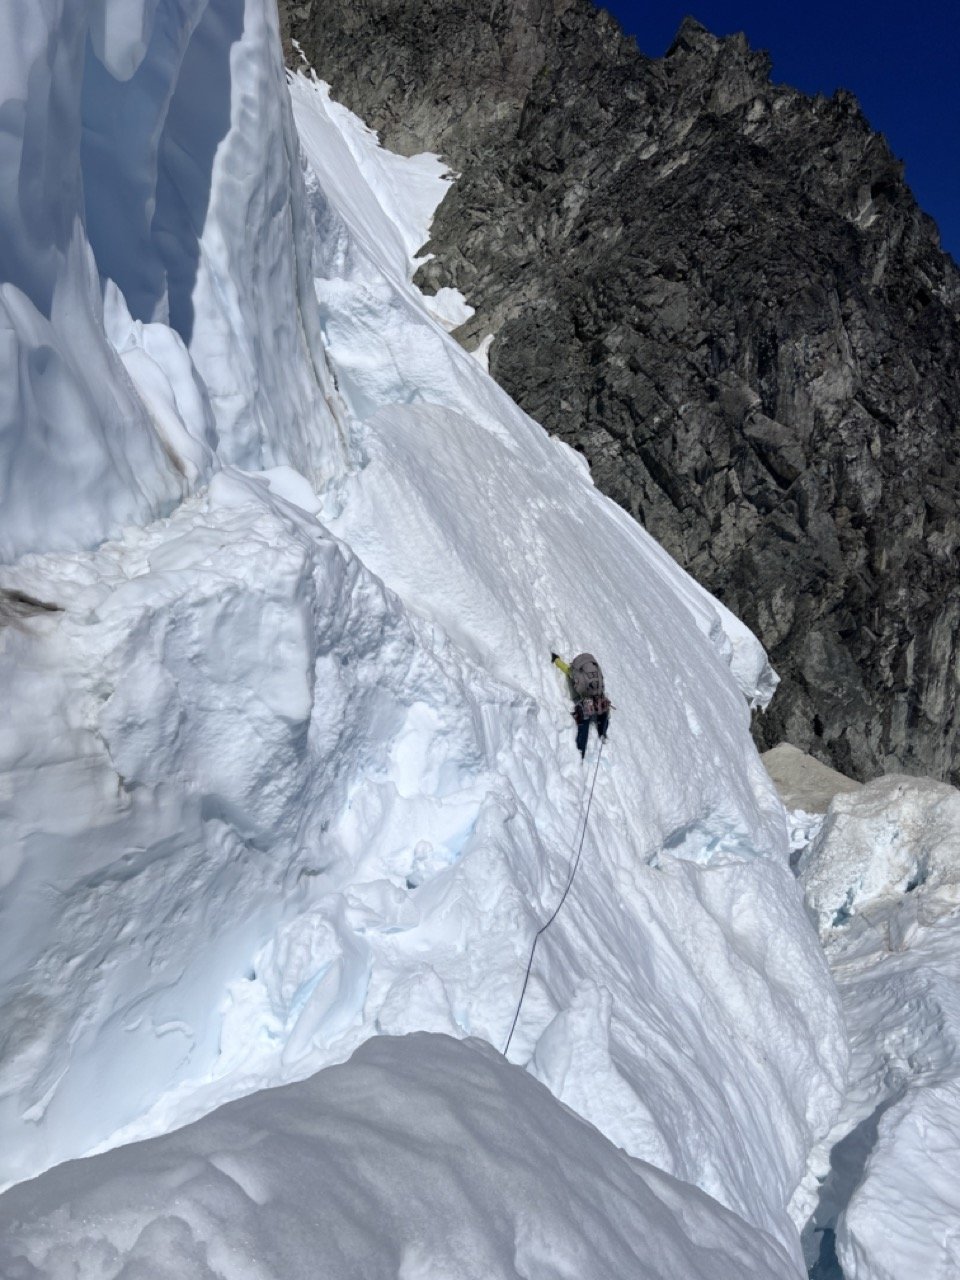
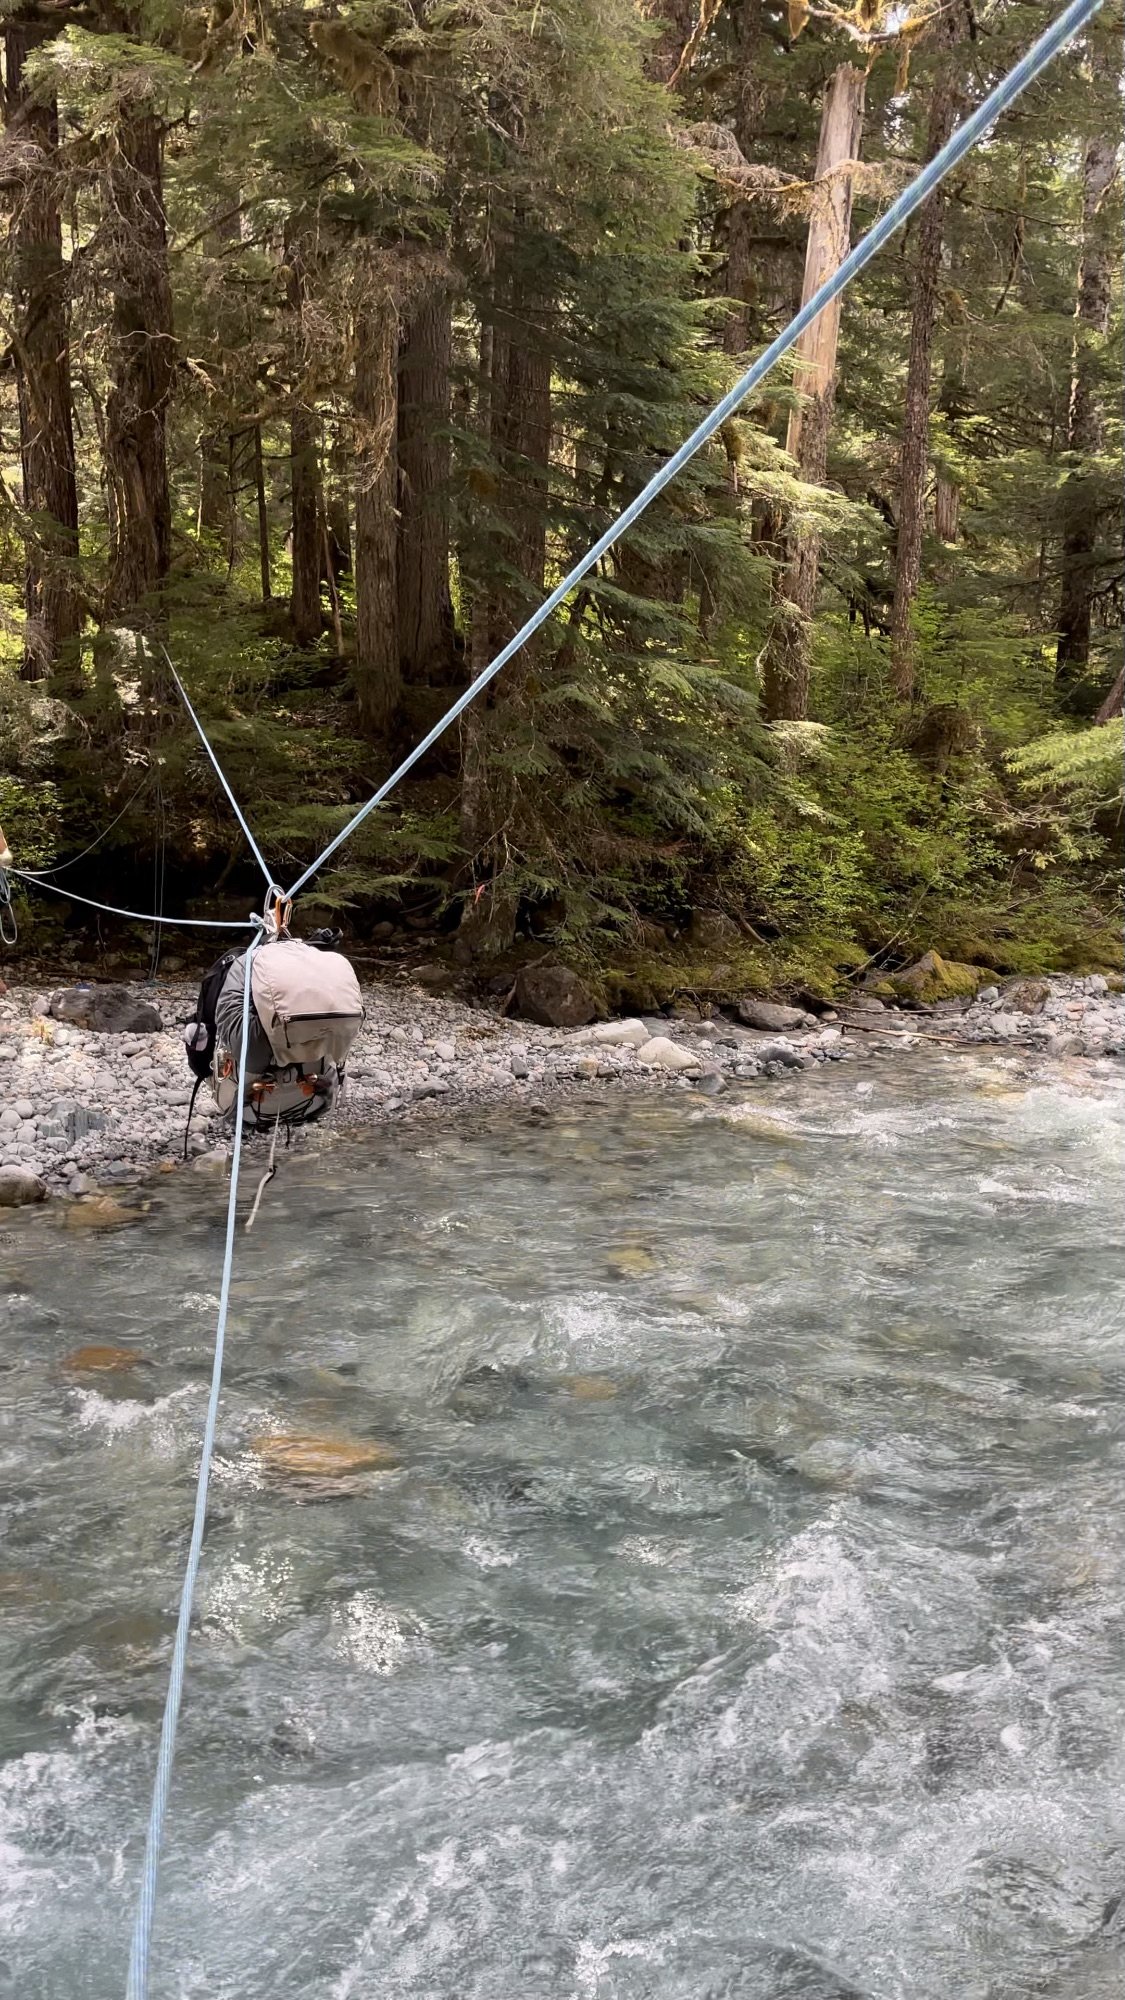
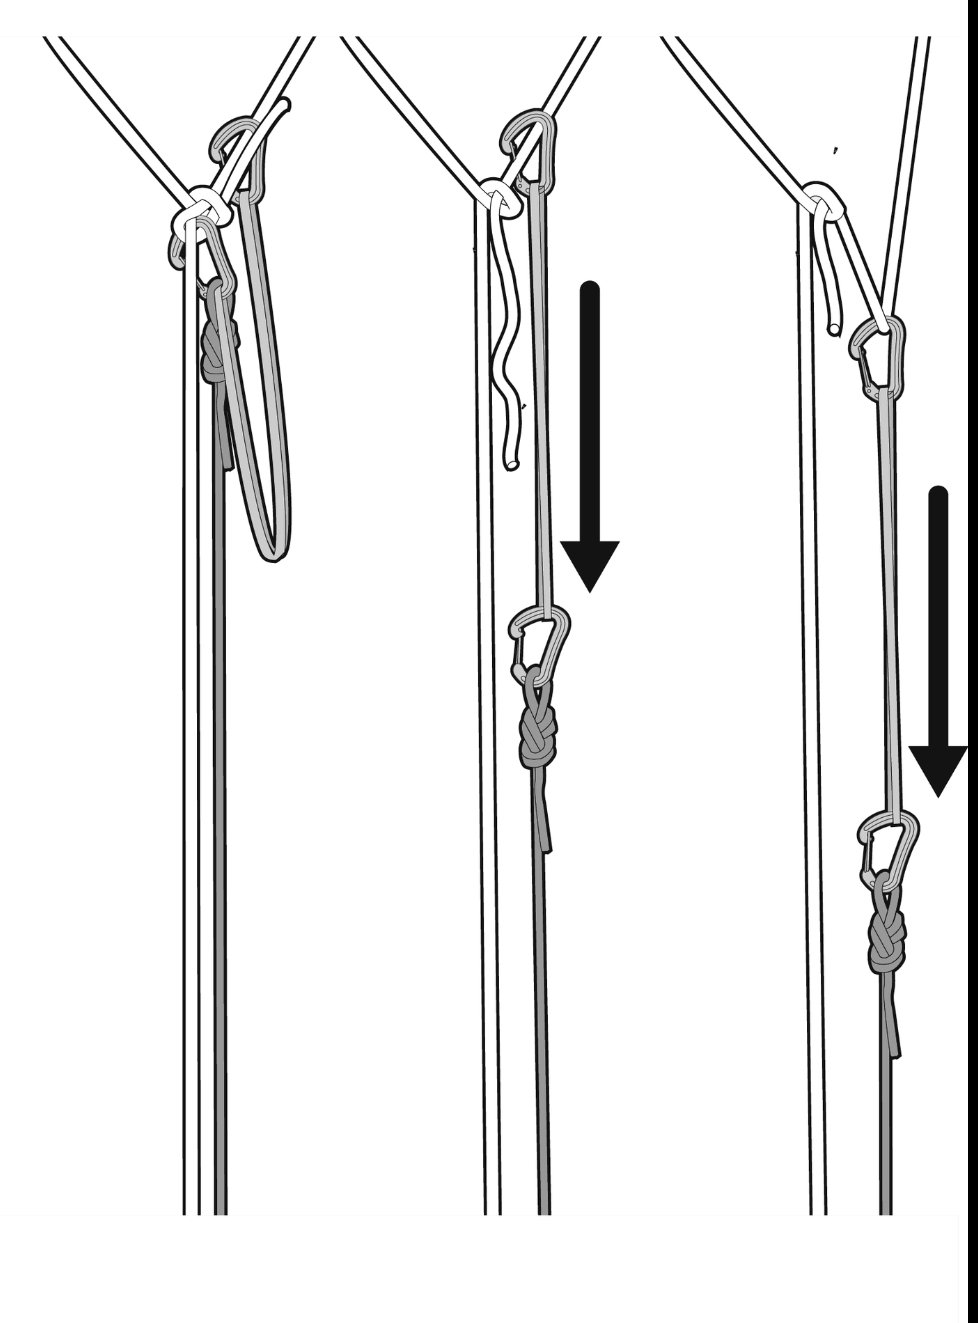
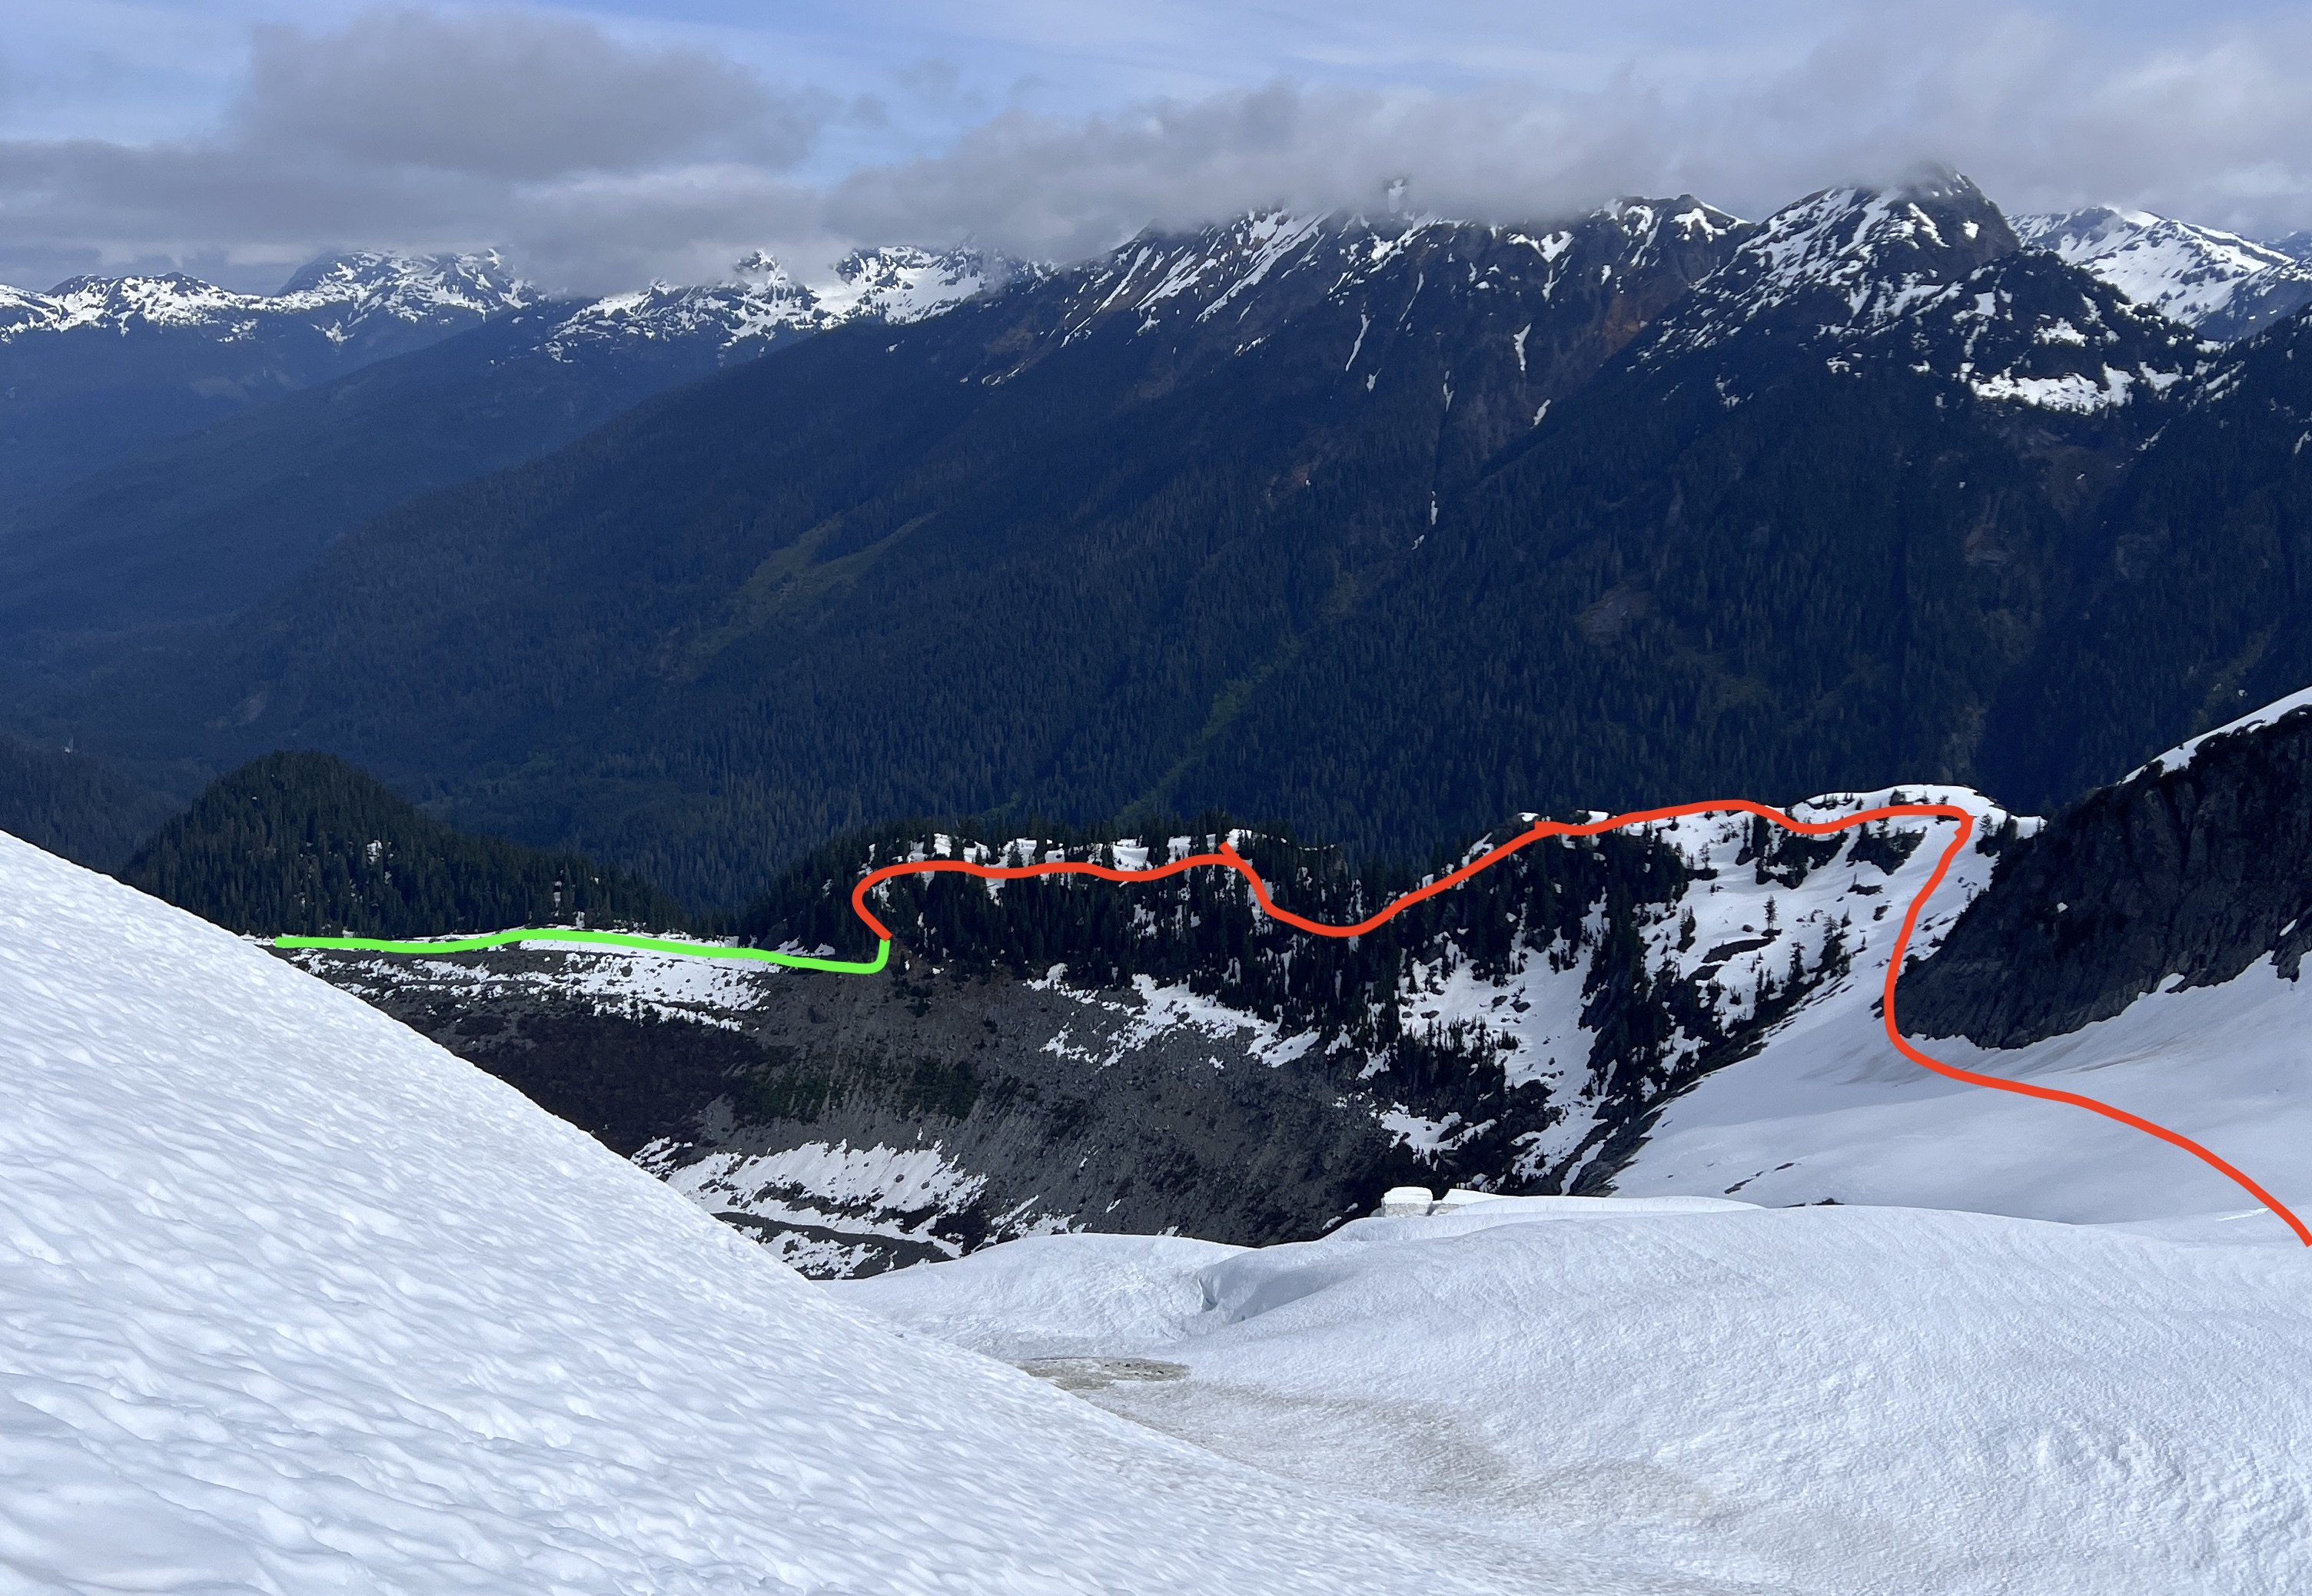
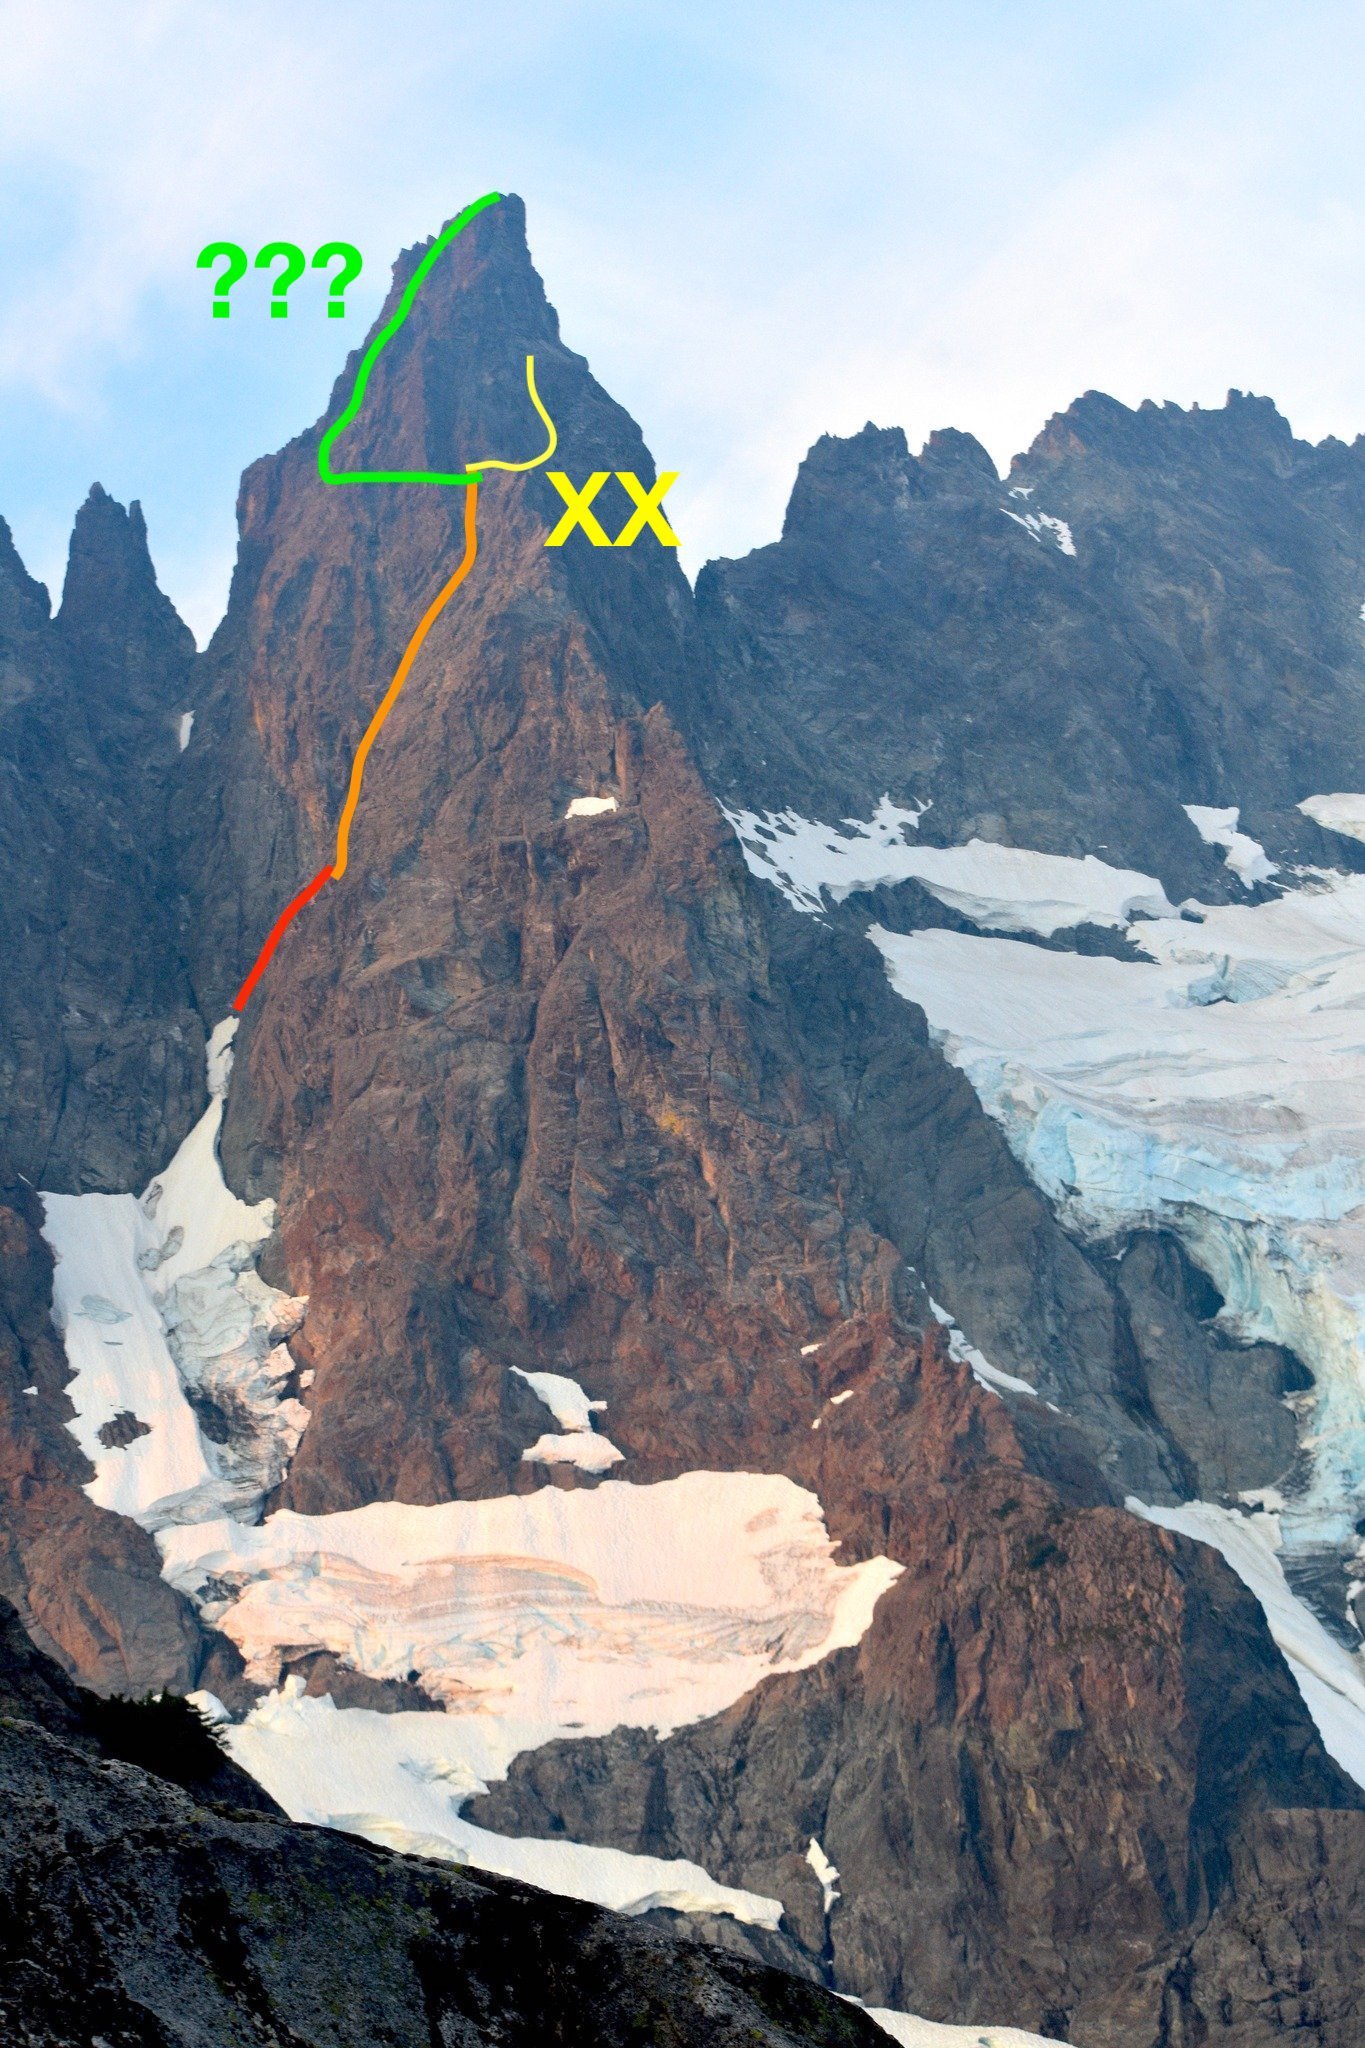
Trip: Mount Shuksan - Price Glacier and Nooksack Tower (attempt) Trip Date: 05/29/2023 Trip Report: Trip Dates: May 27 (Saturday) - May 29 (Monday), 2023 (3 days/ 2 nights total) Climbers: Jeff and Priti Wright Climb: Price Glacier (50 Classic) on Mount Suksan's North Face (successful) + Nooksack Tower (unsuccessful) along the way This report contains conditions on two routes: one is currently a sandbag and one is currently a featherbag...that way everybody has something to comment about! Descent Options: Fisher Chimneys, but there is snow on the trail all the way up Lake Ann according to the rangers on May 27. Rangers recommended floatation on the trail. White Salmon Glacier (skis), but you have a heinous bushwhack on the way out per this TR (link) "Once at the bottom of the glacier, we initiated the most miserable slide alder/thorny bush battle of my life. I was in a tee shirt, and was absolutely brutalized trying to fight through the vegetation with skis on packs." Sulphide Glacier (this requires a long car shuttle) but probably the easiest/fastest way off the mountain. Lots of traffic on Sulphide, no evidence of folks coming up White Salmon or Fisher Chimneys Memorial Day weekend. The snow on the Lake Ann Trail is perhaps scaring people away from Fisher Chimneys. Hanging Glacier Route No matter what you chose, make sure to have GPX tracks of all descent routes downloaded to your phone. You can find GPX tracks at caltopo.com or peakbagger.com. Logistics: Cache a bike or car at White Salmon Base (White Salmon Glacier or Hanging Glacier descent) or Bagley Lakes TH (Fisher Chimneys descent). We locked a single bike to a signpost behind a guardrail (very discreetly) near the White Salmon Base Area. It's a short/fun bike ride downhill and on the dirt road back to Nooksack Cirque Trailhead to your car. Note: White Salmon Base parking lot is closed for construction and no parking is allowed there. Therefore, I'd probably recommend Fisher Chimneys descent with a bike cache at Bagley Lakes parking lot. The road to Artist Point is partially open, so you can cache a bike higher up the road, maybe. You can also hitchhike down Mt Baker Highway then walk the extra 2.2 miles from the NF-32 turnoff to the Nooksack Cirque Trailhead. Park at Nooksack Cirque Trailhead and start from here. To get here, take NF-32 off of Mount Baker Highway, then branch off right onto NF-34 to the end of the road. NF-32 and NF-34 are dry, dirt roads in good condition currently. Plan for extra days out. The Price Glacier route can be trivial or it can be really complex and time consuming. Sandbag: In its current condition, there was no really technical terrain on Price Glacier (this will change day-to-day!). Just easy snow walking all the way up....much easier than the North Ridge of Baker. The bergshrund has a trivial crossing up the middle that might last a few more weeks. If it's out, however, then you're in for some mixed climbing out of the moat on the left or right side of the shrund. Featherbag: Nooksack Tower has a lot of rockfall, the worst rock quality I've ever experienced (even after the Southern Pickets Traverse!), VERY sparse protection, lots of required downclimbing, and difficult routefinding. Basically, YGD, and I don't recommend this peak at all to anyone, probably ever. I know it's a Cascade classic, but I was so shut down on it and also so unimpressed. It's just terrible...and too dangerous imo. All you successful Nutsackateers are free to comment about how trivial it is and how I need to harden up. Approach We got to the Ranger's office in Glacier at a leisurely 9:30 (they open at 8:00) but recommend you get there as soon as they open because stashing the shuttle/bike takes time. You might also want to consider getting your permit a day early, then sleeping at the trailhead to get an alpine start. Then we discreetly locked up a bike off the road near the White Salmon Base area and drove to the Nooksack Cirque TH. At the trailhead, head straight to the river and slightly downstream to reach an improved log crossing to start the Nooksack Cirque Trail. The trail has a few downed trees, but is generally in good shape. First improved log Crossing just at Trailhead Second improved log crossing along the trail...Priti doing her sexiest logwalk pose After reading this legendary trip report (link) from Pellucidwombat about their 9/2/22 Labor Day Weekend climb, we came prepared to encounter anything. This report is definitely worth a read. Mad props to those two for getting it done in those difficult conditions. I really feel like earlier in the season, the better for this climb. The original log crossing across the North Fork Nooksack River (now gone) has been there for years and years and provided access leaving the Nooksack Cirque Trail into the Price Lake valley. Pellucidwombat describes how they found a new crossing and provided us with the GPX point. Their new crossing is also gone (not underwater, but actually swept away). The best place to ford the river that we could find is at the original log crossing location (N 48.87097° W 121.61267°). We went up and down the river for hours to look for a new crossing. This location spot is the least sketchy spot to cross. A few parties have done it unroped this season (with skis!), however I thought it was sketchy and high enough to cross on belay then set up a tyrolean for the packs. Our tyrolean steps: Set up one end of the 60m rope to the tree as a retrievable bowline (equivocation hitch could also work, but this thing give me the heebie-jeebies, and it might be harder to release after a tensioned tyrolean). Practice this at home first! Tie-off of the bowline tail as as a Backup/Failsafe. Cross the river on belay with a bight of rope attached to your harness. Note: bring a bight across, not just the other end. Keep both ends of the rope at the start. Once across, make an anchor around a tree (2x 120cm runners work), then bring the anchored end of the rope tight and tension it with a simple Z-pulley (I used two micro traxions since they release easily). The taut, Tyrolean line goes from the Bowline to the Z-pulley. If you happen to have a GriGri, it is much safer to use the GriGri as a progress capture pulley than the micro traxion (link). Technically, Petzl says YGD if you use a micro traxion as a progress capture pulley for a tyrolean (link). Of course, a regular/passive pulley (such as a locked-open micro traxion) with an old-school progress capture hitch (Bachmann, prusik, Valdotain, etc) also works well and is safer. The free end of the rope going back to the start gets pulled in and attach a backpack to a figure-8 on a bight. Clip the pack onto the tensioned line and pull the pack across with the slack line. With a 60m rope, the person at the start should hang on to the free end of the rope to pull the carabiner back across. Therefore, you have a tensioned line and a slack line (tether). Re-tension the Z-pulley between each crossing. Once both packs are across, follower confirms that the Removable Bowline is set up, removes the Backup, then Tyroleans across the tensioned line (nothing fancy, just hand over hand with a locker on their belay loop) Release the tension on the Z-pulley. The Bowline (or EQ Hitch) won't release while the line is tensioned. To release the micro traxion (or GriGri or progress capture hitch), you'll need to tighten the Z-pulley slightly in order to open the toothed cam (practice this if you don't know what I'm talking about). Pull the pull side of the rope to release the Bowline (or EQ hitch). Note: this may be a *vigorous* pull! If you've set up an EQ Hitch, practice ahead of time what it feels like to pull on each line alternating between each bight release. Releasable Bowline (pictured) from 'Down' by Andy Kirkpatrick: the most effective ghosting technique, due to the fact most climbers know how to tie a Bowline, it’s safe if carried out correctly, and it works. In this set-up, a 120 cm sling is being used. You can use a longer sling (240 cm) or cord, but 120 cm is the minimum length. Anything shorter and the Bowline will probably not fully release. Also note that the tail of the Bowline must be long enough to tie an effective and secure the Bowline (30 cm long), but not so long that the tail does not fully clear the Bowlines when the RELEASE rope is pulled. There is flagging at either end of this river crossing location. From here, follow frequent flagging up the slope through mild bushwacking and bootpack trail until it opens up and you get your first glimpse of Price Lake. If you lose the flagging, retrace your steps and try to get back on course (GPX tracks are helpful). This section of the approach would be much harder without the flagging, so please try to preserve it. This section from the North Fork Nooksack River up the slopes to the Price Glacier moraine is fairly trivial, but it is STEEP! Once the slope opens up, you first traverse across talus and boulders to eventually gain a lateral moraine. Follow the moraine bootpack trail (green line pictured below) until you are under a cliff band. Immediately gain the cliff by the first gully (red line pictured below), then follow the undulating ridge (many bivy sites here) until you are forced to go down onto the open snow slopes. We bivied on top of this ridgeline the first night, but a strong party can easily make it to the Nooksack bivy which is recommended so that you get on Price Glacier early the next day. Priti and I originally planned to spend one day on approach, one day on route (Price Glacier only), then fly off the summit the morning of the third day. There was a team of 2 who were one day ahead of us (Eli Philips @eeelip and Ian Mock @cascade.ian) who impressively planned to do Price Glacier with skis on their backs and also tag Nooksack Tower along the way. When we got to the Nooksack bivy, and saw their tracks going up the Nooksack Tower approach gully (and after watching them effortlessly float up the Price Glacier in just a few hours), we couldn't let these guys 1-up us! So, we changed the plans and spent all of our second day questing up Nooksack Tower with just the pictures of the pages from Selected Climbs. The route line in the book is a little deceiving since it goes straight up the "central couloir" which looks to have overhanging terrain, and not the 4th-and-low-5th class terrain advertised. If we had done some research ahead of time, these two trip reports would have been handy from 2013 Jason G (link) and 2014 Dave Shultz (link). Eli and Ian (as we found out later) also didn't have enough beta, starting too low in the approach gully and bailing after getting spooked on runout terrain. I think we started at the right spot which is to go as high in the approach gully as possible then start up the right side at some TAT (don't get suckered up the chimney directly up the middle). The route has 3 distinct sections: low angle ramp/slabs (red line below), low angle couloir (orange line below), then a sharp traverse out left to more low-angle ground to the summit (green line below: the presumed route which we did not explore, so do not trust this green-line-overlay!). The start of the route has a few body lengths of wet, low-5th ledges with good gear in a corner which soon eases to low 4th class and little protection. Pass a large rappel anchor at the top of the slope where the angle steepens, then make a short traverse out right under the steepening wall and turn the corner to continue up and left into a wide gully (orange). Continue up this gully which gradually steepens to gain the ridgeline and a prominent notch where you get amazing views of Price Glacier. Side Note: A neat option for future parties might be to bring all your kit up to this ridgeline (top of orange line), cache your packs, summit Nooksack, retrieve your packs, then make two 30m rappels down the other side of the ridge to the top of Price Glacier which would bypass much of the heinous descent and shorten your total trip. The only downside is that you'll bypass the fun lower 2/3 of the Price Glacier route. From the ridge, we accidentally continued out right onto the West Face (yellow line). The route got difficult, loose, with bad protection (spooky!), so we tucked our tails and bailed. A key bit of beta from JasonG's TR would have helped us tremendously: "For aspiring Nooksack Tower ascensionists ... traverse hard left [at the ridgeline] across 3 or so ribs as soon as feasible once you've climbed up and right from the snow gully. Then, basically traverse left until you get to 3rd/4th class gully that will take you to the summit. This is key, don't be pulled up and right by the numerous rap stations-these led to the North face . Alpine Select gives this variation a 5.7/.8 rating and it felt quite spicy in boots." Note: I presume this North Face route continues straight up from the orange line. Photo above is taken from pelluciwombat 9/2/22 TR and not representative of current conditions. Nooksack Tower Descent: Selected Climbs warns that the descent off Nooksack Tower takes longer than the ascent, which is true! We only had one 60m rope so we made a couple short rappels with a lot of belayed downclimbing between stations. Two ropes would definitely had been nice! Be prepared to freshen up lots of anchors with new tat and maybe some leaver nuts since a lot of the anchors are snafflehound-tattered stuff from JasonG's 2013 ascent. Priti nearing the prominent notch at the ridgeline. We went right (West Face). North Face is pictured in the center (possibly). Likely, the Beckey route is way left around the other side of the skyline ridge. We bivied our second night after our 12hr attempt on Nooksack Tower at the Nooksack Bivouac (the prominent saddle under Nooksack Tower). Right now it is flat and snow-covered for several tents comfortably. Note that late in the season (according to pellucidwombat), this saddle is just a knife-edge snow ridge and not conducive as a bivy site. There is another nice bivy site on flat snow on an obvious rocky outcropping on route just after traversing out from the Nooksack Bivy. With fresh steps to follow, the Price Glacier itself was a non-event, taking 3-4 hours to ascend the face. Pure Type 1 Fun! We may be the first people in history to have steps kicked and the proper route found for them on Price Glacier! Luxury. No gear was placed, no crevasses were fallen into, and we got the muscular endurance workout we were hoping for. We each carried one picket and the follower carried one screw in case of a crevasse fall. The bergshrund crossing was easy, located in the middle (pictured below). I would almost feel comfortable solo'ing the Price Glacier in its current conditions (from a technical standpoint) except for the fact that it is still a glacier with several potentially dangerous crevasses, so a rope and glacier travel gear is still recommended at the very least. Above picture: Priti crossing the bergshrund in trivial conditions. This is traditionally the crux of the route. If there is no way to cross it directly, then mixed ground must be taken across the moat on the right or (more commonly) left side. Once on top of the face, it is necessary to make a wide circumnavigation to join the procession of Sulphide climbers. Instead of the wide circumnavigation, we followed Ian and Eli's clever shortcut, traversing high under the summit pyramid, then ascending to a notch in the South Ridge then descending slightly to join the main route to the summit. The summit pyramid is in easy conditions now, with snow most of the way to the top, with just a short section of 4th class rock (a few body lengths), reaching the summit at noon after starting out at 6:00AM. The descent went smoothly, then Priti grabbed her stashed bike and picked up the car, for a multi-sport weekend! Thanks North Cascades! Gear Notes: Single rack to #1 (used on Nooksack, didn't place any rock gear on Price...still a good idea to bring some rock gear for Price just in case, small cams are nice on Nooksack) 2 pickets for glacier travel (one on each person at all times, more pickets if you're not comfortable soloing "steep" snow) 1 knifeblade (didn't use) 10 ice screws (didn't place any, good to bring maybe 4-5 at all times) 12 runners (used a few to make anchors on Nooksack Tower, bring LOTS of anchor material and nuts if you plan to climb Nooksack) small rack of nuts (great anchor gear on Nooksack Tower) V-threader Rappel device for Fisher Chimneys rappels (good to have for emergency anyway) we did not bring rock shoes but I might have liked them on Nooksack (although traditionally it's been climbed in boots, but I'm not hard enough) crevasse rescue kit single hiking pole each (very nice for all the snow walking) 2 alpine ice tools each (Petzl Gully would be perfect) tent was very nice to have on exposed bivy spots (as opposed to open bivy or tarp) Floatation (snowshoes? ugh) *might* be nice for Lake Ann Trail, but I think skis are maybe a bit contrived for these current conditions considering how much bushwacking you do on approach and descent. We didn't bring any floatation and were very glad we didn't. 1x 60m rope (a pull cord or half/twin ropes would have been nice for Nooksack Tower) Approach Notes: Nooksack Cirque Trail


 1 point
 -
Emilio, check this out:1 point

