Search the Community
Showing results for tags 'mountaineering'.
-
I am new to mountaineering/glacier travel. I took a guided climb on Mt Baker last summer and will be taking a mountaineering course this coming winter. I am looking to get a rope for glacier travel and plan to start with Mt Baker again next summer. I was looking to see if there was a dedicated thread for this topic but didn't find one. If anyone knows of one could you point me in that direction? Wondering what type of ropes would be ideal for starting out with this level of climbing. I have read in various places that 3 people can be on anywhere from 30-50 m safely. I this accurate? Would 50 m be significantly extra for a 2-person rope team? The second question relates to diameter - would a half rope between 8-9mm be sufficient for this type of travel? I see that a bigger diameter rope (>9mm) is obviously going to weigh more and is often used in other types of climbing at longer lengths (60m). Is there a standard or ideal rope length and diameter that is standard or more versatile. Wondering what the thoughts are on trade-off between diameter, weight, length, durability and versatility. Any thoughts would be appreciated! Thank you, Joe
-
Hi all! My name is Zach and I just moved to the area, it's about the worst time of year for the types of climbs I wanna do but I'd like to make plans with somebody to do some winter-accessible stuff including but not limited to some of the tags on this post, and stuff in the spring and summer. Everything from cragging to alpine stuff but preferably the latter. My experience includes: AAI's AMTL1 class (South Early Winter Spire, Baker, Silver Star), trad following and leading at Devil's Lake in Wisconsin, easy glaciated peaks in Peru, ice climbing in Michigan, and several years of sport climbing. I have most of my own gear including a standard rack, but lack the correct ropes and snow/ice protection. I've been out of the game for a bit because of two hip surgeries earlier this year so I'll need to brush up on some stuff before hitting it too hard, but I'd definitely like to get active asap if anybody is interested. Shoot me a text at 616-443-8851, thanks!
-
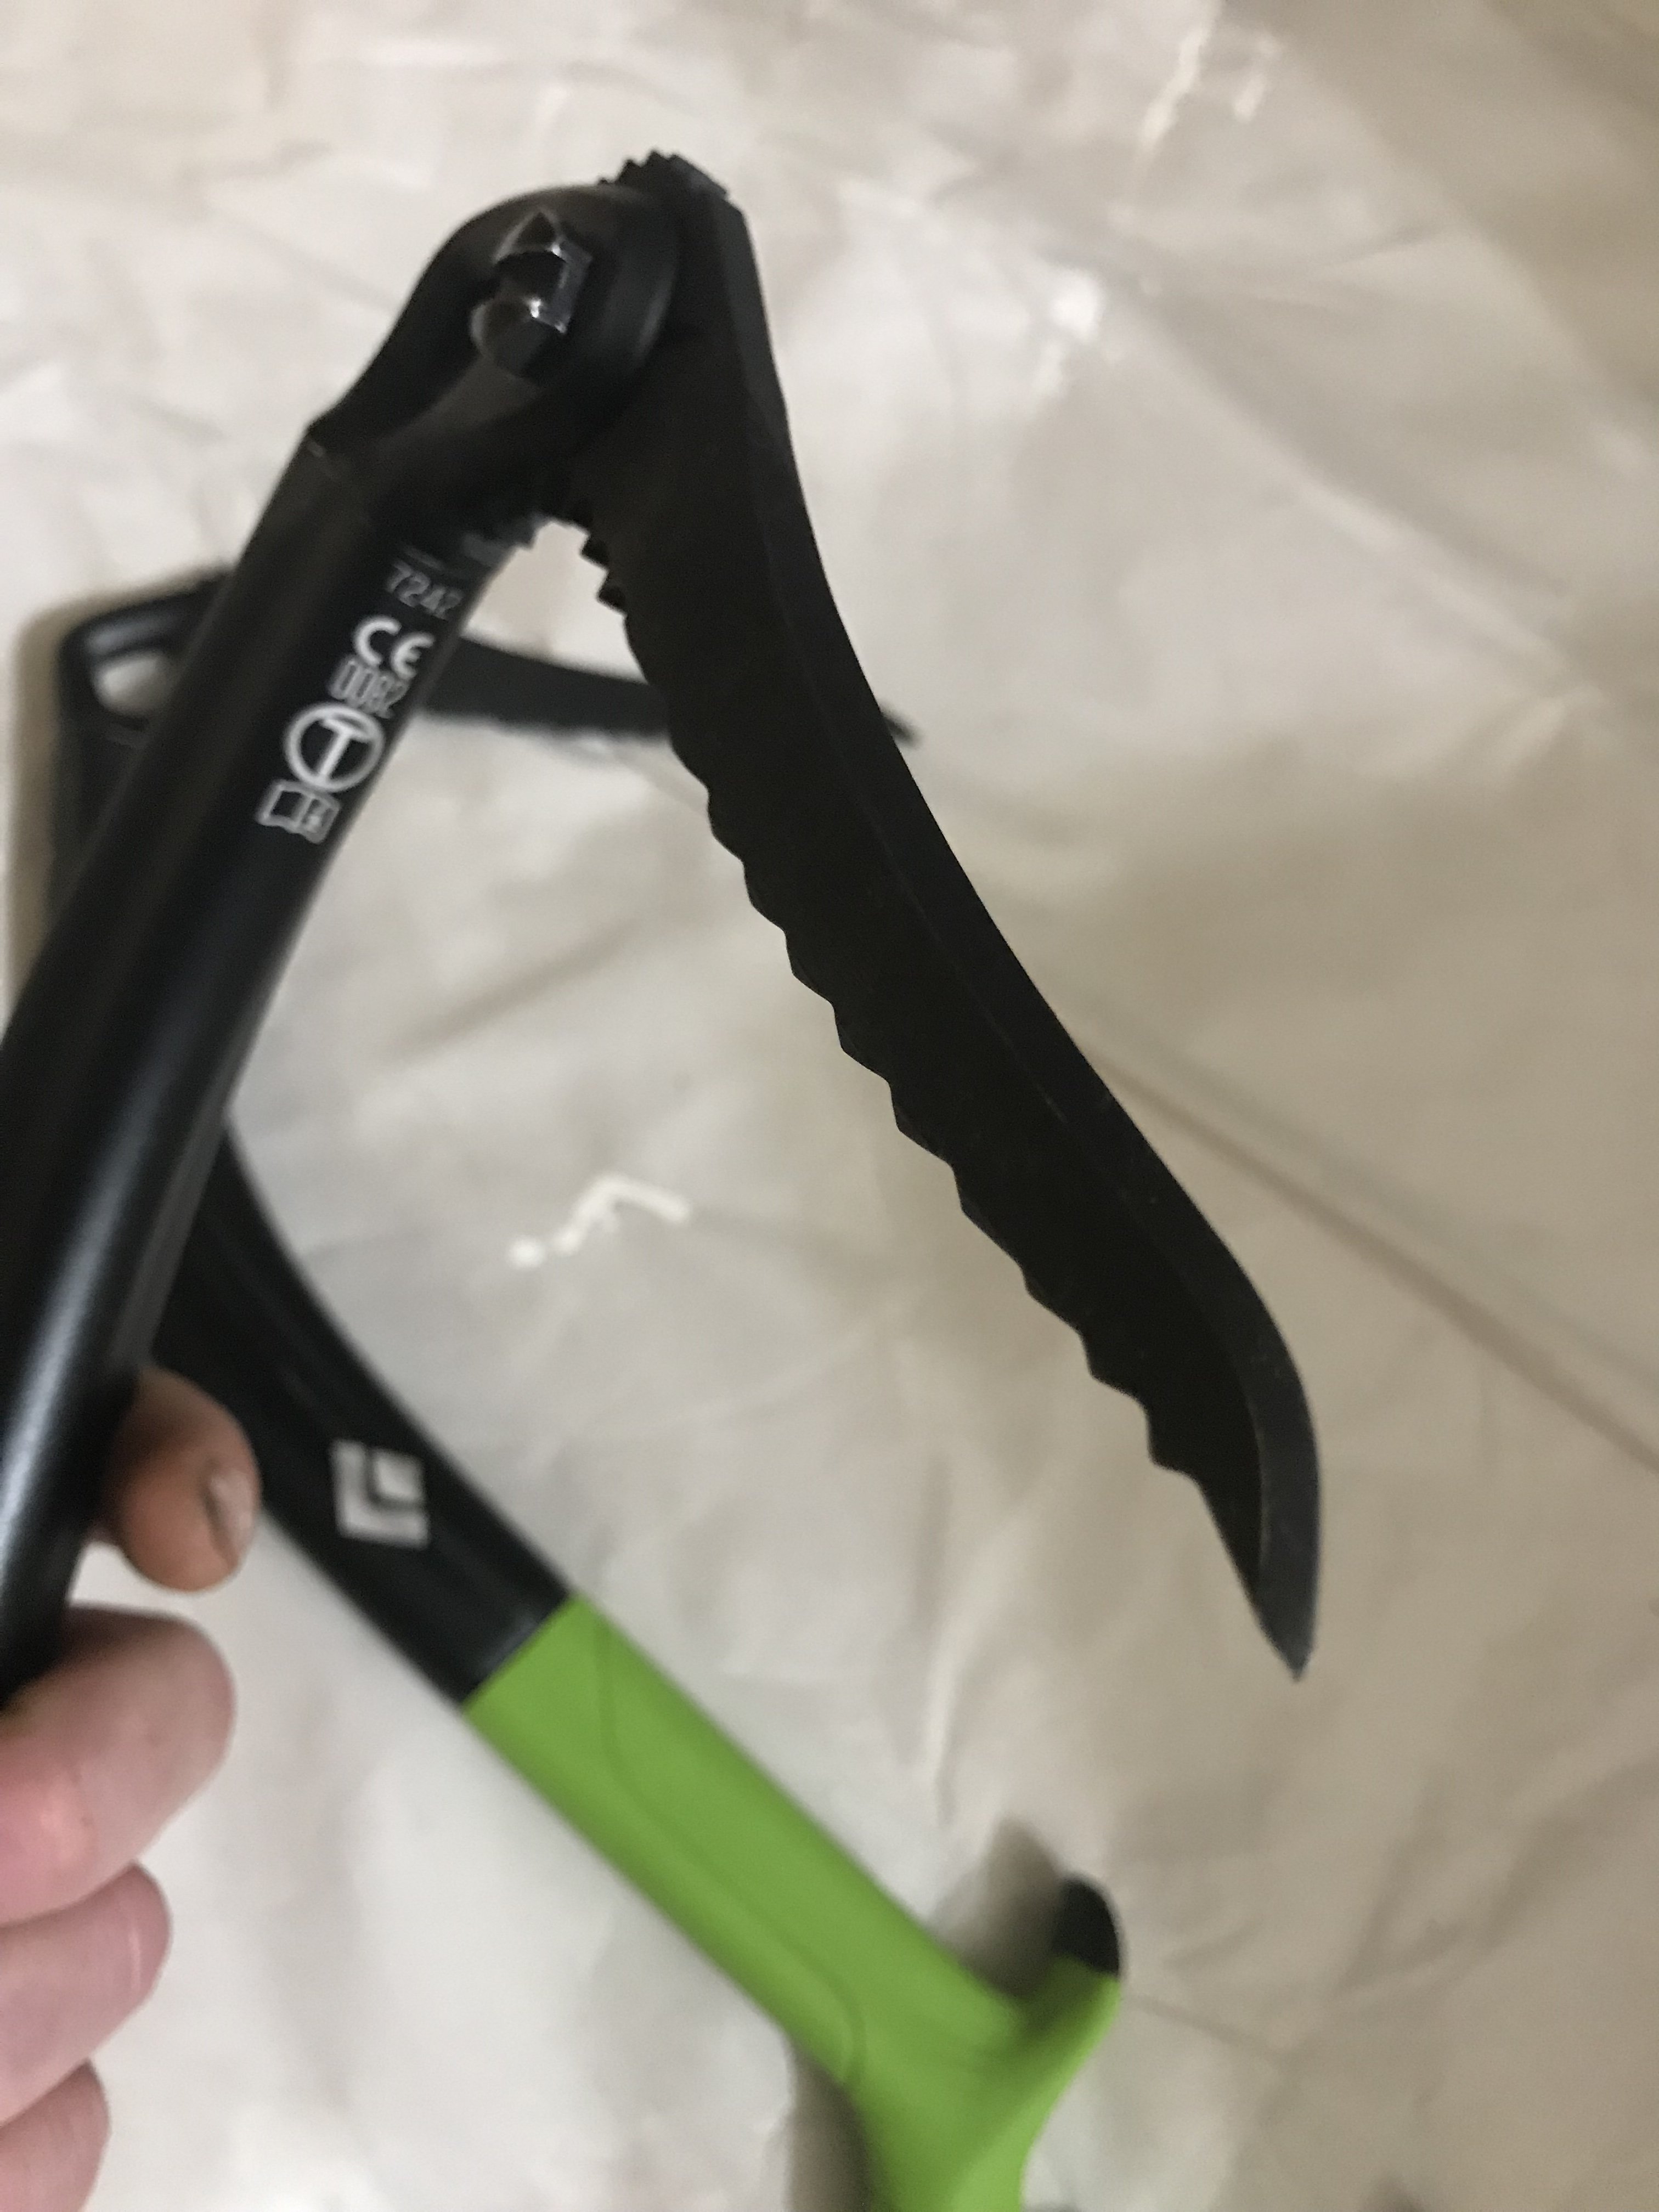
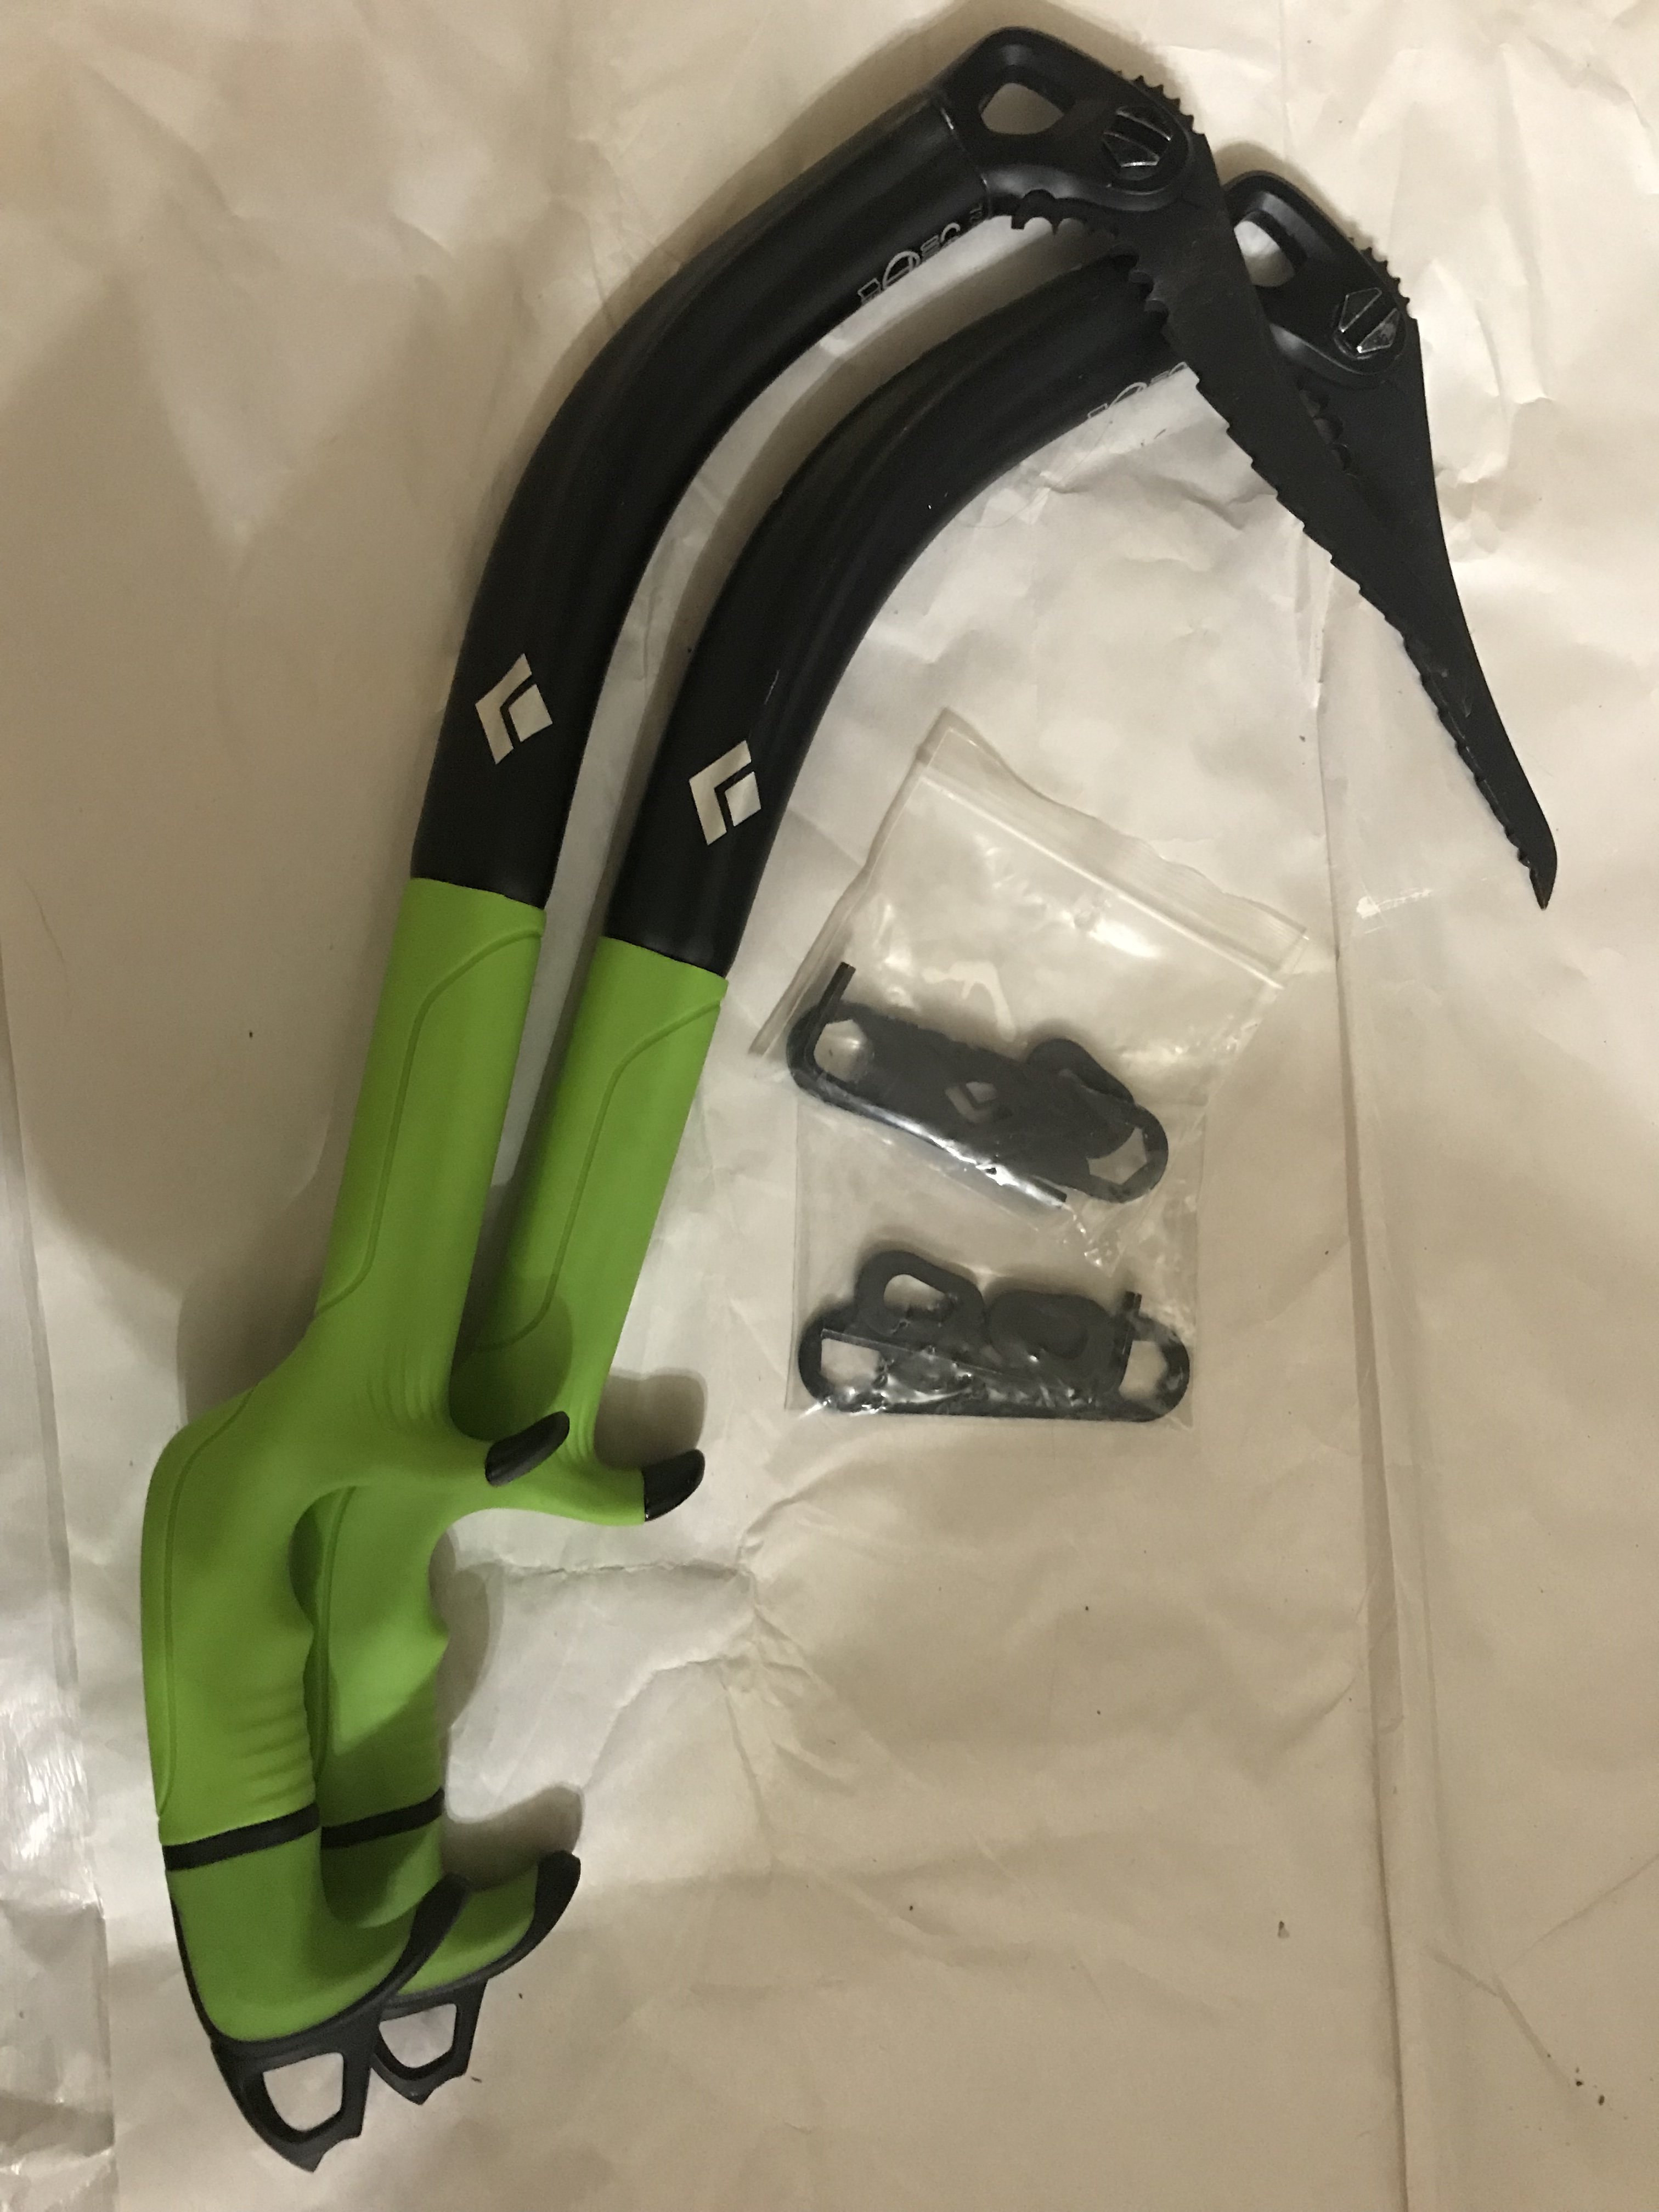
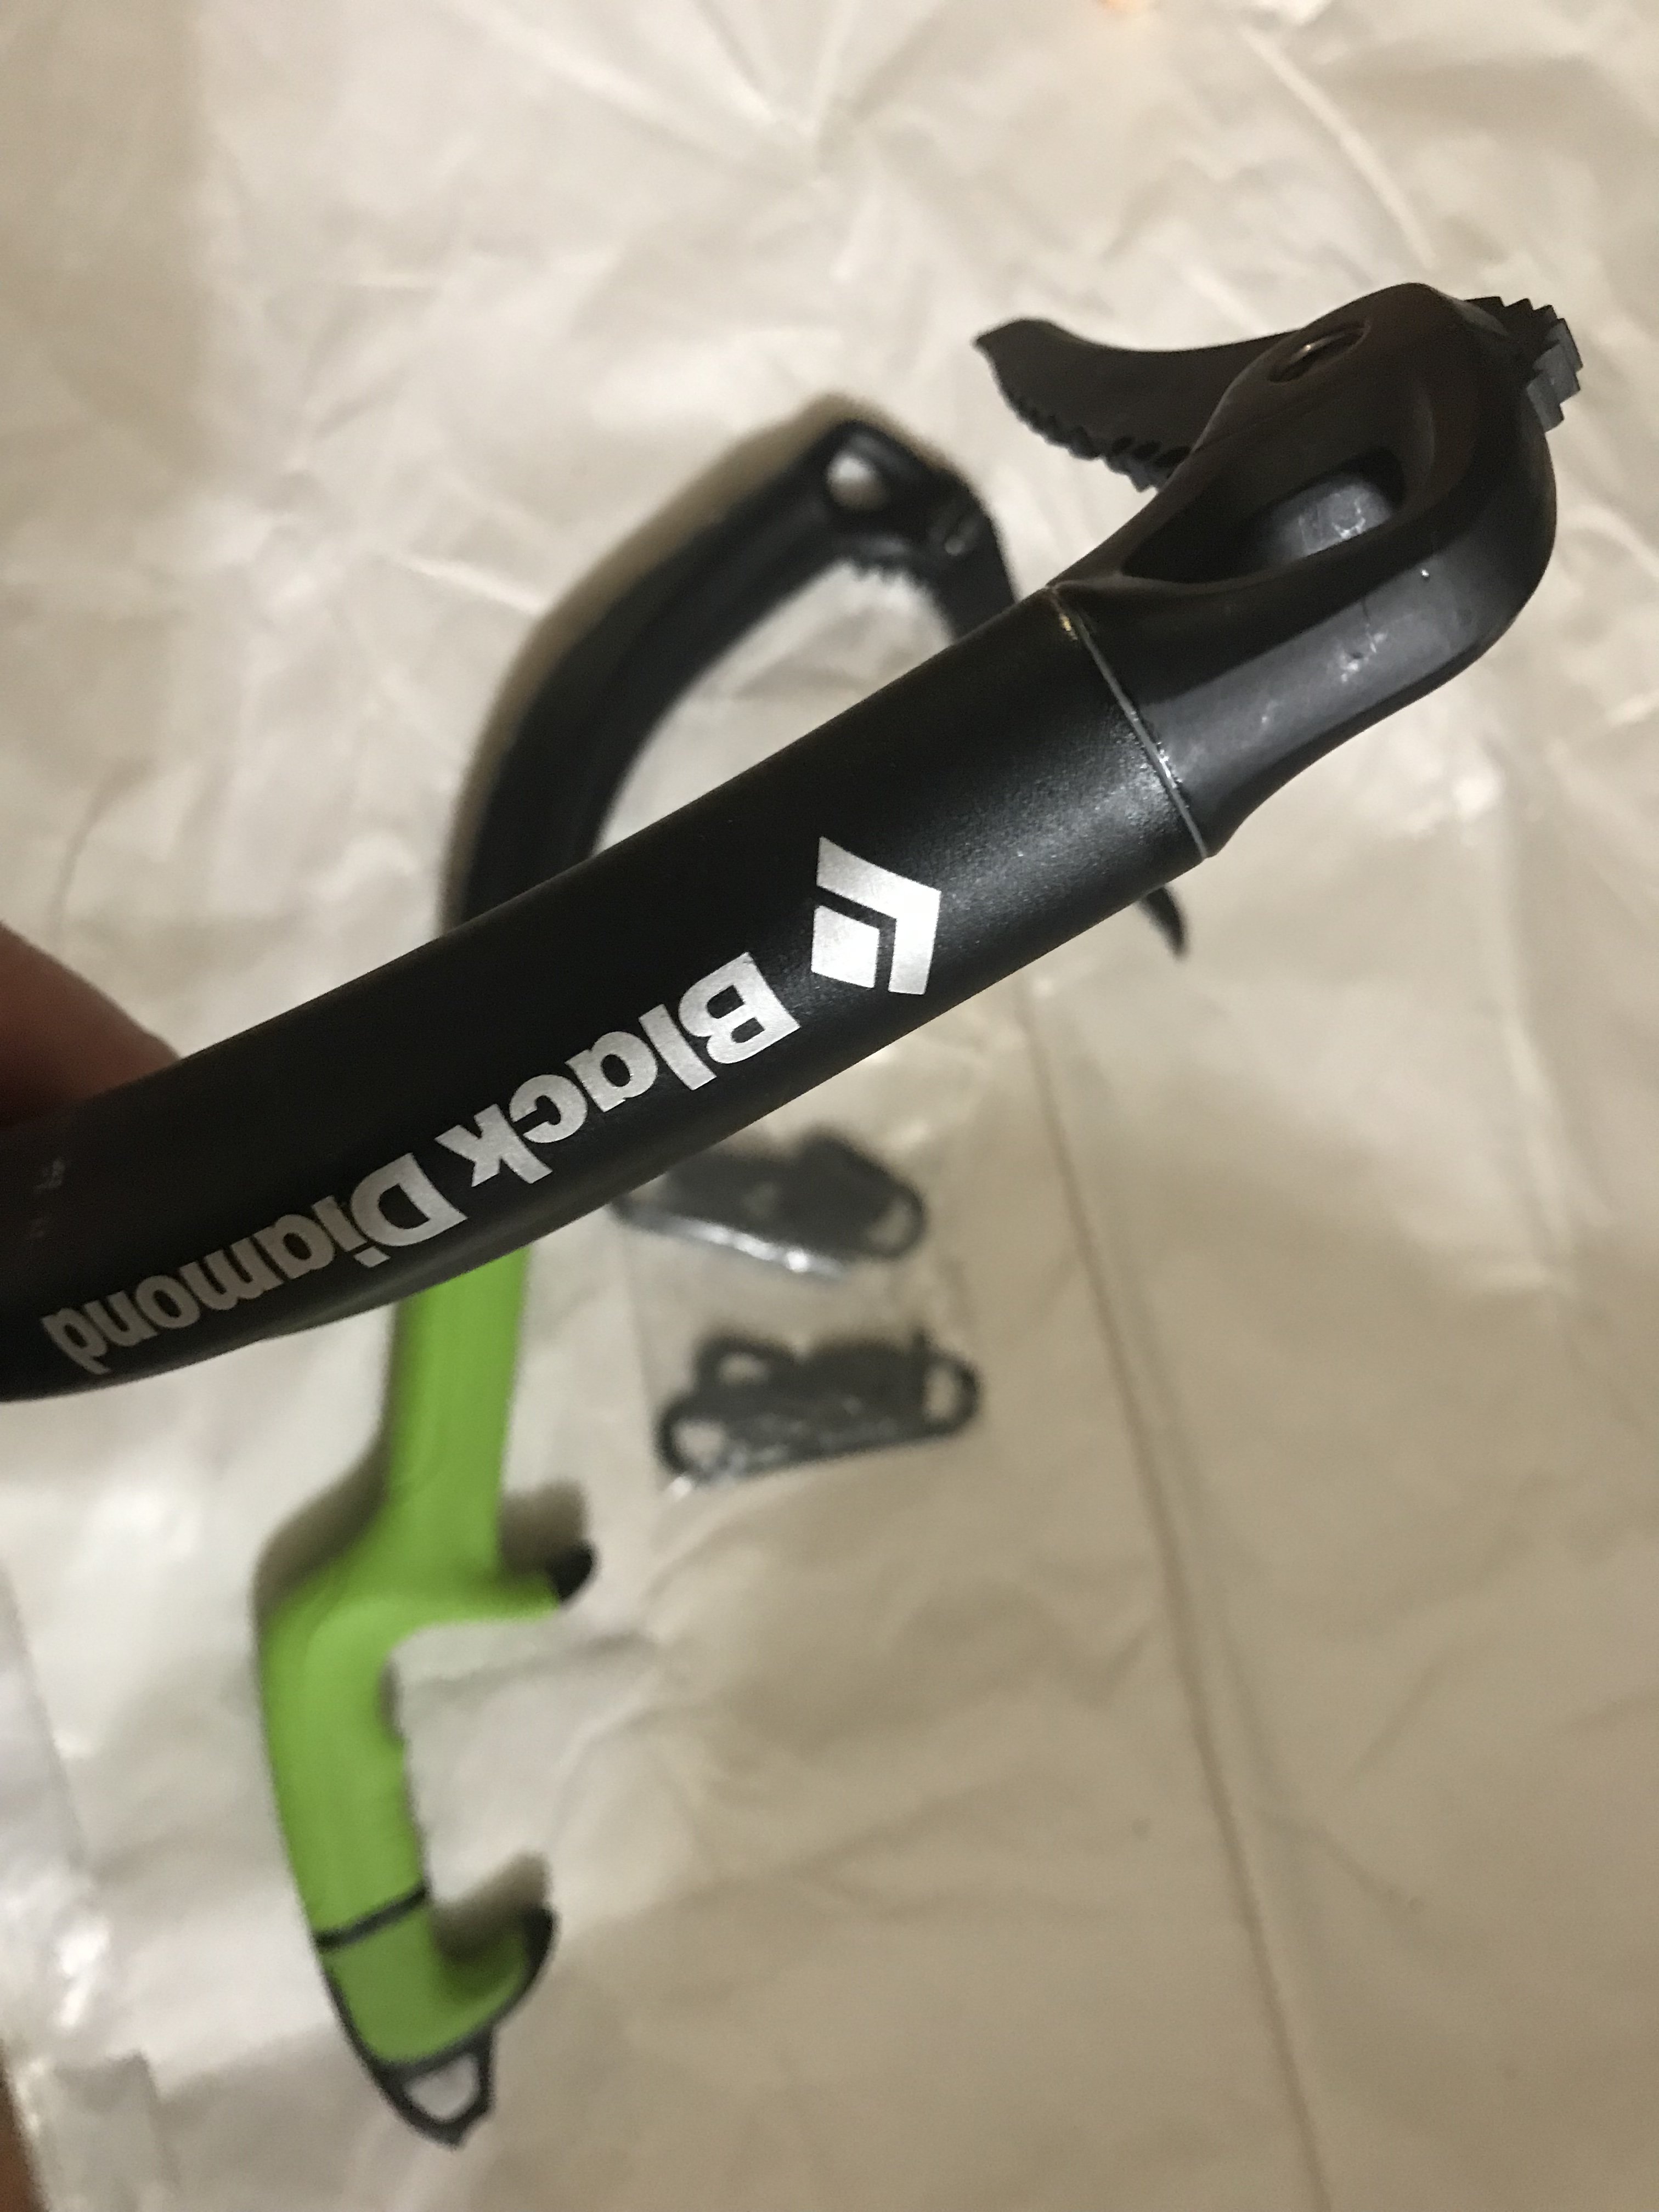
Four years ago I thought I was gonna be a mountaineer! I enrolled in the courses, I bought the gear, and I started paying the tuition. Currently, I am in school to be a doctor of physical therapy. Can you guess what happened? I got mega injured and spent so much time in rehab that I decided on a change of life course. Fortunately, all the gear listed here is 100% brand new and never been used. I didn't get injured USING the gear, but I did remove the price tags when I first purchased them- thus, I cannot return them to backcountry.com for a refund. I simply held onto all this stuff hoping that one day I'd use it. But now I lay awake at night thinking about my extravagant student loan debt and not so much about summiting any dang thing in Patagonia. So, you want some of these goodies? Everything is 100% brand new and the prices are simply 50% of what I originally paid for them a couple of years ago. Local pickup in Portland is preferred, but I can maybe drive stuff out to you or ship it also depending on what all is good for everyone involved. Attached is a nice little PDF of some photos, information, and prices about all the gear. I'll keep this list up-to-date as things move. If you see it here, then I have it at my house! Have a great season everyone! Again, prices are listed at 50% of what I paid for them and all items are in the same condition as I received them. The list includes: 1. Black Diamond- Prime Alpine Touring Ski Boot - 27 - Bd Orange $150 2. Salewa Vertical Pro Mountaineering Boot - Men's - size 9 $160 3. Petzl Lynx LL Crampon with Fakir Crampon Bag $105 4. Dynafit TLT Radical ST Binding - 92mm brake $250 5. Garmin eTrex 30 GPS $90 6. Black Diamond / Pieps Sport Avalanche Safety Set (incl. shovel, probe, beacon) $190 7. Grivel G1+ S.A. Ice Axe w/Leash - 66cm $50 8. Suunto MC-2G Navigator Compass $40 Mountain Goods.pdf
-
I just finished AAI's Alpinism 1 & 2 and I have about a week left in Washington before I need to leave. I would love to get back into the hills and gain more experience while I'm here. I'm mostly interested in moderate glacier climbs like the Easton on Baker, Sulphide on Shuksan, Eldorado, Sahale, Glacier Peak, etc. Please reach out if you're interested!
-
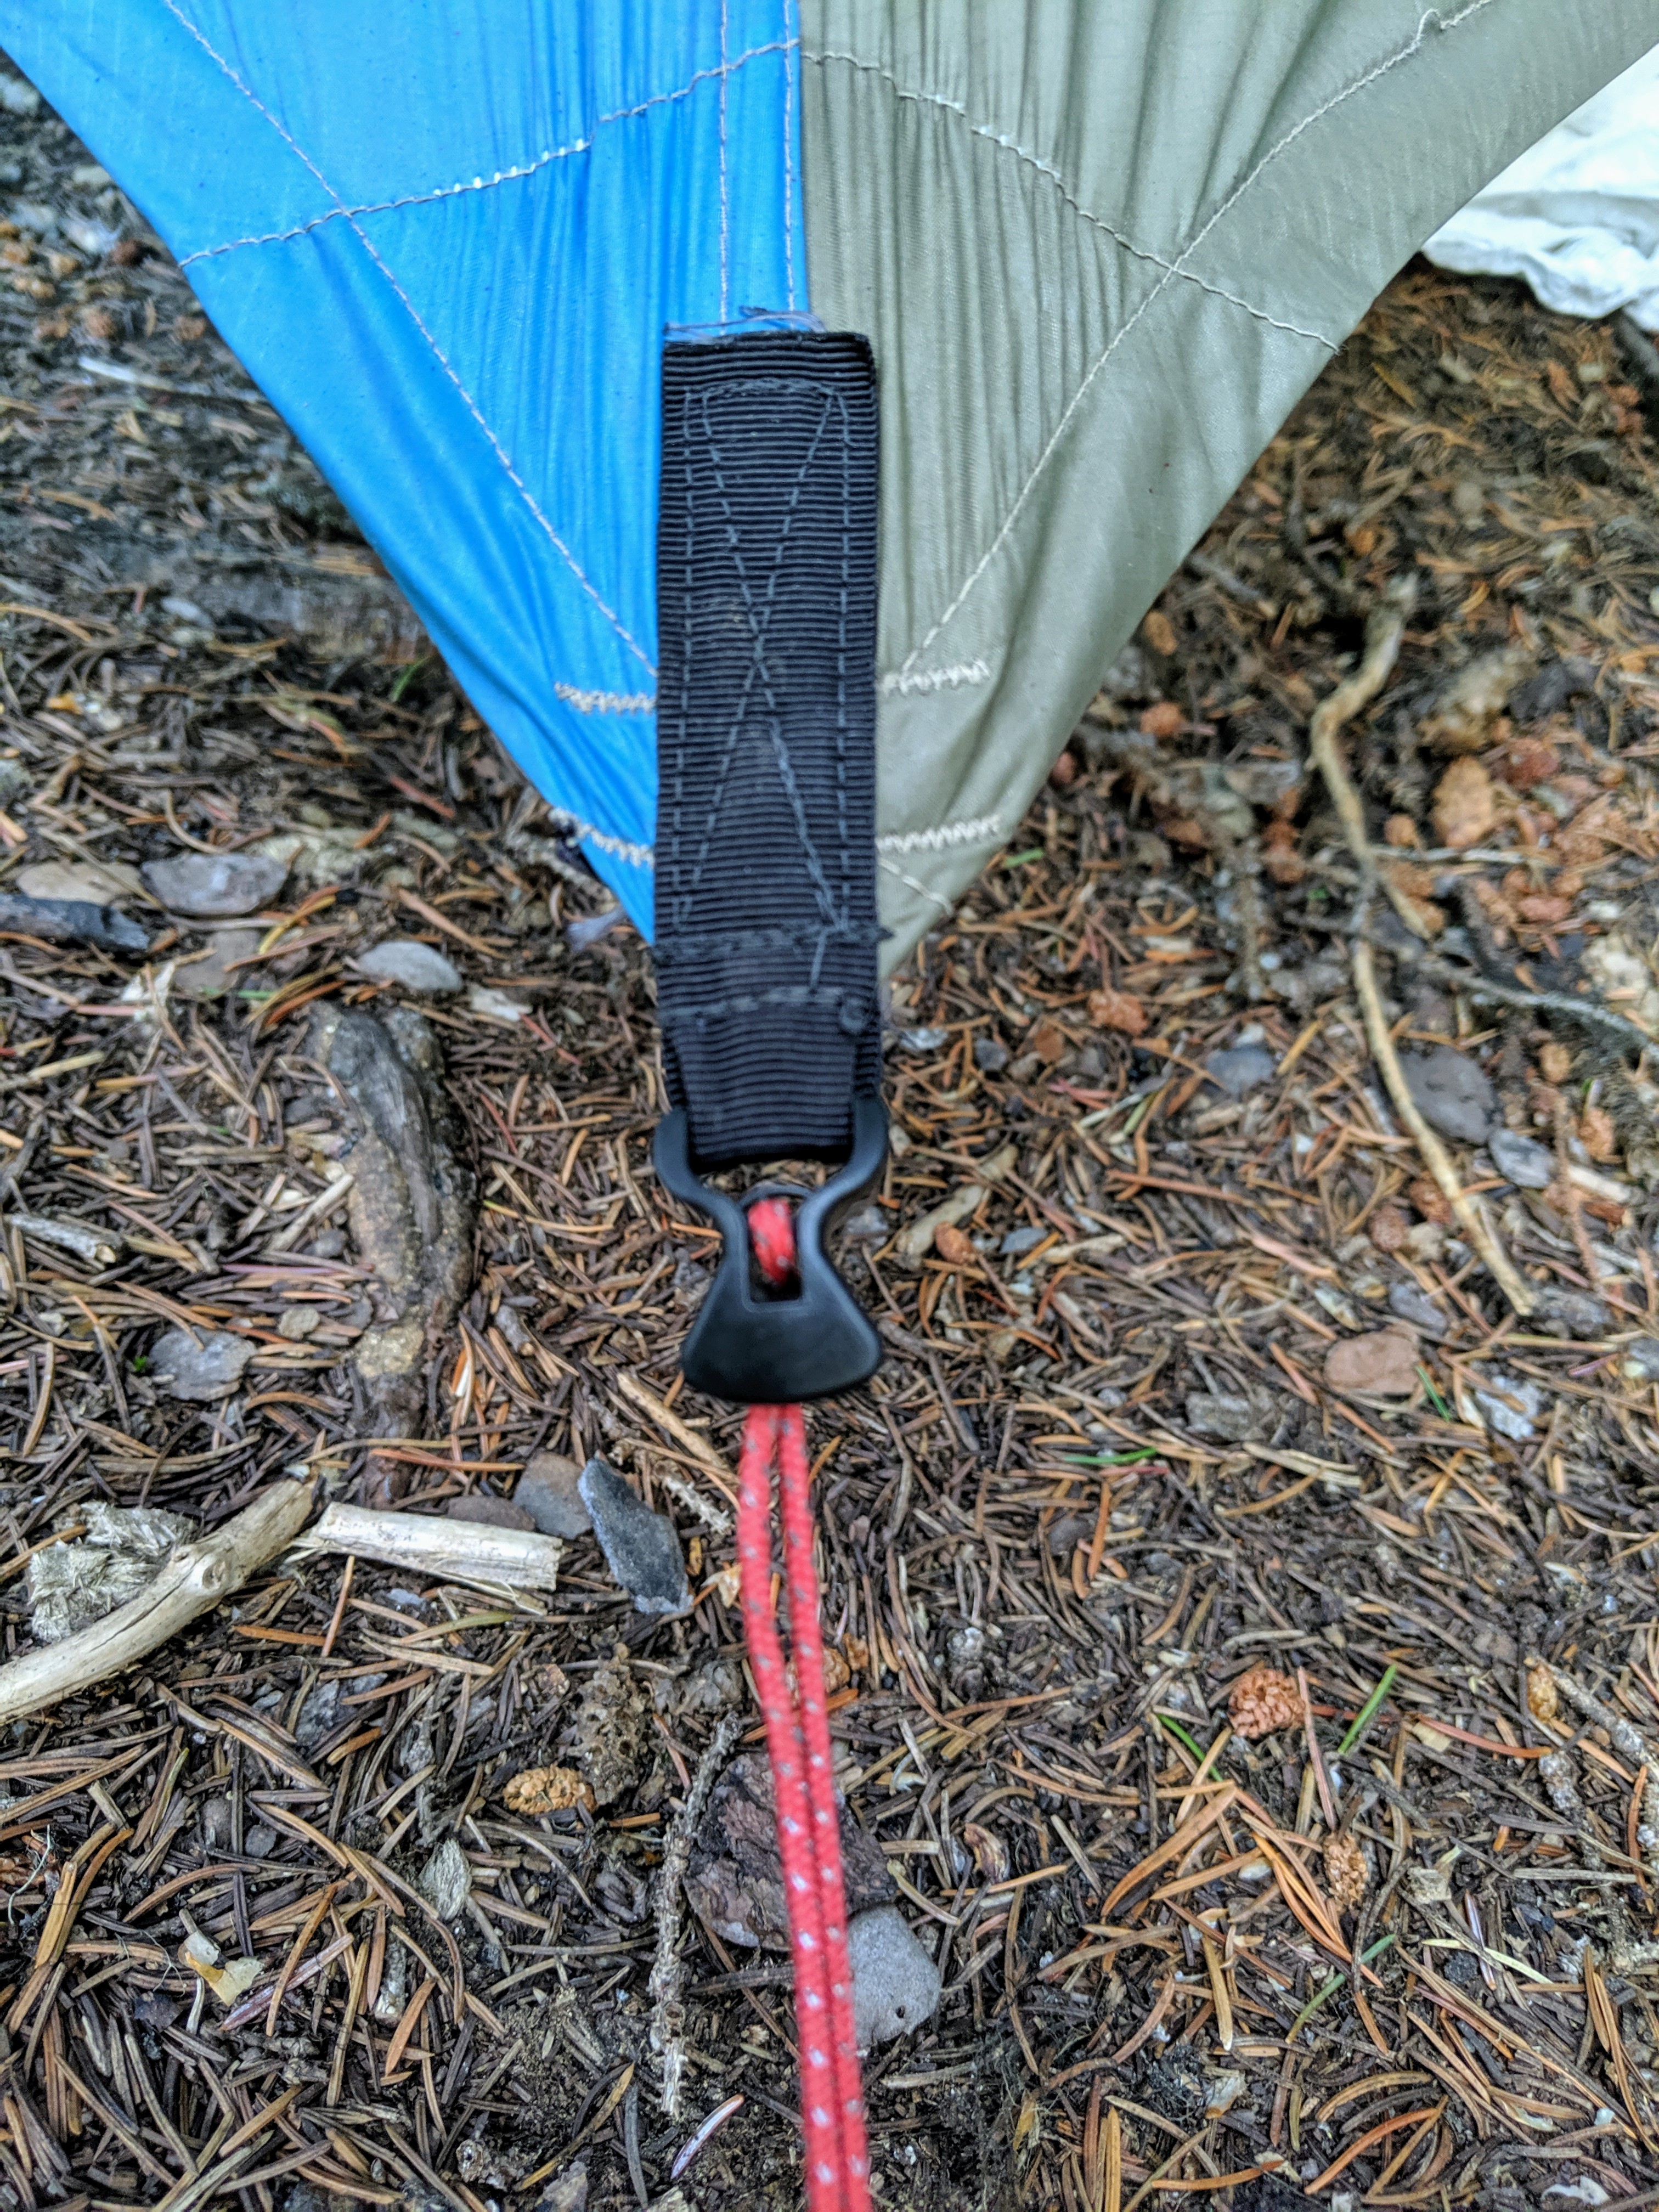
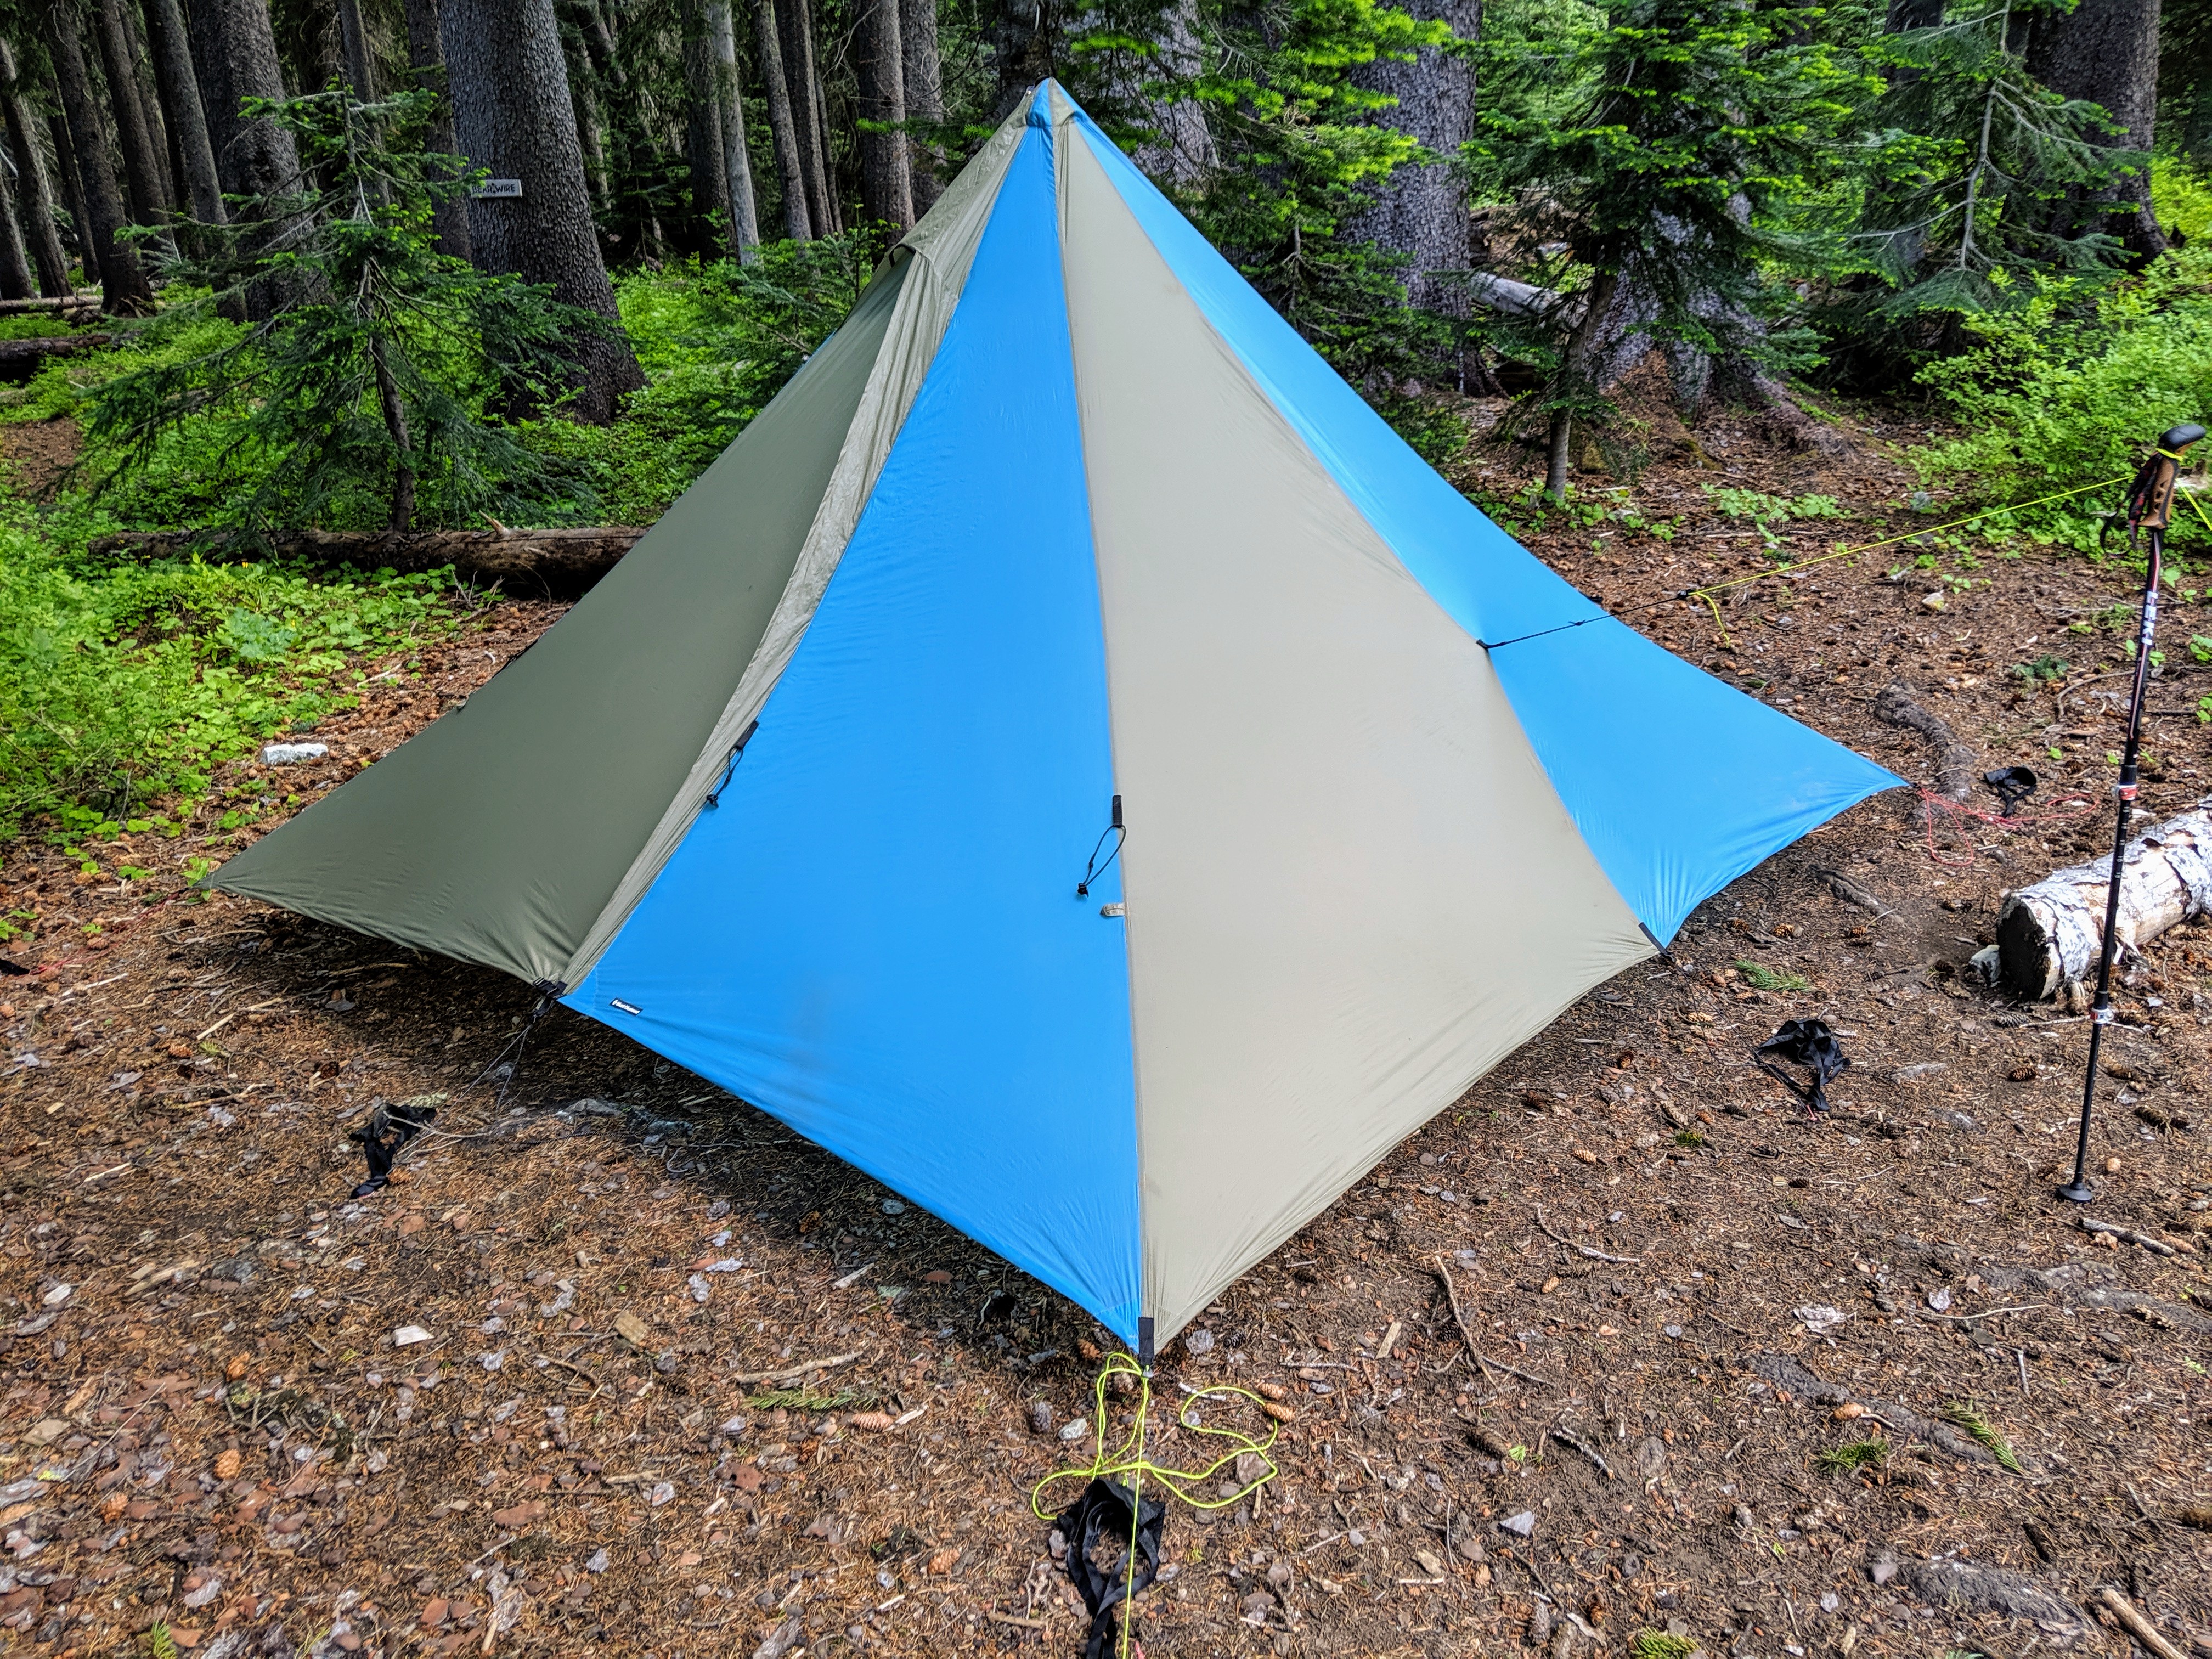
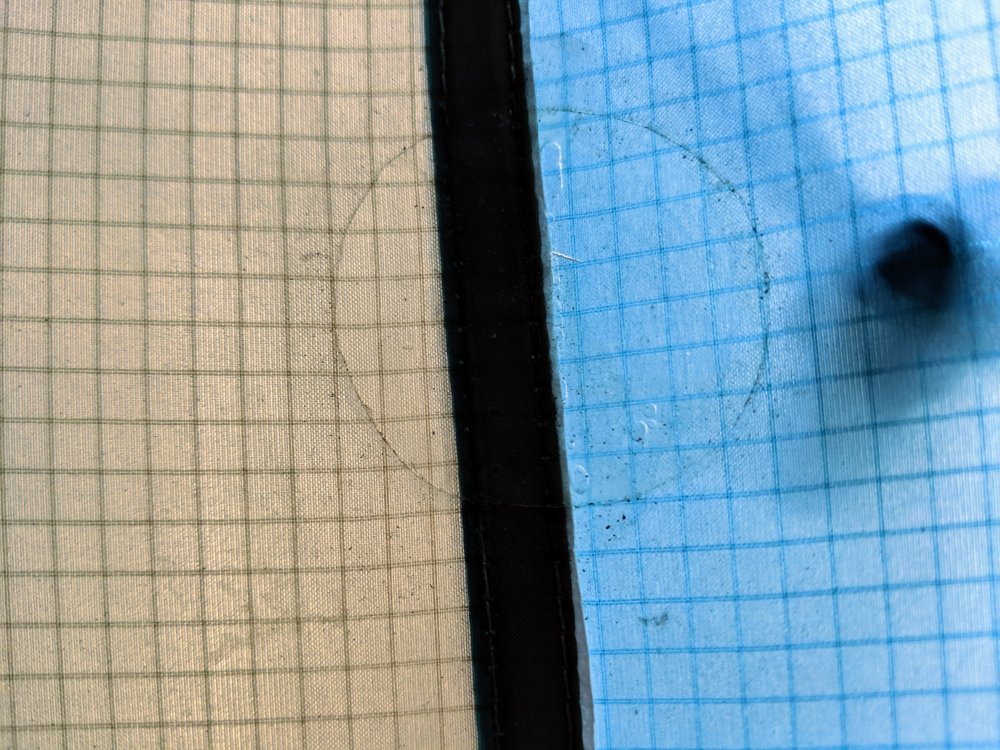
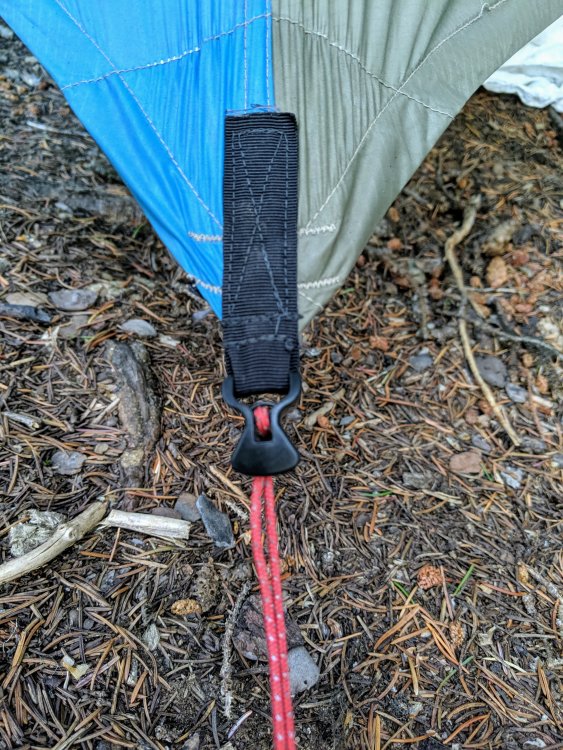
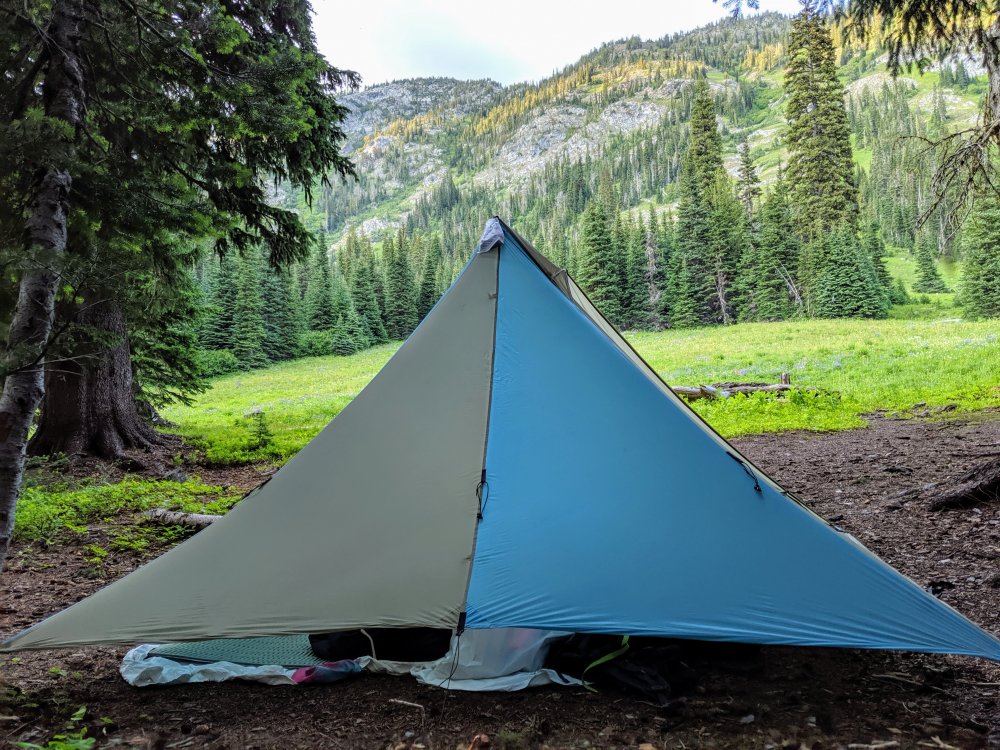
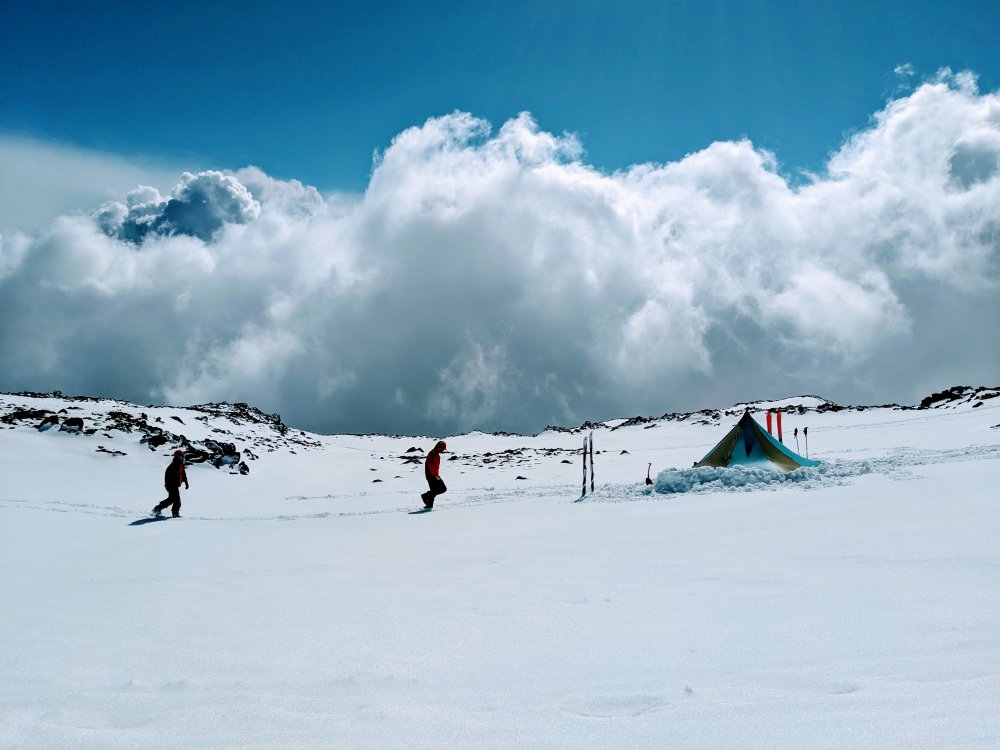
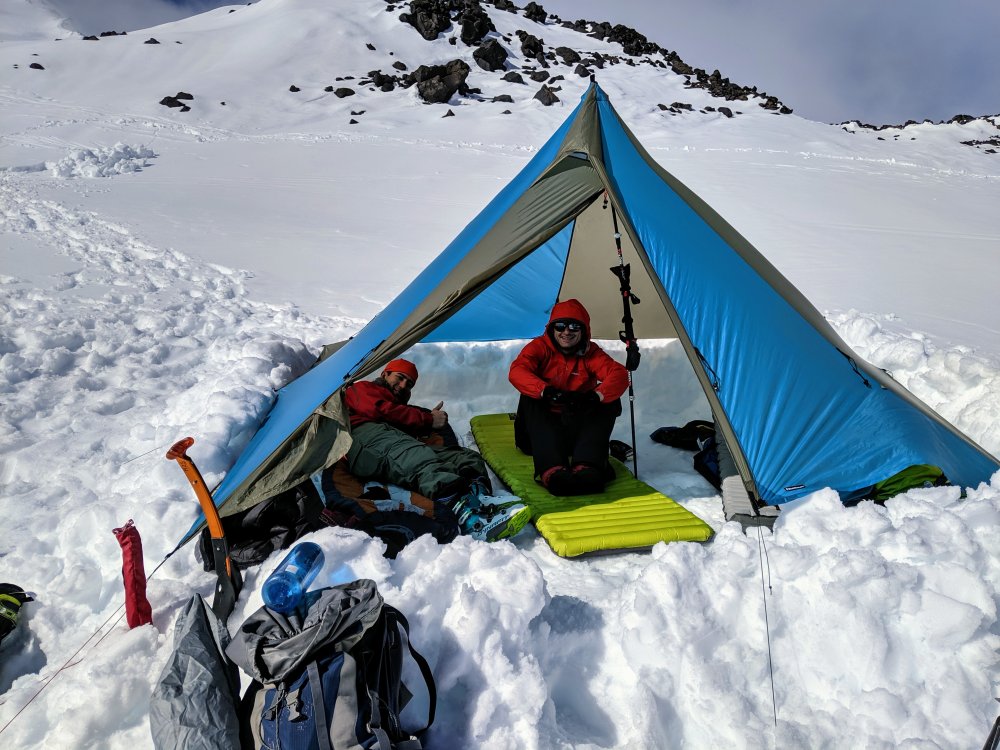
[SOLD] I have a Black Diamond Mega Light pyramid tent for sale. Makes a great 4 season shelter - used it for ski touring and spring mountaineering. It has been babied by an ultra-light gear head. This tent is unique in that it has been professionally modified by Jared at Simply Light Designs, an designer and sewer of products made of silnylon, to include Lineloc 3's at each perimeter tie-out (8) and mid-panel tie-out (8) at each seam. The tent has already been seam sealed. I will include 8 three-foot lengths of premium Lawson Glowire cordage. I have had it for two winter seasons and have used it around 20 times. Works great. There is one tiny patch, from a tiny 3mm slice made when cutting off the dang tags before it ever left my living room. The patch is made of tenacious tape and silicone that has been on the entire life of the tent and still holding strong. In all this tent is great - I've used it as a kitchen/lounge and sat 16 people inside comfortably. I've used it at basecamps on Mt. Baker, Mt. Adams, and Mt. Rainier for climbs. I like the design so much I've upgraded to a HMG Ultamid 4 pyramid tent, therefore will let this one go to one lucky buyer. I'd rather not sell the carbon fiber pole, but will if you insist. $225 Shipped, available for pickup in Seattle. Photos on craigslist, but will post on this thread soon: https://seattle.craigslist.org/see/spo/d/seattle-black-diamond-mega-light-tent/6924875039.html And, yeah, I'm that guy trying to sell something on his first post. Haha.


-
 Dear All, We are visiting OHSU in Portland for work, on July 18. Would love to stay to do some mountaineering between Portland and Vancouver till July 23. I'm an experienced mountaineer, but have never been to Pacific North West. Looking for a reliable partner - Mount Rainier would be an obvious target, but happy to join any other trip - Hood, Olympus, Adams, Jefferson, Baker... between Portland and Vancouver. . See below some basic info about me. Just PM me if you are in the area on those days, and open to potentially team up ! Thanks Vaclav About me: - Entrepreneur/CEO of a medtech company based in Oxford UK,. - Member Academic Alpine Club Zurich (AACZ), Oxford University Mountaineering Club, Austrian Alpine Club. - Have climbed 40+ peaks of comparable or higher difficulty to Rainier at 4000m-7000m elevation.Experience gained mostly in the Alps, Andes, Caucasus, Pamir, Altay. - Physically demanding but not very technical climb on French PD or AD would be ideal for this trip. I have done routes up to French D, but would not be as ambitious with unknown people - Highly safety conscious. Every couple of years i repeat glacier rescue training, and have real-world experience in rescue situations involving other climbers/skiers. - At the moment, i do not plan to bring skis given reported poor snow conditions, but could.
 -
Dear All, How partnering for Mt Rainier during July 18/9 - July 23 ? Hood, Adams, Jefferson, Olympus, Baker .... - or any more interesting peak between near Portland, Seattle and Vancouver. I'm from Europe, nowadays based in Oxford UK, visiting OHSU in Portland for business on July 17/18. Unfortunately I don't know any mountaineers in Pacific North West, so keen to team up ! I am comfortable to lead such climbs technically, with a reliable partner, but unfortunately won't have much time to do research for routes/maps. I'm experienced in both alpine and ski mountaineering, having done 40+ high altitude peaks of comparable/higher technical difficulty than Rainier between 14,000 and 24,000 feet, and practice crevasse and avalanche rescue almost every year. Member of Academic Alpine Club Zurich (AACZ). Good endurance - I have done up to 20 hour mountain routes and up to 16,000 uphill feet in one long day. Not as fit at the moment, but 7,000 feet uphill/day is still fine. Thanks, Vaclav
-
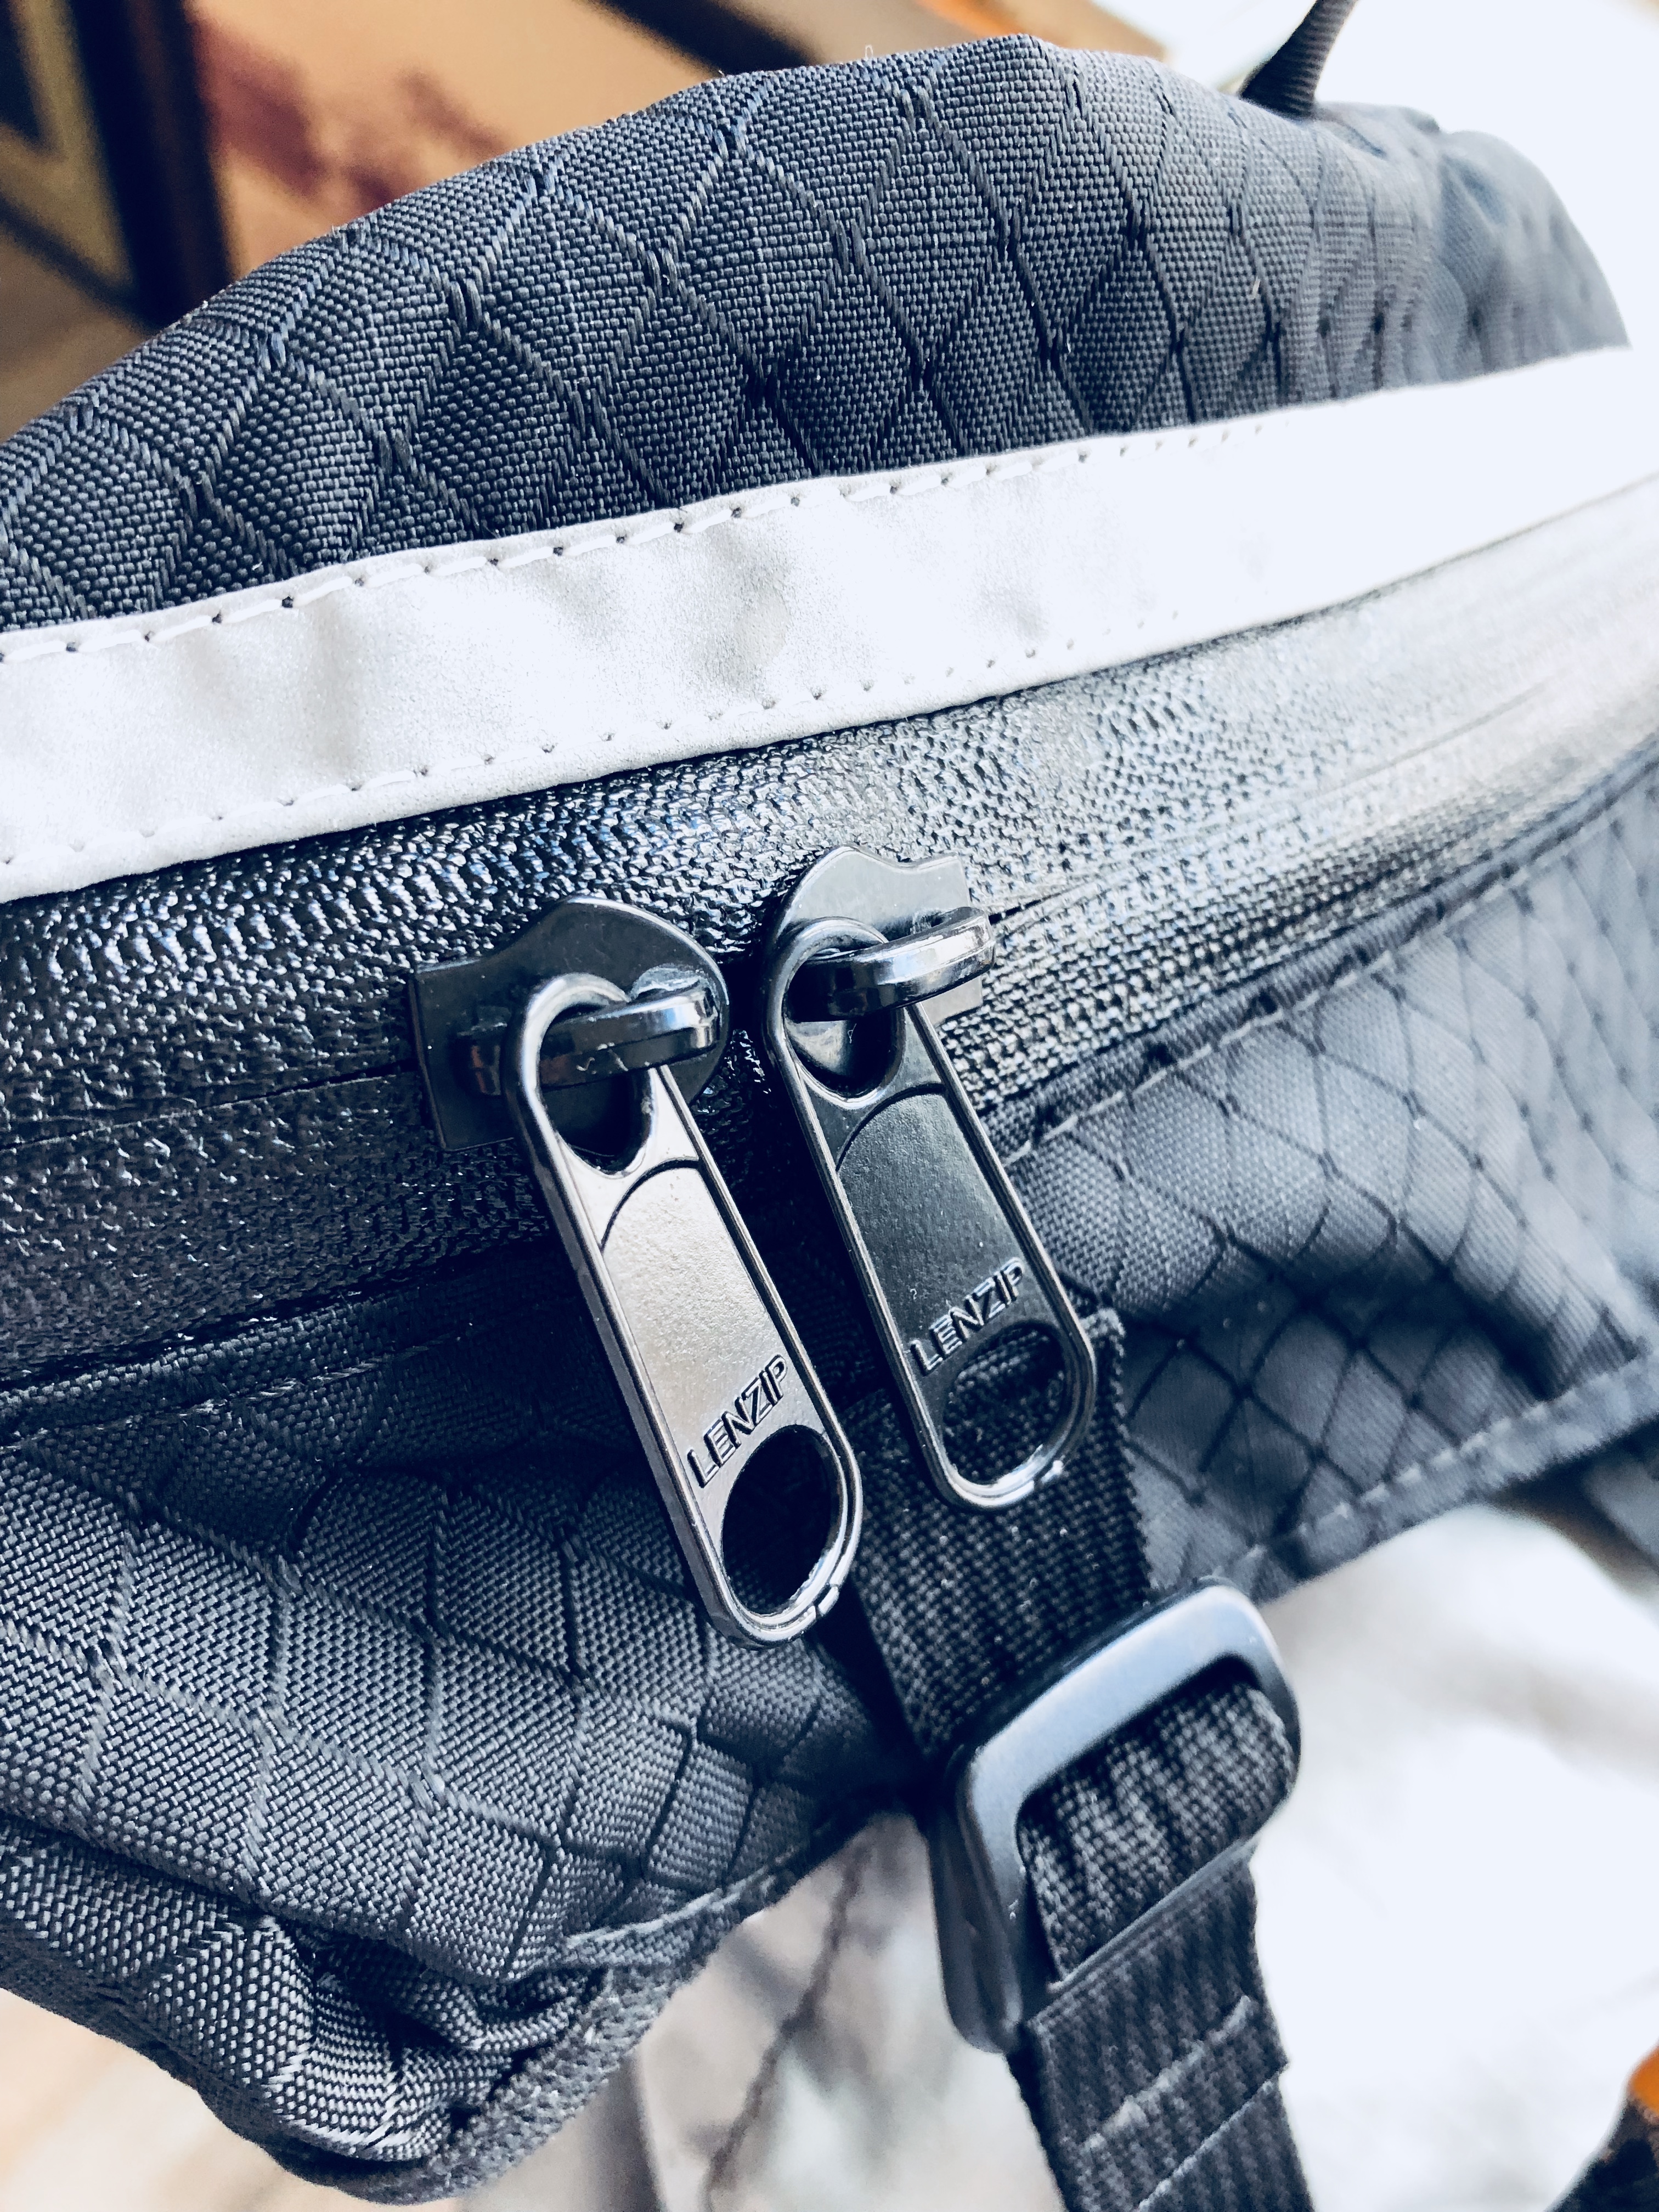
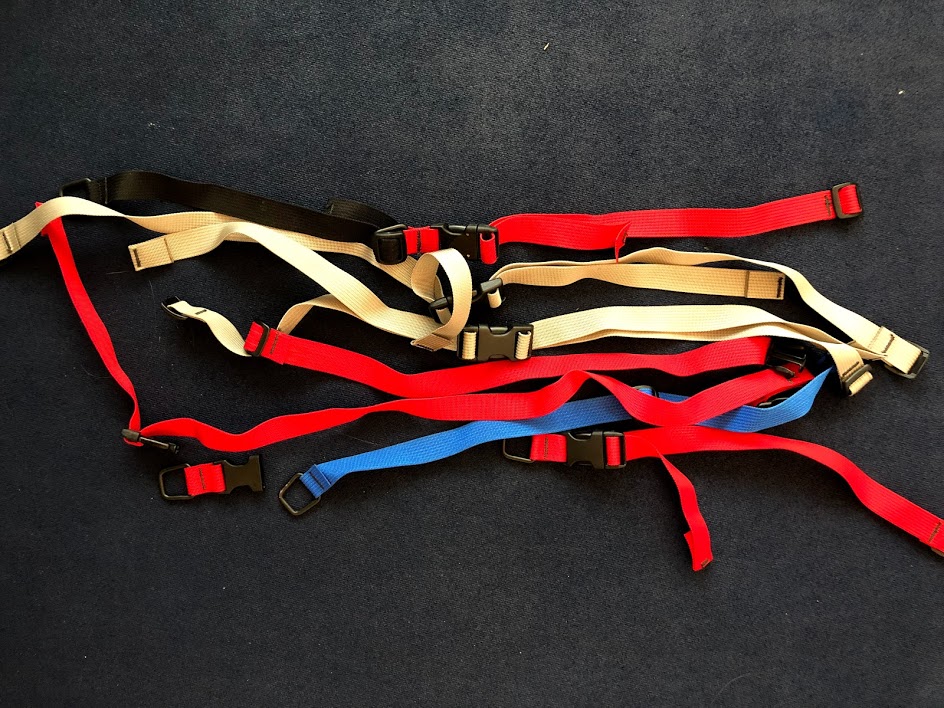
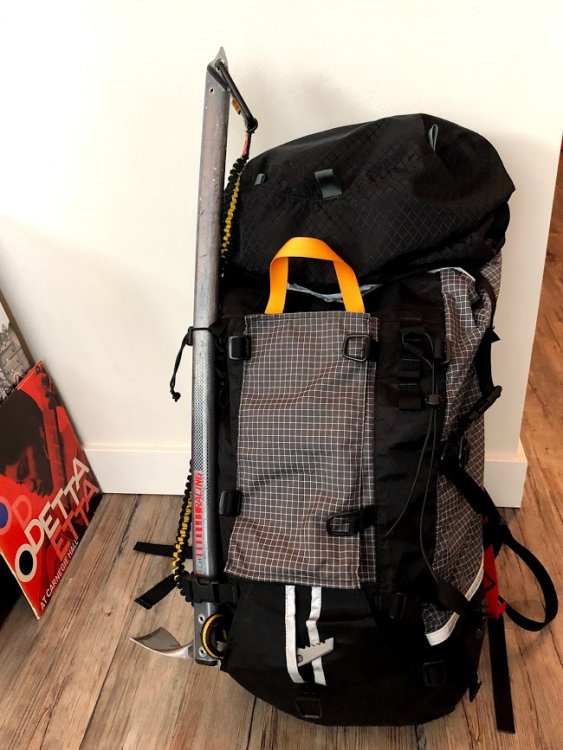
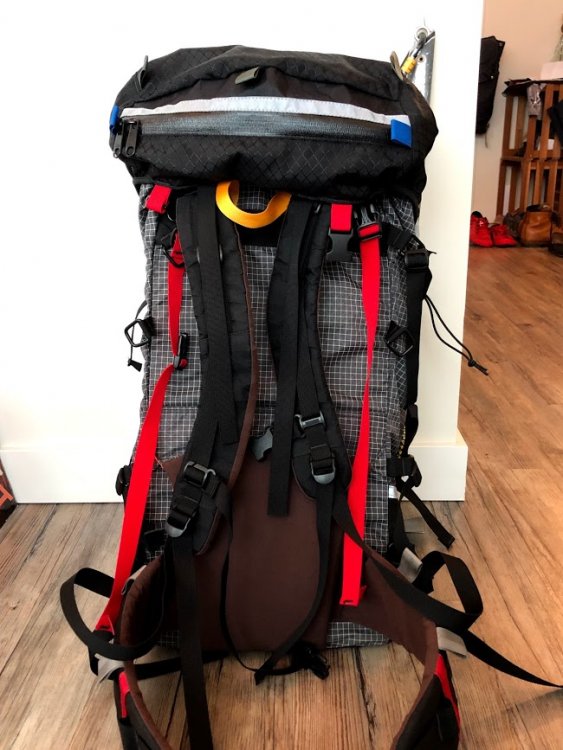
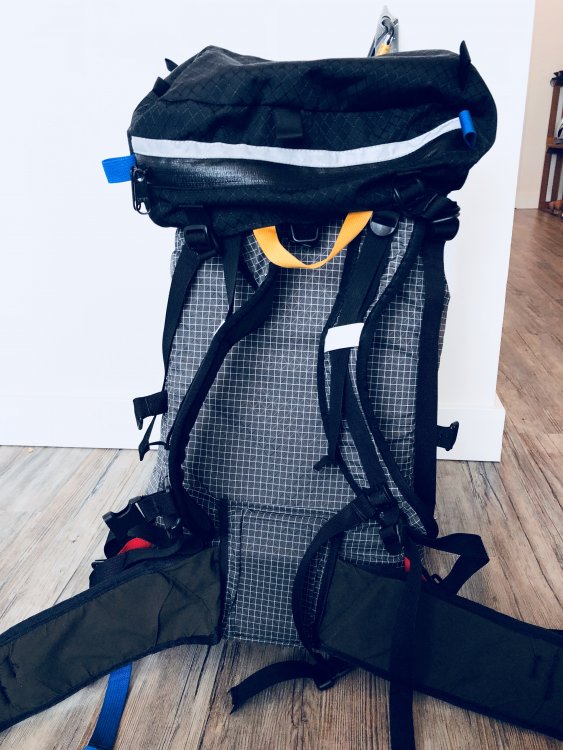
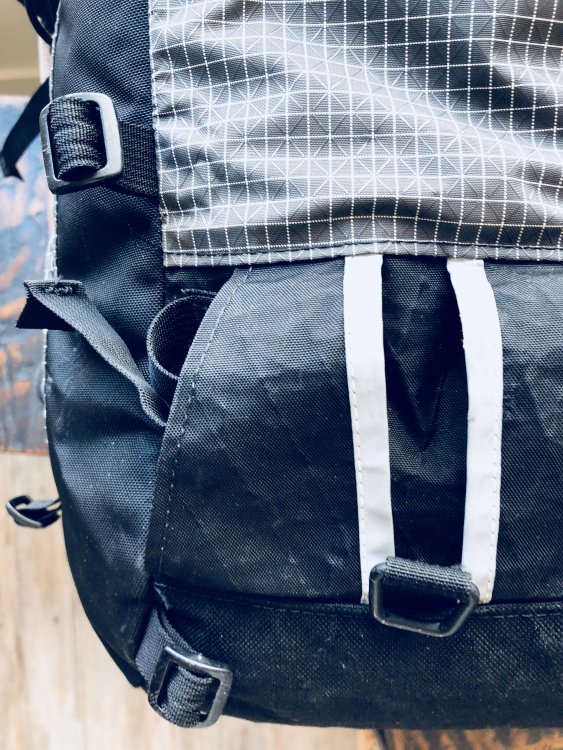
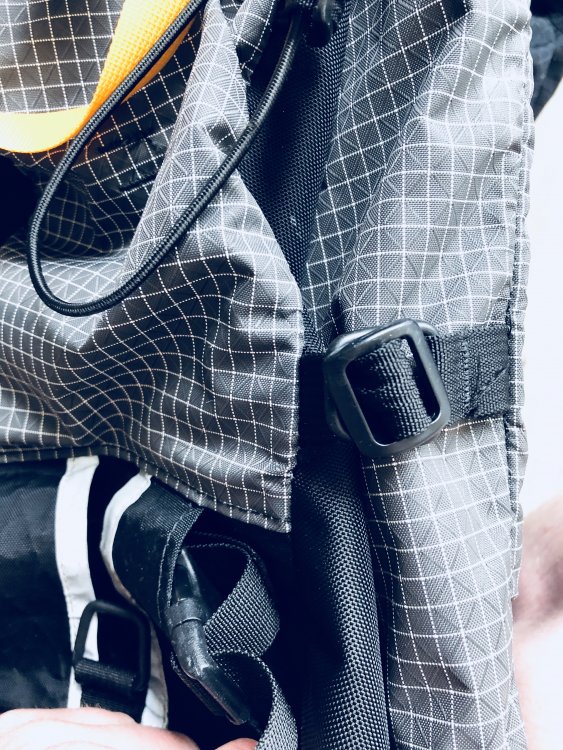
This is *the* PNW pack for climbing and mountaineering in my opinion, and those of many others (*coughAmericanAlpineInstituteGuidesChoice*cough). This is the Ballistics version so extra durable fabric only on the hard wear points. And all the straps! Lash anything and everything (crampons, rope, etc) I have three Cilo packs and am only selling his as I can (for now) manage the 30:30 pack for most of my climbs. Subsequently, this has only been on Adams, Rainier, and possibly Baker- so super minty! $250 This is a fair price and is without the notable hassle of the forever unclear production timeline from Cilo themselves, anywhere from 2-4 months, sometimes it's longer. And yes it's true, they don't ever give you updates. That for sure is the one downside of a climber-run business but then you can't be so mad when they also want to climb and the make the best packs! Plus USA made! This includes 2 sets of the diagonal carry strap system ($38) and the rope catch strap system ($15) worth $53 I'm located in Seattle and am glad to meet up anywhere reasonably close. On eBay as US*Grant for selling history. From CiloGear: The 40B is the pack of choice for cragging and weekends close to home. It is a robust and durable pack that will treat you right today and in the years to come. The 40B responds to the desire of folks for a pack that would work for Alpine cragging or serious routes in more civilized areas. The 40B is about 2.5" shorter than the 45L or 60L WorkSacks, and is just the right size for shorter folks and awesome weekends. The 40B WorkSack easily carries crampons or a water bottle in the crampon pocket. Volume Range: Normal: 42L | Expanded: 60L | Compressed: 30L | Closed: 20L Weight and Sizing Specifications Pack bag: 815g(1.8lbs) | Hip belt: 120g | Lid: 170g | Strap set: 200g | Framesheet & Pad: 590g | Total: 1895g(4.1lbs) Size by torso length 17" - 19" = Medium


-
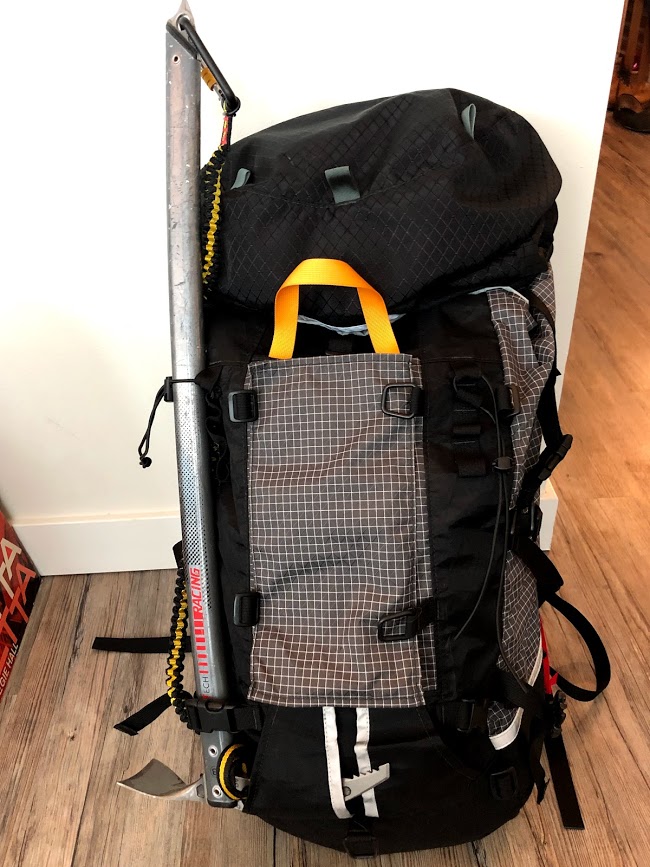
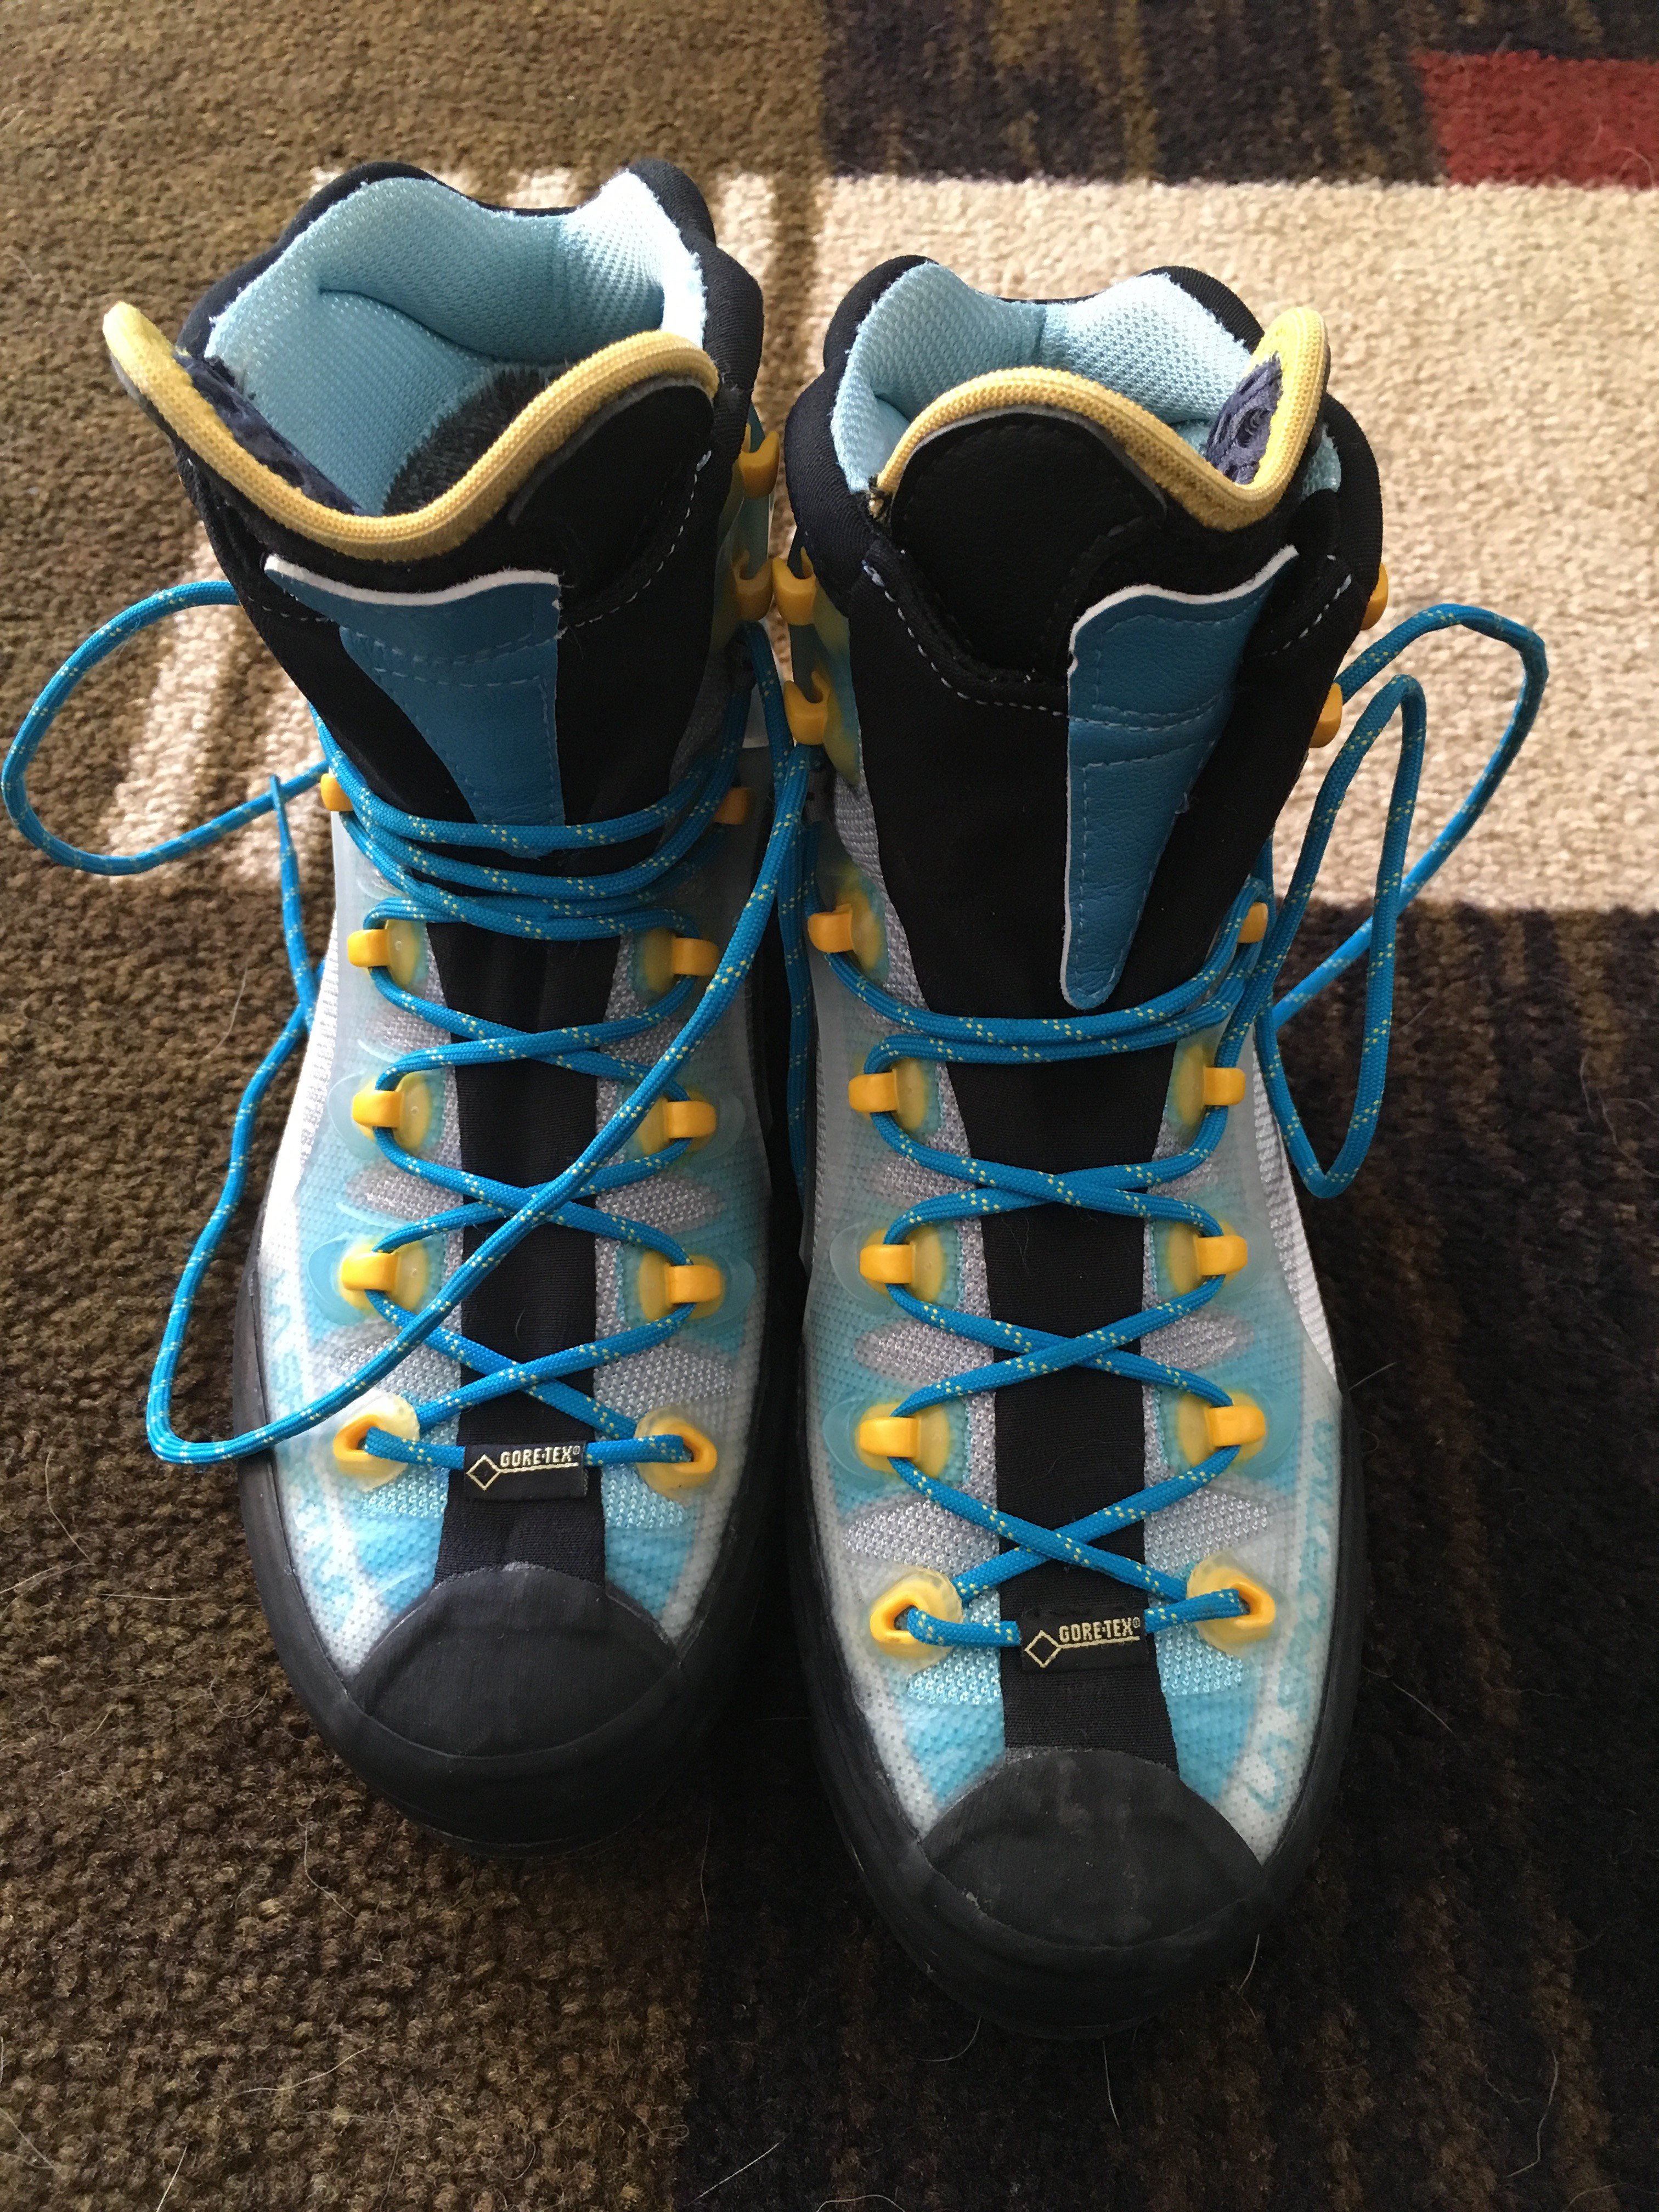
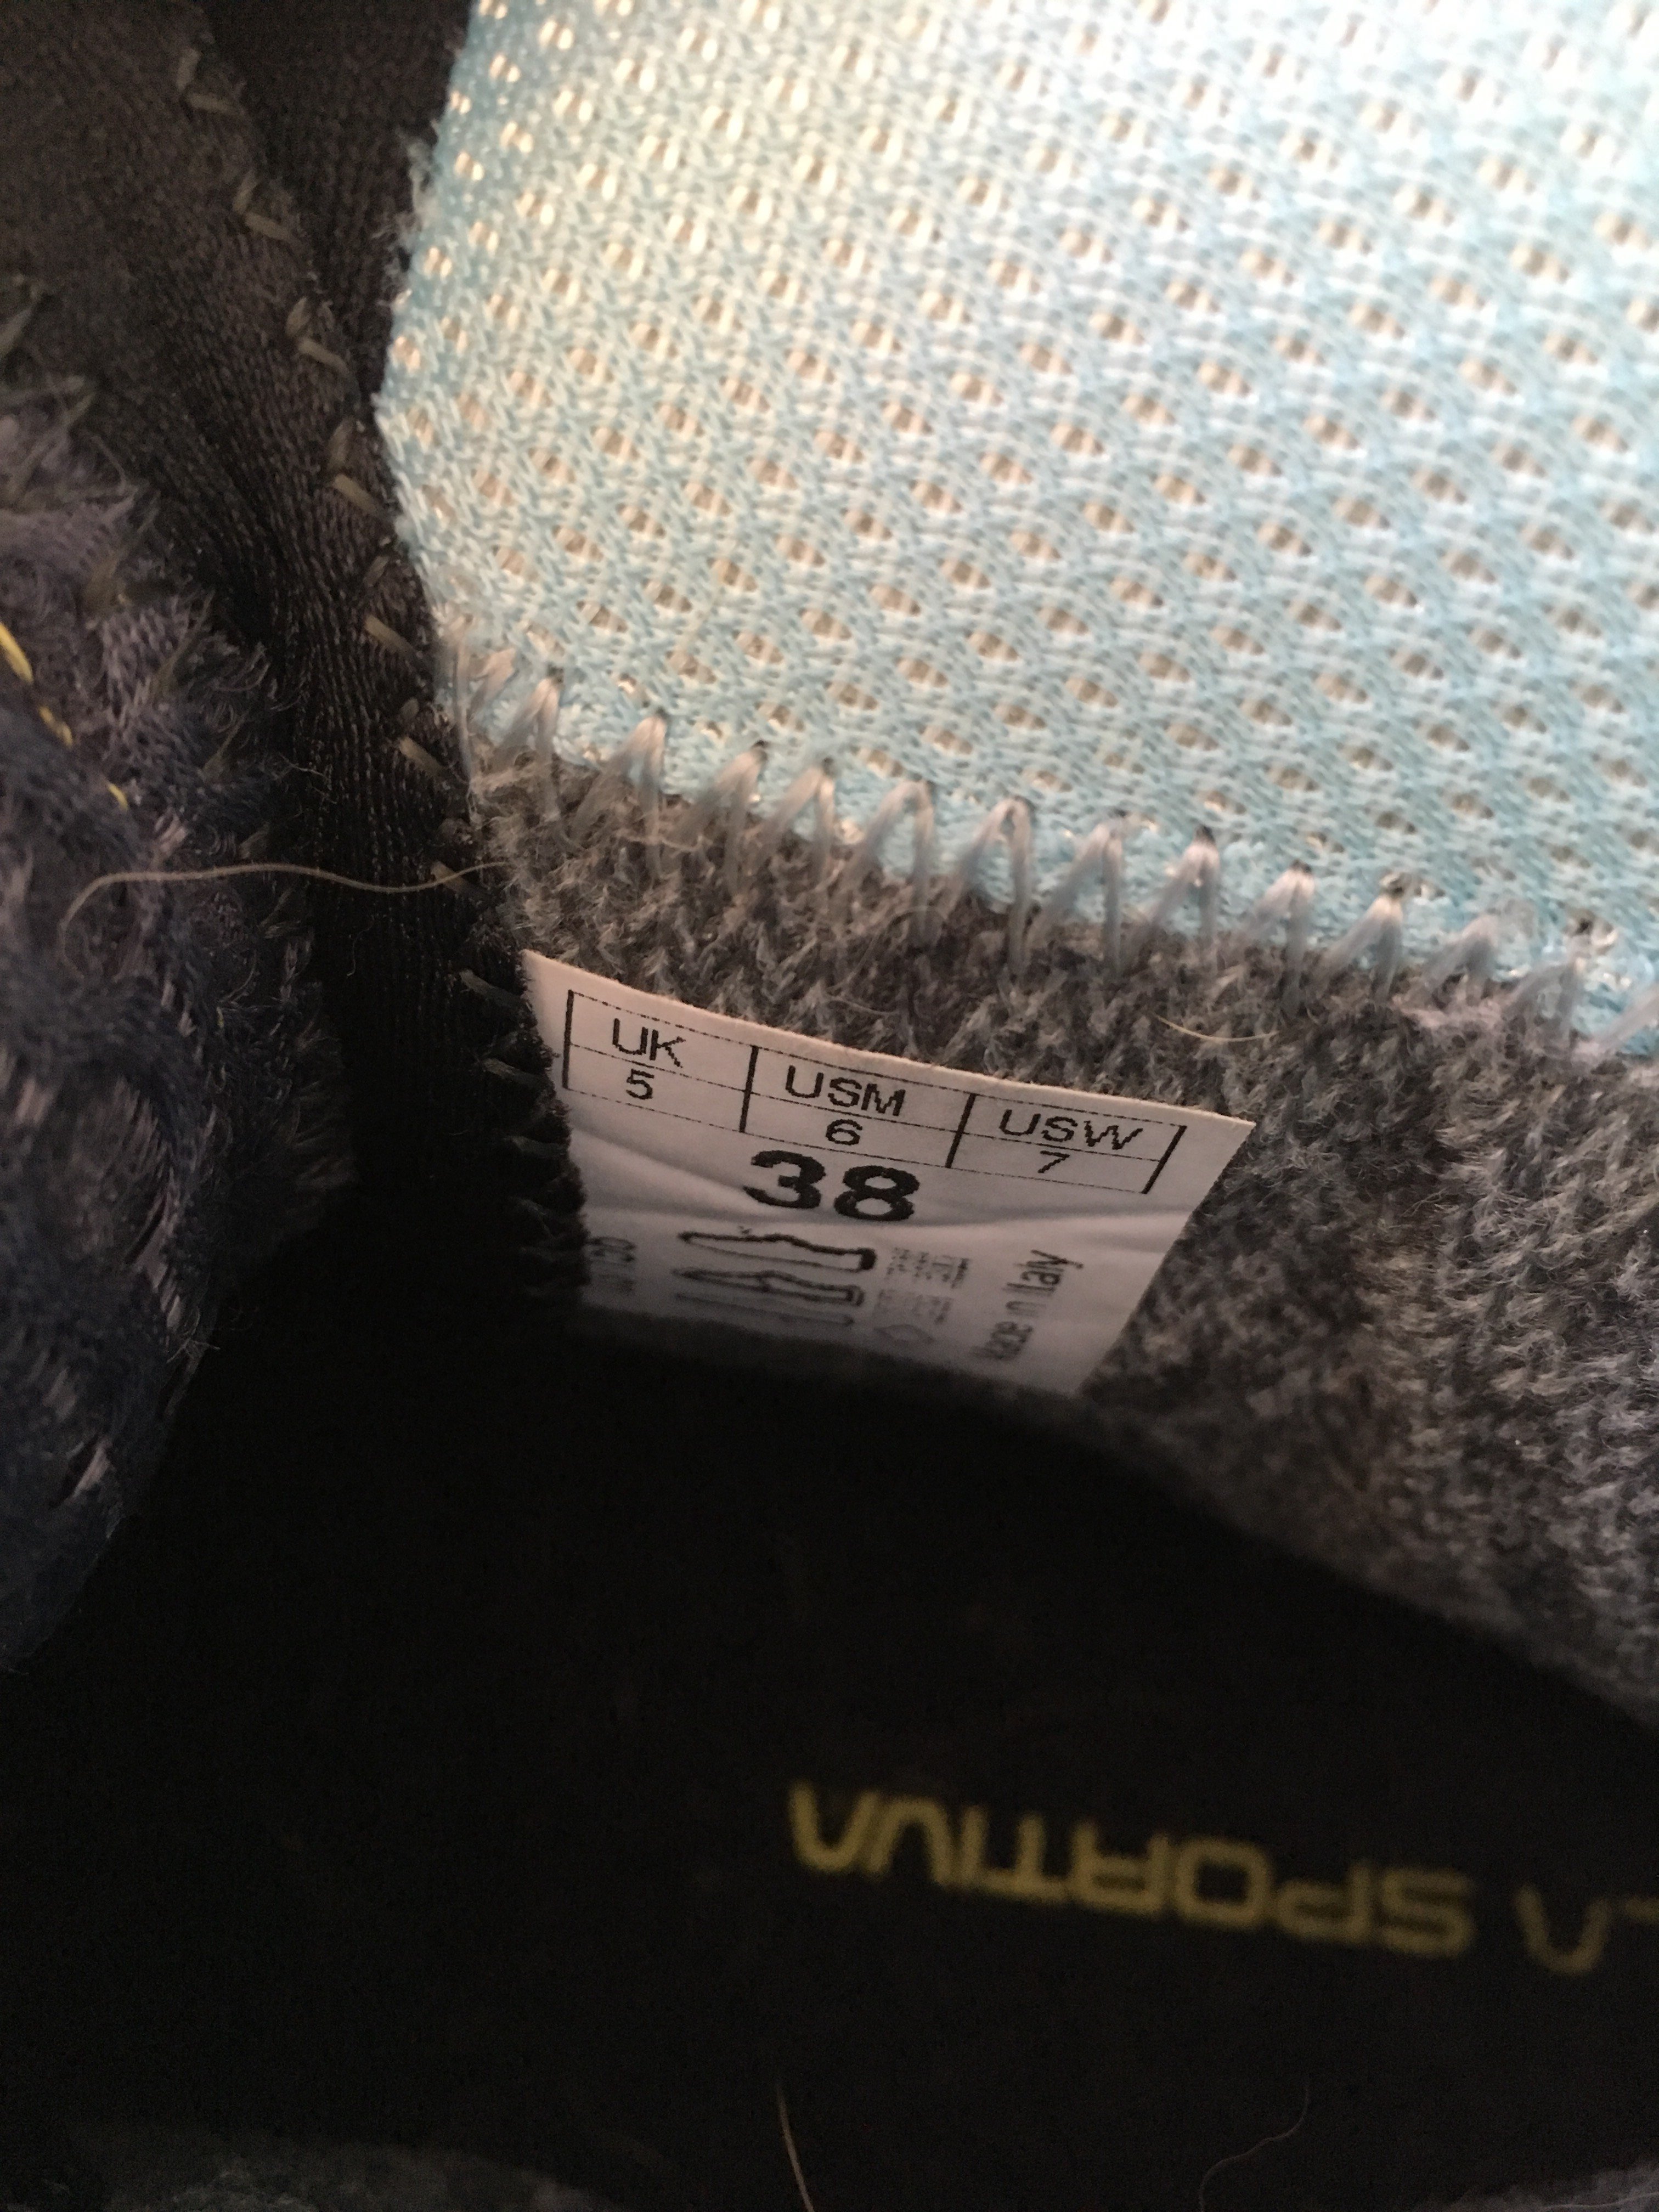
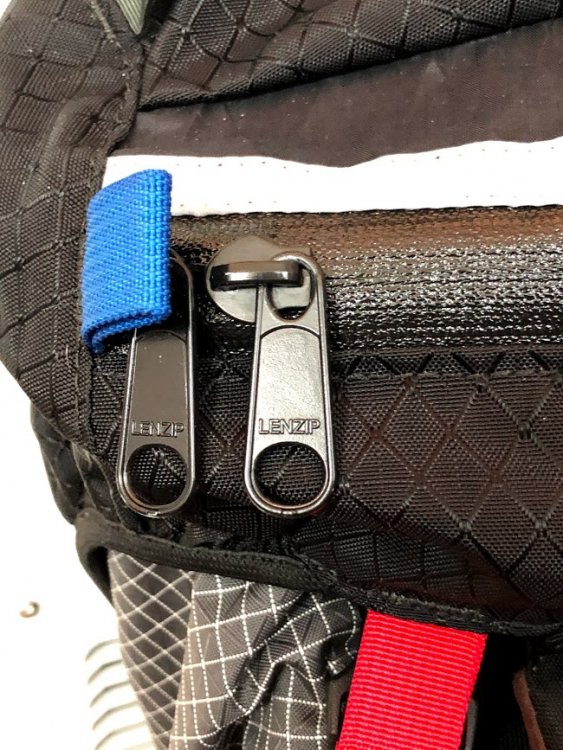
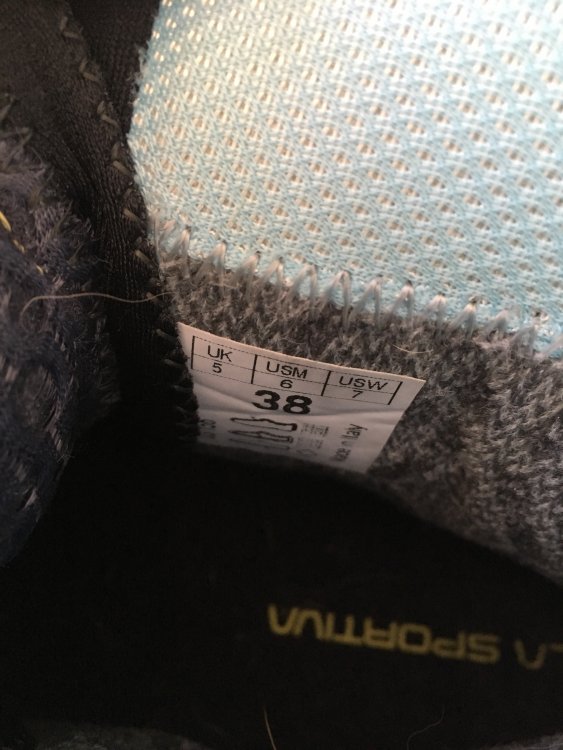
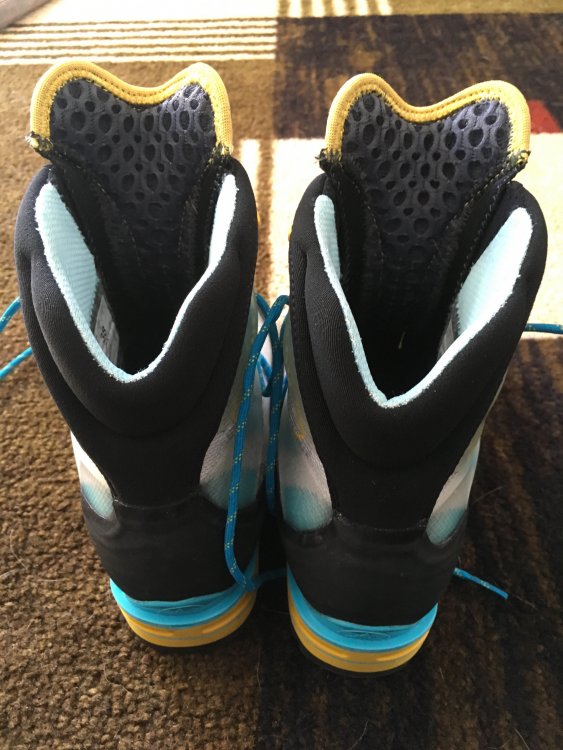
Lightly used (3-4 days out in snow and ice) mountaineering boots - size 38 (US women's 7). They're basically brand new and great boots, but half a size too small for me. Can met in downtown Seattle or the Columbia City/Seward Park area.


-
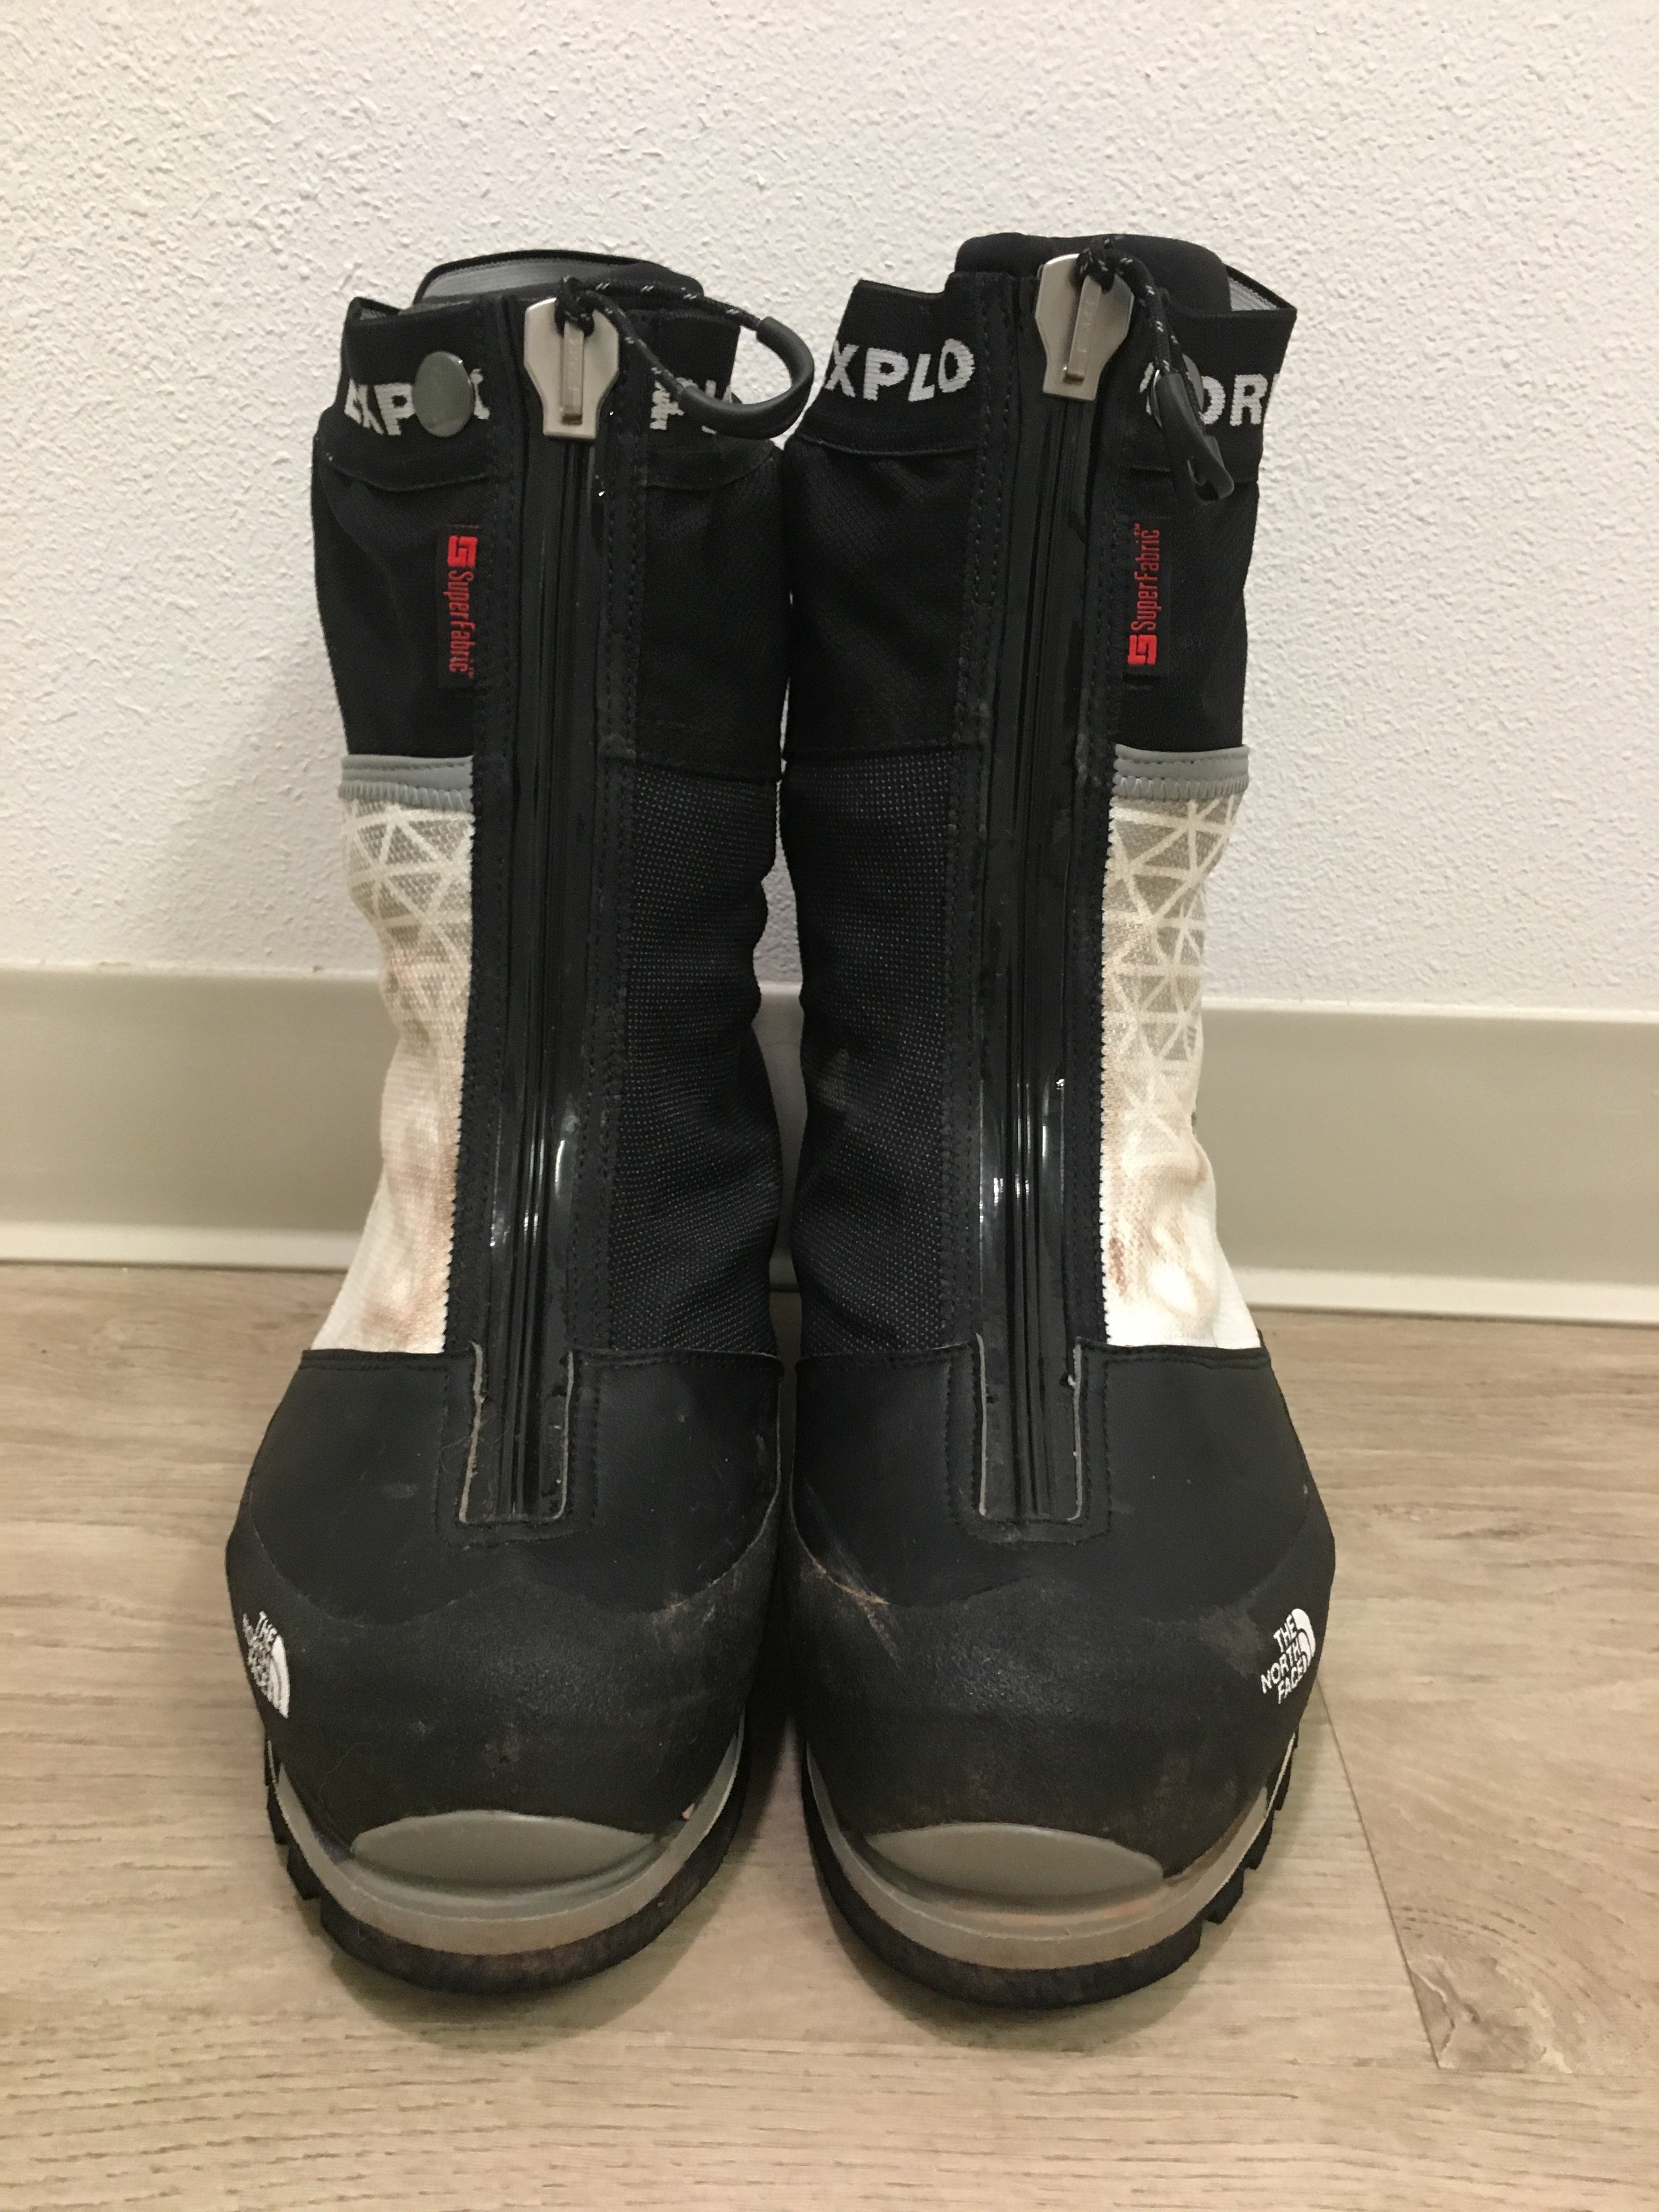
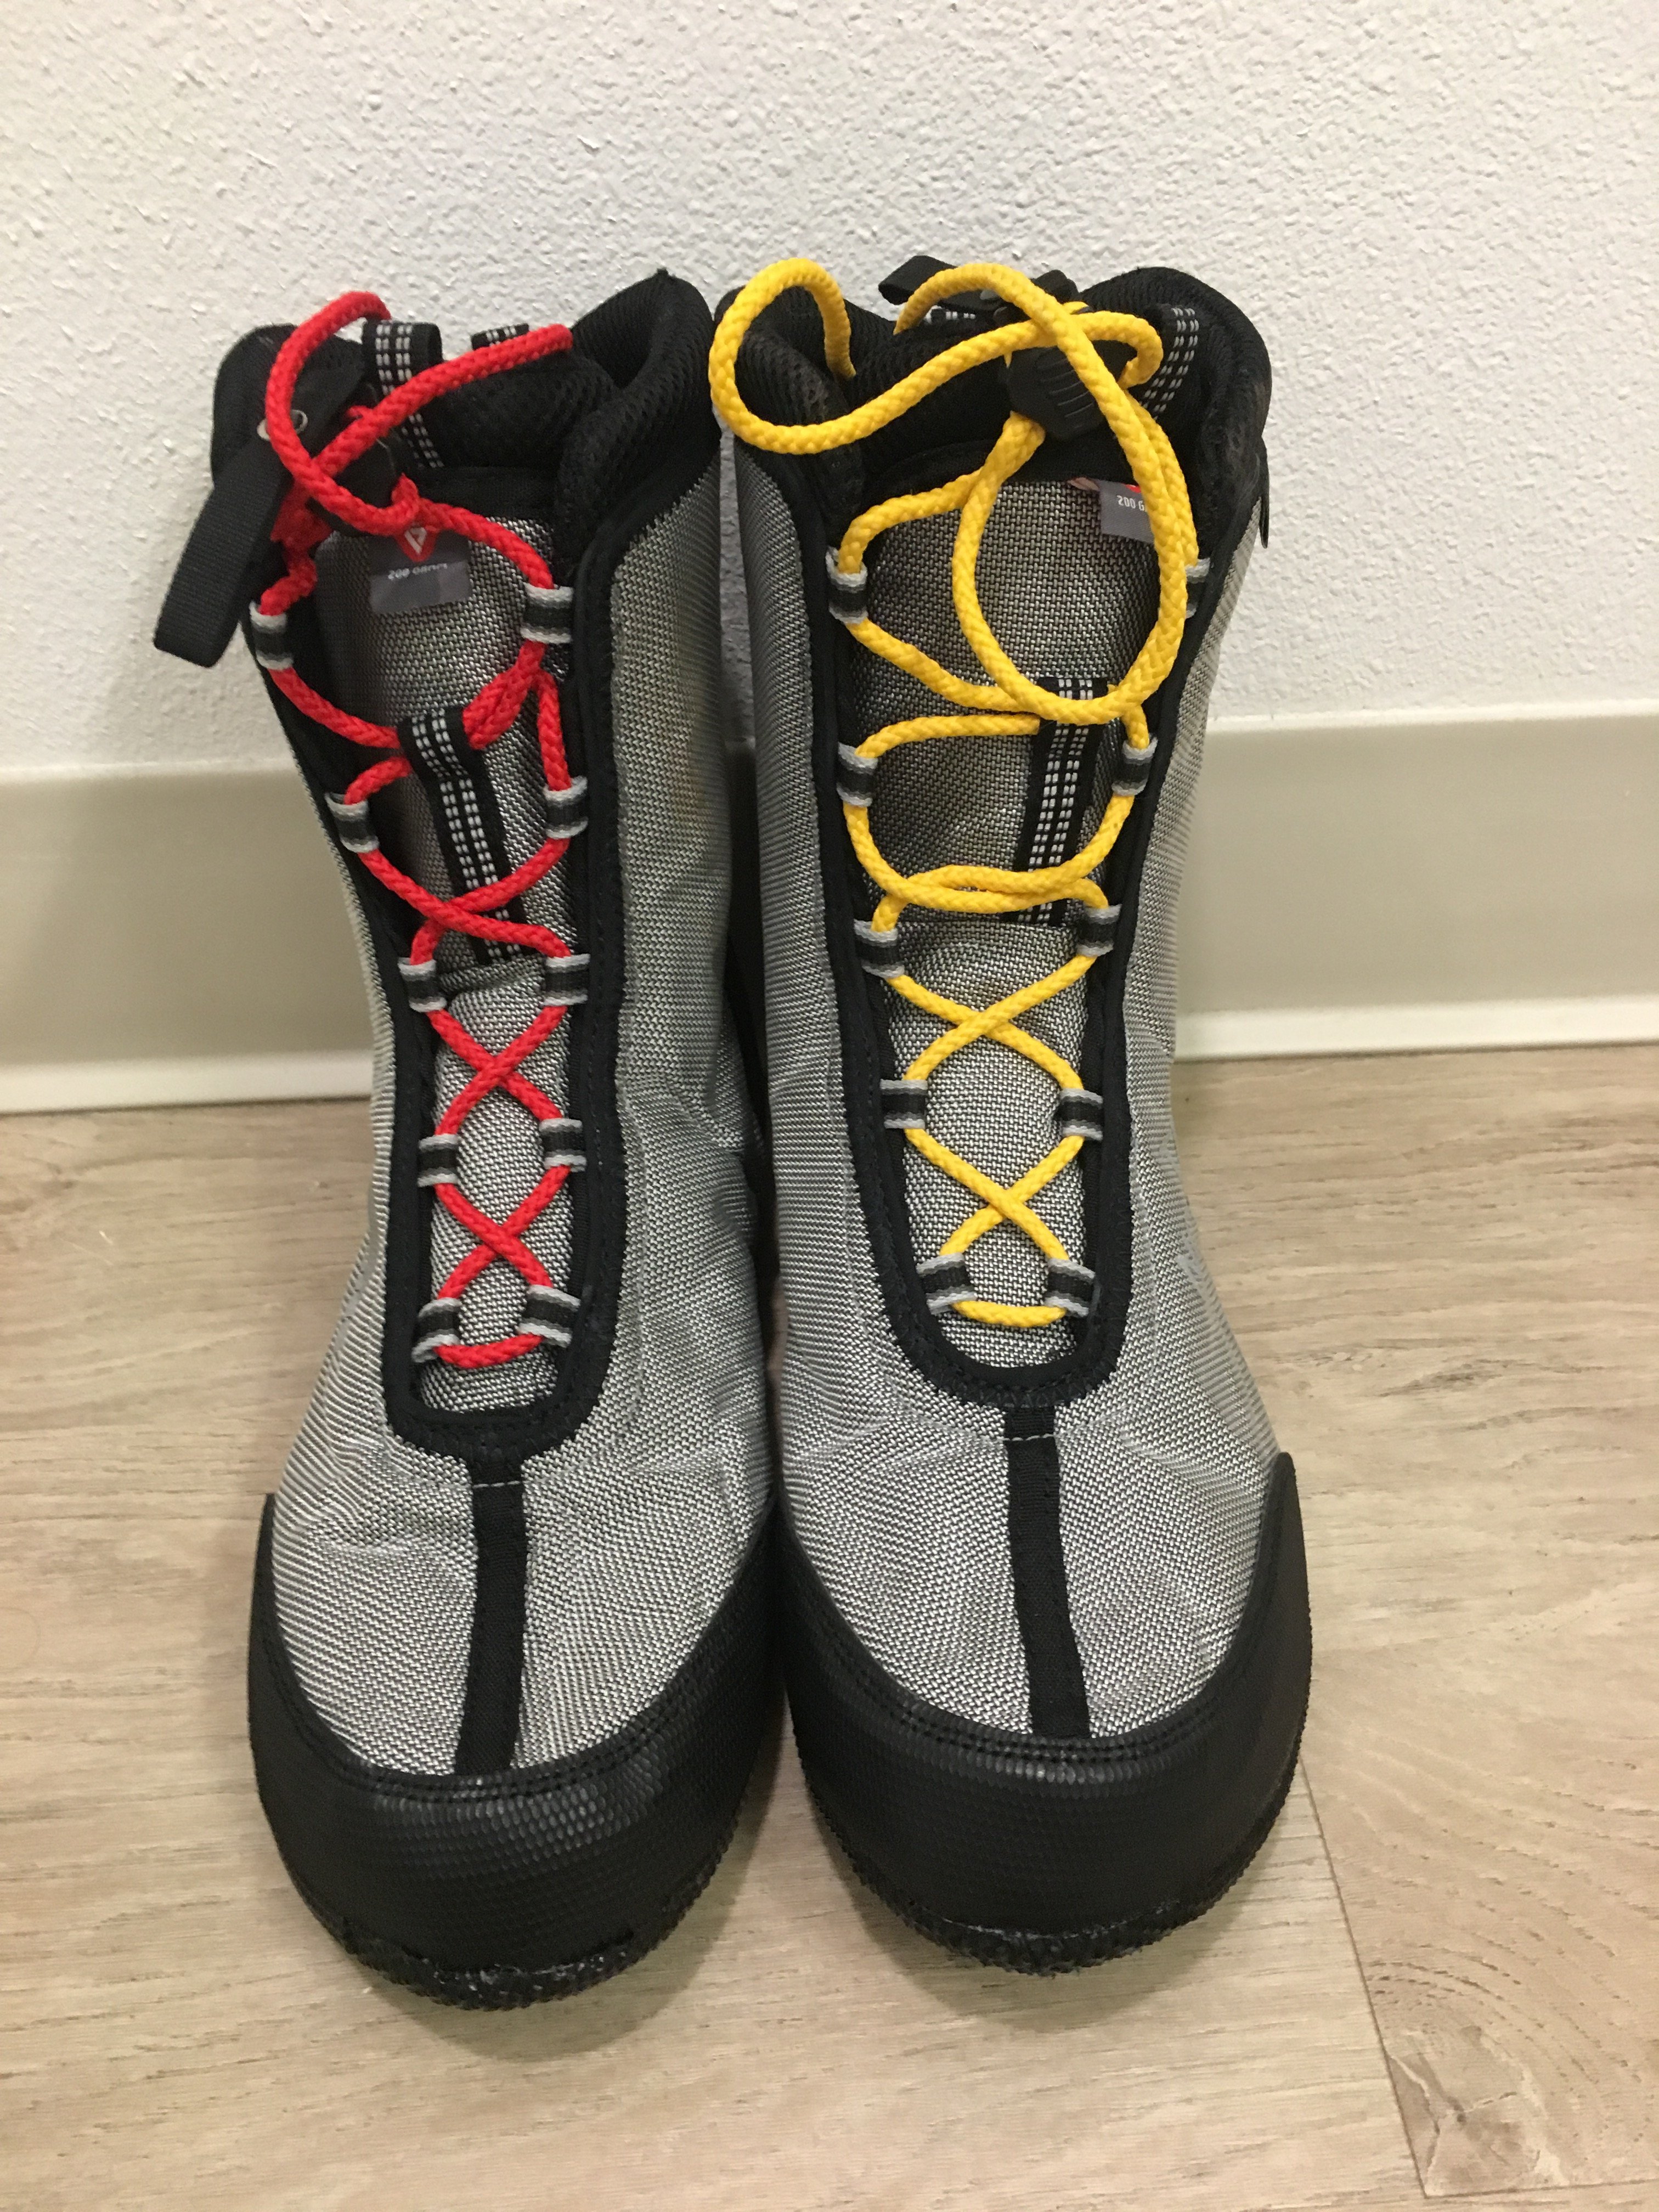
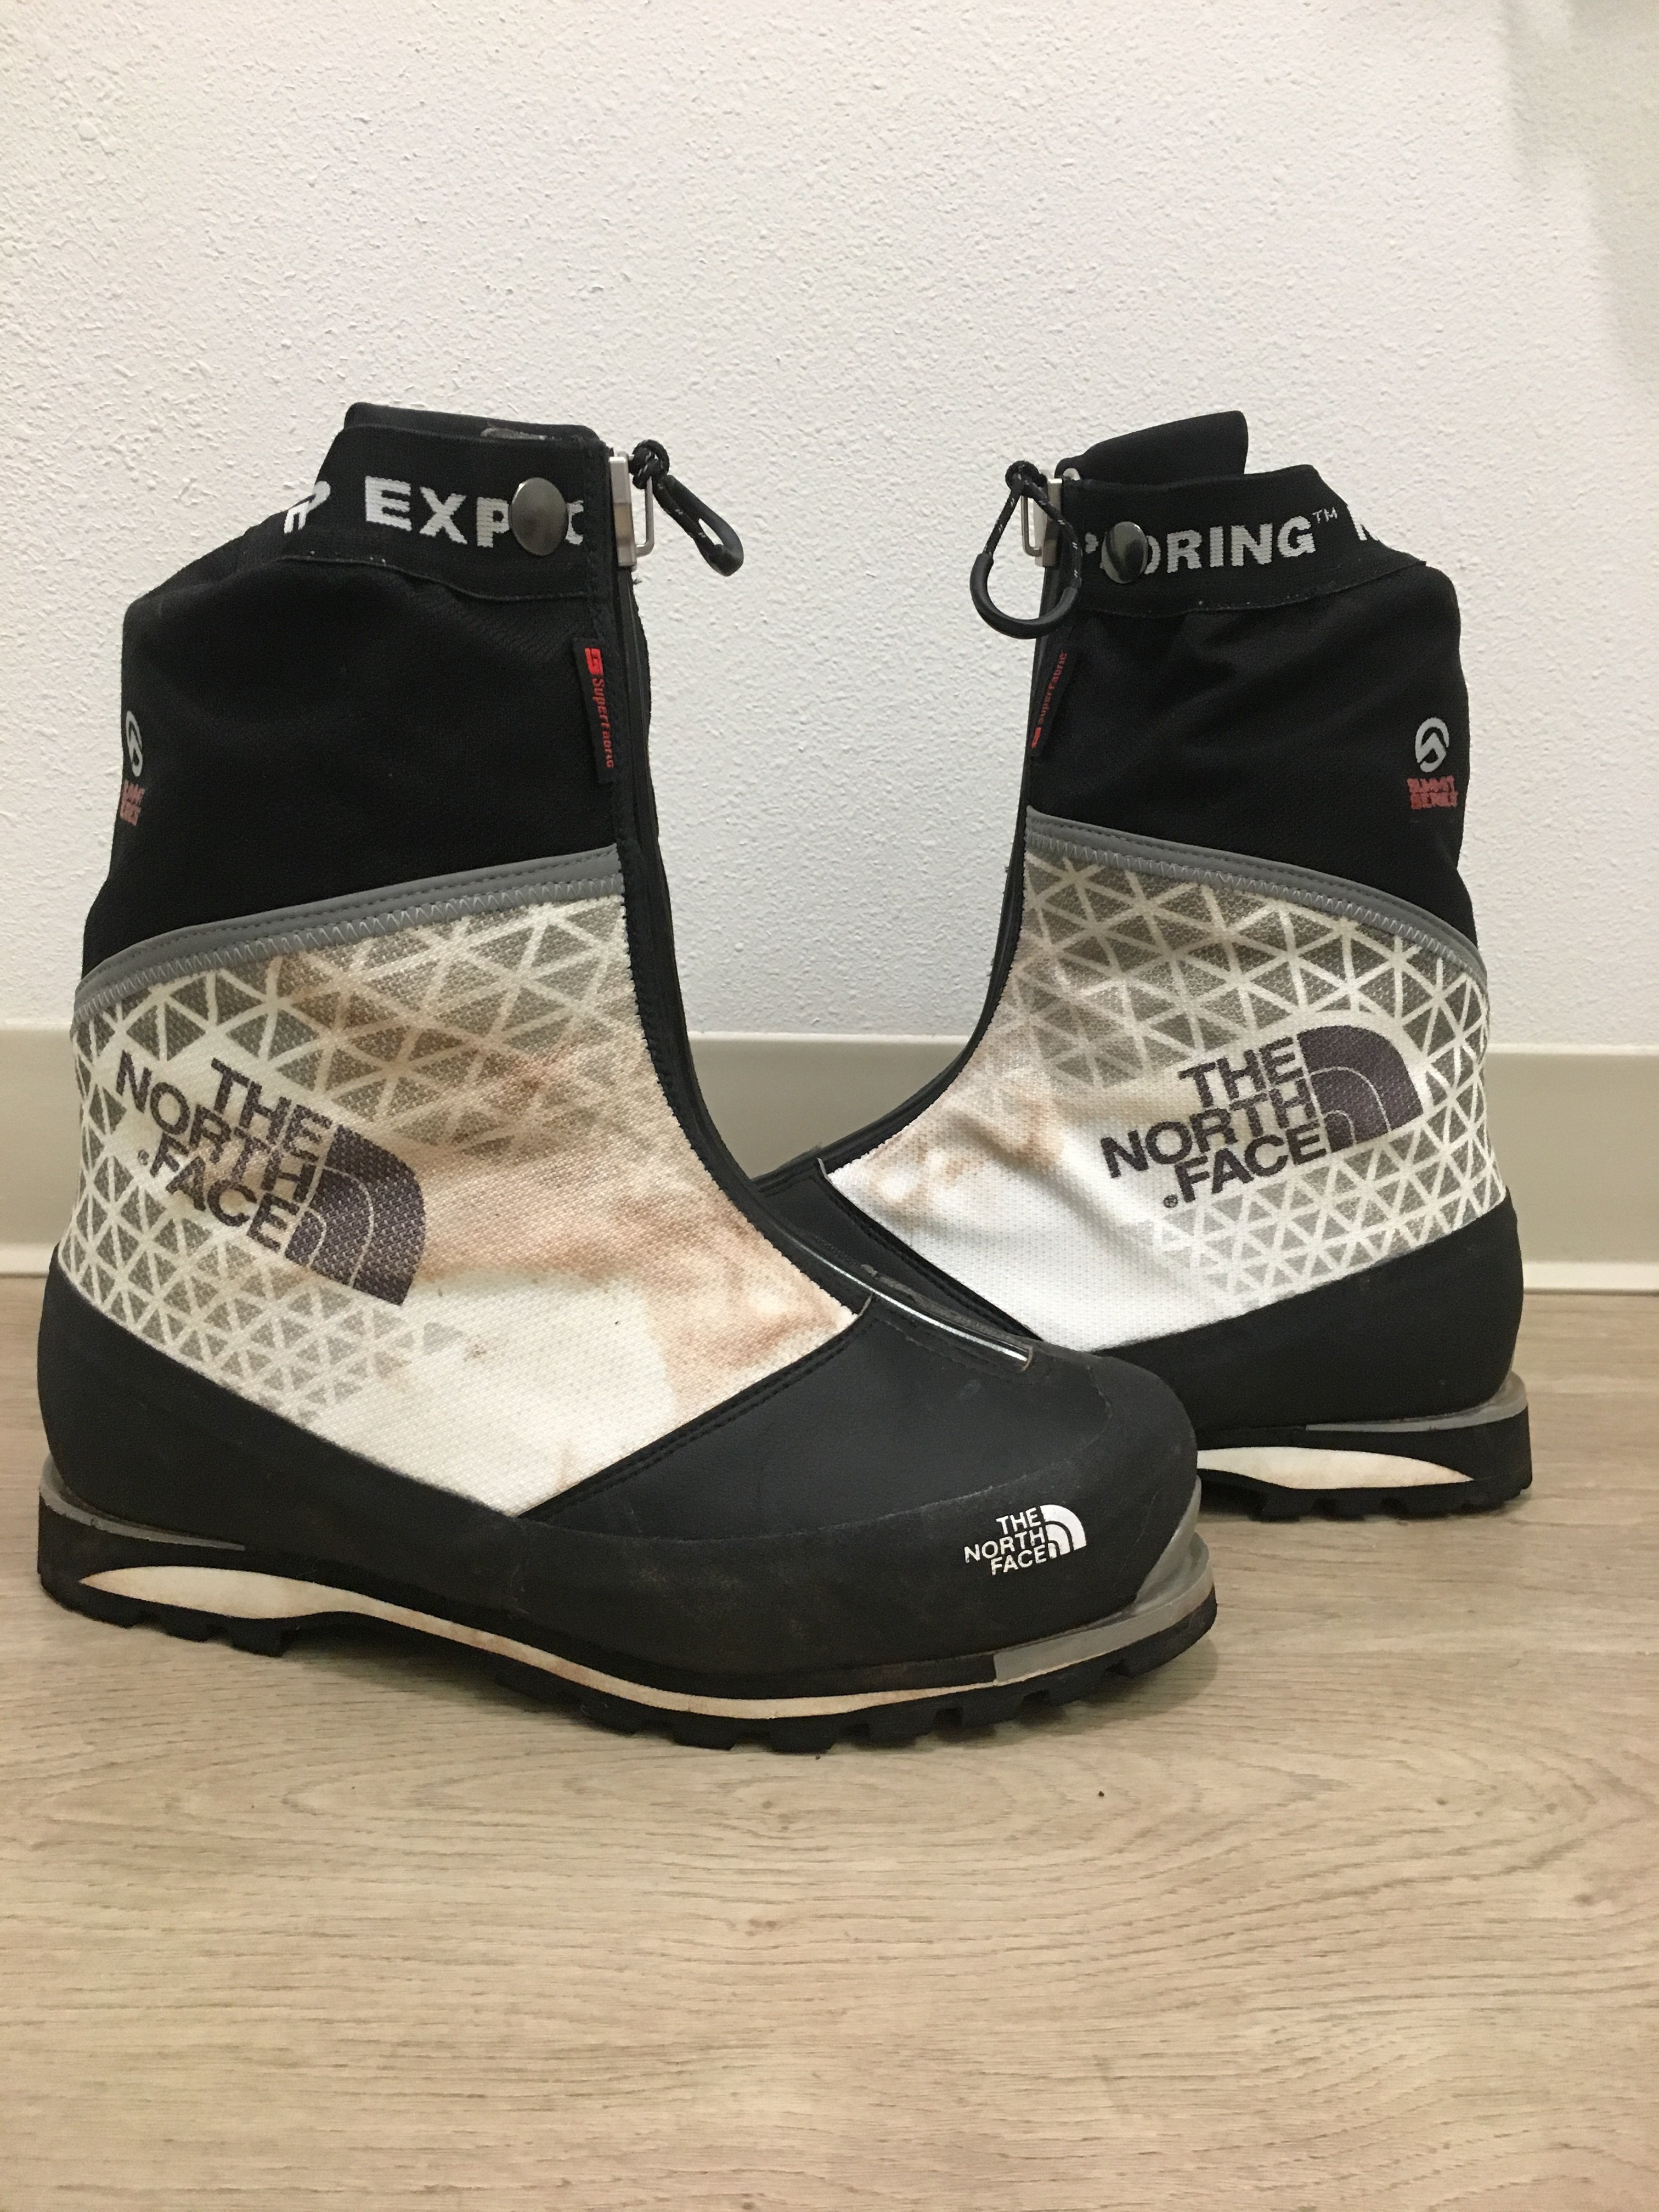
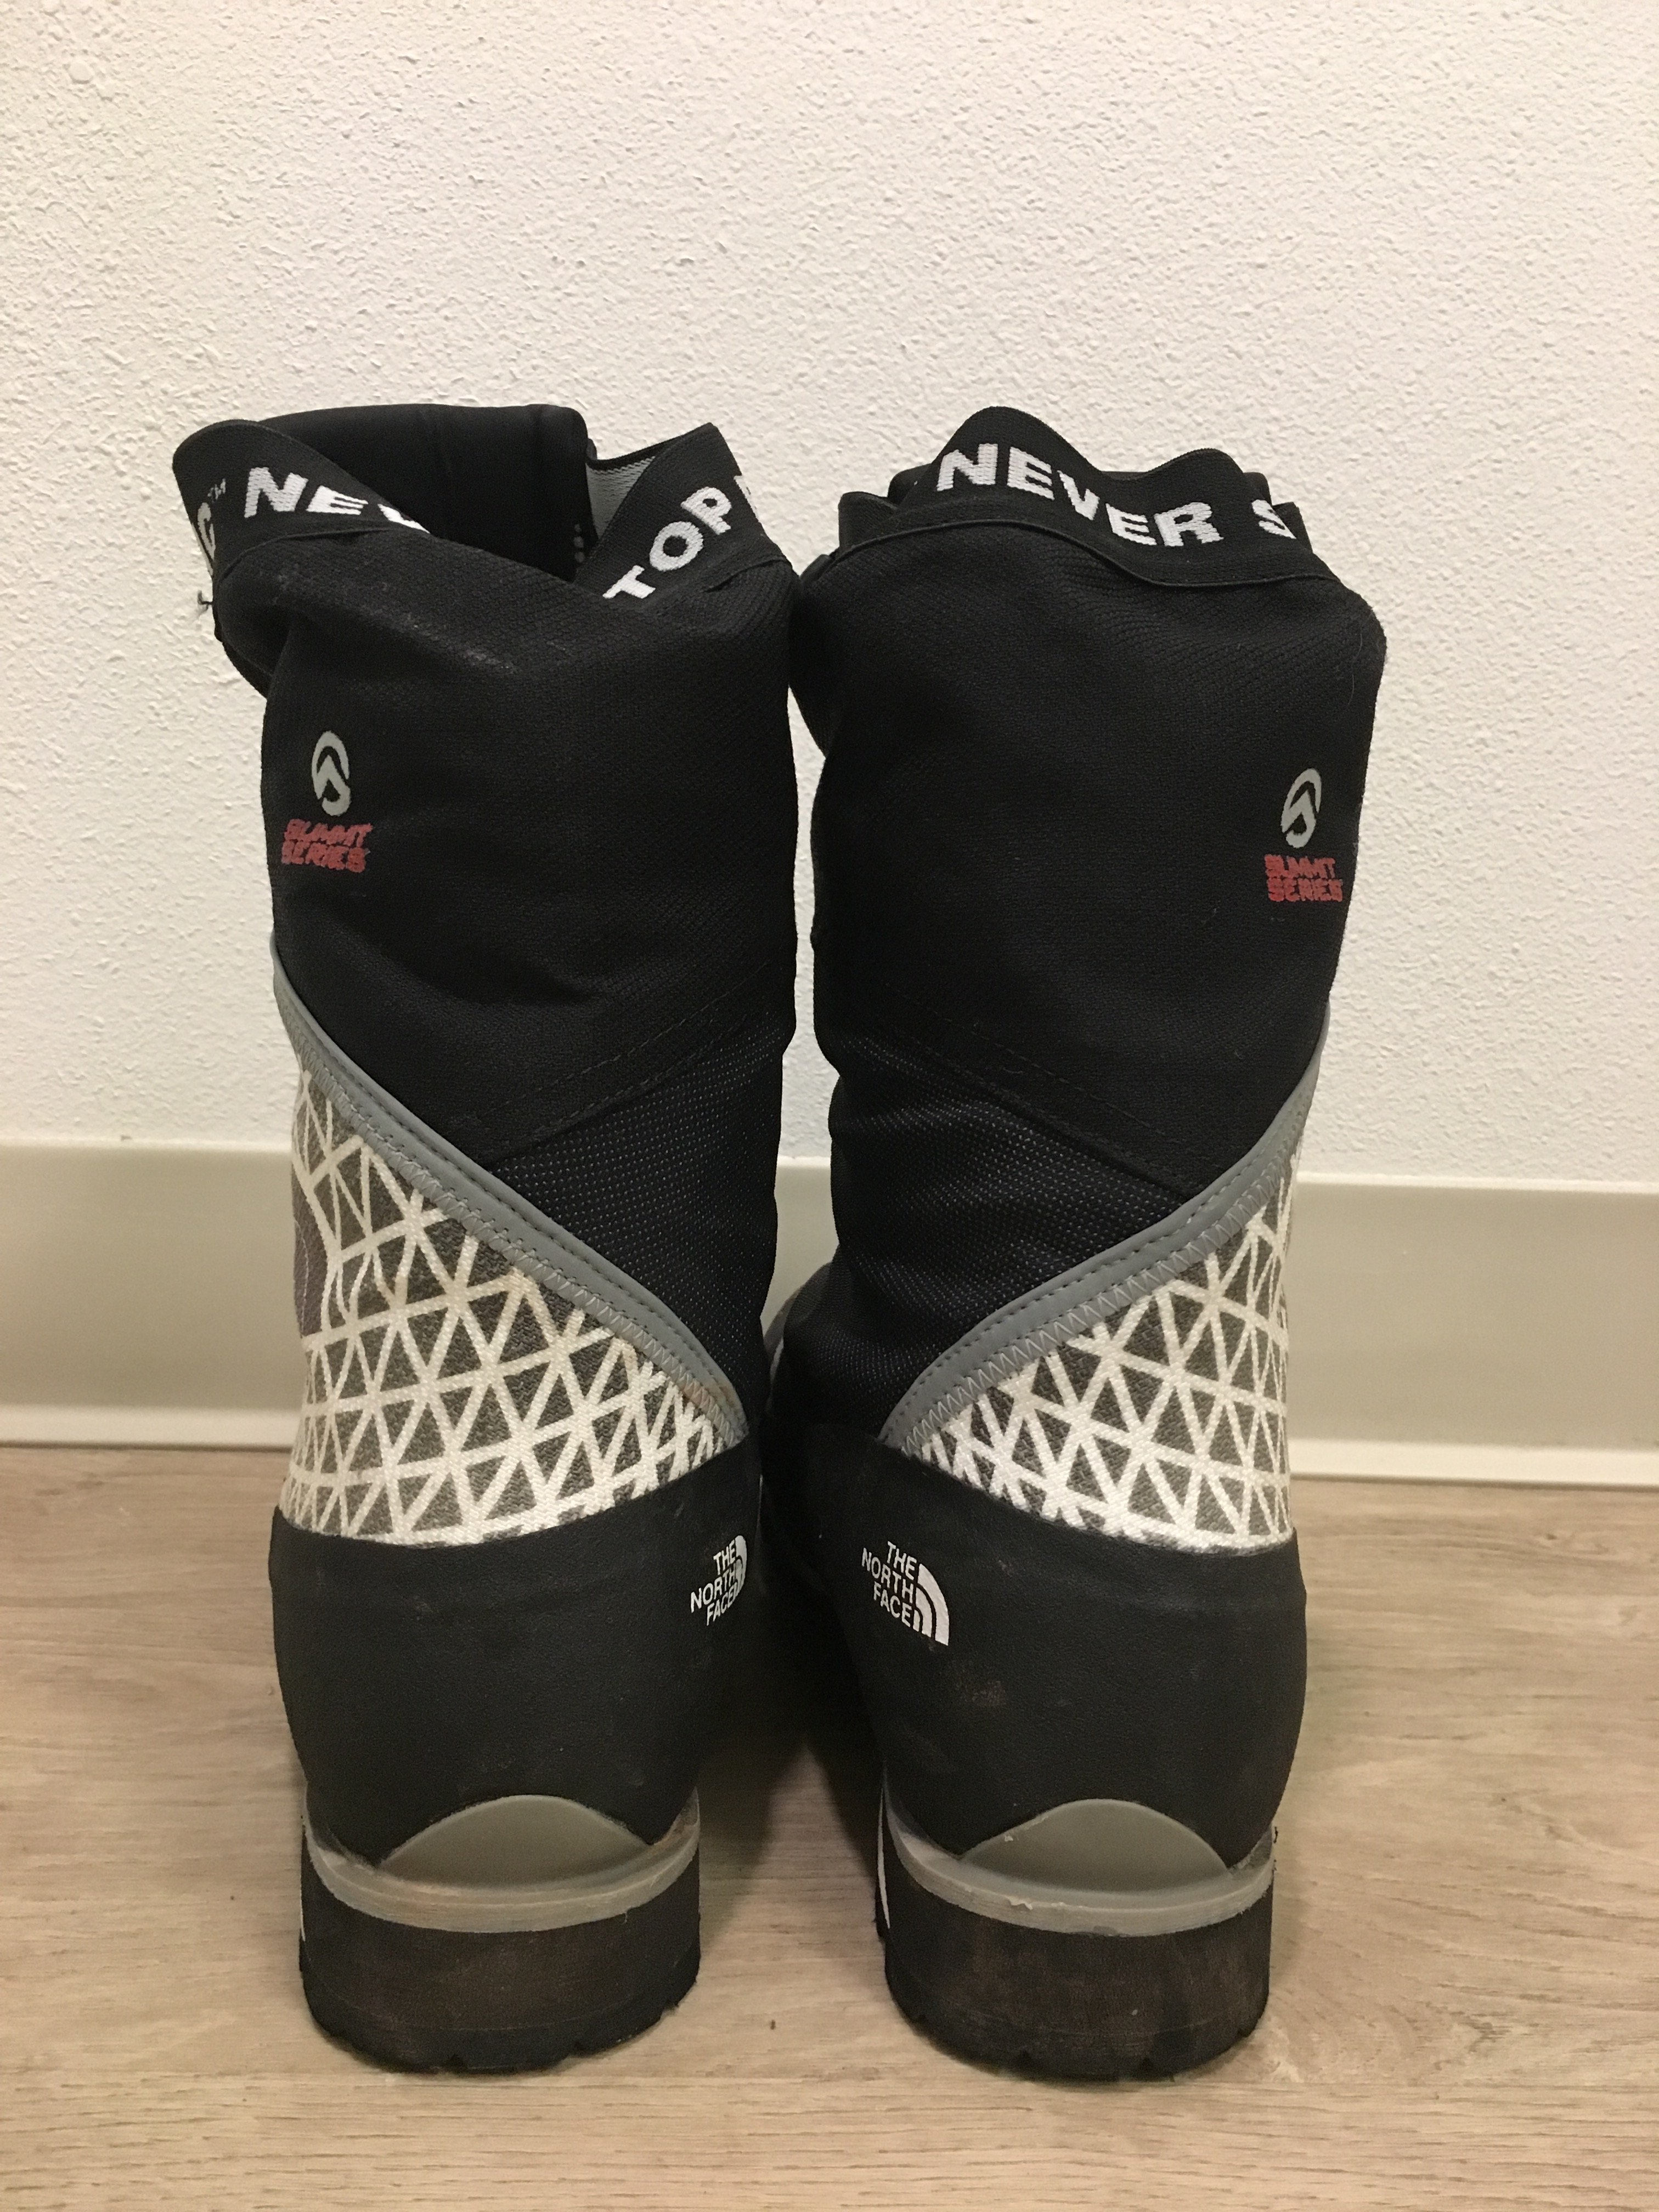
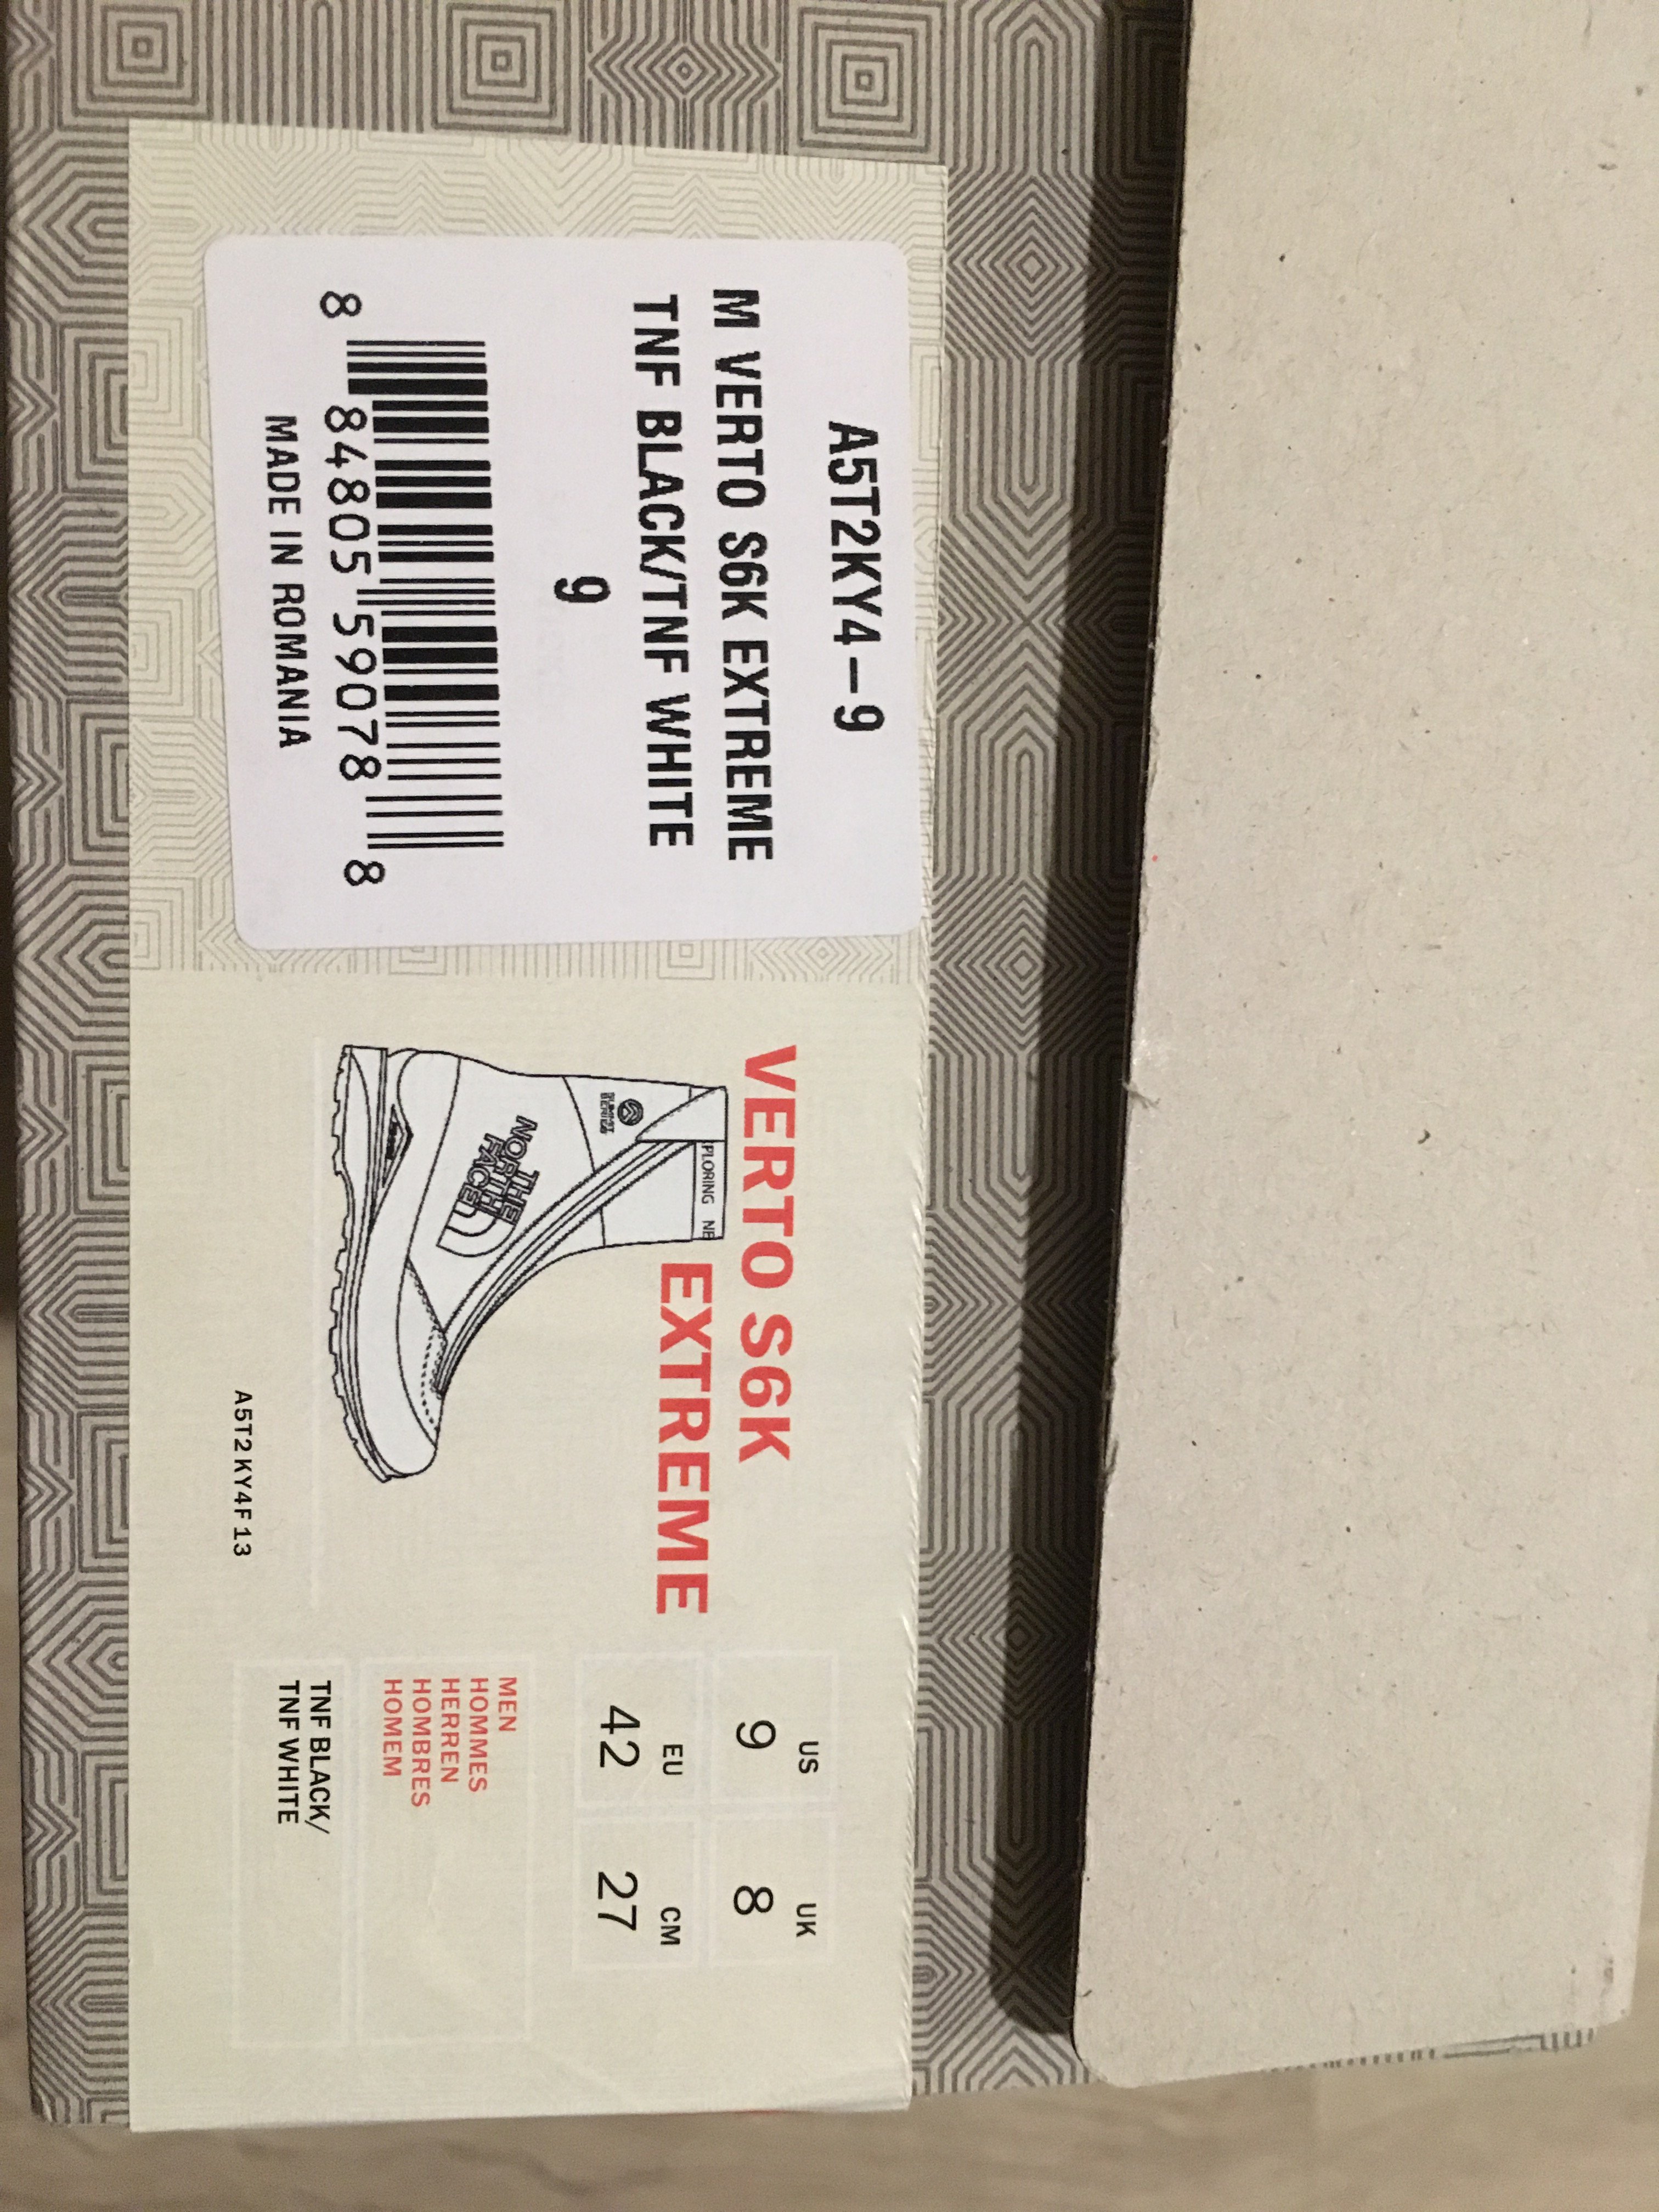
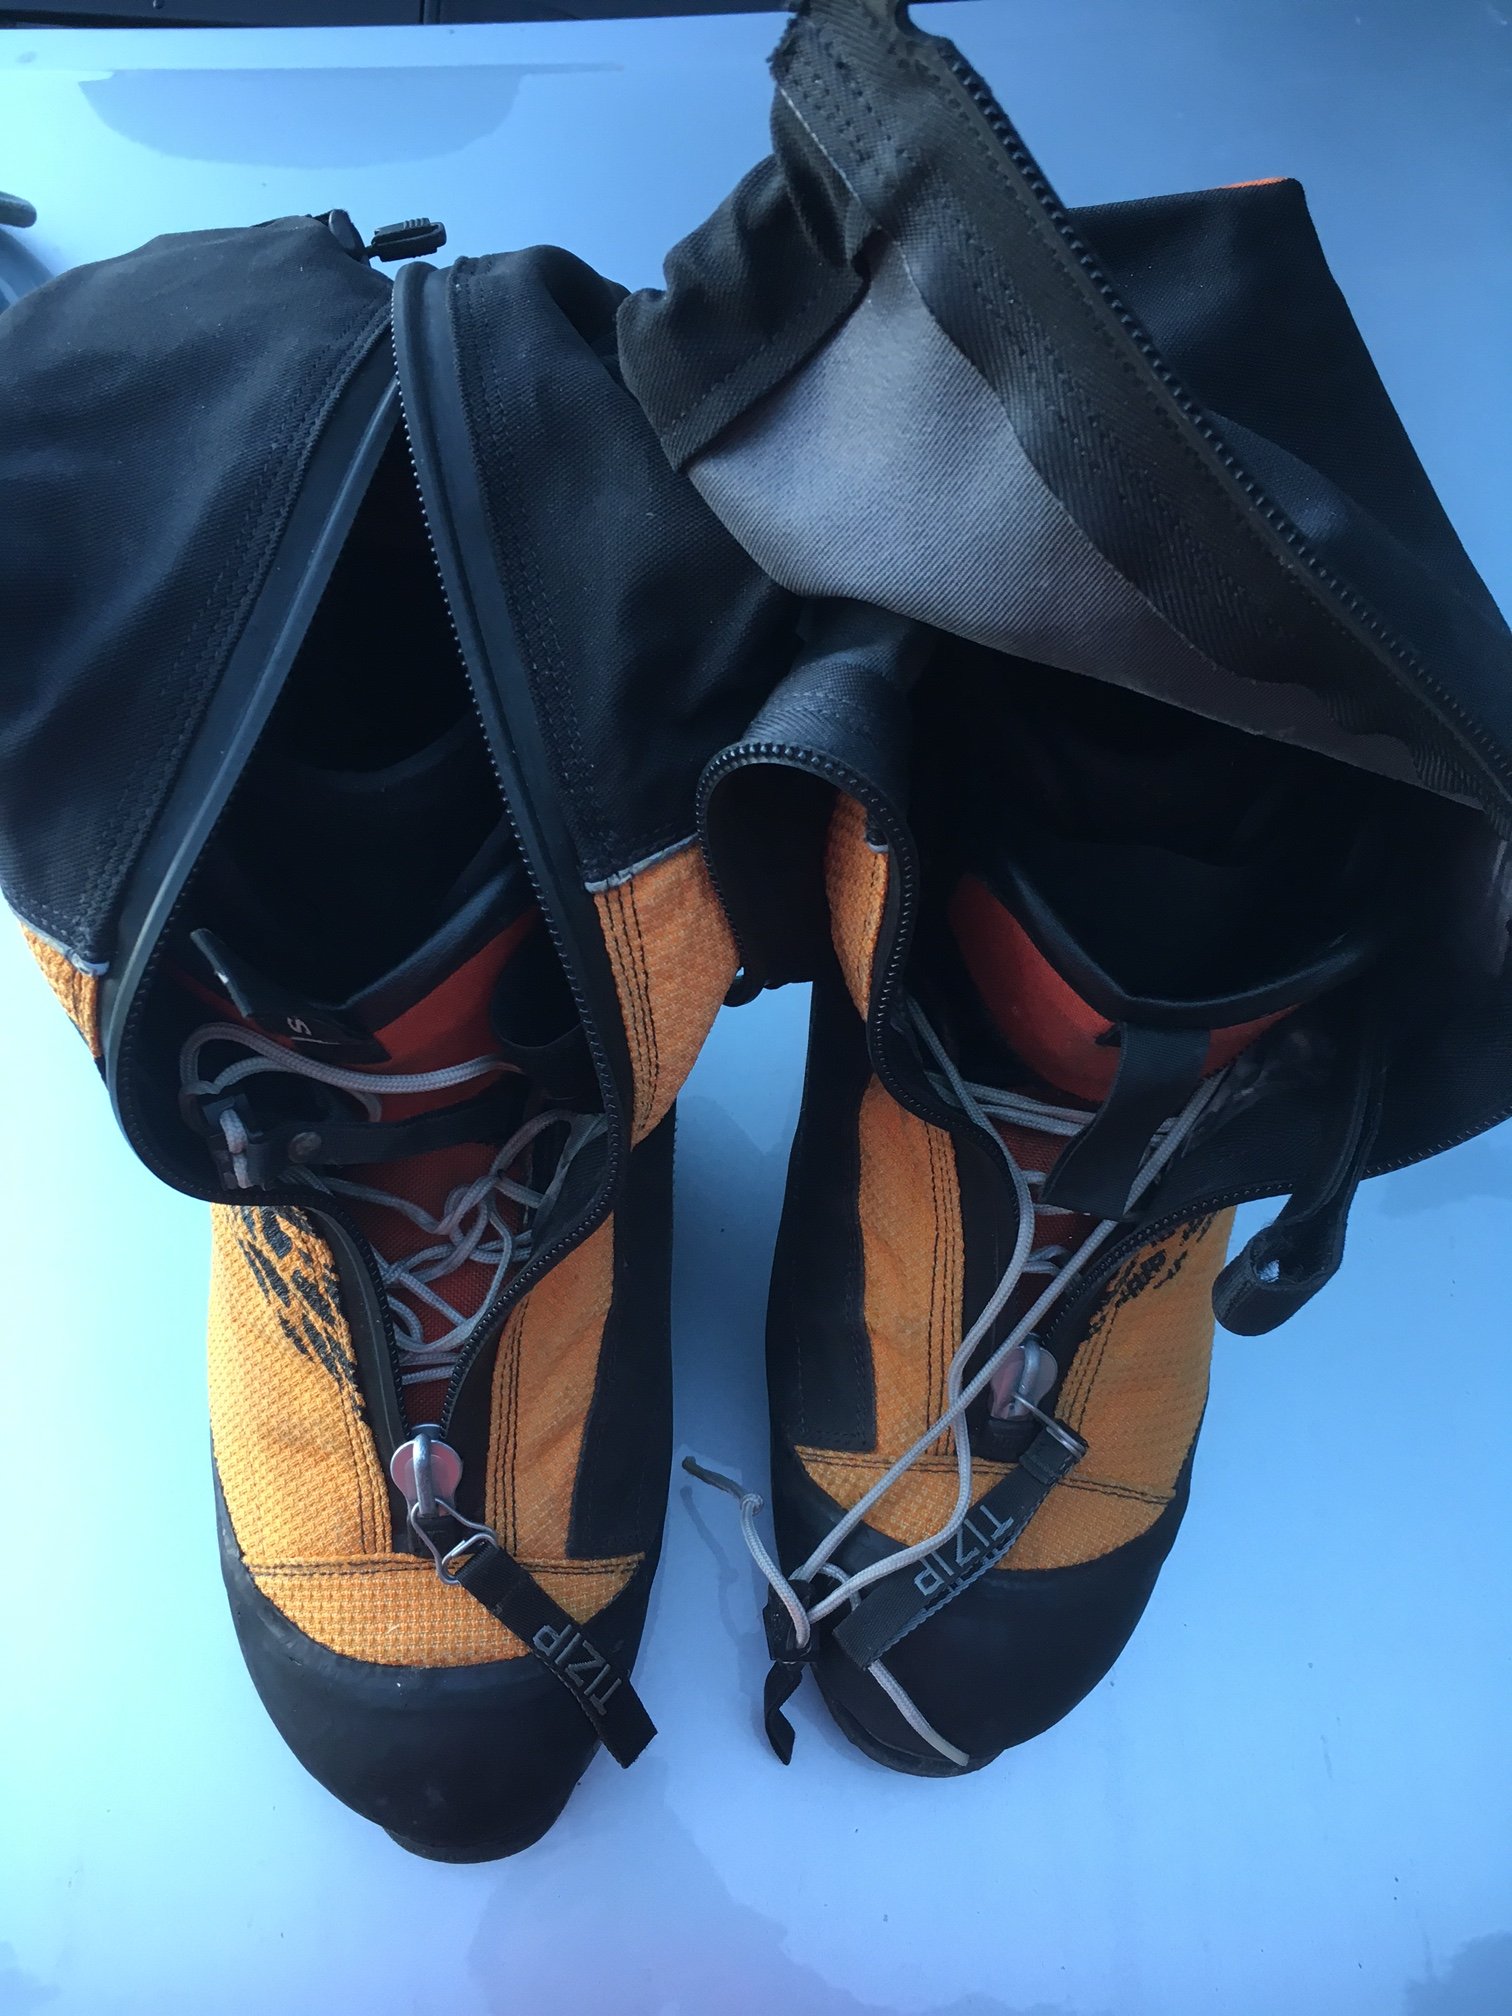
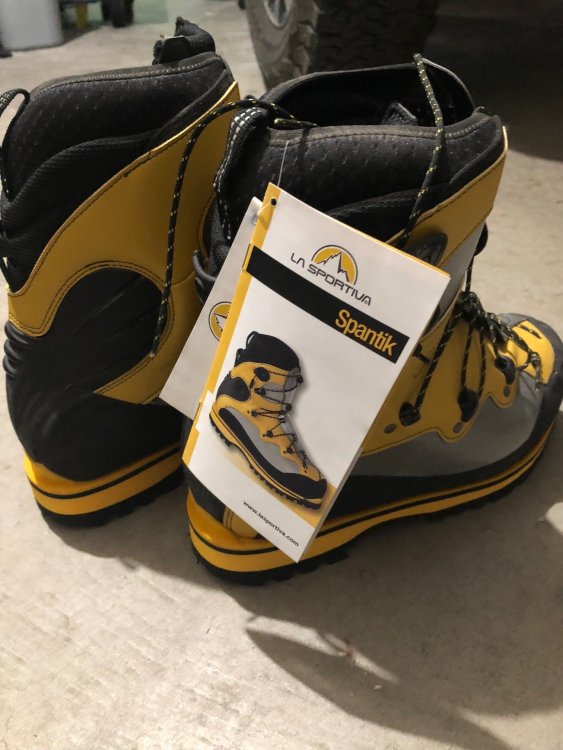
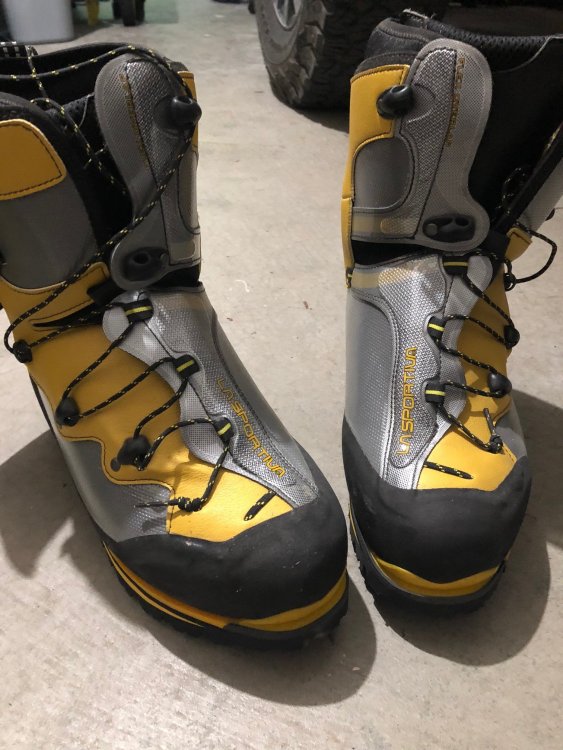
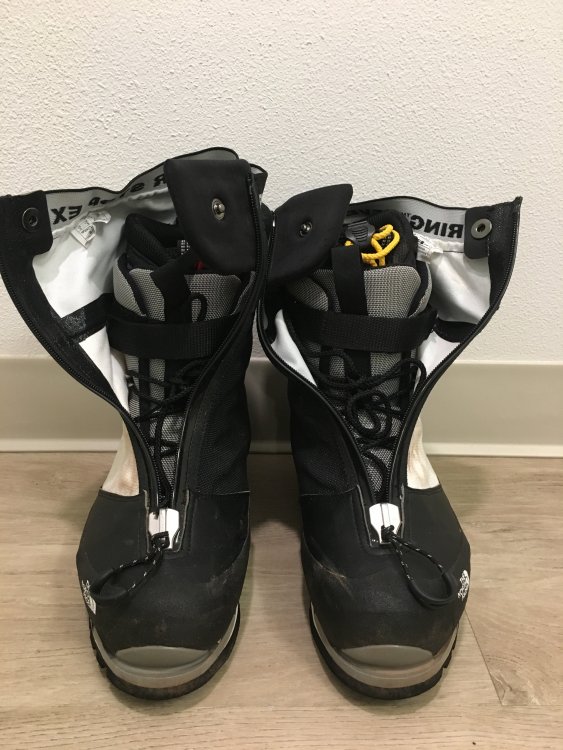
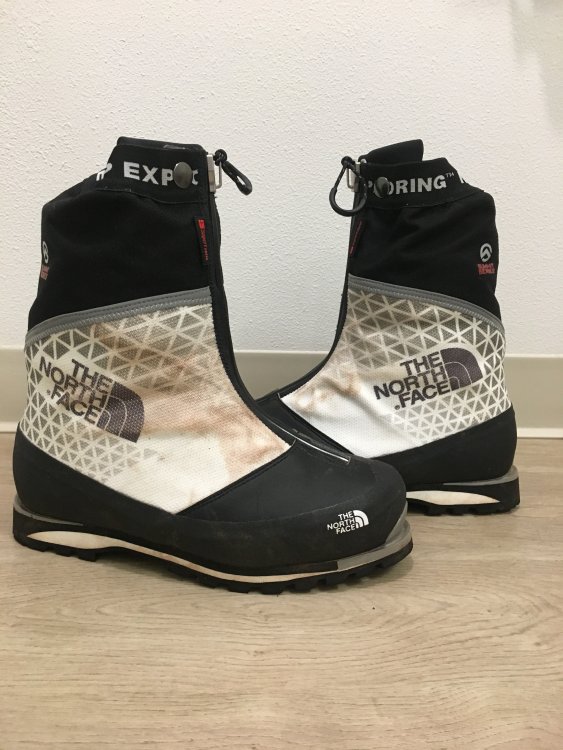
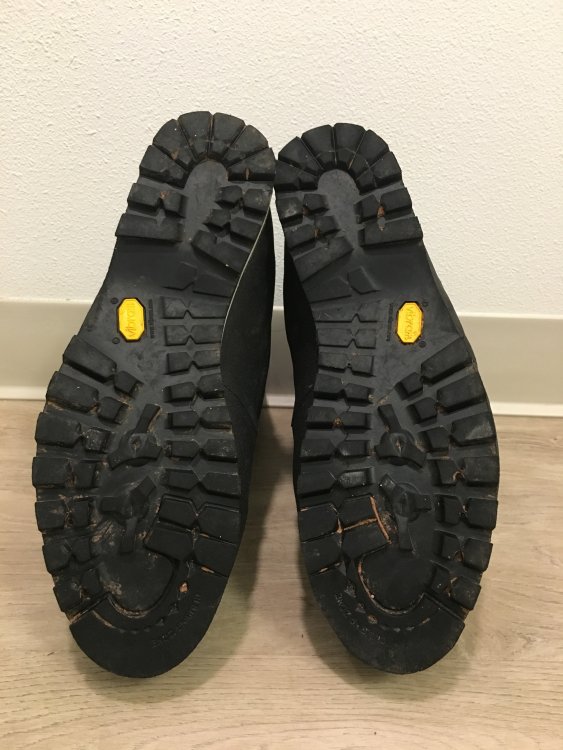
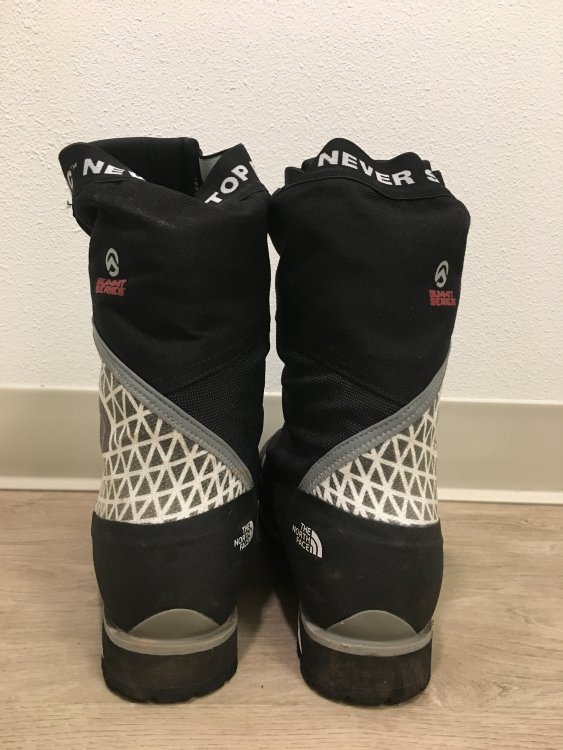
These are brand new, never worn or used, still have the tags on them! Excellent condition, have been stored inside. Purchased these for some climbs that ended up not happening, now they are yours for a great deal! Looking to get $400 obo. Local to Seattle, if you need shipping, $425. Accept venmo or paypal. The Spantik is a double boot designed for cold, high altitudes environments. This step-in crampon-compatible boot excels on steep terrain without sacrificing walkability. The thermo-molded inner boot and one-handed closure system provide insulation and convenient lacing.

-
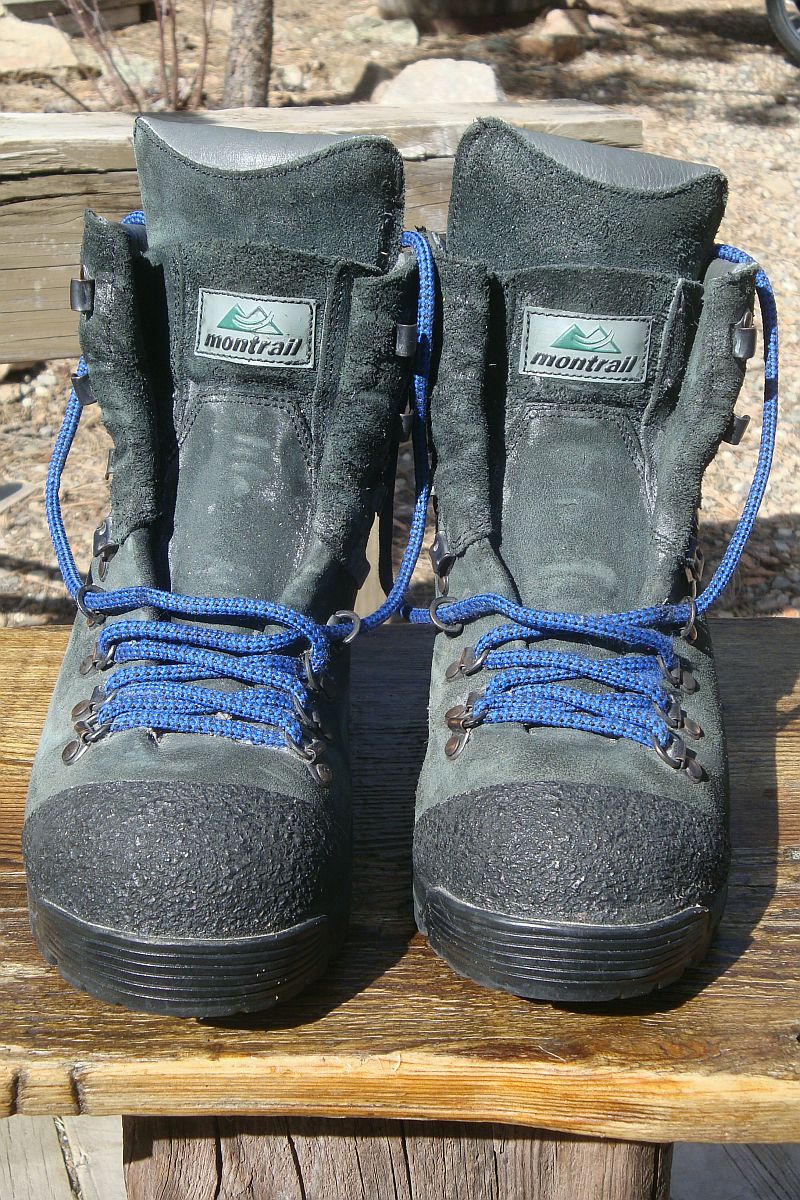
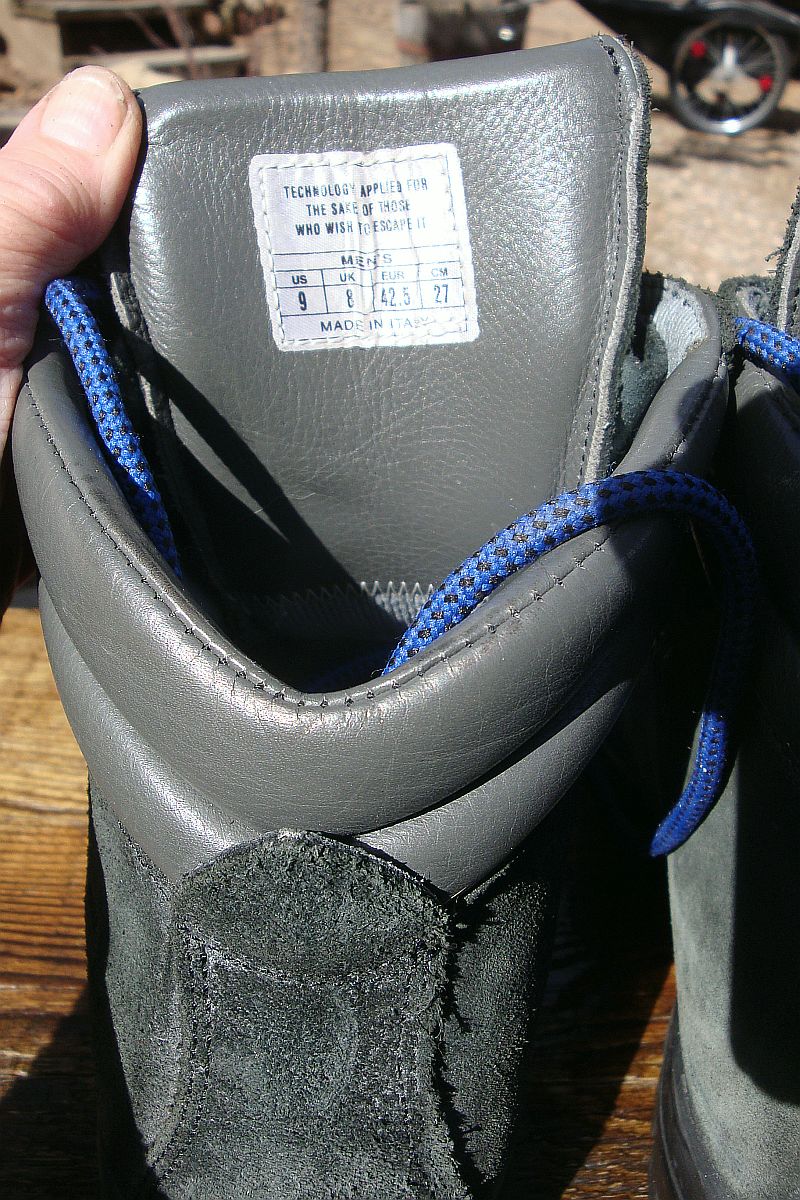
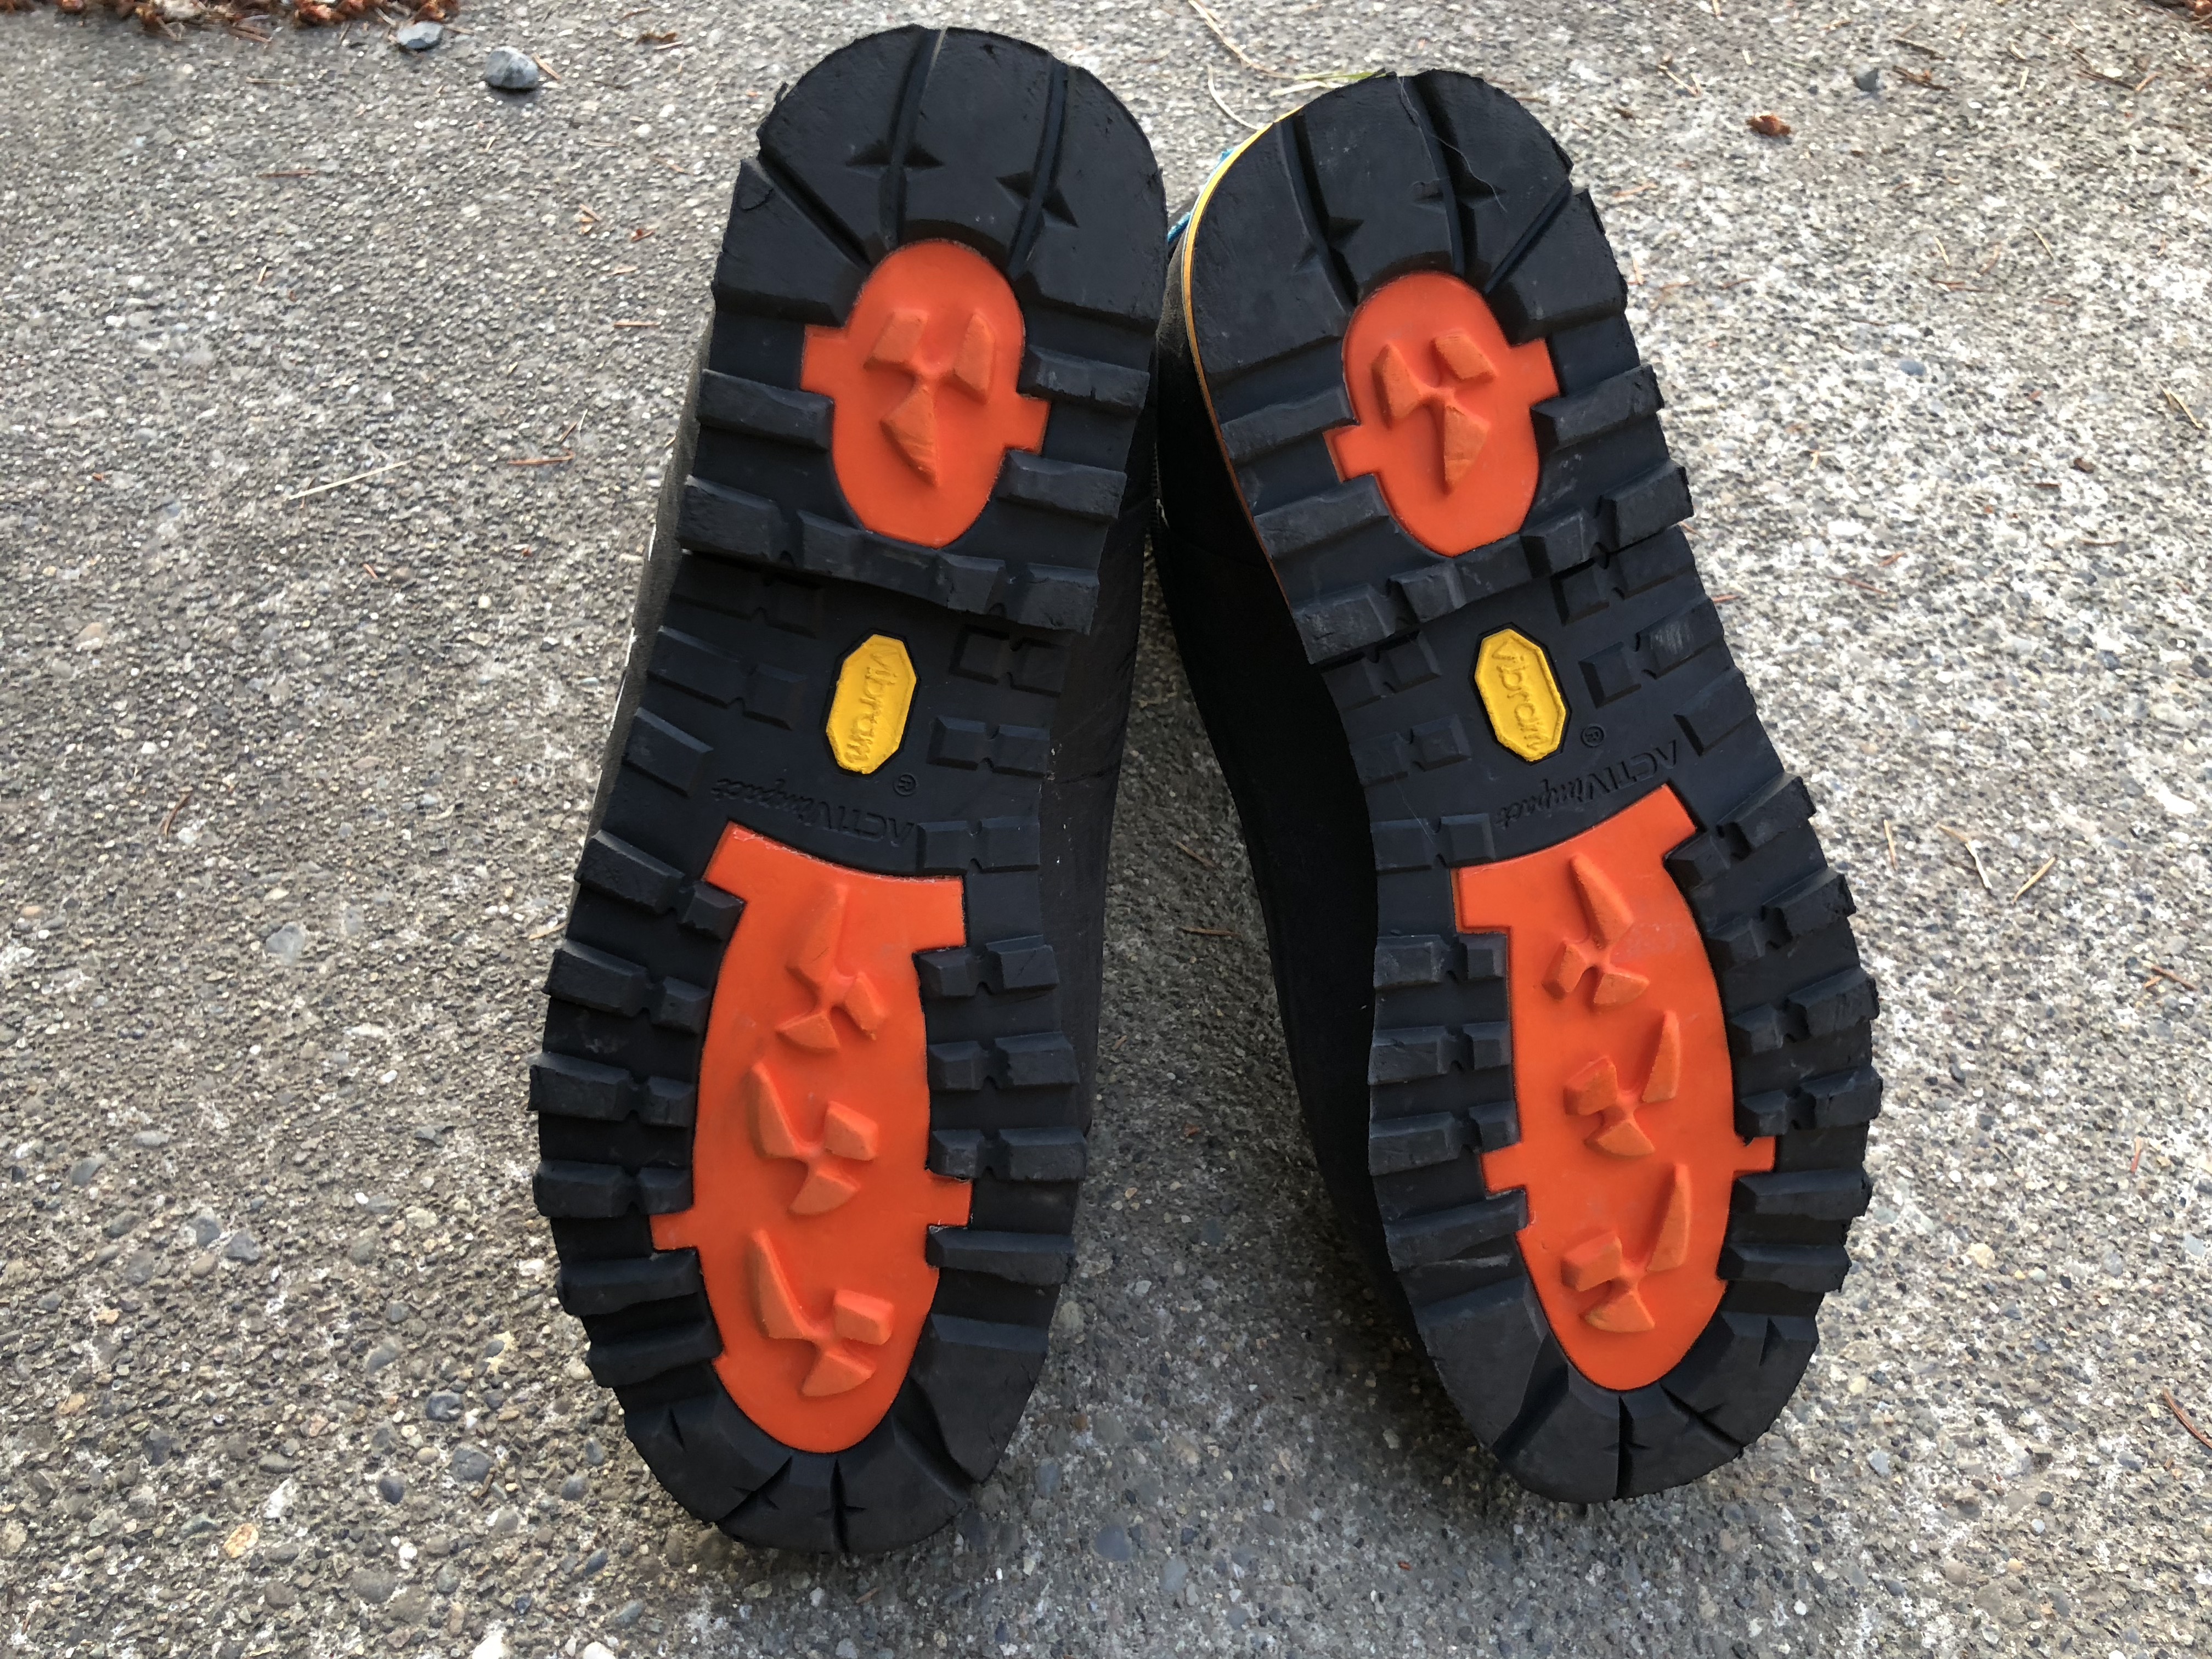
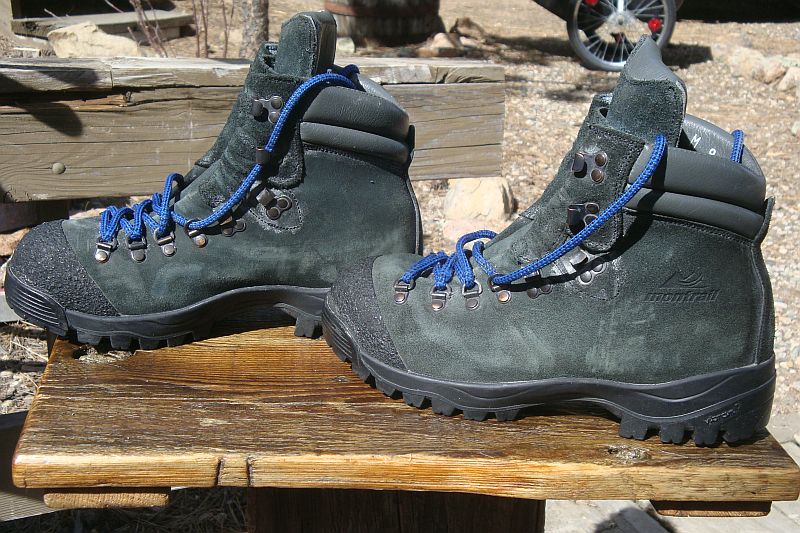
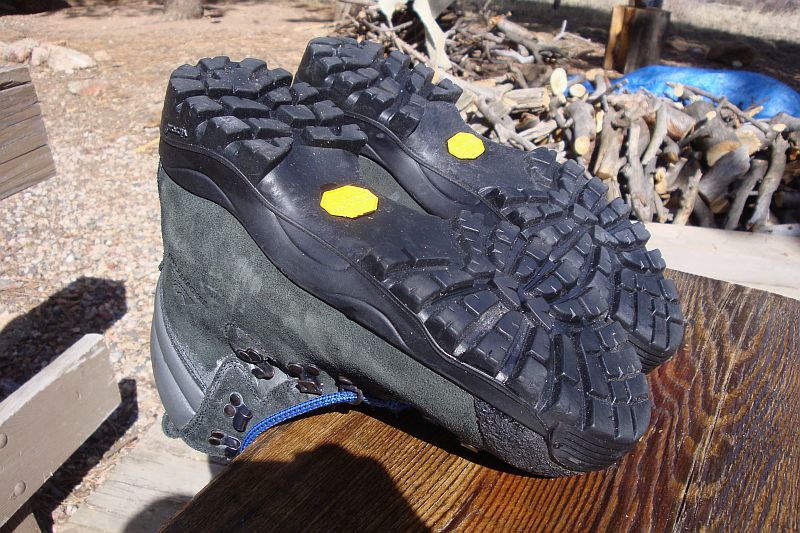
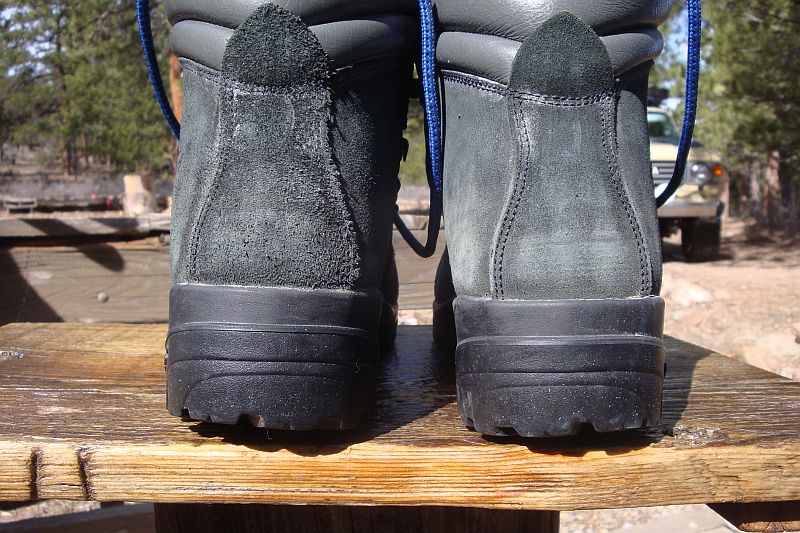
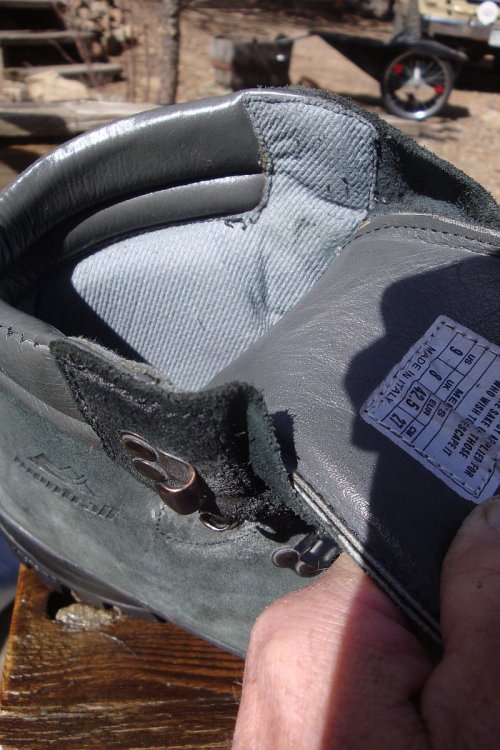
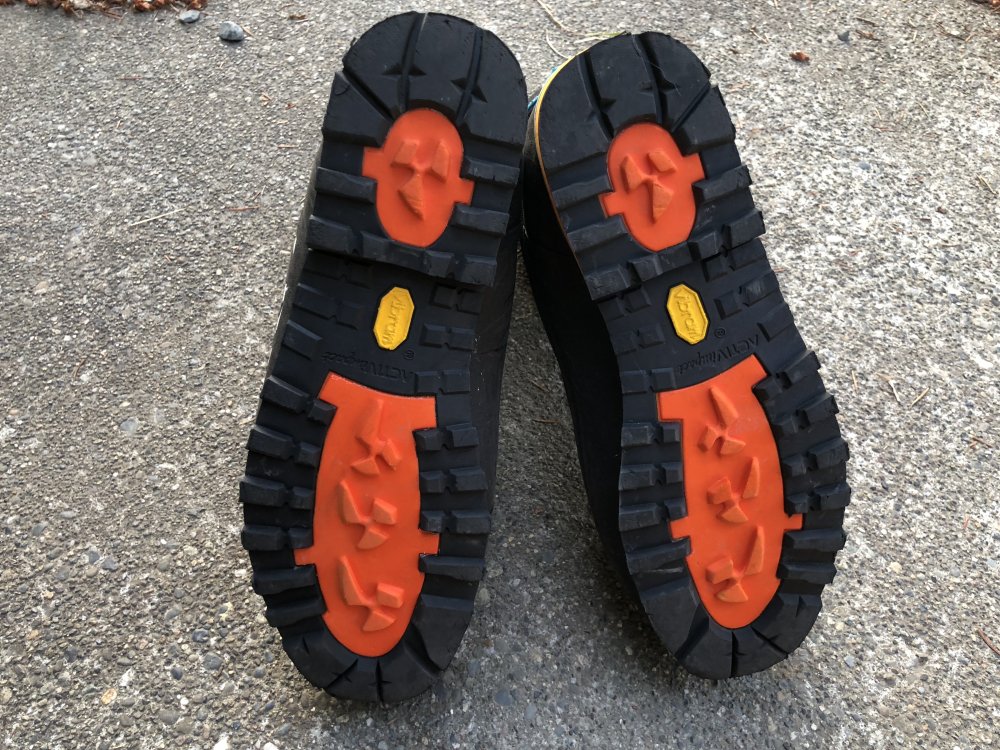
 Heavy duty boots with stiff shanks that can be flexed just a bit by hand at the ball of the foot. Good for rough terrain, providing support for heavier loads and with crampons for snow couloirs, glacial travel and icy rock gullies. Use with strap-on crampons such as Petzl Vasak with Flexlock bindings or older, full strap-on SMC's. Pair with rigid crampons for easy to moderate ice climbing. - Vibram deep lug sole with next to no wear. - Cambrelle lining that is clean and near new in appearance. - Rubber toe rand. - Separate outer tongue gusset helps to keep out water and debris. - Full grain, rough-out leather. - Size US 9, Eur 42.5. To help with sizing, the inside measurement of the foot bed, toe to heel is 10&1/8 inches. This is with the tape right on the insole of the left shoe and measuring to where the removable insole at the heel begins its upward turn. Compare with your current footwear. - Weight is 2 lbs, 1 oz per boot. Hardly used, in close to new condition. Asking $125.00 shipped. PPFF or please add 3% if you prefer a "goods" transaction.


-
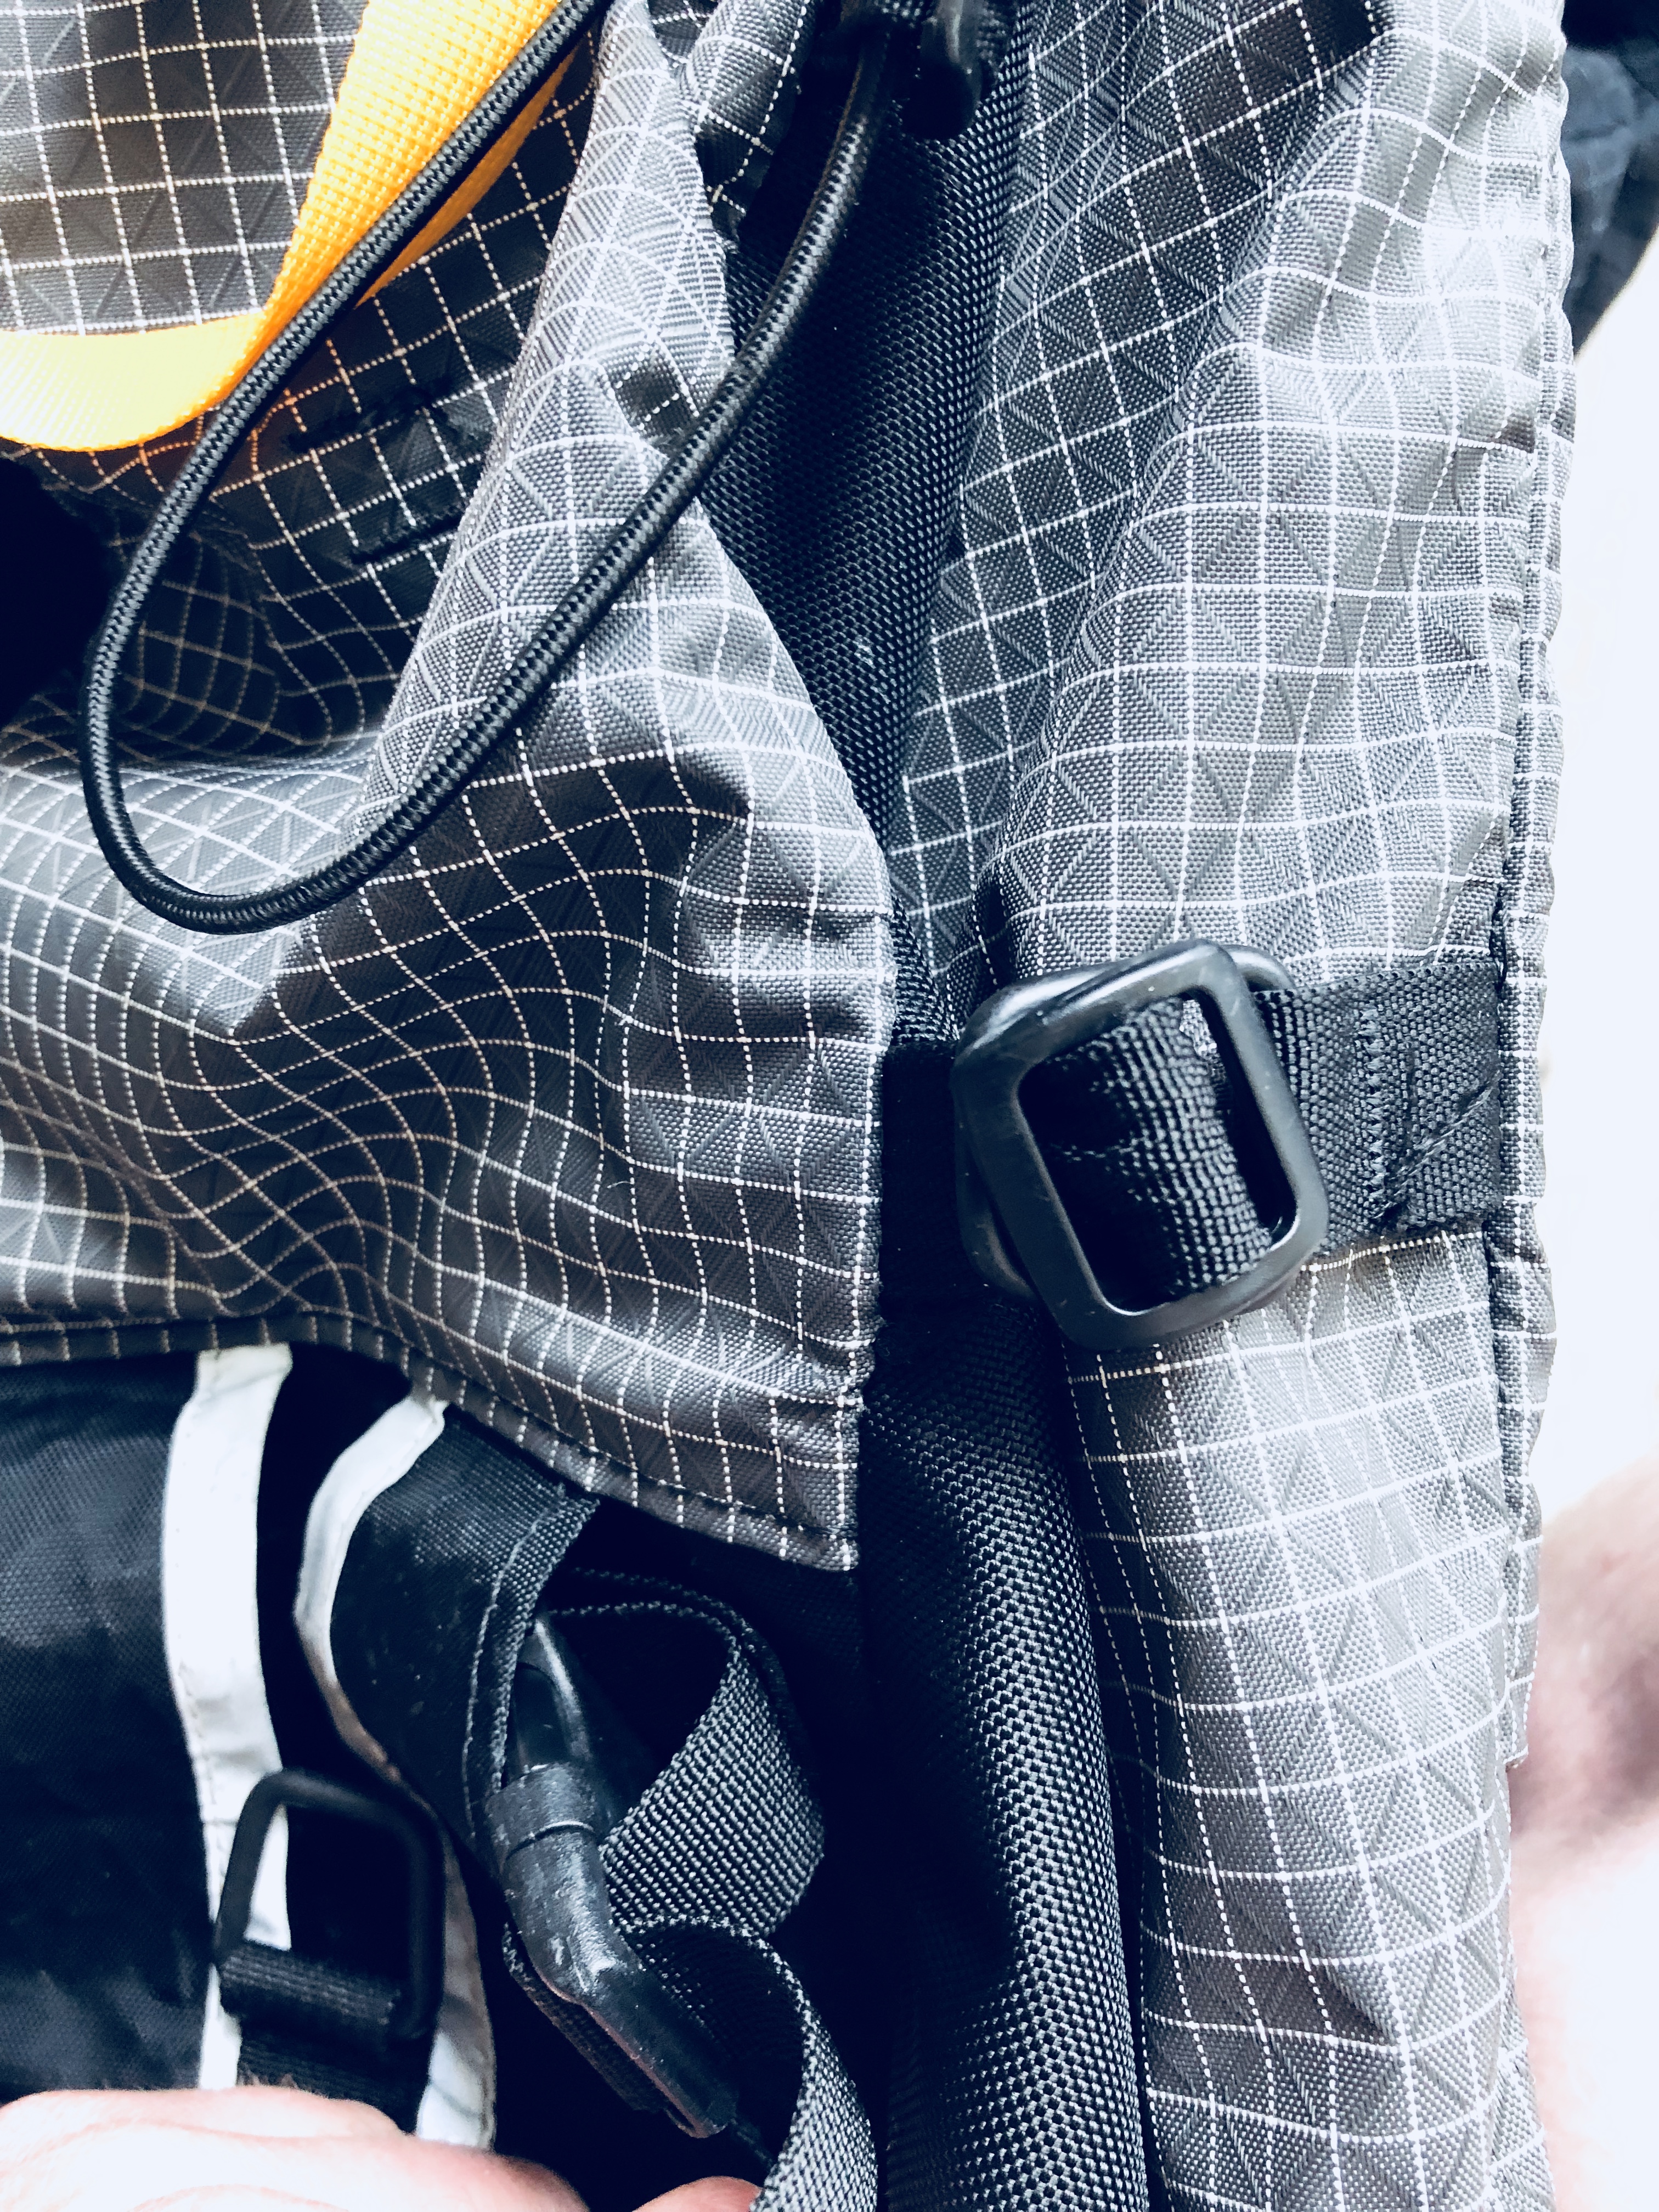
If you are looking at this, you know how amazing CiloGear packs are and this is their winner of the Guides Choice Award. This has an amazing amount of versatility in terms of expansion and compression. This can be used as a single pack for climbs and that isn't just copy. It expands to 40l with the collar extended and down to 15l compressed. I can carry everything in this to base camp and then cinch down the sides for summit day. This version is the burly Guide Service edition which adds super burly VX100 and VX42 for hyper abrasion resistance. You can see from the pictures, this is in near mint condition. Aside from the best pack for spring/summer mountaineering, you don't have to wait the 6-10 weeks for Cilo to make it for you! In short, this pack is amazing. I have three other Cilo packs and am only selling this to downsize a little. I'm in Seattle $175/obo (plus shipping if I can't find someone local)


-
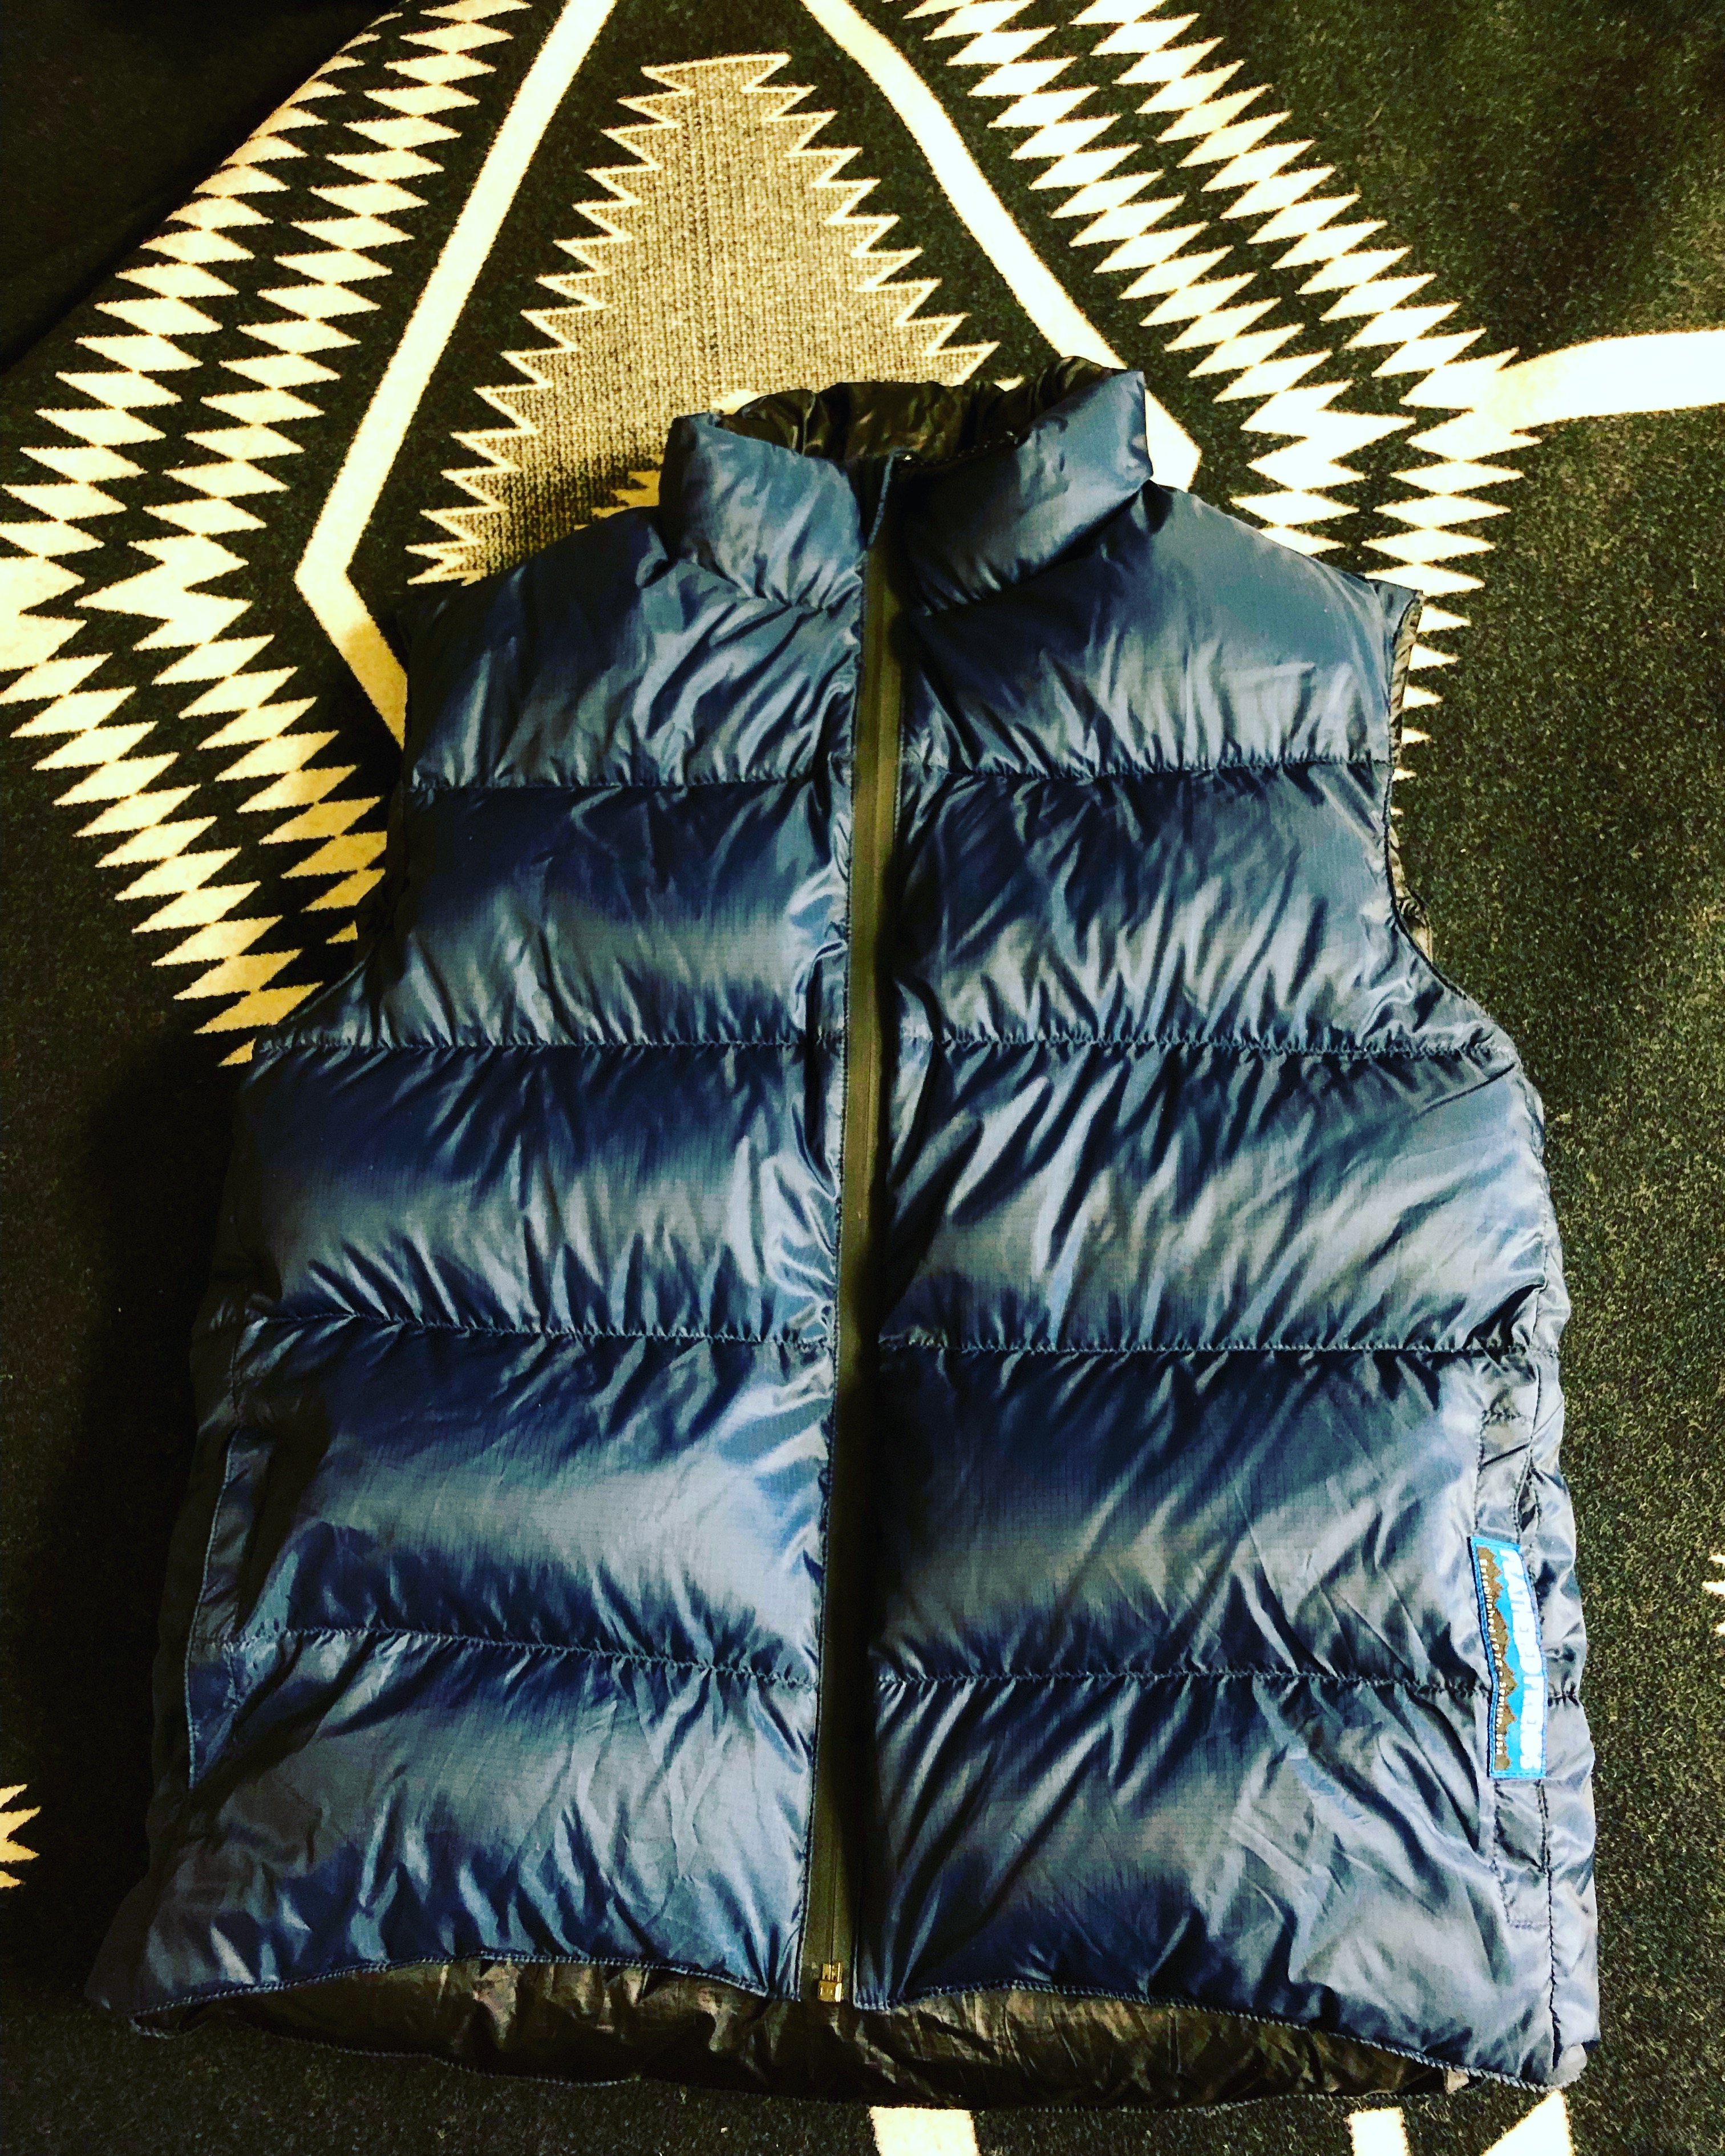
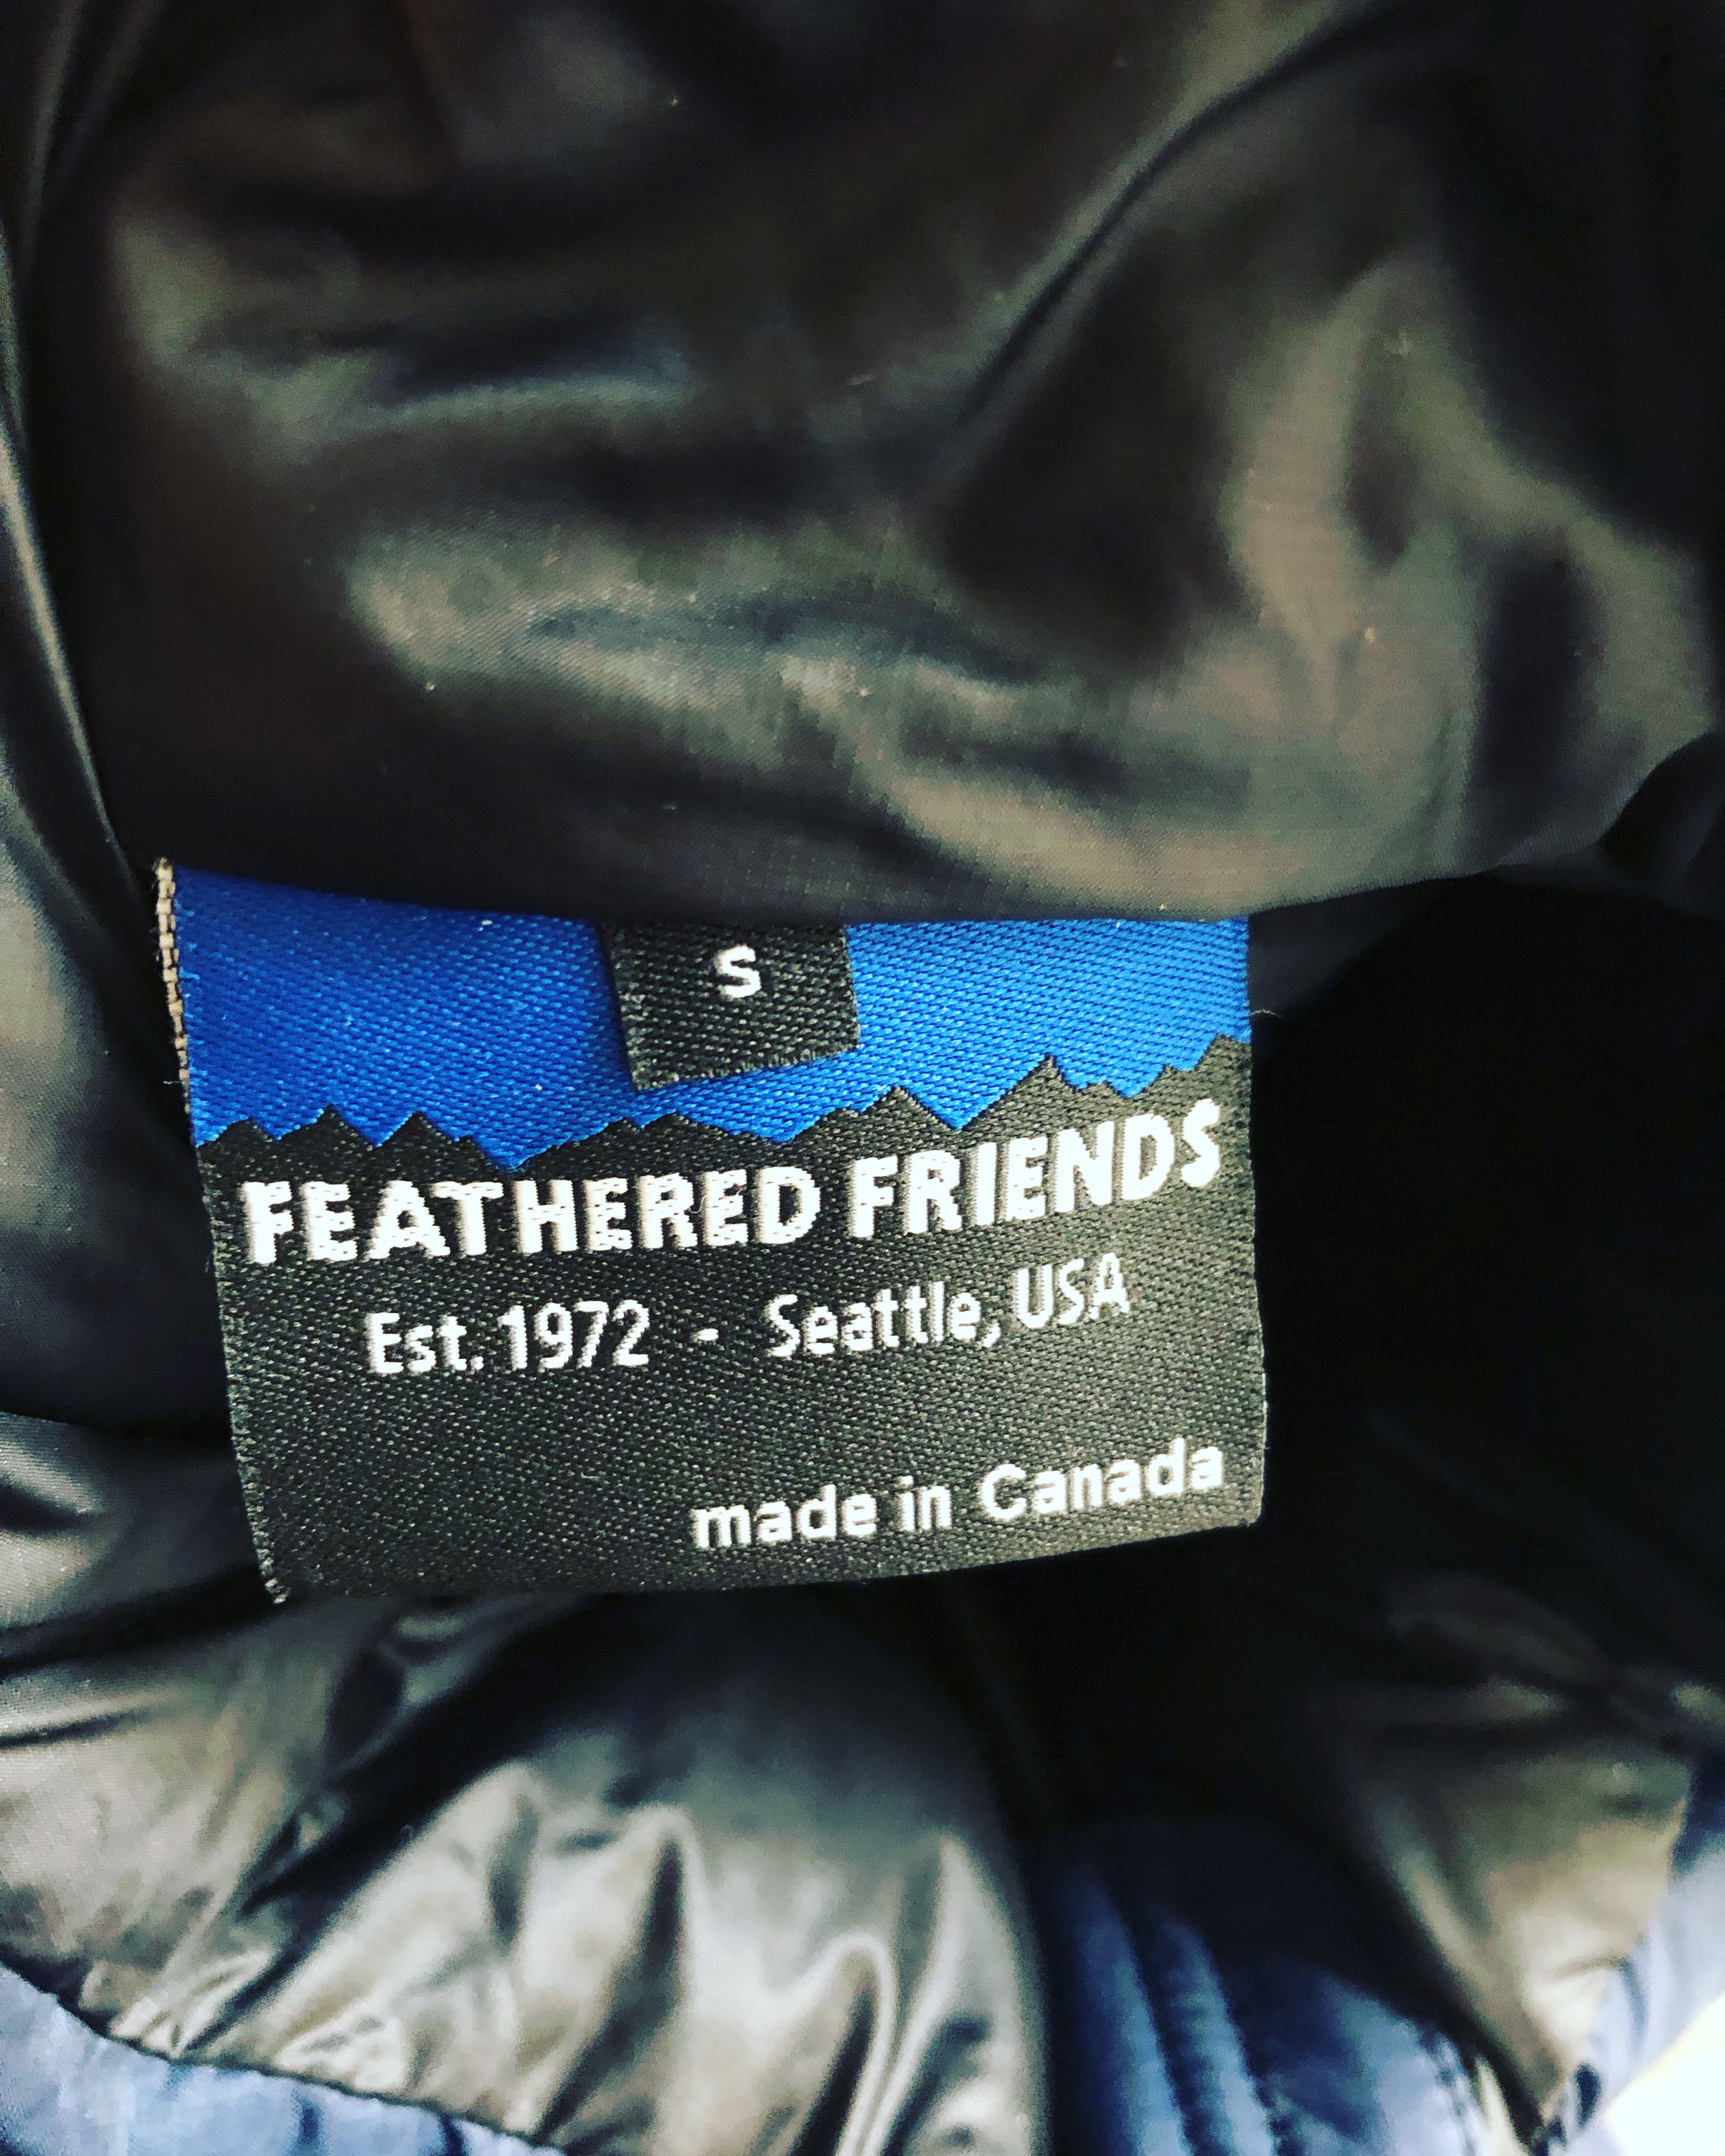
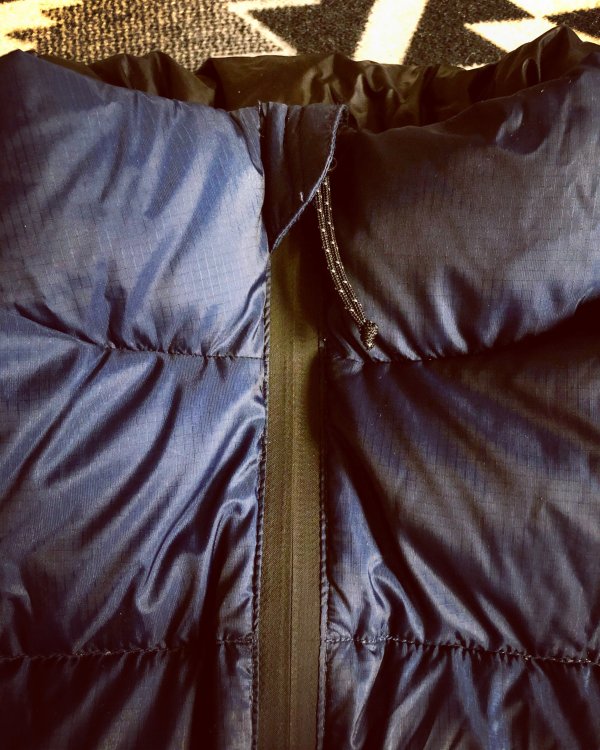
Hyperion Vest850 Down FillFill Weight: 3.1 ozAverage Weight: 6.9 ozSewn Through ConstructionInterior Stash Pockets & Insulated hand warmer pocketsFeathered Friends storage/stuff sack includedNever used, always stored loose so loft is as good as the day made! I've got the Hyperion Jacket as well and absolulely love it, just never found a need for the vest version. My loss, your gain! Super light, super warm$209 new (plus tax) 100% Rating on eBay (95 sales) Work downtown Seattle, will meet up within reasonable distance in Puget Sound!


-
BD Fuels, never used, $299.00 EACH Msrp, buy them both for $450. Email me at verticalpope@gmail.com if you’re interested


-
Worn ONCE in Montana and the descent was muddy, boots have been cleaned like new and in box. I bought the size too big, I know, idiot! Boots run big. Thanks for looking!


-
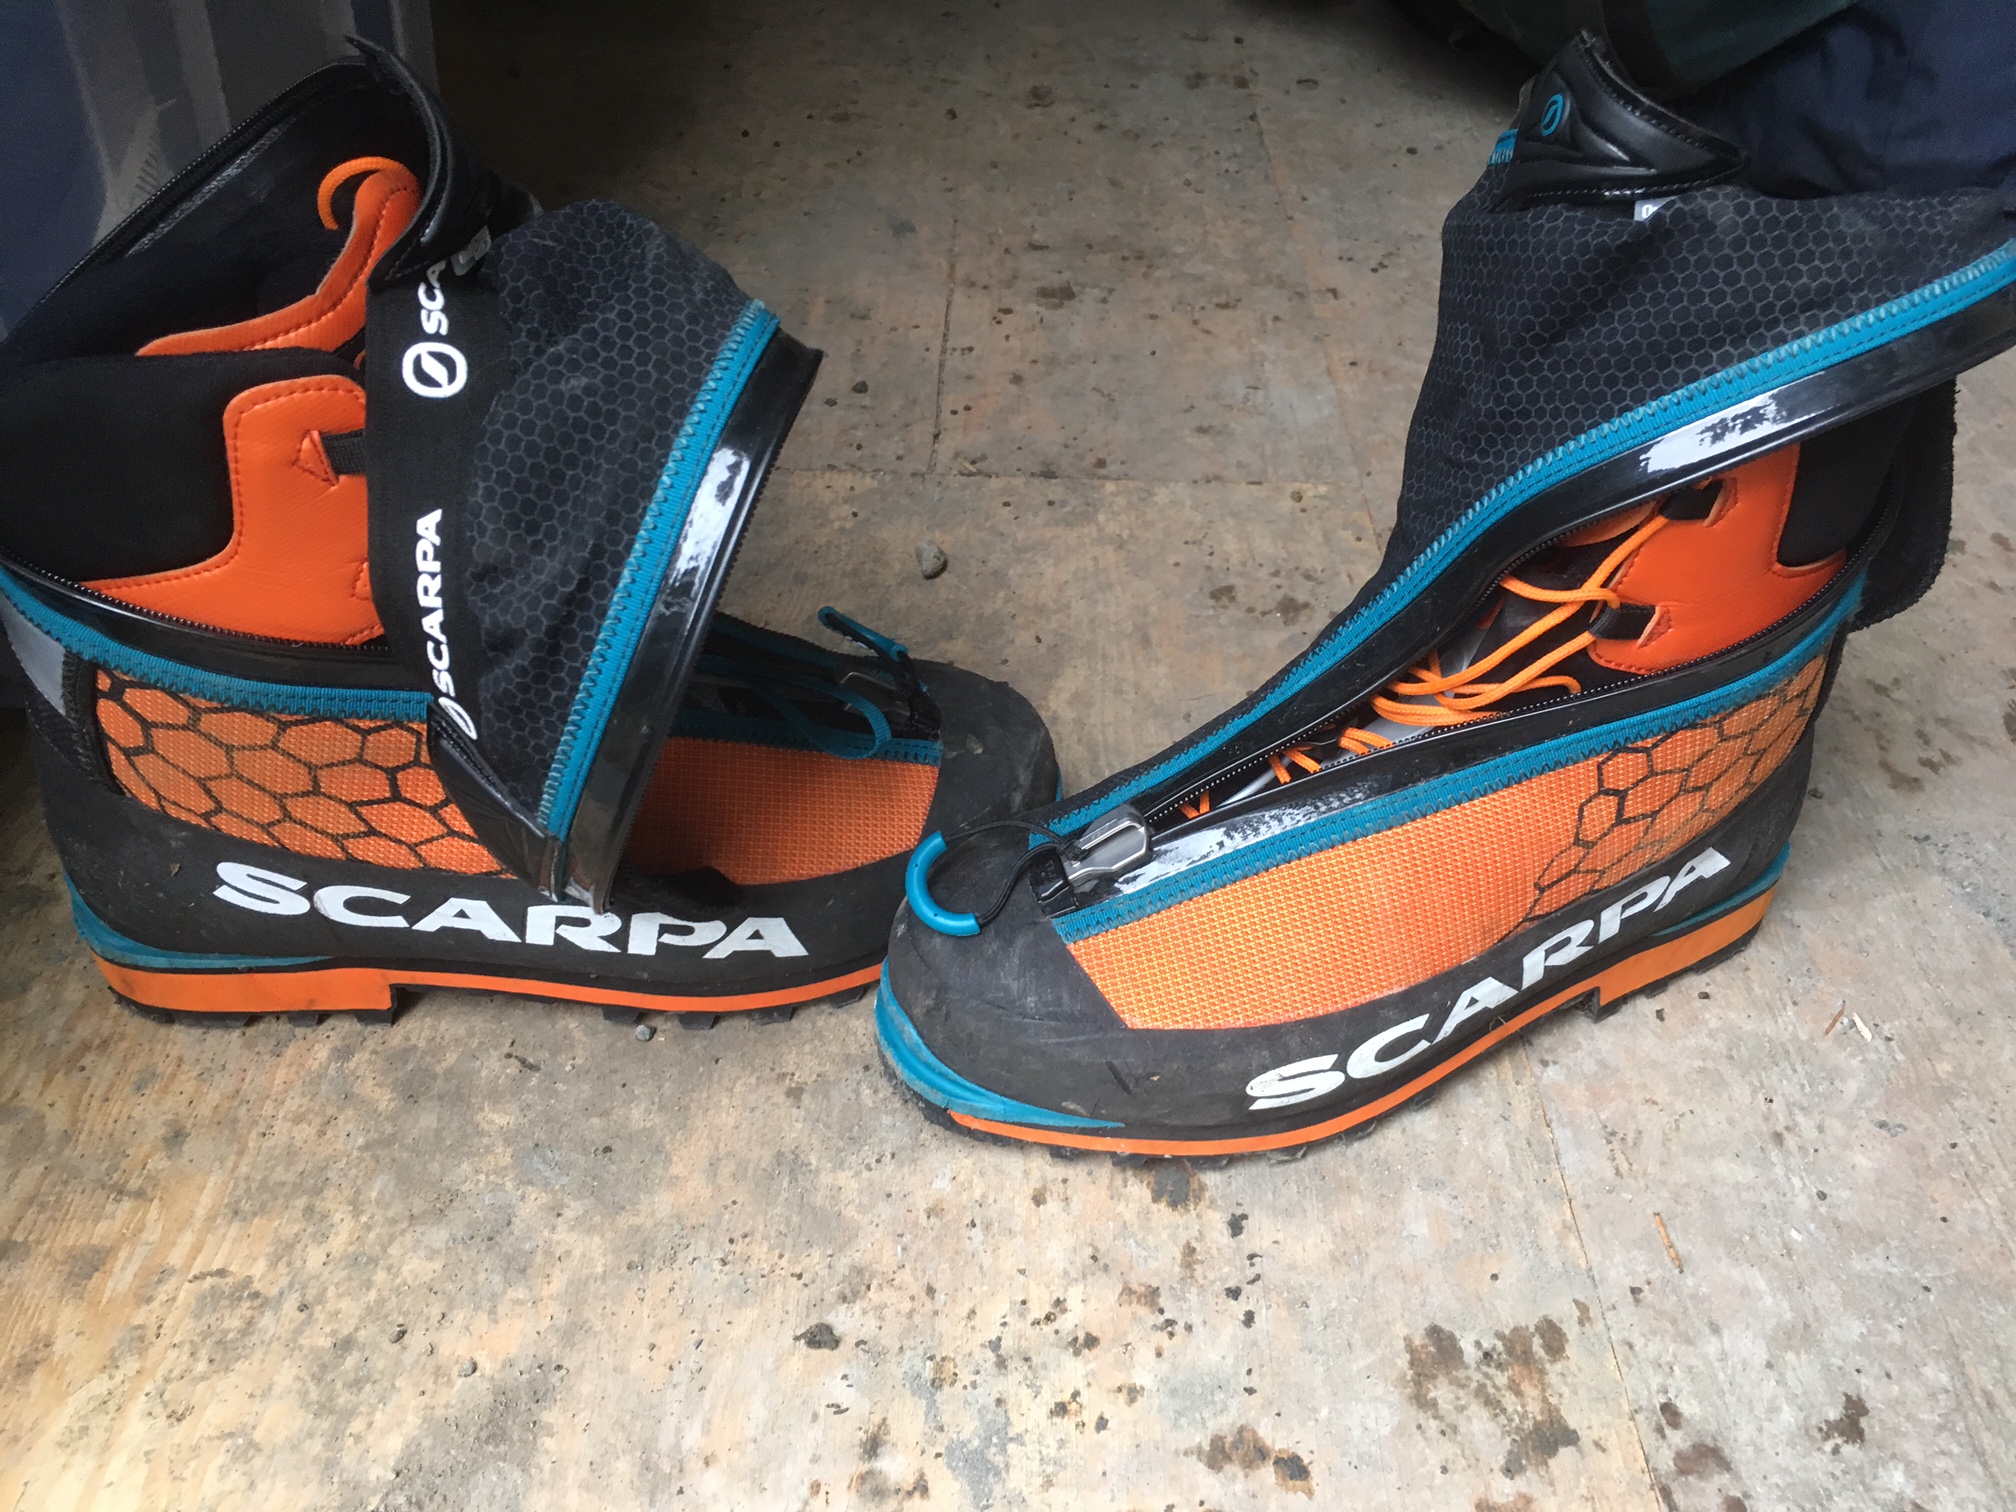
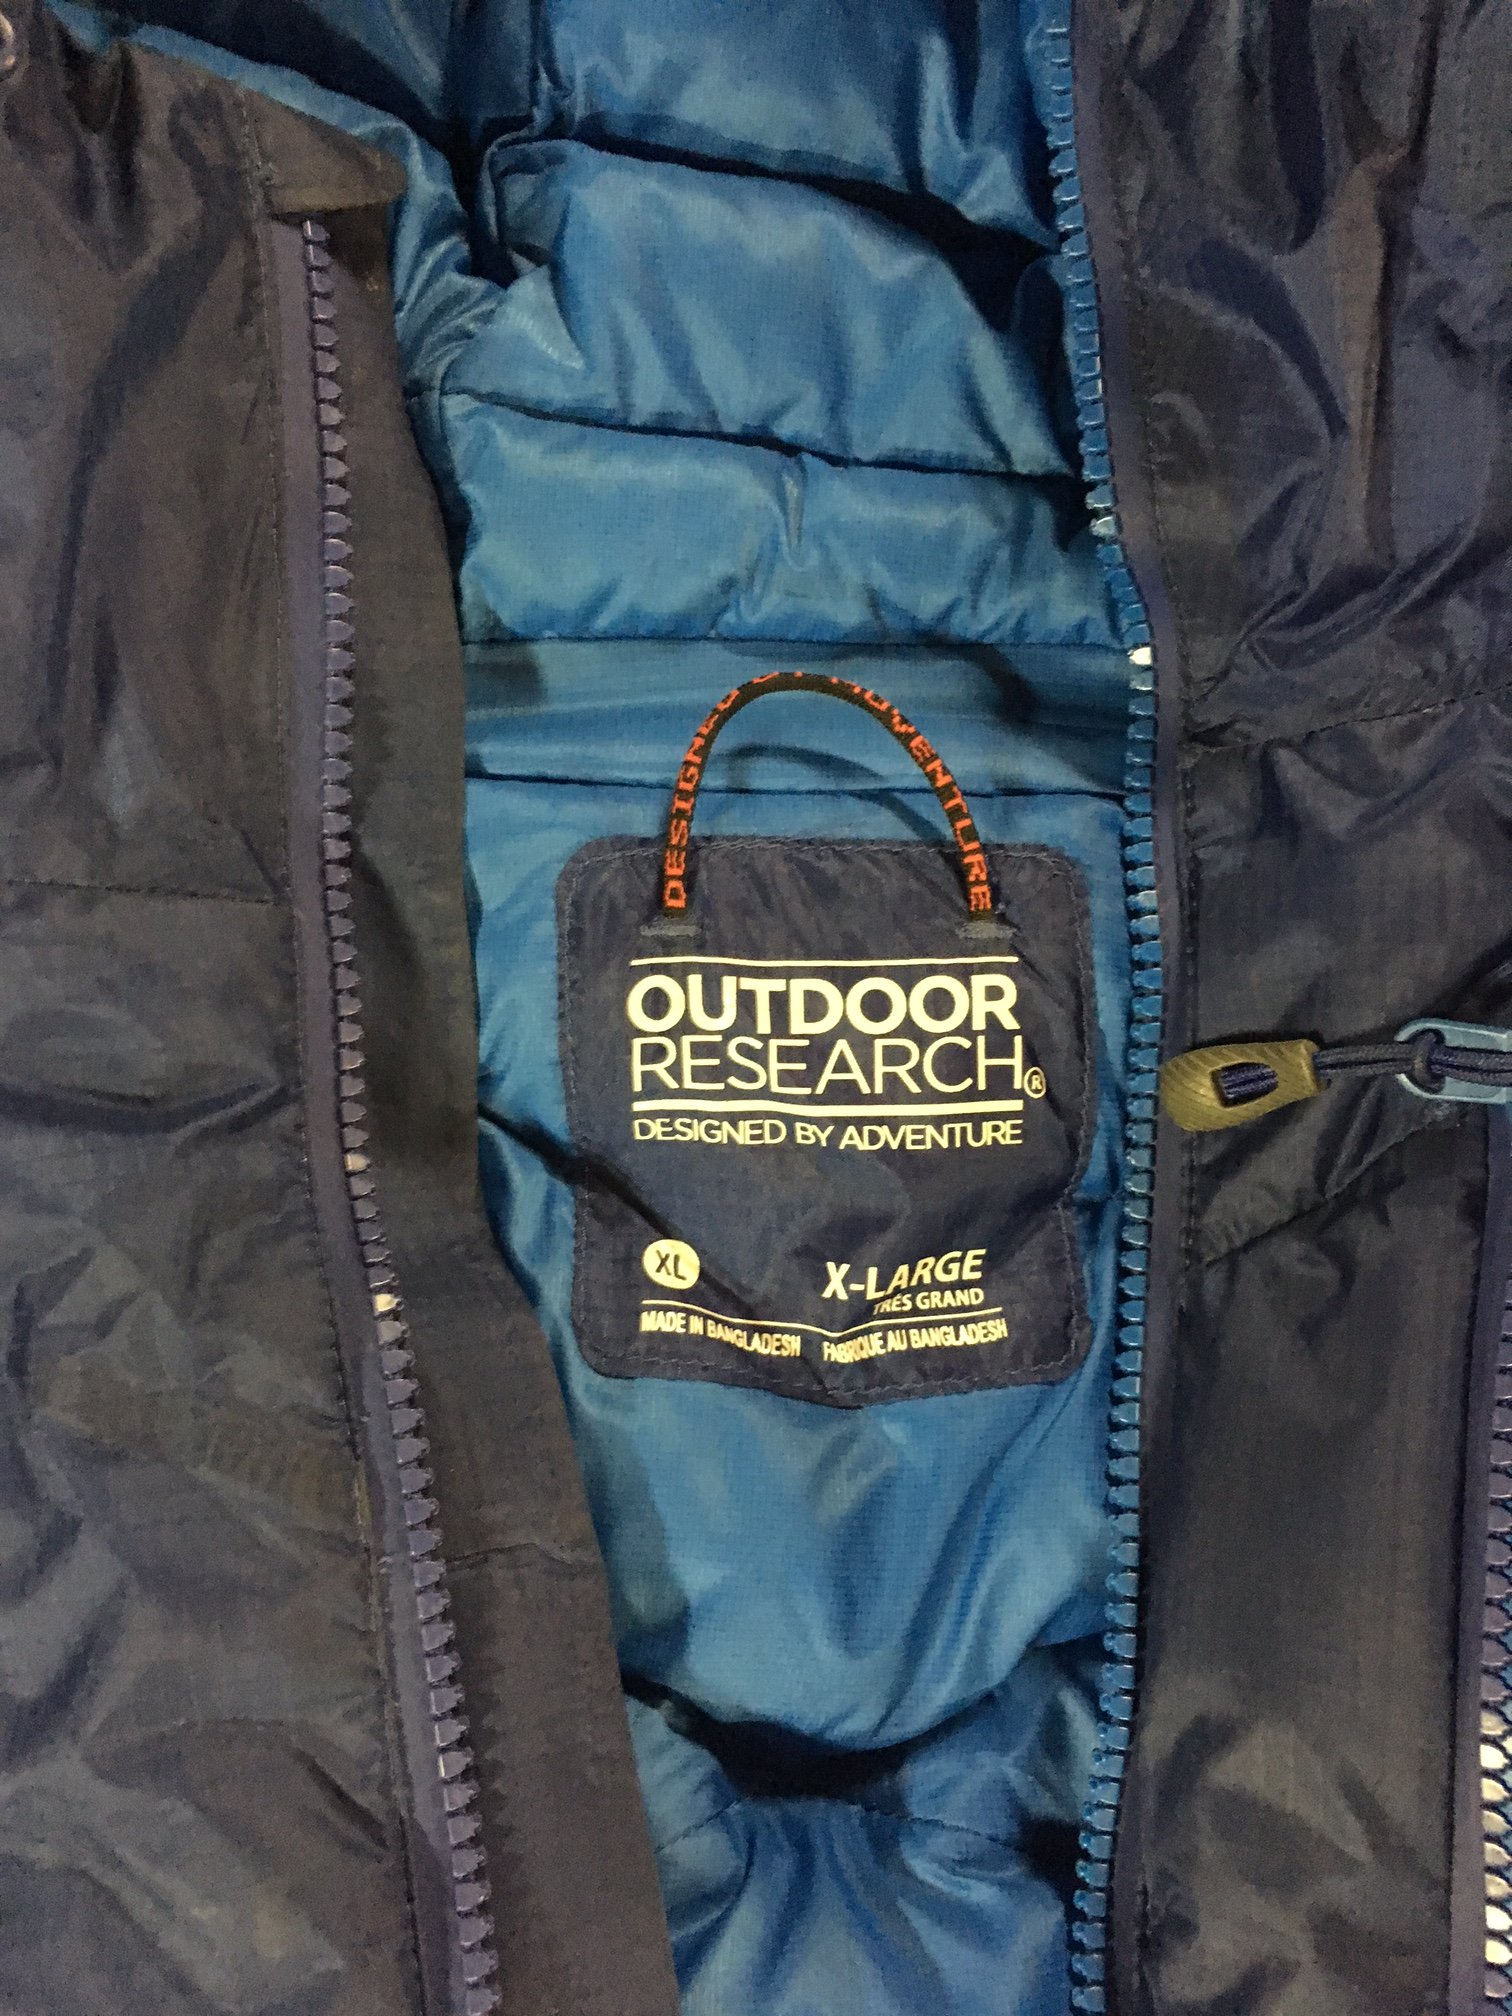
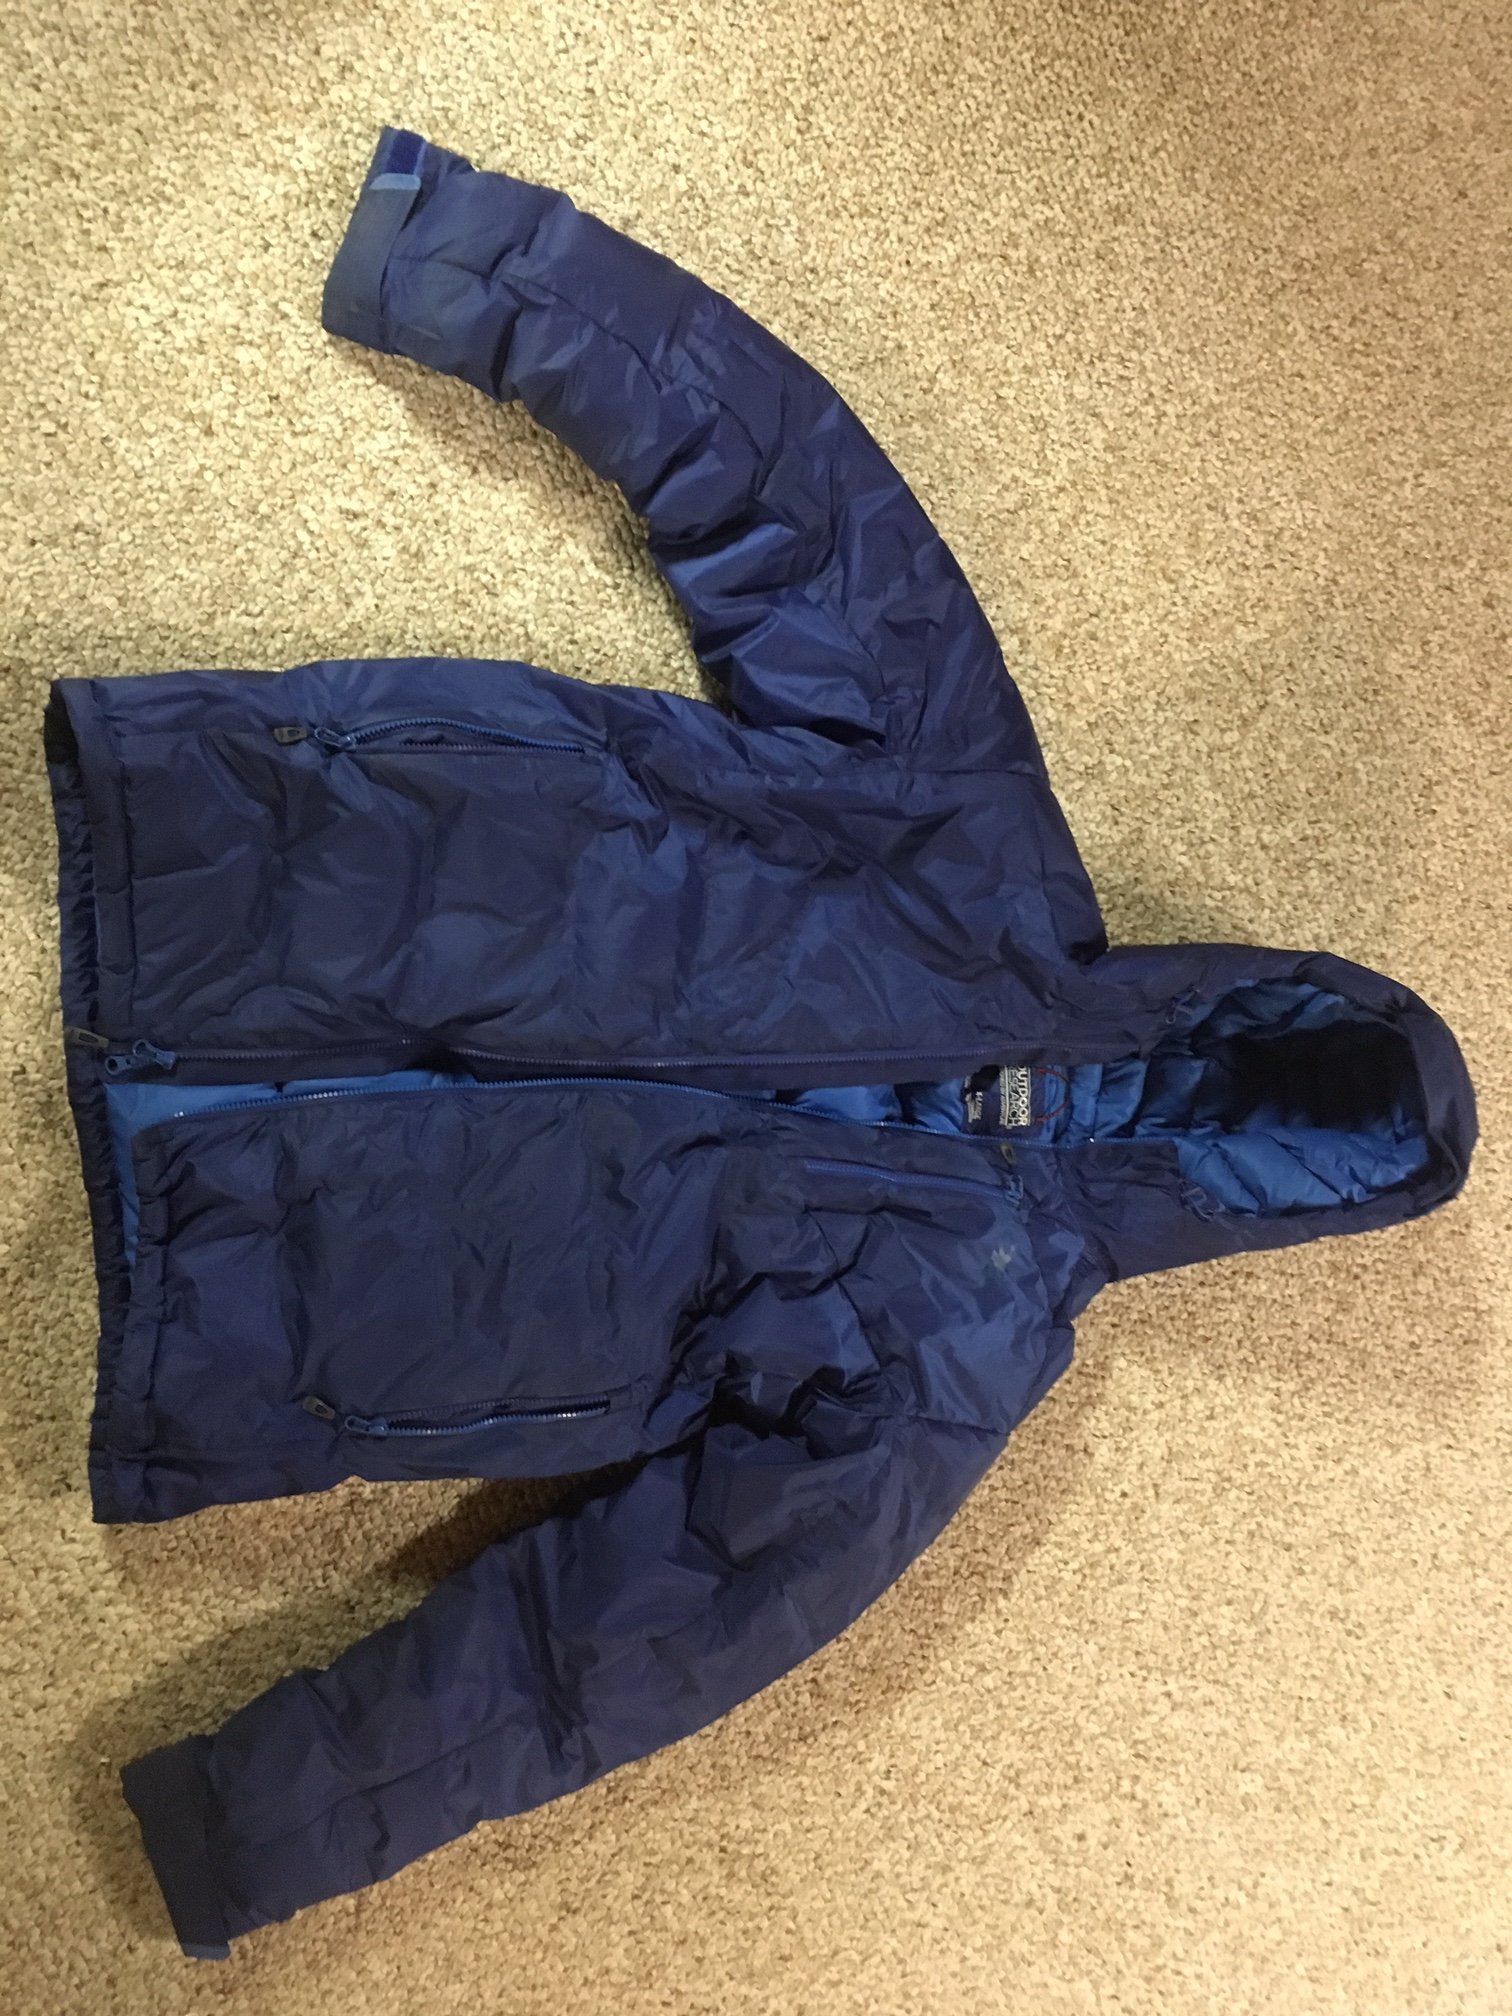
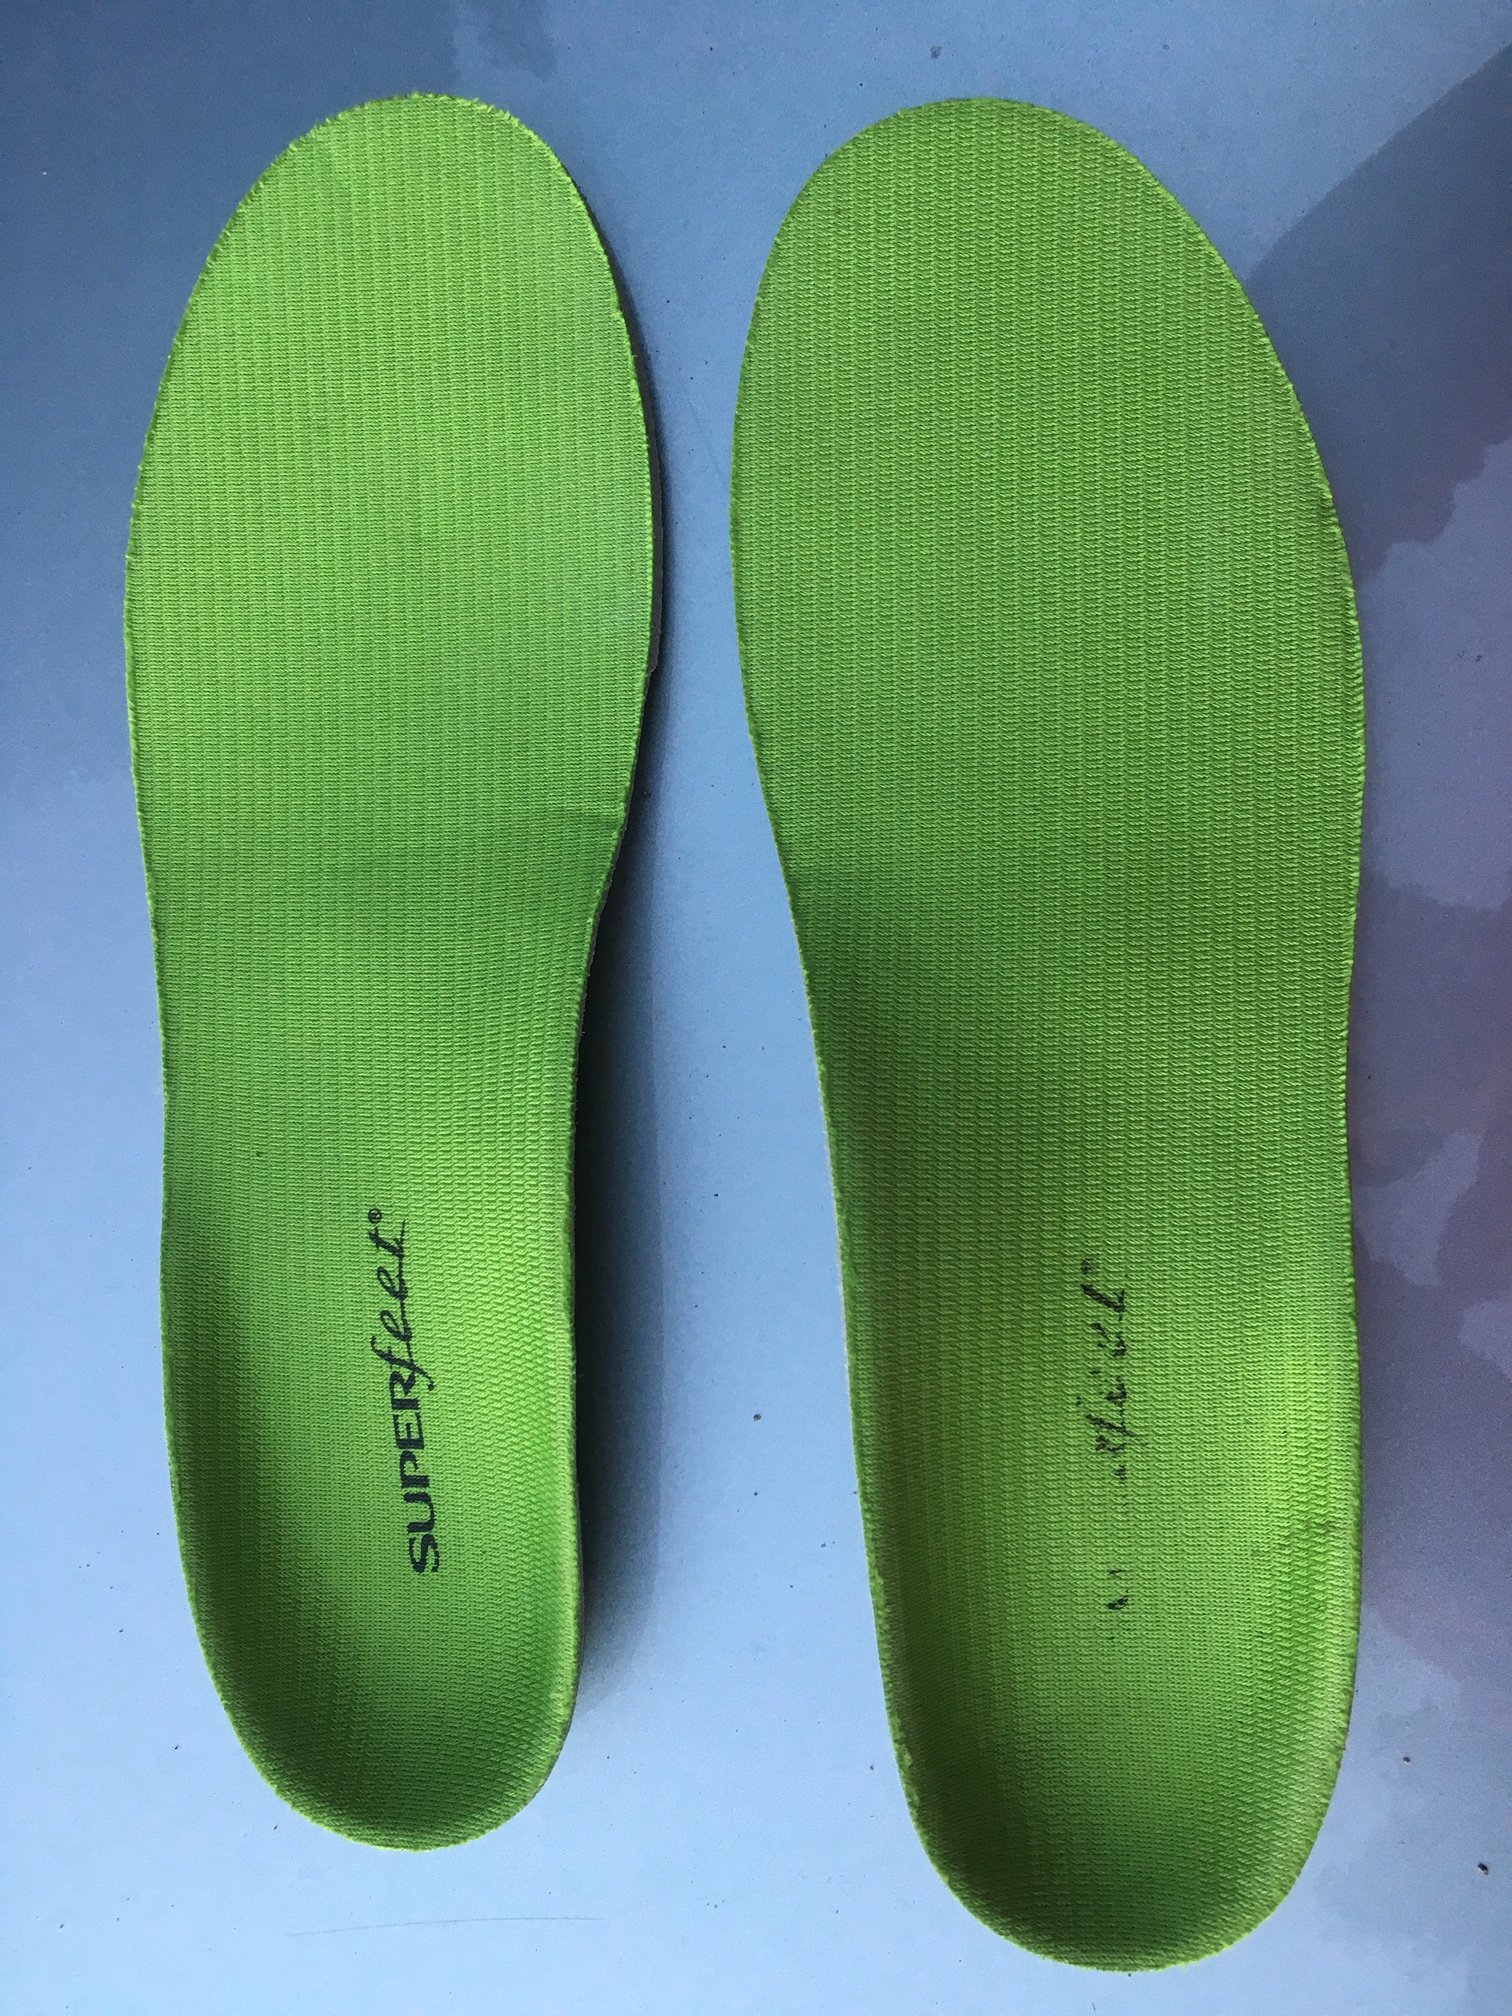
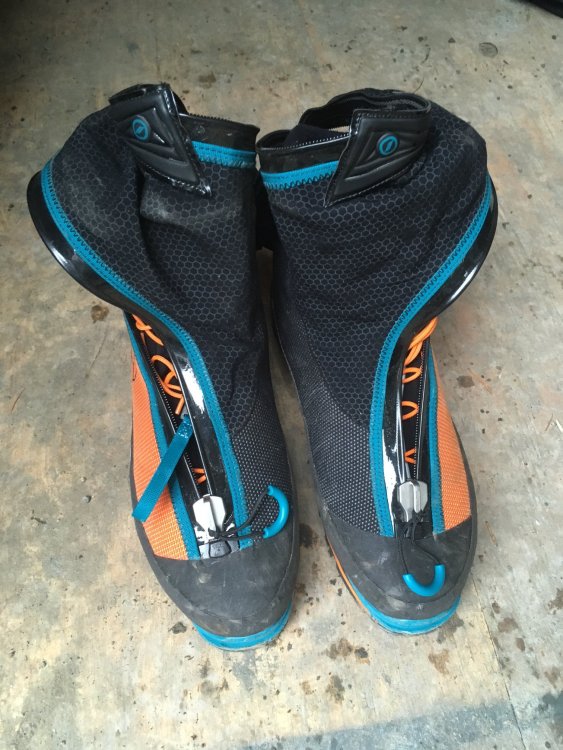
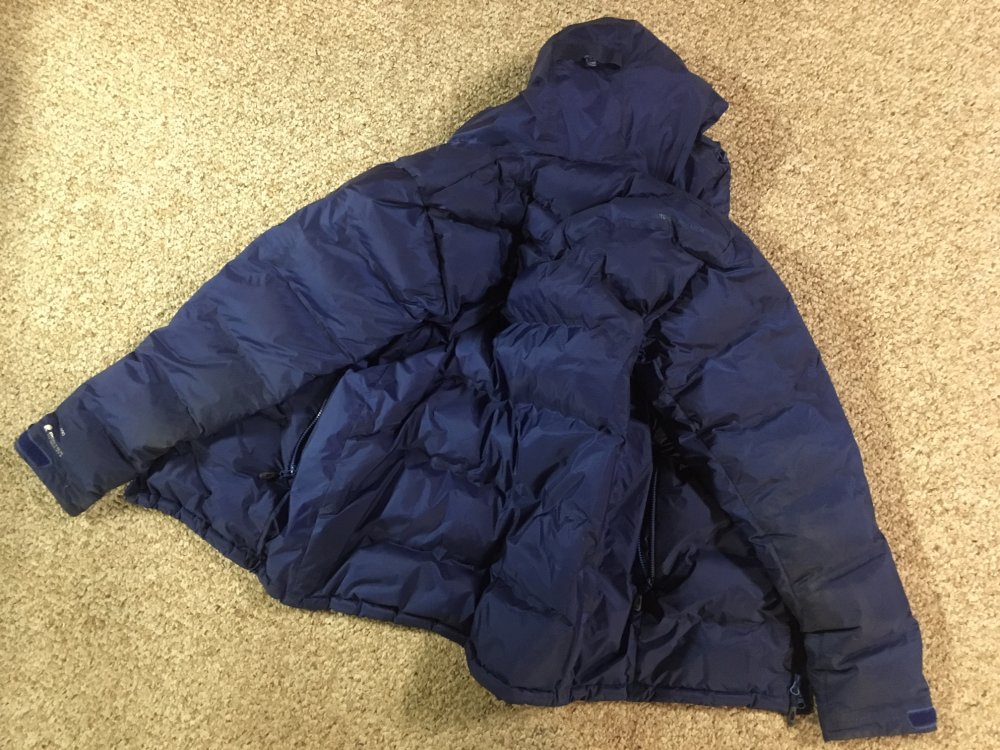
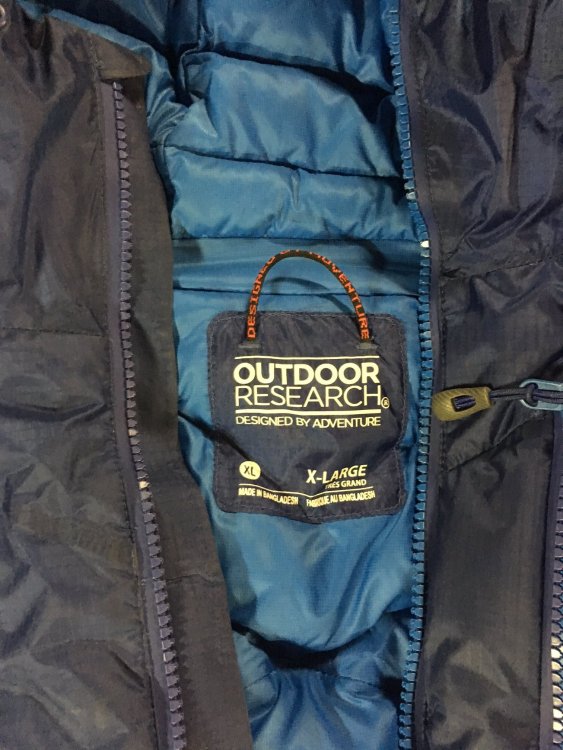
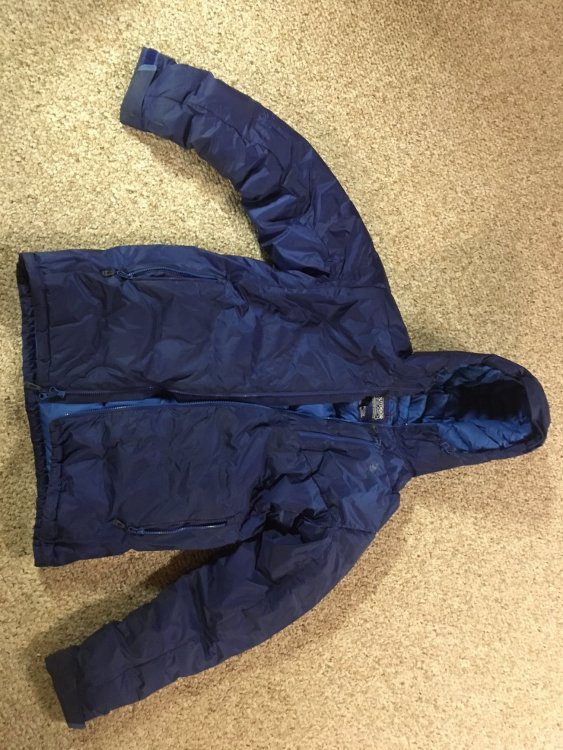
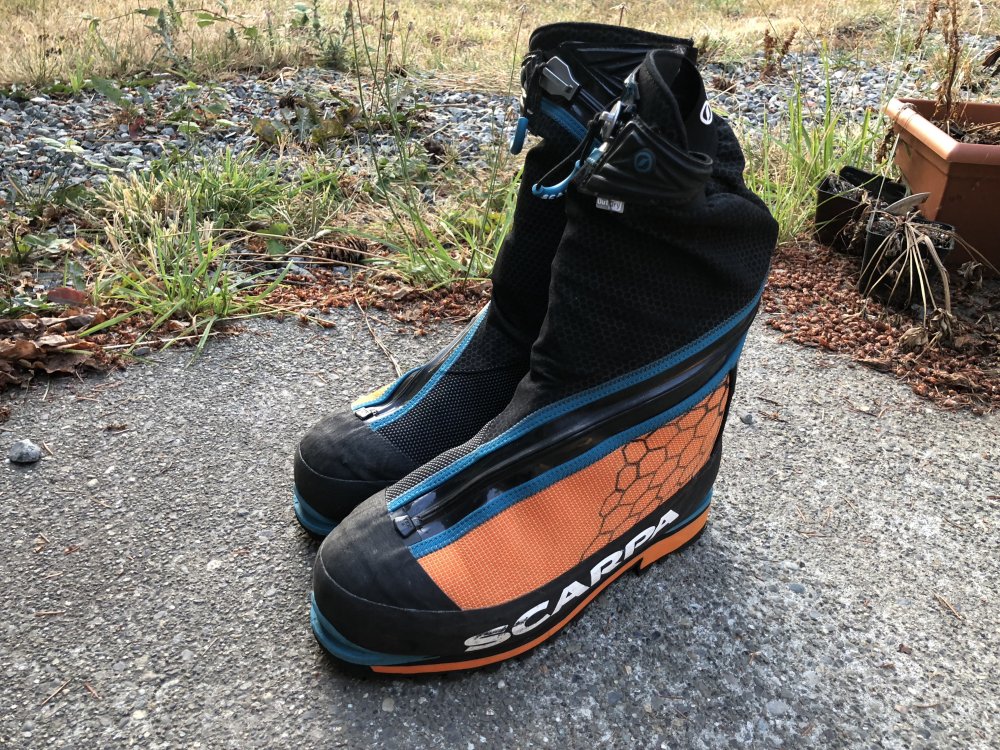
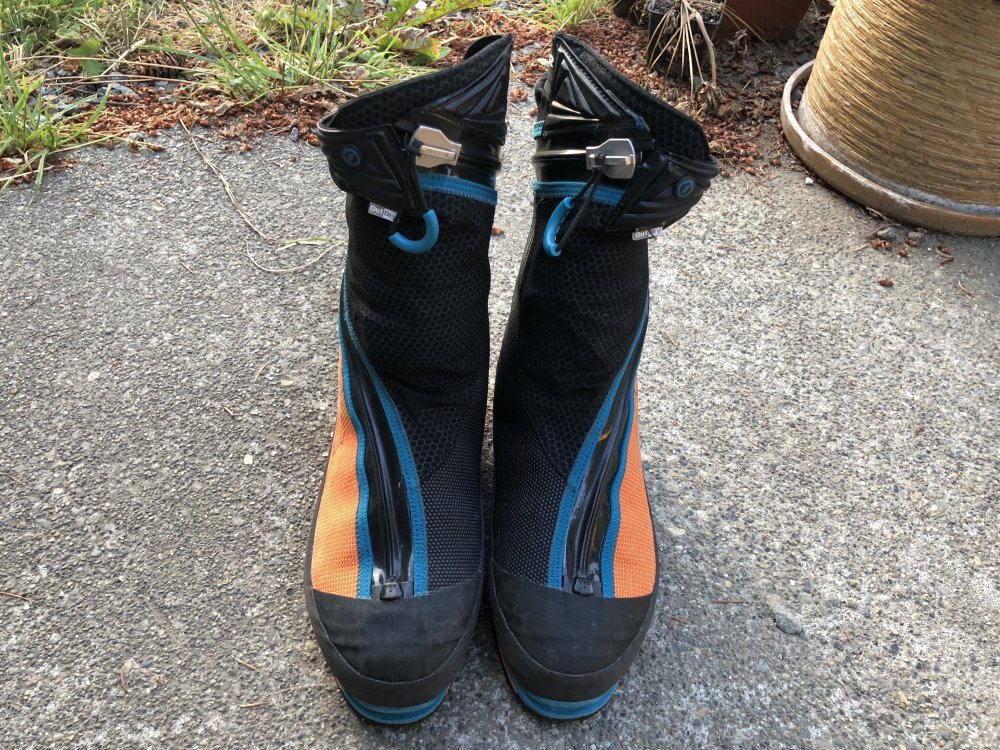
 I have the following 3 items for sale (REDUCED PRICES!) Scarpa Phantom 8000 (2015 Model) High Altitude Boots Size 45 - Used but in good condition. Superfeet Included - Great boots for Denali! Price = 369. Scarpa Phantom Tech (2018) Technical Climbing Boots Size 44 - Used twice - nearly brand new! Price = 410. Outdoor Research Floodlight Down Jacket Size XL. Used in but in nice condition. Price = 150. Shipping is 18 bucks for each pair of boots, 10 dollars for the OR Jacket. Venmo or CashApp for payment. If you are interested text me at 406-Five Nine Nine -8743 or respond to me through this forum. -Seth
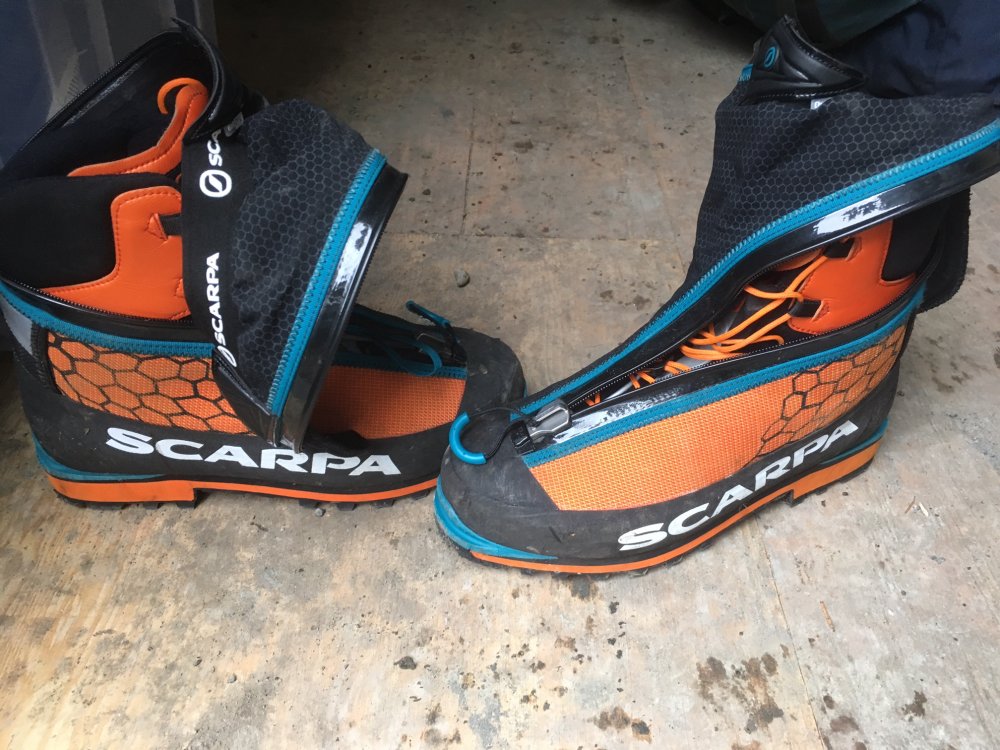


-
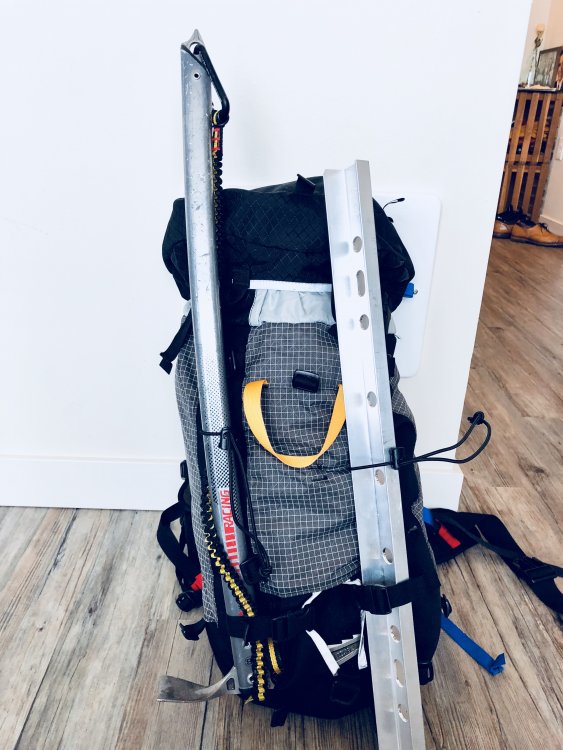
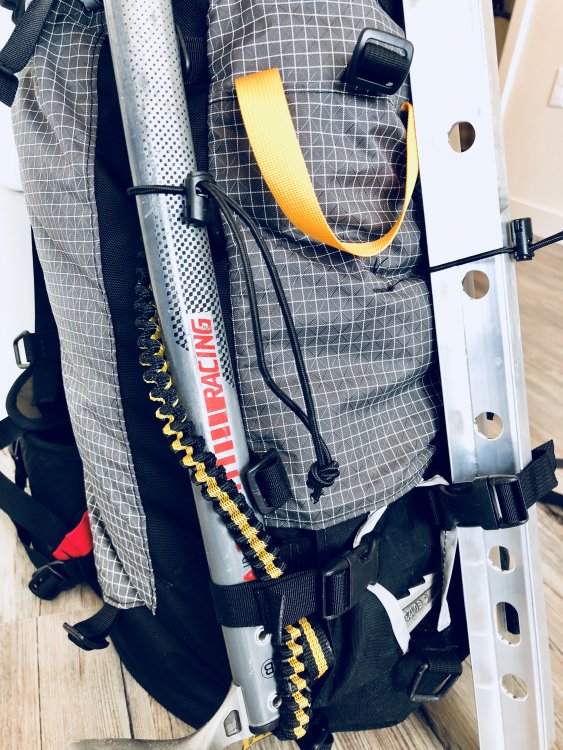
Gear Review - Osprey Aether 85 Intro: When it comes to packs, you want something comfortable. It needs to be well made, rugged and have useful features. I’ve owned the Osprey Aether 85 for some time now and wouldn’t change it for anything else. Here is my break down review of the pack: Comfort: - I find it to be extremely comfortable even when its full to the brim tipping 60lbs. At 40lb I can hardly tell I have it on, it does an extremely good job of distributing the weight on my hips and shoulders. At the end of a long day I don’t get that soreness on my shoulders that I’ve gotten with other packs. It has plenty of adjustments to make sure you get the perfect fit. Quality: - The quality of the pack is great. Overall the stitching on the seams is good and the zippers function flawlessly even when the pack is stuffed, it is easy to open and close. Where you can really tell the quality is on the shoulder straps, waist straps and back padding. The straps are well padded and thick as to not dig into your skin while carrying heavy loads. Also the back padding has webbing and allows for great breathability so you’re not building up a ton of sweat in your back. Features: - Mountaineering packs shouldn’t have too many pockets or compartments but it should have the right ones. The Osprey Aether, has very convenient features that make for a very practical pack. (1) The zippered pockets on the waist straps allow for storing any thing from lip balm to sunscreen or a Go Pro camera. It allows for quick reach of items that you may need frequently with out having to take of the pack. (2) It also has secure loops on each side of the pack to store 2 ice axes or tools in a safe way where it wont poke you or anyone around you. (3) The straps at the bottom of the pack let you strap in your sleeping pad nice and tight. (4) It has a water bottle holder on each side for quick access. (5) The top is a removable 15L summit pack, once you remove it from the main body it has two straps that allow you to throw it over your shoulder or even wear it like a fanny pack! (6) Lastly the front of the pack has a mesh layer that can be used to store anything you wouldn’t want to get mixed in with the rest of your gear…like…poop bags. (There are more features to the pack but for me these are the most important.) Ruggedness: - If this pack lacks in anything, its in the fact that its not waterproof. If you are typically climbing in snow, you have to be careful how you lay it down or your gear will end up damp. Other than that, it is build like a tank in every other aspect. Mines has been thrown on rocks, dirt, gravel, snow and glacier and its still good as new. No rips or tears anywhere. Final thoughts: - This pack earns 5 stars in my book. I consider its built very solid and useful for anything from back packing to mountaineering. Its large enough to hold enough gear for multiday expeditions and very compactable for short trips. Its adjustability makes it suitable for heavy loads and comfort that last for hours on end. Whether its scrambling up rocks or slogging up a snow field this pack will perform great. Its worth every penny! You can't read more articles on my blog www.brandonclimbs.com
-
This is my blog with daily pictures from the mountains in Middle East. http://nematisweet.blogsky.com/
-
This is my website where I post my trip reports, gear review and other adventurous post. I am partnered with a Non profit - The HERO Organization, to raise awareness for the opioid epidemic. 100% of the donations go to HERO. www.brandonclimbs.com
-
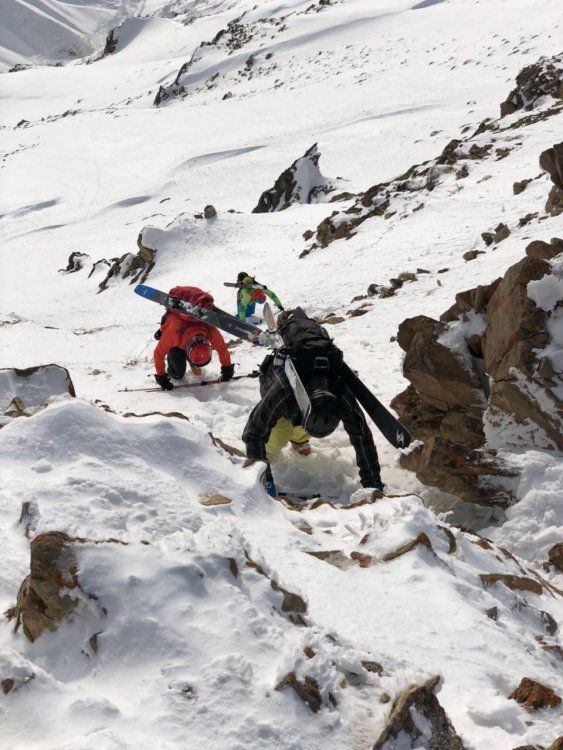
Trip: Mt Shasta - Casaval Ridge Trip Date: 03/03/2018 Trip Report: Mt. Shasta Via Casaval Ridge Mt Shasta Facts: Its the second highest peak in the Cascades next to Rainier(No.1) Over 15,000 summit attempts are made every year with only a third being successful. Most of the climbing is done via the popular Avalanche Gulch Casaval ridge has an elevation gain of approx 7,300' Lessons Learned Shorty after arriving from my Rainier trip I was eager to redeem myself on another mountain. Although I had summited, the ass kicking I received really humbled me and opened my eyes to all the areas I needed to improve on for my next going. After much searching I came across Mt Shasta and instantly knew this one would be next. I booked a winter trip via Casaval ridge, I prefer going on the less popular routes to avoid the crowds. This time around I convinced my good friend Yen to join me which made me that much more excited knowing one of my good buddies was joining me for the adventure. The lead up to this climb was especially difficult and there where times when I considered cancelling the trip, I had lost my grandfather to cancer a month after booking the trip and two months before the climb my younger cousin died of an opioid overdose (Please see passion & purpose for more on this and how I’m using my climbs to raise awareness on opioid addiction). These where very difficult times for me personally and made my summit all the more emotional. Training Things where much different this time around. I gave my self considerable amounts of time to train (7 months) and I took my training much more seriously. I trained hard and frequent. I ran 4-5 times a week 5 miles/day on average and did lots of leg work outs, especially exercises that would target my hamstrings and tibialis (down hill muscles). I got on a strict stretching regimen to make sure I had no tightness on my muscles and the best possible range of motion. A good diet got me much leaner and faster for this trip. I had learned my lesson and I wasn't about to commit the same mistakes that nearly prevented me from getting to the summit on Rainier. Mt Shasta California After 7 long months, February finally came around and I was all packed up and ready to go. I flew to San Francisco, spent a few days getting to know the the beautiful city before renting a car and heading up north. On route to Shasta we where able to enjoy the amazing ride, taking in all the scenery that surrounded us completely topped in fresh snow. We got to Shasta in the midst of some crappy weather, it was all cloudy and the visibility sucked. So we opted to head to a local restaurant to have one last solid meal before heading up for the climb the next day! We had pasta, steak and potatoes, it was a feast! We where making sure our bellies where completely satisfied before the big day. We where so stuffed we can hardly walk but when we stepped outside, the weather had cleared and Mt. Shasta's massive presence was towering over us in the most incredible of ways. It really was a sight to be seen. At that very moment I knew we where in for a treat! The Climb The next morning we all met at the SWS office and introduced ourselves. This time around I was one of the few that had some past mountaineering experience. Despite all my training I was still a bit weary and intimidated by the mountain. To my surprise the guides let us know that due to the bad weather conditions, no group from SWS had reached the summit this winter. But luckly we had a very narrow window where we might be the first to make it up(fingers crossed). After a quick pow wow, gear check and poop bag course (poop bags vary from mountain to mountain, not all poop bags are created equal!), we loaded up our packs and headed for the bunny flats. Upon arrival we quickly realized the snow was soft and deep thanks to a heavy fall the days before. We straped on our snow shoes and began breaking trail. The weather was nice and cool and the mountain was as if you where looking at a Virtual reality post card, it was perfect. We slowly started making our way up to what would be our camp for the next two days. It was a very pleasant day on the mountain and I was feeling great, absolutely no exhaustion or leg pumps. Every hour or so we would stop for a break and a chance to take in the breath taking view's. The last 90 minutes consisted of ascending a fairly steep snow field and before we knew it we had arrived at this ledge that would be our camp for the next 2 days. Everyone dropped their pack, pulled out the shovels and automatically started digging out the tent platform. We dug about 3’ in the deepest section and where able to get some nice cozy spots for the tents where they would be protected from the wind. As the sun came down, the temperature started dropping quickly and in a blink of an eye it got very very cold. Even with my mitts on, my fingers were so cold they hurt. I figured it was a good idea to get warm so I quickly tucked my self into my sleeping bag and "tried"( hardly a truth when mountaineering) to get a good night’s sleep. This proved very difficult due to the winds pounding on the tent all night long. It was also Yen's first time on a mountain so he was so excited he wasn’t having any sleep either. What seemed like 15 min after I was finally able close my eyes, the guides where shinning their head lamps on our tents to wake us up. Summit Day It was 2 am, extremely cold and it took some serious will power to get moving. We drank hot coco, got our gear on and set out to conquer the summit. It was dark out and windy while we roped up and started on the ridge. The wind was picking up the snow and spraying it on my face making for some nice frozen snot. We kept moving along waiting for the sun to rise and warm us up a bit. Eventually It did and we got the most incredible views with Mt Shasta’s shadow casted upon the surrounding landscape. We where also able to get a good view of the ridge we where climbing. It was amazing, full of these huge red rocks protruding from the snow forming whats really the most aesthtic line on the mountain. We where roped up in two groups of four. By sunrise our group was moving at a considerably slower pace than the other, so we started to worry we wouldn’t make it to the top on time. We had been at it for nearly 6 hours and had yet to make it to Shastina (Shasta’s little sister at 12,335’) and we still had 2000’ of elevation gain to go before making the summit. I was feeling great, my training had proven to work and I was ready to pick up the pace at any moment to race for the top. The problem was my group members where having a hard time keeping pace and where giving in to exhaustion. By just focusing on putting one foot in front of the other for few hours, we eventually made it to the famous misery hill. By now I could see the first group already making it to the top of the hill. Matt, our group guide sat us down for a second to let us know that our summiting window was closing. We had a choice, either call it a day and start making our way down or haul ass to the top, each one at his best pace and one of us summits on time. At this point we un-roped and he let us know that we had 45 minutes to drop onto misery hill and make it to the top (this is where my training really kicked in). After all the events that happened leading up to this trip and how emotional it was for me, I had to summit on way or another. So I kicked it into high gear and started working my way down onto misery hill on my own and then raced up to the top at a frantic pace. I was able to catch up with the first group just at the beginning of the summit plateau. I felt some guilt leaving my partner to climb up at a slower pace knowing he probably wont make it but knowing he was safe and accompanied by the guide, I decided to push on since this climb meant too much to me. Once I met with the other group, I got a quick drink of water before setting out for the summit pyramid. It was gorgeous once at the plateau, you really get to see how massive of a mountain Shasta really is. Then it’s a short hike before getting to the true summit. We had made it!. We took some pictures, signed the summit log and hung out for a bit before heading back down to camp. Just as I started making my way off the summit I saw Yen, my climbing partner approaching the top. I raced down to where he was and took the final steps with him. I was ecstatic he had made it and that we where able to get a summit picture together. The descent At this time we really had to start heading down in order to make it to camp before sun down. We descended down the side of Avalanche Gulch in a long and boring slog in knee deep snow. It took about 4 hours to get back down. Once at camp I took off my boots, organized my gear inside the tent and went straight to sleep. After a long day, when I finally laid down on my sleeping bag I was so tired I it felt like I was laying on a temperpedic and In a matter os minutes i was out cold. The next morning, we where up around 7 and quickly began packing up since a storm was working its way onto the mountain. We wanted to be out as soon as possible. After a quite uneventful descent we had finally made it back to Bunny Flats. Spirits where high and we where all eager to have a decent meal and get some rest. After thoughts All in all even though my physical conditioning was a lot better on Shasta, I still consider Rainier to be much harder both physically and technically. That being said, this is a beautiful mountain with amazing features. I really enjoyed climbing it in the winter since there wasn't any one else on the mountain at the time. Despite the sun beating down on us the whole summit day, it was still cool enough to where we didn't feel fatigued by the sun. I definitely wouldn't mind coming back and climbing it again, maybe try ski mountaineering it instead! HERES A LIST OF THE GEAR I USED, THE PLACES I STAYED AND THE COST BREAK DOWN OF THE TRIP: Logistics: Shasta is pretty much far from everything, you don't have many options other than renting a car. Plus the drive is well worth it (amazing scenery). Your nearest air port is Sacramento which is about a 3 hour drive. Once at shasta, your best bet is to stay at the SWS bunk house. There are plenty of restaurant in the area to satisfy your pre climb cravings. From the SWS bunk house, its about a 30 min drive to Bunny Flats, where you will begin your climb. Cost break down: SWS mountain guides - $825.00 (+ guide tip) Car rental - $235.00 Hotel - $166.00 (2 nights) Pre climb food - $74.00 Snow Shoe Rentals - $40.00 Total: Approx $1340.00 Gear List: Lower Body- La Sportiva Baruntse Point 6 Medium weight Socks Point 6 Heavy weight socks Smart Wool base layer Mountain Hardware ChockStone pants Arc'teryx Alpha SL Pant Upper Body- Bight Gear Solstice Hoody Men's (base layer) North face Soft shell hooded Jacket (**Highly Recomended) Mountain Hardware ghost lite jacket Mountain Hardwear Micro Dome (insulating warm hat) Marmot Men's Windstopper Glove (light weight) Marmot Men's Randonnee Glove (medium weight) Marmot Mens Mit Climbing Gear- Julbo Monte Bianco Glacier Glasses Black Diamond Climbing Helmet Black Diamond Couloir Harness Black Diamond Raven Pro Ice Axe Black Diamond Sabertooth Clip Crampons Osprey 85 Pack Mountain Hardware 3 degrees sleeping bag MSR Snow Shoes Find out more on my website: www.brandonclimbs.com All climbs are used to raise awareness for the opioid epidemic that is weeping our nation. Gear Notes: On report Approach Notes: On report
-
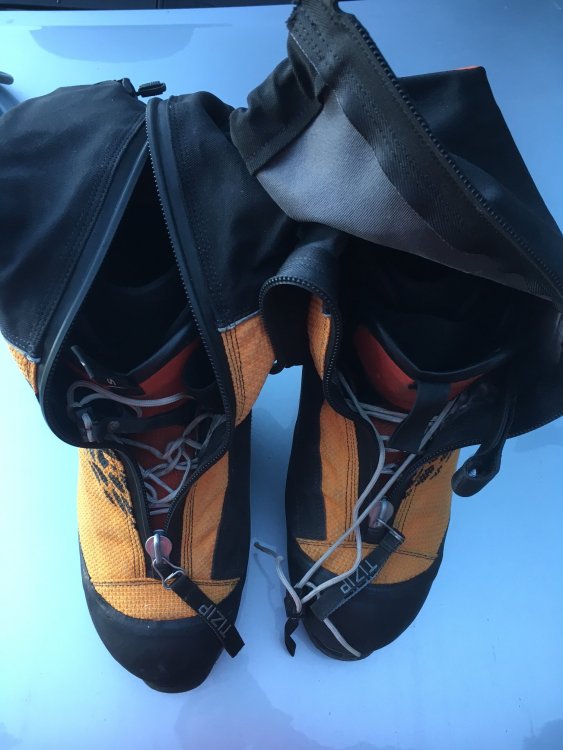
I bought these boots a while back and put about 3 or 4 days of climbing into them. Unfortunately they were a bit too small so I ended up getting a larger size that fit better. These would be a great boot and a good price to the right home. Scarpa Phantom 6000 Size 42
-
Wondering if anyone is selling a 55 CM Adze. Please let me know. Thank you!
-
Wondering if anyone is selling a 55 CM Adze. Please let me know. Thank you!
-
Hi all-- I am planning a winter ascent up Mt. Hood with a group of friends and need some advice! We all have some experience with travel on glaciated terrain, ice field whiteout navigation, crevasse rescue, and rope travel etc. in Alaska. We want to practice our mountaineering skills. Also if you have any favorite Mt. Hood backcountry ski spots, I would love to hear about those as well! What route recommendations do you have? How much of the route can I skin up? What is the best month to practice these skills on Mt. Hood? What are other considerations you think are important? Thanks!
-
My name is Kiira and I am 20! I am a student at University of Puget Sound and I am looking for a mountaineering/alpine mentor. I'm originally from Colorado and have done a number of the fourteeners as well as a 45 day mountaineering expedition in Patagonia on the southern ice field. I just got off of Denali and I am more motivated then ever to improve my technical skills and get out as much as possible! Let me know if anyone would want to take me under their wing and show me the ropes!