Search the Community
Showing results for tags 'cctripreport'.
-
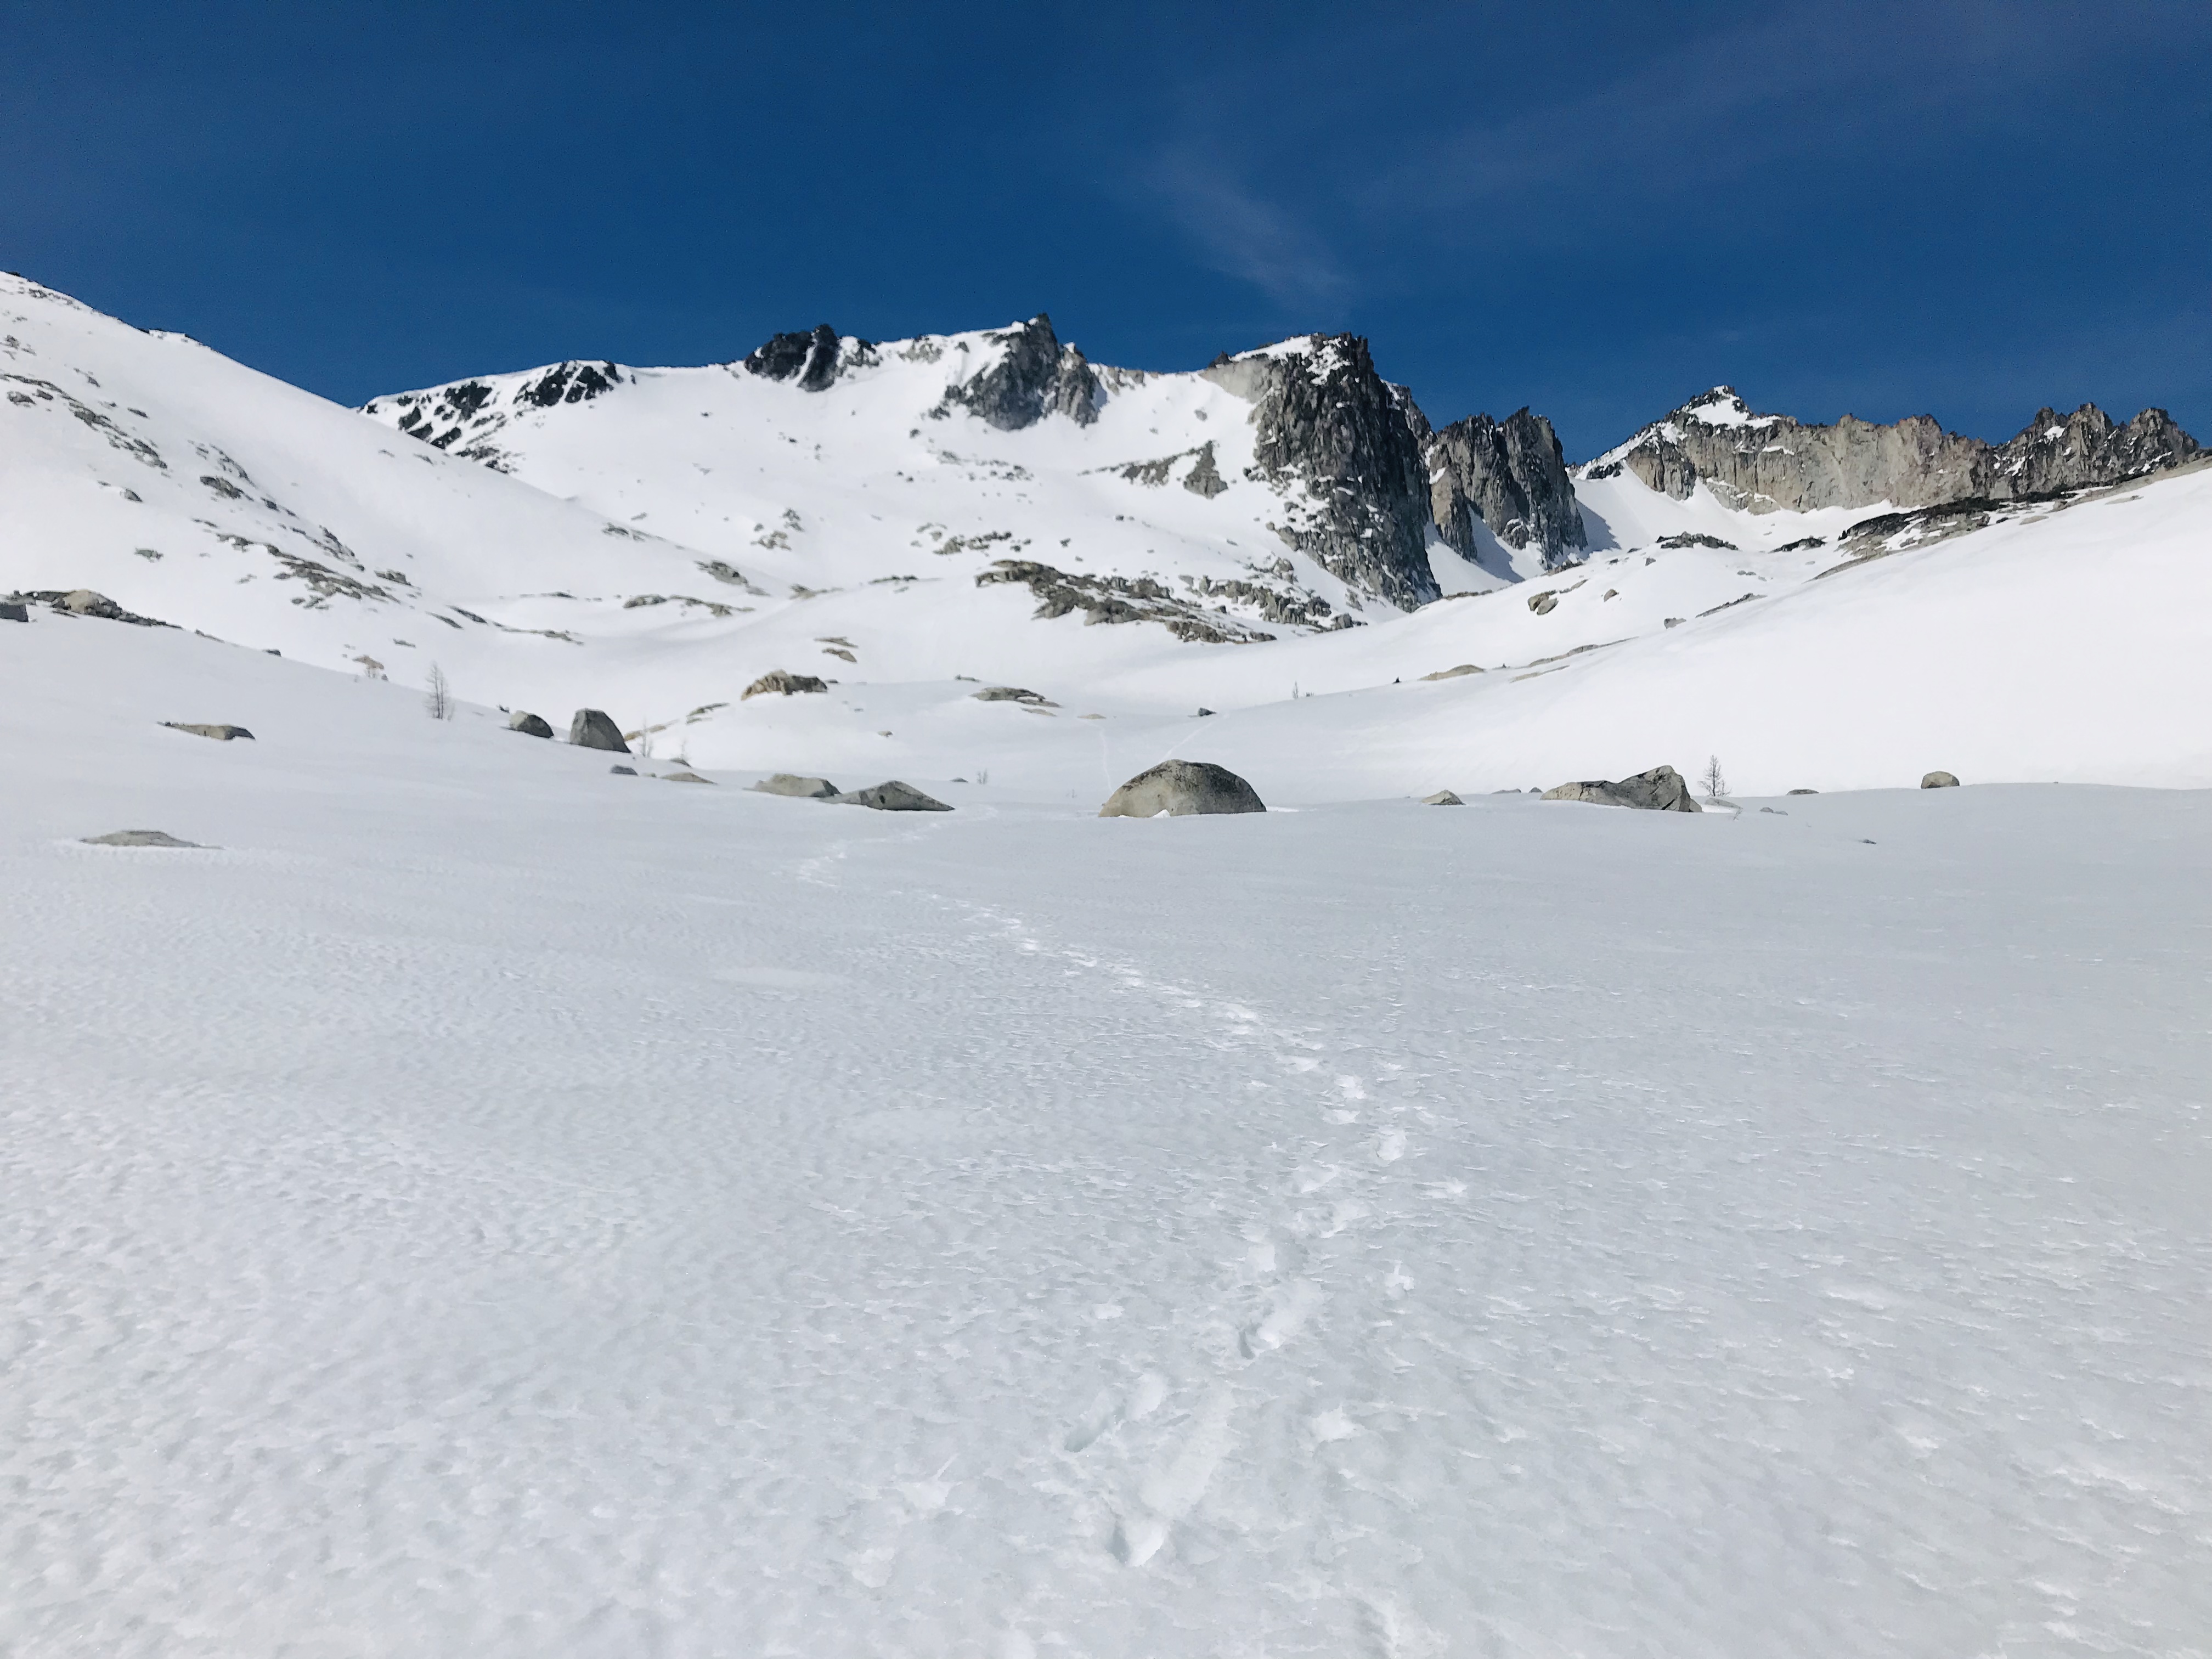
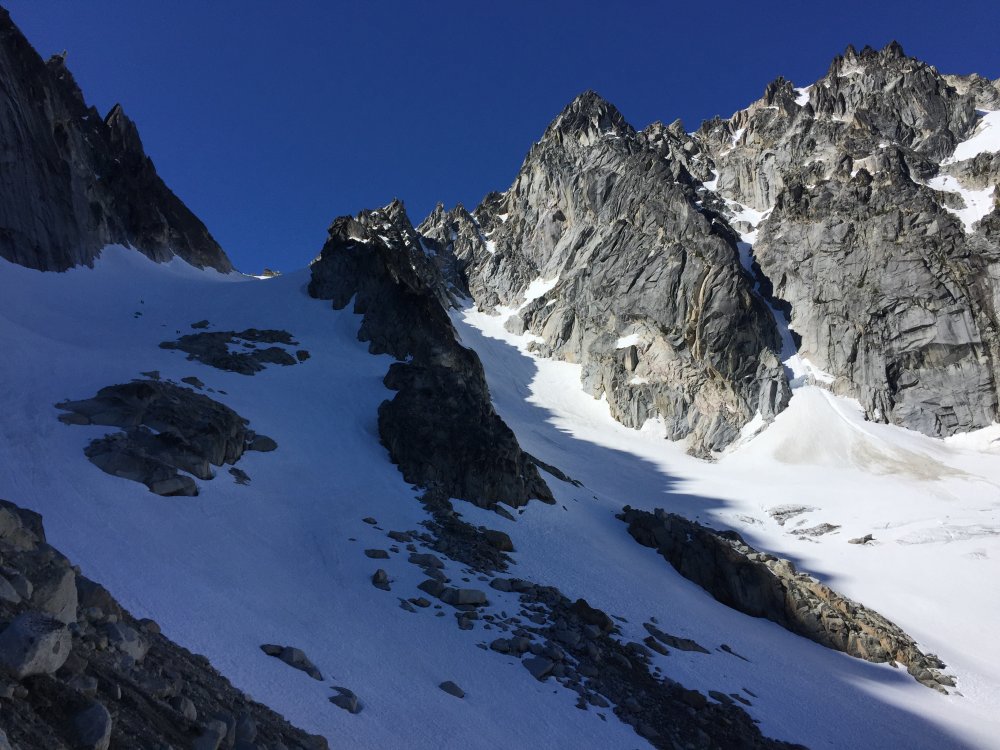
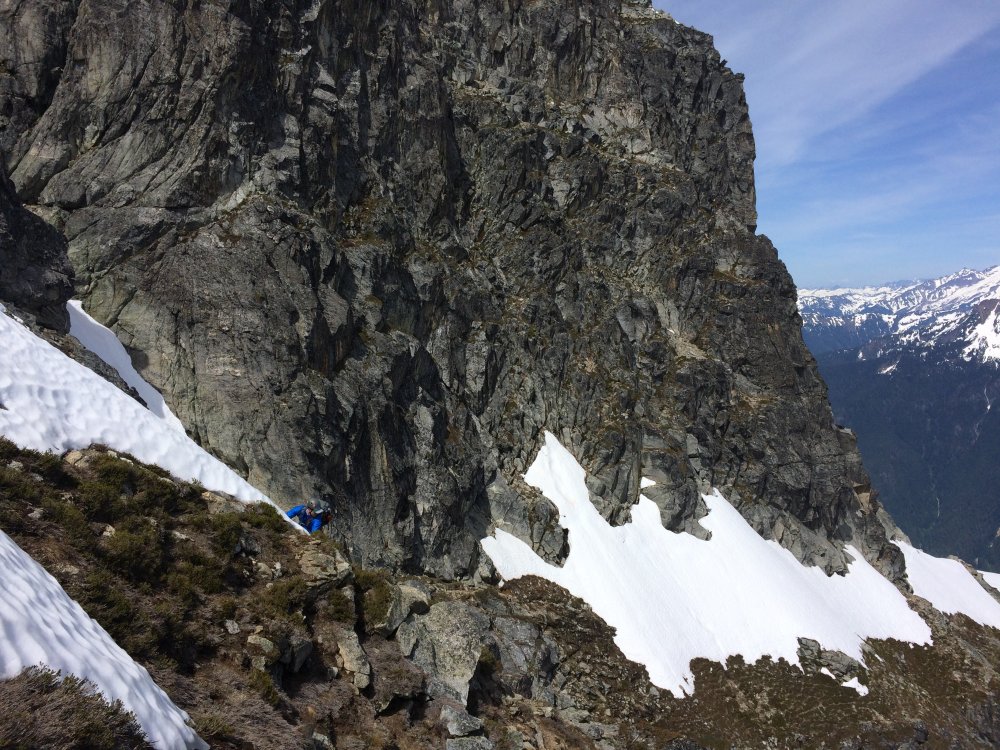
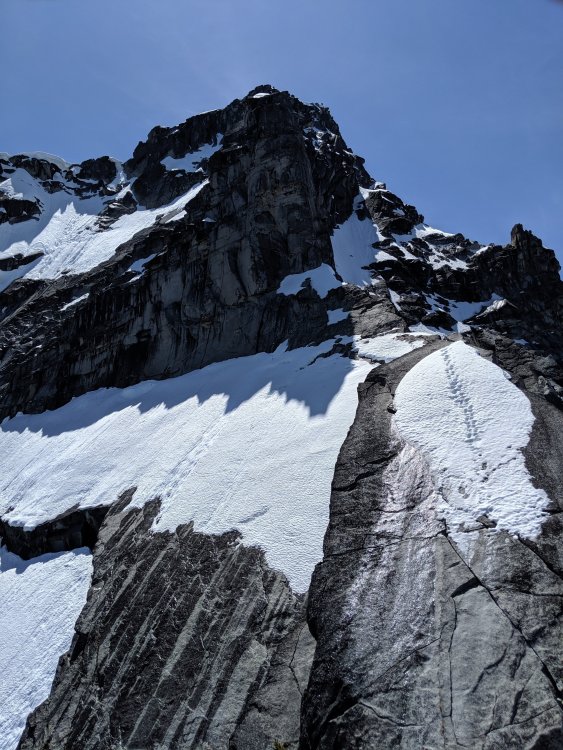
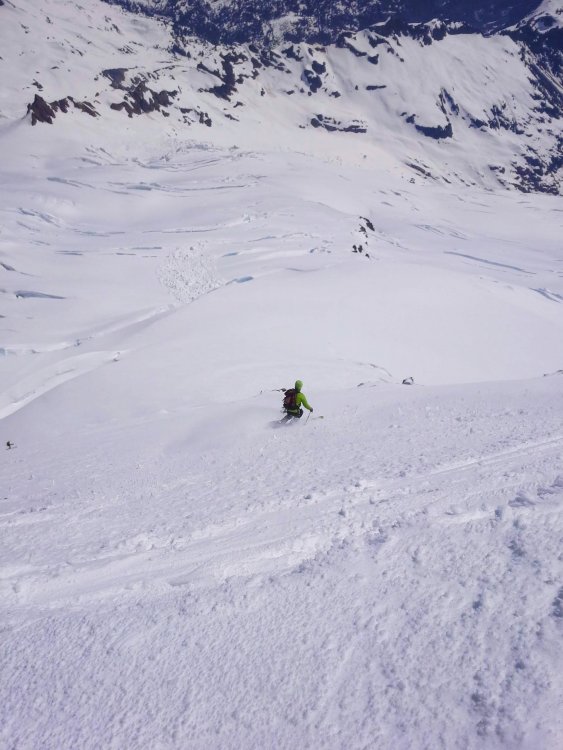
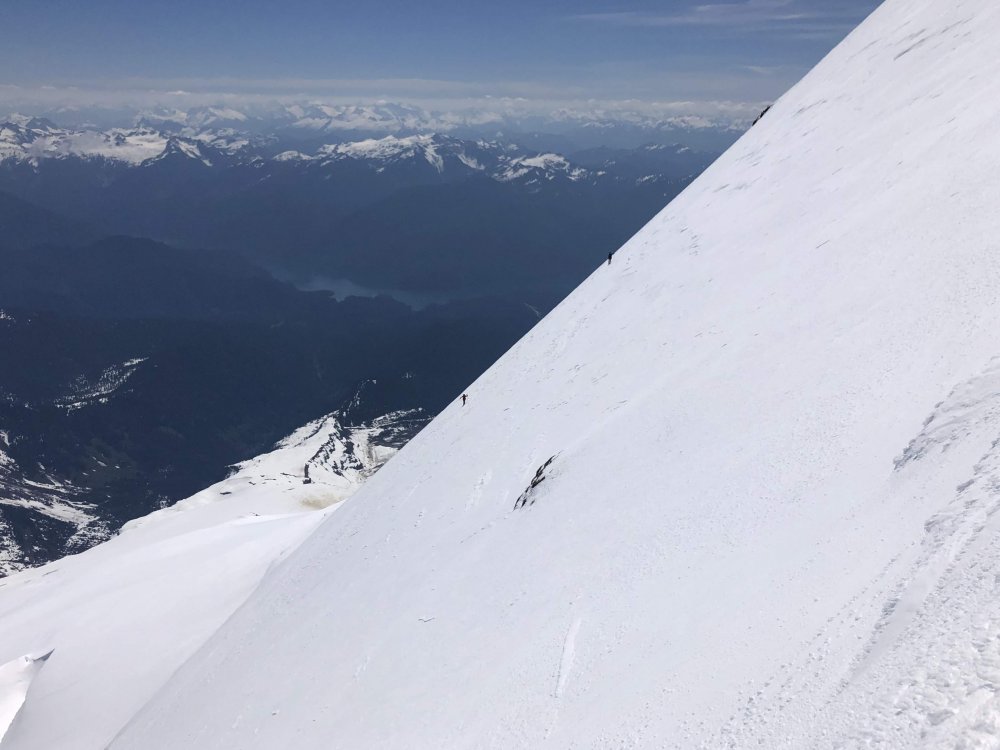
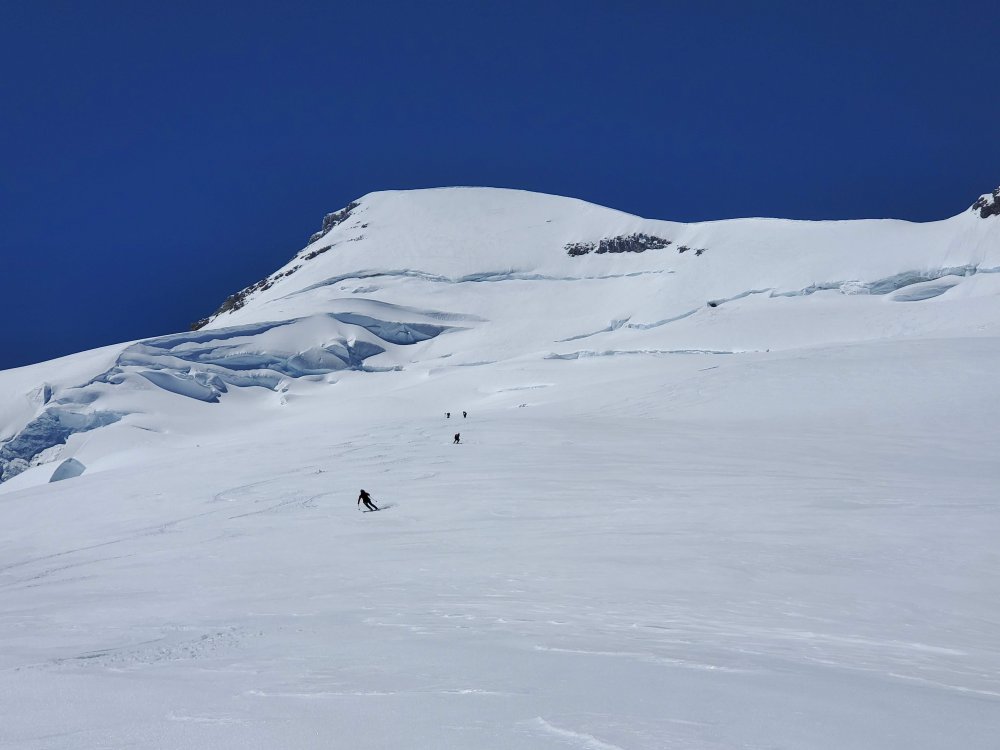
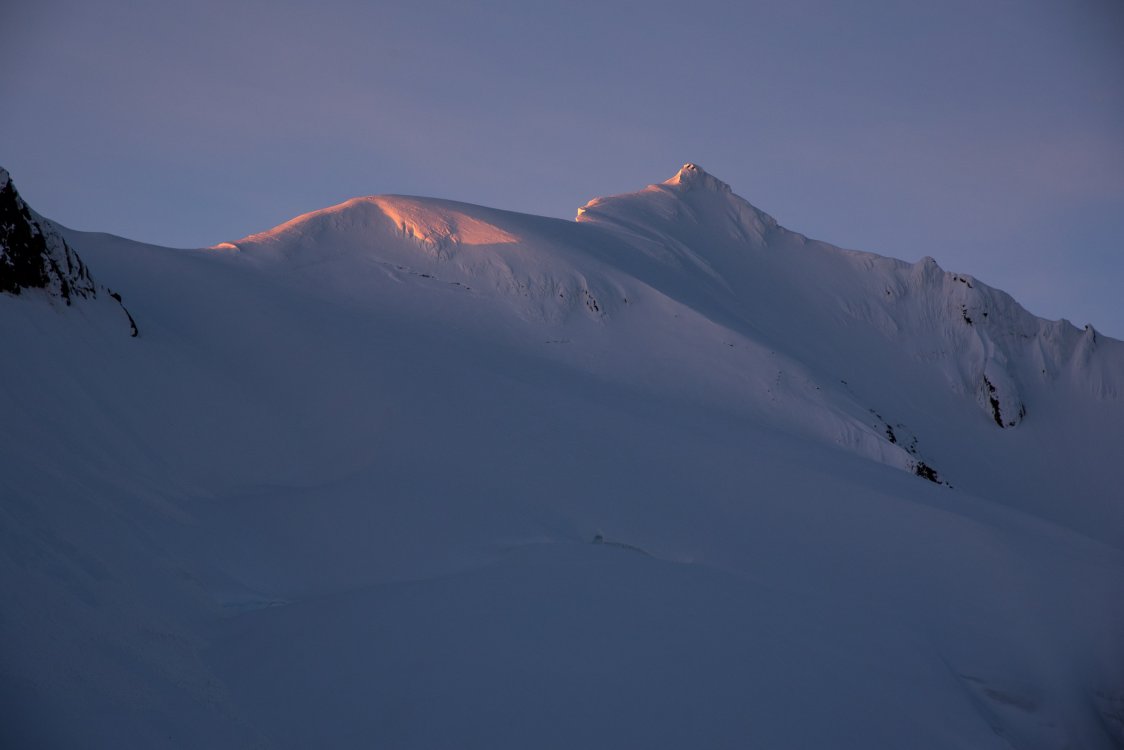
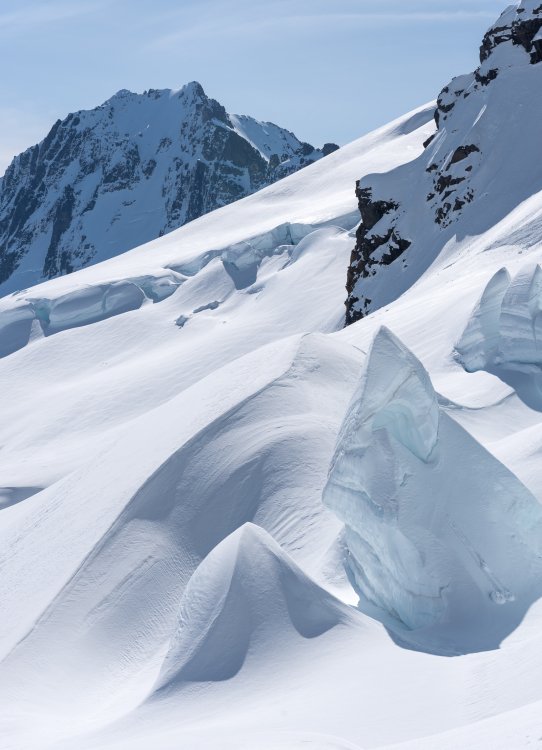
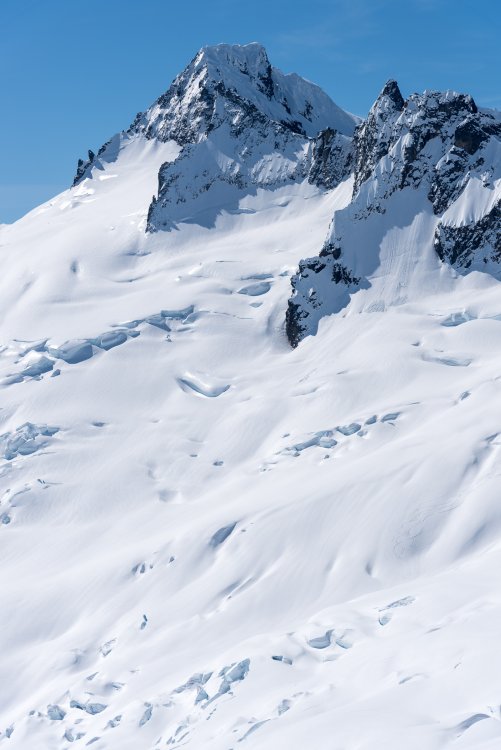
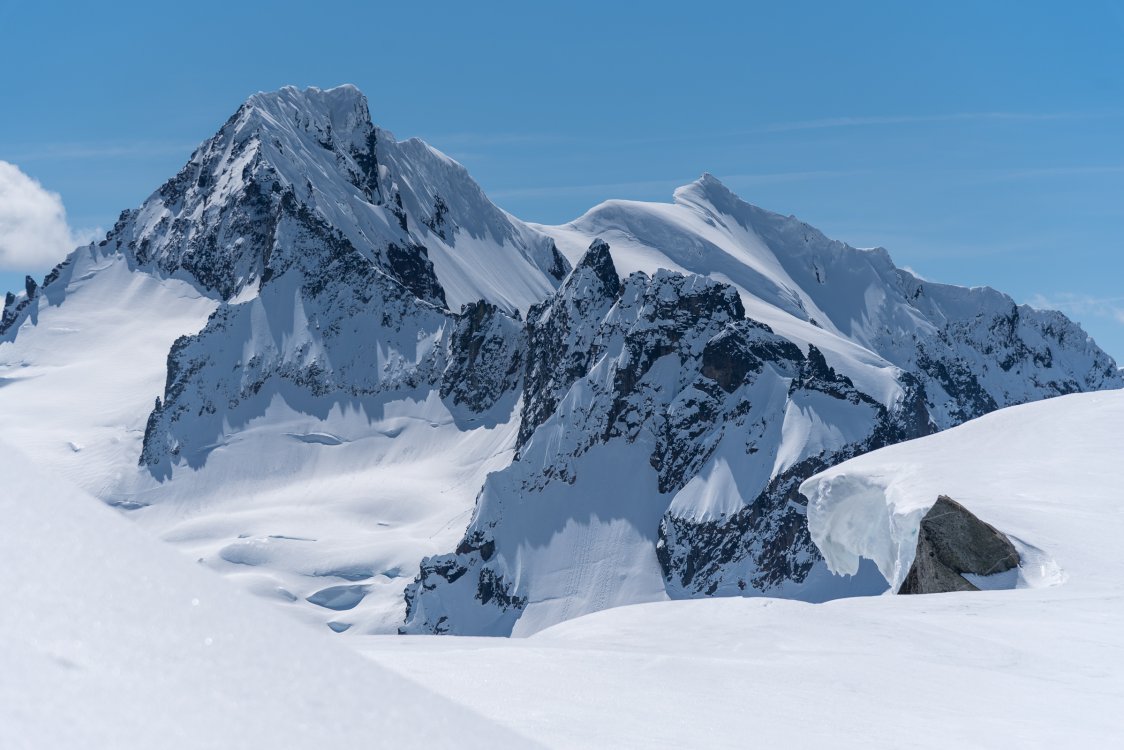
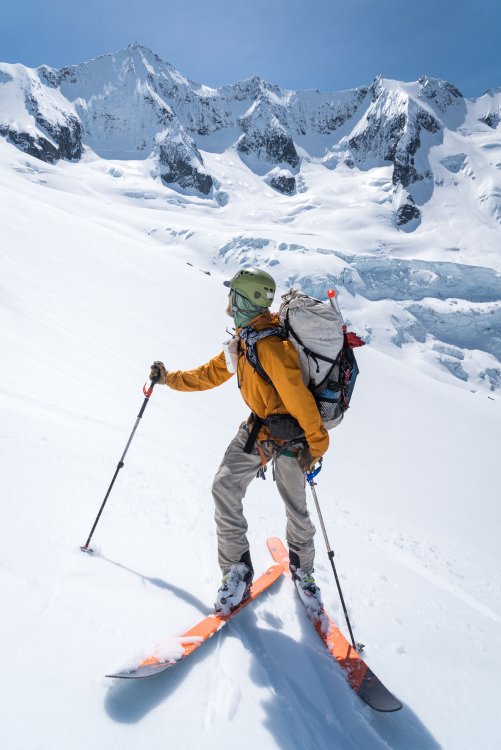
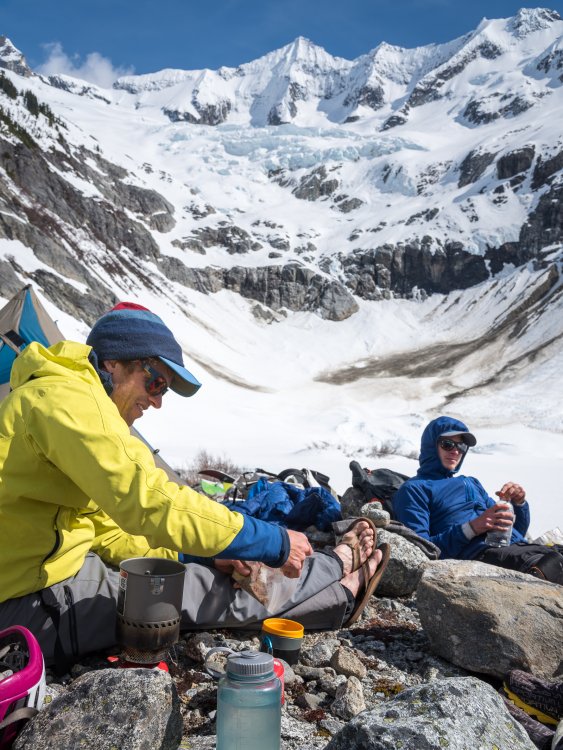
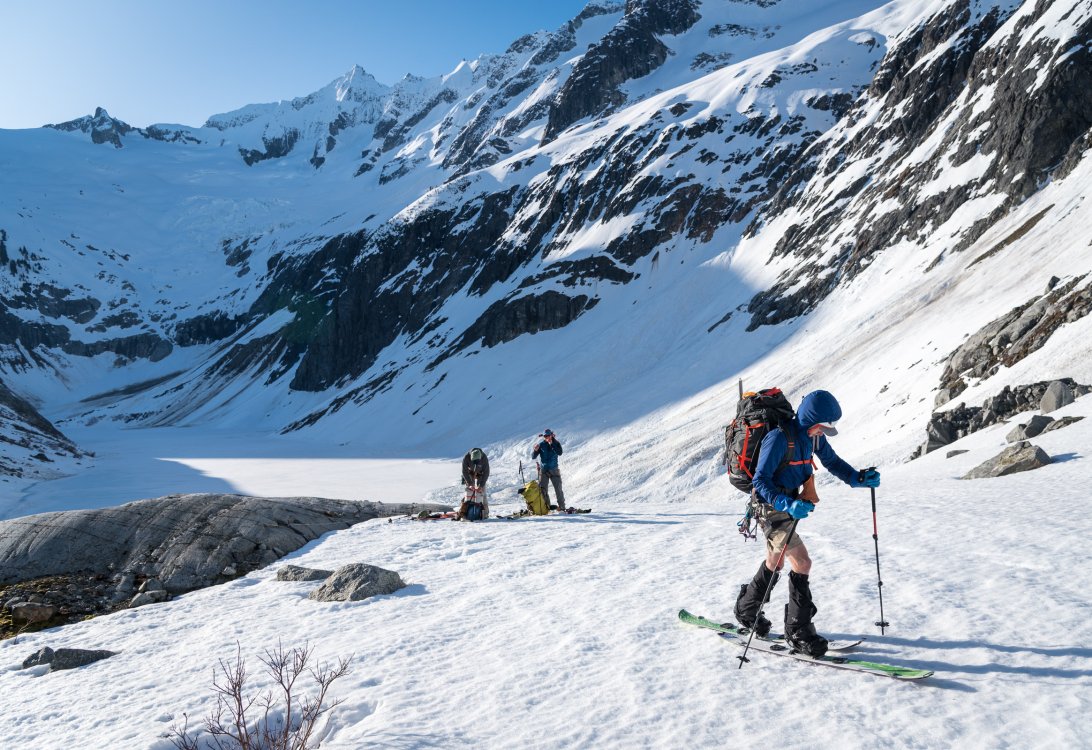
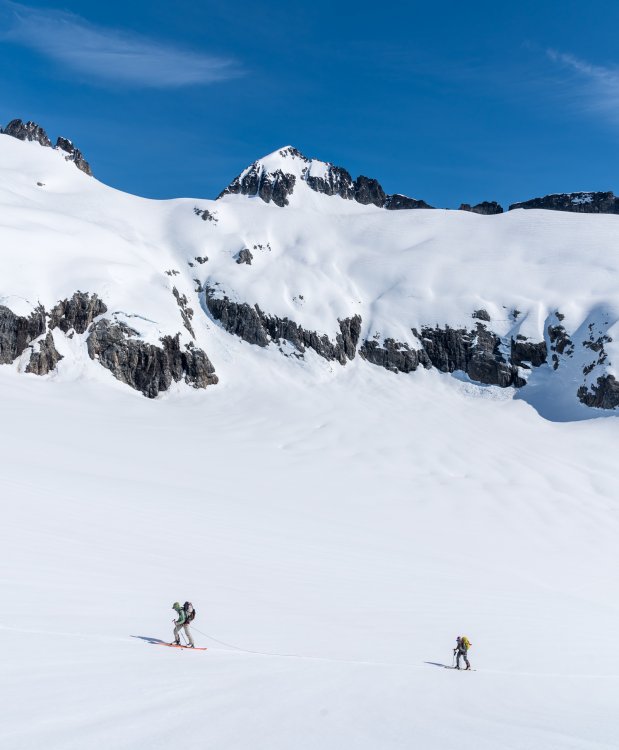
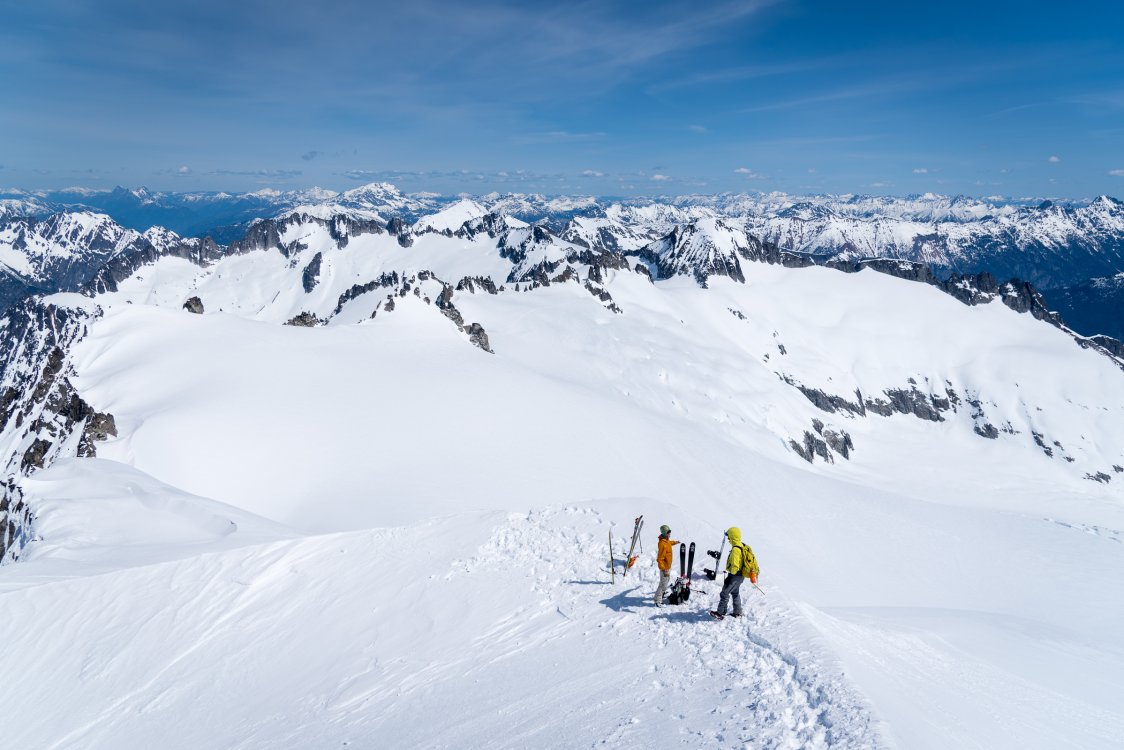
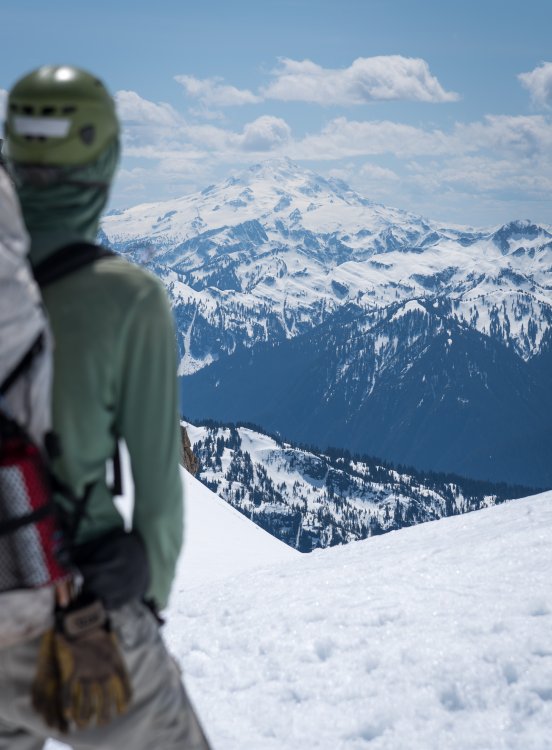
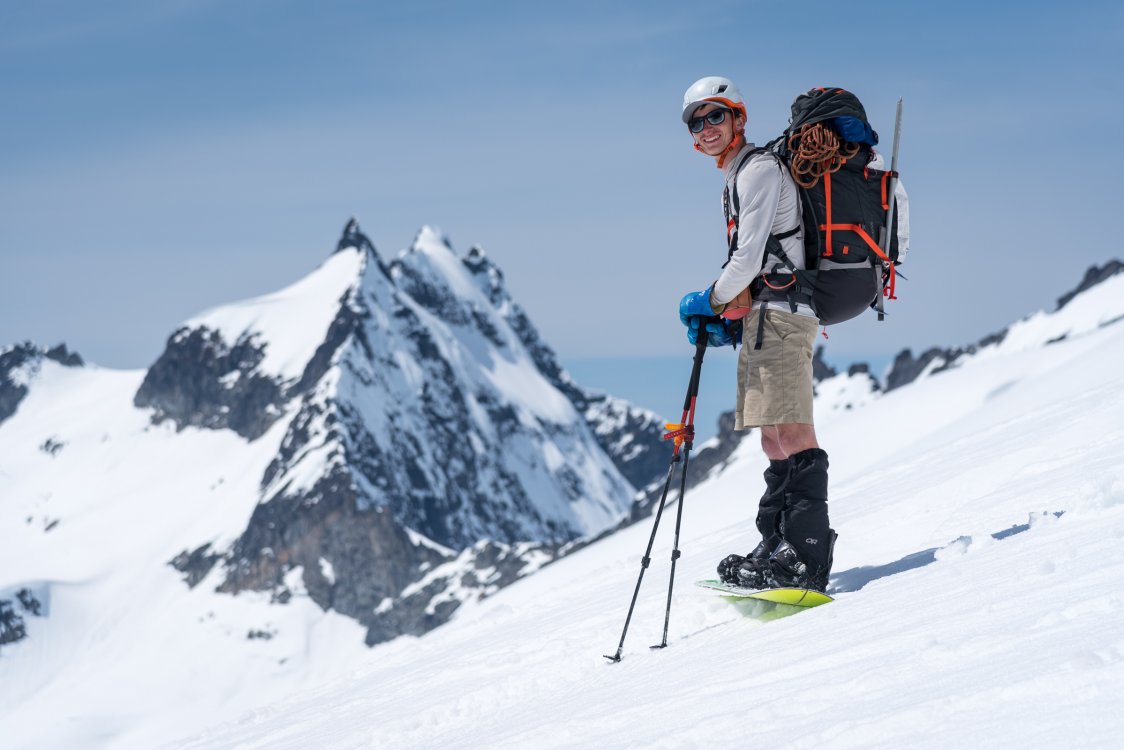
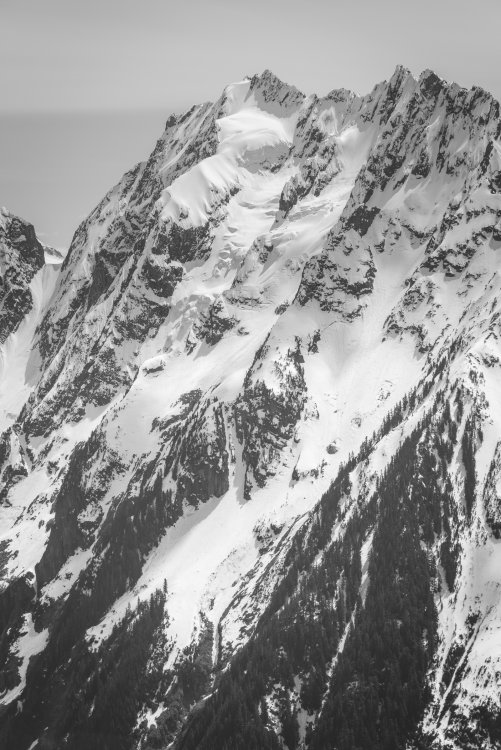
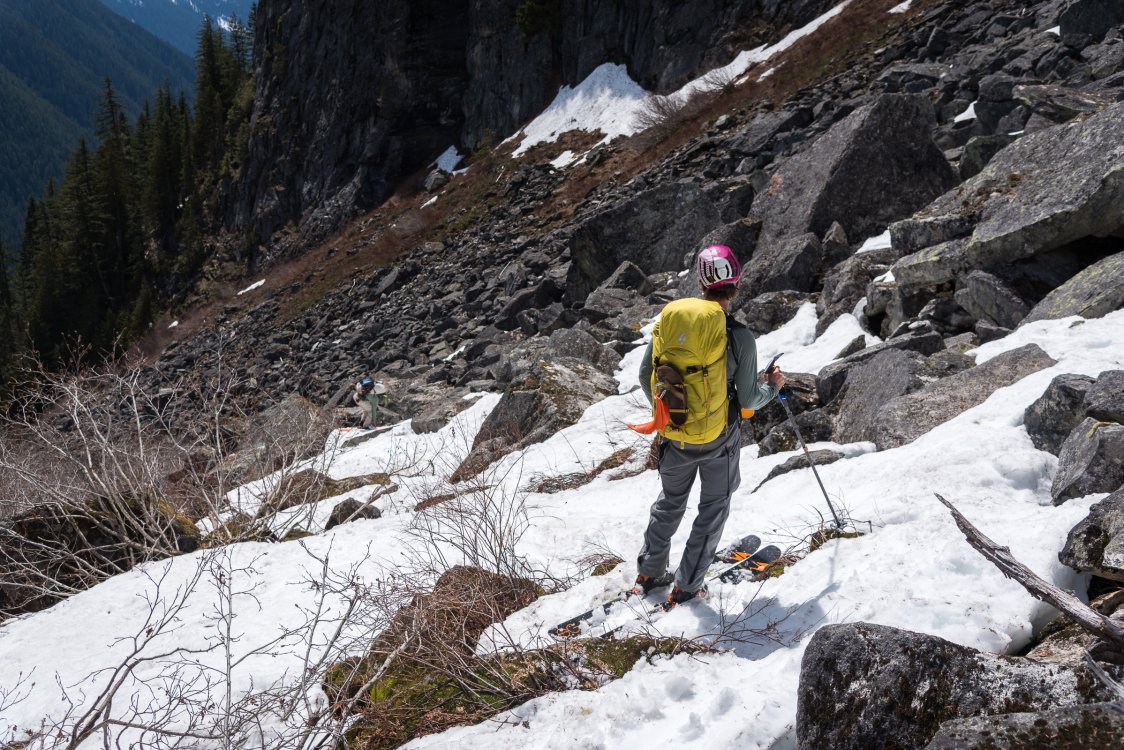
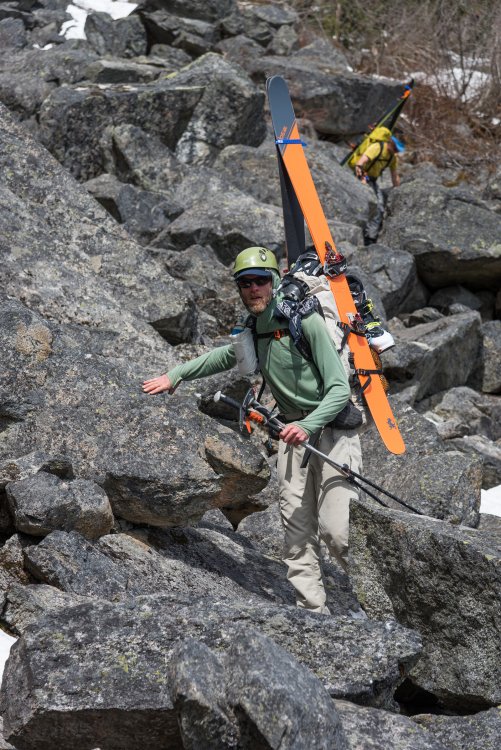
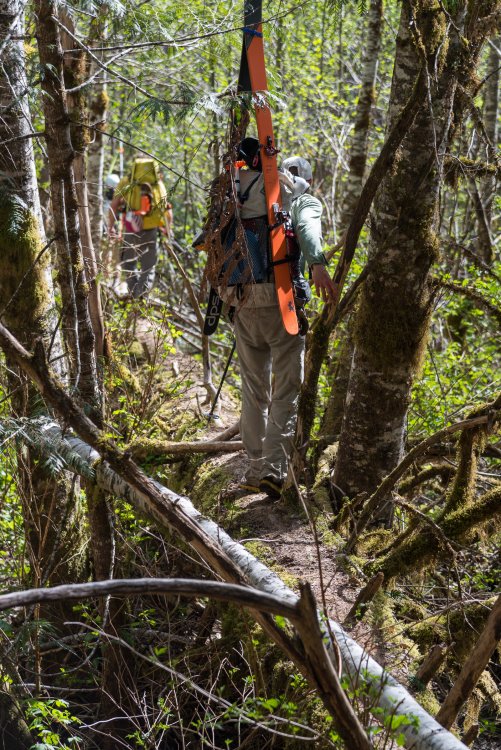
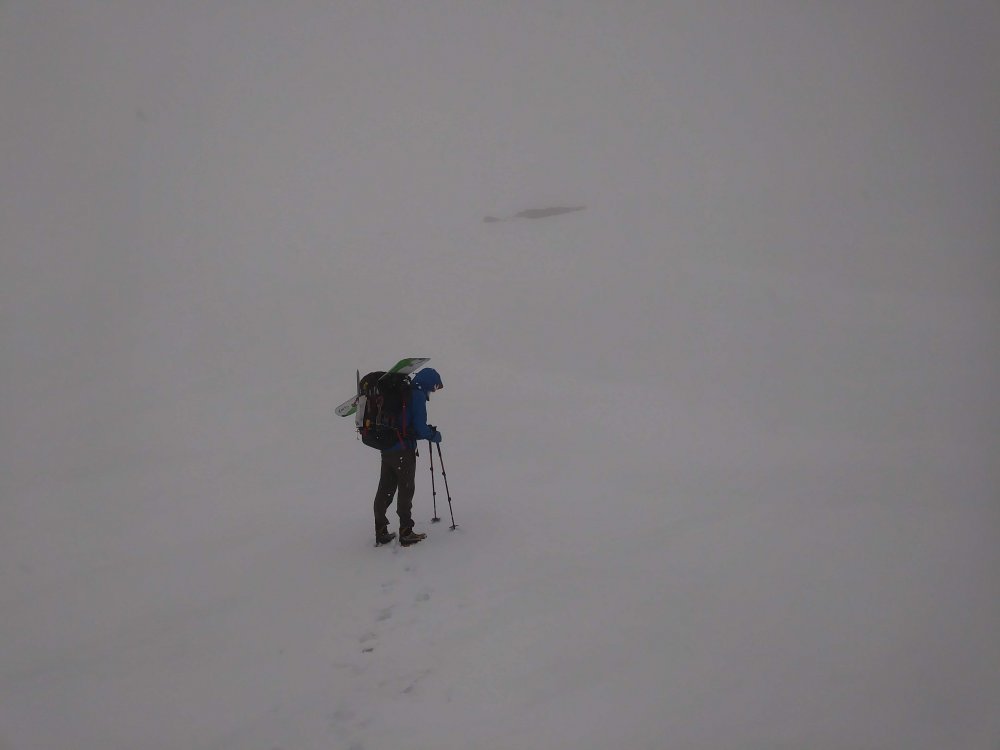
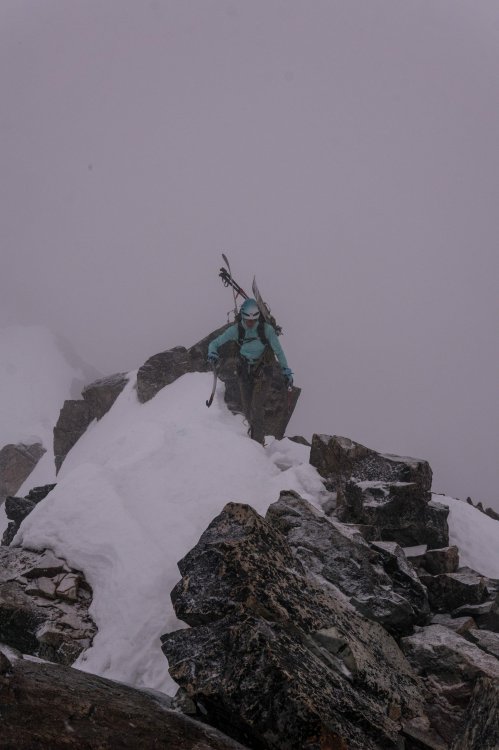
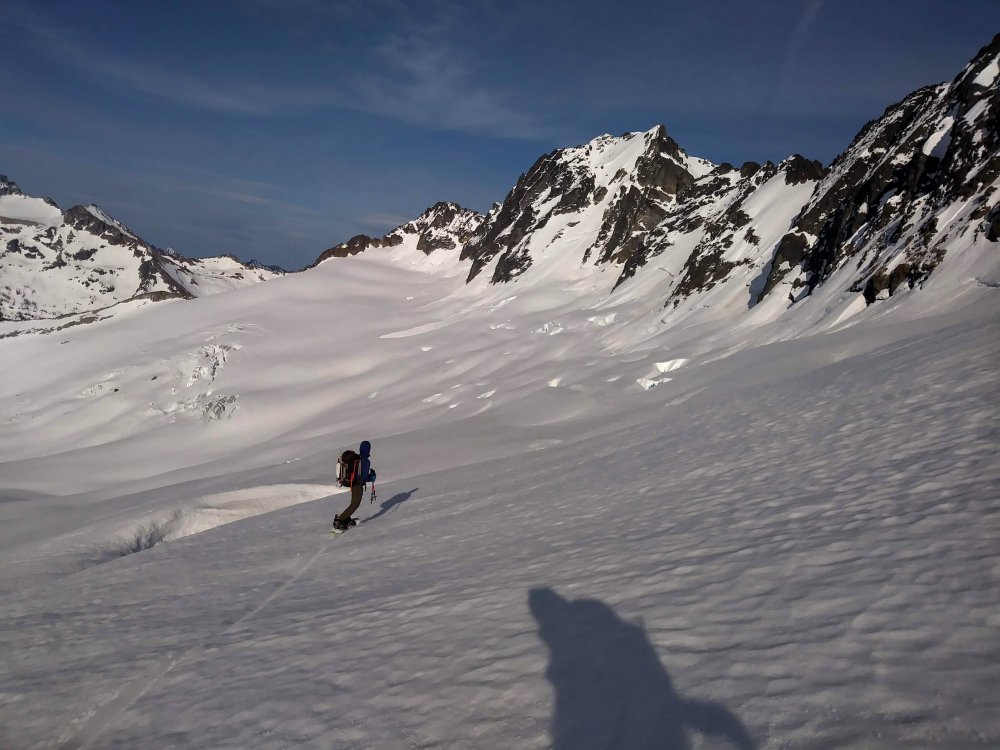
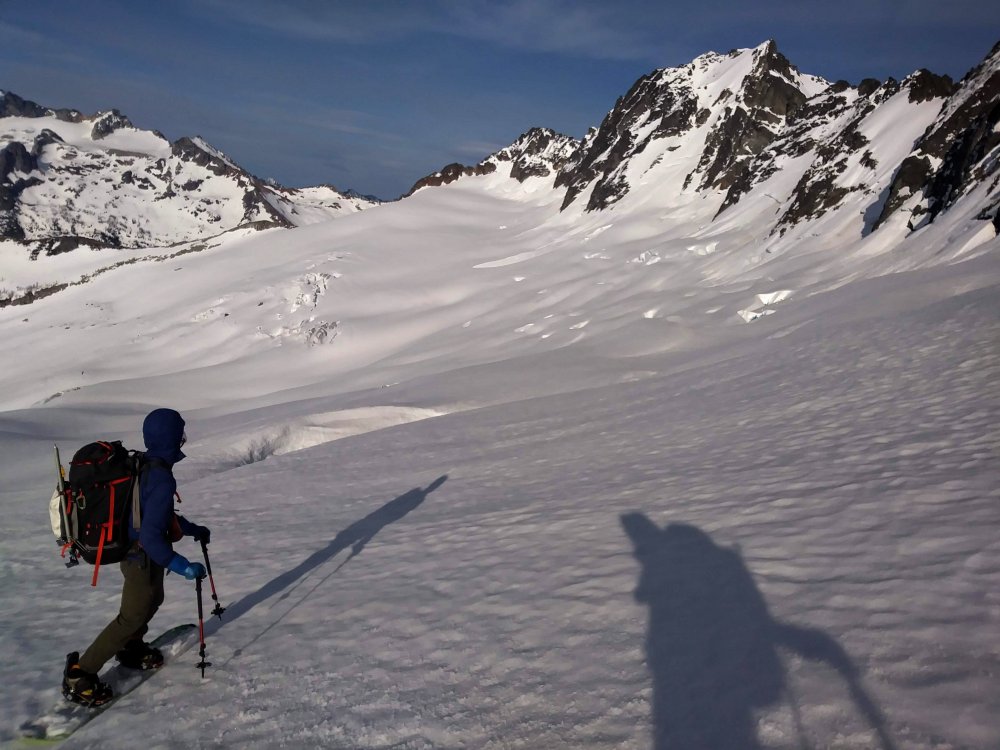
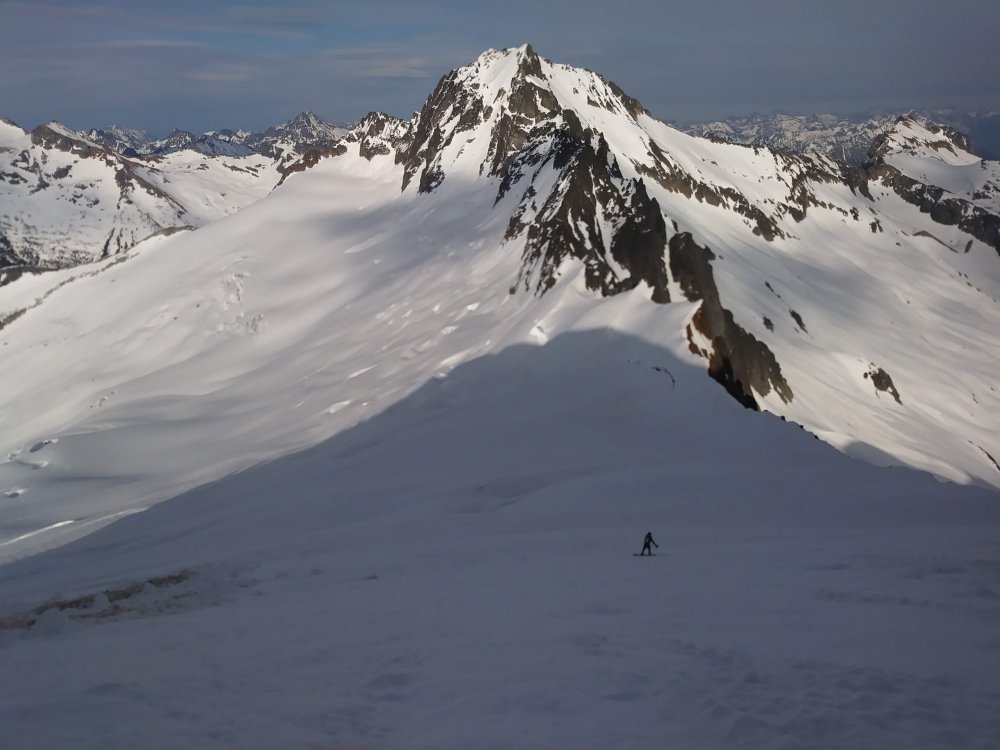
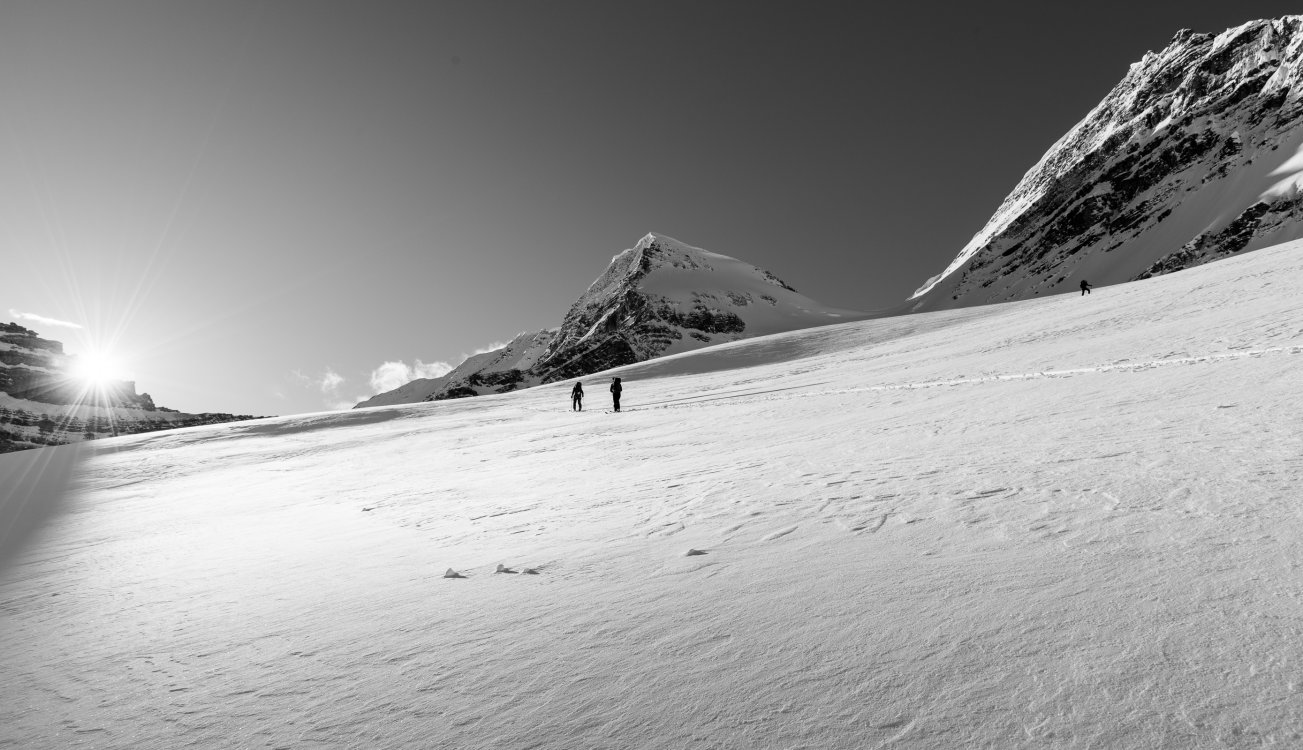
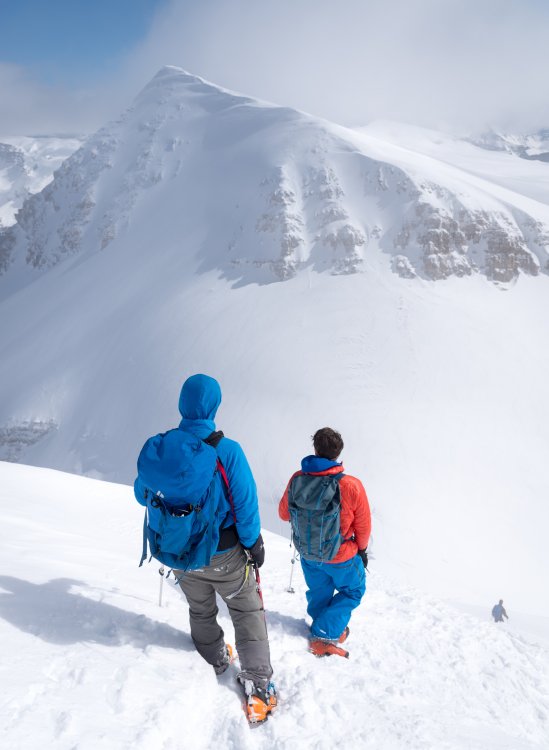
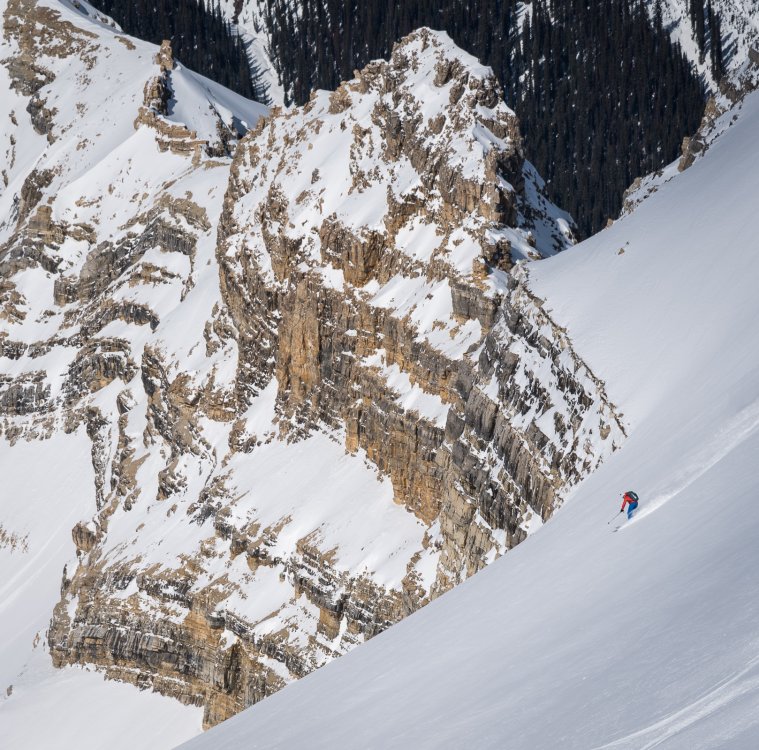
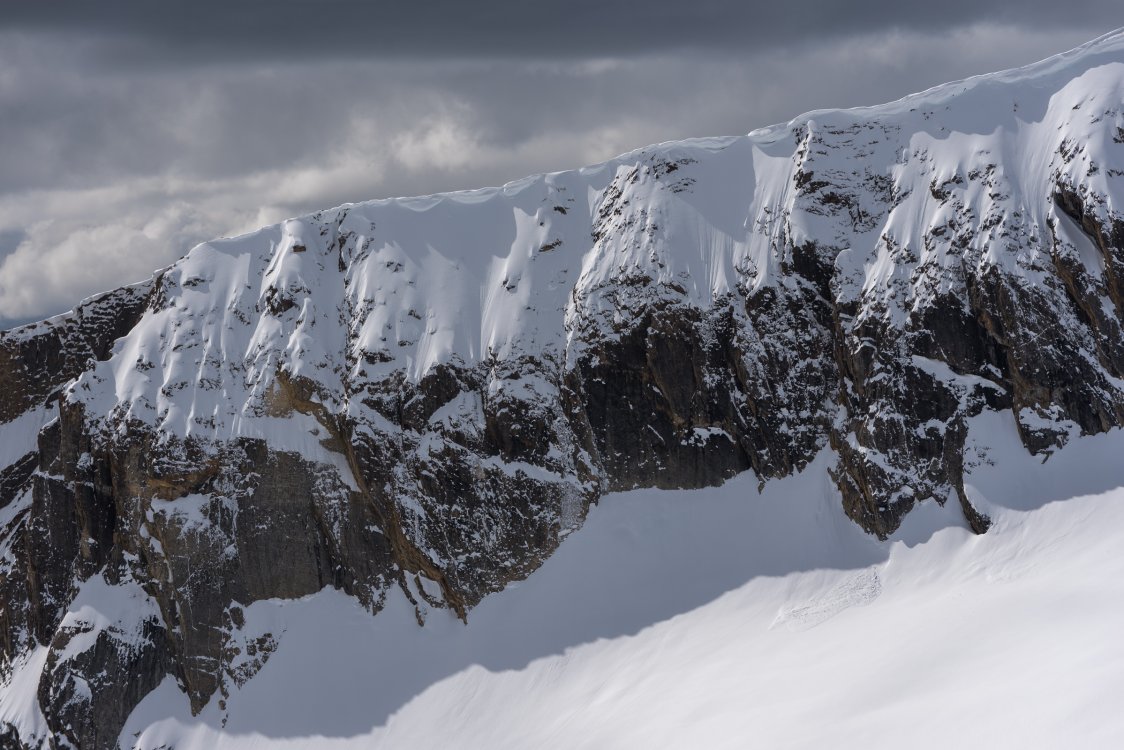
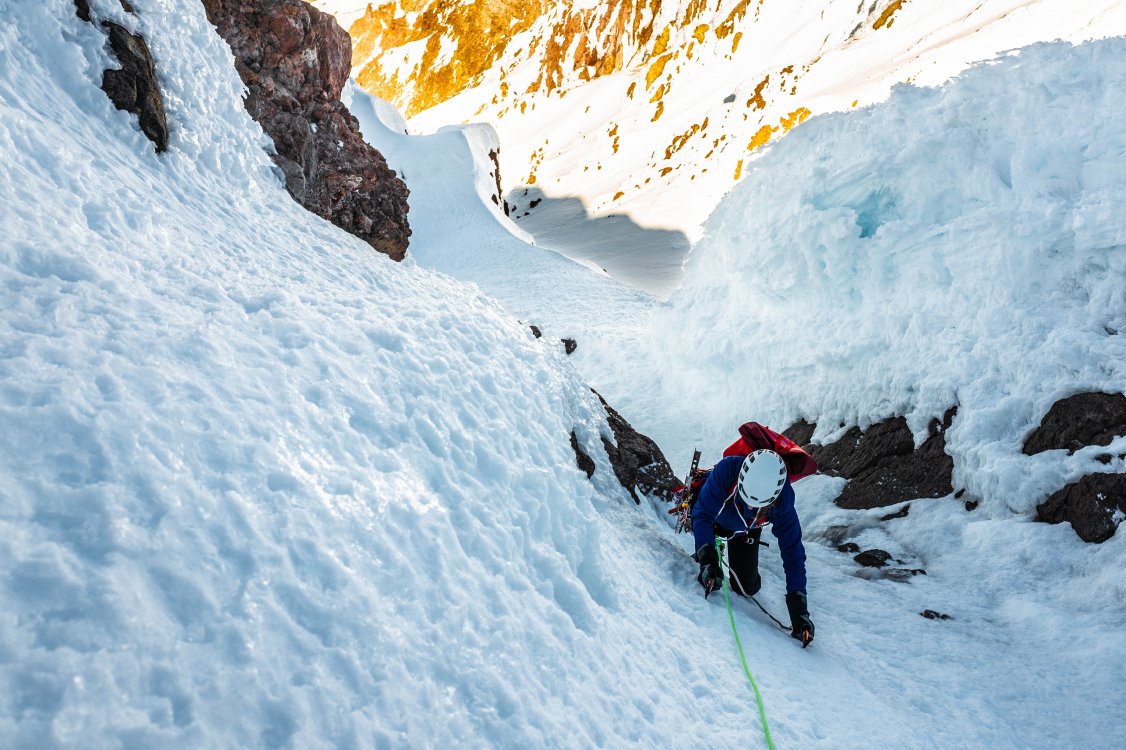
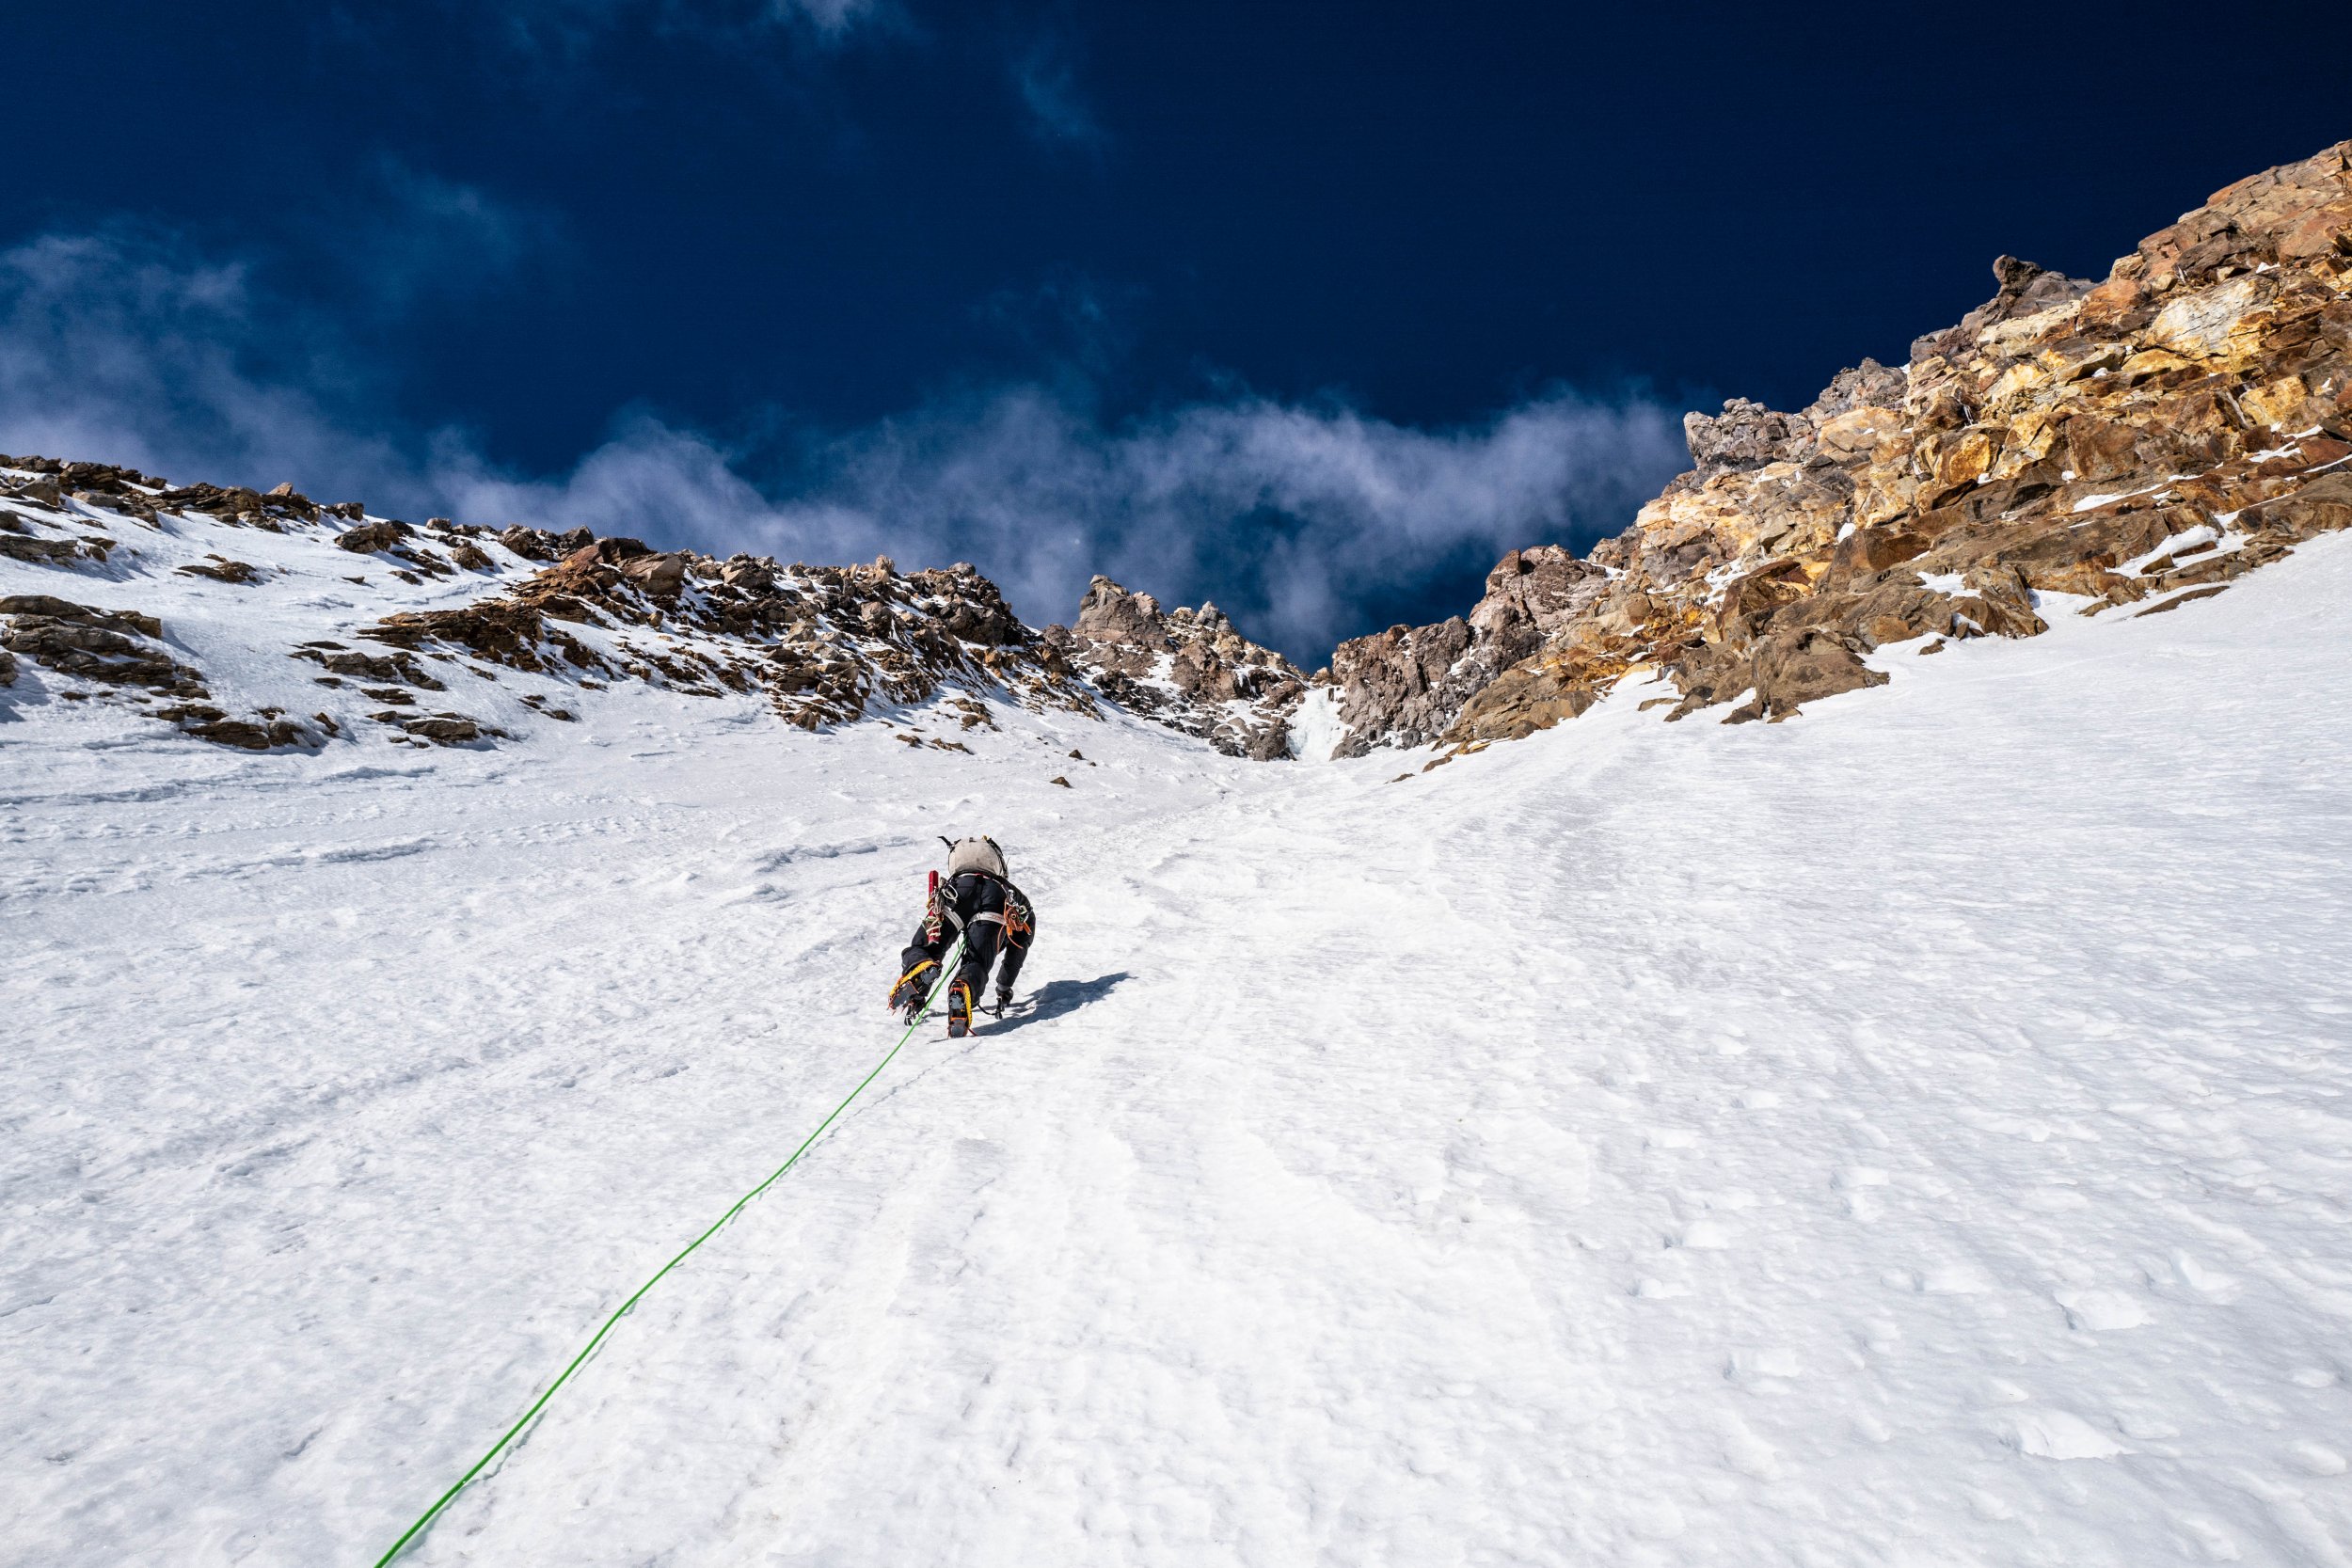
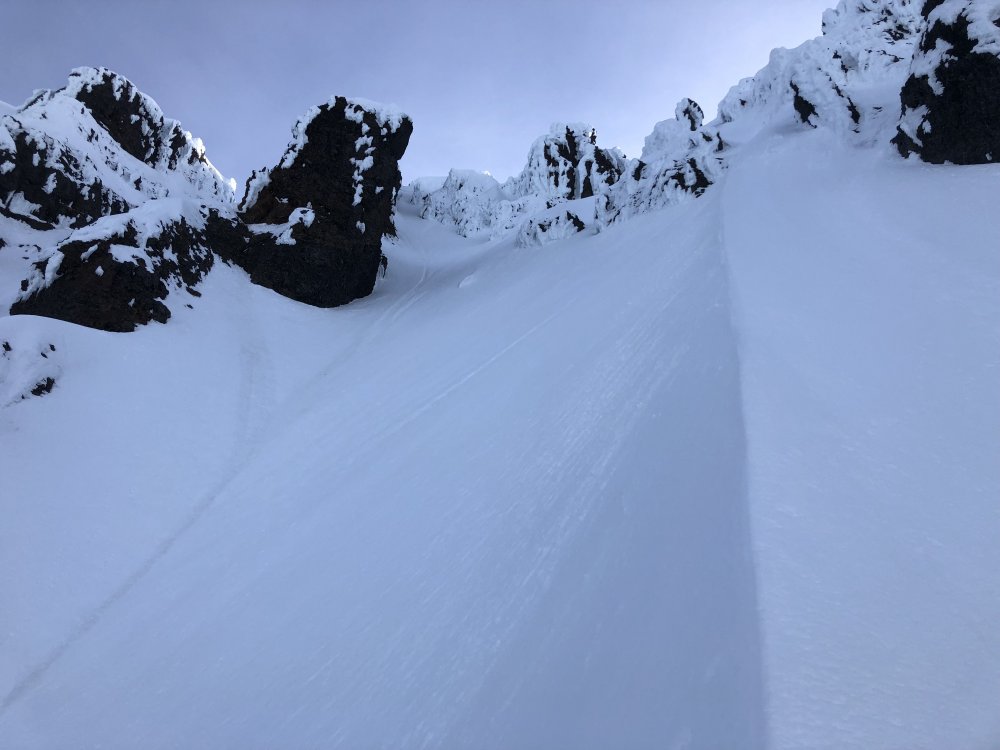
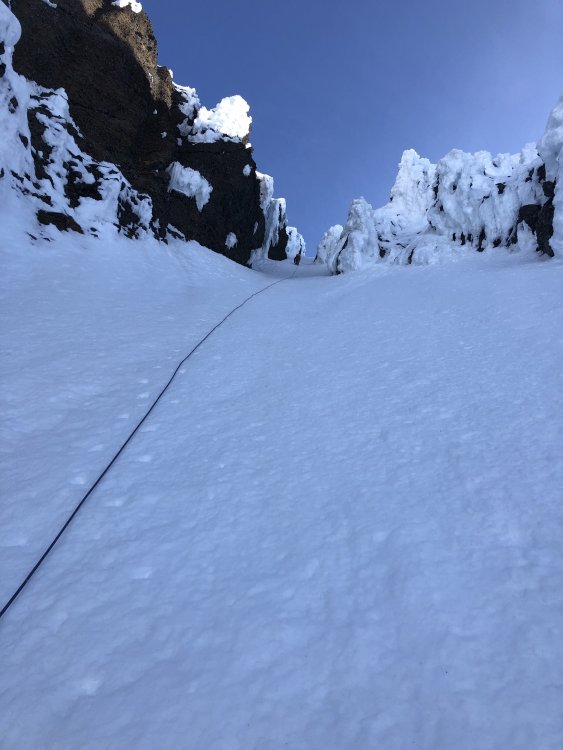
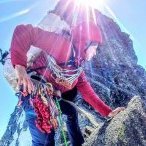
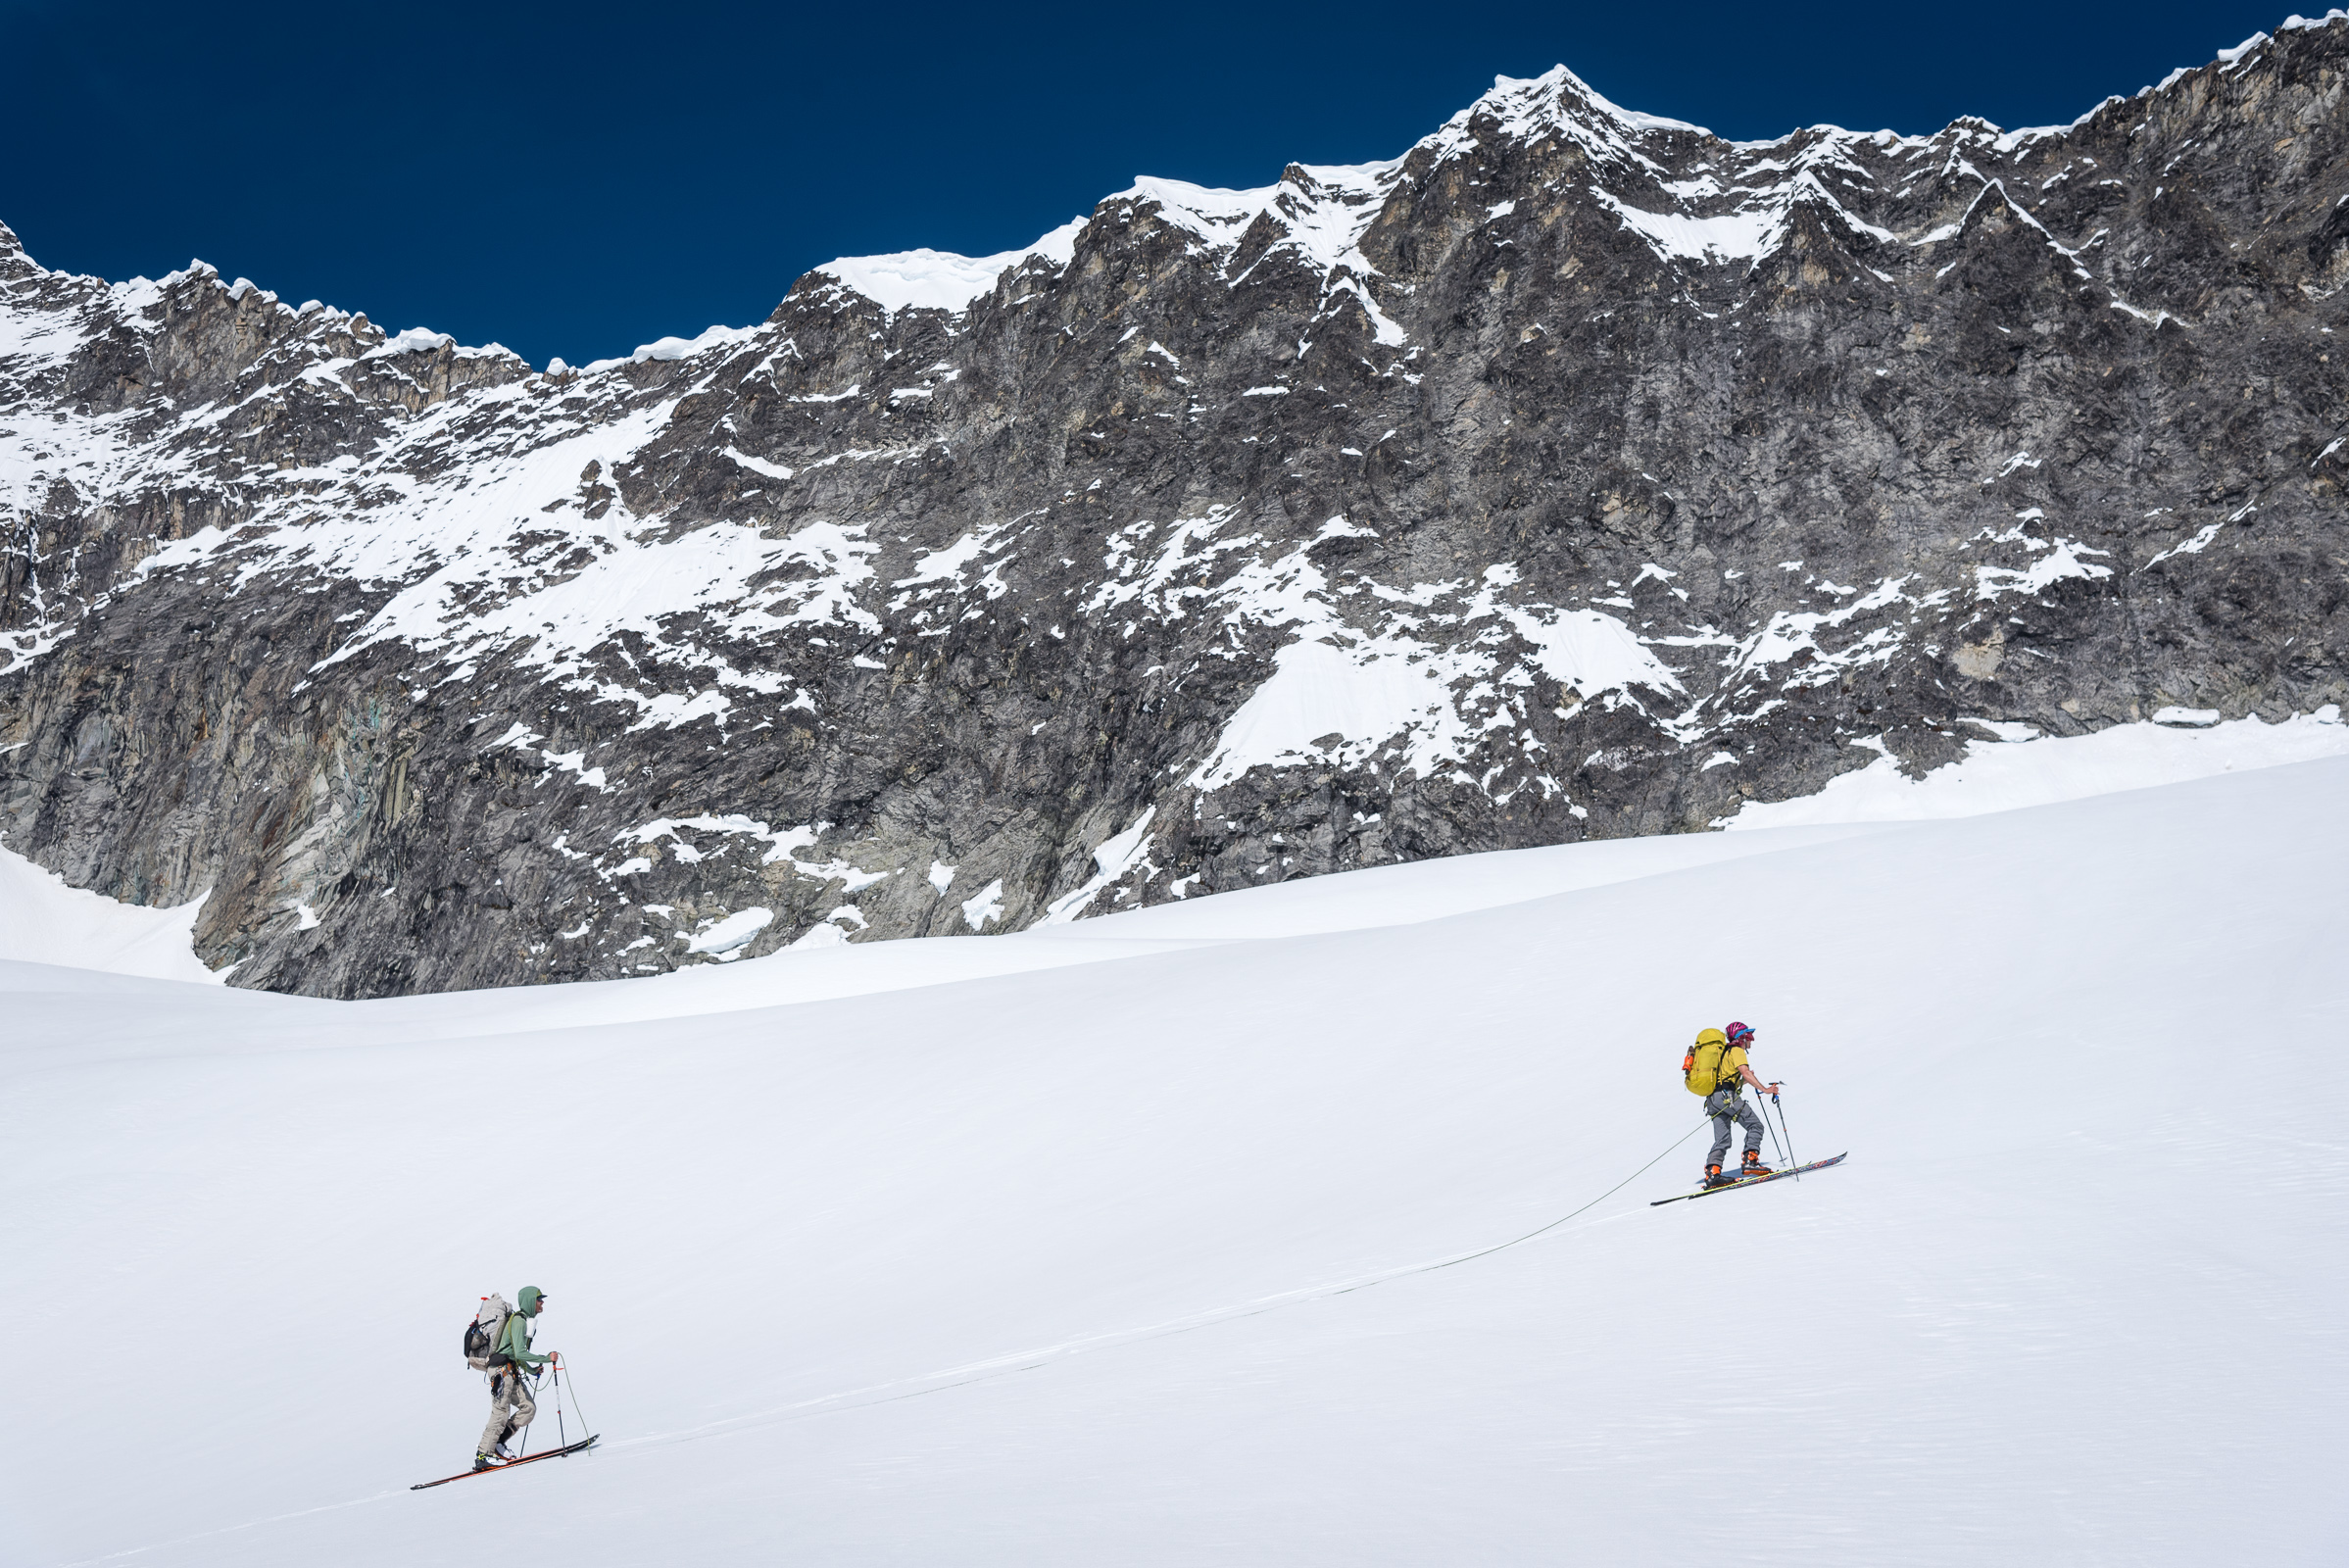
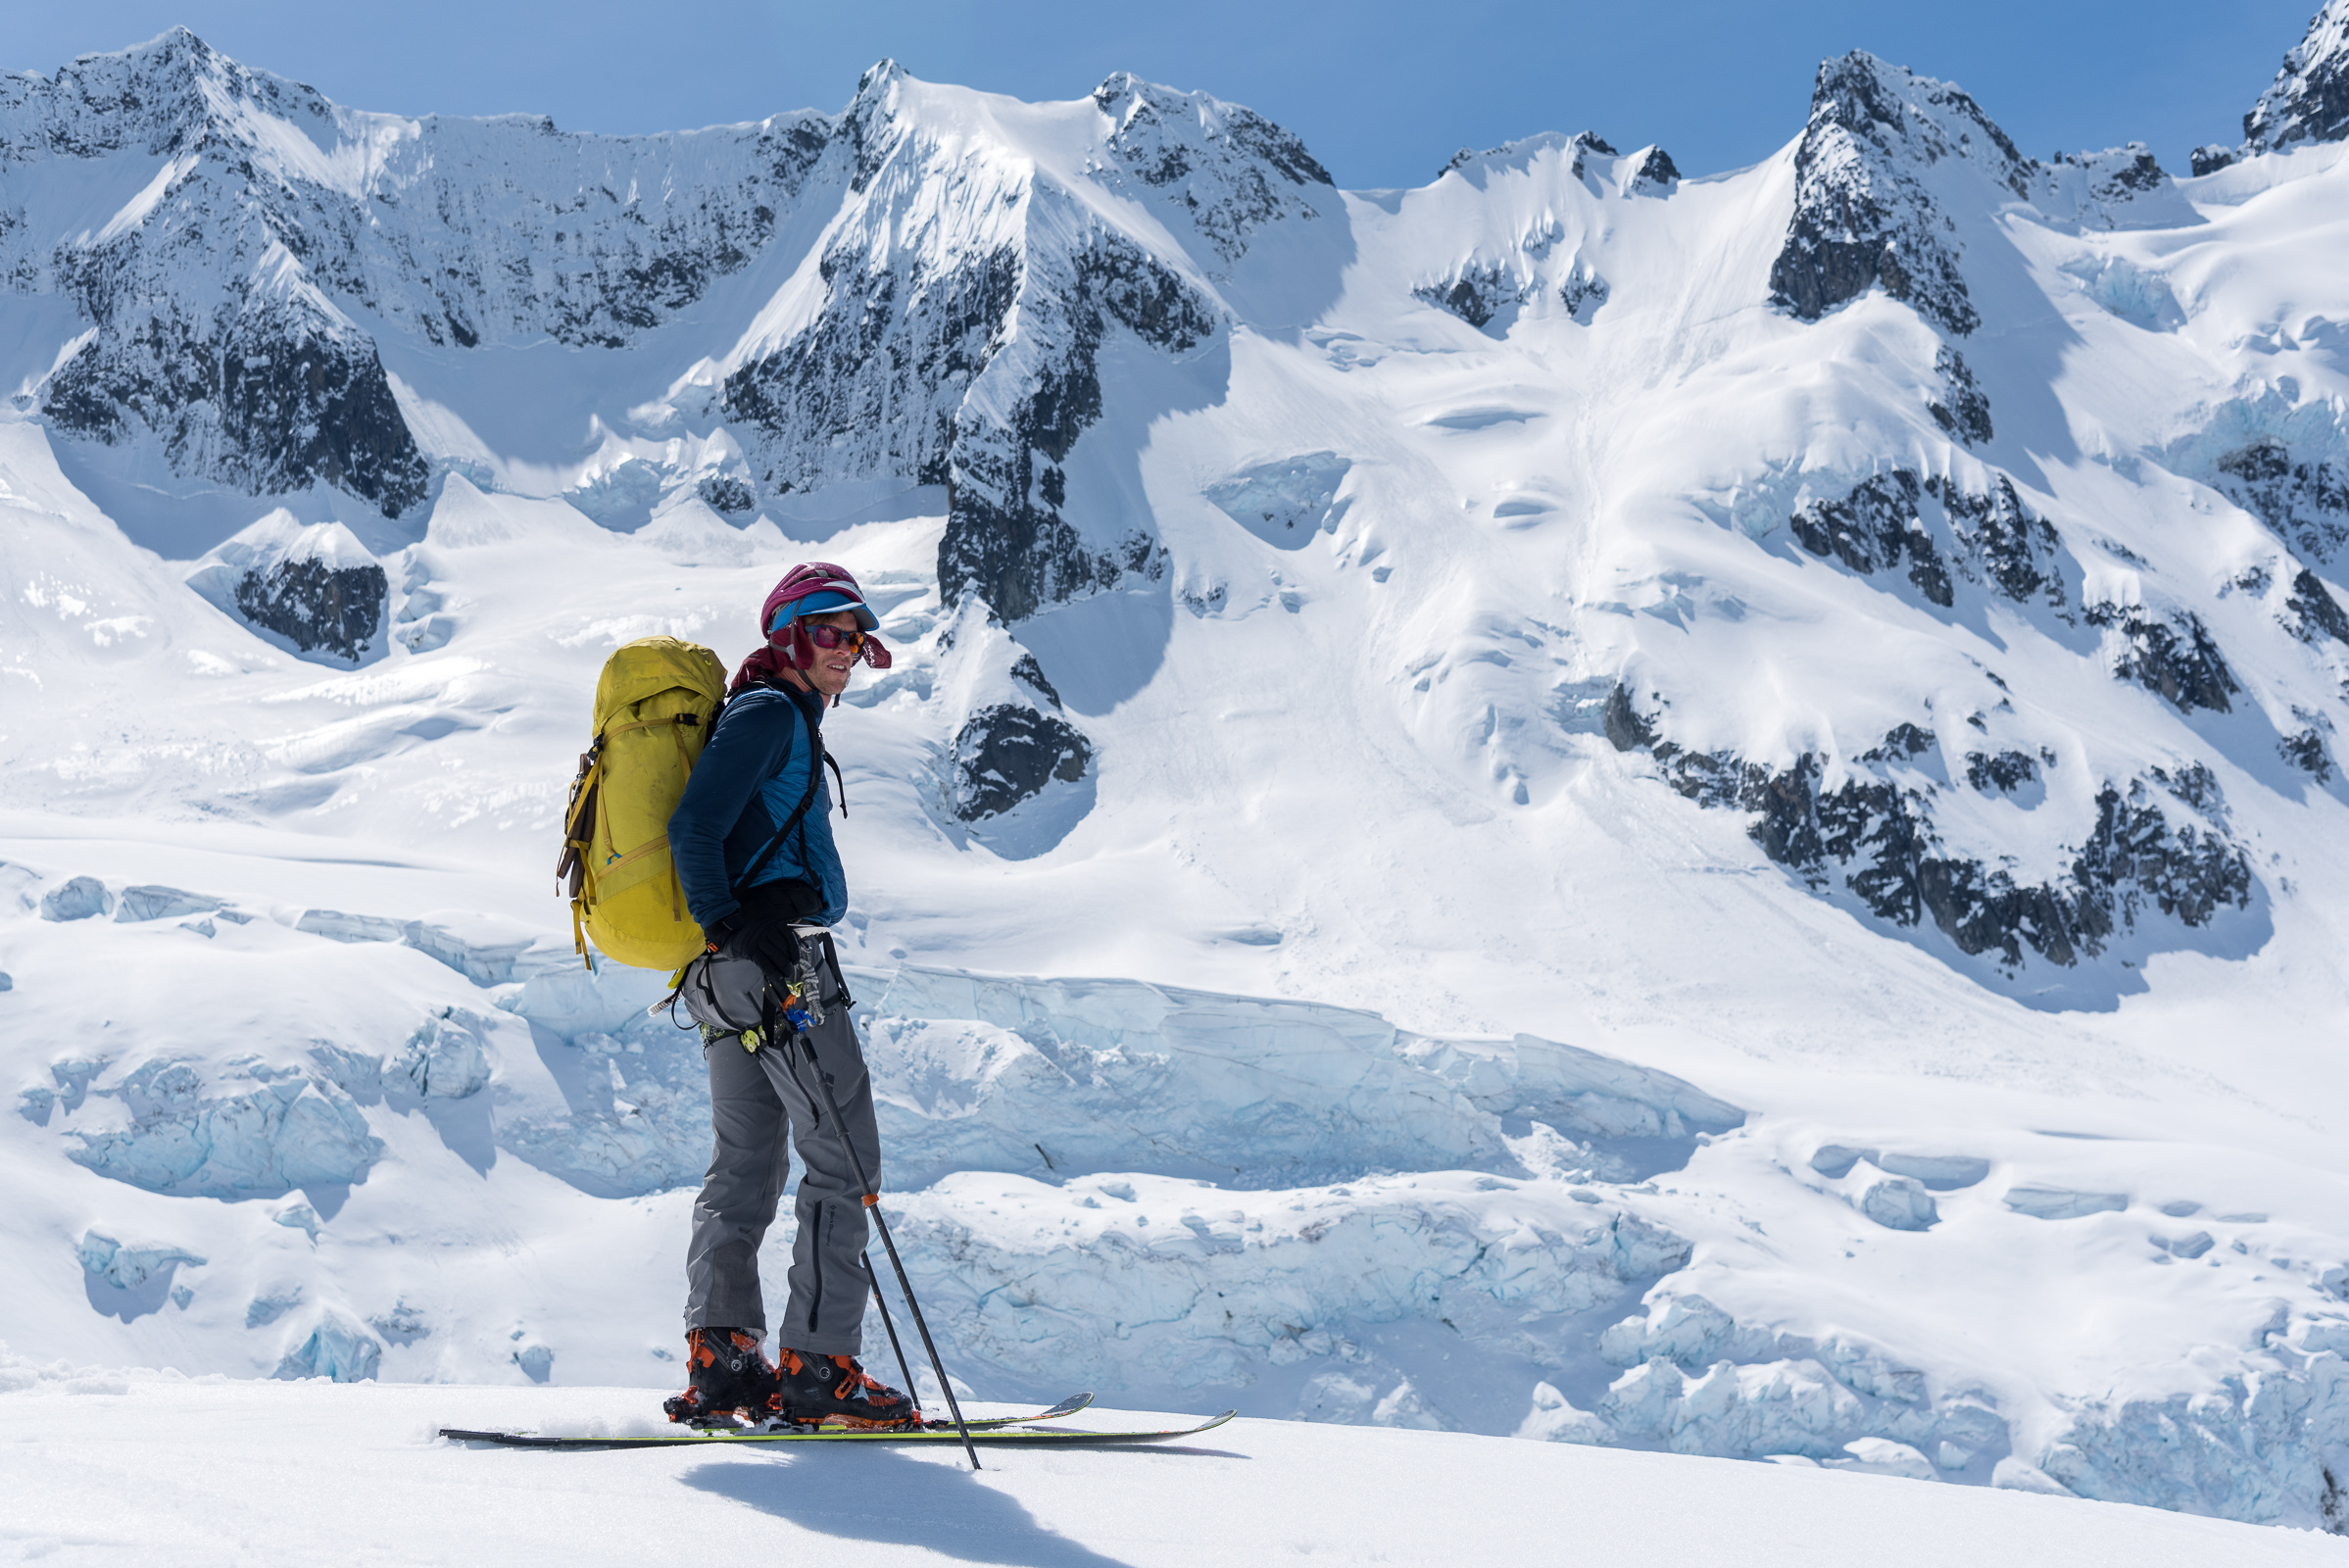
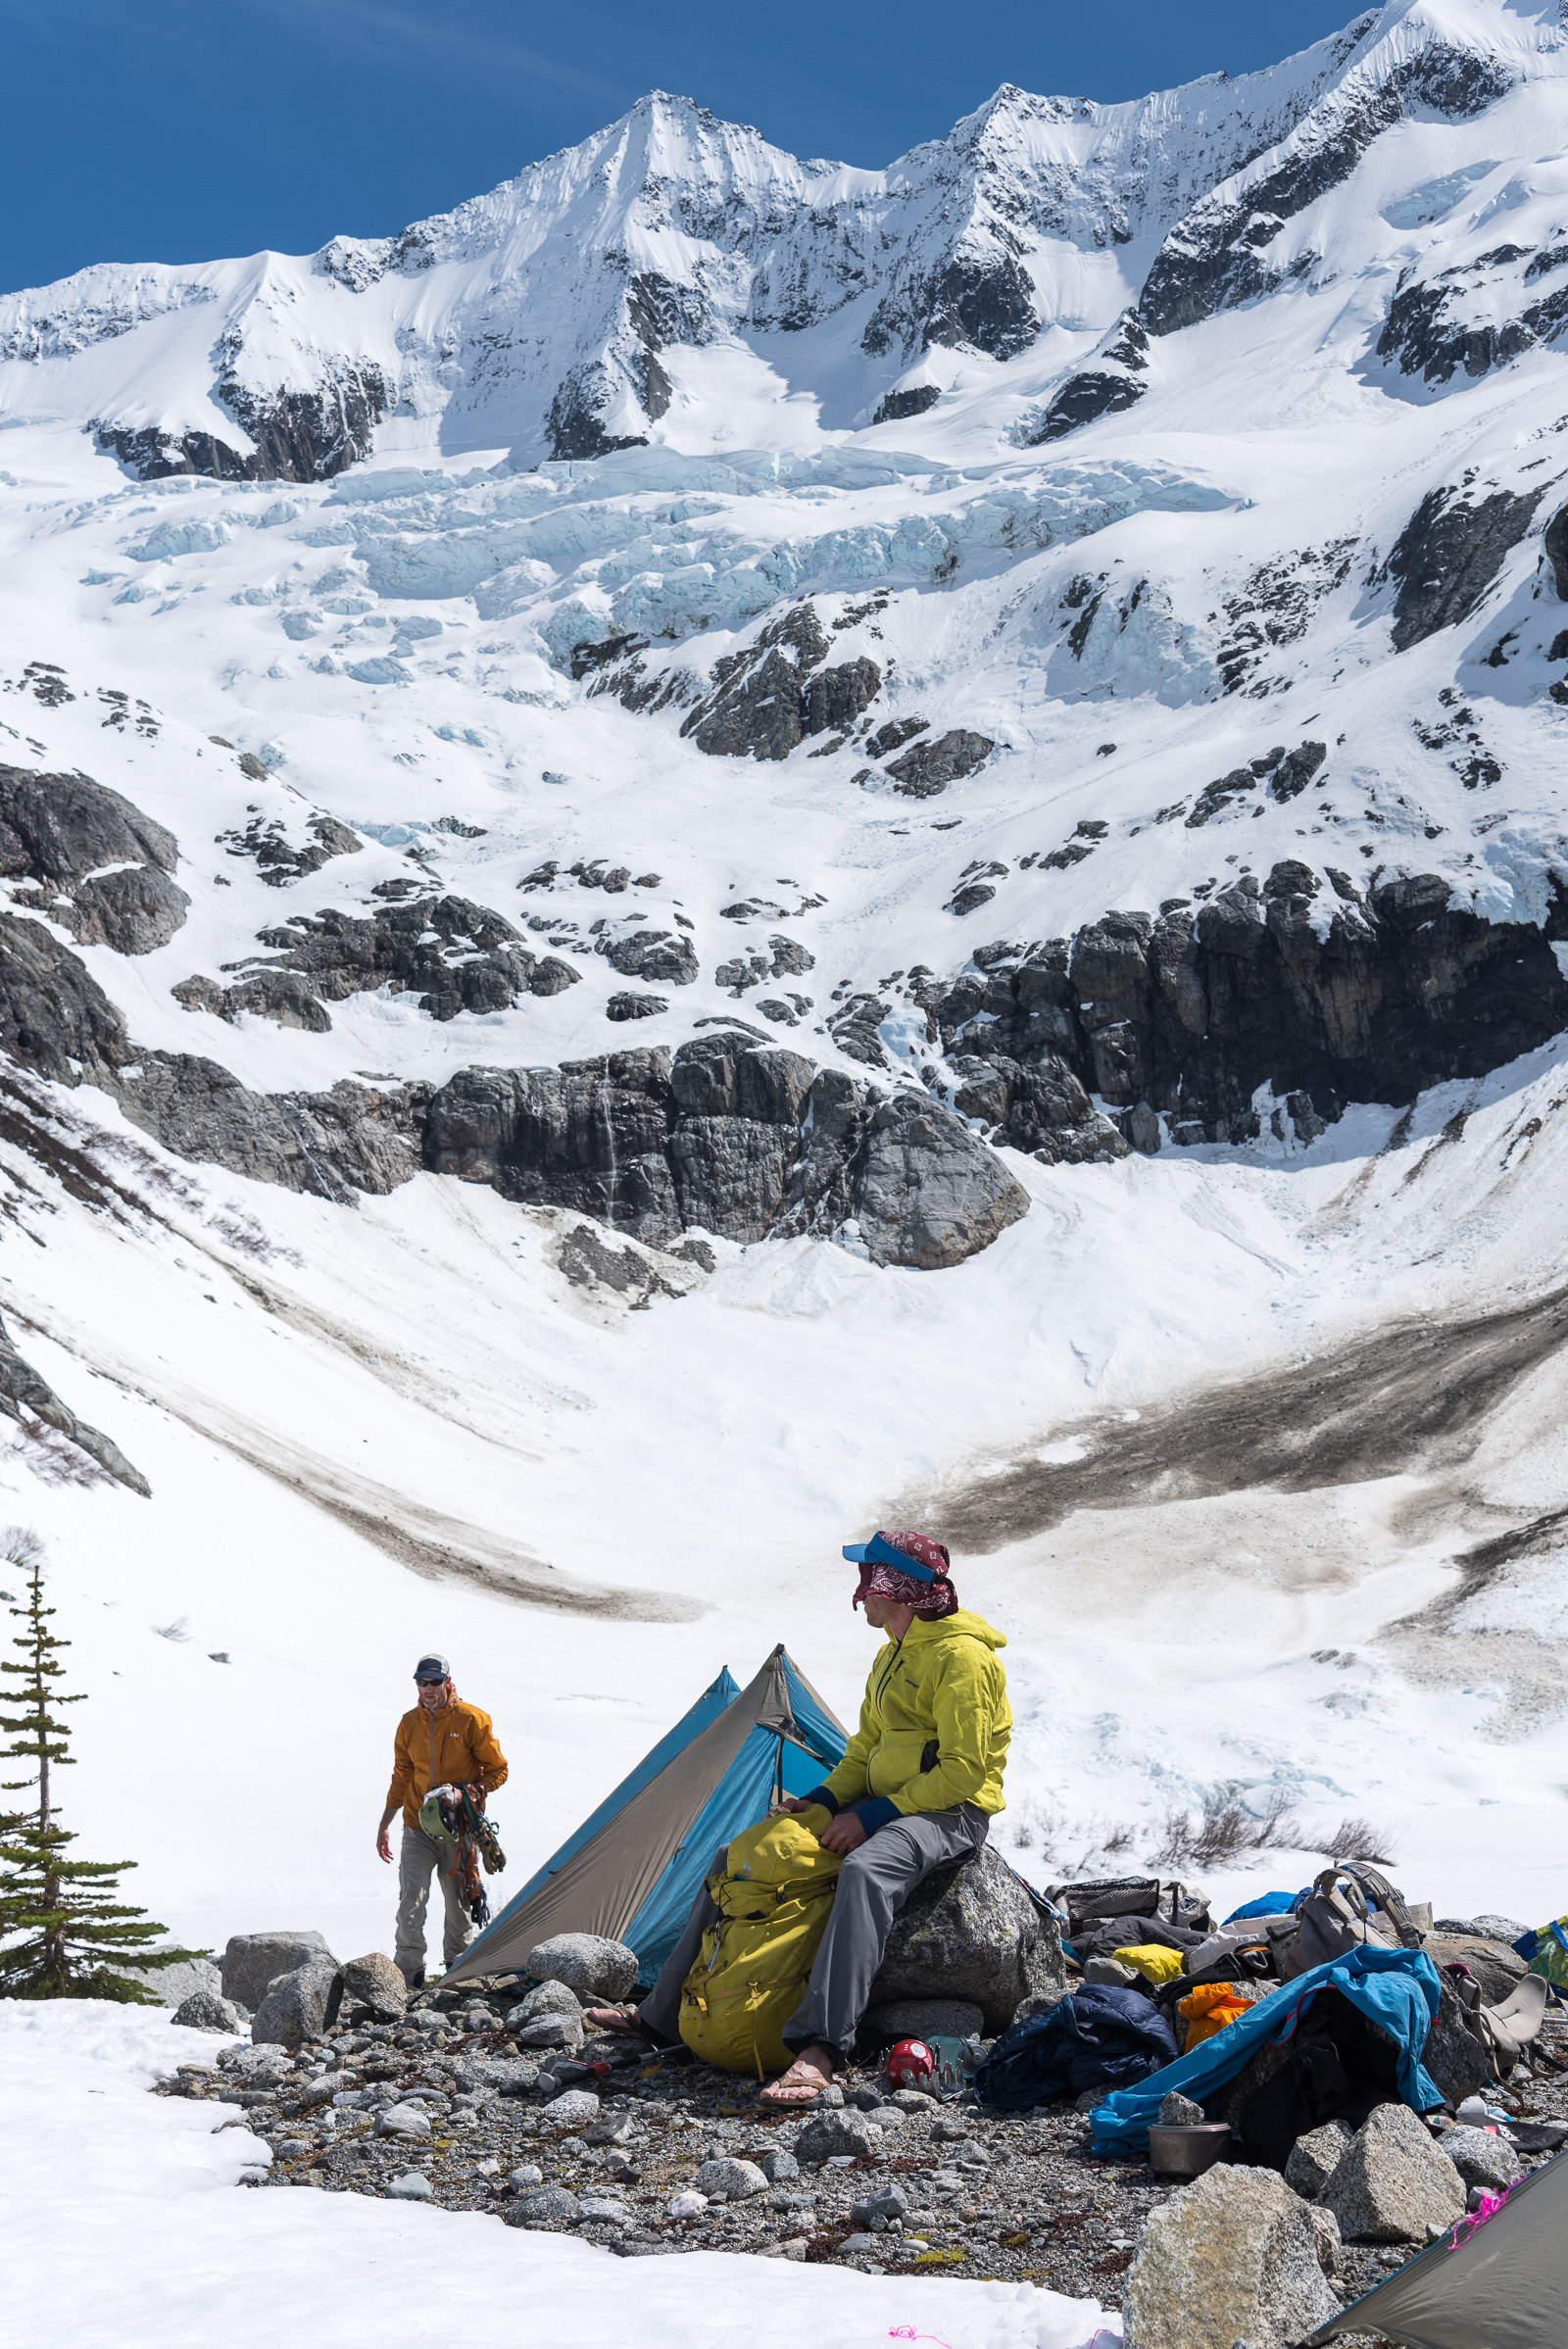
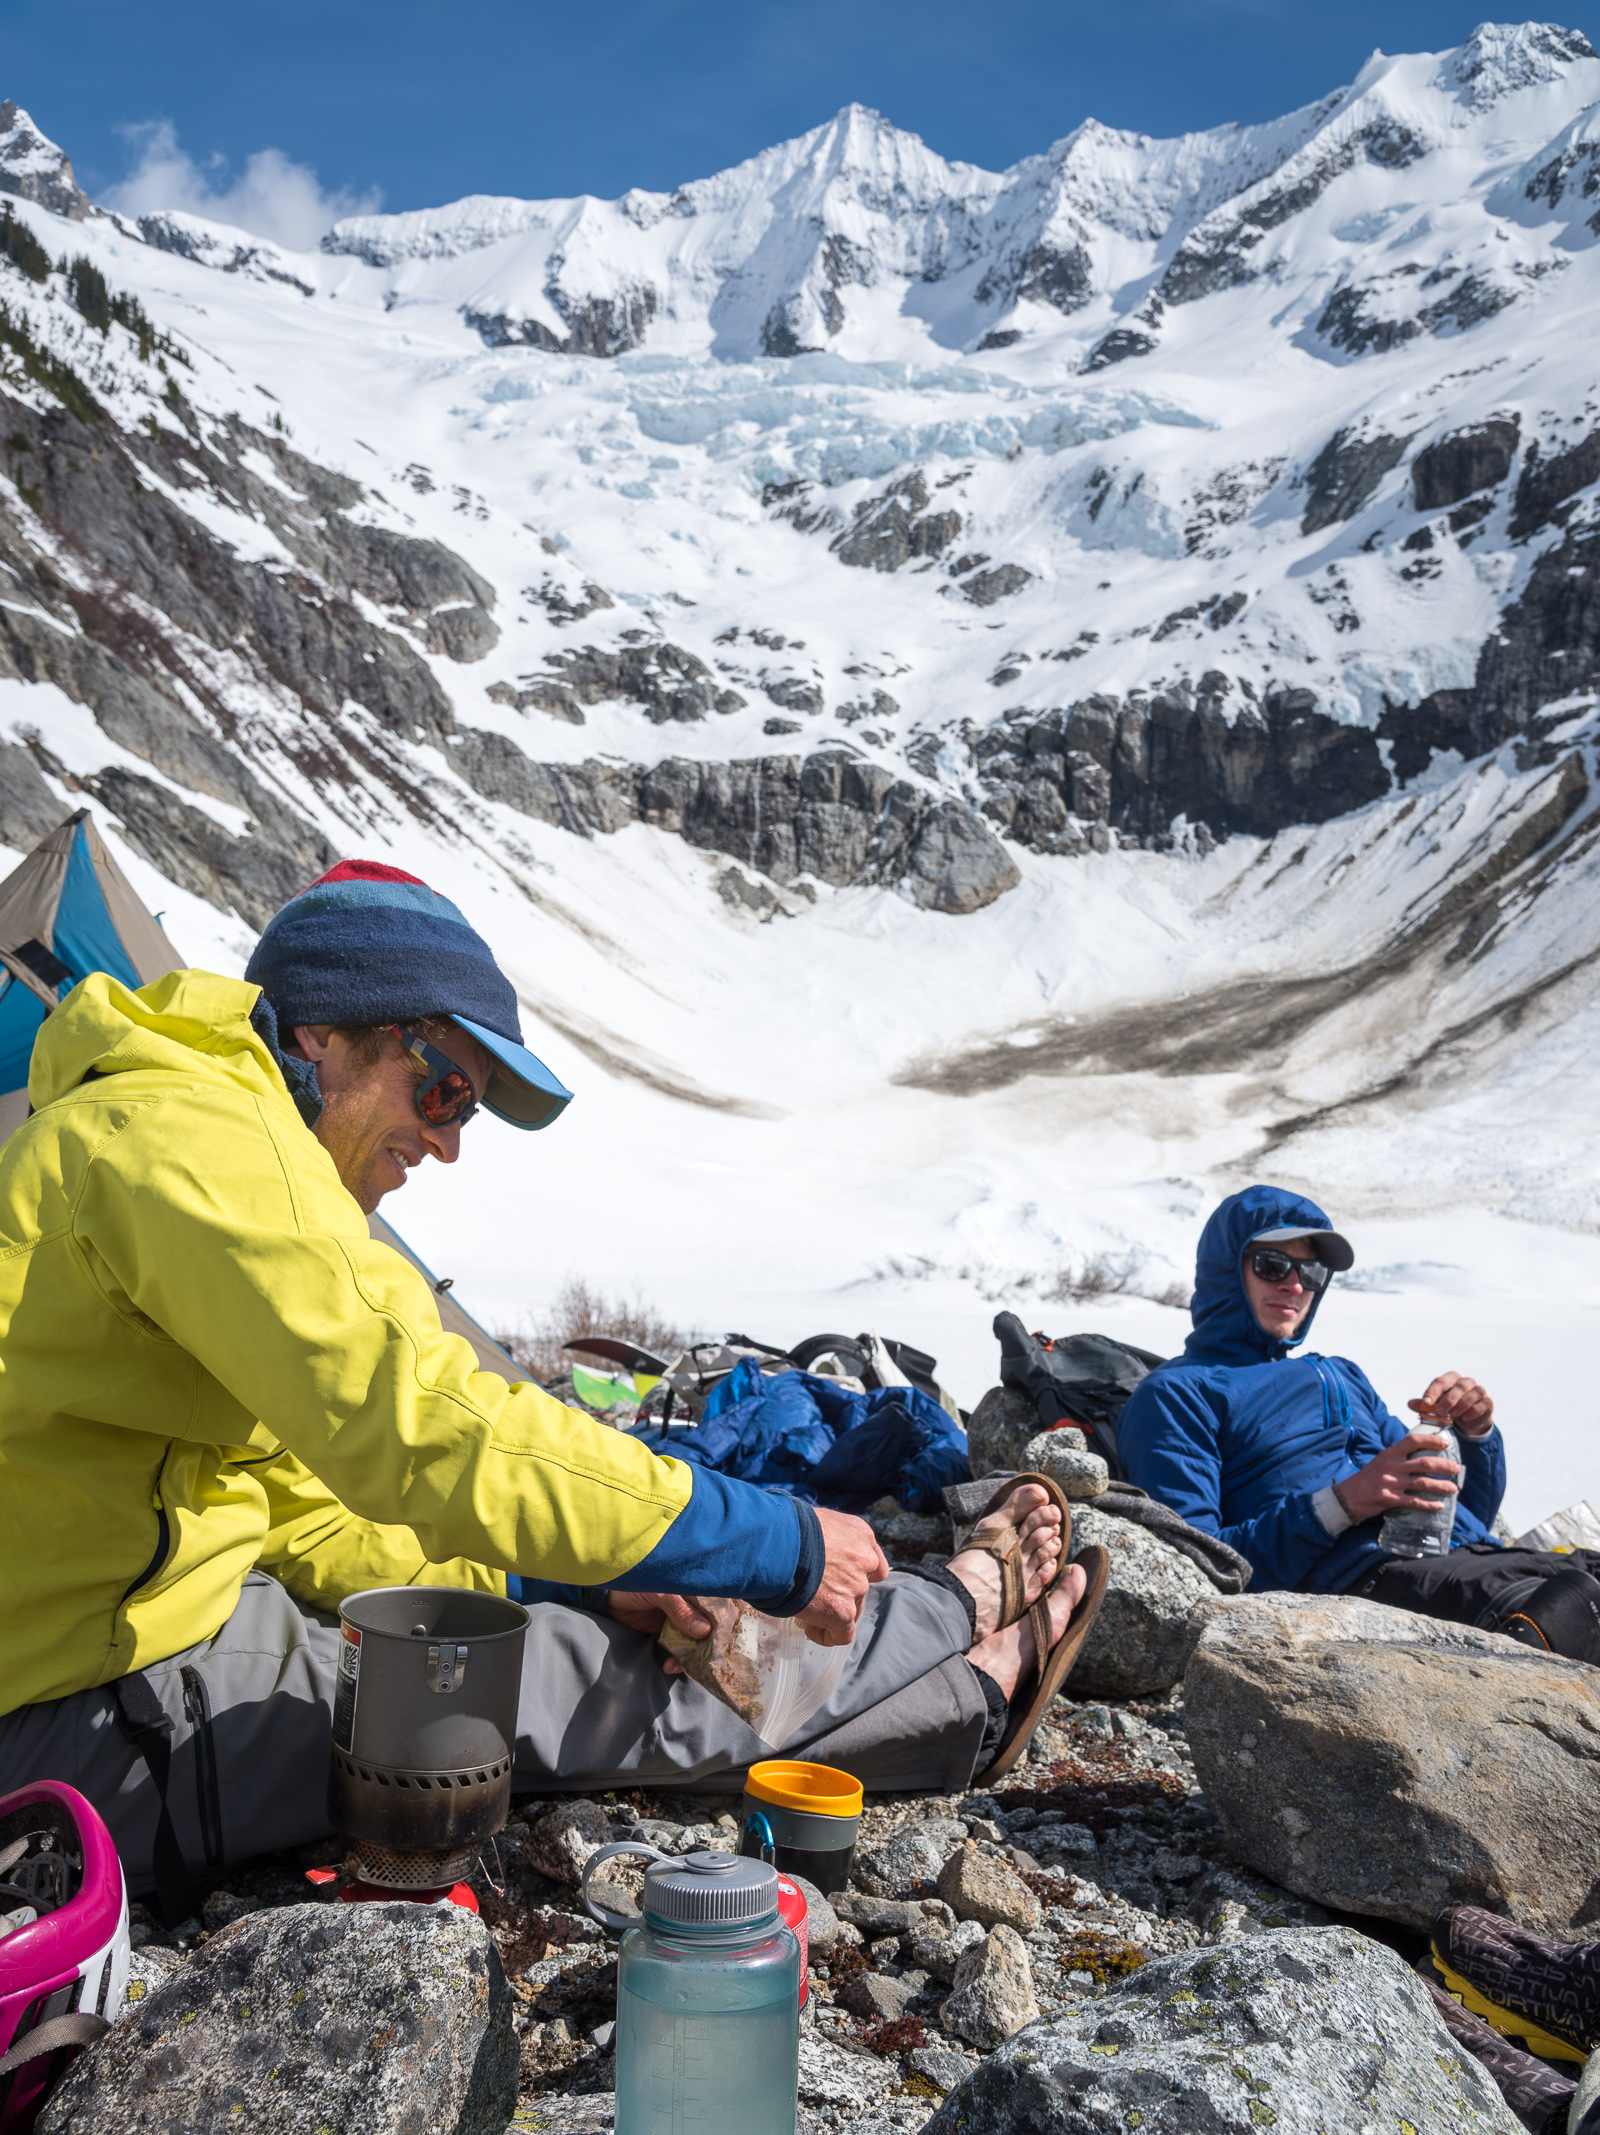
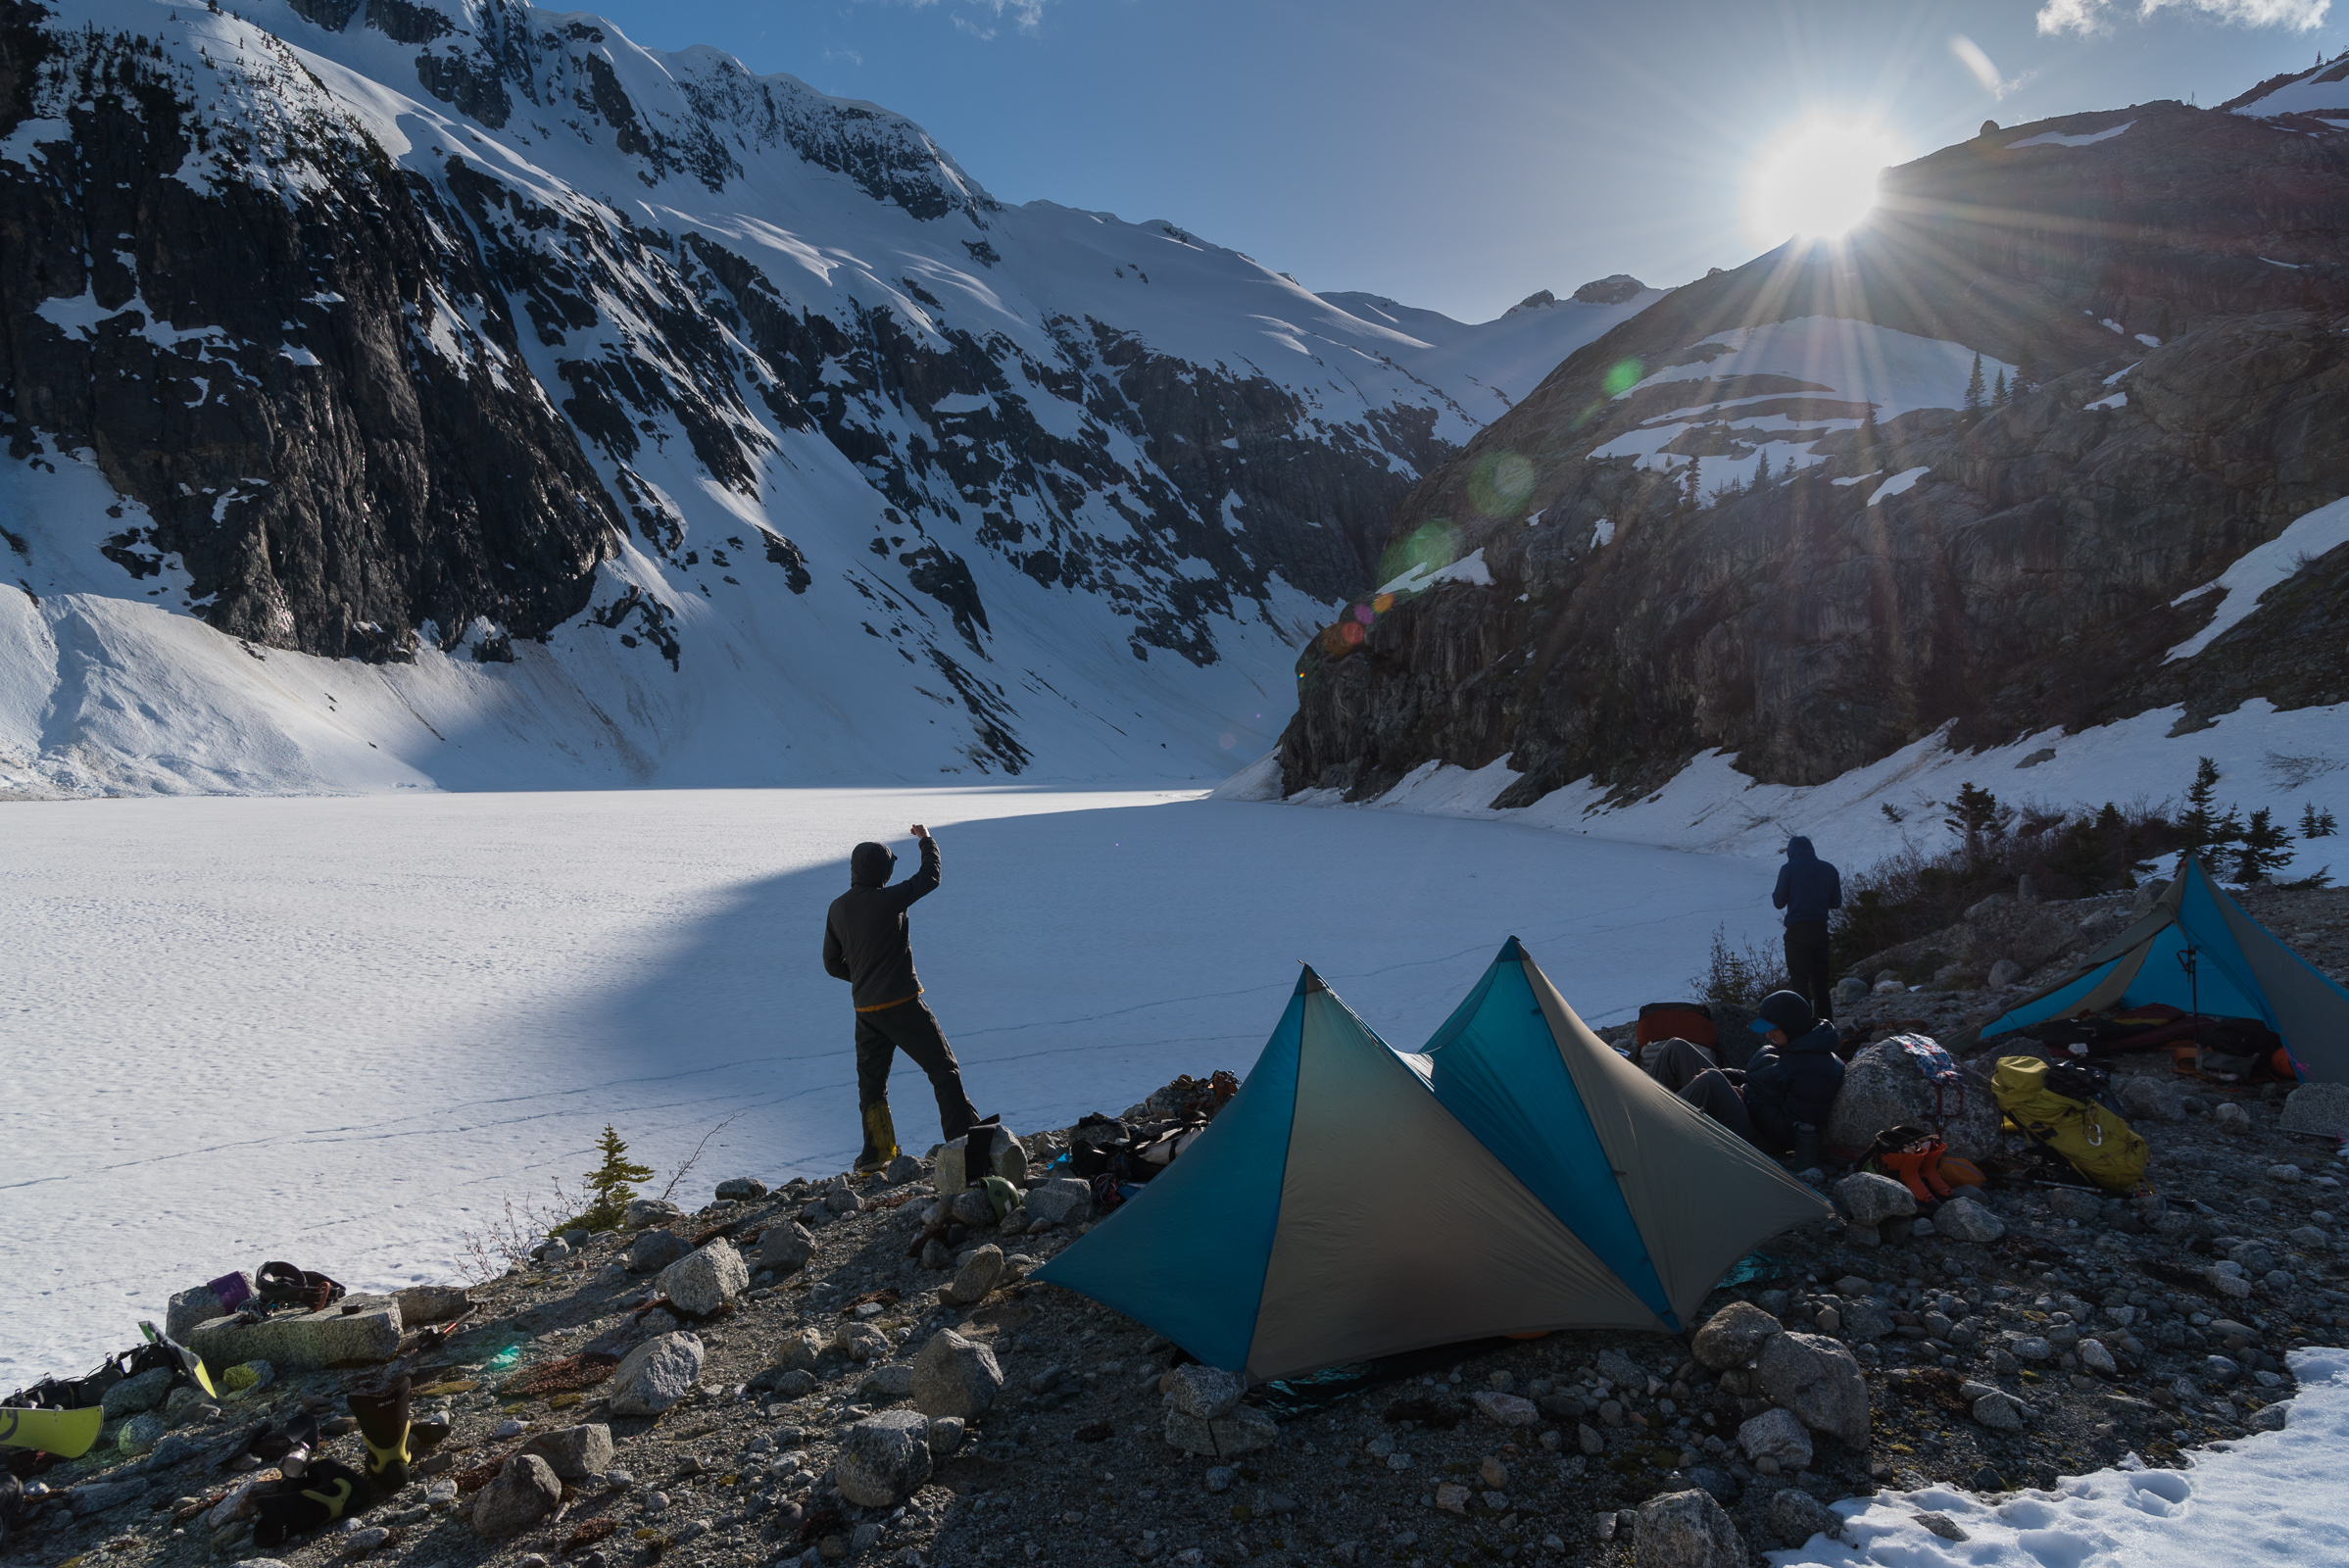
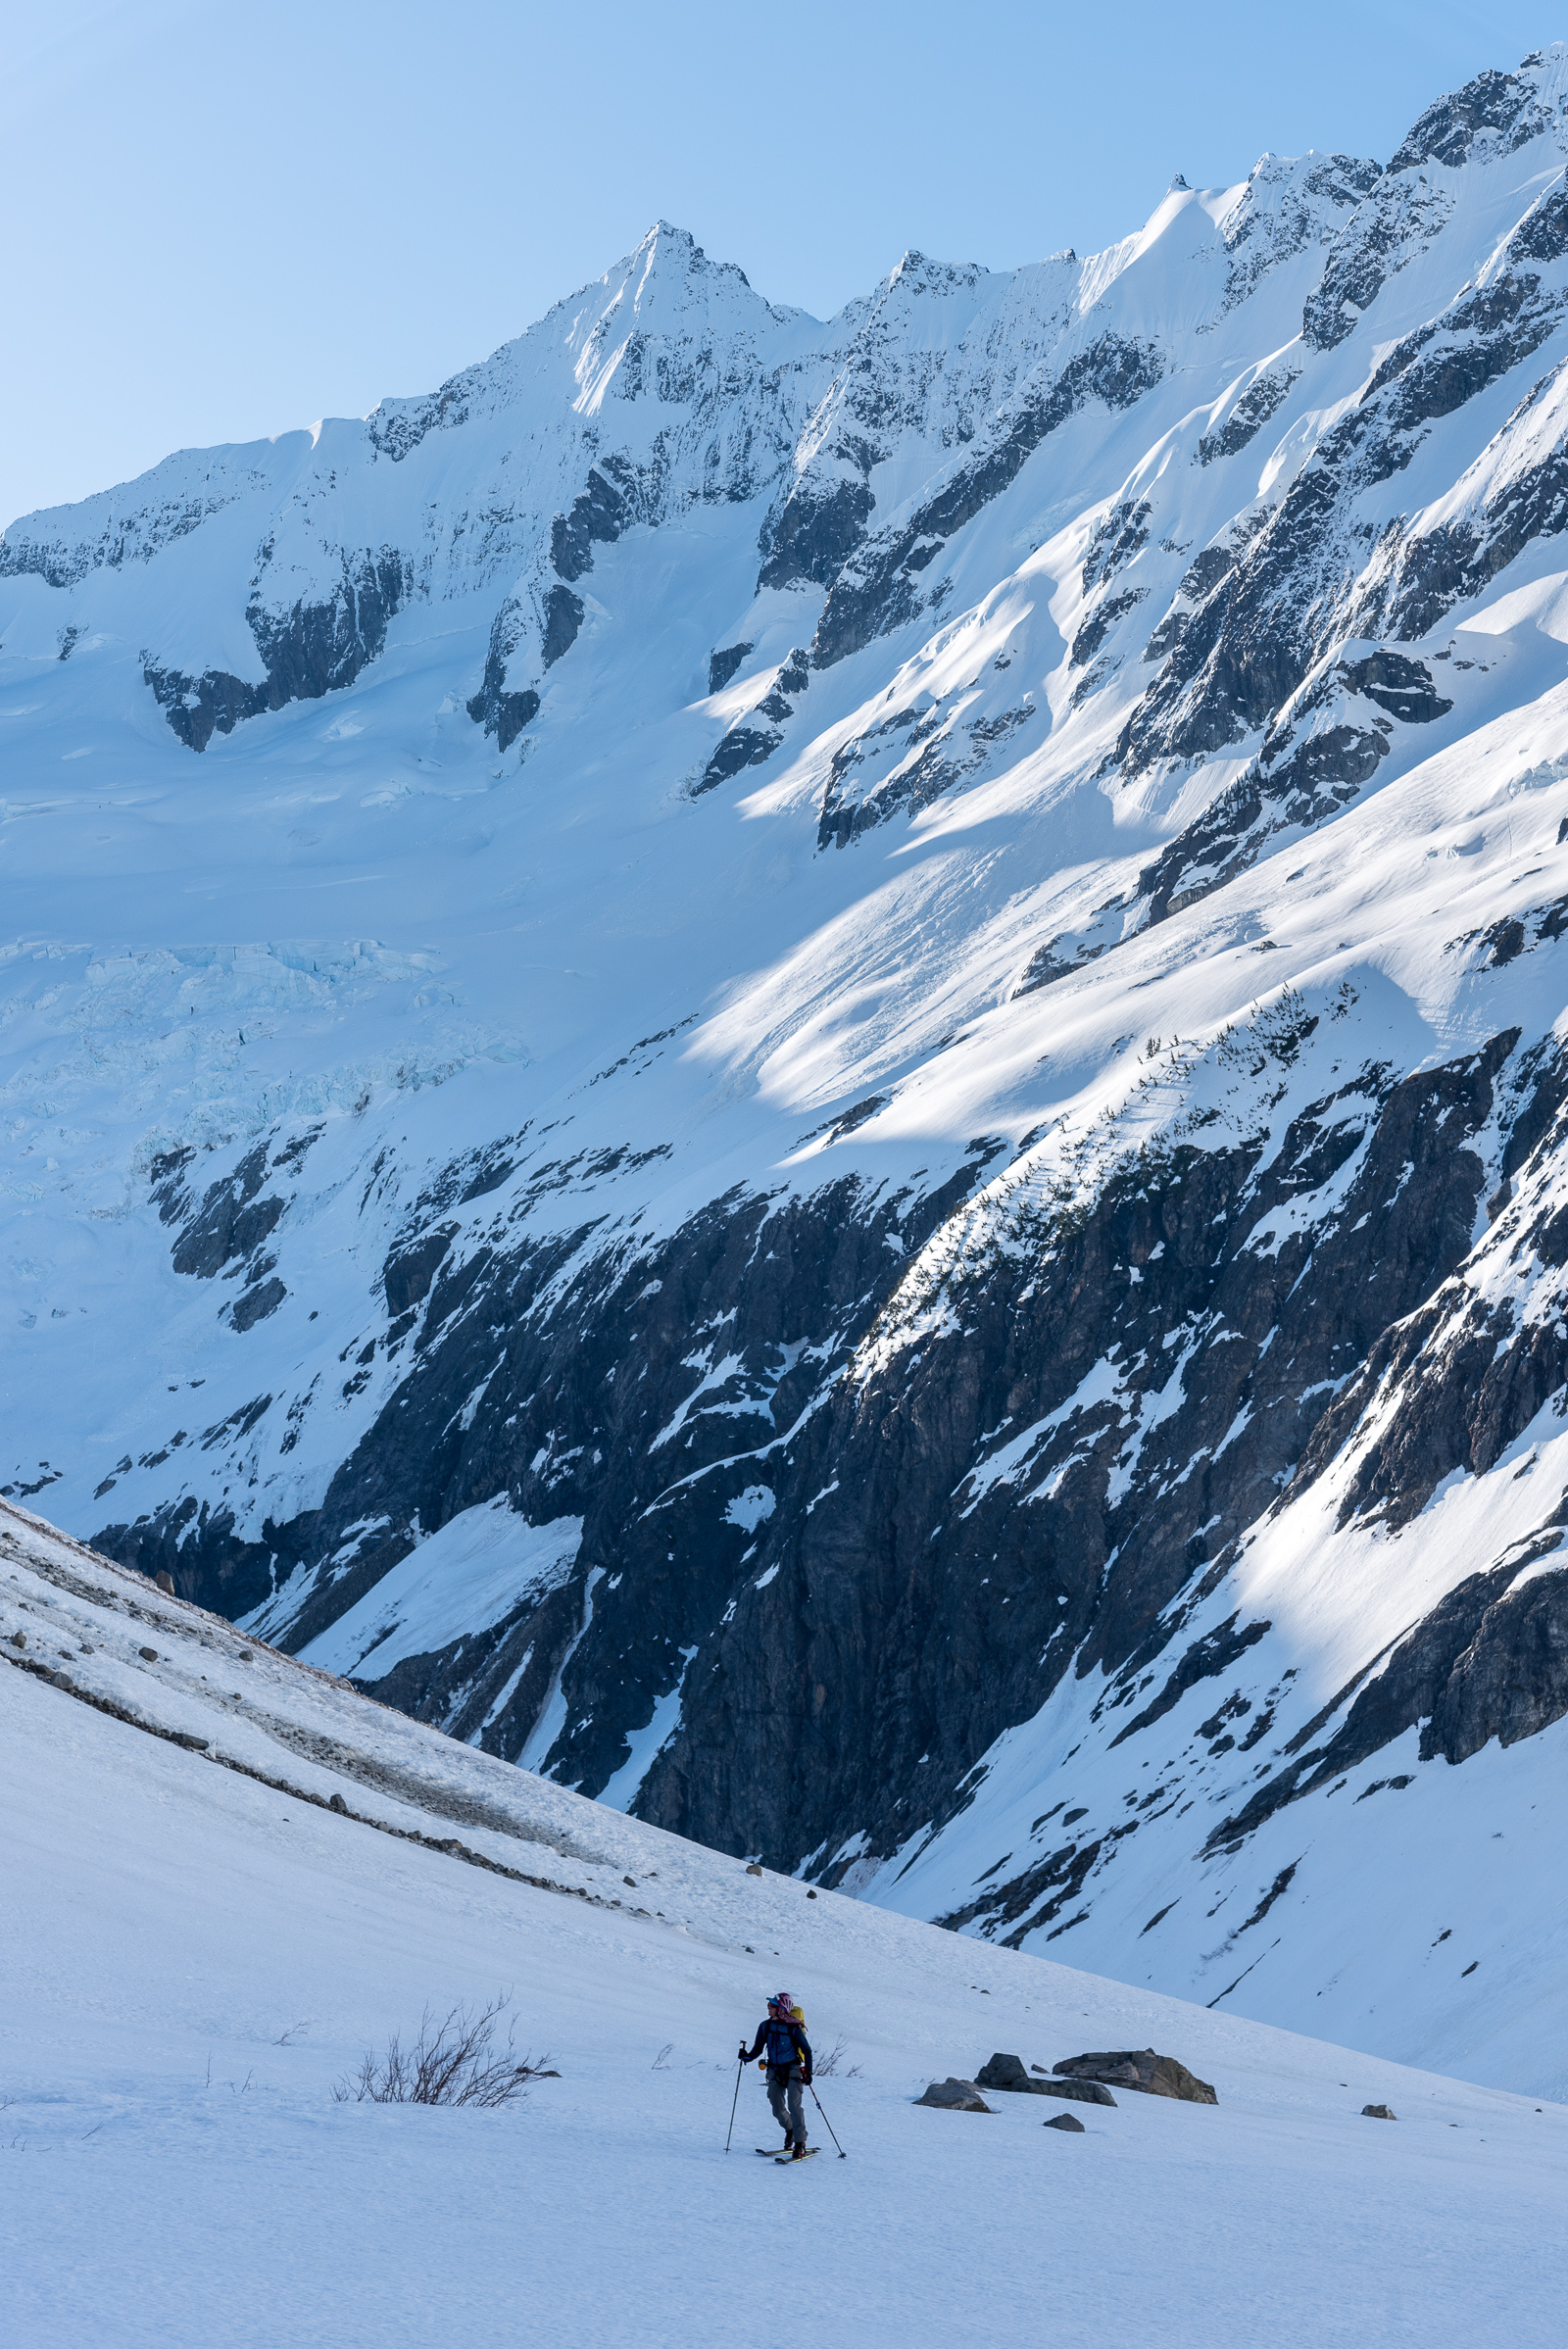
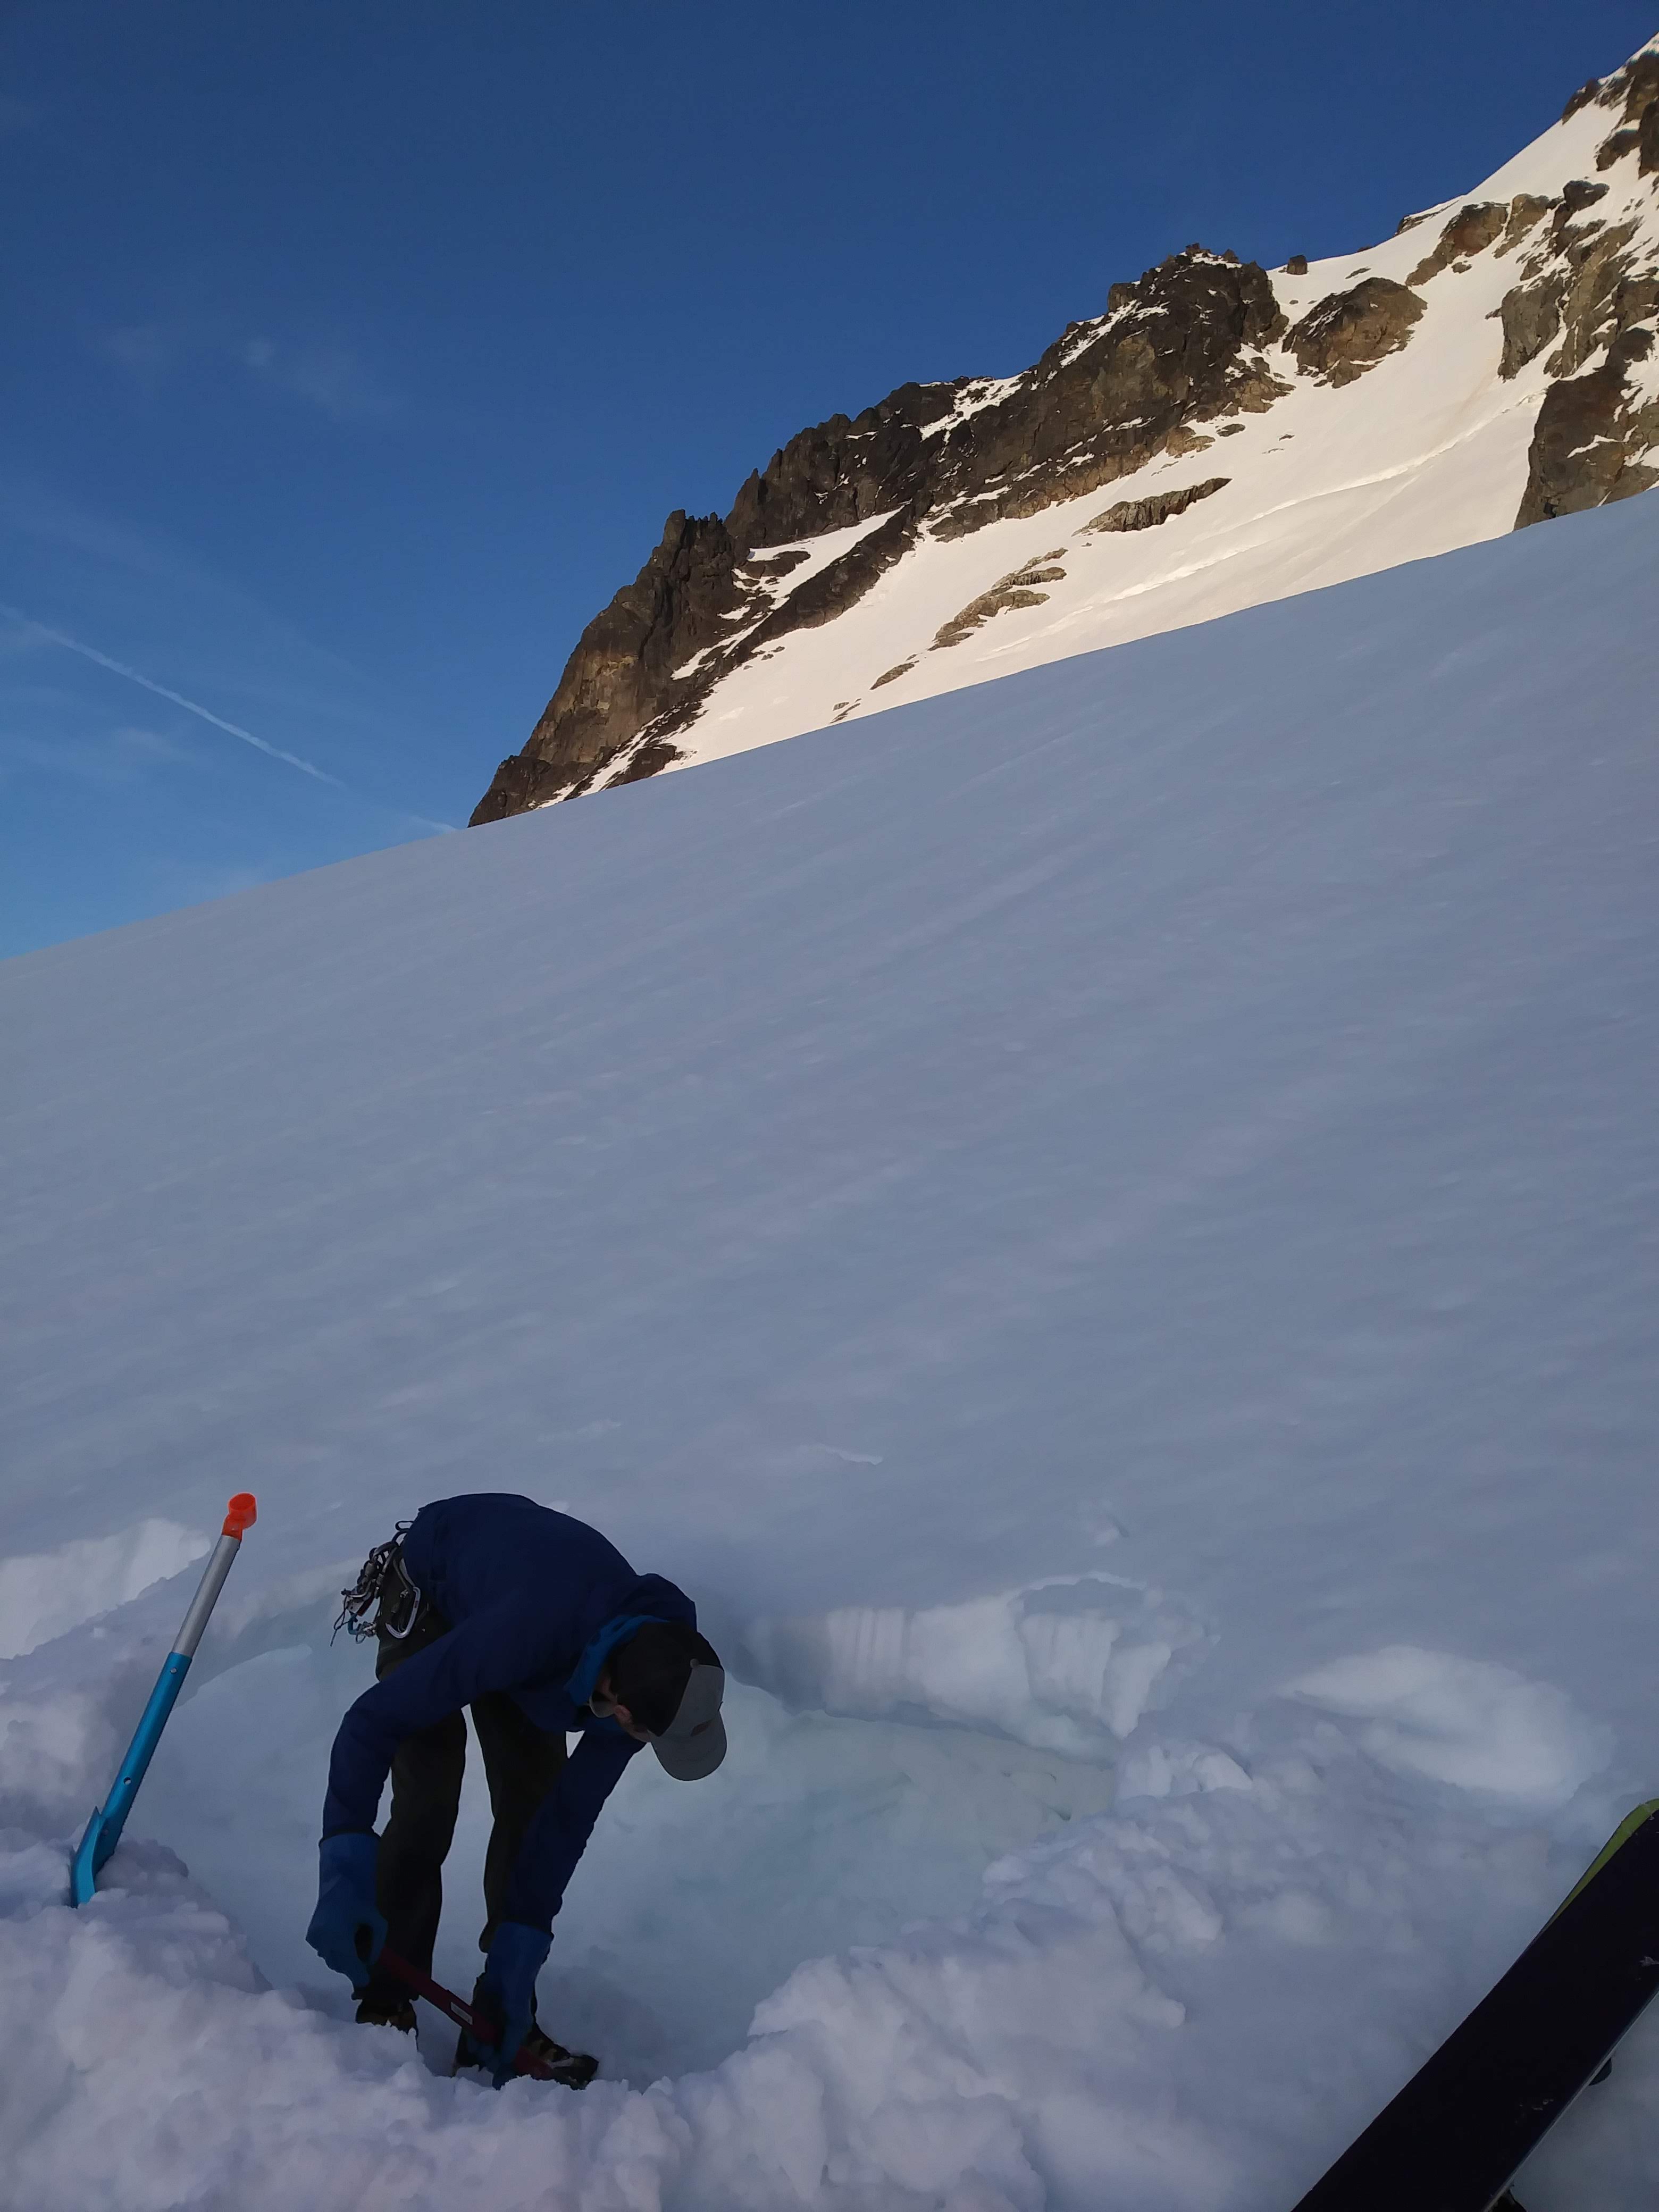
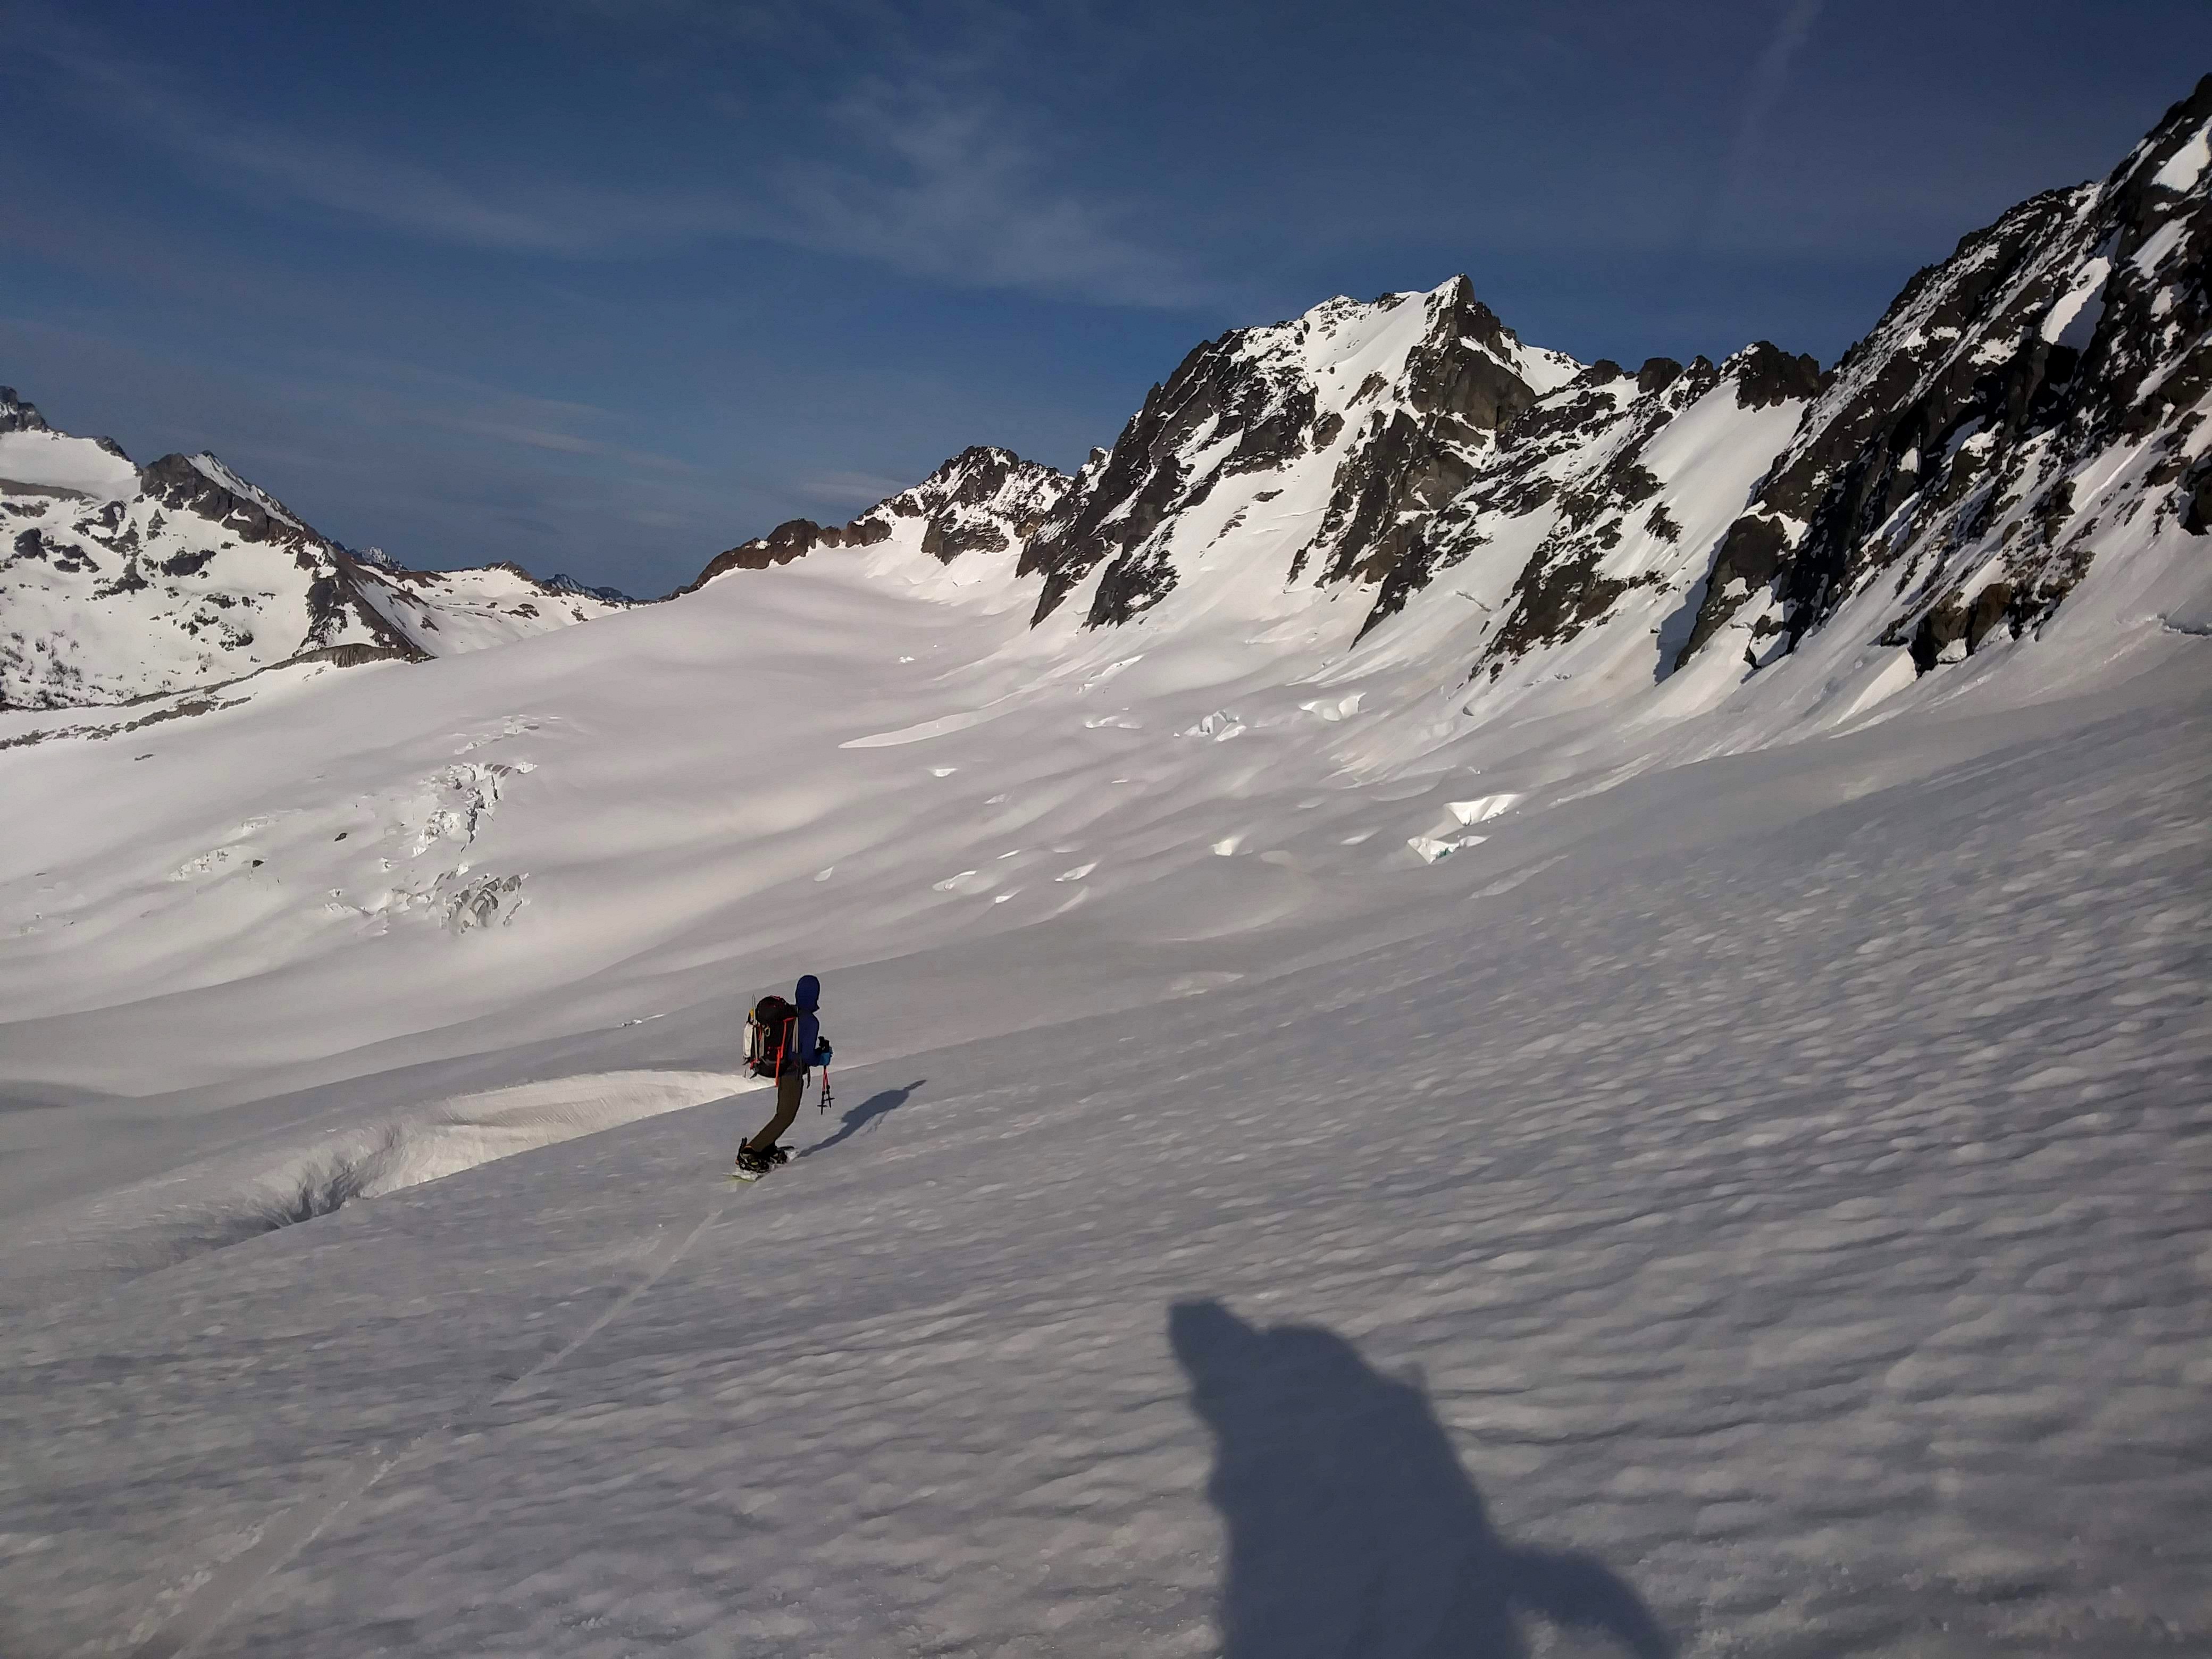
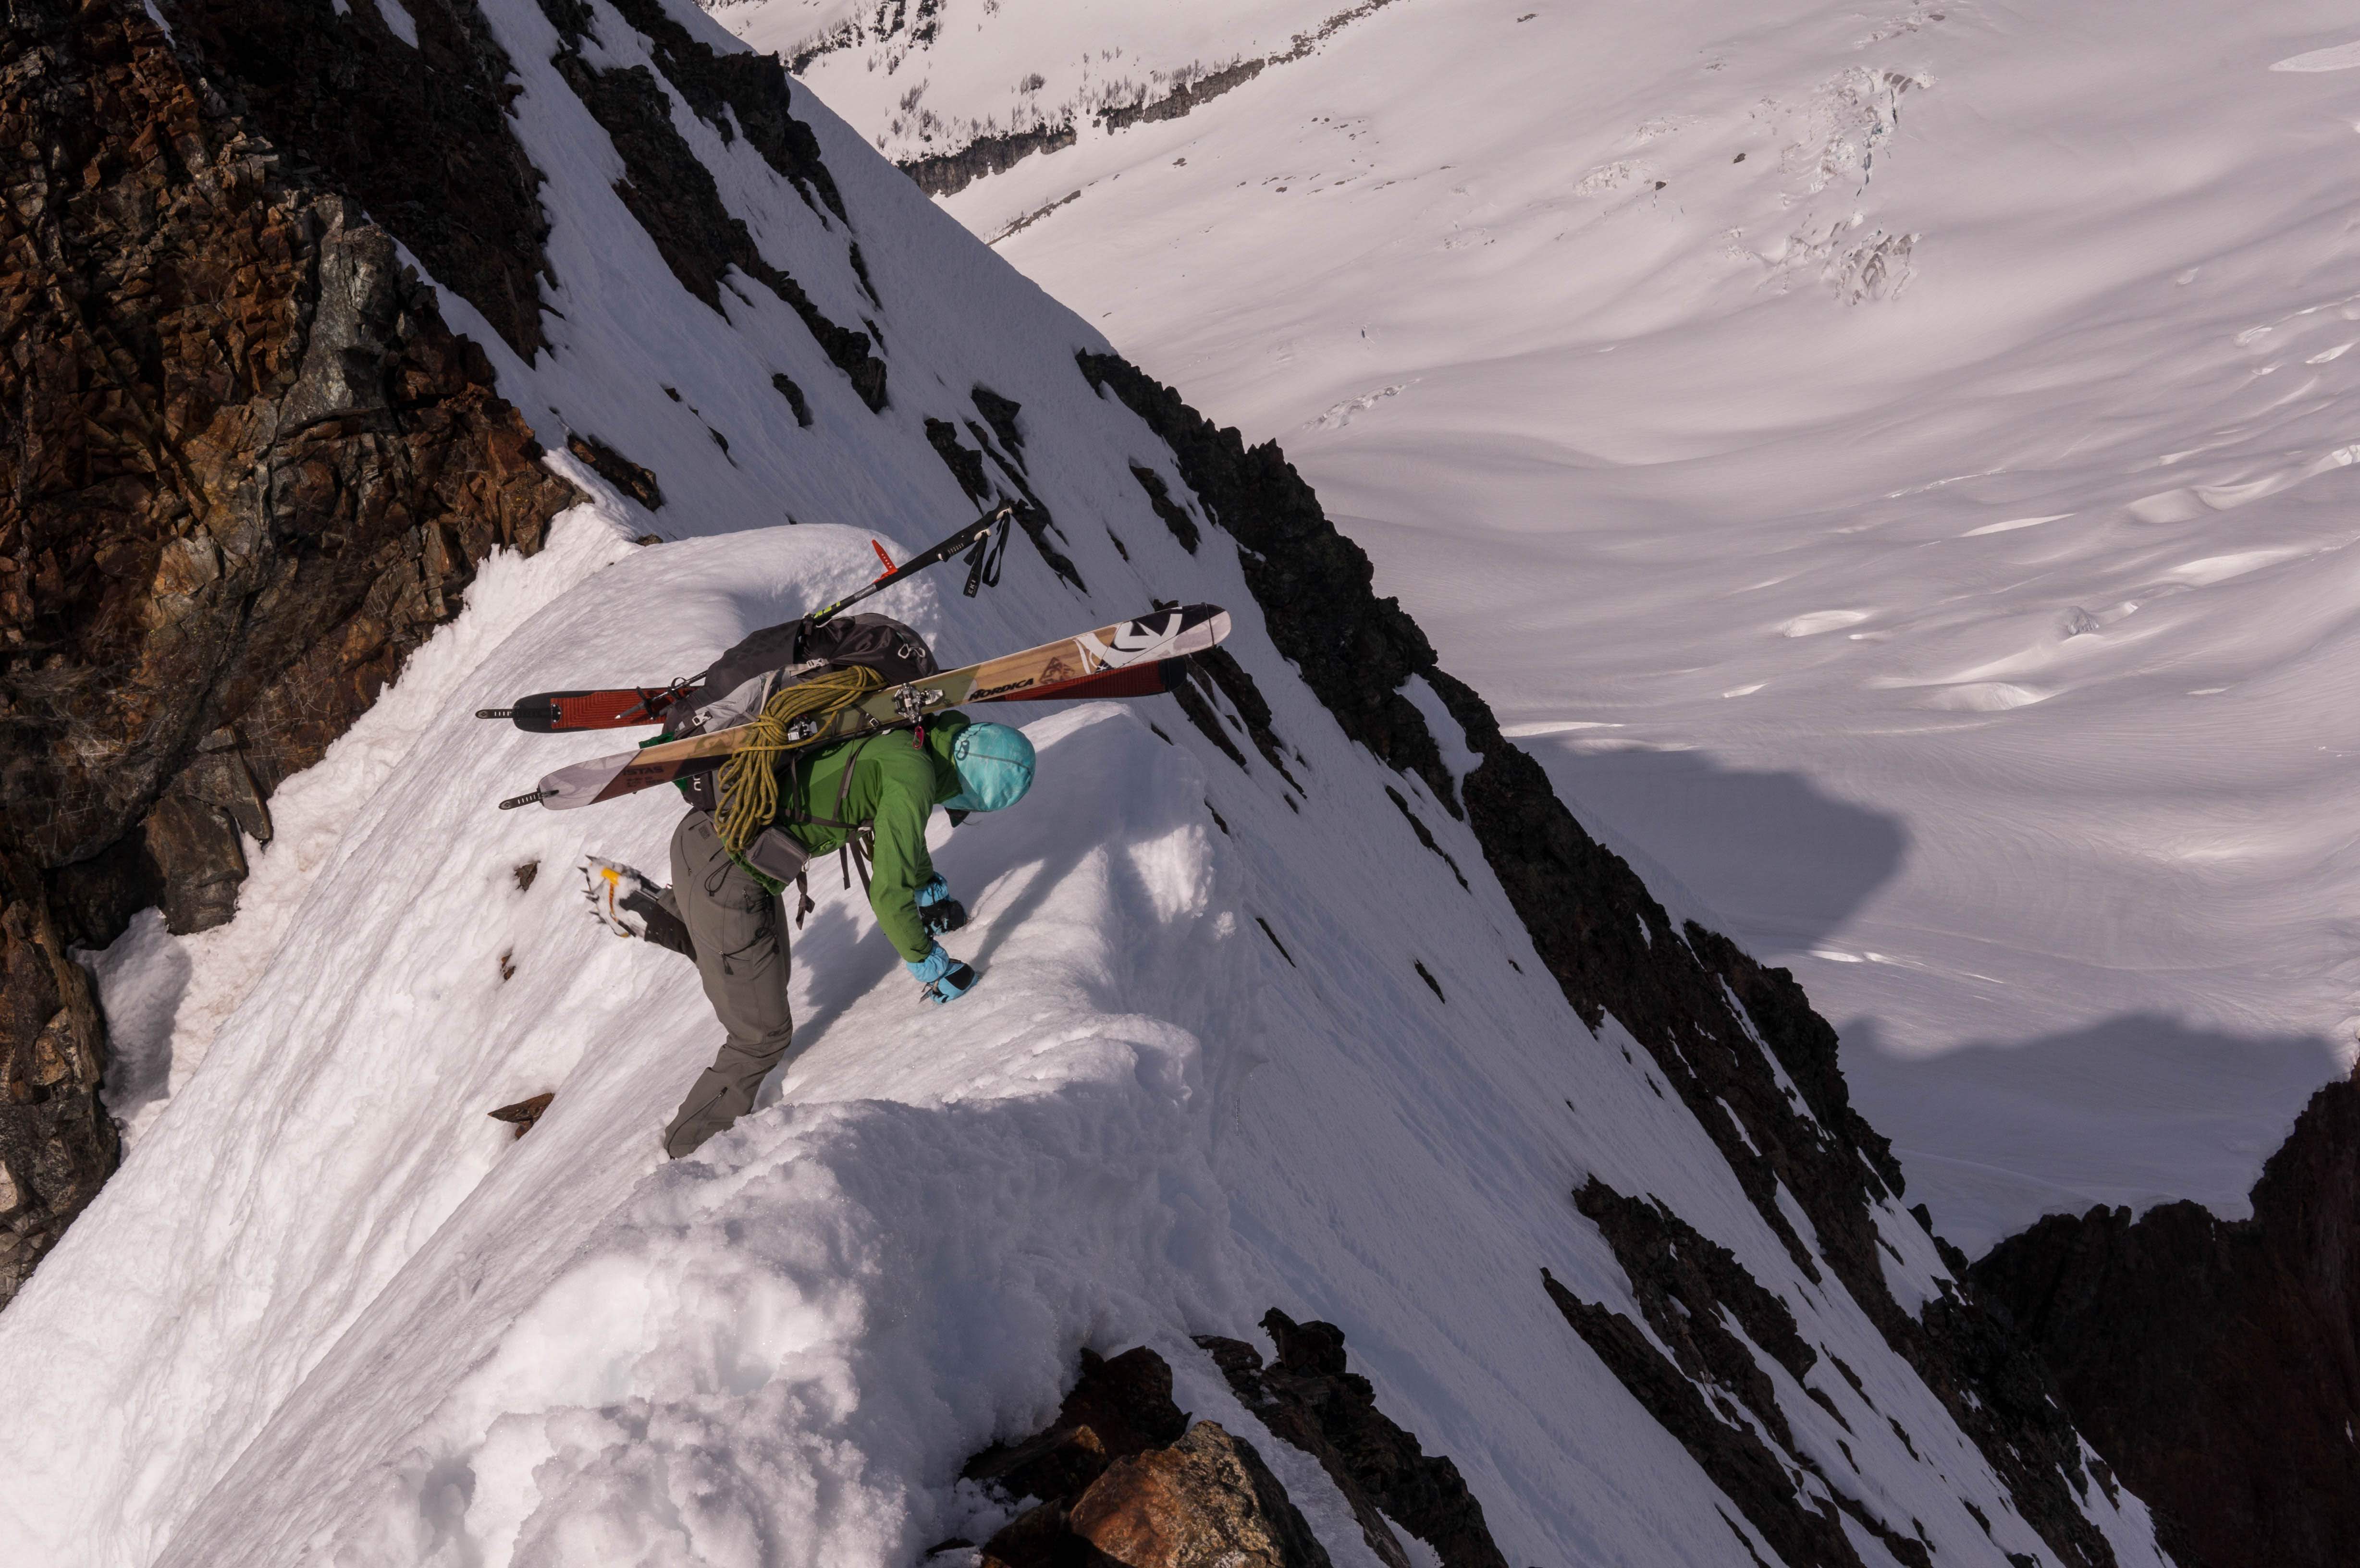
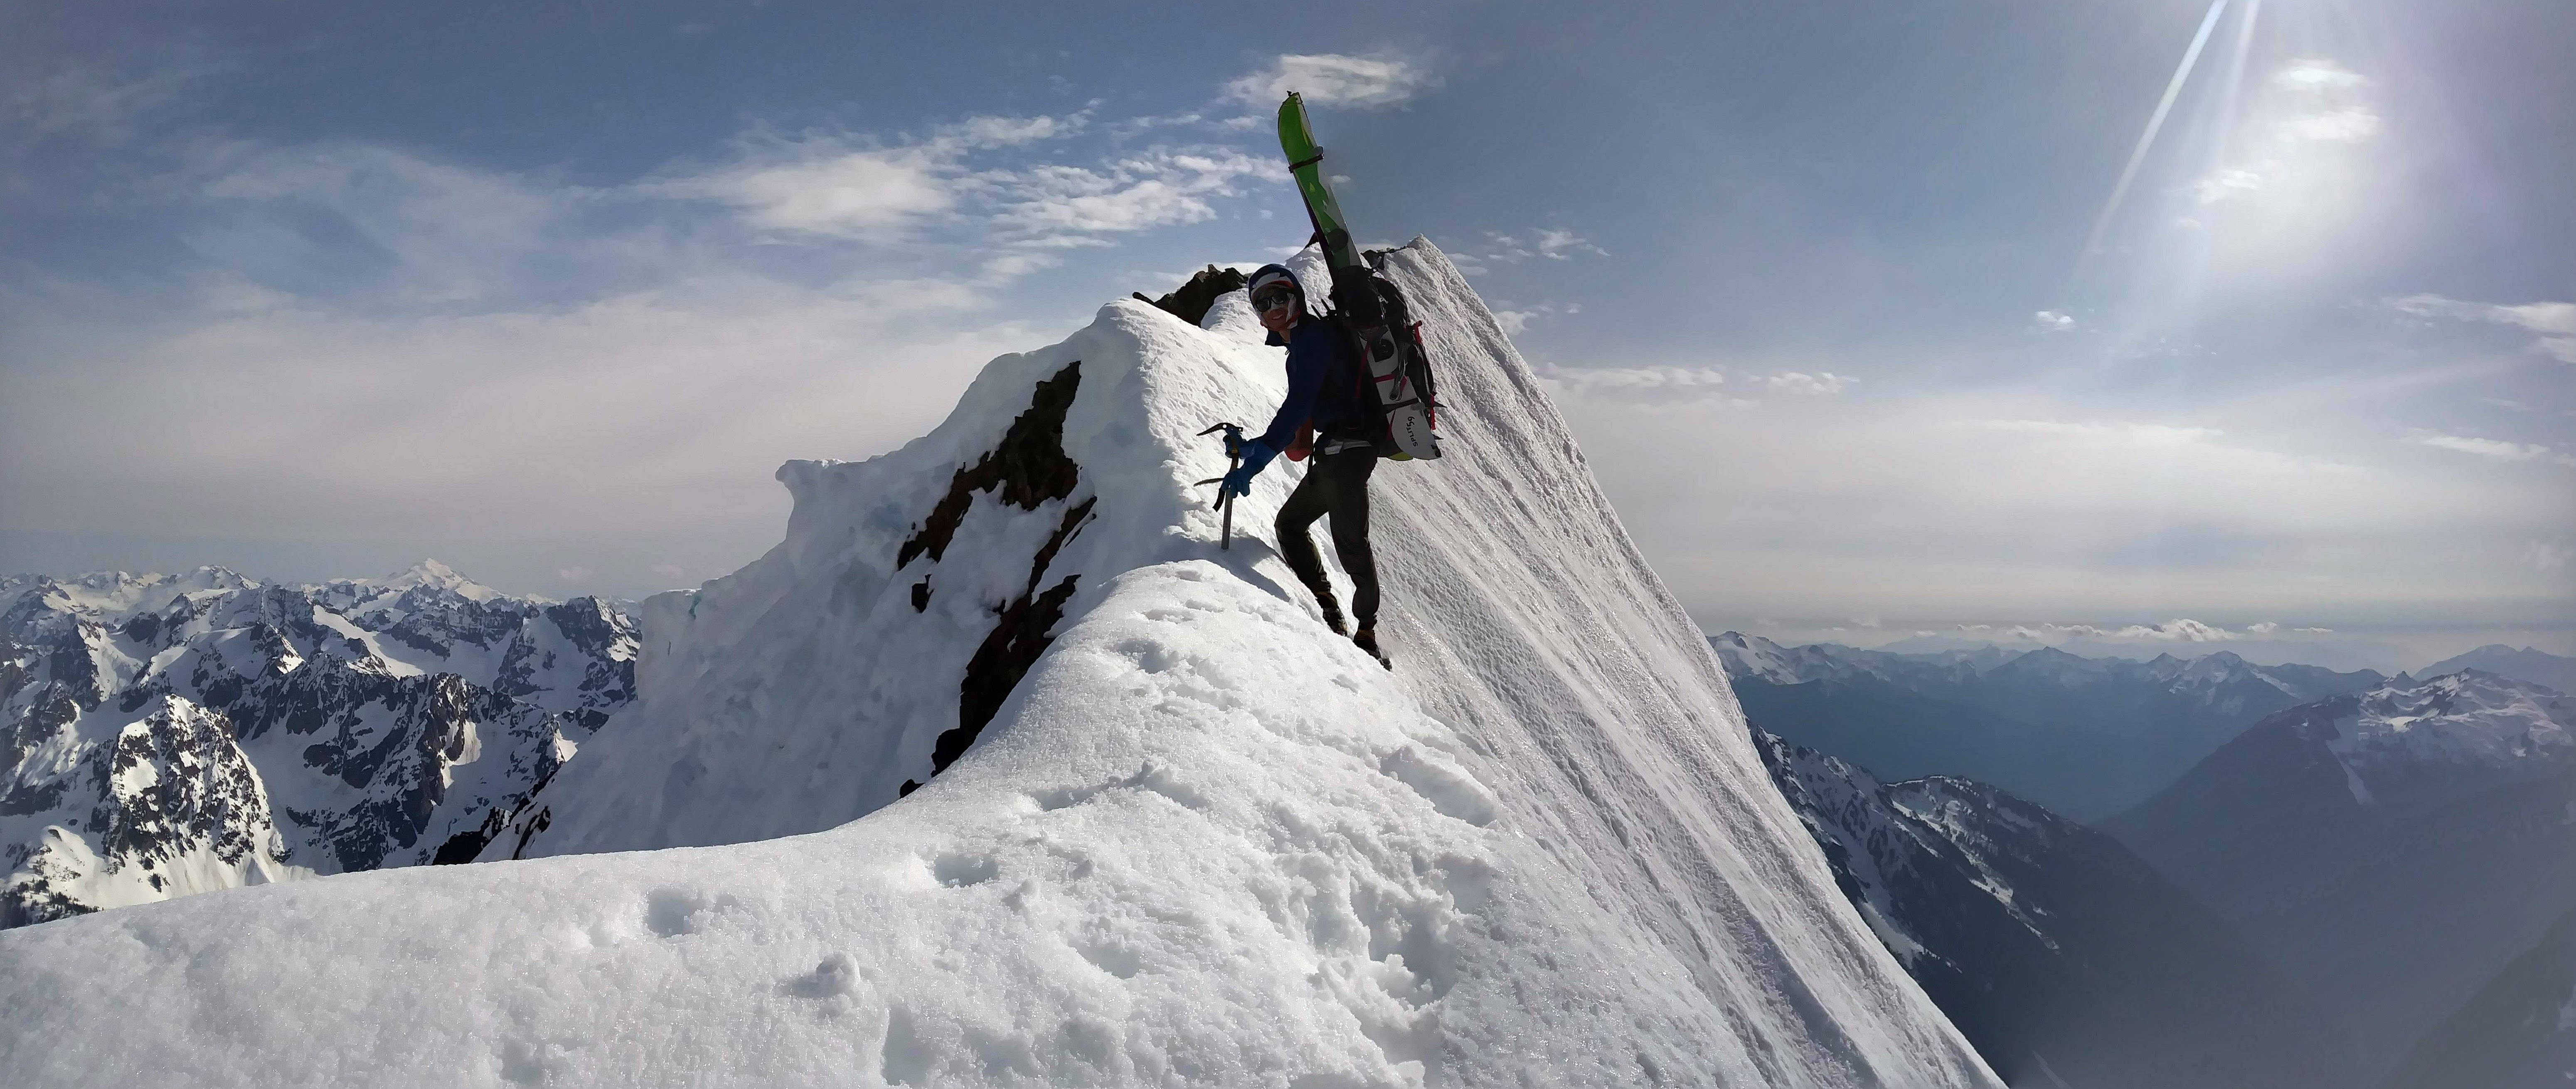
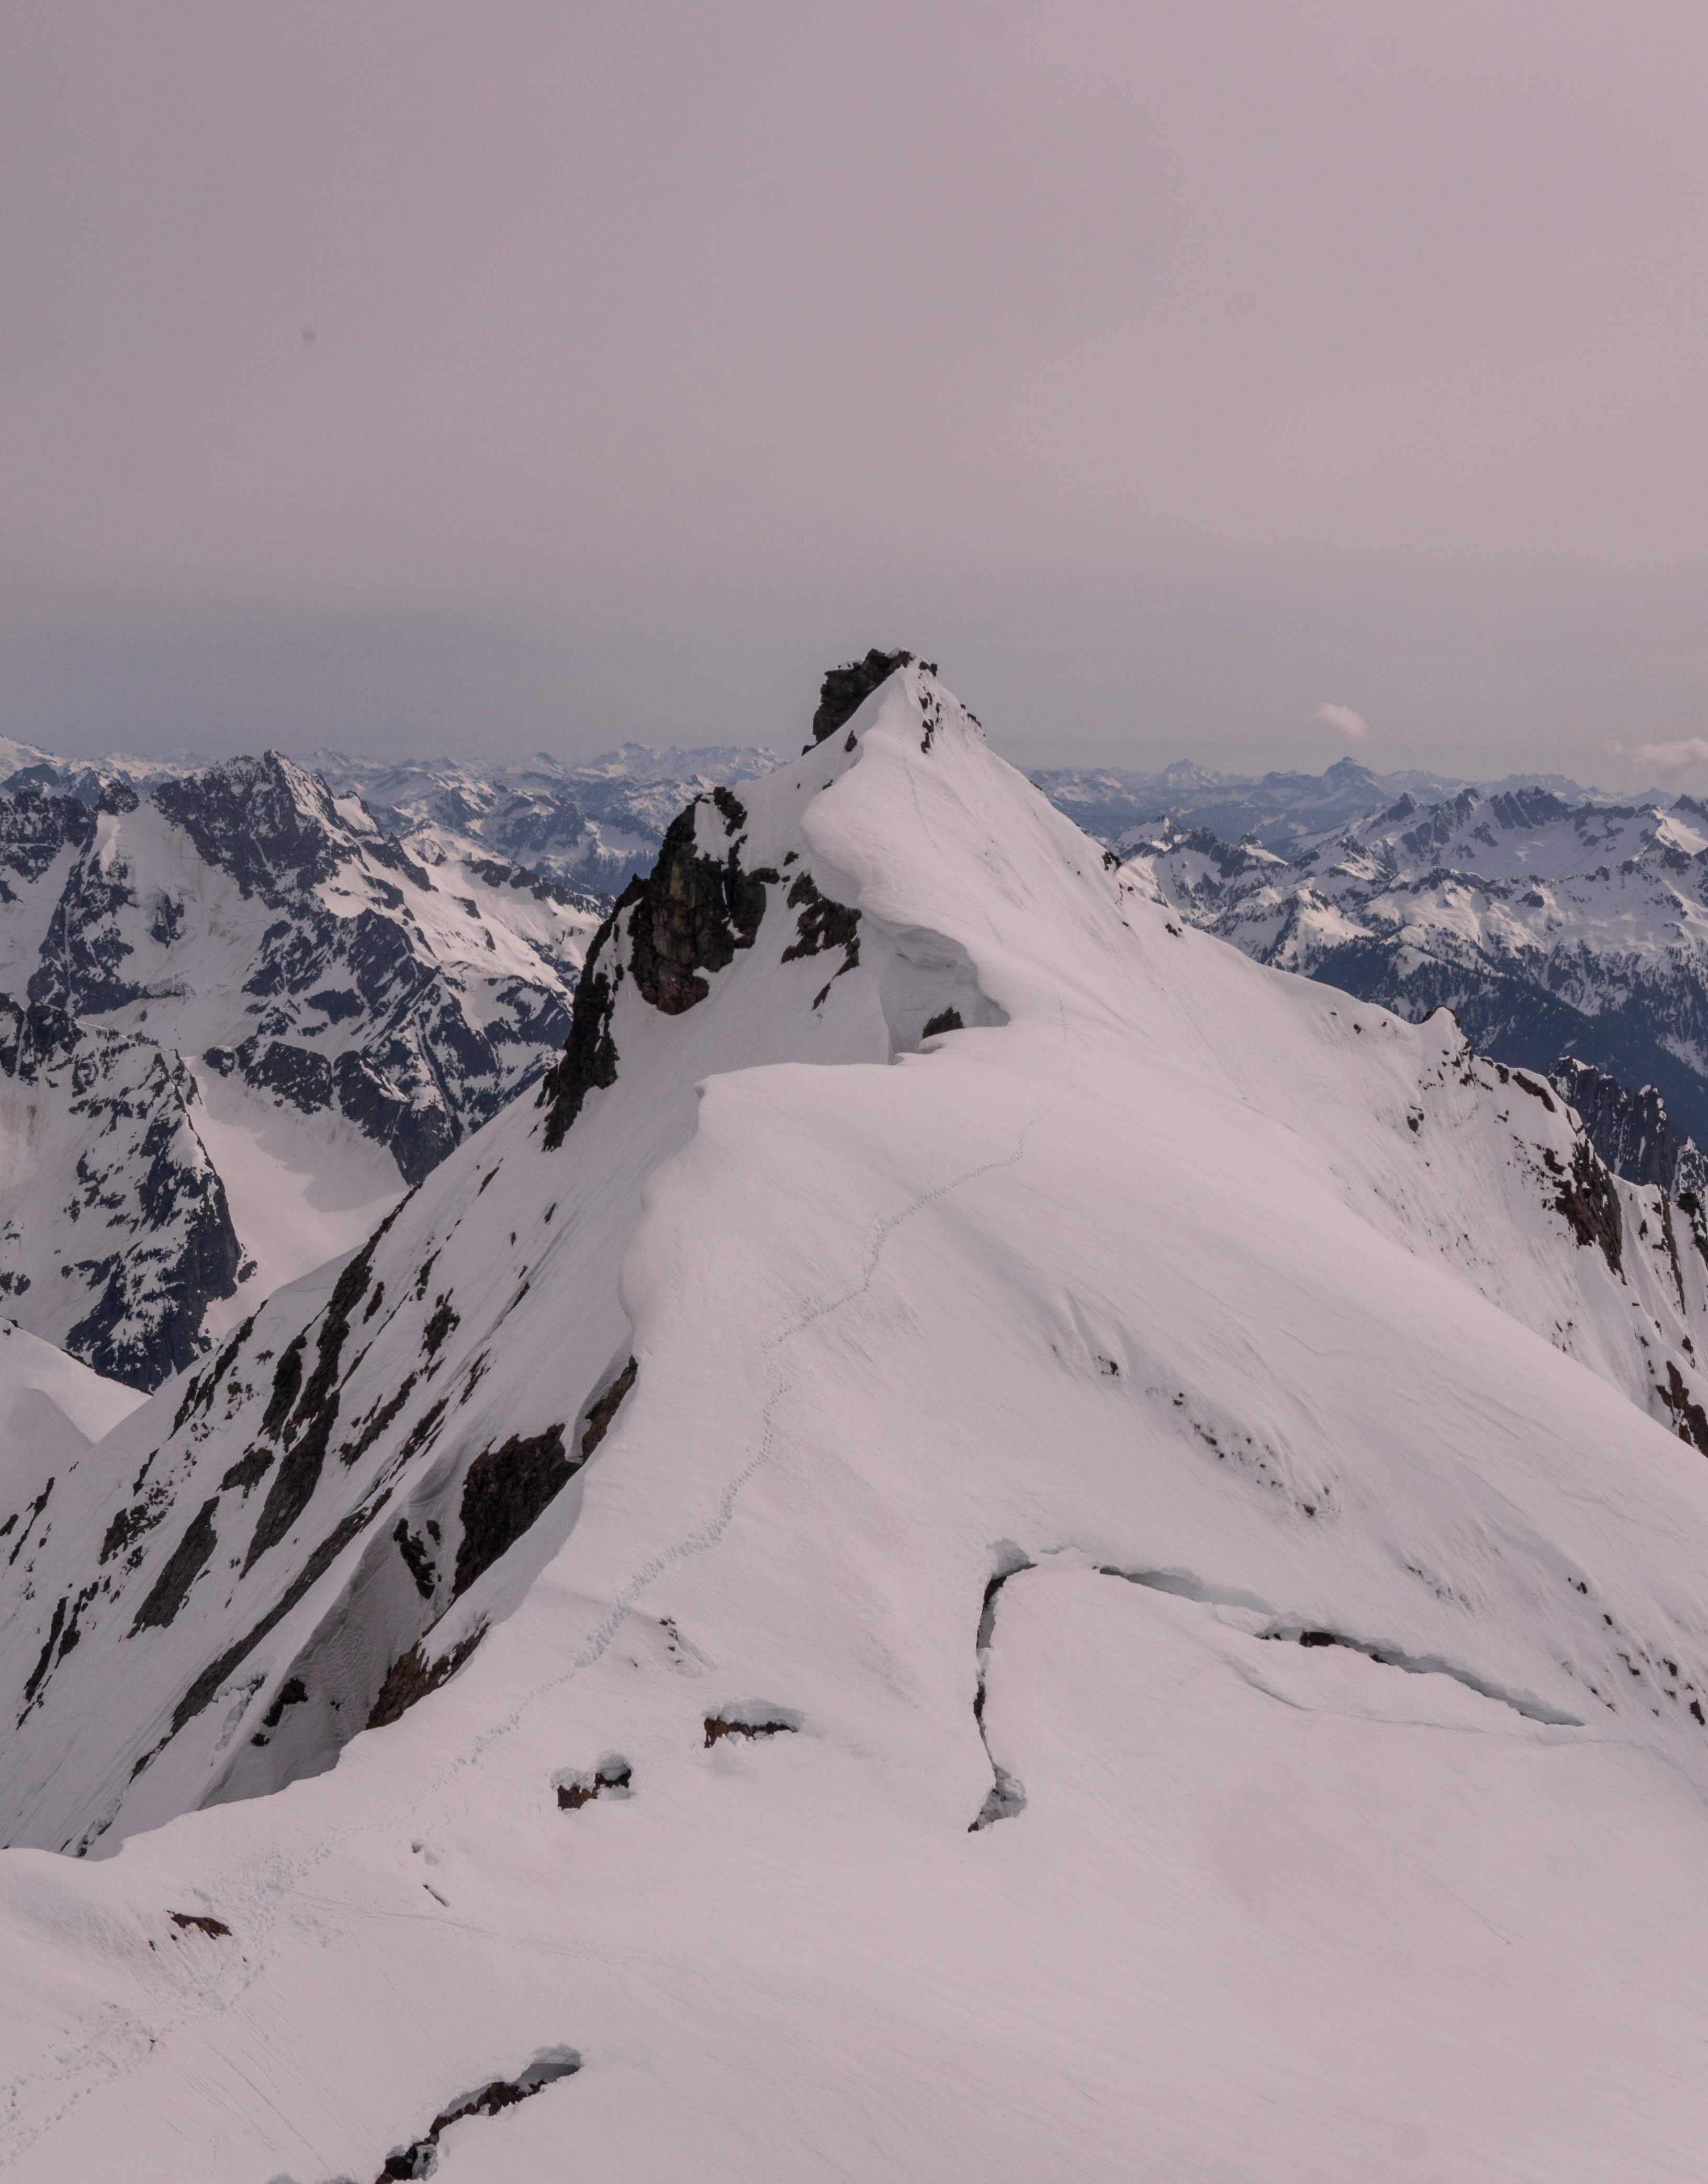
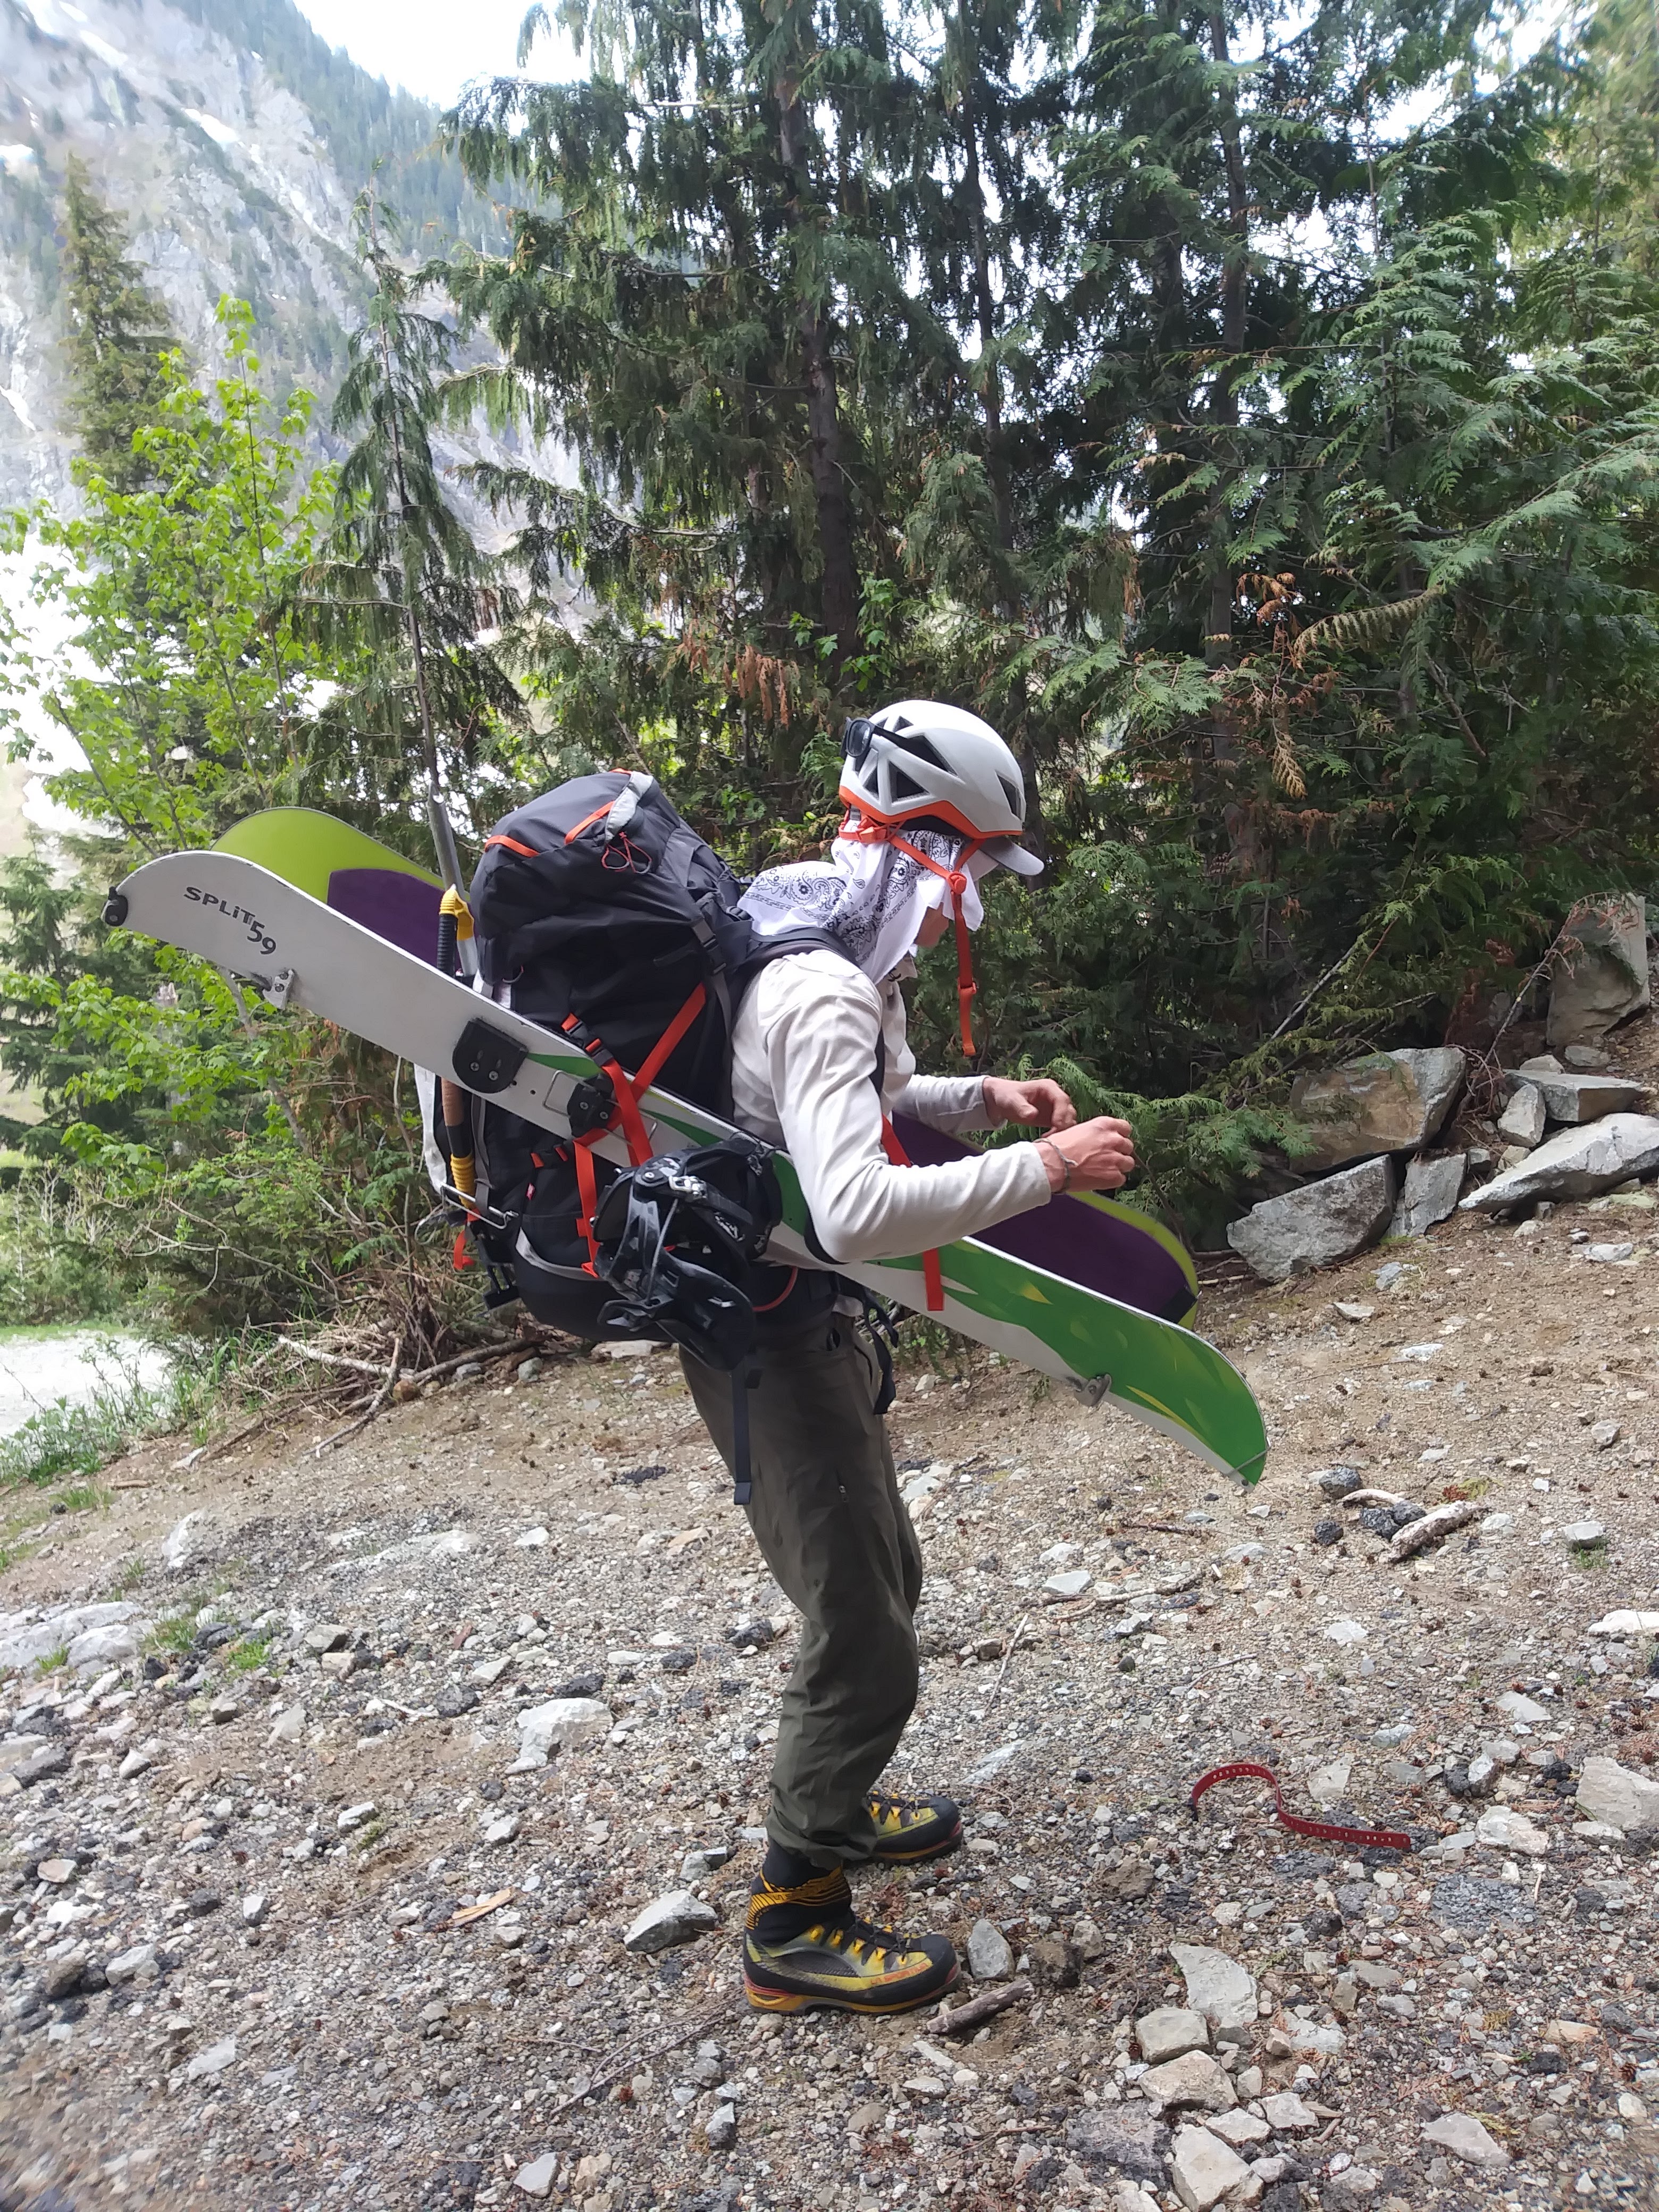
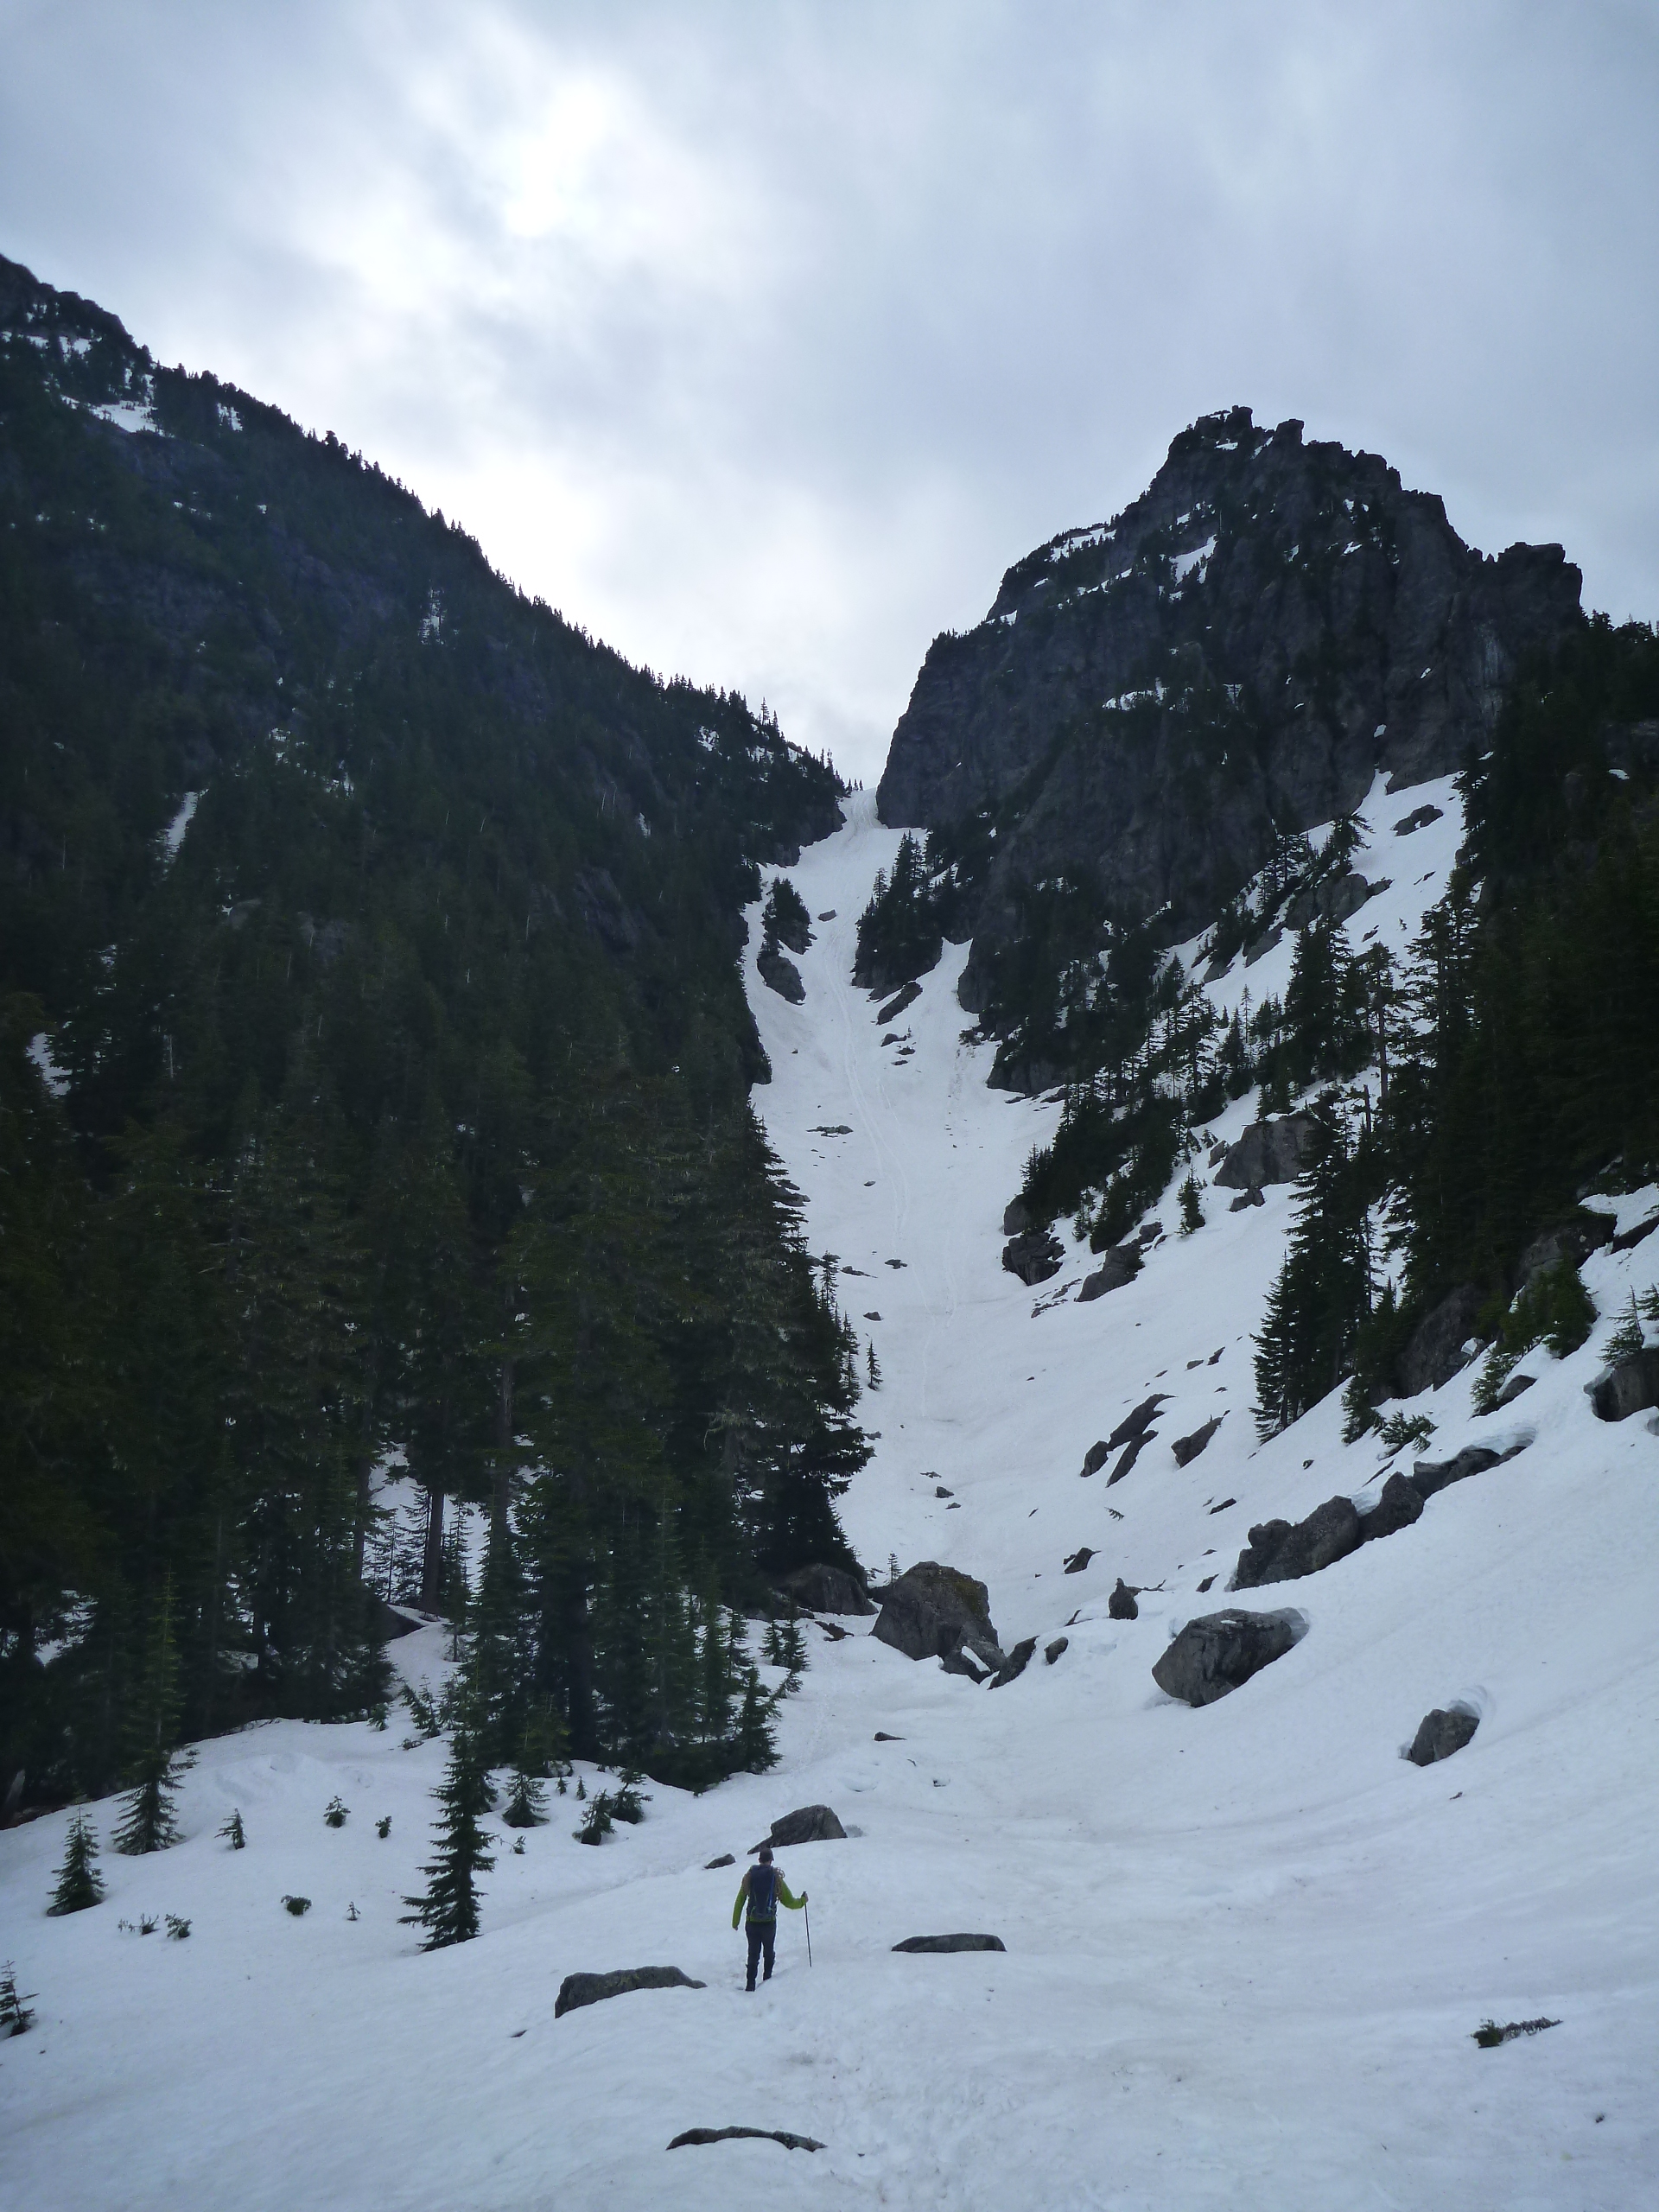
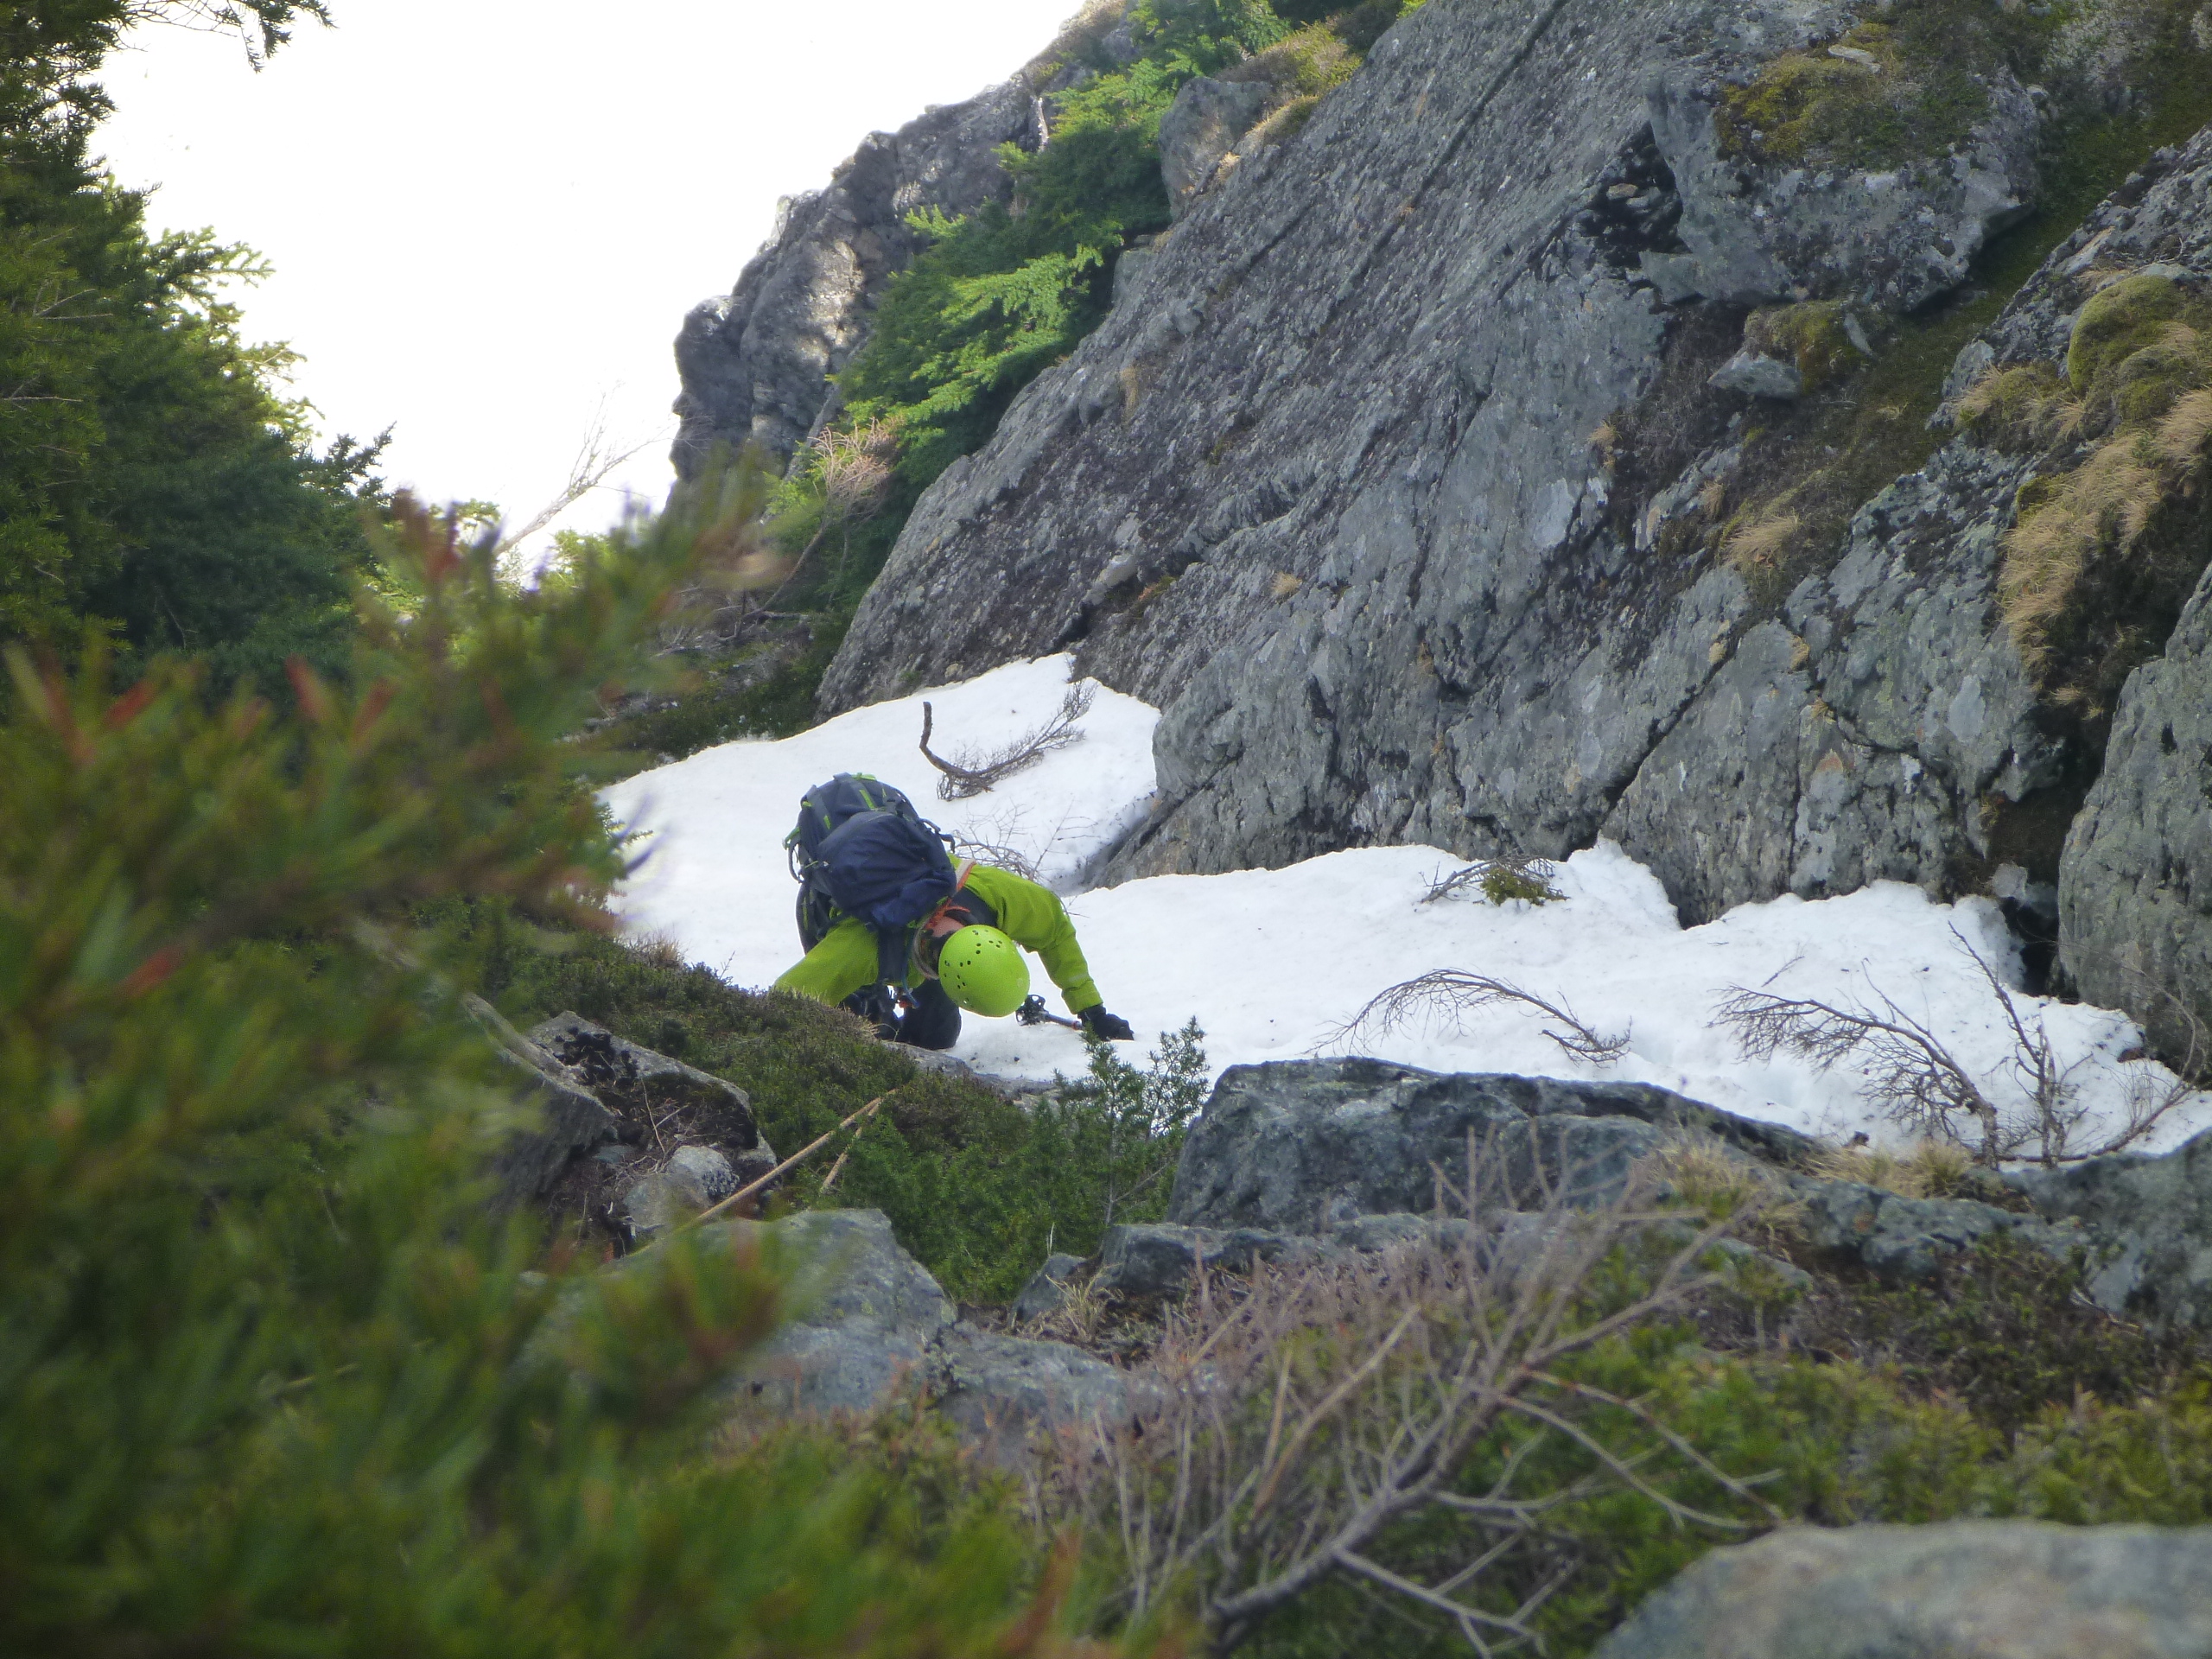
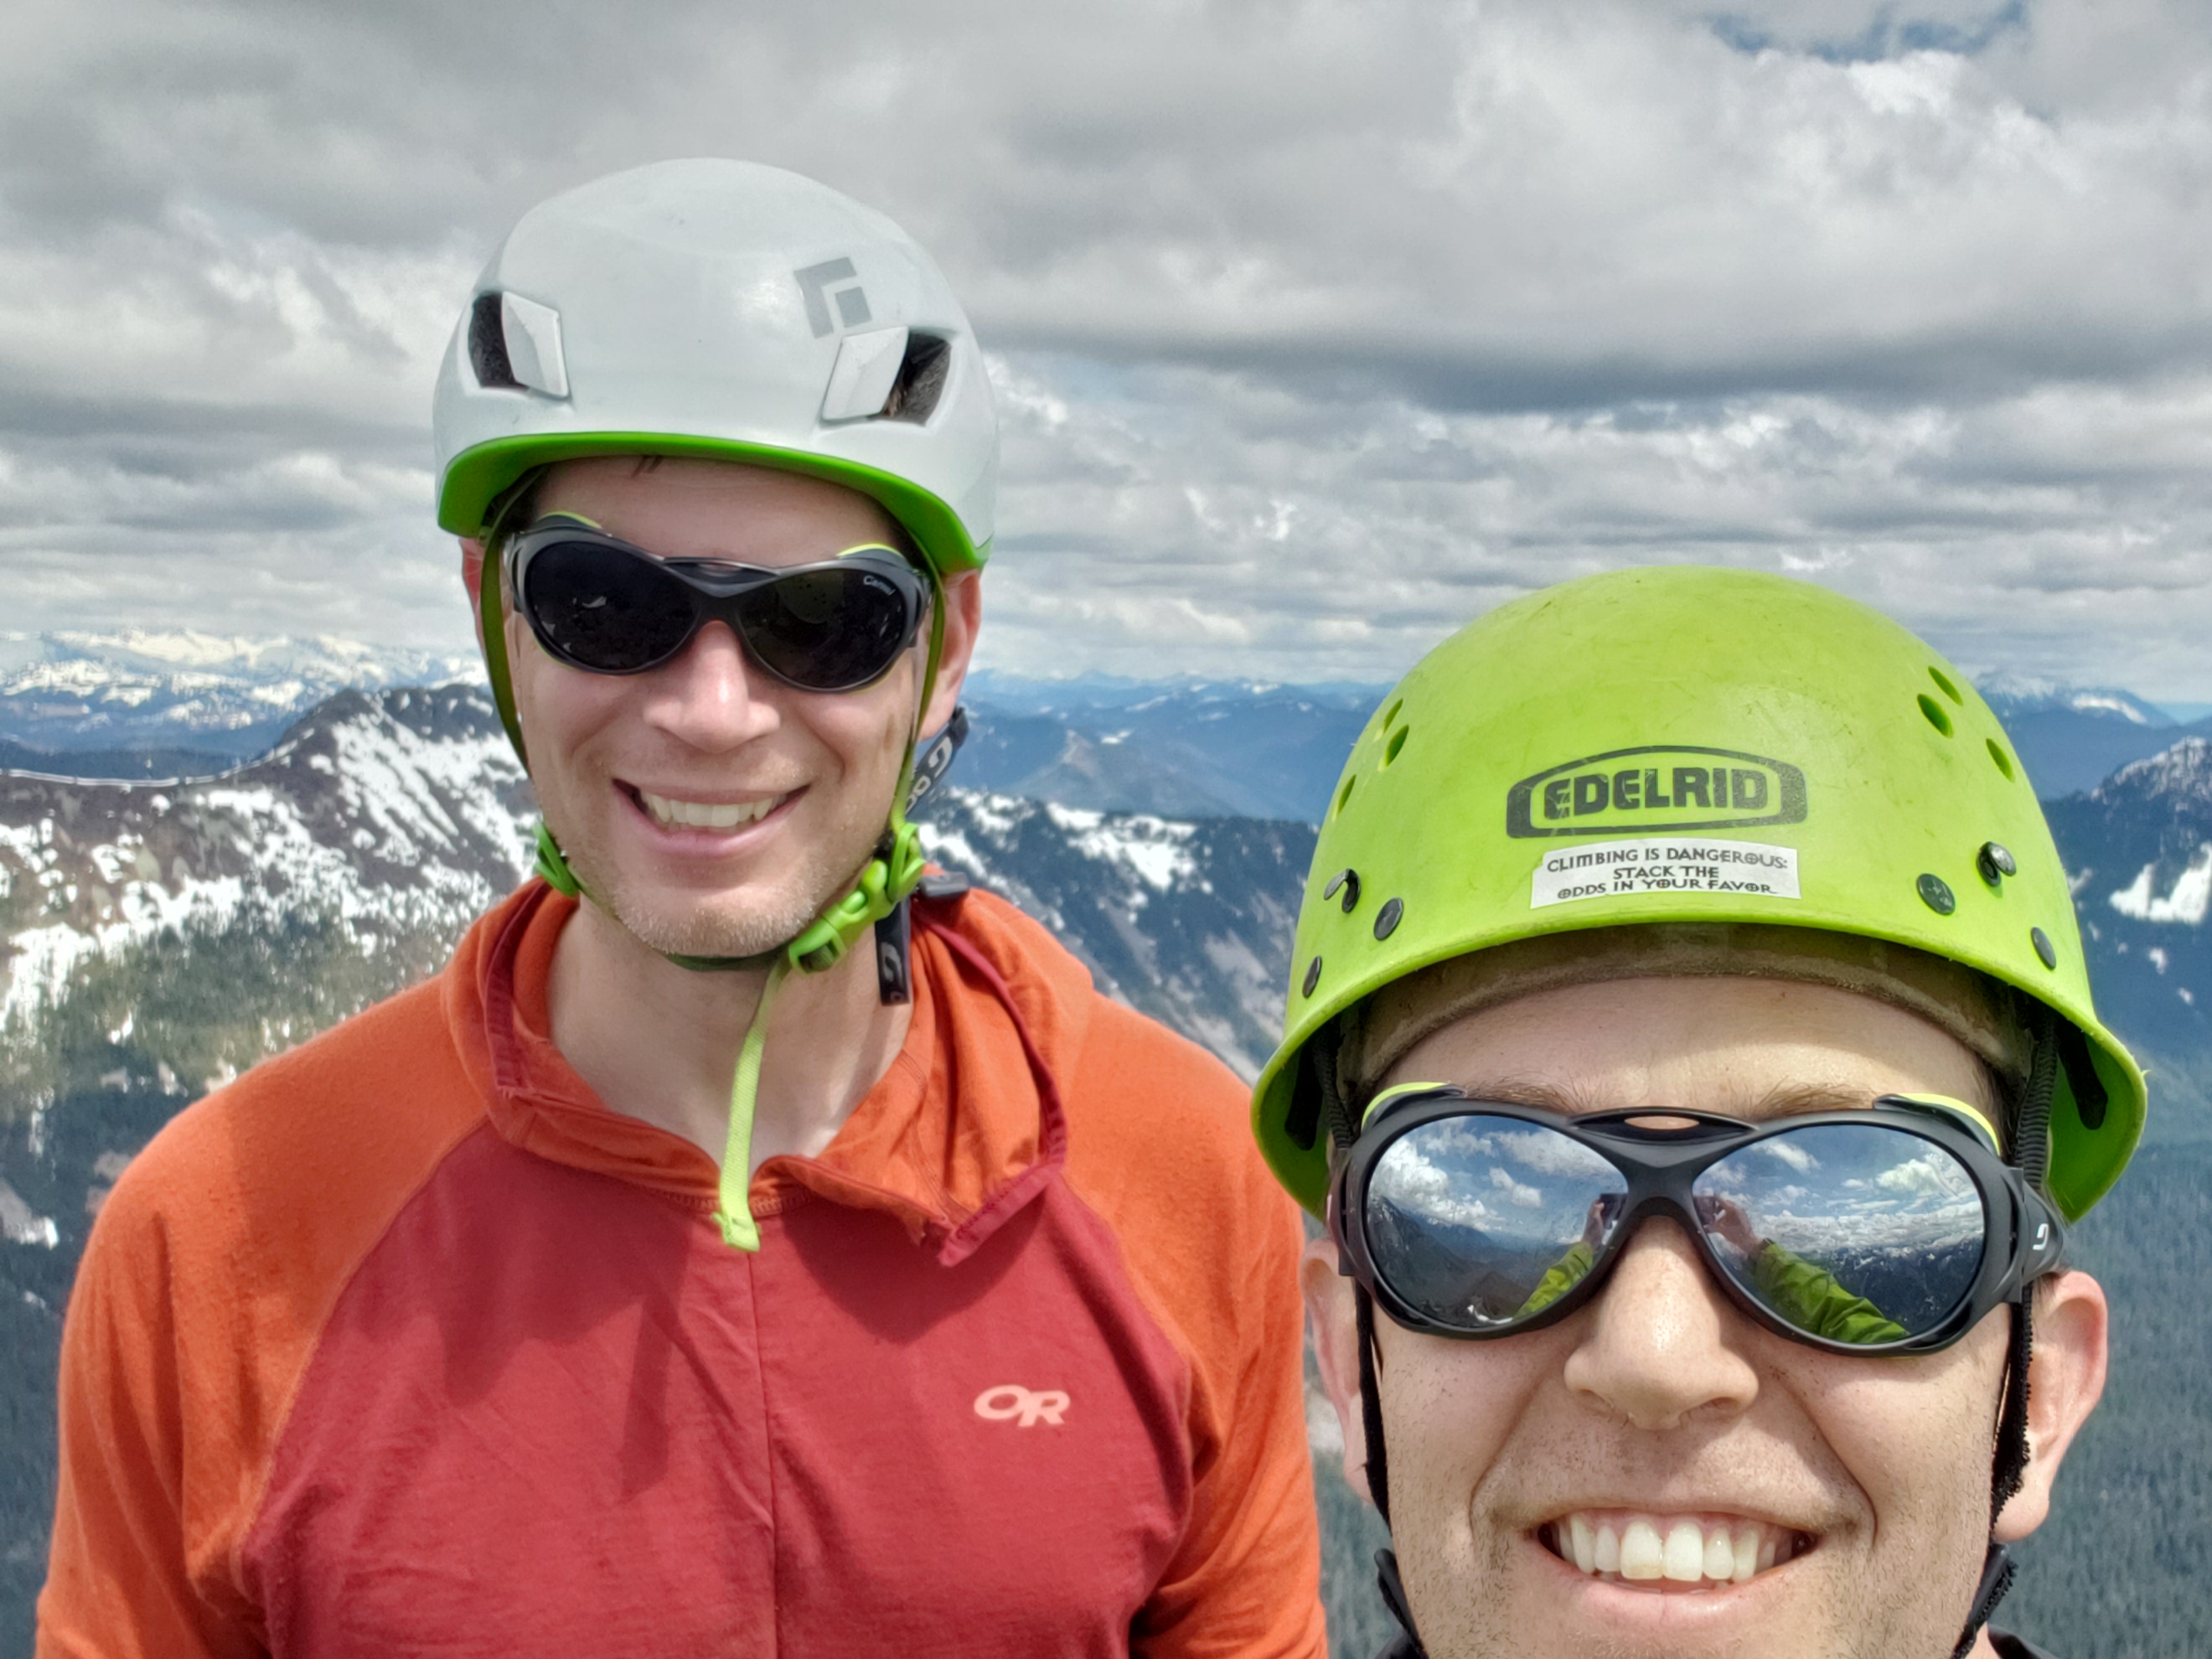
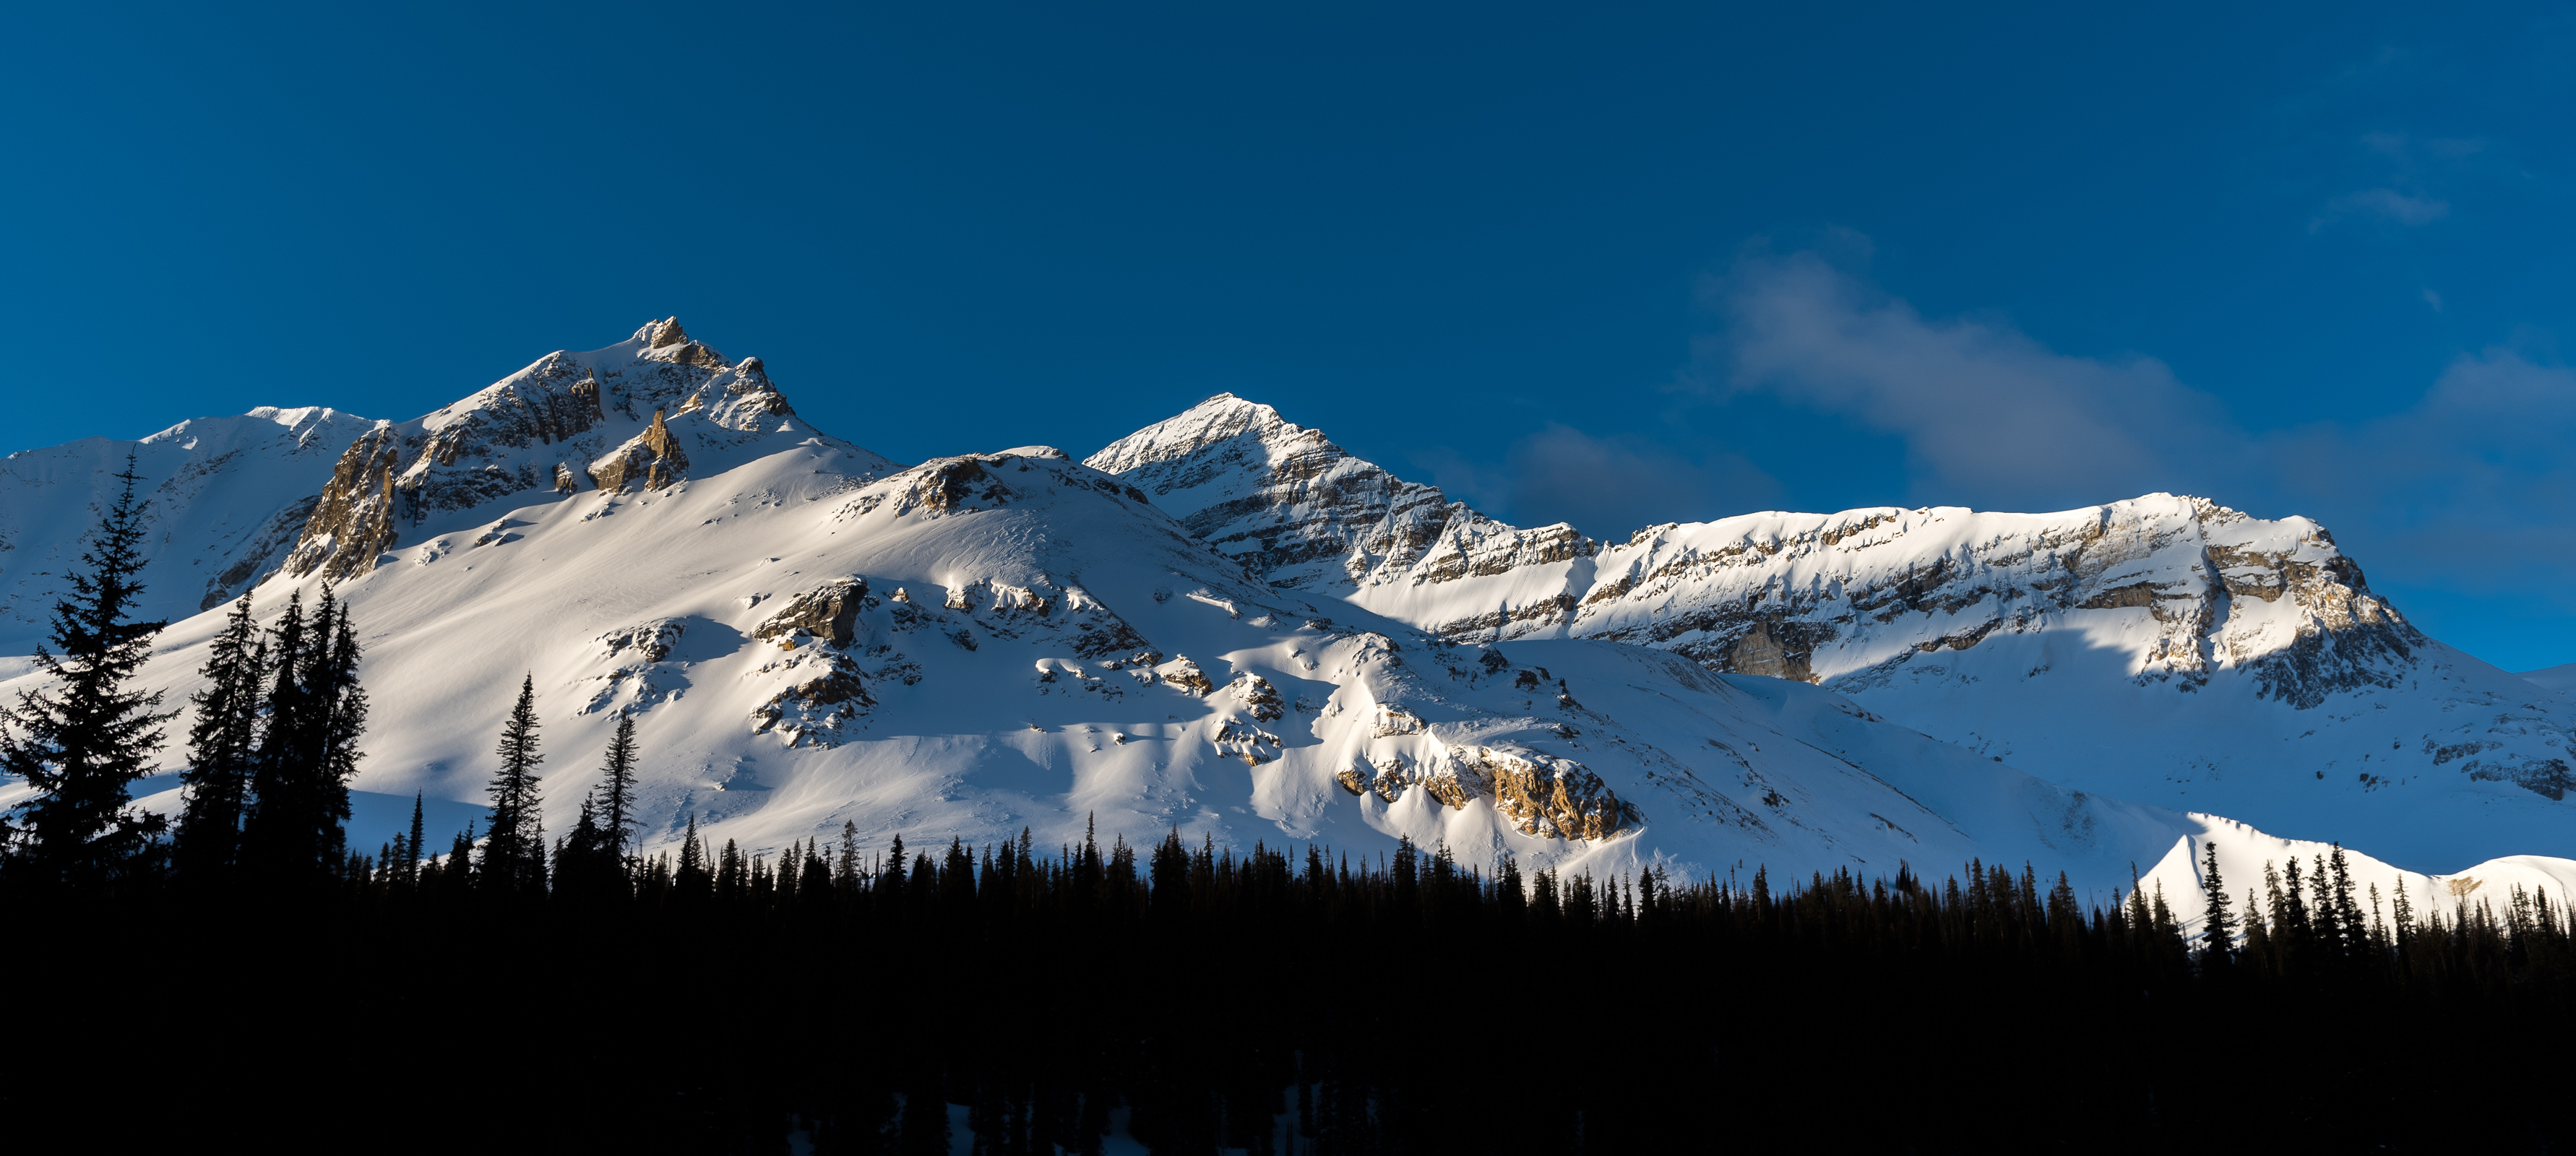
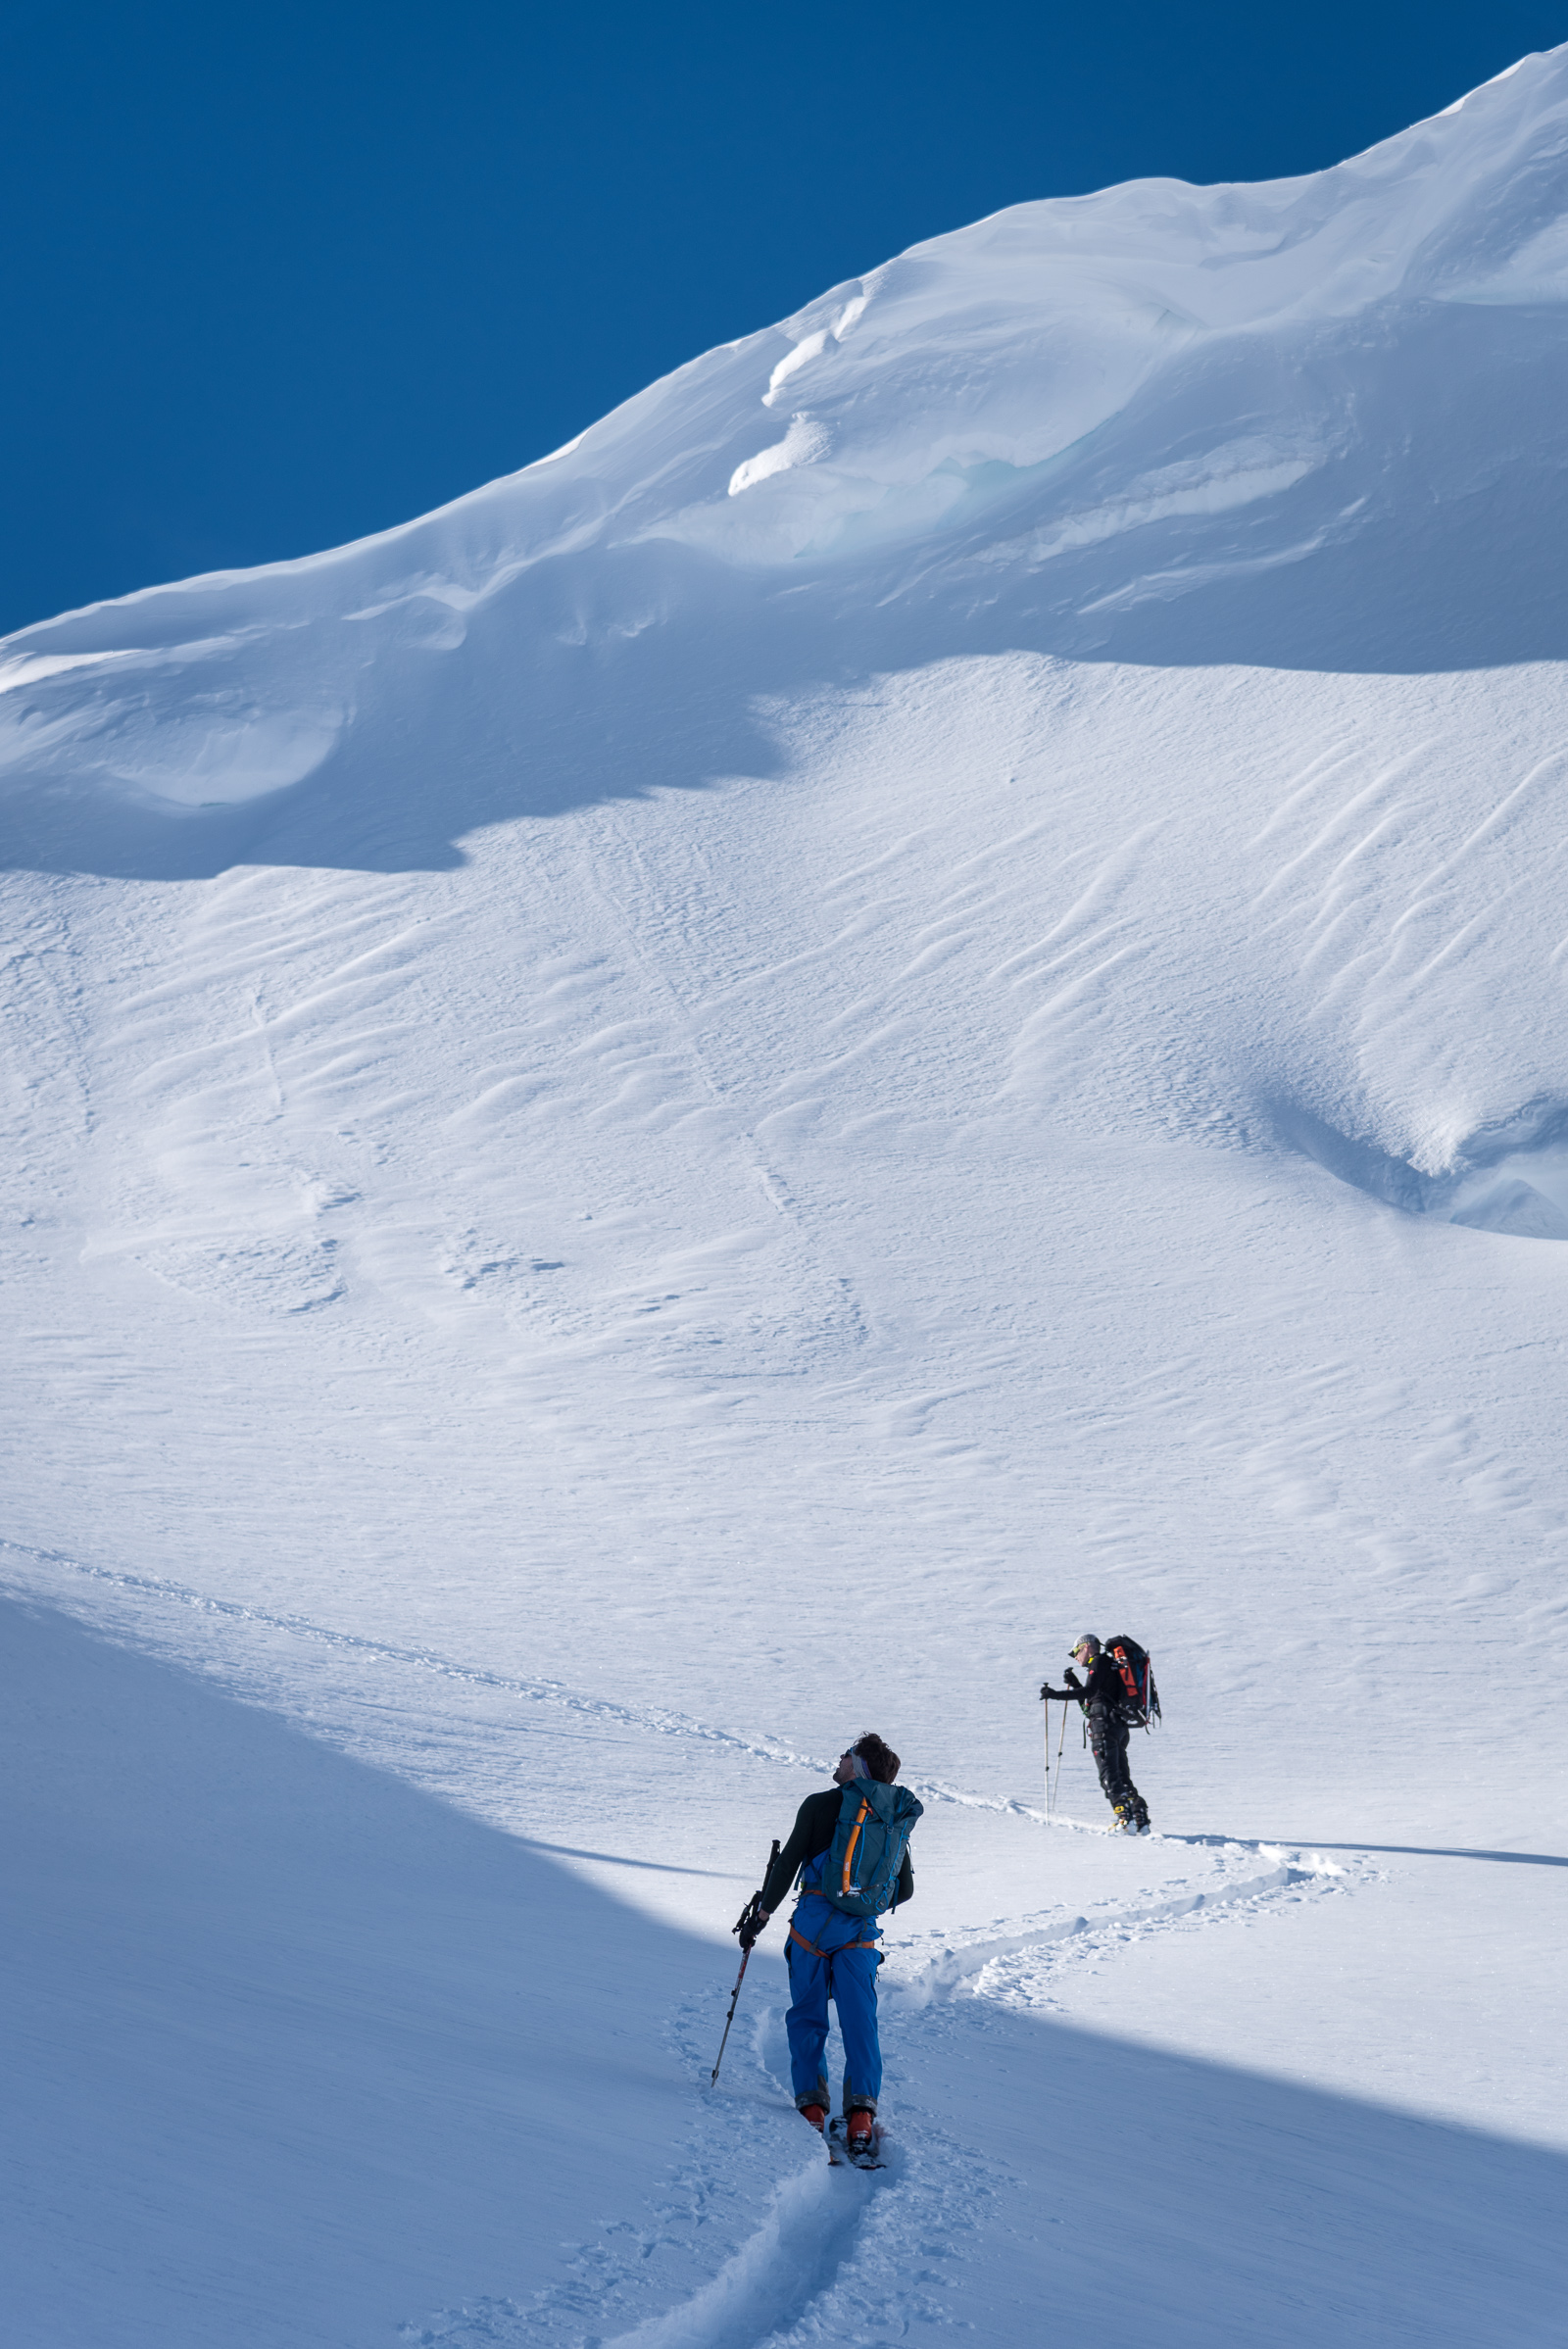
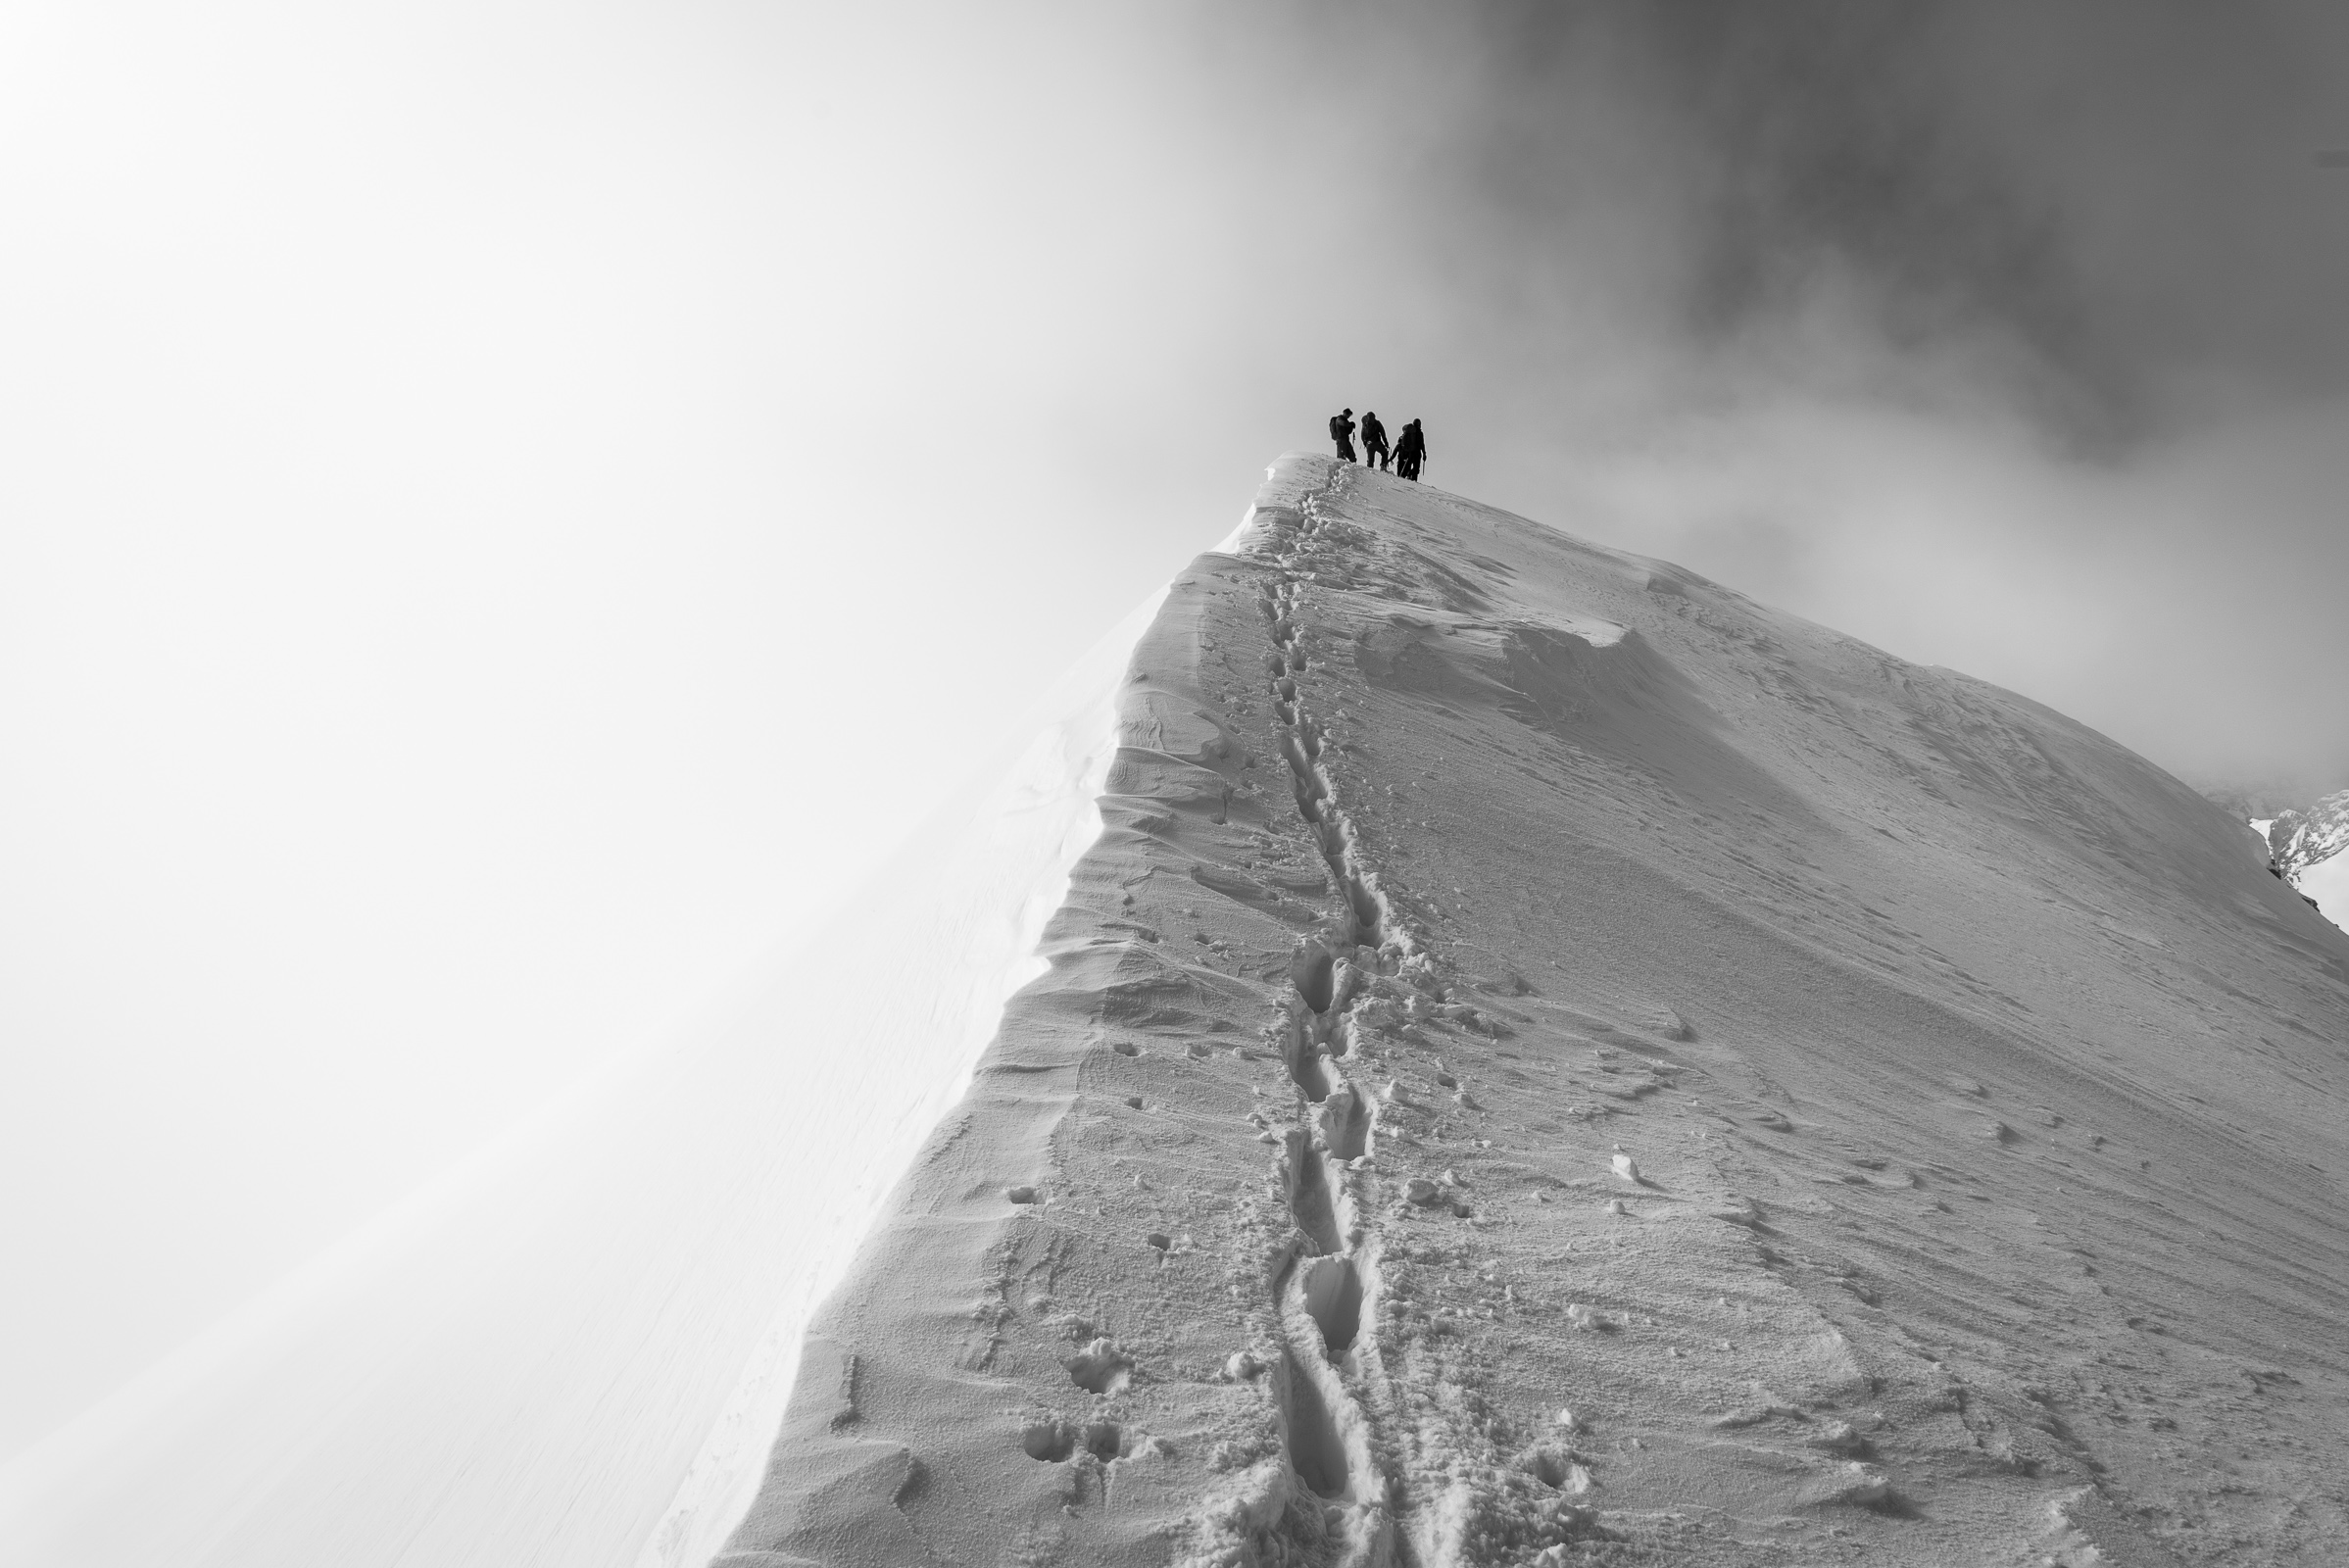
 Trip: Prusik Peak - Stanley-Burgner + Solid gold Trip Date: 05/29/2019 Trip Report: AKA the "It could be worse" road trip When weather in The Valley, Red Rock, Moab, Tahoe, City of Rocks ect. looks heinous for the week you have off, what do you do? You stay close to home and go for some earlyish season ascents of some of the cascades best alpine rock routes! The original plan: Spend a few days in Trout creek waiting for weather to improve. Get a permit for the core, plan for 2 days up there climbing Solid gold and Stanley-Burgner one day, Valkyrie and Acid Baby the other. People said we need snow shoes, but we'll probably be fine. What we actually did: Hike up to Colchuck, hang out under your fly waiting for the thunder storm to pass. Talk to some guys who tried Valkyrie, turns out the route is wet. Rad. one route off the list. Post hole the shit out of Aasgard pass and keep post holing your way through the core in some of the worst spring snow conditions I have personally experienced. Wake up late the next morning to find splitter weather and already slushy snow. Post hole your way over to Prusik. Start up the first pitch of Solid Gold only to find the crux soaking wet, and water dripping down onto the belay. Lower off the spooky chock stone and move over to Stanley-Burgner. Post hole your way up to the base of the route in rock shoes. It seems like some fluffy clouds are starting to form. What did I read yesterday about the warning signs of t-storms? P1/2: Mostly dry except for the crux. Awesome. P3: Mostly dry except for the crux. Cool. P4: Mostly wet except when I try to climb around the wetness and get off route. The added lubricant probably made the squeeze a little easier. P5: Mostly dry except for a few wet jams. At the crux. P6: Pretty damn wet and now there is a full fledged thunder storm baring down on us. Layback around some sketchy new looking loose blocks as it starts to rain. Good thing the route is already wet. Pull up onto the normally awesome summit block only to have my ice axe and entire rack start to buzz. Flip my shit and throw my pack across the summit. Hop over the other side of the summit and start belaying my partner up in a full on vertical sprint and the longest six minutes of my life. There is now a BD .4 on that pitch if someone wants some easy booty. Get the hell off of the summit. Get our rope stuck. Clean it and continue to rap. Post hole our way through very wet waist deep slush over to the base of the west ridge. Run down to lower ground and laugh about how its already sunny again. Try to dry out our gear in camp and decide that this weather cycle is not worth climbing tomorrow. Hike out and get a burrito at South. Drive home and start repacking for WA-Pass. I still have three days off of work. Now for the photo dump. No more pictures till we were back to the base and the storm had passed. Gear Notes: Double rack .2-2 single 3 and 4. Hand full of nuts Approach Notes: Post hole your way up Aasgard pass and down through the upper core. Snow shoes probably aren't worth it.
 -
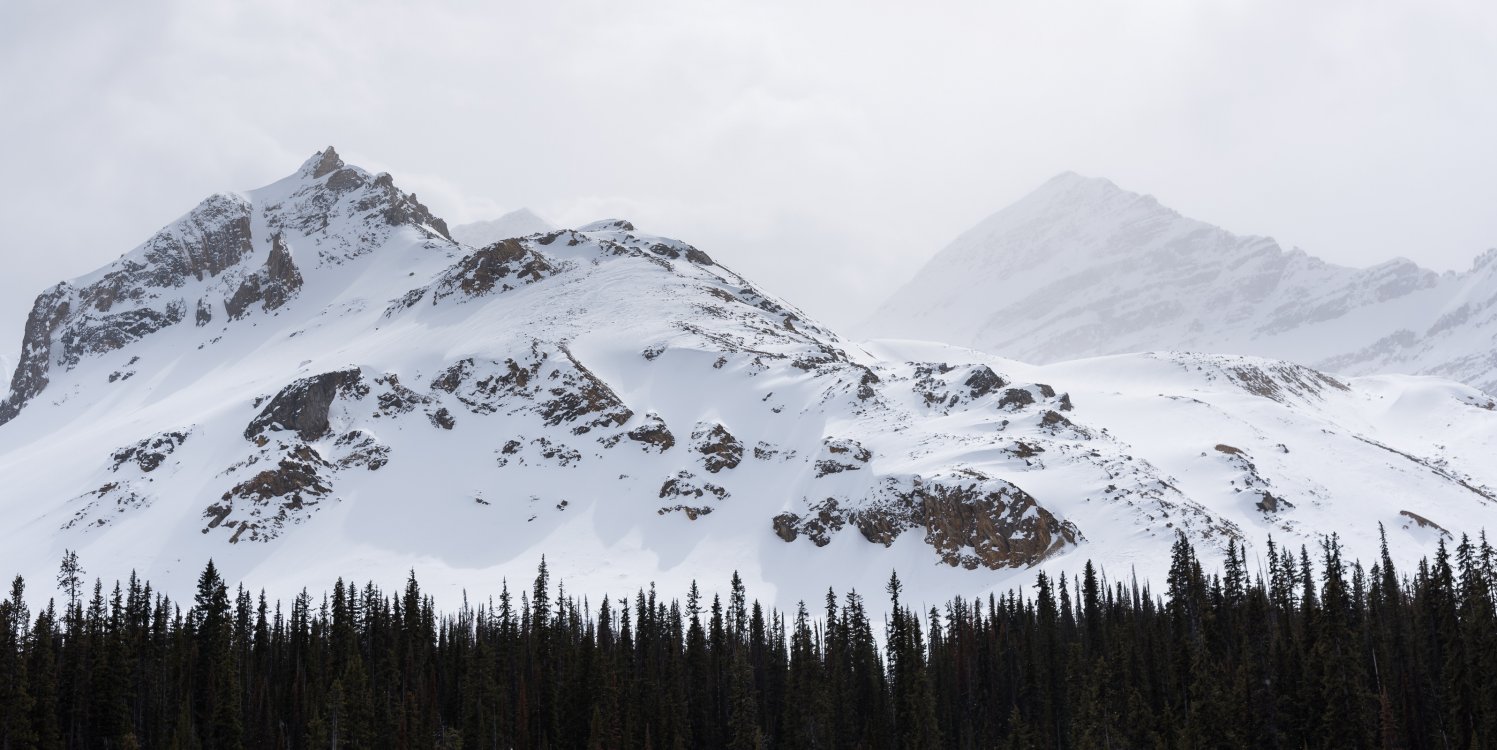
Climbed the North Ridge on June 3rd. Conditions are pretty cruiser to the summit. Gaining the ridge is particularly easy, basically stairs. The right ice variation is abnormally rocky right now, I wouldn't believe it if I didn't see it myself in person. Full trip report here
-
Trip: Colchuck Peak - East Route Trip Date: 06/08/2019 Trip Report: Route is in great condition, mostly snow covered still. Trail to colchuck lake is snow free. Once, you reach the pass there's no need for ice axe or crampons on the other side as it's already thawed out. Views are quite dramatic from up there. I decided to microspiked it, I would not recommend it. Crampons would have been the better choice. Fun glissading on the way out. If you're interested in my gpx file, you can get it here http://bit.ly/ironKneeColchuckPeak Gear Notes: Microspikes, Ice Axe, Trekking Poles Approach Notes: Road to Stuart Lake Trail Head seems to be getting worse every year.


-
Trip: South Sister - Devils Lake climbers trail Trip Date: 06/01/2019 Trip Report: Started hiking at 4:35 a.m. and lost the trail under the snow about ten minutes later. We went too far west and ended up on top of the small Butte between Kaleetan Butte and Devils hill. If there is snow when you go stay climbers right, and find a narrow canyon with a tiny flow of water. There will be ski tracks. Across the plateau we had a rousing discussion about wealth inequality, which ended when we started climbing and had to breath. It was so warm, 40 degrees, we were wearing low-top trail running shoes, and getting plenty of purchase and grip, no slippy slippy. We had our climbing boots in our packs in case it got cold, icy up top, or we wanted to use them for the descent. There were several parties in front of us doing all the step kicking all the way up to the pool at the base of the Lewis glacier. Yes please, and thank you! It was possible to walk on lava cinder from the Lewis glacier about halfway up the final ascent. This is when it was really nice to have trail shoes instead of our climbing boots and we decided to stick with our trail shoes all the way to the summit. After some quick pictures on the summit we descended to The Summit glacier to get out of the wind and took an hour break eating lunch, and switching to dry socks and boots. After that it was all downhill on our butt sleds. The snow was incredibly soft and it was difficult to slide on anyting less than a 20° slope. Had a straightforward hike back to the car and we both got sunburns on the way. Joy! FOR SKIERS: The snow is starting to thin in places up top, and definitely once in the trees on the descent there are bare spots. Mileage: 12 Time on route: 7 hours 45 minutes Elevation gain: 5239 Gear Notes: Waterproof trail runners, ice axes for the first 1000' of descent Approach Notes: Glad we started early, it was warm
-
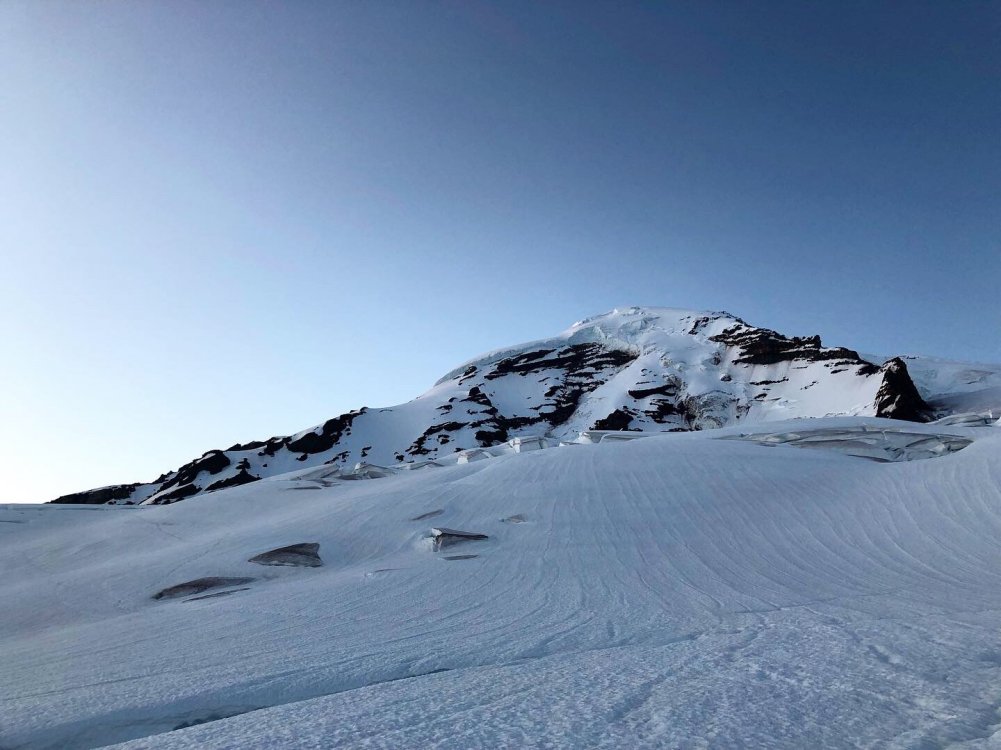
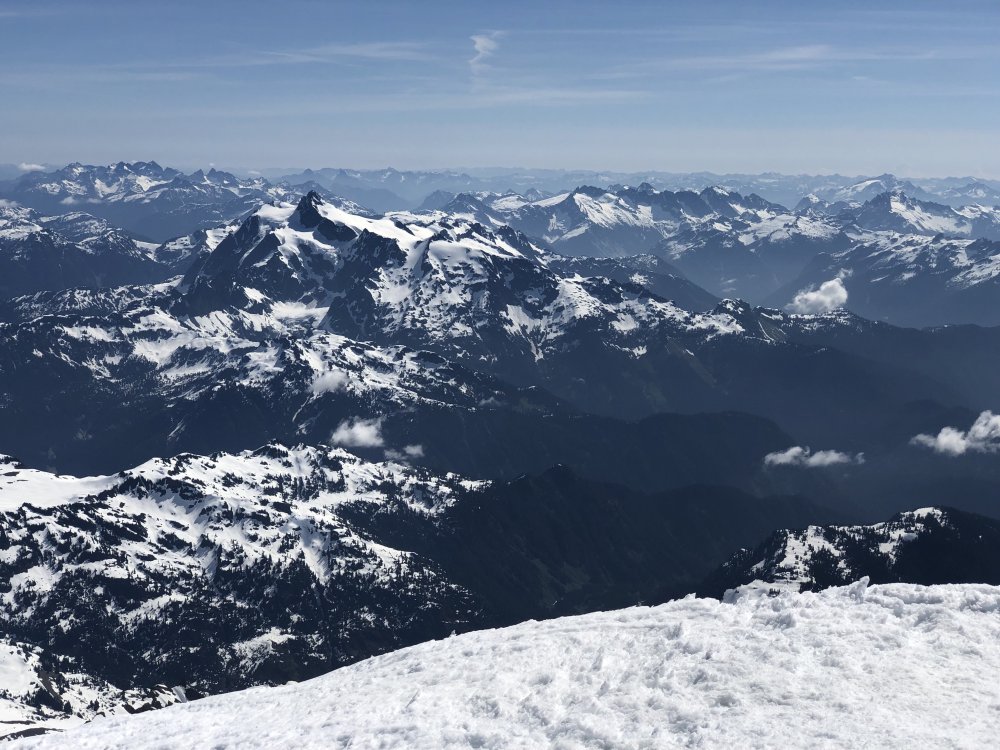
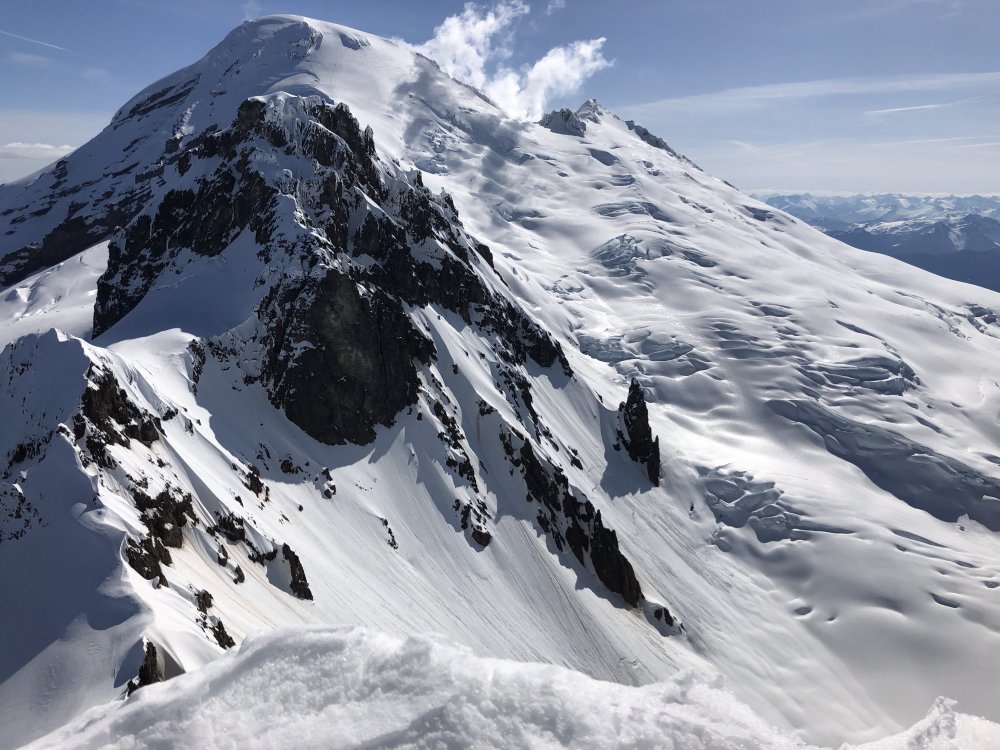
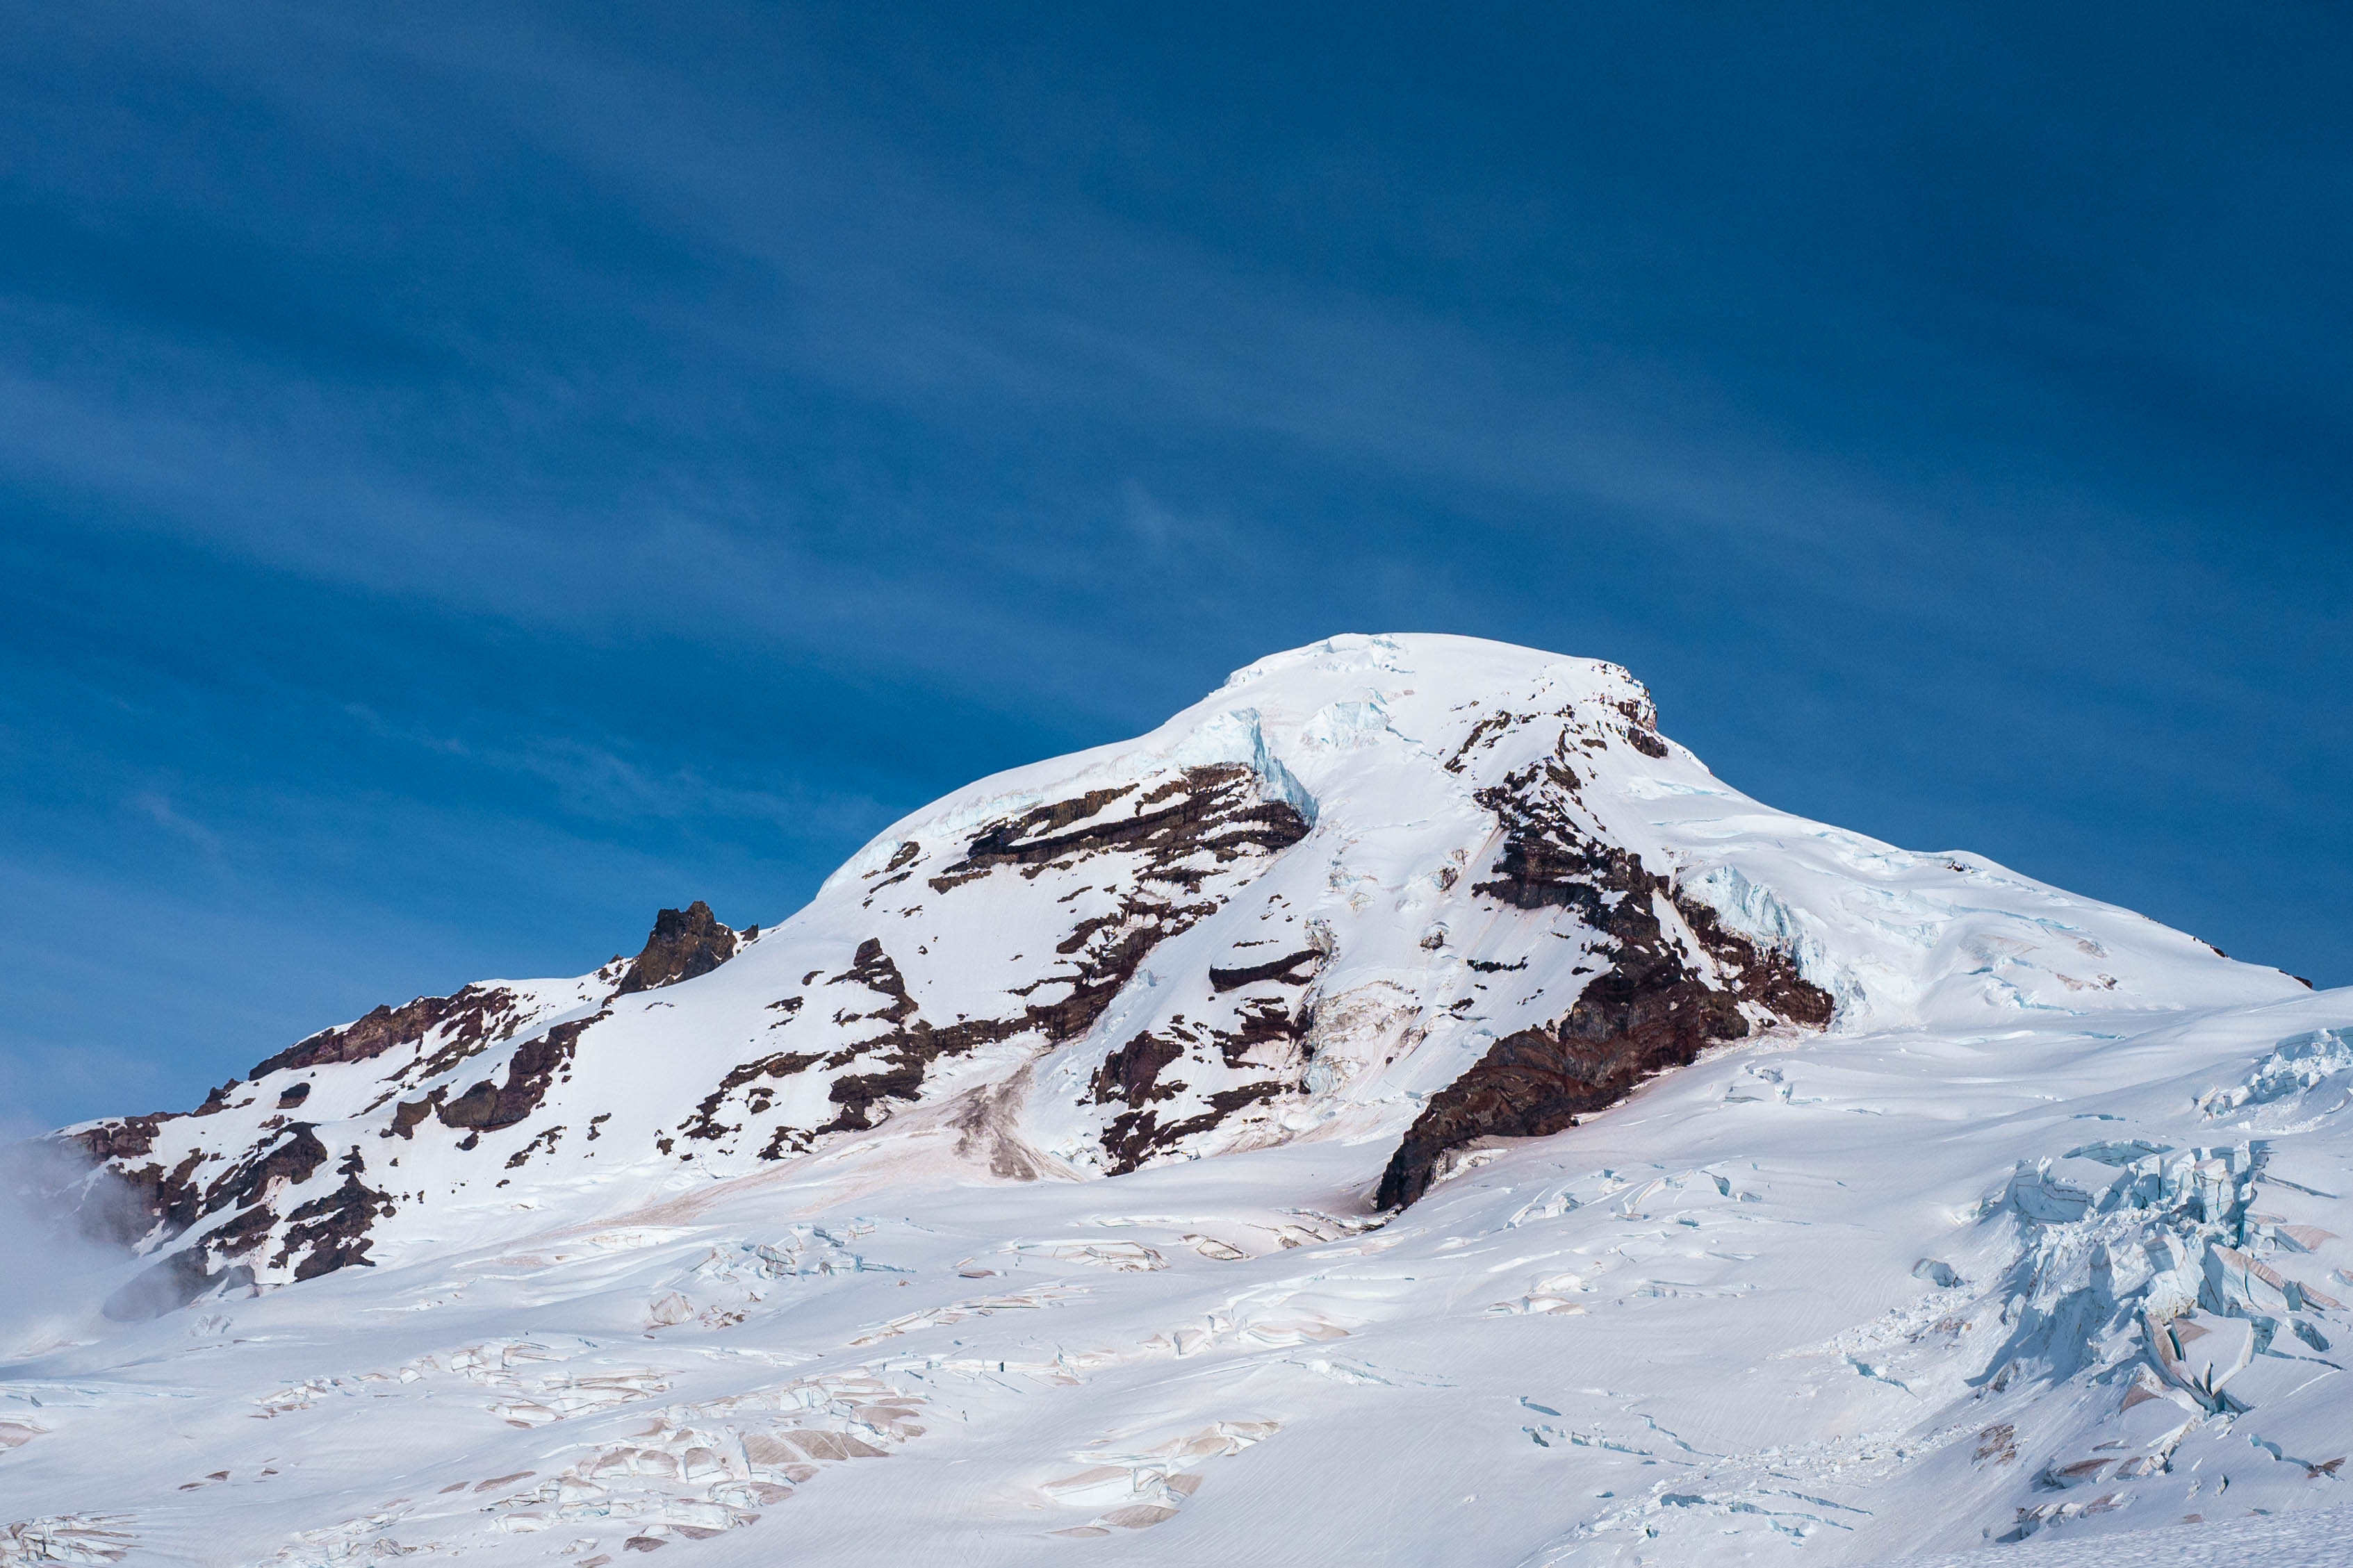
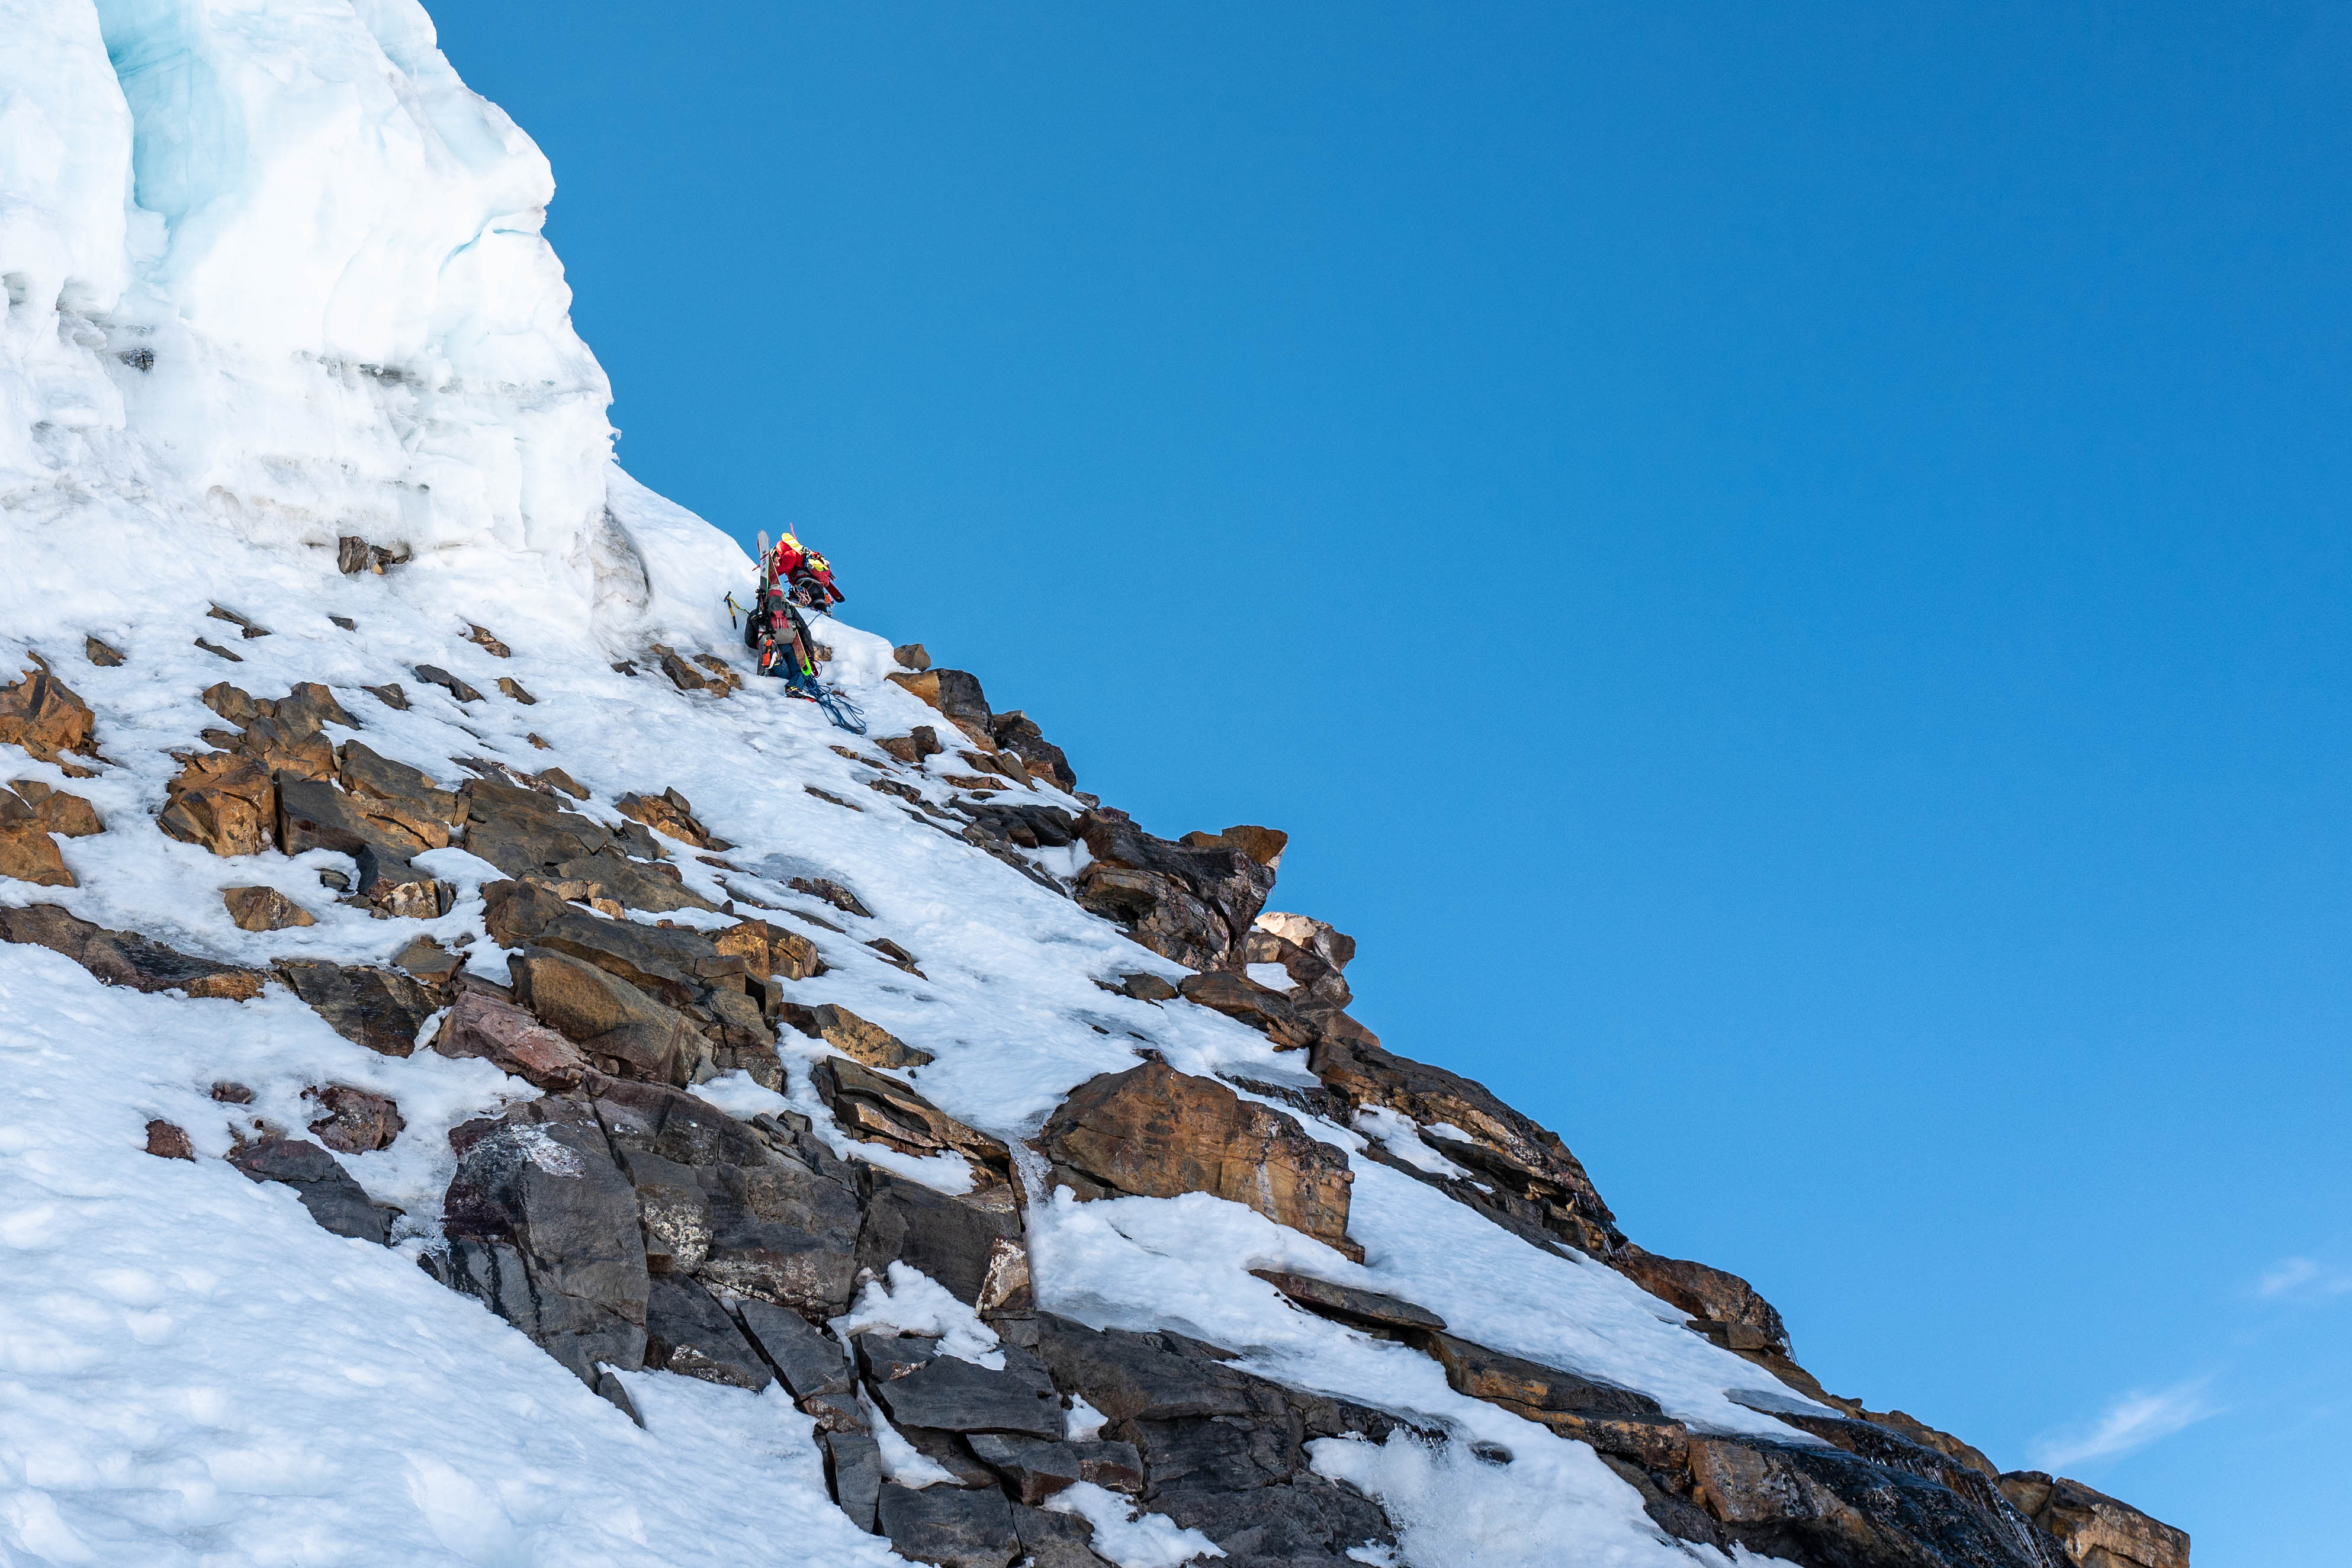
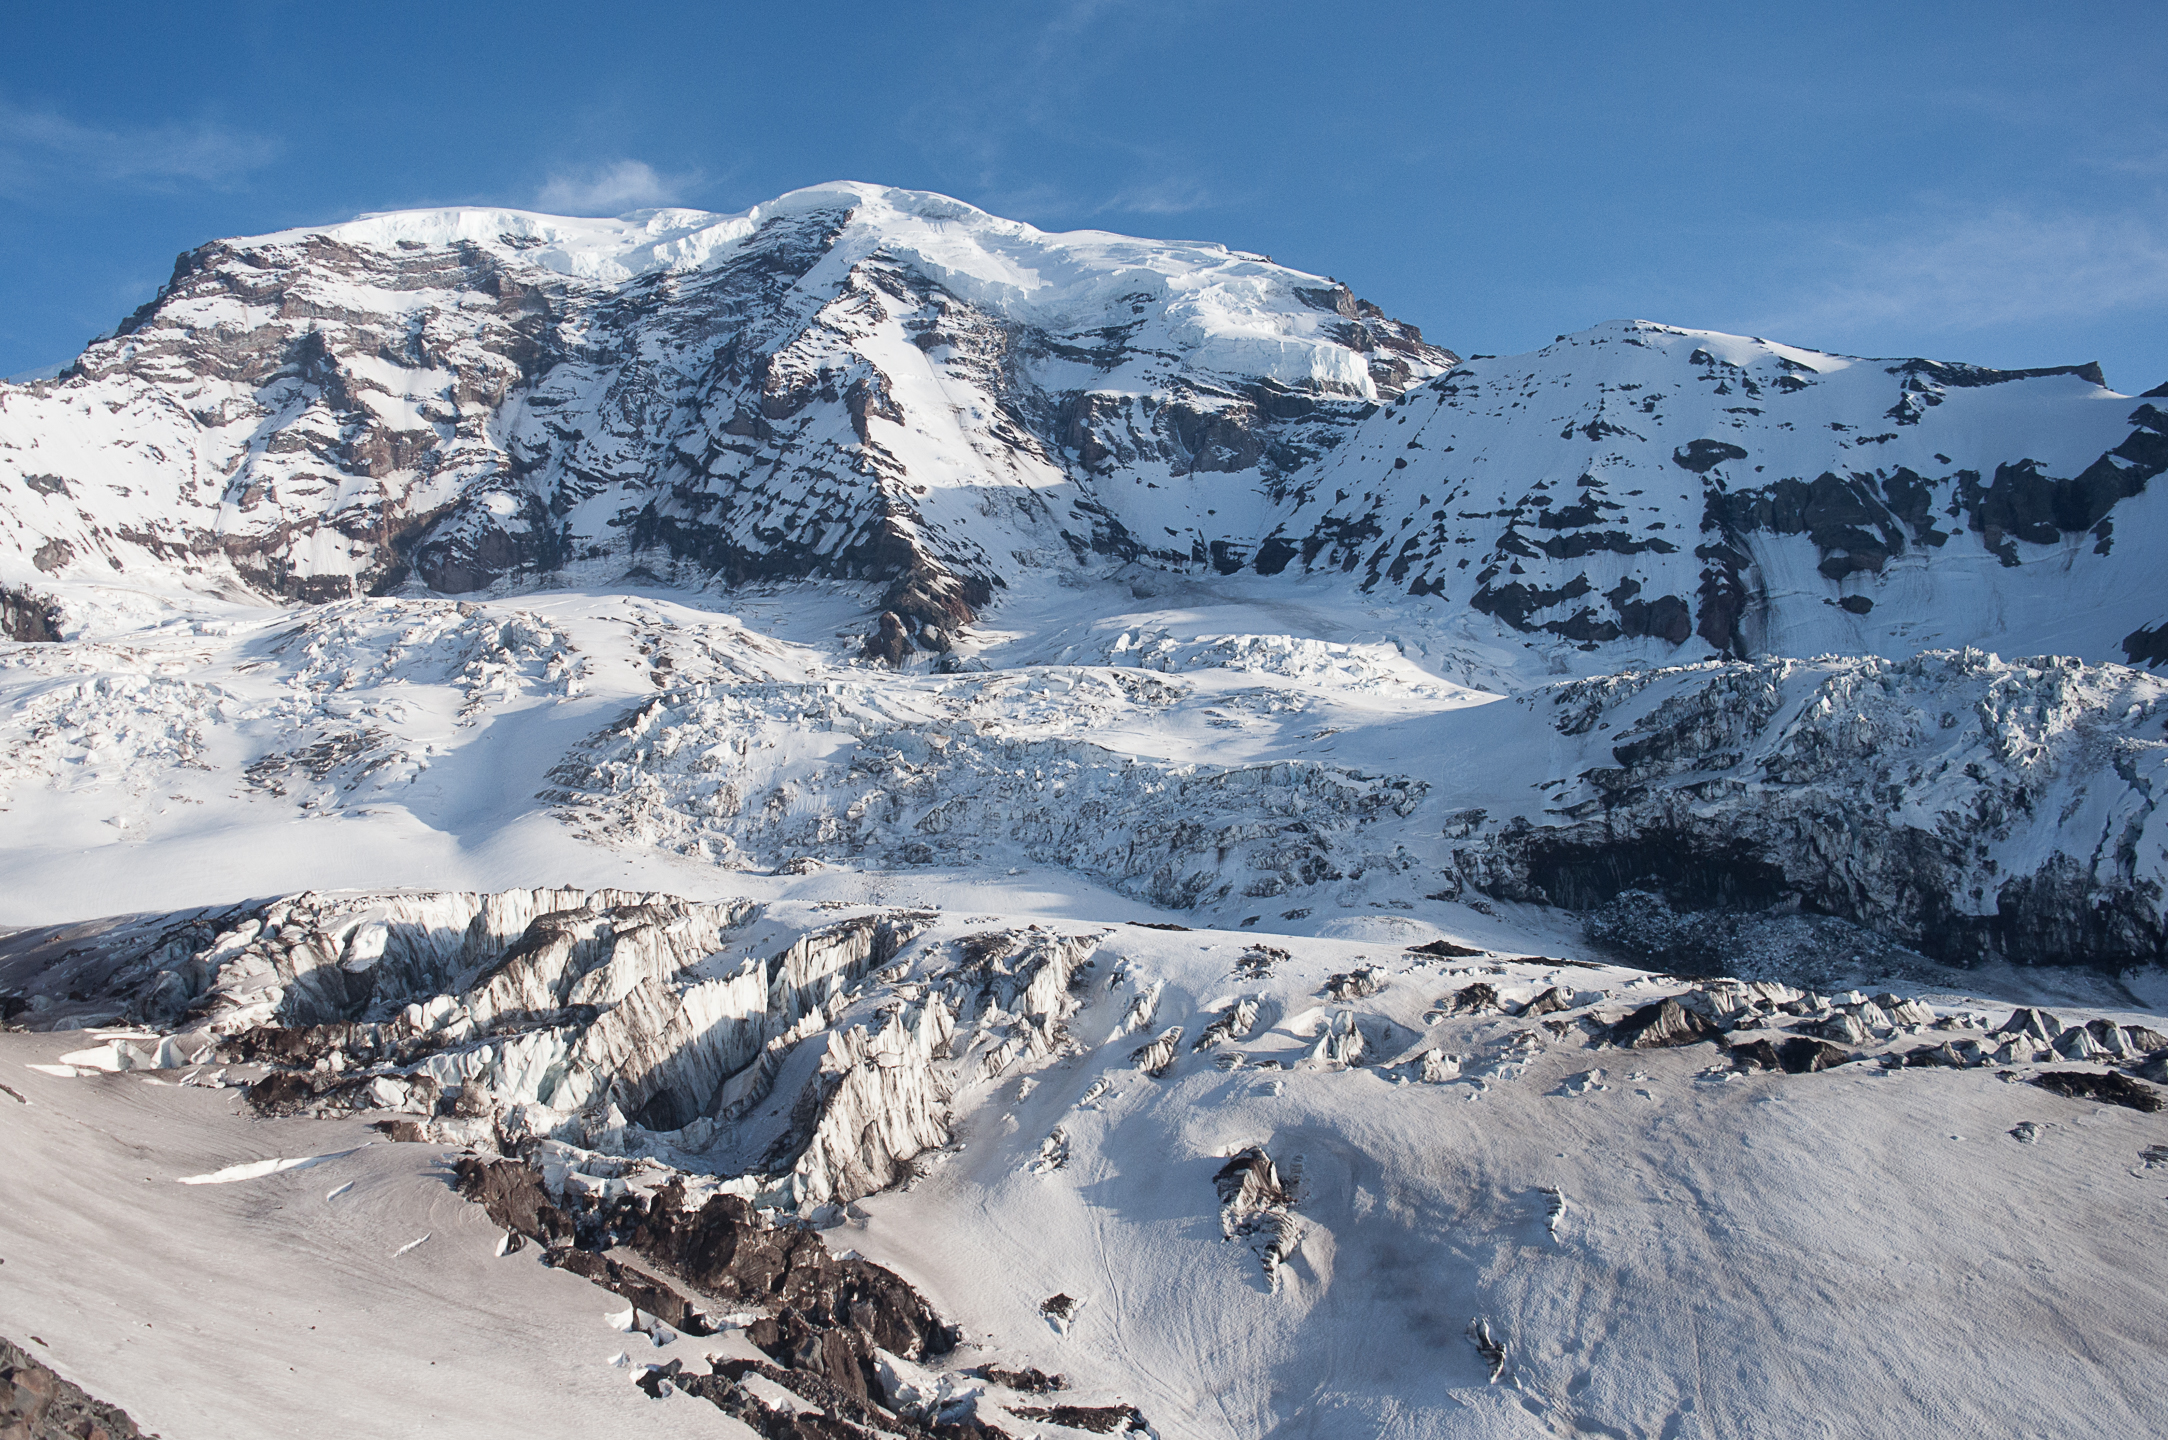
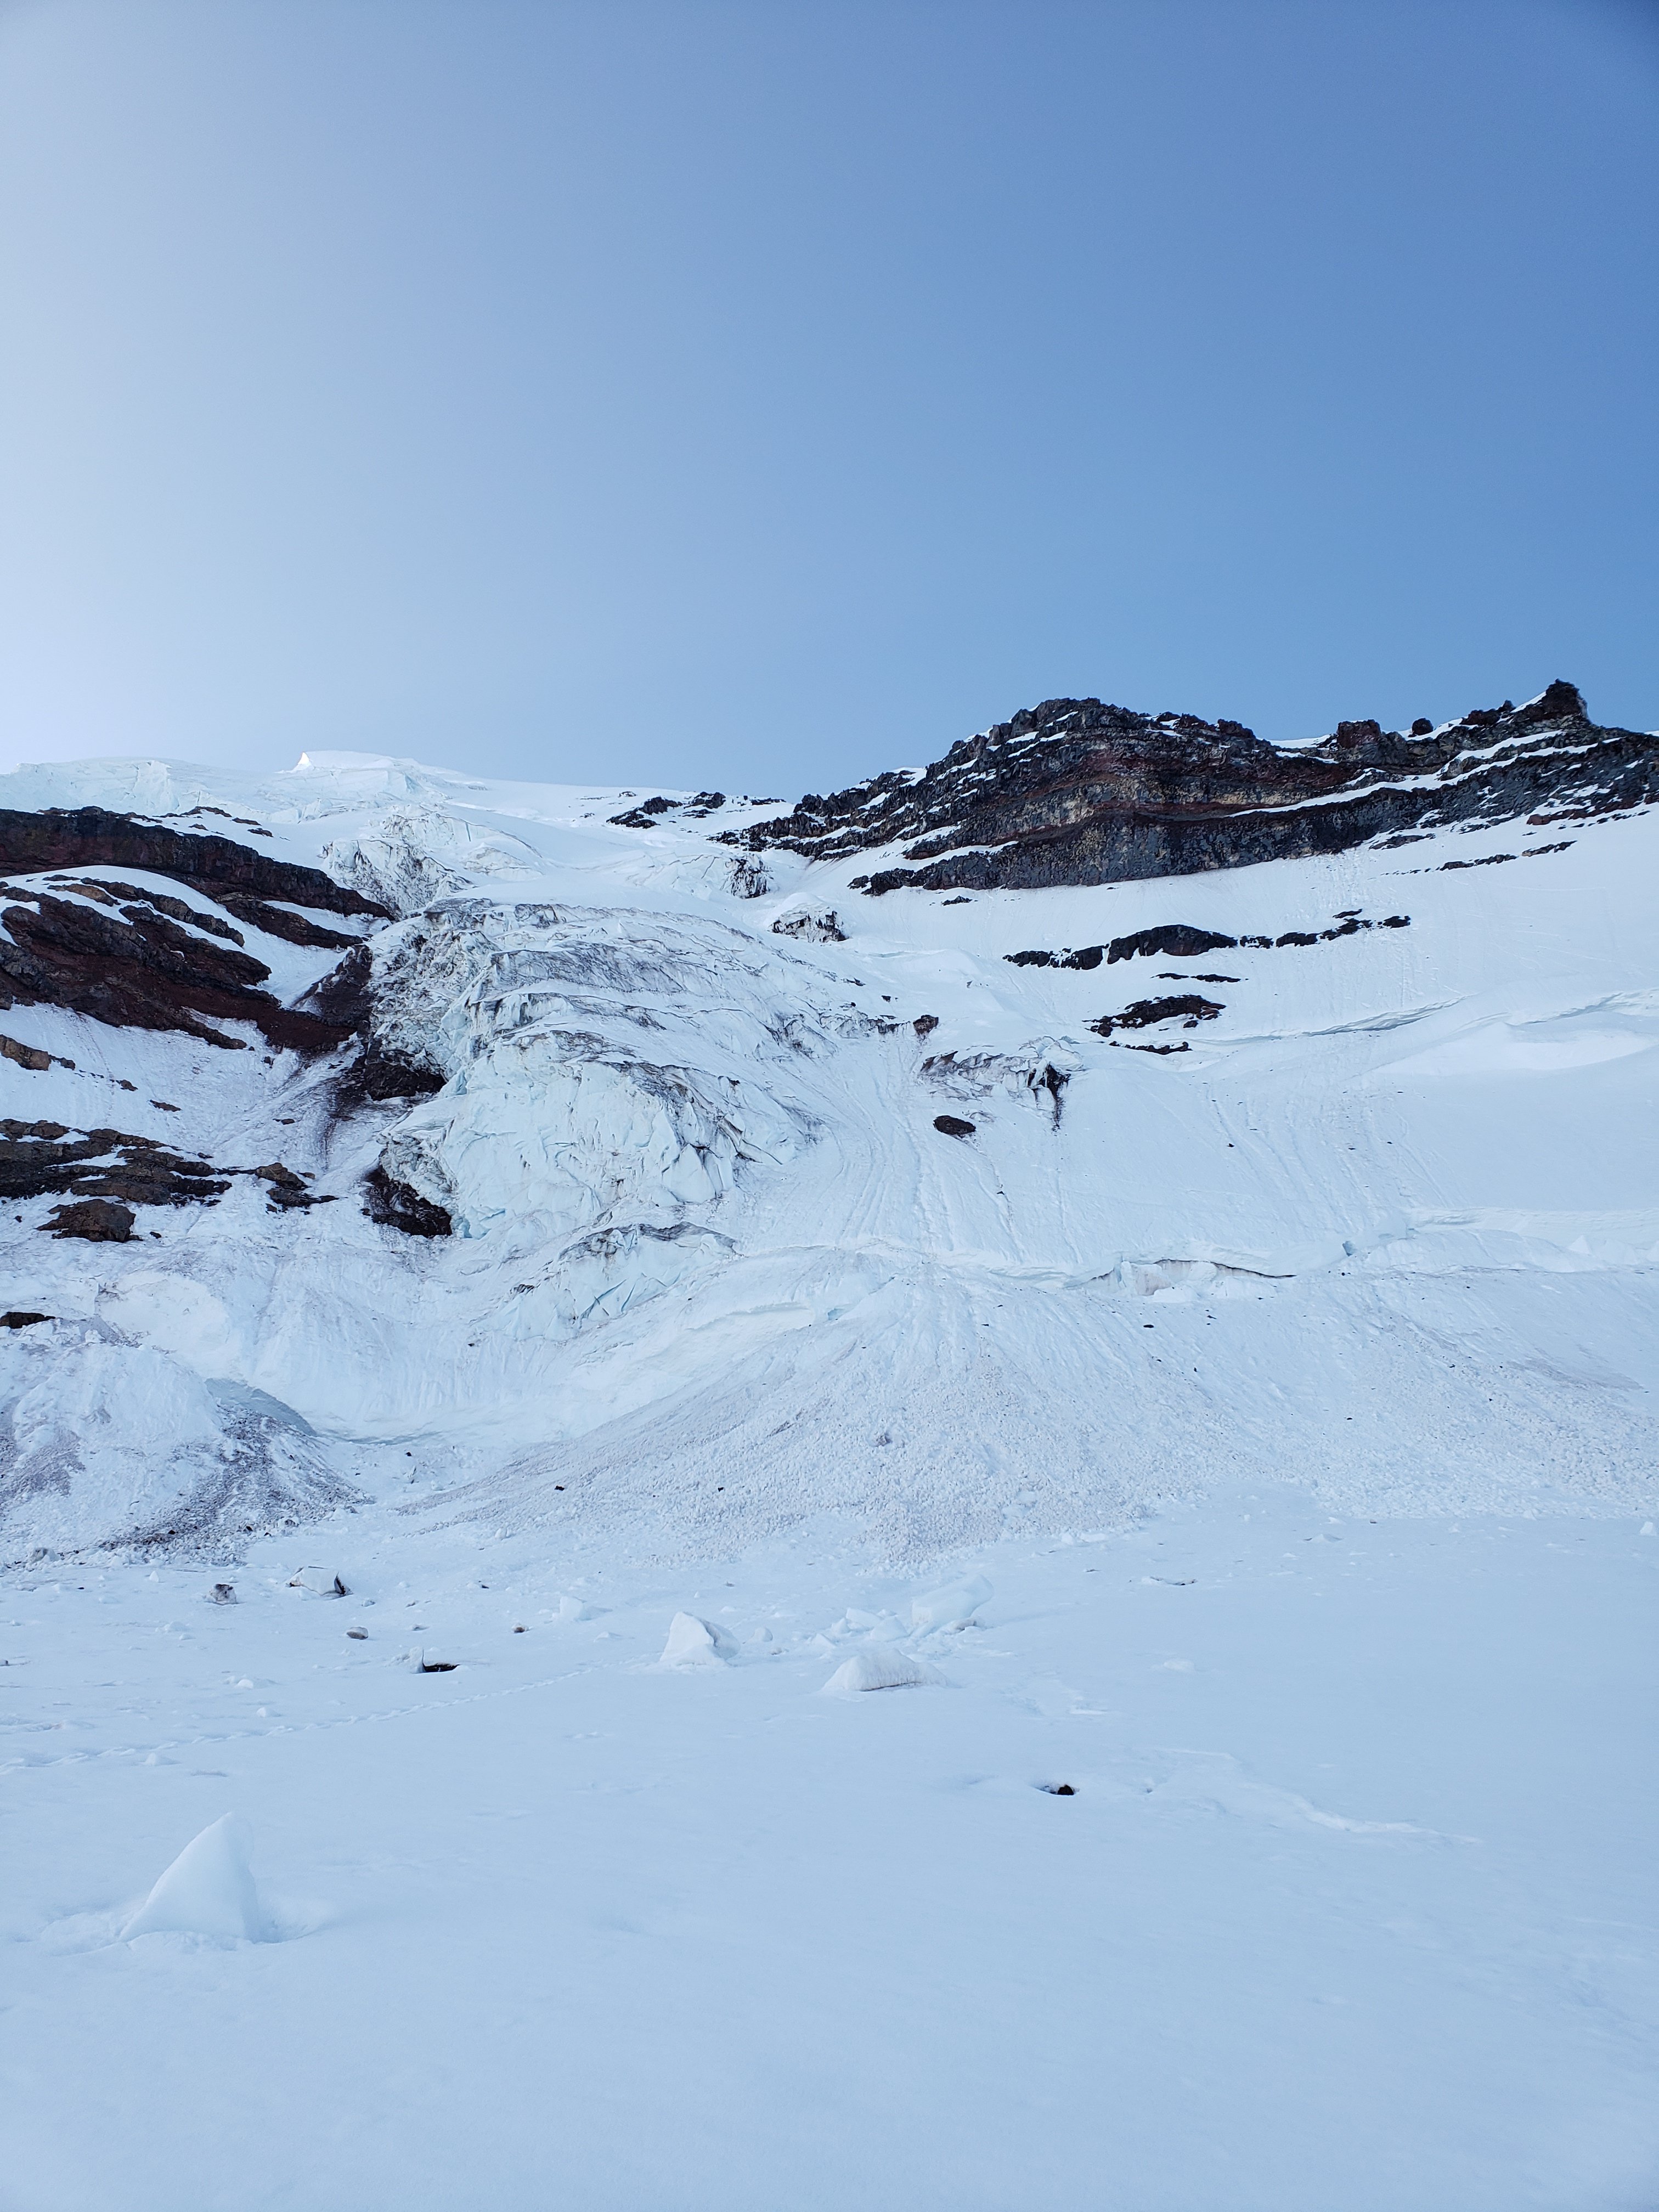
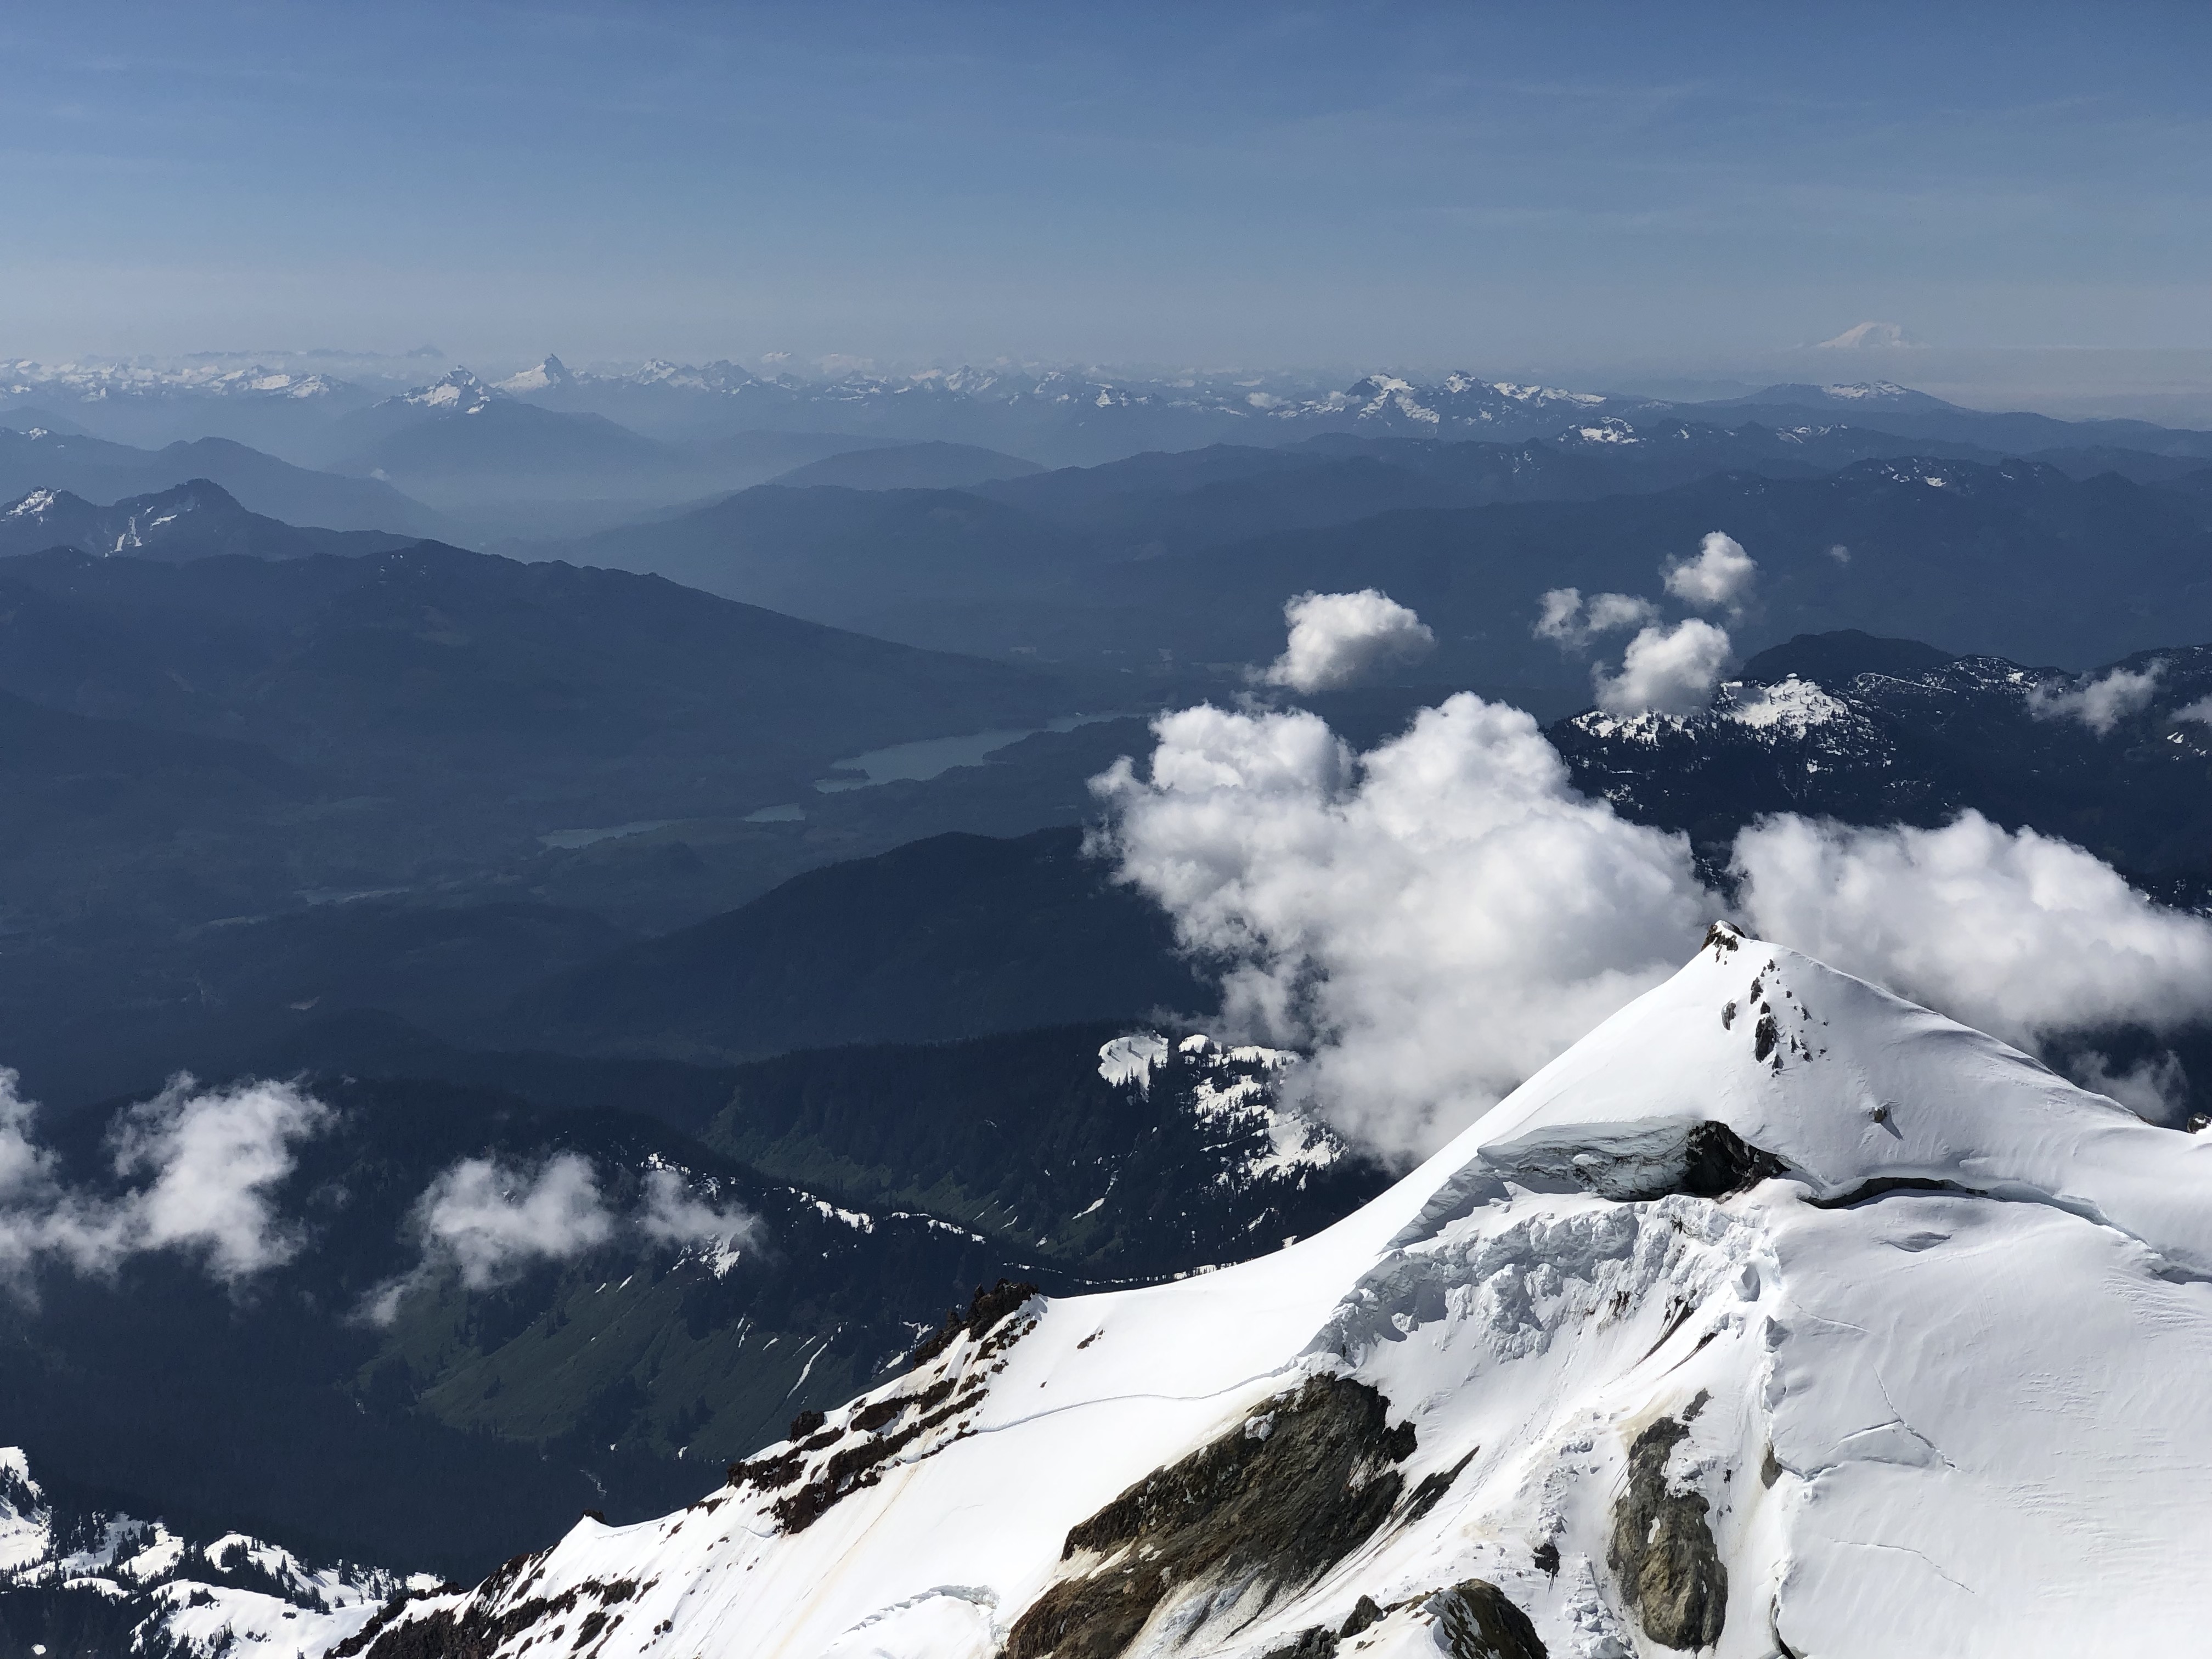
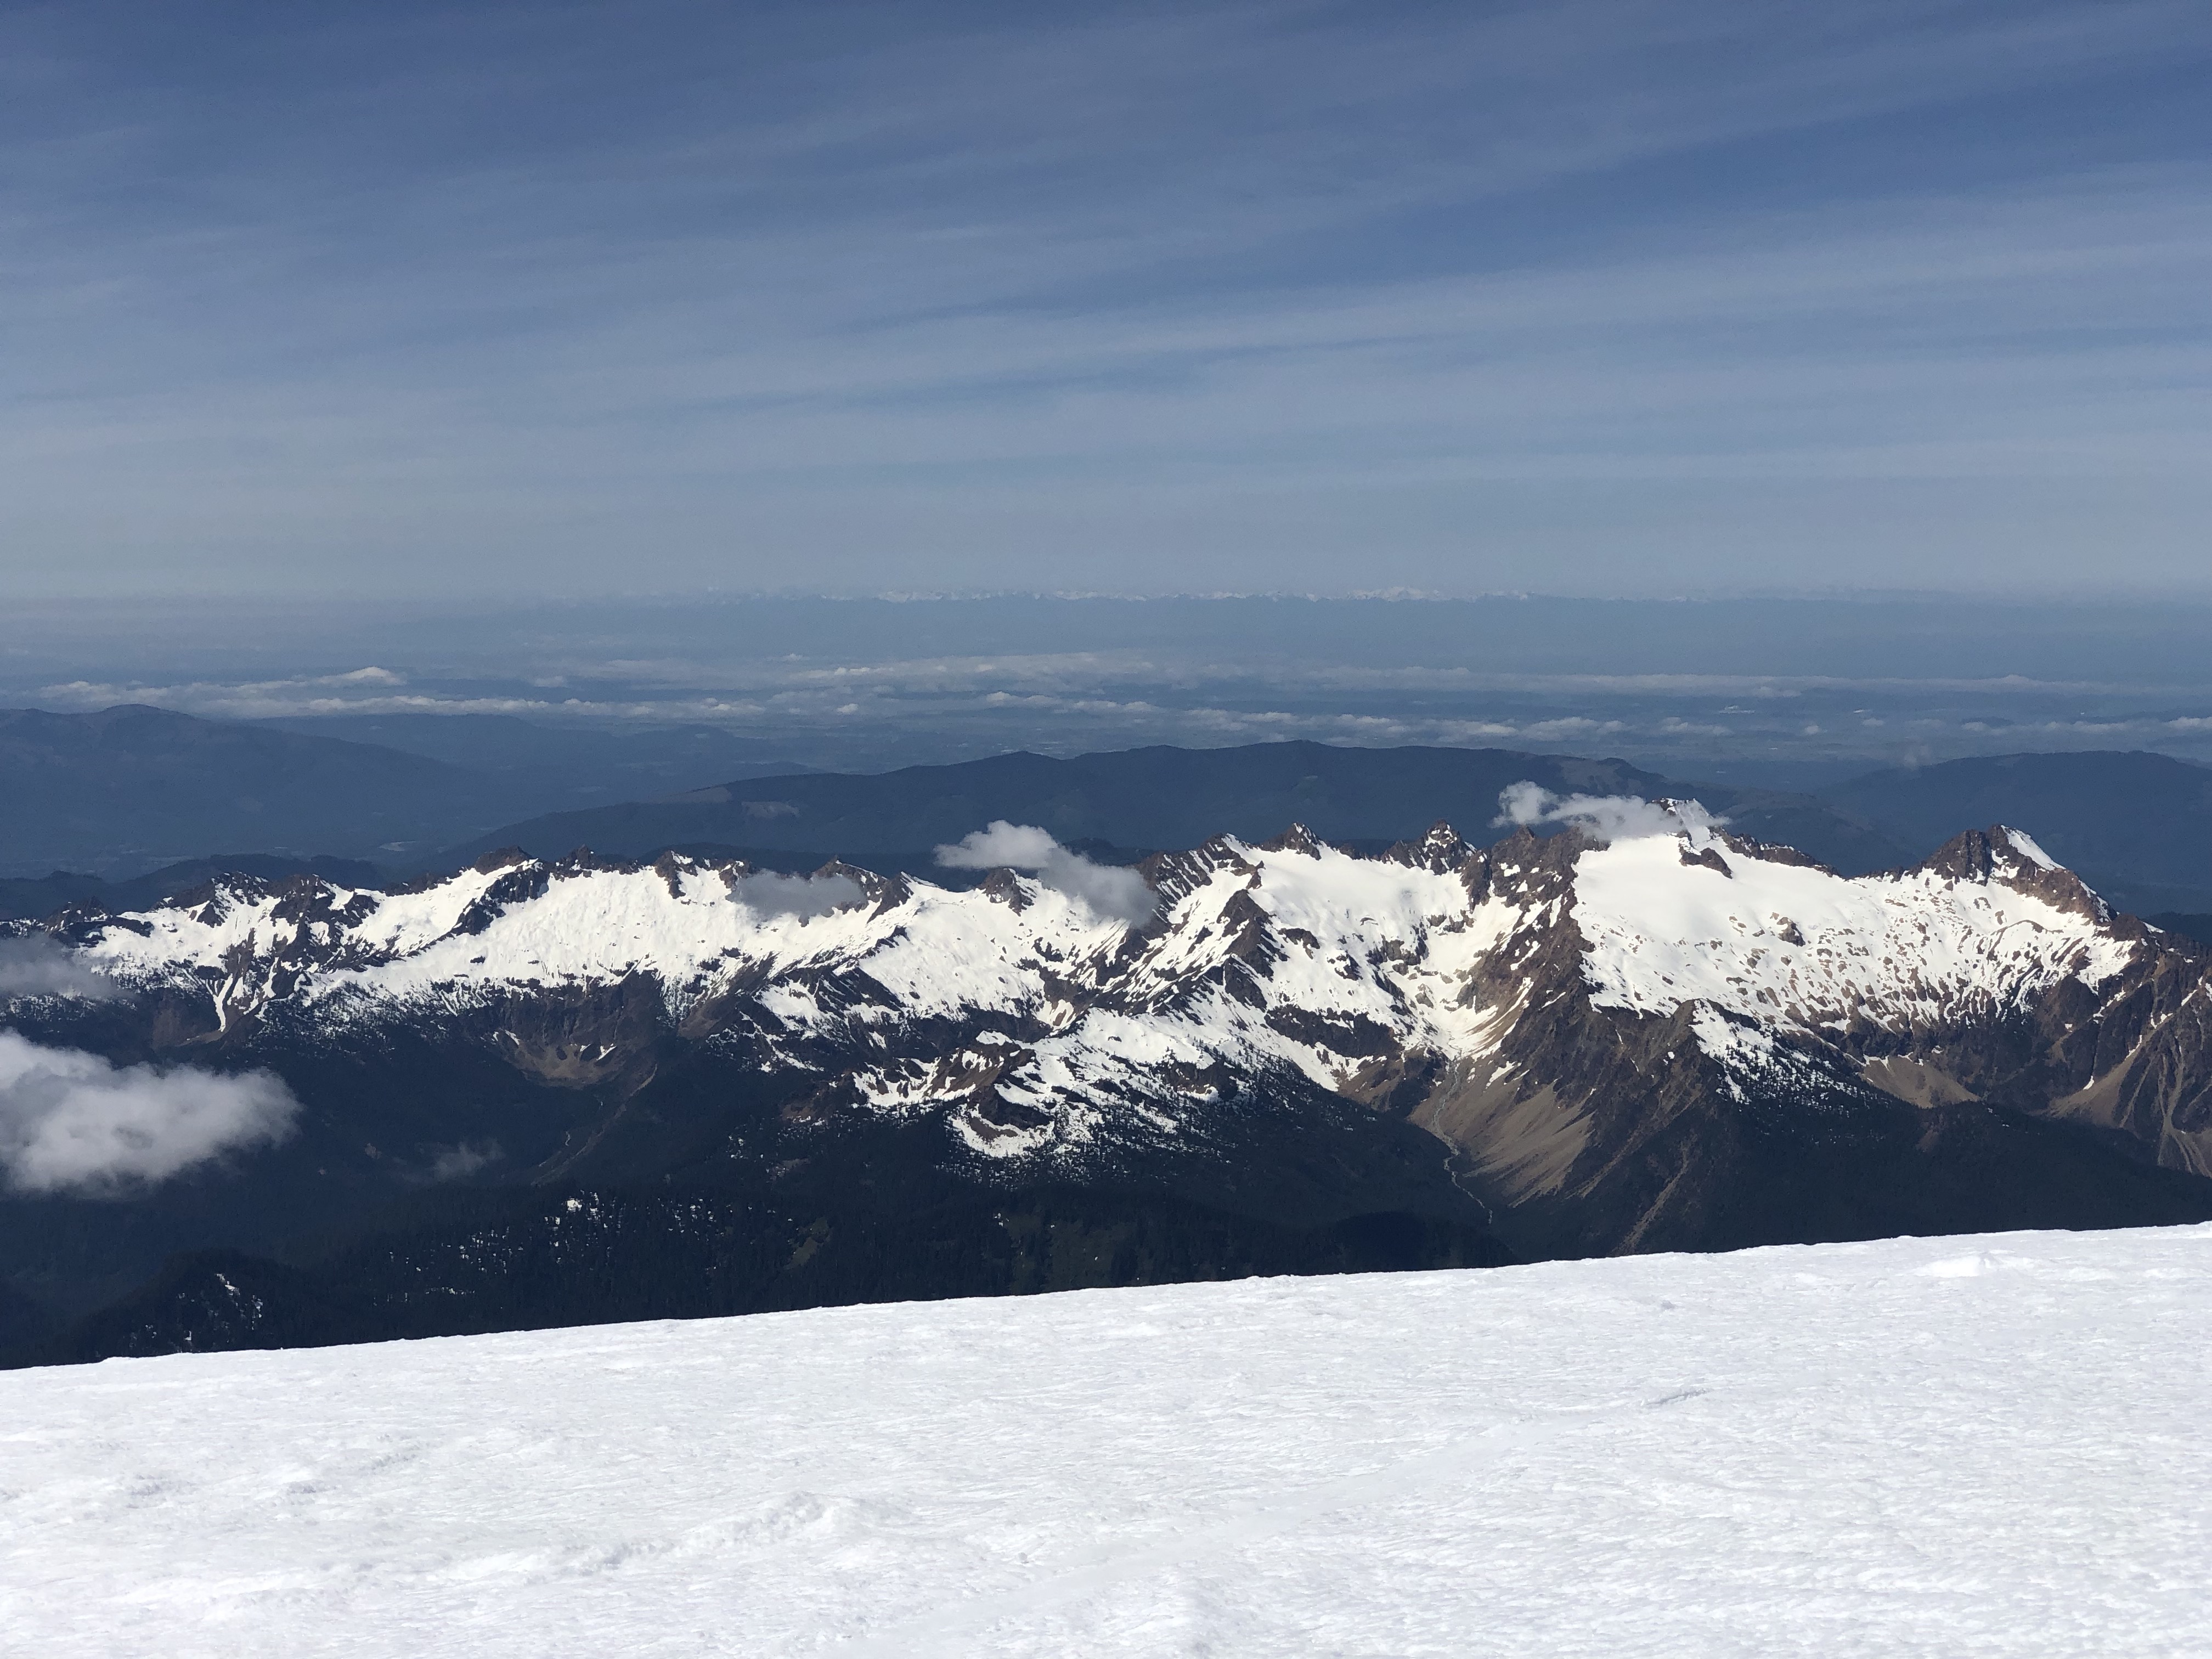
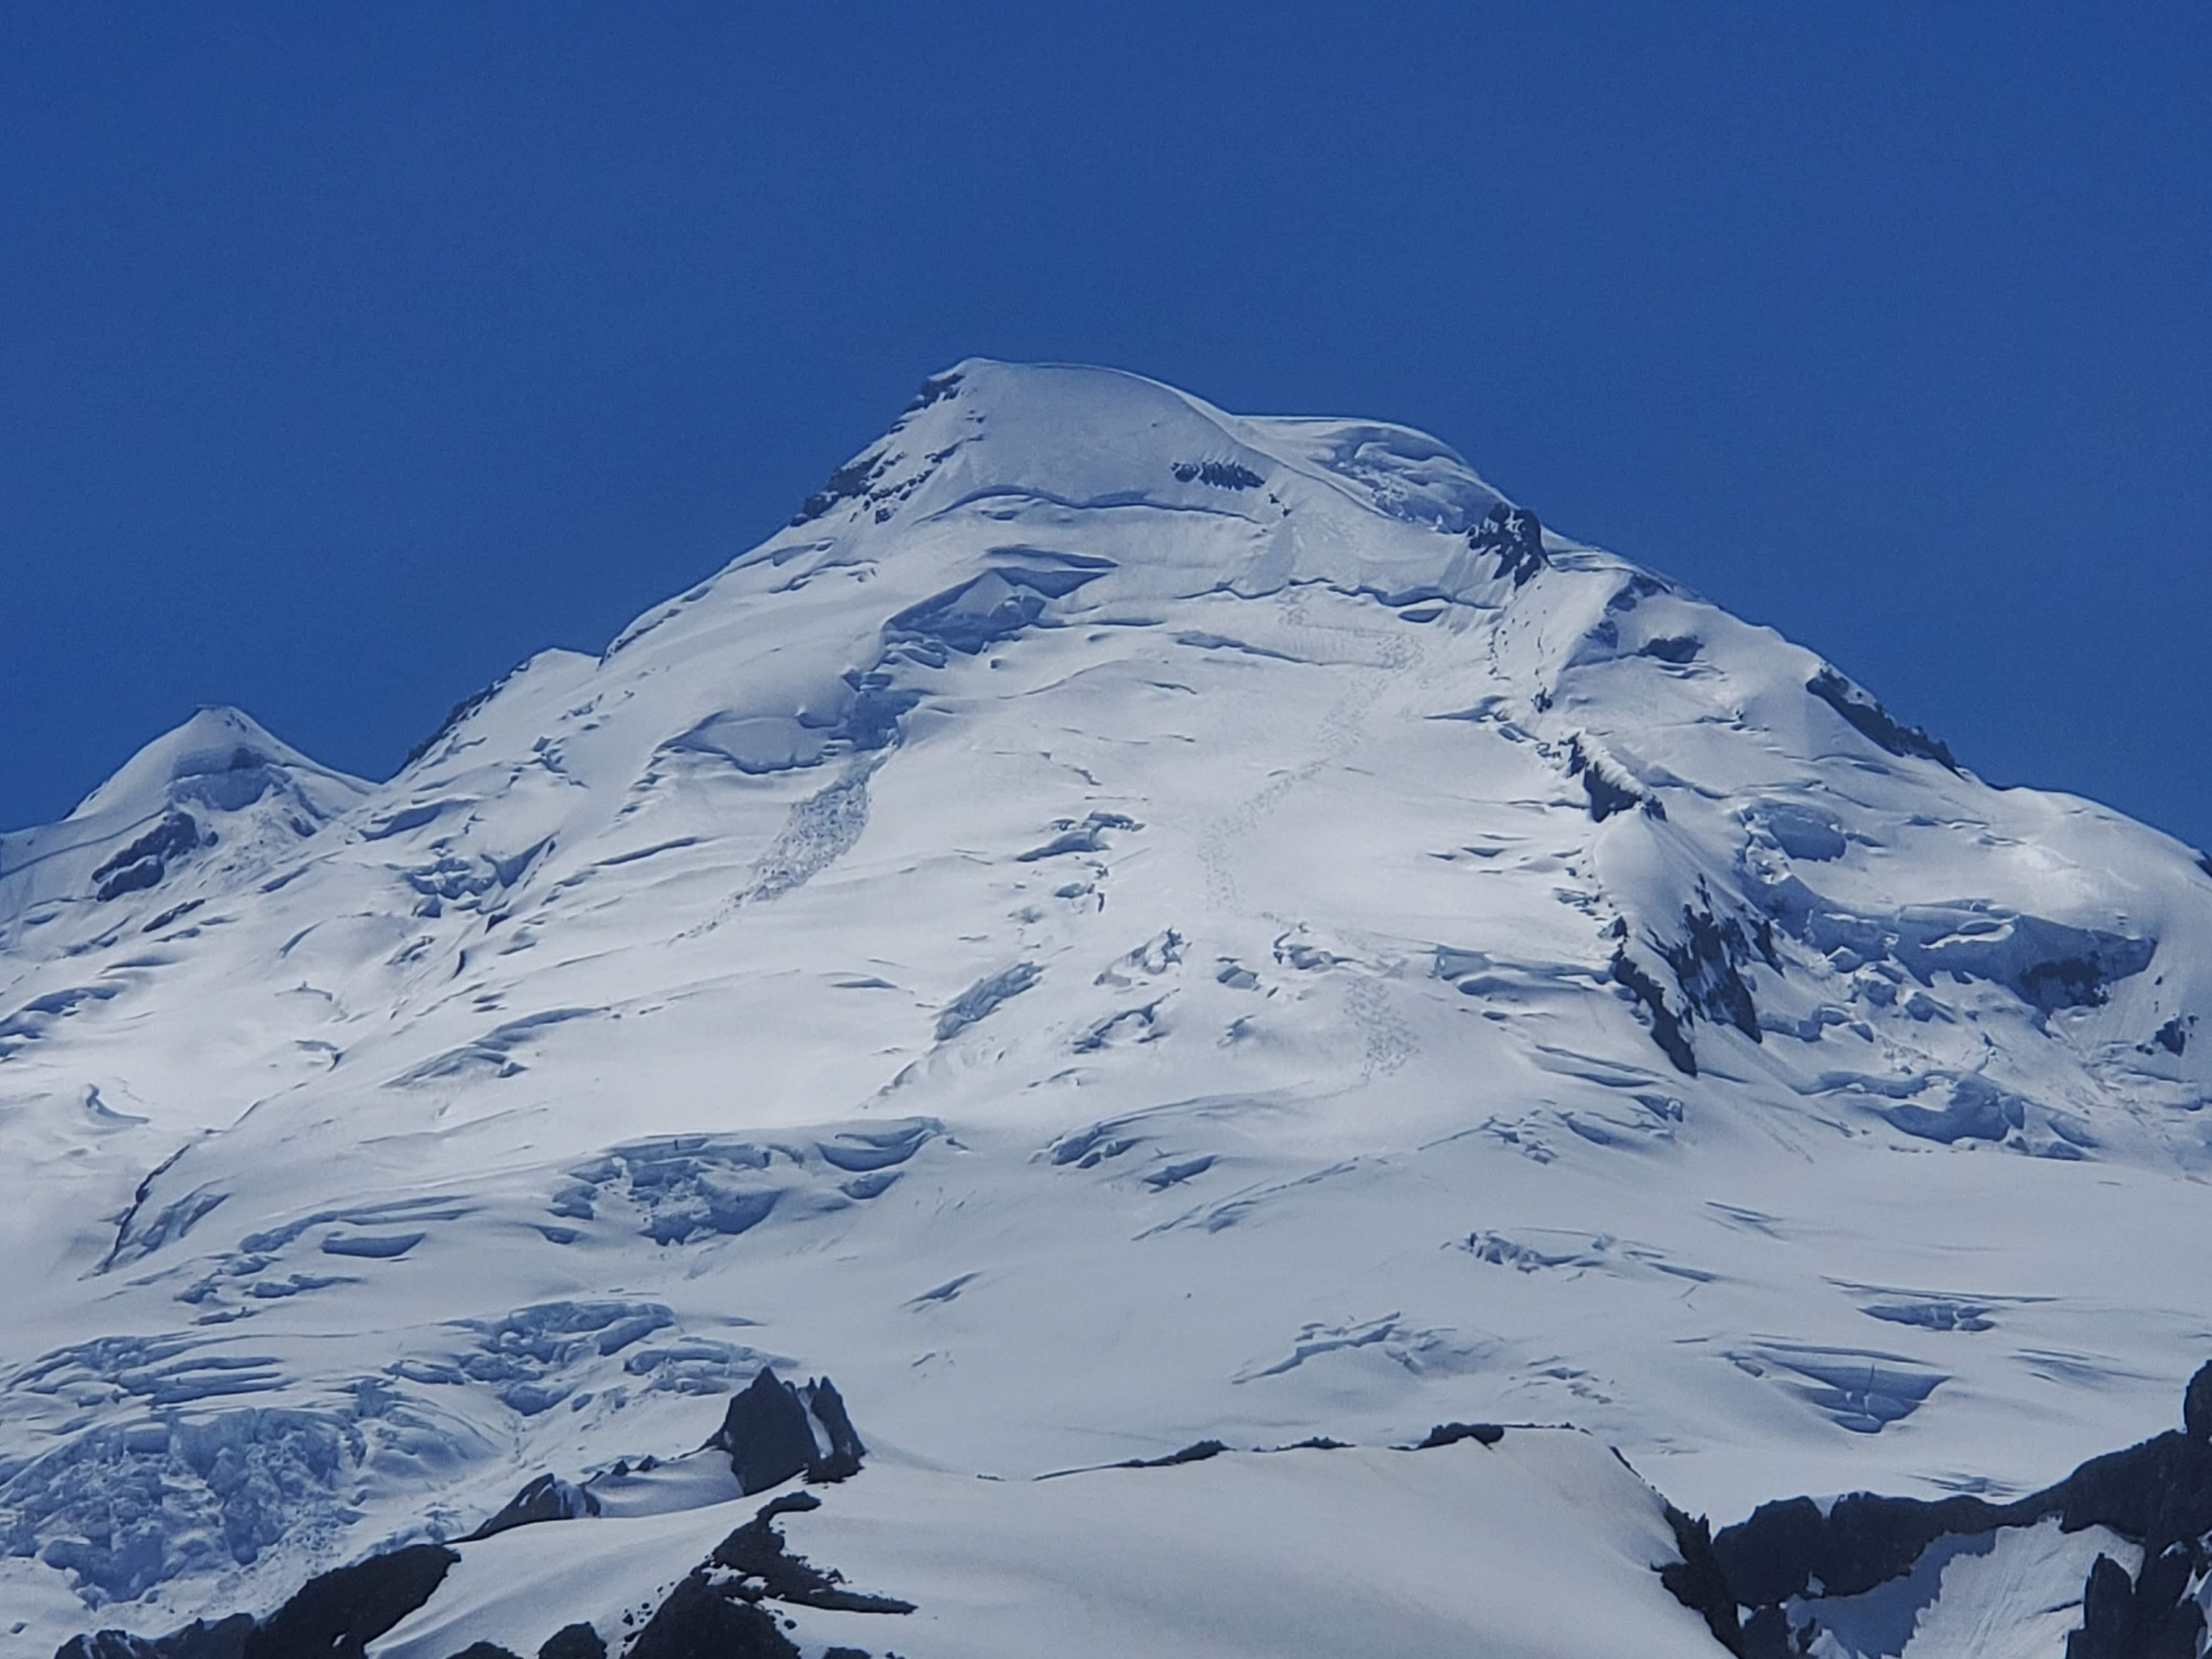
Trip: Mount Rainier - Liberty Ridge Trip Date: 06/03/2019 Trip Report: My friend Matthew and I headed up a couple of days ago to attempt Liberty Ridge, but in the face of high winds decided it just wasn't the time. The recent accident also definitely contributed to our unease. If anyone is interested in conditions, however, here are a couple of photos. The boot pack on the Carbon went through the right of the two obvious corridors through the chaos in the photo, the line seemed very direct from what I could tell from Curtis Ridge towards the west side snowfield below Thumb Rock. A couple of skiers we ran into said the schrund at the top of the Carbon looked very manageable. The ridge itself looks pretty well covered still, with exposed ice near the top of the Black Pyramid, but in what appear to be very manageable quantities. Crossing the Winthrop was mostly trivial, with one narrowish bridge near the far northwest side. View of the Carbon: Close up of the route: Gear Notes: Just standard glacier travel gear for the Winthrop. Approach Notes: Standard approach from White River

-
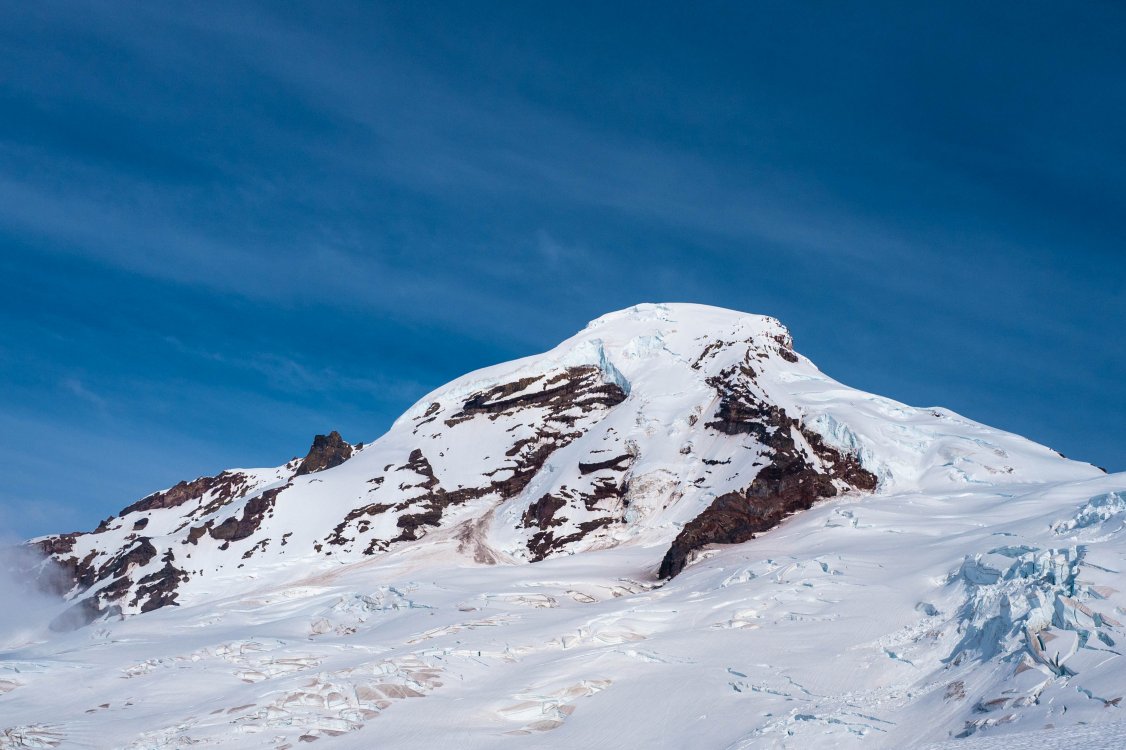
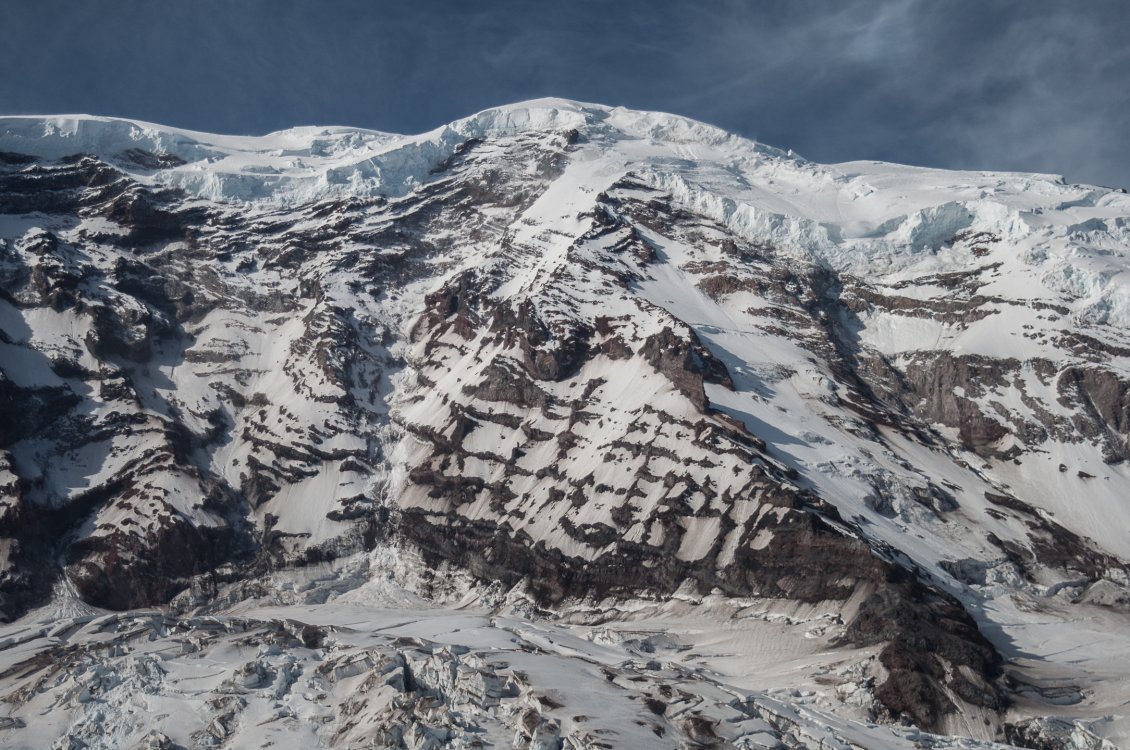
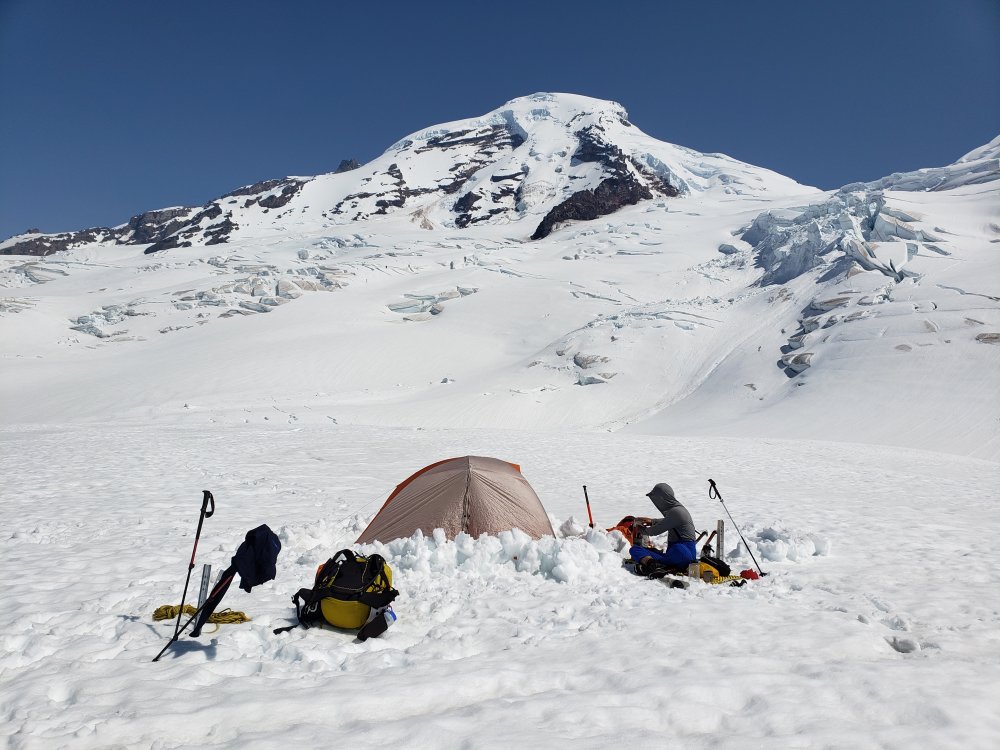
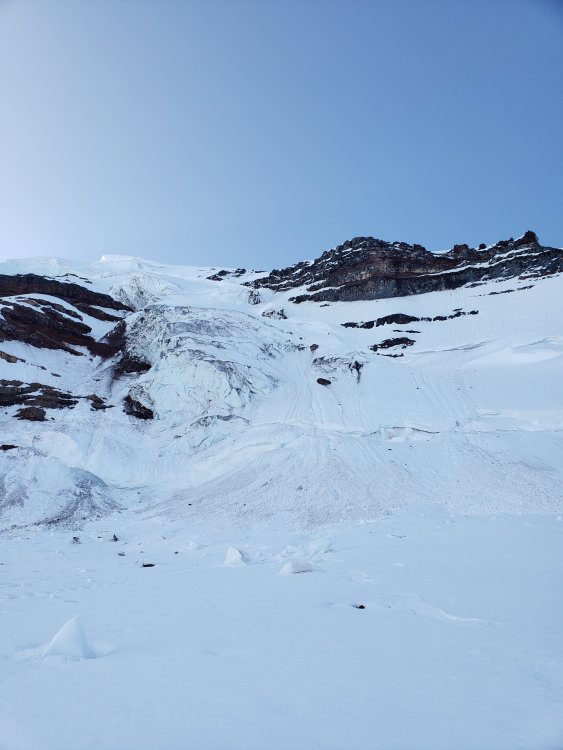
Trip: Mt. Baker - Coleman Headwall Trip Date: 05/30/2019 Trip Report: Trip dates: 5/30 - 5/31 Party size: 2 Met couple parties did NR with good conditions feedback. We camped at ~6525ft on the way to NR with a clear view of our right side route. We were the only party camping in that area. We can see boot path going towards the base of our climbing route, but just up to the last crevasse close to Roman Nose and it was turning left. We started our approach to the base of the climb following boot path and latter we were on our own. Met a family of crevasse around, like we were on some kind of an island. We had to set up a belay while one of us jump over, otherwise approach to base of the climb was navigating around few other crevasses. Our climb started crossing a bergschrund on the right of the big alpine ice walls that was having a nice bridge. After crossing, we went up straight on a mix terrain of snow & ice until we got another bergschrund and a vertical ice of ~7ft on the other side. The bridge was a block of ice ~2.5ft in length and ~1ft in width and the narrow gaps around. We crossed setting up a pitch with 2 pickets and 2 ice crews. We got semi soft snow above the ice wall, we were able to get over the wall. We continued going straight up close to the rock and went on right side, continued going up weaving around the rock until the only snow exit was on the left. We went on the left and continued going up and looking for a way to go over right side between rock bands. Once we got our way to the right side, we continued traversing and going up the slope, got on the ridge and to The Summit! We put on 2 pitches, the 2nd pitch was just with pickets. We simul-climbed the climb otherwise until little after we gain the ridge. The whole climbing route was a fun sustained steep! Descending Coleman Deming route was postholing. There are 3 easily visible crevasses on the route. Glissade was fun. It was a great day to seldom climb this beautiful Coleman Headwall route. Gear Notes: Used 2 ice screws, 4 pickets, 2 ice tools, 60m 8mm single and standard glacier travel gear. Approach Notes: Trail is clear of trees. Snow on trail starts little after toilet & camp signs.
-
Trip: Mt. Pilchuck - Mt. Pilchuck Trail Trip Date: 05/11/2019 Trip Report: First trip report here. Hi everyone! The road near the Heather Lake trailhead is terribly potholed. I drove a small sedan up there and made it without too much trouble, but if you're not used to swerving around potholes it could be difficult. The way back down was worse because of the all the cars parked made for less maneuvering room. Once past the Heather Lake trailhead, it's smooth sailing though; the road is clear and in fairly good shape all the way to the Pilchuck trailhead. Breaking out of the forest is where the snow begins. It could be skinned, but I ended up booting the whole thing since the snow was conducive to hiking and it was quicker to do that than take off my skis again to get over the rocks higher up near the summit. I started my descent down the Gunsight around 10am. It was mostly melted out near the bottom, but there was a small amount of snow left on skier's right that allowed me to ski down to the bottom. Judging from other trip report photos from earlier in the week, I'd expect it to be melted out entirely not too long from now. From there, I hiked up to the left through the trees and headed down Larrison ridge to meet up back with the trail. Gear Notes: Ski touring basics Approach Notes: Rough road to the trailhead. Trail is snow free until breaking out of the trees.
-
Trip: Mt Redoubt - NE Face Trip Date: 06/02/2019 Trip Report: We had a chill day into base camp on Friday, the trail brings you all the way to the basin, however is hard to follow at times (and hard bushwacking at times with A frame ski carry). As other reports mention there is a water fall that will get you quite wet on the approach (bring dry socks!). Near the waterfall and above there were some carins you can follow they will take you towards the Lake and the start to the South ridge, so once in the open we veered off the " carin "trail" to camp. Instead of camping in the moraine (as most beta seems to suggest) we opted to camp a bit lower closer to the river so we would easily be able to pick up overnight gear on our way out. We woke up around 4:00 and skirted towards the moraine and then up to the base of the NE face. The Face was mostly fun hard snow but near the top it was a bit soft. We then headed onto the rock for some interesting climbing in ski boots! Next we climbed steep snow to the saddle just to the right of the summit, this was quite mushy. We left gear at the saddle but it may be wise to bring with you as we found what looked like the rap line for the South route close to the summit. we then however down climbed back to our packs and skis, with one easy rap we were into down-climbable steep snow and then into some mushy skiing out of the couloir. We followed the south ridge route all the way back to our overnight gear skiing almost all the way to bivy spot. We then started back to our car getting to it around midnight. Gear Notes: N/A Approach Notes: N/A
-
Trip: Sloan Peak - Corkscrew Trip Date: 06/01/2019 Trip Report: My partner Alex and I climbed Sloan Peak via the Corkscrew Route yesterday. We left the parking lot on the North Fork Sauk River Road at 8:30 am and with a fairly leisurely pace made it back by 9:00 pm. This is a great shorter alpine trip with all of the fun elements - wacky river crossings, a cushy footpath most of the way, some glacier walking, heather ledges, and a short scramble to a pointy summit with an amazing view. Highly recommended. The approach is fun this time of year! Plenty of slippery logs for the initial crossings over the Sauk River. We crossed 4 braids of the river by walking across the logs Man on Wire style! After this, the trail is in great shape and makes for easy walking. We stepped over a few patches of snow starting at 4500 ft and then put on our boots at 5000 ft. We booted through the soft but supportable snow up to the edge up the glacier and crossed fairly close under the east face. No issues with the glacier, few cracks are open at this time. I would not want to be there when the face is shedding much rock, but there was only a handful widowmakers embedded in the glacier when we passed through. The heather ledges have quite a bit of snow on them still but are passable. The gully next to the south rib is still entirely filled with snow so we went up and around a heather covered ramp with no-fall type exposure. Once there, it was a short 3rd class scramble on clean warm rock up to the summit. Glorious! The glissade down was a hoot! We hustled back down to the Sauk and managed to cross 7 braids of the stream?!? My partner gave up at some point and started marching directly through the river and soaked his pants and shoes. Ha ha. Then it was merely schwacking through devil's club, alder, and stinging nettle until we regained the hiking trail to the parking lot. Apparently we haven't yet honed our Cascades approach/deproach skills yet Gear Notes: boots, crampons, harness, ice axe Approach Notes: North Fork Sauk. River crossings were....

-
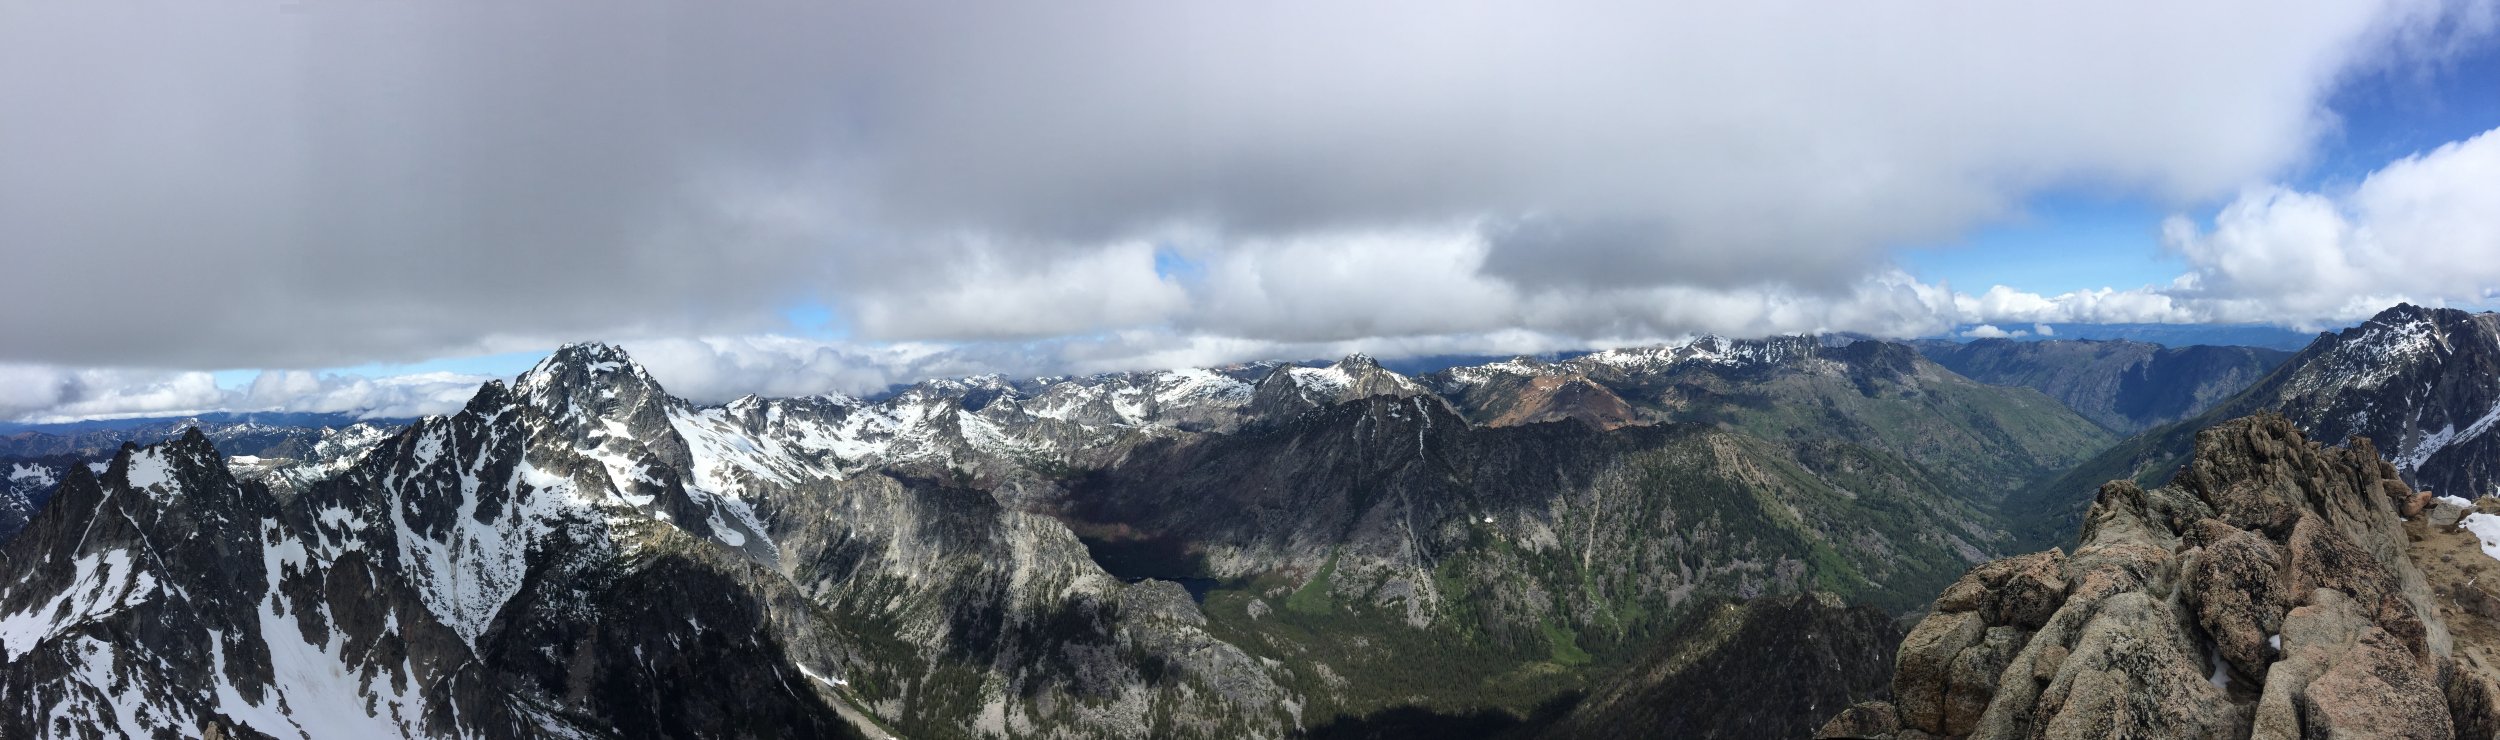
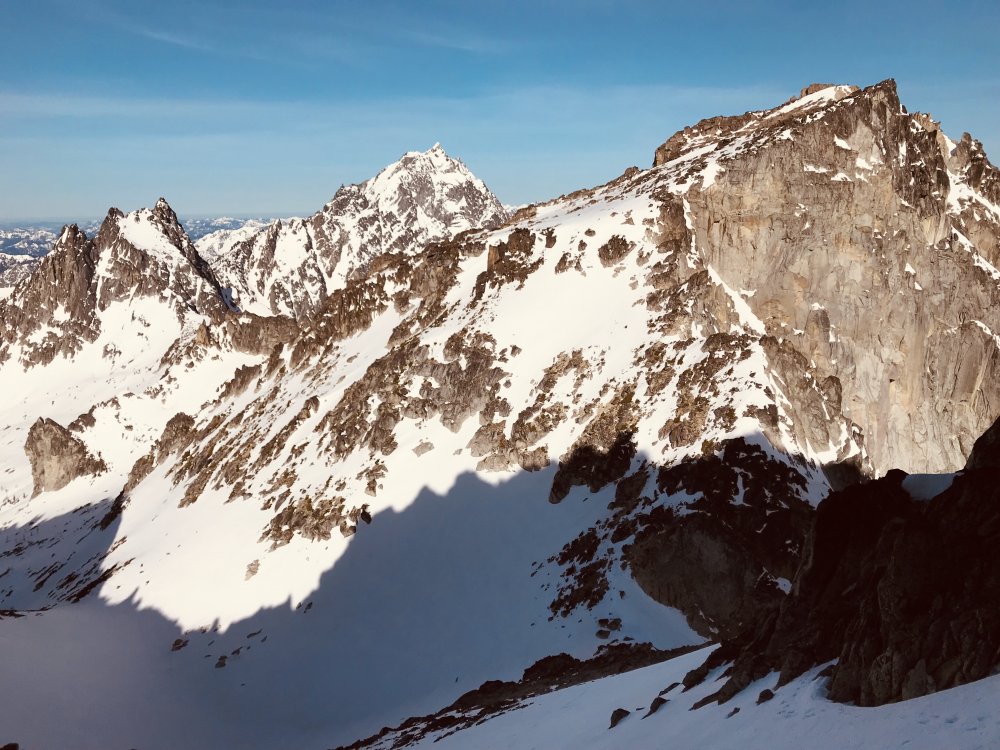
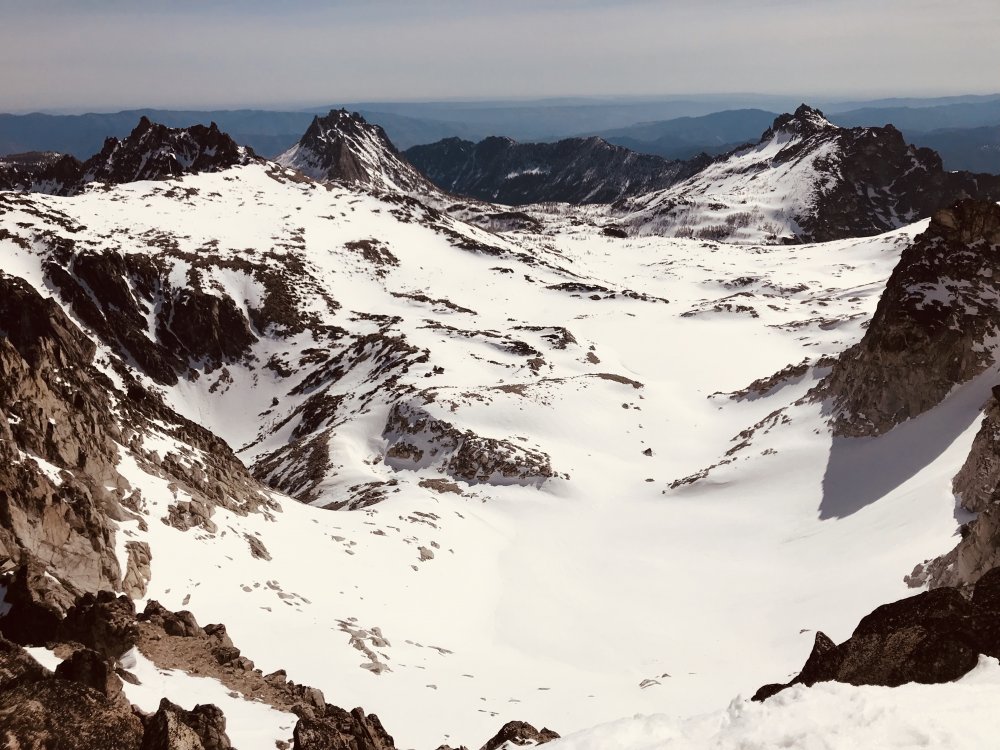
Trip: Mount Stuart - Direct North Ridge Trip Date: 06/01/2019 Trip Report: Disclaimer: in 2019 snow melted very fast. At least three parties made it to the summit last weekend. All crux pitches are dry. Some running water on easy pitches below the notch. The slab pitch is partially covered with snow. Need to cross patches of snow on the upper mountain from time to time. There are four scattered bivy spots on a ground after pitch five, a few spots higher up along the route that are not covered with snow but can fit one or two, a large snow ledge about 400 ft below the end of last pitch towards a false summit. Descended via Sherpa glacier. Left side (skiers) of it gets early sunshine and snow was soft to descent without crampons at 9am. Though my partners used them. Right side that stays in a shade was hard as rock. Gear Notes: BD .1, .2, .4 to 4.; Metolius 0&1; small nuts (placed one nut just because I can); 6 singles & 6 doubles, cordelette, ice axe, bivy, 1/2 crampons Approach Notes: ticks are swarming

-
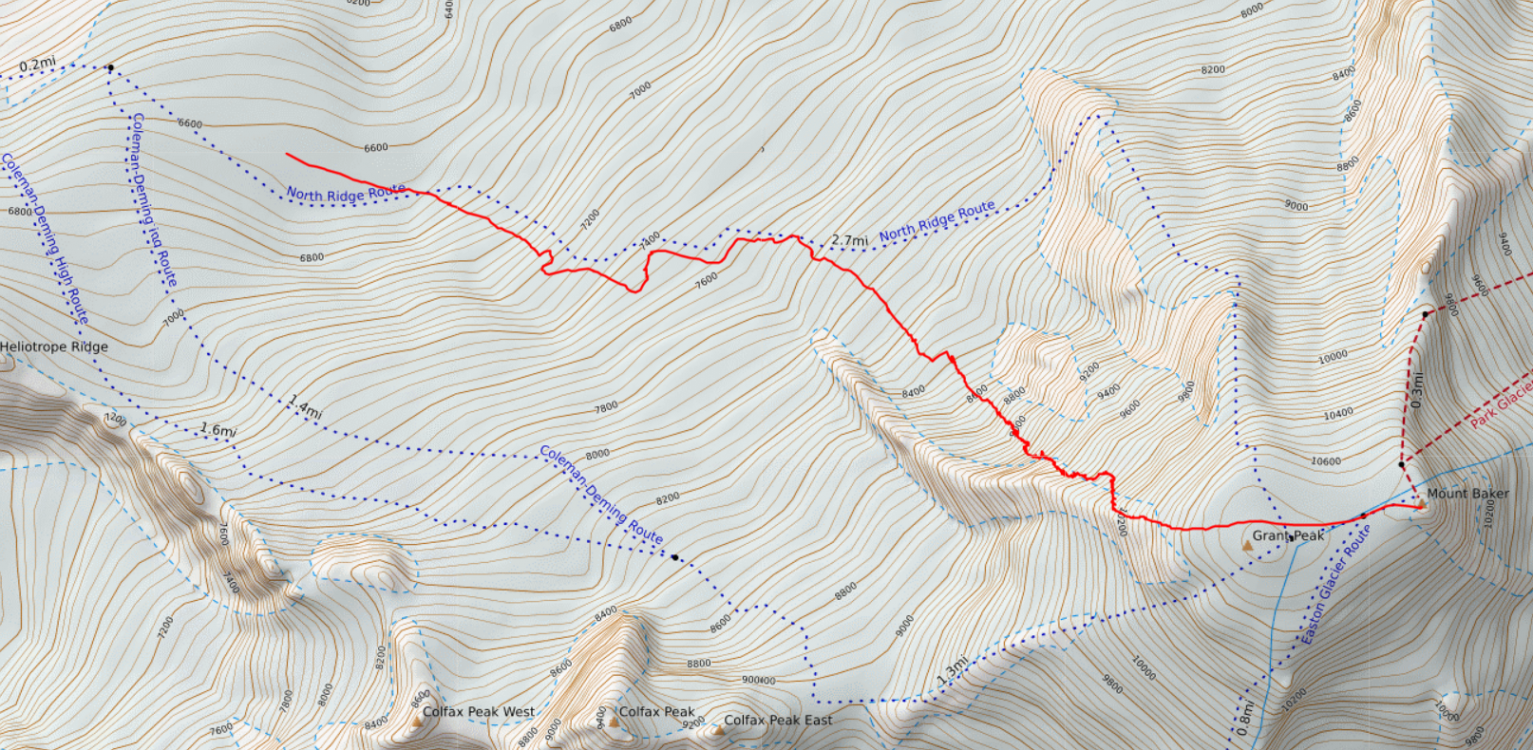
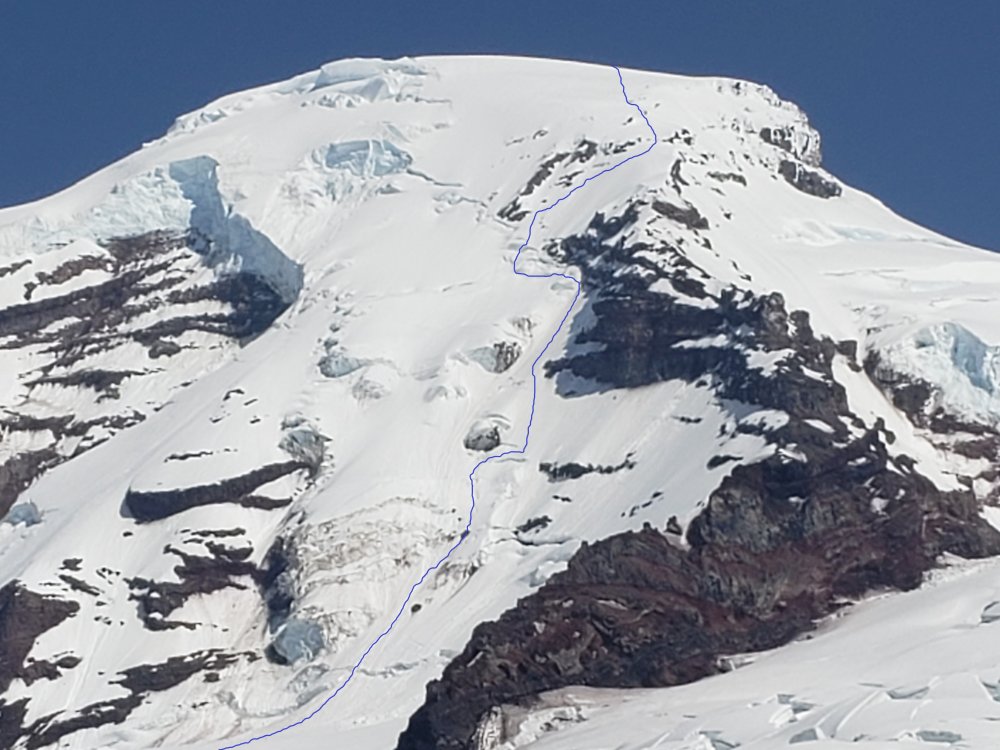
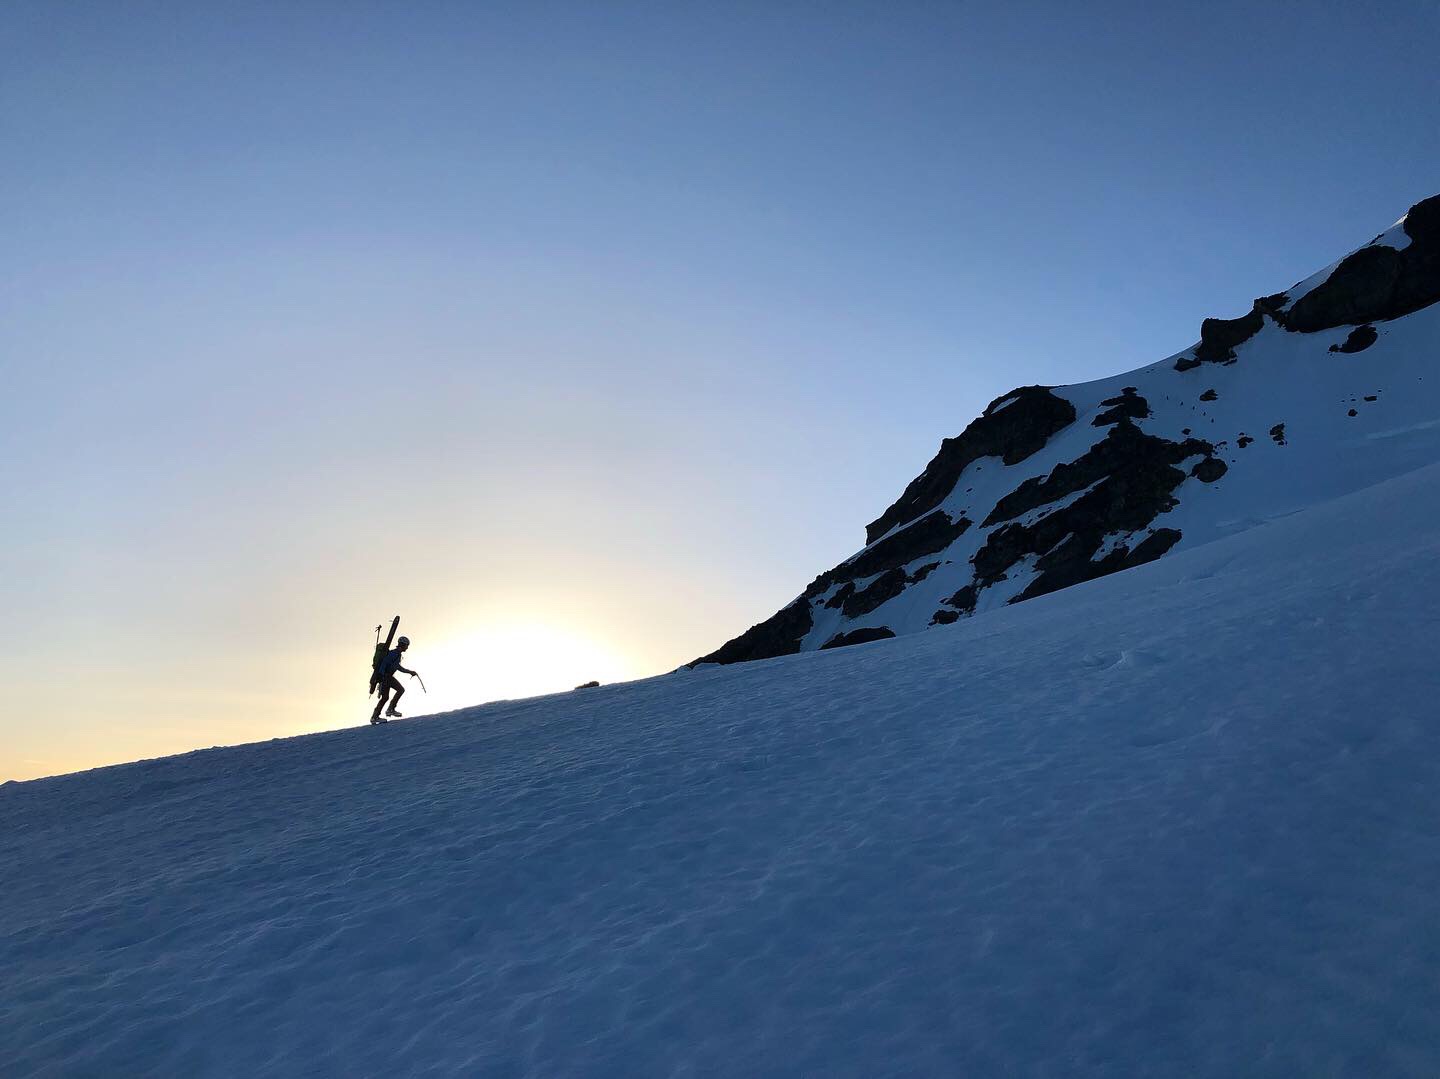
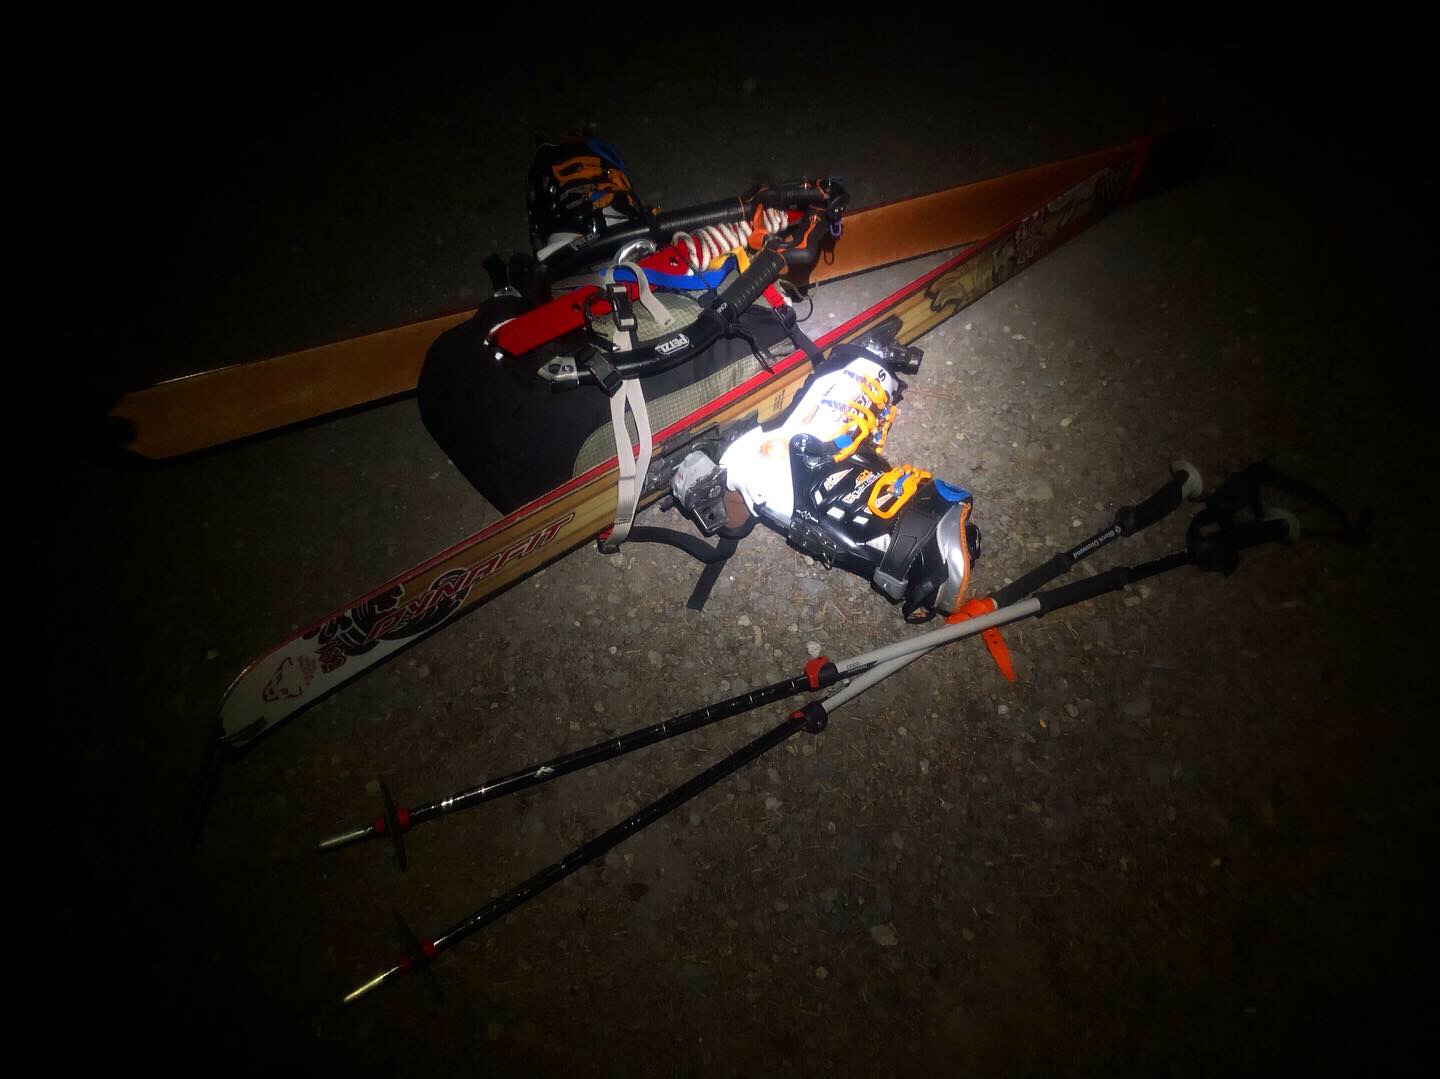
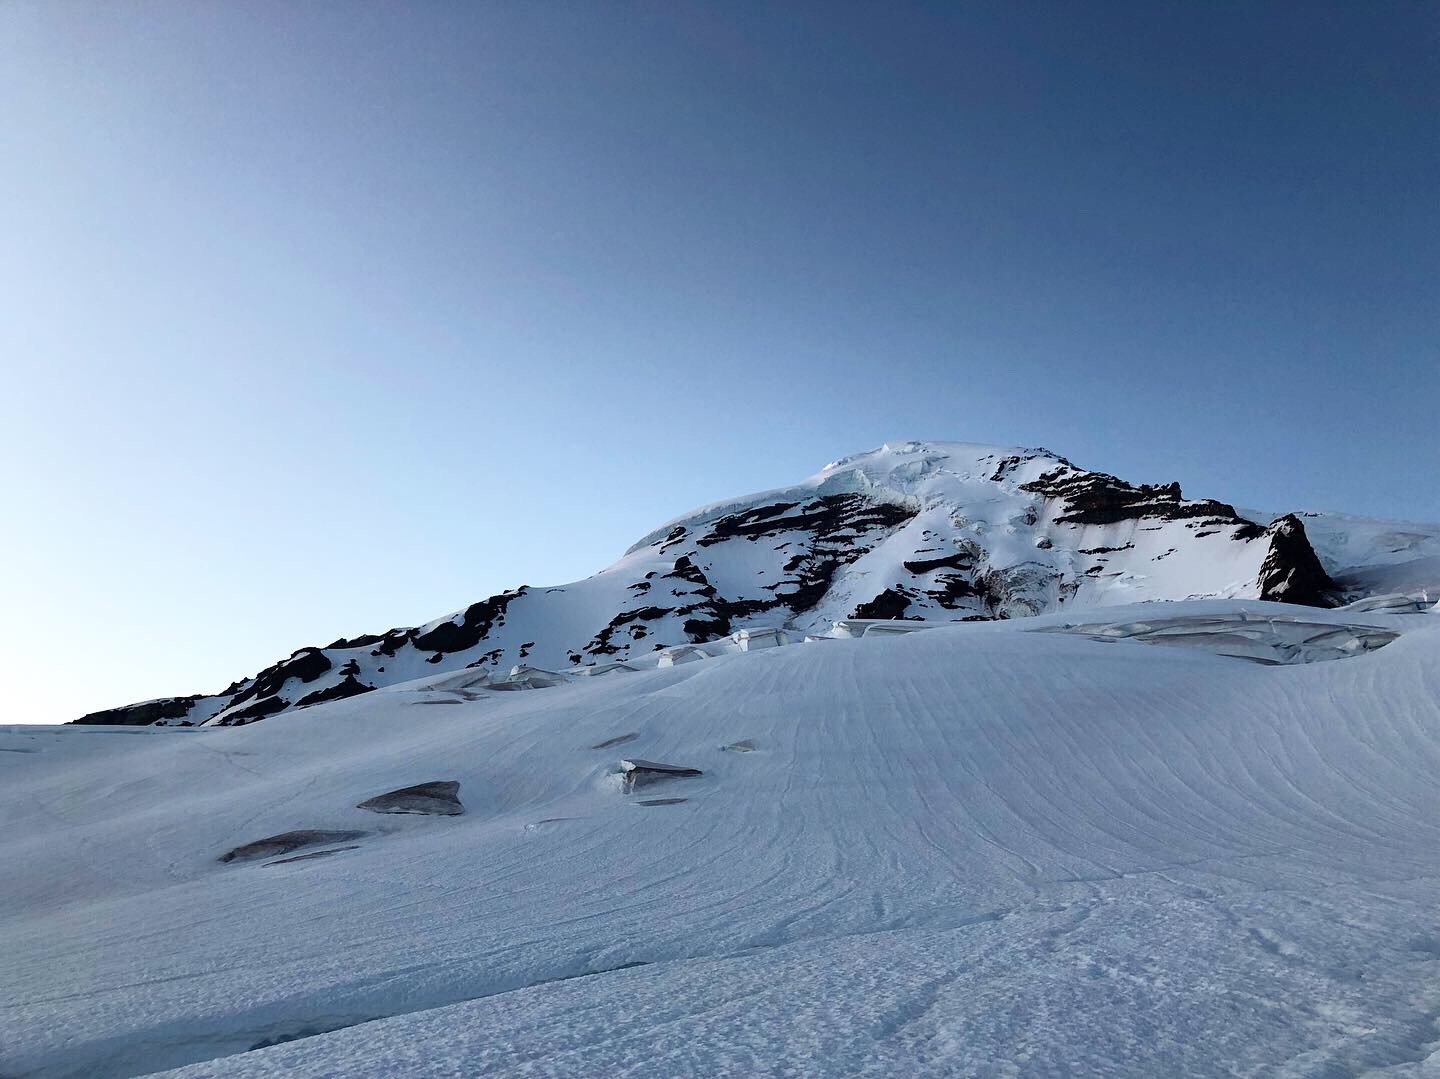
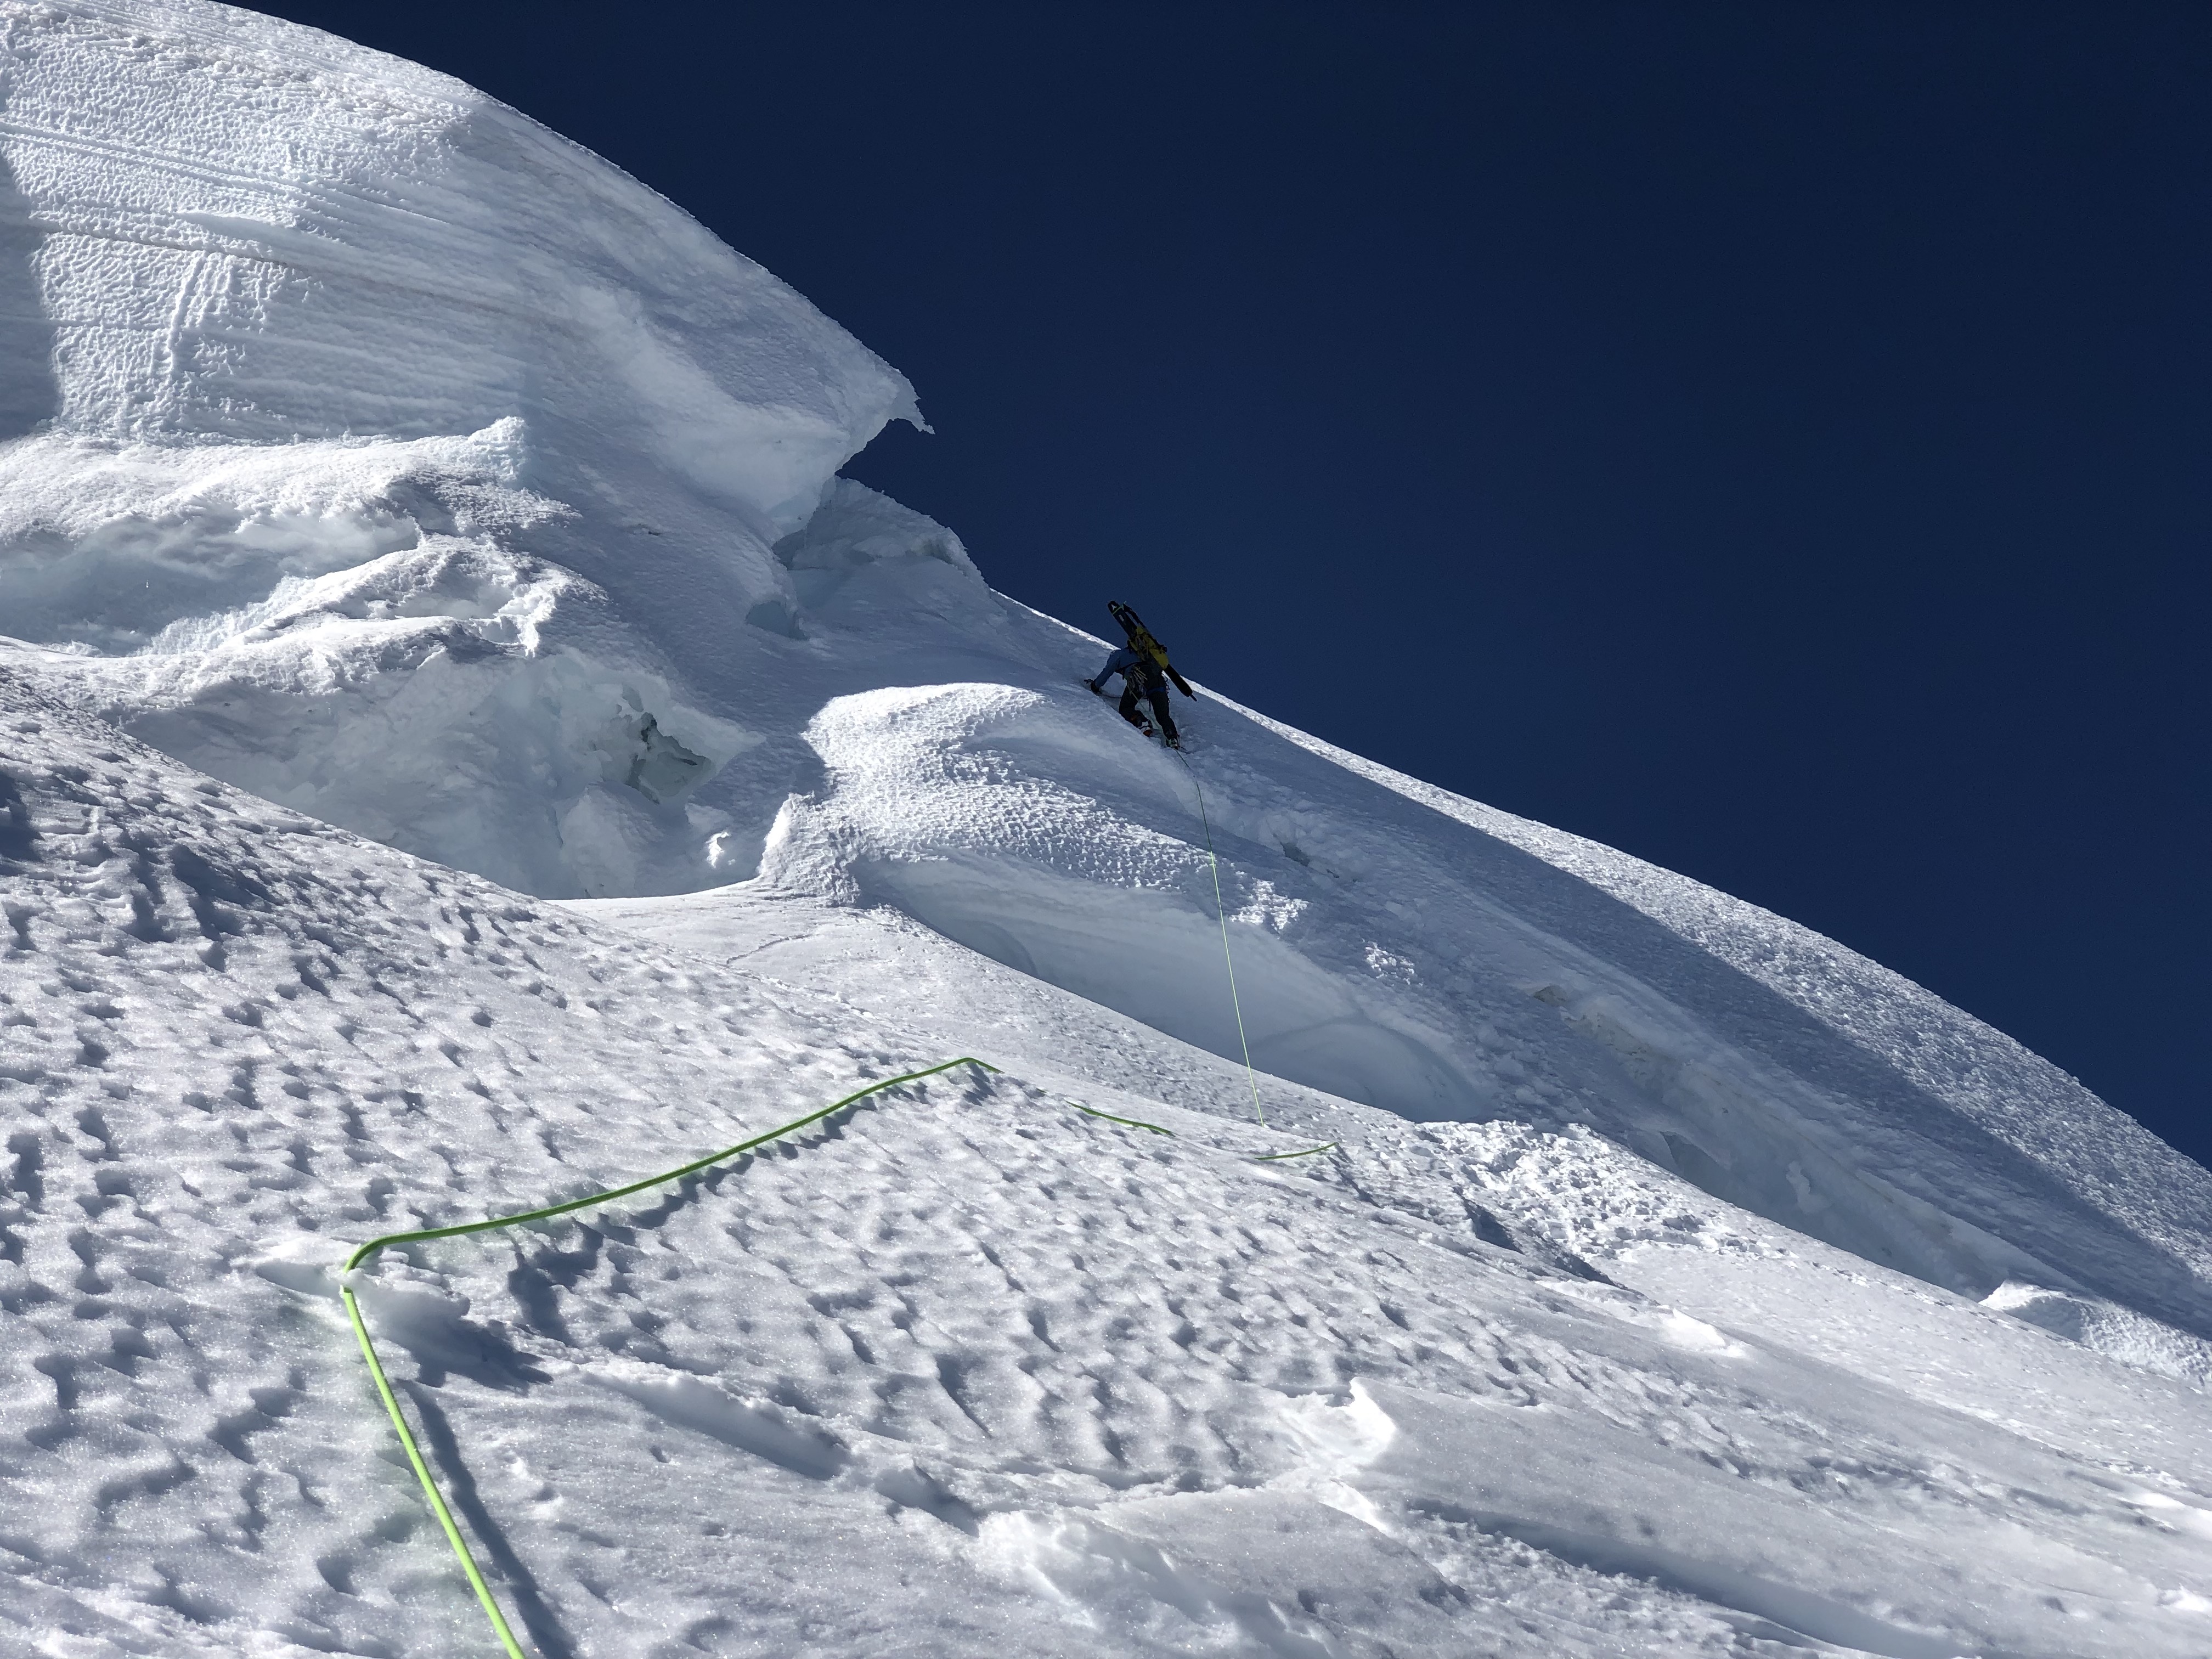
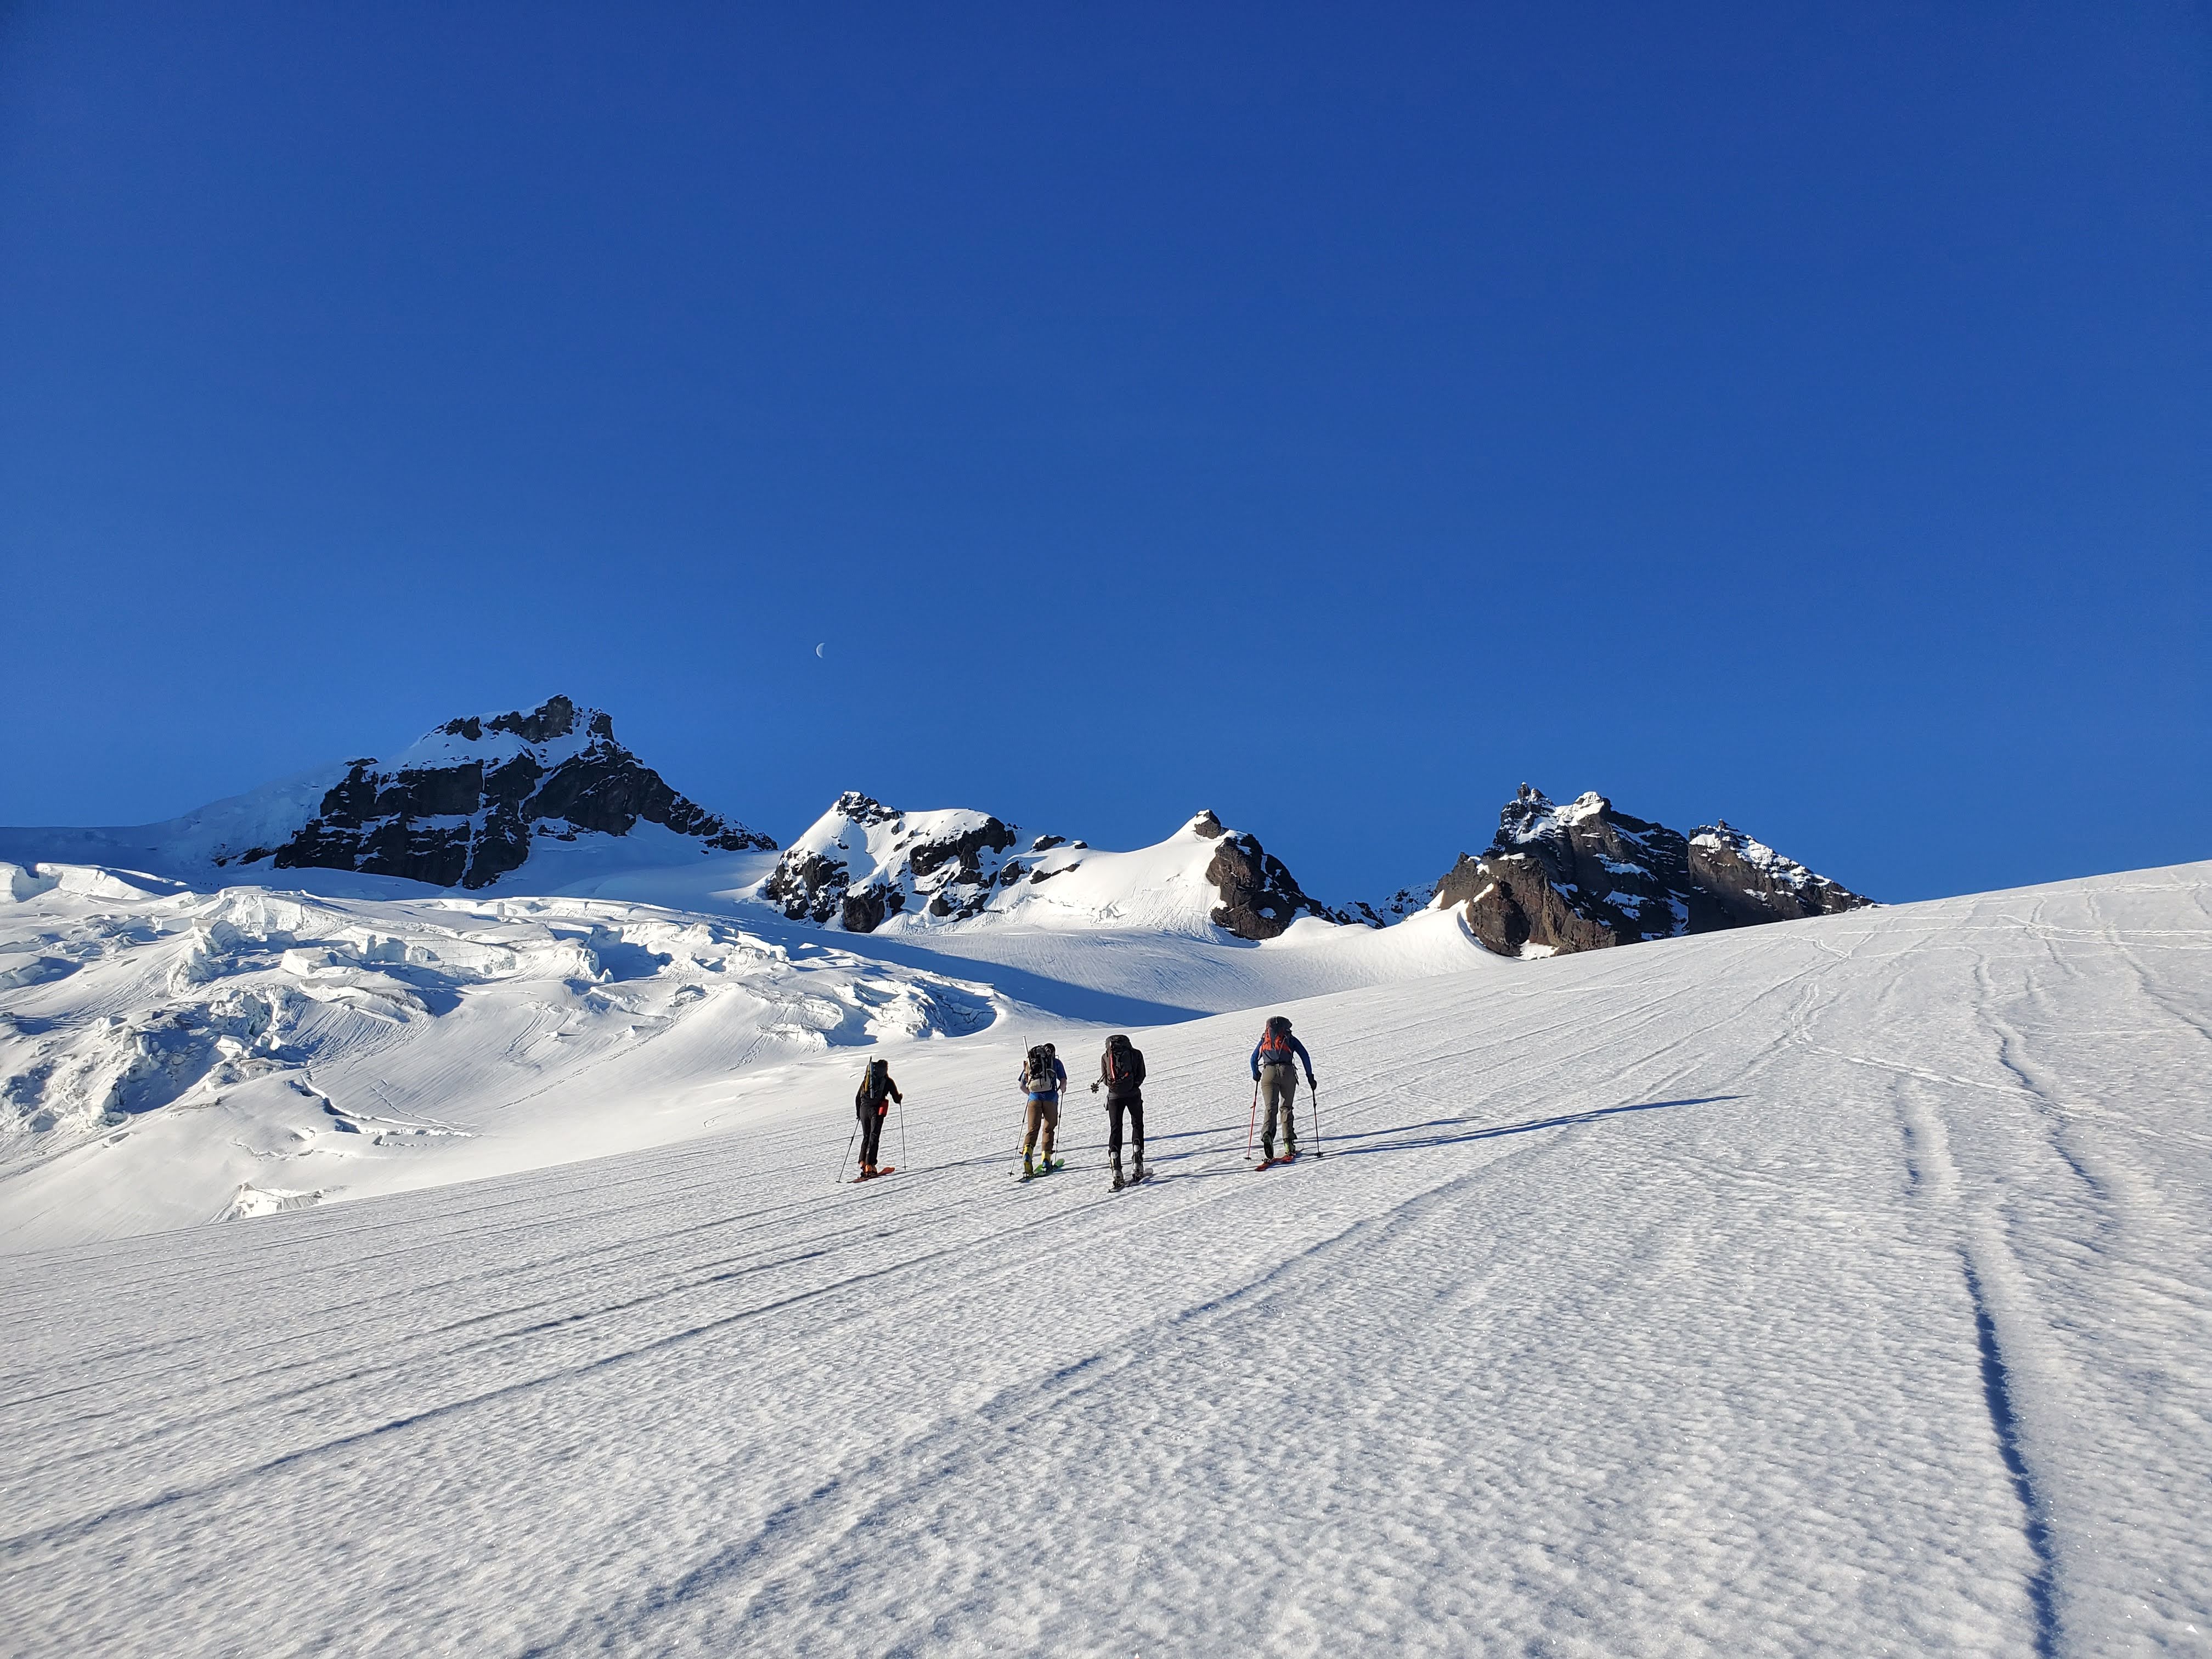
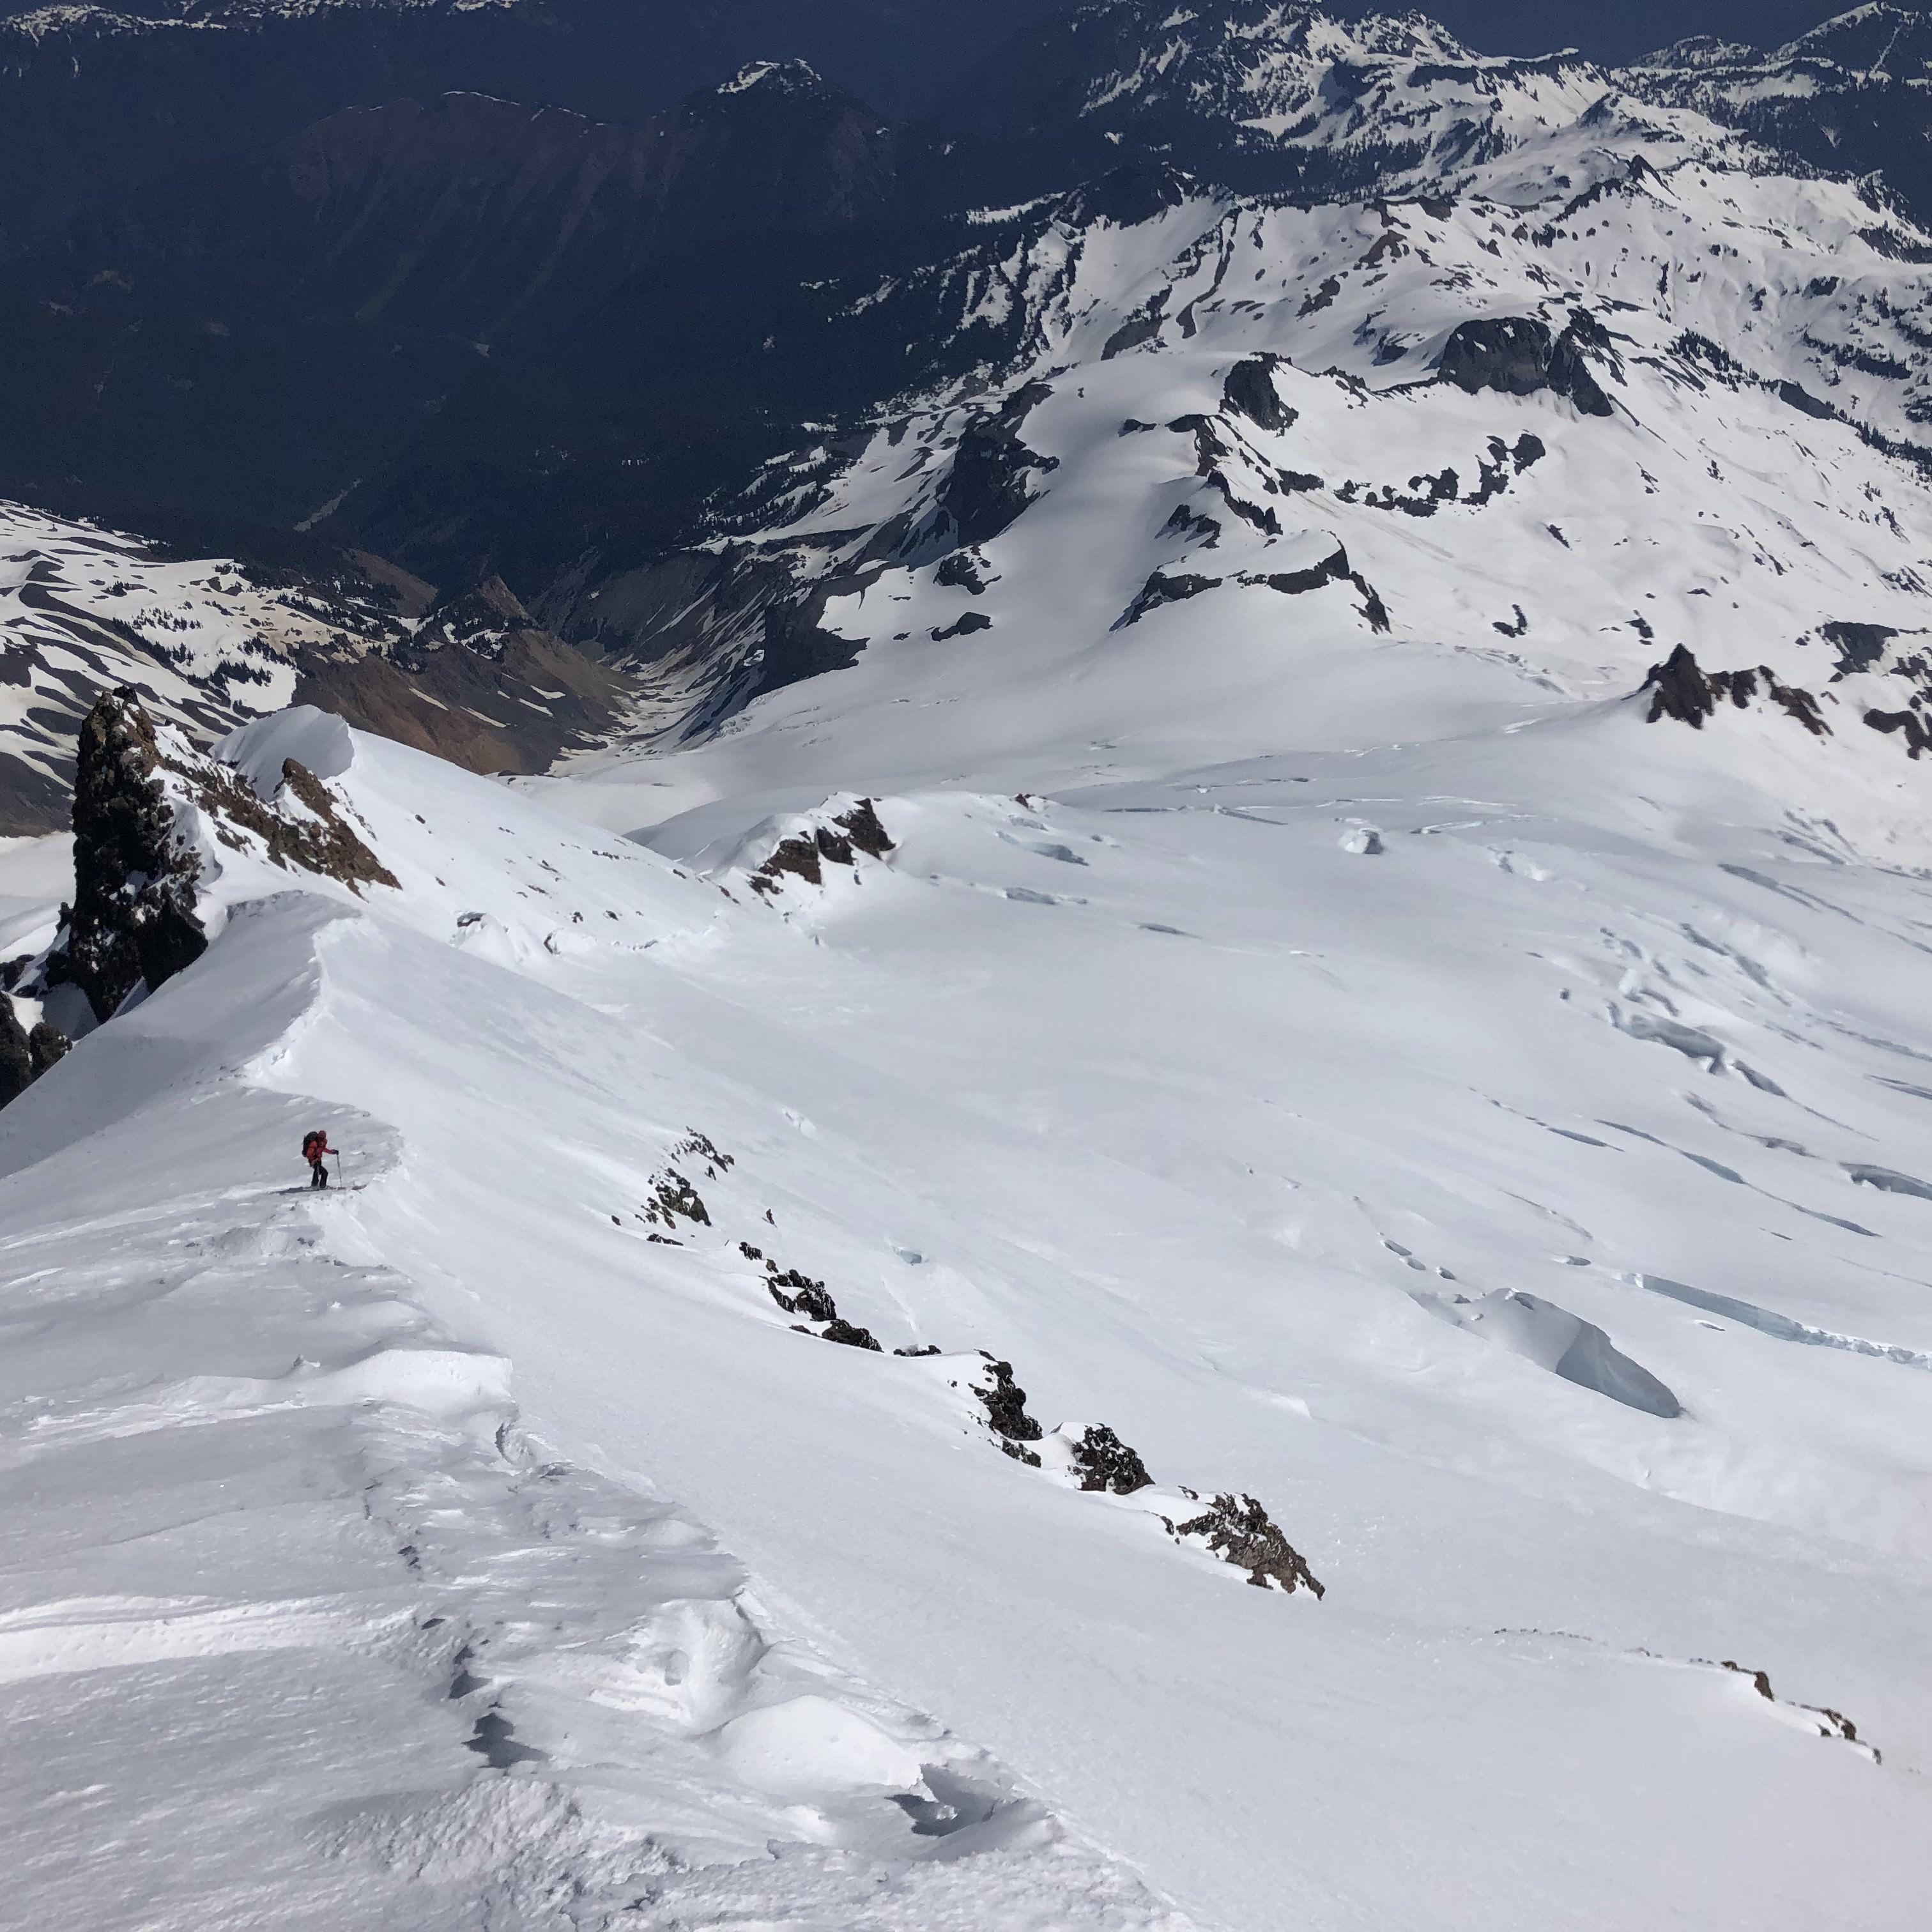
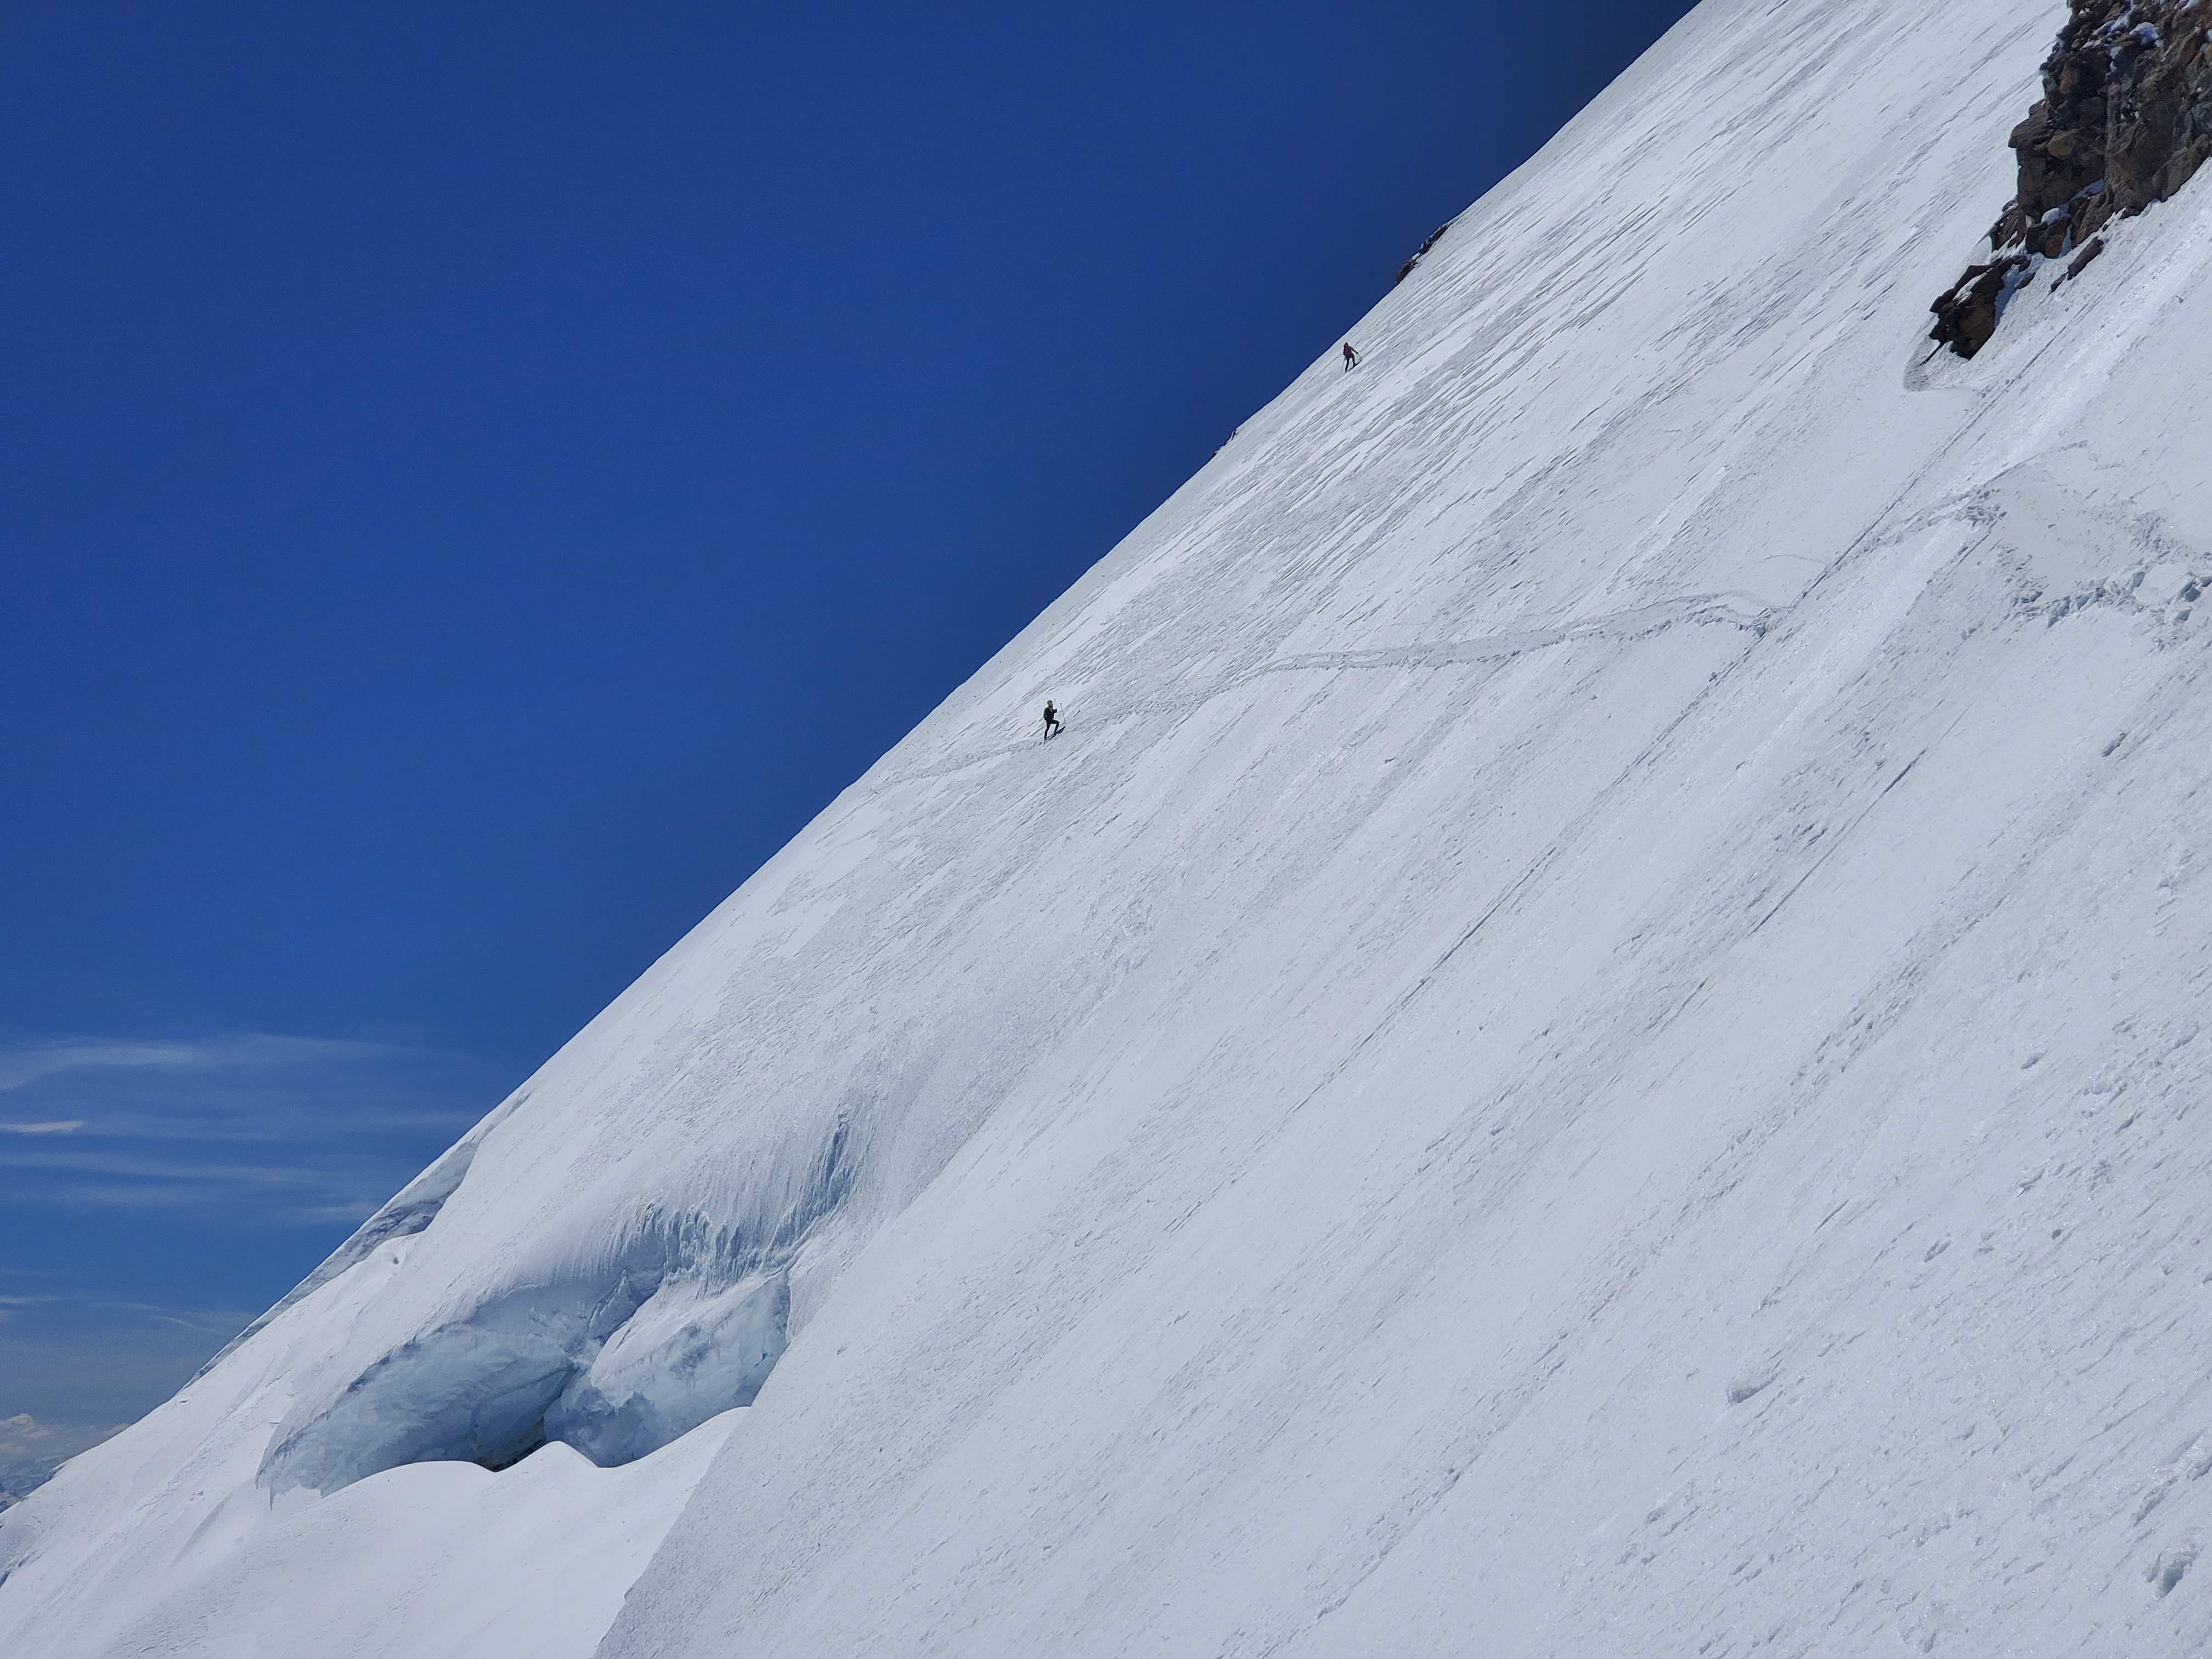
Trip: Mt. Baker - North Ridge Trip Date: 06/01/2019 Trip Report: Yesterday my friend and I climbed the north ridge of Mt. Baker in an 11 hour single push. Camped at the trail head Friday night and managed to maybe get 1.5 hours of sleep. Other cars we coming and going all hours of the night. Woke up at 2am and started hiking up shortly after. The trail has some snow up high as you near the tree line, but is either compact or firm if you go in the morning. Stream crossings were easy. We skinned from just above the tree line to just before the base of the north ridge. We did not rope up for the glacier travel as the snow was very solid. We started booting once we had to cross a narrow but solid snow bridge. We took the broad gully up to the base of the ice cliff and took a AI3/3+ pitch to gain the upper ridge. From there the conditions were very cruiser (AI2 and steep to moderate snow) and in no time were were at the summit. we stopped to eat, repack some things and get ready for the ski down. The upper section of the CD route was firm and didn't end up skiing much of that, switched back to booting after a bit. Started skiing again at the col between Baker and Colfax. Great skiing conditions from there back to the trail. Crevasses on the CD were very easy to navigate through/avoid as you just had to follow the bootpack. Gear Notes: Two pickets (used one) and six screws 2x16cm and 4x13cm Approach Notes: heliotrope ridge trail


-
Trip: Dome Peak - Dome Glacier - Main Summit Trip Date: 05/23/2019 Trip Report: Dome Peak, May 22-24 2019 A mid-week hint of a break in the weather tempted us to Dome Peak. We chose Dome from several alternatives since the UW’s GFS model consistently showed it staying dry, in what was otherwise forecast by NOAA as three rainy days in the Cascades. The gamble worked! The Downey Creek trail is just glorious to “6-mile” (seems closer to 7 mi) camp - easy-going, soft trail bed, old growth forest. From there, travel and route-finding up the Bachelor Creek trail was easy enough until the notorious slide alder section. There, Beckey vol. 2 describes crossing to the south side of Bachelor Creek at ~4000 ft (as do a report or two on this site) and Nelson / Potterfield vol 1 describes the crossing at ~3,750 ft. But some Mountaineers' trip reports describe an alternate approach that worked well for us. In short, still following the trail on the north side of Bachelor Creek at about 4,100’, cut uphill (north) into the slide alder. A straight-forward, low-grade bushwack takes you up to the timber. We did our part to improve it by sawing out a couple dozen 1- to 2-inch branches that made the trail difficult to spot or pass. Currently a pink ribbon marks where the slide alder bushwack gives way to timber, and from there the trail is but a whisper, but it doesn’t really matter because the way is easy going on an uphill traverse until about 4,500 where there is a log to cross to the south side of the creek. 4,500’ also marked the start of continuous snow. In the open valley bottom, the snow was soft, which made for very slow going (post-holing) and covered any signs of the trail. In the timber, the snow was firmer and easier going, so we headed uphill, gaining the ridge between Bachelor Creek and Itswoot Creek at a col at 5540’ that is just above the word “Skagit” on the USGS Dome Peak quad. Once on the ridge, we traversed to the col above Cub lake, with nearly continuous views of Dome Peak (see photo), and large bear tracks. The way was mostly snow on the ridge, interspersed with patches of steep heather and a third class move or two to round the high point on the ridge (on the south side). The descent to Cub lake was about half snow, half heather and rock. We camped in snow on a knob just beyond the lake (see photo). There were wolverine tracks nearby. The climbing route up Itswoot Ridge and over to Dome glacier was almost entirely snow, and straight-forward, but for bad post-holing at the lower elevations where the snow hadn't frozen overnight. Higher up, the crampon conditions were perfect. The summit ridge was mostly snow, and though we continued out on it with a couple pickets, a delicate cornice blocked the way at the true summit block (see photo, looking SW). With huge exposure on the right, 45-degree softening, wet snow on the left, building clouds and a thunderstorm in the forecast, we called the exposed snowy ridge 'good enough' and began descending. By now the snow had softened considerably, and postholing made the way fairly slow-going. But the clouds retreated (temporarily), and we were still all smiles. We returned to camp just before the rain started, and the lightning plus thunder. The next morning the rain eased at about 7 am, and we began our drizzly hike out. We liked the ridge traverse so much we repeated it on the way out, and the rest of the way as well. Gear Notes: Took two pickets (used both on summit ridge) and one purple link cam (didn't use, couldn't access rock) Approach Notes: Downey Creek trail glorious, Bachelor Creek route getting clearer with greater use
-
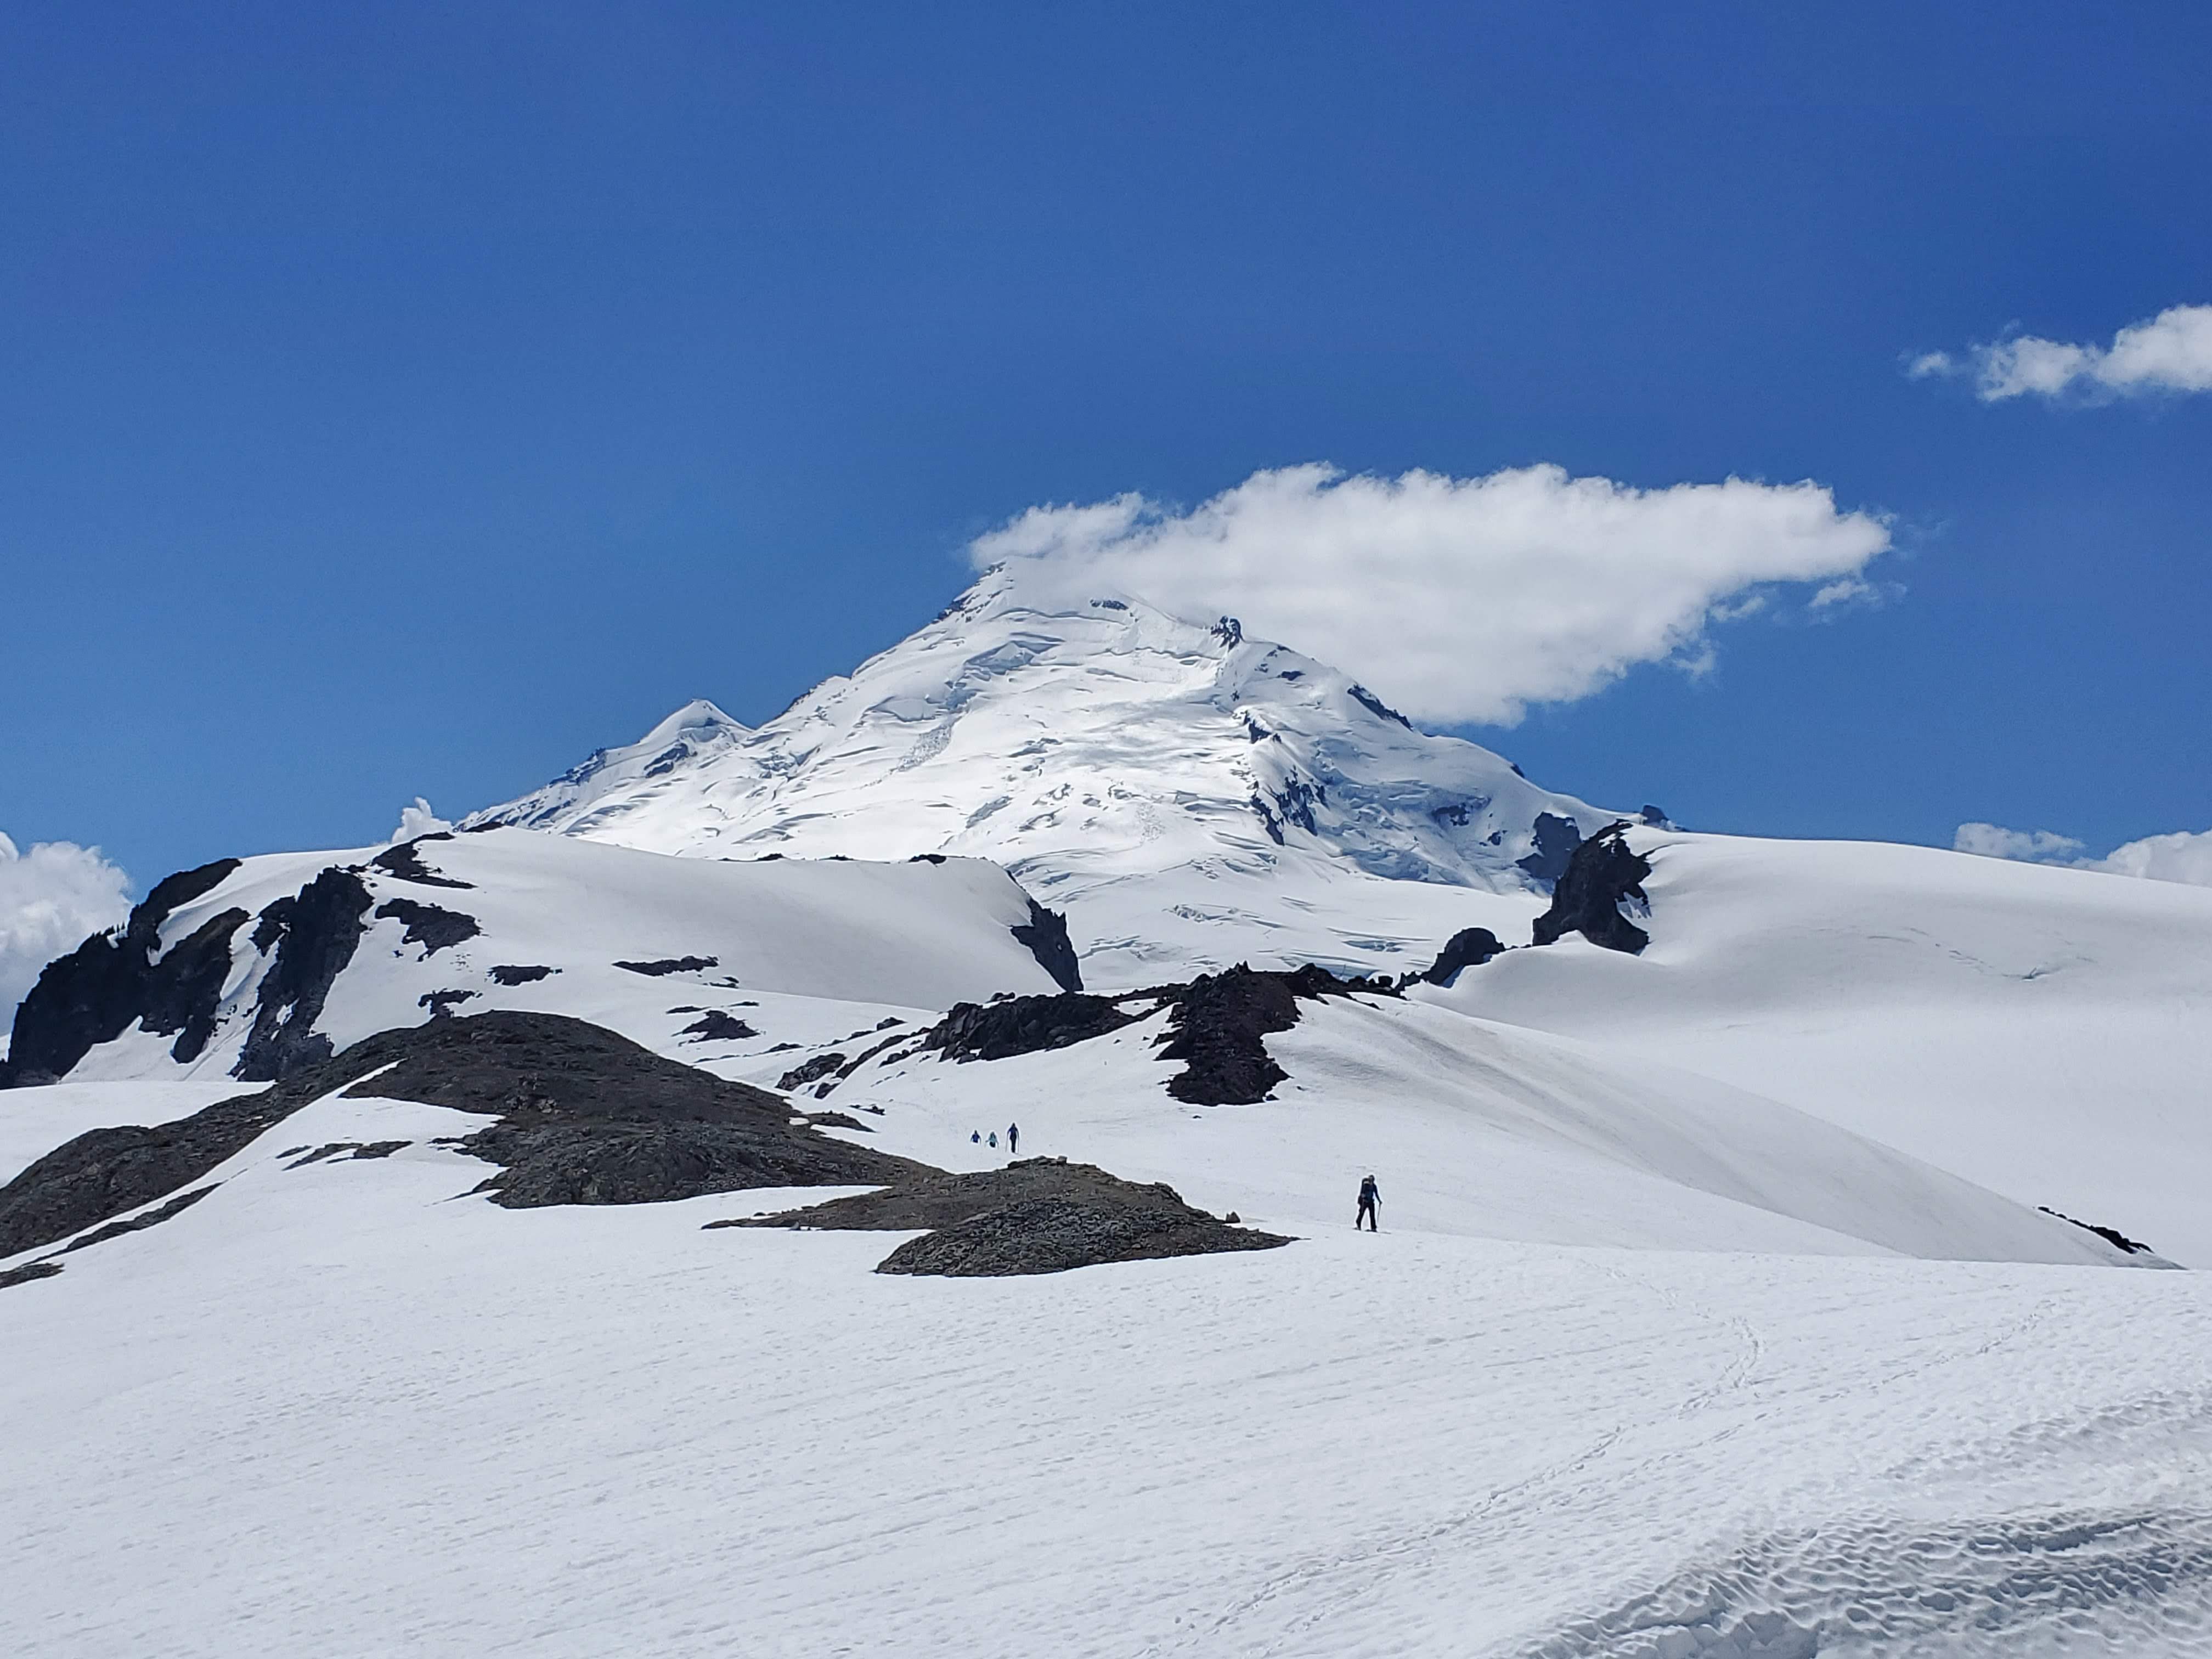
Trip: Mount Baker - Watson Traverse Trip Date: 05/27/2019 Trip Report: Me, my buddies (Fred, Dylan, Max, Tim) and Josh (whom we met on route) did the Watson Traverse up and over Baker on Memorial Day. We left the Heliotrope trailhead at 4 am and arrived at Heather Meadows at 4 pm. It was a lot of work after skiing the Park Glacier, but a way cool route. We summited at 10 am in blasting gusty conditions, but the Park was soft and buttery, pretty much perfect. The crevasses took some thought to navigate, but no real issues. On the miles of traversing I learned that you can skin without skins with sufficiently sticky snow by just switching to walk mode and keeping the angle moderate... pretty cool, and a lifesaver on this route. Coleman Glacier skinning: Kicking it on the summit: Tim ripping the Park Headwall: I wussed out and took the Cockscomb Ridge down a ways, though this doesn't lessen the angle, just the distance you ski 55 degrees above crevasses: Park Headwall: Somewhere west of Coleman Pinnacle: You could see our tracks from as far as Artist Point, pretty rad: Photo credit goes to Tim, Max, Fred, and Dylan. It was great skiing with everyone! Gear Notes: Ski mountaineering gear. Used axe and crampons. Running shoes. Approach Notes: Running shoes to the bottom of the Hogsback, then skis to Heather Meadows. Car shuttle.


-

[TR] Forbidden Tour - Standard plus Eldrorado ski 05/05/2019
JasonG posted a topic in North Cascades
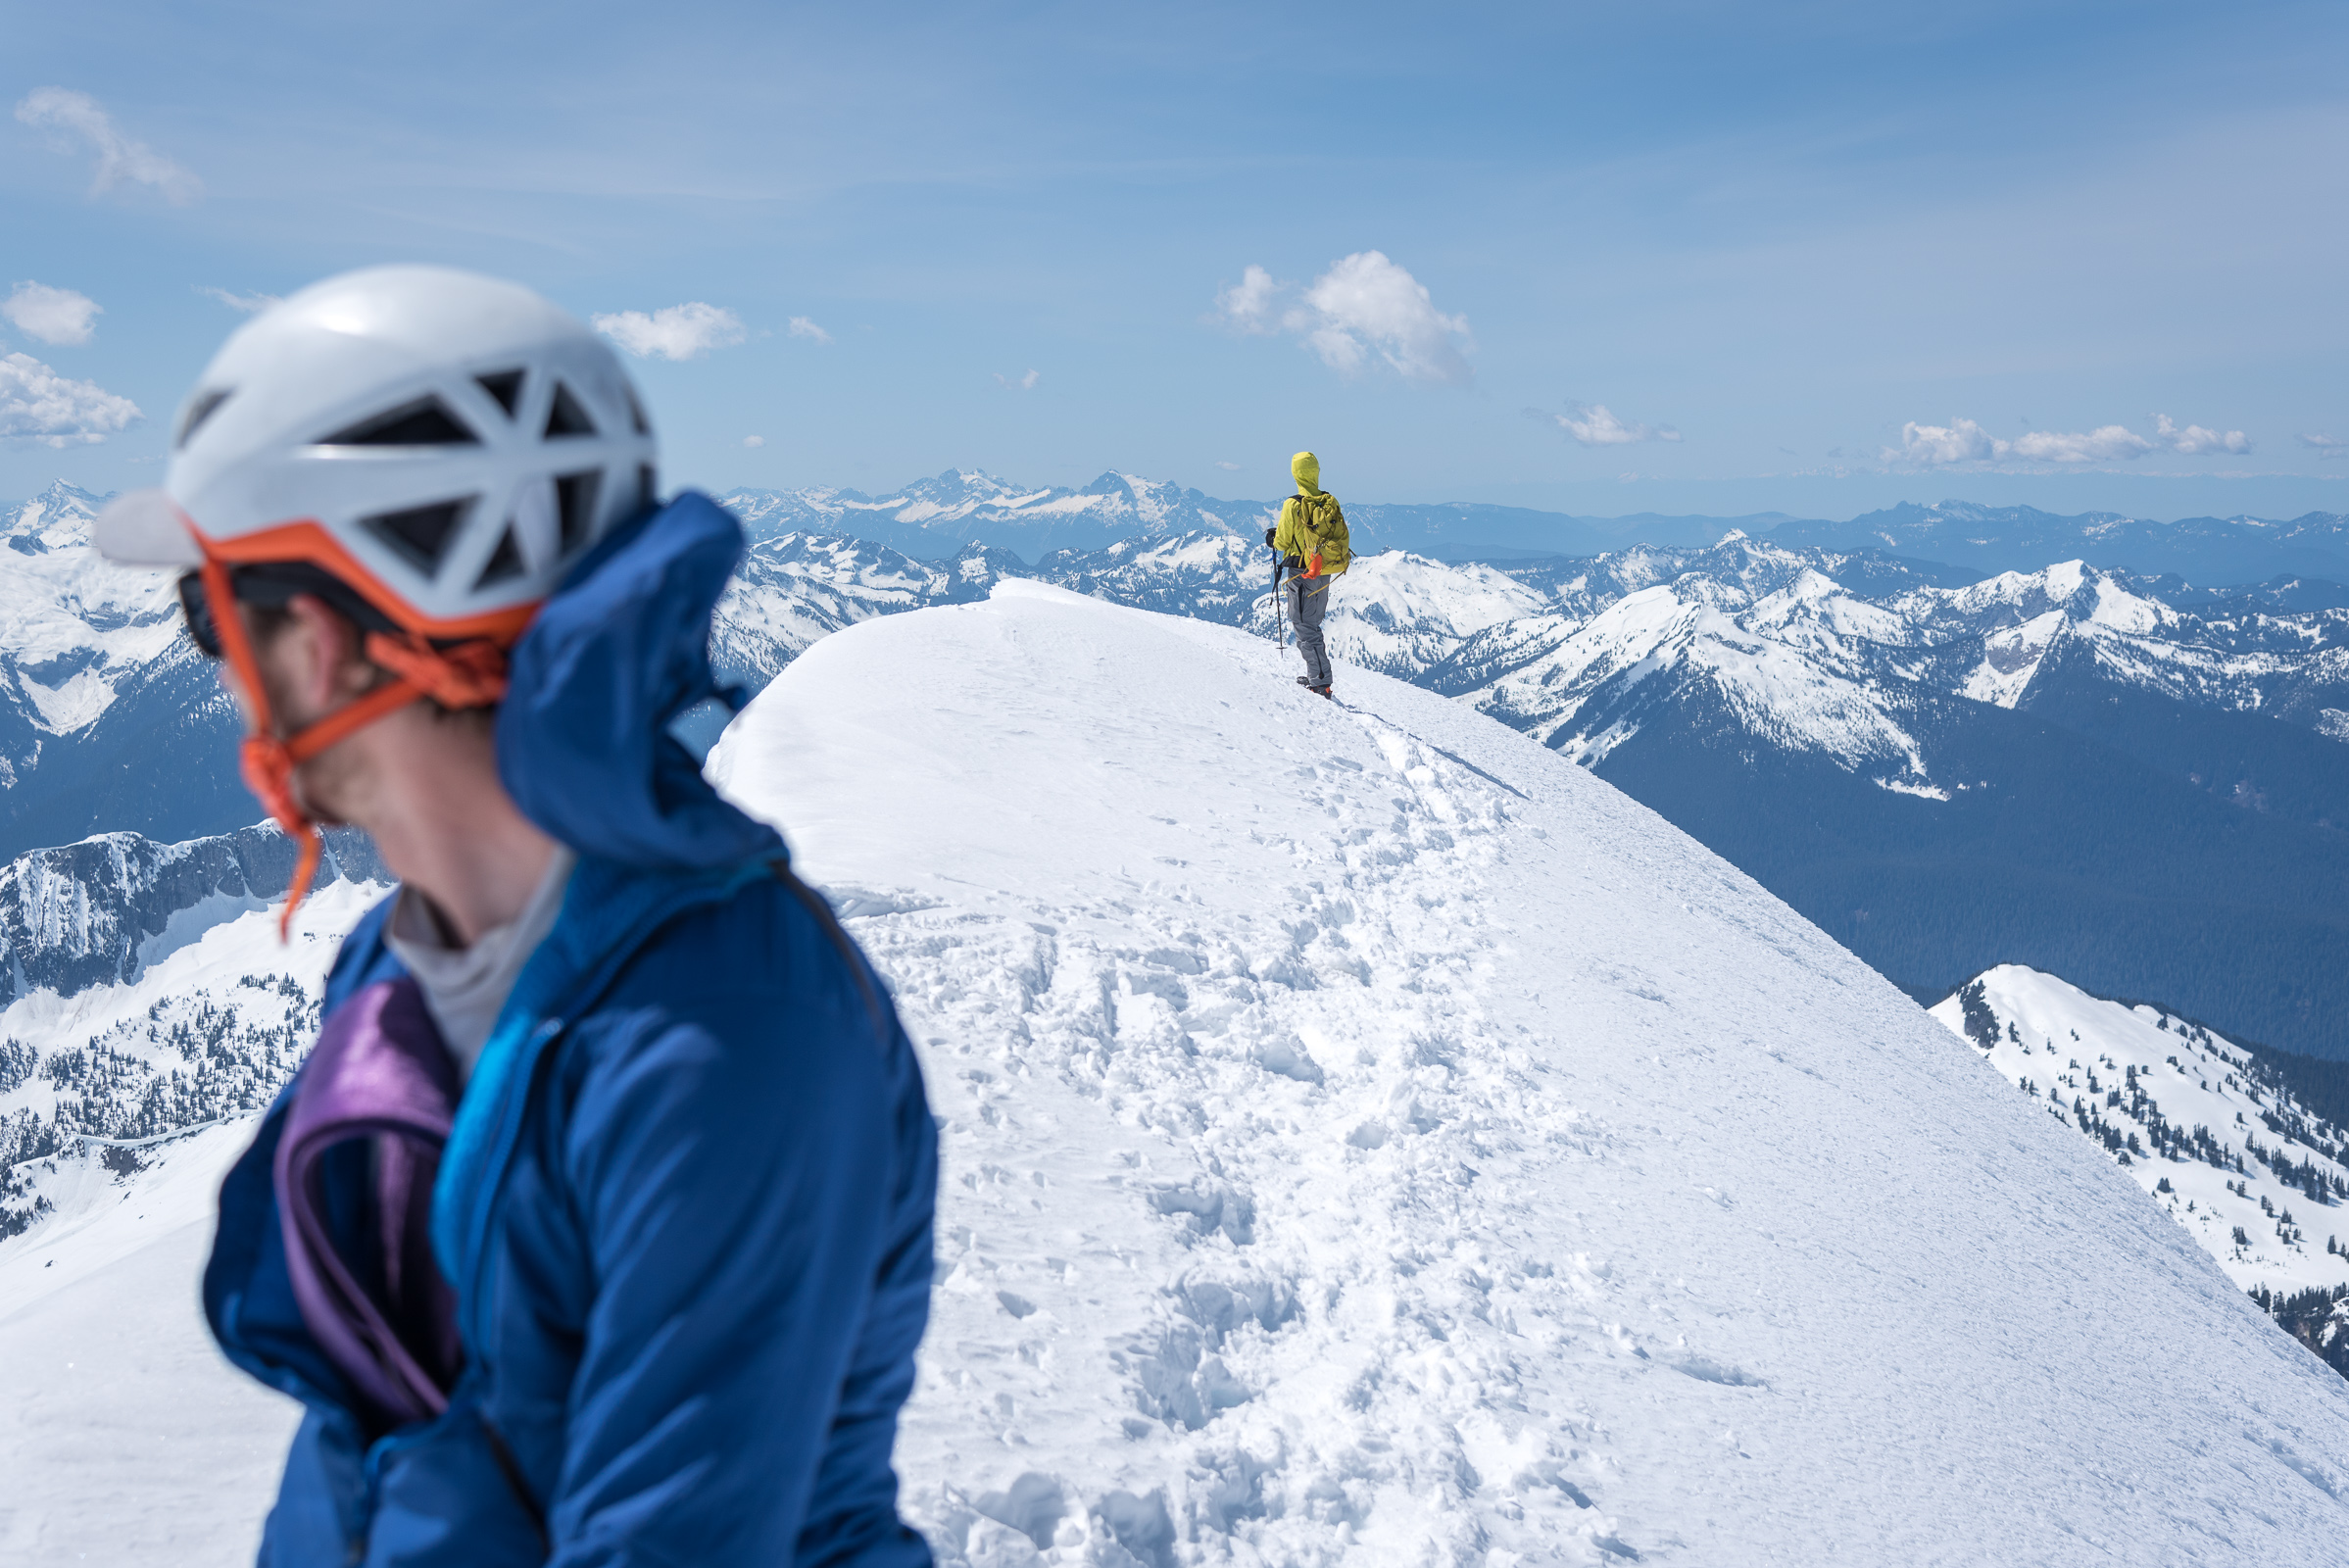
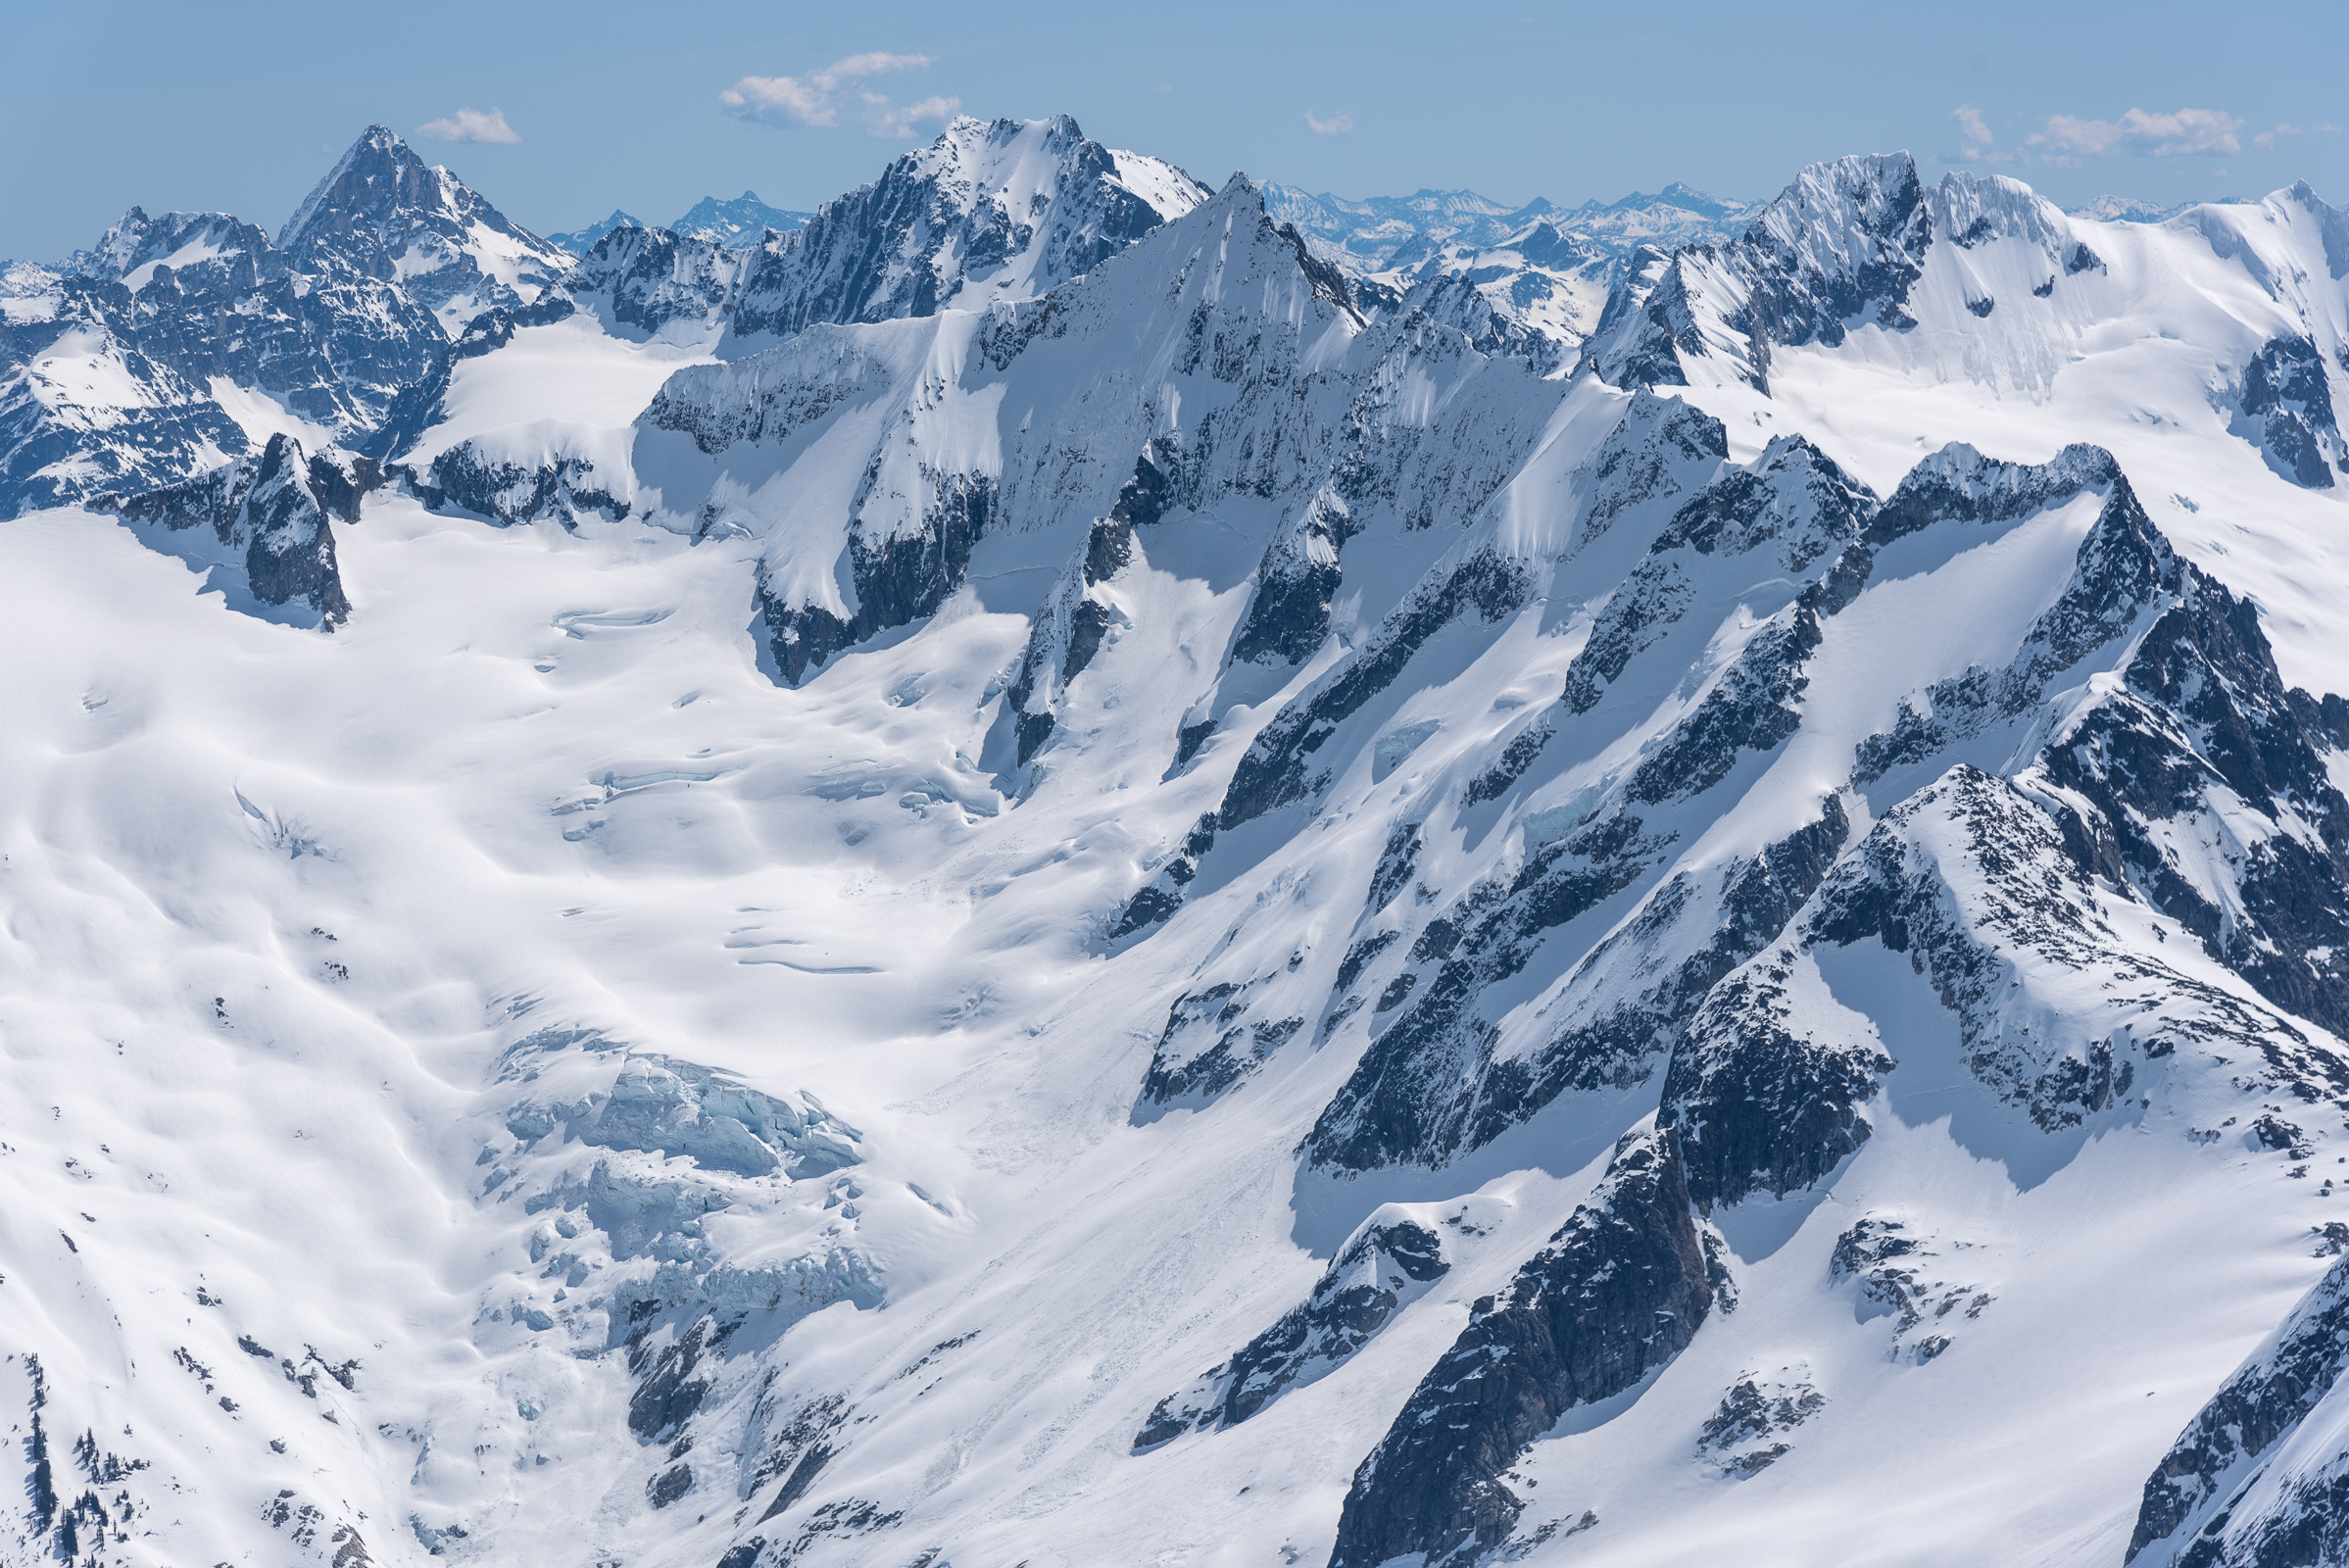
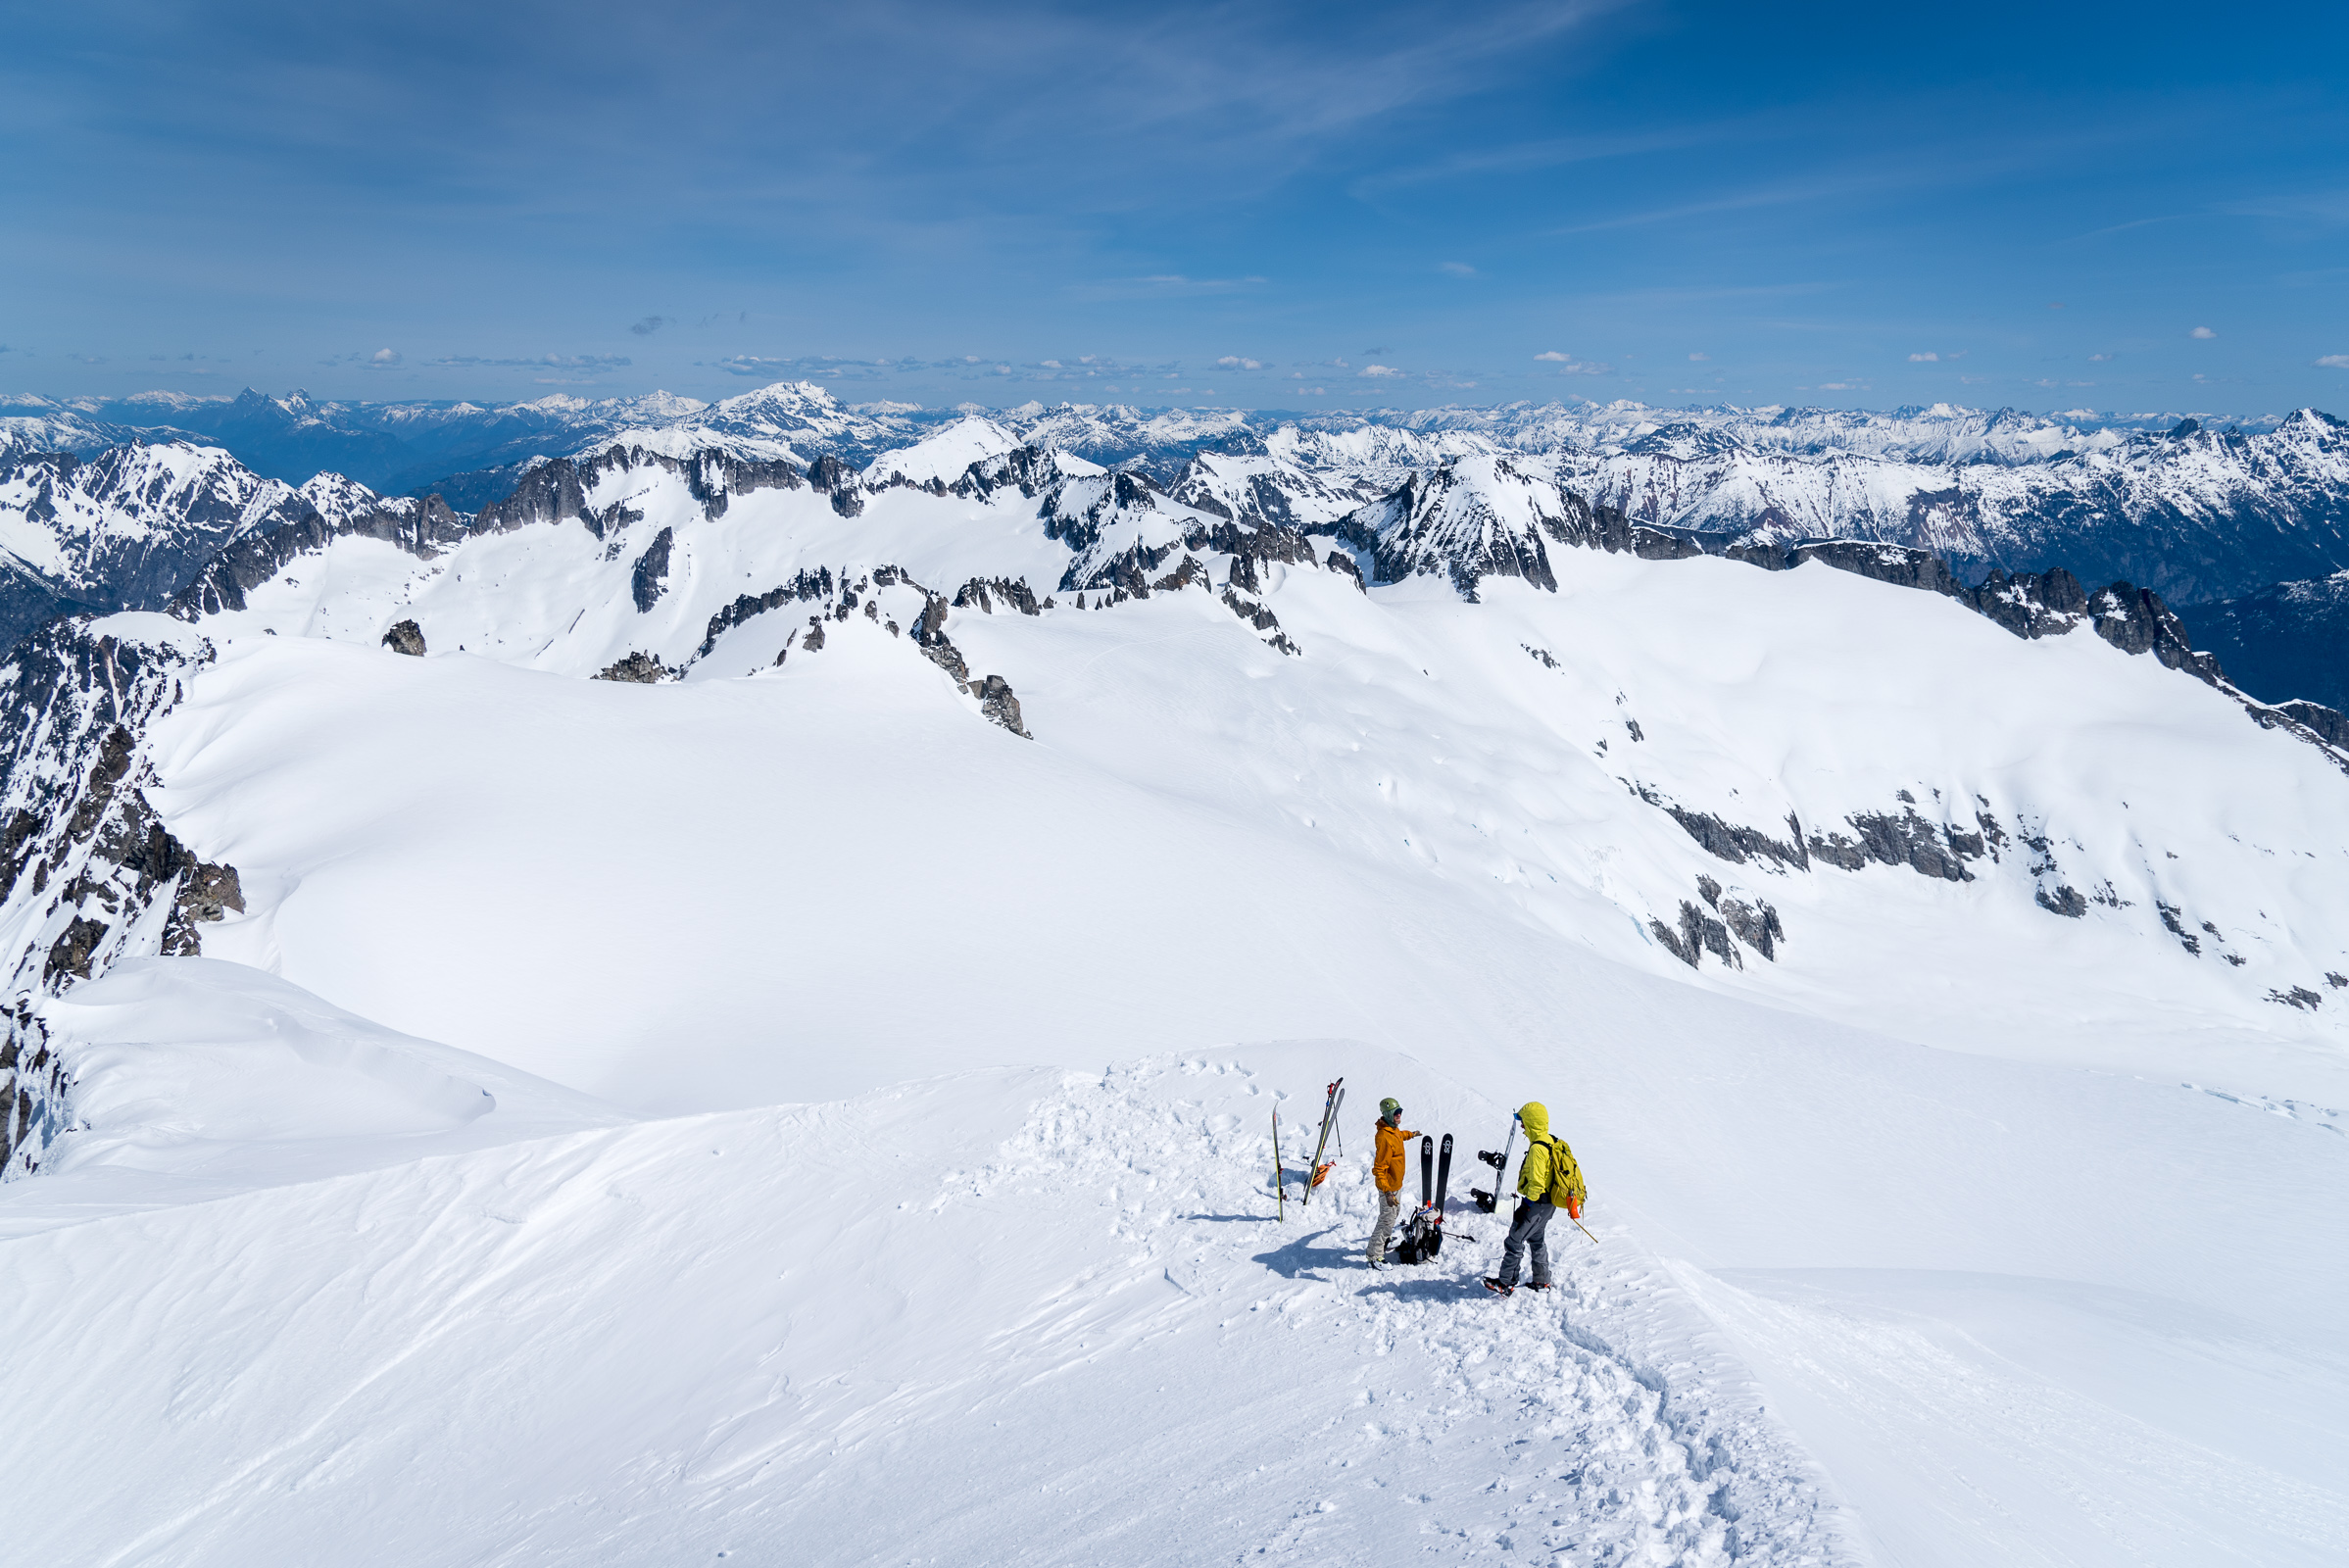
Trip: Forbidden Tour - Standard plus Eldrorado ski Trip Date: 05/05/2019 Trip Report: I'd been wanting to do this tour for more than a dozen years and I wasn't disappointed....Let's just say that. We did it in a leisurely three days (camp one below Sharkin) which allowed for a full afternoon of oogling at one of the premiere deep holes in the range - Moraine Lake. Often looked at, but rarely visited, it has vistas that even Harvey Manning would struggle to translate into words. If you follow our itinerary, on days one and three you should expect shenanigans, which are mostly unavoidable, but such is the price for one of the great adventures in the range. It is worth the price of admission. Special kudos to the young Tyler, for putting up with the predictable banter (chronic pain, kids, politics, etc.) from a bunch of middle aged dudes for a few days, and gamely signing onto a trip where he didn't know any of us. Your enthusiasm for the range will serve you for many years! I could've spoiled it for you with a lot more info, but I'll let you dream about it for a few years and imagine, like I did. Gear Notes: Skis or splitboard. Whippet or light axe. Boot crampons, ski crampons, helmet, crevasse rescue gear, enough rope for a 30m rap. Approach Notes: Sharkfin col (go up the easy gulley but not all the way- turn left halfway up to established station) to Boston Gl. to Forbidden Gl to Moraine Lake to Inspiration and out standard Eldo trail.


-
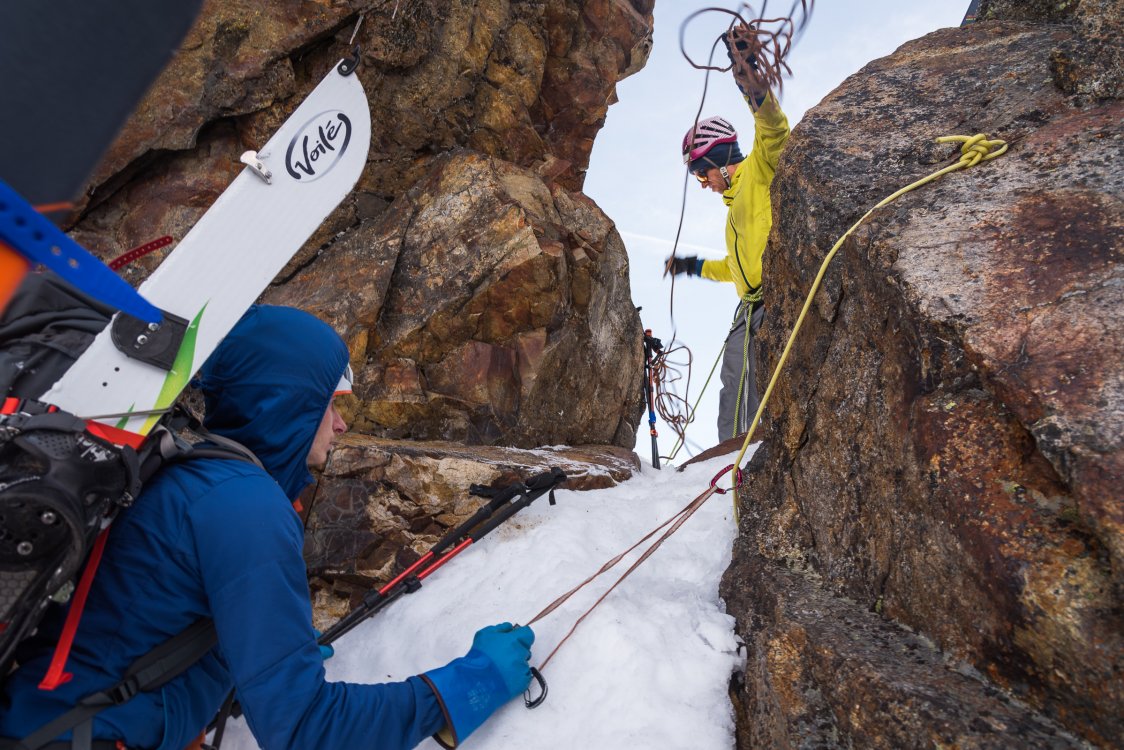
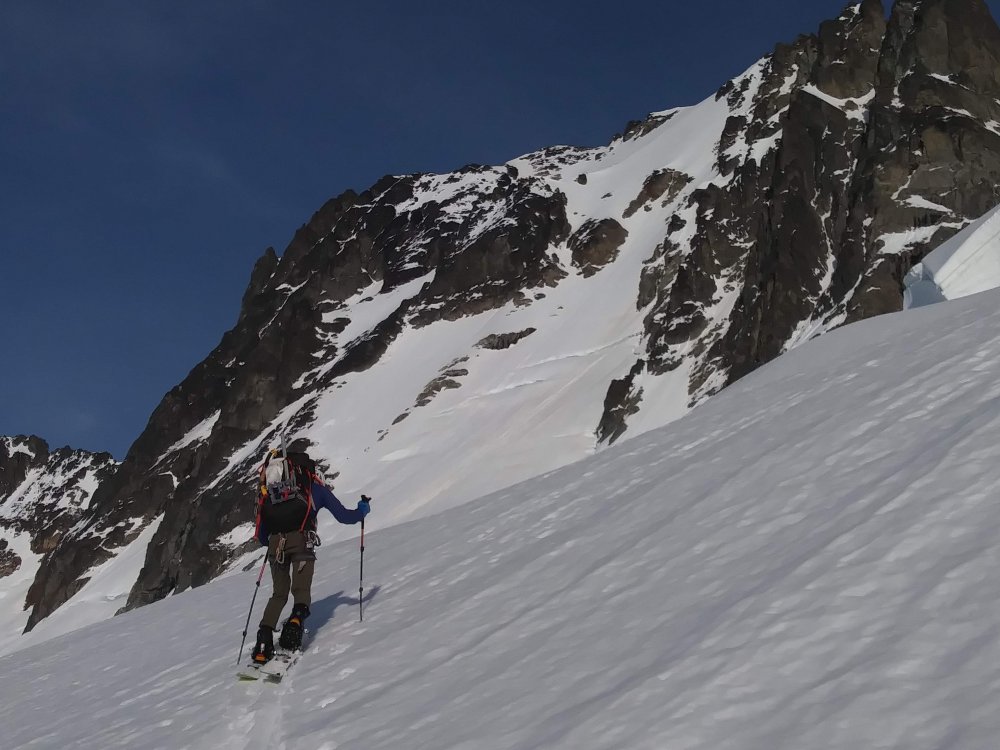
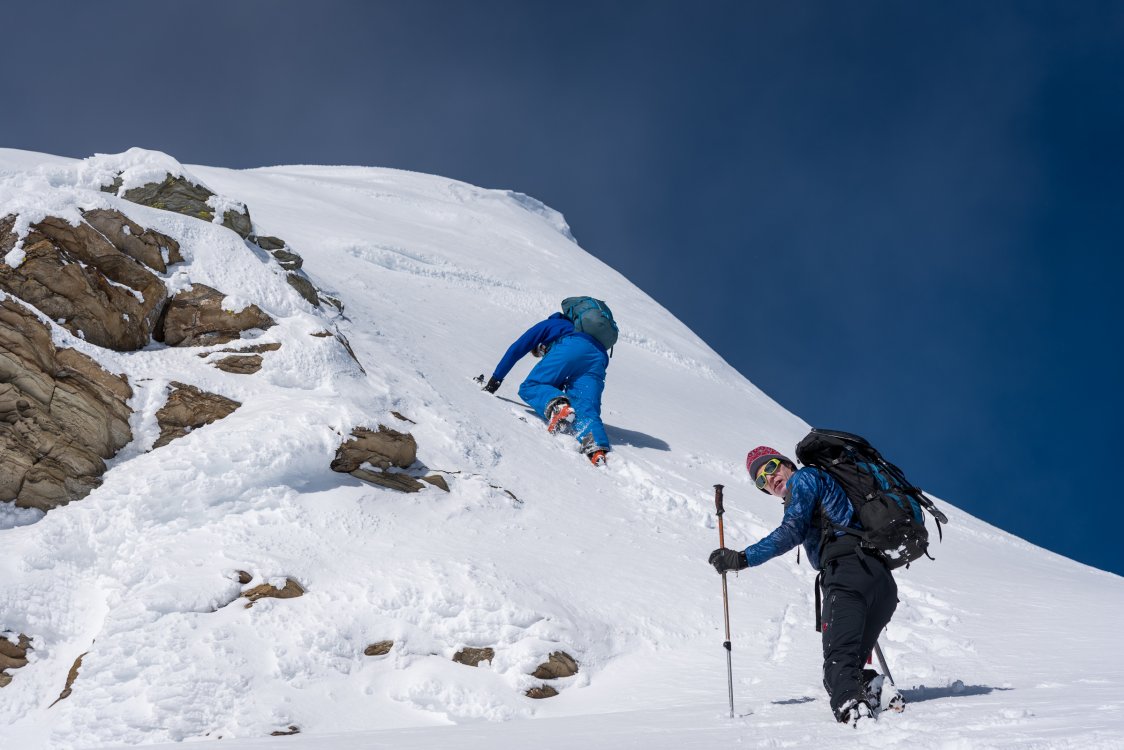
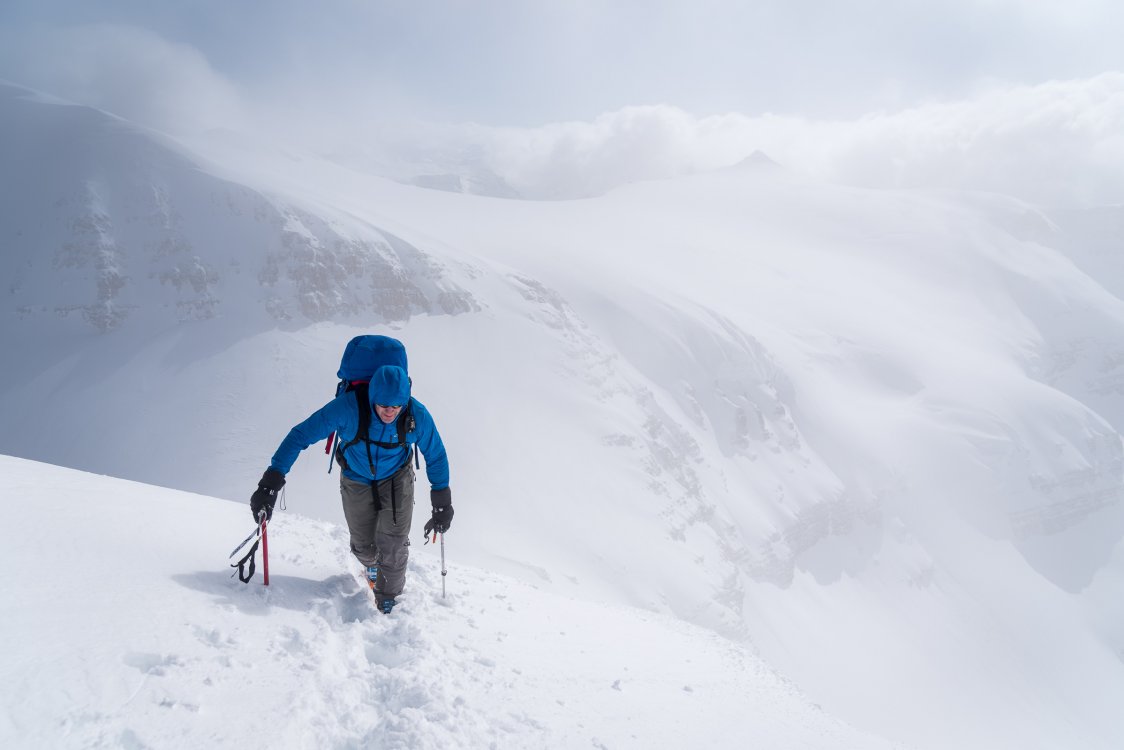
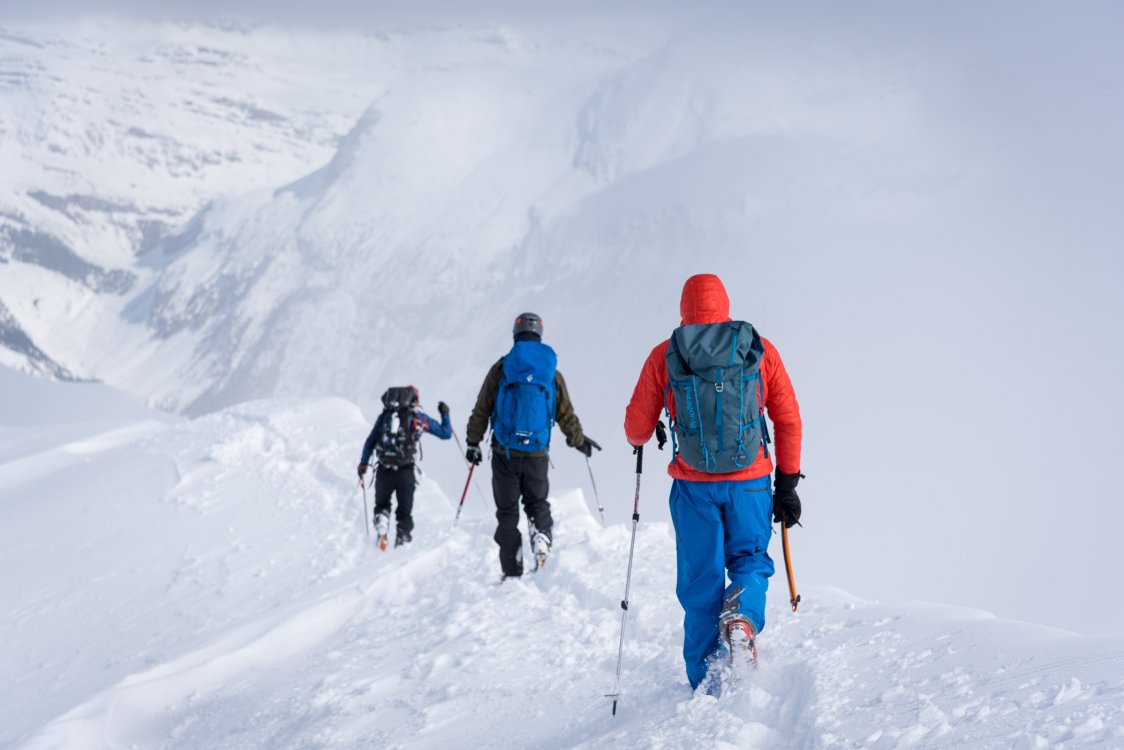
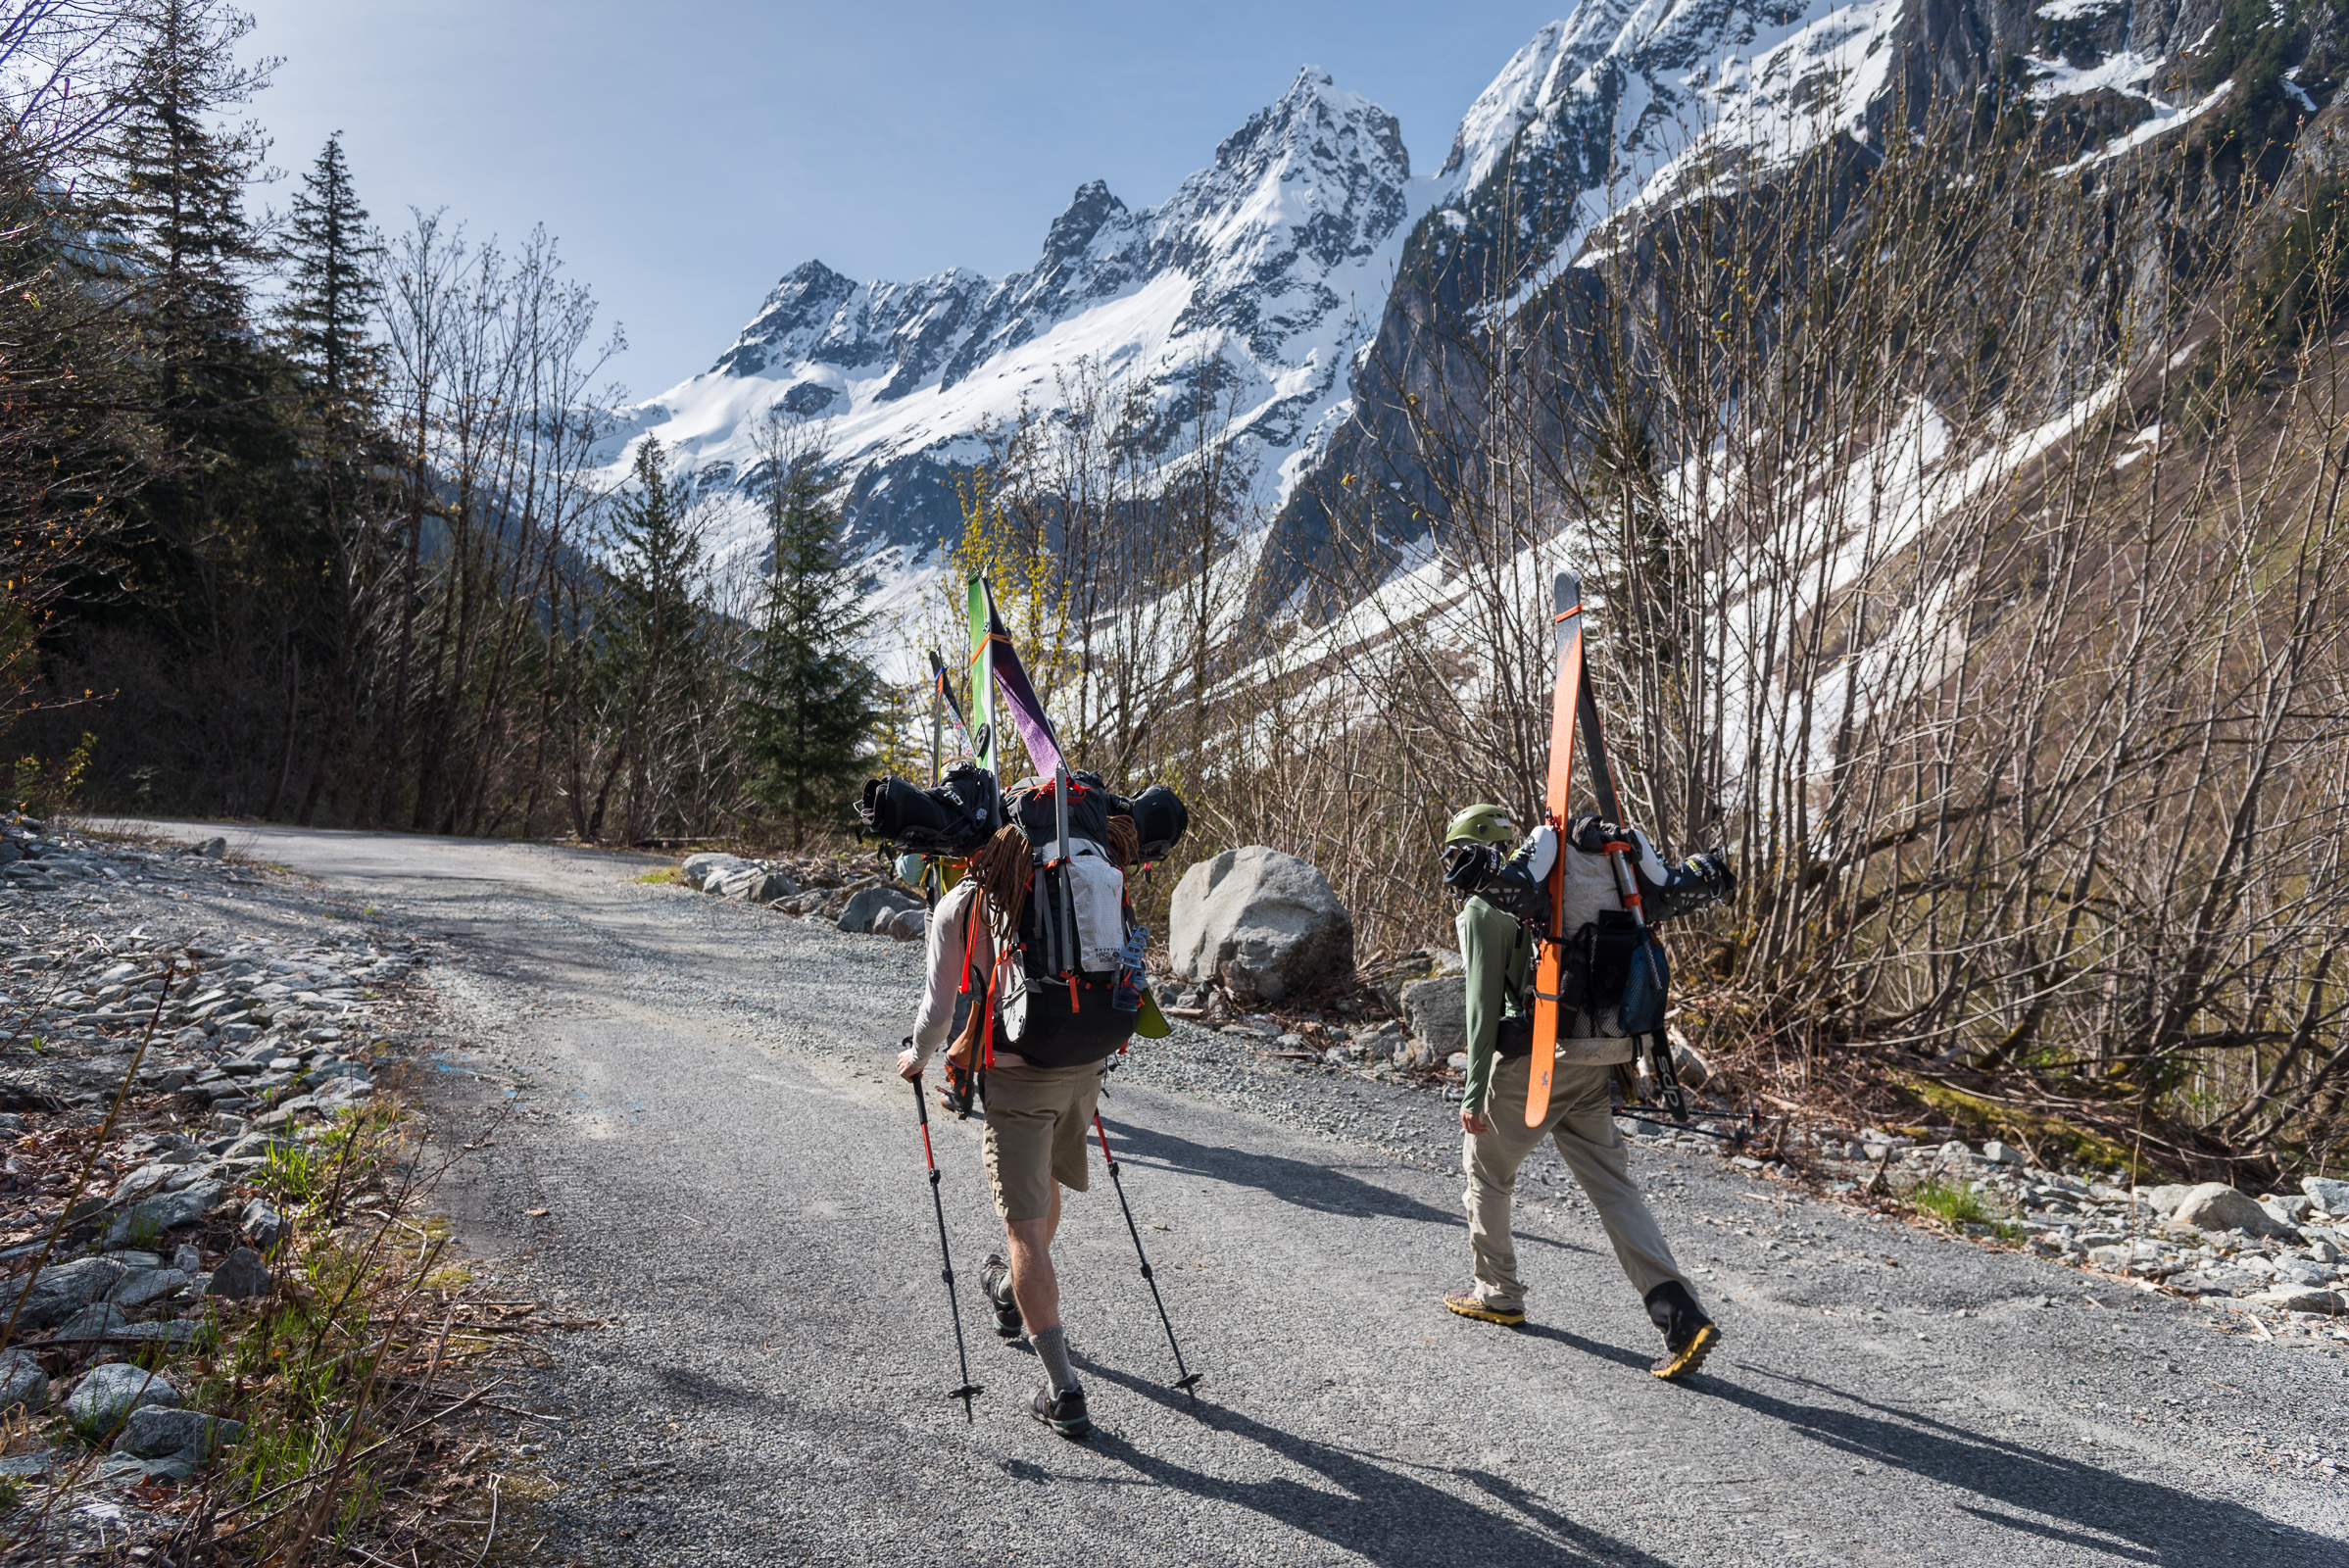
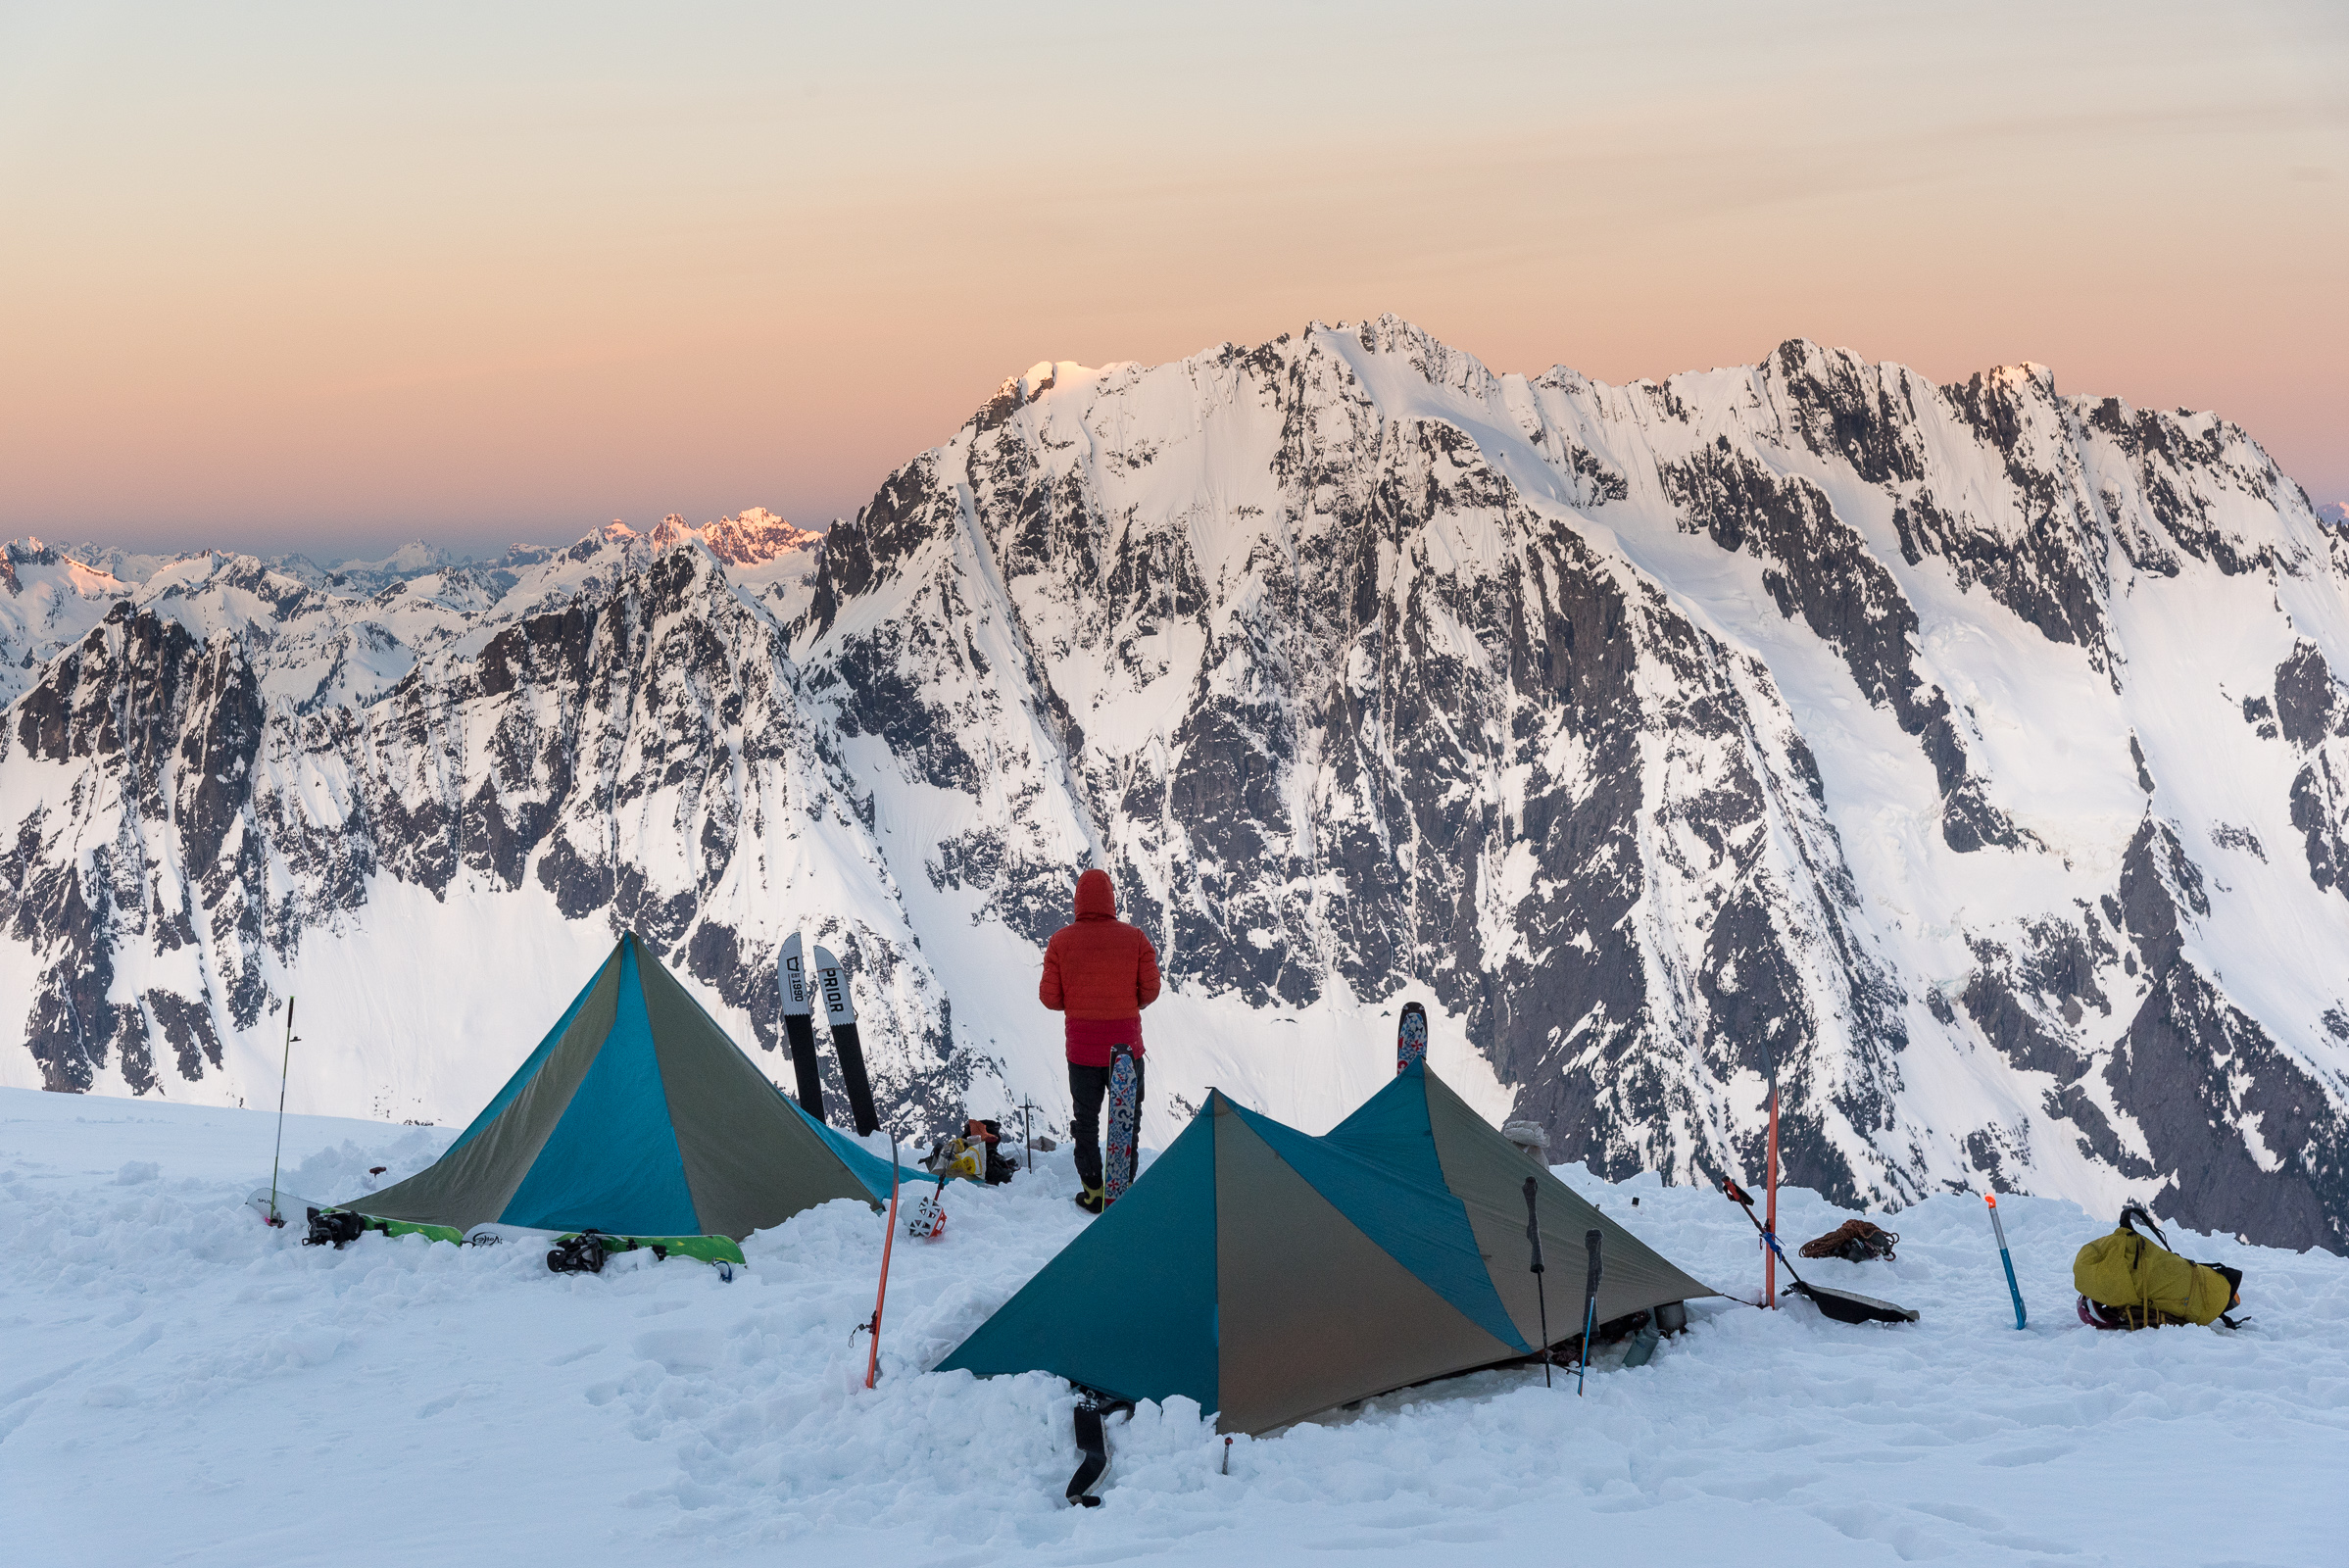
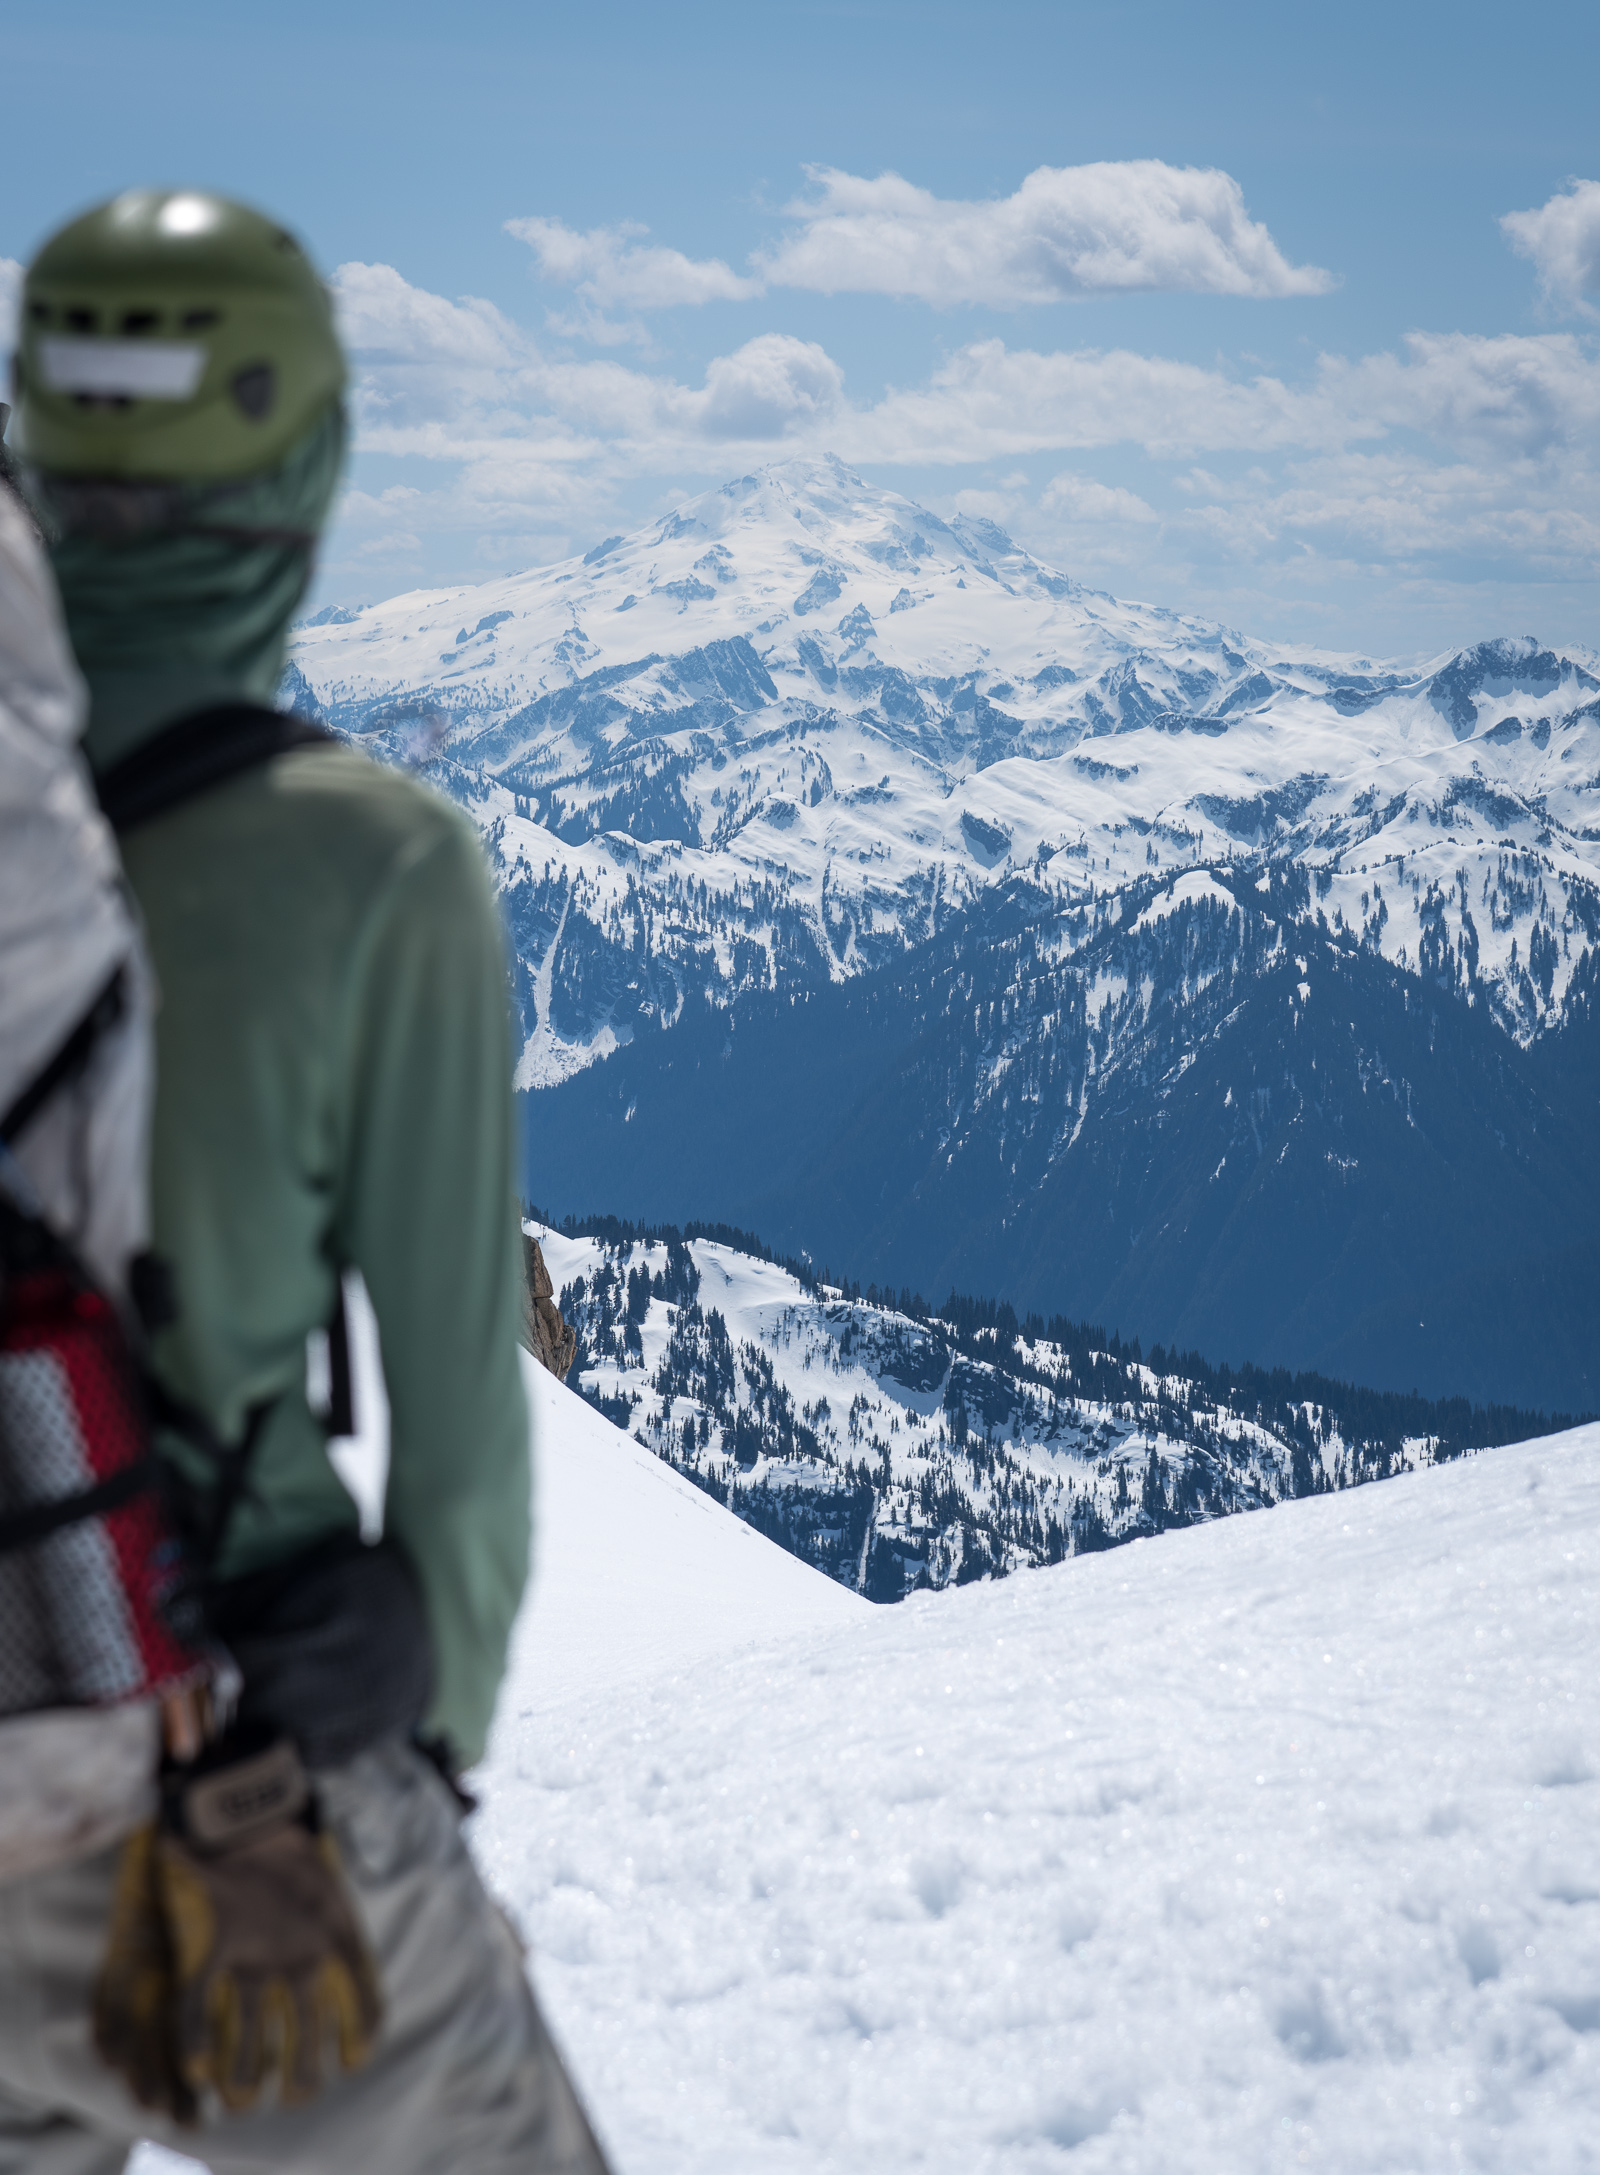
Trip: Buckner Mountain/Mount Buckner - North Face Trip Date: 05/14/2019 Trip Report: Last week, Tyler and I skiied the Sahale Arm. This past Monday/Tuesday, though, we decided to ratchet it up a bit and go check out the north face of Buckner. Our plan: Boston Basin > Boston-Sahale Col > Boston Glacier > camp > Buckner > Horseshoe Basin > Sahale Arm. With skis/splitboard! We had a beautiful, amazing adventure! We discussed our hesitation with Tuesday's 2-4" snow and gusty winds forecast; I really appreciated Tyler's rational explanation of how it probably did not mean certain death, but that he was open to other objectives, too. "I just want to be in the mountains." We decided to take fuel and food for an extra day if we ended up needing to hunker down.We left the Boston Basin trailhead with a fine alpine start of a bit past 11 AM. Tyler decided to try carrying his splitboard as Star Wars thrusters. I decided not to ski strap my skis together, and we both thought our mods worked well! I think he's doing a shakedown, stability-test dance We were able to get onto snow relatively quickly and start skinning. Conditions were great, fairly cool and mostly overcast. We were able to skin all the way to the col with no issues, then switched to crampons and made our way up and around the ridge toward Boston. There was a little section of steepish snow to go around to wrap onto the Boston Glacier side: About to get over onto the shoulder of Boston; Boston Glacier in background. Photo: Tyler But then we were on the glacier, transitioning to skis/splitboard, and having a blast on the great snow!! The sun had come out for a bit, and it was amazing. These two photos are looking toward Sahale: We skiied/splitboarded around the huge crevasses and made our way toward the bottom of the north face. We had to skin a bit, but then soon we were making a sort of snow lean-to in the slope. Tyler made sure to put in a skylight/window. The sunset over Forbidden was fantastic, and the night was wind-less. Tuesday at 5 AM was when the weather was supposed to move in, but there was just light overcast and nothing ominous in sight, no wind. We packed up and started uphill... about 20 minutes or so after we began, I punched through some rock moat thing up to my chest (feet dangling in space until I realized I could kind of stem). Exciting! After I extricated myself, our headlamps revealed ~8' down to some big rocks. I was super super slow on this section and Tyler was extremely patient! About halfway up the face, we saw the nasty black clouds coming in and the snow finally arrived. As we got toward the summit, the winds picked up. Finally we were on the summit (Tyler signed the register/log and noted that the last entry was last October, hmmm) and then quickly off, downclimbing steep icy-ish slopes to the southwest in very low visibility. Photo: Tyler Photo: Tyler We found a shallow moat to shelter in as we refueled ourselves, and then we continued downclimbing for about 800ish feet to where the angle eased up a bit. We put on our skis/splitboard and carefully made our way across the icy-ish slopes of Horseshoe Basin and all of the avy debris. By this time it had changed to rain, and the snow was softening up. We got some good turns in! Finally we were toward the bottom of the exit gully and put the skis/splitboard away, and booted up and up and up in very low visibility. Some phone GPS-checking confirmed our route in the (did I mention?) very low visibility: Finally, within sight of Sahale Glacier Camp, we put on our skis/splitboard and got some good turns in without succumbing to too much vertigo, using our Sahale Arm ski memories to get into the Soldja Boii Creek drainage and with only a few minor tree shenanigans, finally got to the end of the snow, and then popped onto the Cascade Pass trail, and then back to the car! The pizza and beer were well-earned. I'm really grateful that I was able to go on this adventure with Tyler. He's patient, kind, generous, and encouraging. Thank you, Tyler! :-) Times: Day 1: 8ish hours Day 2: 9ish hours Gear Notes: 1 60m half/twin rope --> not used 3 pickets + 2 long screws --> not used One regular axe + one tool --> good Skis/snowboard --> worth bringing! Ski crampons --> yes Bivy sacks + shovels --> dope Goop --> yes (Tyler's calorific concoction of peanut butter, chocolate chips, and oats, in a ziplock bag) Approach Notes: Through, up, up, over, down, around


-
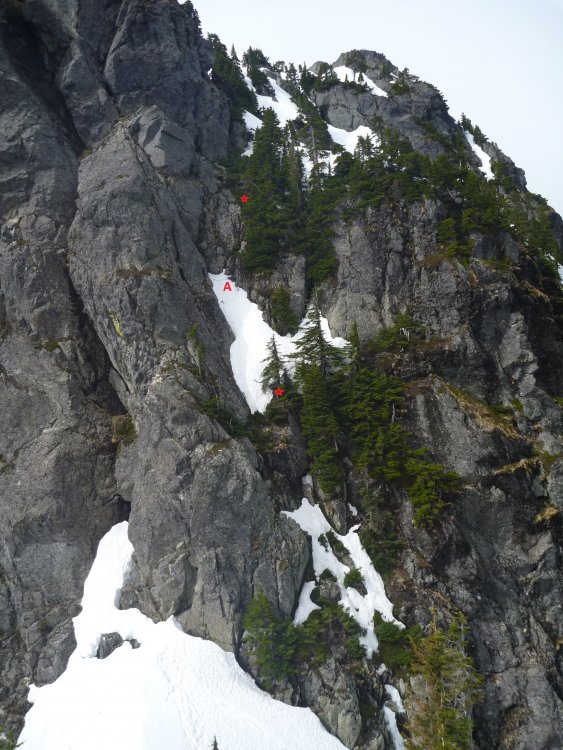
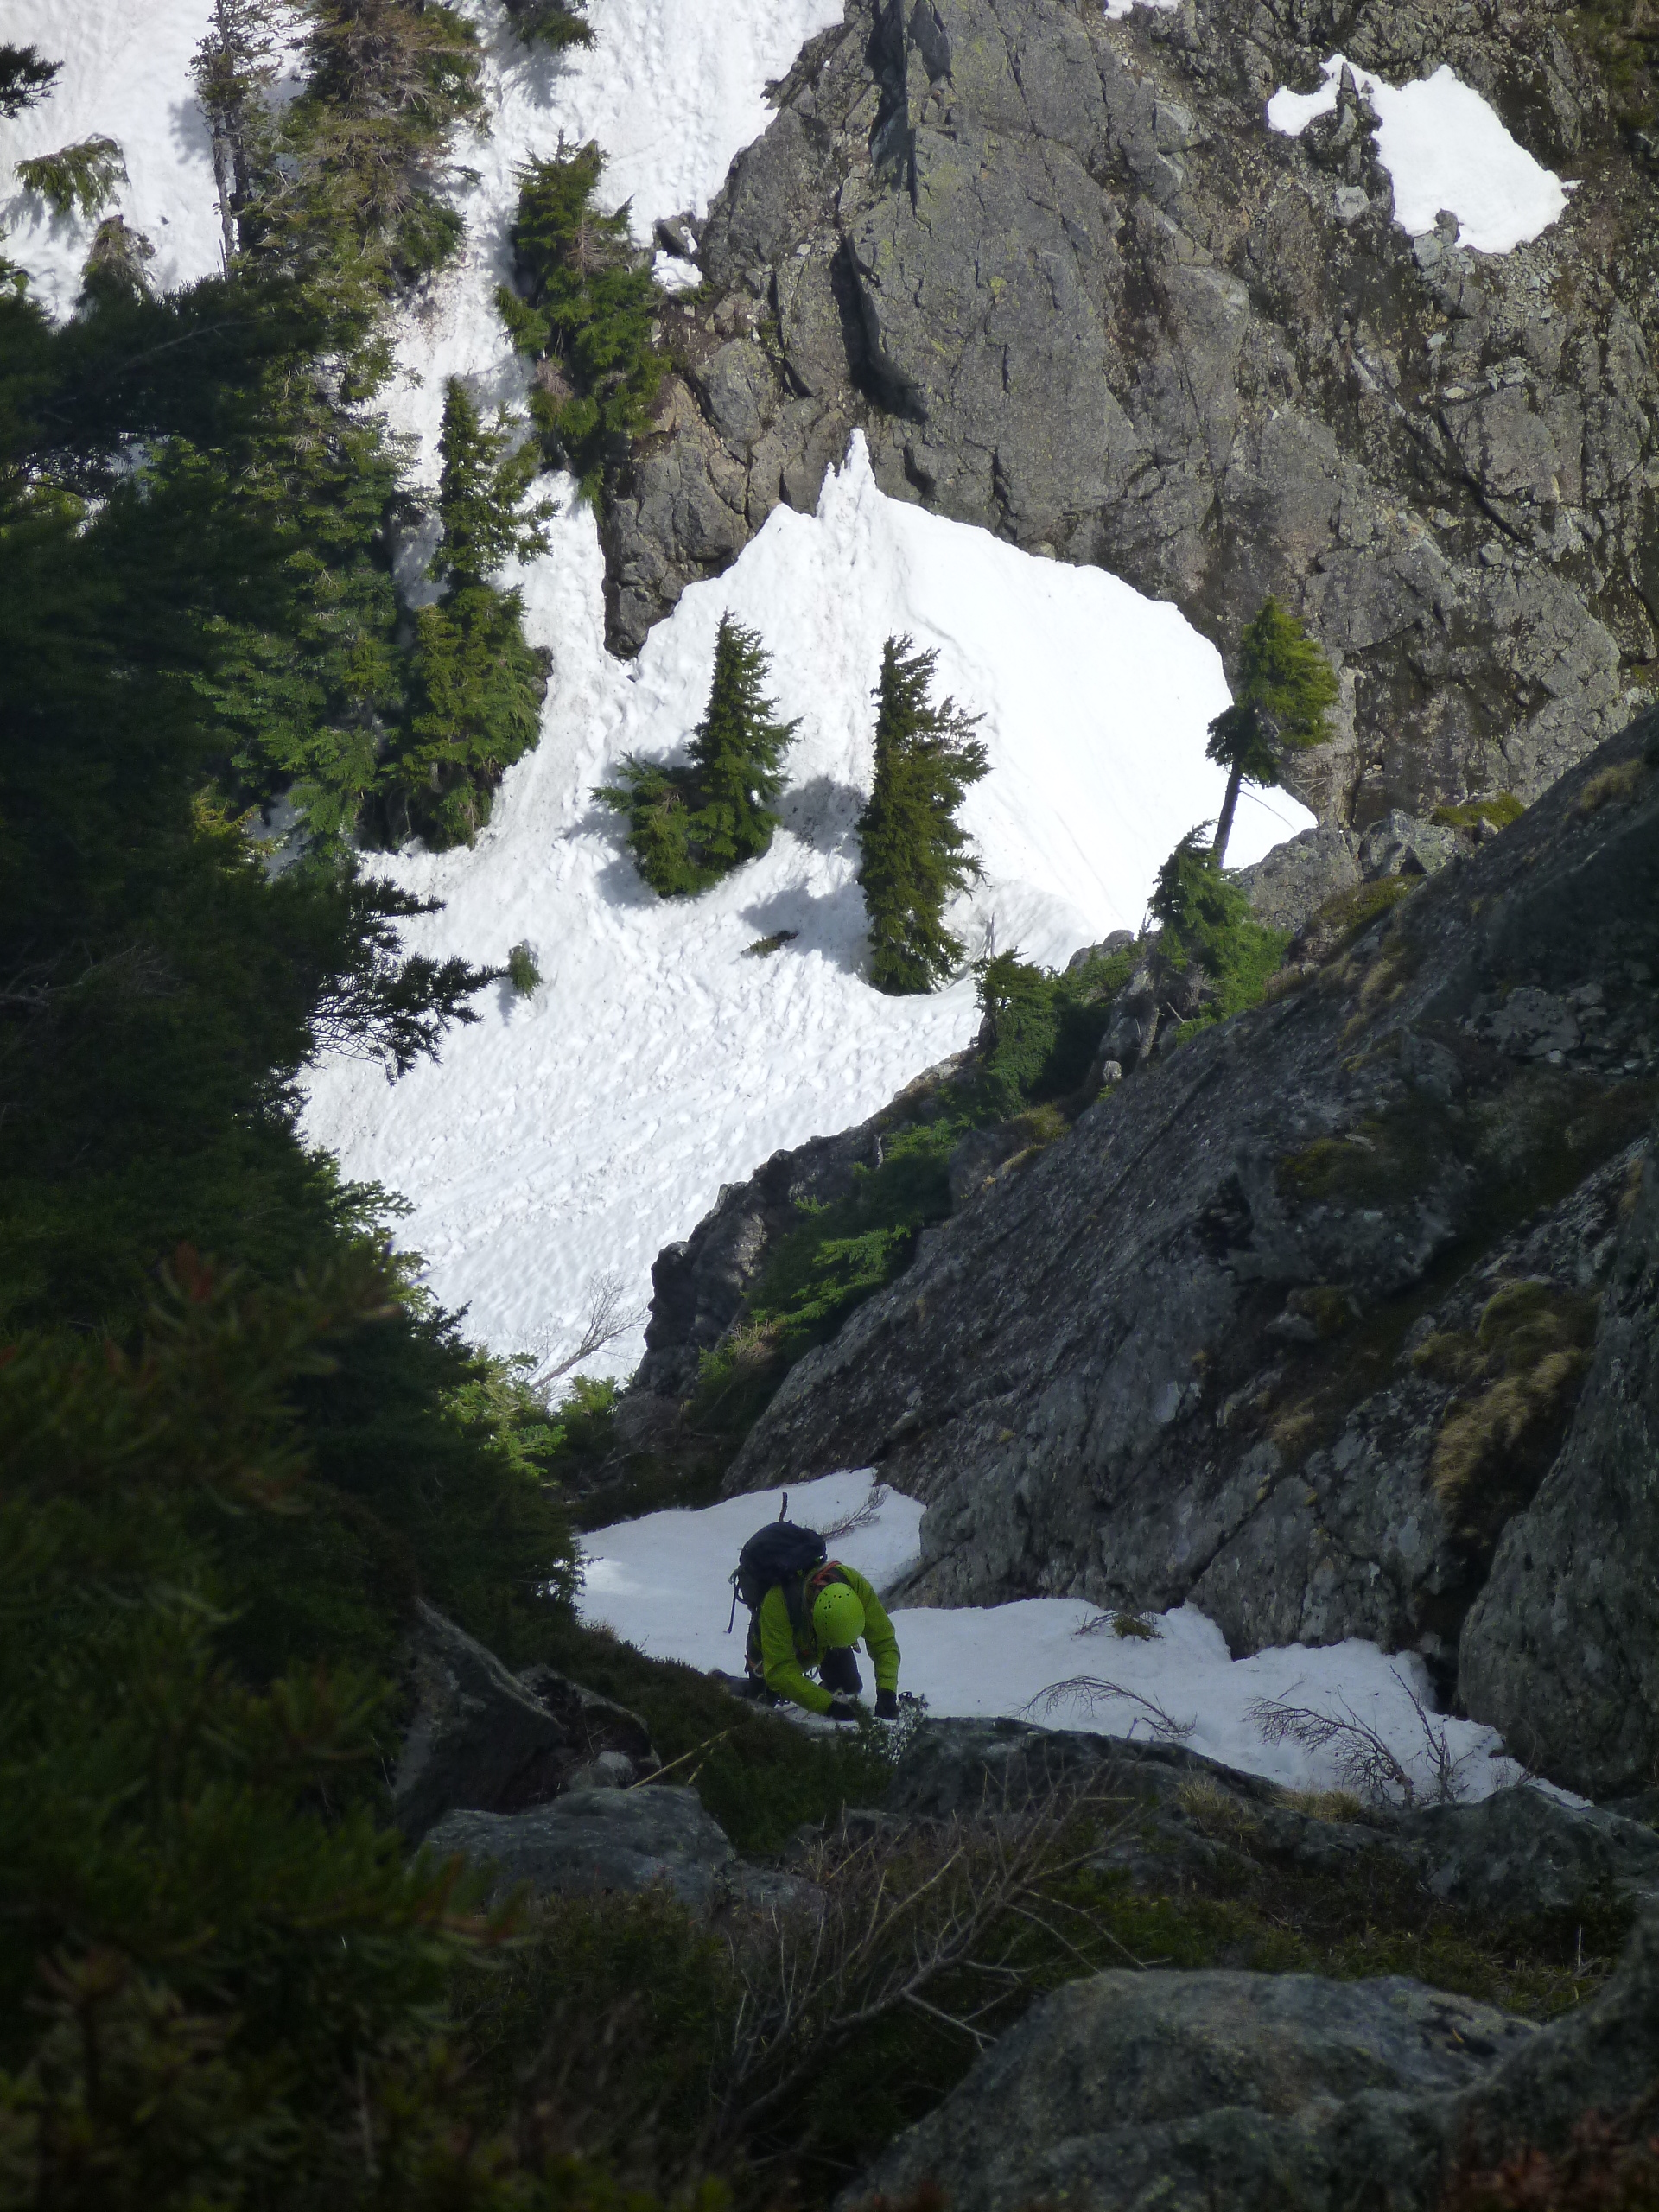
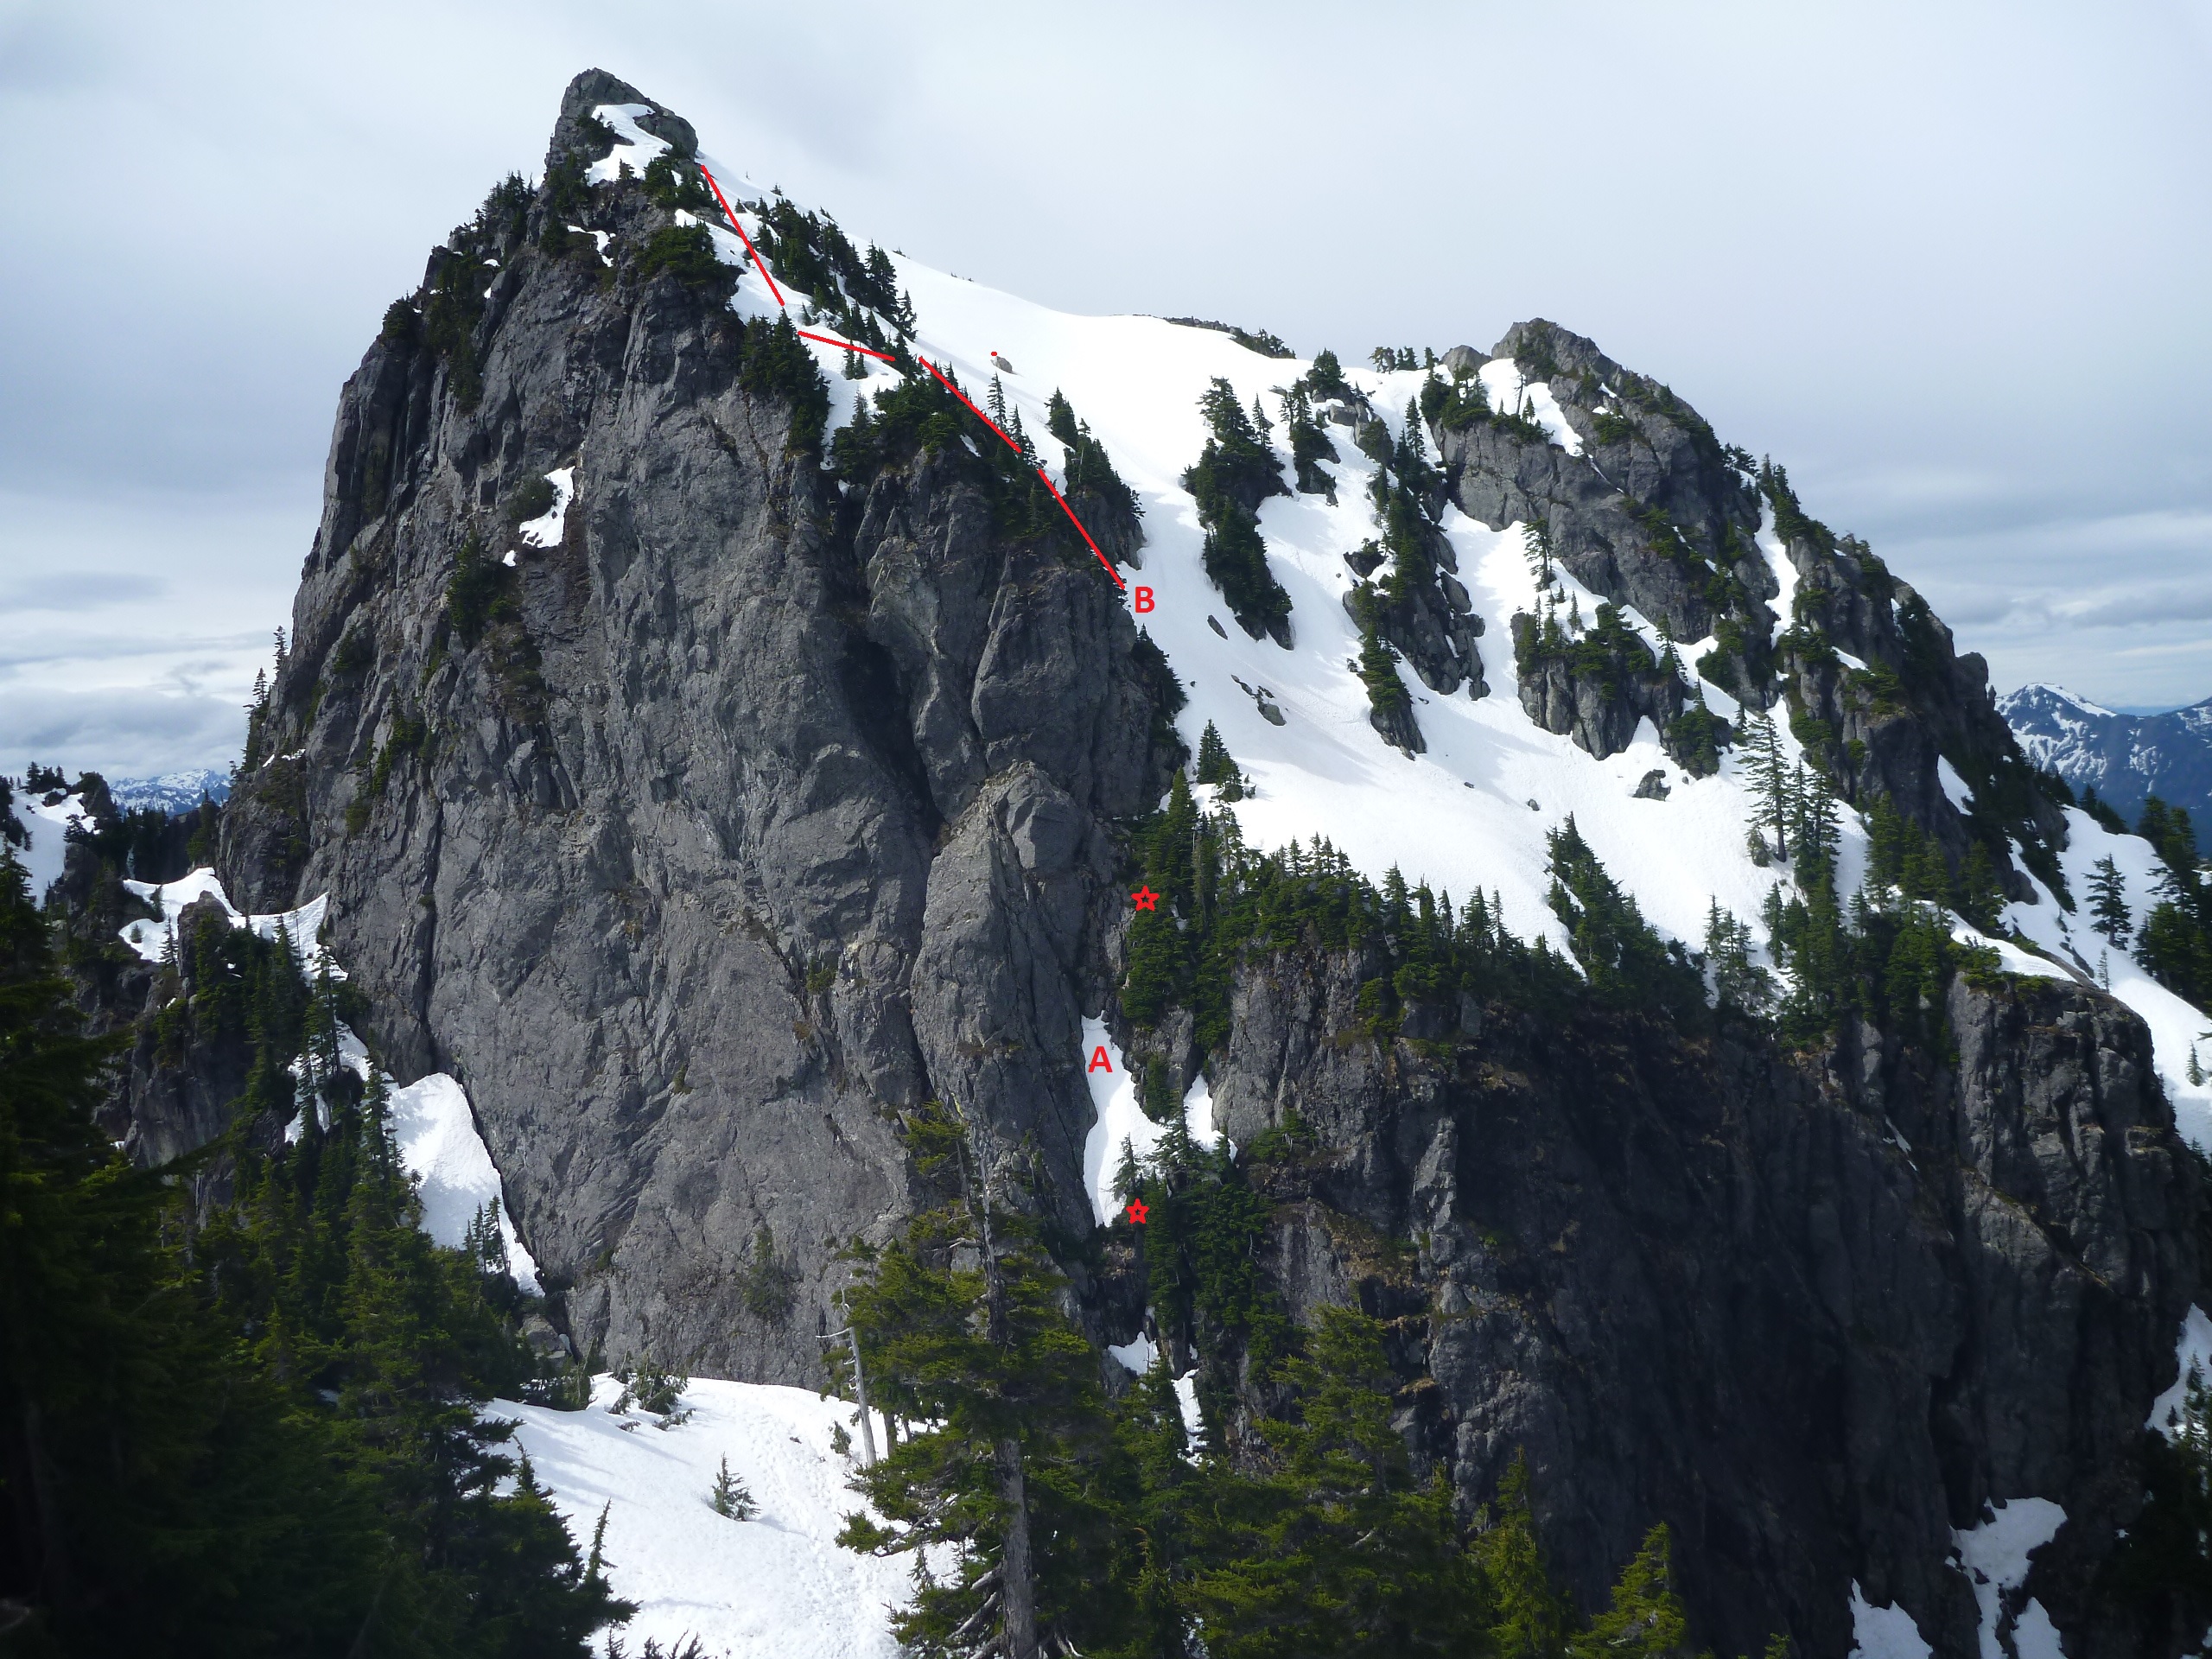
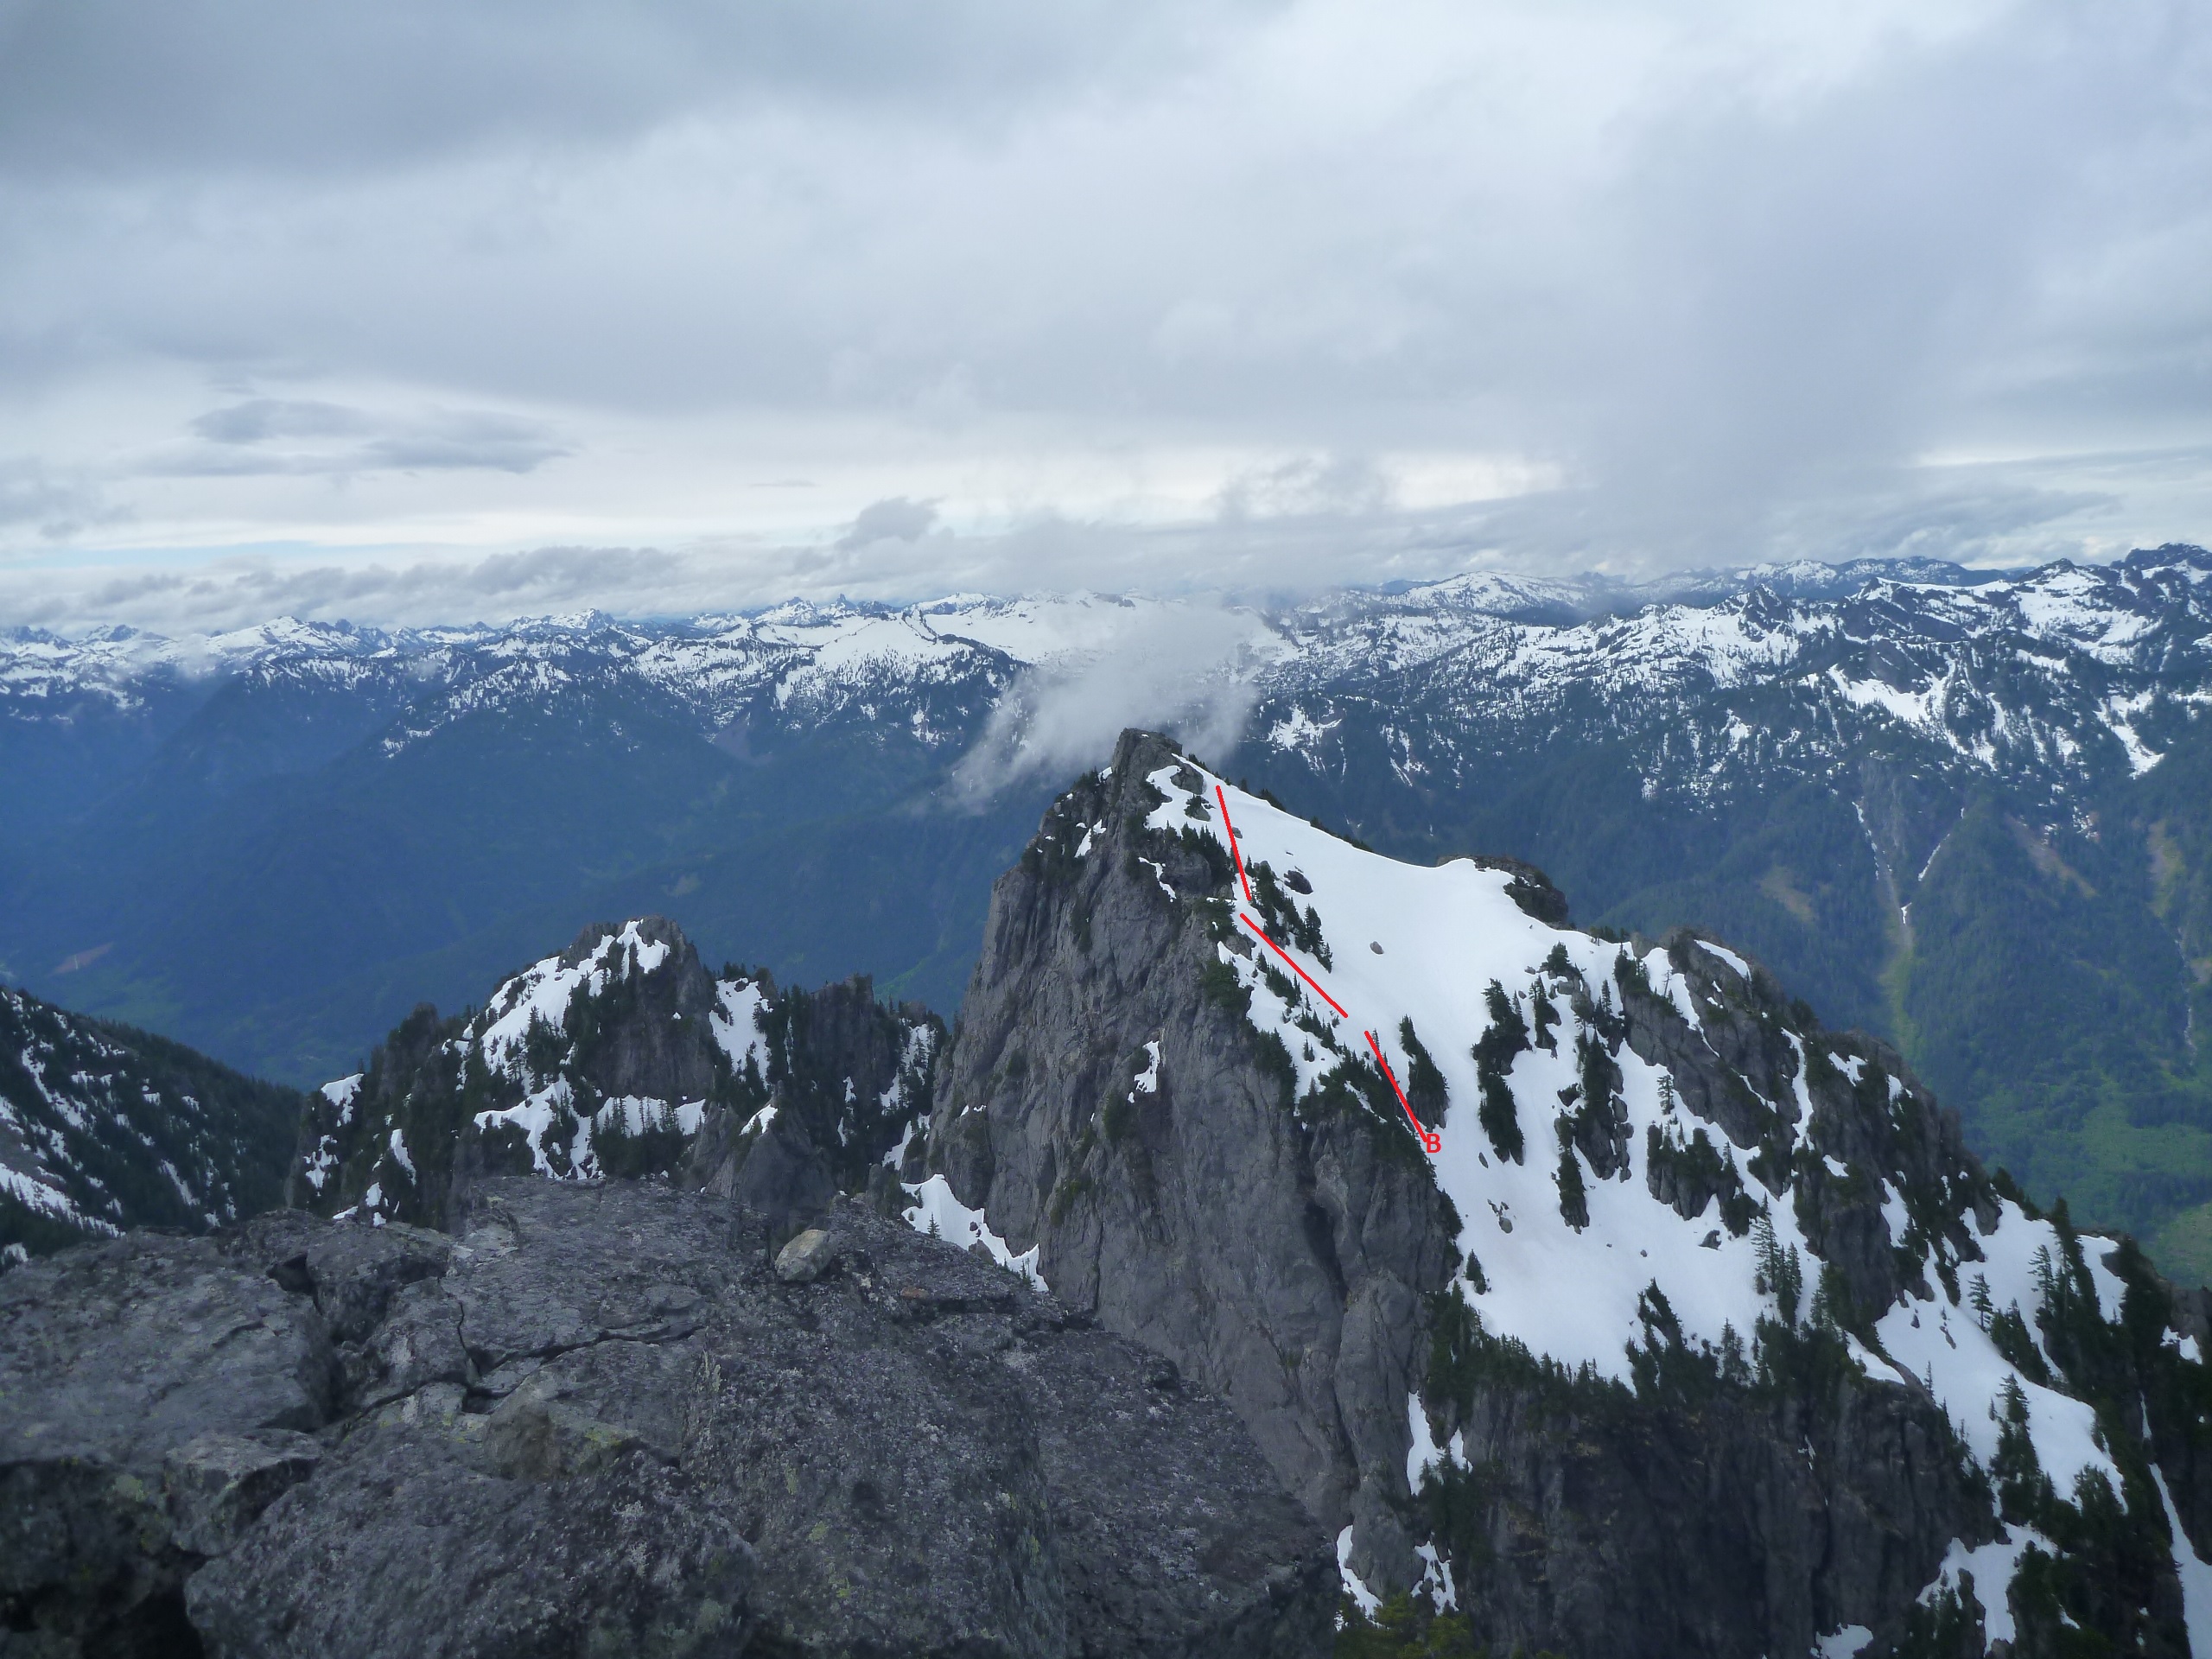
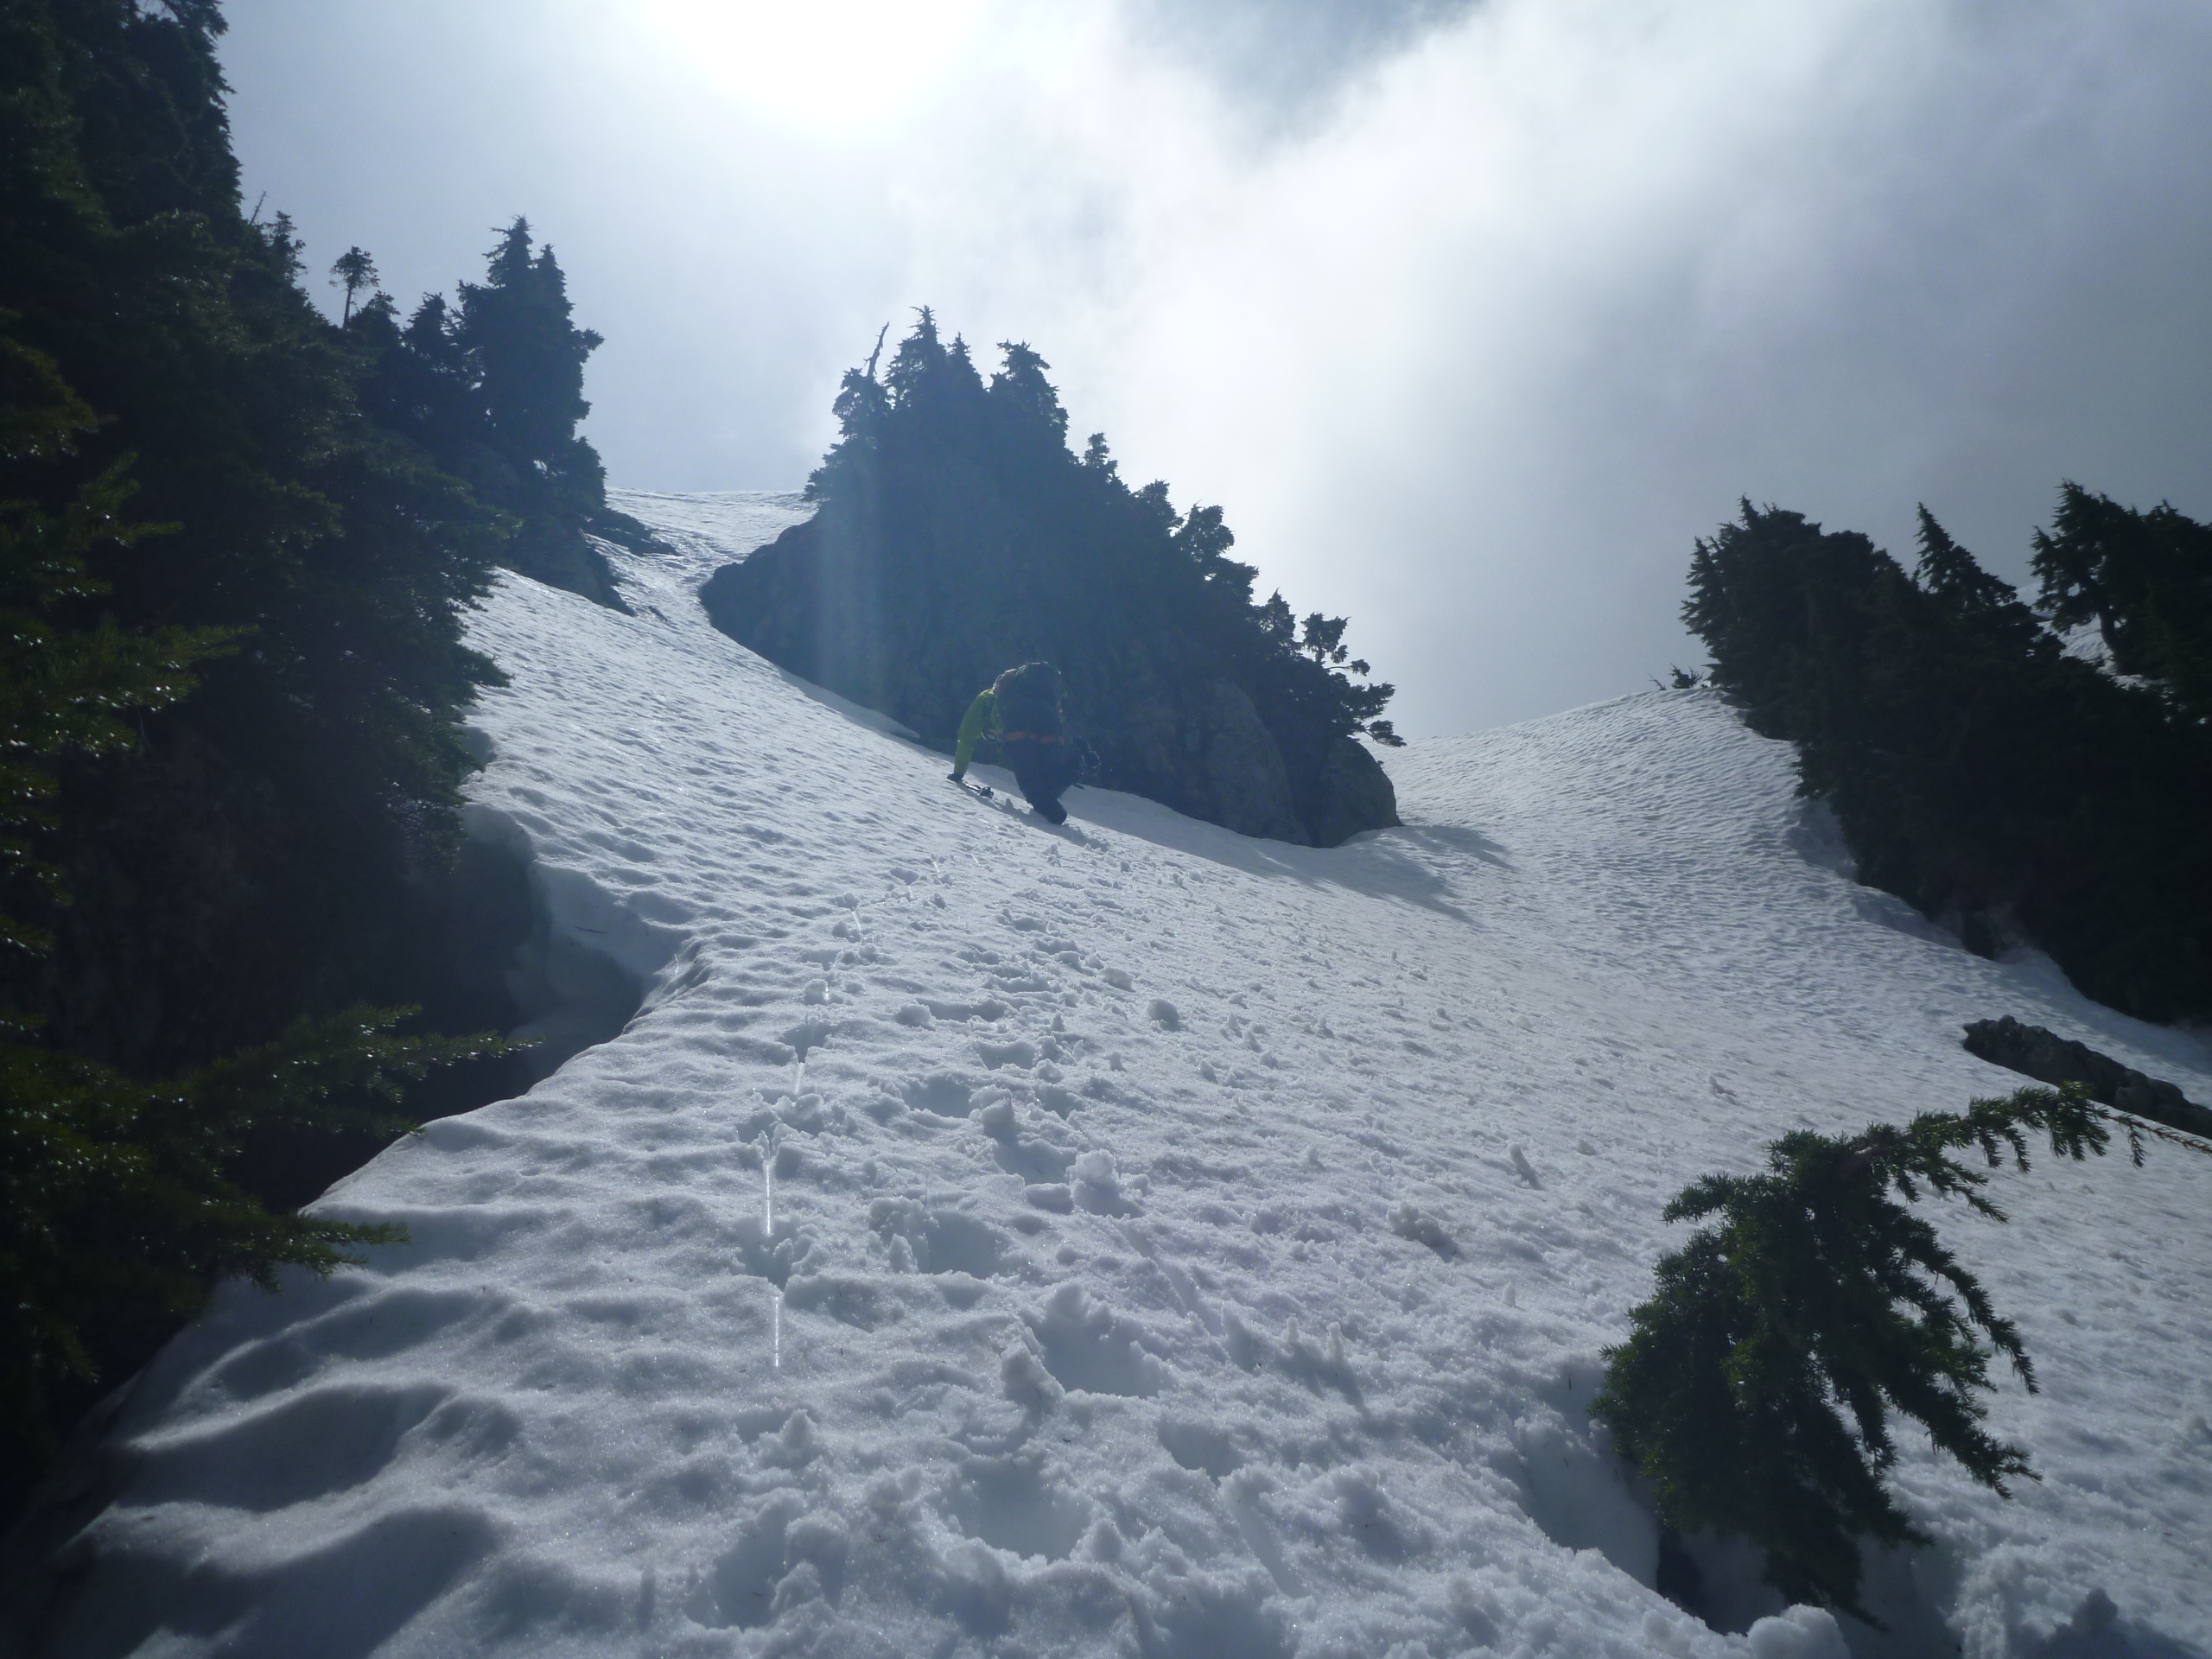
 Trip: Mt Baring 2-fer (north and south peaks) - Standard Trip Date: 05/19/2019 Trip Report: Chris and my original plan was a ski ascent of Baker, but with changing weather coming in over the weekend, we decided to do something lower and less likely to be in the clouds. We chose Baring Peak for a day outing. Having hiked Baring before, I wanted to spice it up by climbing the rarely-summited south peak as well. We came prepared for any conditions with two axes, pickets, crampons and rock pro. Some people call it overkill. We called it training weight. We reached Barlcay Lake trailhead and started up the trail. The approach was still as steep as I remembered, reminiscent of climbing trees in my childhood. It is more root than trail. We made snow-covered gully without incident and headed up. The snow was perfect for kicking steps and we made the notch easily. Snow gully. Baring on the left, south Baring on the right. We scouted the south route, which comes right out of the notch. It looked very doable with a couple snow patches broken by a couple rock steps. We couldn't see above the rocks steps though, so we hiked Baring proper to get a good look at the whole route. Baring was still all snow, but again solid snow that allowed easy steps. We headed down and geared up at the notch. We brought a single 8.2mm twin rope and folded it over. With the amount of trees and possible meandering, I didn't see the point of trying to pitch out 200 feet and deal with the rope drag. I offered Chris the leads and he offered them right back to me. I guess I was leading. The first twp pitches were muddy rock and thin snow without much protection other than slinging trees. The rock horns were loose and the snow too shallow and soft for pickets. It was easy climbing though, something like higher-upper 4th class. ( I want to call it low 5th for egotistical purposes, but it wasn't.) The route from the notch. The stars are the belays. Each belay had good tat with a newer rap ring around a solid tree. The letters line up with photos further down. Chris following the snow finger marked A. The upper route. We chose a narrow chute between two rock outcropping. It was steep and rather thin snow coverage. Going climbers right would have been safer but longer. We rapped down the chute. Chris climbing the snow chute marked B on the above photos. Obligatory summit photo. We hiked down the upper snow and did three raps to get down. The trees ate the rope like a lion with lollipop, so the descent wasn't much faster than going up. The way out was steeper than the way up (I don't know the physics behind it, but somehow the approach trail got steeper) and my knees screamed and almost quit. I gave my knees some pep talks, and they carried me down the root trail and back out to the car. It was a fun trip, but not something I ever need to do again. Gear Notes: ice axes, lots of long runners. Did not use crampons or pickets Approach Notes: Steep. Very very steep. Make your knees cry steep.


-
Trip: Shuksan, Icy, Ruth - Nooksack Traverse Trip Date: 03/01/2019 Trip Report: Fred and I went and did the Nooksack Traverse over the first three days of March. We had fun, I think. We had probably the worst snow conditions of any ski trip I have ever been on, extremely cold temps for Washington, a crevasse fall, and several equipment issues. I might not go back... this year anyway. We parked a car at the Hannegan Pass Road picnic area right at the highway, then drove up to the lower ski lodge. The trip into the White Salmon valley was typical. We traversed in and lost ground to some guys who skied the clearcut, but they didn't have overnight packs. Skinning up the WSG was a breeze really, excellent snow if you were going downhill. We opted to climb the Hourglass instead of Hells Highway. We found about 20' of hard water ice... surprising. It was tough with a single axe and only two screws. Bring real ice gear and do it though! There was another bigger step above that we skirted on the left and topped out on the Sulphide. I would guess it was WI2. Fred approaching the Hourglass: Summiting was easy after dropping our packs at the bottom of the pyramid. We had lost a lot of time in the Hourglass, it's not worth it as a time saver, so we tagged the top and headed down. We skinned down to the flat spot on the Crystal Glacier while the sun set, getting the tent up just at dark. The crossover from the Crystal to the Sulphide was easy, poor light made it seem hard though. Fred on the summit of Shuksan: After a long cold night we packed up and headed uphill for a warmup skin and a look into the Price Glacier. The topout looked unlikely with a crack already running completely across the headwall. We skied down to the entrance to the Nooksack Glacier to check it out, a little trepidatiously we worked our way in, and found bad news. It looked scarry, way scarry. Obviously it's steep, but there is a serac just below the only cornice free entrance, then a crack running completely across the base of the headwall. We balked. We walked the cornice with hopes of rapping over it and downclimbing through a gap in the bergschrund at a minor rib. The drop in on the Nooksack headwall from further east above the cornices, photo by Fred: This option didn't really seem safer, so we went for another look. I really wanted to bail at this point; the WSG is a pretty darn good consolation ski, but I also really wanted to do this route, and Fred never bails (jk). We strapped our skis on our backs and Fred began downclimbing on belay. We only had two pickets so it would be a thin running belay at best. When he got to the top of the 'schrund he couldn't see over, so I set a 2 point anchor and began lowering him... Then the lip blew, it collapsed under him and he fell, the picket and axe I had in blew, as did an intermediate picket Fred had in, and I began rolling. I rolled probably 60' down a 50° slope. My first thought was "oh shit, Fred! I blew it as a belayer!" My second thought was "oh shit, ME! This is going to suck." I think I bounced off the far side of the 'schrund, then hit bottom. We both had the same thought when we hit the ground: "get your head up so you don't suffocate." When I could see again Fred was a few feet away and we were in a 20' deep crevasse. We had fallen about 10' over the lip, then 20' more into the bottom, but we were OK. We both check in with each other, then tried to climb out. The bridge we were on was not the bottom, and it was super hollow, my feet kept punching through into air. I had to take my pack off (with skis on it remember) and use it to push against so I could get my feet up and onto firmer snow. After I got untangled from the rope I climbed the far wall of the crevasse, it wasn't hard, just steep, loose snow. Fred did the same and we were seemingly fine. We later debriefed and realized that this might actually have been the best case scenario. If the anchor had held and I had lowered Fred he would have been free hanging, then we would have run out of rope before he got to the bottom. My only choice would have been to go Joe Simpson on him and cut the rope. The slope and 'schrund from below, photo by Fred: So anyway, we skied down and crossed the Nooksack Glacier without needing to skin. It was close, and there was some shuffling, but we made it through. Fred hanging out below a big serac: Looking back across the Nooksack: After more crappy, technical, icy skinning with crampons, we made the Icy Peak shoulder. My crampon broke about 30' shy of the summit of Icy when I was climbing the icy gully and kicked a rock slab (they were aluminum). But Fred pushed on. We camped between Icy and Ruth for another cold night, making camp just before dark again. More icy hard skinning led the next morning to Ruth and eventually the skin all the way back to the highway. Fred nearing Ruth summit: The East Nooksack from Ruth: Well, I'm glad we did it. Perhaps it is not the best year, perhaps we are just not good enough skiers for the headwall, who knows. We had fun, kind of. I'm glad we did it, glad we made it out, and glad I don't have to do it again, at least until there is another good weather window! Gear Notes: Standard ski mountaineering gear, ski and boot crampons, lots of clothes. Approach Notes: Traversed in from chair 8.
-
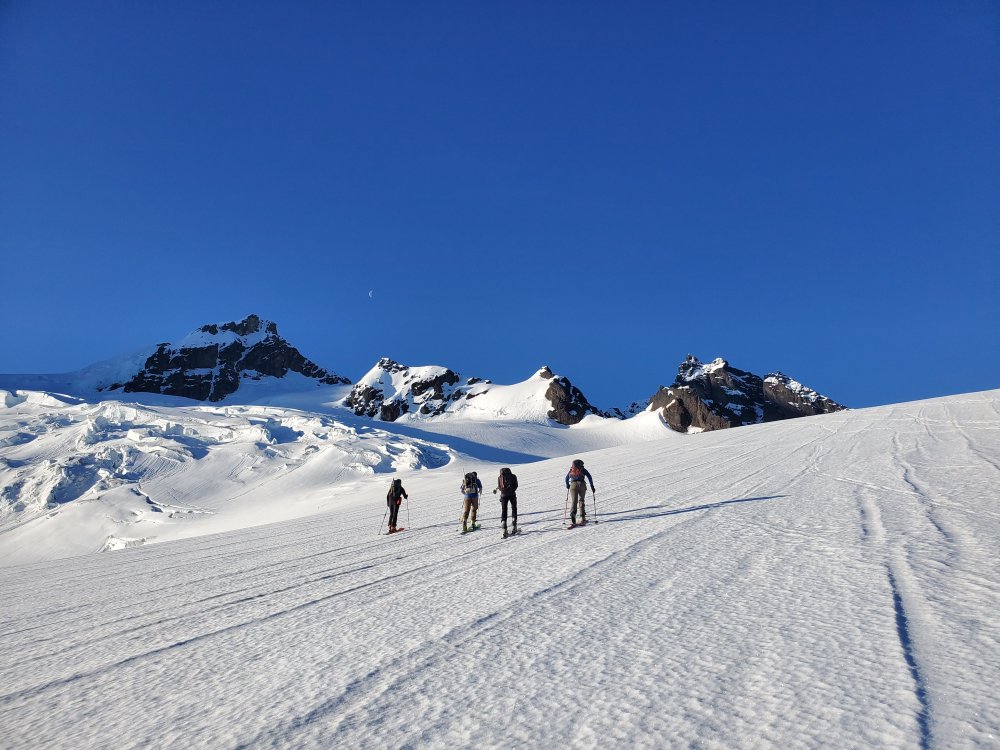
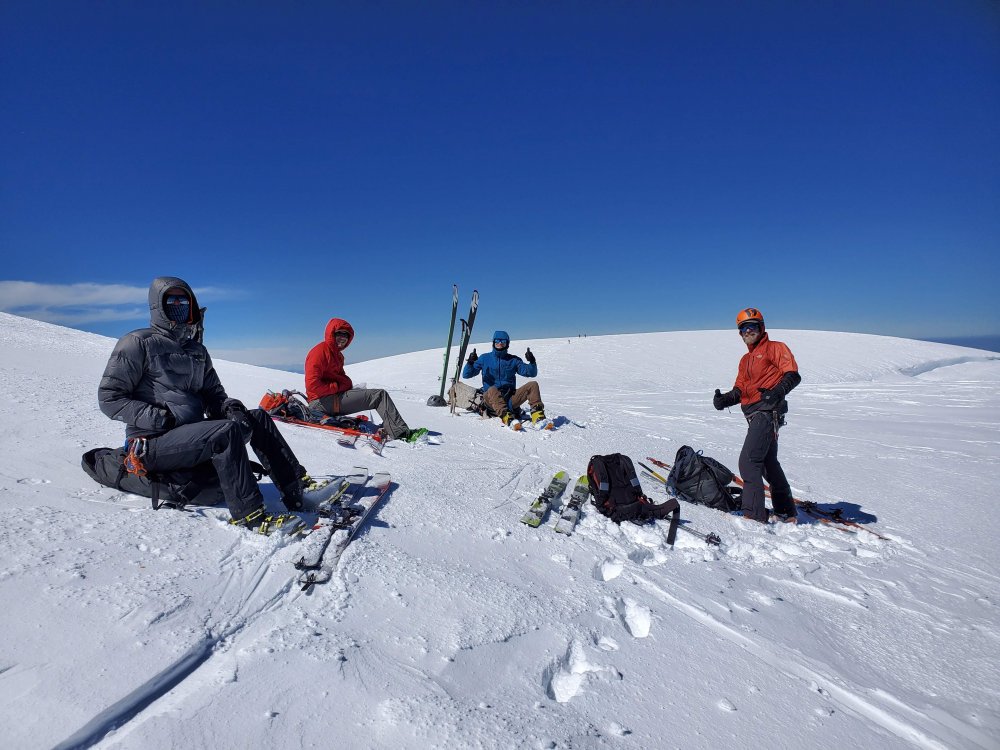
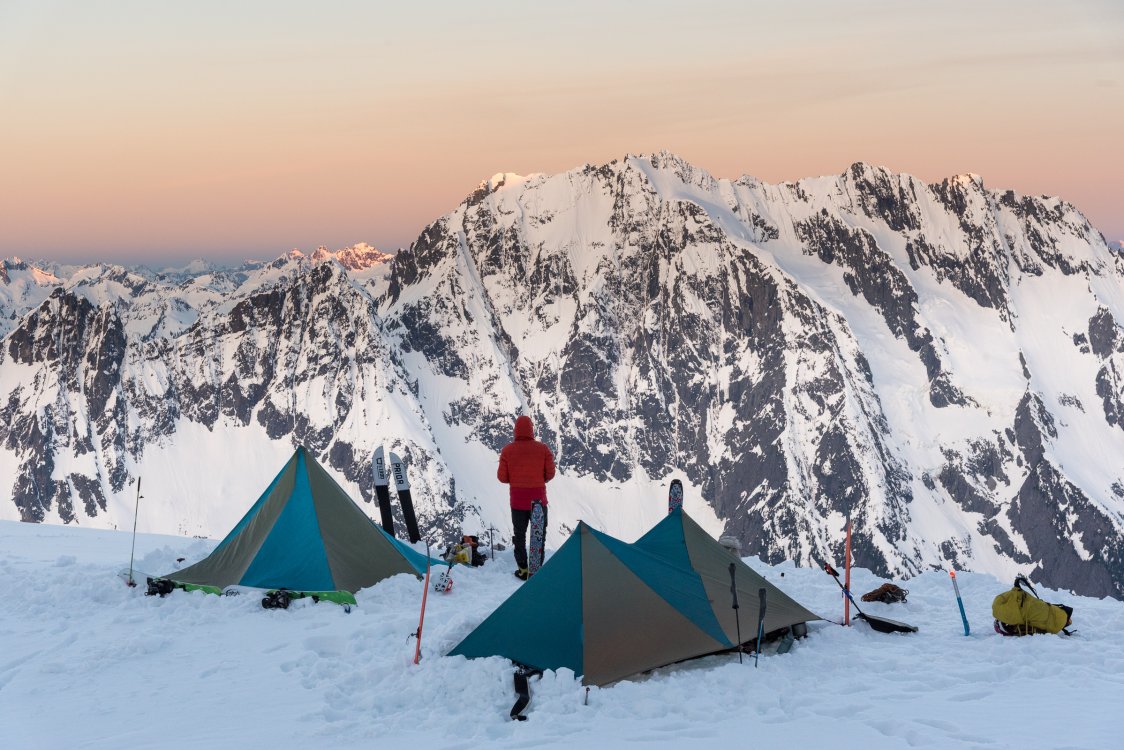
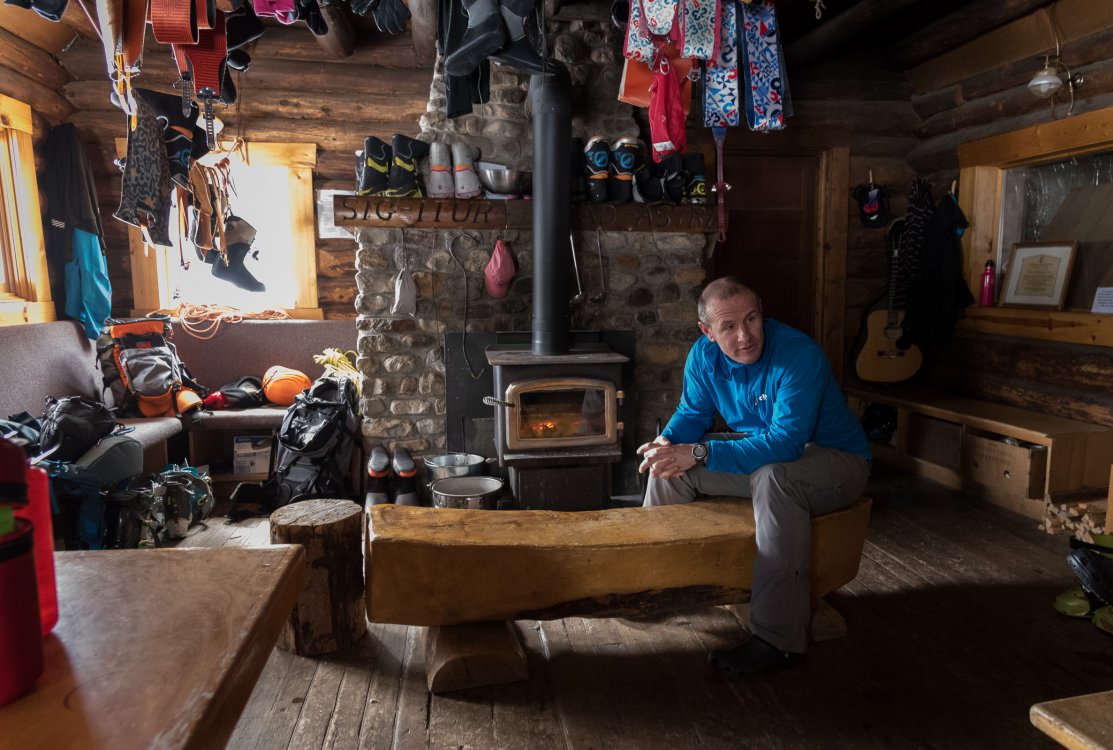
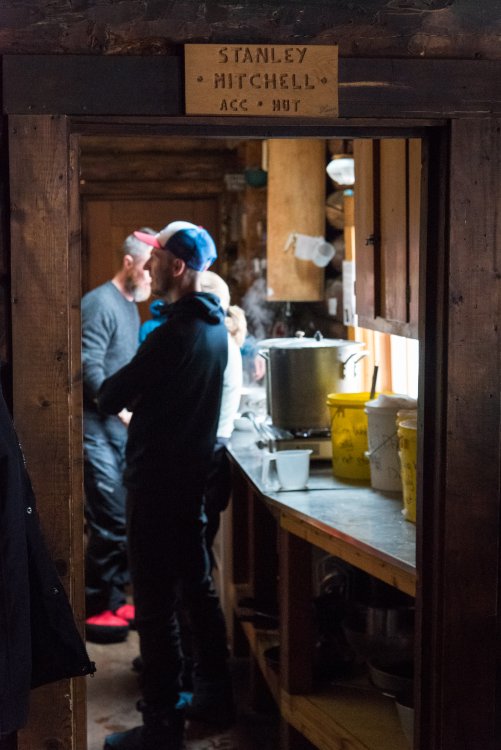
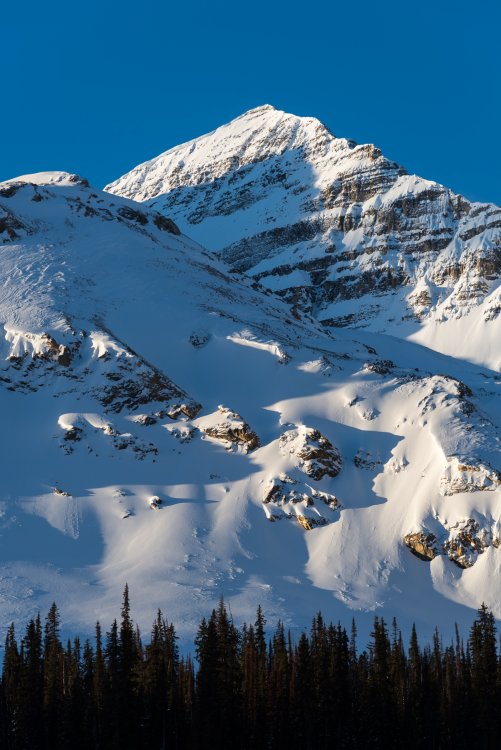
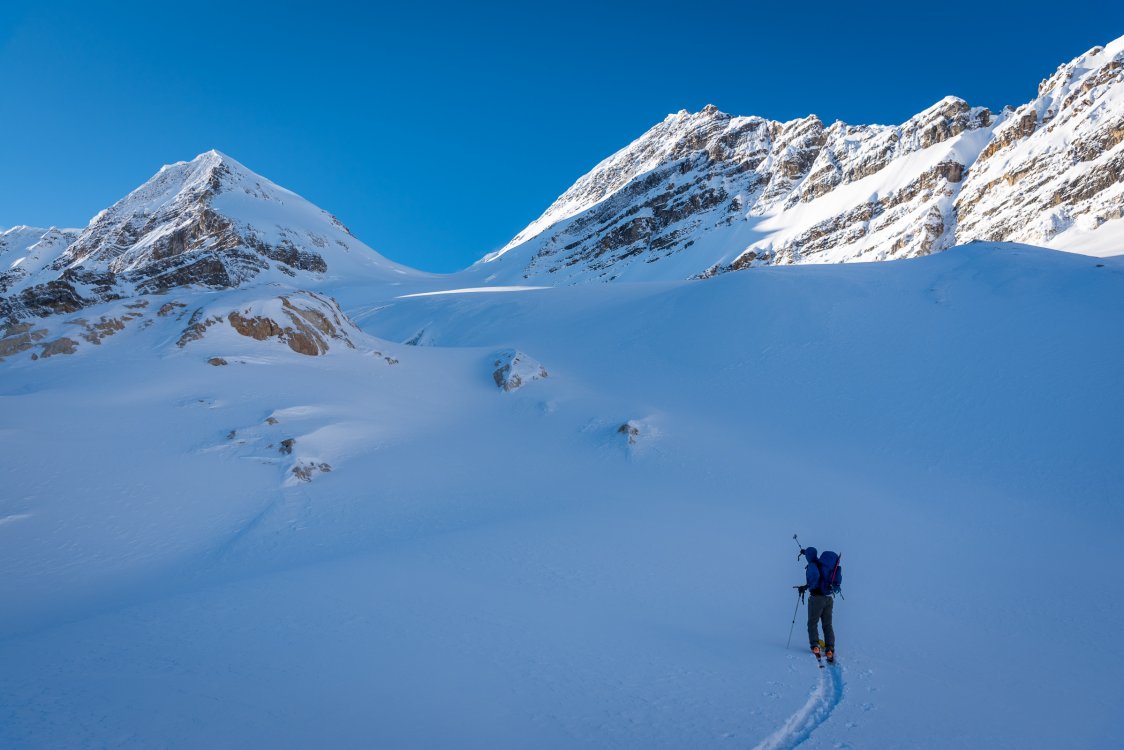
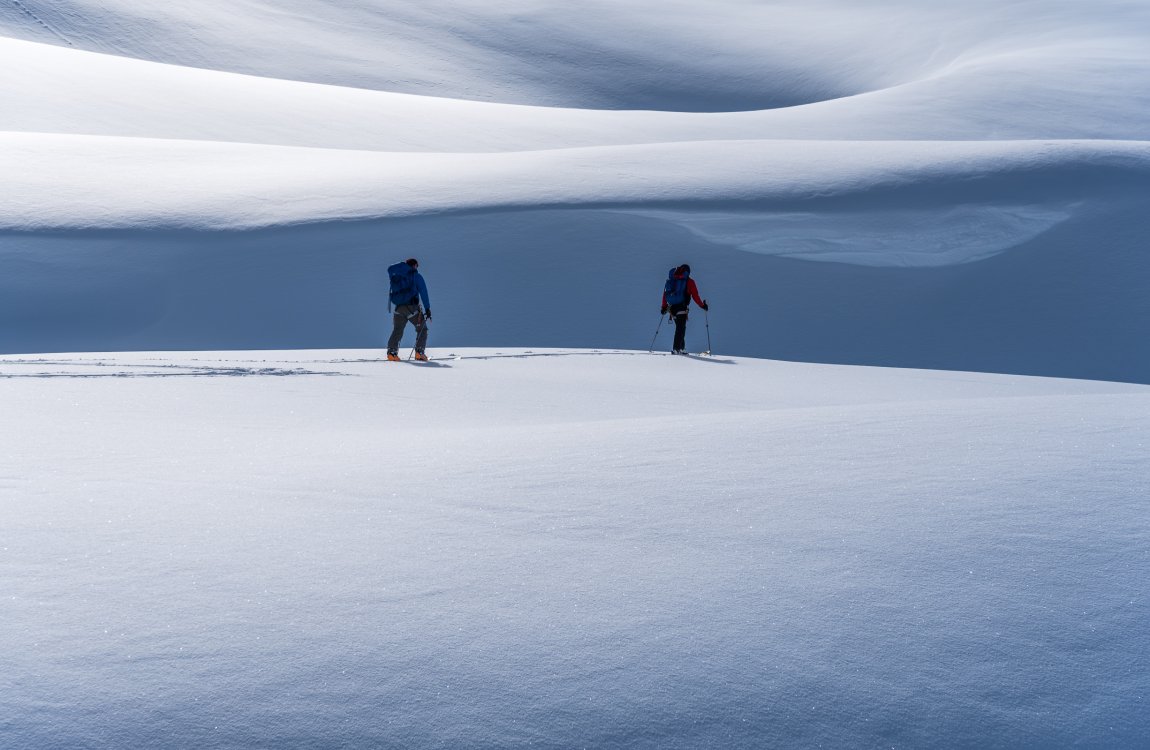
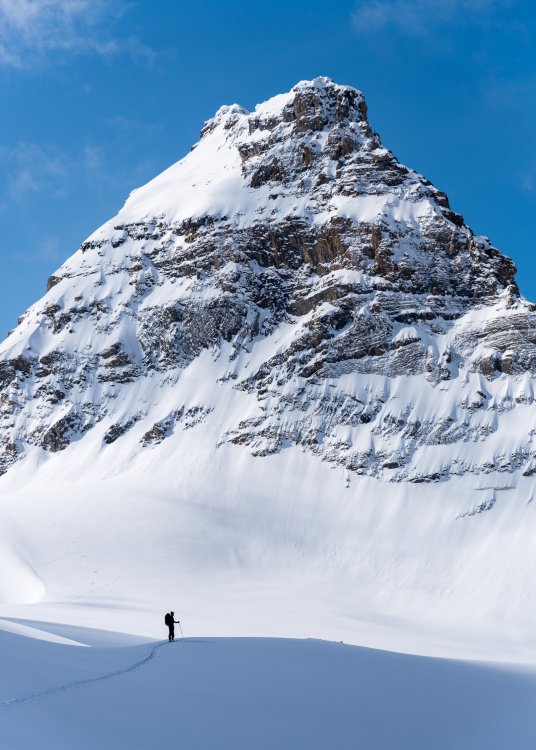
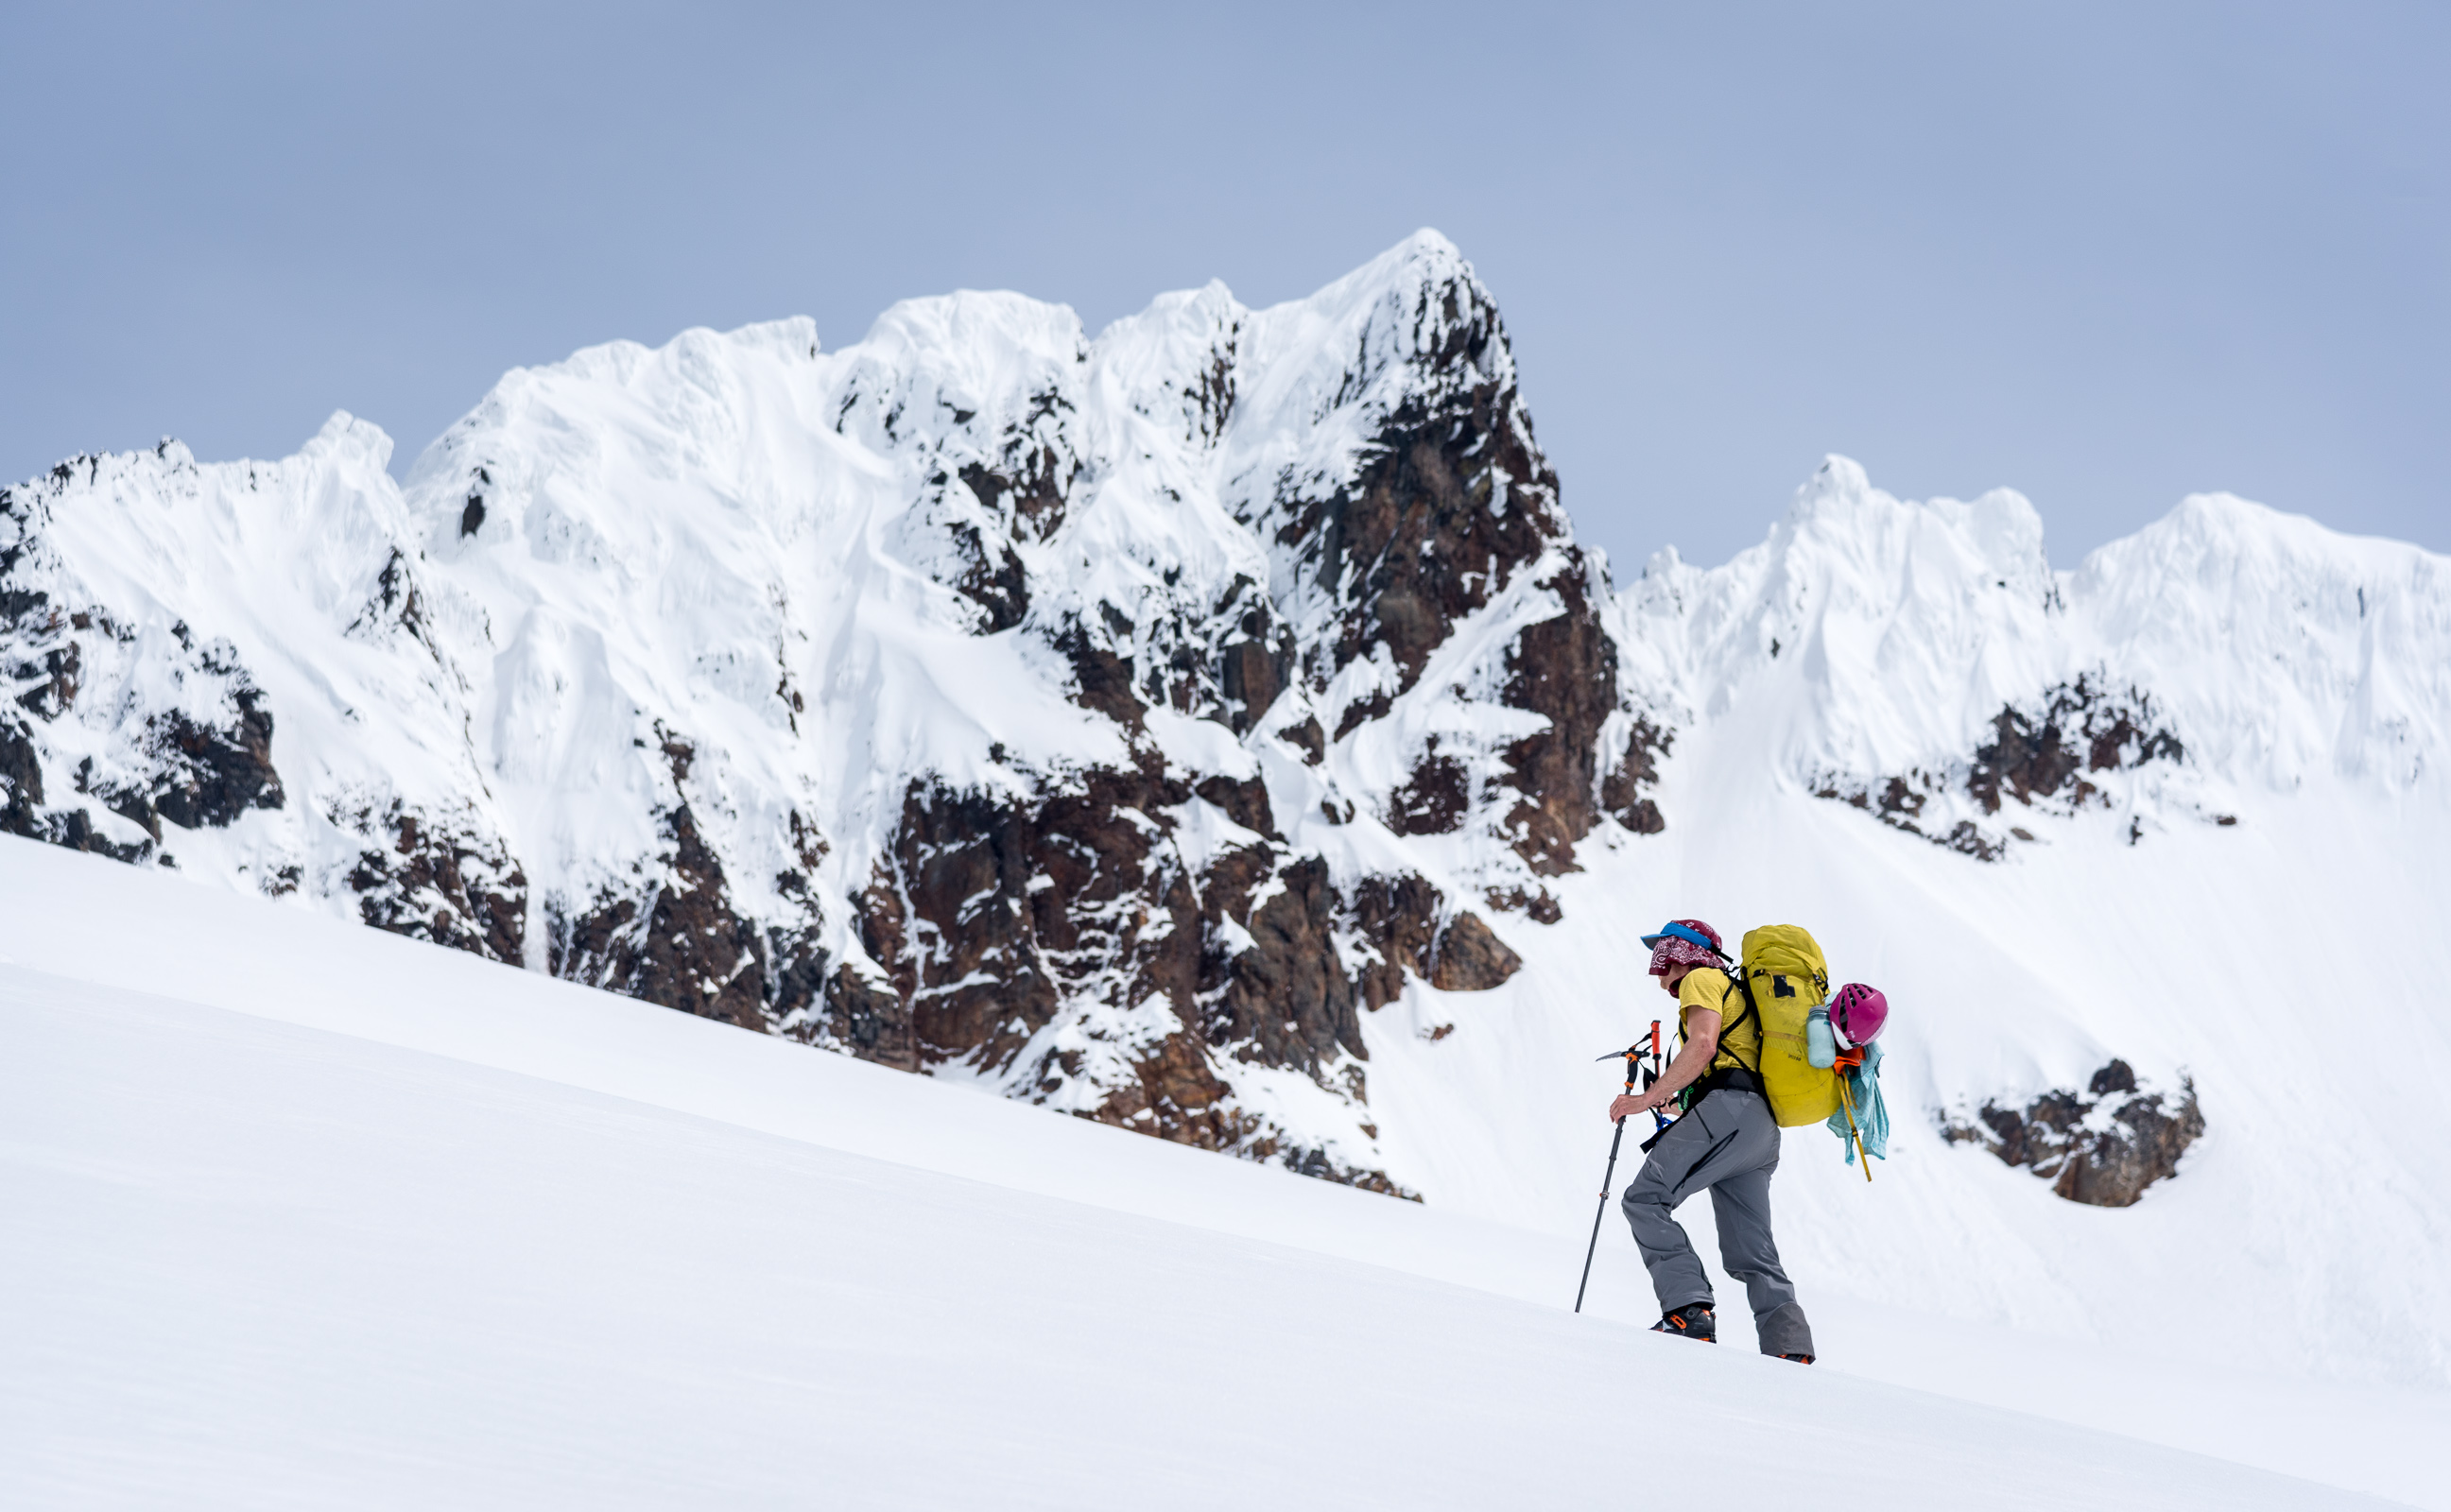
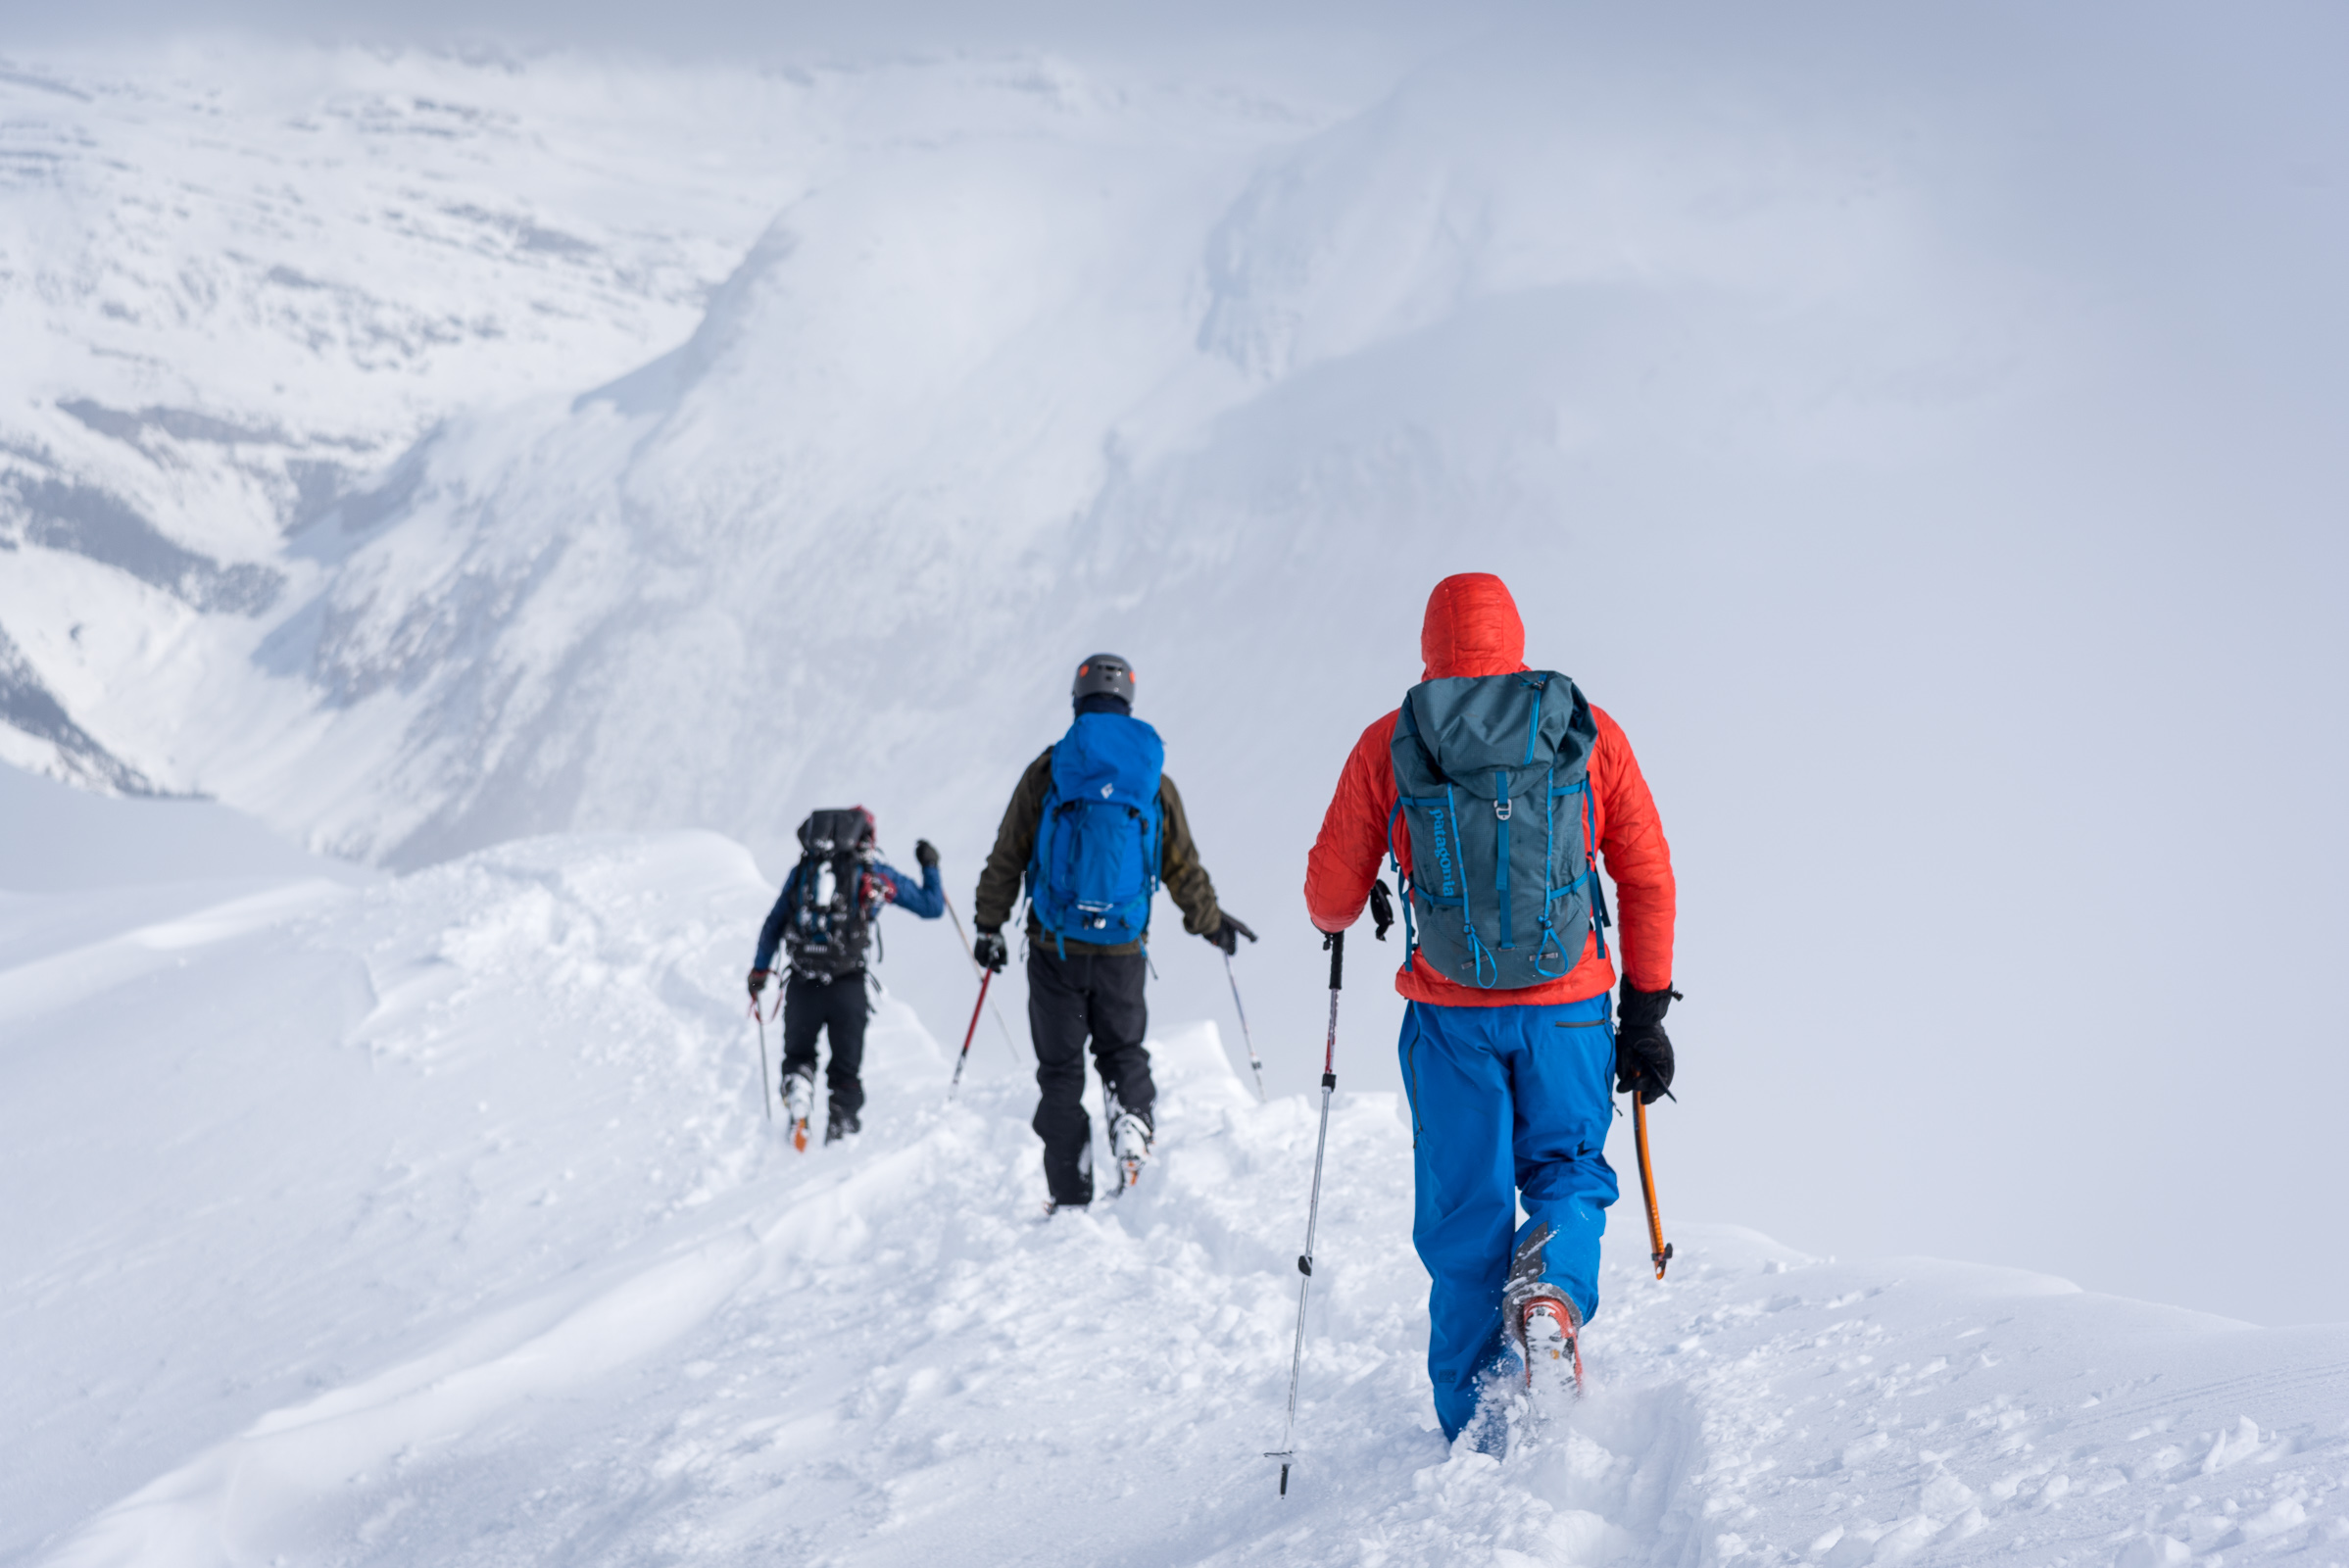
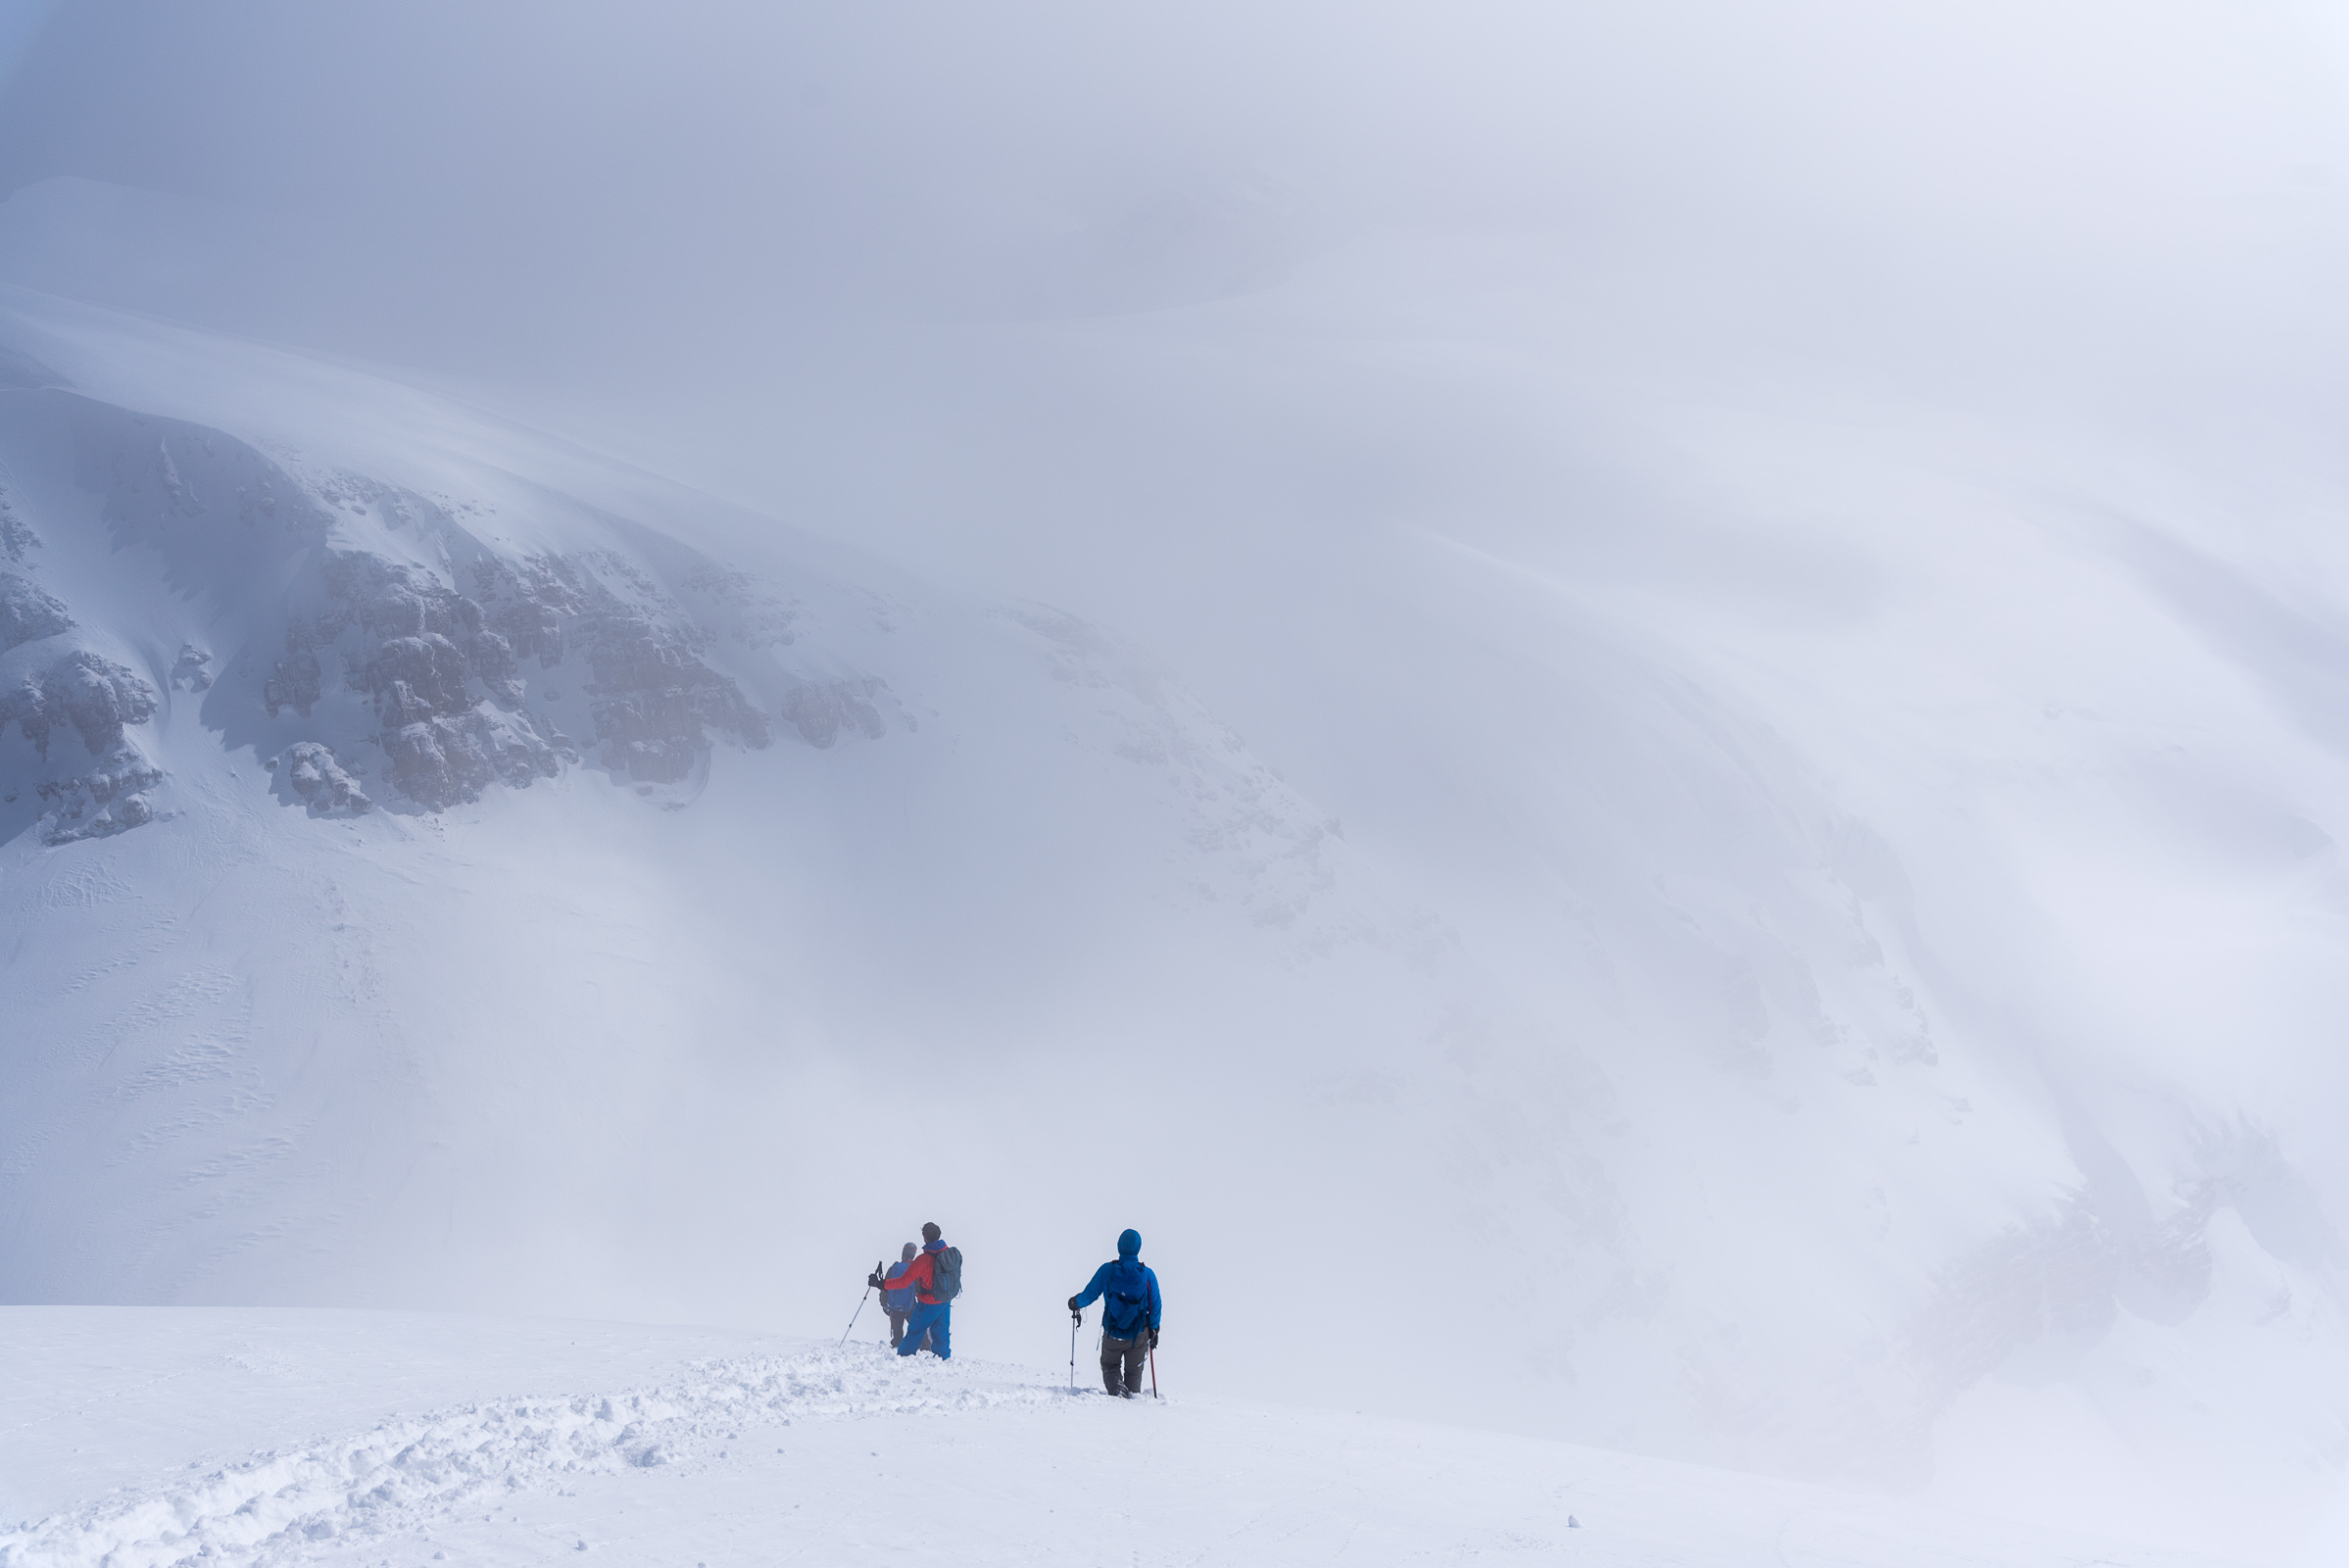
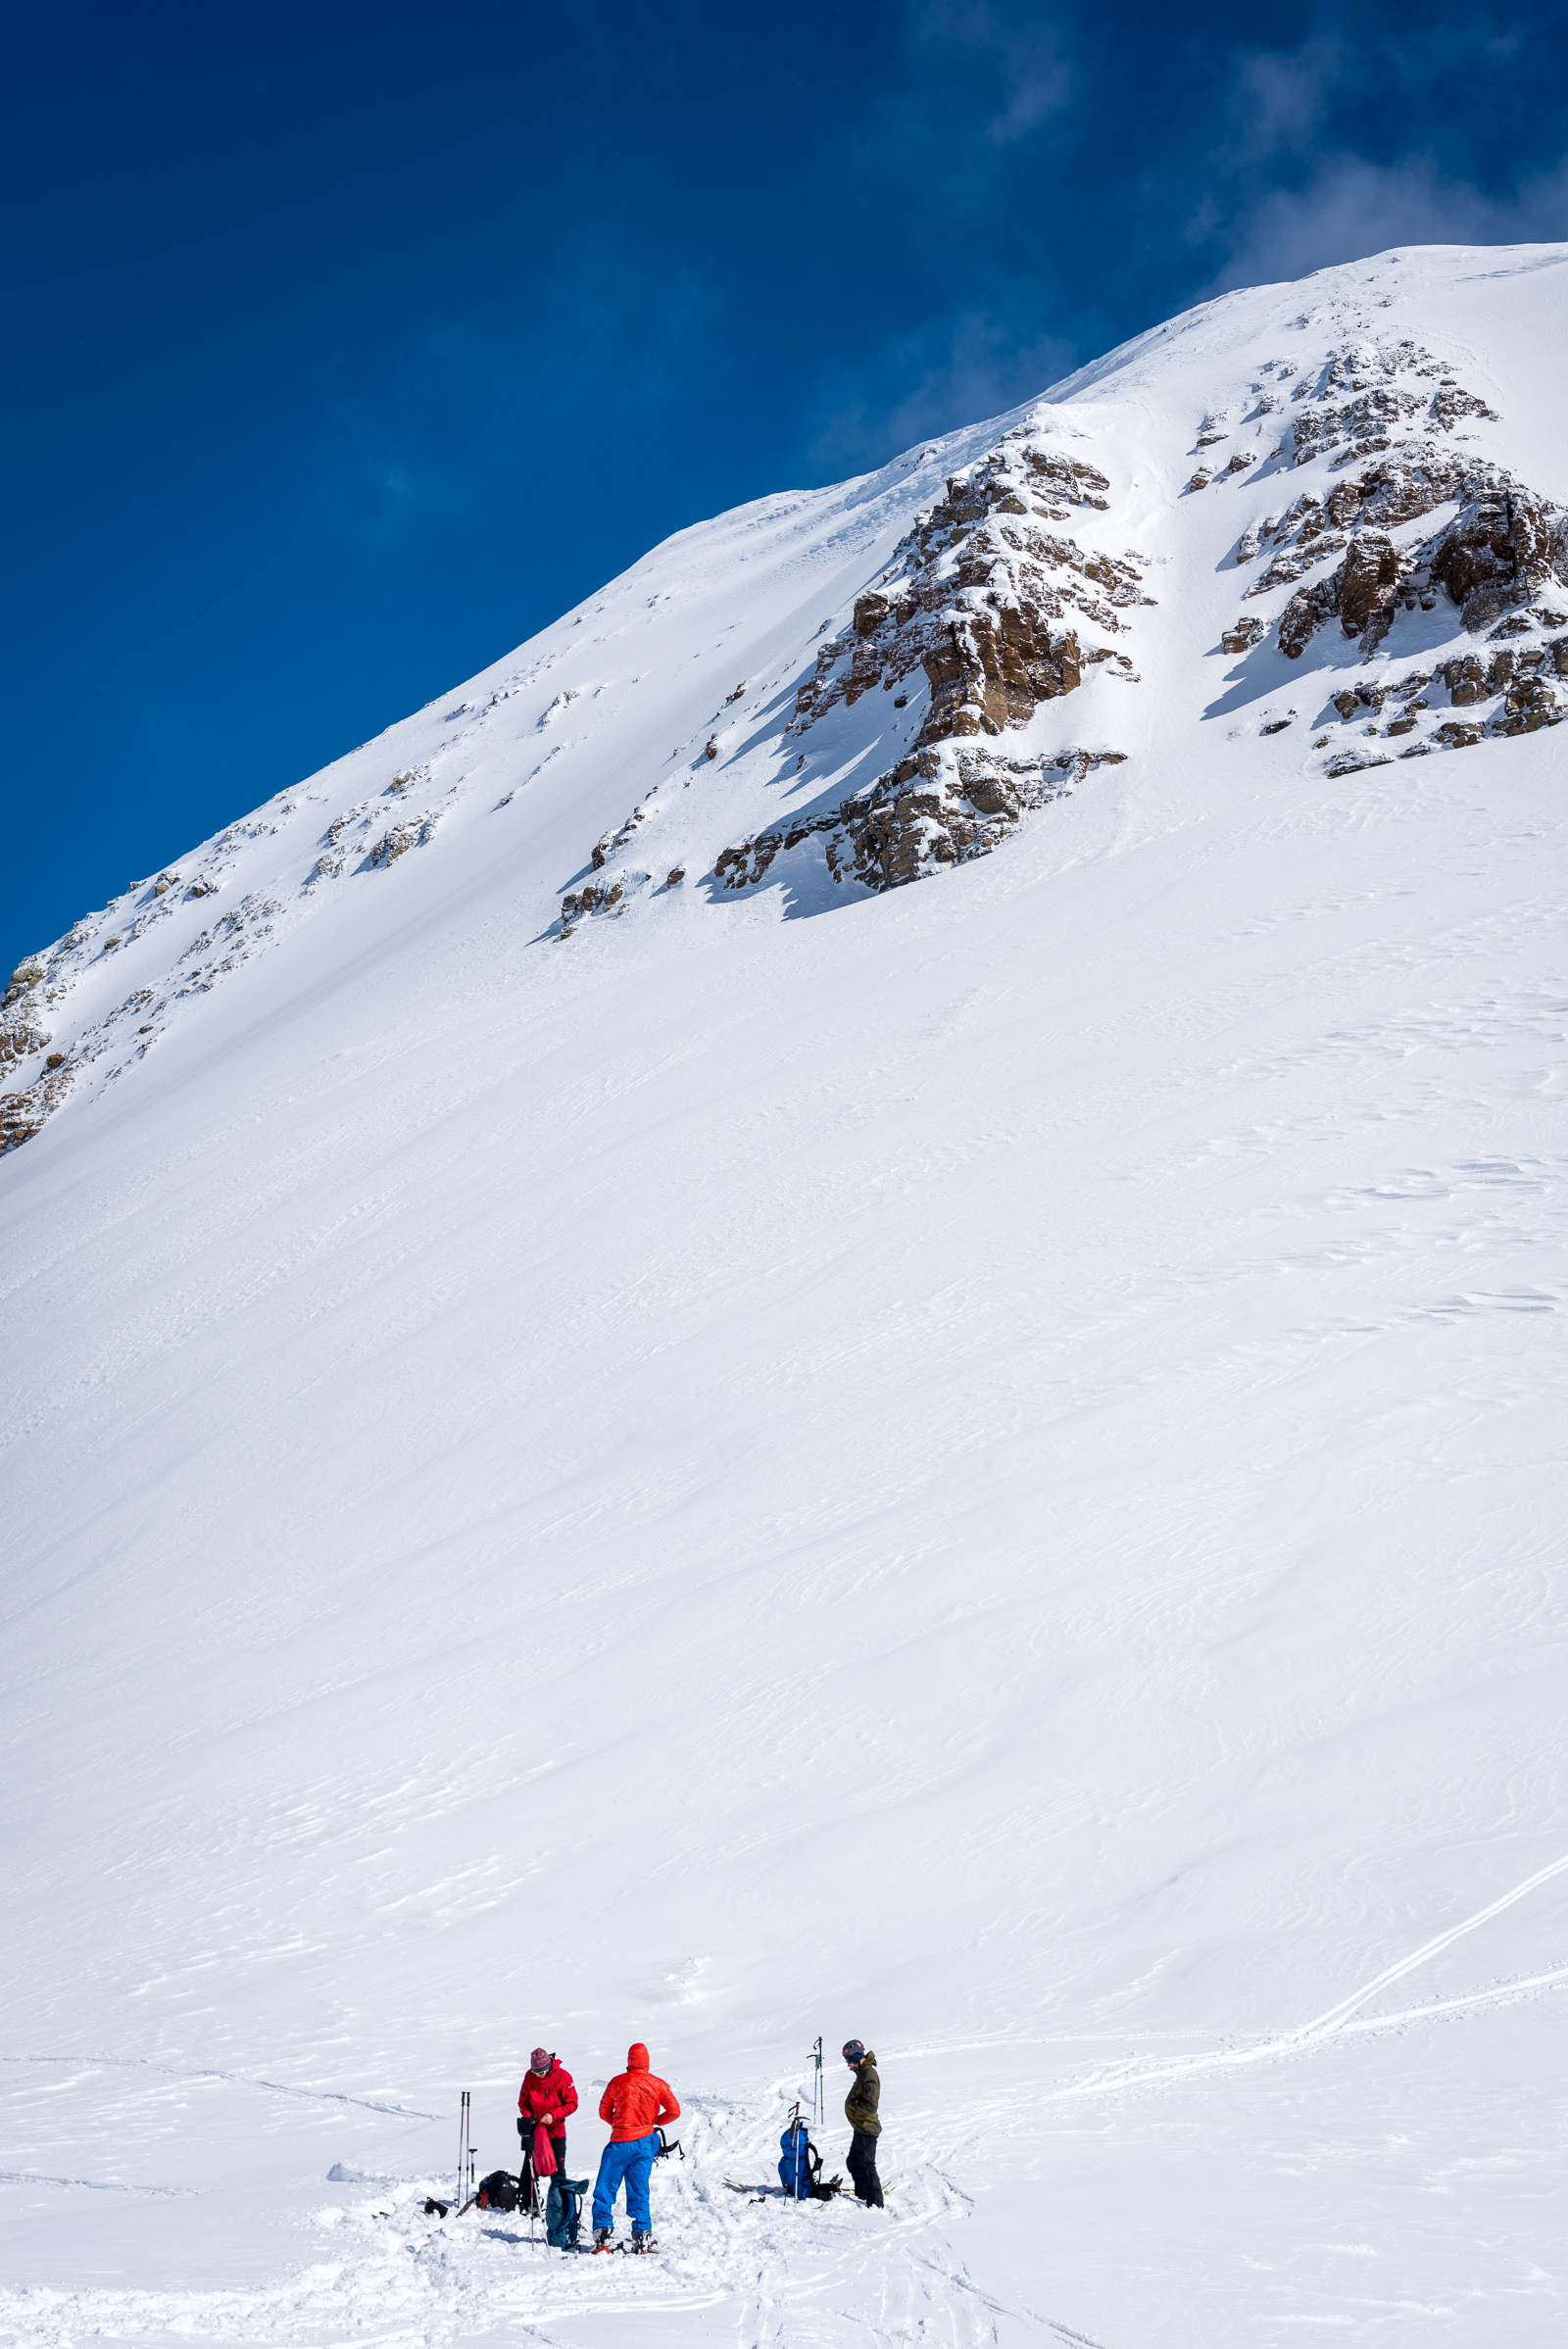
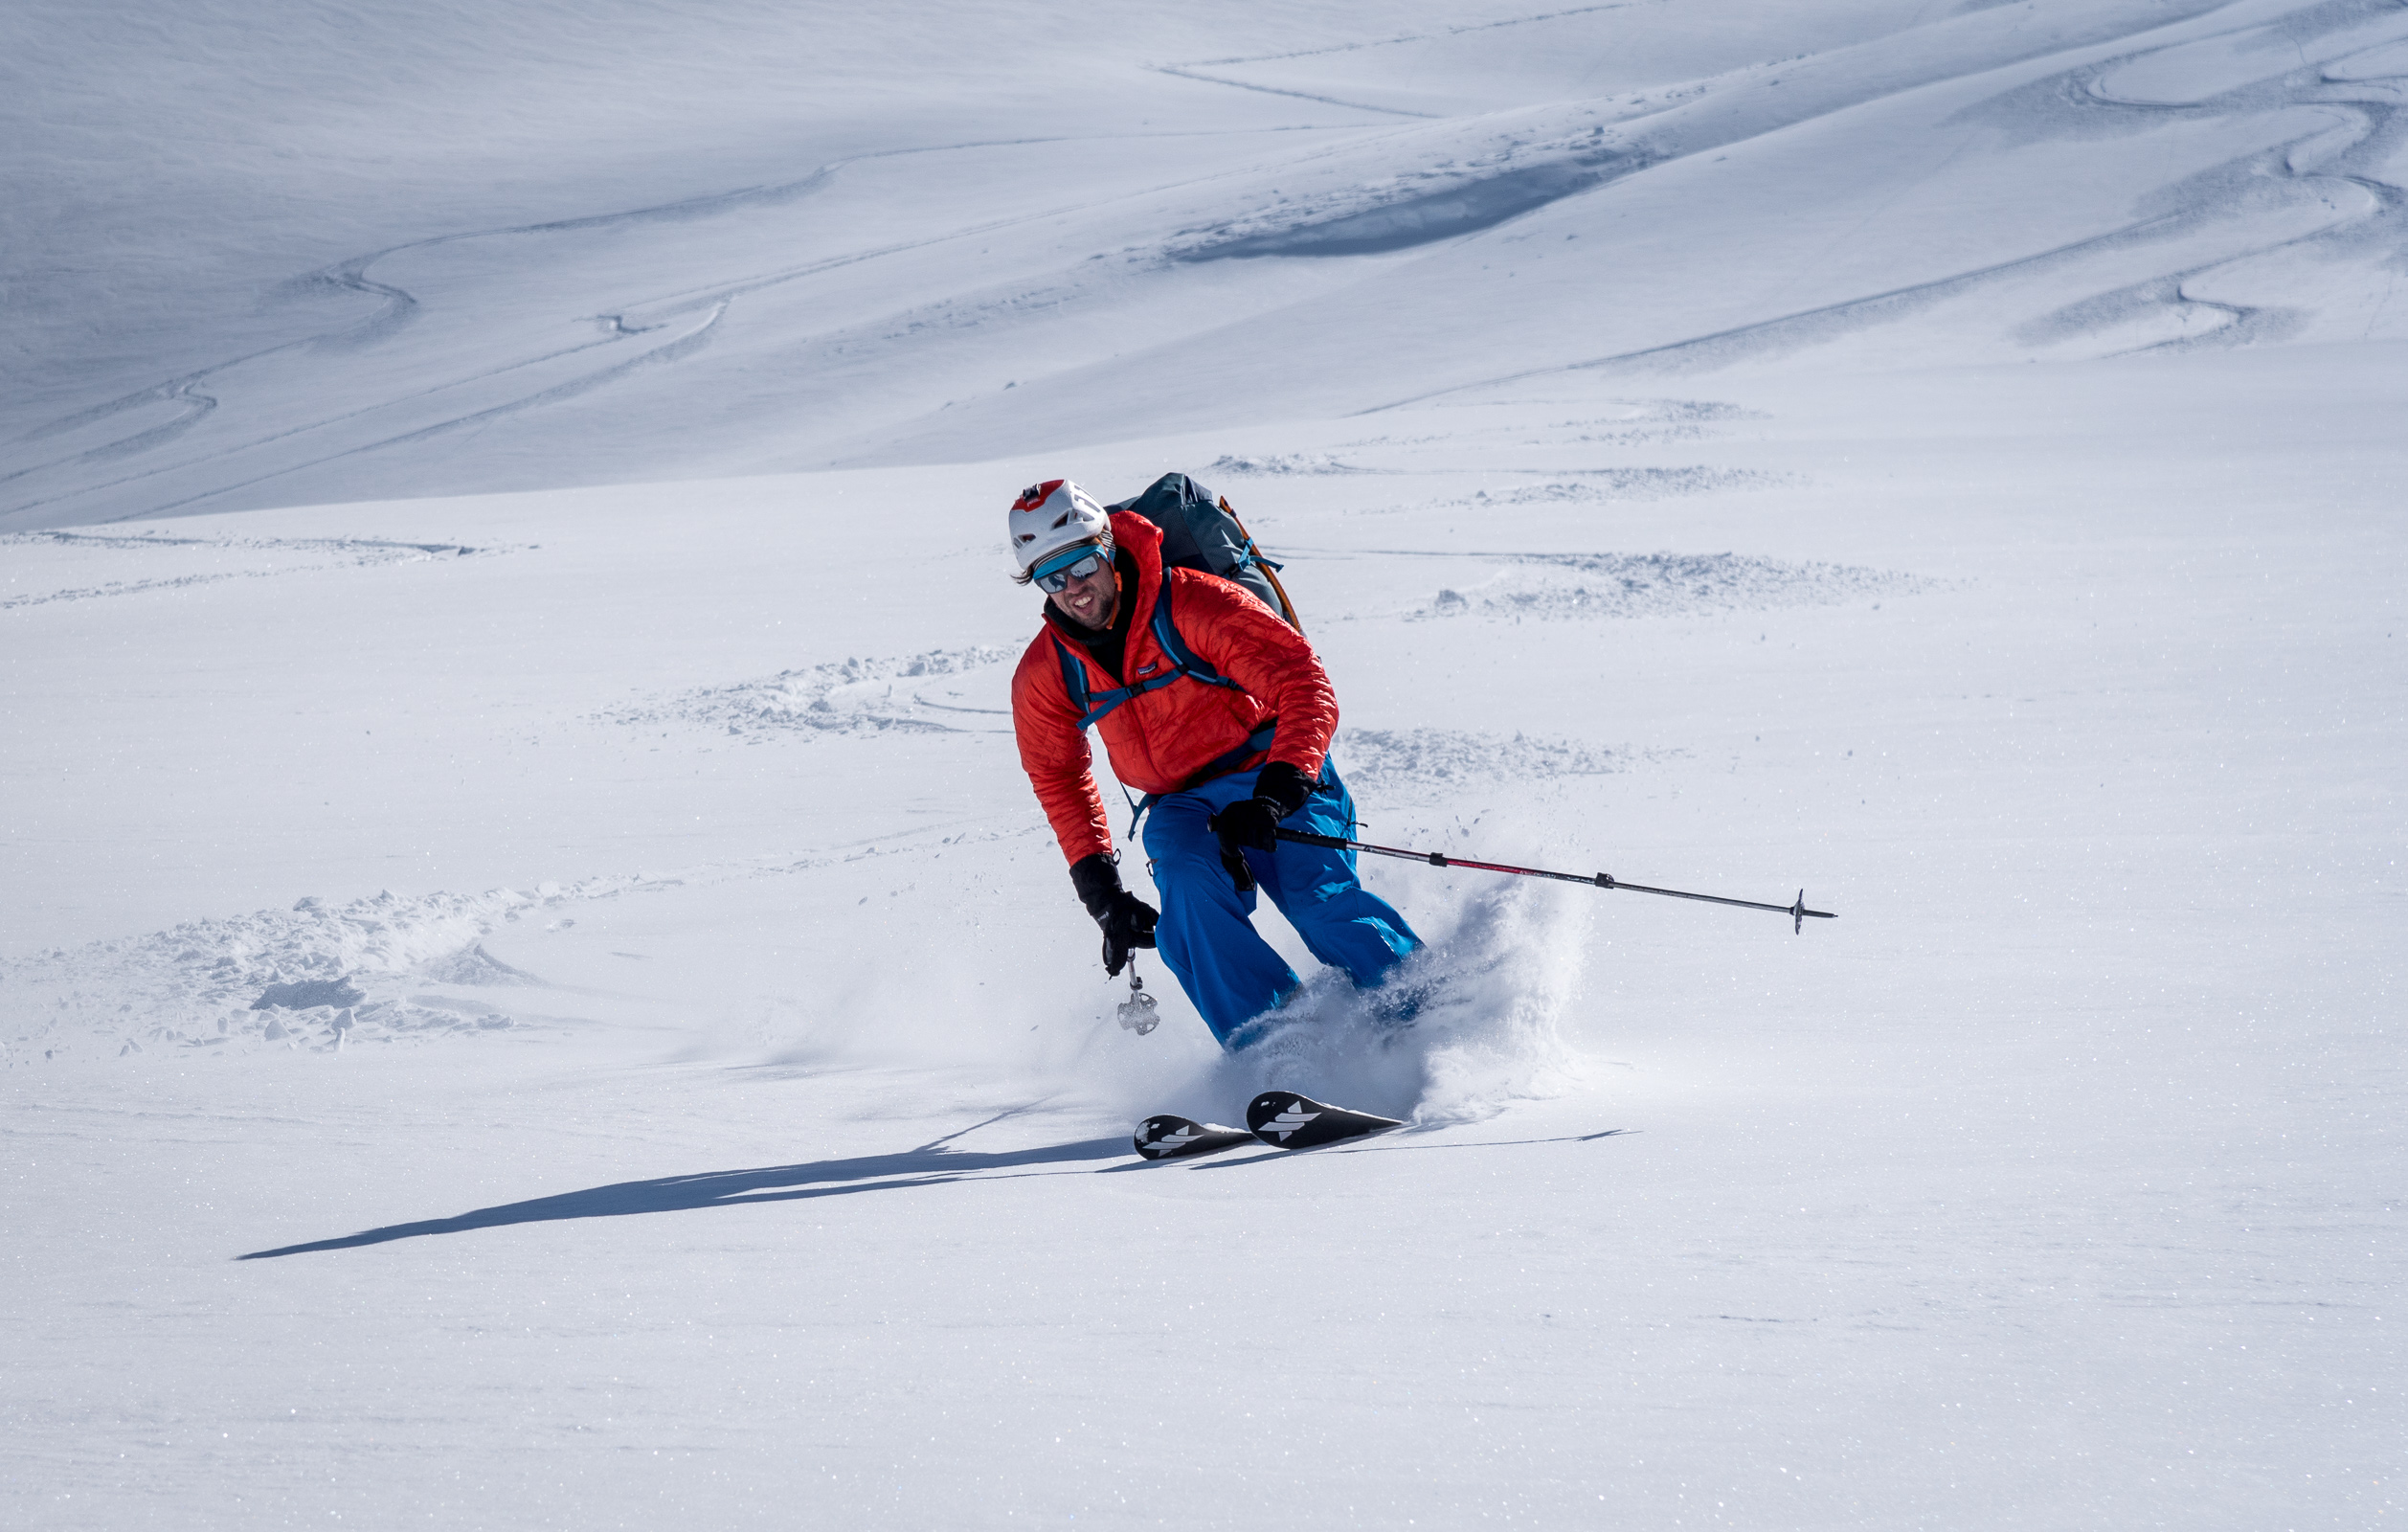
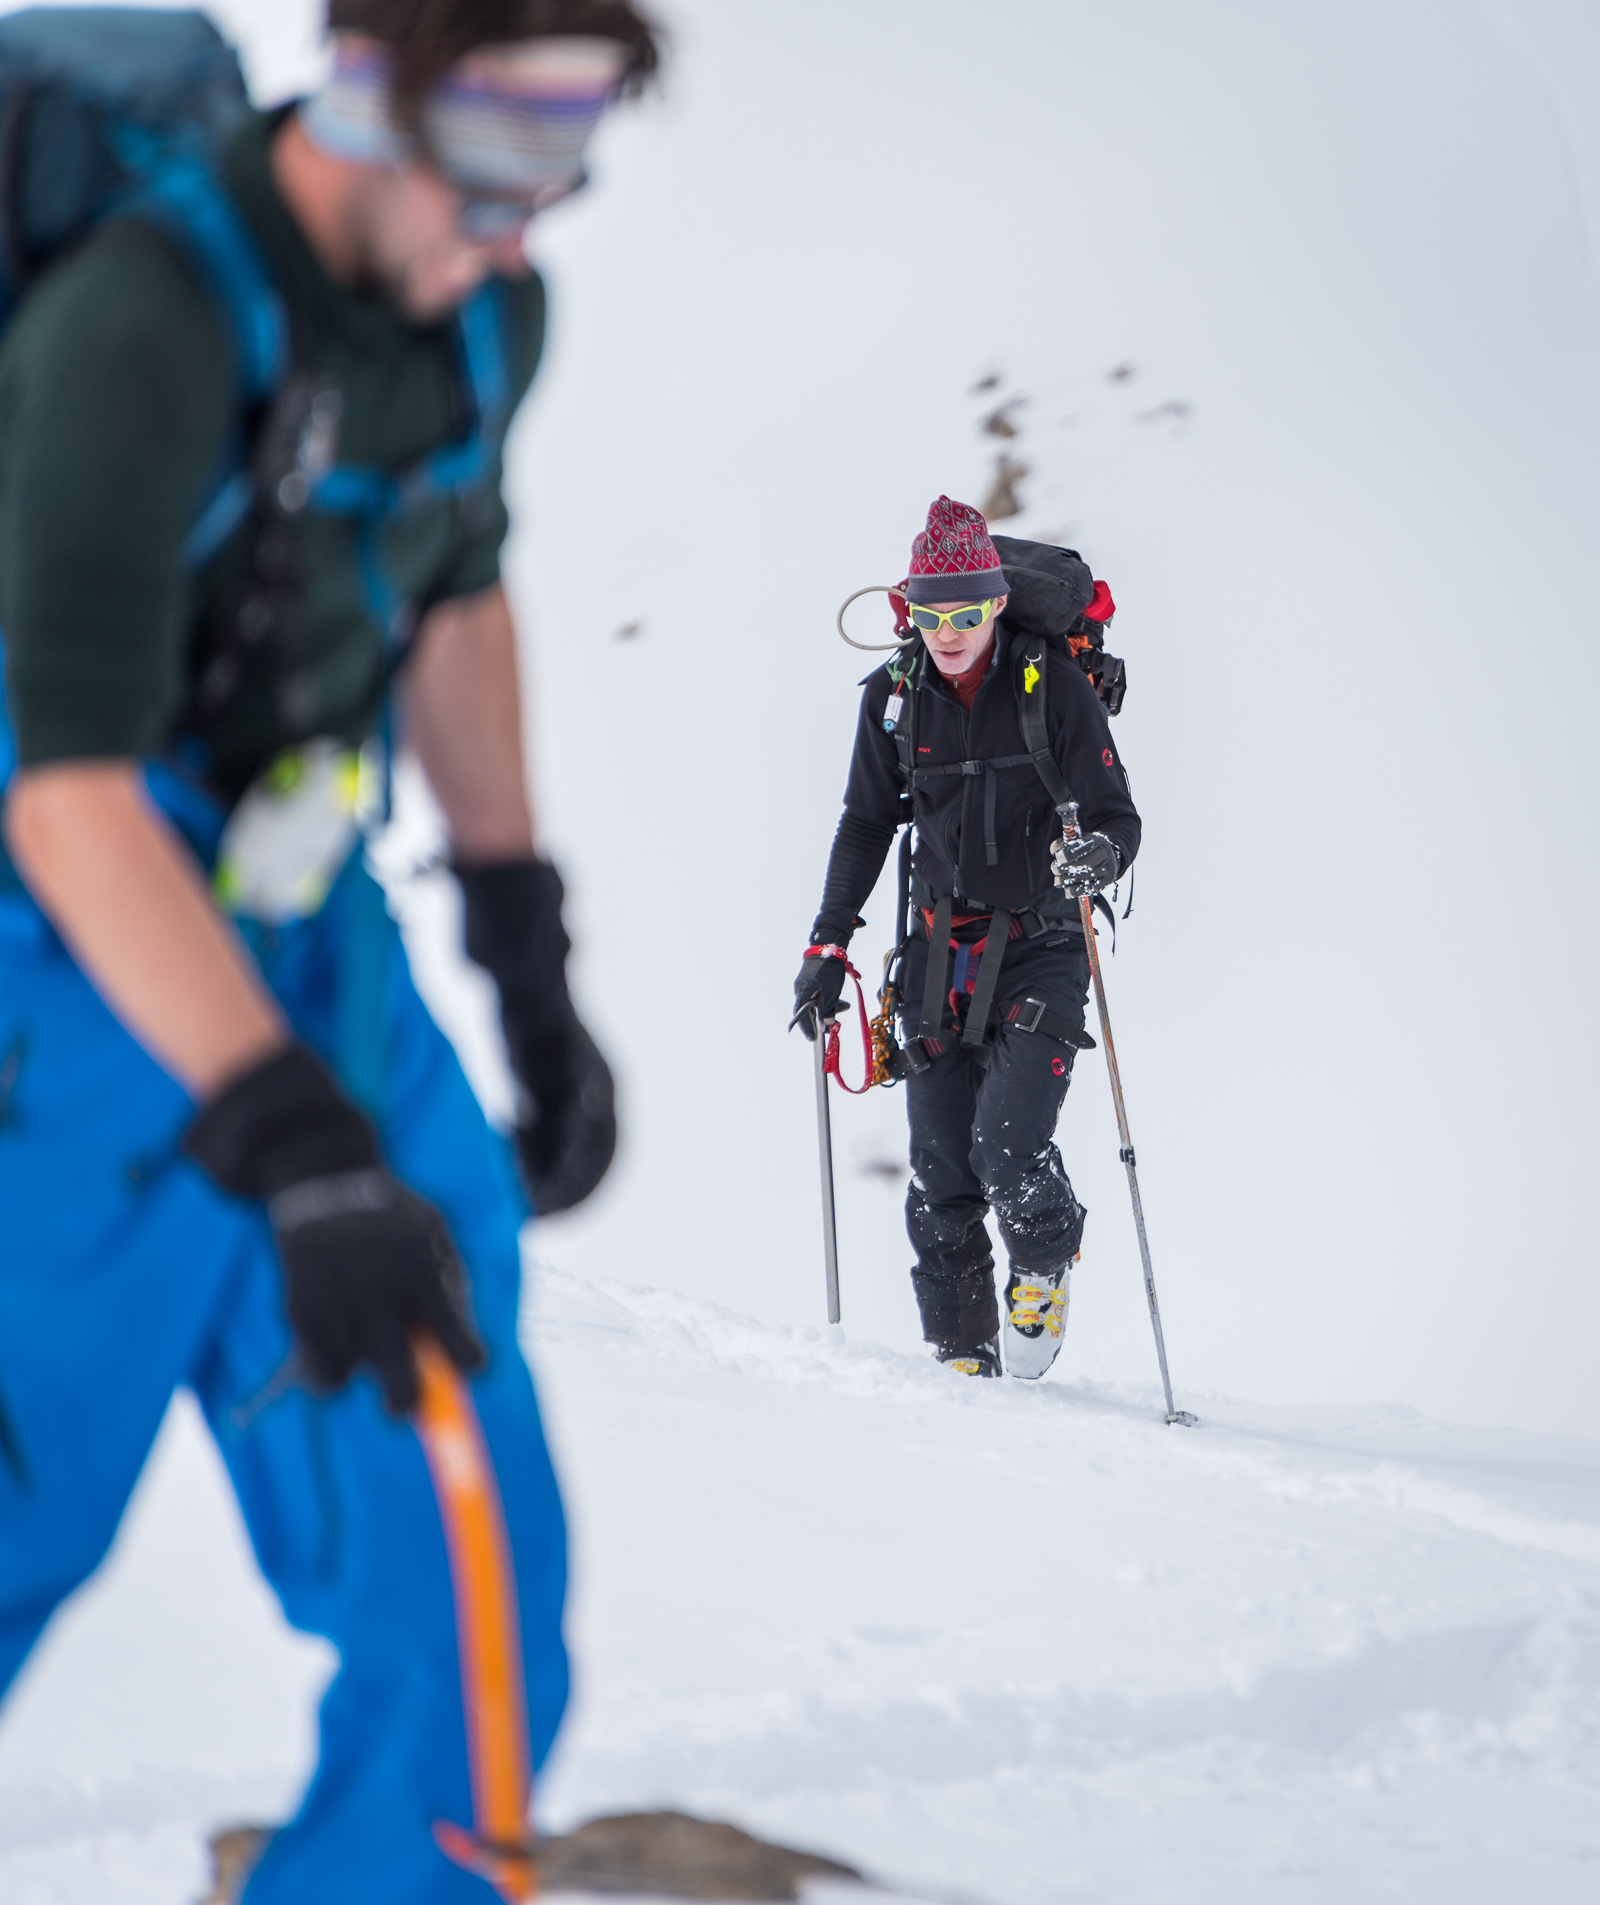
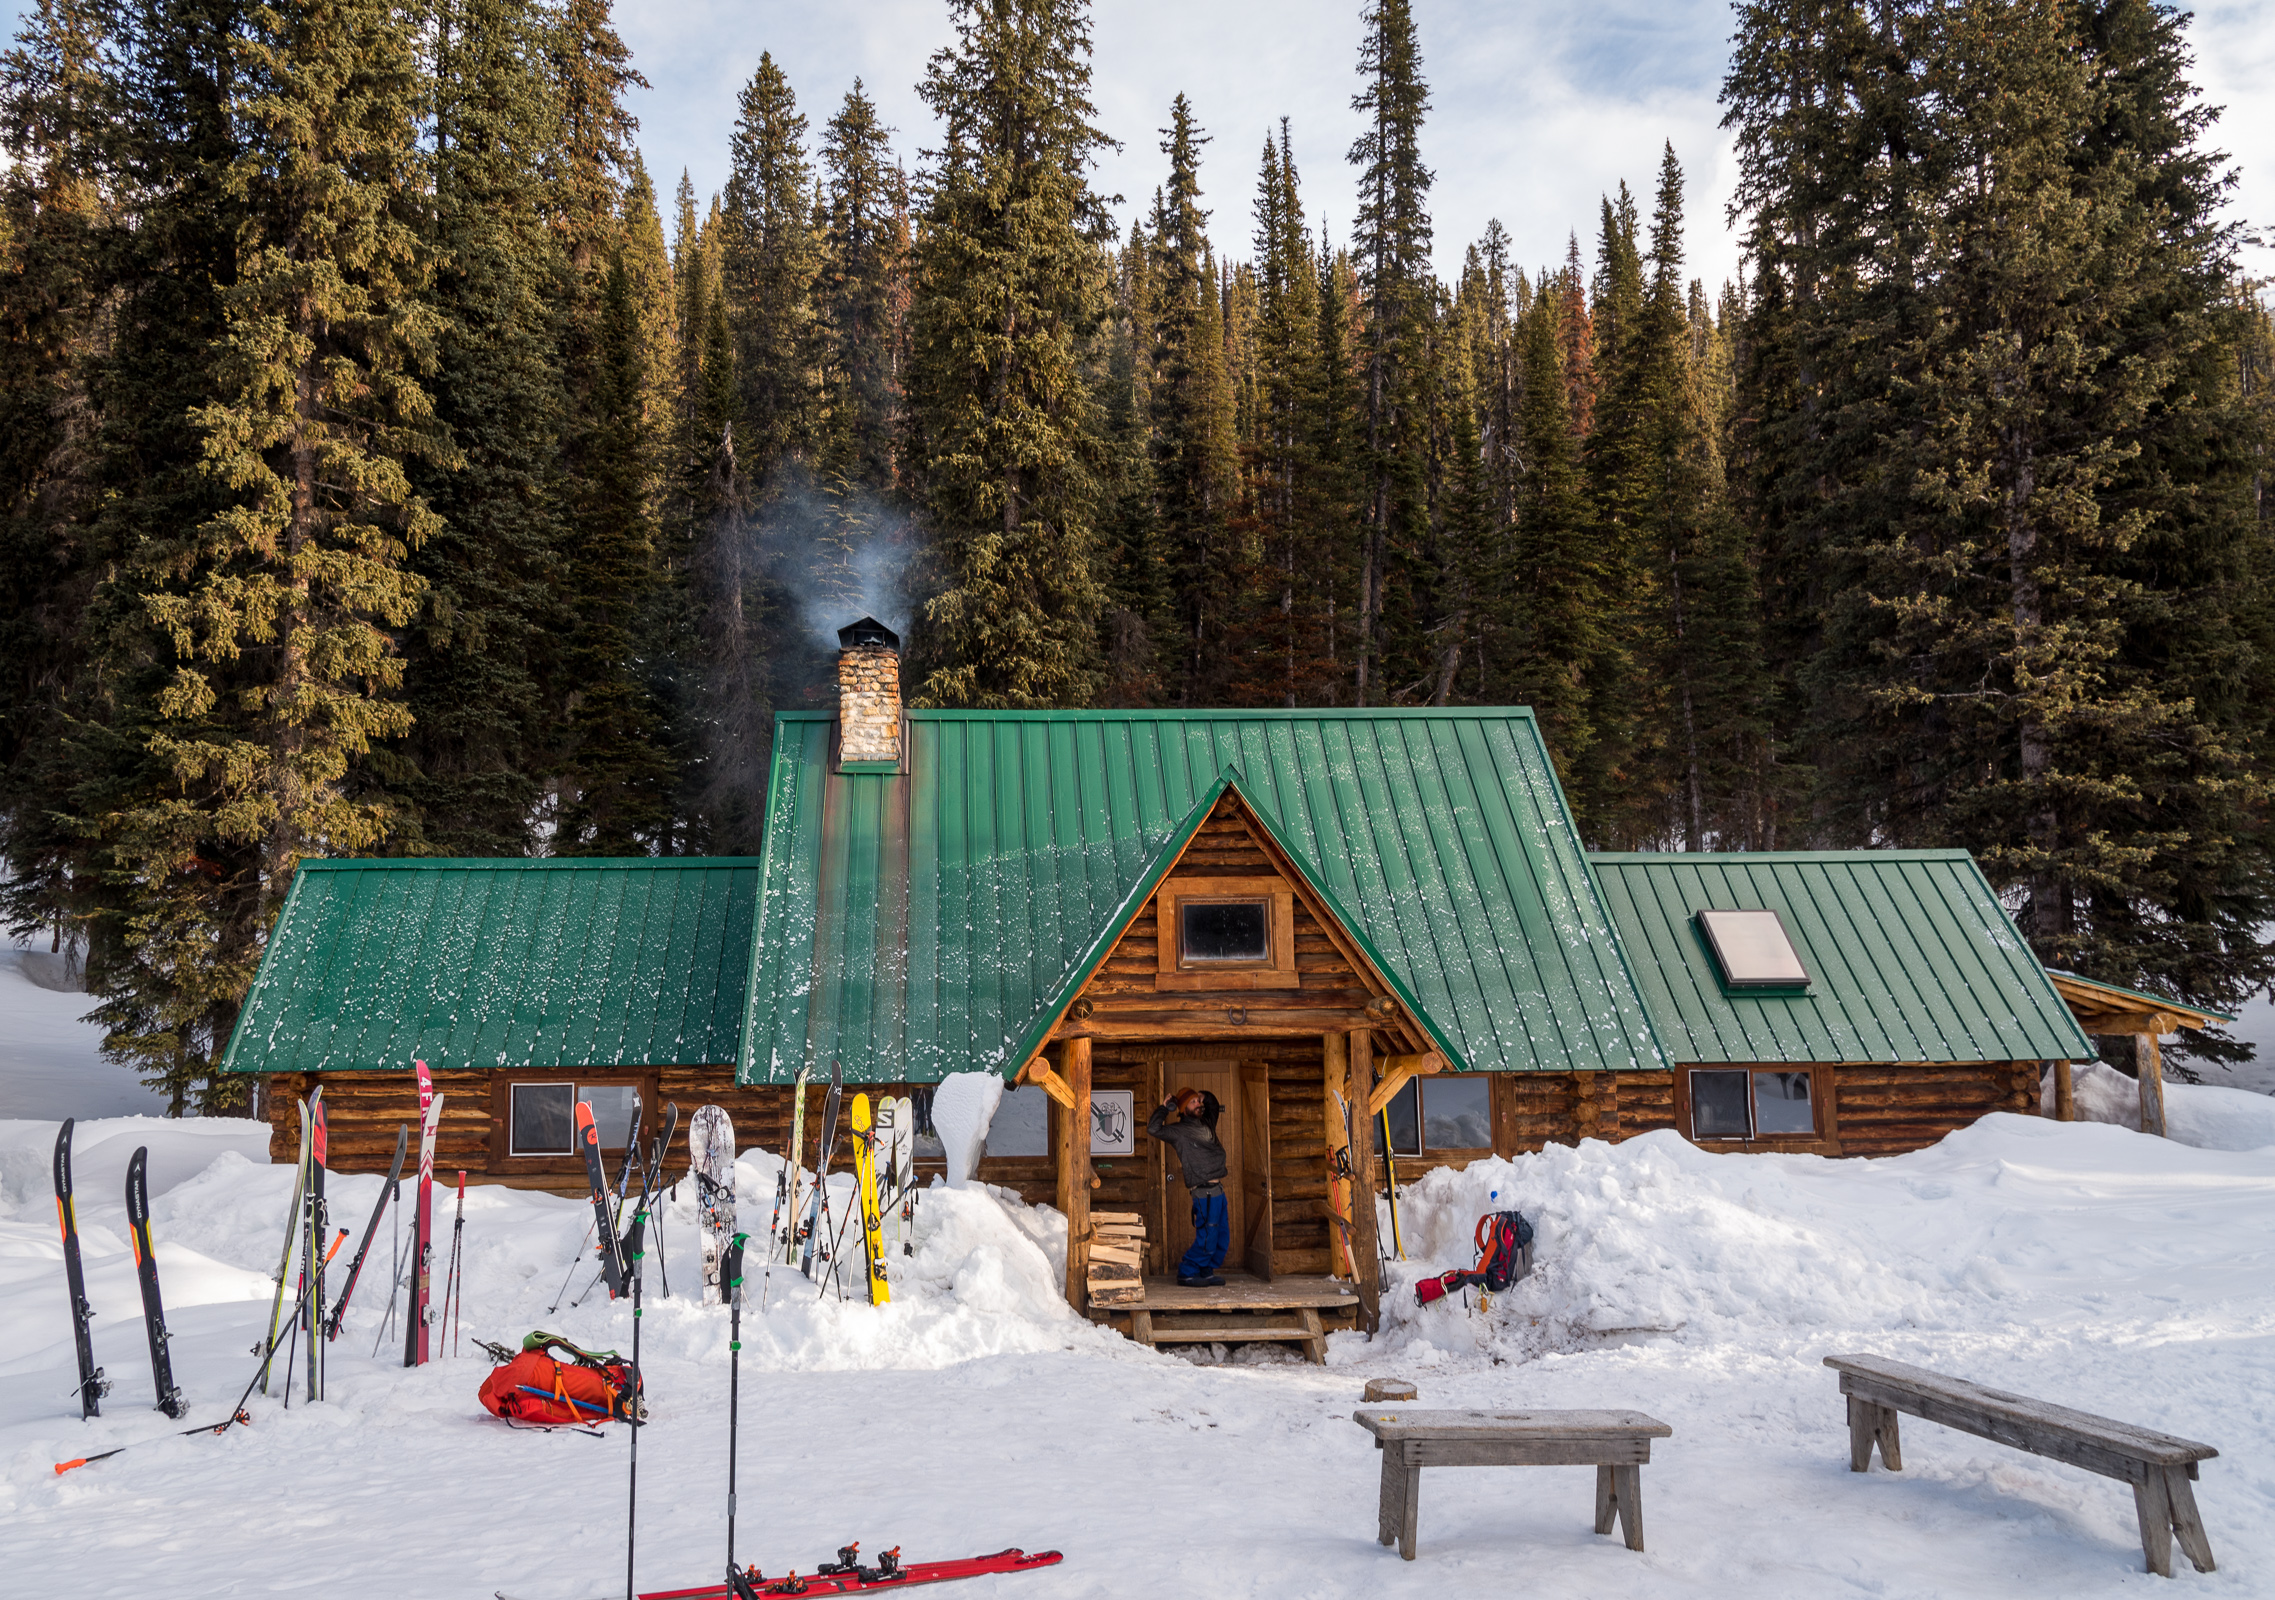
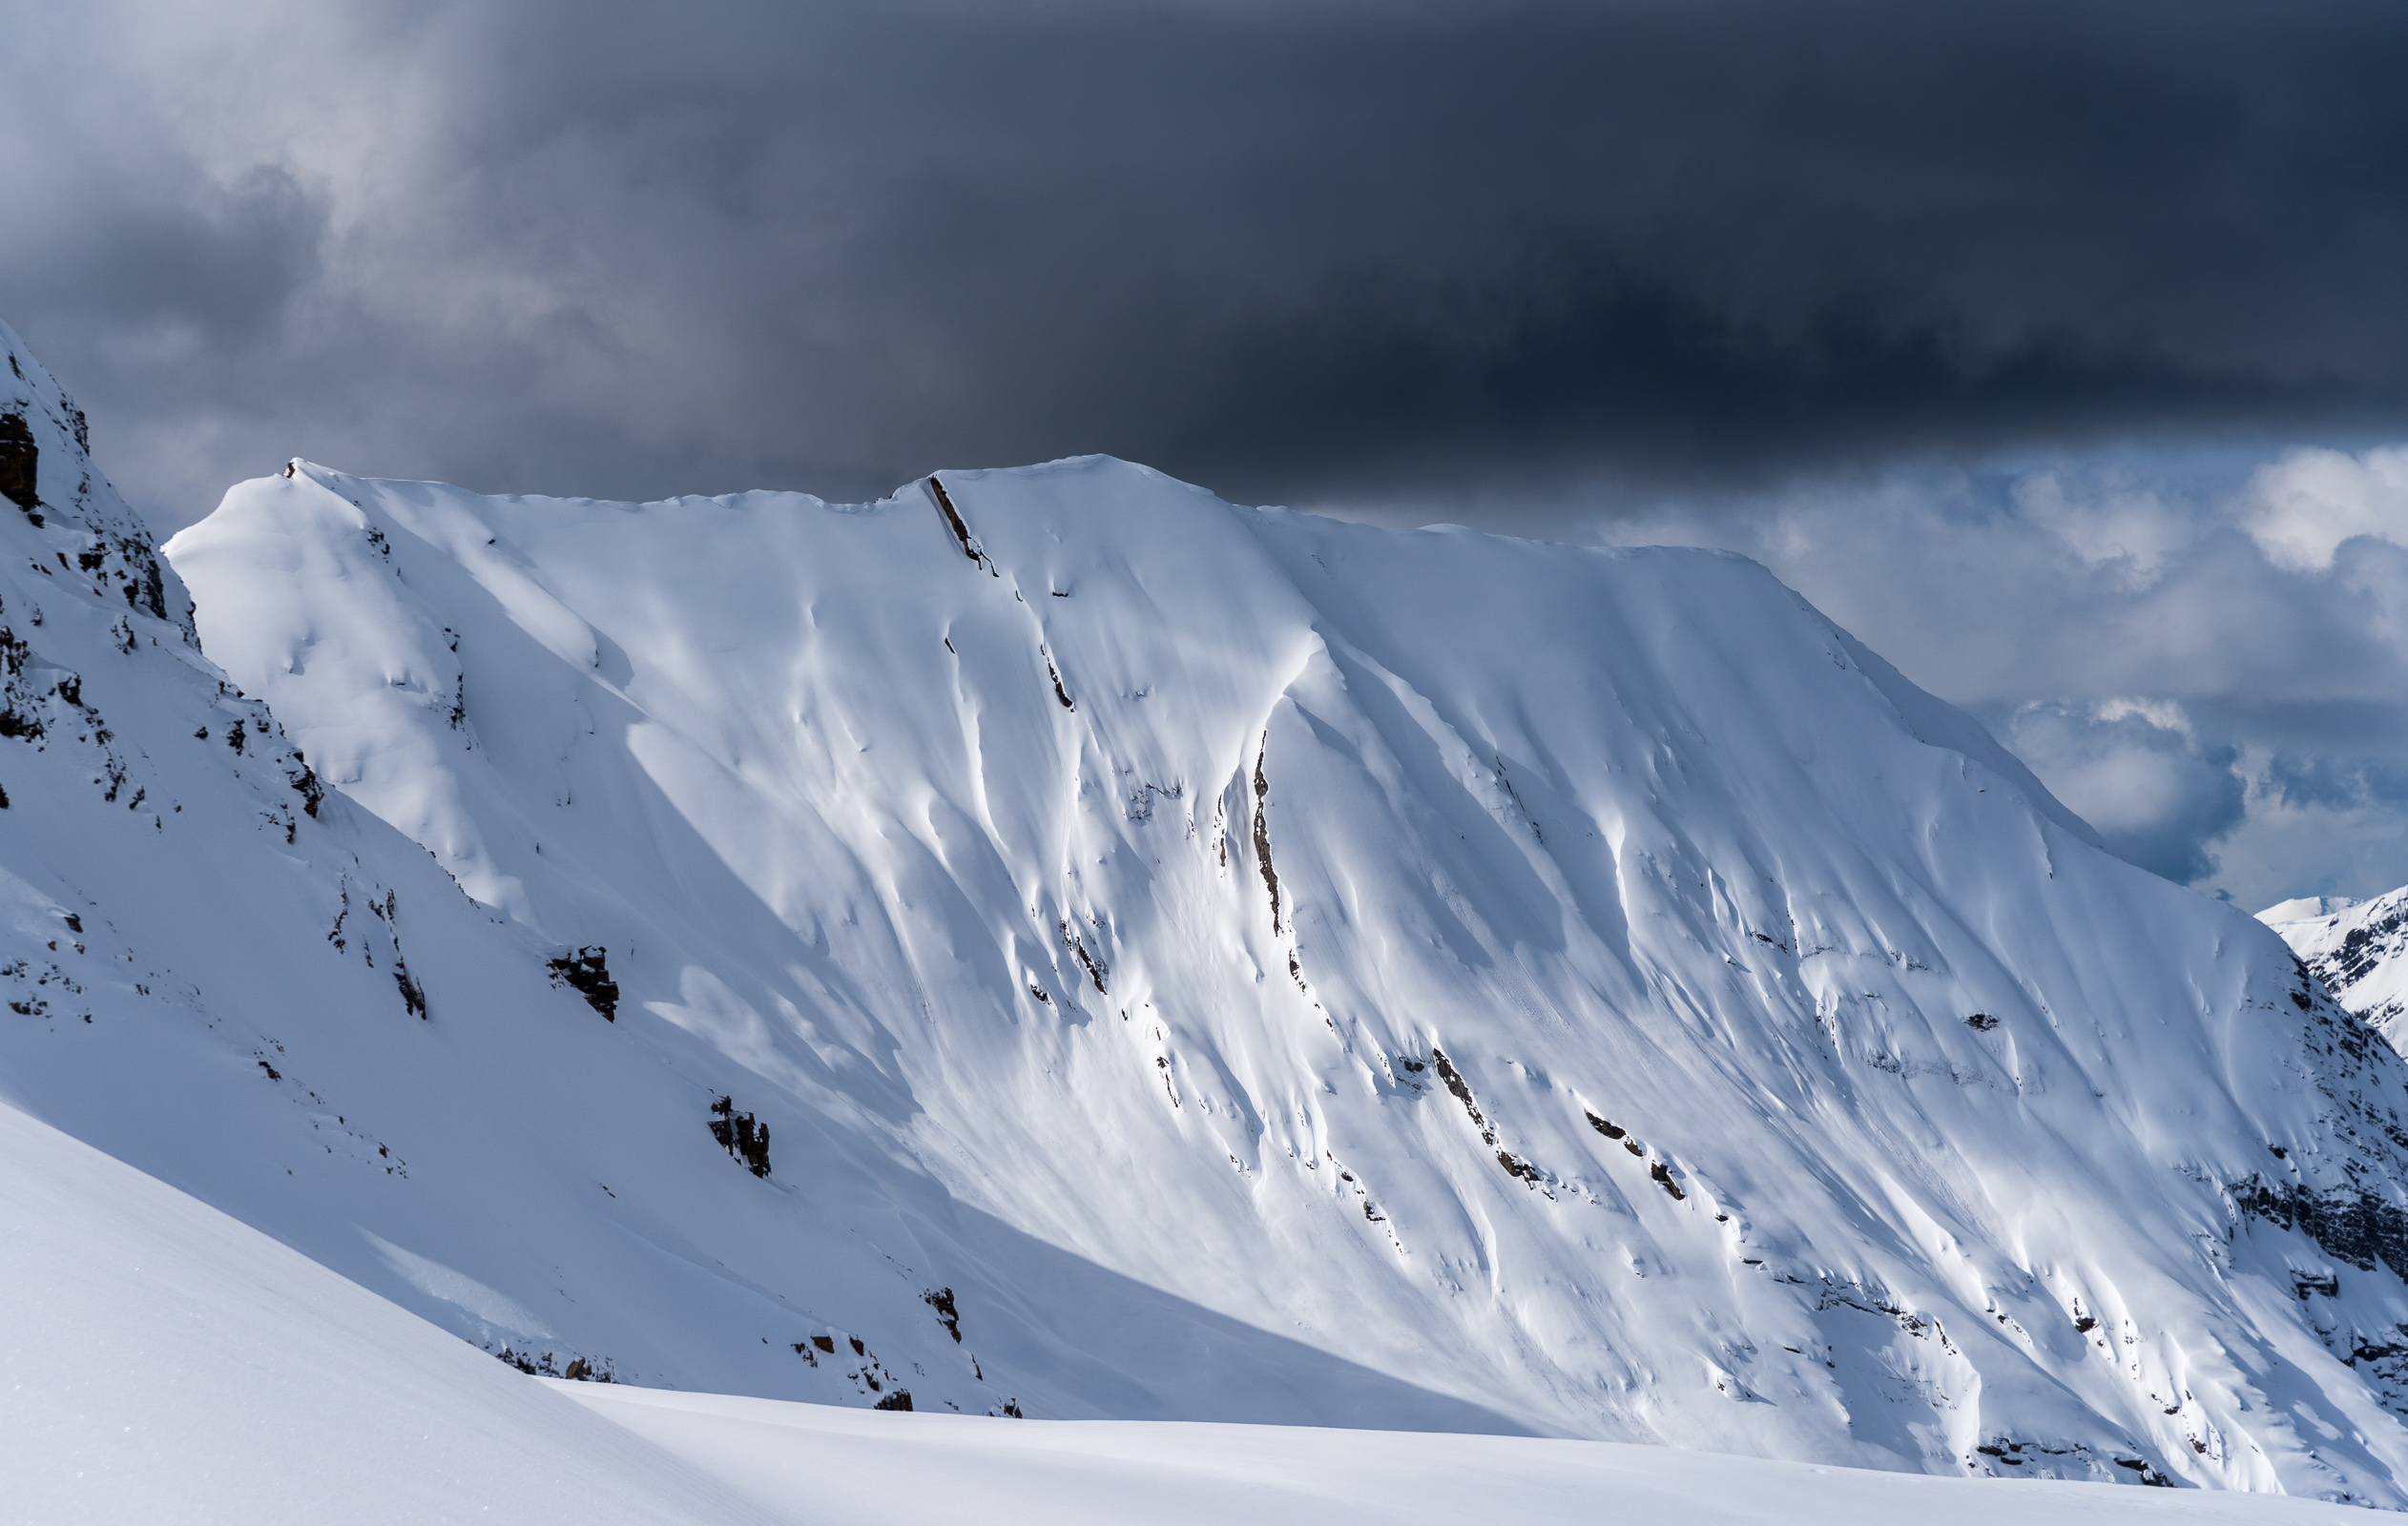
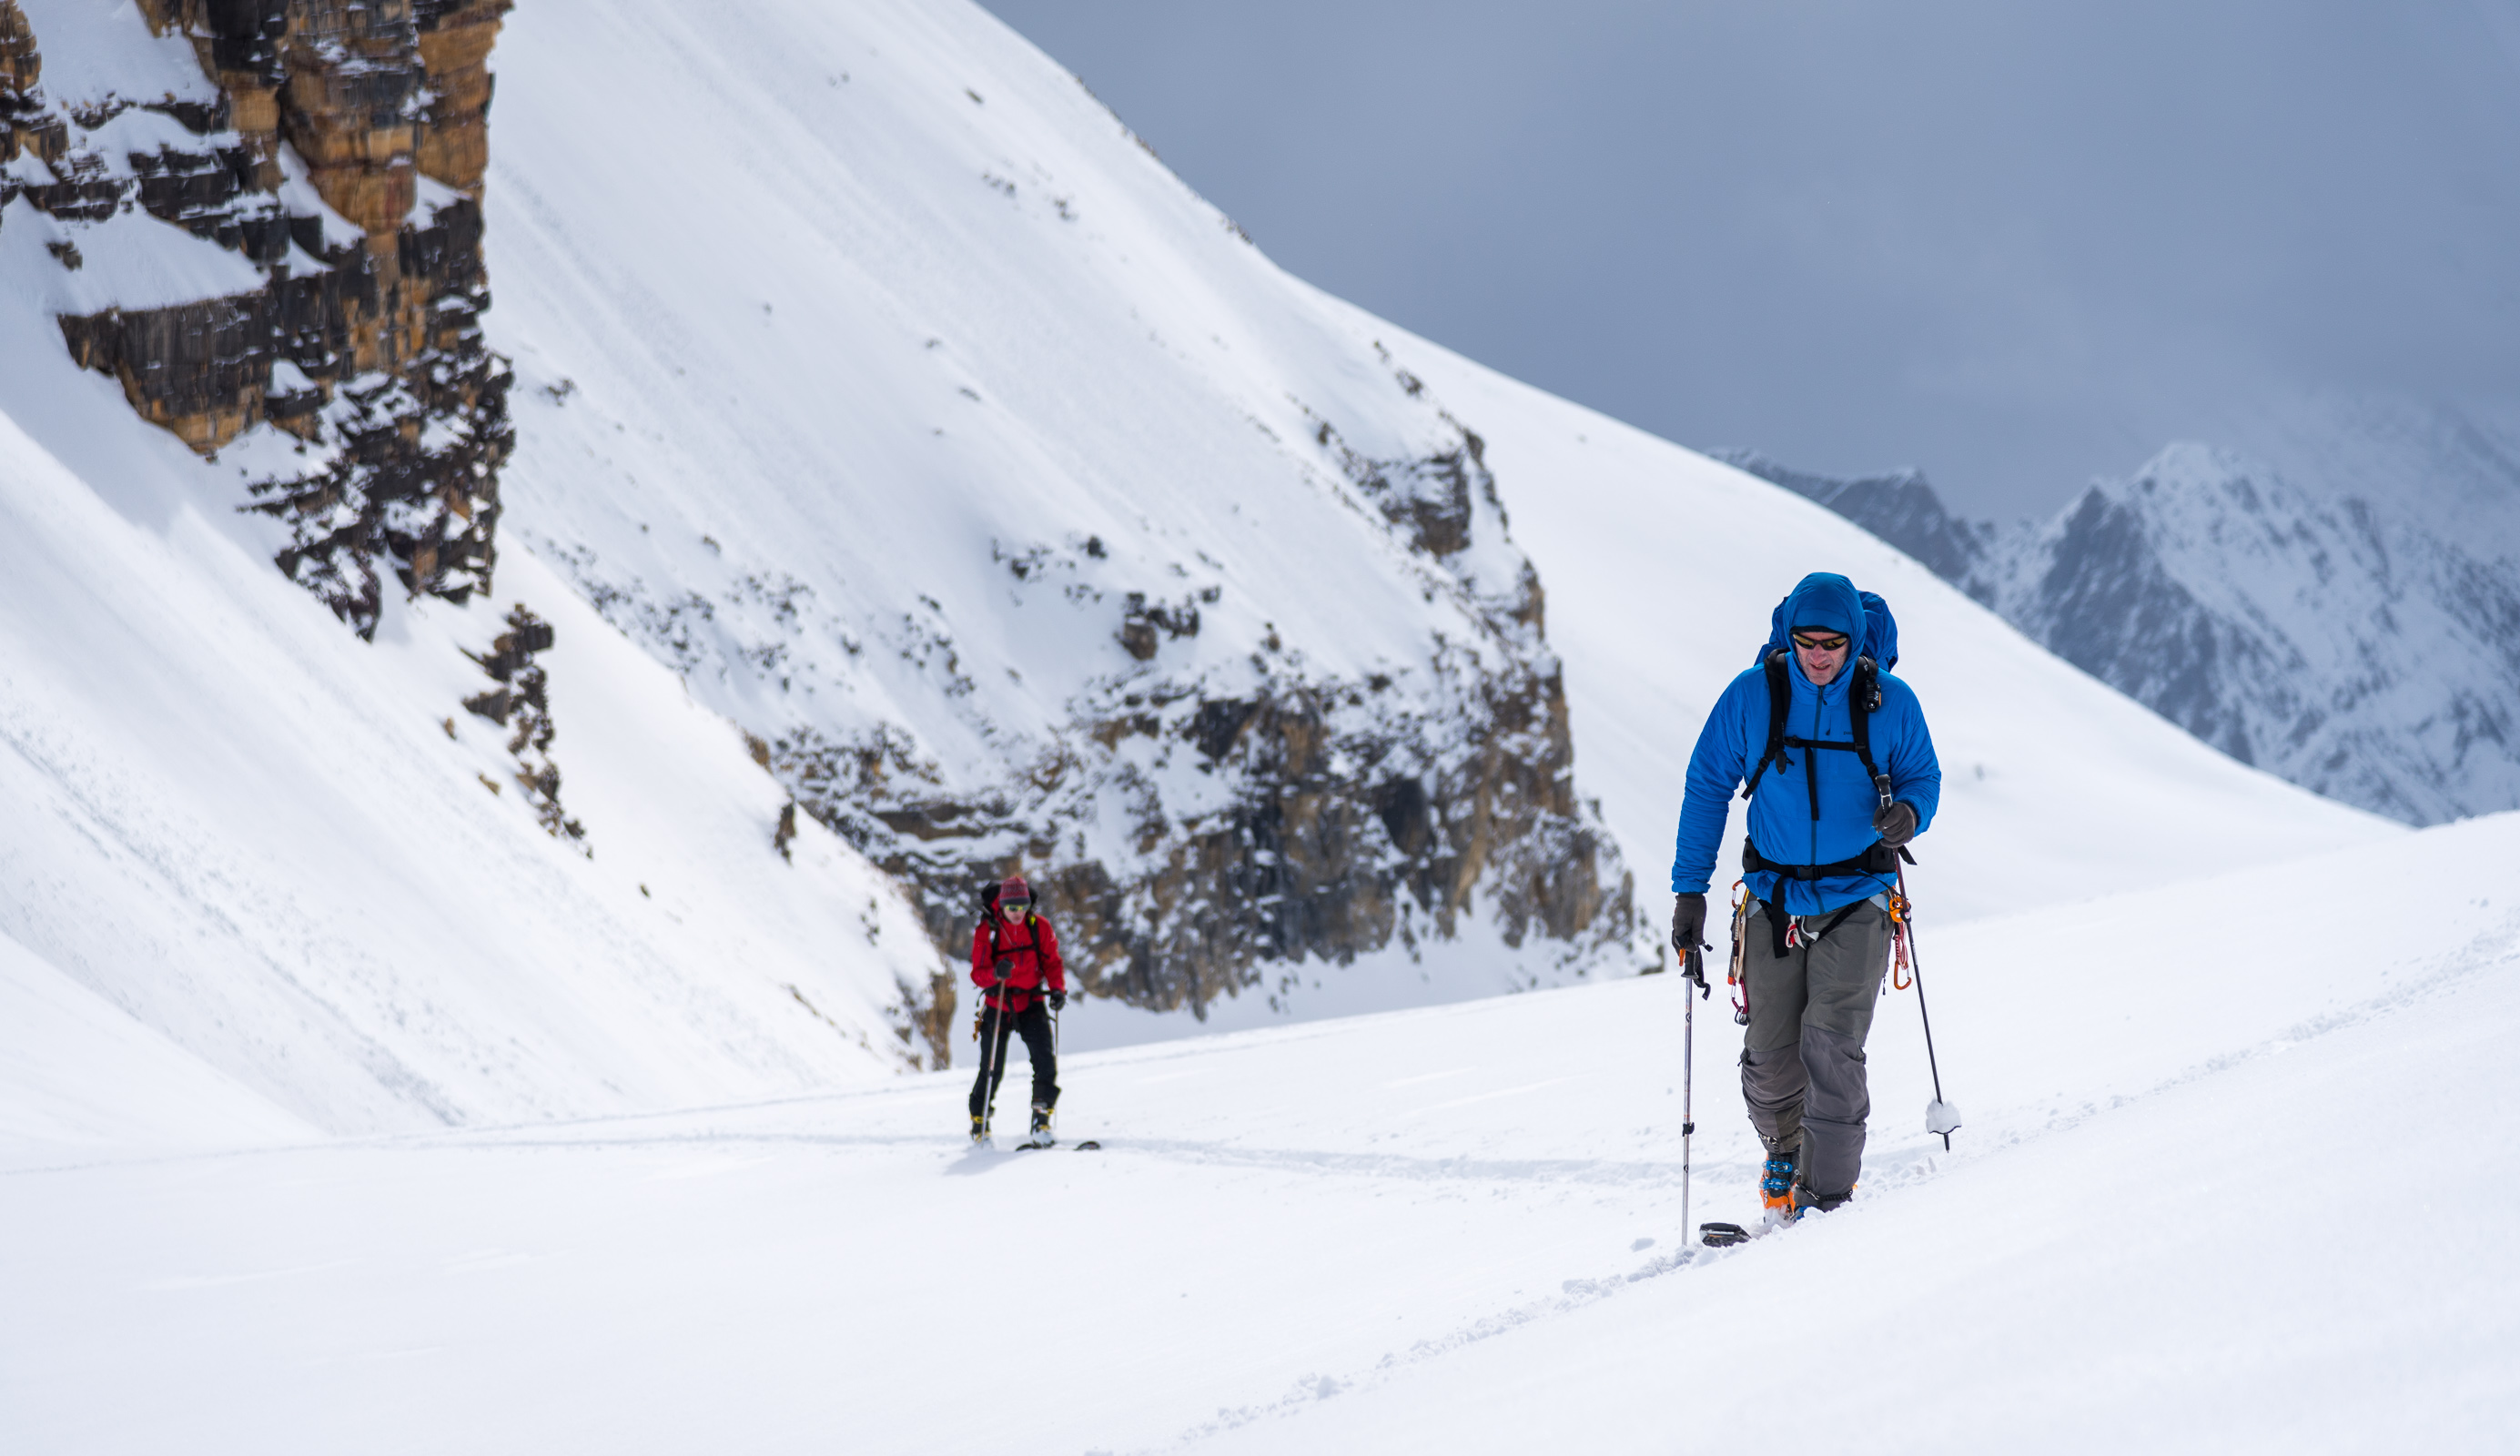
Trip: Little Yoho Valley- Stanley Mitchell Hut - President, Vice President, McArthur, Isolated, etc. Trip Date: 04/09/2019 Trip Report: I'm not the guy to adequately describe a trip like this in words. When it all gels- weather, snow, partners, location- my descriptions fall flat. Suffice it to say that this was a good one. We spent six days in the backcountry, including four full days of skiing and peak bagging around the historic Stanley Mitchell hut. AKA as the "gem" of the Canadian Rockies, a special thanks goes out to the ACC for maintaining such an atmospheric spot to rest, relax, and slay powder. It is so great that you almost forget about the long slog in. Almost. While the core of our group was the usual suspects ( @Kit, @Trent, myself, and Gordo), it is notable that we had someone along that had never met any of us. Austin should be commended on his ability to deal with our aged pace, low risk tolerance, and poor hygiene. He is a fine young man and should not be hanging out with the likes of us. And, after this trip, he probably won't! But for a few days at least we all clicked, and there was only the present. We were able to stand on summits in the sun, looking out on mountains beyond mountains, with nobody else around. It is hard to get any better. The 13km road slog to start: The inside of the historic Stanley Mitchell hut President and VP: Austin and Gordo booting up the Prez: @Kit: Summit of President: Big Country, but not the band: Looking over at the V.P.: Avalanche Roulette on the V.P.: Austin picks correctly: We can all learn a thing or two about skiing from Gordo: And @Kit can teach us to pin it: When we were traversing behind this cornice, some of it fell off in a cloud of powder: Austin on the summit of McArthur: @Trent and @Kit getting ready to head up Isolated: Patagonia Provisions provides! The one and only Stanley Mitchell: @Kit heading to Emerald Pass with Mount Marpole behind: Proper head coverings are essential in the Great White North: Gear Notes: Whiskey, meat, cheese Approach Notes: Long


-
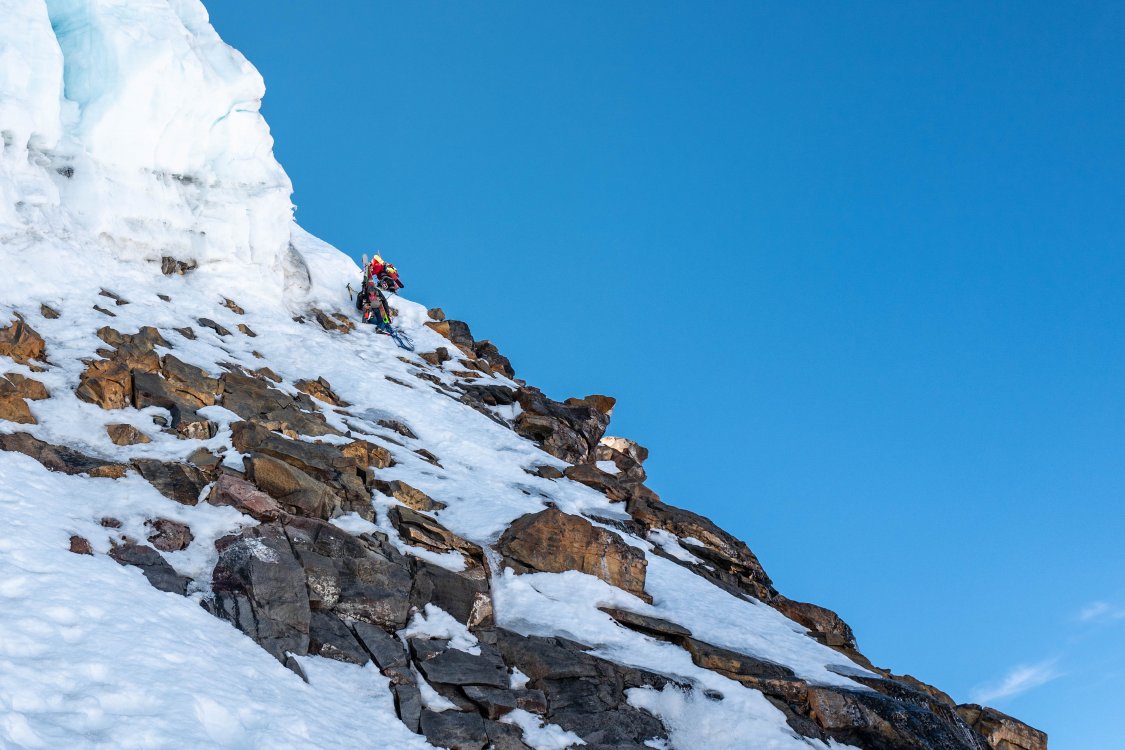
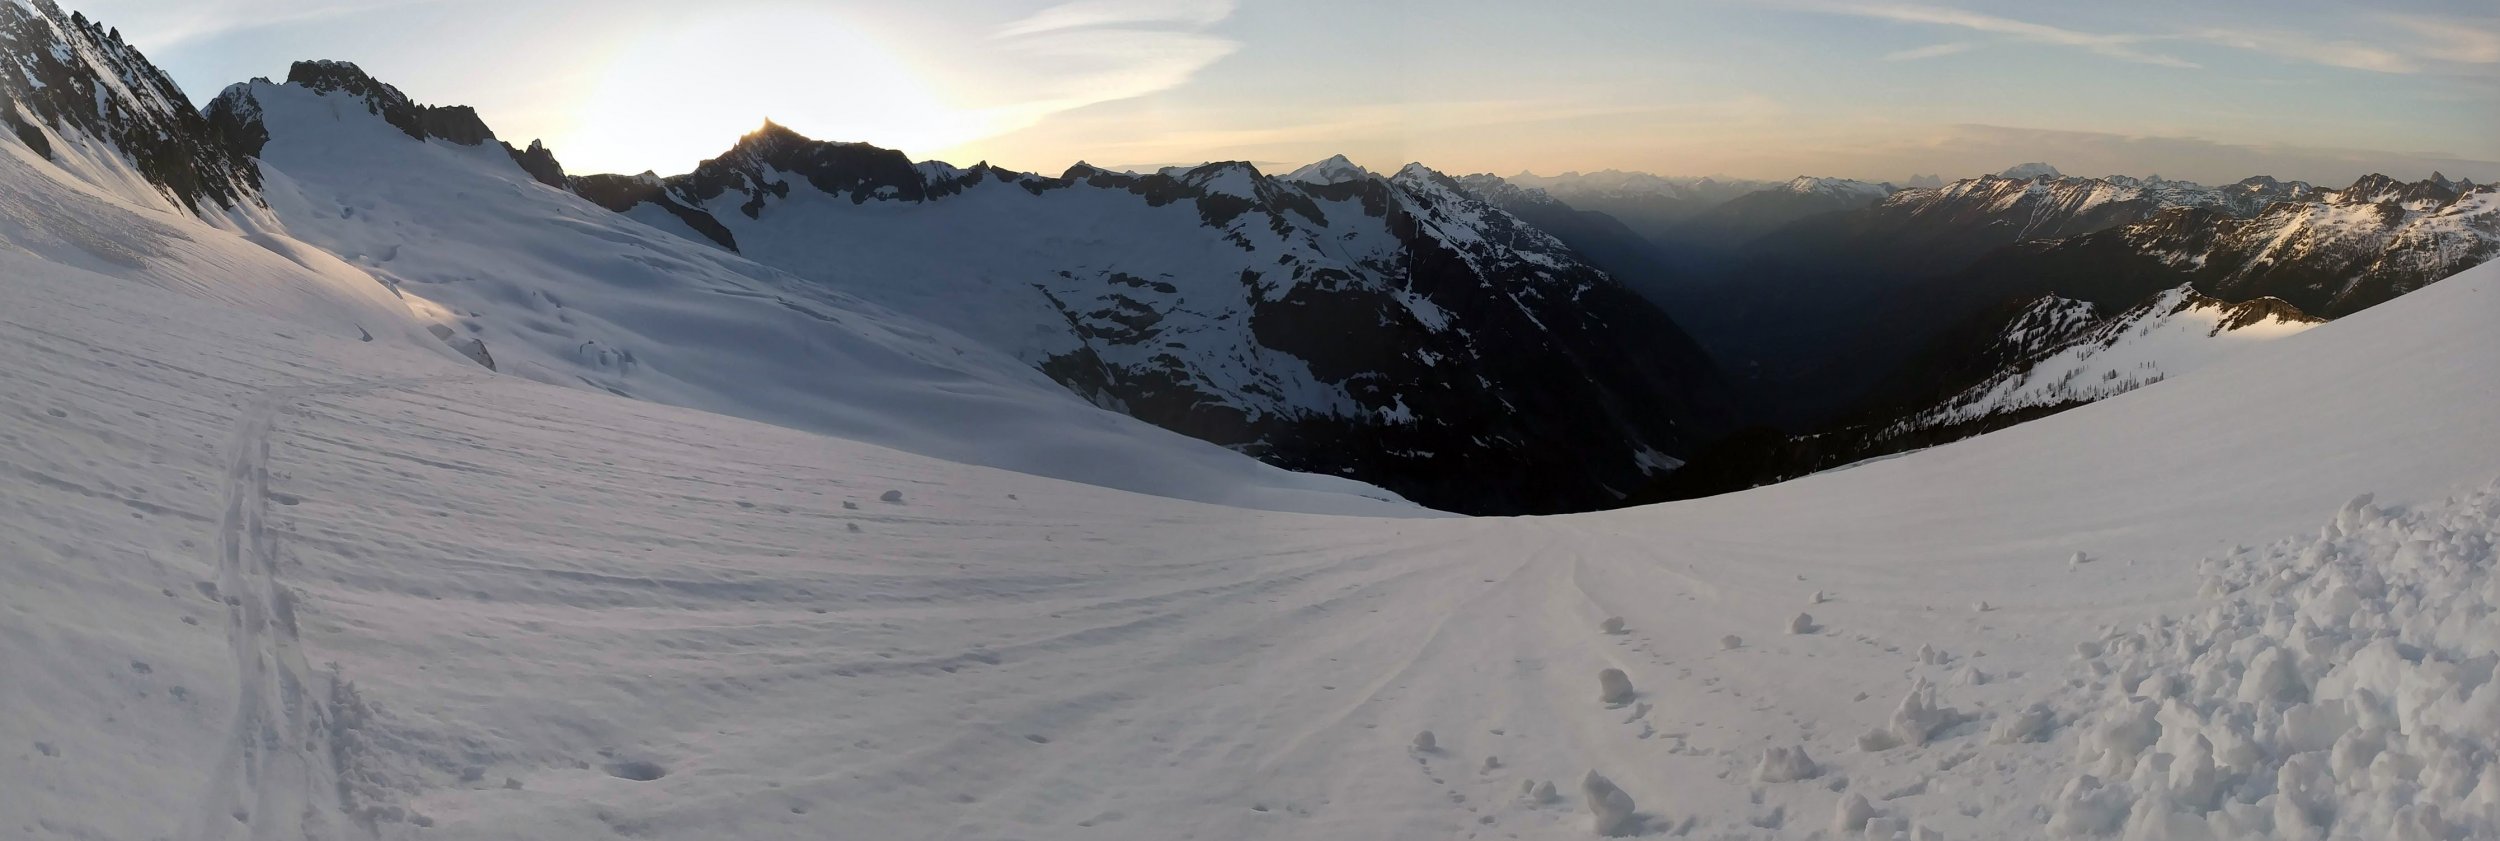
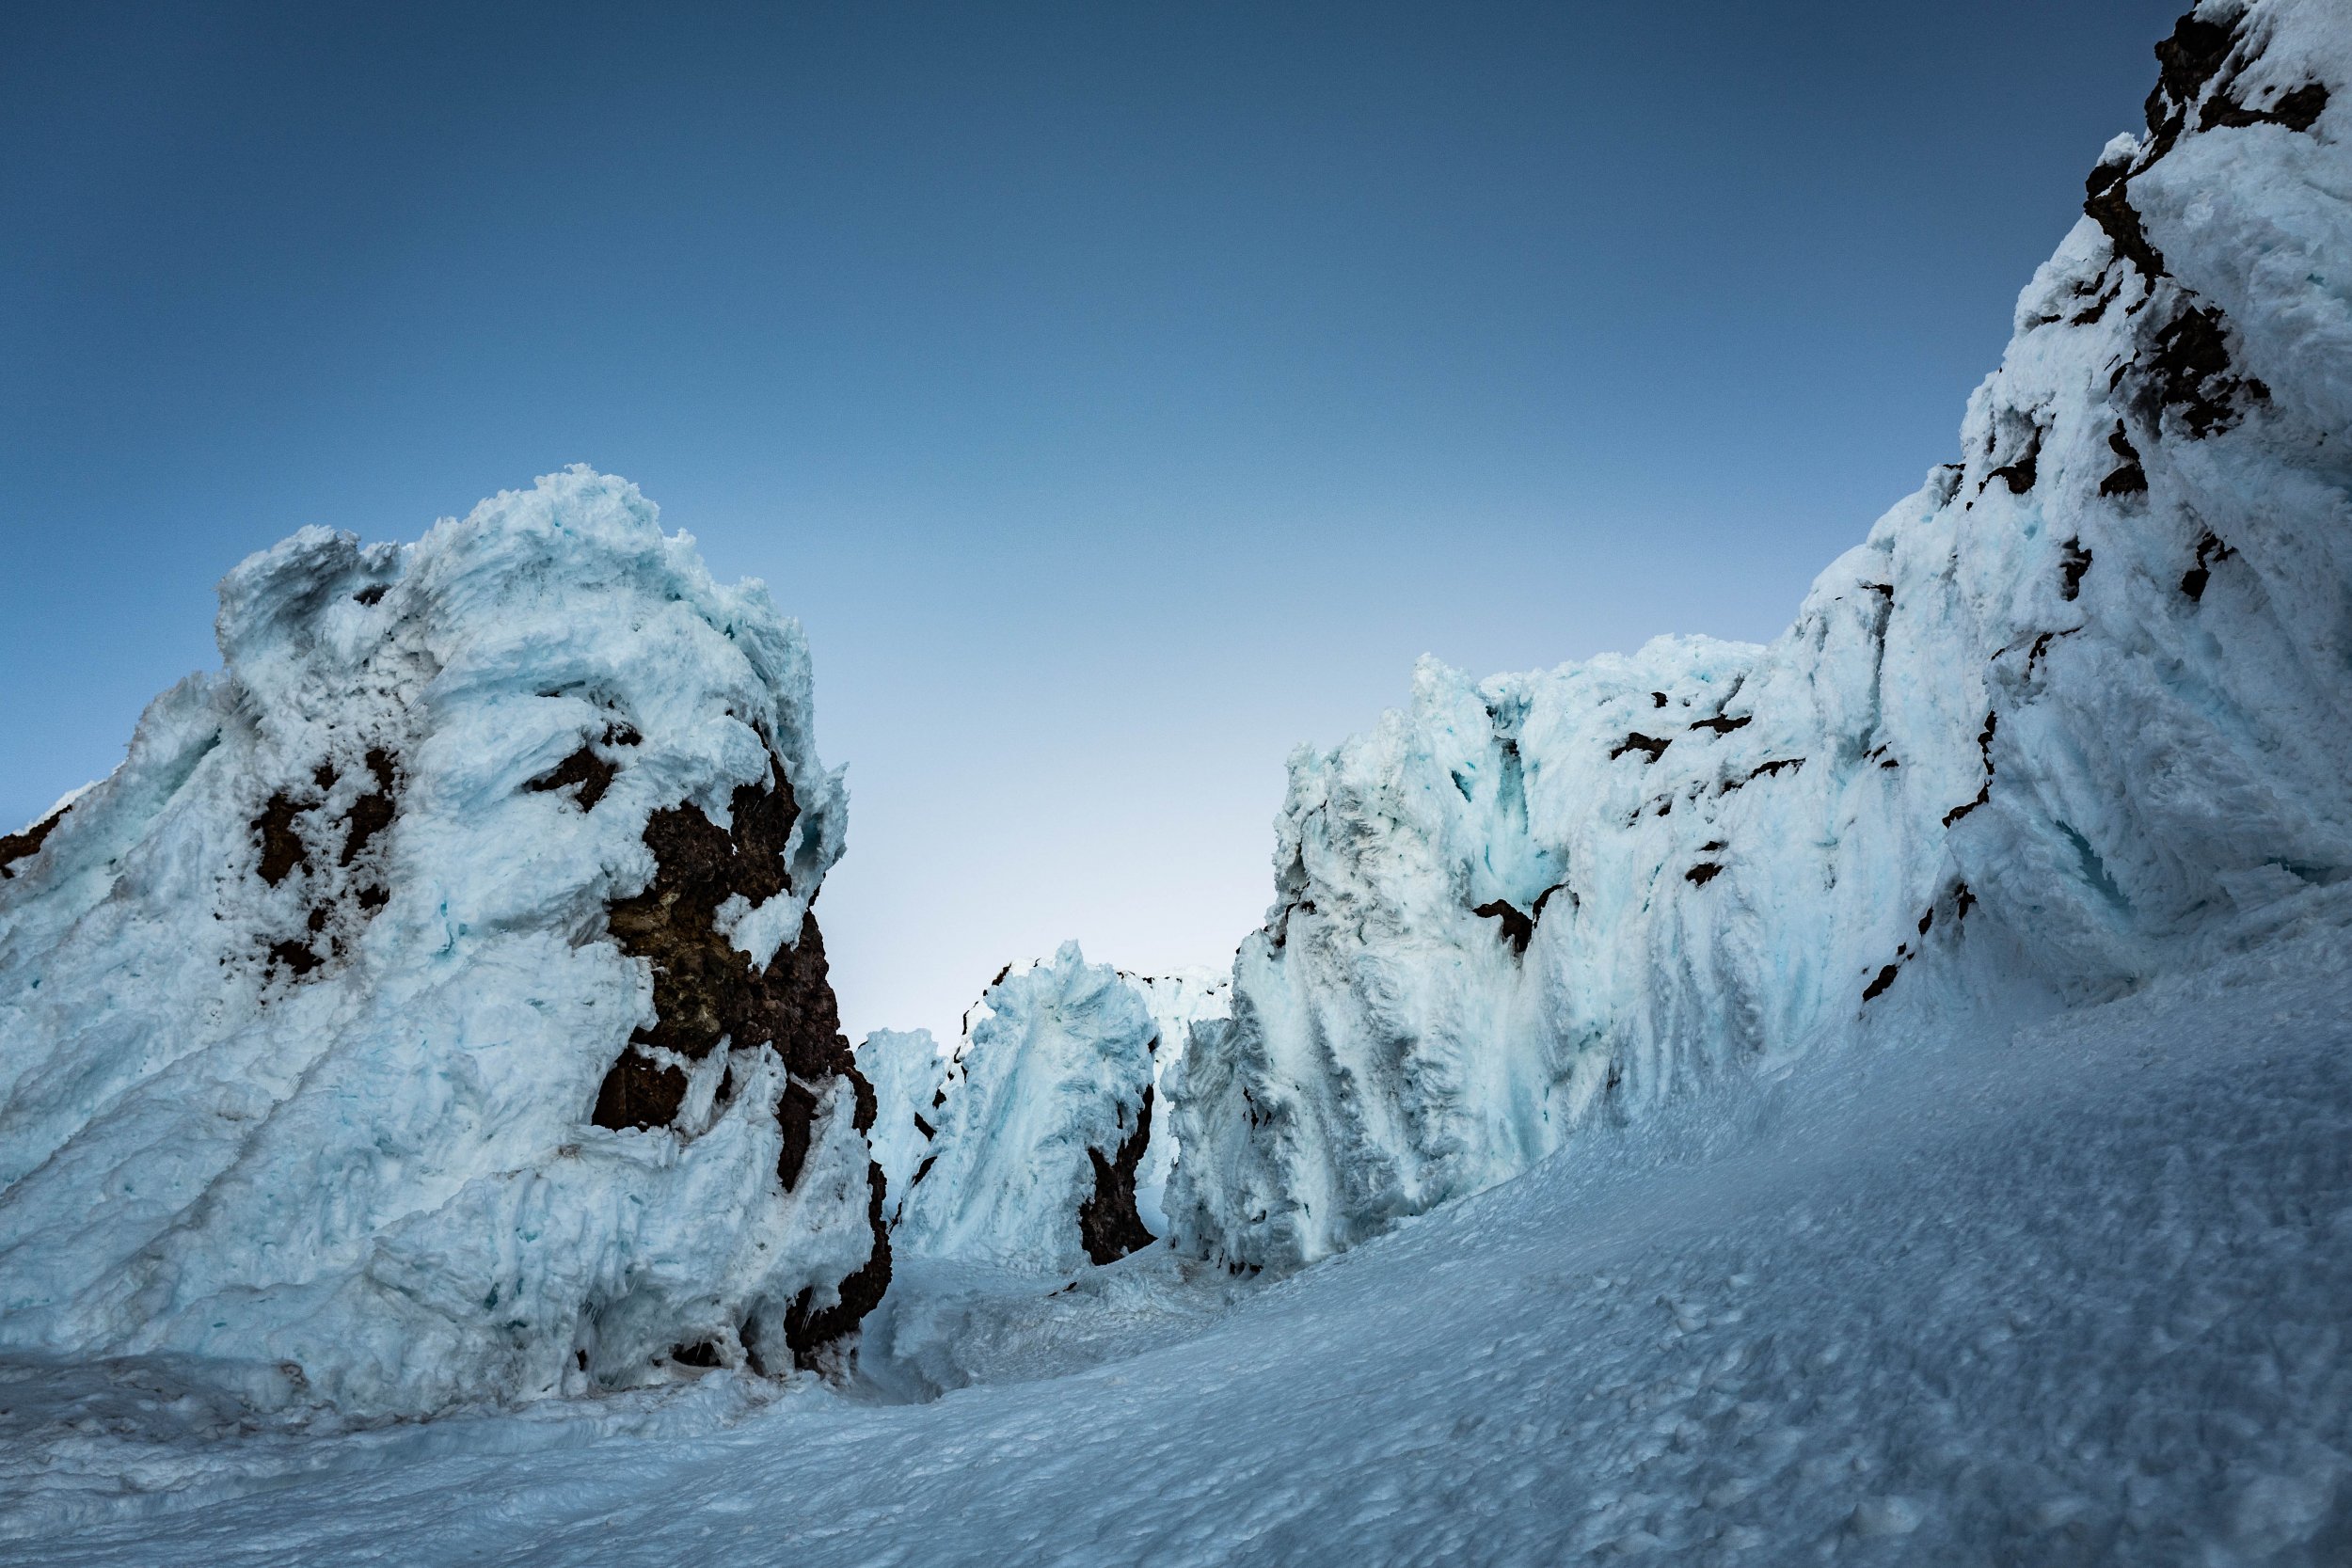
Trip: Mt. Shuksan - Price Glacier Trip Date: 08/04/2018 Trip Report: I am finally getting to posting this trip report after putting it off for too long. Hopefully others will find it useful, as we used a lot of other trip reports to help inform our plans for the ascent of the Price. This was our second attempt at the Price Glacier, our first was in June 2017 when we were weathered out. This year we felt more poised to succeed. We knew the approach and had a good sense for the weather. During the first night we slept in our rental van, right next to Ruth Creek and the Nooksack Cirque trailhead. We woke up at comfortably at 5:00am and took our time getting ready. With ritualistic care, we calmly taped our heels with heavy cotton bandages, layered on the socks, then, once our assembled trotters were fully protected, inserted them into the snug, dry interior of our boots. Being back outside, geared up in alpine armor, filled us with enthusiasm. And as soon as we started hiking, all our boyish enthusiasm was immediately drained. Almost immediately, we had to repeat the process... It had been a rainy spring, and when we walked to the edge of Ruth Creek, we discovered a series of log bridges had been destroyed. So without much hesitation, but a little cursing, we took off our boots, socks and liners, jacked up our pants and walked through the ice cold water. We repeated our foot preparation ritual on the other side, and were finally off on our journey. We were worried about finding the climber’s trail, since last year we had so much trouble with it. After crossing a log bridge and a few dried out irrigation runoffs, we saw a pink tag in the woods near where we should have dropped a GPS pin last year. Worried still that we would struggle to reach the log, we reluctantly proceeded to walk along a path of fallen trees. Surprisingly, it took us right to Nooksack creek where to our left, we spotted more pink tags tied to the tree branches. After moving up the creek toward more pink tags, we arrived at the famous log crossing that separated the landmass the Price occupied from the one accessible by foot paths. After the log crossing it was fairly easy going with new pink tags that some other hikers or climbers left behind. The path still requires a lot of bush-wacking, but we were mentally prepared for this. After getting close to the Price Lake, we took a water break and my climber partner realized he had dropped his sunglasses somewhere between the log cross and where we currently were. We both knew there was no way to complete the climb without sunglasses, so we dropped our packs and slowly retraced our steps to look for the sunglasses. Luckily we did find them, by some miracle, but we had descended 800 feet and now had to go back up to our packs again. We continued the approach through rock fields and finally gaining the ridge on wet alpine vegitation. Slipping down and using handfuls of roots to pull ourselves up 45 degree inclines of dirt, push our way through thick brush but finally making it to the rock field that connected to the lower glacial bedrock. By this time it was about noon and we had about another hour to our planned campsite. We opted not to carry a tent for this climb since the weather looked clear, figuring that we would be happier going lighter. This was true, however now we did not have any shelter from the sun. Another turn of luck, we found a perfect two-person "nap cave" that we could hang out in, watch the conditions on the route, and rest until moving on later in the day. We spent a lot of time debating which part of the glacier looked like the best way to go. We opted to go for the snow and ice chute on the right side of the glacier. While this would have us pass under a large serac, it looked like the most straightforward way up the route. Around 5pm, we hiked up to the upper campsite where we would begin the climb early the next morning. While trying to sleep, we started to get a very light rain shower. With down sleeping bags and no cover, we dumped the gear and retreated to nap cave, running down before the dark creeped in. Part of nap cave was not completely covered, so we made the most expensive homemade rainfly with my arcteryx shell to keep out the rain. We finally settled down for some rest, setting the alarm for 1am. At 1am, we looked outside and the skys were clear again. We both knew our best chances of climbing something this year was to get an early start, especially since we left our gear behind, but neither of us wanted to move yet. But we moved anyway and headed back up to the gear at our previous campsite. From there we had a quick bite to eat, packed, and roped up for the climb. The first stage to the saddle under Nooksack tower was very simple glacier navigation. However, to gain the saddle, we had to cross a twenty foot section of rock where to snow and ice had melted away. Once on the saddle, we had a great view of the route. Mostly, at this point, we were concerned with stream we were about to cross. In the warmer months, a stream forms on the right side of the saddle and this creates a considerable rock fall hazard. We knew we had to move fast through here, but the challenge was the ground was all dirty ice - slick enough to prevent running, but dirty enough to make kicking less effective. As rocks zinged down the hill and exploded into dust or tumbled down toward Price lake, we decided we would go one at a time. From here, we simulclimbed rock solid blue glacier ice around to the base of the snow and ice chute. Overall the conditions were very solid, with mostly hardpack snow or ice. After four to five pitches, we came up on our first major impediment. We stood on the junction of several building sized blocks of ice, the flat part which we were on spanned about the size of a queen bed. We were surrounded by ice cliffs, and connecting our platform to the next section of the route was a thin strip, no wider than a privacy fence, that connected us to the next block which would be about 20 feet of vertical ice climbing. At the connection point still lie an eight foot displacement where our platform sat at a depression. With a suddenness that barely accommodated a head turn, we heard an extraordinary crack. An ice chunk the size of an oven on our right side was coming down and we were in its path. With instinct, we jumped the opposite way, grabbing our packs in the process, avoiding the direct impact. Was more to come down? It wasn’t clear. We had leaped so fast, we didn’t realize that our legs dangled in a crevasse, and my ice axe lay planted with its leash fully extended. But just when everything seemed okay and we could allow a whisper of relief pass through us, I looked down and saw that the ring finger on my left hand was crooked and ran lateral to the direction of others. It was dislocated at best. With no other option, and using the adrenaline from the falling ice, I snapped it back into place. Things were complicated now, I did not know how well I could climb with a busted finger, and I asked my partner to lead the remaining pitches. Trying to move forward, the snow strip in front of us looked questionable, but it was the only plausible way out. While on a proper belay, my partner made an attempt, gingerly walking across the fence edge. He gave it soft kicks at first, to test its stability. His foot just withdrew chunks of snow from its foundation. Gaining the base of the next block, the ice here was much softer and did not hold as well. He fell three times attempting to make it up this pitch. Winded and needing a break, I decided I would have a go at it, dislocated finger or not. We needed to keep moving. I decided to give it a shot with an aid piece, using an ice screw with a cordelette tied off with footholds to help get past the softer, more delicate snow/ice section. With a couple more swings of the axes, I was on top of the ice block. The next problem arose quickly... we had been so hyper focused on getting out, we forgot to transfer the rack. My partner had the rest of the ice screws. I had a picket, but that wouldn’t work with ice. The only option was to use my ice axes as anchors for my partner. I was able to put my partner on belay and used a short redirect and a tibloc that allowed to create a pulley system to assist my partner over the more difficult parts of the pitch. With a few heaves, we we up and out, with the worst of our problems behind us. The glacier felt forgiving at this point, because we had a more contiguous line to follow. That is until we neared the end of the lower broken section. We reached a stopping point where a large void separated us from the glacier above. From our position, there seemed like two ways forward, and neither were appealing. The first was right in front of us - another ice fence to more vertical climbing. This one was even more terrifying though, because the crevasses on each side were deeper, wider, and the ice the fence led to looked precarious. A solid kick seemed like it would throw it off its balance, and with us on it, down into the cold darkness below. The other option was off to our right. There was a large trashcan sized ice block wedged between the section on which we stood and the one we tried to gain. From our position it seemed like we would need to climb out on the crevasse edge to reach it, then down climb a bit to reach the block, then climb more vertical ice to reach our destination. As we weren’t too keen on another ice fence fiasco. I moved over to examine the second option, but quickly determined it impassible. Great. So here we were about to repeat our experience below, except this time in a more delicate position. We also discovered that we had lost two ice screws, which meant we were down to five. We needed at least one to make an anchor on the other side and at least one to protect the leader in case the ice fence collapsed or they took a lead fall. Since my partner had lead the past few pitches, I bucked up and took the lead with my busted finger. On belay and moving out, I felt reassured that the snow and ice was more solid than the one we experienced before. Besides the terrifying exposure to the crevasses on every side it felt, the ice was solid. From here we climbed higher and the slopes got steeper. Soon we were climbing snow instead of ice. The crevasses got deeper too and wider. Our movements changed from hammer swings to fist punches and we choked up on our axes and punched them into the snow. The terrain required that we follow the lines dictated by crevasses, weaving back and forth along the direction the glacier required we go. The final obstacle was the bergschrund. We were fortunate the find the upper and lower parts were still connected on the left side. From here was was solid 60 degree snow climbing all the way up to the top of the Price. Once out of the Price proper, we felt like the worst of our problems were behind us. They were, we walked around to the base of the summit pyramid and took the traditional route up. By the time we descended down the summit pyramid it was 7pm. We were both thoroughly exhausted and decided to sleep on a small section of rocks set away from the summit pyramid (and any potential rockfall). The sunset and view of Mt. Baker in the distance was once of the best I've seen. The following day we exited via the Fischer Chimmey's and thumbed a ride back to our van. In the following days I went to the emergency room to get an ex-ray of my finger. It was also broken, with some bone at the knuckle chipped off, but otherwise it was set correctly as all I had to do was wear a splint. Separately, during the climb I thought I was dehydrated with some throat irritation, but when a doctor looked at it closely I had somehow got tonsillitis on the climb as well. In summary, and as my partner put it: If you like navigational challenges, thirsting for precarious snow climbing on tilted sidewalks weaving around deep crevasses, enjoy searching for creative paths between disjoint sections of variable-angle glacier ice, and want an entire day of mental engagement, then go ahead and roll the dice, make an attempt at the Price. Gear Notes: seven ice screws, four pickets, three tri-cams, two chocks, two cams. Used everything but the rock gear. Approach Notes: From Nooksack Cirque Trailhead. Pink tags showed where the log crossing was and lead up to the rock field. From there, there are no tags - just gain the tree-lined ridge and walk until you can descend toward the lower glacier. We bivyed near the saddle. Depending on the conditions, the difficulty can vary greatly. Plan for three long days if you're exiting from Lake Ann trailhead. In the summer, the ice is rock hard, and the glacier is heavily fractured.
-
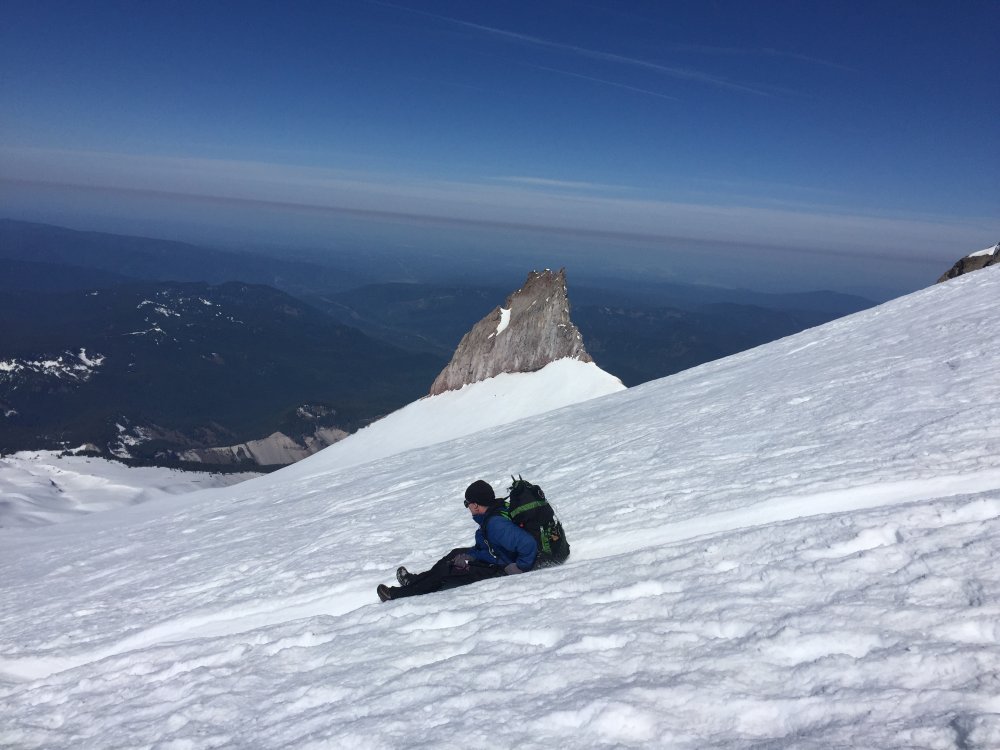
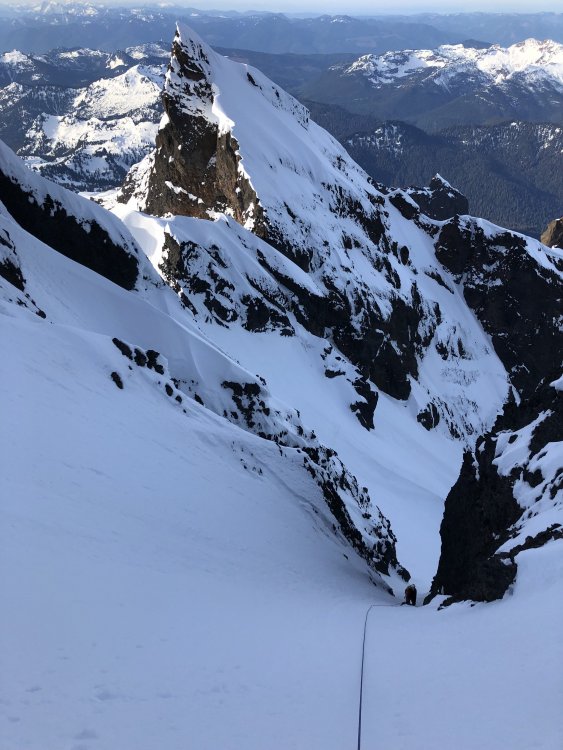
Trip: Mt Hood - Reid Headwall Trip Date: 05/11/2019 Trip Report: For the detailed version, check out the post on my blog. Simulclimbed up the Reid Headwall Left Variation (Mullee 8a) on May 11th, 2019. The climbing was mostly in good neve snow, with a lone ice section. Lots of falling debris, and a very large rhyme pinnace becoming detached at the base of the final snow/rhyme field. Probably the last Hood climb I'll do until 2020. Gear Notes: 3 pickets, 1 screw needed, 50m rope (would have gone with a 30m if we knew the conditions beforehand) Approach Notes: The Southside is still the Southside
-
Trip: Mt Hood - North Face Trip Date: 05/01/2019 Trip Report: For the detailed version, check out the post on my blog. Went up the North Face Right Hand Gully on May 1st, 2019. The climbing was in great conditions. The shrund is definitely opening up and may become more complicated to cross over the next few days. The right gully fully goes all the way to the summit without any significant difficulties. The two ice pitches are in fat/easy condition. Get at it! Gear Notes: Alpine ice climbing gear Approach Notes: Tilly Jane trail in good condition!

-
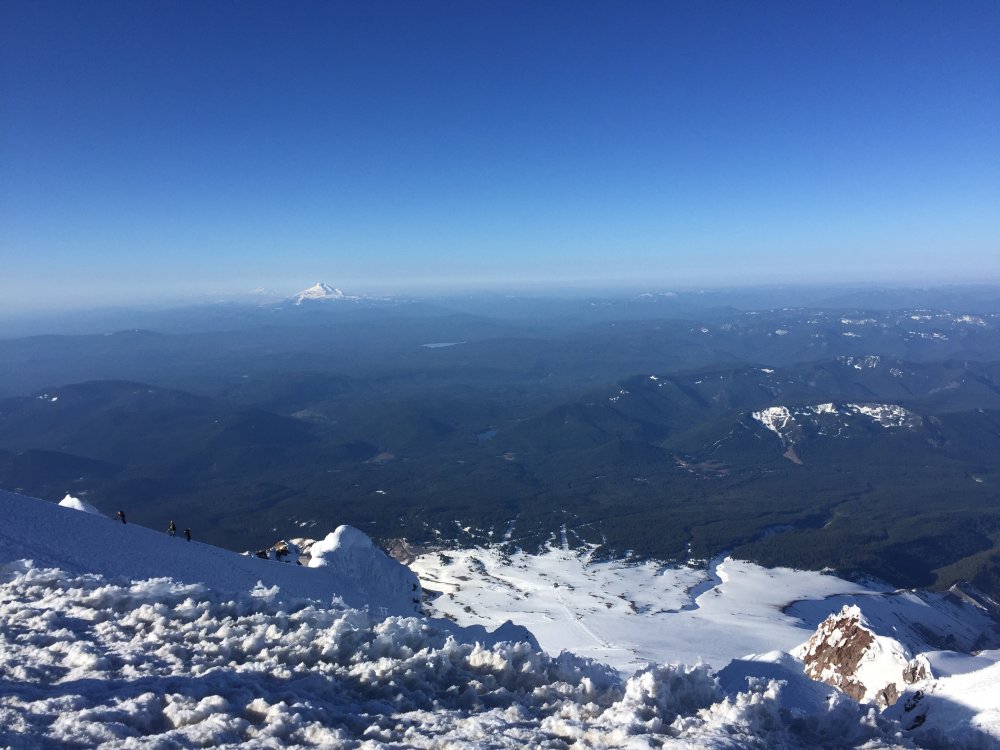
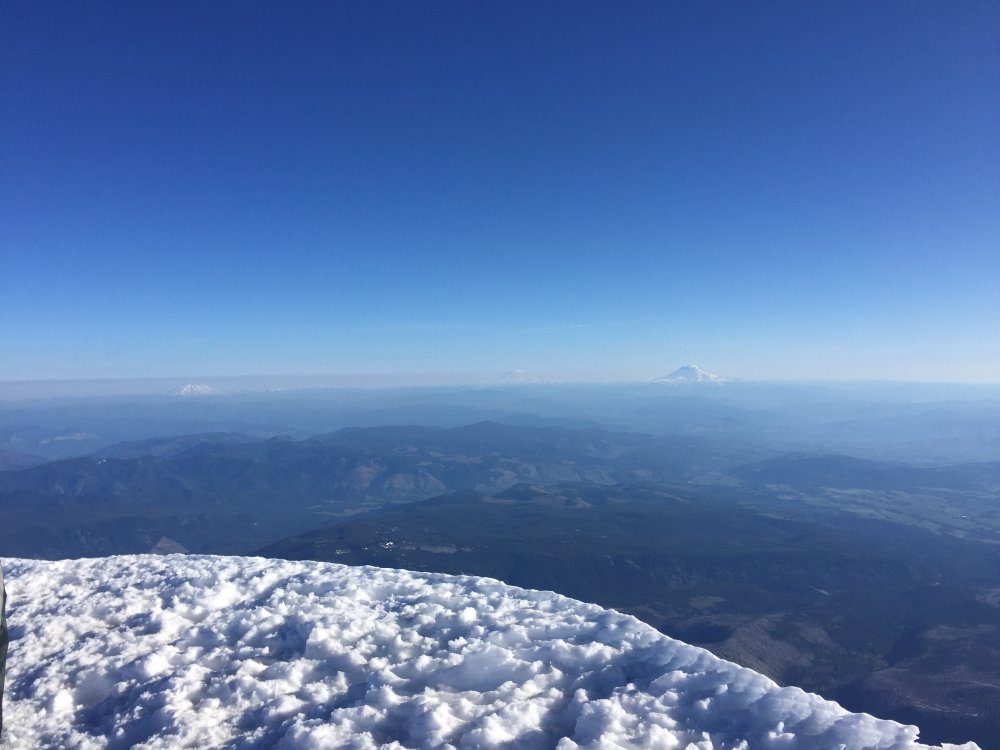
Trip: Mount Hood - Pearly Gates, South Side Trip Date: 05/11/2019 Trip Report: Getting there: Left Seattle area around 7:30 PM Friday 5/10, we got to parking lot in Timberline at 12 AM. Several parties were departing at that time towards the summit, my partner and I decided to sleep a couple hours before. We slept until 2:30 AM and set out towards the summit at 3:00 AM. Conditions: Snow starts from parking lot, no need for snowshoes if climbing at night. We put on crampons at 7200 elevation because it was getting icy. Upon reaching the hogg's back we chose to follow the crowds and went via the Pearly Gates, it's very icy there now and extremely crowded. Crampons and ice axe and helmet is all you need. some people had ice tools, but it's unnecessary. I counted at least 200 people climbing through out the day on the mountain. Summit: We got to the summit at 8 am. Gorgeous views as it was a very clear day. Return: We attempted to go down via Old Chute to avoid the bottleneck in the pearly gates. Some people were climbing via old chute, but I decided to explore a different route alternate path right next to pearly gates, this proved to be an excellent choice as it avoided bottleneck and felt safer than the old chute. Stats: 5 hours from parking lot to summit ( we were going very slow). 2h40m from peak to car. Last 2 miles felt like forever as you see cars very near yet very far. 5100 feet gain. 8-9 miles rt, can't really say as gps was acting up. https://www.instagram.com/iron_knee/ Gear Notes: Ice Axe, Crampons, Helmet Approach Notes: Paved road all the way. Snow stats from parking lot.


-
Trip: Mt. Stuart - Stuart Glacier Couloir Trip Date: 05/05/2019 Trip Report: My friend and I Climbed the Stuart Glacier Couloir on Sunday. Rode bikes up to the trail head. Theres just a 100' long patch of snow near the trailhead now. Hiked in early and the approach wasn't terrible booting. Followed the summer approach trail. Plenty of cairns to go off of when the going gets snowy. Camped at 5400' and woke up early Sunday morning. The snow on the way up to the couloir was firm enough that just your crampon points would sink in. The rest of the snow on the route stayed consistently firm as well. The bergschrund was easily crossed via bridges on climbers right. The constriction in the couloir was in great shape with thick ice. Mostly 60 degrees with a couple short vertical/near vertical bulges. Got to the west ridge notch around 7am and started working our way along the west ridge. On the ridge the ledges and gullies were snowy. The rock on route was mostly bare with patches of ice and ice in the cracks. I thought this made for interesting climbing as you would need your tools for a bit and then want to stow your gloves and tools for some sections. Really fun climbing on the the north side traverse pitch and the following twin cracks pitch out of the tiny notch. This was a fun outing on an awesome route. I thought the climbing was easier but more fun than what we encountered on triple couloirs this year. In these conditions I'd give the route a WI2/M3+/5.6 rating. Gear Notes: cams to 2", assortments of pins, set of stoppers, 2 13cm ice screws, a picket (dead weight as usual, snow was conducive to vertically placed pickets but there was other pro available) Approach Notes: Road is still gated at Bridge Creek campground. Bikes for the road. Booted in and out. Approach was way less miserable on the way in.
-
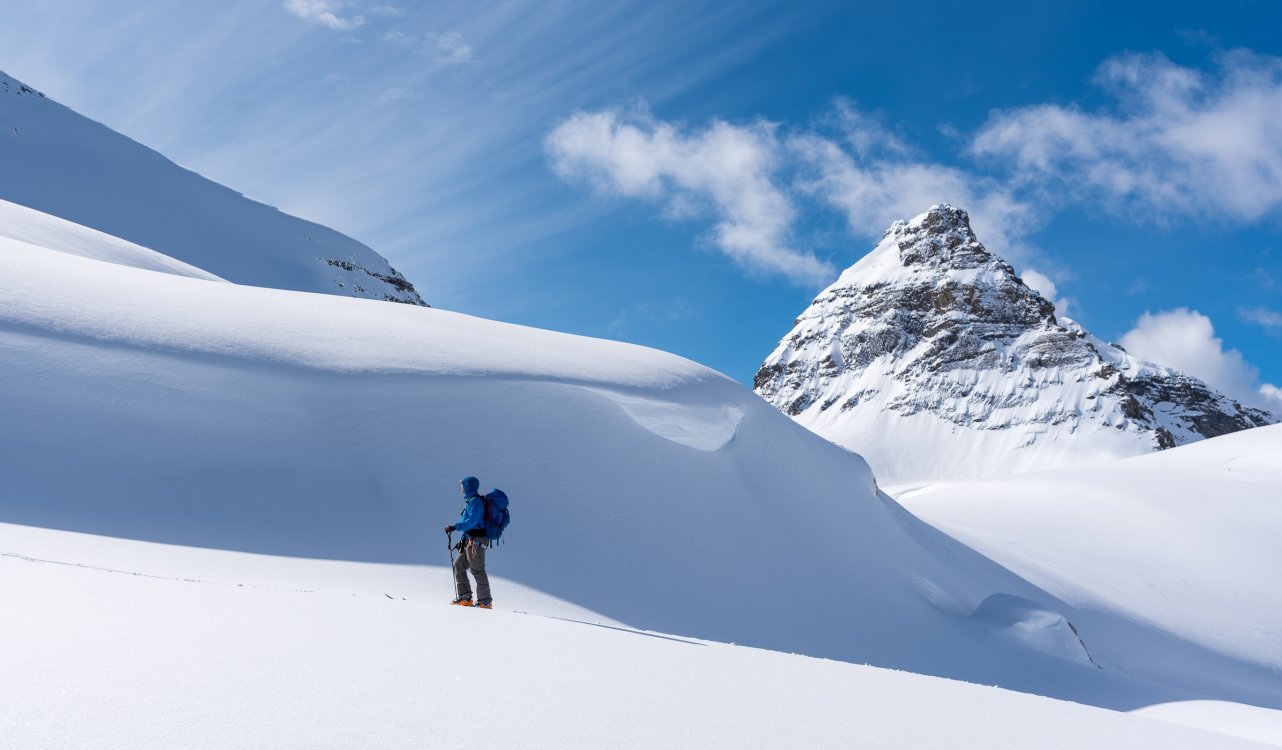
Trip: Lincoln Peak - X Couloir Trip Date: 05/05/2019 Trip Report: Enticed by the prospect of some relentless steep snow climbing, I had been eyeing Lincoln for some time. Given the short season I was really hoping for a good weather window and it was delivered this weekend. Max and I made a leisurely 4 pm departure from the car just a couple of switchbacks up the road from the Ridley Creek TH. After the road ended we endured about 5 minutes of slightly brushy trail before I lost patience and took us up into steep open forest and eventually to a crappy gully. We reached the end of the marked trail and discovered walking downhill 200' to the bend would be better than dealing with half a mile of dense new growth on the ridge. We eventually gained the ridge around 4800' and slogged up to find a decent patch of flat snow at 6200' where we set up camp around 7:30. Alarms went off at 3 and we were moving a little after 4. Although warmer than the preceding week, clear skies overnight had firmed the snow up pretty well. We made our way north around the buttress to the open basin SW of the peak. I switched from walking to front-daggers around 7600'. The lower bergschrund was easy to cross, and after that it was a rising leftward traverse to a spot above a rock outcrop next to a wind lip separating this entry slope from the one immediately below the 1st couloir. Key points of the route from here up to the summit are visible in a straight line. With foreshortening the location of the summit is not exactly obvious, which had me second guessing my dim recollection of the beta I had seen. It is easy to understand why one might pick a gnarly spot on the ridge as the summit rather than choosing the one it was, which from our perspective was a relatively benign appearing white lump. We roped up here and simuled 2 long pitches, swinging leads at the top of the 1st couloir on a steep wind lip. The crack below the 1st couloir was barely open. Snow was essentially perfect for this kind of climb. There was a thick supportable crust that took points and front daggers excellently. Most places whenever a rest was needed it was easy to kick in a few times to make a bomber step pocket. Runnels had not yet formed so we were able to move efficiently either vertically or laterally. Each couloir had a firmer streak near the middle, but still not ice or anything that would take a screw. I never measured a slope angle, but it never felt too steep. We reached the top a little after 9 and took some time to enjoy the views and not be on front points. We belayed the downclimb from the summit block to the saddle at the top of the couloir. Max rapped the first rope length, then we simuled down the way we came up. We were below the bergschrund by noon or so. Every now and then a little rock would roll downhill nearby, reminding us to keep moving. The descent went smoothly, this time we just followed the trail to the road. I discovered that my impatience with the trail on the uphill trek originated with insecurity wearing trail runners and carrying a heavy pack. Going down still wearing boots it went so quickly that I didn't even recognize the spot we had left the trail the day before. Gear Notes: 6 pickets (used all), 3 screws (did not use) Approach Notes: Parked at 2nd switchback ~2700'. Snow started at 3800' where the trail turns north. In this area we found attempts to use open forest instead of brushy trail were not worth the effort. The trail has actually been tended in the not too distant past, and not too bad by Cascades standards. Accept the trail.
.thumb.JPG.b83e65a0b01224f5157d8587f5020f56.JPG)
.thumb.JPG.99a50f83723f59b23ebd3e497e450c50.JPG)
-
 Trip: Colchuck - Colchuck Peak, DragonTail Peak, Enchantments Trip Date: 05/04/2019 Trip Report: Decided to do a long 1-day solo trip of Colchuck Peak and Dragontail. Last minute decision to exit through the Enchantments. 22 miles, 8000ft gain, 21 hours. Started at 10:30pm on Friday, timed it to get across the slopes to Dragontail before they got much sun. Temps through the night were in the 30s. 5 hours from Bridge Creek to the far end of Colchuck Lake, pretty good snow conditions, minimal postholing with boots. Colchuck glacier was in great shape, easy walk up to the col. Colchuck is melted out more than I've seen before this early. Mix of snow and rock. Gully from the col to Dragontail was in great shape, climbed the rocks to exit to the ridge. Started across towards Dragontail peak around 9:30am. Summit of Dragontail by 10:30am. 12 hours on the dot. Being that early figured I had all day to go through the Enchantments instead of Aasgard Pass. Glissaded down the slope from the base of Dragontail into the Enchantments. Snow was firm and fine for hiking all the way across in boots. 14 hours in was almost to the exit down to Snow Lake. Took 6 hours to finish the exit out to the Snow Lake trailhead. Posthole hell. Figured that would be a popular enough route there would be some kind of bootpath kicked in to follow out. Nope. Only saw 3 people camped at Colchuck Lake on my way in, didn't see anyone else till coming across a couple pair of skiers on their way up from Snow Lake. And a big thank you to the awesome couple from Canada who I hitched a ride from for the 3.5 mile ride back to my truck at the end of the day as the sun was setting, I was nodding off and I lost the last bit of cell service. Gear Notes: ice axe, ice tool, crampons Approach Notes: Gate closed, started at Bridge Creek Campground. Road is snow free till trailhead, mixed snow and trail till branch to Colchuck lake then snow. Was fine with boots, minimal postholing.


.JPG.f37bb260a6696ccf3dd4075ea8a3fe13.JPG)
.JPG.f5b84a3e6f806ee0e918bbe983e88c6a.JPG)