montynet
-
Posts
31 -
Joined
-
Last visited
montynet's Achievements
")
Gumby (1/14)
2
Reputation
-
[TR] Colchuck Peak - North Butress Couloir 06/09/2019
montynet replied to Summit_Rolos's topic in Alpine Lakes
Sweet pics. Thanks for report. -
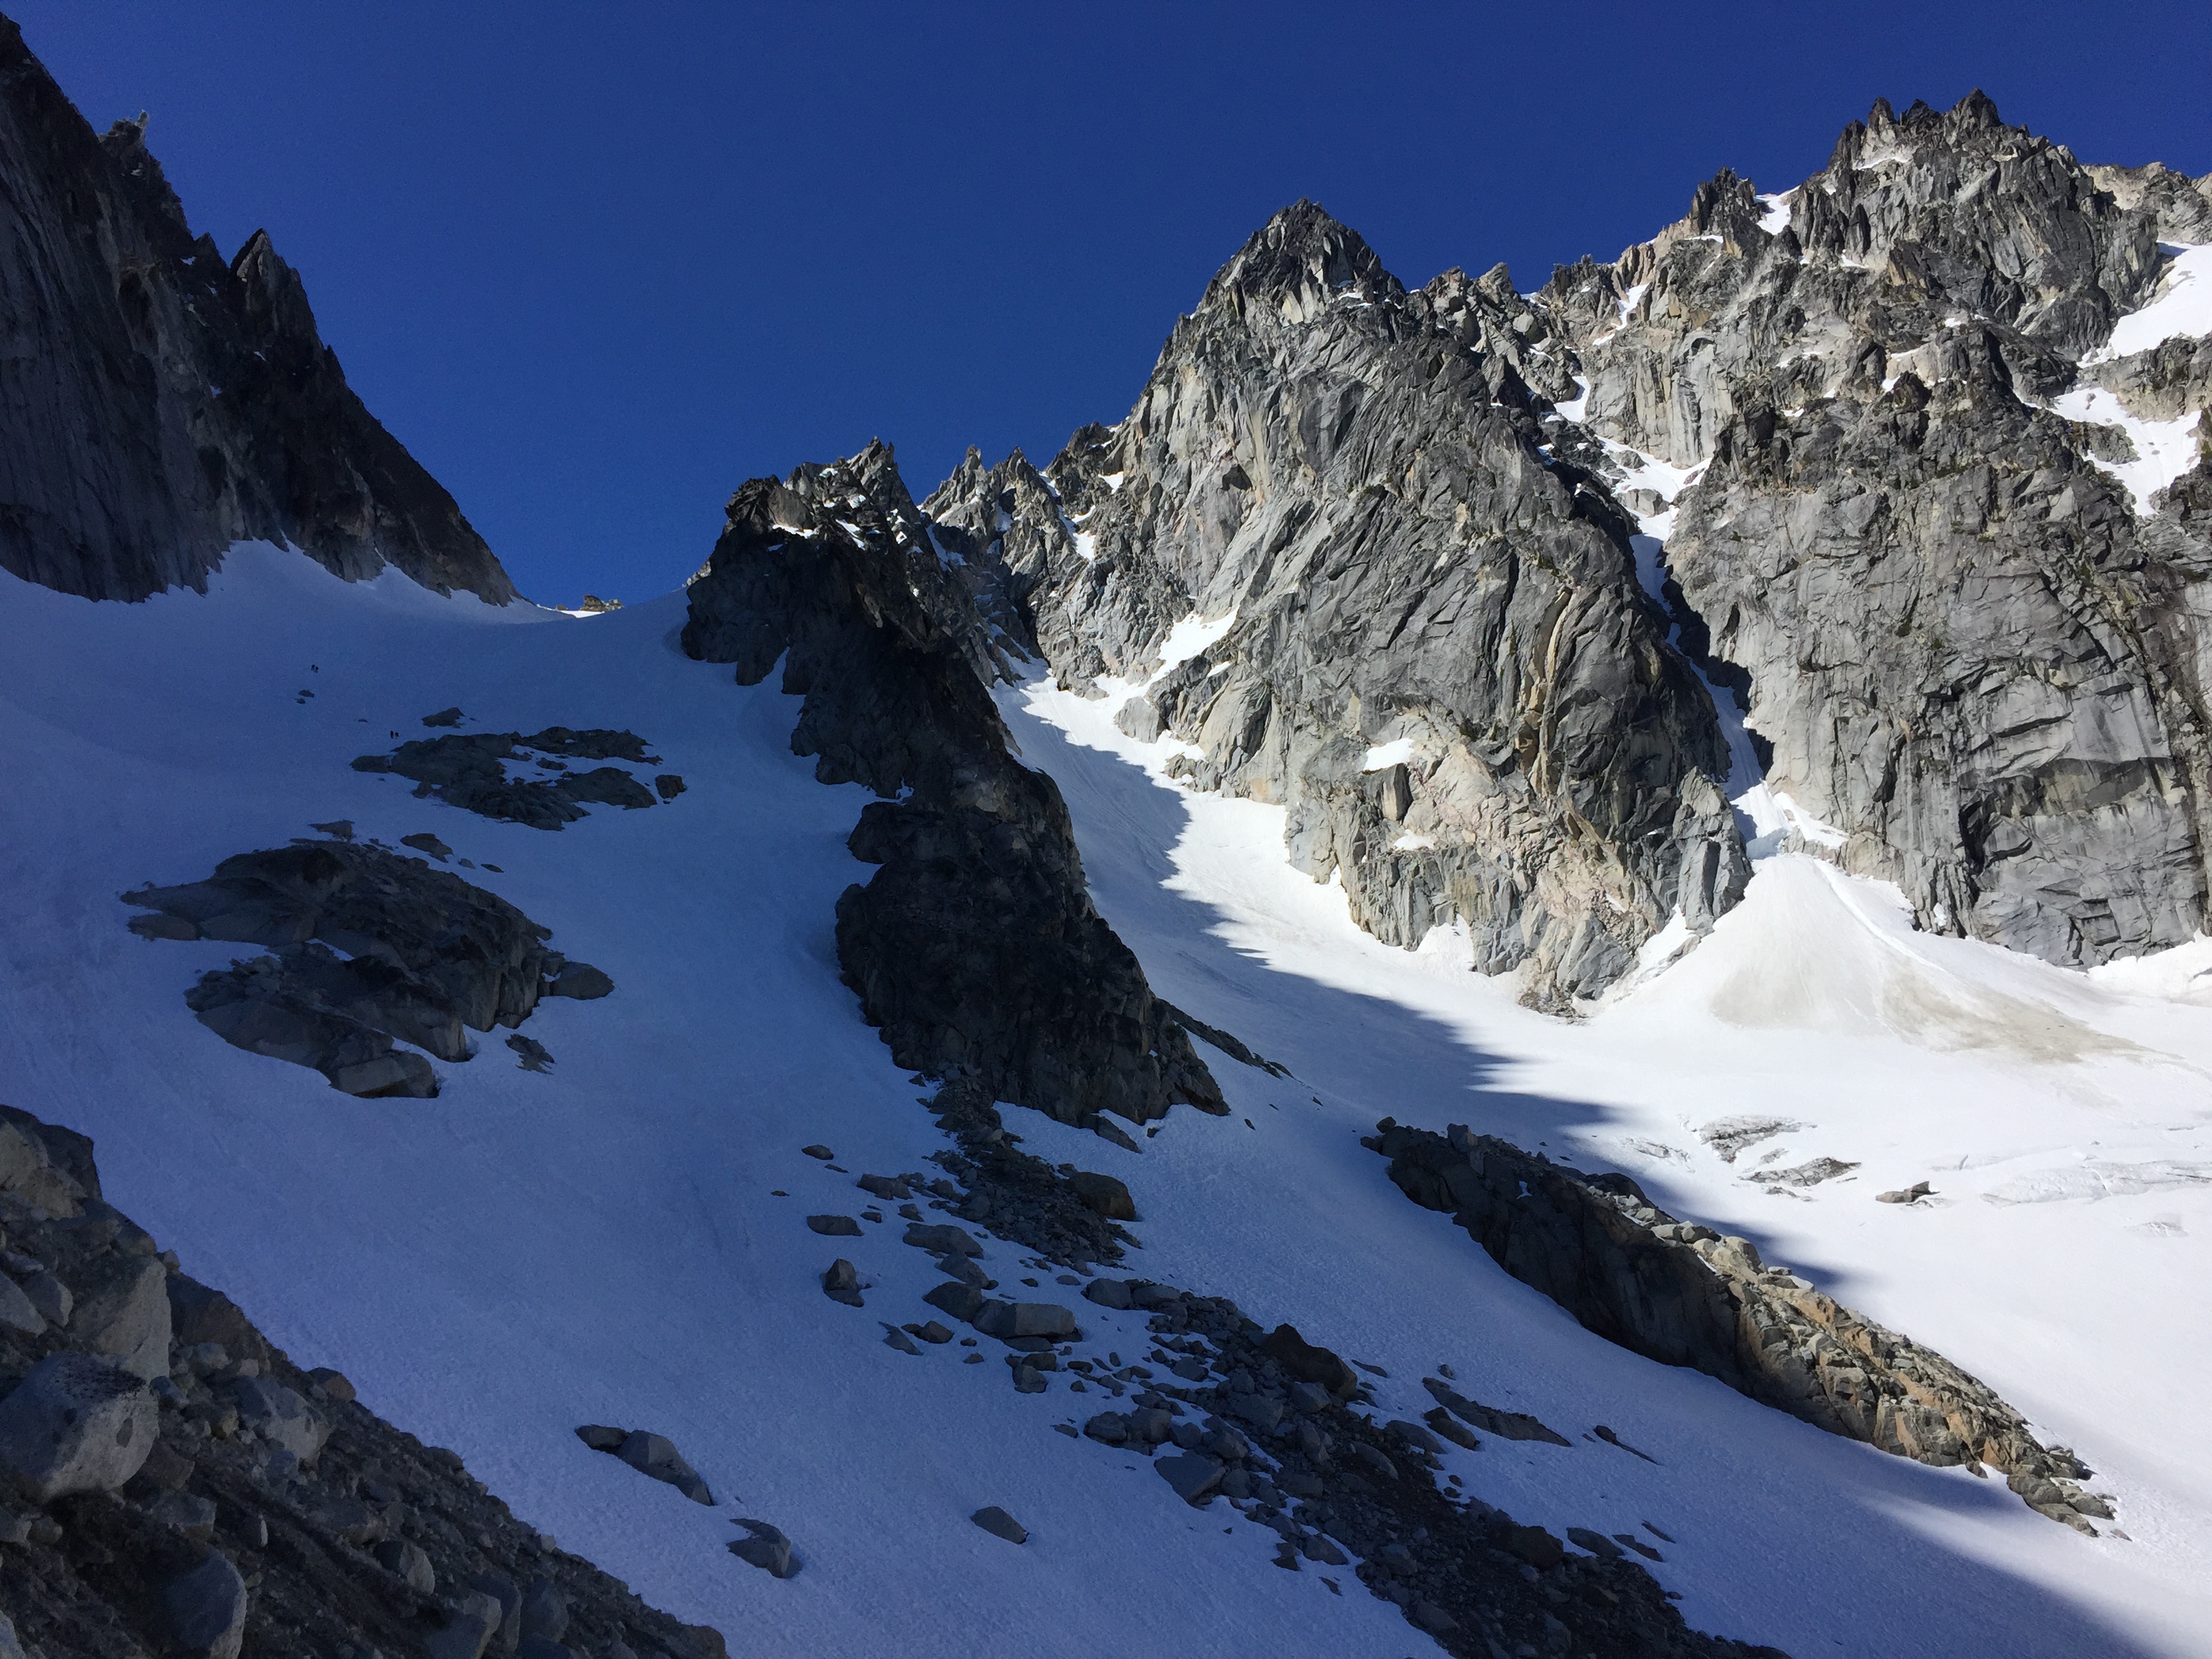
Trip: Colchuck Peak - East Route Trip Date: 06/08/2019 Trip Report: Route is in great condition, mostly snow covered still. Trail to colchuck lake is snow free. Once, you reach the pass there's no need for ice axe or crampons on the other side as it's already thawed out. Views are quite dramatic from up there. I decided to microspiked it, I would not recommend it. Crampons would have been the better choice. Fun glissading on the way out. If you're interested in my gpx file, you can get it here http://bit.ly/ironKneeColchuckPeak Gear Notes: Microspikes, Ice Axe, Trekking Poles Approach Notes: Road to Stuart Lake Trail Head seems to be getting worse every year.


-
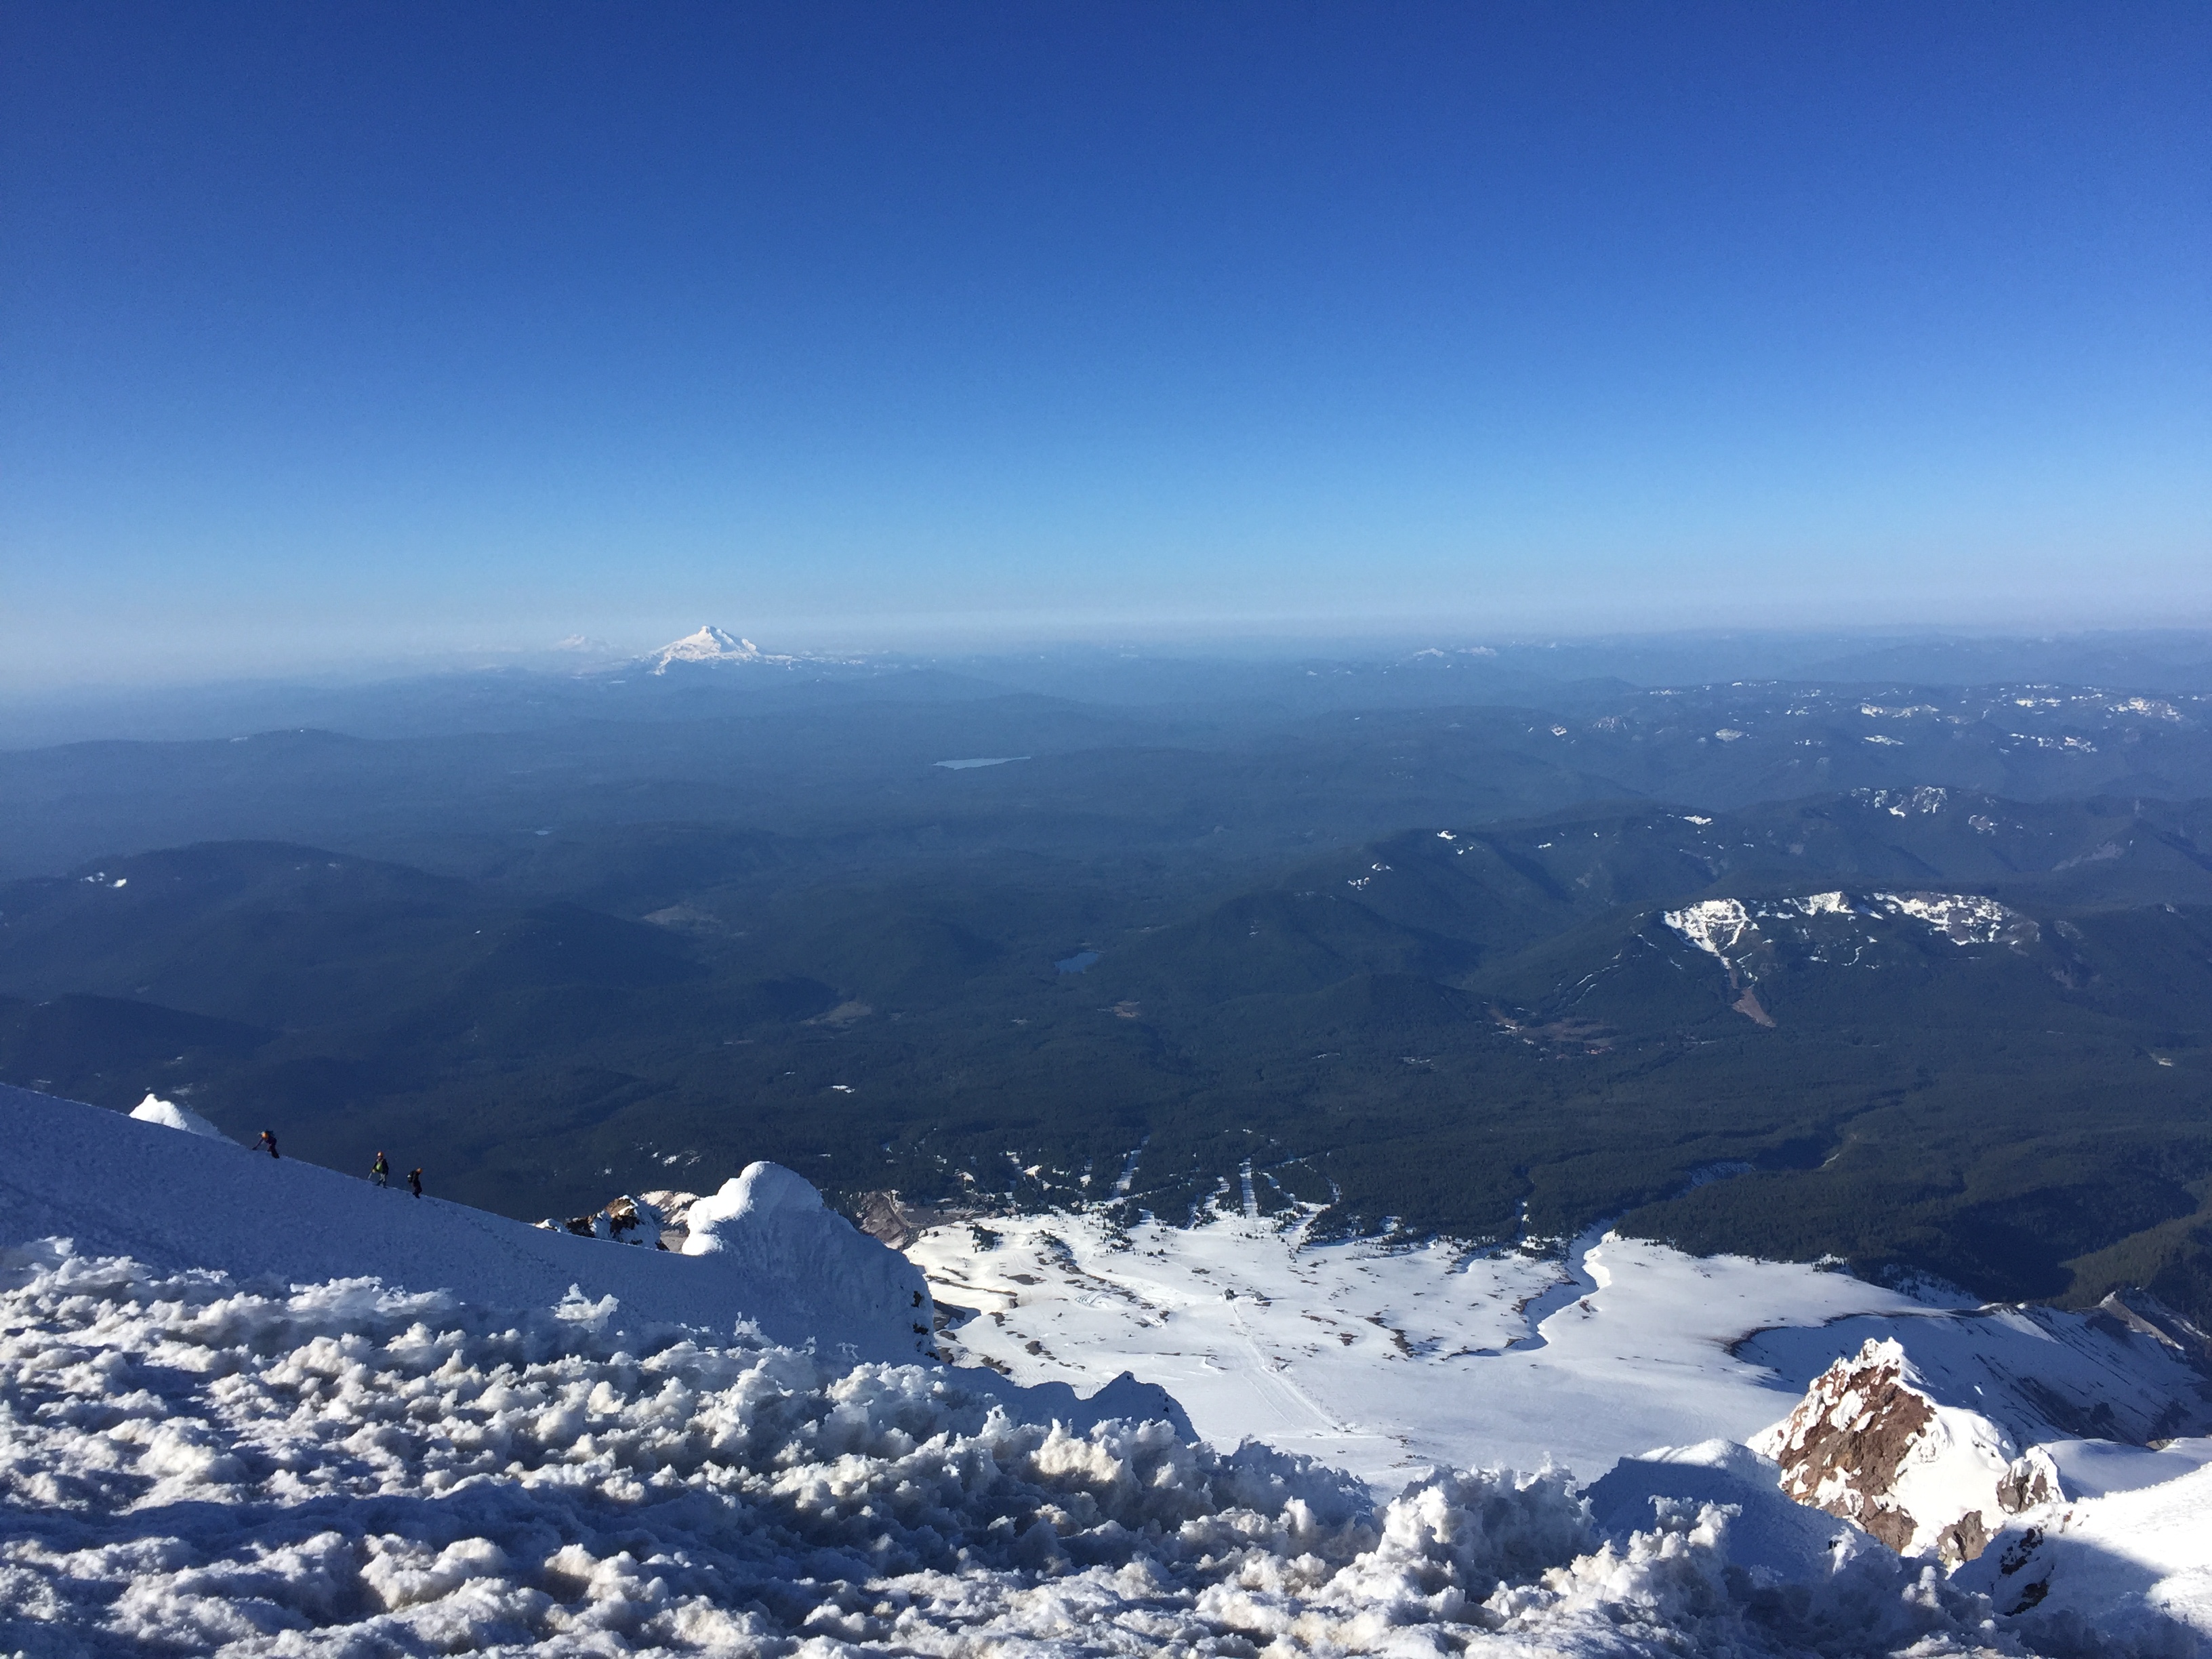
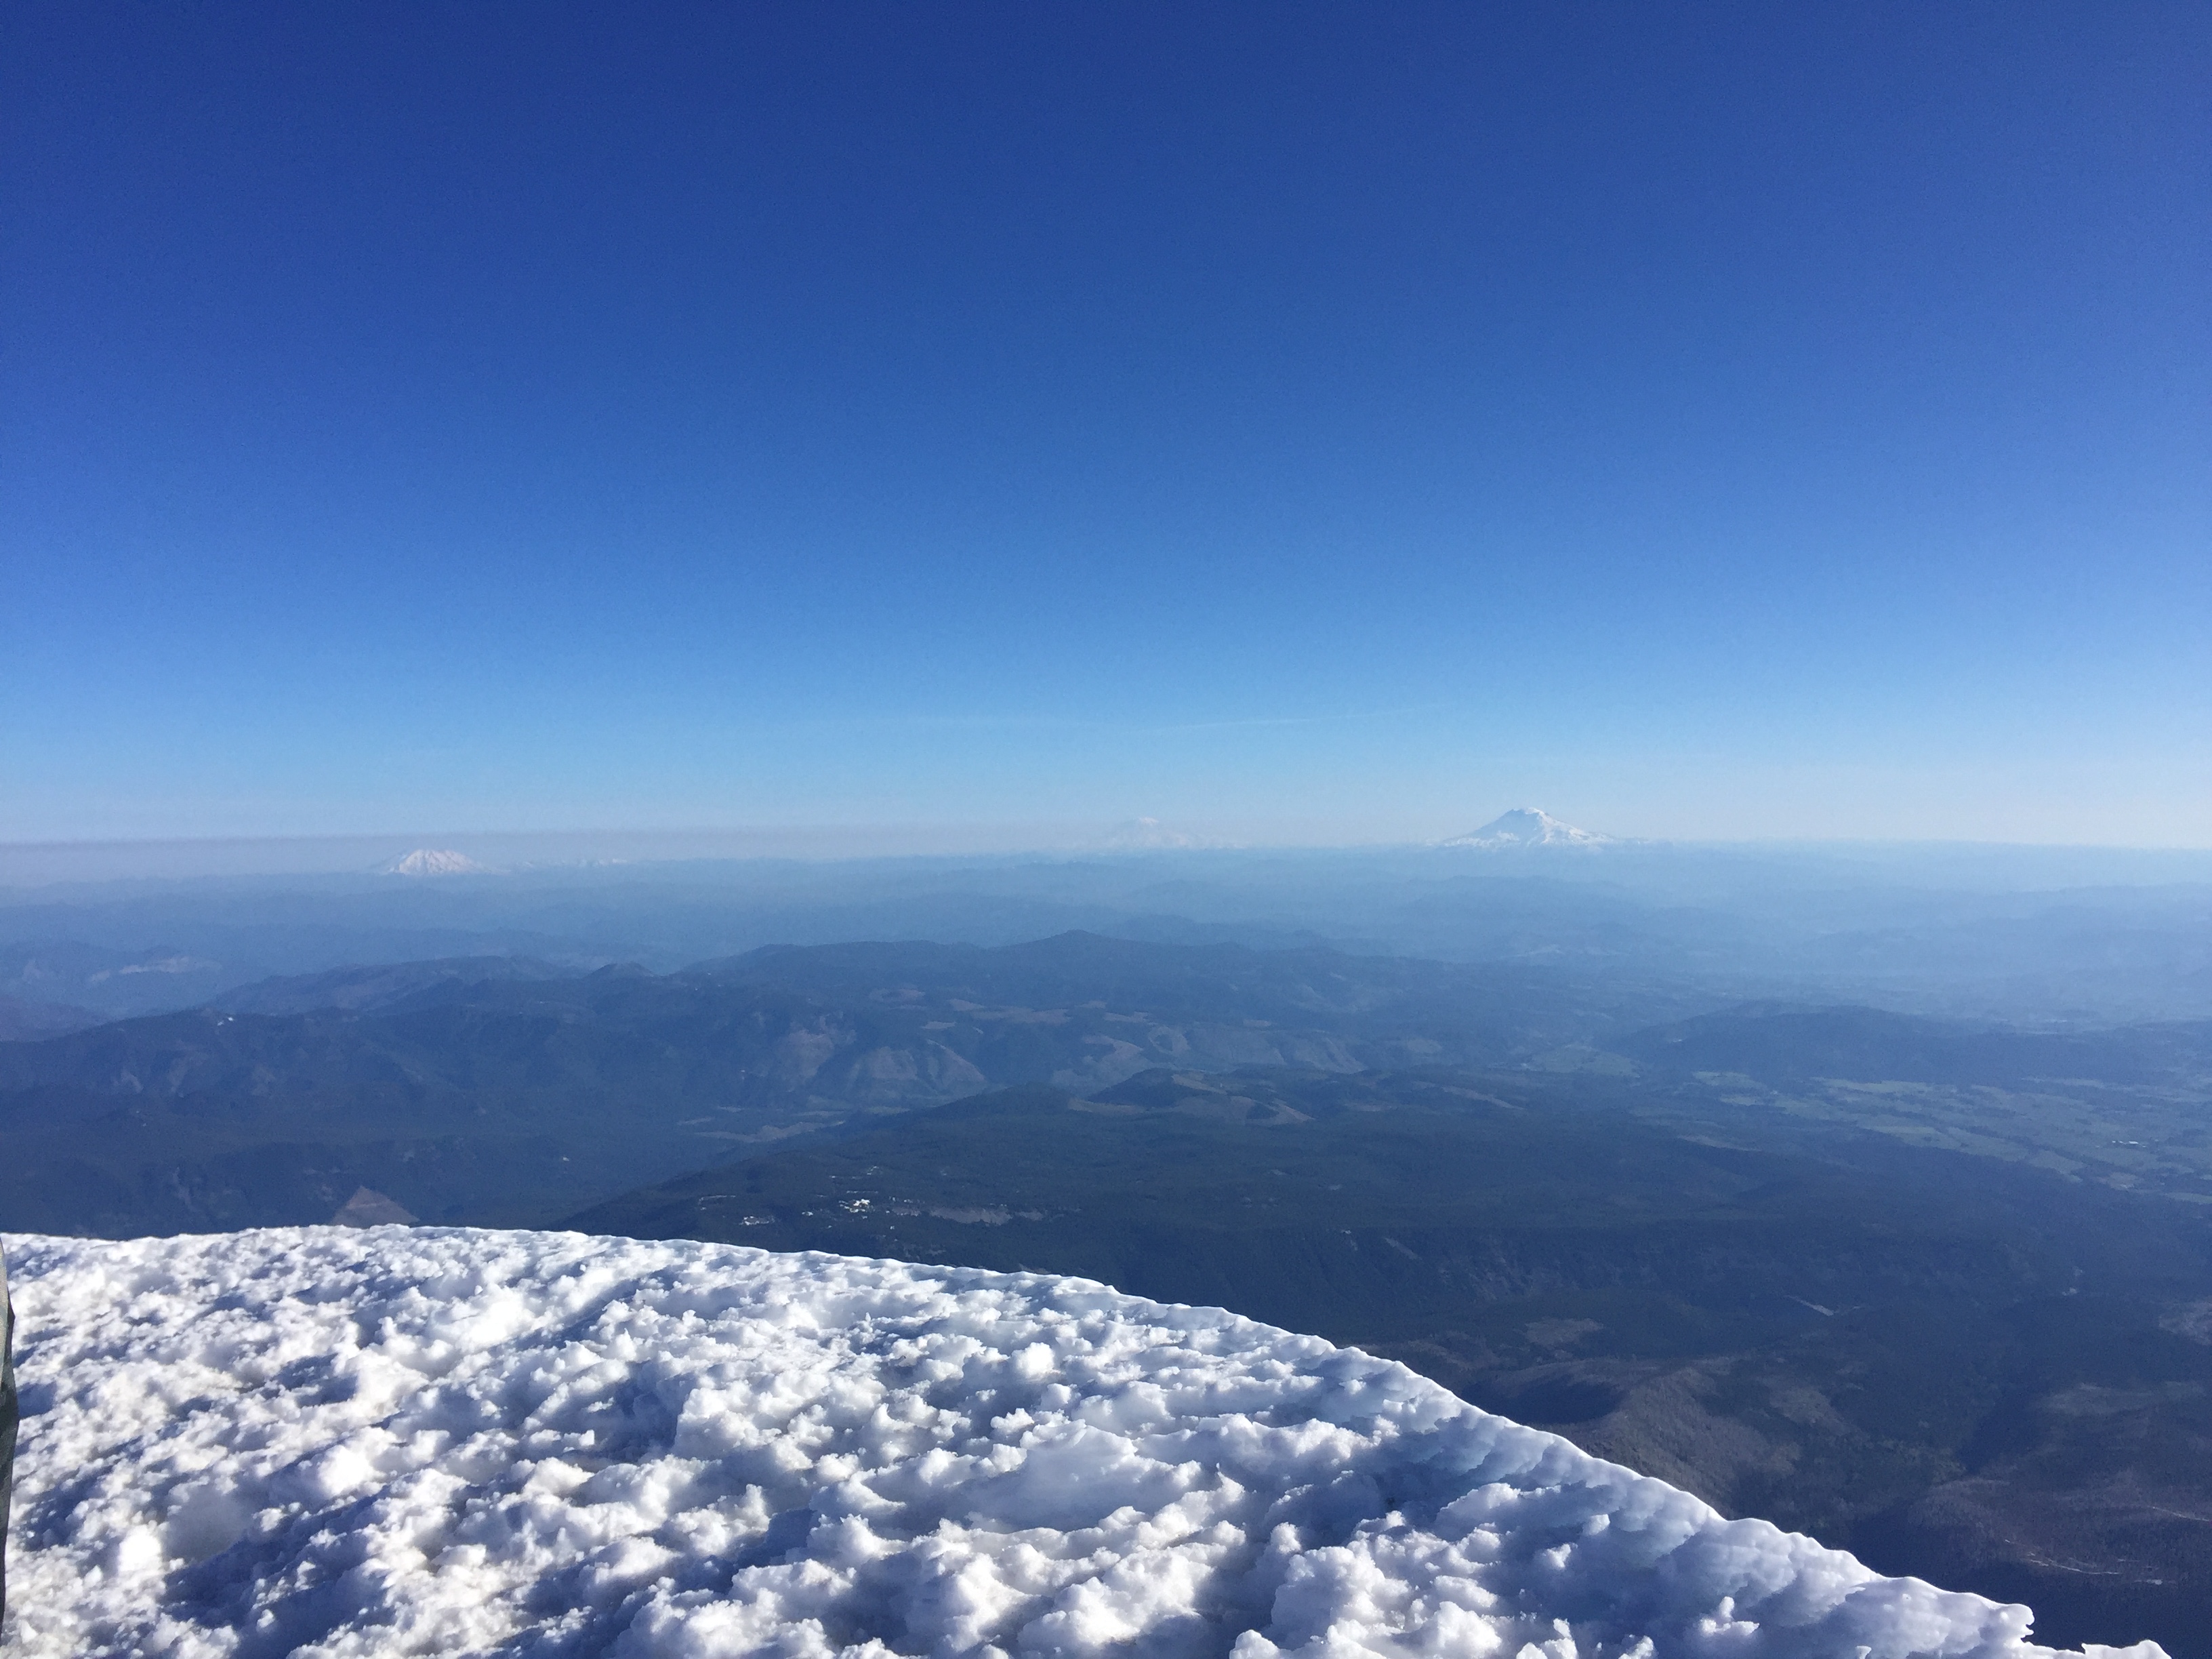
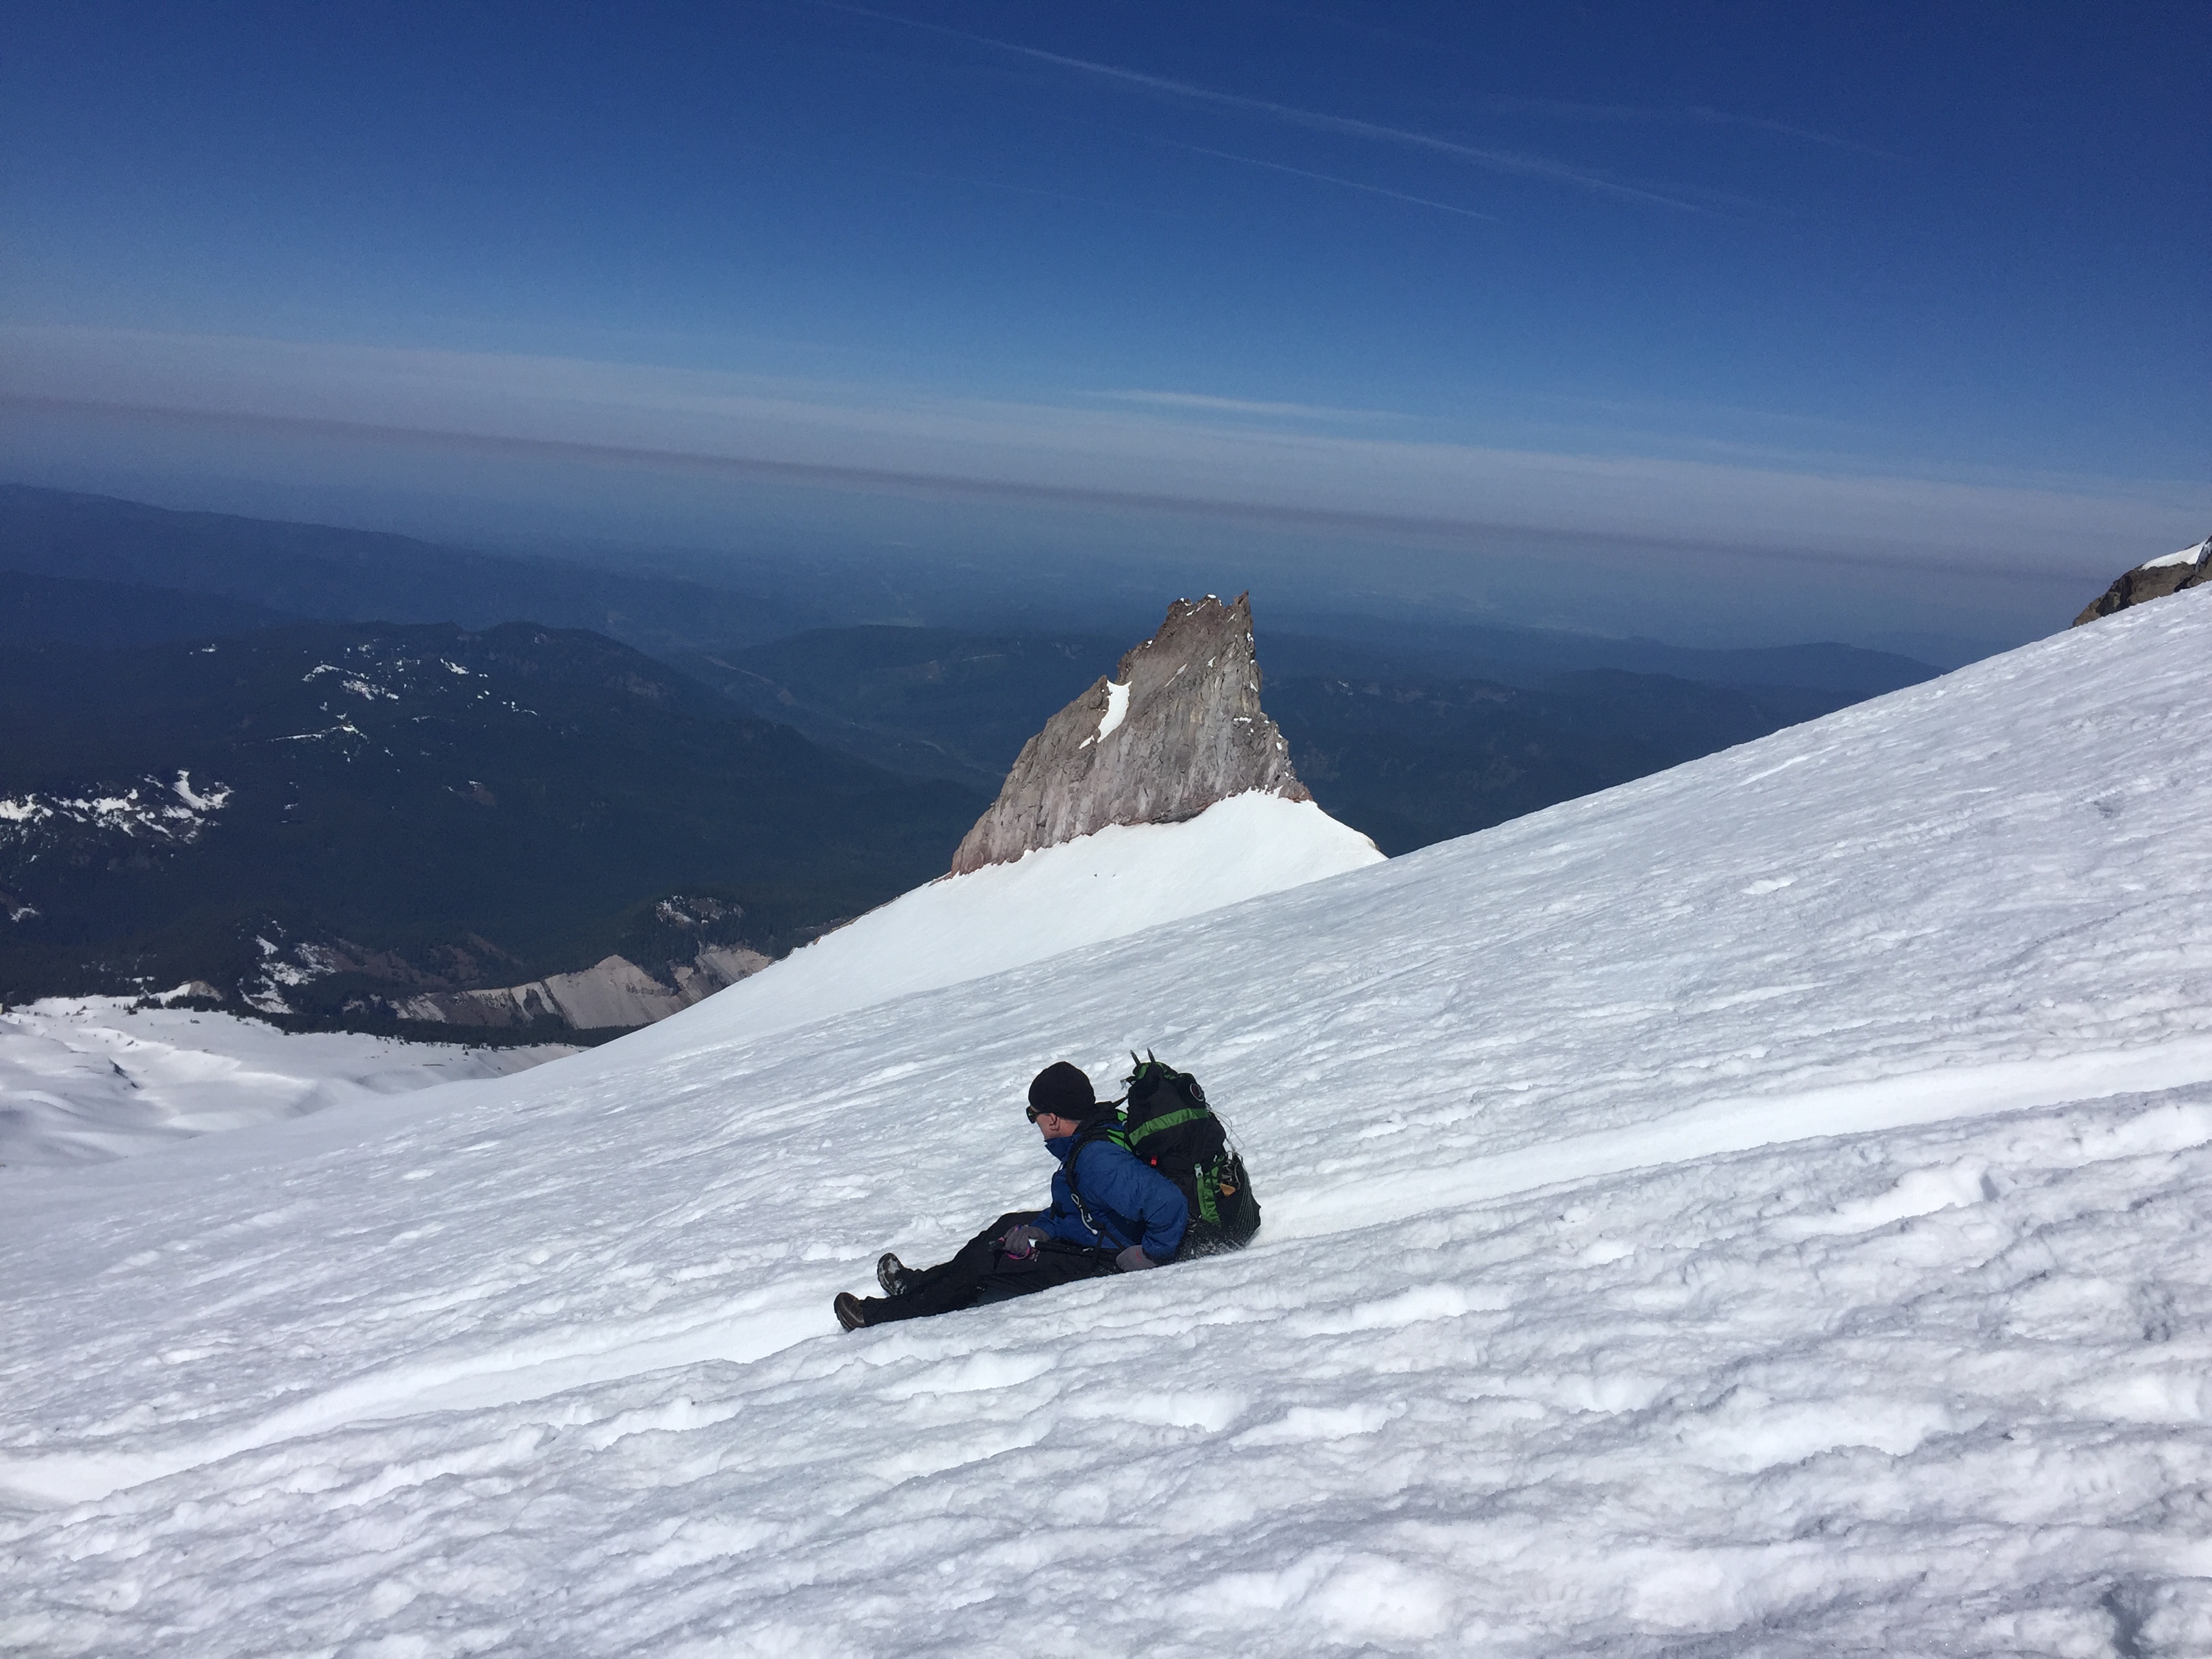
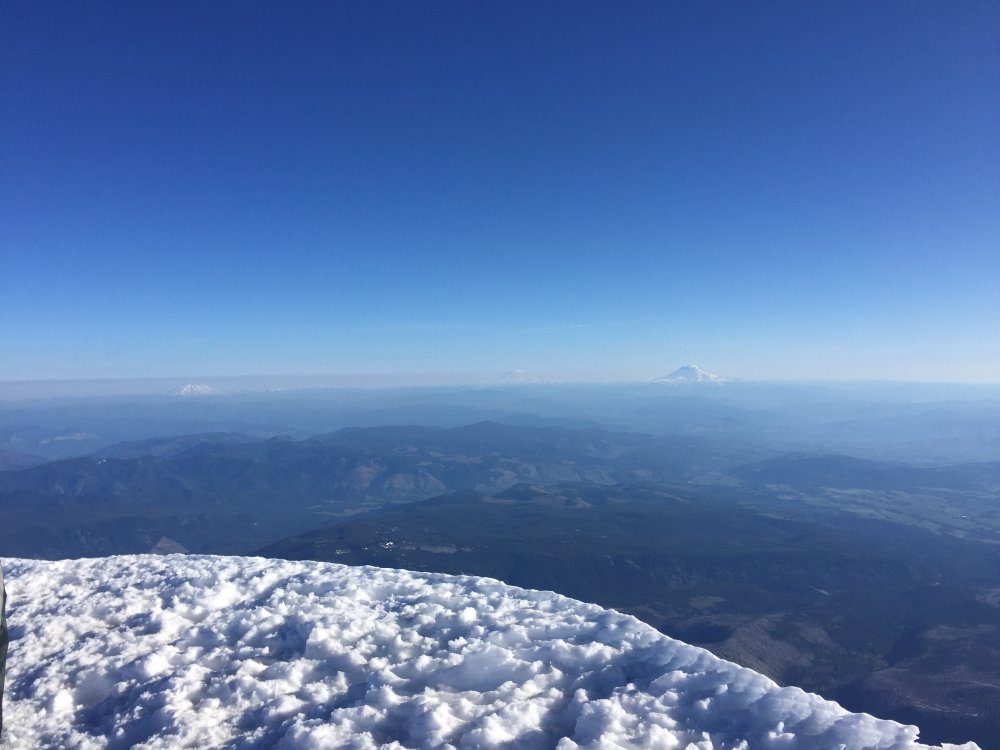
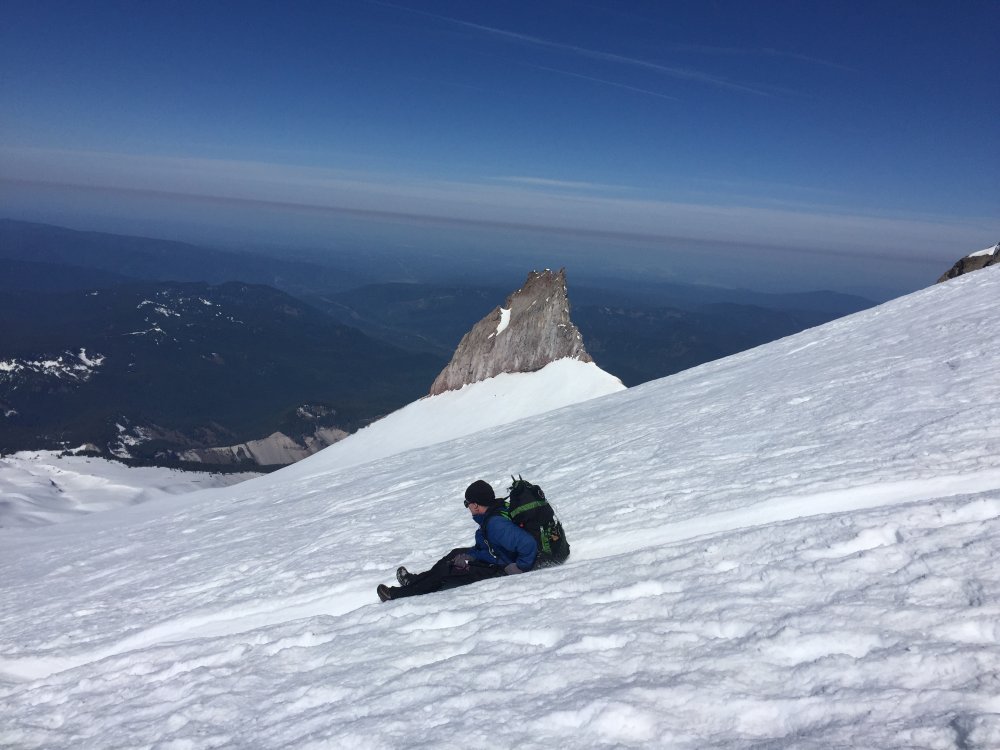
Trip: Mount Hood - Pearly Gates, South Side Trip Date: 05/11/2019 Trip Report: Getting there: Left Seattle area around 7:30 PM Friday 5/10, we got to parking lot in Timberline at 12 AM. Several parties were departing at that time towards the summit, my partner and I decided to sleep a couple hours before. We slept until 2:30 AM and set out towards the summit at 3:00 AM. Conditions: Snow starts from parking lot, no need for snowshoes if climbing at night. We put on crampons at 7200 elevation because it was getting icy. Upon reaching the hogg's back we chose to follow the crowds and went via the Pearly Gates, it's very icy there now and extremely crowded. Crampons and ice axe and helmet is all you need. some people had ice tools, but it's unnecessary. I counted at least 200 people climbing through out the day on the mountain. Summit: We got to the summit at 8 am. Gorgeous views as it was a very clear day. Return: We attempted to go down via Old Chute to avoid the bottleneck in the pearly gates. Some people were climbing via old chute, but I decided to explore a different route alternate path right next to pearly gates, this proved to be an excellent choice as it avoided bottleneck and felt safer than the old chute. Stats: 5 hours from parking lot to summit ( we were going very slow). 2h40m from peak to car. Last 2 miles felt like forever as you see cars very near yet very far. 5100 feet gain. 8-9 miles rt, can't really say as gps was acting up. https://www.instagram.com/iron_knee/ Gear Notes: Ice Axe, Crampons, Helmet Approach Notes: Paved road all the way. Snow stats from parking lot.


-
Trip: 7 Finger Jack, Fernow, Maude - Leroy Basin Date: 9/3/2017 Trip Report: Here's my trip report of a two day scramble. Road: The Chiwawa River Road is in pretty good shape with the exception of the last two miles. Phelps Creek Road is in bad shape, I have a low clearance sedan and I made to the trail head but at times it felt like driving on a beach (sandy and deep potholes). Approach to Leroy Basin: I took the Phelps Creek Trail all the way to the Leroy Creek Trail. Both trails are in good shape. Leroy Creek Trail is steep. 7 Finger Jack: This mountain is a big pile of lose rock. Not recommended unless it's your goal. There is a trail that veers to the left right after a creek on the Leroy Basin High Route. Avoid trying to head directly to the peaks and rather follow a traverse on lose rock to gain the Western most summit (class 2-3). Fernow: From 7FJ drop down and traverse towards a noticeable pass on the distance. The traversal is on lose scree so watch out for unstable rock(s). To drop into the Fernow Basin, you have two choices go directly into the Gloomy Glacier morraine or drop into the lake. Both suck big time due to lose scree/rock. The actual scramble to Fernow is quite enjoyable on mostly solid rock, class 3. Maude: On day 1, I did 7FJ and Fernow, on day 2 I had Maude as my goal. The return trip to Leroy Basin was quite the challenge as it's quite steep via the morraine or the lake (pick your poison). Once on the Leroy Creek High Route, the approach to Maude is quite simple, follow the trail until you hit a pass and then drop down to the Ice Lakes basin to gain the ridge on the other side of the basin. The scramble to Maude's summit is pretty much on trail through out (class 1). Return trip: As I made it to Maude around 12 pm, I decided to explore the Leroy Creek High Route. This trail is in great shape, the only challenge is two scree/talus fields that you must traverse. Stats: 28.4 Miles RT 14672 feet elevation gain My GPX file: https://www.dropbox.com/s/uw33xi8bhmtj85i/Fernow%207FJ%20Maude.gpx?dl=0 Pics: 7FJ Summit View from 7FJ Maude's Impressive North Side Unnamed Lake (in route towards Fernow) One of two basins below Fernow (tiny Gloomy Glacier in there) 7FJ and Maude from Fernow Bivy Spot (upper Fernow Basin) Maude Summit Pic, looking into ice lakes basin Route Gear Notes: Bivy, Microspikes, 1 pole Approach Notes: Trail in great shape, both the Phelps Creek Trail and Leroy High Route.
-
[TR] Sloan Peak - Corkscrew via North Sauk River 8/19/2017
montynet posted a topic in North Cascades
Trip: Sloan Peak - Corkscrew via North Sauk River Date: 8/19/2017 Trip Report: A group of 4 of us took on this route. We met up at 5 am and started our approach hike around 7:10 AM. The first cross of the Sauk River doesn't have a log crossing or at least we couldn't find one. The river is pretty low is spots so we crossed there. The next two river crossings have logs to cross them so we used them. Watch out for hornets between the first river and second river crossing. I got stung by one. the hike is very straight forward, ribbons through out mark the climber's path. We met a second party of 3 that had approach from Bedal Creek and they mentioned they had to do a bit of a bushwack. The glacier is starting to look pretty bare, our route followed the upper northern aspect of the glacier. Several crevasses, there is one snow bridge crossing that can look intimidating but it's pretty solid as of this writing (see picture). The scramble does in fact feel like a corkscrew twisting around the mountain. All in all, a good day. GPX File if interested: https://www.dropbox.com/s/zyro1ueohdpziqw/Sloan%20Peak%20-%20Corkscrew.gpx?dl=0 Gear Notes: Standard glacier equipment, 40meter rope. Approach Notes: Unpaved forest road to the trailhead pullout. -
Trip: Bonanza Peak - Mary Green Glacier Date: 7/1/2017 Trip Report: I climb Bonanza over the weekend solo. Here's my trip report. I woke up at 4 am on Saturday 7/1. I left home at 5 am (eastside of seattle) towards city of Chelan. I had made prior reservations with the Lady of the Lake ferry service for a round trip ticket to the landing of Lucerne, cost for this was $43.75. My boat ride left at 8:30 AM sharp. It took 4.5 hours to get to Lucerne (very slow boat). At this point I got into the Holden Village yellow bus (they carry their patrons from Lucerne to Holden). I did not paid for this in advance. Once I arrived at Holden around 1:30 PM, I had to paid for my bus round trip ticket (cost for this was $15) and I asked about the latest the bus would be departing the following day to Lucerne which happened to be 1:45 PM, this meant that I had less than 24 hours to summit Bonanza and comeback to Holden for my bus ride. Knowing this, off I went for my climb. Holden Village to Holden Lake: Well maintained trail with plenty water sources. The beta I read stated it would take 3 hours to cover 5 miles and ~2200 feet gain, but it took me 1h46m to get to the lake. The trail is snow free. There are some lingering snow patches near the lake. The lake is infested with mosquitoes, it's pretty bad. Deet helped but not enough. I definitely recommend bringing bug net. Holden Lake to Holden Pass: Terrible. This section starts off with a battle with the alder brush. Pretty mess up bushwack. I managed to avoid the worst of it by staying on the side of the hill to the right of the creek. Even avoiding the worst part did not spare me from my own battle with the alder brush. Not much you can do to avoid this other than bringing a machete and lots of extra time. This section was time consuming due to the bushwack. Holden Pass to Waterfall ledges: This section is still snow covered, I put on microspikes, switch over to the ice axe and did a rising traverse to get to the waterfall ledges. Waterfall ledges to upper Mary Green Glacier: From beta I had read, I had two choices. One was to climb on the first 'doable' waterfall way before the toe of the glacier OR two climb the waterfall slabs/ledges at the toe of the glacier. Once I was there, the slabs seemed like an ice fall hazard to me so I went up on the first 'doable' waterfall I found. This was very unpleasant as the rock was wet. Once I made it up the waterfall, I encountered more snow and at this point I switched over to crampons as the snow was steep. I continued on a rising traverse until a flat area around 7200-7400 feet. Then I continued further to the Mary Green Glacier. Mary Green Glacier: The glacier is in great shape. I stayed away from noticeable concavities and tension zones in the middle of it and worked my way up at the northern aspect of it. I only encountered two snow bridges during this section. The bergschrund between the final scramble and the glacier is still in good shape. There is a significant moat to negotiate while getting into the rock, there was a tiny snow cornice/bridge that allowed me to do it without too much hassle but I doubt this will be there in a week. Scramble: Once I was on the rock portion, I took off the crampons and up I went. The scramble as the route description will tell you is indeed very exposed. Mostly class 3 and class 4, but if you're off route you'll be doing class 5. I went a little off route trying to find easier terrain and got myself into trouble so I had to retrace twice due to this. My best advice would be to stay as close as possible to the gullies. The gullies are wet due to melting snow still at the top but just to the right and left of the gullies it is dry and climbable. Summit: There is a summit register. Old and rusty metal box. Brand new note pad inside a resealable container. Views are breath taking from up there. I reached at 9:29 PM as per my photo timestamp. Descend: Due to the fact that I was on a time clock, I downclimbed in the dark with a headlamp (a first for me). My plan was to get to a safe enough spot to bivy but I didn't find anything suitable while on the rock scramble portion of the route. I went all the way to 7400 feet in 'flat' snow area and decided to call it a day around 12:30 AM 7/2. I slept for 4 hours. I woke up at 4:30 AM and very slowly made my way down the waterfall ledges (I highly recommend a rope even if you're soloing for the rappels, there are several slings through out the route). I didn't have one so I downclimbed the whole thing. Once at the pass, I encountered 3 other parties with the same intention of climbing Bonanza in 3 days. I continued to make my way down. The descend after Holden Pass was uneventful. I finally reached Holden Village 11:26 AM 7/2. My total time Holden to Holden was 21h25m. I ate lunch at the cafeteria ($8) and then waited for my bus that would eventually take me to the ferry back home. Some pictures and my gpx file follow: GPX File: https://www.dropbox.com/s/har94j8mvuvny0o/Bonanza%20Peak.gpx?dl=0 Gear Notes: Ice Axe, Crampons, Microspikes, Helmet, poles, and overnight gear. Approach Notes: The Holden Lake trail is in great shape. Plenty water sources along the trail.
-
Trip: Little Tahoma Peak - Cowlitz, Ingraham, Whitman Glaciers, East Shoulder Date: 5/6/2017 Trip Report: A group of 4 of us decided to tackle Little Tahoma Peak. Given the expected nice weather we would have on Sunday 5/7, we thought it would be a nice two day climb. It was an awesome climb. We did it from Paradise as the normal approach from Summerland is still closed at the moment. We met up at 7 AM in Bellevue area and drove to Paradise. We register at the Longmire Museum with the rangers and paid our climbing fee ($47 per person, good for 1 year). The fee is required above 10,000 feet OR upon setting foot on any glacier. We started our climb at 10:19 AM following the Camp Muir route to about 8120 feet and after roping up we started our traversal towards Little T. The first glacier we traversed was the Cowlitz, we had poor visibility on Saturday so it made our route finding very interesting, the route has plenty crevasses, snow bridges still holding pretty well. The second glacier we traversed was the Ingraham glacier, it had far more crevasses and we actually dropped into one to be able to continue our route, passing through the seracs/ice blocks was very cool. Upon reaching the East Shoulder of Little T, we decided to set up camp at about 8800 feet. The following morning we woke up at 2:30 AM and after gearing up and eating we started our climb at ~ 3:30AM. We were climbing on the Whitman glacier and the East Shoulder of Little T. The climb from camp is very steep, about 25-55 degree range pretty much all the way to the summit. Once we reached the last scramble to the summit, we experience first hand the famous rotten rock of Little T. Exposure is significant in this climb. There is a summit register, we had to clean the ice/snow from it (Mazamas metal box). We chose not to take our rope for summit day due to the steepness of the shoulder, in retrospect we could have benefit from taking the rope and using it to rappel at least. Some existing slings are tied around rocks but as mentioned this is rotten rock unsure how reliable it is. I have included our gpx if you're interested and some pictures. GPX: https://dl.orangedox.com/ezyRAk1DicmYgycvqp Cool Video by @niroyb : [video:youtube] Gear Notes: 60m rope 9.8mm, crevasse rescue gear, overnight gear, general mountaineering ice axe, crampons, helmet Approach Notes: Significant glacier travel, steep snow climb.
-
Lost: 1 picket, 1 locking biner, 1 double sling
montynet replied to montynet's topic in Lost and Found
I found my gear. One of my team members had it. -
Hello, I was on Guye Peak yesterday and to be more efficient I lent my 24 inch picket, one locking carabiner, one double sling to a two man team doing the same route. I'm hoping you guys see this and return my gear. We didn't find any place you guys placed my gear so I'm assuming it was unused and still in your backpack.
-
Trip: Hubba Hubba Leavenworth - Left flow of Hubba Hubba Date: 3/4/2017 Trip Report: A group of 4 of us decided to go ice climbing in Leavenworth. We had previous beta that the routes were in, so off we went in search of this ice. Although there are several trip reports for Hubba Hubba we couldn't find a single one with a gpx file. Finding the ice flow wasn't hard though, we had a pretty clear day and we saw it from the parking lot as predicted by trip reports. I have included my gpx file to the start of the ice flows. Beware that this approach is in the unholy range of 30-45 degree slope. There was recent avalanche activity in the approach to the ice flows so we had a few concerns going up fortunately nothing happened. The routes are still in, I do not know how much longer they will last as there were sections of very thin ice. The central flow has the healthiest looking ice but it was beyond our group's skill level so we decided to play it conservatively and did some of the left flow route (WI2+). Apparently this is two pitches, but we did not complete the route as it was more of a learning ice climb for our group than an actual attempt at the whole route. Our group alternated leads as a learning experience. We cleaned the route and rapped off a v thread (not a very good one, but it served its purpose), so I did leave some pmi cord out there. Below some pictures and the gpx file. Gpx: https://dl.orangedox.com/k4GQrJPaIO6eaB25Gy Pics (click for full size, I couldn't get these to rotate for some reason): Gear Notes: We had 5 ice screws (I believe the ice screws were 10, 13, 16, and 2x19), two pickets, and half a rock rack. We used both pickets and all 5 screws but none of the rock pro. Approach Notes: Beware of avy potential on approach. Road to TH is plowed, suitable for all vehicles.
-
[TR] Camp Muir - Winter Standard Route 1/24/2017
montynet replied to montynet's topic in Mount Rainier NP
That made me chuckle. -
[TR] Camp Muir - Winter Standard Route 1/24/2017
montynet replied to montynet's topic in Mount Rainier NP
Both groups made it to Camp Muir just fine. As for the Bear Canister, yes we were just as surprised, but the Rangers are making you take one up there if you're spending the night. They're having a bird problem up there at least that's what they told us. -
Trip: Camp Muir - Winter Standard Route Date: 1/24/2017 Trip Report: A group of 7 members of Adventure Explorers decided to do a trip to Camp Muir to practice building snow shelters and experience navigating a winter storm. We met up in Bellevue area around 7:00 AM on Saturday, drove south towards Paradise. The Mount Rainier Rangers are asking for tire chains regardless of AWD; however, they are only requiring that non-AWD vehicles put on tire chains. We got our permit and bear canister at the Longmire ranger station around 9:40 AM and were informed the the Muir hut was closed. We started hiking from paradise at 10:18 AM.in clear weather. Weather became a whiteout around pebble creek so we started wanding the route shortly after. Snowshoeing to Camp Muir can be very challenging at times, there are sections of the winter route that are quite steep. The snowshoers in our group were using the MSR Lightning Ascent 25 inch snowshoes. At 9000 feet we decided to split the group because it was getting late. The first team to arrive to camp was supposed to start building shelters for the second team. We had radios and tested them before separating. The first team encountered a lone man coming down at 9900ft around 4:05 who pointed to us that the camp was to our right. We proceeded and arrived at camp Muir at 4:20. We discovered that the muir hut was opened and another party of two had just arrived. We decided to use the hut instead of building shelters due to high winds. We tried radioing the other team but could not get an answer back. ... We woke up at 7:00 AM, cooked our breakfasts and left camp around 8:56 AM in whiteout conditions. Two of the members were on skis in front and would wait at each flag found. At pebble creek one member fell down a small cliff and injured his knee. We covered it in snow to reduce swelling and administered ibuprofen to reduce pain. He was able to continue down to paradise. The weather then cleared out a little lower. At the bottom of Panorama point, we encountered 4 guides who were looking for a missing person. We think it might have been the person we saw near camp Muir the previous afternoon. If you're interested in our gpx file, you can get one at https://www.facebook.com/groups/adventureexplorerswa A few pics: Sunny skies when we started One of the steep parts near Panorama Point Higher in the mountain, whiteout conditions Gear Notes: A few of us were in AT gear and others in snowshoes. Approach Notes: Snow starts from the parking lot.
-
Trip: Mount Stuart - Cascadian Coulour Date: 9/10/2016 Trip Report: Two of us decided to attempt the CC route on Stuart in a day. We met up in Seattle area at 4:00 AM. We were at the trailhead at 5:50 AM. We started our hike around 6:10 AM. The Ingalls Lake, Long Pass trail are in great condition. No down trees. After Long Pass, especially while getting down to Ingalls Creek it can be a bit treacherous as the scree is pretty loose. We were at Ingalls Creek around 8:00 AM. From the route descriptions I had read, Ingalls Creek would be our last reliable water source, however this is not true as there's still snow fields on Stuart. You don't need to get on the snow however to get to the peak if you're doing the CC route. The couloir itself is not fun, it's sandy and filled with scree so it can be quite treacherous. Once you get to the saddle it's matter of choice as to how to continue on scree, snow, or rock. There's a choice for everyone, I chose scree as it seemed the path of least resistance. Once I was on the ridge above the false summit, I stayed on the ridge as I was too lazy to drop down to the easier path below on the otherside of the ridge. There are cairns everywhere to help you along the way. I wore my helmet not necessarily because of rock fall but I was concern of falling on the sand or scree and injuring my head. I was at the summit of Stuart at 12:30 PM. I was completely alone in the summit but I counted at least 25 people that were attempting it. My return was along the same route but it did take me longer to get down than actually getting to the summit. The couloir was just not fun for me. I was back at Ingalls Creek at 4:30 PM. And finally made it back to the car at 6:47 PM. I'm glad I did Stuart but I will skip on doing this route again. If you're interested in a GPX file you can request one through the Adventure Explorers facebook page. Pictures below (click for full size): Gear Notes: Hiking equipment, helmet, microspikes (not used). Approach Notes: Trails in great condition, getting down from Long Pass is a little slippery.
-
[TR] Mount Shuksan - Fisher Chimneys 8/13/2016
montynet replied to Gabe O.'s topic in North Cascades
Great pics, thanks for the report.