
Leaderboard


Popular Content
Showing content with the highest reputation on 08/07/25 in all areas
-
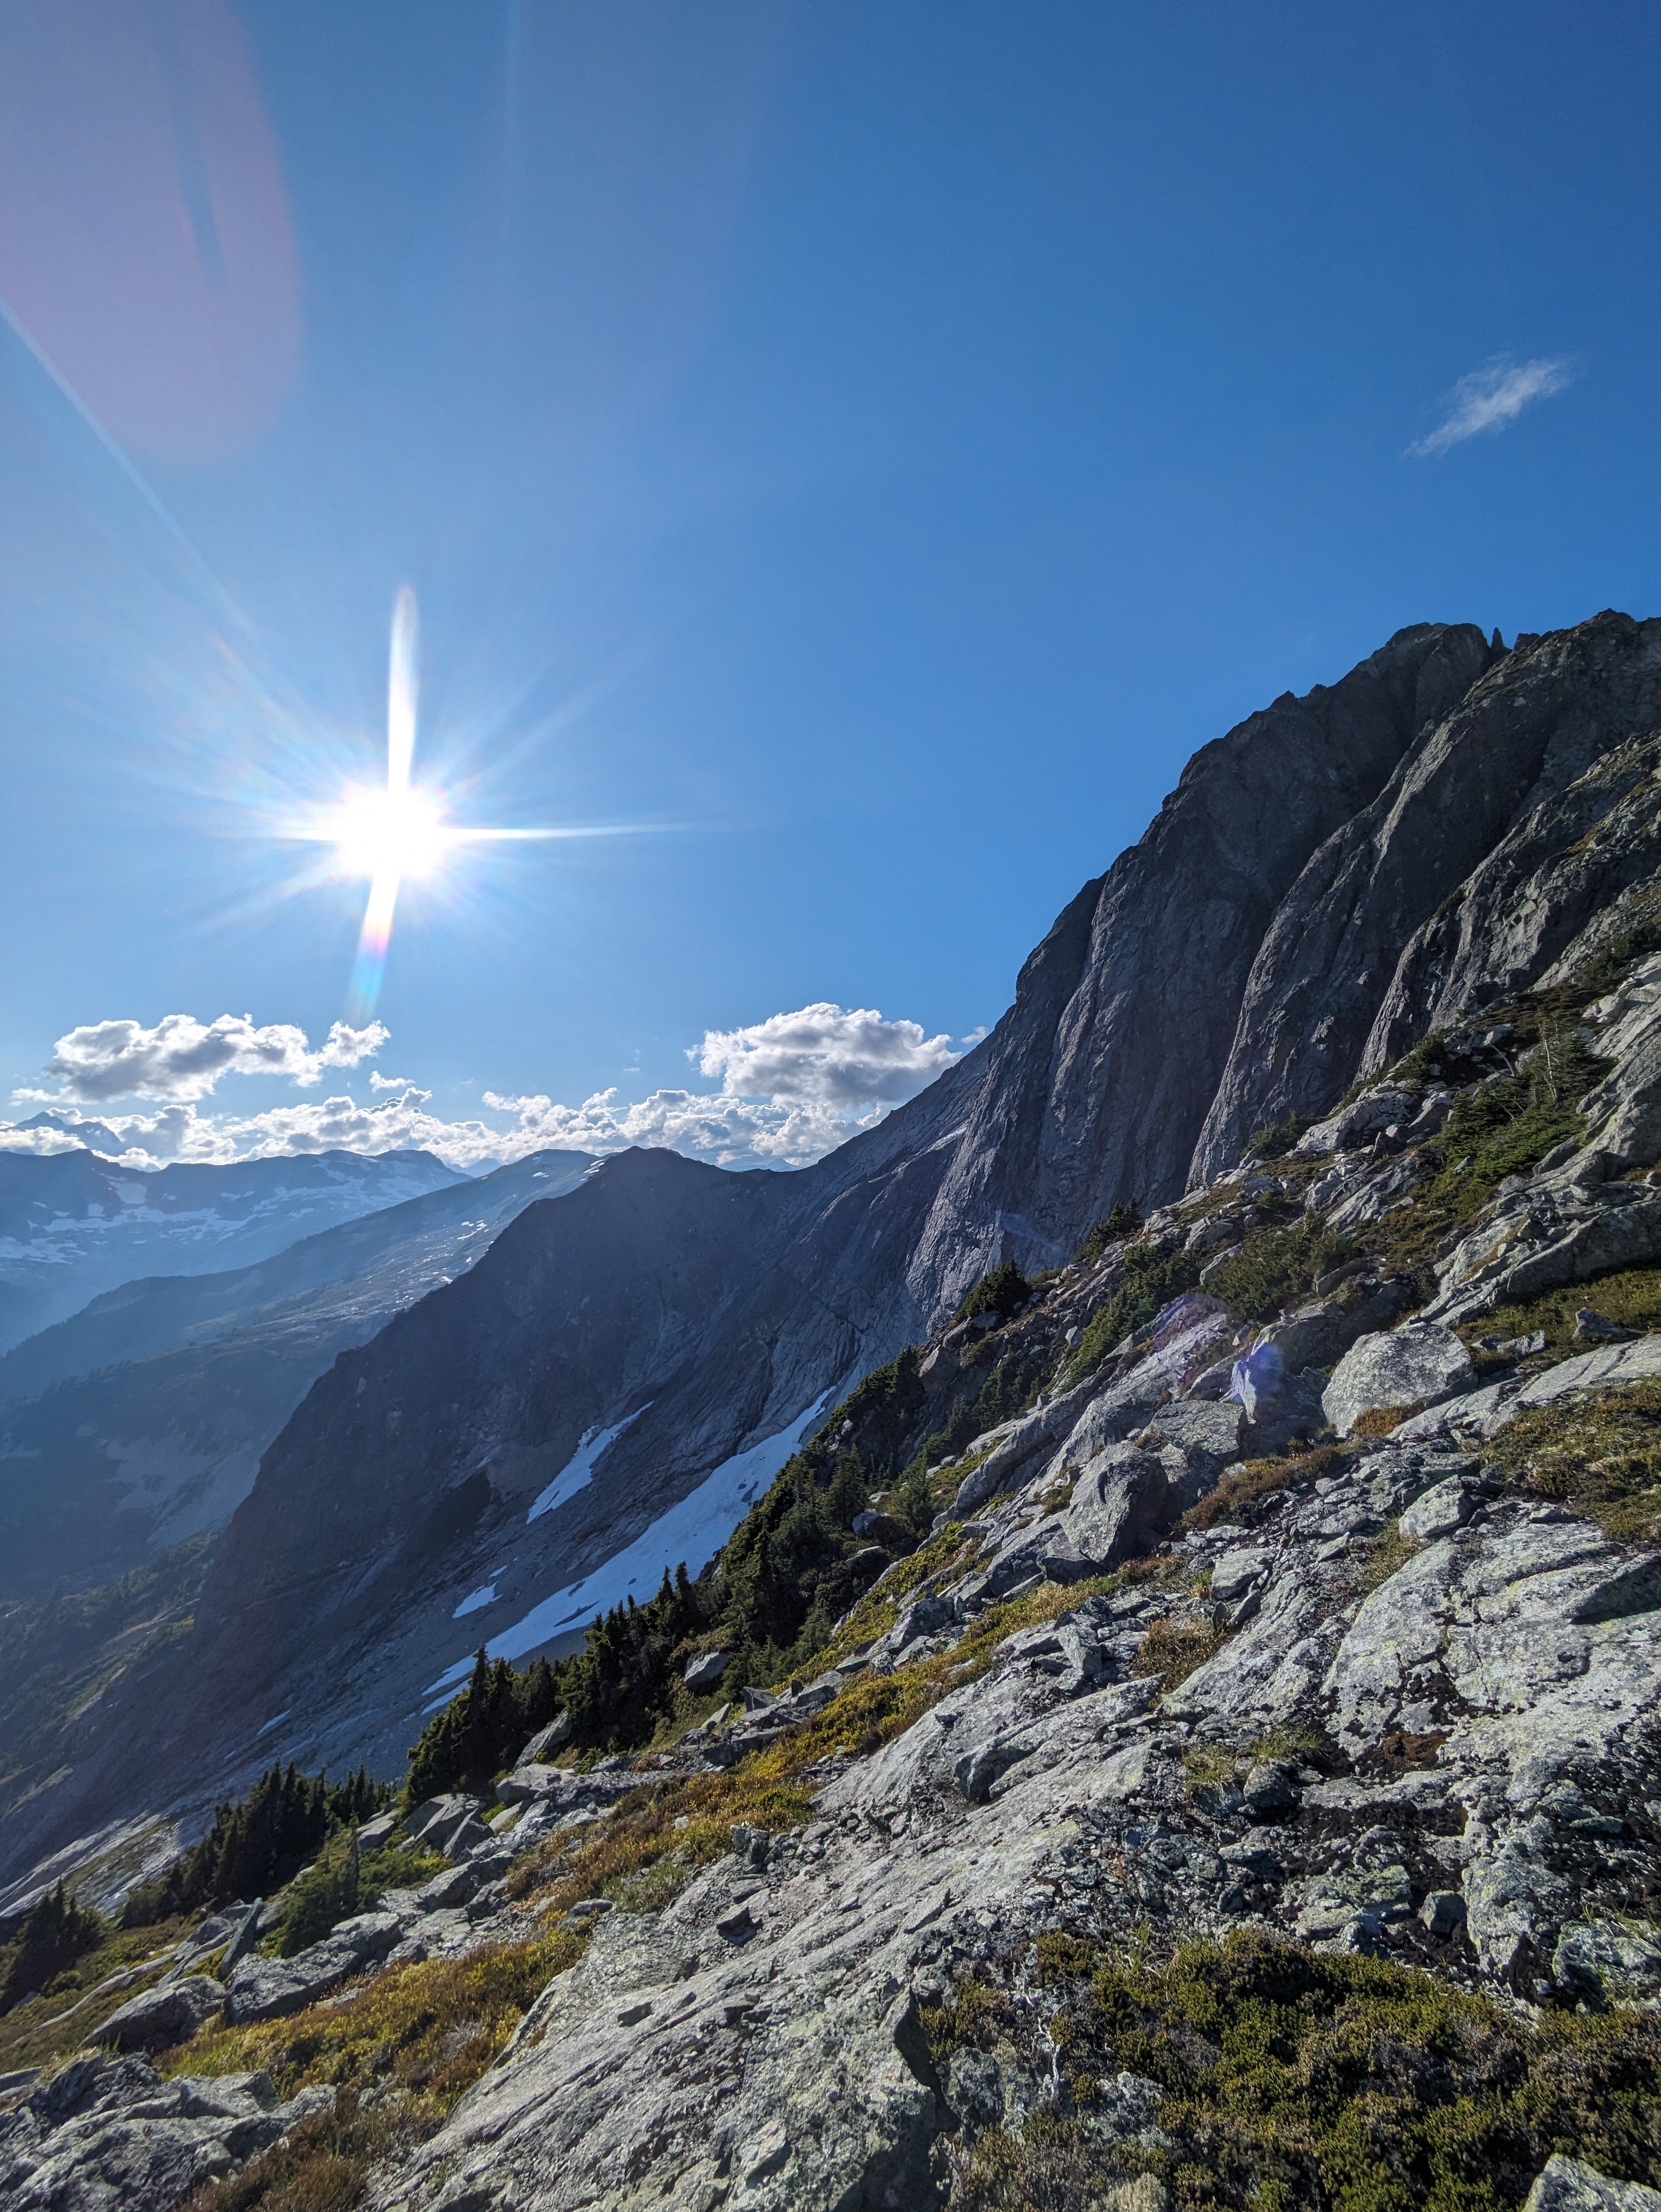
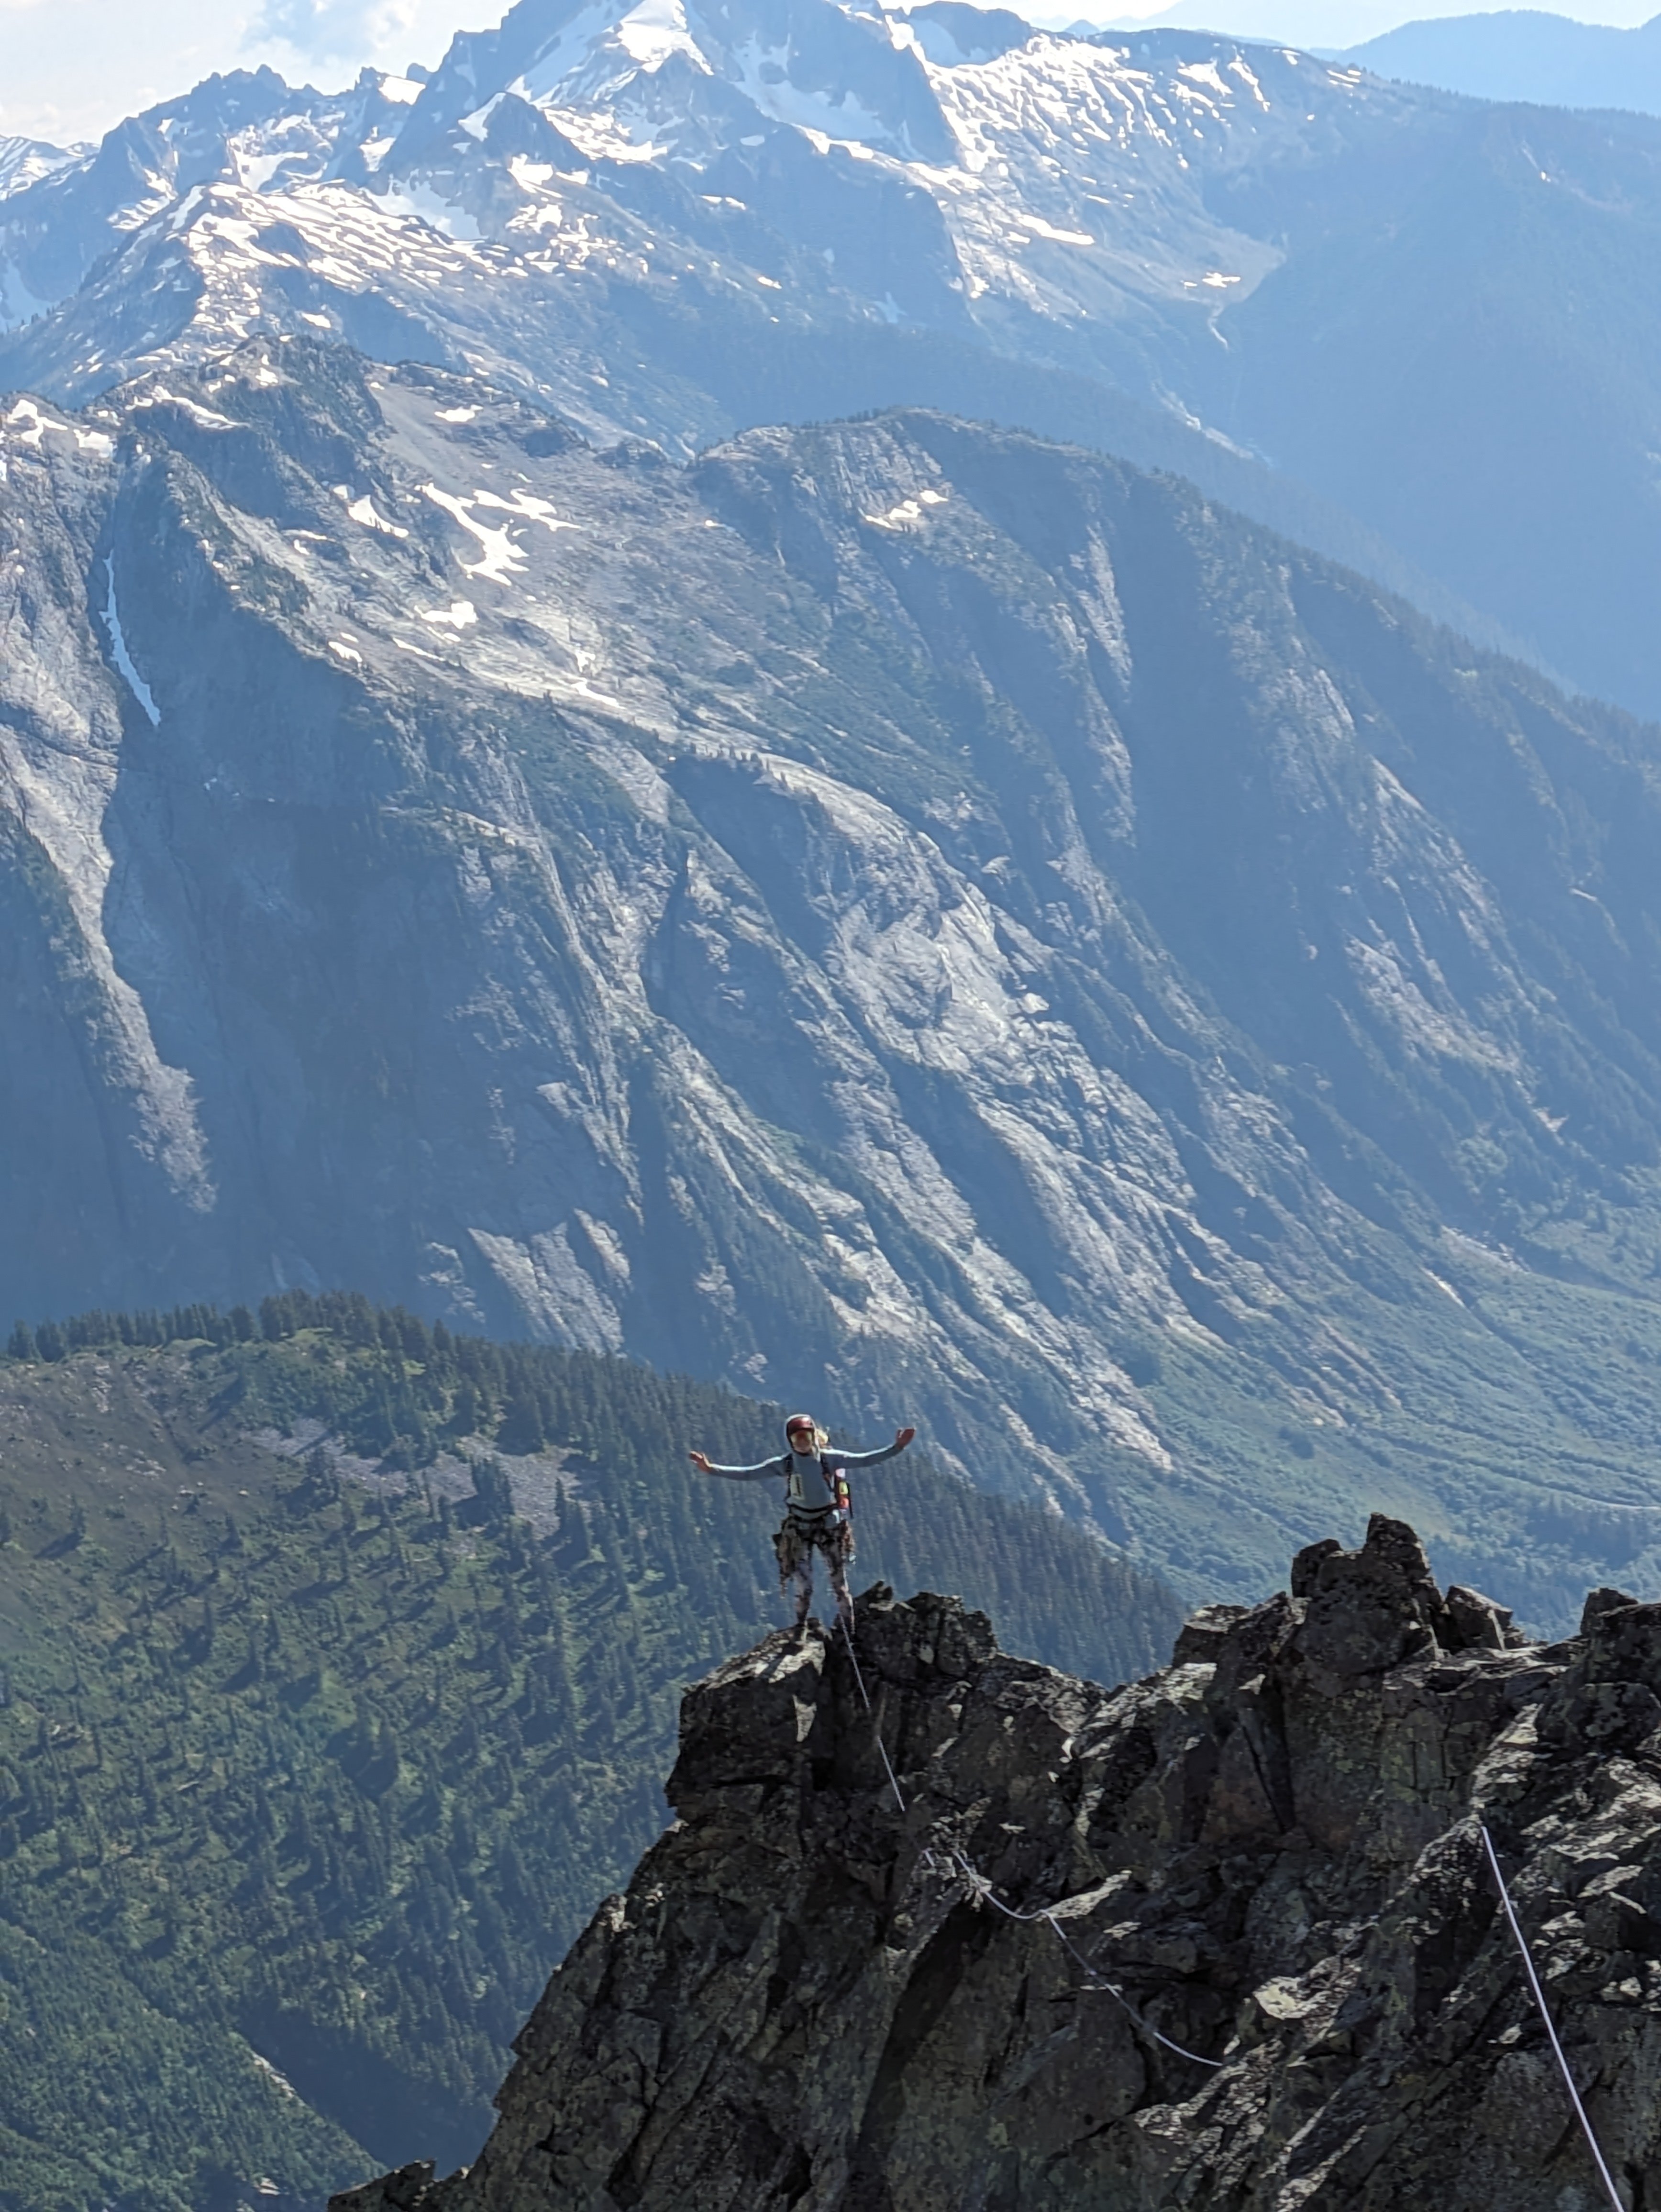
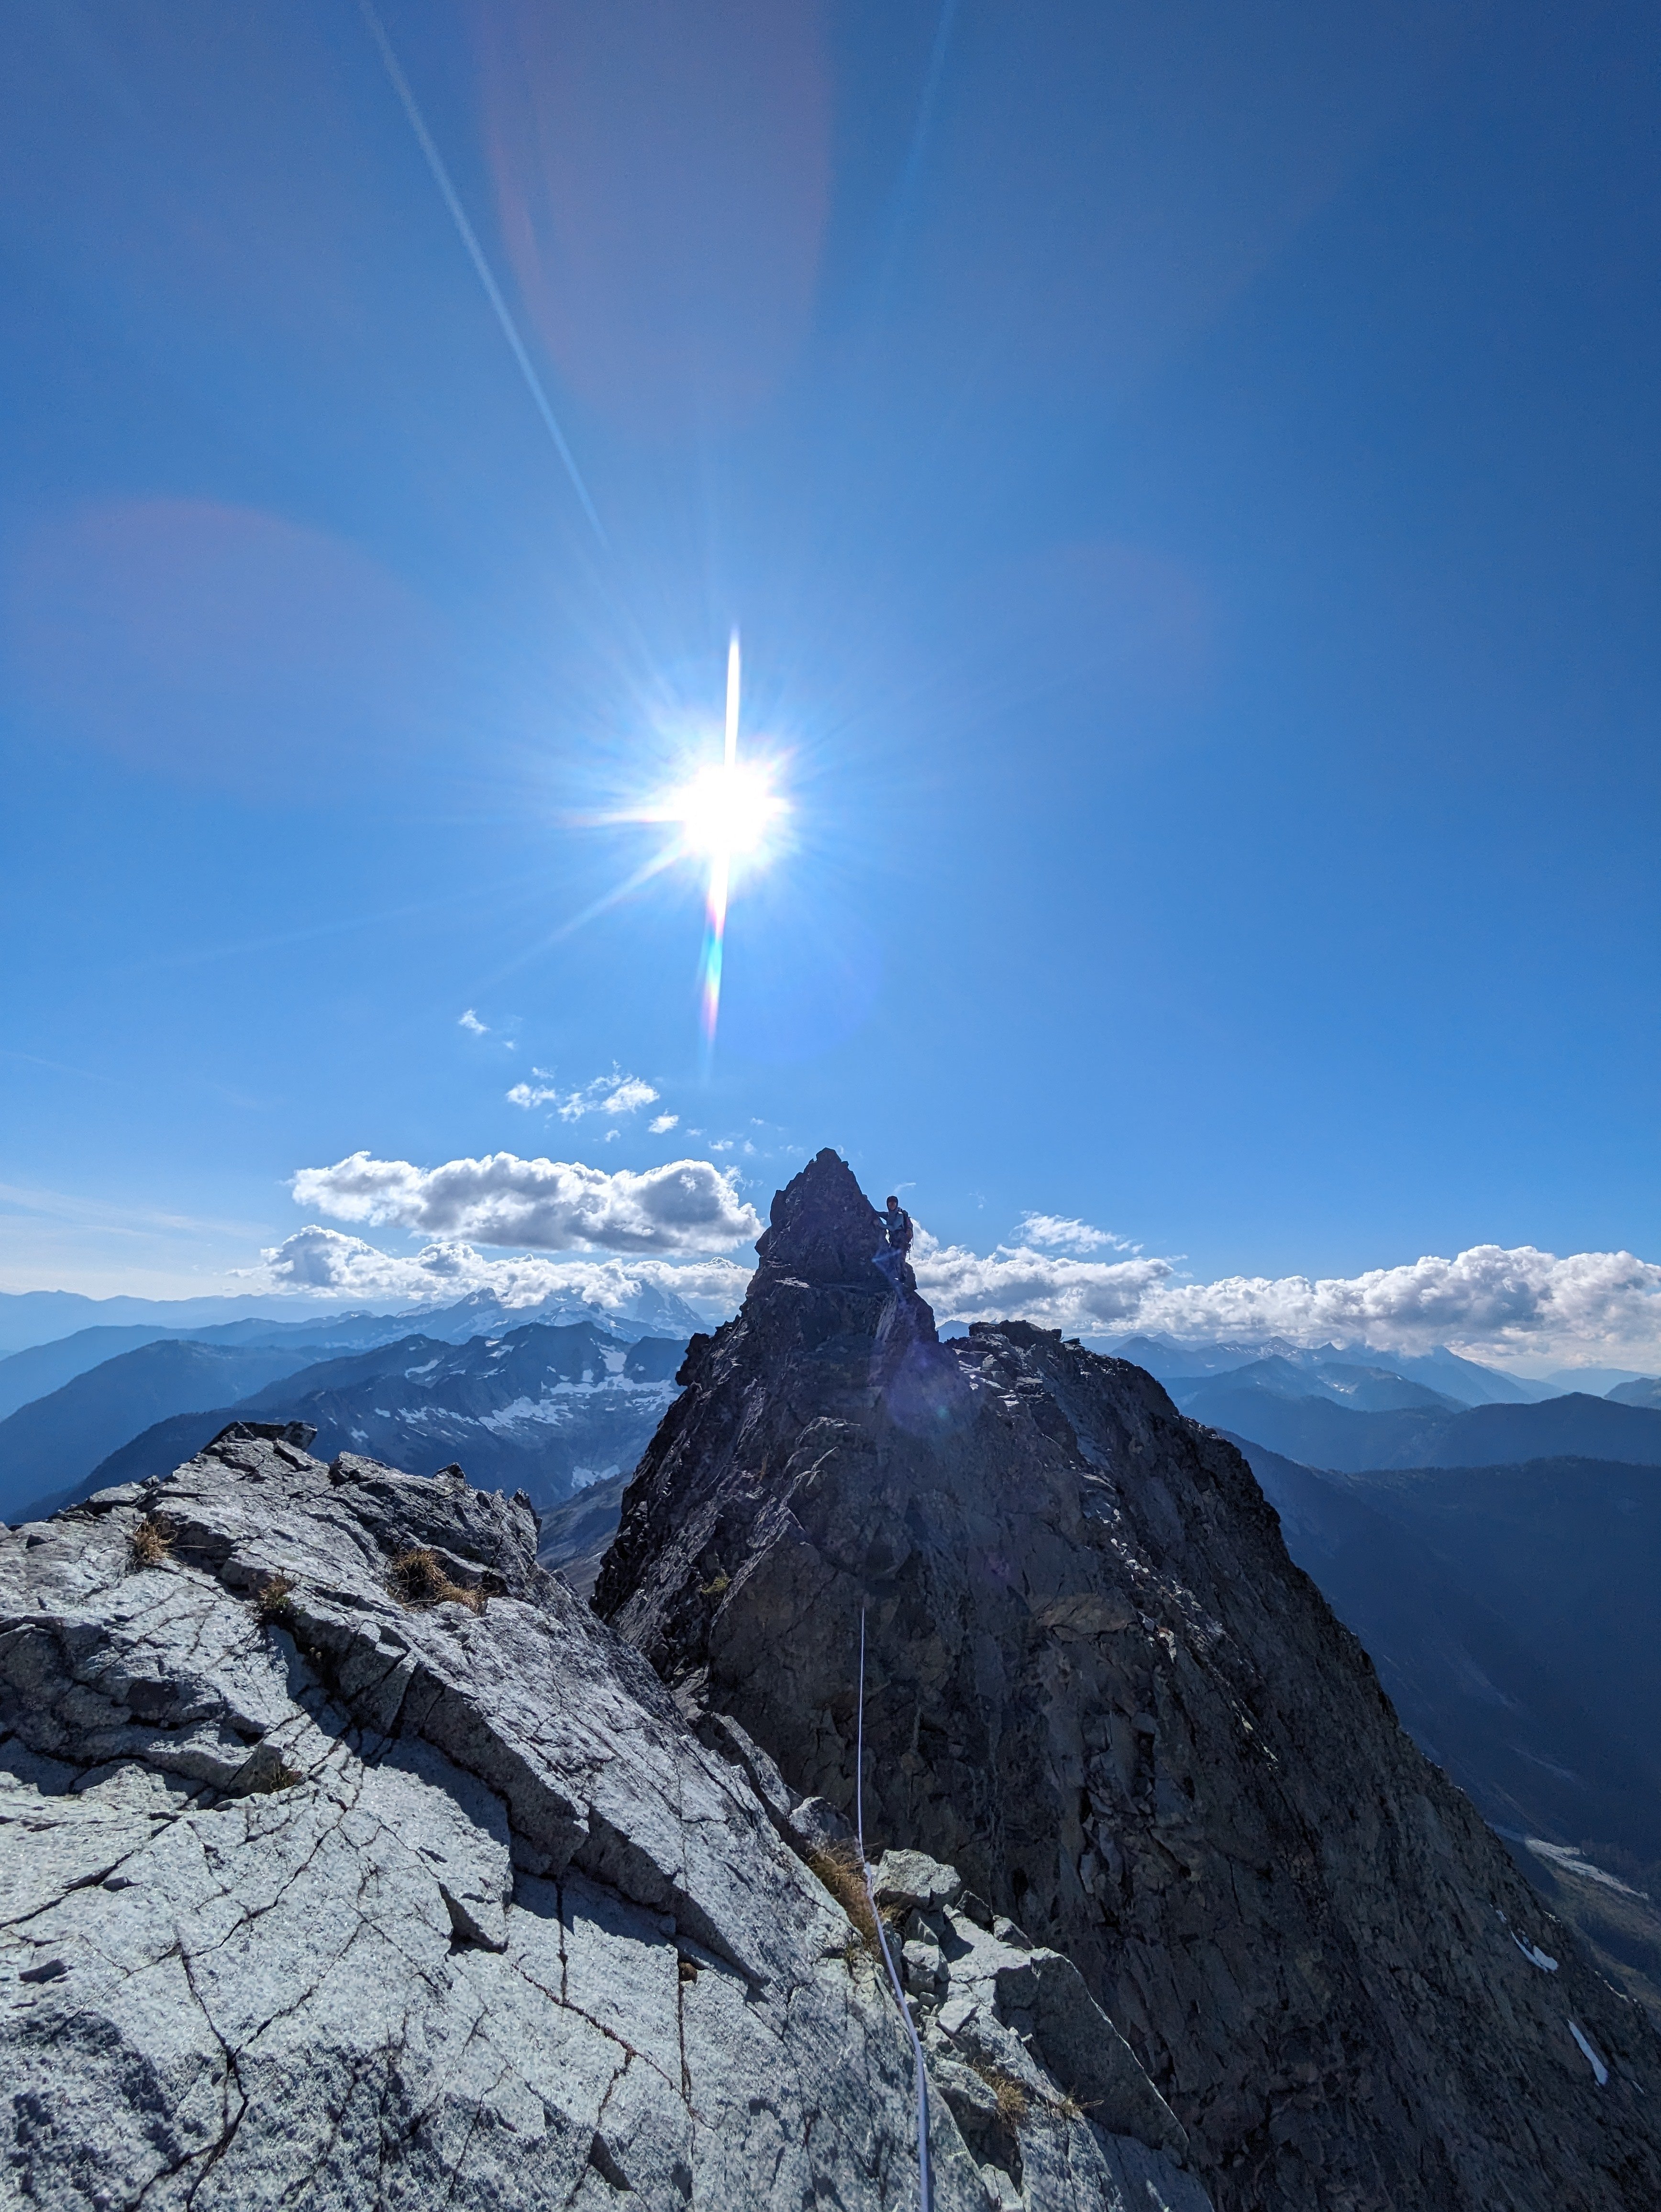
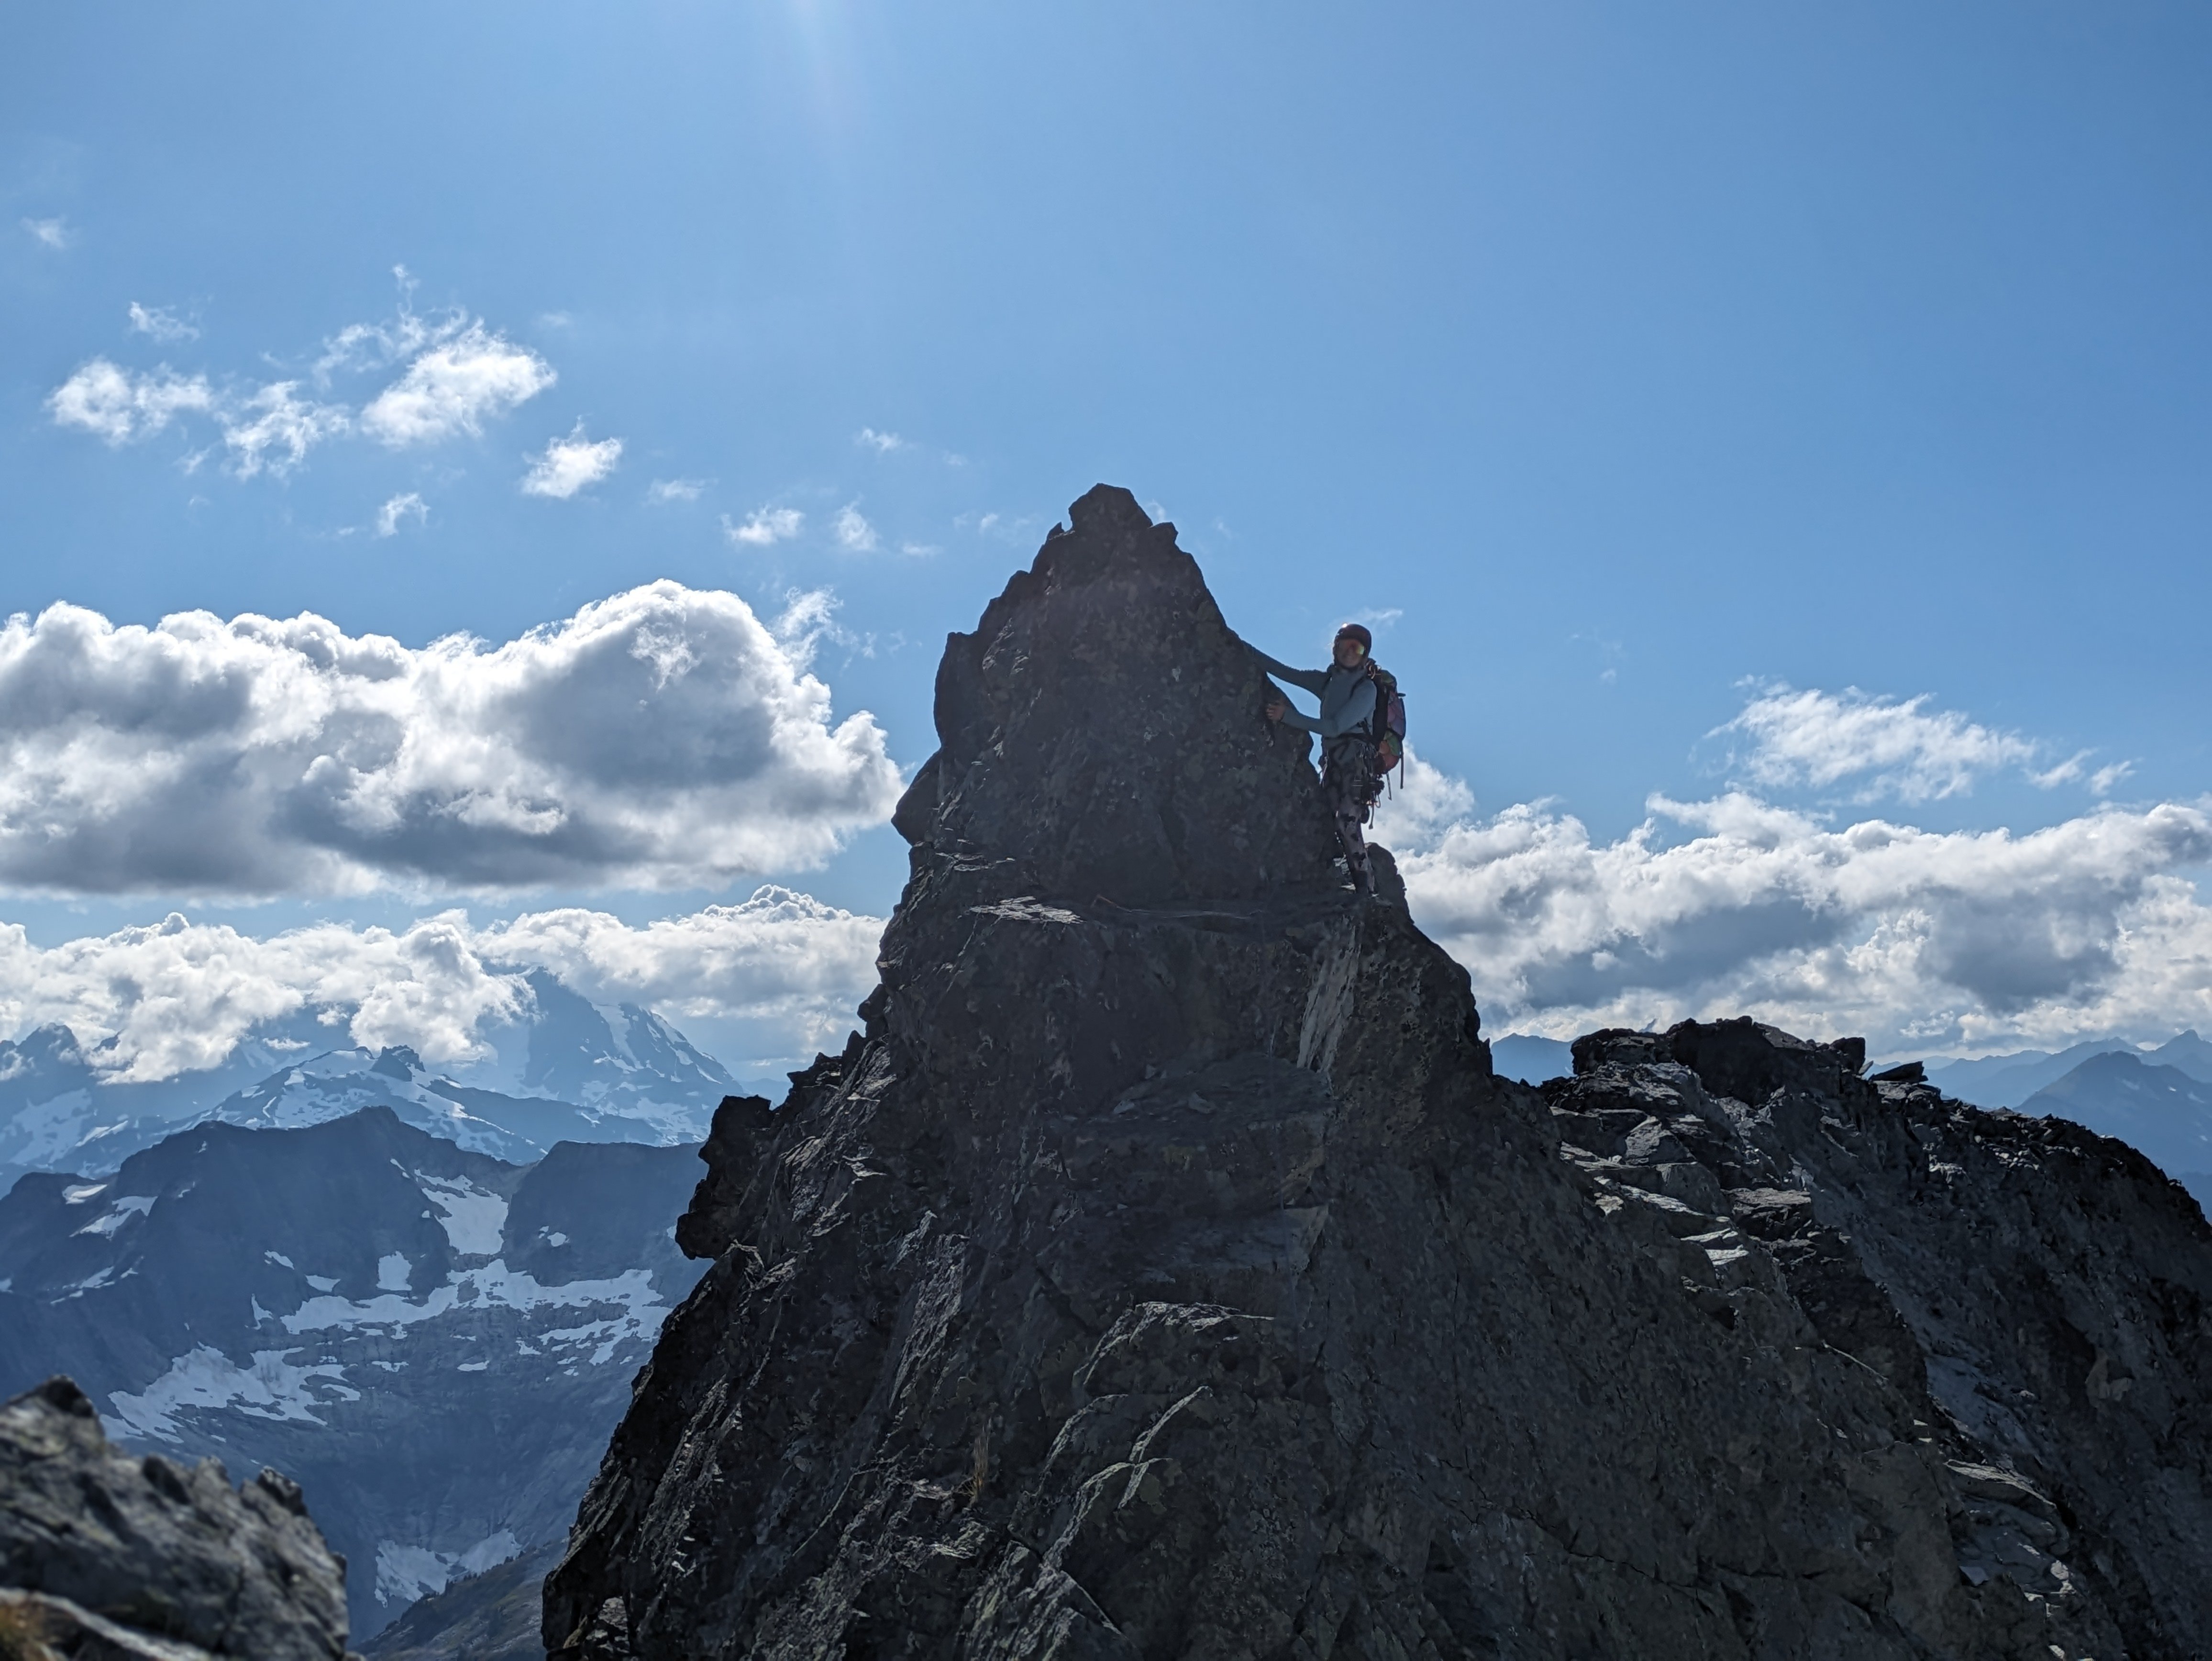
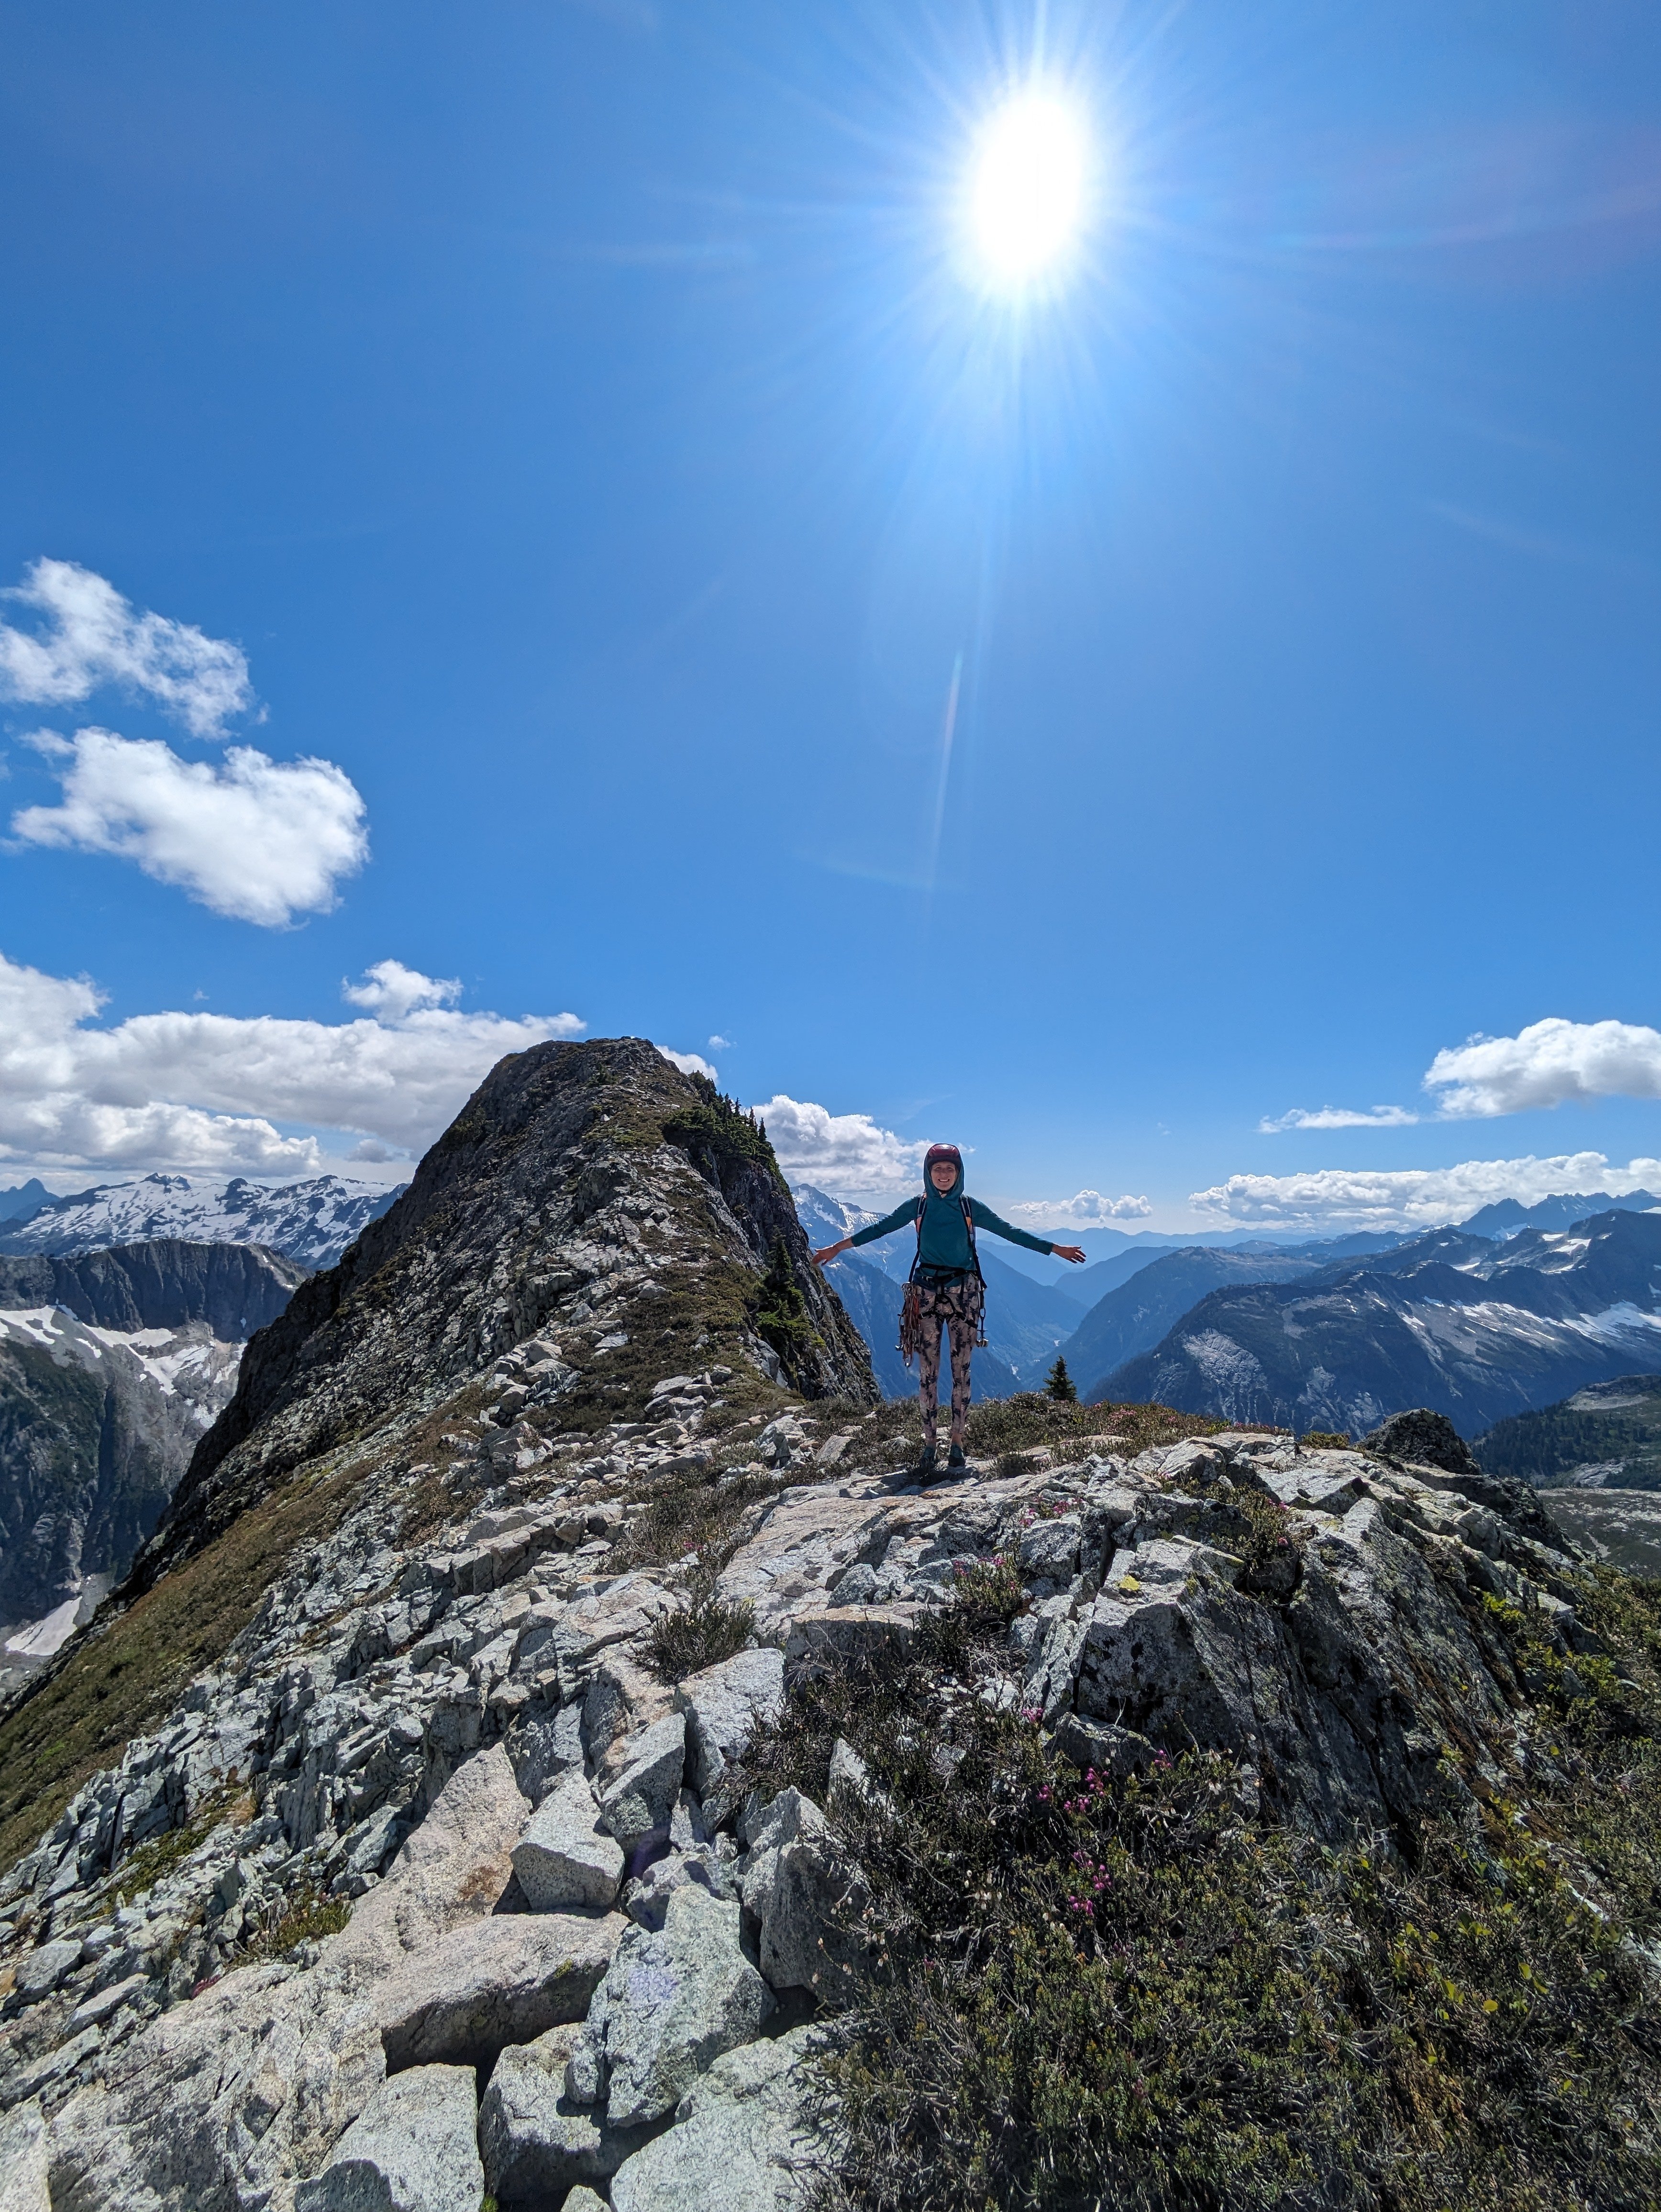
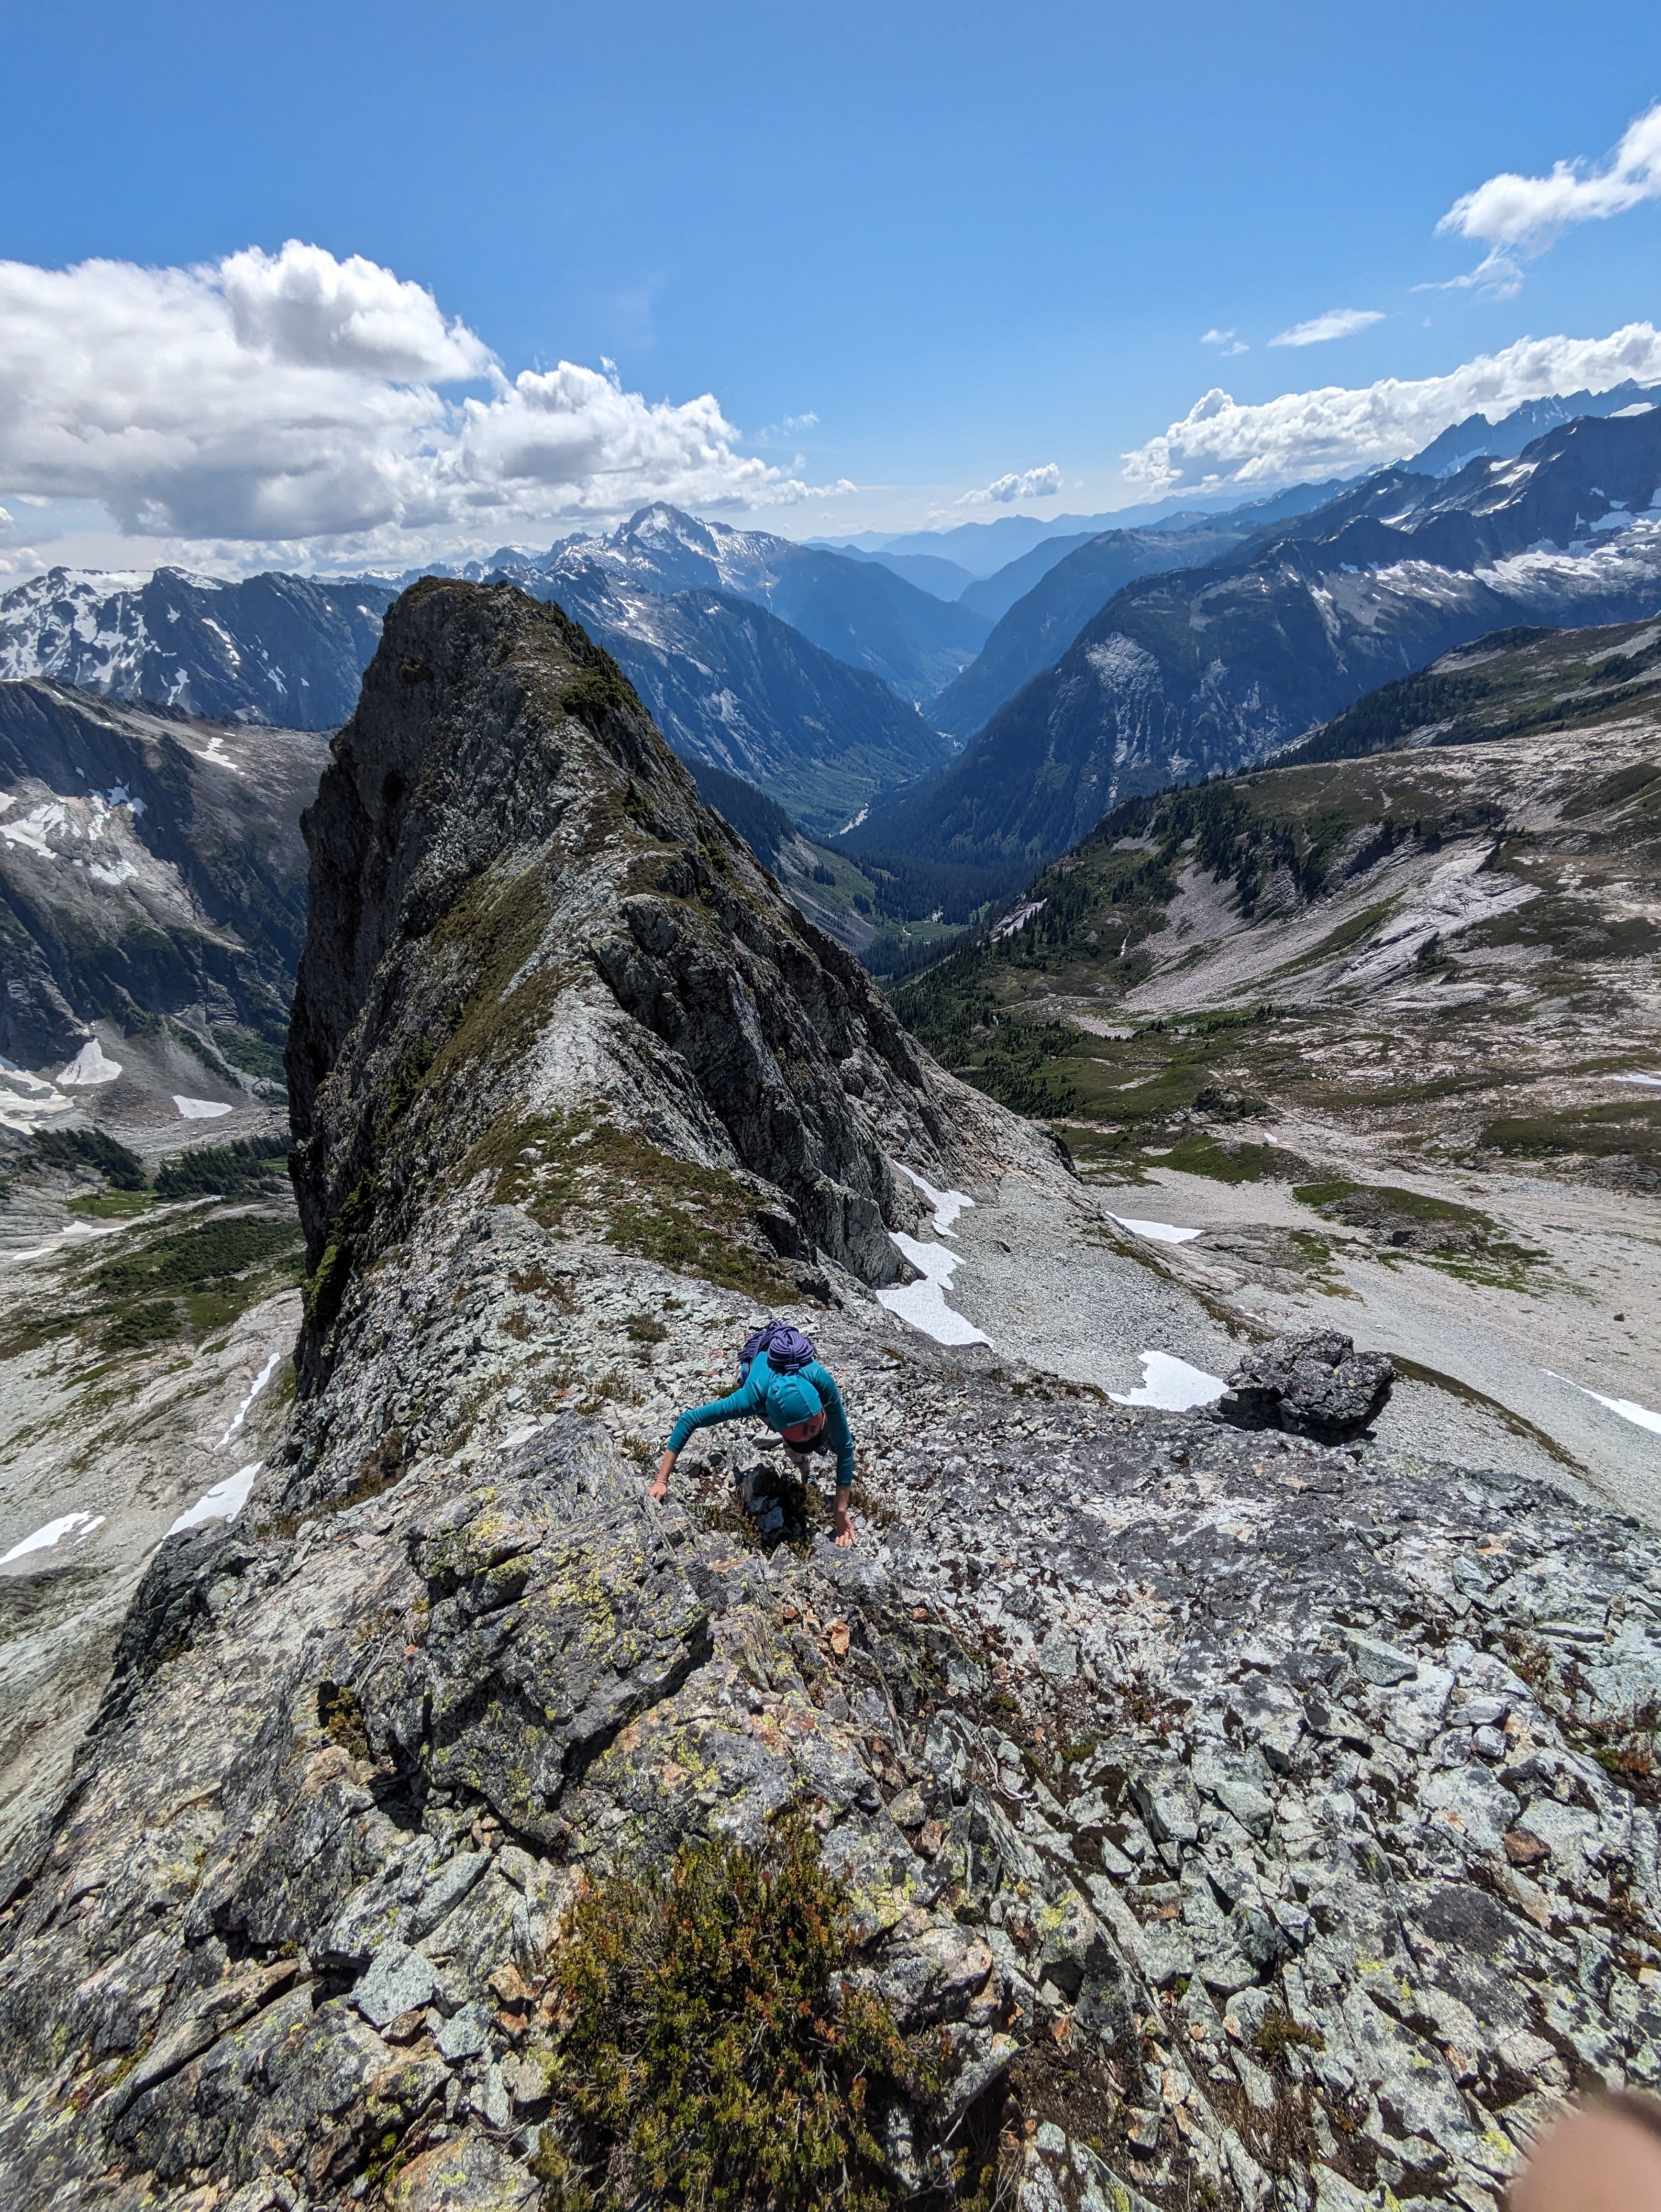
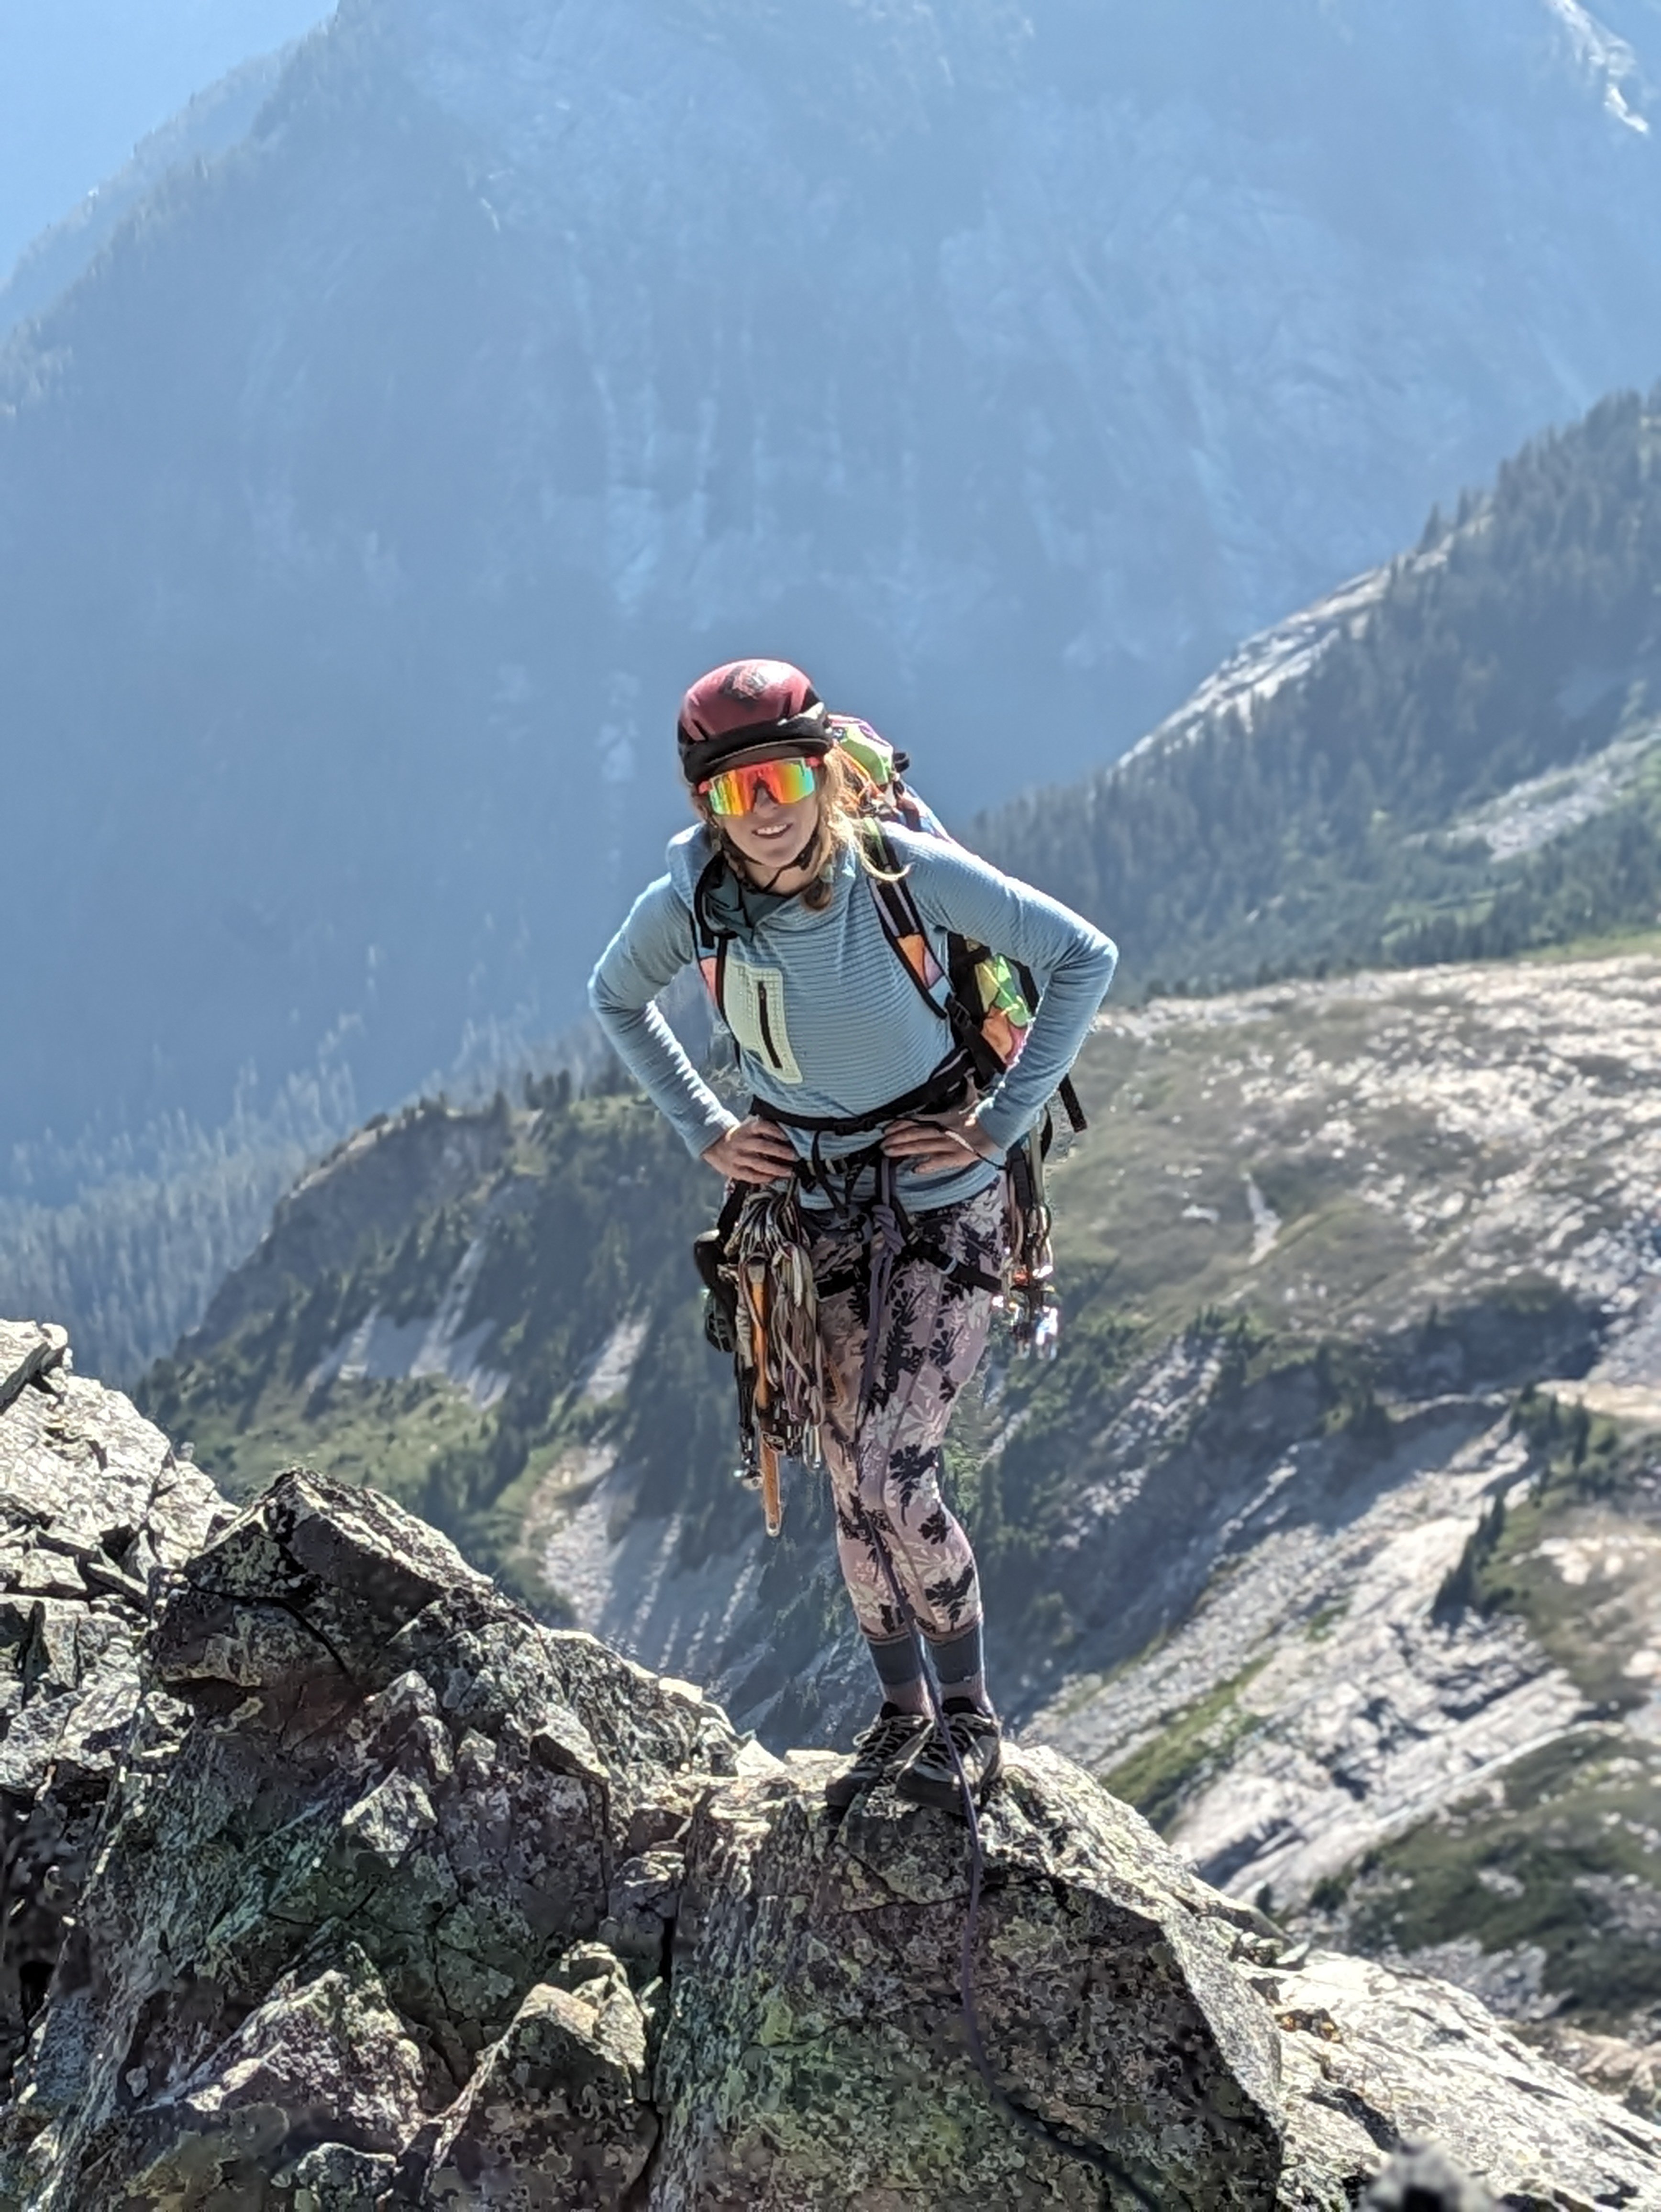
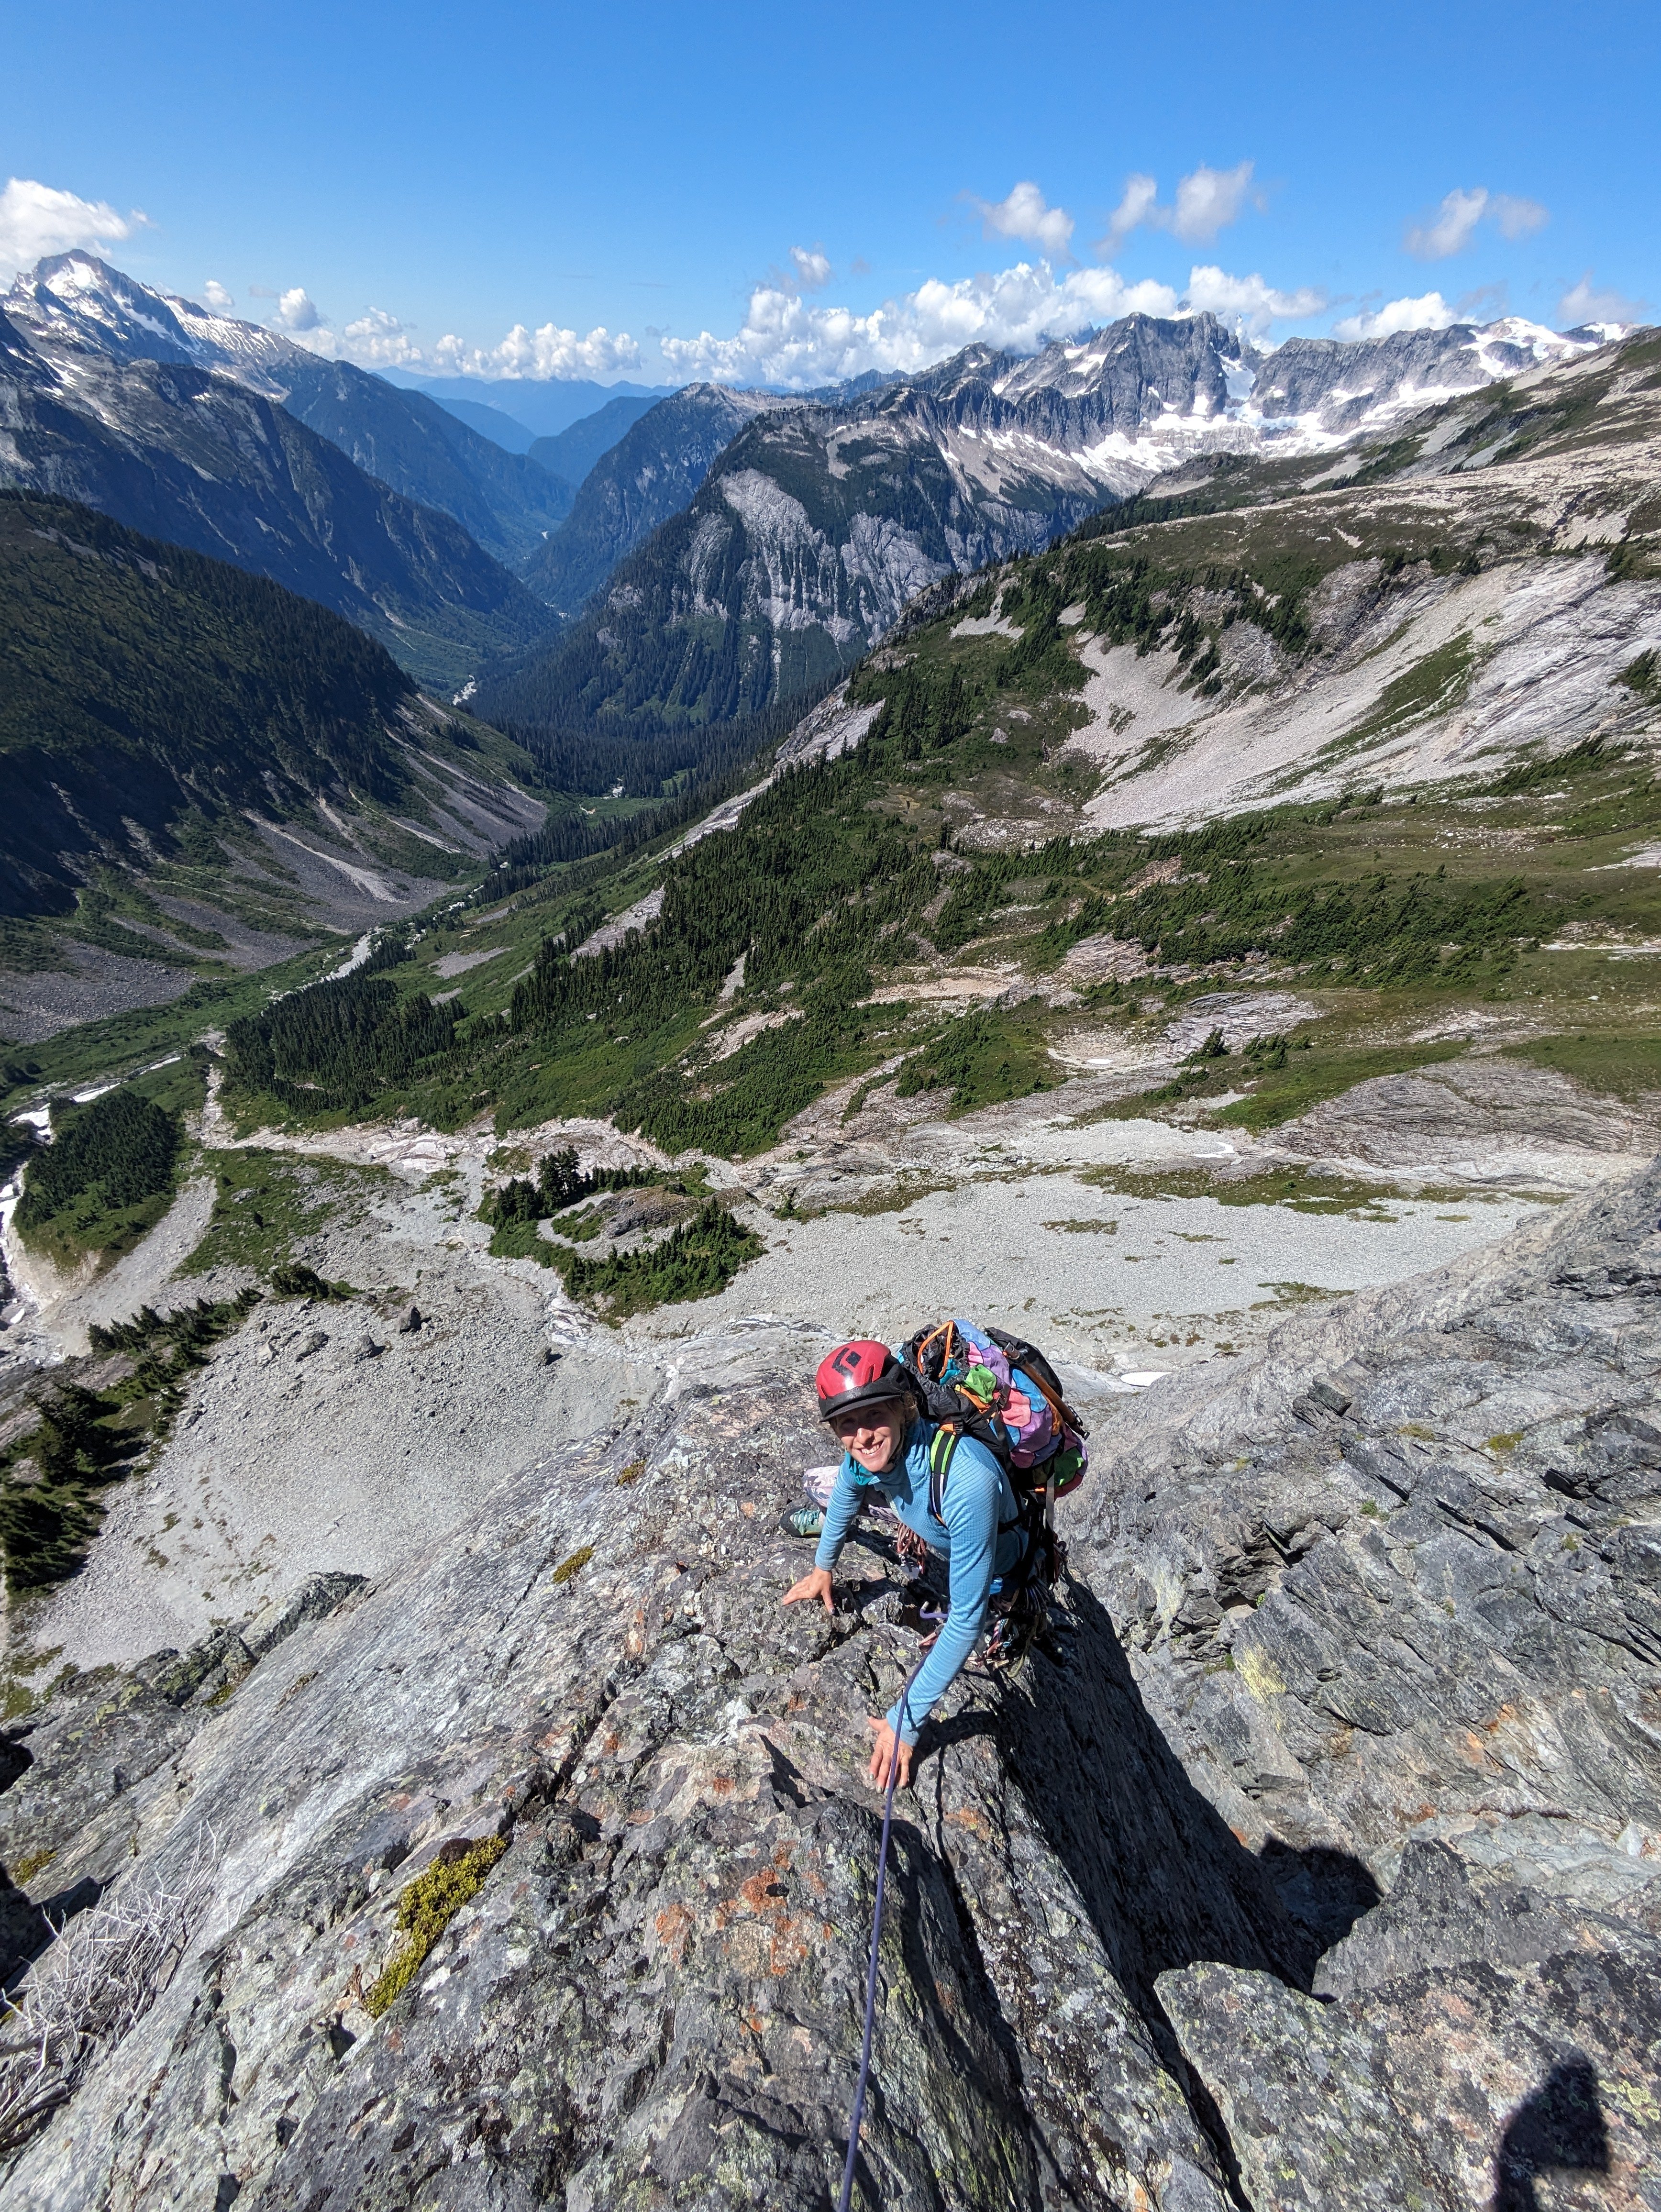
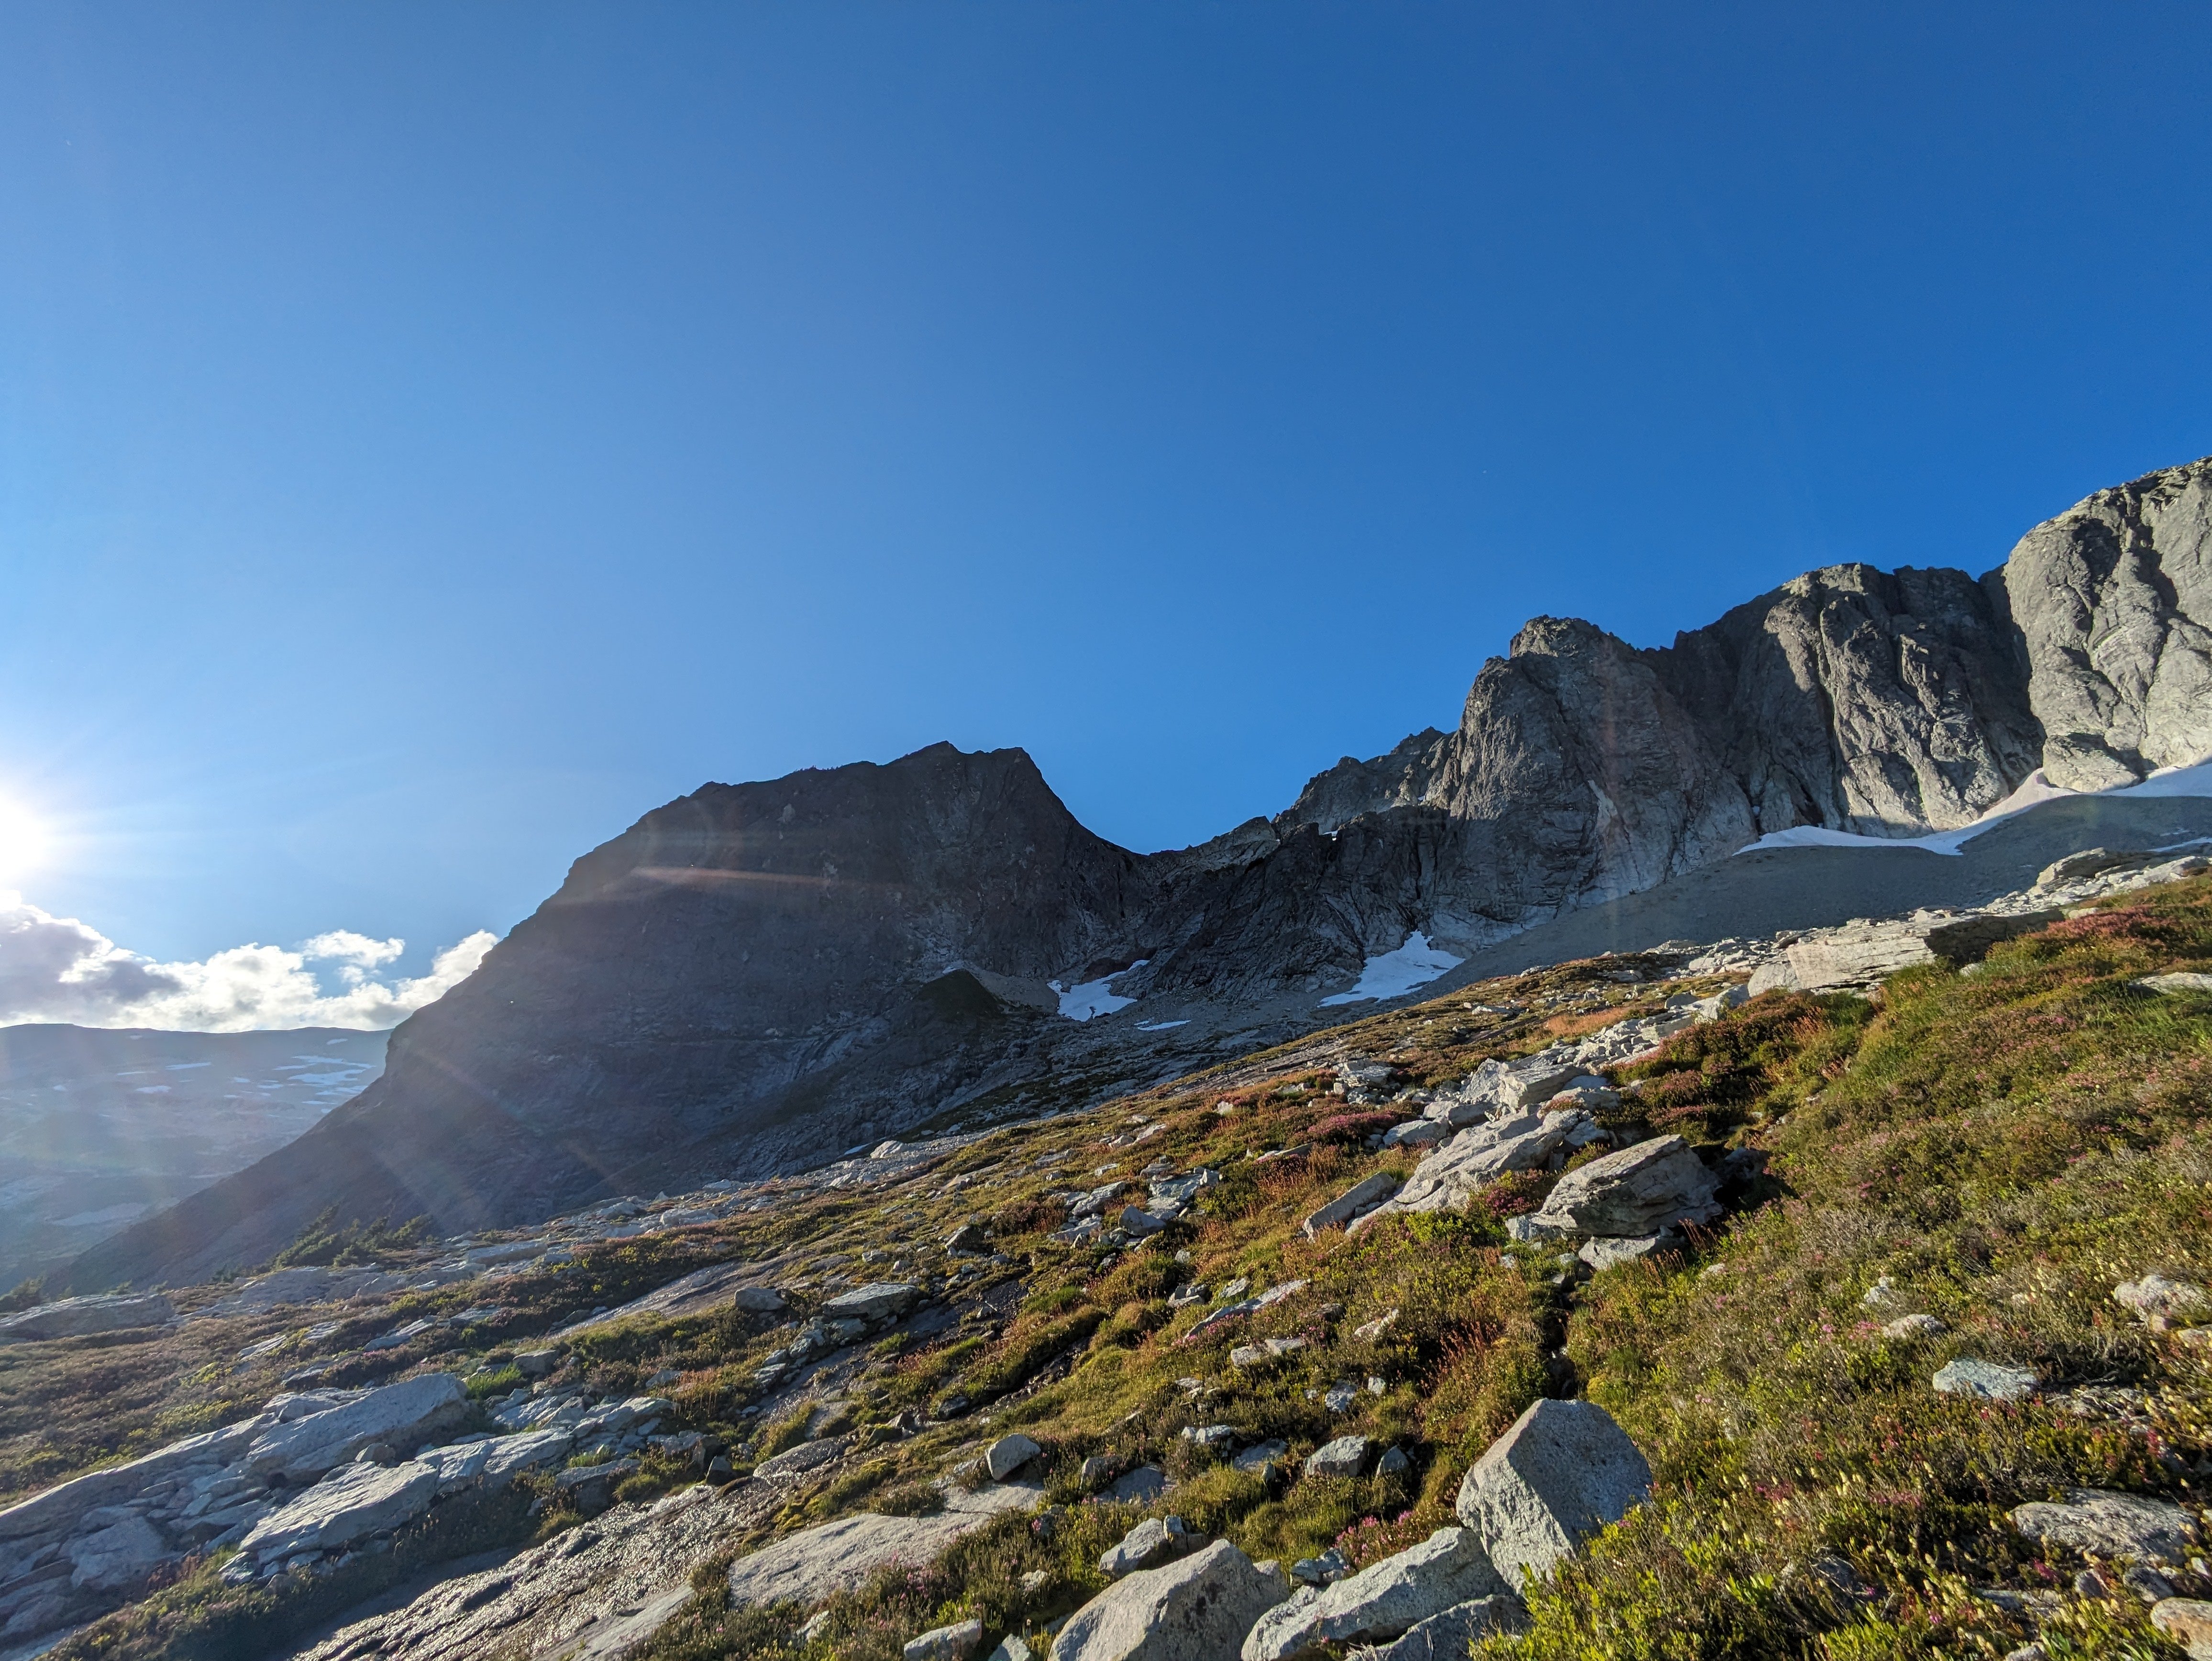
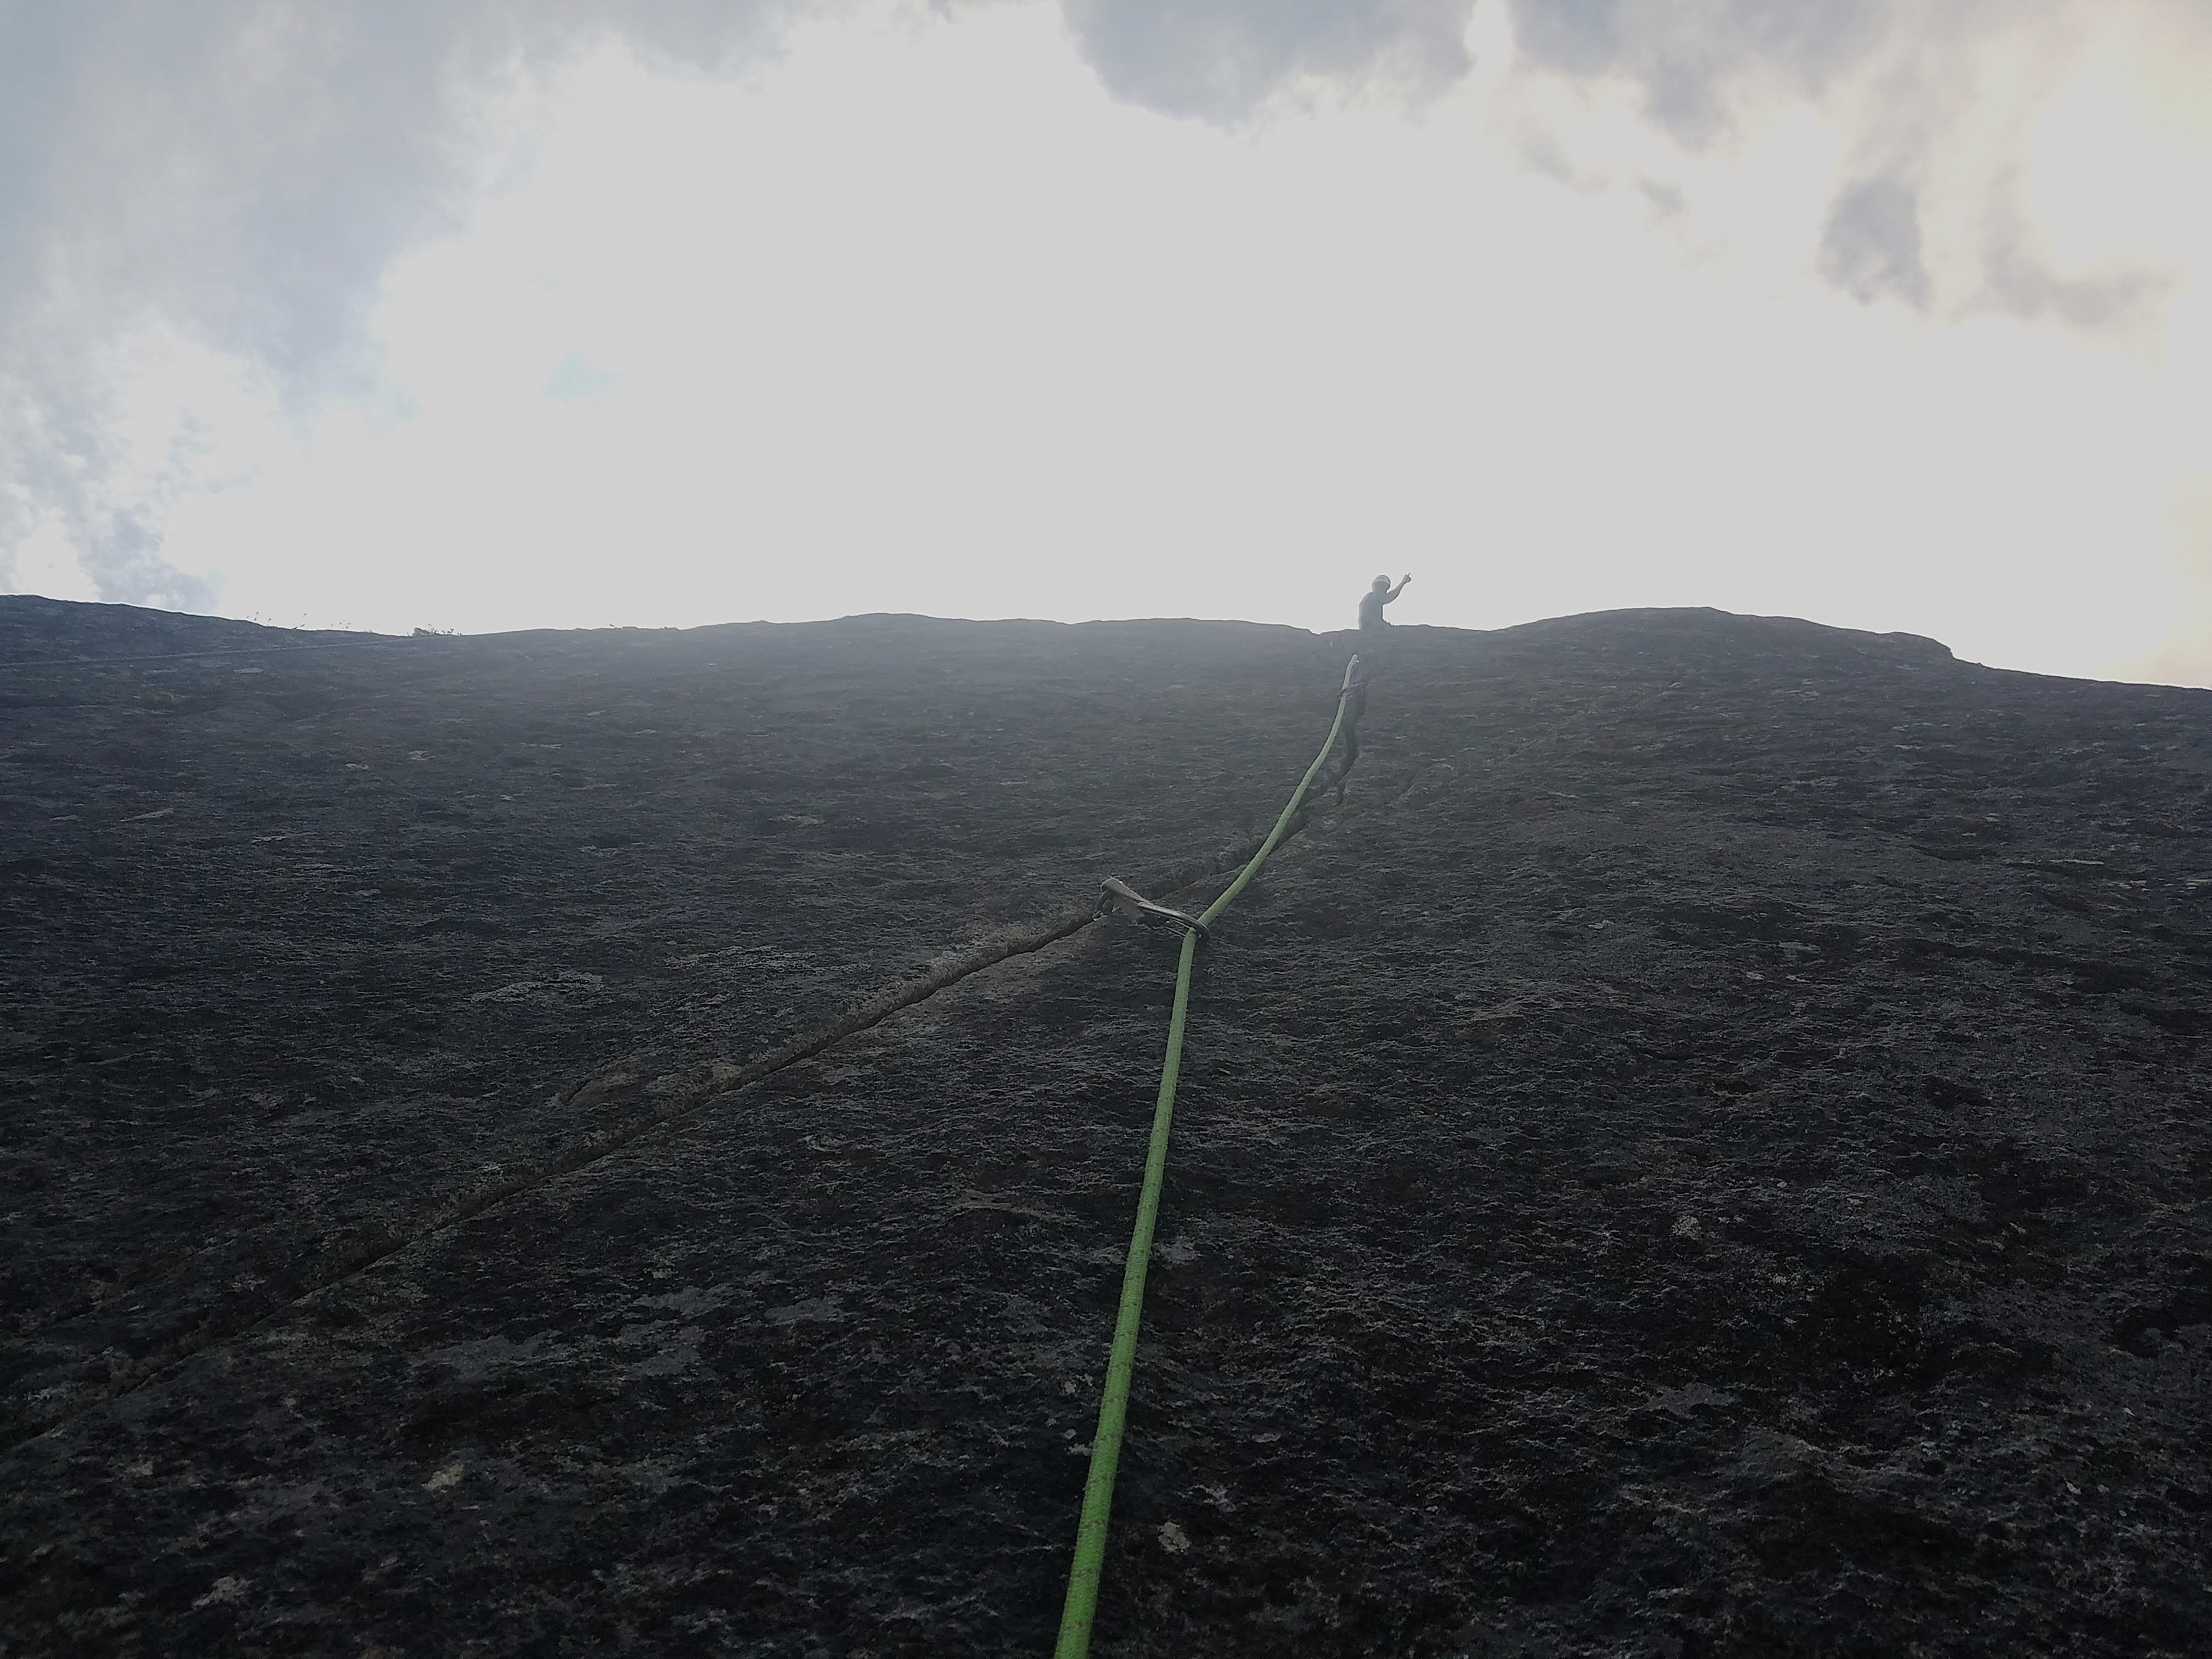
From July 25-27, Lani Chapko and I climbed the SW ridge of Whatcom peak. This is the large, two-tiered ridge that, at its toe forms the imperfect impass. The ridge gains 2400' with 3000' of roped travel. The ridge is generally not very sustained with the upper half being mostly low fifth class. We did it in 14 pitches or simul blocks. The route climbed on generally very low quality shist and required care and deliberate, slow movement the whole time. Protection was surprisingly good through the lower, challenging climbing, but non-existent at times higher up, forcing very long simul blocks to locate anchors. The route follows the skyline Day 1 We left the Hannegan Pass TH around 2pm and hiked to a camp on the summit of easy peak. Day 2 Finish the easy ridge traverse and drop down to the toe of the ridge. We started just left and uphill of the toe on an obvious ledge. Climb then return via easy pass/imperfect impass back to a camp on the summit of easy peak. NOTE: I bolstered the rap anchor above the second pitch of the impasse and added new tat. There is now a small nut and good KB in addition to the sketchy horn that people had been using. Please do not clean this anchor, this section is about 5.5 and often seeps for long after rains. So it can be nice to have the option to rap. Day 3 Wake up late, and hike out, eating copious berries and taking longer than the approach ?. Here's some photos of the climb Lani starting up the first real pitch Climbing on one of the lower 5.9 pitches Short overhanging crack crux The broad notch halfway up Easy scrambling above the notch Some cool ridge climbing up high A near gendarme towards the top Another view One more view of the ridge, following the skyline. Gear; Single Rack .1 to 3, doubles .3 to .5; small set of nuts and 3 KB's (used extensively). As always, here are my pitch notes, though id hardly recommend this route. In all seriousness, Castle in the Sky is a bonefide modern classic Cascades alpine route, so if you want to do something technical on Whatcom, you should really just do that! P1 100' 5.3 Climb water polished slabs and grooves to a massive ledge (easy solo). Move (or establish) belay to far right end of the ledge P2 200' 5.8 climb a runout mossy dike to a poor belay stance. P3 200' 5.6 Continue up the moss dike to a big ledge system. Traverse the ledge to the right anc belay just before the massive cleft. P4 100' 5.9 Traverse into the gully, climb the sometimes chossy gully and belay below an overhanging OW in a forming cave. P5 100' 5.10a Steep moves to the right exit the gully. Then steep chossy, but well protected climbing gains a ramp then a ledge to belay. P6 100' 5.10+ Trend up cracks to a tree. Awk moves through the tree gain a small ledge. The crux crack lies above. Steep pumpy climbing with barely ok gear leads to a sloping ledge to belay. P7 200' 5.9 Surprisingly techy climbing above the belay relents to chossy low fifth class on the ridge. Stretch your rope and find a belay. P8 200' low fifth Scramble the ridge to some trees. Scramble a few hundred feet to the base of a gendarme P9 250' 5.5 Scramble up a grassy ramp on the right of the gendarme. Belay at a small saddle. A few hundred feet of 4th class through a massive notch in the ridge. This is a possible bivy site or bail point. Several hundred more feet of scrambling up to low fifth leads to a small notch. P10 300' low fifth Scramble a loose gully to where you can find gear to belay. P11 200' 5.5 Continue up the gully to where the ridge knife edges out. P12 200' 5.4 Climb the knife edge ridge to the next notch. P13 600' 5.5 Continue along the ridge to the base of the summit headwall. P14 200' 5.7 Climb the left side of the headwall to a spot just below the summit, then scramble to the summit.
 6 points
 -
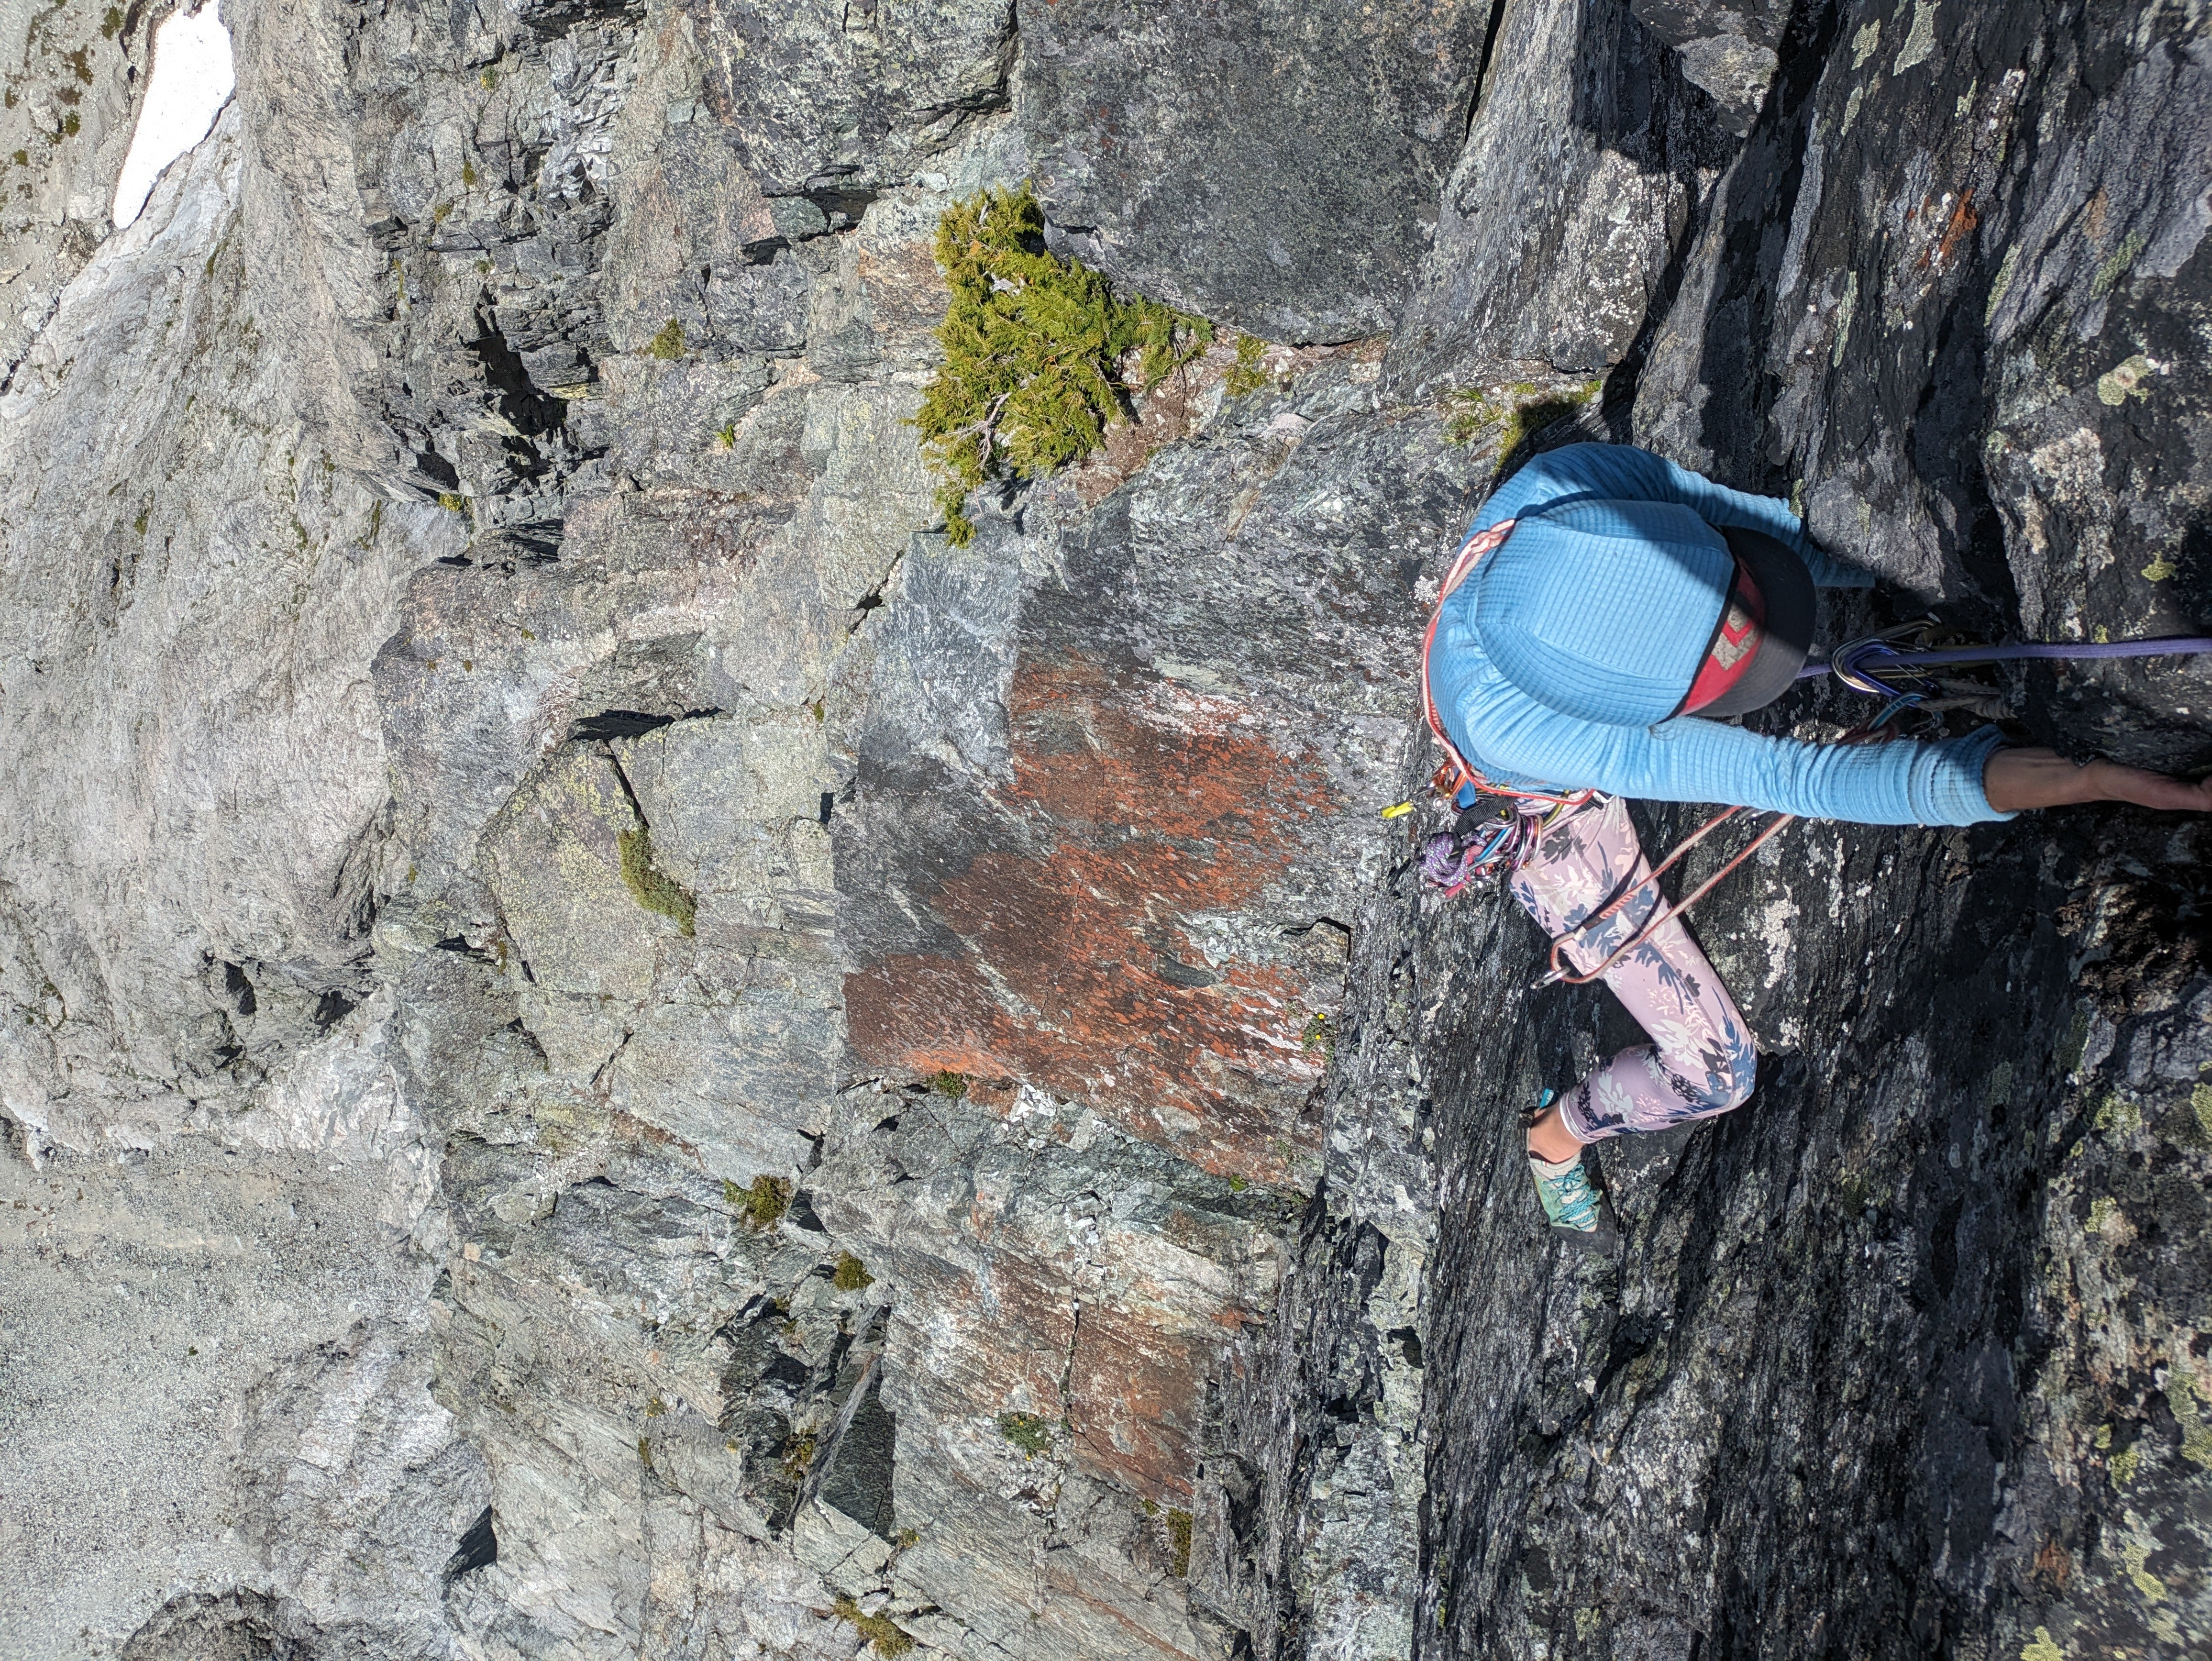
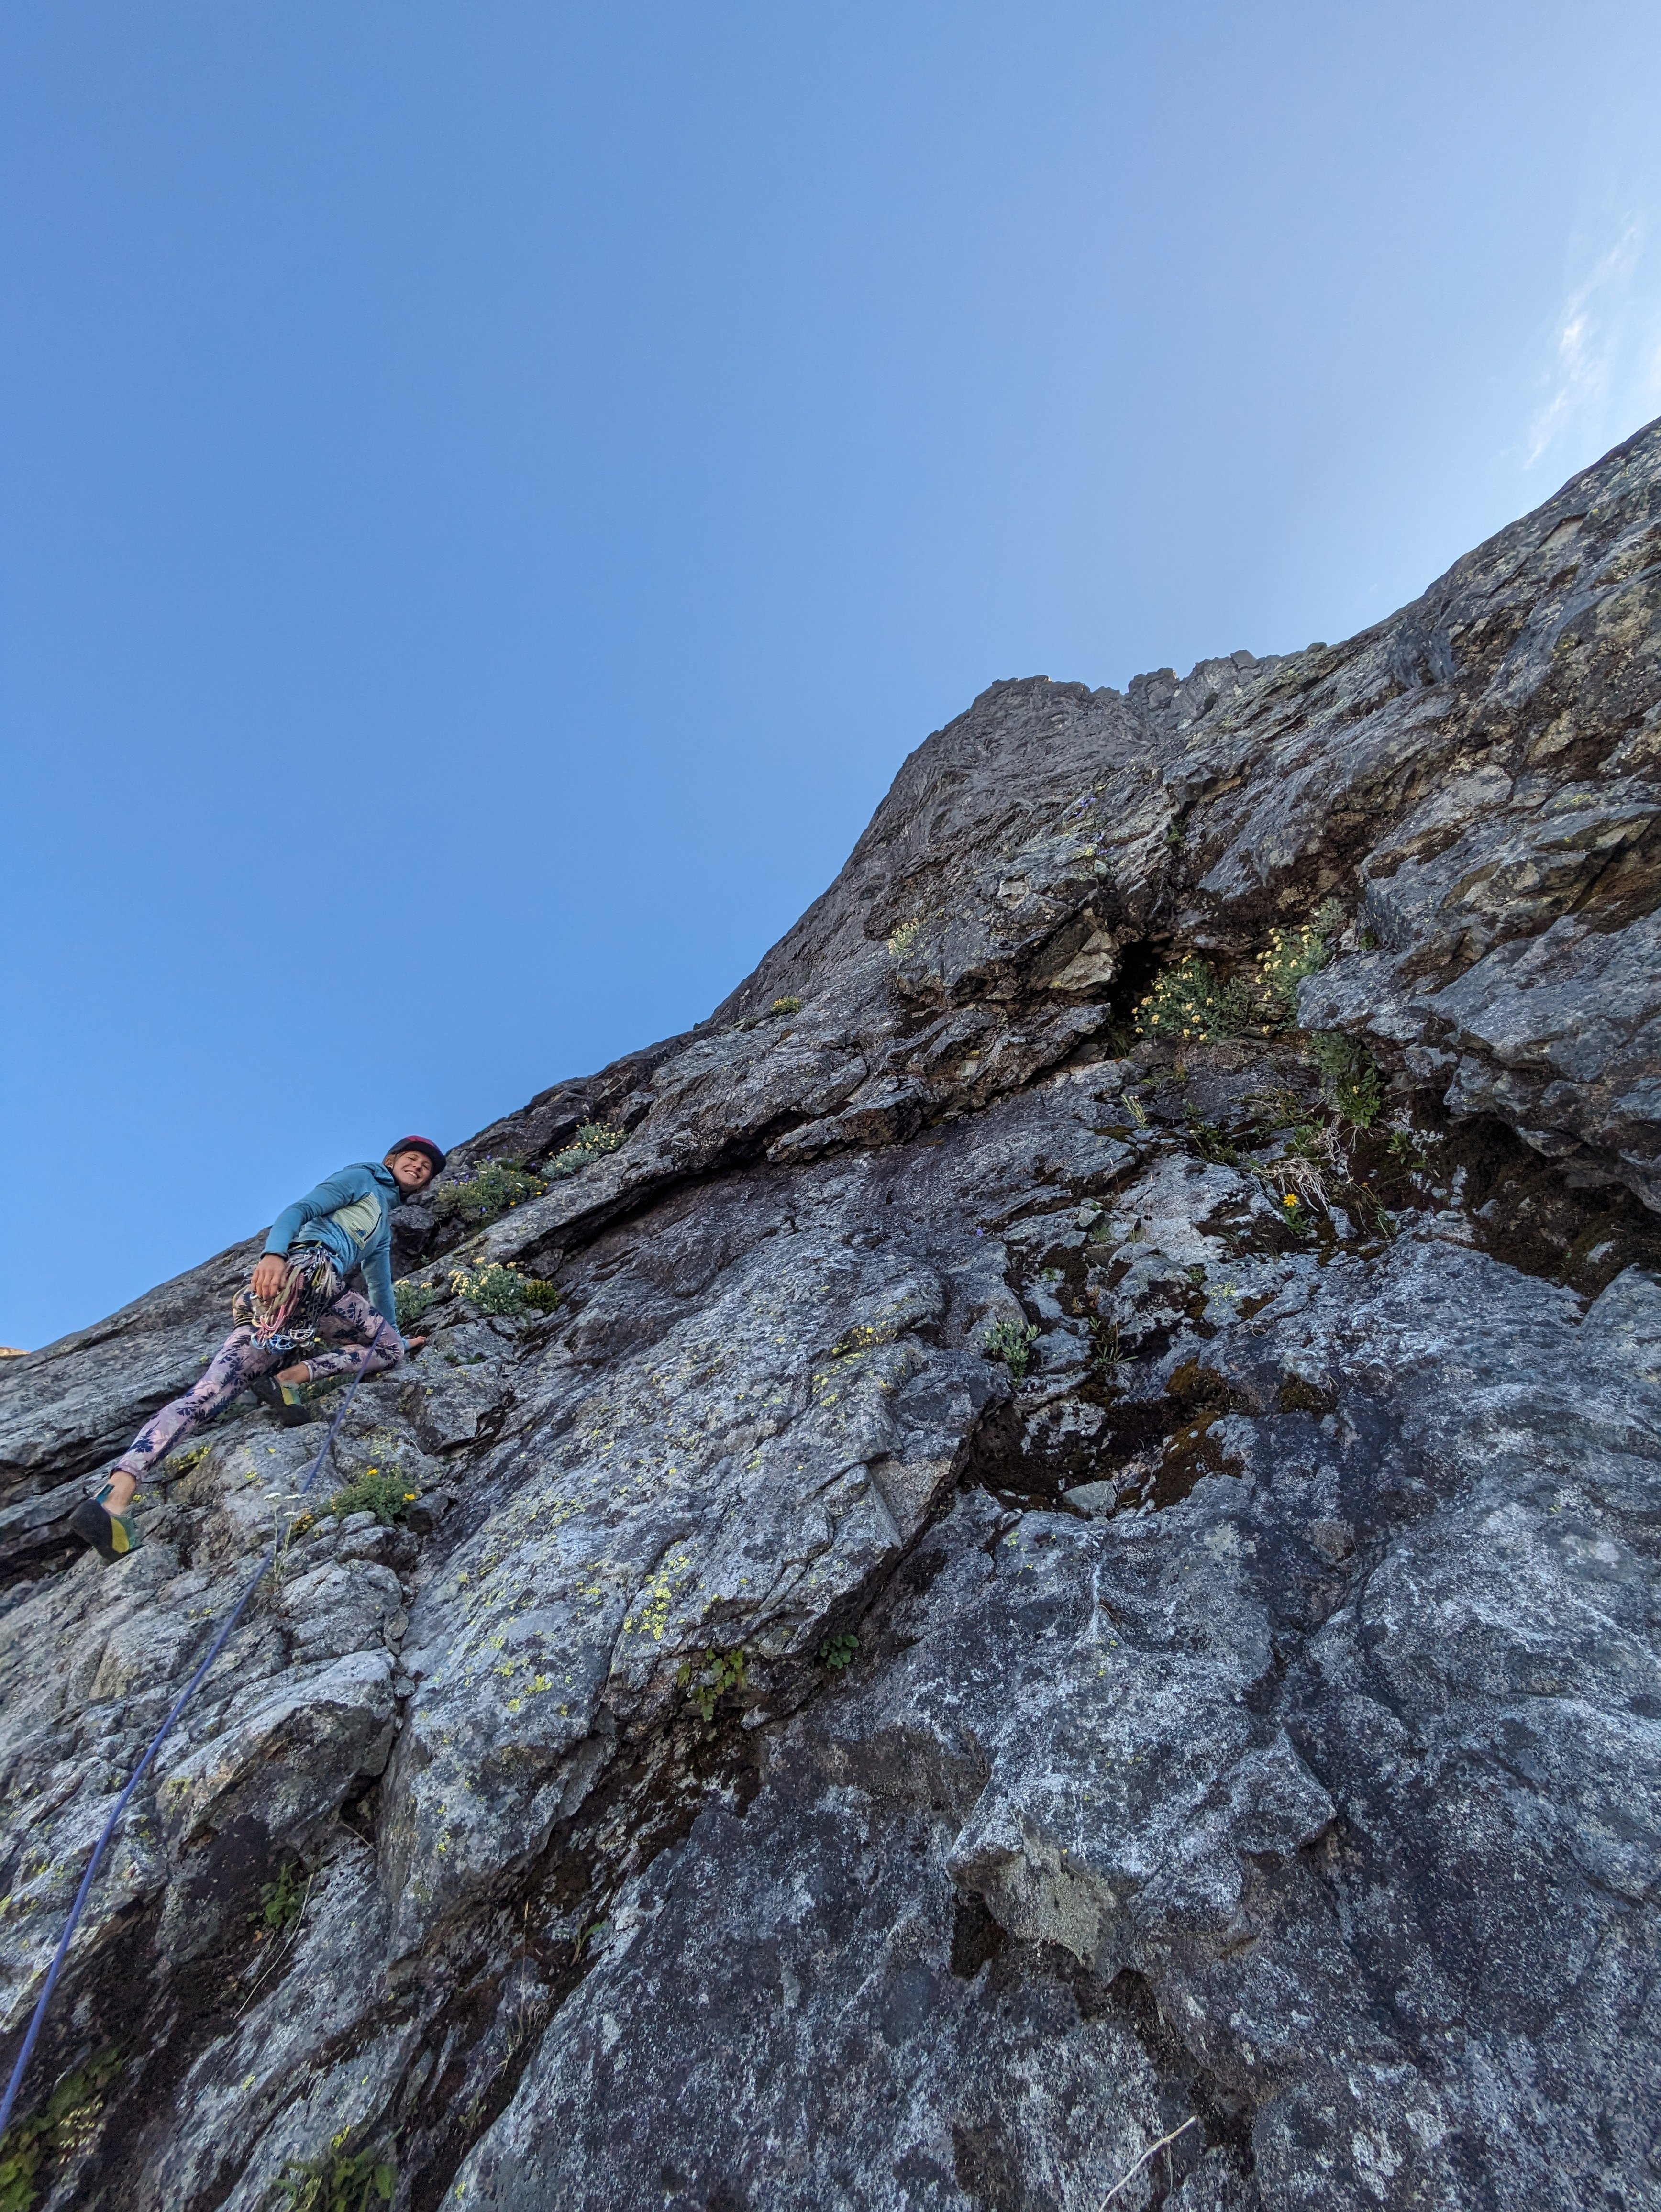
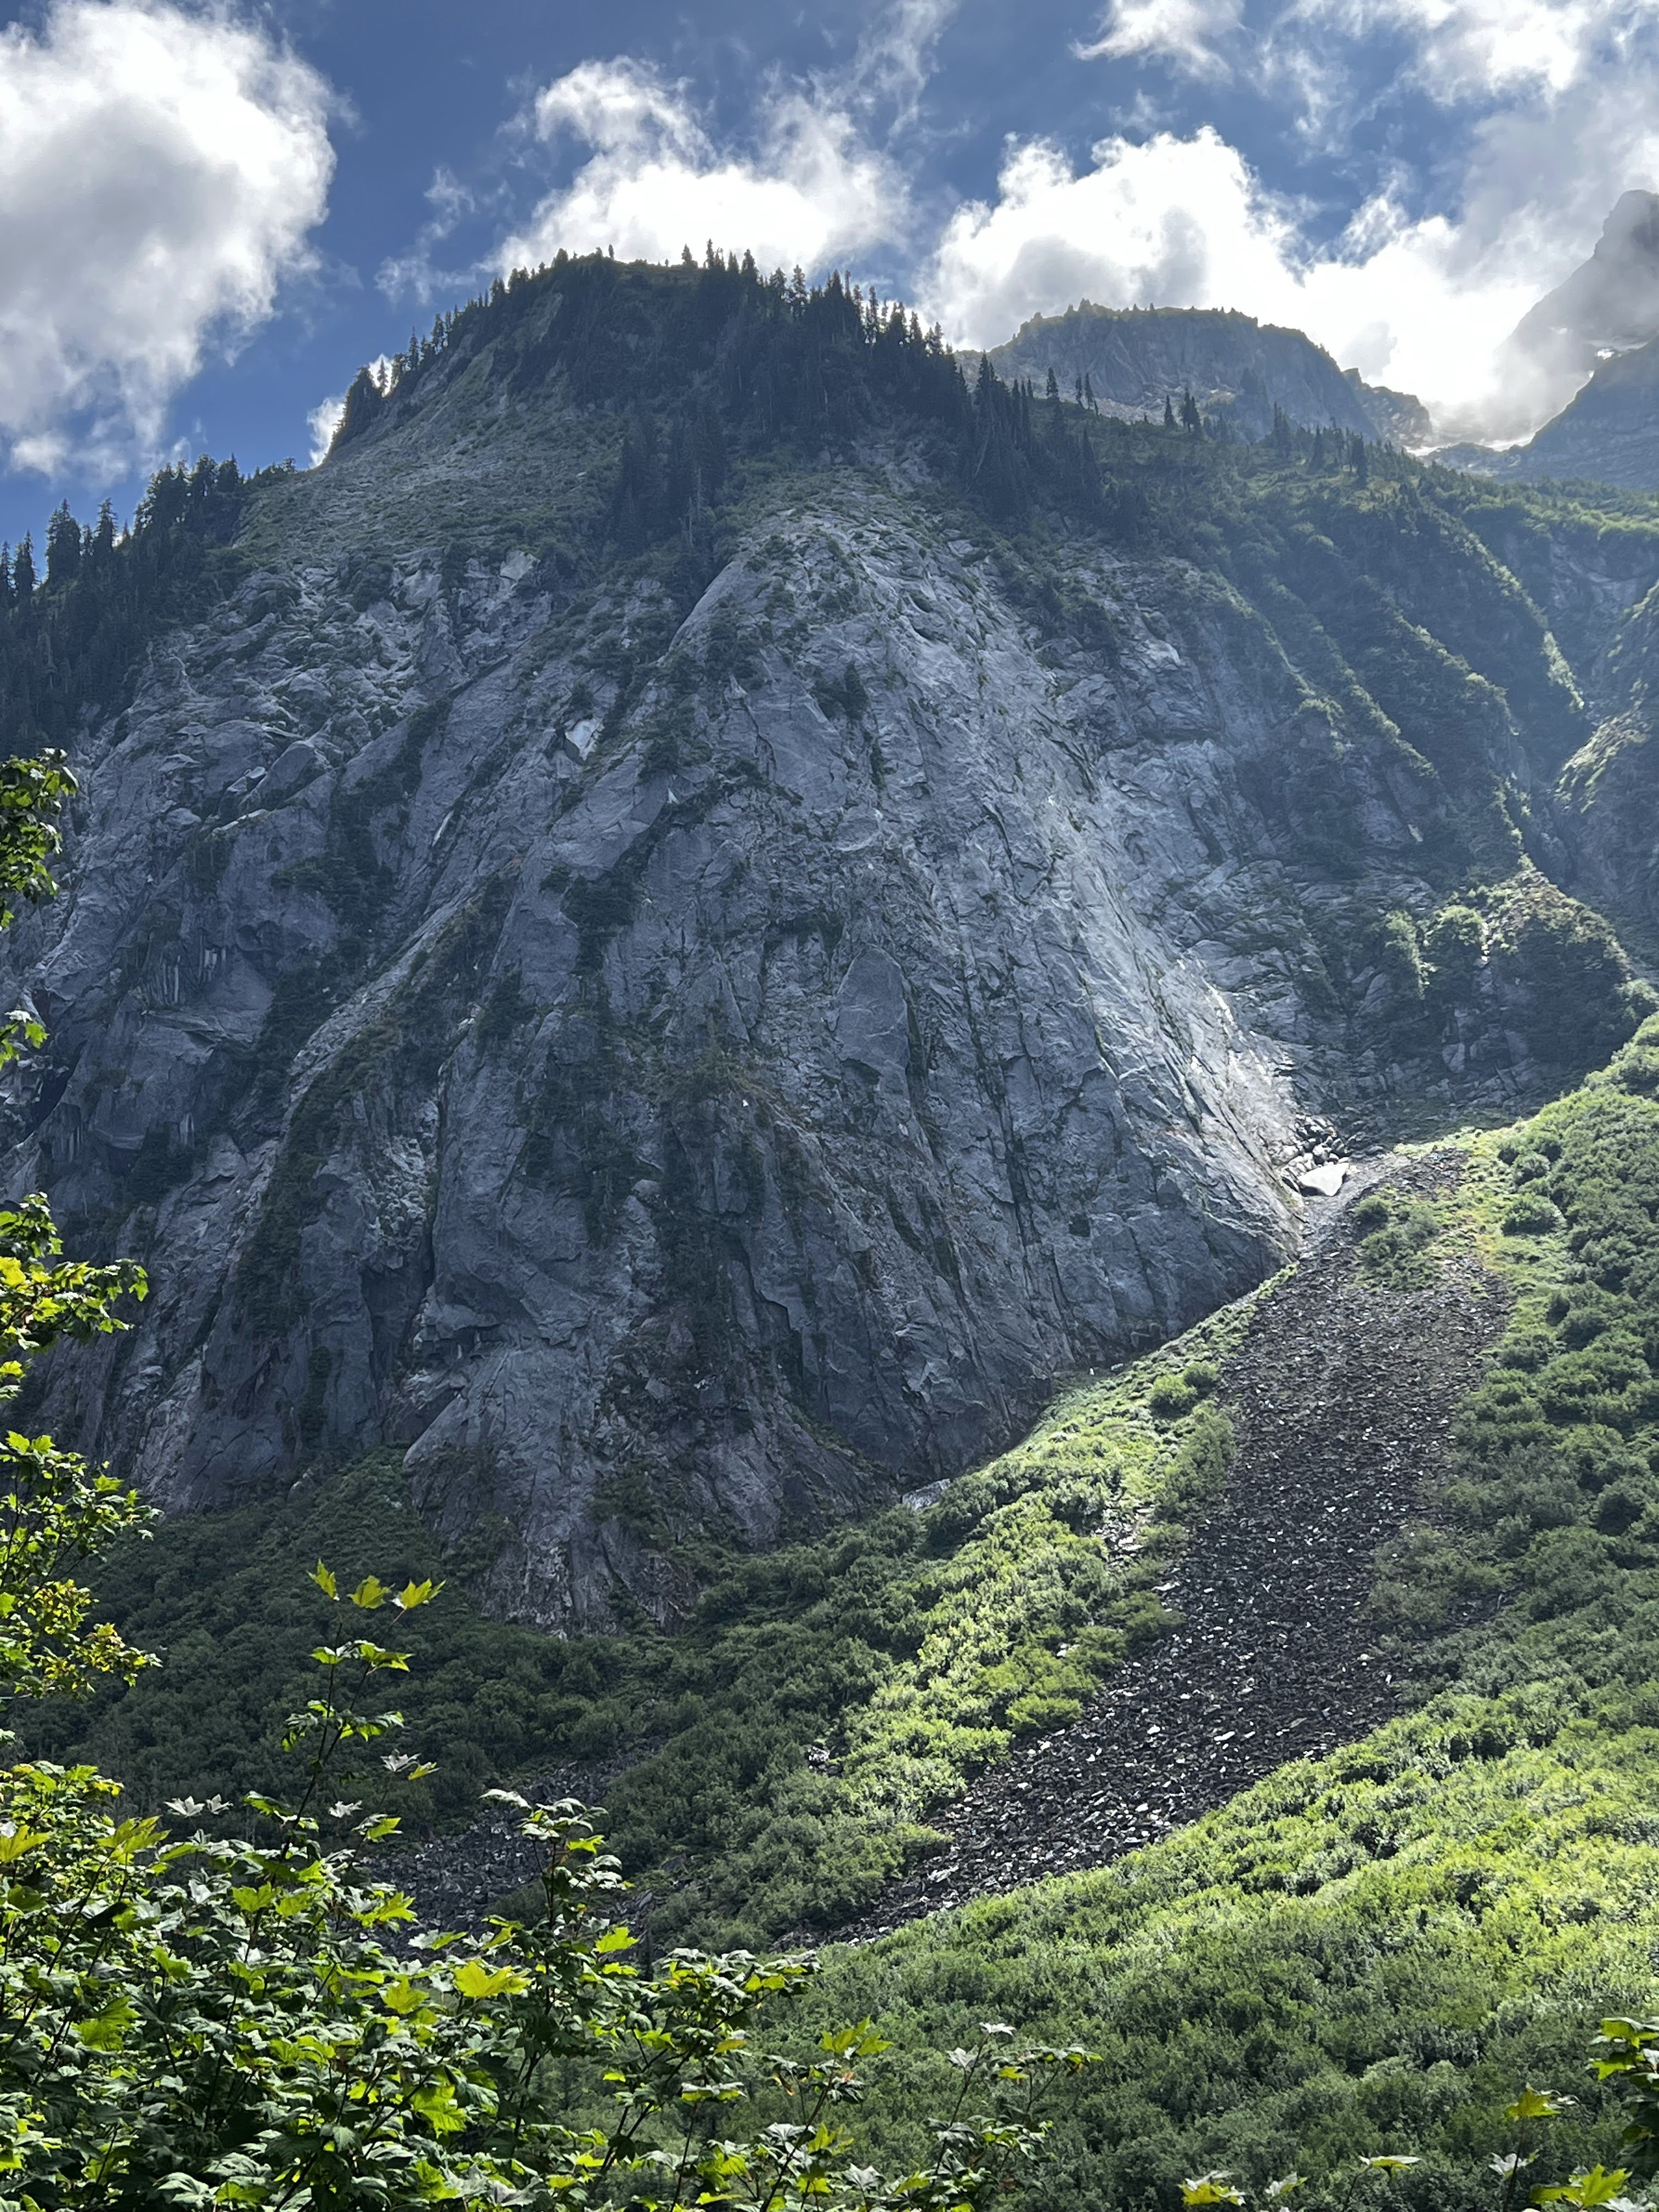
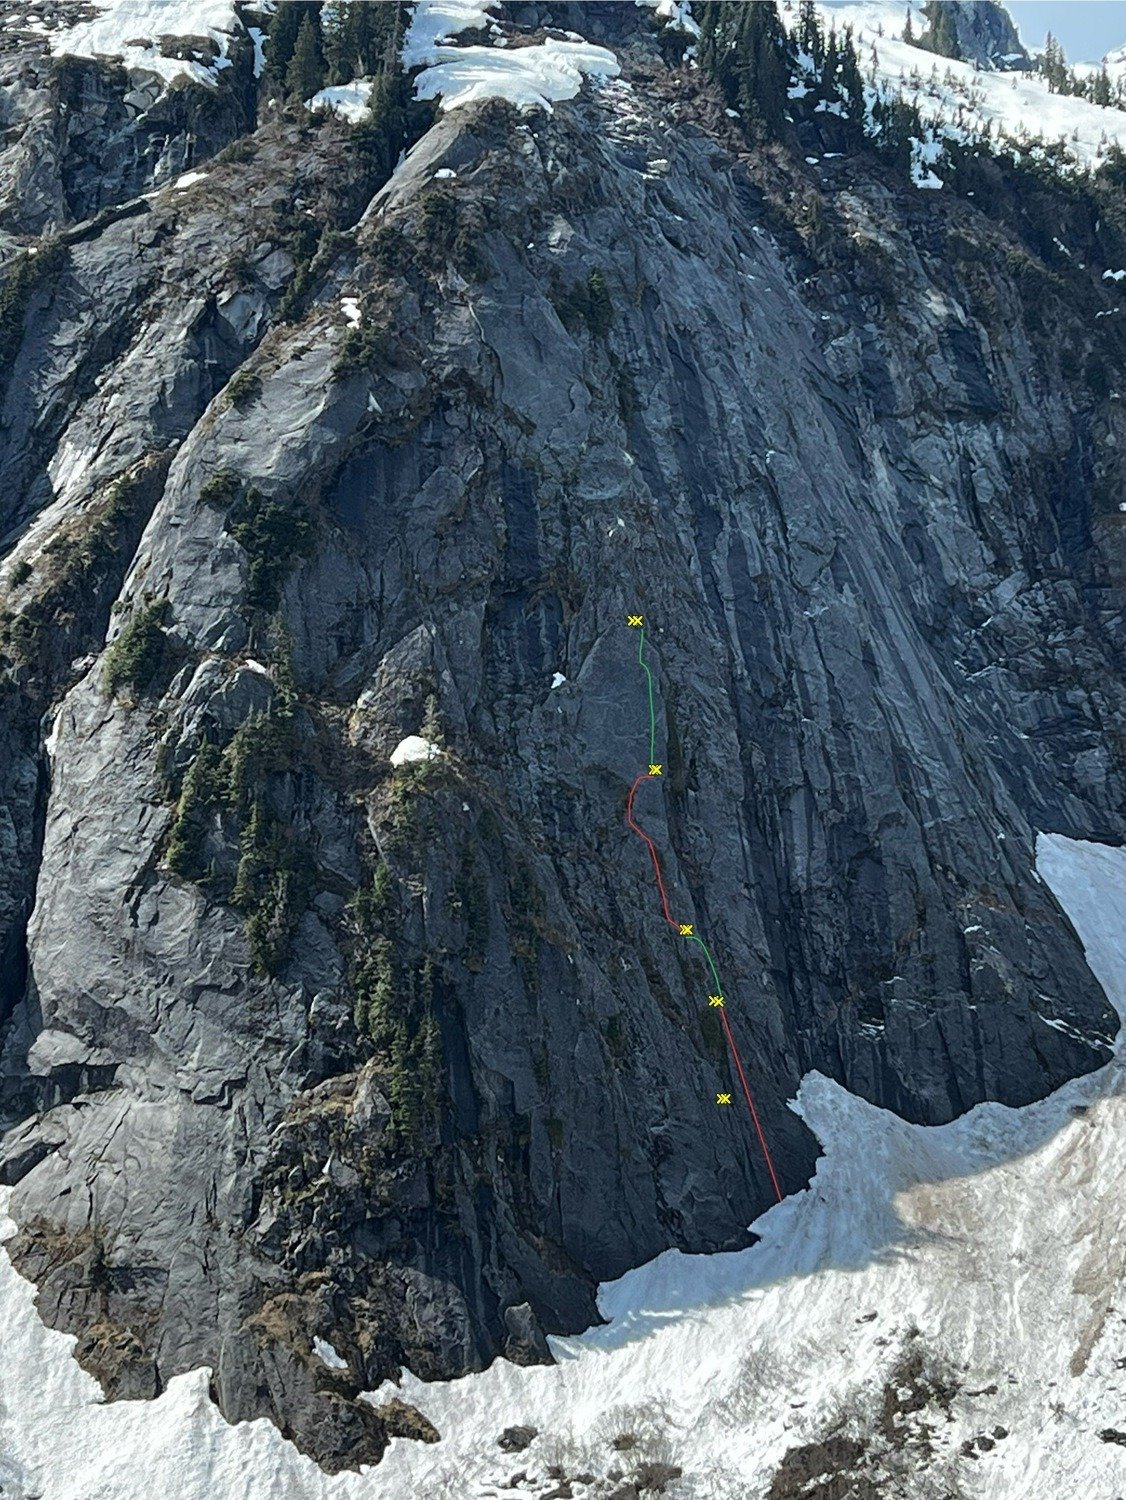
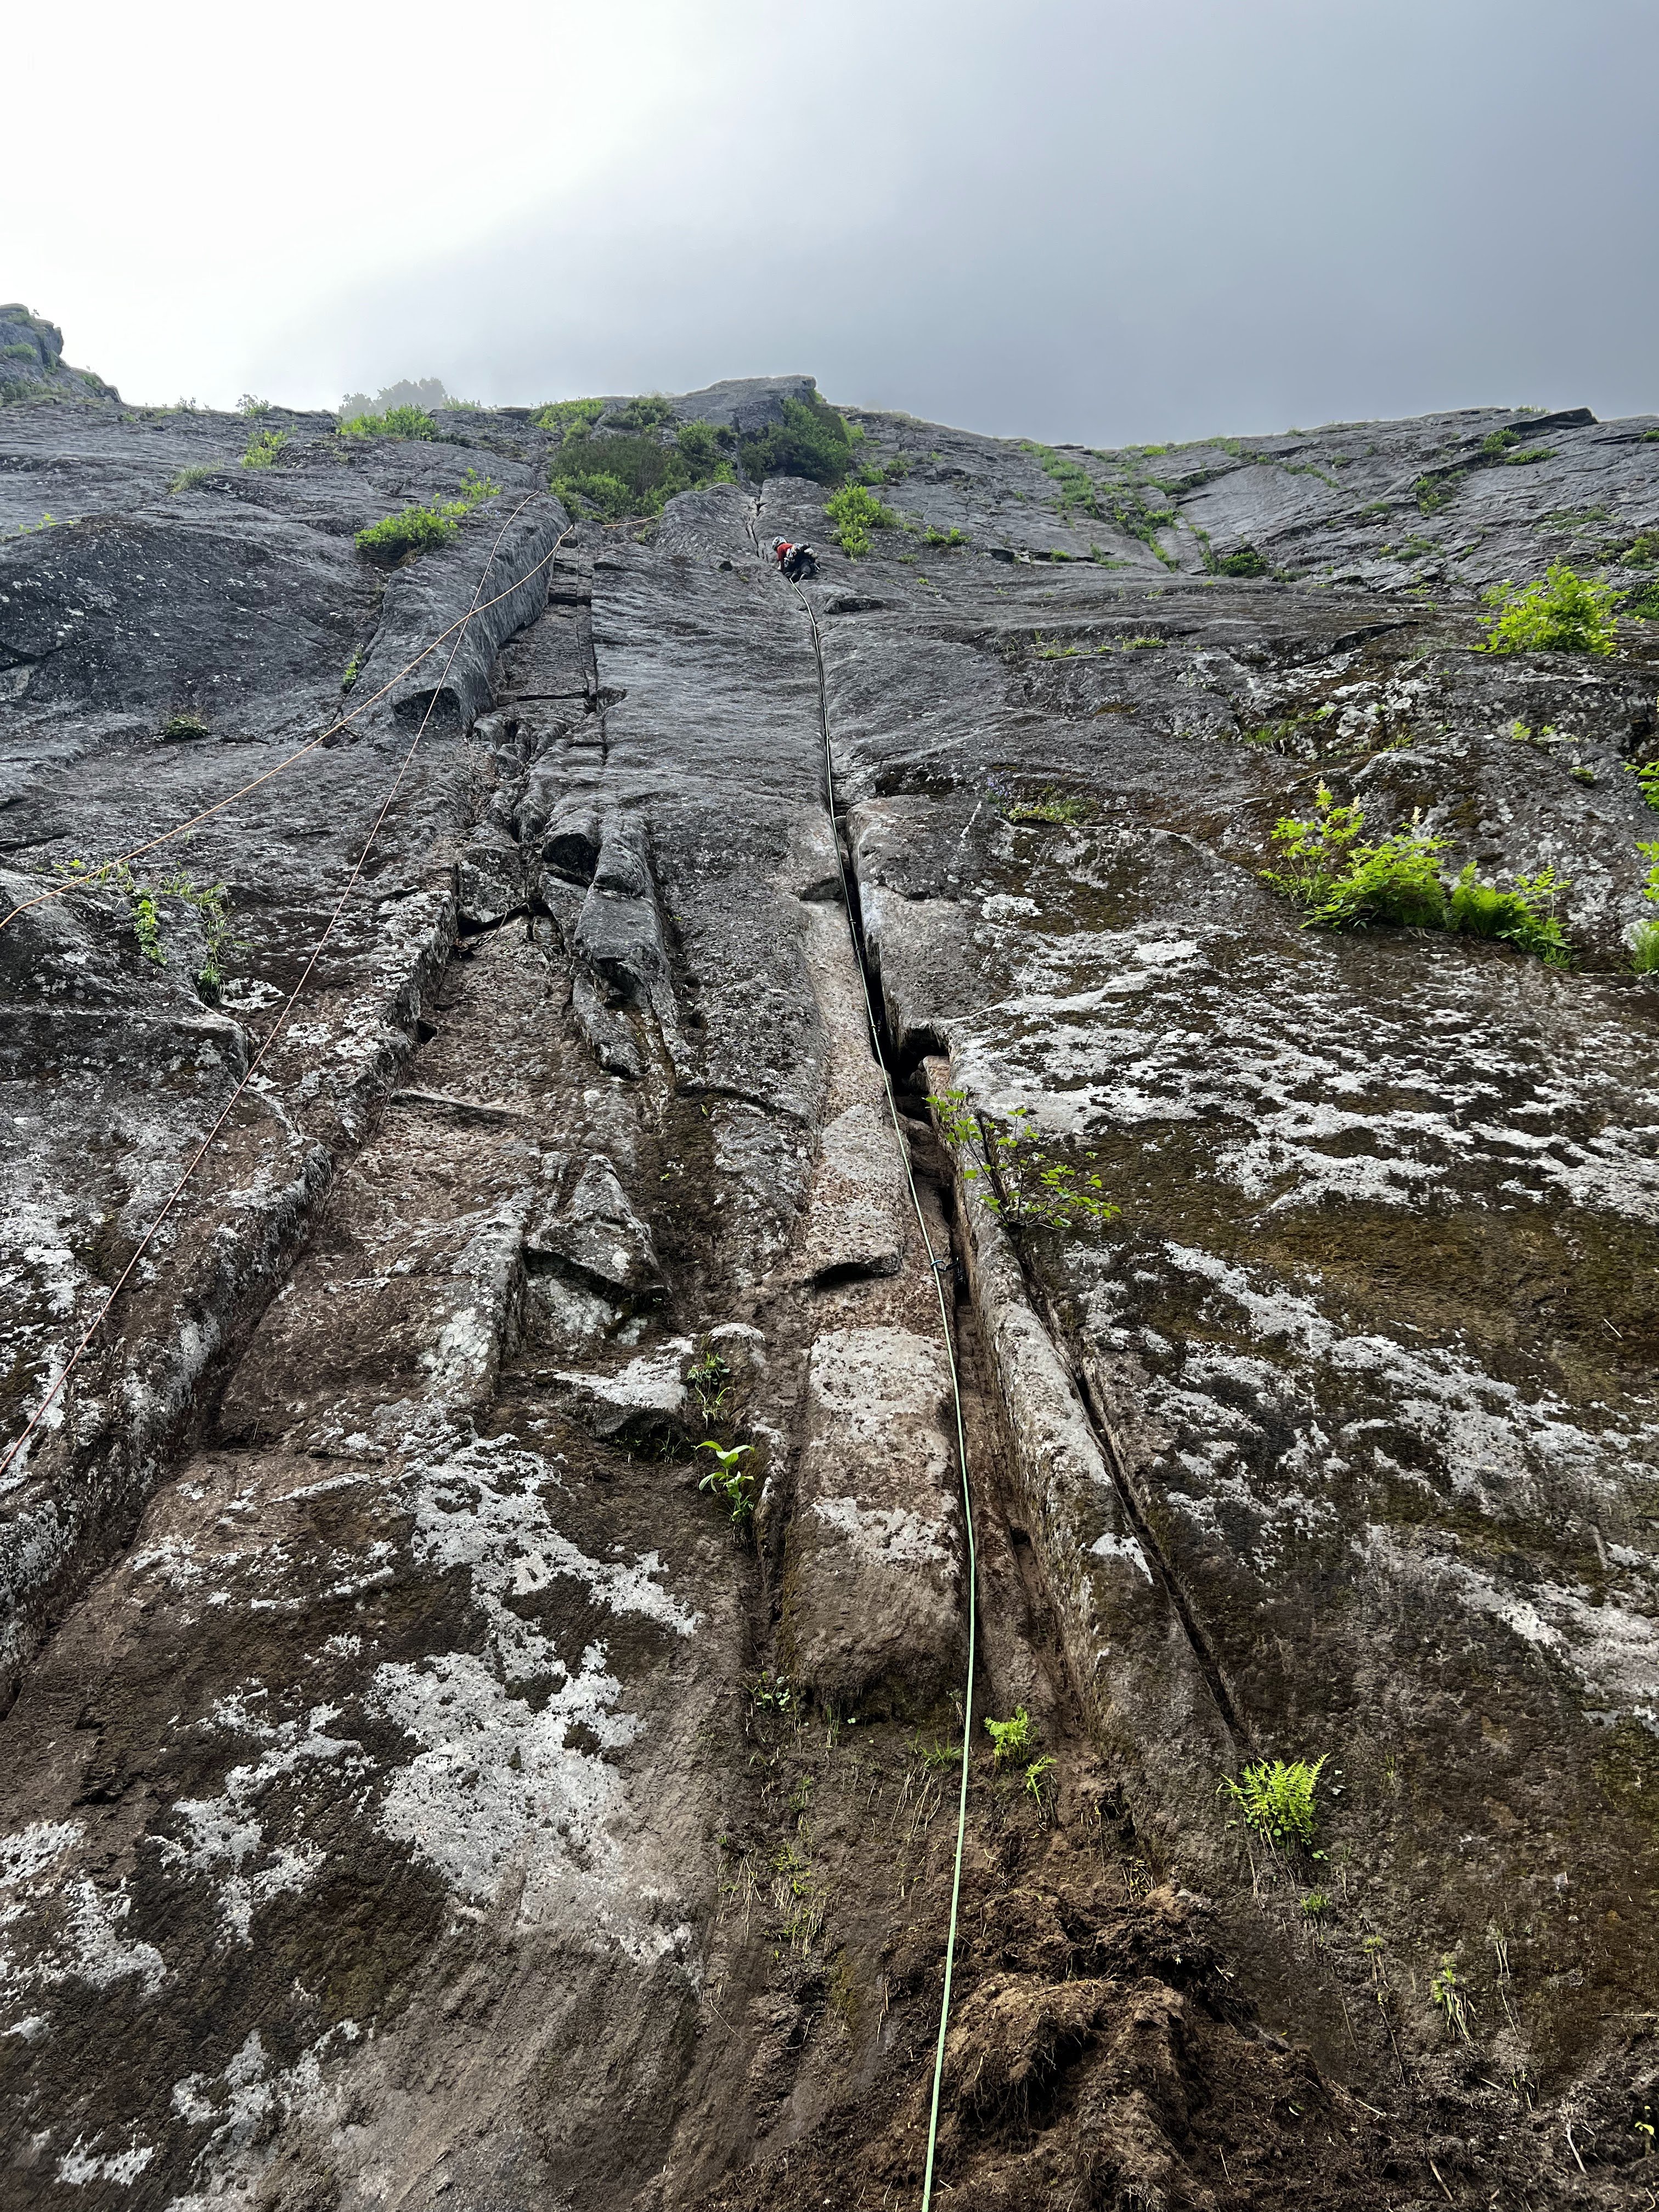
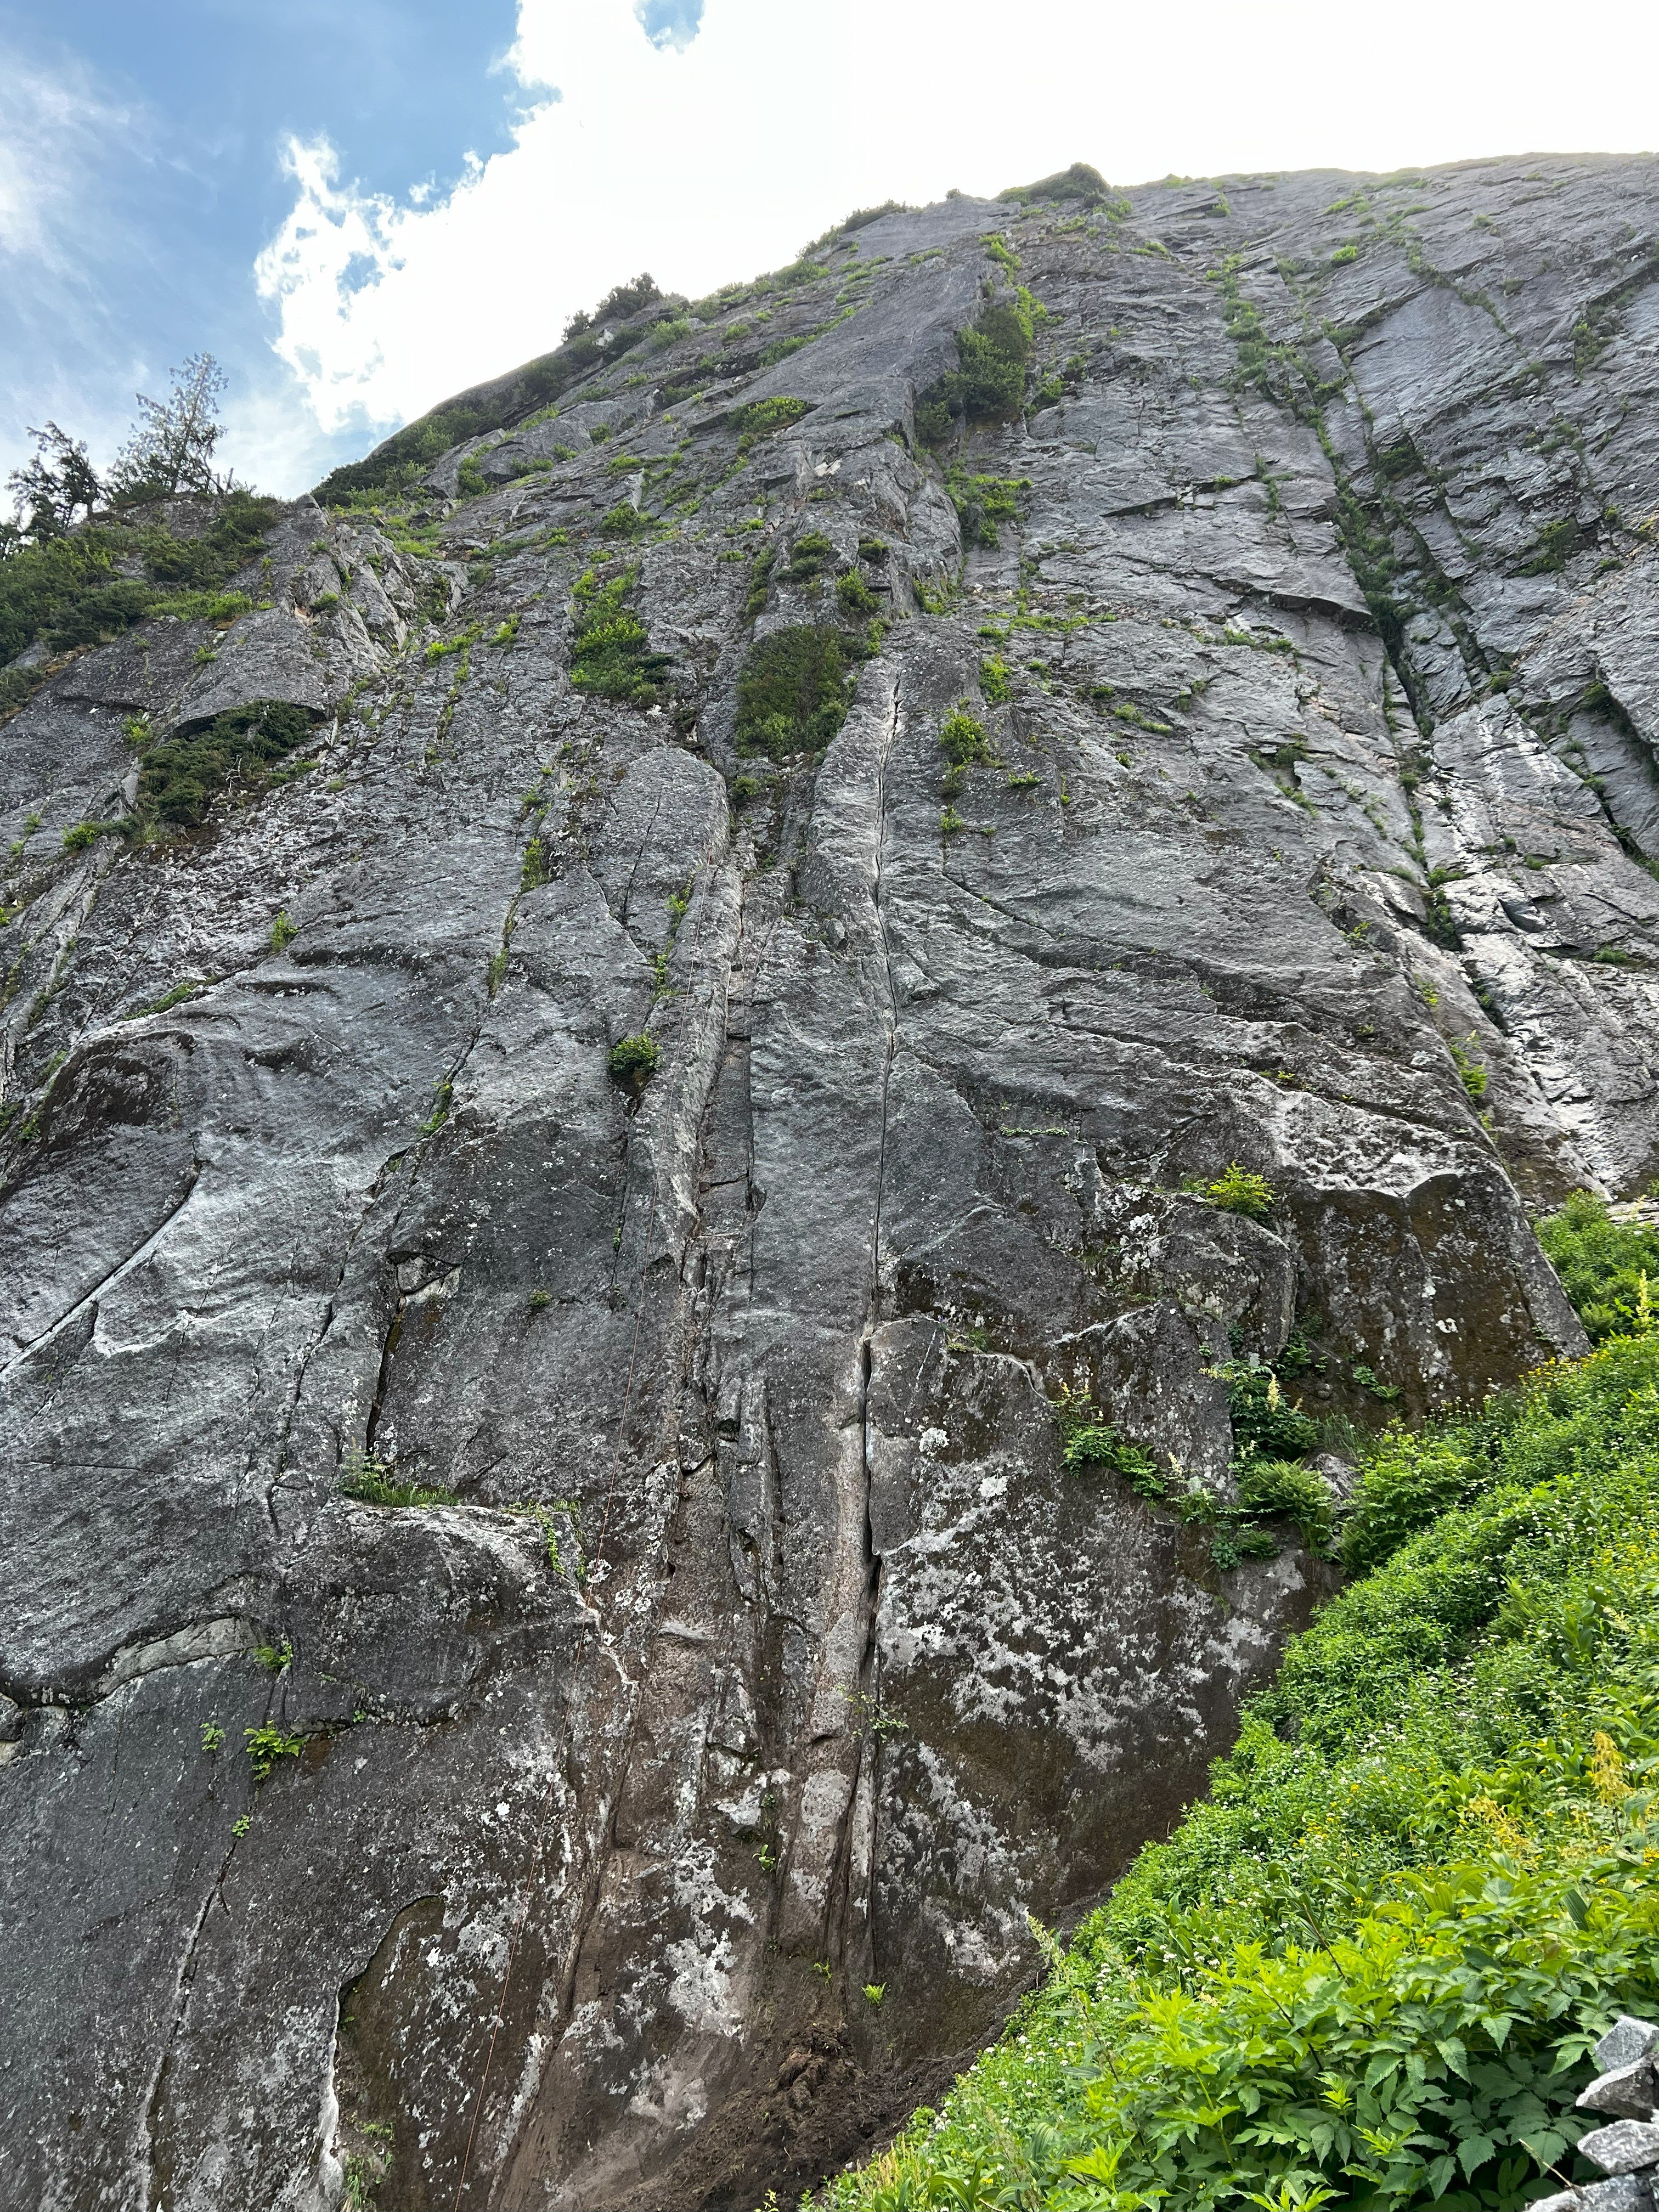
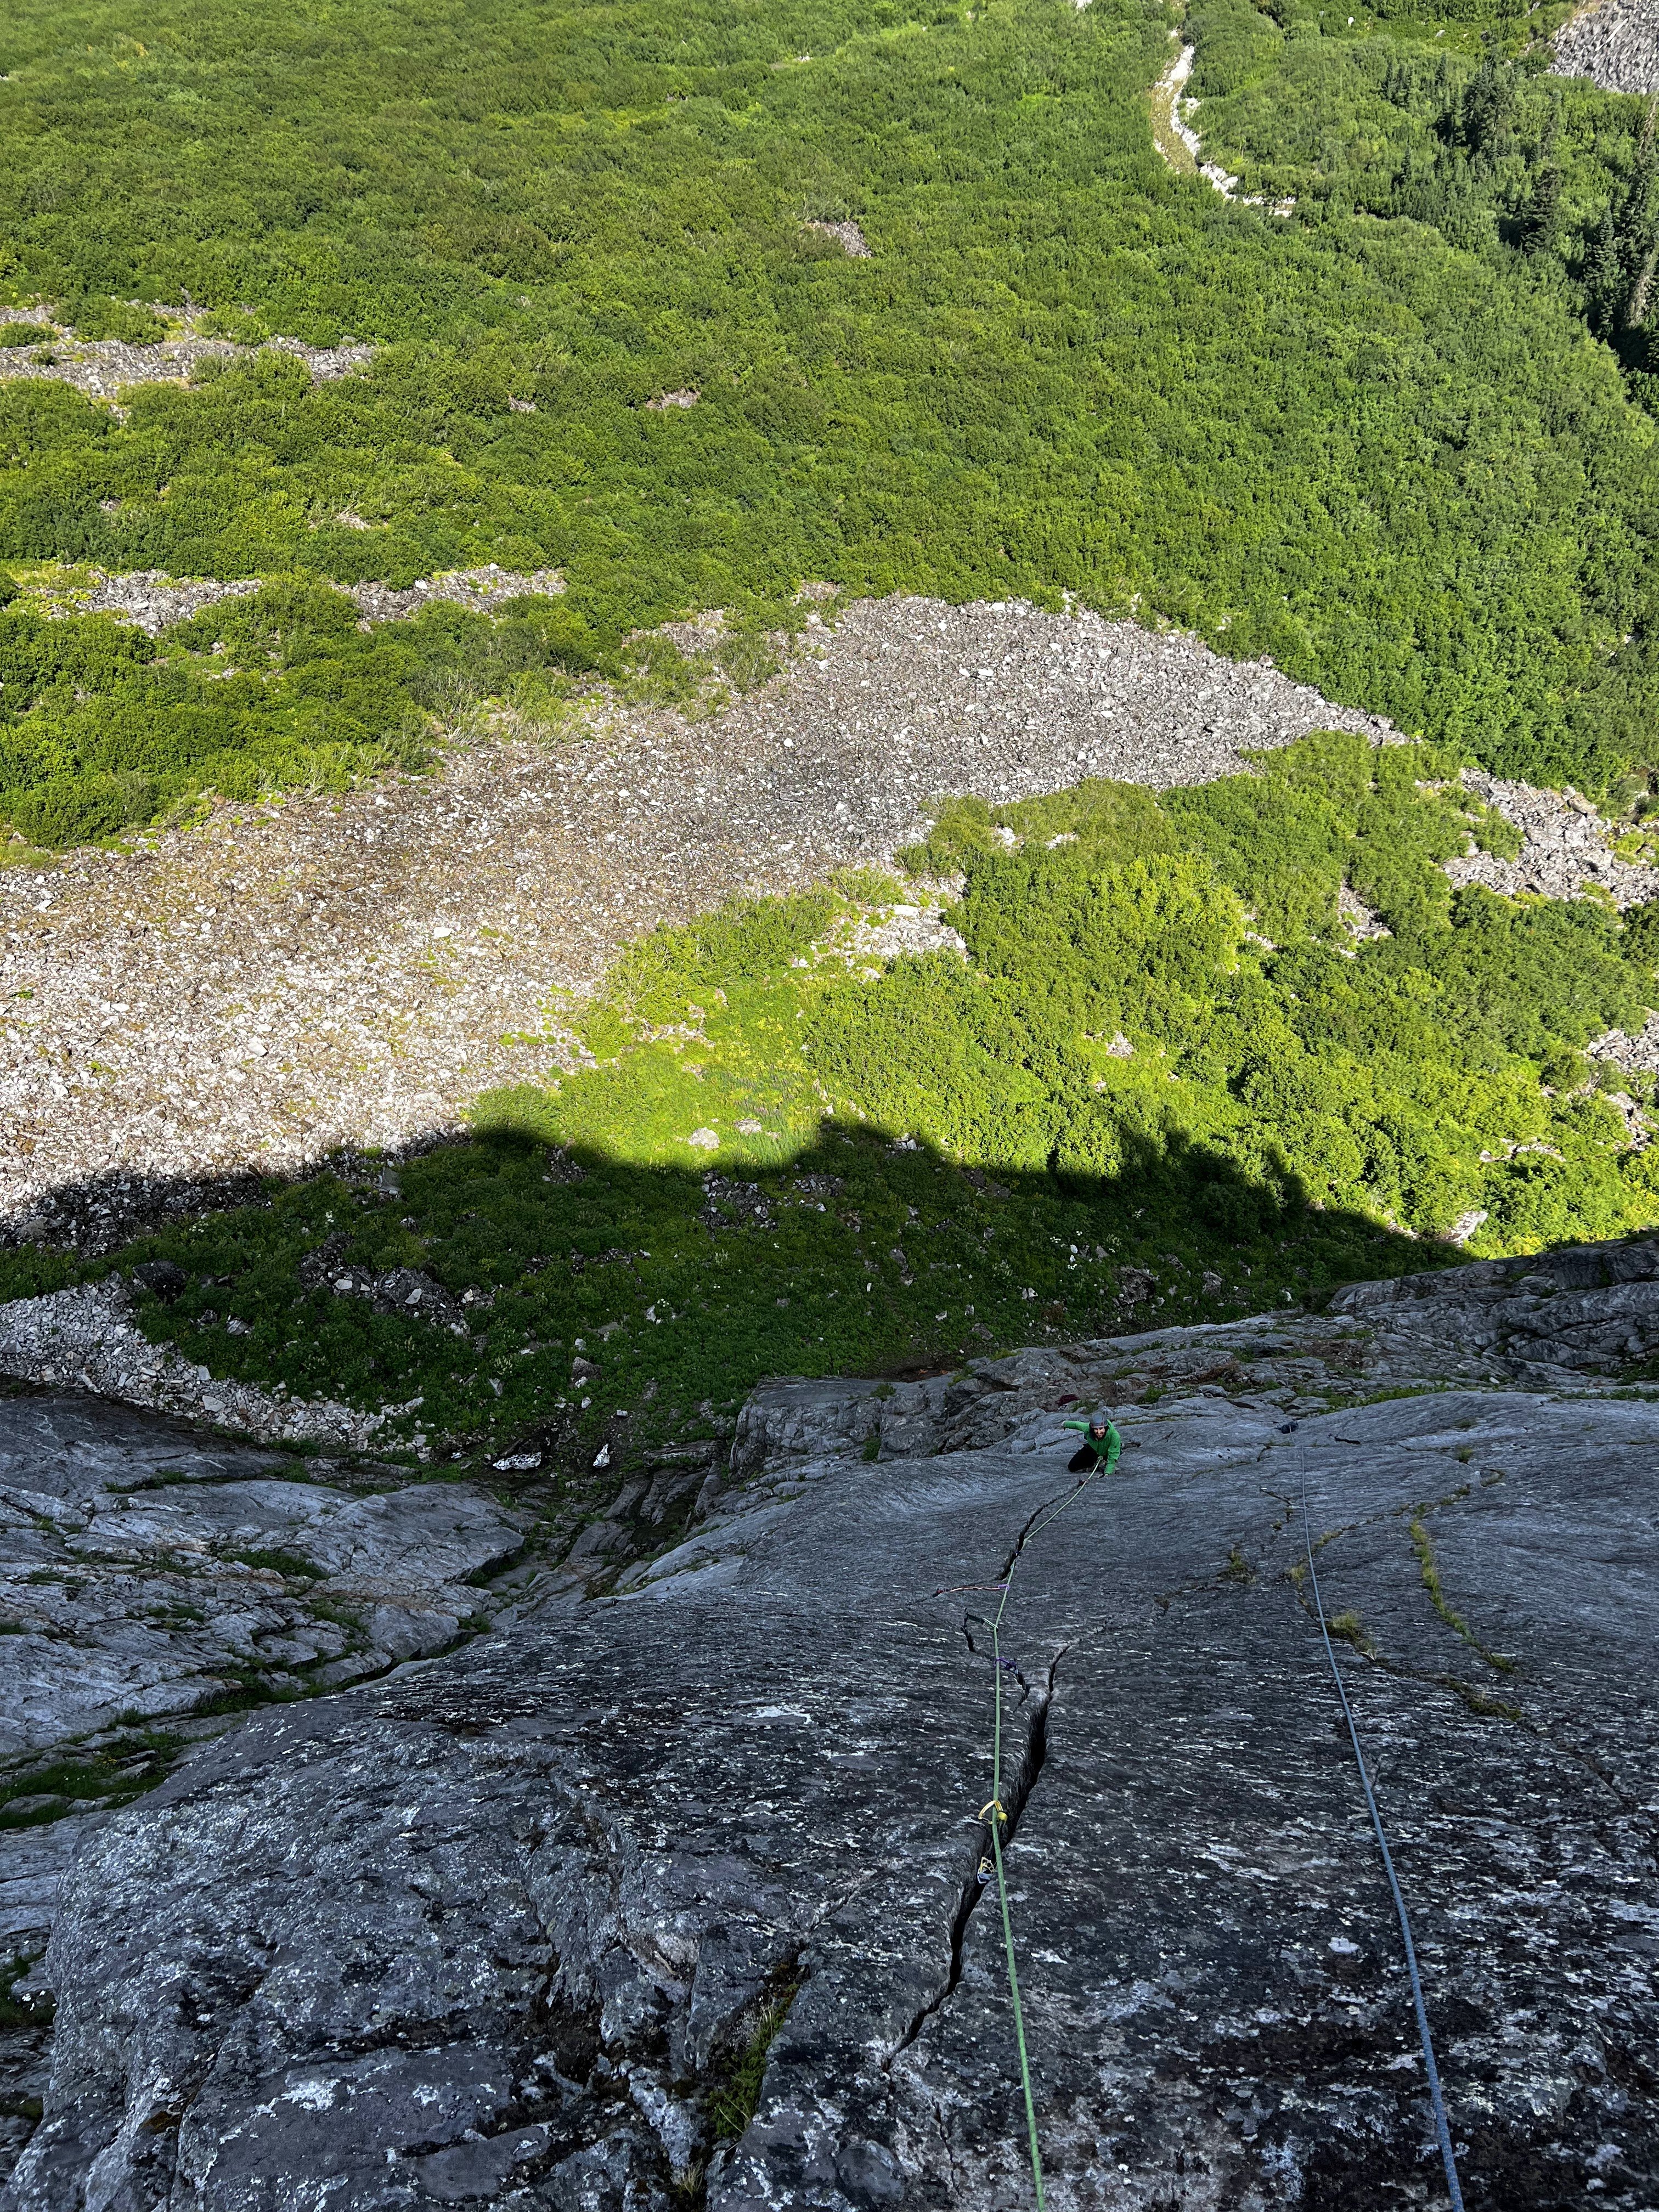
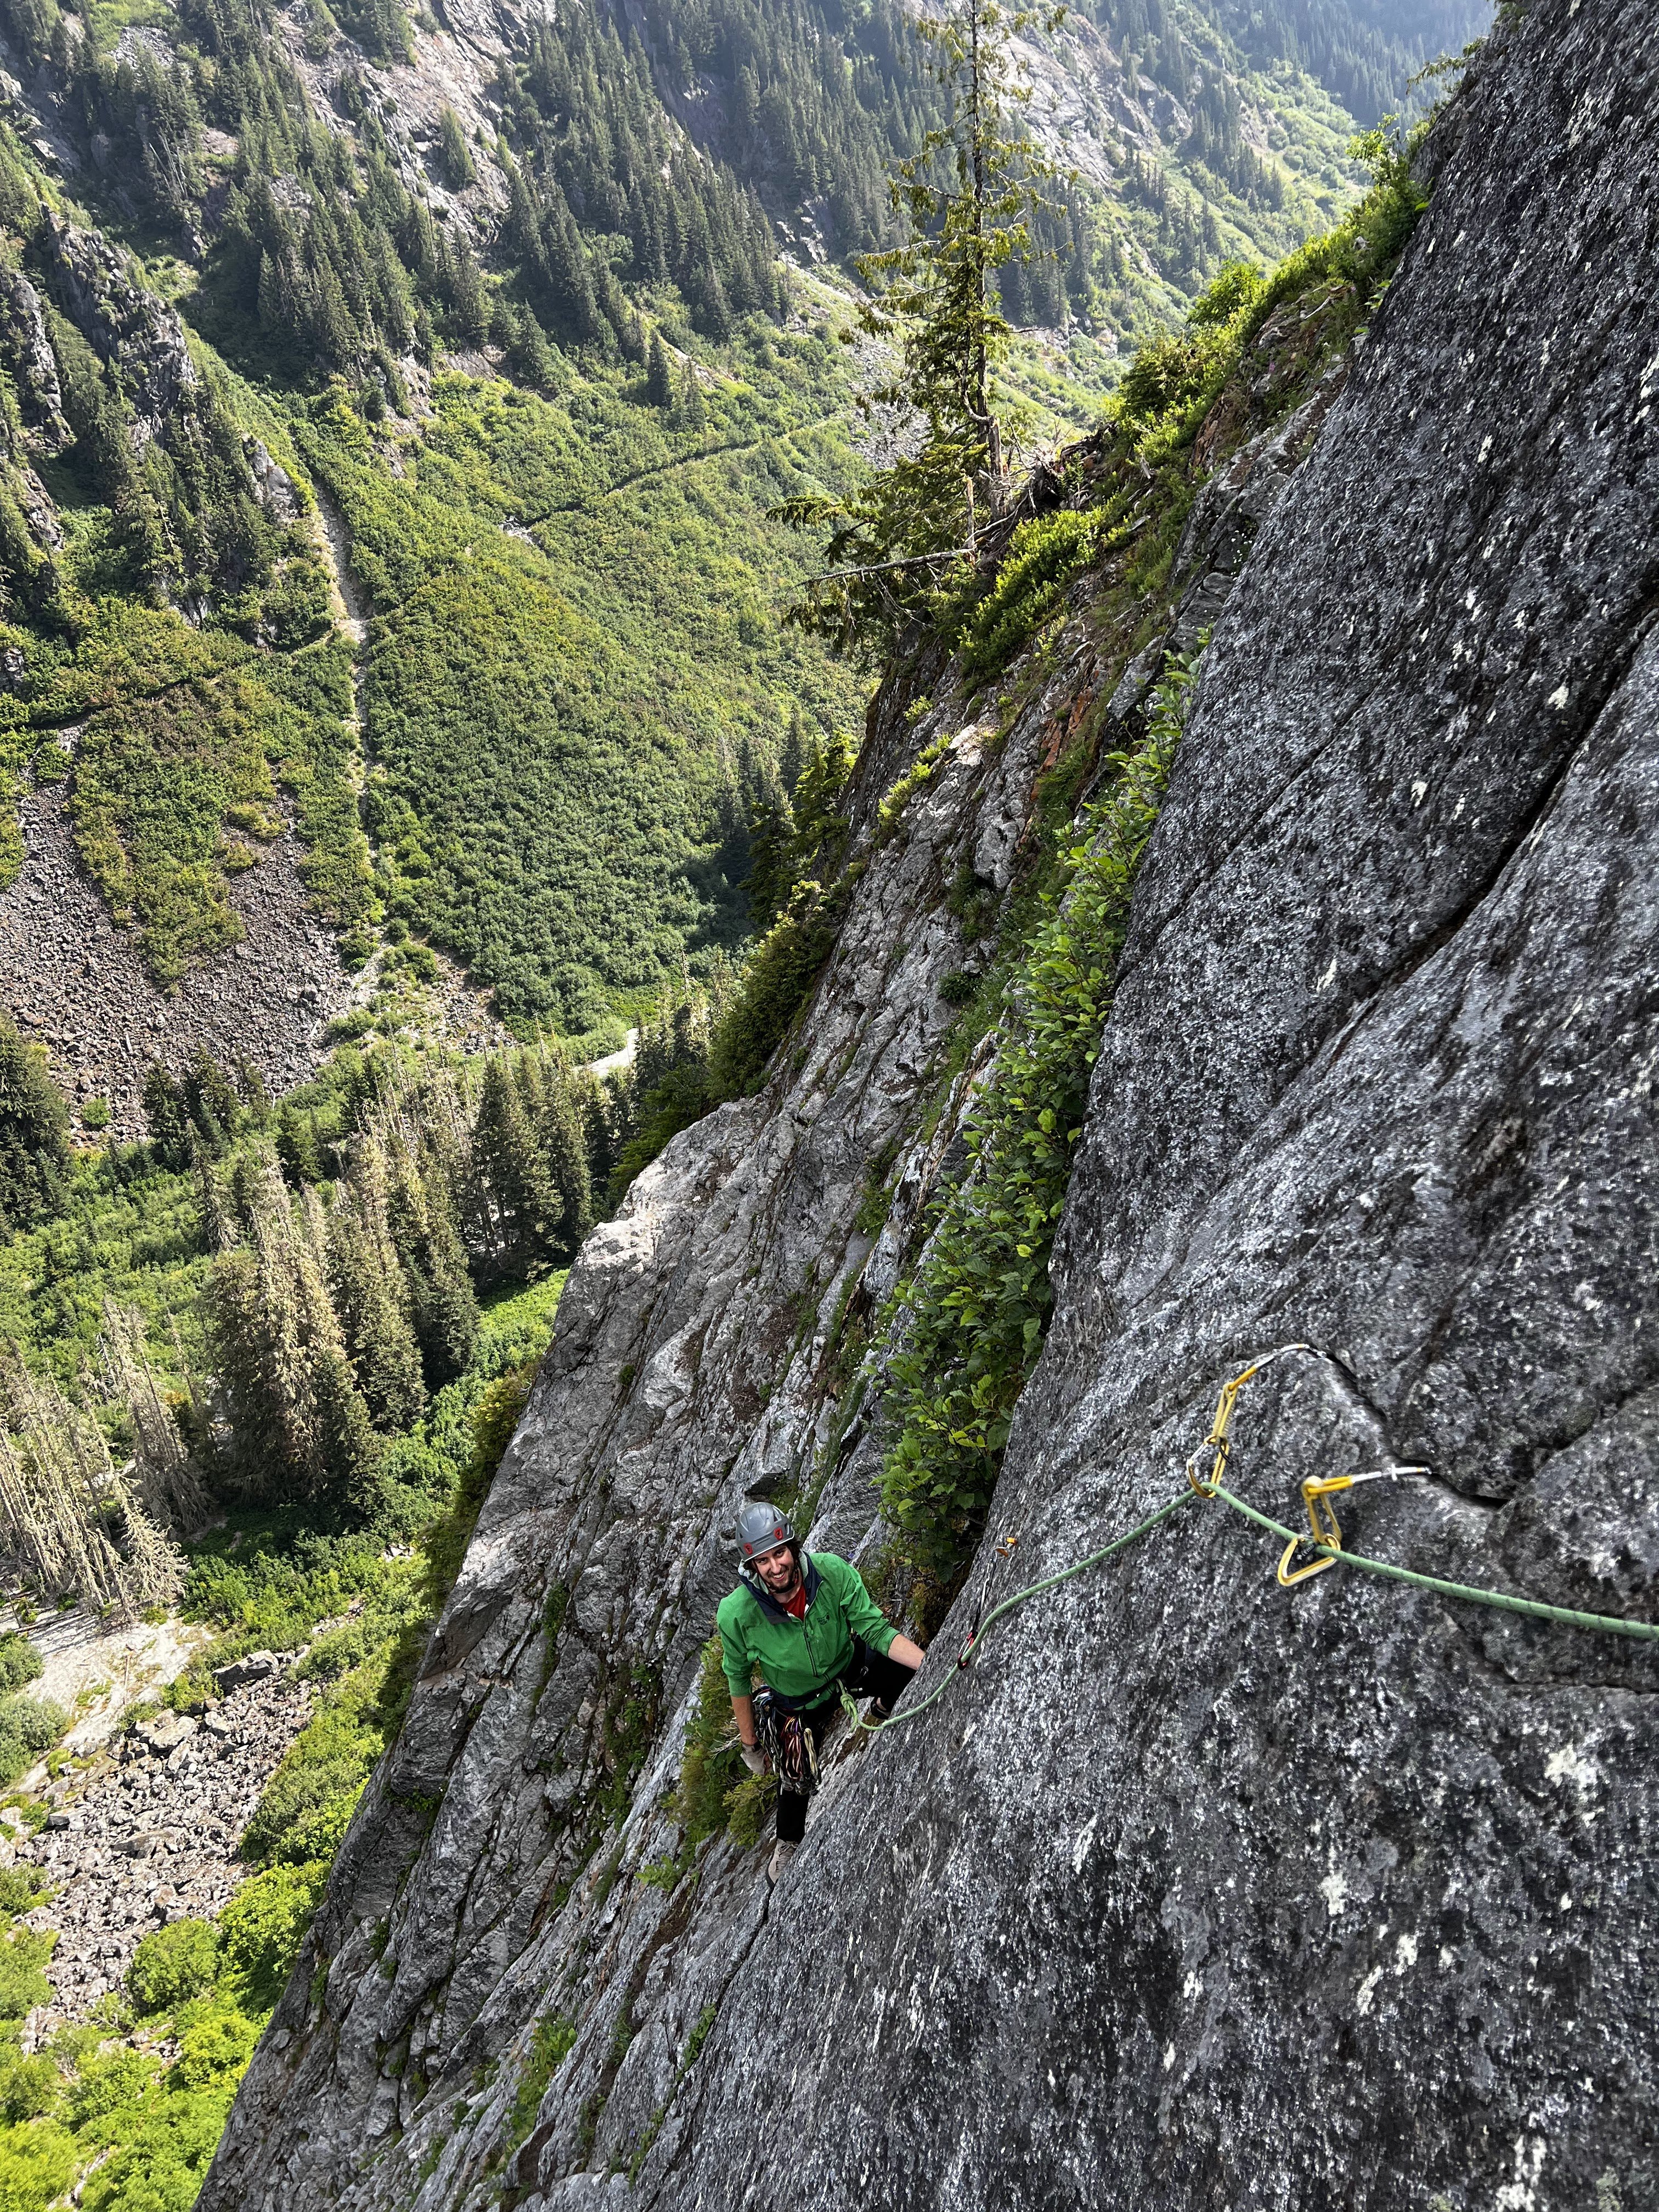
Howdy friends, it's my pleasure to present you all with the newest Washington classic - Negligence located off the Hannegan pass trail. This is a stellar line that links up several crack systems to access a shield about halfway up the large buttress seen across the valley. We spent most of the spring/summer of 2025 developing and cleaning this line and would like nothing more than people to get out there and climb the thing. Approach - From the Hannegan Pass Trailhead, hike Hannegan Pass Trail past the first two switchbacks about halfway to the campsites. Shortly after the second switchback, drop down the open talus field on your right. Continue down the talus almost to the creek, cut right into the woods, then make your way down to the creek from there. Jump from a large log across the first narrow creek band and you’ve found the tunnel through the slide alder. Be bear aware here, we found multiple fresh signs of them (probably due to the golfball sized salmon berries). Follow this until the major creek crossing, then cross the creek. After crossing, head through the trees directly towards the nose of the buttress, hopping another small creek braid before entering into the talus for the final approach. Follow cairns up the talus, then follow the path (likely overgrown) through the underbrush to the base of the wall. The route is located a couple hundred feet to the right of the nose. In total, the approach is around 2 miles, but tends to take around 45 minutes, give or take. Climb - This route takes a series of remarkable crack systems 400 feet up the Hannegan Buttress over four pitches. Protection is traditional, styles vary from off-width to tips, and all anchors are bolted for ease of descent (316SS all around). Each pitch ends at a conferable belay ledge. Pitch 1 - Depending on snowpack, either hop right into the offwidth start, or cross a deep snowfield to dig right into the rest of the pitch. A long continuous crack system varies from tight fingers to the wide stuff, favoring tight hands and good feet. This pitch reminds me of a steeper version of the Apron with lots of flared hands, sustained 5.9 climbing with several good rests. The bottom wide bit is a little dirty and will probably remain so since it gets buried under the snow pack, but it quickly cleans up. This pitch would be a classic all on its own. (5.9+) Pitch 2 - Amble up from the belay towards a notch gully in the leftward wall, clipping in a pin down low, then placing a bit of gear before firing a few fun moves to gain the gully. Make your way up the 4th class to a great ledge to top out this short pitch. (5.8) Pitch 3 - Step left from the belay and begin climbing up a wide box. Tread lightly on the red stone before pulling into the right-facing dihedral towards the alcove. Exit the alcove on thin tips, and continue upwards until bomber hands placements allow you the confidence to trend left in the flake system. Follow the flakes until the roof, then brace yourself for a thin, thoughtful, arching crux protected by small gear as you pull out onto the Shield. Save a .2 and your smallest cam for the business. The crux of this pitch is short and sweet. Its probably easier for folks with thin fingers or long arms and can easily be pulled through on gear. (5.10d) Pitch 4 - This one's in the money for best pitch in all of Washington! Climb the stupendous splitter to the top of the Shield. It is as good as it looks. Some finger crack moves will take you past a loose book size rock (never fear, that thing isn't coming out) to glorious hand jams. It gets a little steeper at the top so be sure to take in the scenery and catch your breath a bit. Top out on a large ledge. (5.10b) Descent: Rap with a single 70m rope. Use the intermediate anchor on the ledge climbers left between the P1 anchor and the ground. Otherwise, just rap the route. Gear - 70m rope Double rack .2 - 3. Singles of 4, .1, and a purple c3 (or equivalent tiny cam, or trango gold ballnut… the best option) to protect the crux. Wires, all sizes. Consider triples in .4 and .5 for the long first pitch and a 5 if offwidths make you shake. Background - The vision and much of the labor for this route came from Nate Fearer with additional help from myself, Neil Miller, Spencer Moore and Alex Pederson. The route name comes from the fact that Nate started this project while on paternity leave and completed it within the first four months of his son's life (he really is a good father and loving husband). The route was established ground up as an aid line, then dug, cleaned, and scrubbed. Then scrubbed, then scrubbed, then scrubbed. Further ascents will clean it even more. Also, we found some evidence of prior development out there including a bolted (2 pitch?) line left of the nose. If anyone has information on this route please let me know.
.jpg.2b582877bdbee4a7e892f3bb36fd185c.jpg)
.jpg.bdabd6c4d8ebc9668d06dd06dc2df6a7.jpg)
 2 points
 -
I feel like my primary motivation for fa's is exploration and freedom. If ya can't enjoy the turds ya step in you probably won't stick around in the game very long.1 point
-
What if they were having the most fun? I say if you can’t make it to a main named summit it’s time to submit it to Geographic Names and get your summit named. This will please the sponsors.1 point