Leaderboard


Popular Content
Showing content with the highest reputation on 10/19/23 in all areas
-
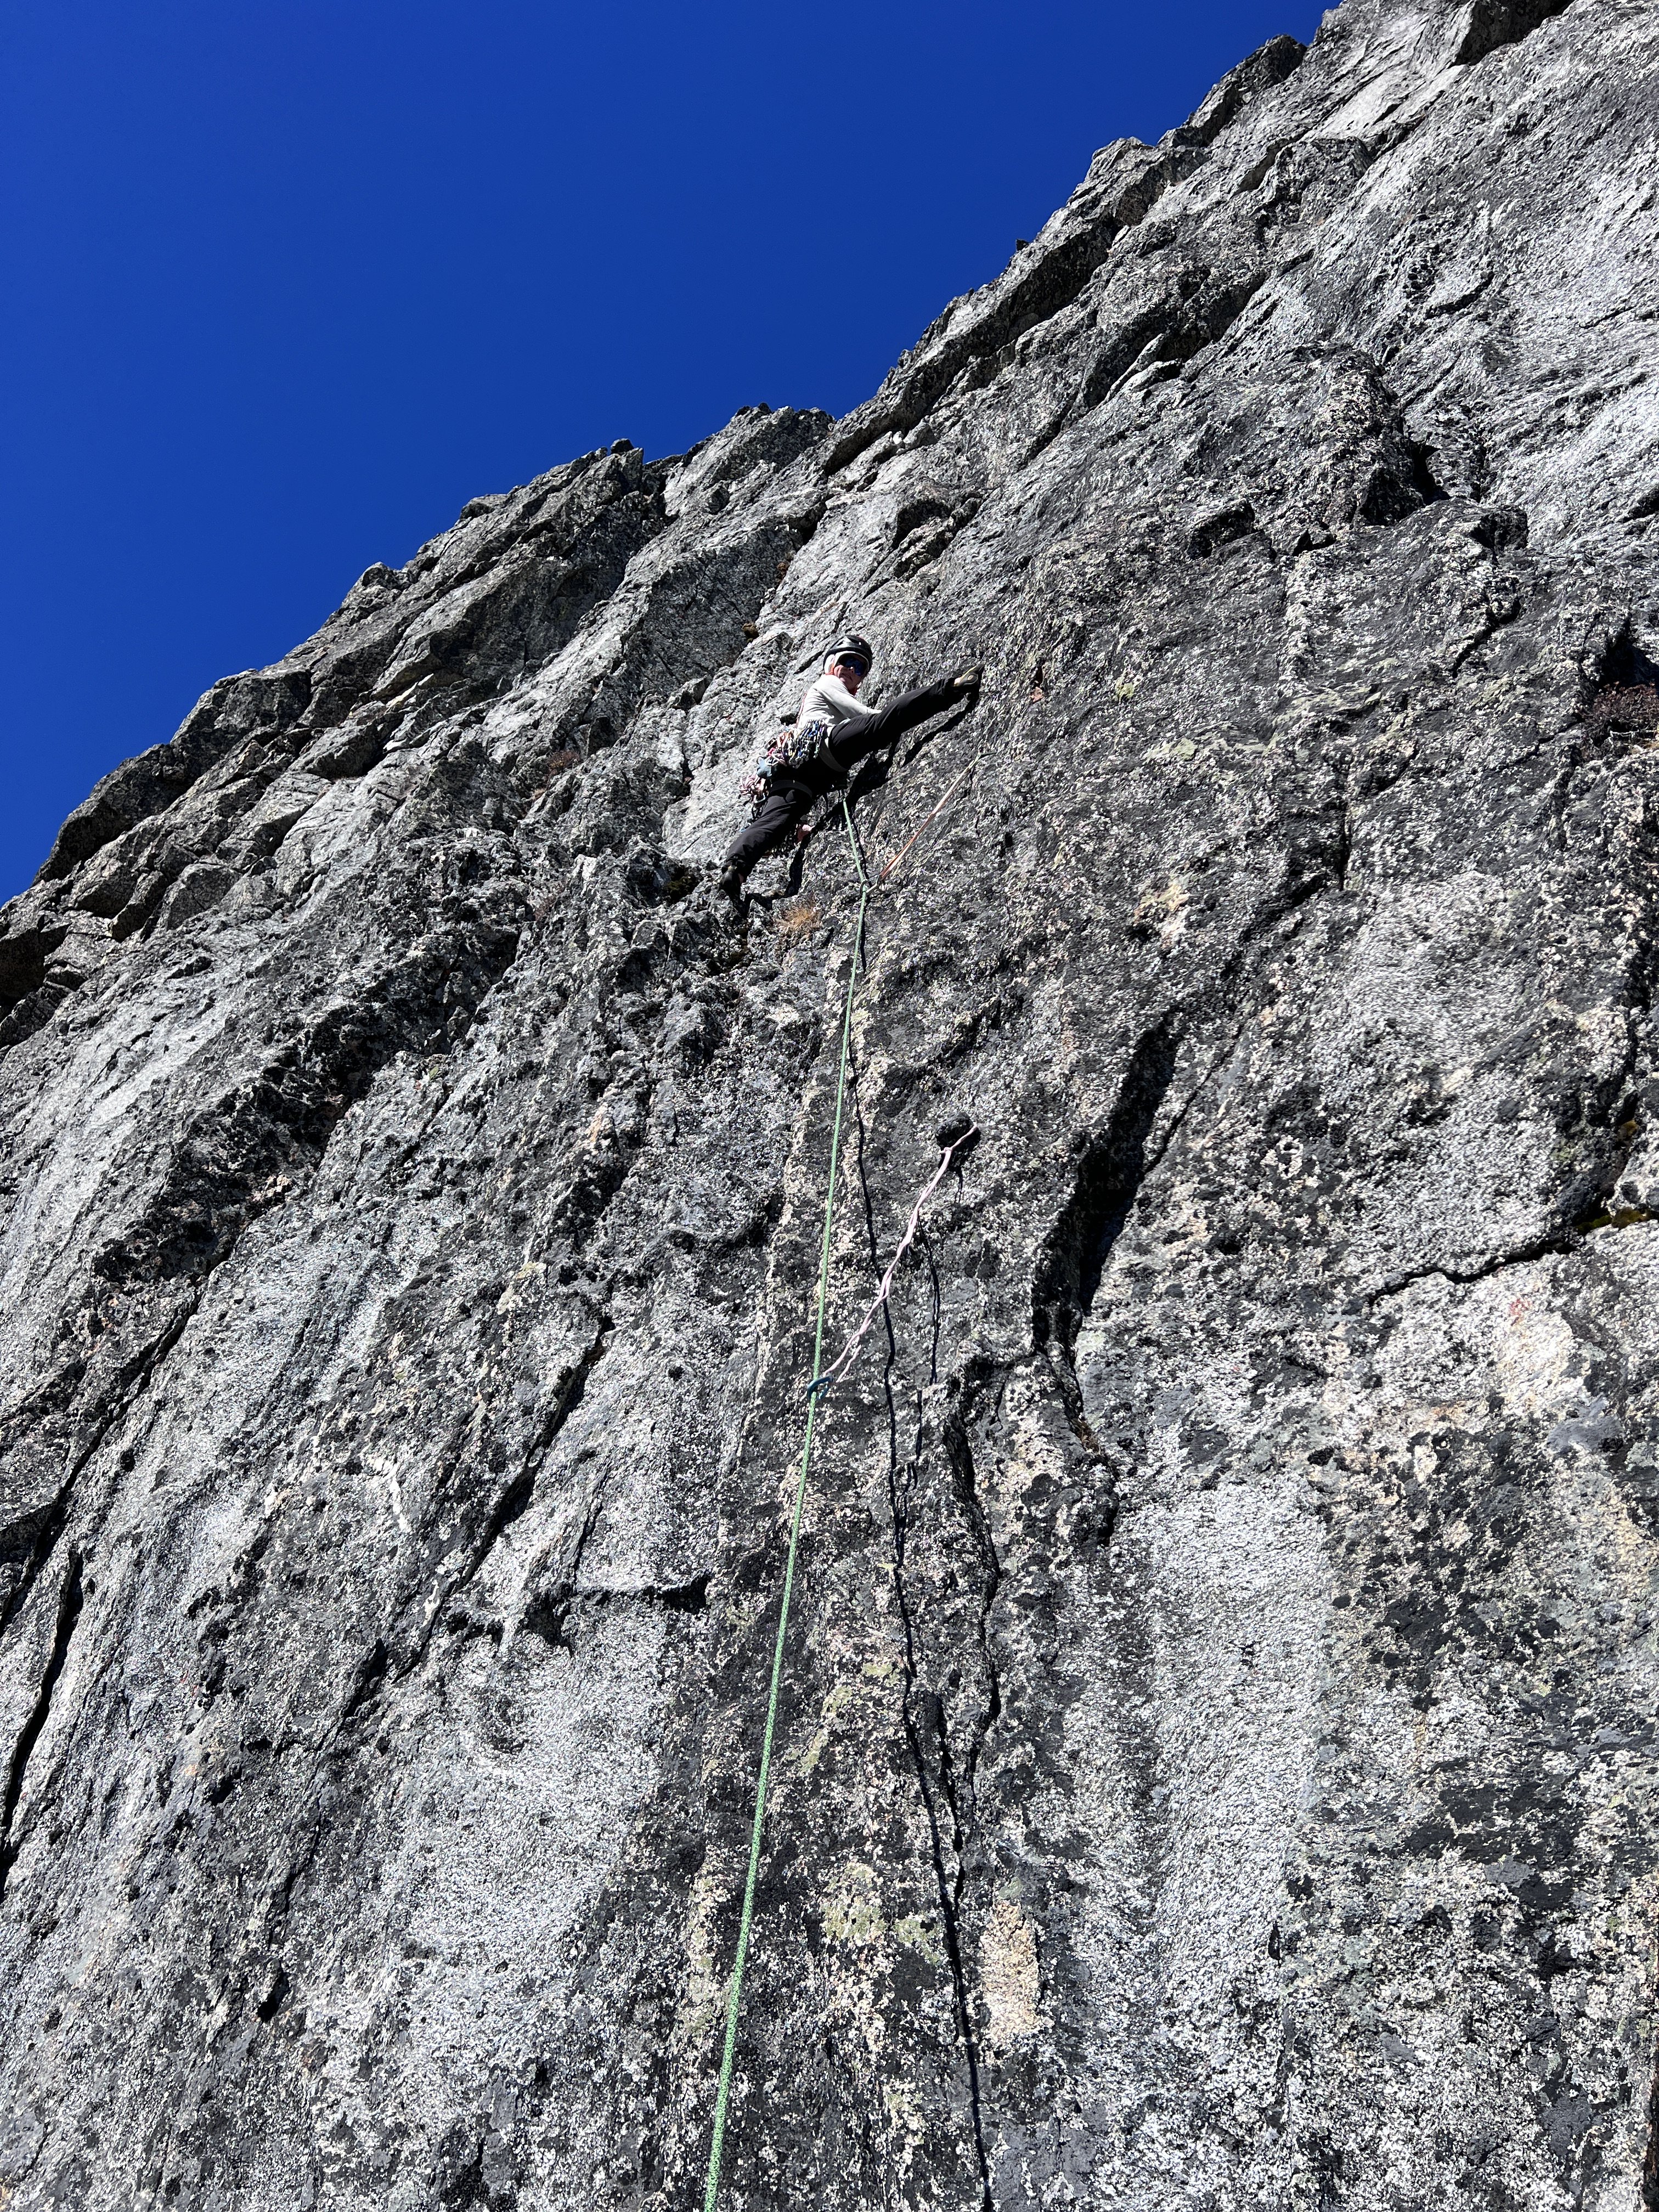
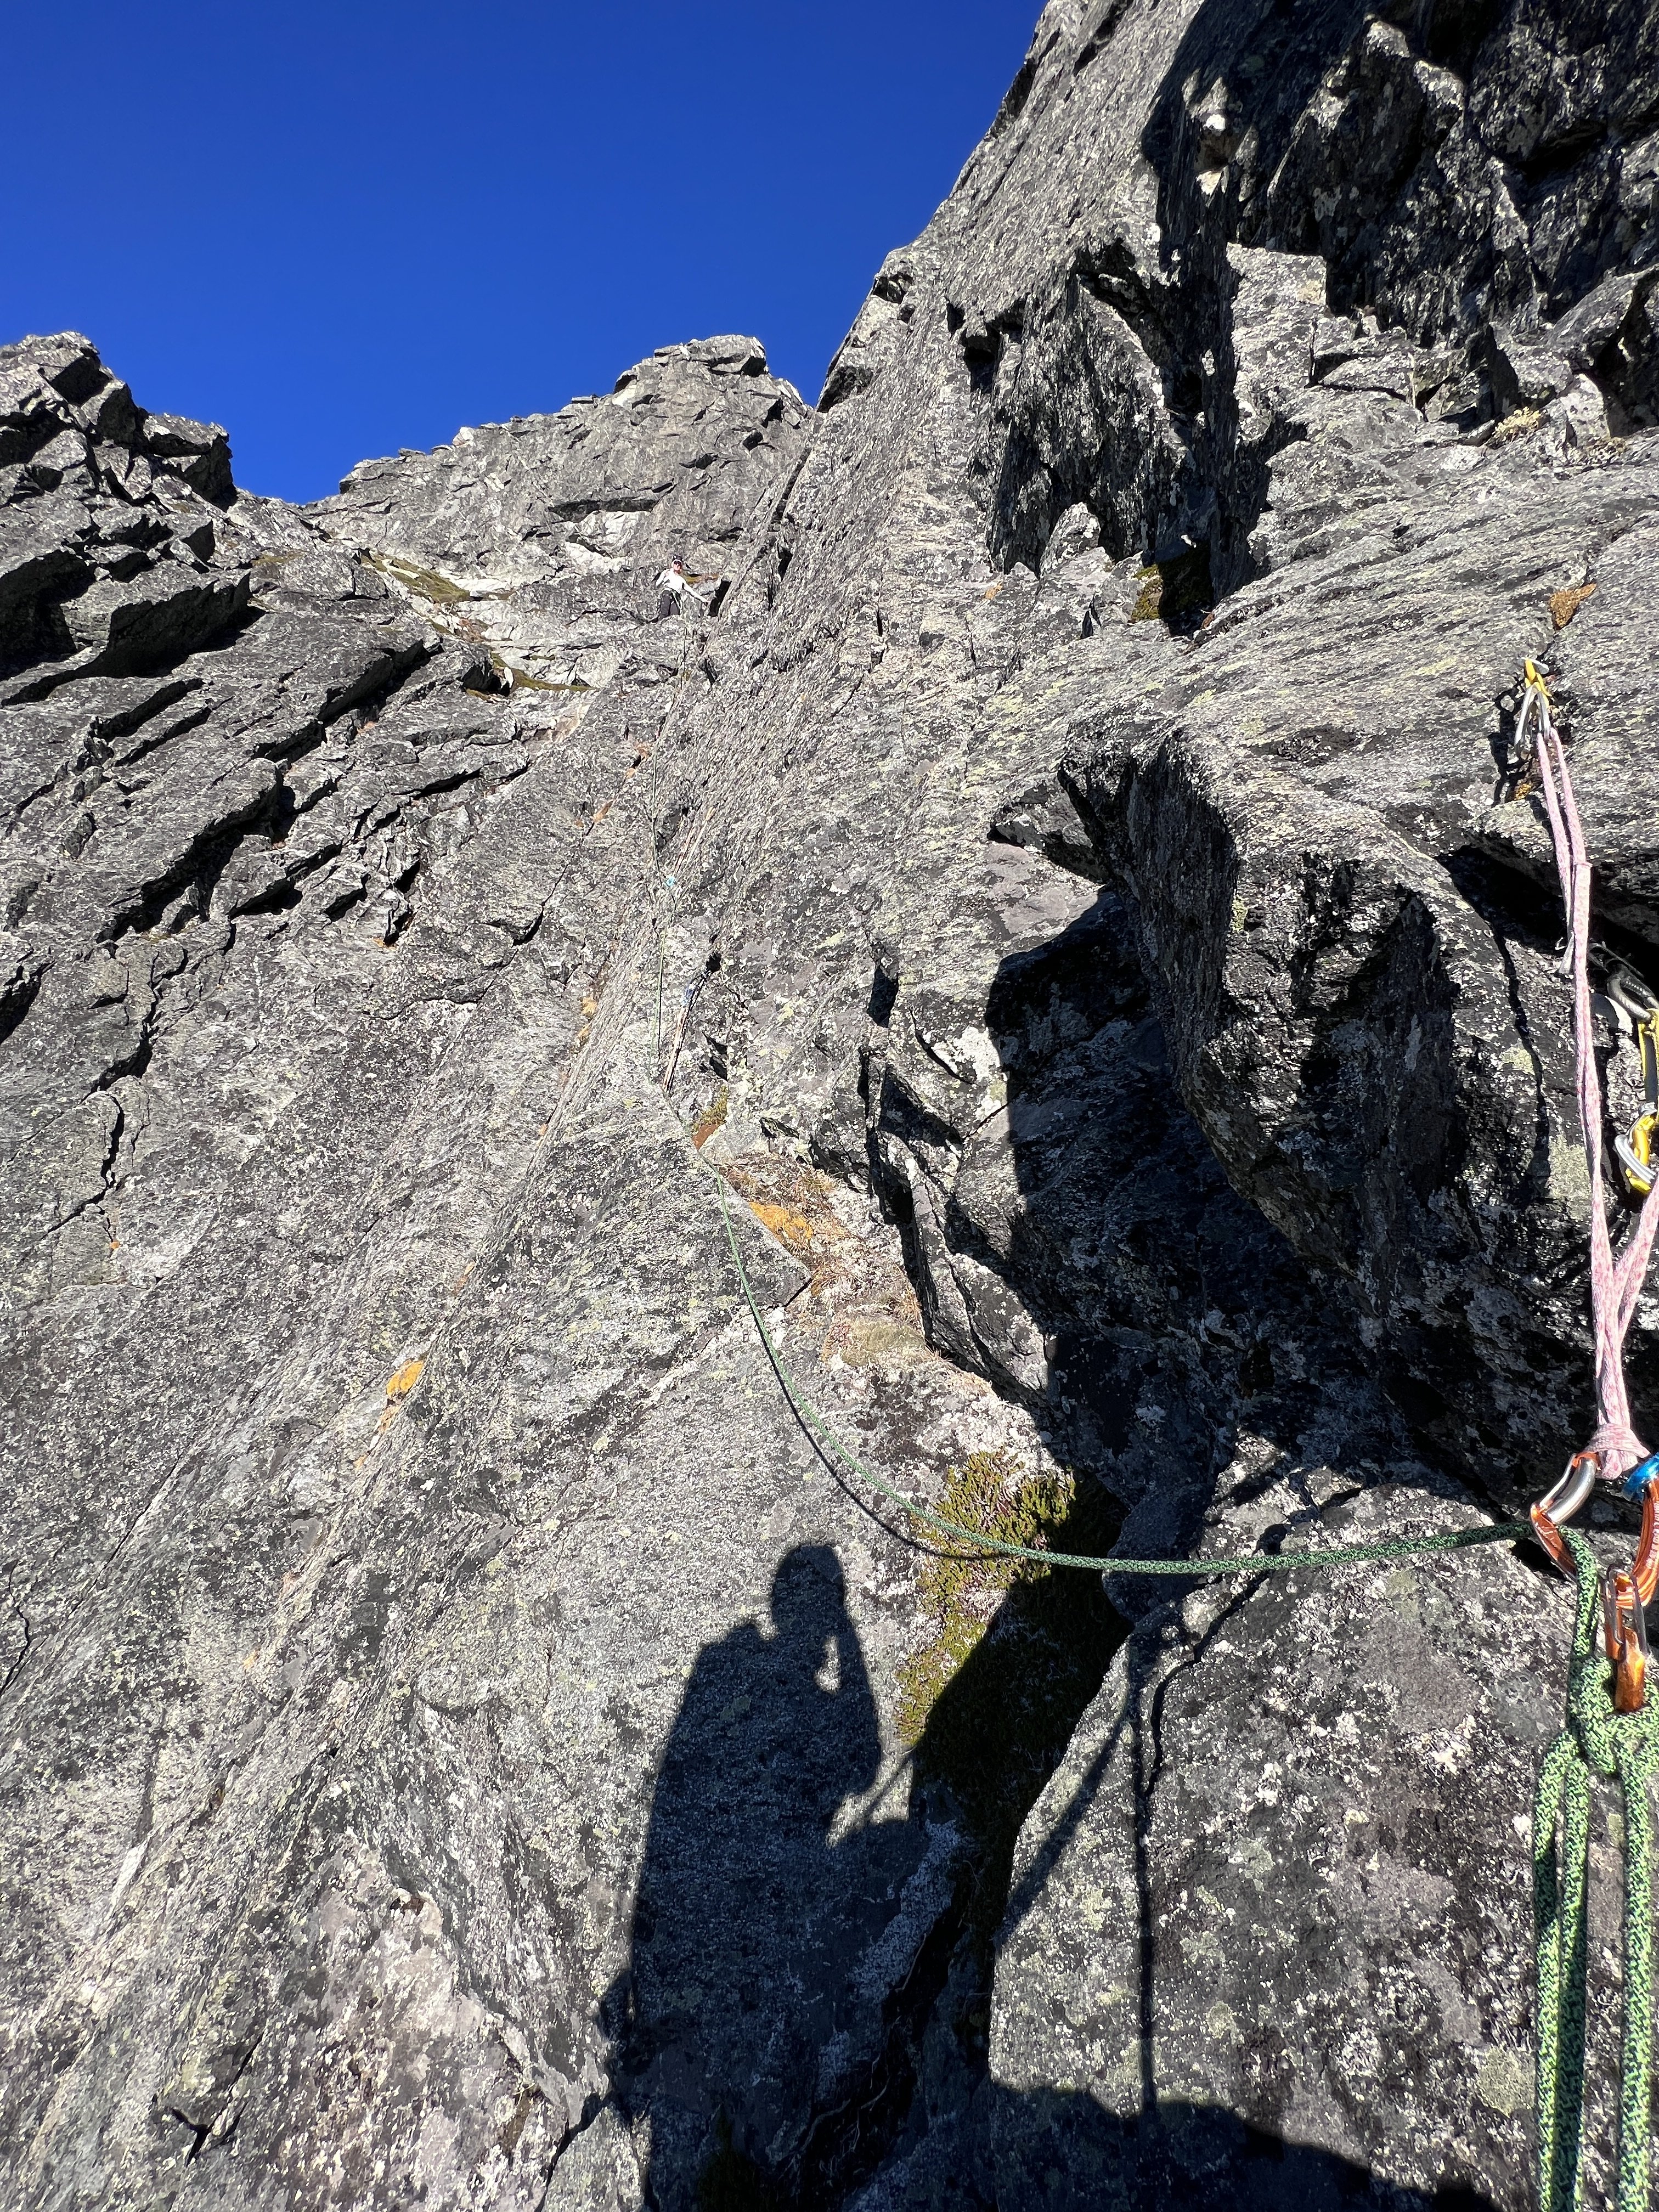
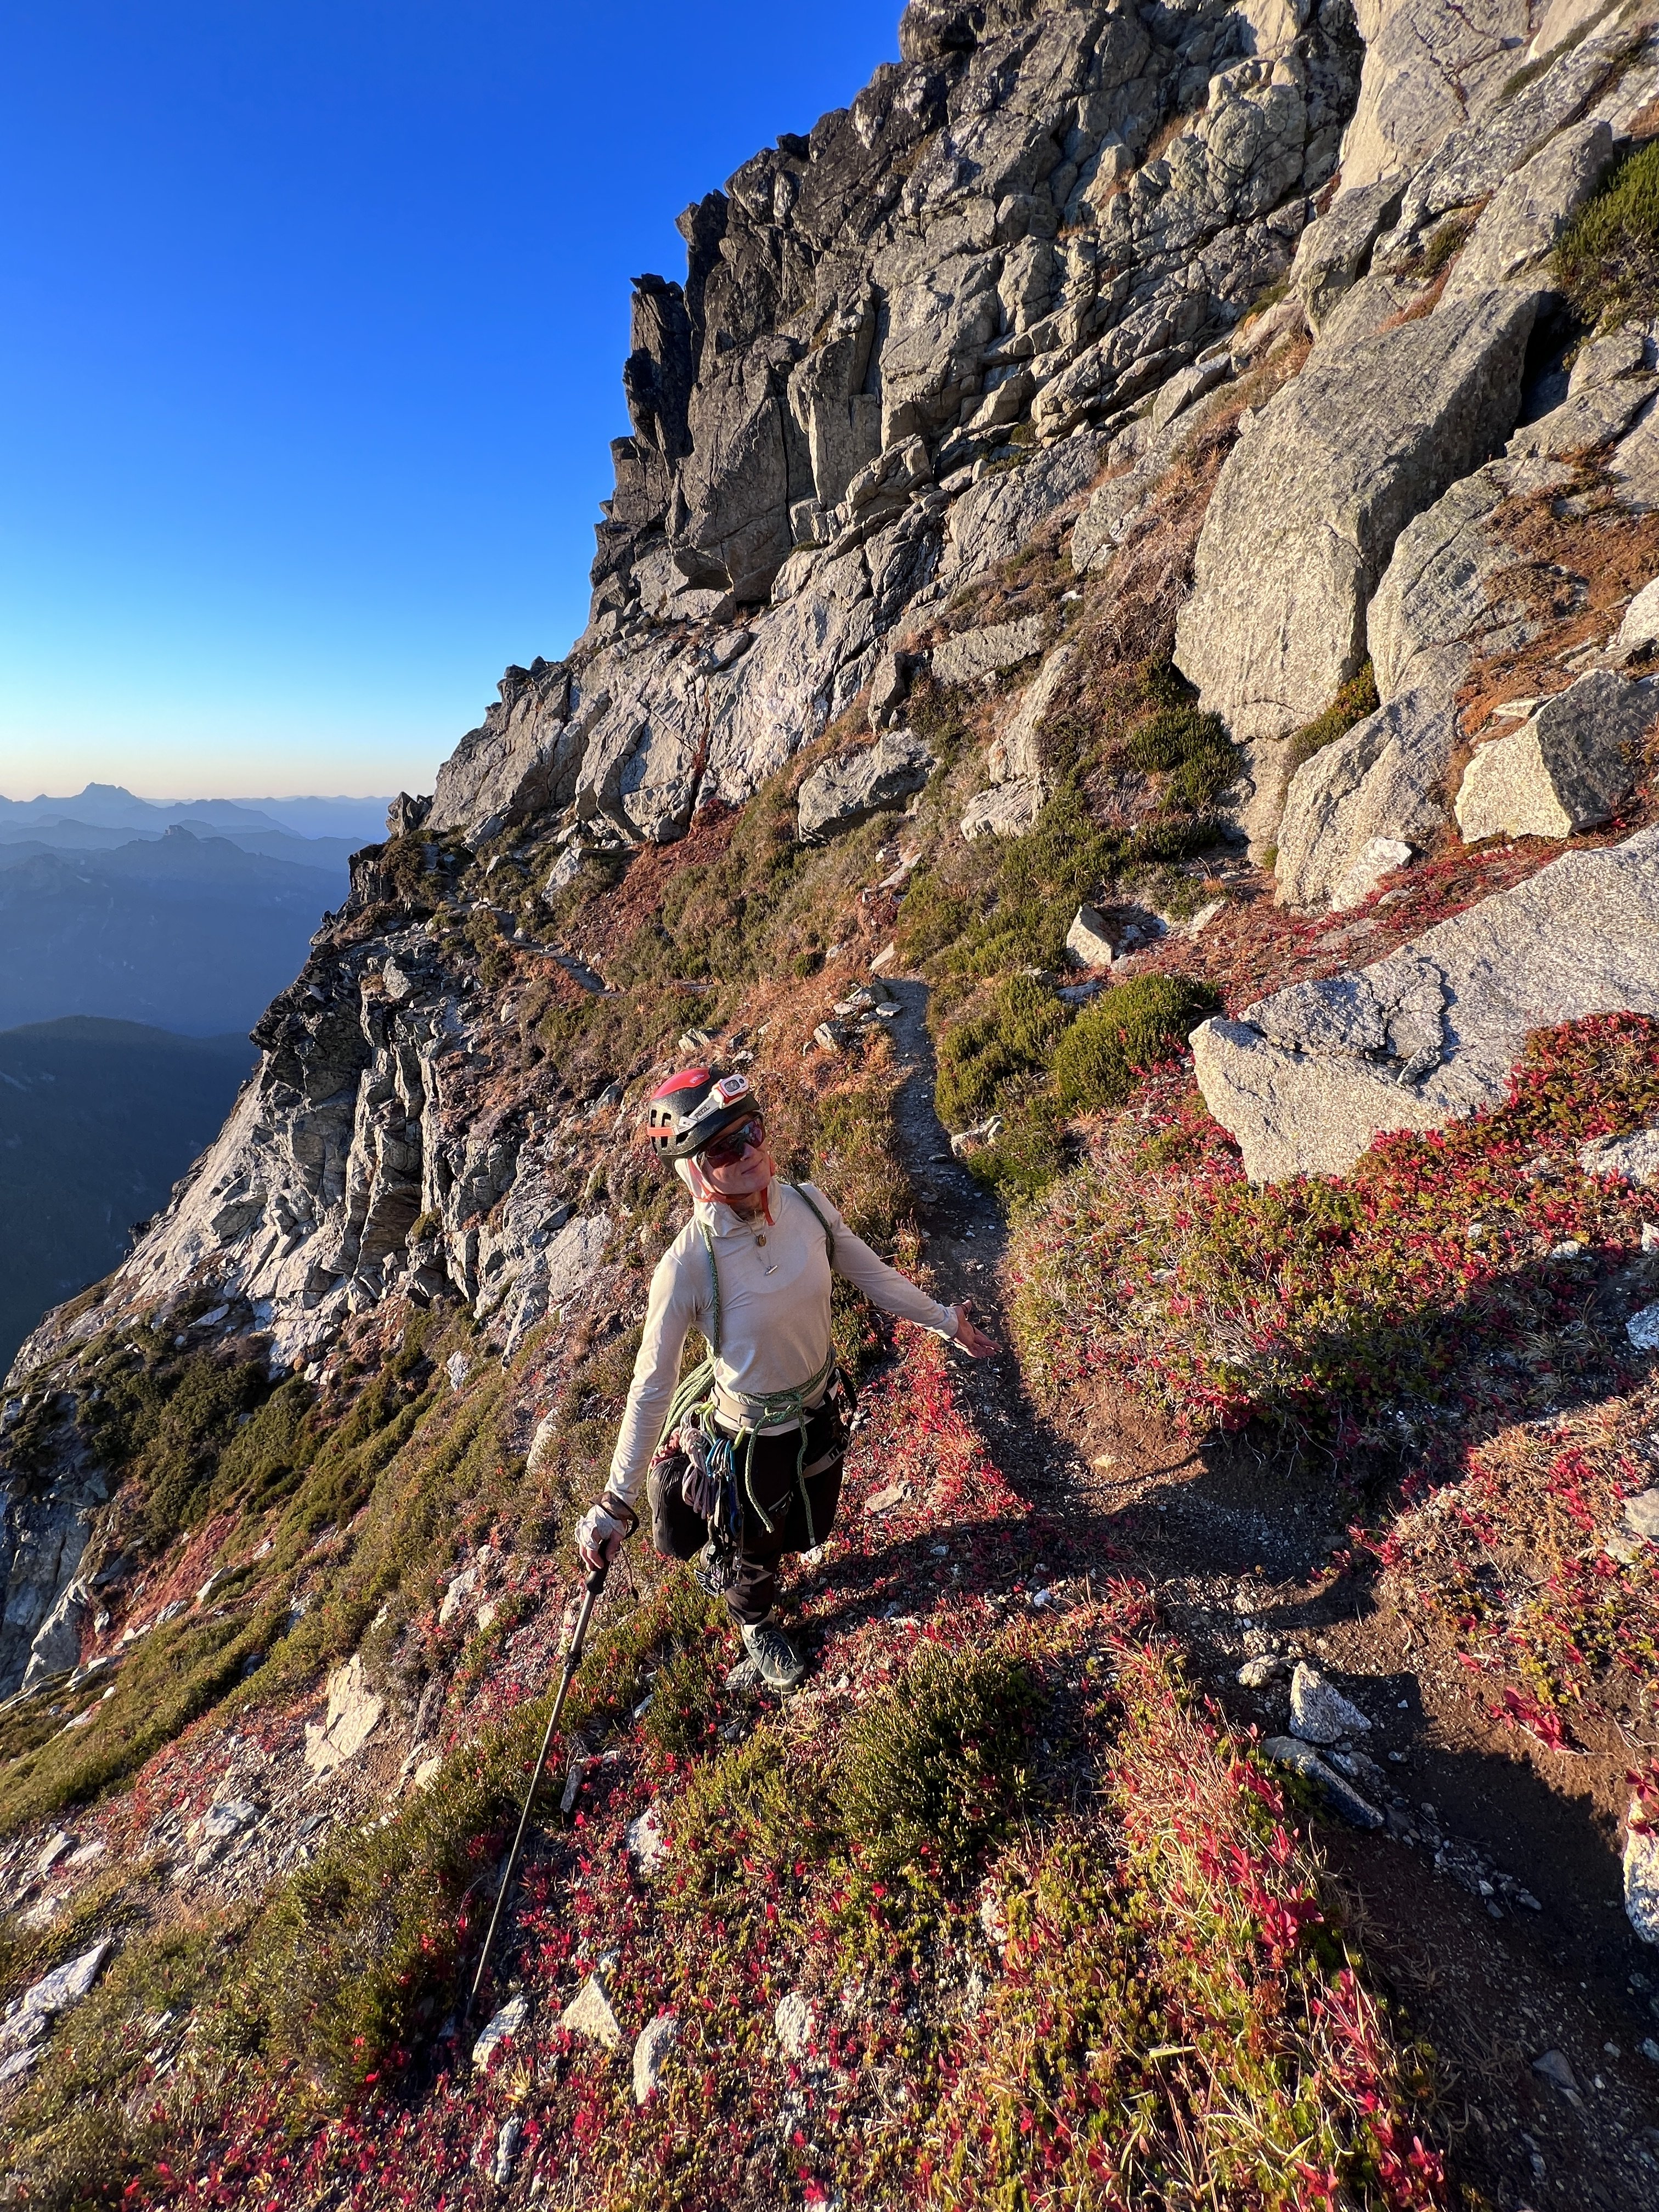
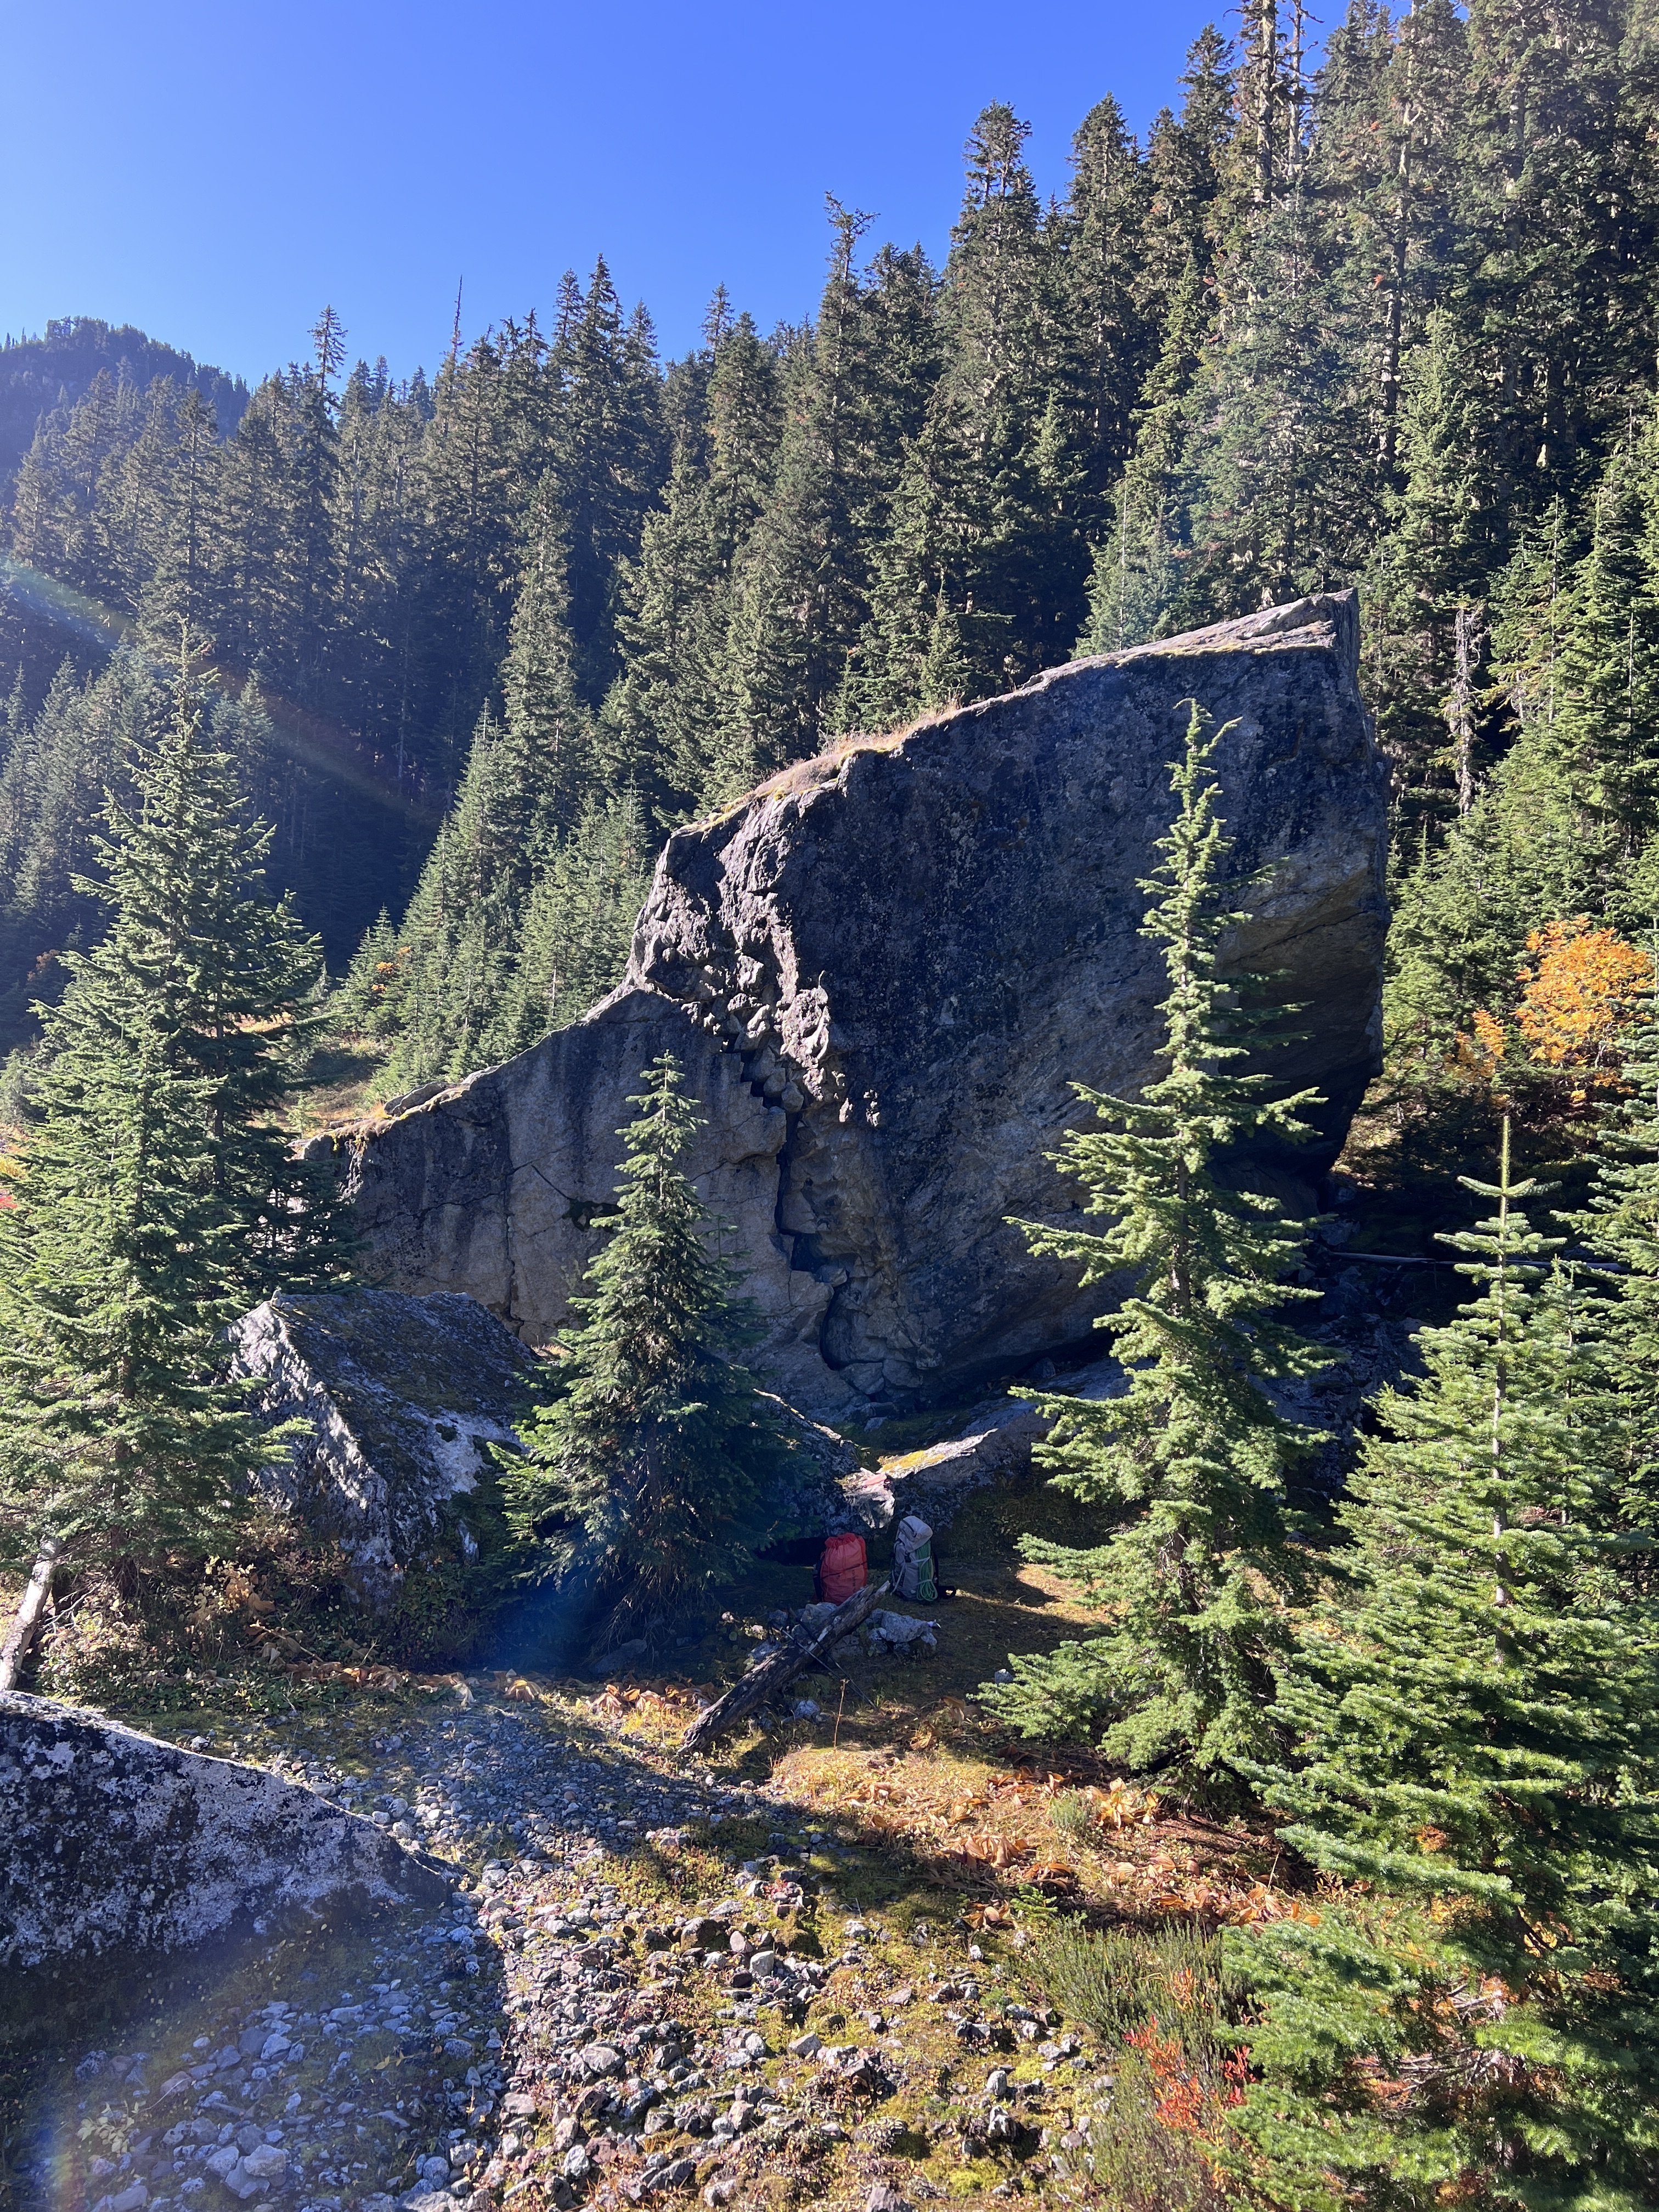
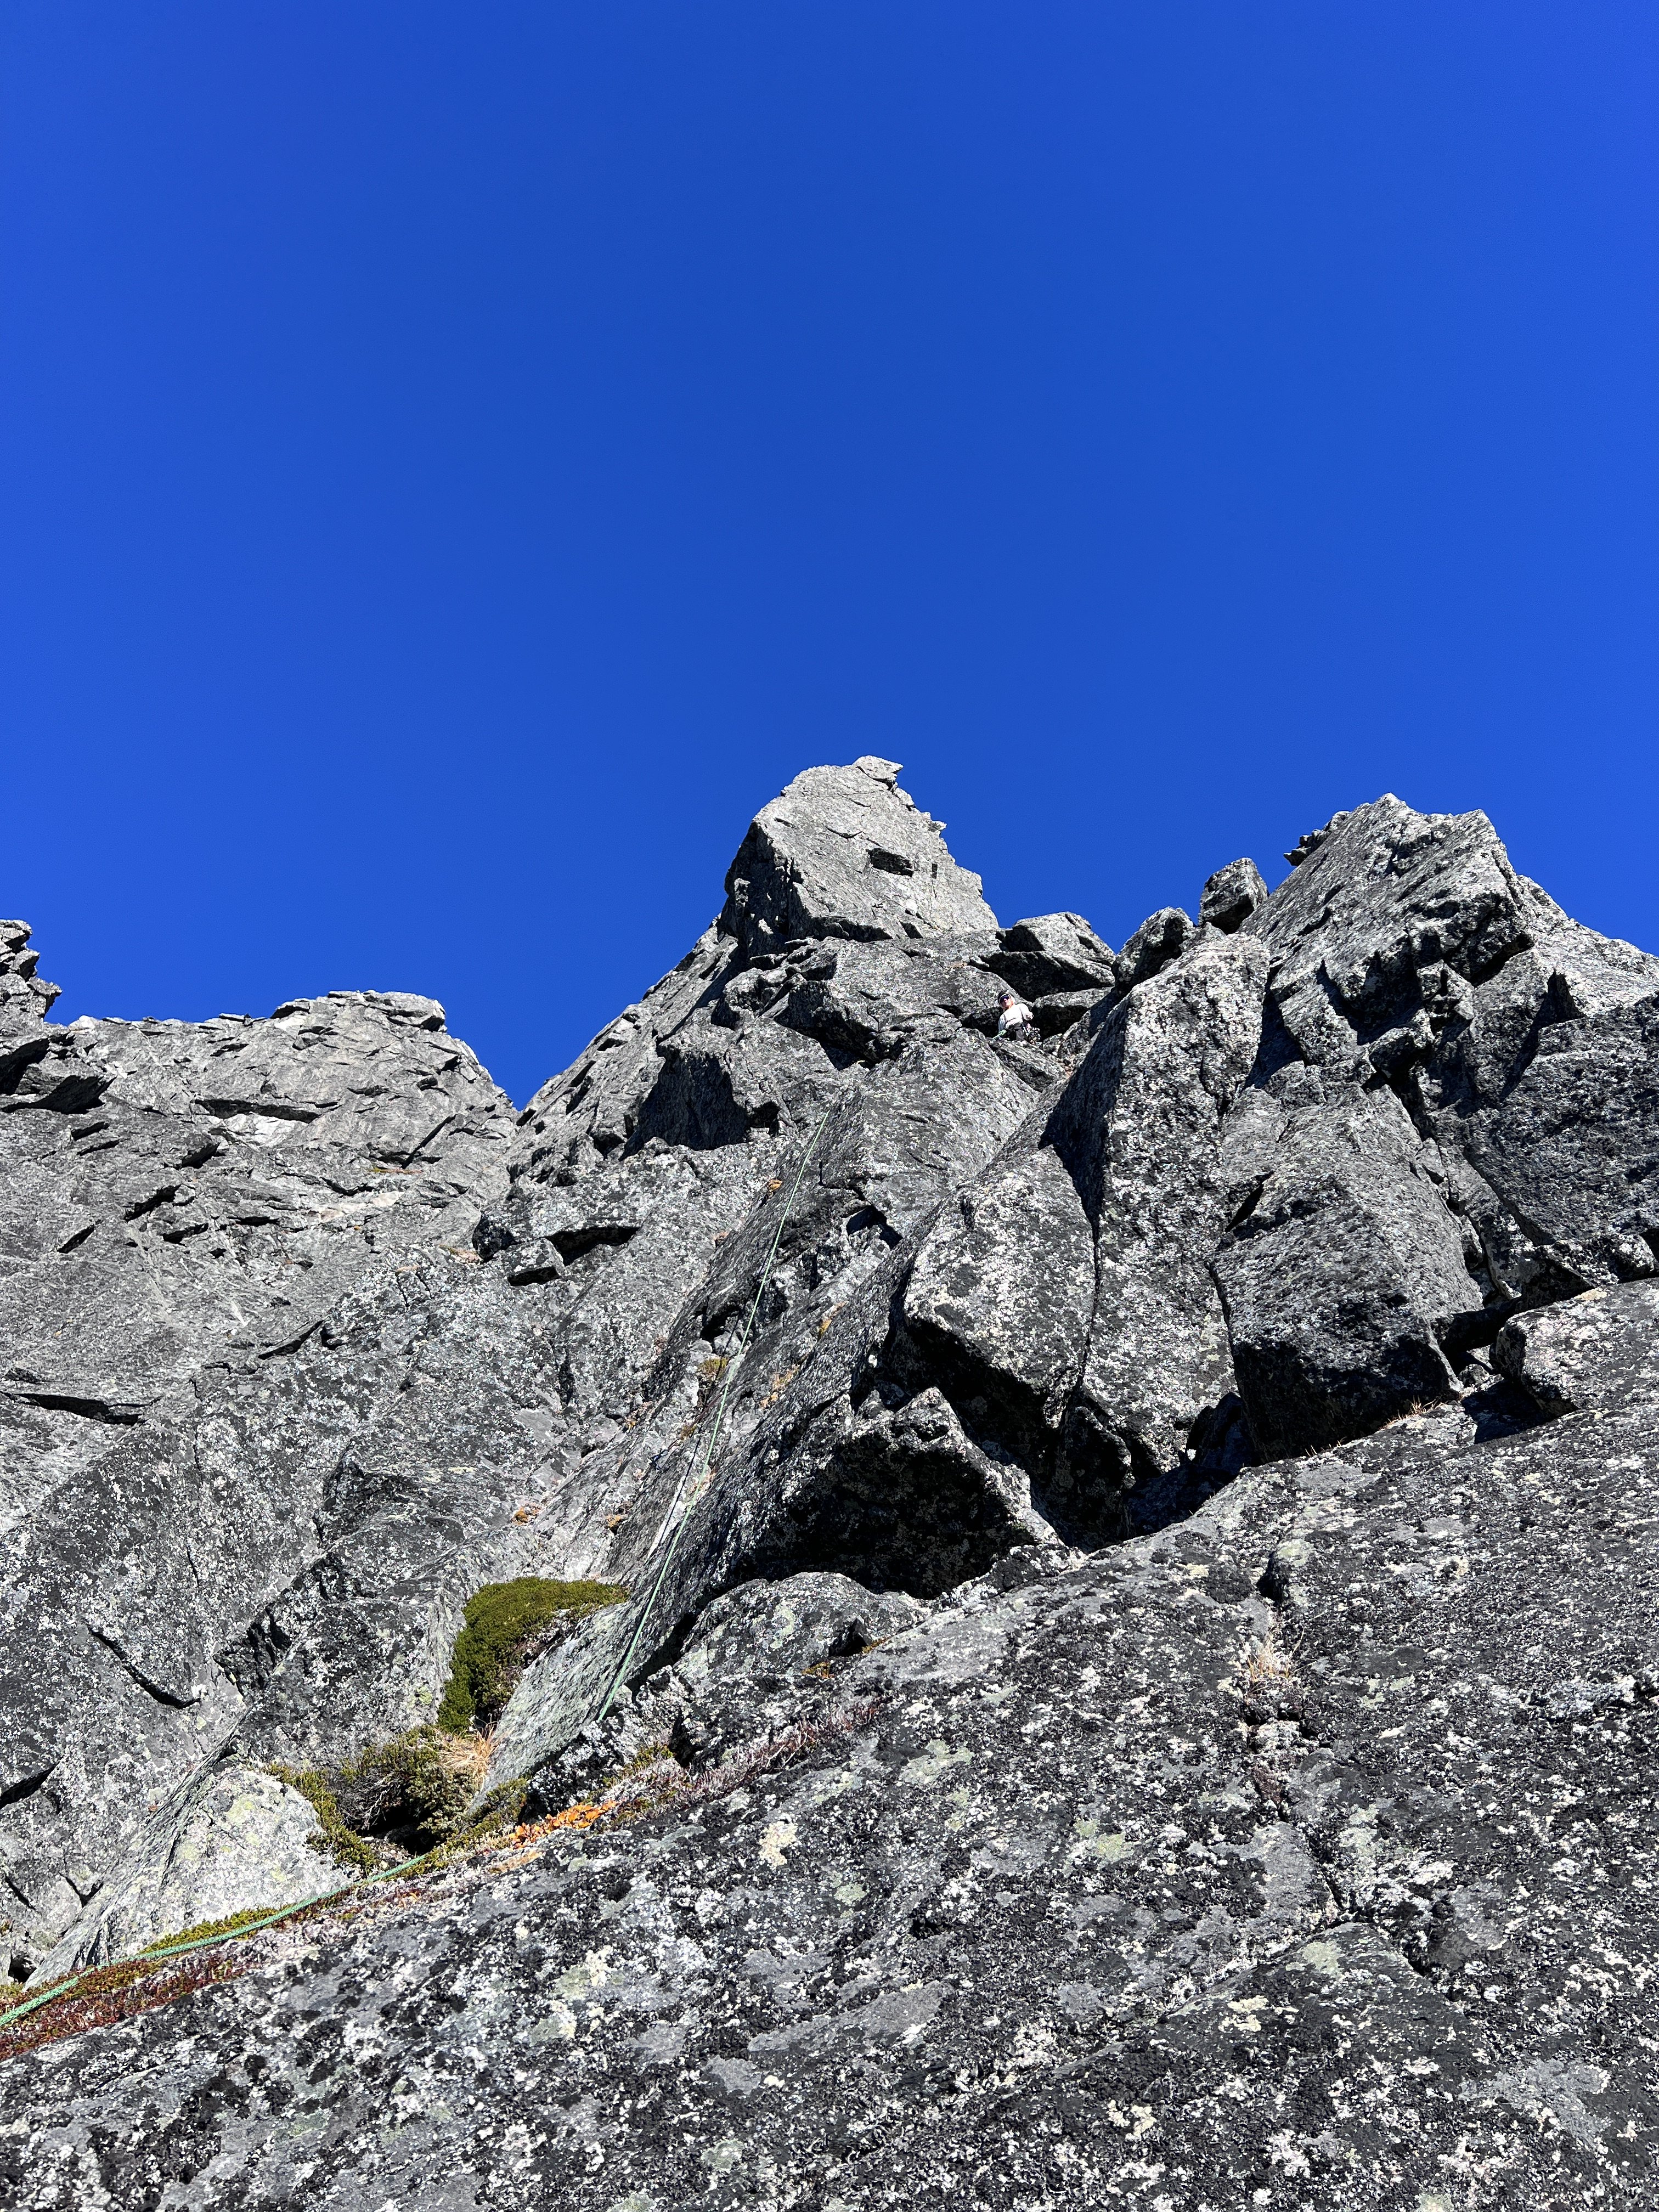
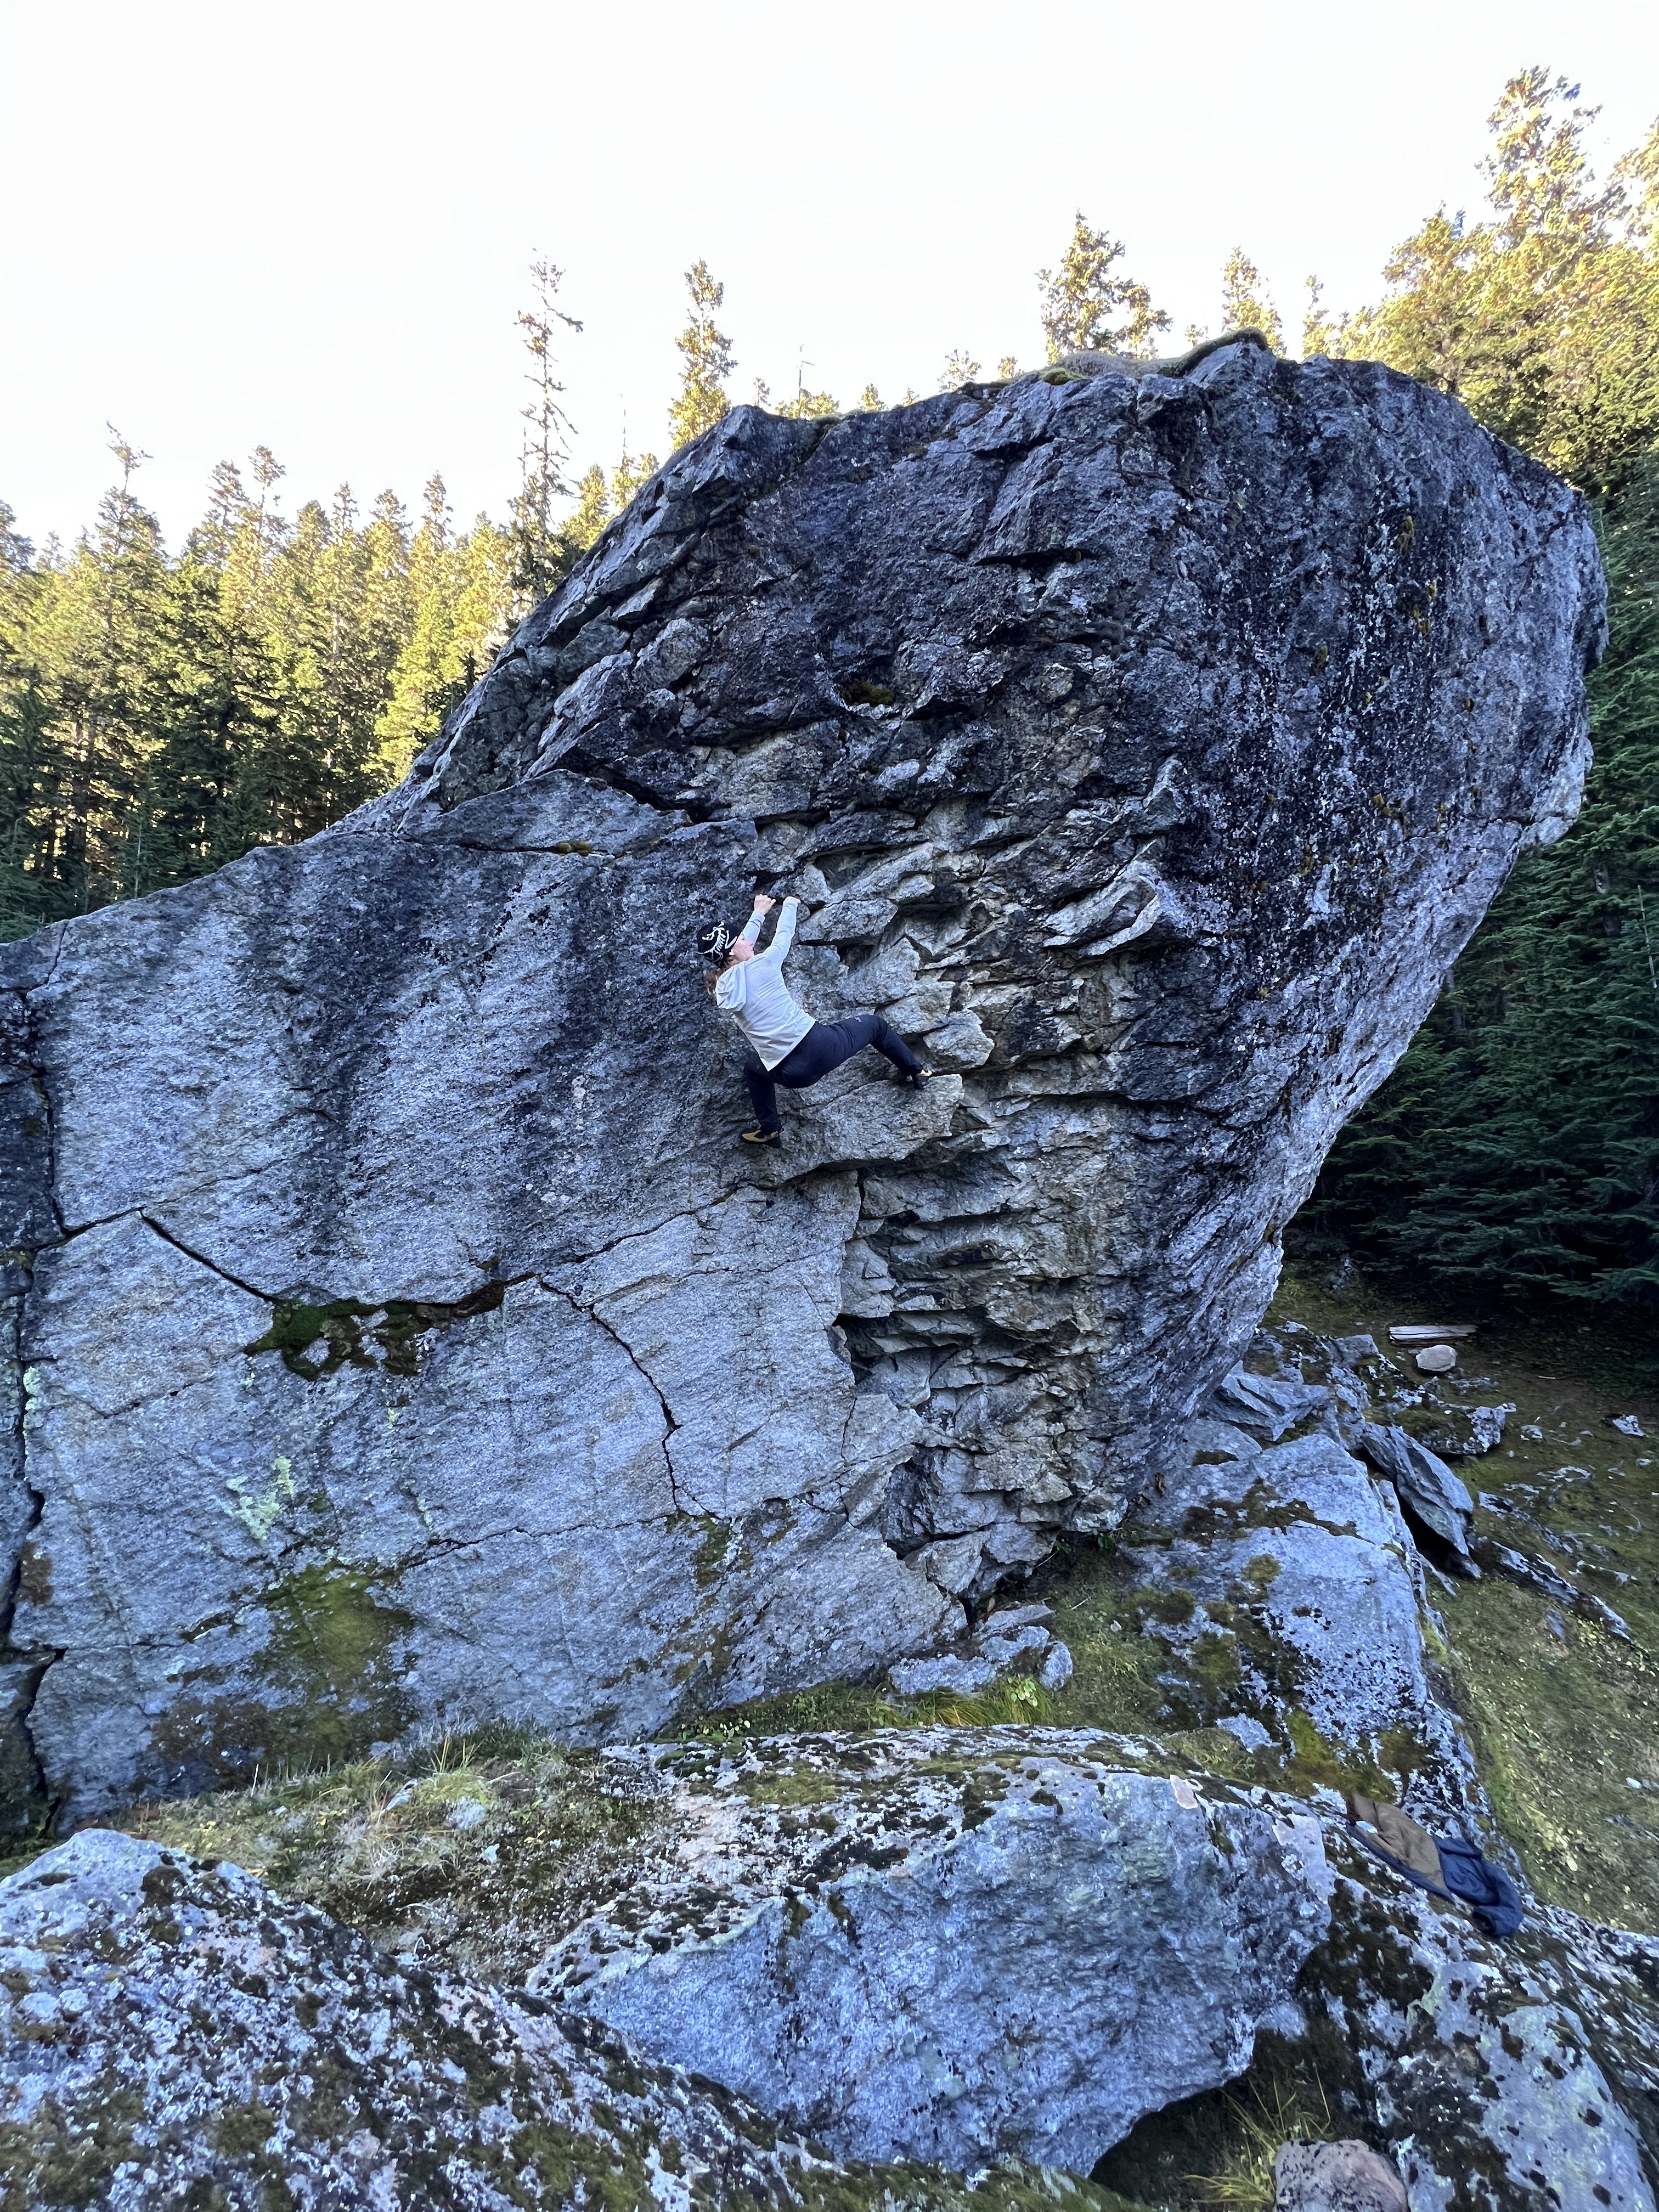
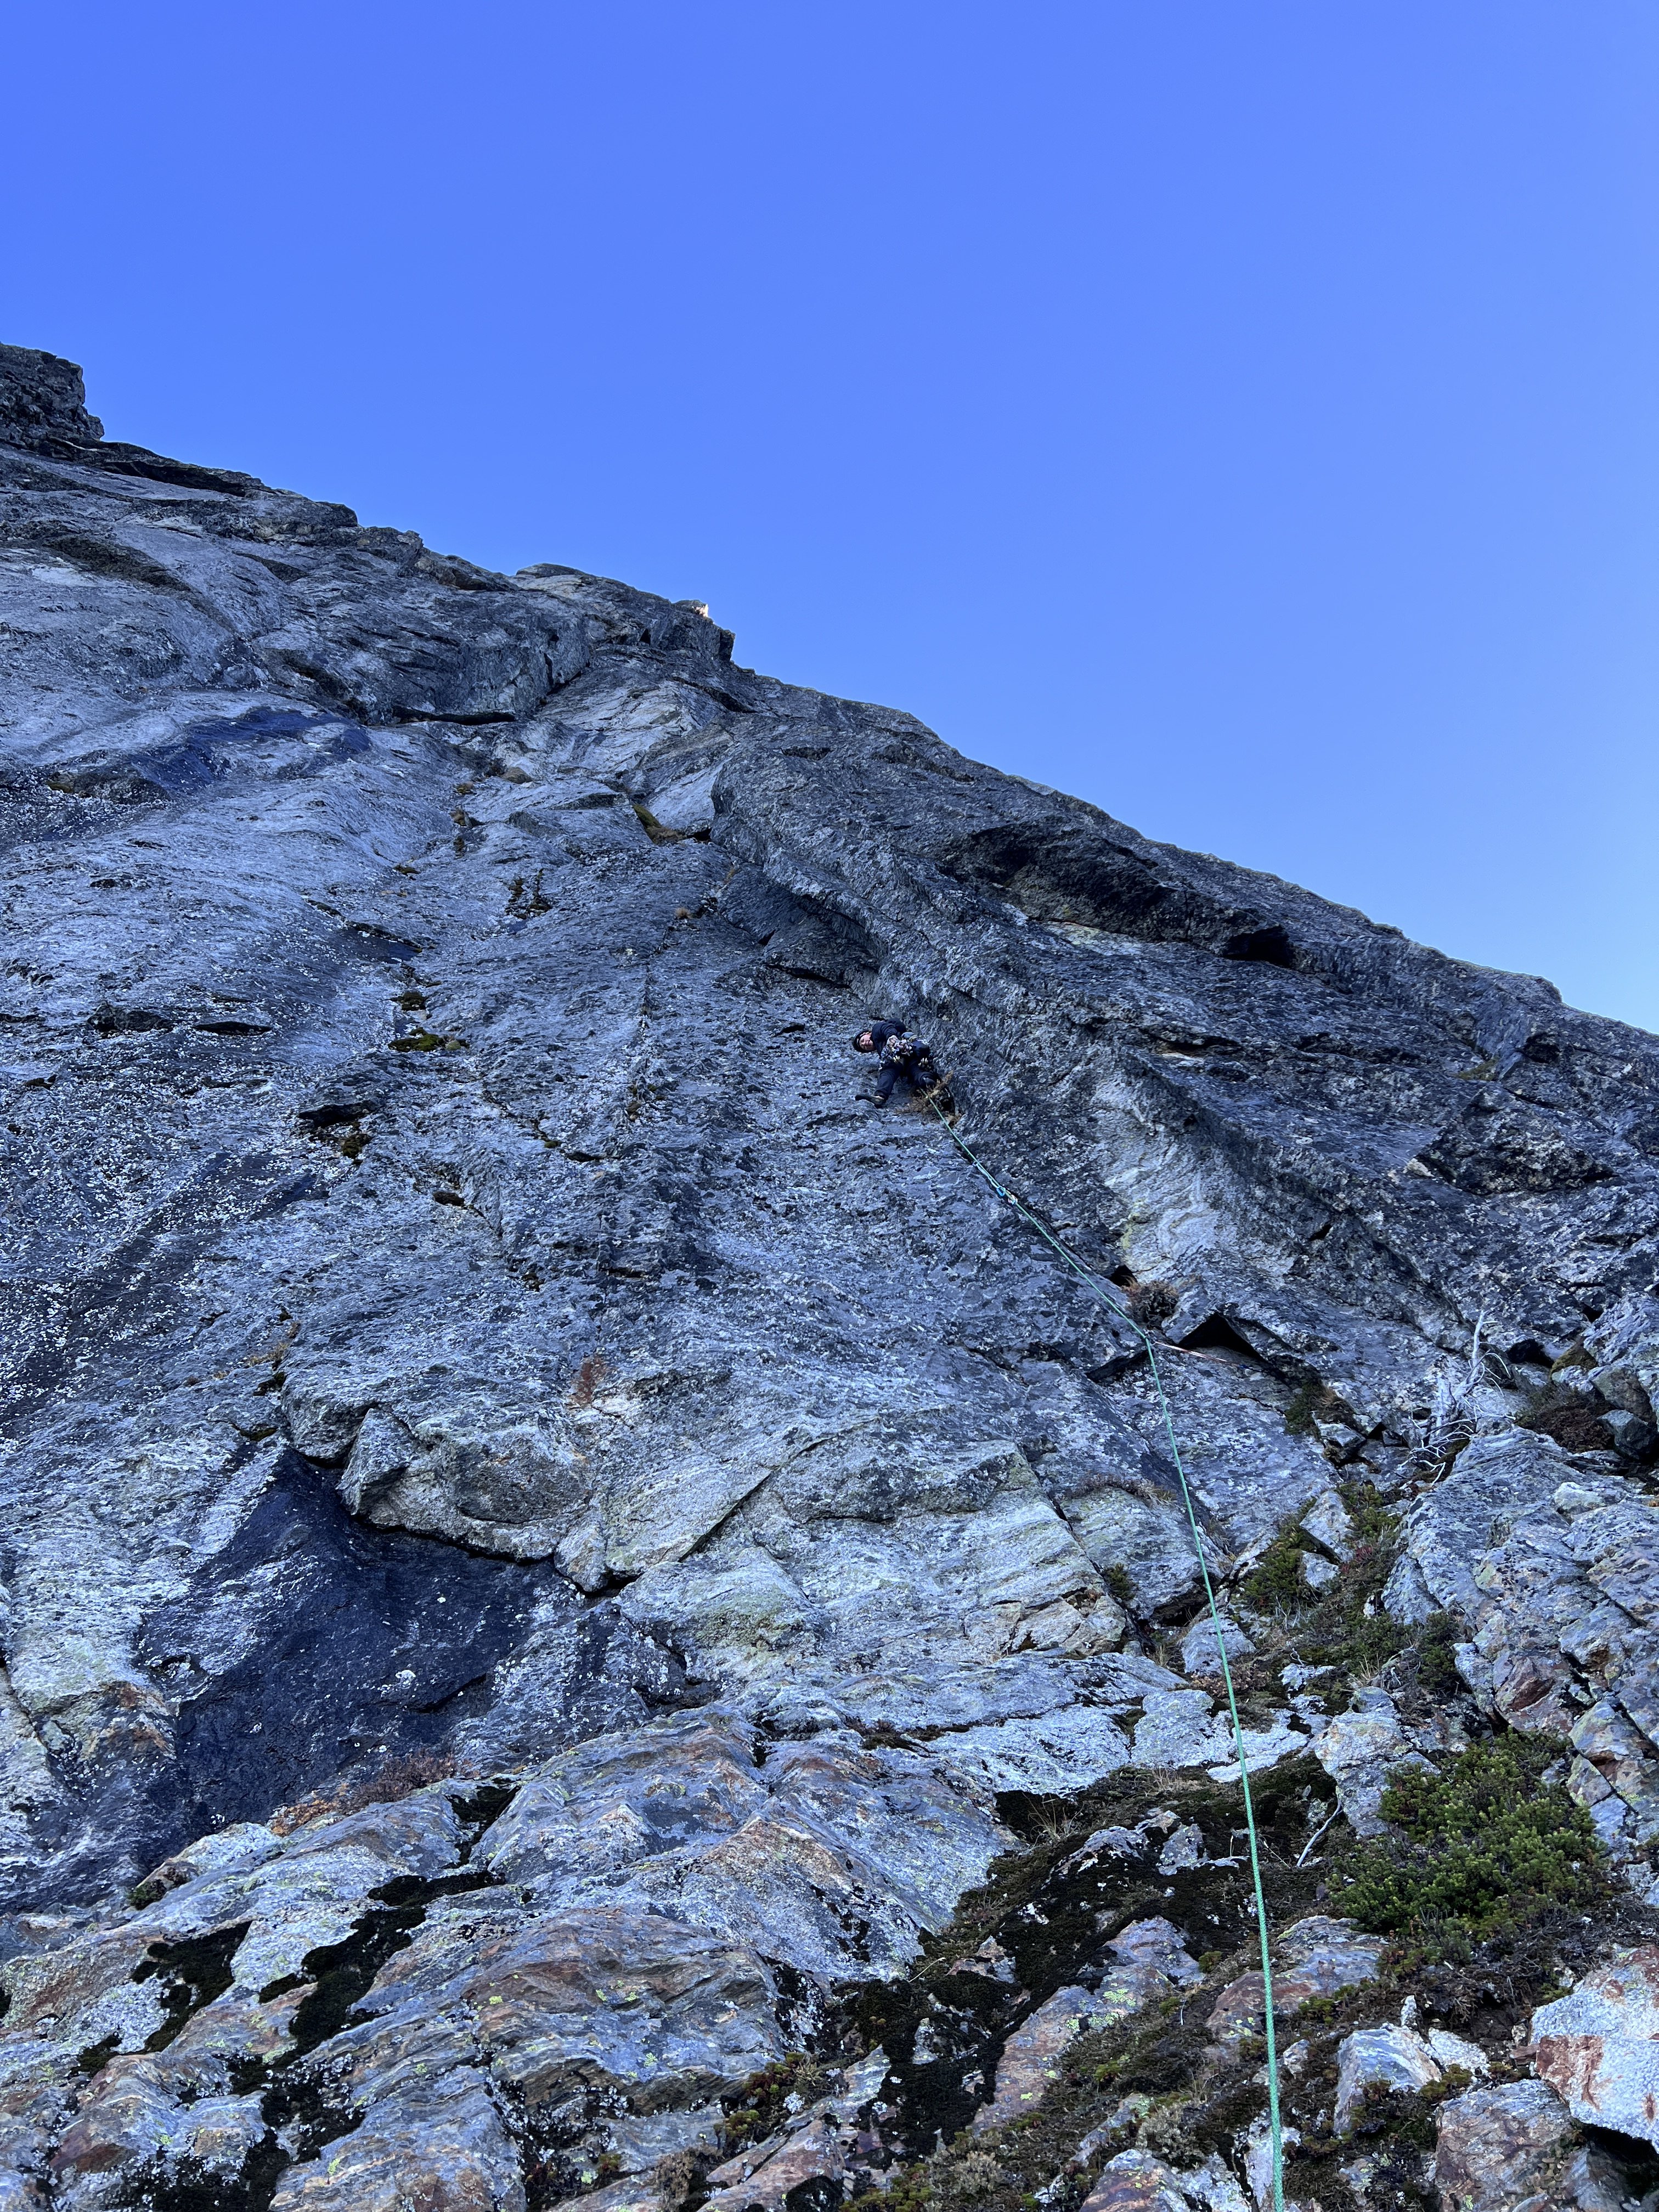
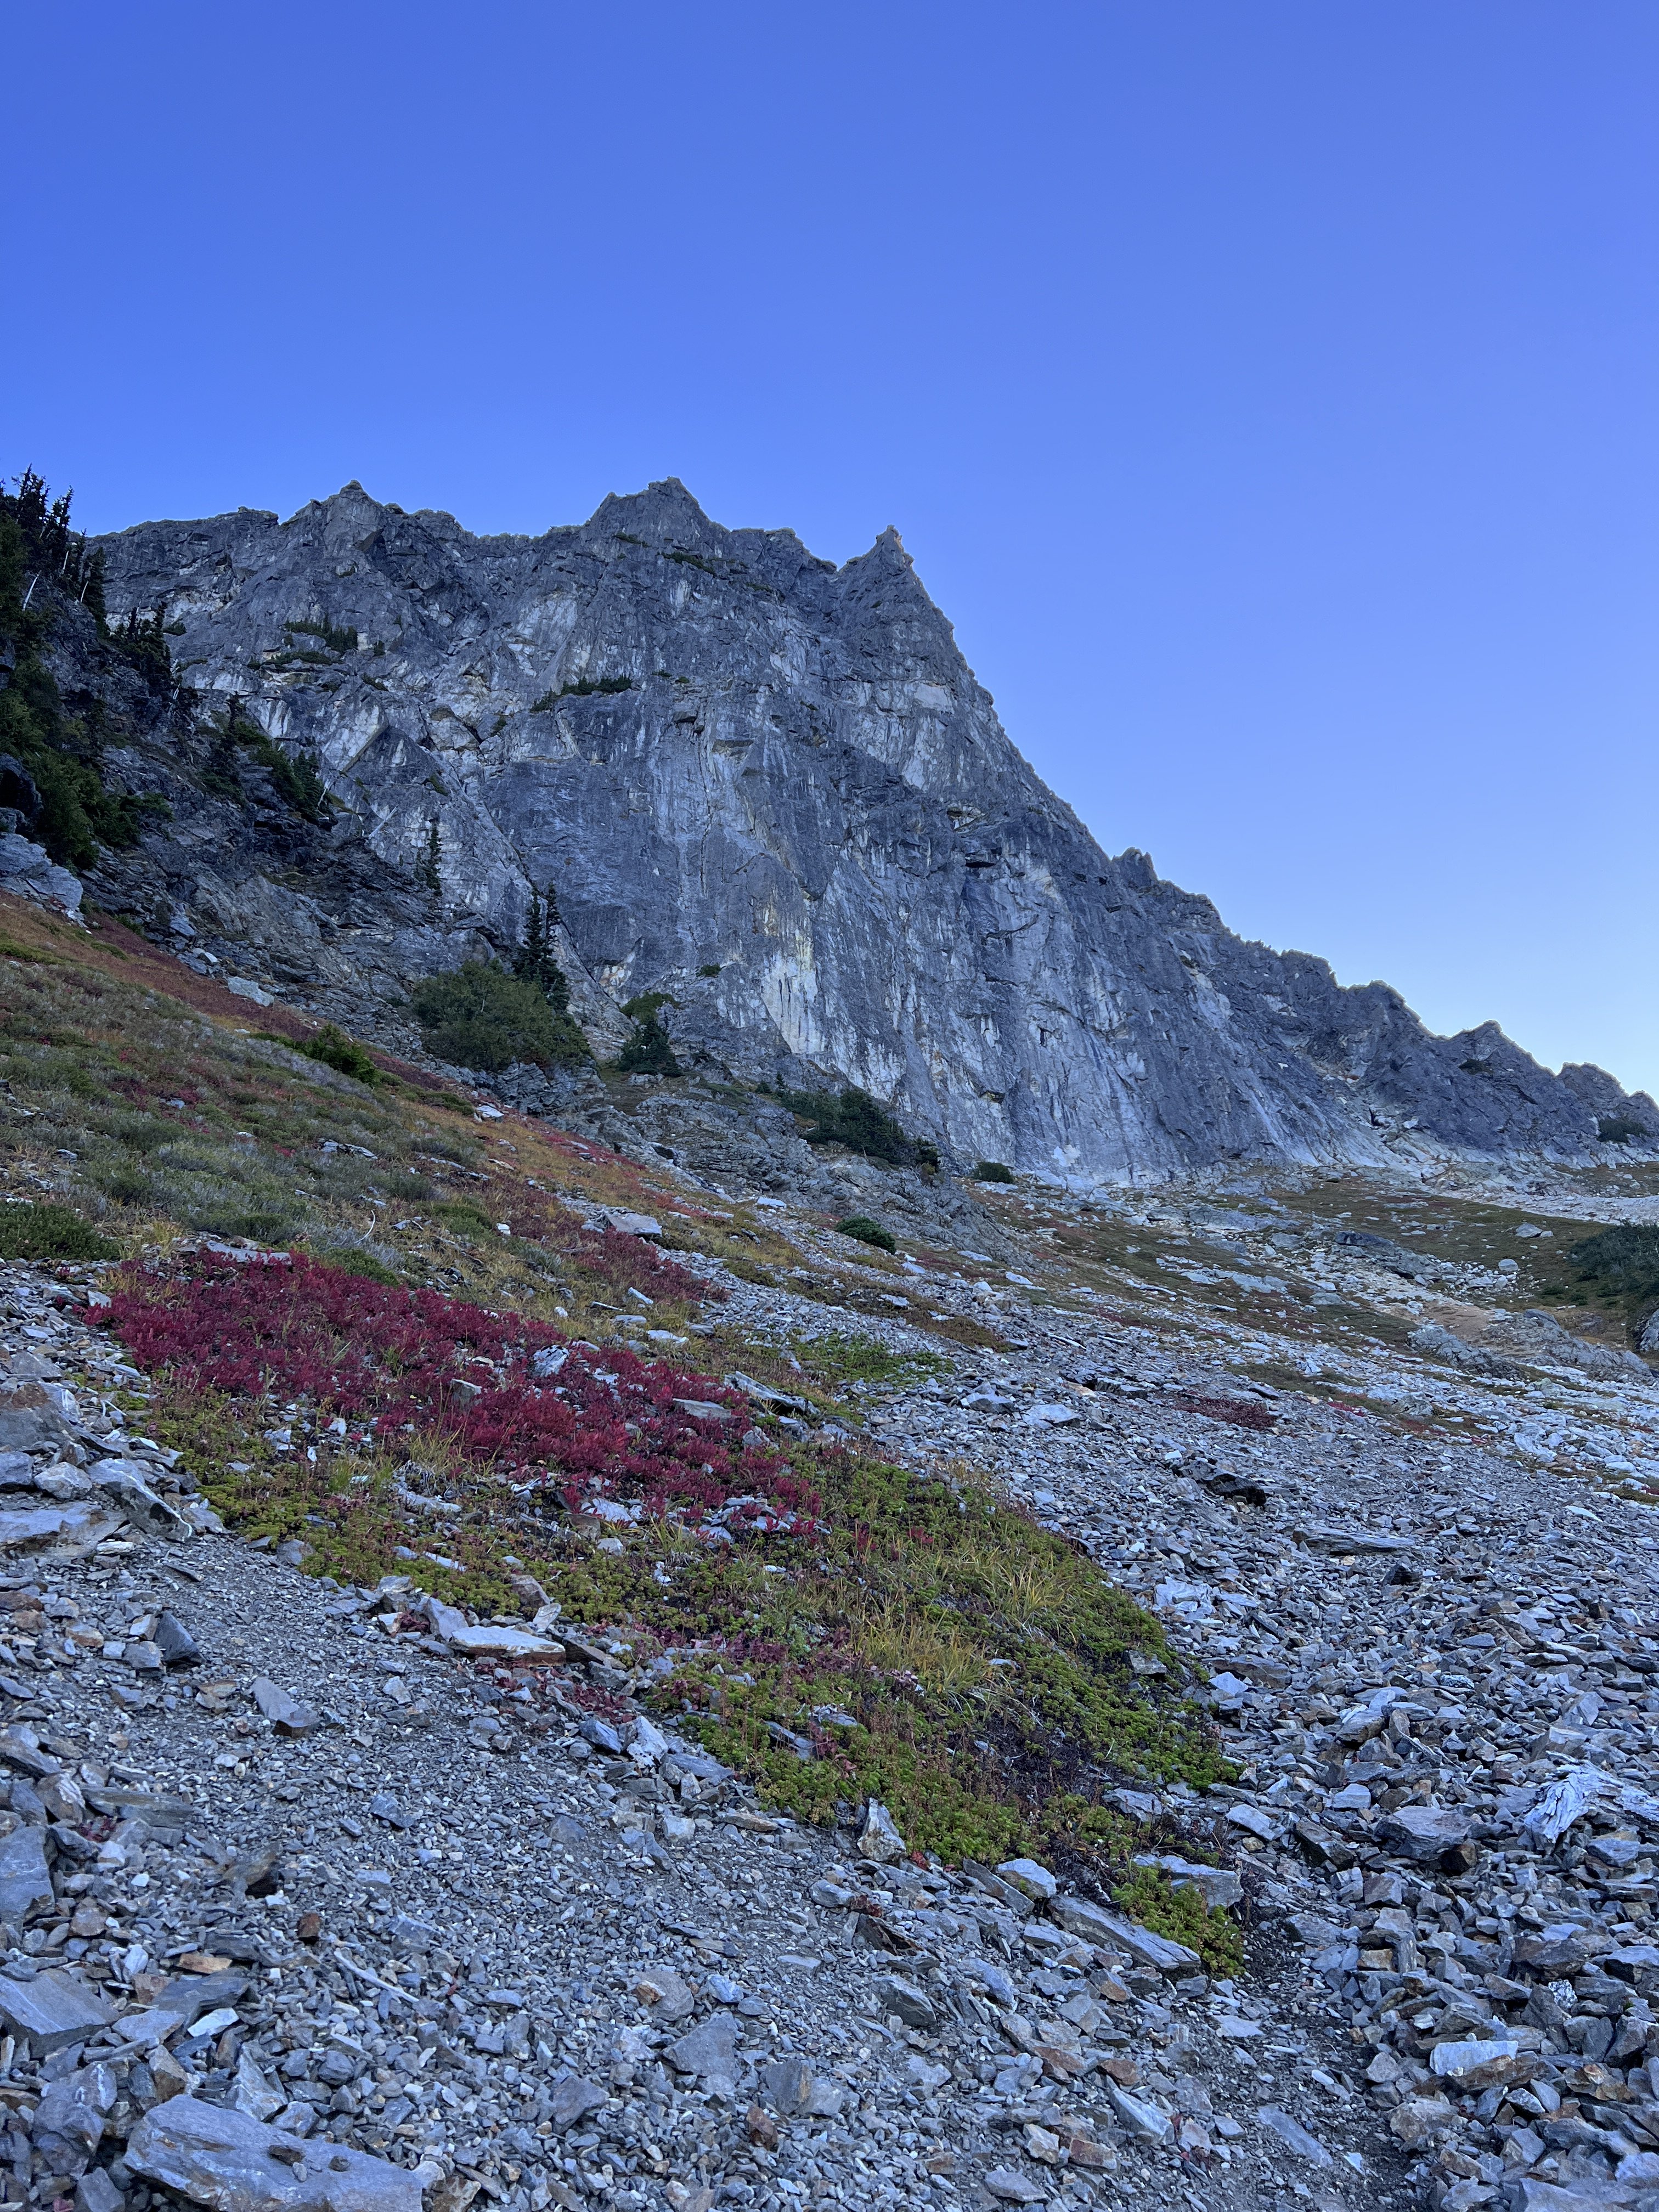
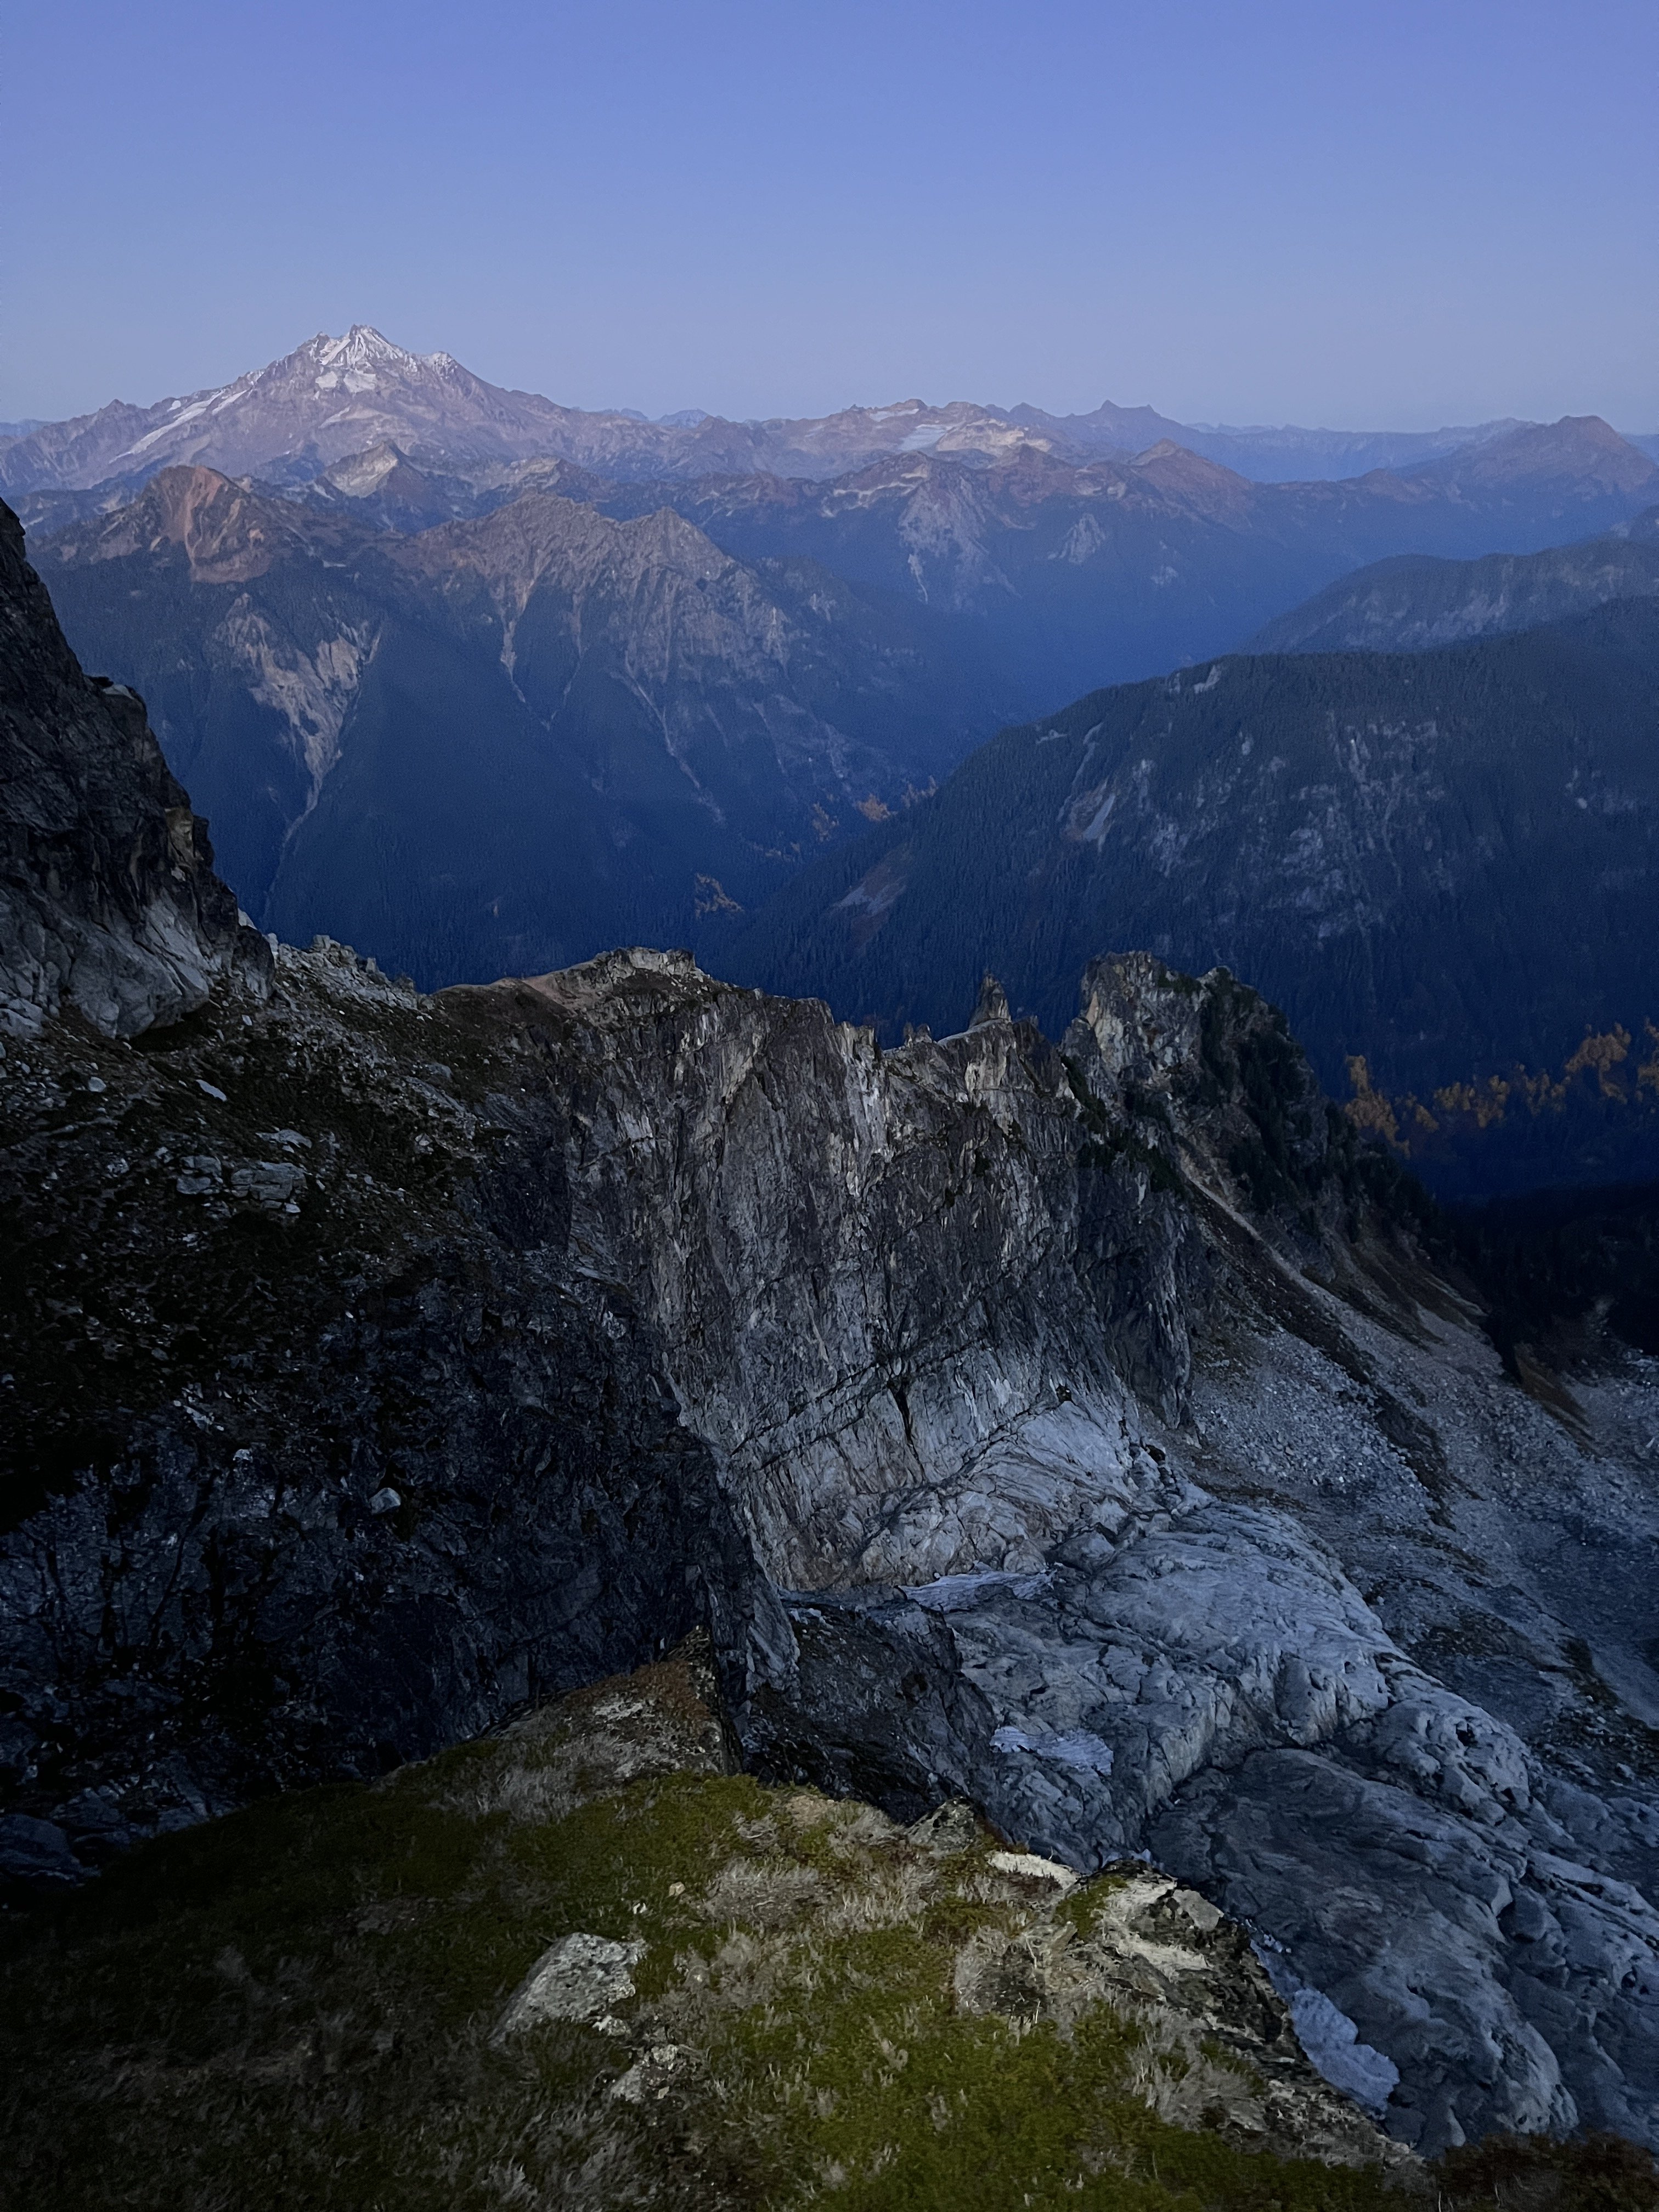
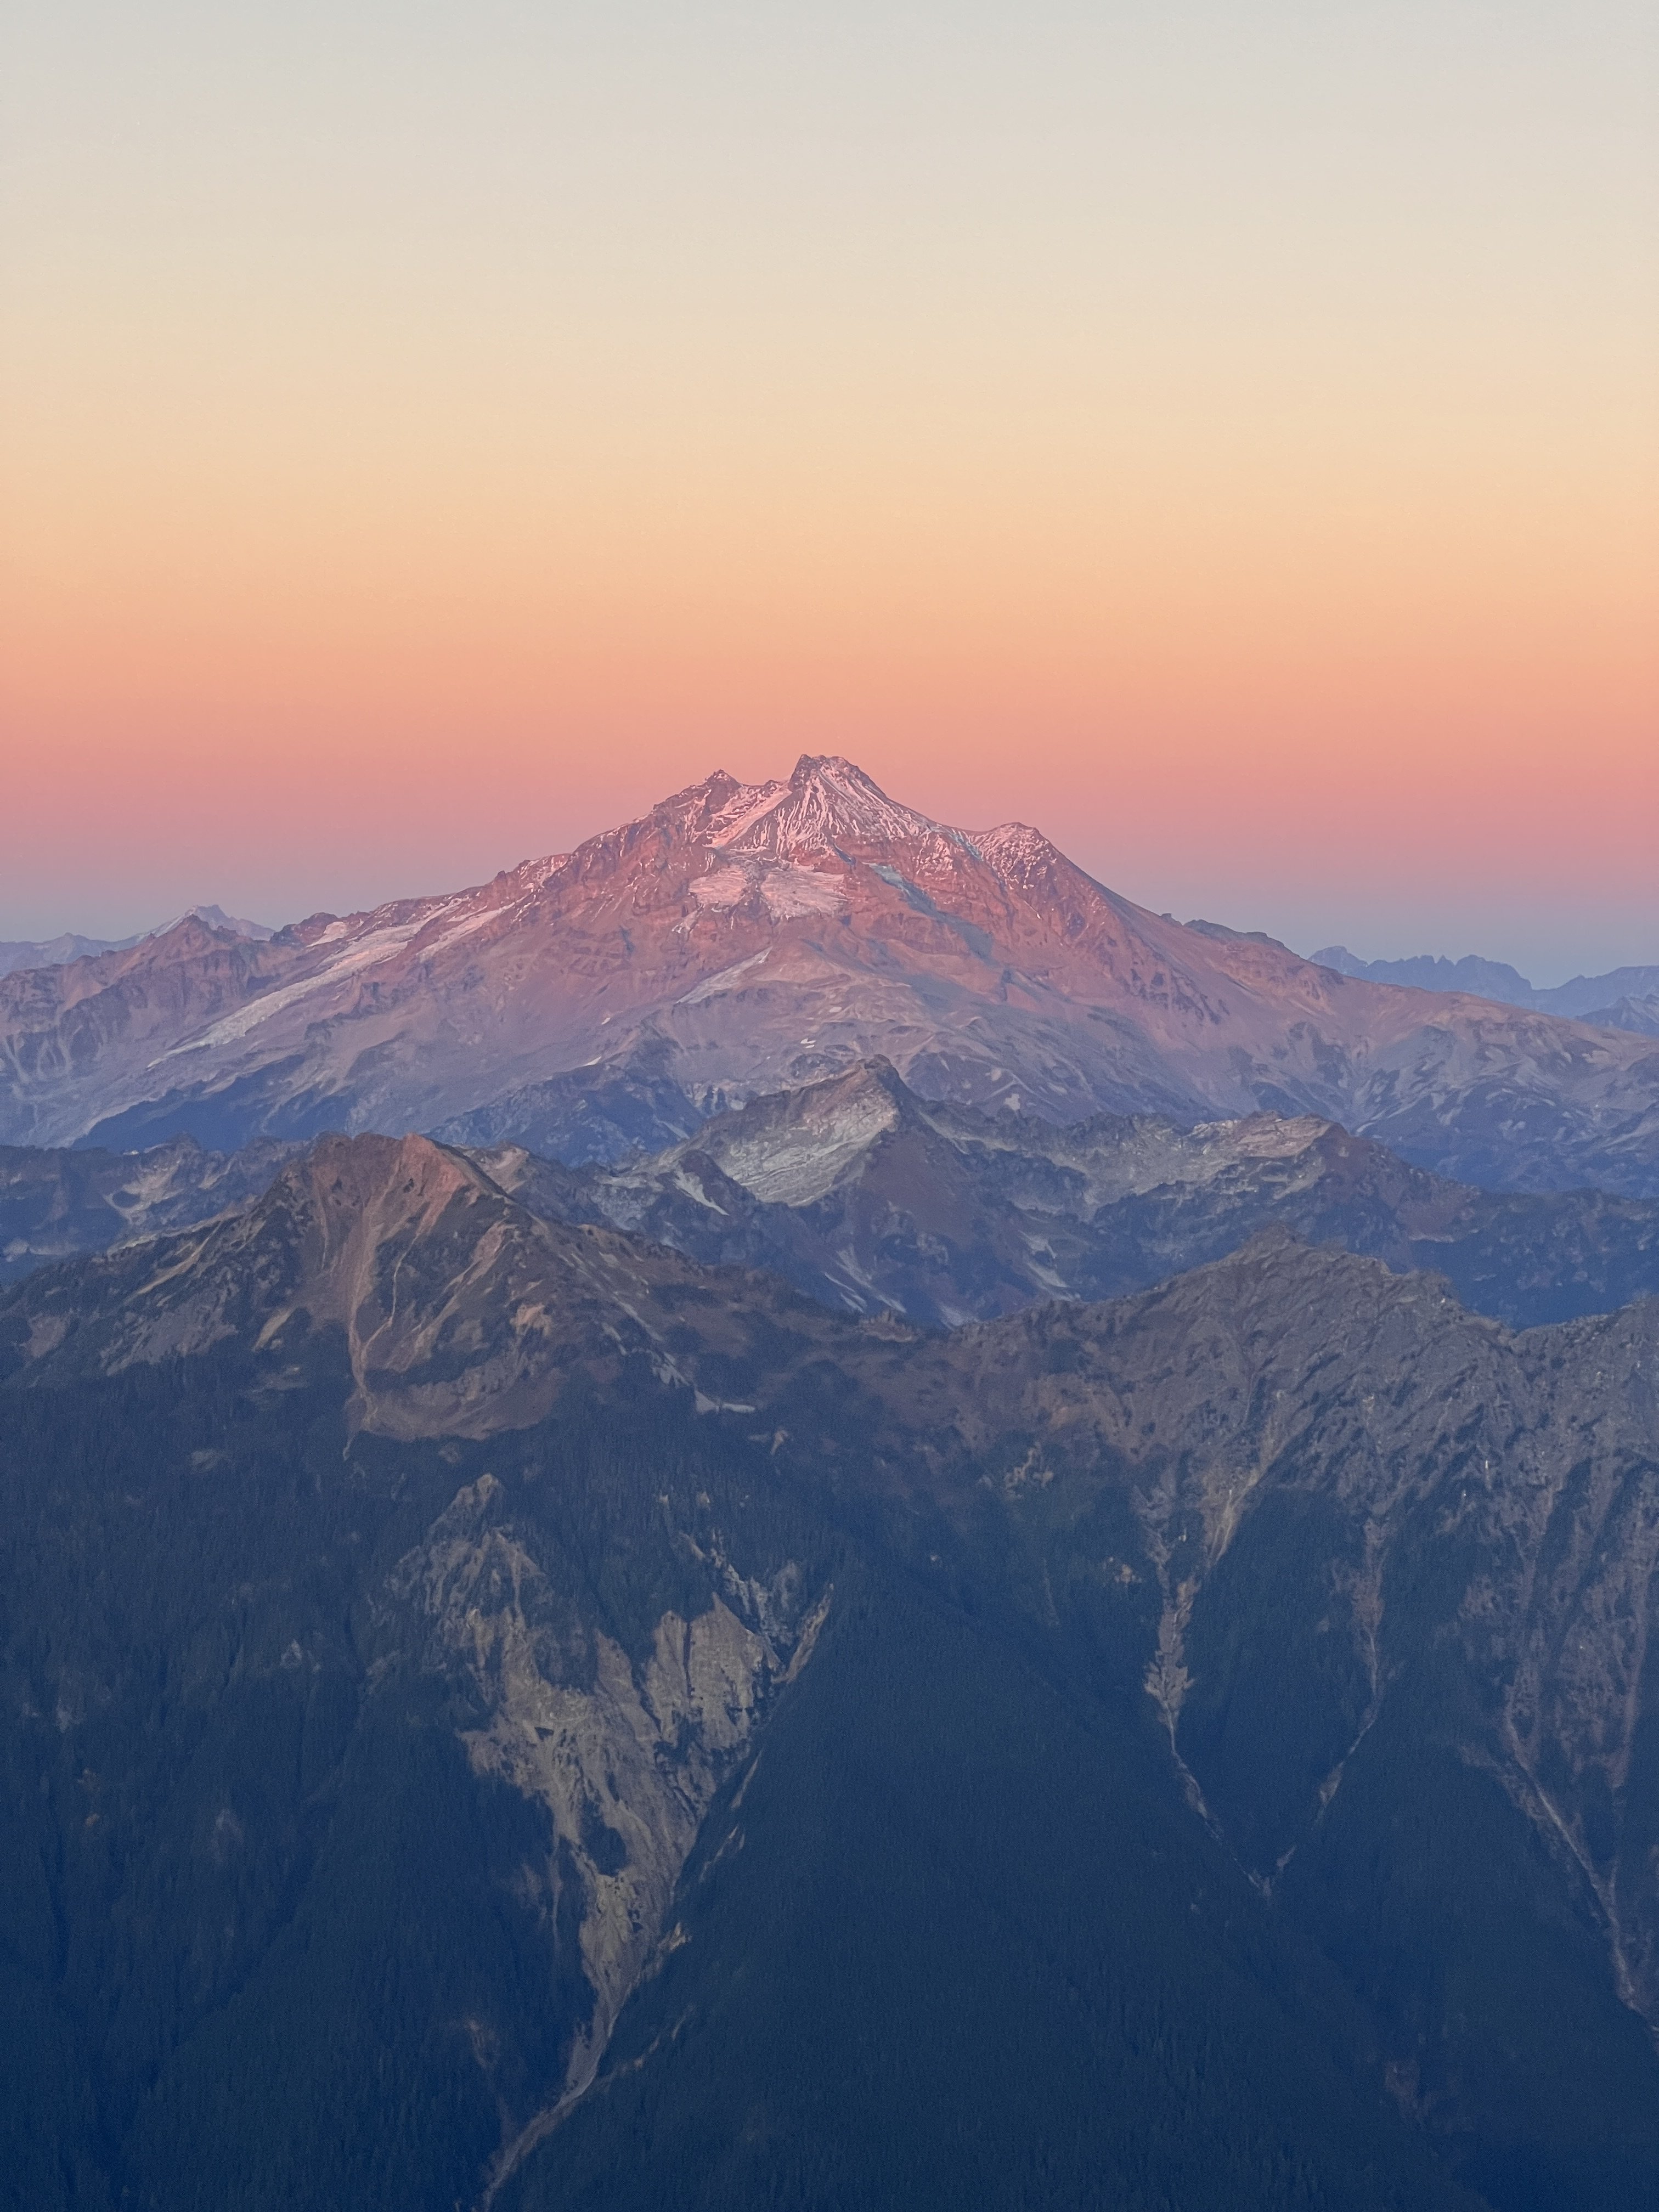
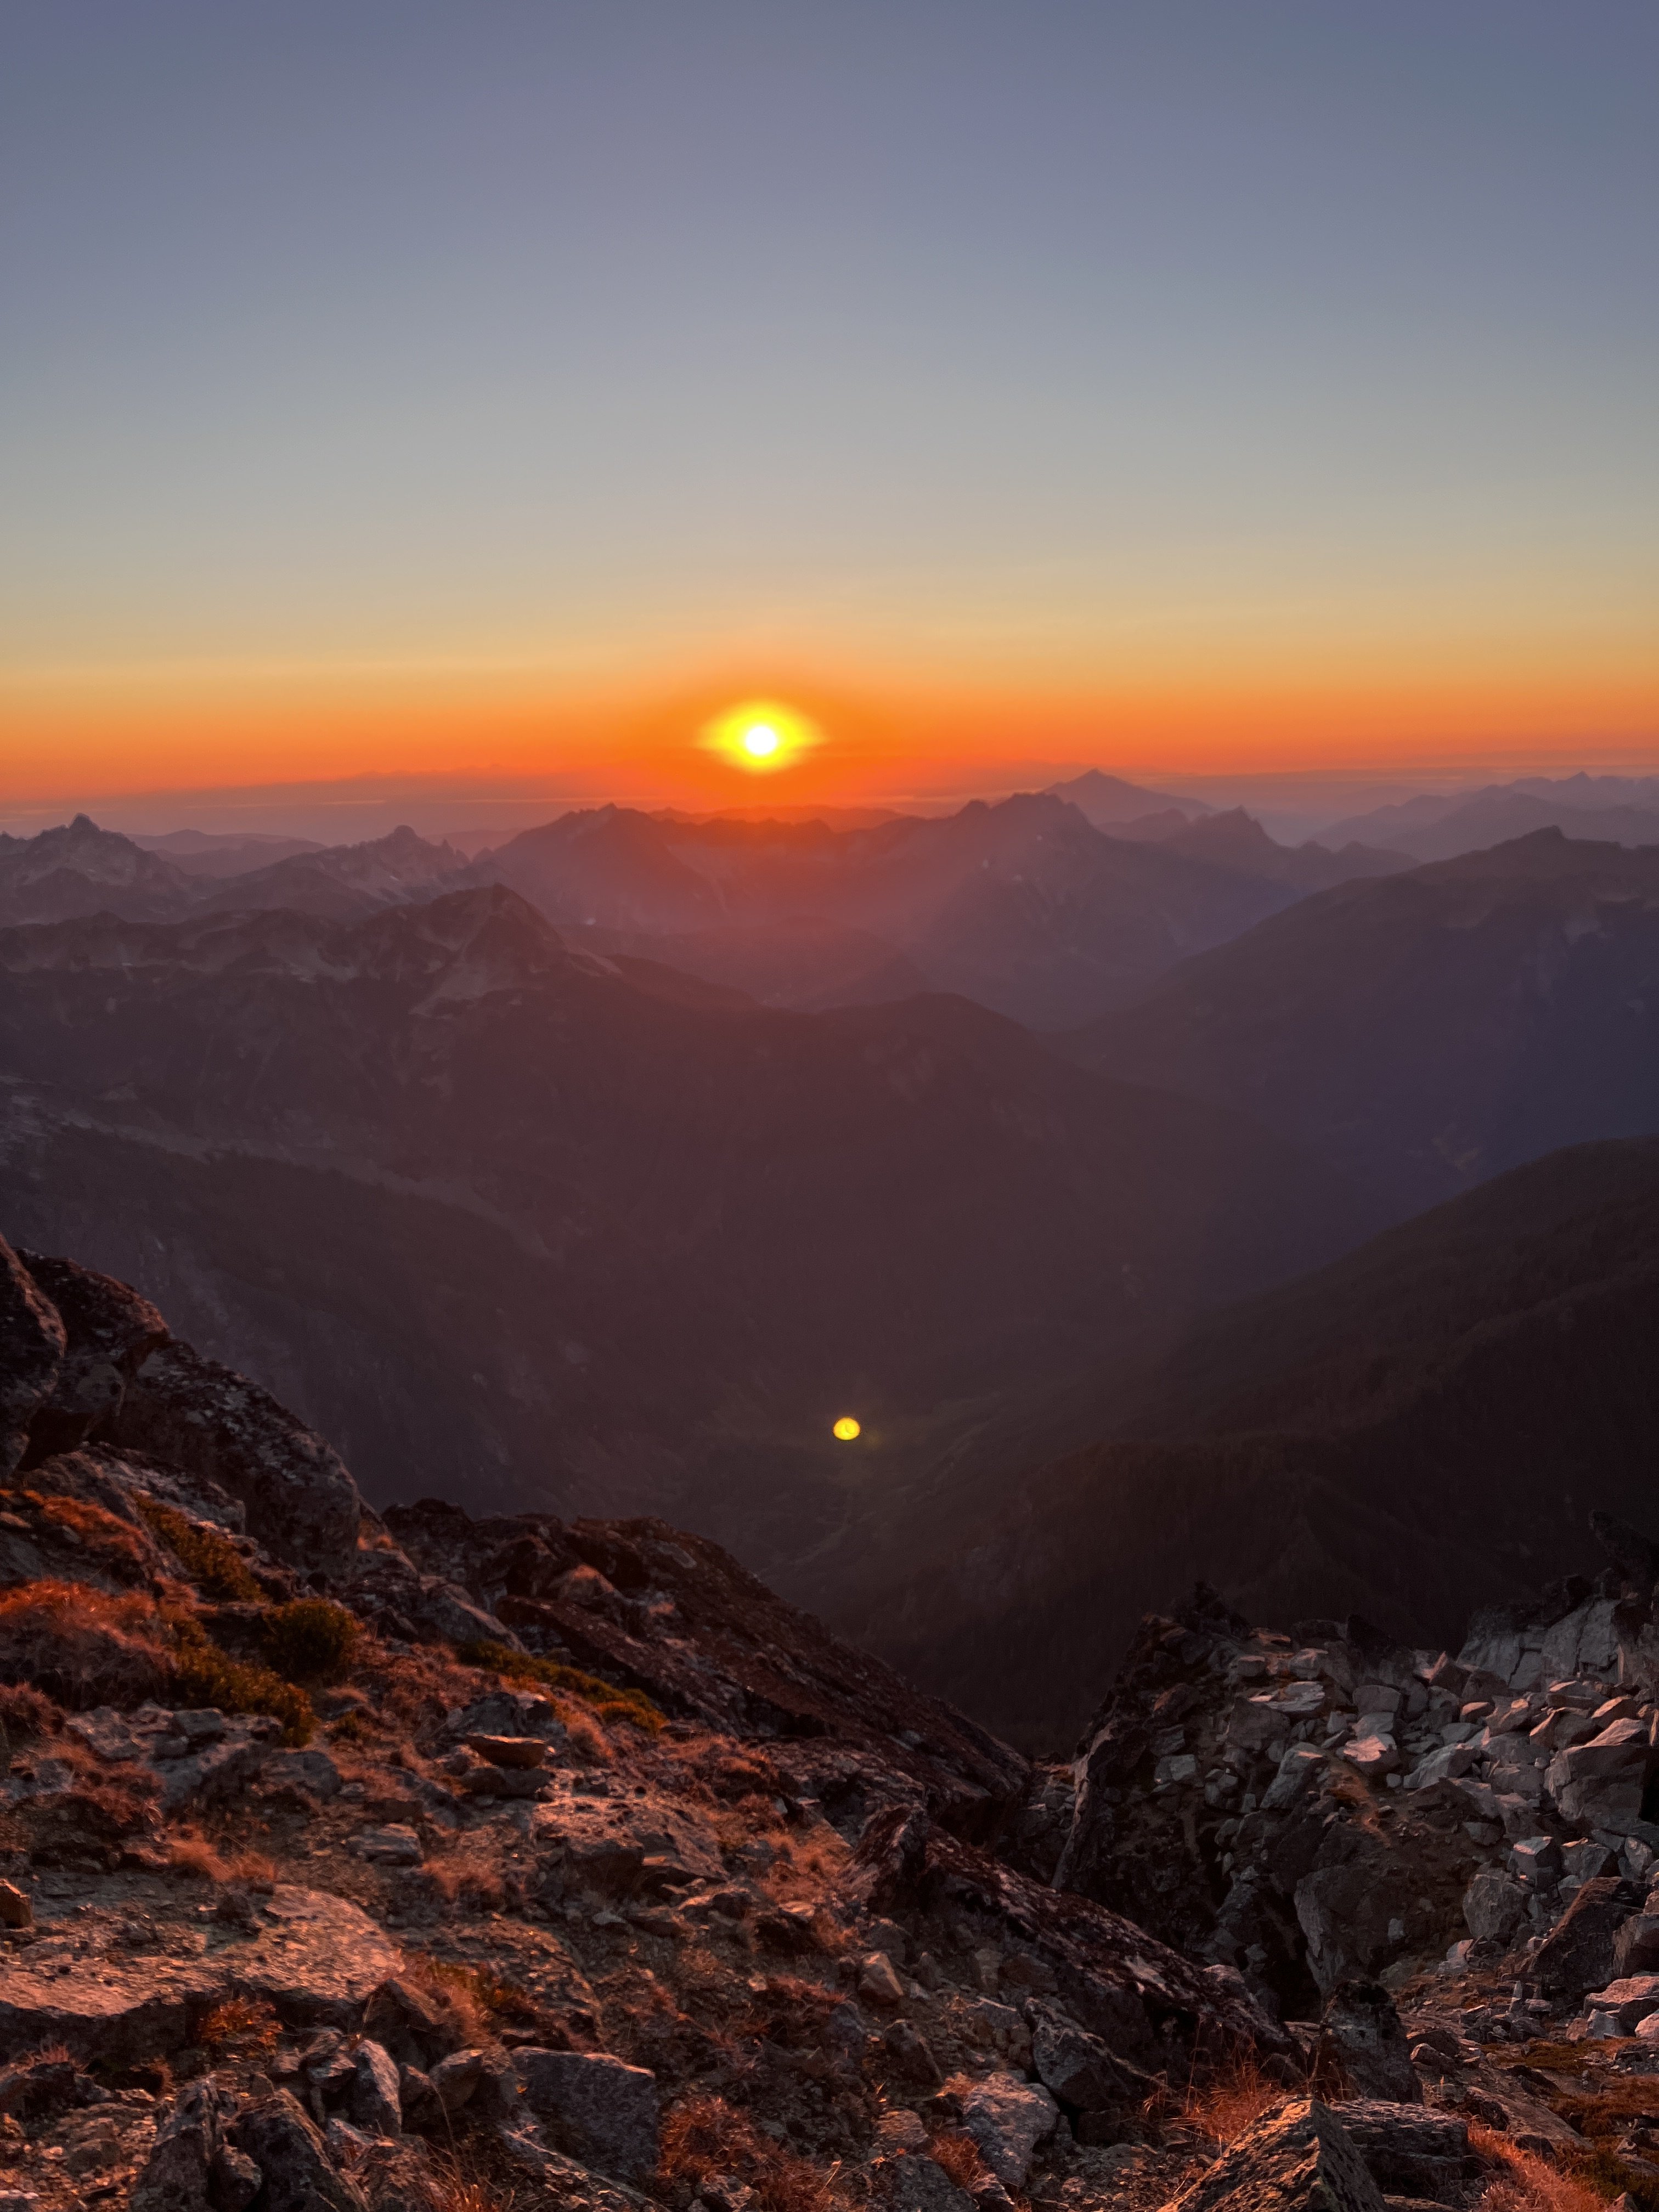
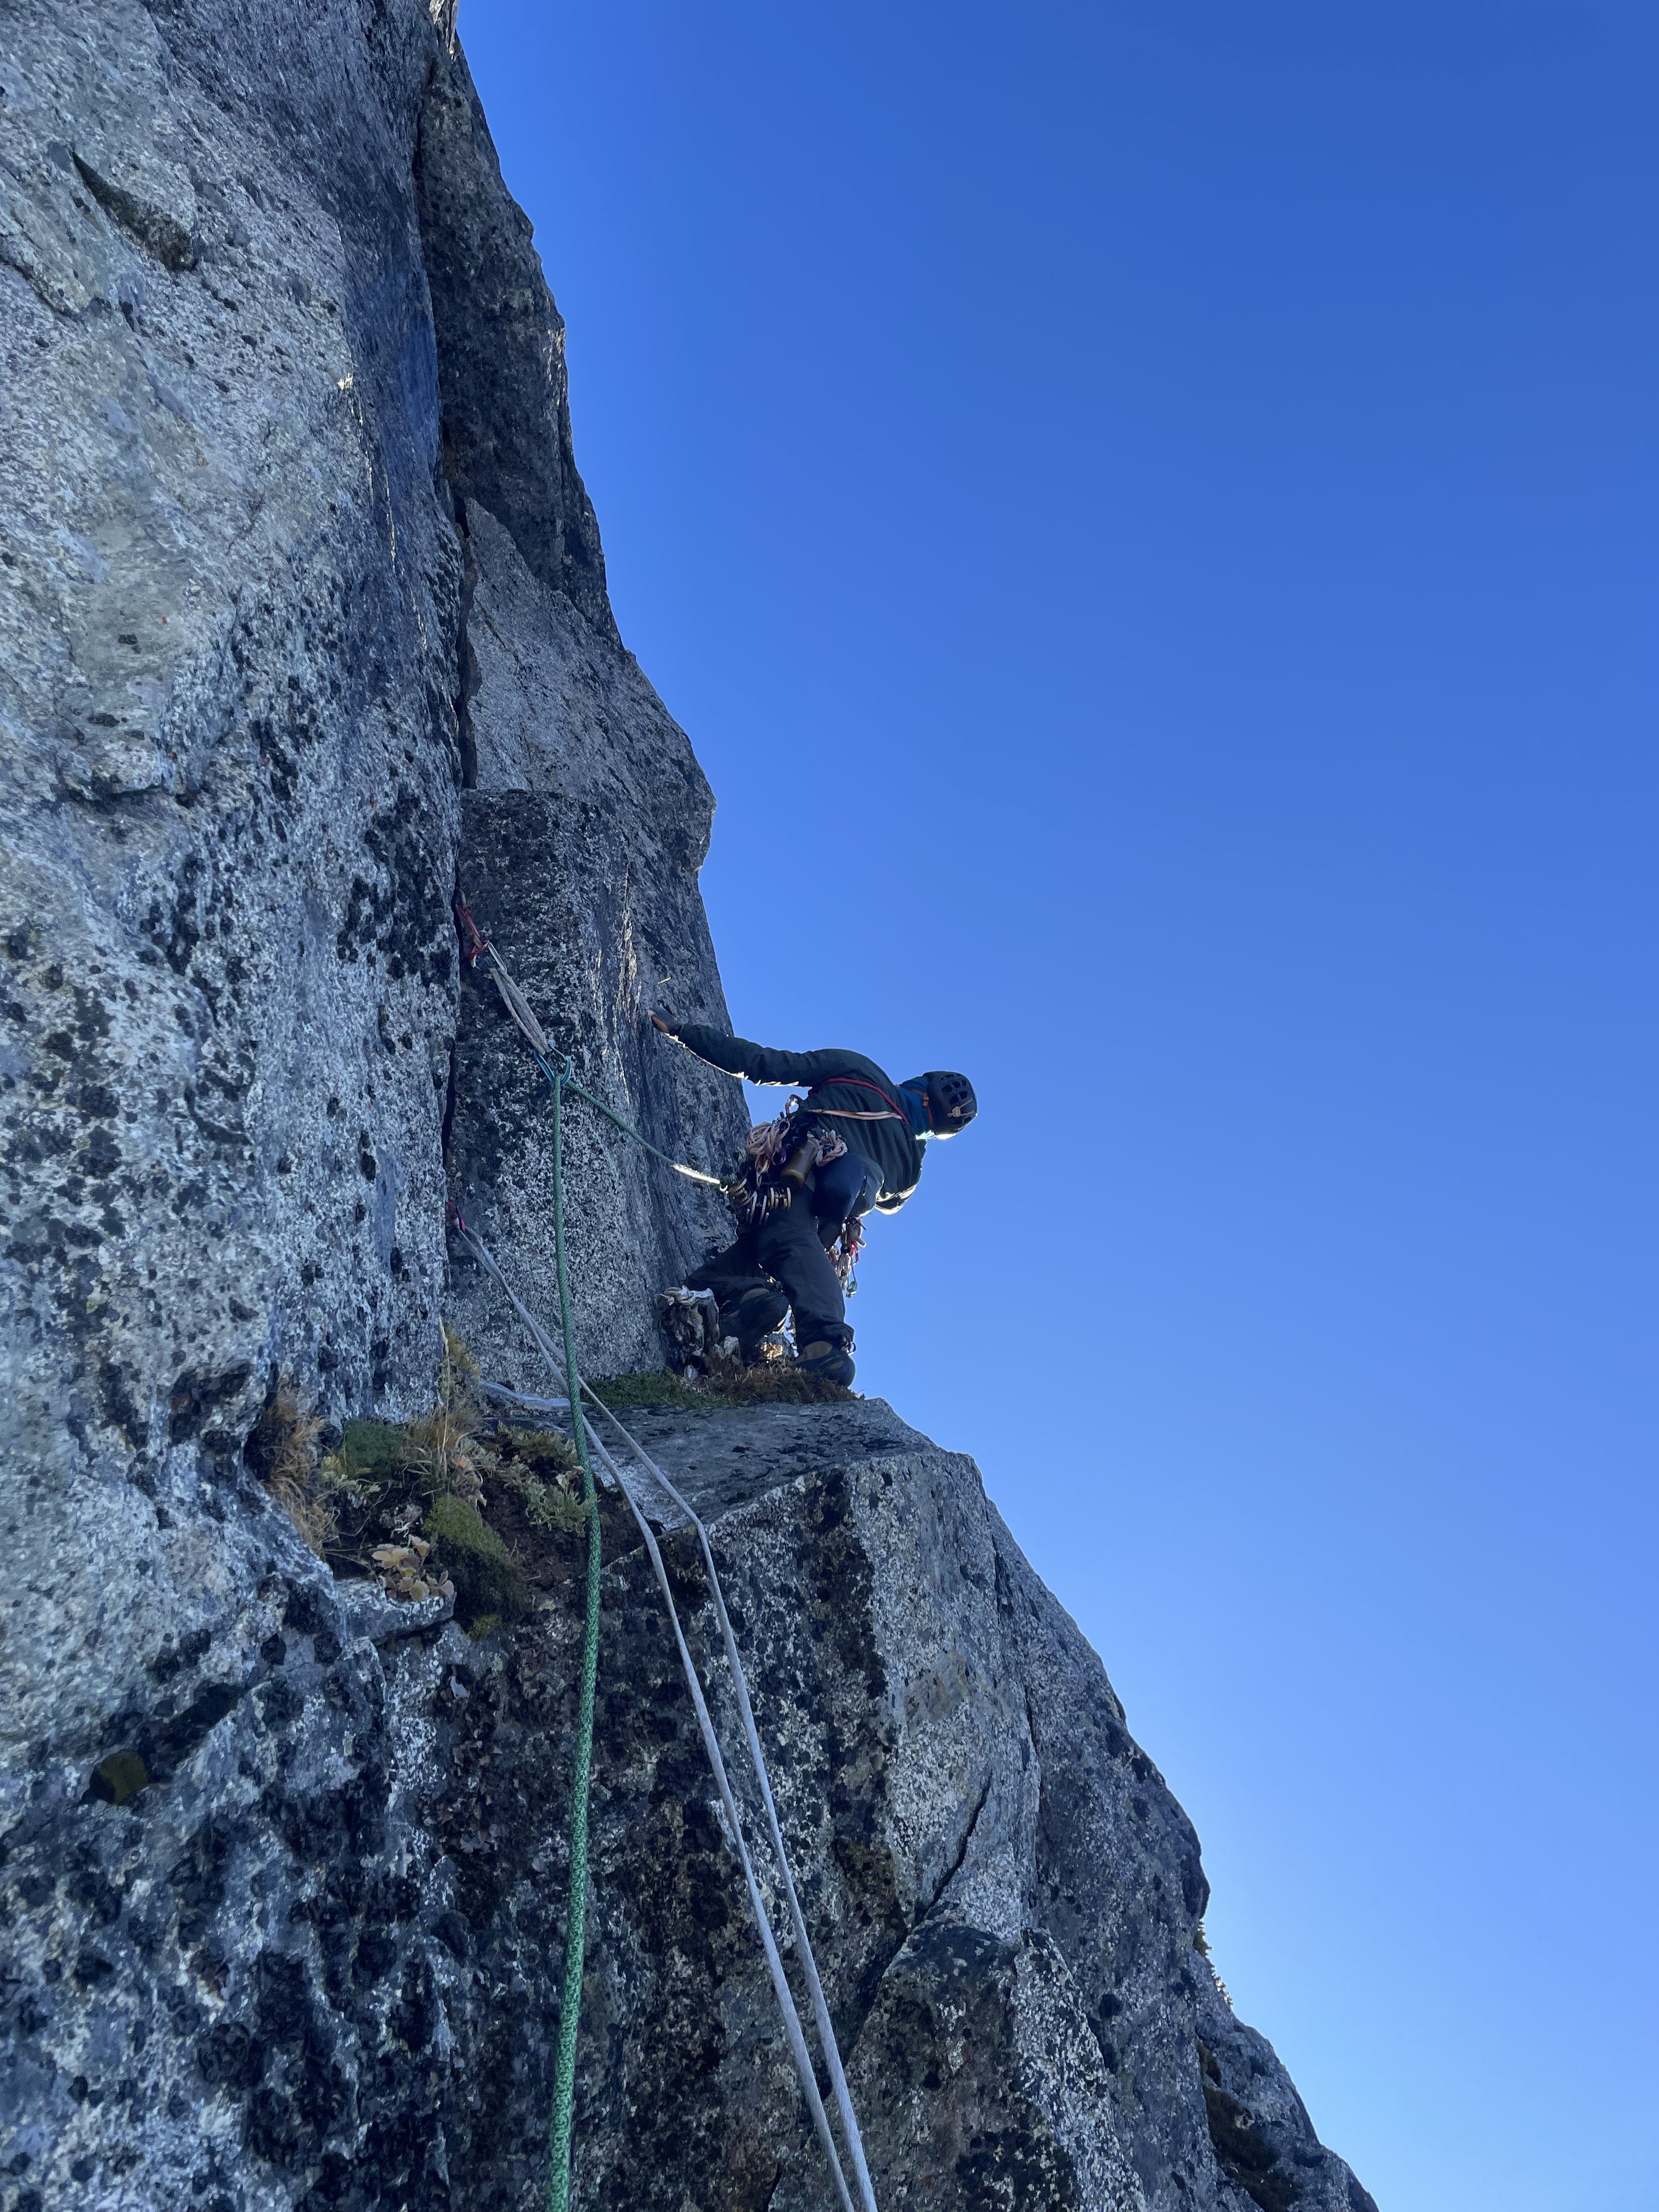
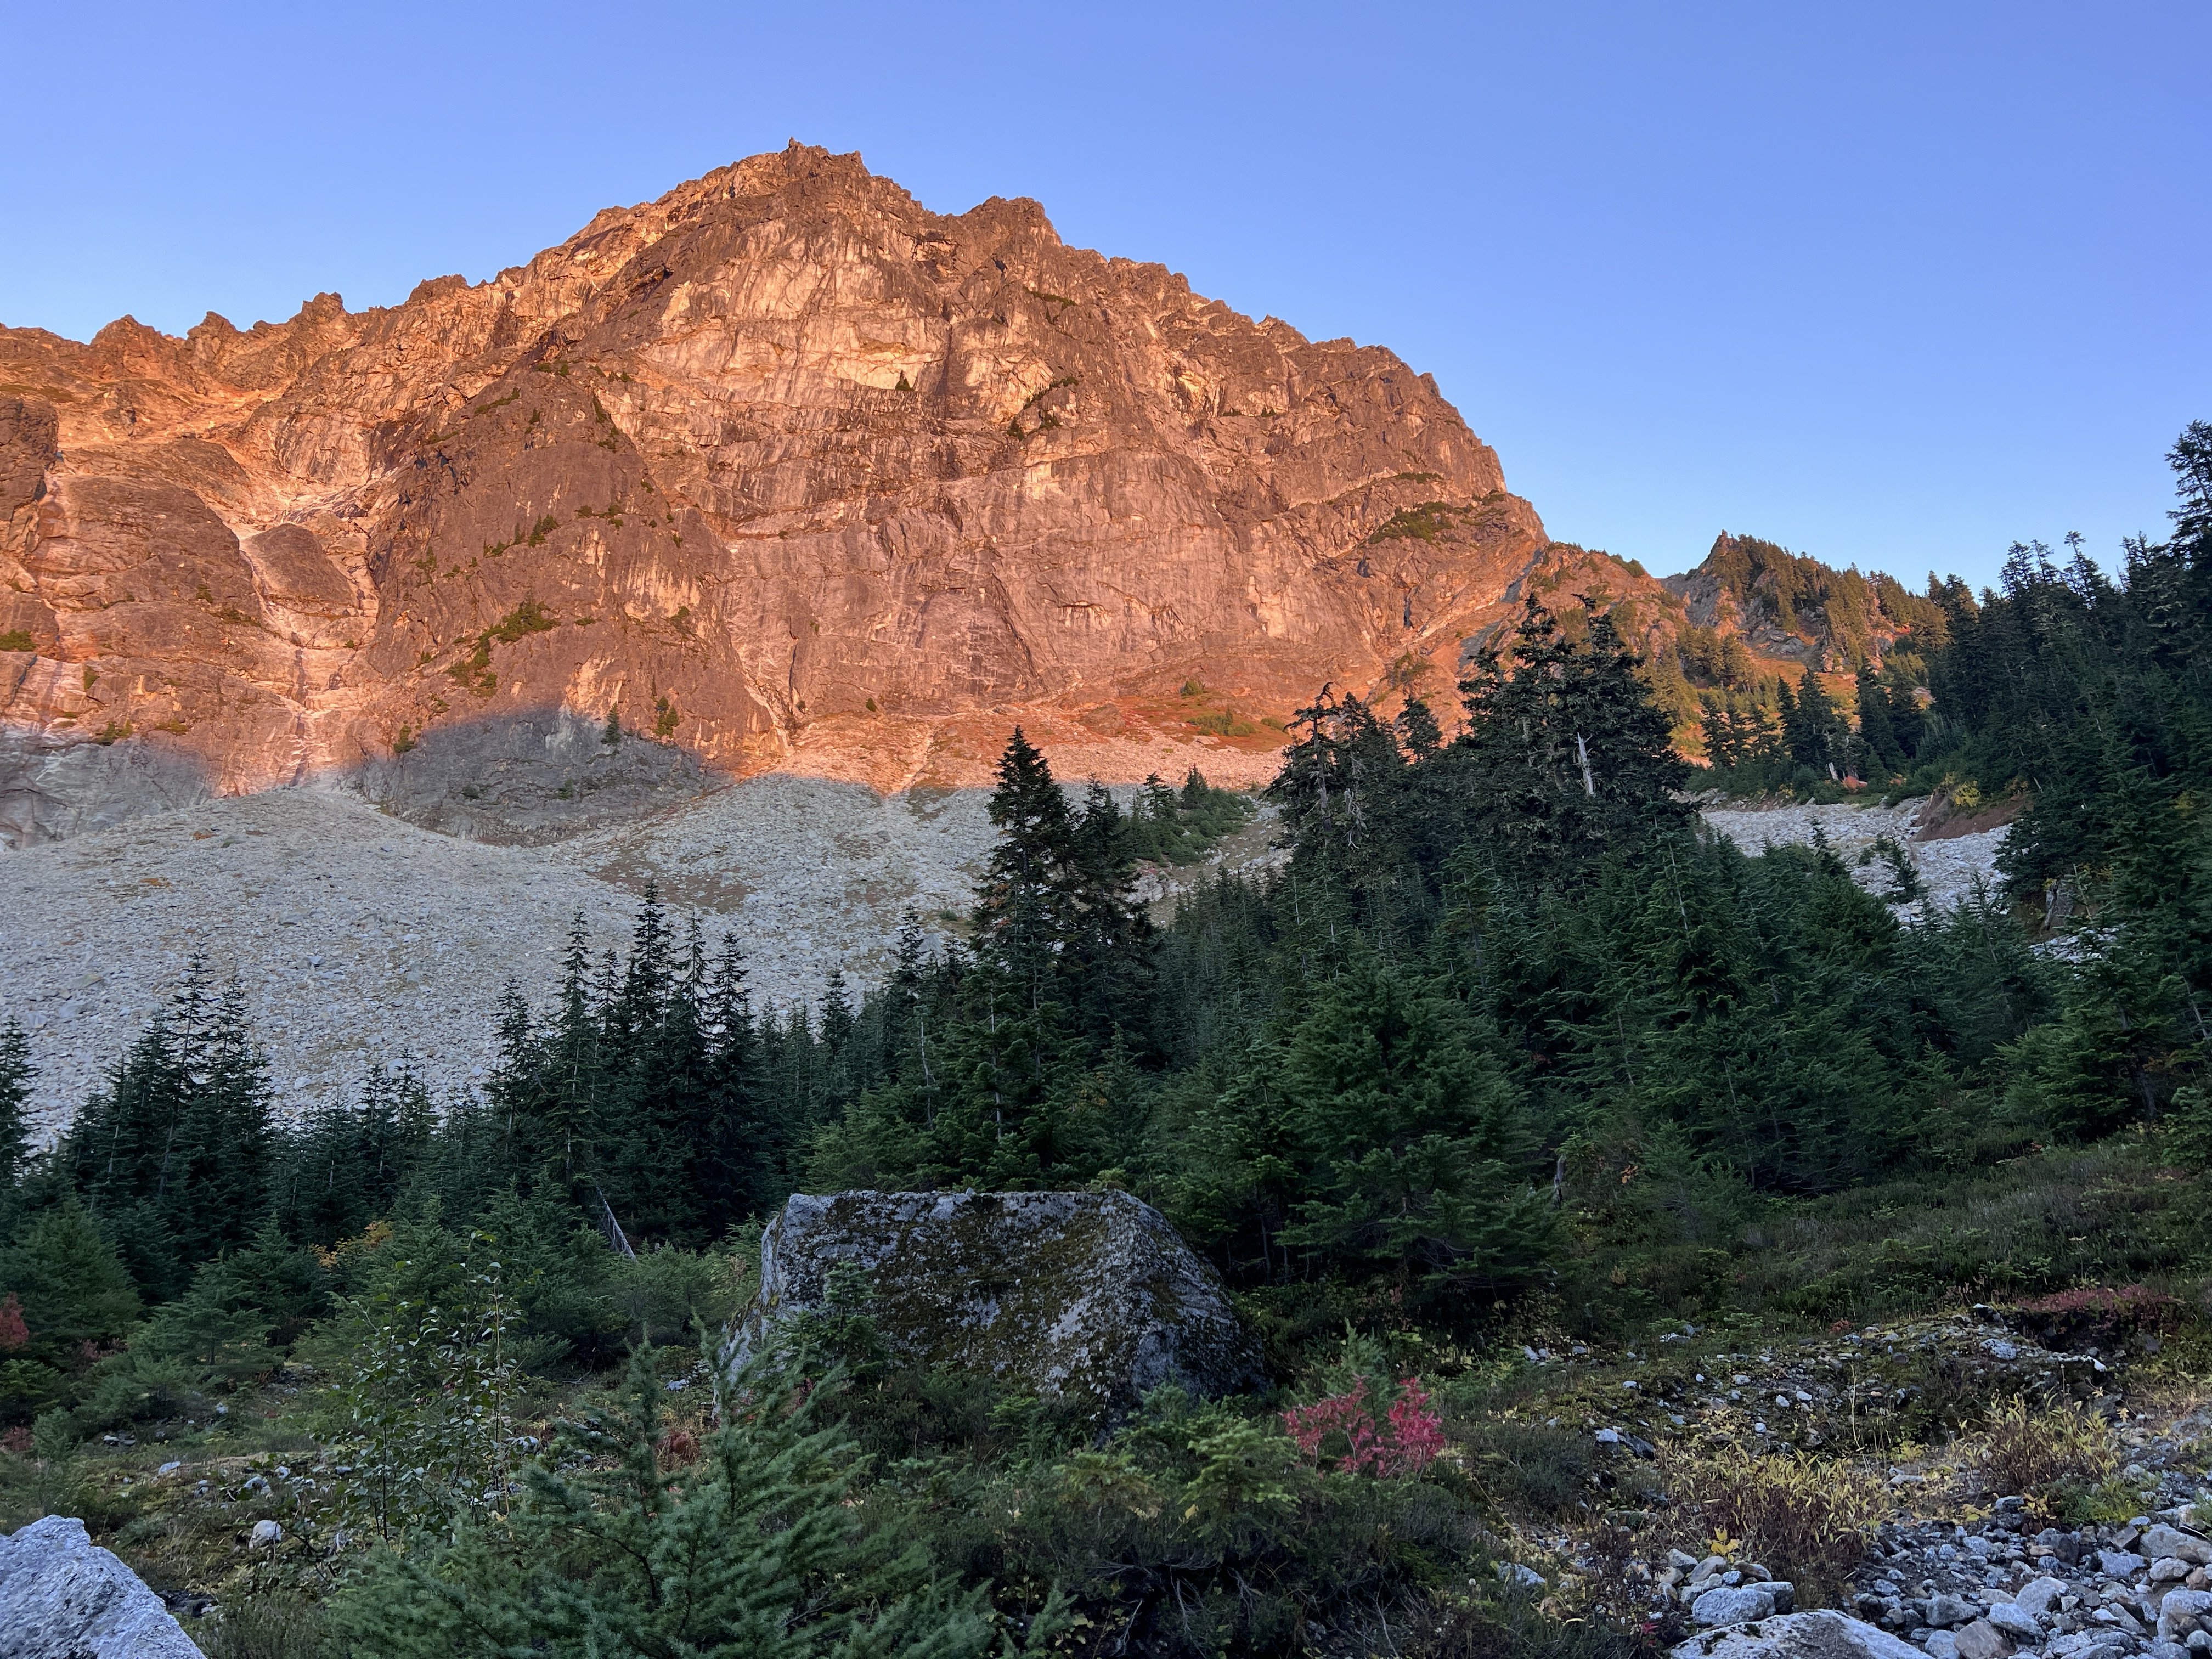
Trip: Sloan Peak - Fire on the Mountain (8 pitches, 5.10+) Trip Date: 10/07/2023 Trip Report: After attempting the SE Shelf on Sloan Peak (the "Matterhorn of the Cascades") in early-October with some Alpine climbing students and not summiting, Priti Wright and I (Jeff) went back the next weekend to climb Blake Herrington and Rad Robert's brilliant route Fire on the Mountain. I've honestly never alpine climbed in the Cascades this late in the season (typically rock climbing). Late season alpine can have really variable weather, but under the right conditions can be surprisingly perfect! One weekend, the mountain was a cold, snowy, winter wonderland. The next weekend, it was a beautiful, warm, dry, summer Type 1 outing. We studied all the past trip reports, downloaded all photos and route descriptions from every source, and still had a couple of issues. This report is not a one-stop shop of beta for this route since I still recommend you look at the past reports/pictures, but here are some extra learnings that we would've liked to have known going in. Read Wayne's report and all the reports linked (we had photos saved to our phone since routefinding was not obvious to us): https://waynewallace.wordpress.com/2018/08/02/fire-on-the-mountain-sloan-pk/ Also, save the excellent Mountain Project Description: https://www.mountainproject.com/route/122891276/fire-on-the-mountain Also, take a look at Steph Abegg's description and overlay of the SE Shelf route (which is the descent route): https://sites.google.com/stephabegg.com/washington/tripreports/sloan-bedal Approach I suppose, theoretically you could also approach via the Corkscrew Route (Sloan Peak Trail), then descend the SE Shelf to get to the base, then take the Corkscrew Route all the way back to the car, but I'm not sure how that compares to Bedal Creek. Most people seem to approach via Bedal Creek, so that is what I will describe. Bedal Creek starts by driving a few miles up a really nasty FS road (4096) which is not on Google Maps (high clearance 4WD advised...I know of at least one party that got a flat tire on this road, and I had to replace one tire after the trip). Here is the turnoff from the Mountain Loop Highway: https://maps.google.com?q=48.0856022,-121.3886677&hl=en-US&gl=us&entry=gps&lucs=,47071704&g_st=ic Take the road up until there is a small berm at the end (there is space for maybe 4-5 cars): https://maps.google.com?q=48.0719366,-121.3763550&hl=en-US&gl=us&entry=gps&lucs=,47071704&g_st=ic NW Forest Pass required (I think). No backcountry permit required. Gotcha #1: The road continues past the berm where you park, but do not start hiking up the road. The trail begins immediately uphill via a good, clear path and flagging from where you park. The USFS description is confusing when it says "Bedal creek trailhead is not located at the end of the road." (that's not a typo, but it is a poor description) There are many trip reports of unfortunate souls continuing up the road only to realize the trailhead was back where they left the car. The Bedal Creek approach (despite all previous accounts) was weirdly difficult to route-find. After many iterations, I think I finally nailed the approach if you are trying to get to the West Face, North Ridge, SW Face, or SE Shelf. Here is a CalTopo map with tracks, turn-by-turn waypoints and water sources (recommend downloading the topo map and satellite map for offline use with these tracks and waypoints): https://caltopo.com/m/RFMPB/LE9HFB06R0Q6PE6H 2-3hours to reach camp under the gigantic boulder in the Bedal Creek Basin (site of the old Harry Bedal Cabin who mined for asbestos in the early 20th century). This is a fantastic site with spring water nearby on flat grass that can fit multiple tents. The only downside to this site is that it is so comfortable and idyllic that you won't want to leave. It is also the site of Washington's most secure and gleeful V1 highball. Many folks climb Sloan in a long day from the City, but we did two nights out for a leisurely Type 1 camping trip (plus limited Fall daylight). Camp in the basin, or higher up at one of the sites on the South Ridge (very close to the start of Fire on the Mountain or the West Face route). See waypoints in CalTopo Map Gotcha #2: Most of the season you will encounter snow and running streams on approach for water sources. We didn't get any snow or water above camp until we descended to the glacier...oops. Carry water. Above: The West Face. Note that the "West Face route" (5.8) actually begins on the Southwest Face (which is on the other side of the right-hand skyline shoulder) Above (SW Face): Fire on the Mountain starts on the right hand side and goes straight up to the pointy gendarme. The West Face route (5.8) starts up the left-trending ramp on the left side of the face that you can see in the picture above. Pitch 1 (shown above) starts in a chimney then finger cracks (5.10+) then belays on a shelf above the obvious finger cracks. Pitches 1 and 2 take the longest, then the rest of the route is fast and cruiser. Money pitch! Pitch 2 (Gotch #3): the FA party did Pitch 2 in two pitches, but all parties since have done it in one long pitch. We ended up splitting up the pitch due to routefinding issues and rope drag, and it seemed logical to split this pitch up since it is so wander-y. Some reports showed climbing a wonderful hand crack flake above the belay, but NO! Ignore this beautiful crack (shown above), walk 10ft to the right on heather and find another beautiful hand crack next to an off-width. Climb the hand crack on the right, then traverse right to a small ledge. Climb up and gradually right on runout face to a "vertical seam"....we never found any of this since the face climbing was too scary so I backed off. Instead, we did a low, hand traverse to a grassy gully that led up to the roof (this was a complete garbage variation). I don't know...weird pitch...I never figured out where to go, and you can't see the roof from the bottom of the pitch...just keep trending up and right). The roof was super runout, save your #3 and 4 for this. I would have very much liked to have had a second #3 and one #4 for this pitch. Pitch 3 (shown above): climb the obvious, right-leaning crack, and don't be suckered straight up or left. Pitch 4 (Gotcha #4): This is NOT an Offwidth (unless it has changed in 10 years)! The Mountain Project and the Steph Abegg descriptions of this pitch are correct. It's just an obvious straight up, right-facing, dirty corner. Very straightforward. End on top of a pedestal (old piton rappel anchor from Kearney is down and left of the pedestal). No place for a #4 on this pitch (what the hell Blake!) Pitch 5 (shown above): Get your slipknot ready before you get off the deck and eye up the chickenhead (shown above)! Follow knobs then a ramp leftward. Skip the first right-facing dihedral and continue leftward to the second right-facing dihedral (5.10c). Belay just above the dihedral or keep going as much as you can in order to make Pitch 6 shorter. At least one party I know accidentally went straight up (into a right-facing dihedral) from this belay instead of starting off on the left; they found hard runout climbing to get back on route. Follow the chickenhead! Pitch 6: Climb as high as possible until you run out of rope (consider simul-climbing because it's no harder than 5.8). Skip the heather ledge and keep climbing into Pitch 7. Skip the unnecessary "boulder problem hand crack" and just take the path of least resistance out right then back left. Just chose your own adventure and continue straight up. It wasn't harder than 5.8 unless you just want to do a 5.10 boulder problem. Keep climbing, aiming for the pointy gendarme. Lots of good belay spots. Pitch 7 (shown above): If you extended pitch 6 past the shallow, heather ledge, chose your own adventure up the easiest path (no more than 5.8 if you chose wisely) and continue straight up to the pointy gendarme. DON'T start traversing too early! Continue aiming for the pointy gendarme summit until you reach an overhanging bulge (shown above) and you are forced to traverse out left. Belay under this overhanging bulge. You definitely want to split this pitch into 2 pitches, which is very logical because (1) rope drag is terrible on the traverse and (2) you can stretch this traverse pitch and end it above the heather ledge where you feel really comfortable to unrope. Note: for reference, there is a steep, slabby gully on the left side of the gendarme...don't go here! Stay on the prow and traverse high which puts you directly onto the final heather ledge. Once at the safe, heather ledge, you can unrope, put comfy shoes on (it's 3rd and easy 4th class from here), and coil the rope. Gotcha #5: Don't start traversing right at the first heather ledge system you see at the top because it does not join the Corkscrew Route here. Whether or not you are opting for the summit, traverse left on gentle heather for about 30m until you reach a gully. Ascend this gully for another 30m (3rd and easy 4th) until you reach the HIGHWAY that is the Corkscrew route (shown above). From here, leave your stuff and go left, following cairns, a nice path and some more 3rd/4th terrain to the summit (~30min to summit). Or, if you skip the summit, take the Corkscrew highway going right. Pictured above: descending the corkscrew trail traverses counter-clockwise around the Southwest side of the mountain where you will get a view of the impressive East Arm. The SE shelf descent route is a lower shelf beneath the East Arm. You will need to descend down slopes down an obvious gully to a rappel station (15m rappel or low-5th downclimb) which takes you to the top of the SE Shelf. Some parties rap off the shelf onto the glacier, but we found that just going all the way down the shelf was pretty fast and safer (plus the moat at the bottom of the rappel could prove tricky). There is some low-5th slab climbing at the bottom of the SE shelf. See some of my waypoint notes in my CalTopo. Enjoy! Gear Notes: Doubles to #2, single #3 (lots of finger size cams). Would have liked an additional #3 and also a #4, but not necessary. Didn't bring ice axe or crampons since we knew that the glacier could be avoided by climbing slabs in late season (recommend ice axe and aluminum crampons for added safety). Bring lots of water. Didn't have any water or snow from our bivy site in Bedal Creek all the way to the glacier on descent. One hiking pole each was really nice. One big follower pack. Approach Notes: Download this map (topo and satellite) plus the routes and waypoints: https://caltopo.com/m/RFMPB/LE9HFB06R0Q6PE6H

 1 point
 -
There is snow on the ground at 5k'. Let the games begin!1 point
-
https://www.climbing.com/news/new-5-14-crack-washington-alpine/ pretty damn cool doing such a hard line way back in there.1 point
-
Hey Rob I appreciate the detailed response! I made it up and down no problem minus some toe bang from the Nepals. That is a killer (in the best and worst way) route with no snow on it. Was the only person on the entire trail until I hit Monitor Ridge, of course. Anyways once again I appreciate the reply and I'll take that information along with me for future climbs!1 point
-
Trip: Mix-up Peak - The Misunderstanding (FA) Date: 10/25/2011 Trip Report: Yesterday Forest McBrian, Dave Jordan, and I established a new line on Mixup Peak in North Cascades National Park. The route climbs the northeast face of the north summit and is partially visible from Cascade Pass. We had spotted the seasonal line last week while climbing on Sahale Peak and hoped that the weather would hold out long enough so we could sneak in an ascent. Fortunately the weather was with us and we had clear and cold temperatures immediately following a brief warm spell that included rain up high--this created perfect conditions on the climb. The line climbs the center of the North Face. Approaching the route (in upper right corner) The route begins in a narrow gully that sits about 60 meters east of the obvious couloir that splits the face ( 2004 TR for that line). The first pitch set the tone for the route with excellent sticks in perfect snice, but a dearth of protection opportunities. Each of the following eight pitches were all rope stretching pitches, totaling almost 1800’ of climbing on the face. This route was both longer and more difficult than we had anticipated and is unusually sustained for a Cascades line--only two pitches didn’t have 55 degree or steeper terrain and all of them went straight up without any side-to-side deviation (except pitch two which moves about 15 meters right at mid-height). The belays were all sheltered from icefall, but close enough for good photos! Pitch one Pitch three (one of the easy pitches) Pitch four We found the crux to be surmounting a roof draped with icicles on pitch five and agreed that the pitch was undoubtedly the best pitch any of us had ever climbed in the mountains. Forest led it in impeccable style. Above the crux was an incredible ice chimney that led to yet another ice pitch and, finally, a short snow slope to the crest. Pitch 5 crux Following pitch 5 (Cascade Pass trail in upper left) Following pitch 5's ice chimney Pitch 7 Following pitch 7 The technical climbing ended at a small notch in the summit ridge where we took in an incredible view of Johannesberg and Formidable in amazing evening alpenglow. It was a perfect day in the mountains. Gear Notes: Knifeblades (4-6) Cams (purple TCU to 3”), doubles to 1” 2-6 short screws 70m ropes, two ropes recommended in case of retreat. Approach Notes: Hike to Cascade Pass. Follow the trail onto Mixup Arm. The route starts about 60M east of the prominent couloir. It lies above a remnant snowfield that is obvious on the USGS map. An easy 2.5 hours to the base. Descent Notes: From the crest of the ridge at the notch, traverse on the west side of the ridge southwards towards the south/true summit for about two rope-lengths on shattered rock. Gain the first obvious notch and continue past it to the second notch. The rock quality in the second notch is noticeably better than along the crest. From here, we down-climbed the East Face to the Cache Glacier on steep snow to 55 degrees. Rappelling may be necessary in other conditions. From the Cache Glacier, traverse north and west around Mixup Arm and back to Cascade Pass. Here is a modified Scurlock photo ( original) showing the east face. We downclimbed just west/left of the ridge that lies just right of the center of the photo. Special Notes: We found that the route gets a tiny bit of sun until about eleven in the morning. Small amounts of spindrift and ice chunks came down during that time, but after the sun moved further south the debris stopped. Due to the exceedingly compact nature of the rock, anchoring options were extremely limited and much time was spent finding anchors that frequently (and unfortunately) verged on being inadequate. Although we managed with 60m ropes, we strongly recommend bringing 70m ropes to potentially give more options for finding belay anchors. Mix-up Peak, The Misunderstanding IV, AI4R, M4 2200’ of climbing Kurt Hicks, Dave Jordan, Forest McBrian October 25, 20111 point