Leaderboard


Popular Content
Showing content with the highest reputation on 09/08/18 in all areas
-
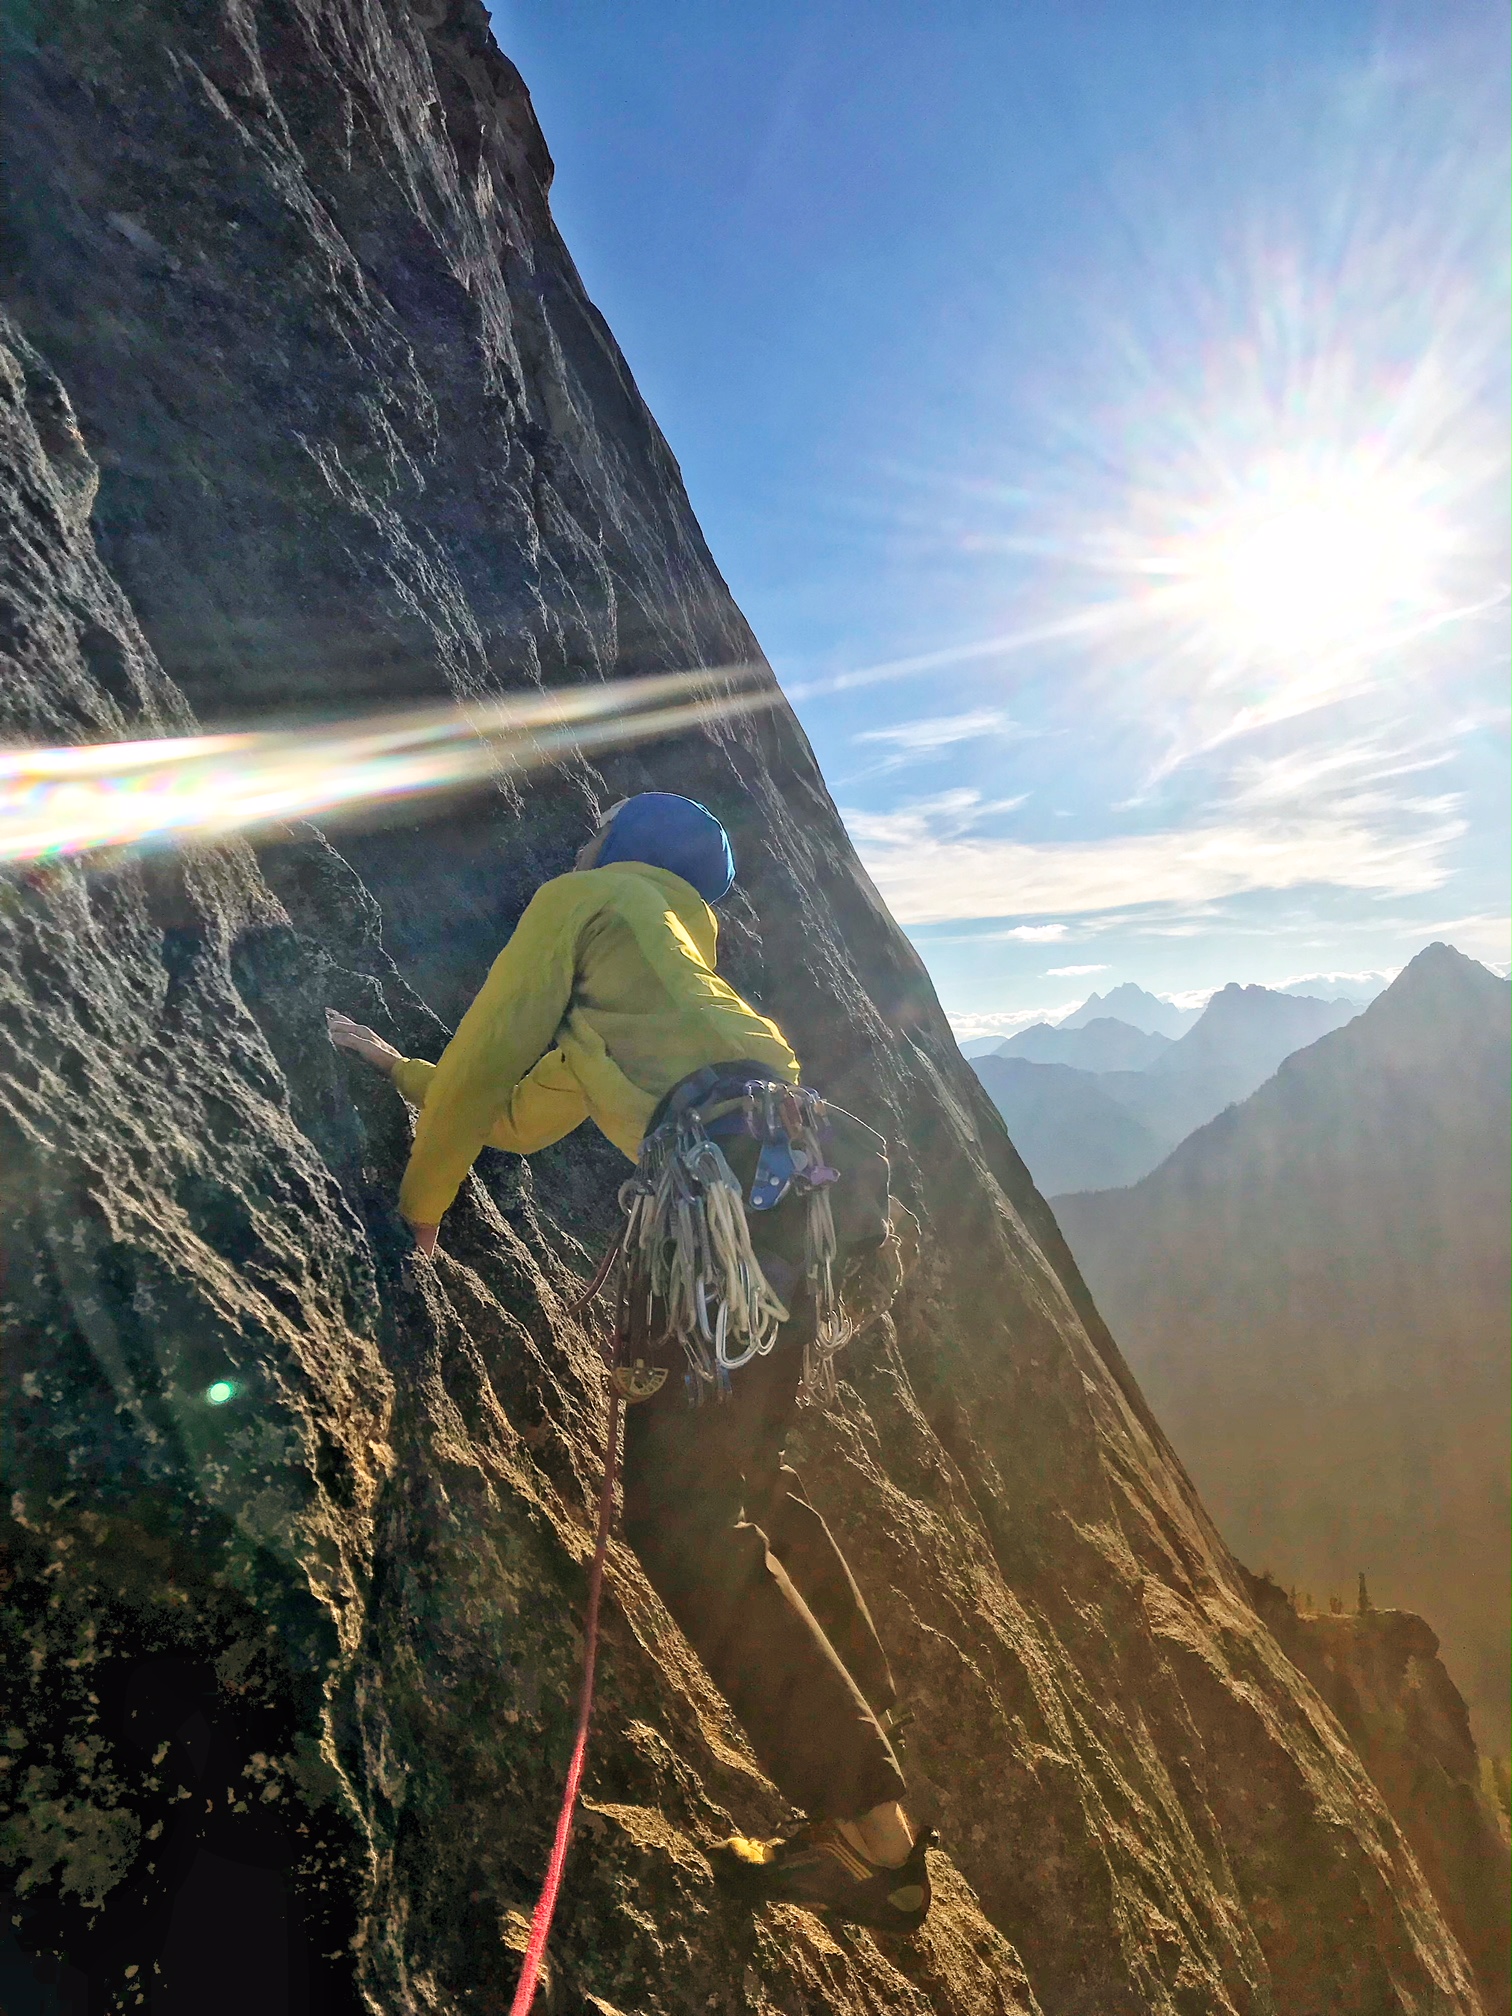
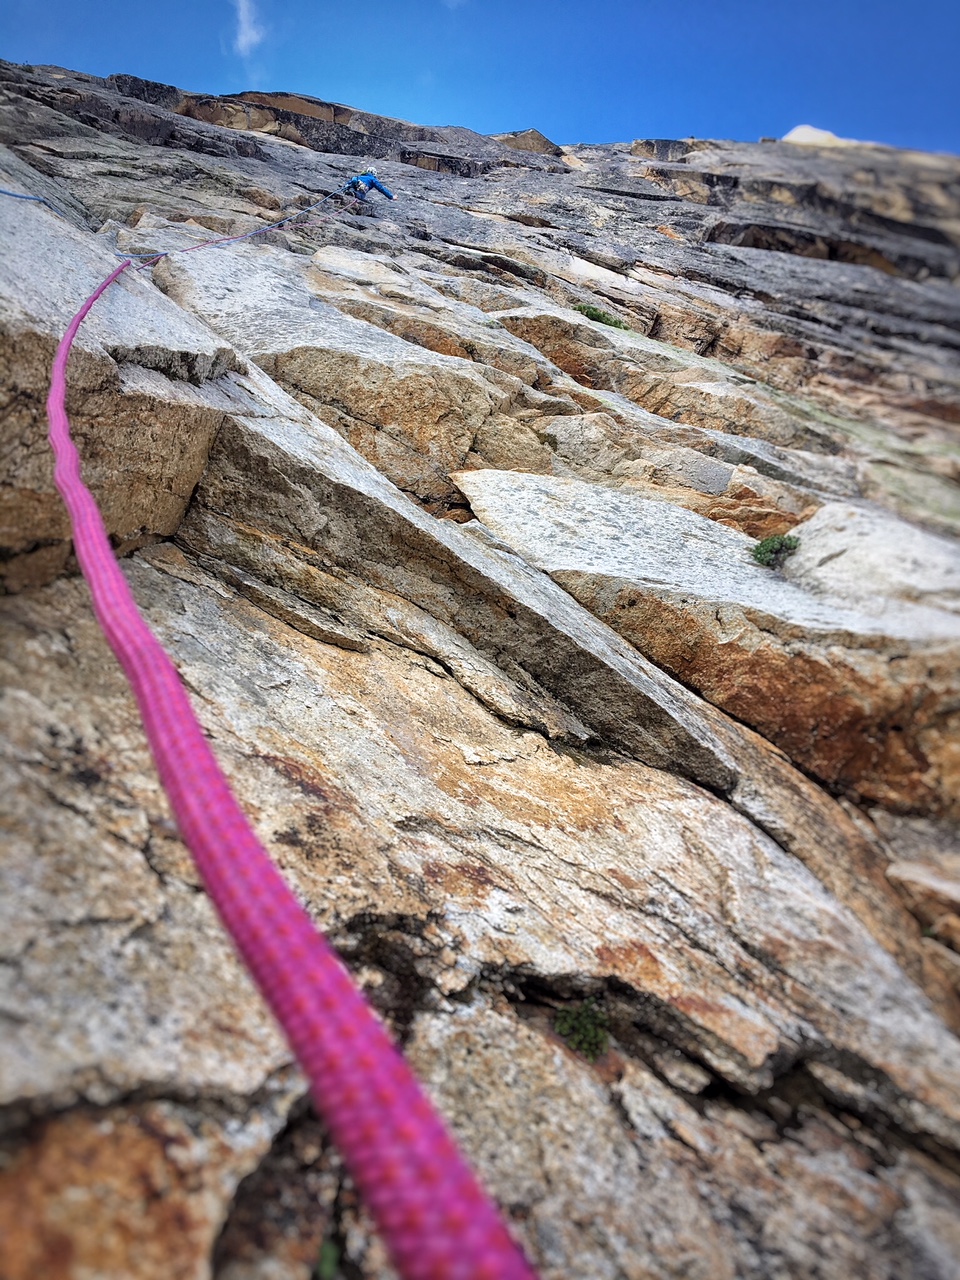
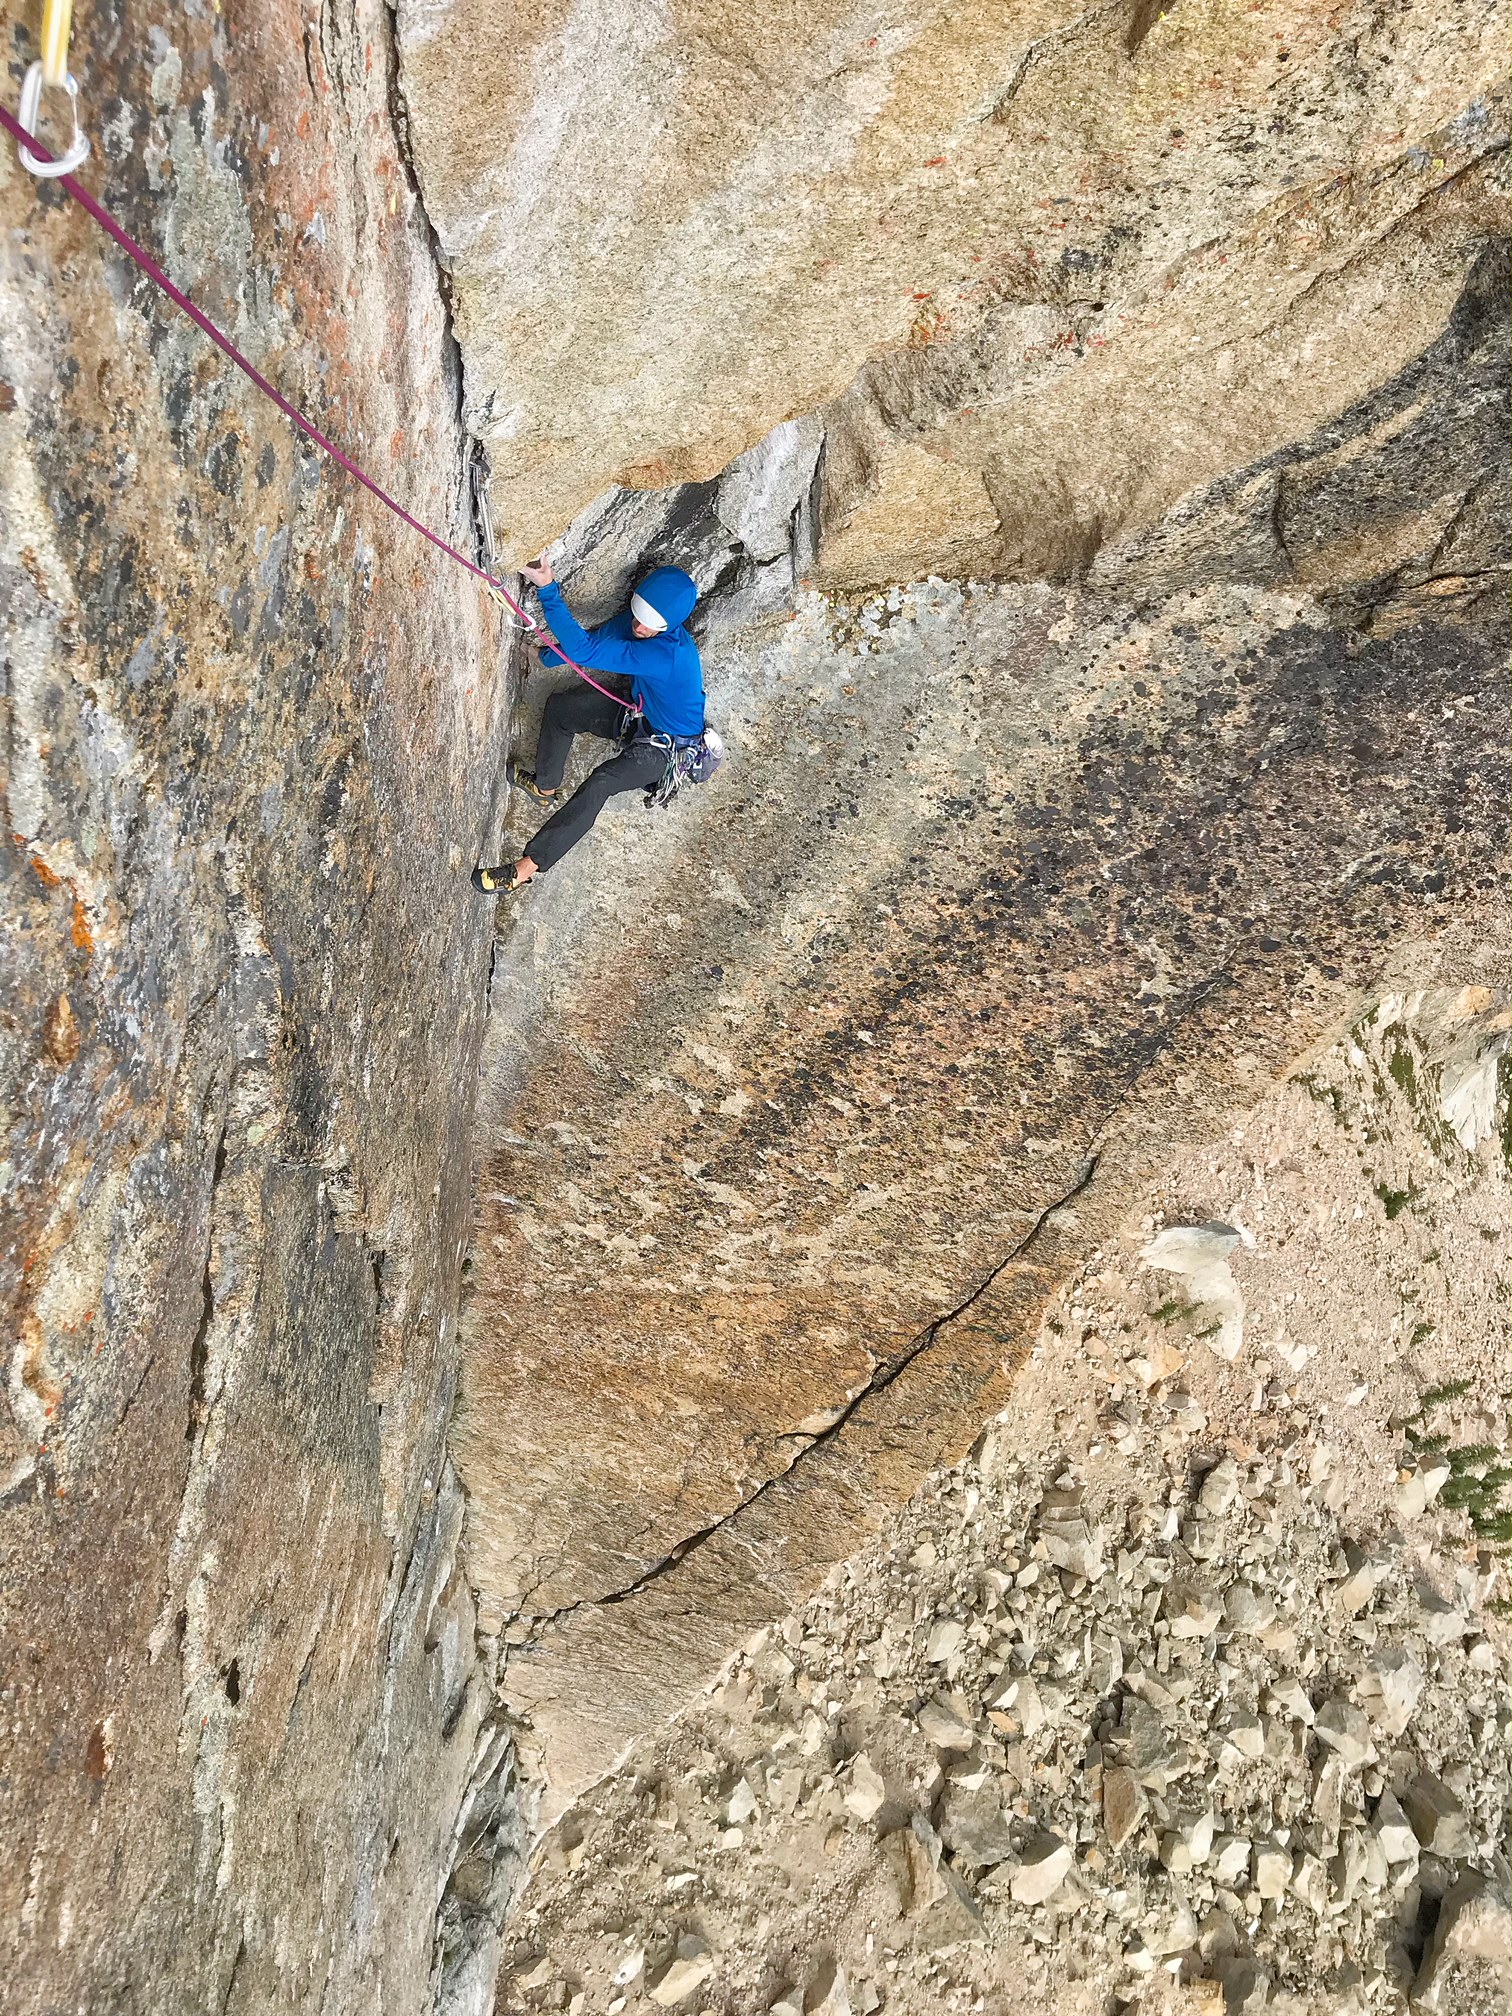
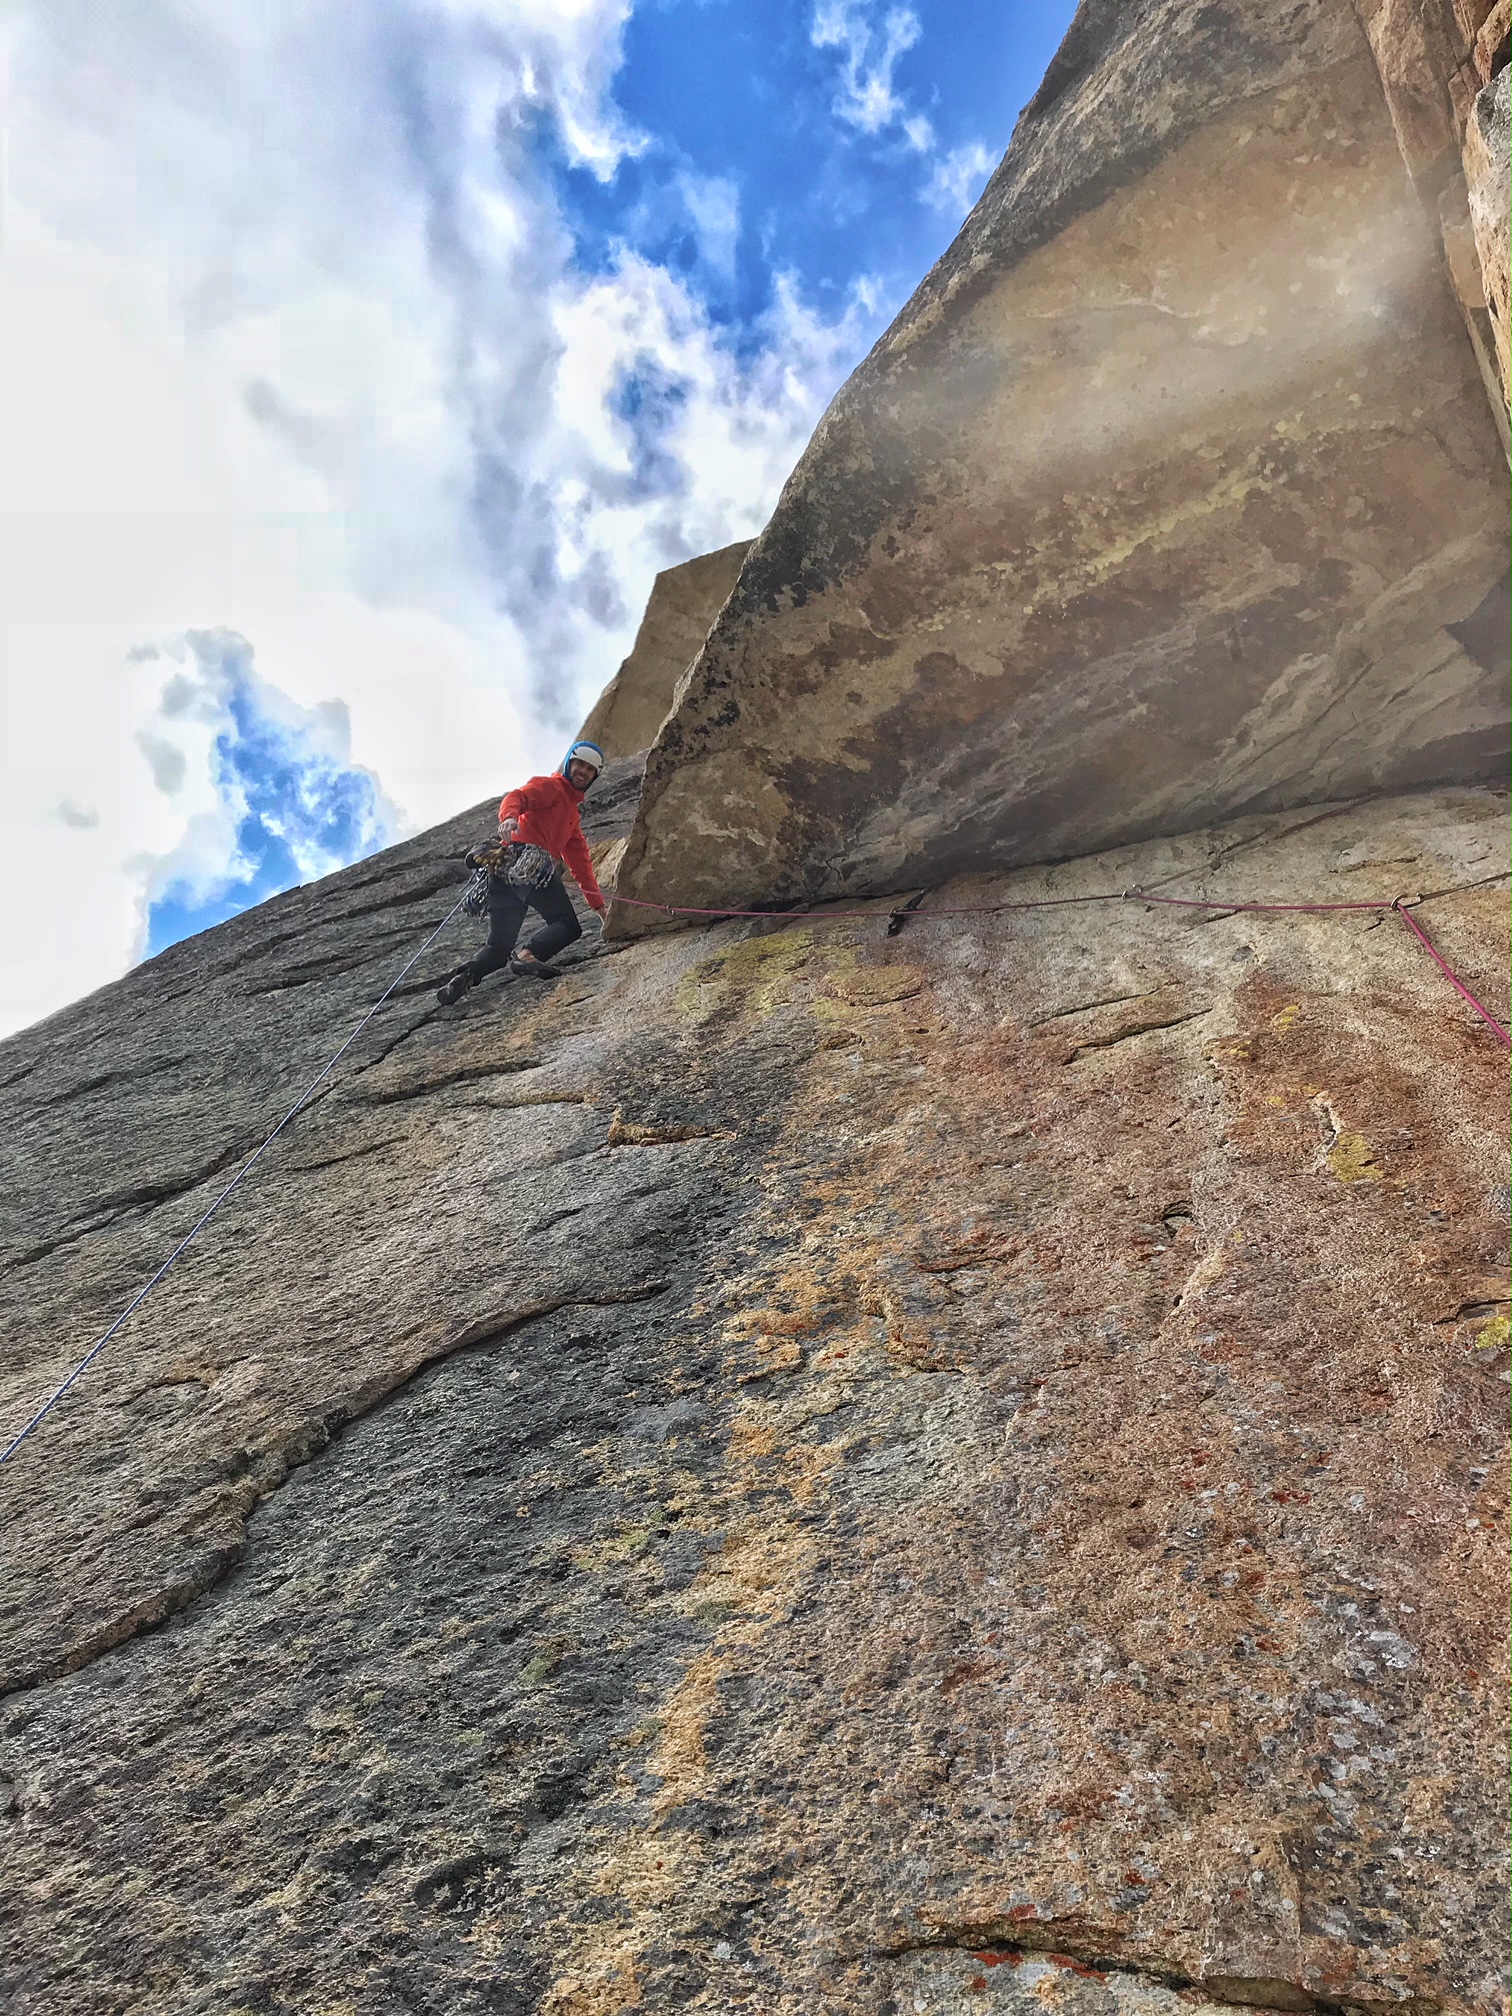
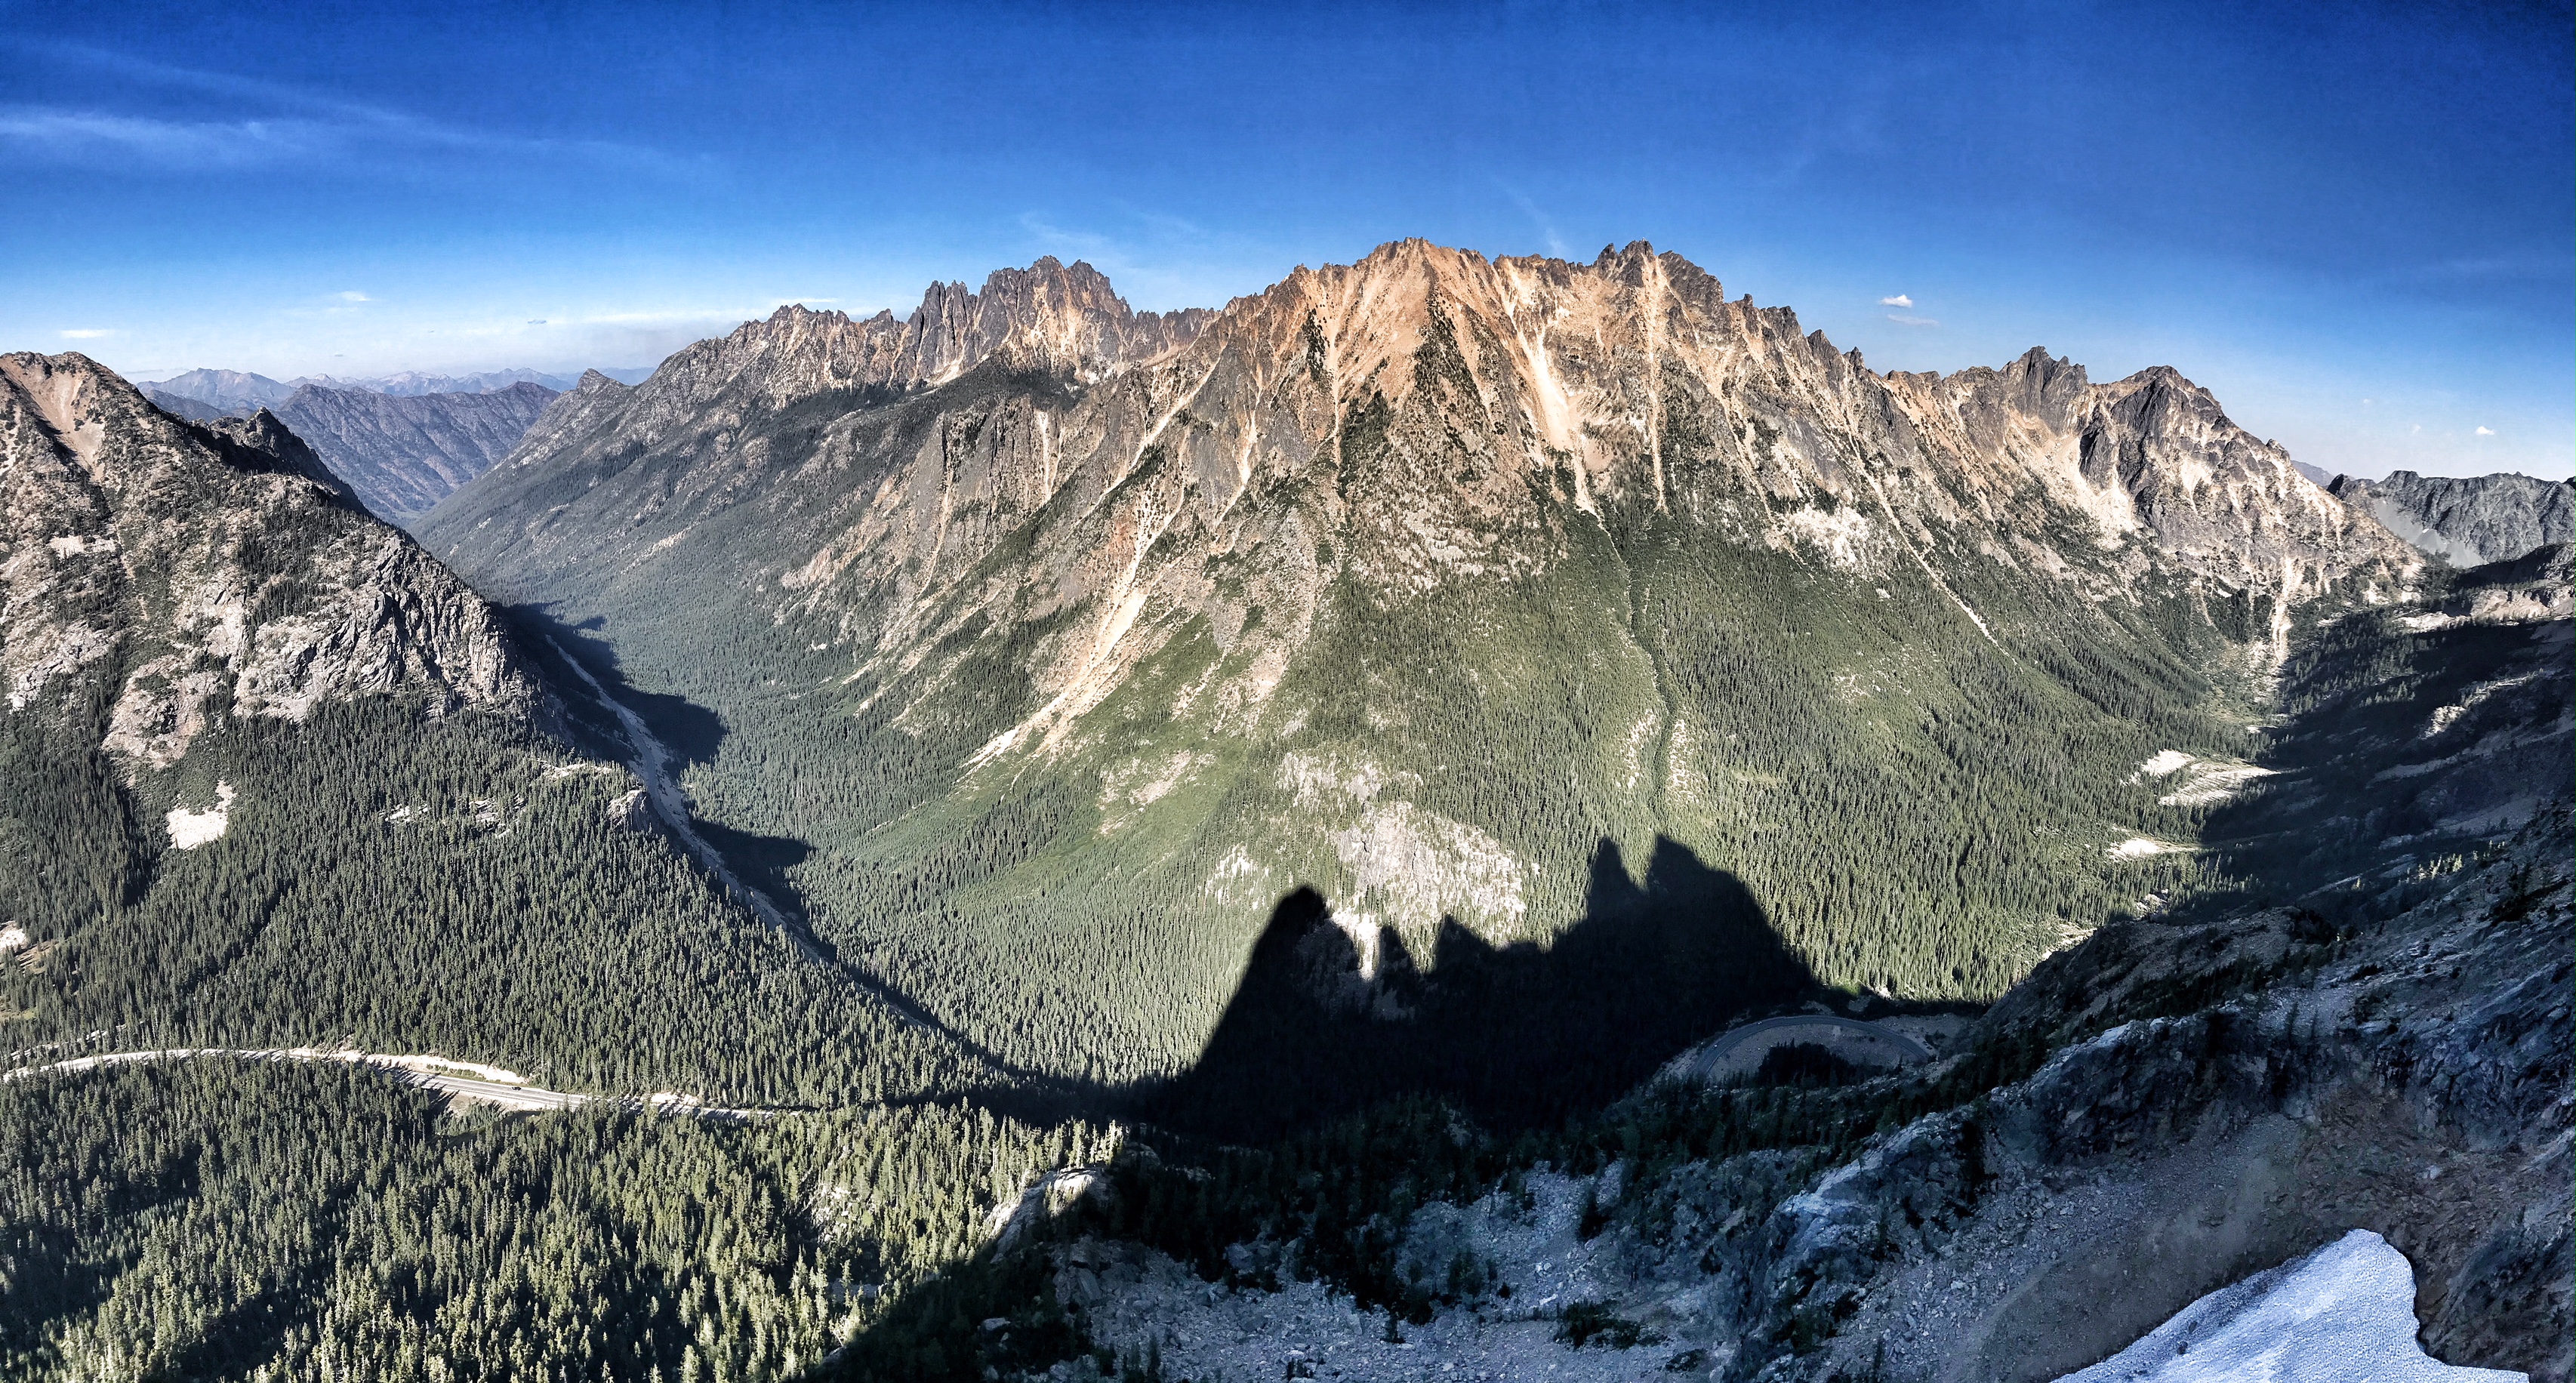
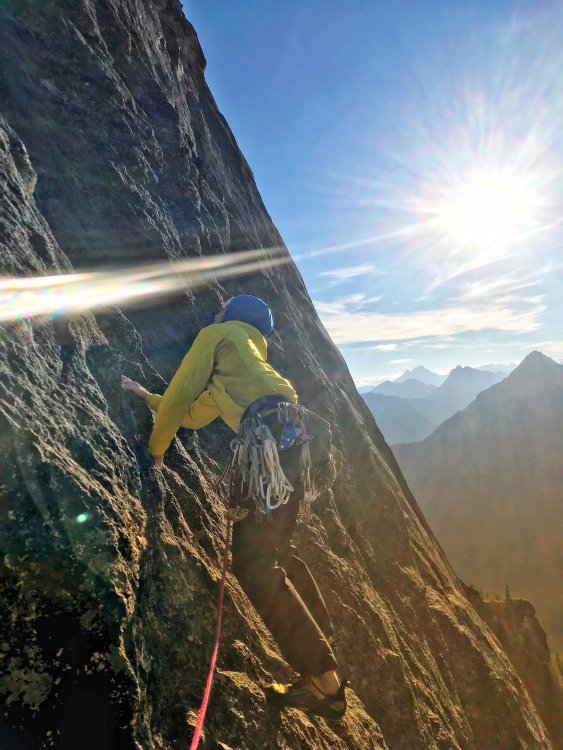
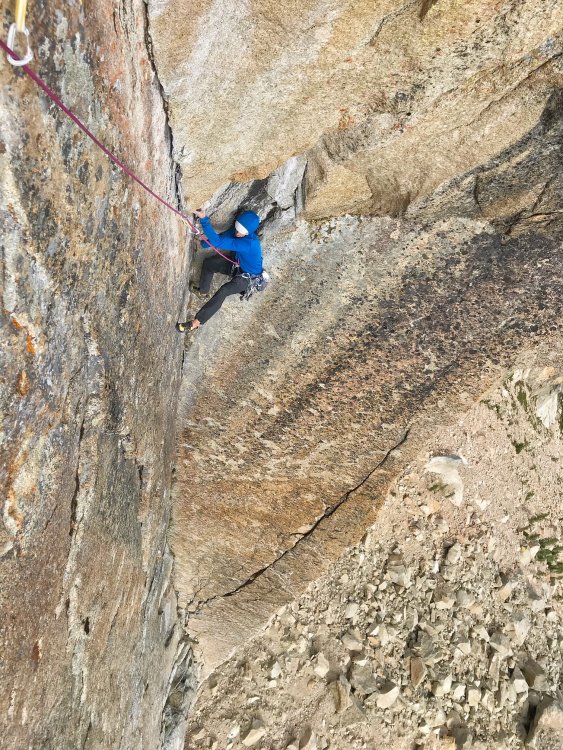
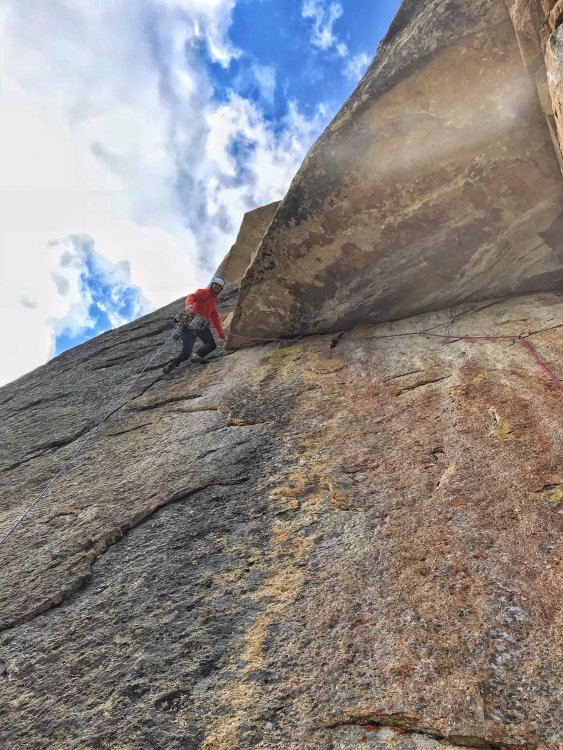
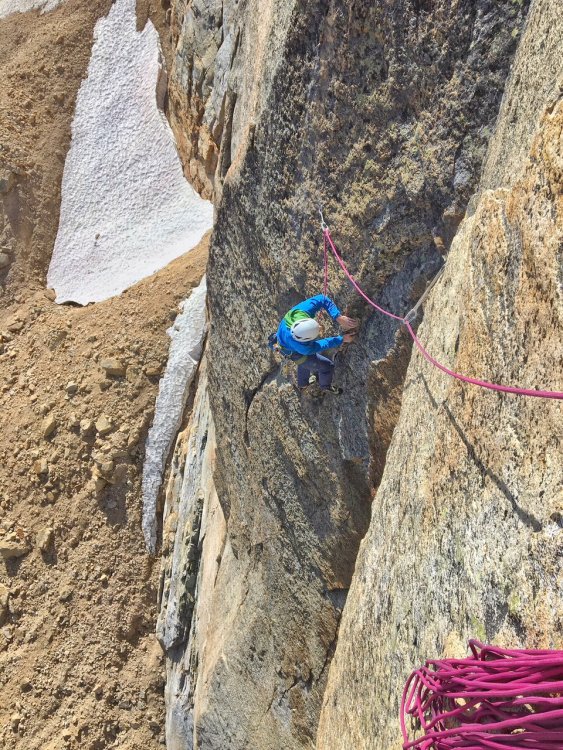
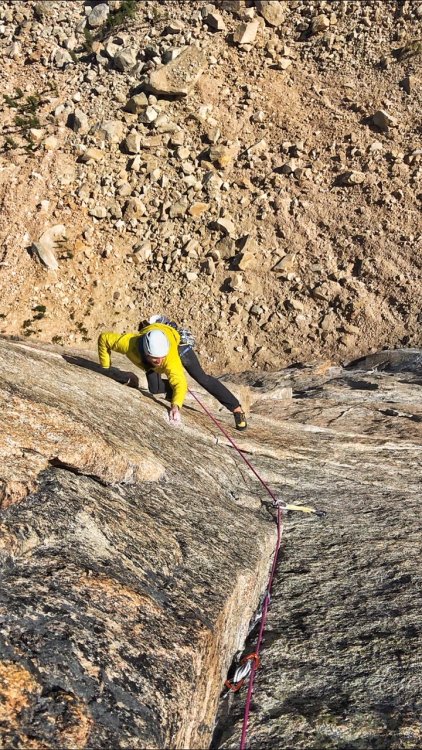
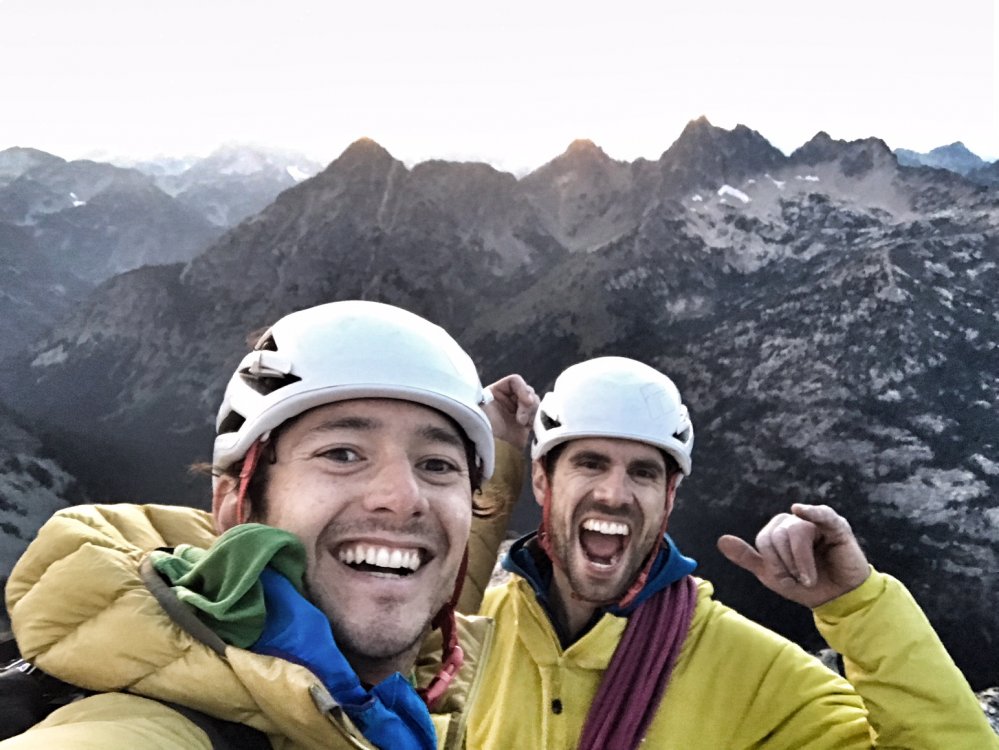
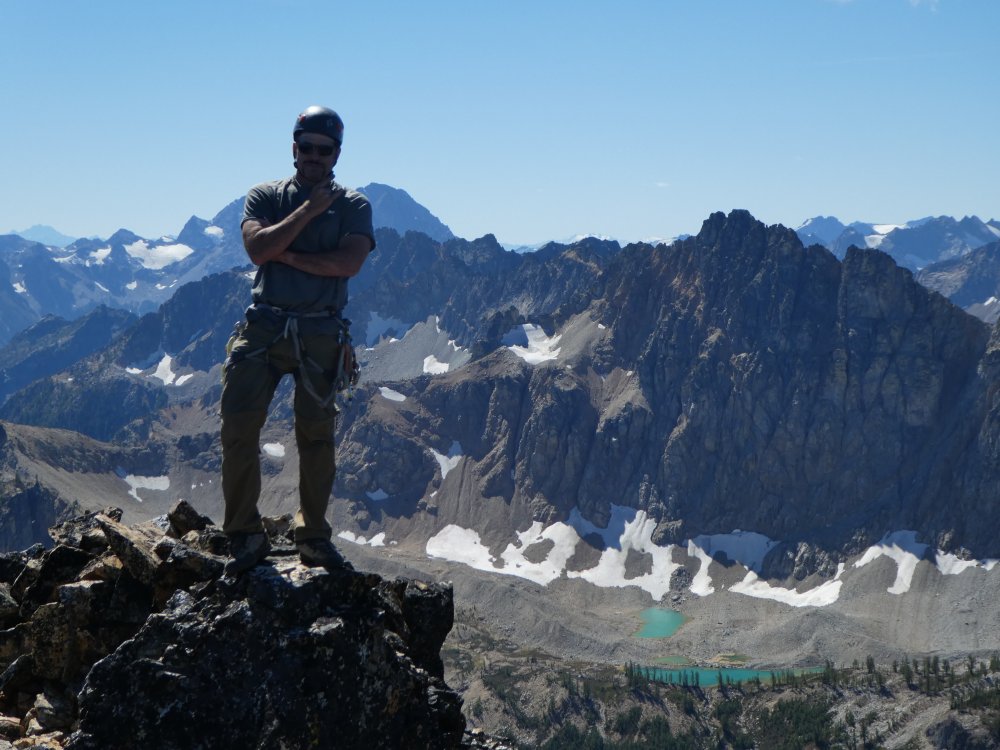
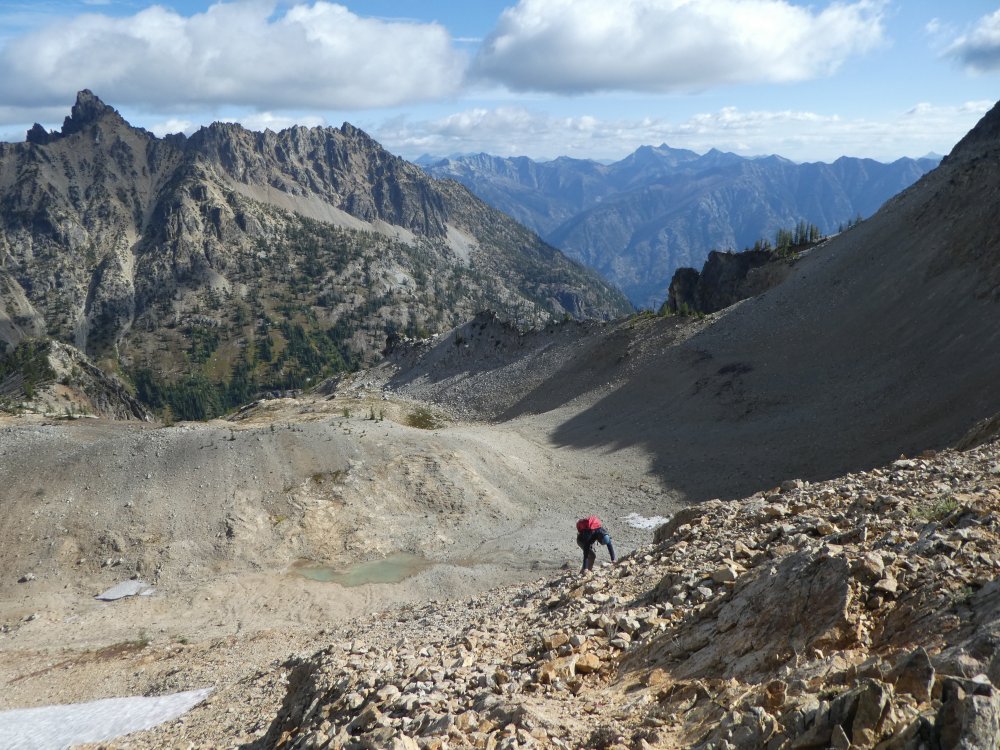
Trip: Washington Pass, Liberty Bell - Thin Red Line Trip Date: 09/01/2018 Trip Report: My buddy Andy Traylor and I had set this as a goal route to free for the summer season. Neither of us had really approached a bigger route like this with a redpoint mentality before and weren't sure exactly how to do it. With many different ways to consider an ascent "free," we settled on what we believe is a pretty commonly followed set of rules. We wanted to swing leads, and either redpoint or follow cleanly on every pitch, lowering back to the belay if necessary. Our plan was to spend one day and check out the first six pitches to get a feel for the moves and the gear then try and send the next day. On day 1 we took our time climbing the first six pitches, with no real pressure or time crunch. We TR'd the cruxes a couple times and feeling pretty good about going for it the next day, rapped off and headed down for a big dinner. The next day we set out a little nervous, but also feeling good about our chances. Once we were on the route we were moving and climbing well. Thoughts on the pitches for anyone that cares (some gear beta here so purists need not read on): P1. Straightforward crimping and edging straight up to the anchor. I actually headed right after the last bolt, going more directly to the anchor on day 2 and thought that was slightly better. Andy getting all artsy with the iPhone on P1 P2. Short pitch. Boulder problem over the bulge through the mini changing corners. Good pro and the pin at the end of the crux seemed in good shape, not tested. Belay on gear. P3. Awesome and memorable pitch I thought, shorter than it looks in photos. Super thin edging and stemming in the dihedral leading to a roof with wet holds that allow you to exit the corner and gain a stance. I basically punched myself in the face popping out of the wet locks first go round. Pin in the corner seemed good, I tested it and it held. Mostly finger sized cams. Belay at full on hanger. Andy in the corner/roof that ends the crux on P3 P4. Fixed gear in the roof seemed only ok, hard to tell with the tat and I didn’t spend much time examining it, but you probably won’t come off under the roof anyway, clip and go. Andy exiting the roof on P4 The last bit traversing back toward the anchor we both found a little awkward and harder than it seemed it should be. On the traverse back to the belay on P4 P5. Business #1. Super fun 5.10 traversing and edging to the corner. Corner gets progressively harder with the real business starting at the bolts. I will say on my initial go I was not super happy to have left basically all the rack at the belay, expecting only a few pieces then bolts. I'd take mostly finger sizes, but I was happy to have a black Metolius and a #2 C4 (certainly not necessary but provided me with some mental fortitude to try hard). Bring lots of slings, I think I had like 14 and ran out somehow, placed too much gear I guess. The crux moves are technical, a little powerful, desperate and amazing. The last move, while not the hardest, has the potential to be a heart breaker and I can only imagine being very desperate if you’re under, say, 5’9. Belay on medium sized gear above the bolts, significantly better stance. Andy sticking the last move, he never fell once climbing this pitch over the 2 days. P6. Business #2. No picture. First roof is super casual. Leading up to the second roof the climbing gets less secure but good small finger gear is there between pins. The boulder problem is powerful, but pretty straightforward cranking (V4ish?) on pretty good holds. We were a little confused by all the talk about a necessary and specific red C3 placement. We couldn’t find anywhere by the beak, or below the roof for that matter, where this would go. Any clues? However that piece or a blue Metolius or equivalent went in bomber just above the lip. If that’s the placement everyone is talking about, then there is no need to scavenge around for a red C3 if you don’t have one. We left it out in favor of a blue Metolius on round 2. Climb past the bolts (if not rapping from here) and belay on the better sloping ledge with hand sized pieces. P7. Only dog pitch on the route. Thought the rock was poor quality, basically a connector pitch. Ends on the scary looking “how is it still hanging there” block creating the ledge. P8. Another techy and pretty thin 11+ pitch. Really really good. Looks super thin but there is gear to be had and both the head and pin are in good shape, Andy tested both and approved. Some small hand sized gear higher. P9. Excellent and fun 10+ climbing again builds as you get higher. Looks like the seam dies out at the top, but keep going up instead of traversing left. That’s probably super obvious but I was getting tired and moving more timidly by this point. P10-12. Progressively easier climbing. Nice to have Scott's topo for P10 to know where to get started. The last belay sits basically on the arête between the east and north face, we came back into the sun here. There are brand spanking new bolts here instead of the pin/fixed wire combo some guide mentions. Maybe it’s obvious, but the climbing heads left up the lighter colored dihedral. This looked too steep to us to be the 5.7 climbing, so Andy headed out right on the lower angle terrain and we had a bit of an epic on the easiest and last pitch of the route. The rock quality deteriorated into kitty litter, so Andy tried to sling a chockstone to lower back to me, only to get the rope got stuck forcing even more shenanigans (face palm). All in all we wasted some hours and all hopes of pizza. Once corrected we soloed to the top without further incident. Don't go this way. Why is this photo so big? All in all, neither of us fell following any of the pitches. On lead, some of the pitches took a try or two, but in the end we pulled it out and nabbed a free ascent. We learned a lot about climbing in this style and really enjoyed the process. Thanks to Mikey Schaefer for figuring this out, it provided one of my all time favorite experiences in the mountains so far. Psyched for the next one! Gear Notes: Doubles from purple Metolius to .75 BD, singles to #3 BD. Our second set of cams were Metolius offsets. They worked amazing (as always for granite) and I always carry them as doubles, but far from necessary. Nuts. Placed 1 RP but probably not necessary. Lots of slings, like ~16. We used a 40M tag line and hauled the bag on most pitches. Approach Notes: Most casual "alpine" approach ever. Like 25min from the car.


 3 points
 -
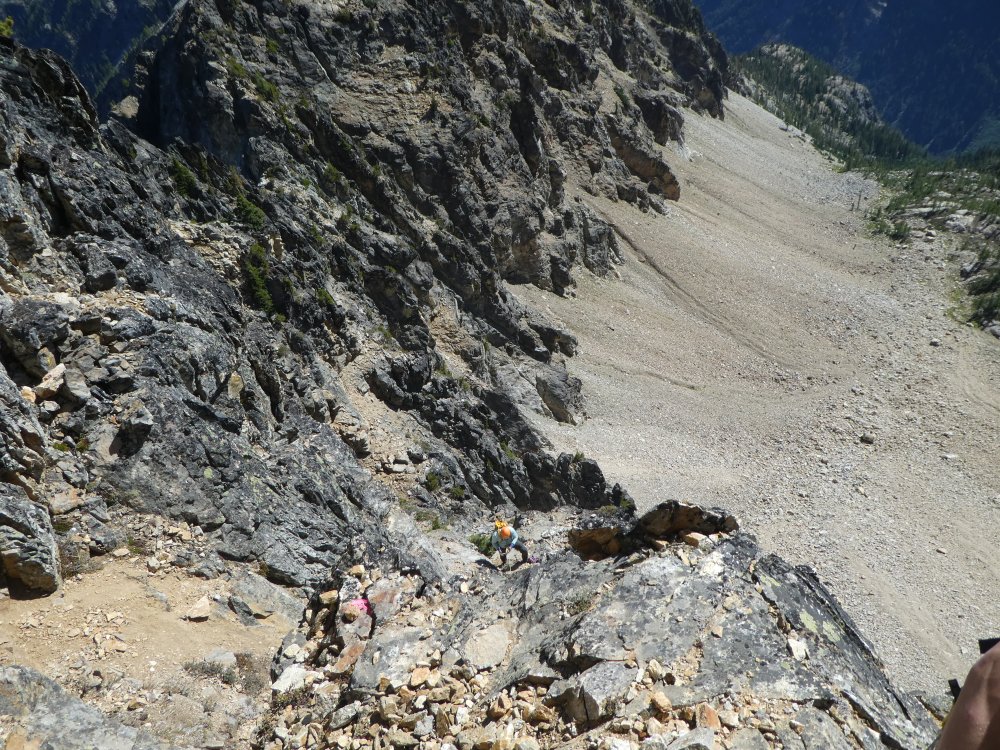
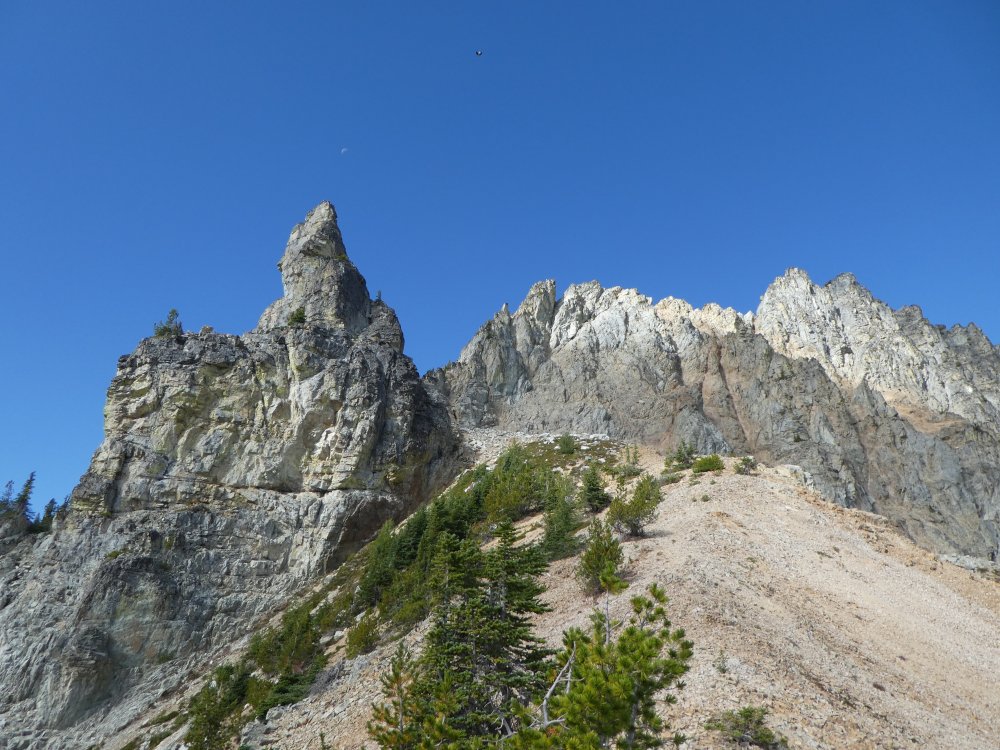
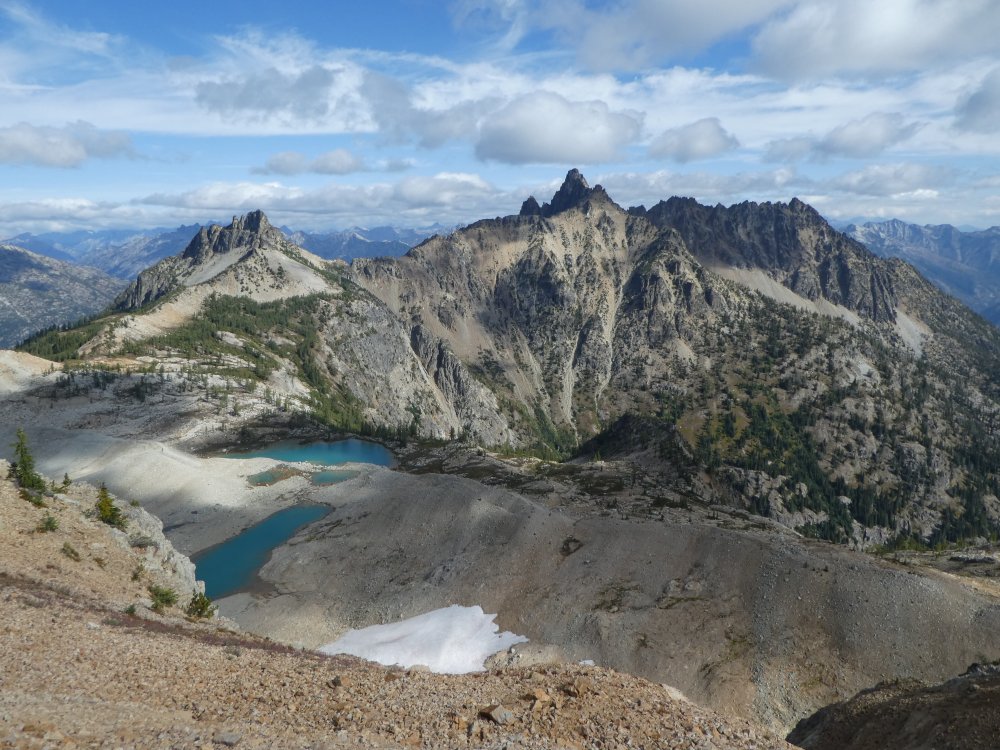
Trip: Tupshin and Devore - SE Routes Trip Date: 09/01/2018 Trip Report: This year I decided to celebrate an extended Labor Day weekend near Stehekin. For a bonus, the recent rains had cleared out the smoke we've been engulfed in and the forecast showed no rain. On Saturday we rode a very crowded Lady Express from Field Points Landing to Stehekin. We then caught a late (30 min) but almost empty Red Bus to Harlequin Bridge and hiked up the Stehekin River Trail and Devore Creek Trail to Bird Creek Camp. From here we turned uphill and schwacked our way to flat terrain around 5400' and camped. Time to camp was just under 7 hours. Sunday we arose pre-dawn (which is late and luxurious these days) and hiked straight uphill over towards Tupshin. At about 7000' we attained the ridge leading to the basin below Tupshin's SE face. We crossed the talus fields and ascended to about 7600' and the base of the route. There was no snow whatsoever on our approach which made for a lot of tedious travel, but fuck, it is September! We scrambled the first bit of the SE face and tied in just below the minor block that marks P1. I opted to lead the exposed class 3 around the 5.2 block and flipped my rope over the top of the block before proceeding to a 4th class quasi-chimney. P2 was mostly scrambling. P3 and P4 were more interesting, each with a nice (but short) low-fifth section (5.4-ish). At the top of the fourth pitch, we untied and scrambled to the summit. Although there is a ton of loose rock, the ascent seemed mostly safe and secure. The descent - not so much. We ended up rappelling five times, including the section at the bottom that we had scrambled. It was a constant fight not to knock rocks down and move carefully to stay out of each other's fall line. Once off the route, we made our way back to camp. There whisky awaited me, and I drifted off to sleep happy to finish this one off safely. On Monday we ascended to the 5800' basin below Devore and hiked up the steep gully leading to a basin. From here we ascended the steepening basin to rock bands that we scrambled to the edge of the lakes at 7000'. We ascended some horrible shitty choss to the shoulder of the ridge (7500'). then ran the ridge to a large gendarme. To compensate for the choss-slog we were treated for some of the most spectacular views I've seen: Our route descriptions said "do NOT go around the S side" (of the gendarme). We ended up wasting 2 hours trying to get around the N. The snow patch here was too melted back and icy (rotten ice). Eventually we gave up and I checked out the S side. It went! From there it was a quick shit-slog through choss up and right about 300' to a notch in the ridge, a short ridge traverse to a 4th class step and finally a scramble finish to the summit. We did 2 rappels down (both short) and retraced our steps to camp. Everyone was tired and wanted to head out the next day so we set our alarms to allow for plenty of time to get to the bus in time. Tuesday was an easy hike back to Harlequin where we all rinsed off in the river and relaxed waiting for the bus. We got some goodies at the bakery and a beer on the boat. By that morning the smoke was back in force so we were not too sad to save Flora for another trip. Gear Notes: 60m rope, small alpine rack, helmet Approach Notes: Open forest with some schwacking
 1 point
 -
Not glacier glasses but UV, eyes, sunglasses: Article on UV damage to eyes Explanation w scientific references You'll note that a significant mode of exposure is reflection off the back of the glasses into the eyes. IMHO, reflection off snow is a concern in alpine climbing. When planning extended snow travel, consider using darker glasses and minimizing exposure due to reflection off the back of the glasses by wearing glasses that are larger and/or fit closer to your eyes and/or have barriers to prevent light entry from the sides/bottom.1 point