-
Posts
99 -
Joined
-
Last visited
-
Days Won
40
Everything posted by Kyle M
-
[TR] Lennox Mountain - Goat Basin Ice Climbs FAIL 11/30/2019
Kyle M replied to Kyle M's topic in Alpine Lakes
@OlympicMtnBoy no! Now I'm really bummed. -
[TR] Lennox Mountain - Goat Basin Ice Climbs FAIL 11/30/2019
Kyle M replied to Kyle M's topic in Alpine Lakes
@rat crazy! If only we had known this and driven further up the road... kickin myself for not researching more. Alas, seems like that was a bit greater of a cold spell and maybe those routes were not in. At least that's what I'll tell myself... -
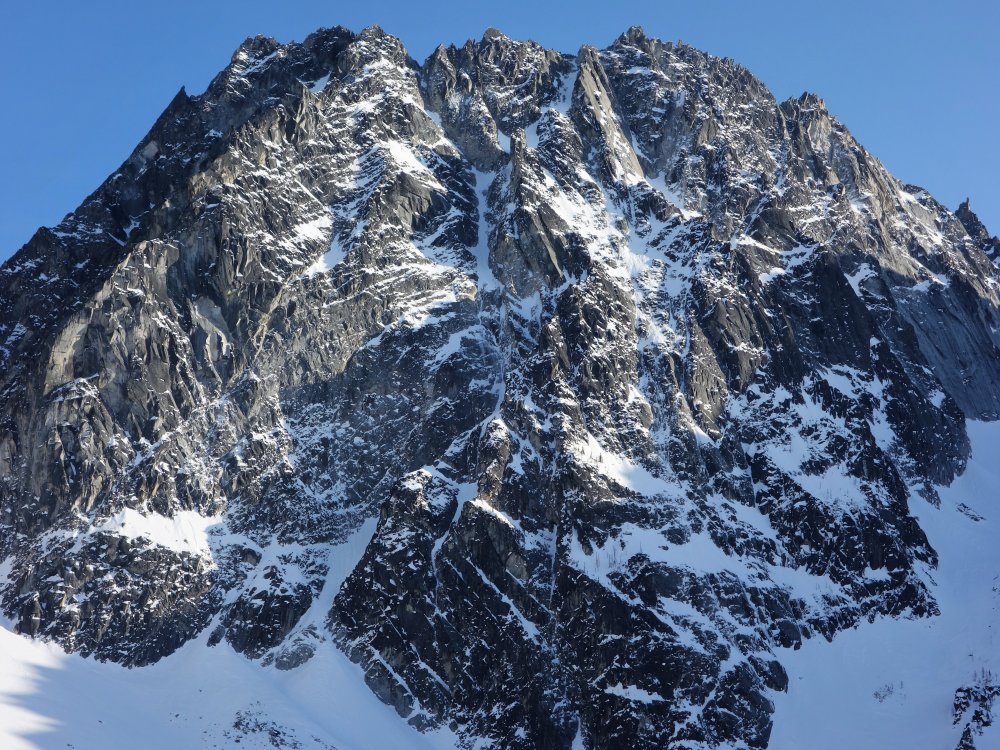
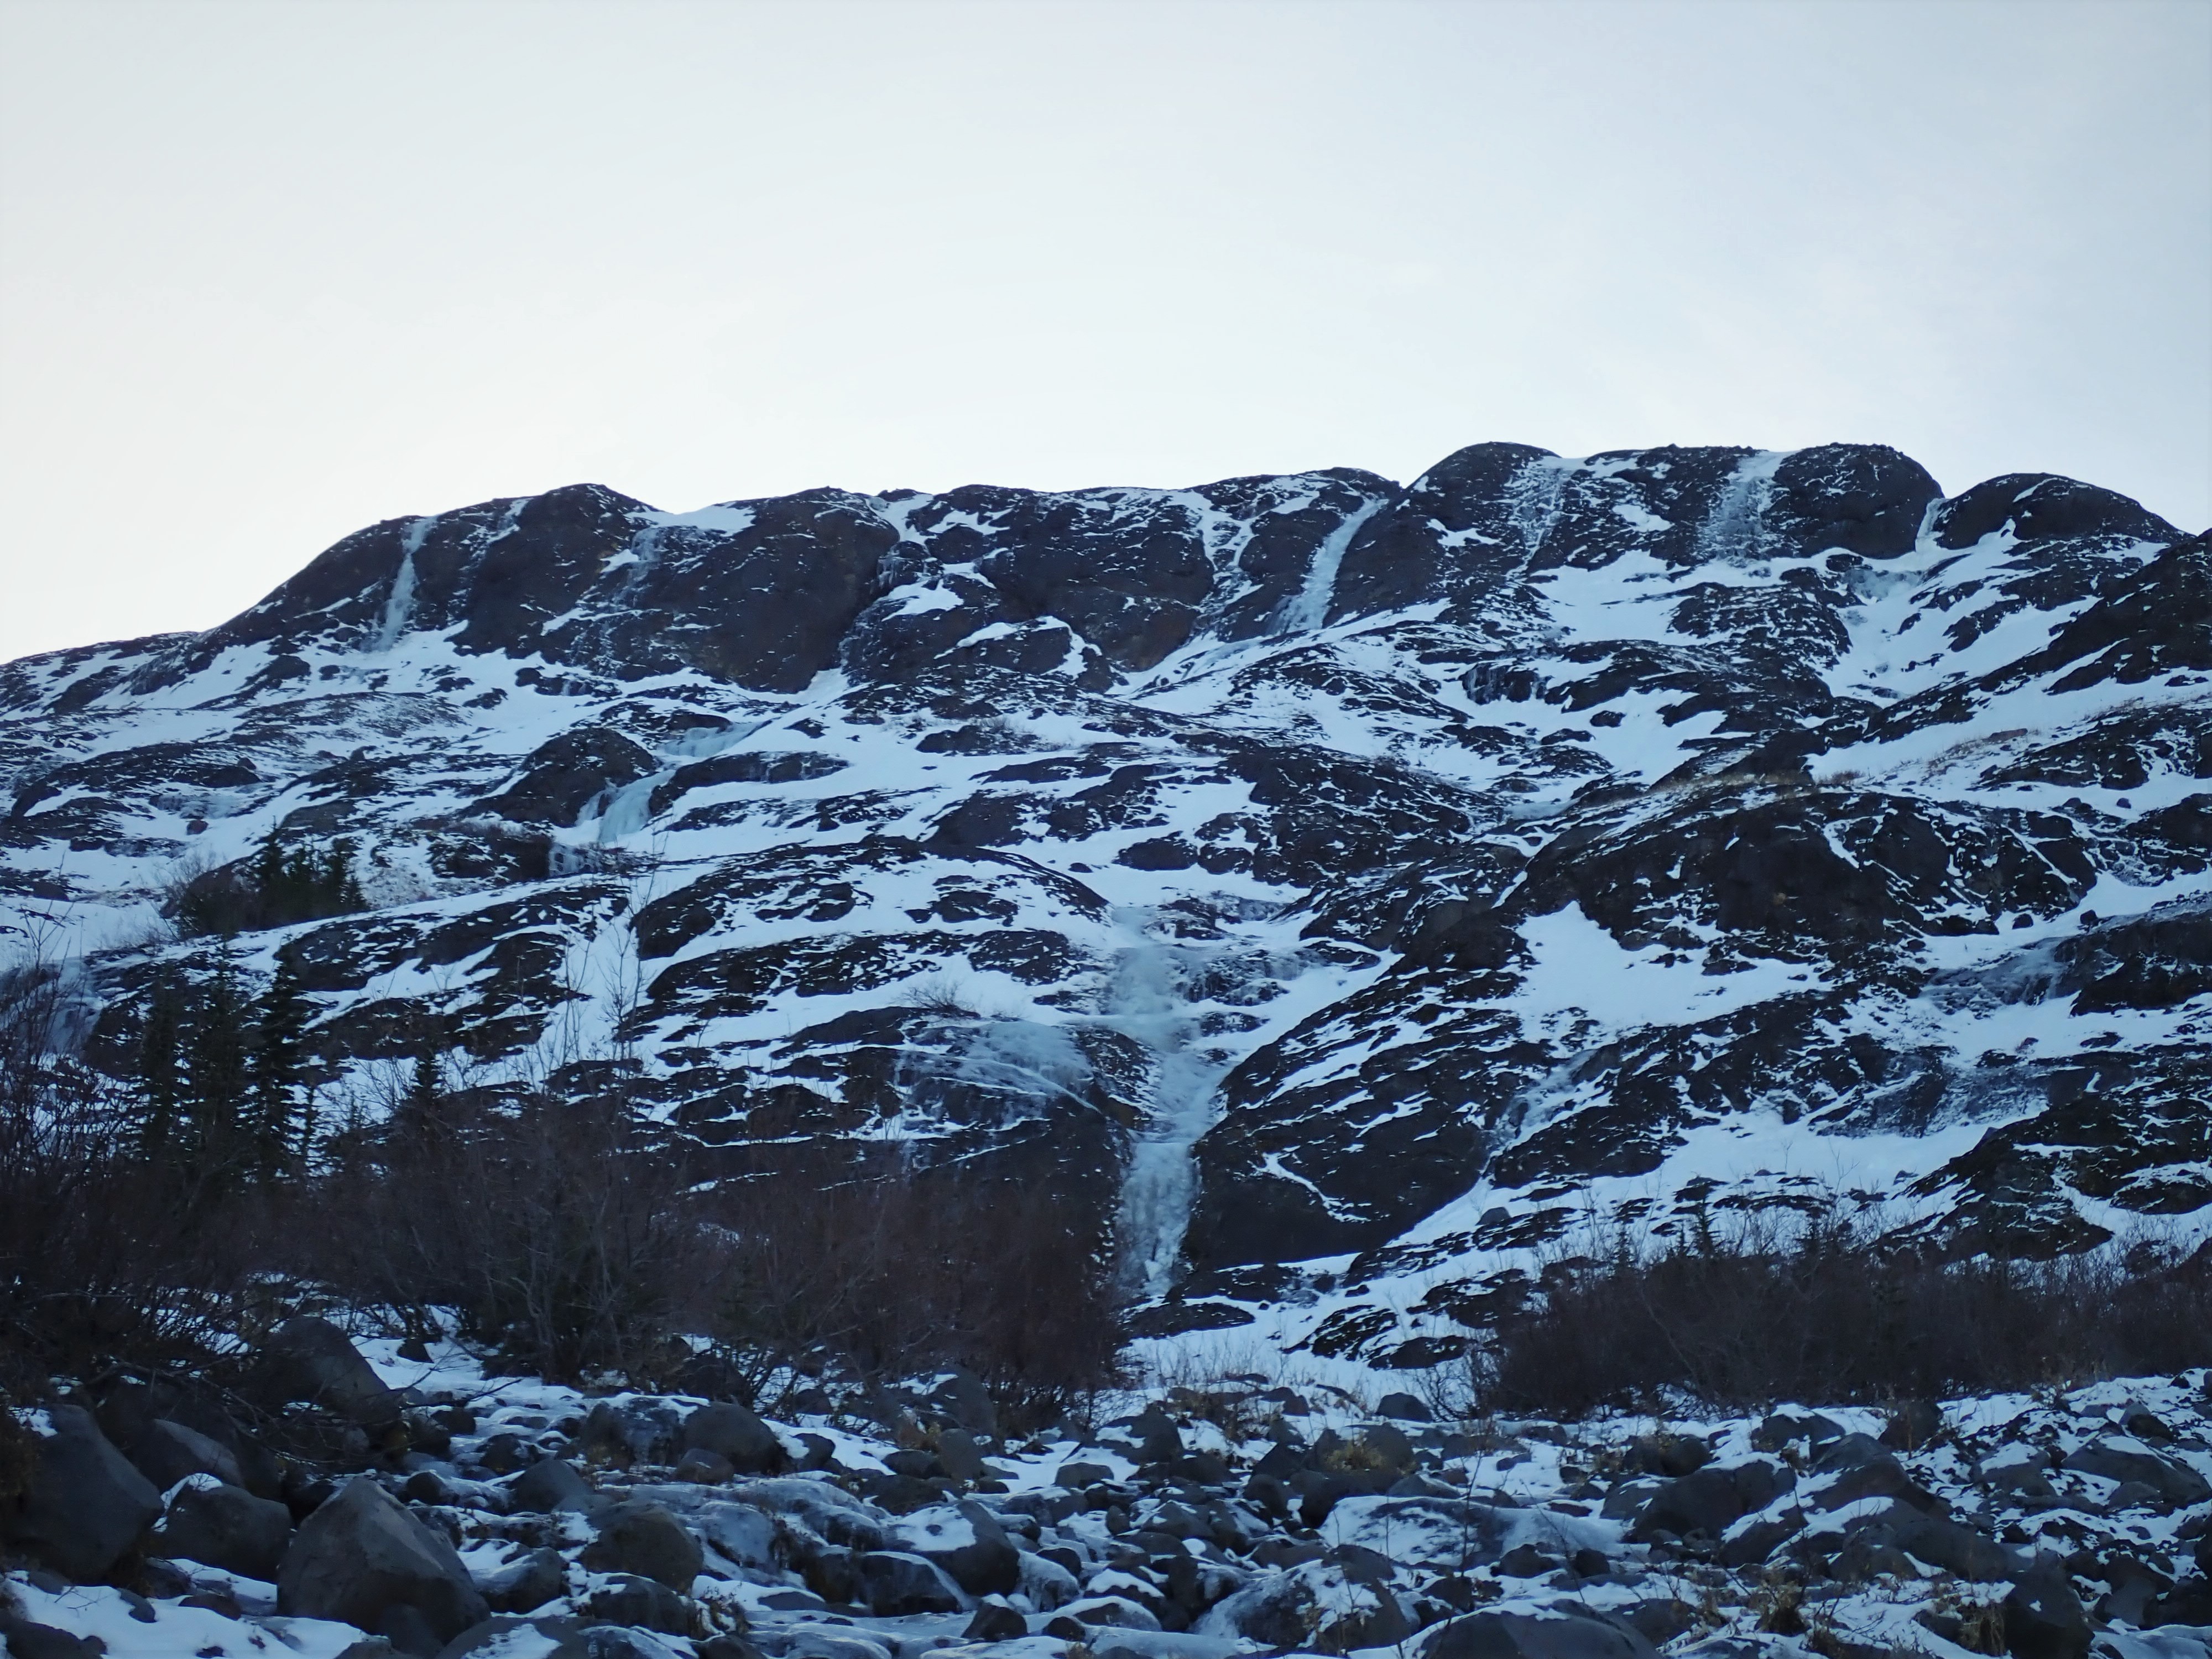
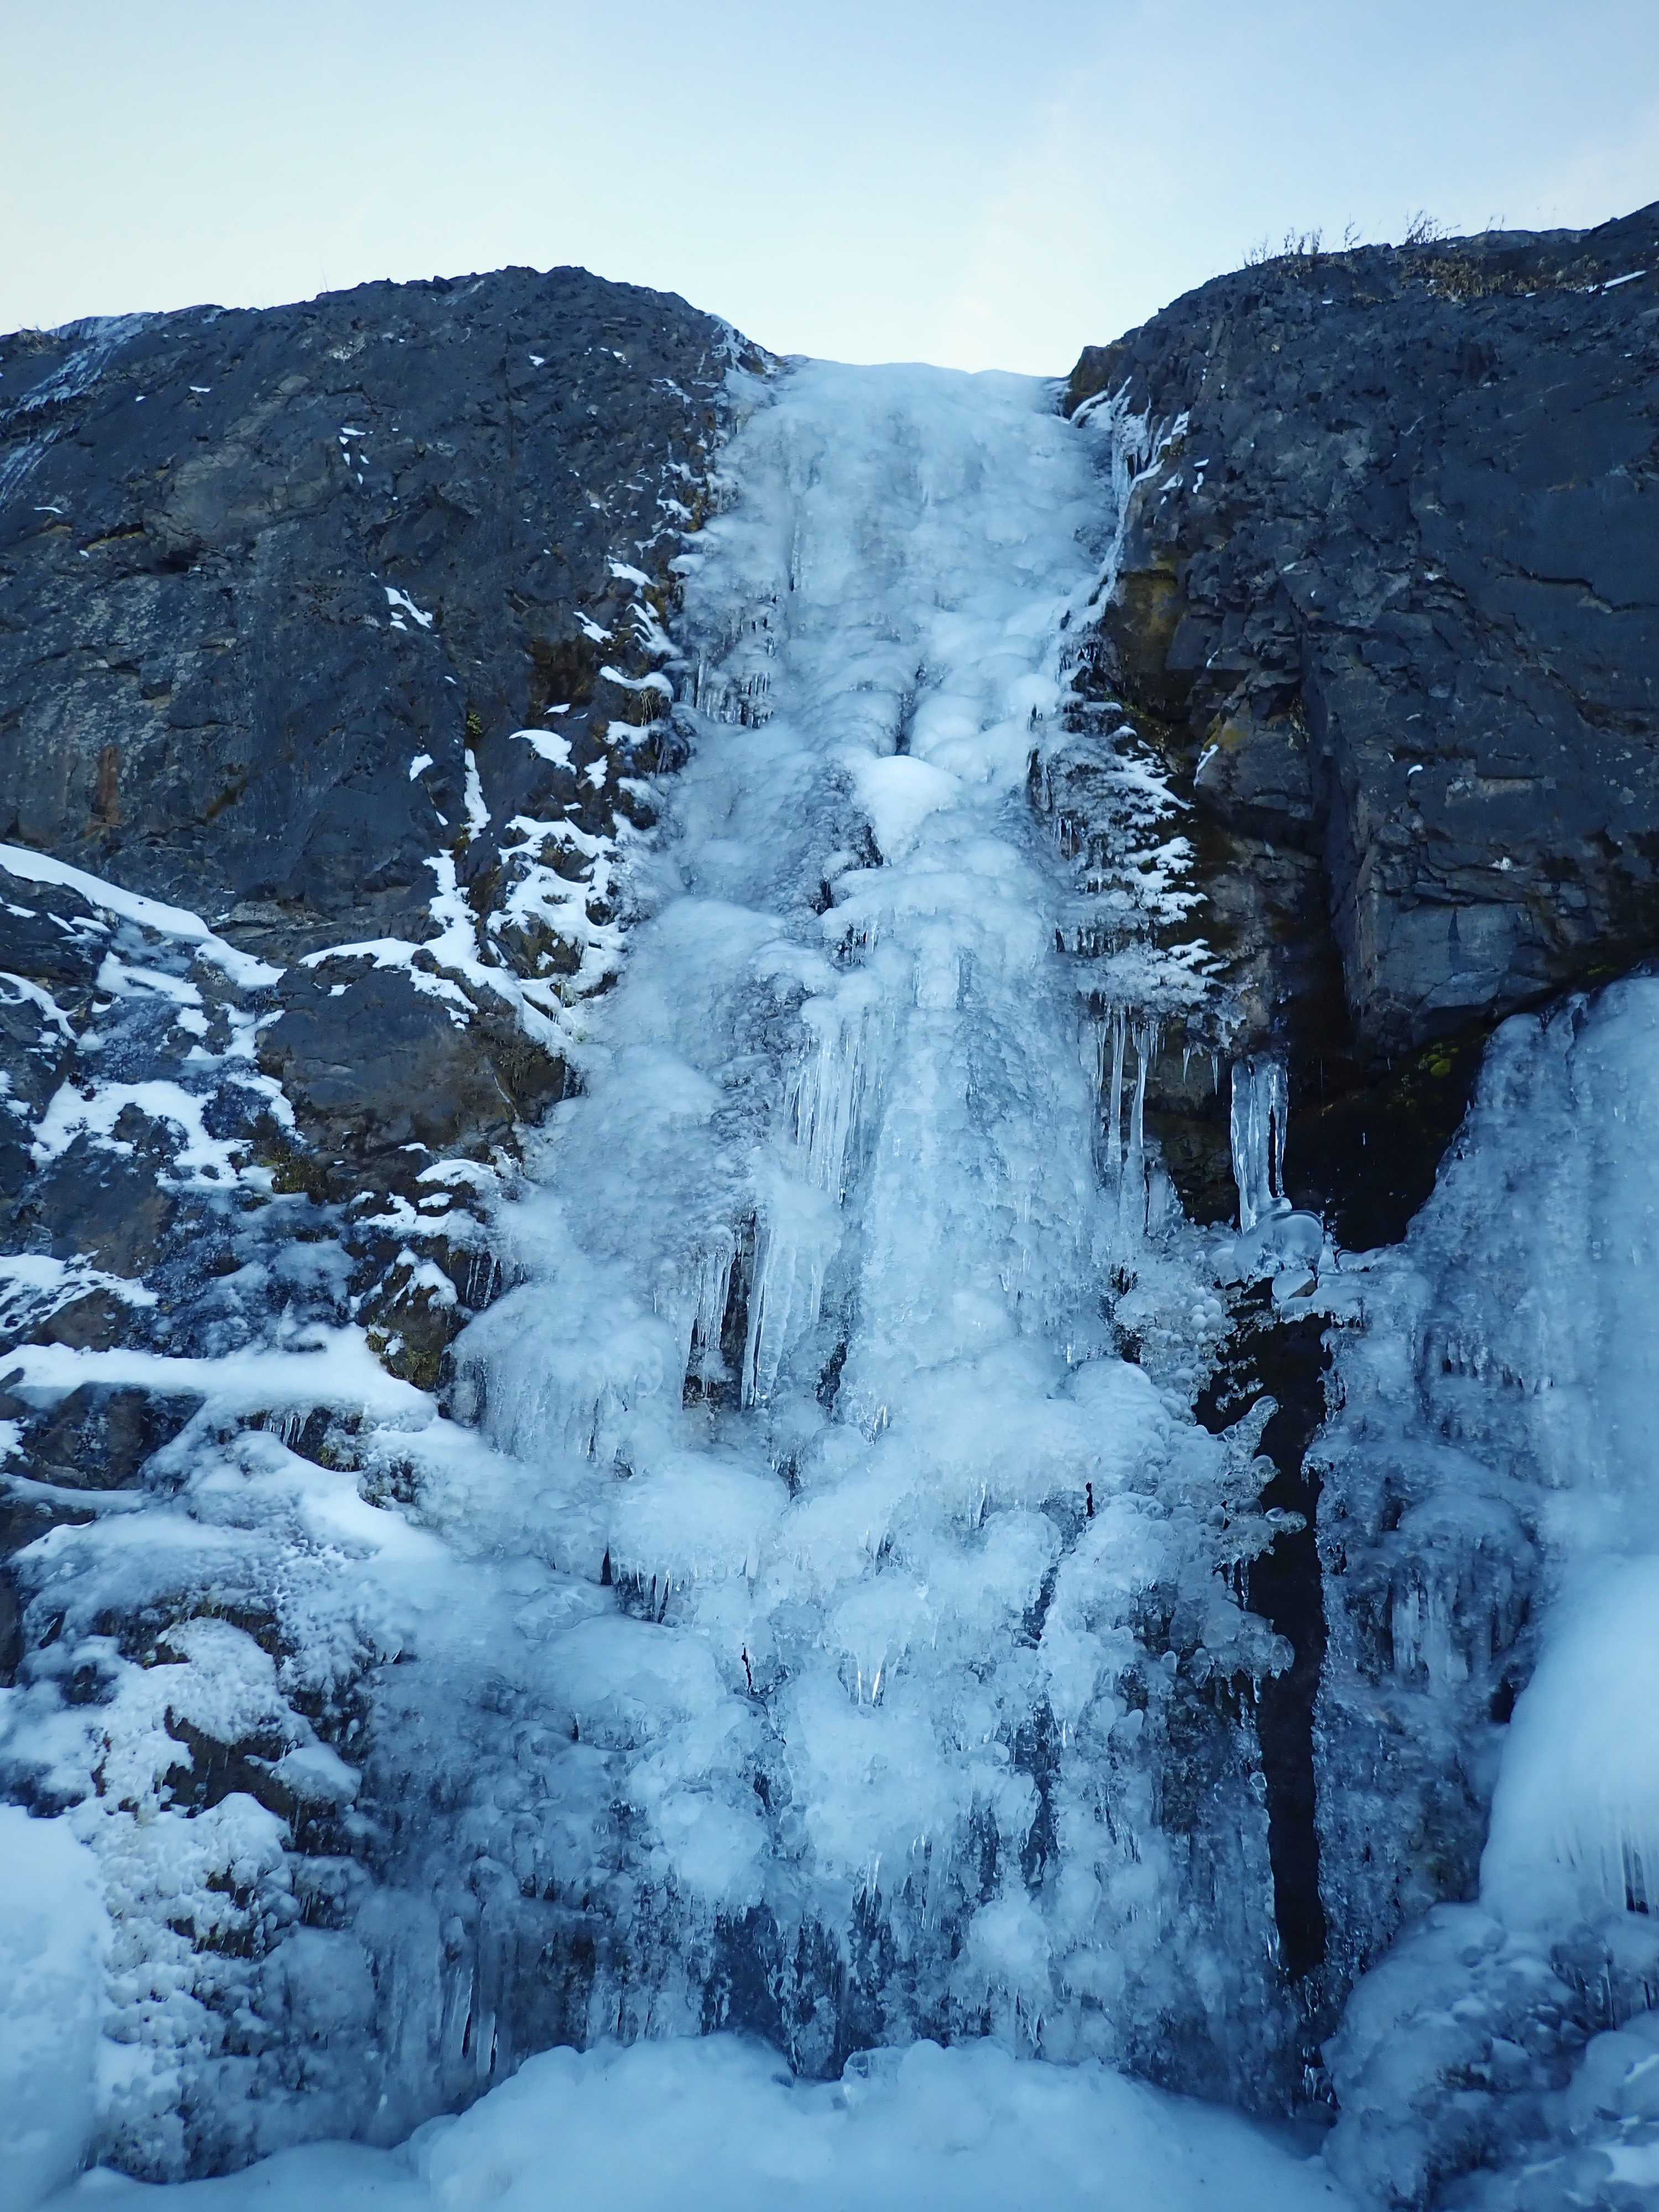
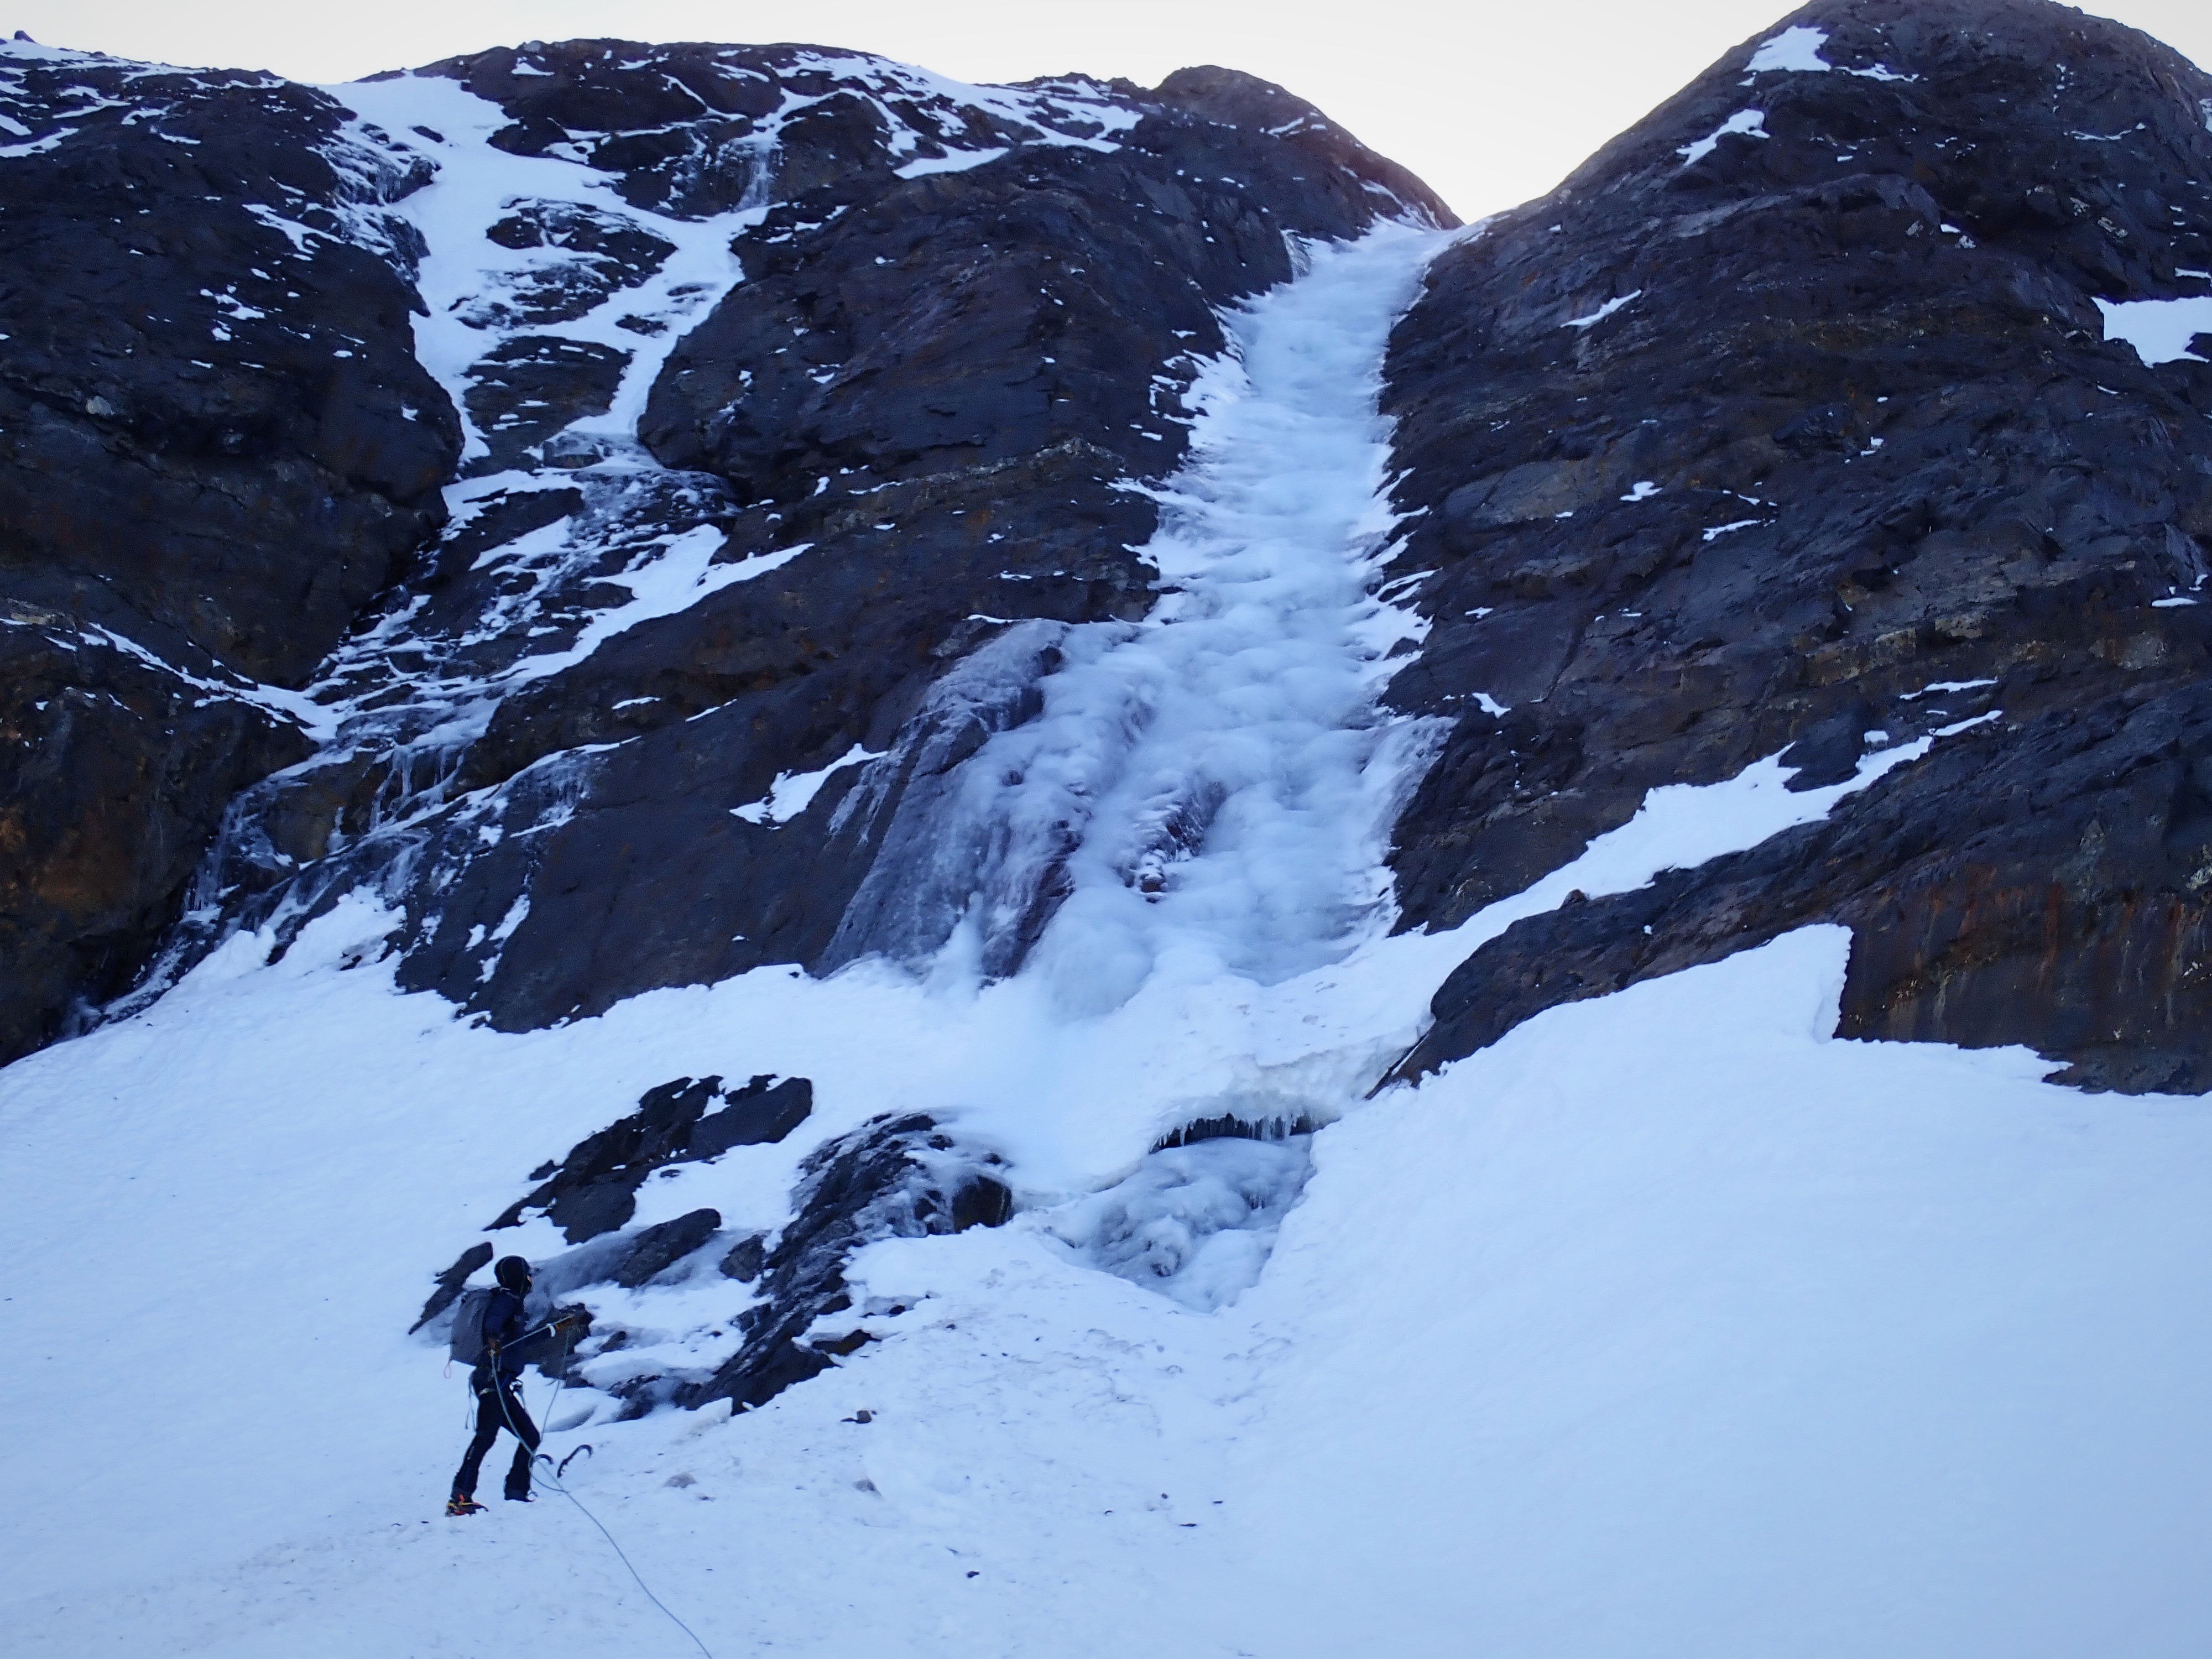
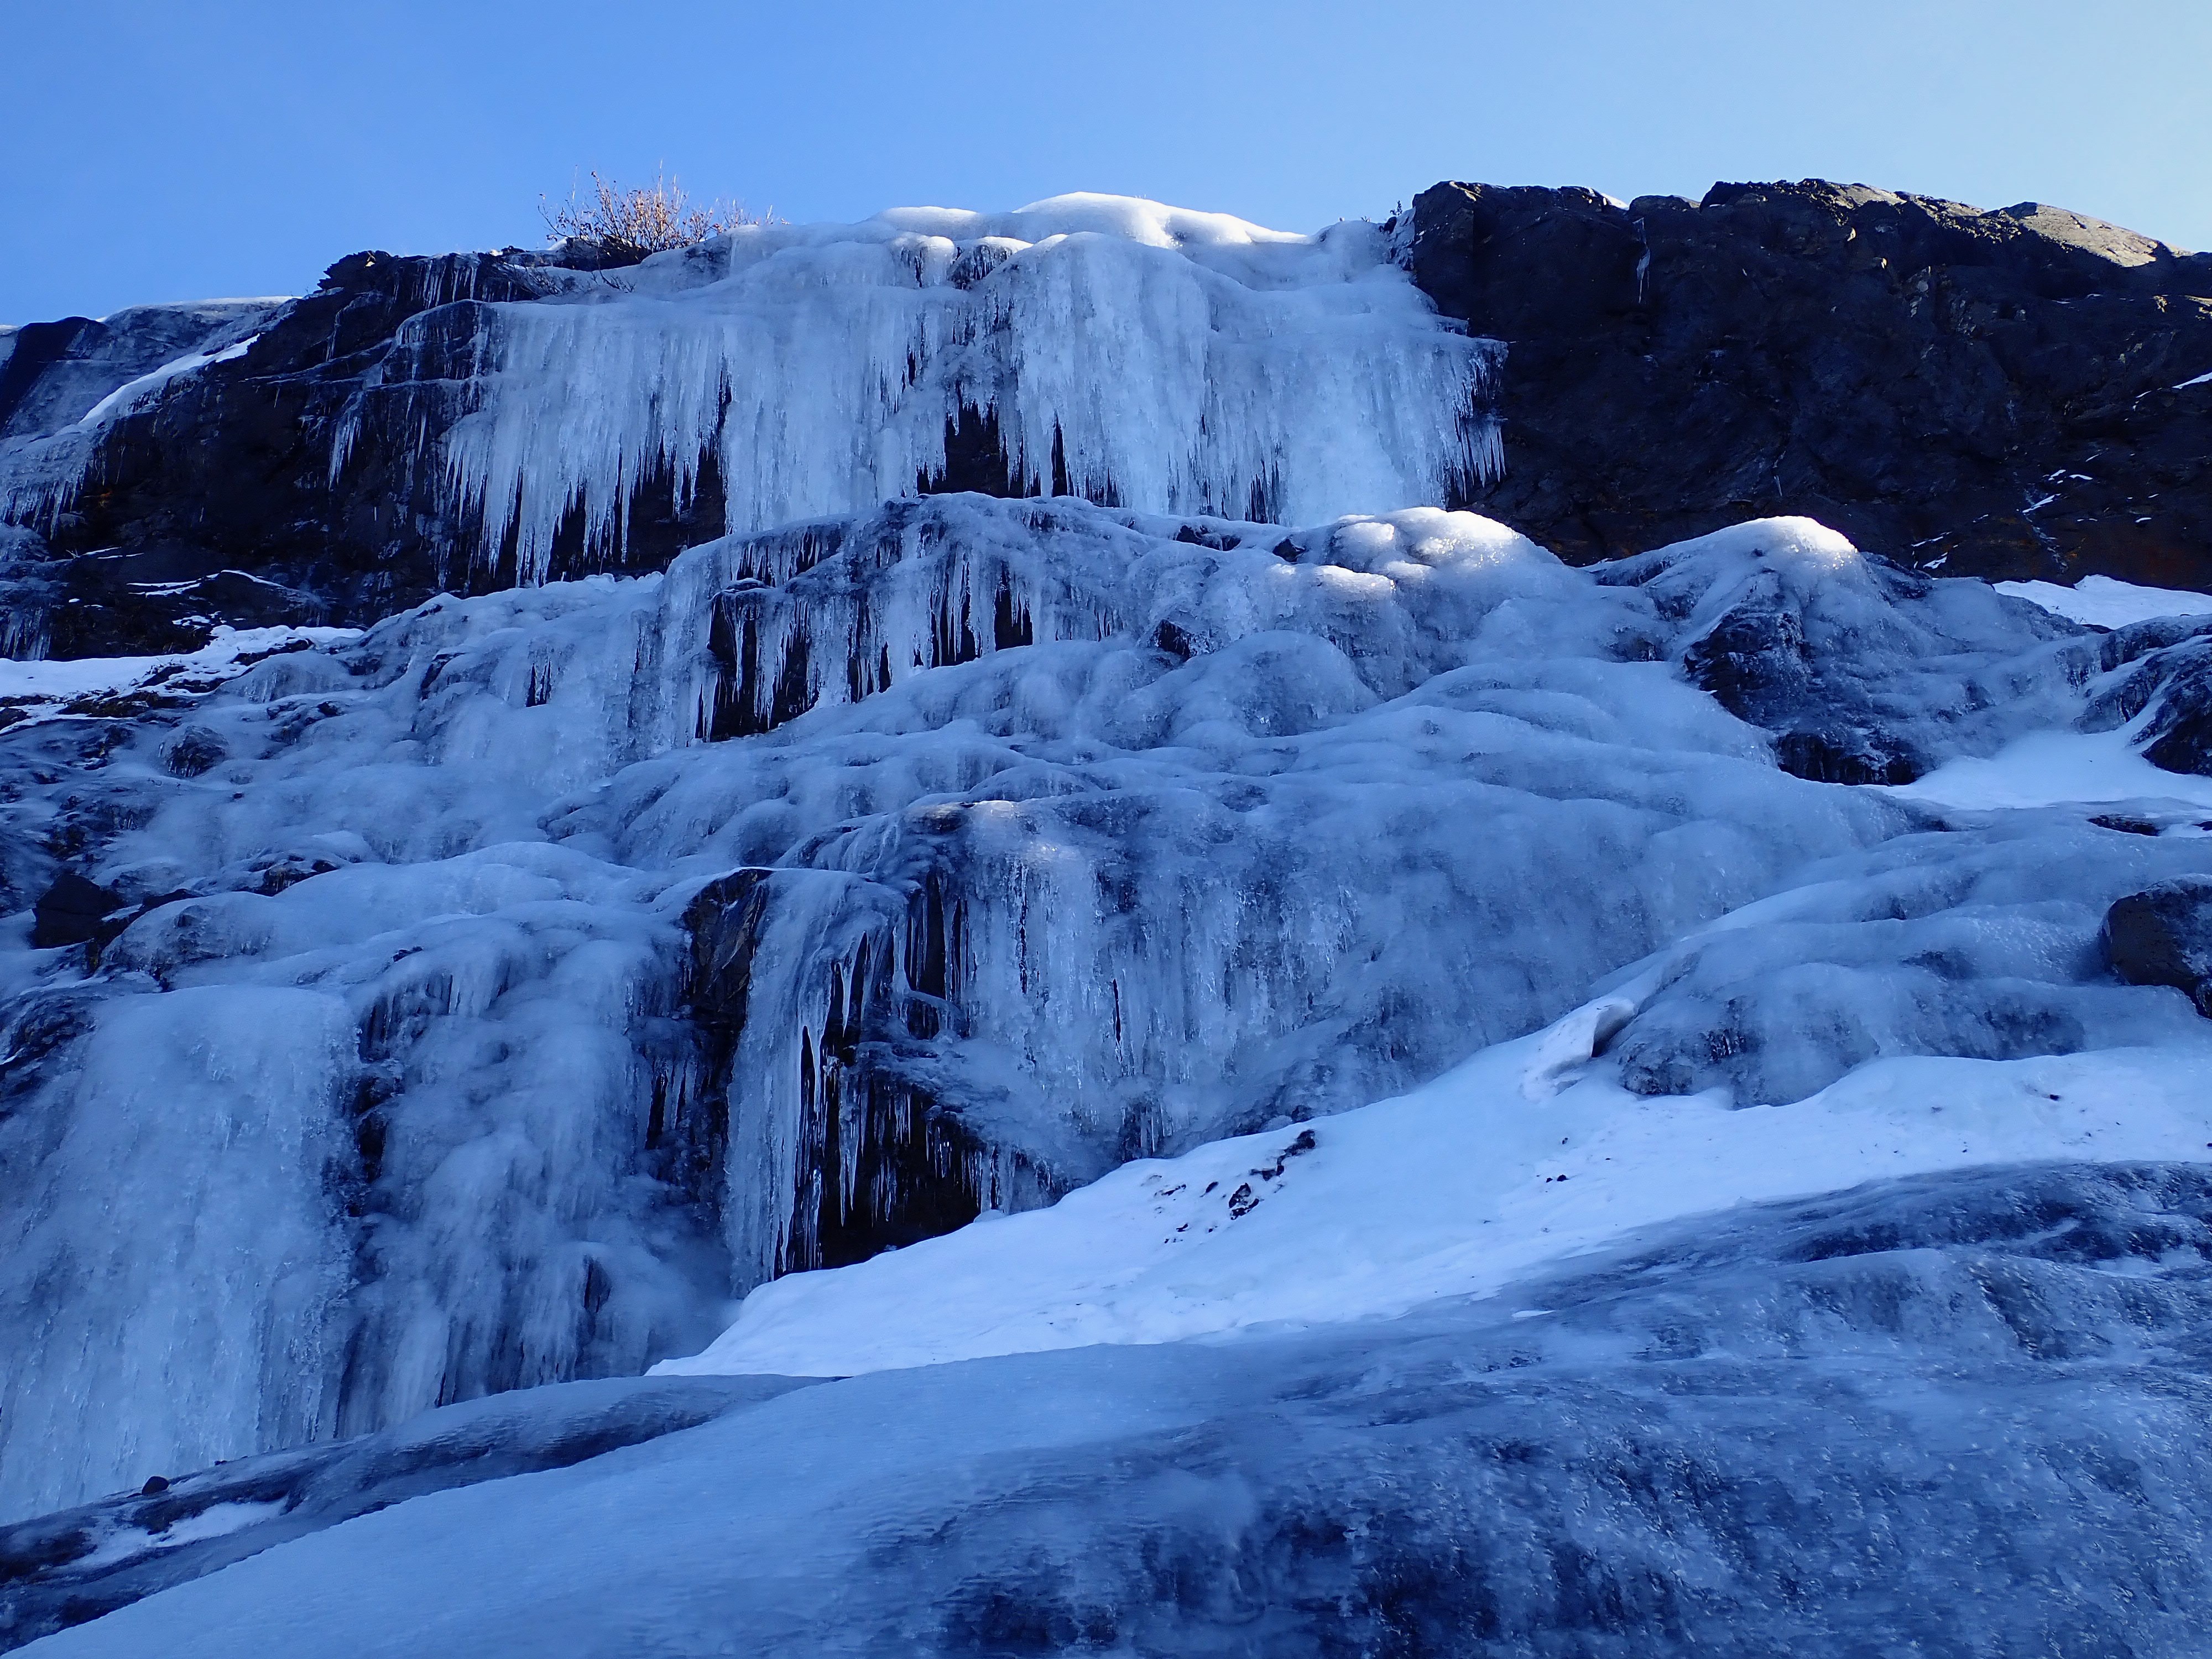
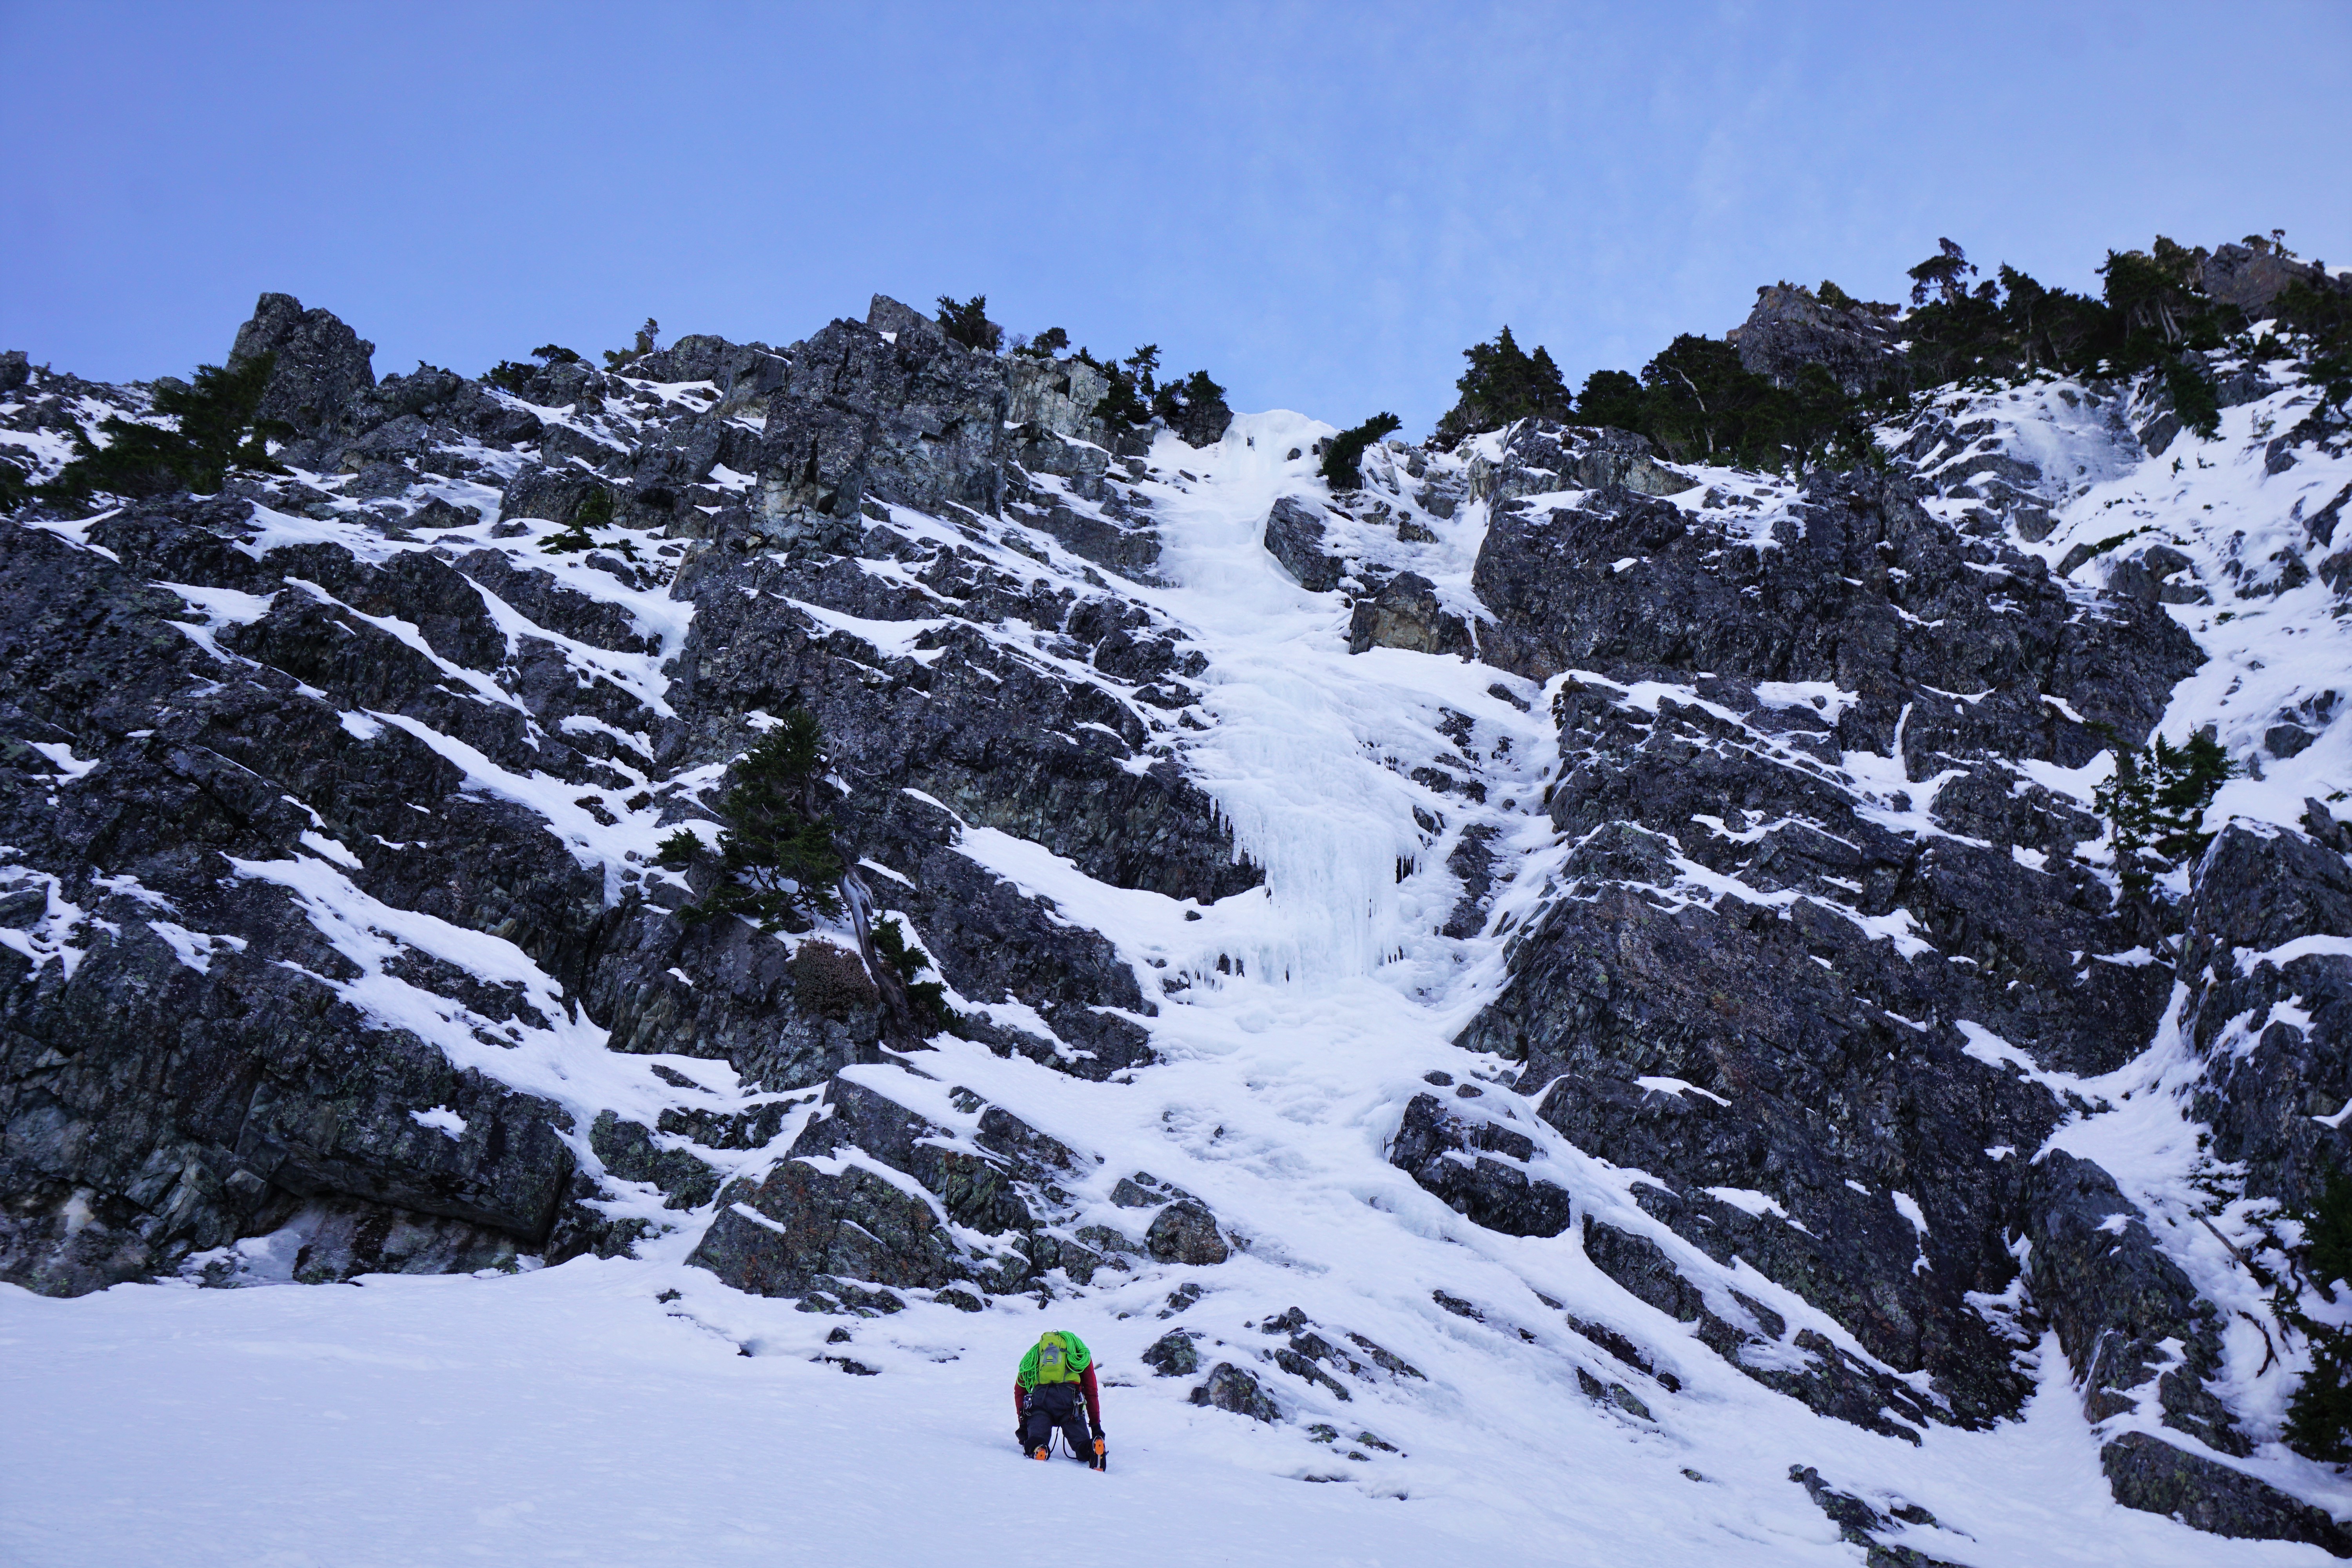
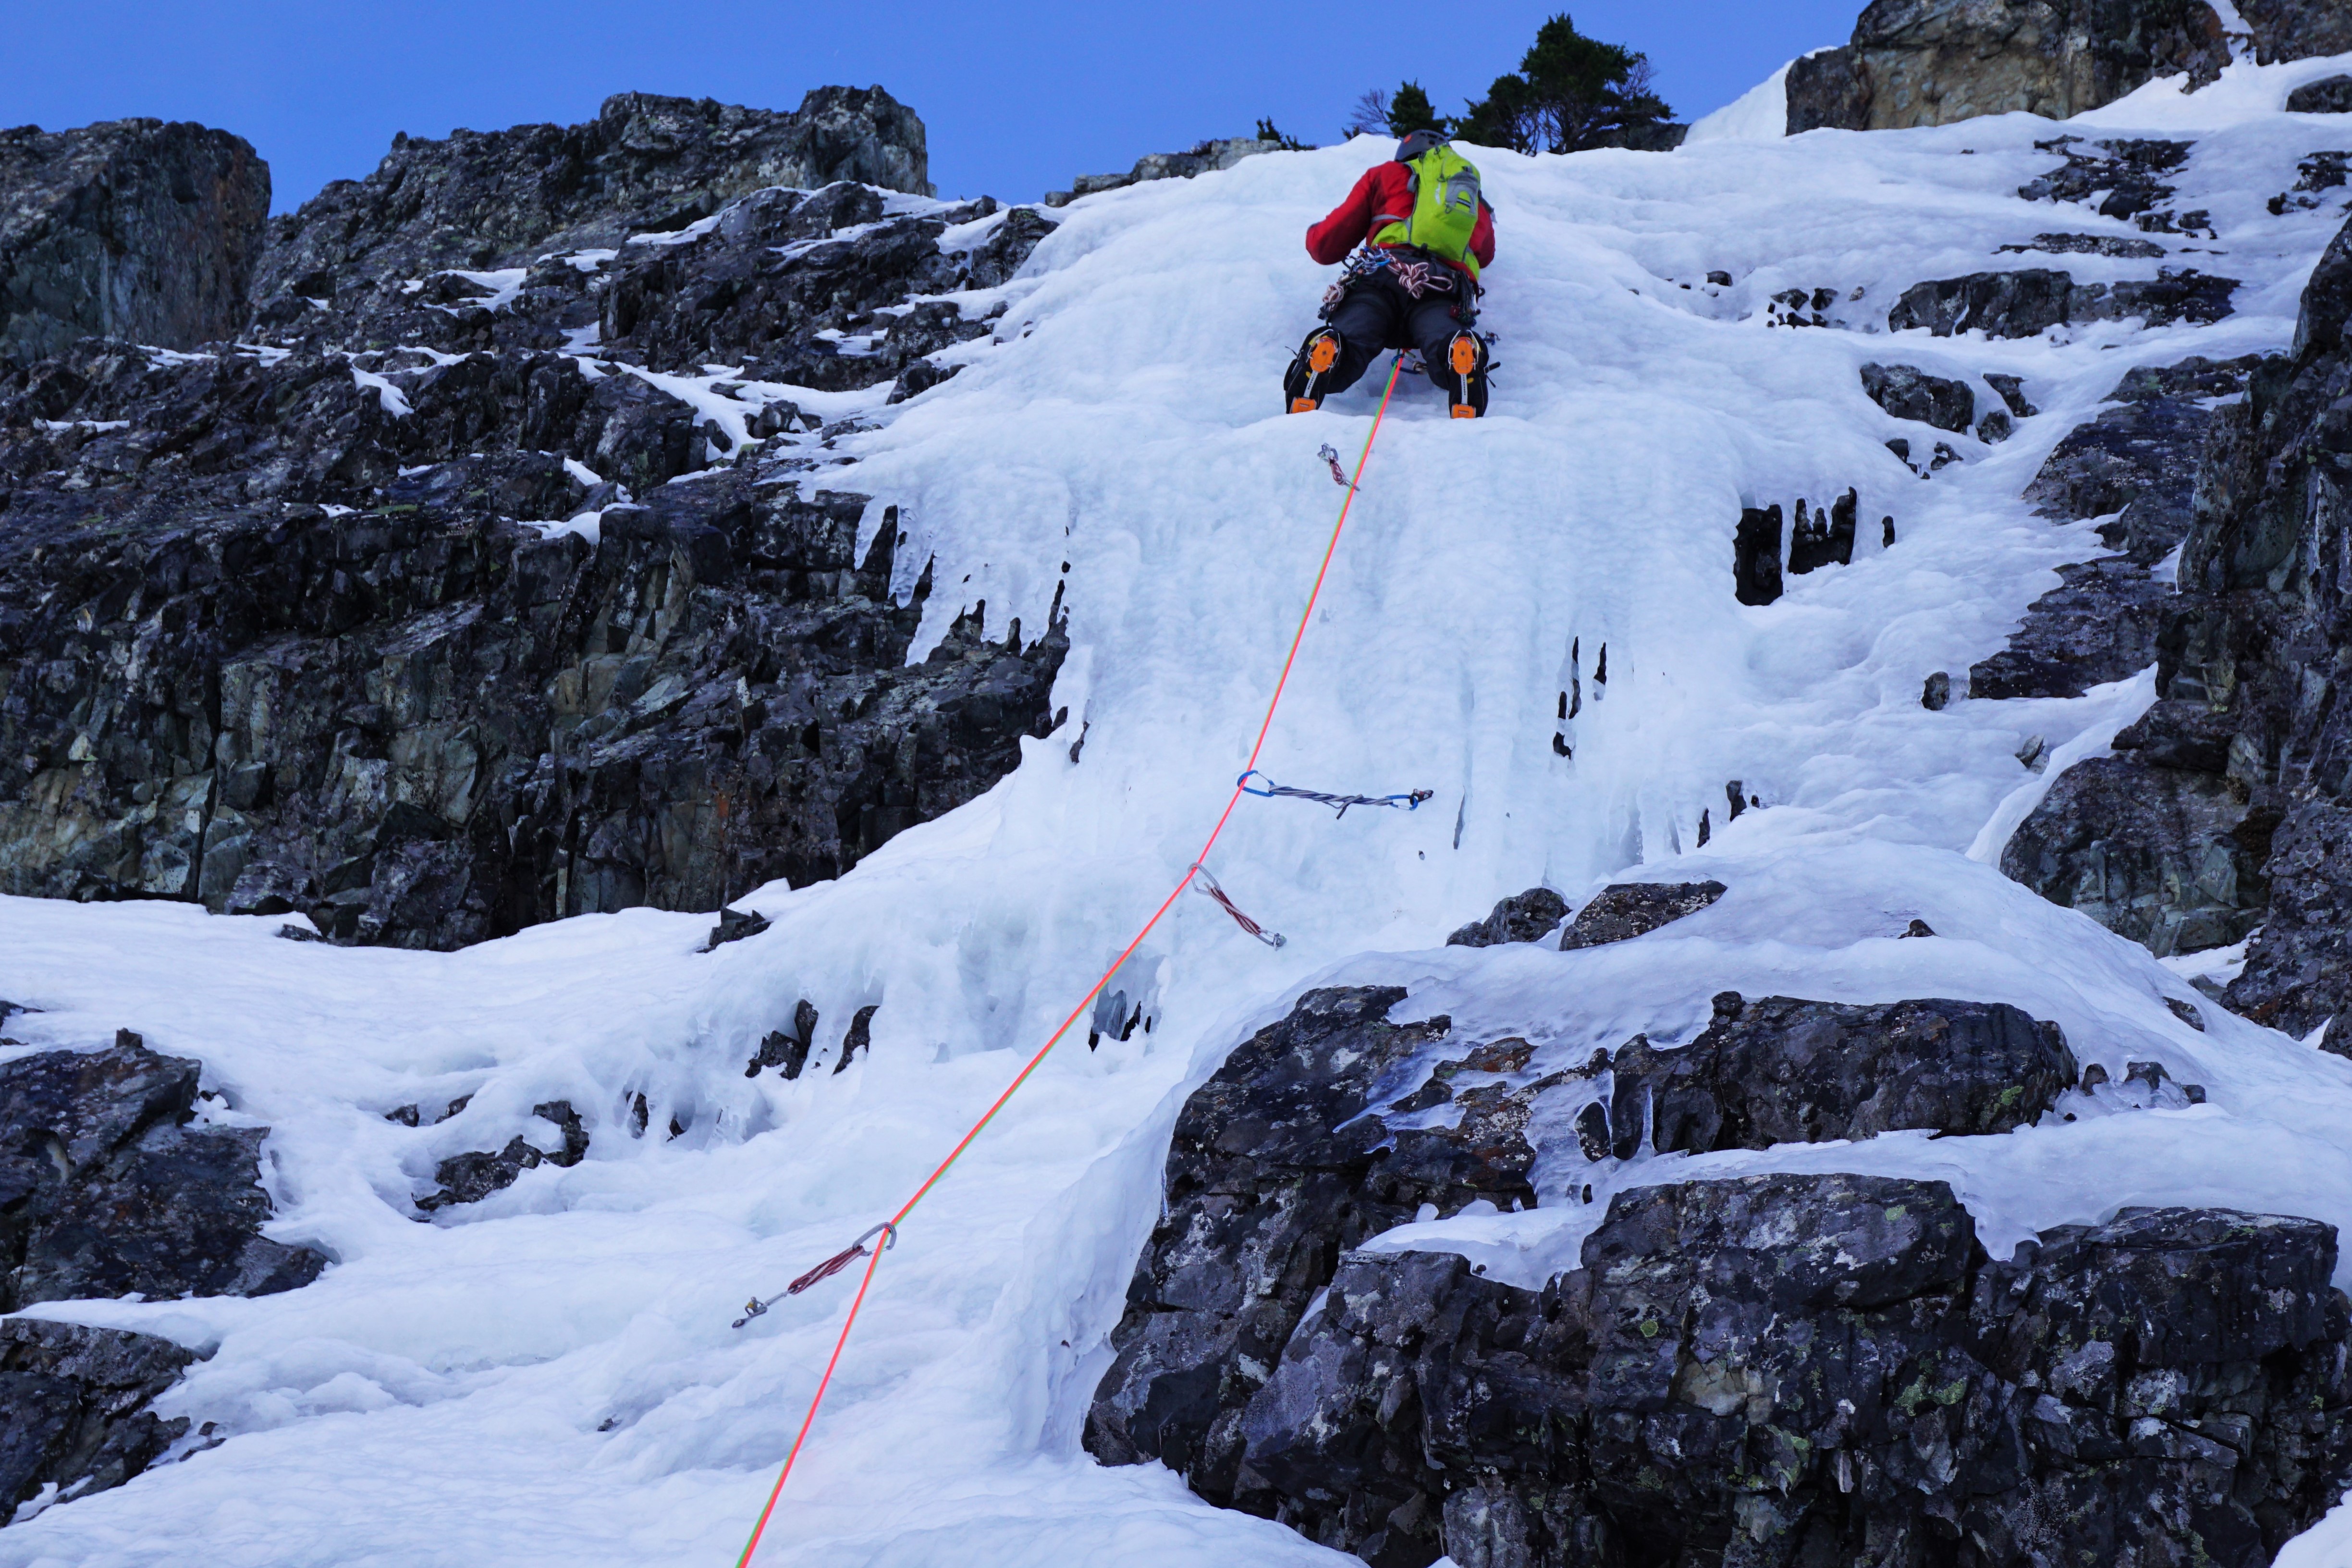
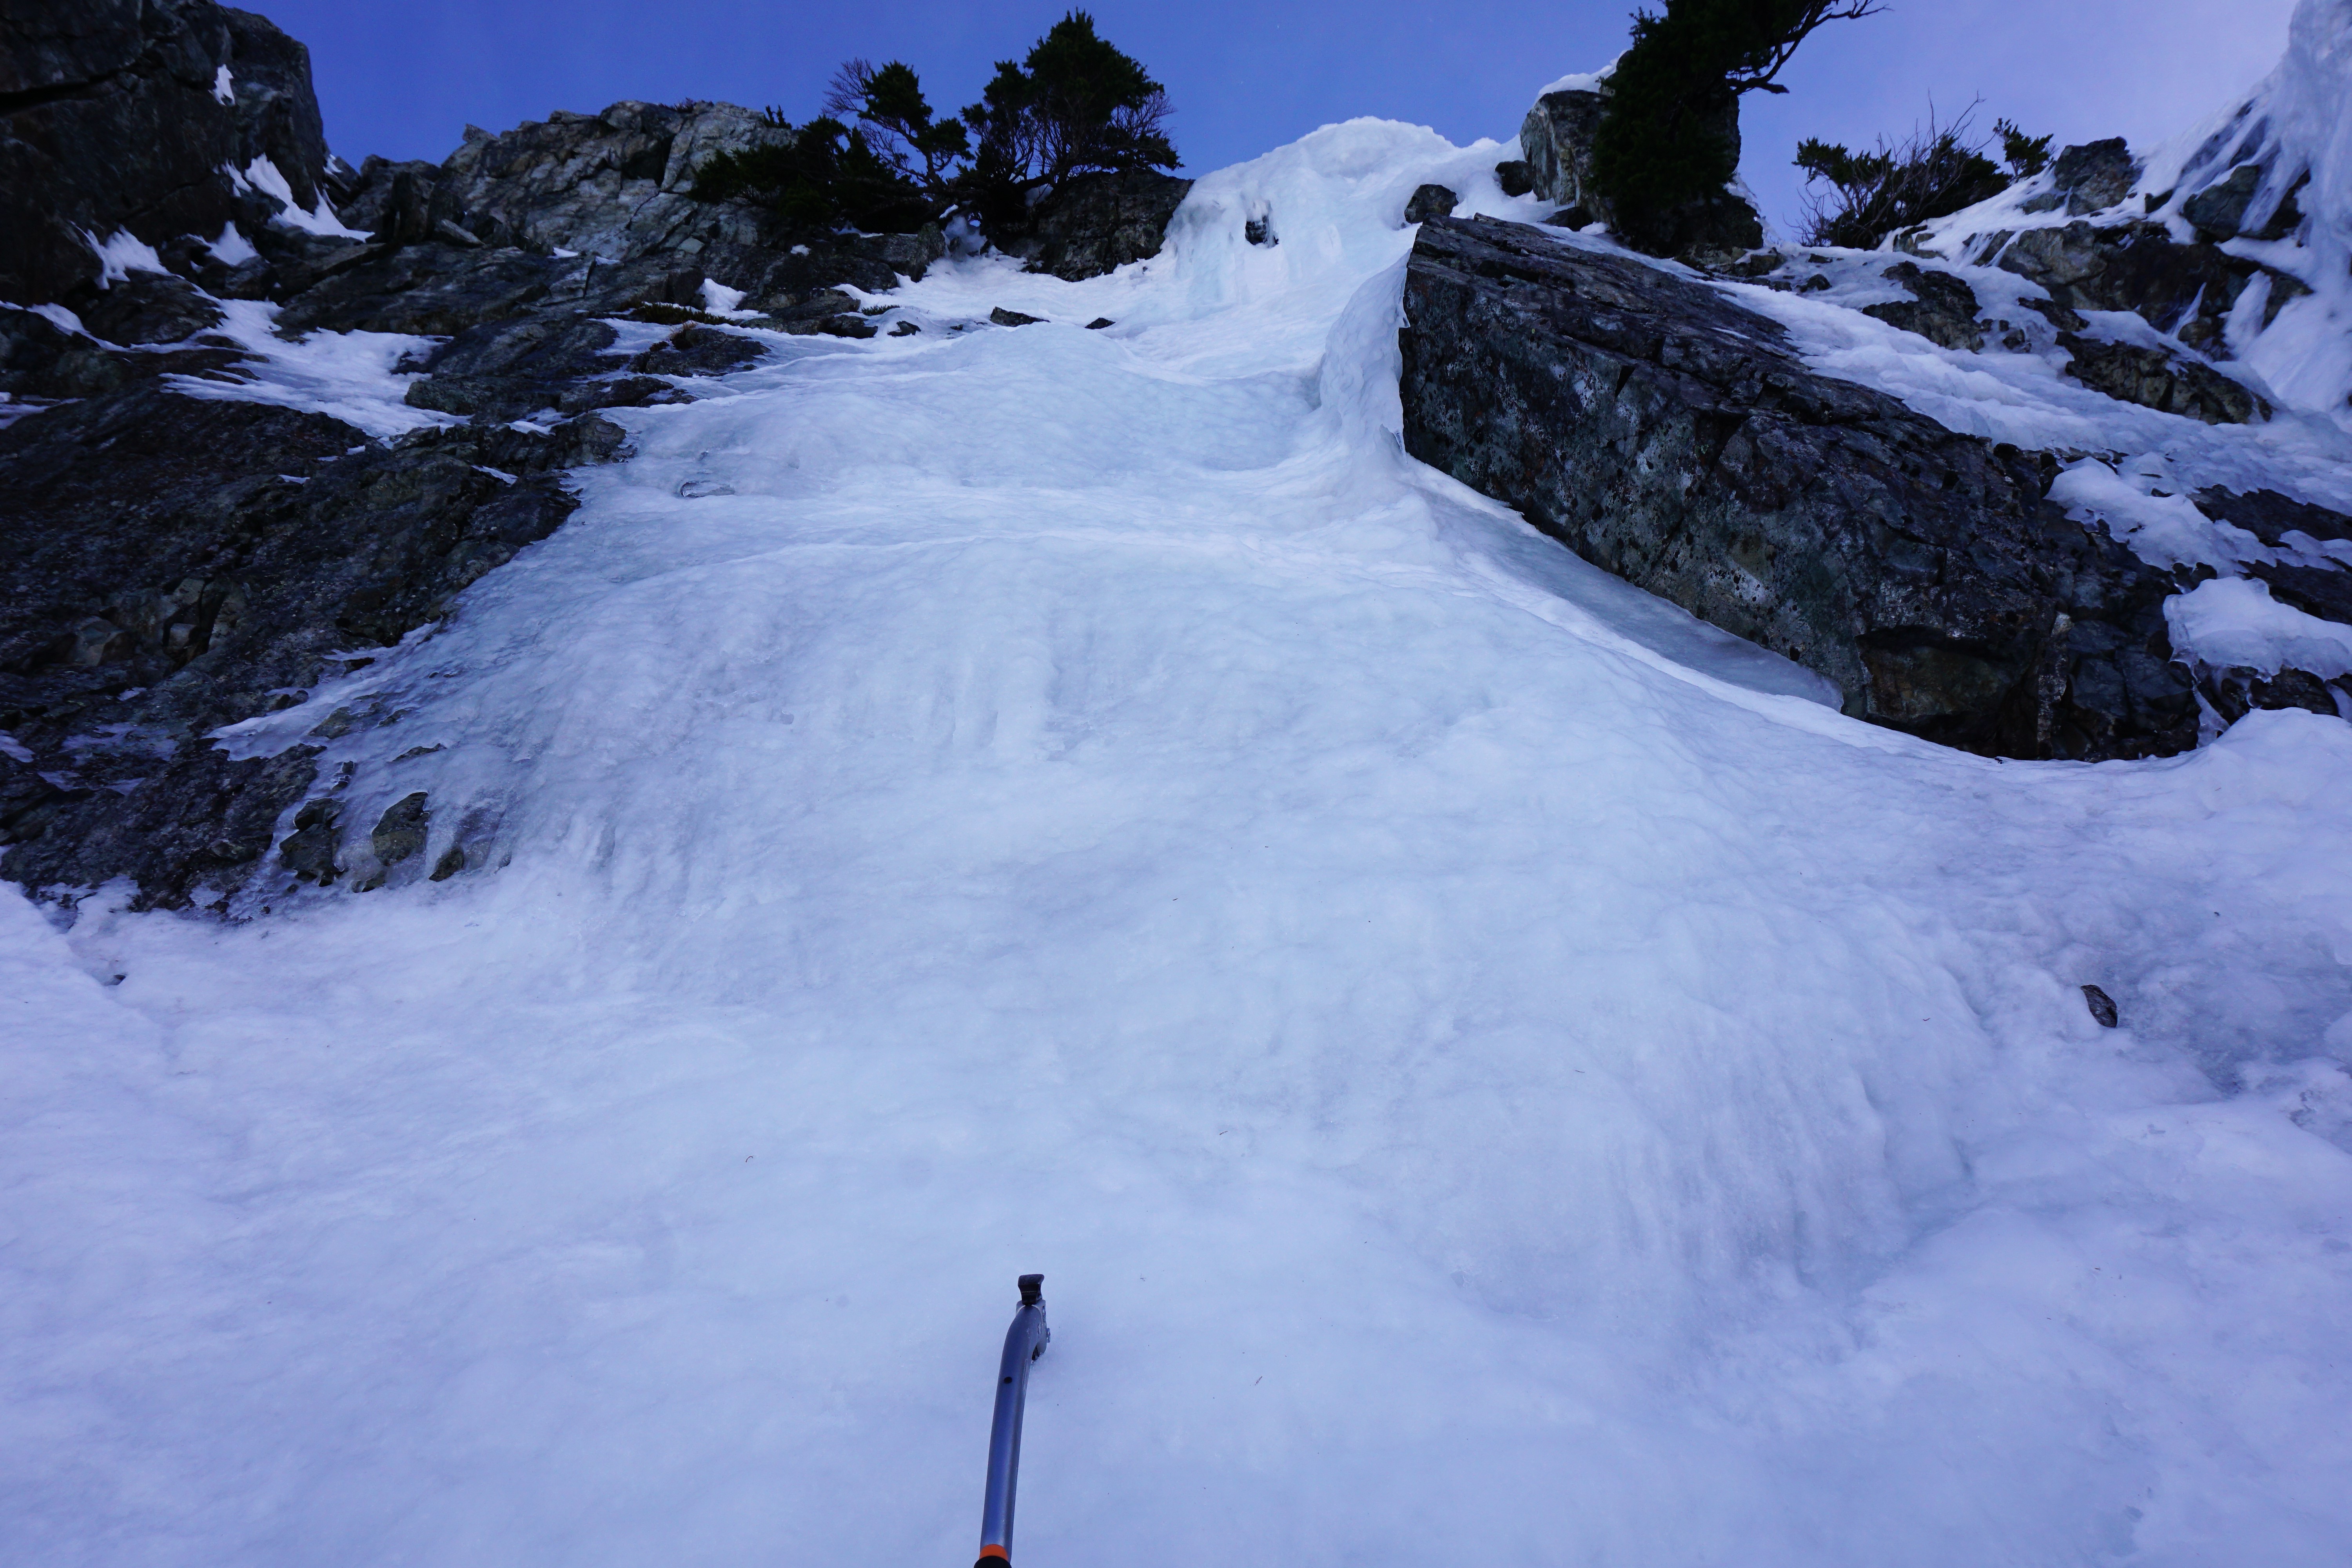
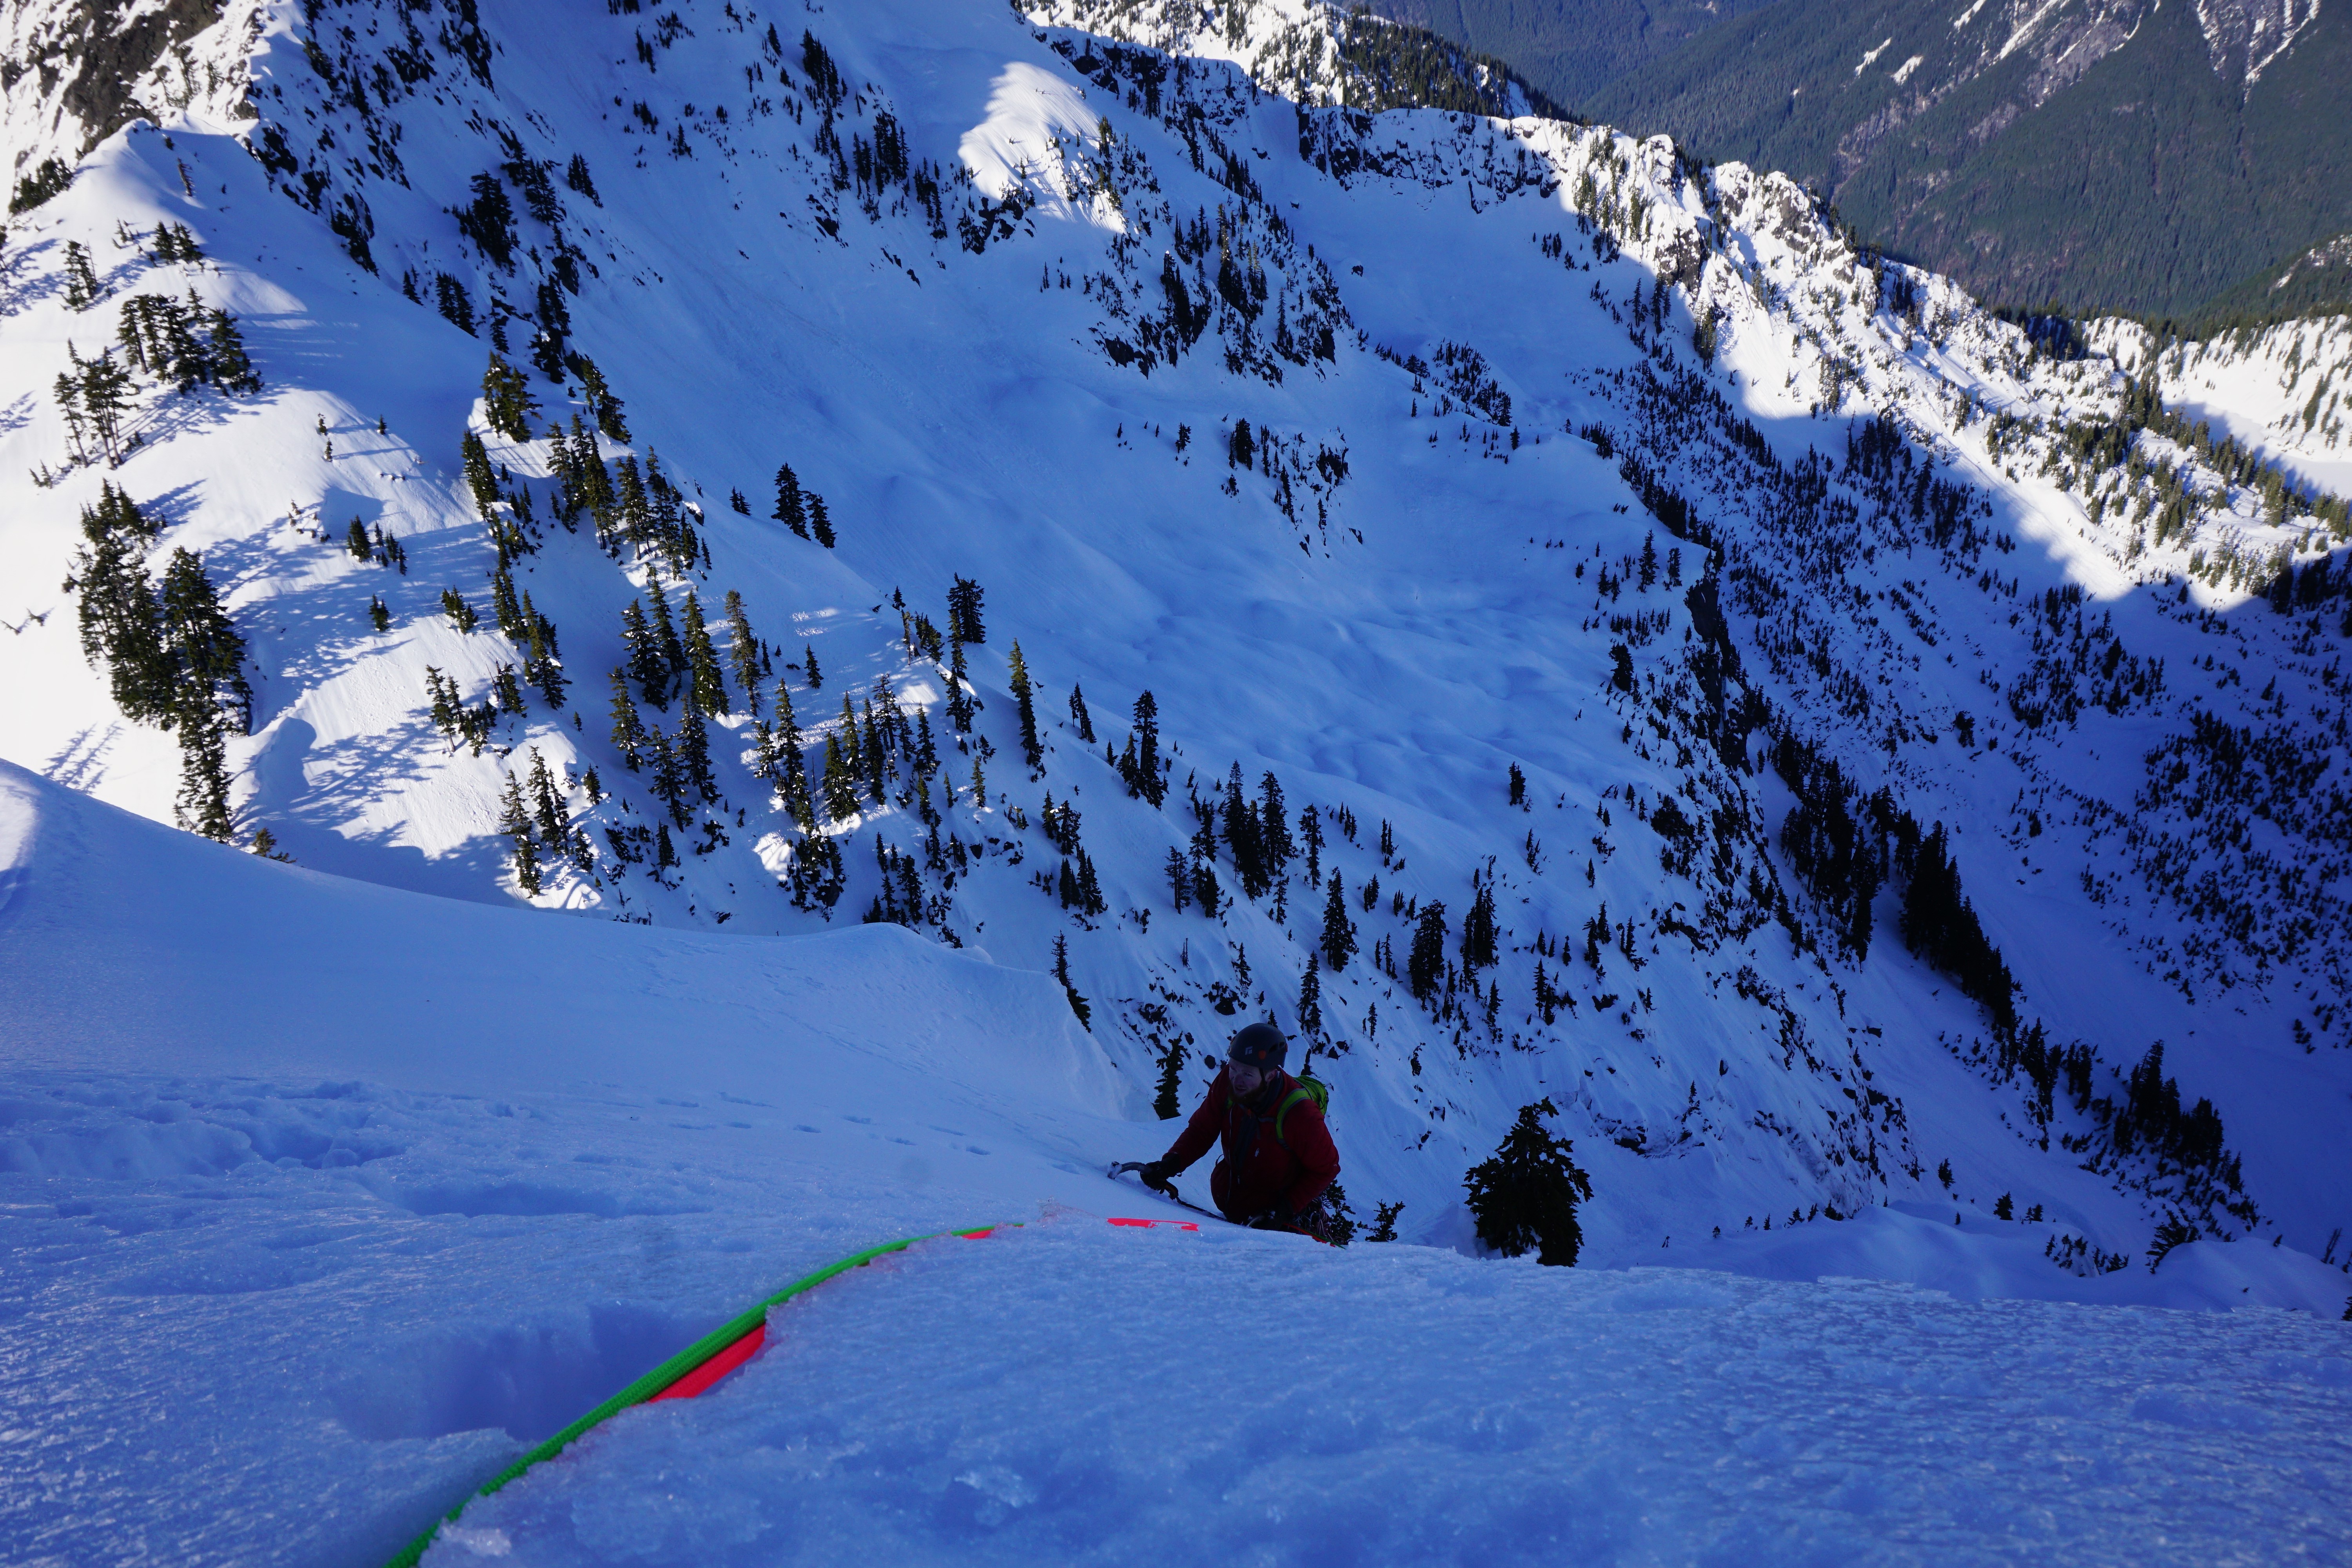
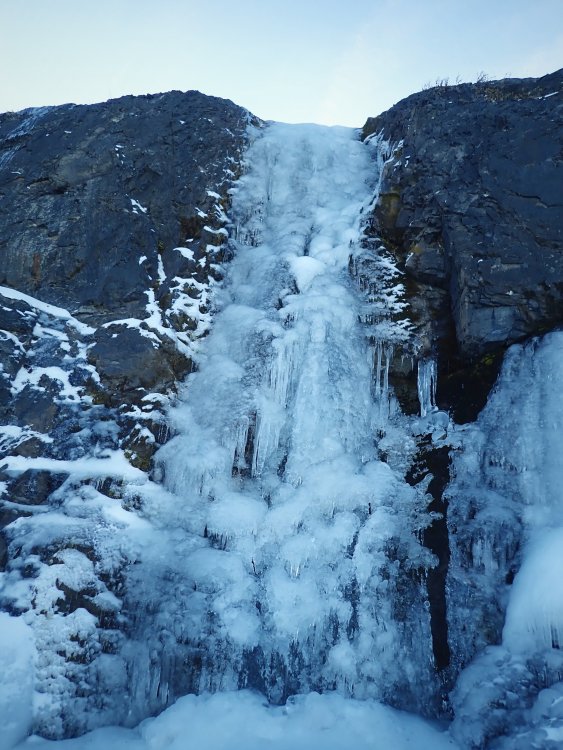
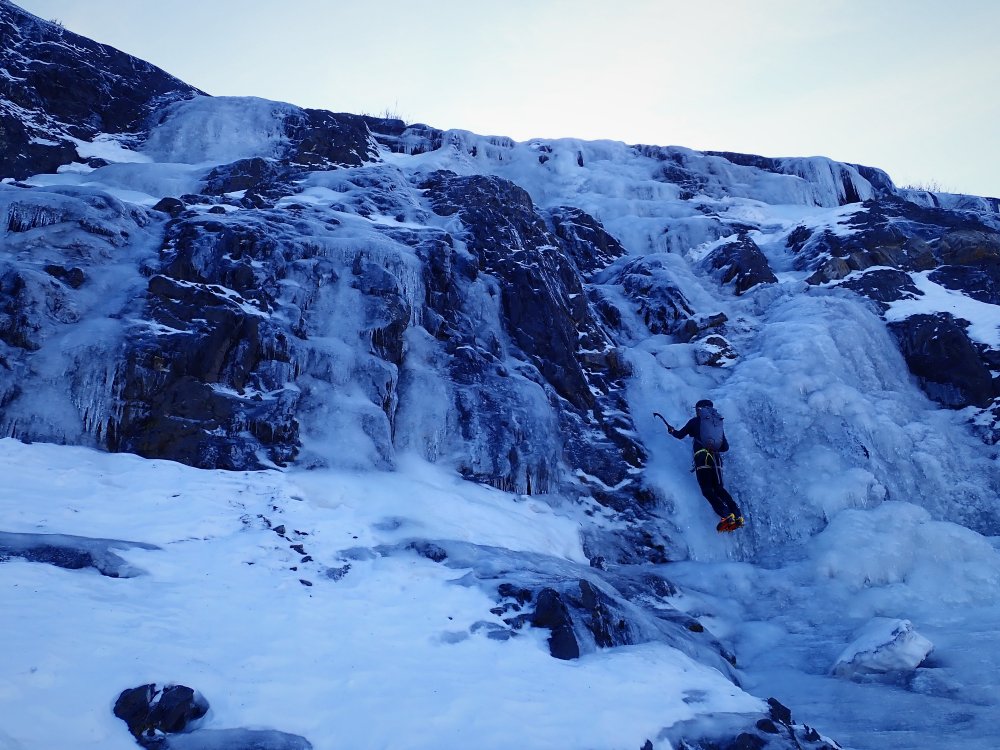
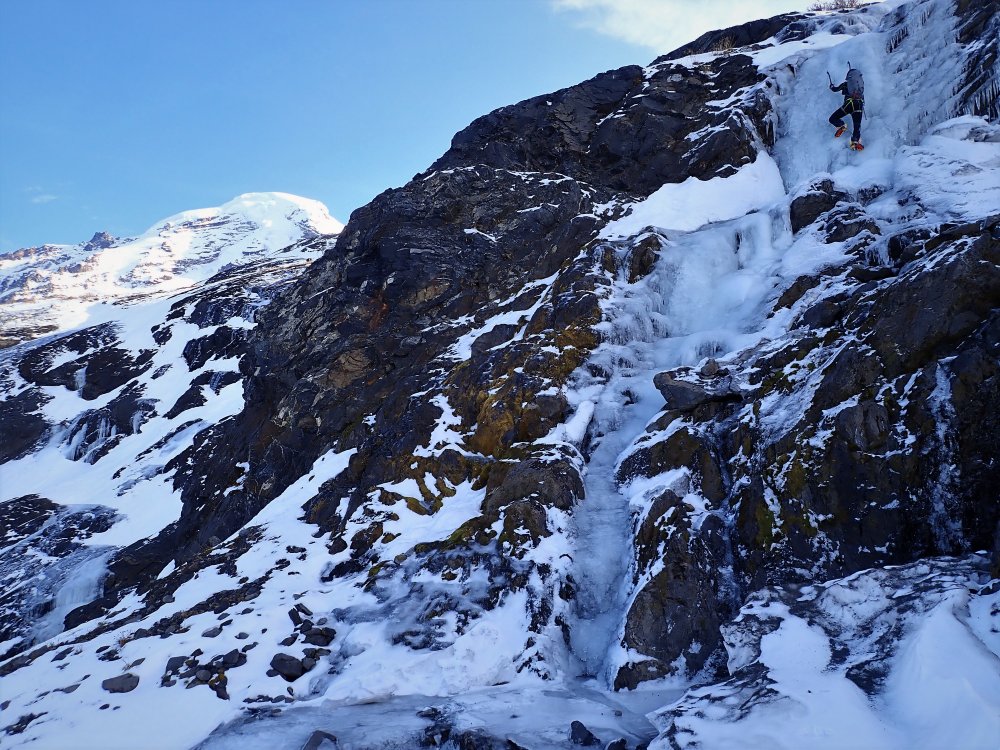
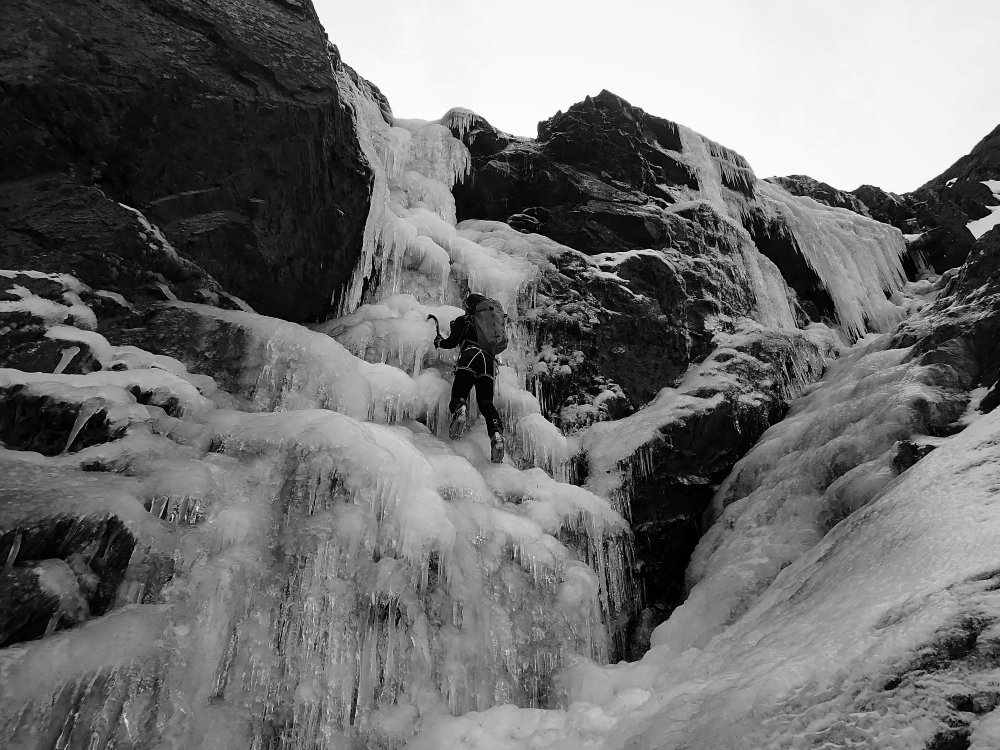
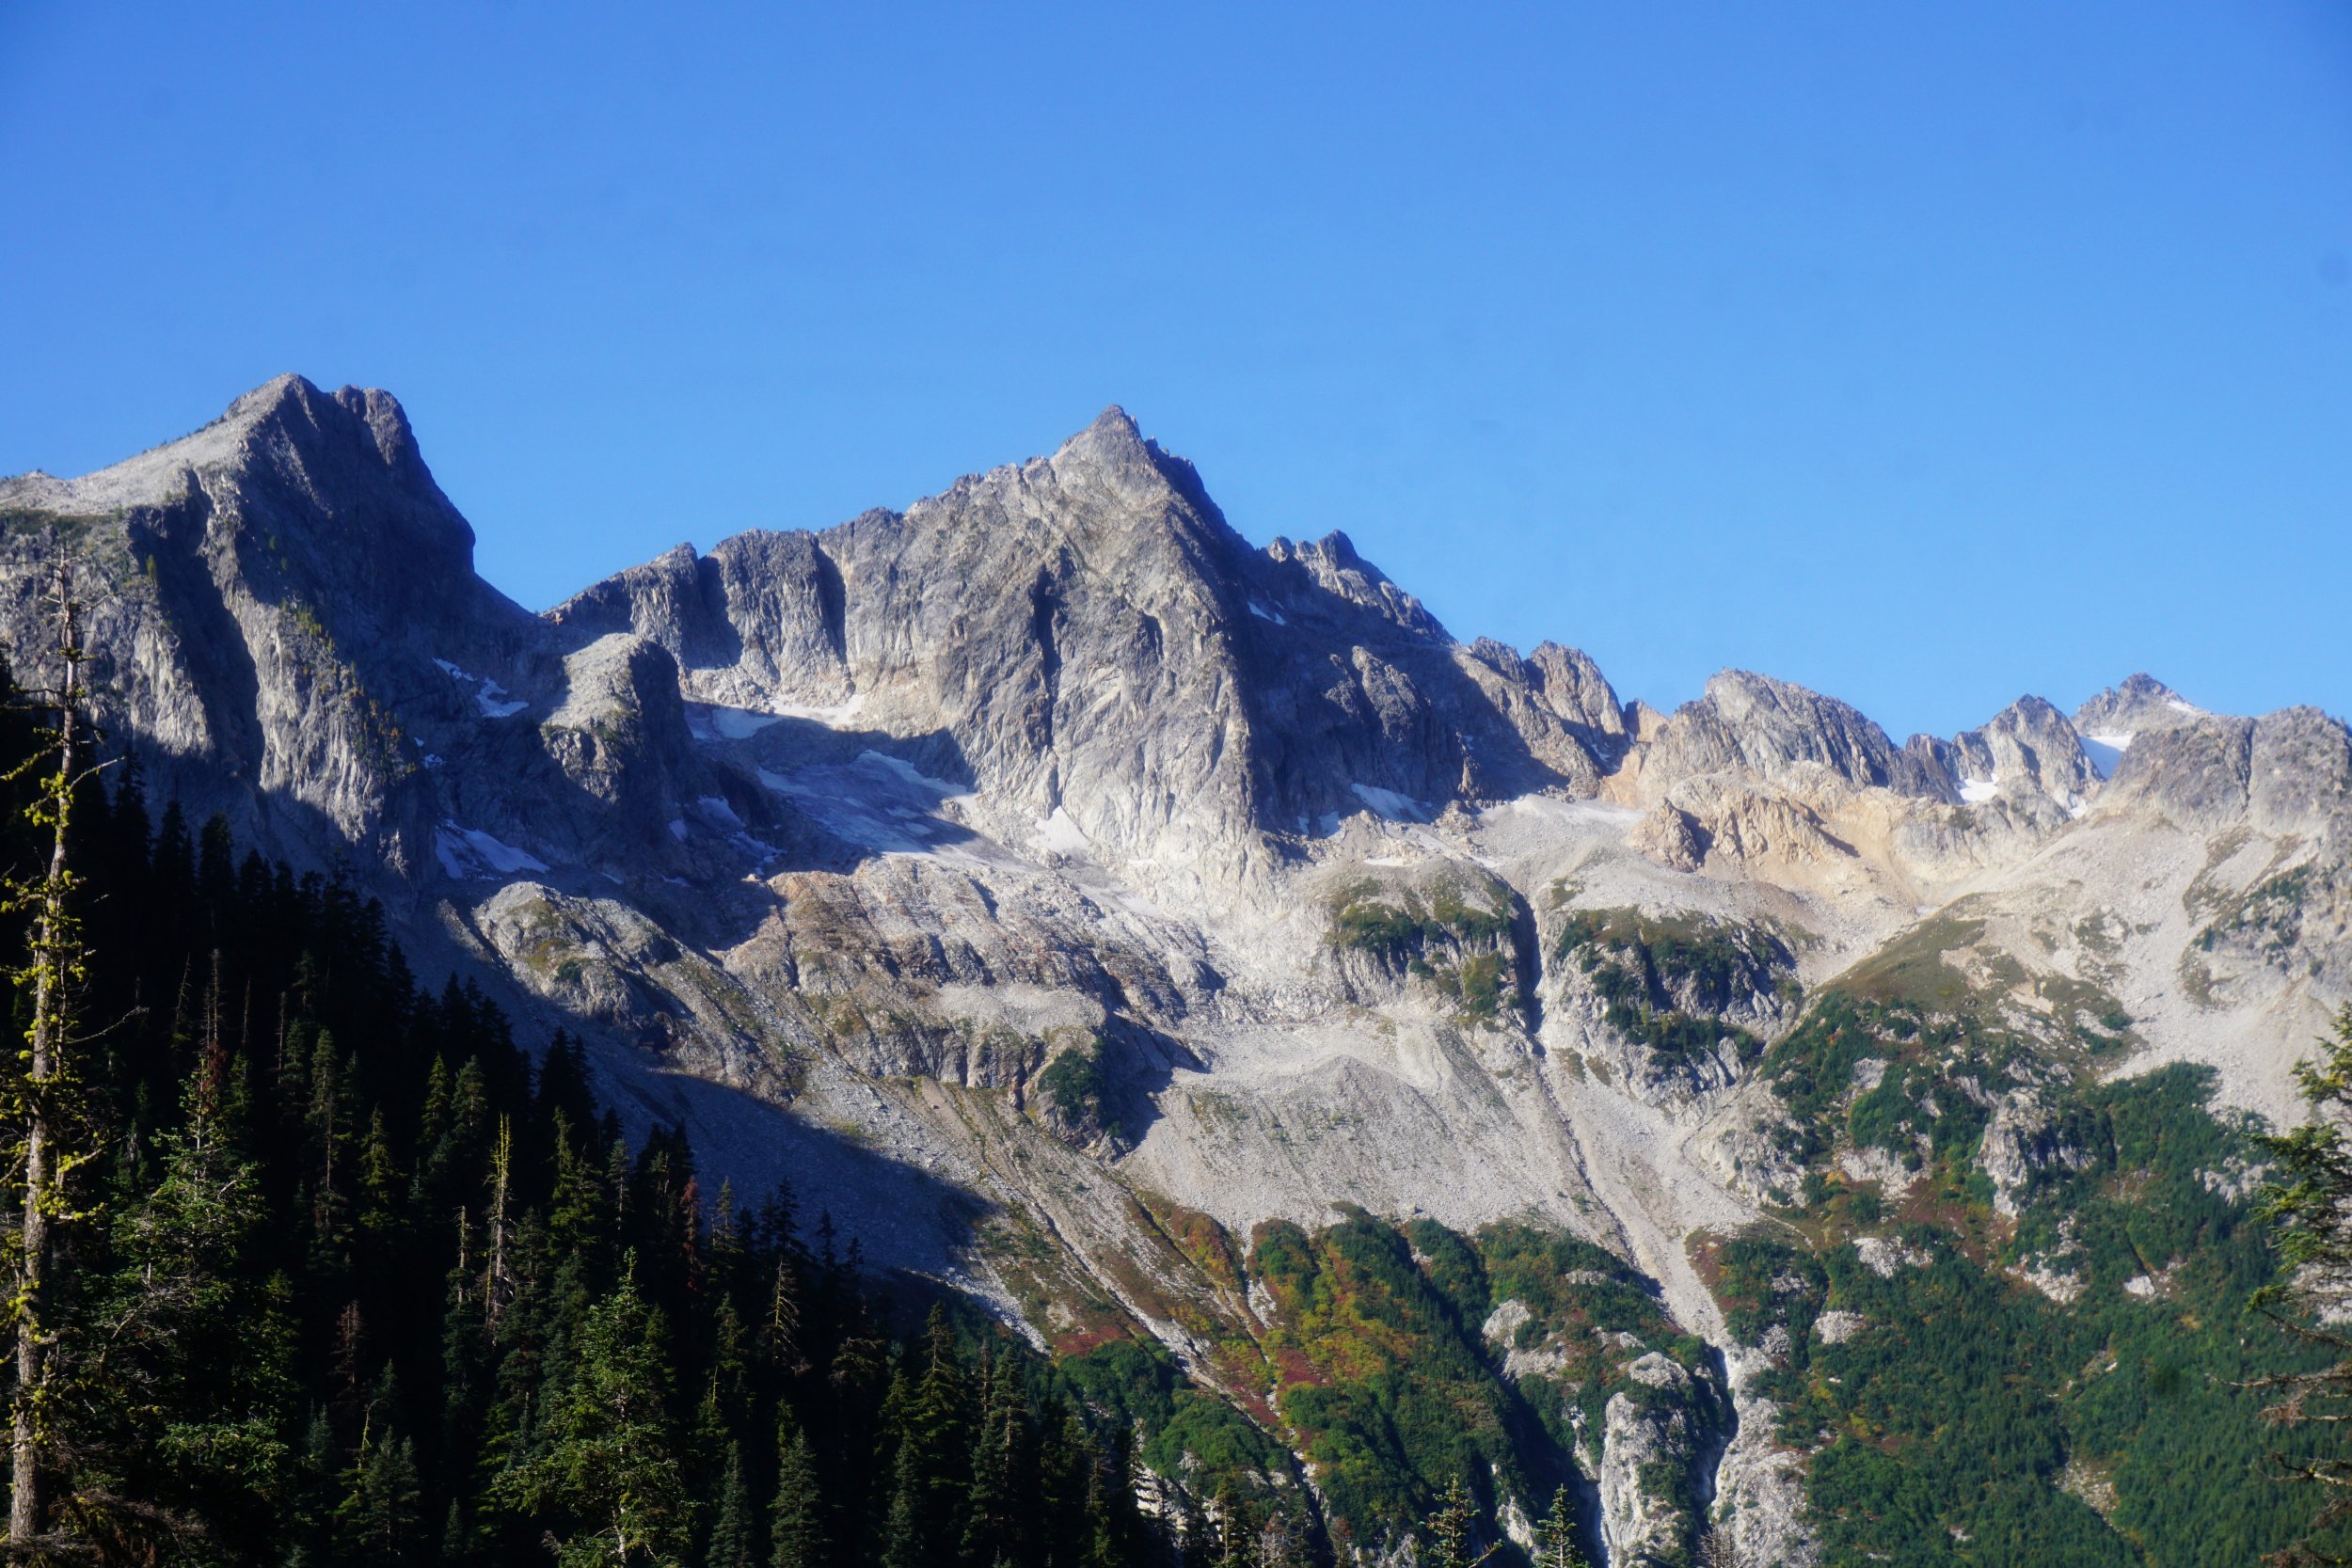
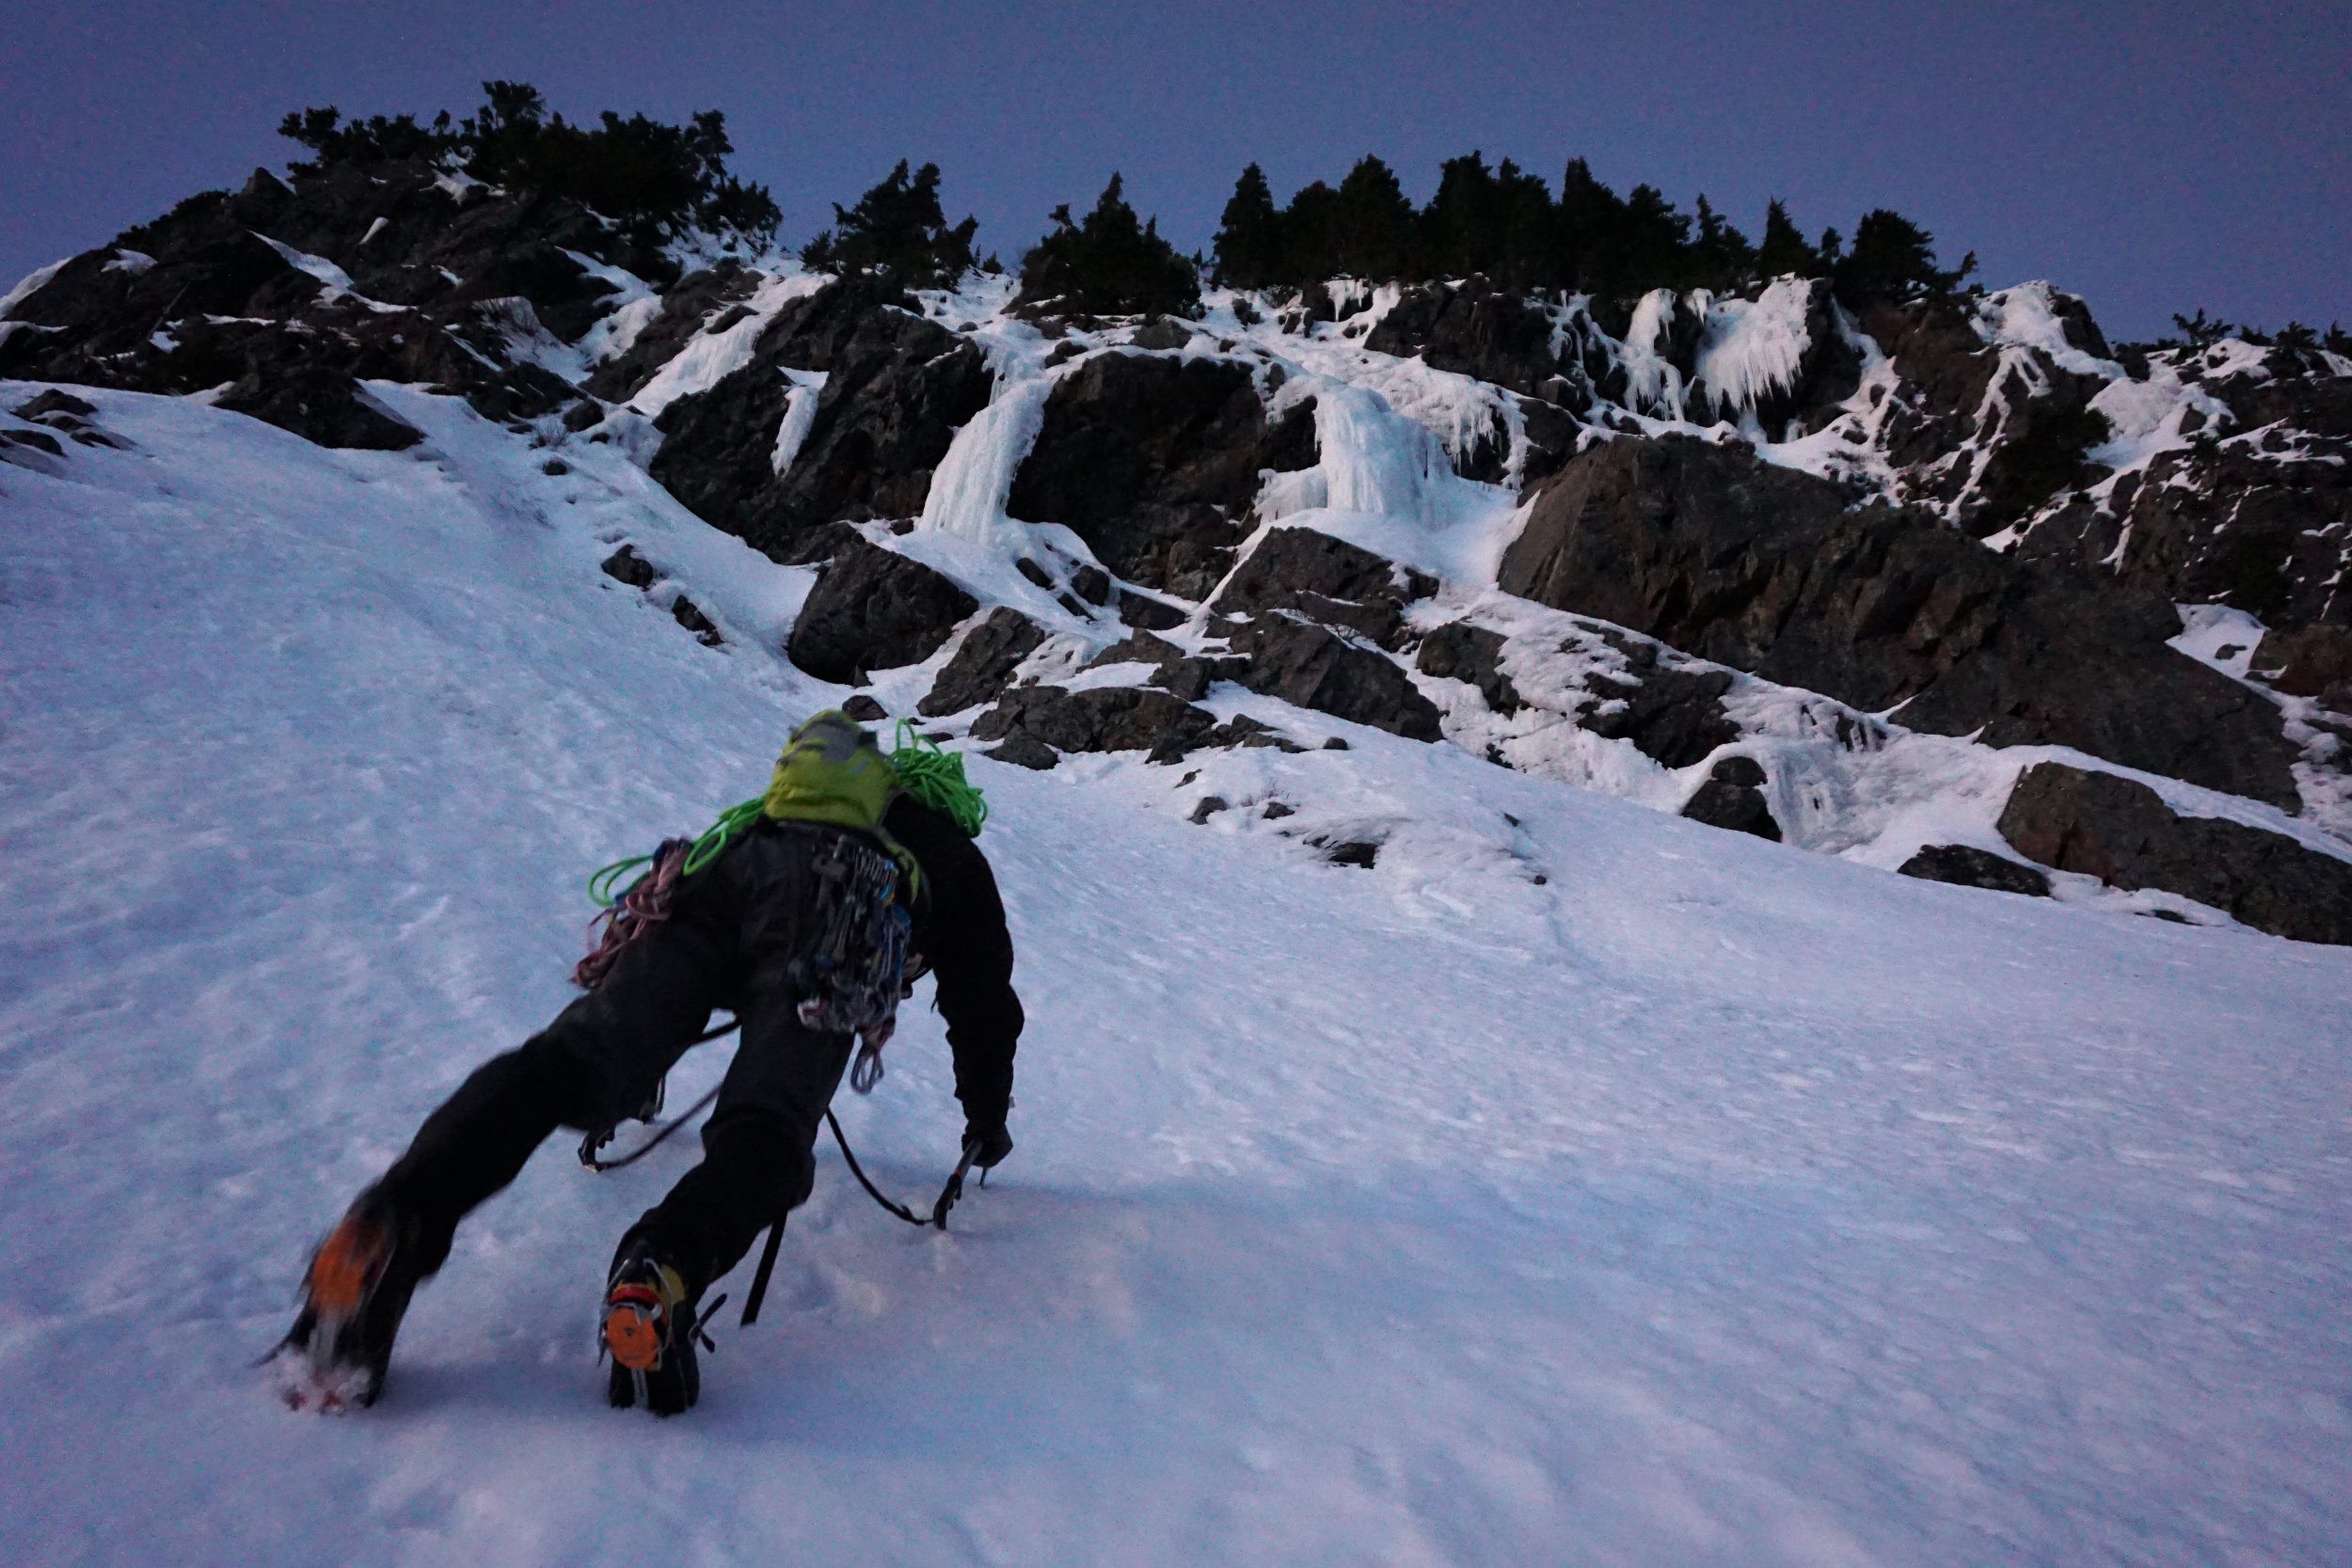
Trip: Lennox Mountain - Goat Basin Ice Climbs FAIL Trip Date: 11/30/2019 Trip Report: TLDR: the approach is pretty heinous without snow coverage. Lots of climbable ice, even in the lower basin at 2500 ft, but the approach terrain is confusing, brushy, and rugged. Long version: I've long been curious about the Dave Burdick ice routes in Goat Basin beneath Lennox Mountain. There's not much information about them expect for when Dave originally went up there himself. During this recent coldsnap, I was wondering where to find substantial ice and this seemed like a good shot: north facing basin fed by large snowfields above. Flow is the issues during this old season cold snap, but the north slopes of Lennox are large enough that I thought there'd be enough water to form ice. We drove up the Money Creek Road, which is in good shape. Through the trees, it appeared we saw ice up there. We parked near a pullout and tried to find a place to cross Money Creek. We found a spot where I could make it across the icy boulders with trekking poles, but my buddy unfortunately fell in. We dumped his boots out on the other side and dried out some of his clothes. I'd recommend just fording. We started up on the west side of Goat Creek. The amount of blowdowns was ridiculous and movement was really slow, so we bailed westward, finding an open clearing at the base of an avalanche slope. This was very brushy and we couldn't see our feet, but at least it was easier than the dense forest. Then we got onto some dry rock creekbeds. It wasn't brushy, but all the rocks were covered in frost and ice, making for slow travel. Eventually this creekbed joined again with Goat Creek and we walked up the west bank of Goat Creek. At this point, we started to see a bunch of long ice gullies coming down into this lower valley, down to an elevation of about 2500 ft! These lines were about 1000 ft long, with many sections of WI2-3. Like a mouse is drawn to shiny things, we decided to try exploring one of these. But our vision of the lower sections was obscured by alder and terrain, so it was difficult to choose which one. Eventually we made our choice and climbed out of the steep river bank. The alder got really bad as we got closer to the climb, and the boulders had snow on them underfoot, pretty nasty. When I reached the base of the climb, I was disappointed to see that the entire 100+ ft first pitch, formerly obscured from us, actually began in a pool of water and was too thin down low. Additionally, there was another cliff below us that prevented traversing to the next flow to our left. The terrain is deceptively complex out here, a maze of alder and canyons, much like the kind of narrow topographical canyons you see in the Wenatchee or Yakima foothills. Bummed, we retreated to the valley floor, only to find that the alder had unzipped my pocket and my phone was missing. We retraced my steps using the GPS in the alder, but never found it. Time for an upgrade, I guess. The first pitch of our long proposed route. Everything above it looked great. Back at the valley floor, we decided to move leftwards and try to ascend the boulder slope on the SE side of the valley that would lead us to Goat Basin. Alder kept us pinned on the riverbed, but it became entangled in a slot canyon, necessitating some spicy ice slab scrambling to get around the riverbank. On the way back, we would cross the river a few times to avoid this. Going up the boulder field, the snow got deeper and movement slower. Eventually we just gave up. From here, we finally had a good viewpoint of all the lower flows. If we had this view to start the day, we could've seen the way of bypassing some lower wet pitches and getting on the beautiful upper flows. But alas, it was too late in the day, I was pretty beat up mentally by the rugged approach (we covered only like ~1 mile), so we started the painful descent down the snowy boulders. Good view of the lower valley. Lots of good looking low angle lines. We nailed the routefinding on the return trip and did everything in probably half the time. It's amazing what a little beta can do. It was pretty disappointing to not get on any ice even with the cold temps we have had, but conditions in the Cascades are deceptively bad right now. I guess this is the price I pay for being an adventurous climber and explorer. I am new to travel in the mountains in this sort of shoulder season and am learning so much about when and where to go and when to just stay home. I have no doubt the actual Goat Basin climbs were in, as these lower ones were in above 2500 ft. I would not recommend this approach under anything but a mid winter snowpack. The brush and boulders are really bad, but with a few feet of snow, it could be pretty fast. Just be careful because the slopes are subject to significant overhead avy danger. The Money Creek crossing would be a pain at any time of year. Big thanks to Chris for always enjoying my crazy adventure ideas and staying positive. Hopefully this information is helpful to someone and our sufferings will be vindicated. Gear Notes: Screws and ropes and tools, used none of them sadly. Approach Notes: It's rough. Stick west of Goat Creek initially, then cross back to the east side as you ascend to Goat Basin.
-
[TR] Dragontail Peak - North East Couloir 11/23/2019
Kyle M replied to PorterM's topic in North Cascades
Thanks for crushing it Porter! If anyone wanted more photos and the story from a follower's perspective: https://climberkyle.com/2019/11/23/dragontail-peak-ne-couloir-wi2-m5-r/. -
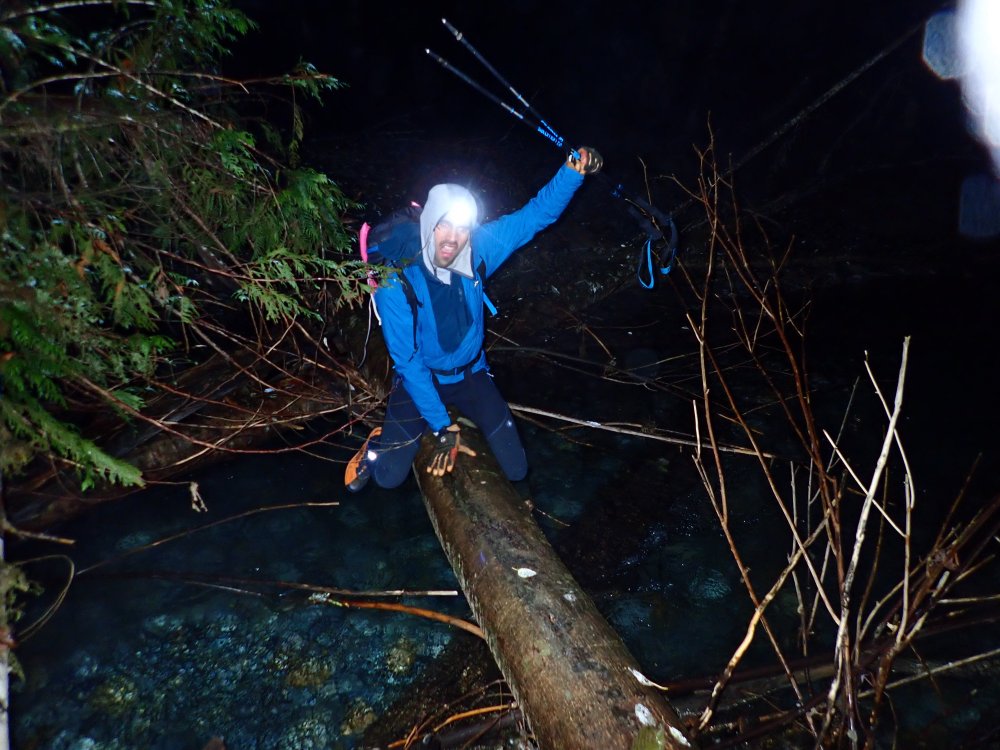
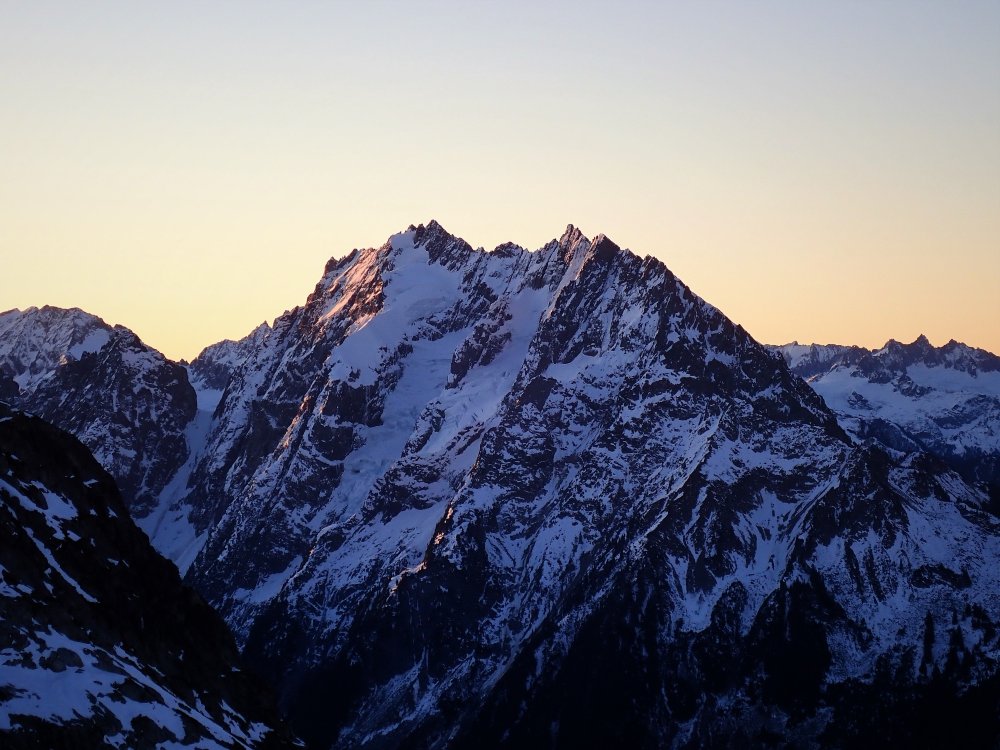
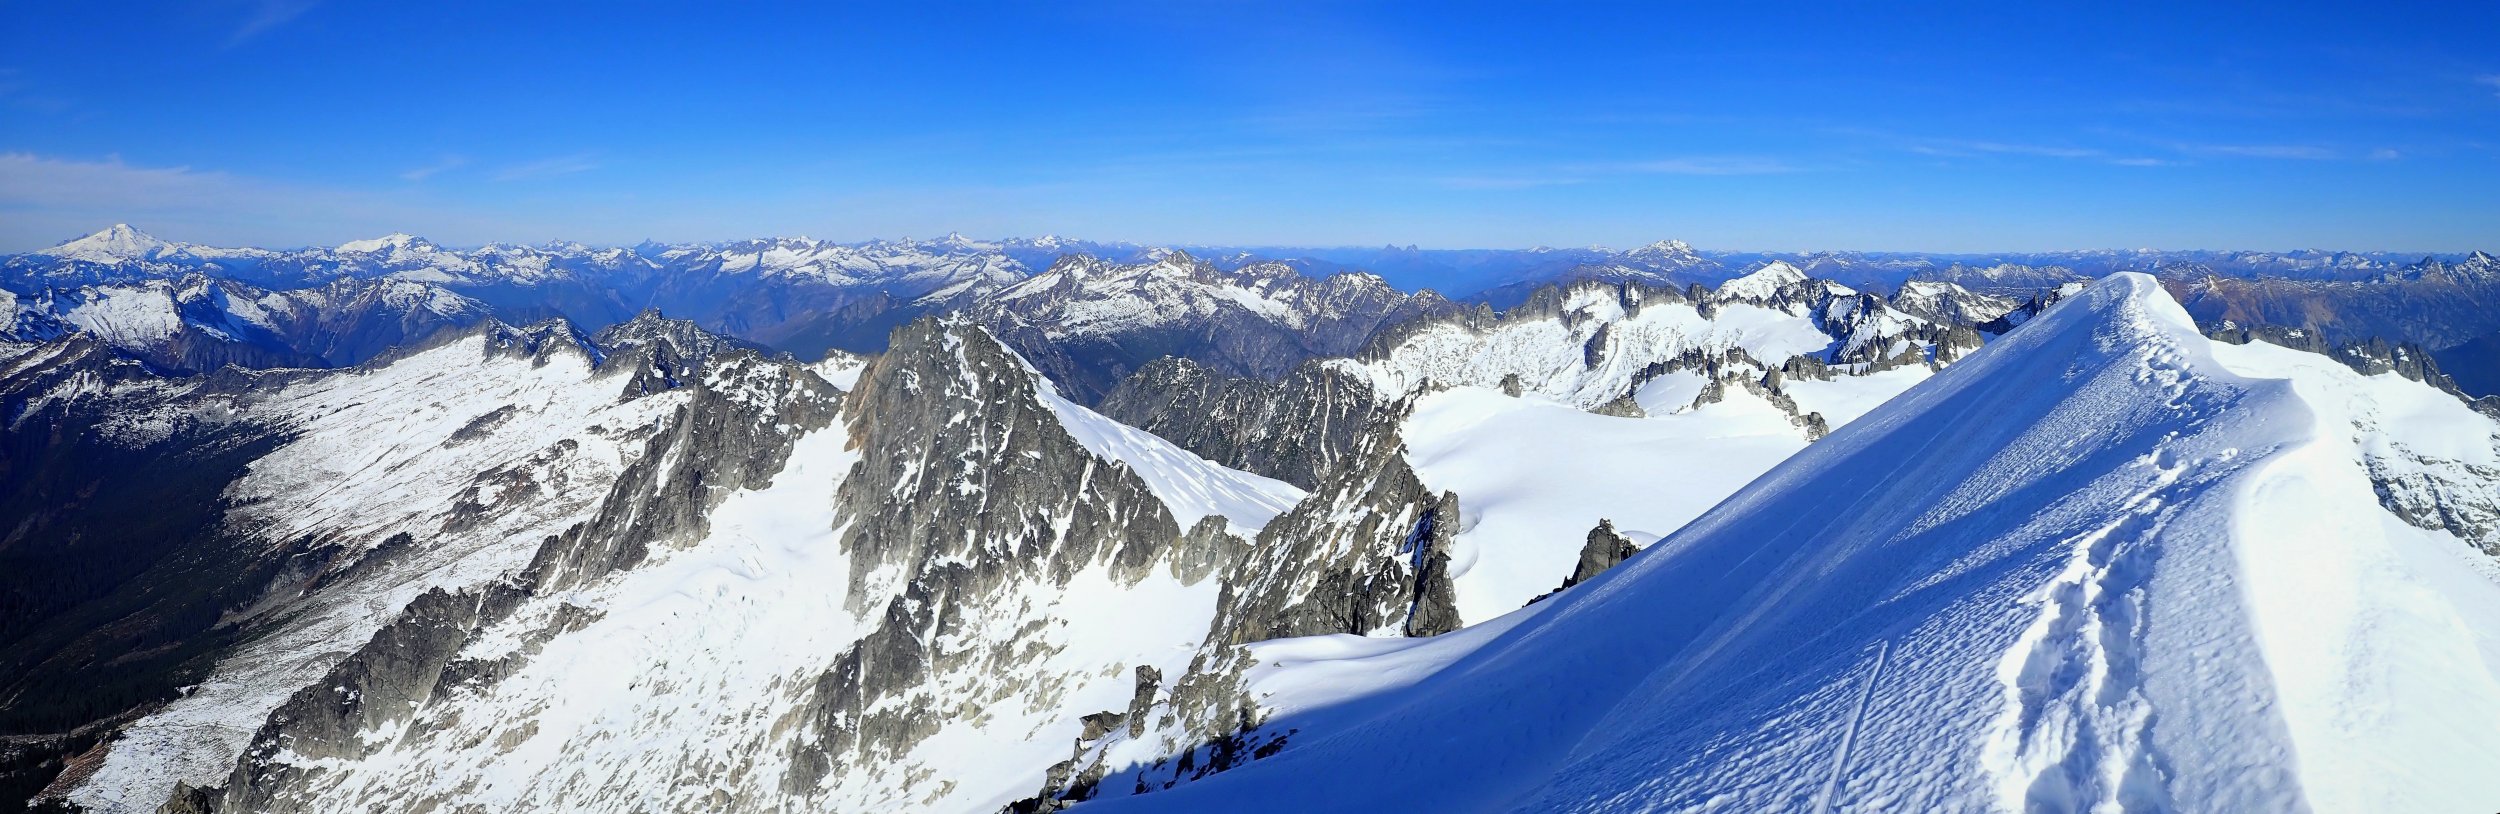
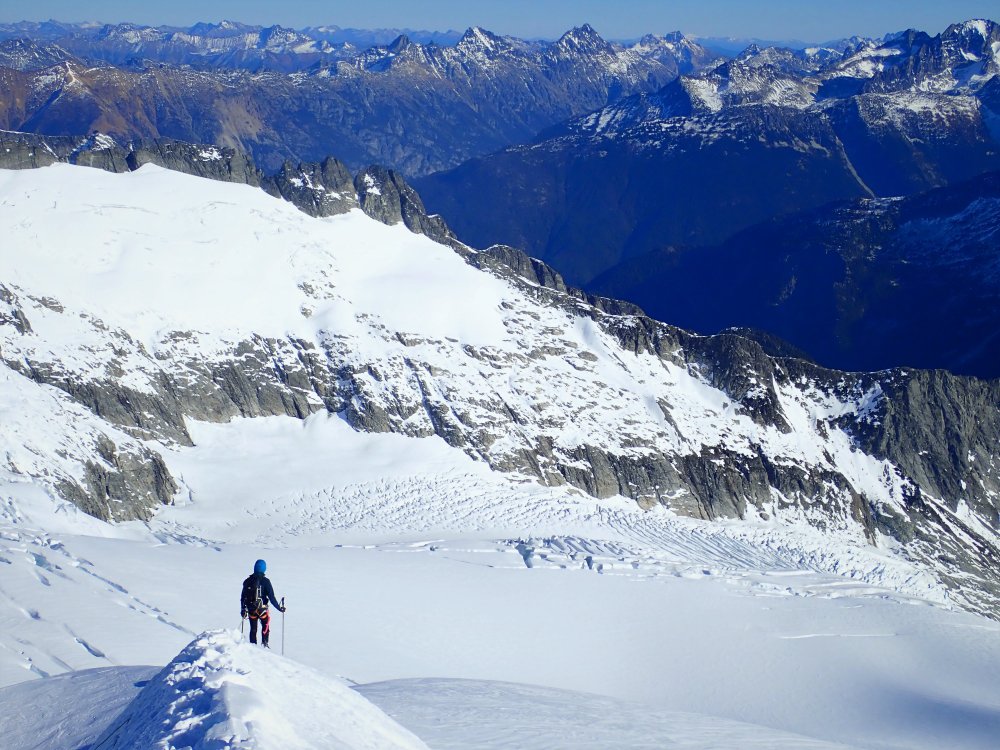
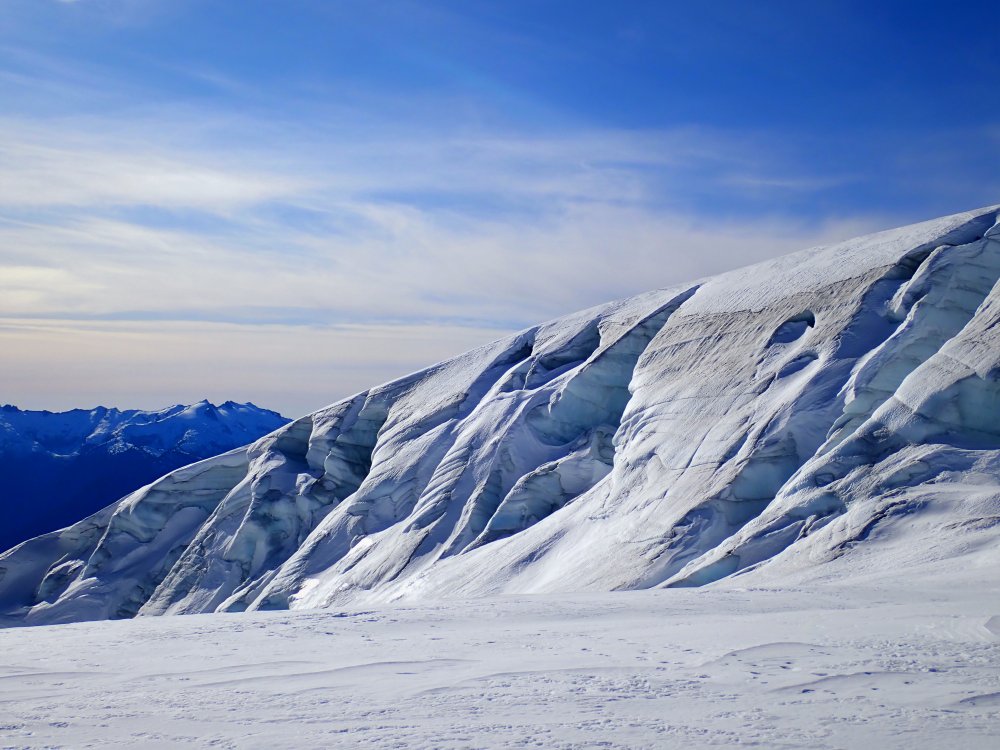
Trip: Eldorado Peak - NW Ice Couloir Trip Date: 11/06/2019 Trip Report: Anthony and I jumped on the bandwagon and ran a lap on the NW Ice Couloir of Eldorado on Wednesday. The approach was snow free through the boulder field and crevasses were easy to navigate on the glaciers. In the couloir, we encountered absolutely perfect conditions: fat WI3 ice steps, bomber snice. We never had to pull any thin ice or mixed routes, which seems to be an apparent miracle for this route. Everything about the route was great: the climbing, the position, the condition. It was simply the best alpine climbing we have ever done! The descent got a little post holy at times, but not too bad for a day in November! It took us 5.5 hrs to the base of the route, 8 hrs to the summit, and 11.5 hrs car to car. Go get it! https://climberkyle.com/2019/11/06/eldorado-peak-nw-ice-couloir-wi3/ We met a soloist, Shuan, out there. If he sees this, well, rad send! Nice cold wet log to cross in the dark. Jberg getting the first light. Warming up on the Inspiration Glacier. First view of the route. Approaching the first ice step. Typical ice conditions. So much fun! That famous knife-edge. Summit views. Heading back down. Towers upon towers! Ice ice baby! Gear Notes: 7 screws, a few tricams and nuts. Pickets could be helpful if you feel the need to protect all the snice. 70 m rope did the rappels in 2 rappels, may have been 3 rappels if just a 60 m rope. Approach Notes: No snow until maybe 5500 ft. Glacier is cruiser.


-
Trip: Mt. Baker - Heliotrope Ridge - Heliotrope Ridge Ice Playground Trip Date: 11/01/2019 Trip Report: Took advantage of the cold autumn weather and lack of snow to do a little easy ice climbing on the flows above the Heliotrope Ridge Trail before reaching the glacier overlook. There are an abundance of ice flows just 1-1.5 hrs from the car, mostly in the WI2-3 range. It is like a little ice playground. We climbed one super fun 4 pitch route that ended with the obvious ice gully that splits the upper headwall beneath the Coleman Glacier. All in all, it is super fun place with easy, safe, accessible ice and a great warm up for the season. Check it out! For more details see: https://climberkyle.com/2019/11/05/heliotrope-ridge-ice-playground/ Gear Notes: Ice is thick enough to take screws. All climbs are walkoffs. Approach Notes: Up the Heliotrope Trail, you will start to see frozen flows up and to the right as you go.


-
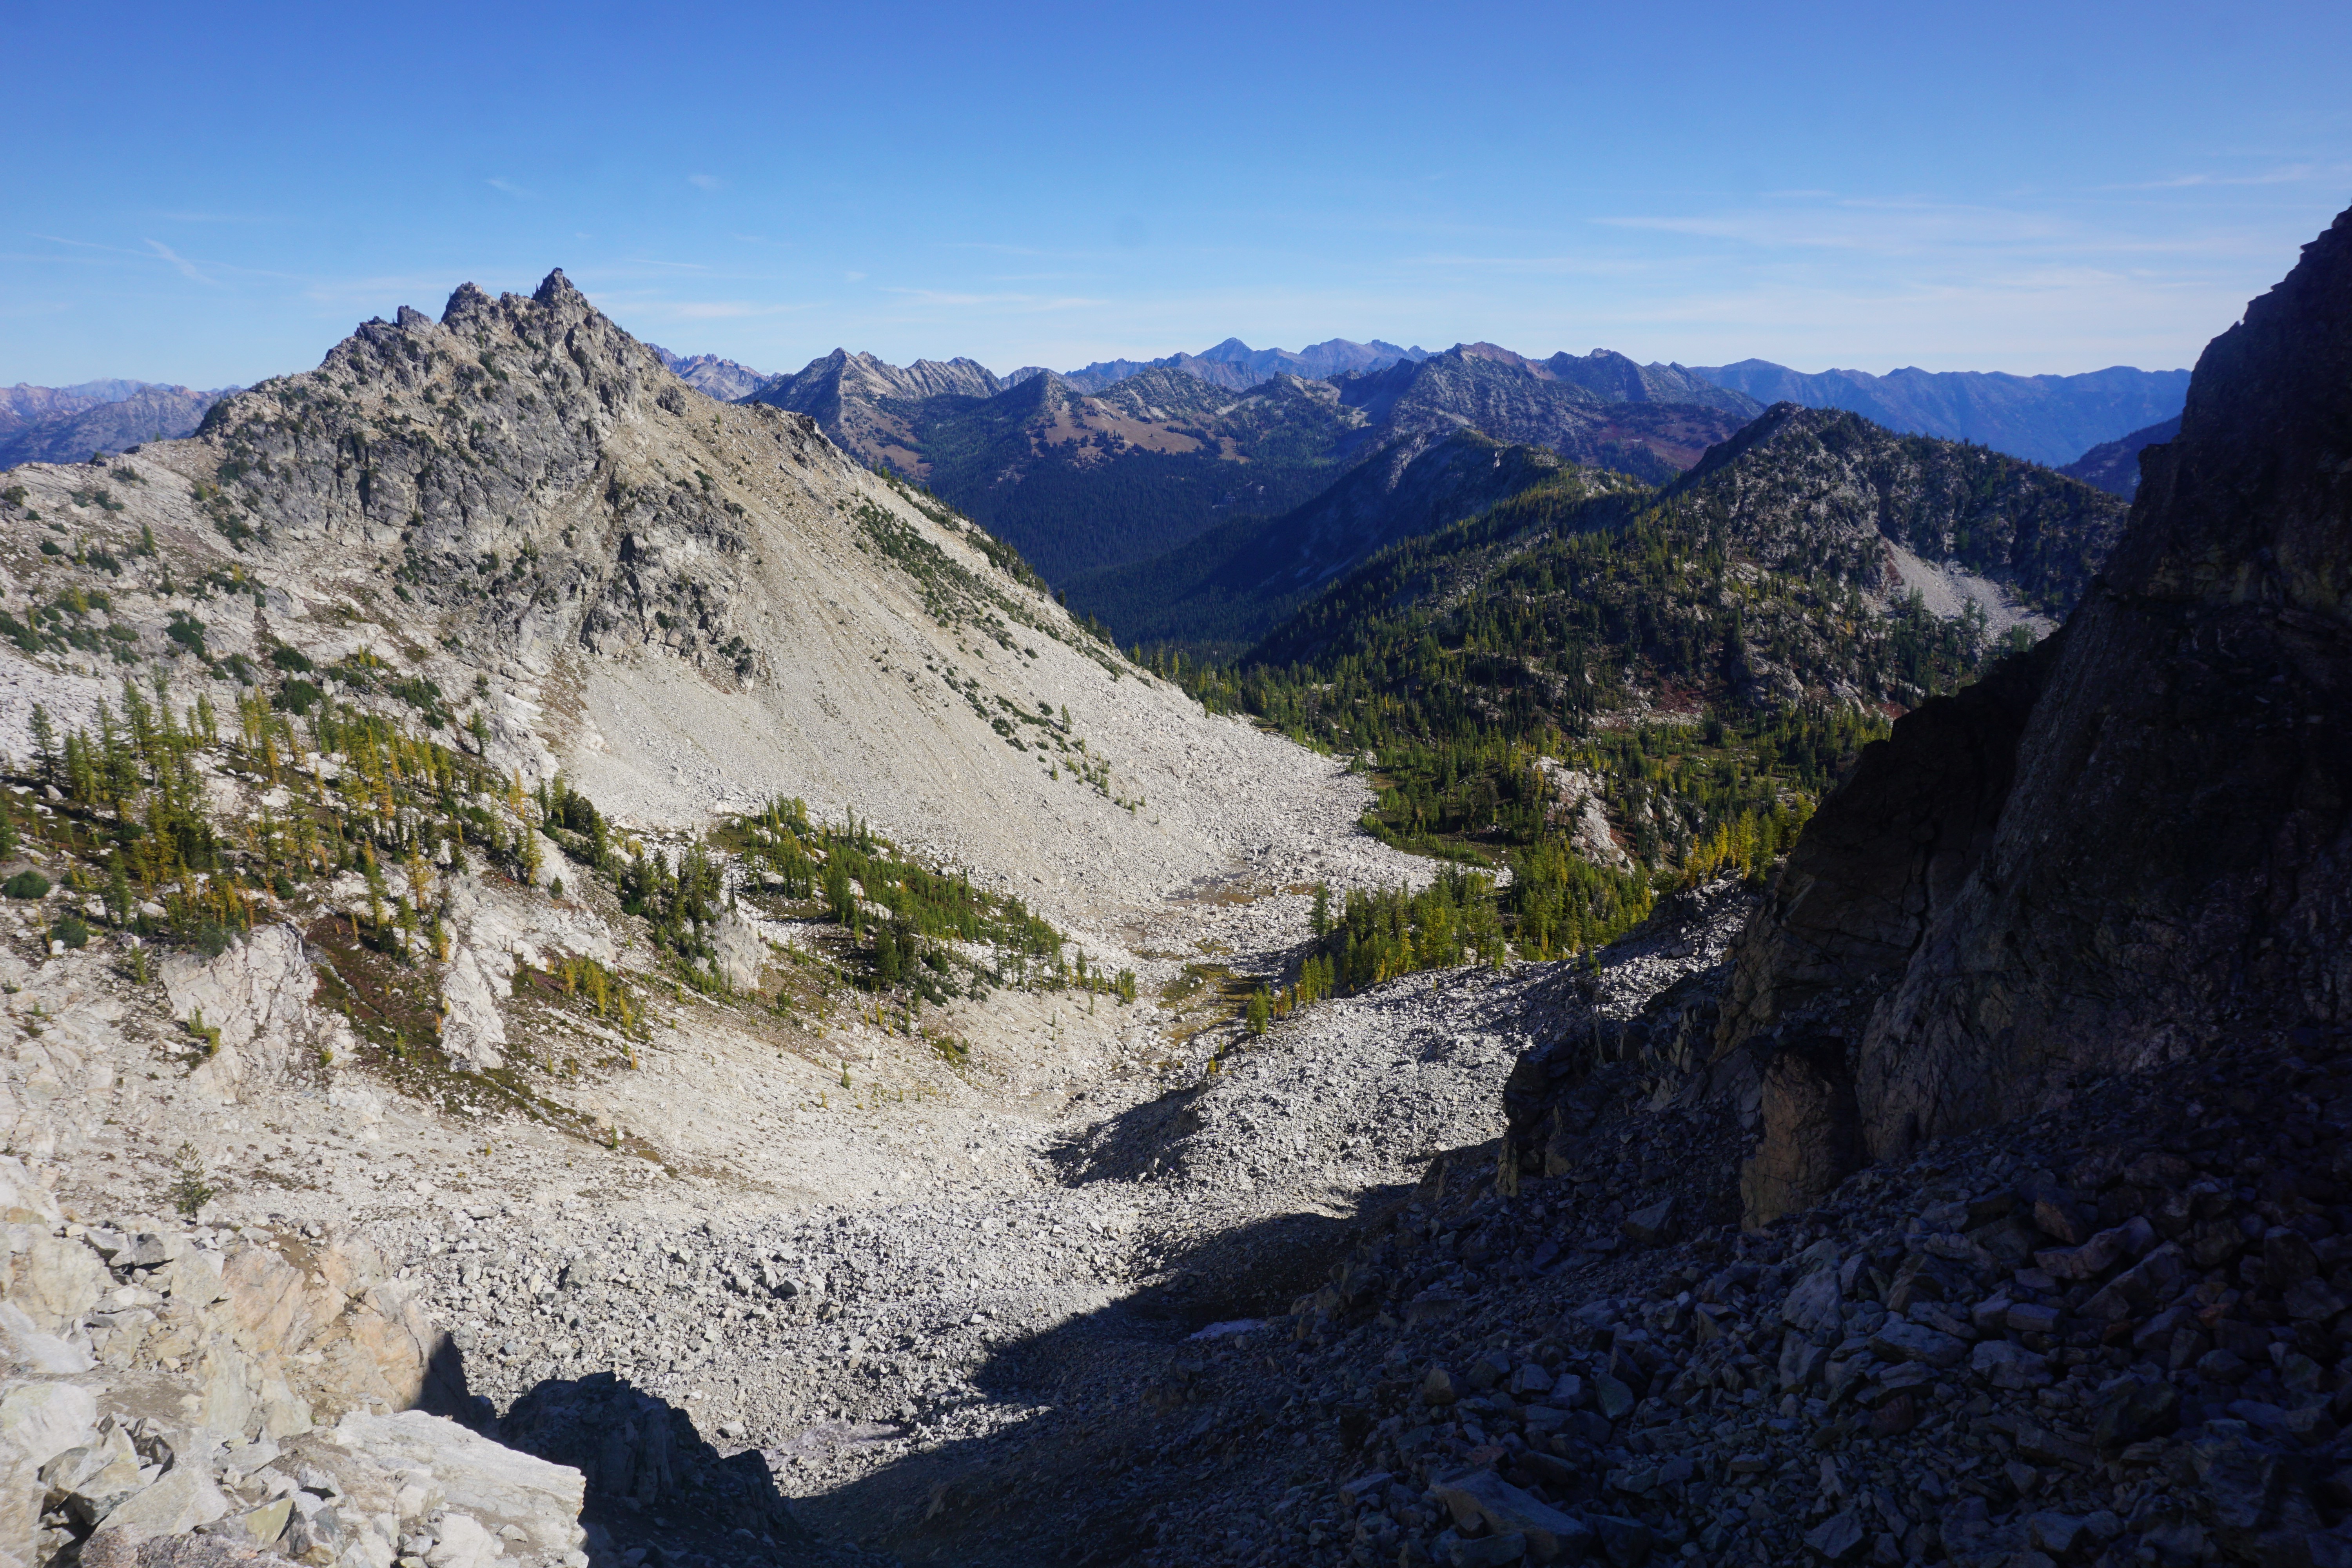
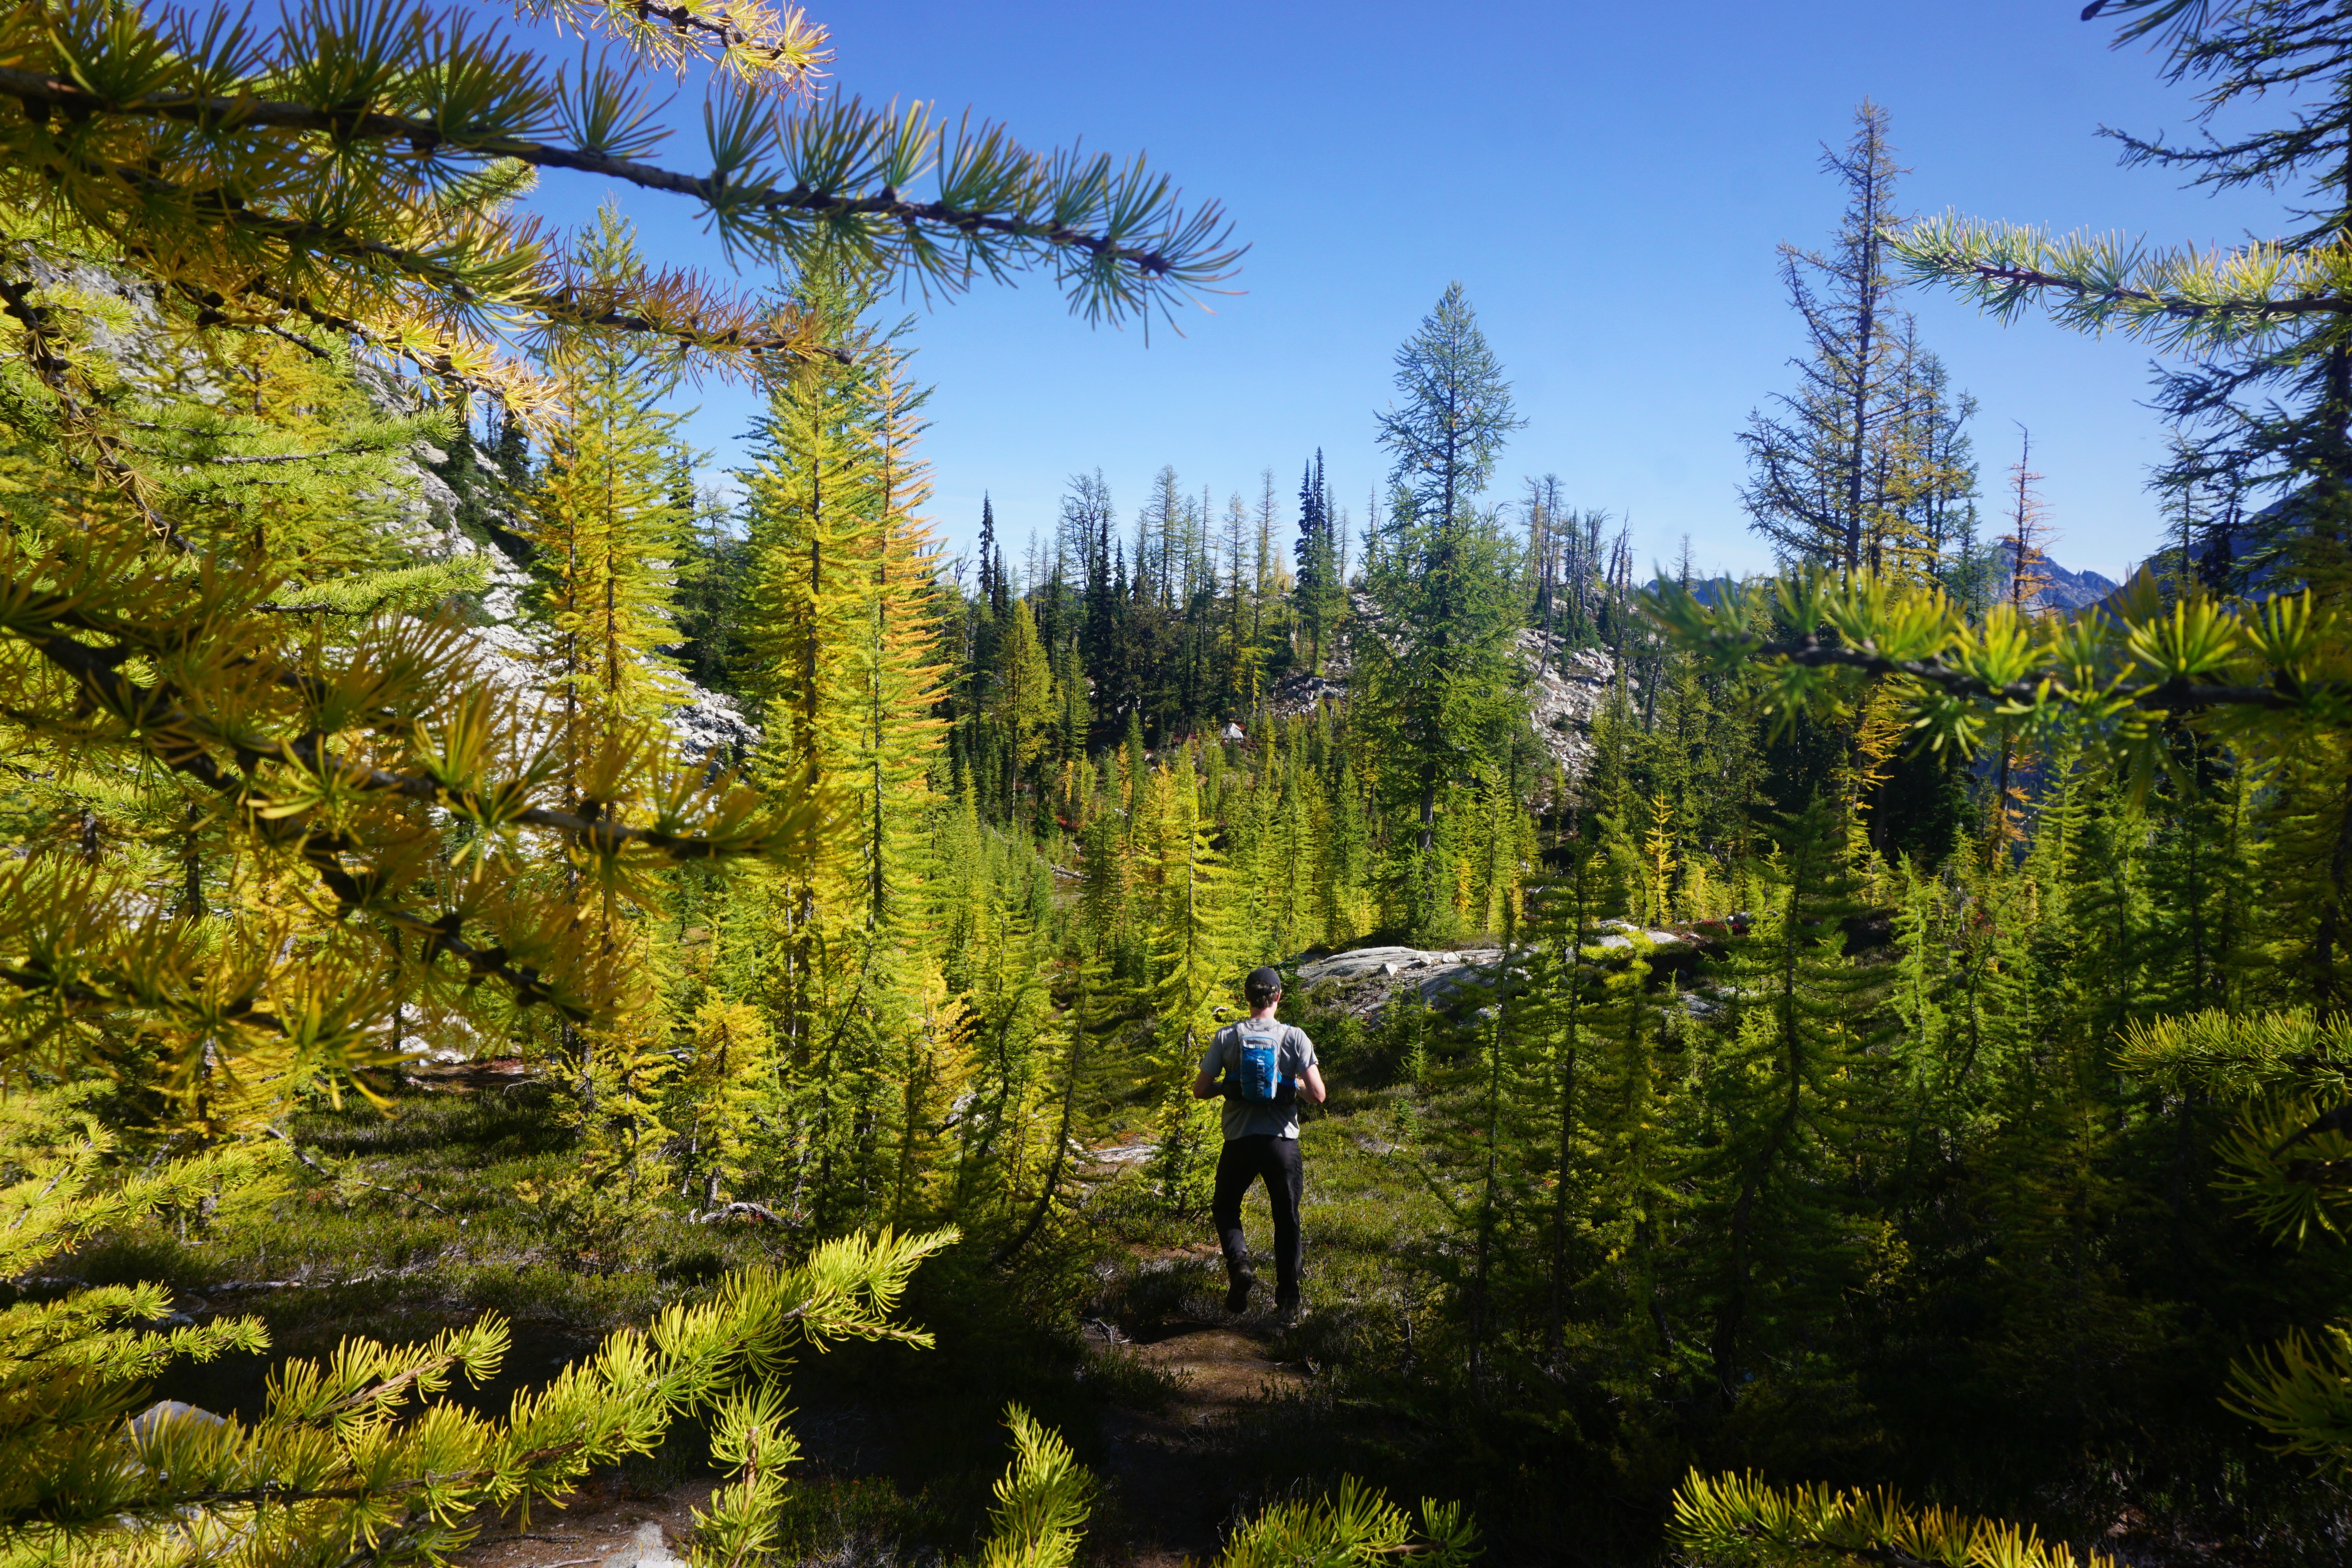
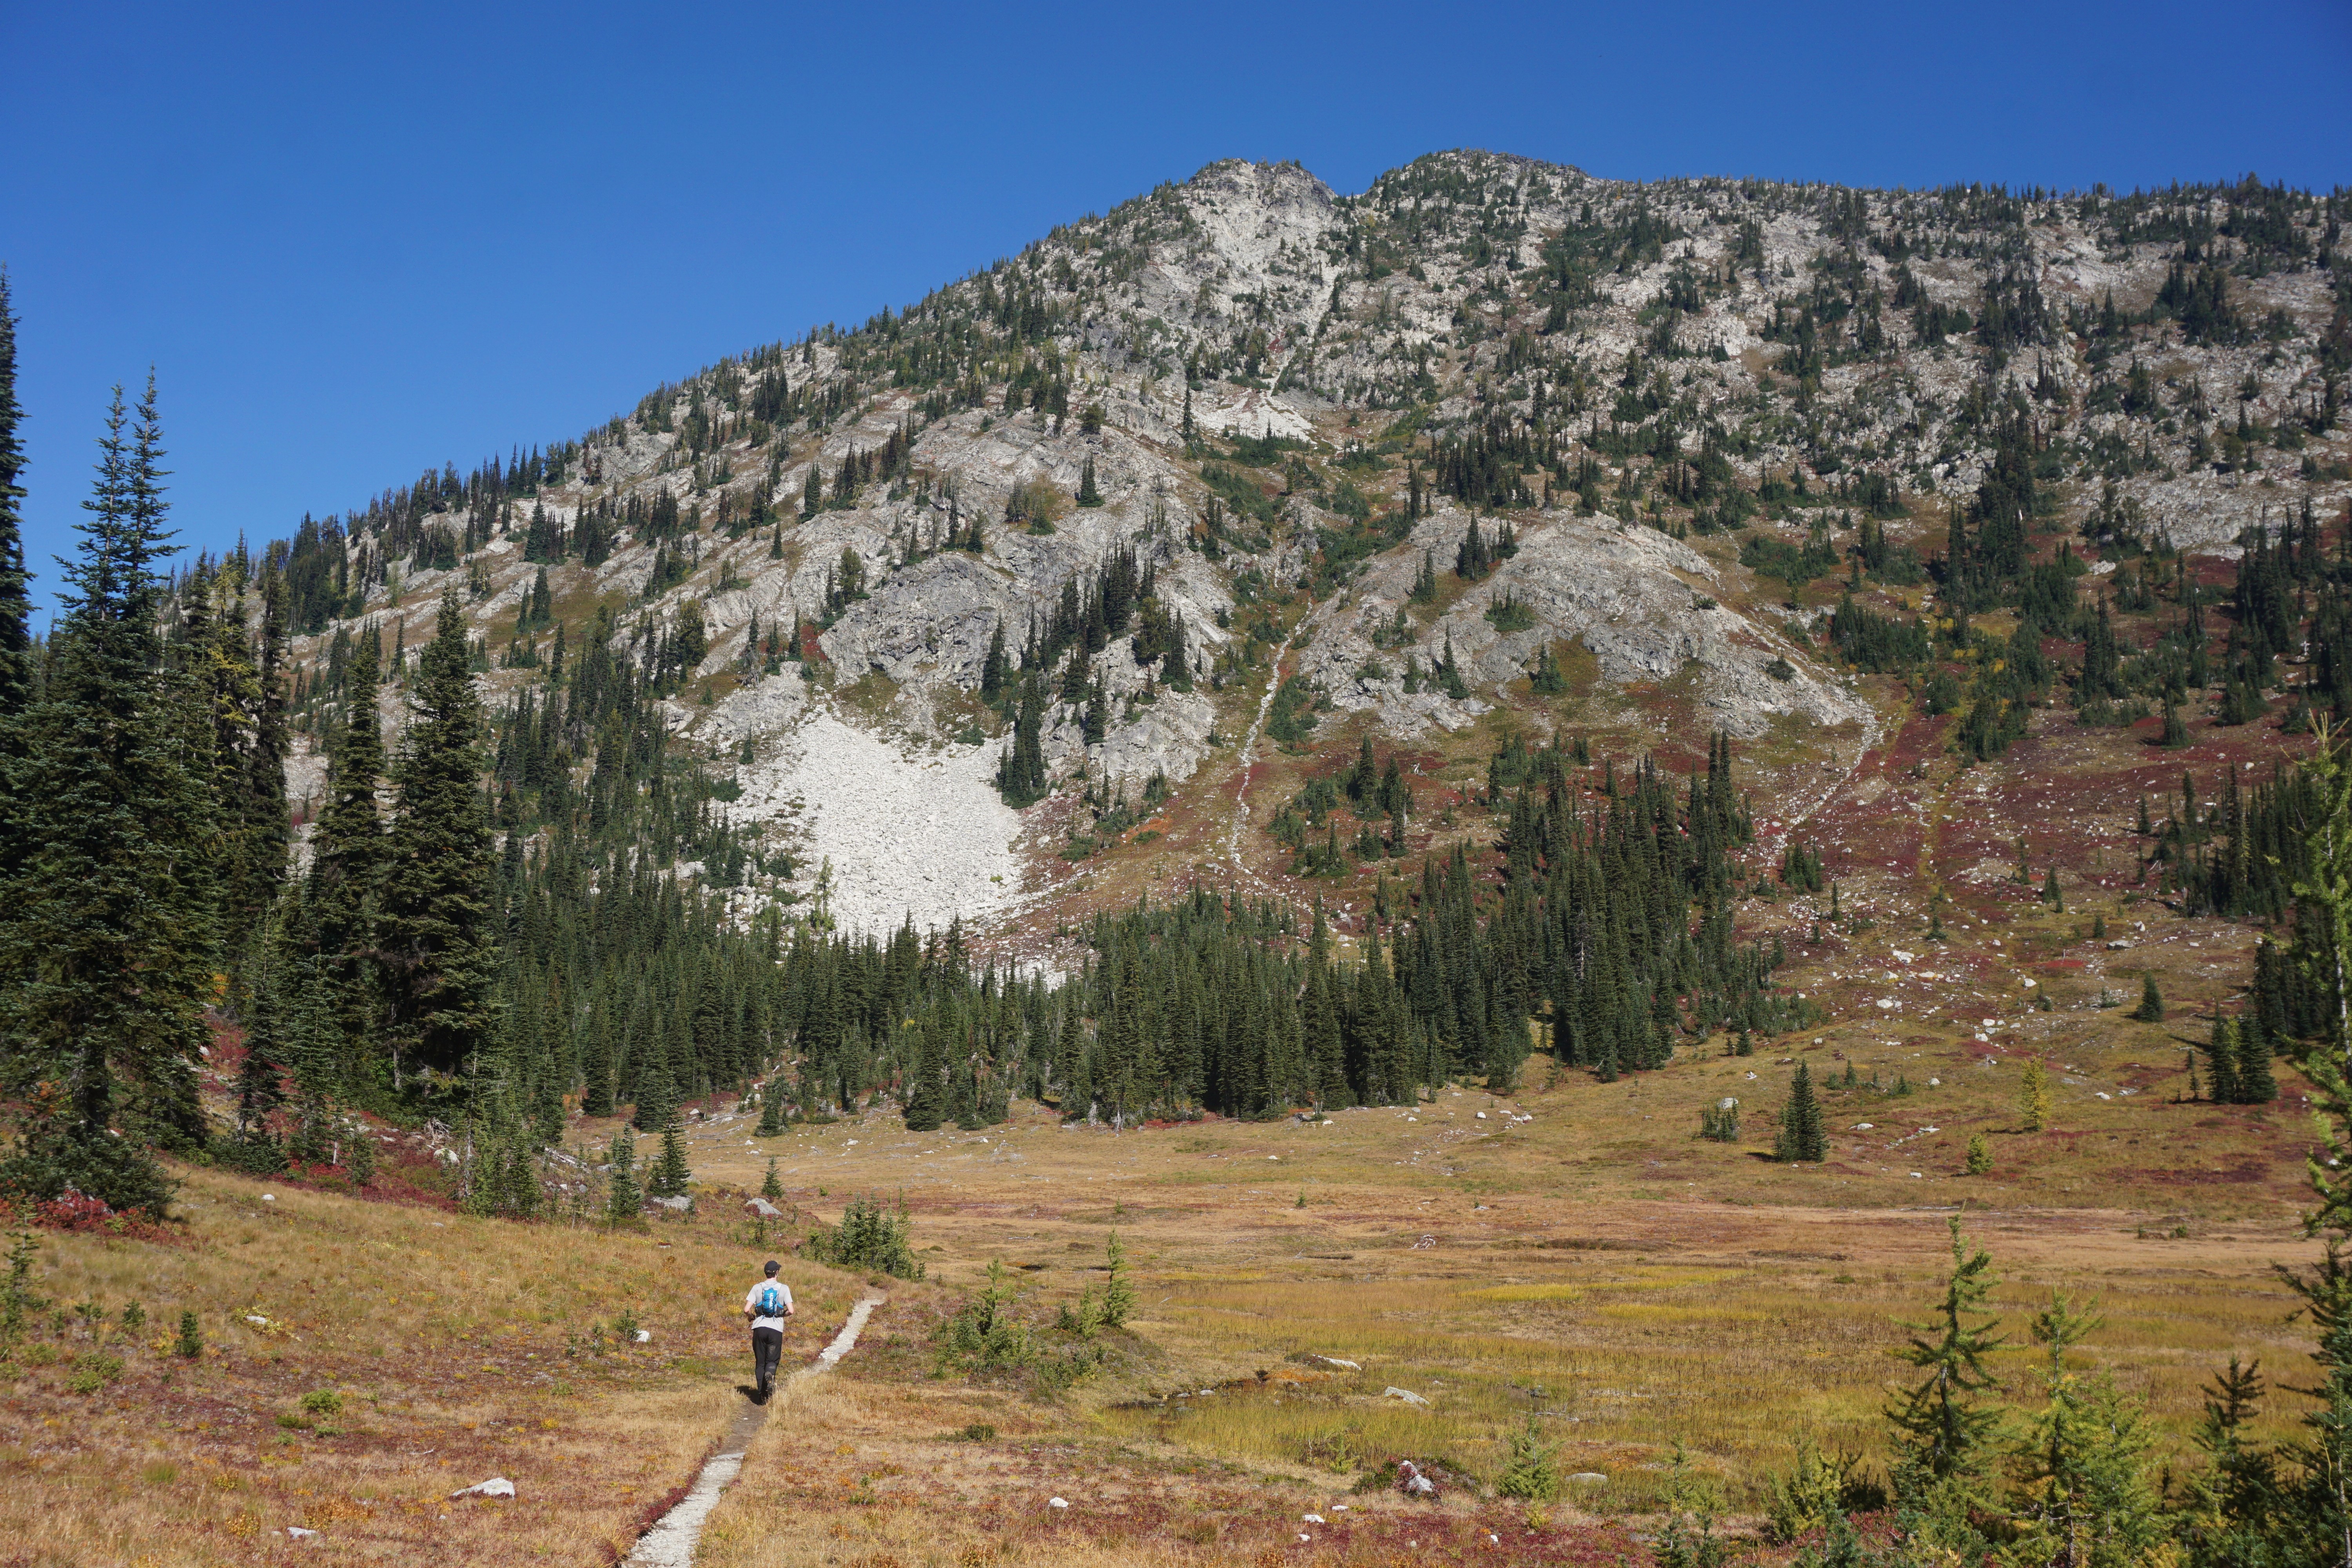
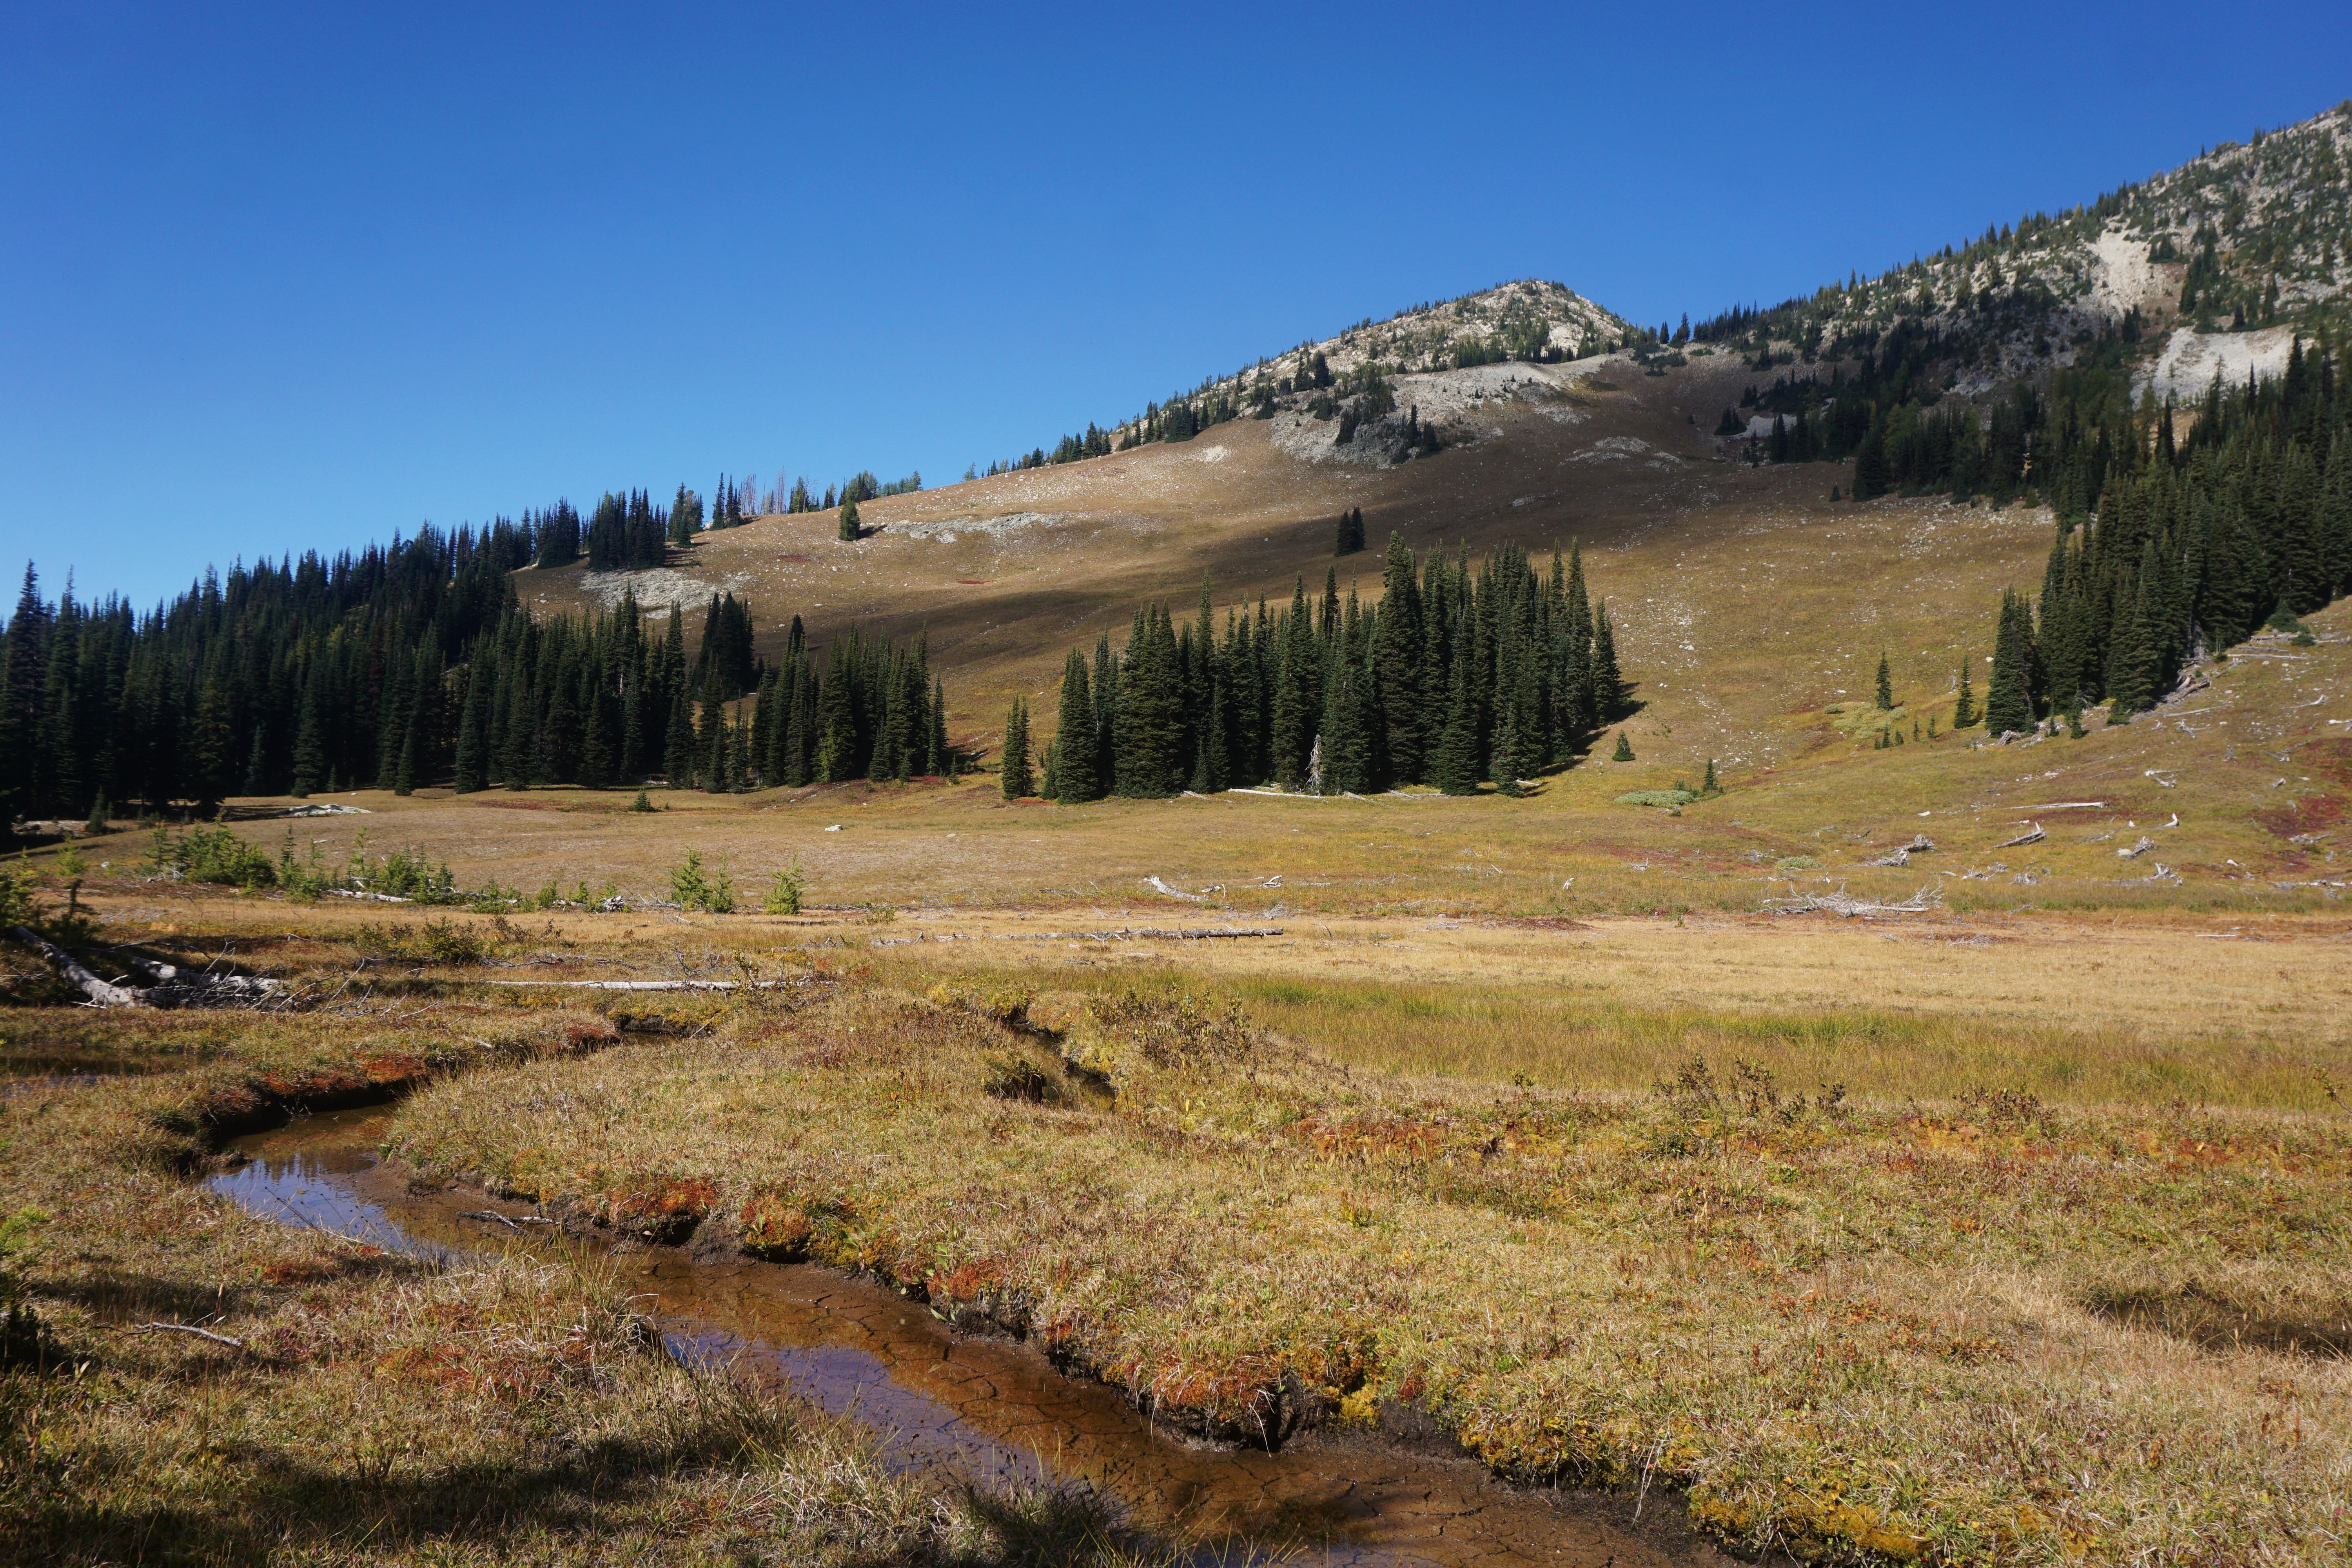
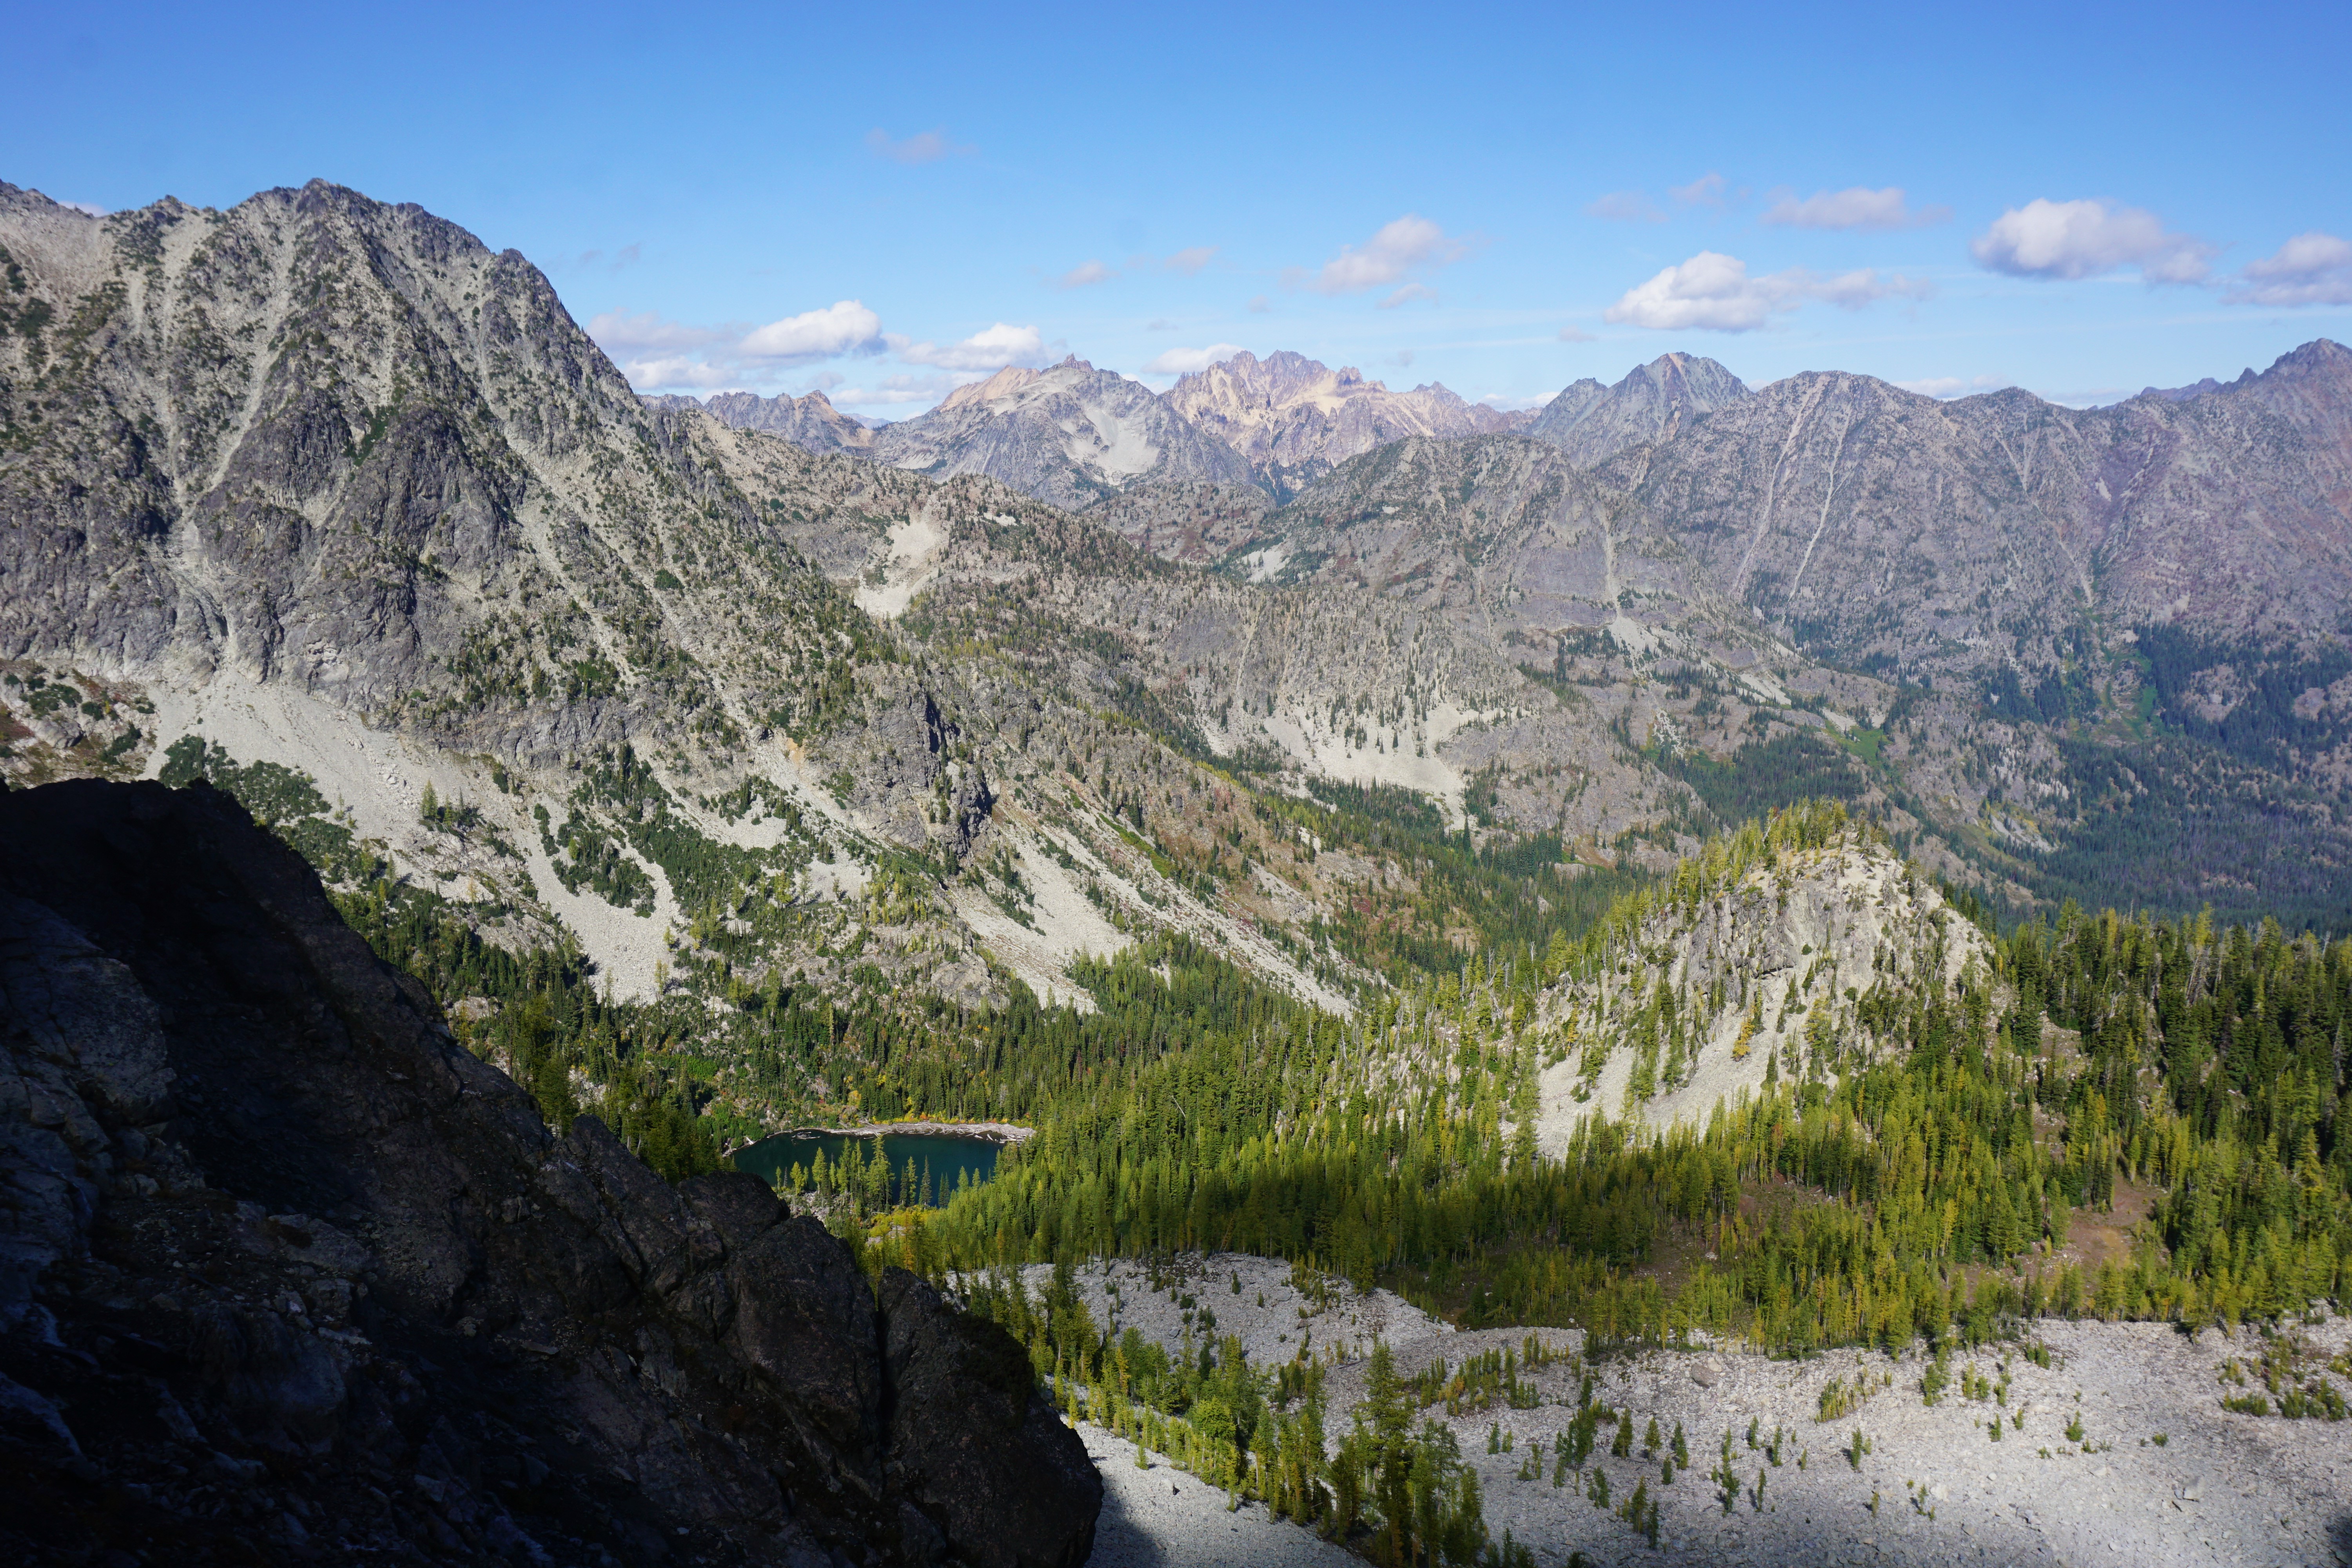
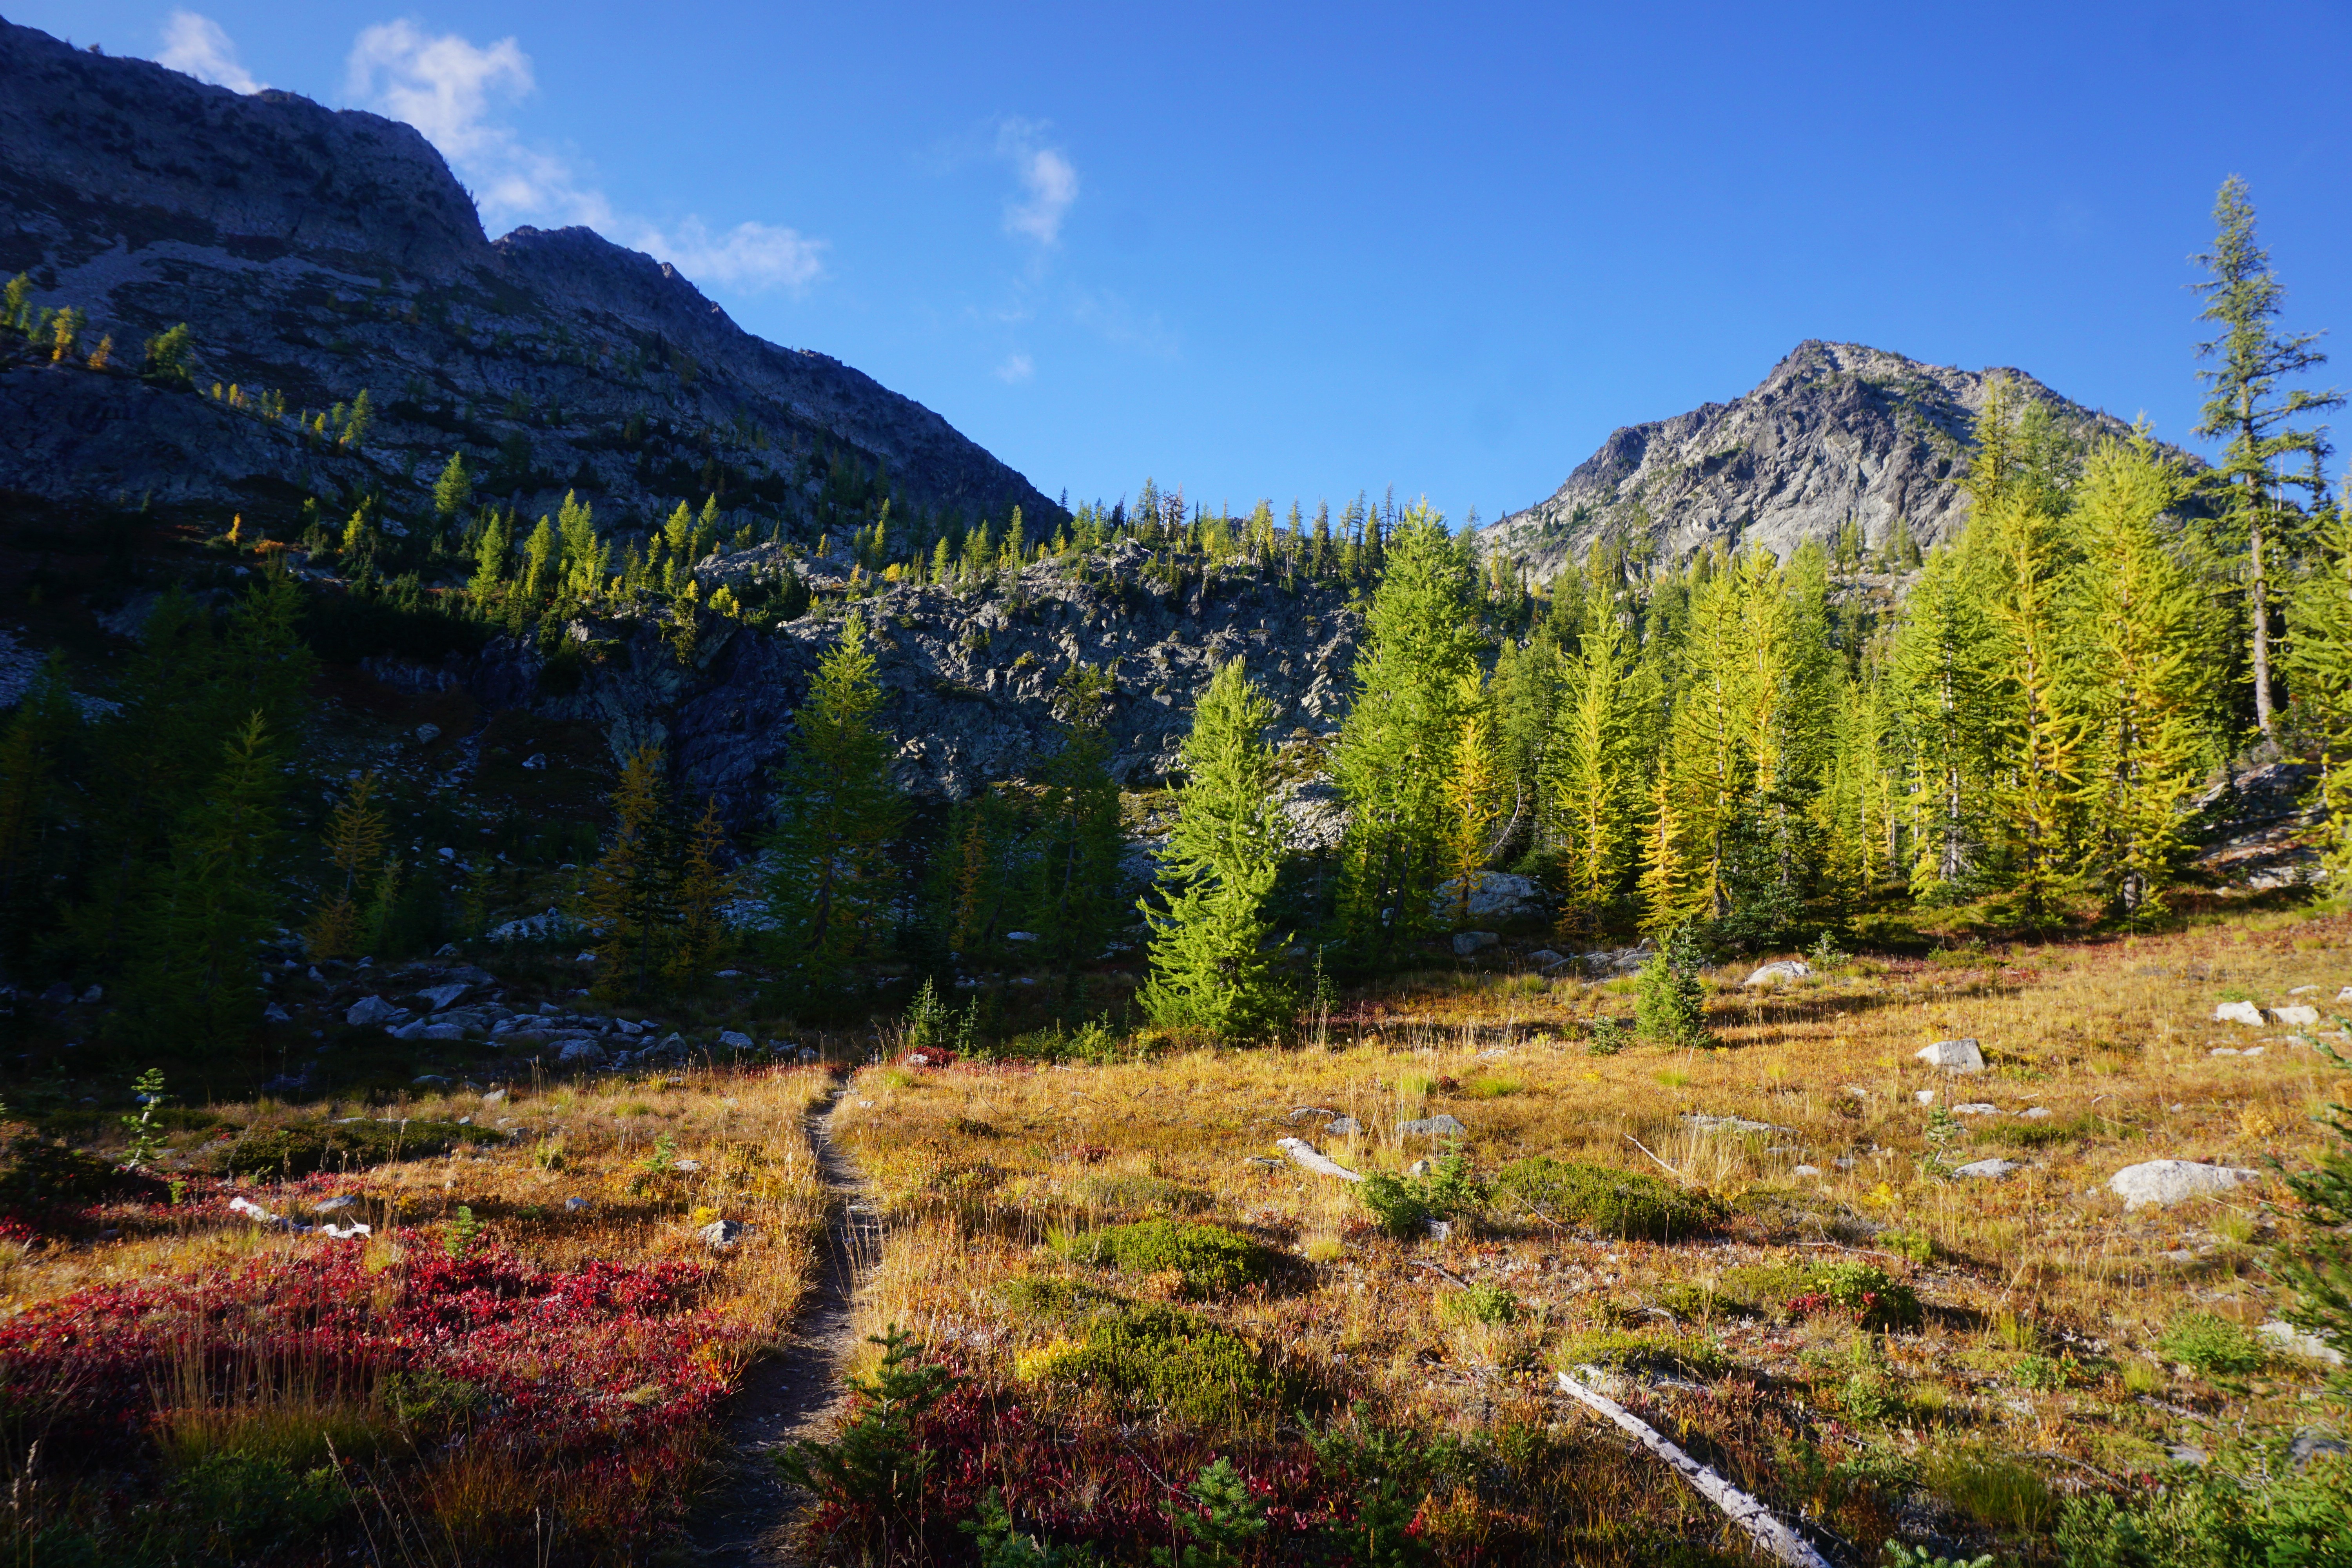
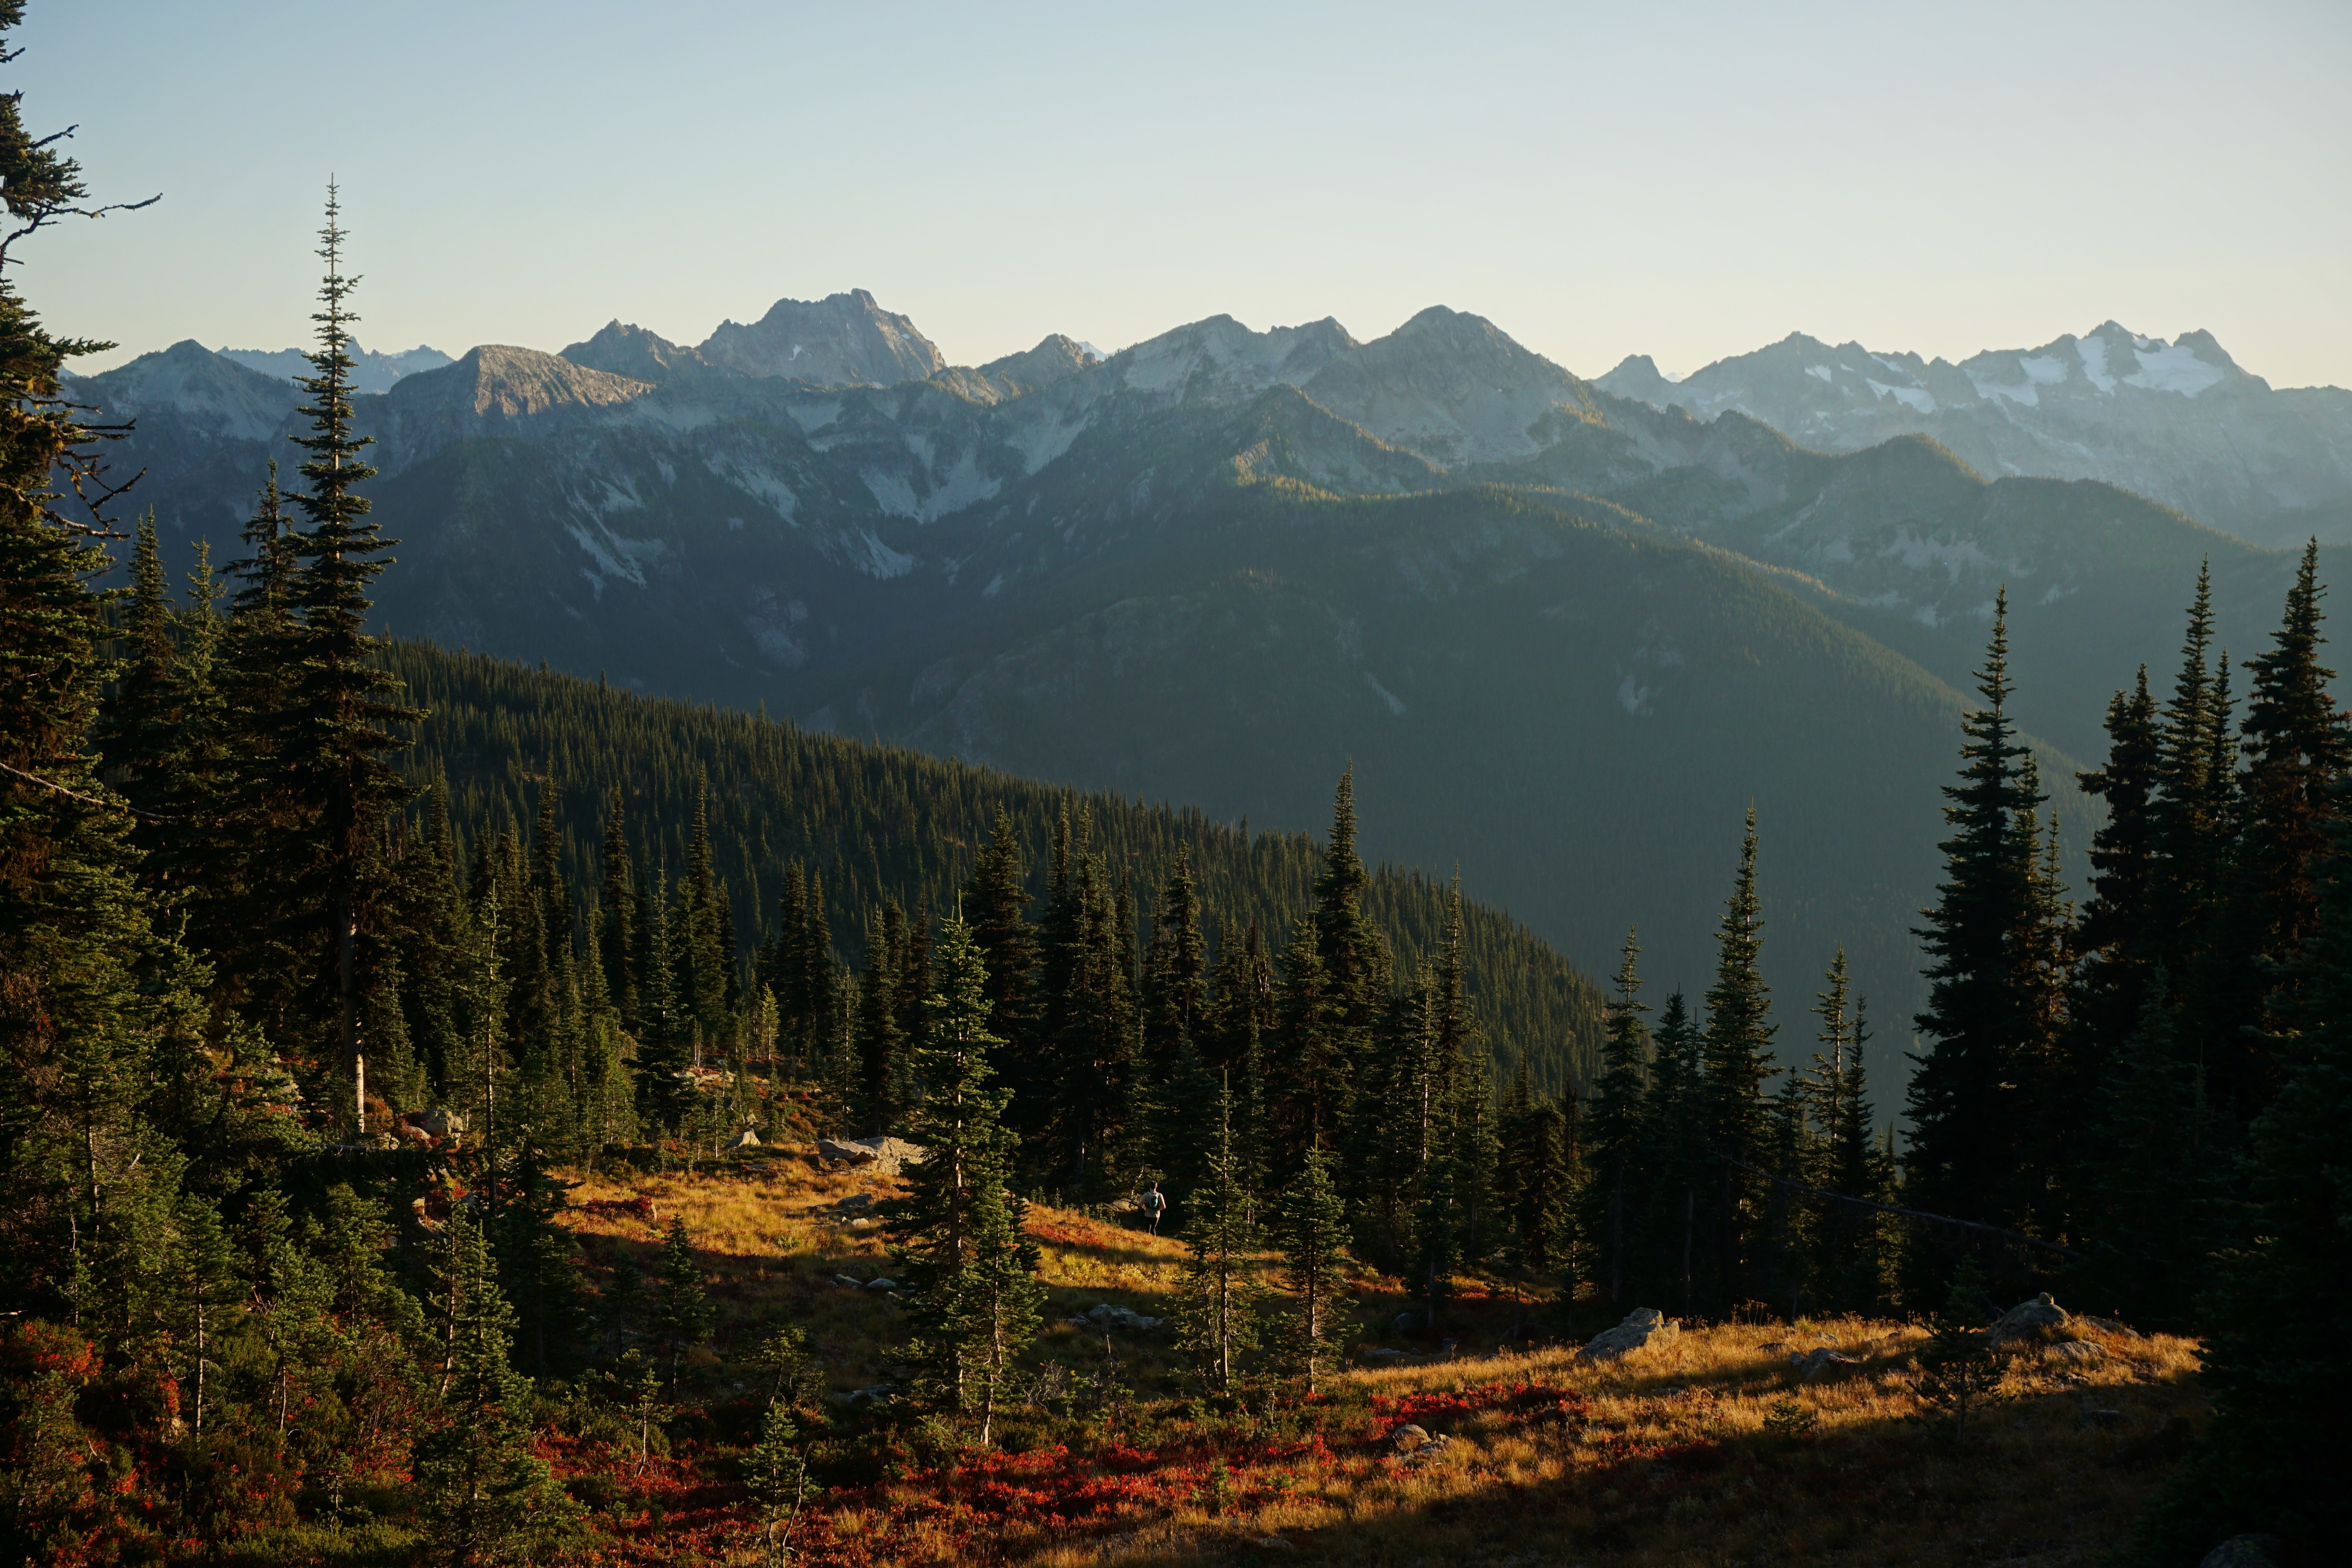
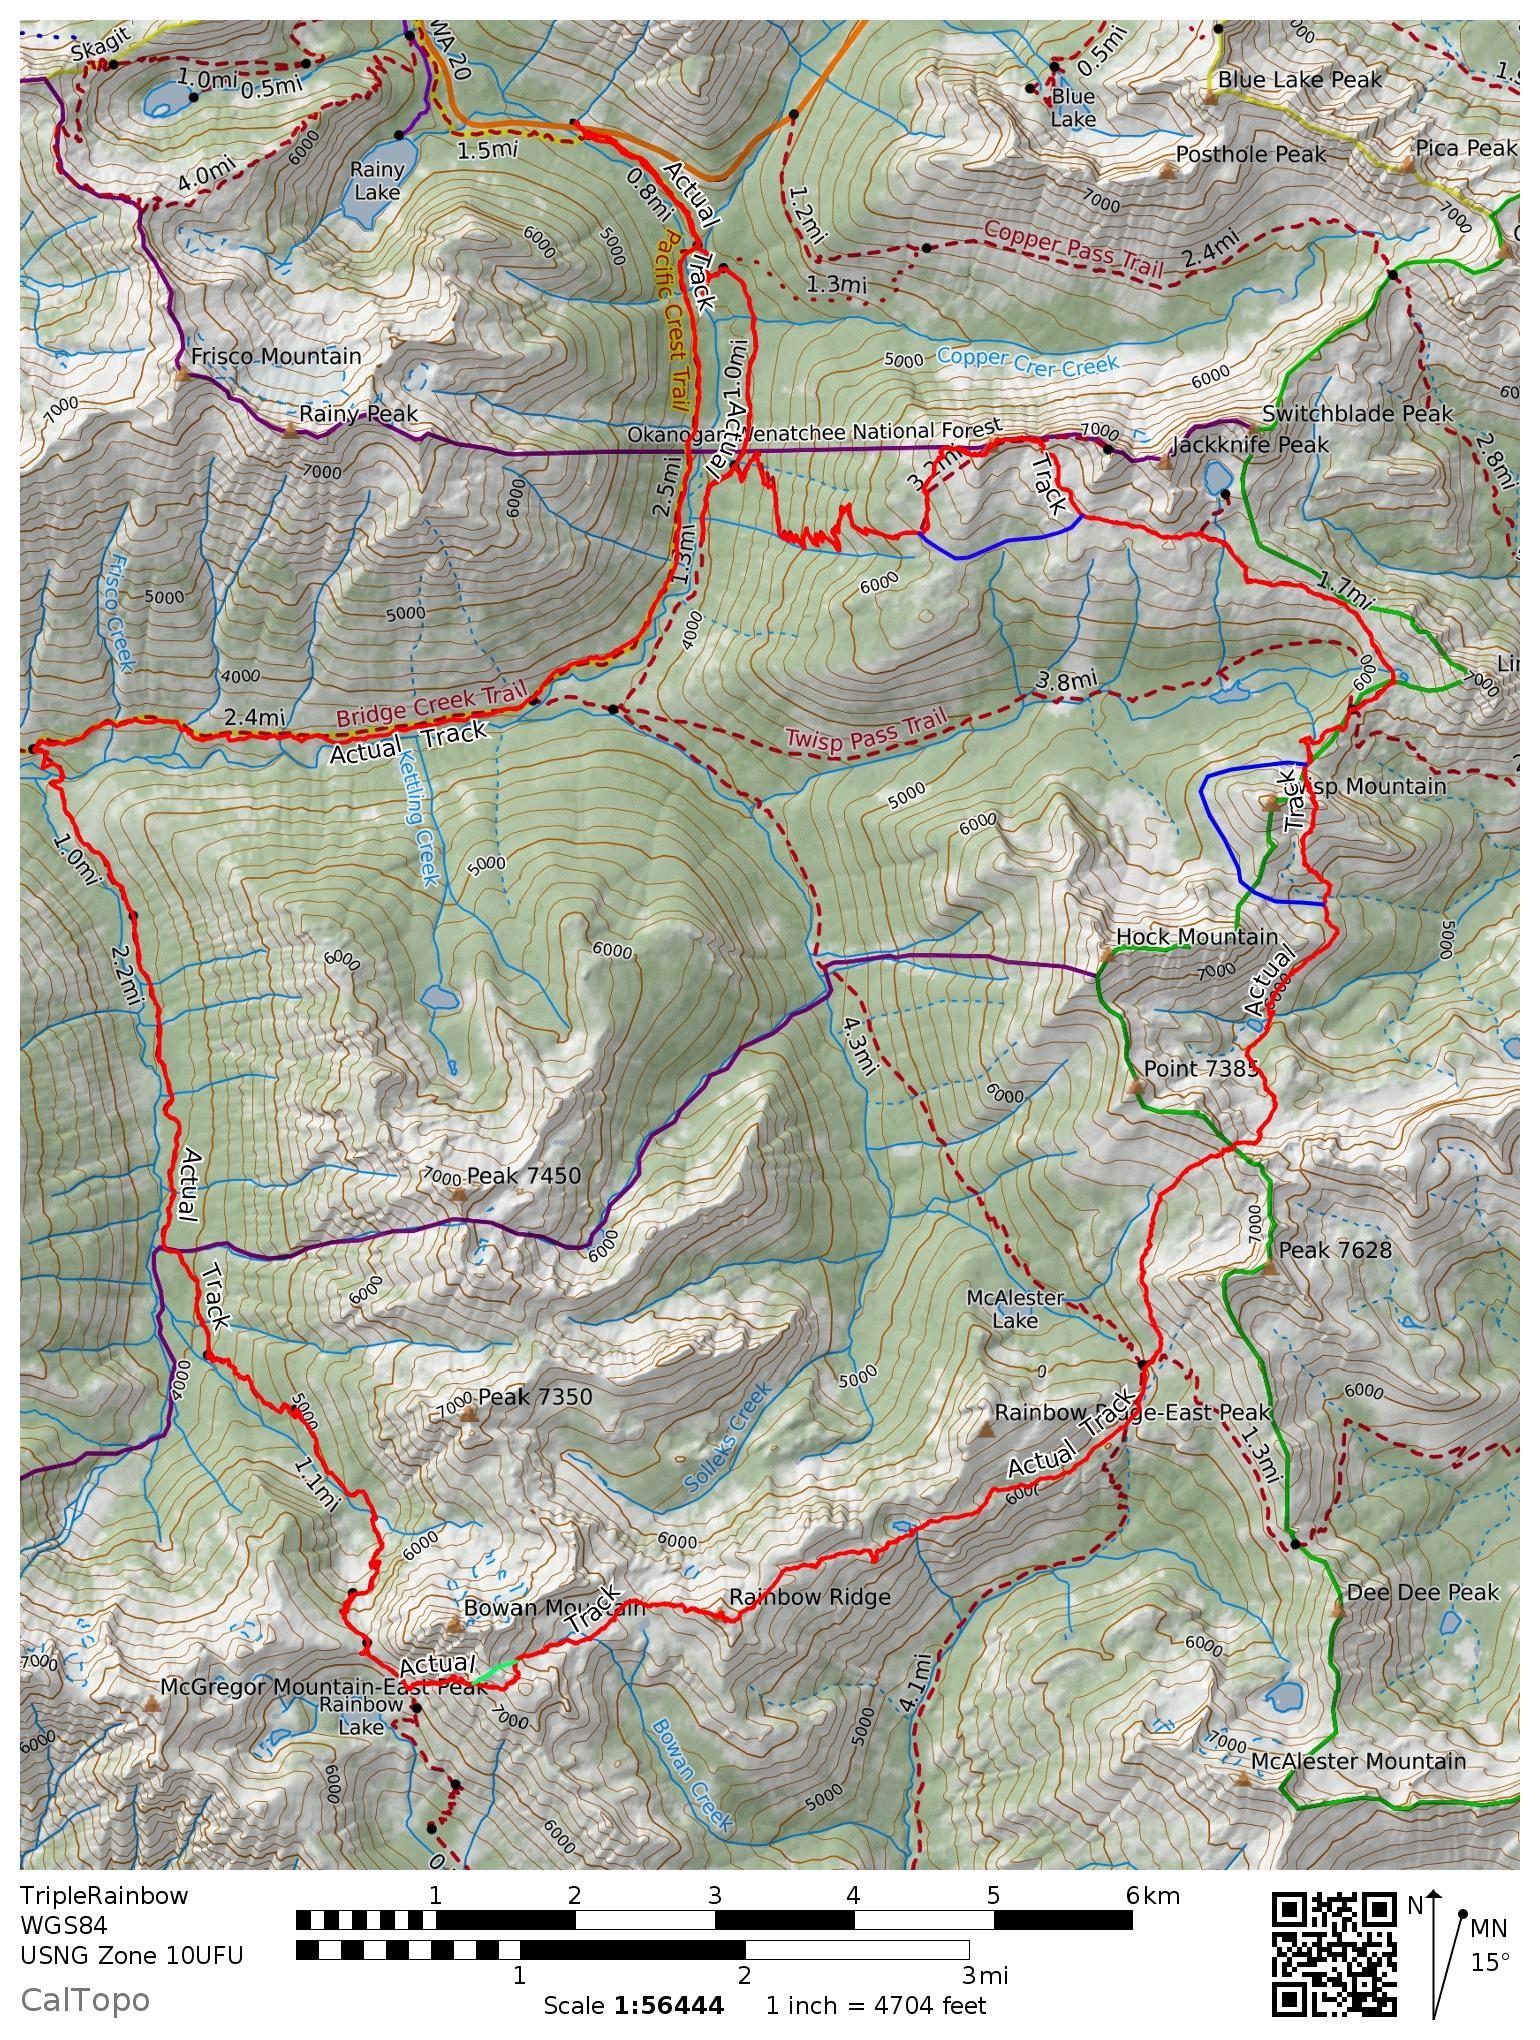
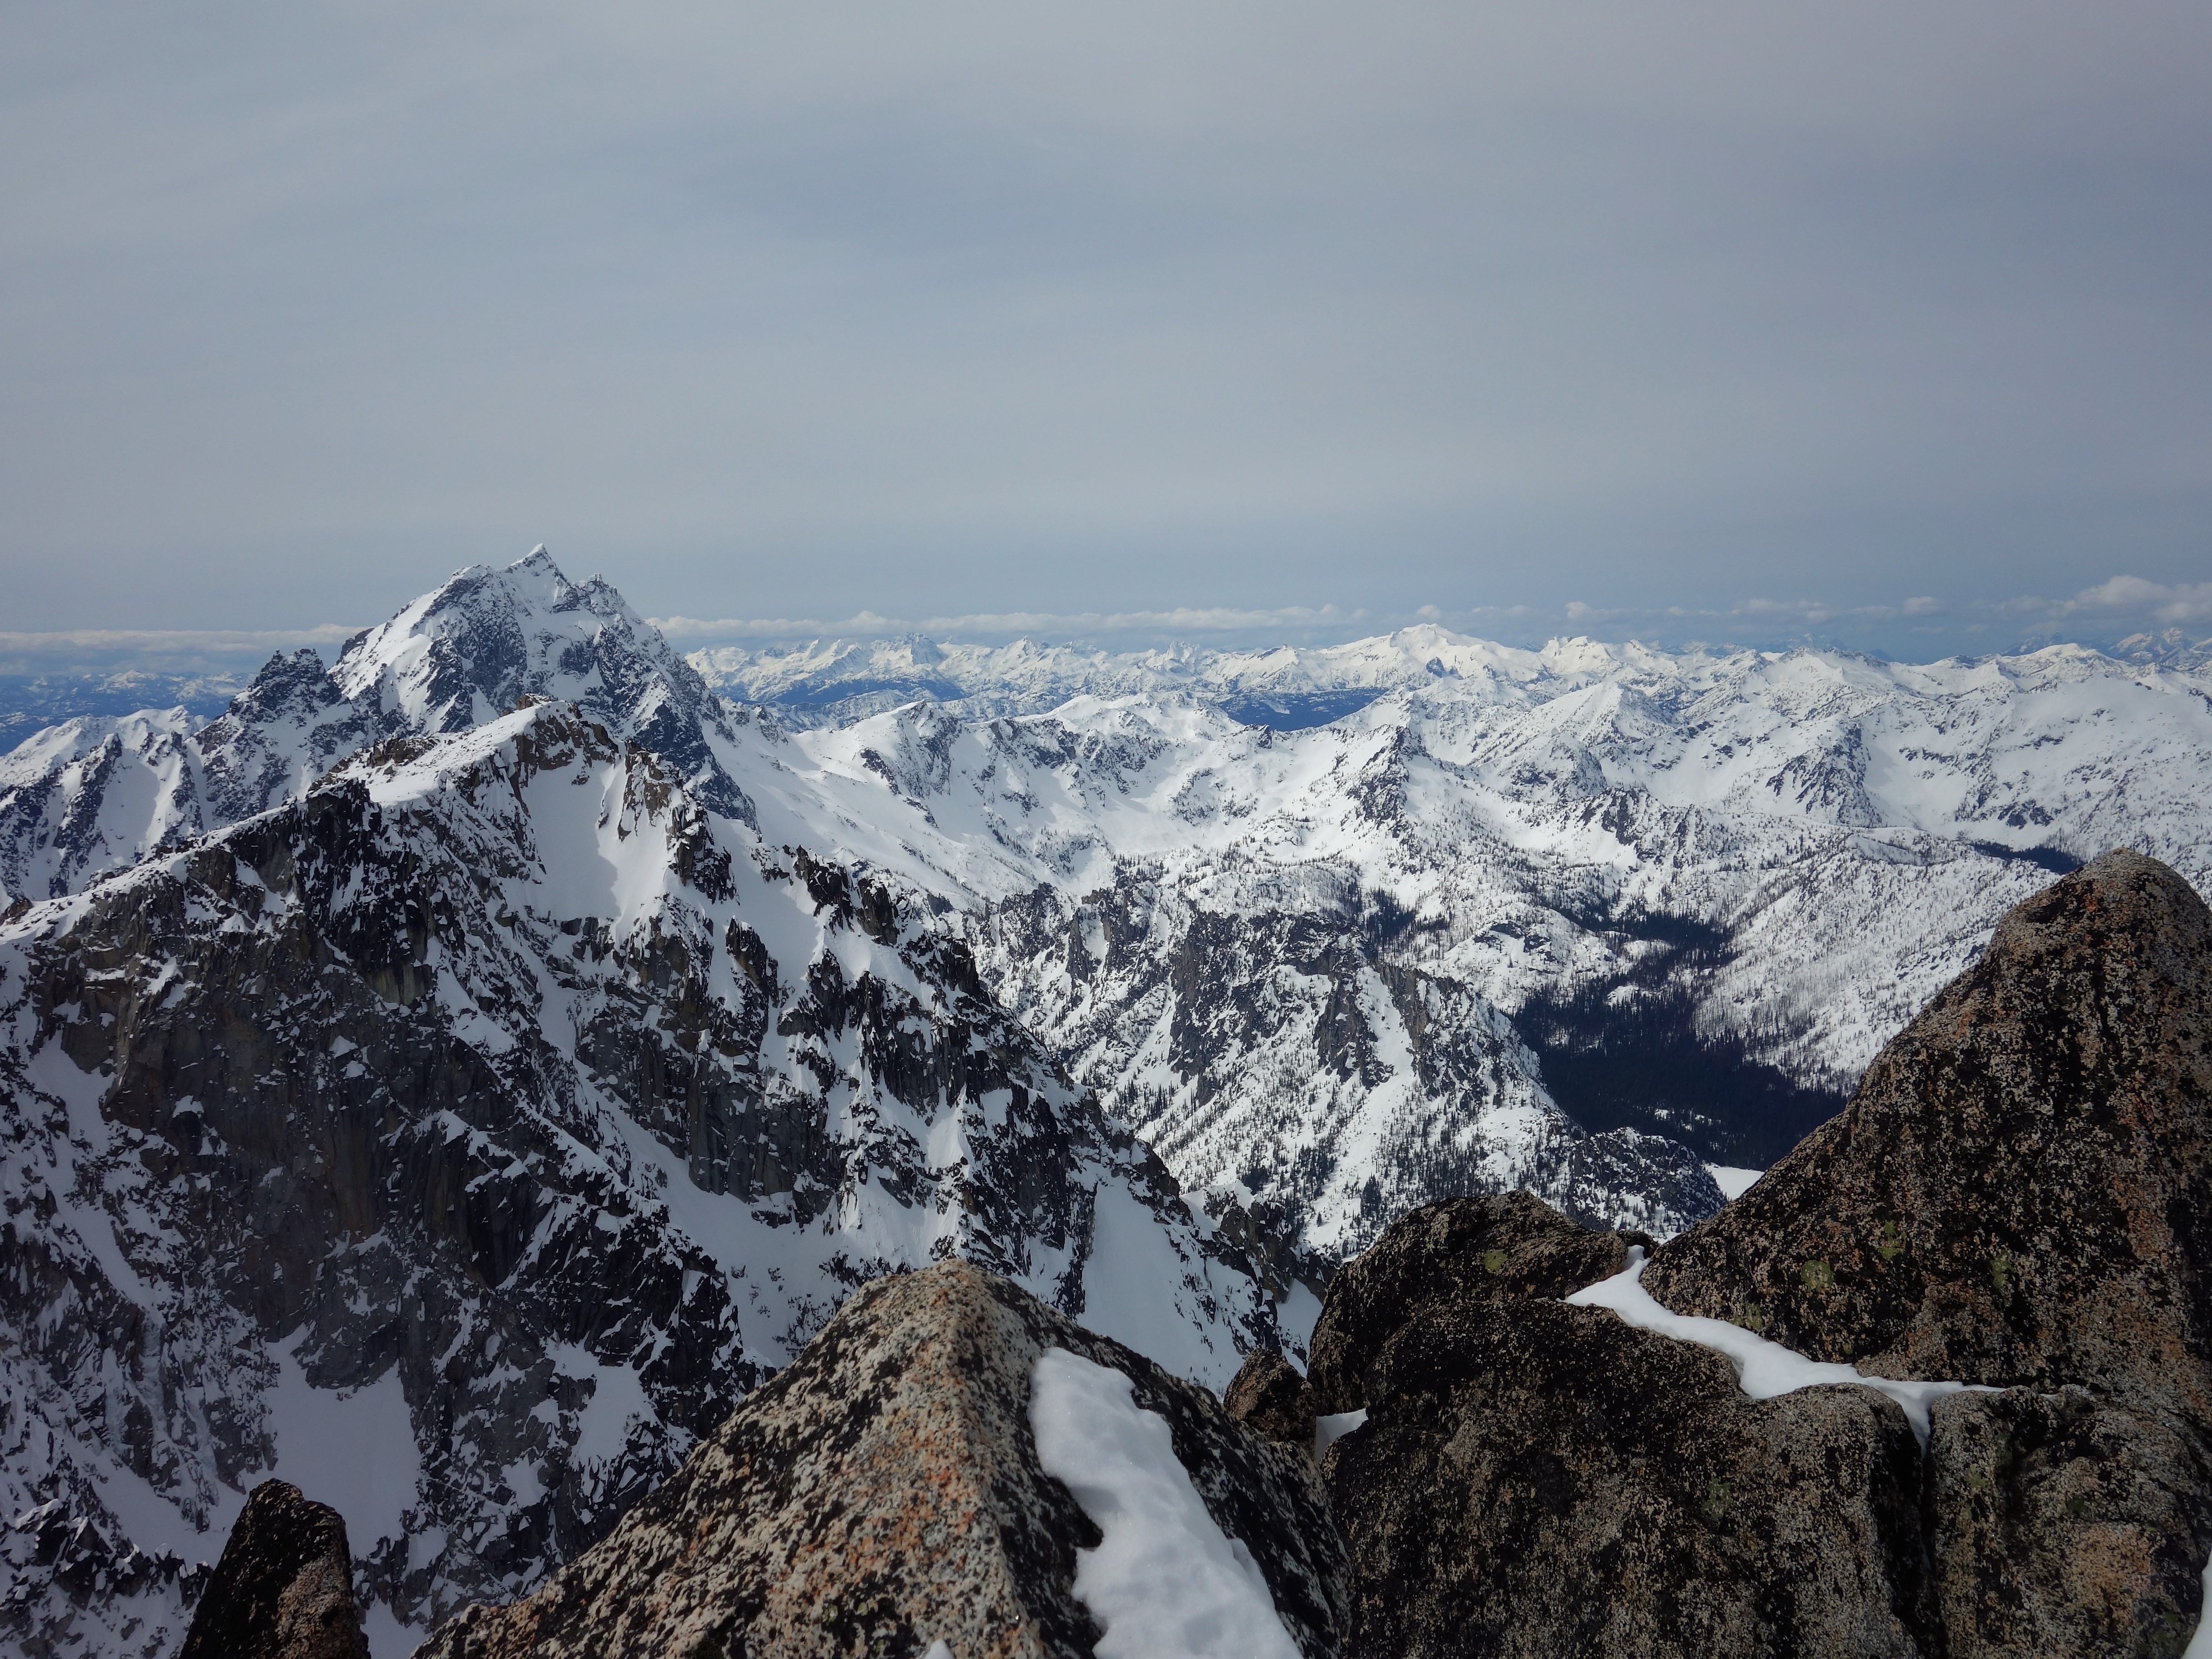
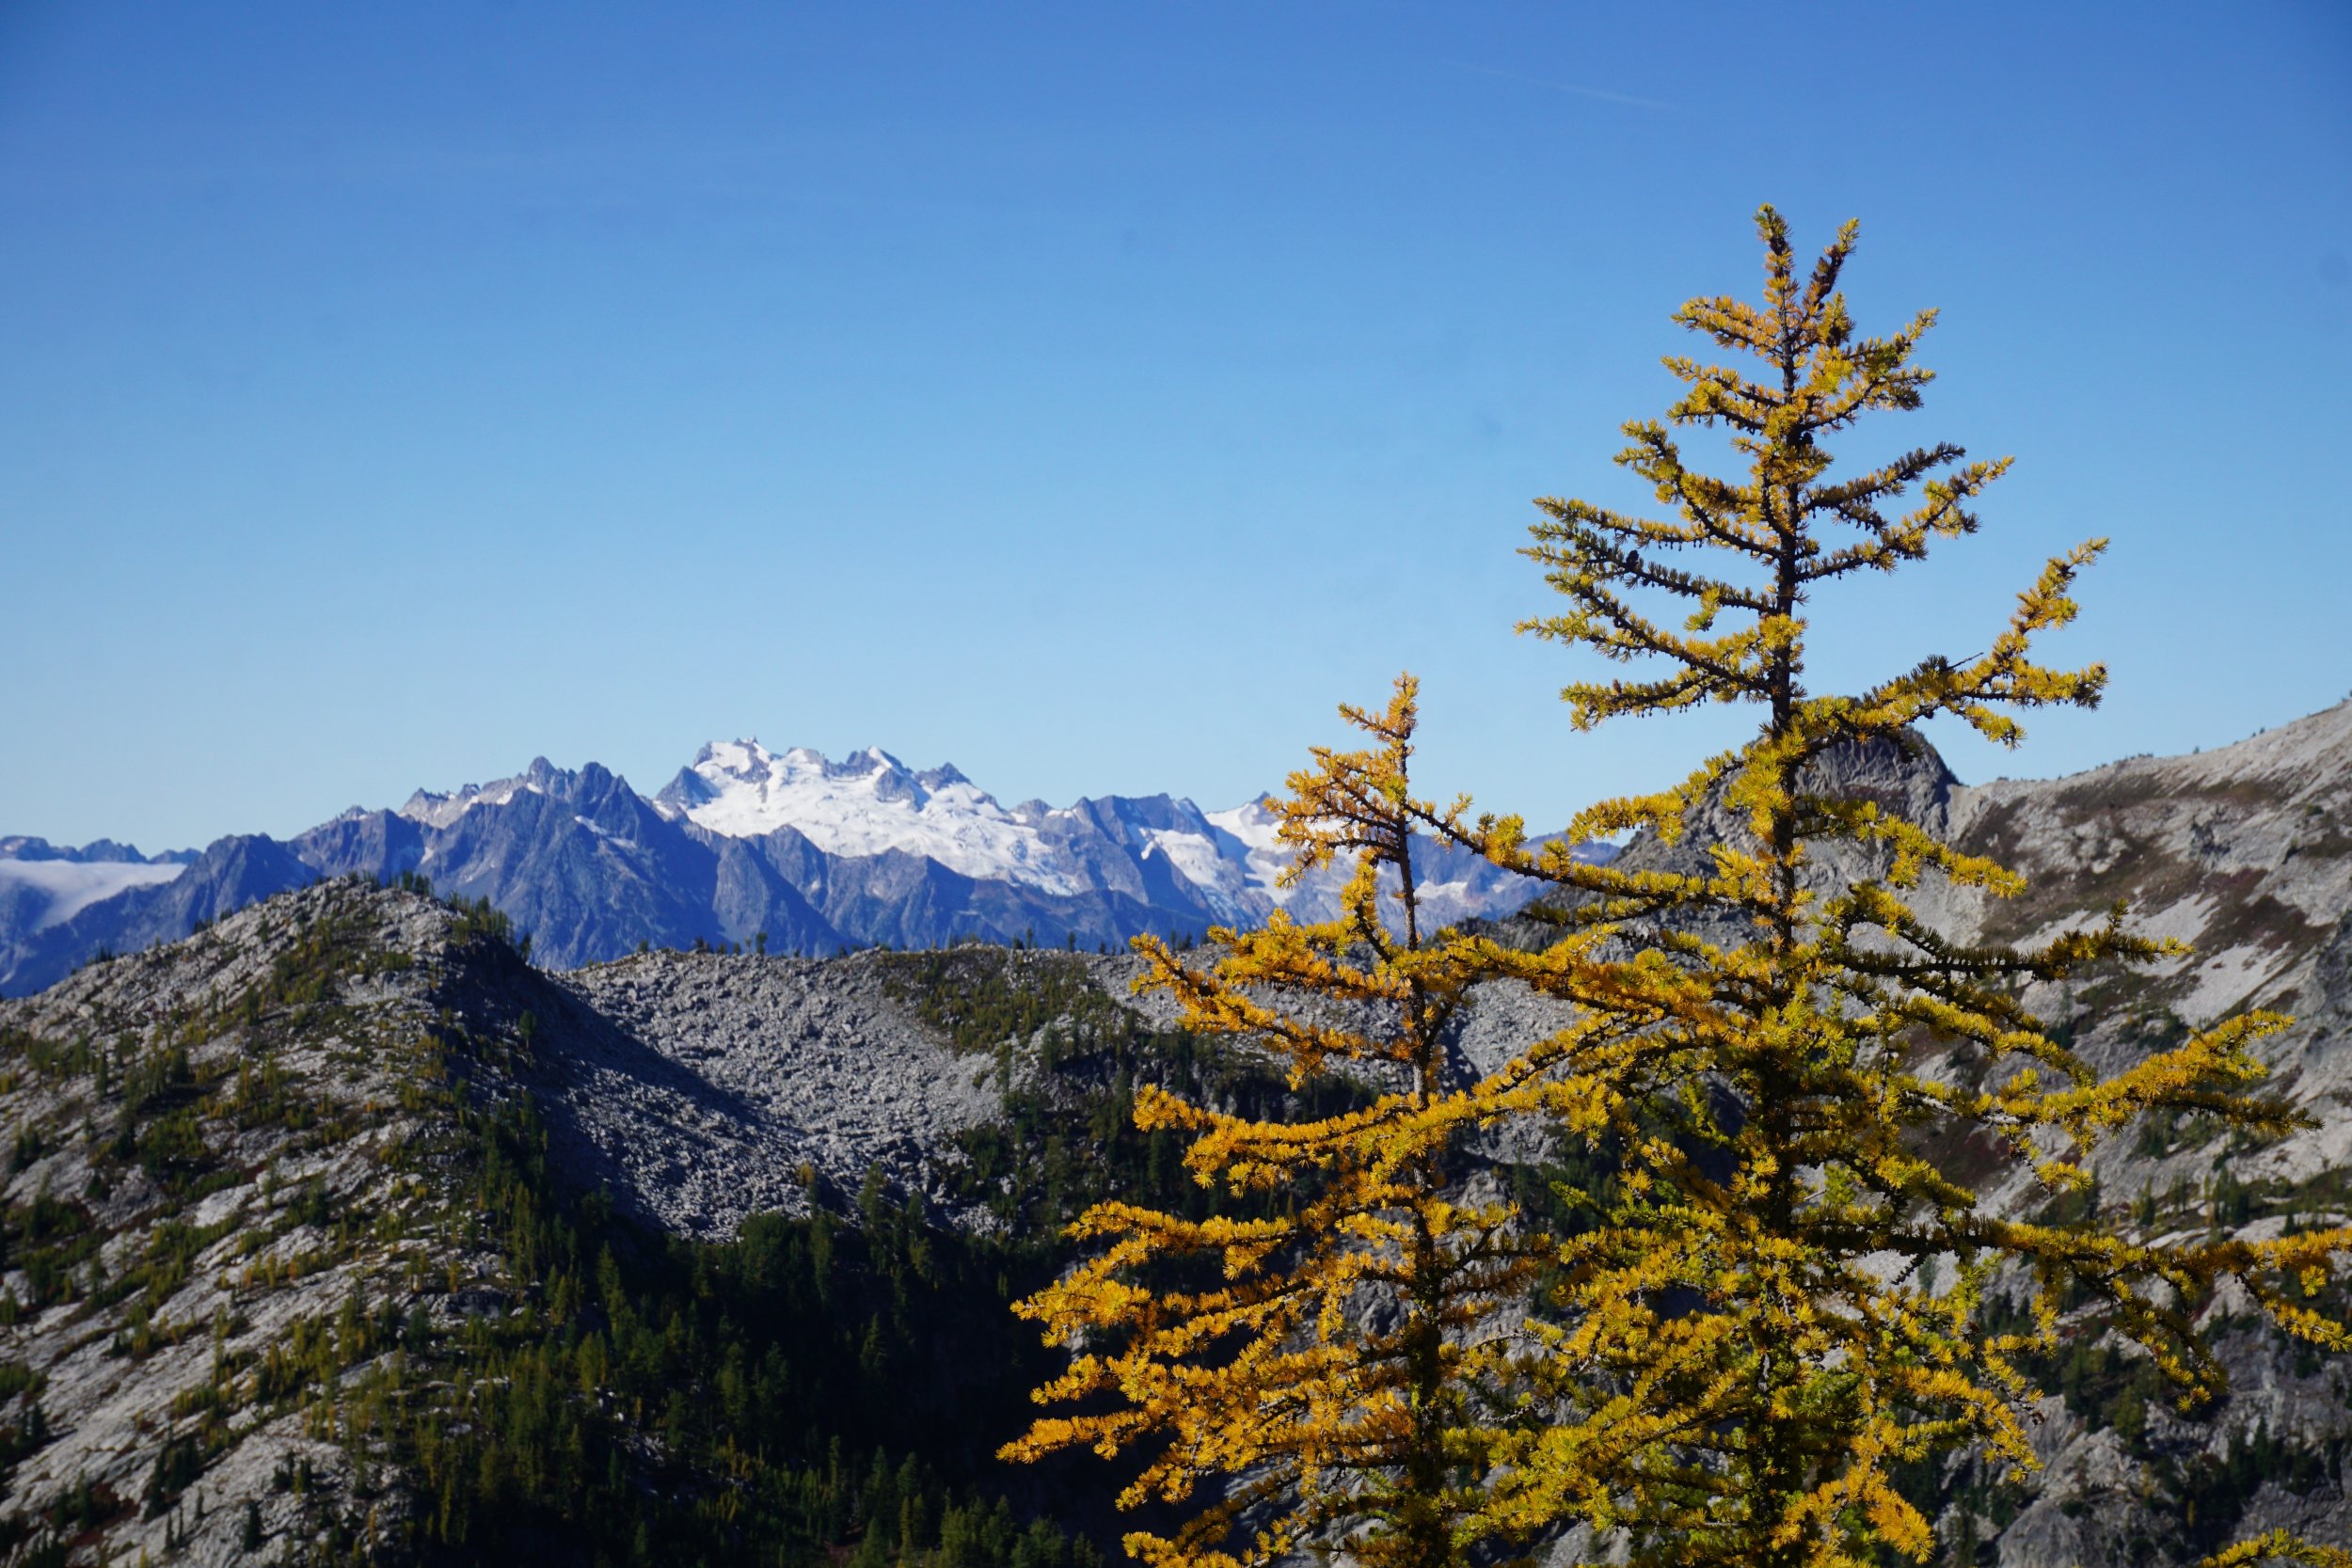
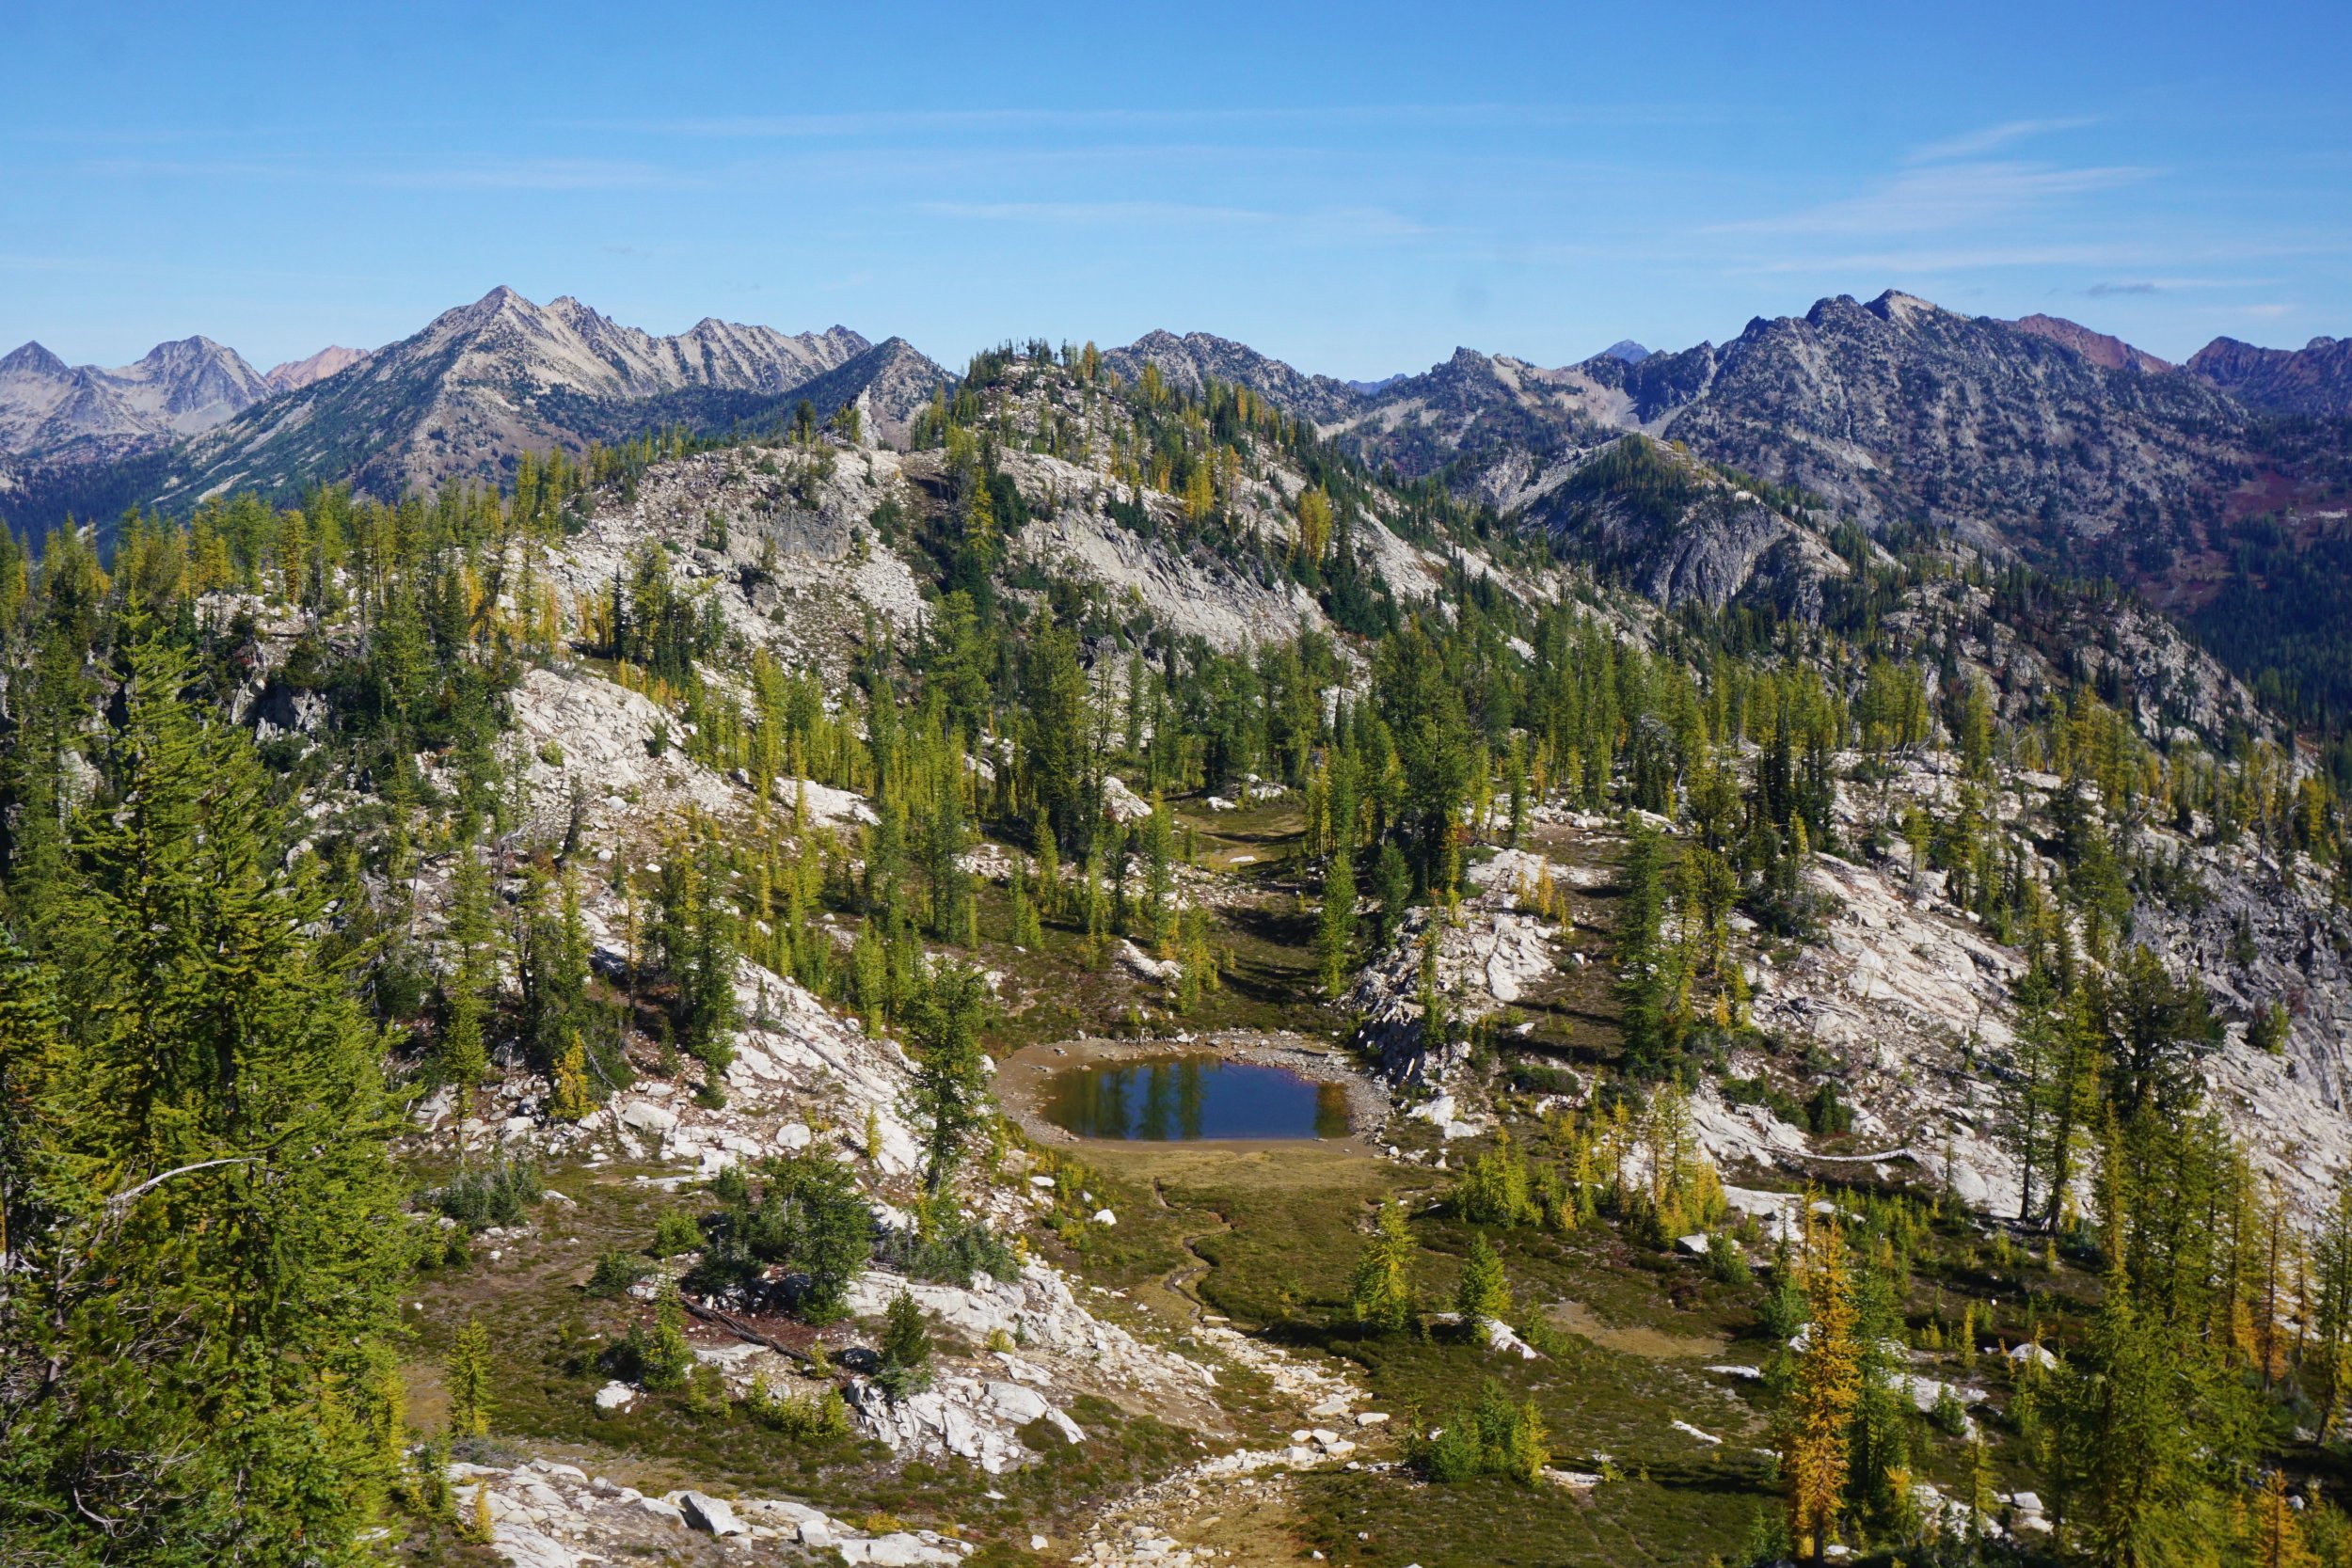
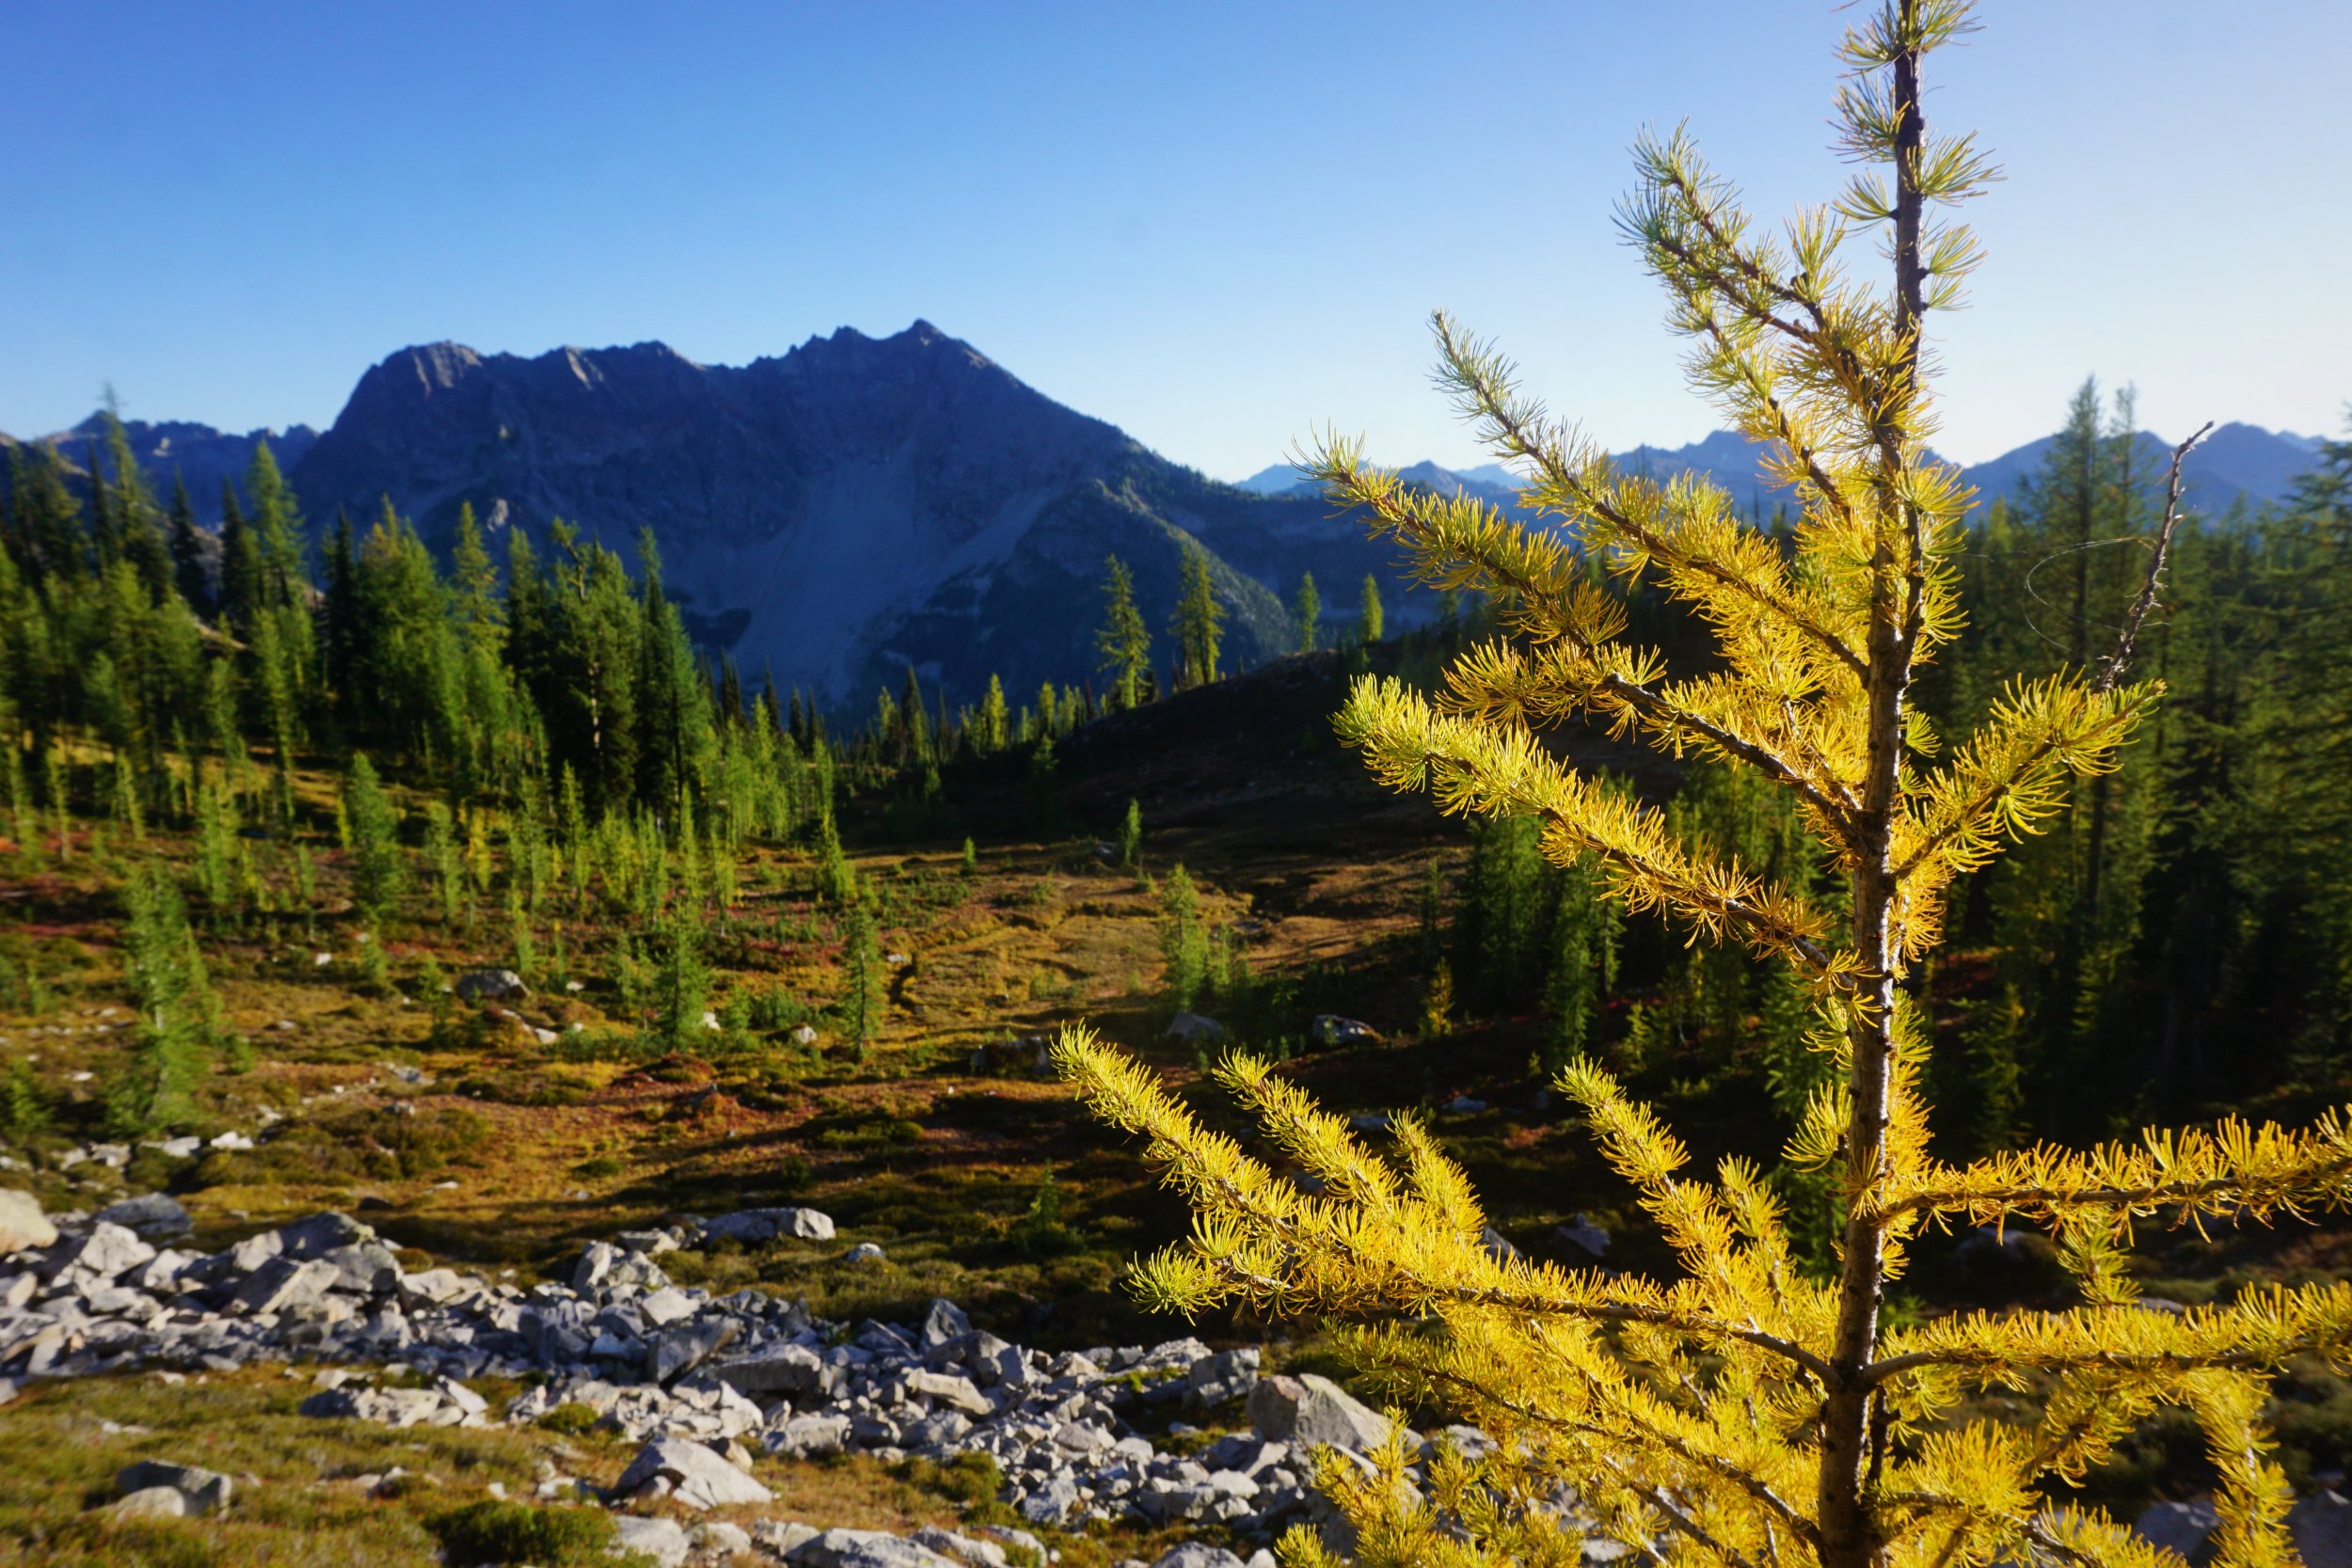
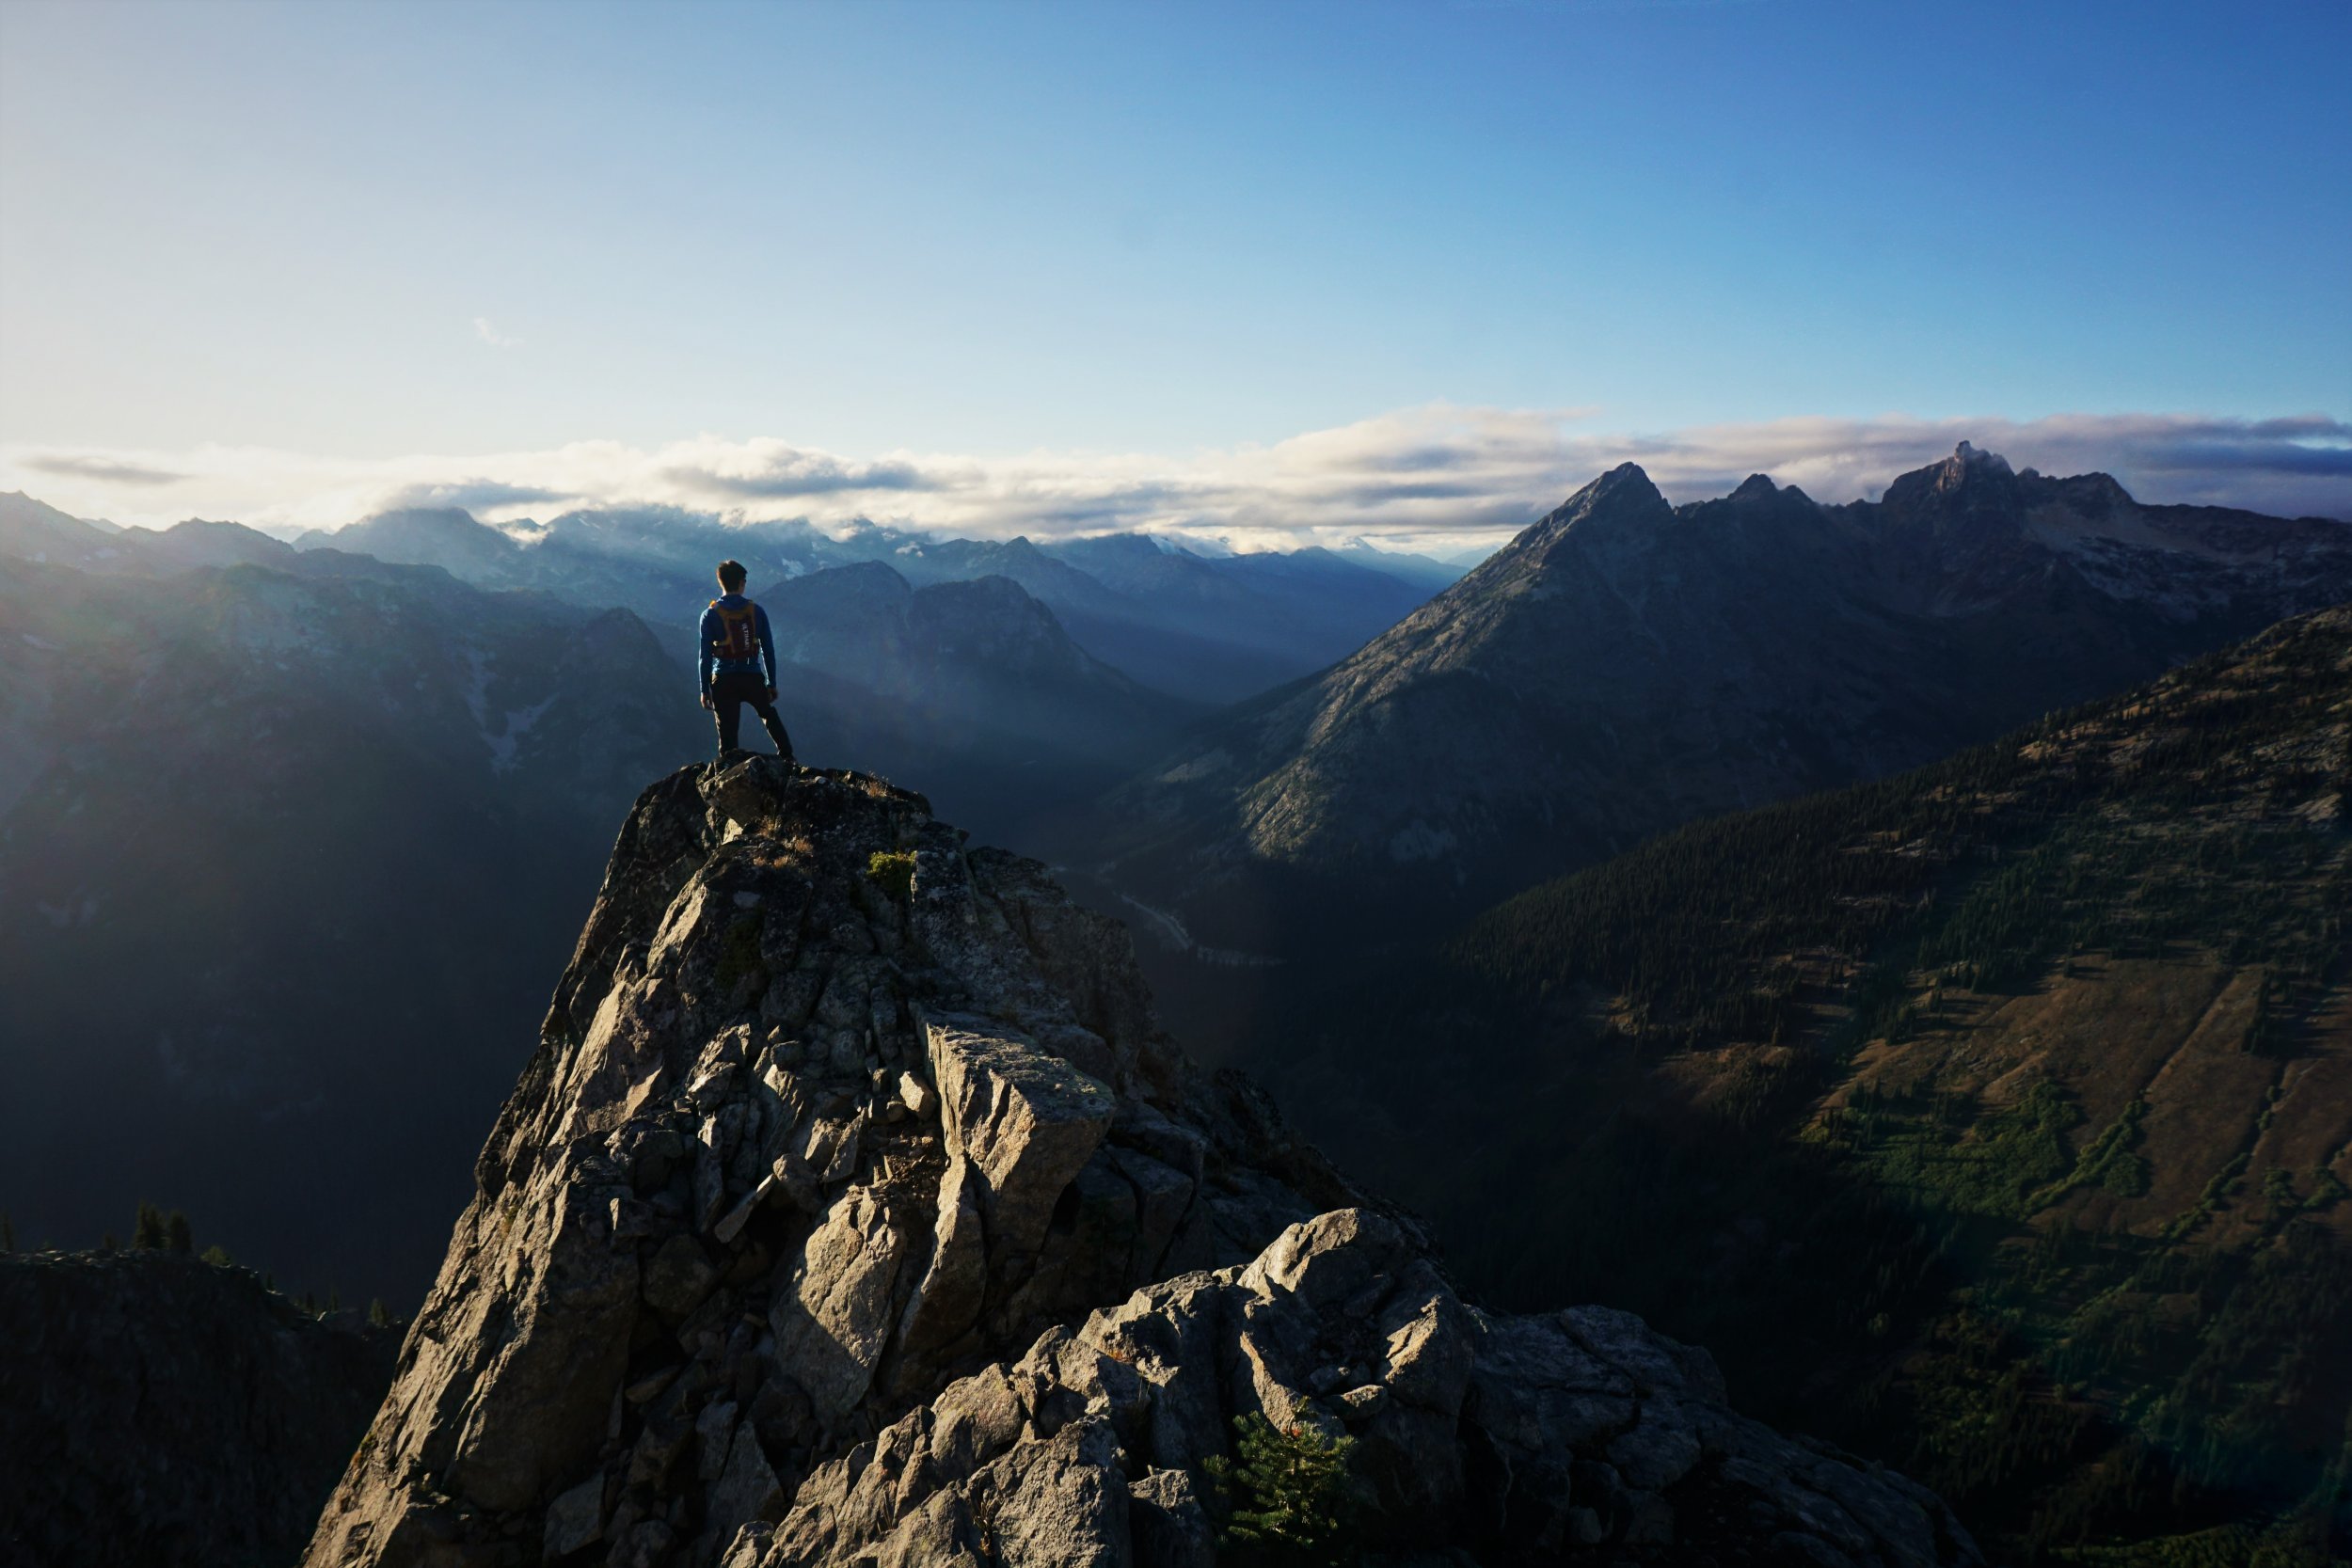
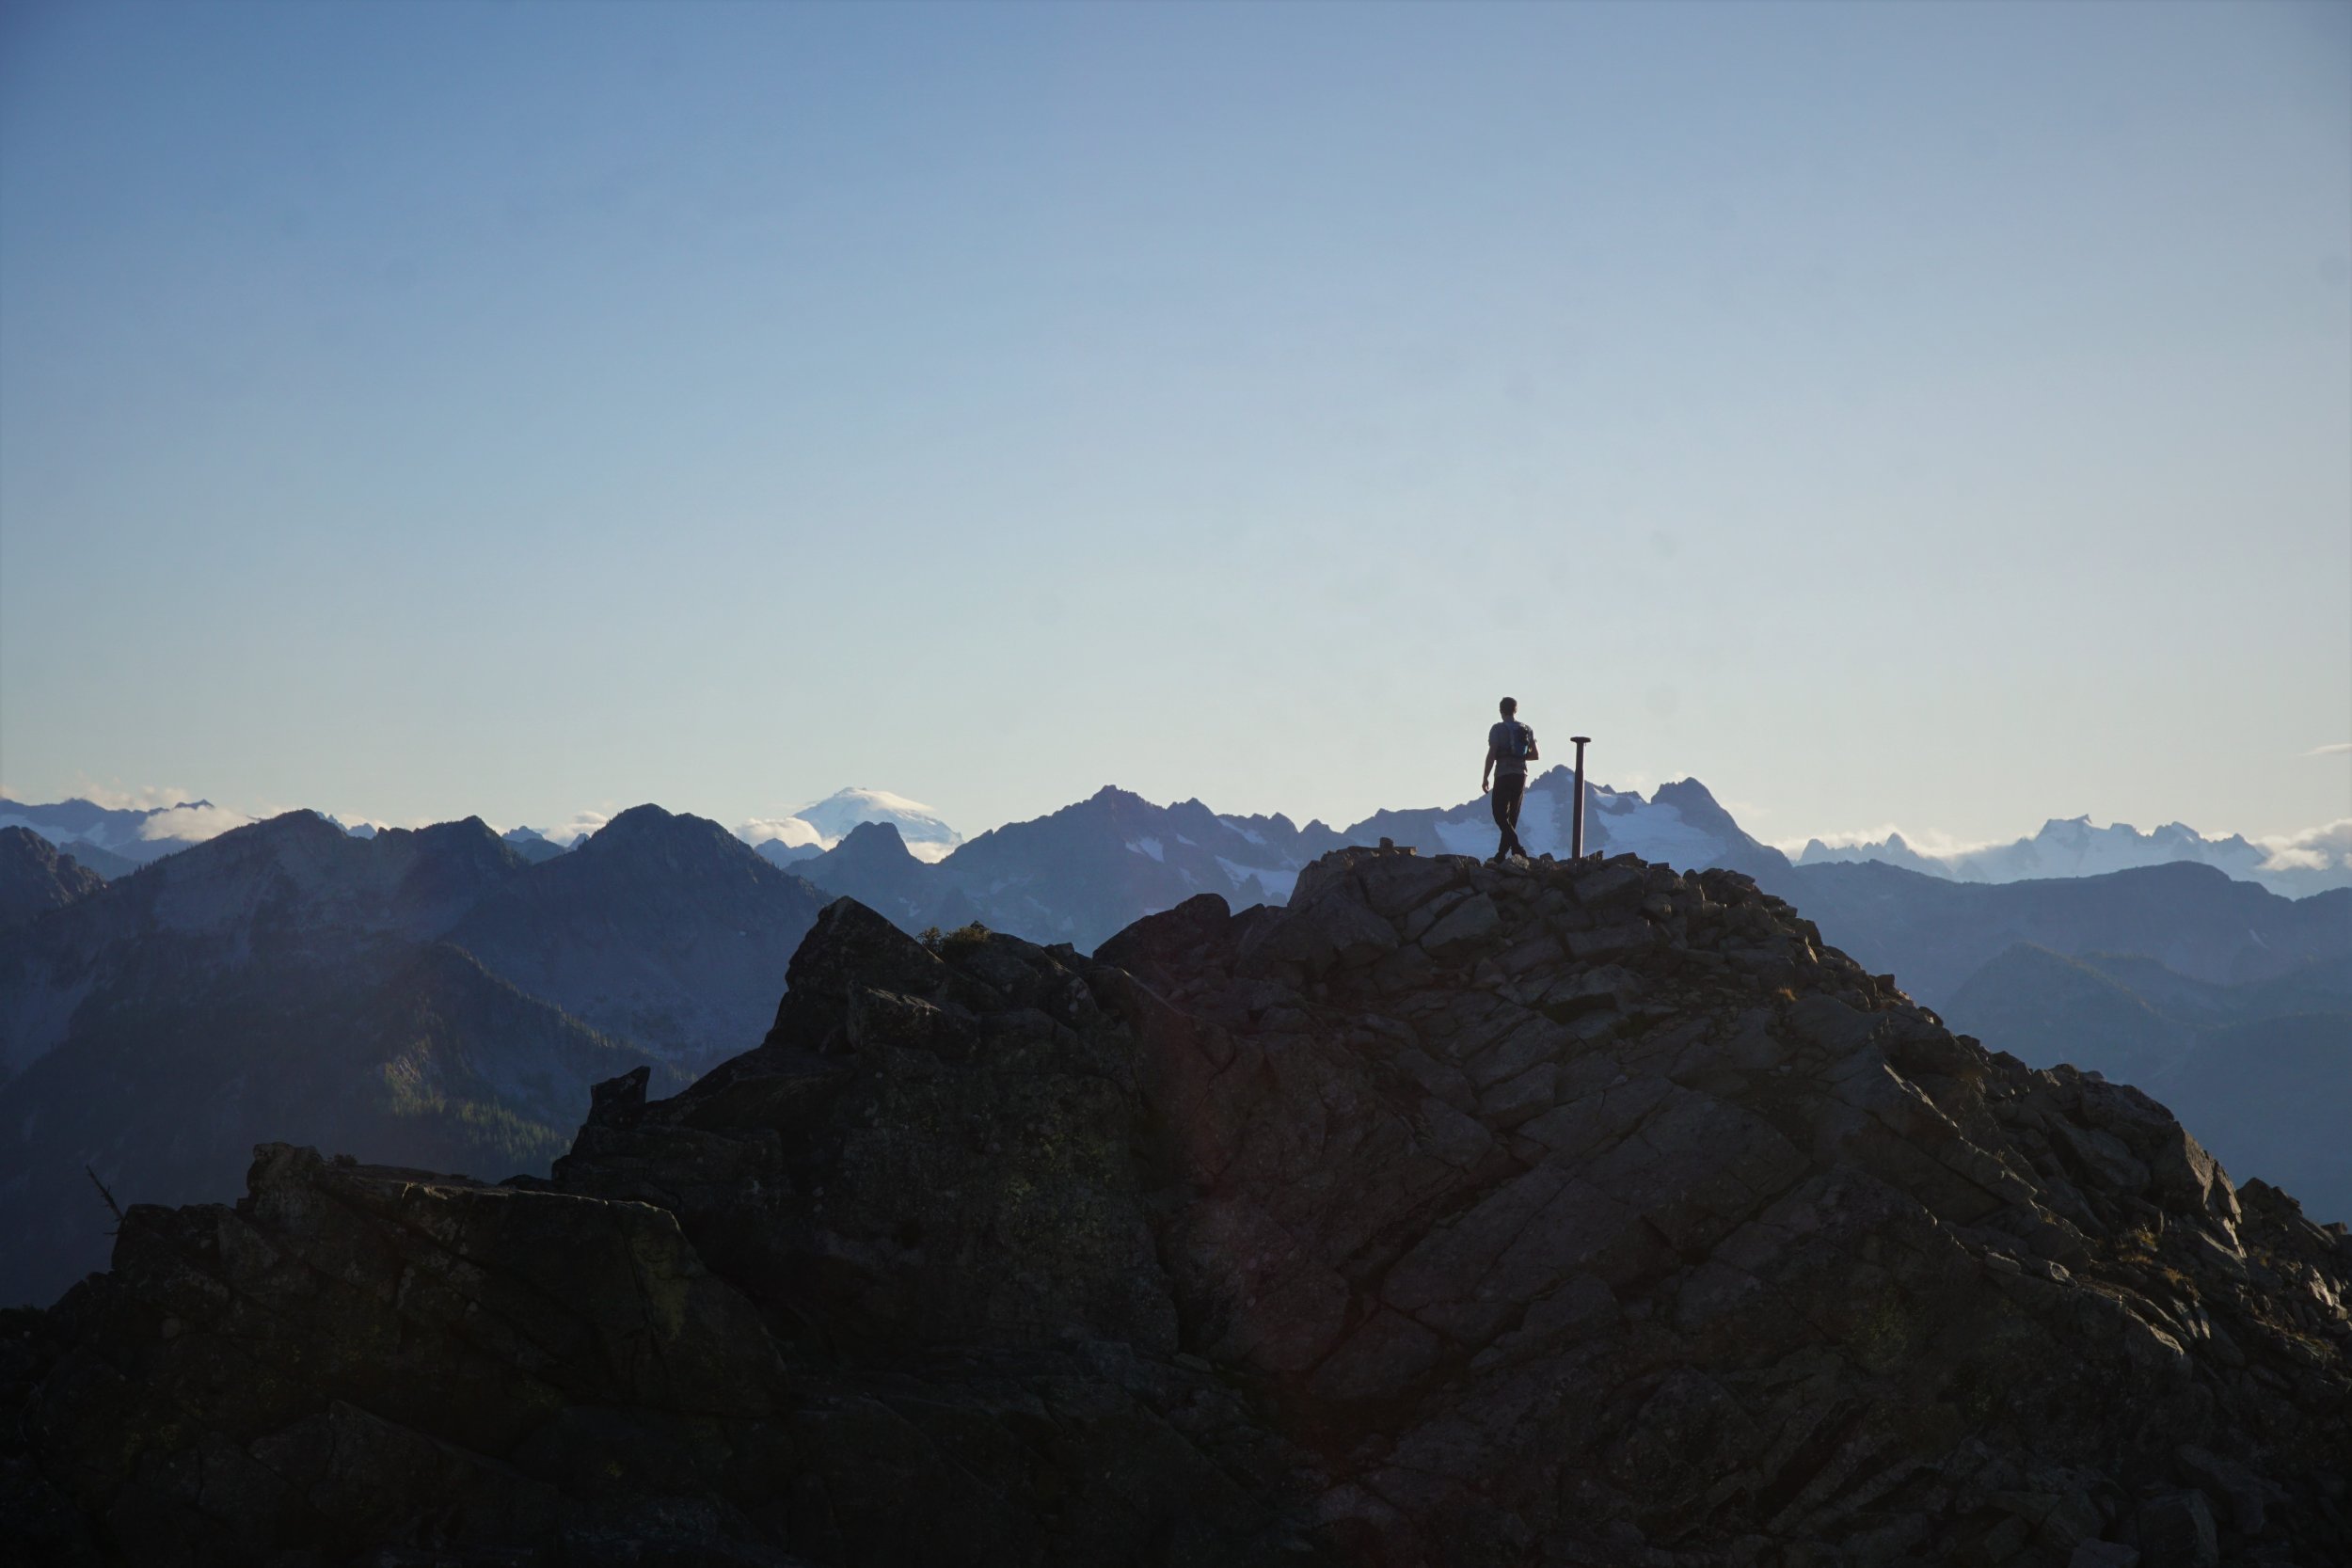
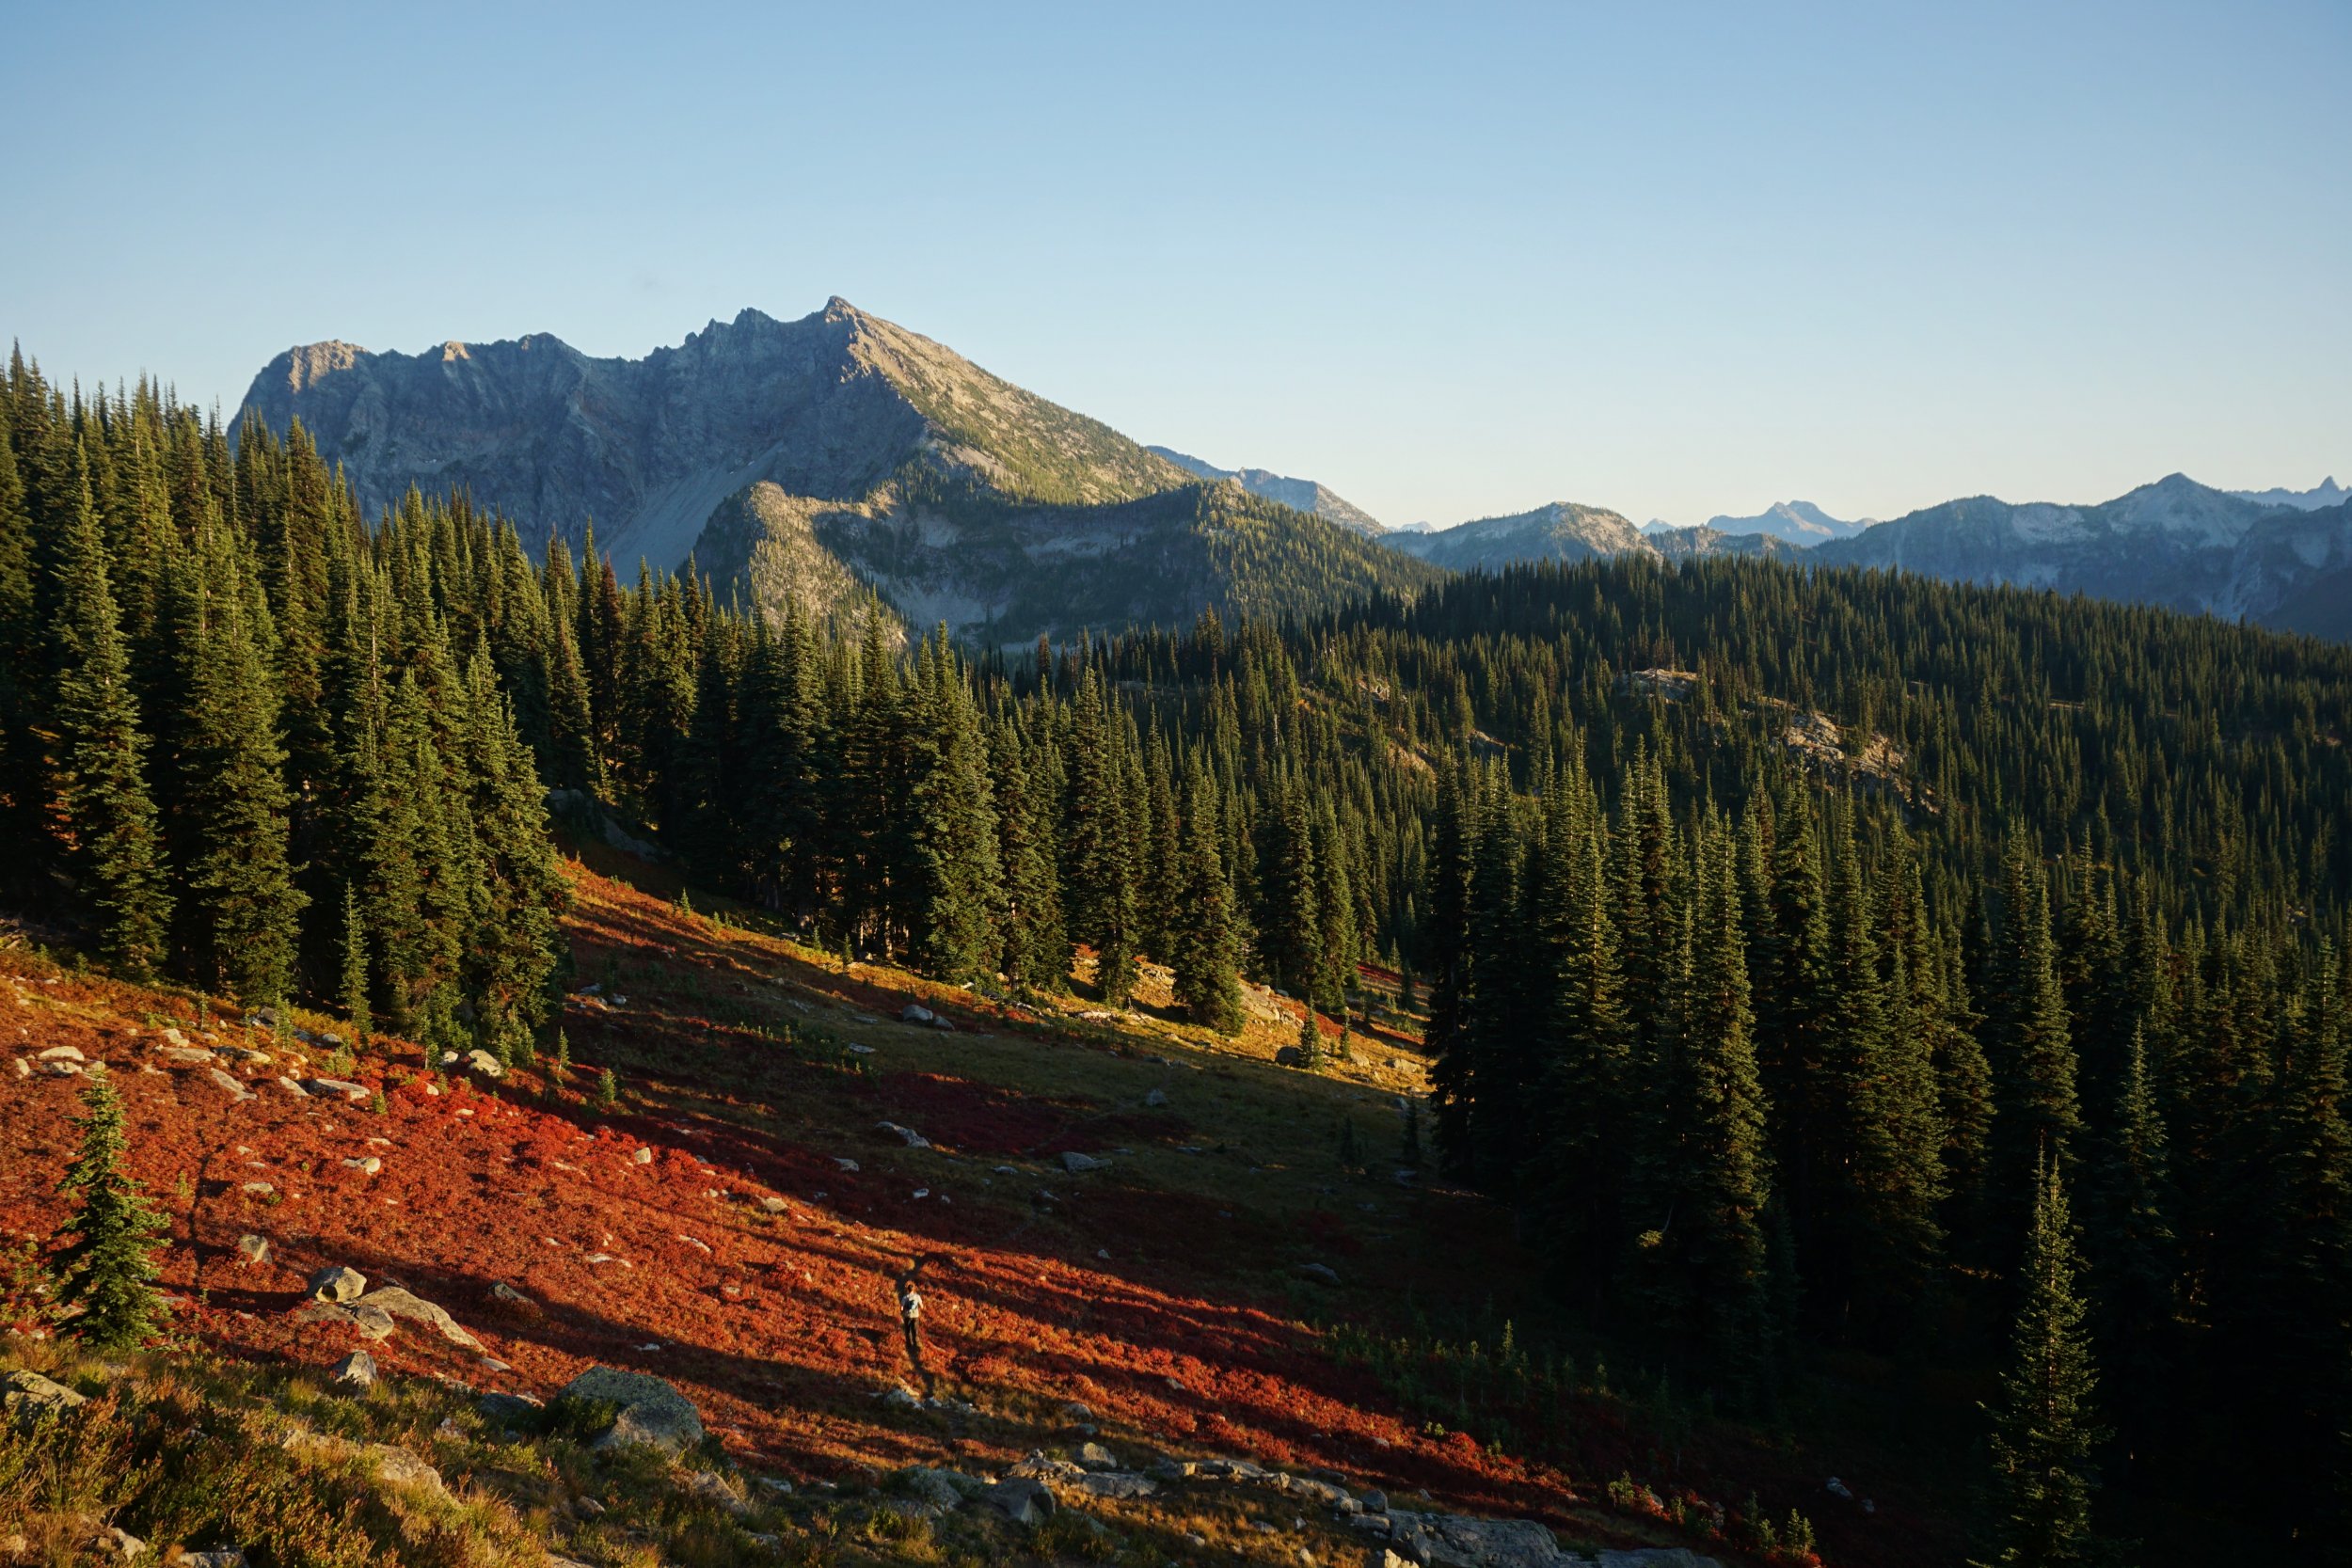
Trip: North Cascade National Park / Lake Chelan National Recreation Area - Triple Rainbow High Route Trip Date: 09/21/2019 Trip Report: @thedylan and I did a fun fall high route from Bowan Mountain to Stilleto Peak. It had three distinct off trail sections, the most stunning of which was Rainbow Ridge, so we decided to call it the Triple Rainbow High Route. Even though the larches were not quite full on, it was still just such a beautiful and inspiring day, with miles and miles of larches and carpets of red. We found the off trail travel to be generally very easy, with some more annoying north facing moraine descents, but nothing really over class 2 or so. In total, it was 30 miles (about 12 "off-trail") and 9.5k ft gain. It took us just under 13 hrs c2c, but we didn't always chose the optimal path, took some wrong trails in the dark, and took hundreds of photos. This is really an underappreciated area, and magnificent in the fall time! Cool rock on the McGregor Massif. Dome Peak and larches. Looking across Rainbow Ridge from the shoulder of Bowan. Lovely Rainbow Ridge. Cruising through larch groves. McAlester Pass. Another nice meadow. Looking at Twisp Lake from the south. Endless larches and red carpets. Another marvelous basin beneath Switchblade Peak. Getting towards Stilleto. Looking down to Rainy Pass. Stilleto Lookout Site. Beautiful meadows on the way down. @thedylan looking like a running star or something. Fun route! Gear Notes: Running shoes, poles. Approach Notes: PCT down bridge creek, then Rainbow Pass trail up to Rainbow Pass.


-
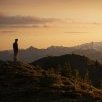
Trip: Alpine Lakes Wilderness - Thunder Robin High Route Trip Date: 09/07/2019 Trip Report: I did some off trail exploration, connecting the high terrain between Thunder Mountain Lakes and the Robin Lakes. I found the terrain to be surprisingly rugged and remote feeling, despite never being more than a mile or two from the PCT. There was a lot of talus and steep heather and not too much brush for the area. My general route: traverse south from Thunder Mountain Lakes, cross into the basin above the Deception Lakes, traverse the west side of Mac Peak, down to Talus Lake, up over the next pass, down to Lake Phoebe, and up past the Granite Mountain Potholes to Robin Lakes. Then I took the PCT back to the Surprise Creek TH, where I started. It made for about 29 miles and 10k ft gain. For more details, see https://climberkyle.com/2019/09/07/thunder-robin-high-route/ Evening above Lower Thunder Mountain Lake. Sunrise on Mt. Stuart. Sunrise over Square Lake. Sunrise over Daniel and the Deception Lakes. Basin west of Mac Peak, lots of talus. The ridge north of Talus Lake. Lake Phoebe. Granite Mountain Potholes. Robin Lakes. Surprise Gap. Gear Notes: Lightweight bivy kit, poles, La Sportiva Ultra Raptors for the gnar. Approach Notes: Surprise creek trail to Trap Pass to Thunder Mountain Lakes.
-
Nice work! I remember running by that ridge 2 years ago and wondering if the rock was any good and how the climbing would be. Props for going out there to check it out! I was on the east ridge of Berge in the rain the weekend before...
-
Trip: Glacier Peak Wilderness - Mt. Berge, East Ridge (IV, 5.8) Trip Date: 08/25/2019 Trip Report: 2000 ft of solid granite in a sea of choss? It sounded too good to be true, so two half-Asian Kyles made the trek out to the East Ridge of Berge. We found decent climbing but really cool exposure in a beautiful setting. Unfortunately, we also found rain and clouds where there was supposed to be sun, which added to the adventurous feel of the route. We reached a definite 5.8ish chimney crux at the start of the fifth tower (yes, there are six towers before the summit, starting from the notch to the right of the Twin Gendarmes). The route took us about 6 hours to climb simul climbing almost the entire thing, so if you plan on pitching it out, plan on a long day. Or two. If you want a little more beta, check out https://climberkyle.com/2019/08/25/mt-berge-e-ridge-5-8/. Hiking through the burn up the east ridge of Cleator. The east ridge of Berge from the approach. We climbed up the dirty gully to the right of the twin gendarmes. Typical ridge terrain. This was the most fun, exposed climbing. About to enter the clouds. Endless towers in the mist. Beautiful basin between Berge and Buck. Quite a bit of nasty alder descending from Buck back to the trail. Gear Notes: Standard rack of cams. Nuts aren't super helpful but work in some sections. Approach Notes: The east ridge of Cleator has burned in the last few years but is still pretty clear so easy to travel. Follow game trails off the ridge to the south around 5600 ft and contour into the basin north of the east ridge of Berge. Easiest descent is down to the Berge-Cleator saddle. Descend from the Buck-Berge saddle like we did at your own risk.
-
Trip: Snoqualmie Pass - Commonwealth Ultimate Ridge Linkup (CURL) Trip Date: 07/28/2019 Trip Report: Anthony and I did a fun enchainment of Guy Peak (south side), Snoqualmie, Lundin, Red, Katwalk Peak (north of the Katwalk), and Kendall. There was some exceptional scrambling, hours of exposed "Beckey 4th class". We tried to stay on the ridge proper as much as possible except for when it was simply too sketchy in trail runners or it was too vegetated. Here's some beta: - Guye Peak: approached from underneath the west face, we climbed a rib to the left of the South Gully, this offered some amazingly steep, hero juggy scrambling. - Snoqualmie to Lundin: There is an incredible knife edge just after Snoqualmie. West ridge of Lundin is cruiser, bypassed the impassable gaps on the left with some low 5th. - Lundin to Red: There is an optional gendarme (which we took) partway down the ridge which was probably the crux of the entire route for us. We left the Red Pass trail and the talus field and climbed a gully system to the summit. - Red to Katwalk Peak: The descent off Red was nowhere near as bad as people describe. Partway along the ridge, we ran into "The Cleft", a vertical impasse that splits the ridge. We had to descend a few hundred feet before finding a fourth class weakness through it, then climb back up to regain the ridge. - Katwalk Peak to Kendall Peak: mostly vegetated at first, but with some fun knife-edge right before the Katwalk. Kendall North Ridge is cruiser. It totaled 12 miles, 6.5k ft gain, and took us 8:23. Apparently it has been done in four hours . https://climberkyle.com/2019/07/28/commonwealth-ultimate-ridge-linkup-the-curl/ Scrambling steep terrain up the south face of Guye. More fun higher on Guye. Full view of the CURL. The middle summit of Guye. Awesome knife edge after Snoqualmie. West Ridge Lundin. Red mountain and the ridge. Crux gendarme. Some loose scrambling on Red. Fun slabs on the downclimb of Red. The 4th class weakness through the Cleft. \ Above the Kendall Katwalk. Red mountain with the Cleft visible on the right. Nearing summit of Kendall Peak. Gear Notes: Helmet, running vests, approach shoes. Approach Notes: Start up the neighborhoods beneath the west face of Guye, climb talus to the base, then curve right to the south face.
-
Trip: Glacier Peak Wilderness - Dakobed Range Circumnavigation Trip Date: 07/13/2019 Trip Report: Did a nice two day solo circumnavigation of the Dakobed Range. Started at the White River TH, went up the Indian Creek Trail (completely overgrown, nearly impossible to follow) and took the PCT to White Pass. Then went into the Whitechuck Basin, over Kololo Peaks, down the Honeycomb Glacier, beneath Tenpeak into the Napeequa Valley. Bivied this pass before tagging Neyah Point in the morning. Took the brushy trail through the Napeequa and up over Boulder Pass and back to the trailhead. It totaled about 50 miles and 12k ft gain. All but four miles (PCT section) of this route were either off trail or on brushy trail, so the mileage was a little more difficult than one might think. The terrain from Kololo Peaks to the Napeequa was pure magic, some of the most remote, stunning scenery I have ever seen in the Cascades. Nothing about this route is too difficult, but there is substantial low angle glacier travel and a bit of tiring side hilling beneath Tenpeak. https://climberkyle.com/2019/07/13/dakobed-range-circumnavigation/ The off trail section of my route. 8 ft tall brush on the Indian Creek "Trail". Deer near the PCT. Nearing White Pass. Tarn in the Whitechuck Basin. On the Whitechuck Glacier. Honeycomb Glacier. Honeycomb Lake. Tenpeak Tarn. Butterfly Lake and Neyah Point. My bivy at Butterfly Pass. Sunset on Glacier peak and Butterfly Lake. Marine layer flowing over Butterfly Pass into the Napeequa. Dakobed and Tenpeak from Neyah Point. Following the stream into the Napeequa. Cirque of the Butterflies - a truly magical place. The Napeequa River. Grassy meadows don't tell the truth... slide alder! Boulder Basin. Gear Notes: Trail runners and poles. You might want crampons, ice axe, helmet, glacier gear depending on conditions and your safety levels. Approach Notes: Terrible, terrible bushwachking. The Indian Creek Trail was miserable.
-
[TR] Stuart/Enchantments - The Enchanted Enchainment 06/30/2019
Kyle M replied to tylerhs01's topic in Alpine Lakes
Hugely impressive! I've pondered doing this trip in two days, but never one before! -
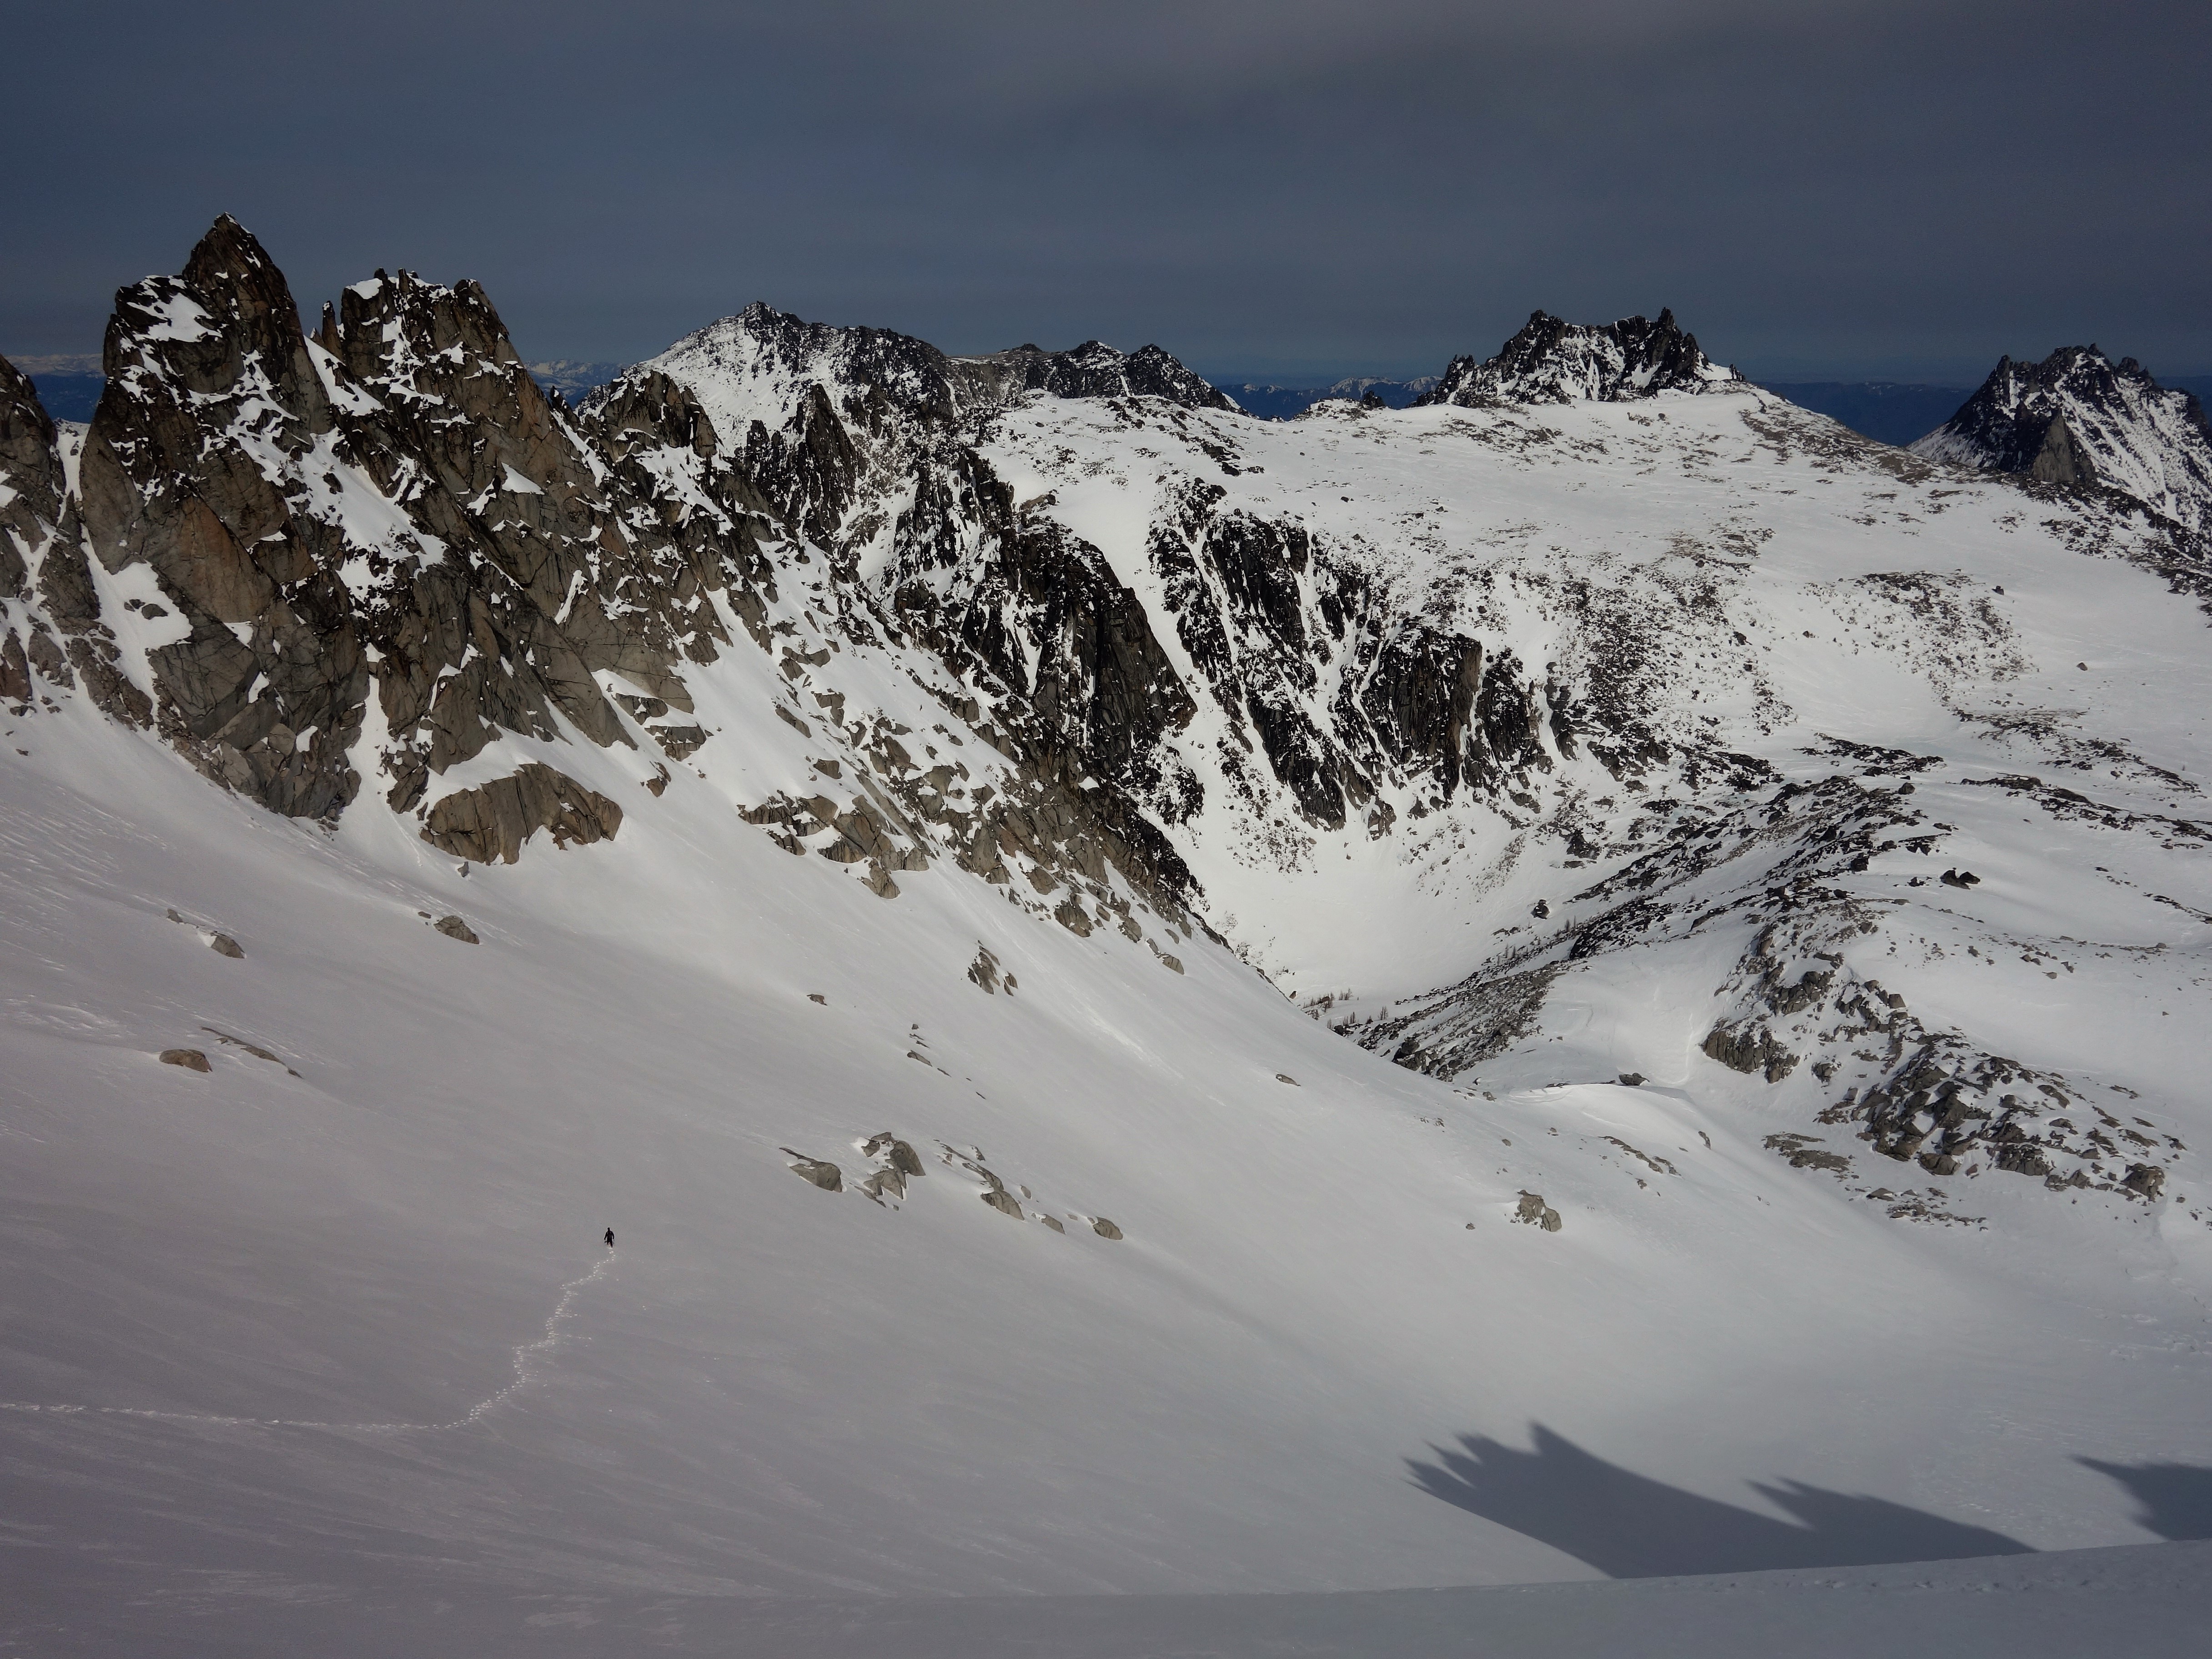
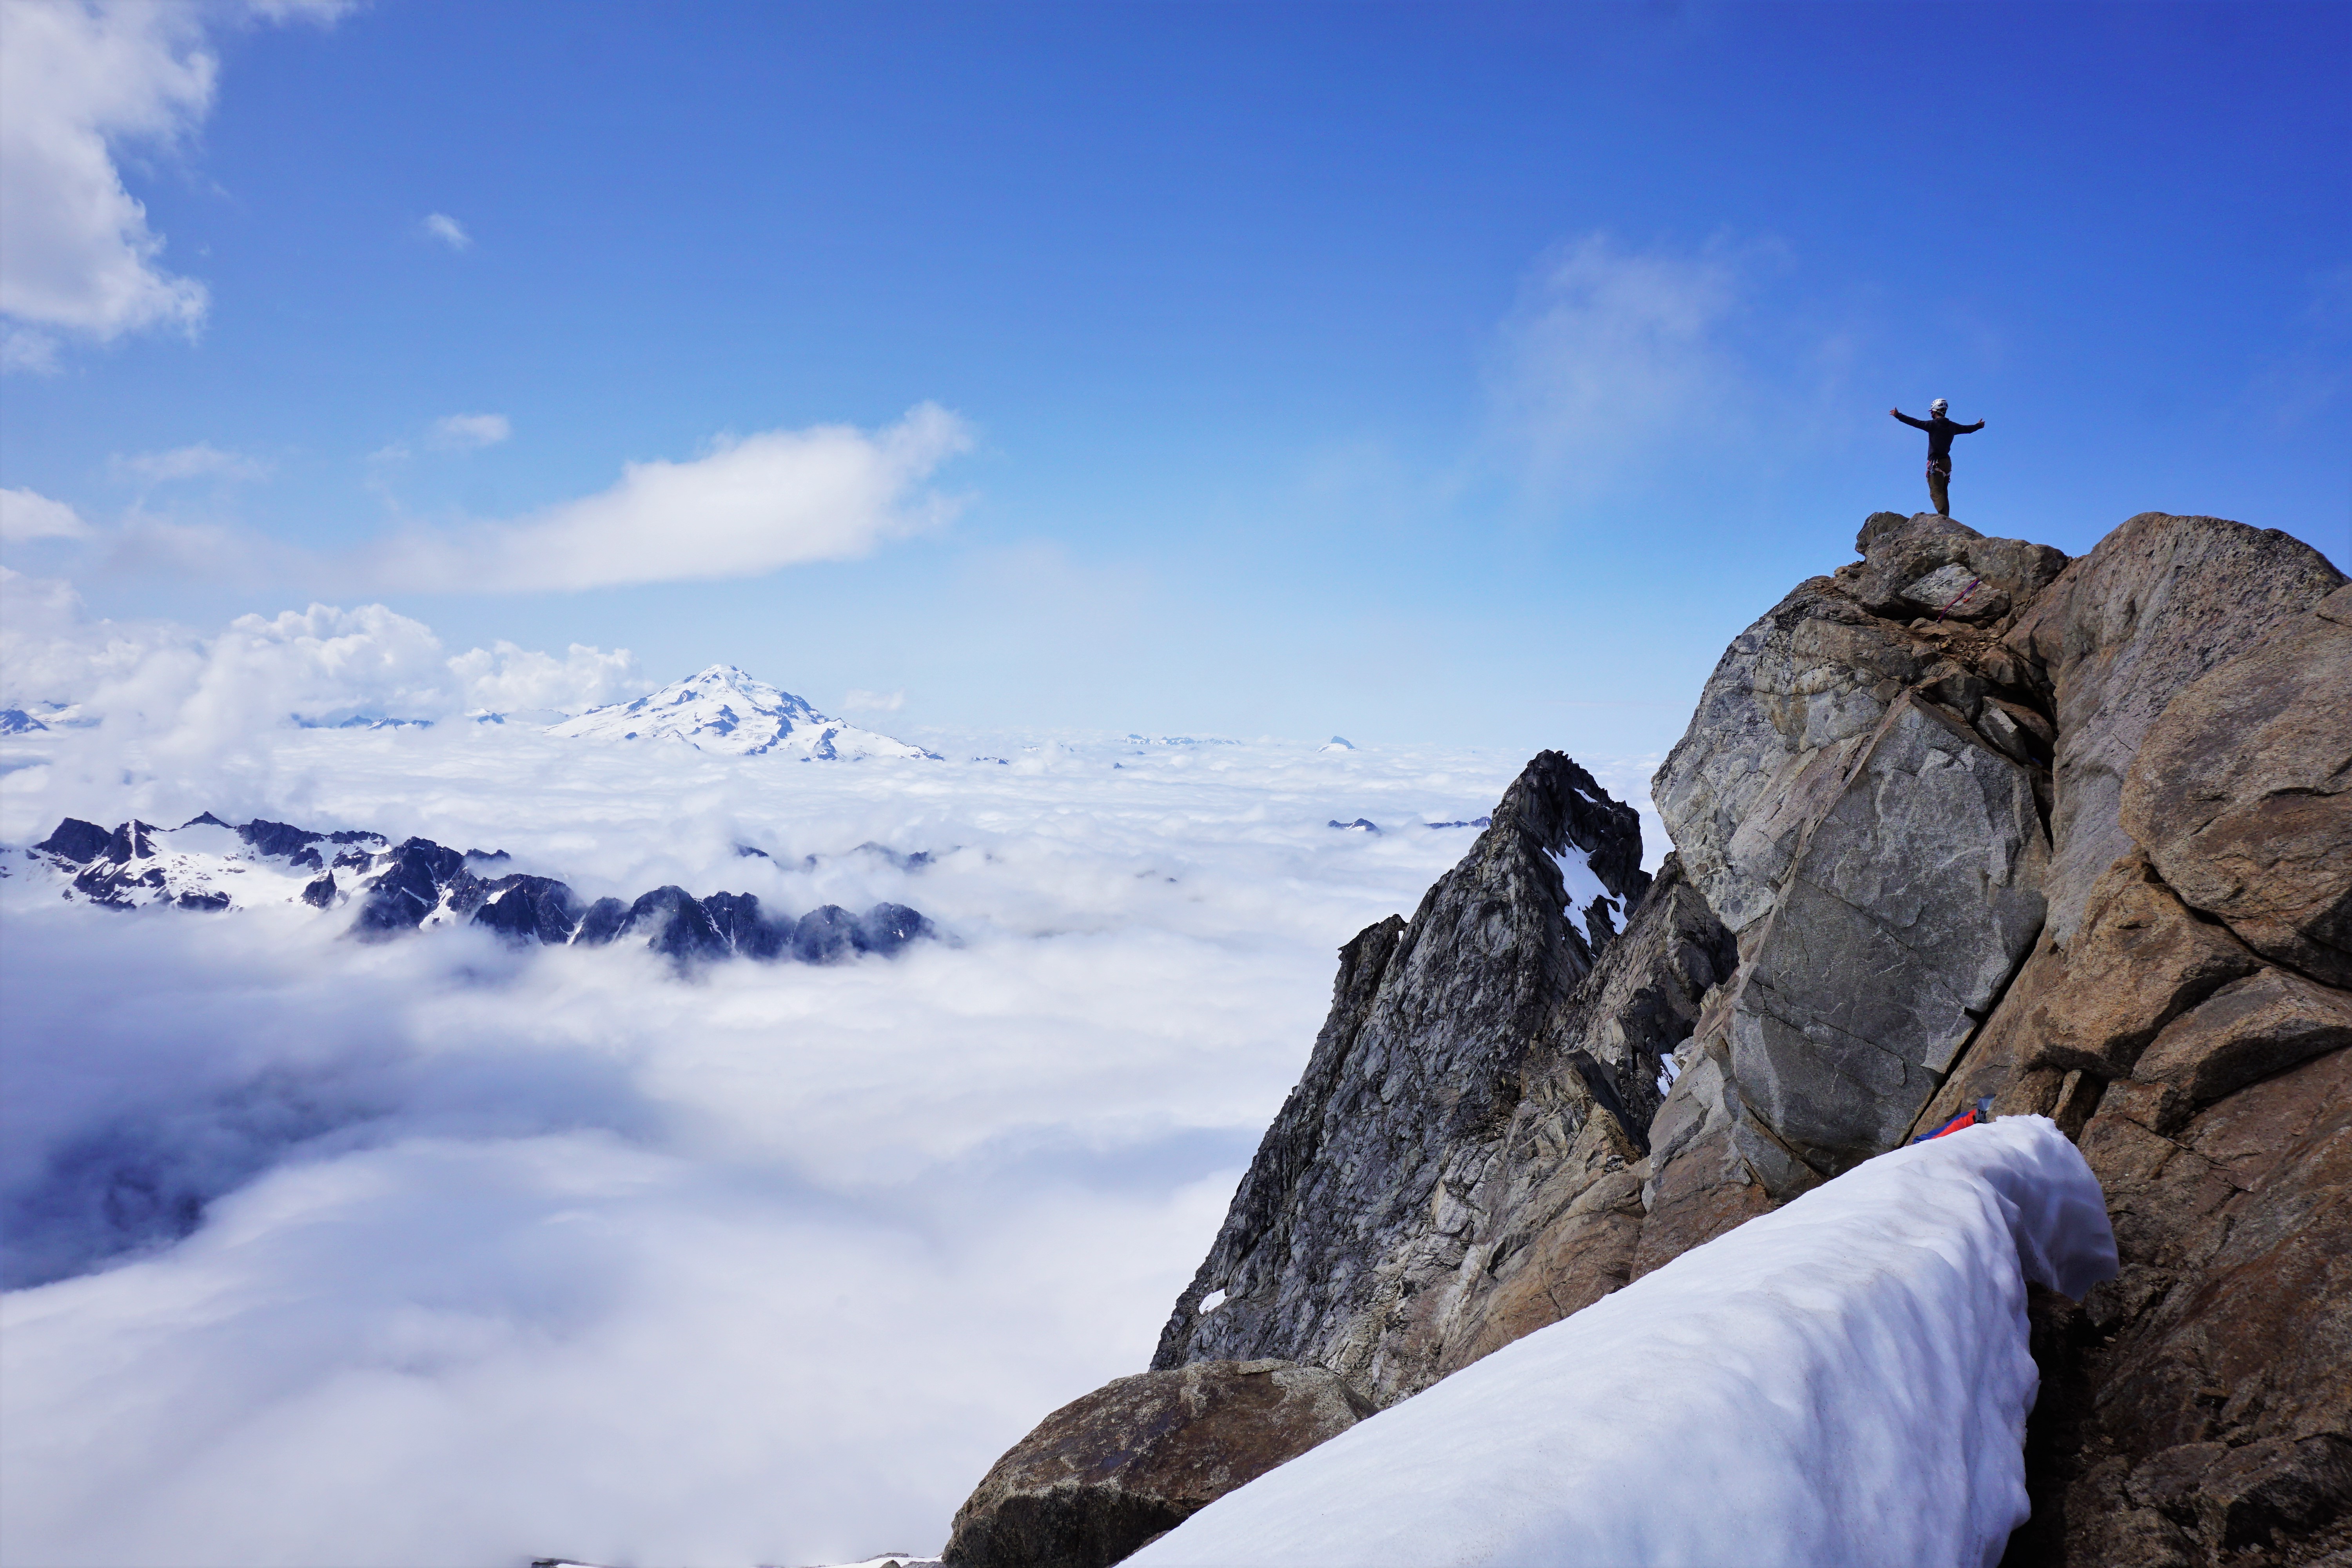
Trip: Alpine Lakes Wilderness - Mt. Daniel via Snoqualmie Pass (The Alpine Lakes Crest Traverse) Trip Date: 06/30/2019 Trip Report: Over the weekend, Logan and I completed a high route from Snoqualmie Pass to the summit of Mt. Daniel, traversing the remote 7,000 ft+ peaks we call the "Alpine Lakes Crest". We started at Snoqualmie, took the PCT to Chikamin, went over Chikamin, down to Iceberg Lake, up to the Overcoat Glacier, across to Summit Chief Pass, down to the Dutch Miller Gap Trail, up to La Bohn Gap, over Hinman, across to Pea Soup Lake, up Mt. Daniel and down to the Cathedral Pass Trailhead. 37 miles, 14-15k ft gain. The meat of the the trip is a spectacular 20 miles of nearly continuous off trail, above treeline travel. We didn't see a single other soul in those 20 miles. The crux was definitely traversing from the Overcoat Glacier to Summit Chief Pass. Stay high on the ridge and aim for the "key ledge" an obvious sloping ledge about 100 ft below the ridgetop that gets you through the obvious vertical cleft that splits the ridge. The scramble up to the Overcoat Glacier from Iceberg Lake was also a little cruxy near the top on the wet 2nd and 3rd class ledges. On a side note, we figured out a great alternate route up the Lynch Glacier. Climb the ridge on the west side of Pea Soup Lake to a snow finger and ascend this to the Upper Lynch Glacier. This gets you by the lower icefall, which is difficult to even access once the lake melts out. This region may not have any Bulgers, permits, or a national park to its name, but we think it is as raw, rugged, and stunning as any other part of the Cascades we have visited. We crossed four glaciers, passed dozens of sparkling lakes, and danced across remote summits. The terrain was huge: everything we dreamed of and then some. There were so many special spots I don't know where to start. And the line felt so pure and alpine. We did the traverse comfortably in two days, having to route find along the way. Our first day was 11 hours and second was just over 9, so it is definitely doable in one big push, but it is also worthy of 3 or 4 days to enjoy the marvelous spots along the way or maybe bag some more summits. If you want to get it, I'd recommend sooner rather than later because the snow cover makes all the boulder and talus less painful. For more details and beta, see: https://climberkyle.com/…/…/the-alpine-lakes-crest-traverse/ Descending Chikamin. Nice tarns on the backside of Chikamin. Iceberg Lake. Looking up to Overcoat Peak. Crossing the Overcoat Glacier. Chimney Rock. Summit Chief Pass. Little Big Chief. Williams Lake. Chain Lakes. Shoulder of Hinman. Lepul Lake and Baker in the distance. Hinman Summit views. Descending to Hinman Tarns. Hinman Tarns. Alt route: Ascend the ridge and snow finger on the right up to the Lynch Glacier. Pea Soup Lake. High on the Lynch Glacier. Daniel Summit! Daniel summit views. Racing down before the storm hits. Gear Notes: Waterproof running shoes, crampons, ice axe. Didn't bring a rope but some might want to for the Lynch Glacier. Approach Notes: PCT to Chikamin, then straight up the face.
- 7 replies
-
- 6
-

-

-
- high route
- traverse
- (and 1 more)
-
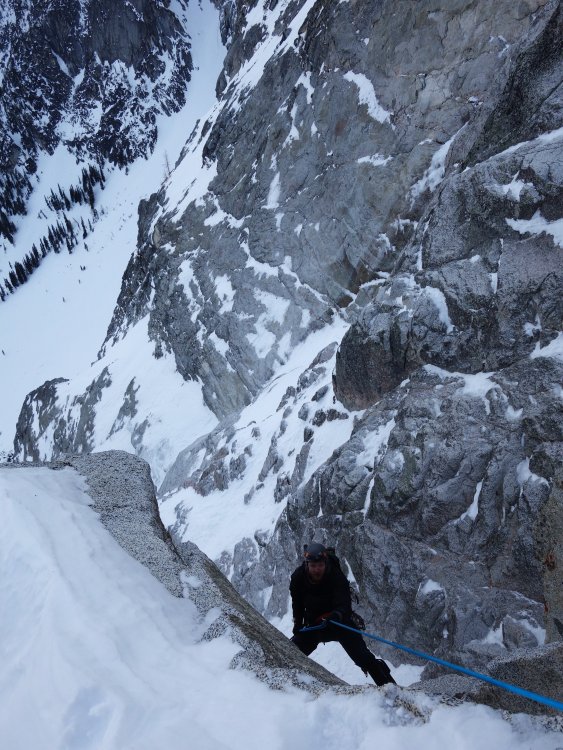
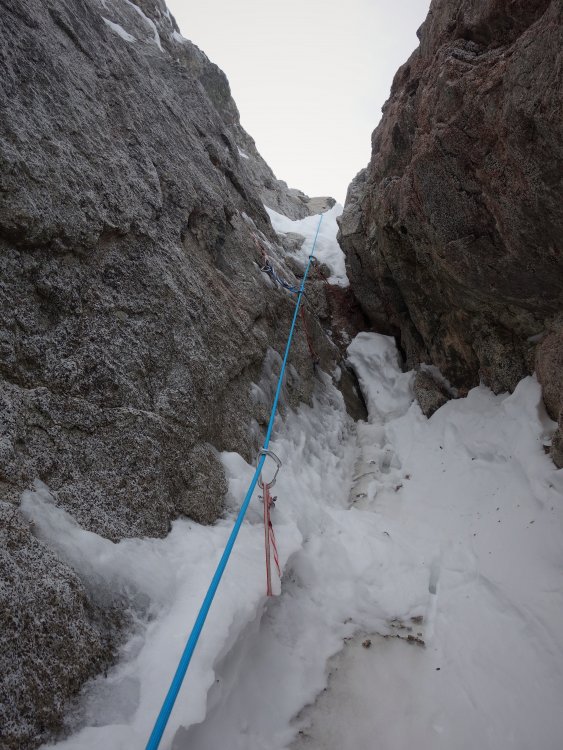
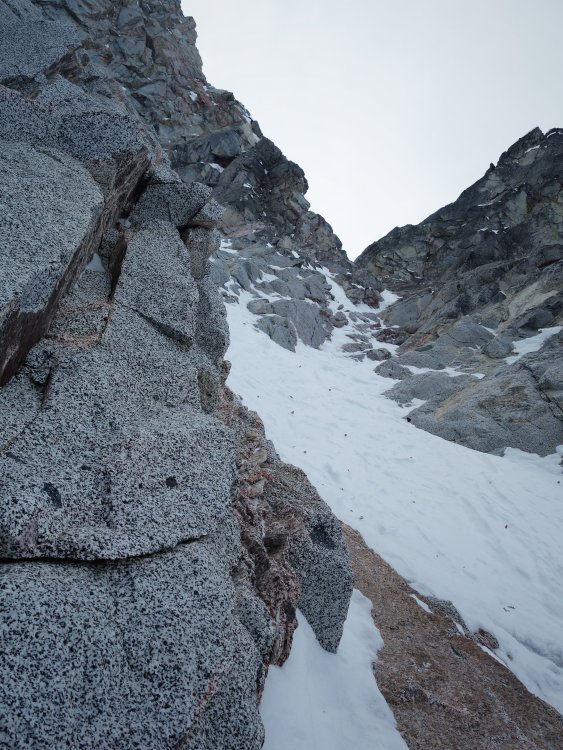
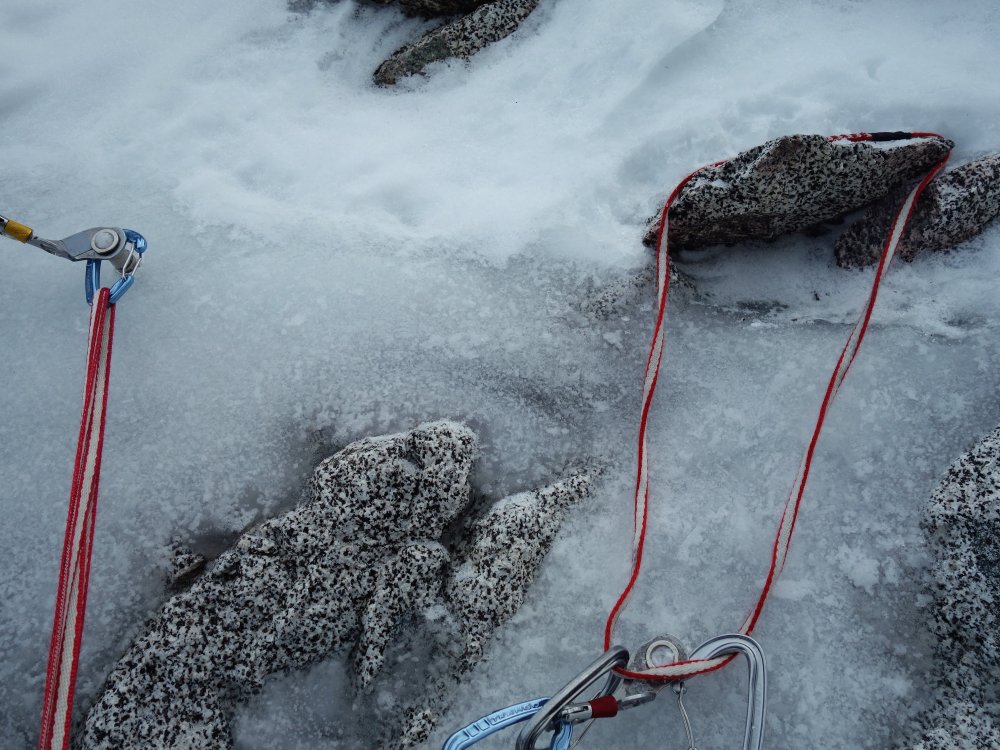
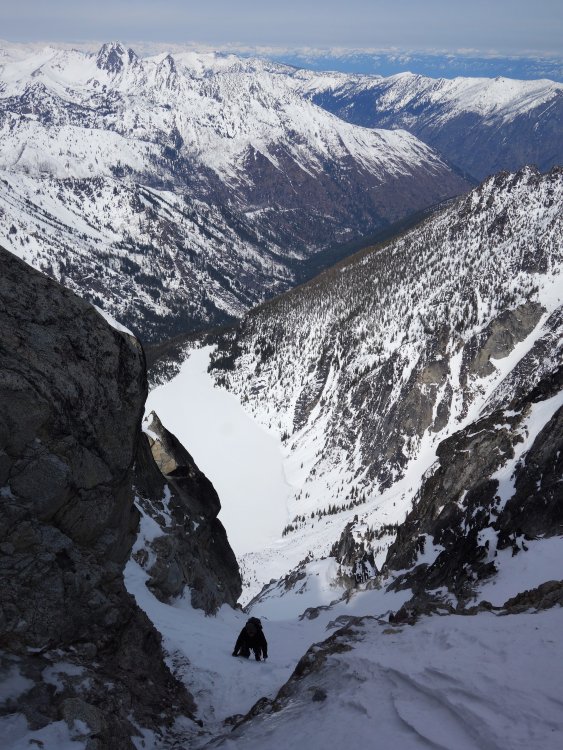
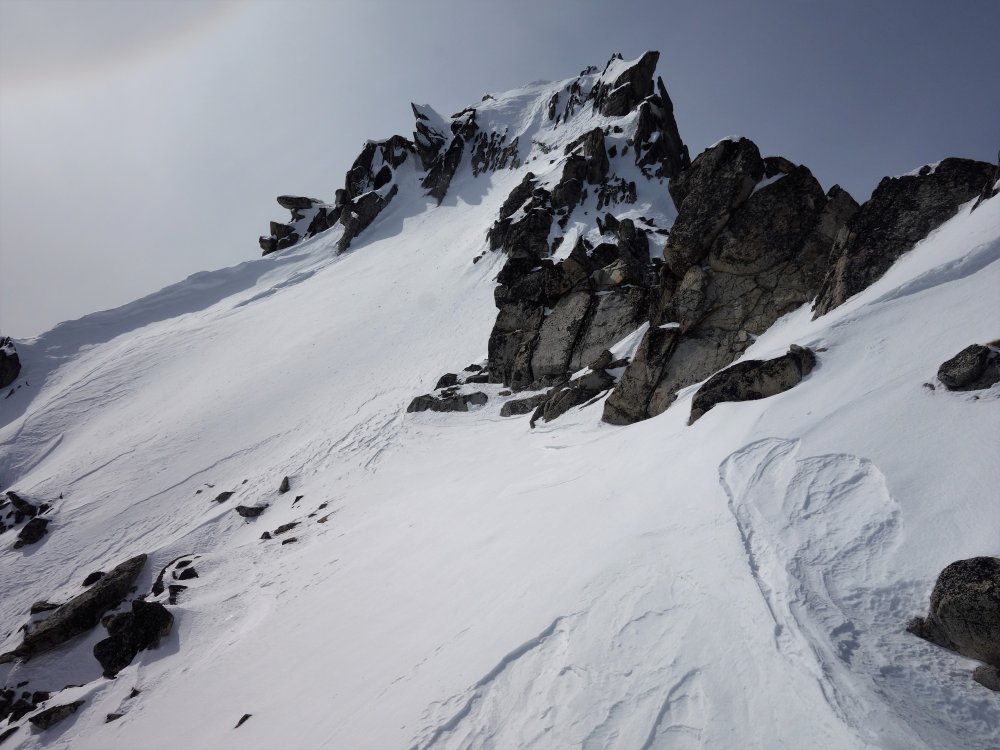
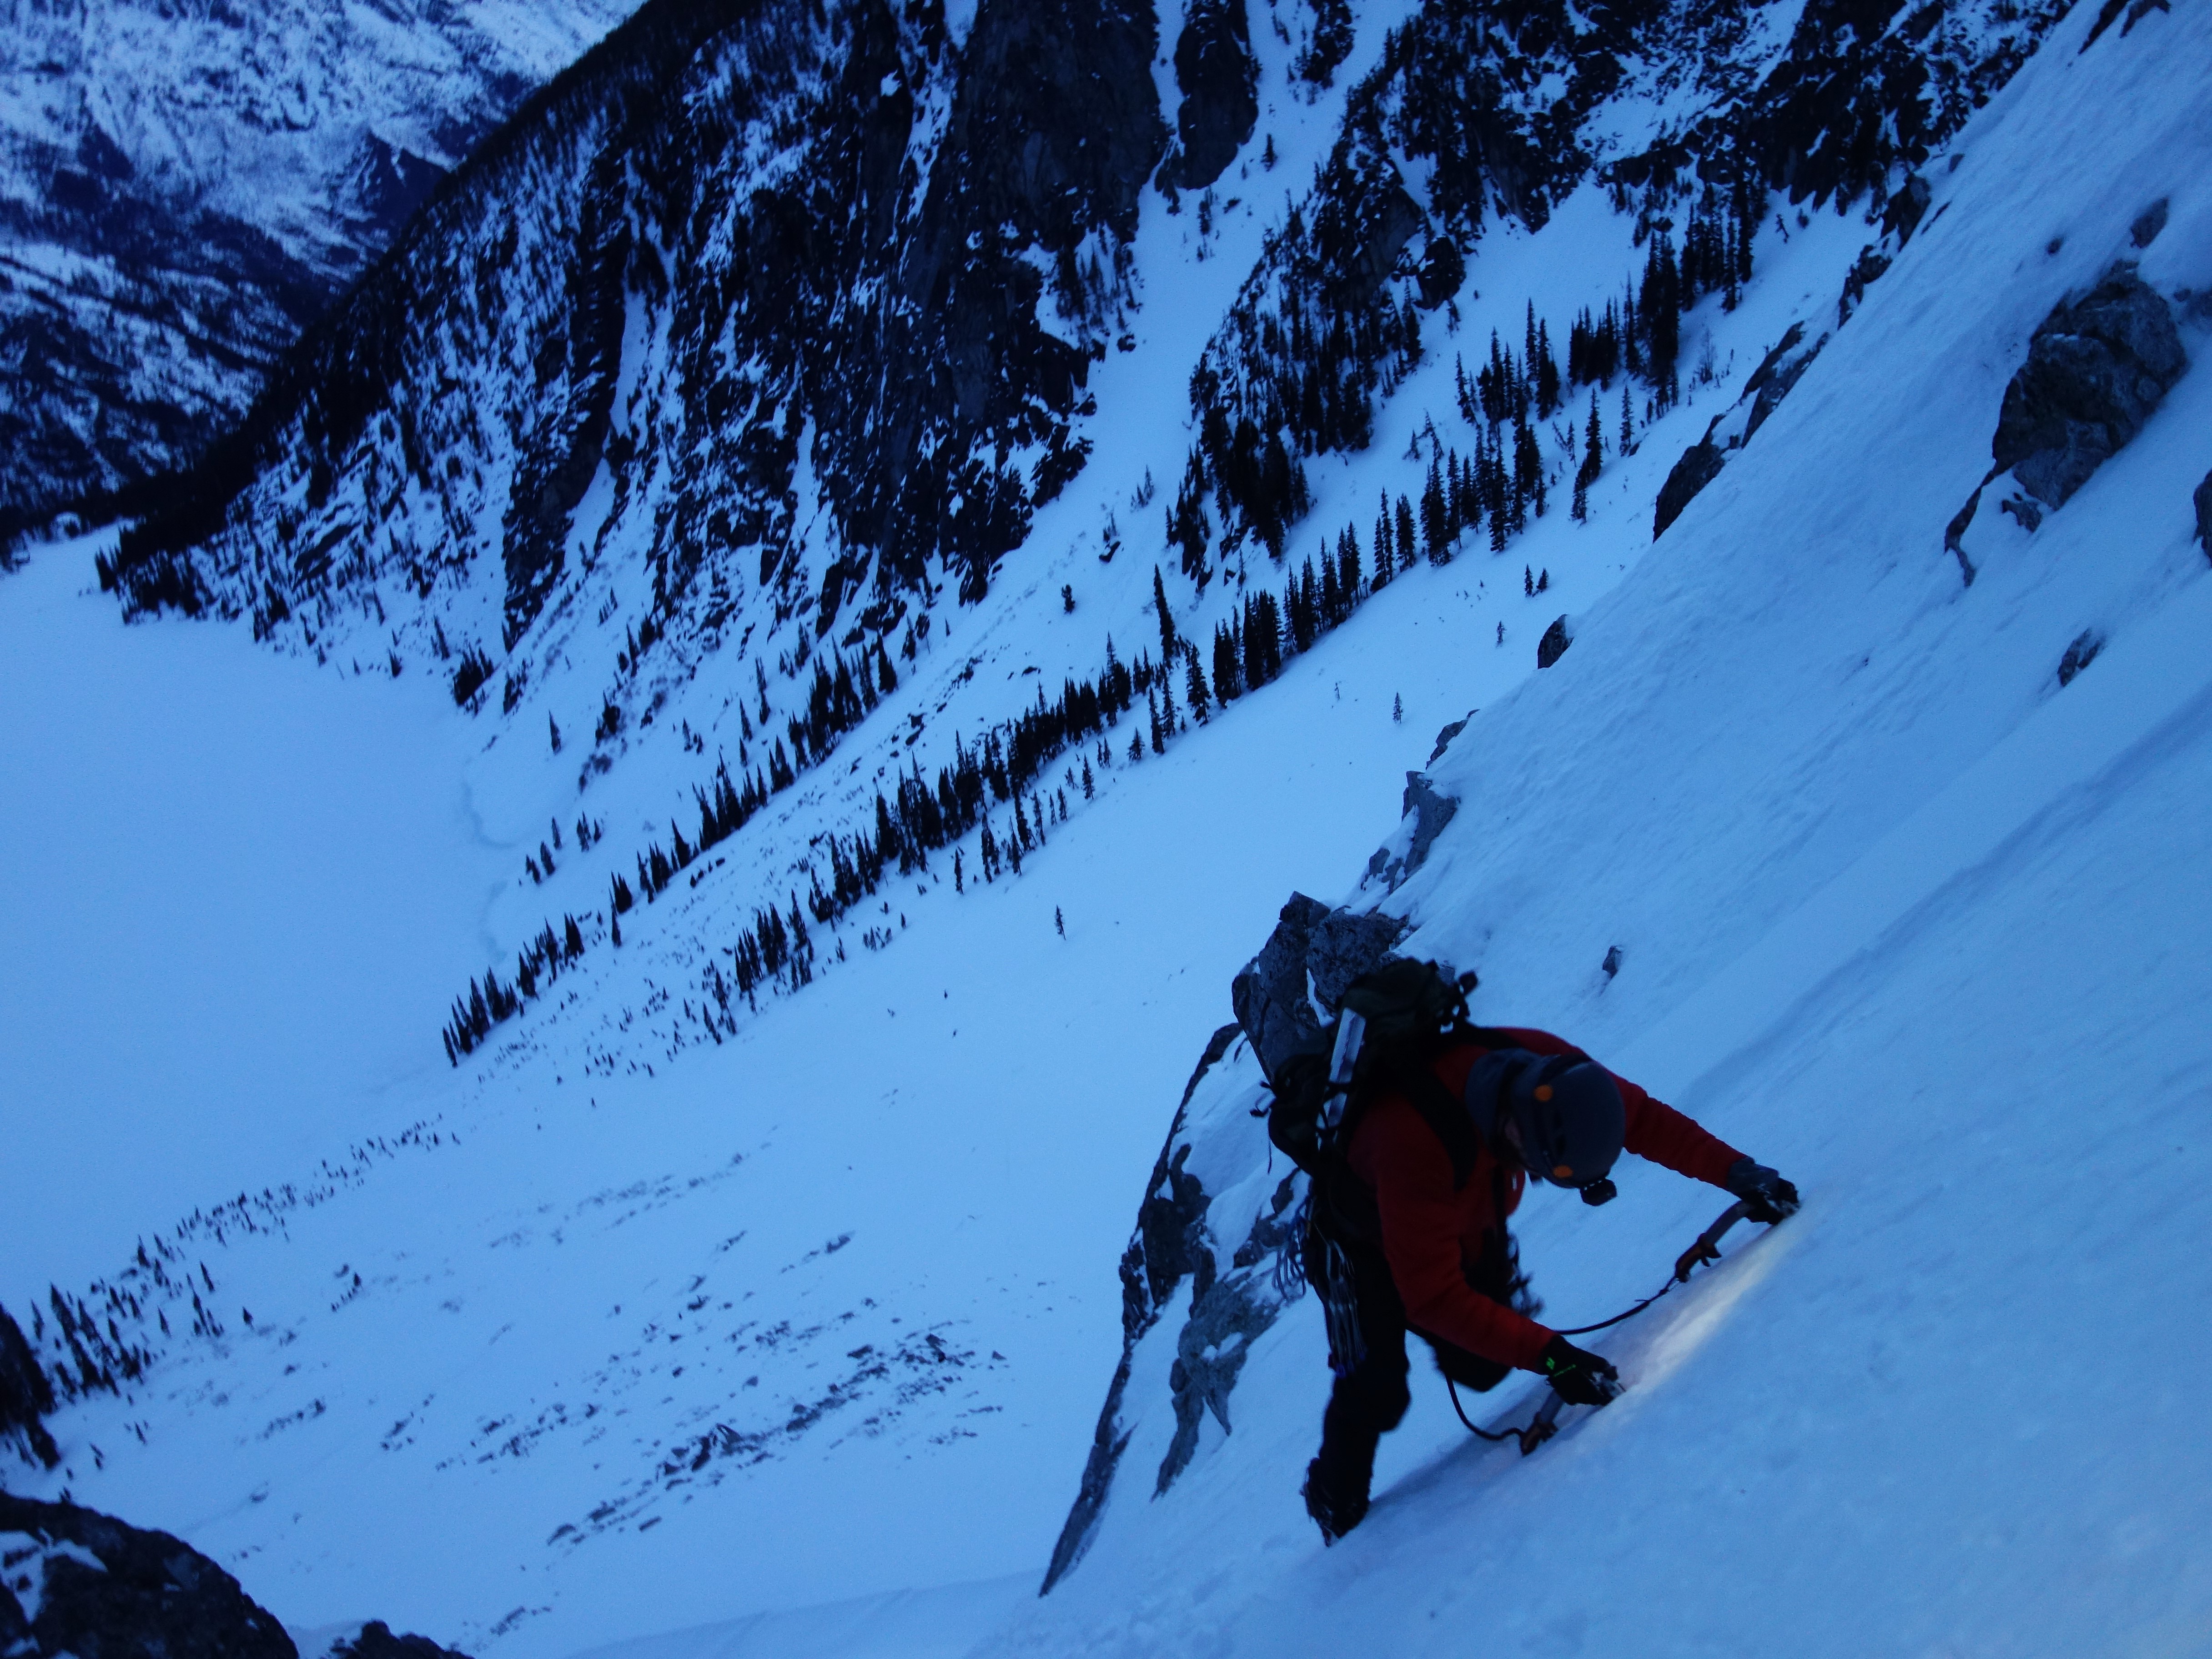
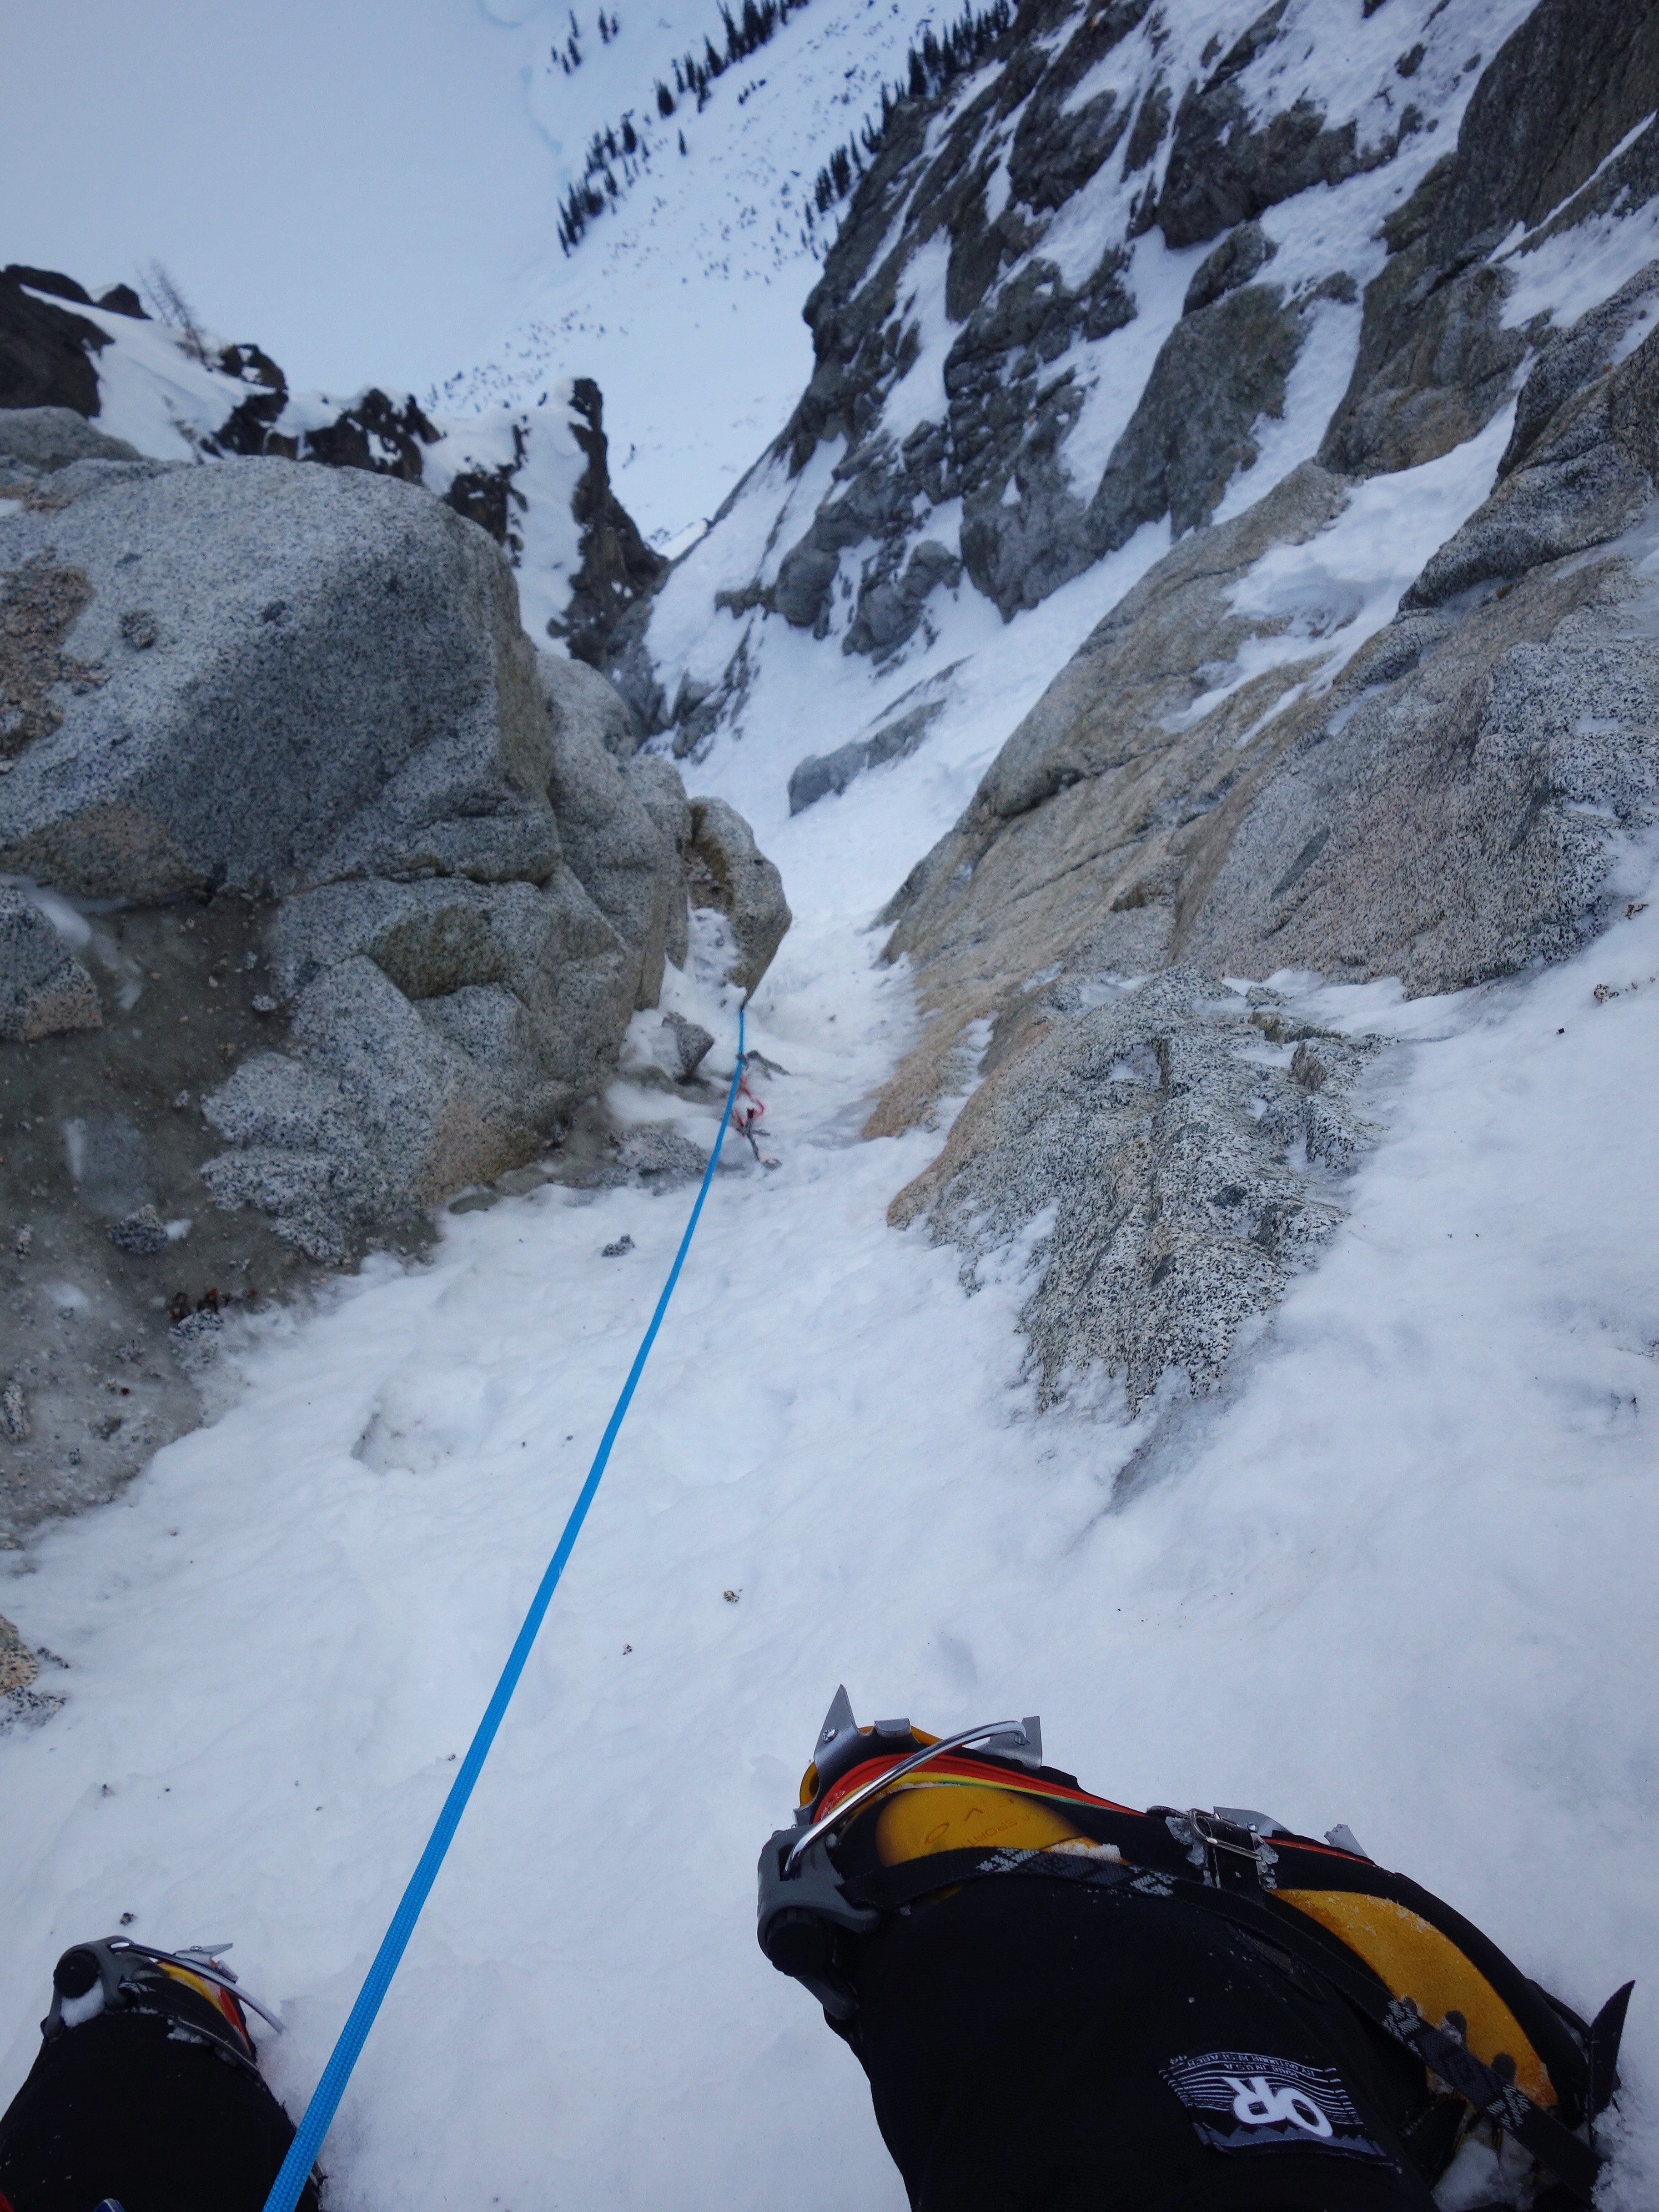
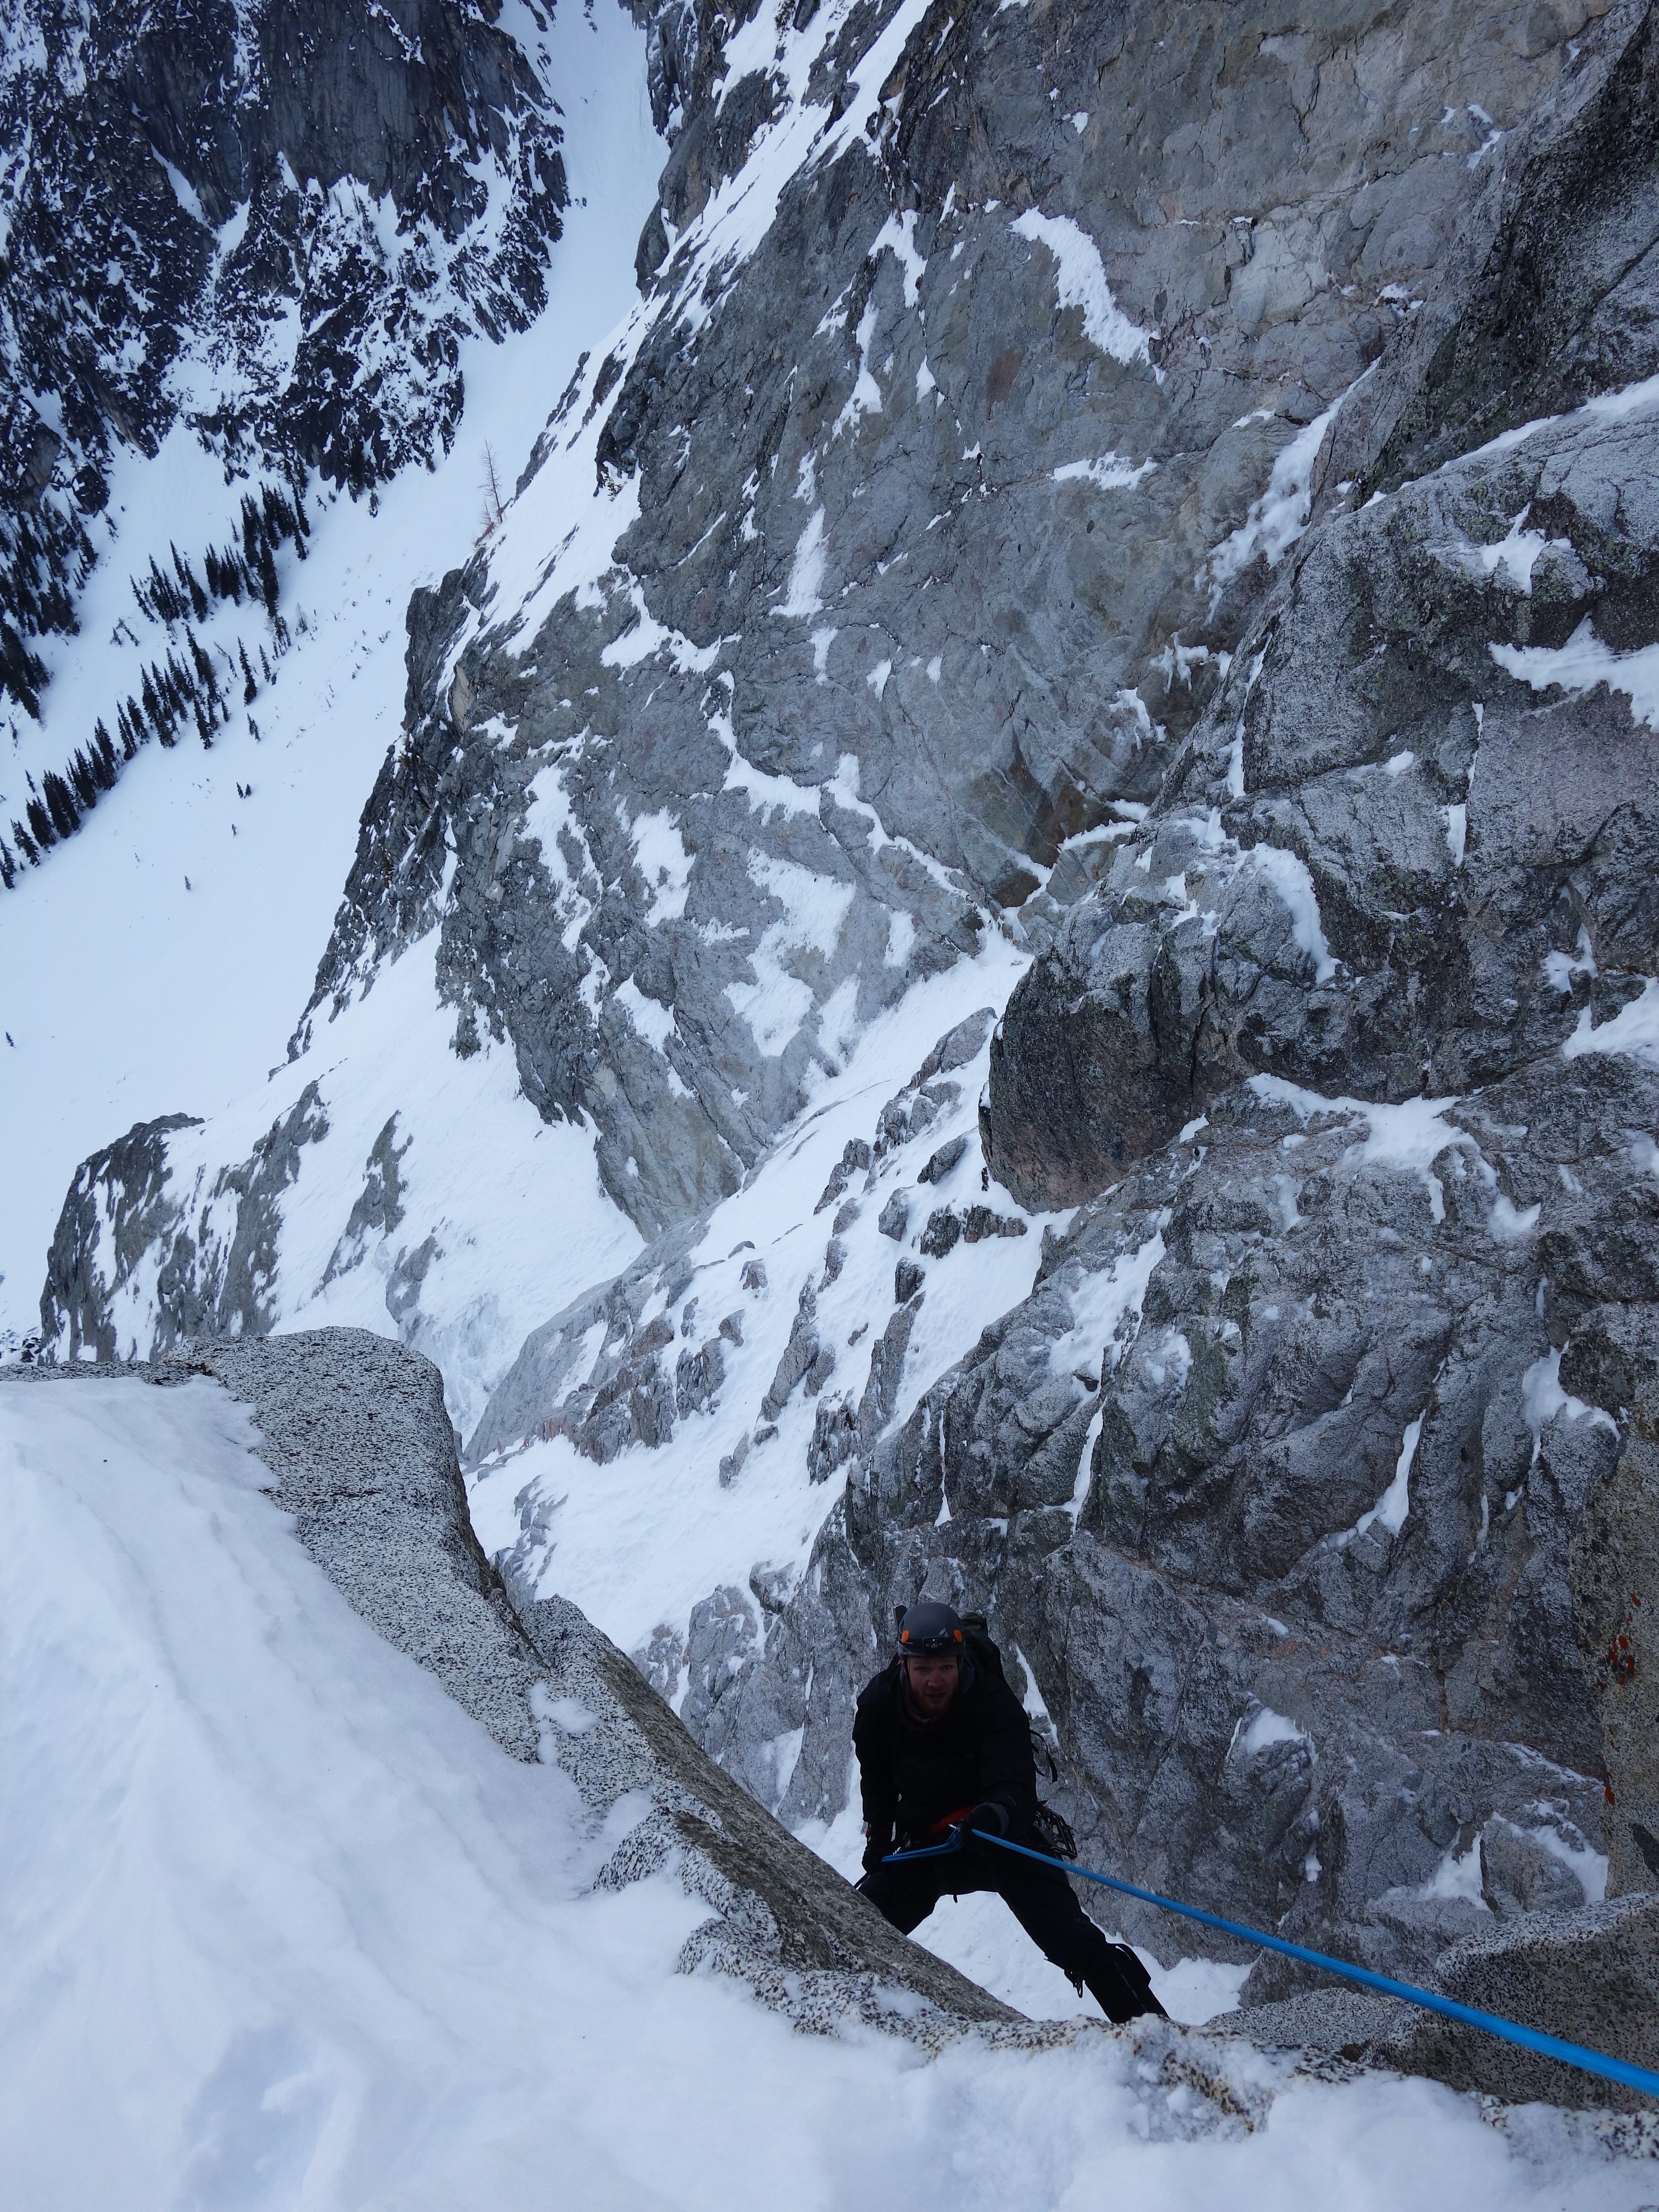
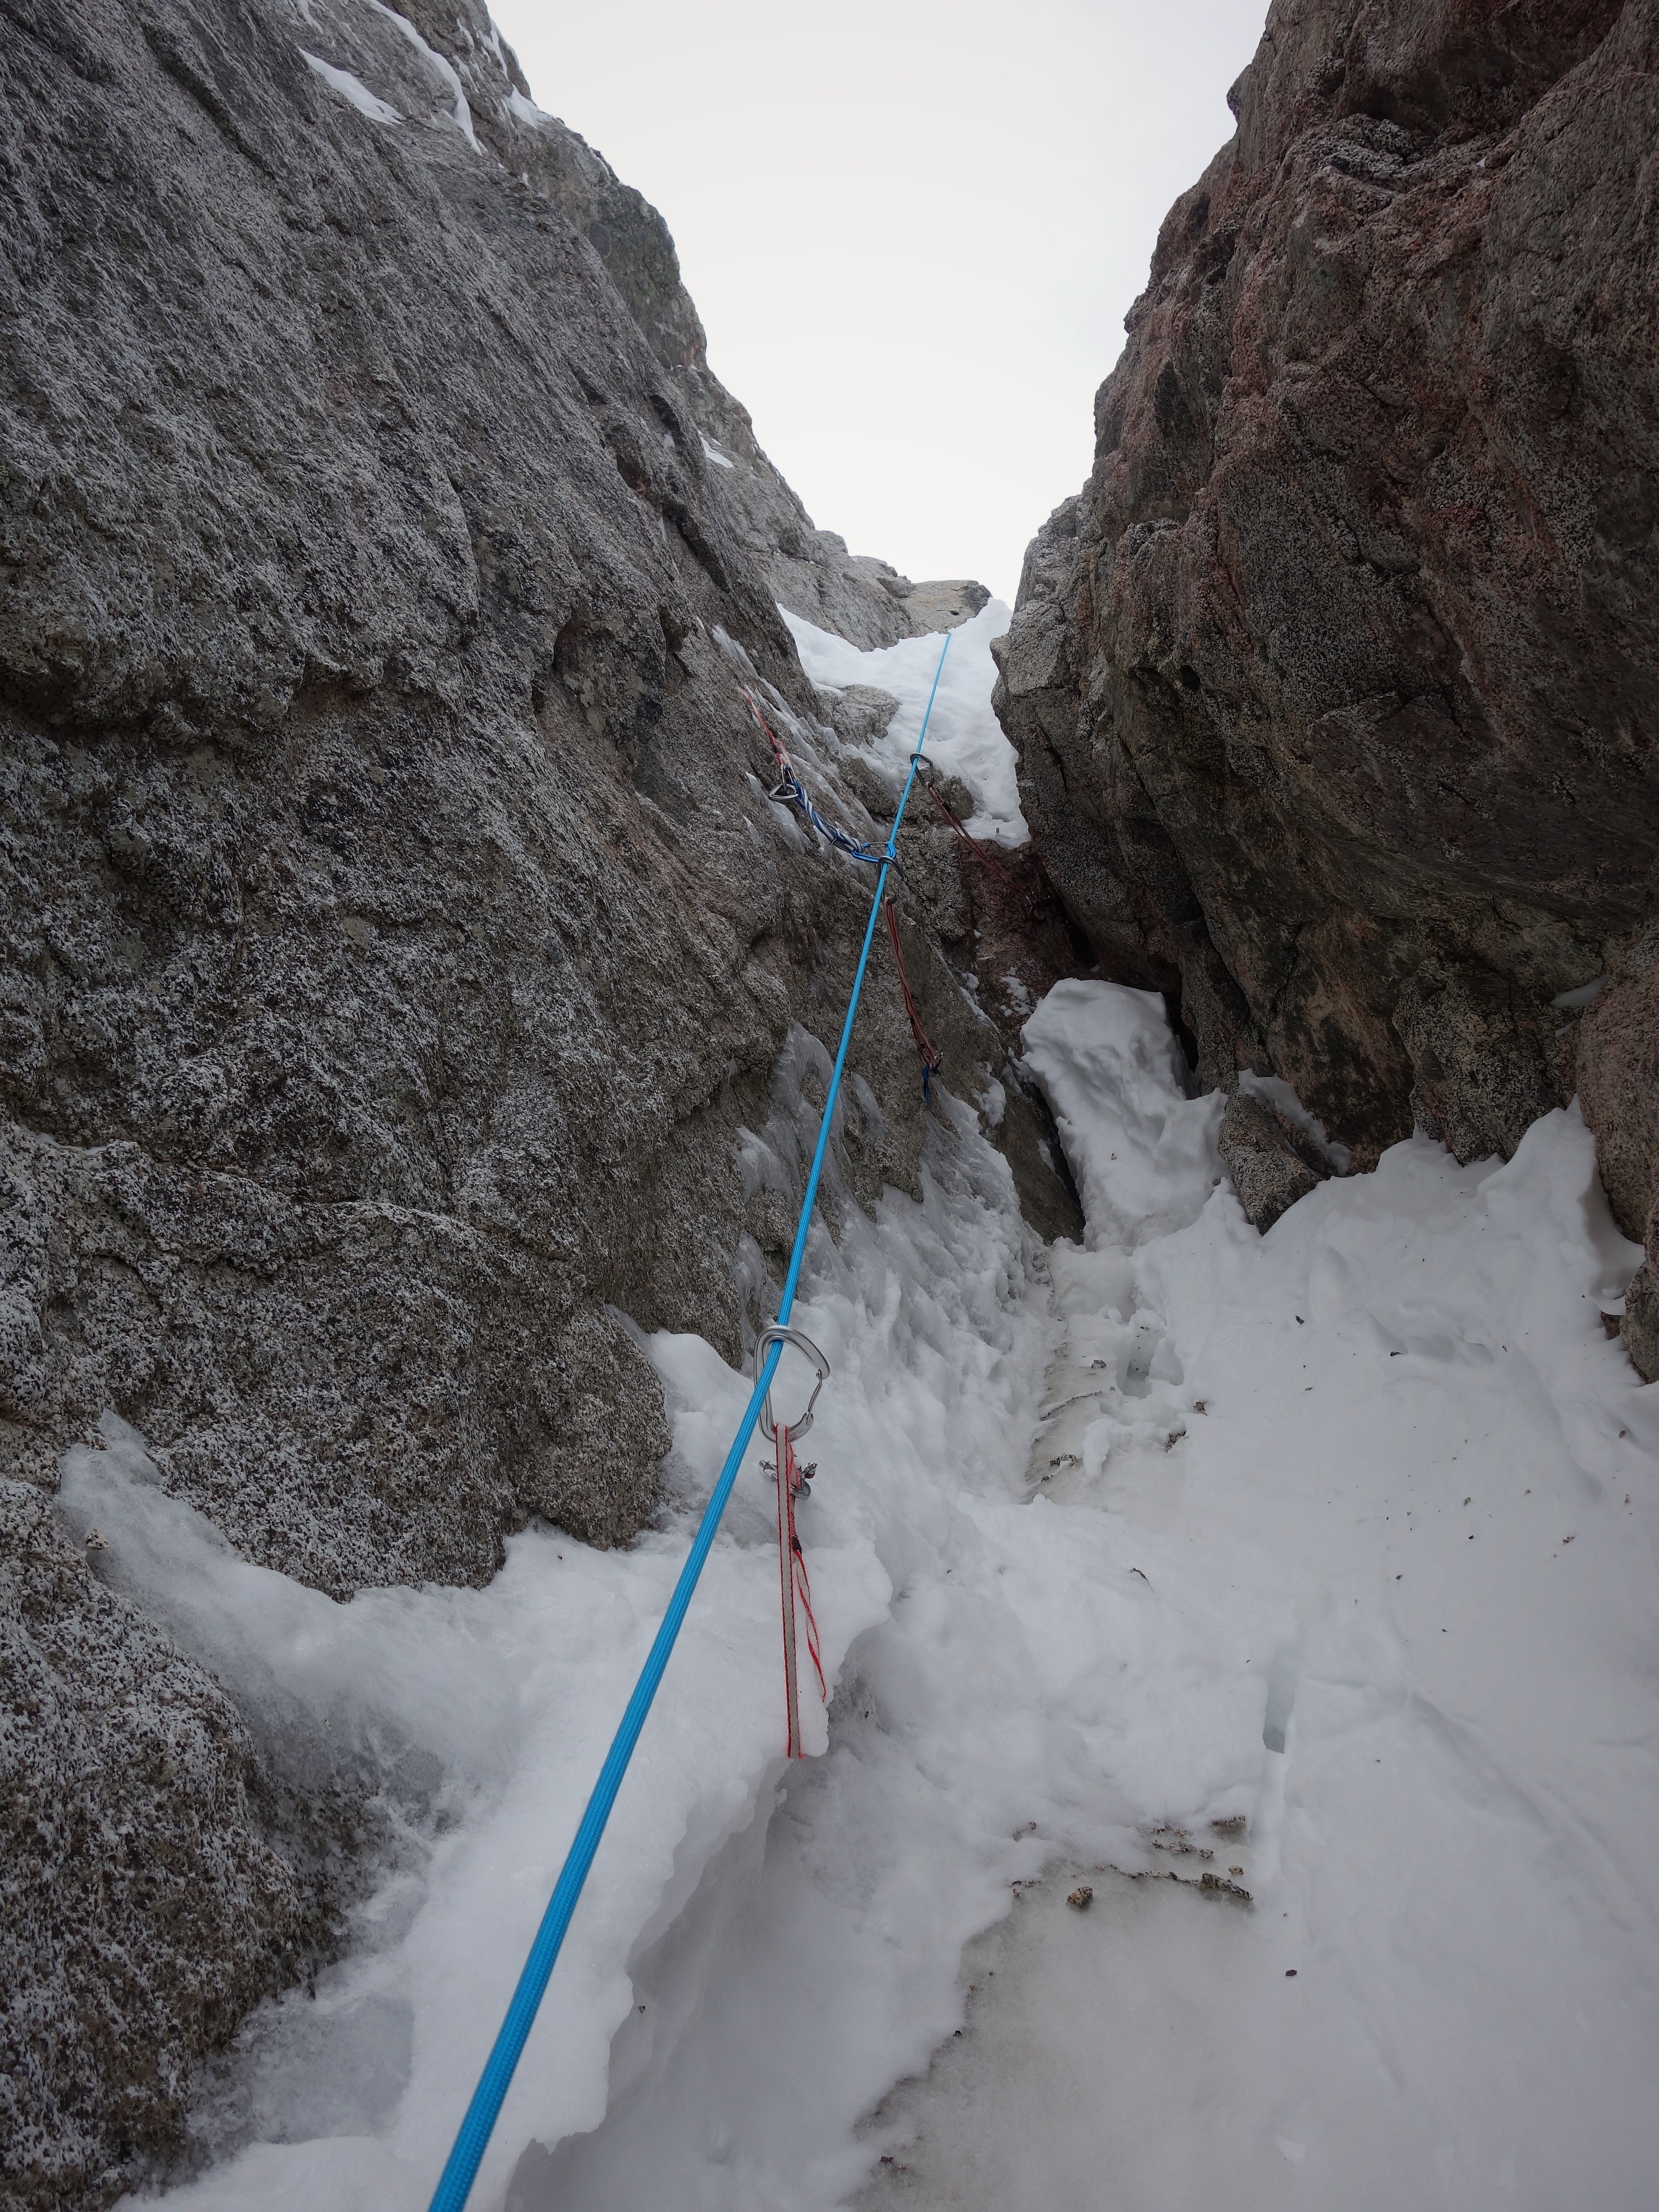
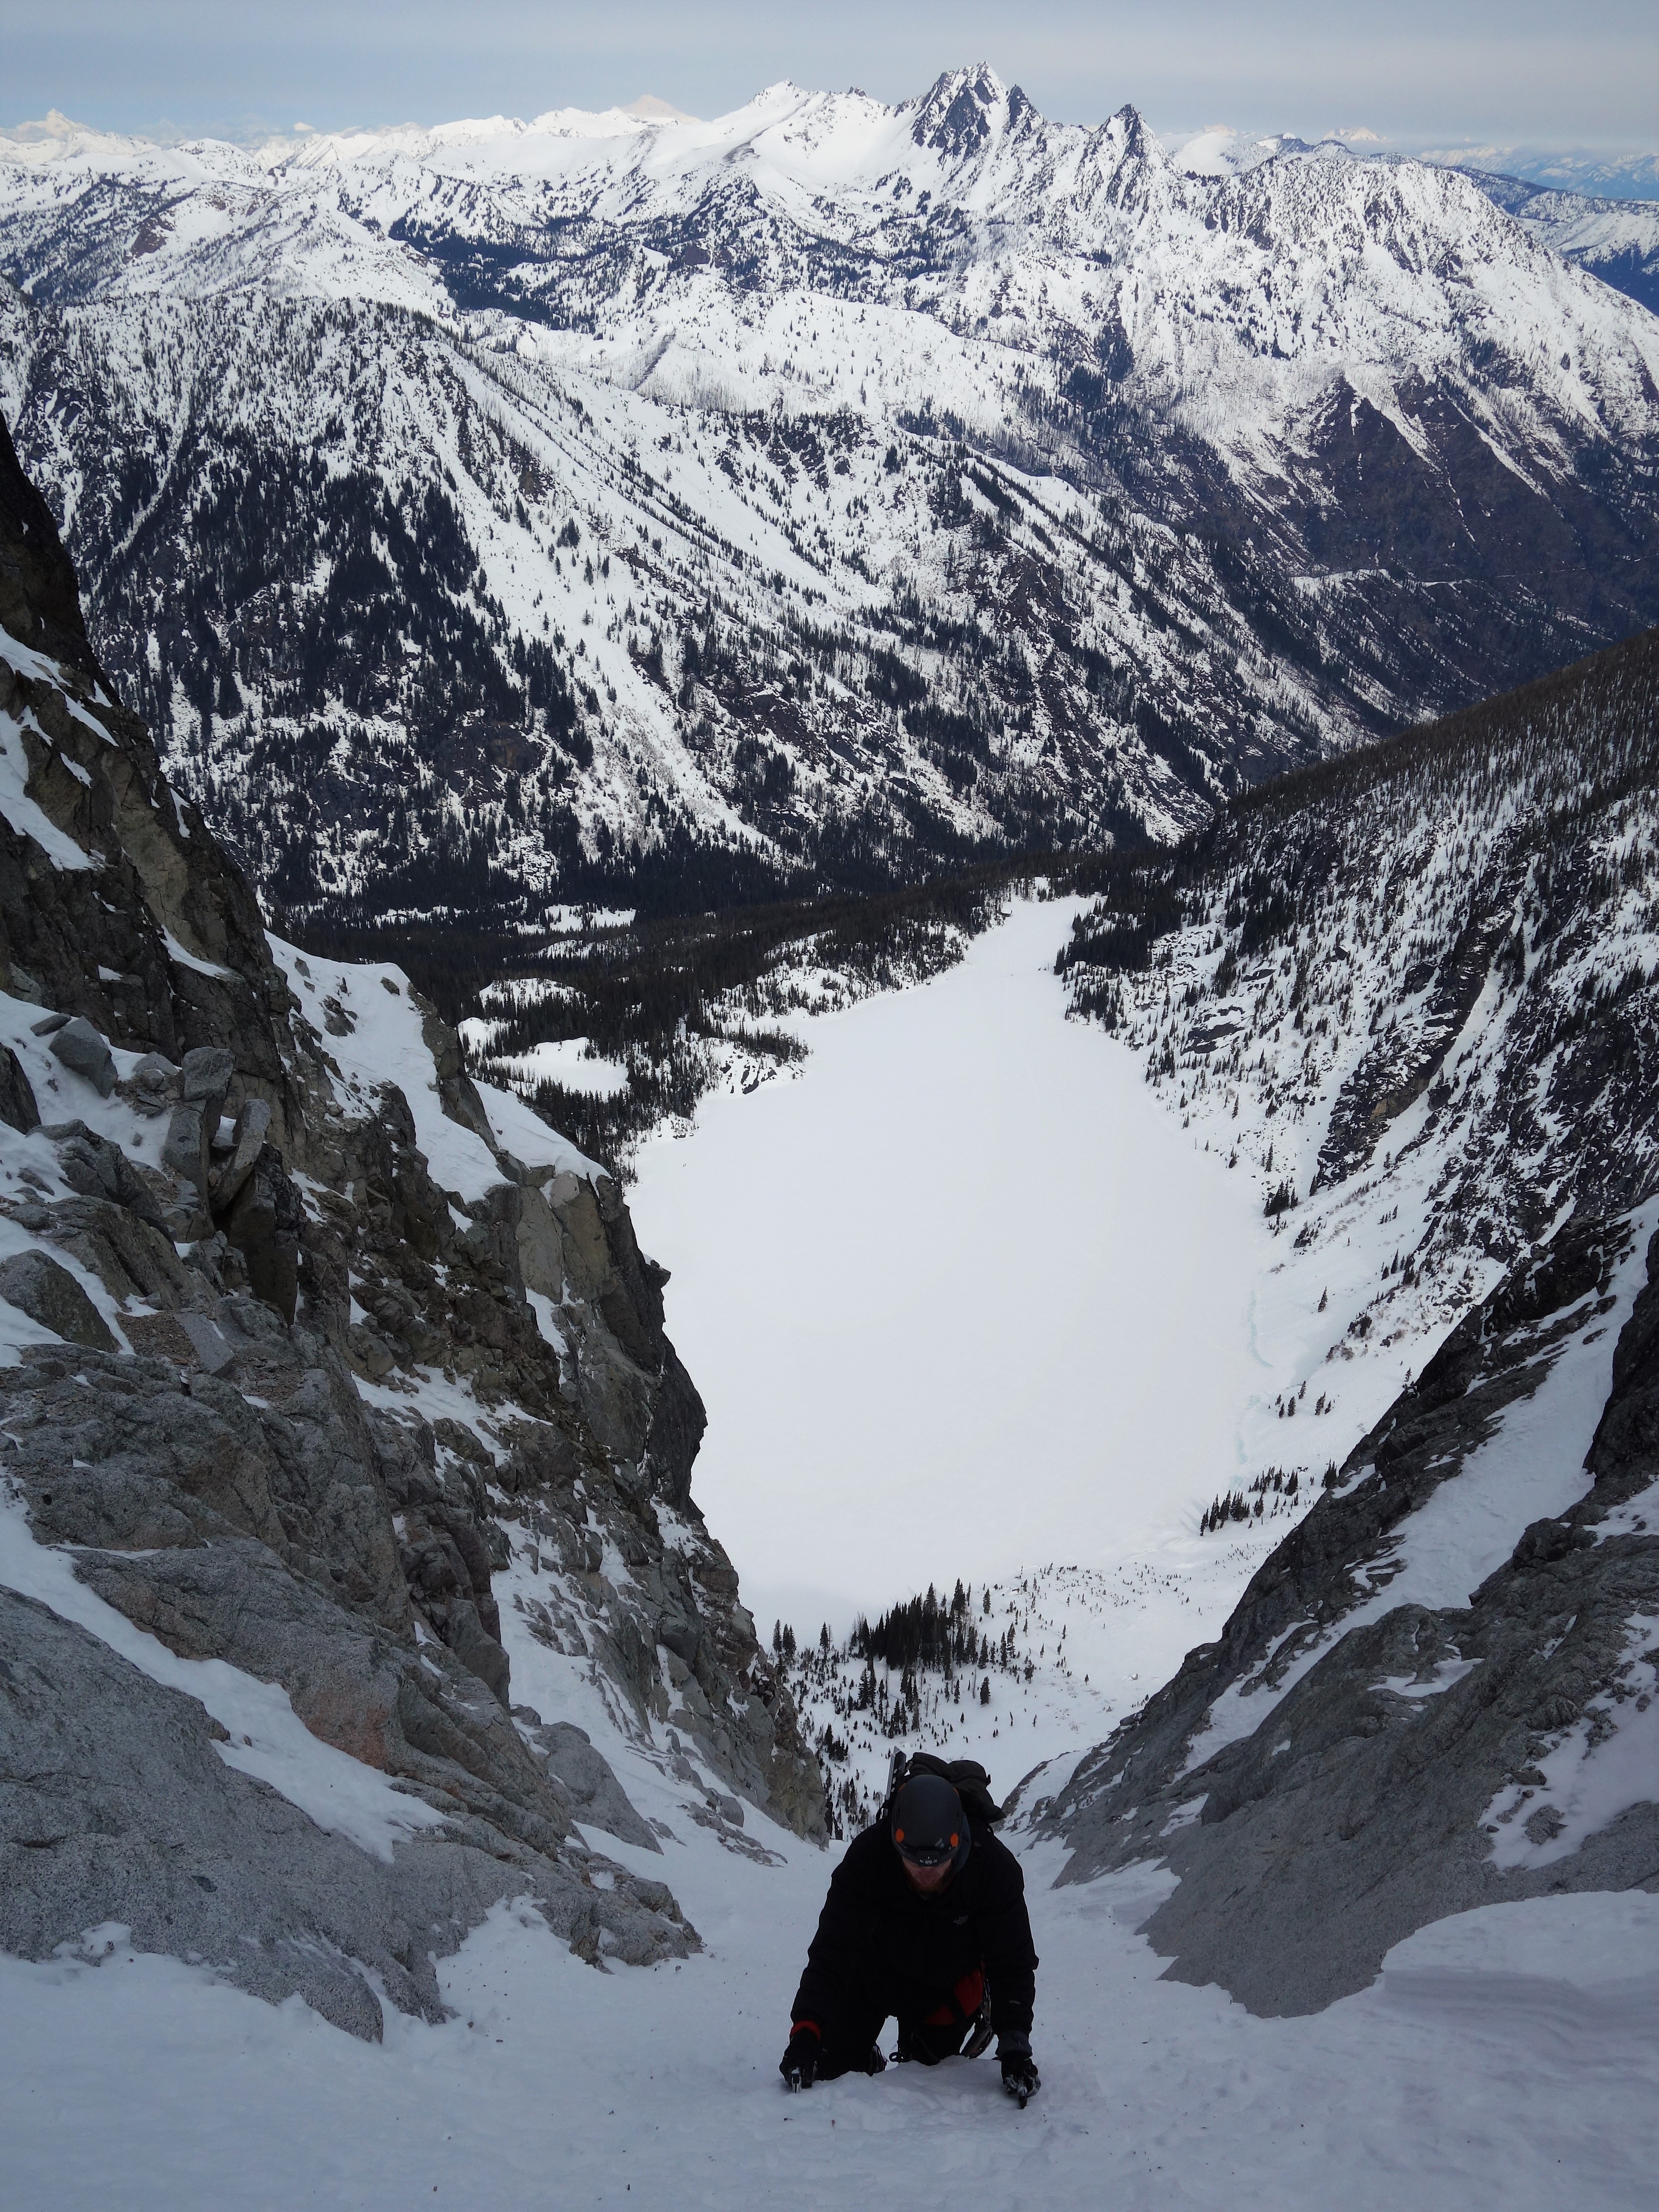
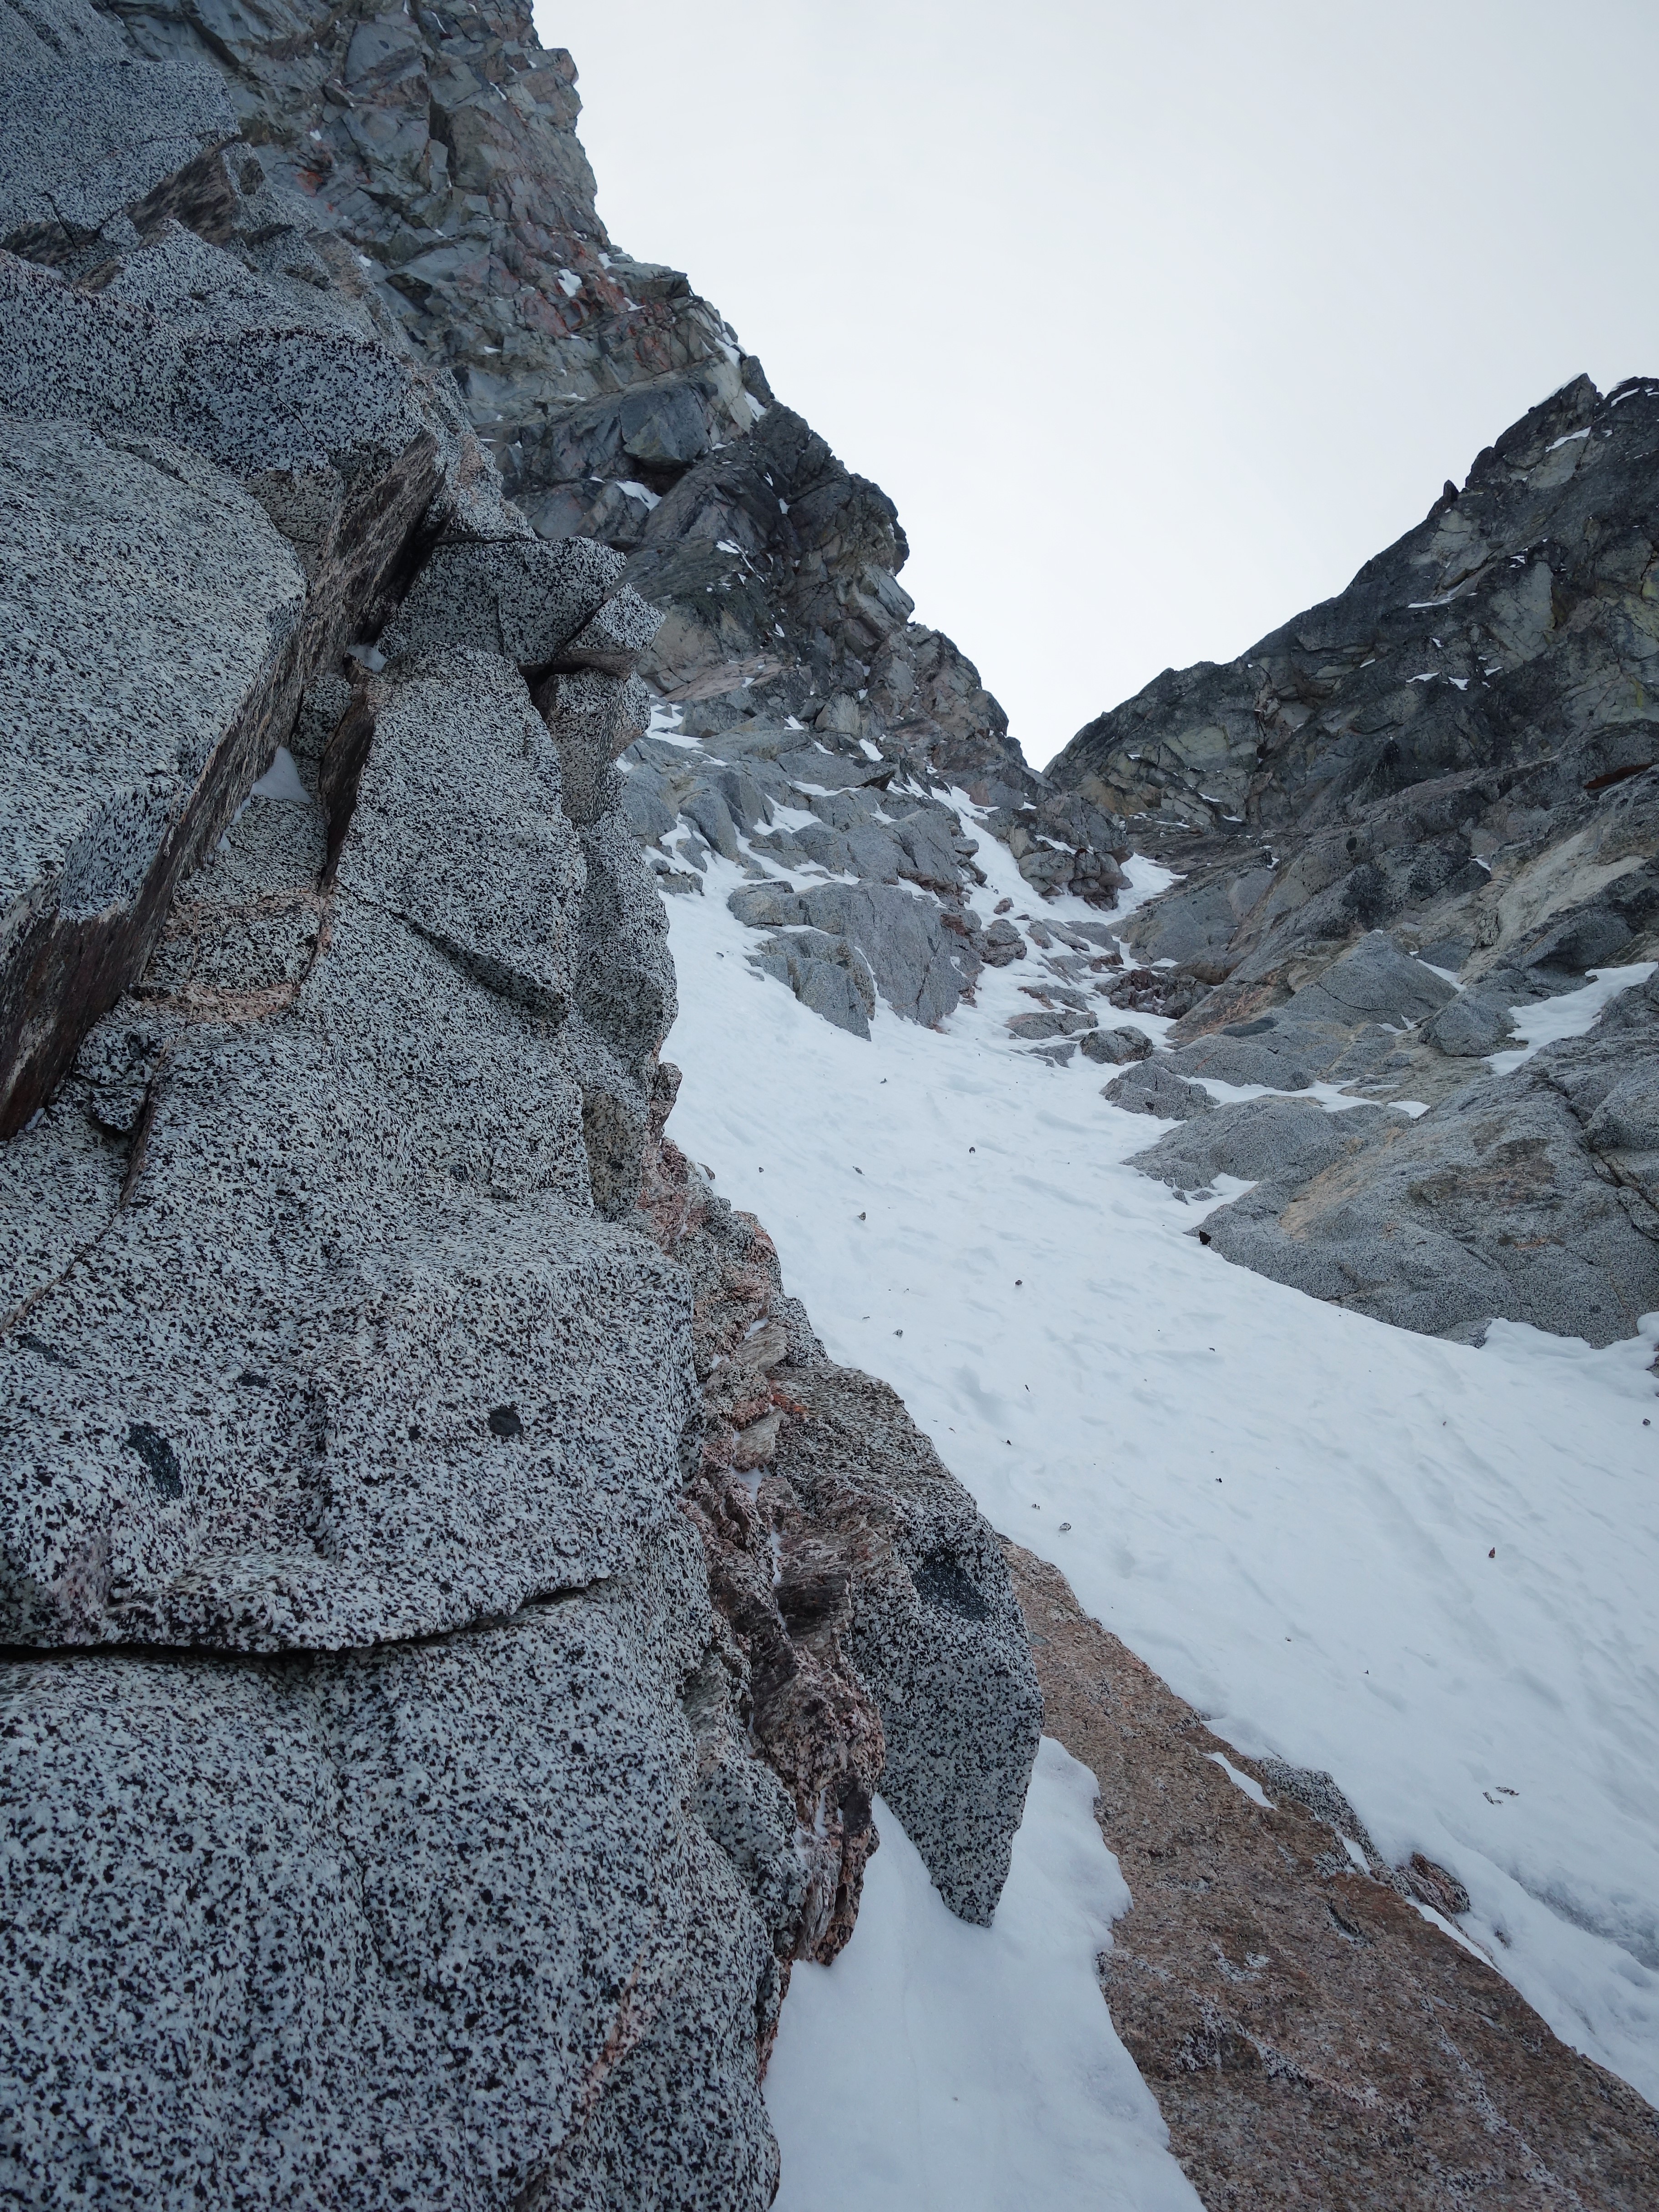
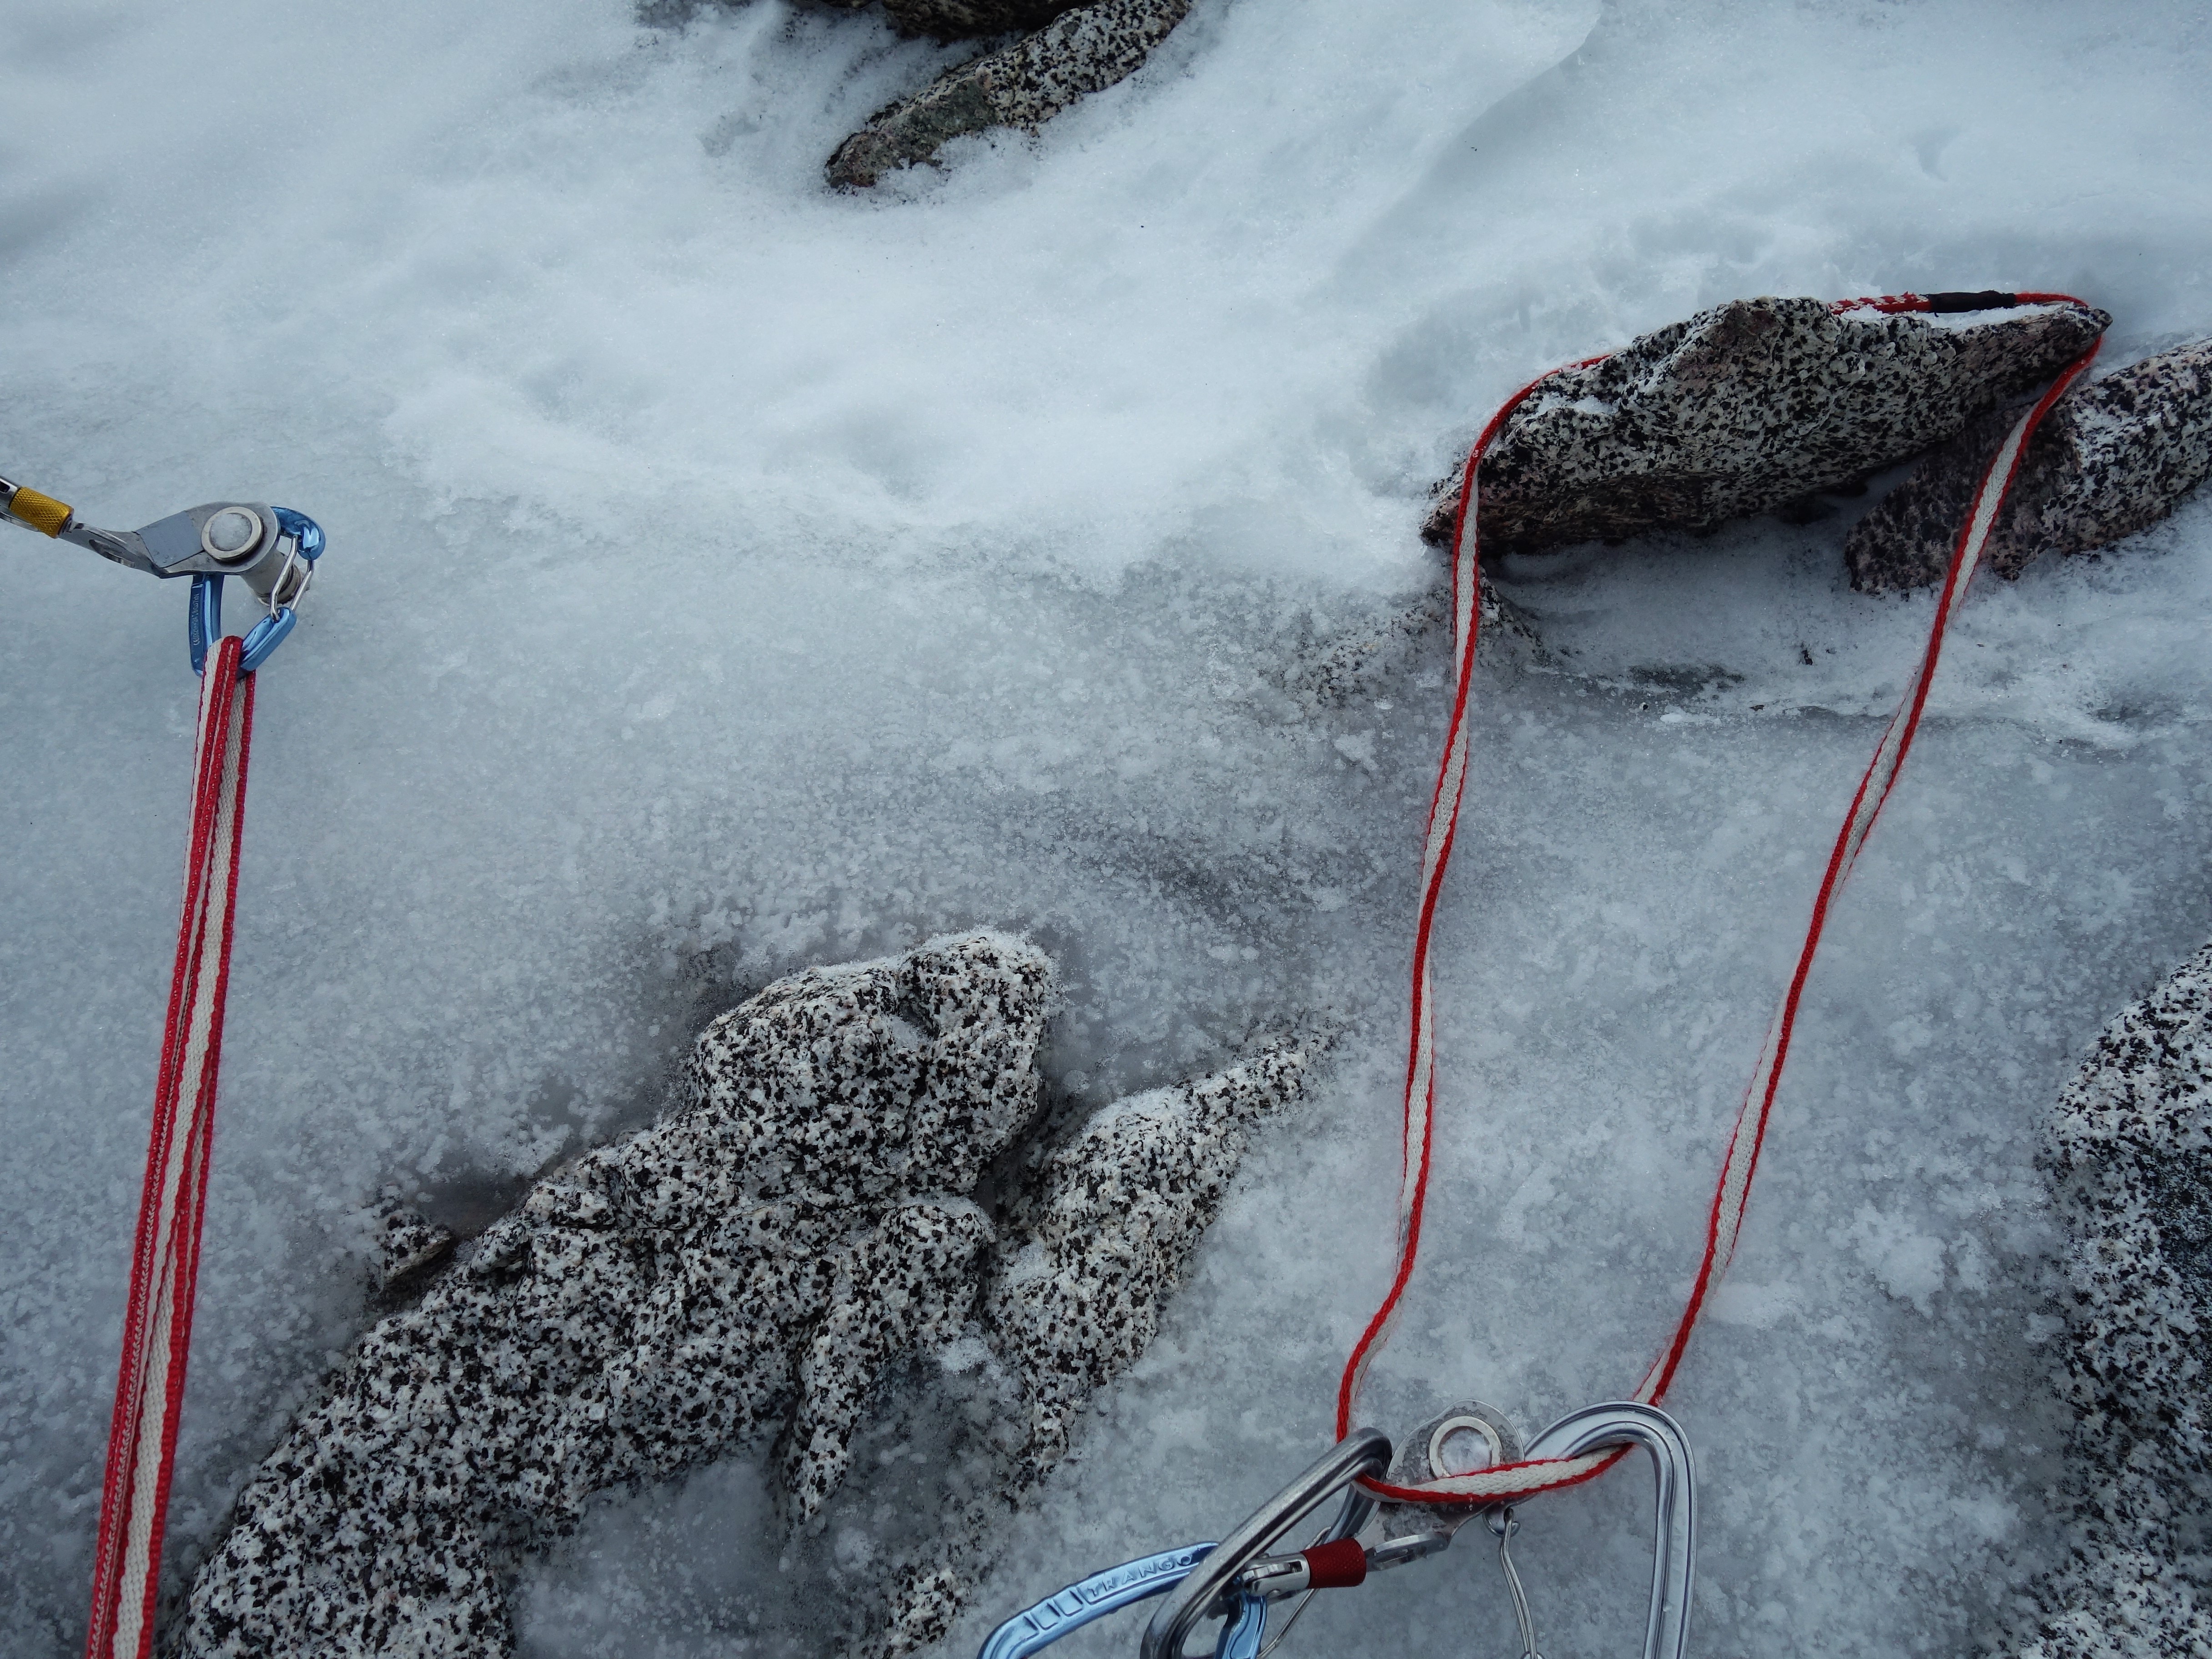
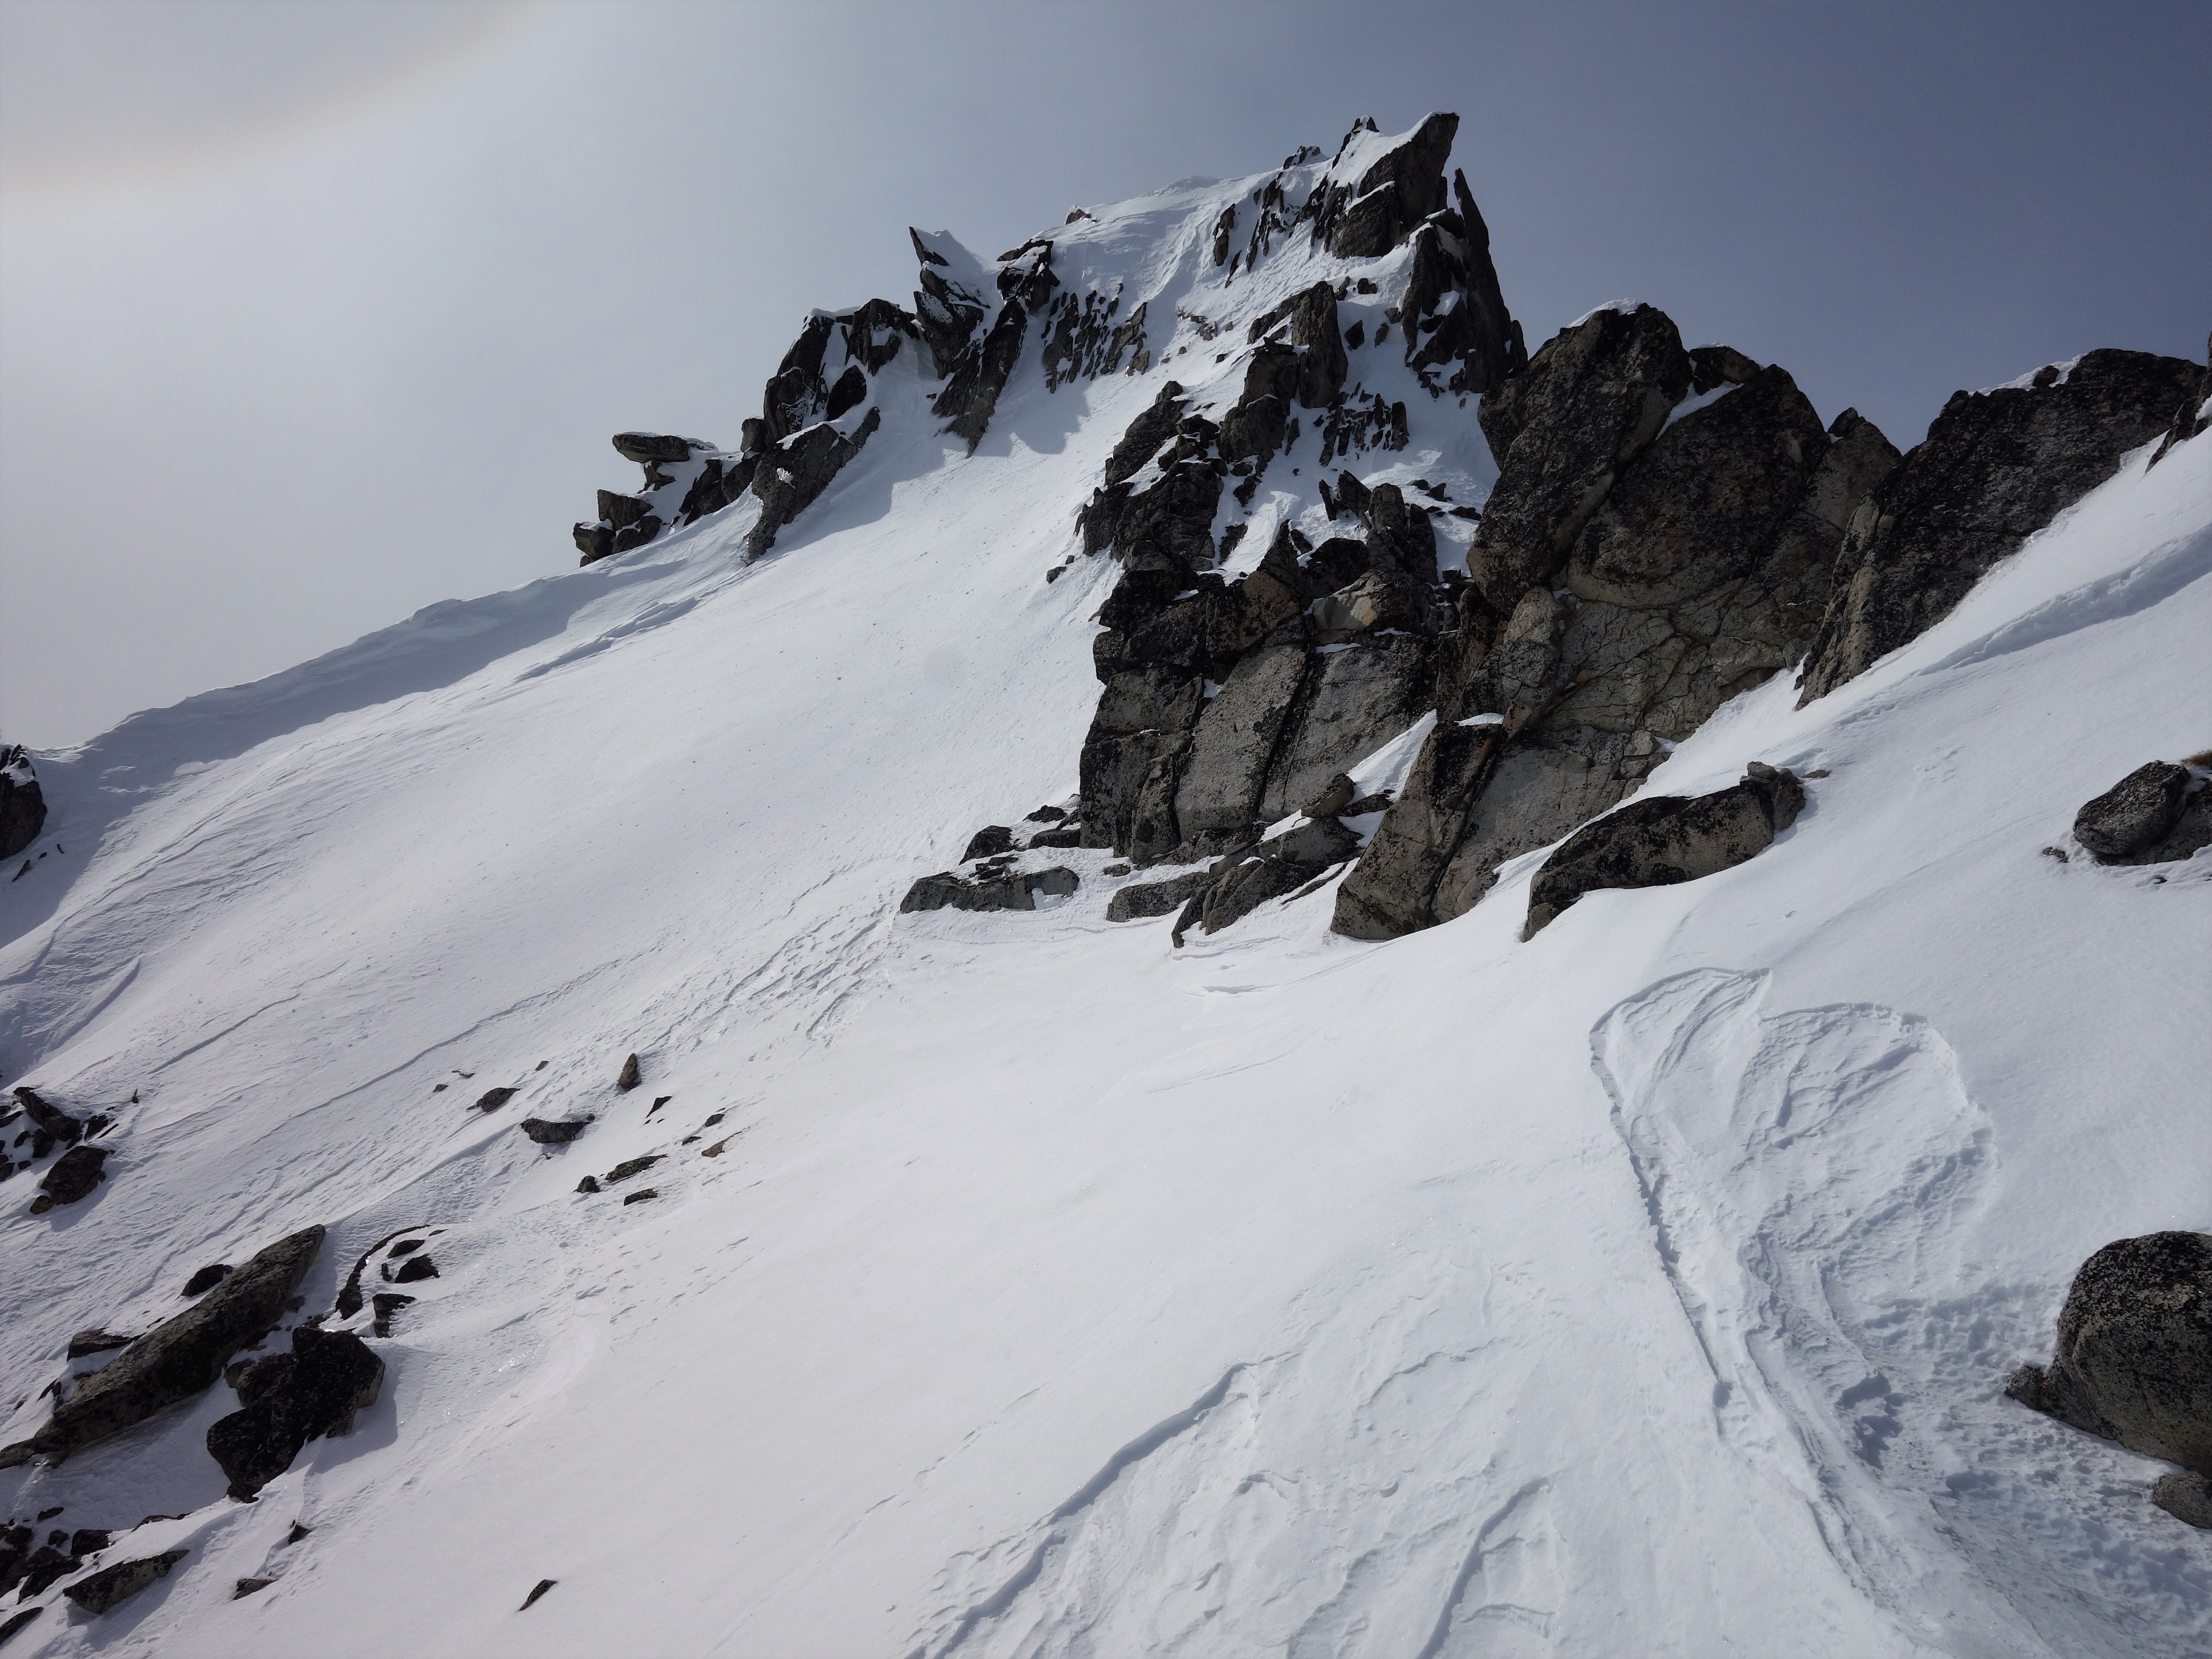
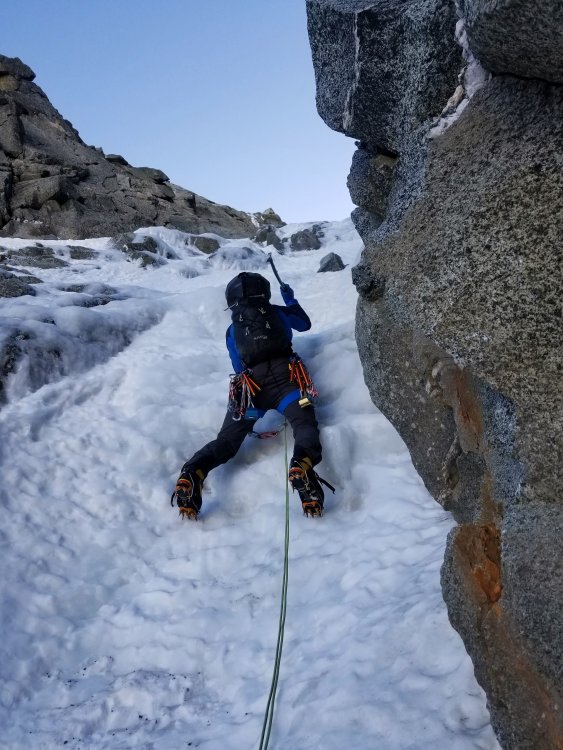
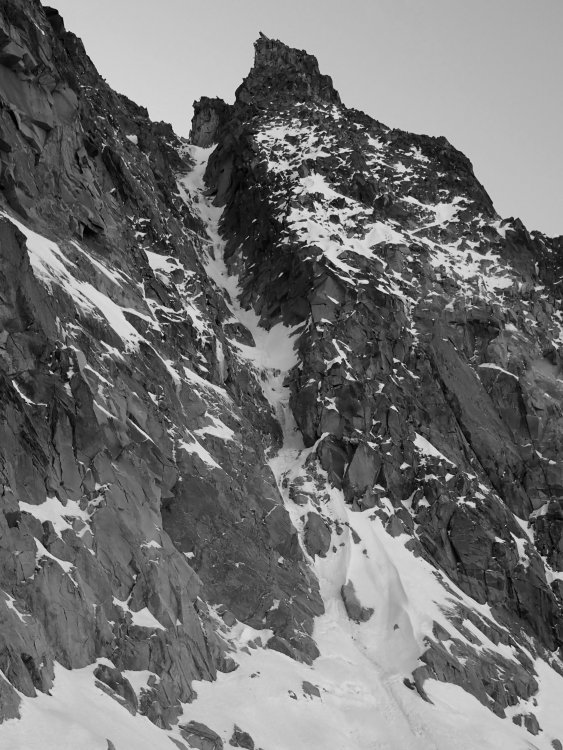
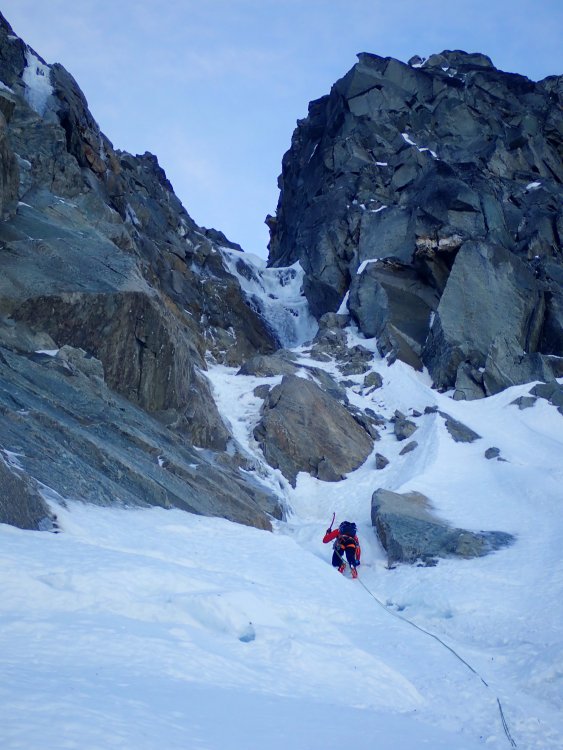
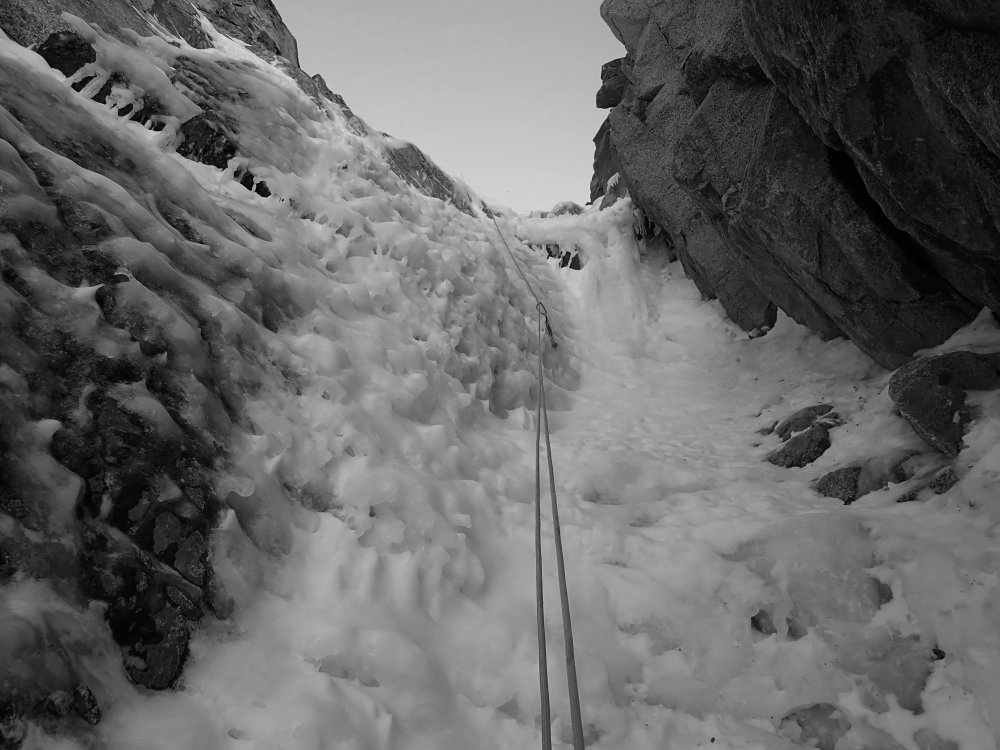
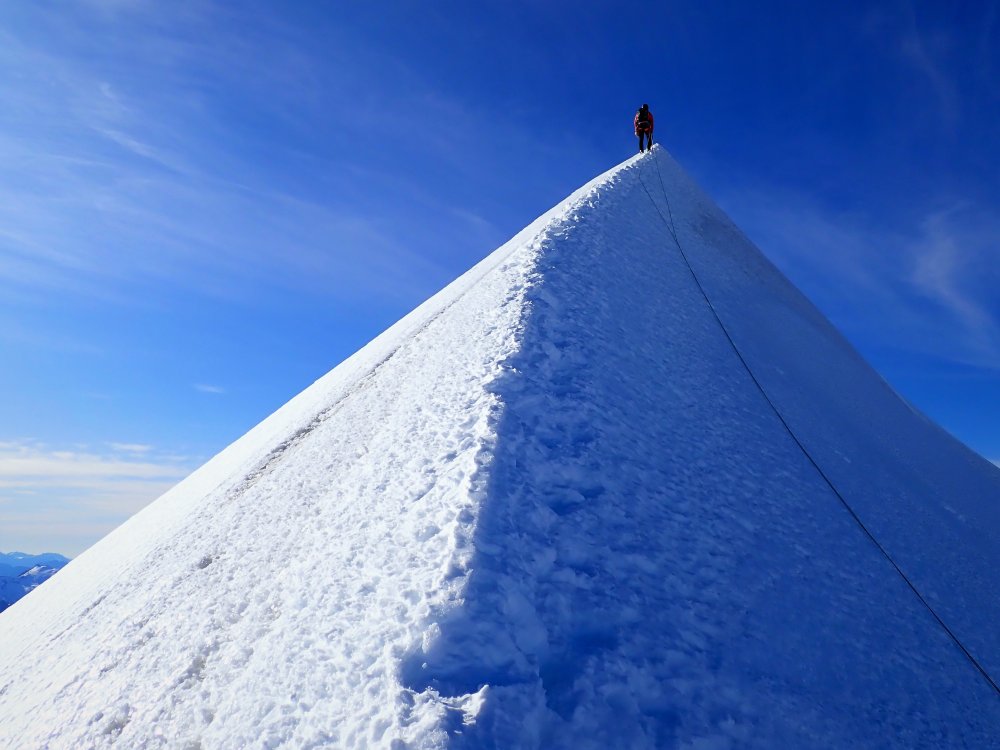
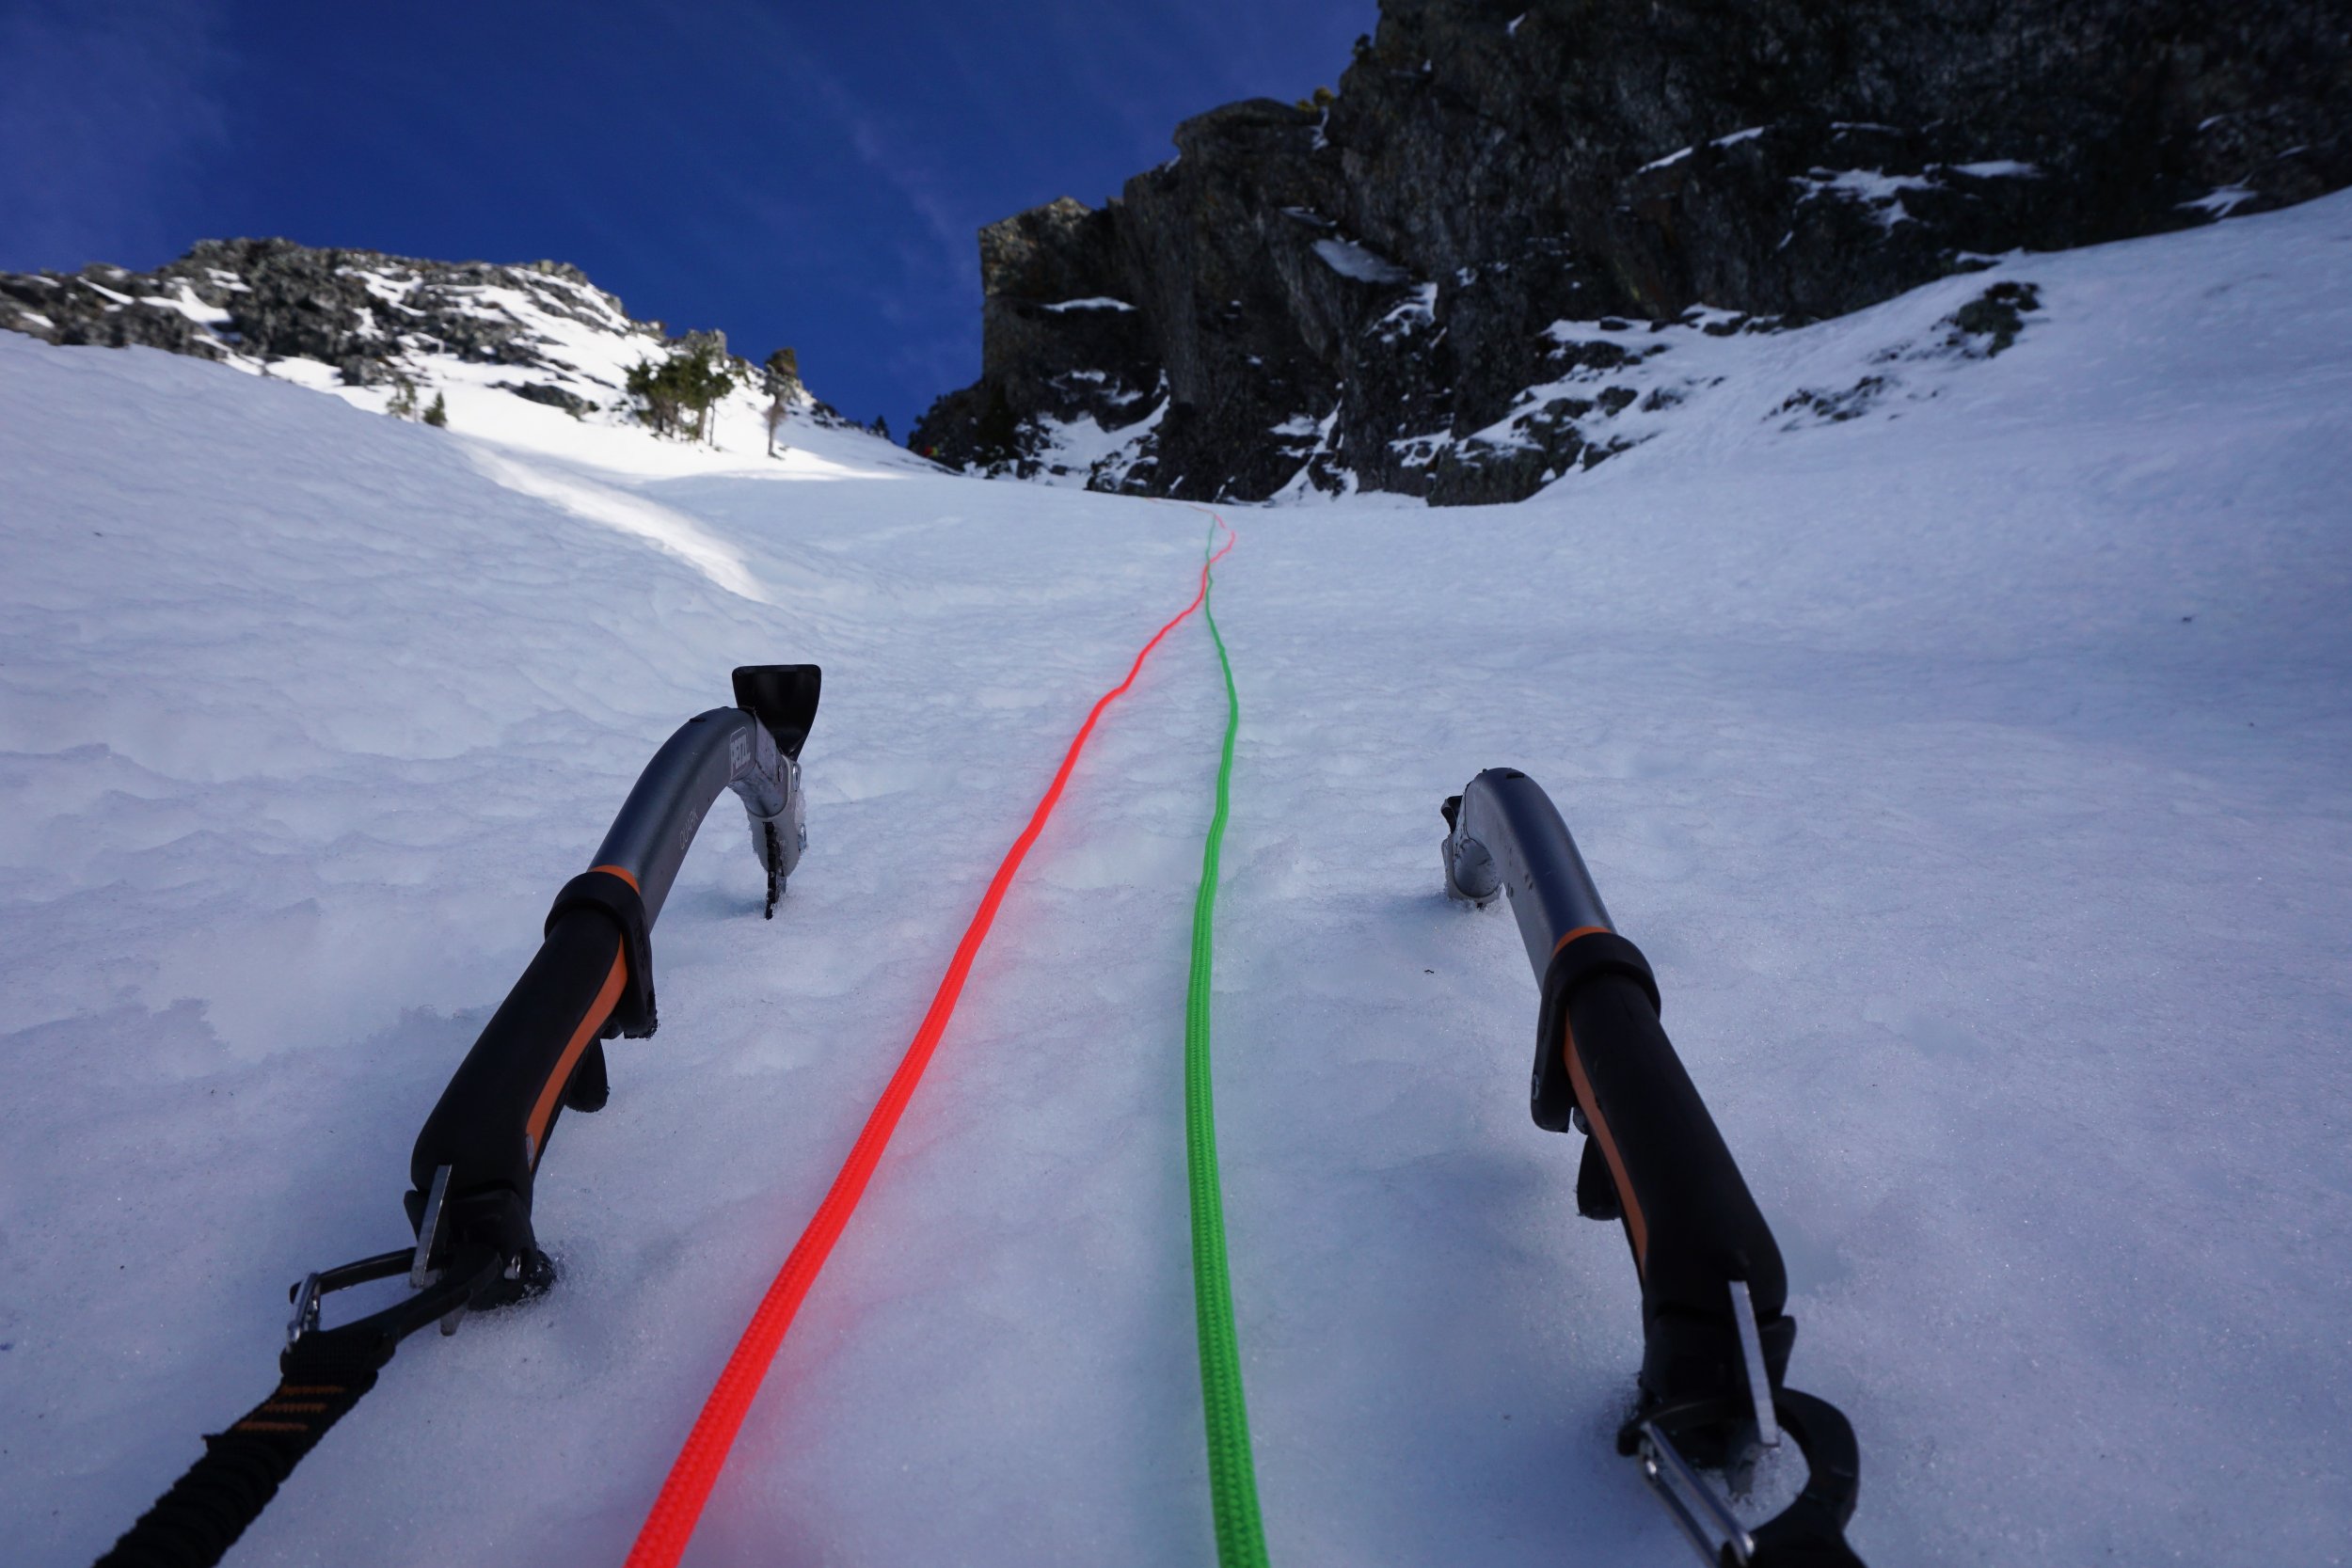
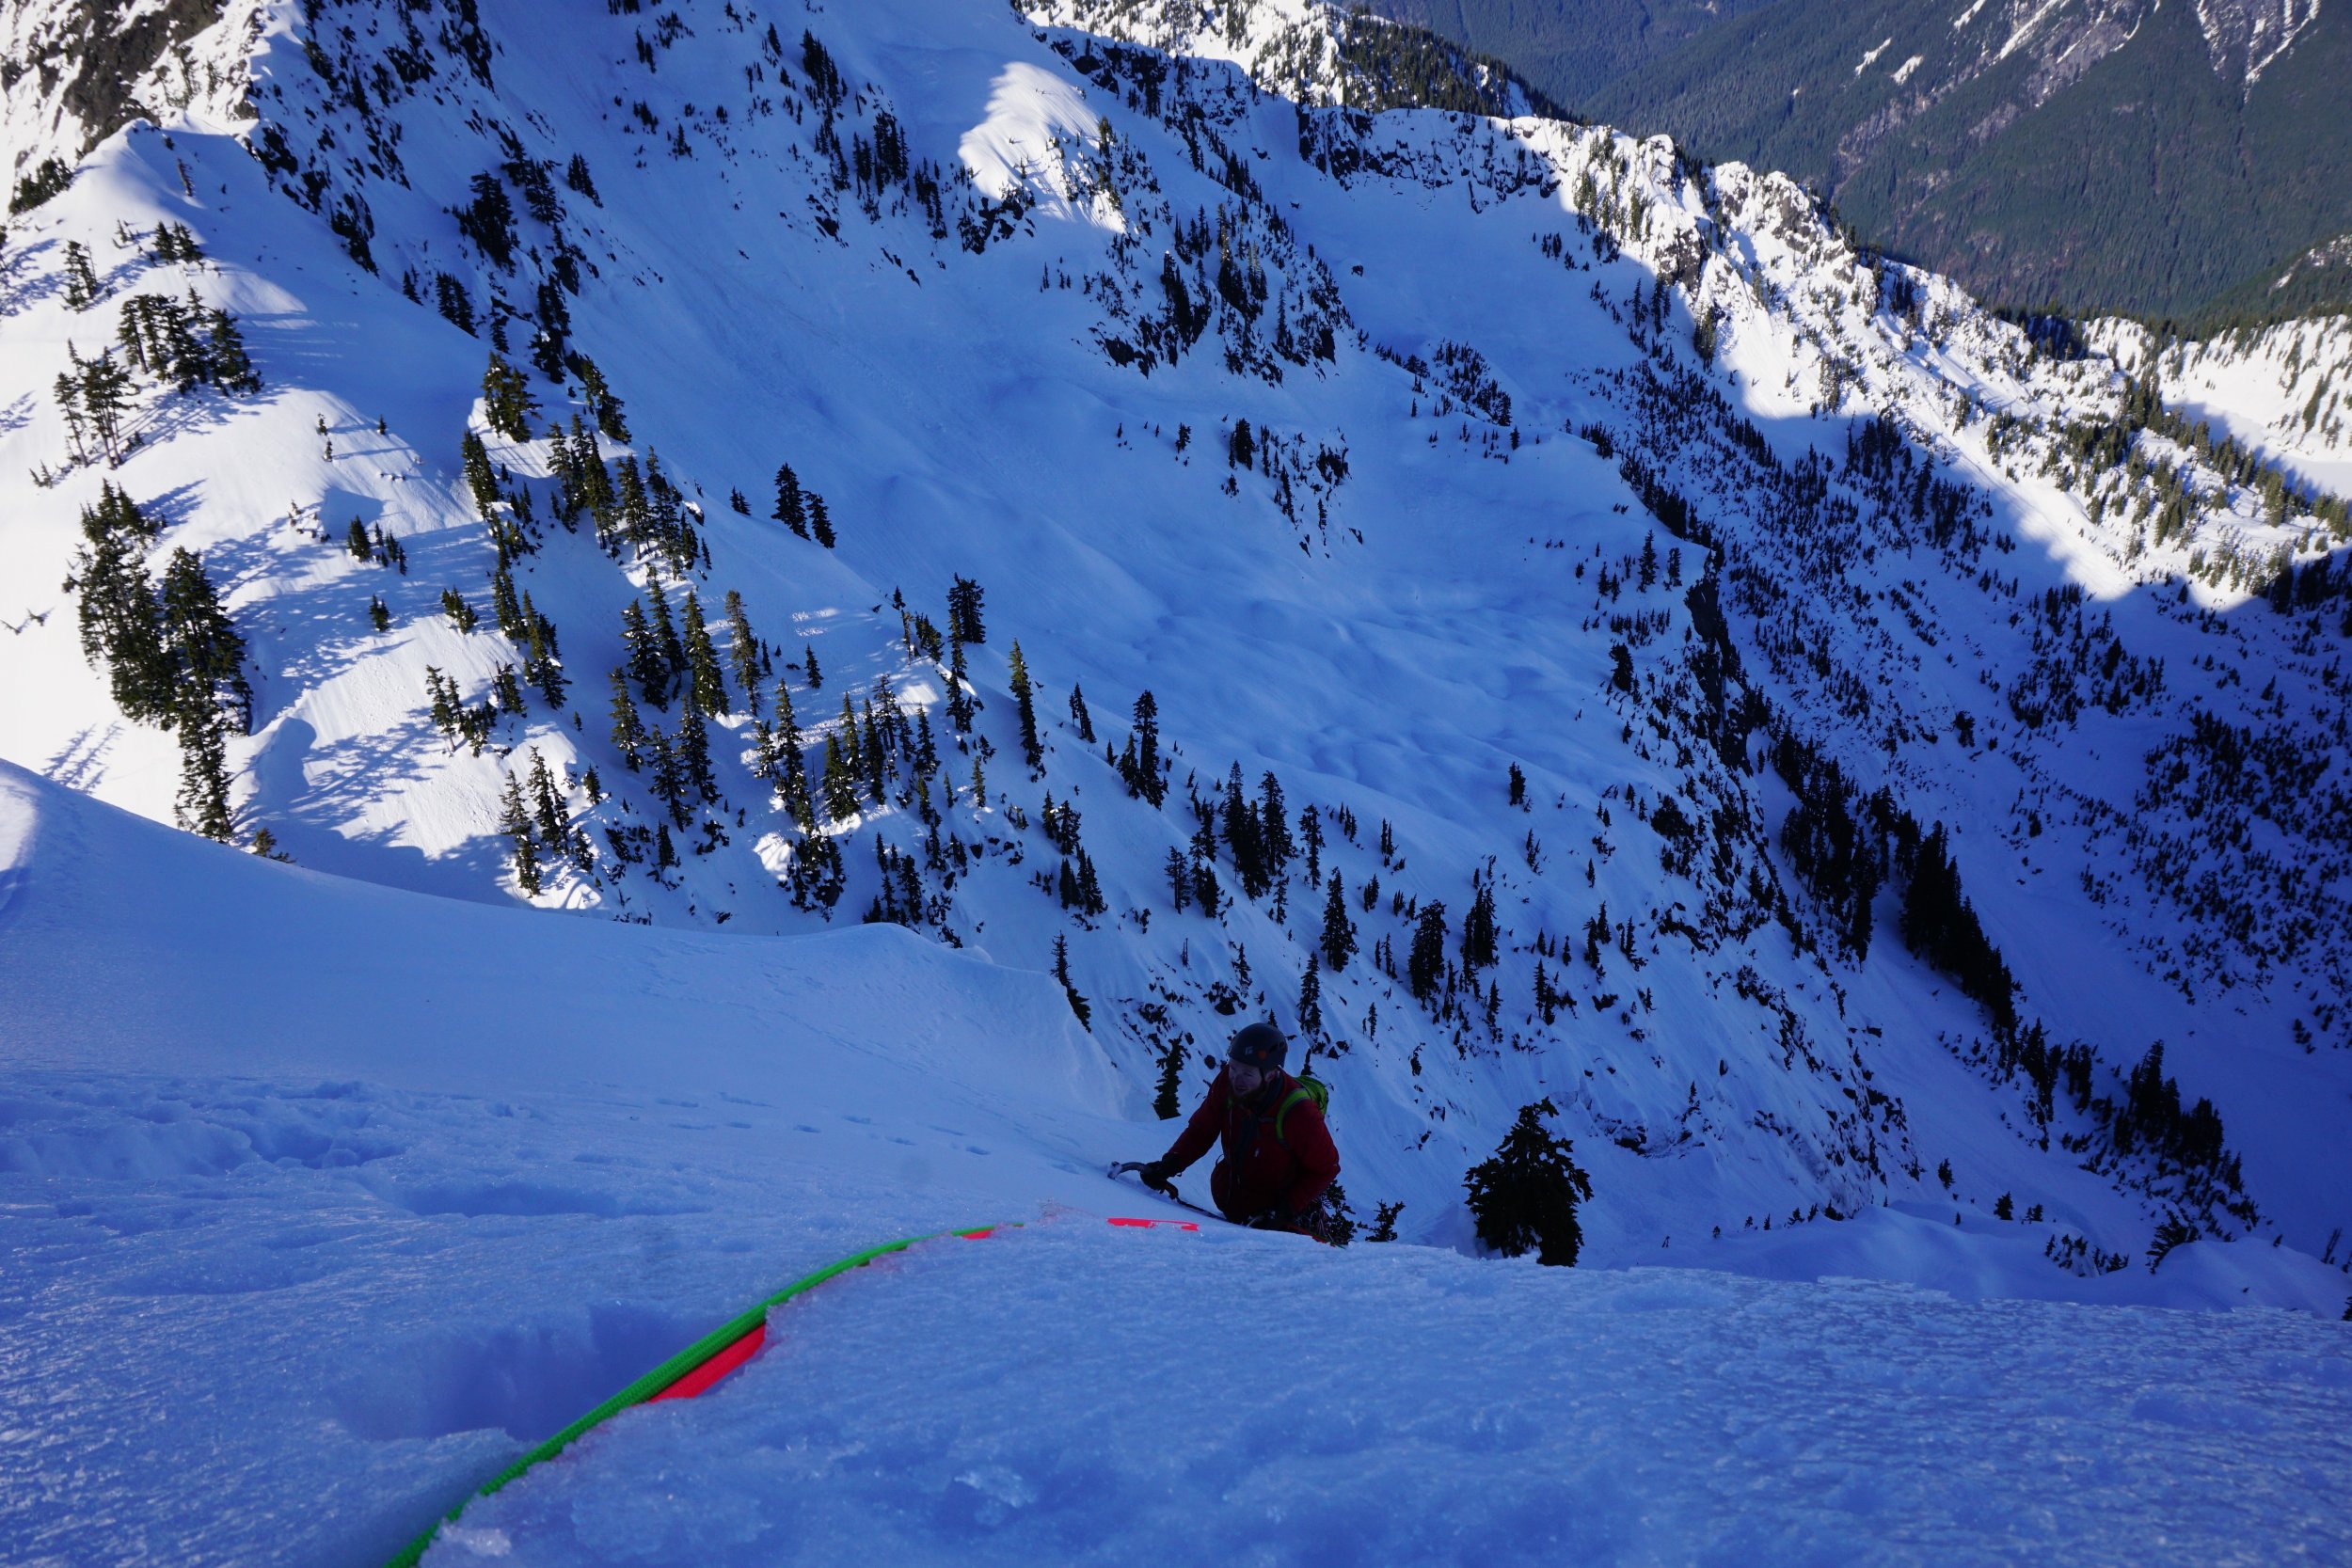
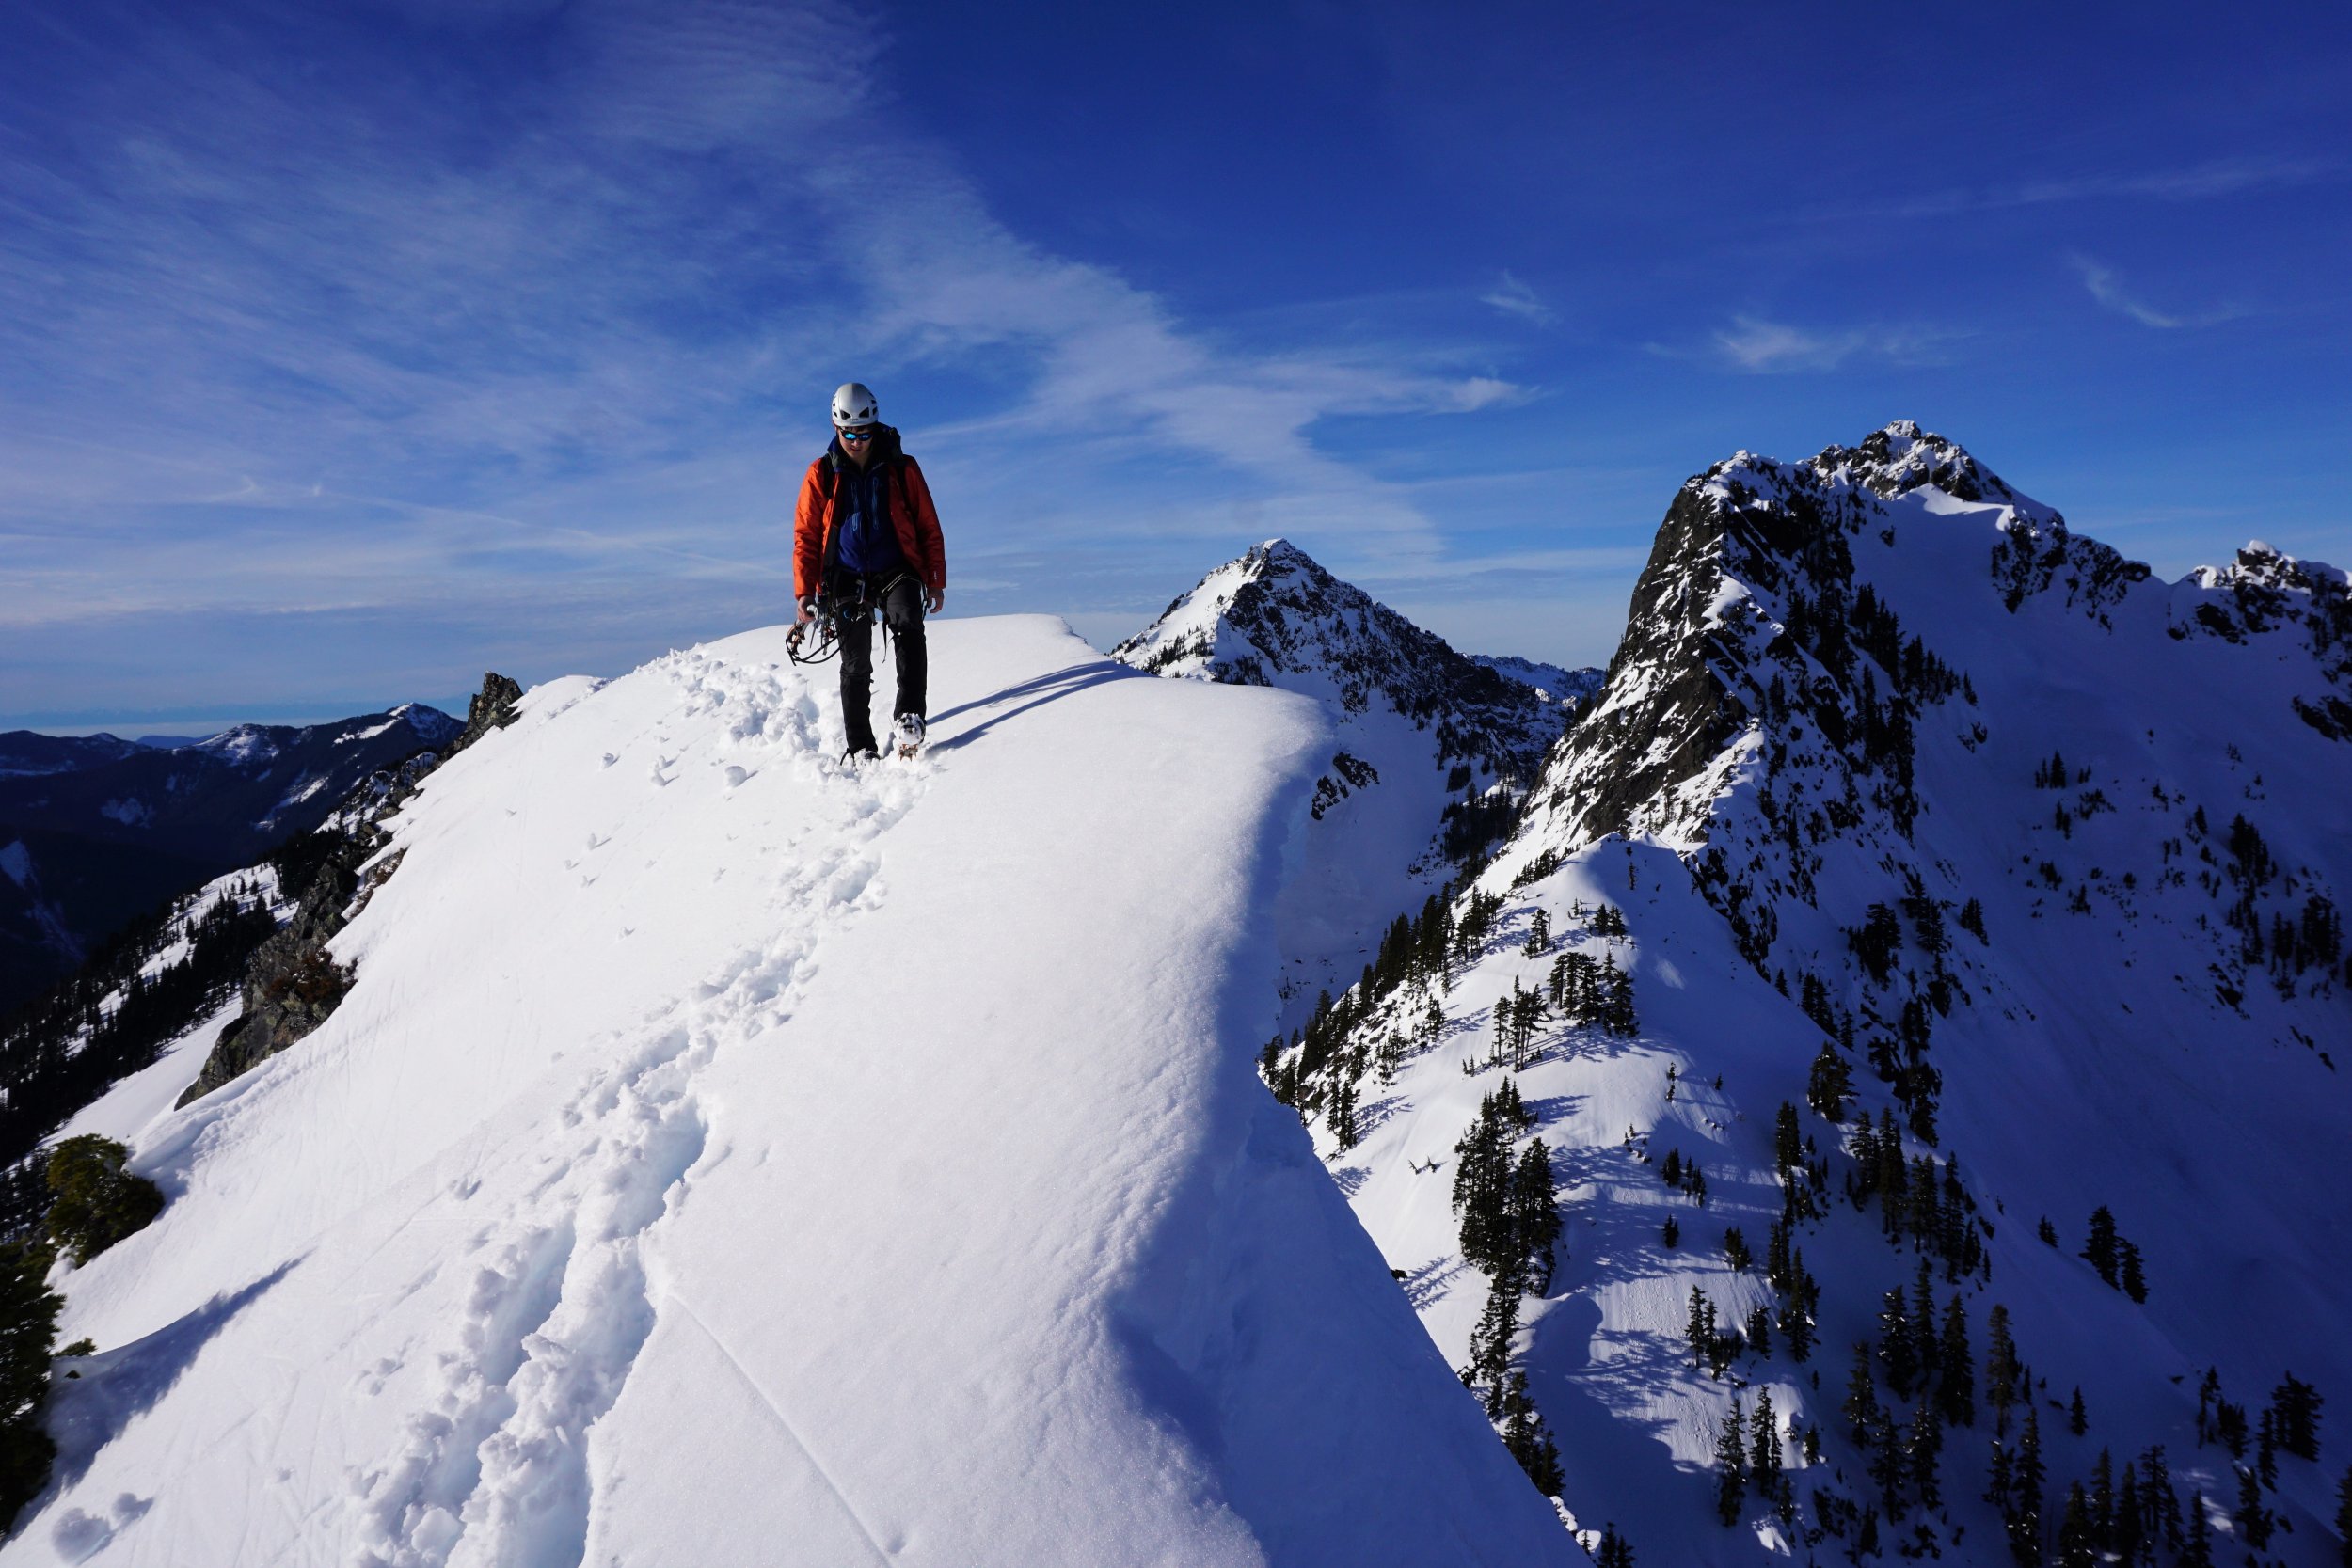
Trip: Mt. Stuart - Ice Cliff Glacier Trip Date: 04/20/2019 Trip Report: Jacob Krantz and I climbed the Ice Cliff Glacier (AI2, 60-70 degree snice) on Stuart on April 20th in 21+ hours car to car. We climbed three pitches of mostly steep snice and a little AI2 on the left side of the lower ice cliffs. The upper couloir was sustained and exposed at 50+ degree snice with a short bit of true WI2, but very secure climbing. The right hand exit had no cornice issues, although massive cornices still loom over the majority of the couloir. We chose not to go to the true summit since it was in the clouds and we were tired. The descent down the couloir to the Sherpa Glacier was extremely icy and grabby on skis and we actually chose to downclimb some of it. Lower glacier was awful breakable crust. All in all, about 24 miles, 8000-9000 ft gain, and one wild day of suffering and adventure in the mountains. For a more detailed, TR, see https://climberkyle.com/2019/04/20/mt-stuart-ice-cliff-glacier-ai2-60-70-degree-snice/. Entering the broad basin at 5400 ft. Looking up at the Ice Cliff Glacier. Starting up steep snow to the base of the cliffs. Leading up through steep snice and easy ice. An incredible setting! Looking up the exit couloir. We took the notch on the right. Soloing a nice AI2 bulge in the constriction in the couloir. Topping out on the route! Our little "summit" for the day. Sherpa Peak. First few turns into the couloir. It only got steeper and icier... Spooky loose wet slide that took out our skintrack through the woods, on a NW aspect in the basin around 5400 ft. Must have happened during the late afternoon at some point. Gear Notes: Used 2 pickets, 5 screws. One might want more pickets if you want to protect all the steep snice. Approach Notes: Road was skinnable a little before the Eightmile trailhead, but melting fast. We kept skis on all the way to Stuart, although just barely in places. Creek crossings were generally easy to find. The section after you leave the Stuart Lake trail is brushy. Be prepared.
-
[TR] Humpback Mountain - Humpback Flows 02/07/2019
Kyle M replied to Justin Pucci's topic in Alpine Lakes
Great job everyone! We're starting the renaissance of ice climbing here in the Seattle area! (okay, maybe that's a bit of an exaggeration) But regardless, this is an awesome crag and it will be fun to watch conditions on it and see other lines go down! It just proves that there's ice in almost any winter here, but it might move around. -
@AlexWhat kind of conditions does Keekwulee Falls need to come in?
-
Good to hear some multiyear perspective! Skinning by the look interesting, but I did not realize how big and awesome they were until I got underneath them. They make the ice routes in the Alpental Valley look short and thin by comparison (although the Alpental climbs are coming in well this week). They're definitely worth the approach in my mind.
-
Thanks! Although I do not have multi year evidence, I think the Melakwa Flows will come in regularly each winter, unless it is super cold or ridiculously warm. The large snowfield above it to feed meltwater, its direct solar aspect, and its relatively high elevation of 5000 ft mean that it will likely experience extensive freeze thaw cycles at some point during the winter or spring and form. They might not be as fat many years, but I would expect them to be there. They were already forming in mid November this year when I first saw them. The line on Bryant Peak I see to be more ephemeral and probably a result of the warmer temps we have had this winter. It needs probably many weeks of good freeze thaw to form, but it does always have that snowfield above to feed it. The routes on Lennox that Alpine Dave discovered look very cool and hopefully I will get out to them in time. I believe they are just as good as when he climbed them, but people are conservative and generally like to follow where there are recent trip reports and where others are going. The climbs on Lennox have a few things not going for them: significant approach (compared to say, Alpental ice), significant avalanche hazard, and you cannot see them from a major road or trail. That last point is maybe the biggest factor. Almost all popular ice climbing in WA (and maybe elsewhere, but cannot really say) is easily visible from a road or trail. People don't want to potentially "waste" a whole day carrying their tools and rack around and not get to climb anything. If we assume that ice forms in the same density elsewhere in the Cascades as it does in the established areas, then there's hundreds of lines waiting to be climbed out there, even without snowmobile access. Part of our goal with these climbs was to show what potential is out there in our backyard and inspire others to explore. We are not by any means good or even experienced ice climbers, but we are young and naive, and that naivety led us to think that there was more ice out there than just the Alpental Valley, even on a 50 degree weekend. And it was only one valley over...
-
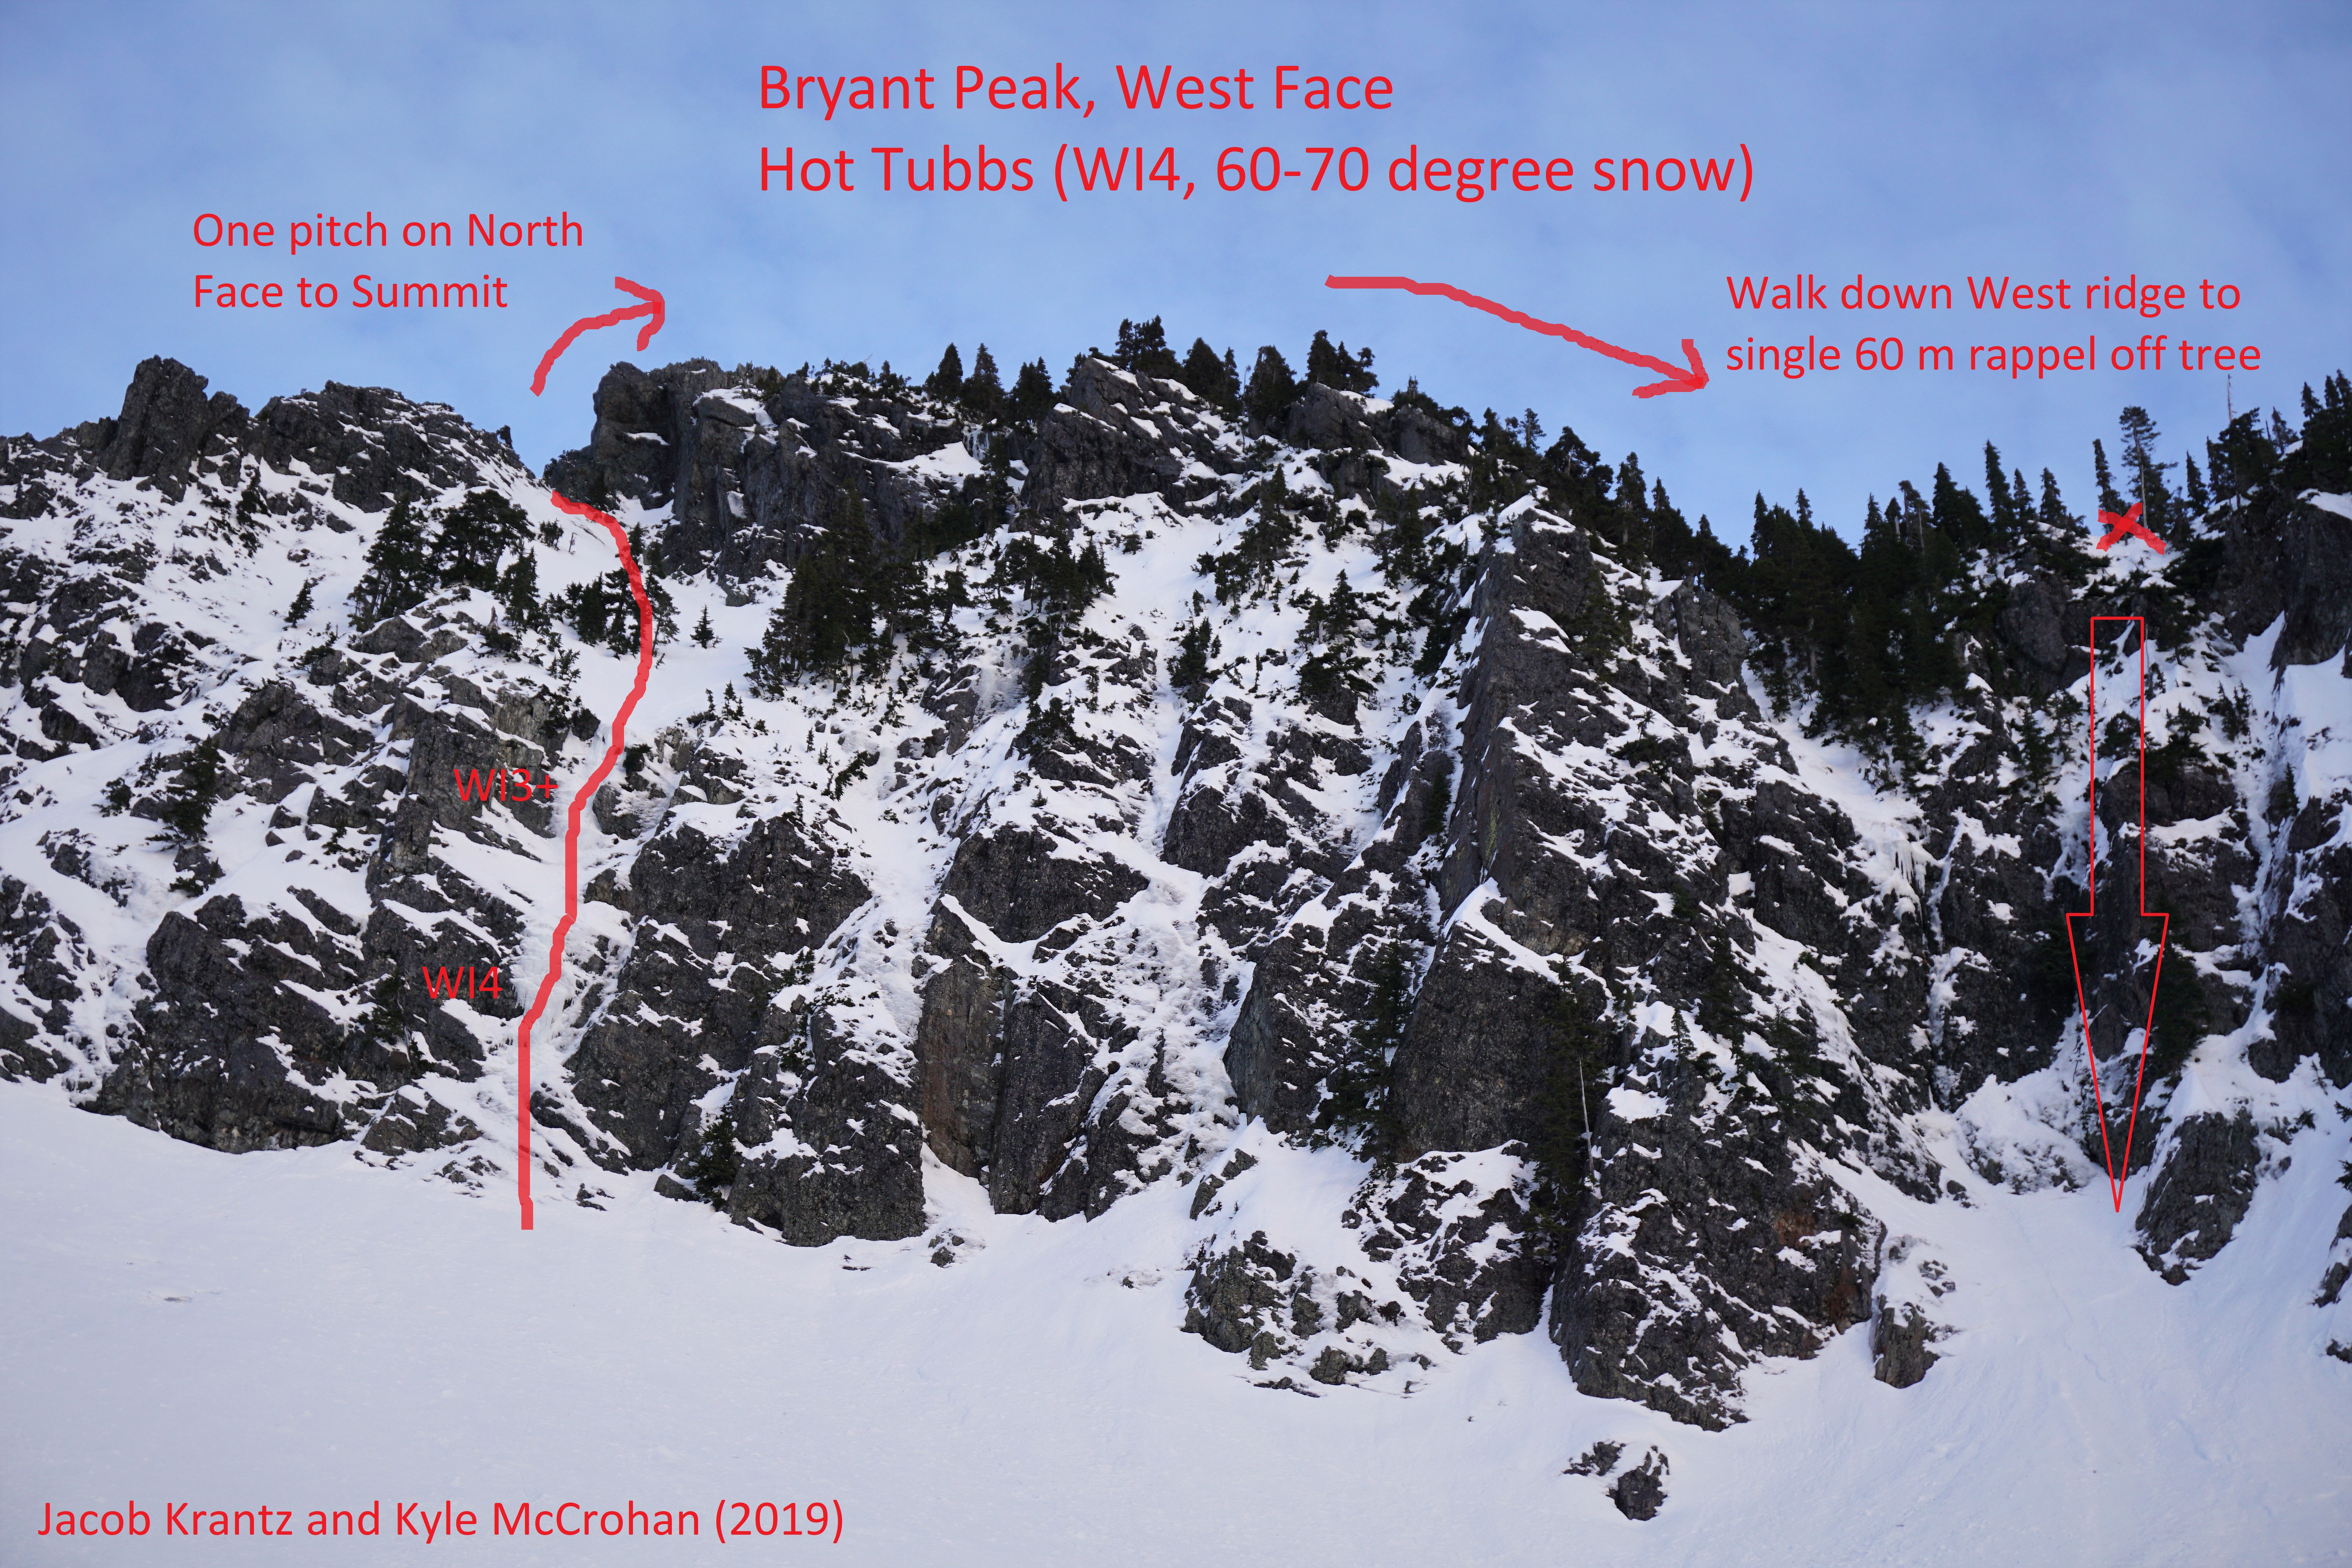
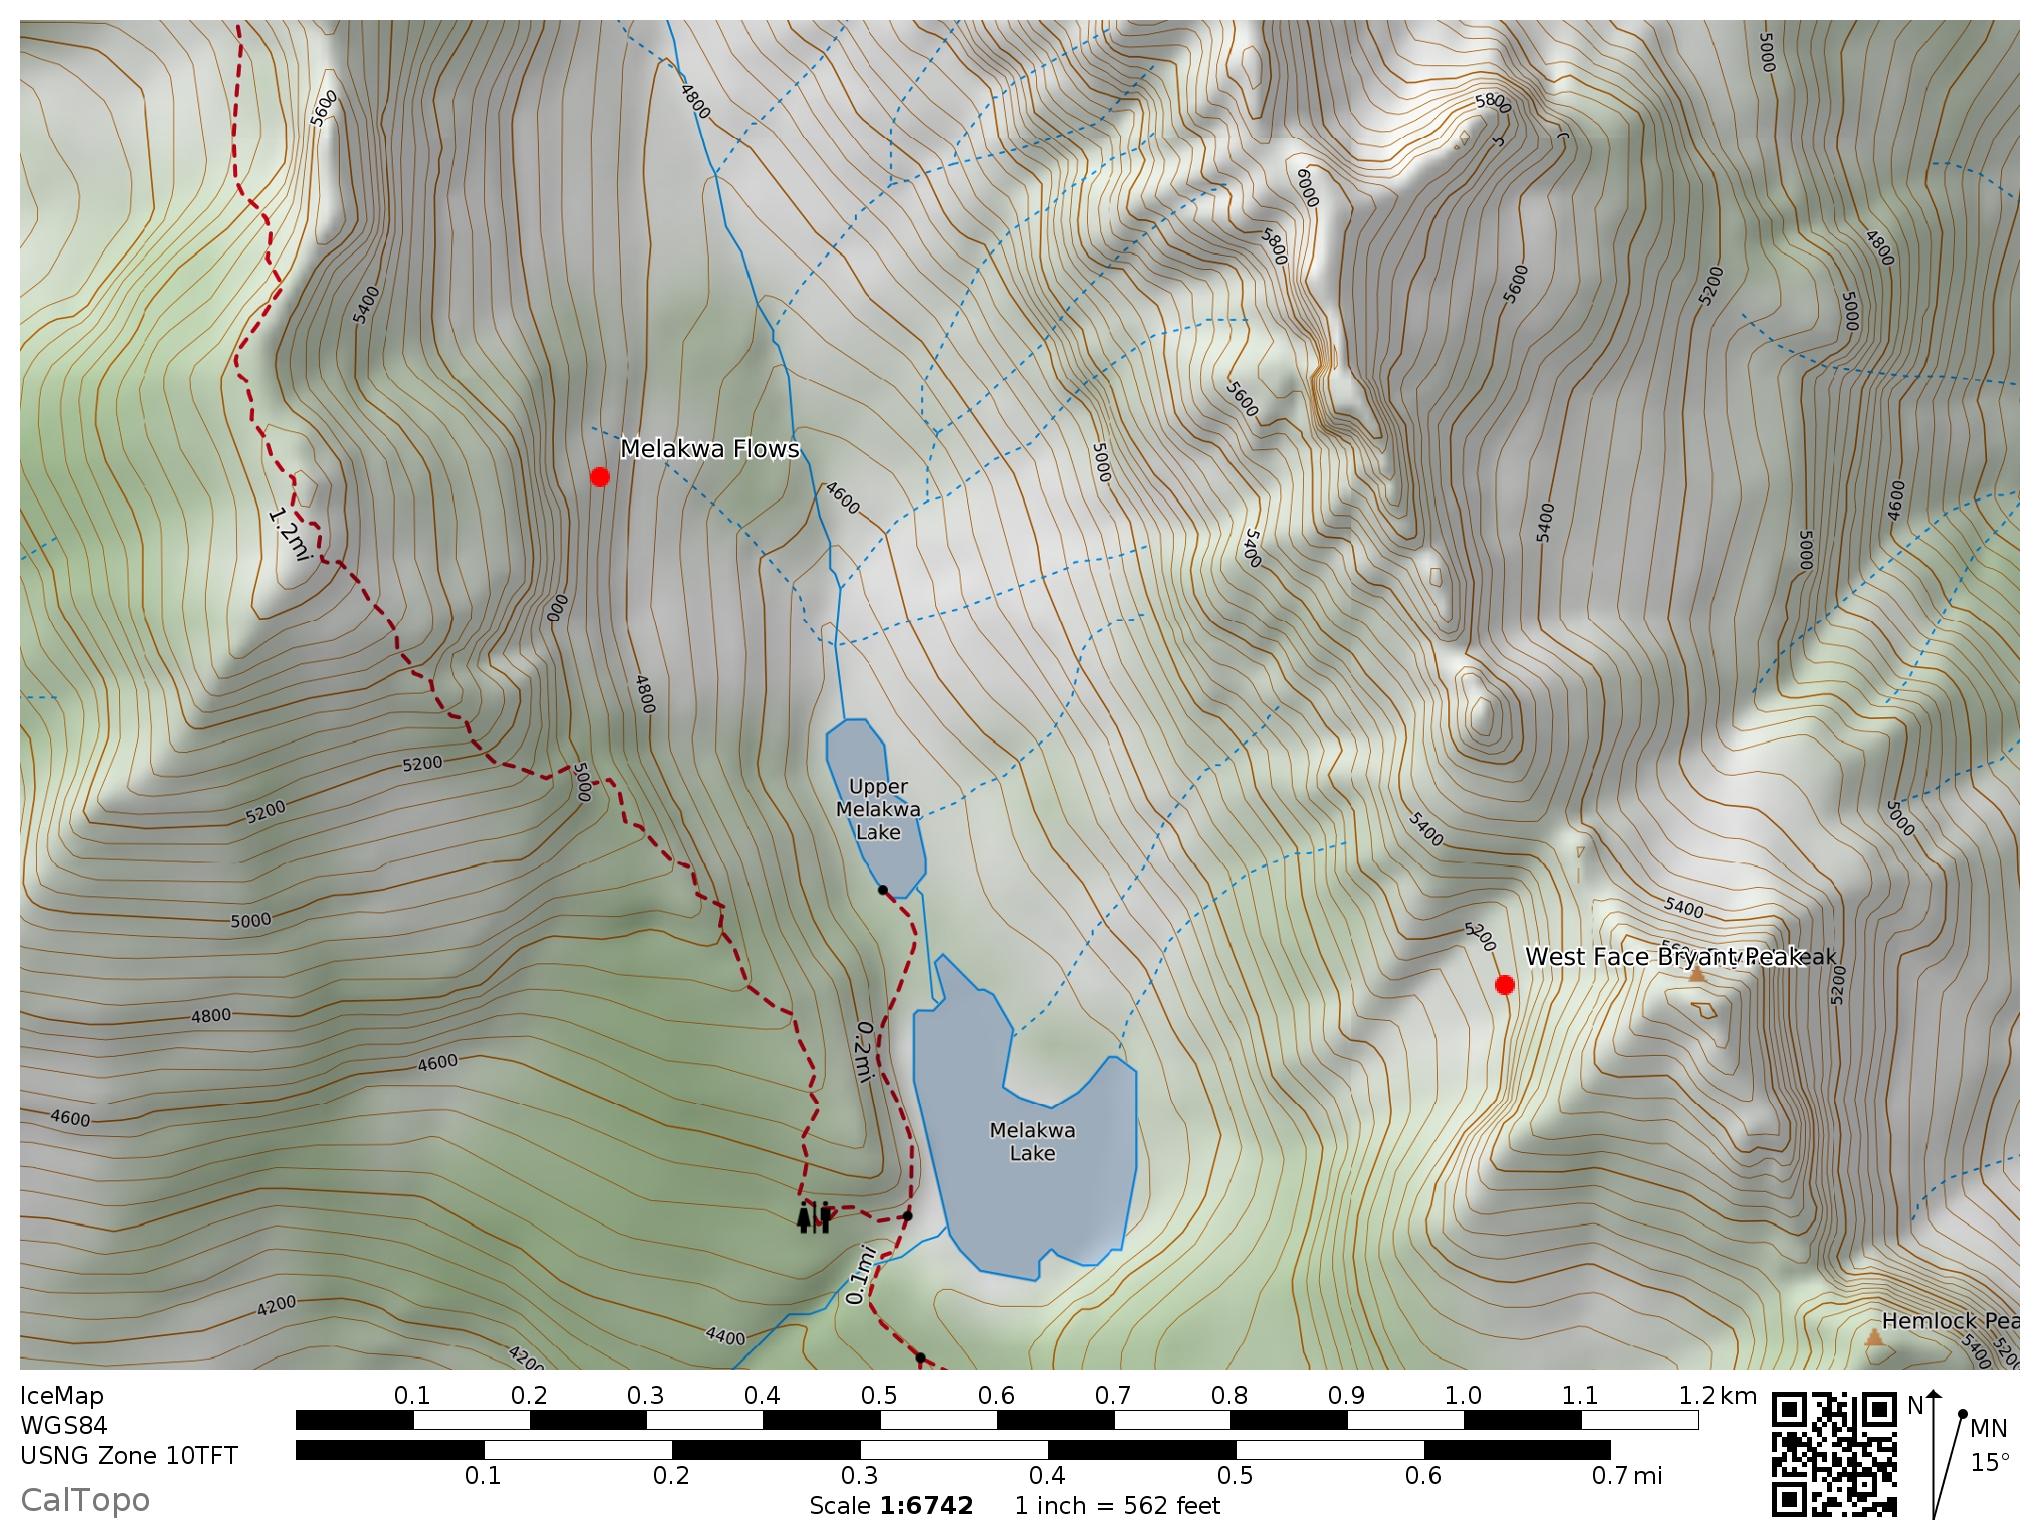
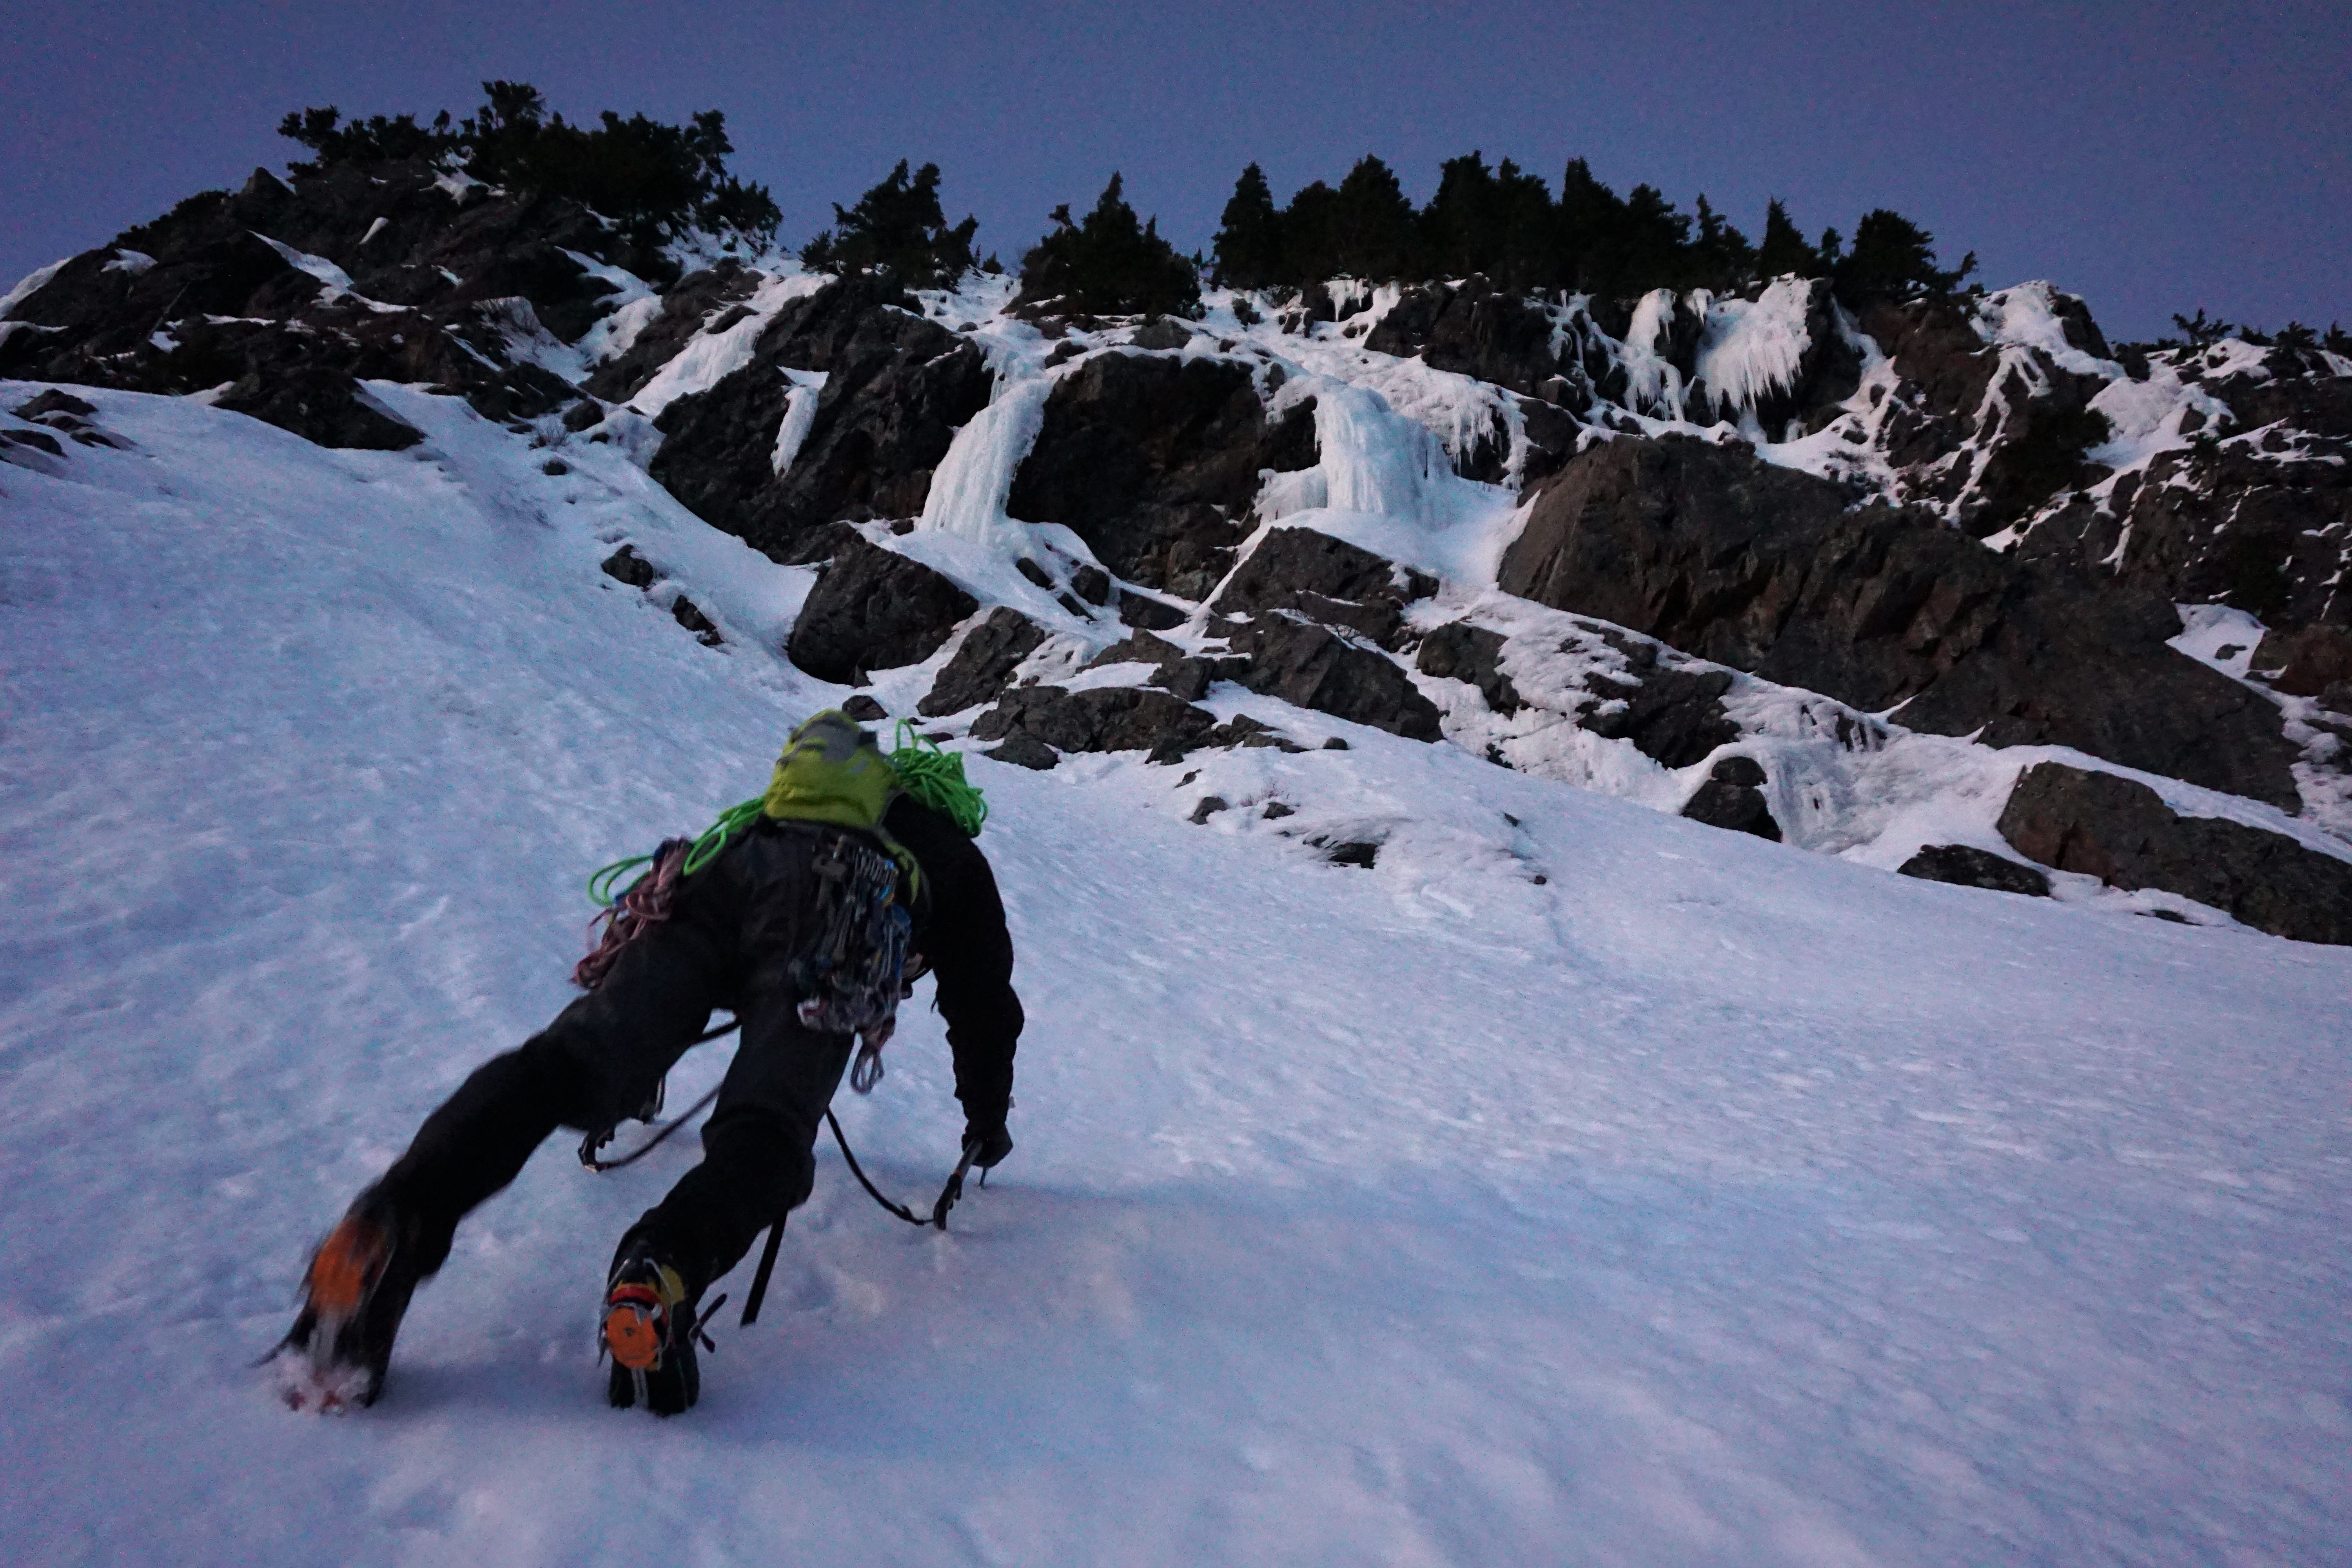
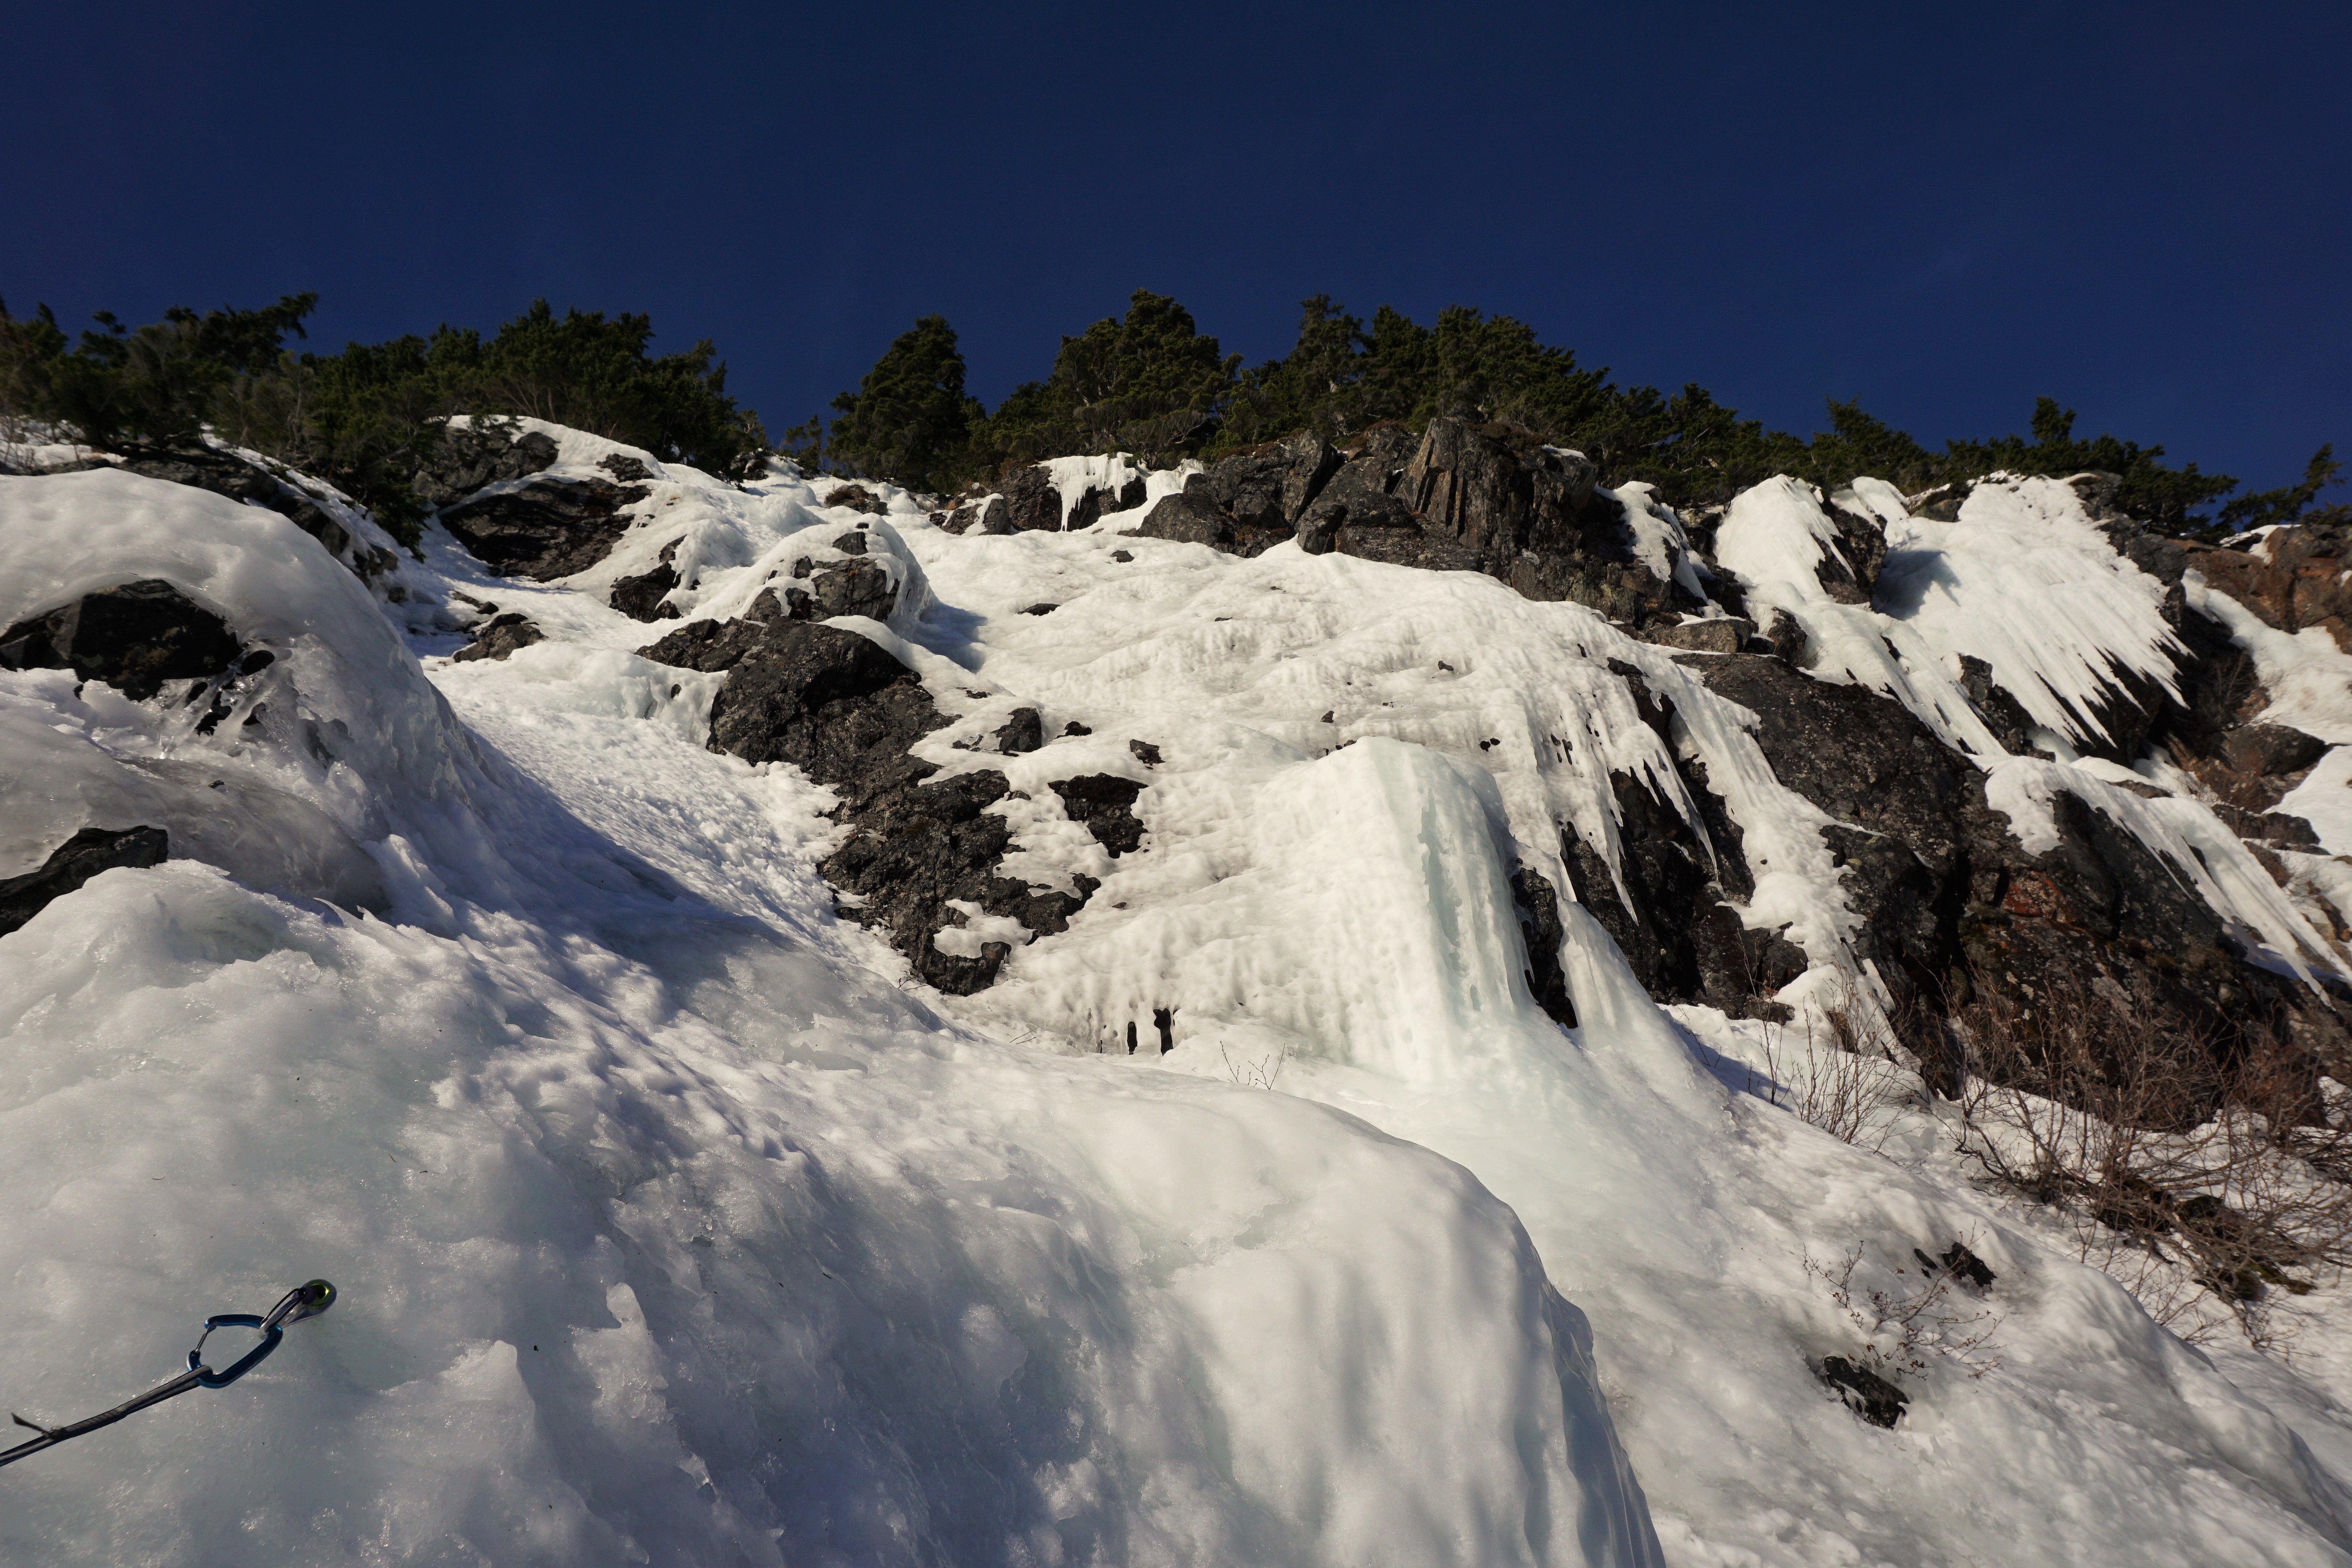
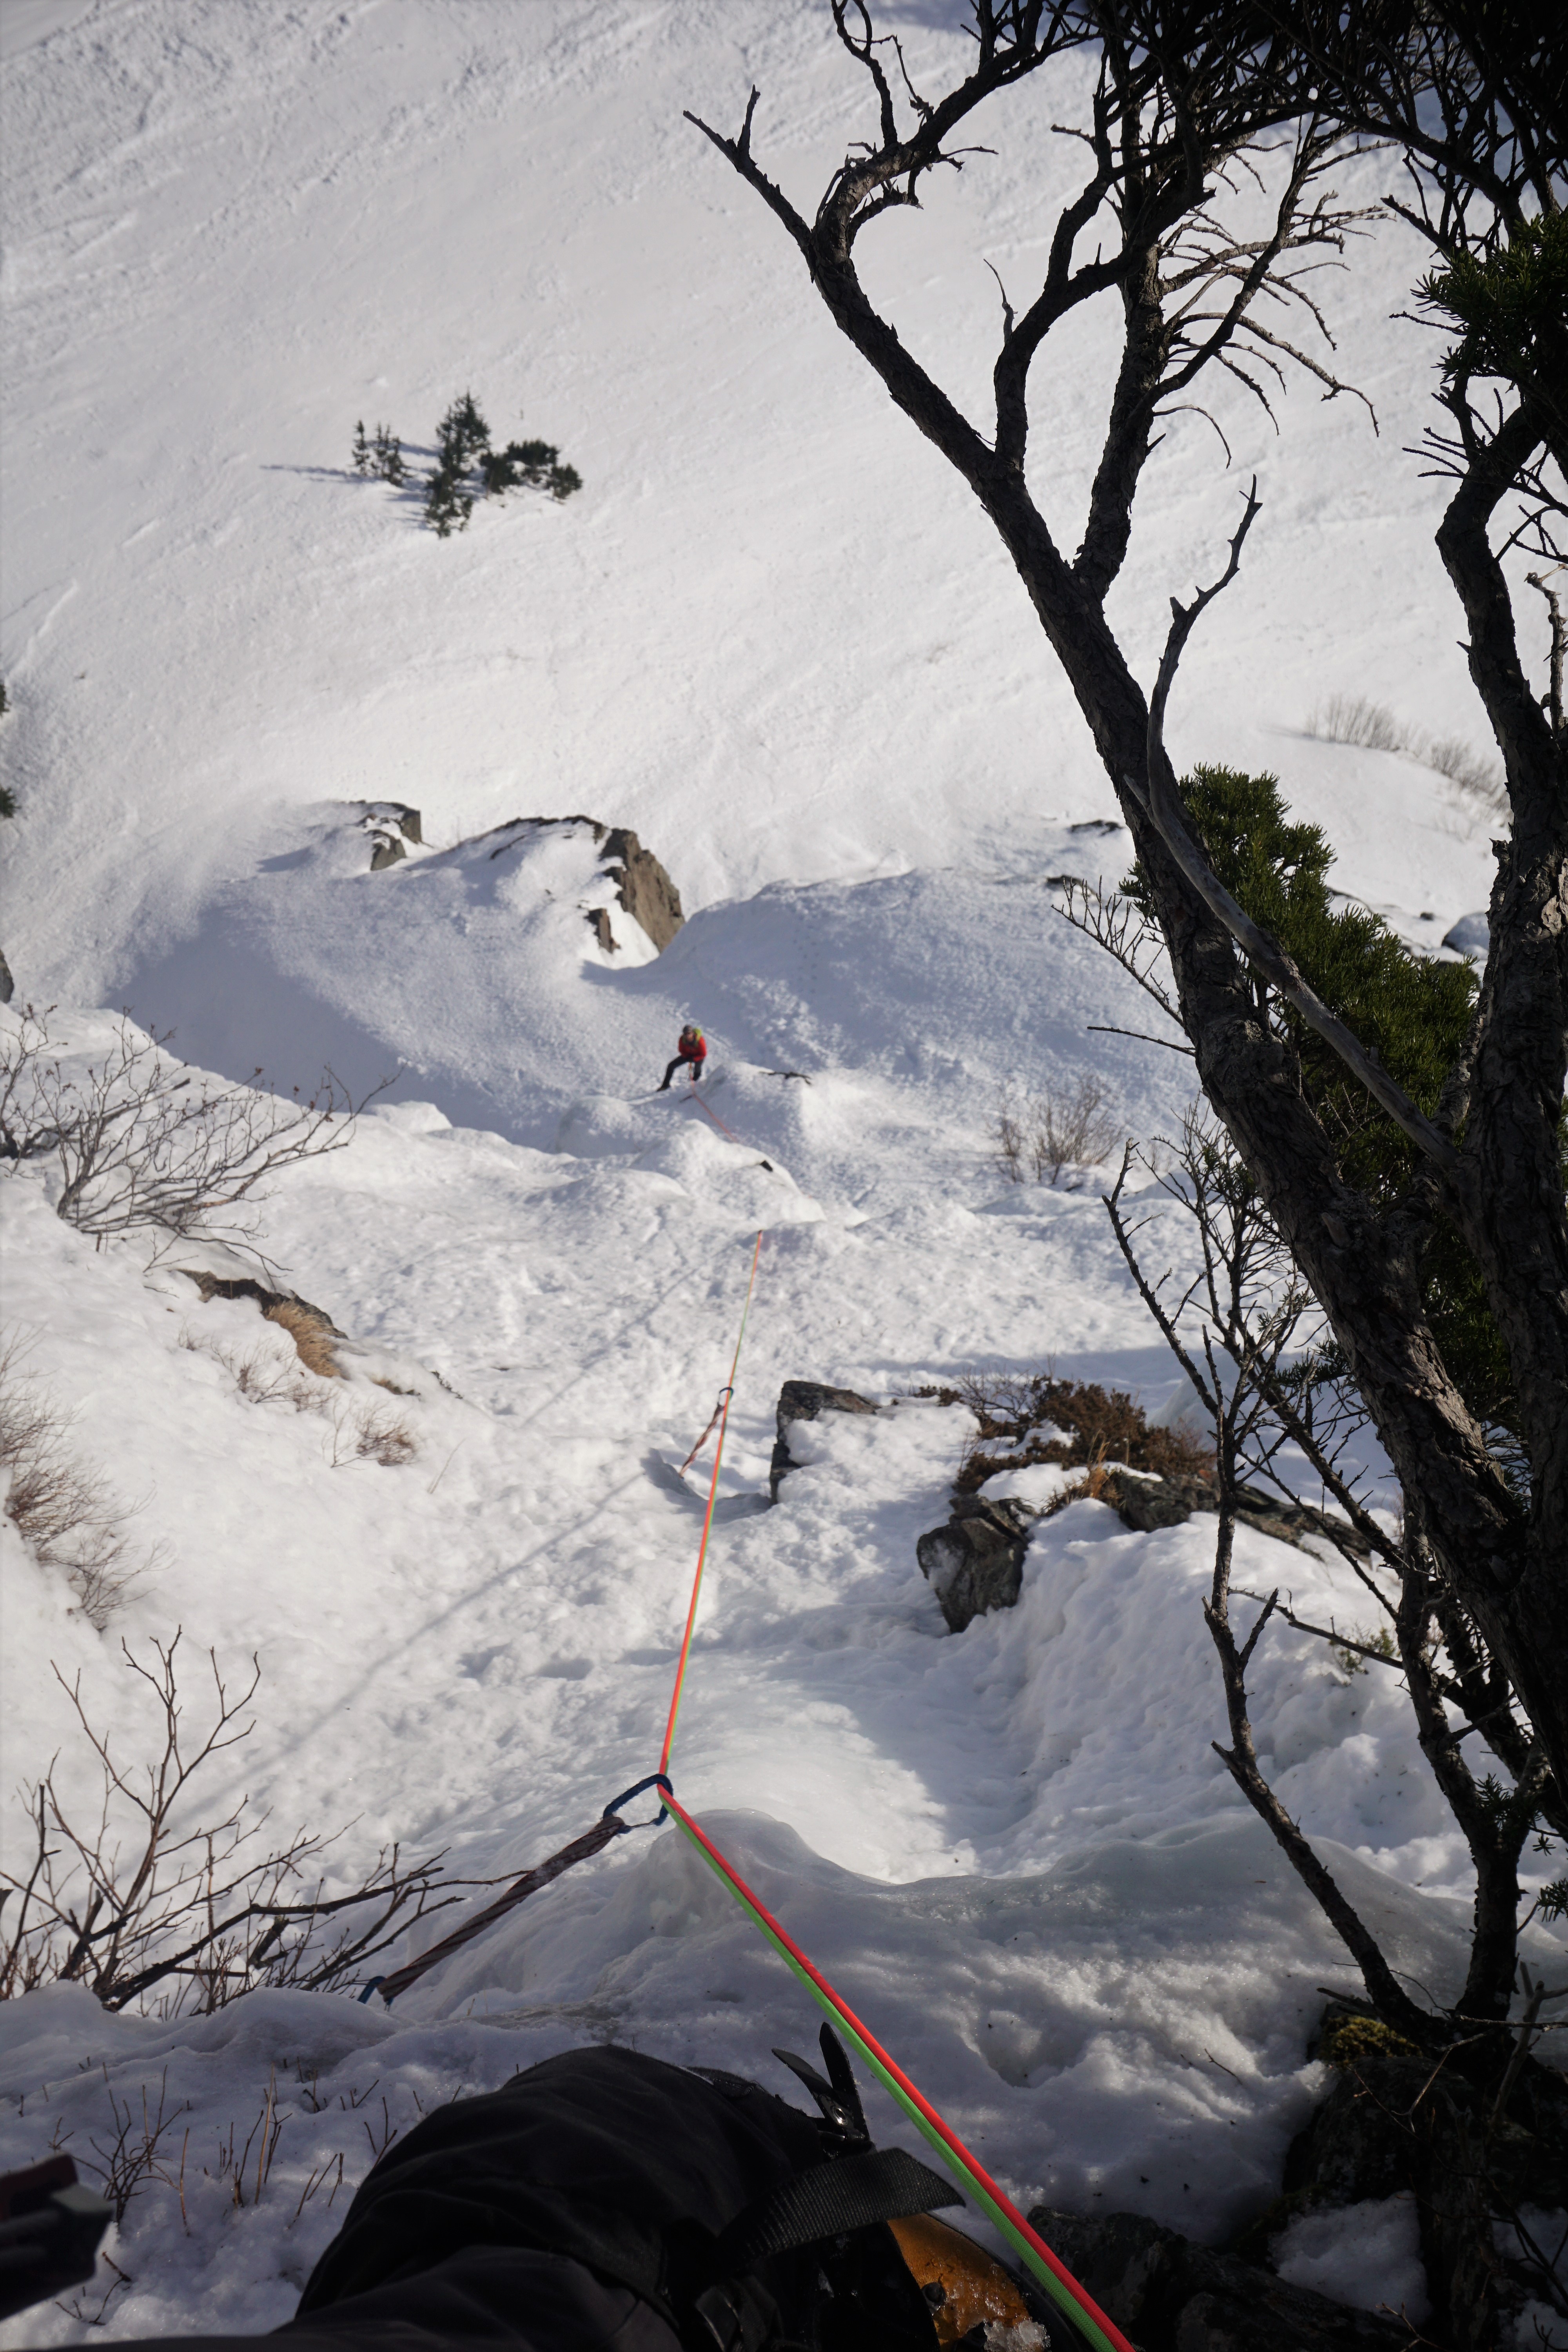
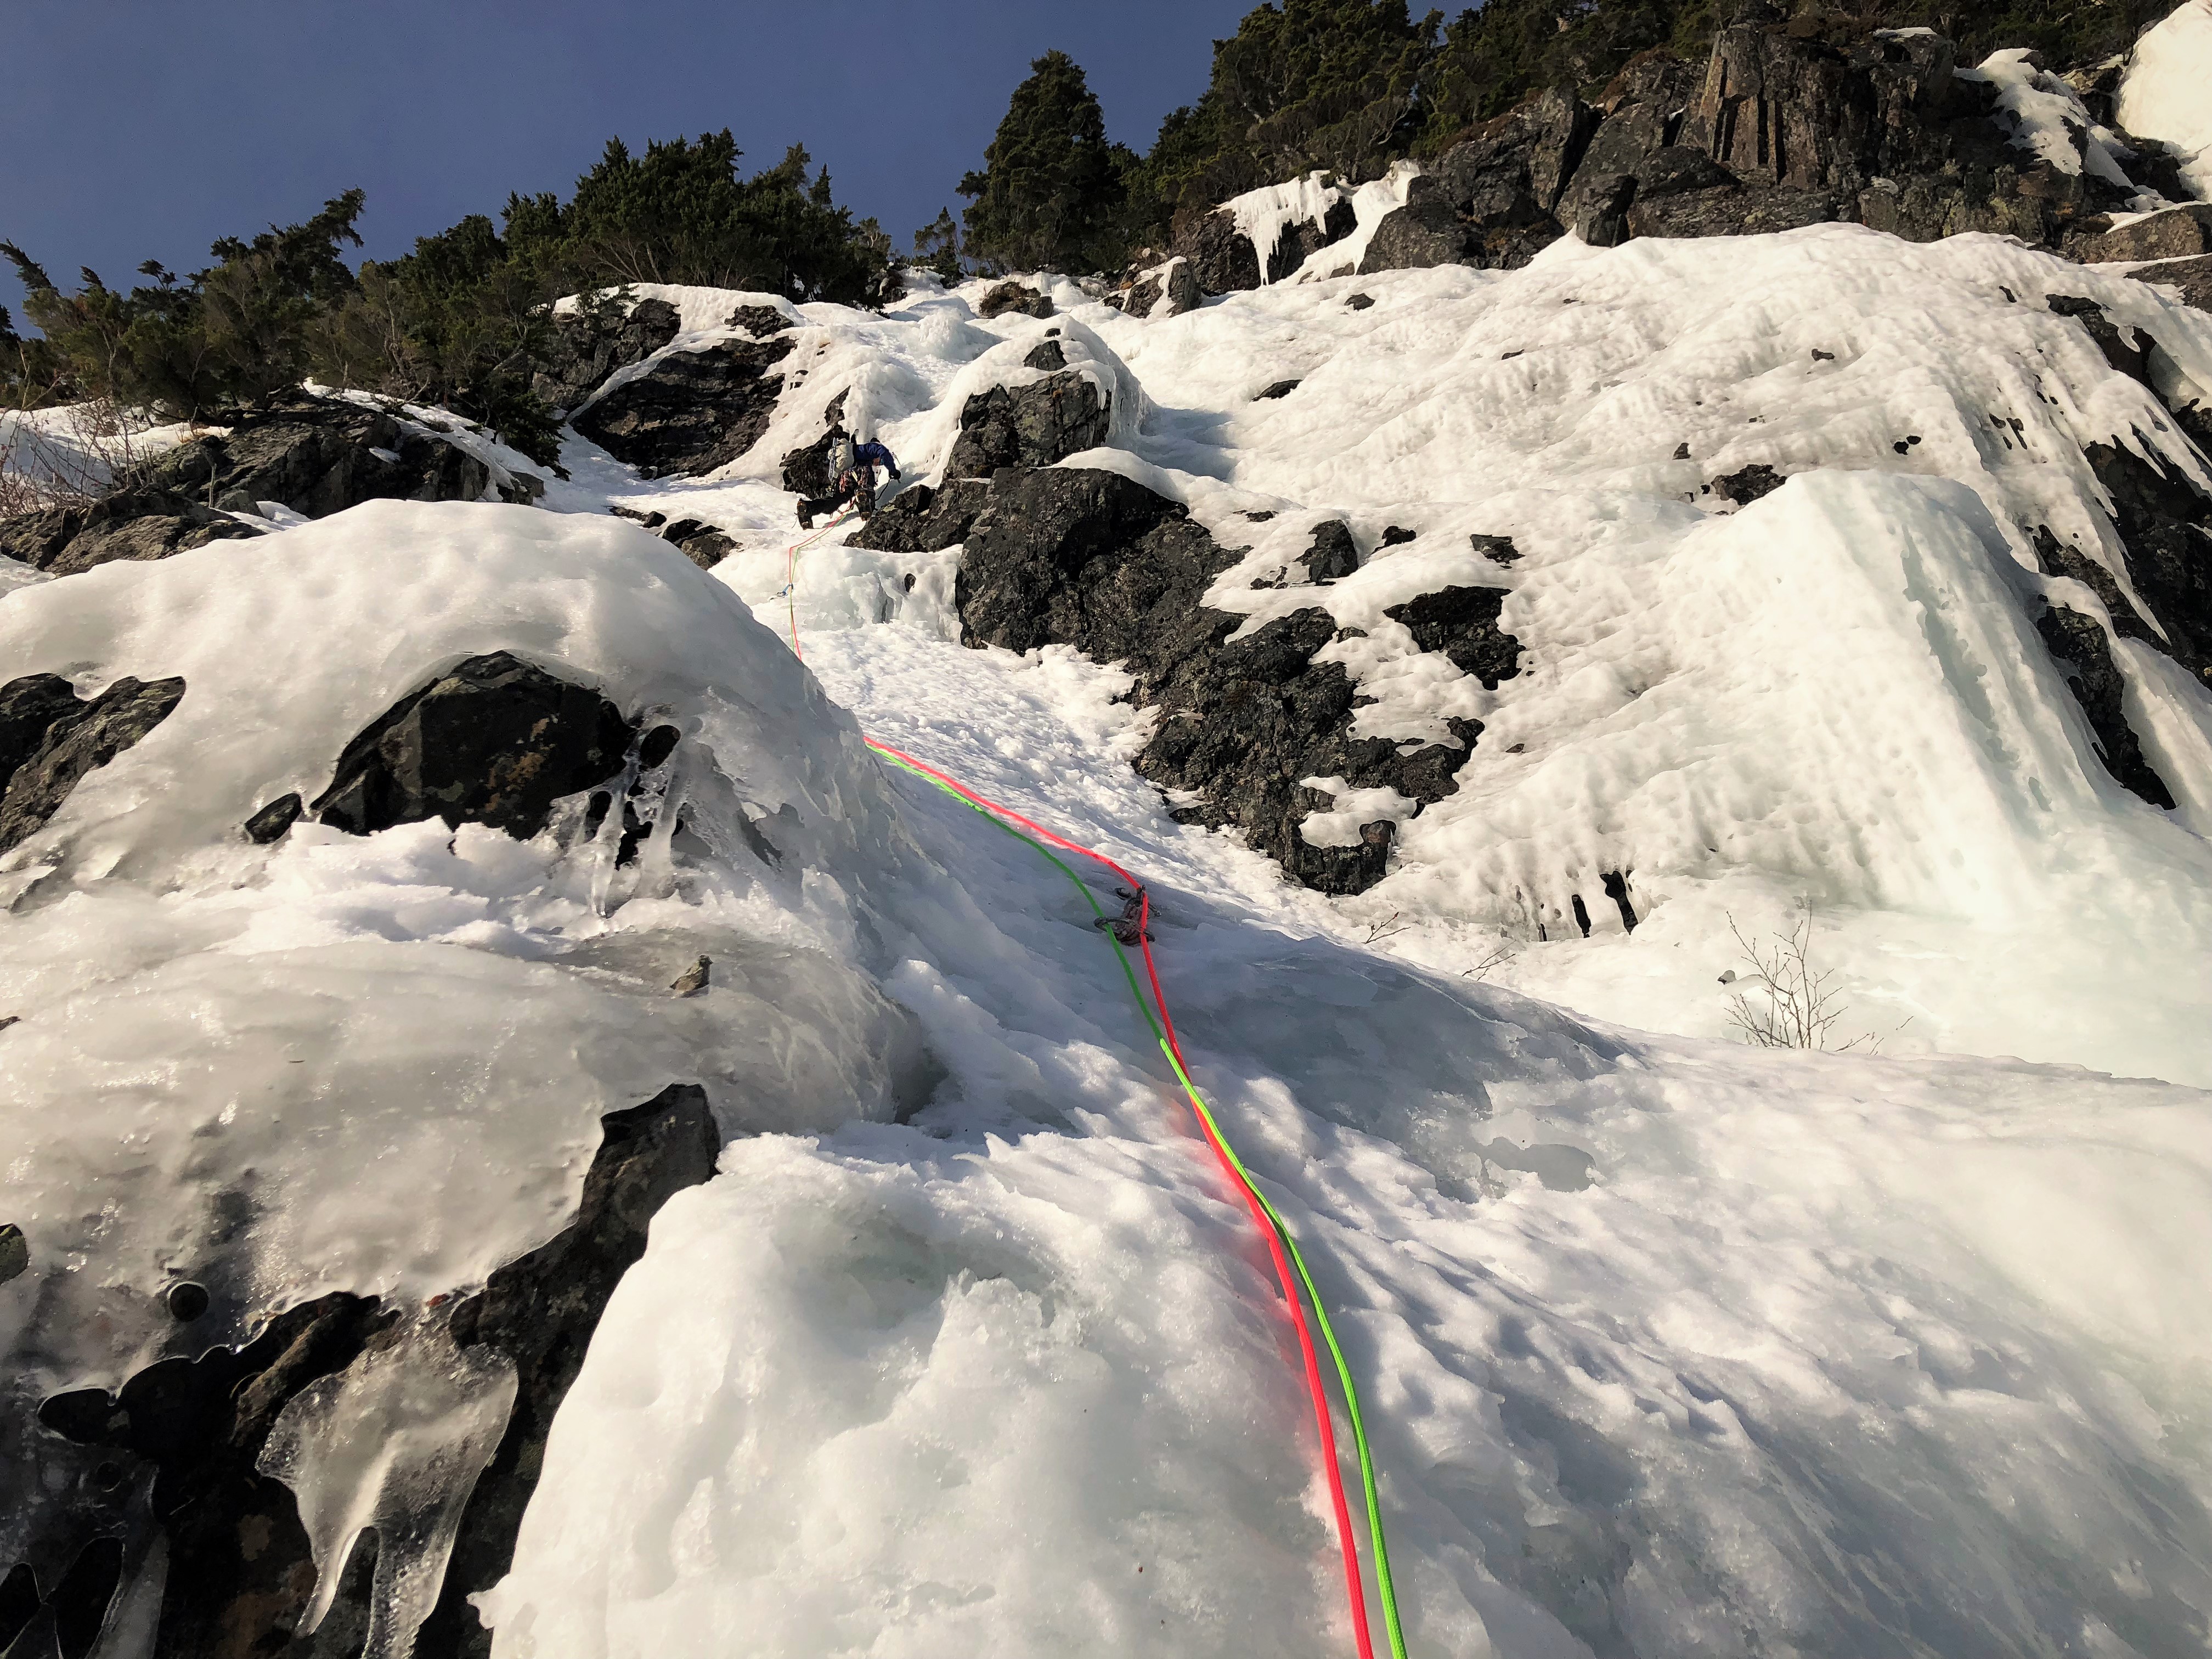
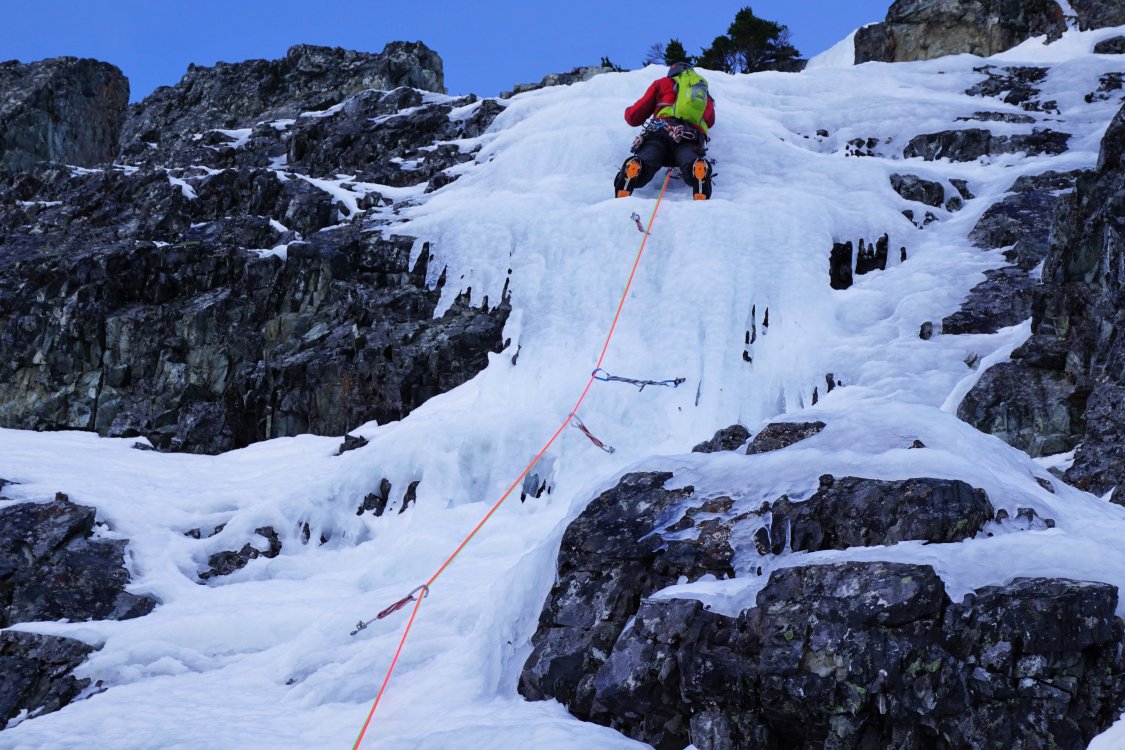
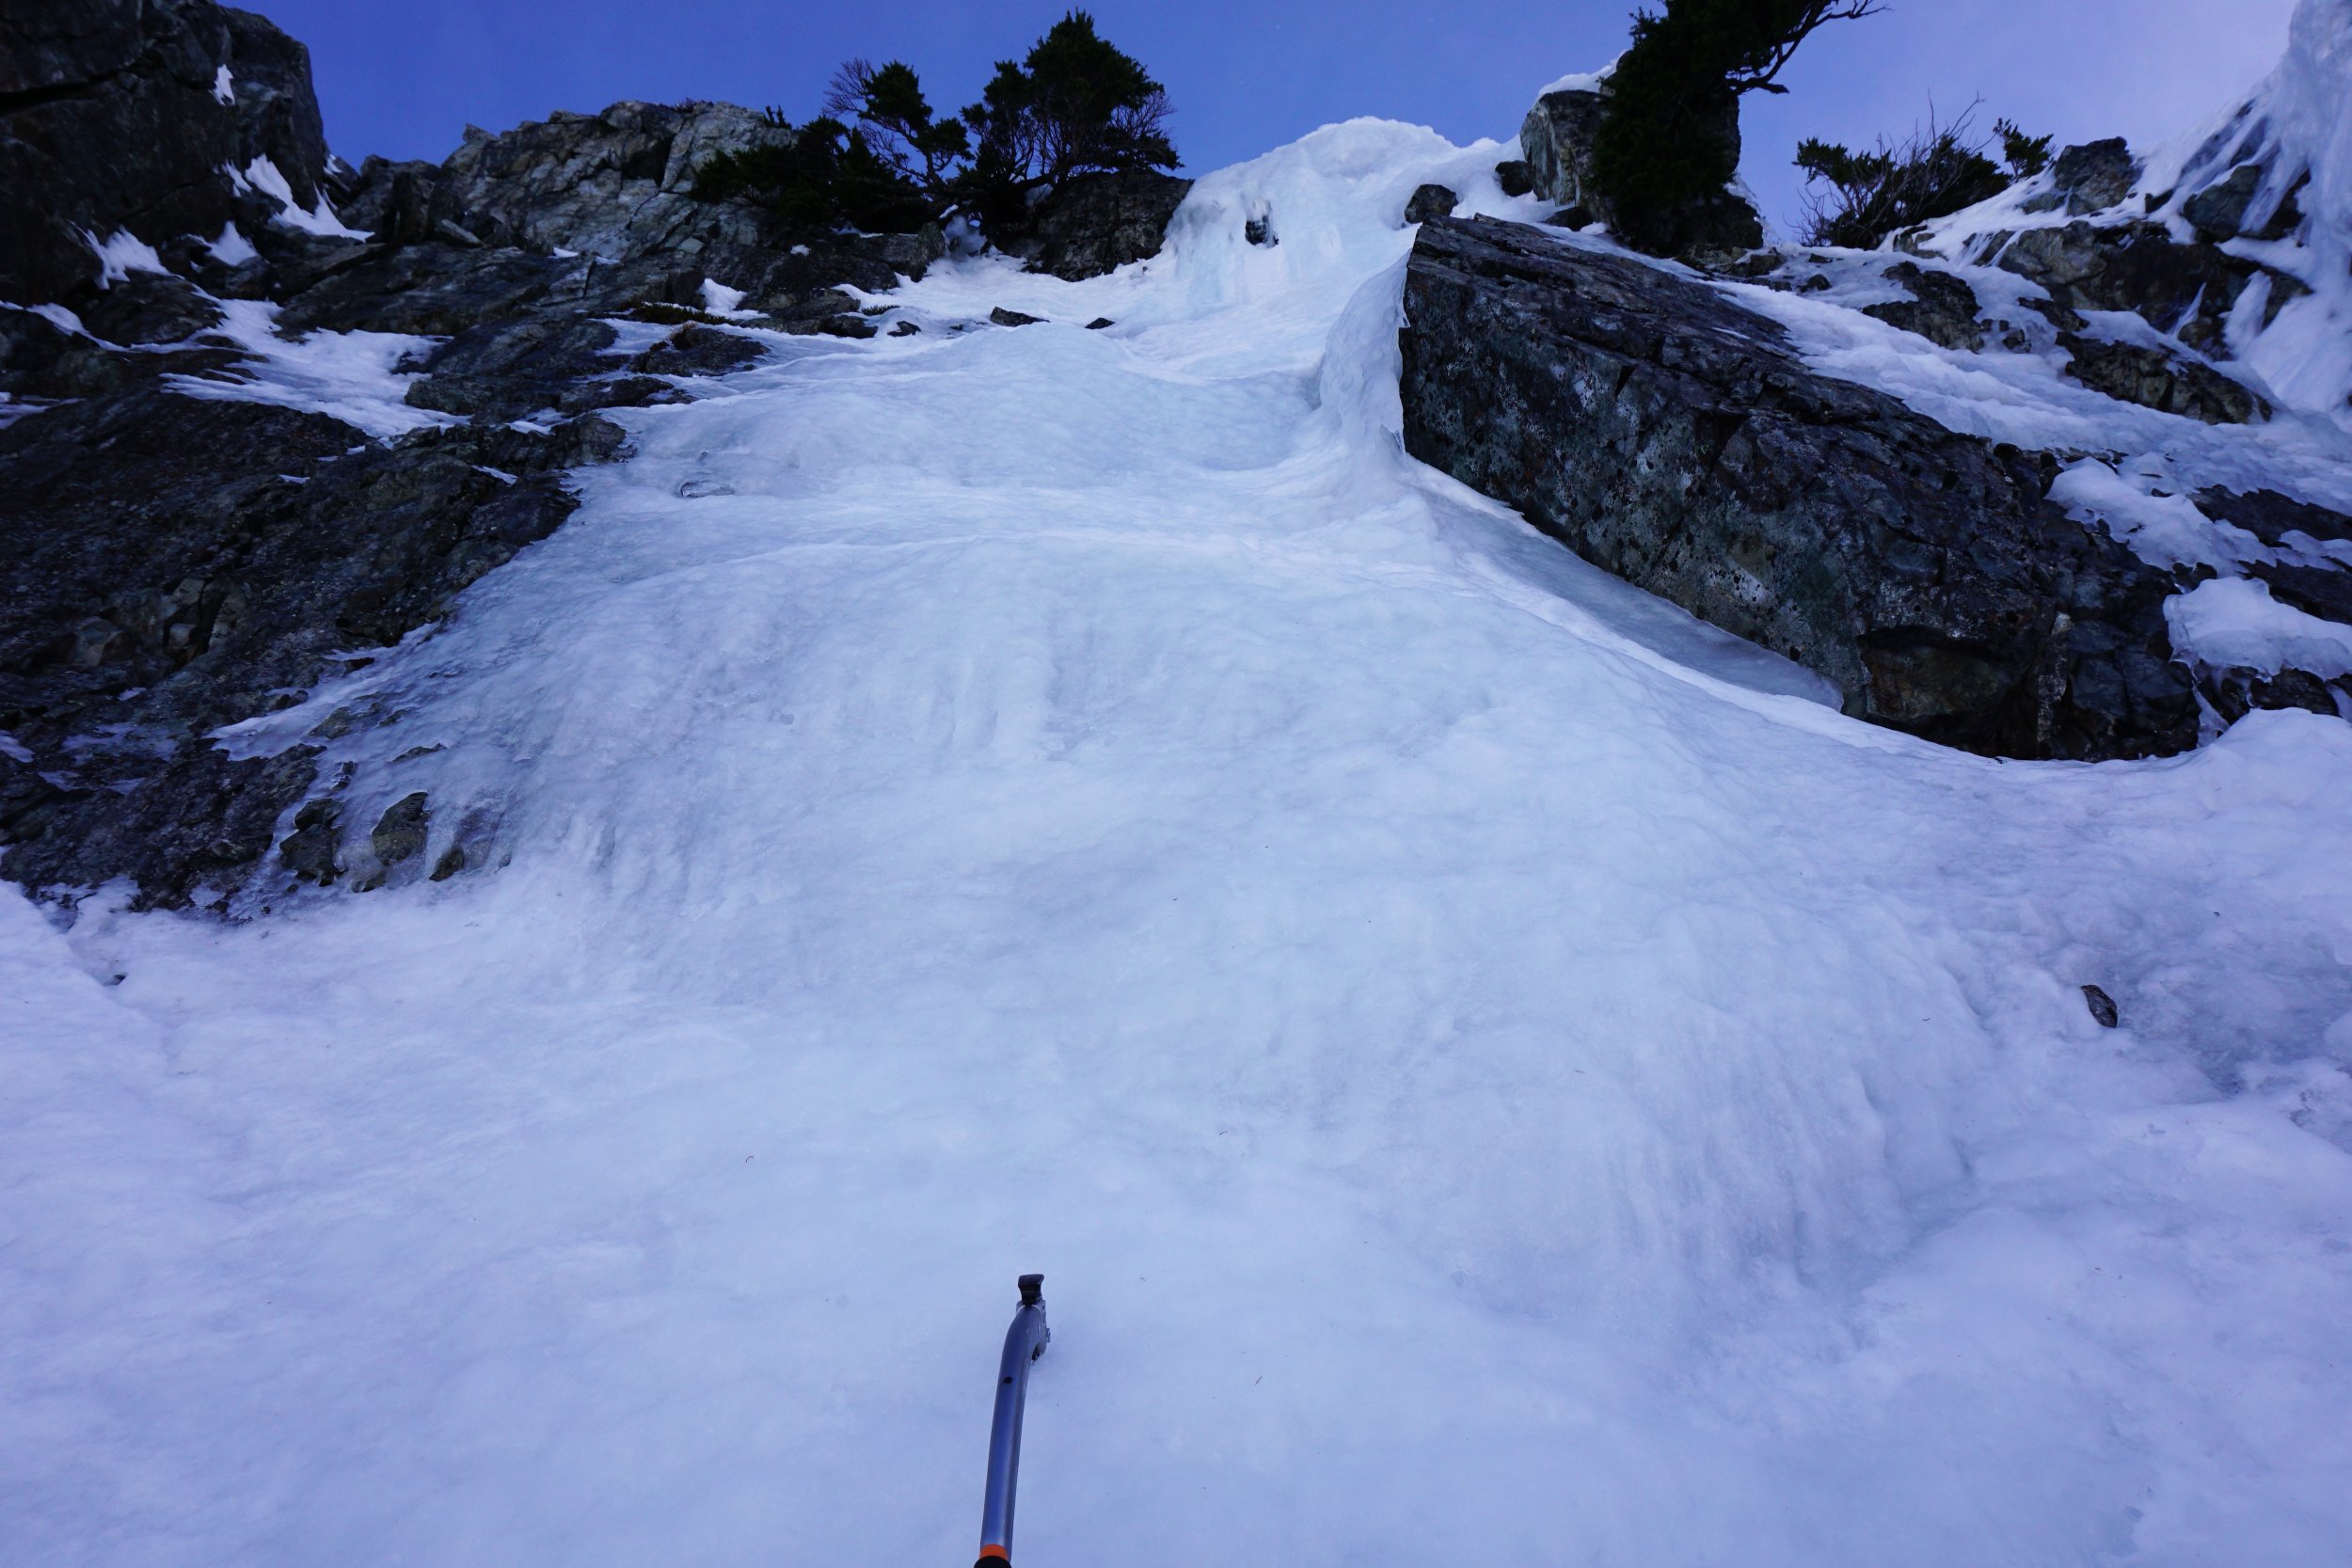
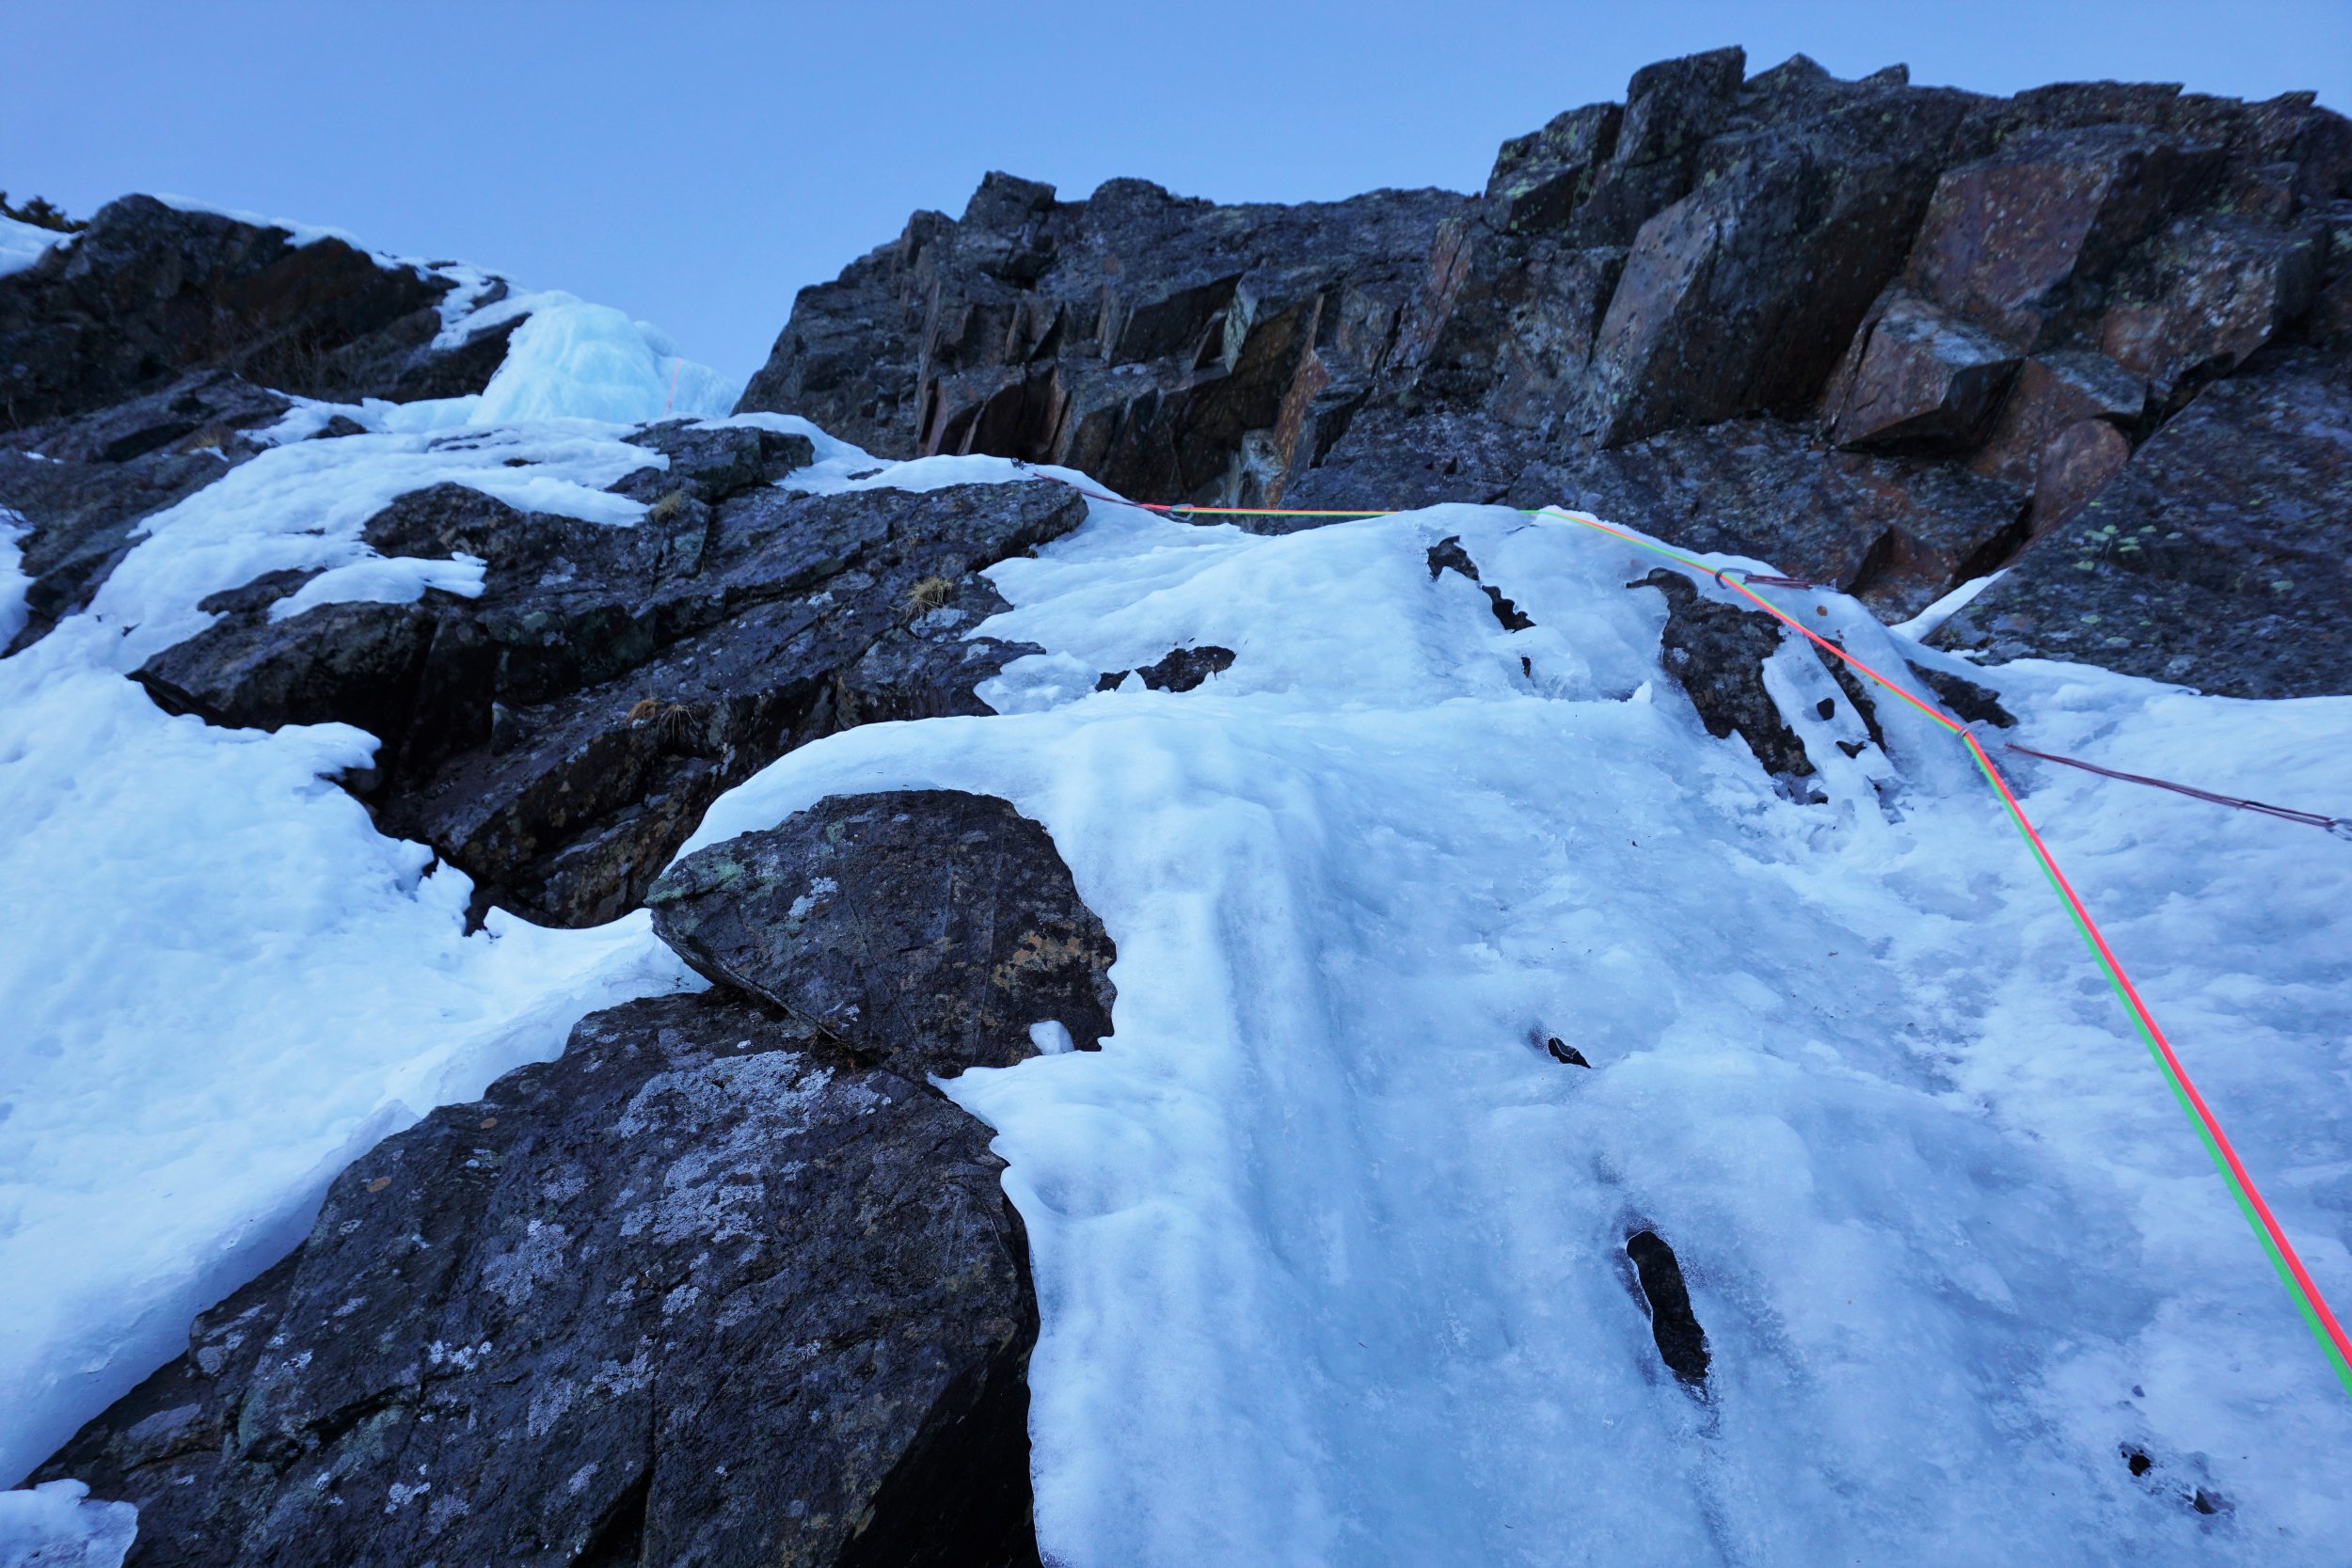
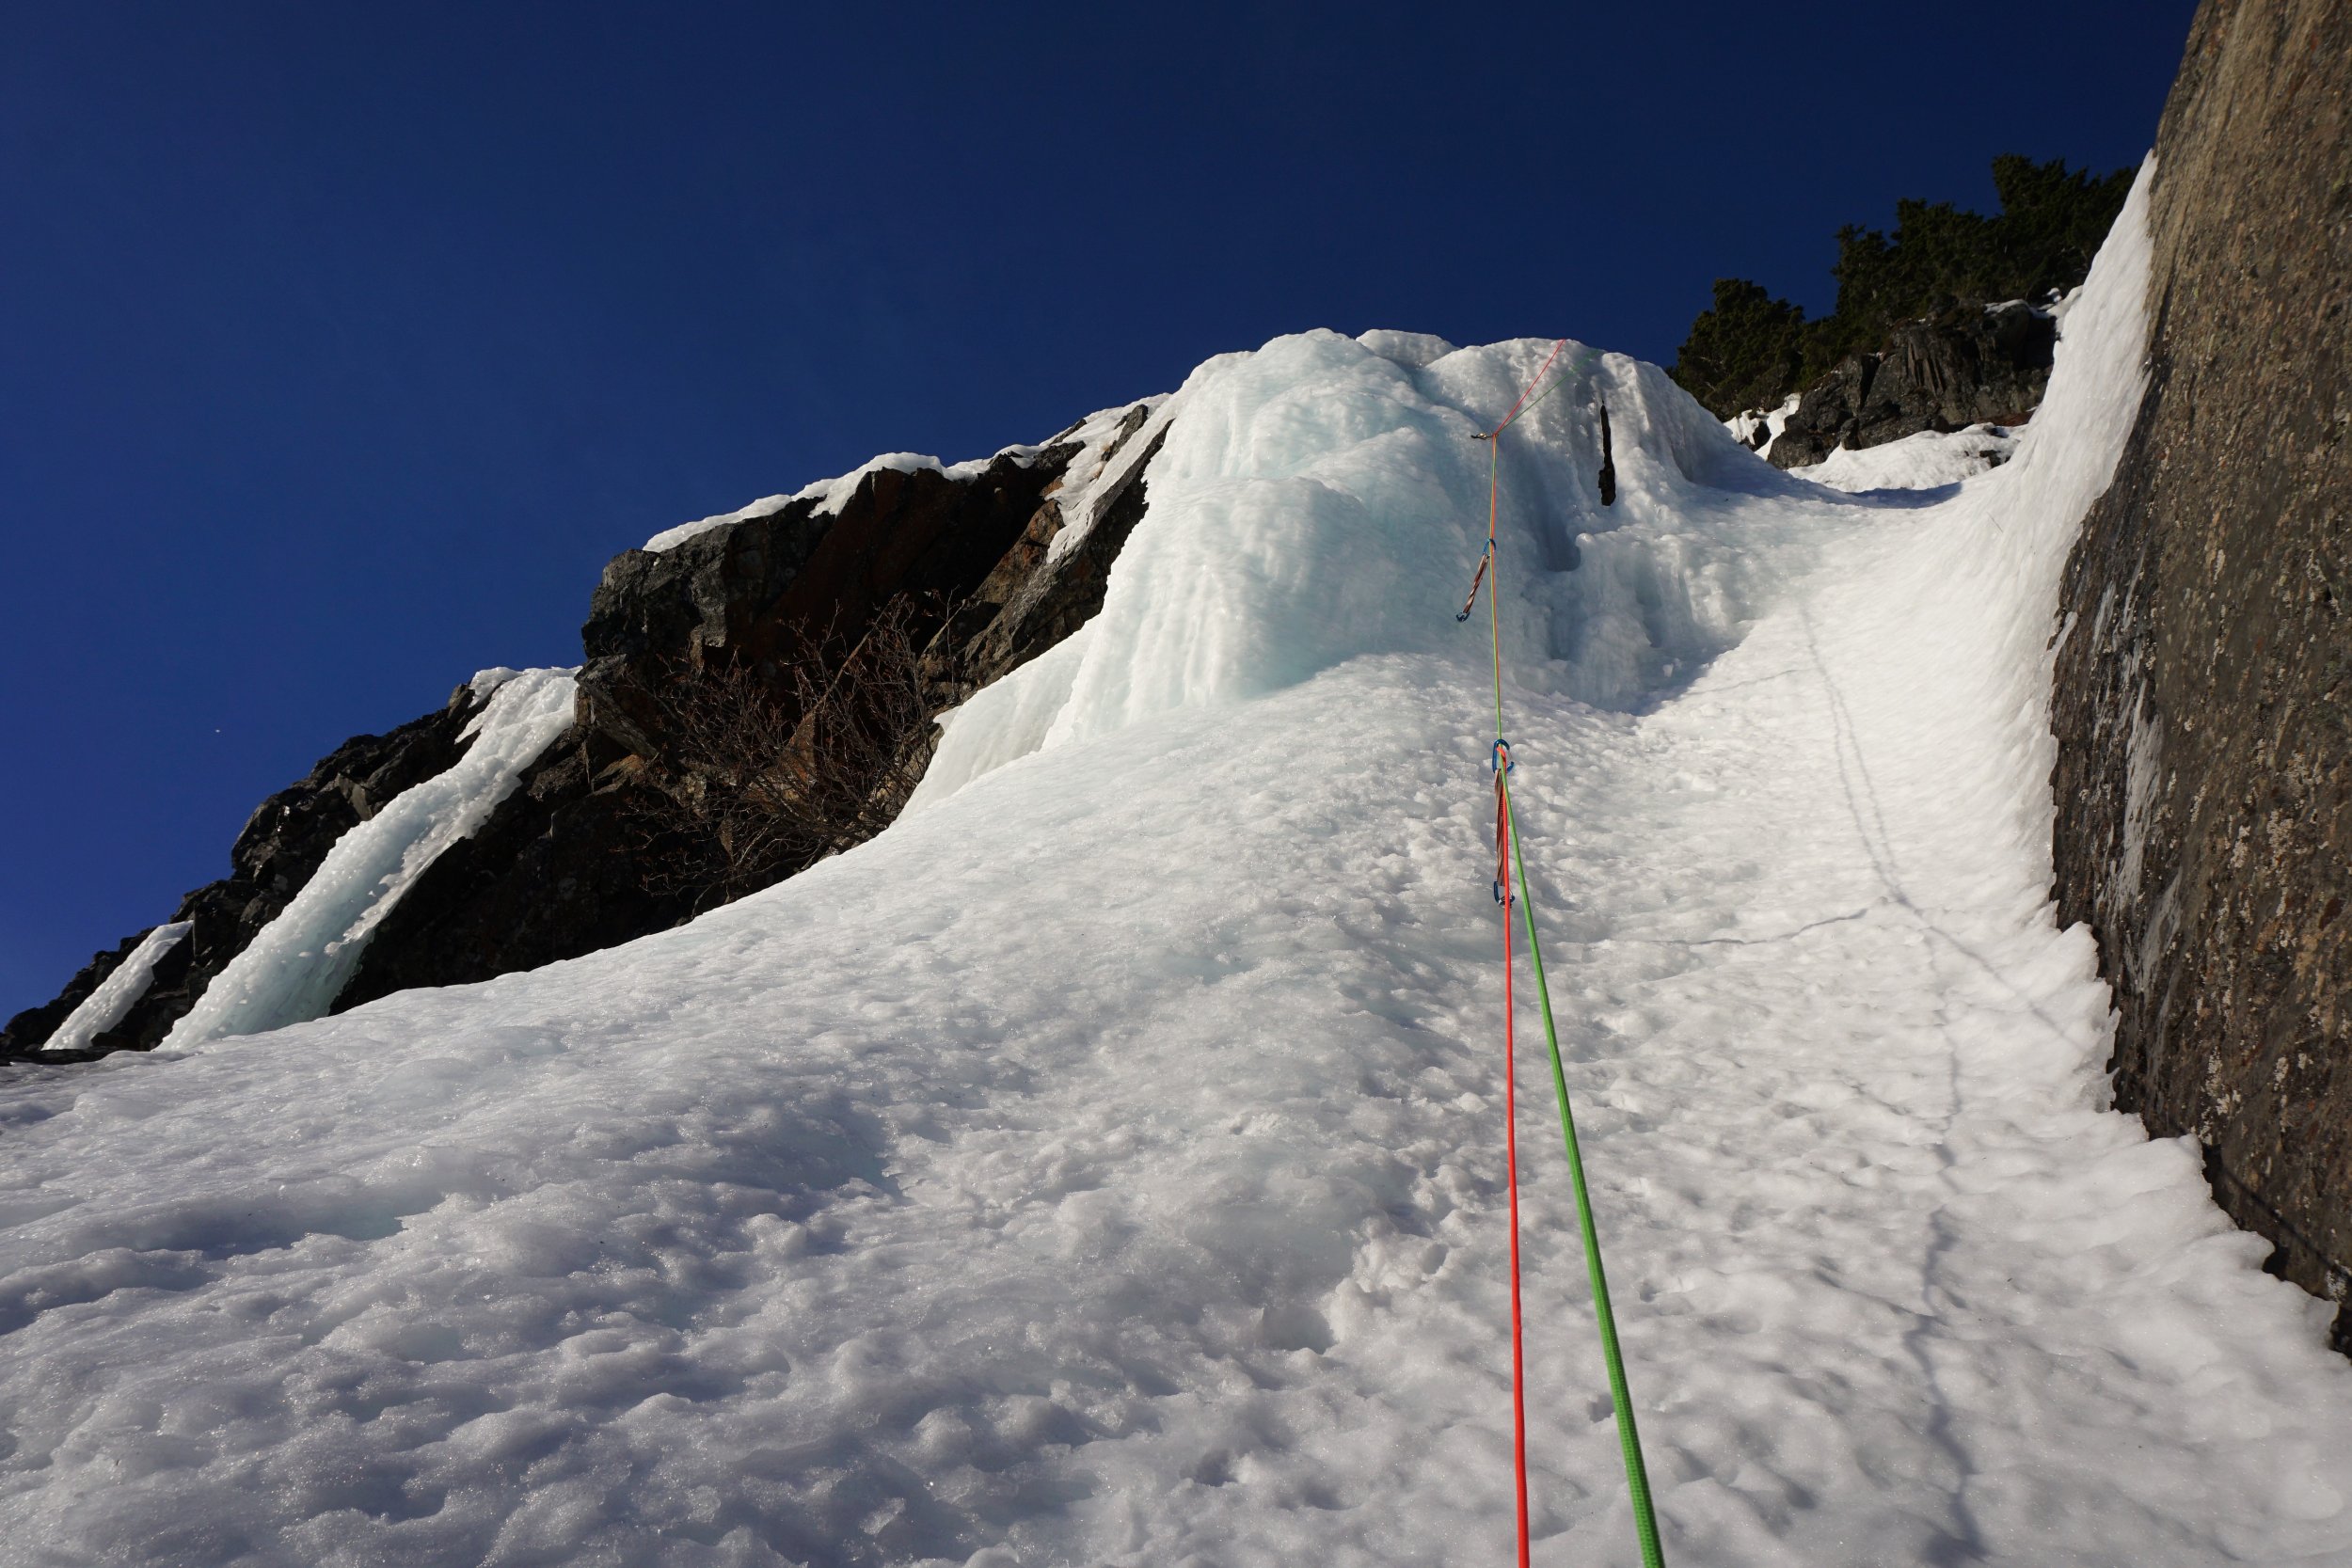
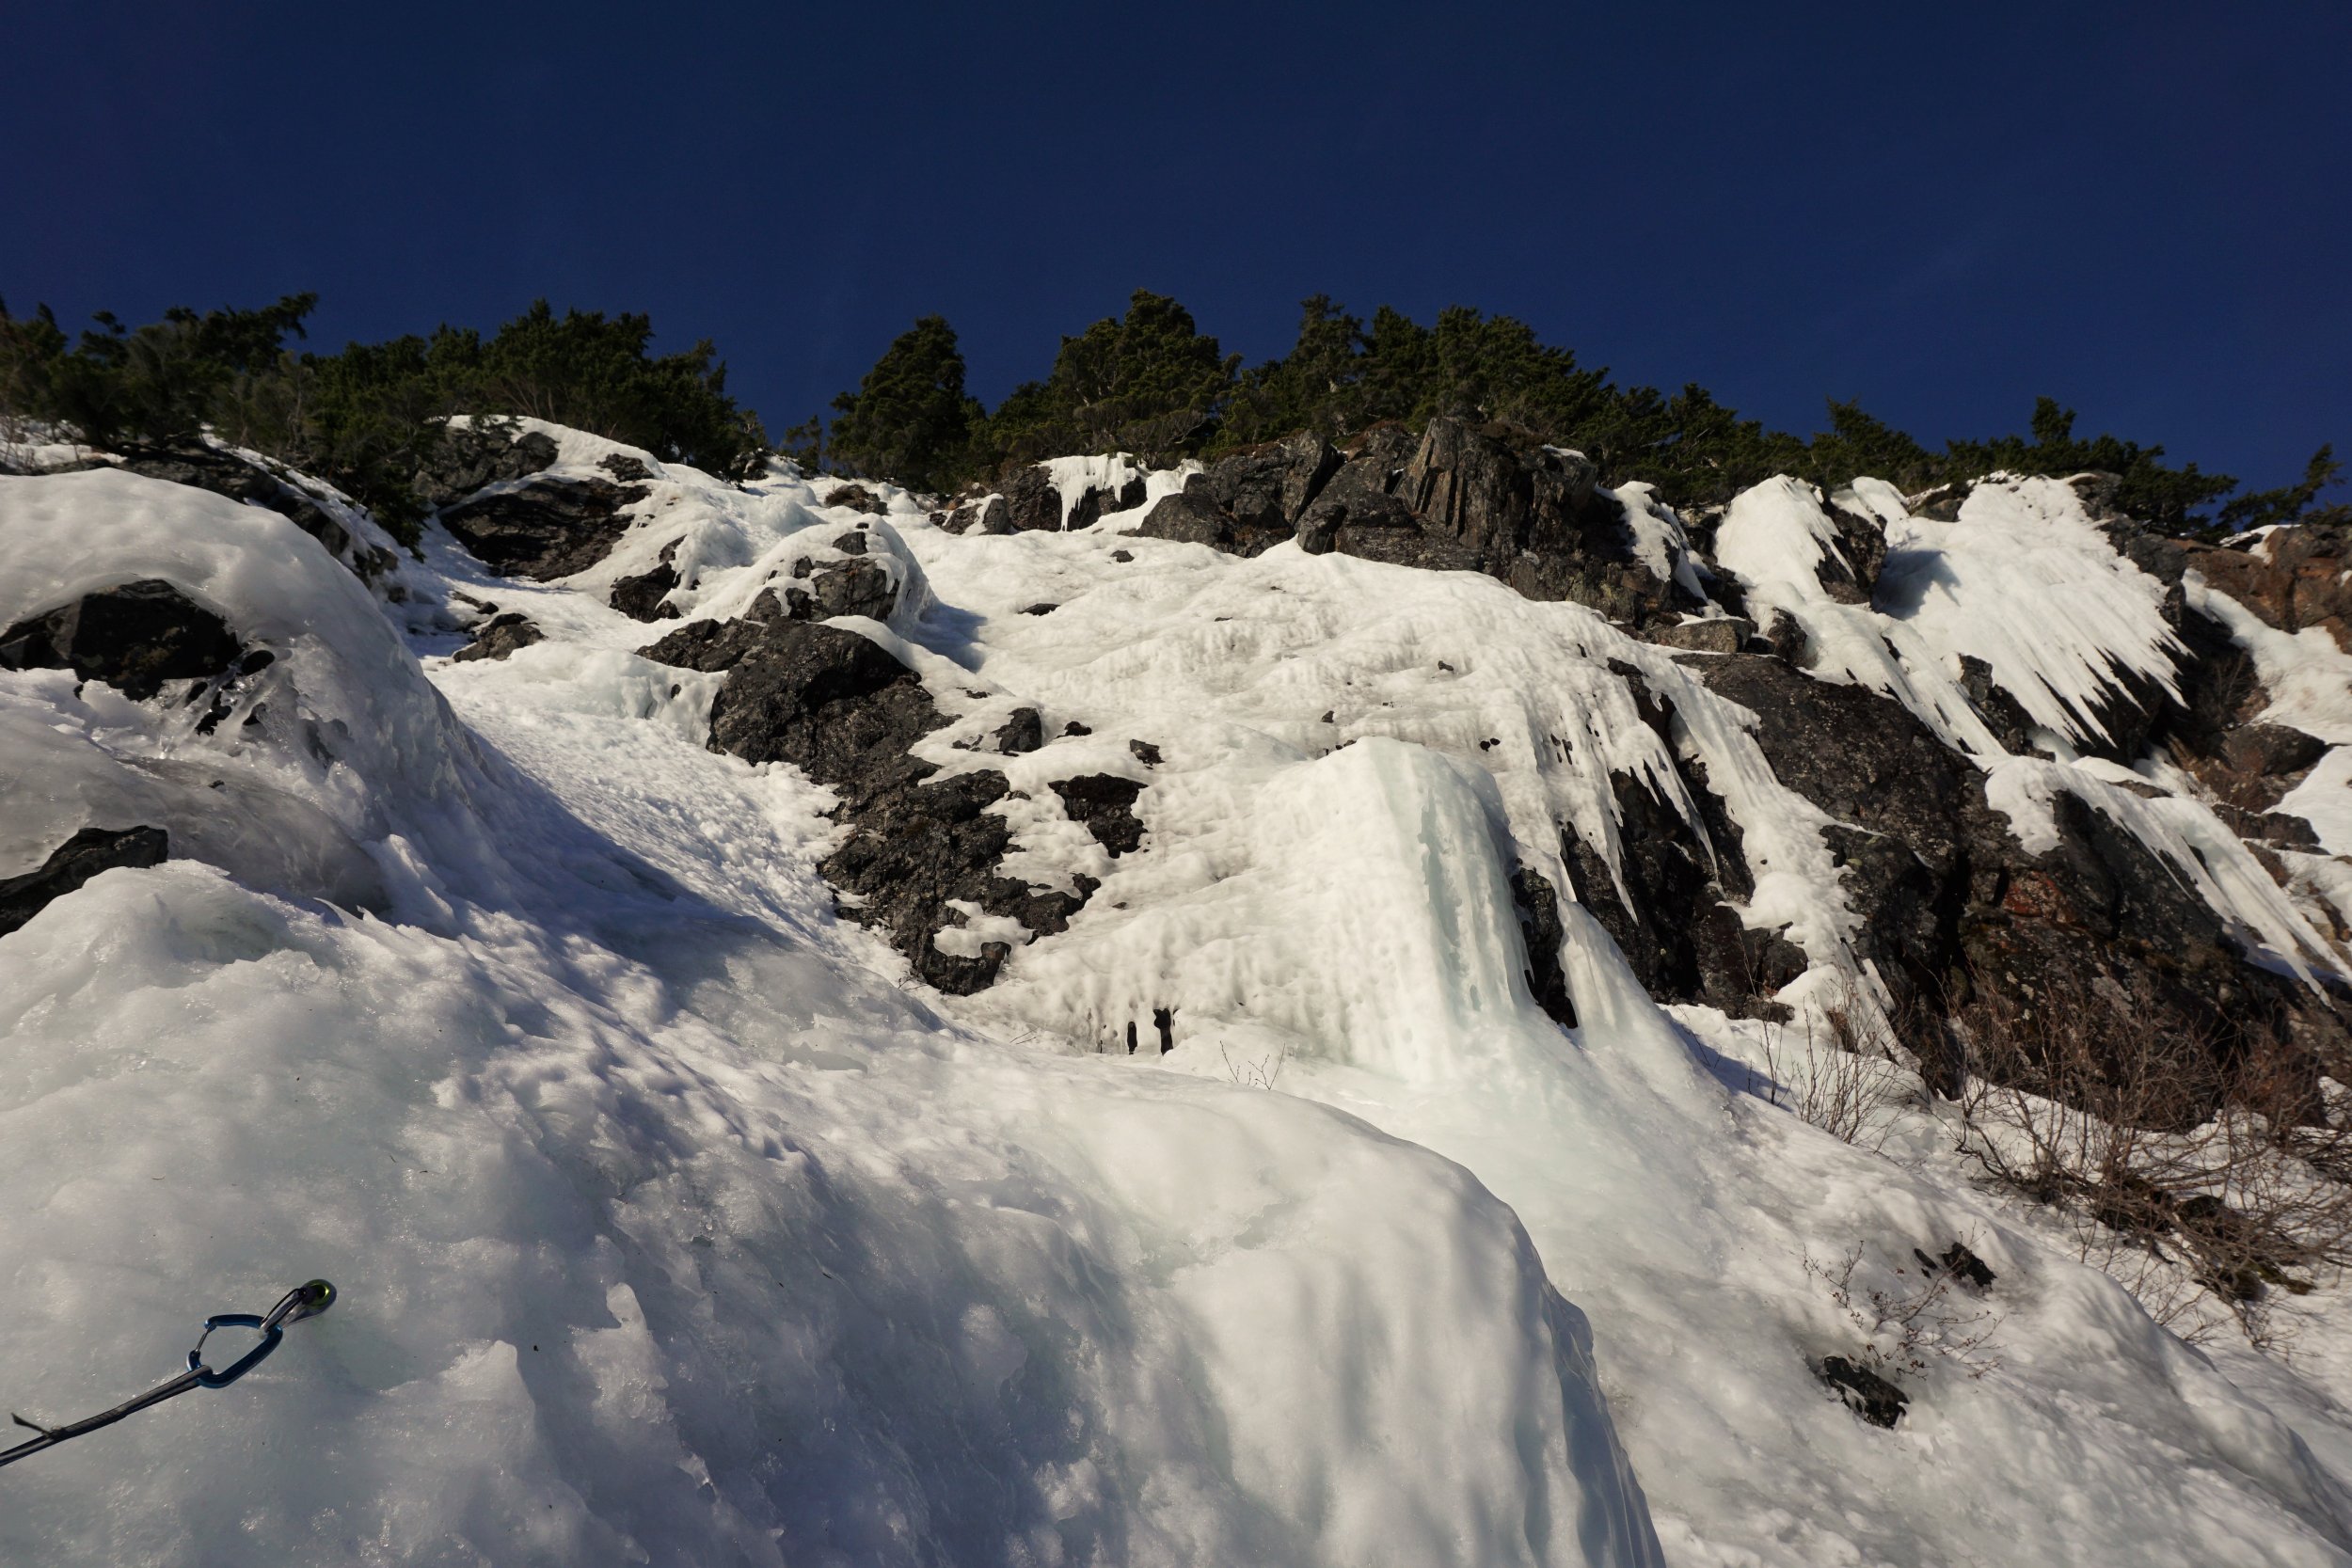
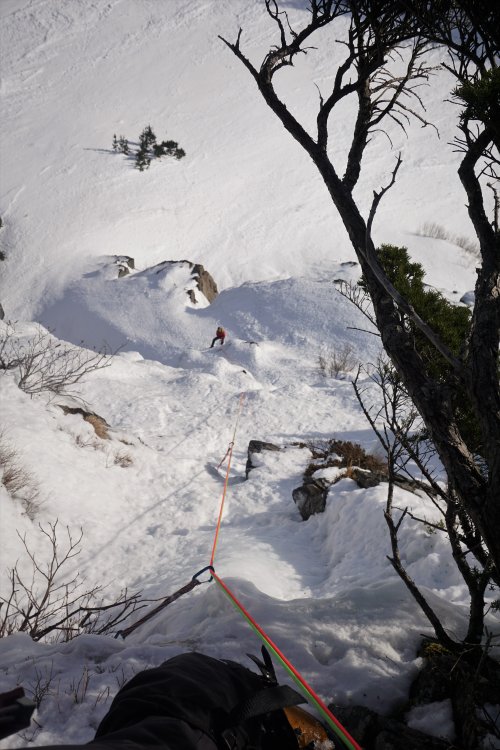
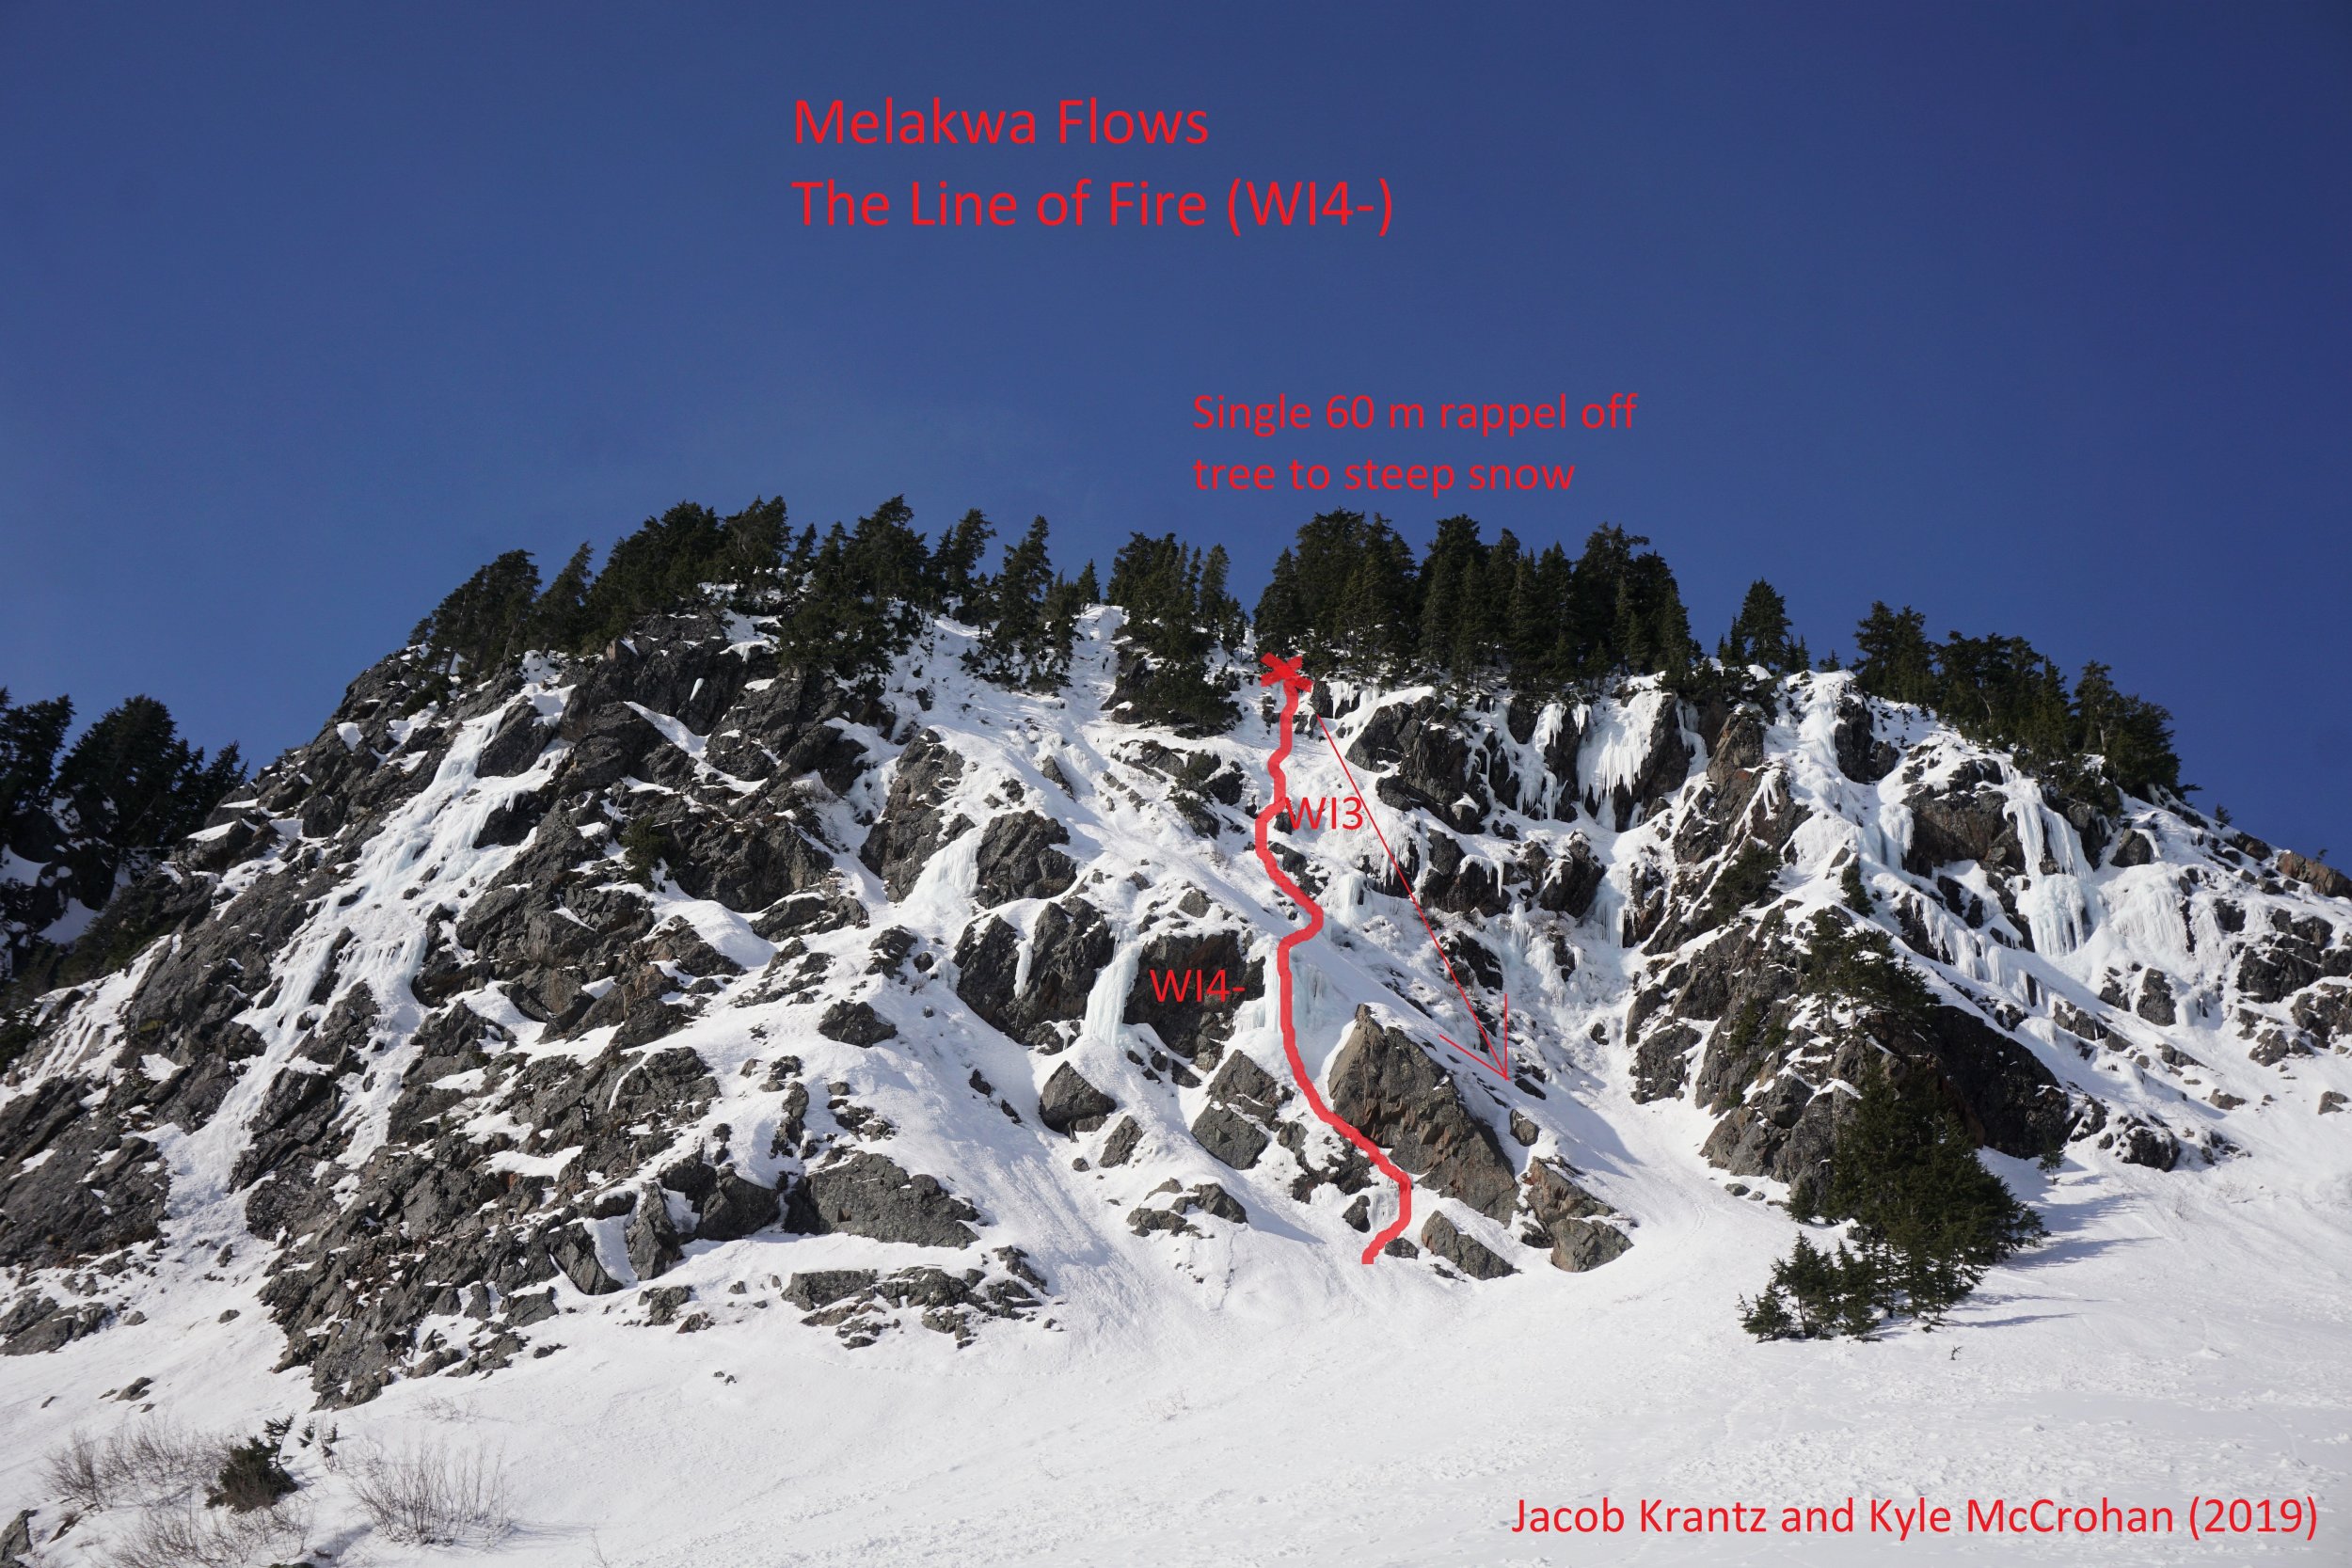
Trip: Bryant Peak, Melakwa Flows - Possible FAs: Ice routes on West Face Bryant Peak (WI4, 60-70 degree snow) and Melakwa Flows (WI4-) Trip Date: 01/27/2019 Trip Report: On the warmest weekend of a warm winter here in Washington, Jacob Krantz and I set out to explore some undocumented ice lines near Snoqualmie Pass I had spotted earlier in the winter. We did some research on the internet, Beckey Guide, and WA Ice guidebook but found nothing about these climbs, so these are possible FAs or FRAs at least. We climbed an awesome 4 pitch route on the West Face of Bryant Peak to the summit and a fun 2 pitch route in an area I've been calling the Melakwa Flows. The Melakwa Flows are an incredible group of ice flows of varying grades near Melakwa Lake. It's mind boggling to think we could not find anything about climbs in the Melakwa Flows, considering they are probably one of the densest concentration of reasonably accessible ice climbs in WA, especially impressive considering the warm temps lately. Hot Tubbs (WI4, 60-70 degree snow) West Face Bryant Peak Although only 4-5 pitches, we thought this route was awesome, offering a substantial amount of moderate ice, steep snow, and wild exposed summit pitch. It packed a lot of punch for such a short and accessible route. We also managed to stay in the shade the whole time, starting around 10 am. We'd love to see others get after it and some other possible ice lines on the west face! P1: Climb thin low angle ice to the vertical WI4 curtain. Send the curtain then continue up easier terrain to set a belay in fat ice. P2: Climb up progressively steepening fat ice to a WI3+ bulge. Above, continue up another 20-30m on 45 degree snow to a group of trees for the belay. P3: This is a long pitch (~80 m). Simul climb up snow, trending left as the cliffs force you. Establish a belay on a snag at the notch on the spine of the North Ridge. Watch cornices here. P4: Traverse right across wildly steep and exposed snow (60-70 degrees) on the north face, using trees for protection. At the third and tallest tree, make a few thin ice or mixed moves up a slab and continue straight up another 10-20m to the summit ridge. Descent: hike down the west ridge a few hundred feet until it flattens a little, then make a single 60 m rappel off a big tree down to the bottom of the west face. Approaching the first pitch. Top of the flow is part of the second pitch. Jacob crushes the WI4 crux. Looking up at the second pitch. Navigating between the two pillars at the top felt like WI3+ to me on lead. The ice here was FAT! Simulclimbing bomber snow on the third pitch. Steep exposed snow traverse to start pitch 4 out onto the north face. It was super unconsolidated and unsupportive. Would have been terrifying if it wasn't for all the trees! Jacob finishes the last bit of steep snow to the summit ridge. Walking along the wonderful summit ridge of Bryant, Kaleetan and Chair in the background. The Line of Fire (WI4-) Melakwa Flows These routes are on a cliff band just north west of Upper Melakwa Lake, easily visible from the upper lake. They look like they have considerable avalanche danger above, so beware. Even though we approached in the dark from our camp Sunday morning at Melakwa, we still only got in one two pitch route before this face got blasted by the sun and snow started coming down. The ice was often pretty soft to take screws, but I imagine if you hit this area in a cold snap or even just normal temps it would be incredible! It is a total ice playground, with easily a dozen routes 150-300 ft long ranging from a rambly WI3 to free standing WI5 pillars! There were incredibly fat sections of ice by WA standards. We hope this inspires others to go explore this gold mine of WA ice climbs! P1: find your way through mixed terrain or thin ice up to the base of the FATT pillar. The pillar is vertical or near vertical for 15 feet and super bomber, WI4-. Make a belay in some thick ice across the snow ramp above. You could skip this first pitch by ascending the snow ramp to the right. P2: A long pitch (~150ft) of rambling WI2-3 terrain, with at least half a dozen WI3 steps one to two body lengths in height. It's choose-your-own-adventure here. Total type 1 fun. Except for at this point, I was on lead getting pummeled by huge clumps of snow. It was still awesome. We ended at a big tree anchor. Descent: Single 60 m rappel down to the steep snowfield ramp, down climb as quickly as possible to get out of the line of fire. Climbing steep snow to the base. We took the pillar in center right of the photo. Jacob led up this thin section to gain a ramp leading to the pillar. We don't recommend this start. There were other options to the left. Approaching the beautiful pillar. So big and wide. An abundance of options on the second pitch. There's even more rambly ice to the left out of this photo. Me leading some awesome WI3 fun. This was right before I started getting pummeled I believe. Looking down from the top of P2. It looks like mostly snow, but you cannot see all the little ice steps from above. It was very high quality. Approximate location of the flows. As temps cool down next week, I think these climbs will just get better and better. If there's awesome WA ice on a blistering hot weekend like this, it ain't so bad! So get out there and send, WA ice climbers! Want more beta and photos? Check out my full trip report at https://climberkyle.com/2019/01/27/new-snoqualmie-pass-ice-climbs/. Gear Notes: We used 9 screws of varying lengths (much of the ice is quite thick actually, but still bring the stubbies), 1 picket, 8 slings, a few nuts. Double 60 m ropes are nice for the rappels, but there are walk off options also. Prepare to make you own rap anchor if you don't fine ours. We brought cams and pitons also but never really used them. Approach Notes: Either approach up the Denny Creek Trail to Melakwa Lake or over Bryant col (north saddle of Bryant) via Great Scott Basin from Alpental like we did. It took us 3 hours with overnight packs from Alpental to the West Face of Bryant, and about 3 hours from the Melakwa Flows back to Alpental with similarly heavy packs. Note there is considerable avalanche danger on these approaches, so proper gear and training is recommended.


- 10 replies
-
- 5
-
-

-
- first ascent
- snoqualmie ice
- (and 1 more)
-
Trip: Northern Chiwaukum Range - Chiwaukum Brush Battle Trip Date: 09/23/2018 Trip Report: After plans changed last minute, I had to search for a solo trip idea for Sunday. I really didn't feel like driving super far but weather looked suspect on the west side of the Cascades once again, so I figured the Chiwaukum Mountains would be a good compromise. I scratched together a rough idea: park at White Pine TH, take the direct route up the ridge south to North Chiwaukum, descend to Larch Lakes trail, from Cup Lake ascend to the summit of Big Chiwaukum, descend by the Grace Lakes and down the Wildhorse trail back to the car. It would include peaks, scrambling, pristine lakes, and lots of fall colors! Well, it had most of that, and some more I didn't ask for... I had only heard of the direct route up to North Chiwaukum in the winter, but I can verify it works when in not snow cover too, as long as you have a tolerance for thousands of feet of steep (and in my case, terribly wet and slippery) brush. All the downed leaves and branches were slick from a storm the night before and I sometimes had trouble gripping. Poles were helpful. The first bit was the worse. There was a brief moment when I began to reconsider my decision in a thicket of Devil's club and downed trees. I then realized I had to embrace the futility of all my actions to find peace with my struggles. The zen of bushwhack. Around 4200 ft the ridge got less steep and a faint climber's trail appeared at times. It kept getting better and eventually, close to 6000 ft, I got my first views of the valley nearby. At this point, I was thoroughly soaked and a cold wind was blowing over the ridge. Pretty soon the trees were covered in rime ice. It was cold. The cold had advanced the stages of the larches to a nice yellow behind the icy covering. When I got to the ridge at 7000 ft, it was full on gnar. No trees for protection, just barren icy tundra. I tagged the summit of North Chiwaukum 3 hours in. The (imaginary) views were exceptional. As I contoured toward the saddle to the SE, I dropped beneath the clouds briefly and was treated to a beautiful little basin with sparkling ice covered larches! There indeed was hope. Stepping over that saddle in the raging wind, I was treated to an incredible spectacle: raging clouds spilling over the Chiwaukum Crest, Larch Lake surrounded by yearning larches who in short time will earn the status of golden, and carpets of red, yellow, and orange sprawling across a deep valley. It made me want to cry. All was good. I descended through a short scrambly section and then started to weave my way down the path of the least resistance. This quickly became the path of greater resistance, as I got sucked into some nasty alder and had to burrow through a creekbed for a good 15 minutes to get out. When I finally reached the bottom of the valley, and looked back, I saw that there was an easier path climber's right. I went down more with the streams in the middle. Finally on a trail, I had a nice stroll to Larch Lake and was even able to jog a little. The larches were just getting going and in another week they'll be in their prime. I filtered some water and appreciated the lake. It was Enchanment like! Great granite walls and larches studded all the way up the mountainsides. I then proceeded a few hundred feet up to Cup Lake. Here, I met one family, the only party I would see all day expect for close to the White Pine TH. We were once again socked in the clouds and it even hailed a little. I explained to them my plan and that I at least had to get over the crest somehow to get back. I think they took pity on seeing a skinny boy with such a tiny little vest pack in such poor conditions. I had counted on "Partly Sunny" by the afternoon as NWS promised, but it seemed things were going the other direction. I was doing fine on time, just over 5 hours in, but with the poor visibility and a dying GPS, I wasn't sure about continuing to Big Chiwaukum. I knew that once I entered the clouds I wouldn't be able to see more than a hundred feet and there was a lot of tedious terrain in front of me, so I made the decision to pass on it and instead go back over Deadhorse Pass. I didn't know anything about the route over Deadhorse Pass, but if a horse made it up (and then died) as the name suggested, it couldn't be that bad right? Still, the pass looked suspiciously steep on a map and I got glimpses of cliffs through the clouds. I got a compass bearing and started up towards the pass in minimal visibility, but cliffs kept pushing me right. I was getting a little concerned, but then out of the darkness on the left emerged a cut through the cliffs: a passageway! This gully looked loose, but would hopefully go. It was pretty easy down low, but got pretty loose and insecure up top. The fresh rain had really stirred the soil up. Still, it wasn't as bad as the Mountaineer's Route on Whitney (sorry, California, your "classic" route might be the worst scramble I've ever done) after two weeks of continuous afternoon thunderstorms. I topped out and was greeted with a blast of cold wind. If coming from the other side, there were a few other similar looking gullies, not sure which one is the right one but they all look kinda spooky from the top: I headed down from the pass pretty quickly. It was pretty eerie. It got super still as I walked through this spooky basin. Watch out for the shadow-creatures appearing out of the mist. Or the wet bushes trying to soak you. Let's be honest, hypothermia is the real threat in the Cascades. After this flat basin, I was greeted with a bunch of steep cliffs and unattractive gullies. I inspected four or five of them like an unimpressed suitor before settling on the one that seemed "least ugly". It was class 2, but weird loose, slippery class 2 that had me maybe more uncomfortable than I was when I free soloed the West Ridge of Stuart. I don't know, maybe I'm just getting old. Finally being of legal drinking age will do that I guess. From here, the fun wasn't over. As I got lower, the brush got thicker and thicker once again. And this time, I really got soaked. Not like, mama I peed my pants damp. Like, Mommy I fell in the toilet wet. My pants actually clung to my skin, they were completely soaked. I was getting pretty tired of this brush, but I guess it was my own doing. One thing about solo trips is you have no one else really to blame for your follies. It's nice to be self-reliant but it's also nice to have a scapegoat (and partner for support and safety, of course). I generally trended skier's right and felt like it sorta worked. After about an hour, I finally found a climber's trail. My speed greatly increased and then at about 4900 ft, I hit the Wildhorse trail, elated to out of the brush. From here, I was able to cruise down the trail back to the car, for a round trip time of just under 9 hours. Total, it was about 15 miles and 7k gain with nearly all the gain off trail. In good weather, the views would be great. I think it's a cool route because of the lack of established climber trails or cairns, but it's not for everyone. I'd love to see someone complete it or even throw in some other Chiwaukum peaks. The falls colors are second to none. The Chiwaukum are massive, lonely peaks. They hold a very special place in my heart. Here's a map showing my track in red. Blue shows the extension I wanted to do. Gear Notes: UD running vest, Z poles, some clothing that would become wet, LS ultraraptors (tripled in weight because of water) Approach Notes: Go straight up. Basically due south from the parking lot.
-
[TR] Dragontail Peak - Triple Couloirs 03/31/2018
Kyle M replied to aikidjoe's topic in Alpine Lakes
Nice work! We were the party ahead of you guys. Thanks for picking up that picket we dropped! -
Trip: Dragontail Peak - Triple Couloirs Trip Date: 03/31/2018 Trip Report: Climbed Triple Couloirs yesterday via the bypass of the runnels. Weather was great, but route was pretty bony. There was very little ice thick enough to take a screw and a lot of slabby poorly protected mixed climbing, which was interesting considering we had never climbed mixed before and only had started ice a few months ago. Snow was okay, just slow. Dragontail conditions: We soloed all the couloirs. First couloir was pretty fast. We got to the base of the runnels and decided to pass on that. One other party behind us climbed the runnels and said it was "The hardest mixed climbing they had ever done before". We continued up the 1st couloir another 150 ft and then started a pitch up to the left. One 80 m pitch to the rap anchor at the base of the 2nd couloir. It had a nice icy/mixed corner that actually feature the fattest ice we would see all day, enough to get in a 10cm screw! The final part of this pitch had some sketchy traversing on rotten sugar snow on top of bare rock slab. I had to do some major excavation to find features in the rock slab underneath to use: Short rap, then the crux mixed chimney (but protected well) to the base of the 2nd couloir. 2nd and 3rd couloir were very unconsolidated and full of rotten sugar snow on top of slab in places, which made for exhausting breaking trail sliding around and stepping pretty deep, but at least there's a ladder of steps now. 60 m pitch between 2nd and 3rd couloir was relatively easy mixed, but very poorly protected. Solid 50ft runout between pieces. This pitch was a rope stretcher, and all I could find for a belay anchor were some partially screwed in stubbies... Not much pro around here as I said. Up the 3rd couloir: There was one short last WI2 step in the 3rd couloir, soloed it. Last walk to the summit: Summit photo of Stuart: Descent to Aasgard: 8 hours on route, 1 hour back down to lake from the summit. Descent was pretty firm in places down Aasgard. Some good WI features near the top of Aasgard. Some evidence of shallow wind slab avalanches in the couloirs, but we didn't notice any current activity. Gear Notes: Gear: nuts, angles (used once), cams .2-1 (small cams very useful), 10cm and 13 cm screws (bring the stubbies), pickets (not used, snow was too soft), 60m rope. Approach Notes: No flotation needed as the trail to Colchuck is packed, although the post holing across the lake was pretty bad. Be careful on the lake, one guy punched through and got his boot wet. Snow was consistent from about 2.5 miles up the road on.