Leaderboard


Popular Content
Showing content with the highest reputation on 12/18/19 in all areas
-
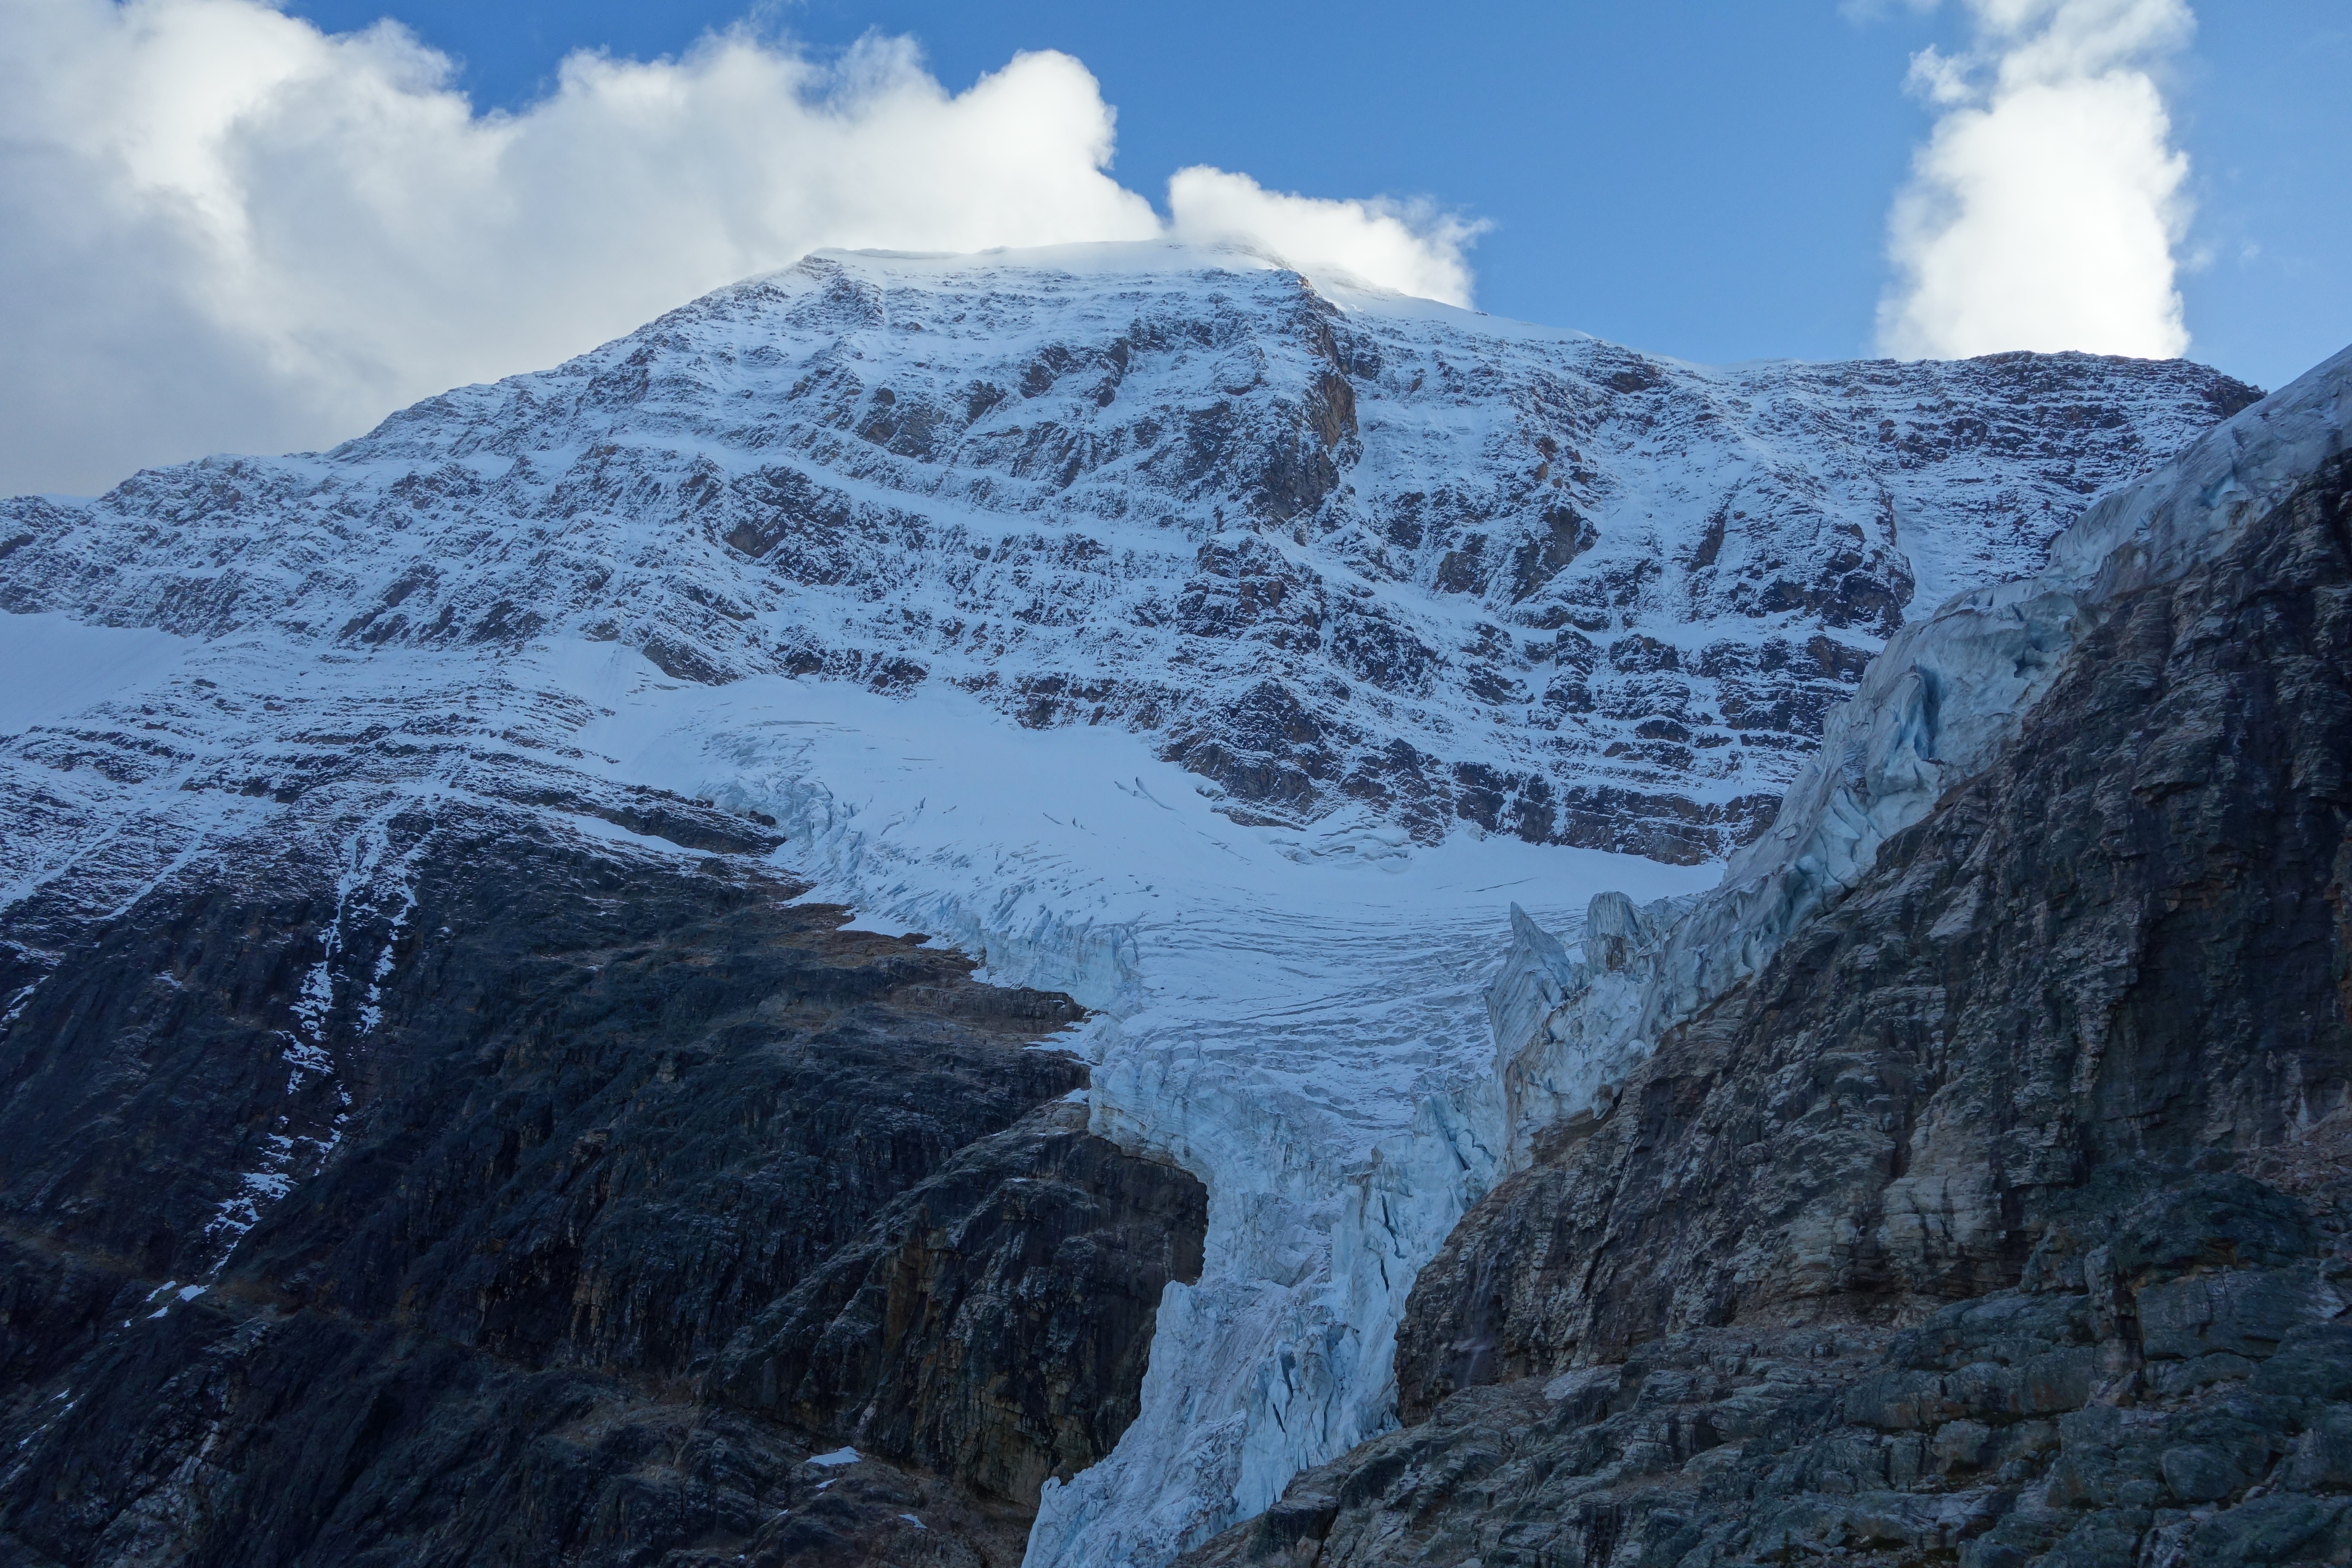
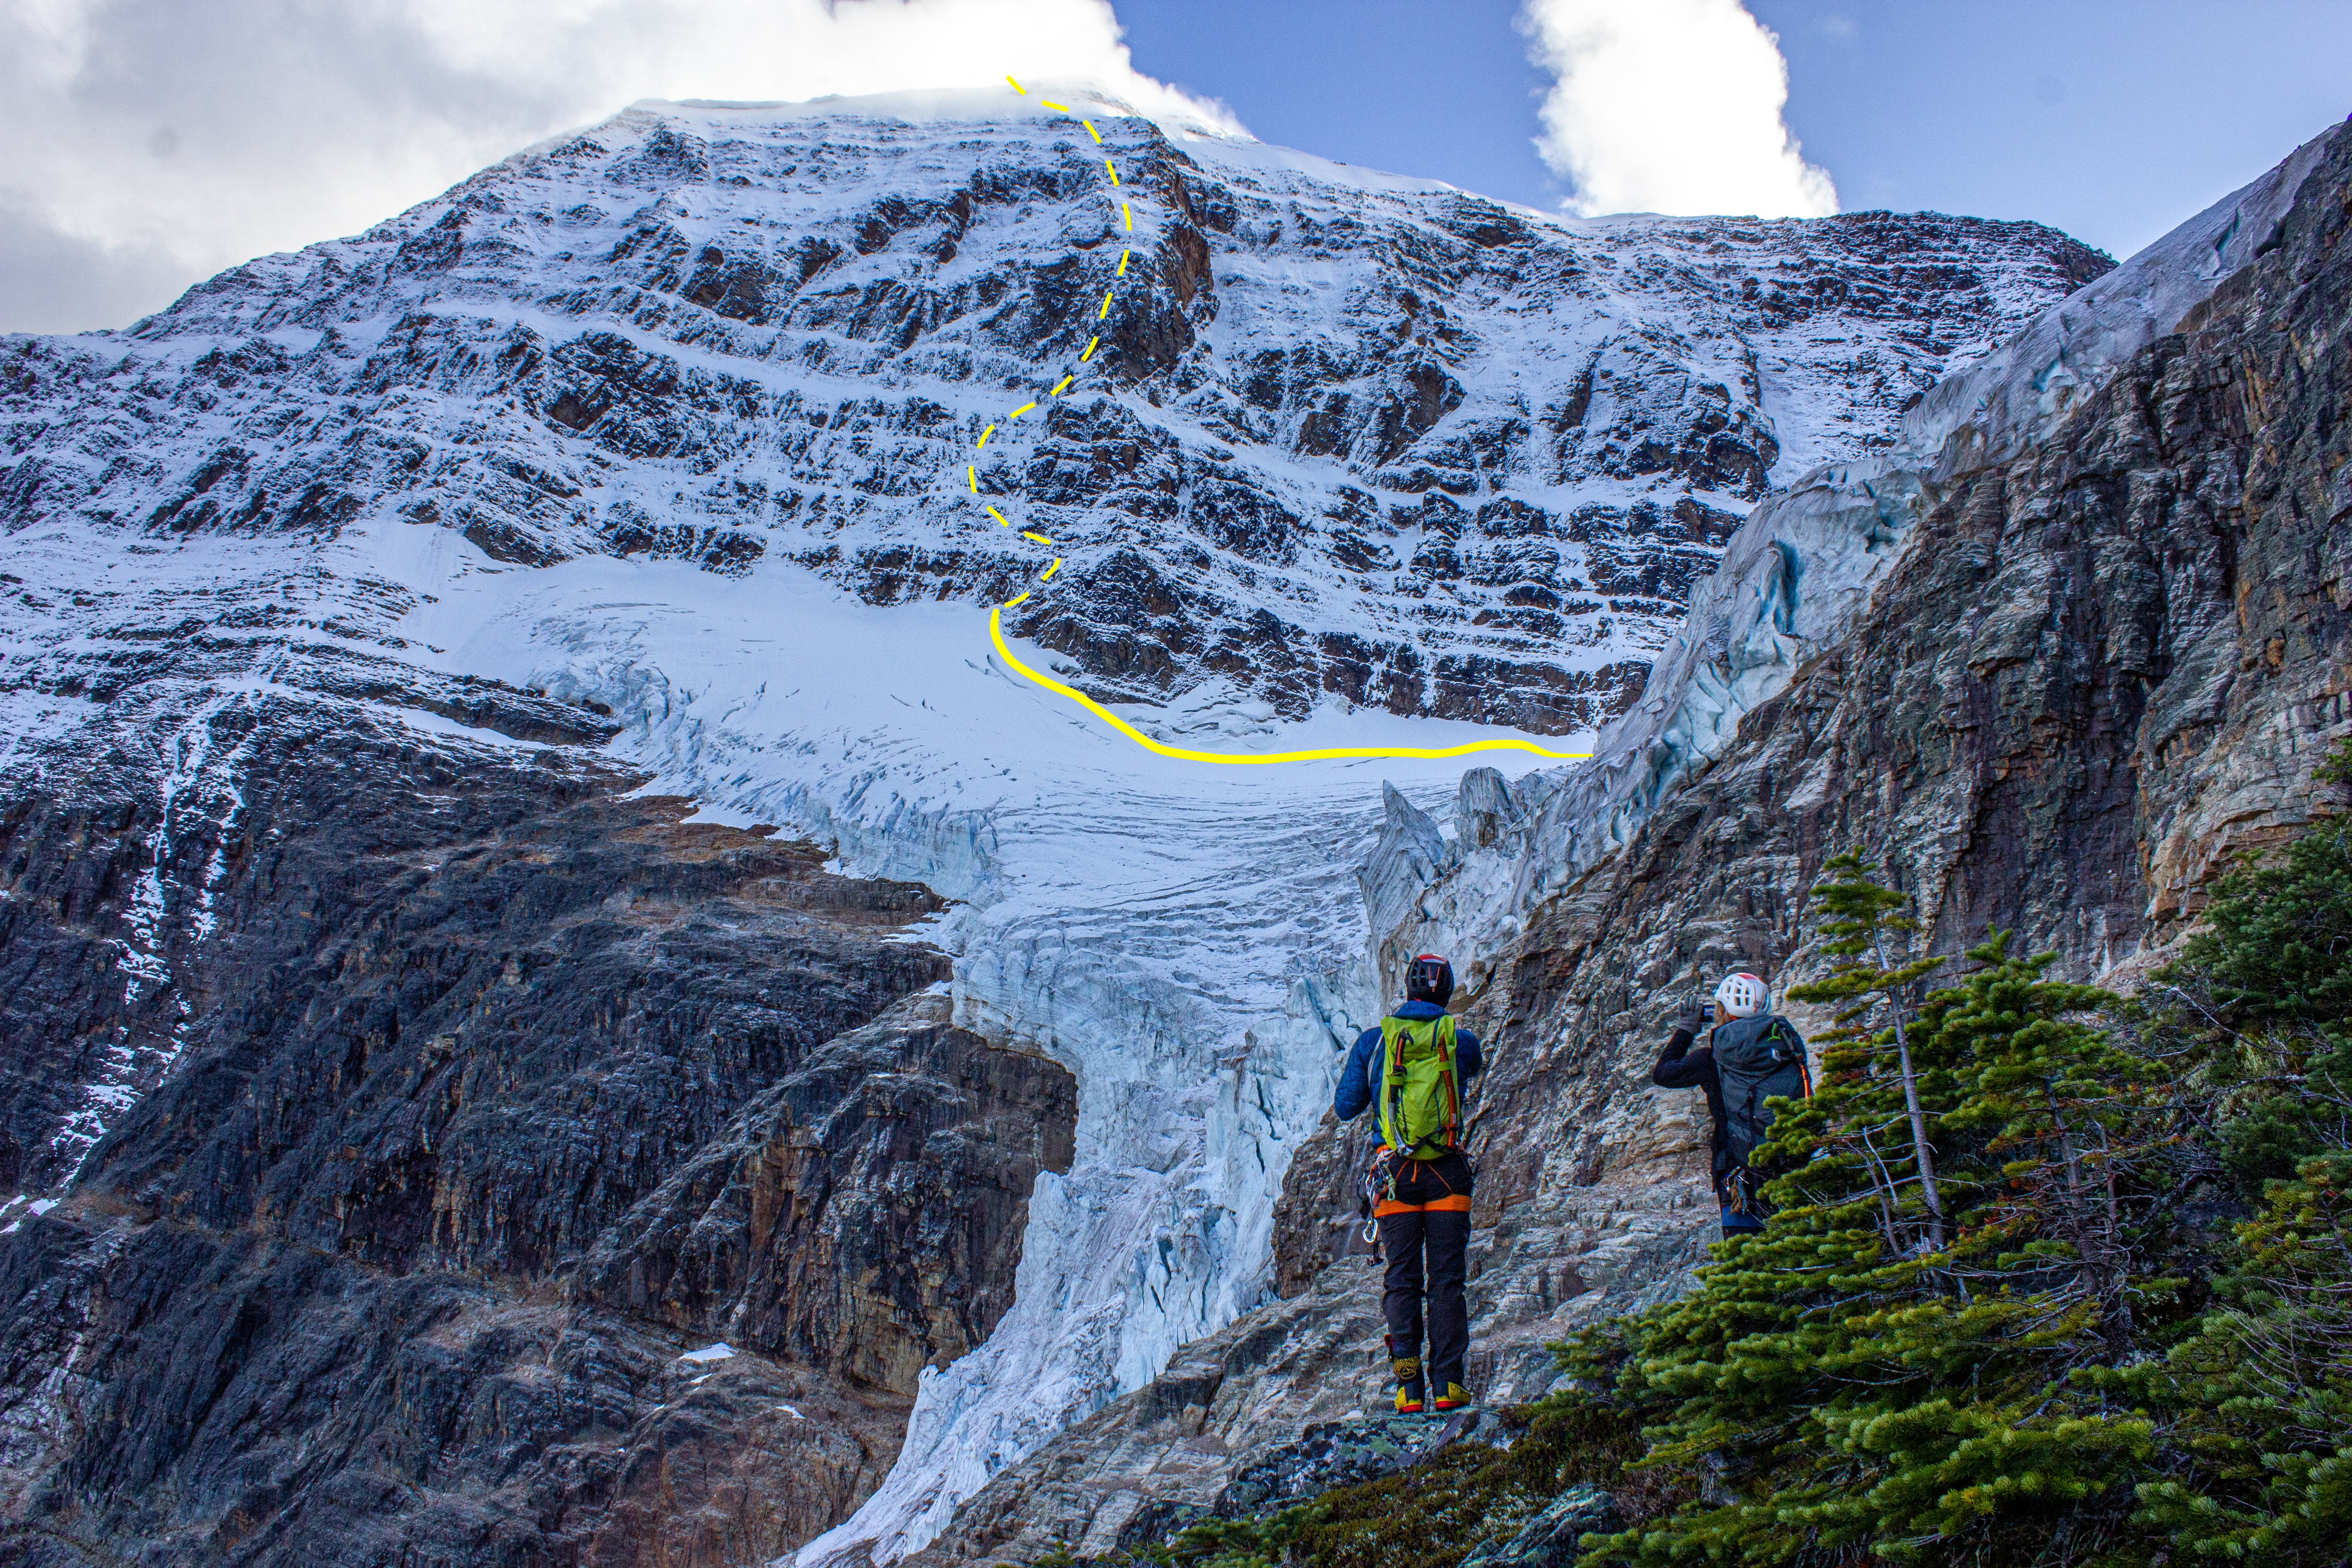
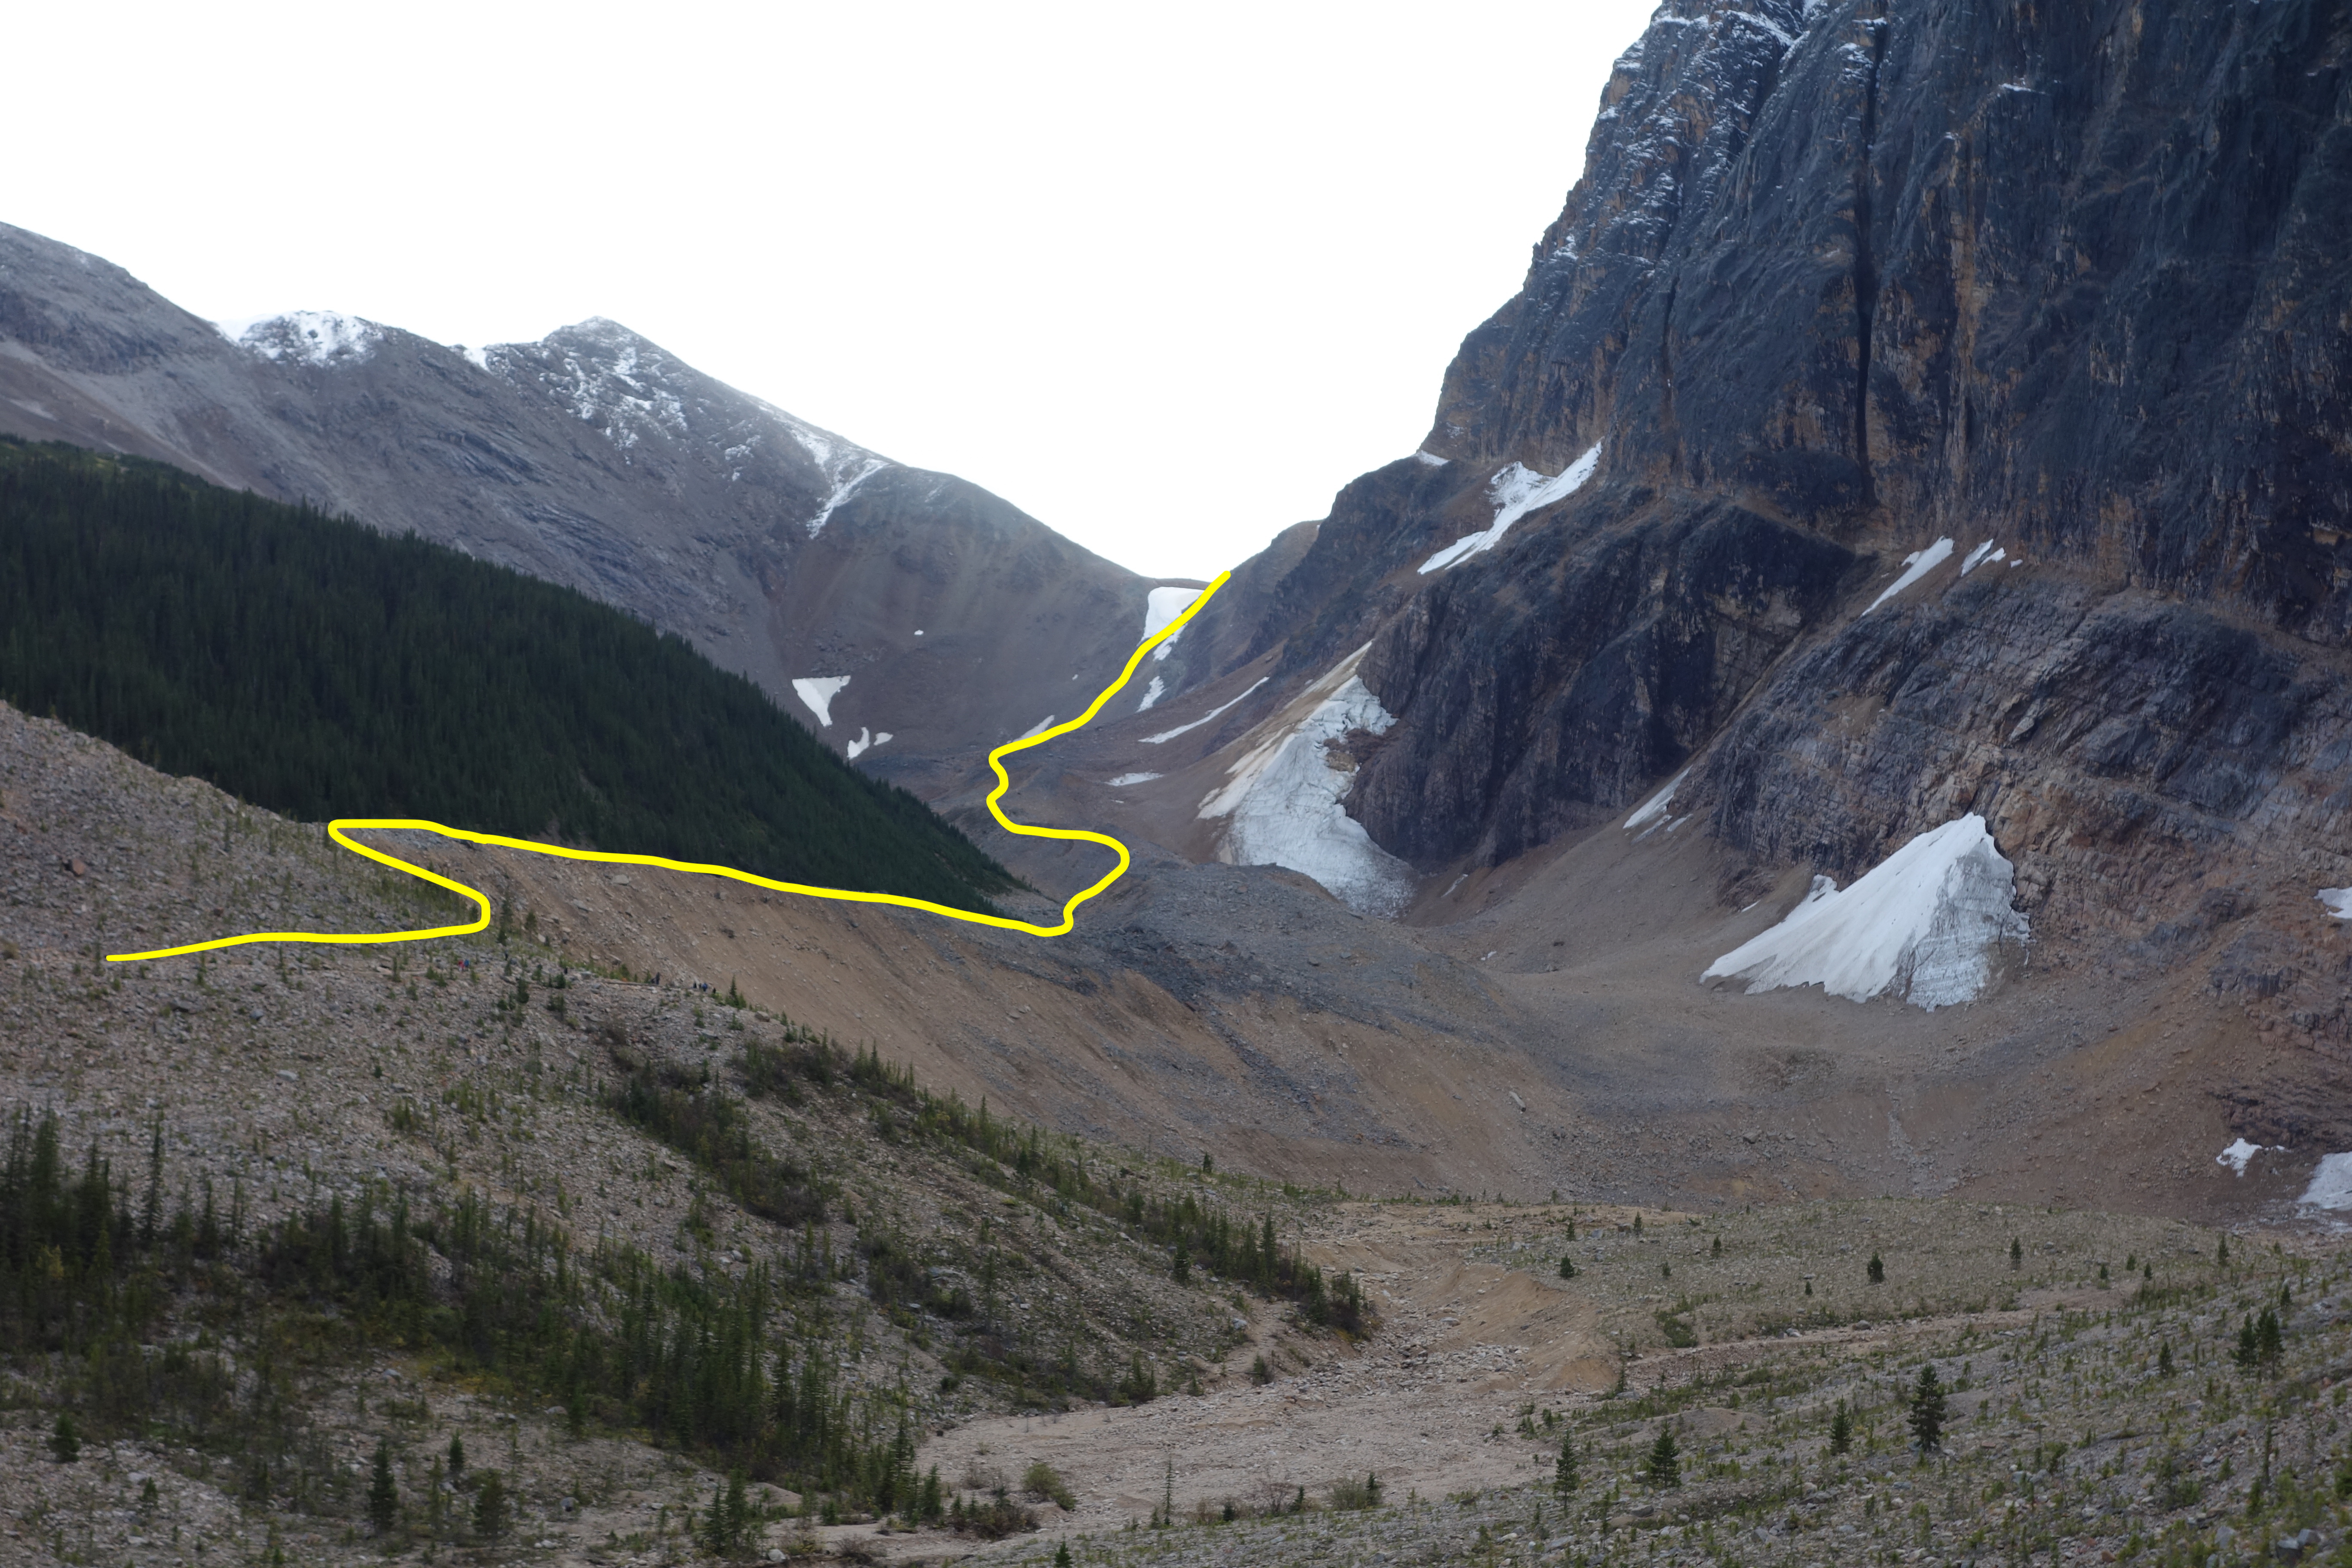
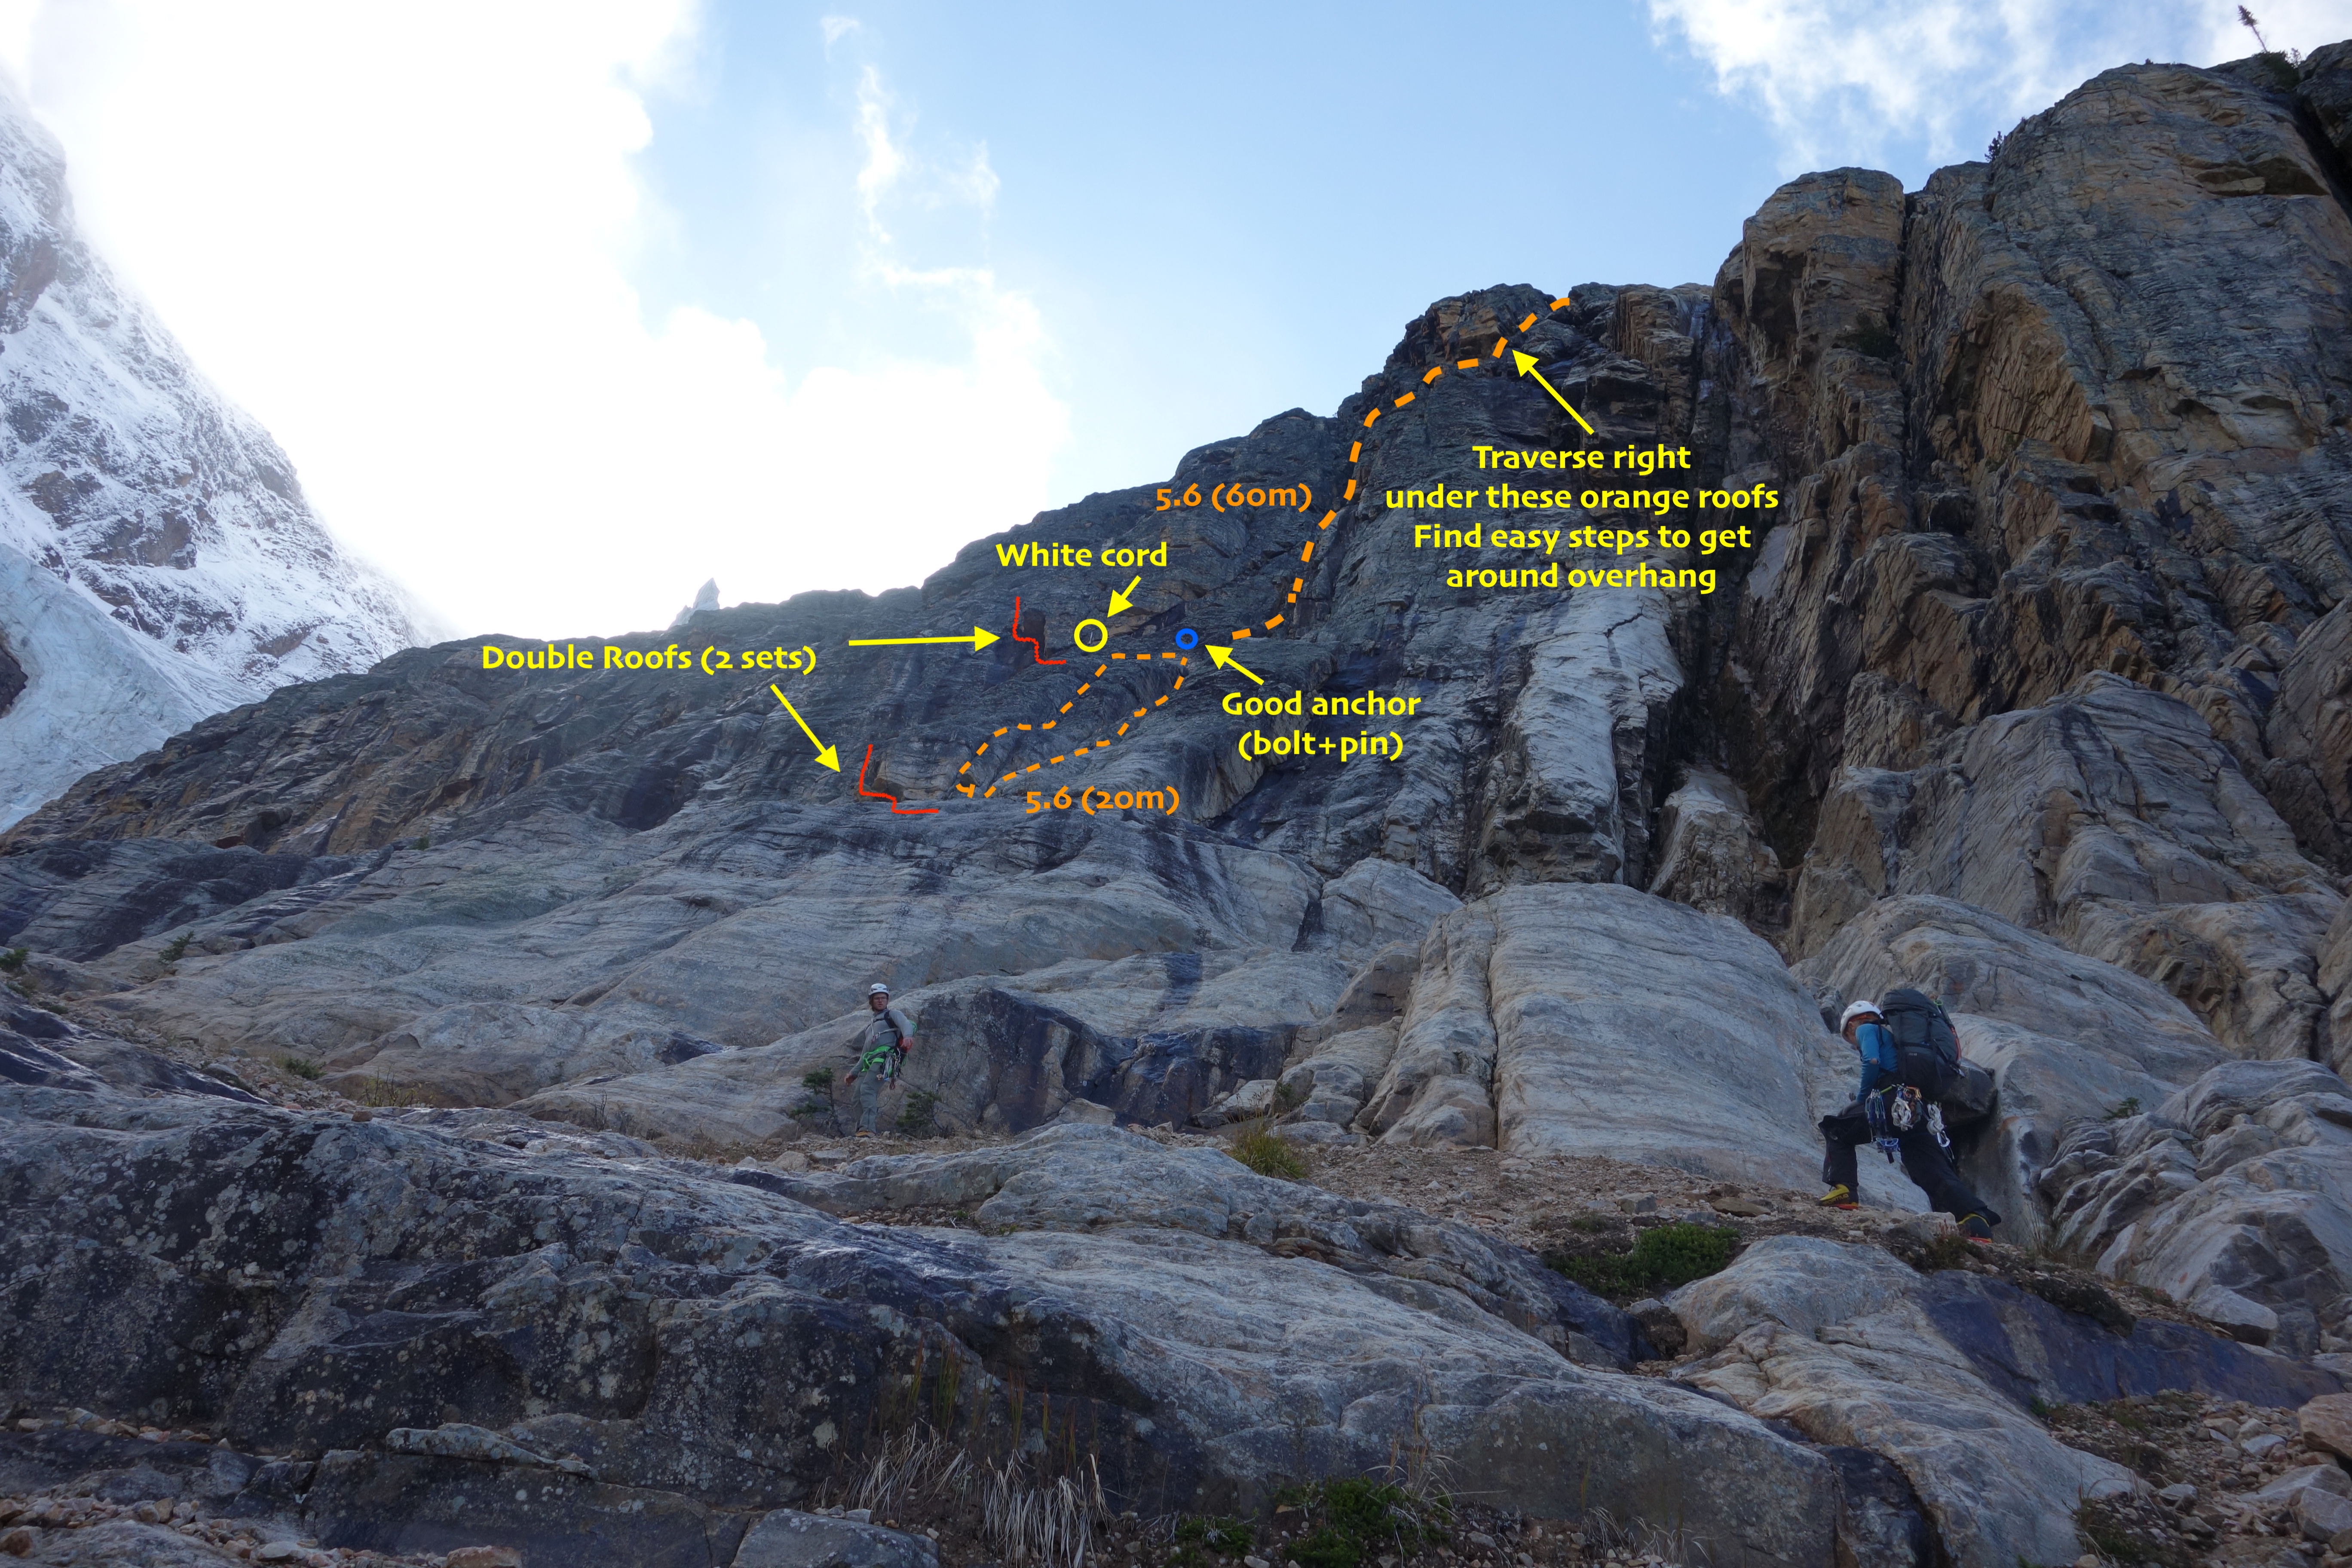
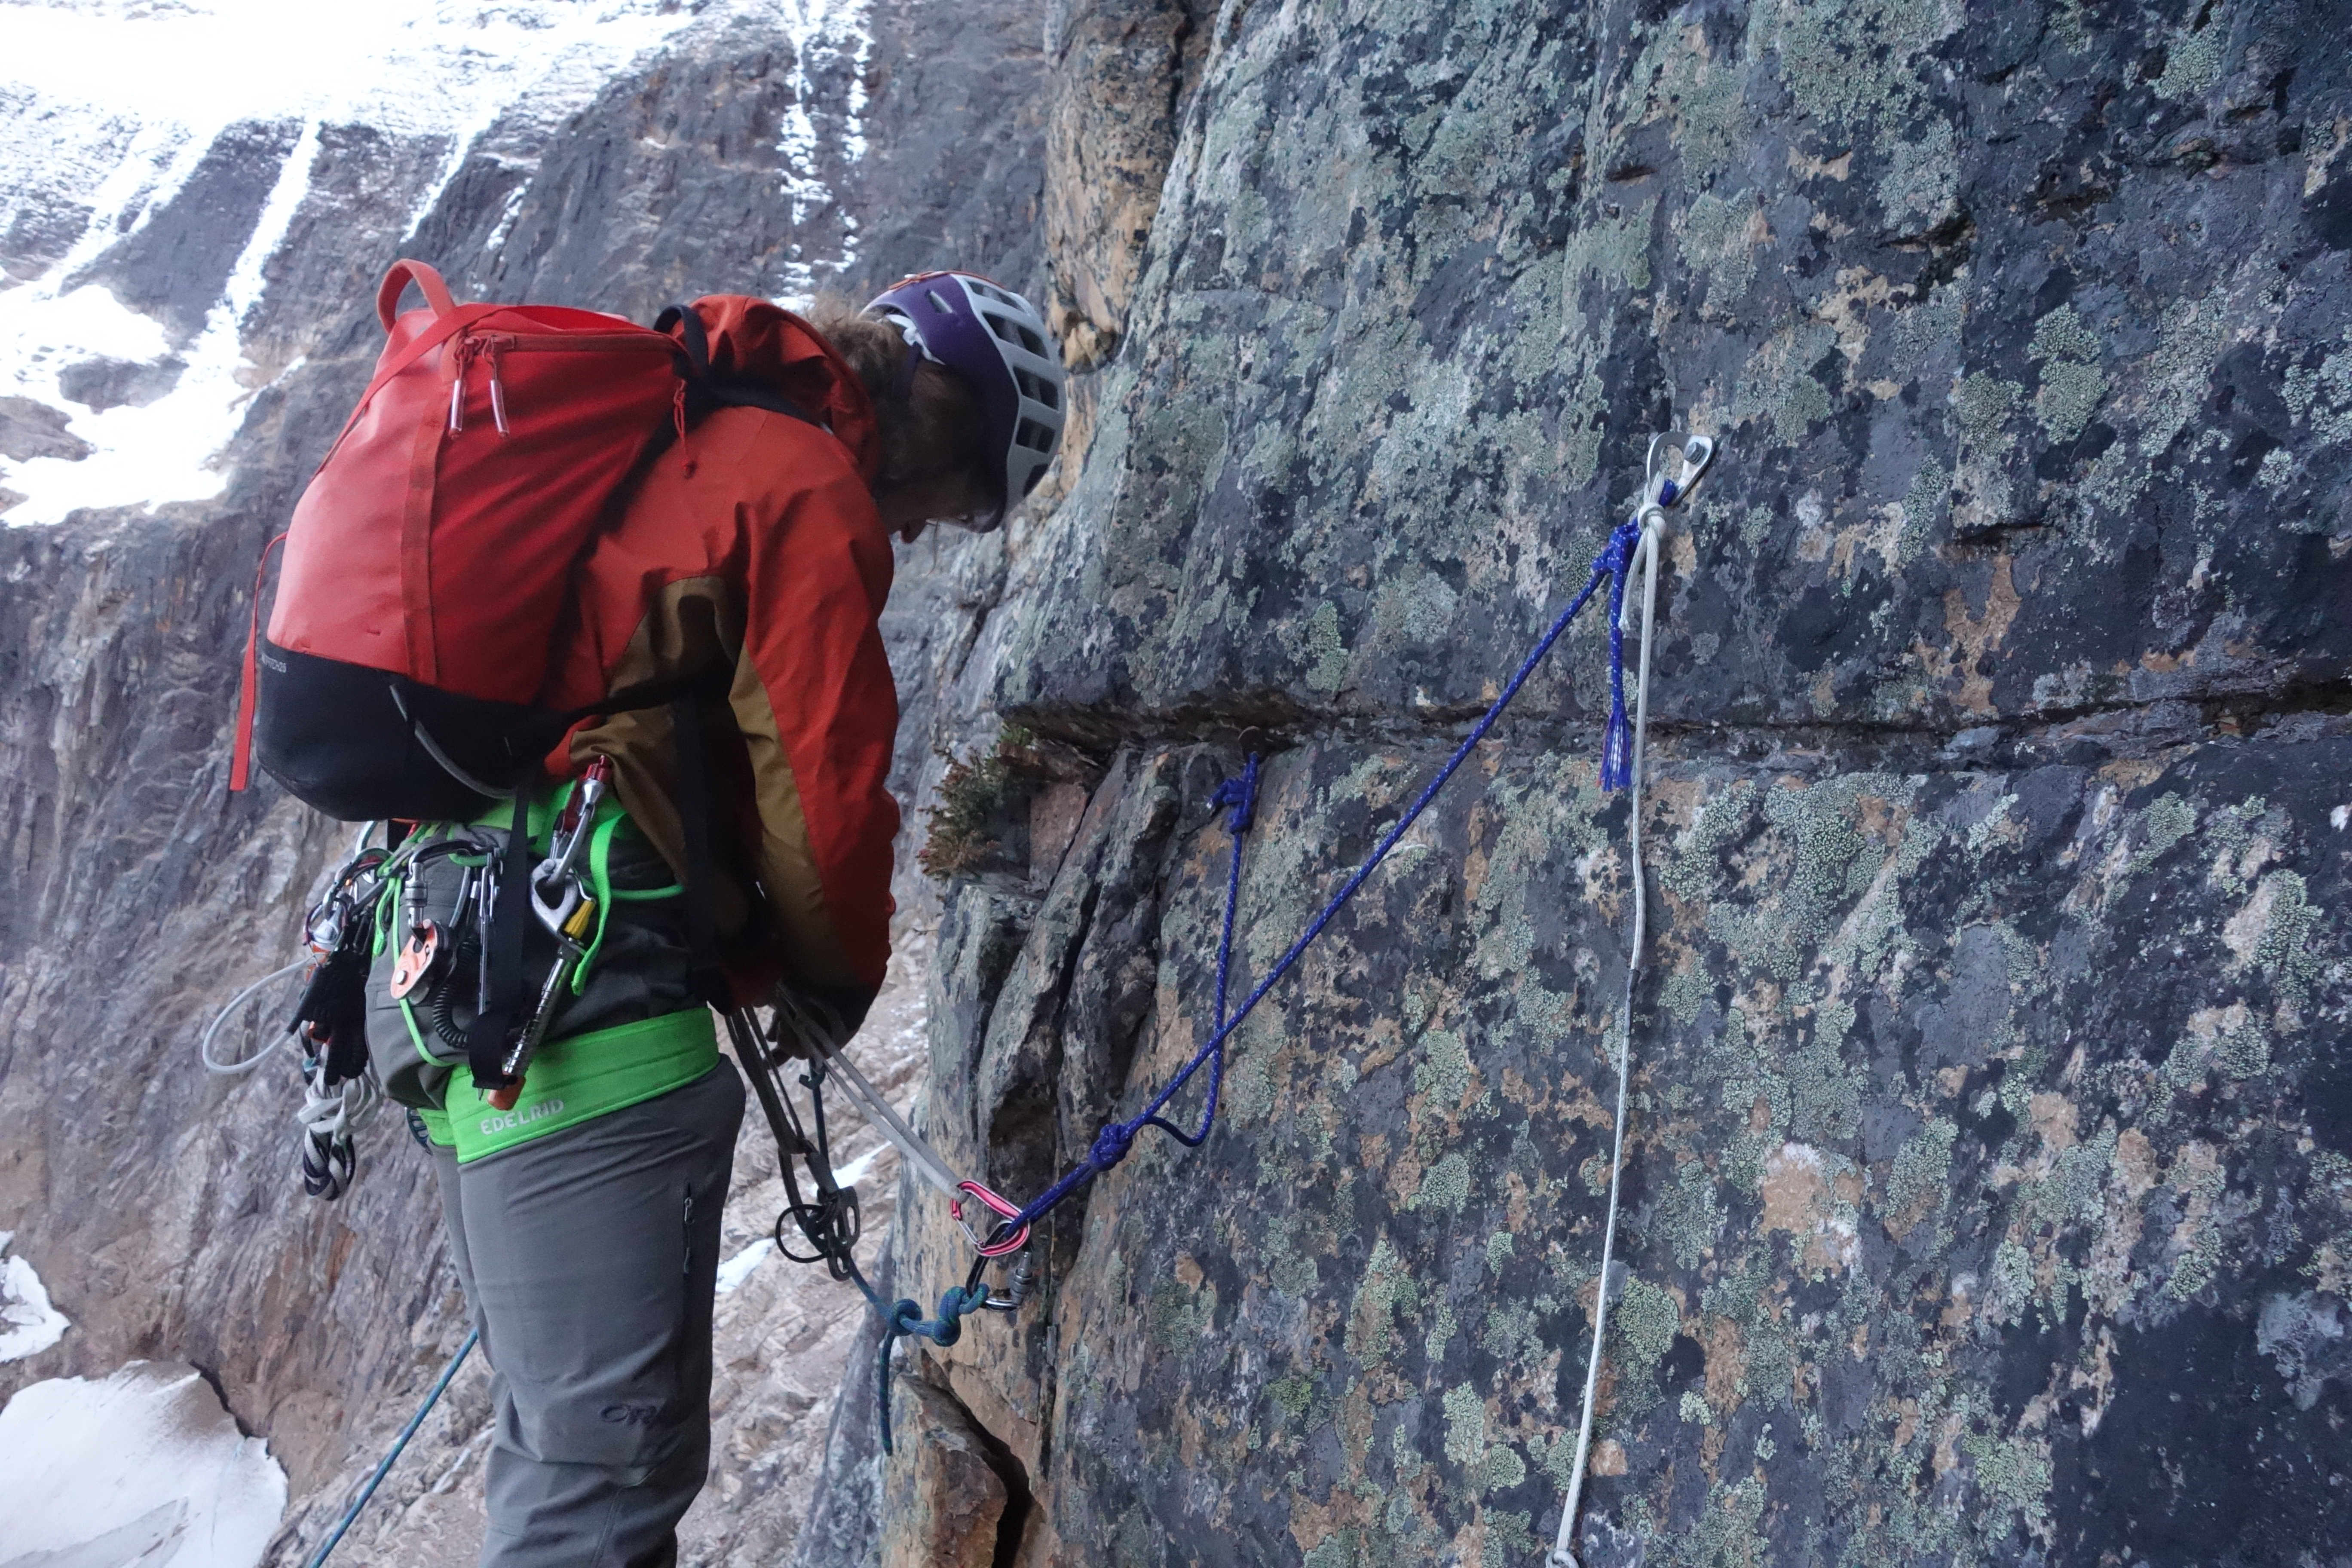
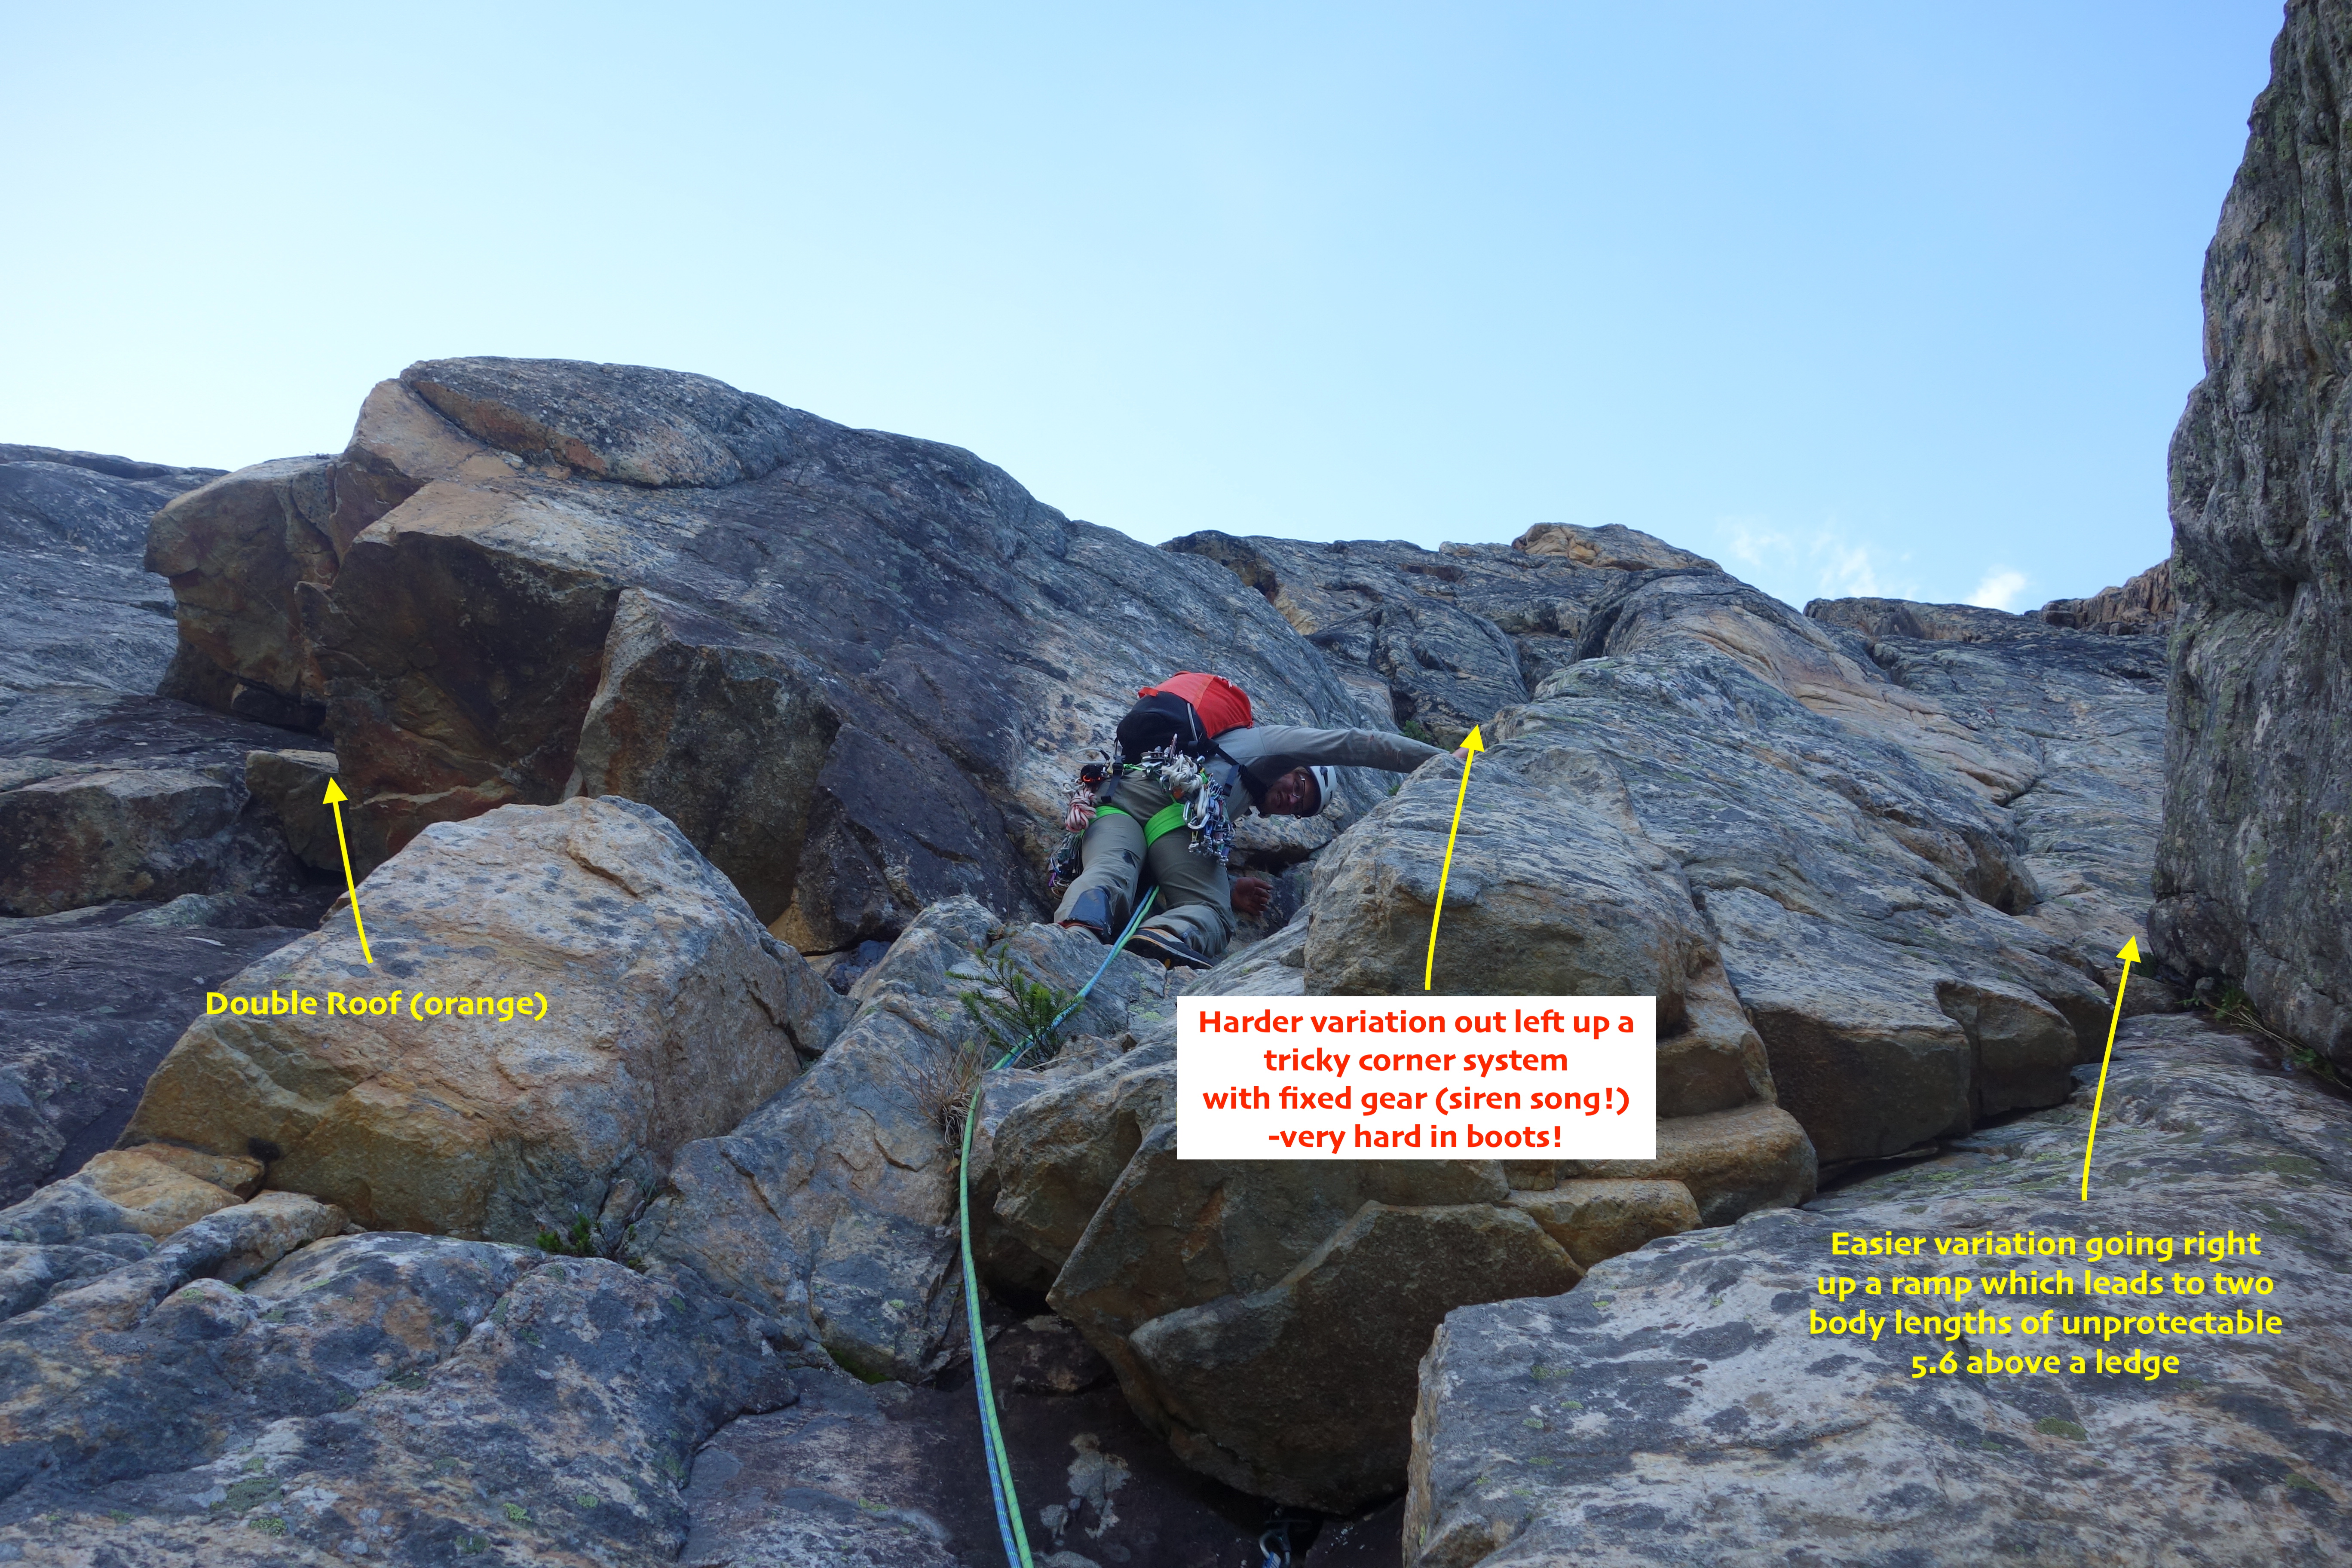
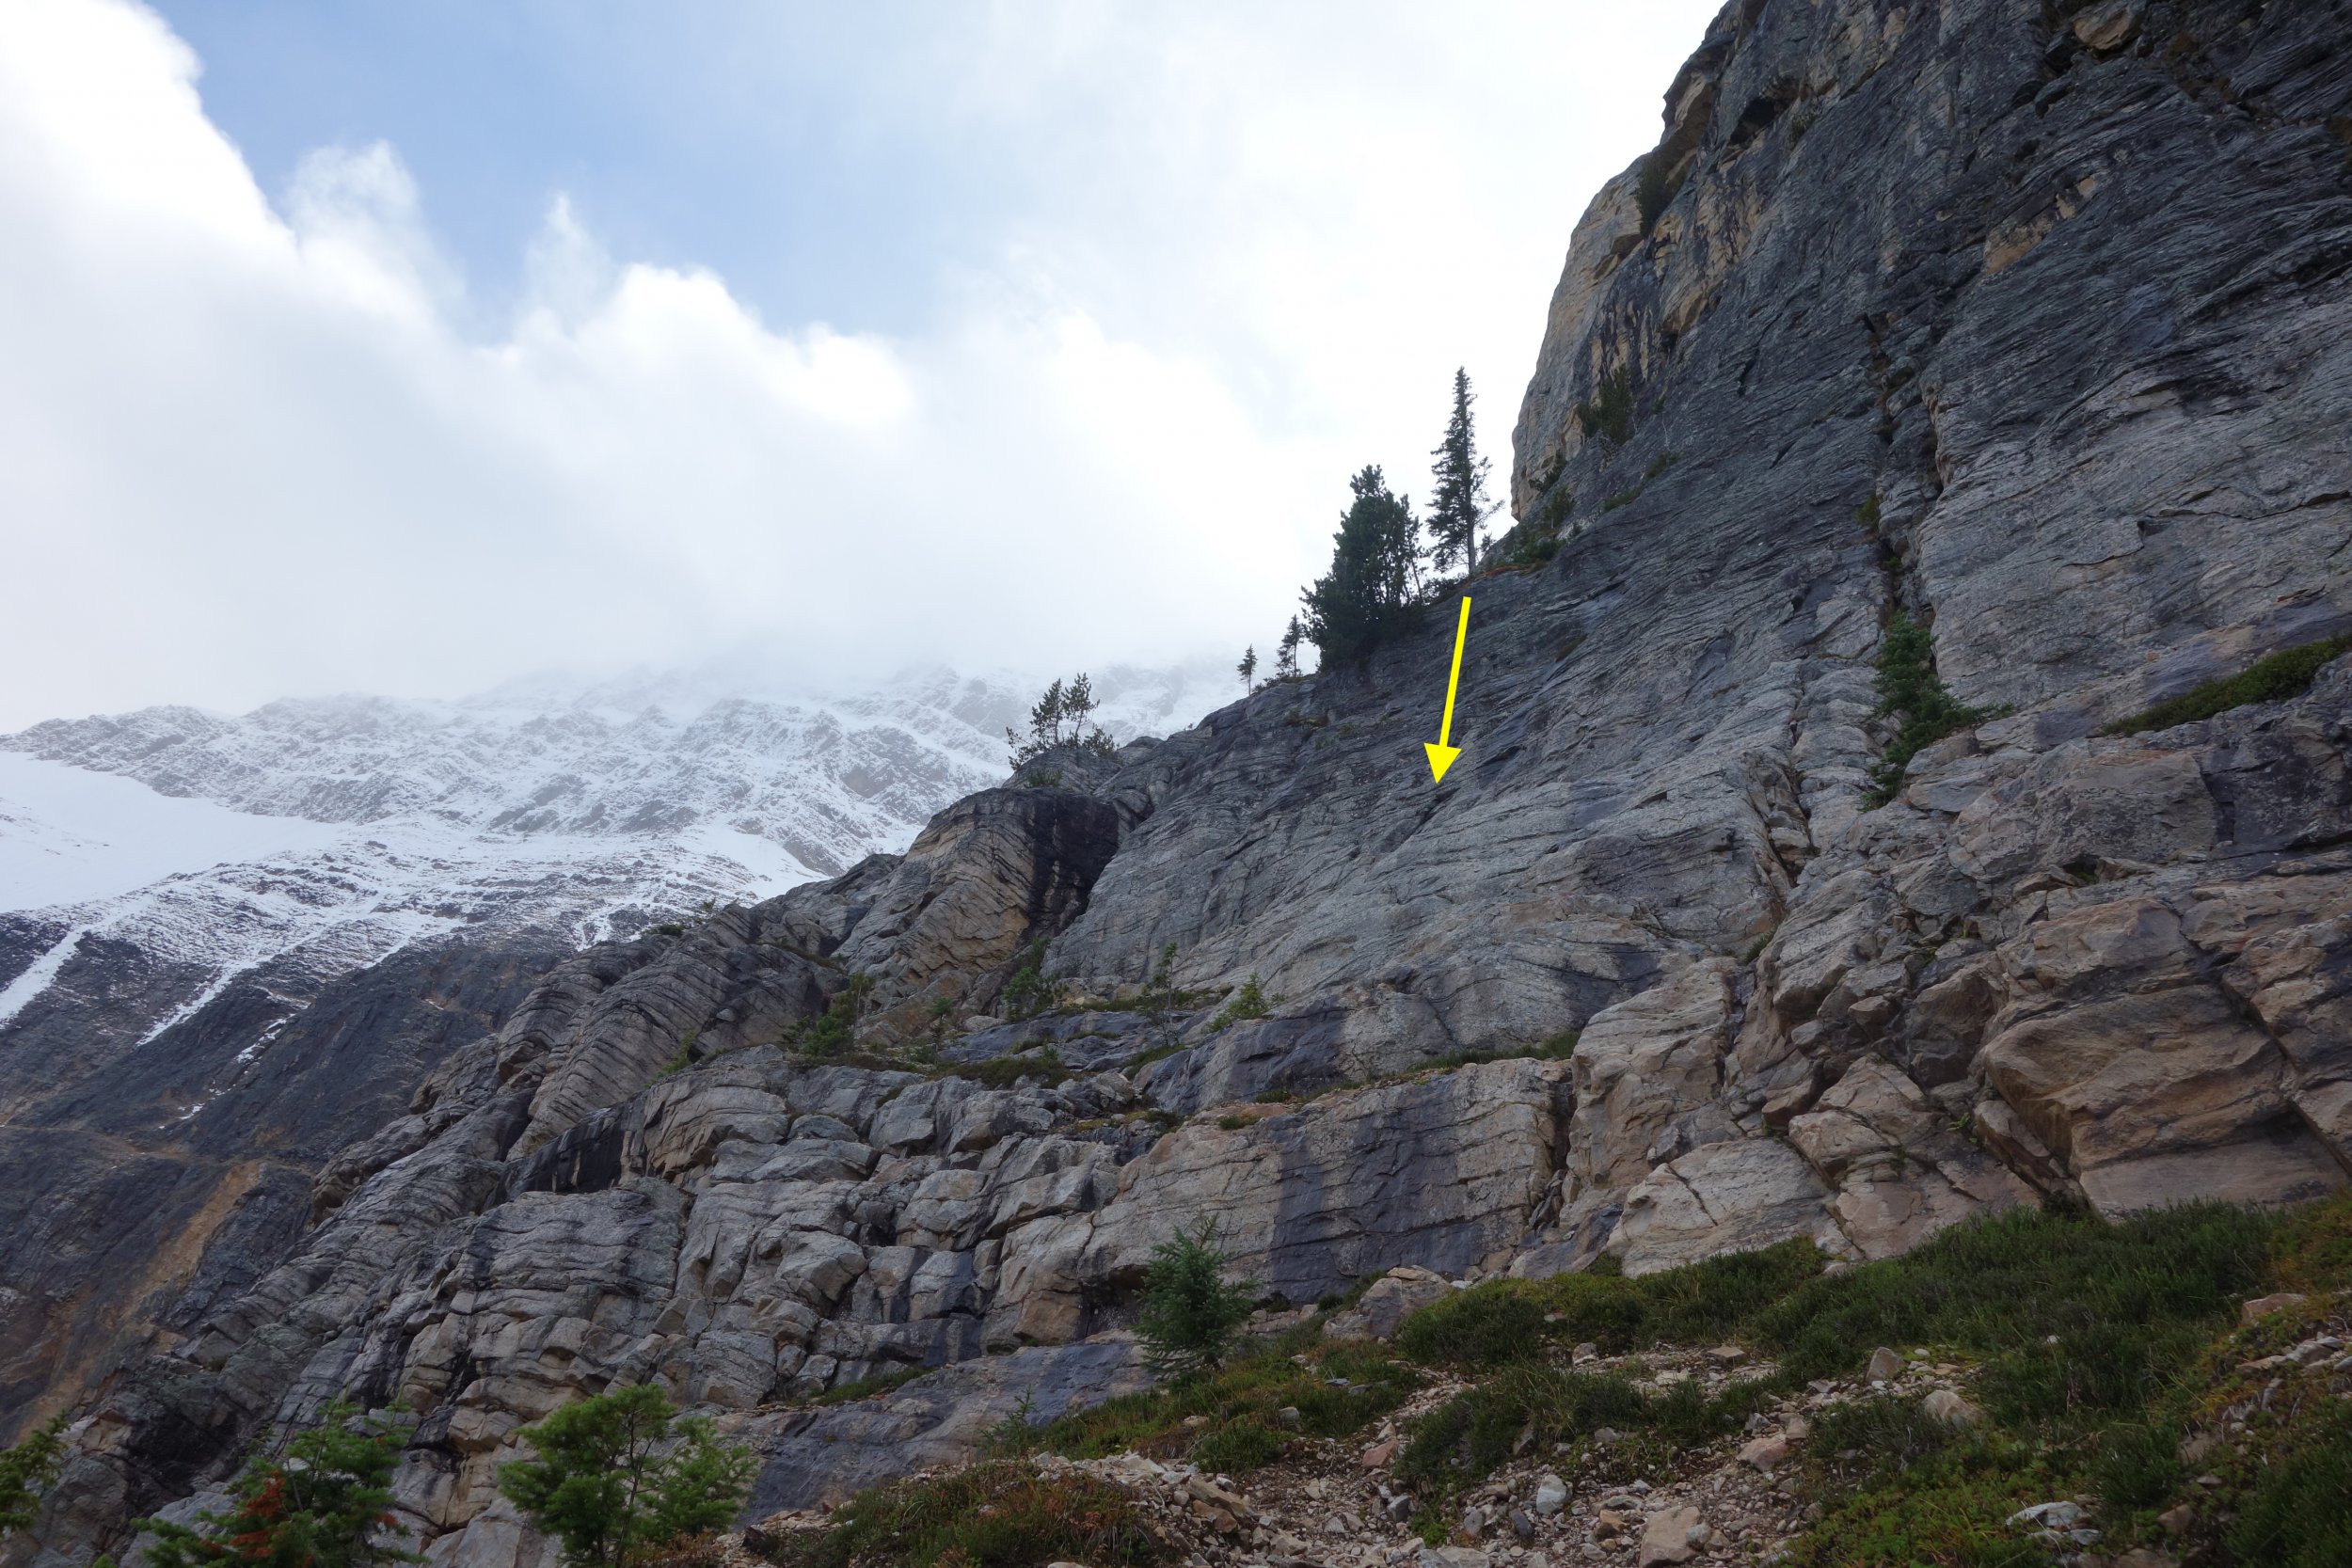
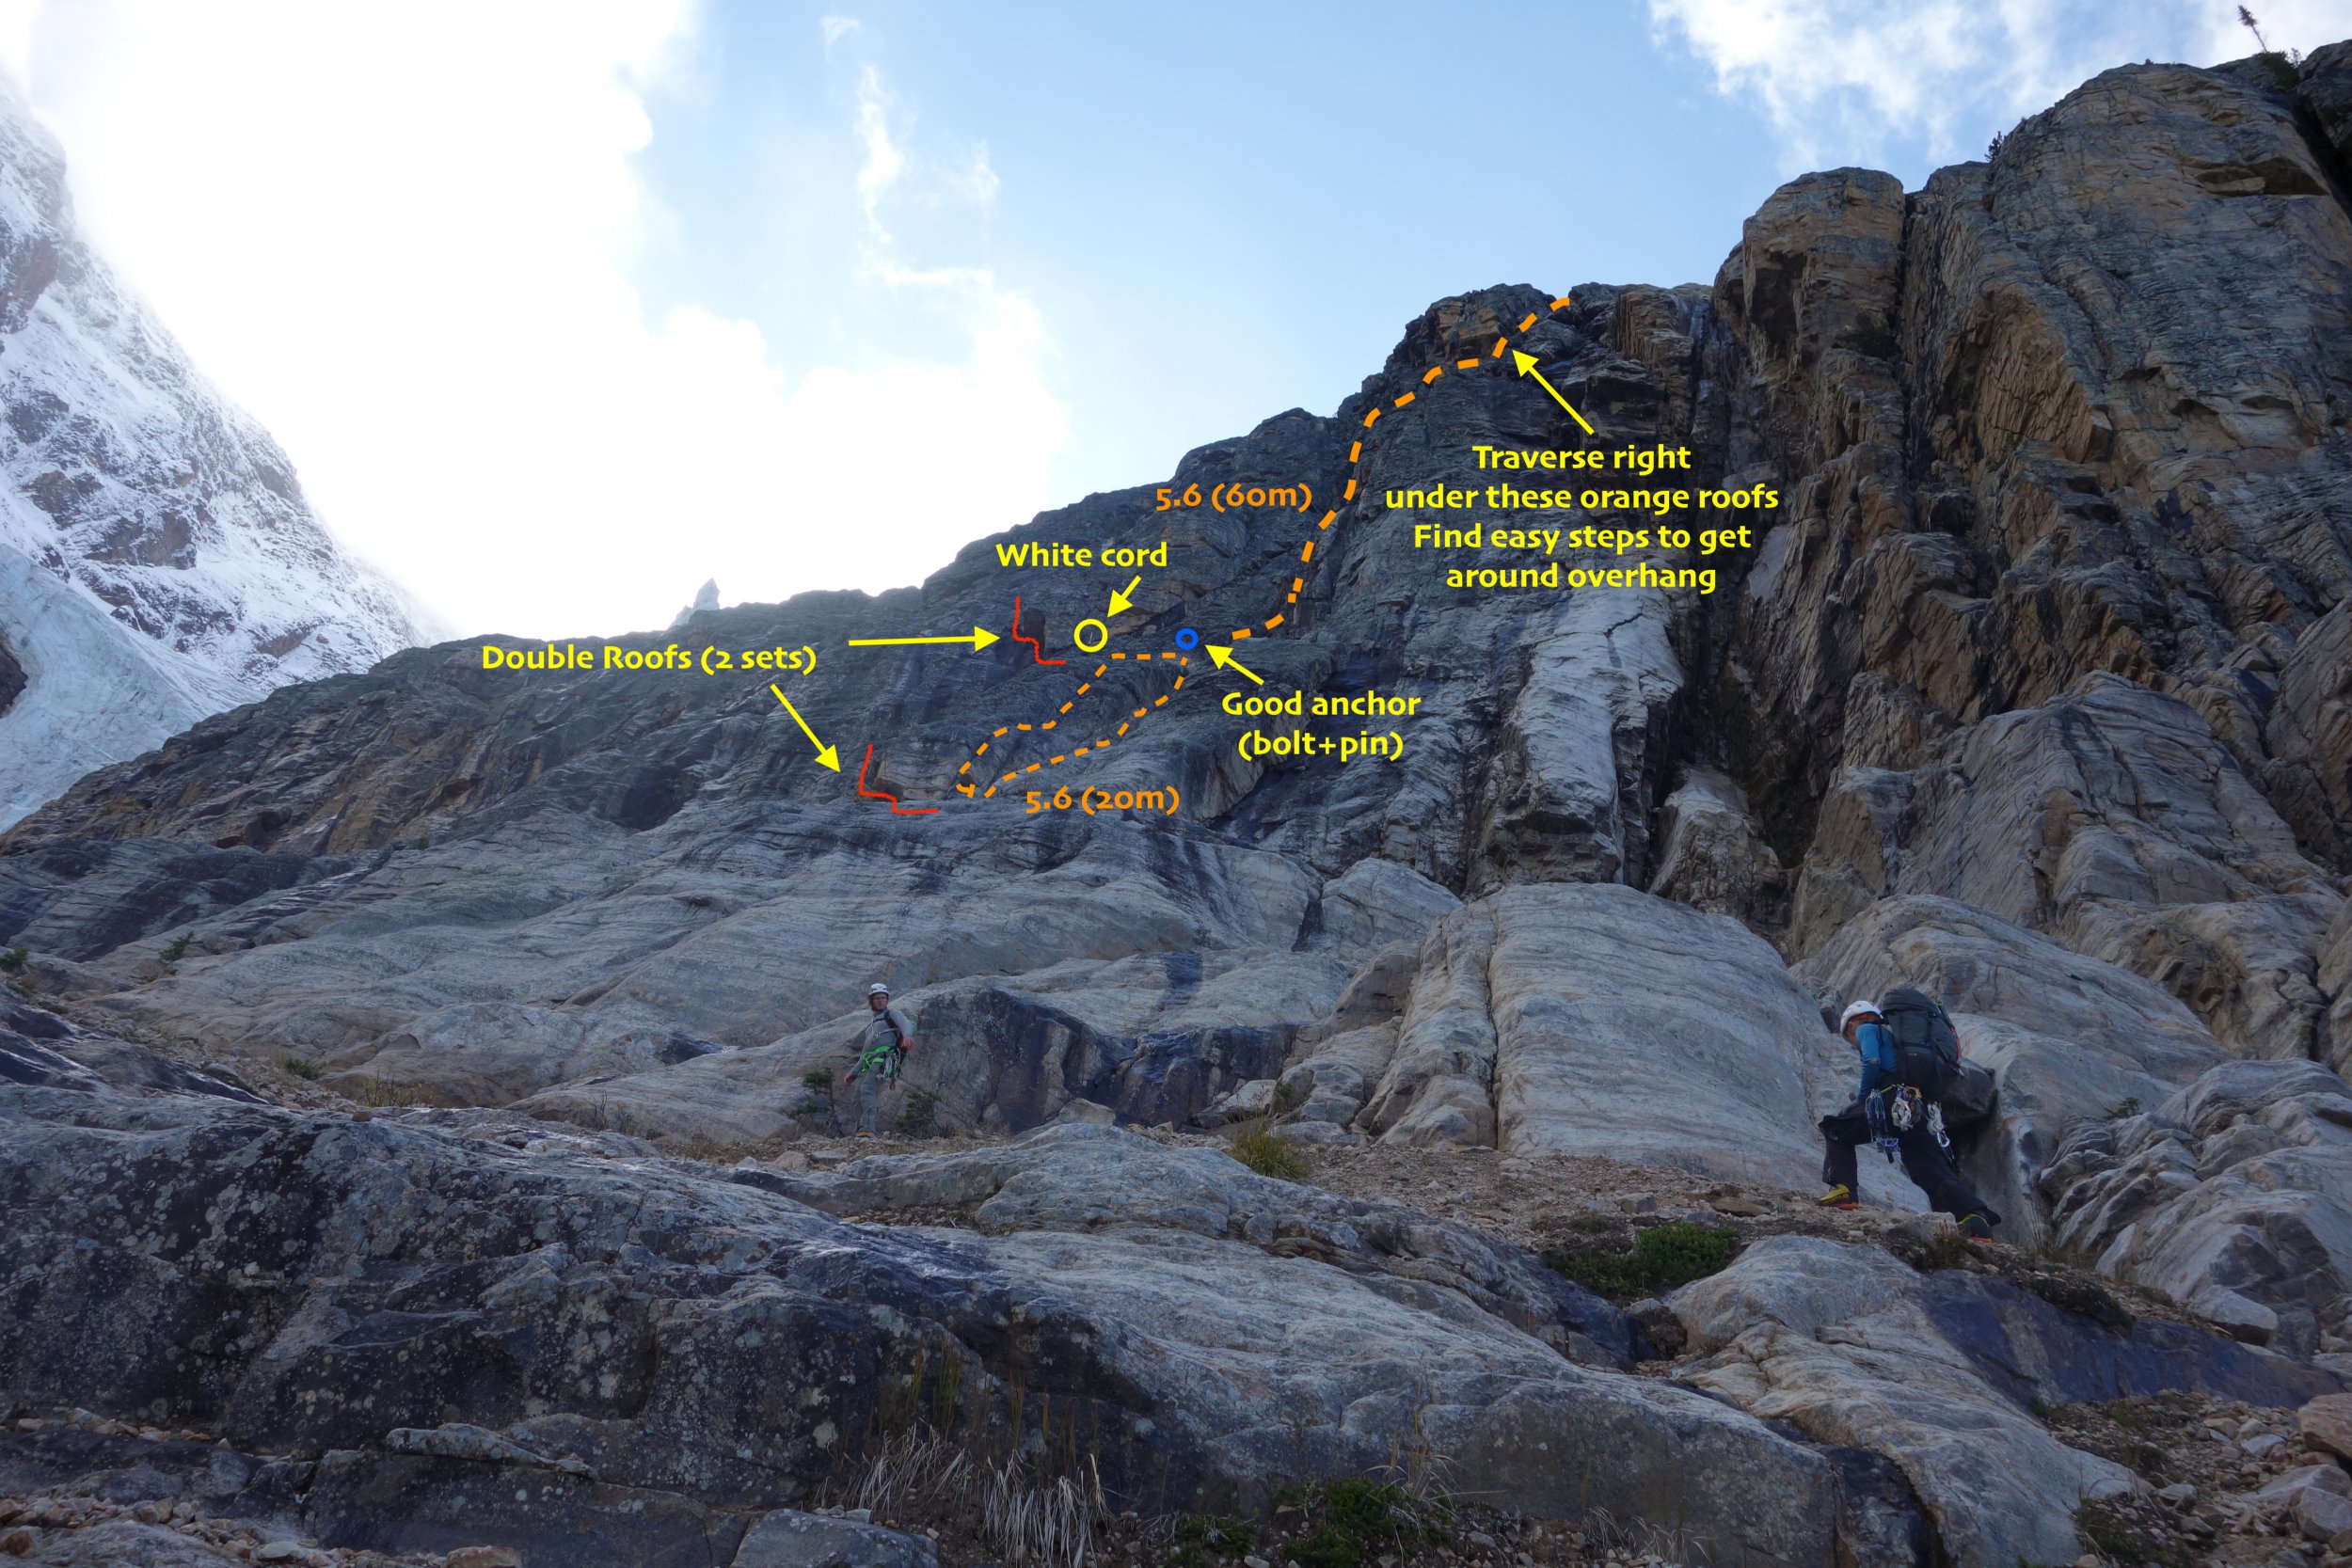
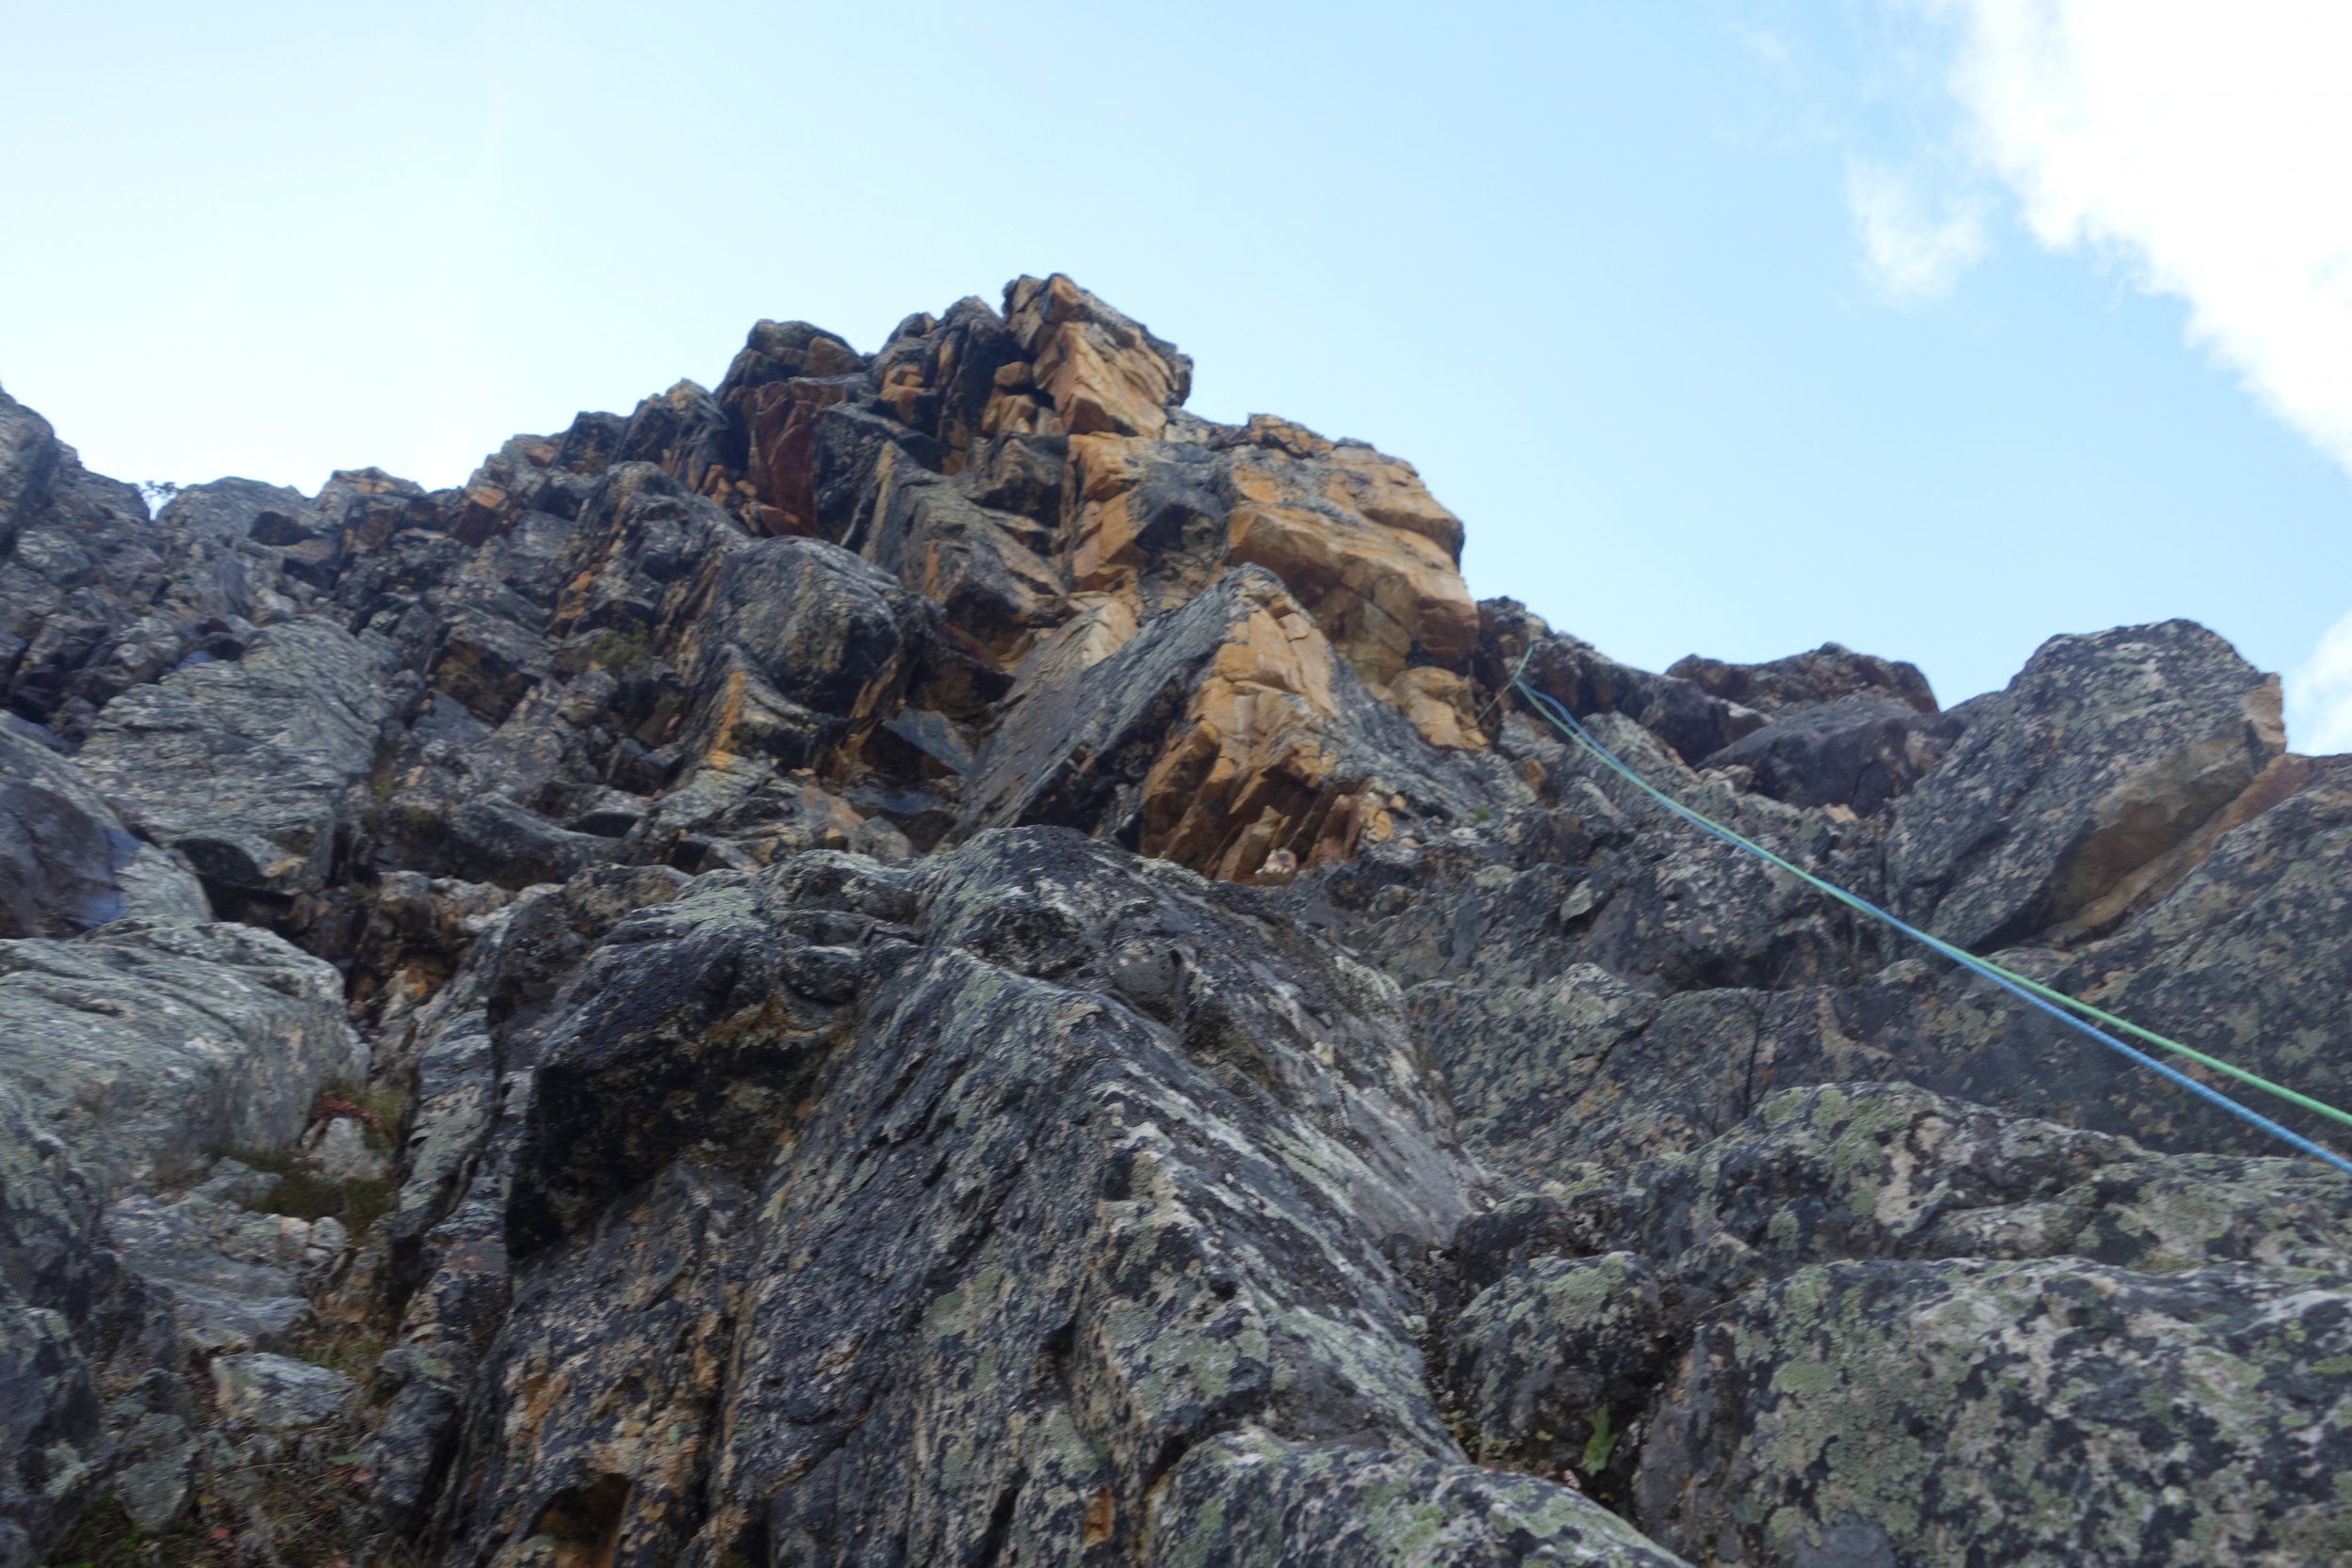
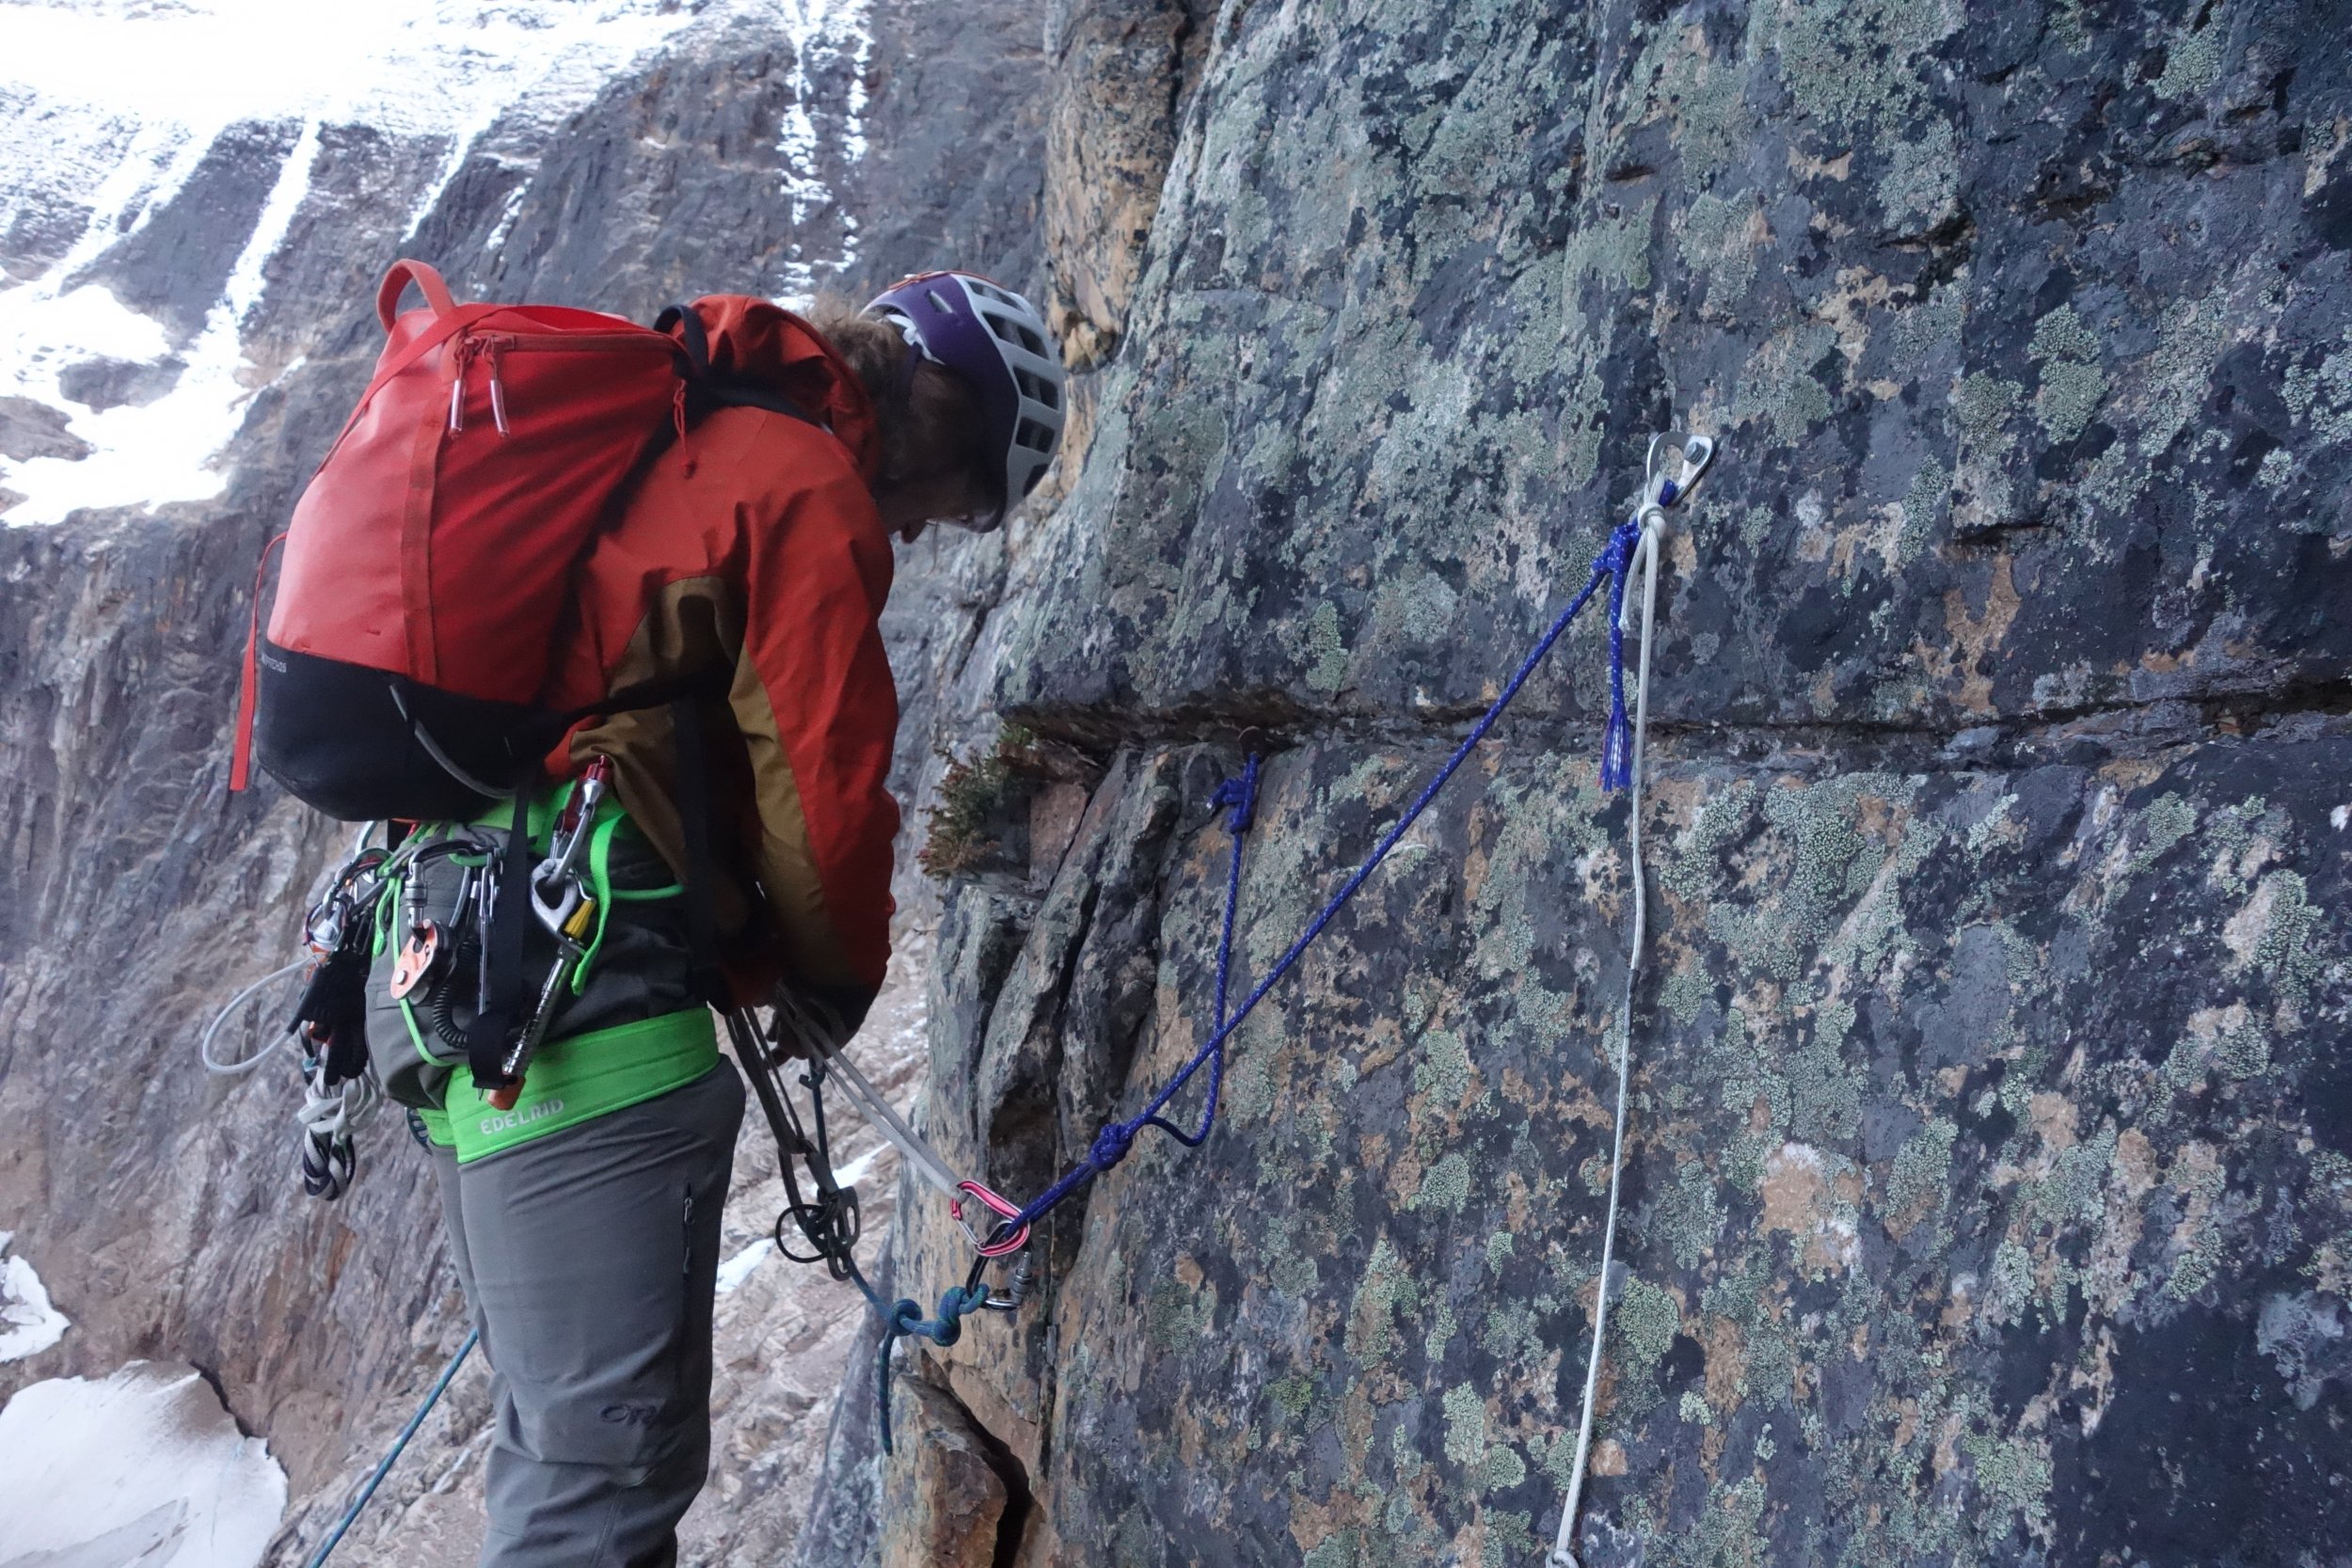
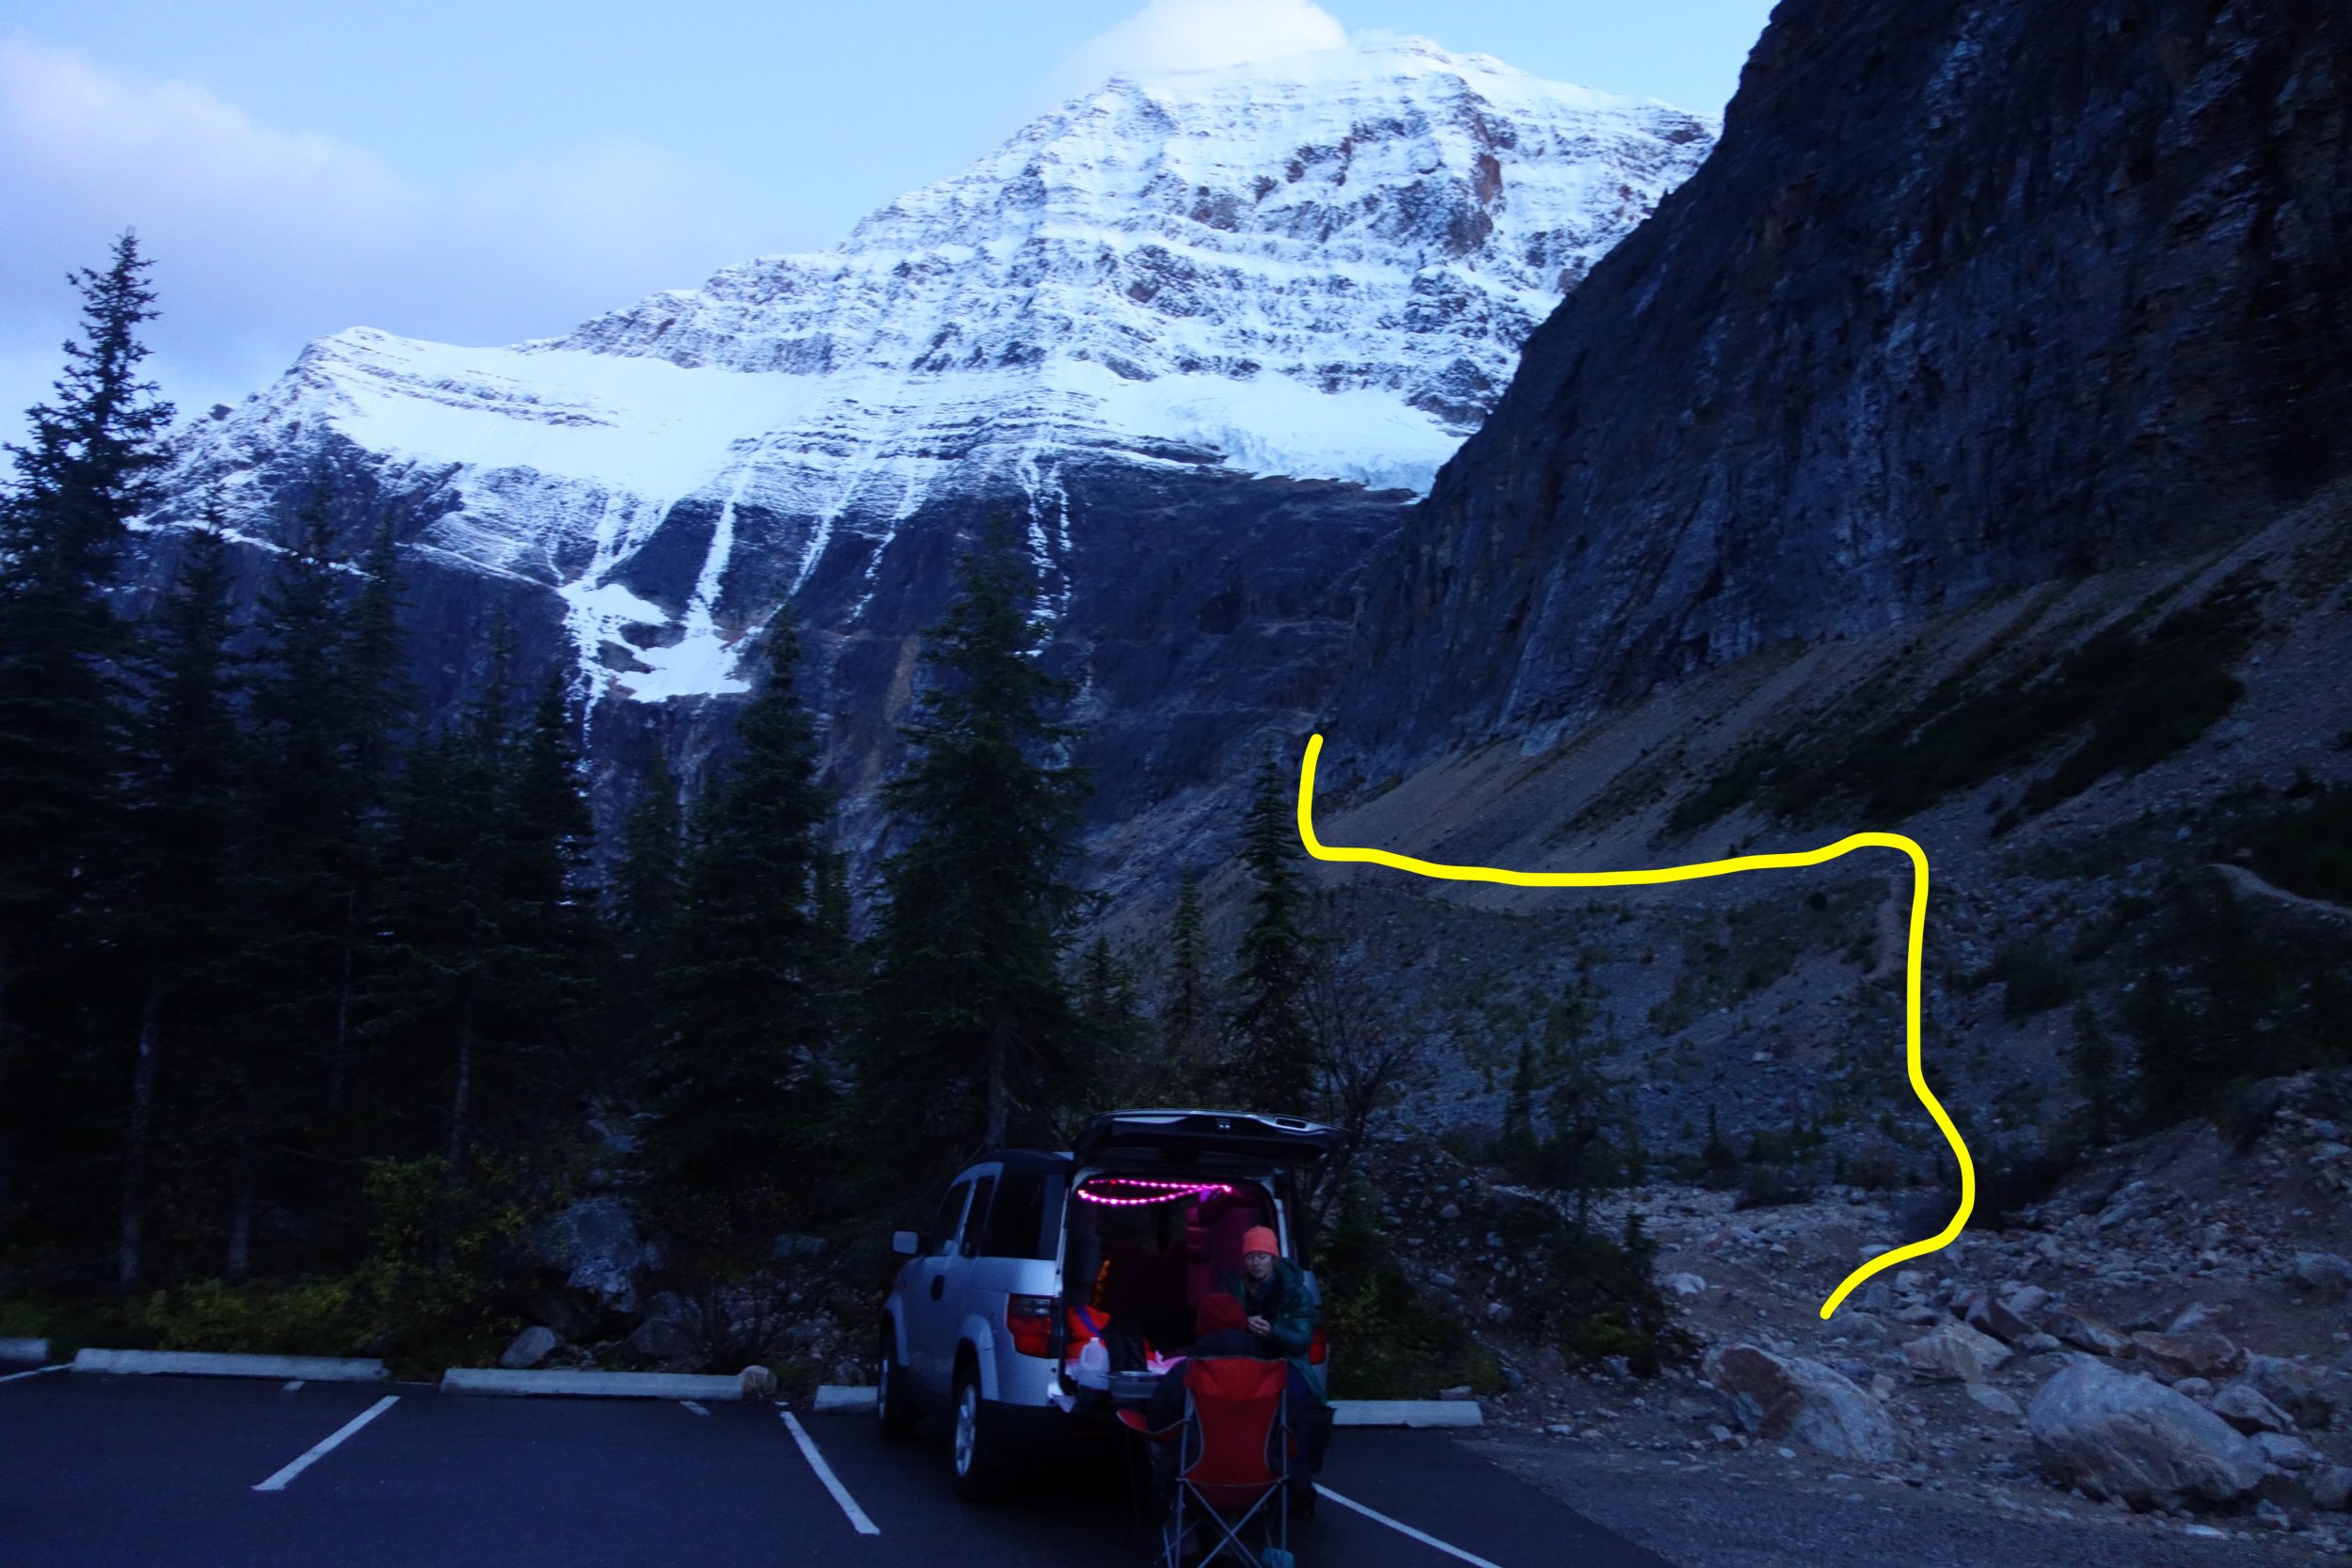
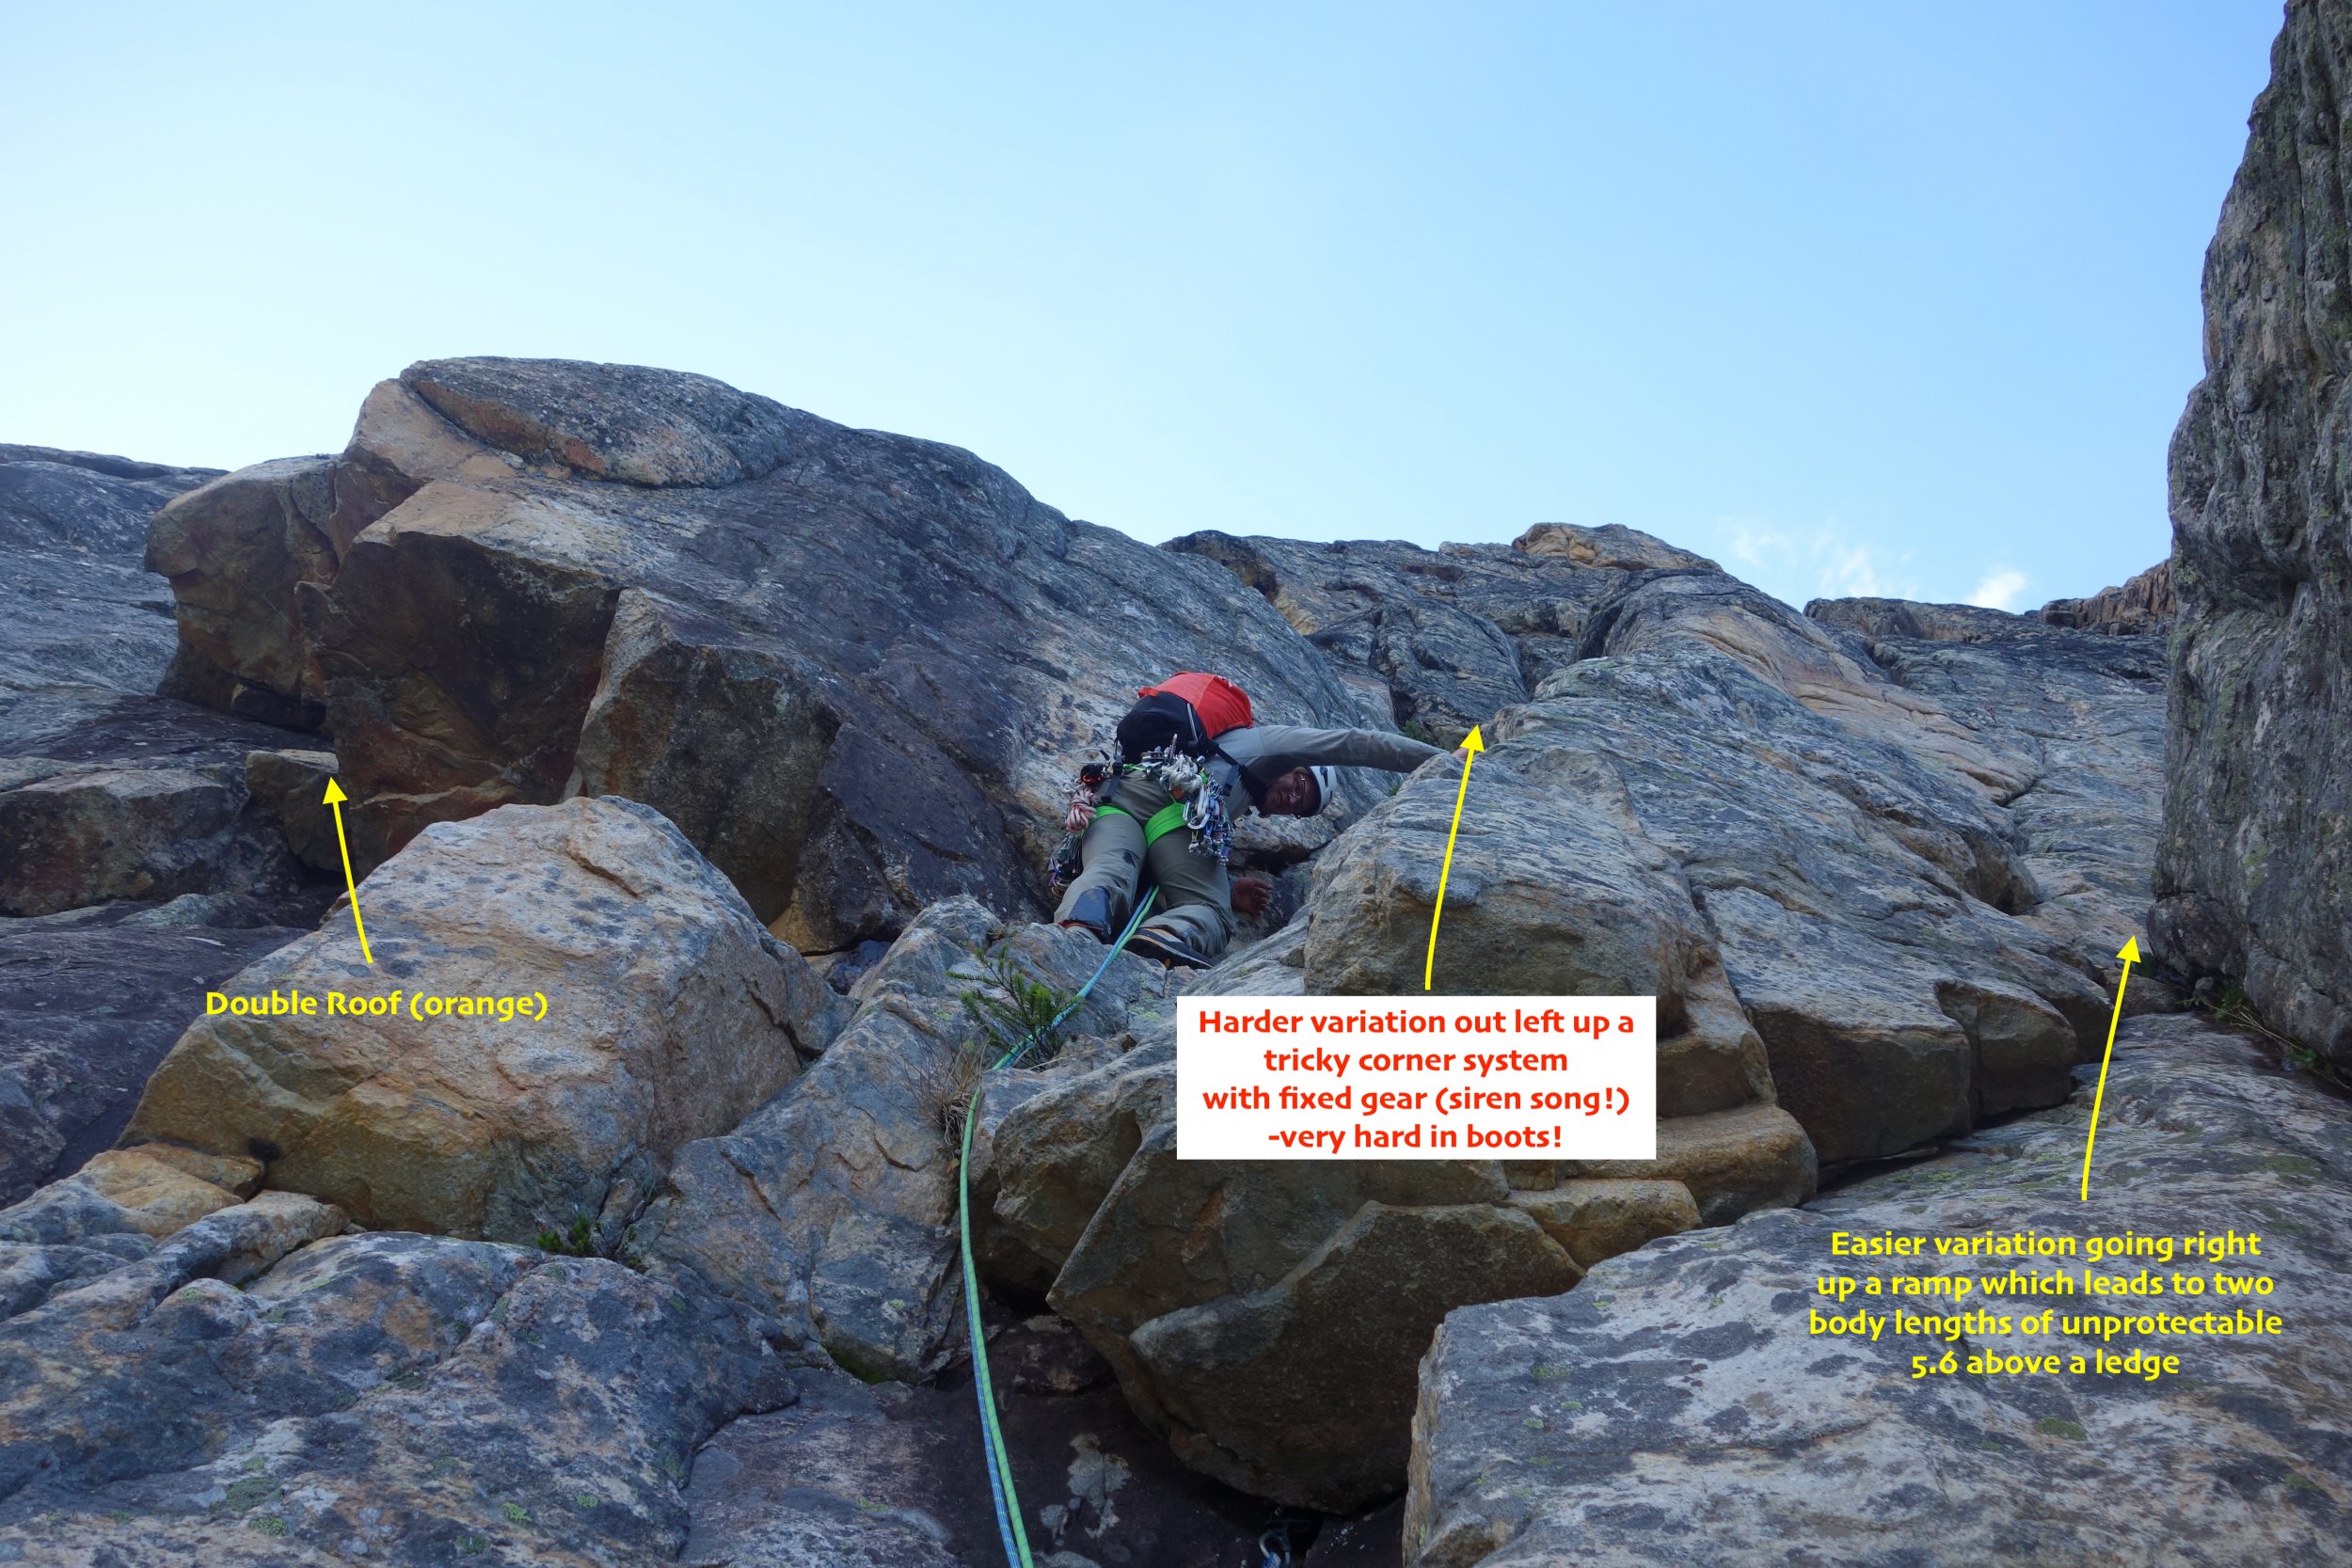
Trip: Mount Edith Cavell - North Face (Chouinard/Beckey/Doody) - Attempt Trip Date: 09/22/2019 Trip Report: Climbers: Jeff and Priti Wright, and Dane! High Point: Bergshrund at the base of the wall, above the Angel Glacier One of North America’s great mountain faces. The original North Face route on Mount Edith Cavell (near Jasper, Canada) takes the central line up the face to the summit. This was a Smash n Grab attempt from Seattle after watching weather and conditions for a month. I think we nailed it on both counts, which alone was a good lesson. We were joined by our friend Dane who has been climbing in the area for a month long trip and whom we met while climbing All Along the Watchtower this August. We got up to the base of the wall above the Angel Glacier bergshrund and were forced to turn around due to a crampon toe bail failure. None of us had brought spare crampon toe bails (lesson!). We're stoked to come back and try it again, now that we have the approach beta dialed. It was still a grand adventure! The typical style (which we followed) is to do the approach in a few hours by daylight to practice the routefinding on the complex 5.6 rock route up to the Angel Glacier to get around the hanging seracs. Then, come back to the car, sleep, and start over again at O-dark thirty to go for a car-to-car push in a day. This avoids bringing bivy gear up the wall. It was humbling and awesome just to get up to the base of the wall, stand on its bergshrund, and look up into the dimly moonlit vertical darkness with packs full of metal and desire. On the attempt in the dark, it took 4.5hrs to get from the car to the bergshrund. We had left two fixed ropes and top rope solo'd to avoid re-leading it. If I came back with a single rope, I would fix the 60m single rope from above the chimney (leave an anchor) to get all the way to the bottom of the 5th class start, then re-lead the final 25m again in the dark. The route is commonly climbed in July and August, which brings two hazards: 1) rock fall, and 2) a band of exposed, loose, unprotectable shale near the summit ridge. By waiting until late August-October, the rock is more stable, and the band of shale is covered in snow and/or ice. The downside is that snow on route makes the climbing mixed, and icy cracks can make it difficult to find protection. By late September, the approach is still dry, 5.6 rock climbing (which we did in boots). The wall, however, was all snow-over-rock, which makes the 5.7 rock on the wall a mixed experience in crampons and ice tools (instead of rock climbing with rock shoes in the summertime) . This TR only describes the approach. The original route took 3rd class terrain to the left of the Angel Glacier ice flow. But hanging seracs now threaten much of the wall, and a new 5.6 approach route goes way right of the ice flow to gain the Angel Glacier. This route is totally safe and stays well away from the hanging seracs. The picture above is our high point along the Angel Glacier to the bergshrund, and the approximate North Face route is a dashed line (which we didn't get to do). We followed the hand-drawn topo on Mountain Project, and it was REALLY useful! https://www.mountainproject.com/photo/107268014 From the parking lot, cross the small stream and immediately gain the lateral moraine (shown above) which eventually leads up to the wall. As you approach, take note of 25m tree rappel (above your head) shown in the topo which is an alternate descent to down climbing the 3rd/4th class approach. Continue traversing on a 3rd class path for quite a ways, step across one stream from a waterfall, and continue until it forces you to start ascending up and right to a large ledge (shown in the topo). This is the same ledge which leads to the optional tree rappel descent (this tree is easy to find and is all the way climber's right along this ledge). The approach is left of a small waterfall and right of the larger waterfall (as shown in topo). Below is a picture of the tree from which you can make a 25m rappel, if descending. From the large ledge, continue up 3rd/4th class terrain (unroped) and look up for two sets of double roofs. The lower set is orange and you belay just below this. The upper is black, and has and a white cord hanging from a pin just to the right of it. This white cord is a crummy anchor, or (more likely) a redirect to the better anchor further right (one pin, one bolt). There are two options for the start, if you take the easier option (right), you won't pass by this white cord at all. Two pitches gain the upper 3rd/4th scramble. Recommend making the 1st pitch a short, 20m pitch and stopping at the bolt anchor to avoid an awkward belay further up in the chimney. The second pitch goes up a chimney (no actual chimney moves, nice feet and hands abound), and is a 60m rope stretcher with a short overhang section. Both pitches are just left of the corner waterfall shown in the picture below. The picture below also shows Priti and Dane on the big ledge (the same ledge where the tree rappel is). We had twin ropes and fixed one long 60m rope from the top of pitch 2, then fixed a short 20m rappel from the bolt anchor. This allowed us to top rope solo the route in the dark the next day with a micro traxion and skip having to re-lead it in the dark. Watch out for snafflehounds in the summer! The picture above is looking up from where you first rope up. Above is the bolt/piton anchor above the first pitch on a good ledge. If you take the right variation on the first pitch, it leads directly (and obviously) to this anchor. The second pitch looks a little different than what the topo describes (beware). Start up a chimney (shown above) for 20m to a scrambling section. Then cross right on easy terrain under large orange roofs (don't keep going up a ramp straight up, shown above). Then a short overhanging move with good feet and hands (5.6) to a large ledge with a 2-pin anchor (may require a few meters of simul-climbing to reach this anchor). You can add in a good black Totem to this anchor to back it up. From this ledge, you can unrope. You are not yet on the large ledge shown in the topo which crosses the waterfall; this is still above you. Continue straight up from the anchor on easy 4th/low-5th until you find the large ledge. Cross back right across the waterfall and continue to a large left-facing corner. Easy ledges take you well up the corner system until you can exit right on easy 3rd class steps. Don't leave the corner too early! Pass through a patch of small trees, then across a grassy patch to look up and see a large, obvious notch (easy to pick out in moonlight). Continue up scree slopes to this notch. Once at the notch, the topo recommends descending 15m, then ascending a gully. We did this, and we do not recommend!!! Loose, hard, and scary. Instead continue up a right-facing corner straight up from the notch; this looks difficult, but there are good feet to stem. Once above the corner, traverse way left to get onto the Angel Glacier. Whew! Water plan: Here you will find an optional bivy site and running water. Allegedly there is also running water at the East Ridge col. You can start from the car with just half a liter of water, fill up a couple liters at the bivy site, then fill again at the East Ridge notch (maybe). The Angel Glacier is heavily crevassed near the seracs (obviously) so you can make a wide sweep to get away from the edge. It gets a little steep when you approach the wall, but not too bad. Some reports mention that it gets tricky to cross the bergshrund in summertime. The East Ridge (recommended) is way shorter and takes you straight back to your car. This is the descent recommended to us by the Smileys. The West Ridge is much longer, with complex routefinding on easy 3rd class terrain, and forces you to walk back up the road to get back to your car. The East Ridge is mostly 3rd/4th but stays mainly on the ridgeline (shouldn't be too hard to find your way in the dark) and has a crux 5.2/5.3 section that some parties rappel. This 5.2/5.3 section is located just above the shoulder, halfway up the ridge. Below is the easy descent from the East Ridge col which takes you along the lateral moraine to a trail and back to the trailhead. Gear Notes: Pickets for the summit snow field, 4 screws (various sizes), rack to #3, nuts, 2 KB's, 2 ice tools each Approach Notes: Read above


 1 point
 -
I suspect the skiing is better than the climbing right now. The attempts/exploratory hikes I made before this huge storm system moved through revealed very little ice, so this new snow will need to consolidate, bond, melt, freeze which will take some time and clear days and nights1 point