Kuato
-
Posts
66 -
Joined
-
Last visited
-
Days Won
20
Everything posted by Kuato
-
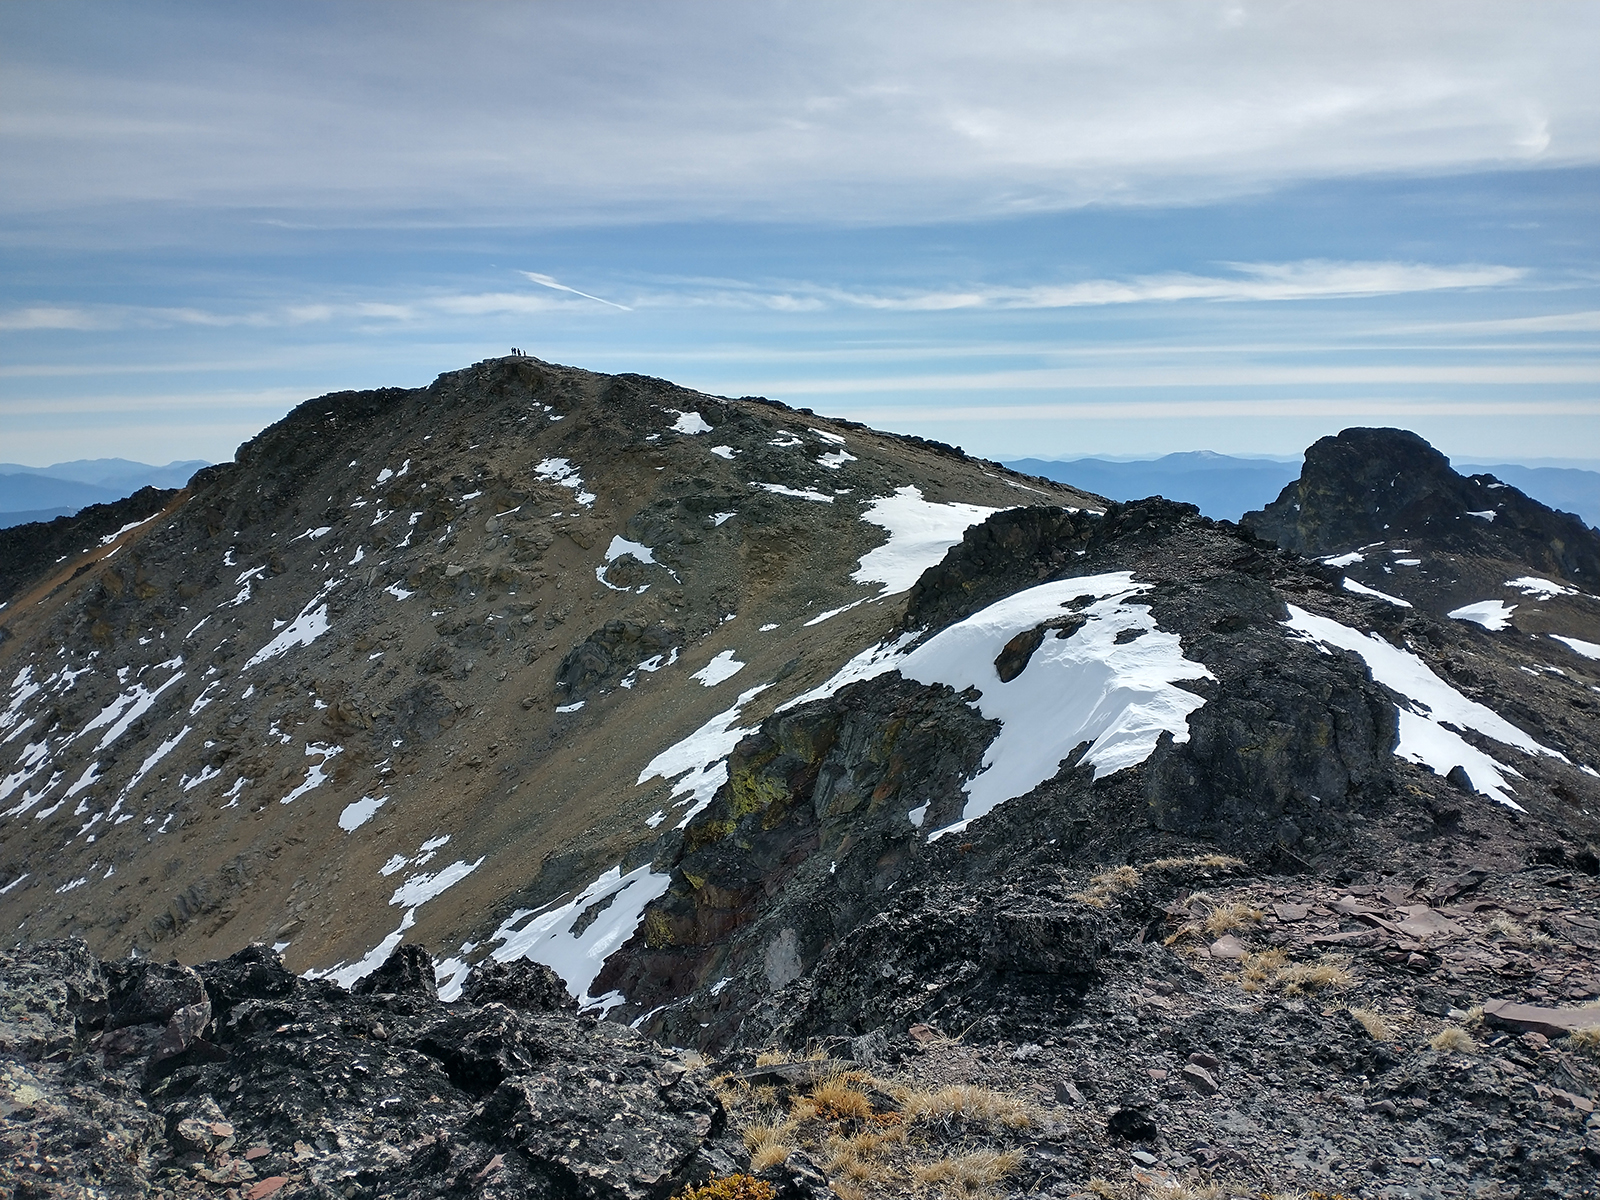
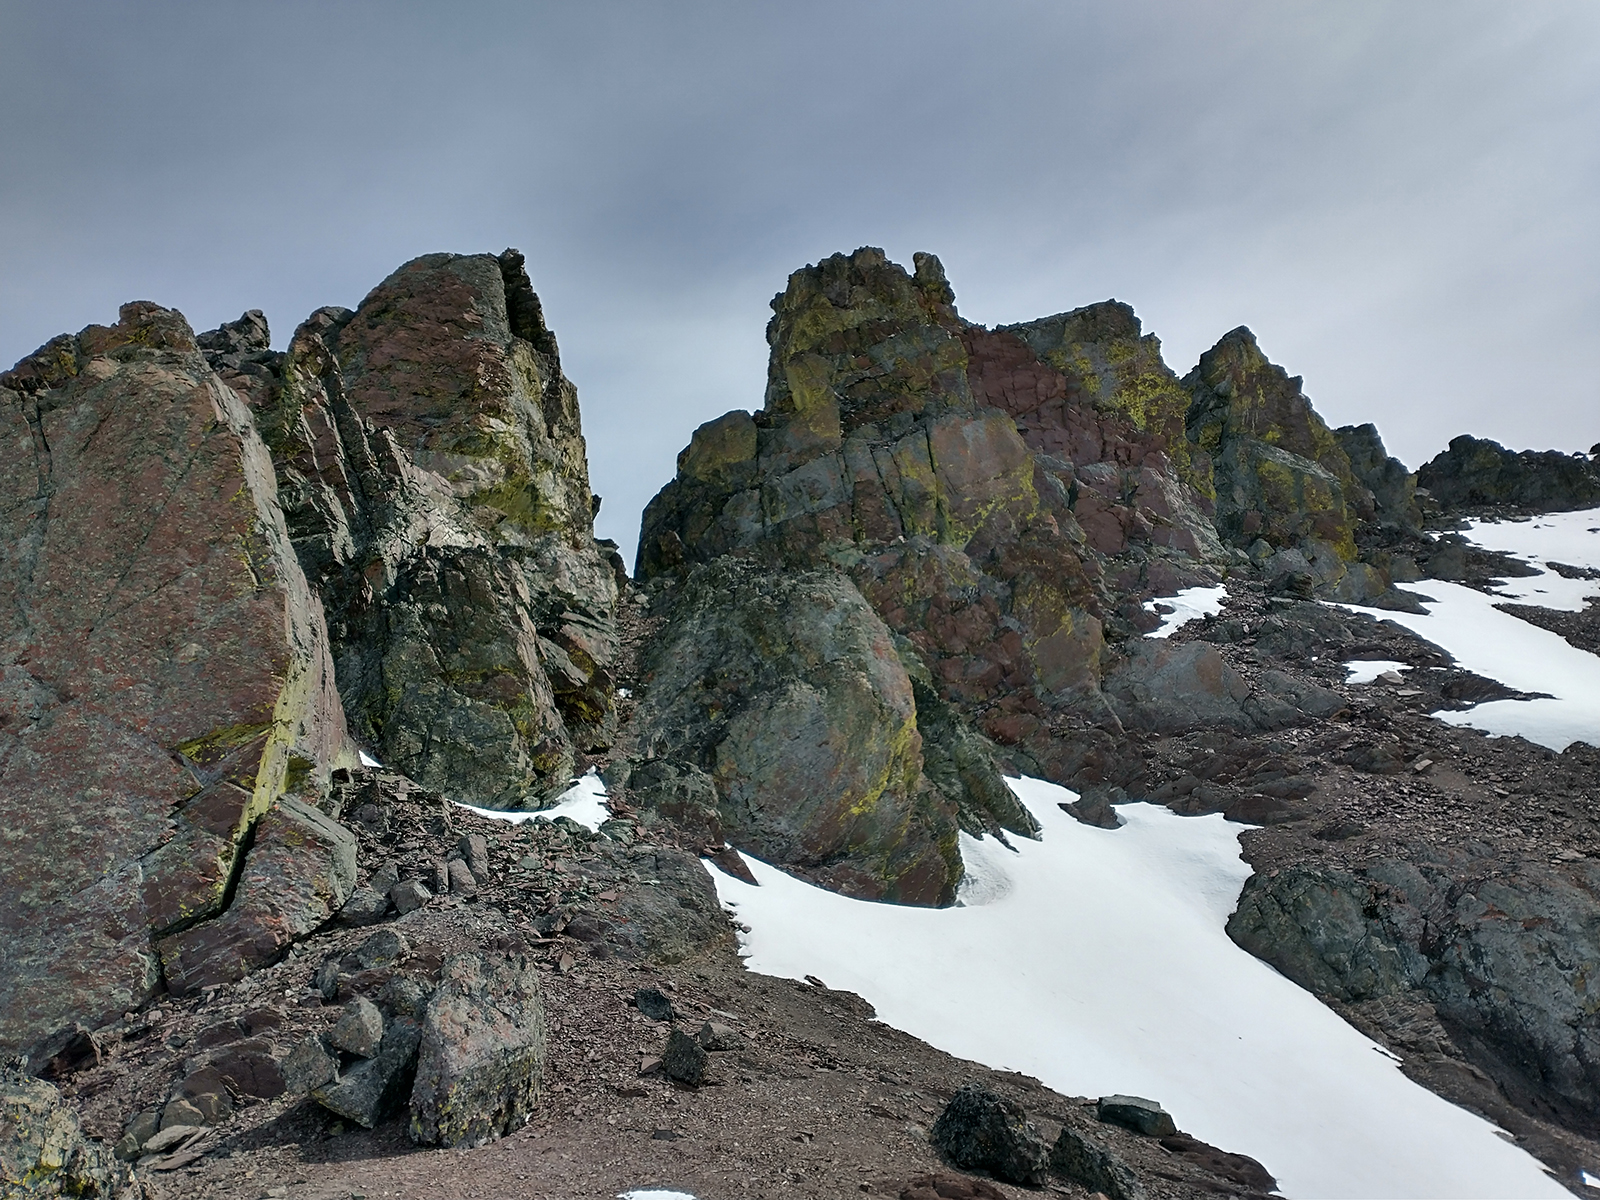
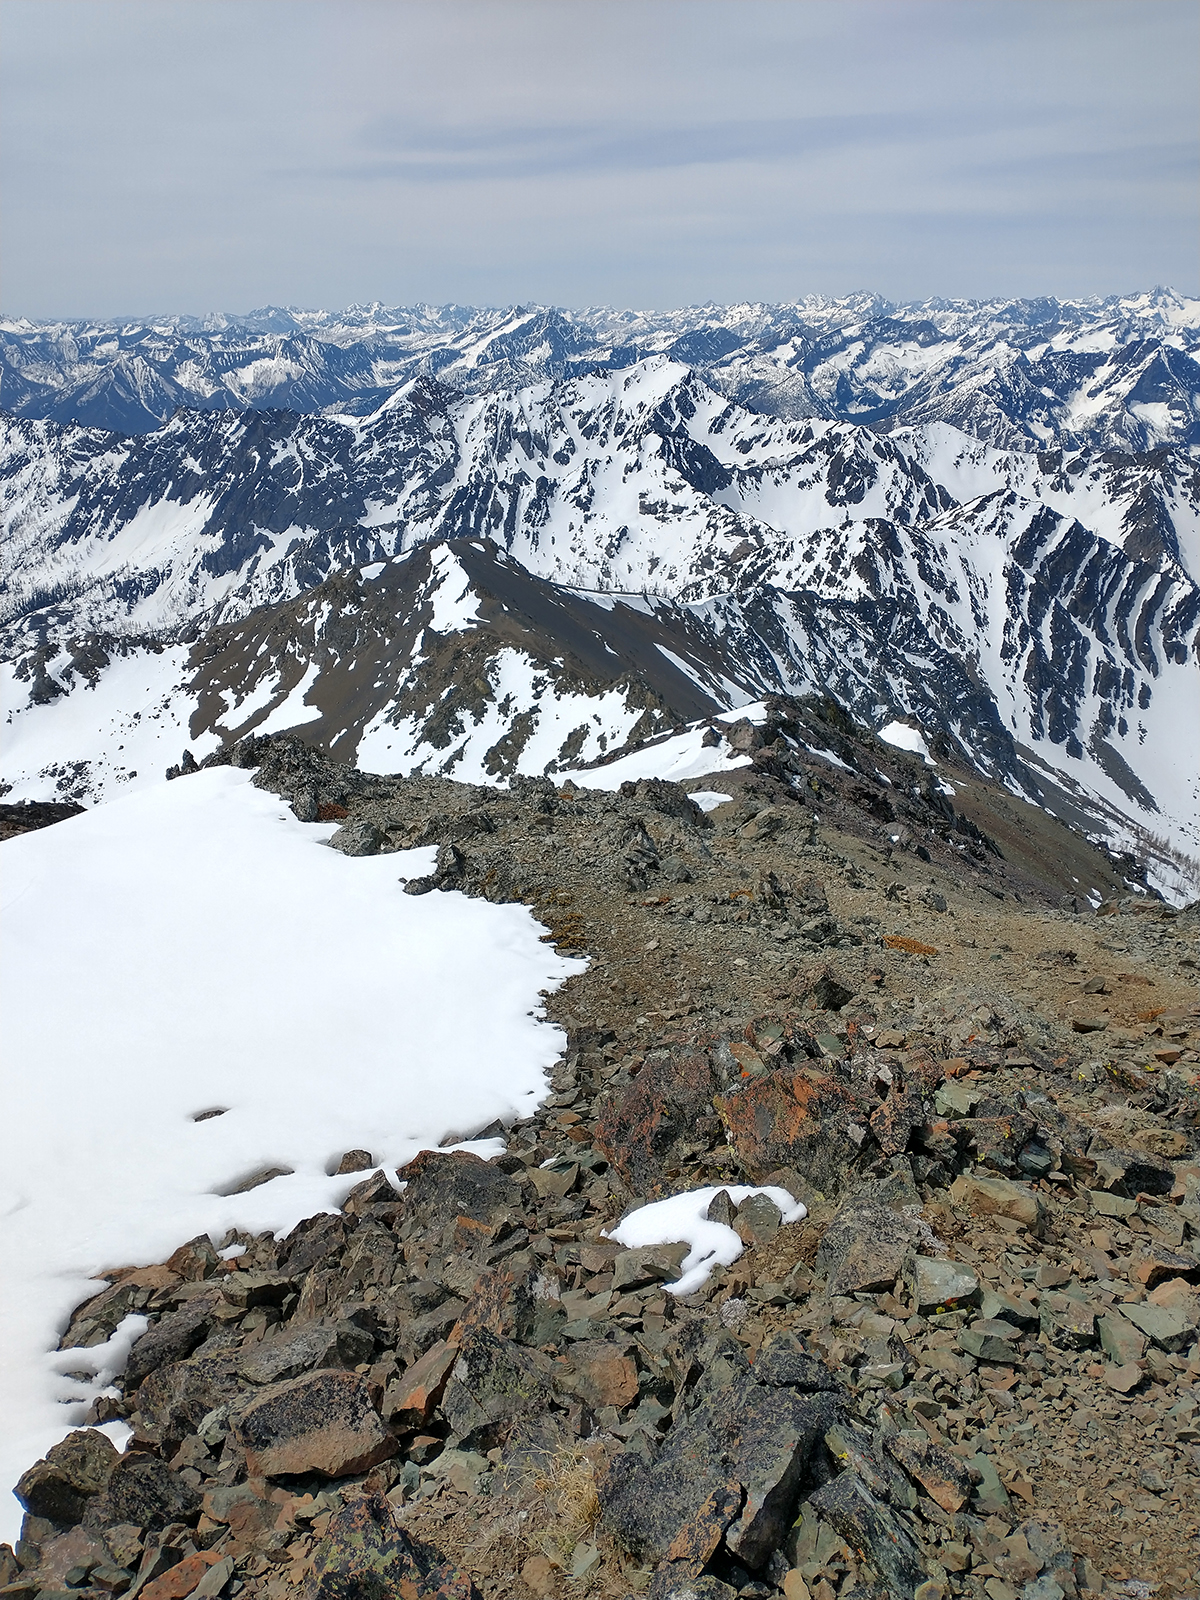
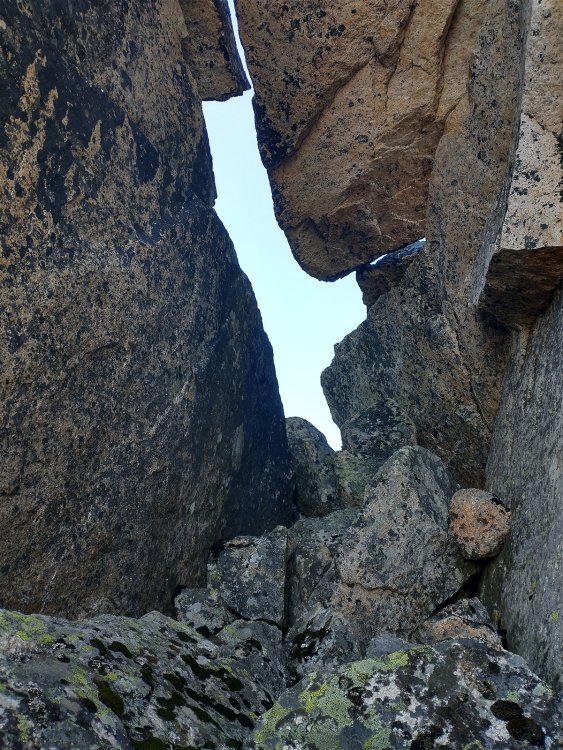
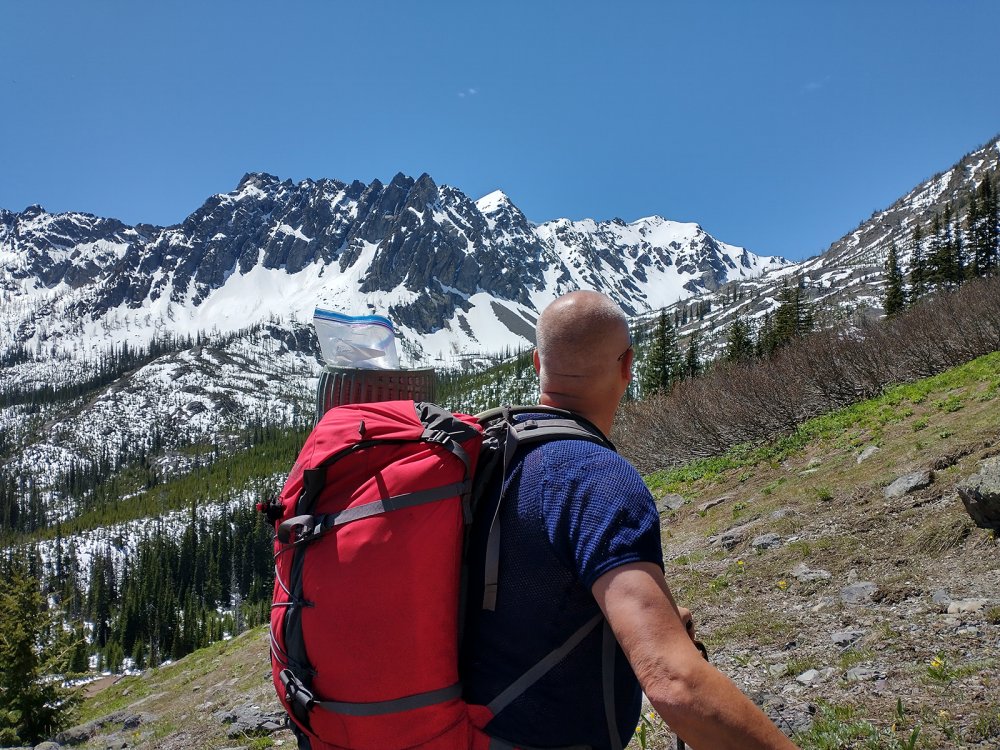
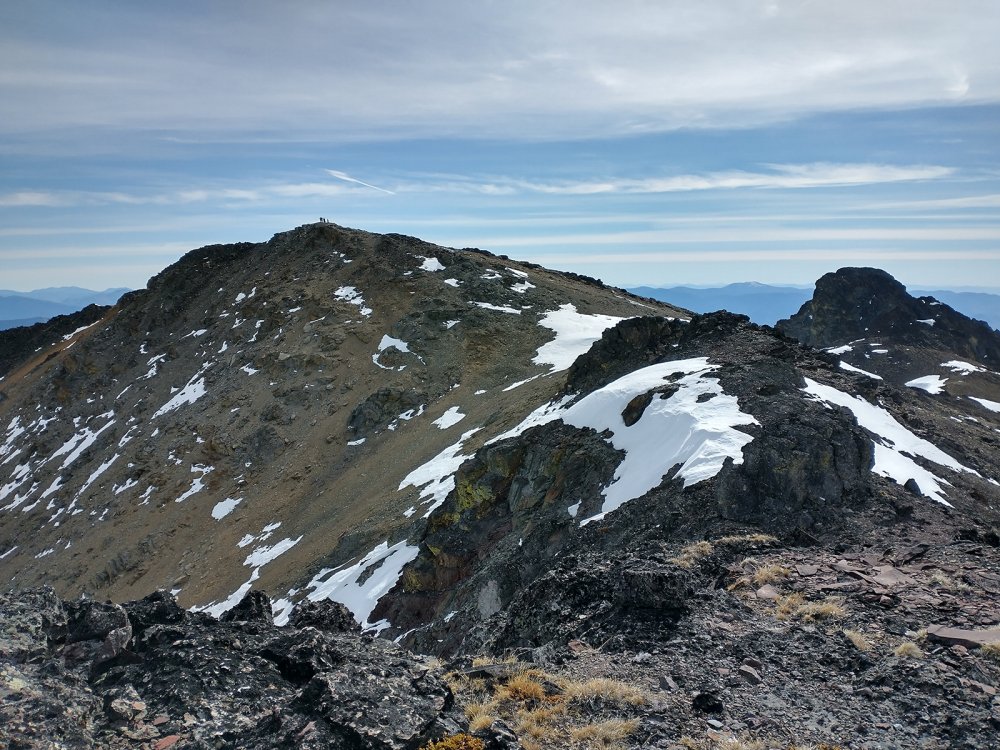
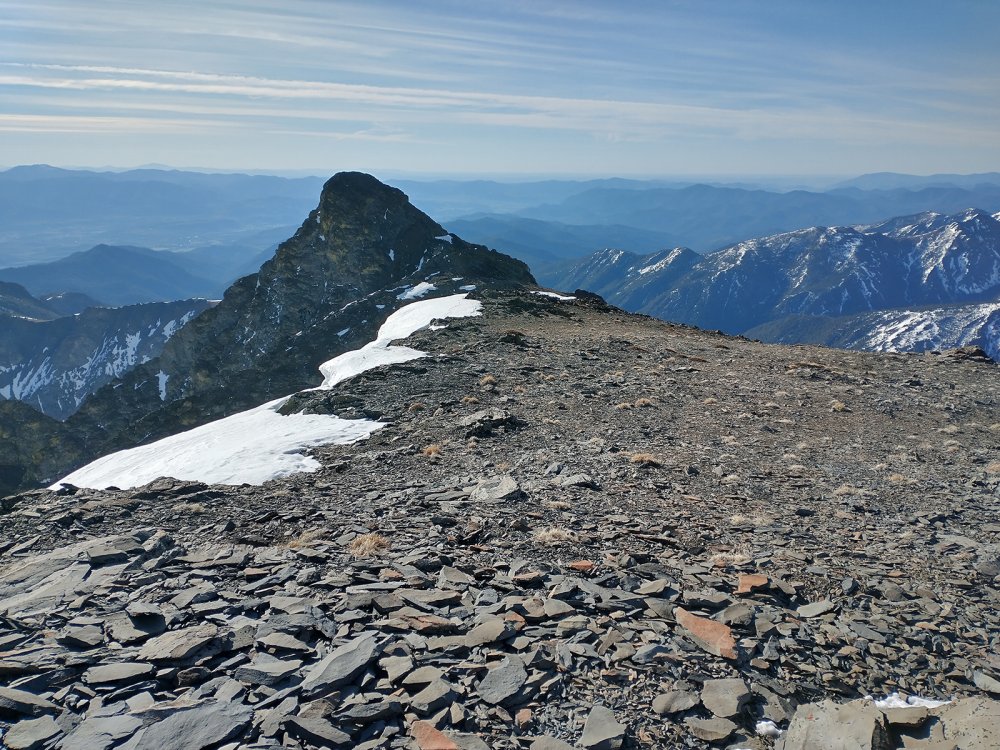
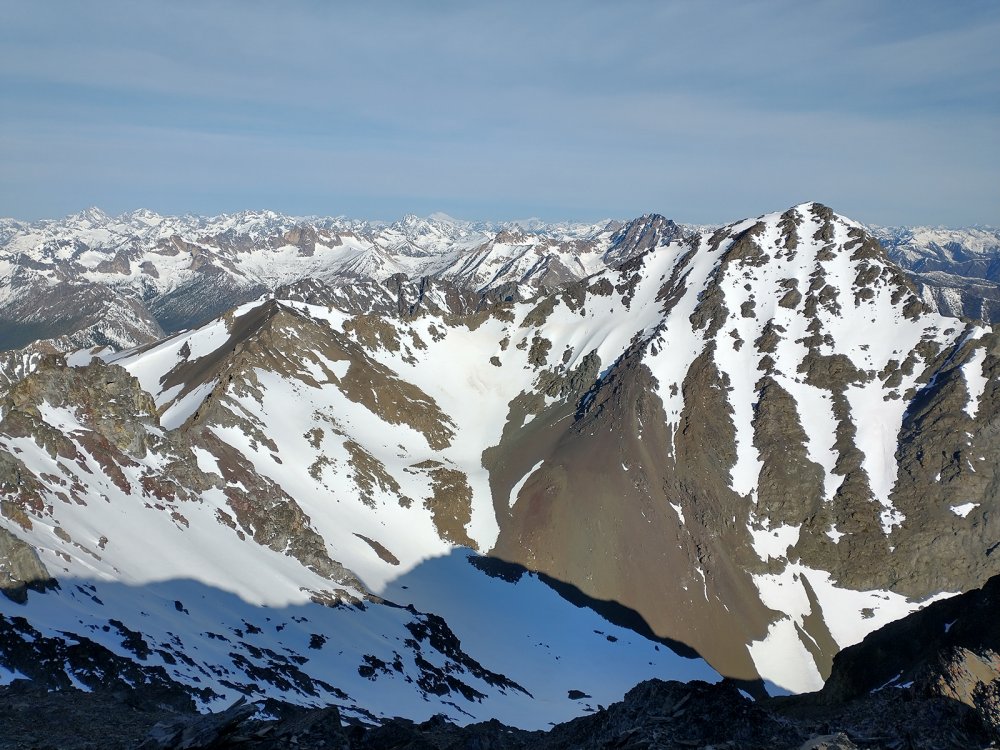
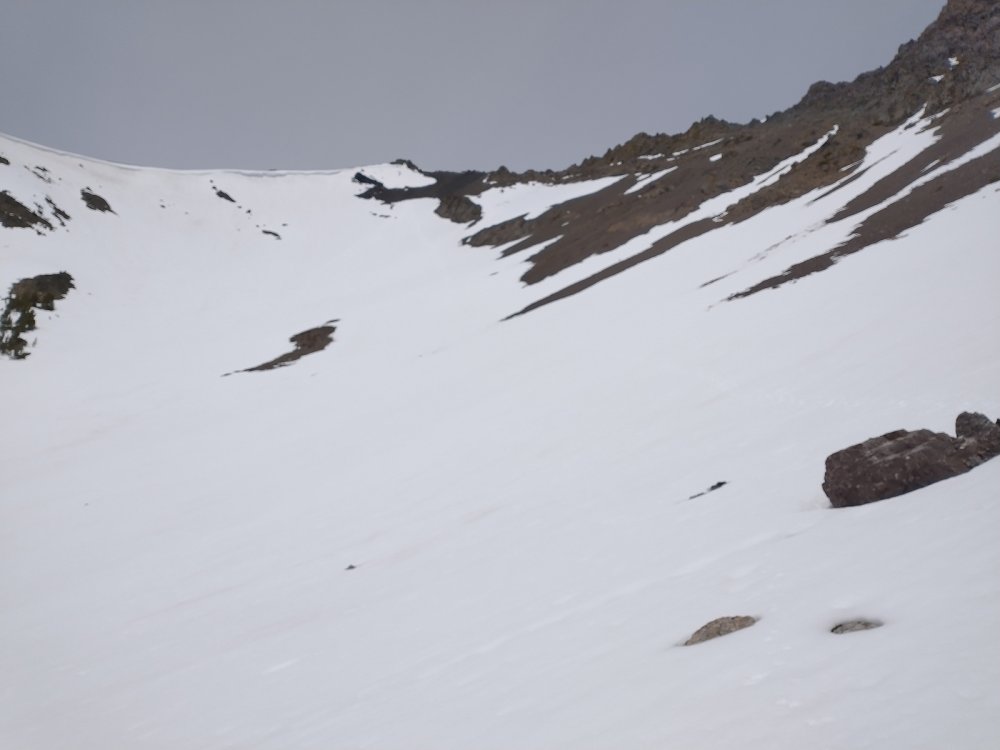
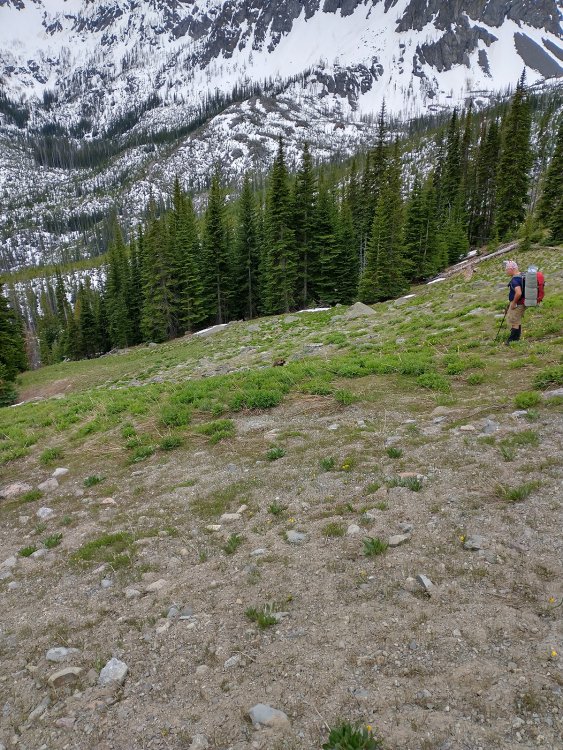
 Trip: Mount Lago (8745'), Mount Carru (8595') & Osceola Peak (8587') - Shellrock Pass Approach Trip Date: 10/02/2021 Trip Report: Mount Lago (8745'), Mount Carru (8595') & Osceola Peak (8587')– Shellrock Pass Approach – October 2-4, 2021 (Sat, Sun, Mon). I climbed Mount Lago, Mount Carru & Osceola Peak over the weekend. I started the climb from the Slate Pass Trailhead off Hart’s Pass Rd. outside Mazama, WA. I planned for a 3 day trip. The weather was looking like perfect fall conditions. Mostly crisp and clear. I drove to the Slate Pass Trailhead Friday night and slept in the vehicle. Saturday: I was up and moving down the trail at 7:30am. Starting at 7000’, it was cold and crisp. I arrived at Shellrock Pass Trail (5000’) at 11:00am, 9 miles in. The trail in was almost all downhill with a little uphill here and there, overall a very nice trail. I started the trail climb towards Fred’s Lake reaching a pass above the lake (7100’) by 1:30pm. The trail dropped down to Lake Doris. Lake Doris looks to be very popular with lots of camping areas and a spider’s web of trails all around the area. I found it difficult to find the correct trail out of the Lake Doris area heading towards Shellrock Pass. The trail out of the Lake Doris area to Shellrock Pass is much less traveled and a little overgrown in sections. There are several downed trees across the trail to navigate on the way to the Shellrock Meadows. I made it to Shellrock Meadows for camp at 4:30pm, 15 miles total for the day. The Shellrock Meadows is well worth the trip just to camp. The fall colors are in full display with the Larches gold color everywhere. The head of Eureka Creek begins in this meadow. It was like walking into a painting. Sunday: Some cloud cover had moved in overnight. I left camp at 7:45am reaching Shellrock Pass at 8:45am. The clouds started breaking up and the views started opening up. I could now see the long ridge climb ahead for the 3 summits. The ridge climbing is mostly loose rock and lots of it, class 2 with some class 3 mixed in. I made it to Mount Lago summit (8745’) at 11:15am. The views were really kicking in now. I dropped down to the Lago/Carru Col (7600’) by 12:45pm. I needed to drop down to 7500’ to hit a diagonal ledge system to gain the Carru ridge. I made it to the Mount Carru Summit (8595’) at 2:30pm. The climb down Carru to the col below (7700’)was loose and steep, careful movement was necessary. There are a couple of rounded peaks between Carru and Osceola. I climbed up and diagonal across the rounded peaks until I needed to drop down to the col below Osceola. This took more time than I was expecting. I was very happy to find a fantastic camping area at the base of the Osceola ridge with a little lake for water supply and great views. I arrived at the camp at 4:50pm (7200’) and called it a night. Monday: I left camp at 7:00am heading up the ridge to the summit of Osceola. I reached the summit (8587’) at 8:30am. The summit registry was frozen shut, so no sign in. There was a rock engraved on the summit in memoriam of Robert William Metlen, very cool. I headed down towards Lake Doris, lots of loose rock along the way. I was very happy to be back on trail again at the lake. I was back at the base of the Shellrock Pass trail by 11:30am. I climbed the trail back to the Slate Pass trailhead arriving at 4:30pm. This was a great fall season trip in a beautiful area with lots of excellent camping options. I didn’t see the cliffs off the side of Hart’s Pass road on the way in but I did on the way out. It was like something out of the Raiders of the Lost Ark. If you go off the side you will die a fiery death for sure, but it would be one hell of a ride. Some Tips and Notes: 1. Bring comfortable boots, there is a lot of walking on this trip. 2. The trail after Lake Doris is hard to find due to the network of trails around the area. The trail to Shellrock Pass angles down toward the valley. 3. The trail after Lake Doris is lightly travelled with several downed trees and faint trail sections. 4. Shellrock Meadow is awesome for camping. 5. Climbing these peaks from Shellrock Pass is a long ridge climb but the views are great. 6. There is a great camp area at the base of Osceola Peak ridge on the east side at 7200’ with a small lake water source. Travel Time for reference: Saturday: Trailhead to Camp – 9 hours, 15 miles, 3000’ vert. Sunday: Camp, over 2 Summits, to Camp#2 – 9 hours, 8 miles, 3800’ vert. Monday: Camp#2 to Summit to Trailhead – 9.5 hours, 14 miles, 3700’ vert. Total Mileage: about 37 miles Total Elevation Gain: about 10,500’ Gear used: Trekking Poles & Helmet. Mount Rolo from Pass above Fred's Lake. Osceola, Carru, Lago from Pass above Fred's Lake. Trail to Shellrock Pass after Lake Doris. Valley to Shellrock Pass. Mount Lago from Shellrock Meadow. Osceola Peak from Shellrock Meadow. Route View from Shellrock Pass. Carru & Osceola from Lago Summit. Osceola Col Camp 7200'. Osceola Peak Memorial. Another glorious fall day on the trail. Heading back up to Slate Pass. Gear Notes: Trekking Poles & Helmet. Approach Notes: Slate Pass Trailhead, Shellrock Pass Approach
 -
[TR] Hadley Peak (7515') - Skyline Divide Trail to South Ridge 09/25/2021
Kuato replied to Kuato's topic in North Cascades
I did meet a couple on my way up who were coming down from the summit who had come up via the Cougar Divide. The Cougar Divide route looks to be a shorter, more direct route. They said they ran into a lot of hunters on the way up as well. -
Trip: Hadley Peak (7515') - Skyline Divide Trail to South Ridge Trip Date: 09/25/2021 Trip Report: Hadley Peak (7515') – Skyline Divide Trail Approach – Sept 25, 2021 (Sat). The weather was perfect, 60 degrees and clear skies. Last time I climbed the Skyline Divide trail was about 24 years ago. I had forgotten how beautiful this area is. Saturday: I headed out from the trailhead (4400’) at 7:00am. The trail is in excellent condition, lots of traffic. The trail starts climbing right from the start. The trial starts to open up around (6000’). I ran into a couple hunters on the way up. There are lots of hunters in the area currently, it probably would be a good idea to wear some bright clothing to help standout a bit more. I made it to the top of the Skyline Divide Trail Bluff (6600’) at 9:00am. I arrived to the Lake (6400’) at 9:45am. The lake is the only source of water along the route that doesn’t require down climbing to get to. The route starts climbing steeply up the ridge from the lake. There is a trail pretty much the whole route up to the summit. The trail is a little hard to follow in a couple spots, but it is there. I spotted a herd of 25 mountain goats on my way along Chowder Ridge. I made it to the summit of Hadley Peak (7515’) at 12:00. I climbed the South Ridge to the summit. The ridge was Class 2 with a little Class 3 here and there. The rock is loose but not that bad by Cascade standards. The views from the summit are fantastic with Mount Baker right in your face. There was another herd of 12 mountain goats that I spotted from the summit. I’ve never seen so many mountain goats in one area before. I started back down at 12:45pm. I made it back to the trailhead at 5:00pm. This area of the Cascades is so beautiful that it almost looks fake. This was a great, laid-back day climb, perfect for Fall. Some Tips and Notes: 1. The only water source on route is the lake at 6400’. 2. Lots of hunters in the area currently, wear something bright. 3. The route starts to get steep right after the lake but levels out after achieving the ridge. 4. There is no snow to cross on route. 5. The South Ridge route has the least amount of loose rock, Class 2-3. 6. There are nice camping options all along the ridge and on connecting ridges. Travel Time for reference: Saturday: Trailhead to summit back to trailhead - 10 hours. Total Mileage: about 15 miles Total Elevation Gain: around 4000’ Welcome to Valhalla. Ridge after ridge. Lake at 6400'. Ridge above Lake. 25 Mountain Goats along Chowder Ridge. Chowder Ridge to Hadley Peak. South Ridge to Summit. Mount Baker close and personal. View on the way out. Gear Notes: I used Trekking Poles and a Helmet. Approach Notes: Skyline Divide Trail Approach to the South Ridge of Hadley.
-
Trip: Cashmere Peak (8501') - South Ridge Trip Date: 09/11/2021 Trip Report: Cashmere Peak (8501') – Eightmile Lake Trail Approach – Sept 11-12, 2021 (Sat, Sun). The weekend weather in the Leavenworth area was looking good. I texted DanO and he was game for a climb. We headed for the Alpine Lakes Area, why not, everyone else was. We climbed Cashmere Peak (8501') over the weekend. We started the climb from the Eightmile Lake Trailhead off Icicle Creek Rd. Saturday: We headed out from the trailhead (3280’) at 7:00am. The trail is in good condition, lots of traffic. We stopped at Little Eightmile Lake for water (4400’) since we had heard the next section up the burn area was dry. Turns out there were 2 water sources we passed going up the burn area. We were ready to cross a lot of downed trees on the way up the burn area as reported in a recent trip report. Turns out many of the trees have been cut out of the trail since the August trip report I had read. We crossed maybe a dozen downed trees the entire trip. 11:15am we reached Caroline Lake. We headed up toward Windy Pass. We came across water around 6500’ on the trail up. We reached Windy Pass and started looking for a suitable camp spot arriving at 2:00pm (7250’). We decided to go for the summit since we had the time and the weather was looking good. We followed the trail along the ridge through some boulders and up to the base of the South Ridge of Cashmere. DanO decided that was good enough for him and would wait for me to summit and come back. I climbed the South Ridge of Cashmere. The rock was pretty nice quality Class 3-4 with some exposure, much better than dealing with the loose rock below in the gullies. I summited at 4:30pm, great views of the surrounding peaks of the area. We made it back to camp on the ridge at 6:30pm and enjoyed the beautiful evening. Sunday: We left camp at 8:00am and made it back to the trailhead at 12:15pm. This is a nice climb with an easy uphill approach on good quality trail with some fun rock on the ridge to the summit. Some Tips and Notes: 1. There are a couple water sources on the way up the burn area. 2. There are some downed trees along the burn area, but not that bad and fairly easy to pass. 3. Last running water access was around 6500’ on the way up to Windy Pass. 4. There is no snow to cross on route. 5. There is not much in the way of route finding until you are at the base of the South Ridge of Cashmere, just follow the trail up the ridge. 6. The South Ridge of the summit has good quality rock, Class 3-4 with some exposure. 7. There are several bivy/camp options along the ridge above Windy Pass, bring enough water the ridge is dry. Travel Time for reference: Saturday: Trailhead to Windy Pass Ridge Camp to Summit & back to camp – 11.5 hours. Sunday: Camp to trailhead – 4.25 hours Total Mileage: about 19 miles Total Elevation Gain: around 5400’ Gear used: Trekking Pole, Helmet. Up the Ridge from Windy Pass. Rocky Spires along the Ridge. Crossing the boulder field. At the base of the South Ridge of Cashmere. South Ridge of Cashmere. View into the Enchantments area. Gear Notes: Trekking Pole, Helmet. Approach Notes: Eightmile Lake Trail to Windy Pass to South Ridge of Cashmere
- 1 reply
-
- 3
-

-

-
Trip: The Brothers (6842') - Lena Lake Trail / Hourglass Trip Date: 09/05/2021 Trip Report: The Brothers (6842')– Lena Lake Trail Approach – Sept 5-6, 2021 (Sun, Mon). I climbed The Brothers (6842') over the holiday weekend. I started the climb from the Lena Lake Trailhead off Hamma Hamma Rd. The weather was in the 70’s and looking pretty nice for the 2 day stretch. Sunday: I caught the 7:10am ferry at Edmonds over to Kingston. I started out from the Lena Lake trailhead (700’) at 10:00am. I arrived at Lena Lake at 11.15am. The lake trail is very popular with lots of campers around the lake. I made my way to the Climber’s Camp at the end of the mapped trail (3000’) by 1:30pm. The trail going to the Climber’s Camp from the lake does a lot of weaving around but it is not too hard to follow if you pay attention to the worn path. The trail goes through the Valley of Silent Men. The valley was beautiful and the highlight of the trip. Having plenty of daylight left I decided to go as high as possible to camp on day 1. The trail above the Climber’s Camp is still pretty good and not difficult to follow. The last running water was at 3600’, near a couple of snow sections before climbing up through the burn section. I carried as much water as I could to high camp. I reached a perfect camp spot at 5500’ at 4:30pm. Monday: I left camp at 6:30am heading up through the Hourglass section toward the summit. Terrain was a mix of loose rock with some nice rock options off to the right side heading up (Class 3). I made the South Summit (6842’) by 7:45am. The summit ridge had several options to get around or over various rock spire sections, a mix of Class 2, 3 & 4. There was no summit registry. There were a couple of bivy spots around the summit area. If one wanted to add the North Summit, it would probably add about an hour or so with some route finding, mostly Class 3 & 4. There is snow between the South & North Summits down low, so water could be obtained by climbing down and melting snow. It was cloudy down low but beautiful up top with perfect weather. I headed back down to camp climbing down the rock on the side of the Hourglass section which worked well, arriving at 9:30am. I packed up and was on my way back to the parking lot arriving at 2:15pm. Caught the ferry and headed home. I was surprised by the light traffic on the way in and out. I was expecting to be sitting in line for a while but I made the first boat each direction. Overall this was a very enjoyable trip, especially going through the Valley of Silent Men. Some Tips and Notes: 1. The trail up to the lake is like a freeway, very easy travel, lots of people. 2. Last running water access was at 3600’ just before going up through the burn area. 3. There is no snow to cross on route. 4. The Hourglass section has loose rock but it can be avoided using the rock on the right side. 5. The summit ridge has several options around the rock spires. I used a path between some trees and a rock wall that worked pretty good. 6. There are bivy/camp options above the Climber’s Camp. One at 4000’, 5200’, 5500’ and around the summit area. Travel Time for reference: Sunday: Parking Lot to 5500’ Camp– 6.5 hours. Monday: Camp to Summit to Parking Lot – 7.75 hours Total Mileage: about 16 miles Total Elevation Gain: 6100’+ Gear used: Whippet, Helmet. Lena Lake on way to Climber's Camp Trail. Trail through Valley of Silent Men. Kept expecting to see Ewoks swinging through the woods. Stunning waterfall on the way through the Valley of Silent Men, a little piece of heaven on earth. Start of the burn area section of the trail. Around 5000', route goes diagonal under the rock face. View from camp 5500'. Start of Hourglass Gully. North Summit from South Summit, Mount Constance & Warrior Peak in the background. Gear Notes: Whippet & Helmet. Could have used a regular trekking pole in place of the Whippet. Approach Notes: Lena Lake Trail No. 810 to Trail No. 821 to Climber's Camp through Hourglass.
-
[TR] West Peak (7365') of the Anderson Massif - East Ridge 08/14/2021
Kuato replied to Kuato's topic in Olympic Peninsula
I was checking out your trip report for Anderson earlier in the year, it looked like a nice trip. I was hoping that Flypaper Pass would still have some snow left to climb up and down, no such luck, it was pretty dicey. The West Peak is definitely worth the trip back into the area if so inclined. The next basin over that is below West Peak is pretty nice looking and it would get you around Flypaper Pass. -
Trip: West Peak (7365') of the Anderson Massif - East Ridge Trip Date: 08/14/2021 Trip Report: West Peak (7365')– Dosewallips River Trail Approach – Aug 14-16, 2021 (Sat, Sun, Mon). I climbed West Peak (7365') of the Anderson Massif over the weekend. I started the climb from the Dosewallips River Trailhead outside Brinnon, WA. I planned for 3 days with a possible bonus summit of Mount Anderson if time and conditions permitted. I wanted to get the hell out of the smoke and breath some fresh air, mission accomplished. Saturday: I caught the 7:10am ferry at Edmonds over to Kingston. I started out from the trailhead at 9:30am. I brought a mountain bike for the first 6.5 miles to the ranger station and for the return trip. I made it to the ranger station at 10:45am. Anderson Pass was reached at 5:15pm. I headed up the Anderson Glacier Trail to camp at a small lake at the top of the trail arriving at 5:45pm. The trail along the way was beautiful with great camping options every hour or so. Mileage was 6.5 miles by bike , 11.5 miles to camp hiking. Sunday: I left camp at 6:15am heading for Flypaper Pass. I crossed over Flypaper Pass (6500’) at 8.50am. Flypaper Pass is almost entirely snow free right now. The route up to the pass is steep, loose rock the entire way. Crossing this pass with snow covering the steep loose rock would be the way to go, earlier in the season. If I wasn’t planning to climb Mount Anderson also, I would have climbed over to the basin below West Peak instead, much better looking terrain. Once at Flypaper Pass I decided to climb West Peak first. I headed down the Eel Glacier to the base of the SE Ridge of West Peak. I reached the North Notch at 11:15am (7000’). I headed up the East Ridge to the Summit arriving at 12:05pm. The route is Class 3 & 4 rock with some decent exposure. Loose rock sections throughout the ridge. I climbed Mount Constance a couple weeks ago, going the standard route, and this route up West Peak is more technically demanding. I was eyeballing the Mount Anderson route the whole way up and it was not looking good. The steep snow that leads to the summit ridge of Anderson is now melted out to the blue glacier ice almost the whole way up. I had aluminum crampons and a standard ice axe so I decided against an Anderson summit attempt with the current conditions. If I was to do Mount Anderson now, I would bring sharp steel crampons and two ice tools for that slope, possibly some protection against a slip; Maybe try a different route up all together, avoiding the glacier ice. I headed back to Flypaper pass from West Peak summit arriving at 2:45pm. Going down Flypaper Pass sucked way worse than going up. Very loose and steep the whole way down. 5:00pm I arrived back at the small lake camp, packed up and headed down for a lower camp. 7:15pm I arrived at Diamond Meadow camp for the evening. Monday: I left camp at 6:30am. I reached the ranger station at 9:15am. I headed down on the mountain bike reaching the Trailhead at 10:30am. This was a great trip in a beautiful area with lots of excellent camping options. Some Tips and Notes: 1. The trail to Anderson Pass is in excellent condition, easy travel & beautiful. The trail to Anderson Glacier is also nice but less traveled. 2. Water access for the whole trip was great with water as high up as 6700’ on summit day. 3. If planning to climb Mount Anderson via the standard route, be prepared for glacier ice climbing. 4. Flypaper Pass is snow free, steep, loose rock currently. I would recommend an alternate route. 5. The East Ridge of West Peak is exposed class 3-4 with sections of loose rock. 6. Bring a mountain or cyclocross bike for the first and last 6.5 miles, it will save you a lot of time. Travel Time for reference: Saturday: Car to Camp – 8.25 hours. Sunday: Camp to Summit to Camp#2 – 13 hours. Monday: Camp to Car – 4 hours Total Mileage: about 42 miles Total Elevation Gain: about 7100’ Gear used: Trekking Poles, Helmet, Ice Axe, Crampons. The trail in is really nice. Small lake camp at the top of the Anderson Glacier Trail. On the way to Flypaper Pass. Easy going until you reach the base of the pass. Rock at the base of Flypaper Pass, it is steeper than it looks. Loose class 3. Looking down the route traveled from Flypaper Pass. Looking across Eel Glacier from Flypaper Pass to the SE Ridge & East Ridge of West Peak. I went straight across to the snow finger at the base. Looking back across the Eel Glacier to Flypaper Pass from the SE Ridge of West Peak. Rock along the East Ridge of West Peak. Summit of West Peak from the false summit. Kind of spicy with a naughty runout. Summit view looking back at Anderson. Anderson route with lots of steep glacial ice. I'll stick with the expose rock ridge climb thanks. Looking back at the terrain traveled. I saw nobody summit day, I had the whole mountain to myself. Hard to believe with the amount of people at the trailhead. There are great camping spots all along the area surrounding the big lake. I haven't spent much time in the Olympics until this year, mostly because of all the red tape that is the usual for this area. With all the park service hiding from the Boogeyman Virus, you can experience the mountains the way they were meant to be, pure & free from bullshit. Gear Notes: Gear used: Trekking Poles, Helmet, Ice Axe, Crampons. If Climbing Anderson via the Eel Glacier Route bring sharp steel crampons and ice tools, you will be dealing with rock hard, steep glacial ice Approach Notes: Dosewallips River Trail Approach & Up the Anderson Glacier Trail.
-
[TR] Mount Constance (7756) - SOUTH CHUTE - STANDARD 07/31/2021
Kuato replied to Kuato's topic in Olympic Peninsula
The summit pyramid rock looked like it was waiting to fall off for the most part. Lots of cracked loose looking rock. There was a crack that looked like it could hold some protection going up one side if someone felt inclined to give it a shot. -
[TR] Mount Clark - Standard 08/09/2021
Kuato replied to KaskadskyjKozak's topic in Olympic Peninsula
I was up in that area this weekend doing Mount Mystery. Clark was looking really nice. Deception wasn't looking so nice, kind of like a pile of loose rock. What was your total travel time to the summit and back? -
[TR] Mount Mystery (7639') - East & South Ridge 08/06/2021
Kuato posted a topic in Olympic Peninsula
Trip: Mount Mystery (7639') - East & South Ridge Trip Date: 08/06/2021 Trip Report: Mount Mystery (7639') – Royal Basin Approach Trip Report –Aug 6-8, 2021 (Fri, Sat, Sun). I climbed Mount Mystery (7639') over the weekend with DanO. We started the climb from the Upper Dungeness Trailhead (Rd. 2870) outside Sequim, WA. The weather forecast was looking decent Thursday night but had changed to kind of pissy by Friday morning, we decided to give the climb a shot anyway since the Sequim area has a rain shadow typically. We planned for 3 days with a possible bonus summit of Mount Deception if time and weather permitted. Friday: We caught the 7:11am ferry at Edmonds over to Kingston. We made it to the trailhead at 9:15am. We made it to Royal Lake by 2:20pm. We headed for the Upper Basin and finally settled into camp in the Upper Upper Basin area near a lake at 6340’ at 5:30pm. The trail is nice all the way to the Upper Basin. We took a trail heading East out of the Upper Basin to our final camp area. The Upper Basin is a beautiful area with lots of camping options and excellent water access. Trip mileage was about 9 miles. Saturday: It started pissing down rain early in the morning and kept pissing until about 12:30pm. The sky was starting to open up and look nice here and there with a high pressure system moving in. I decided to go for Mount Mystery at 1:20pm. DanO decided to stay at camp and rest up for our return trip Sunday. I crossed over Royal Pass (6860’) with some snow travel and into Deception Basin. The rock was loose but predictable, fairly nice compared to other climbs. I arrived at Mystery Col (6740') at 3:30pm. I climbed up the moraine ridge to the top of the glacier, then up to the col. I reached the summit at 4:45pm. I climbed the East Ridge up to the South Ridge to the Summit. The route is a mix of loose rock and dirt with Class 3 and 4 rock higher up to the summit. I decided to hit the North Summit as well as the South Summit just to make sure which one was the true summit. The South Summit is the true summit by 20’. There is no summit registry on either peak, not enough traffic I guess. The North Summit is solid 4th maybe low 5th Class with a crack climb to the top. I left the summit area at 5:25pm. I reached Mystery Col at 6:25pm and Royal Pass at 8:15pm. I made it back to camp at 8:45pm just as the sun was going down. An excellent day in the mountains snatching victory from the jaws of defeat. Sunday: We slept in a bit and left camp at 8:20am arriving back at the car at 1:30pm. This was a great trip in a beautiful area with lots of excellent camping options. I’m glad we decided to make it happen in spite of the weather forecast. Some Tips and Notes: 1. The trail to the lake is in excellent condition, easy travel. The trail to the upper basin is also nice. 2. Water access for the whole trip was great with water as high up as 6400’ on summit day. 3. There was not much snow travel needed but the crampons were nice to have. 4. There are camping options all along the trail, around the lake and all over the upper basin area. 5. Deception basin is a fantastic area for camping with several lakes and streams and great views. 6. The rock on Mount Mystery is loose in sections but also very nice in sections, watch what you are grabbing. Travel Time for reference: Friday: Car to Camp – 7 hours. Saturday: Camp to Summit to Camp – 7.5 hours. Sunday: Camp to Car – 5 hours Total Mileage: about 23 miles Total Elevation Gain: about 6700’ Gear used: Trekking Poles, Helmet, Ice Axe, Crampons – I didn’t use the Ice Axe. Royal Lake - bring your fishing pole. On our way up to the Upper Basin. Final section before camp. The snow sections kind of shaped like North and South America lead to Royal Pass which leads to Deception Basin. View from camp (6340') in Upper Upper Basin, kind of a primordial vibe. Deception Basin. I saw some fresh bear poop on my way through. Mount Mystery and Deception Basin. Looking down into Deception Basin from Mystery Col (6740'). Route up Mount Mystery looking a little extra mysterious. Mid Section of East Ridge. Some 4th Class on Upper East Ridge. South and North Summits of Mount Mystery (7639'). South Summit is the true summit by 20' (pile of rocks). Summit View: North Summit, Mount Deception & Mount Clark. A great climb with great camp options! Gear Notes: Gear used: Trekking Poles, Helmet, Ice Axe, Crampons – I didn’t use the Ice Axe. Approach Notes: Upper Dungeness Trailhead (Rd. 2870) - Royal Basin Approach -
Bargainhunter - The ridge I am talking about is the one directly above the main glacier on Colonial. The picture with the waterfall and Colonial in the background gives you the best view of the route. I'm pretty sure I climbed up the rocky island ridge, straight behind the lake camp, to the ridge above the glacier then over to the summit. I don't know if it has a route name, but it works & it adds some extra spice.
-
That is a beautiful area to climb in. Another way up, if you want to avoid the glacier ice, is to climb to the top of the ridge and follow that to the summit. I did the ridge route a few years ago and I remember it being pretty nice. Class 3-4 for the most part, some loose rock. The trick is getting off the ridge to the summit block.
-
Trip: Mount Constance (7756) - SOUTH CHUTE - STANDARD Trip Date: 07/31/2021 Trip Report: Mount Constance (7756') – Lake Constance Approach Trip Report – July 31-Aug 1, 2021 (Sat, Sun). I climbed Mount Constance (7756') over the weekend. I started the climb from the Dosewallips River Trailhead (Rd. 2610) outside Brinnon, WA. I attempted this climb a month ago and did not do enough research. I ended up trying to climb Warrior Peak thinking that it was Constance and having to turn around after running out of time. The West side of Warrior Peak is not fun, shitty rock and steep. The weather was looking somewhat iffy with the potential for thunderstorms predicted with a weather window for summit day. The other potential climbs all had worse looking weather so Constance got the green light. I planned for a 2 day climb. Saturday: I caught the 9:35am ferry at Edmonds over to Kingston. I made it to the trailhead at 11:30am. On last month’s attempt I decided not to bring a bike for the first 5 miles to the Lake Constance Trail, resulting in 2+ hours of boring road hiking. This trip I brought the bike for the first and last 5 miles of the trip, huge difference. The bike ride took 45 minutes to the Lake Trail, saving me about 1.5 hours and the extra wear on my feet. Great start so far. Lake Constance Trail is a workout. It climbs 3300’ in 2.2 miles and has a couple Class 3 sections on the trail itself. I was shocked how much the water situation changed since my last trip up the trail at the end of June. June was a raging torrent of water coming down Constance Creek, July the same creek was bone dry where the trail meets up with it. The first water available on the lake trail is about 2600’. It was cloudy with a little bit of light rain here and there, I made it to the lake at 4:45pm. I decided to proceed up to the base of the thumb to setup camp, right at the turn to go up the South Chute of Mount Constance. Last month this area was 70% snow covered with plenty of running water. By the end of July the snow is less than half with minimal water options. The only water available was coming from the section of the mountain just before the Thumb. One good flowing creek and one minor flow coming down a rock face. I set up camp below a running water source at 5200’ in a nice flat camp area that was under snow the last time through. I counted about 6 good spots for a tent of bivy in the area. I got as much water as I could before going to sleep to be ready to go in the morning. Sunday: I woke at 4:00am planning to be on the trail by first light. It started to rain. Shit. I was thinking I might be 0 for 2 on this peak when the rain started to let up and the clouds started to clear out. The weather was starting to look nice so I headed for the summit at 7:15am. I headed up the South Chute. The talus was loose so I tried to stay as close as possible to the sides of the cliffs where I had better traction. 8:45am I reached the top of the South Chute. The gully up to the E-W Notch was more of the same down low so I climbed onto rock on the left side as soon as possible arriving at the Notch at 9:45am. The snow finger on the other side of the Notch has melted out enough that it can be avoided. 10:45am I made it across the Finger Traverse. The snow finger dropping down after the Finger Traverse has melted out substantially. I cut across diagonally to the shelf heading to the summit avoiding the snow. I arrived at the summit at 11:45am. The views were pretty limited due to all the smoke in the sky but I didn’t care, the climb was fun and worth the trip by itself. Summit register was in good shape and fairly new (placed July 2020). I headed back down the way I had come up. The loose talus that sucked on the way up was really nice on the way down, a love hate relationship. I arrived back at camp at 2:45pm. Packed up camp and was on my way down by 4:00pm. I was very happy to have the bike waiting for me at the end of the lake trail. The last 5 miles went quick and I was back at the trailhead at 7:45pm. I was able to catch the 9:40pm Kingston ferry back to Edmonds. This is a challenging climb with plenty of loose rock and navigation required. Great climb! Some Tips and Notes: 1. The only running water above the lake is from the creeks flowing down the side of the mountain before reaching the Thumb. There was no running water on the route on summit day. 2. Some have said that bringing a bike is not worth the hassle. I would disagree. I would definitely bring a bike, it makes quick work of the boring ass 5 mile road hike in and out. 3. I brought Crampons and an Ice Axe and didn’t need either one. The snow has melted out enough that it can be avoided for the most part. 4. There are good camp options above the lake, before the Thumb, with running water above. 5. I came across a trail runner on the way to the summit, he was doing the climb in one long day going light and fast. He was figuring about 12 hours. Travel Time for reference: Saturday: Car to Camp – 5.5 hours. Sunday: Camp to Summit, back to Camp, back to Car – 12.5 hours Gear used: 1 Trekking Pole, Helmet - brought Crampons and an Ice Axe and didn’t need either one. Waterfall along Lake Constance Trail, one picture from Late June the other from Late July. Amazing how fast the water dries up. Trail sample going to Lake Constance. Heading up to the Thumb camp. Nice camp at the base of the Thumb (5200'). South Chute from camp. Big Ass Spider on the way up South Chute. Looking down South Chute to Camp and water sources. Gully to E-W Notch. E-W Notch - narrow, loose and steep going over. Looking back across Finger Traverse. Trail Runner coming across Finger Traverse. Ledges leading to summit (back right peak). Ledges to Summit. Looking back over route traveled. Summit of Mount Constance. Nice Summit Register! I didn't leave my address, but I did leave my blood type and a stool sample. Summit view looking back over route traveled. Great Climb! Gear Notes: Gear used: 1 Trekking Pole, Helmet - brought Crampons and an Ice Axe and didn’t need either one. Approach Notes: Start: Dosewallips River Trailhead (Rd. 2610) outside Brinnon, WA. Lake Constance Approach up South Chute to Standard Route.
-
[TR] Mox Peaks - NW Peak (Easy Mox) - NE Ridge 07/24/2021
Kuato replied to KaskadskyjKozak's topic in North Cascades
Great trip report! Congratulations on the Bulger 100. Excellent information for that area. I've been thinking of a trip out to those peaks but the time requirement and distance always has me picking something else. -
Fantastic Trip Report! It's amazing what the human spirit can endure. “That which does not kill us makes us stronger.” ― Friedrich Nietzsche. I've been thinking about climbing this peak for years. I've heard that there is a 4th Class route up this but it is probably a trap.
-
Trip: Kyes Peak (7227') & Monte Cristo Peak (7136') - South Ridge & Northwest Face Trip Date: 07/10/2021 Trip Report: I climbed Kyes Peak - South Ridge (7227') & Monte Cristo Peak - Northwest Face (7136') over the weekend. I started the climb from the Blanca Lake Trailhead Approach (Trail 1052) outside Skykomish, WA. The weather was looking perfect again and I had some more free time, so time for the mountains. I planned for a basic 2 day climb but it turned into a 3 day epic instead. Saturday: I drove to the Blanca Lake Trailhead and was starting the trip at 11:00am. I headed up the well traveled trail to Virgin Lake (4540’). I headed to the northeast side of the lake and looked for the climbers trail going north up the ridge toward Kyes Peak. I didn’t find a defined trail but I found something close and started up the ridge. The trail up the ridge comes and goes the whole way up. Sometimes the trail is beautiful and other times it disappears into oblivion. When the trail disappeared it was usually because it took a sharp turn straight up toward the crest of the ridge. The trail is vertical in several spots where you need to use tree branches to make it up. There are several sections of bushwacking in the middle of the trail & also a fair amount of loose rock. Once I dropped down below the west side of point 5845’, I was looking for a good route across the cliffy ridge to the open slopes above Columbia Glacier. I read a report that said you should go back up to the ridge once around point 5845’. I did not do that. I instead saw a nice looking traverse around the toe of the cliffy ridge. The traverse start elevation was about 5300’ and dropped down to about 5200’ while crossing. I hugged close to the toe of the cliffy ridge and found good game/climbers paths throughout the cross over. Some bushwacking through trees and brush on the way over but not bad. The traverse spit me out right in front of a stream and into much better terrain. I climbed up to about 5500’ and found a nice bluff to setup camp, right between two streams and flat. Called it a day at 6:00pm. Sunday: I left the bluff camp at 7:00am and climbed straight up toward the Roundabout Point gap. Took me an hour to get to the gap and then another hour to reach the summit of Kyes Peak. The climbing was relaxing and straight forward. The ridge to Kyes Peak looks pretty steep and exposed from a distance but once on the summit ridge it is basic Class 2-3. A great start to the day and I was making good time. I was thinking that I had plenty of time to hit Monte Cristo Peak next and get back to camp and then head out. Ignorance is bliss. From what I had read, Monte Cristo Peak has several class 3-4 routes up the mountain so I was just going to pick one and make it happen. I traversed below Roundabout Point and decided I wanted to do the Southwest Ridge route to Monte Cristo. I needed to make it down to the Columbia Glacier where I would head straight over to the ridge. Sounds easy. I spent the next 3 hours trying to find a route down to the Columbia Glacier finding nothing but cliffs and deep gullies that both required rapelling to make the glacier below. My only problem being that I did not bring a rope, thinking both peaks were going to be basic class 3-4. I needed to find a section I could down climb without too much risk. Finally at the end of the 3 hours I found the only rock ledge system that would get me to Monte Cristo Peak without a rope. I had to go high up to the base of the cliffs above, and traverse around at about 6650’. The ledge system led to the snow basin between Monte Cristo and the NW ridge of Kyes. I crossed the snow basin to the SE Ridge of Monte Cristo. The SE Ridge of Monte Cristo is supposed to be class 3-4 with a section of 5th. The route looked more like class 3 straight into vertical class 5 for several pitches. I decided to circle around the east side of Monte Cristo to see if there was another section that fit the Class 3-4 description. I made it to the North Col between Monte Cristo and Cadet Peak and still everything looked too vertical. I circle around to the NW Face of Monte Cristo and finally found a section that looked like Class 3-4 down low. I decided to climb this route thinking this must be another one of the Class 3-4 routes up. Wrong! The Class 3-4 turned into 5th Class about 50 feet up the route. I came across 3 different sling/piton setups for placing protection or rappelling along the route. Evidently I was right in the middle of the mid 5th Class route going to the summit, possibly climbing up the rappel route. All of the rock I was encountering was loose, downsloping, steep and nasty. Full suck mode was engaged. The rock quality was so poor that there was no way I wanted to attempt to down climb any of the route. My best option was to keep climbing to the summit and find an easy route down. Finding good holds going up was difficult at best. The rock on the entire side of the mountain was garbage. I would try going left or right to find better rock, but it did not matter, it all sucked. After a few more hours and several years off my life, I finally made the summit at 7:00pm. I found the summit registry in a PVC pipe. The registry was completely water logged and dissolving into pieces. Only the main portion of the summit log remains intact. The PVC pipe summit registries that I have been coming across do not keep out water and seems to absorb water into the pipe. Waterproof paper is a must for the summit registries. Now it was time to find the easy route down off of Monte Cristo. Yeah right! Monte Cristo Peak is basically a giant gravel pit with downsloping loose rock everywhere. The easiest route that I could find was going down the South Face. This was slow and tedious, like walking on marbles spread out all over a hardwood floor sloping off to a cliff. Did I mention that the rock on Monte Cristo Peak sucks? I finally made it down to the snow just as the sun was going down. Thank you Jesus! Out come the lights and I travel back to camp over much easier terrain arriving at 12:30am. I under estimated Monte Cristo Peak and paid a hefty toll. The best lessons are learned the hard way, that way you remember them forever. Monday: I left the bluff camp at 9:30am. I reversed my route all the way back to the car arriving at 4:30pm. I decided to make a stop at Blanca Lake to relax on the way back. Looking up the lake to the Columbia Glacier, there is a giant horseshoe of cliffs surrounding the glacier. The only easy way to the glacier is walking up the side of the lake to the base of the glacier. One thing I wished I knew before starting the climbs. Some Tips and Notes: 1. I’ve climbed a lot of peaks and I can say without a doubt that Monte Cristo Peak has some of the worst rock quality of any peak in the North Cascades. 2. If climbing Monte Cristo Peak, bring a rope for rappelling. Down climbing on the loose garbage rock is about as fun as slamming your hand in a car door. 3. The lower traverse from 5300’ to 5200’ across the toe of the cliffy ridge before the nice slope under Kyes Peak worked well both ways. 4. If you are not bringing a rope, the only route I could find to get to Monte Cristo’s SE Ridge from Kyes Peak is a ledge system at 6650’, on the NW side of the NW Ridge of Kyes Peak. 5. The ridge between Virgin Lake & the Camp below Kyes Peak is dry. Be sure to carry enough water. 6. There are several good camp options on the way up to Kyes Peak, look for the bluffs. Travel Time for reference: Saturday: Car to bluff Camp – 7 hours. Sunday: Camp to Summits, back to Camp - 17 hours Monday: Bluff camp to Car - 7 hours Gear used: Whippet, Crampons, Helmet - Could have used an ice axe & a rope Virgin Lake still mostly snow covered. Ridge Trail down low. Ridge Trail up higher. Looking straight across cliffy ridge traverse from 5300' View up toward Roundabout Gap and cross over bluff from camp. Summit ridge of Kyes Peak. On the way to Monte Cristo. Part of 3 hour tour getting to Monte Cristo. Cross over bluff, excellent camp spot. Looking back at the 6650' rock shelf to the SE Ridge of Monte Cristo. Monte Cristo South Face & SE Ridge. On Northwest Face route of Monte Cristo. Relaxing at Blanca Lake. Gear Notes: Gear used: Whippet, Crampons, Helmet - Could have used an ice axe & a rope Approach Notes: Blanca Lake Trailhead (Trail 1052) - Climbed ridge north of Virgin Lake to camp.
-
I climbed "Bird" peak from the north side that is facing Lake Mountain. That route is class 3-4 maybe a touch of 5th. There is a keyhole section that I climbed through to get to the upper section. The south side is class 3, 4 and solid 5th rope territory.
-
Trip: Monument Peak (8592'), Lake Mountain (8371'), Bird Peak (8330') - East Ridge Up, SE Ridge Down Trip Date: 07/03/2021 Trip Report: I climbed three peaks over the holiday weekend. Monument Peak (8592'), Lake Mountain (8371'), Bird Peak (8330') outside Mazama, Pistol Pass Approach. Started the climb from the Monument Creek Trailhead (Trail 484). The weather was looking perfect again and a holiday weekend, time for another east side climb. Headed out Friday night, caught some Zs at the Trailhead and headed out early Saturday morning. Saturday: I planned for 3 days as the trip is long with lots of climbing. I headed up Monument Creek Trail to the Eureka Creek ford to the Pistol Pass Trail and up the ridge. There used to be a bridge across Eureka Creek years ago but it came down and has not been replaced. There is a nice bridge base and a solid rock platform on the other side of the creek that is begging for a new bridge. Sure would do wonders for connecting the trails in the area for a nice big loop around the mountains of the area. The ford across Eureka Creek is not too bad, knee to mid-thigh deep depending on the crossing location. I found it easiest to cross a little way down the trail toward a rocky river bank. The Pistol Pass ridge trail is bone dry the whole way up. There is no water from Eureka Creek to Lake of the Woods Lake. I filled up with 3 liters of water at the creek and still had to travel about 2.5 hours without water before I got to Lake of the Woods to set up camp. The ridge is hot as hell when the sun is out, no place to hide and no water to cool off in. The trail up the ridge is hard to follow between 3900’ and 6000’, when in doubt stick to the ridge crest. Sunday: I Left Lake of the Woods Camp at 6:00am and climbed straight up a gully to a ridge line at about 7500’. I was thinking that the prominent rocky peak seen from Pistol Pass and the Lake area was Lake Mountain, it isn’t. It is an unnamed peak that is 40’ lower than Lake Mountain (which is to the north and is much easier to climb). This unnamed peak I am going to call Bird Peak (8330’) from here on out. I’m calling it Bird Peak because it kind of looks like a bird beak from one side and from the other side it looks like the mountain is flipping you the bird. Maybe it should be called Homonym Peak. Anyway, Bird Peak is a decent climb. It is a mix of 3rd, 4th and 5th class rock with an airy summit and room for one, maybe two people, to sit directly on the summit. Sitting on the summit of Bird Peak I realized that I was on the wrong summit and needed to climb Lake Mountain like originally planned. Lake Mountain is a basic class 2-3 scramble. Bird Peak is a much nicer peak. I headed down the ridge from Lake Mountain toward the Lake in the basin between Lake Mtn. and Monument Peak. Lots of water and camping spots in the basin. The ridge down from Lake Mountain to the basin is fairly steep with loose rock combined with slick rock sections. Not too fun but doable. From the basin Lake I climbed up toward the start of the East Ridge of Monument Peak. The East Ridge of Monument Peak is a mix of class 3 & 4 steep, loose, down slopping rock. Off the north side of the ridge is a sheer drop for several hundred feet. The first 100’ is the hardest part of the ridge and then it eases up a bit. With the loose, steep rock and the sheer drop, the pucker factor was at the high setting. I made it to the summit of Monument Peak about 3:00pm. Great views in all directions. I headed down the SE Ridge of Monument to return to camp. The SE Ridge is composed of tedious loose talus most of the way. When I reached the 7000’ mark on the SE Ridge I headed down the diagonal gully to the basin below. It’s loose shit rock all the way down to 6600’. From here I climbed back up and over the gully above Lake of the Woods and back to camp at about 9:00pm. A long day with lots of climbing and distance, my feet were done. Monday: I left Lake of the Woods Camp at 7:00am. I went back up and over Pistol Pass, down the ridge trail, through the Creek and back to the car at 3:30pm. Some Tips and Notes: Bring comfortable shoes, this is a long trip. I brought Hokas for the easy trail and creek crossing and mountaineering boots for the cross country and peaks. There is no water at all on the ridge between Eureka Creek and Lake of the Wood Lake. Bring as much water as you can carry from Eureka Creek. The trail up the ridge is hard to follow between 3900’ and 6000’, when in doubt stick to the ridge crest. The trail will fade in and out in that stretch. There are actually two lakes in the Lake of the Woods area, only the bigger lake is on the map. There is a smaller lake about a ¼ mile north of the main lake. There is a lot of water in the basin between Lake Mtn. and Monument Peak. A lake and several streams with good camping options. The East Ridge of Monument Peak requires your full attention. Class 3-4 steep, loose, down slopping rock. The gully to get onto and off of the SE Ridge of Monument Peak is not fun but it is the best option. Bottom is at about 6600’ and top is at 7000’. Travel Time for reference: Saturday: Car to Lake of the Woods Camp - 10.5 hours. Sunday: Camp to Summits back to Camp - 15 hours Monday: Camp to Car - 8 hours Elevation Gain for the trip: about 10,000’ Gear used: Whippet & Helmet Eureka Creek Ford at the top of Trail 484 Pistol Pass View - Bird Peak & Lake of the Woods down in the trees Lake of the Woods - Nice Camping. Bird Peak from ridge above Lake of the Woods Lake Mountain from summit of Bird Peak. Monument Peak - SE Ridge & East Ridge and Face Monument Peak - East Ridge Blackcap Mountain in the distance from the East Ridge of Monument Peak. Monument Peak Summit. View from Monument Peak. Looking down SE Ridge of Monument Peak. 6600' Access point of SE Ridge of Monument Peak. It's a lot steeper than it looks. Wear and Tear. One days worth of grippy rock climbing. Gear Notes: Gear used: Whippet, Helmet, Work Gloves. Bring lots of water carrying capacity, you will need it! Approach Notes: Monument Creek Trailhead (Trail 484) Start Location. Climb ridge trail to Pistol Pass.
-
There should be a law that all summit registers must be made from waterproof paper. I love to open summit registers that look like used toilet paper inside with a dried up ink pen for writing. I guess they can't use brass weatherproof Mountaineers cases for all the summits, they'd go broke. One of the nicest registers I have even seen is on the top of Boston Peak, you would never guess the age of the register inside.
-
Trip: Clark Mountain (8602') - Boulder Creek Route Trip Date: 06/19/2021 Trip Report: Clark Mountain (8602') Boulder Creek Approach Trip Report – June 19-21, 2021 (Sat-Mon) I climbed Clark Mountain (8602') outside Lake Wenatchee, Boulder Creek Approach. Started the climb from the White River Falls Campground Trailhead. The weather was looking perfect again, time for another east side climb. Texted DanO to see if he wanted to go, he was game. We headed out Friday night, caught some Zs at the Trailhead and headed out early Saturday morning. We planned for 3 days for extra time if needed or wanted. We headed down The White River Trail (1507) to Boulder Pass Trail (1562), then to Clark Mountain Trail (1556), then cross country to Clark Mountain and back the same way. White River Trail (1507) was a nice flat walk along the river through old growth forest, some blow downs to clear. Boulder Pass Trail (1562) was also nice with some blow downs and was where the climbing began. There was a ford across Boulder Creek that crosses the trail at 4000’. The ford had three sections of creek to cross. We crossed barefoot in the freezing ass water which actually felt quite nice on the feet after a few hours on the trail. The last section of the ford is the deepest and fastest moving, about mid-thigh deep for about 6 feet. I decided to slip and jam my toe into a rock on the last section just for giggles and shits. DanO didn’t have a problem. We started hitting snow just before the ford around 3900’. By the time we made it to camp at 5000’ at the base of Clark Mountain Trail (1556), the snow was thick. We only found one dry, halfway flat area to camp for Saturday night. Sunday. DanO decided to stay at camp and maybe try for the South East Peak Ridge later. I headed out for Clark at 5:30am. The snow was somewhat soft starting out which was a bit surprising. Once wrapping around the Clark Mountain Trail (1556) the snow firmed up for a while then went soft again above. I headed for the 7200’ level of the South East Peak Ridge of Clark Mtn. At that elevation there is a gully that is the easiest way down to the South side of Clark. Had to drop down about 300’. The gully is the easiest way down but it is not easy. The gully is composed of steep, loose rock and snow and is the hardest part of the climb going this route. I worked my way down by using ledges on the other side of the gully. If I had a rope, I would have rappelled the gully. The snow in the gully and on the South side of Clark was firm due to being in the shade, crampons and an ice axe were nice to have. I made my way across the snow to the Clark summit. The temp changed quite a bit once crossing the ridge. One side was like being microwaved alive and the other side had a nice stiff cold 30-40mph wind to deal with. I was happy that I brought a puffy coat to stay warm. The final summit area was basic 2nd class rock. I was thinking about bagging Luahna Peak next door, but after seeing that it would require several extra hours of side hilling on soft snow, I decided against it. There is water at the bottom of the cross over ridge and water all along the South side of Clark to about 7500’. There are several nice bivy locations on the cross over ridge, just no running water, only snow to melt. I came across a long line of Wolverine tracks that went over the ridge and kept going and going. They are amazing animals. Made it back to camp around 4:30pm. We packed up to move below the creek ford for the 2nd night camp. We found a nice camp ground around 3880’. Boulder Creek had gotten deeper the 2nd time across but the crossing went well. Monday. We left the 2nd camp about 7:30am and were back to the car at 10:30am. A nice stroll back. Overall it was a nice climb. All the snow remaining made the trip interesting. I’ll take the snow over the later season loose rock any day. Some Tips and Notes: 1. Bring sandals for the Boulder Cr. Ford at 4000’, I didn’t and now I have a toe that looks like a rotting banana. 2. Snow starts at 3900’ 3. The last running water was around 7500’ 4. A rope would be a good idea for the 7200’ gully descent and ascent. 5. There are decent bivy spots on the cross over ridge, bring up water with you or melt snow. Travel Time for reference: Saturday: Car to Camp (5000’) 8 hours. Sunday: Camp to Summit to 2nd Camp 12 hours Monday: 2nd Camp to Car 3 hours Gear used: Ice Axe, Trekking Poles, Crampons & Helmet On the way to camp at 5000' View from camp at 5000' Up & Over the South East Peak Ridge of Clark Mtn. A nice bivy spot on the cross over ridge around 7000' Looking down from top of 7200' Gully. Looking up from the bottom of the ledges I used to bypass the gully. Looking across the upper ledges used to bypass much of the gully on the way back up and over. Summit Rock. Great views from the top - Luahna Peak, Glacier Peak, Mount Baker & Shuksan. Gear Notes: Gear used: Ice Axe, Trekking Poles, Crampons & Helmet - A rope would be a good idea for the 7200’ gully descent and ascent. Approach Notes: White River Falls Campground Trailhead, White River Trail (1507) to Boulder Pass Trail (1562), then to Clark Mountain Trail (1556), then cross country to Clark Mountain.
-
Trip: North Gardener & Gardener Mountain - Wolf Creek Trail Approach Trip Date: 05/29/2021 Trip Report: Climbed North Gardener (8956') & Gardener (8898') Mountains outside Winthrop, Wolf Creek Approach. The weather was looking perfect on a long holiday weekend, time for another east side climb. Texted DanO to see if he wanted to go, he was game. We headed out Friday night, caught some Zs at the Trailhead and headed out early Saturday morning. We planned for 3 days for extra time if needed or wanted. Wolf Creek trail to Gardener Meadows was nice, some blow downs to clear. A few snow patches on the trail, the meadow up to about 7000’ is snow free. We decided to camp above the meadows about 500’ vertical. We had the hillside to ourselves, the meadow had many groups camping. We arrived early but not early enough to bag the summits and get back before dark, so we got plenty of sleep to prepare for Sunday. Sunday. DanO decided to stay at camp and maybe try for Gardener later. I headed out for Gardener at 5 am. The snow was very firm and somewhat icy in the early am. I decided not to bring crampons and was regretting that decision for about an hour. I slowly made progress up to the rock above the snow. Probably not the standard route but it got me off the icy snow. The rock was a mix of 2nd and 3rd class with lots of loose rock. Made it to the summit of Gardener before 8 am. There was a peak right next to Gardener that looked to be the same height or possibly higher, so I climbed that too just to be safe. Turns out the other more interesting looking peak was 40’ lower than Gardener, with 3rd class loose rock. Next I headed for the ridge between Gardner and North Gardener. I stayed high on the ridge and was met with loose Class 3 with some decent ledges to get around the vertical rock sections. Took some navigation to find the ledges but they are there. The connecting ridge was the most technically difficult part of the climb. I summited North Gardener around noon. Beautiful views and perfect weather. Made it back to camp around 2pm. We packed up and headed down the trail a ways to camp to make Monday's trip shorter. Monday was uneventful, 4 hours out to the car. Snow started at around 7000’. Last water was around snow level. The ridges and peaks are mostly snow free depending on your route. The bowl coming back down from North Gardener was 75% snow. The snow was perfect for plunge stepping on the way back. Lots of wildlife around the area. We saw two bears, a dozen or so deer and a porcupine over the trip. Overall this is a very nice early season climb with great views. The snow made the climb much more interesting than anticipated. Be ready for many other climbers on route, it is a very popular area. Some Tips and Notes: 1. This is a popular area so plan accordingly. 2. Snow starts at 7000’ 3. The last running water was around 7000’ 4. The ridges and the summits are mostly snow free 5. Crampons, Ice Axe and Helmet would be a good idea to bring along Travel Time for reference: Saturday: Car to Camp (6240’) 7.5 hours. Sunday: Camp to Summits to 2nd Camp 12 hours Monday: 2nd Camp to Car 4 hours Abernathy Peak on the way to camp. Gardener Mountain Summit. Mystery summit off the side of Gardener. 40' lower than Gardener but much more fun to climb. North Gardener from Gardener. Connecting ridge rock. Extra spicy section along the ridge traverse. Views where better than a poke in the eye with a stick. Snow bowl coming down from North Gardener on the way back to camp. DanO trying out his new porcupine mating call, the porcupine was unimpressed. Gear Notes: Gear used: Whippet & Trekking Pole. Didn’t bring crampons or a helmet but would have used both if available. Approach Notes: Wolf Creek Trail Approach. About 10-11 miles to Gardener Meadows.


-
- 3
-
-
-
Nice work. That crevasse crossing definitely had some pucker factor.
-
[TR] Seward Peak - Standard - West Ridge 05/23/2021
Kuato replied to geosean's topic in North Cascades
Did you guys make it past the big ass gate on FS Rd. 38 that has the warning about being video monitored? There is some BS notation about a wildlife closure 12-1 thru 6-15 on some maps. Climbing in whiteouts is fun, it's like entering a parallel universe where you get to wander around inside the mind of Joe Biden when he's trying to read a teleprompter. -
Trip: Robinson Mountain (8726') - Northeast Ridge Trip Date: 05/22/2021 Trip Report: I climbed Robinson Mountain (8726’) outside Mazama, Northeast Ridge Route. I started the climb from the Robinson Creek Trailhead, a little over 9 miles down Lost River Rd. from Mazama. I decided to head East over Hwy 20 to see how much snow is in the Eastern Cascades. There is a lot less snow on the east side, but still a decent amount depending on the peak. Robinson Mountain has melted out faster than the surrounding peaks by quite a bit. The weather was perfect. Clear skies and warm. I was prepared for a long day on the mountain so I started up the trail around 5:30am to leave plenty of time before dark. You will cross two bridges on the main trail heading up. About 40 feet after the 2nd bridge (that crosses Beauty Creek) look for the climber’s trial on the right side of the trail heading uphill (about an hour up the trail depending on your speed). The climber’s trail heading up towards Robinson Mountain is fantastic. It is one of the nicest climber’s trails I have ever climbed up. I’ve been on trails that are on maps that are not as nice as this climber’s trail. Snow started at around 4600’, patchy at first, then pretty solid until you turn to go up the grassy slope (5200’). The grassy slope is snow free up until about 6000’. 6000’ to the top of the ridge is all snow. The last running water I came across was a small waterfall right below the lake. The lake (6750’) is still snow covered with a couple spots of water opening up. Water up before going up to the ridge or be prepared to melt snow. From the lake I went up the snow covered slope to the left (south) to gain the ridge. I followed that ridge to the main Northeast ridge that leads to the summit. Most of the ridge is snow free. The climbing is mostly class 2 with a short section of class 3 here and there. The section going up the false summit is the most difficult being exposed 3rd class for about 50 feet. Coming back from the summit I decided to go straight down the snow bowl toward the lake. The snow had been in direct sun for hours so it was perfect for plunge stepping. Overall this is a very nice early season climb. The snow melts off the peak early and the views are awesome. 6100’ of climbing gives you a good workout to boot. Some Tips and Notes: 1. This is a long day trip. Took me 11.5 hours total time. Average fit climber pace. 2. The last running water is right below the lake. 3. An ice axe would be a good idea to bring along, as the snow gets somewhat steep in sections. 4. Snow starts at 4600’ 5. The ridge to the summit is mostly snow free. Travel Time for reference: Car to Summit 6.5 hours – Summit to car 4.5 hours Bridge over Beauty Creek. Start of the climber's trail after Beauty Creek Bridge. Look for the broken off tree stump. Climber's trail. Nice enough to be on a trail map. Lake and snow bowl leading to the ridge. Heading up to the ridge on the left (south) side of the lake. Looking down to the lake while heading up to the ridge. Looking up the Northeast ridge to the summit. Looking down the Northeast ridge from the summit. The views from the summit are fantastic! You can see almost all of the major peaks in the Cascades. Gear Notes: Whippet, Ice Axe & Helmet. Brought crampons but didn’t need them. Approach Notes: Robinson Creek Trailhead start location. Head up the climber's trail about 40' past the Beauty Creek bridge.
- 1 reply
-
- 2
-

-
-
[TR] Ruby Mountain (7408') - Northwest Ridge 05/15/2021
Kuato replied to Kuato's topic in North Cascades
I added an extra expanded picture looking west which includes Primus & Tricouni peaks. Pretty much all the peaks have a lot of snow still.