jefetronic
-
Posts
47 -
Joined
-
Last visited
-
Days Won
6
jefetronic's Achievements
")


-
https://www.jeffreyjhebert.com/adventures/little-tahoma-via-paradise Found the person who lost their phone...last September. https://turns-all-year.com/trip-reports/little-tahoma-via-paradise
-
My partner and I found an iPhone sitting on rocks about 200 feet below the summit yesterday, May 13. I brought it home to Seattle and charged it (it was dead) but it does not have an emergency contact. Adorable lock screen photo attached. DM me if it's yours!
-
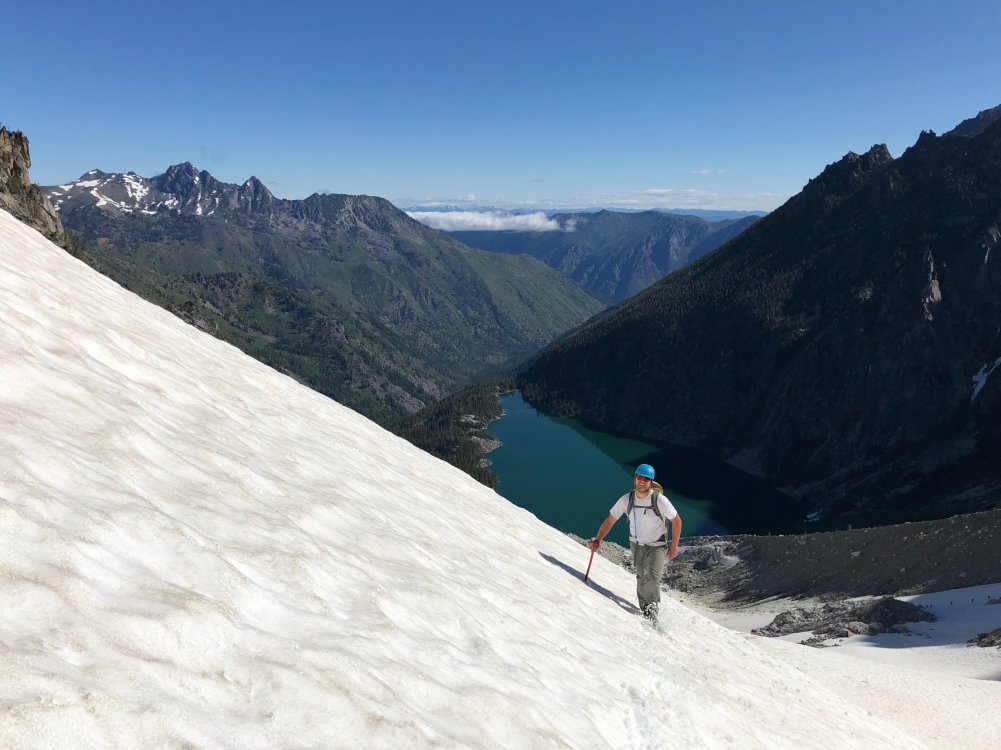
Trip: Glacier Peak - Frostbite Ridge Trip Date: 08/07/2022 Trip Report: TR and GPS track on my site here: https://www.jeffreyjhebert.com/adventures/frostbite-ridge-on-glacier-peak As the fourth-highest peak in Washington State and a beautiful, remote objective, I always wanted to climb more than just the standard route on Glacier Peak. With a perfect weather window over an early-August weekend and a good friend and climbing partner willing to suffer a bit, it was time. Adam and I drove out to the North Fork Sauk Trailhead on Saturday morning with open bivy gear, one axe and one light axe each, crampons, a 30m glacier rope, a few ice screws, a couple of pickets, trail runners, boots, and, perhaps most importantly, a good supply of whiskey. Our 3-day, lollipop plan was to hike 20 miles the first day to get near the start of the Kennedy Glacier, then climb the route and descend the Cool Glacier on the other side a good ways before camping again and then hiking out on the morning of the third day. We left the car at 10am and hiked up the standard approach until we hit the PCT, where we took a left up to Red Pass. We ran into a number of through-hikers on the PCT and each of them was a bit surprised to hear we were there to climb Glacier Peak. We also ran into a soloist who said he’d started up the Kennedy Glacier, but turned around. It was a bit ominous hearing that as we marched our way North on the PCT. The variety and amount of ground we covered this first day was pretty cool and we enjoyed it as much as we could despite the slowly-building pain creeping into our feet, shoulders, and hips. It was after 7pm when we made it to the tricky crossing of the Kennedy Creek. We just put our heads down from here and hiked up Kennedy Ridge to 5,300 feet where we expected to leave the PCT in the morning and saw a creek on the map, hoping there would be somewhere flat to bivy. We arrived at 8pm to find a nice little campsite with one other person, quickly set up shop, and conked out. The mileage and vertical gain from camp to the summit didn’t seem to warrant an alpine start, so we woke up at 5am and were moving by 6am. Heading straight up from camp was exactly the right move and quickly put us on a large moraine overlooking the entire North side of Glacier. There were some old signs of traffic, but the area had the feel of being forgotten and much more remote than other big peaks in Washington. We switched from trail runners to boots at the toe of the Kennedy Glacier at 7:30am, keeping crampons on our backs to start since the snow was reasonably soft and there was a clear dirty, rocky band to get through on the glacier below Kennedy Peak. This section was perhaps the most dangerous of the route—it was a crumbling mess with big boulders waiting to succumb to potential energy, perched on glacial till. After gingerly getting through this bit, we were on the wide-open Kennedy Glacier with very little crevasse hazard on its left half. Things were uneventful until we got to Frostbite Ridge itself. We could see the Rabbit Ears feature above us and our options were getting on a pumice treadmill up the ridge or staying on steep snow to the left. We opted to keep crampons on and stick to the snow. We stayed left past the first gendarme and on some of the steepest snow (~50 degrees) near the top, which went pretty easily with our second axes. The snow took us almost to the top of the face and then we scrambled a few feet to the highest point, just to the right of the highest gendarme (the Rabbit Ears themselves, it turned out) at 12:30pm. From here, we could see the rest of our route and it looked like it would all go. We could also see our 3rd class descent to the upper Kennedy Glacier. It looked loose and nasty, but ended up being quite reasonable and quick. The first 50 feet up the snow on the other side were steep, but it eased off significantly from there and we romped our way up, across, then down to the saddle below the final face. The face had the glimmer of ice to it, which was a welcome departure from walking. We determined the angle was low enough and the steep part short enough that it made more sense to solo than to pitch out. I set off and enjoyed settling into the flow of ice climbing despite the knuckle-bashing involved with straight-shaft axes. After the ice step of 40 feet or so, it was back to snow until the top, but it steepened up again right near the summit and made sense to front-point with both axes—quite fun to climb that way right to the summit. We arrived at 2:15pm. The descent was straightforward and pretty efficient on sloppy snow. We never needed the rope and took our crampons off as soon as we were down the initial steeper sections. We descended all the way to the plateau at 6,750 feet where we found a nice spot to camp off snow with great views. We got moving the next morning at 7:15am and were back to the car a little after noon. We stopped at the bottom of the switchbacks before the final flat slog out to consume most of the remaining whiskey and floated on a cloud of air most of the way back to the car. This route had a more adventurous, remote, wild feel than lots of other climbing in Washington. In a way, it felt more like a destination climb I would have flown somewhere to do. Yes, the walking to climbing ratio was quite high and we never took the rope out, but it did bring some fun challenges, stellar views, and time way out there. Gear Notes: Did use: whiskey Didn't use: 4 ice screws, 2 pickets, 30m rope, glacier kit Approach Notes: Buckle up
-
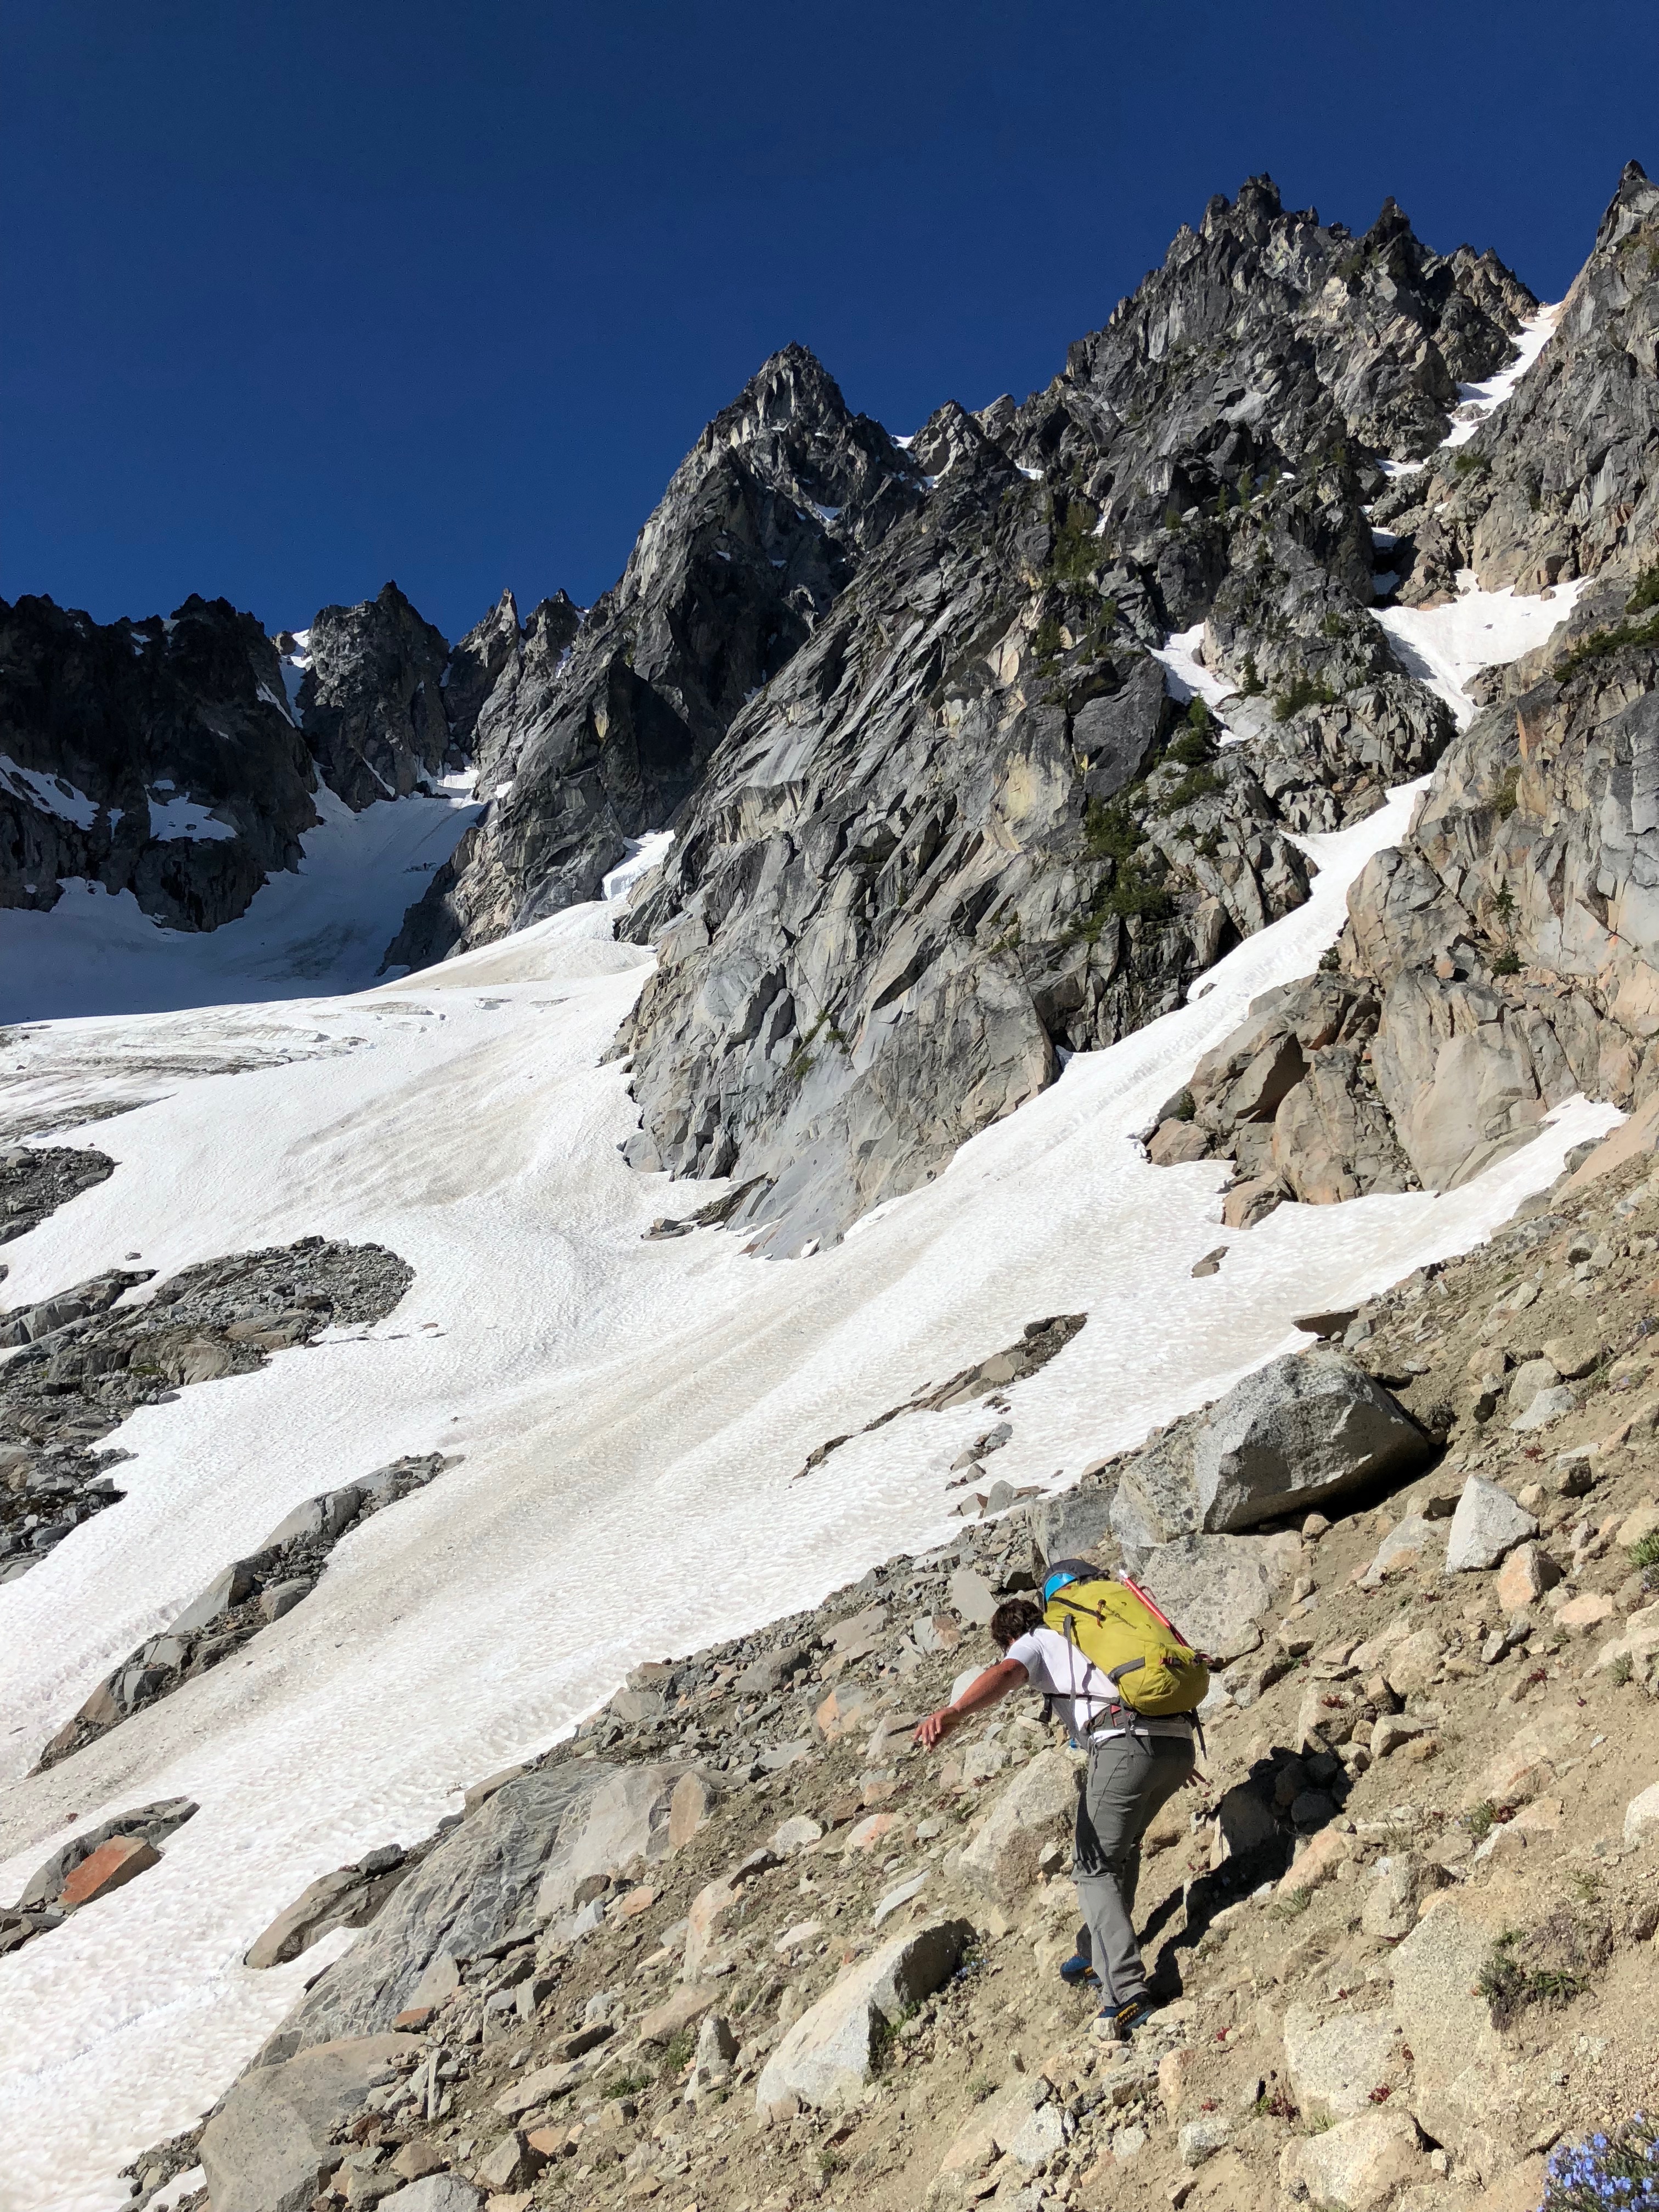
Trip: Mount Maude - North Face Trip Date: 07/23/2022 Trip Report: Kelsey and I were ready to move on from ski season but are in terrible rock climbing shape after pandemic years out of the rock gym, so we searched for snow routes. Mount Maude quickly shot up the list and we believed it would still be in shape despite it being late July, based on the snowpack we’d been observing this summer so far. We’d been up in the area to scramble Seven Fingered Jack before, and so the approach was familiar. We drove out Friday night in Kelsey’s van, getting a free, violent massage chair experience on the especially-bumpy access road, and conking out a bit after 11pm. We had decided that it would be nice to catch the route in slightly softened conditions and that its North-facing aspect should keep it from heating up too much, so we woke up at 5am and were moving by 5:30am. With just climbing gear, layers, and food for the day, we were reasonably light and banged out the approach to the meadow camp in Leroy Creek Basin in just over 2 hours. From there, we followed the climber’s trail until we hit snow, switched to boots, and made our way up to the Seven Fingered Jack / Maude col at about 10am. It was sunnier, warmer, and with less snow than we’d hoped on this side, but our view of the top of the route suggested it might still be in condition. We had a snack here, put on our harnesses and sharps, and started our downward traverse toward the route. We were on mushy snow for a ways before hitting a baked-out section for which we took crampons off and scrambled loose 3rd class until hitting snow coming down the North Face which looked more or less continuous. We got our crampons back on here at 11:30am and pulled out our second tools. The snow was softer than we were hoping for down low, but not demonstrating any signs of loose slide potential, so we scampered upwards unroped. The angle down low is quite reasonable in the 35-40 degree range. In the middle of the route, there was a brief bare traversing section we had to scramble through, but it was low-angled and pretty easy. From there, the route kicked up in steepness. We took our time, kicking in good steps, which varied in difficulty from a couple of kicks to five or six with some toe bashing. The last 75 feet or so was appreciably steeper and much more firm. We slowed further here to kick nice, secure steps. A nice consolation was that the firmer snow made for secure high-dagger tool placements. At 1:15pm, we crested the last steep snow of the North Face and high-fived on low-angle, rocky terrain that led to the summit. We had lunch and took a brief nap up here then started down at 2:15pm. After heading down the South Ridge for a ways, we decided to roll the dice and take a more direct, loose descent path to the West. It had efficient sections on loose scree and snow and a couple more painstaking sections on loose rock, but it went. By 4pm, we were back at the Leroy Creek Basin camp area and, by 6:15pm, we were back at the van for just under a 13-hour day. A fun day out, a beautiful area, and a nice transition out of ski season. The booter is in! I'd guess the route will still be in for another couple weeks (knowing how hot it's gotten since our ascent). Go get it. A few more photos and a GPS track are here: https://www.jeffreyjhebert.com/adventures/north-face-of-mount-maude Gear Notes: Soloed the route with crampons and two tools. Brought a few pickets, a few screws, and a 30m glacier line just in case. Only pickets would have protected it. Approach Notes: Head to 7FJ-Maude Col and then do a descending traverse across snow and loose 3rd class to ~7,750 to start the route.
-
Trip: Mount Baker - Park Glacier Trip Date: 05/30/2021 Trip Report: TR and GPS track here: https://www.jeffreyjhebert.com/adventures/park-glacier-on-mount-baker With a decent forecast over the long Memorial Day Weekend, Colin and I decided to put the work in to access the remote Northeast side of Mount Baker. It turned out we timed our trip quite well, being able to skin straight from the Heather Meadows parking lot at the Mount Baker Ski Area and encountering some tricky, but doable crevasse crossings near the top of the route. Expecting about 4-5 hours of approach, we left Seattle in the late morning, departing from the car at 1:30pm. It was hot in the bright sun as we climbed up to Artist Point and even hotter climbing up to the shoulder of Table Mountain without much of a breeze. We made it here in about 1h 20m from the car—not bad for schlepping overnight gear! The short descent toward Ptarmigan Ridge wasn’t worth transitioning for, so we awkwardly skied down the sticky warm snow and across to a point where we could start climbing again. We decided to stay relatively high and climber’s left along Ptarmigan Ridge. While this likely included a bit of extra up and down, we were able to stay with skins on all the way to the saddle next to Coleman Pinnacle, arriving in about 3 hours from the car. We did a curling traverse down and skier’s right from the saddle, keeping skins on again. This got us to what’s marked as Camp Kiser on some maps, which has a fabulous view of Shuksan. We decided to press on to The Portals, with one more awkward skins-on descent and one more climb before reaching our destination for the day after 4 hours on the dot (5:30pm). We dug out a campsite, set up shop, and enjoyed a lovely evening watching the mountain pink up. Knowing the upper Northeast-facing cirque would bake as soon as the sun rose, we got going decently early, skiing away from camp at 5am. There is a cliff band at roughly 6,150 feet which is tough to scope well from above. We eventually found an exit we could ski at the far skier’s right edge of our traverse from camp, then skied down onto the Rainbow Glacier. The snow was quite firm but the angle looked reasonable to skin all the way up, so we put ski crampons on. Our ascent of the glacier went smoothly, weaving around crevasses as we encountered them and using some photos we’d taken of the route from camp the evening prior. A big sulfur vent near 8,000 feet really completed the volcanic ambiance. At about 9,000 feet, we skinned up between two gaping crevasses running vertically down the mountain. At about 9,500 feet, we had to end run a big crevasse toward the North before swinging back left across the face. It was clear from here that the “moat” described in the ski tour guidebook as being “easy or difficult depending on conditions” was fully out and would easily fit a school bus. We’d expected to come back across the face to find a ramp across a high crevasse and this worked out well. The snow bridge crossing this final crevasse was a good 8 feet wide, spanning a narrow point about 10 feet across. The rest of the crevasse was much more open and it was a big one. I gingerly skinned across with Colin below me and the rope tight, thinking light thoughts until I was safely on the other side. I dug in and body belayed him across. From there, our final challenge was to make a traversing ascent of the headwall above this gaping crevasse. Thankfully, the snow was perfect for kicking in good steps and we just took our time. At 10,180 feet, I busted through a small cornice and onto the ridge above the Cockscomb. It was relatively easy going from there across ice and wind-affected snow. We reached the top at 10:15am, so just over 5 hours from camp despite that painstaking rising traverse. We celebrated briefly, explained where we were coming from to some folks coming from the Coleman-Deming, and then scooted back from whence we came to get back across that face and the snow bridge before things warmed much further. Thankfully both went well and we were able to enjoy a stress-free 4,000-foot ski back down the Park and Rainbow Glaciers. The snow was heaviest up high and improved the lower we went, with really fun corn on the bottom third. We skinned back up towards camp, booting the short cliff band and then side-hilling through south-facing slop. We arrived at 1pm and had a nice, leisurely lunch with some tea. Fresh socks were downright luxurious. The rest of our descent went smoothly, mostly retracing our approach line except for taking a lower route North of Coleman Pinnacle to avoid gaining unnecessary elevation. At 5:30pm, we arrived at the Heather Meadows parking lot and retrieved our stashed beers from a snowbank. Over 22 miles with a lot of traversing made for some pretty beat-up feet and we were very excited to exit our boots. Obligatory Aslan Brewery waffle fries and burgers capped off an excellent 2-day adventure. Gear Notes: Skis, crampons, axe, glacier kit Approach Notes: Buckle up for a long up and down traverse from the Mount Baker ski area
- 1 reply
-
- 2
-

-

-
 No problem. Happy to help. I think we nailed the season. The snow was stable and firm, the guide companies had been sending clients up on most peaks already, and the weather was great—dry pretty much the whole time. Three weeks actually bordered on too much for us. After two weeks, we'd climbed everything on our initial three-week itinerary and we even considered flying home early or heading to another destination, but decided to just do one more peak. This was partly due to weather, conditions, and logistics all working out really well for us. My three-week trip to Patagonia felt too short due to difficult weather. Two-and-a-half weeks in Peru was also bordering on too short, given getting sick there. So three weeks is a good duration if you can swing it to buffer for the unexpected. We left Bolivia feeling like there wasn't much unfinished business. Other options for us were the West Face of Huayna Potosi and the Grand Traverse of Illimani. We would have done the latter if we'd been a bit more healthy and confident at the end of the trip. We considered Chachacomani, but it didn't sound terribly interesting. Ancohuma was a similar story. Sajama didn't sound interesting to us at all. I think Peru might have an edge if you're choosing between the two for a first trip: Huaraz is more of a mountain town with a scene focused on climbing, there are more route and peak options, and the climbing can be more technical (but there are easier options as well). La Paz is a big city and the peaks are generally less technical. Transportation is similar. Some approaches in Peru are bigger and make more sense to do with support (donkey drivers, etc.), which is an interesting experience. We did like the faster and lighter approach in Bolivia having experienced both, though. It's pretty cheap in both countries once you're there. I believe Bolivia has the edge on cheapness. We didn't hire a guide in either place, but we heard that Peru has "European rates" while Bolivia was surprisingly cheap for guides, porters, donkey drivers, and cooks from what we heard. Hotels were easily bookable online for both places in advance and costs were pretty reasonable. Bolivia was downright cheap. We found it was worth spending a bit more in Huaraz—our first hotel smelled like sewage and had a lot of street noise. Basic supplies where cheap in both places. For example, we bought standard butane fuel for our stove at 20 Bolivianos per canister in La Paz ($2.90). There are normal grocery stores in La Paz with staples. Huaraz had some smaller ones and you could buy things like oats, dried fruit, salami, etc. in the markets. Taxis worked in both places and were pretty reasonable (3-hour drive from Illimani was 450 Bolivianos / $65) and some transportation made sense to do in Collectivos in both places, which are dirt cheap. Looking forward to hearing about your adventure down there. - Jeff
 -
We did the trip in La Sportiva G5 boots. I've found them to be a touch warmer than my old Nepal EVO boots since the shank is carbon instead of steel and it's easier to loosen them on the fly if cold. There were a few times when my feet got a bit numb (primarily in the early morning while front-pointing up the headwall on Illampu), but the G5s worked well. We saw a lot of people in Spantiks and other double/plastic boots. Similarly, neither of us needed alti mitts—we got away with heavy BD gloves (and some numb fingers at times). In terms of gear, we had a whole spreadsheet down to the earplugs, but here's the key stuff: Climbing G5 boots; trail runners for approaches Dual horizontal-point crampons Quark tools & spinner leashes Lightweight harness and crevasse rescue kit Pole and whippet (really nice for approaches/glaciers/low-angle stuff) Speed 50 pack 30m x 8mm glacier line for most everything (brought a 70m lead line for Illampu; brought a 70m tag line down there, but didn't use) A few slings and screamers (just used a couple) 8 ultralight screws (didn't use; carried often) 5 pickets (usually brought 2 unless more technical) Some nuts (didn't use) Some pins (didn't use) Avy gear (didn't bring out as the snow was stable) Camping Firstlight tent (we brought an Eldorado as well, but didn't use since the weather was great; a groundcloth might have been nice) Xtherm pad and -10 degree down bag (turned out to be overkill, but oh-so comfy) Reactor stove and Katahdin BeFree water filter
-
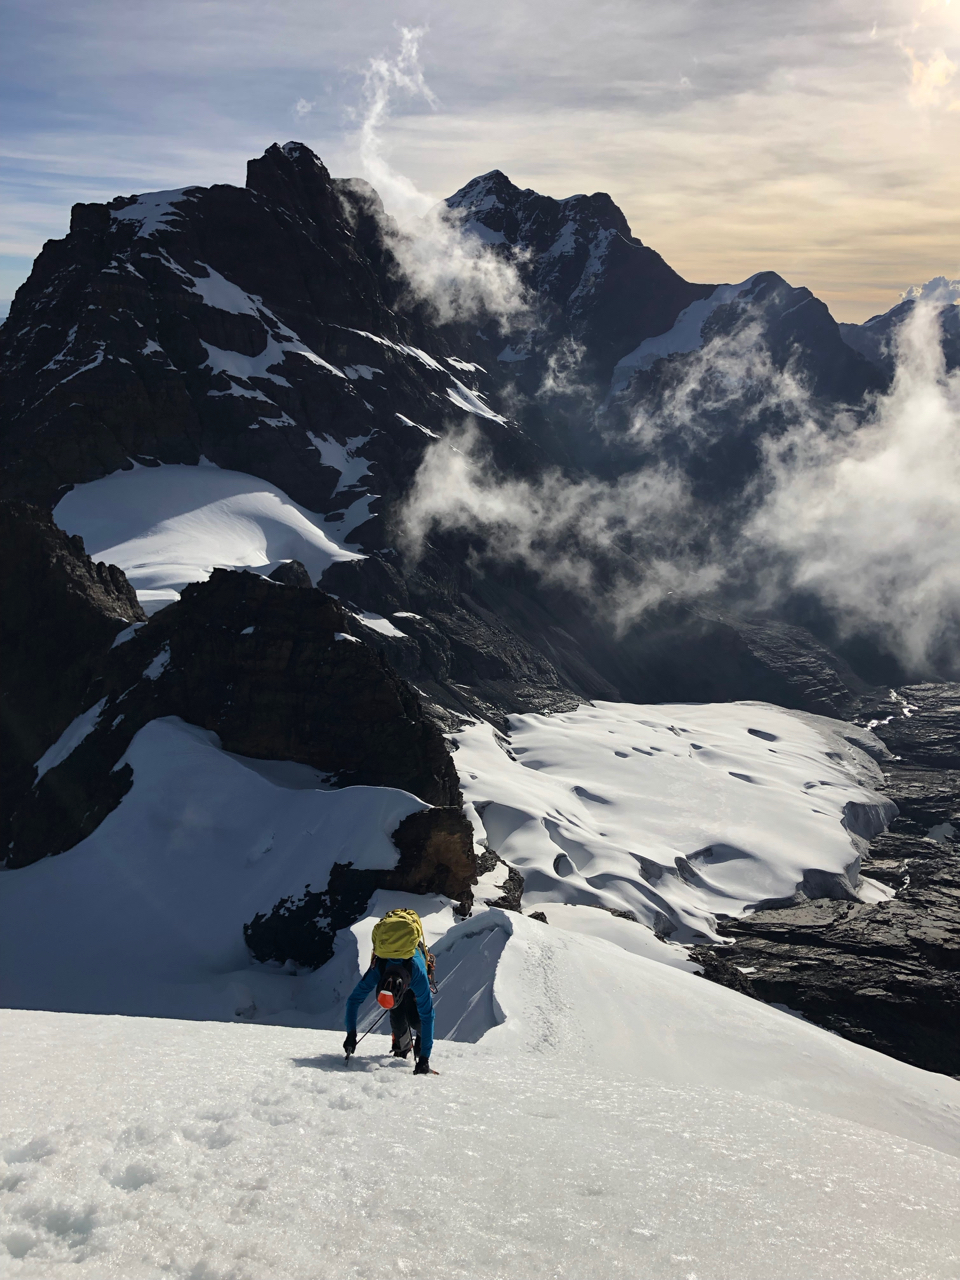
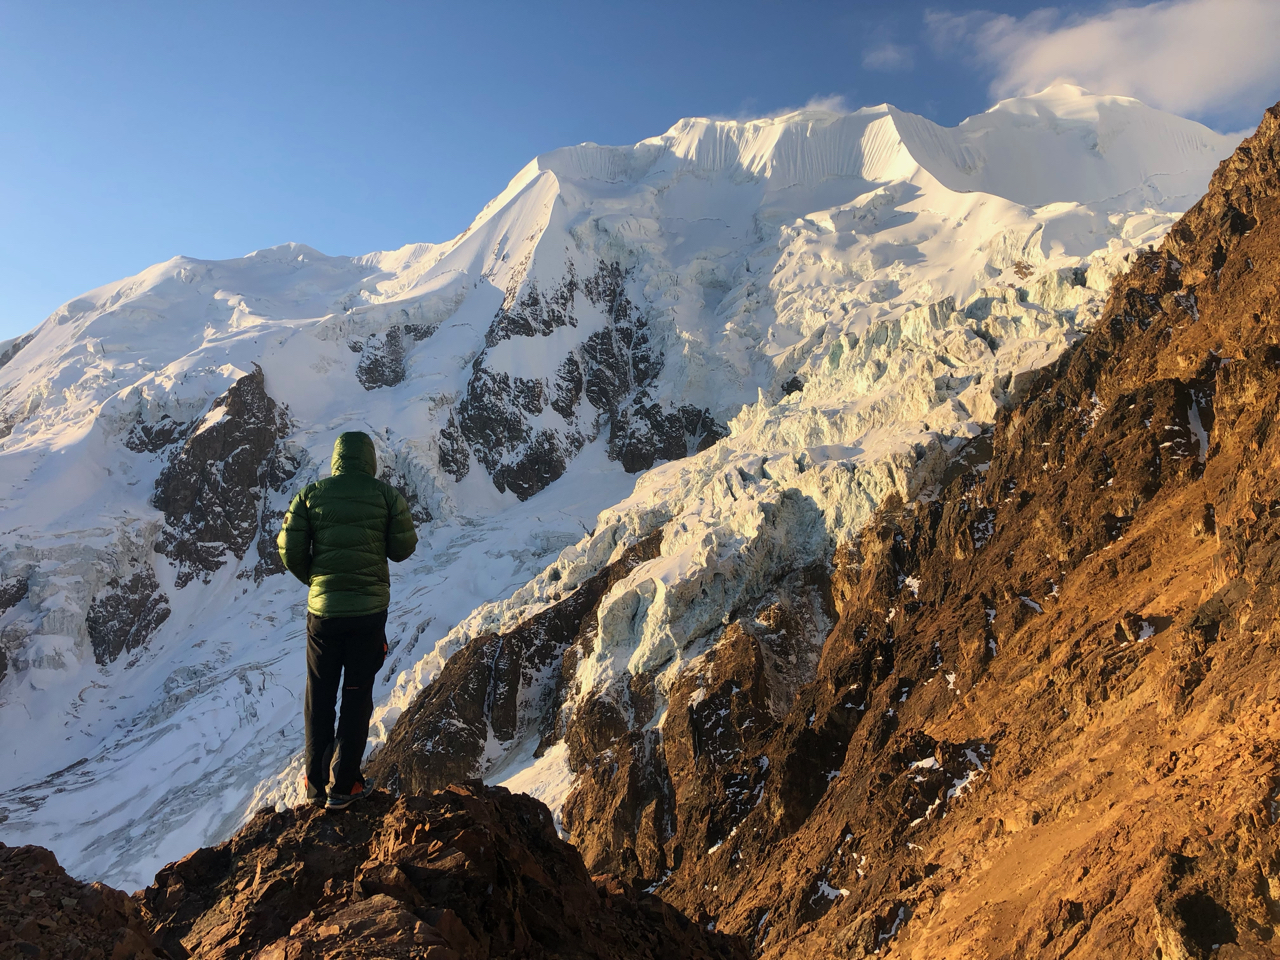
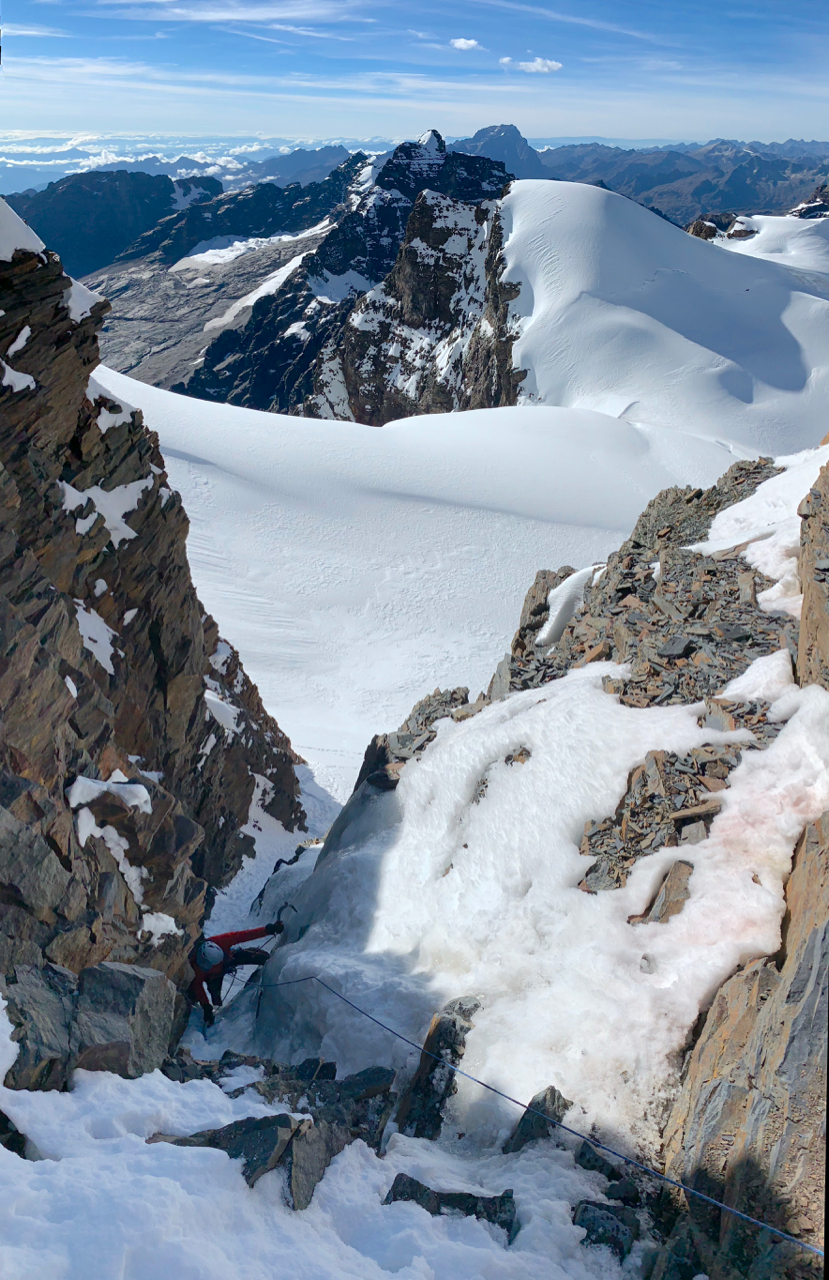
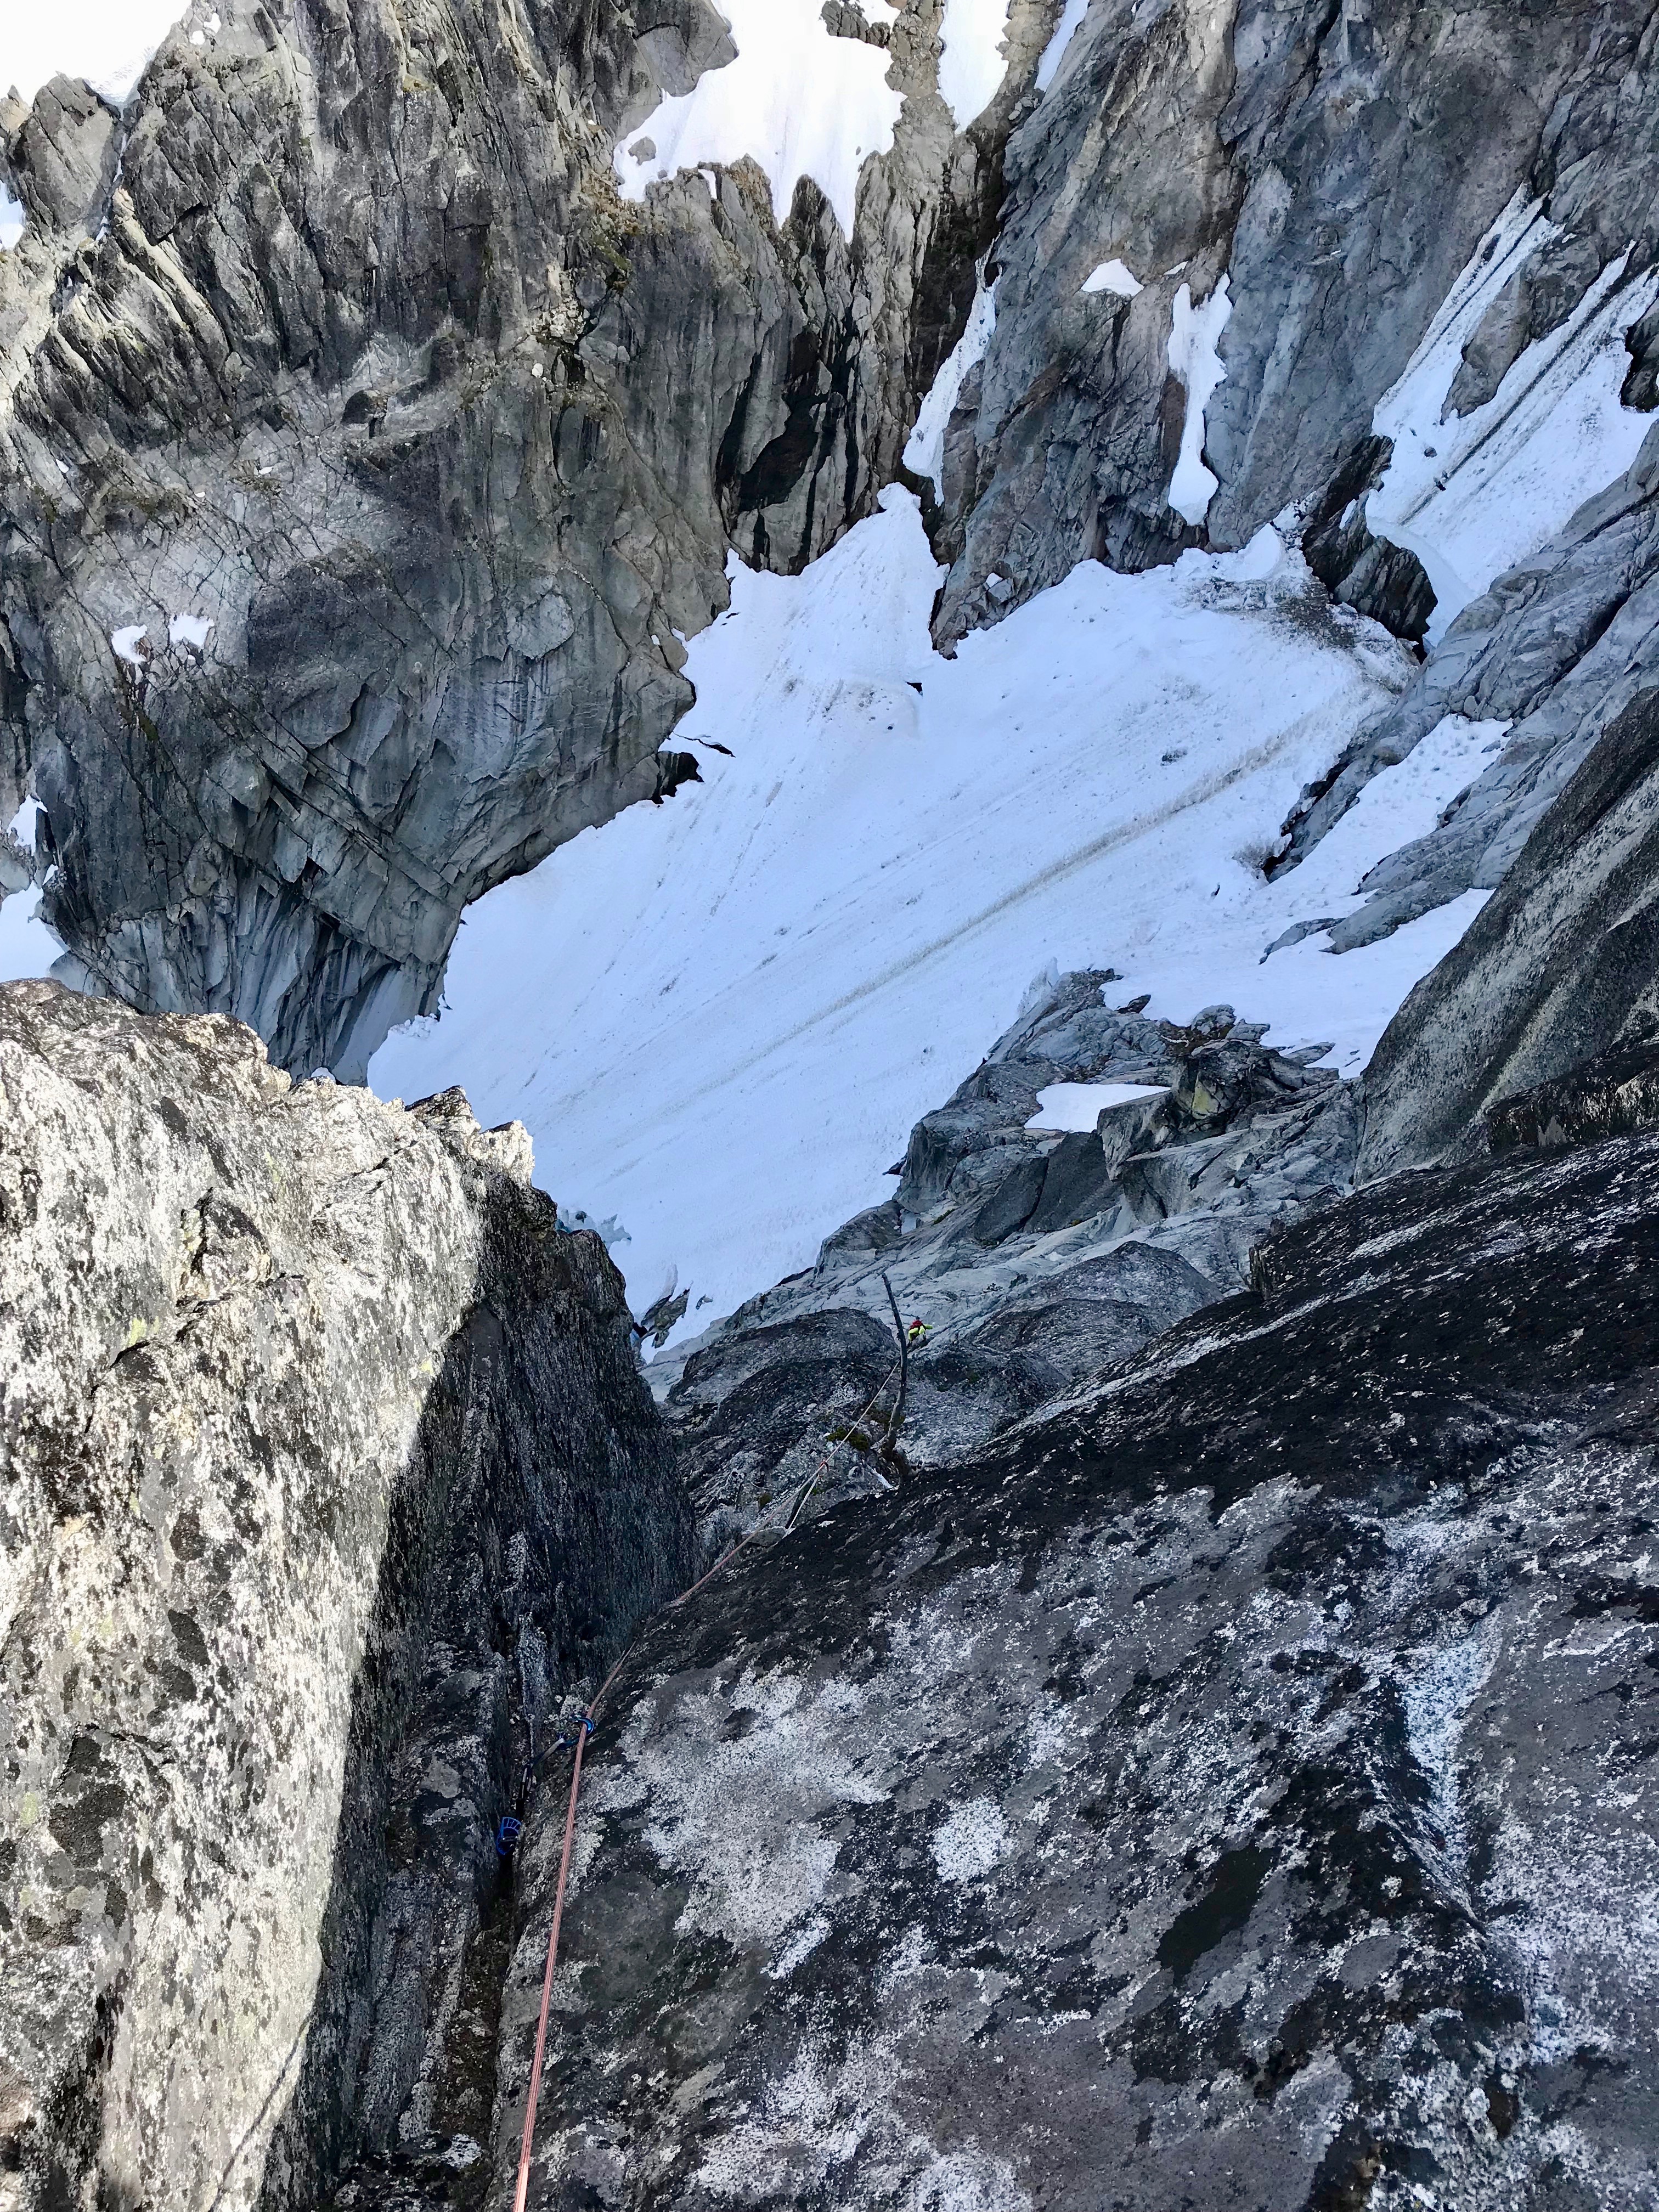
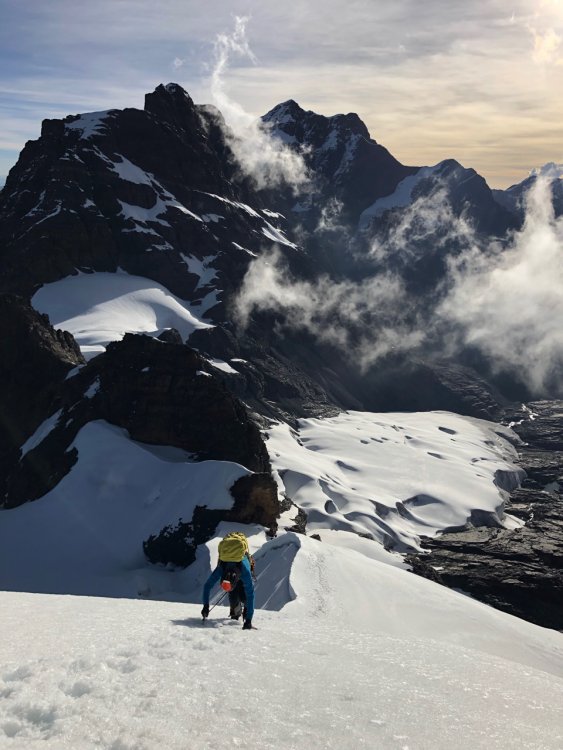
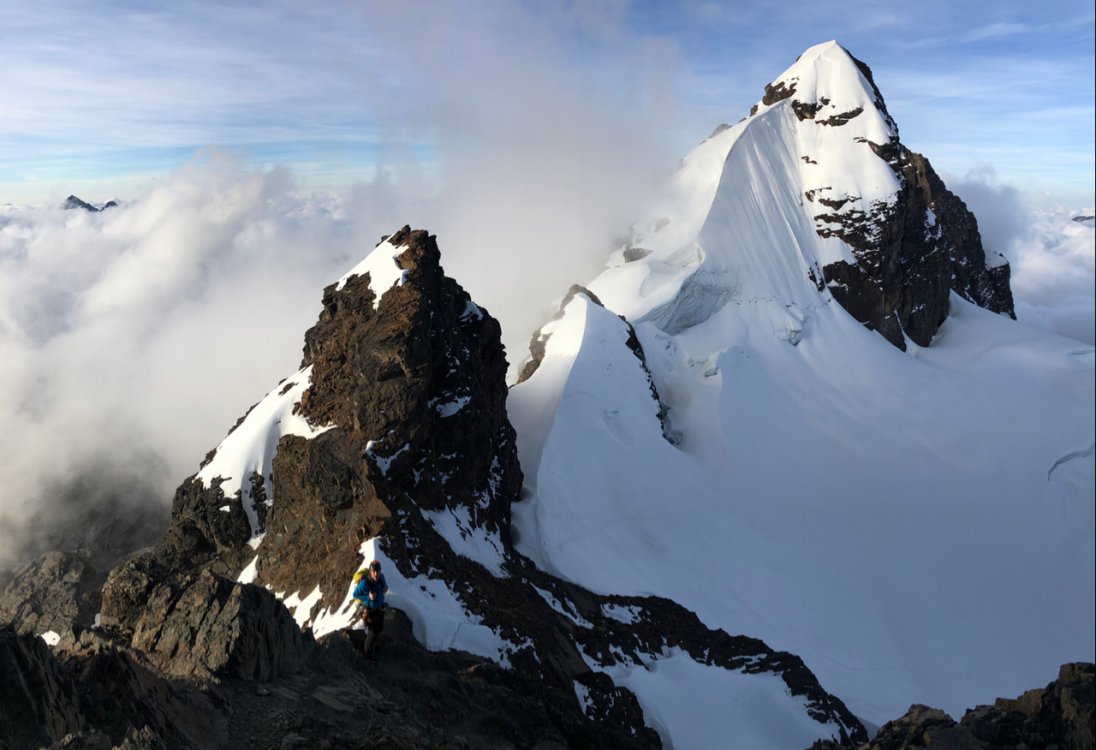
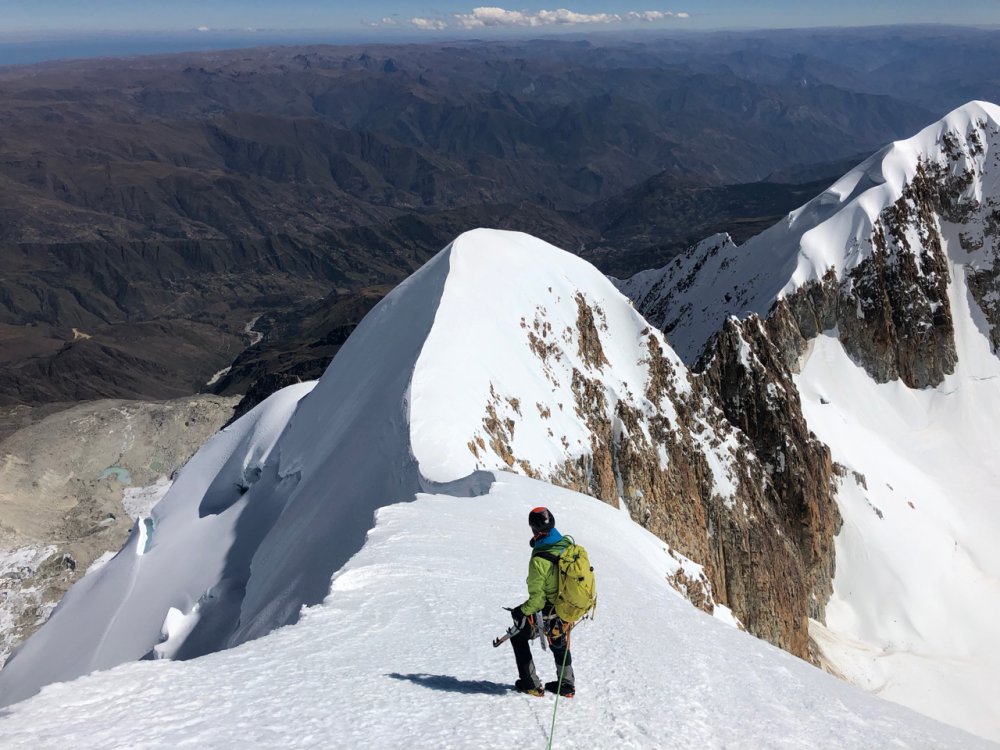
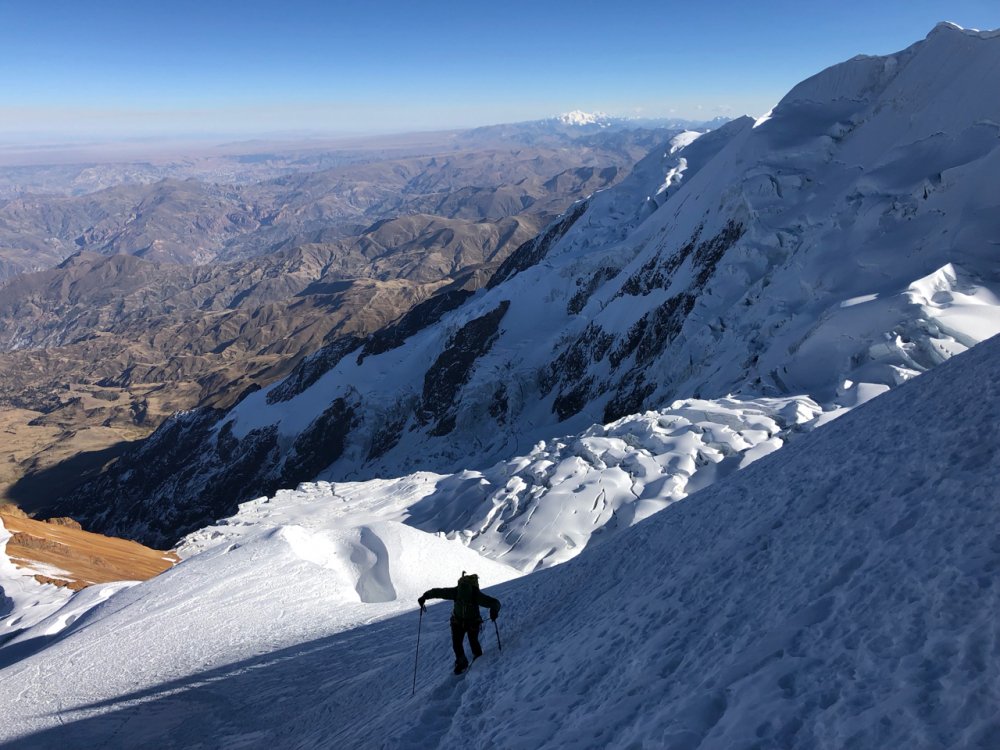
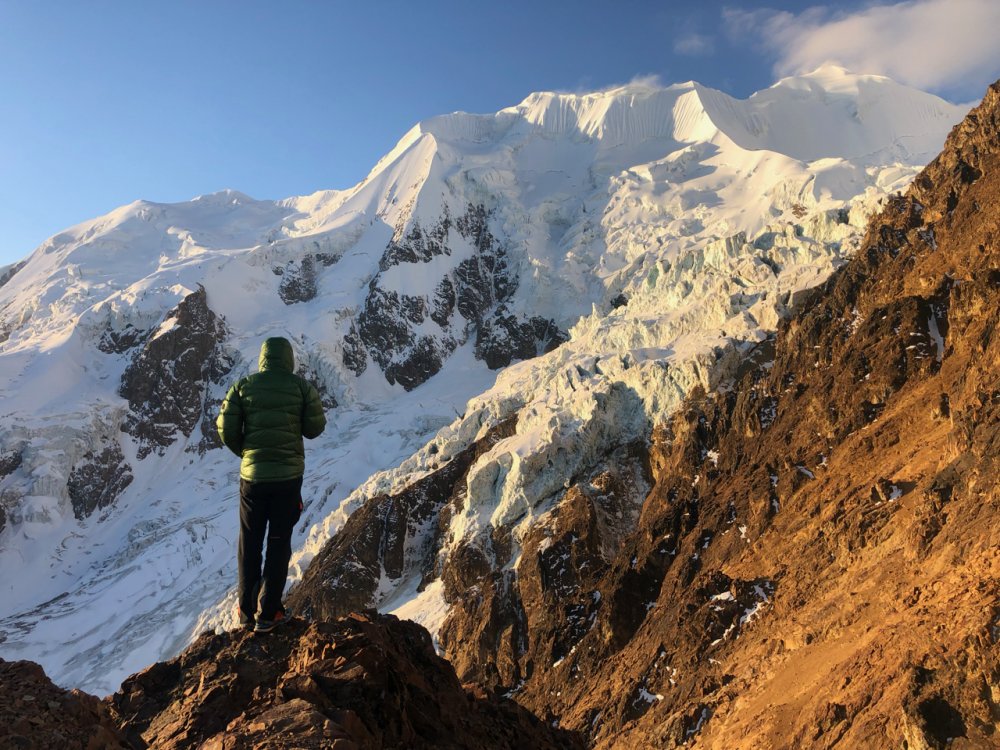
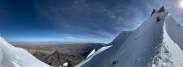
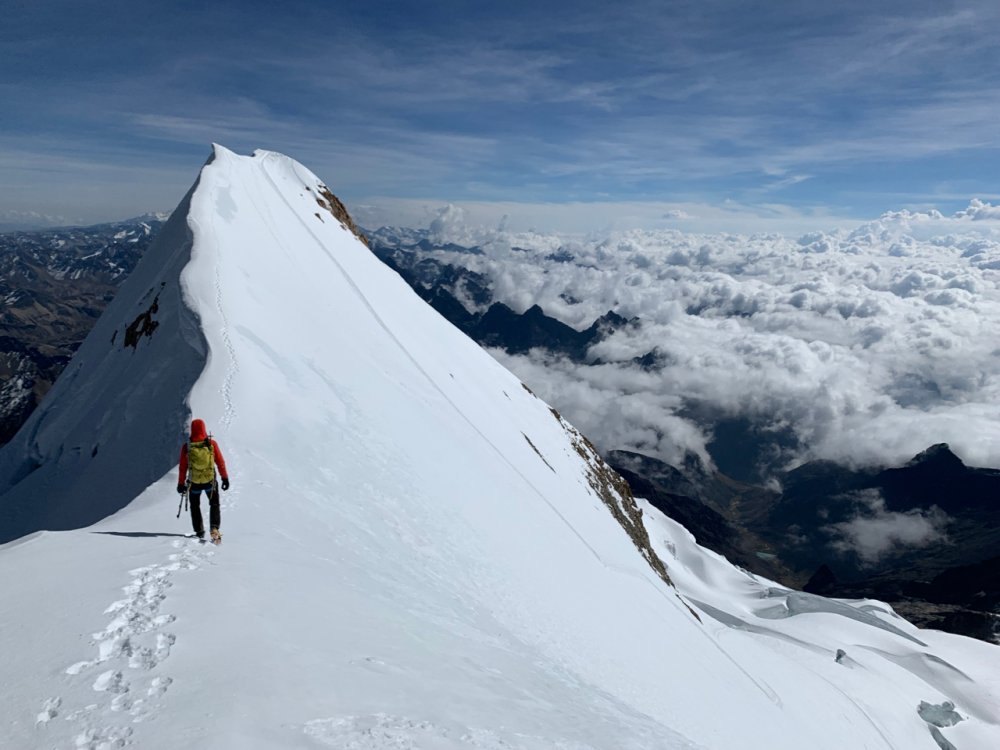
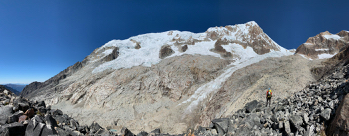
Trip: Bolivia - Cordillera Real - Pequeño Alpamayo, Cabeza de Condor, Huayna Potosí, Illampu, and Illimani Trip Date: 05/26/2019 Trip Report: I just returned from a 3-week climbing trip to Bolvia and figured some folks here would be interested in hearing about the climbing down there. We stayed mostly healthy, had perfect weather and conditions, and the logistics went smoothly, which made it possible to pack in a lot of climbs: May 26 - Arrive in La Paz May 28 - Pequeño Alpamayo (17,618') - West-Southwest Ridge (III, AD) May 30 - Cabeza de Condor (18,530') - Southwest Ridge (III, AD+) June 2 - Huayna Potosí (19,974') - French Direct Route (III, AD+) June 6 - Illampu (20,892') - Northwest Headwall to Southwest Ridge (III, AD/AD+) June 12 - Illimani (21,125') - West Spur / Normal Route (II, PD) June 15 - Depart La Paz My partner and I had previously done similar trips together to Patagonia and Peru, so we felt comfortable designing our own itinerary and climbing alone without guides. I'd recommend this for experienced climbers who appreciate a "faster and lighter" mentality (and only if you have at least one person who can speak enough Spanish to get by). We bought Yossi Brain's 1999 Bolivia Climbing Guide and found enough beta online as well. We did a healthy amount of Google Earth scanning to identify camps and approach trails too. In my trip reports linked above, I've included Strava links with our GPS tracks to save others some trouble (just ignore if you want more suspense : ). In terms of logistics, we flew into La Paz, which is crazy city of nearly a million people in a valley with another million or so on the sprawling altiplano called El Alto. The city is an interesting experience in contrasts, with everything from folks living in dirt-floored huts to a shiny cable car system. La Paz is about 12,000' depending on where you stay and El Alto is about 14,000'. We opted to rent an Airbnb in La Paz for the whole trip as a basecamp (at ~$30/night, this was pretty economical). We started in La Paz for 3 days / 2 nights to acclimate before our first objective, which we deliberately chose to be one of the shorter peaks (Pequeño Alpamayo at 17,618'). This worked well for us. We slowly ratcheted up the elevation over the course of the trip and never felt worse than headaches and throwing up breakfast once. You can hop into the links above to hear more about our experiences and the routes. I've put a few pictures in here to whet your appetite! - Jeff Gear Notes: We brought 5 pickets, 8 ice screws, some nuts, and some pins, just in case. We ended up placing pickets only once or twice on the trip and simul-climbed or simul-soloed almost all of the terrain. Approach Notes: See each trip report for some details on how we got there and a GPS track.


-
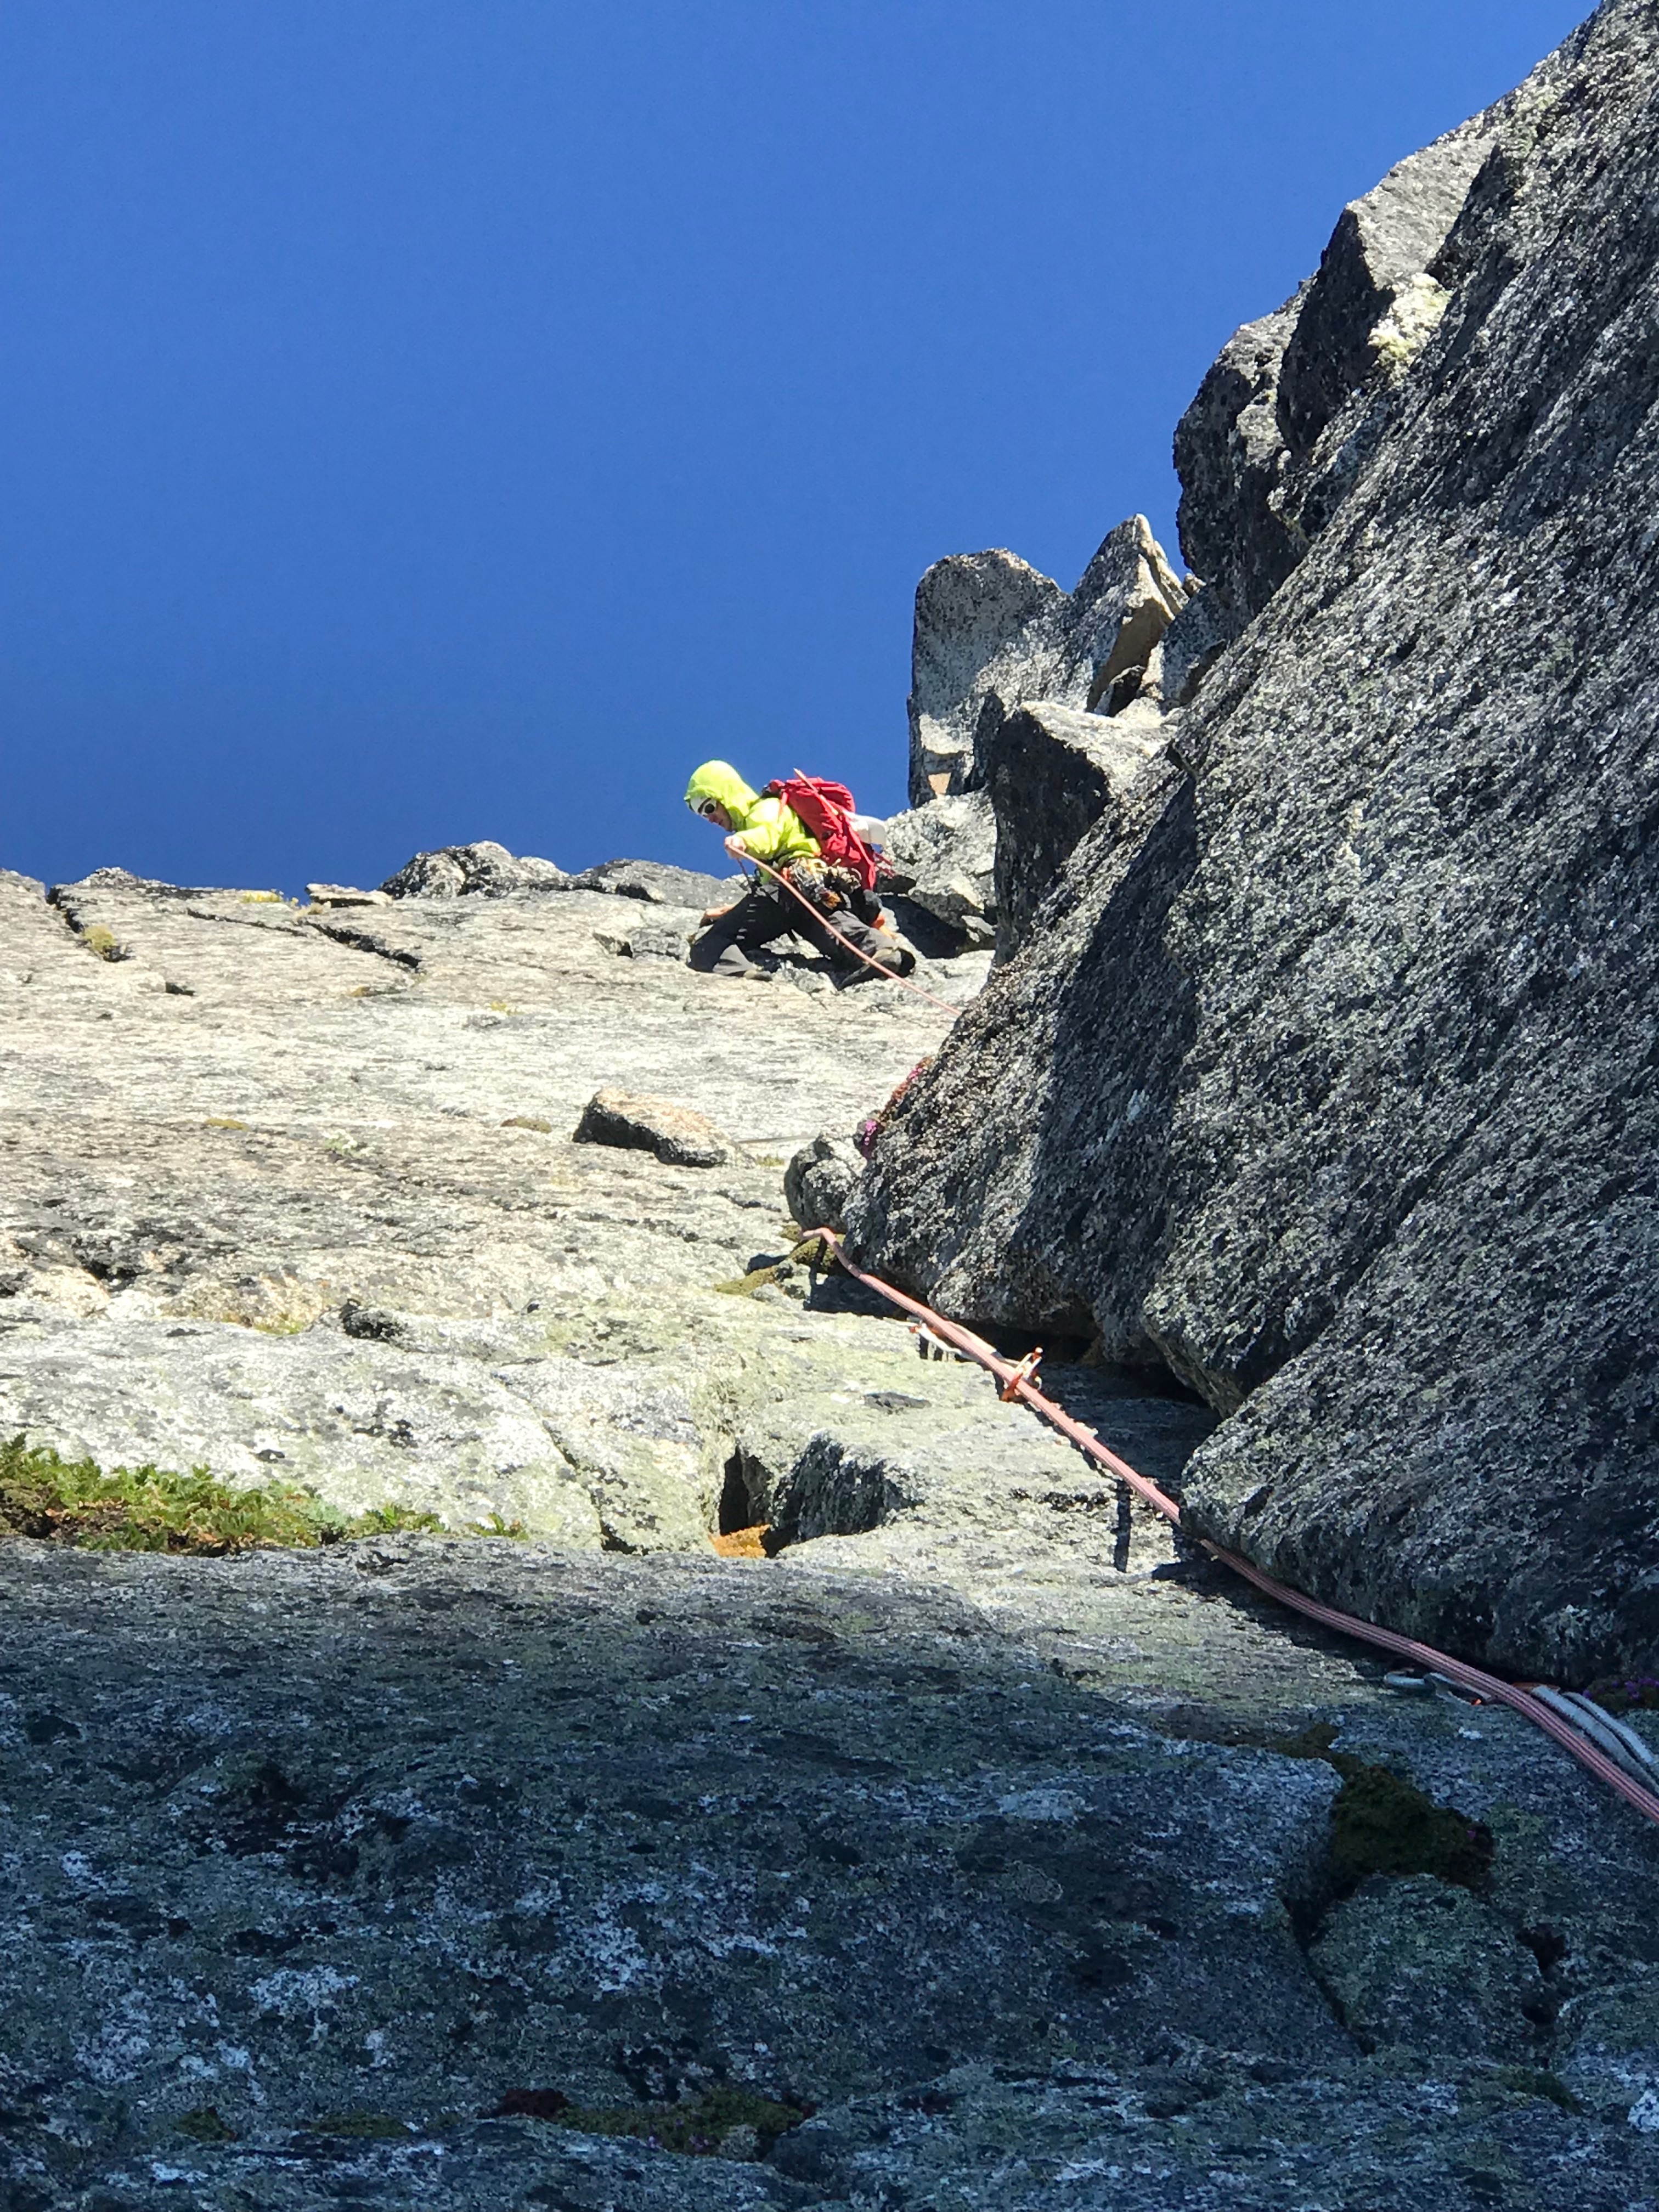
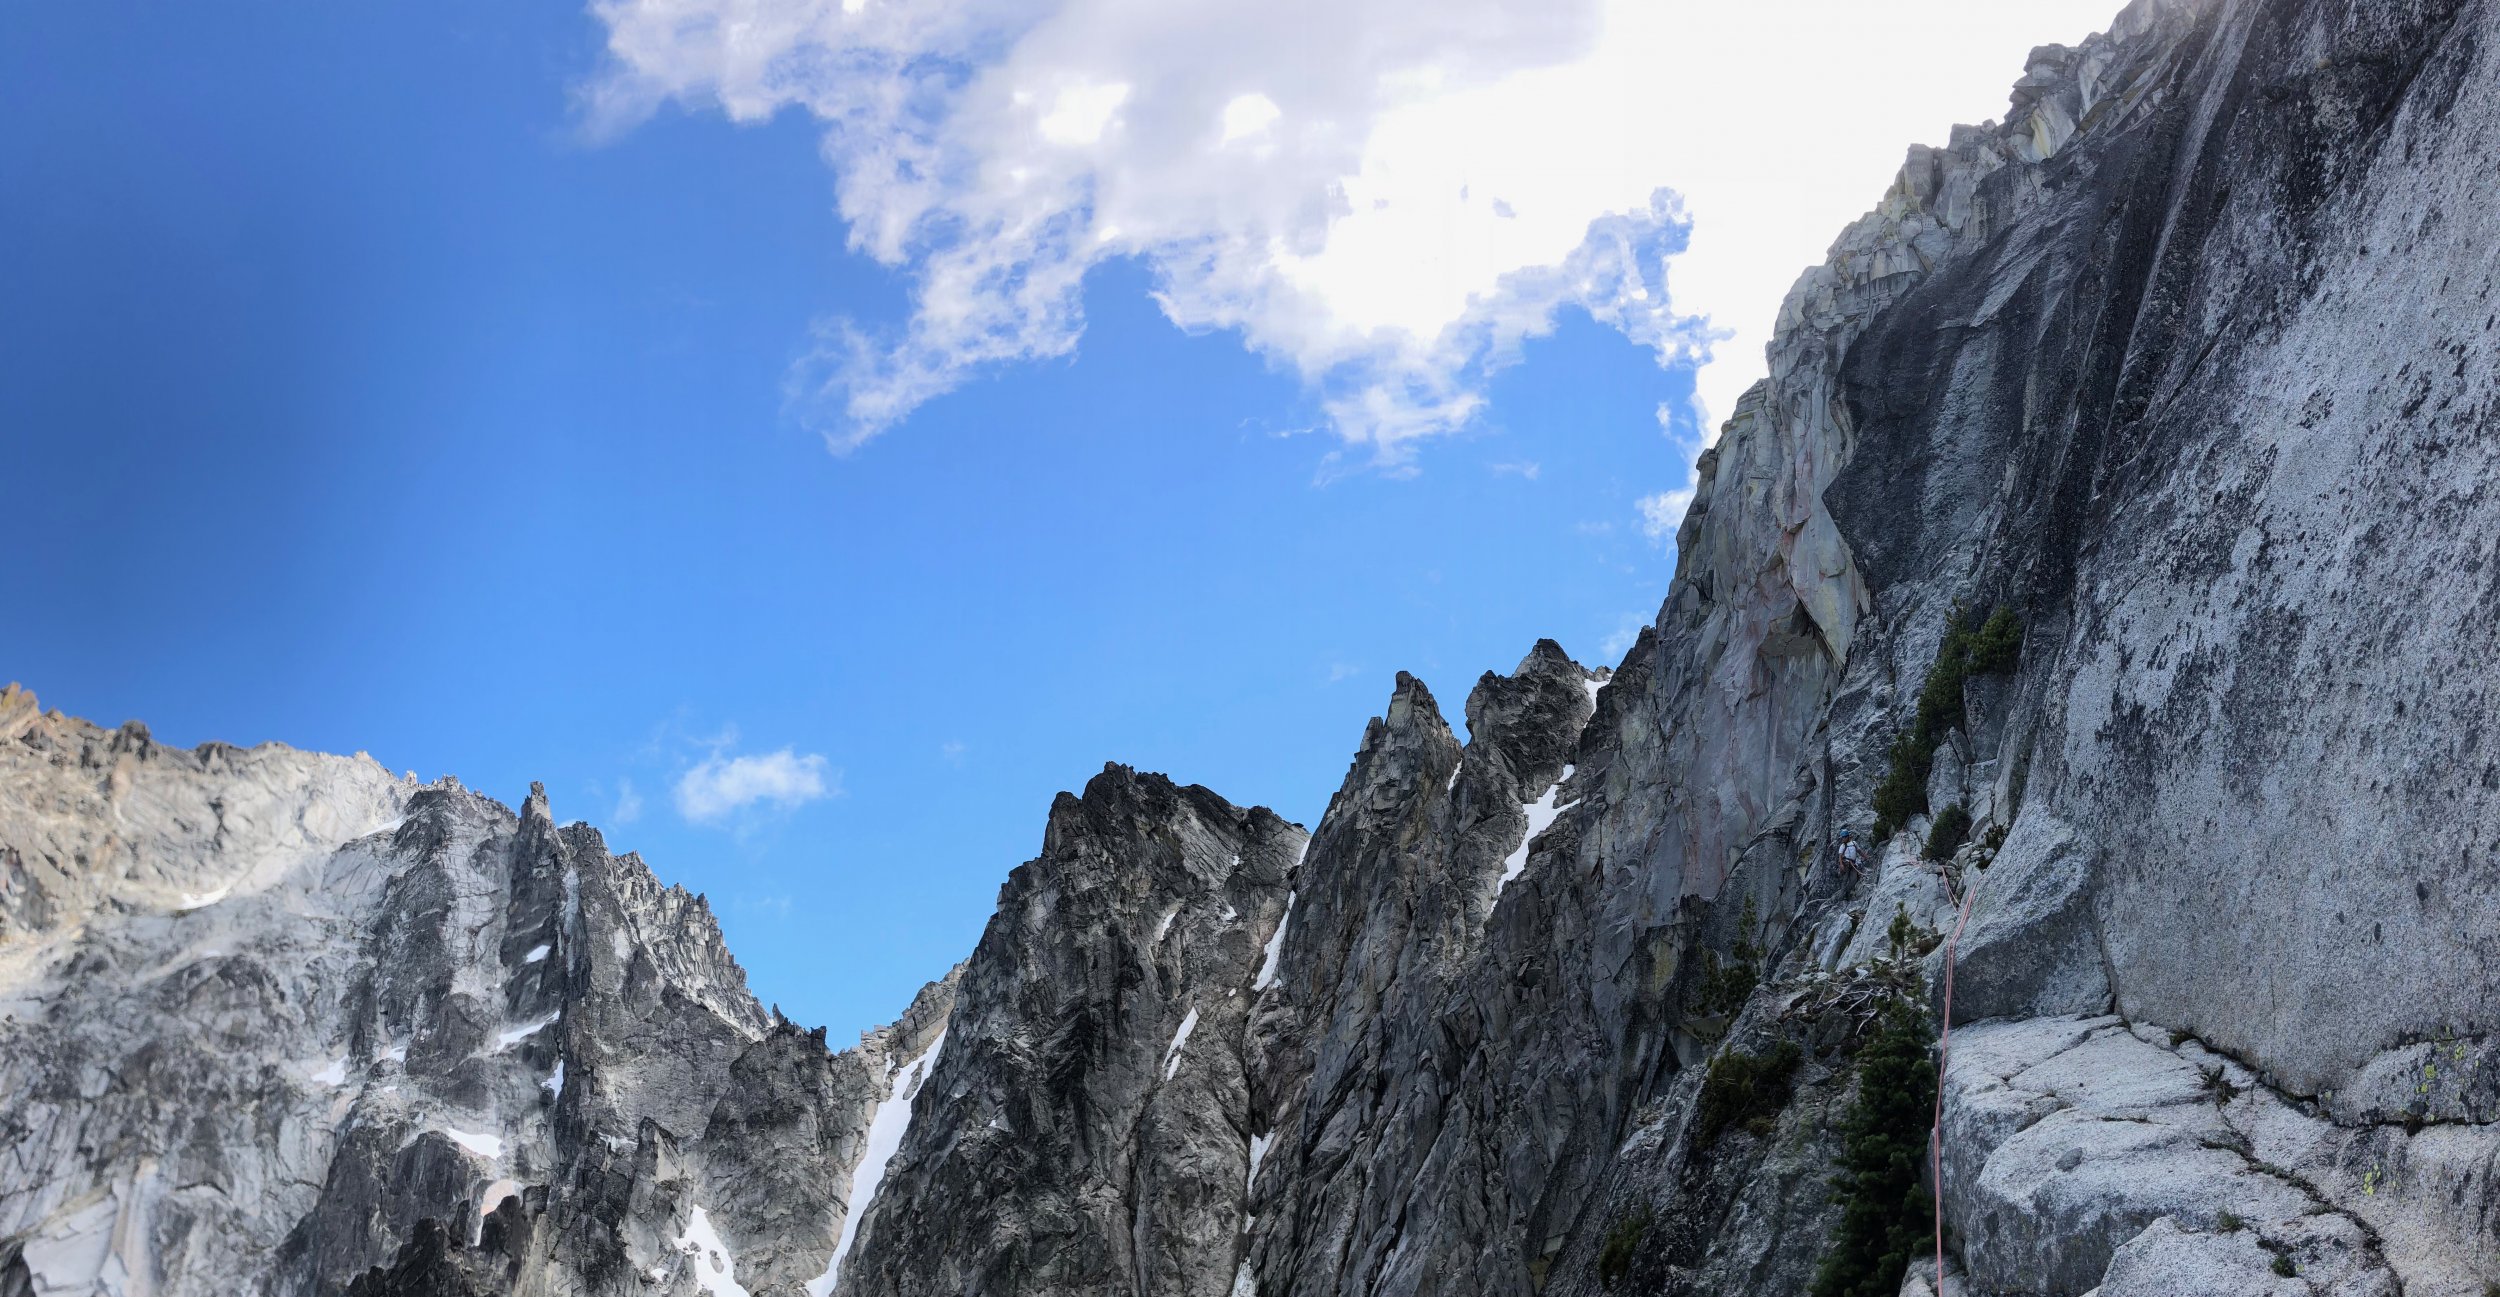
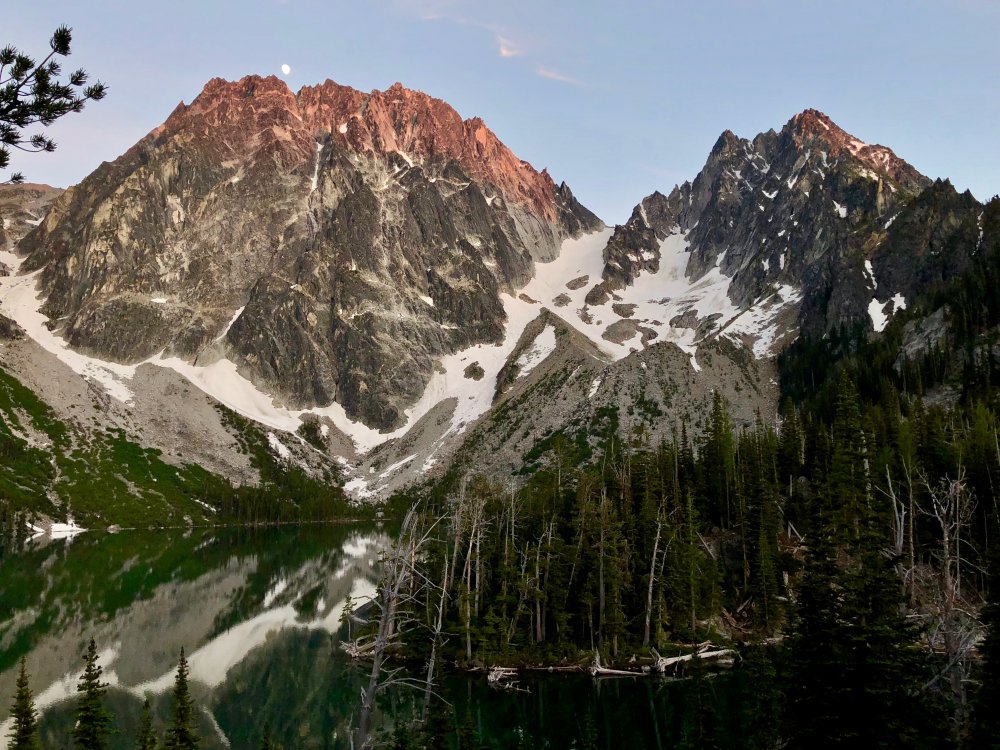
Trip: Colchuck Peak - NE Buttress (Kearney) Trip Date: 06/23/2018 Trip Report: A few years ago when I got Alan Kearney's Classic Climbs of the Northwest guidebook, I was a bit surprised to see an unfamiliar route on a familiar peak—the Northeast Buttress on Colchuck Peak made Kearney's short list of 51 routes, so it had to be good but I hadn't heard much about it. A bit of searching on Cascade Climbers yielded a mixed bag, especially when considering the original Beckey line. In either case, the route went onto my list. Adam and I had talked about climbing together many times before, but it hadn't yet come together. He reached out early this week and we hatched a plan to car-to-car the NE Buttress (Kearney version) on Saturday. We drove out to the Stuart Lake Trailhead late on Friday night and got a little sleep there with alarms set for 5am—we were guessing that we could do the route in about 14 hours, but also knew we had a lot of daylight in case things weren't so fast. We started the approach just before 6am and went pretty fast. 2 hours in, we were on the far side of the lake on our way up the moraine. A little shy of 3.5 hours at 9:15am had us at the base of the ridge after enjoying continuous snow from the moraine up. We each had strap-on crampons on our approach shoes and light axes. The approach After consulting the beta a little, we located the first pitch of Kearney's start and racked up below it at the toe of the buttress. We'd brought rock shoes and a rack to 3 with doubles of .5 through 2. Adam took the first pitch at 10am and had a great time on the wide, broken crack on solid rock after traversing around some snow on sandy terrain to get there. I then did a very short pitch to the top of the crest. From there, it looked like the line might go lower later in the season, but the couloir snow convinced me to stay on a ramp system just a bit higher. After down-climbing a little from the crest, I traversed over and made a fun, steep move to get onto more solid granite which I ran right, then up a seam, and then back left to a ledge for the belay. Pitch 1 and Pitch 3 Pitch 4 turned out to be a bit of a low point. Adam set off and quickly encountered some moss and dirt on his traverse to the main dihedral. Sections of the pitch were really fun while others had a bit too much dirt and loose gravel. We knew we were on the right track, though, due to a couple of fixed pins we passed along the way. It took quite a while for Adam to find the way and stay safe on this pitch and it was 1:30pm before both of us were on top. The ledges We switched to approach shoes and doubled our rope in half for the ledge systems. I headed across and found that the rock quality and number of trees in the way reduced after the first pitch or so. It was actually pretty fun to move fast and link 3-4 pitches in one block. On a nice ledge before the route turned up the wall, we put our rock shoes back on and tied into each end of the rope. Adam did a quick bump of our belay to the base of the crux pitch and then set off. With our 70m rope and about 15 feet of me simul-climbing at the end, he was able to reach the ridge crest, linking pitches 9 and 10. I followed the pitch and had a great time—the rock was solid and the movement was varied and interesting. It meandered left before traversing back right and then into a left-facing corner all the way to the ridge. We were both on top of the crest at 4:30pm. Looking down the crux pitches, the buttress crest, and the final pitch Back in approach shoes, I linked pitches 11 and 12, getting us up the buttress crest and onto some ledges below the headwall. Views back to the belay on the ridge crest and Colchuck Lake were stellar. Adam bumped us up to the headwall and, after a few minutes of searching, we found a rightward traverse under big blocks for 80 feet or so on ledges to the North-facing dihedral that would bring us to the top. I took this pitch, having a ton of fun in the early evening sun and finding edges and gear anywhere I wanted them. I ran out of rope and gear just below the top and Adam headed through and brought me up. One loose block that had seemed solid when I banged on it with my hand decided to go as I mantled to the top and I had to jump out of the way, spraining my ankle a little trying to land on a foothold—thankfully the rock sailed right by me. We topped out a little after 7pm for about 9 hours on the route—a bit longer than we'd expected, but we hadn't been rushing and instead had been feeling pretty casual throughout. We started down by 7:30pm on dirt and rock to the col and then continuous snow down the glacier (skier's right fork) until a few hundred feet from the trail. It was 8:45pm when we got to the corner of the lake at the end of the boulder field. We only stopped once on the way out to numb ourselves a bit with bourbon and take in the sunset hitting Dragontail and Colchuck. We were at the car a little after 10:30pm for a little less than 17 hours on the day. While there were a few moments on the route where dirt, moss, lichen, and loose rock detracted, so much of the route was good climbing on good rock with a great position and view. We agreed that it was more interesting and sustained than the Serpentine Arete on Dragontail (which did not make the Kearney guide...). This TR on my site: https://www.jeffreyjhebert.com/adventures/ne-buttress-on-colchuck-peak Gear Notes: Single rack to 3 with doubles .5 to 2 worked well for us to do link pitches and simul-climb Approach Notes: Approach shoes, strap-on crampons, and light axes were fine


-
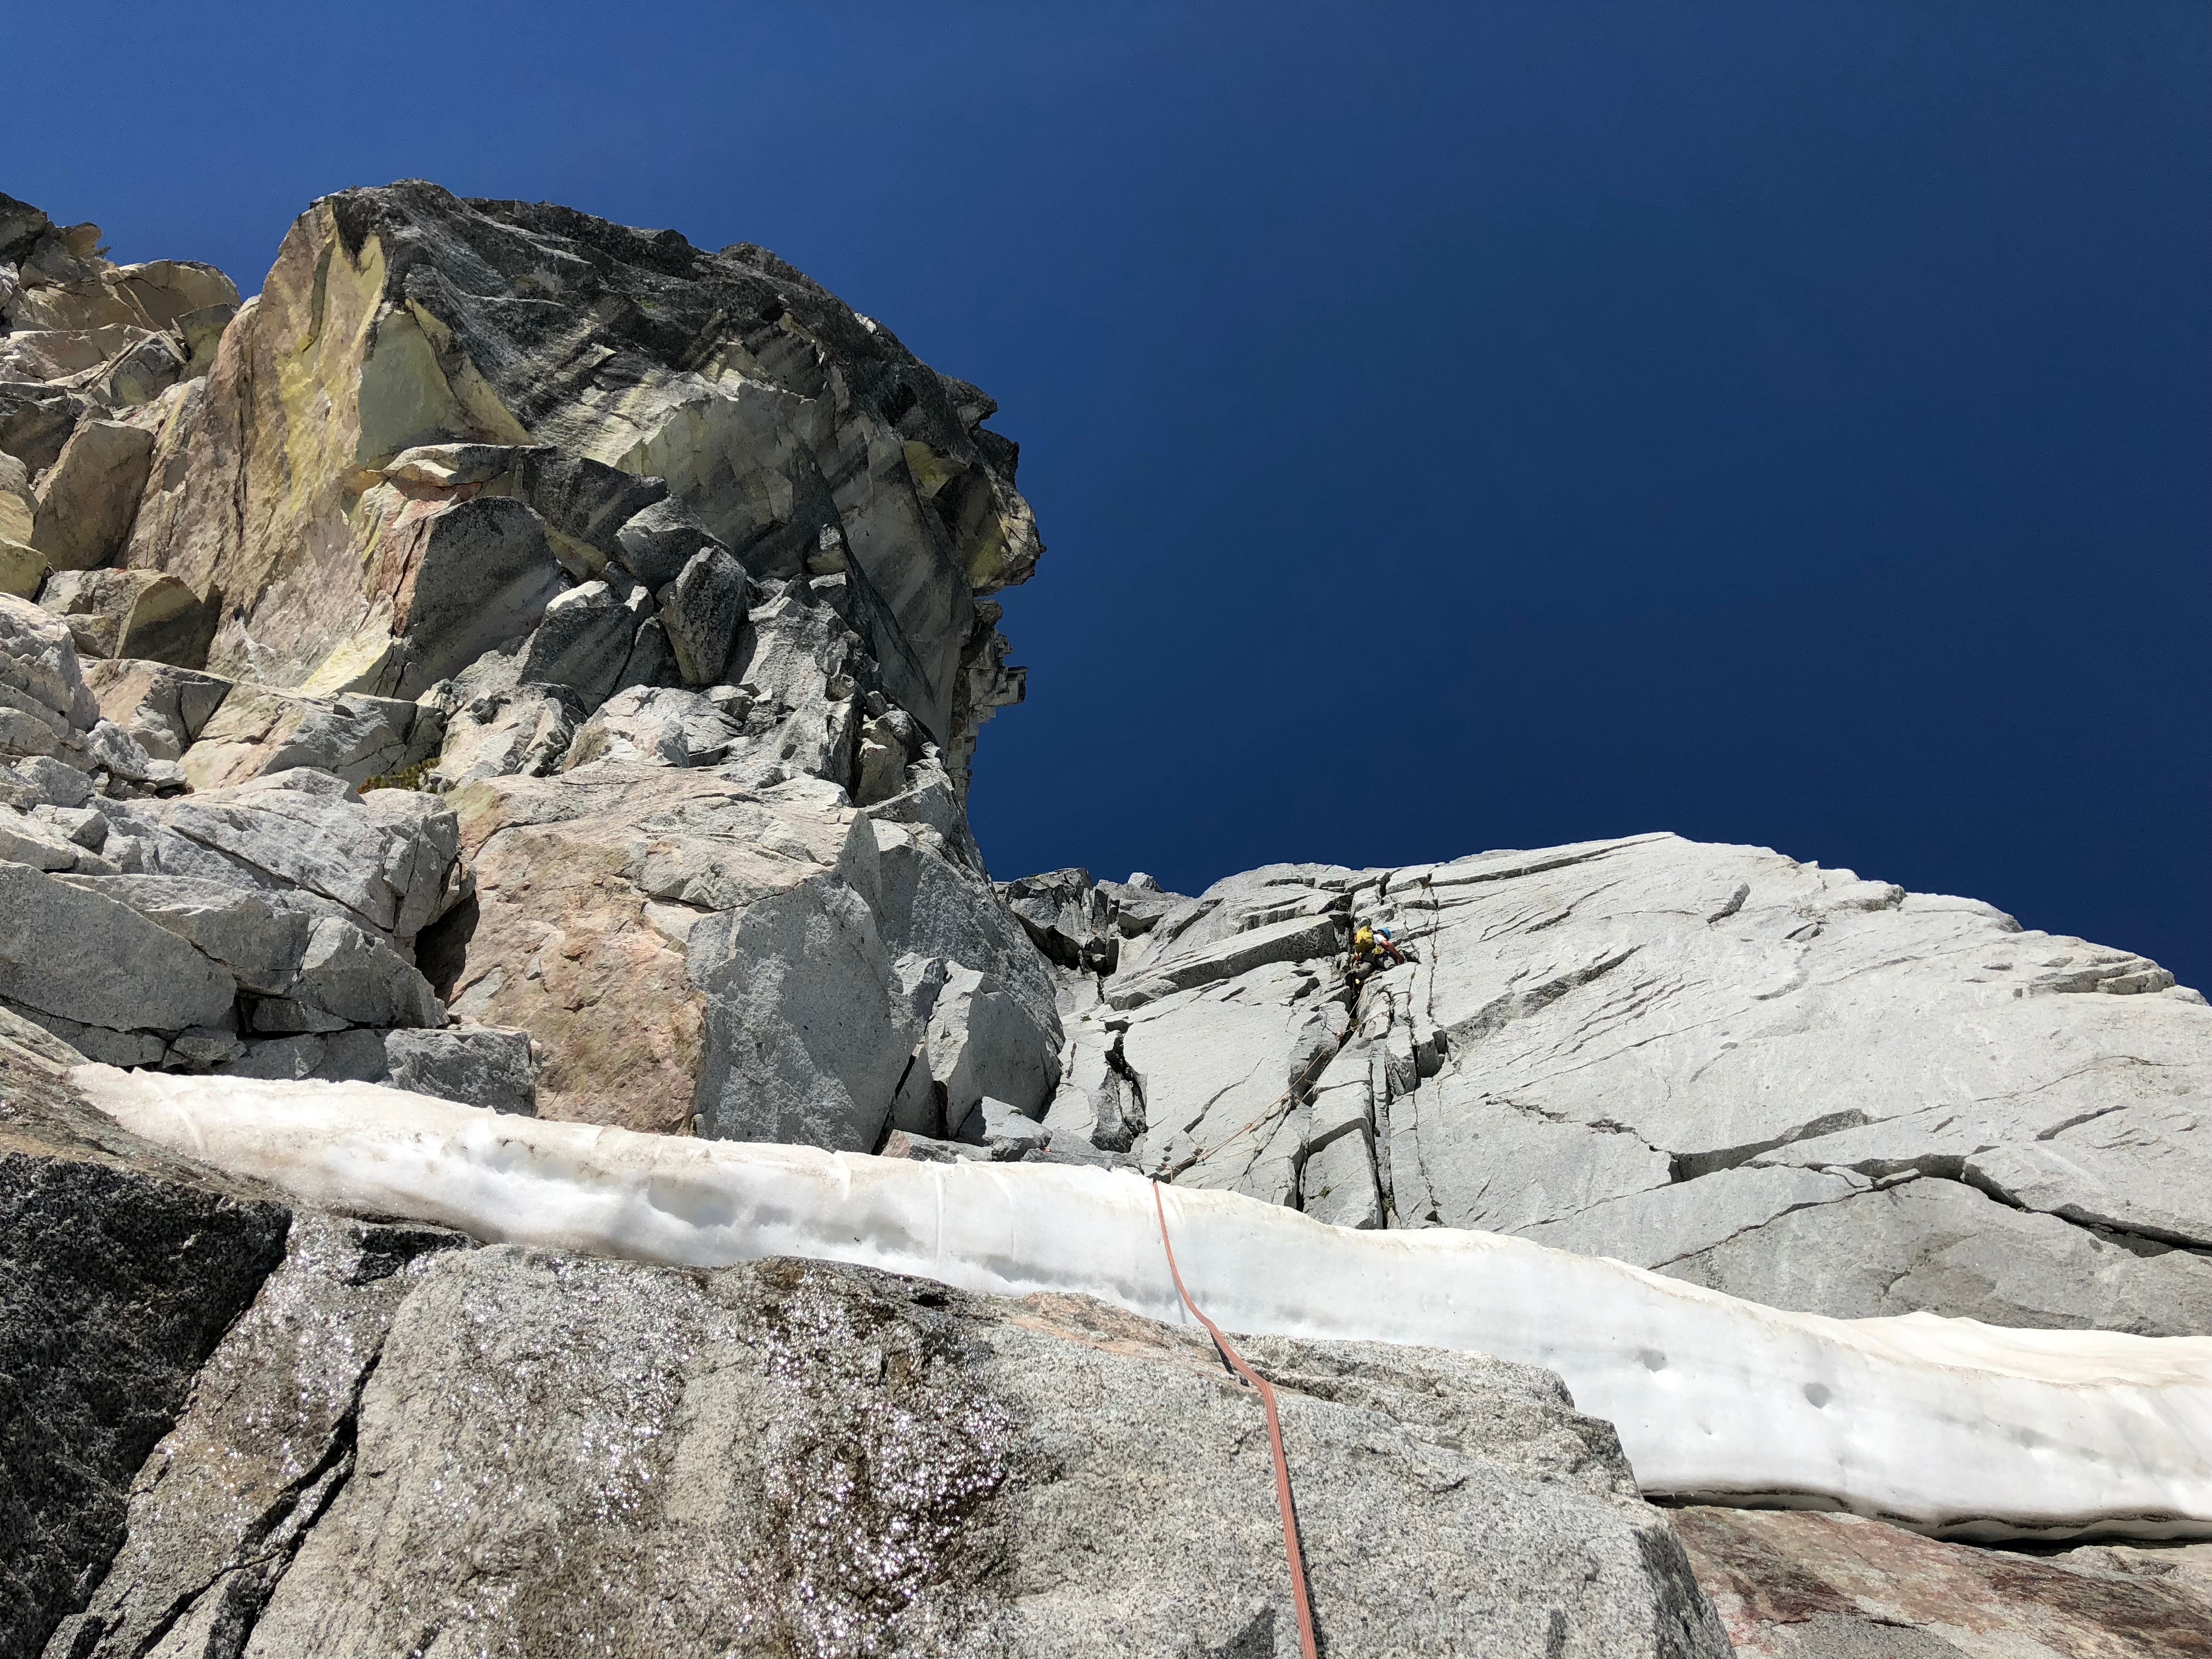
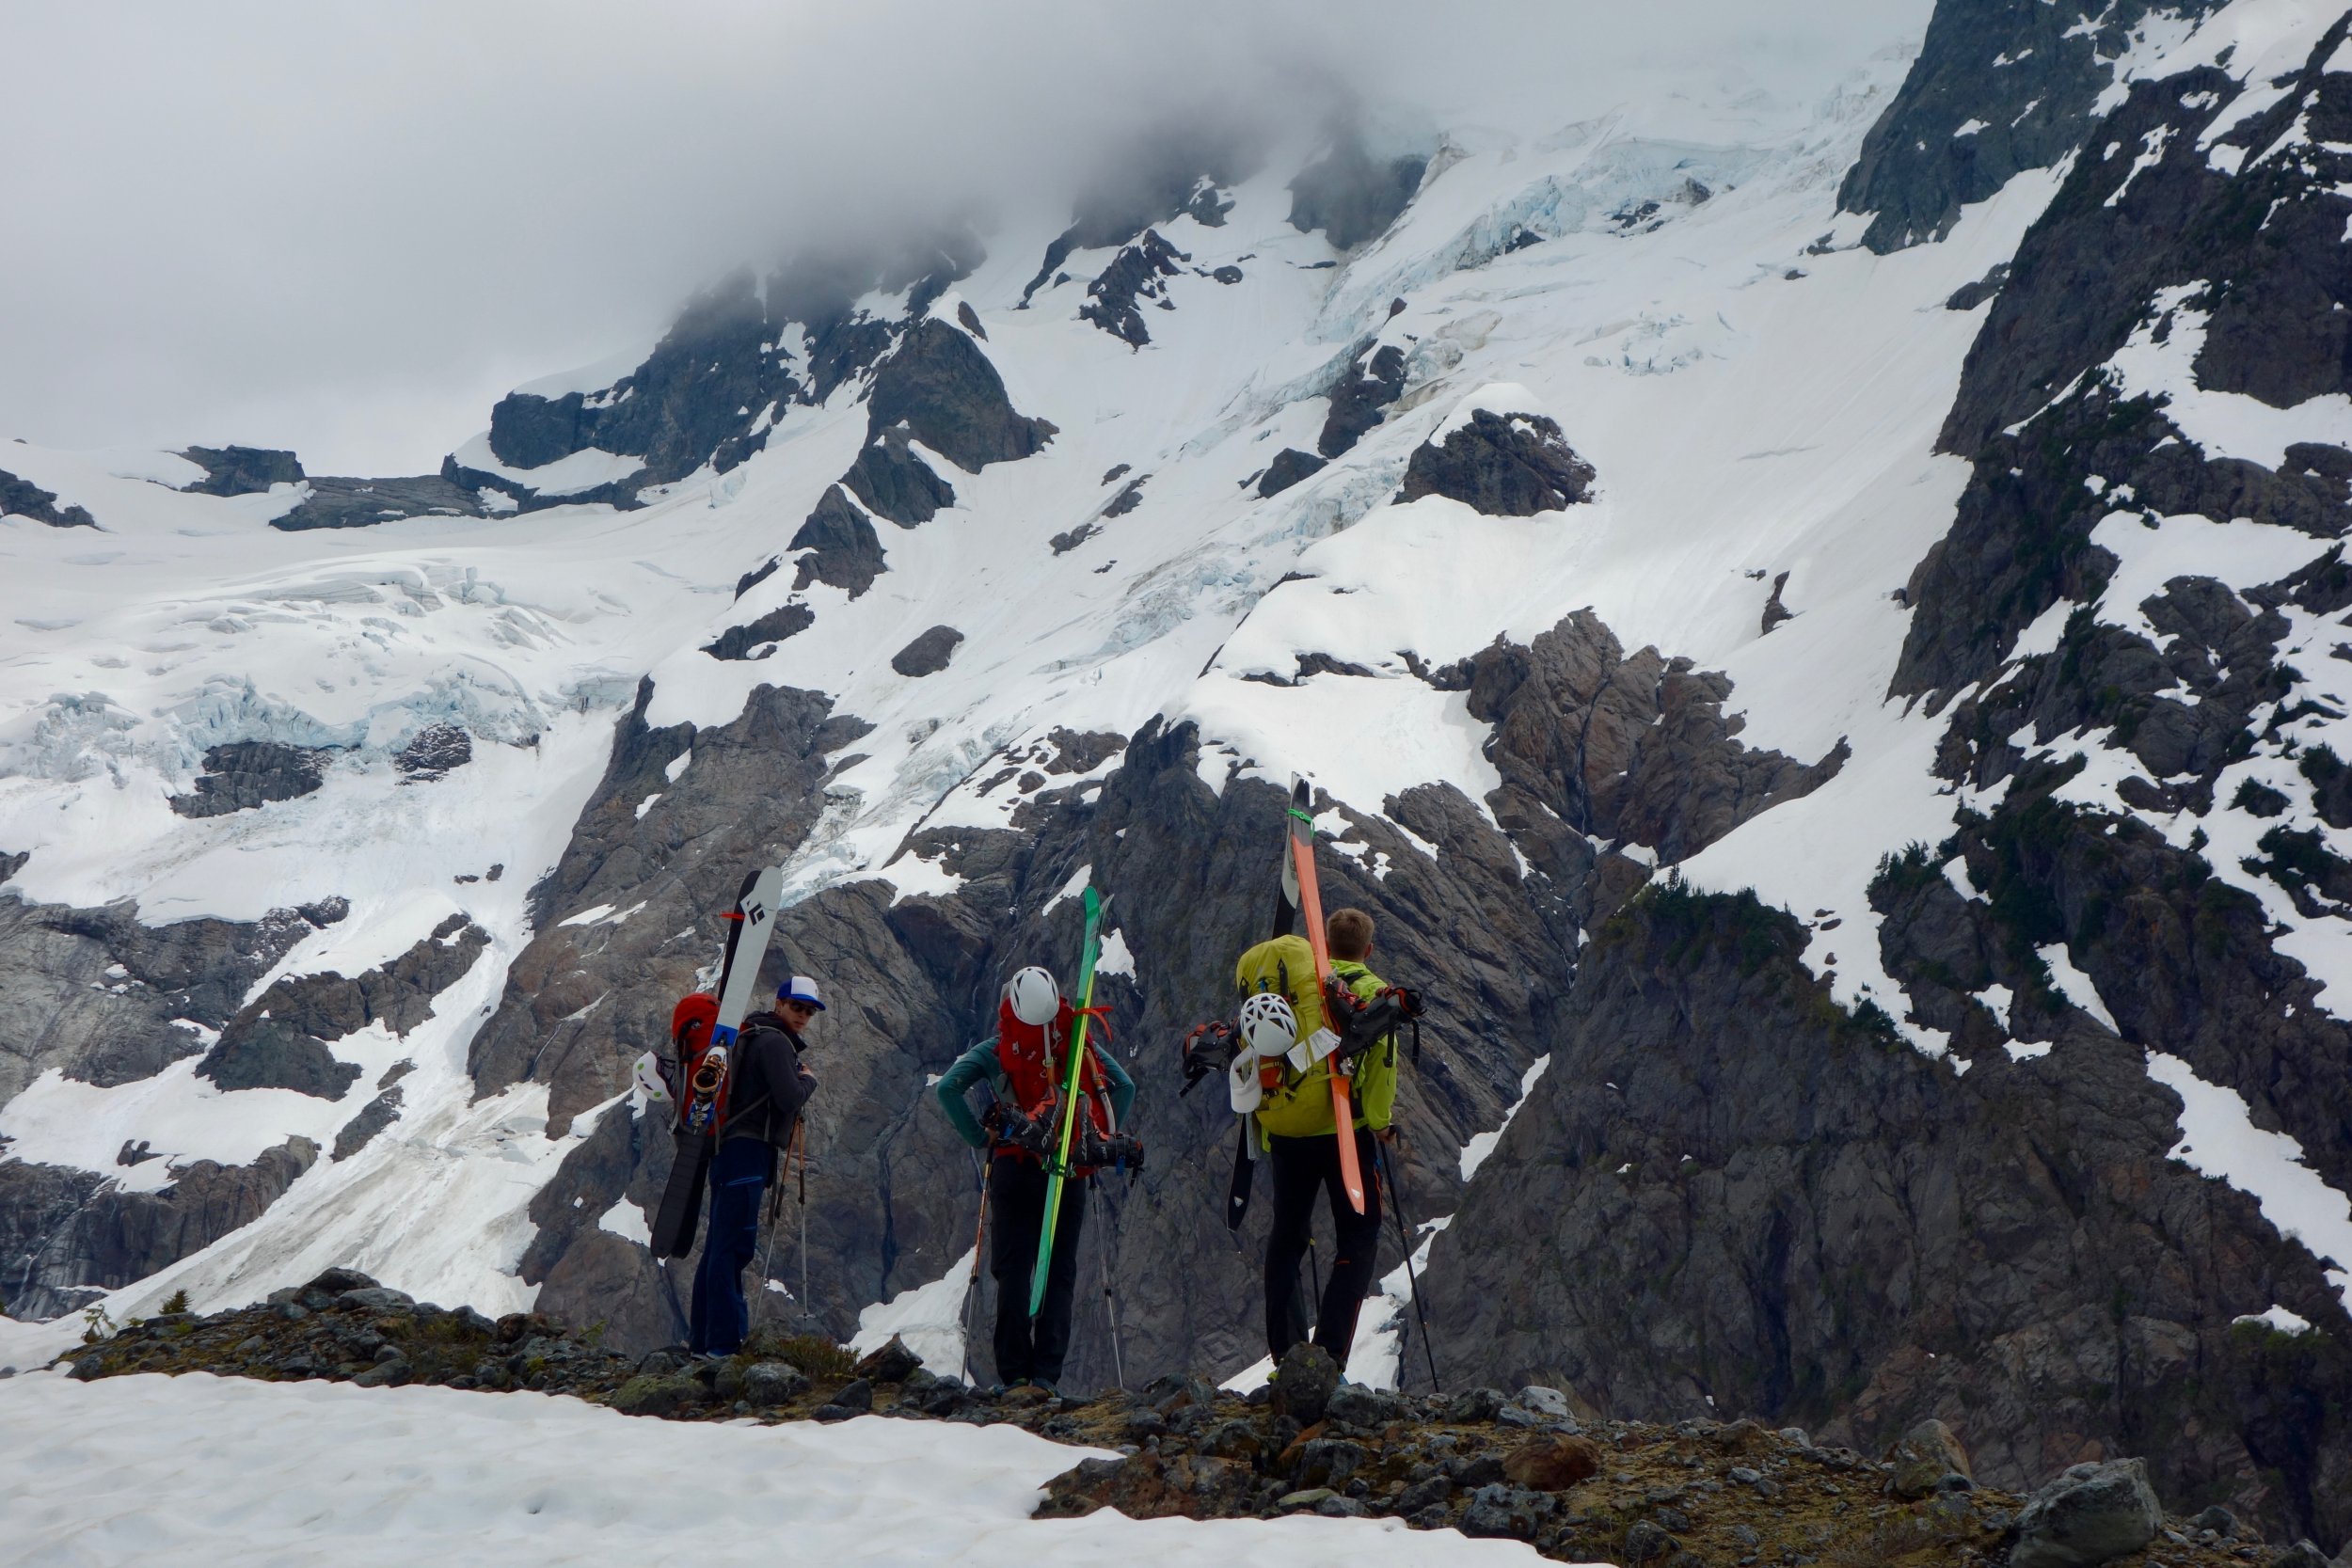
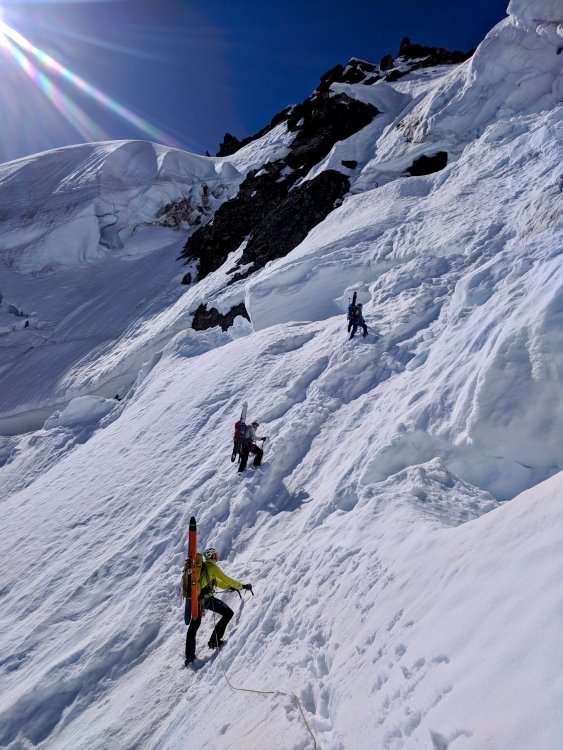
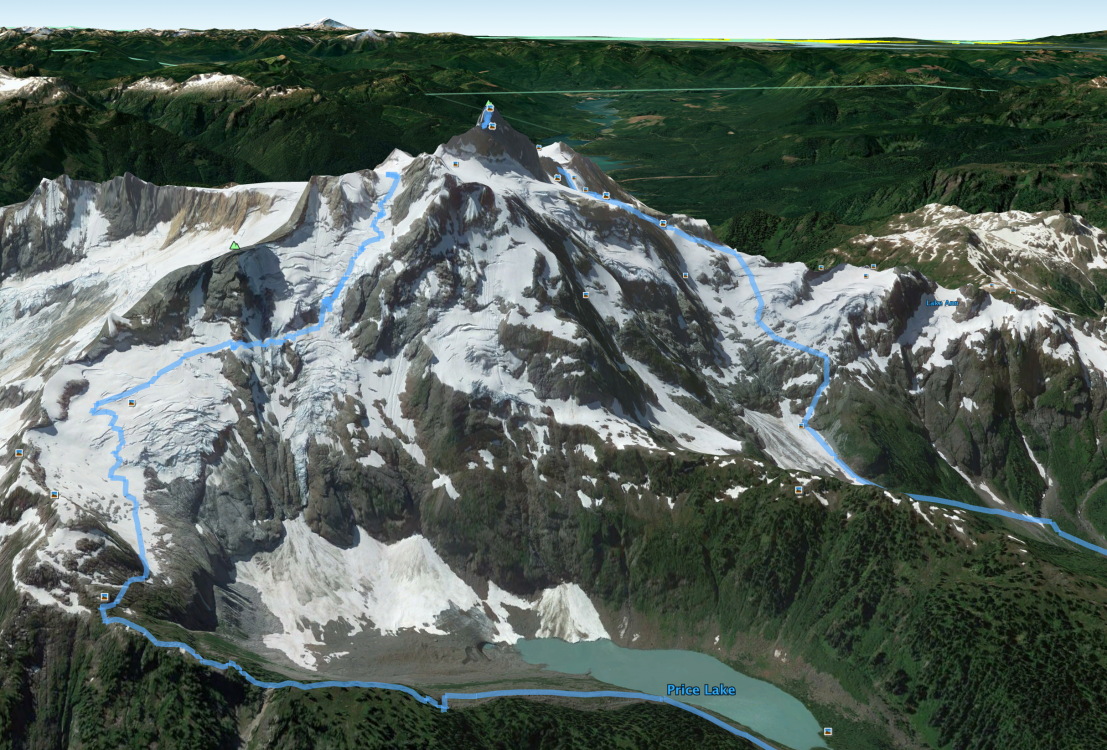
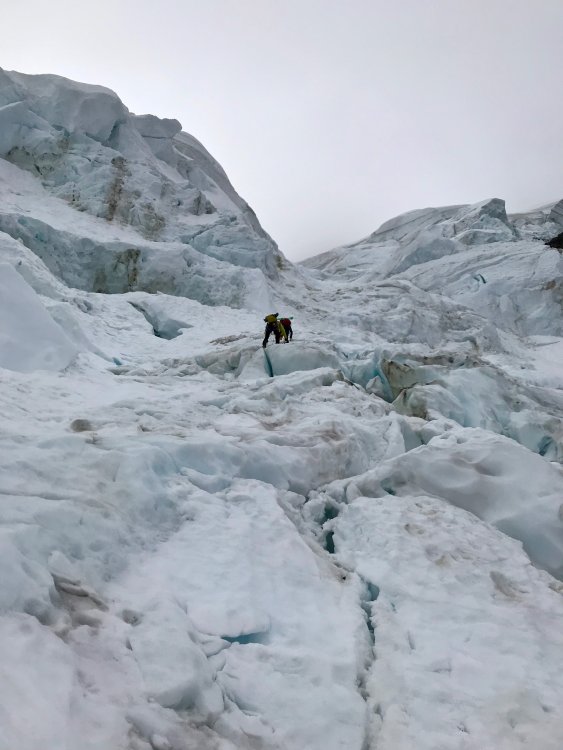
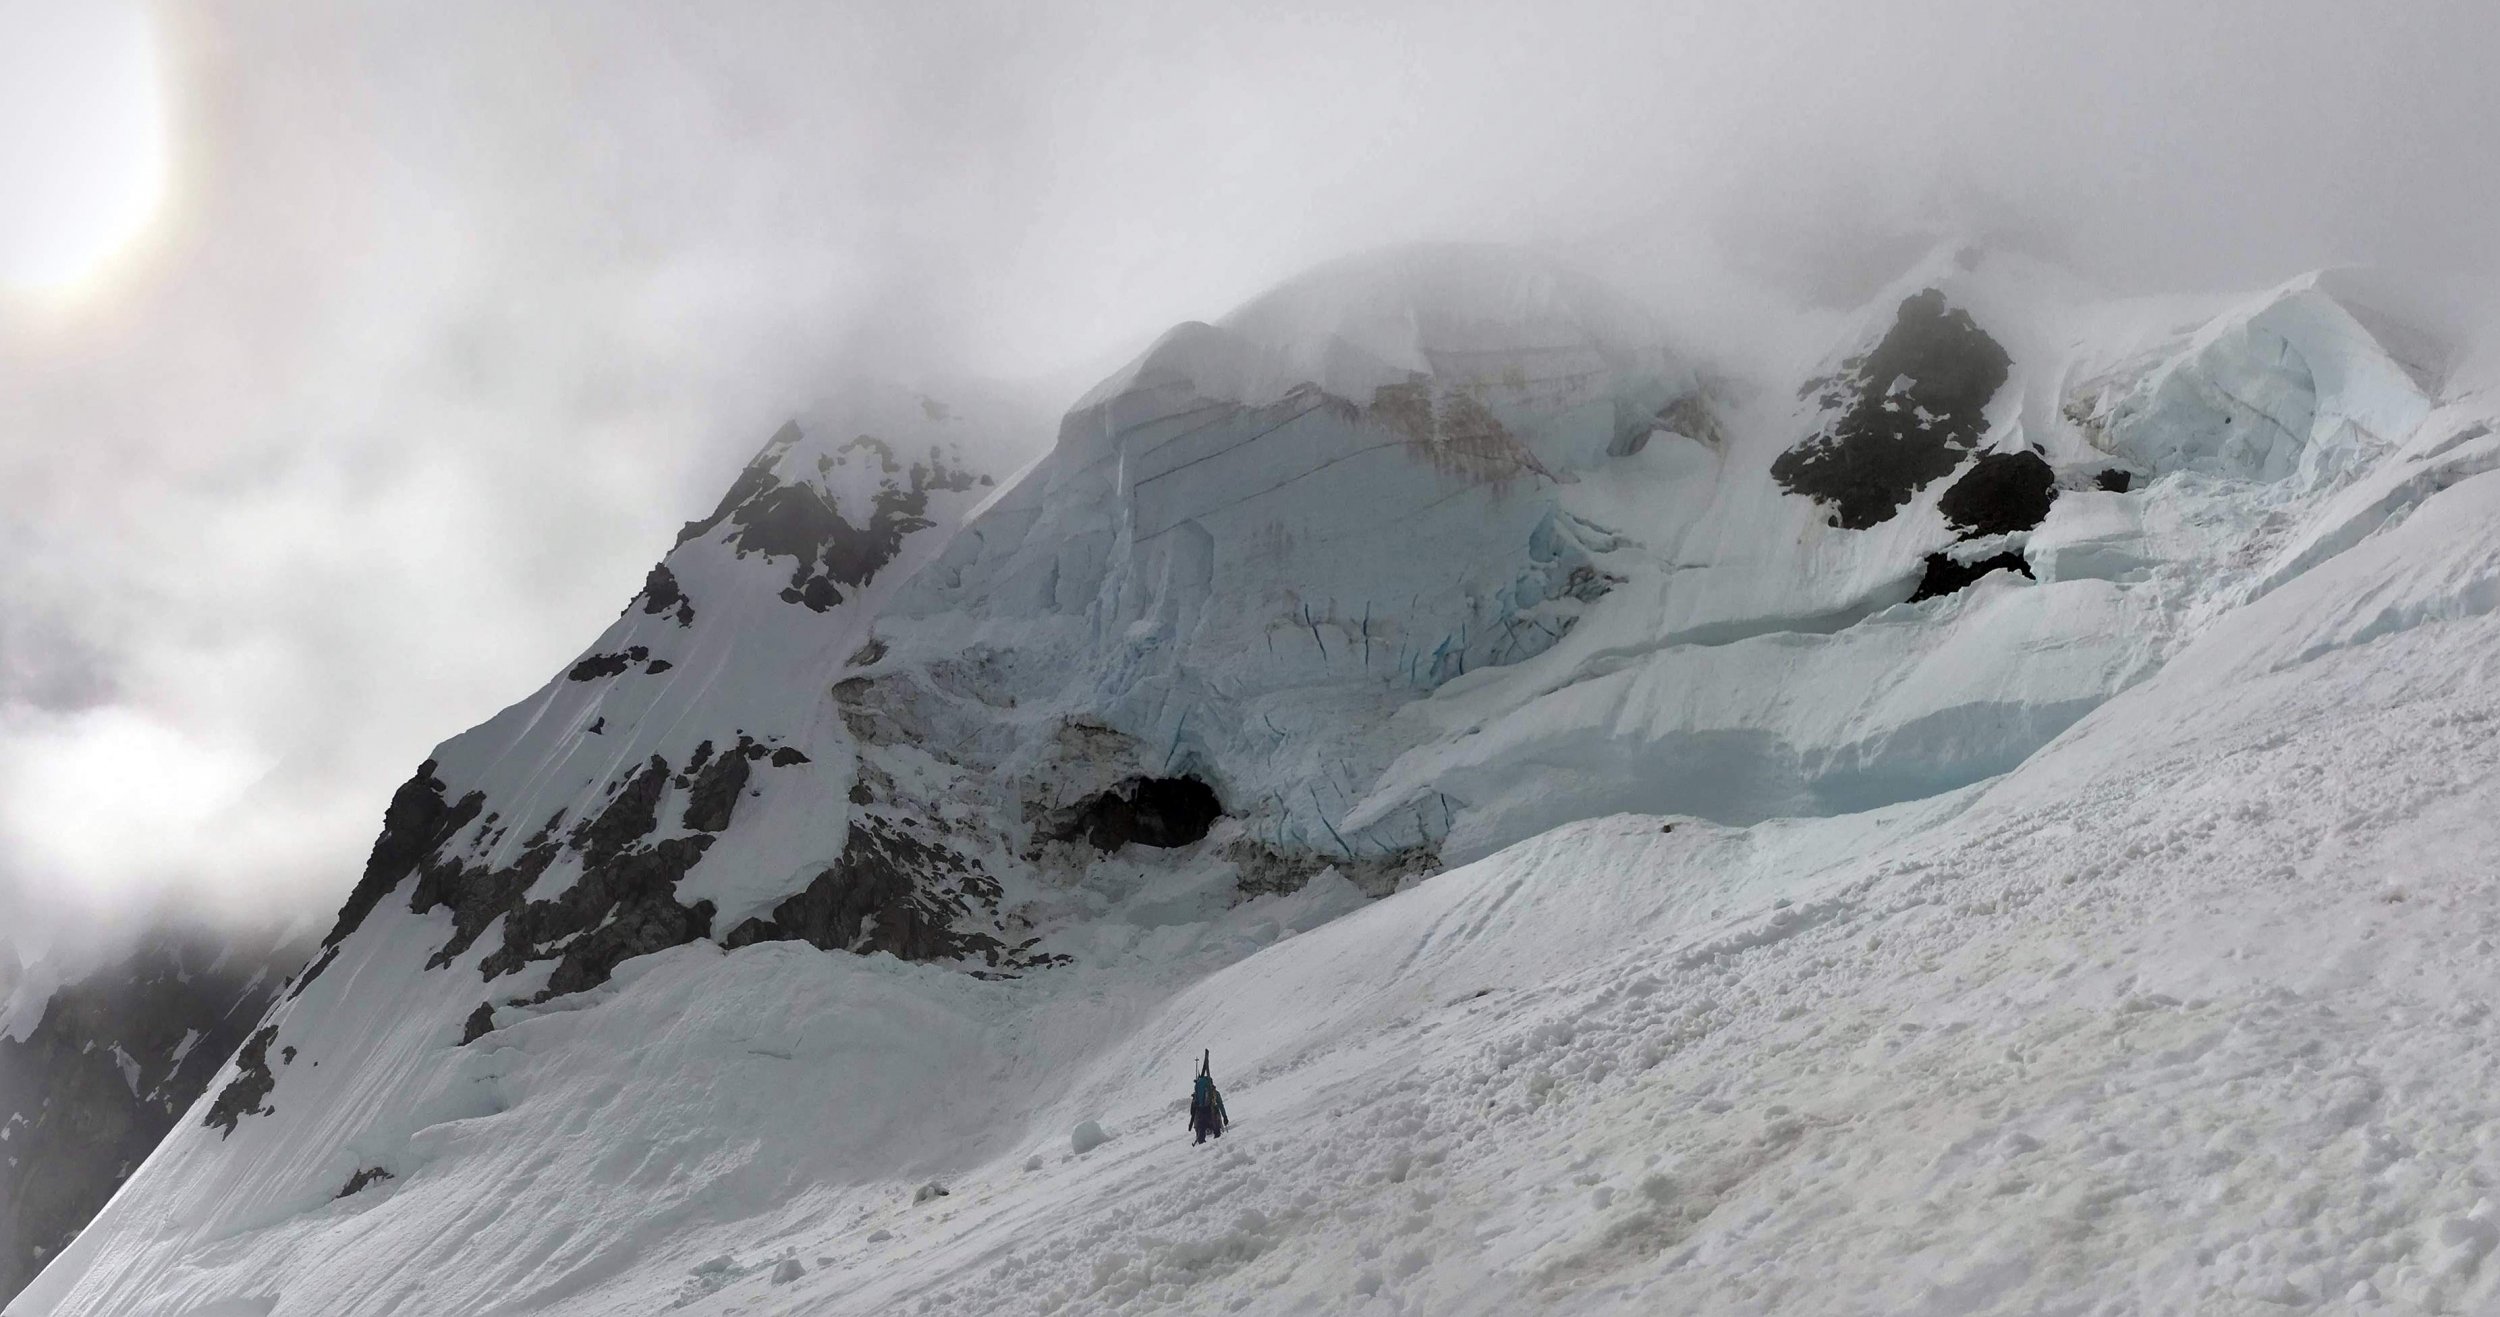
Trip: Mount Shuksan - Price Glacier Trip Date: 05/27/2018 Trip Report: A little more content is up on my site here: https://www.jeffreyjhebert.com/adventures/price-glacier-on-mount-shuksan The 50-classic Price Glacier on Shuksan had been high on my early summer alpine climb list for a number of years, but conditions, weather, and logistics hadn't yet aligned for an attempt. With Owen flying up to Seattle for a long weekend of climbing over Memorial Day weekend, it seemed like a worthy objective. During our research and planning, we were concerned that most trip reports had been from later in the season (typically July or even August), but it had been such an unseasonably warm spring that I figured the timetable was accelerated by roughly a month. I'd also been on Shuksan a few weeks earlier via the Sulphide and gotten a feel for the conditions. Our other concern was the recent wet slab activity on the persistent weak layer in the area (and even on the White Salmon—a similar aspect and at a lower angle) and the potential for warm temperatures and sunshine making the snow wet at best. About a week before, Eric decided to come up as well and we made it two parties of two on the adventure with Kelsey joining as well. We had a good group debate about the route selection as well as whether or not to bring skis—there was a good possibility of walking the skis in, carrying them while climbing technical ice in ski boots, and then 'schwacking them back out. In the end, we decided to do the Price and bring skis. Game on. We left Seattle on Saturday morning at 6:30am and stopped at the Ranger station in Glacier for our permit where we learned that the first log across Ruth Creek was out. Not the best way to start things off... We drove one car up to the gate just outside the White Salmon Ski Lodge parking lot and then headed down to the Nooksack Cirque Trailhead where we geared up and started off just shy of 11am. We immediately forded the river barefoot in shorts. It was invigorating, but not terrible. Just over an hour on the trail got us to a faint climber's trail heading down to the North Fork of the Nooksack. We followed flagging tape to the river and saw the famous log crossing upstream. After a nice lunch, we each shimmied across the log, which is nicely angled downhill and relatively smooth. Really well-set flagging tape marked the whole way up to Price Lake. We were expecting this portion of the approach to be pretty painful, so when we made it from the log crossing to the opening at Price Lake in only an hour and a half of pretty open, steep trail, we were pretty surprised and happy. We stuck to the moraine and started getting intimidating views of the mountain and Price itself, though a ceiling of clouds shrouded the top of the mountain and route. Kelsey fording Ruth Creek, the famous log crossing, and entering the trees on our way up to Price Lake After a ways up the moraine, we got onto consistent snow and decided to start skinning. At the first major rise on the ridge, we were worried that the snow wasn't continuous staying low as was suggested in some reports, so we headed up to the crest with skis on our backs again. This worked, but proved to be a bit of extra energy as we gained and lost some vert following the crest. At about 5,400 feet, we ran into a party of three also approaching for the Price, but without skis (we weren't expecting company on this route), and ended up following them across and down to gain the glacier at about 5,200 feet on what were likely rock slabs in the summer, but was continuous snow for us. After booting a ways, we switched back to skinning and went up to a nice flat area on the glacier at about 6,150 feet where we set up shop for the night after being on the move for about 7.5 hours. Ascending the moraine on the approach, catching our only views of the route before it got socked in for the rest of the day The cloud cover which had been covering the top of the route during the approach had slowly lowered during the afternoon and eventually socked in our campsite as well. Over dinner, we discussed our options and decision points in the morning. We also celebrated my birthday, including a pan of brownies with candles that Kelsey had hiked in. They were awesome! It was decided that we'd wake up at 3:30am and have a look. If we were still socked in, we'd snooze for an hour and then at least pack up and go to the saddle to see if it'd clear before bailing if we had to—none of us thought it wise to attempt the route in a whiteout after not being able to fully scope it out on the approach. At 3:30am, the sky was much clearer and, while there was a decent amount of cloud cover, it seemed like it'd go. We took our time packing up, hoping things would improve a little and knowing that the clouds would help keep the snow in better condition. We started moving at 5:30am and gained the saddle in 30 minutes from camp. We descended and traversed from the saddle, getting across some steep snow and broken ice to reach a patch of low-angled blue glacial ice that we'd scoped out during the approach as what seemed to be the path of least resistance. I took the ice pitch and had a lot of fun swinging the tools and plugging in screws. Traversing from the saddle to the ice step and going up the fun ice step From there, we traversed underneath some menacing ice cliffs and then decided an ice and snow gully going up and right looked like our best bet. It got us out of the direct objective hazard pretty quickly and was quite fun with mostly neve and some ice, protecting with an occasional screw when things got steeper. The gully continued up, across lots of broken terrain and through a series of steeper and gentler steps before depositing us on the upper glacier. We all breathed a momentary sigh of relief knowing that most of the danger and difficulty was behind us, with the key exception being the bergschrund. The steep snow and ice gully and getting close to the bergschrund Eric and Kelsey swung into the lead at this point, returning the favor of the boot pack and taking on the warming upper slopes. The clouds cleared and it got downright hot. We were really excited to see that the very left edge of the bergschund was sufficiently filled in to enable passage and let out some whoops as our line came into view and we knew we could get through the last bits before things got much warmer. A few switchbacks and steep snow got us onto the final slope to the saddle and then the saddle itself about 5 hours and 45 minutes from when we'd left camp at about 11:15am. Woo hoo! We regrouped briefly and then skinned around to the South side of the summit to get our last bit of steep snow done before things warmed further. The summit had baked out a lot since my trip up a few weeks earlier, but the gully was still mostly snow except for a few rock moves in the middle and then again at the top. We got to the summit at 1:30pm and took in the (thankfully) clear views of the range. The down-climb went smoothly and we clicked into our skis to begin our descent 9 hours after we'd started at 2:30pm. The turns were fun and pretty buttery down to and through Hell's Highway. We skinned up the Lower Curtis and then skied down to the camp above Whinnie's Slide, getting there at about 4:15pm. Summit! Skiing down the Upper Curtis Glacier on our way to the White Salmon We'd brought provisions to spend the night there, but were all pretty happy with the snow conditions to that point and knew we had lots of daylight left, so we decided to rest a bit there in the sun and then continue our descent. We left the camp area at 4:45pm and were down the whole White Salmon Glacier in less than 30 minutes, enjoying buttery snow the whole way, even on the wet slide debris lower down. The snow ended up being continuous and skiable all the way down to 3,150 feet, but we knew that there was some 'schwacking to be done from there on out. The 'schwack After refreshing ourselves with glacial melt and switching back to trail runners, we started battling the shrubbery. It wasn't too bad in the valley at first, but we never found the faint trail in the old timber and proceeded to battle slide alder, tight trees, and steep mossy slopes for about 1 hour and 45 minutes until we finally reached the road, exasperated but happy to be through the business. The cat track walk was quick and we reached the car shuttle with much-needed beers and snacks at 8:45pm, a little over 15 hours after we'd started. In my opinion, in the conditions we experienced, I can see why this route got the 50-classic nod. The Nooksack Cirque is gorgeous. The route is a very aesthetic and obvious line through steep, broken, glaciated terrain. Going point to point means traversing much of the mountain, regardless whether descending Fischer Chimneys or the White Salmon Glacier. There is some objective hazard on the route and it's clear that conditions can vary widely, making this a tough one to get just right. Thankfully, it seems that we did! Our track up and down the mountain Gear Notes: Brought 6 screws, 2 pickets, 4 cams, 3 pins, and a small set of nuts. Used 4 screws and 1 picket. Carried skis and lucked out with the amount we were able to skin and ski. Approach Notes: First log across Ruth Creek is out, requiring a ford. Pink and orange flagging tape mark the way off the trail, across the North Fork of the Nooksack, and up to Price Lake


-
Thanks! We planned to climb Tasman while we were up on the Plateau, but the weather closed in after we climbed Cook and we heard from some guides that the route was out. We also planned to do Aspiring later in the trip, but the weather stayed quite unsettled, so we drank wine and ate cheese near Wanaka and Queenstown instead.
-
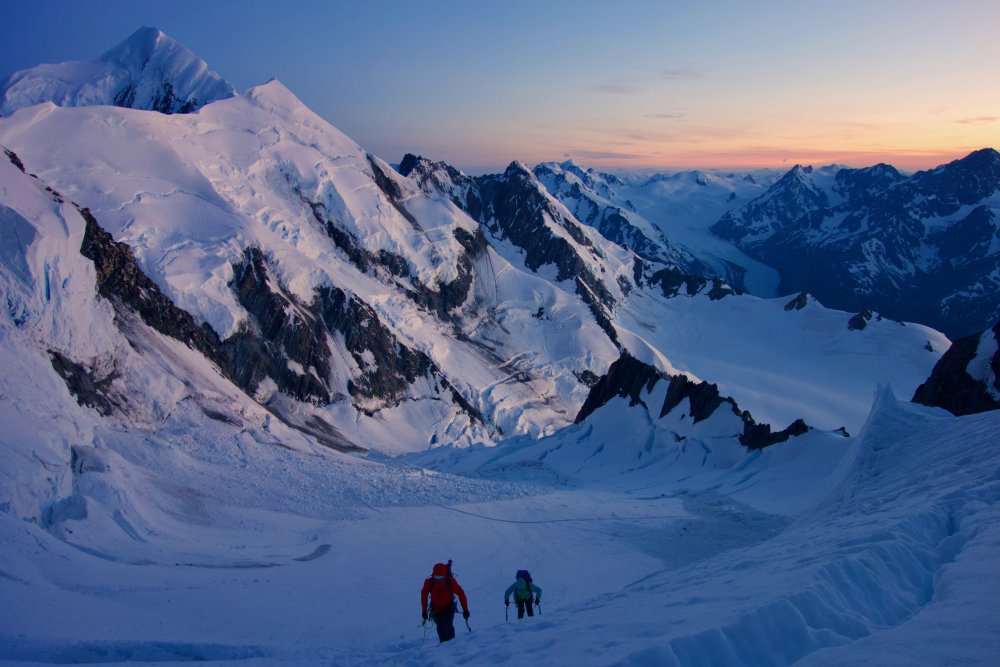
Trip: Aoraki Mount Cook - Linda Glacier Trip Date: 12/07/2017 Trip Report: For anyone interested, I recently traveled to New Zealand and successfully climbed Aoraki Mount Cook via the Linda Glacier, approaching from the valley floor via Ball Shelter and the Boys Glacier. Trip report and photos here: https://www.jeffreyjhebert.com/adventures/linda-glacier-on-aoraki-mount-cook Gear Notes: Pickets, screws, nuts; 2 tools; crevasse rescue gear; 70m single line Approach Notes: Just about everyone takes a helicopter to Plateau Hut these days. We hiked in. Due to to glacial recession and erosion, it's unsavory and somewhat dangerous to do so.
-
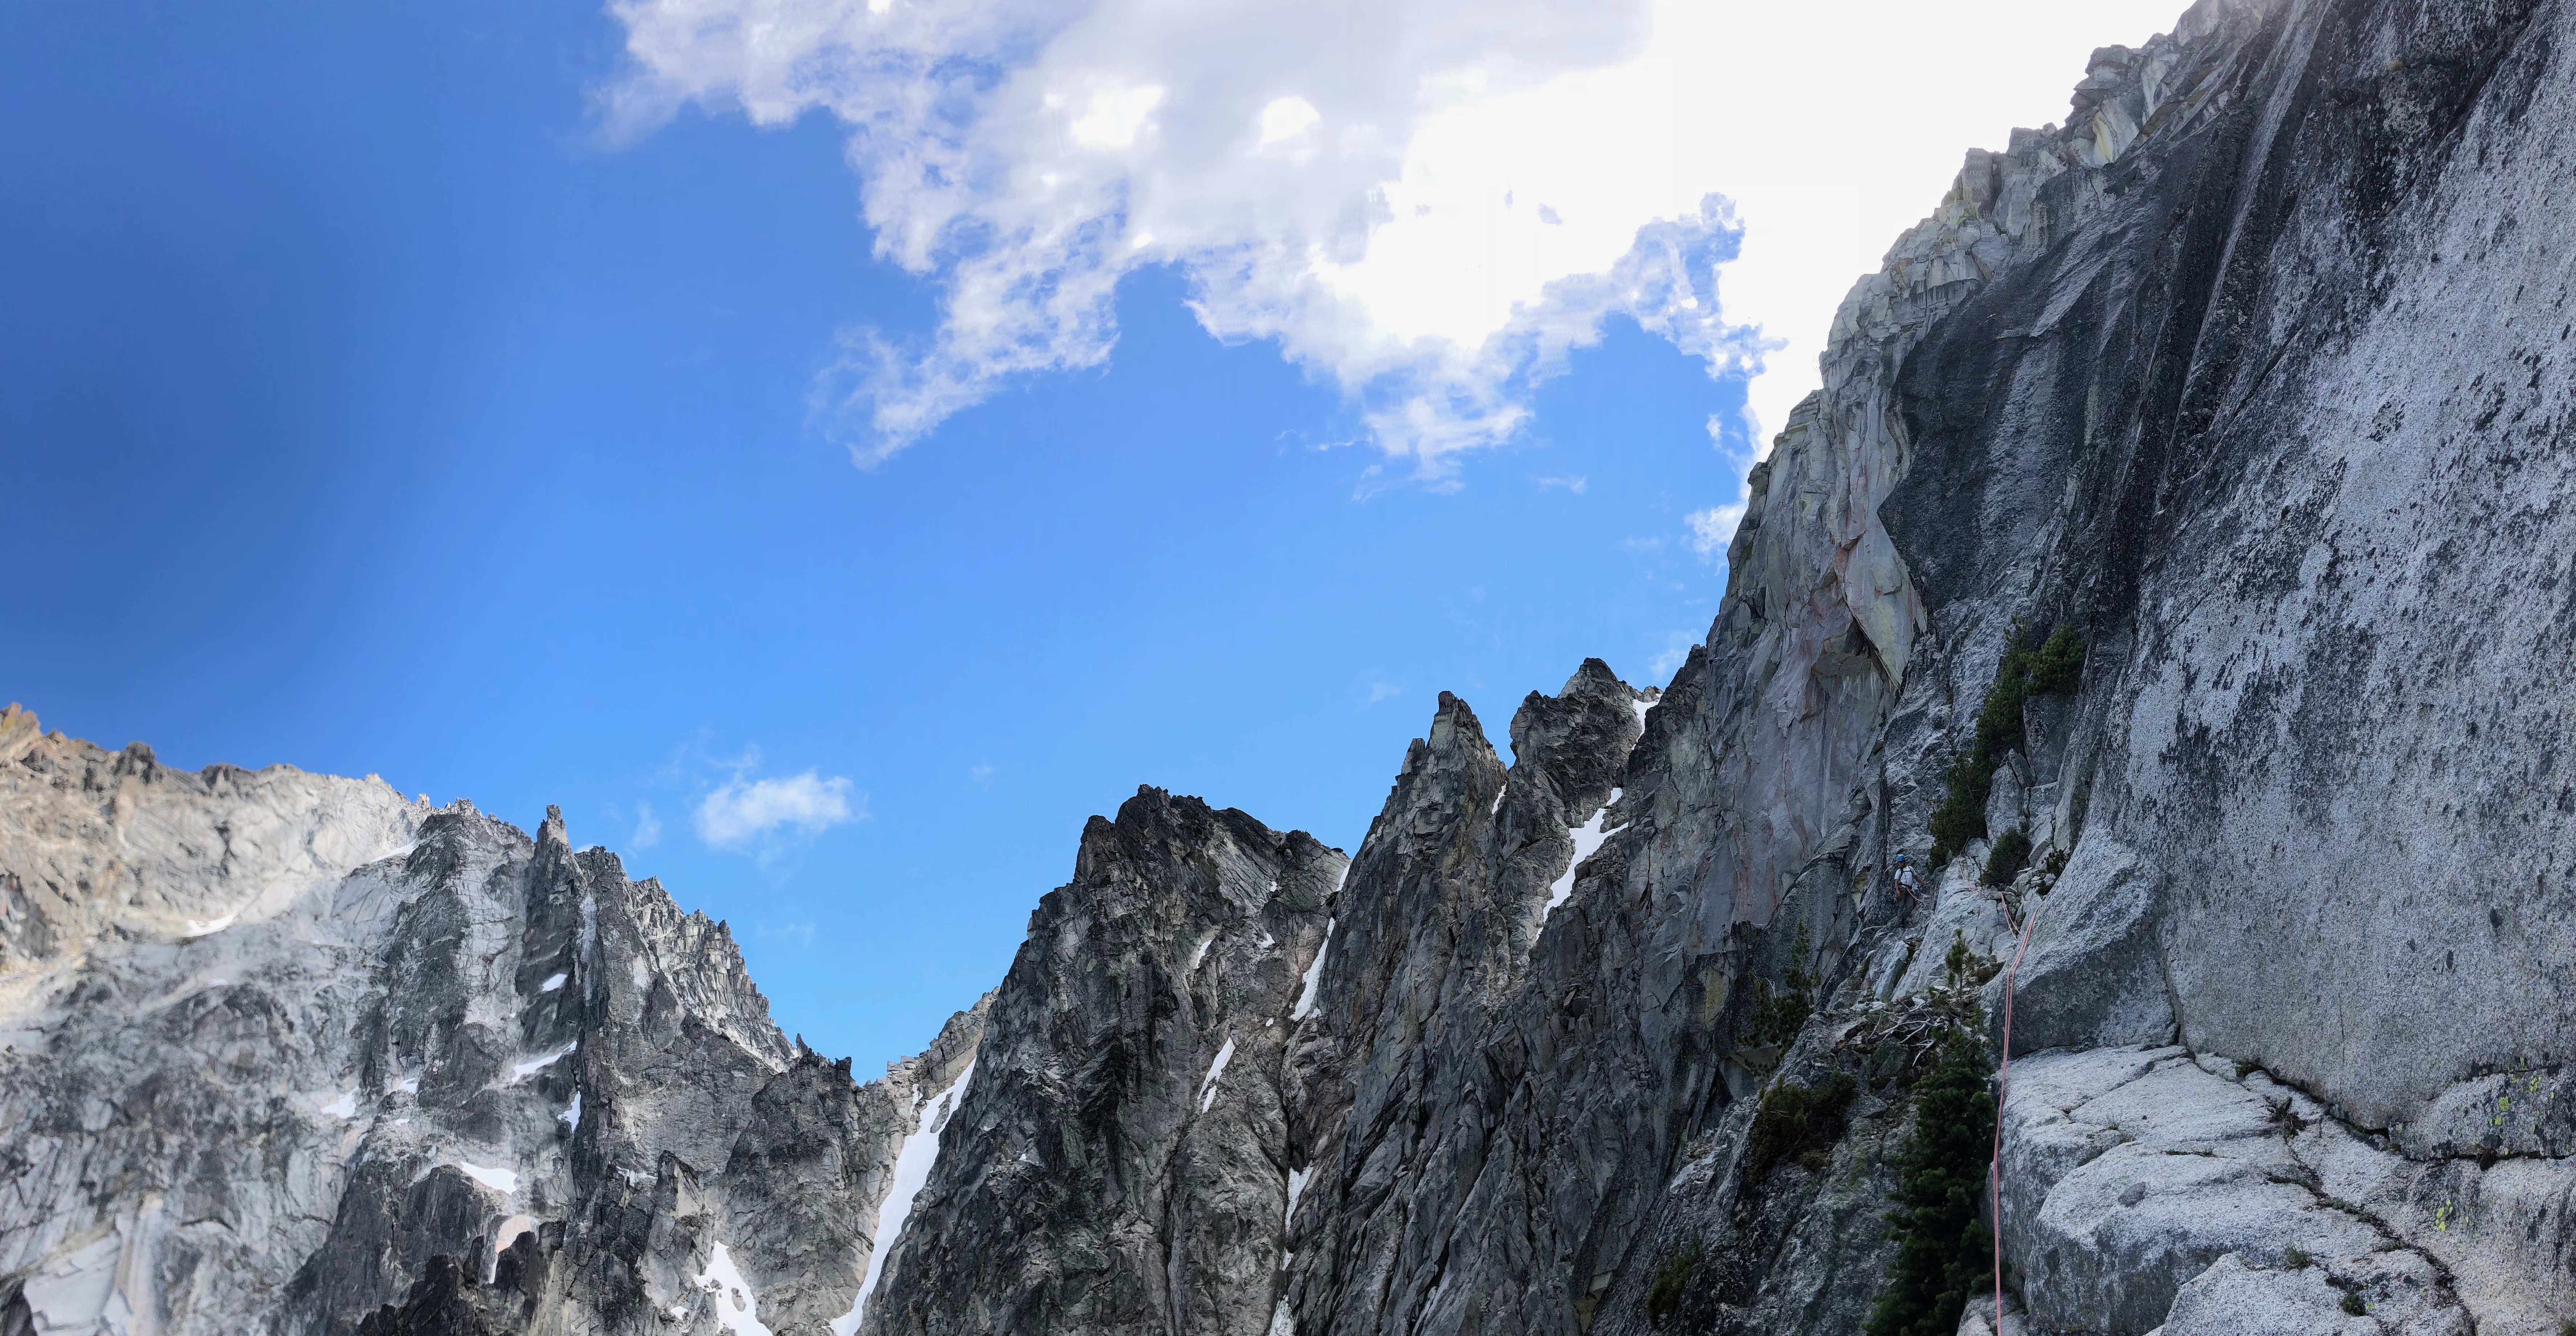
Trip: Inspiration Peak - East Ridge Date: 8/20/2016 Trip Report: We planned our adventure on Thursday night, left Seattle around 8:30am on Friday, grabbed permits for the Terror Basin, and started hiking up Goodell Creek at about 12:30pm. Much has been written about the intensity and duration of Pickets approaches, so we were mentally prepared for a slog. Thankfully, a pleasant 1.5 hours along the creek with some brush, but nothing crazy, took us to the turn uphill. While it was steep and unrelenting for nearly 4,000 feet, it really wasn't that bad either. Perhaps deciding to not carry a tent, given the forecast, helped a bit. At 5,200 feet or so, we got our first full view of the Terror Glacier basin and our objective. It was striking and motivation enough to make the long, open traverse to the saddle at 6,200 feet and descend to camp, where we arrived at about 6:30pm. We met one other party of two there who decided to go for Terror. Another party of two came in after we'd set up camp; they were headed for West McMillan. Behind them was a party of four who were also aiming for Inspiration's East Ridge. We got to bed early, woke up a little after 4am, and were on the move a bit after 4:30am. The benches weren't hard to navigate in the dark and we eventually made it to the outlet of the lake below McMillan before starting to head up slabs toward Inspiration. A little after 7am, we had crampons on and were crossing snow toward a narrow snow ramp which we hoped would take us to the upper glacier and the base of the route. After getting most of the way up it, we decided that it was too tenuous--the snow bridge wasn't very thick, the ice was pretty steep, and the crevasses below us were big. We headed climber's right to the rock rib separating McMillan and Inspiration instead. It was mostly 4th class with a few 5th class moves. It brought us exactly where we wanted to go--to the upper glacier just a few hundred feet from the base of the route. We quickly traversed over and found a thin tongue of snow laying up against the face with significant moats on either side across the whole face. Lucky! The first few hundred feet of the route were engaging, but forgettable. The climbing was pretty steep for approach shoes with packs and we gingerly simul-climbed our way up until things eased near the top. At the top of the saddle, we switched to rock shoes for the crux pitches and thoroughly enjoyed the first 5.8 pitch before arriving at a lovely ledge below the crux with stellar views from the Northern Pickets all the way around to Glacier Peak. We could see our friends cruising up West McMillan Spire as well. Dale set off on the crux pitch and couldn't contain his joy, belting out comments about how awesome the hand jams were. The climbing was pretty physical with packs on and the crack was awesome, ranging from wide hands to perfect hands. I seconded and took a look around at every rest. The climbing would have been an amazing pitch on its own at Index, but to be on that face with that position in the wild Picket Range was something else. We finished the pitch with high fives and many a superlative uttered. From there, it was easy ridge scrambling to the summit. We switched back to approach shoes for the ridge and were glad we did. It was 12:30pm when we hit the summit, so we decided there was time for a short nap after lunch, and then it was time to begin the tedious descent. 3 double rope raps off the summit down the West Ridge got us to a station above the South Face. The rap from there was nearly a full rope length free hanging before touching down a little bit above the next rap. Invigorating! The rest of the raps went without incident, as did our long end run across the glacier to make it through the maze of crevasses (photos from the summit were helpful). We retraced our steps from the morning at that point and were back at camp around 7pm to make dinner before dark. After a leisurely start on our last day, we thoroughly enjoyed our descending traverse out, including foraging a bunch of wild blueberries. The hike down the steep ridge really wasn't that bad and put us back at the car at about 2:30pm. View of our objective from camp the first night Approaching the broken-up glacier The crux pitch. Stellar. Photo by Dale Apgar. More of the crux pitch. Photo by Dale Apgar. Heading up to the summit Summit view. Photo by Dale Apgar. Looking back at Inspiration while end running crevasses on the way out The view back on our hike out Gear Notes: Single rack to 3" with doubles of .75 through 2. Bring some cord to back up raps (and a knife to take down some of the old stuff) Approach Notes: Glacier is pretty broken up. We ascended the rock rib separating West McMillan and Inspiration. The moat is large, but currently manageable with a snow bridge in one place.
-
It was easier than we expected it to be to gain the rock ramp. The glacier was quite broken up at the base of the ridge and we had to front-point up some sections of icy glacier, but the moat wasn't bad at all for us.
-
Much appreciated! All set now.