


jakedouglas
-
Posts
139 -
Joined
-
Last visited
Posts posted by jakedouglas
-
-
For spring/summer ski mountaineering on the volcanoes you can go pretty skinny to save weight, around 80mm waist.
For winter touring, something around 100mm is nice, although people go both skinnier and wider than that.
If I were you and I was looking to buy 1 ski to do a bit of everything I would pick something around 90mm that was equally suited to both firm and soft snow conditions. Once you get some skis and use them for a while you'll have a better idea of the tradeoffs you prefer to make. You can also rent different touring skis to try before you buy something.
-
There are a LOT of existing threads about this, both here and other places. I recommend doing a search and reading through them.
Yes it depends on the conditions, your objectives, and your personal preferences. It's really hard to make a recommendation without wrapping up one's own ideas in it. The Voile Charger however is definitely too wide and heavy to be a good all-around touring ski.
Look at skis like the K2 Wayback or Coomback, Black Diamond Aspect or Current, Dynafit Baltoro or Manaslu, La Sportiva GT or Lo5, etc.
If you can state more specific objectives and preferences then you will get better recommendations.
-
I looked at the Trailbreaker but found that it was substantially heavier than anything else I was considering. I just got the Gamma MX pants and like them, but can't comment on long term durability.
-
Trip: Chair Peak - North Face
Date: 1/1/2014
Trip Report:
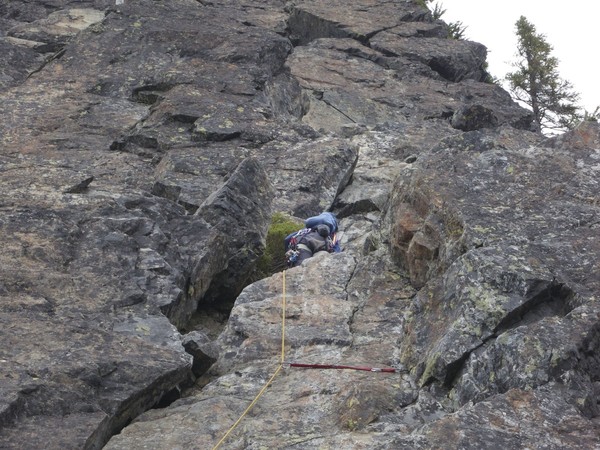
Climbed the North Face of Chair on New Years Day with DPS and GerritD. DPS has climbed it many times (17th successful summit?) and proclaimed it to be in great condition. We climbed 4 full 60 meter pitches.
- P1: great ice for the first two thirds perhaps, tapering off to firm snow. 2 decent screws and a good pin. Ended with a belay at a large wall of solid ice that took the 22cm all the way.
- P2: great ice again at the beginning, tapering off to snow. Ended with a tree belay.
- P3: started out with a line between ice bulges that took great screws. Conditions fell apart towards the top with steep climbing on breakable crust with unconsolidated snow underneath. Glad I wasn't the leader. Really stretched the ropes to belay from an even bigger tree.
- P4: hard to leave the belay because the stance was disintegrating underneath us, but after that it was easy climbing on 45 degree snow for half a rope length to the ridge. Then traversing under the summit block and up the side to the top.
We weren't comfortable downclimbing the initial descent gully, so DPS gave us a belay from the summit to a stand of small trees on the rib separating the two southern gullies where we found some tat. From there we rapped exactly 60m to the start of the "normal" raps at the col and did 2 more to very easy terrain. The last one was probably not necessary, even for us. Shared the ropes with another pleasant party on the way down.
Thanks to DPS for leading the whole thing and taking us on our first real winter alpine climb.
Didn't take out the camera much, but here are a few pics:
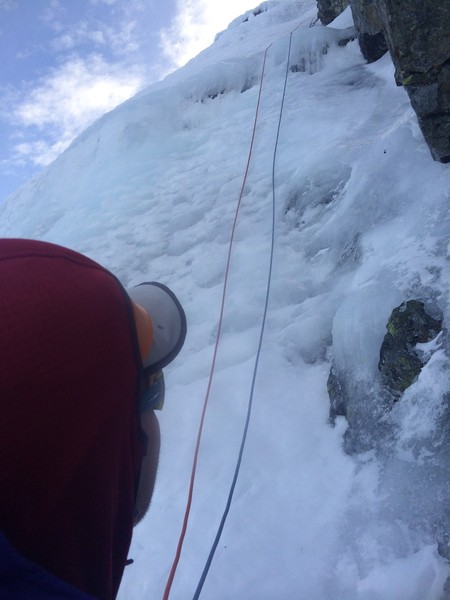
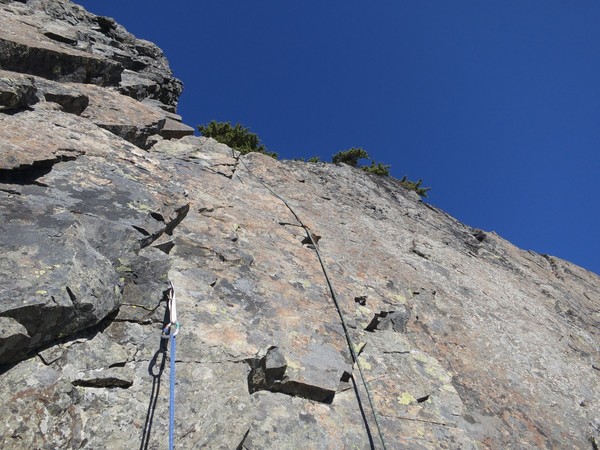
Looking up at great ice on P1.
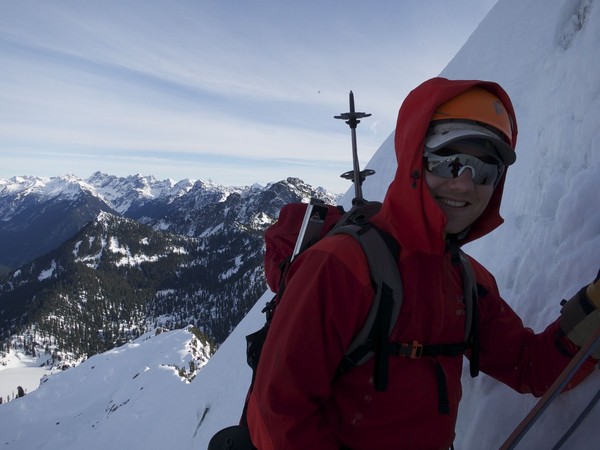
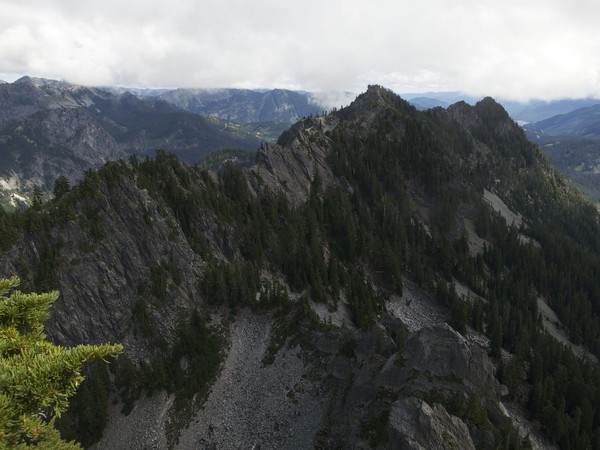
Great views all day.
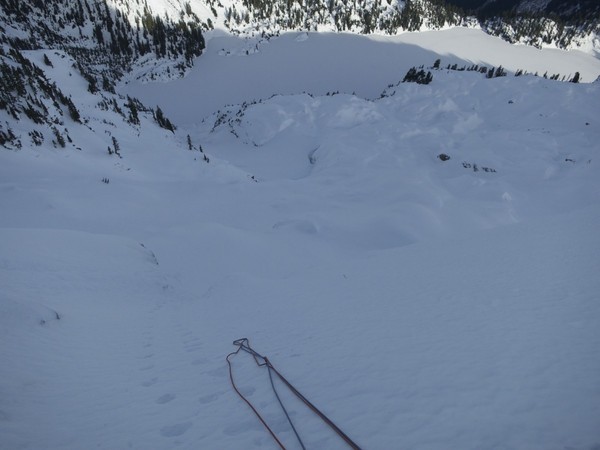
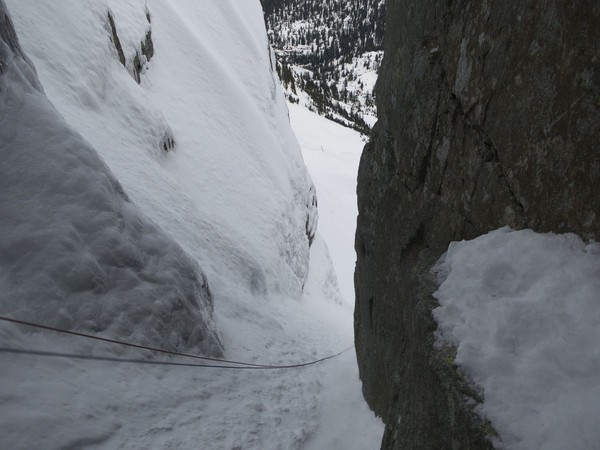
Looking down P1. The best ice on this pitch is just out of sight below the dropoff. It was probably the steepest part of the climb.
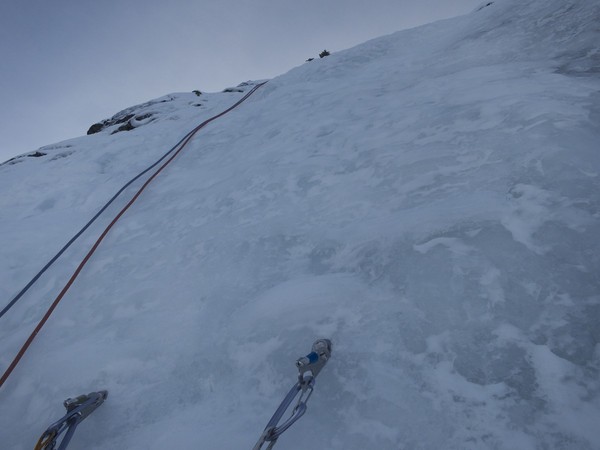
Looking up at P2.
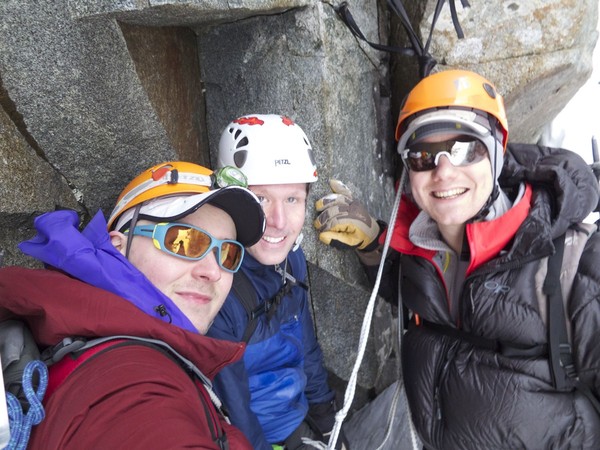
Hanging out at the 3 piton anchor on the way down, waiting for the other party to pass us.
Looking down the last rappel.
Gear Notes:
2x60m ropes. 1x22cm 3x16cm screws. A few placements bottomed out, so a couple shorter ones would be nice. Only rock protection used were 2 small cams and a pin for a belay at the base of the route and 1 good pin on P1. Double slings for trees.
Approach Notes:
If you're a scared noob, rope up before traversing under the North Face to the base of the route and throw in a few pickets on the way. It gets fairly steep.
- P1: great ice for the first two thirds perhaps, tapering off to firm snow. 2 decent screws and a good pin. Ended with a belay at a large wall of solid ice that took the 22cm all the way.
-
Trip: Colchuck Peak - Colchuck Glacier attempt
Date: 11/2/2013
Trip Report:
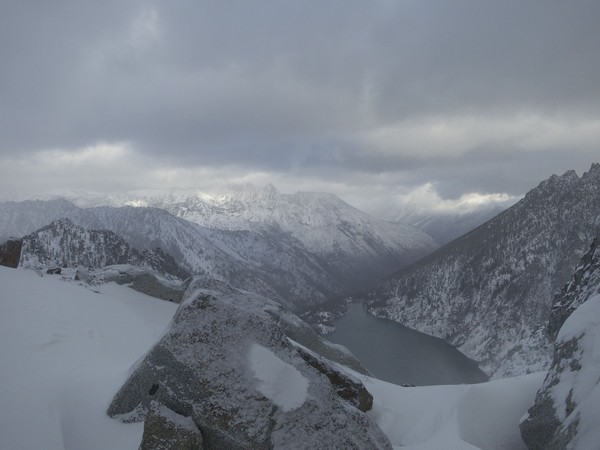
This weekend we headed up to Colchuck Lake with hopes of climbing Colchuck and/or Dragontail by the scramble routes from Colchuck Col. With a storm forecast, we didn’t have much in the way of expectations, but were psyched to get out and try something. We drove to the trailhead Saturday morning where light rain was falling but storm conditions hadn’t yet manifested, and set off around 11:30AM.
Rain turned into light snow as we hiked up, and the wind picked up to the point where I put on my helmet in case of falling branches. We met a local solo climber heading down who had bailed on his plan of climbing the Colchuck NBC after requiring goggles at Colchuck Lake. Sure enough it was full on storming when we reached the lake, with very low visibility.
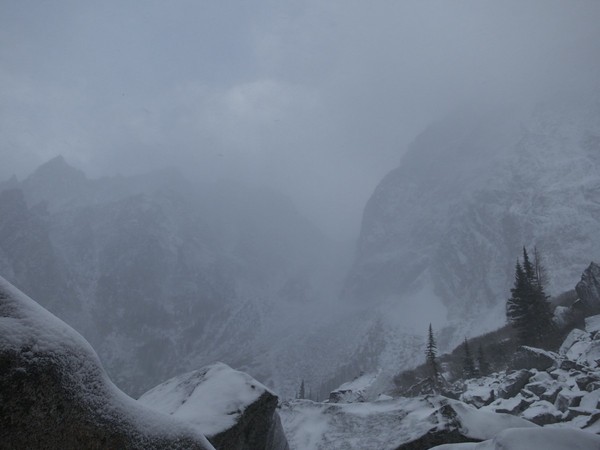
A peek through the blowing snow. This was the best the weather got on Saturday.
We were a little nervous about sleeping in the woods with the high winds so we headed to the boulder field and tried to setup camp at the flat site there that is reasonably sheltered, but tent stakes wouldn’t drive into the ground and we didn’t have enough cord to secure the tent to anything else. We ended up retreating to a site in the woods along the trail where the tree activity ended up being pretty mild that night. We also ran into a pair of hikers heading down from an attempt to cross Aasgard pass, where they reported being blown over several times by the winds. The forecast for Sunday was better, so we crossed our fingers and headed to bed.
We ended up leaving camp around 5:30AM and once we got out of the trees we could see stars in the sky, which lifted our hopes. The boulder field was very tedious, with a thin layer of snow and ice covering everything. This just got worse and more painstaking as we worked our way up the moraine, with all of the scree and vegetation slick and loose. I believe it took us around 4 hours to gain the top of the rocks that go up the middle of Colchuck Glacier, a brutally slow pace for the elevation gained. We stopped here for a break and to pull out the rope. I understand the Colchuck Glacier does not form many crevasses of significant size, but we were wary of any late season openings being covered with the new snow and didn’t want to risk it since we had brought the rope along anyway.
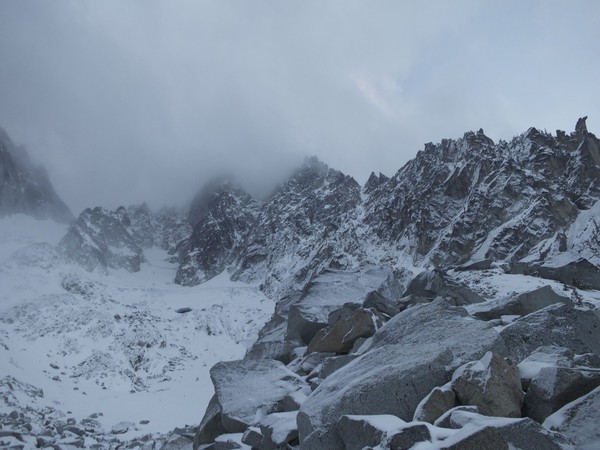
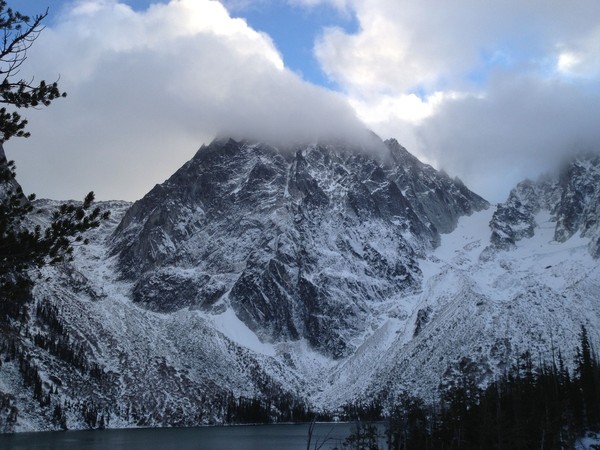
Colchuck as it got light

NBC closeup
Sunrise
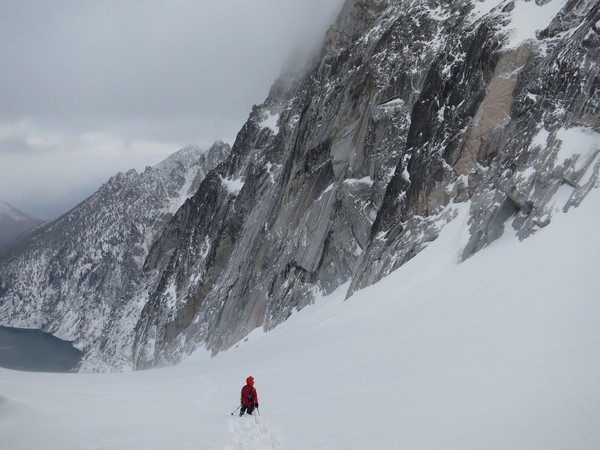
We found the glacier to be loaded with fresh snow from the storm, almost always knee deep and sometimes wallowing up to our waists. This was hard work, but we punched it and made rapid progress for the remainder of the climb, at least 2x as fast as we had gone so far. We topped out at Colchuck Col just after 11AM, certainly the longest it has ever taken me to gain ~2500 feet.
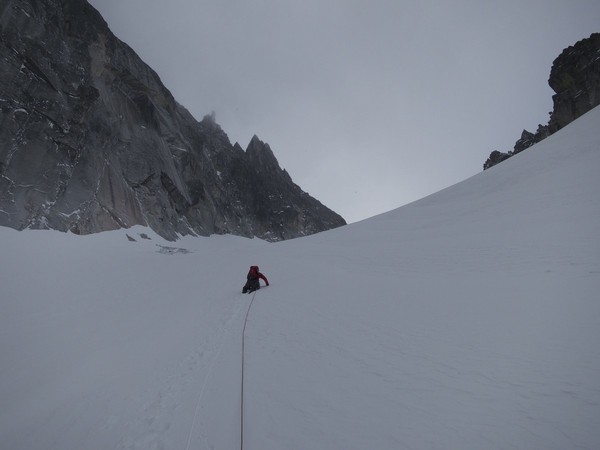
Wallowing
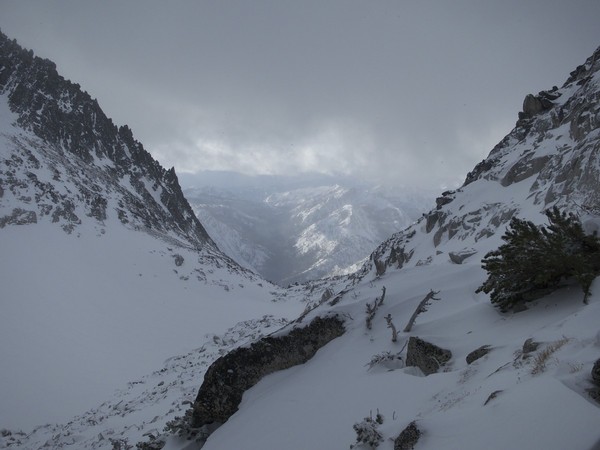
Looking south from Colchuck Col
Gully up Dragontail visible in the background
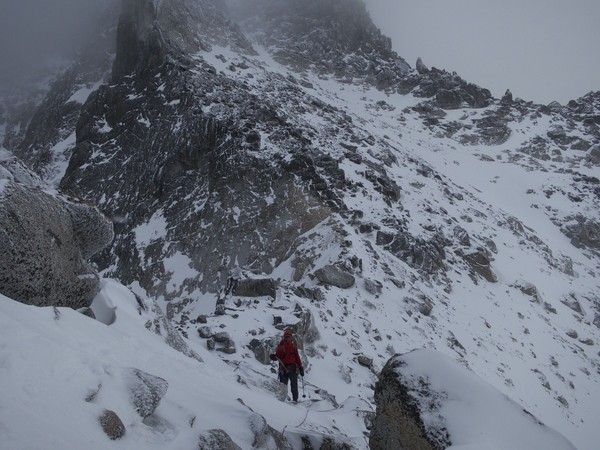
My partner had to pick up his roommate at the airport in the evening, so we had agreed that we needed to be heading down by 12PM. Neither of us had been up Colchuck before, and as we looked at the thinly snow-covered rocks of the scramble up to the summit plateau and reflected on our experience with those conditions earlier in the day, it became clear that we would not be able to make it up and down within that time constraint. With substantial disappointment we turned around to head down.
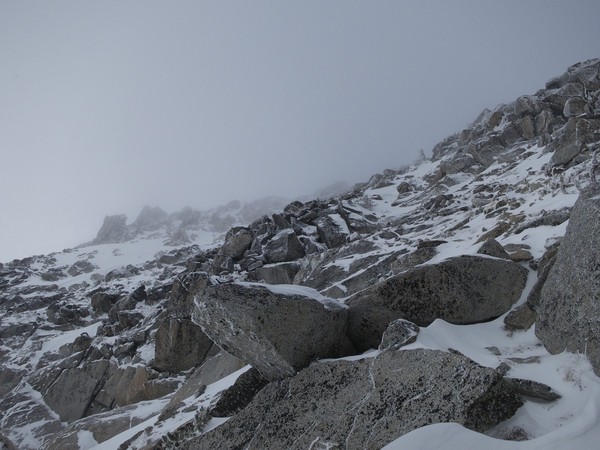
Scramble up Colchuck, thinly covered with snow
Plunge stepping was easy and we flew down the deep snow in great time. It would have been an amazing ski in these conditions. As we got down towards the moraine, we stuck to the east side of it, in order to stay on easy snow as far down as possible. This ended up being a mistake when the snow started to run out and turn once again into sketchy alternating sections of icy scree and hardpack snow with bad consequences for a slip. We had to traverse back west, climbing a little to gain a rock outcropping, and eventually regained our path through the boulder field from earlier in the day.
Admiring Dragontail on the way down
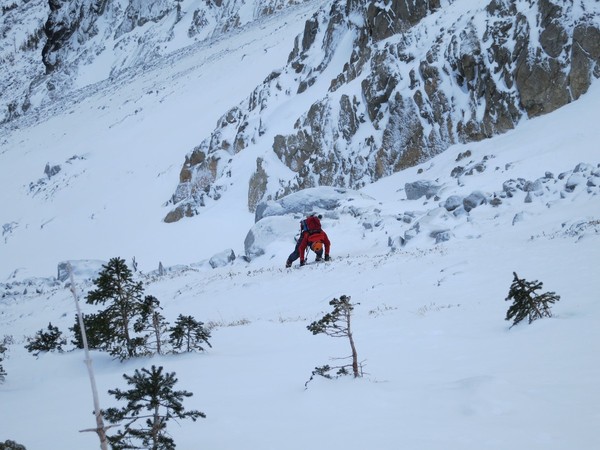
Ice tools useful for crossing scary vegetated slopes. What a shit show.
Back at the tent and happy to be off of the moraine, we had some food and a 15 minute nap before rushing back to the car. On the way down the trail, we had to cross a number of large blowdowns that had fallen overnight. Maybe we were stupider than we thought to be up there in such high winds. It had also snowed substantially to quite low on the trail compared to the day before.
As usual the hike out seemed to take forever and eventually it got dark. After stumbling around for a while it became impossible and we had to dig out a headlamp. Finally back at the car in the otherwise empty parking lot, I almost had a heart attack when the battery barely kicked the engine over and it immediately died. 2 more attempts got it to start, with a big relief. Revived by Heidleburger, we drove back in time for the airport pickup.
We will be back, but probably not until the boulder field and the moraine are covered. The area is stunning right now and we had a great time.
See ya
Gear Notes:
hard shell and goggles
Approach Notes:
snow and blowdowns on trail, slippery boulders and moraine
-
Thanks kevino. I'll remember to check there from now on.
-
I have read that it can get quite icy in the late season, and the weather this fall would seem conducive to that. Anyone been up there recently?
-
I just moved out to North Bend from Seattle and I like it so far. I live about 1 mile from several trailheads that provide just about any distance of daily training runs/hikes I want and there are a handful more trailheads within about 15 minutes drive. Extend to 20 or 25 minutes and you can access everything in the Snoqualmie Pass area, which has a ski resort.
The resort is at a lower elevation than the other resorts in Washington and gets a bit less snow, but there are extensive backcountry options for skiing and alpine climbing in the area, which are pretty popular.
I would hesitate to call North Bend itself a "mountain town" though. Some neighborhoods can have that feeling (mine does, a little bit), but other areas seem to be getting developed into prefab suburbs. I think a lot of people just happen to live here but spend most of their time commuting to Seattle for work, and aren't necessarily into "mountain life" or outdoors recreation.
-
Trip: The Tooth - South Face
Date: 10/20/2013
Trip Report:
DPS and I had a great trip up The Tooth today, leaving the parking lot at 6:30am. I figured all of the snow would have melted out by now, but I quickly regretted wearing trail running shoes with mesh uppers when my feet got soaked by step kicking and postholing up in the bowl.
We swung leads with me starting on P1. As soon as I got out of the shade it must have been 75 degrees. I had dressed for chilly weather with long underwear bottoms and a heavier weight long sleeve shirt and I sweated my guts out for the rest of the climb, finishing off all 3 liters of water that I brought before we even got back down.
We were treated to amazing views and encountered only one other party on our way down. We found the rappel tree at the top of P2 to be well on the way to toppling over, and so we moved the anchor to a sturdier tree/root thing right next to it. Thanks DPS for the handiwork.
The only "mishap" was that the 60m rope we used did not quite reach the ledge for the second rappel station on the way down Pineapple Pass. I had to reach out and clip myself to the anchor and then downclimb to the ledge. This ended up not being a big deal but it was interesting to find this rope be so much shorter than the other 60m I had used before, that reached the ledge with a foot or two to spare. Stretch maybe.
On the hike out, we saw some guys on Rap Wall doing some very tough looking dry tooling. All in all an awesome day, home by mid afternoon.
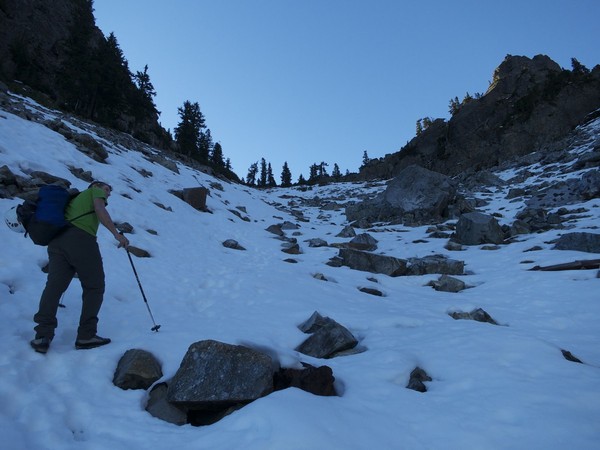
Approaching on often breakable crust
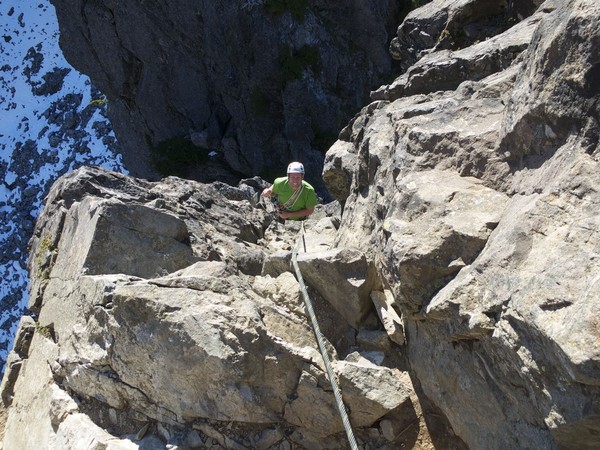
Coming up P1
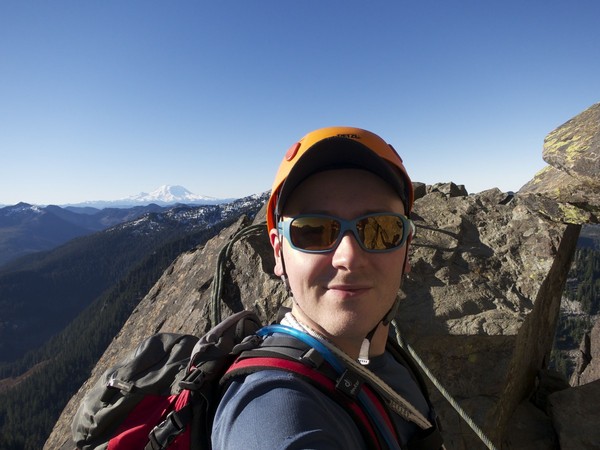
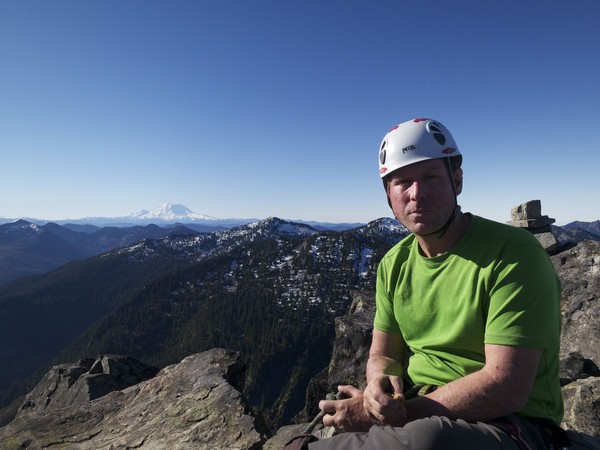
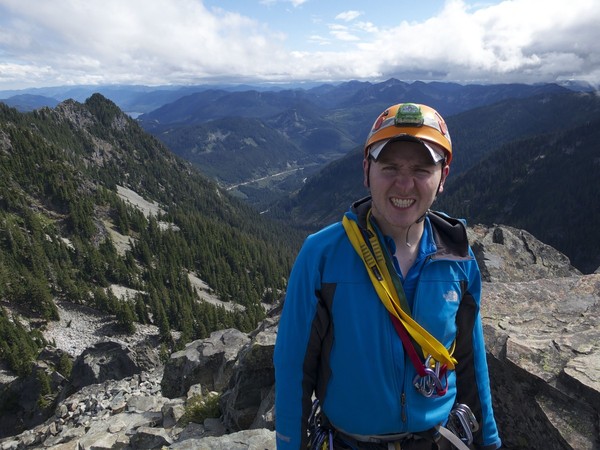
Rainier selfie
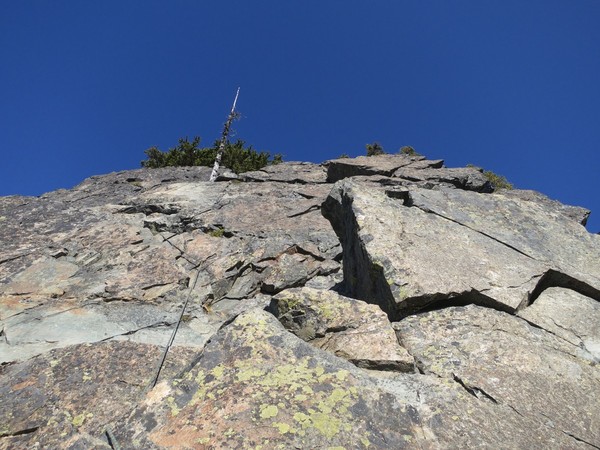
Looking up P2
Looking up P4
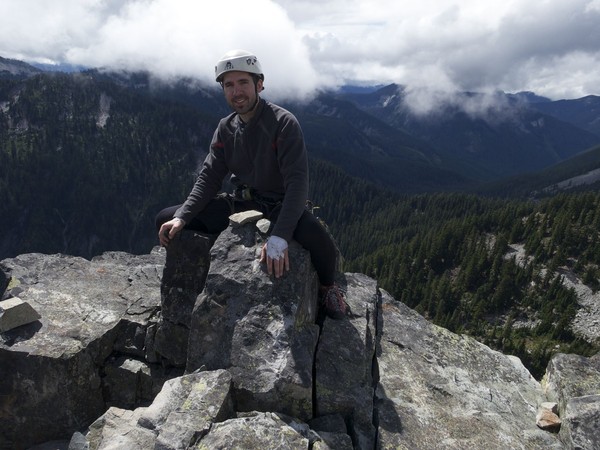
DPS on the summit
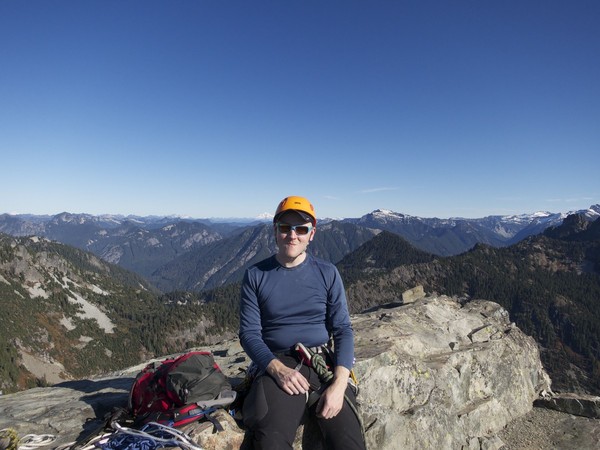
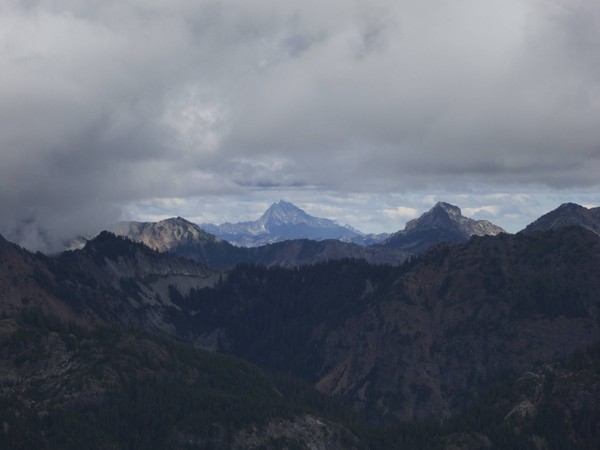
Glacier peak behind me
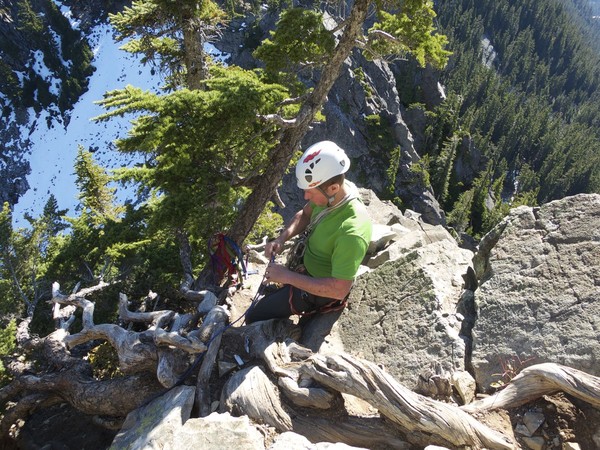
Moving the P2 rappel anchor
DPS heading down
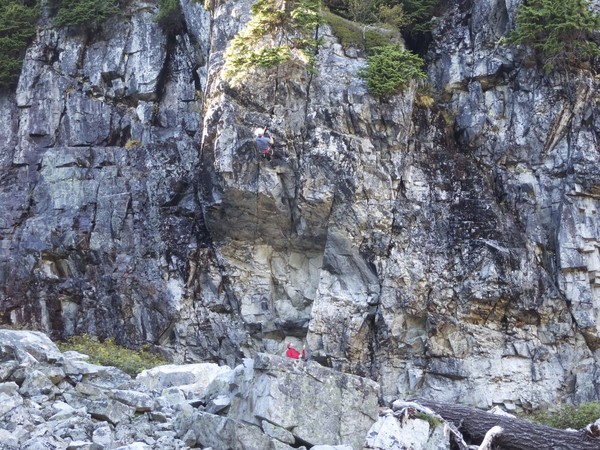
Dude working hard on Rap Wall
Fall colors are in
Gear Notes:
Used: Sunglasses
Did not use: Soft shell, hard shell, insulated jacket, gloves, warm hat, and anything else I brought in anticipation of cold/wet weather
Could have used: Sunscreen, swimsuit
Approach Notes:
Just enough snow on the talus field to be annoying.
-
You should check out this recent thread .
-
I was told that for touring, you may want to select a length a bit shorter than otherwise, or kick turns will be a pain. I guess this is probably a function of your leg length mostly, but as a rule of thumb I was told to not really go longer than your height.
Both of my pairs of skis are at least 1 size down from the recommended length for my weight (especially considering pack weight). This reduces stability at speed, but I do like the maneuverability. YMMV.
-
I'm a new skier and went through this research process last winter. All of the recommendations I got are consistent with what has been said here. Around 100mm is a good all-arounder to start with and you can eventually get different or additional skis for varying conditions or as you discover your preferences. I ended up getting a 98mm for myself and 100mm for my girlfriend. When spring came around I picked up a cheap but light 80mm pair for skiing consolidated snow.
If you are deal hunting, I just saw a pair of Black Diamond Aspect (90mm waist) in 176 length at Pro Ski in Seattle for $275. Not quite as wide as the general recommendation, but I know people that have fun on them as their only ski and it's a good price IMO.
-
I've been eyeballing the new G3 ZenOxide C3 105 for winter stuff. Weighs about the same as the skinny Dynafit skis but has a 105 waist.
Ultimately you have to decide what your priorities are. At one point I had hoped that someone could point me at a magical "Cascades ski", but it turns out that there are just a million skis and a million different personal preferences that vary wildly.
-
Ran across this video of the helicopter hoist
-
Hope your partner recovers well. Was there anything in particular that caused the fall, or just an accident?
-
Heading out of the Alpental lot this afternoon Sunday Sept. 8 I was looking at my phone but looked up to catch a glimpse of what looked like SAR vehicles on the side of the road, like maybe a response was going on. It looked like they might have been looking up at Guye.
Anyone know what this is about?
-
I do agree about snow travel though. That seems to be the missing piece for everyone.
Anyone have a good suggestion where to practice steep snow climbing safely as well as self arrest practice?
I don't know about steep climbing in particular, but the Paradise area is good for practicing snow skills in general, including self arrest. Slopes with safe runouts and close to the car.
-
Fellow noob here. I'd recommend elaborating about your current skills and what kind of activities/objectives you hope to do. This will make it more clear to people whether you might be a good match.
It sounds like you probably know how to belay and rappel and you say you have led 5.2. What grade can you reasonably follow? Do you know how to build gear anchors? Do you have any group equipment such as a rope or rack?
Do you want to go cragging? Alpine rock climbs? Volcano glacier slogs? Ski mountaineering? Swinging 2 ice tools? All of the above?
Depending on the activity and your skill level, you can research some appropriate objectives and state a specific goal that you would like to complete. You don't have to do this but it can help narrow down a partner, and having a concrete goal is always good so you don't waste your time noodling around.
Stating your safety preferences can also be a good idea. People have wildly varying ideas about what acceptable safety standards are and you have to decide for yourself what you are comfortable with. If you aren't clear about it, this can become an awkward problem during a trip.
There are always clubs and classes, but I believe that I come to a better understanding through researching and figuring things out with my partner, than I would being shown. There are more ways than one to do a lot of things in climbing and you have to pick the best way for you.
Do a lot of reading and practicing of the technical aspects at home. Real trips will always be more complicated than you anticipate, so the basics need to be second nature.
-
Not specifically related to taking new climbers out, but I have noticed that many people are obsessed with removing equipment whenever it is not completely necessary for a given section. The time of taking things on and off not only adds up throughout the day, but also complicates things when you find yourself in terrain where you would like to have them and it's tricky to get them out of the pack and put them on.
For me, the harness and helmet usually go on at the car or camp, and stay on until I get back. If it is too warm for the helmet on the hiking approach, I leave it clipped to the outside of my pack so that I can put it on in a few seconds without removing my pack. Wearing these items also frees up space in the pack and potentially allows me to carry a smaller pack.
When I have brought crampons, I generally leave them on for the entire duration that I am traveling on snow where they might be necessary, unless it is plainly obvious that they will not be. Even on a long slog it is unlikely that the efficiency I would gain from moving them from my feet to my pack would outweigh the time spent stopping to change them 1 or more times. I also won't find myself on hard snow wishing I had them on.
-
You should go climb Black Peak now

har har
-
Trip: The Tooth - South Face
Date: 8/24/2013
Trip Report:
My partner and I climbed The Tooth for the first time this past Saturday. It was our first “alpine climb”, if you can call it that, and our second multi-pitch trad climb, the first being R&D in Leavenworth.
We slept in the car at the trailhead on Friday night, knowing that we would have company on a Saturday so we needed to get started early-ish. Still, a party of 2 showed up around 5am and hit the trail just a few minutes before us at 5:30.
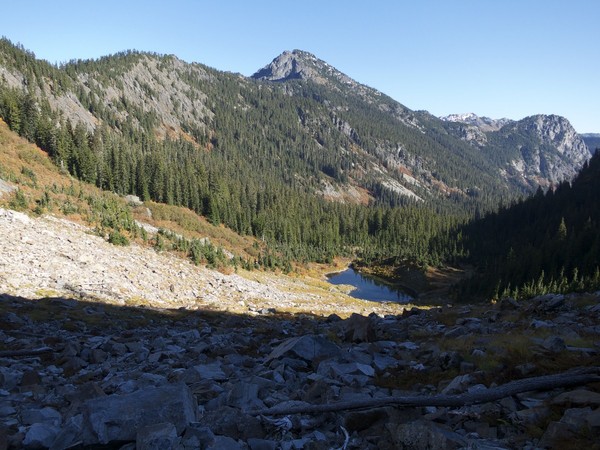
My partner had been sick with mono so I volunteered to carry the rope and the rack to make better time. It still took us around 3 hours to reach the base by taking the Snow Lake trail and traversing around the bowl before climbing up towards The Tooth. I am accustomed to taking the cat track in winter and I am not sure if there is a faster way than this with no snow cover, but it seemed very indirect.
After figuring out the best way to scramble up to the base we took a while to eat and started getting ready to climb. The party of 2 ahead of us was making quick progress with the leader cruising and not placing any gear. As we were getting ready another party of 3 scrambled up and introduced themselves. We ended up working with these nice guys a lot for the remainder of the ascent.
P1 from the base
My partner led up to the first puny tree on the route and belayed me from there. I thought I had seen the party ahead of us departing from here, and remarked that it wasn’t very far up, but we decided that maybe The Tooth was shorter than we expected. This early belay would cost me in rope drag on the next pitch.
Messing with the first tree. Don't bother with this, keep going.
At this point the party of 2 was already coming down, so we waited for them to do their business. As they arrived at our tree, their pull got stuck and the leader soloed back up and freed the rope. By the time they finished, the party behind us was climbing, so we offered to let them pass. I waited for the leader to get ahead and then it was my turn.
I climbed maybe 30-40 feet to find the leader belaying at a slung block. He asked why we had belayed from the tree and it was now obvious that this should have been our first belay. He let me squeak past and I continued.
Above this was a large ledge where it took me a few minutes to figure out the easiest route up the wall above. The other party suggested heading up the right-hand side where I placed a bomber nut, but after getting a feel for what the moves would be it was clear that this was not the easy route and was more than I wanted for my first time up here. I found an easy ramp on the left where things felt more exposed, and equalized a small nut and a red C3. I was skeptical that this setup would hold much, but it was probably 4th class and I didn’t see anything better.
I clipped a fixed pin and took the easy blocks and ramps up past the dead tree, feeling like I was doing squats as I heaved up the rope behind me. My belay here included a slung root. Ok, this is starting to feel pretty “alpine”. I could see the party of 3, but not my partner, and they were kind enough to relay our commands. Pulling up the rope was a full-body workout and I was happy to feel it get easier as my partner ascended.
Big belay ledge after terrible rope drag
By now it must have already been several hours, with our slow leading and waiting for the other parties pass us. The other leader arrived and we shared the belay area while we took a break to eat and drink again. His followers unroped as they arrived so they could scramble the next section, and we sat around for a while as they departed. My partner was feeling sick and talked about bailing, but I just agreed to lead the rest.
Denny, right?
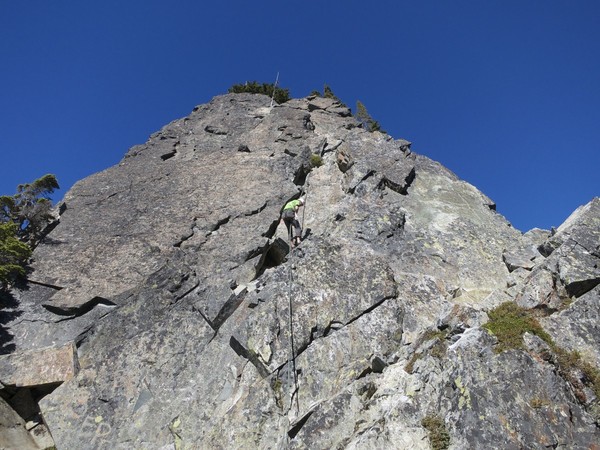
We aren’t really into the unroped thing yet, so although the terrain was easy and without much possibility for falling completely off of the mountain, I stayed on belay and placed a piece or two on the way up. I arrived at the base of the final short pitch where several parties were either climbing or rappelling from the summit, and after going back and forth all over the place assessing the situation, I realized that I just needed to get out of the way again and let everyone finish. The rock in this area is very loose and it took me a long time to find somewhere out of the way to plug some cams in and bring up my partner.
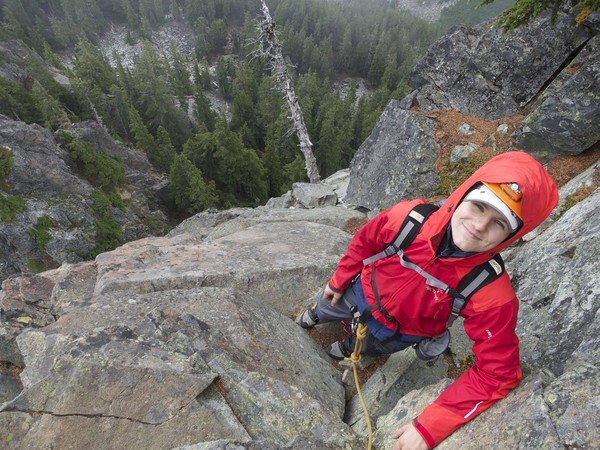
Staying out of the way on easy terrain. Photo by cool dude aka Jason
Okay, almost there. I saw the obvious exposed “catwalk” which I had no interest in taking, and also what I have seen described as a 5.6 flake, with the tree station at the top. There was another guy climbing 10 feet left of the flake that I intended to take and he accommodated me crossing over his rope. I expected this to be the crux, but I found the flake to be very easy. The guy next to me said that it is 4th class. Maybe he was climbing the 5.6 part? I had read a lot of trip reports prior to the climb and I’m still confused about this.
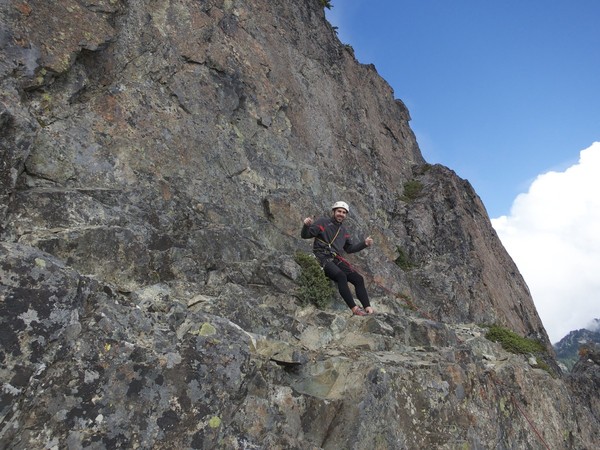
Dude who climbed next to me and let me cross his rope. I believe the flake I took is just up and to the left of him in this picture.
A lot of the flake sounded hollow and the best gear on the way up is an old fixed cam. The last 10 feet or so got “protected” by a #1 that I could rip out with my hand unless it sat just right. I brought my partner up to the tree and there was a group hanging out on the summit. We weren’t sure what the summit was like but we knew our comfort level was well below theirs, so we agreed to belay each other to the summit and back.
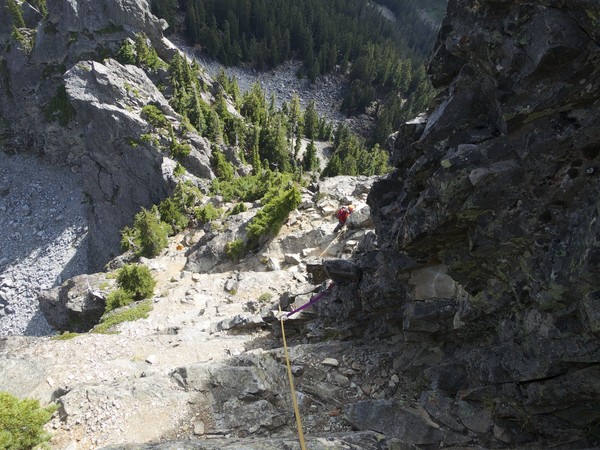
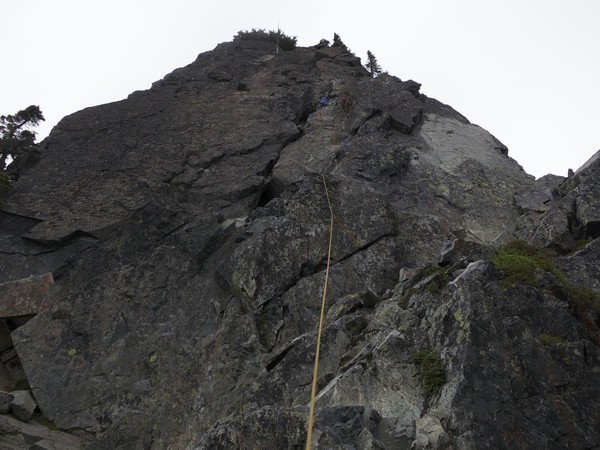
Looking down the crumbly last pitch. Garbage #1 visible.
Looking up towards the summit, which is just out of view up and to the left
I belayed my partner up and the guys on top generously offered to belay me up as well so we can hang out on the summit together. I broke down the belay and one of the guys walked down to carry one of our backpacks to the top since my partner left his. At the top my partner is tied into a few cams with enough rope to walk around and I tied in too. This is obviously not necessary as the summit ledges are flat and large, but this was our first rock climb in the mountains and we were clearly a bit on edge being on the top.
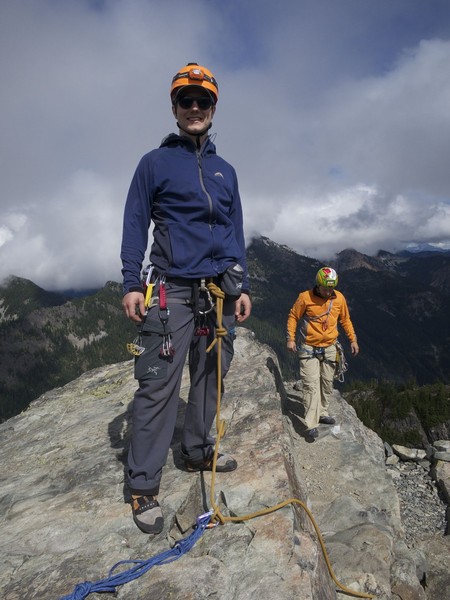
Him
Me
Cool dude
We hung out for a long time on the summit talking to the other guys and eating until they left. We had left the car with 2L of water each and finished the last of it at this point. I checked out the slung block, which most parties had used to descend, but ultimately we decided that we wanted to go back the same way we came up. There was some loose gravel to get back to the tree, which is basically on the edge of the face, so we belayed each other back to it to begin the descent.
The first few rappels went fine, albeit slow. I was going first using a prusik backup and then providing a fireman’s to my partner. This was the first time I had used the prusik on a descent of any considerable length and found that I wasted a lot of time messing with it as it would catch frequently, even though I was tending it. Next time I will try fewer wraps or a klemheist.
I passed the next slung block and neared the tree that had been our first belay on the way up. It looked like a stretch but doable, and I recalled that the party of 2 descending earlier that morning had completed what I believed was a rappel between the same stations as I was currently doing. I walked off of the last ledge and soon realized that I had made a mistake.
I was about 10 feet above the tree and at the end of the rope. I know that the party earlier in the day had not ended up so high above the tree, so they must have had a rope with a little more stretch. I was getting tired now and wasn’t keen on climbing back up or downclimbing to the tree if I didn’t have to, and I knew that my partner wouldn’t want to either. He had some of the rack and I had already put a bunch of gear in my backpack on the summit, but I poked around until I could build an anchor with the handful of pieces on my harness and shouted to explain the situation.
He came down and did another rap off of the slung block above me. It looked like this one might have reached the base of the route, but to avoid more shenanigans we pulled and rethreaded the rope at the tree. From here we arrived at the base and had another quick bite to eat.
We had some minor hesitation about rappelling down Pineapple Pass since we didn’t know what we would find. I could see the second station and the talus field not far below it though, so we went for it in the interest of time and not dealing with scrambling back around. I went first and had to stop several times to sort the strands as they were conveniently turning into spaghetti every time I tossed them further down.
I arrived at the second station and found it to be the most “interesting” one of the day. The block was fairly solid but there seemed to be some potential for the slings to pop off if the rope were to whip around a lot while rappelling. There didn’t seem to be any solid rock in the area to leave nuts in even if we wanted to, so for now I gardened out a placement for a cam that would hold the slings more securely in place. I don’t imagine that this anchor would phase many experienced climbers, but it raised my eyebrow as a noob.
My partner came down to meet me and I kept my head low as a fair amount of loose rock was falling. I went first being heavier and carrying the heavier pack, and he went second, removing the cam. Touching down on the talus field felt good and we high-fived in congratulations of not fucking anything up too badly.
It started to get dark as we hiked down and head lamps came on after not too long. We had no trouble navigating back out into the bowl, but had to check GPS once before we got back on the Snow Lake trail as it was completely dark by now. We finally got back to the car at 10pm, completing what is likely the longest ever ascent of The Tooth at 16.5 hours C2C.
We had been very thirsty on the way down and exercised great restraint to keep from drinking potentially poopy stream water. We both downed 2 root beers and a large gatorade each, with a few croissants, and promptly passed out in the car for the second night in a row.
I realize that The Tooth is something of a joke to most people here, but I figured I could provide a view into the experience of us 2 dudes who are afraid of heights and figuring out climbing for ourselves. It seems like the majority of experienced climbers either had more of a knack for this to start than we do, or get started by having a teacher drag them up a handful of climbs. From each of our trips come a lot of lessons and I like it that way. Baby steps.
I imagine the next time we go will be a lot faster, with knowledge of the route and more experience finding placements. The rappels took a long time but we got our system fairly dialed towards the end, so this should be better next time too. We also spent a lot of time waiting for people to pass, but we were so slow that it would have been impolite not to insist.
Comparison with R&D:
- Easier climbing with big holds and no requirement to climb cracks
- Fewer solid protection opportunities. Probably bomber by Cascades alpine standards, but substantially less than a granite crag.
- Many rappels instead of walking off to the car
- Belay areas are smaller, making it more difficult to negotiate with other parties
- More loose rock. Required testing of holds and care not to knock it down. Funny enough though, it was R&D where I got nailed in the helmet with a rock.
- Easier to communicate, at least with low wind
I am not sure which one is a better beginner climb. I got more frazzled leading R&D but I don't necessarily think it is harder overall, given the infinite amount of bomber protection. Probably just because it was my first. They are both good and provide unique experiences to a new leader.
Big thanks to everyone who was patient and helpful on the route.
Someday...
Gear Notes:
The biggest rack The Tooth has ever seen
Approach Notes:
Snow Lake trail
- Easier climbing with big holds and no requirement to climb cracks
-
We used 1 micro traxion each as part of our 2 man glacier travel setup this year but we definitely did not have them configured to hold the fall. Seems ill advised as others have said. Note that the device can be pre-attached to the rope without having to hold the fall.
In the ascending scenario we use the traxion connected to the harness and a prusik for the feet. The primary benefit is that you don't have to fuss with unbinding and pushing up the harness prusik while you hold yourself up standing in the foot prusik, which can be a pain in the ass with cold hands/gloves and a thin diameter rope that causes the prusik to kink up on the rope.
Similarly we had problems getting our old prusik minding pulleys to mind the prusik properly when using an 8mm rope. The micro traxion resolved these issues and allowed us to carry the light rope. It is also lighter than the additional prusik and prusik minding pulley we used to carry.
I like that genepires came up with a way of actually equalizing the two anchors instead of the second one essentially just being a backup that is unlikely to be loaded equally unless the first one gives a lot.
-
Thanks guys. This is about what I figured. Lots of time on I90 stuff.
-
Yea, sounds like Tooth NE slab is no good for us.
I forgot about SEWS SW couloir, which seems pretty perfect. Added that and Colchuck NE couloir to the list.
New to Backcountry Skiing
in the *freshiezone*
Posted
An alternative perspective is that Shuksans are heavy given their width.