
Leaderboard


Popular Content
Showing content with the highest reputation on 07/02/25 in Posts
-
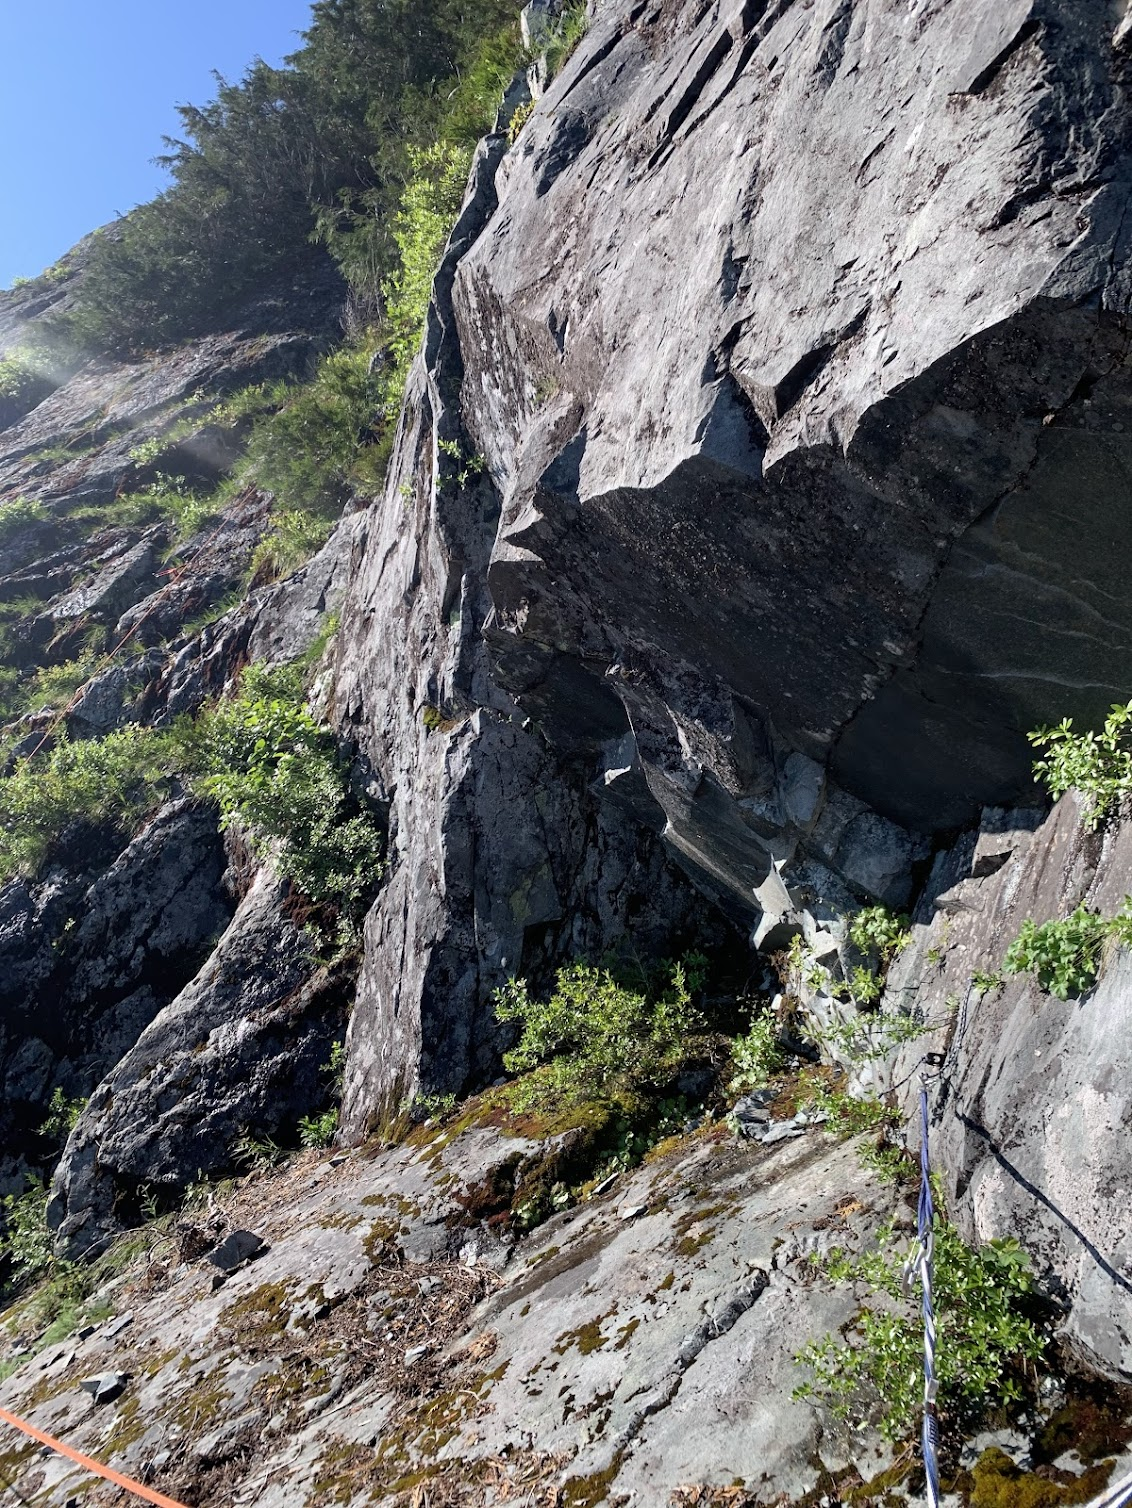
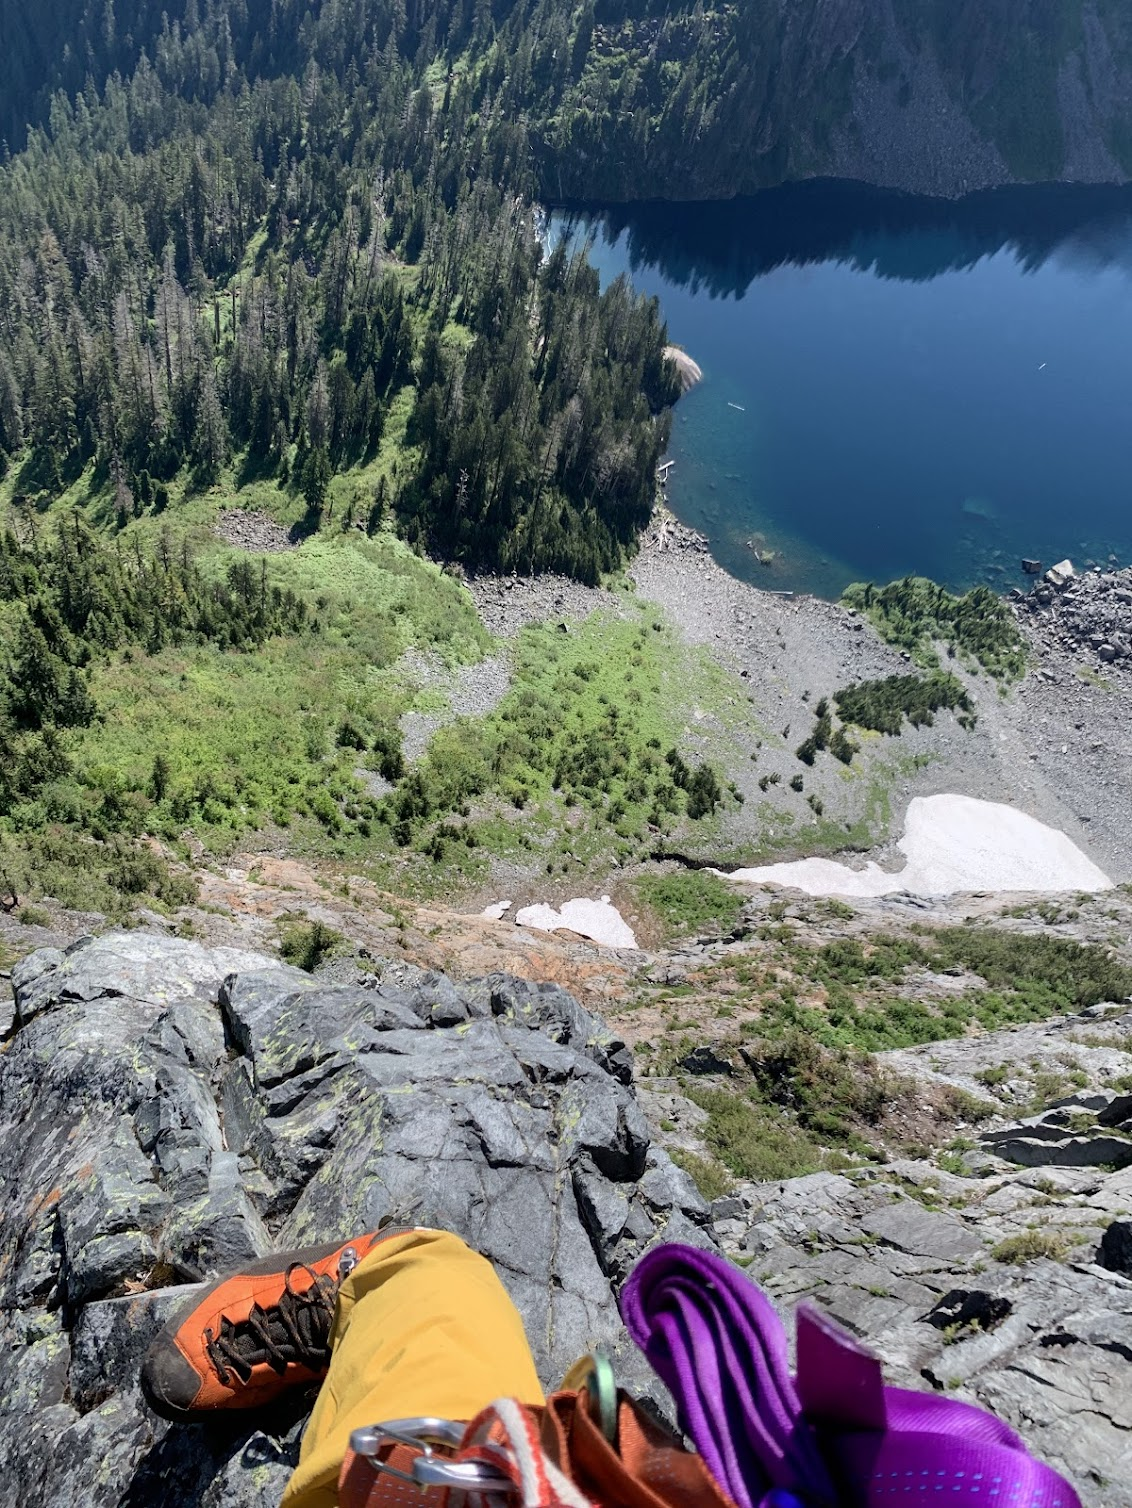
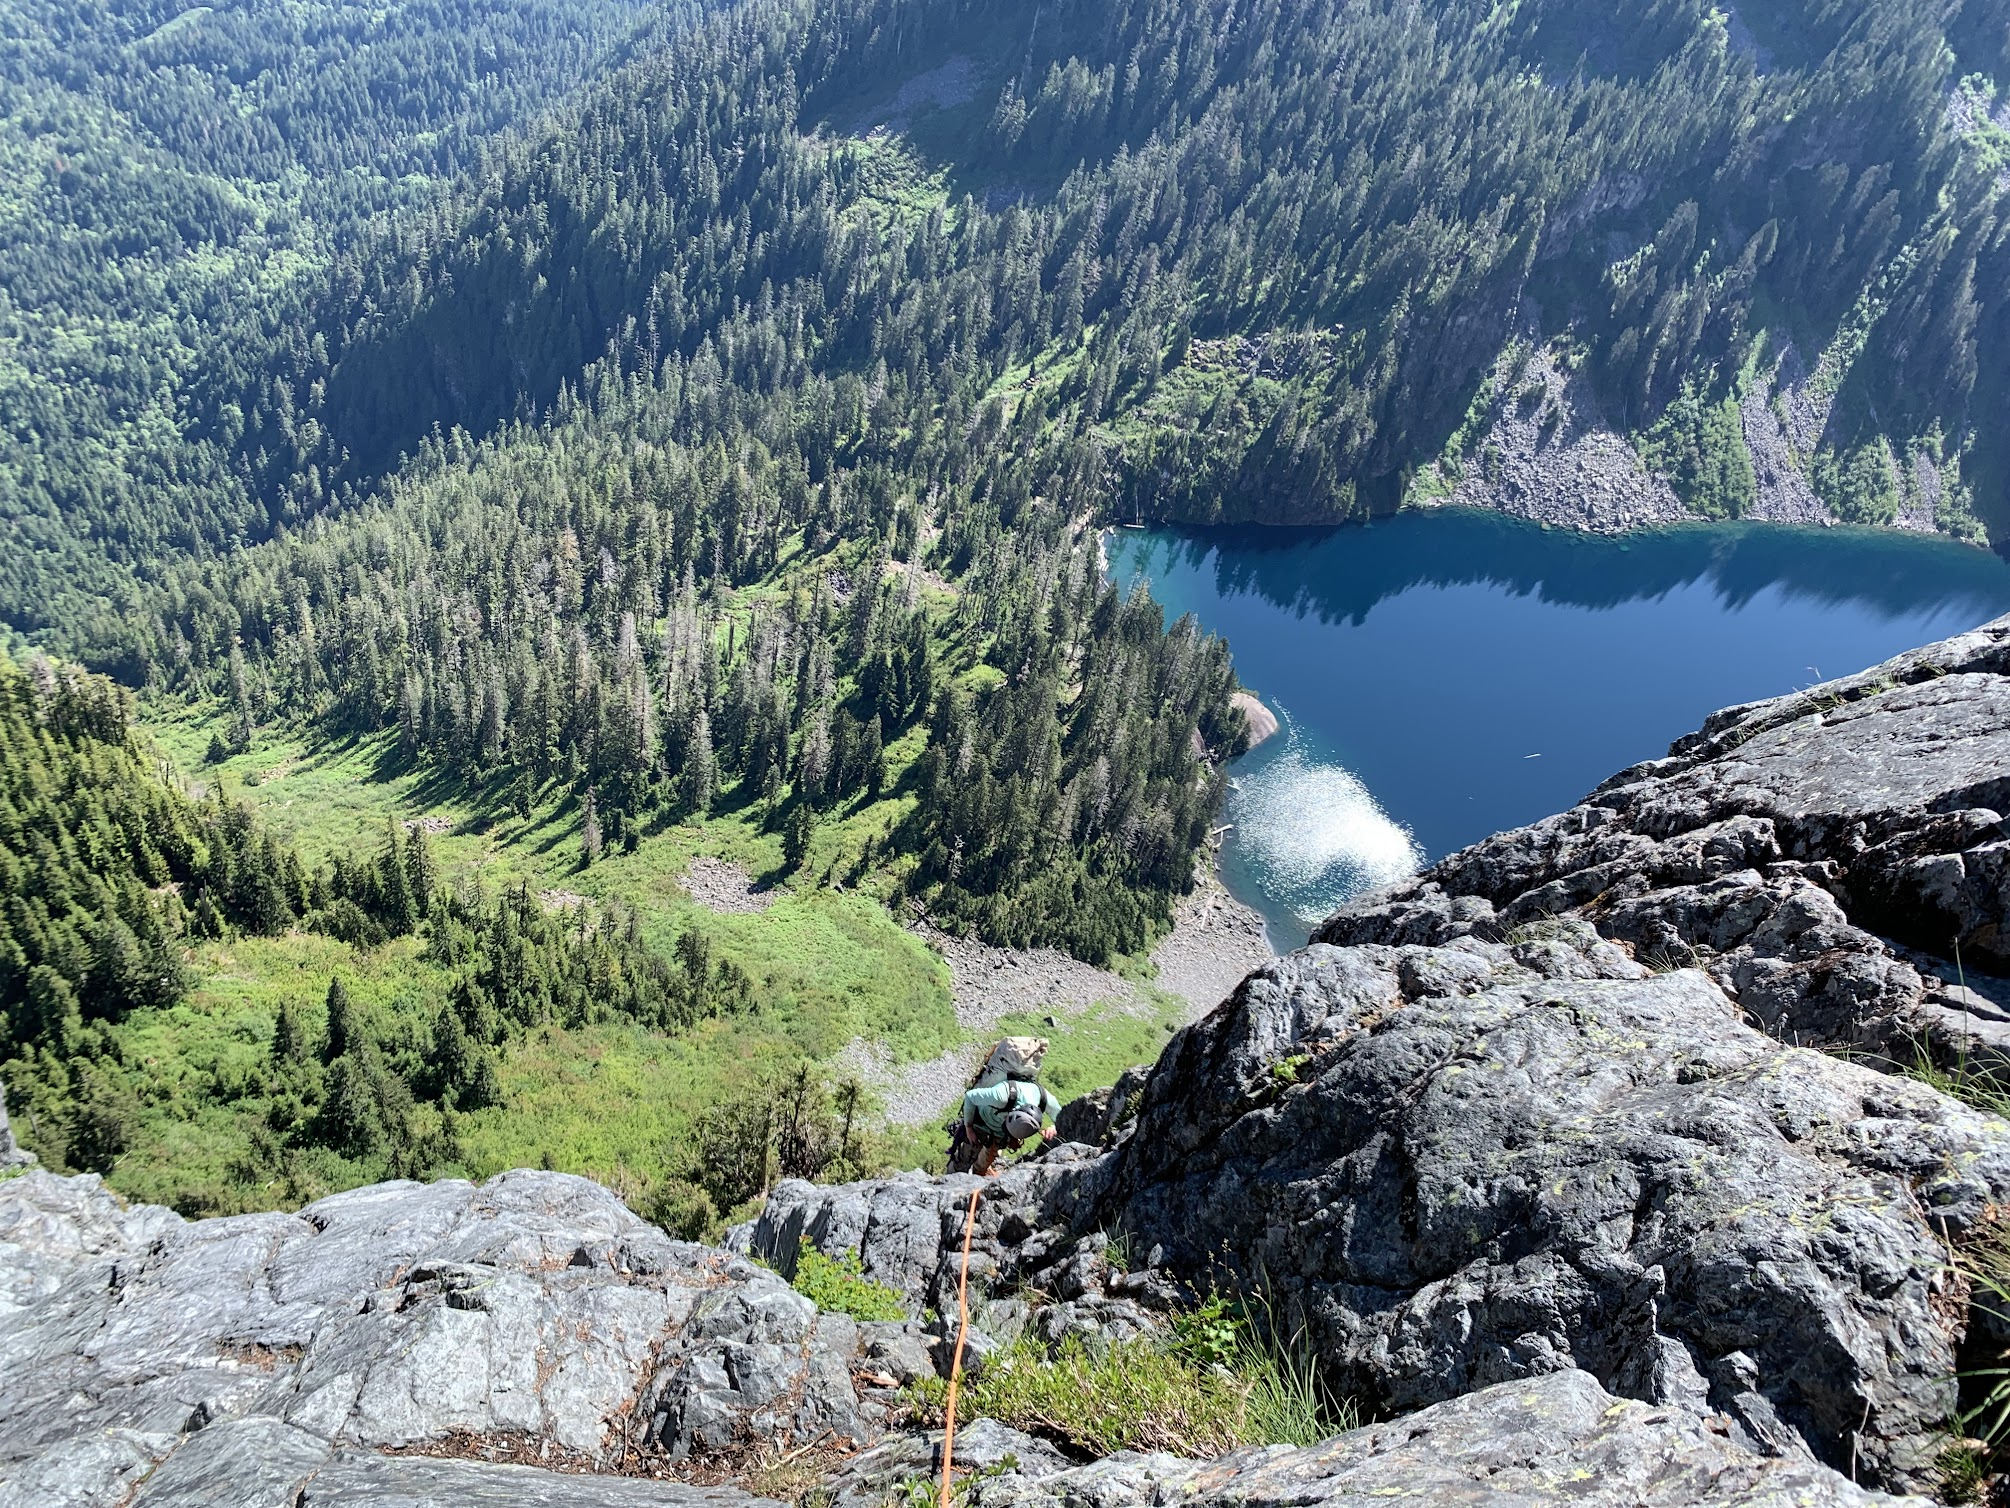
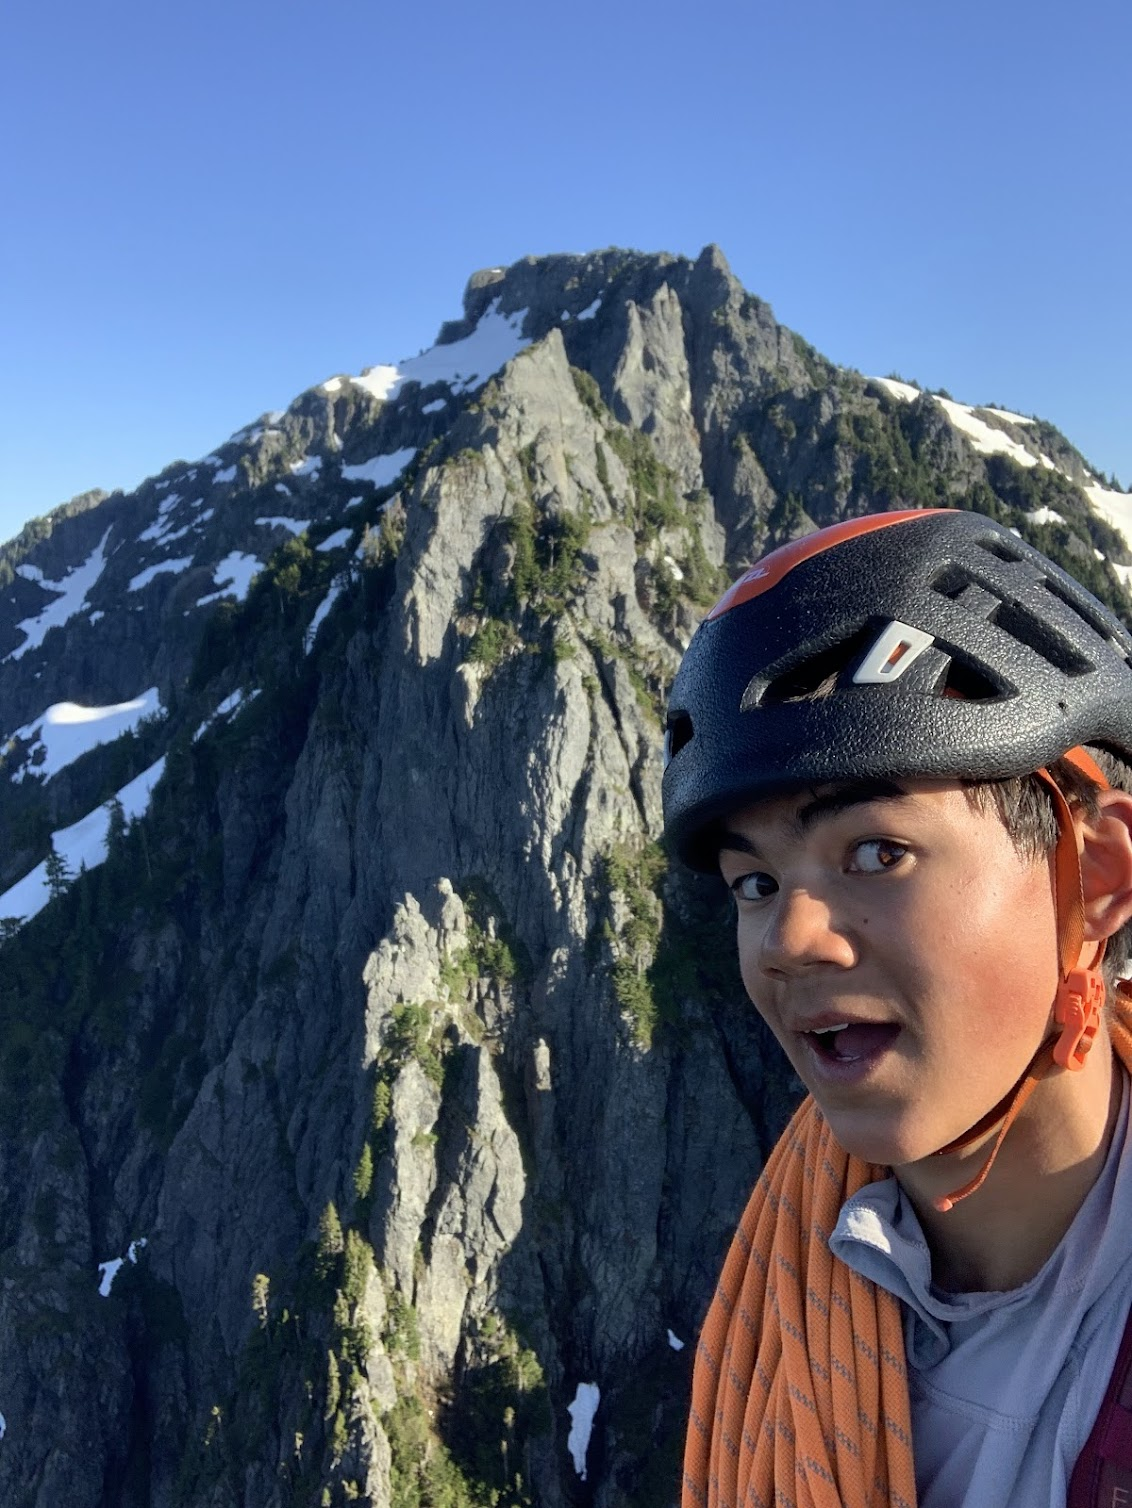
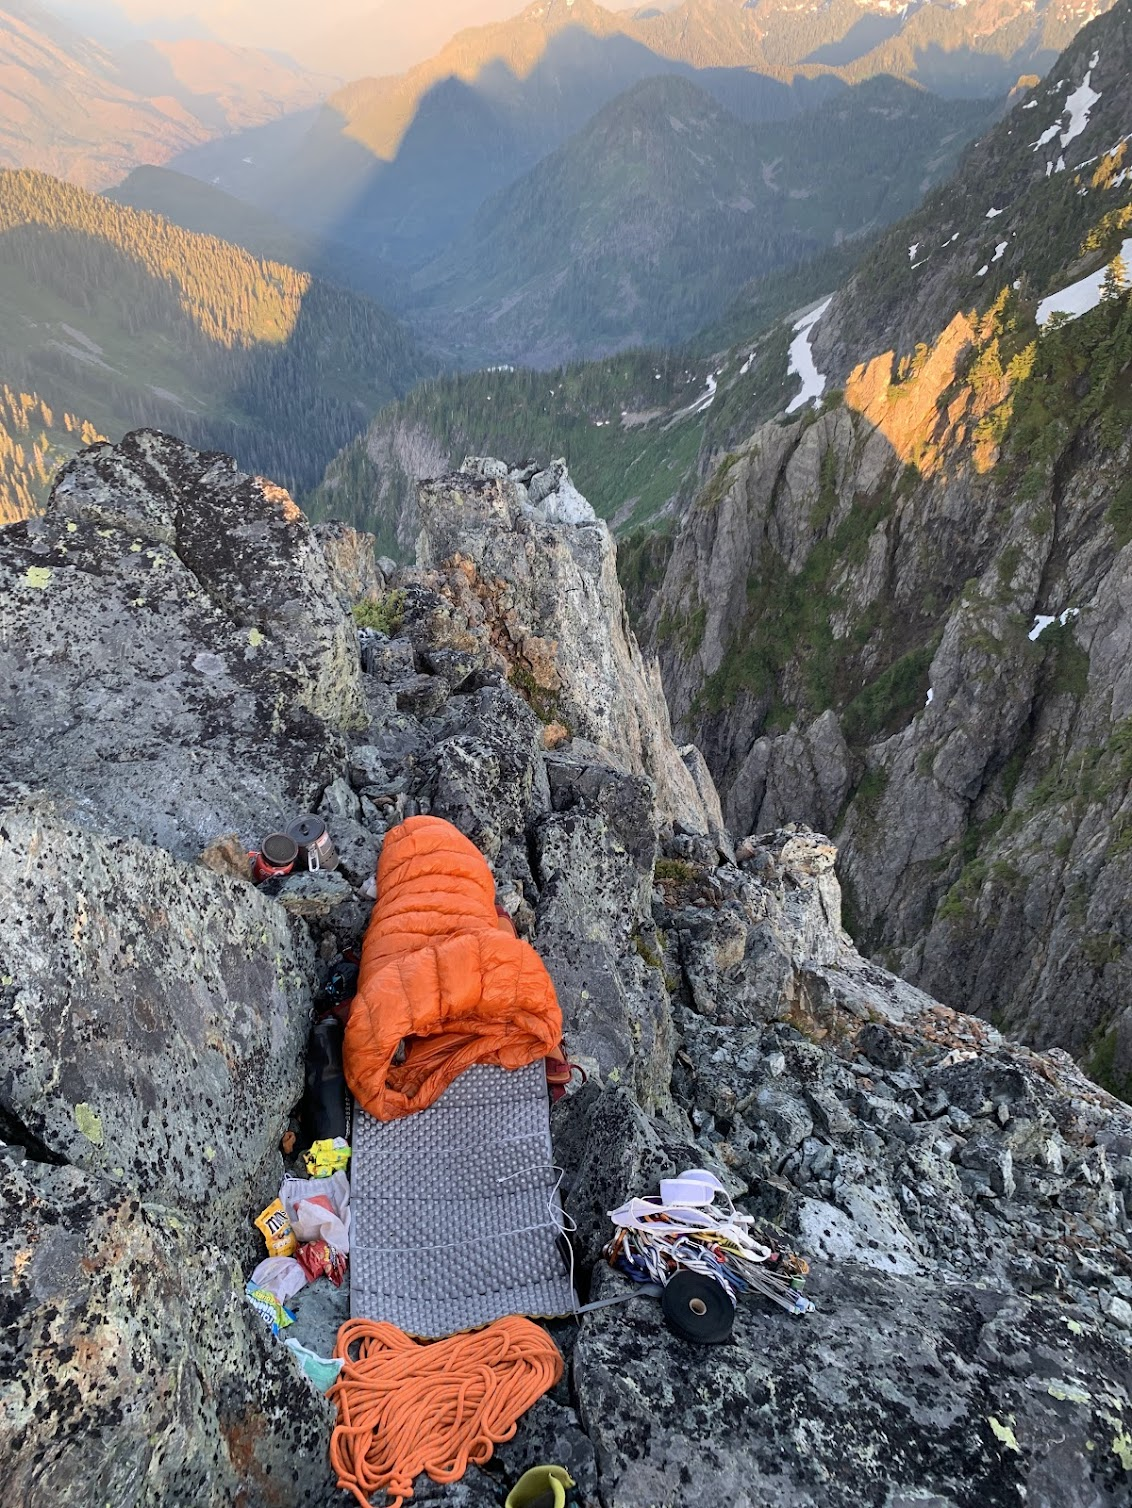
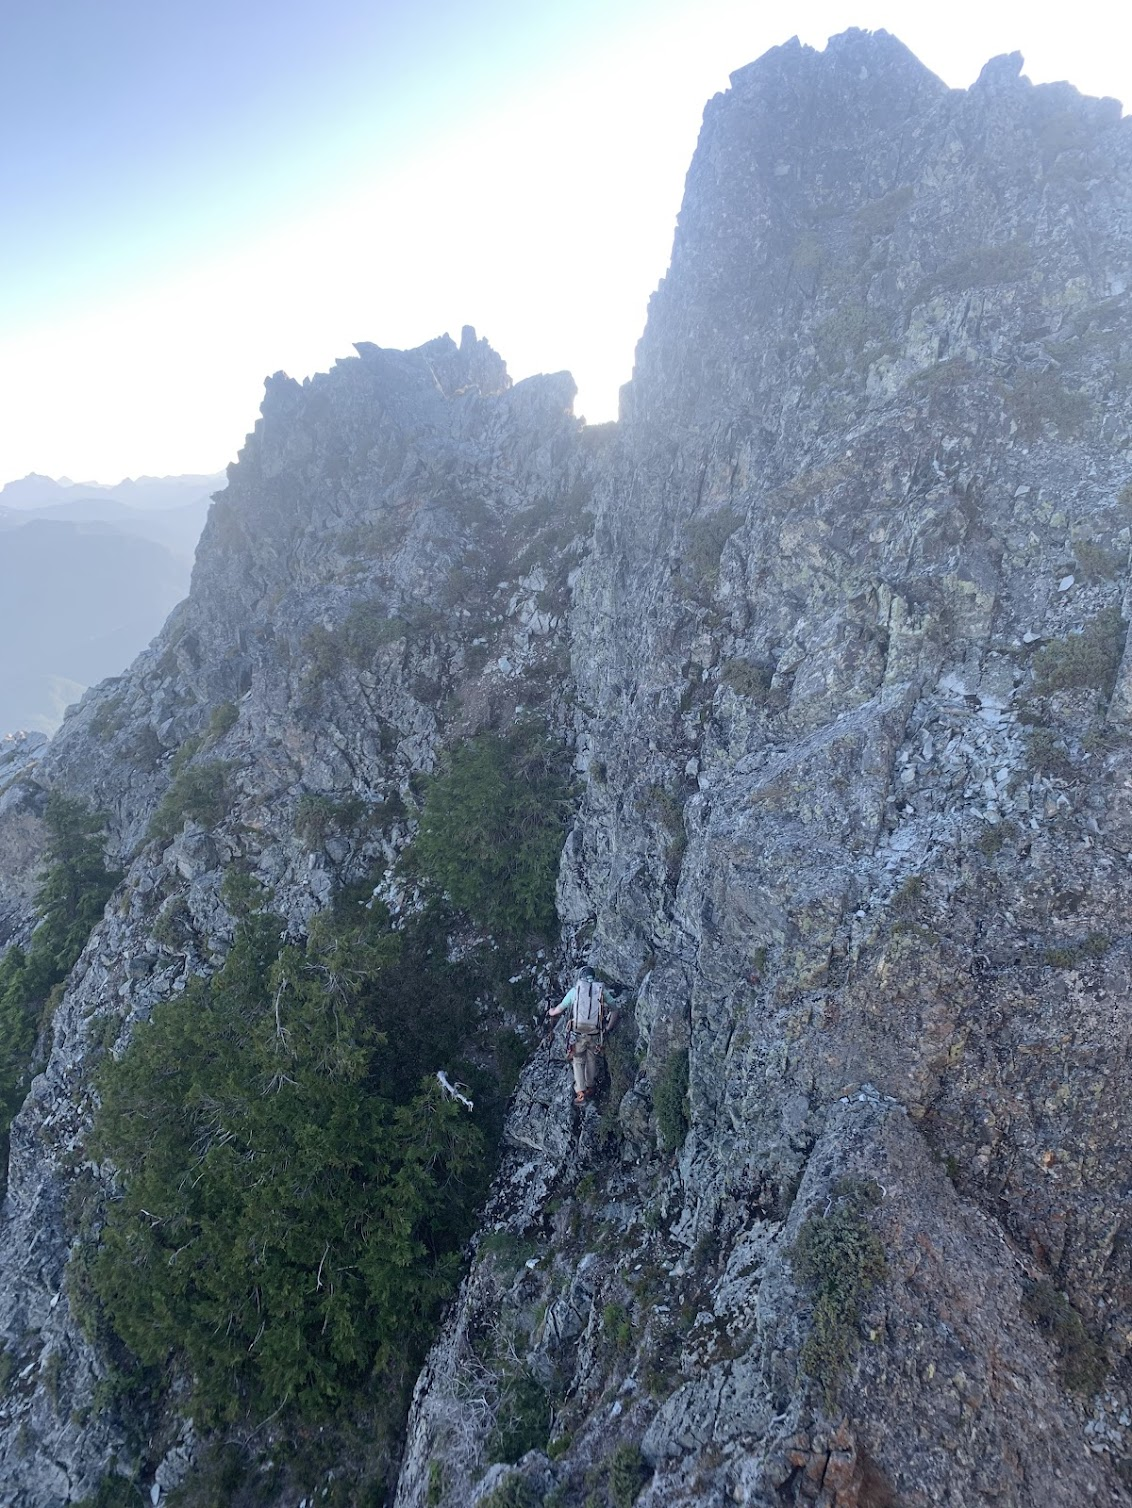
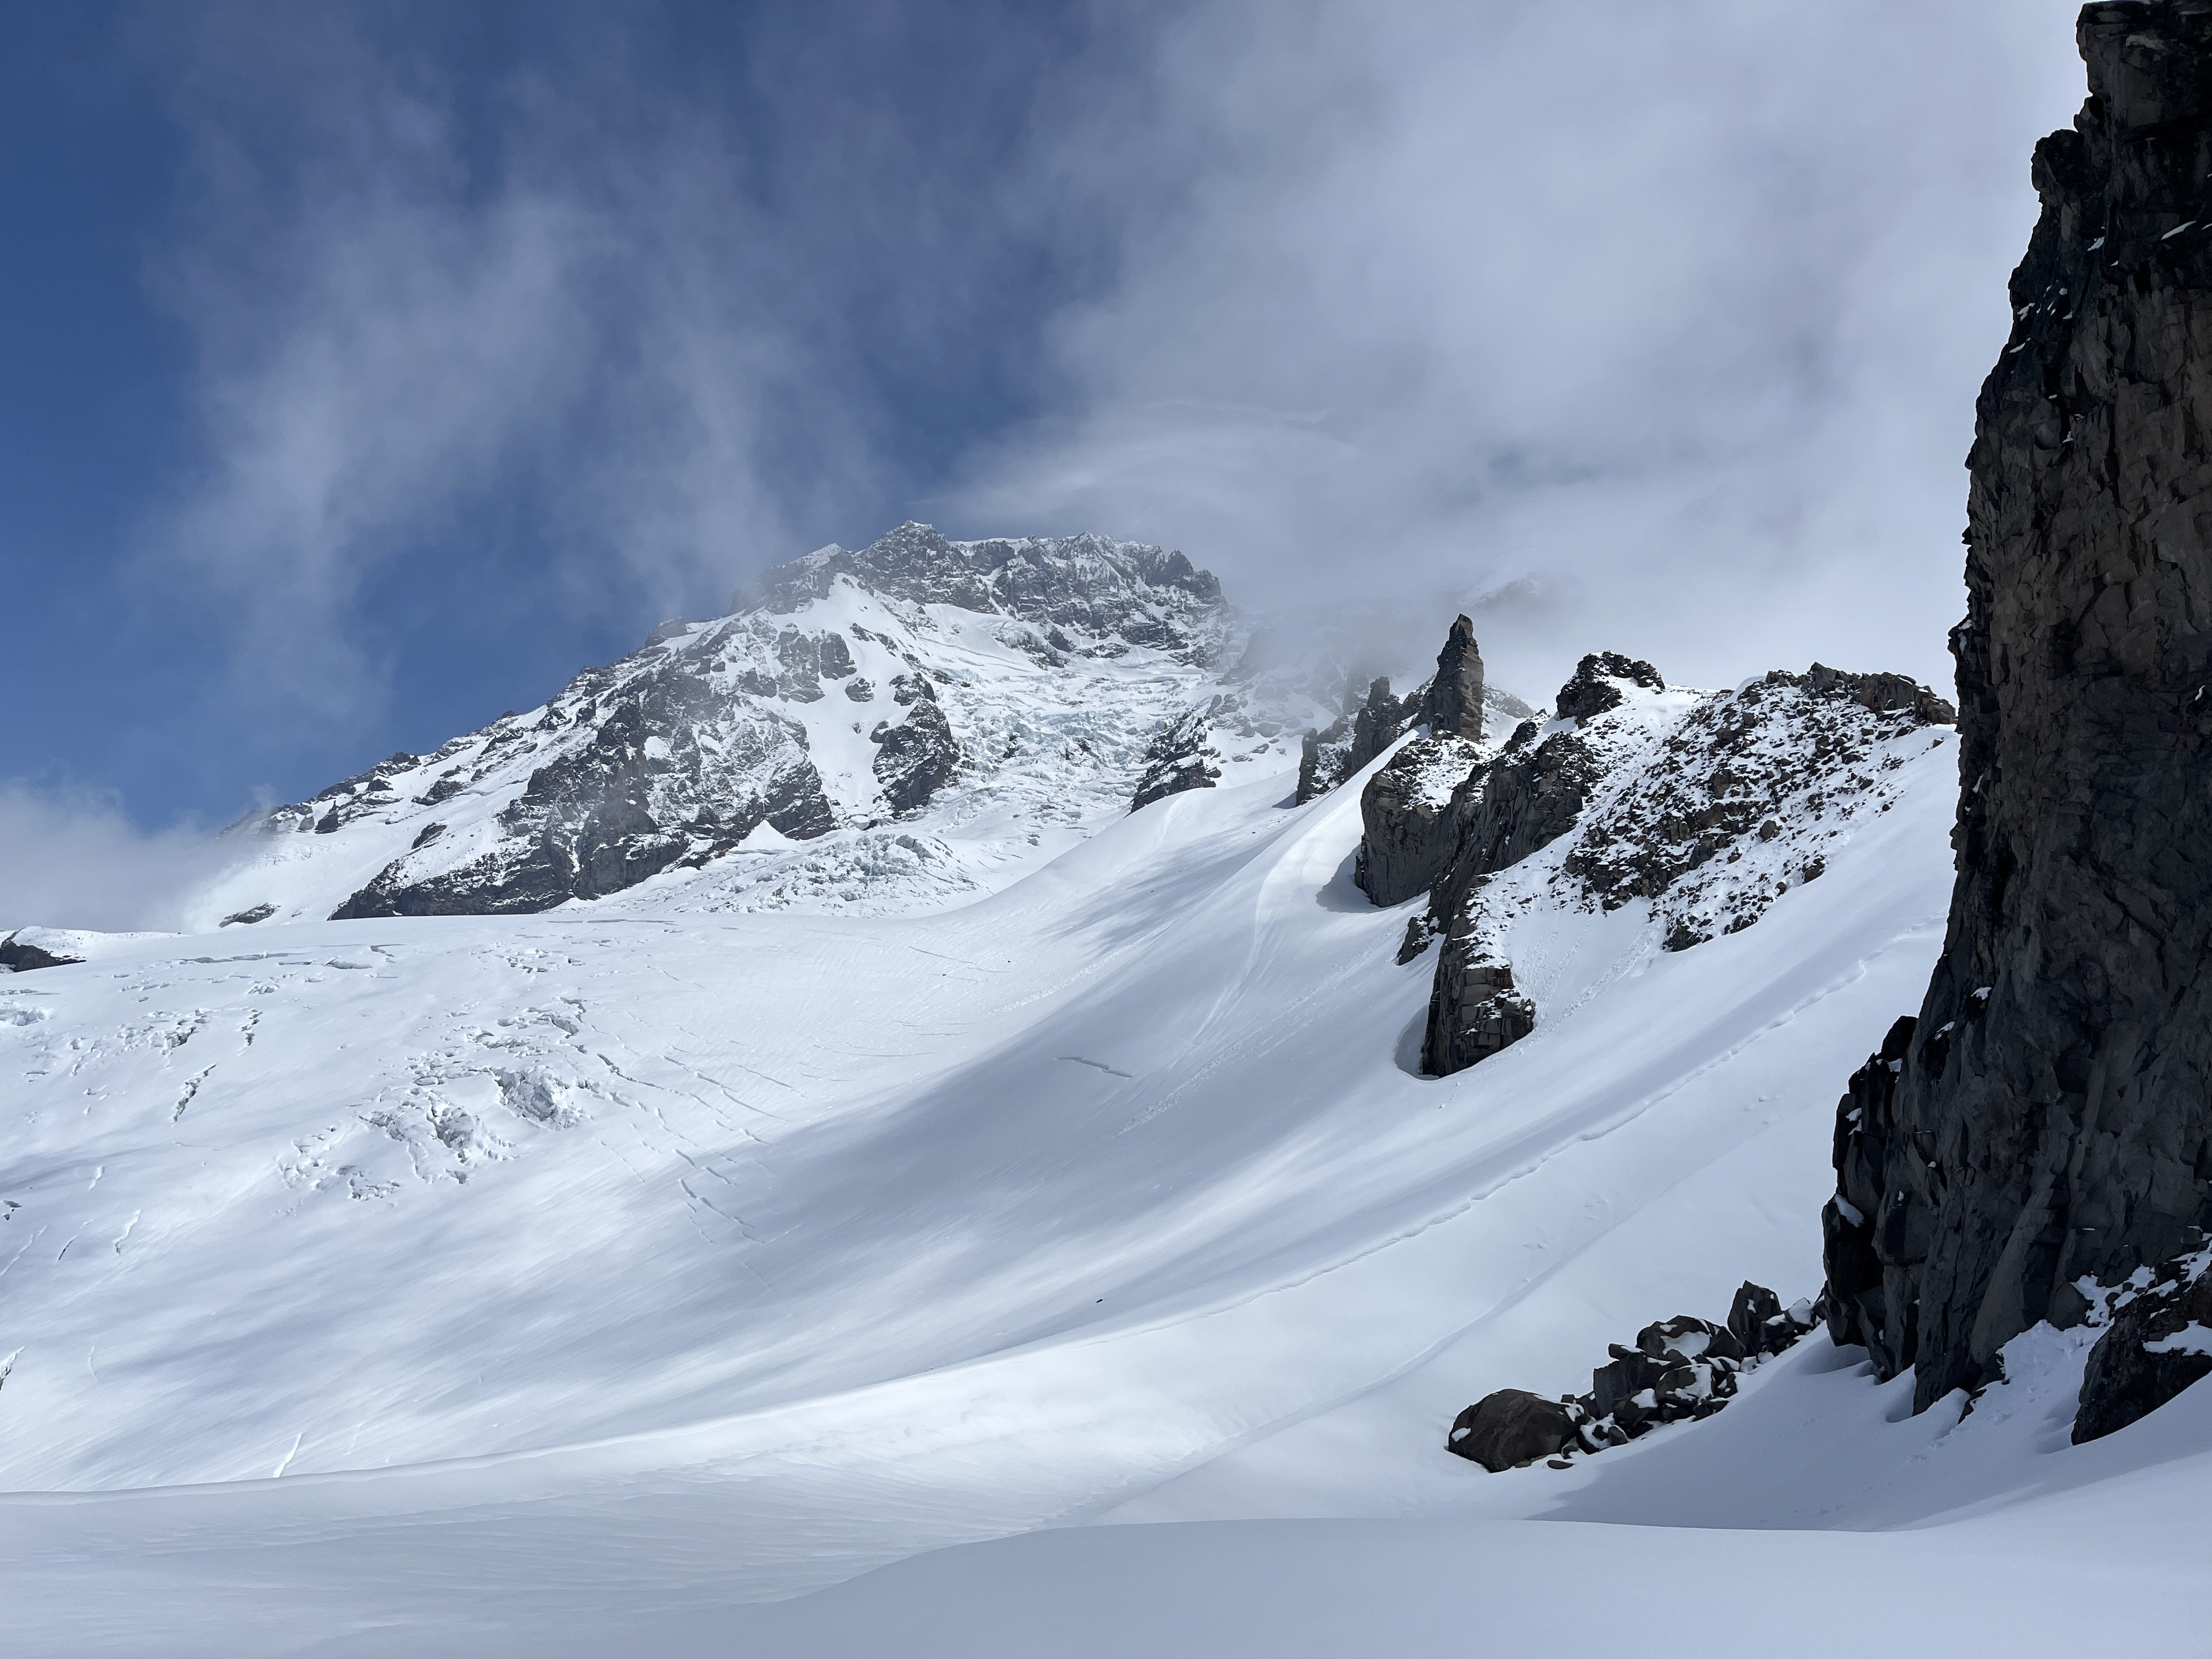
Trip: East Fury - North Buttress Trip Date: 06/29/2025 Trip Report: In the couloir leading to the buttress from its east side, the drawbridge is up. It’s hard to think of a route in the cascades that I haven’t climbed that I was more excited to try. From Luna col the position of upper snow arete looks insane. And the photos in this 2017 report don’t hurt: https://cascadeclimbers.com/forum/topic/100747-tr-mt-fury-north-buttress-6232017/?tab=comments I was lucky to find a partner inspired enough to take a day off and put in the considerable effort to get out there and check it out. Saturday was a little cloudy and not too hot, which kept things relatively smooth on our way from big beaver to Luna Col. Even though I’d seen it before, the first sight of the northern faces of the southern pickets that rewards the grind up to -6400 was literally breathtaking. I let out a little pious whoa. The last mile or so took approximately forever but we arrived well before dark, 11.5 hours after drop off. A ghost set up our tent. From the col the couloir didn’t look too promising but wasn’t obviously impossible so we proceeded to go for it the next morning, leaving camp at 5am (4:30 might have been better). As in the trip report from 2017, we trended left on the descent to Luna lake, which worked well. From the lake we traversed W and SW, bottoming out around 4500’. At this point we could see the snow was not continuous in this first couloir and quite a bit lower, maybe 15-20 feet, than in the 2017 reference photo. We found a ~5.0 exit onto slabby rock and got up to easier ground. Continuing up we traversed as quickly as possible across the exposed face to the entrance of the main couloir. From below it still looked worth trying. But only about 200’ up it we encountered a hidden moat spanning wall to wall, just above where I am in this photo. It was tall and unnervingly hollowed out. Questing up and left on the rock for a bypass was fruitless. I found steep slabs without much pro. And transitioning from boots and crampons to rock shoes while exiting a tenuous snow location onto a narrow rock stance turns out to be very awkward. At 30m I ran out of rope (folded 60m half), placed a piece and down climbed on top rope back to the snow. We down climbed the steep snow back out the couloir. About to down climb to the first couloir. Looking up on our return to Luna lake I thought, hmm, we came down that? It looks improbably steep but is actually reasonable. All throughout the cirque there was surprisingly little activity given how warm the day was. At camp 12 hours after we left the evening was unpleasantly hot and buggy and I impatiently awaited the reprieve of dusk. In the meantime there was some helicopter activity near Outrigger. I hope everyone involved is all right. The heat was considerable already at 7am the next morning when we began our descent. I used crampons but there really was no hard snow to be found. We took a long break at the stream by Luna camp and it seemed then that we’d make our 5pm taxi in plenty of time. One small delay occurred when we saw two bear cubs climbing to the top of a tree right off of the trail. Mama wasn’t making herself seen or heard, so we backed up a little, made a bunch of noise and gave them a few minutes to clear out. We didn’t see the cubs again and did see the mother a little bit off trail, not acting aggressively. Checking the time. As the afternoon miles went by we realized that we were slipping behind and had to really push to get there right at 5pm. The driver was very nice and encouraged us to take the time to cool off in the lake. I don’t know if I have it in me to try this route again but if I did it would have to be possibly even earlier in the calendar, and in a year with above average snow pack come June. The west side alternative doesn’t appeal much to me, the photos from Steph Abegg make it look like overhead exposure would last a lot longer than it does while traversing in from the east. Gear Notes: Crampons, ax, whippet, 60m half rope, single picket, light rack and some bail gear Approach Notes: Big beaver to Luna col to Luna lake


 3 points
 -
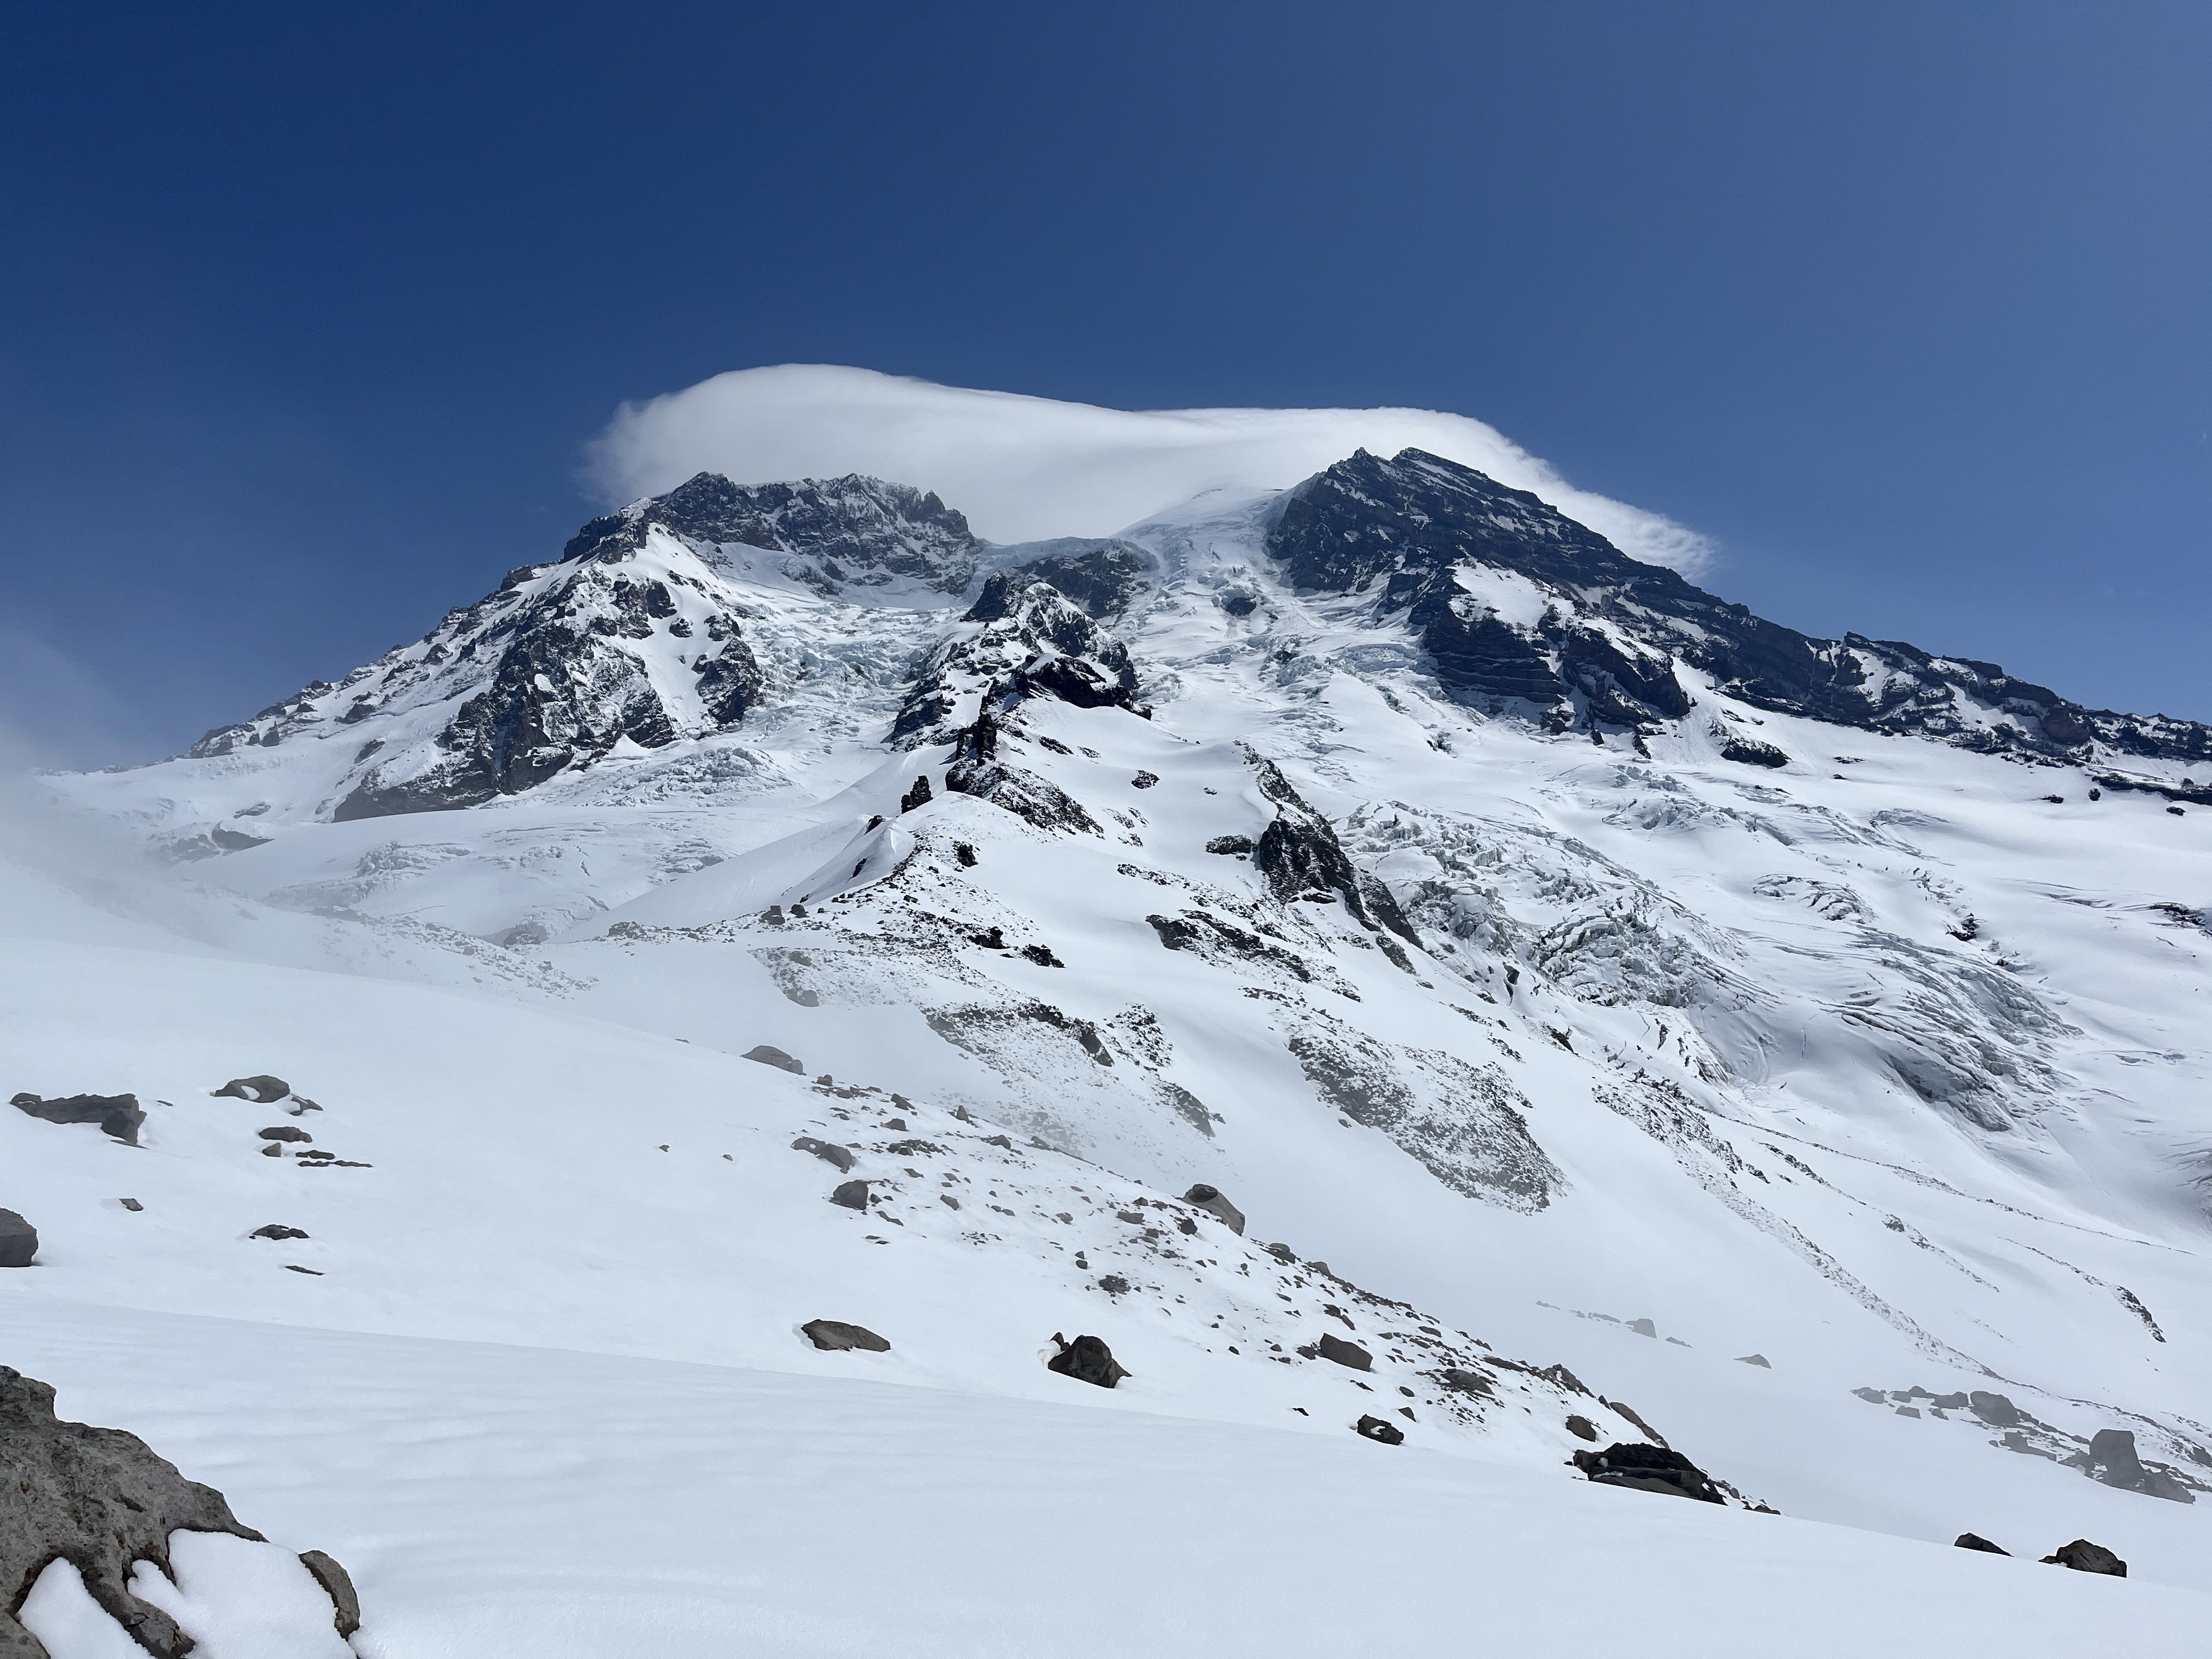
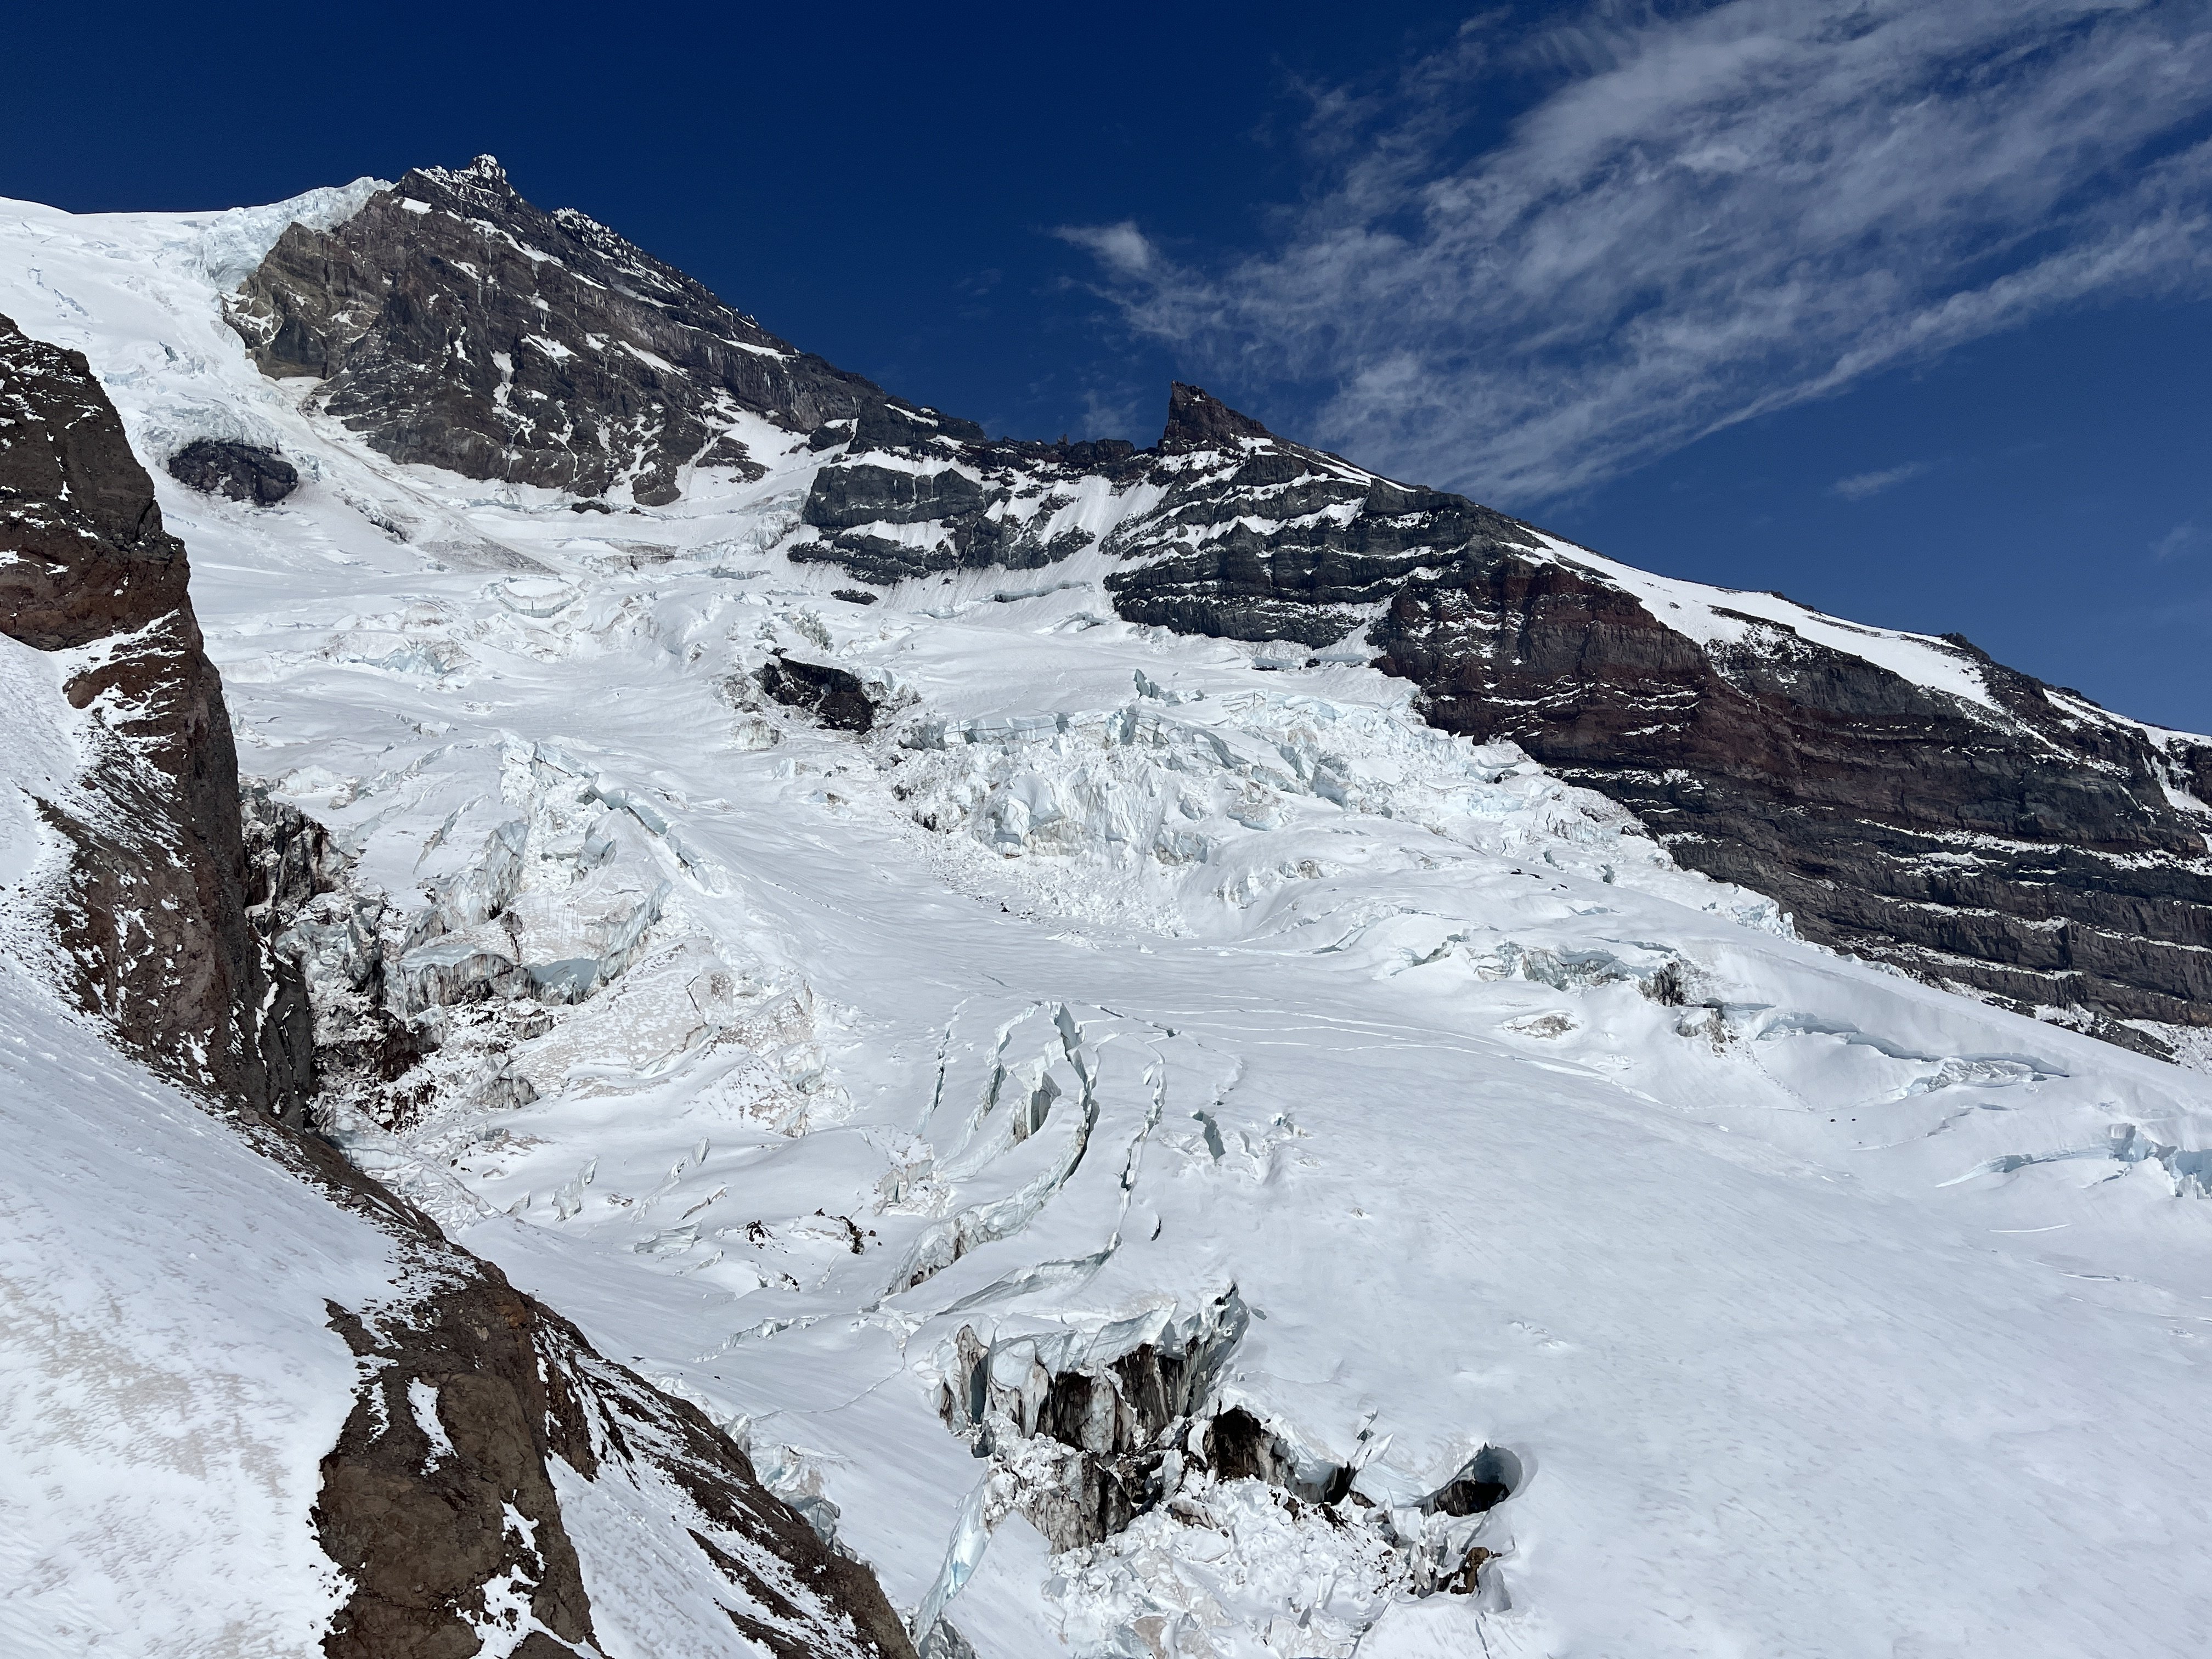
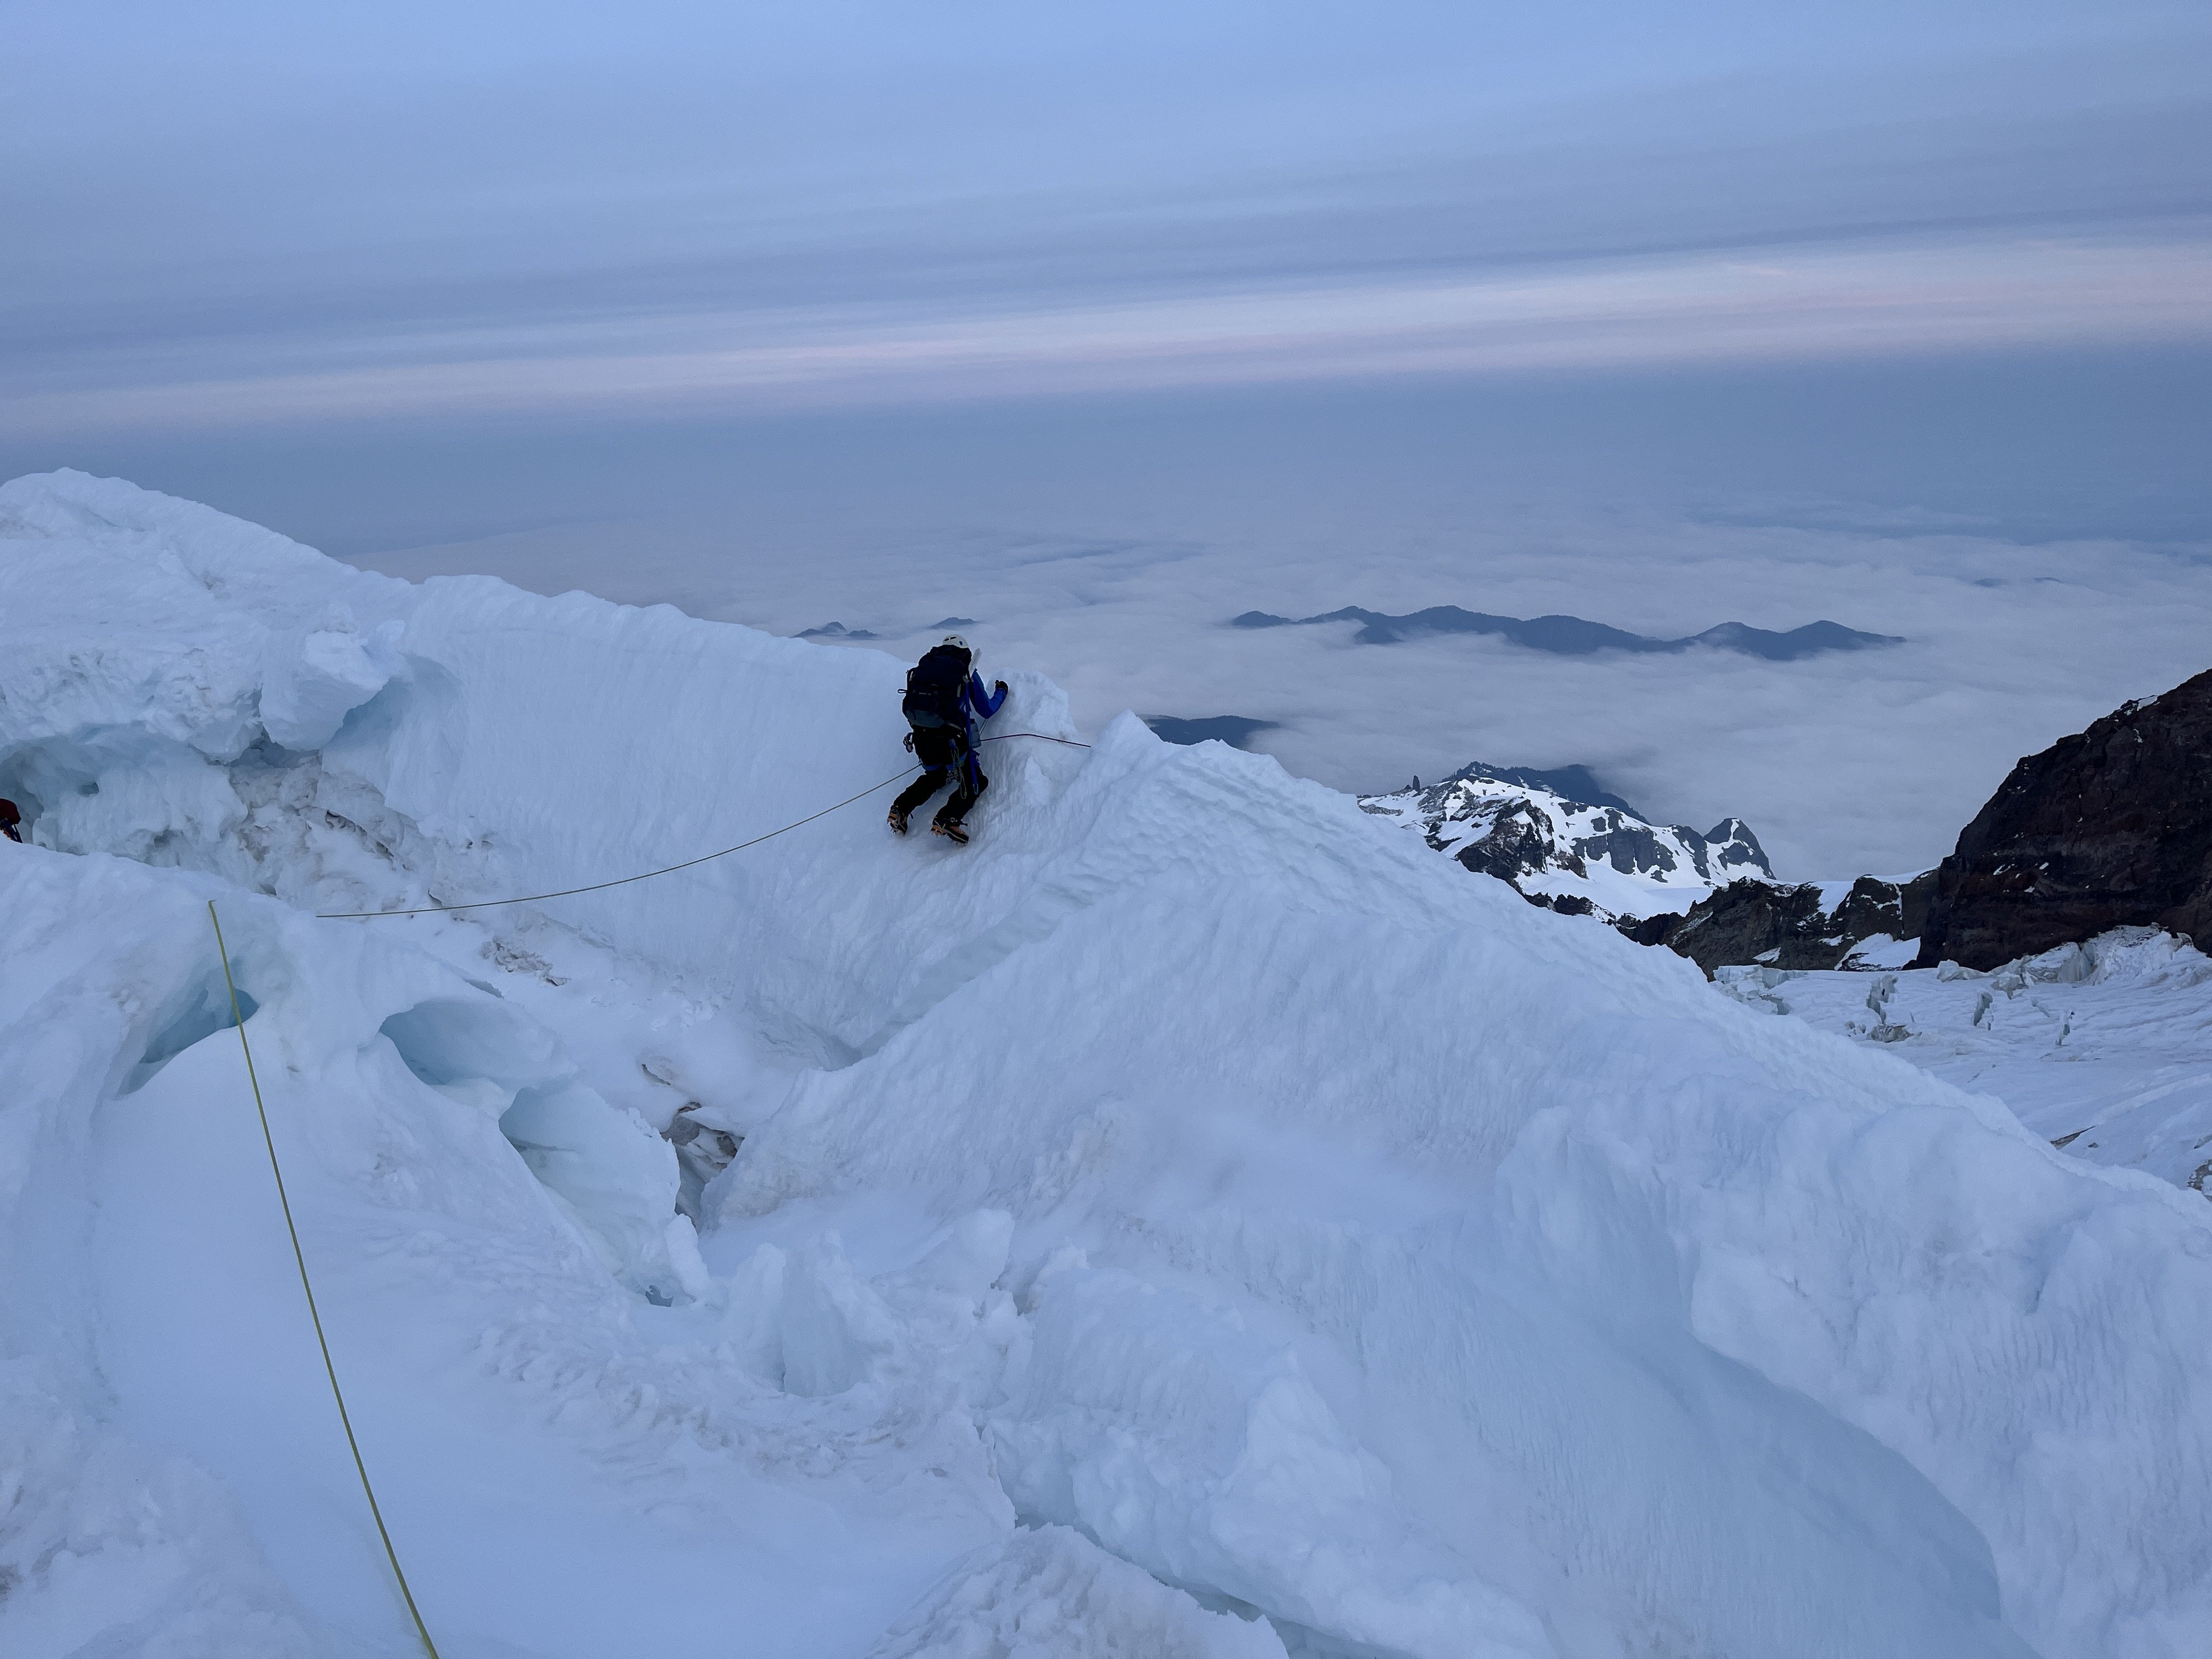
Trip: Mount Rainier - Emmons Central Trip Date: 06/30/2025 Trip Report: When looking at Emmons from Sunrise, Andrew got the idea of trying a route that would connect with a feature similar to the Emmon-Winthrop route corridor but positioned in the middle of the expansive glacier. This feature starts around 10k and provides easy direct access to the upper mountain. I was skeptical about the idea until I had a closer look myself a few weeks ago while climbing Cowlitz Chimney. We could not find any information about this route and decided to refer to it as Emmons Central. Please, let us know if you know the history or previous ascents. To spice things up Adrew pitched starting the glacier terminus. We scouted access to the moraine Saturday afternoon and took closeup picture of the route to weight our options. The pictures did not show any clear paths to the corridor but the “right” side variation looked the most promising. Sun morning, we hiked and shwacked to the terminus and started making our way up the glacier. The idea was to skirt very broken up lower section on the right, then hook left trying to ascend to a rocky ridge in the middle of the glacier. We could then follow the ridge for a little bit until being able to push right to access the start of the corridor. We identified one potential make-it-or-break-it crevasse below the rocky ridge but did not see any clear dead ends along this option. After leaving the moraine and getting on snow we started aiming for a nunatak at 9400 following open slopes with minimal crevasse issues. From here we initiated our left hook as the glacier became more broken up. After some navigation we reached the crevasse with a question mark and were able to get across on an exposed but solid bridge far left. This brought us to the rocky ridge where we set up the camp at exactly 10080ft. Being in the middle of a glacier with the largest area in the contiguous US and having dry ground to sit on was awesome. Looking up from camp revealed crevasse problems we did not see in the pictures. The general plan was to keep going right and that is exactly what we did in the darkness the following day. It was obvious when we finally gained the ramp because there were no crevasses in sigh as far as the headlamps could shine. The angle starts around 40 degrees and gradually eases off with elevation as it trends slightly left. Around 12.5k the route connects with the late season DC route variation. To our luck we ran into set of boot prints around this elevation. Later on the boot path became marked with wands so my guess is that the guides or rangers prepared the route for when the regular DC gets too broken up. We followed the boot prints and wands until connecting with the regular DC and the well beaten path to the summit. We descended via the standard Emmons-Winthrop route. Gear Notes: pickets Approach Notes: Moraine trail to "End of maintained trail" sign then follow a boot path down. We then hiked along the vegeration up until it looked more open2 points
-
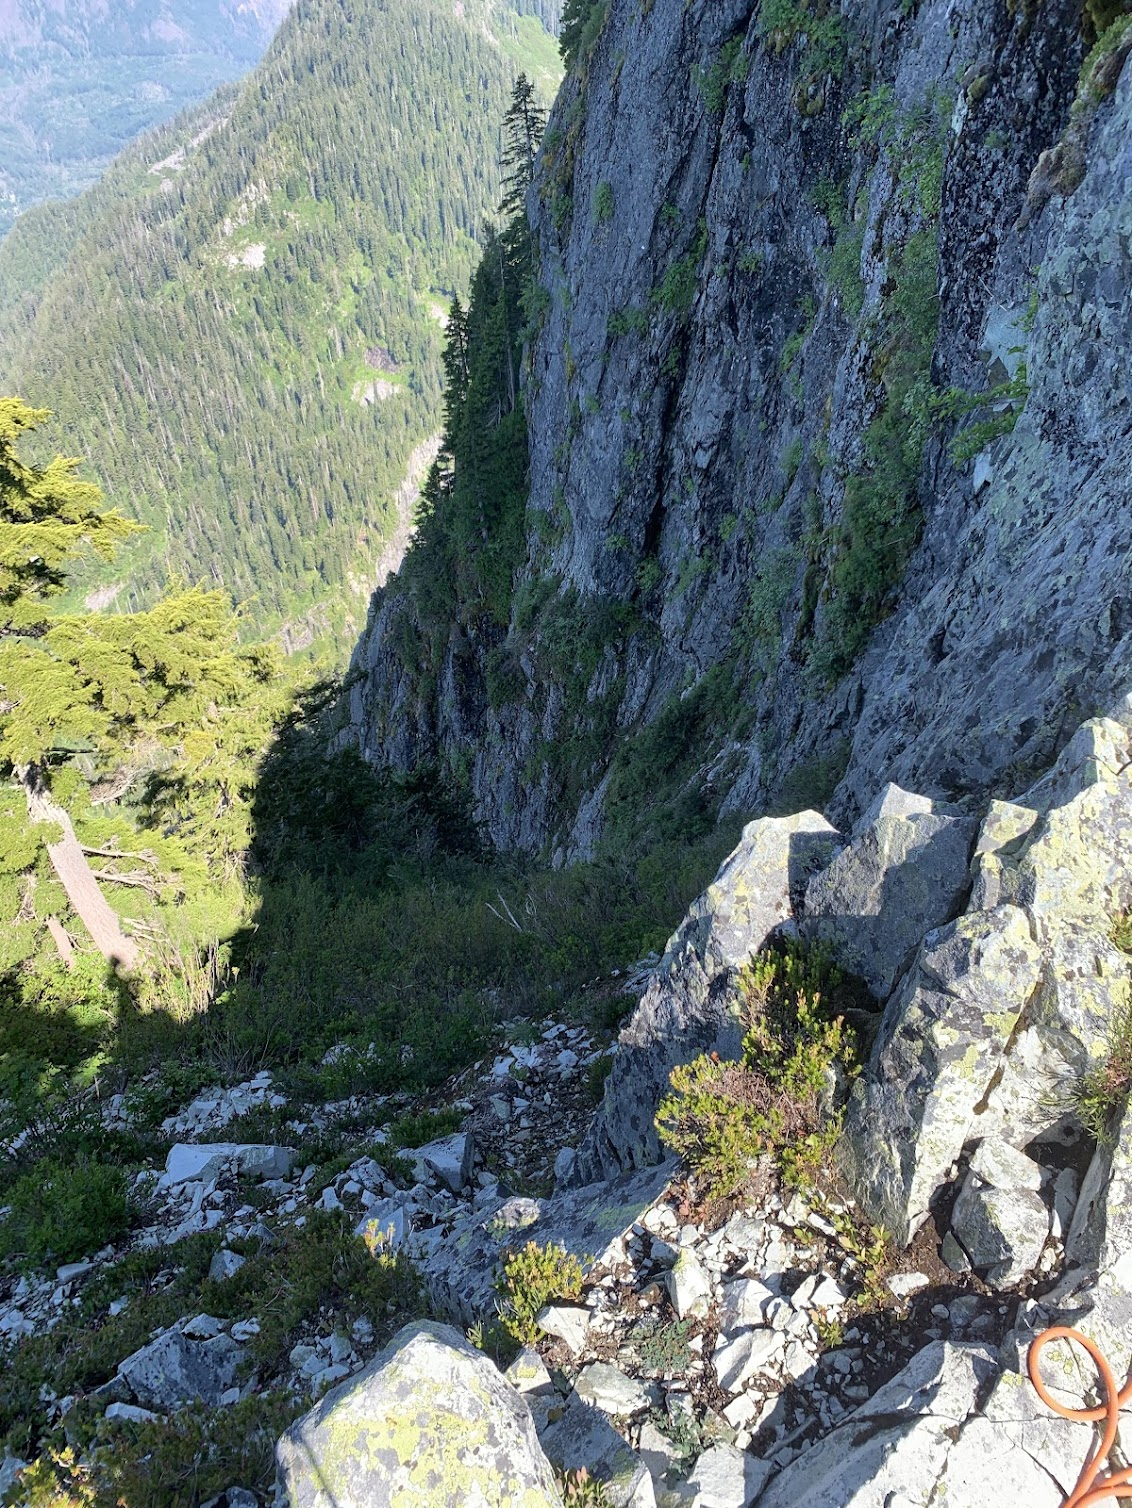
Trip: Mount Index - North Face Trip Date: 06/29/2025 Trip Report: Kinda tired but figure I should write some stuff down while it’s fresh in my mind. I’ll split this into two parts, the story and the beta. The Story is pretty simple, me and a partner decided to go for the Index traverse on Sunday and Monday. We had extra time on saturday so we hiked into lake serene to make for an easier morning. Without light on Saturday night, we made the mistake of trying to bivy at the flatter spot in the topo on the north of lake serene. This is very schwacky. Don’t do it. It wasted a lot of time. Anyways, Sunday am we worked our way up the talus and then up to the ridge. It was still a little wet and loose so we decided to rope up. Halfway up, my partner bonked and our pace slowed considerably. We made it to the summit late and decided that in his condition it wouldn’t be safe to commit ourselves to the rest of the traverse. A nice summit bivy ensued and then 16 rappels + downclimbing the next day. We chilled in by the lake and hiked out at a reasonable time. In the descent we also realized it was prolly a good idea we didn’t commit ourselves to the traverse. It fingers were beat and the rock was so warm that touching the rock was truly painful. Wouldn’t be fun to be forced to climb in that. My partner has a brain and realized this blue collar suffer climbing aint for him, but if anybody wants to get on something suffery with me, let me know. I got a lot of time this summer and like to put my head down and work. Anyways on for the beta Beta: Approach via Lake Serene. Take the trail around the lake to the talus field. Follow the talus field up, eventually getting near the cliffs on the left but not on them. Eventually you will be forced into the bush to the right of the cliffs where there is a faint climbers trail. At times it can be decent but often, its only marked by the fact that you can see the ground every once in a while. Bushwack 4th class up onto the NE Ridge, pulling on lots of branches. Eventually you’ll get out of the schwack and onto the ridge. Take the easiest looking route up, roping up if you feel necessary. Climb this until you reach a slab with two pitons under a roof. Once here take the leftward brush filled ramp for about 50ish meters until you reach a short E facing exposed rock rib. This is a great pitch with exposure above lake serene. It will quickly ease up into a nicer gully below an open book feature. Climb to the treed ledge on the left side below this open book where you’ll find the crux pitch of the route. Start up on left side of the open book before traversing right on smaller holds to get to the easier gully above the open book. Here you’ll find a block with a lots of slings for a nice belay. At the block, climb hard right out of the gully and then climb straight up the steep trees and brush until it gets too steep. Here you should see a small hidden ledge going around right. Take the narrow, exposed ledge around the right skyline where you’ll finally see the North Bowl. Traverse, pulling steep brush, to get into the open bowl. Once in the bowl, the route goes up the steeper long gully on the left. Work your way up this thing, staying on the right side of it for most of the time. Eventually, before the gully turns right, you’ll find yourself on a nice ledge to the right of the gully with a slung tree and a piton + nut anchor above it. Climb up here and then to the left back into the gully. From here(when the gully turns right) it is 60 meters of steep bushwacking up to the toe of the North Rib. The North Rib is the highlight of the route. Stay right on top or barely(a few feet) to the right the entire time. This can be led in 2-3 pitches or one easy simul. It is exposed, but the holds are great unlike the rest of the route, and the location is amazing. Once at the top of the ridge, quickly climb up the small slabs onto the summit ridgeline. Scramble this, along, or slightly to the right for most of it until you reach the summit. slab with pins below roof. Ramp off to the left great exposure on E facing rib topping out of open book looking down rightwards turn at end of gully filled with steep branches. Taken from toe of N. Rib ig I'll have to come back for these guys summit bivy summit ridge scrambling(taken on way back) Gear Notes: Double rack to #2 but a single would probably be fine. Bring lots of double length slings, you'll be slinging a lot of shtuff. Approach Notes: Lake Serene -> boulder field -> Shwack
 1 point
 -
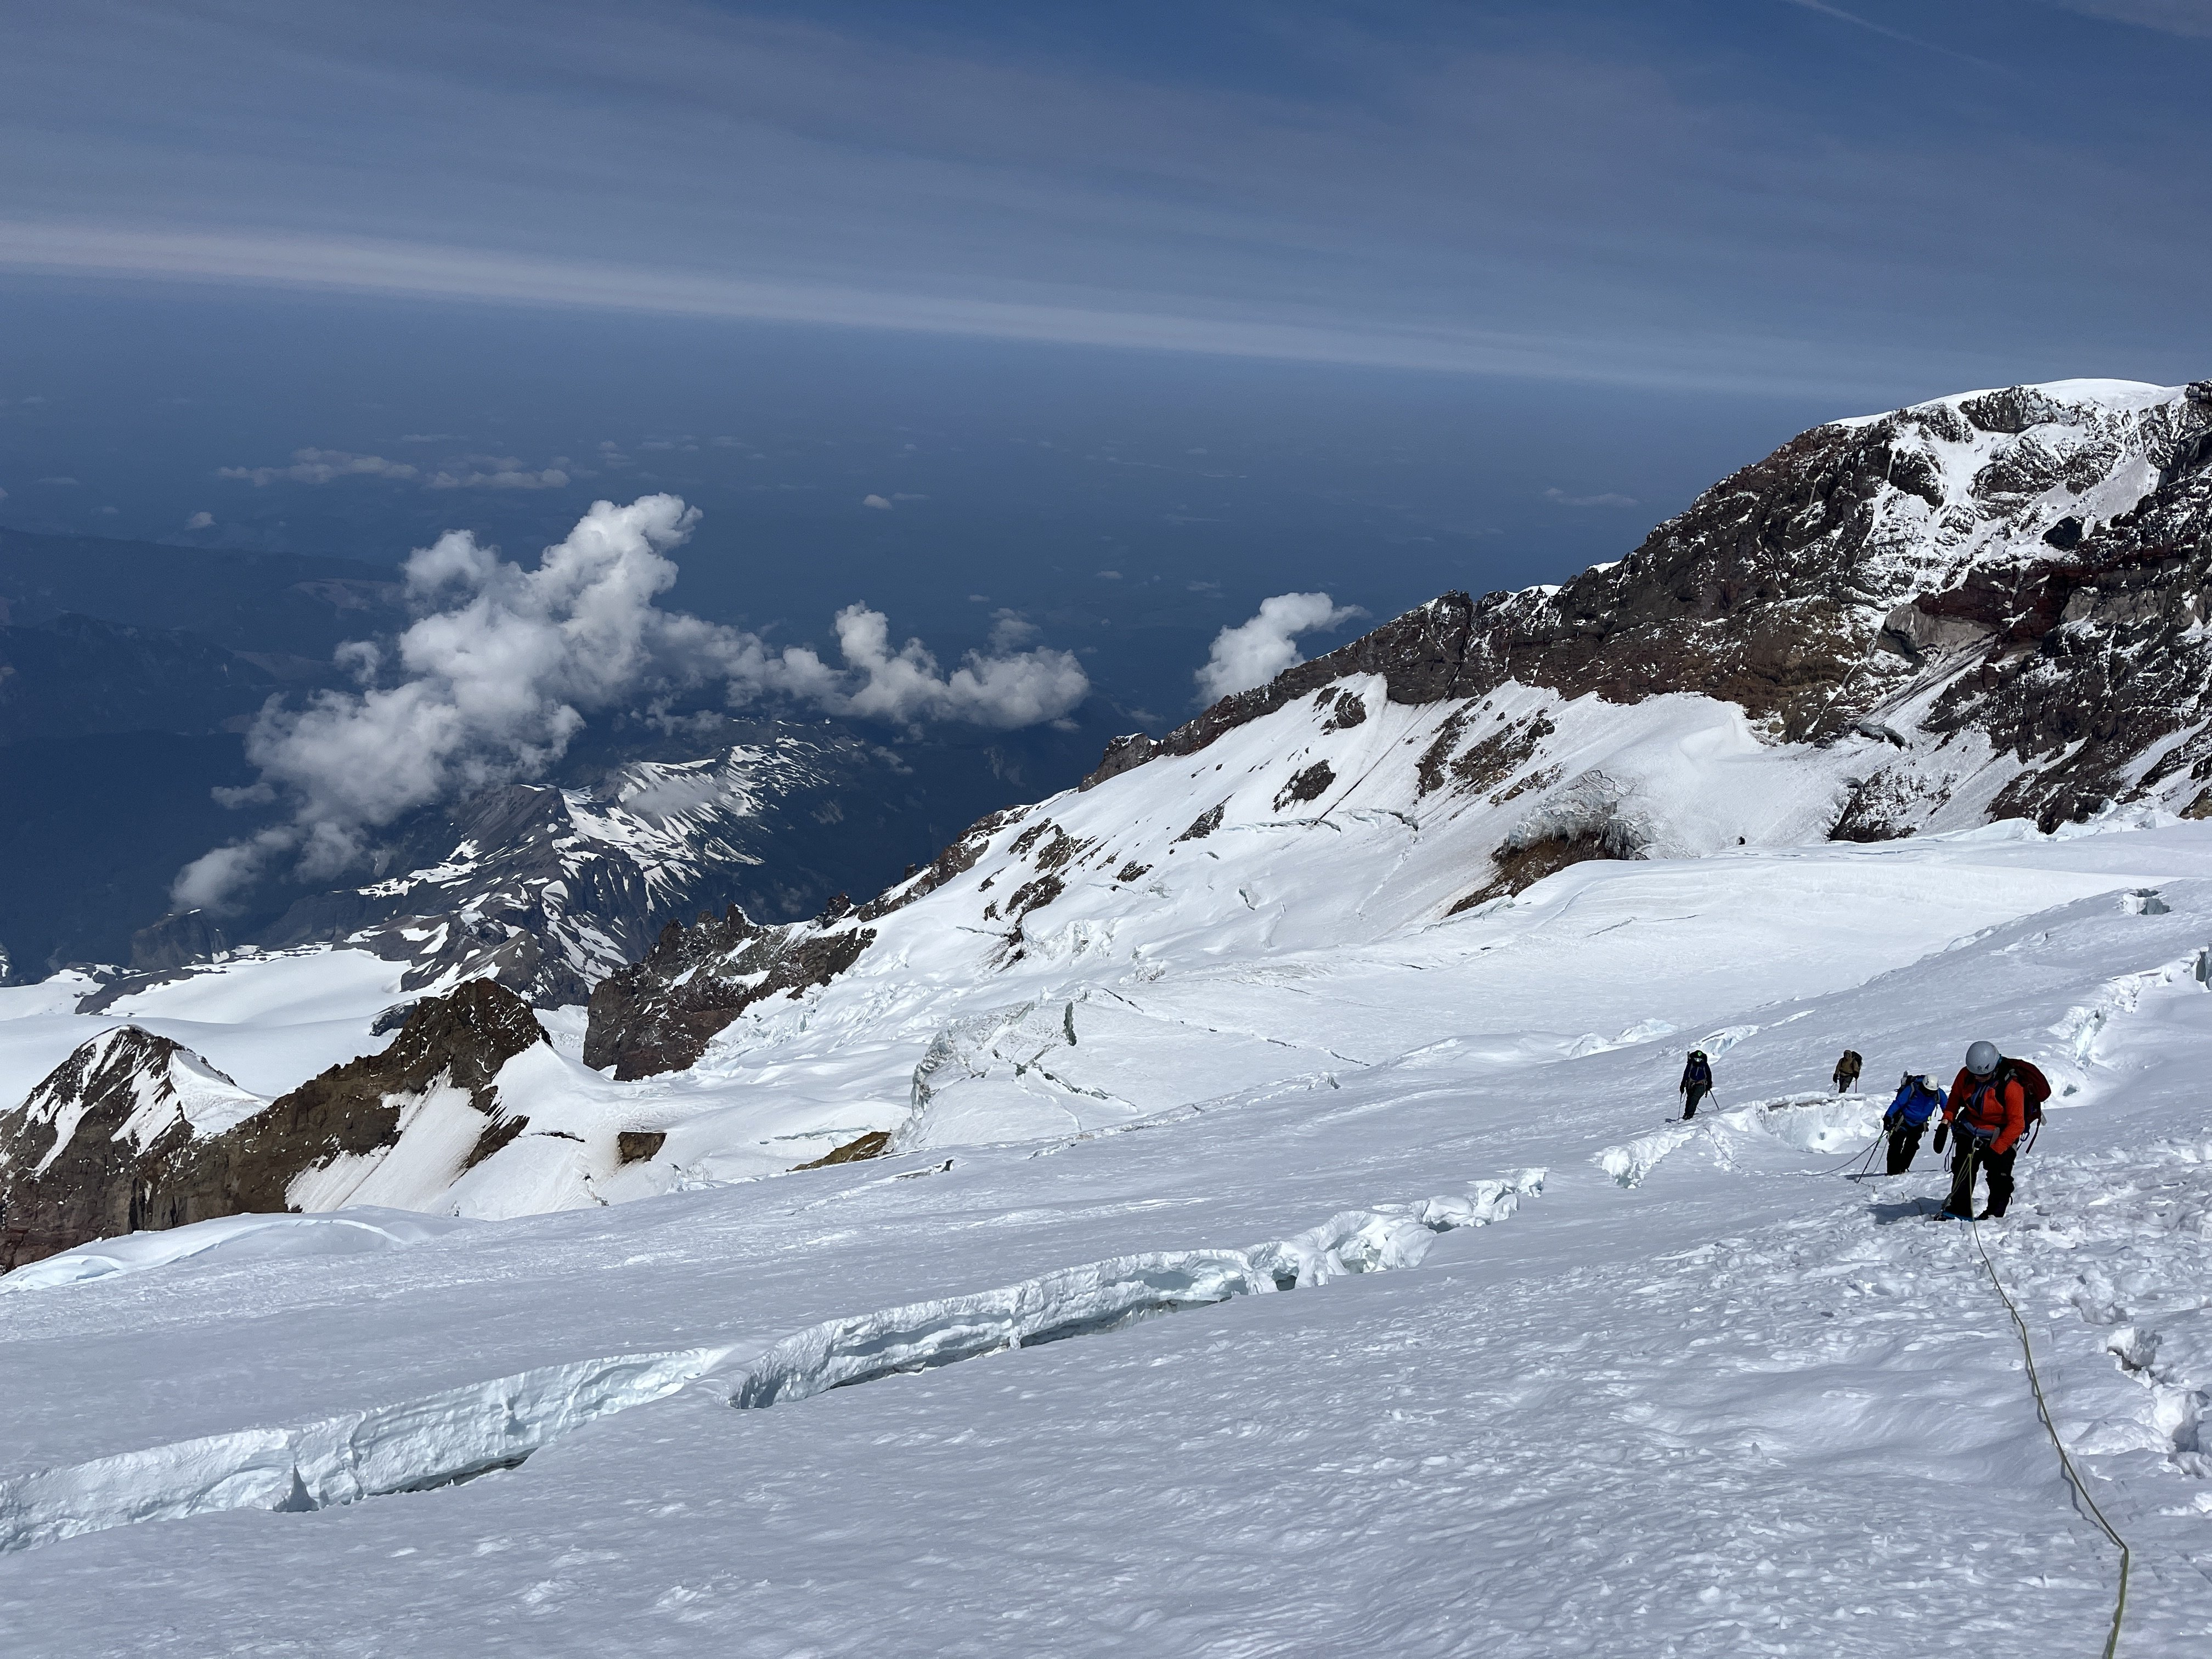
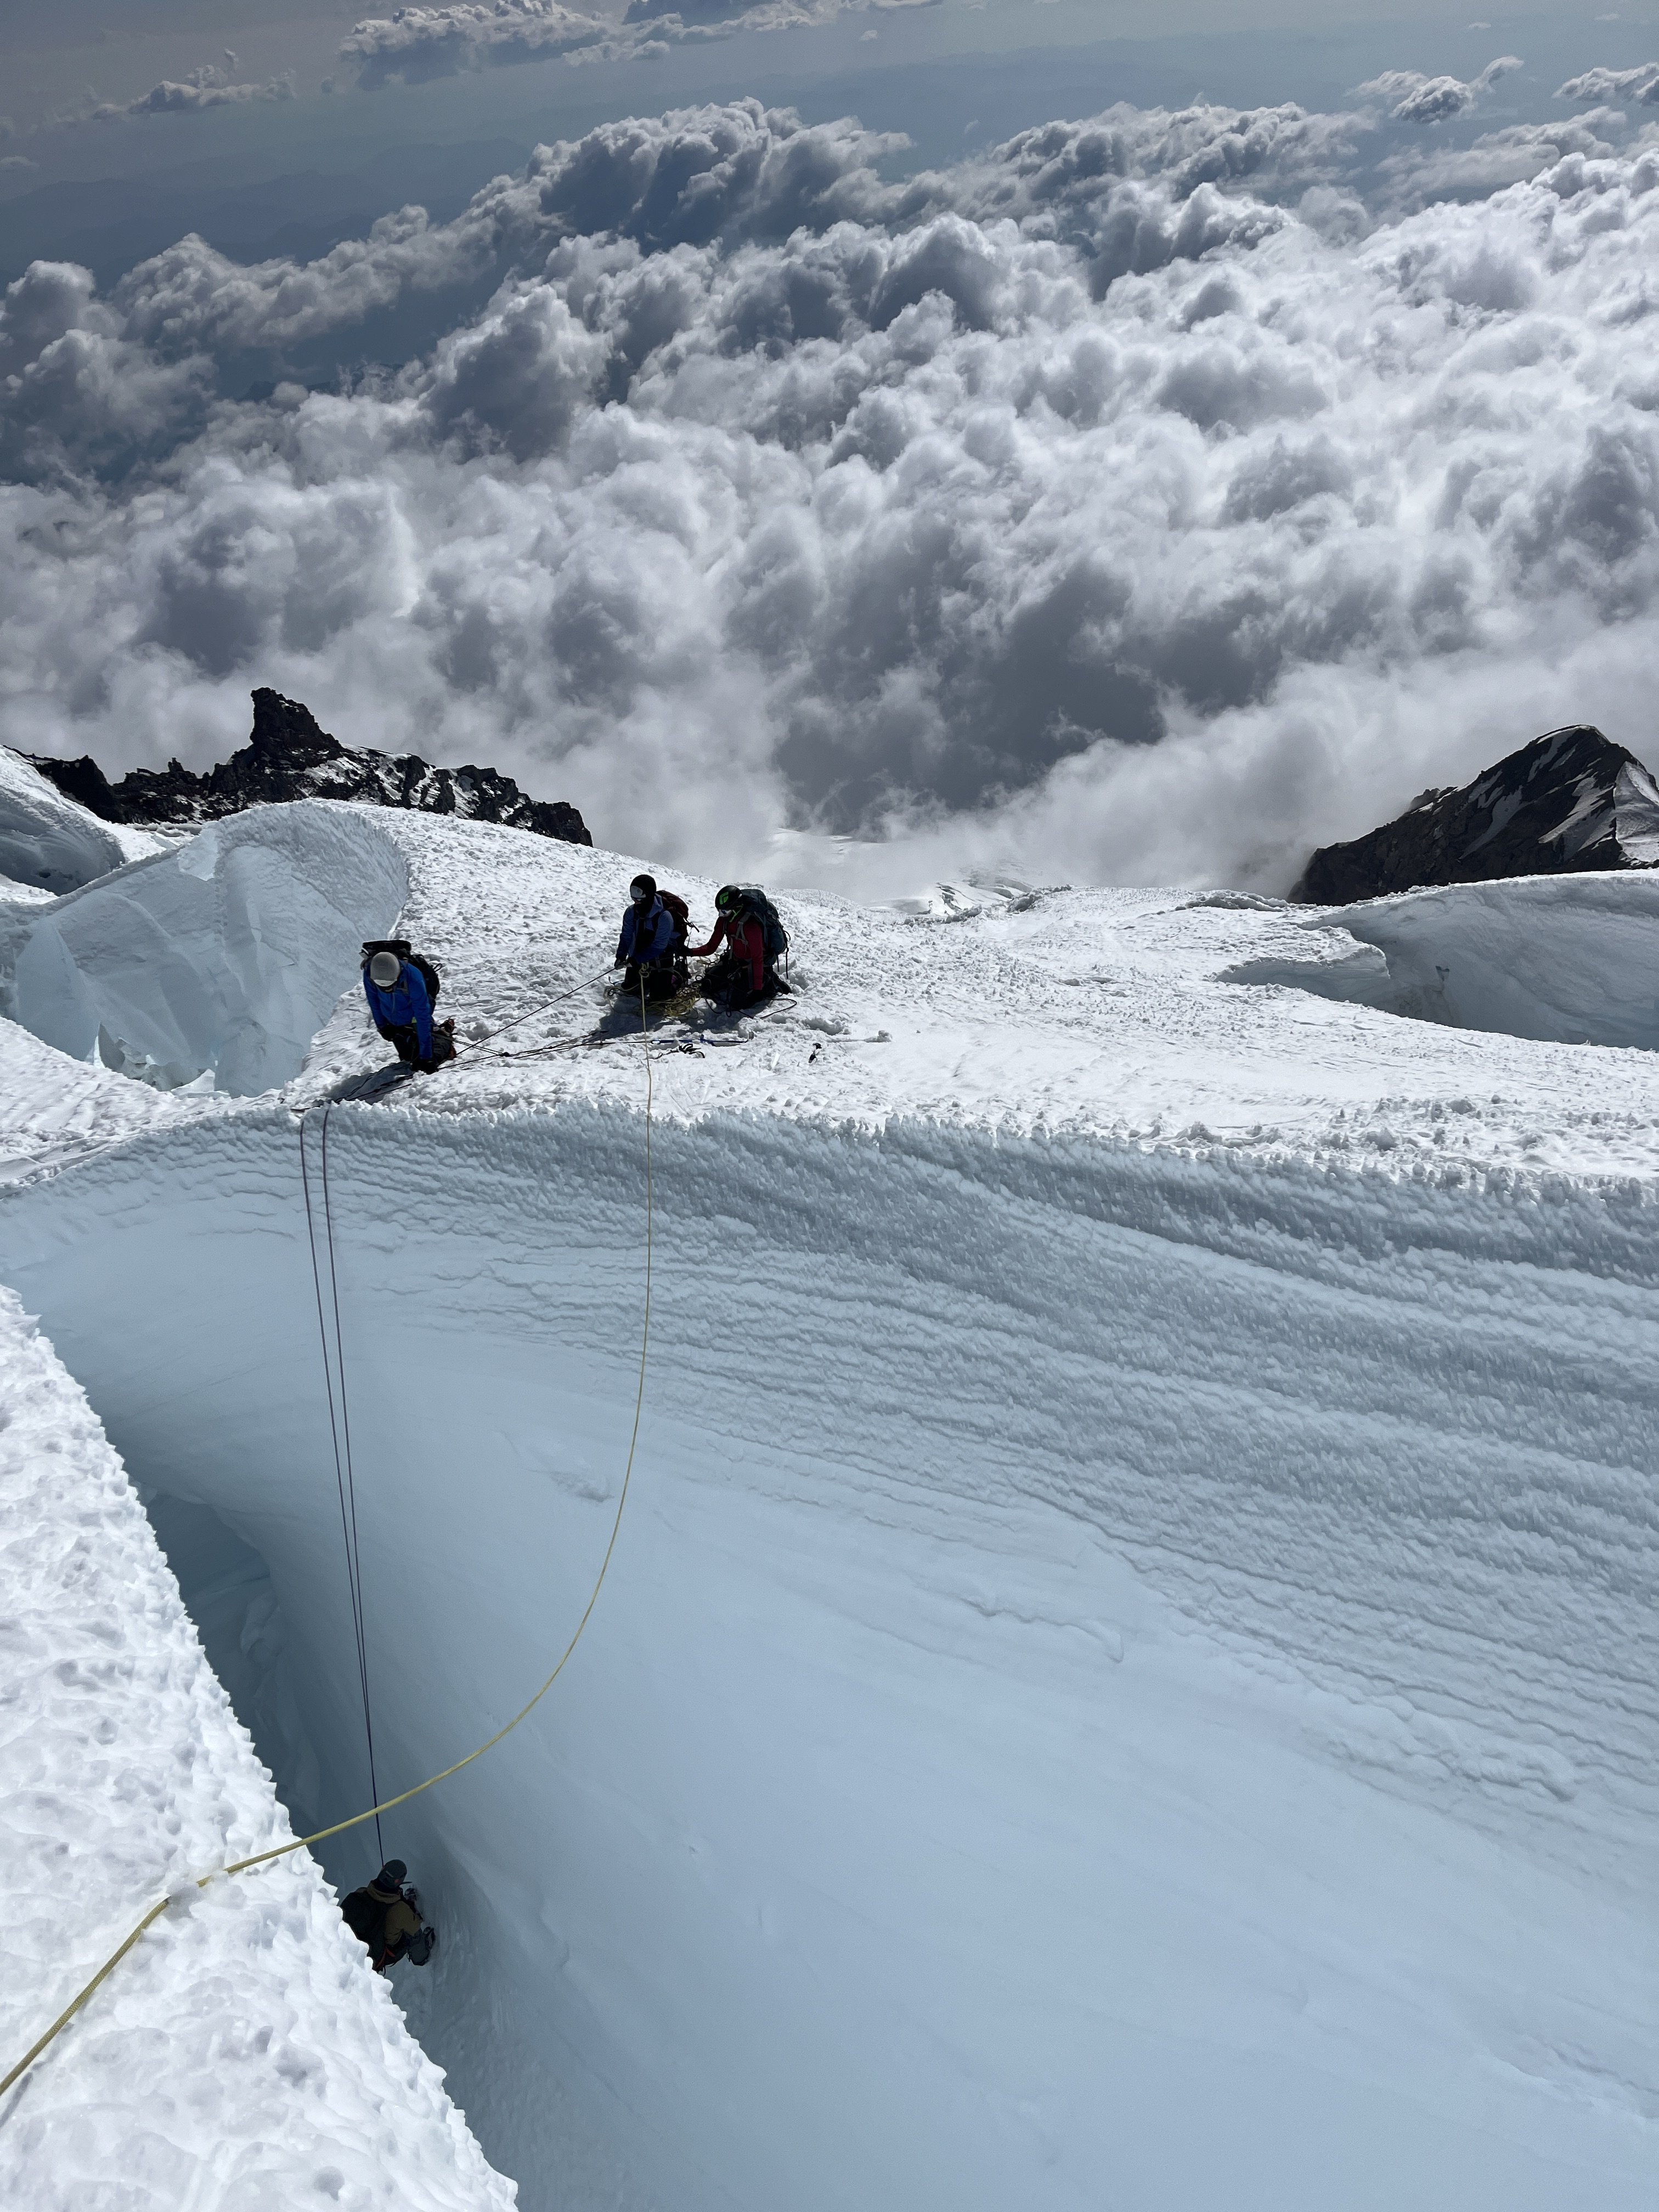
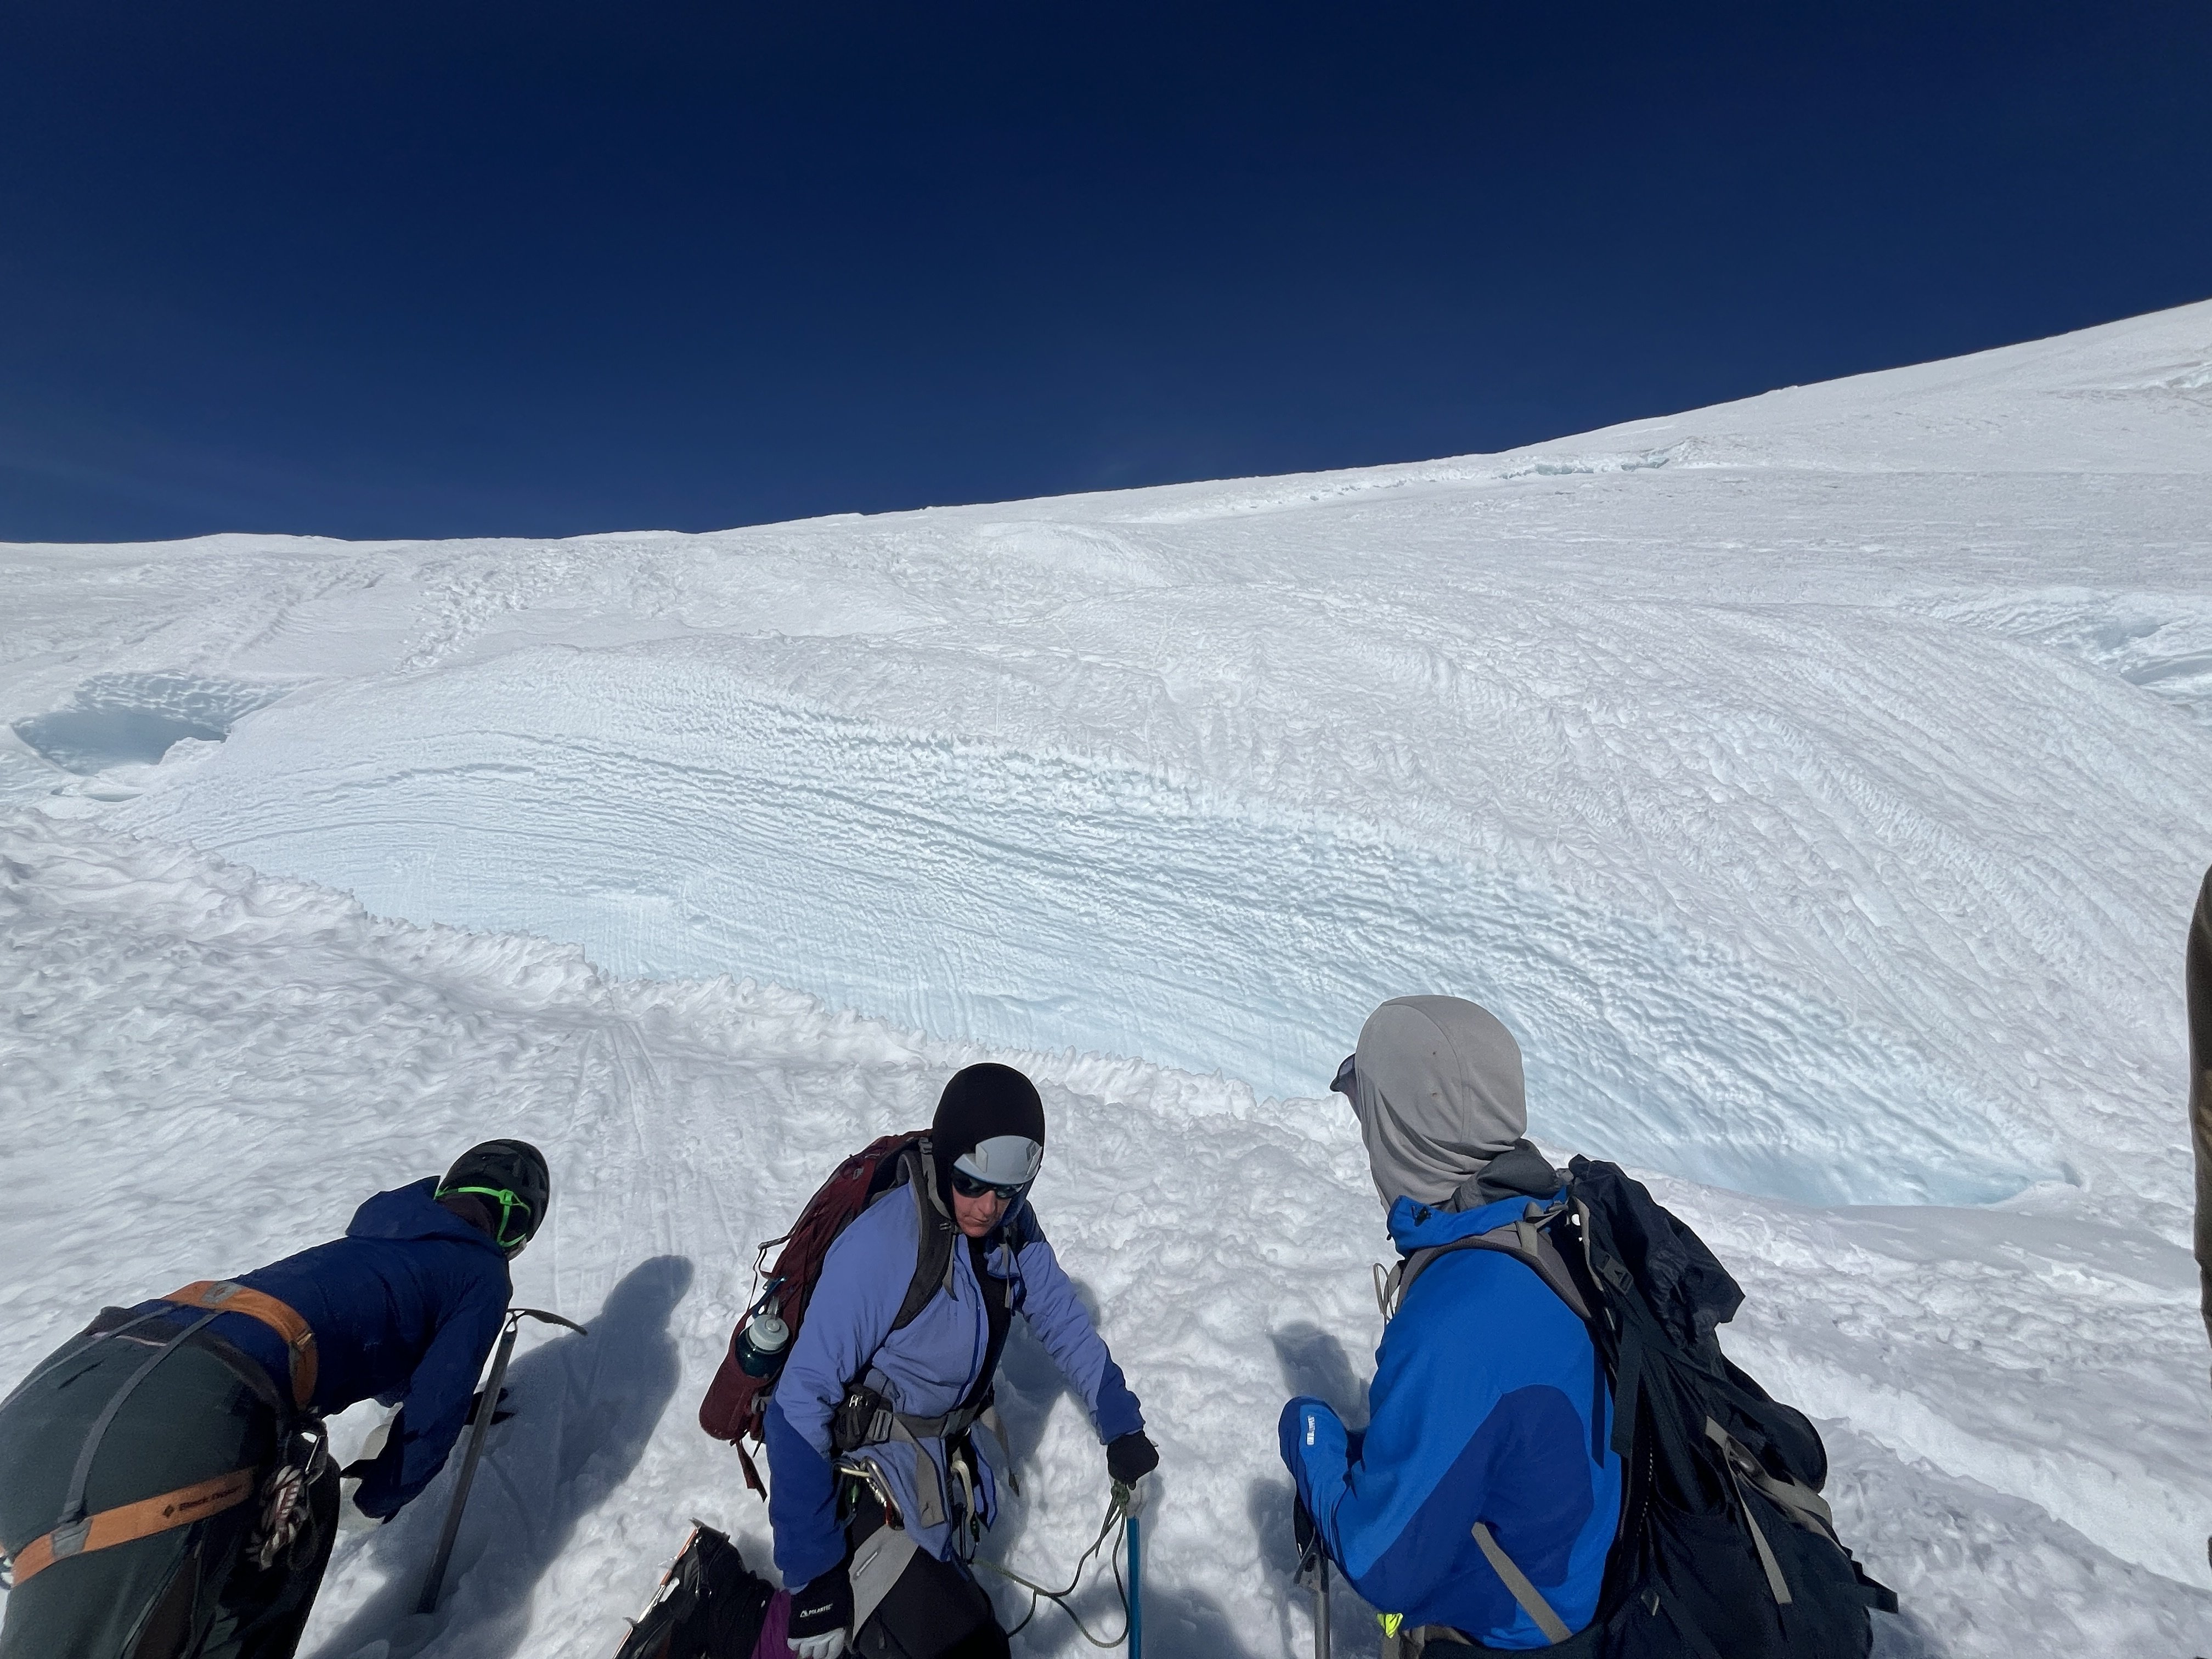
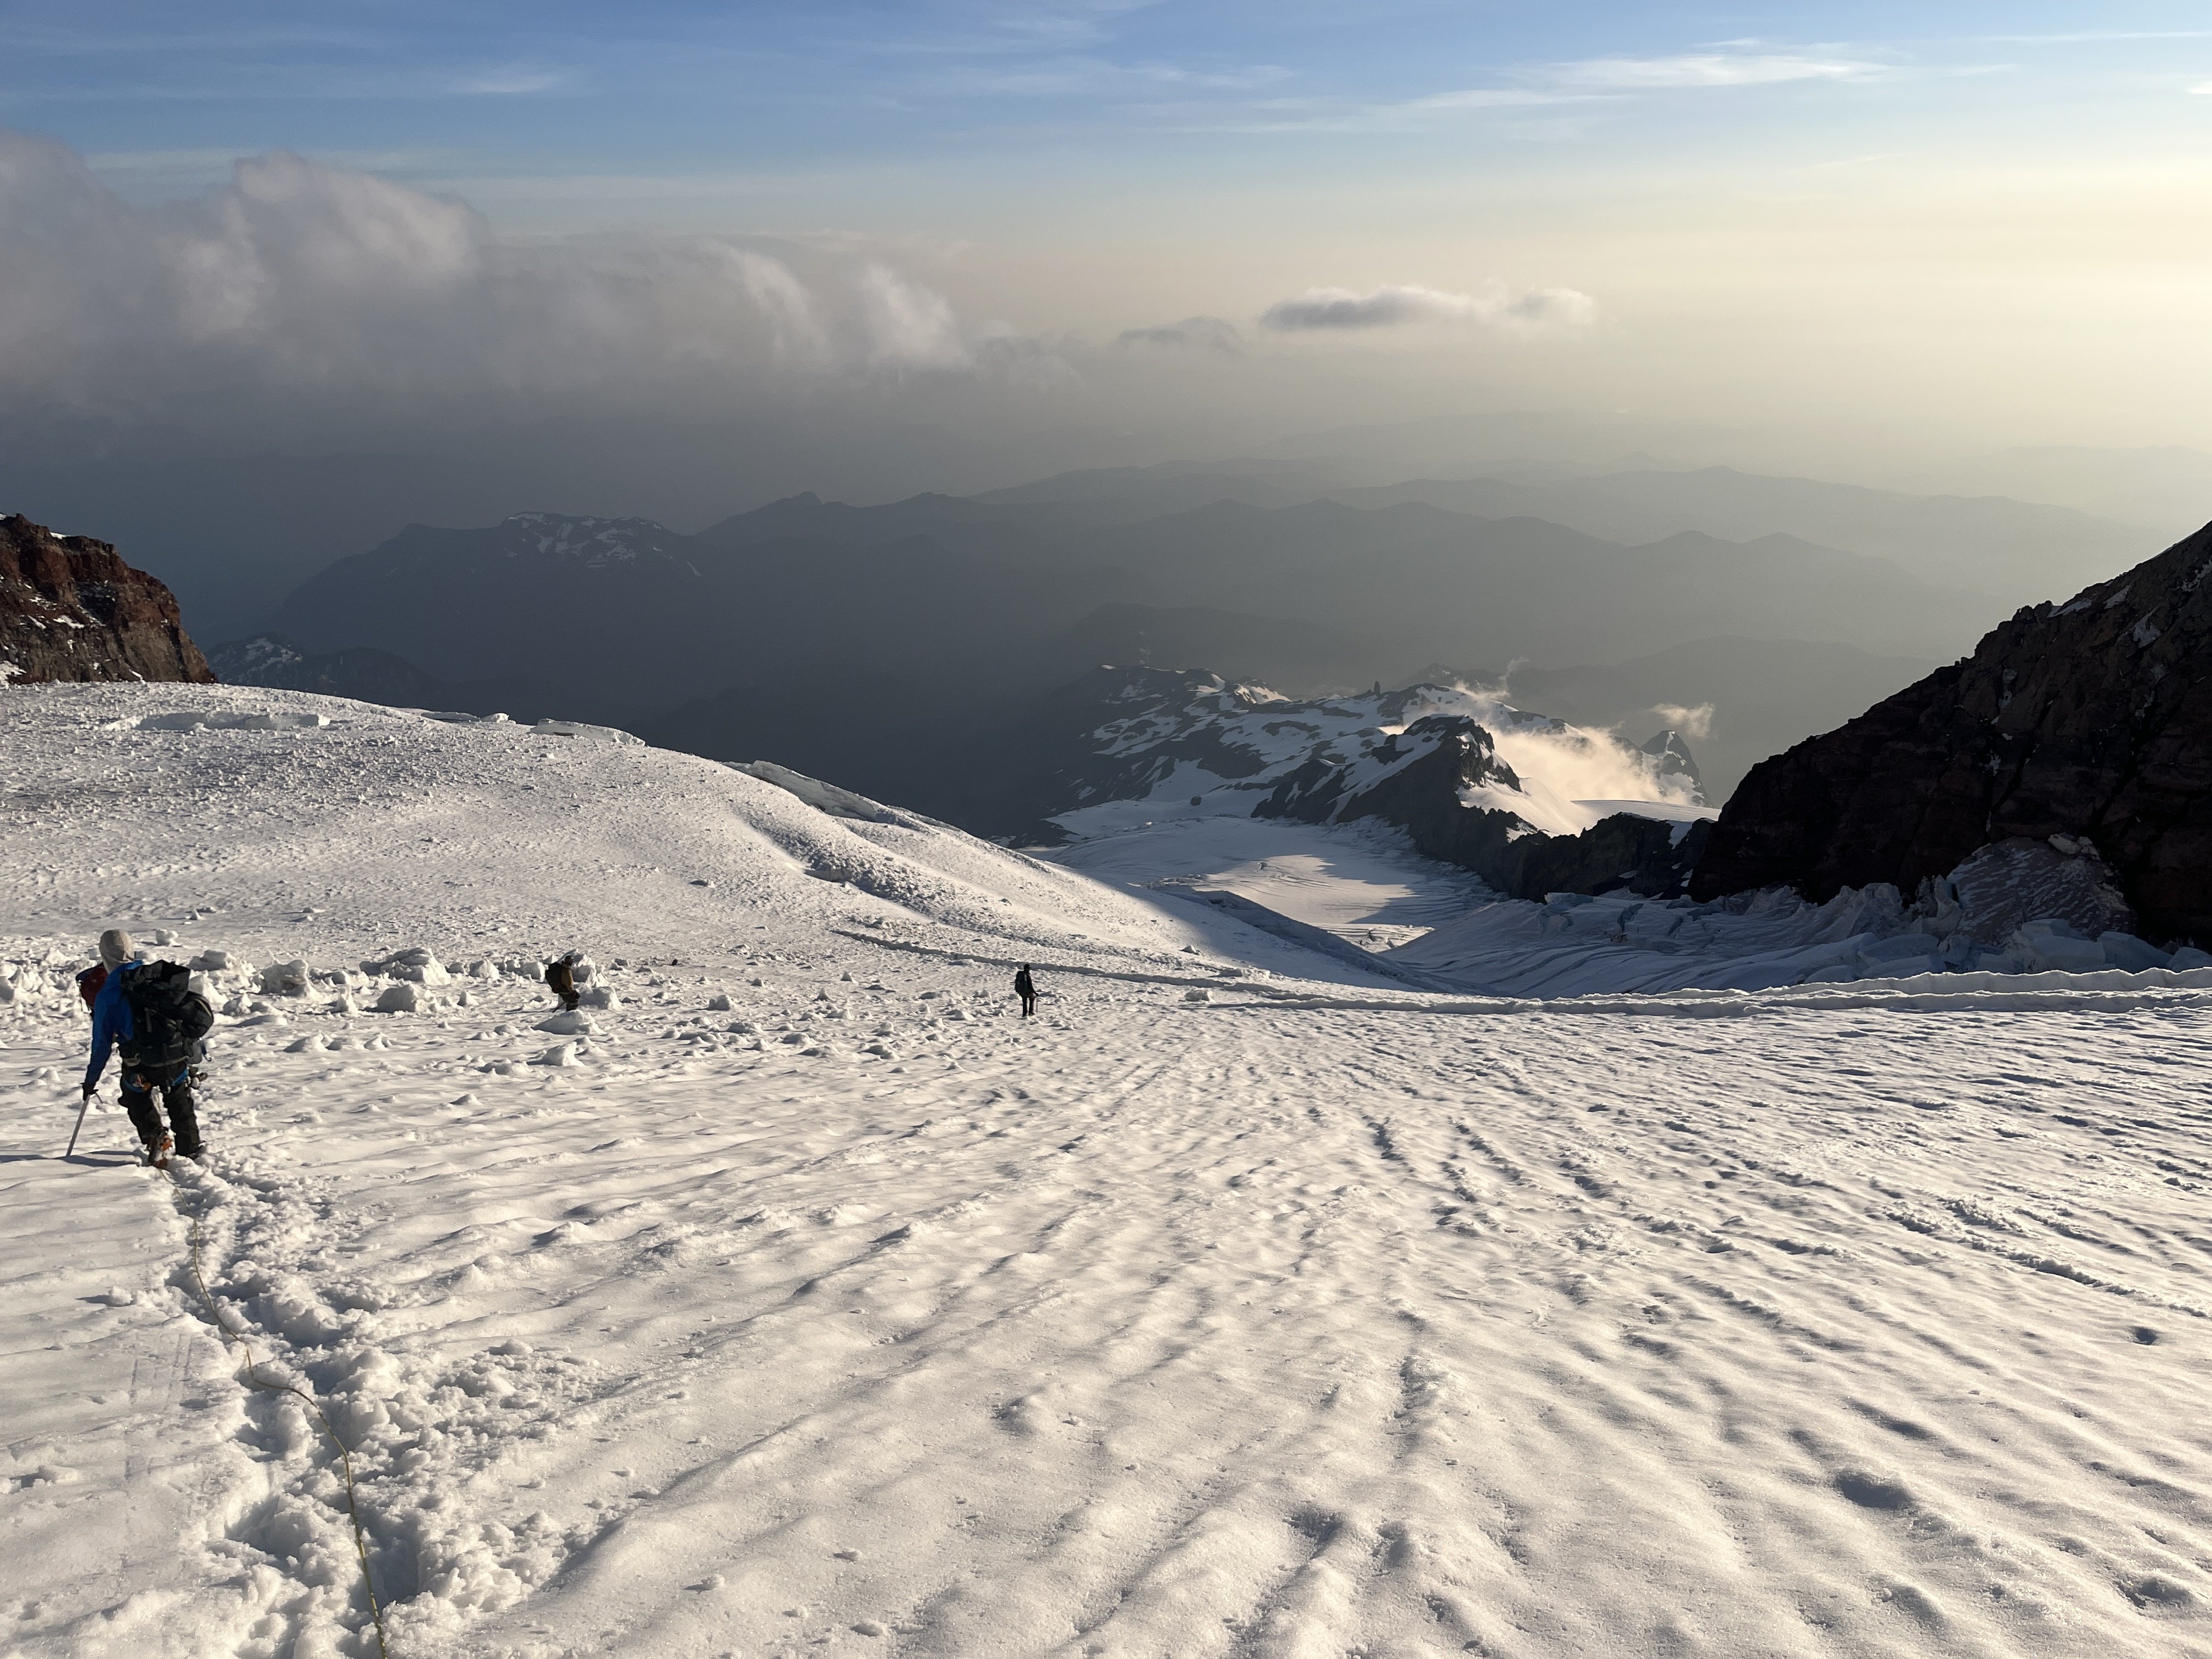
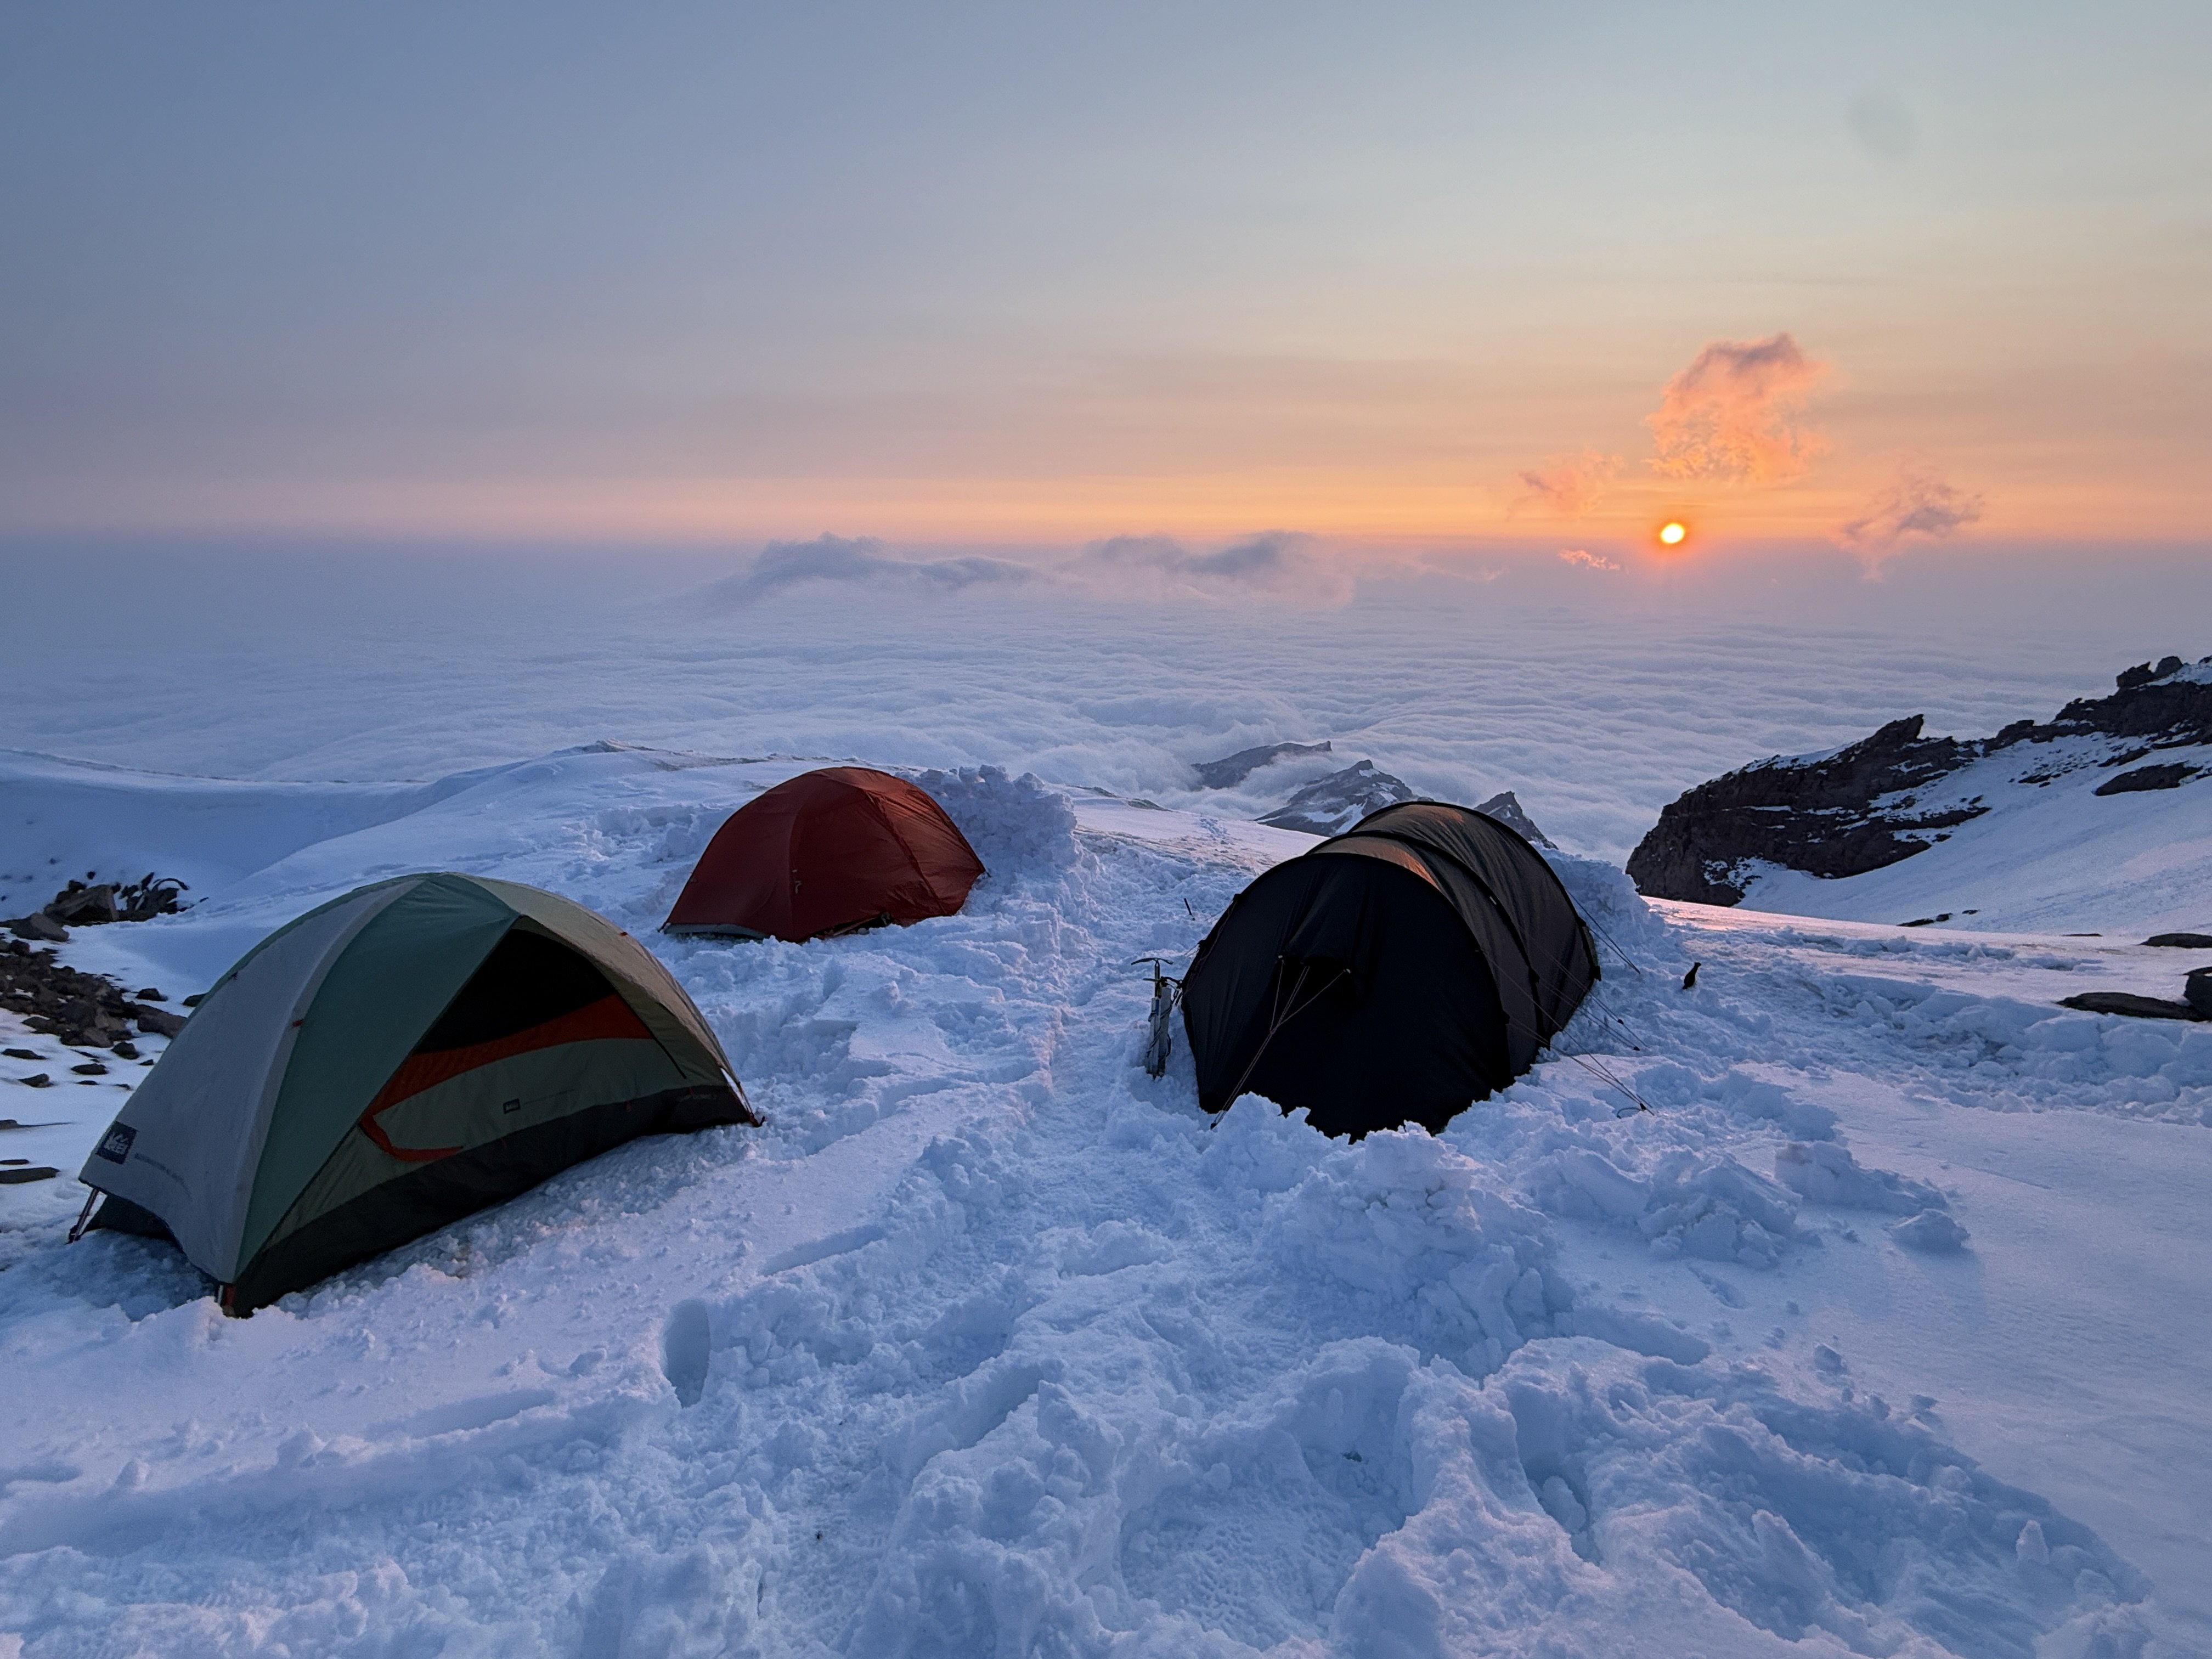
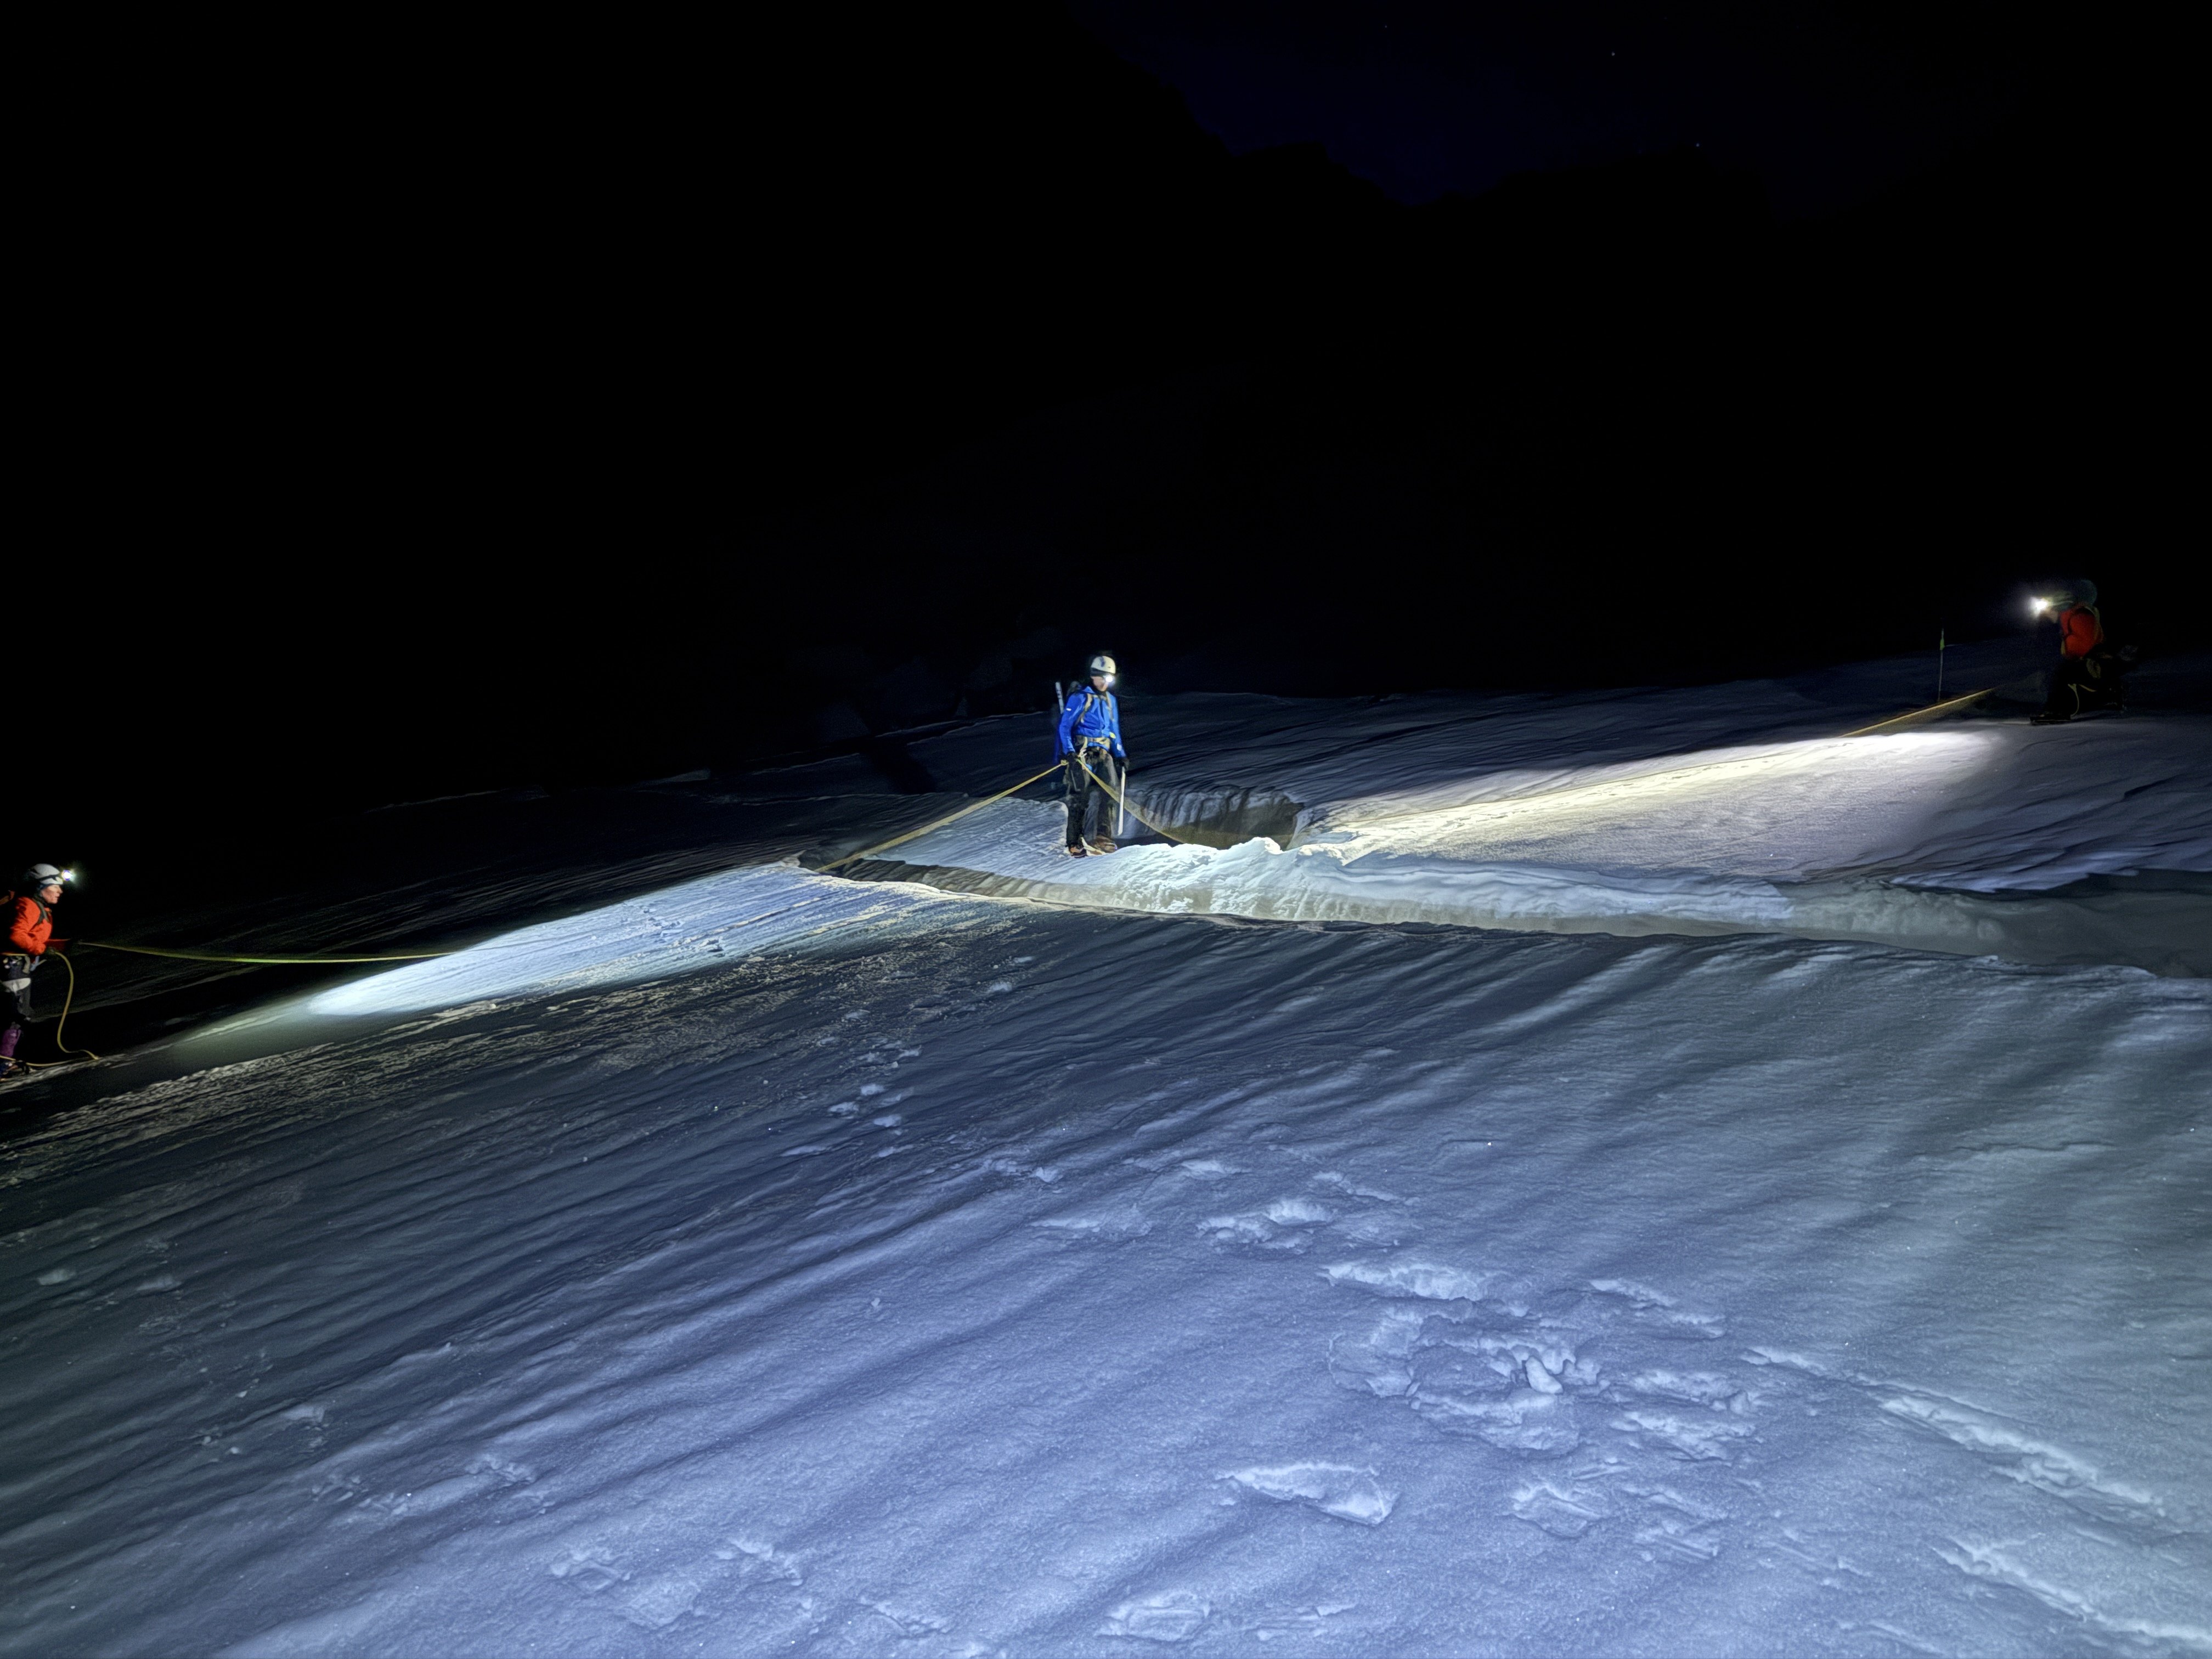
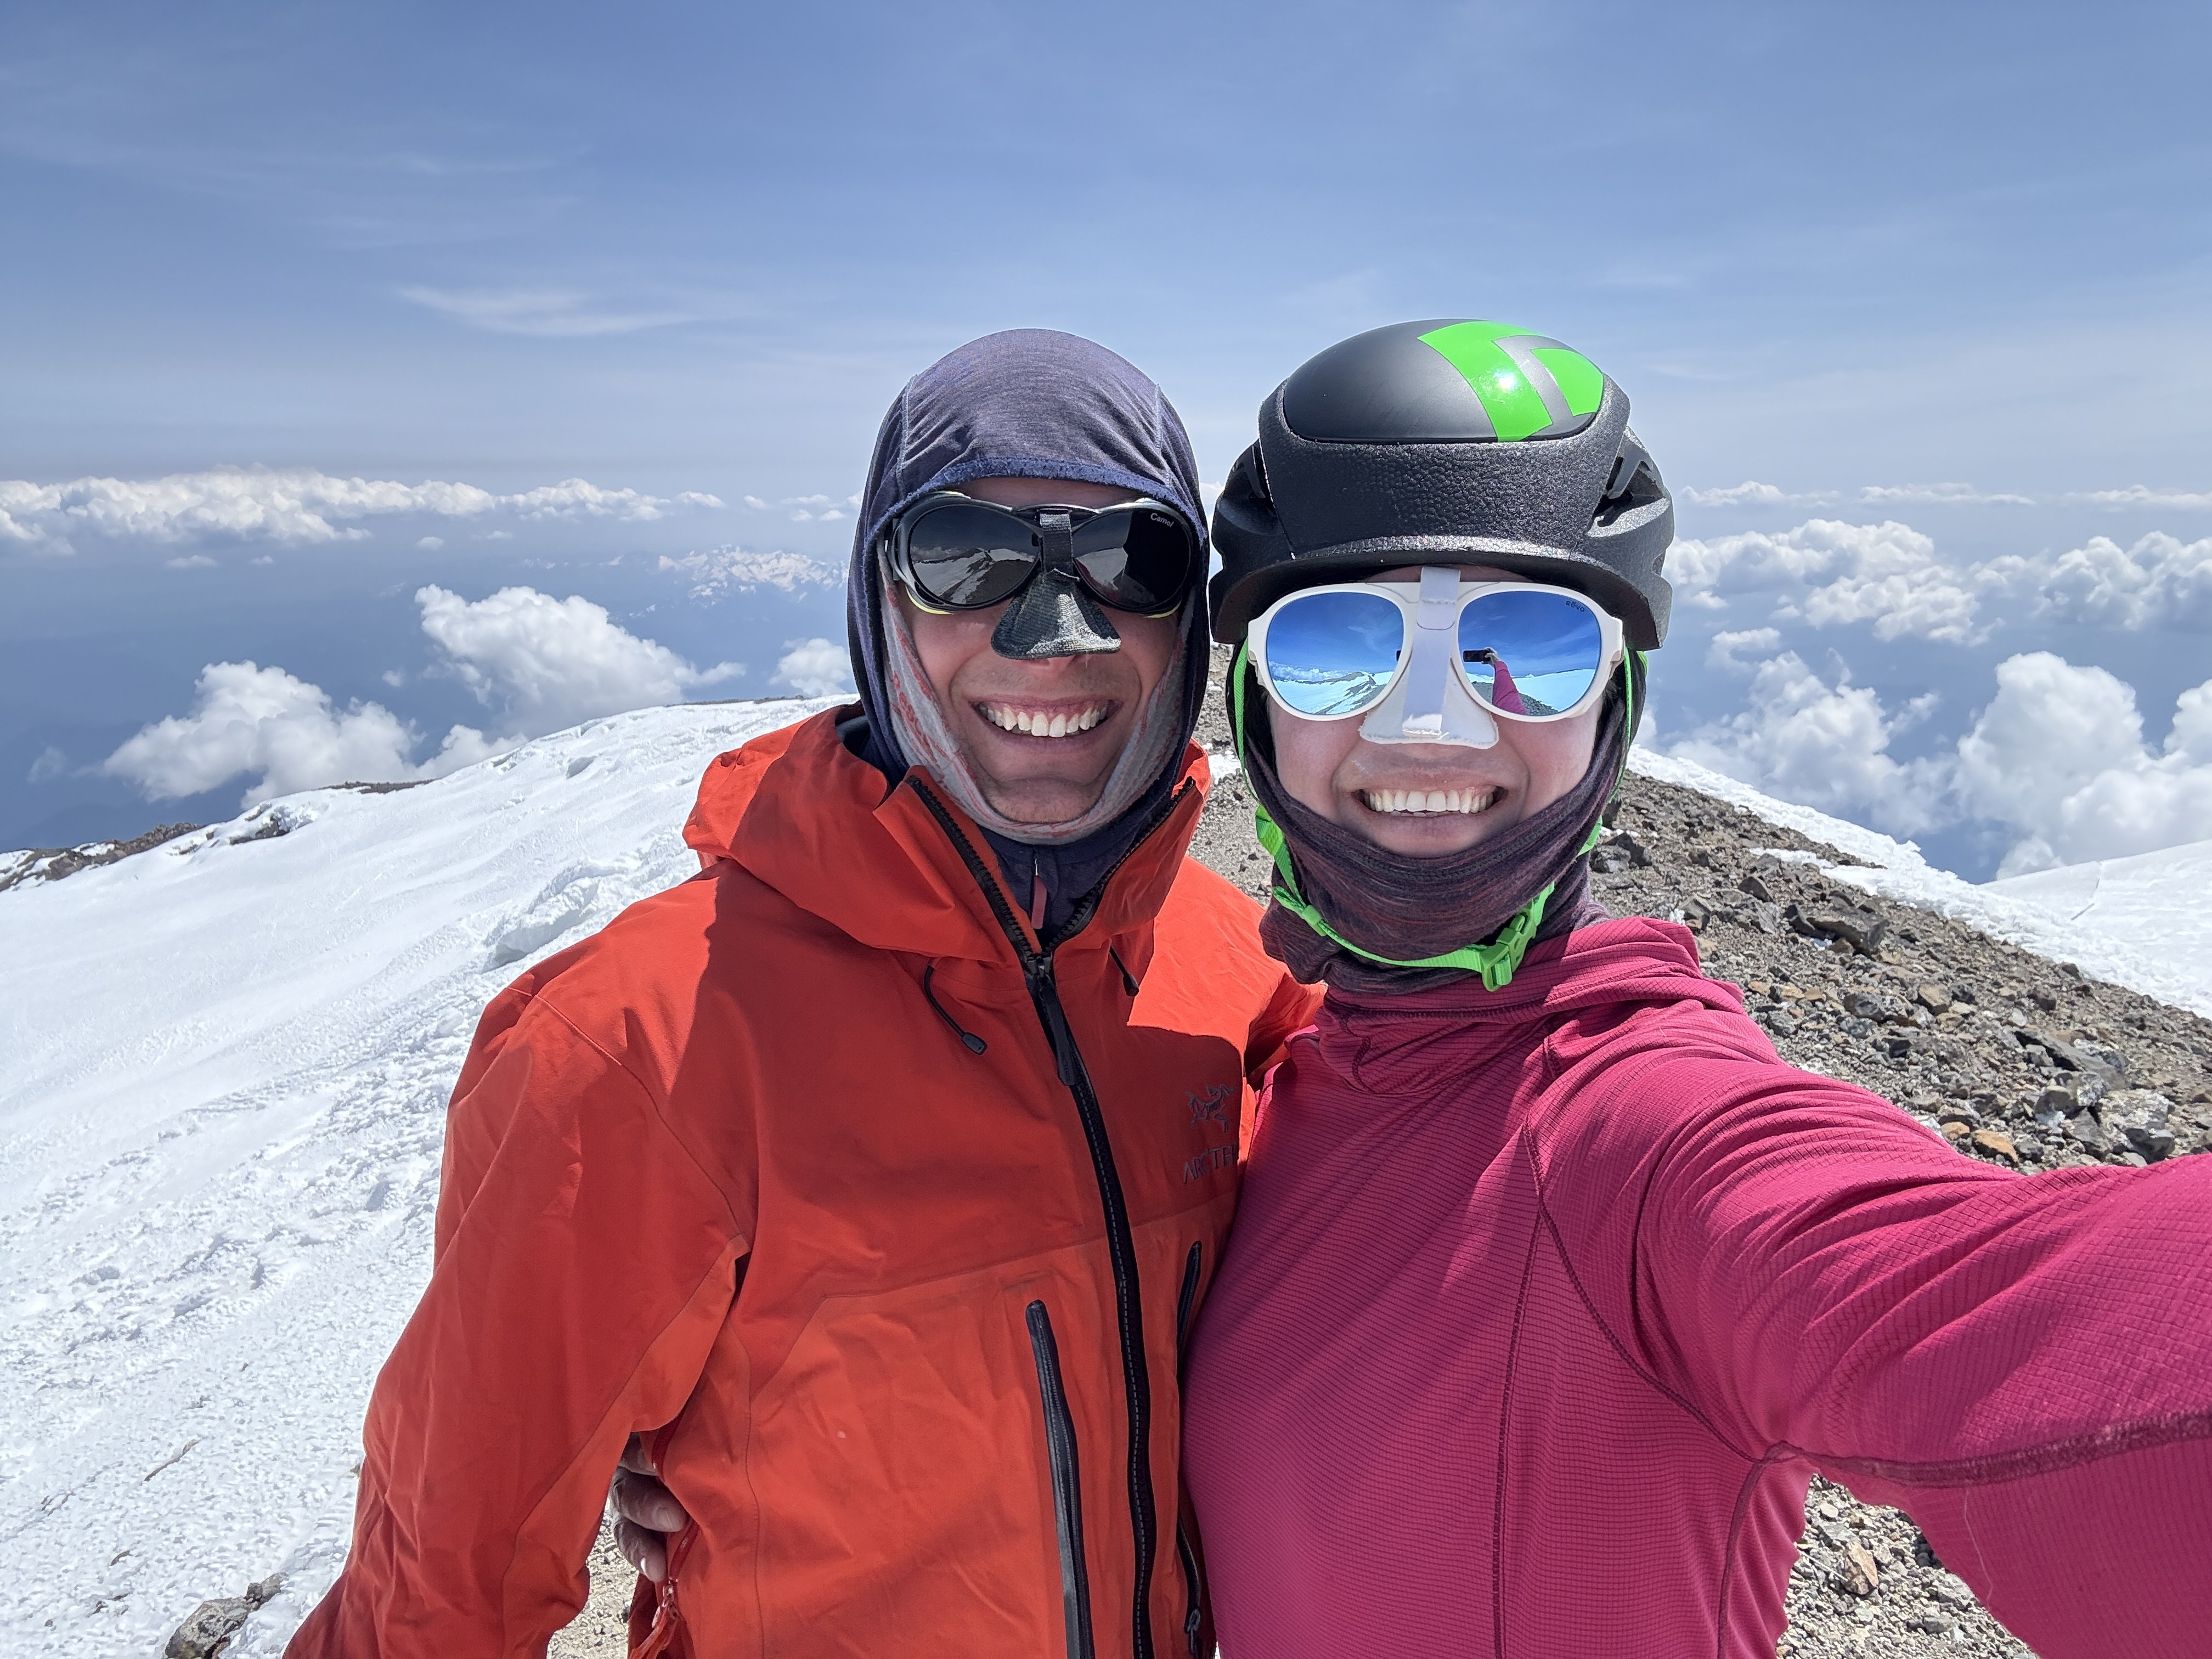
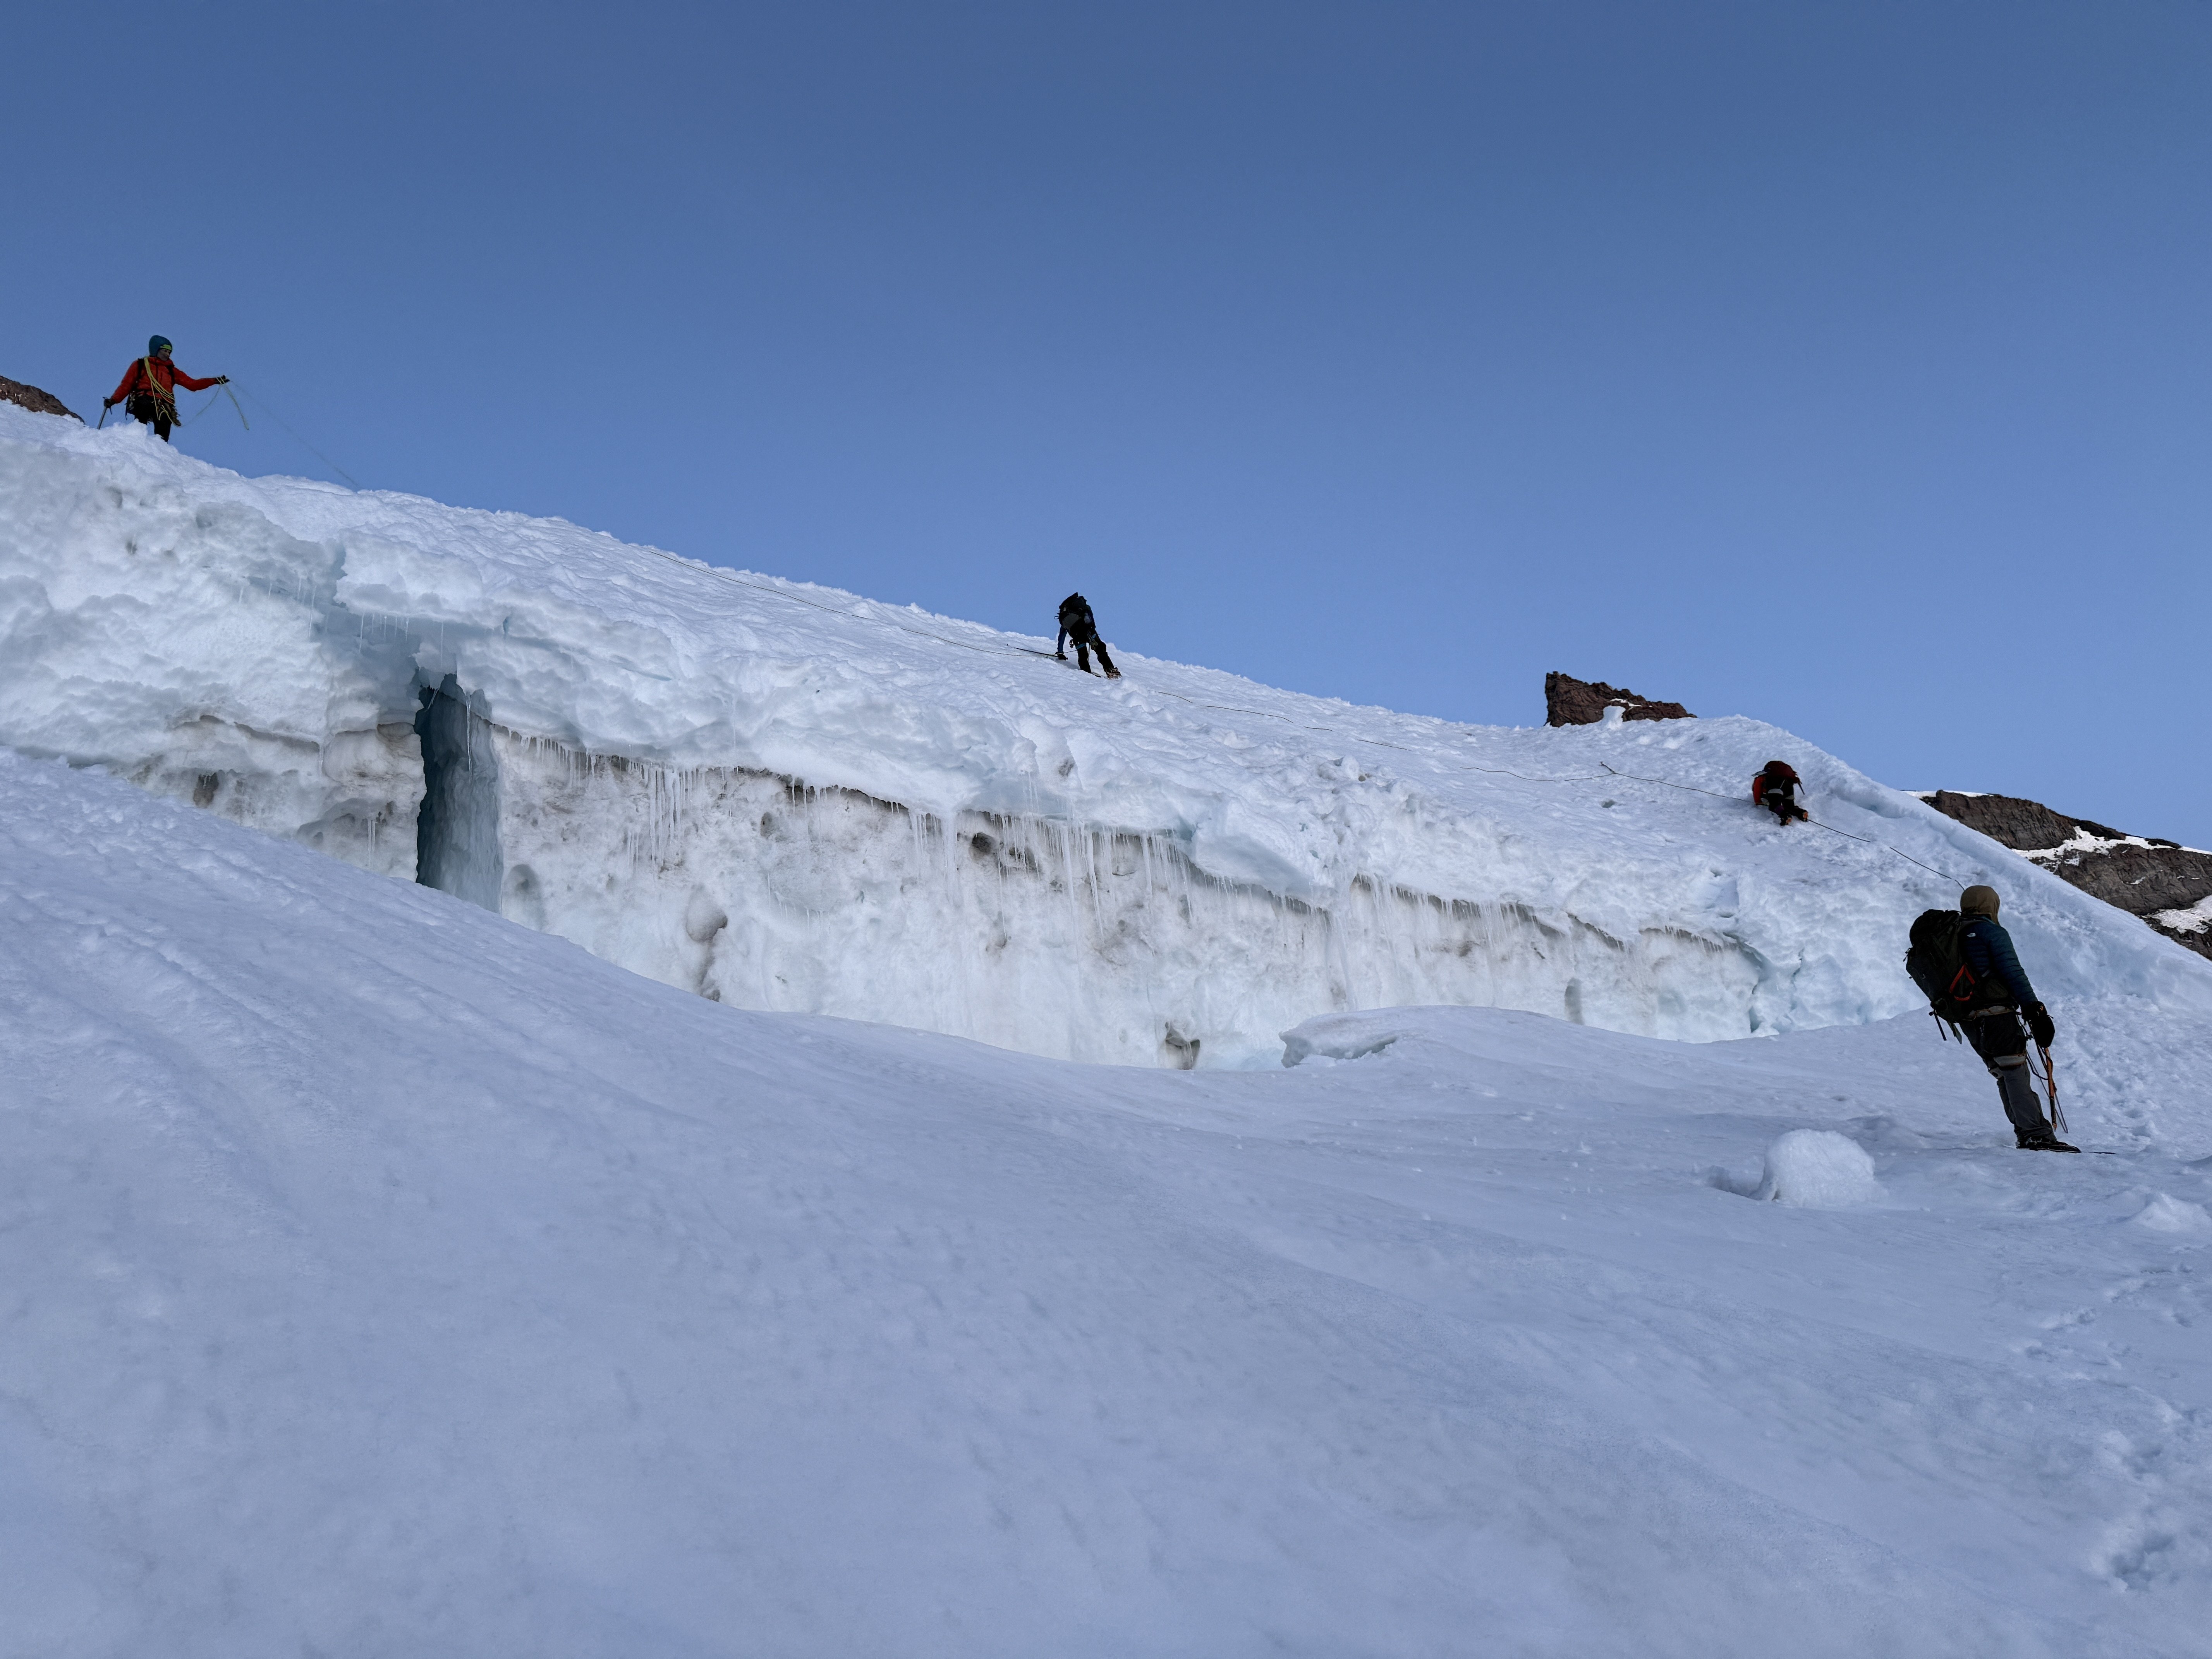
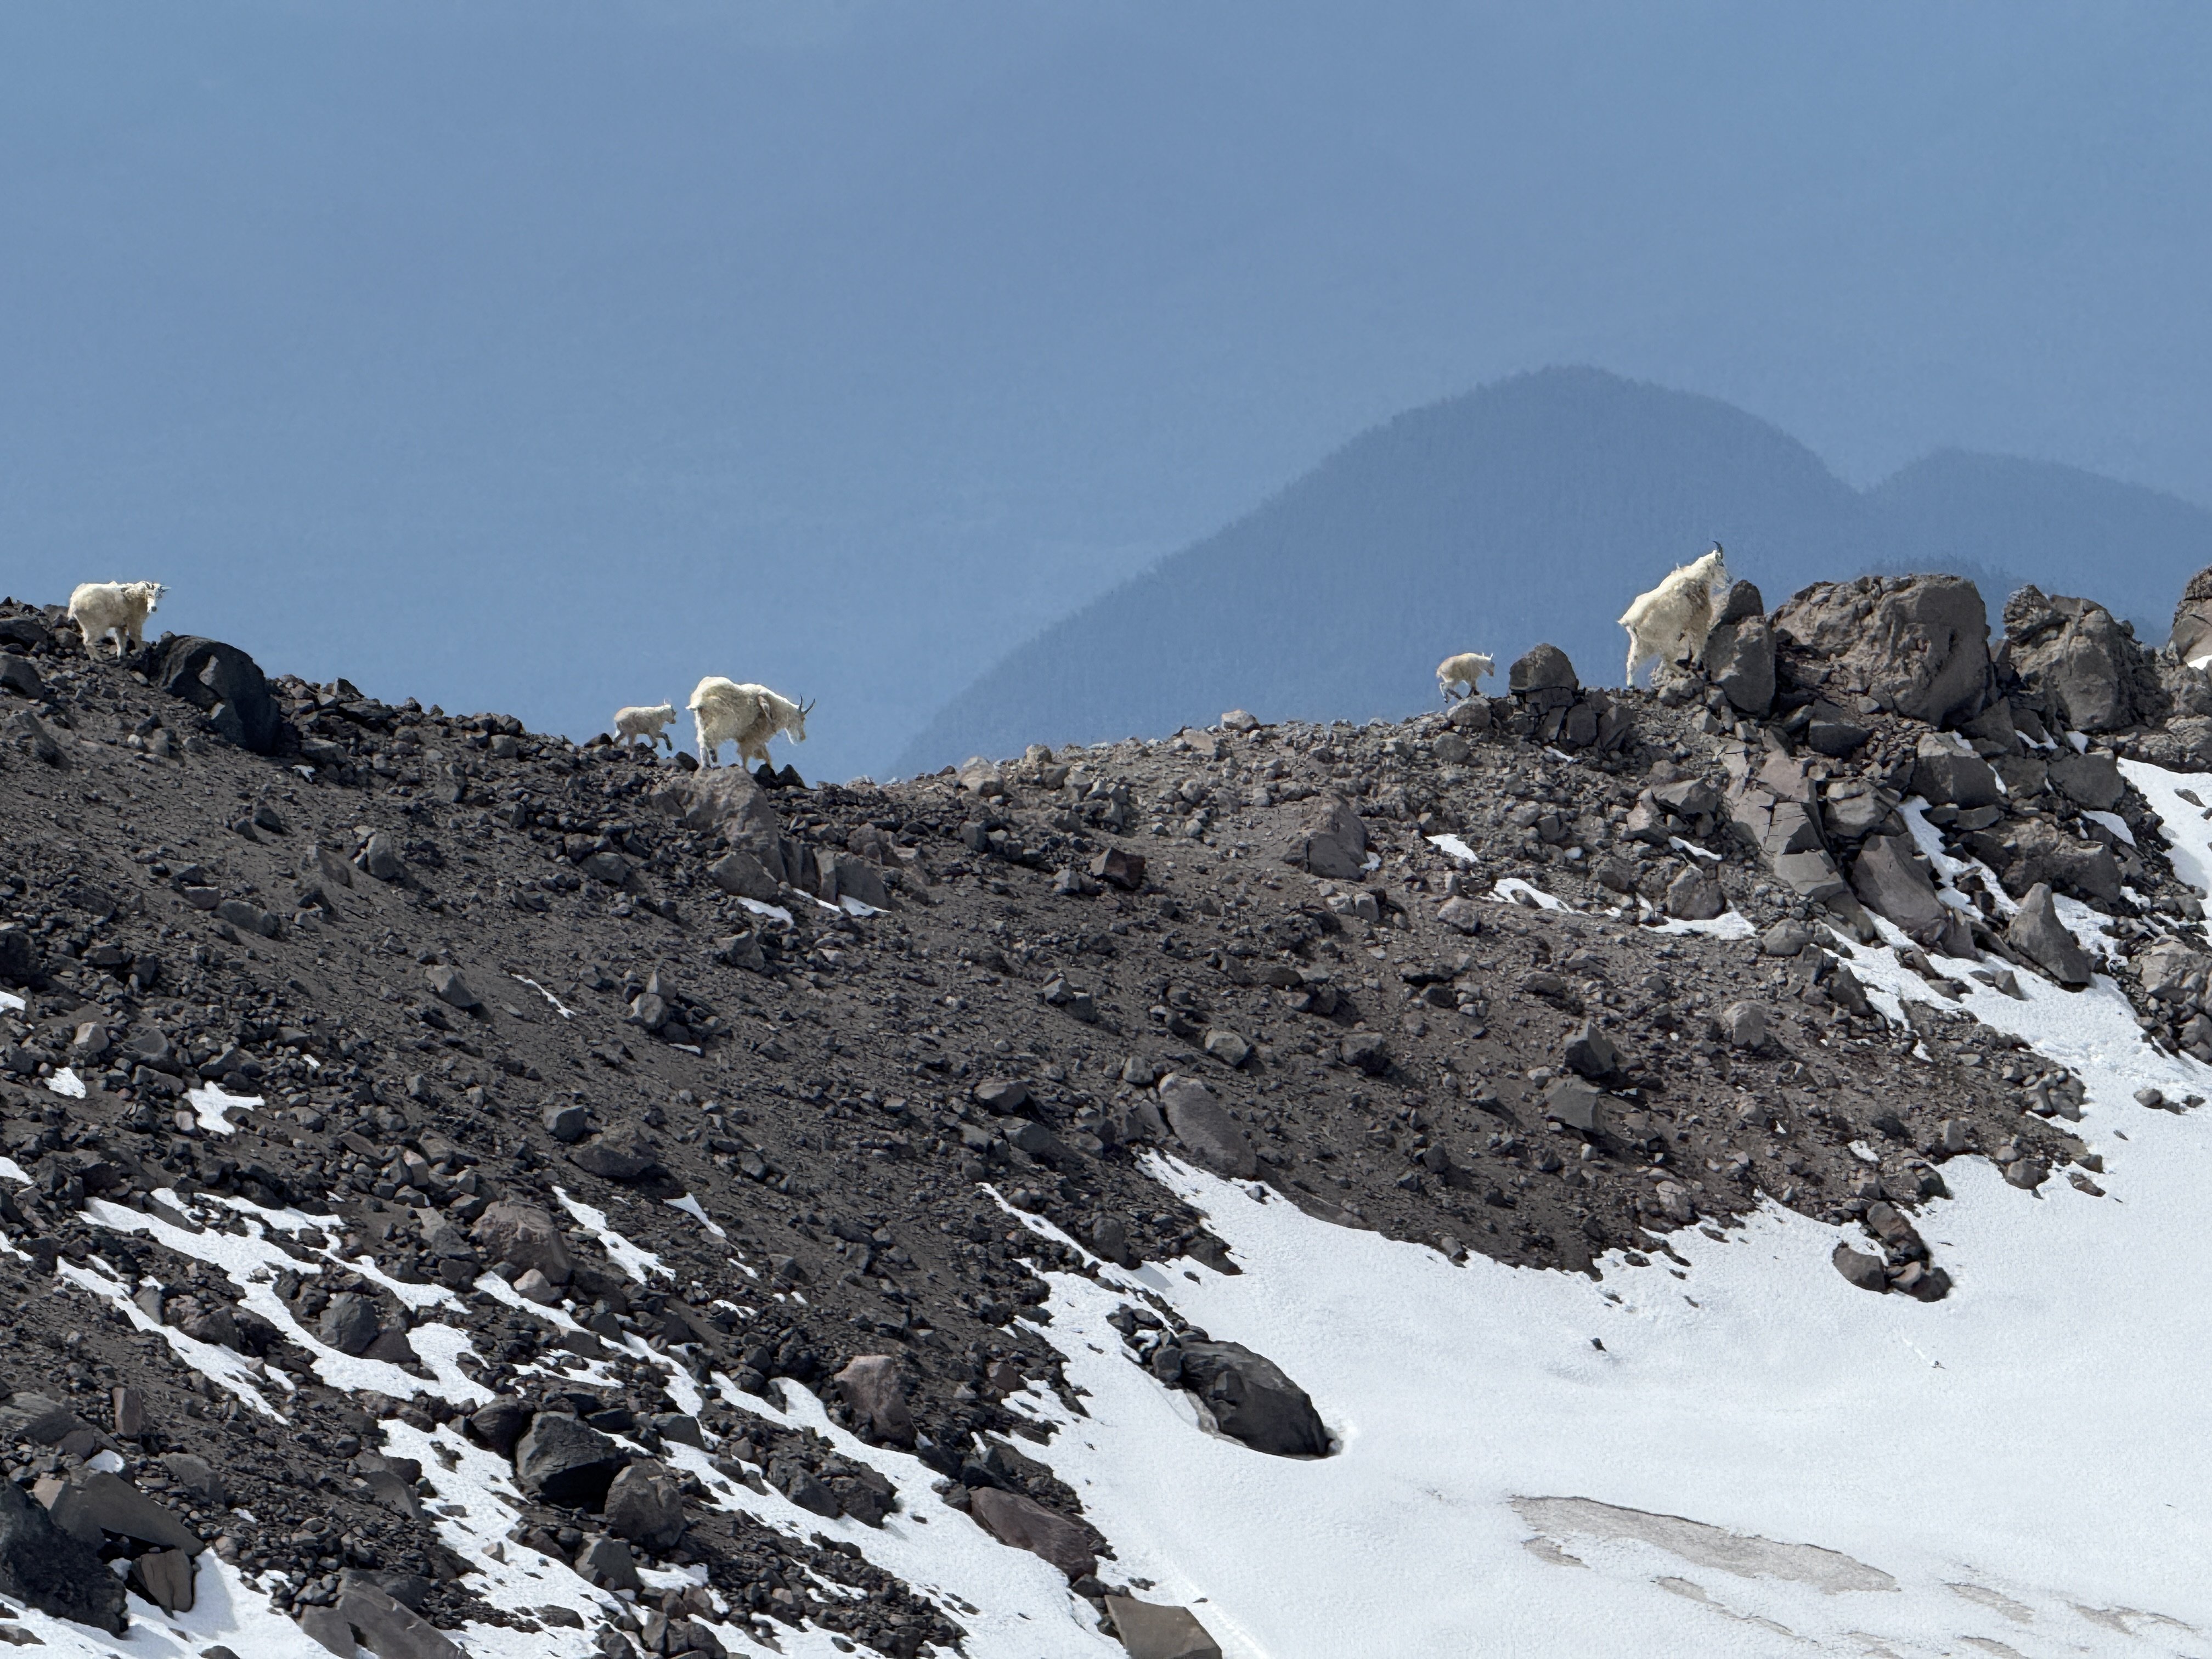
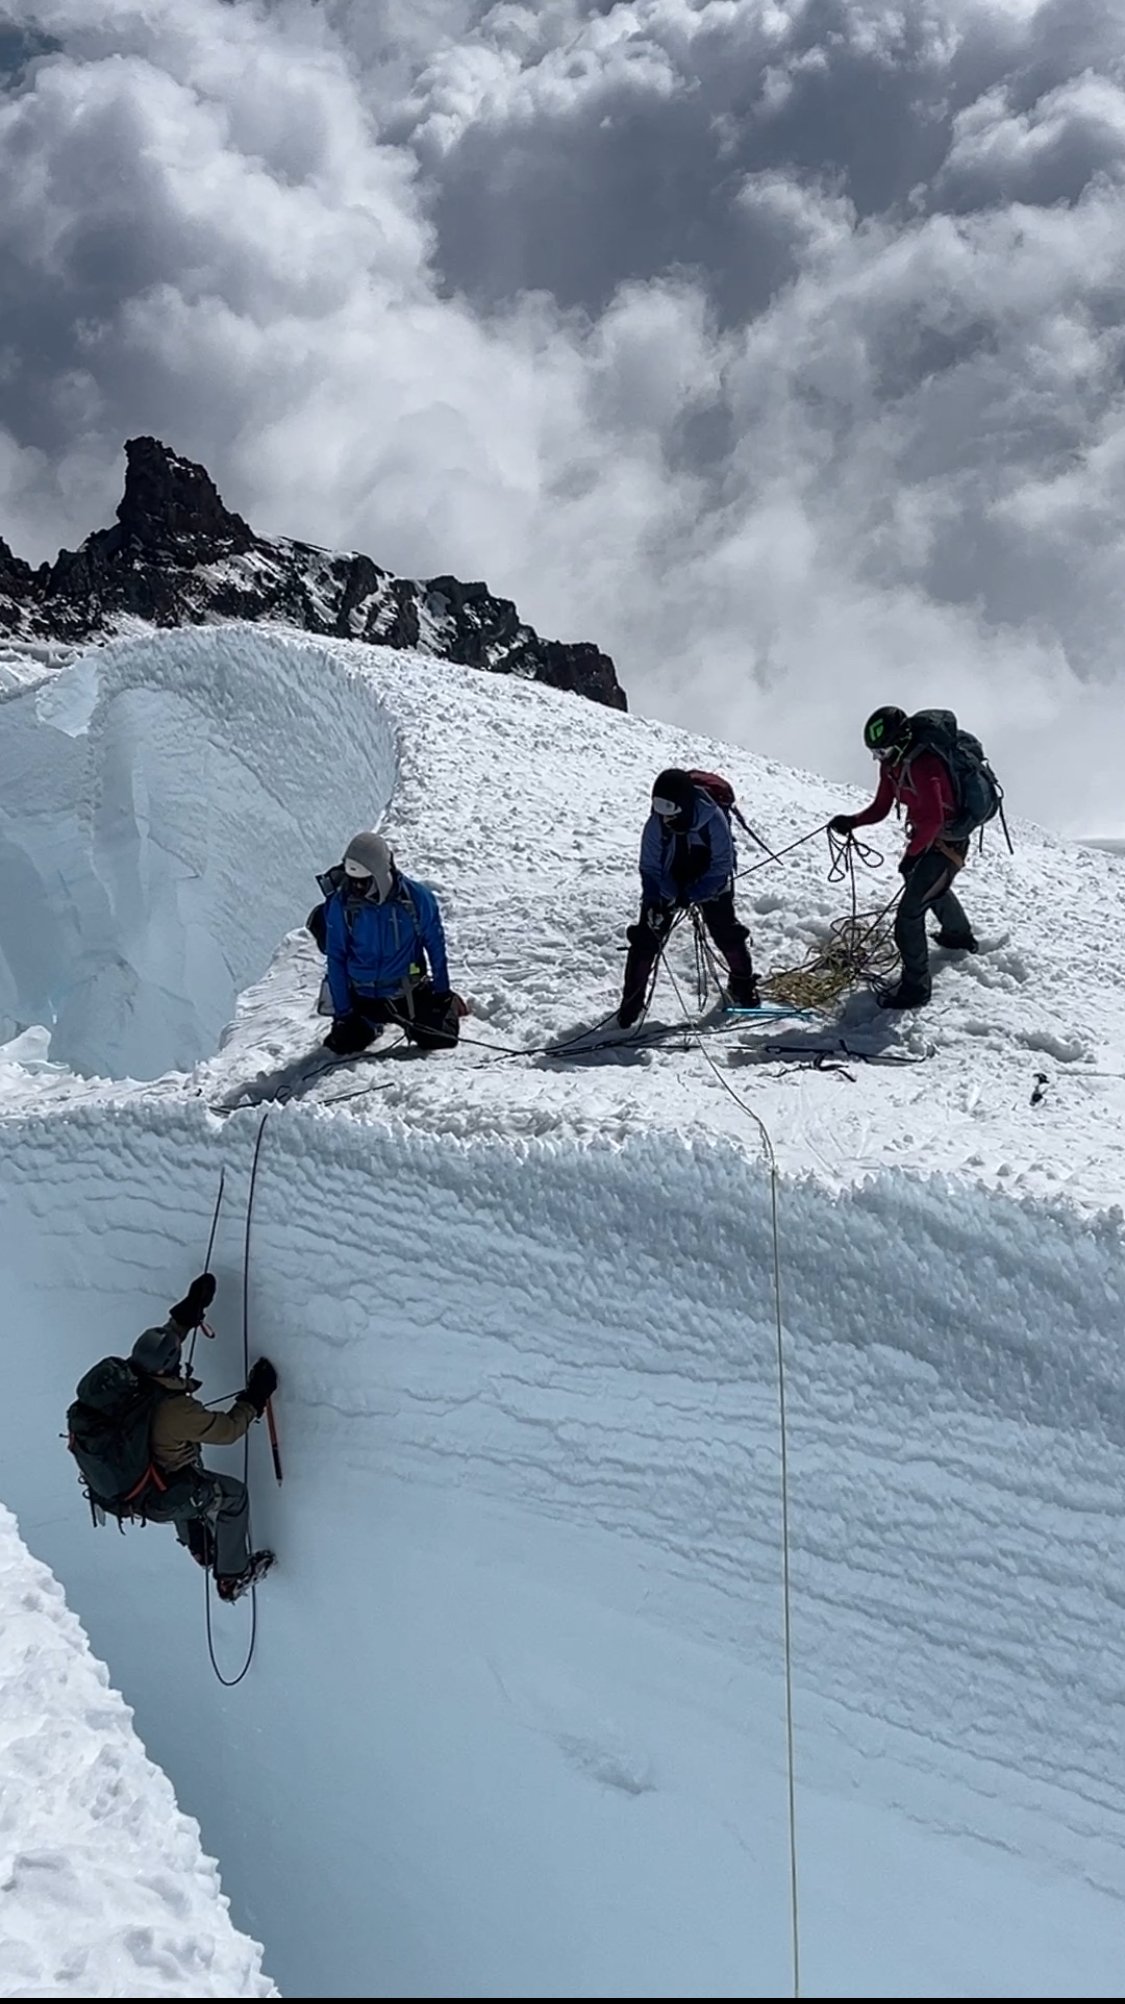
There are plenty of trip reports out there about the Tahoma Glacier, so I won't elaborate too much on the route. Last year we had planned to climb this route but with a very terrible forecast during our dates we postponed it a year. This year we braved the rain on day 1 in hopes of the promised good weather for summit day. Thankfully it paid off. Leaving the trailhead Saturday morning in the rain. (Photo by my wife) Found fresh snow from the previous night that was now a sloppy mess.....still raining. (Photo by my wife) Rewarded with this view on Day 2. We moved from Camp 1 at 6,200 ft up the Puyallup Cleaver to high camp at 9,800ft at the base of Saint Andrews Rocks. Looking at the Puyallup Glacier. It was well filled in and easy walking up to high camp at 9,800ft. Looking down at the Tahoma Glacier from high camp. You have to drop down the ramp to reach the glacier proper. Sunset at Saint Andrews Rocks at 9,800ft. (Photo by my wife) Early morning crevasse navigation. (photo by my wife) Some more crevasse shenanigans in the broken up sections. More crevasse zigzagging. (photo by my wife) The team nearing the top of the route approaching 14,000ft. The summit with my wife and I. At 13,100 feet on the way down our 2nd person (out of 5) had a sliding fall into a crevasse. I have always said that if you keep your intervals tight you shouldn’t have to worry too much about crevasse falls. And over the last 15 years this has proved true in both the PNW and AK. With multiple small punch throughs over the years nobody has ever gone farther than their armpits. But this time was different. This is because if you punch through a snow bridge you will likely go up to your waist or backpack but then be tight and climb out on your own. I think this is true for typical crevasse falls….bad snow bridge, or winded over crevasse. These are times were you are surprised and fall right in. There is an entirely different type of crevasse fall. This is when you take a fall in steeper terrain and are unable to arrest that fall prior to the crevasse. I never really thought much about this because I feel really confident on crampons and look at those short locations as “do not fall” sections. But clearly with a less experienced group I need to take those sections a little more seriously. Our #2 guy on the rope was very tired on the way down which I am sure contributed to the fall. He fell in just such a place on a traverse above a crevasse on terrain I would call “no fall zones”. He fell off the upper lip and into a big open crevasse. The rope wasn’t super tight but there wasn’t an excessive amount of slack in the system. It was in difficult terrain where there were multiple obstacles stacked right after each other so team members were navigating different technical obstacles all at the same time (not ideal). Looking back I think I could have potentially avoided the incident by the use of running protection. I just felt so secure in those sections that I didn’t really think it necessary. But when taking newer people out it is better to take a couple minutes to add running protection than a hour to pull someone out of a crevasse. Lesson learned for sure, and I am just really glad he was ok. When the fall occurred, my wife who was leading the rope team had just finished all the technical obstacles and was on the lower lip of the crevasse. #2 was working across a traverse 8 feet above the lip of the crevasse and then had a 10 ft down climb to a narrow snow bridge. #3 had just finished a down climb and was just making a step across a thin snow bridge and onto the traverse. #4 was at the beginning of a down climb. #5 (myself) was anchoring the back on the slope above. When #2 fell he was unable to arrest in those 8 feet and so fell off the upper lip. He stopped about 30 feet below the lower lip and just above a sloping snow ledge. The rope never came tight to my wife (#1) because #2 fell towards her creating slack. #3 was pulled off her feet across the snowbridge onto the traverse. She was able to arrest. #4 was pulled off his feet and into the down climb. Myself in the back was able to arrest and hold the fall helped by #3 on the traverse. Thankfully #2 who fell in was uninjured. We were able to give him a little slack so he could get his weight on his feet onto the sloping ledge and then we started working on a plan. It took a bit of time to get things setup since the terrain was complicated where most of the team had arrested the fall. But in the end we were able to get everyone except for myself to my wife's position on the lower lip where there was a great spot for rescue. They were able to equalize 2 pickets (1 deadman and 1 end SLAM) and then used a 3:1 system with an ice ax at the lip to keep the rope up. Once the system was set 2 people were able to haul out the climber in less than 5 minutes. Having various different levels of experience on the team we spent a few minutes afterwards discussing and debriefing the incident. Here were a few lessons people found helpful. Place anchors further from the edge so there is more room to haul. When moving downhill keep walking down past the obstacle (body belay) vs. a hip or ice ax belay. This allows you to quickly run downhill should someone slide towards you creating slack. You need room to walk around at the anchors when performing a rescue. If in a safe spot think about just being out of the system. If not then use cord or the back end of a rope. Both the first 2 rescuers got pretty pinned into short tethers that prevented much movement initially. Have 1 person take lead on patient care and tell the person in the hole to put on warm clothes…even in best case scenarios it is going to be 15-20 minutes in the cold crevasse. If there is a ledge in the crevasse consider giving slack to get the person off the rope and onto their feet. Use the rope for backup should the snow give way again. Think through all the steps that need to get accomplished and try to figure out what can be done concurrently to speed up the process and gain efficiency. Here is the rescue in progress from the top lip of the crevasse at the beginning of the traverse. I ended up be "stuck" on the high side and only helped through directions. I felt the team plenty competent and taking the time to get me to them would just delay pulling out the fallen climber. One more shot as the fallen climber nears the lip. A shot looking up at the top lip of the crevasse and the traverse above. You can see the top of the upper down climb above the traverse on the left. The thin snowbridge is hidden behind the traverse on the left. The final down climb and narrow snow bridge are on the far right after the traverse. The whole incident took about an hour from the time of fall to having everyone out and gathered up at the lower lip. From there we continued down the glacier without further incident. Although people's nerves were a bit shot and any steep terrain encountered further down was negotiated with slow care. This resulted in a very long but safe day. Farther down the glacier at about 11,000ft. We hiked out the next day in beautiful sunshine and tired bodies. But got to see some goats in the process. (photo by my wife)

 1 point
 -
there will be plenty of people up there. take more sun protection than you think you need (hats, buffs, glasses - sunscreen never lasts long enough). Take lots of water and start early. 3 AM from the parking lot is probably early enough if you're fast, otherwise it is more pleasant as a two-day trip. take a trash bag or waterproof pants for the glissade down! (remove crampons for the glissade)1 point
