


bargainhunter
-
Posts
71 -
Joined
-
Last visited
-
Days Won
5
Content Type
Profiles
Forums
Events
Posts posted by bargainhunter
-
-
Outstanding! Thank you for sharing this. Very nice style and preparation. You made it seem like a casual weekend outing in the Cascades. I'd love to do this route in a similar style. Very well done!
-
Great thread. For those who need a refresher as to how badass Dan is, read this:
https://www.powder.com/stories/the-legendary-story-of-a-mysterious-solo-ski-mountaineer/
-
The first main photo in John Scurlock's "Snow and Spire"(pp.26-27) is of the east face of South Twin in winter:
[Photo pending...I'm having trouble uploading the photo...The gallery upload feature appears closed. I'm getting a "Permission denied ...Fatal error"].
Look at the snow filling up the slope almost to the notch near we descended in the left hand of the photo. Looks like we could have jumped off and glissaded down! No sketchy moat there.The ridge descending in the center of the photo is the northeast ridge which dberdinka descended on his bike tour hike (described here).
-
Dberdinka, not sure about Strava (I don't use it) and my partner found the GPS track on the Strava search engine.
Cheers Jstluise, good seeing you guys up there! I enjoyed your TR too.
-
Trip: South and North Twin Sister - Loop traverse
Date: 8/26/2017
Trip Report:
Yesterday, I spent a 15 hour day on a loop tour of North and South Twin Sister with my friend Lukas, a climbing partner of almost 20 years. We covered 18 miles of terrain and gained more than 7000' in elevation. Best of all, we made it back to B'ham's Casa Que Pasa within 3 minutes of closing to replenish with multi-pound burritos. We found on this trip that if you push to accomplish your goals and don't give up until you are absolutely stuck and shut down, you might actually succeed while facing that which seems initially impossible.
We left the Middle Fork of The Nooksak by the gated bridge at 7am and walked up the logging roads, then trails, to the flanks the West Ridge of South Twin. We cached a bike at the turn off of North Twin's west ridge trail and wondered about the history of an old cabin site (~4520') in the valley between North and South Twin as well as marveling at the spring gushing out of the valley between the two Twin Sisters (~4740' last reliable water en route to the summit...fill up here).
We dispatched the class 2-3 west ridge of South Twin summit and both remarked that it felt shorter and easier than North Twin's similar West Ridge which we had done 11 months earlier. Both of us felt baffled that write-ups described it as slightly harder and longer. Maybe it was due to the fact that South Twin's west ridge was just the approach hike for our longer tour which we had in mind for the day. We were following the GPS track of a pair of runners who climbed both peaks and connected the two by walking along the glacier on South Twin's western flank, arriving back at their car in an impressive 6 hours.
Their route descended South Twin's southeast ridge to a notch, and then dropped westerly down steep cliffs onto the glacier. We had no information about their experience other than their GPS track, which had taken place in May two years prior. As we descended increasingly steep chossy 4th class cliffs and downclimbed past two sets of rappel slings following their path, it dawned on us that that party may have had a rope (we didn't), and likely had had more snow present during their trip (before much of the spring snow had melted), perhaps covering the steep final cliff portion which we found abutting a menacing glacial moat.
As we gingerly descended the western cliffs of South Twin's southeast ridge, through loose cliff steps peppered with gravel and sharp rockfall, we hoped to find a straightforward step onto the west side glacier. Backtracking up and down and zig zagging back and forth on exposed 4th class terrain, we had no such luck. Our efforts cliffed us out a mere 50 feet above the invitingly close glacier, obviating how effortless it would have been to have stuffed a rope, harness and rappel gear into our packs. The weight savings of going ropeless no longer seemed worthwhile. I was sketched! (Moral: bring a rope if you go this way!)
Verbalizing my fear to Lukas and the obvious conclusion that we were going to have to retrace our steps merely ignited his persistence. He committed to handholds at our feet and lowered himself into vertical appearing 5th class terrain, feeling out blind foot placements, discovering positive handholds which were hidden from our vantage point above due to the increasing cliff steepness. Beneath us was the bottomless blackness of the glacial moat which emanated such a spooky vibe that I dared not look directly into the inky void for fear of seeing death itself. Our causally rated outing had suddenly been transformed into full on business class if not downright formal affair. The exposure was palpable and it's texture was scary.
My instinct for self-preservation urged bailing (if that were even still an option), but Lukas' sticktoitiveness kicked into high gear. He inched down methodically from positive handhold to solid handjam to secure foot placement, ignoring the bottomless moat beneath him, focused on reaching a small ledge bridging to the glacier.
In retrospect, the combination of my more conservative preoccupation with safety with his boldness to press on has likely been a winning combination for our mountain success over the years. While writing up this TR I reckoned that partnerships which are too bold risk premature death while those which are too conservative never get anything done. Somewhere between the two is the balance. Thankfully we found it that afternoon. A few minutes later we jumped the final step onto the glacier. With hands in Union gloves and nary a worry, we strolled merrily on our way as if we were Joe Arpaio and Donald Trump were president. We were blissfully amnestic of the fact that the grim reaper himself had just lifted our necks from the stocks of the guillotine and tossed us, like a disgusted bouncer, into the alleyway. I wasn't arguing. We pressed onward toward the notch between North and South Twin, skittering in the glacial sun cups in our approach shoes, casting sideways glances for signs of hidden crevasses, stepping around only one. Casual.
The next segment of our adventure found us at the notch between North and South Twin. In this mid afternoon hour, prudent mountaineers would have elected to continue scrambling down the west sloping valley and hightailed it safely back to the trailhead. We are slow learners however and we dumbly pressed on up the southeast ridge of North Twin into unknown (to us) terrain, consoling ourselves that once we tagged the summit of North Twin, we were on familiar ground and could autopilot down the west ridge. After all, we were following the GPS track of a couple of lamos in running singlets and mesh vests with gel packs who had just jogged this route in 6 hours. WTF!
I felt that the southeast ridge of North Twin was only slightly more difficult than either of Twins' west ridges, but more exposed with more loose rock. The scenery however, was breathtaking. Mt Baker was directly to our (north)east, revealing it's more private side containing the Squak and Easton glaciers. South Twin's massif behind us, with it's intricate ridges and adjacent glaciers, was stunning.
Ascending further, each step closer to the top of the North Twin's southeast summit held an increasing percentage of dread that we might get cliffed out above a deep notch separating us from the the true summit. The connecting steps and ridges of our route grew steeper, and the exposure grew more intrusive. At one point, I paused and scrolled through my iPhone's photo albums specifically to study summit pics from last years's ascent of North Twin. I knew I had some wide sweeping panoramas and perhaps I could find a detailed perspective of the cliffs beneath our feet? I found an archived photo of our current perch, thinly veiled in a swirl of mist. As I zoomed in, a man with lesser rectal fortitude would have promptly soiled his REI zip off pant-shorts.
"Lukas, we're screwed," I bellowed up the ridge. "There is no safe way down to the notch from here. It's too steep and cliffed out. Let's bail!" These words impacted Lukas like a gnat farting a mile away. Nonplussed, he was dismissive, "Bail? You've got to be kidding. To where?"
I mumbled about some steep chossy gulley hundreds of feet beneath us that might lead back to our approach valley. Lukas ignored me as if I'd just suggested we go bobbing for apples in an overflowing portapotty. He then pointed out a series ledges, downsloping and covered with loose rocks several hundred feet beneath us: they appeared to wrap around to the west and perhaps might connect to an easier adjacent ridge to the true summit of North Twin, bypassing the notch entirely? With the sun approaching the horizon, I felt like a man who'd been kick in the balls a thousand times and was about to get his 1001st kick. What the hell, what's one more kick?
We scrambled down sketchball loose gullies interrupted by short 4th class death steps toward his proposed imaginary route. Less than a hundred feet lower we were hit with an epiphany that all climbers have experienced at some point: the frontal perspective of a cliff face from far away often makes it look much steeper and intimidating than it really is.
Sure enough, the impossible cliff which appeared to guard the true North Twin summit from our side of the notch was actually just low angle 3rd class terrain when we got right up in its grill. Elated, we bagged the North Twin summit, allowing ourselves a 5 minute rest break before descending the straightforward west ridge as the sun dipped close the San Juans. When darkness finally required headlamps, we had arrived at the descent trail in the forrest. Bowler! We still had a couple of miles to hike to reach my bike hidden in the trees. Lukas, sans bike and evidently reaction formating by his recent foray into ultra-marathoning, pathologically announced he would run the rest of the 6.5 miles back to the car. "Don't you want to run too?", he asked. Um, no.
I walked the final miles to my bike, pausing only to dump pebbles out of my shoes and insure that the weird sound in the shadows was indeed croaking frogs and not a ghost intent on making me piss my pants. My bike had a flat tire, a mere flesh wound at this point as I was equipped with a pump and patch kit. I repaired it by headlamp then coasted a half dozen miles down well groomed logging roads in the dark reaching the car at 10pm. Lukas had arrived at the car 15 minutes prior. What a stud!
All in all a grand adventure, and I do mean adventure, as the outcome was quite uncertain at times, but accompanied by a persevering partner, we prevailed. I could not have pulled it off otherwise.
Lukas' uploaded all of his videoclips from the trip into an into an
. I found it funny, amusing and quite dorky in it's candid realism.His Strava link of our path is here. Evidently, the ~ 4 hour moving time is an inaccuracy due to his GPS tracker being set on "run mode", which stops the clock if one is moving less than a running pace, as we were much of the trip. It took us 15 hours car to car, with many short breaks.
There is a TR from dberdinka who did a similar trip SOLO _AND_ BIKED from Bellingham. Great style! Chapeau! His route smartly descended the NE ridge from South Twin's summit to reach the glacier on the west side, thus avoiding our drama. This may likely be the better descent route for ropeless parties.
Gear taken: Approach or running shoes, light axe (e.g. Camp Corsa), light aluminum crampons (Black Diamond Neve 'pons worked very nicely with my approach shoes); my partner never took his axe nor crampons out of his daypack. Jolly Ranchers worked well during the grind sections to maintain morale. Tire repair kit and pump for your bike.
Gear I wished that I'd had: A rope to rap over the scary moat gap or steep sections on the the SE ridge of South Twin which leads to the glacier. Completed will and testament placed on my desk at home, along with a list of my savings and retirement accounts to make things easier for my heirs. Rosary and holy water.
All photos copyright Charlie Wolf 2017
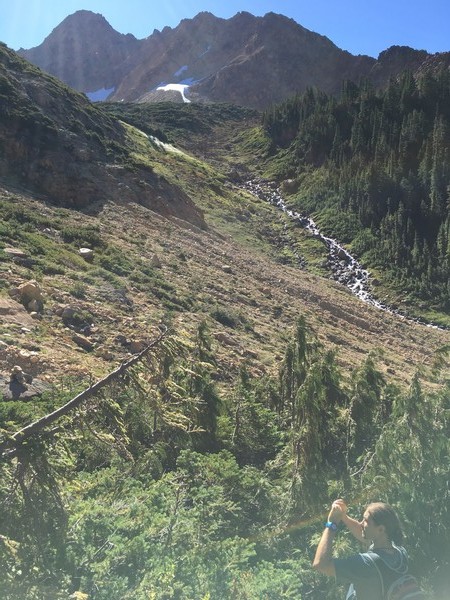
On the southern flanks of the west ridge of North Twin, approaching South Twin:
The valley between North and South Twin with South Twin's west ridge in skyline:
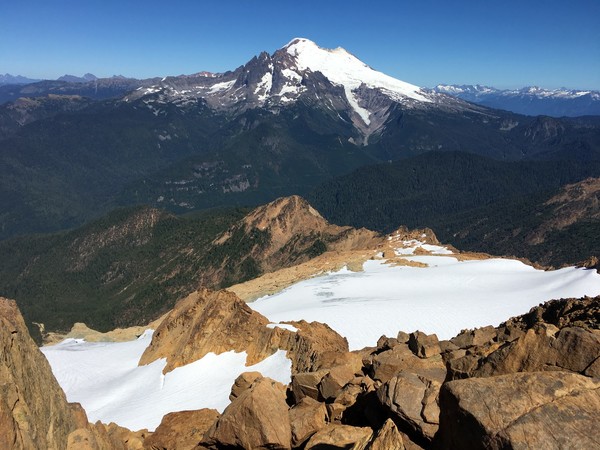
The view NE from South Twin's summit toward Mt. Baker
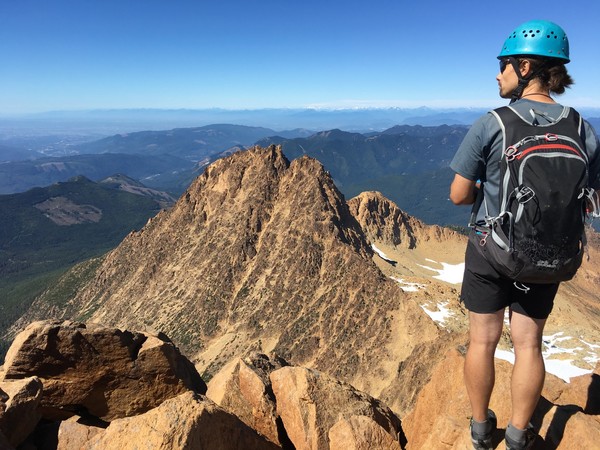
Lukas on summit of South Twin with North Twin in the distance. After descending South Twin and traversing the glacier back to North Twin, we went up North Twin's righthand (SE) ridge and down the left (West) ridge:
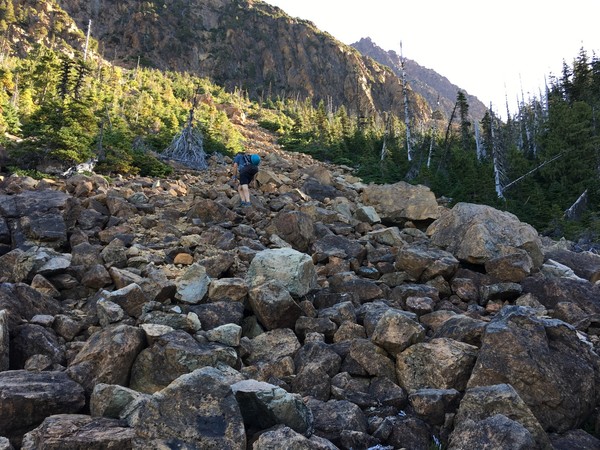
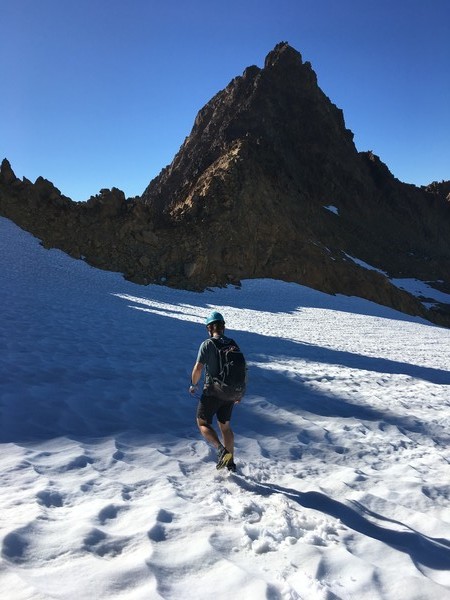
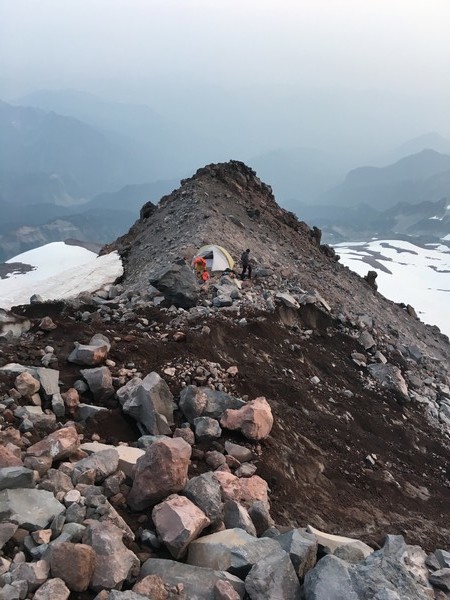
Descending toward South Twin's SE ridge:
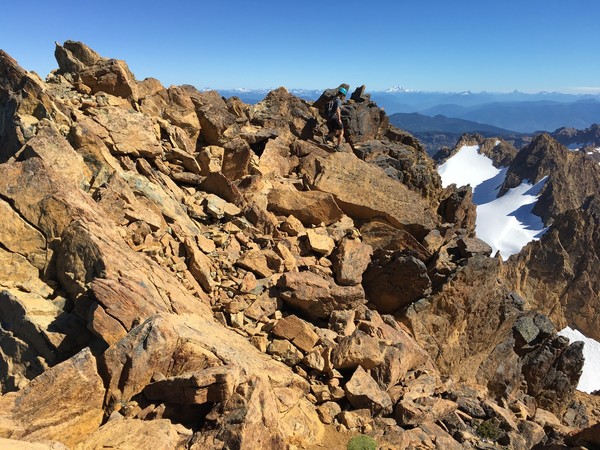
Descending toward South Twin's SE ridge:
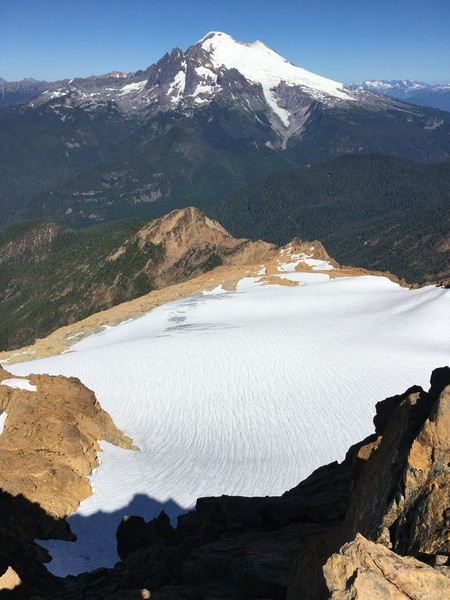
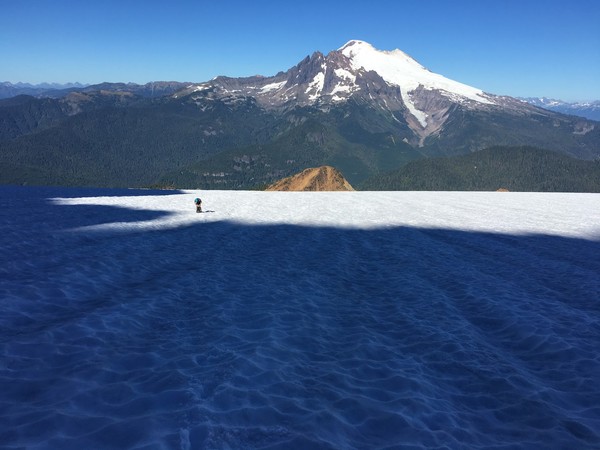
The glacier east of South Twin and Mt. Baker:
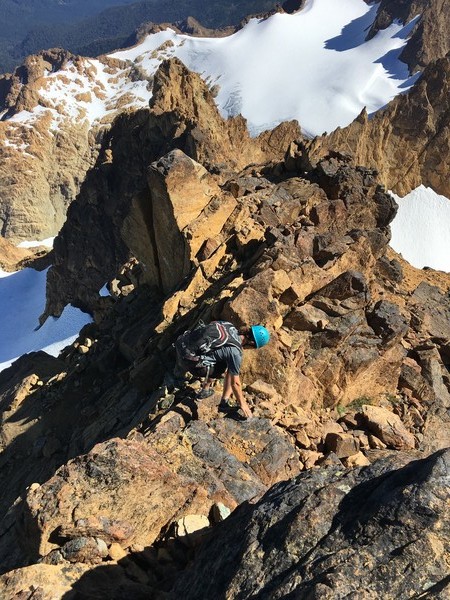
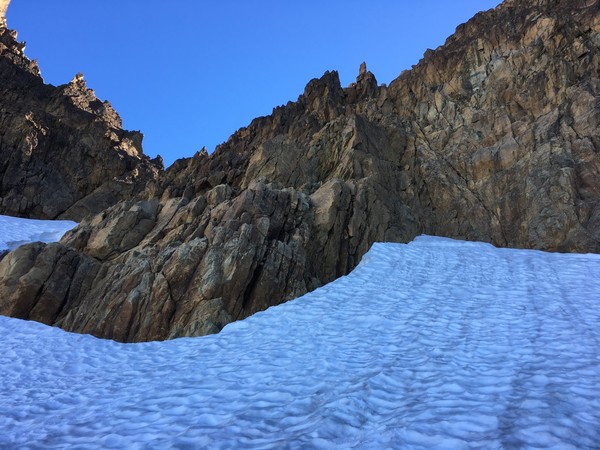
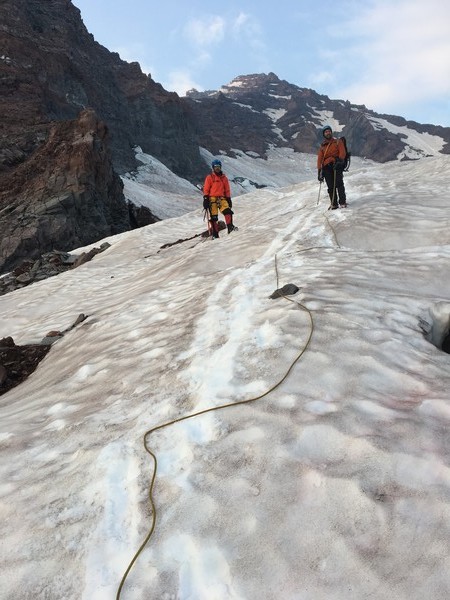
Finally arriving at a spot where we could step onto the glacier after descending ropeless down the eastern slope of South Twin's SE ridge:
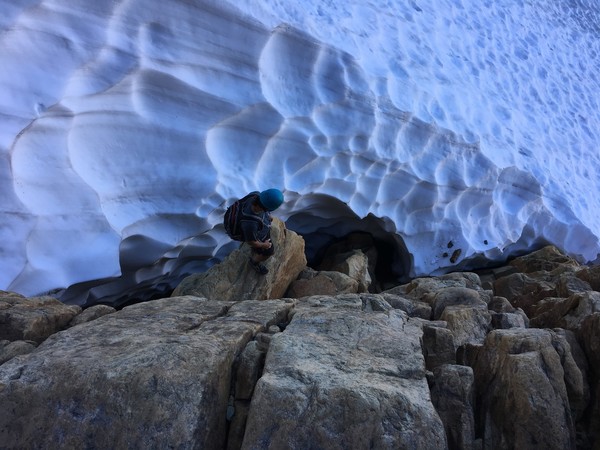
On the glacier at last!:

Looking back at our descent route from eastern side of the SE ridge of South Twin:
Twin Sister's Glacier and Mt. Baker:
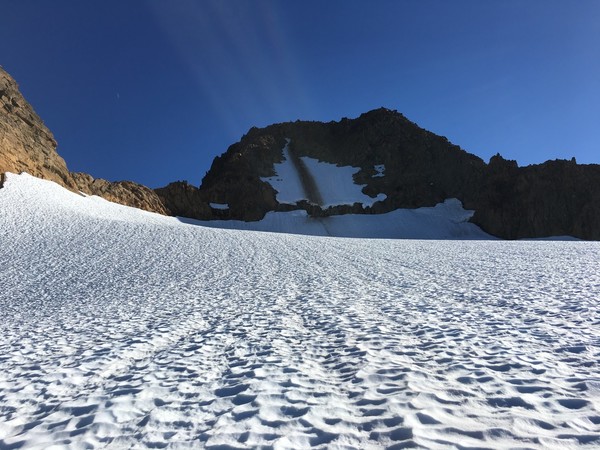
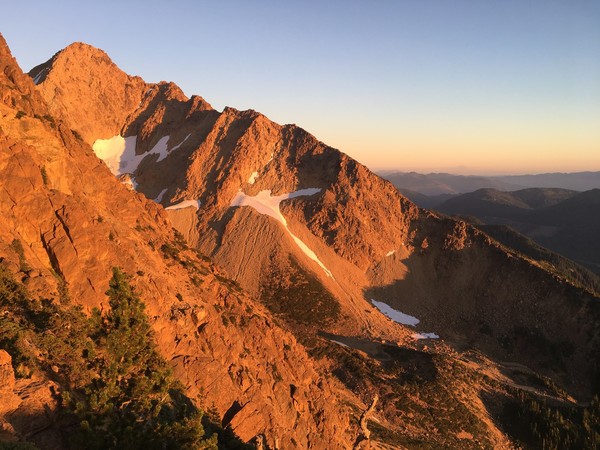
Looking up South Twin from the north. The NE ridge descends the left skyline:
Approaching the SE ridge of North Twin:
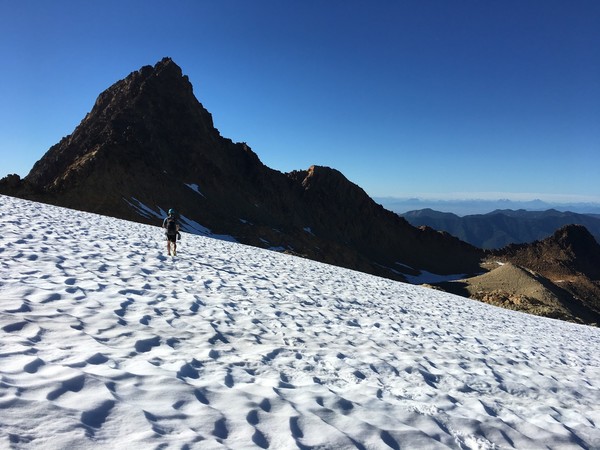
Closer to the SE ridge of North Twin:
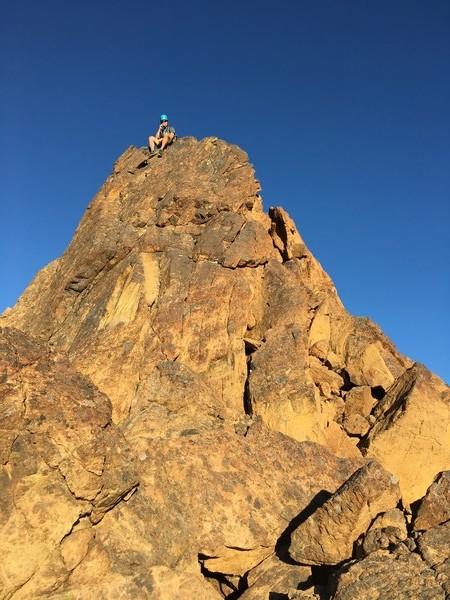
Lukas near the eastern summit of North Twin. He's looking toward the summit notch:
Descending, low North Twin Sister's west ridge:

Sunset view of South Twin Sister's West Ridge from low on North Twin Sister's west ridge:
-
If you can add ~ 20 mins to that drive, try Church Mountain just outside of Glacier on the 542. Lots of switchbacks for 1st 2 hours then a clearing thru alpine meadows and another hour of hills to a scenic summit ridge with great views of Mts. Baker/Shuksan. Almost 4k' elevation gain over 11 miles roundtrip out and back. Leisurely 4.5 hours roundtrip walk... crampons/axe helpful in early season...4th class finish to true summit optional.
-
-
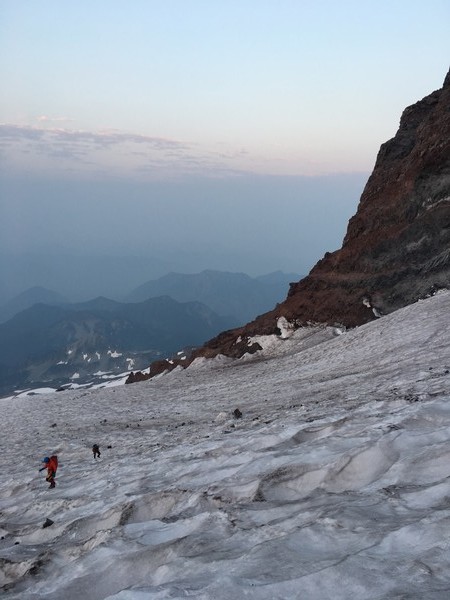
Went with 2 friends visiting from out of town up Mt. Rainier's Eastern Success Couloir last week. Hiked in from the Westside Rd up the old Tahoma Creek Trail, past Mirror Lake and Pyramid Peak, then camped at 7k' on approach slopes just south of the Success Cleaver and again the next night at 9k' on a ridge between the Pyramid and Success Glaciers. This acclimatized us perfectly as none of us had the slightest hint of altitude sickness during the climb.
From our 9k' high camp, we roped up across the Success Glacier to the bergschrund. Route finding was straightforward, slope angle was low and the glacier was hard snow, punctuated by significant rockfall in places. Crevasses were easily visible and avoidable.
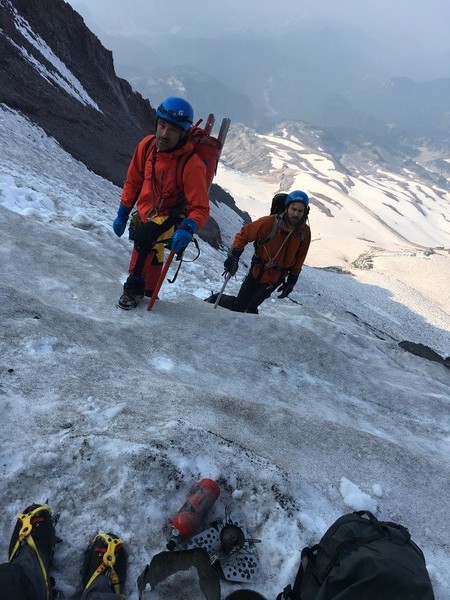
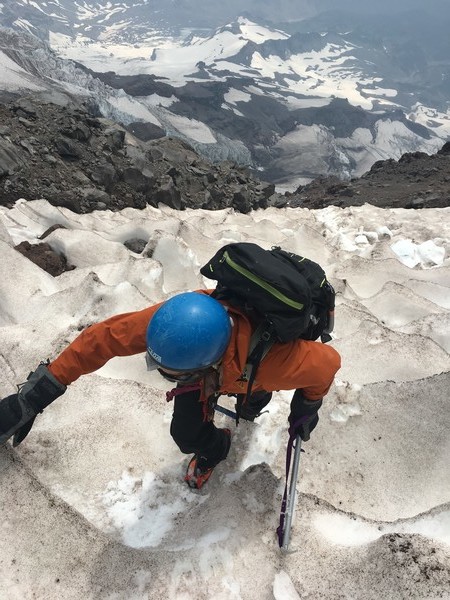
We placed 2 pickets crossing the 'schrund. A snow bridge delivered us to a small amount of slightly sketchy scrambling on a wet, gravely, down-sloping ledge above the 'schrund, but otherwise accessing the upper couloir snowfield was largely uneventful. We unroped above the 'schrund as the slope angle was mellow and heavily sun-cupped, and more importantly, devoid of crevasses.
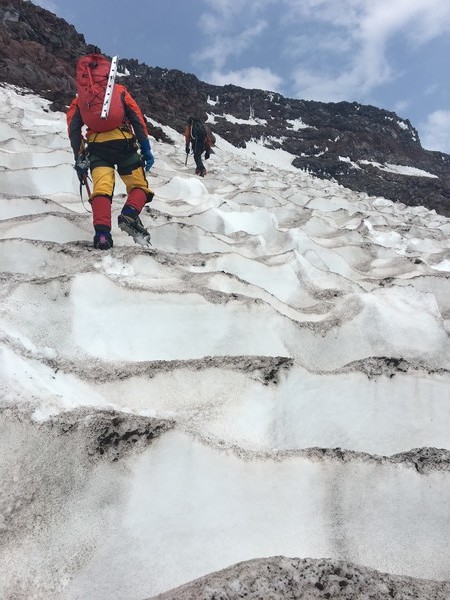
The Eastern Success Couloir was straightforward up to and beyond the first rock band, and we punched through the second rock band directly with a brief 20' section of roped climbing with a single move of 5.6 or so (this could be bypassed by climbers right, but we were impatient). Concerning signs of significant rockfall were omnipresent, and looming unstable rock cliffs surrounded us the entire climb.
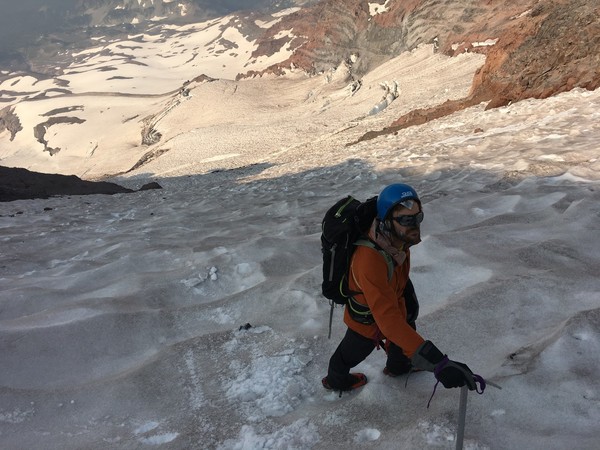
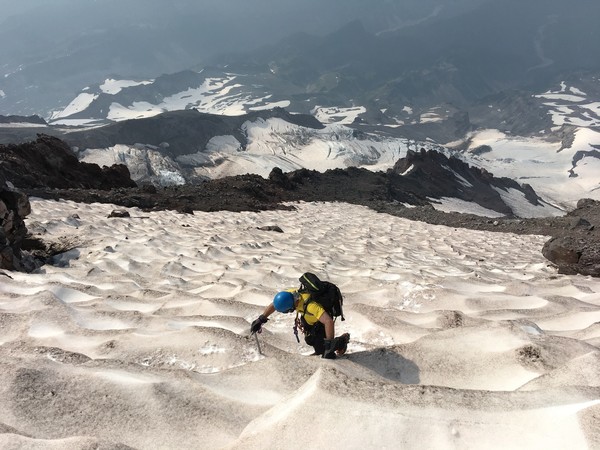
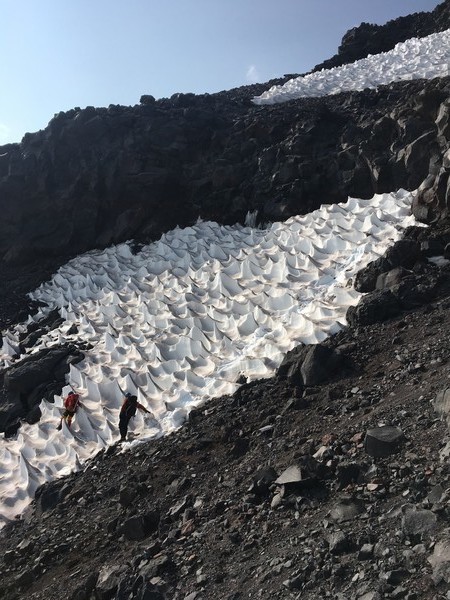
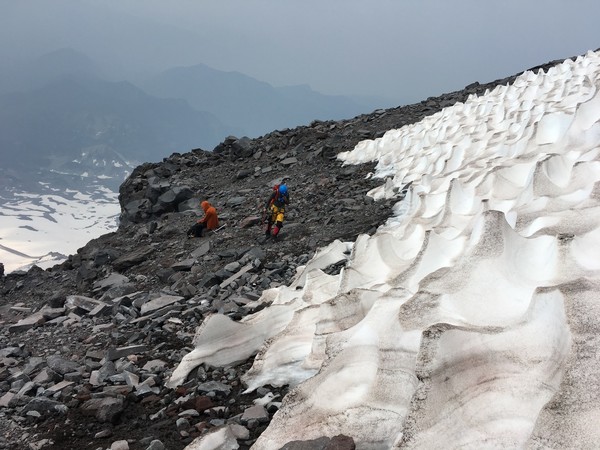
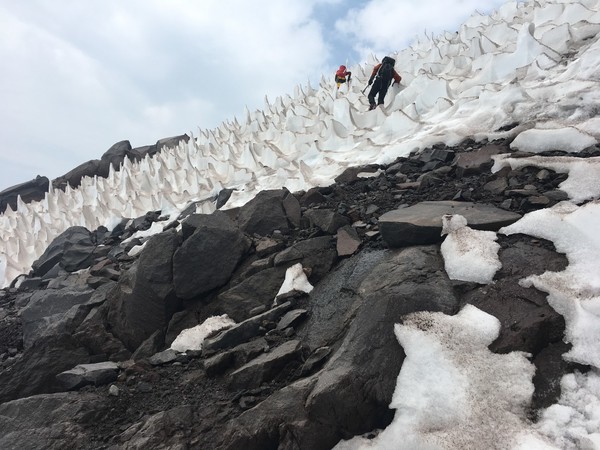
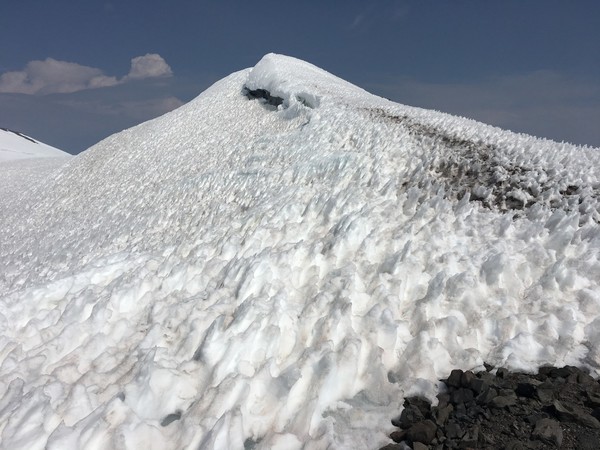
Above the second rock band, we alternated between patches of rocky slopes and sun-cupped snow which transformed into hurdles of increasingly large penitentes as we ascended higher. We bypassed more cliff bands via the most straightforward way, at times unsure if we were following the best route.
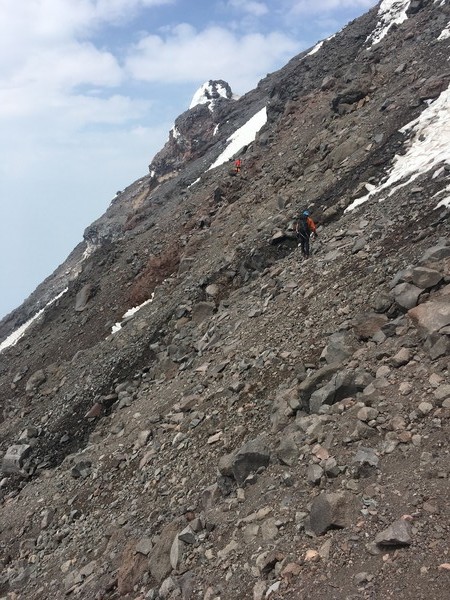
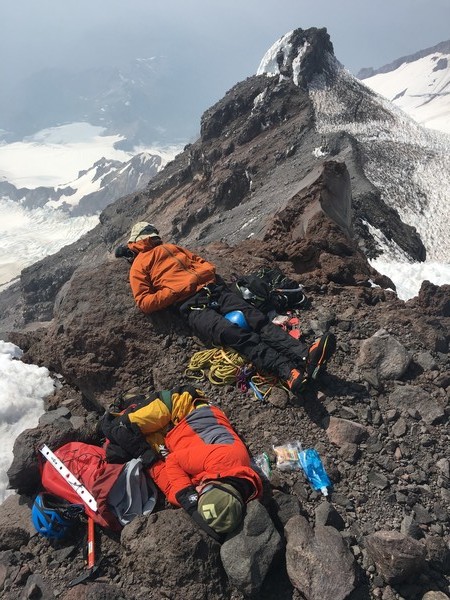
At ~13,500' we cut climber's left through a ridge notch, and traversed/ascended a left leaning steep snow-free talus/scree slope under scary cliffs that appeared ready to obliterate us arbitrarily with sharp rockfall. We merrily popped out on the summit plateau and rested on a dry pumice/gravel patch about 50' lower than nearby Point Success. Point Success proper appeared to be a corniced-over crevasse (or bergshrund?), guarded by endless 4' tall penitentes and soft deep post-holey snow. I melted snow on our pumice patch as my pards briefly napped.
Fatigue from our 5k' ascent and our recent experience with the penitentes immediately squelched further thoughts of slogging through the endless penitentes to Columbia Crest, as this drudgery would have taken hours. We didn't even bother venturing a few hundred feet over to the true summit of Pt. Success due to similar malaise.
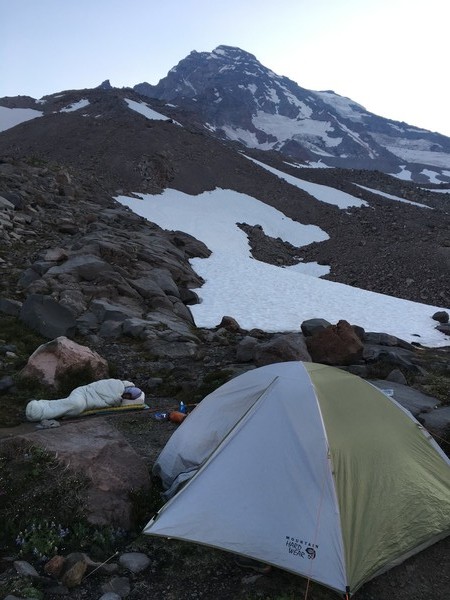
Upon returning to high camp, the temperature dropped and winds picked up, rattling our tent. Heavy rainfall pelted us and thunder boomed periodically. I was concerned enough about lightning to move the ice axes and snow stakes away from the tent. In the AM, lenticular clouds covered the summit.
On the hike out, Kaleem wore only one semi-functional boot as the soles on both boots had delaminated on the approach. His valiant attempts to hold them in place first with bungy cords, then super glue, and finally extra shoe laces, prusik cord, and cloth tape, had ultimately failed. His discomfort while descending barefooted through miles of sharp glacier rocks and rocky trail must have been offset by the comfort he had received from his 5 pound memory foam pillow which he had carried to high camp. Stoic, he did not complain once. Burly.
Back at the trailhead, jonesing for hot showers, we drove 18 miles from the Westside Rd. to Paradise under the erroneous and outdated advice of an old edition of Mike Gauthier's guidebook which indicated public showers were available at the visitor's center ("Bring quarters. It's worth it," stated the 1999 edition). Wrong. Showers were removed when the visitor center was rebuilt in 2008. For post climb showers, you can drive to the Alder Lake park and curse the crappy intermittent coin-op showers and end up jumping in the lake out of frustration as I did.
The ridiculous weekend traffic and human zoo at Paradise was offset marginally by our grandiose delusions as honed alpine gods slumming it among pathetically deconditioned hoi polloi. The impressively stunning view of Rainier from Paradise was a more palatable reason for us to keep our noses in the air. Our route was just visible along the left skyline.
Conclusion: Eastern Success Couloir was an uncommon route with a remote appeal and relatively long but enjoyable approach through varied and beautiful alpine terrain. I think we timed it a little late in the season however, as the rockfall was significantly dangerous at times and lack of snow made the rocky slopes less aesthetic. Weather was hot and running water was found gushing even up to 14k feet; our beloved Rainier was melting out. Still we had the entire side of the mountain to ourselves and didn't even see a party on the Kautz route despite perfect summer climbing weather.
Gear: standard mountaineering or lightweight ice axe (e.g. Camp Corsa), 'pons, 2 pickets for the 'schrund, helmet, rope. We took 2 Petzl Quarks in addition but used only one to hammer the snow stakes at the 'schrund crossing, thus I suggest you leave them, along with ice screws, at home (though they did look cool on our packs). 5 lb memory foam pillow optional.
Captions appear on individual photos when viewed in the gallery. All photos copyright 2017 Charlie Wolf


-
Damn it it. I knew I was doing something wrong. I'd been using Trader Joe's bags!!!! No wonder I can't send the gnar like Colin! Gotta upgrade to those lighter bags ASAP...
https://www.petzl.com/US/en/Sport/News/2017-6-5/Colin-Haley-s-Begguya-Kit
-
The Freerider looks awesome and I want one. I have the Mescalito and love it, but it's much smaller at only 24L vs the 41L of the Freerider. I got the Mescalito to have a durable small climbing pack as I always seem to have my fair share of groveling (e.g. chimney scumming) despite best intentions no mater the route.
It's seems that each time I get lured by lightweight gear (e.g. thin nylon packs), I'm disappointed when it quickly shreds. I just returned a lightweight REI Flash 30 after 2 seams ripped on a simple Mt. Rainier outing. Just putting a pack down on that coarse volcanic tuff (on Success Cleaver) gave me pause. Ok, I overstuffed the bag and had crap strapped all over it, but still, I could have dragged my Mescalito behind my car on the whole drive from Bellingham to Rainier and likely still have had a functional pack for the climb. Same problem with my Lowe Alpine Attack Summit and equivalent paper thin lightweight daypacks by Mountain Hardware and Patagonia; they are all shredded sieves now.
I was recently comparing 40L alpine sacks on outdoorgearlab (they have a nice review) and am having trouble pulling the trigger. The Black Diamond Speed 40 was about to get my vote but the Patagonia Acensionist 40L also seemed good. The Arcteryx Alpha FL 40 was simple and sweet but overpriced, as was the Cilo Worksack. The Hyperlite wasn't adequately durable and too much $$$.
But, I'm thinking of ignoring the weight factor and just getting the Freerider as my APLINE pack (yes at 3Lbs). God forbid! But at least I won't be buying an new lightweight "alpine" pack every few years...
The Metolius Express (capacity 39L) is also tempting in that it's got a removable hip belt (better with harness) and hideable packstraps, and but the compression/lash straps on the Freerider seem like a nice feature for attaching gear/skis etc. Hmmm....
EDIT: The Cold Cold World Valdez pack (40L) is also a quality durable unit. I like Fish products and I think Metolius designed their Mecalito off of the success of the Atom Smasher. I have had the Metolius grade V bag (Half Dome?) for ~15-20 years and can personally vouch for it's undestructability.
-
Never seen that sign nor had any problem on the standard approach which sees plenty of hiker/skier/biker traffic.
-
Chapeau...but, you are solo and on some big crevasse terrain. It's just a matter of time before you punch through. Be careful. This occurred a few days after your trip:
"Crevasse fall is second in two weeks on Mount Baker"
http://www.bellinghamherald.com/news/local/article154517854.html
-
I got one for similar reasons. Then I got the vestibule as well. Aside from sleeping in it in my living room, I haven't used it in real conditions yet. I'm 6'2" and am ok with it being small. It's light. It's also better than bivying while squatting in a garbage bag, or just lying on your rope in your alpine shells on a glacial rock (Mt. Formidable).
For winter I sometimes use a tent fly with poles and no floor (Sierra Designs Super Flash), but if it's really windy, spendrift covers everything and that negates the benefit of a lightweight shelter. My VE-25 was nice on Denali's West Butt, but it's 10lbs; still I watched people there in little Biblers and Direkt 2 type tents at 17k' and they looked miserable, however the Direkt2 would be a good Cassin tent. The Direkt2 reminds me of a lighter Bibler I-tent that I bought in 1980 but that got destroyed while alone on the Hotlum-Bolum route in a winter storm high on Shasta. On Aconcagua, I just took a bivy sack. For 3 season use, I have a Big Agnes Fly Creek UL2, which also did well in snow in the Alps of Tohoku, Japan, buts it's really just for light 3 season use.
So I think the Direkt2 will be a nice addition to the quiver. More later when I actually use it...
-
Metolius Mescalito
-
The trigrests WILL break if they get slammed against a bulge. I broke both of mine on my first weekend using them while toping out and accidently hitting them trying to mantle onto a step. I don't think they are necessary, but for more sustained climbing (WI4 and up) and matching both hands on one tool, they are great. I'll probably eventually buy new trigrests for that reason, I just need to be disciplined and remove them if I'm climbing on easier terrain. I think if Petzl made them from metal this wouldn't have happened.
Still, I think the Quarks are amazing tools, and superlight! My friend climbs with heavier Vipers and I preferred the Quarks hands down as they stuck much easier and effortlessly.
-
Mark,
I have your same Joe Brown Helmet. I also bought a Sirocco last year. The Sirocco is tougher than it looks and won't wear out scraping in a chimney. Still, the inner harness of the Joe Brown is far, far superior to distributing impact from a direct blow from rockfall. You can pound the Joe Brown with a fist and not feel pain from it, but a light blow on the Sirocco hurts. Still, the Sirocco is very light and has it's place, but for walls for serious impacts, I'll stick with the heavier Joe Brown.
-
Scurlock's "Snow and Spire" is also not to be missed.
-
I just bought one sight unseen and took it on a long overnight cross country solo scramble up Black Kaweah's SW chute a couple of week ago.
When it arrived in the mail and I opened the box, I pretty much felt like an idiot for blowing $120 on a piece of foam, which is pretty much all it is. But, it's a well designed and VERY lightweight functional piece of durable foam, and reflects the excellent attention to detail and design that is intrinsic to most Petzl products.
For me it's niche product for those looking for the lightest helmet possible, kind of like someone who buys a Camp Corsa ultralightweight ice axe. That axe won't replace a burly heavier steel mountaineering axe nor a techinical ice tool, but for lightweight forays where an axe is occasionally needed to negotiate steep snow terrain safely, it excels as you don't feel it on your pack on the approach. [My older mountaineering axe is a mega heavy but indestructable Stubai FKW with an extendable telescoping shaft. When I summited Denali with it in 2000, even then people were laughing at how outdated it was. Then again, I was also wearing camo pile bibs that I'd bought on the sale rack at Cabella's for $17.]
Back to the Sirocco...>Since I had about 12+ miles to hike in and much of that cross country, I didn't want to lug my trusty, dependable HEAVY old school Joe Brown helmet with me. Ugh.
The true benefit of the Sirocco is lightweight. But when comparing it to my Joe Brown, if I slam my fist hard down onto the top of my head to simulate a mild impact, I felt NOTHING with the Joe Brown as it has an inner nylon harness that supports the top of the helmet off my head and disperses the impact nicely. In contrast, the Sirocco definitely transmits the force to the top of my head and I felt pain, yes pain, just from my self inflicted blow.
So, if I'm climbing a rockfall prone route like the, um, the Eiger's North face (yea right...not), I might go with the Joe Brown. If I'm needing something ultralightweight that will protect my head if I tumble down a slope or take an upside down backwards aid fall, or take a spinning lead fall with lateral impact, or just need protection from the occasional smallish errant rocks, the Sirroco fits the bill.
In short, it serves it's role in my quiver. It's also highly visible, which can be a plus in dark and stormy conditions since most of my outerwear is dark. And the ventilation appears to work well without compromising protection.
I'll try to chime in again after I've used it some more.
-
Don't overthink this too much. An old pair of plastic boots with a pair or few of wool socks should be just fine. No need to shell out megabucks. I used some old Asolo AFS 101s a half a size too big and didn't need overboots. At the 14K camp temps dropped to -27F, which was the low during my trip up the West Butt. I had an old heavy REI bag rated to -5F and slept cold, but my feet never got cold.
[TR] Mt. Shuksan - Price Glacier 08/04/2018
in North Cascades
Posted
Shabash! Fucking stellar lads! Thanks for posting up!