


jspitzer
-
Posts
72 -
Joined
-
Last visited
Everything posted by jspitzer
-
first ascent [TR] Revelation Peak, Middle Fork Snoqualmie - Epiphany FA 8/28/2016
jspitzer replied to Rad's topic in Alpine Lakes
Hi all, Climbed this route on June 28th, 2023 as a training in preparation for an AMGA alpine exam with two guides. First off, nice work Rad and Kurt for putting together this route and sharing it with us. The beta above in this post is very helpful but just doing the route a few notes to add for the next person to tackle Revelation Peak Climbing difficulty, while the route is not difficult in terms of 5th class climbing it does require individuals to have a strong mountain sense for navigation both in the pitch climbing and descent. I would not recommend this route for the 5.8 climber as some of the pitches had limited gear. I would recommend this only for the individual looking for an obscure adventure with nobody around in an absolutely stunning scenery! We left the parking lot just after 7am and return at 8:15pm. It took us around 2hrs to the base of the route (note the description above is very helpful). The first 3 pitches went relatively quickly and pretty straightforward climbing. Once in the light grey bowl, best to stay on the climbers left side of the feature as this had the most solid rock and best places for building anchors. Pitches 4-7 are general easy to follow aiming for the ramp with the pine tree. Once completing the traverse pitch the route changes nature. Be prepared for some thick bushwacking above the traverse pitch to get to the start of pitch 9. We stayed roped up as we were mock guiding and this section took us around 1.5hrs with breaking it into mini pitches on the 4th/low 5th class treed terrain. Once at the base of pitch 9th pitch (ridge) we did a combination of mini pitching to get to the base of the tower. To get around the tower, we followed the beta above staying on the climbers right side descending 30ft of 3rd class and then traversing on 4th class terrain. After the tower we ended in treed gully with a very large dead snag leaning up against the final pitch. We did a micro pitch up over the dead snag and then 1 more final pitch to the summit, hitting the really good crack. It's worth noting this pitch is on the SE side of Revelation Peak and as climbing up the pitch, the descent will be to your climbers right. From the base of the 9th pitch it took us 2hrs to the summit. On the summit at 4:15. There is a summit registry but no pencil :(. Last summit in the registry was in 2020!!! For the descent we rappelled SE and replaced all the anchors with new cord. The first rappel we downclimbed (SE) 30ft of 3rd class to a large single pine. Then 2 more double rope rappels and a single rope rappel. All rappels are on solid large pine trees with either a carabiner or rap ring. Now the fun begins! First put your glasses and leather gloves on!!! We descended down the gully until it steepened, then did a traverse hard climbers left and slowly descended through Devils Club, Slide Alder, and eventually aiming for a swath of Old Growth. We worked the old growth down finding micro terrain to work and eventually ended up in the wash below not having to rappel. It would be challenging to navigate this in the dark. From the summit to the wash it took us 3:15. Now in the wash, enjoy the hike down and back to the Pratt river trail eventually to the car. Thanks again Rad and Kurt for putting together this adventurous line! It's worth doing if you want a classic Cascadian adventure but wouldn't necessarily do it again. Happy Climbing! -
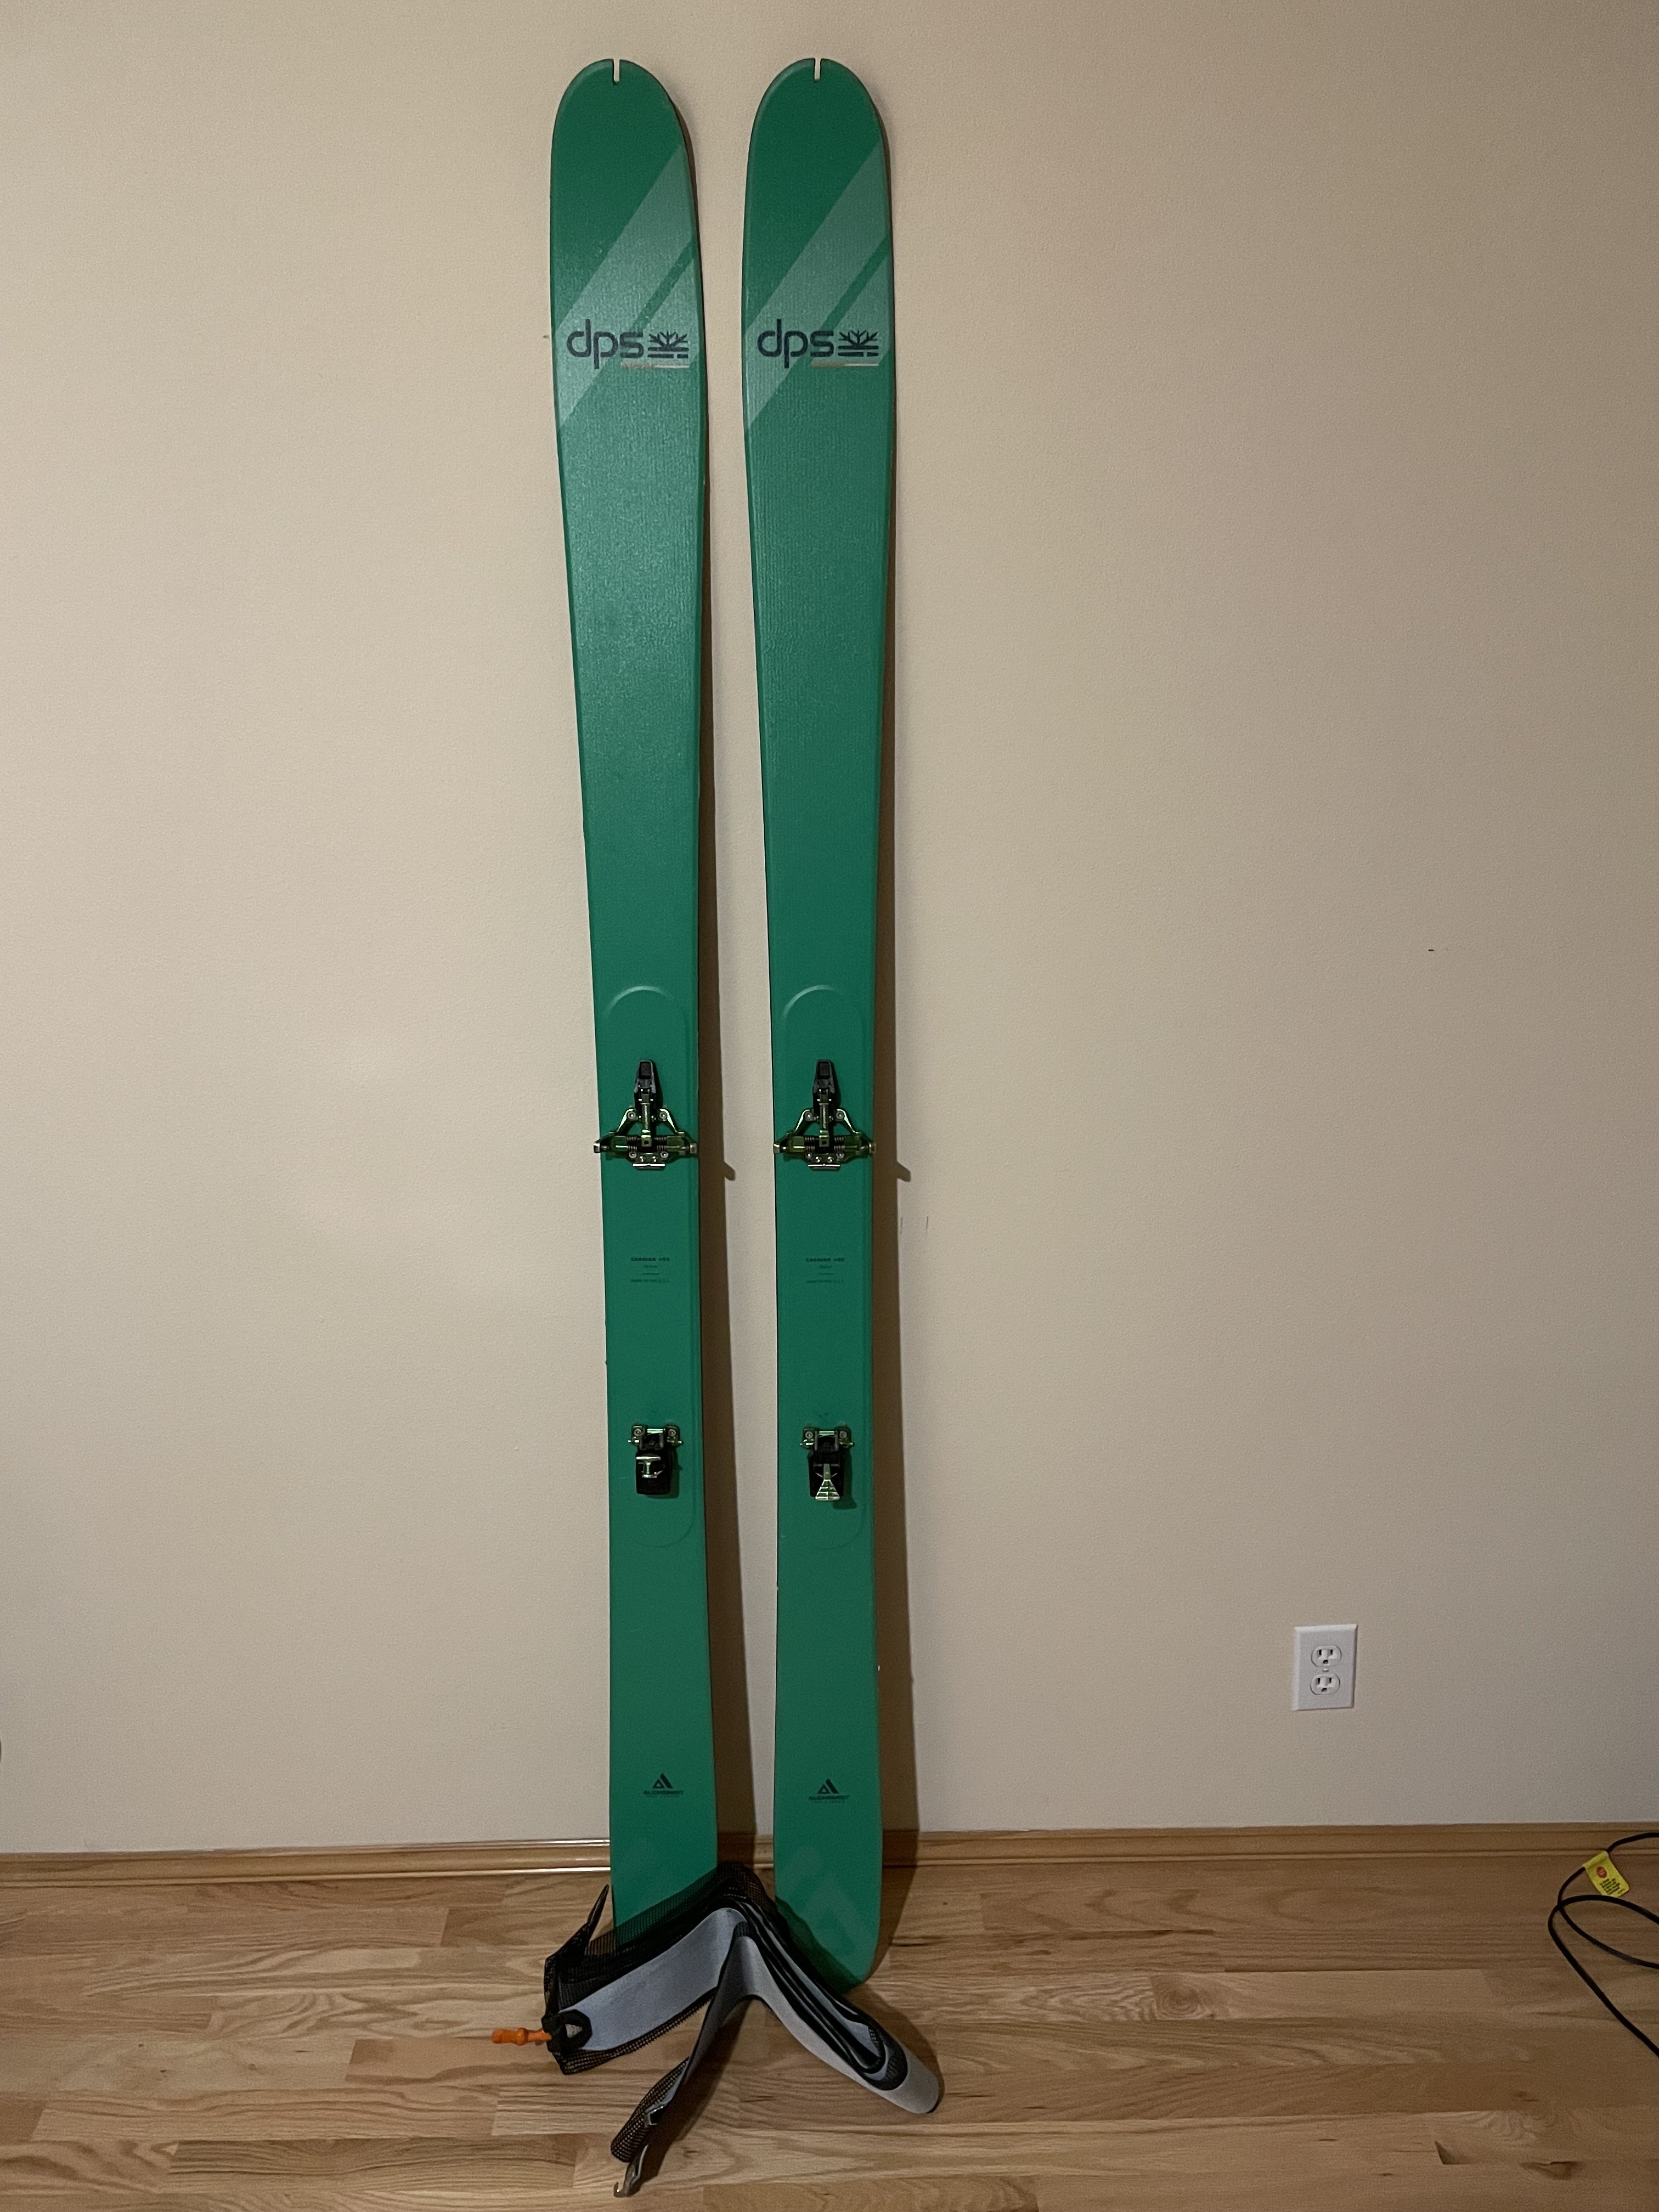
Hi sorry i forgot to add the price. I'm asking $950 for the setup. Please let me know if you have any questions.
-
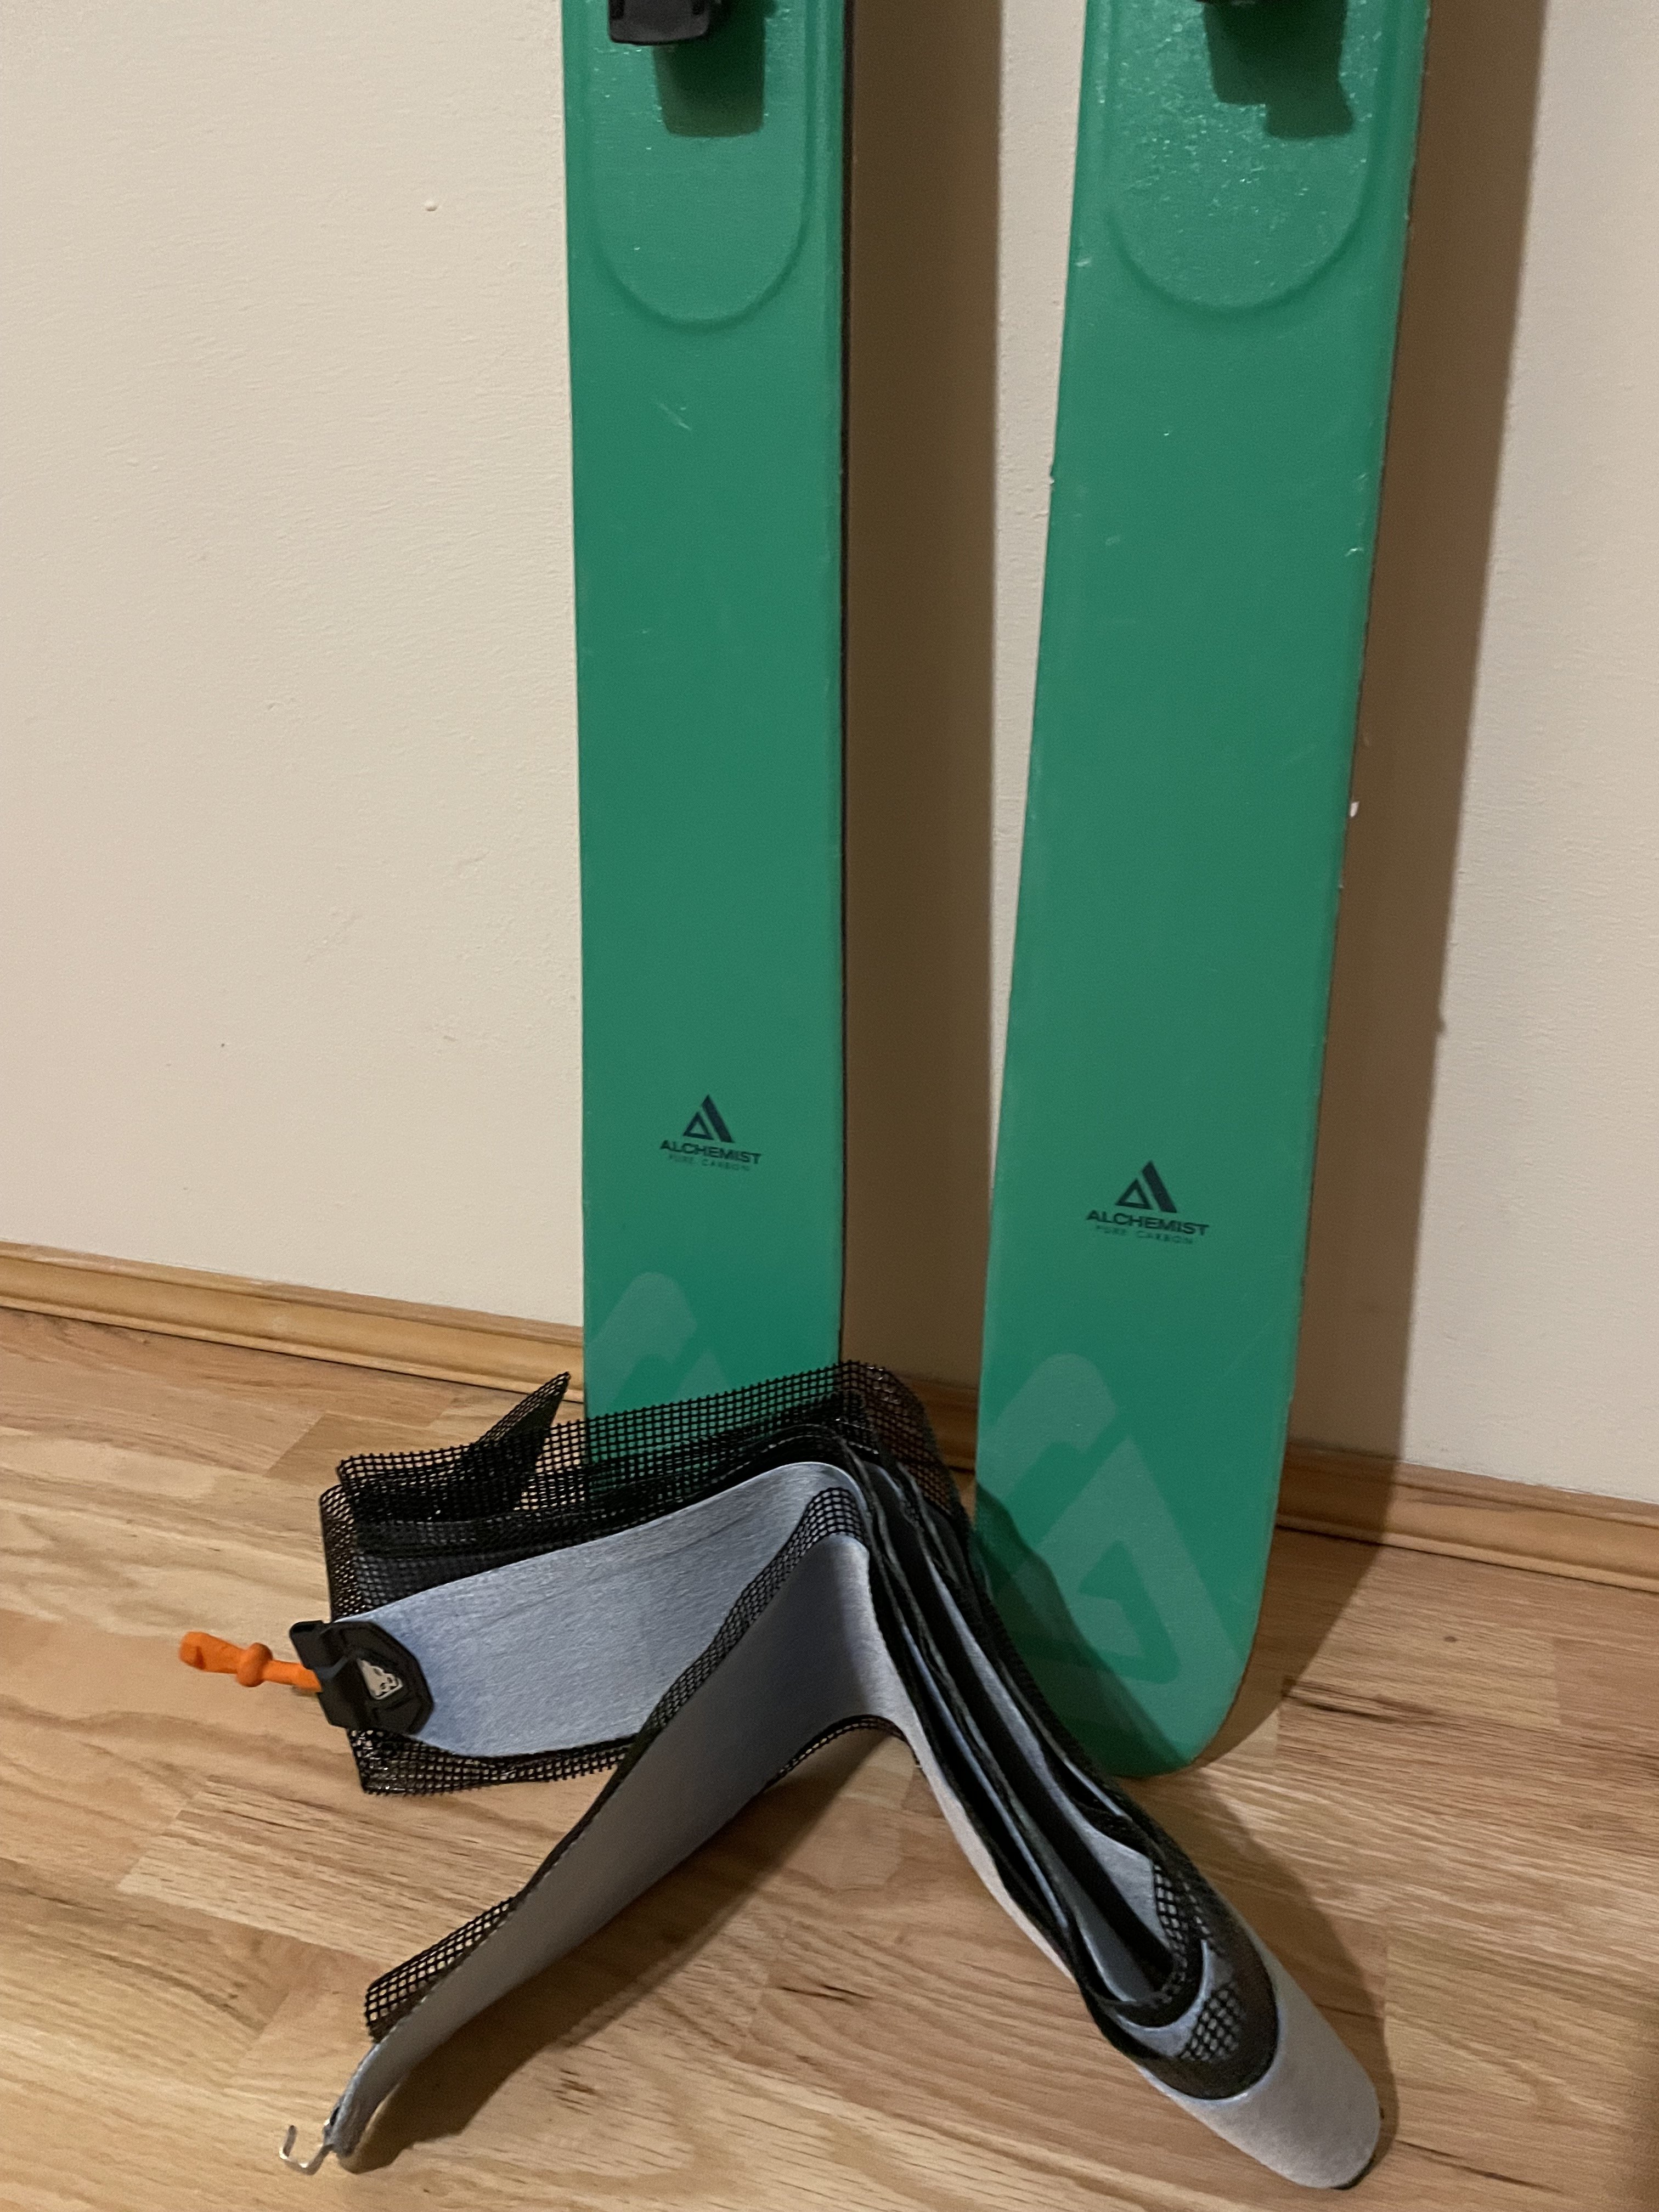
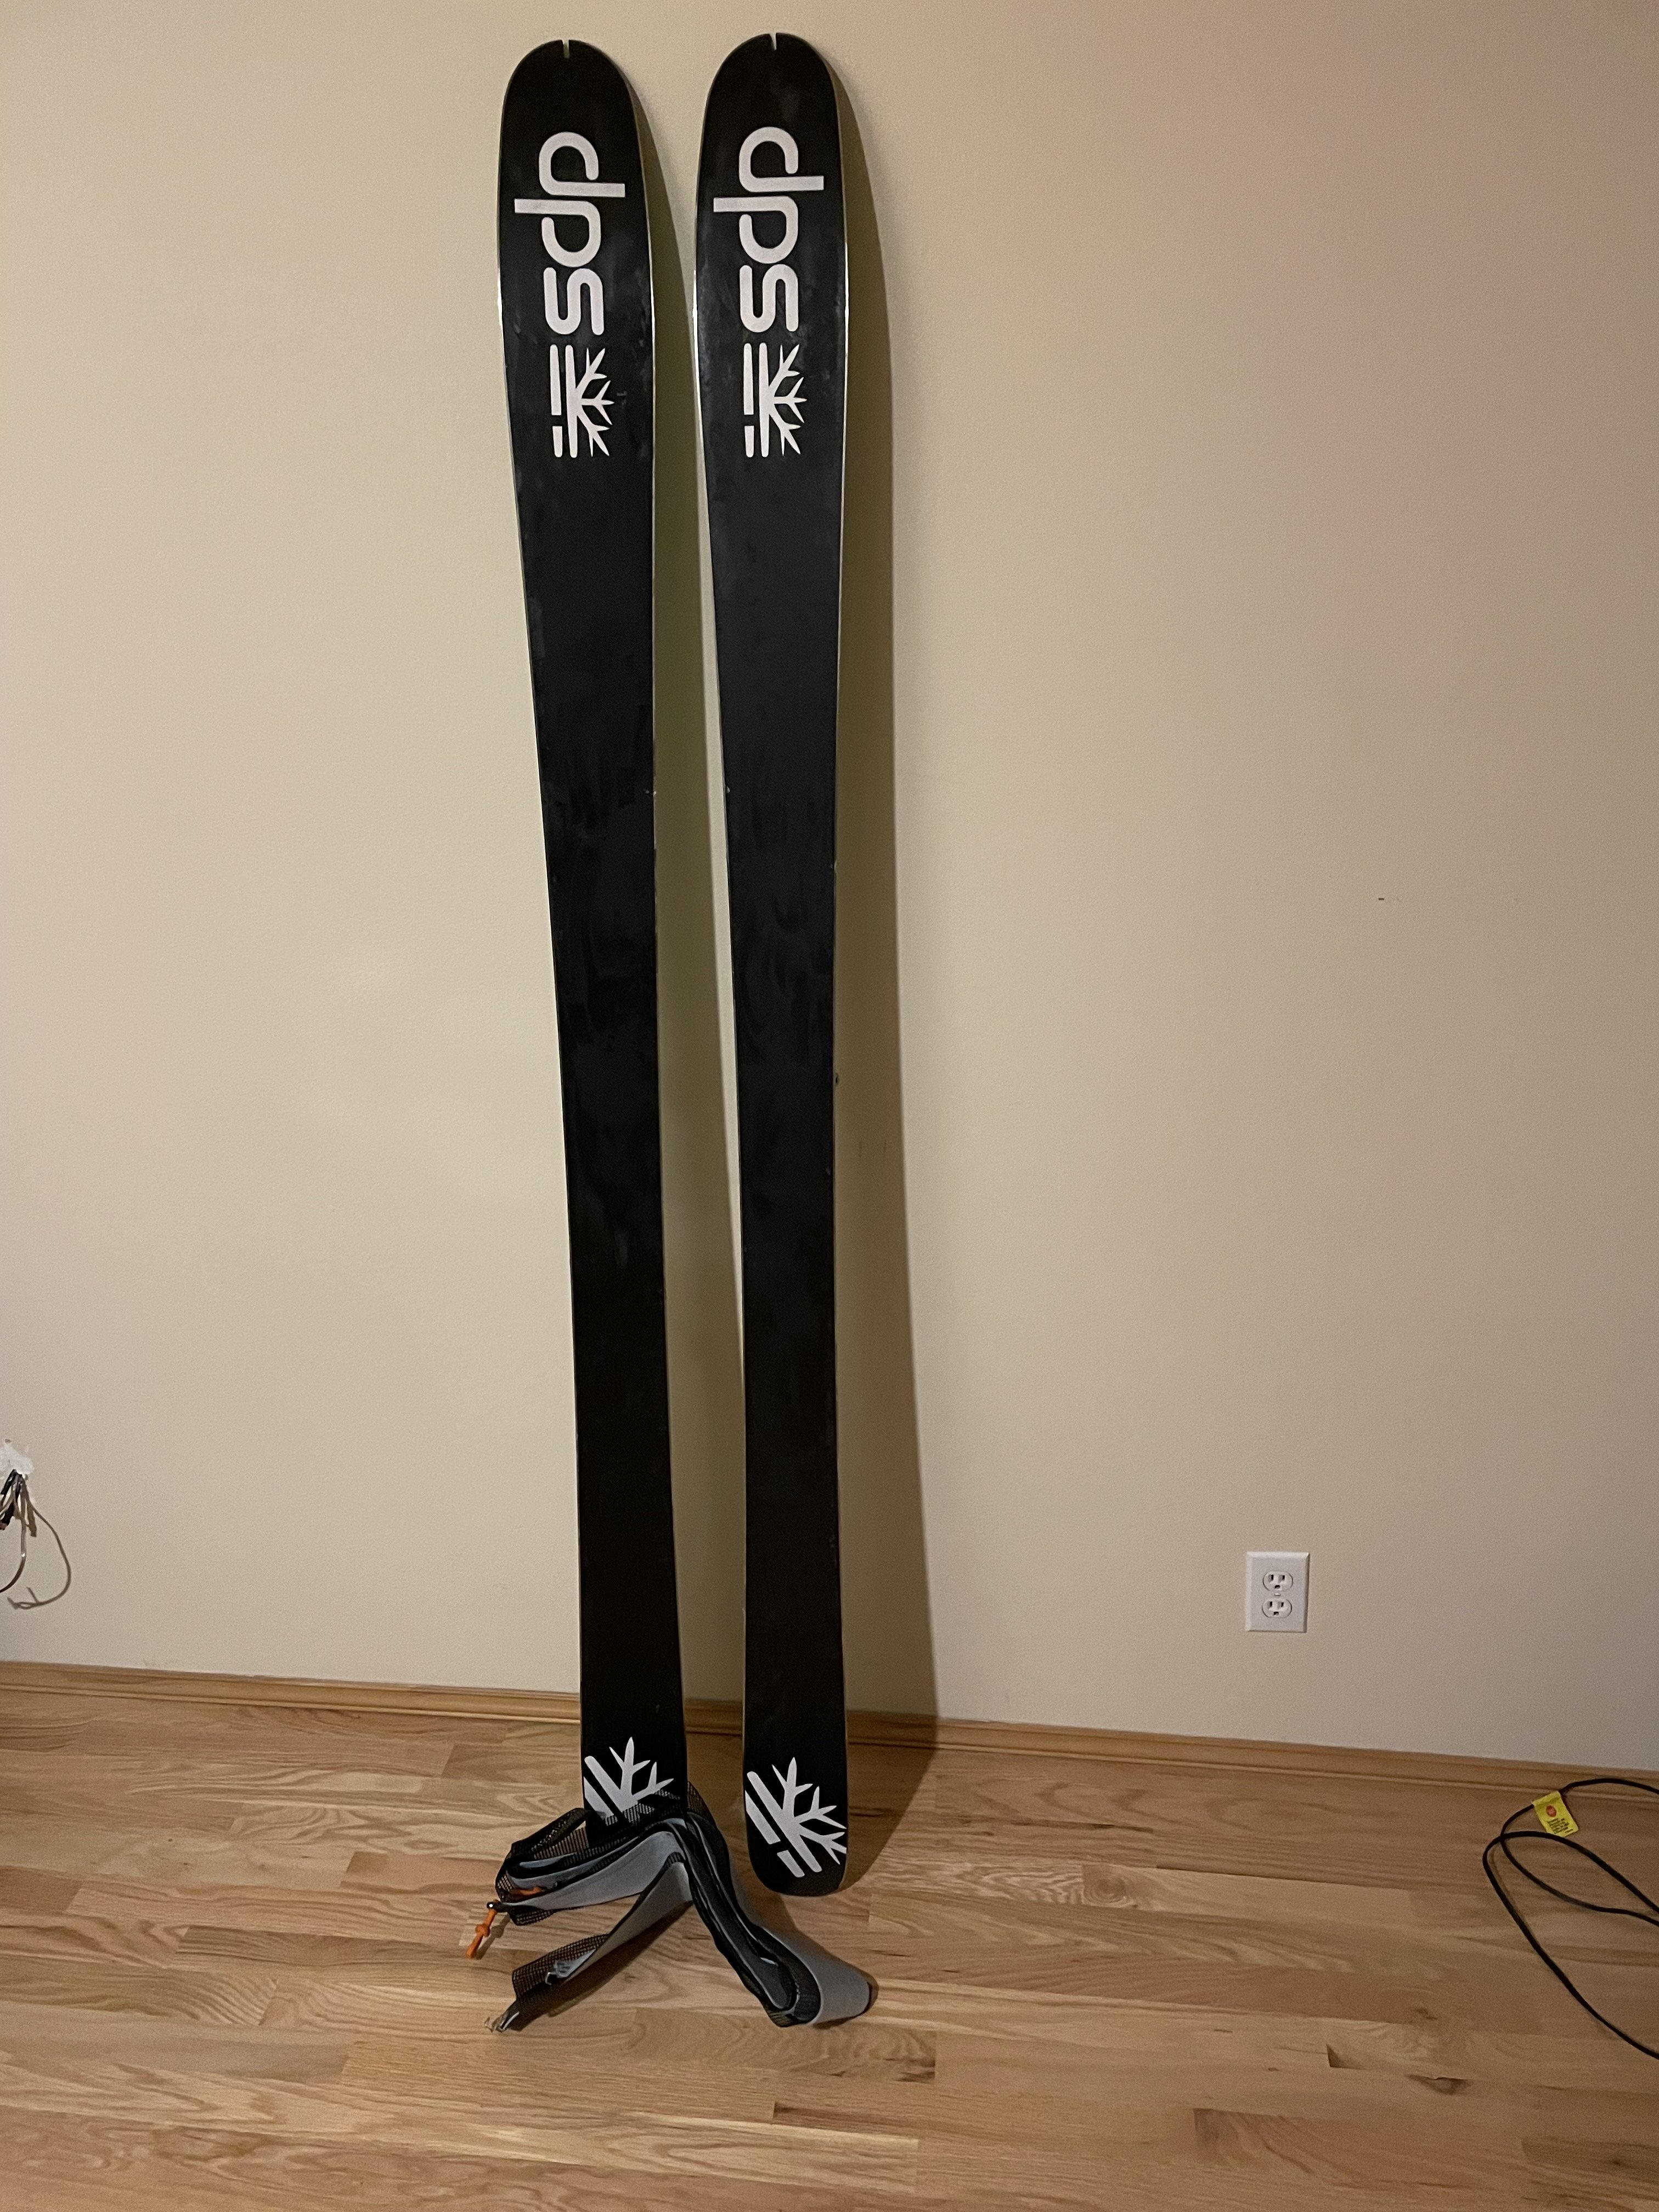
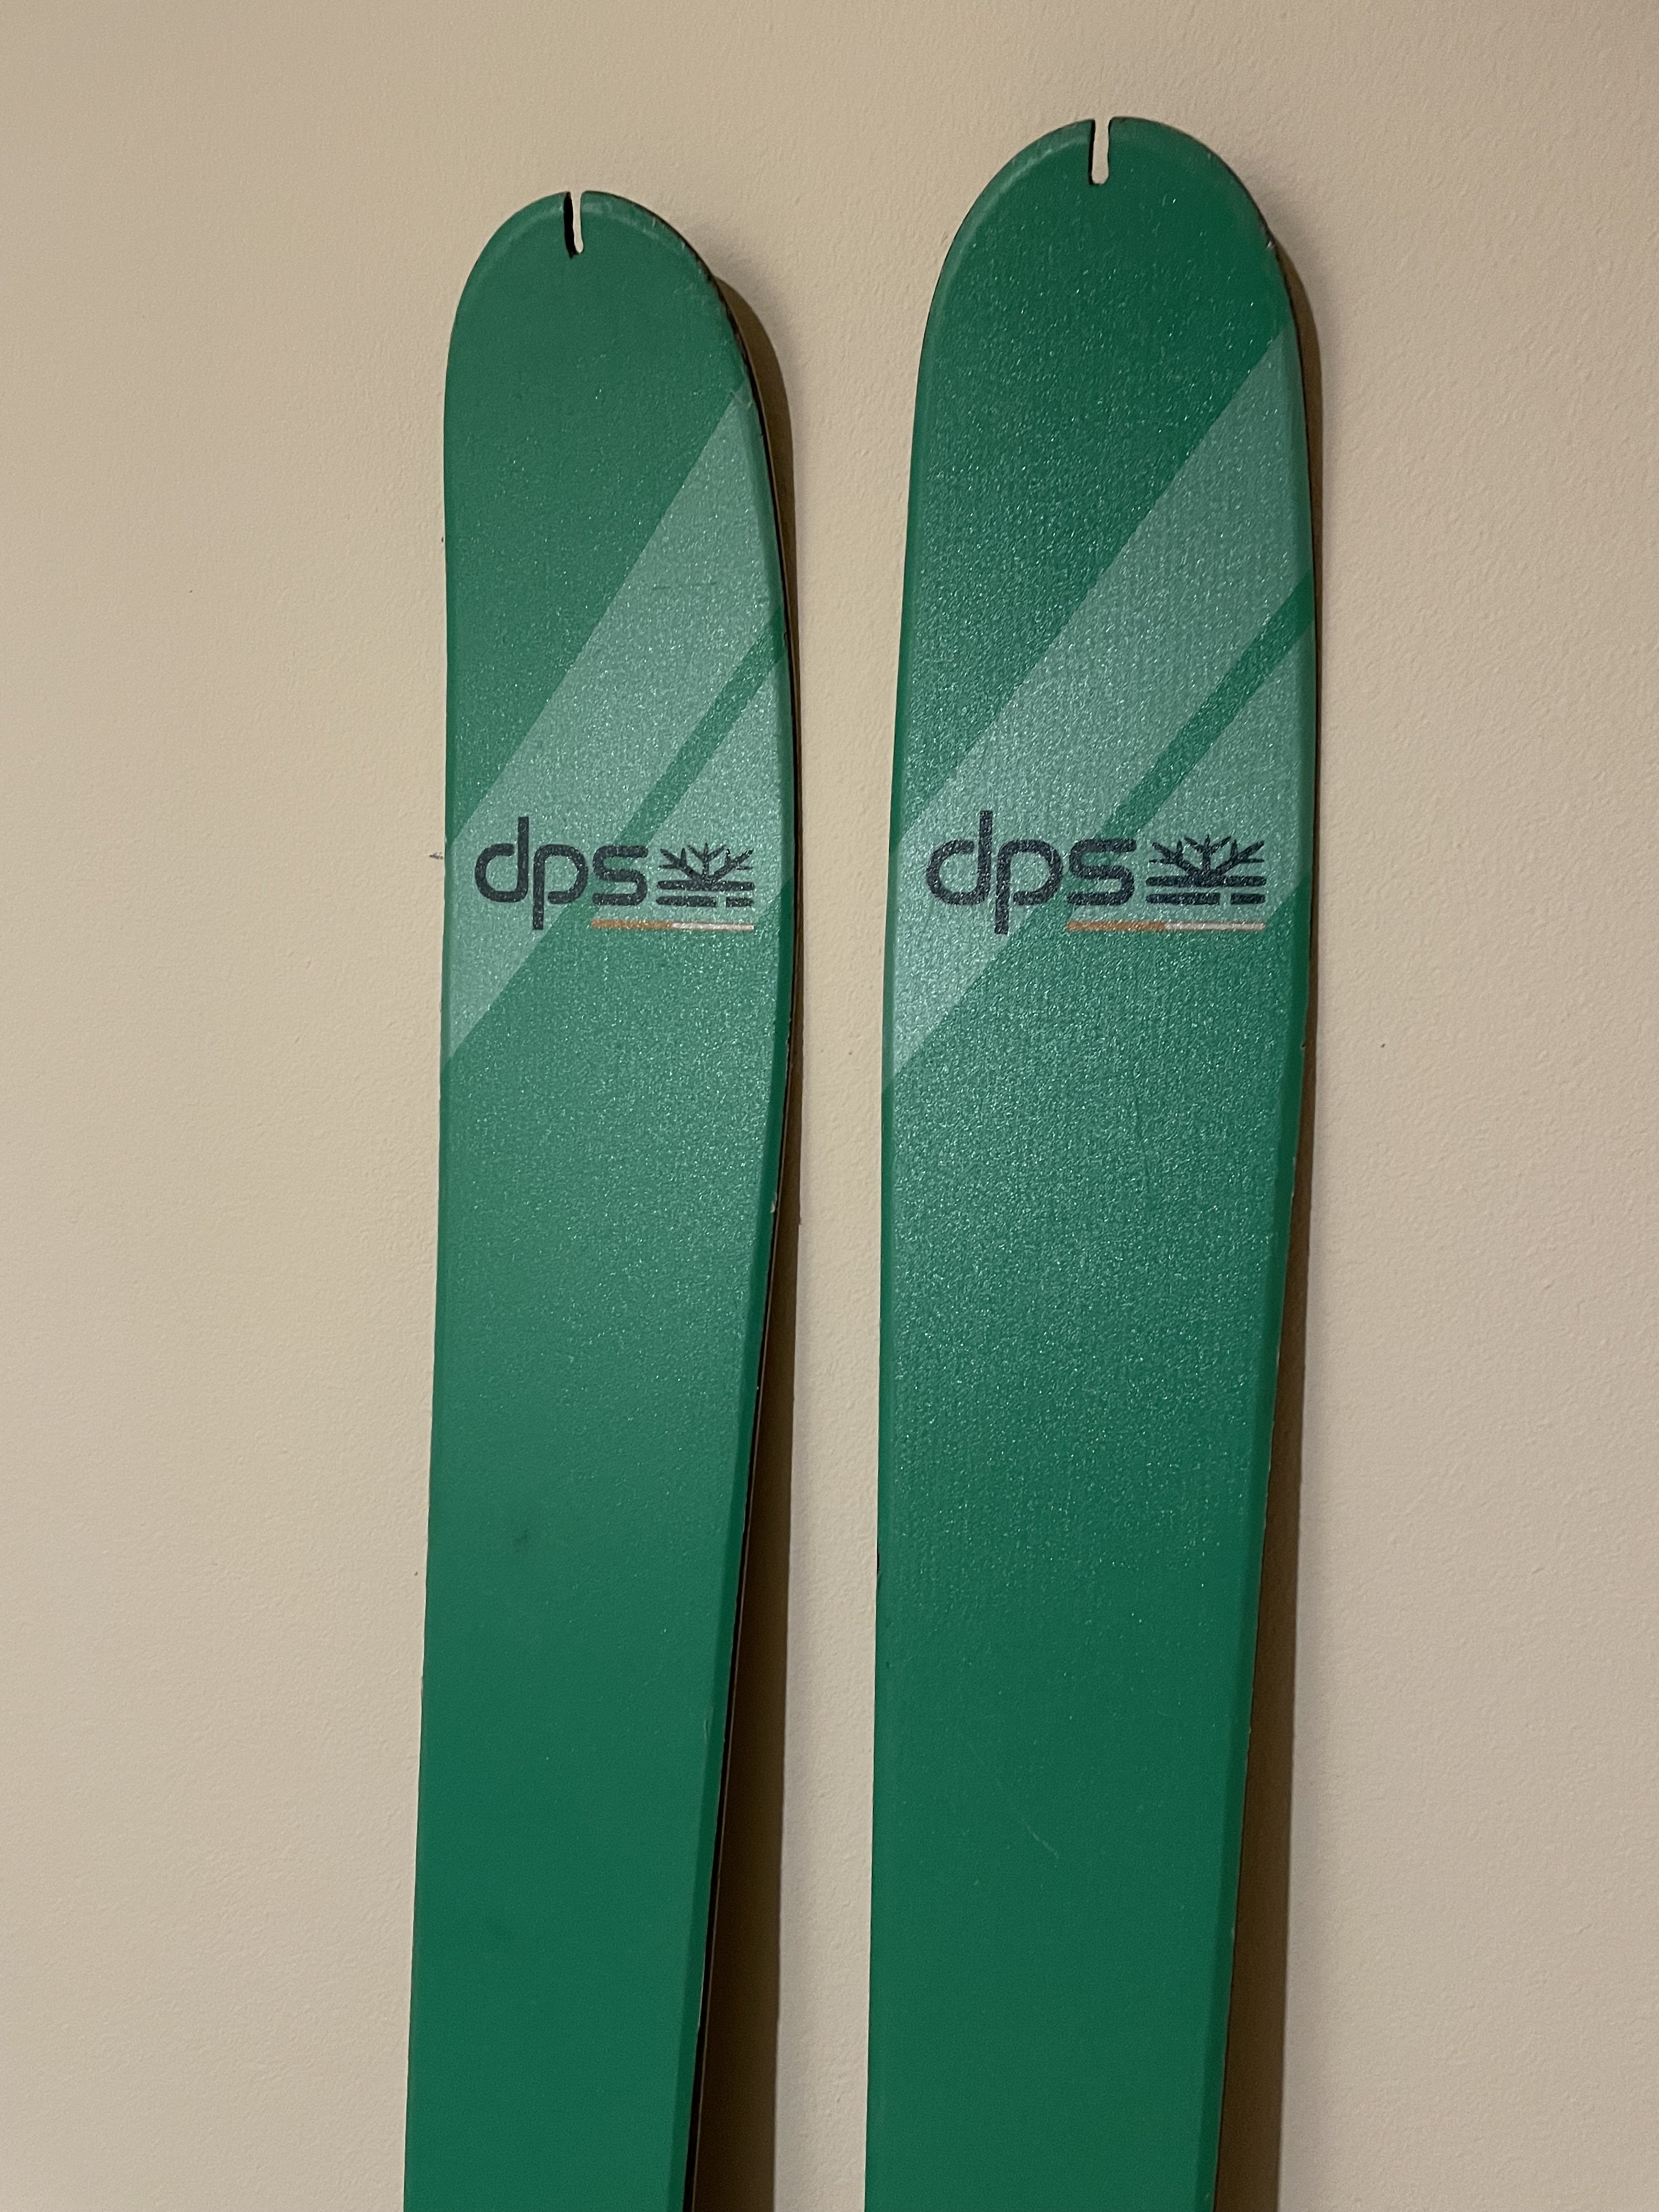
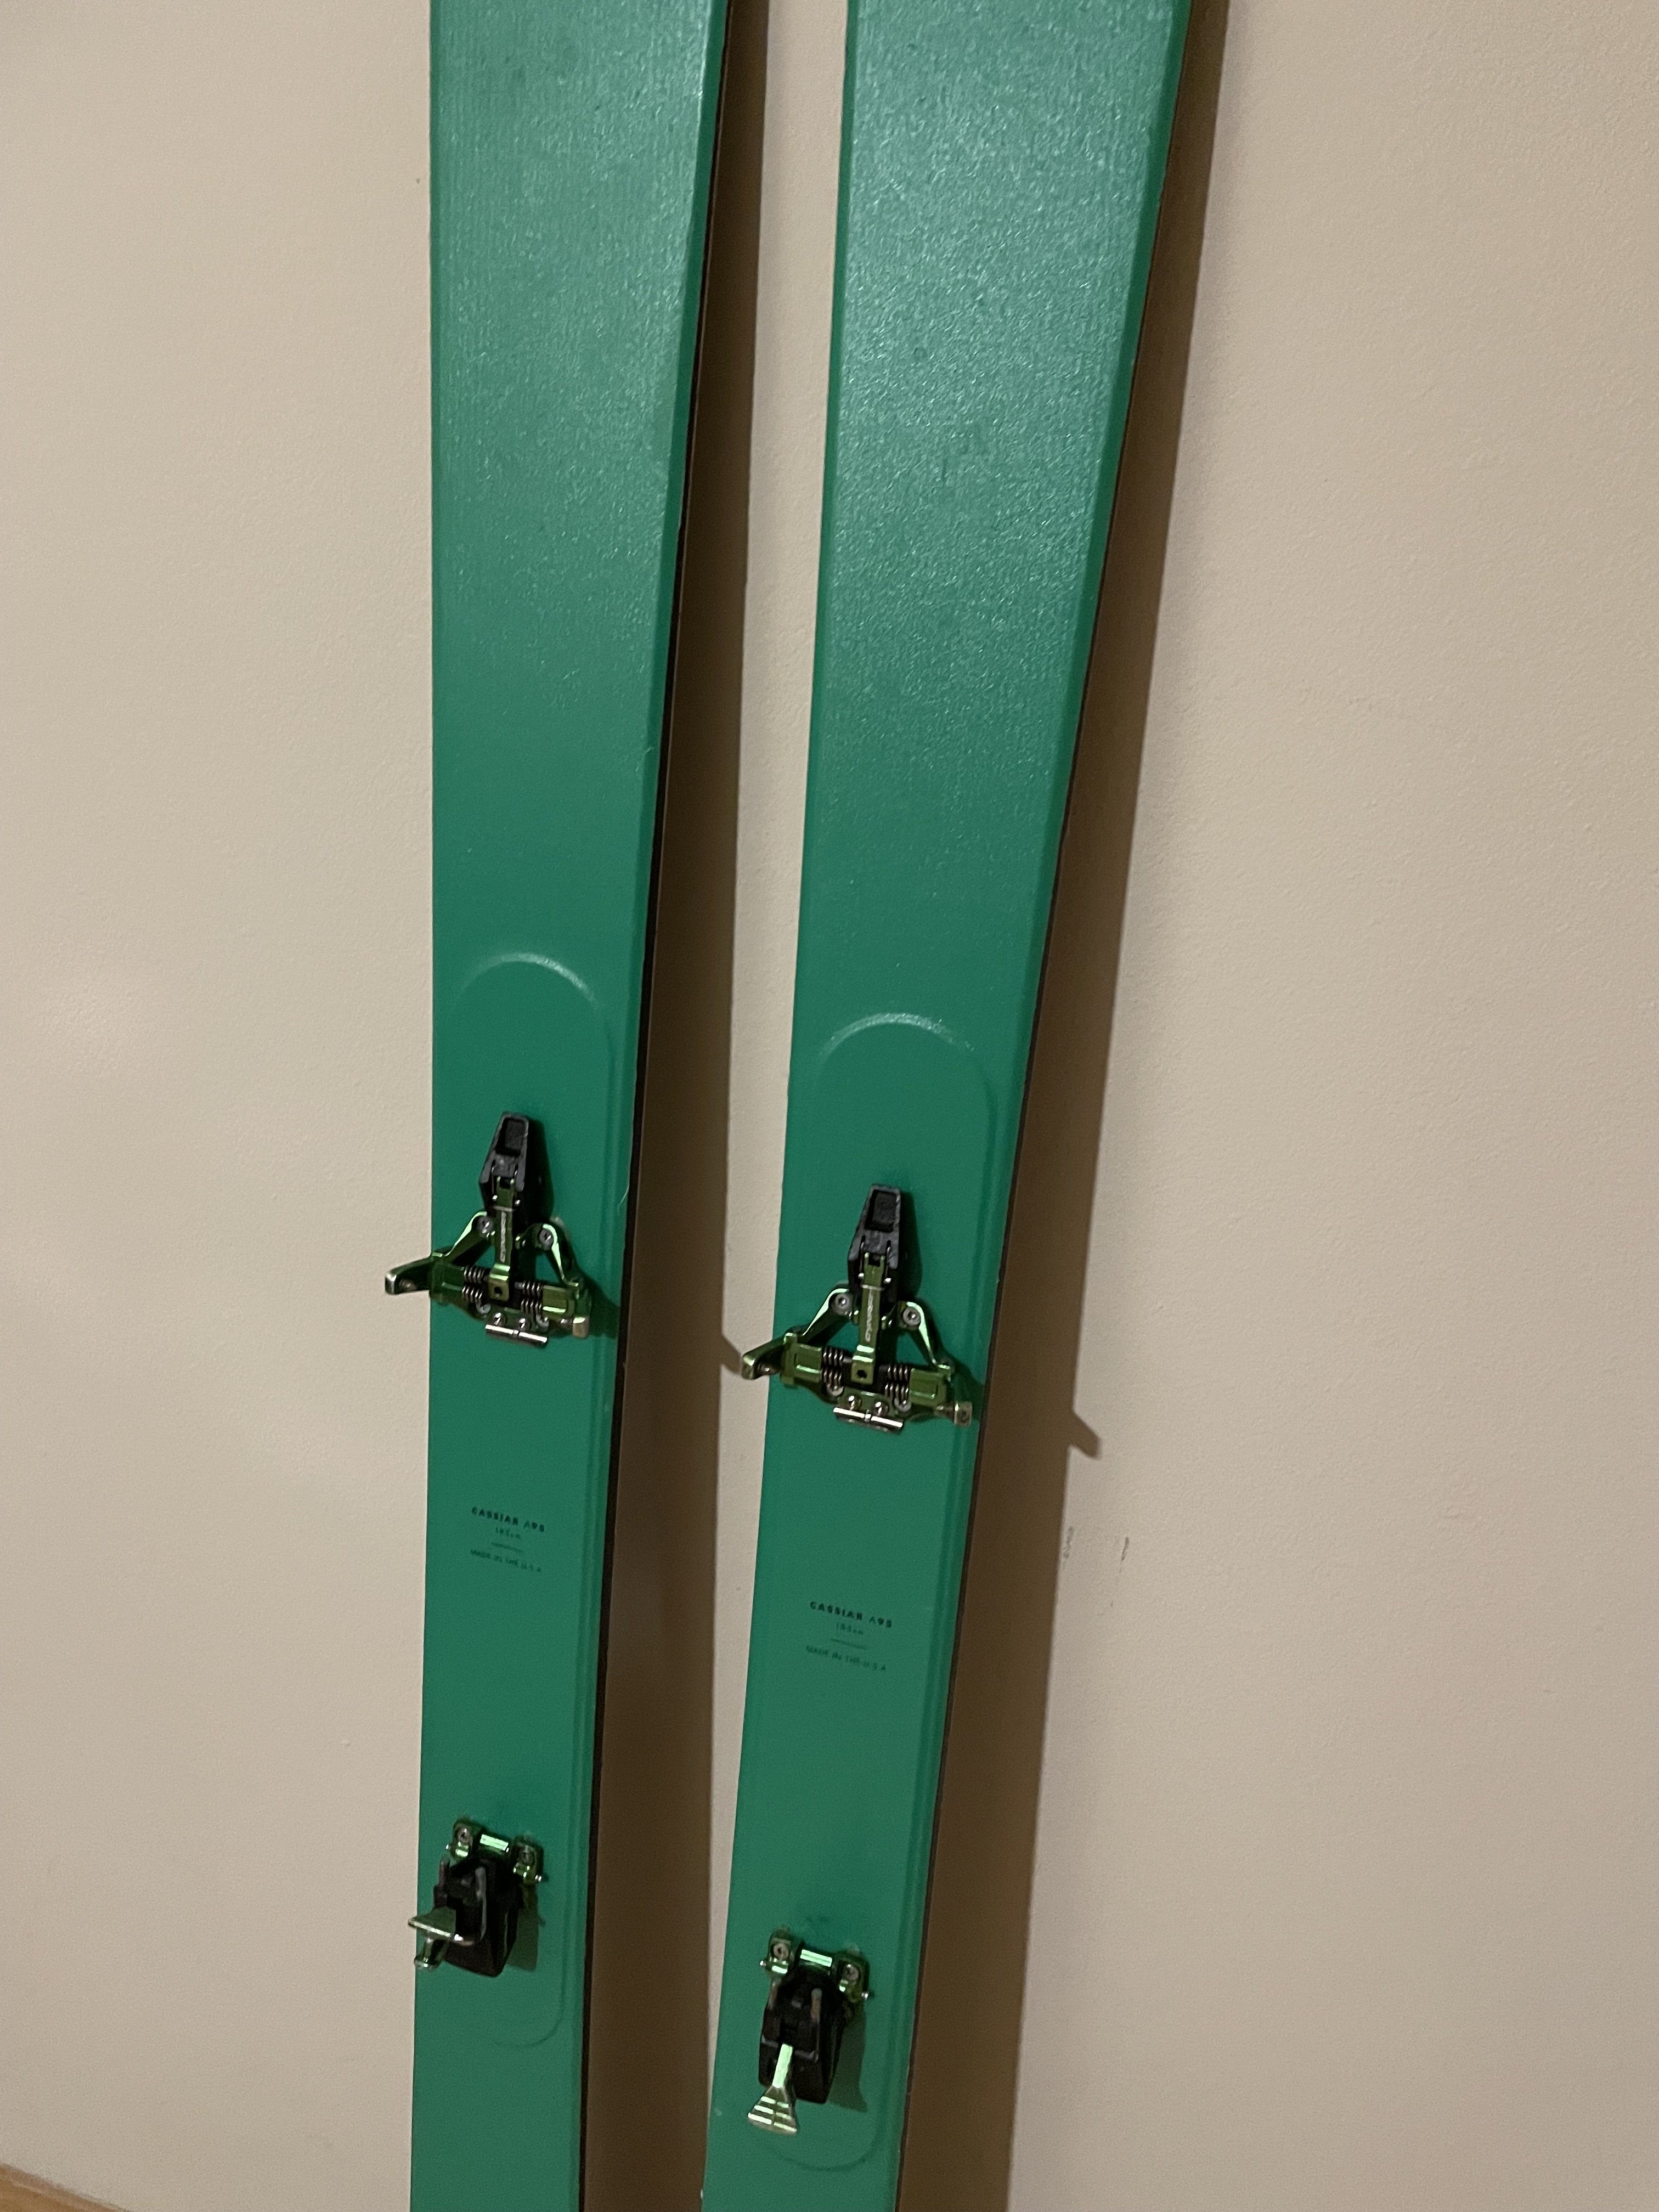
Alright, I'm selling a sweet backcountry and ski mountaineering set up. DPS Cassiar 95 Alchemist skis with Dynaft Superlight bindings. These skis are mounted for a 311mm boot sole length. The skins are customized Dynafit Speed Skins which are made by Pomoca and the connection is tip to tail allowing for a more secure skin for the long days in the mountains. These skis are in really good conditions and have a set of storage wax on them currently. Just need to be scrapped and then ready to go. Dimensions: 129/95/116 Radius: 18m@185cm Rocker: Freeride Rocker Ability Level: Ability Level 9 Construction: Full Sidewall It's no secret that, in the galaxy of acclaimed DPS men's big mountain skis, the Wailer family shines the brightest. And those skis have earned every bit of their legend. Here's something that isn't as well-known: for skiers that truly ski the whole mountain, spending at least as much time on the frontside as the backside, the Cassiar 95 is likely a better choice. Its 95mm waist is wide enough for all but the deepest days, while also delivering superior edge-to-edge quickness and carving precision on groomed snow. A flatter tail and subtler rocker than you'll find in the Wailer family lends additional stability and a higher speed limit. And you'll be hard-pressed to find a better companion for spring backcountry conditions. The DPS Cassiar 95: the connoisseur's all-mountain ski. Alchemist is the next step in the evolution of DPS's groundbreaking Pure3 carbon skis and the finest example of their relentless pursuit of innovation. The Alchemist construction uses vibration-tuned aerospace carbon and premium Aspen wood cores for a smoother ride and more progressive flex, without compromising the power and precision skiers have come to expect from DPS carbon skis. The end result is the ultimate piece of lightweight versatility.
-
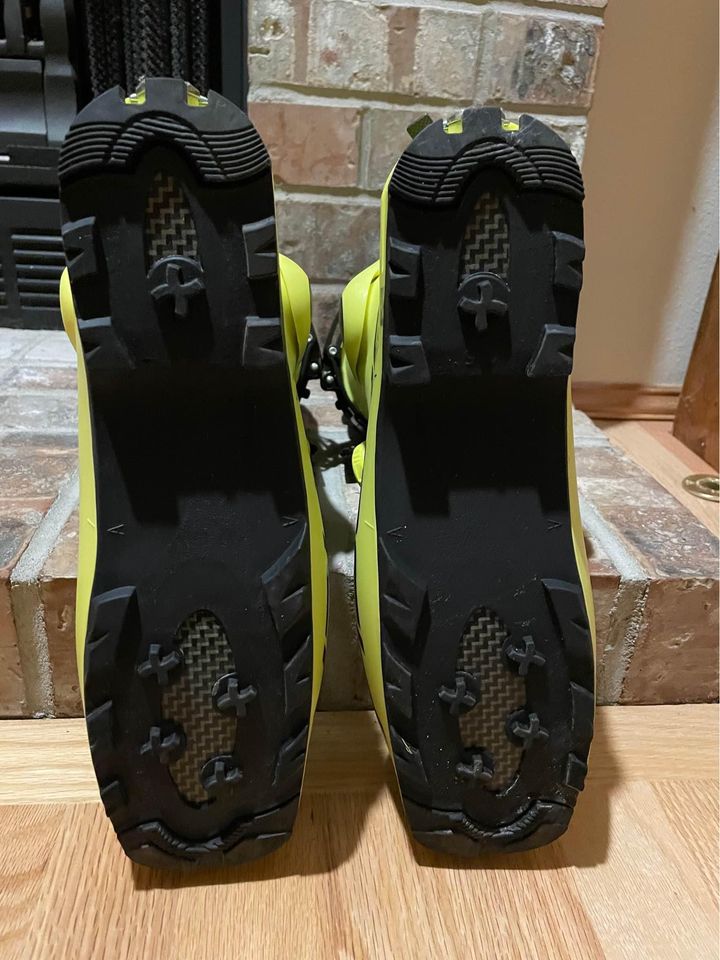
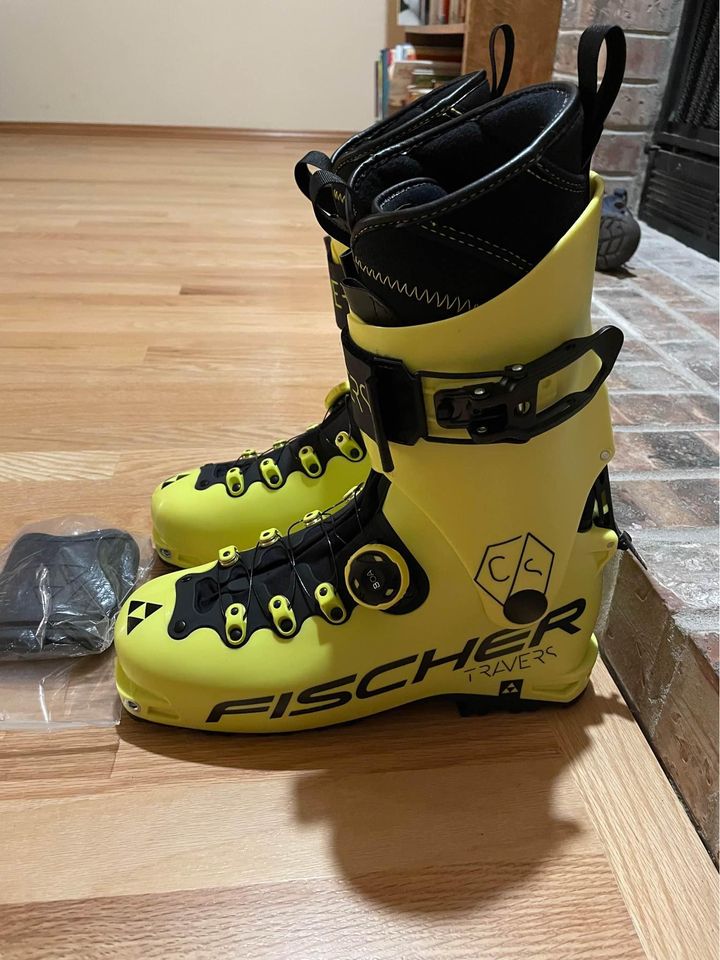
Hi, I have a pair of brand new pair of Fischer Traverse CS boots size 28.5. I ordered them and realized I need the next size up. I’m asking $450 for these boots which they retail for $850. These boots are great for ski touring and ski mountaineering. These boots are a 28.5 with a boot sole length of 306mm. PS - having issues uploading the photos so DM me and i can send them on over. https://www.facebook.com/marketplace/item/586369742417222 Happy to split shipping cost in the US. Please let me know if you have any questions


-
Trip: Croatia (adventure sport climbing) - Paklenica National Park Date: 9/31/2014 Trip Report: I typically don't post much about our trips, but our recent trip to Croatia was amazing and I highly recommend it! Probably one of the best places i've sport climbed around the world with routes from single pitch to grade IV and V big wall sport climbs ranging from 5.6-5.13 My wife wrote a trip report with more info and pictures on her blog. Rachel's Blog We found it hard to find much information about logistics and climbing there so wanted to share it with rest of the community. We began our trip by checking out the island of Hvar. The island is located off the southern coast of Croatia and it is a beautiful two-hour ferry ride from the port of Split. The next day we walked along the ocean side trail for about 20 minutes to the crag called Cliffbase. It is a private crag and there is a small fee to climb there. We enjoyed 35 - 40 m bolted climbs right out of the water. Every route we climbed was great and the views of the rocky Mediterranean coastline were beautiful. Swimming around the rocky limestone boulders was also a highlight. We spent two days climbing there and then packed up and headed a bit north to Paklenica National Park. As one of eight national parks in Croatia, Paklenica is home a variety of large and small limestone formations with over 400 routes from grade 3 to 8b+ from single pitch to multi-pitch. The park is uniquely beautiful consisting of two broad limestone valleys (climbing is only allowed in one of them) and filled in with pine and beech forests. As you climb higher above the valley floor, views of the Adriatic Sea begin to peak out in the distance. The park is well maintained and there is one wide walking path that leads to the majority of the climbing. We rented a small apartment in the little town of Starigrad at the base of the park for 30 Euro/night. We spent our first few days dodging rain showers and sampling some of the cragging in the Klanci area and some of the shorter routes on the nearby formations. On my birthday we climbed the 4 pitch 6a+ Karamara Sweet Temptations on Veliki Cuk and then cragged at Crljenica high above the clear, blue Mediterranean Sea. When the weather got nicer, we sampled some of the routes on the bigger formations. First up was the 4 pitch, 120 m Domzalski on the Stup of Anica kuk. At 6a, it was some of the best limestone slab and edging climbing we had done. After lunch, we checked the unique Bears on Toast (6c+) climb which ascended the very distinct water runnel formations up the limestone face, typical of the karstic limestone commonly found in Paklenica. While the bolts were big and new, we were finding that the bolting was a bit sporty forcing you to climb at the grade. It definitely kept things exciting! The next day, we climbed on the famous Anica Kuk formation. This 350 meter limestone wall is the jewel of the area. There are hundreds of routes on the formation raging from 6a to 8a. We started up the classic Klin route. The climbing was fun despite being a little wet. After I lead up the crux pitch, we somehow managed to get ourselves off route and begin climbing up a very steep route up the center of the wall. After getting worked on what was supposed to be a 5c traverse, we started to think that maybe we had traversed onto the 7b Zenith. We continued up wildly exposed terrain to the top and had a good laugh about our poor route finding skills on the summit. After a rest day checking out the historical city of Zadar, we spent our final day climbing up numerous formations in the park. We first checked out the 200 m Senza Pieta (6b+) on Debeli kuk. It was a fantastic route up the sunny face with some really fun slabs, edges and over-hanging terrain. After finishing up that route, we decided to run up the mellow Sjeverno Rebro on Veliki Cuk's West ridge (4b+, 170m). Still not quite tired out, we cragged a few more pitches at Klanci for a total of 450 m of climbing and 14 pitches. We would highly recommend a trip to Croatia. Logistics were easy, most people spoke English and it was not overly expensive. The food was good, the scenery was beautiful and the people were accommodating. Life was simple and easy. Sleep, eat and climb. That's what I call a good vacation!
-
Trip: Canyonlands National Park: Moses - Primrose Dihedrals Date: 9/28/2013 Trip Report: Rachel and I got lucky and climbed Primrose Dihedrals on the Moses before the Government shutdown. Hopefully the National Parks will open again soon as this tower is not to be missed. Road Condition: The road up Taylor Canyon is in good condition and I was able to drive my Subaru up the whole way to the trailhead. Route: Great sustained steep desert climbing on this tower. There is lots of beta out there online. All the bolts on the "Ear" pitch are in place and good condition. P1: Climb an inverted V slot (5.11+) to a 2 bolt belay at about the level of the notch to the east. or climb down a few feet (but not more) and then up onto an exposed ledge which leads around the corner to the west. Follow this ledge to the belay bolts (5.8). P2: Work up to the left edge of a roof, and fire up a beautiful finger crack to a roof . Continue up via liebacks and steep jamming P3: This pitch is very short and actually starts about 10' below the previous belay. Downclimb from the belay). From here, stem and hand traverse left to a thin crack, and climb this (5.10-) for only about 30' to a huge sloping ledge with 3 bolts. This ledge is only a little bit higher than the previous belay. From here the upper section of the route is visible and awe inspiring. P4: Follow a straight in crack to a pod, then up a right facing dihedral (5.10 hands and then fist) to a 2 bolt belay. This pitch looks tough from below, but a convenient foothold off to the right at one roof makes it easier than one might think. Awesome Pitch! P5: Continue up a weird 5.9 crack to the base of the ear (large cam may be useful), optional hanging belay here. Lieback or offwidth the ear (5.11+), using 6 bolts to the right of the corner. After the last bolt you used to have to free climb 15-20' to the top of the ear. The crack here is over 6", but halfway up this section look for a smaller crack inside that offers some protection. P6: Chimney behind a large flake and head straight up (5.8) to a 2 bolt belay. Alternatively, you can follow 1 or 2 bolts above the belay (5.10 face). P7: This is the same as the last pitch on the Dunn Route. Face climb past 2 bolts to the top. Gear Notes: 2 60m ropes for rappelling Pale Fire Cams: 1 blue TCU 1 yellow TCU 1 black FCU Black Diamond cams 2- 0.4 3- 0.5 3- 0.75 3- #1 2-#2 3-#3 set of nuts (useful on pitch 5) 14 draws/slings Approach Notes: Drive up Taylor Canyon Road
-
Trip: Sahale Peak - Boston Basin - Quien Sabe Glacier Date: 5/19/2012 Trip Report: Did a 6 day mountaineering course for Alpine Ascents in Boston Basin May 13-18th with Lee Lazarra. Here are some of the observations from our trip. Cascade River Road blocked a few hundred feet before the Eldorado parking lot. Boston Basin Trail: The trail Is slowly melting out with mixed snow and dirt for the first 1/2 mile. The steep tree tunnel section can be avoided by climbing a snow slope on the climbers right. Midas Creek is starting to melt out below 4200ft and could be come difficult to cross in the short future. Can be easily avoided by just going further up hill. We traversed into Morning Star Creek and ascended moderate angle snow slopes to Boston Basin. We camped on the lateral moraine just south of the Boston Basin low summer camp. Sahale: On 5/16 we had excellent cramponing conditions up the Quien Sabe Glacier to Sahale. The summit ridge is heavily corniced on the East side. Only a couple small crevasses are opening up on the Quien Sabe. Several large moats and glide cracks are forming on the slabs below the Quien Sabe glacier. By early afternoon snow became deep and punchy. Avalanche Activity: Witnessed several large D2-D3 avalanches off north side of Johannesburg. Boston Peak and Sahale Peak had many loose wet avalanches on steep terrain but did not entrain much snow. On the lower East ridge of Forbidden Peak the hanging Slab bowl avalanched producing a R4 D3 coming within 500ft of Boston Basin high camp. Flotation: Surprisingly we did not need to use our snowshoes at all. Happy climbing, Jonathon Spitzer IFMGA Guide snowrockandiceadventures
-
Climbing Shuskan via the Sulphide route can have many hidden avalanche obstacles along the way. Here are some of the few that come to mind. 1) At the Col when you cross from Shannon Ridge into the Sulphide zone you cross several steep East facing slopes with steep cliffs above you. Also that zone is known for having large cornices this time of year. 2) Passed the col you still have several zone of steep rocks and cornices above you until you are on the Sulphide GL 3) Summit Pyramid: I have seen several large wet loose avalanches come off the South side of the summit pyramid. The South East ridge stays clear of avalanche danger. Hope this is helpful and be careful out there Jonathon
-
Awesome film and editing work! NWO looks like an amazing line. Here is a getto film from climbing in the AK range in 2010 youtube
-
I found a Lounge Chair base of Godzilla/City Park yesterday (4/10). Let me know if it's yours and we can meet up. I've attached a picture of it. Levi is not include with the chair!
-
Trip: Thailand - ThaiTanium Wall and Ao Nang Tower Date: 1/11/2012 Trip Report: On December 13th, Rachel and I escaped the drizzle and rain of Seattle, WA in search of tropical weather and sport climbing. After more then 24 hours of travel we arrived to the sport climbing mecca Tonsai and Railay Beach. The stories and pictures don’t lie about this tropical paradise being lined up with incredibly steep limestone cliffs directly off the beach and crags with short approaches. Endless fruit smoothies, Thai food and beer are easy to access while still being tied into the rope. There is so many routes to choose and to climb in Southern Thailand. Here is a trip report from two different multi-pitch routes we climbed on separate islands. No question these were both highlights from our trip. I highly recommend both routes! For me details and pictures you can check out http://www.snowrockandiceadventures.com/index.php?page=post&id=28 ThaiTanium Wall on Ko Yawabun ThaiTanium Wall offers an amazing 4 pitch route “To The Members” rated 6c, 6c, 6c+, 6b (5.11b, 11b, 11c, 11a). Rachel, Dylan, Rich and myself jumped at the opportunity to climb this classic route and hired “Cleft” our boatman to take us there. After the 45min boat ride to this hidden island, Cleft pulled up below the over hanging old fixed ropes, which we jumared (30ft) out of the boat to gain the start of the route. I lead the first pitch, which was an amazing 6c for just over 30meters. The scenery was mind-blowing and the climbing was unreal. Rachel lead the second 6c pitch which was incredibly steep on this heavily featured overhanging wall. I lead the third pitch which had a short crux right off the belay followed by some small technical holds to some step tufa climbing. Rachel took the last pitch to the top of the wall on incredibly sharp limestone rock. We rappelled down the route and back into the boat (for most of us). Rachel decided to jump from the top of the fixed ropes into the water. On the way back we encountered a typical afternoon thunderstorm and torrential down pour. Orange Chandeliers on Ao Nang Tower We hired our trust worthy boatman Cleft for a short 10min boat ride from Tonsai to Ao Nang tower. I teamed up with Rich from Australia while Dylan climbed with Mariyene from Quebee. The three pitch route “Orange Chandeliers” is rated 6b, 6b+, 6c (5.10d, 11a, 11b). The route comes into the sun after 1pm so we had to move quickly, so that we did fry in the heat. Cleft was able to get us close to the tower, then we scrambled up a 4th class ramp section with fixed lines that we traversed to access the first pitch. The first pitch was steep tufa climbing with great rests for 30meters. The next pitch was short and slightly overhanging. The long third pitch had several crux sections including delicate moves on shape rock near the top. Two rappels landed us back in the boat and before 1pm we were in Tonsai drinking beers! Both routes require two 60m ropes to rappel, 15 quickdraws, a belay device, and a swimsuit to jump into the ocean afterwards. Photo from Dylan Taylor (www.tayloralpine.com) Approach Notes: beach-boat-climb-rappell-boat-beach-bar
-
Yeah, Moster Tower is on my list. Did you do the North Ridge or the Kor? Looks loose from Washer Woman Cheers
-
Hey anybody want to go crag tomorrow? Looks like it will be sunny
-
Trip: Canyonlands National Park - Moses, Standing Rock, Washer Woman Date: 11/1/2011 Trip Report: I got back earlier this week from climbing towers in Canyonlands National Park. There's a lot of different information out there about these towers. Thought I would summarize my trip, which I would highly recommend! Photos and more info can be found at snowrockandiceadventures.com Moses: Primrose Dihedrals IV 5.11 The Mineral Bottom road is full fixed and you can drive any type of vehicle down that road. Were the road splits and goes up Taylor Canyon (5miles) you need a 4 wheel drive, high clearance vehicle to reach the trailhead. From the trailhead follow trail to base of route. Pitch 1: 5.11+ or 5.8 scary traverse. 100ft Pick your poison. Fixed Anchor Pitch 2: 5.10+, climb splitter crack through several small roofs, for the crux keep an extra .75 cam which is near the top of that pitch. 130ft Gear Anchor 2-3"cams Pitch 3: 5.10, start by down climbing 5.8 then traverse 10ft and climb face and crack to next ledge. 40ft Fixed Anchor Pitch 4: 5.10+, amazing hands to wide hands to fist! awesome pitch. 120ft. Fixed Anchor Pitch 5: 5.11, classic "Ear" lie-back pitch. We bailed due to rain. Retreat was easy with fixed anchors Washer Woman: In Search of Suds III 5.10+ Approach by driving down Shafer Trail Road to access White Rim Road. Camped at Airport Campground. 1h30mins from ranger station. Highly recommend 4 wheel drive vehicle. From campground drive another 20mins to Buck Canyon or until you see Washer Woman. There is a couple cairns marking where to park and follow the path to the base of the climb 1hr hike. Pitch 1: 5.10, hands and fists in a corner system. 120ft. Fixed Anchors Pitch 2: 5.9+, climb through the "eye" and up chimney to wide hands to ledge. awkward moving pulling onto belay ledge. 100ft. Fixed Anchors Pitch 3: 5.10+, climb crack system to crest of tower. 60ft. gear anchor 1-2" Pitch 4: 5.9, traverse 4th class ledge system to summit block. Fixed anchor below summit block Pitch 5: 5.10+, bolted summit block. Fixed anchor on summit Descent: This is the more exciting part. From Pitch 4, make a double rope rappel over the arch of Washer Woman. Very exposed and free hanging getting into the rappel. Follow rest of the anchors down. Standing Rock (aka Totem Pole): Kor Route 5.11 We spend another night at the Airport Campground, then got up early in the morning and drove additional hour and half to Monument Basin. There is a fixed rope that we rappelled to access Monument Basin. The fixed rope is located 300yards away from the road in a gully with two bolts. Park in wash marked with a cairn when the road gets close to the rim and Standing Rock is directly to the south. Walk 300 yards west along the rim and look for the second gully marked with a large cairn for the fixed rope. Descend to Monument Basin and walk to base of standing rock. (good beta on mountainproject.com) Pitch 1: 5.10, climb up the crack and traverse below the roof. 120ft fixed anchor Pitch 2: 5.10+, traverse 20ft and climb up loose crack and flakes passed and old hanging anchor to ledge with 5 fixed pins. 130ft. Pitch 3: 5.11 or 5.10 C1. The 5.11 section felt pretty hard maybe there are some hold missing, anyways follow up and right to the summit Descent: Rappel to pitch 1, then rappel to ground, with two 60m ropes. More photo's on my blog snowrockandiceadventures.com Moses Tower Standing Rock Jonathon leading pitch 4 Primrose Dihedrals Gear Notes: Standard desert tower rack: Lots of cams, off-set nuts, two ropes, beers, and extra gas. Approach Notes: Get over night camping permit at Island-in-the-Sky Ranger station if camping in park. $150 fine for illegal camping.
-
Hey, does anybody want to go to Index tomorrow? Forecast looks good! Let's go sent JS
-
Last week, we climbed Heaven's Gate on the upper wall. I would highly recommend this route! It follows an amazing feature of texture rock up high. Pitch 1 (5.10c): Lamplighter, it's a steep looking wide chimney with good cracks in the back. There are two distinct crux's on this pitch. The first crux is exiting the chimney which is protected by a bolt. Second crux is after the chimney climbing the steep face on the right (2 bolts). Recommend not to belay at first anchor head up and right (5.8) 20ft to second anchor. This pitch is Index 5.10! Pitch 2 (5.11a): Bolted, crux is at second bolt. Then great steep face climbing to the anchor. Pitch 3 (5.10+): Bolted, shorter pitch with easier climbing Pitch 4 (5.11b): Bolted, crux is climbing through the two roofs. The bolts are perfectly placed. An excellent pitch. Gear: 15 draws. Single set of cams to #3 BD with doubles in .4 and .75 for the first pitch. We left the rack at the top of the Lamplighter Pitch. For more info check out snowrockandiceadventures and racheligreenberg
-
Trip: Fisher Chimney's Mt Shuskan - Shuskan Date: 9/20/2011 Trip Report: Hello Climbed Shuskan via Fisher Chimney the other day. Route is in excellent condition. The trail to Lake Ann is almost 100% melted out. There is a large moat on the snow crossing before the the 4th class rock section before fisher chimney proper. Fisher Chimney's are all snow free. Winne's slide is all snow and no blue ice! We camped above winne's slide. Only 2 tent sites are melted out up there. The climb from high camp is in great condition. A short section of glacier ice right out of camp approx 100ft. The Upper Curtis had only one major crevasse crossing can be avoided be going out left. Hells Highway looked like it does in mid-July, except for a large crevasse at the top Hells Highway. Climbed the SE ridge and descended the South Gully conditions were normal on the pyramid. Here's a link to my website with photo's from the climb snowrockandiceadventures.com Looks like conditions will change after this weekends storm
-
RIG: I didn't need any pickets for the summit ridge when I was there. The snow was very deep and soft. I would still recommend carrying a couple just incase conditions have changed. Hope that is helpful
-
Trip: Eldorado/Shuskan update - Date: 5/26/2011 Trip Report: Hey.... Here's a trip report for climbing Eldorado and Shukan w/some pictures http://www.snowrockandiceadventures.com/index.php?page=blog Eldorado: Overall it is in really good shape, just deep trail breaking! Details: I just got off a trip from Eldorado on May 20th-23rd. The trail has some new down fall in sections but isn't to bad. I hit snow just below the first boulder field at @ 3,800ft. The lower boulder field is melting out quickly and the snow is very deep/punchy. Above the first boulder field at around 4,500ft there is multiple large avalanche debris crossing (D2/D3) size avalanche that came down probably a couple weeks ago. Pretty impressive, it ran into the trees the large old growth trees. We camped at 5,800ft in the Eldorado Creek drainage. We spent all 3 nights at this campsite and it did not freeze any night we were there. Crossing the col at 6,200ft was no problem, FYI there are some large cornice's on that ridge line. We found deep snow conditions in Roush Creek drainage getting up to the Eldorado Glacier. Some small D1-D2 size avalanches have come off the hanging cliffs/snowfields on the climbers right hand side heading up to the Eldorado Glacier. However there is still alot of snow on some of those cliffs with large glide cracks forming. The East ridge is currently all snow covered with deep trail breaking. The classic summit ridge consisted of thigh deep snow. The Eldorado and Inspiration Glaciers have a lot of snow and no crevasse were showing currently. Also the NW face of Forbidden looks to be shaping up really well for summer.