


off_the_hook
-
Posts
177 -
Joined
-
Last visited
-
Days Won
1
Content Type
Profiles
Forums
Events
Posts posted by off_the_hook
-
-
Nice! Great photos and report, as usual.
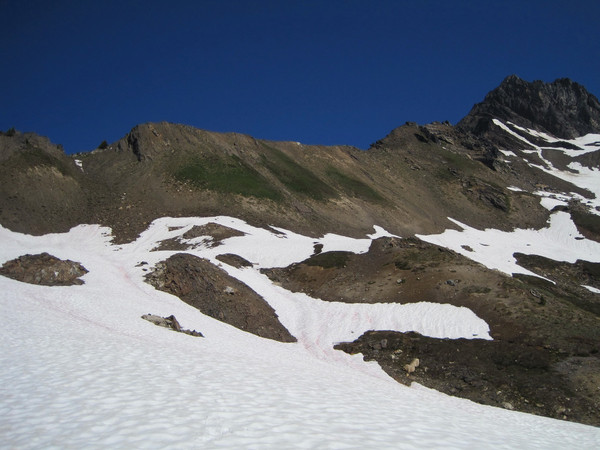
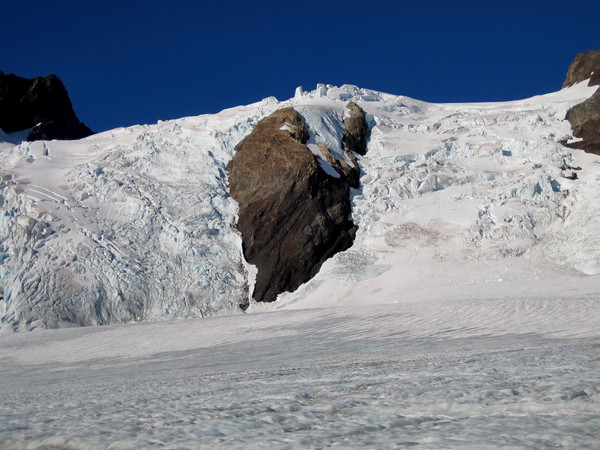
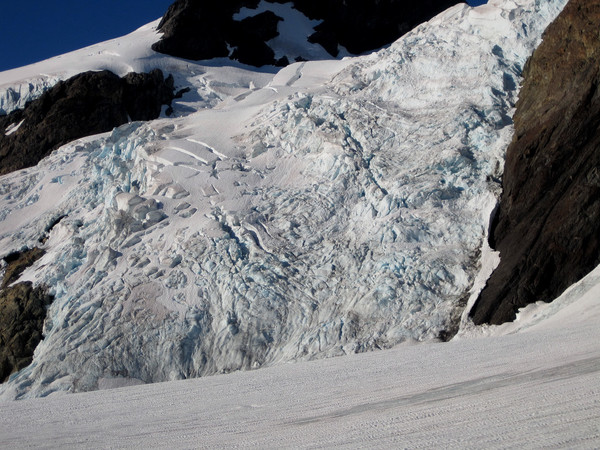
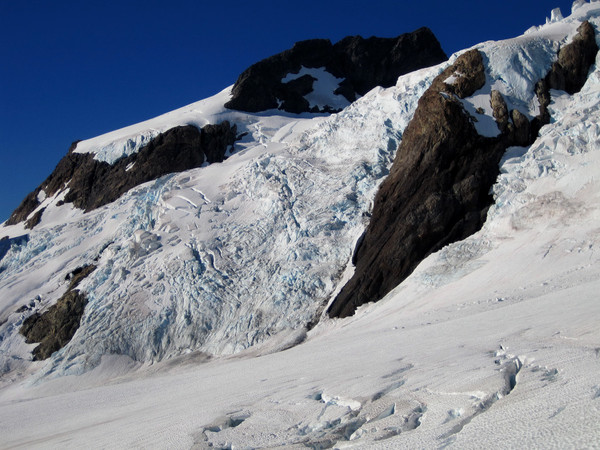
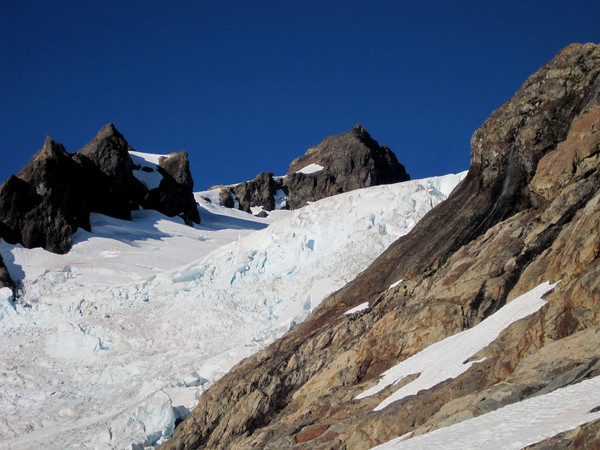
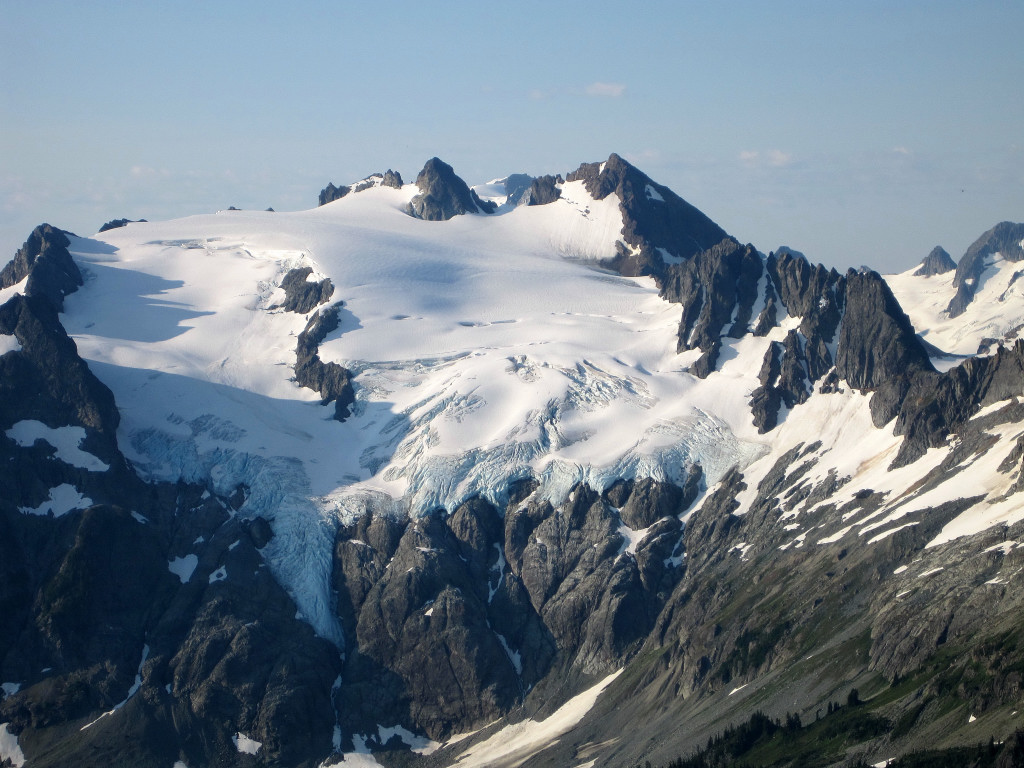
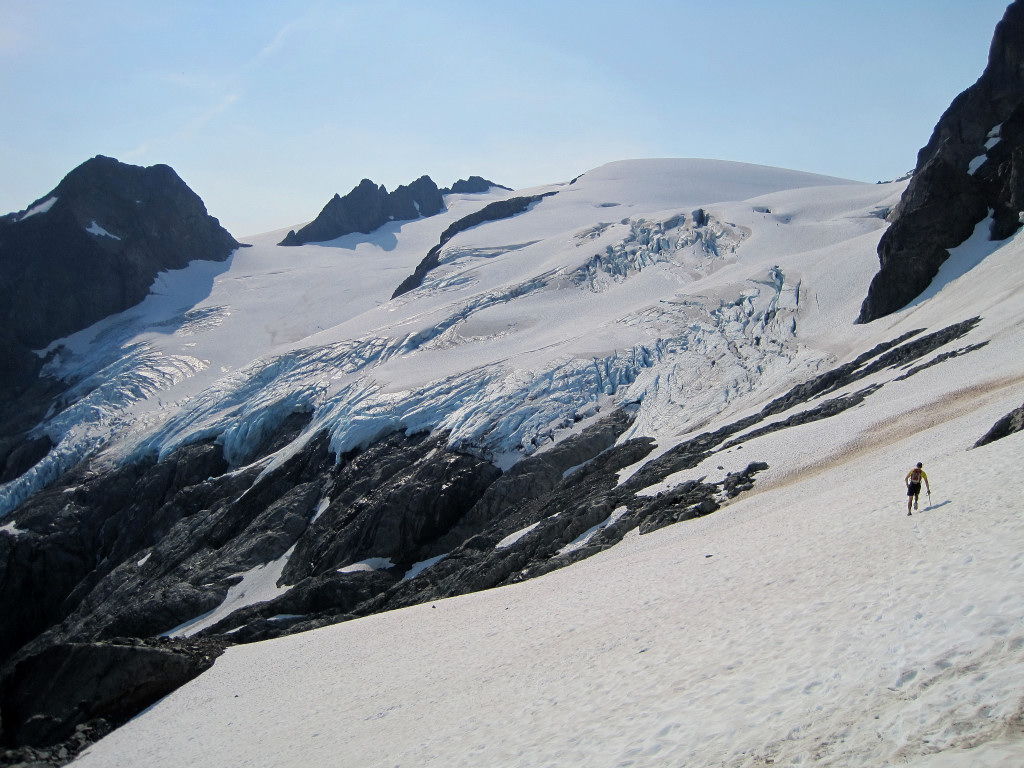
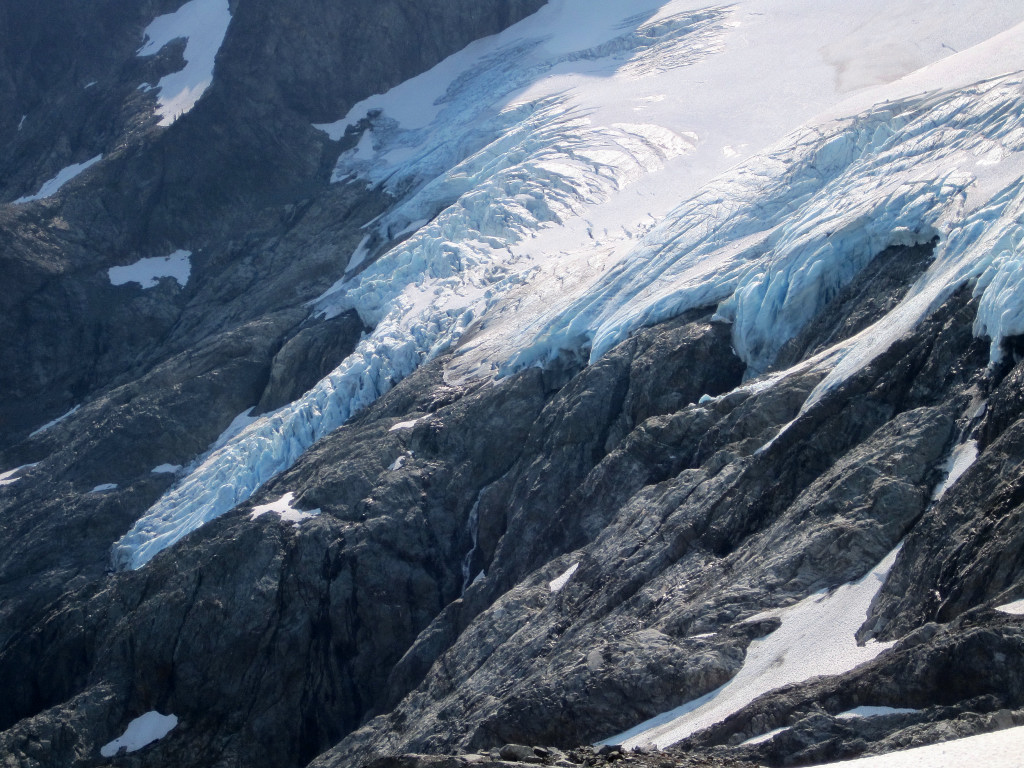
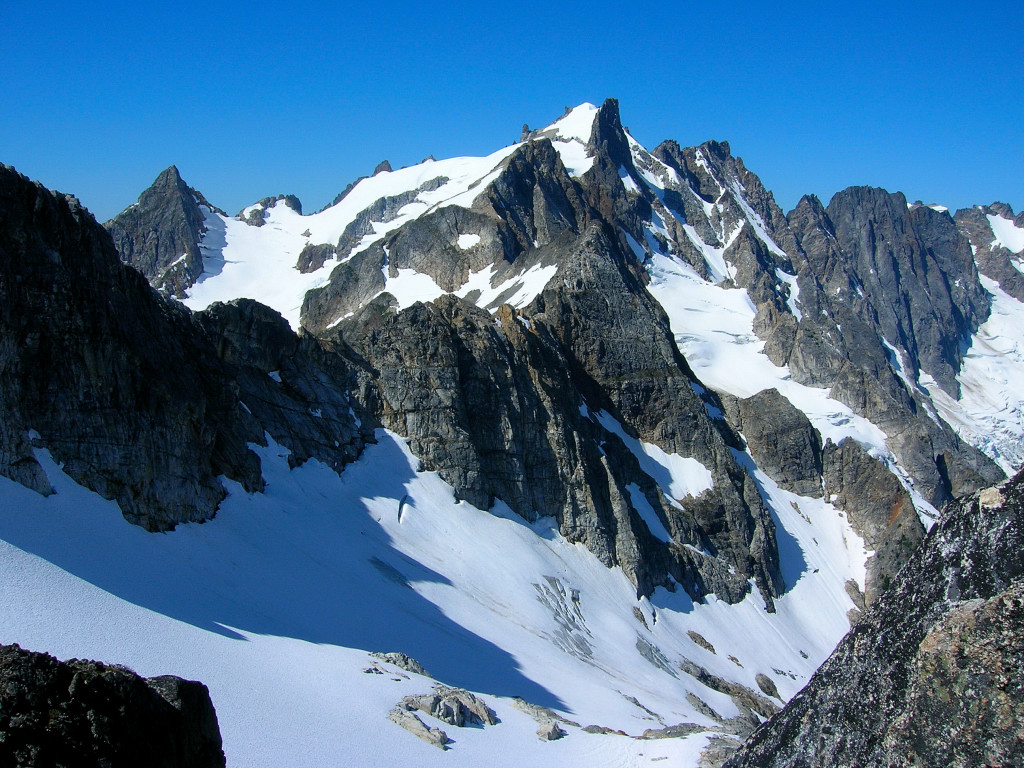
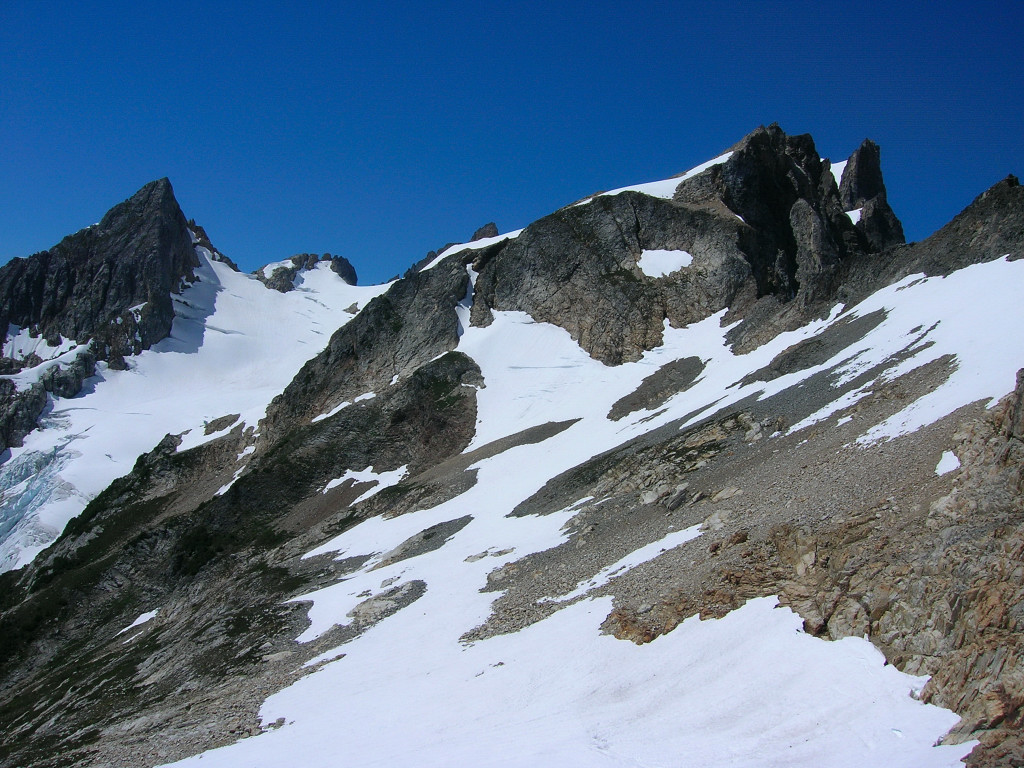
The loss in thickness and coverage on the north side ice patch is striking... and over only three years. At this rate, in a couple more years there won't be an ice patch to traverse there in late season, just more rock scrambling. I've always been pessimistic about the glaciers in the Cascades, but they are vanishing faster than I even imagined.
-
No need to watch TV anymore... the best programming is on Wayne's YouTube channel. Your videos are awesome!
-
Looks like sweet climbs! Nice job! How was the traverse around Whatcom this time of year?
-
Trip: Suiattle Crest 50 Mile Adventure Run
Date: 8/4/2009
Trip Report:
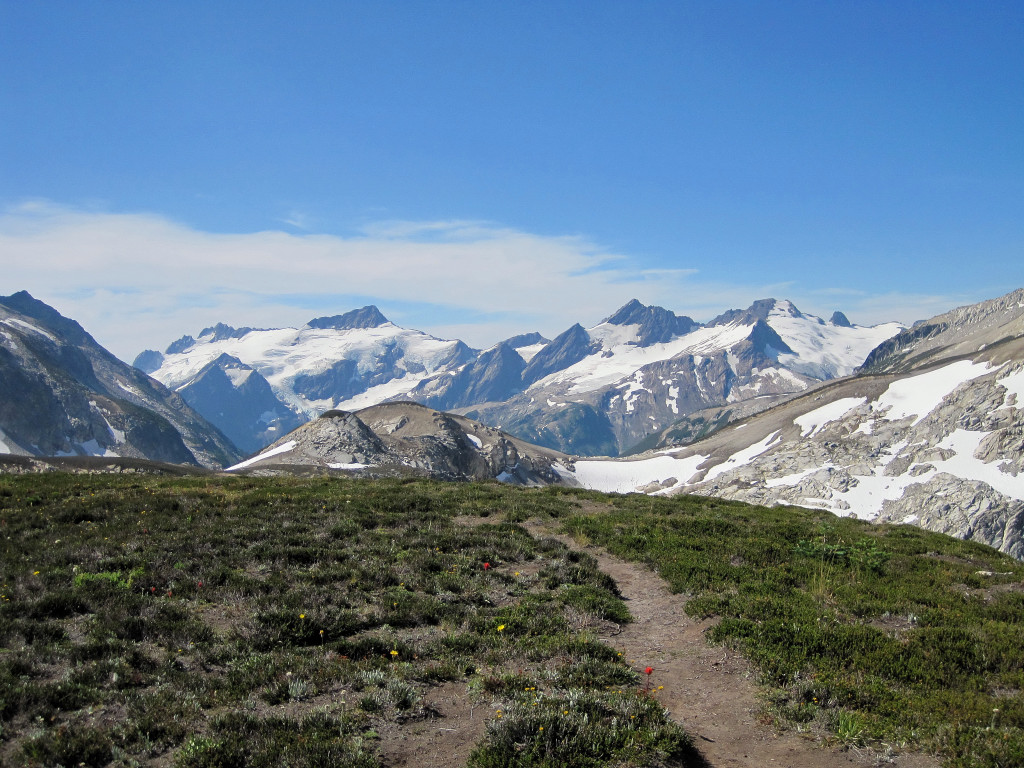
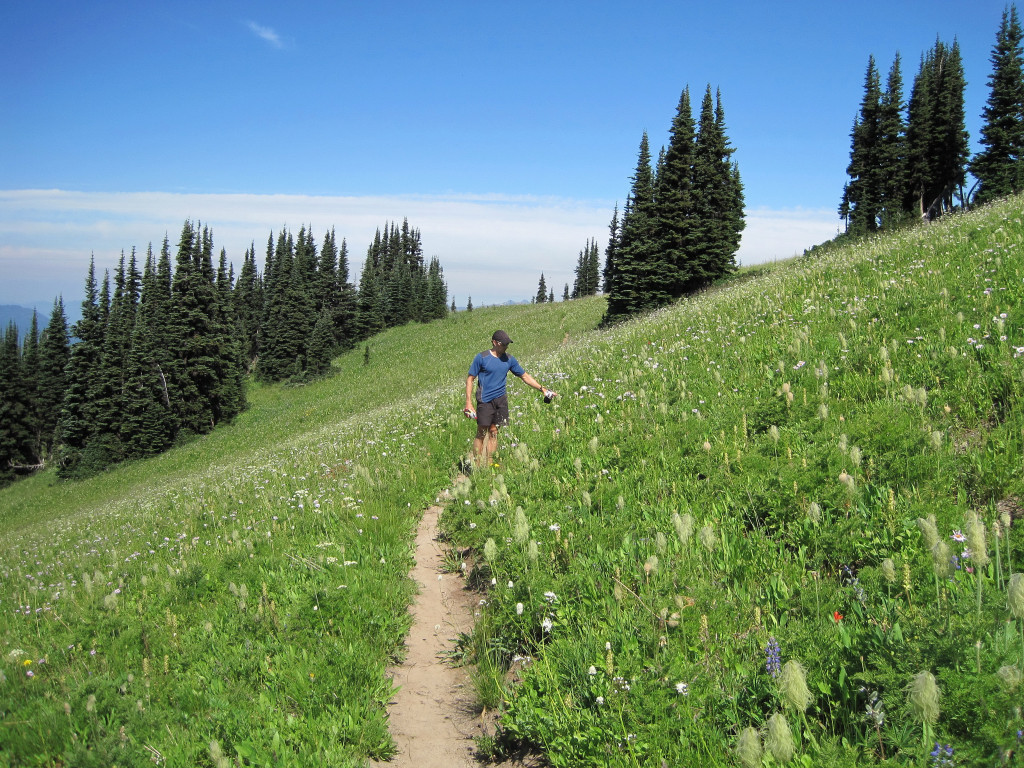
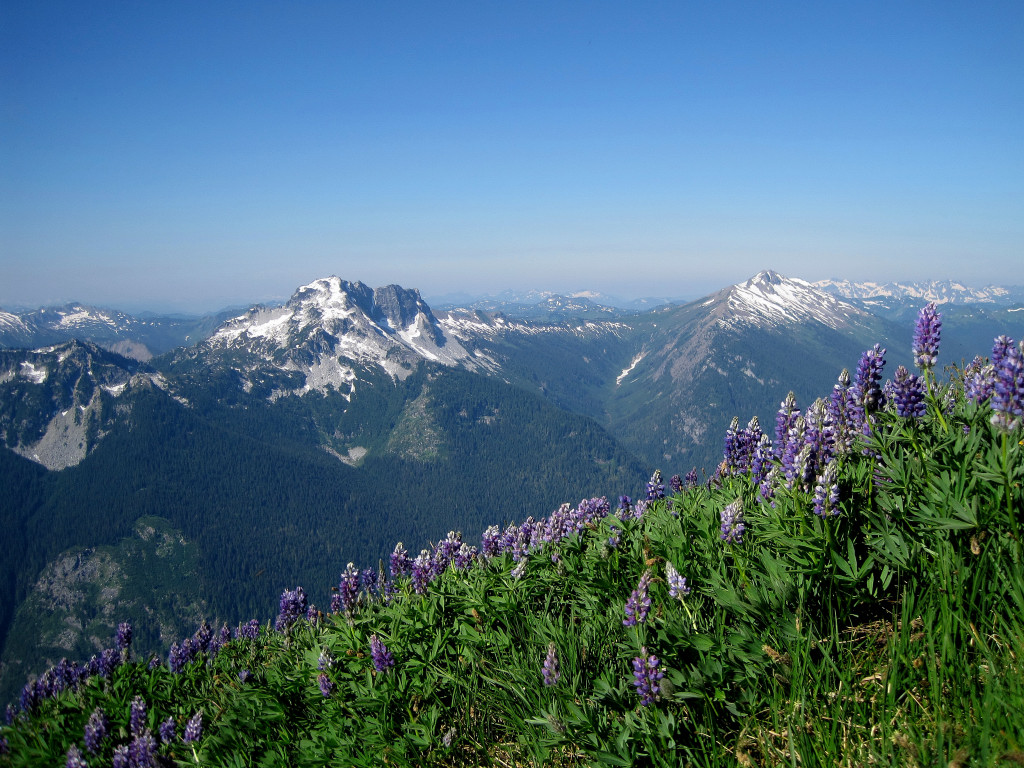
Colin Abercrombie and I completed a 50 mile adventure run loop in the Glacier Peak Wilderness that includes 12,500+ ft of elevation gain and passes through six passes (Little Giant Pass, High Pass, Buck Creek Pass, Suiattle Pass, Cloudy Pass, Spider Gap). We did the loop in 13:37, but our progress was often slowed by stops to photograph the amazing scenery. A large portion of this extremely aesthetic loop follows near the Cascade crest along the Suiattle River drainage, hence the name “Suiattle Crest 50 mile.” While we climbed no summits, the alpine flavor and grand vistas along the way make this a classic outing.
[video:youtube]
Alternatively, the movie can watched on Vimeo.
Colin designed this giant loop which is remarkably close to 50 miles in distance and covers virtually all the highlights in the region. There are essentially two scenic areas of the loop – the Napeequa Valley/High Pass region and the Lyman Lakes area – separated by 10+ miles of relatively uninteresting trail in the woods between Buck Creek Pass and Suiattle Pass, with a significant extra hill climb over Middle Ridge. We started at Little Giant TH and I recommend doing the route clockwise beginning with the climb up to Little Giant Pass. The first 16 miles from Little Giant TH to High Pass are the most arduous with the steepest climbs, brush (very wet and very cold from dew in the morning), some off-trail travel, and routefinding issues. After High Pass, the complexities are mainly over as the trails improve allowing for more running. Doing the loop clockwise provides for a relatively easy 13-mile finish along the Phelps Creek Trail and dirt road from Phelps Creek TH back to Little Giant TH. A shorter option that is very popular with backpackers is the ~37 mile Spider Gap/Buck Creek Pass Loop. This option avoids the complexities of Napeequa Valley and the ascent to High Pass, but the beautiful scenery in the Napeequa Valley and around High Pass is well worth the extra effort and mileage.
Location (Elevation): Time Elapsed / Split / Real Time
Little Giant TH (2,600 ft) : 0 / 0 / 04:55
Little Giant Pass (6,409 ft) : 1:35:24 / 1:35:24 / 06:30
High Pass (6,876 ft) : 5:35:31 / 4:00:06 / 10:31
Buck Creek Pass (5,796 ft) : 6:43:15 / 1:07:43 / 11:38
Cloudy Pass (6,420 ft) : 9:18:52 / 2:35:37 / 14:14
Spider Gap (7,040 ft) : 11:00:02 / 1:41:09 / 15:55
Phelps Creek TH (3,500 ft) : 12:42:38 / 1:42:36 / 17:38
Little Giant TH (2,600 ft) : 13:37:23 / 54:45 / 18:42
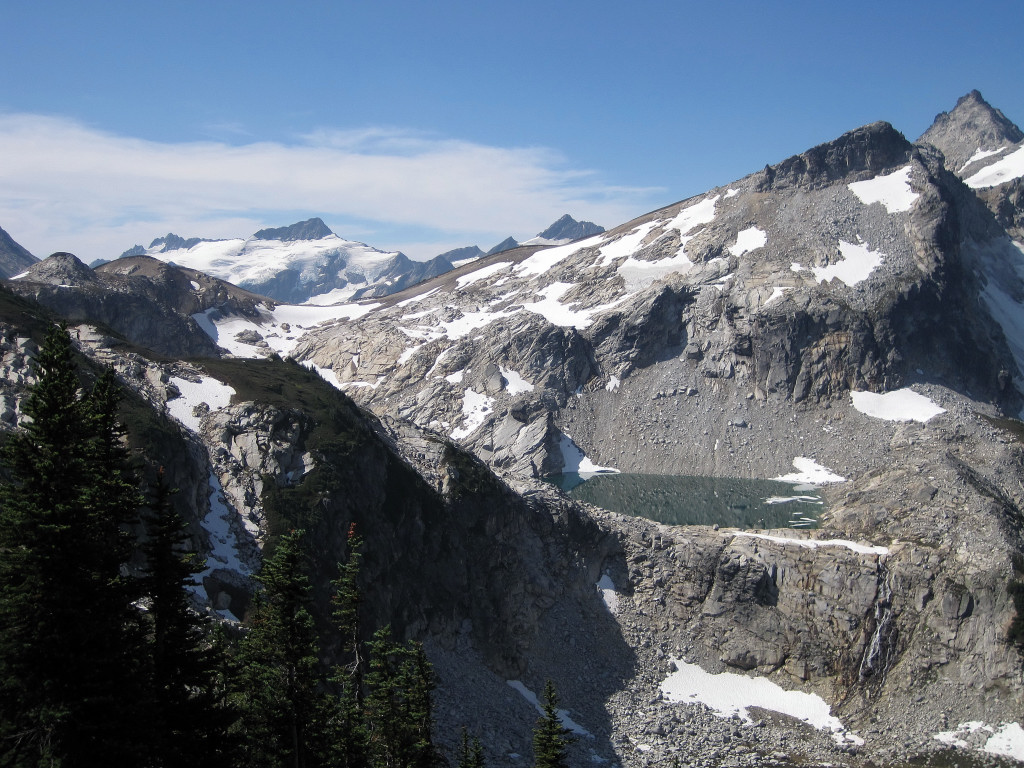
Clark Mountain from Little Giant Pass
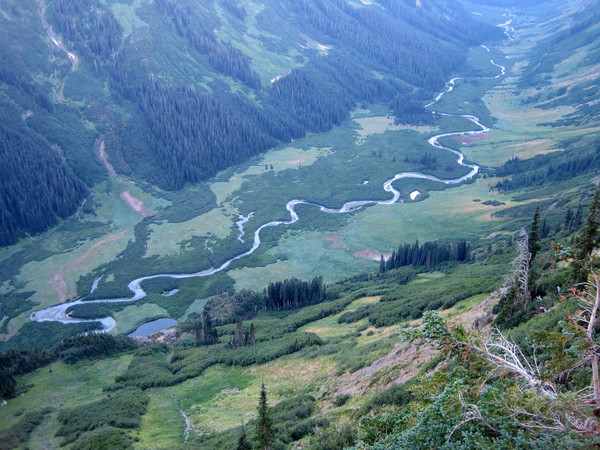
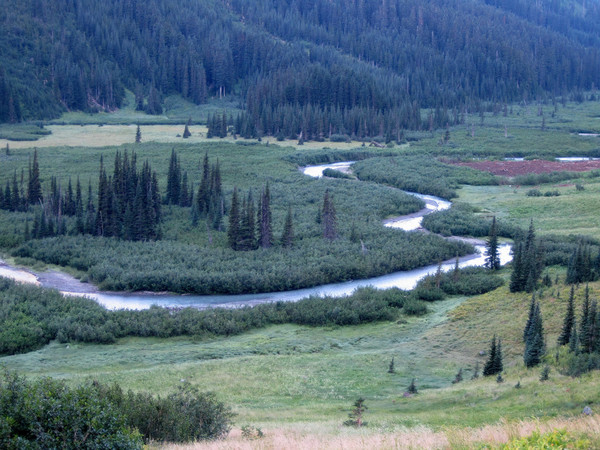
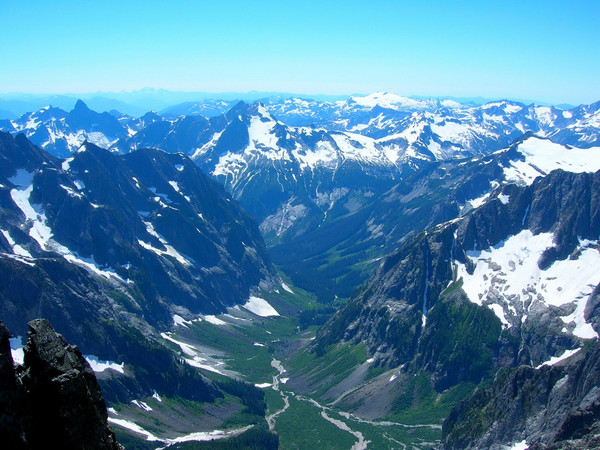
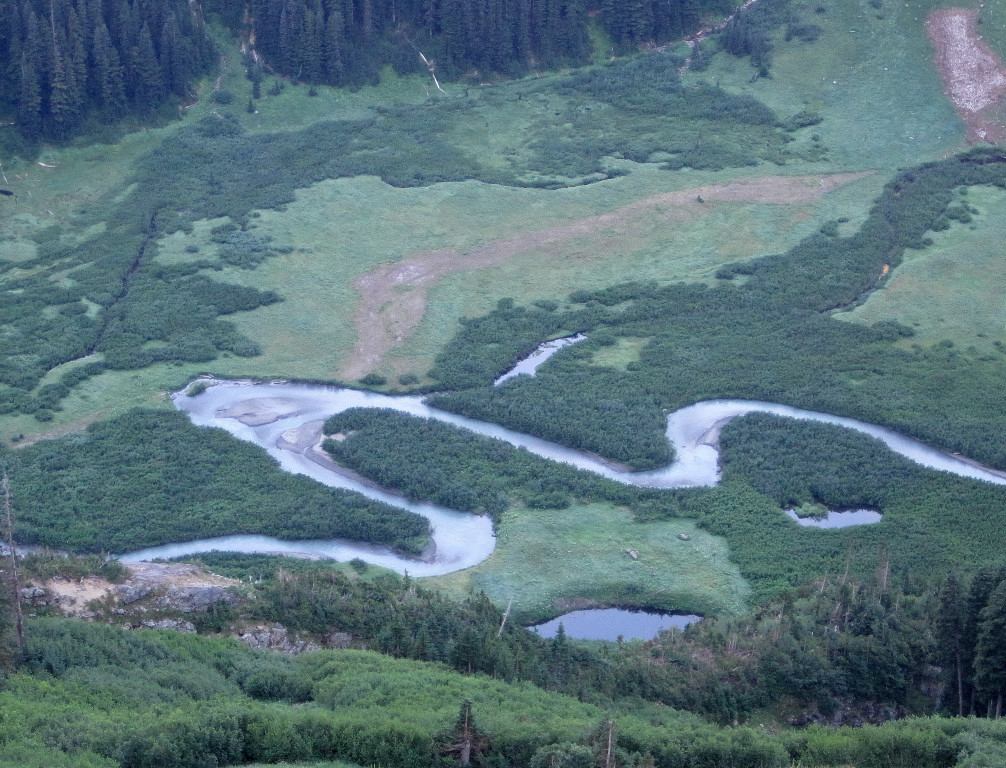
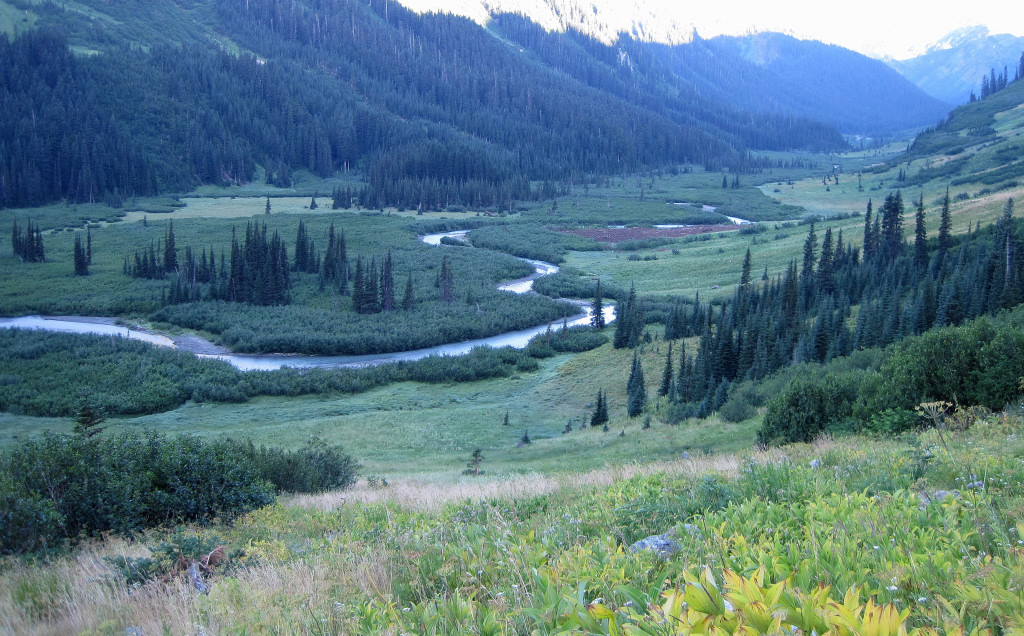
Napeequa Valley
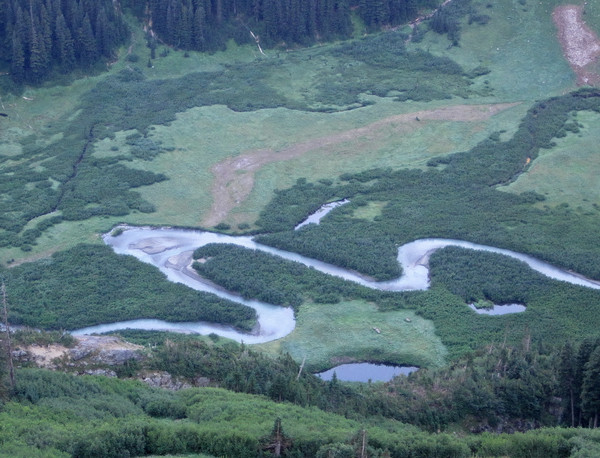
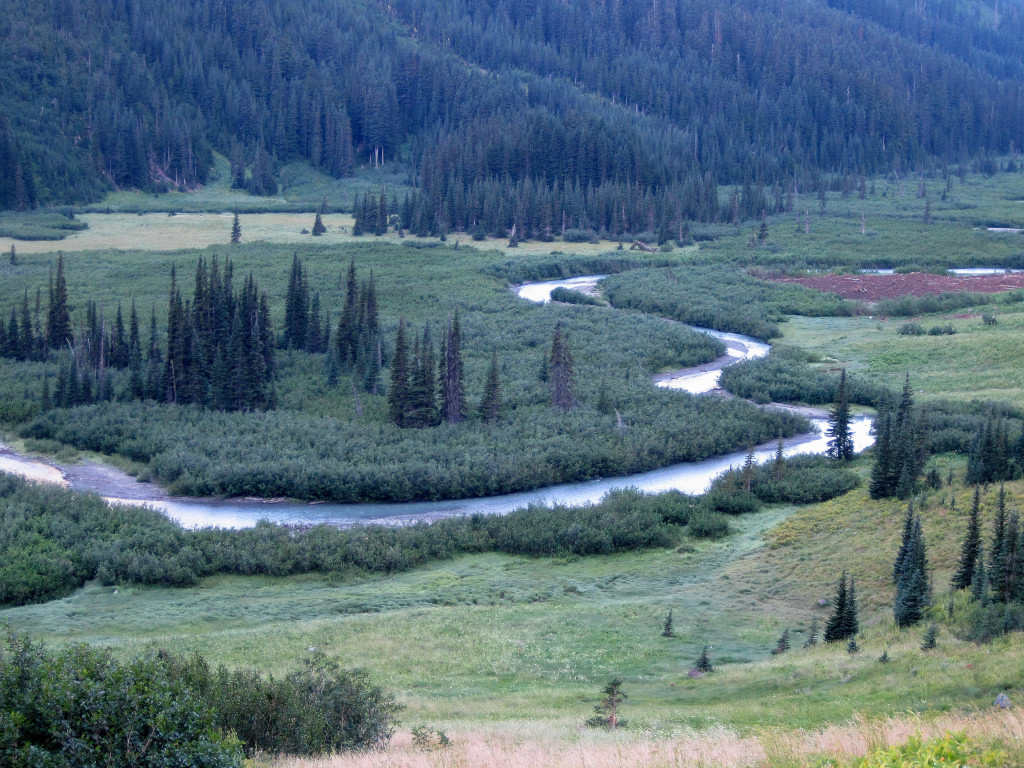
River Bends

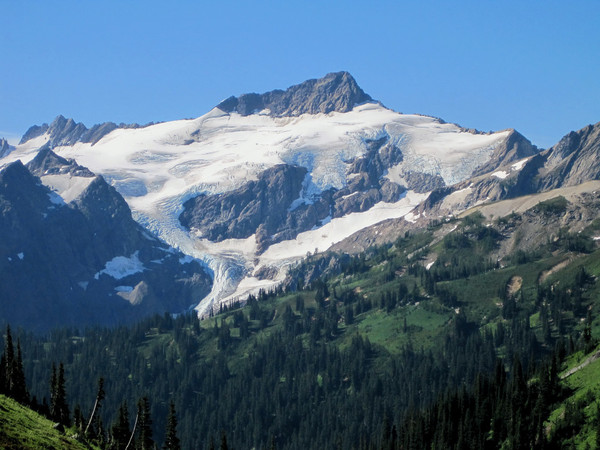
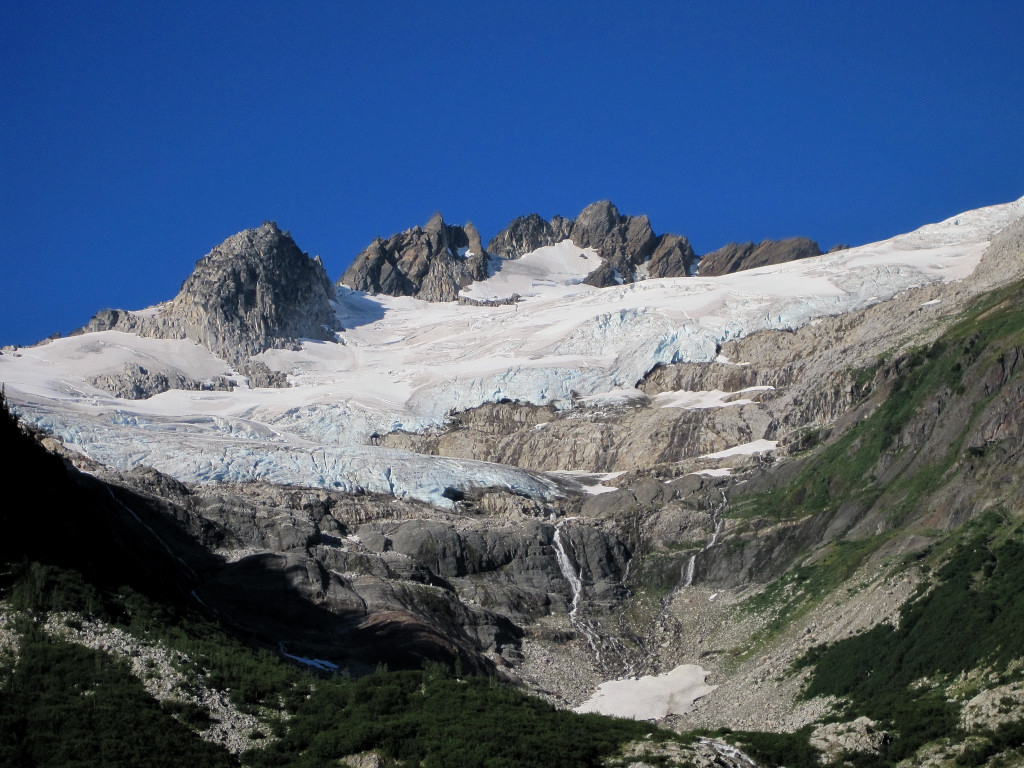
Walrus Glacier
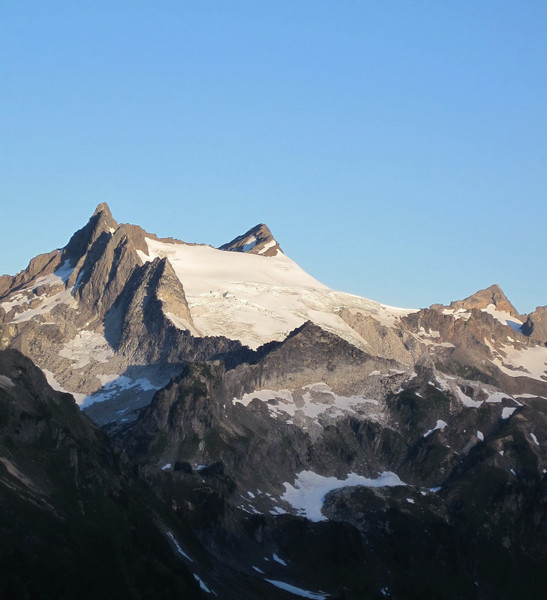
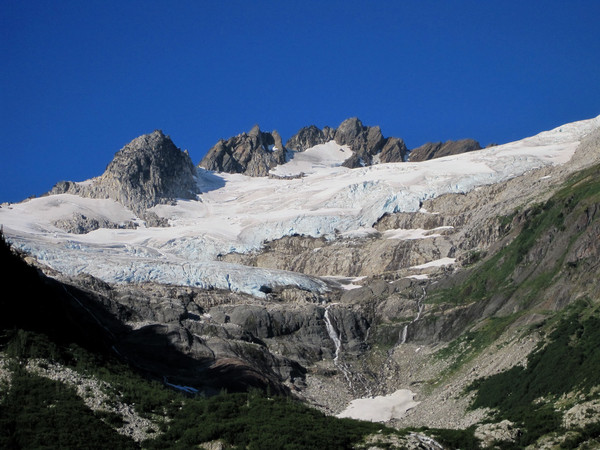
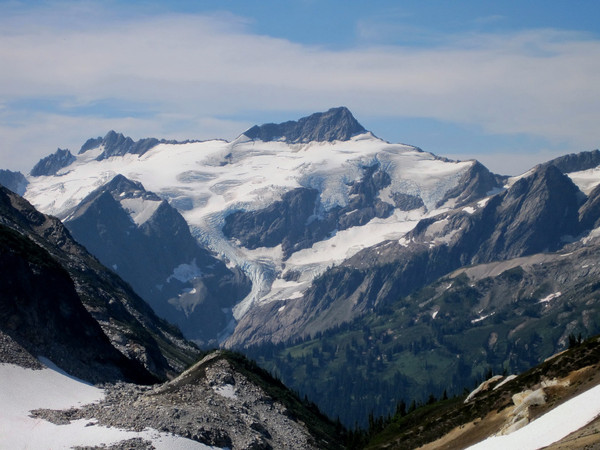
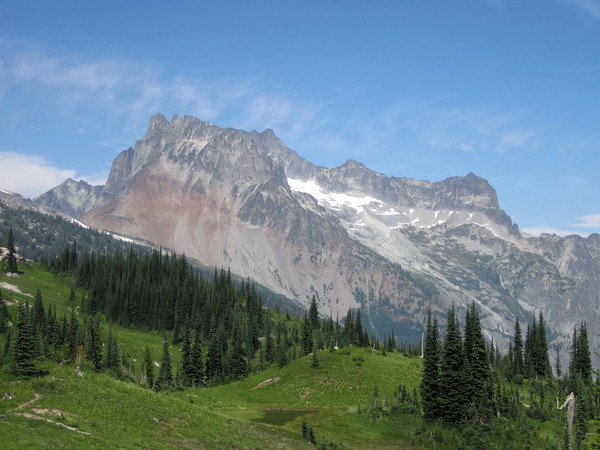
Clark Mountain and Richardson Glacier


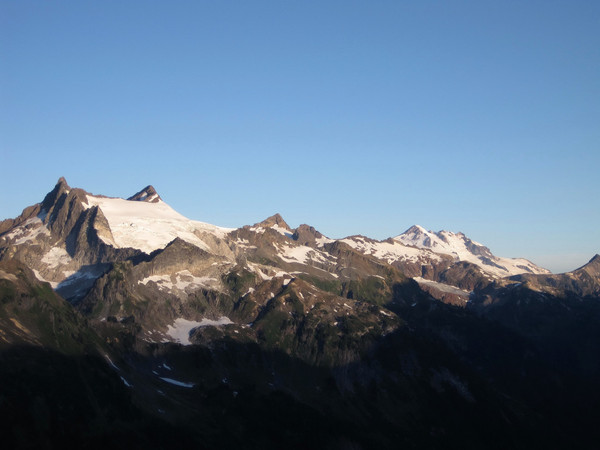
Luahna and Pilz Glacier
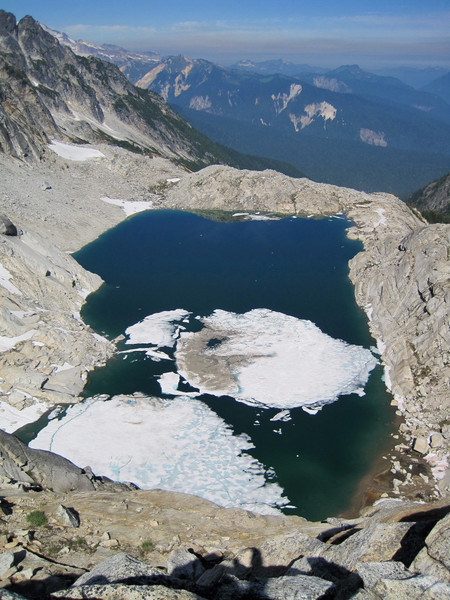
Triad Lake


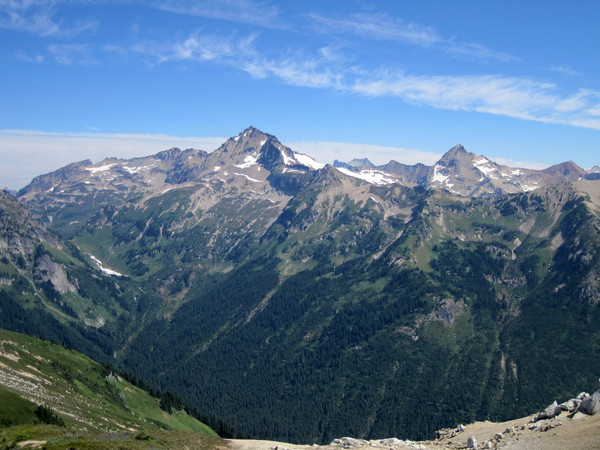
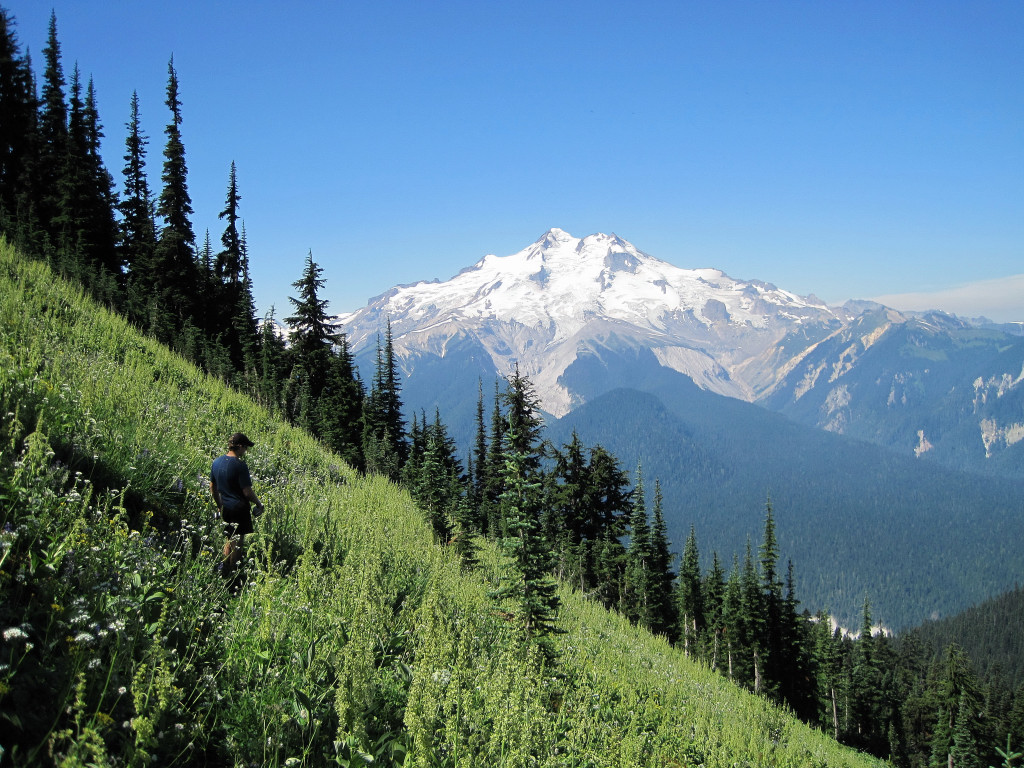
Glacier Peak from High Pass
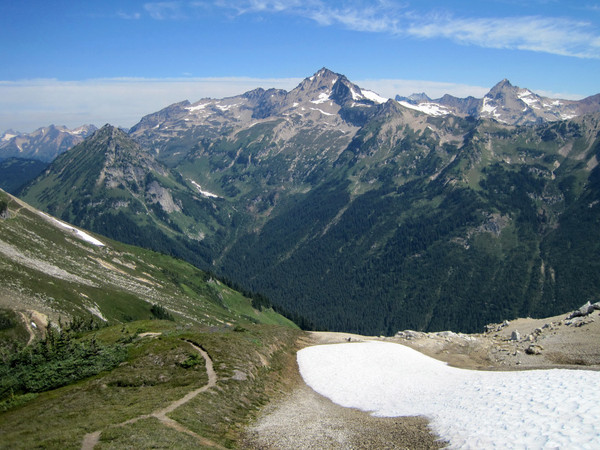
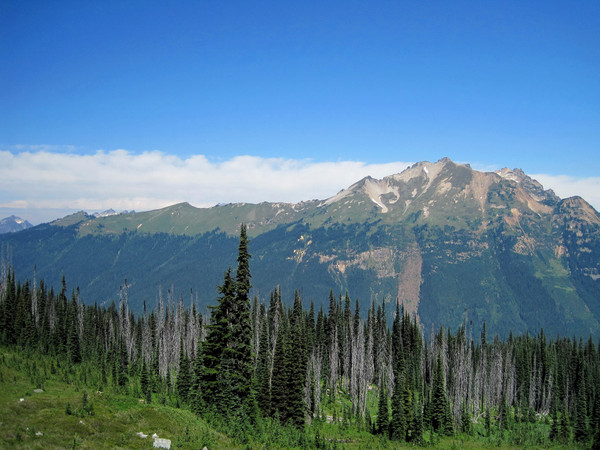
View across Buck Creek Valley to Fortress and Chiwawa


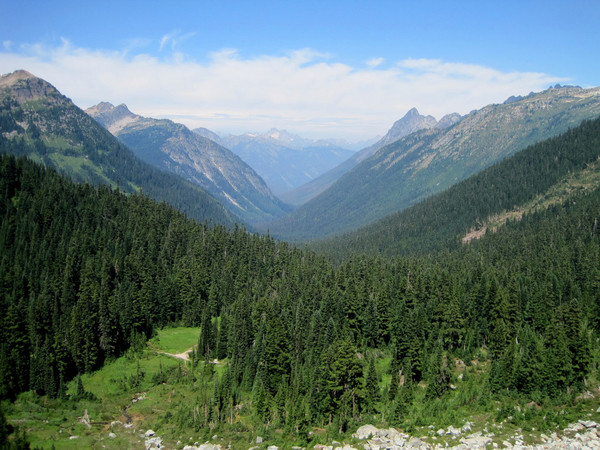
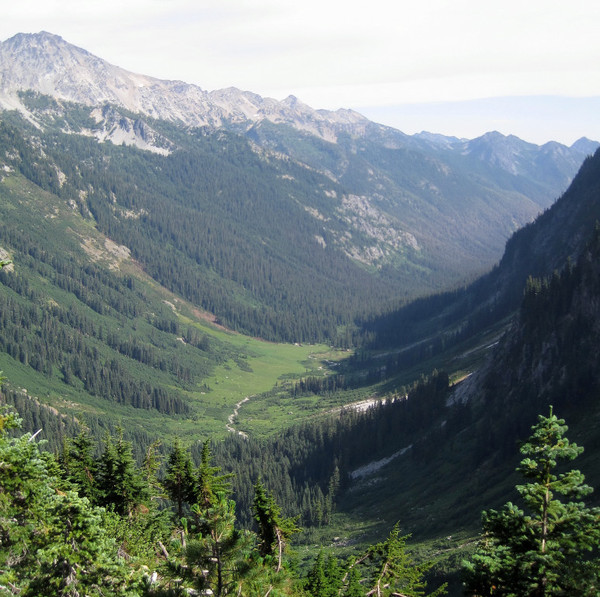
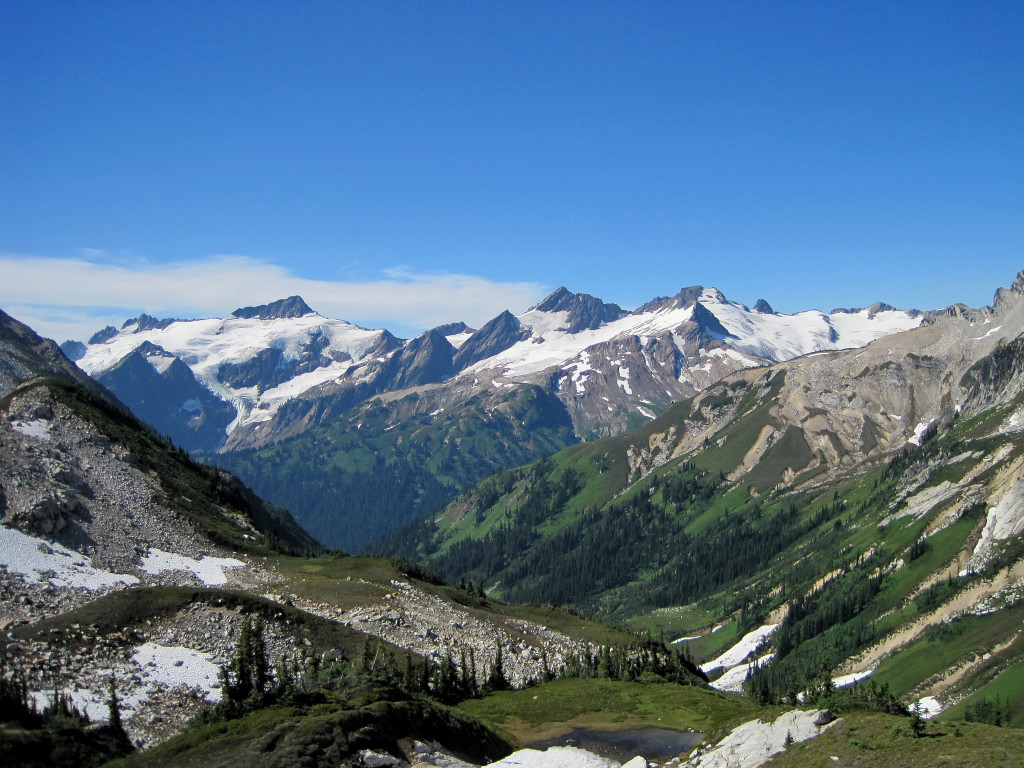
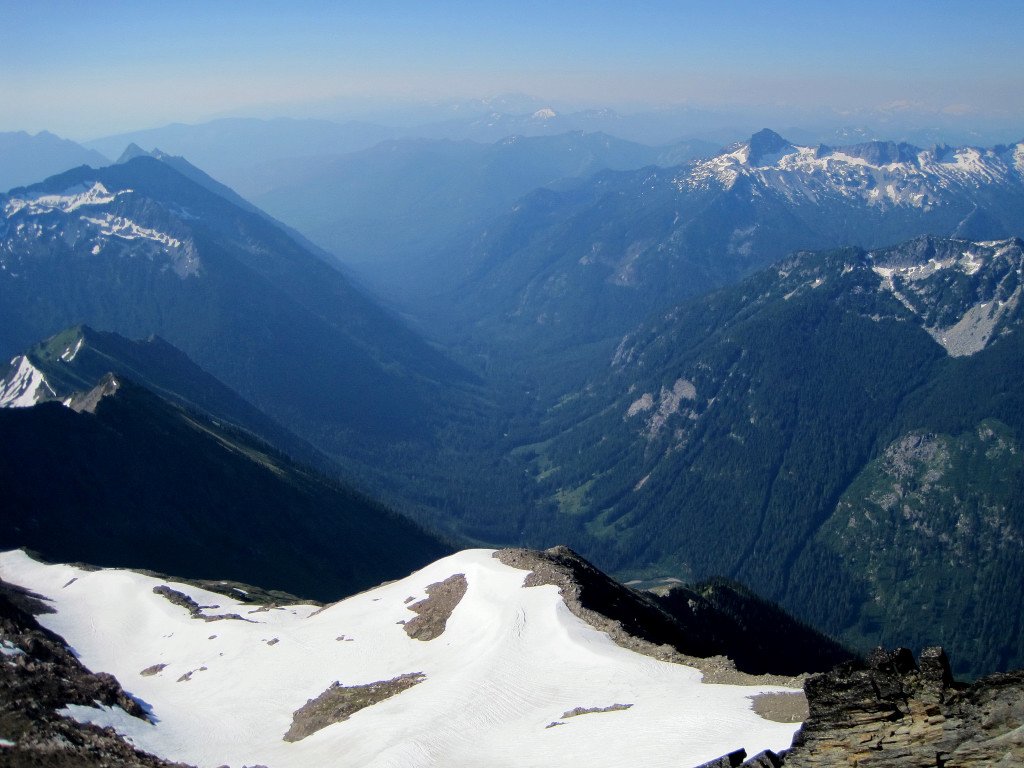
Upper Suiattle River

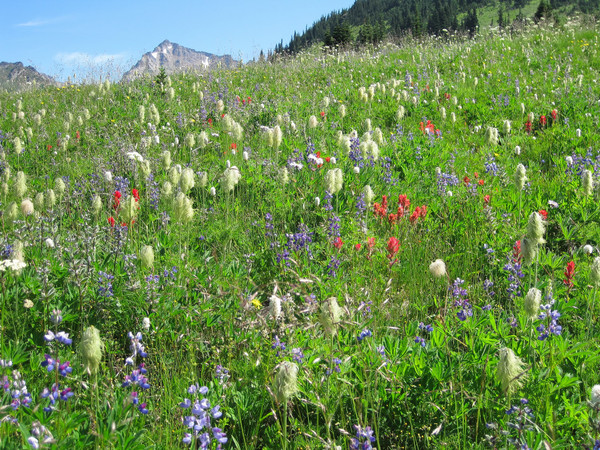
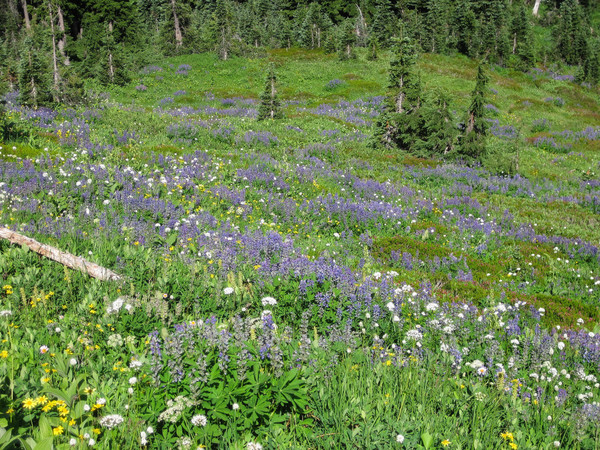
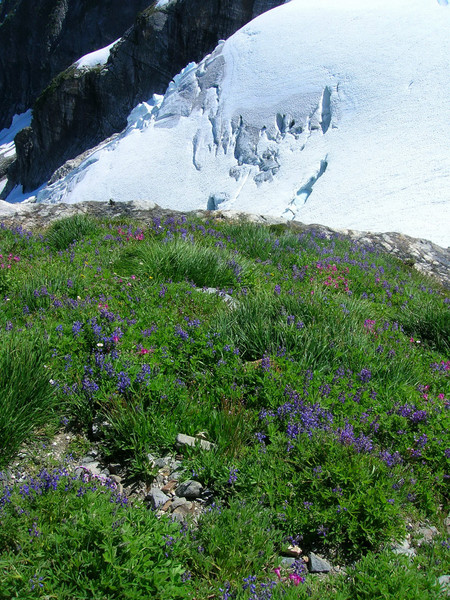
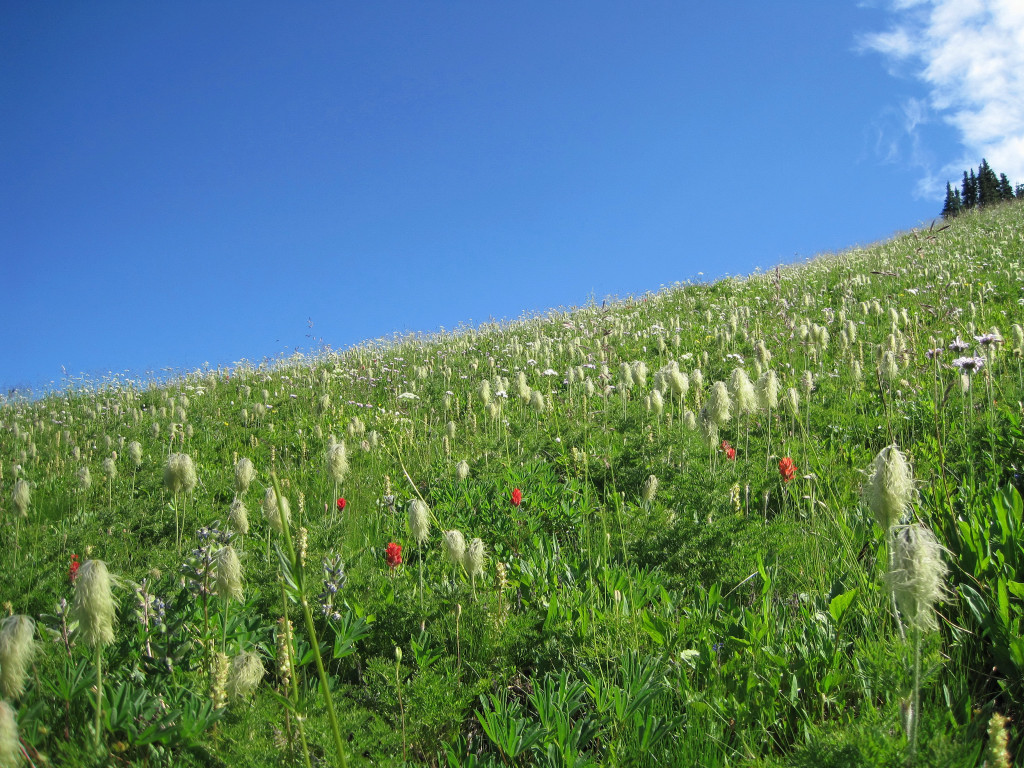
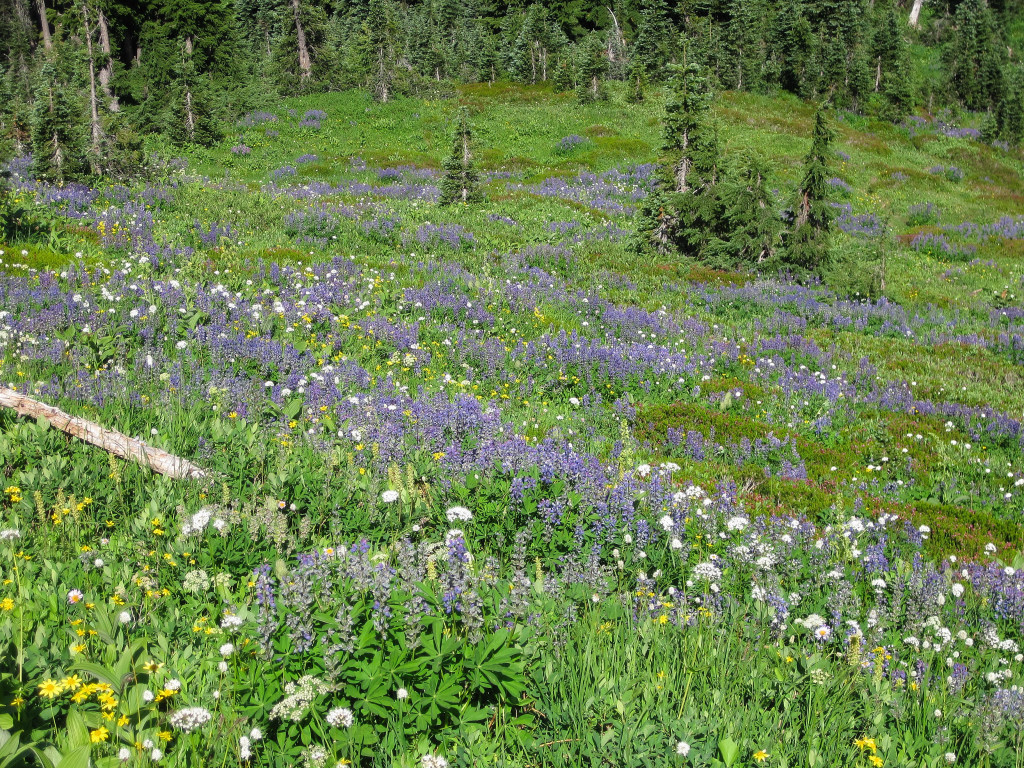
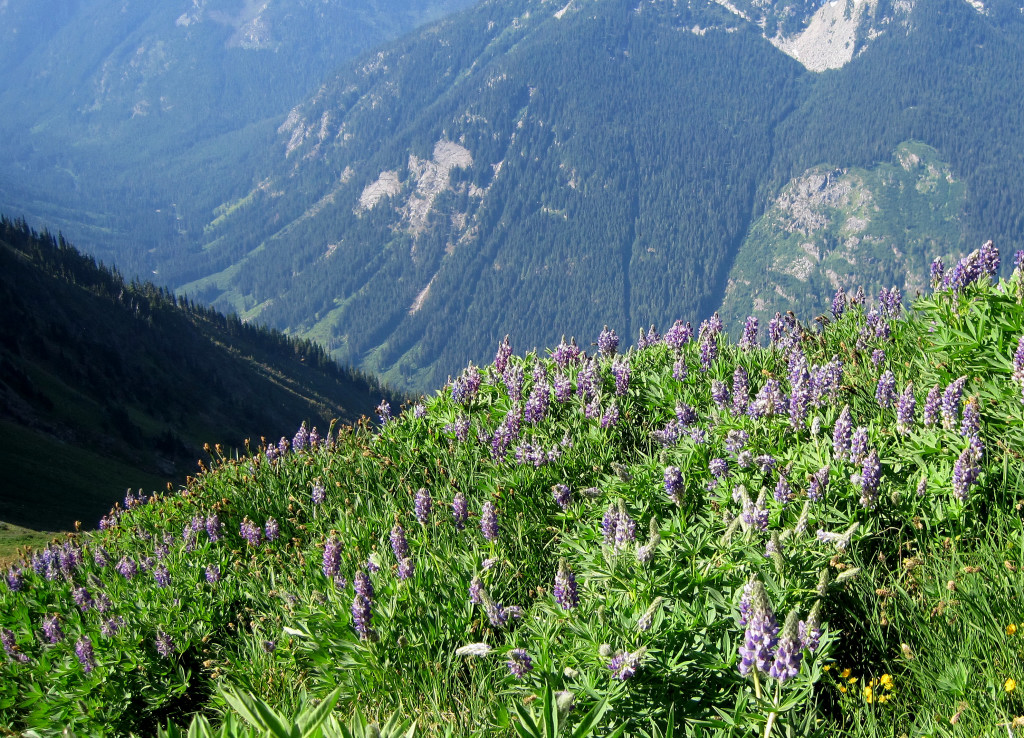
Meadows!


Miners Ridge and Plummer Mountain

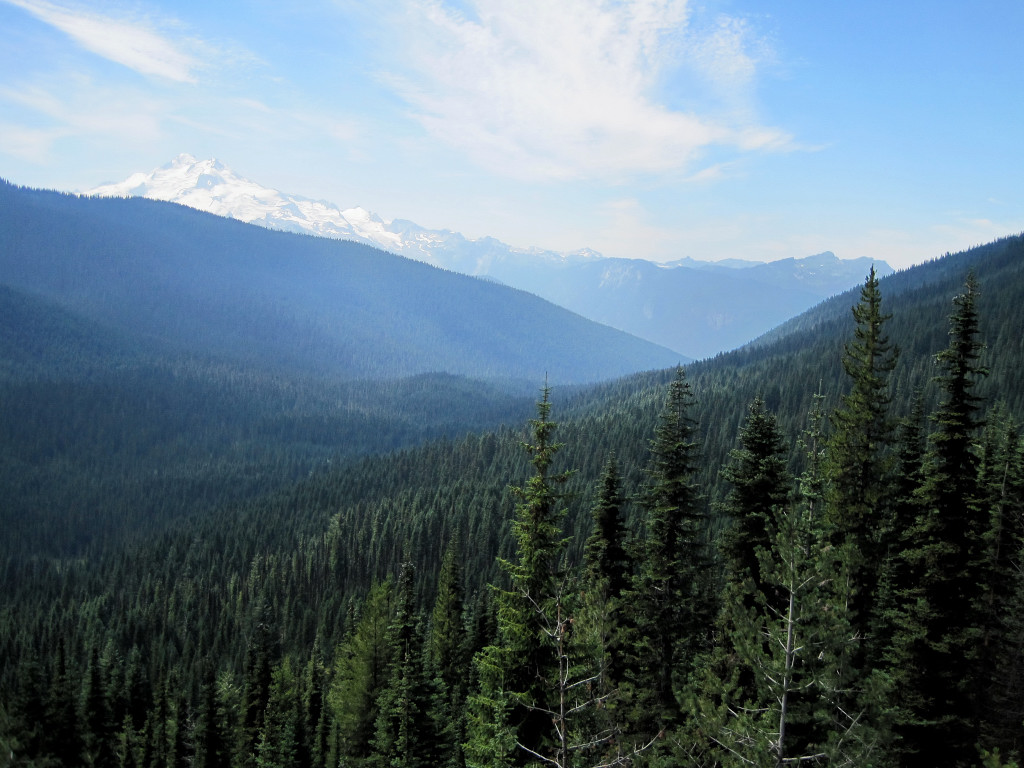
Carpet of trees below Suiattle Pass
Agnes Creek Valley from near Suiattle Pass

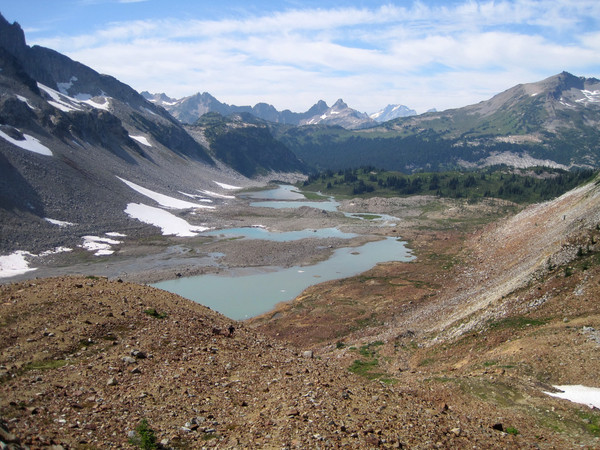
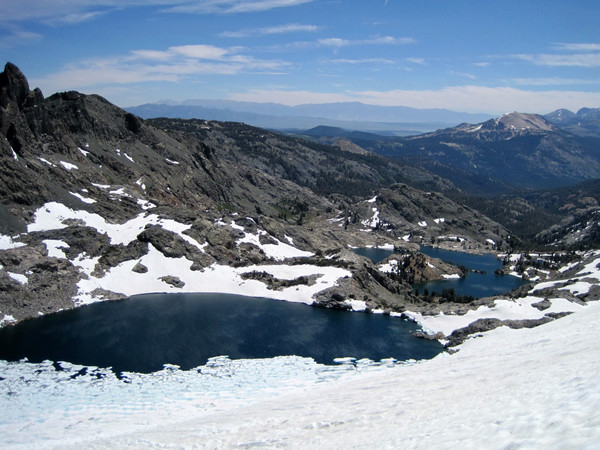
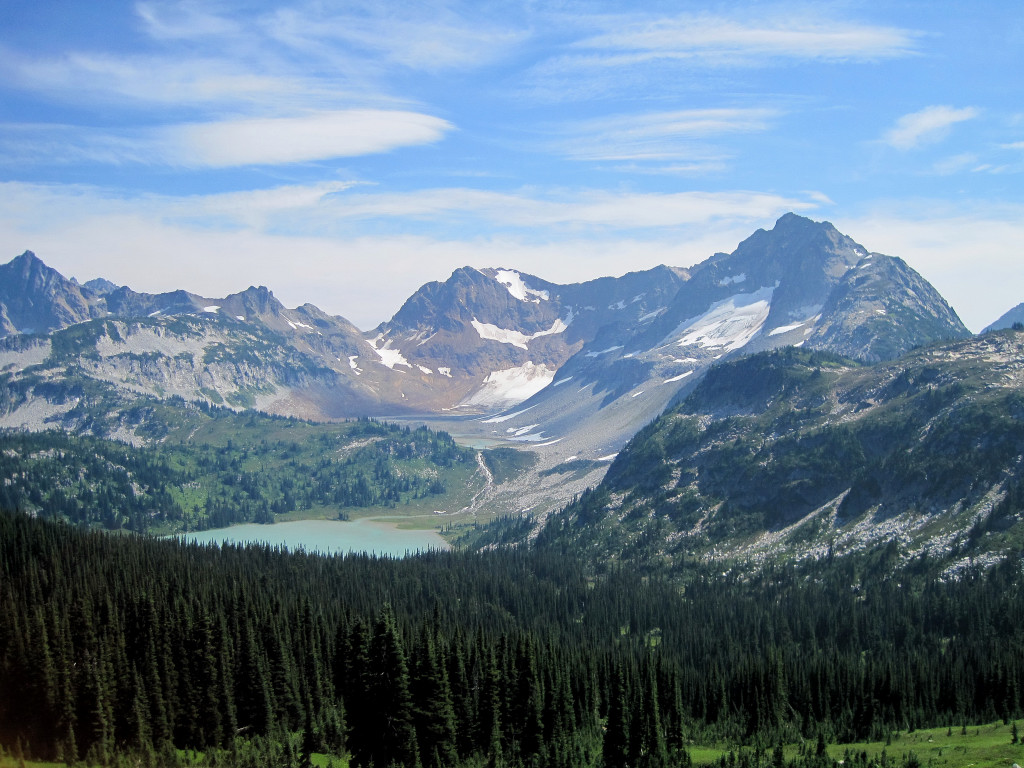
View of Lyman Lakes Basin and Chiwawa Mountain from Cloudy Pass

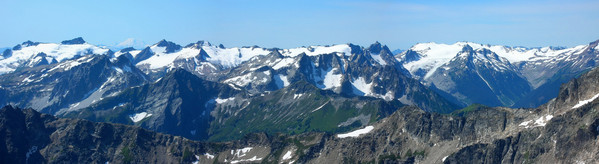
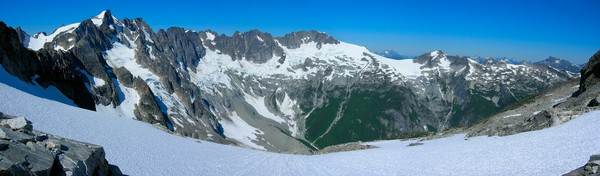
Panorama from Cloudy Pass

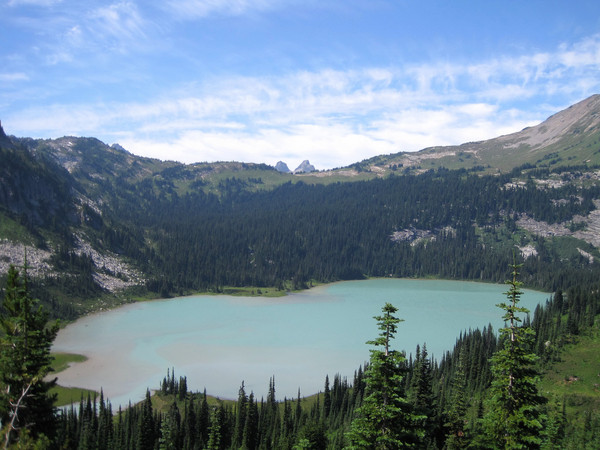
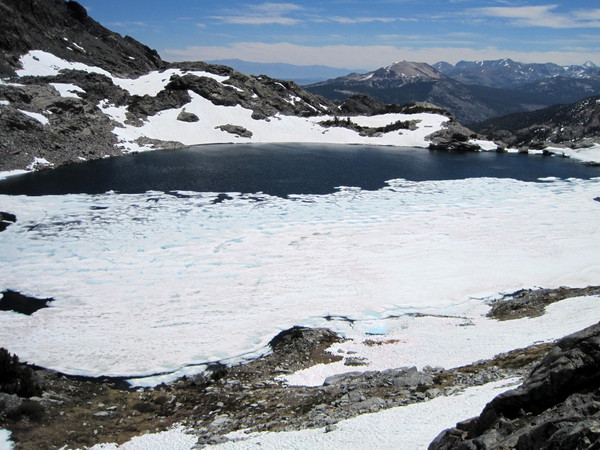
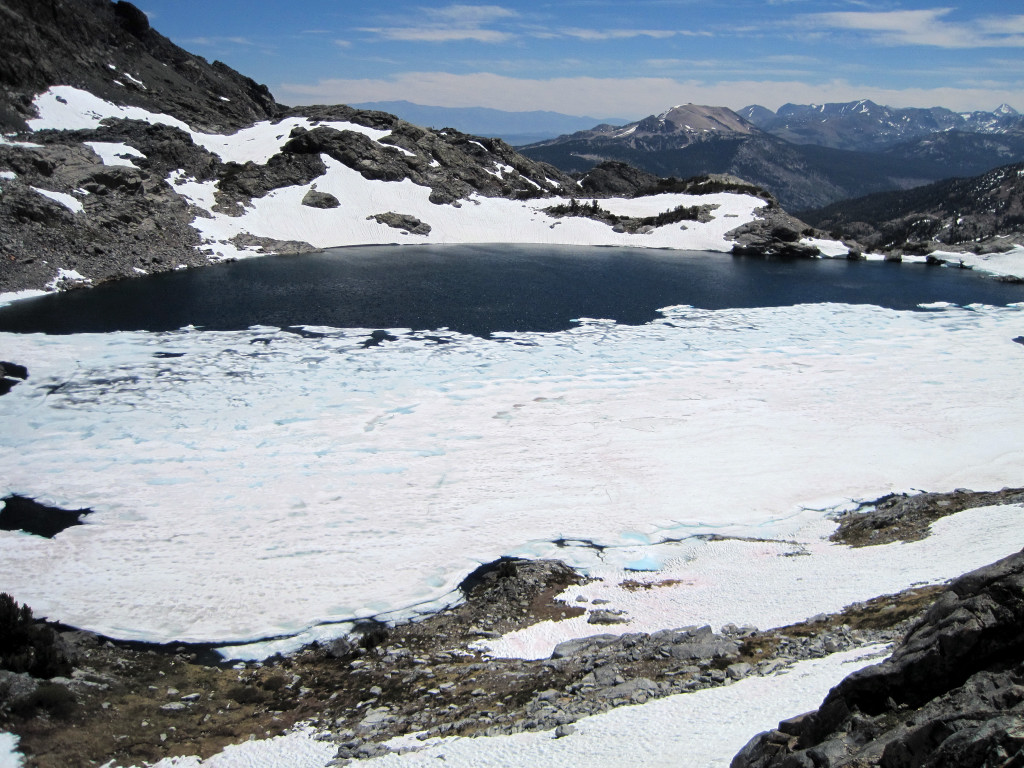
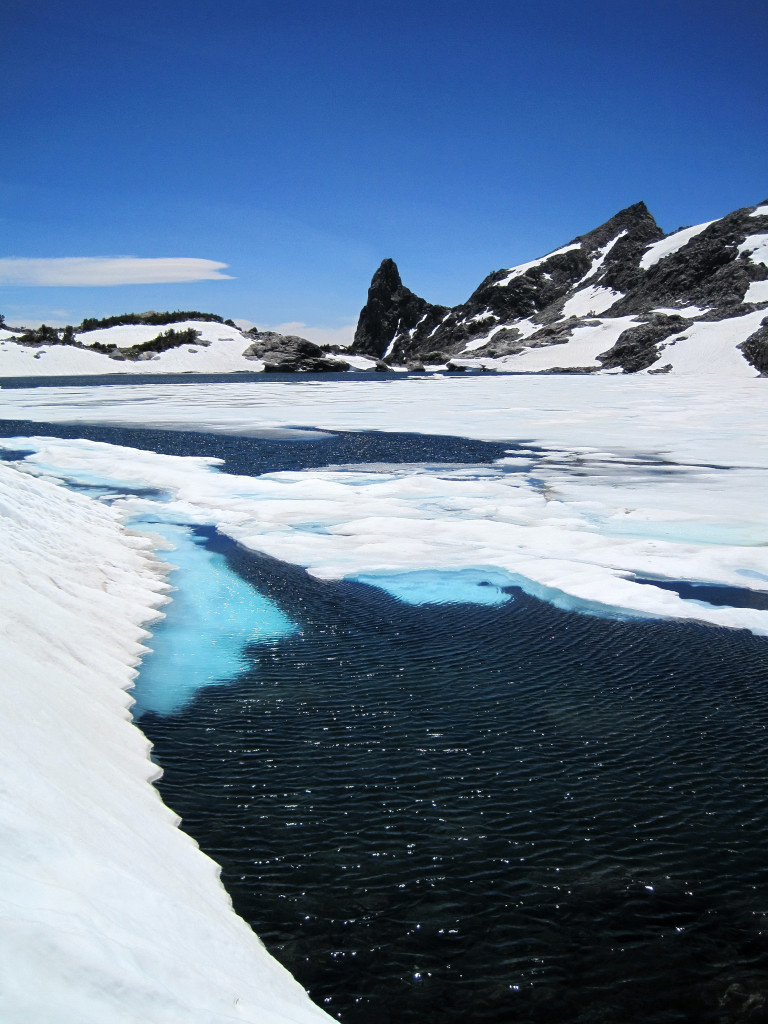
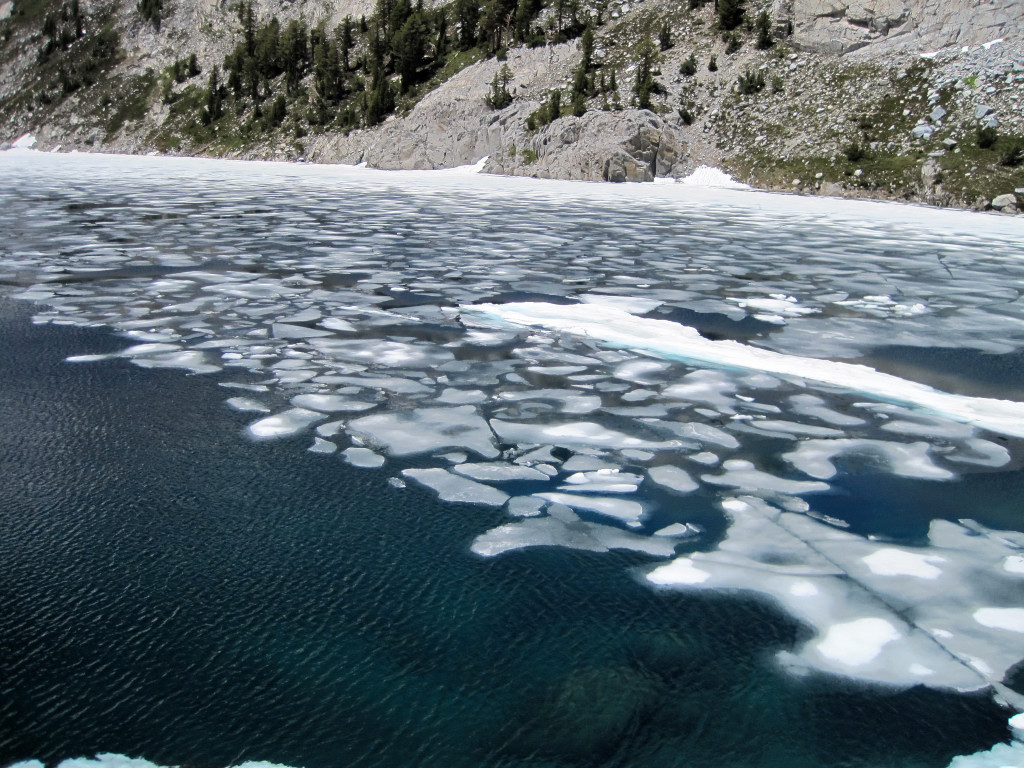
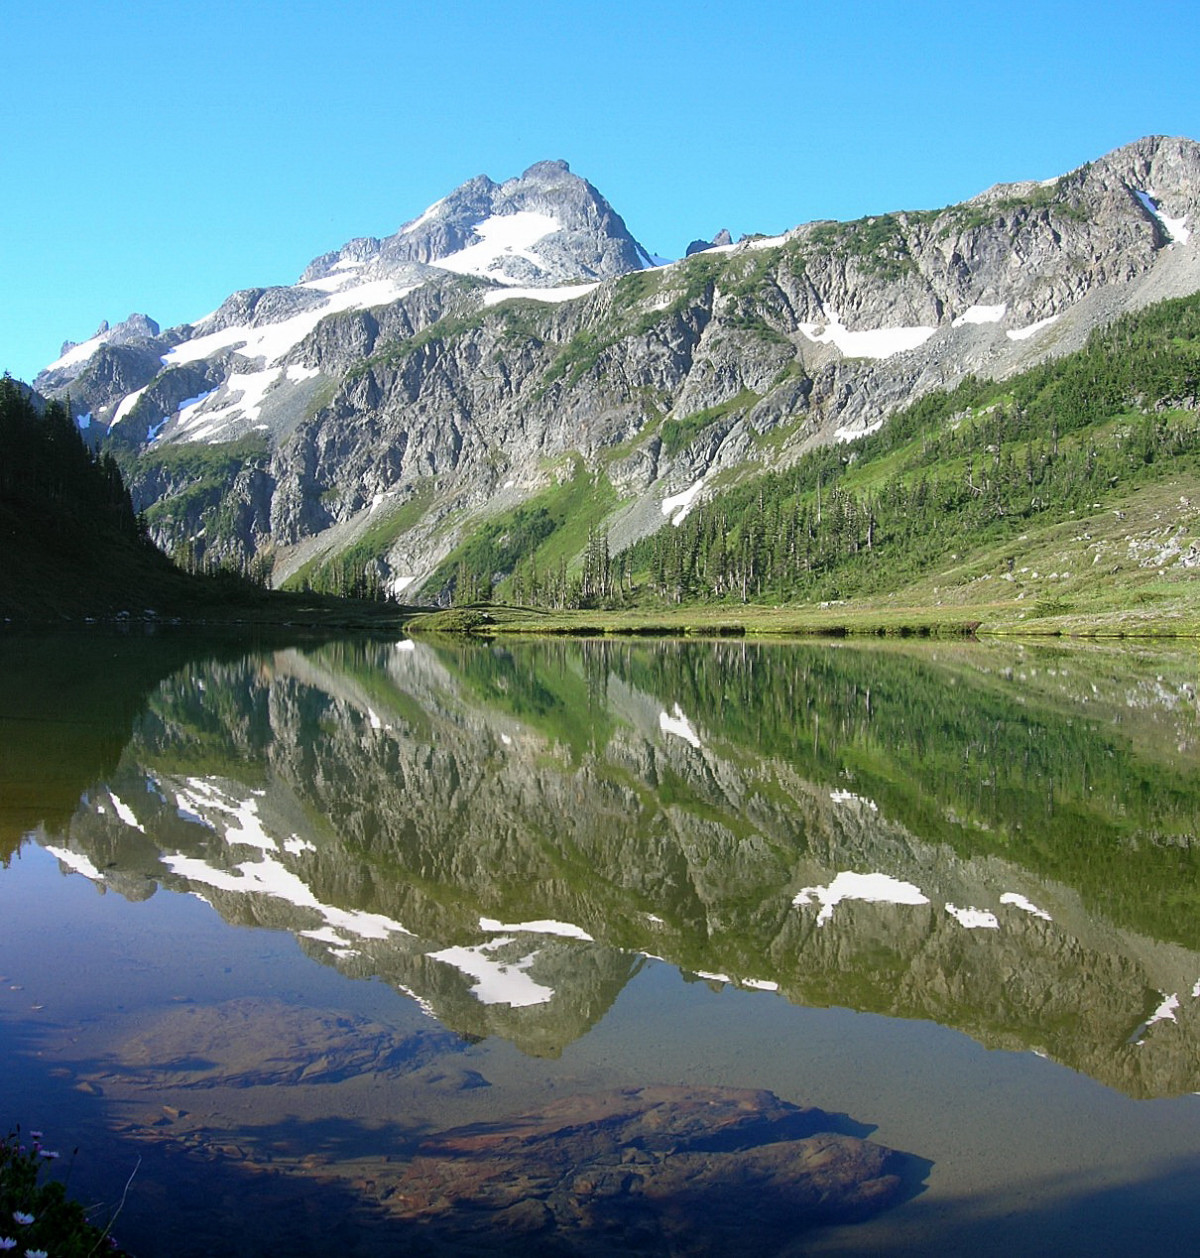
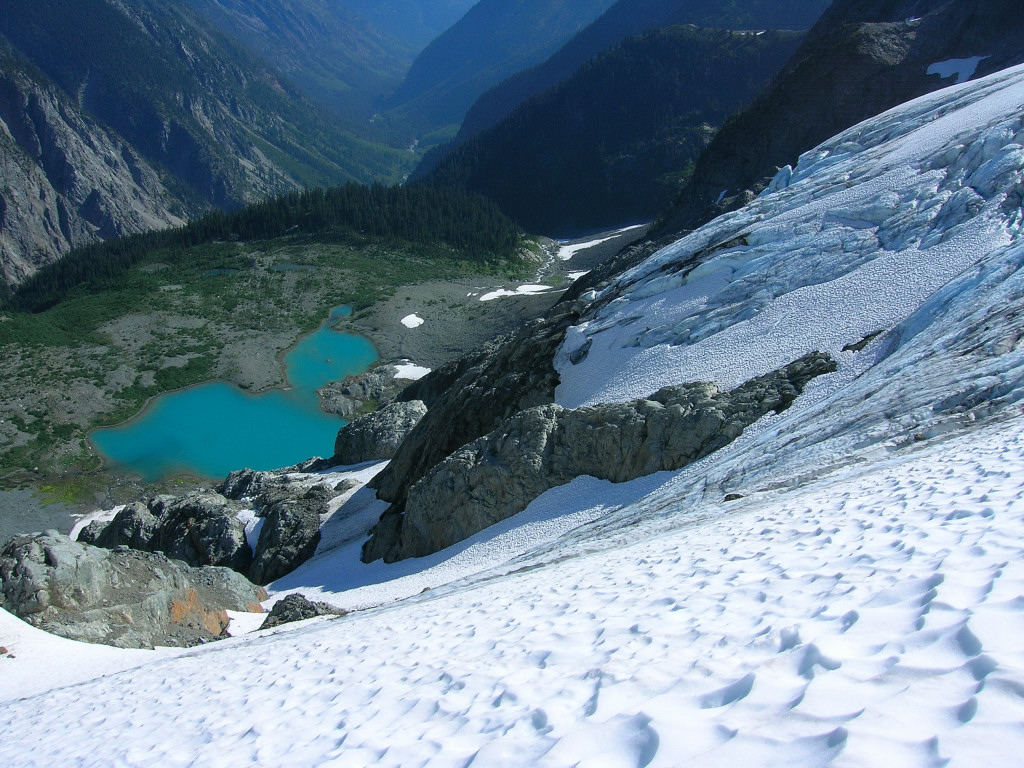
Lower Lyman Lake
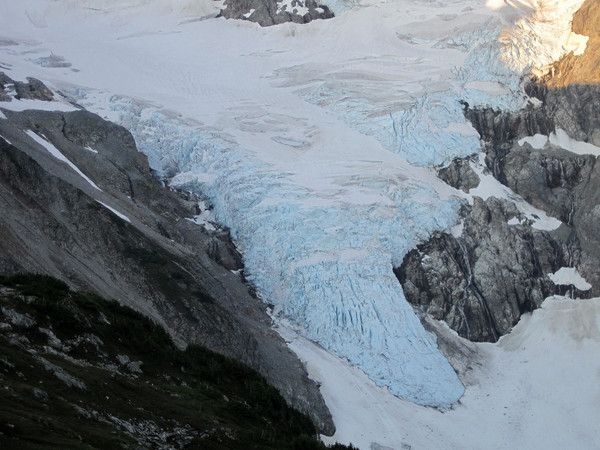
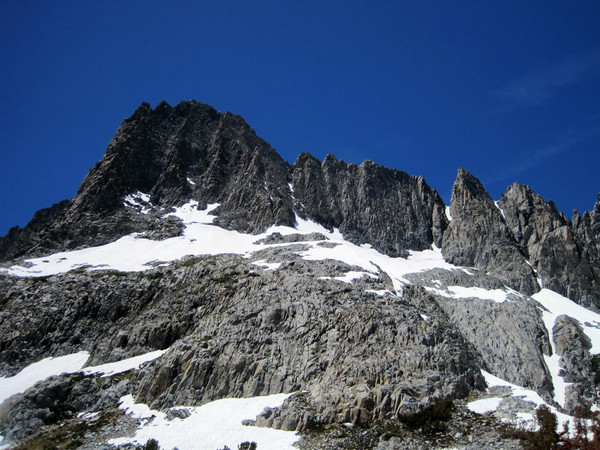
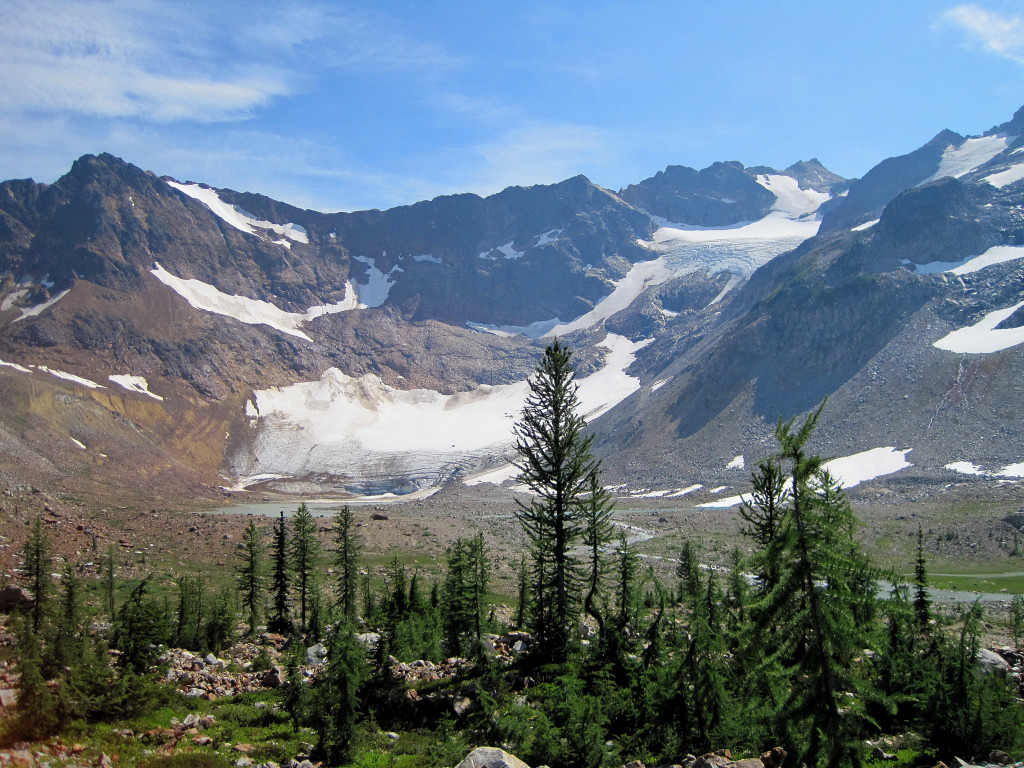
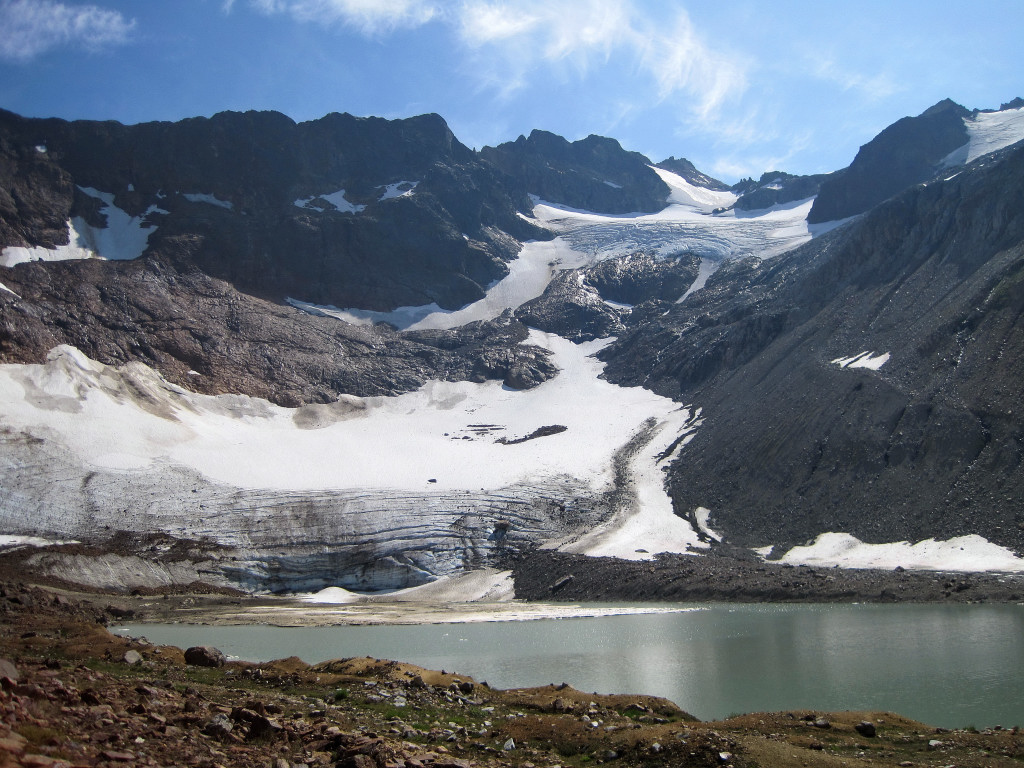
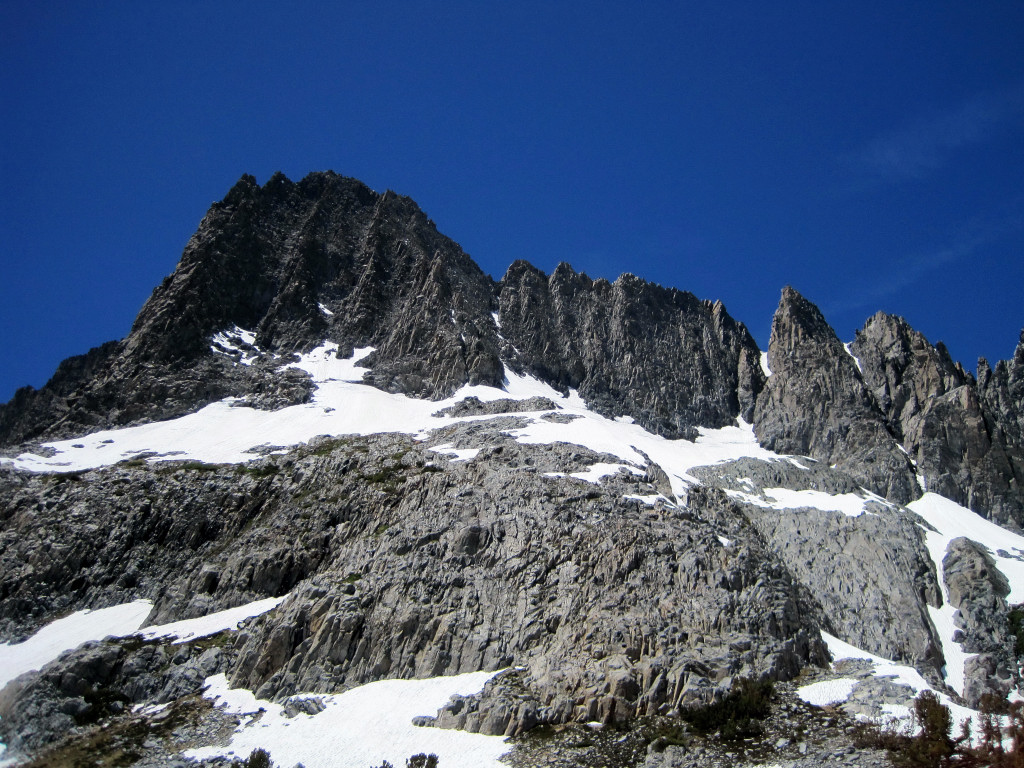
Bonanza Peak

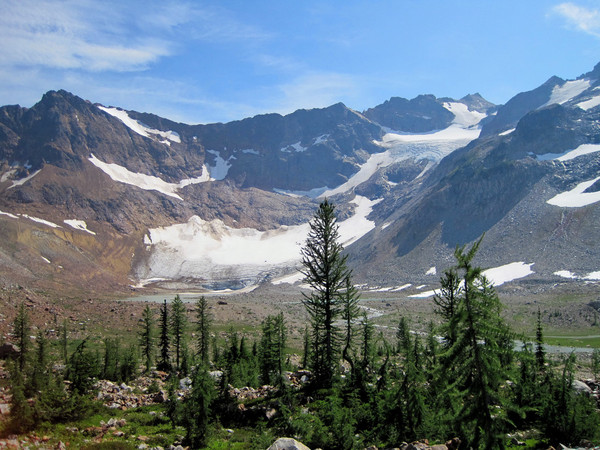
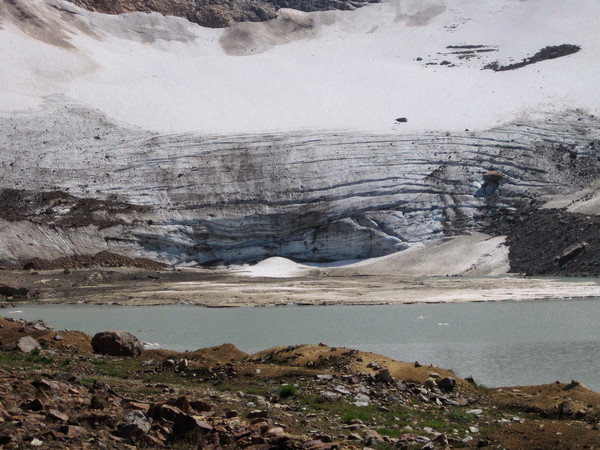
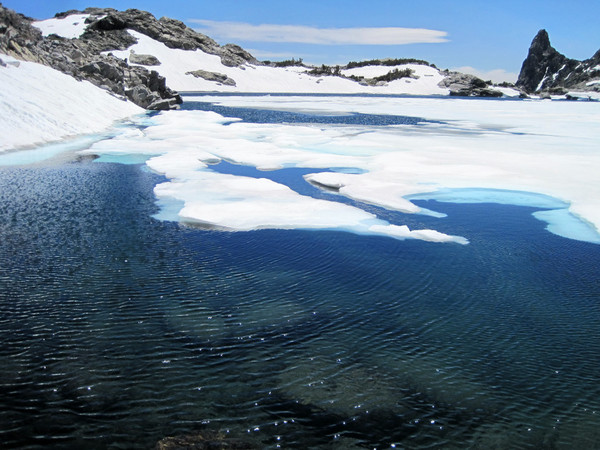
Lyman Glacier Remnant


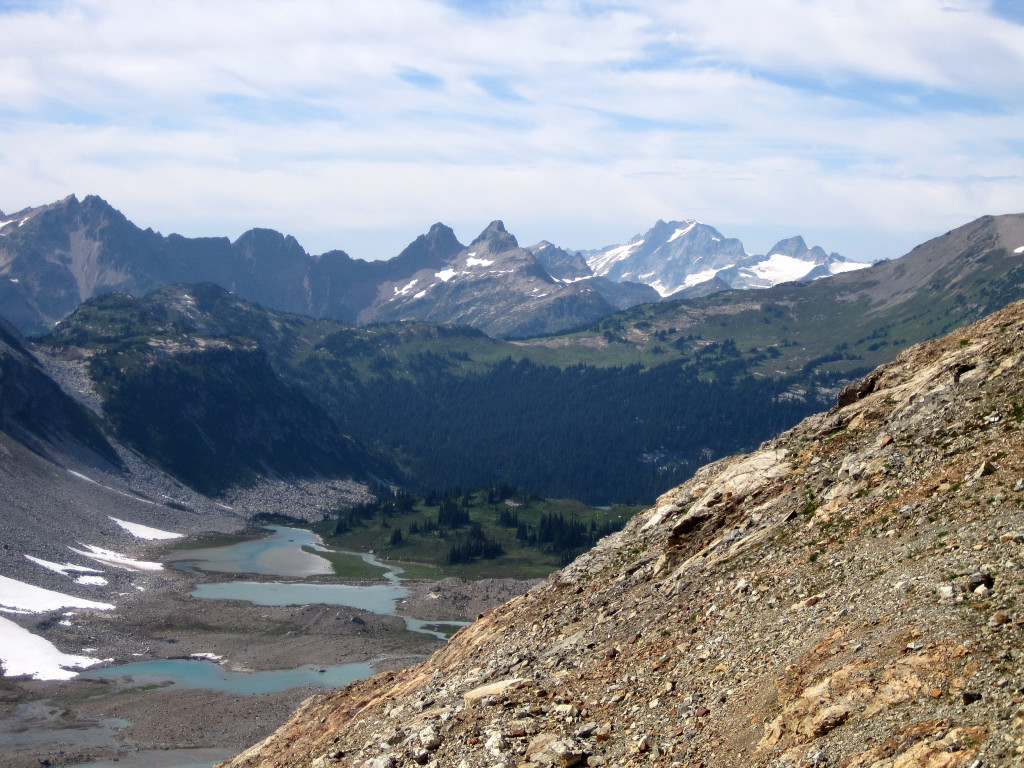
Spider Meadows and Phelps Creek Valley
Gear Notes:
La Sportiva Fireblade Trail Running Shoes, SaltStick electrolyte caps, Clif Shot Bloks, Ultimate Direction Handholders and the Ultimate Direction Wasp pack.
Approach Notes:
The forest service has done a good job logging out the Little Giant Pass Trail and the Phelps Creek Trail. Napeequa Valley is brushy, and the brush is very wet and very cold in the morning! The path up to High Pass is difficult to spot as it climbs from the Napeequa Valley, but it is worth looking for. The path is a bit overgrown, but nothing compared to the slide alder mess you will encounter otherwise. There are a few large logs remaining on the stretch between Buck Creek Pass and Suiattle Pass to jump over or walk around.
-
Nice job!
What do you think total mileage and elevation gain was?
Thanks!
Mileage for the timed portion of the traverse from Cascade Pass TH to Downey Creek Bridge on the Suiattle River Road is around 35 miles with approx. 11,000 feet of elevation gain. Until the Suiattle washouts are repaired, the total distance is closer to 44 miles.
-
Trip: Ptarmigan Traverse FKT - Fastest Known Time
Date: 7/28/2009
Trip Report:
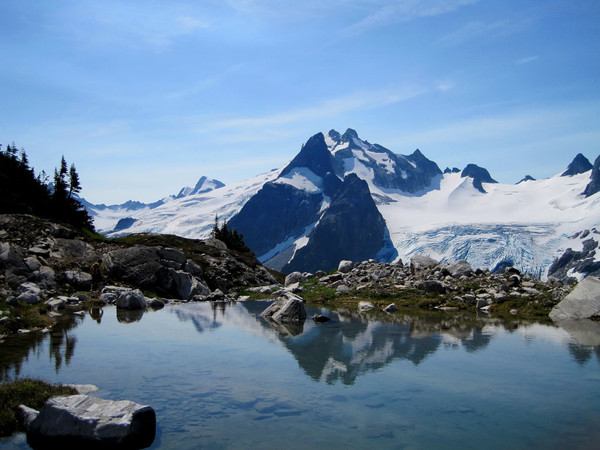
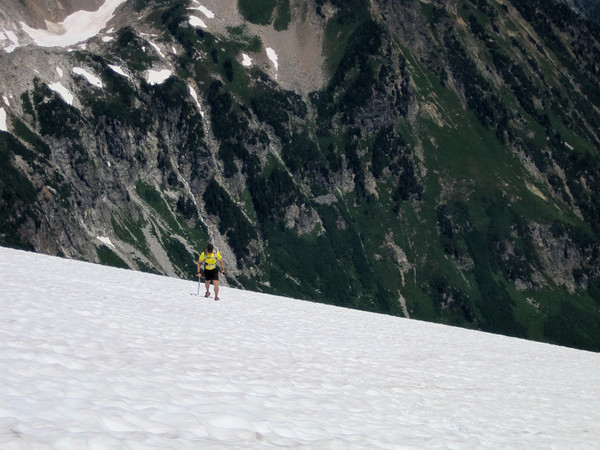
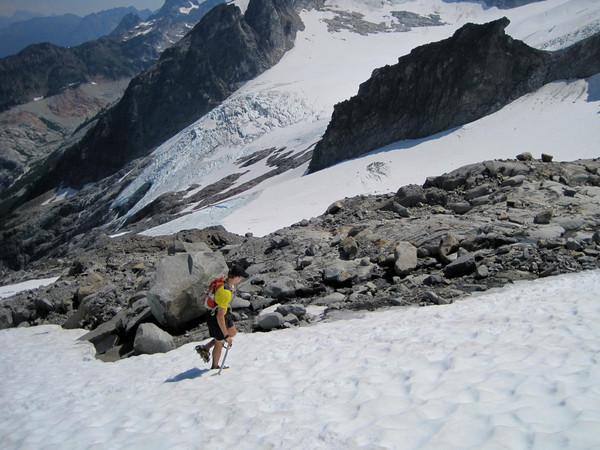
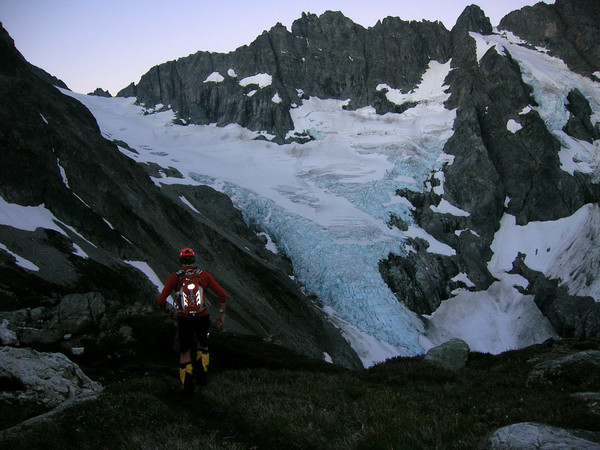
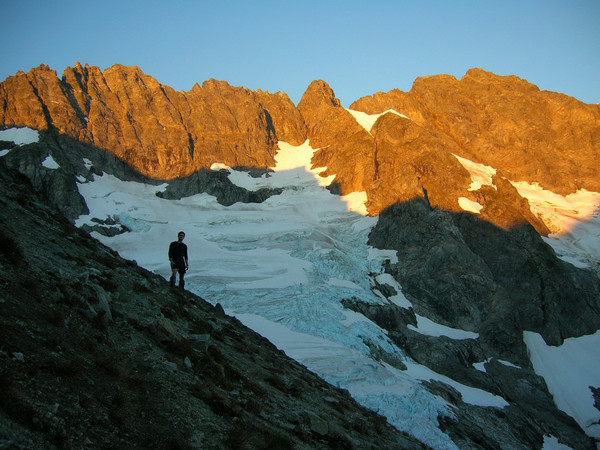
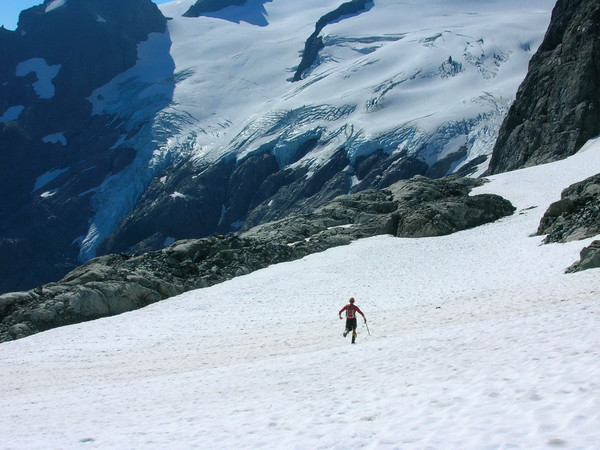
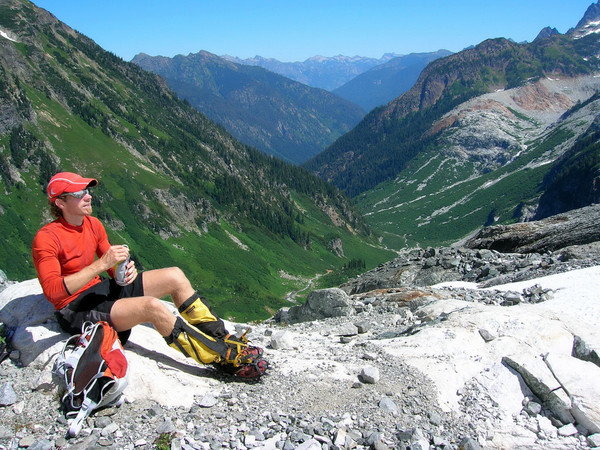
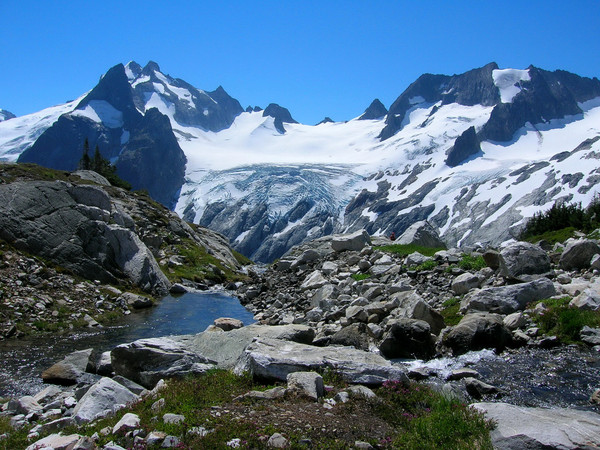
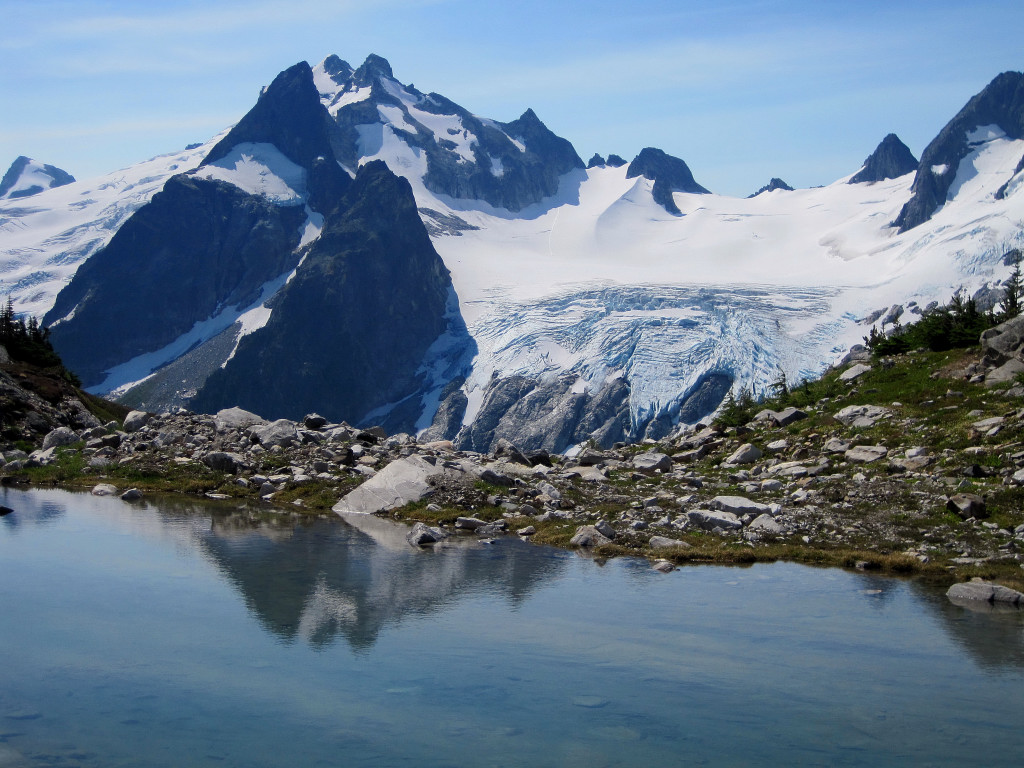
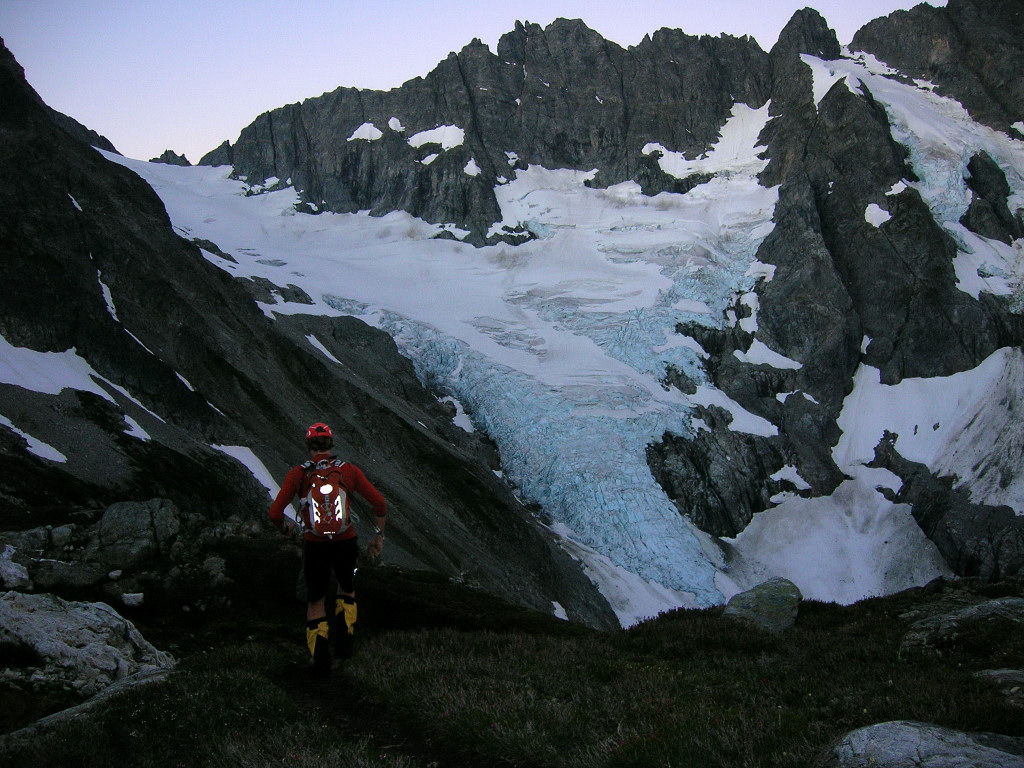
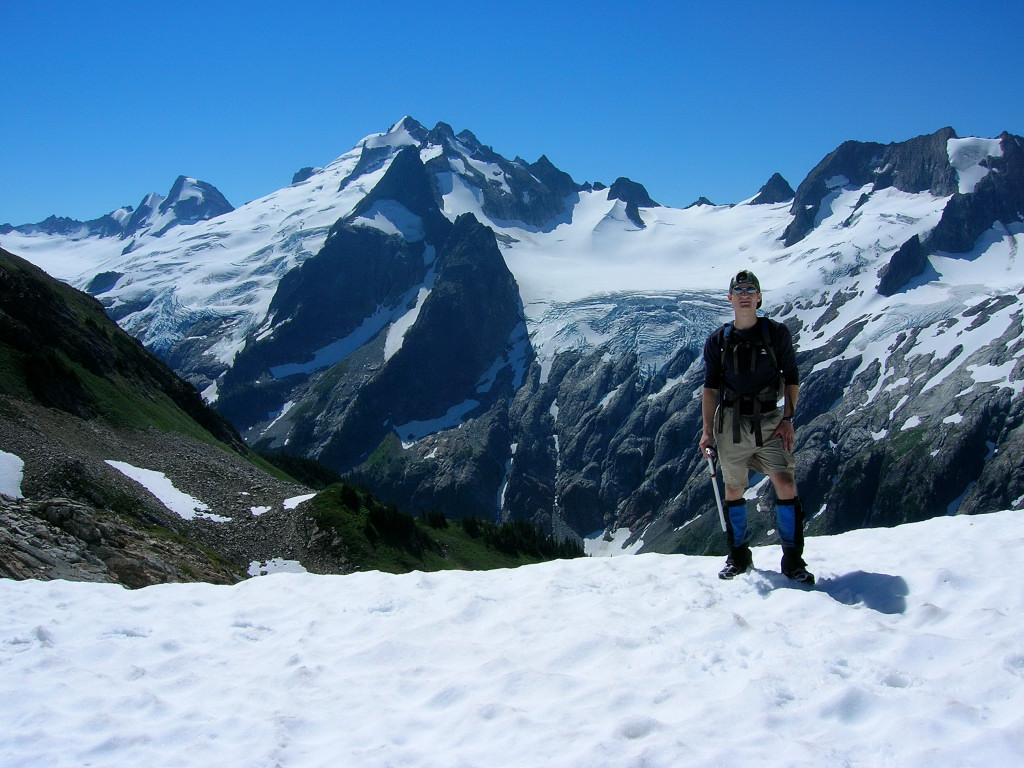
Colin Abercrombie and I completed the Ptarmigan Traverse in 14:36 from the Cascade Pass parking lot to the Downey Creek trailhead, a new FKT (fastest known time). In 2008, Colin and I did the traverse in 18:10 so we were extremely happy to do it 3 hours and 34 minutes faster this time.The prior FKT was by Joe Stock and Andrew Wexler, who completed the traverse in 15:40 on September 4, 2004 (or 2001? Or 2002?). Since the upper part of Cascade River Road was closed for repairs due to a washout from severe thunderstorms we got an extra warm-up period and set out from Eldorado TH at 3 am reaching Cascade Pass TH in 55 minutes (the road should be repaired by now). We started the watches at 3:55 am at Cascade Pass TH and reached the Suiattle River Road at 6:31 pm. A big concern was the potential for extreme heat along the traverse and descent through Bachelor Creek. Fortunately, there was a cool breeze on all of the glaciers and cumulus clouds provided some shade as we descended Bachelor and Downey Creeks.
[video:youtube]
Alternatively, you can watch the movie on Vimeo (faster stream).
Location (Elevation): Time Elapsed / Split / Real Time
Cascade Pass TH (3,600 ft) : 0 / 0 / 03:55
Cascade Pass (5,392 ft) : 47:47 / 47:47 / 04:43
Cache Col (6,920 ft) : 1:50:18 / 1:02:31 / 05:45
Spider-Formidable Col (7,320 ft+) : 3:39:54 / 1:49:35 / 07:35
Yang Yang Lakes (5,830 ft) : 4:26:06 / 46:12 / 08:21
LeConte-Sentinel Saddle (7,200 ft+) : 6:10:46 / 1:44:40 / 10:06
White Rock Lakes (6,194 ft) : 7:11:00 / 1:00:14 / 11:06
Spire Col (7,760 ft+) : 8:54:06 / 1:43:05 / 12:49
Cub Pass (6,000 ft+) : 10:15:47 / 1:21:40 / 14:11
Bottom of Bachelor Creek (2,440 ft) : 12:48:15 / 2:32:28 / 16:43
Downey Creek TH (1,415 ft) : 14:36:10 / 1:48:00 / 18:31
Comparison: 2009 vs. 2008 (difference)
Cascade Pass TH (3,600 ft) : 0 / 0
Cascade Pass (5,392 ft) : 48 / 55 (- 7)
Cache Col (6,920 ft) : 1:50 / 2:13 (- 23)
Spider-Formidable Col (7,320 ft+) : 3:40 / 5:00 (- 1:20)
Yang Yang Lakes (5,830 ft) : 4:26 / 6:20 (- 1:54)
White Rock Lakes (6,194 ft) : 7:11 / 9:51 (- 2:40)
Spire Col (7,760 ft+) : 8:54 / 11:55 (- 3:01)
Cub Pass (6,000 ft+) : 10:16 / 13:42 (- 3:26)
Bottom of Bachelor Creek (2,440 ft) : 12:48 / 16:30 (- 3:42)
Downey Creek TH (1,415 ft) : 14:36 / 18:10 (- 3:34)
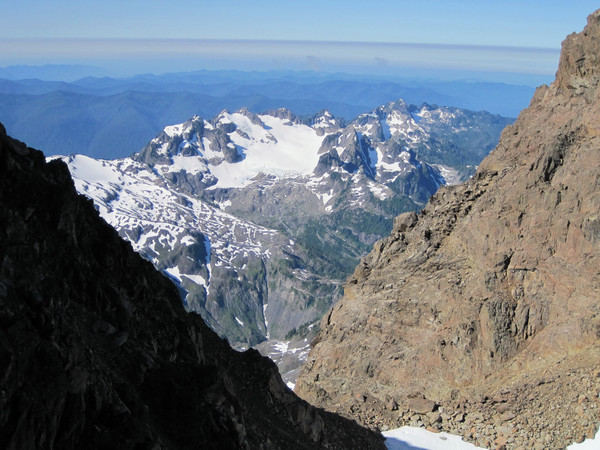
Several factors contributed to the faster time this year. First, we had even more experience on the traverse allowing us to take the most efficient route and avoiding time and energy consuming errors we made last year on the way to Kool Aide Lake and the Middle Cascade Glacier (stay climbers left of the center of the glacier to avoid large crevasses). Second, we were more consistent with our pacing and took shorter breaks. Third, we significantly improved our “transitions,” which is the time it takes to put crampons on and off – there were at least a half dozen transitions along the traverse.


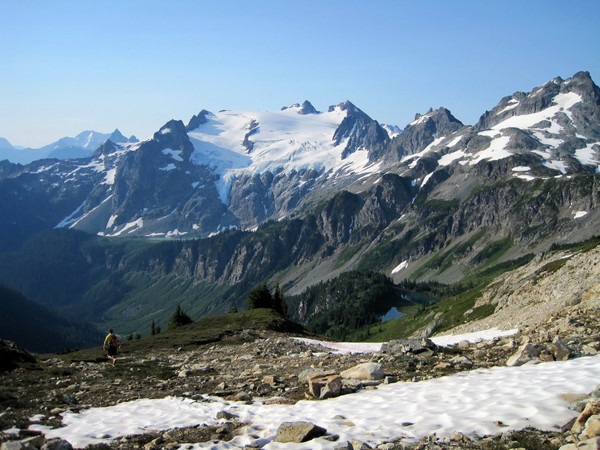
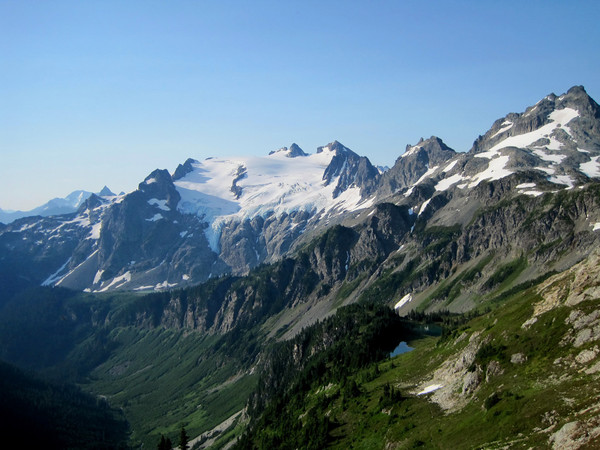
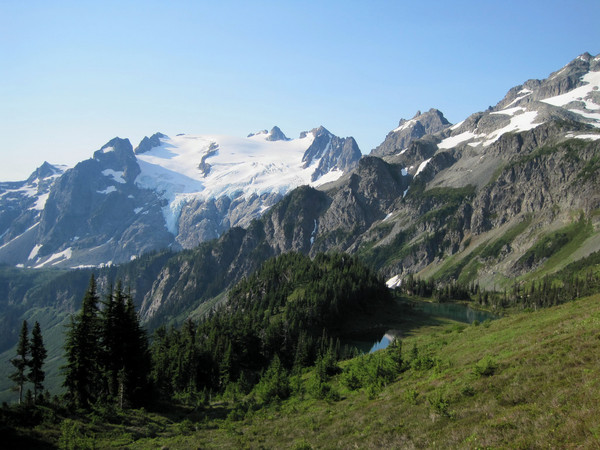
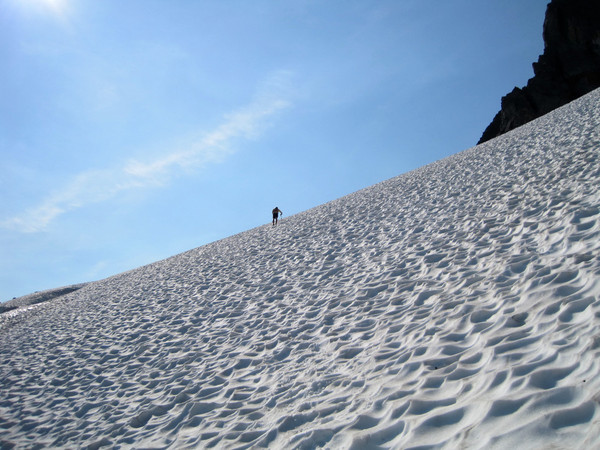
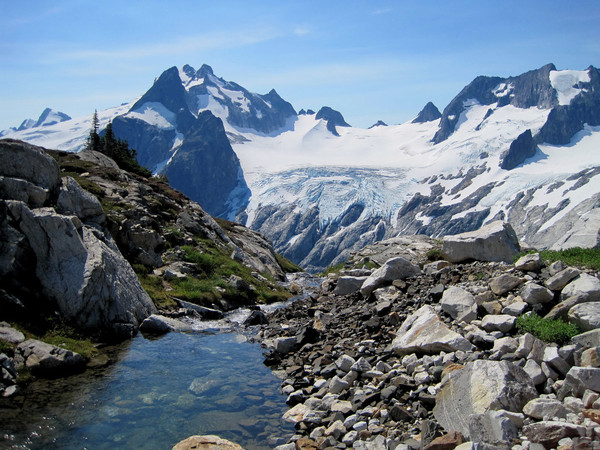
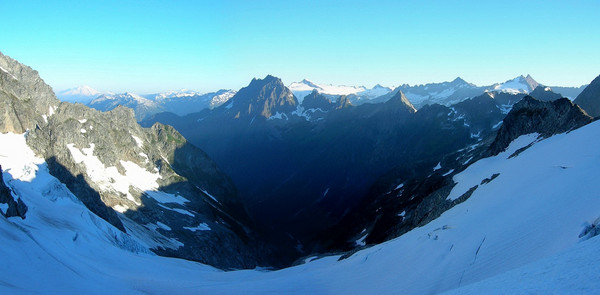
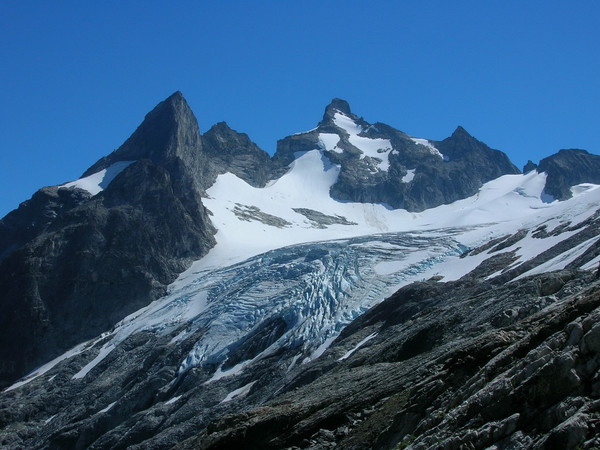
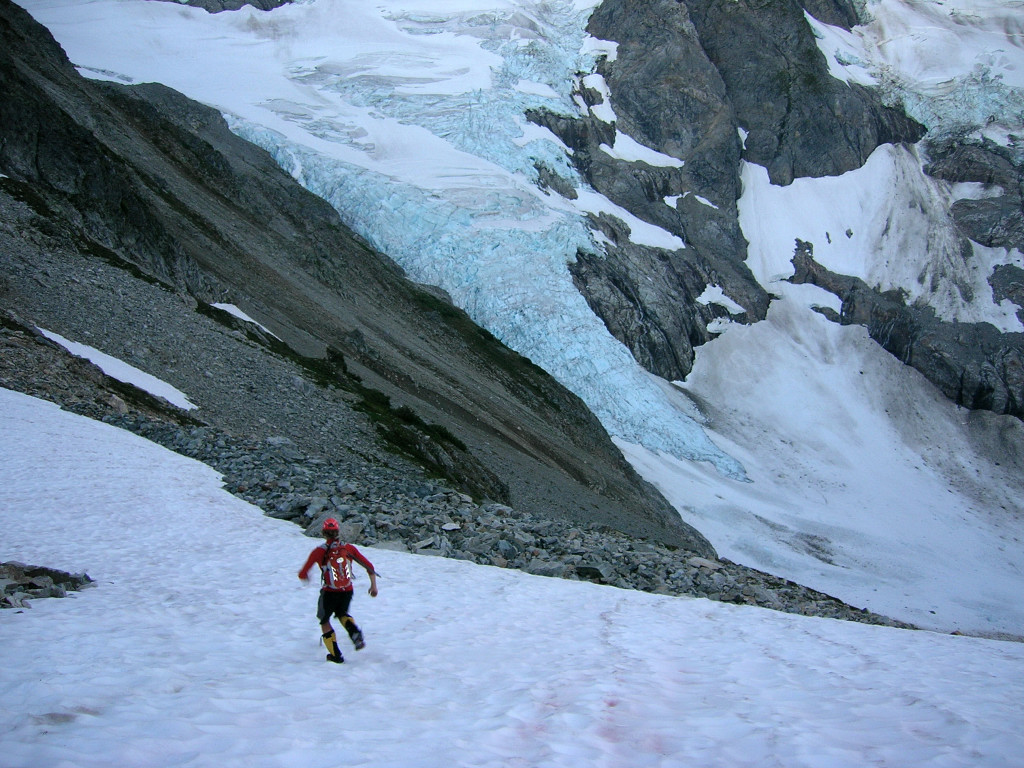
The glaciers are still in good shape with few crevasses. However, despite being 2.5 weeks earlier than our trip last summer, they have noticeably less snow and more ice revealed. This hot and dry summer is taking its toll and glacier travel will become more circuitous soon.
Bachelor Creek seems to deteriorate a bit more every time we pass through. The heavy rains from the thunderstorms along with the high humidity appear to have generated explosive growth of the brush in the last week. We battled a bit with the brush, but fortunately it’s a relatively short section. Unfortunately, the Downey Creek trail has also deteriorated with many new blowdowns and obstructions over the trail making that section a bit slower than last year. It seems like the Downey Creek trail goes on forever and we were happy to finally reach the Downey Creek bridge and immediately put our legs in the cool waters of the stream. We didn’t relish the 8.5 mile walk along the road, but it went by pretty fast and we reached the car before dark at 9:15 pm.


Many more great photos of the traverse can be found on last year's TR.
As usual, Colin was a great partner for this undertaking. We both had the route dialed in and shared the same goals and objectives. Colin would also like to note that in addition to covering the Ptarmigan in a new FKT, he also set the record for least calories consumed on the Traverse and the greatest caloric deficit at the end of the Ptarmigan

Gear Notes:
Axe, Crampons, Trail Runners, SaltStick, ShotBloks
Approach Notes:
Road was gated at Eldorado TH due to a washout from the severe thunderstroms. It was slated to be opened on Wednesday morning, but we went ahead with our plans to do the traverse on Tuesday and walked the road to the start. Bachelor Creek is very brushy and Downey Creek has additional blowdowns and impediments this year.
-
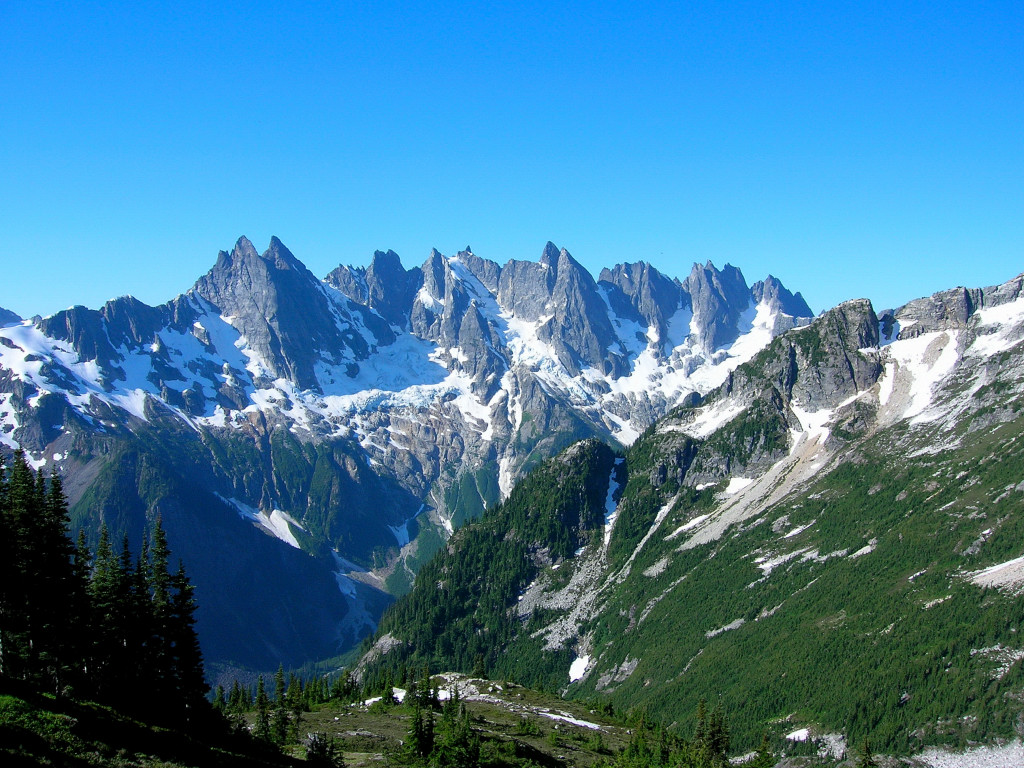
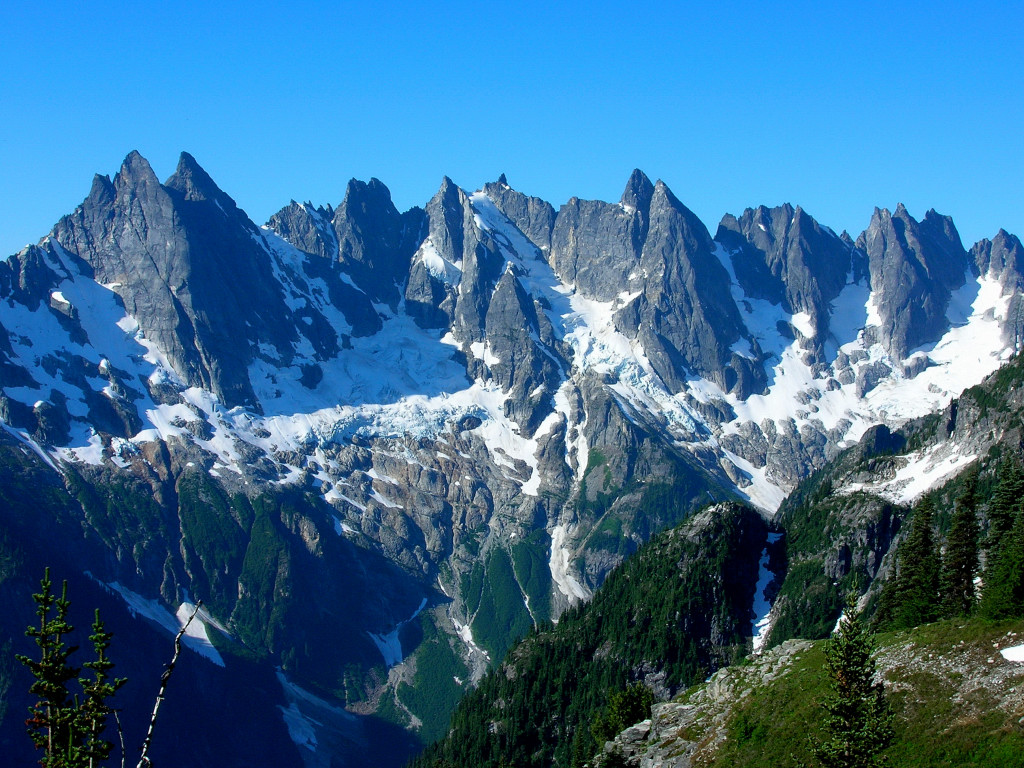
Fantastic TR! You've put together a highlight reel of awesome Pickets photos the past couple weeks.
-
Thanks for the photos. The recession over the past thirty years is significant and very sad, but even more alarming are the stark differences between 2003 and 2009, especially in terms of thickness. We've had a couple decent years for the glaciers recently in terms of winter snowpack and climatologically cool summers, but it seems as if the recession is accelerating notwithstanding.
-
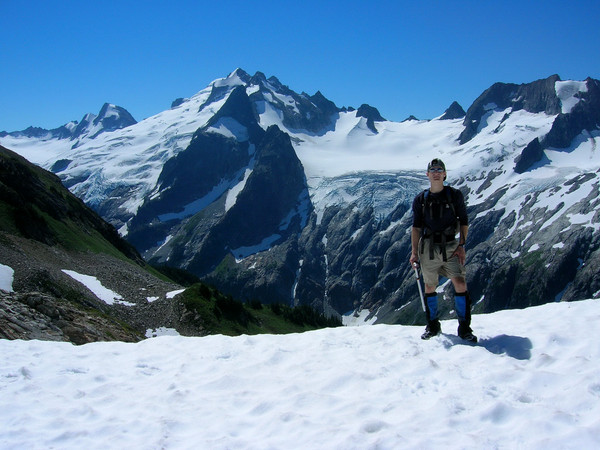
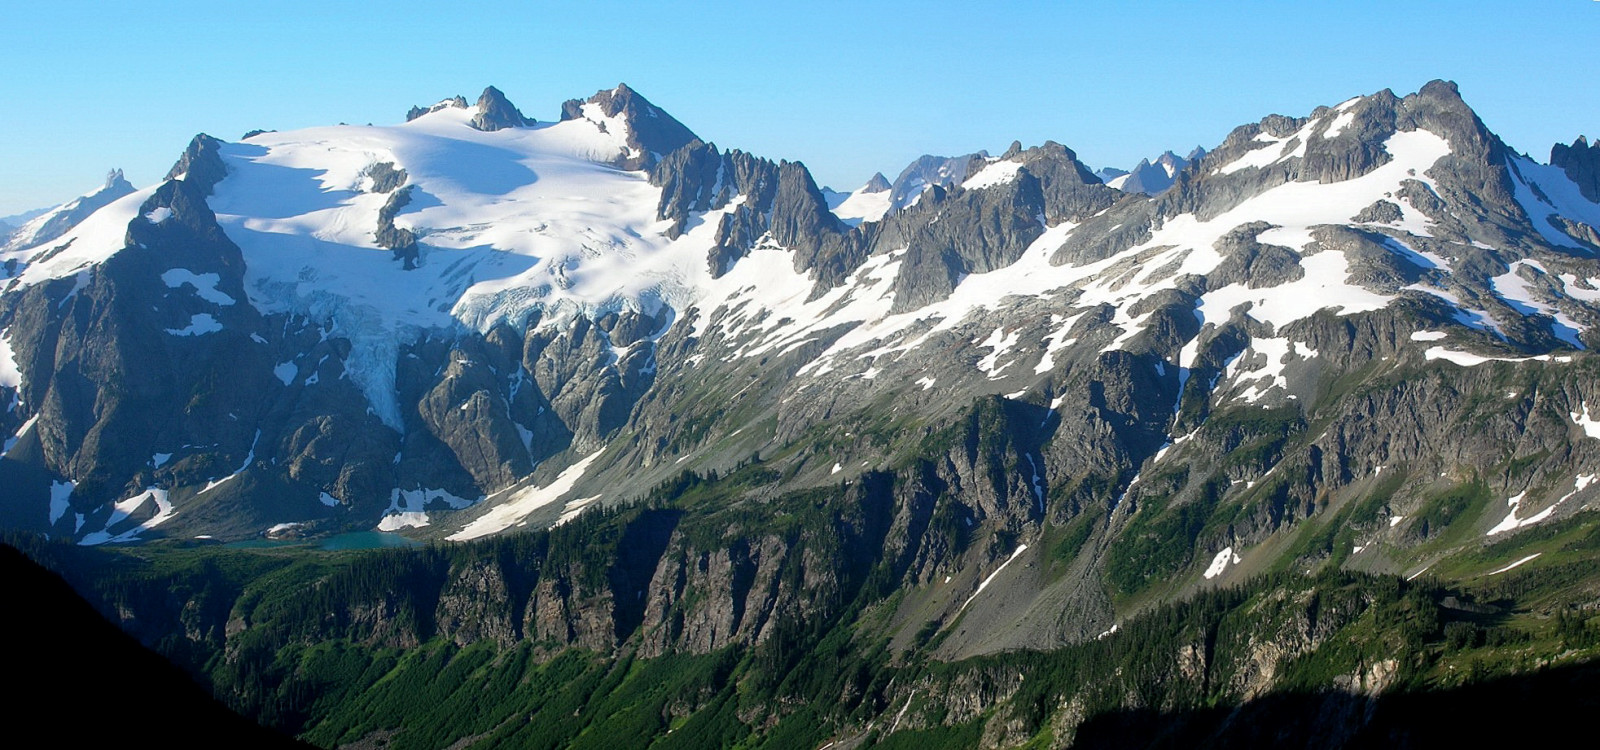
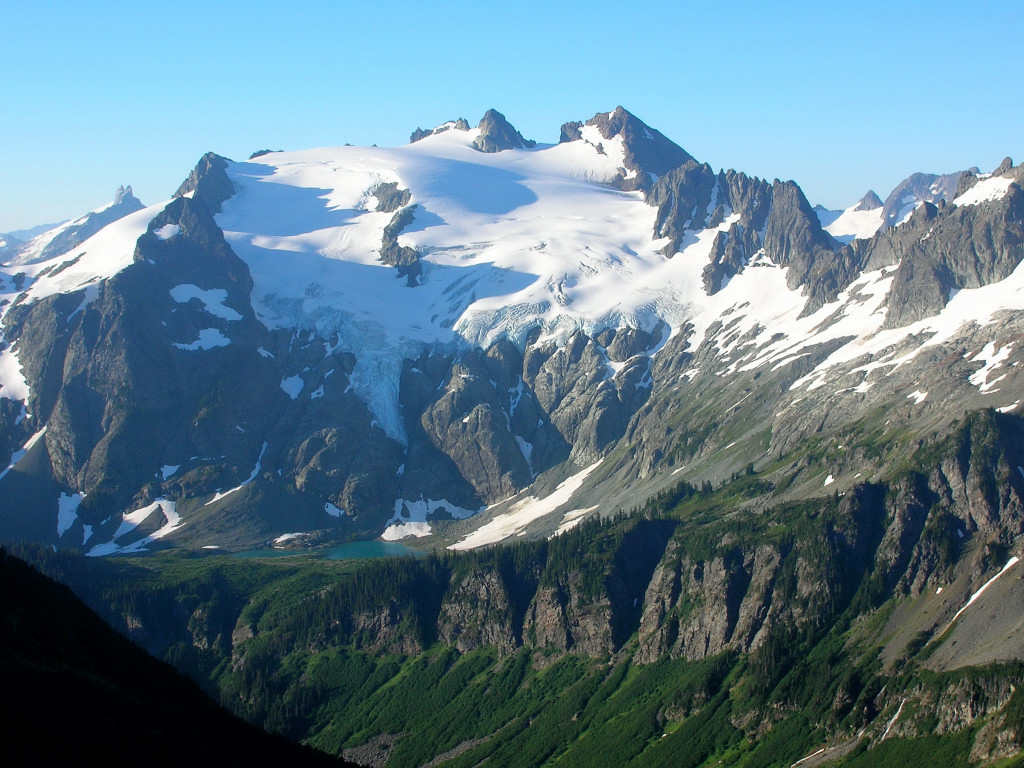
Trip: Clark Mountain - Boulder Creek
Date: 7/21/2009
Trip Report:
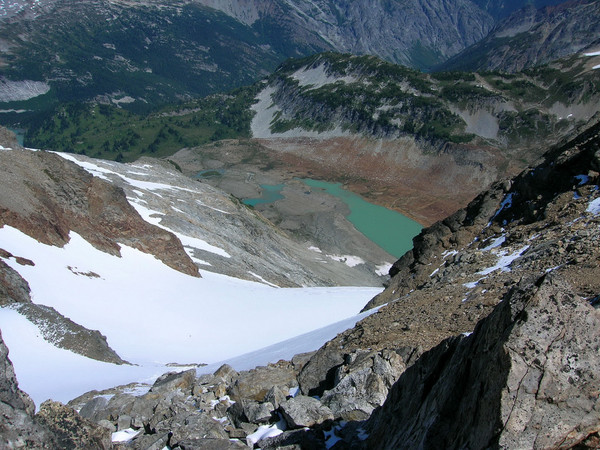
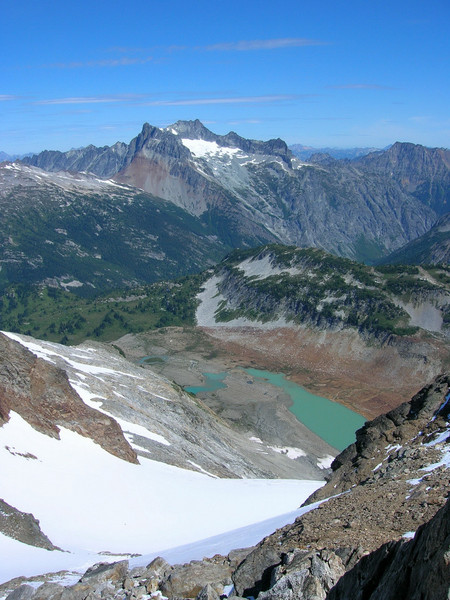
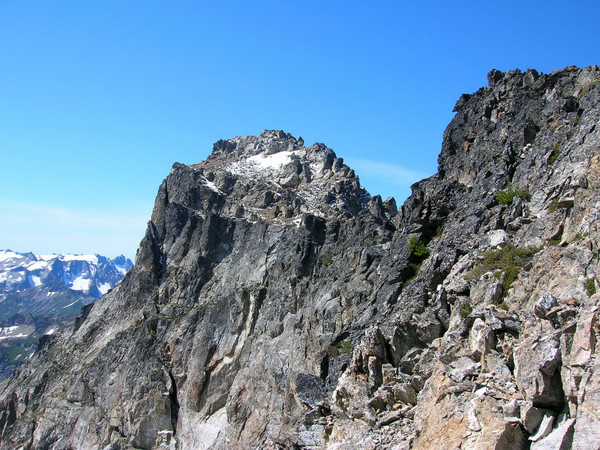
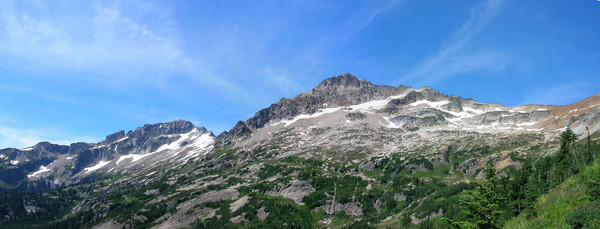
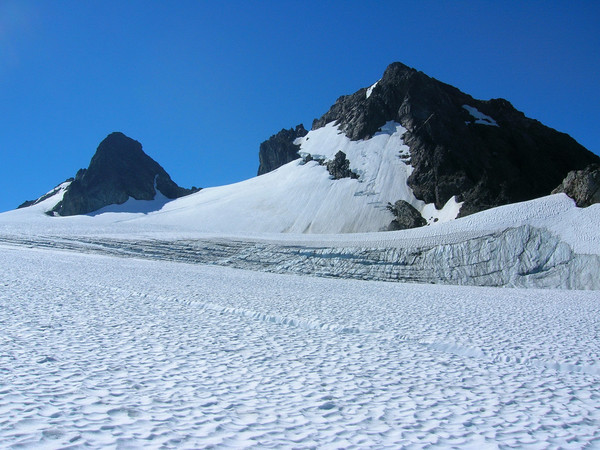
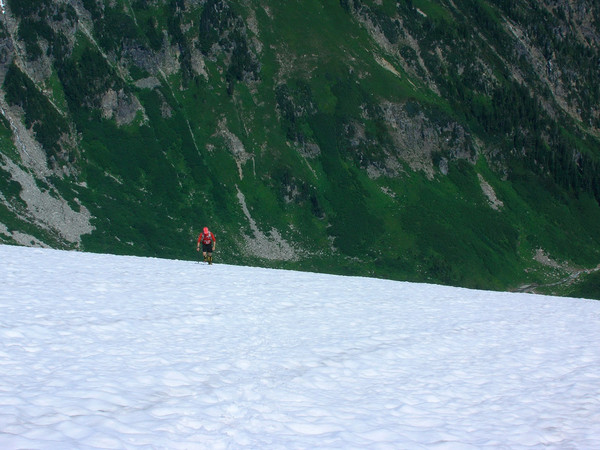
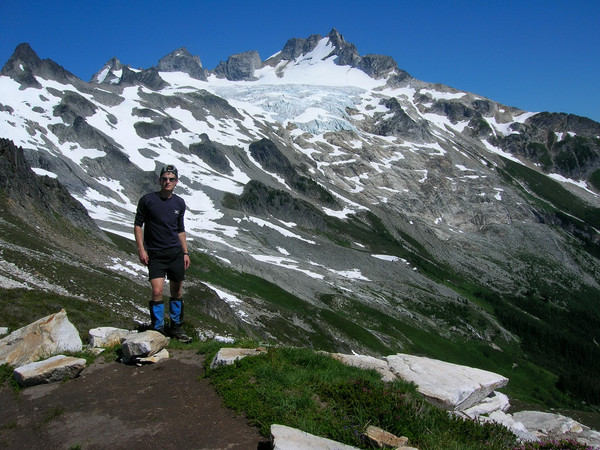
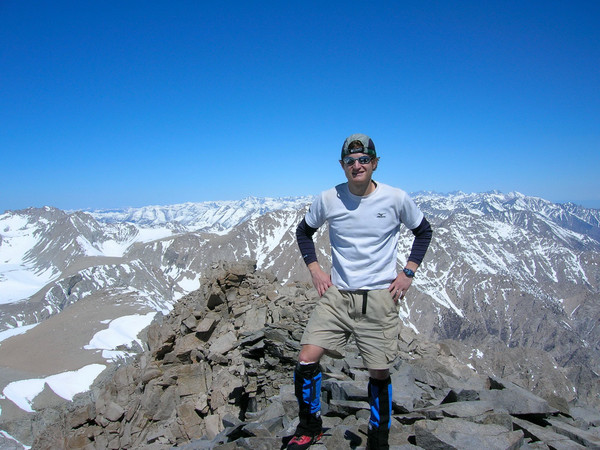
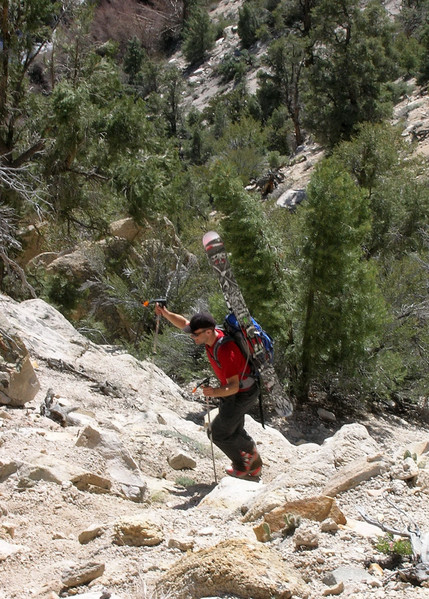
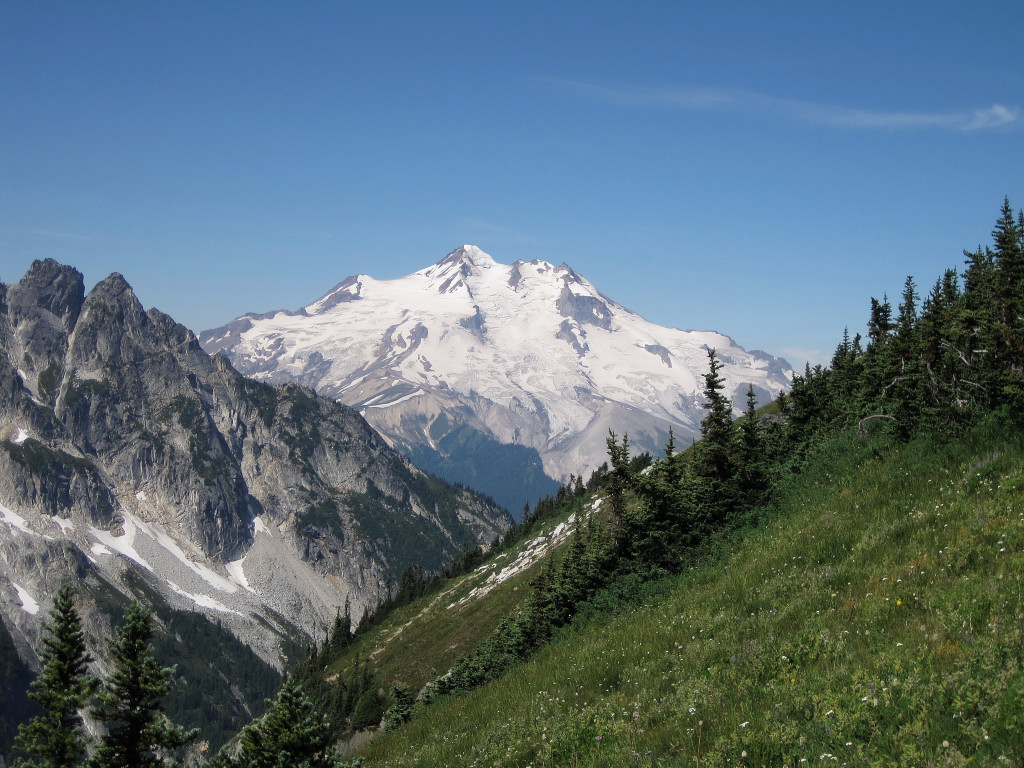
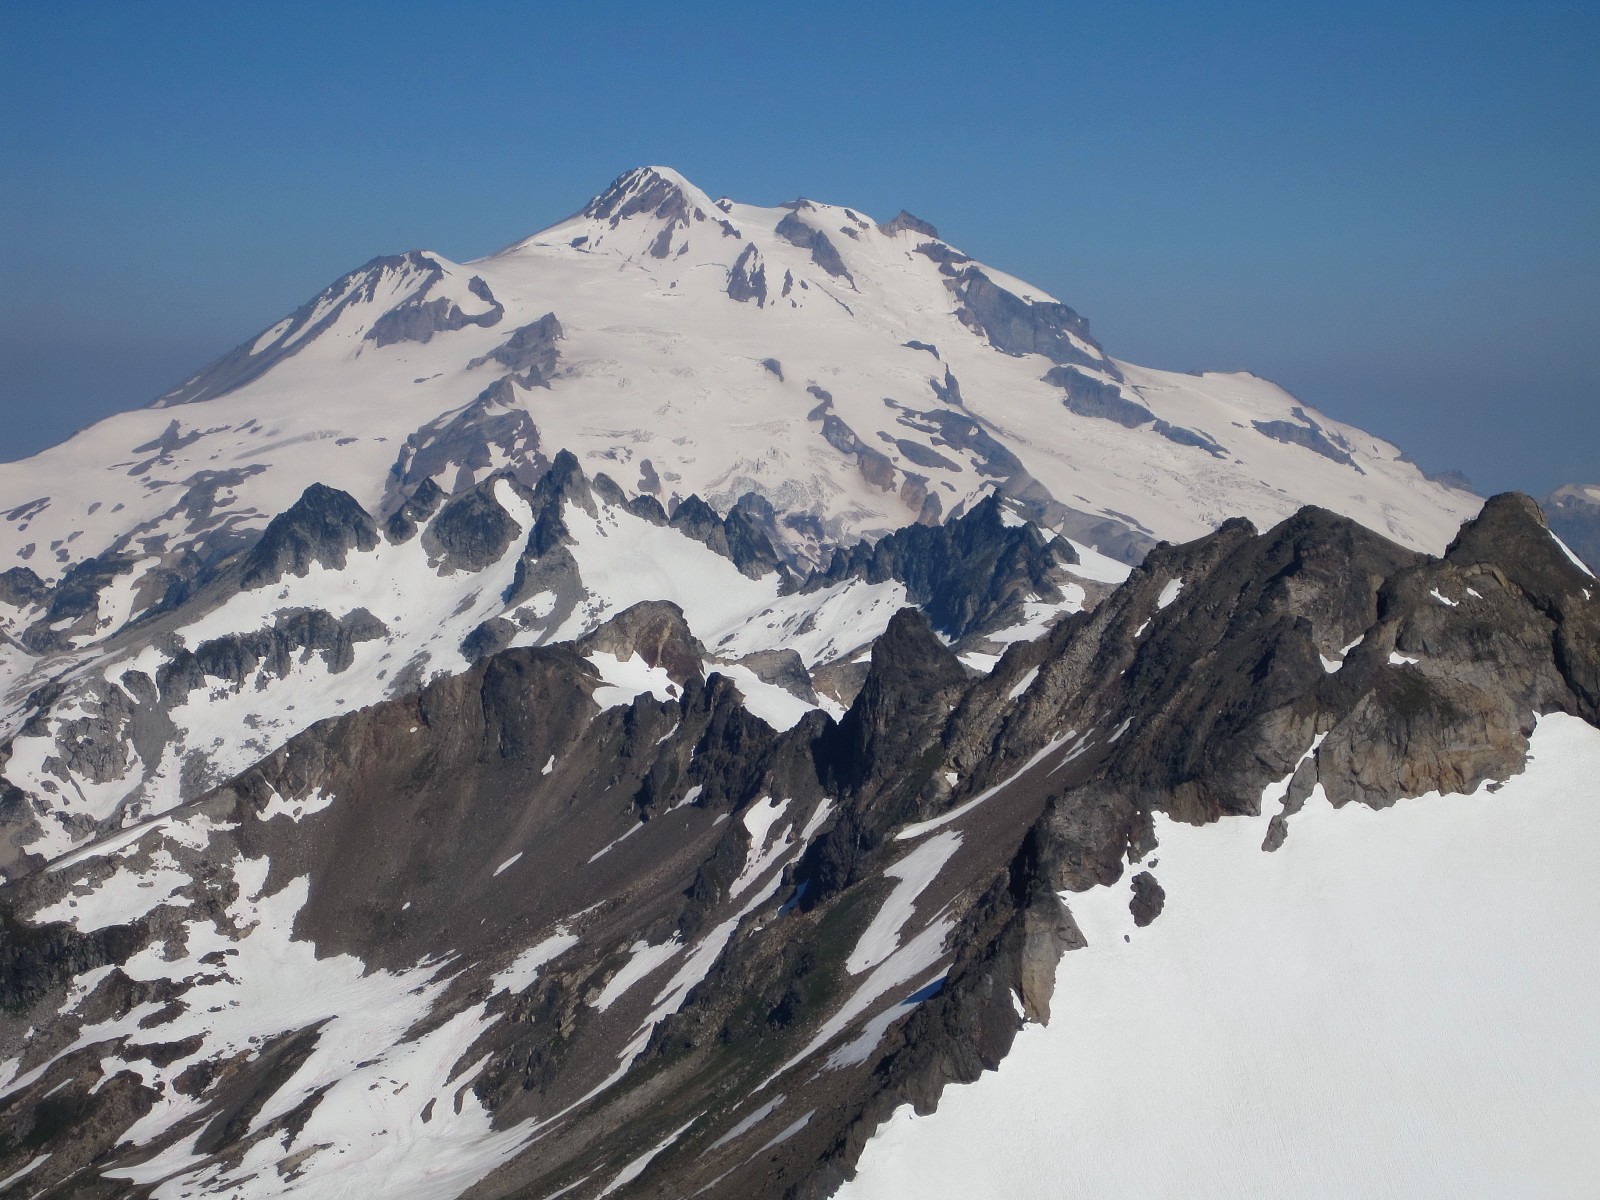
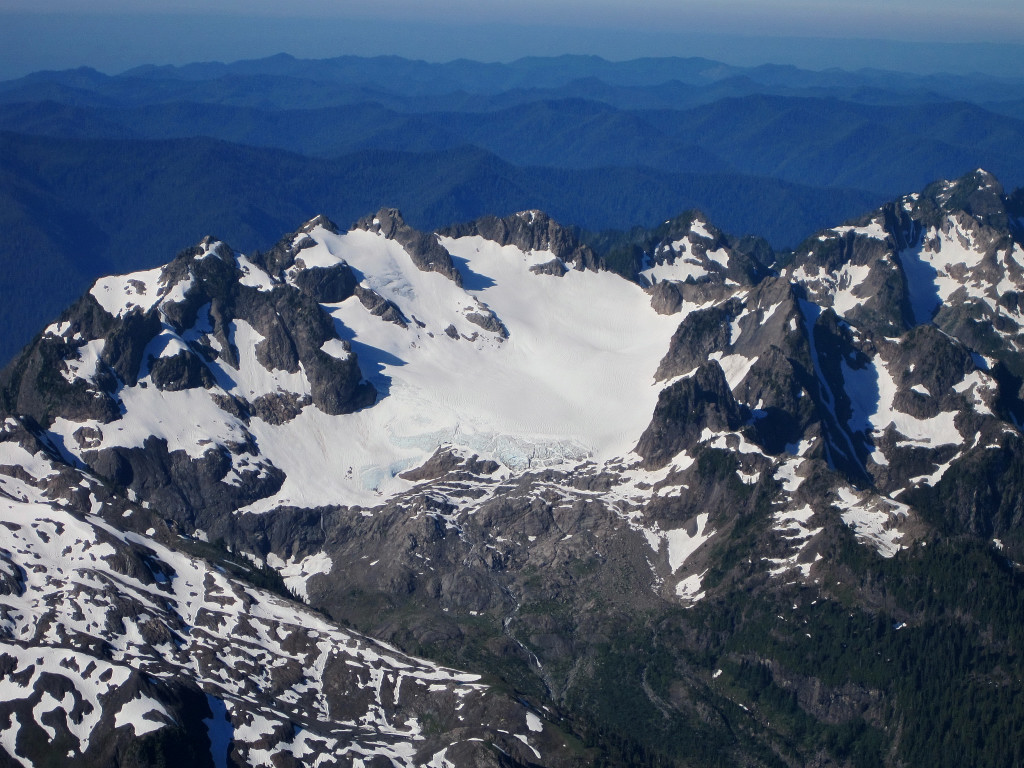
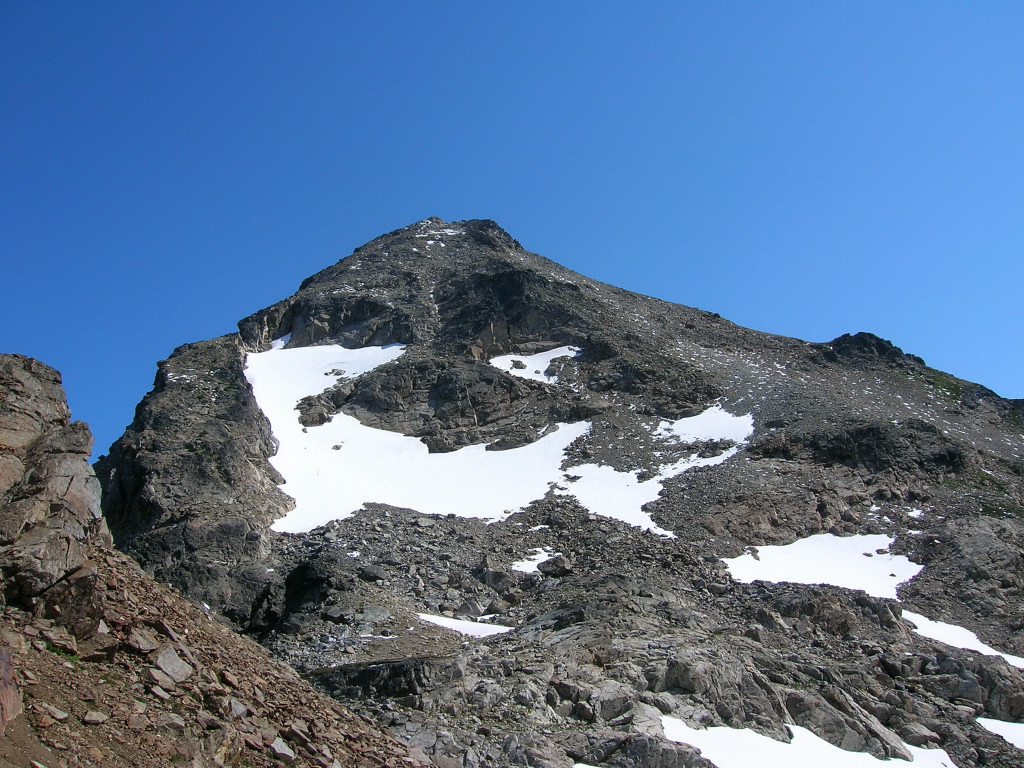
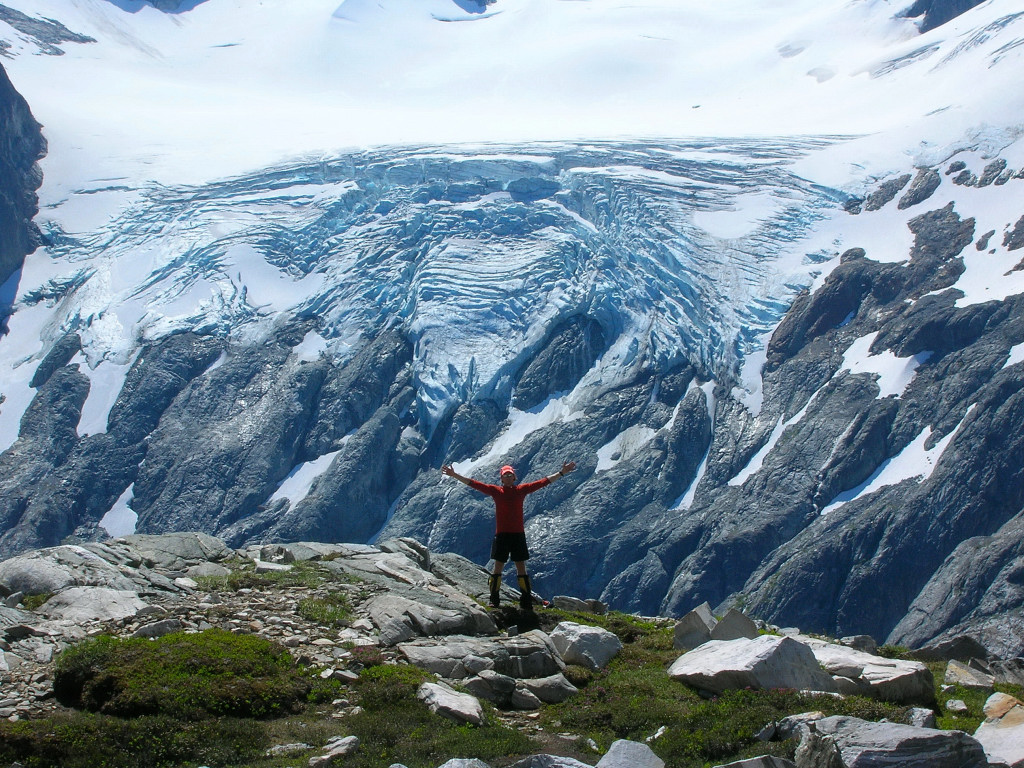
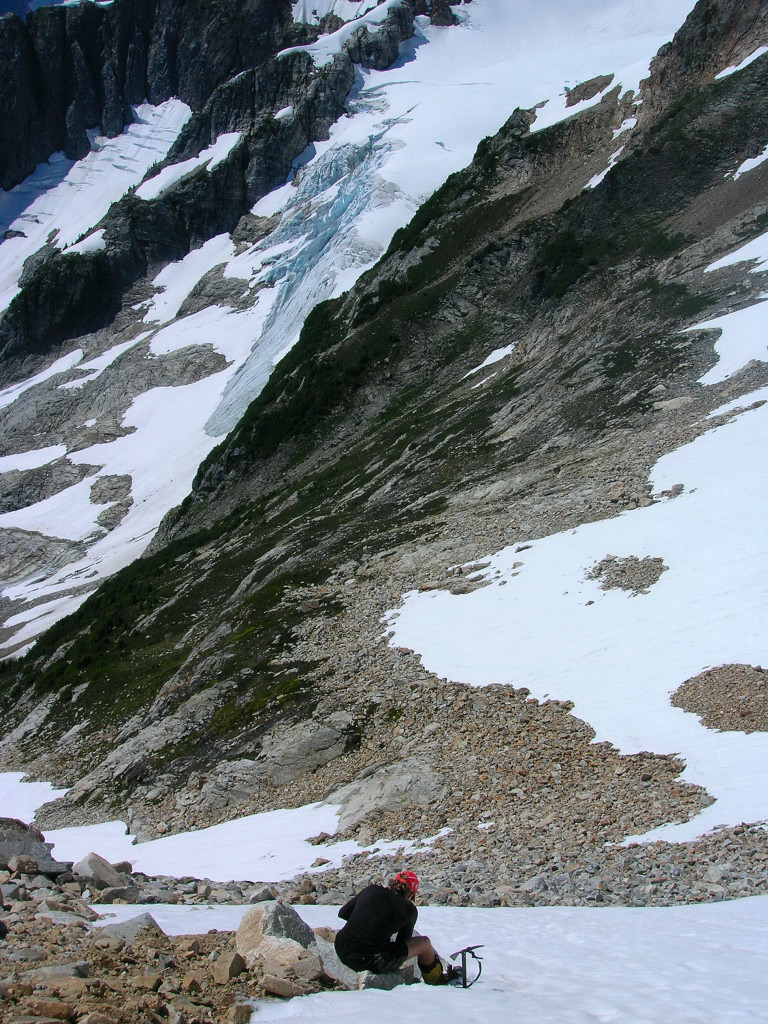
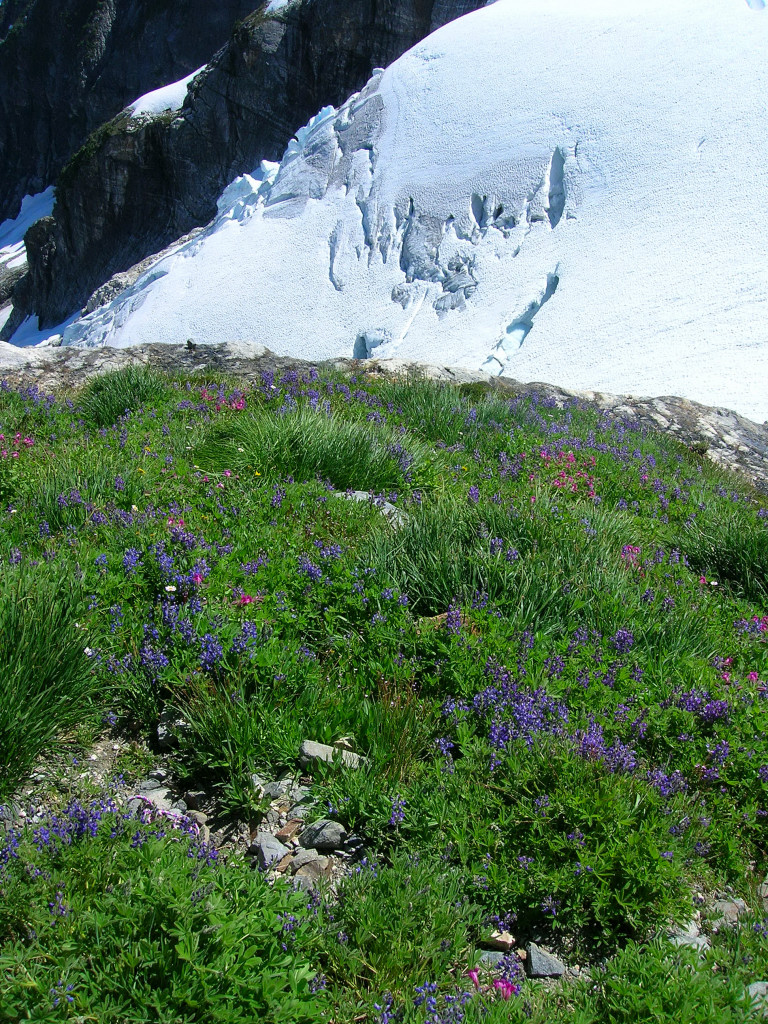
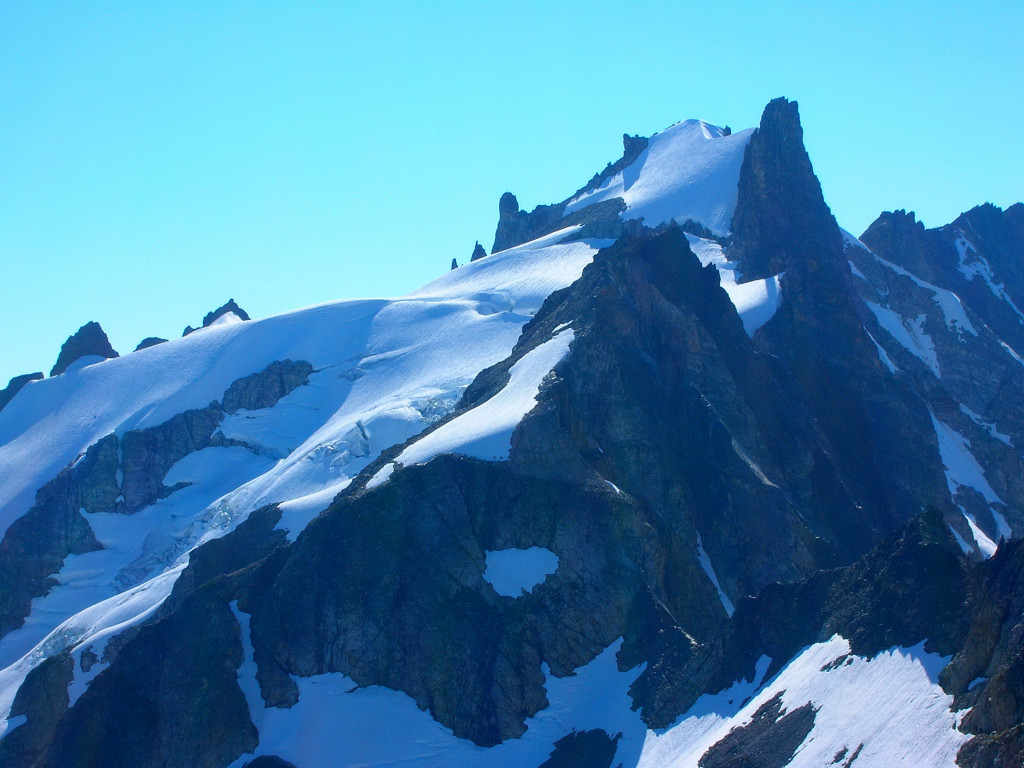
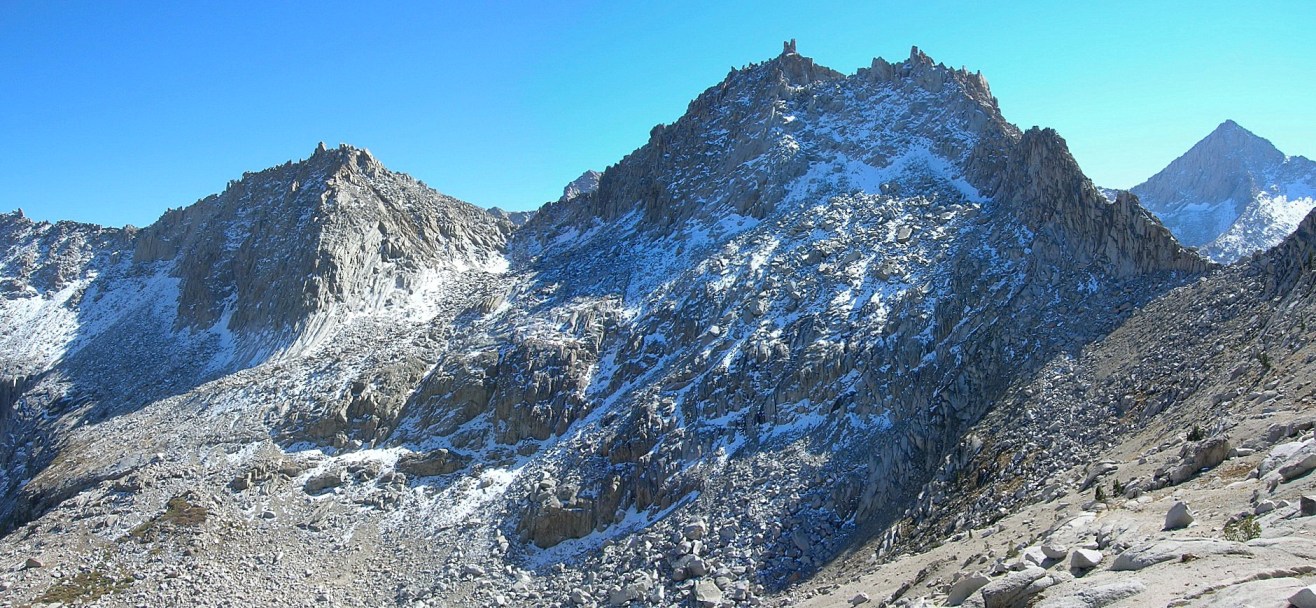
Clark Mountain is a great non-technical climb with excellent views of the Dakobed Range, Glacier Peak, and the Napeequa Valley. With a tight schedule (I had to be in Sammamish at 3 pm), I thought Clark would be a nice objective for the morning so I left Sammamish at 2:45 am and arrived at White River TH at 5:15 am. The shortest route to climb the mountain is right up from the White River Valley (~16 miles RT), but the fastest route is probably the Boulder Creek route (~23 miles RT) which utilizes trails (Clark Mountain High Route) leading all the way up to 6,000 feet. I chose the Boulder Creek route and was able to reach the summit 3:34 after beginning. After 16 minutes on top, I made the return trip in 2:54 (6:44 roundtrip).
Location (Elevation): Time Elapsed / Split / Real Time
Trailhead (2,300 ft) : 0 / 0 / 05:30
Boulder Pass Trail JCT (2,400 ft) : 40:11 / 40:11 / 06:10
Upper Boulder Basin (5,000 ft) : 1:43:46 / 1:03:34 / 07:14
Arrive Clark Summit (8,502 ft) : 3:34:29 / 1:50:43 / 09:04
Depart Clark Summit (8,502 ft) : 3:51:03 / 16:34 / 09:21
Boulder Pass Trail JCT (2,400 ft): 5:59:47 / 2:08:44 / 11:30
Trailhead (2,300 ft) : 6:44:27 / 44:40 / 12:14
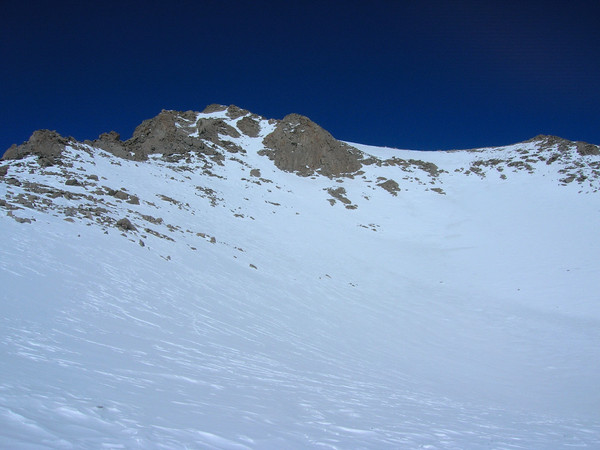
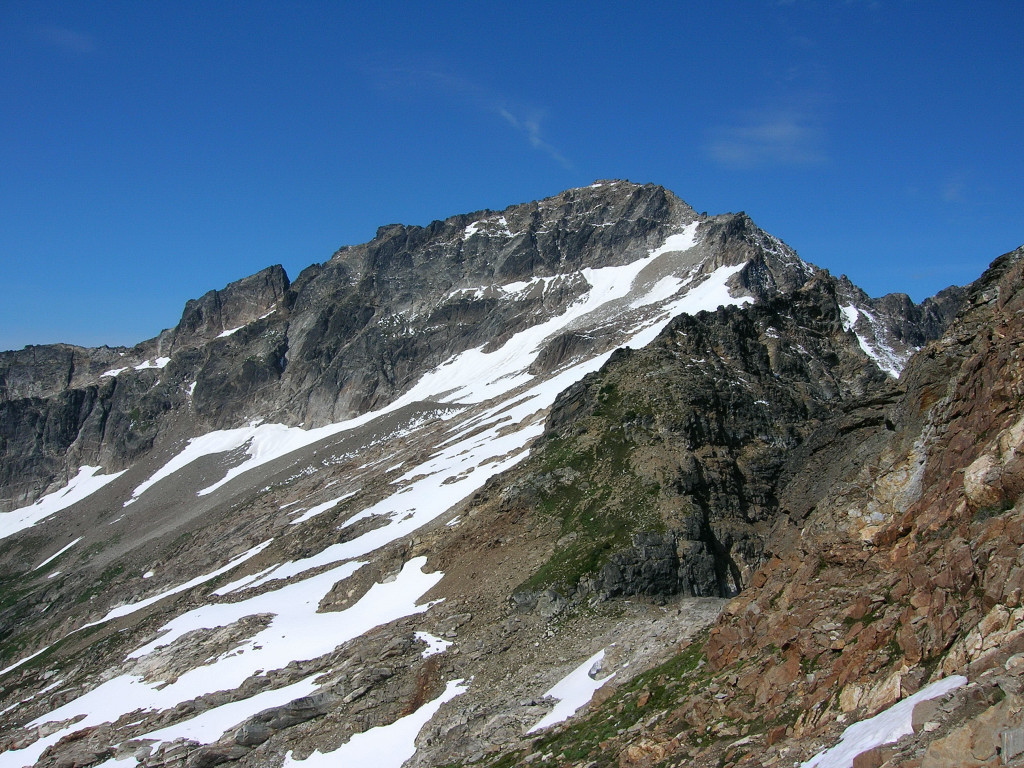
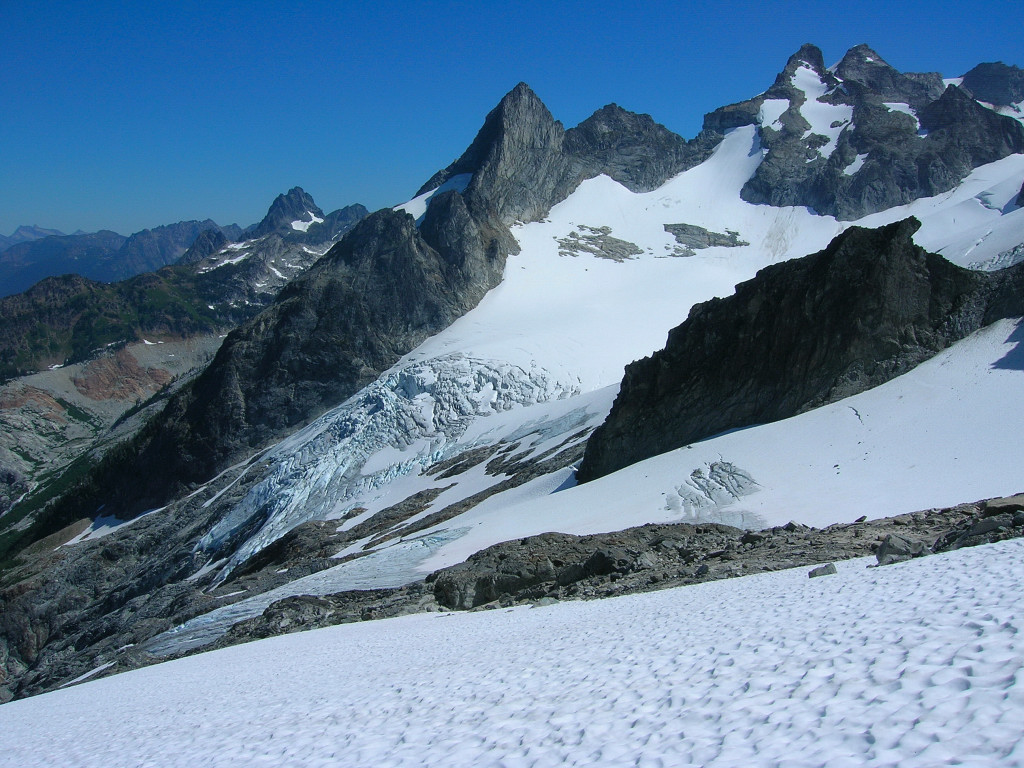
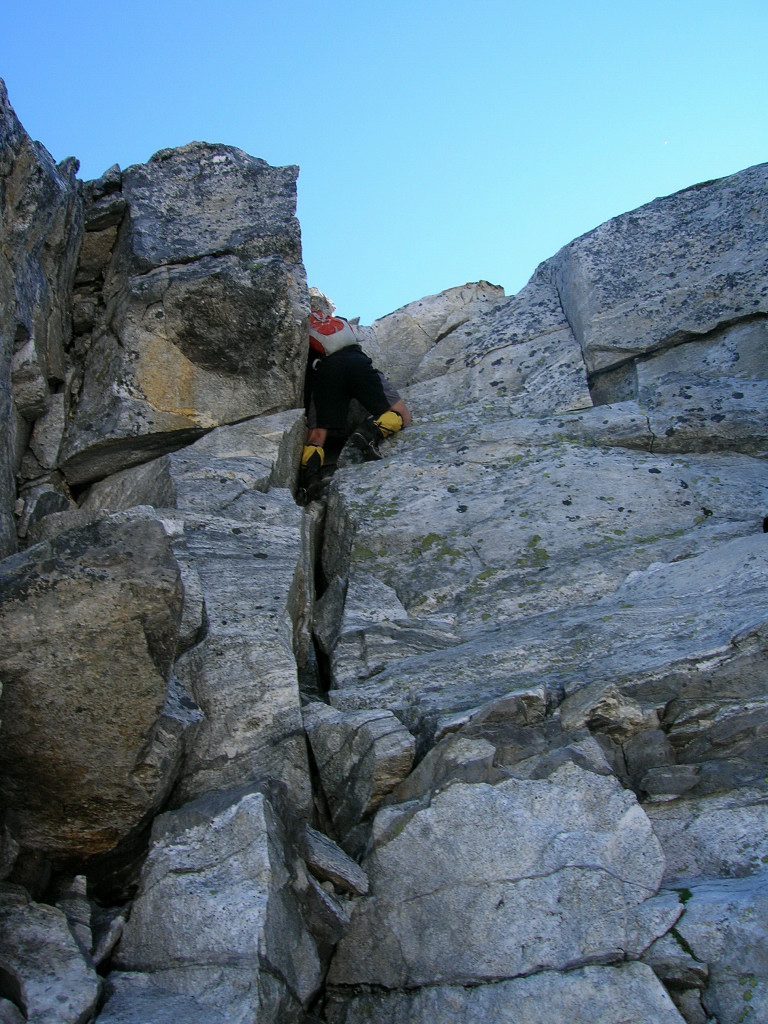
The White River and Boulder Pass trails are in good shape (recently logged out) except a couple open spots along White River and lower Boulder Creek Basin are moderately overgrown/brushy. From the head of the Boulder Creek basin, finding the good use trail up to the alp slopes below the SE Peak of Clark Mountain is imperative. It ascends fairly steeply and in no time you reach the heathery meadows below the SE Peak. From here, I ascended snowfields and solid dirt/rock to a lower col and took the ridge to the 7,200 ft col (better than ascending the sandy/loose slope right below the 7,200 ft col). From here, I descended the class 2 gully, traversed the basin, ascended snow to near the summit, and completed with a short class 2 scramble. On the way back, I used the loose and sandy slopes below the 7,200 ft col to my advantage and plunged stepped down to the heathery meadows in a matter of minutes.
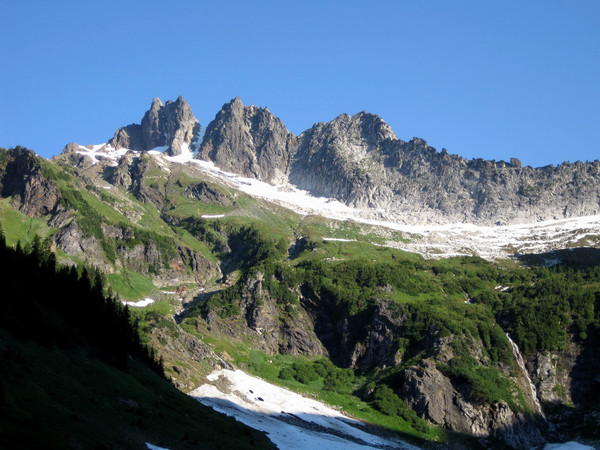
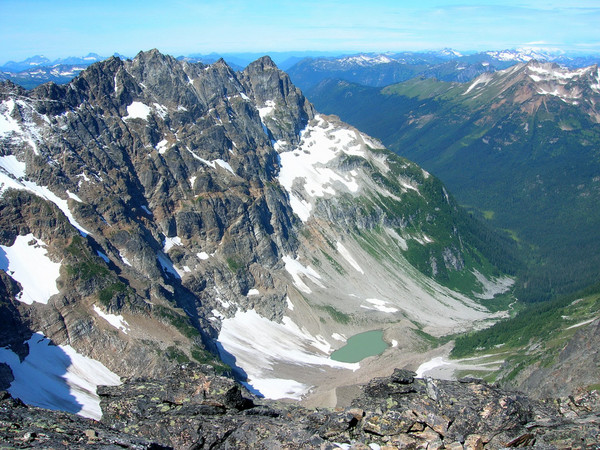
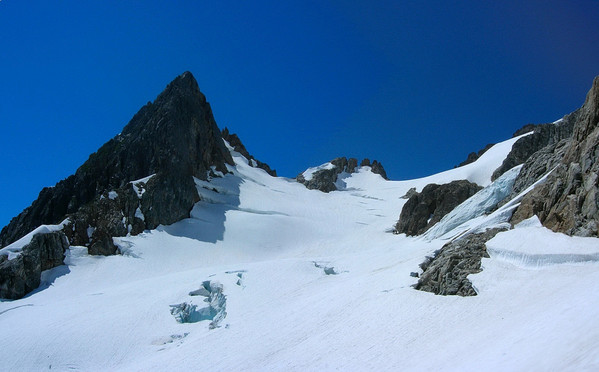
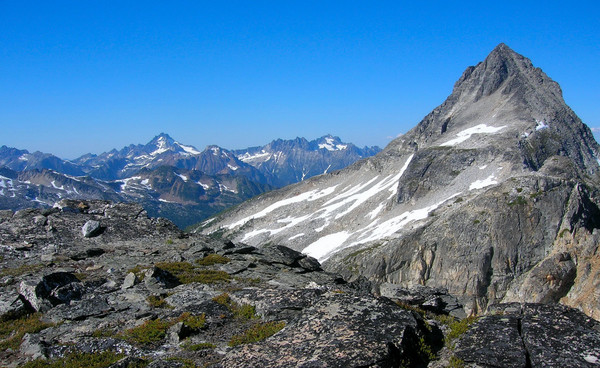
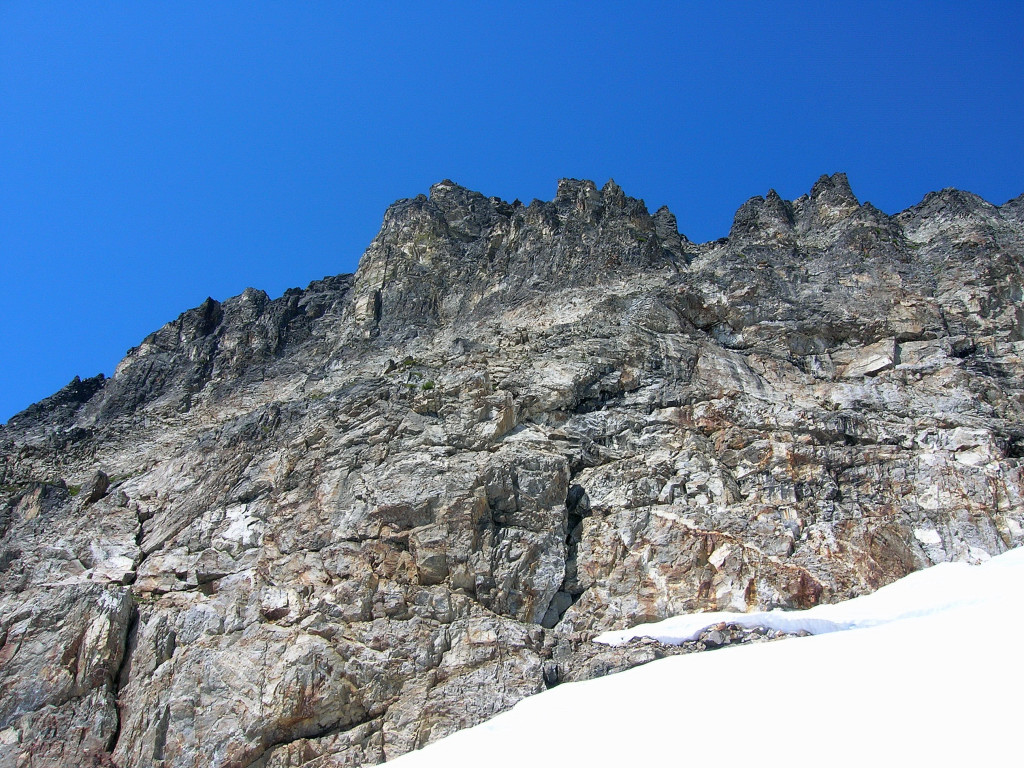
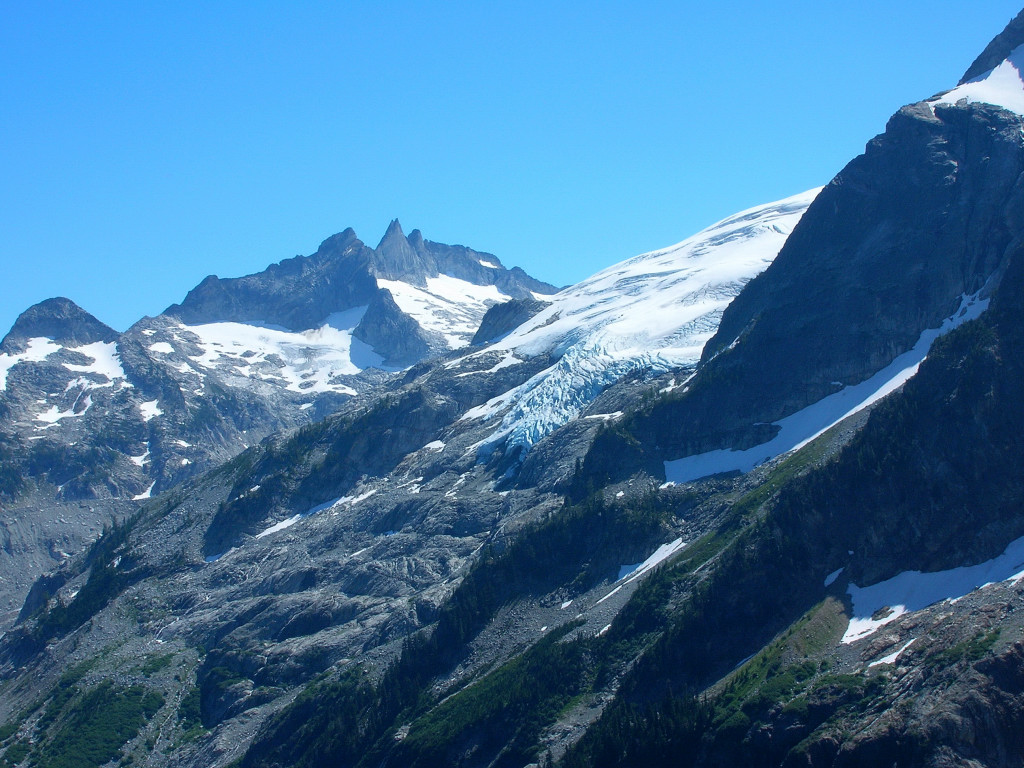
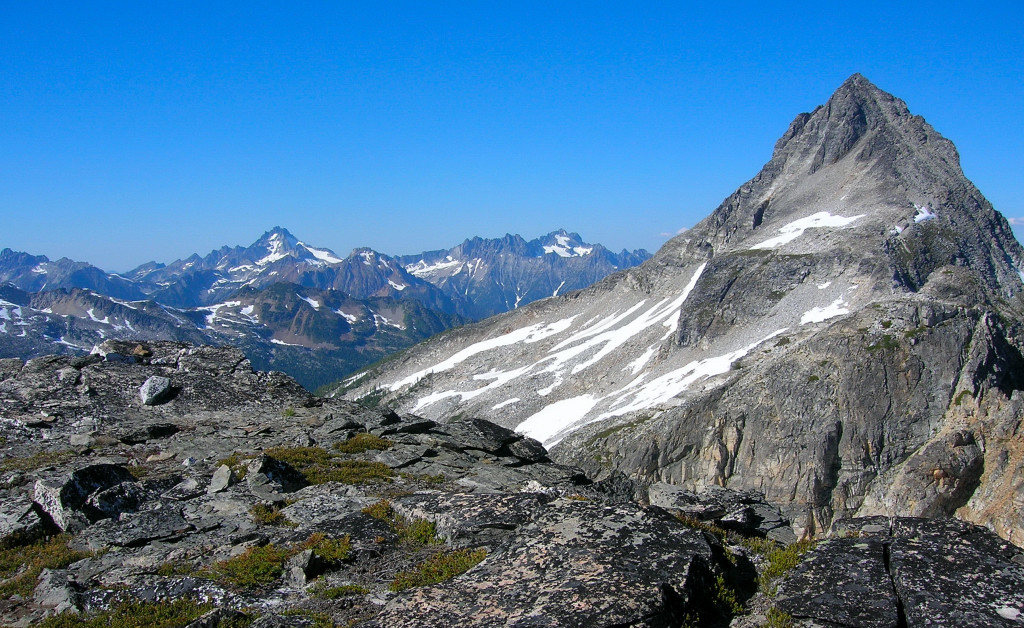
Southeast Peak of Clark Mountain from Boulder Creek Basin

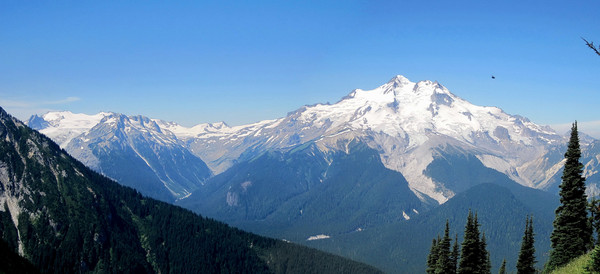
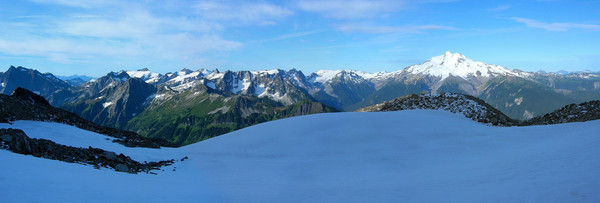
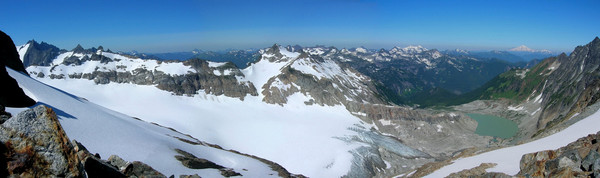
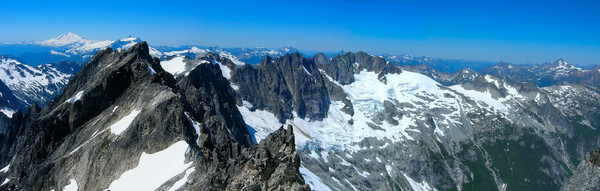
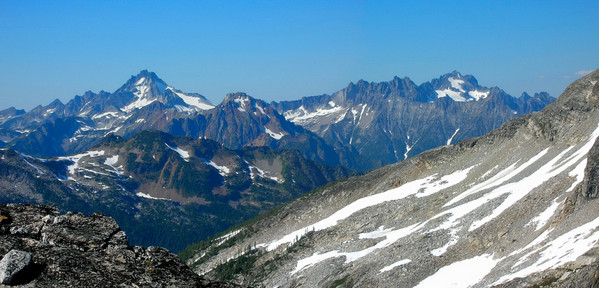
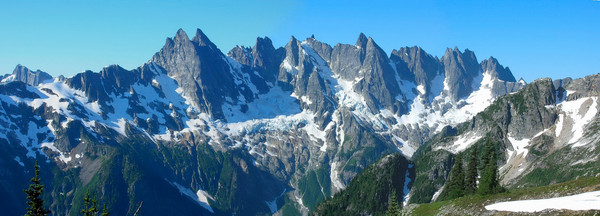
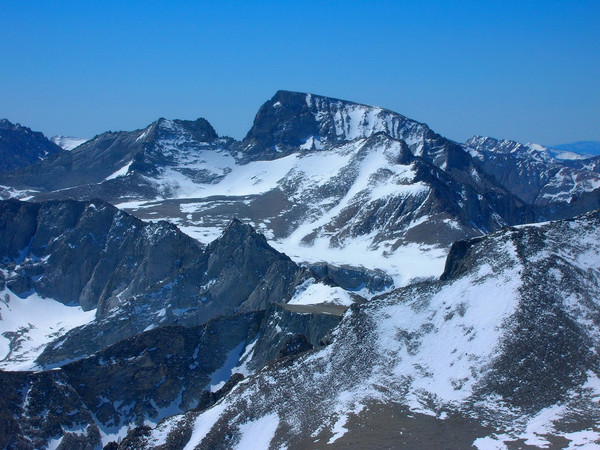
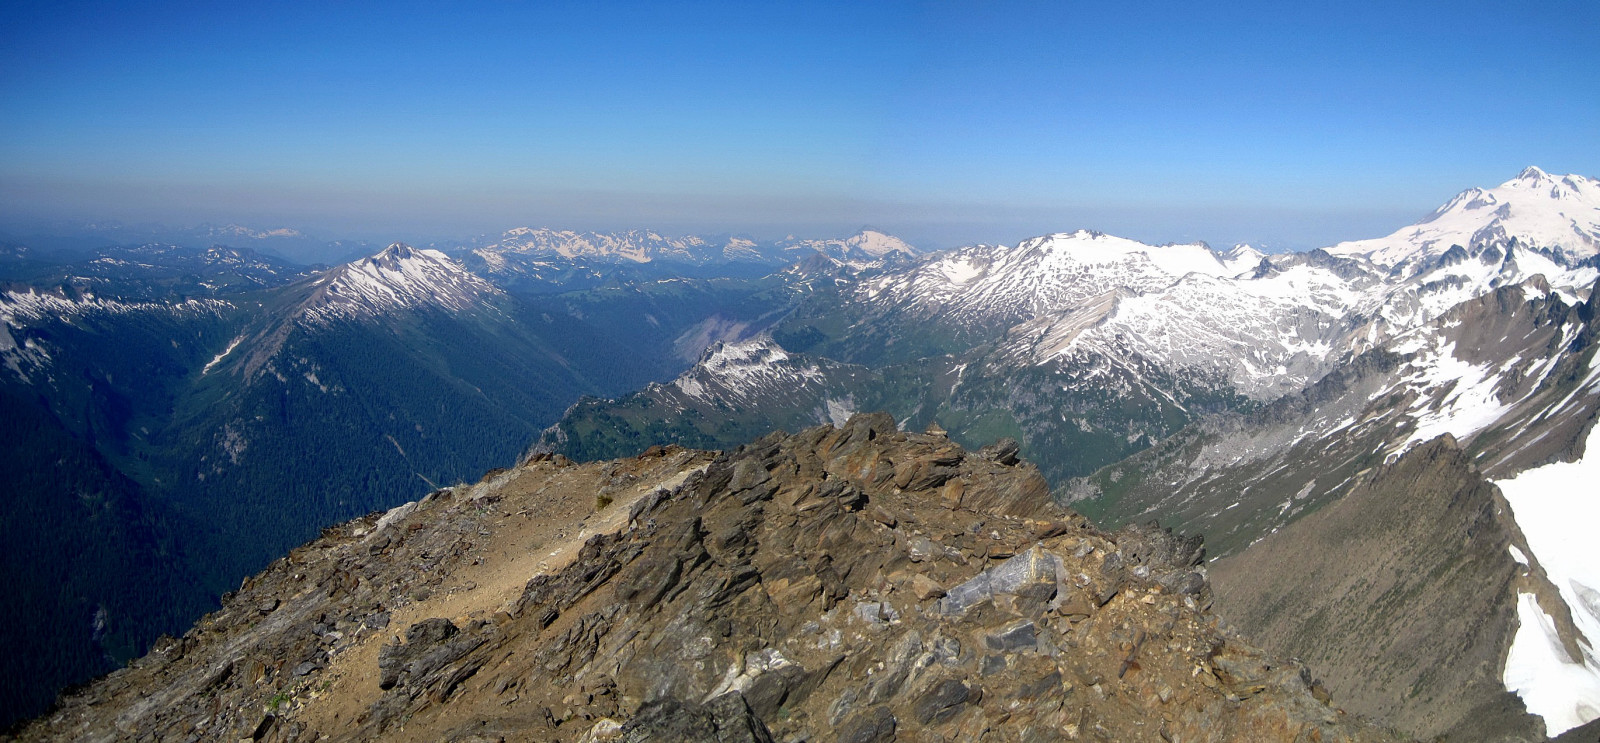
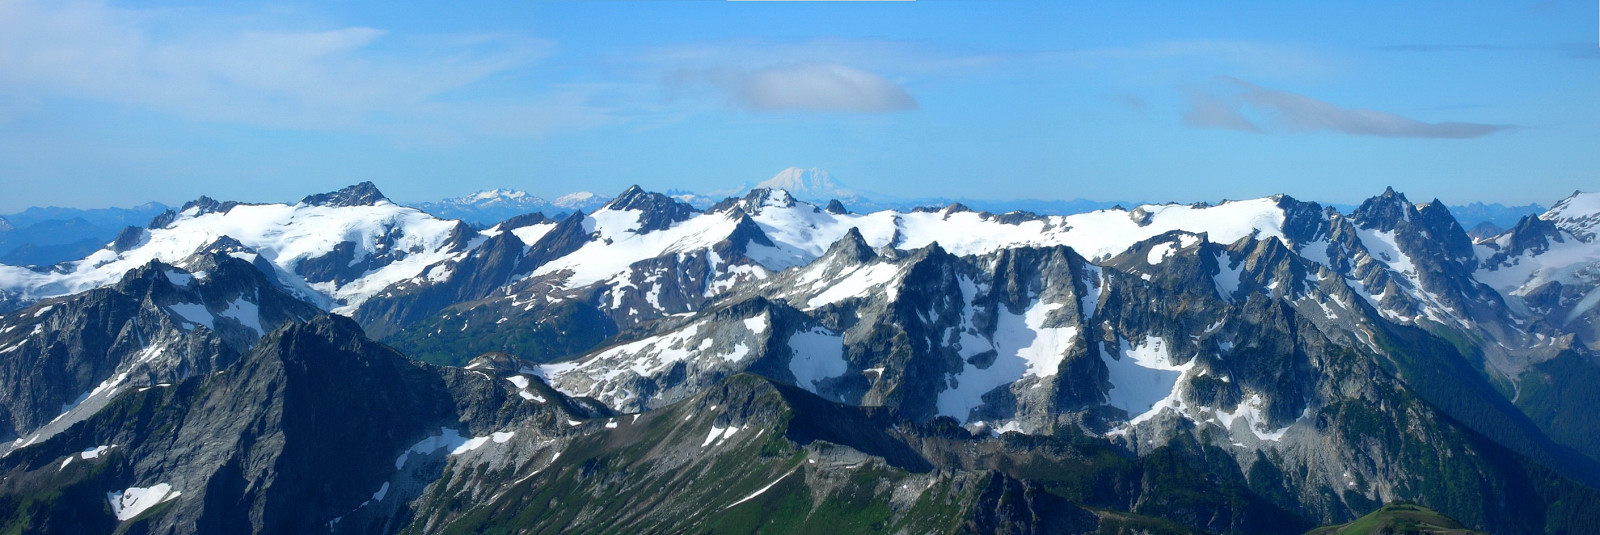
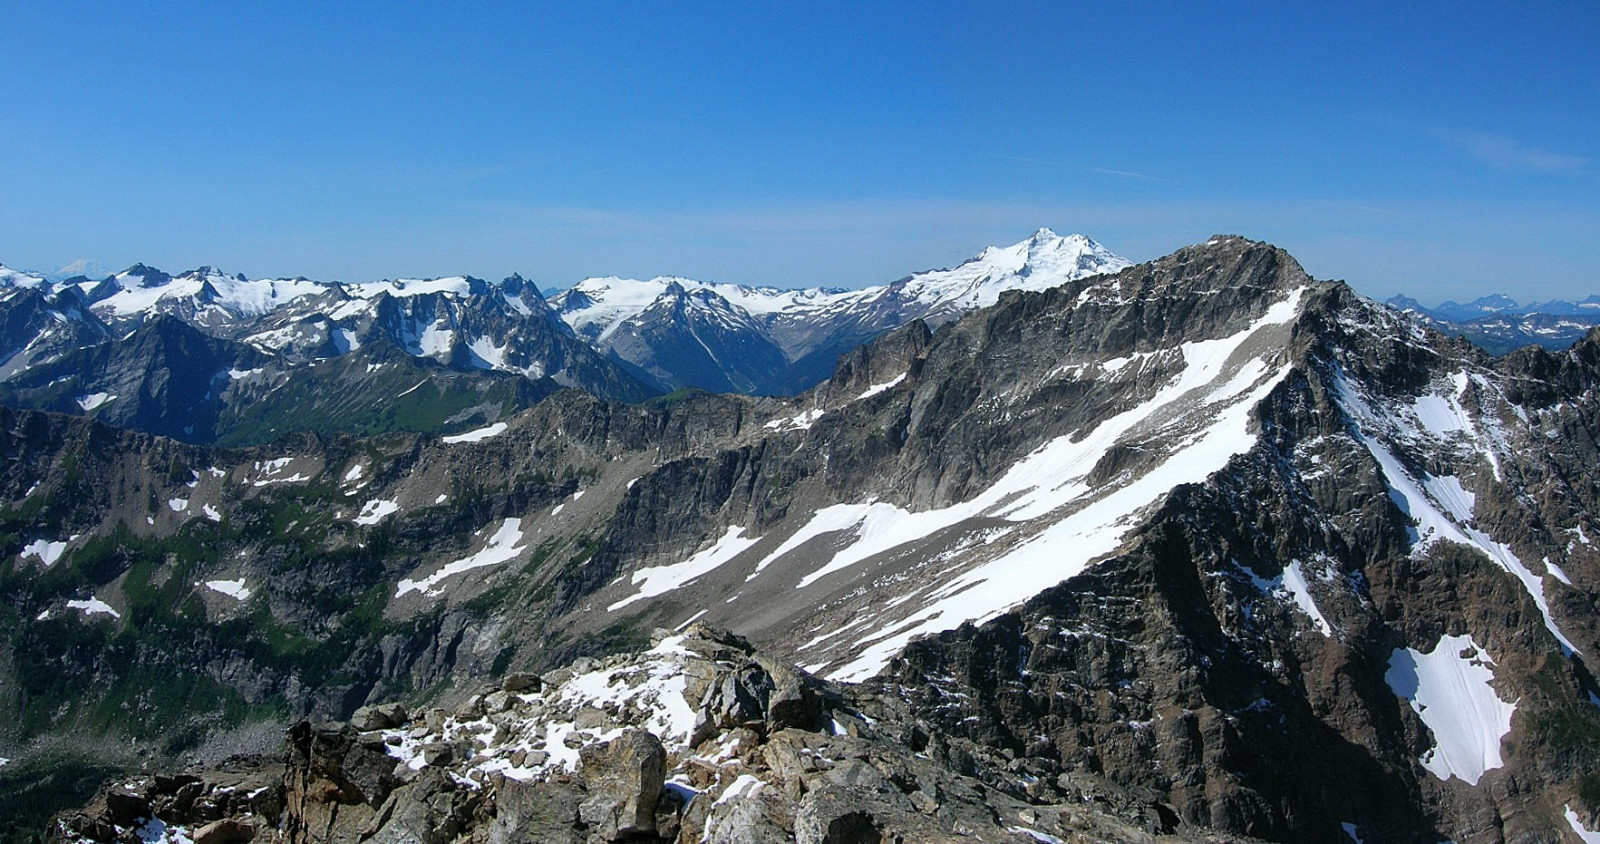
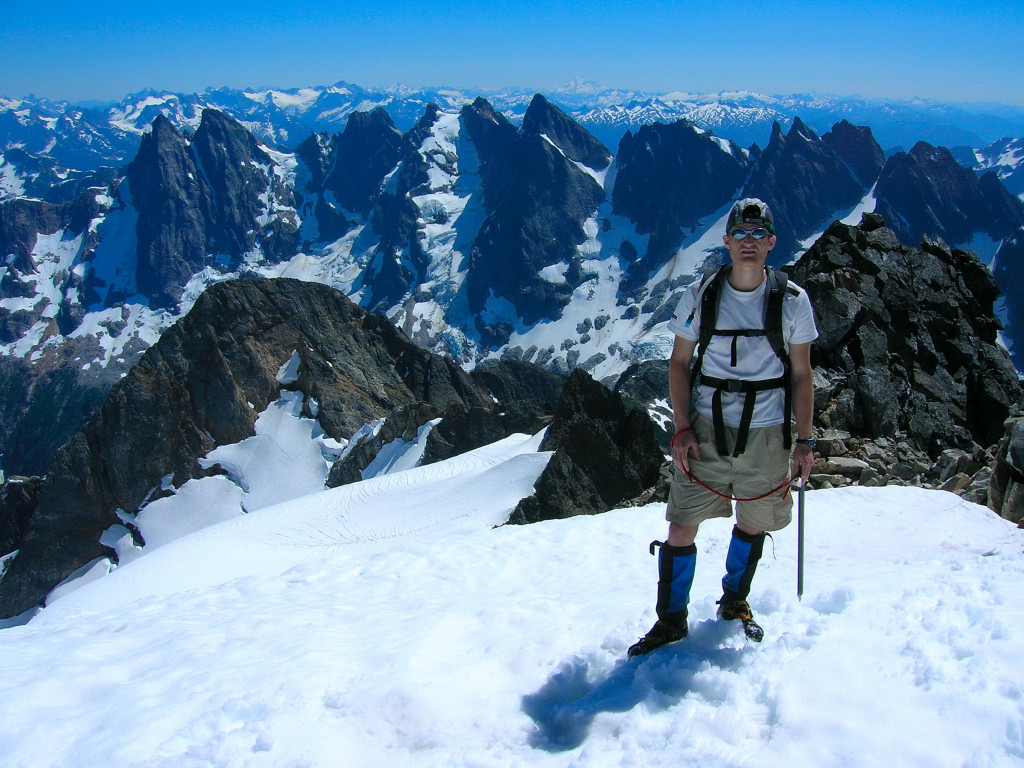
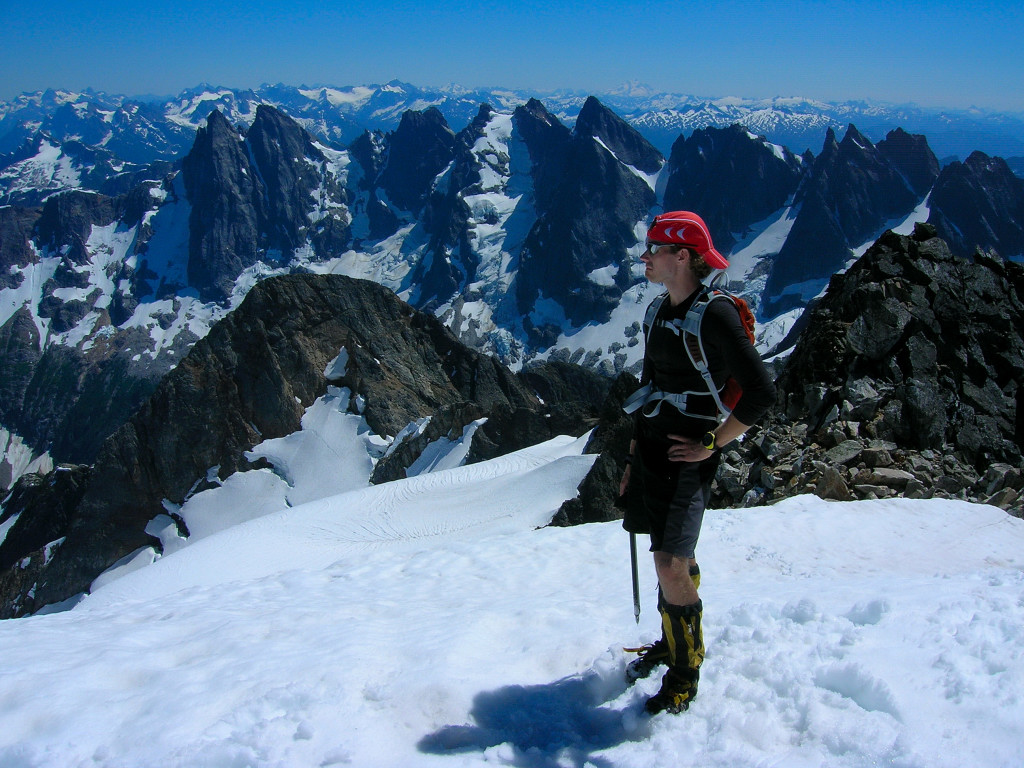
Panorama of Dakobed Range to Glacier Peak
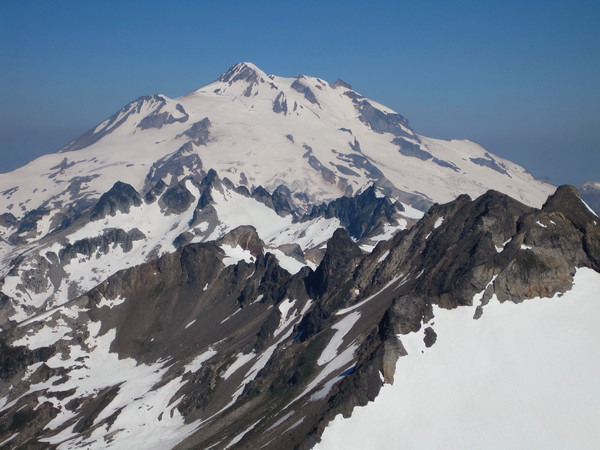
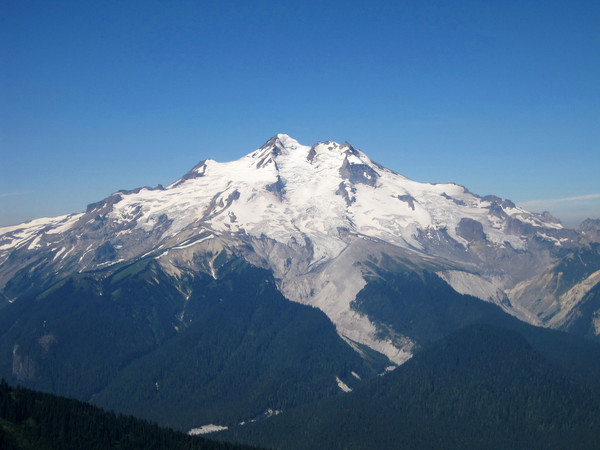
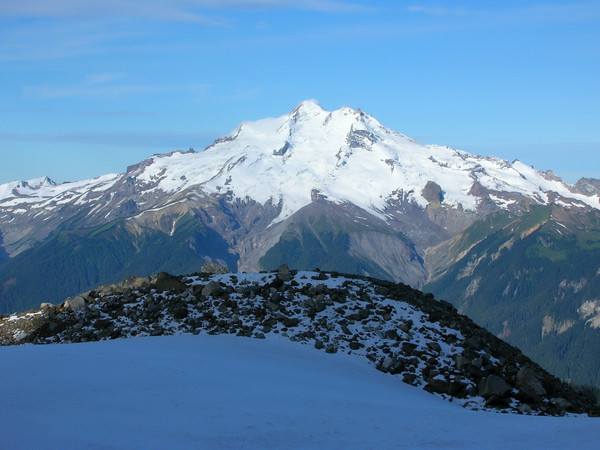
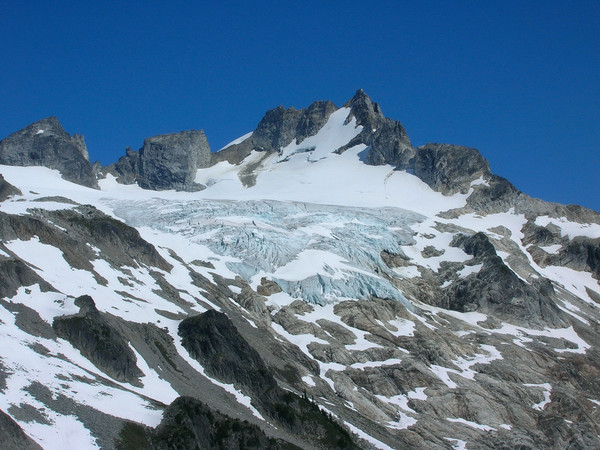
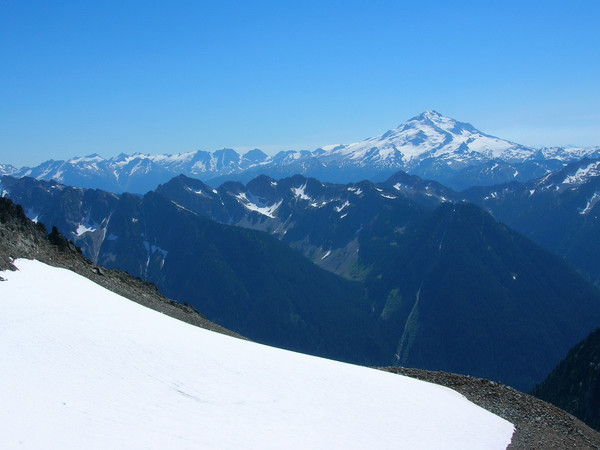
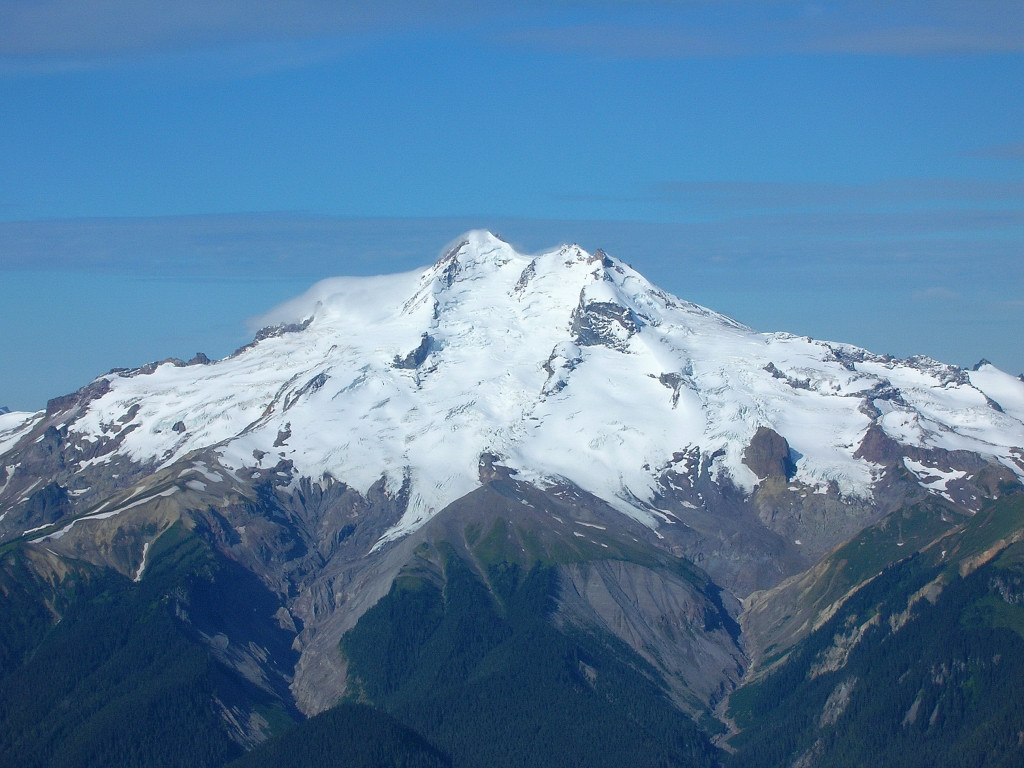
Glacier Peak close-up
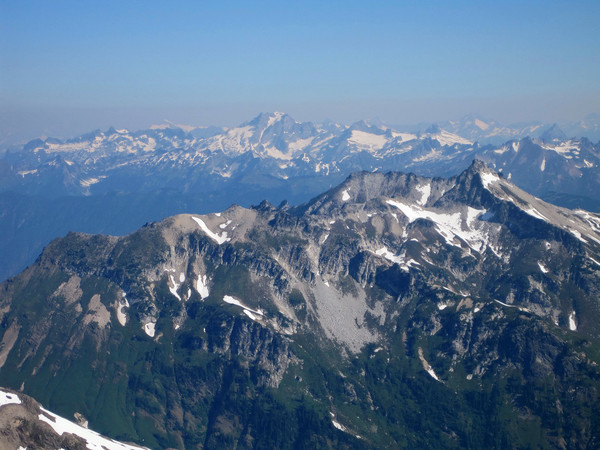
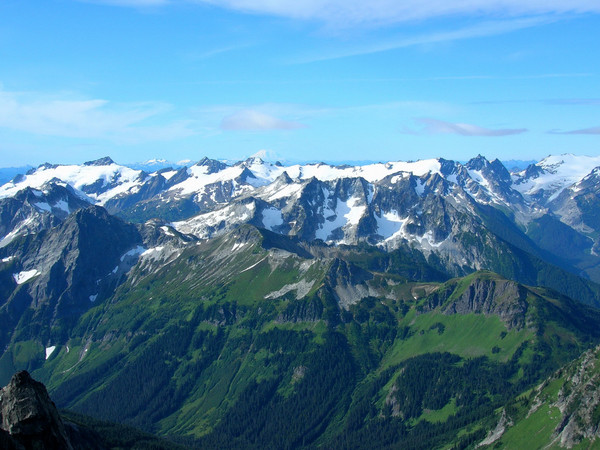
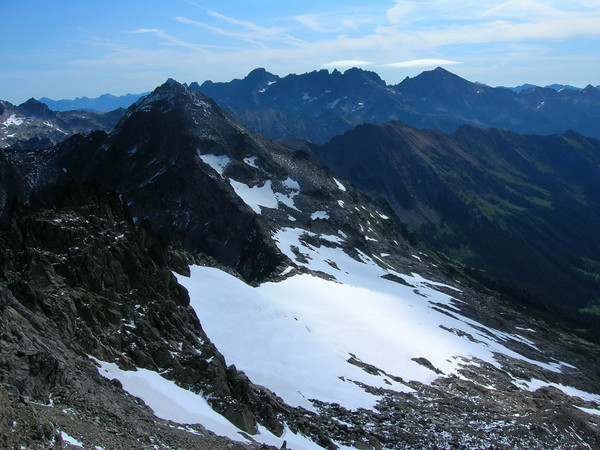
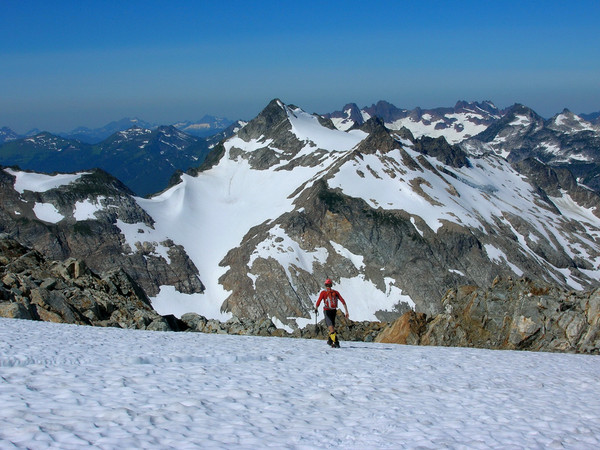
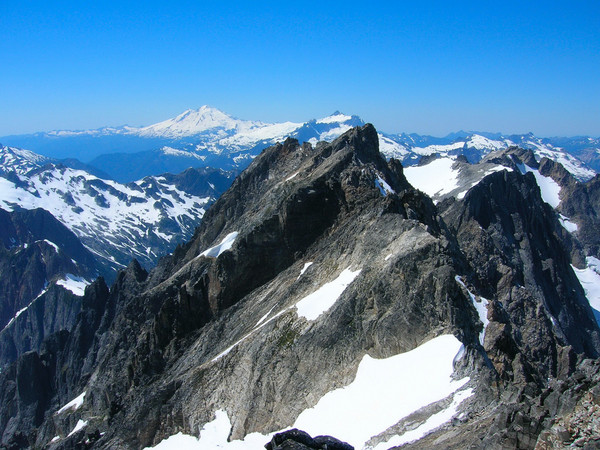
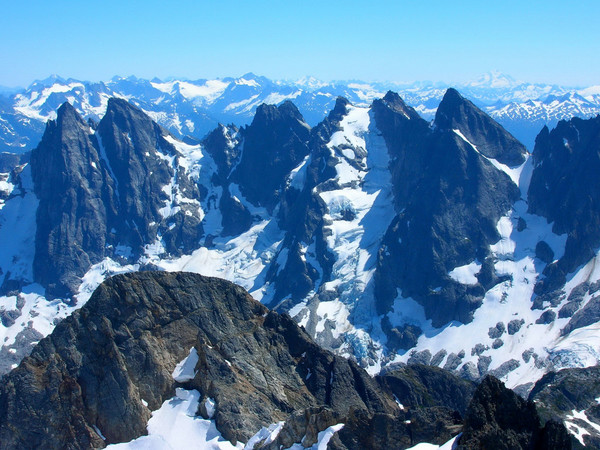
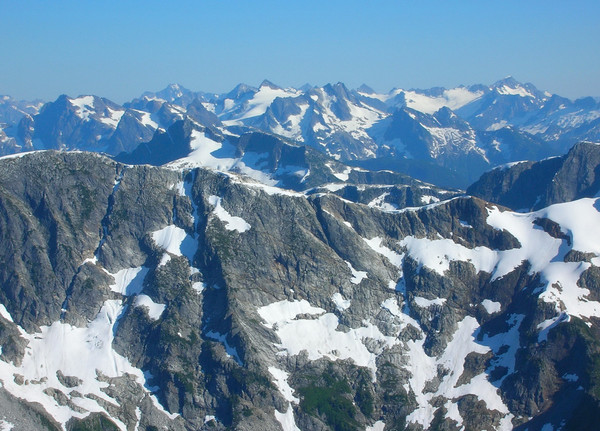
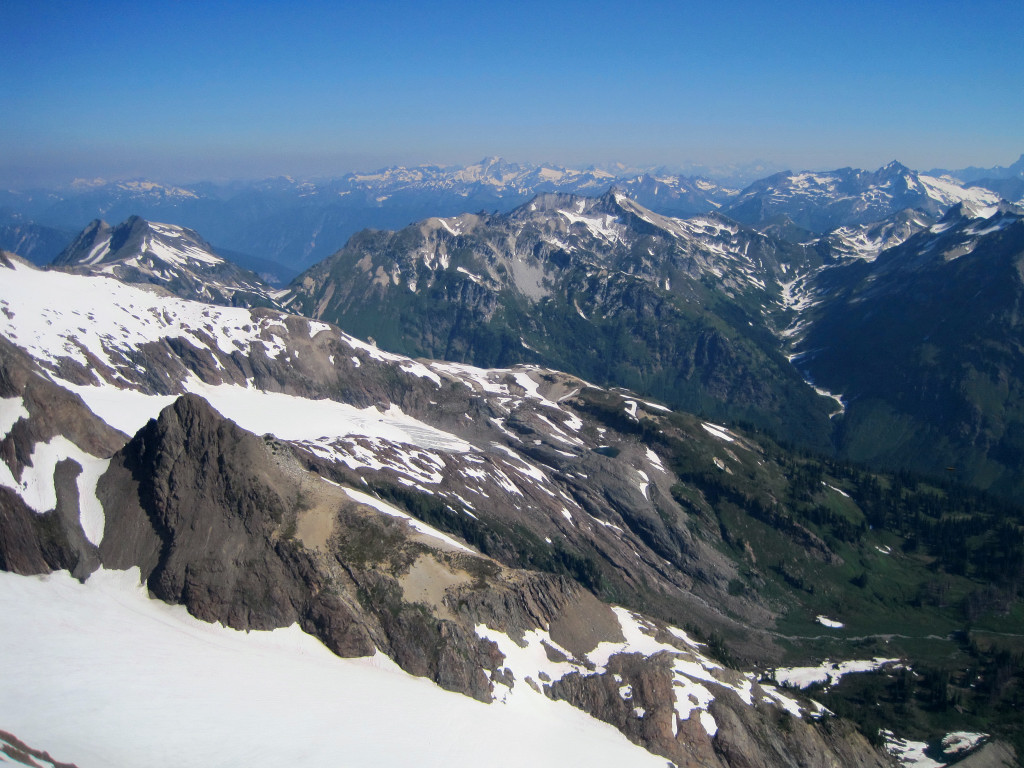
View to Ptarmigan Traverse Peaks

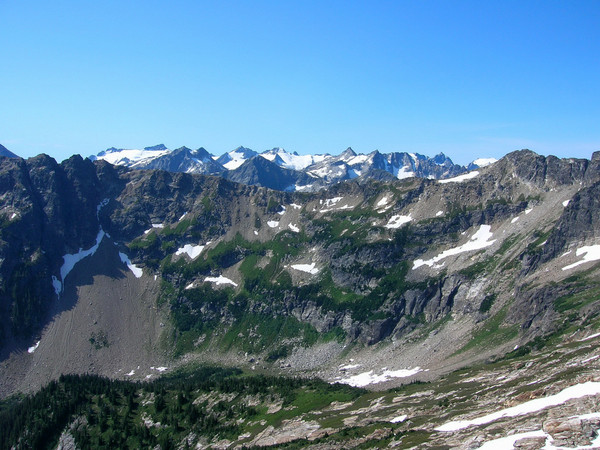
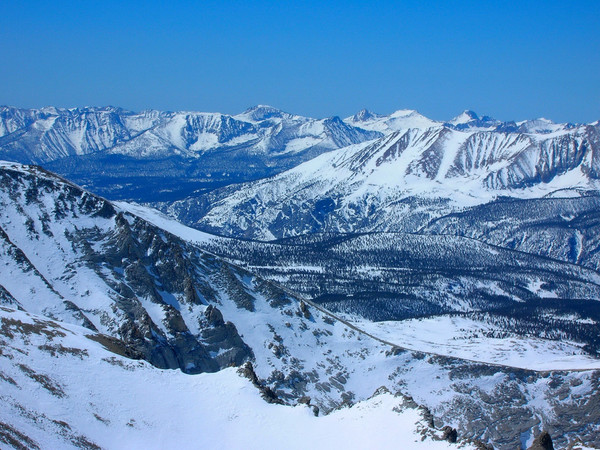
Panorama of Upper White River including Indian Head Peak and Kololo Peaks
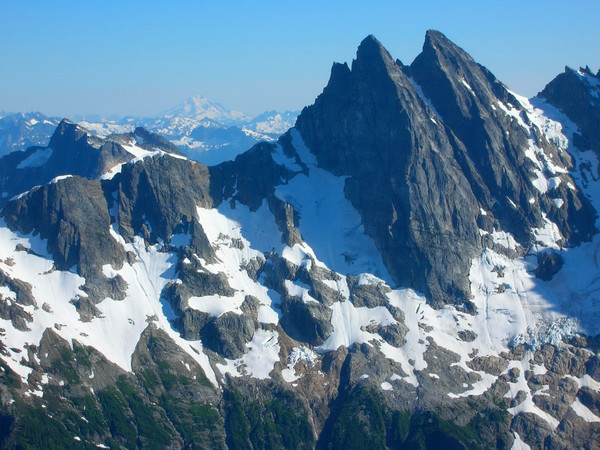
Sloan Peak in the distance

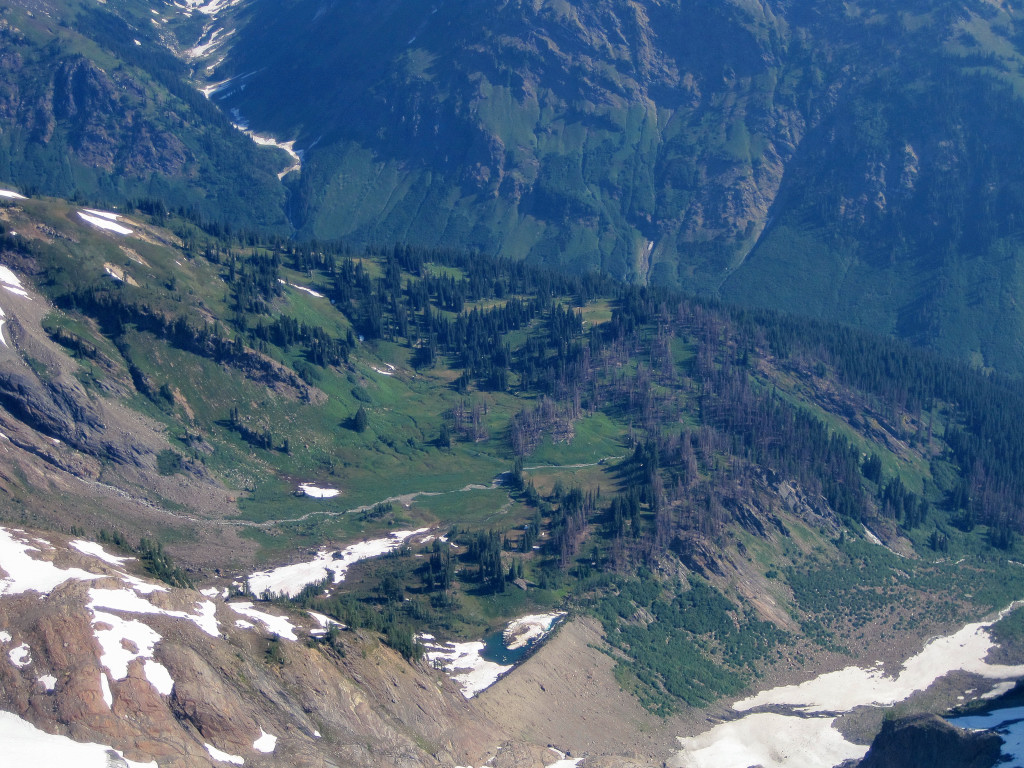
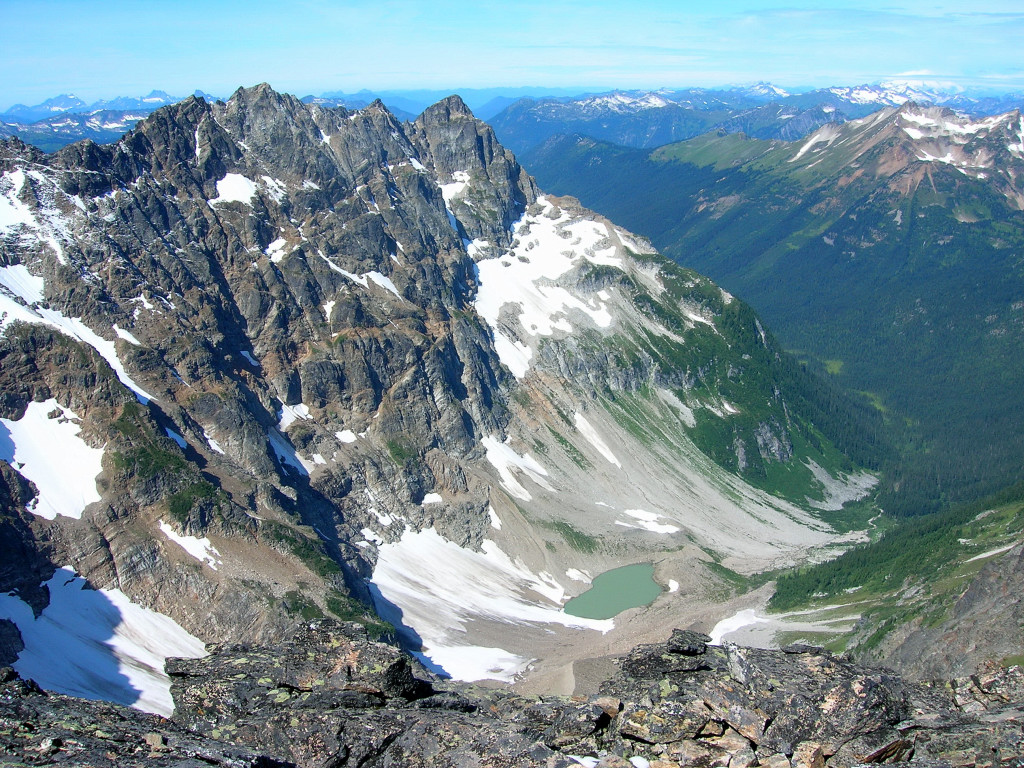
Meadowy bench above the Napeequa River valley
[video:youtube]
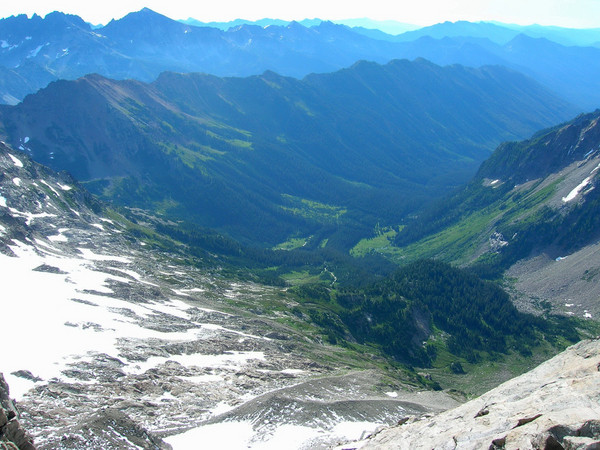
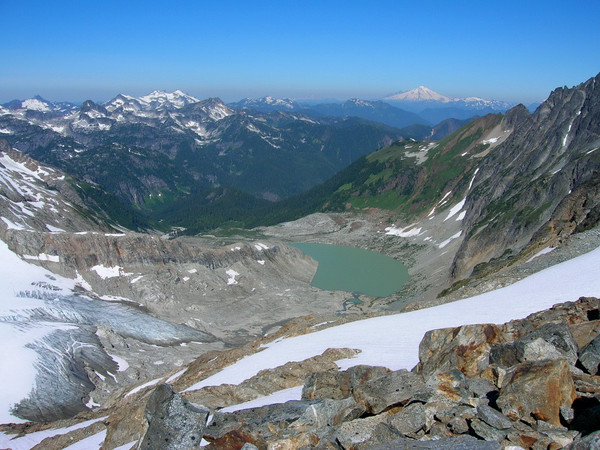
White River Valley


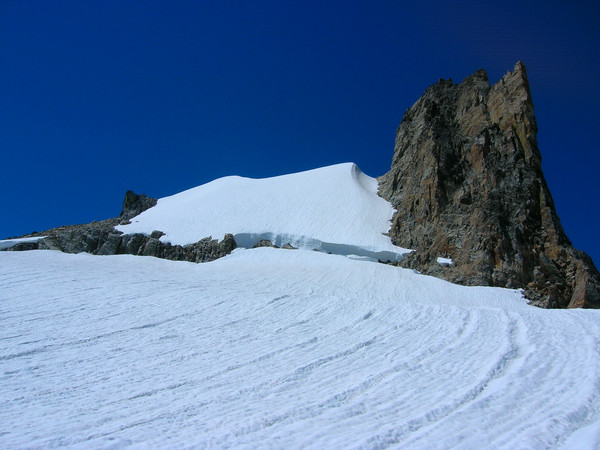
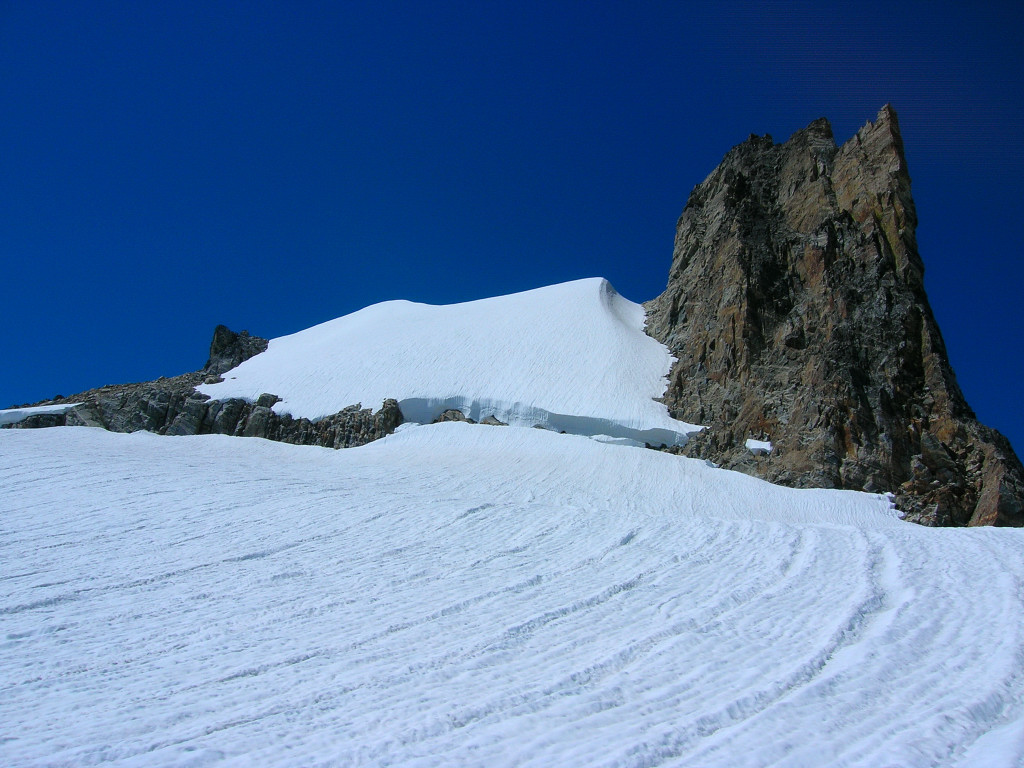
Final slopes up the summit
7,200 ft col is middle-right of the photo

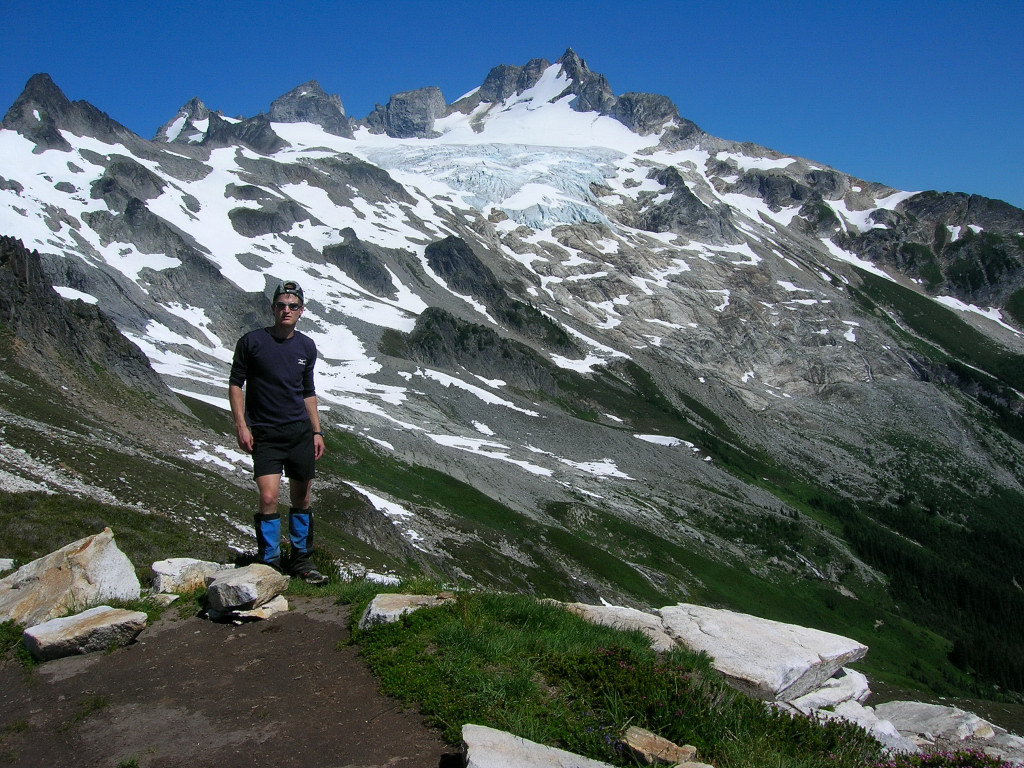
Alp slopes below the Southeast Peak of Clark

View to Boulder Pass

Gear Notes:
Axe and crampons for final snow bits, although they are not required anymore.
Approach Notes:
White River Trail and Boulder Pass Trail have been logged out, but they remain moderately brushy in sections. The "herder path" is also easy to follow and exits the Boulder Pass Trail just before it begins the final ascent up to the pass.
-
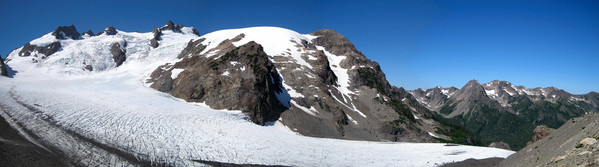
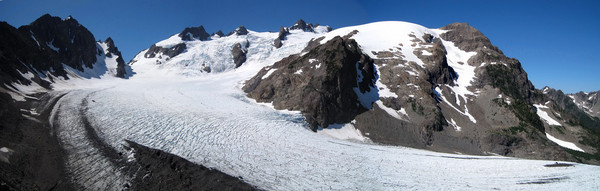
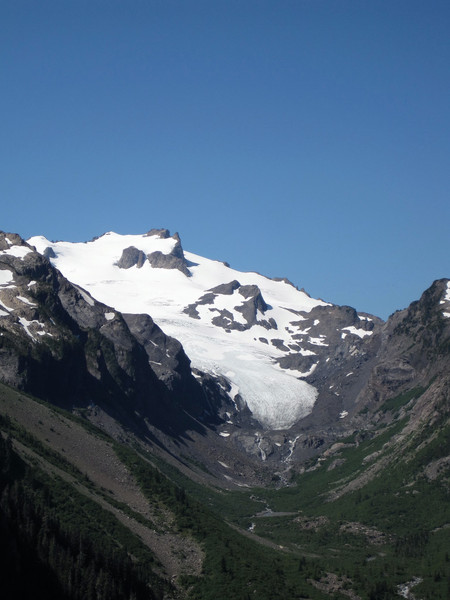
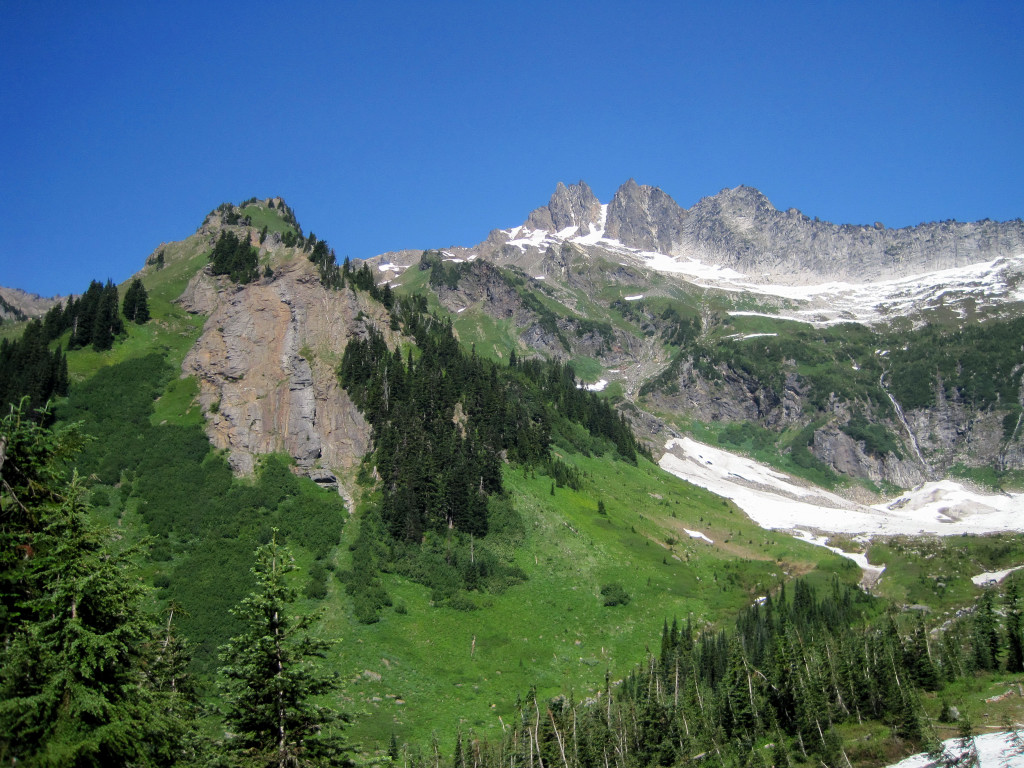
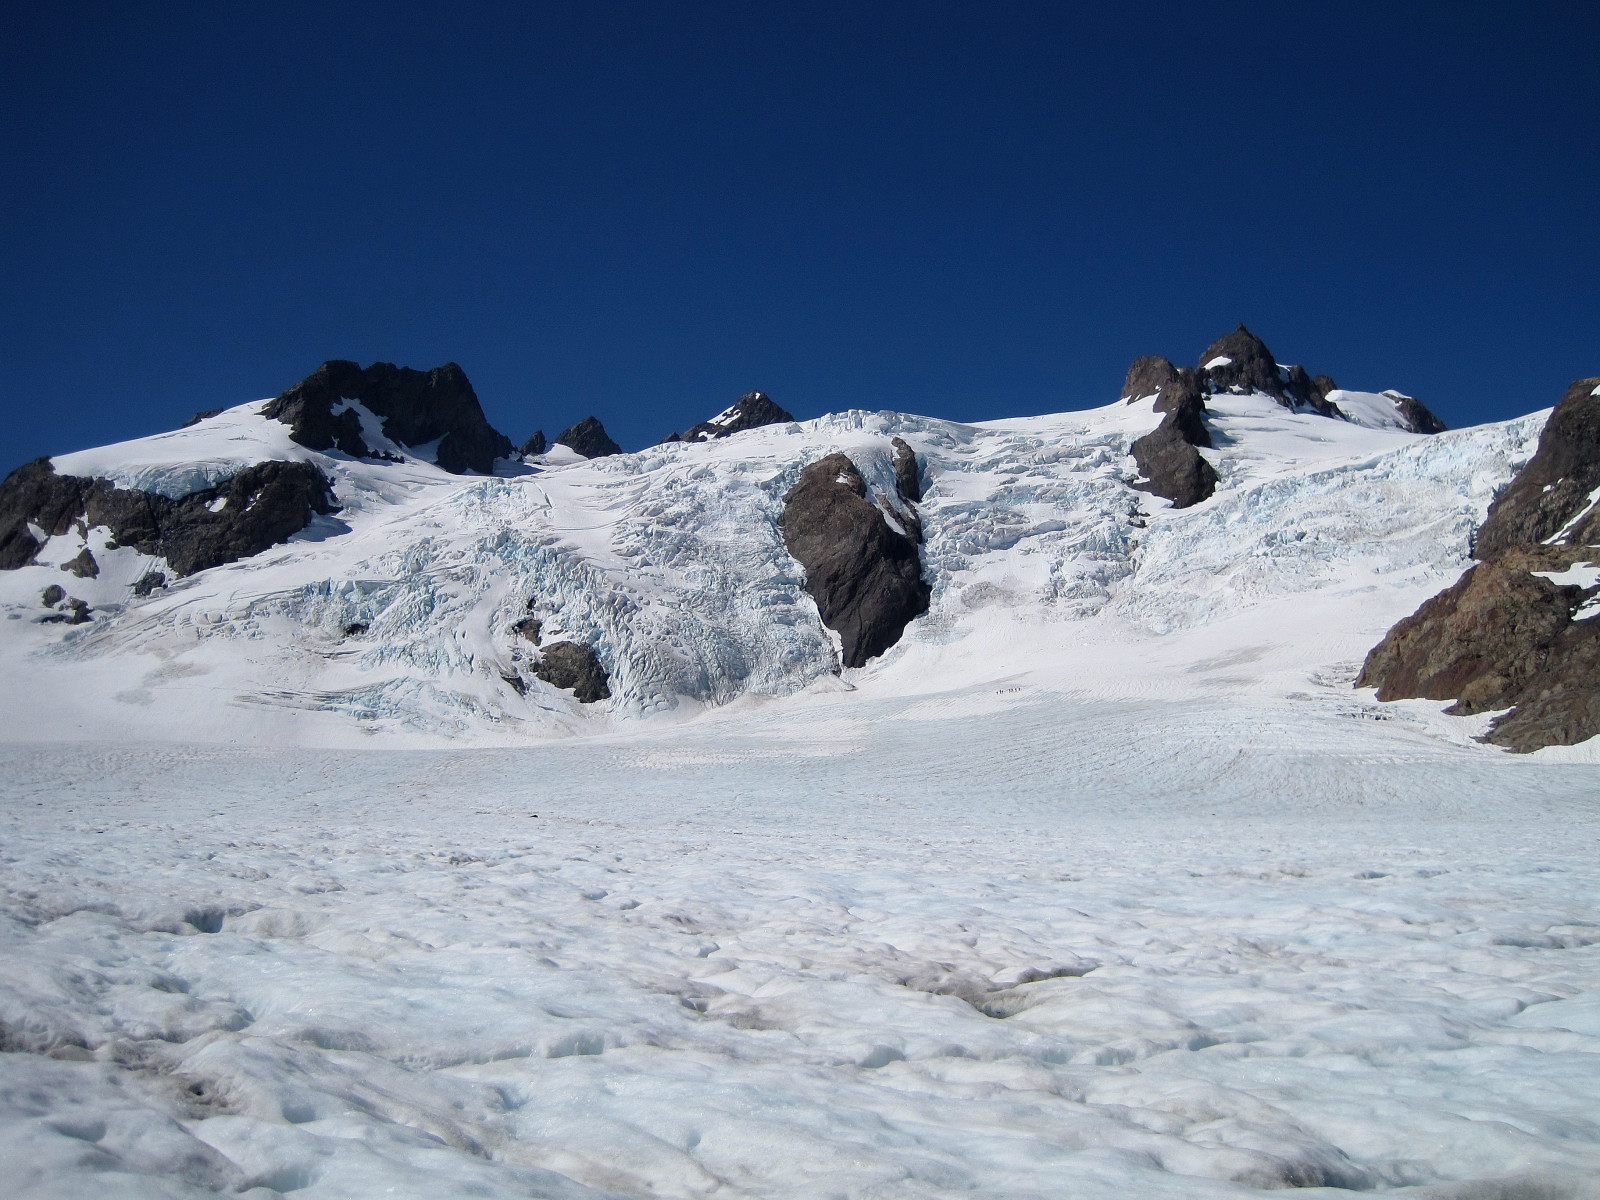
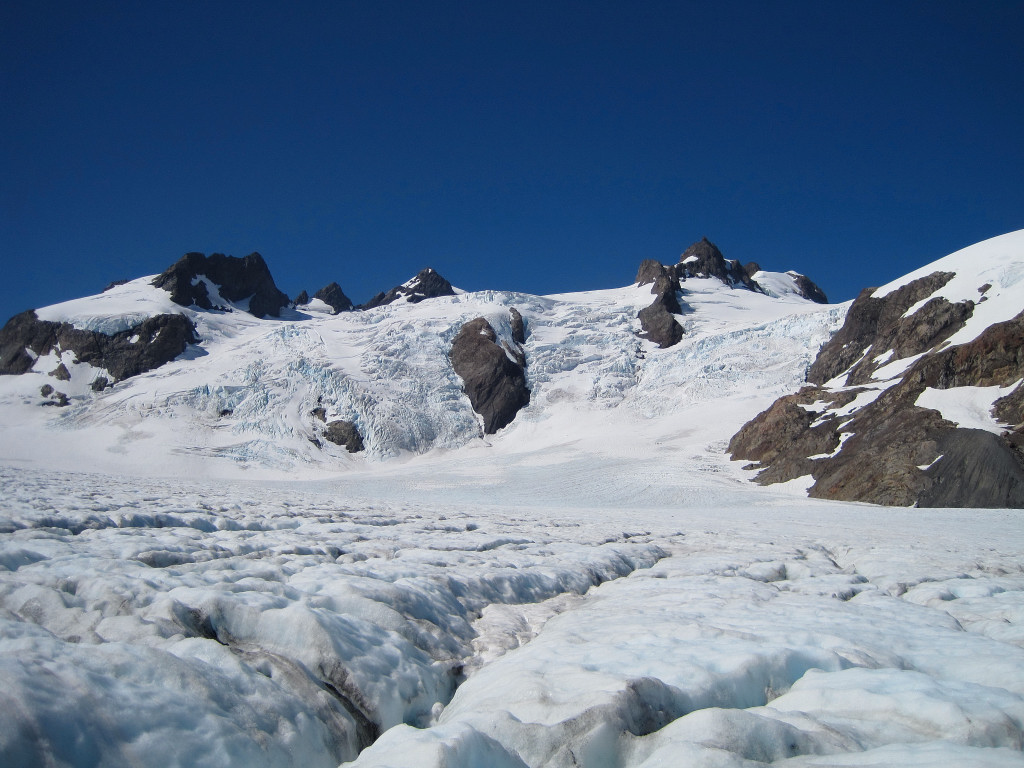
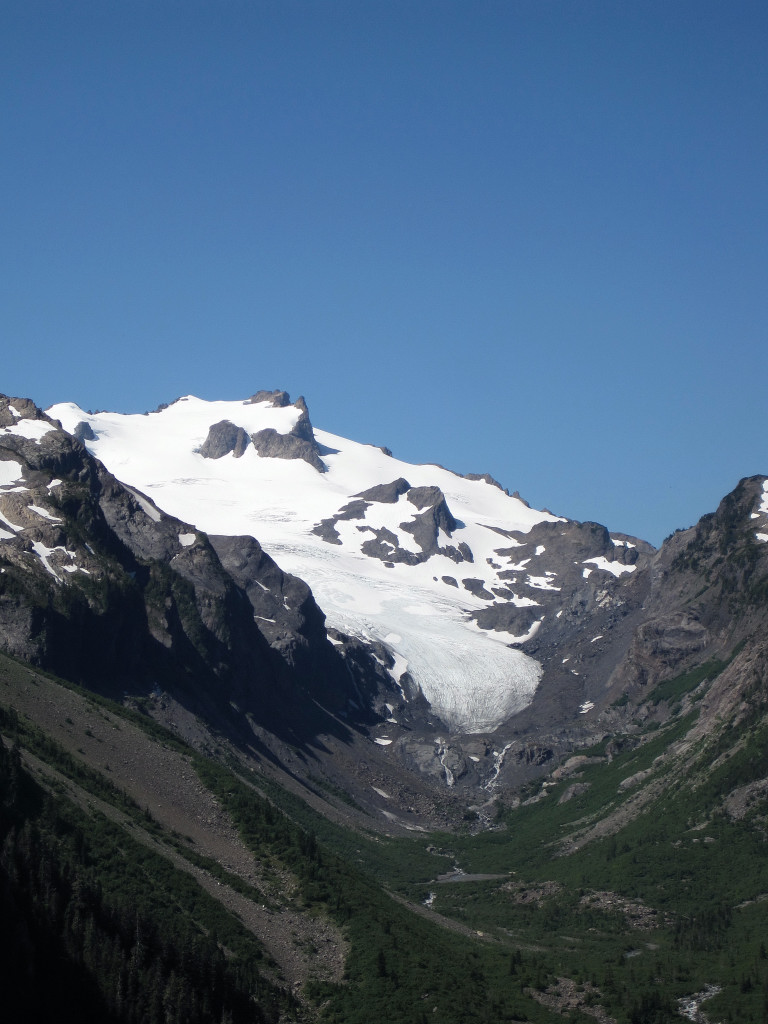
Trip: Mount Olympus FKT - Blue Glacier
Date: 7/16/2009
Trip Report:
I climbed Mount Olympus in 11 hours, 6 minutes round trip. This is the new fastest known time (FKT) on the mountain, breaking my own FKT from July 31, 2007 by 24 minutes. I went solo and the climb was unsupported. I started at 3:10 am and finished at 2:17 pm (miraculously, the same real time that I finished in 2007). Aside from a few minor differences (ladder downclimb on avalanche chute before Glacier Meadows, softer and slower snow conditions), everything from the weather to route conditions were essentially the same as in 2007.


Sweet shot for perspective.
Location (Elevation): Time Elapsed / Split / Real Time
Trailhead (578 ft) : 0 / 0 / 03:10
5 Miles (800 ft) : 46:10 / 46:10 / 03:56 (5 Mile Island)
9.1 Miles (950 ft) : 1:26:20 / 40:09 / 04:36 (Olympus Guard Station)
13.1 Miles (1,370 ft) : 2:09:01 / 42:40 / 05:19 (Hoh River Bridge)
15.1 Miles (2,558 ft) : 2:37:26 / 28:25 / 05:47 (Elk Lake)
17.5 Miles (4,400 ft) : 3:19:49 / 42:23 / 06:30 (Glacier Meadows)
Glacier Moraine (5,000 ft) : 3:53:36 / 33:47 / 07:04
Arrive Summit (7,969 ft) : 5:49:53 / 1:56:16 / 09:00
Leave Summit (7,969 ft) : 6:06:44 / 16:51 / 09:17
Glacier Moraine (5,000 ft) : 7:29:26 / 1:22:42 / 10:39
17.5 miles (4,400 ft) : 7:55:48 / 26:21 / 11:06 (Glacier Meadows)
15.1 Miles (2,558 ft) : 8:25:01 / 29:13 / 11:36 (Elk Lake)
13.1 Miles (1,370 ft) : 8:47:52 / 22:51 / 11:58 (Hoh River Bridge)
9.1 Miles (950 ft) : 9:26:59 / 39:07 / 12:37 (Olympus Guard Station)
5 Miles (800 ft) : 10:12:02 / 45:03 / 13:21 (5 Mile Island)
Trailhead (578 ft) : 11:06:53 / 54:51 / 14:17
Comparison: 2009 vs. 2007 (difference)
5 miles: 46:10 / 42:16 (+3:54)
9.1 miles: 1:26:20 / 1:22:46 (+3:34)
13.1 miles: 2:09:01 / 2:08:43 (+0:18)
15.1 miles: 2:37:26 / 2:44:23 (-6:57)
Glacier Moraine: 3:53:36 / 4:10:12 (-16:36)
Arrive Summit: 5:49:53 / 5:55:20 (-5:27)
Leave Summit: 6:06:44 / 6:17:14 (-10:30)
15.1 miles: 8:25:01 / 8:48:51 (-23:50)
13.1 miles: 8:47:52 / 9:08:50 (-20:58)
9.1 miles: 9:26:59 / 9:58:24 (-21:25)
5 miles: 10:12:02 / 10:38:58 (-26:56)
Trailhead: 11:06:53 / 11:30:54 (-24:01)
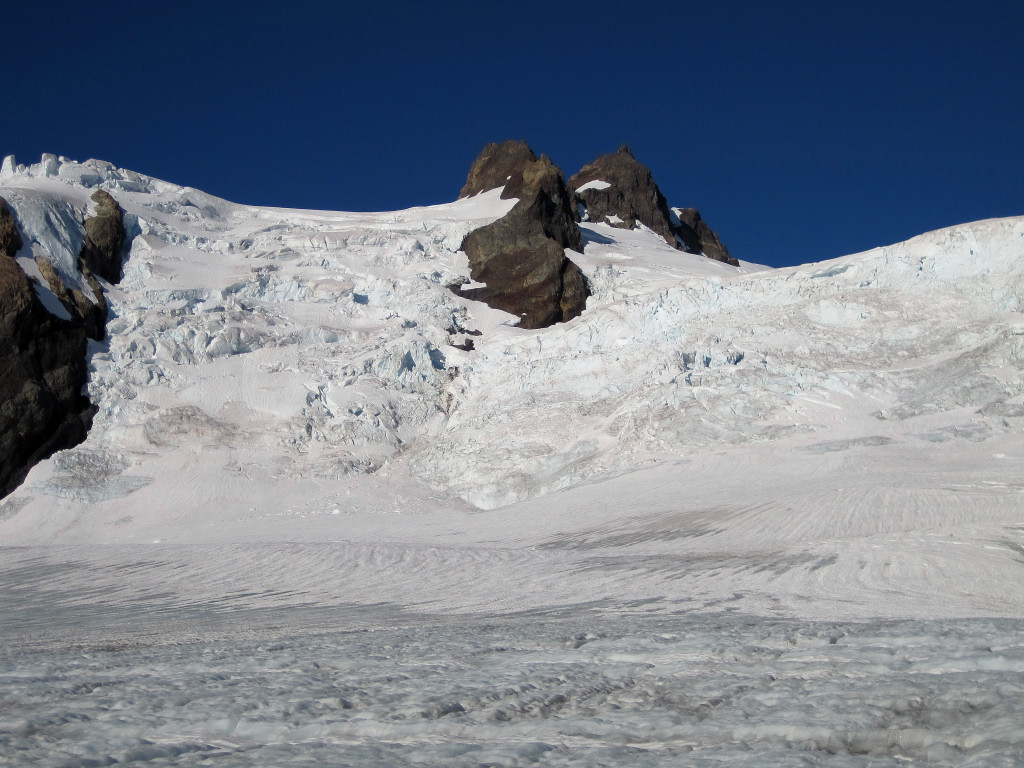
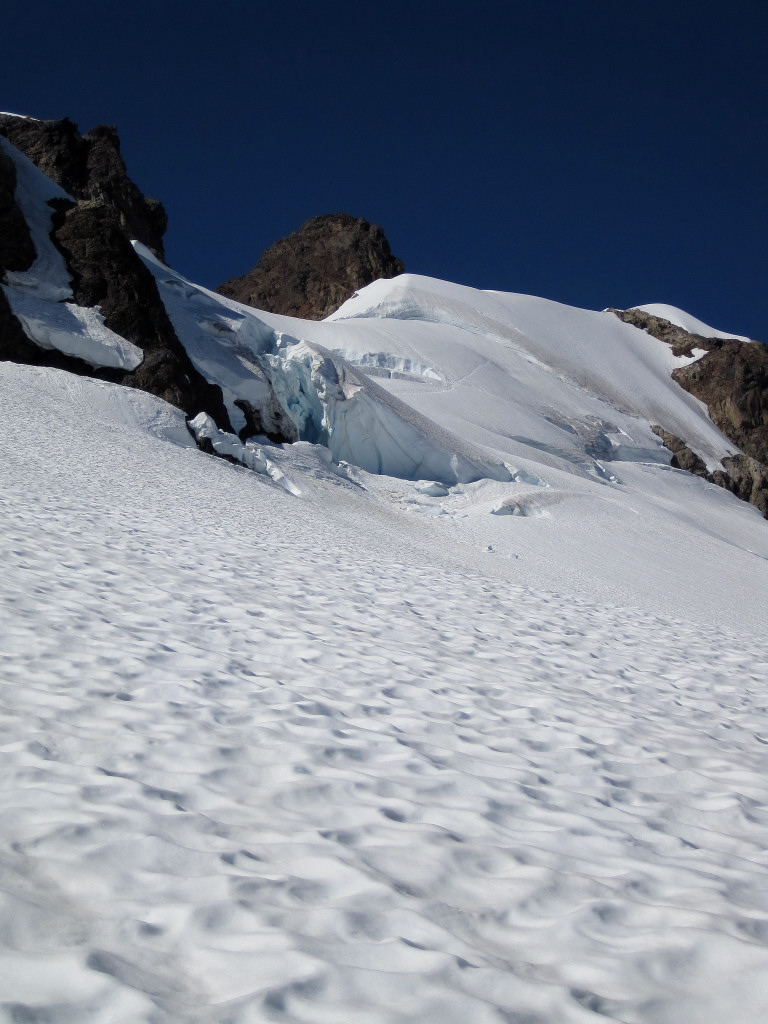
The glacier is generally in good shape with the route through Crystal Pass impediment-free. However, a large snowbridge just before Crystal Pass might be vulnerable if this hot weather continues. Also, the summit block is easily accessible - no moat has formed like last year.
The primary goal was to go under my time from 2007, which I accomplished, but I thought it would be nice to go sub 11 hours. With 13 miles to go, there was still a chance - I would have to go 10 min/mile pace, a tough task after 9 hours of moving hard. With 5 miles to go, I acknowledged to myself that sub 11 was out of reach and my tank was running low so I was just concerned with finishing it out. Despite the fatigue at the end, I felt a lot better than in 2007. Sub 11 hours is within my capabilities for next time, but less than 10 hours seems highly unlikely for me. Mount Olympus has spectacular scenery and I did not sacrifice photography, which is one of my favorite parts of adventure running - here is a collection of some photos and video clips (many are similar to 2007):
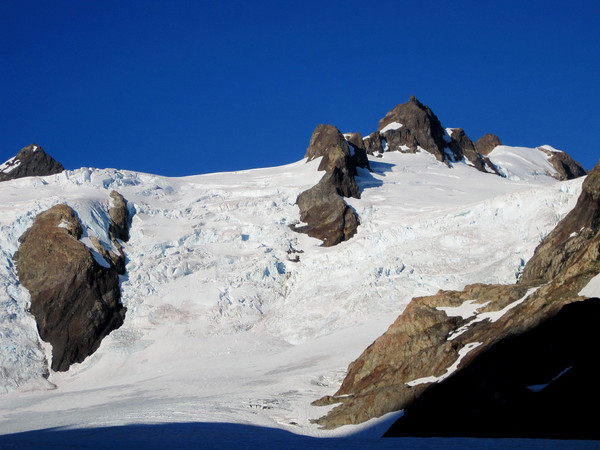
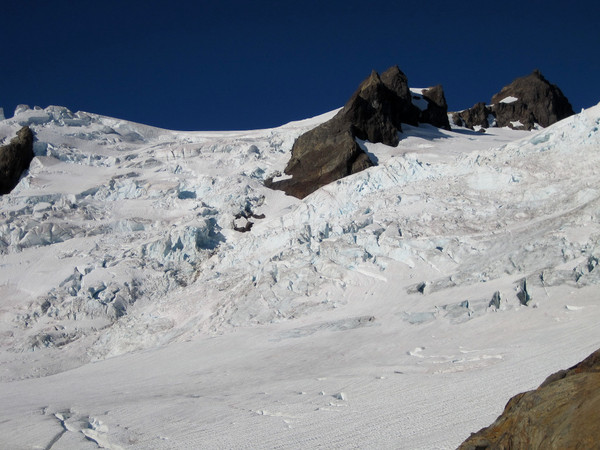


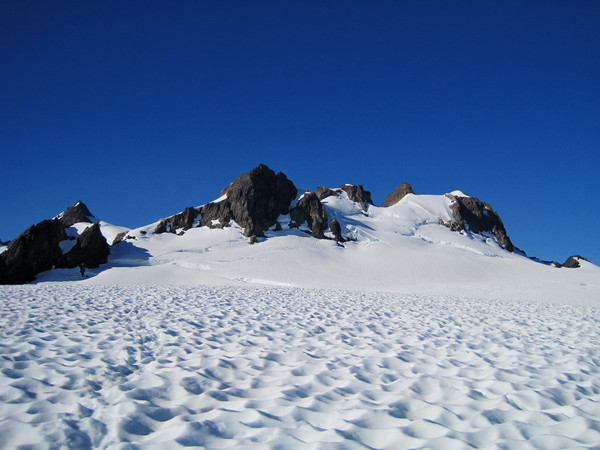
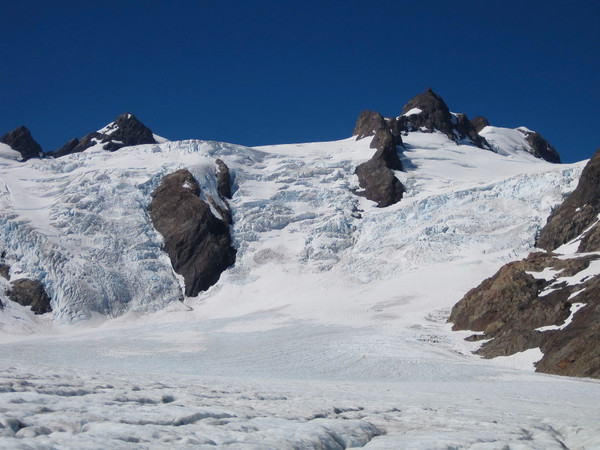
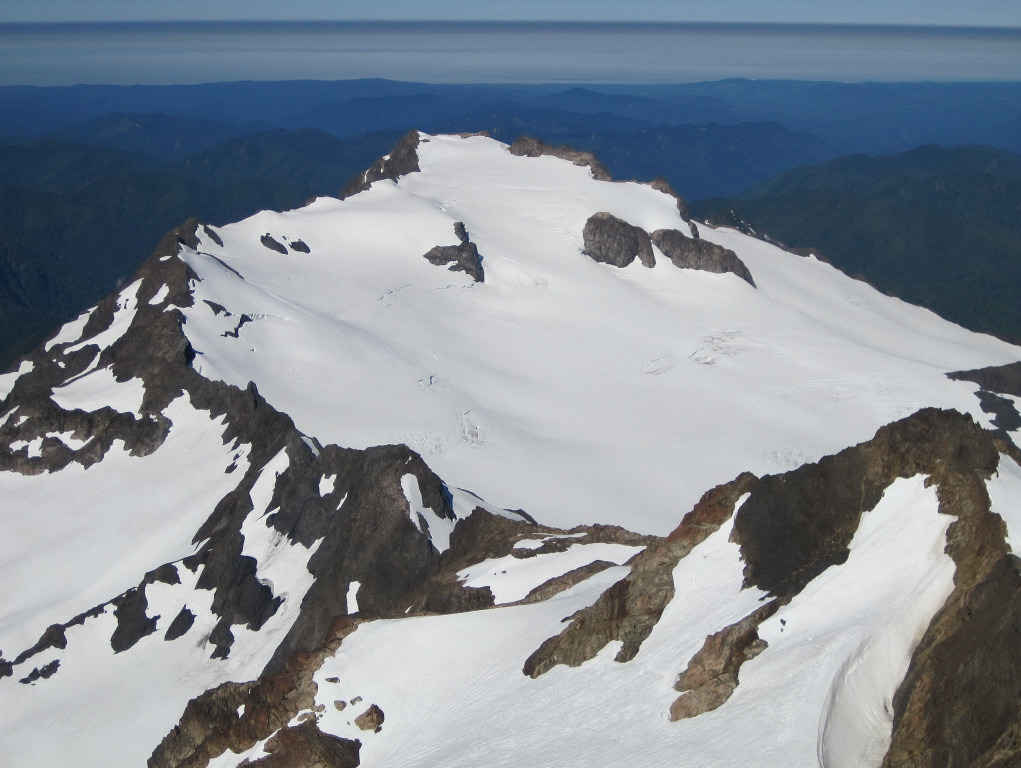
West Peak and Crystal Pass from Snow Dome
[video:youtube]
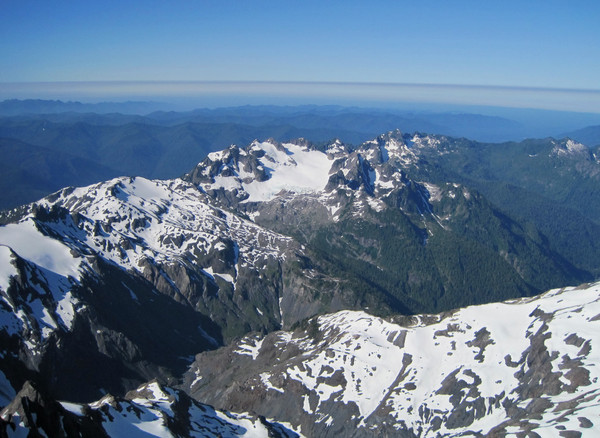

The Valhallas

Mount Tom

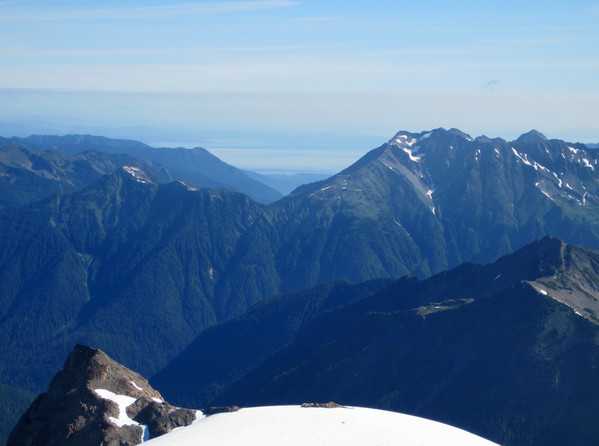
Strait of Juan de Fuca framed by Mount Carrie and the High Divide
Valhallas framed by West Peak and False Summit
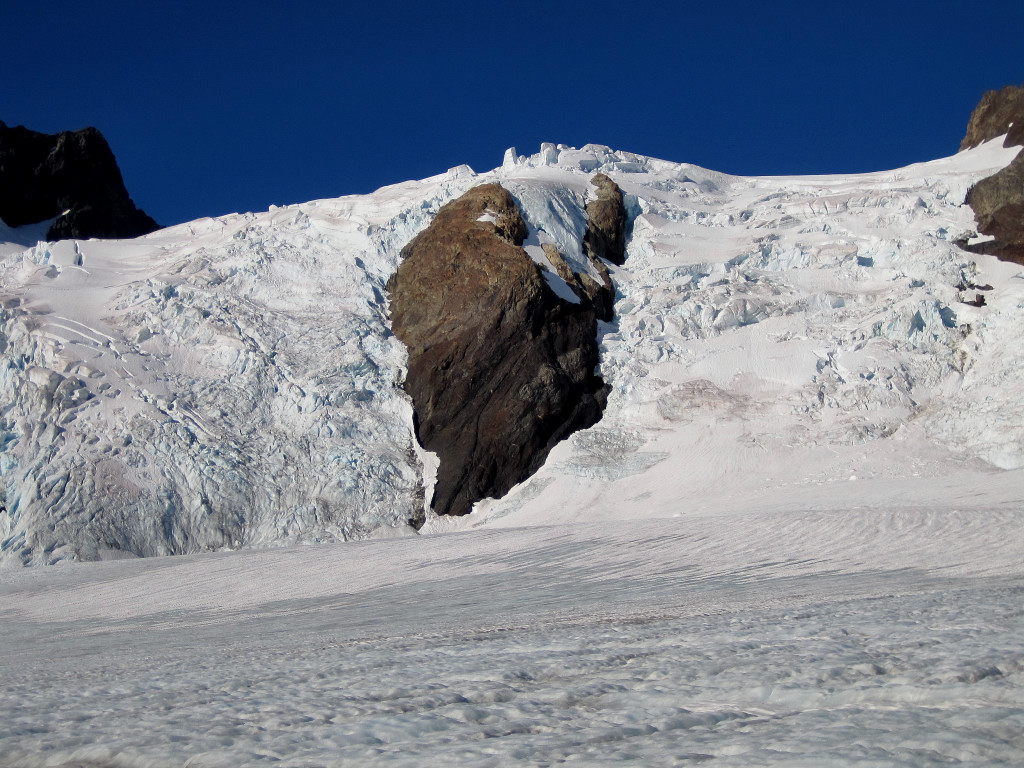
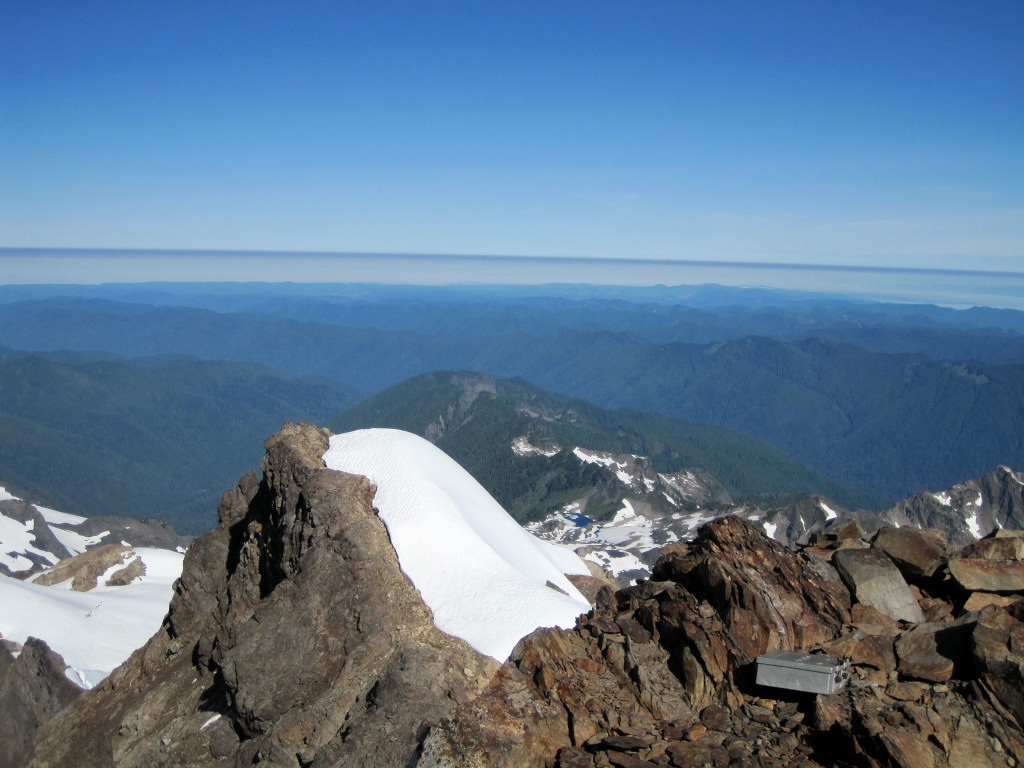
Summit block

Direct route up the summit block is falling out of shape, but it still looks doable
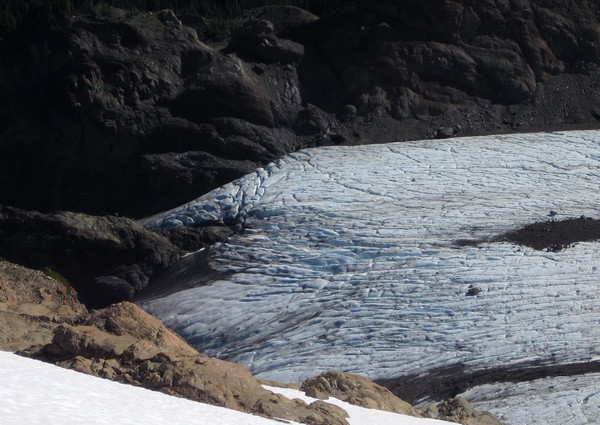
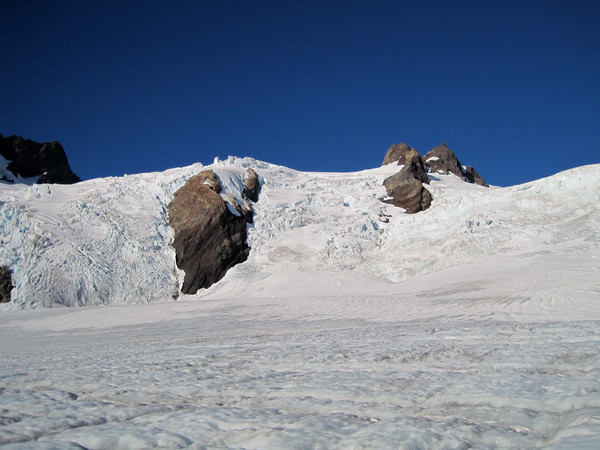
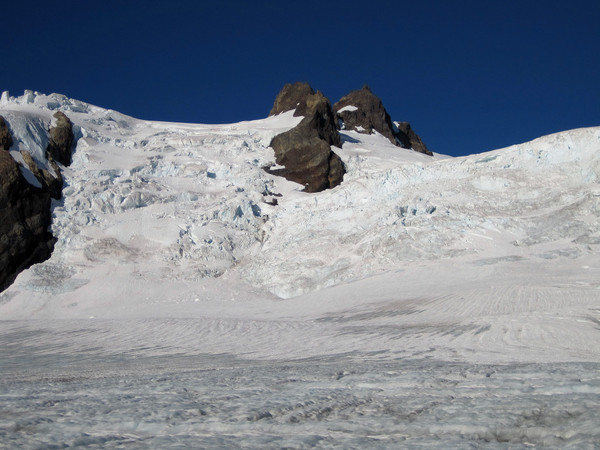
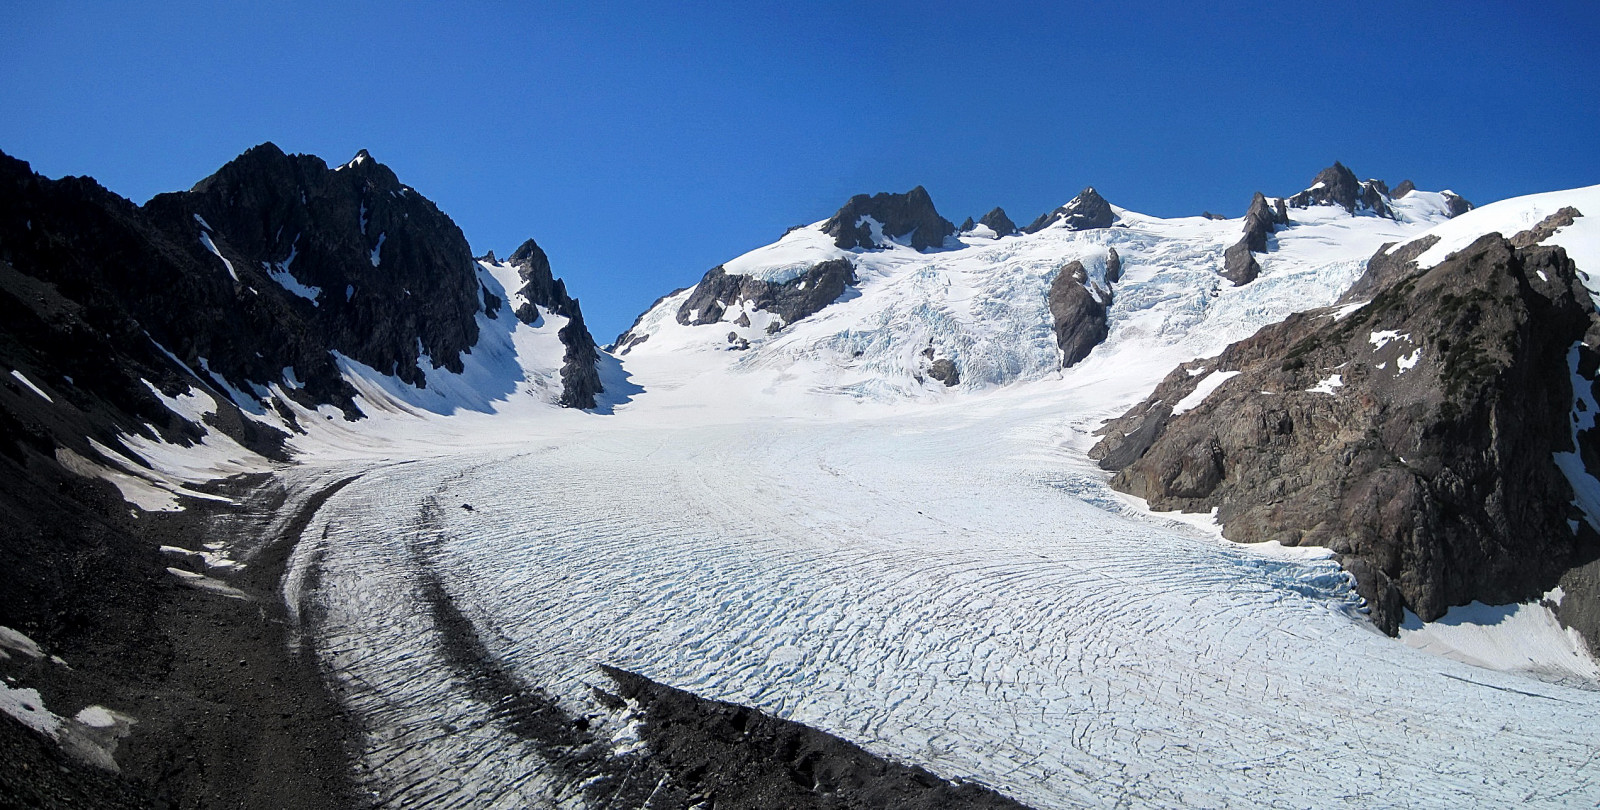
Terminus of the Blue Glacier from Snow Dome.
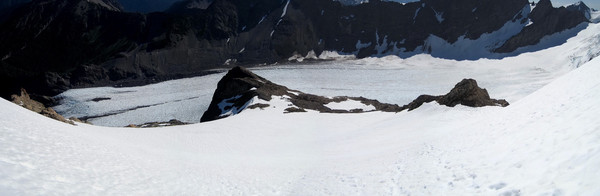
Blue Glacier Panorama
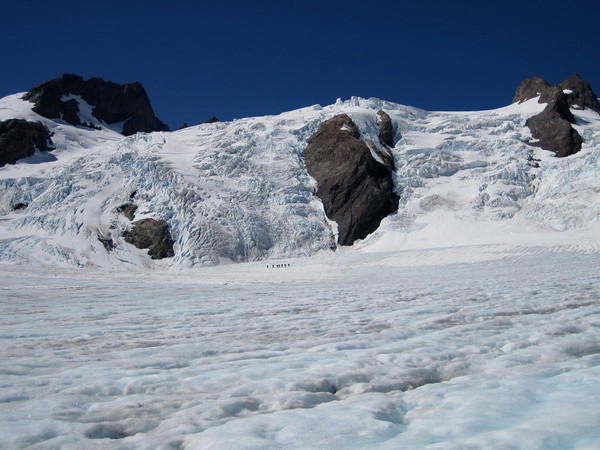
The party of seven climbers were great subjects.


Wide panorama from the Moraine
[video:youtube]
[video:youtube]

Gear Notes:
Crampons, Ice Axe, SaltStick electrolyte caps
Approach Notes:
Trail in great shape - not even any mud in the rainforest and no fording of streams. Park crews also did a great job brushing out the section between Elk Lake and Glacier Meadows. A ladder + rope is installed to get past steep slide area just before Glacier Meadows.
-
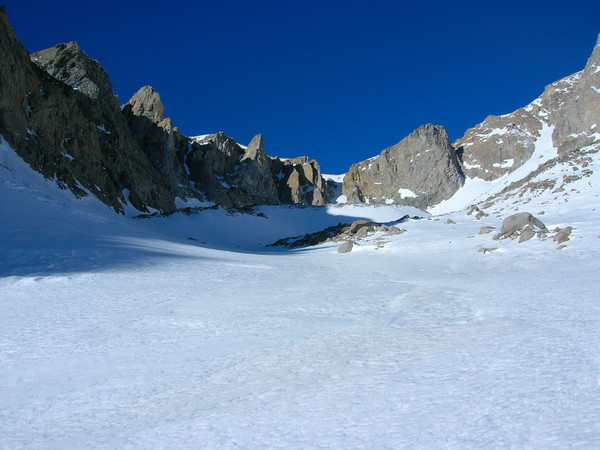
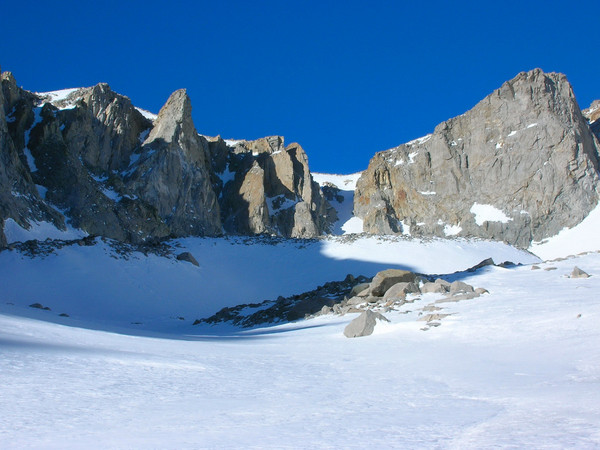
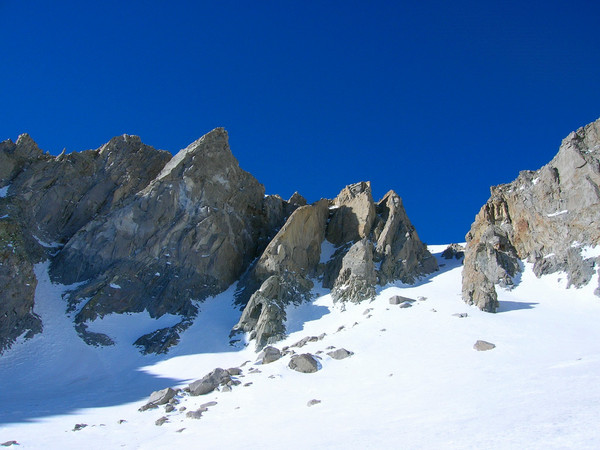
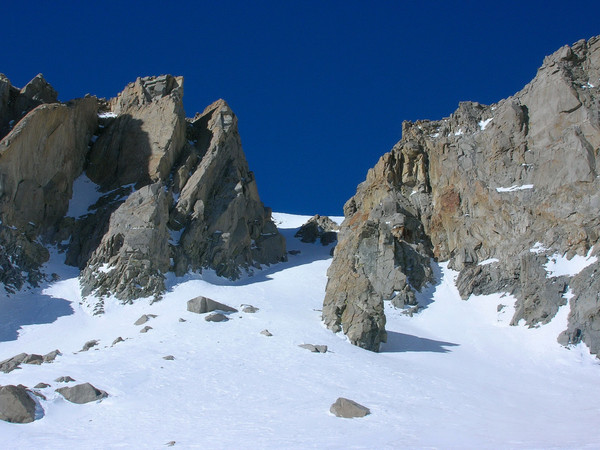
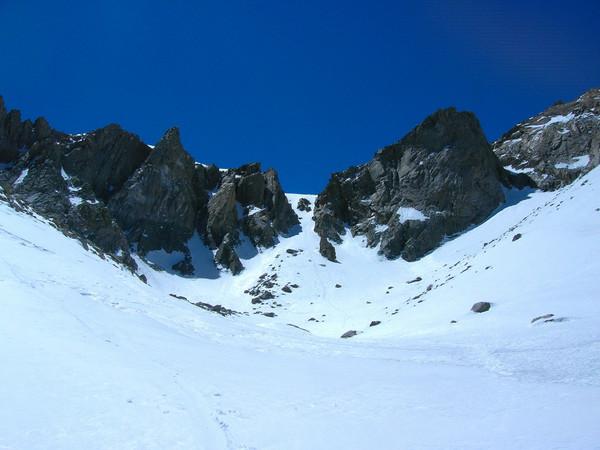
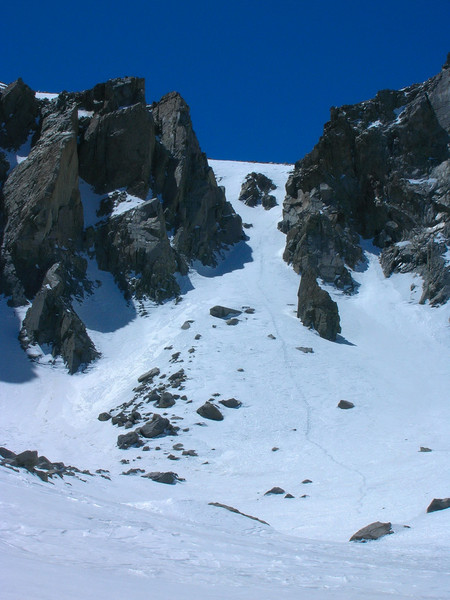
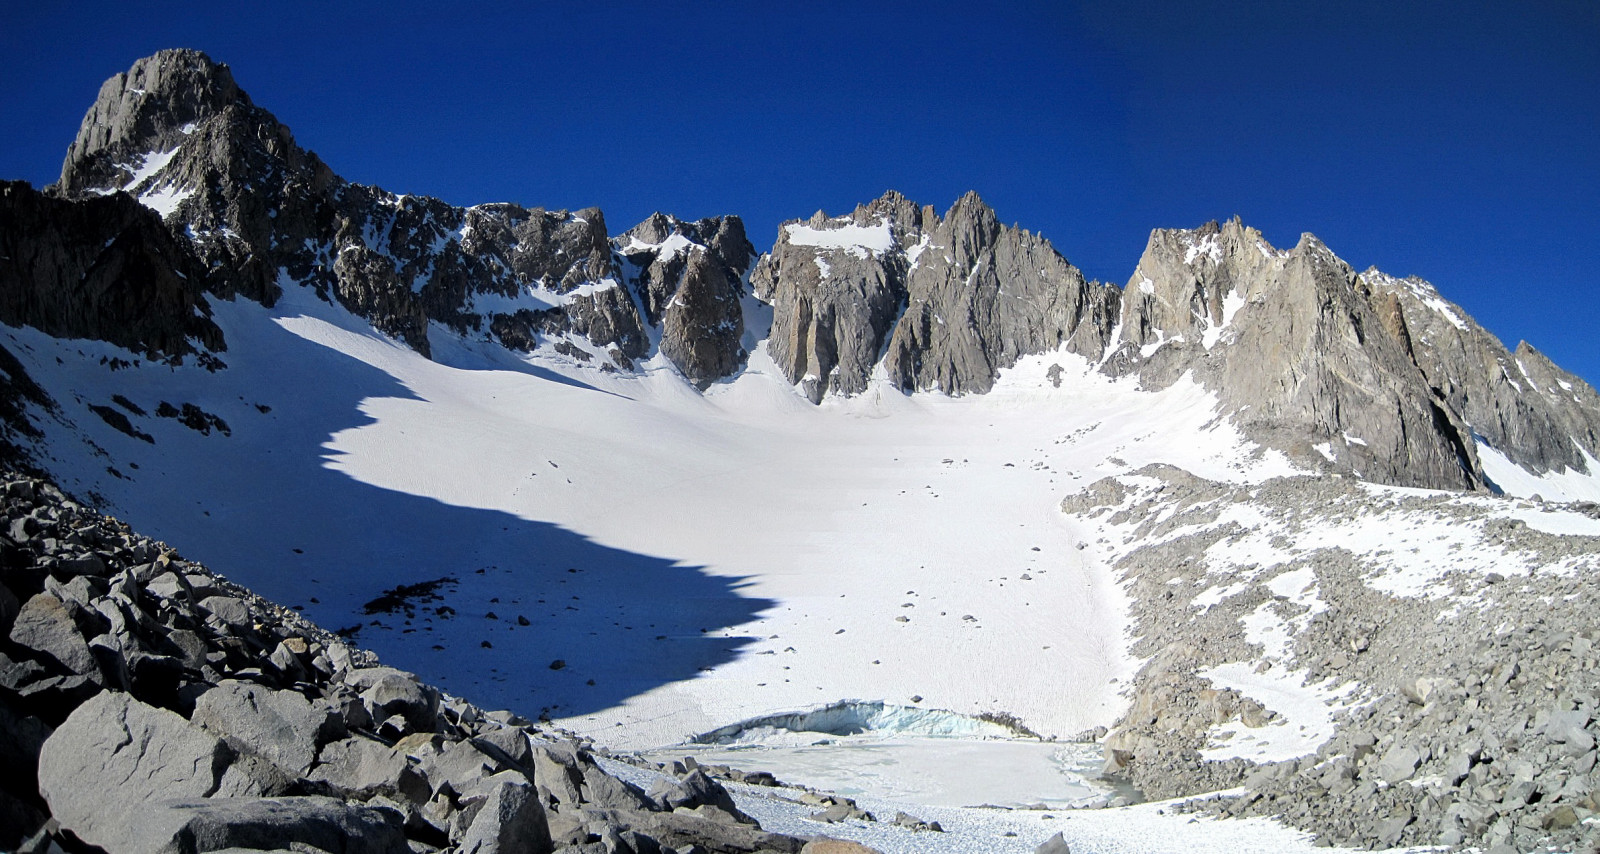
Trip: Mount Sill - North Couloir
Date: 7/9/2009
Trip Report:
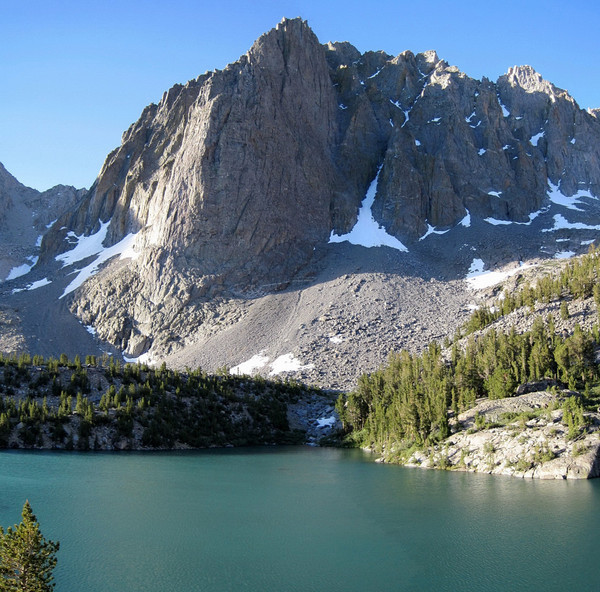
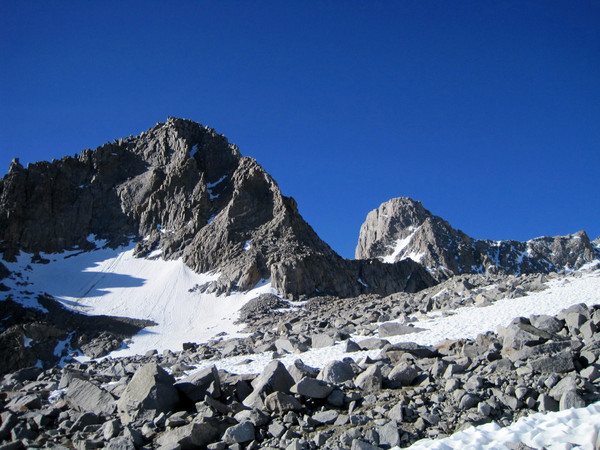
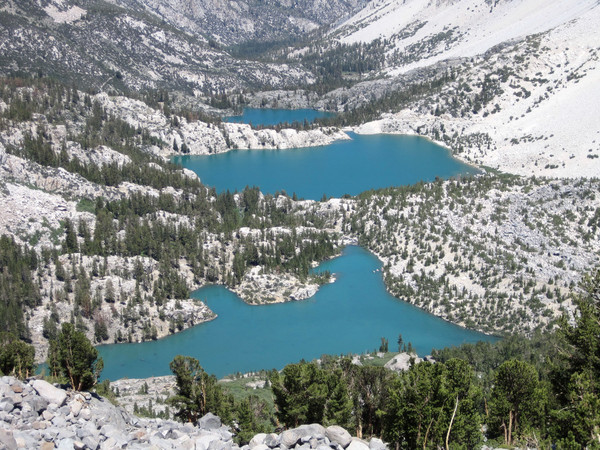
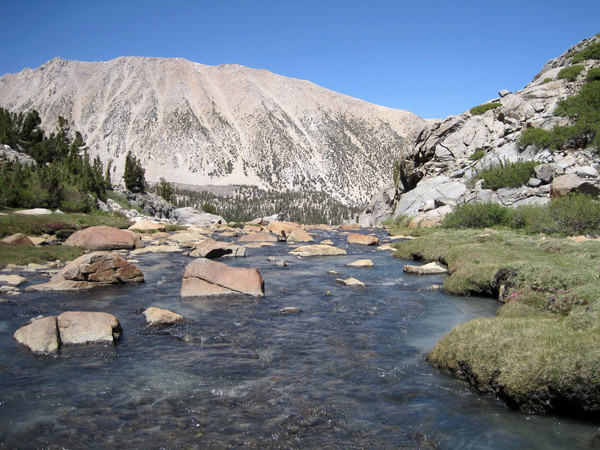
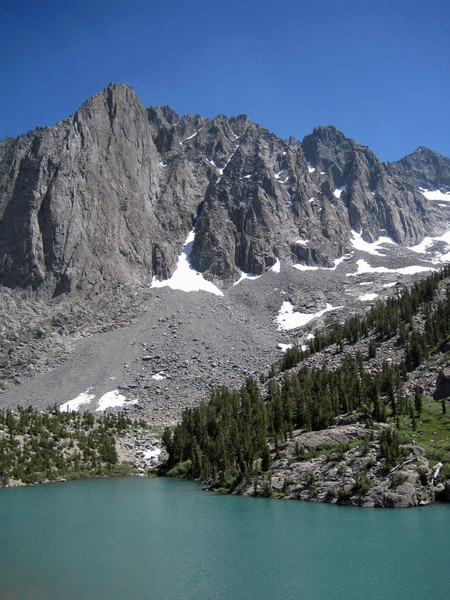
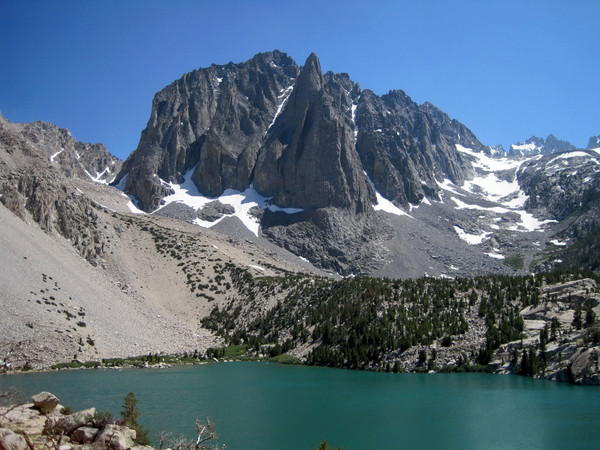
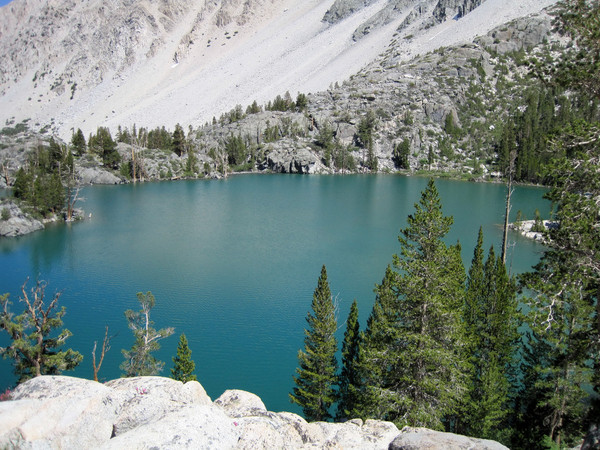
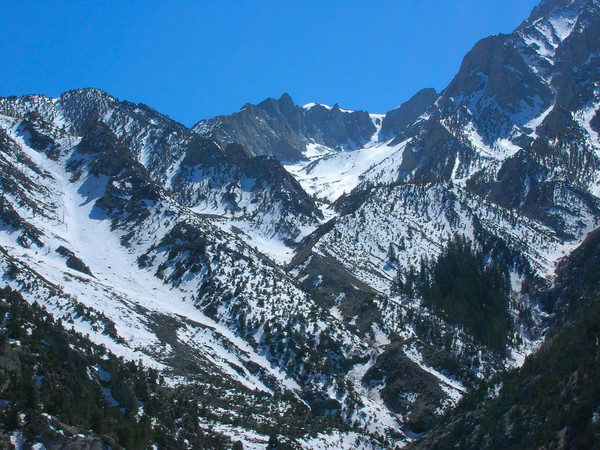
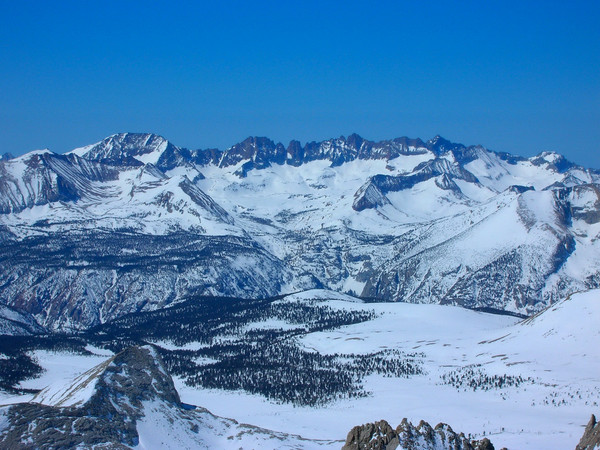
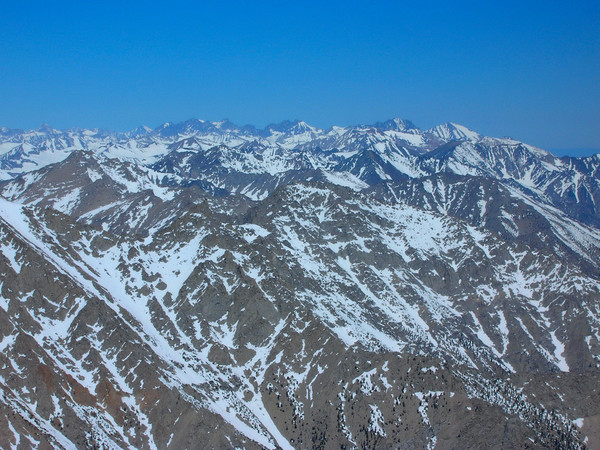
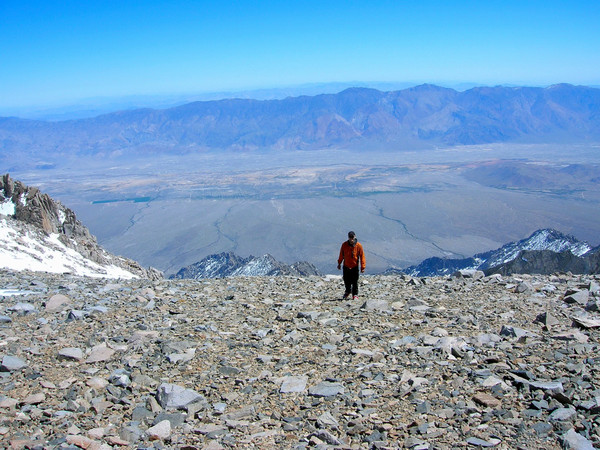
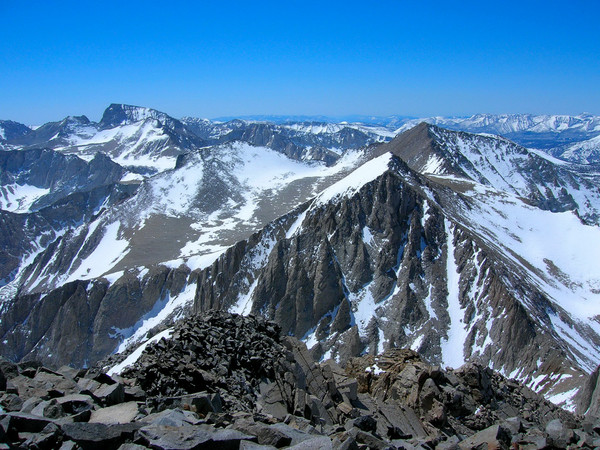
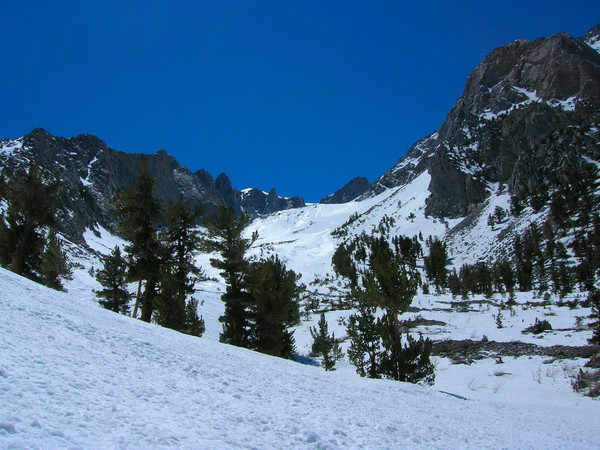
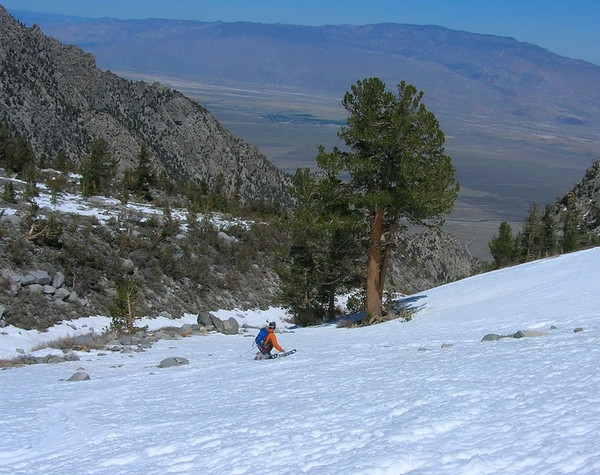
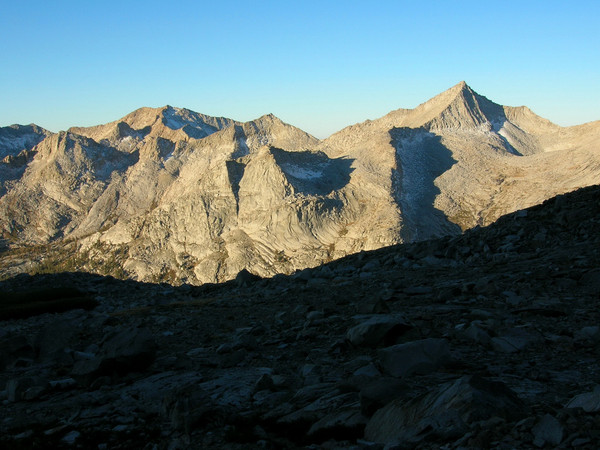
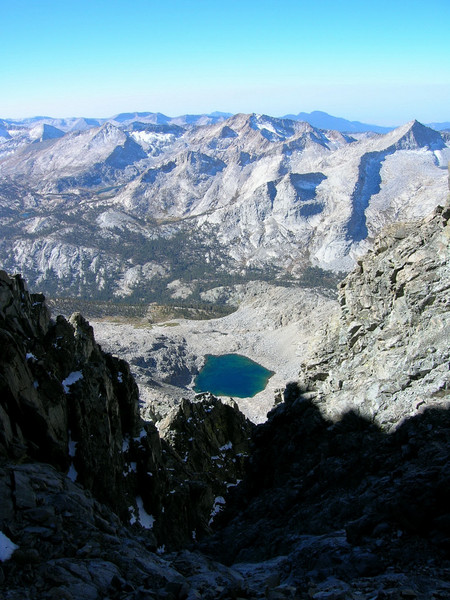
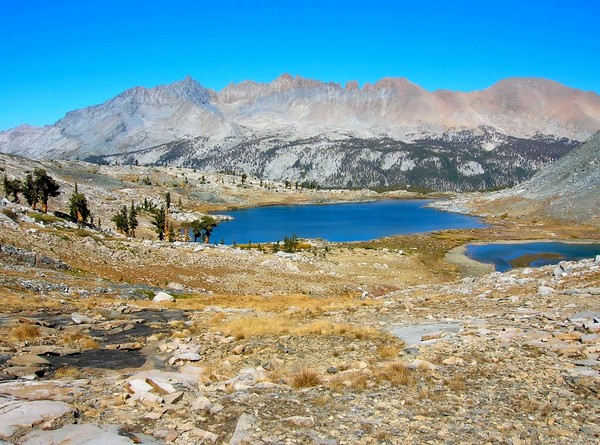
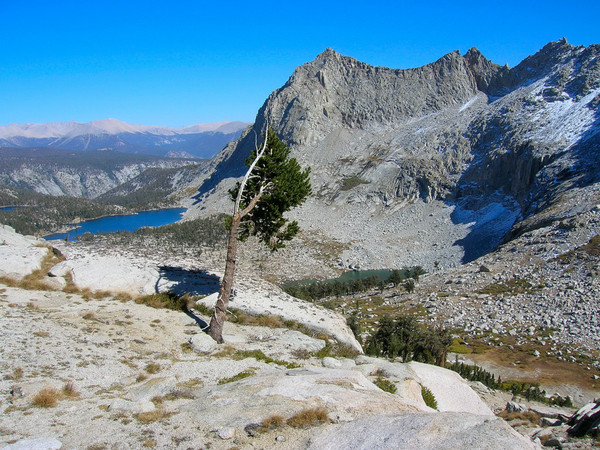
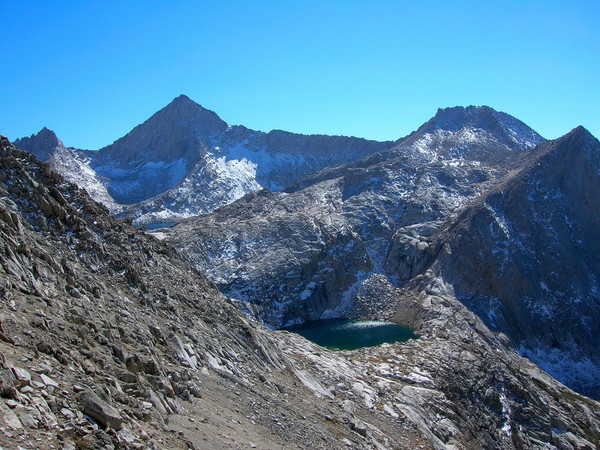
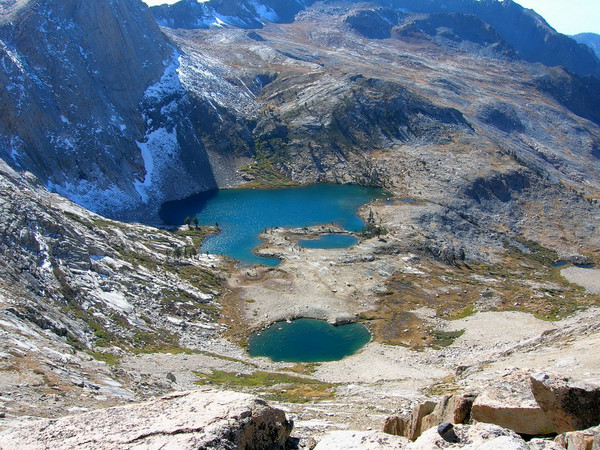
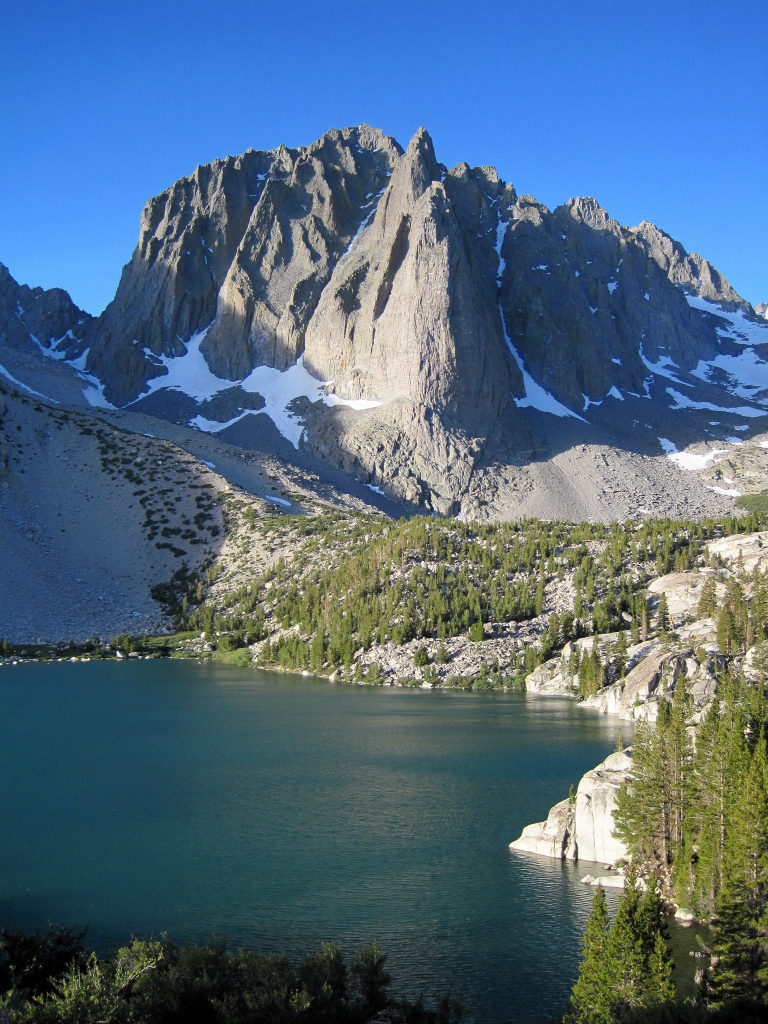
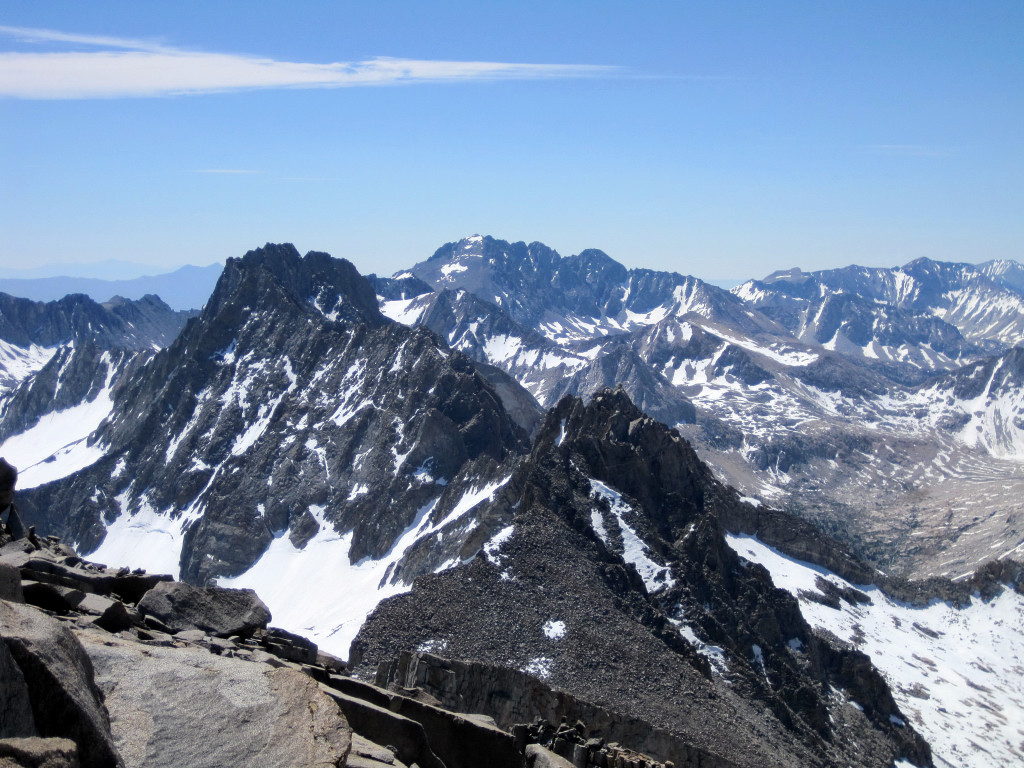
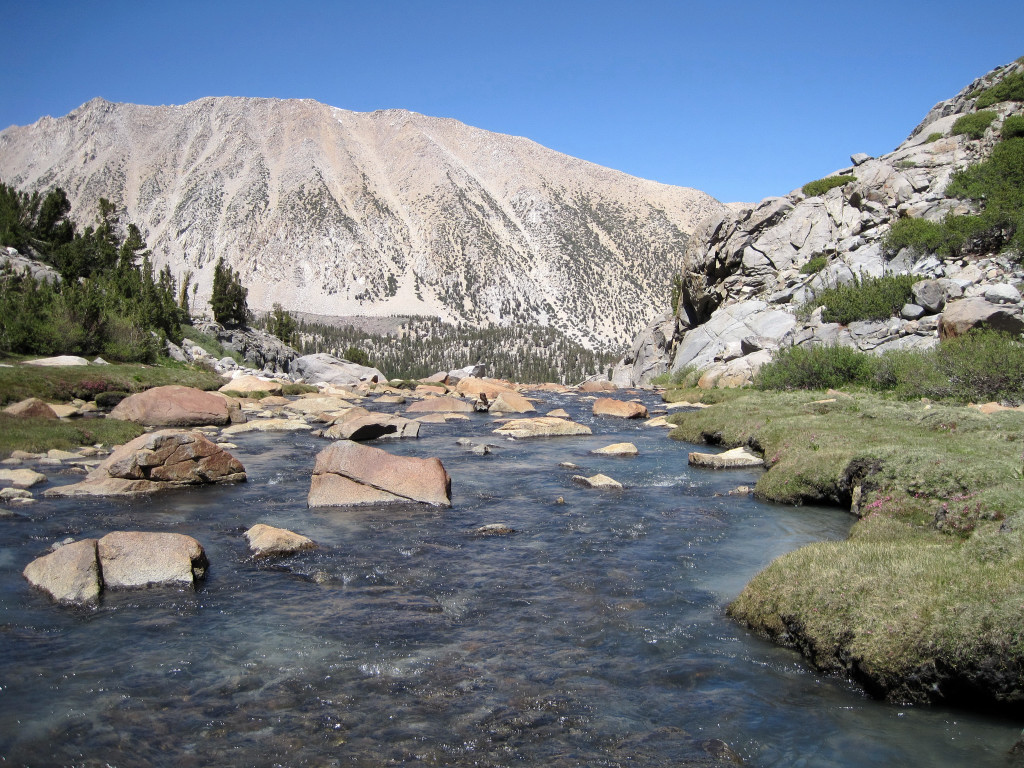
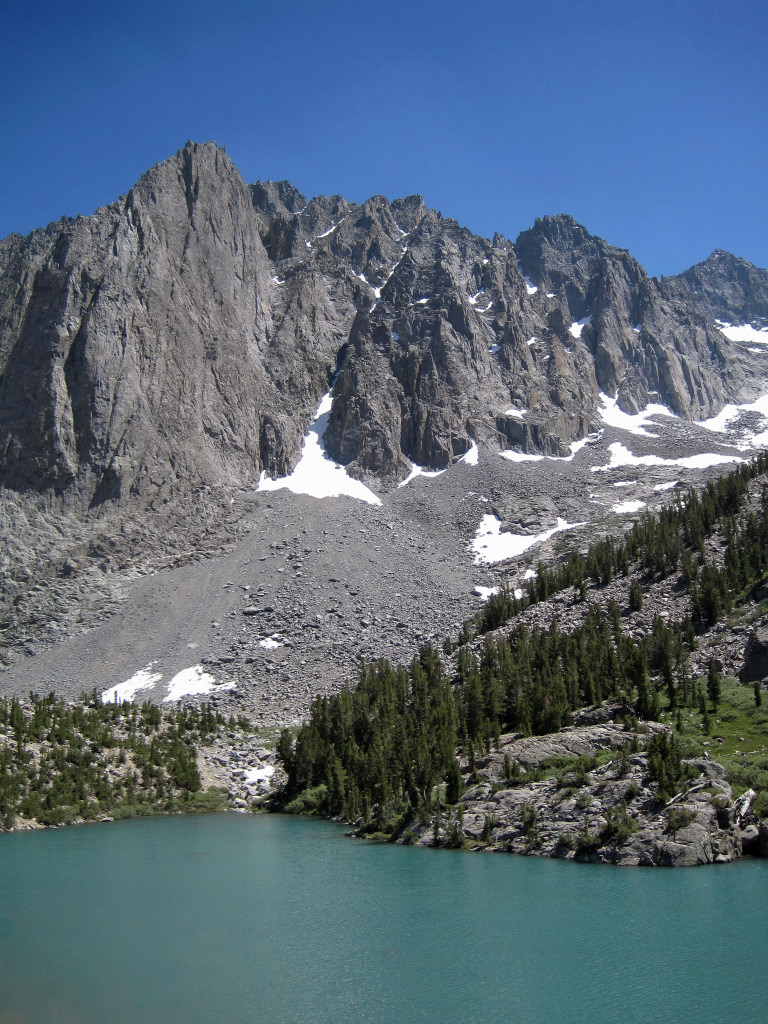
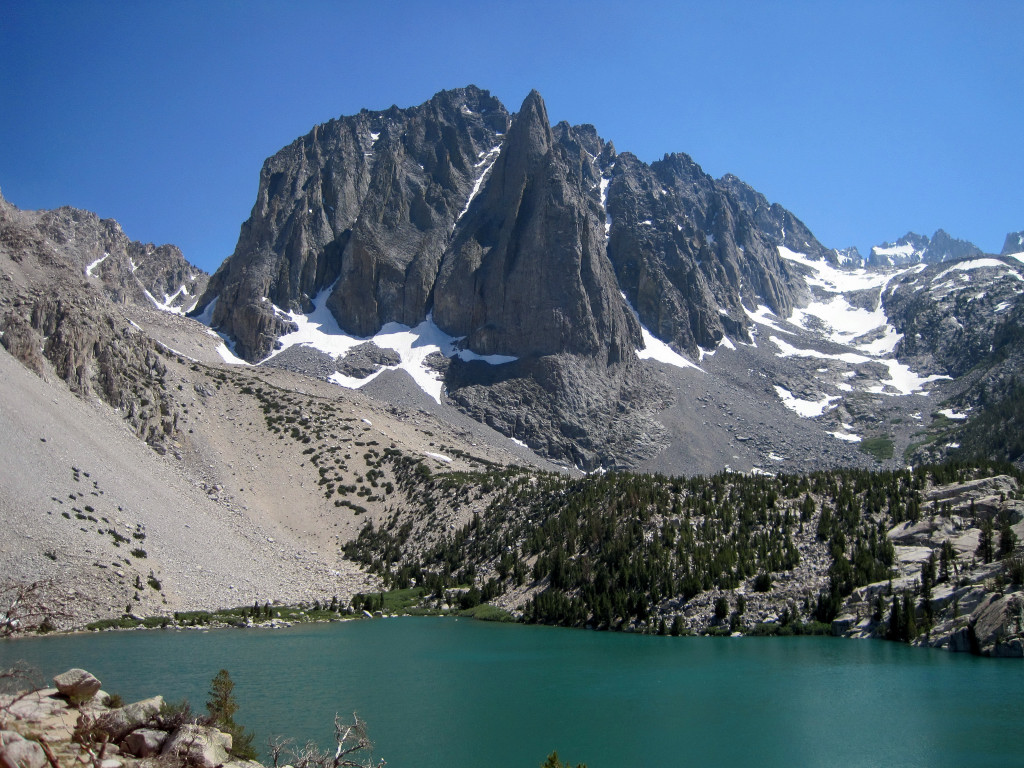
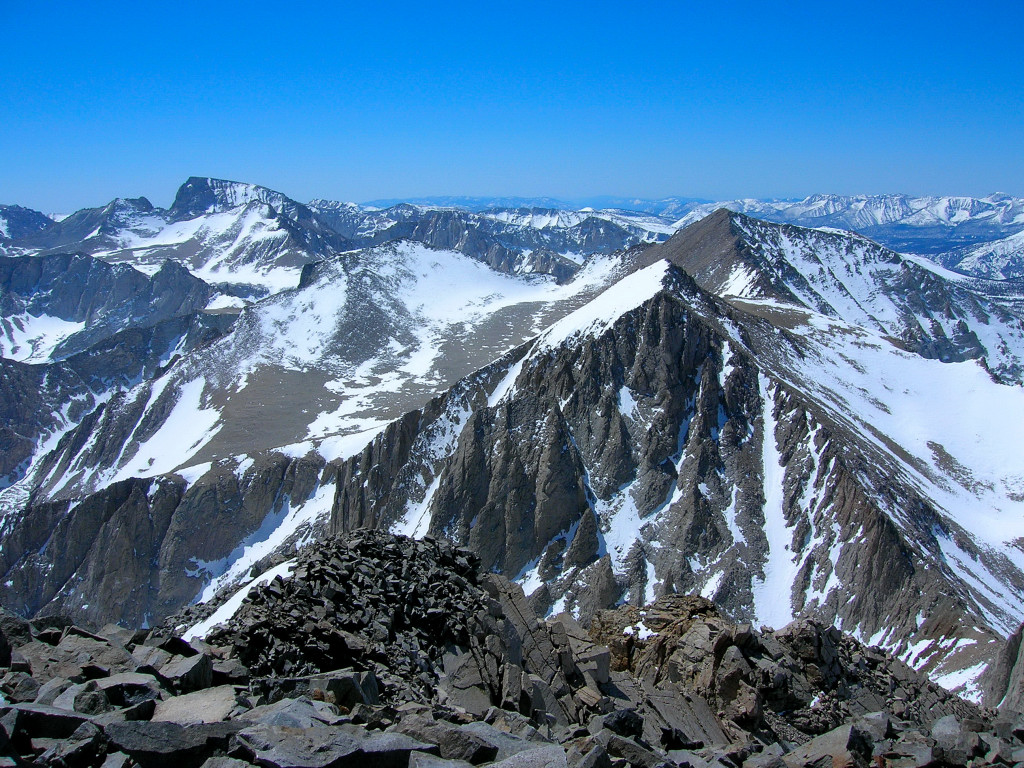
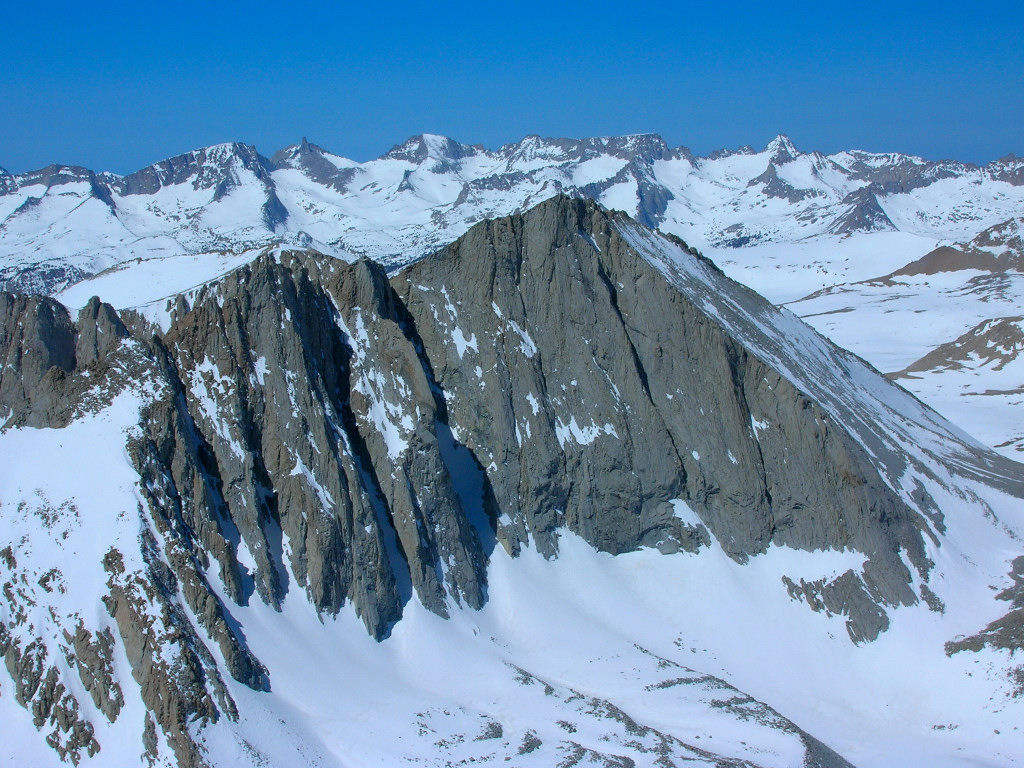
Mount Sill is known to have the best summit view in the Sierra Mountain range and is located in the most rugged part of the range in the Palisades group. Standing 14,153 feet, Sill is the second highest summit in the Palisades (behind nearby North Palisade) and the sixth highest mountain in the state of California. I have done several climbs in the Sierras, but until this climb I had yet to visit the Palisades. The North Couloir route via the North Fork Big Pine Creek is not the fastest route – an easier approach is via Bishop Pass and a shorter approach is via the South Fork Big Pine Creek. However, the North Fork is arguably the most scenic with lovely alpine lakes, towering Temple Crag, and sweeping views of the Palisade Glacier, the largest glacier in the Sierras. I departed at 5:15 am and reached the summit 5:23 after beginning. After 27 minutes on top, I made the return trip in 4:55 for a roundtrip total of 10:45.
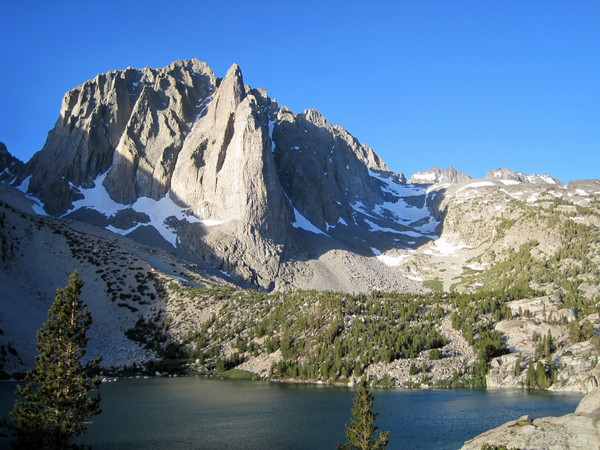
Temple Crag from Second Lake
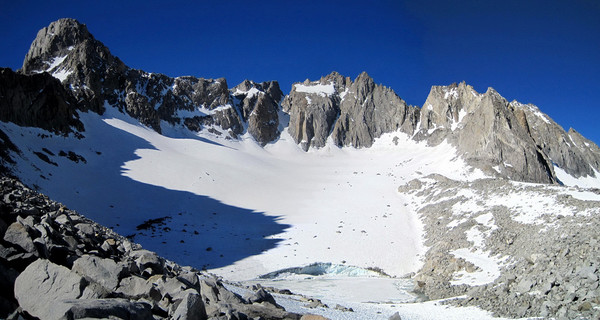
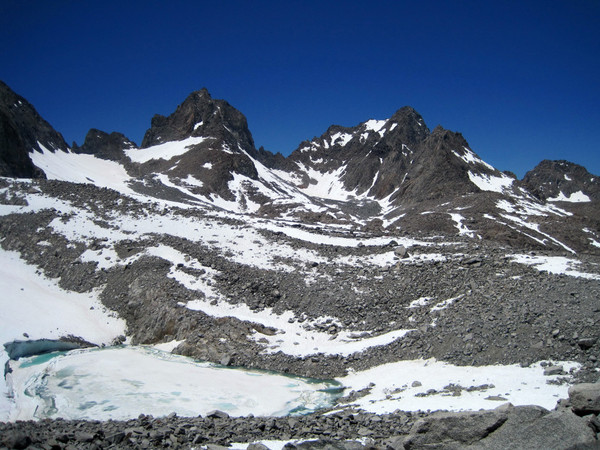
Palisade Glacier Panorama
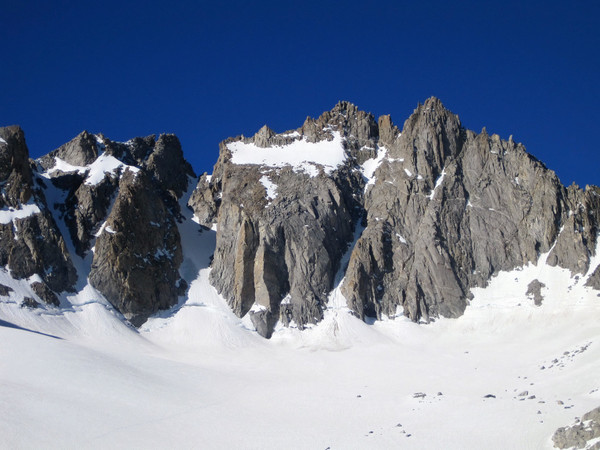
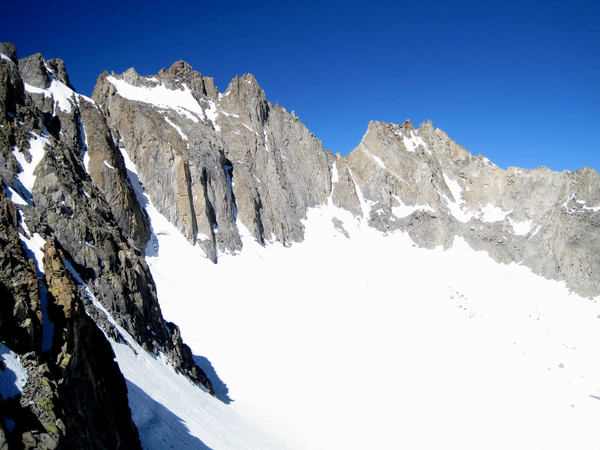
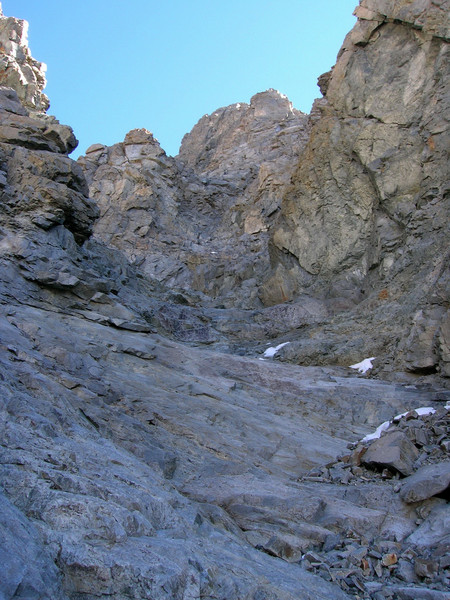
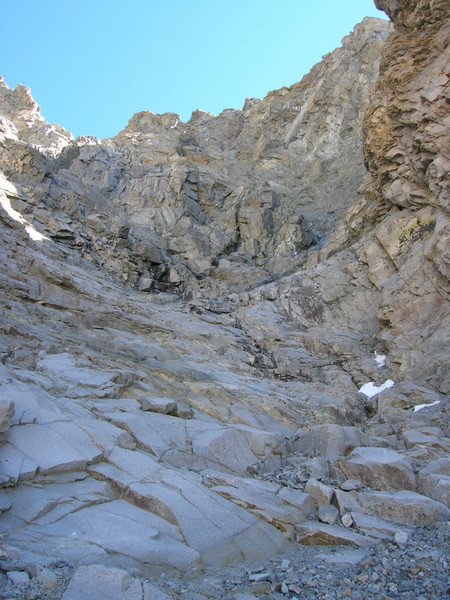
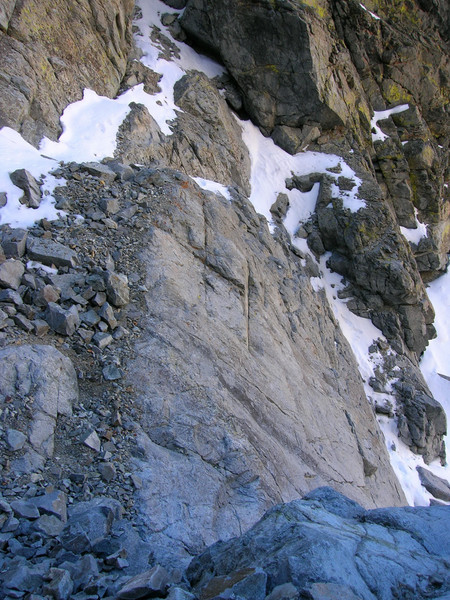
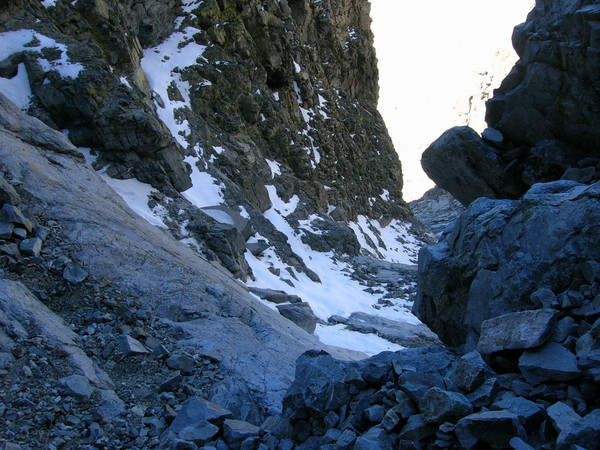
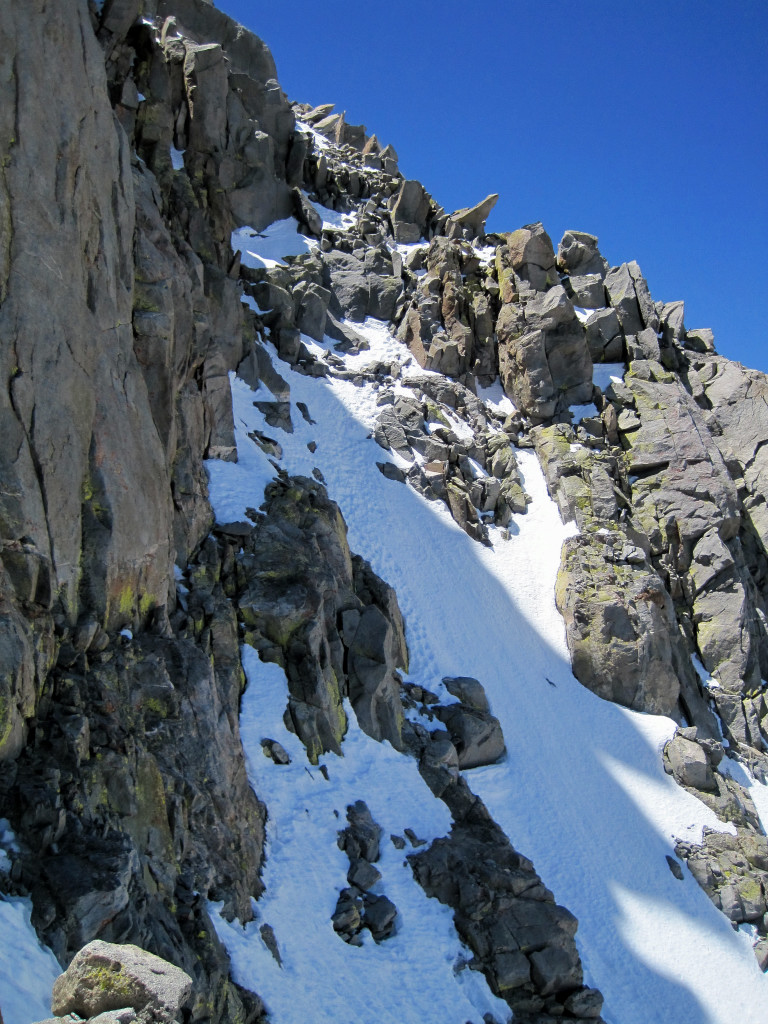
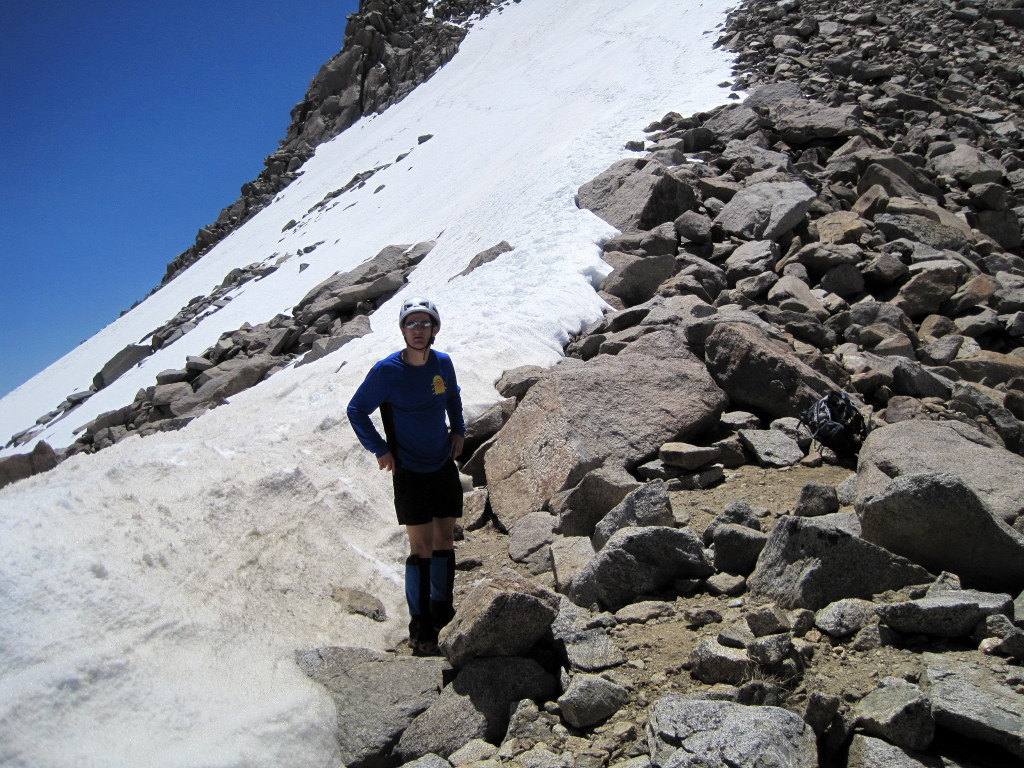
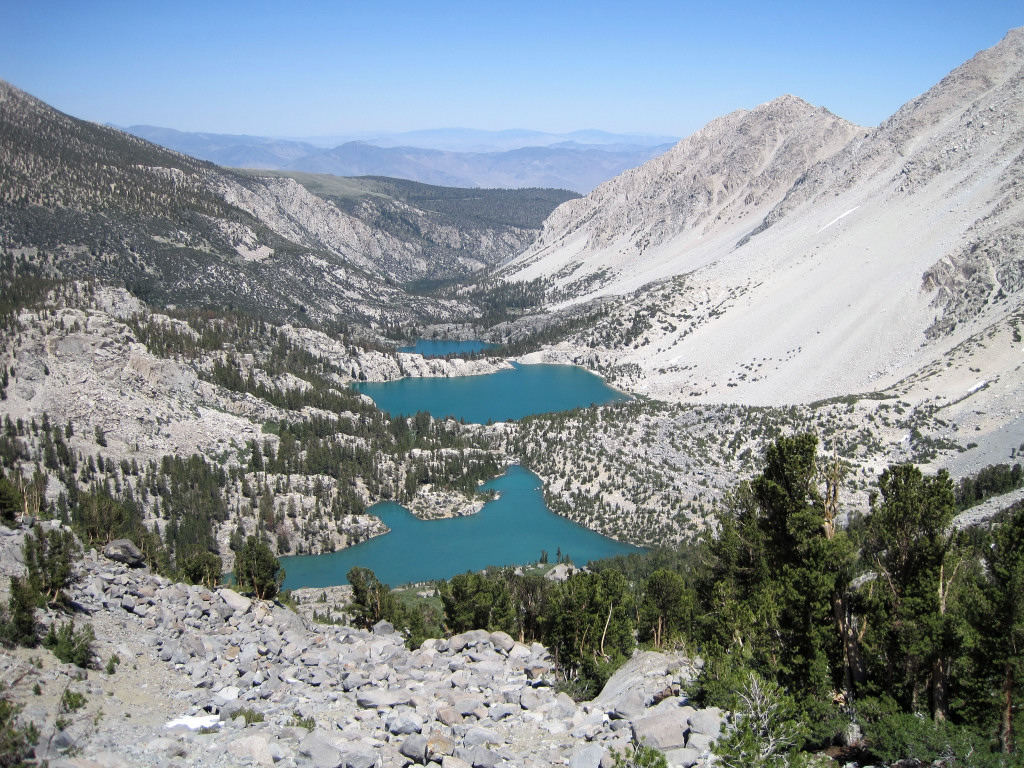
The 10 mile walk up the North Fork of Big Pine Creek in the morning was nice with great views of Temple Crag from Second and Third Lakes. There were some blustery winds that made it a little chilly. Continuing up beyond Sam Mack meadow, there was a surprising amount of snow left around the glacier moraines. The Palisade Glacier also appeared to have a hefty coat of snow on it. Since I essentially climbed the mountain straight form sea level, I felt the altitude a bit heading up the L-shaped North Couloir. In addition, the class 3 / 4 traverse was partially covered in steep and icy snow requiring more attention. The view from the summit was spectacular and I look forward to climbing other peaks in the Palisades.
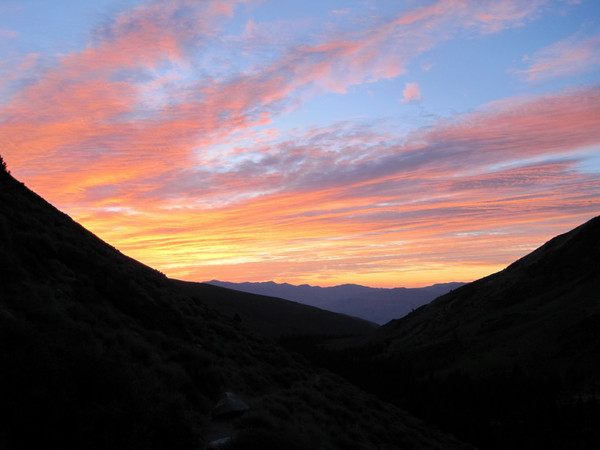
Sierra sunrise

Temple Crag from Third Lake
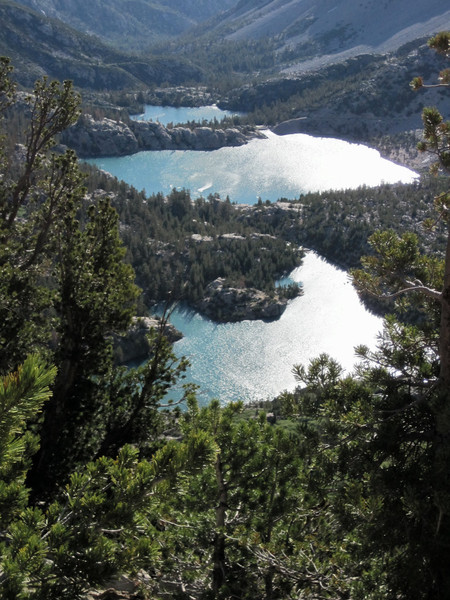
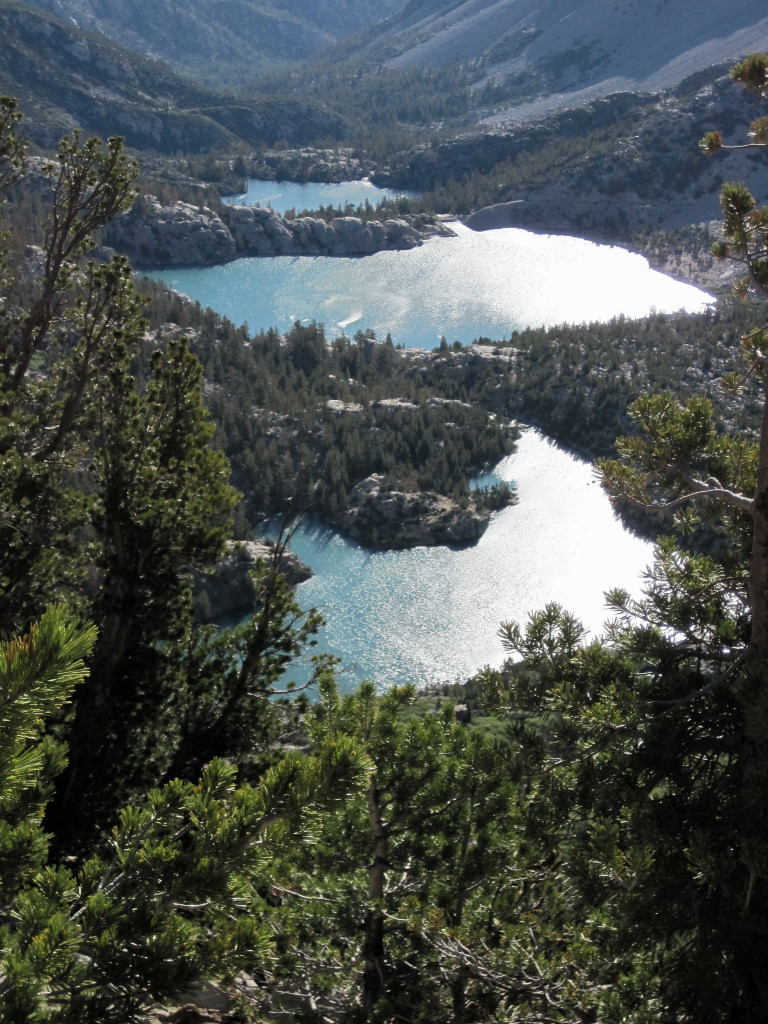
First, Second, and Third Lakes
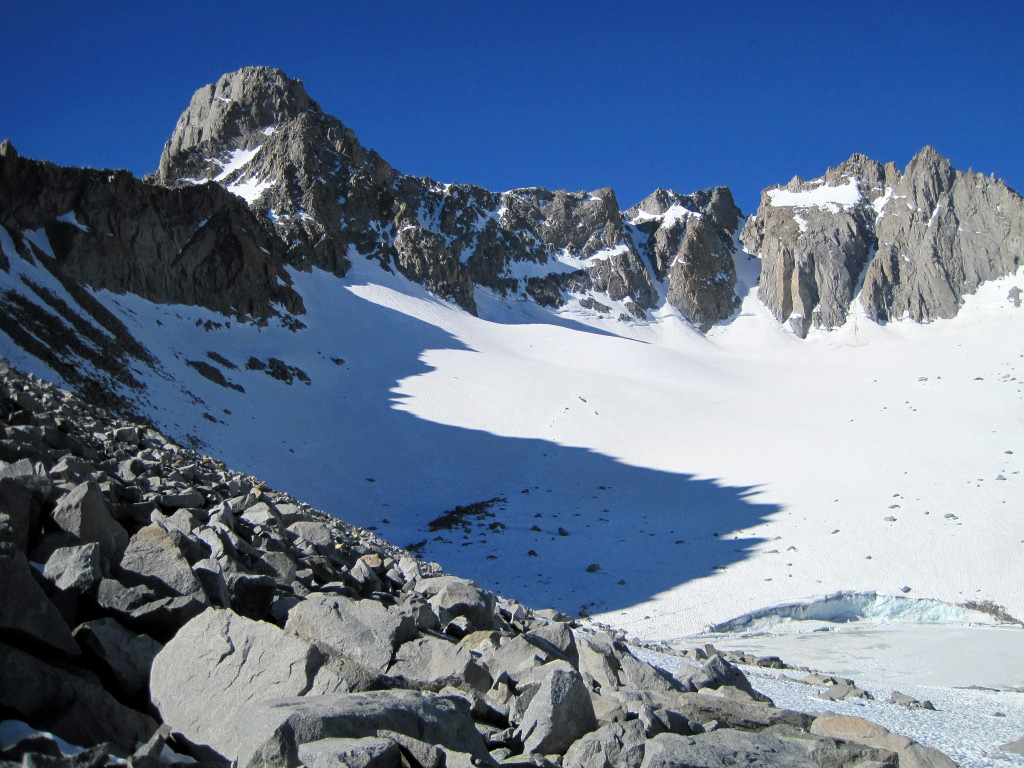
Mount Gayley (left) and Mount Sill (right)

Mount Sill and Palisade Glacier
North Palisade
North Palisade and Thunderbolt Peak from Glacier Notch
[video:youtube]

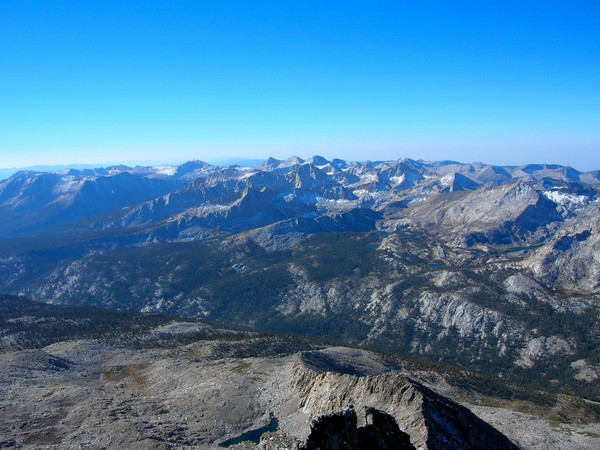
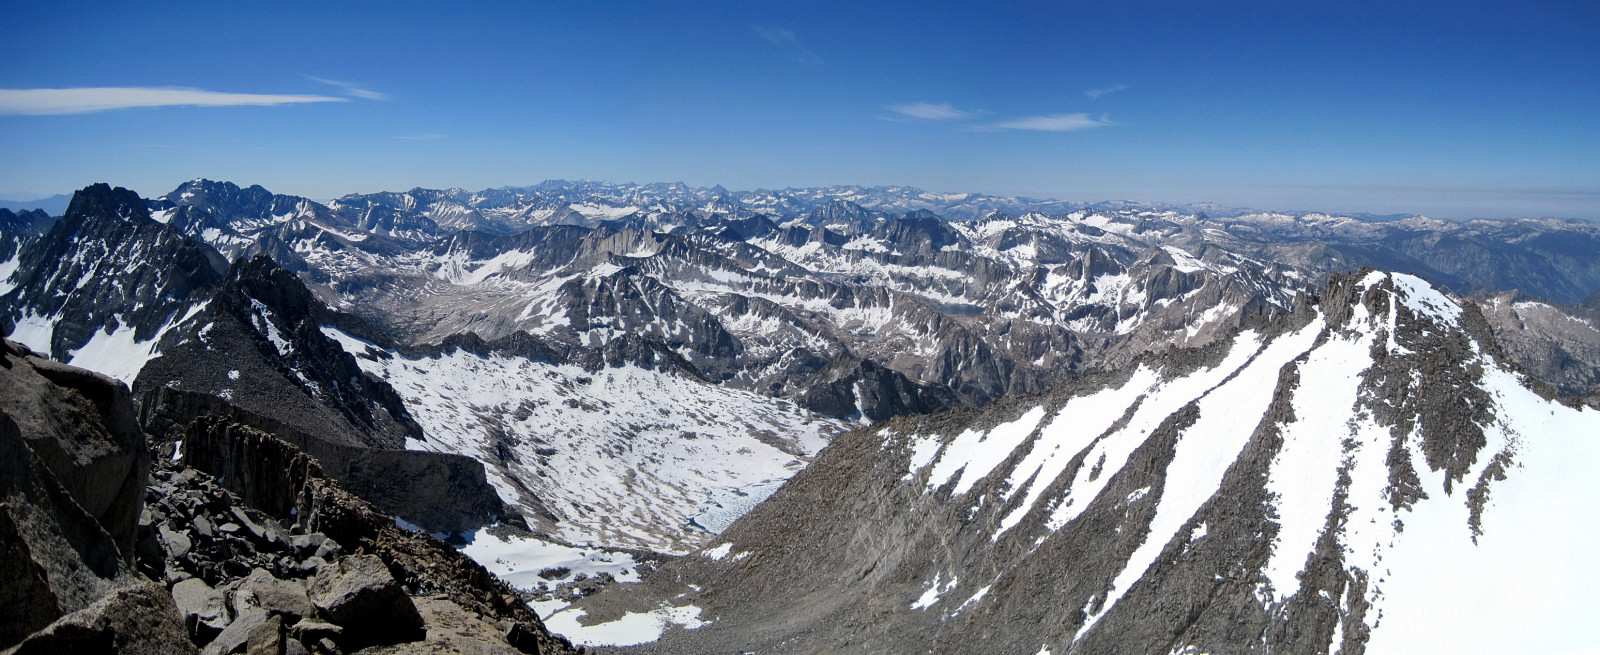
Panorama looking north from the summit
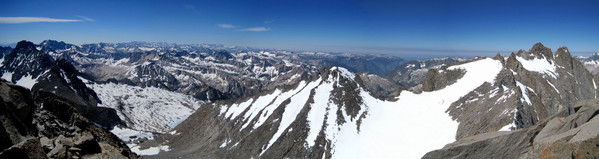
Wide panorama from the summit of Sill
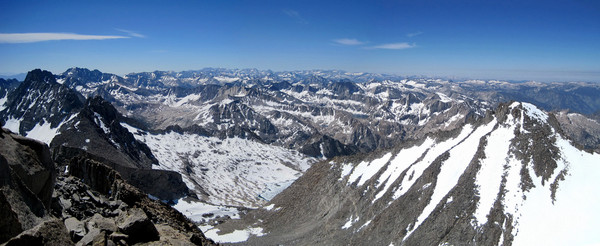
Panorama looking South from Sill
[video:youtube]

Norman Clyde Peak, Middle Palisade, and Split Mountain

Rugged high Sierra
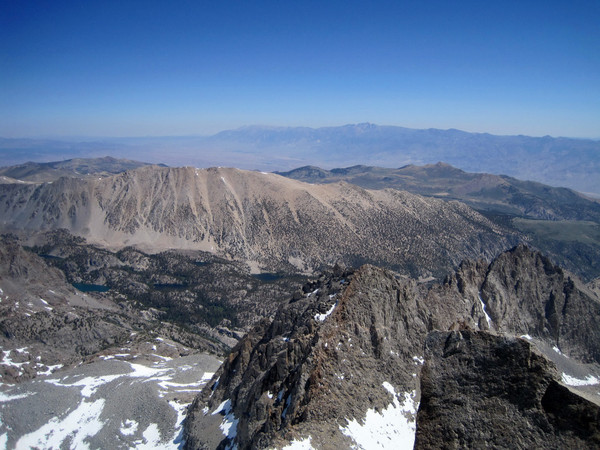
North Fork Big Pine Creek and Owens Valley in the distance.

North Couloir route class 4 section with steep and icy snow.

Mount Winchell (left) and Mount Agassiz (right)

A look down the North Fork Big Pine Creek
Close-up of first, second, and third lakes
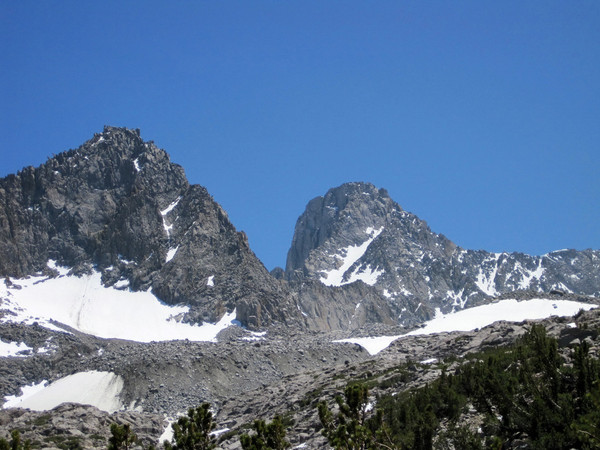
Mount Gayley and Mount Sill
Sam Mack Meadow

Third Lake
Second Lake
First Lake
Gear Notes:
Crampons, ice axe, helmet
Approach Notes:
Trail in good shape to the moraines below Palisade Glacier; snow thereafter.
-
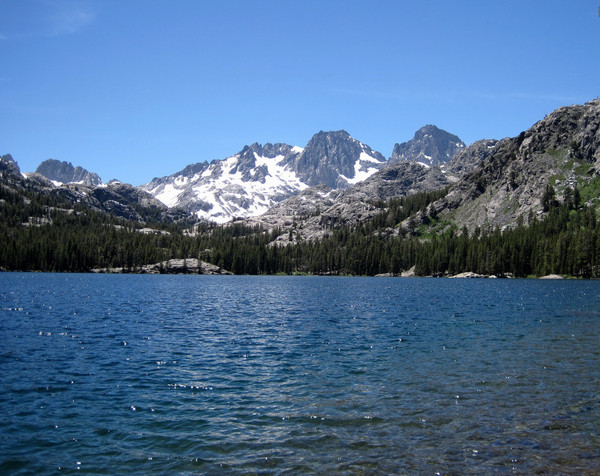
Trip: Clyde Minaret - Rock Route
Date: 7/10/2009
Trip Report:
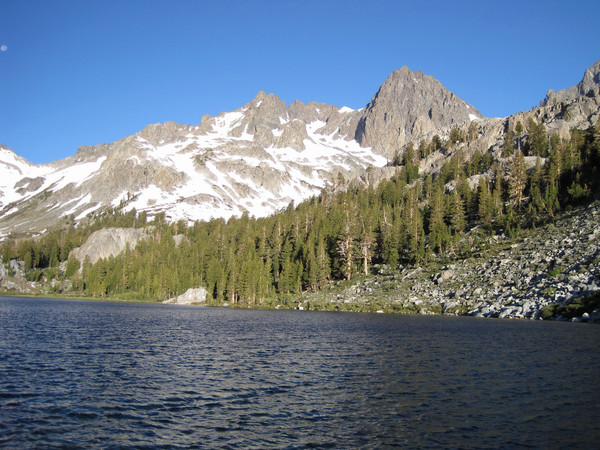
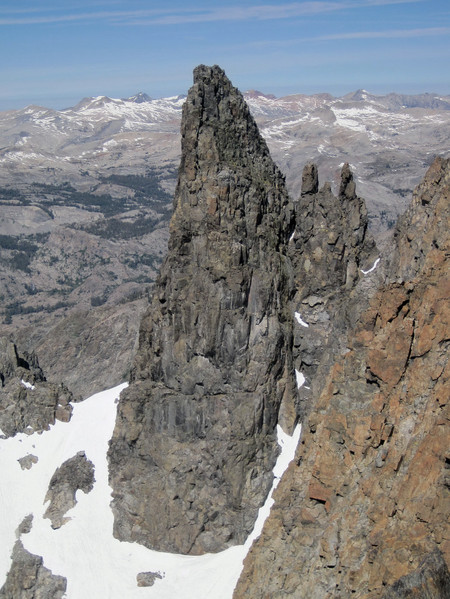
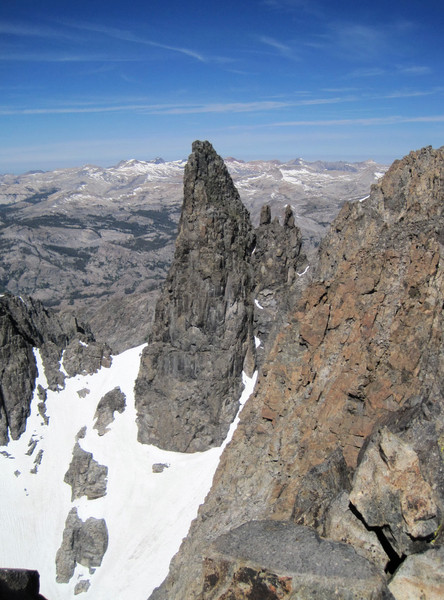
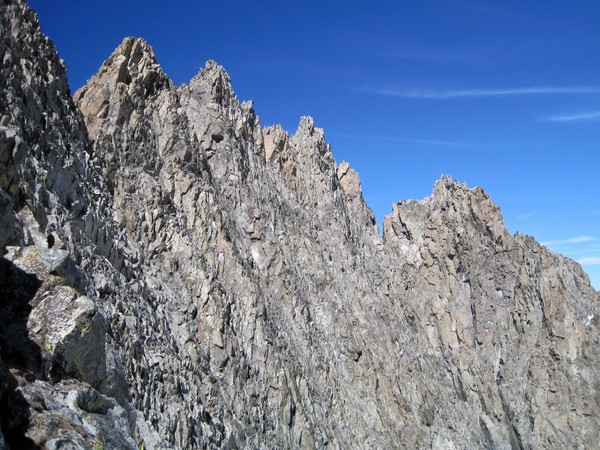
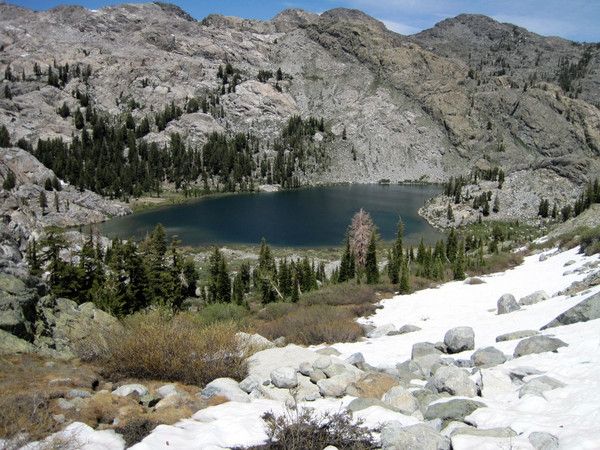
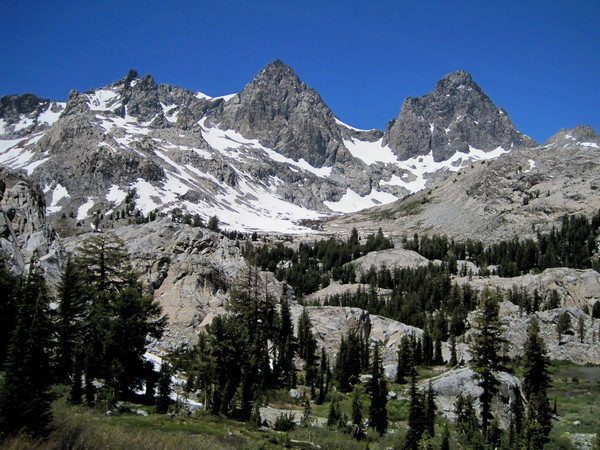
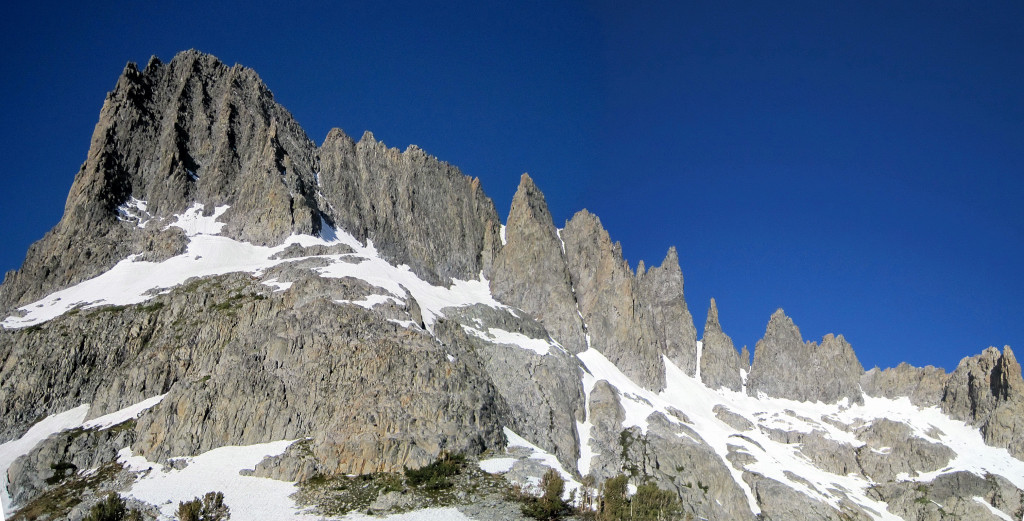
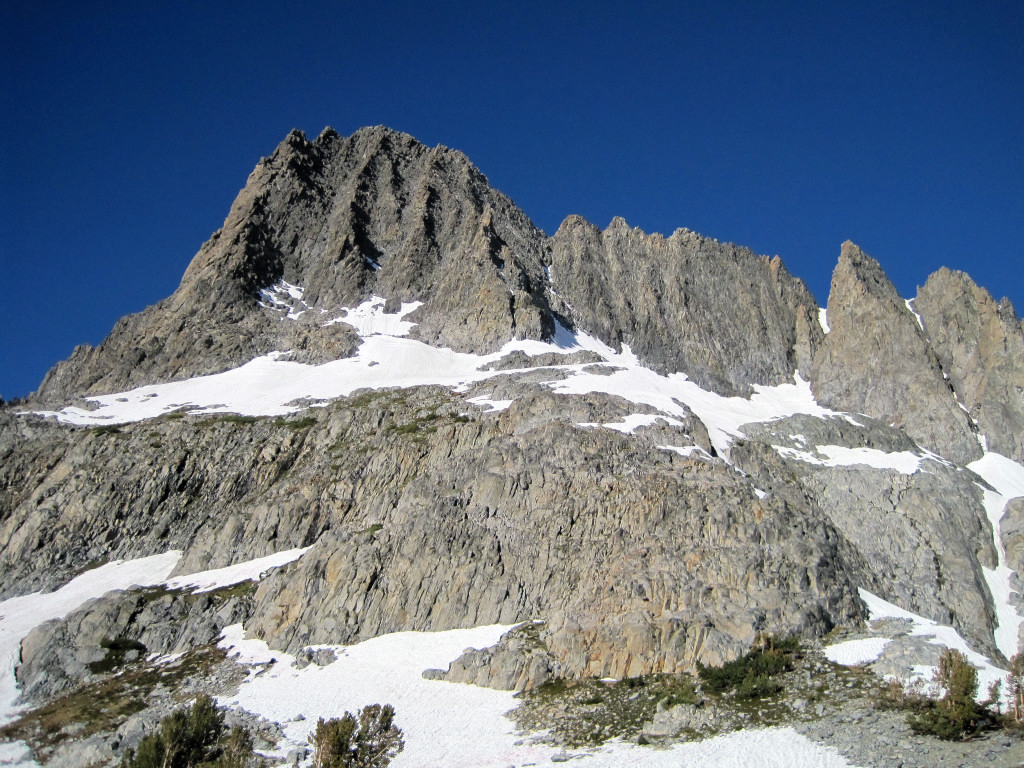
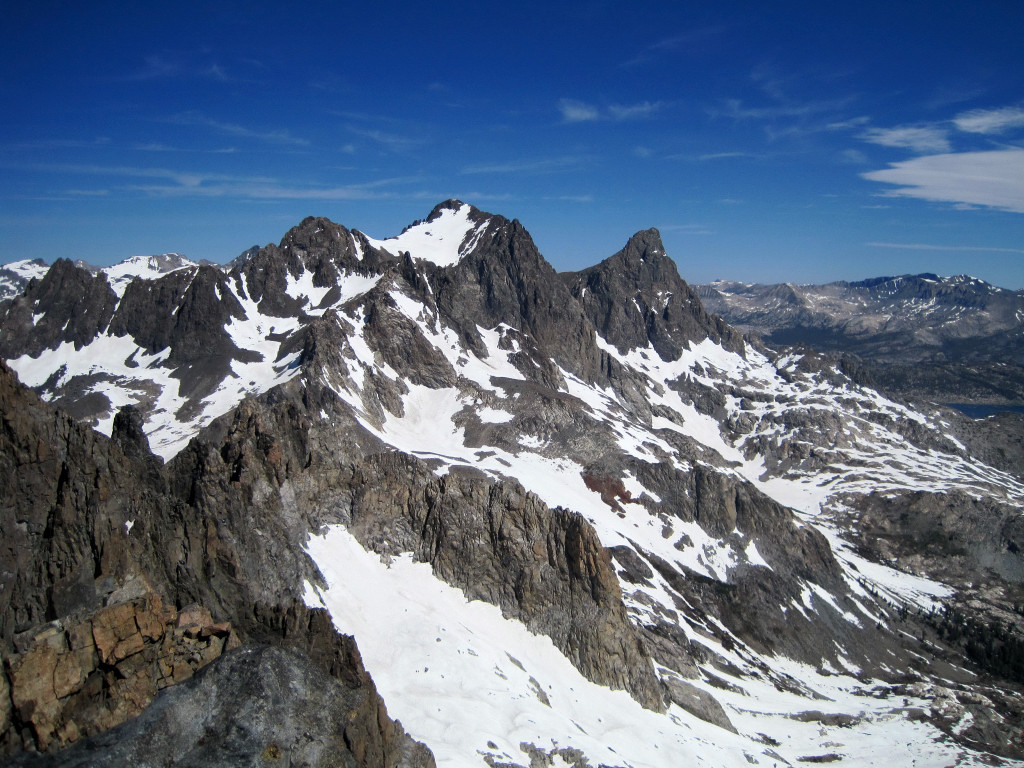
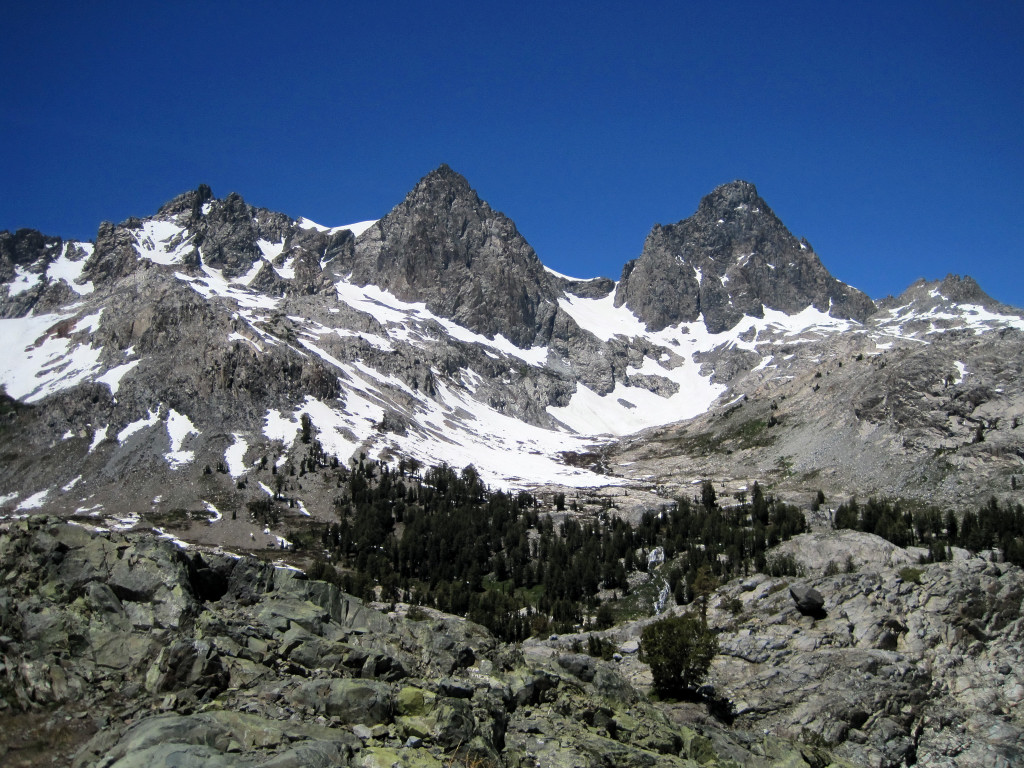
Clyde Minaret is the highest point of the rugged Minaret group of peaks near Mammoth Lakes. I have wanted to climb in the Minarets since I first viewed them from the summits of Mount Ritter and Banner Peak in 2007. I took the Rock Route, which is the easiest route up to the summit, but still involves exposed class three scrambling and a class 4 downclimb. I reached the summit 5:03 after beginning, took 15 minutes on the summit, and returned in 4:27, for a total roundtrip of 9:45. Since I had climbed Mount Sill in the Palisades the previous day, I was hoping for a shorter outing, but the route up Clyde Minaret proved to be involved with quite a bit of scrambling and spicy snow/ice sections. All in all, a very enjoyable climb with spectacular scenery.

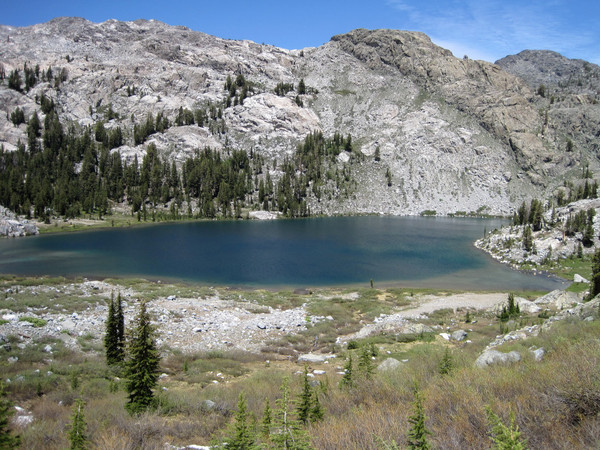
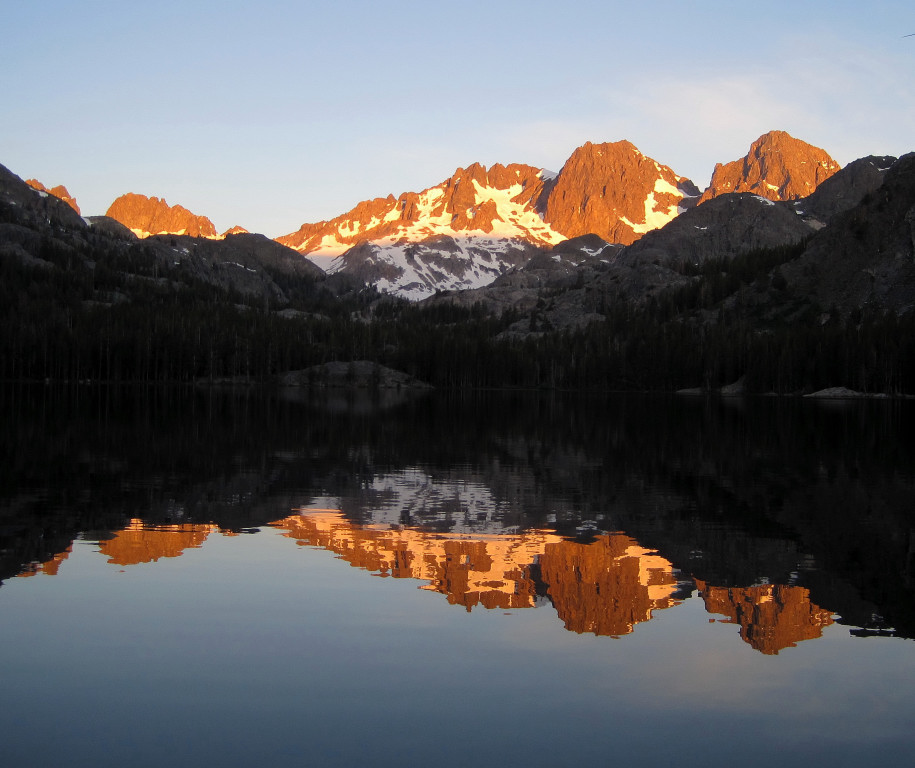
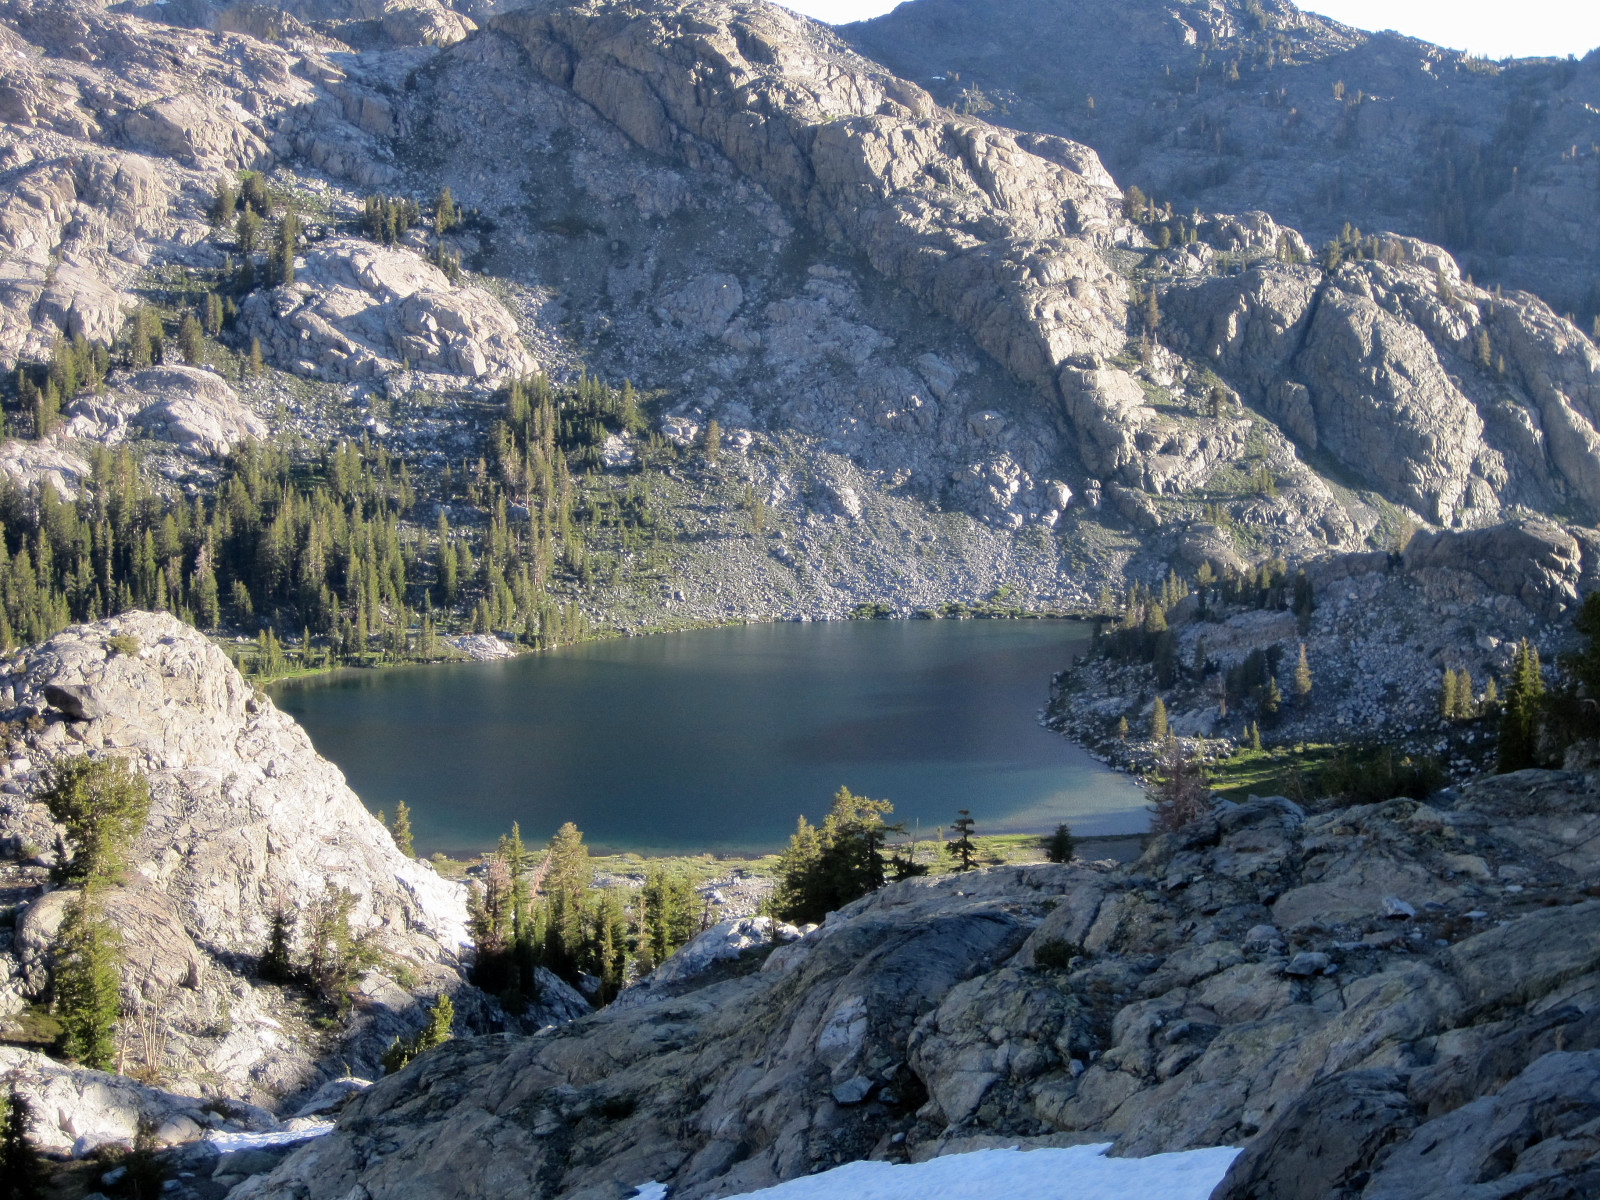
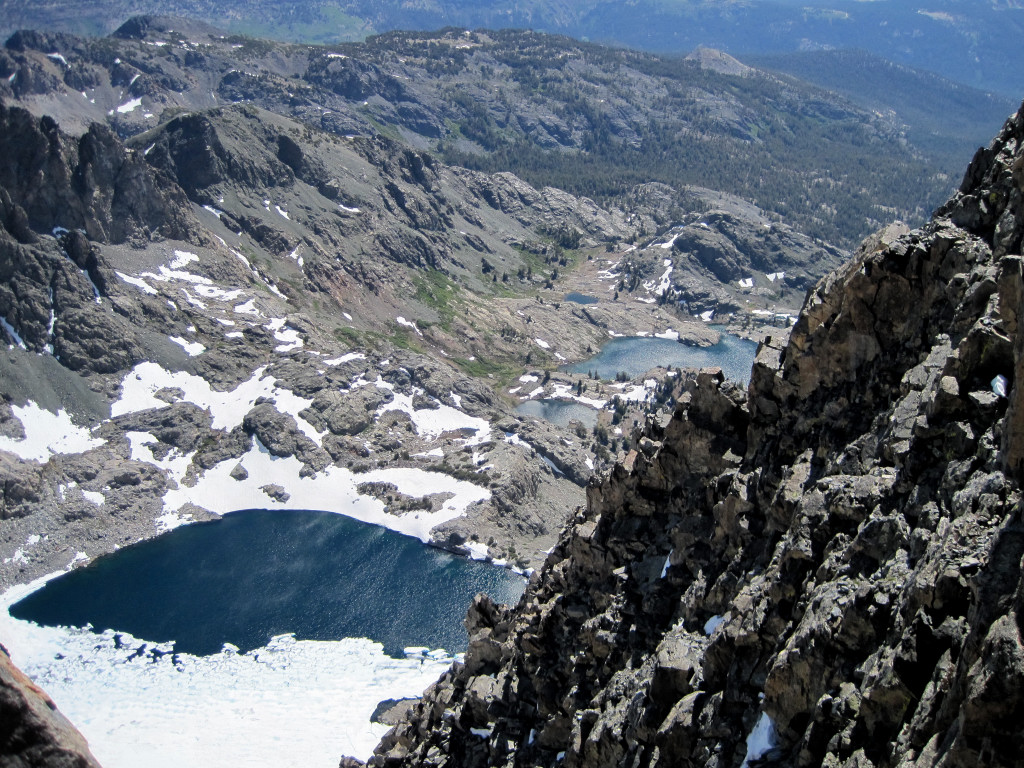
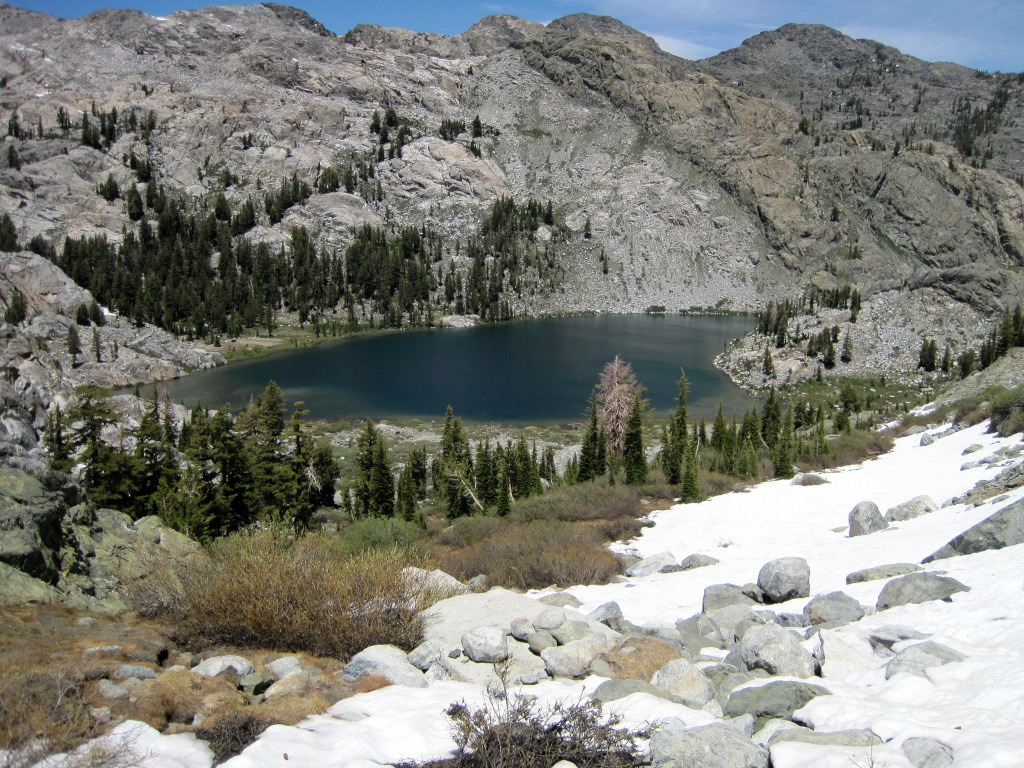
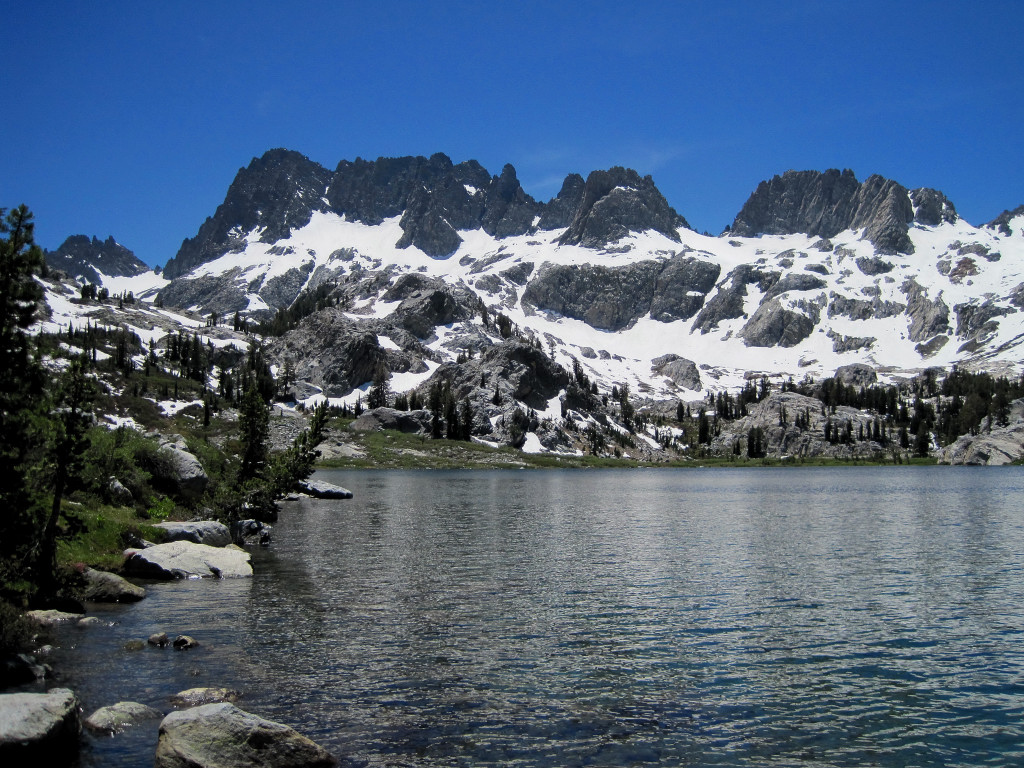
I started at Agnew Meadows at 4:55 am and reached Shadow Lake just in time for alpenglow over Mount Ritter and Banner Peak. I continued on up the canyon to gorgeous Lake Ediza and then up snowfields to Iceberg Lake. Icy snow covered the steeper terrain between Iceberg Lake and Cecile Lake so I put crampons on. I reached Cecile Lake about 2:50 after beginning (9.5 miles) and thought the summit could be an hour away, however, I ran into some complexities. First, I tried to avoid the icy steep snow by accessing the ledge at the start of the route from the south side but was turned around by a gaping bergschrund. Realizing the north access was the only route that would work, I retraced my steps and swung around to the north side. This aspect is in the shade most of the day resulting in steep snice, inappropriate for my Kahtoola aluminum crampons. Fortunately, I found a way to ascend to the ledge by climbing up between the snow and the rock. The next complexity was a series of steep snow patches in the narrow chute of the Rock Route. It took some time, but I found ways around these snow patches with occasional 4th class climbing. Finally, I had some routefinding issues on the upper part of the route by climbing to the right of the rib crest where the climbing was more difficult. I finally made it up to the false summit, downclimbed the class 4 section, and made my way to the summit. Great views of the Minarets, Ritter/Banner, and the many alpine lakes below. The clarity was great with Mono Lake clearly visible in the distance. After a break on the summit, I began the descent with the route seeming much more obvious from above. Downclimbing the steep, icy snow below the ledge was tedious, but I was happy to find that the snow between Cecile Lake and Iceberg Lake had softened up. From Lake Ediza I jogged most of the way back to Agnew Meadows, arriving 9:45 after beginning at 2:40 pm.
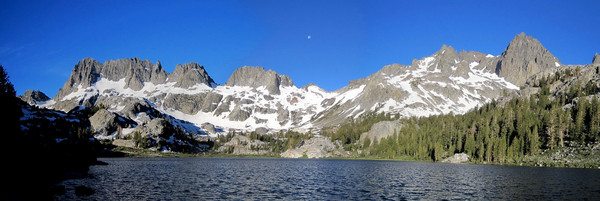
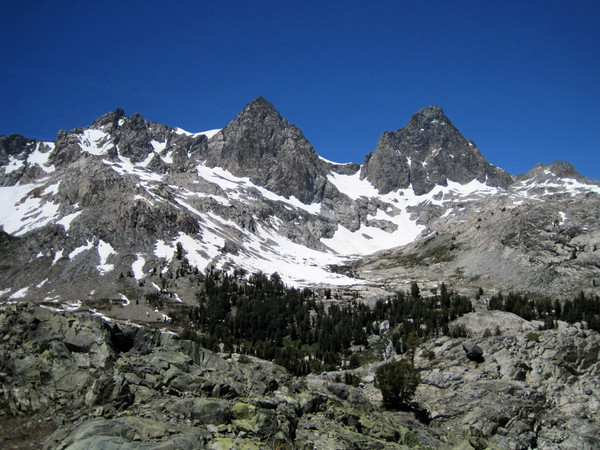
Panorama from Lake Ediza
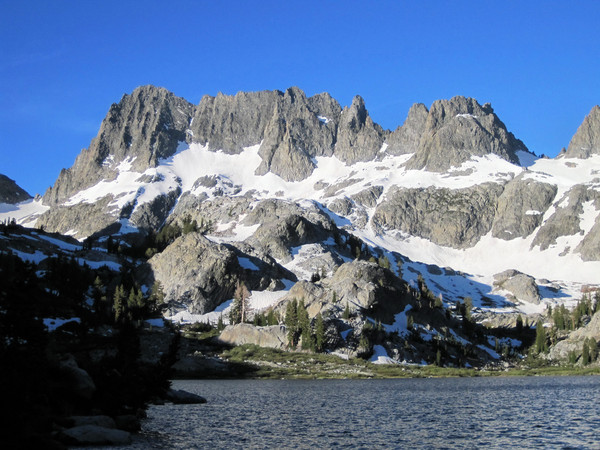
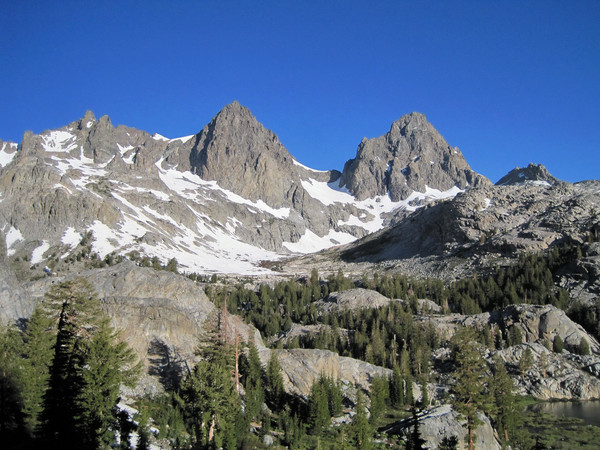
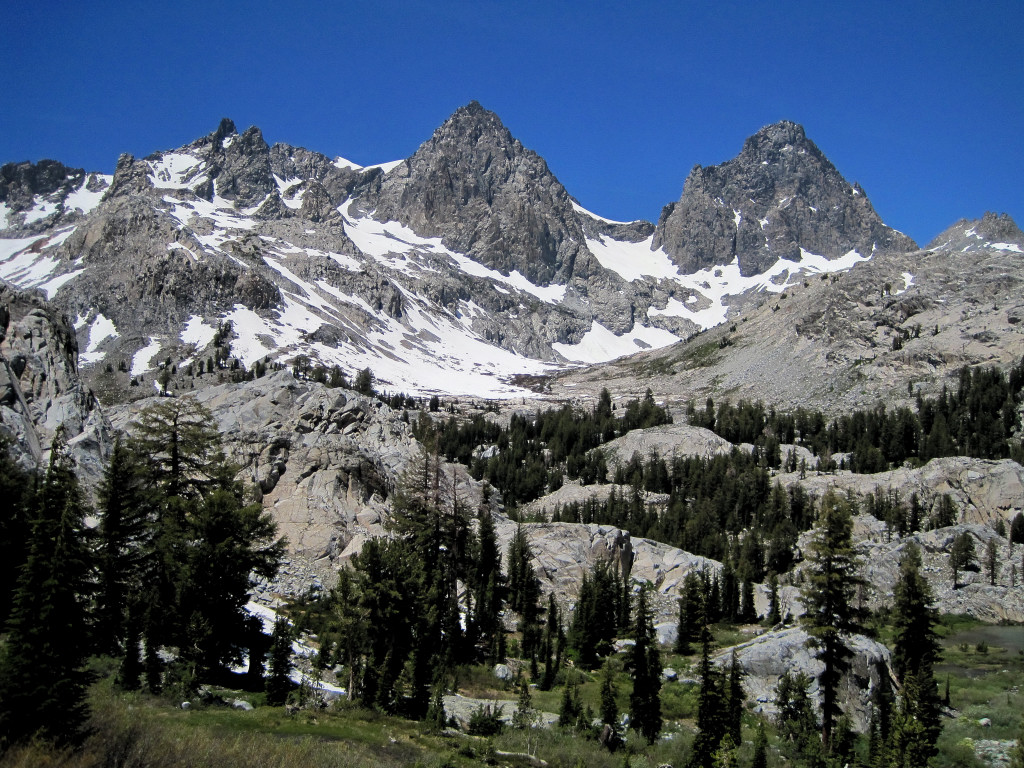
The Minarets from Lake Ediza
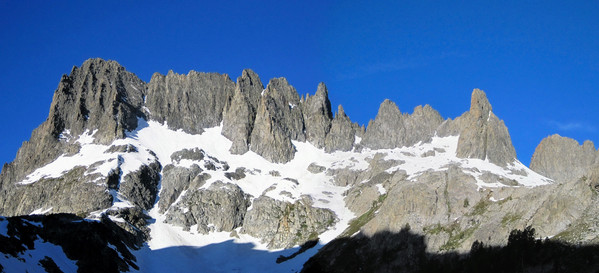
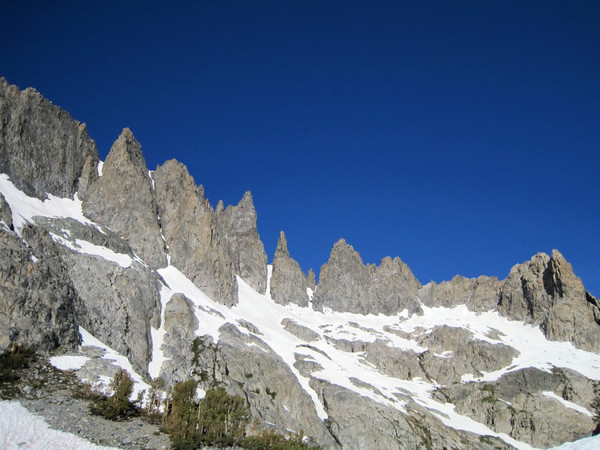
The Minarets
Ritter and Banner

Lake Ediza
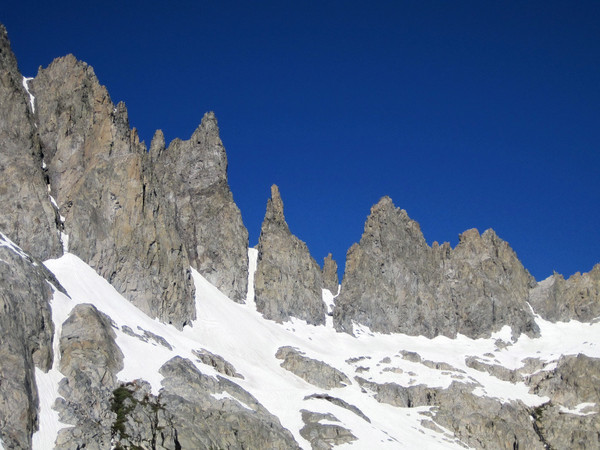

Minaret Panorama
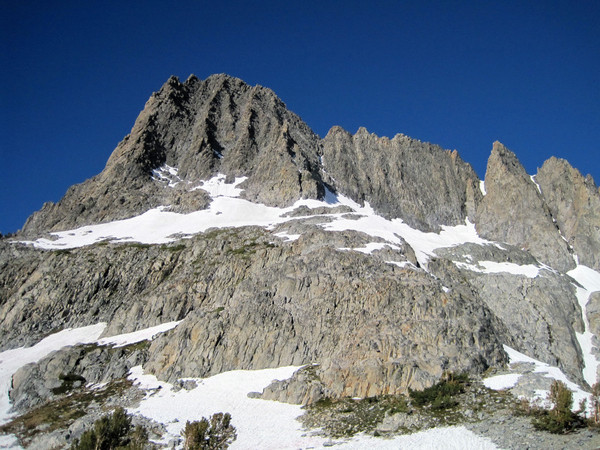
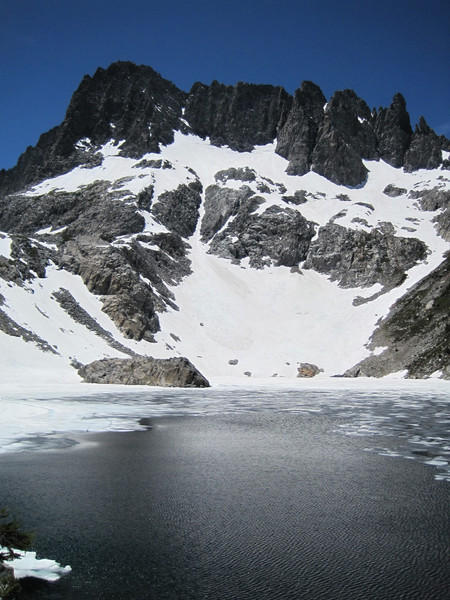
Clyde Minaret from Cecile Lake

Ritter and Banner from the summit
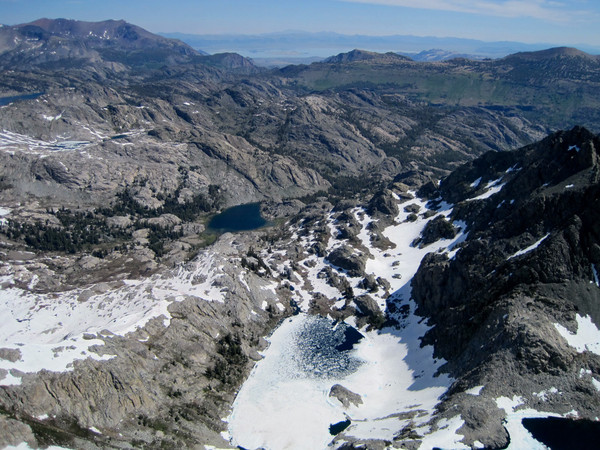
Looking down to Iceberg Lake and Lake Ediza
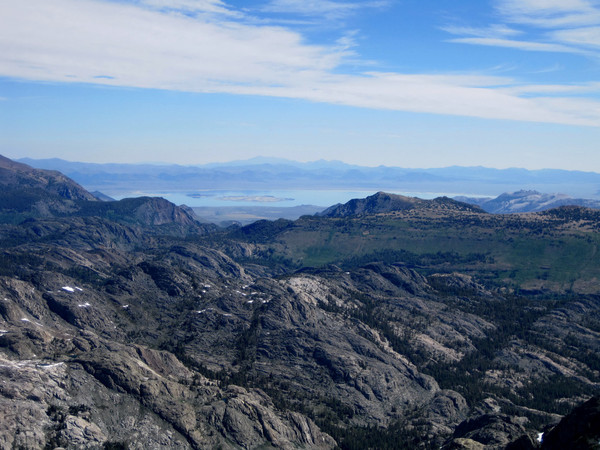
Mono Lake in the distance

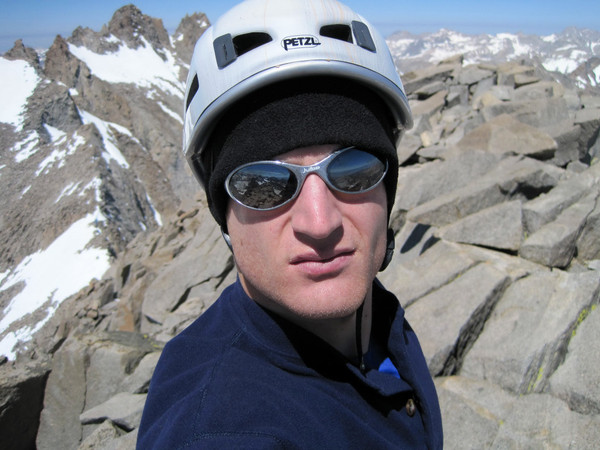
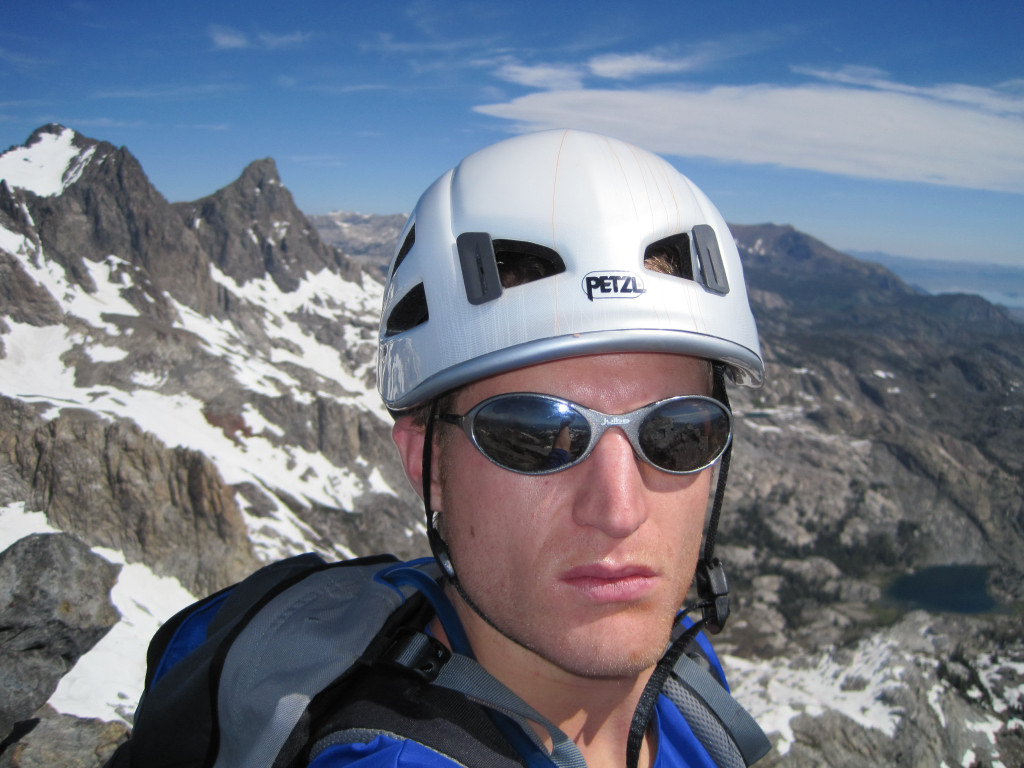
Summit shot
[video:youtube]

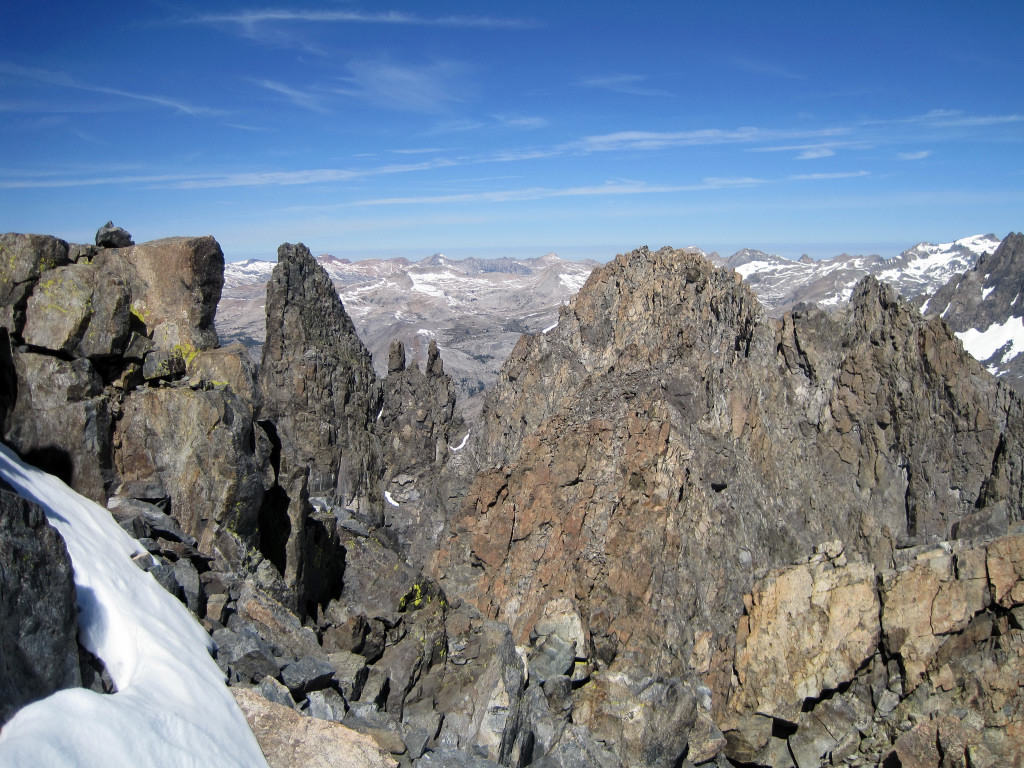
Minarets from the summit
Michael Minaret

4th Class step


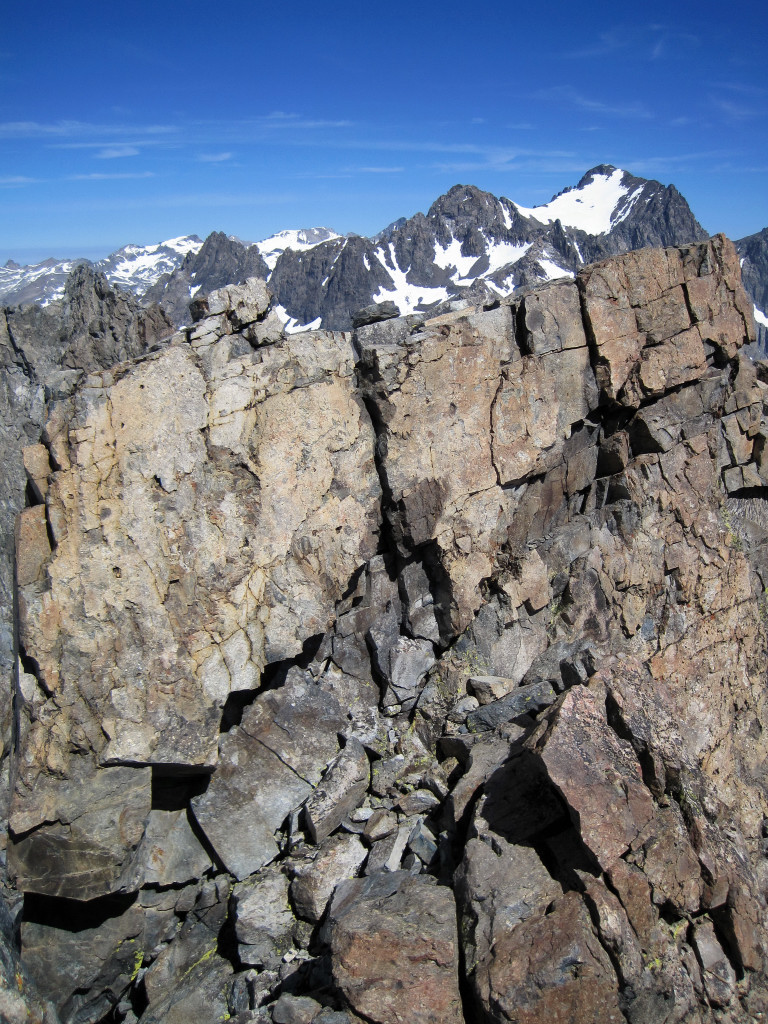
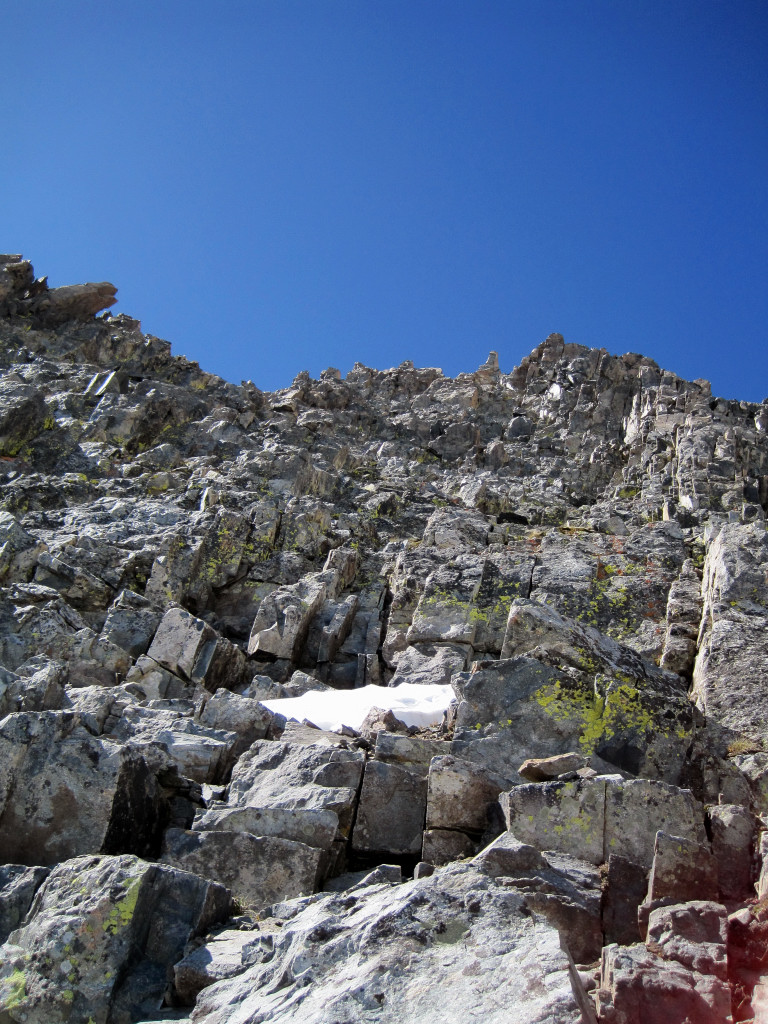
A look up the final portion of the rock route to the ridge crest.

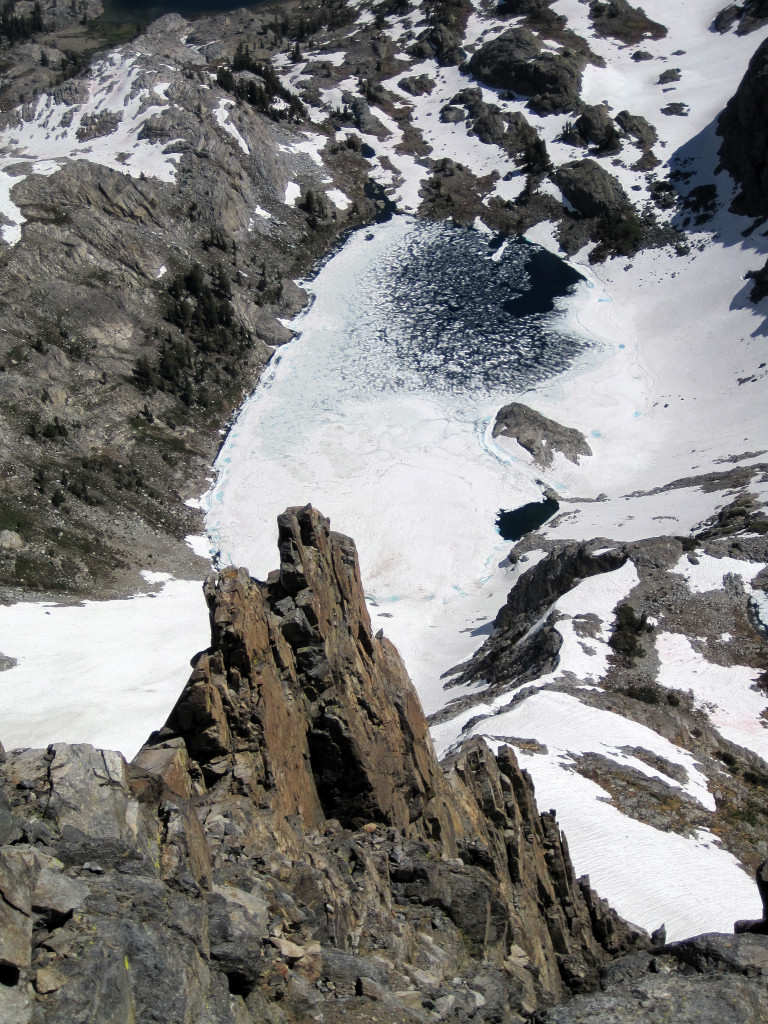
Gendarme with Iceberg Lake
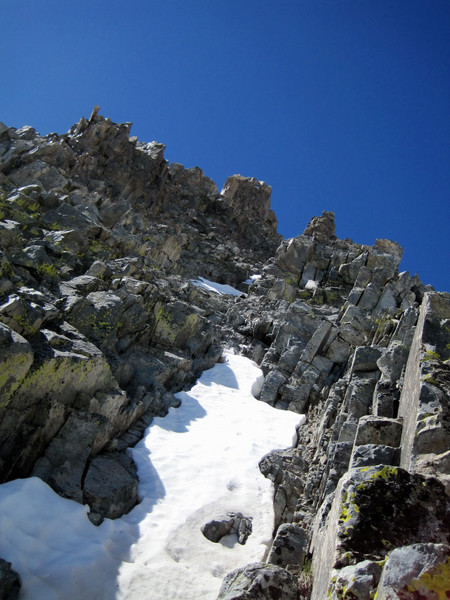
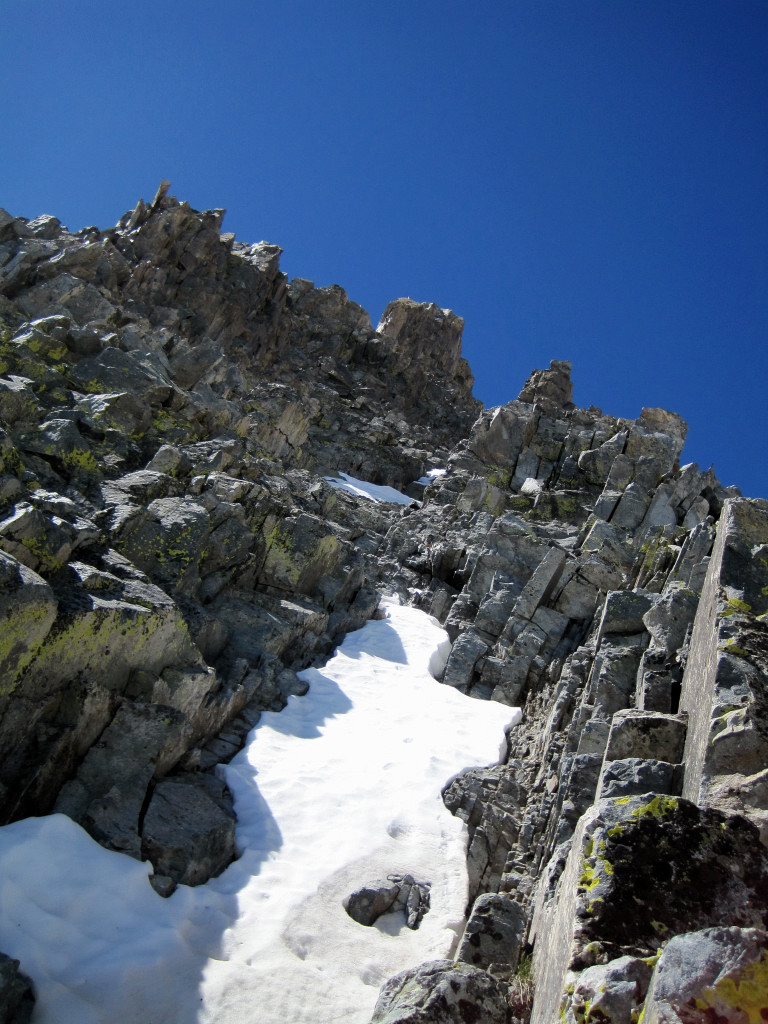
Steep snow patches in the Rock Route chute.
Cecile Lake
Icebergs in Cecile Lake

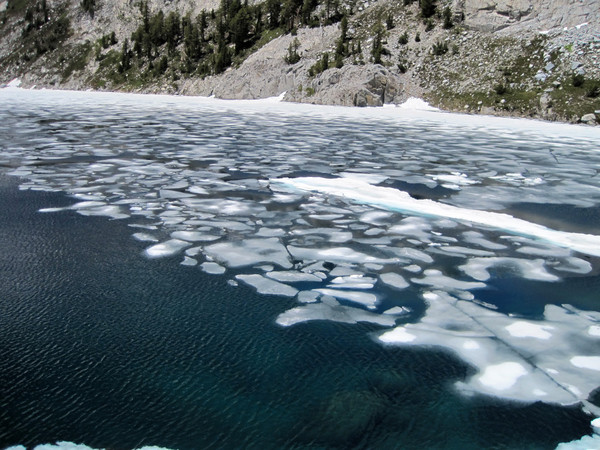
Icebergs in Iceberg Lake
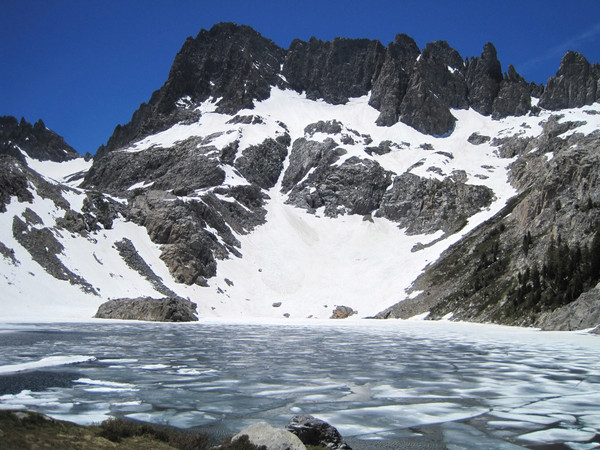
Iceberg Lake
Lake Ediza
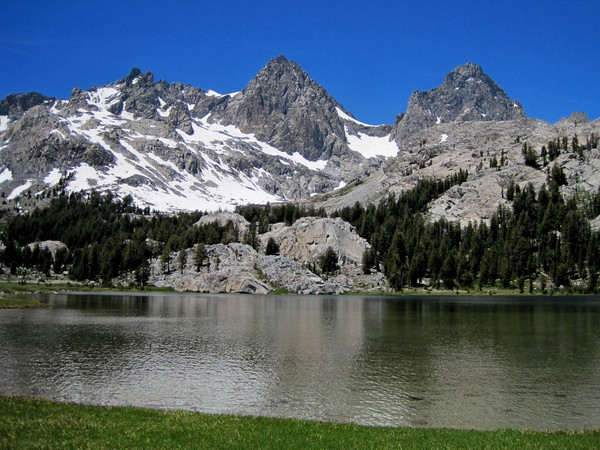

Minaret Range from Lake Ediza
View from Shadow Lake in the afternoon.

Gear Notes:
Crampons, ice axe, helmet.
Approach Notes:
Trail in great condition to Lake Ediza. Snow patches remain between Ediza and Iceberg Lake. All snow (icy in the morning) between Iceberg Lake and Cecile Lake.
-
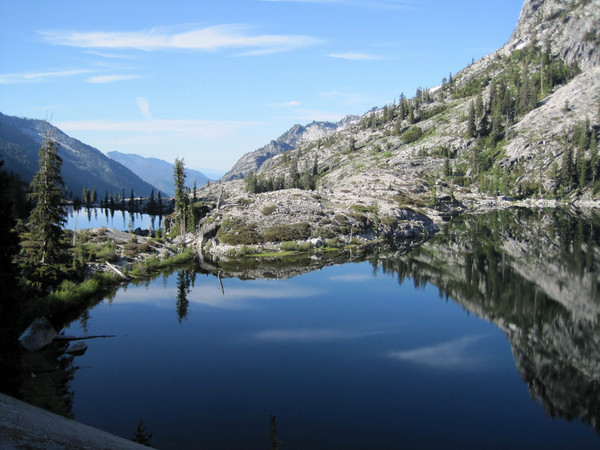
Trip: Thompson Peak - Trinity Alps - Canyon Creek Lakes
Date: 6/18/2009
Trip Report:
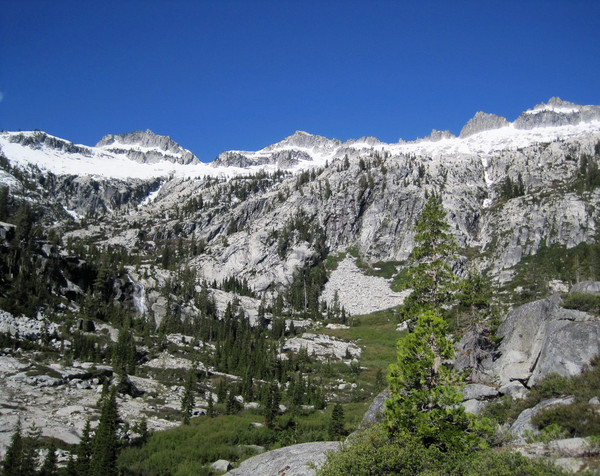
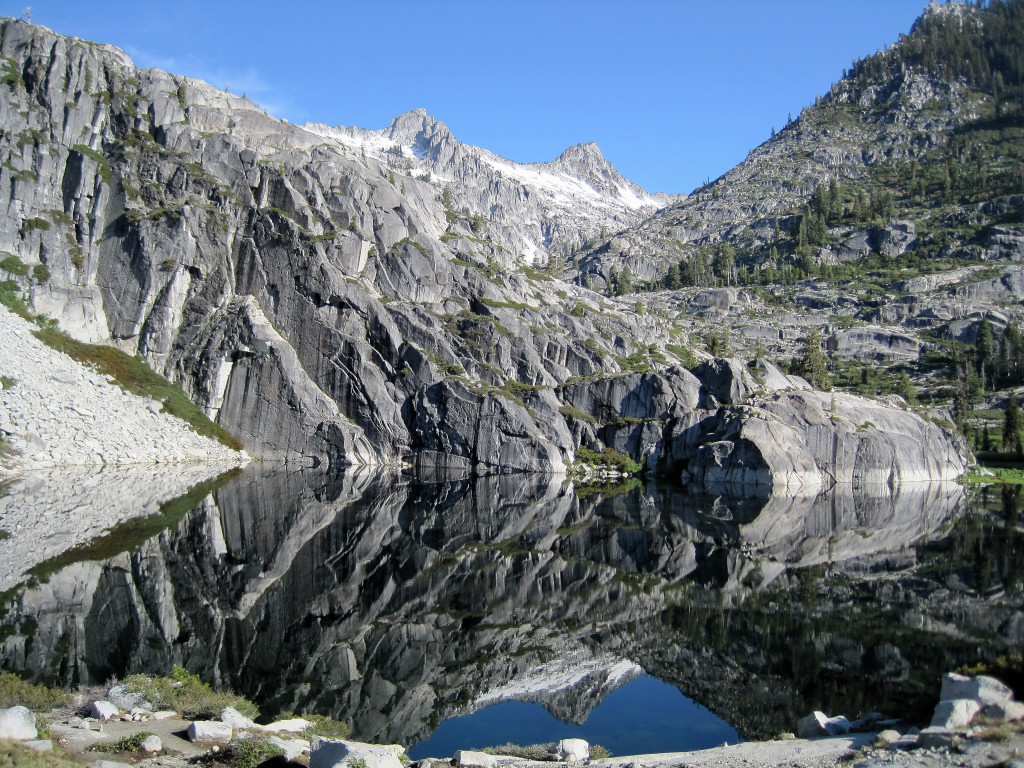
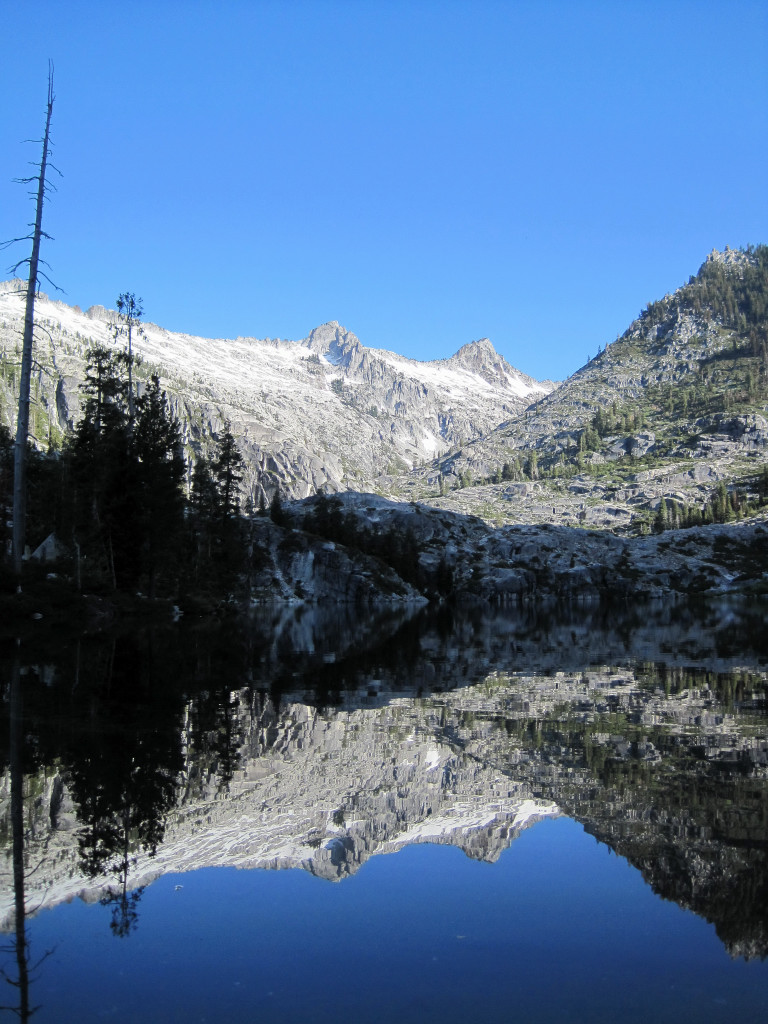
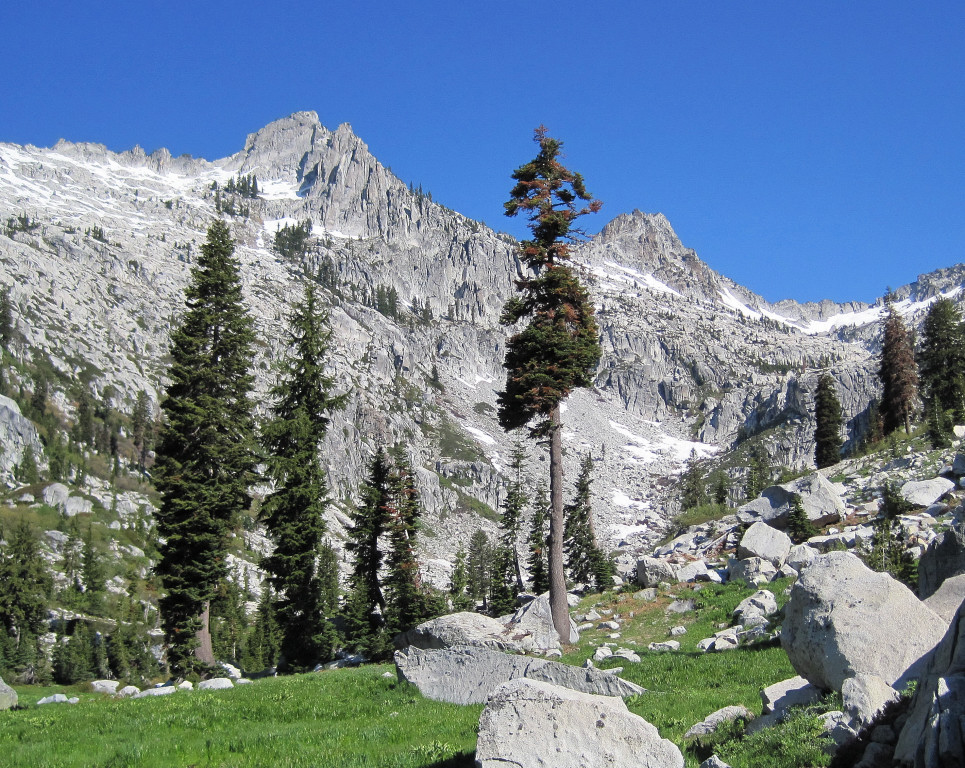
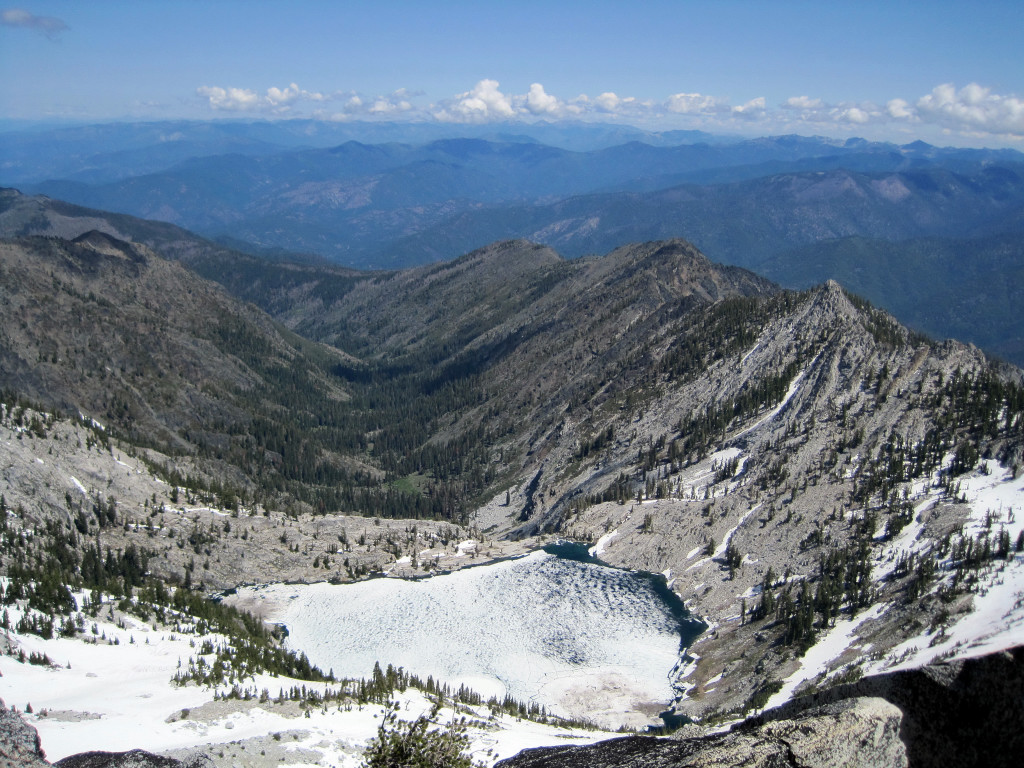
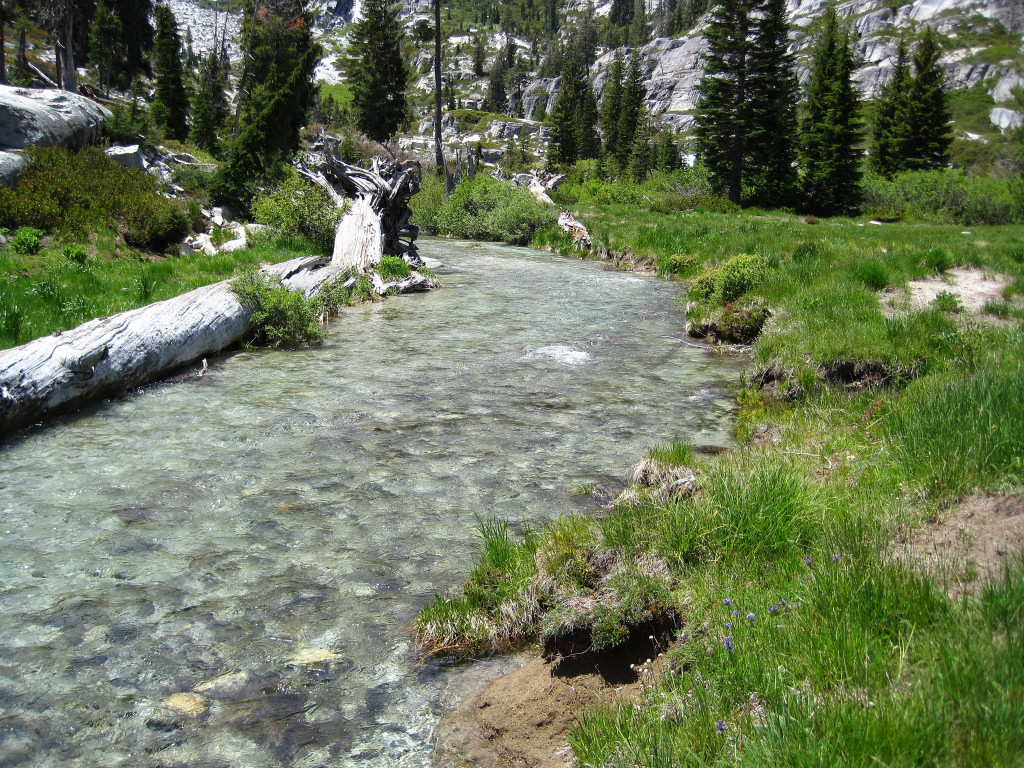
I climbed Thompson Peak in the Trinity Alps via the Canyon Creek trailhead in 9:42, starting at 6:20 am and finishing at 4:02 pm. The climb involved 16 miles of trail and nearly an equal amount cross country travel, entailing bushwhacking, routefinding, scrambling, and snow. I found spectacular mountain scenery and a true wilderness feeling beyond Canyon Creek Lakes where there is virtually no evidence of human impact.

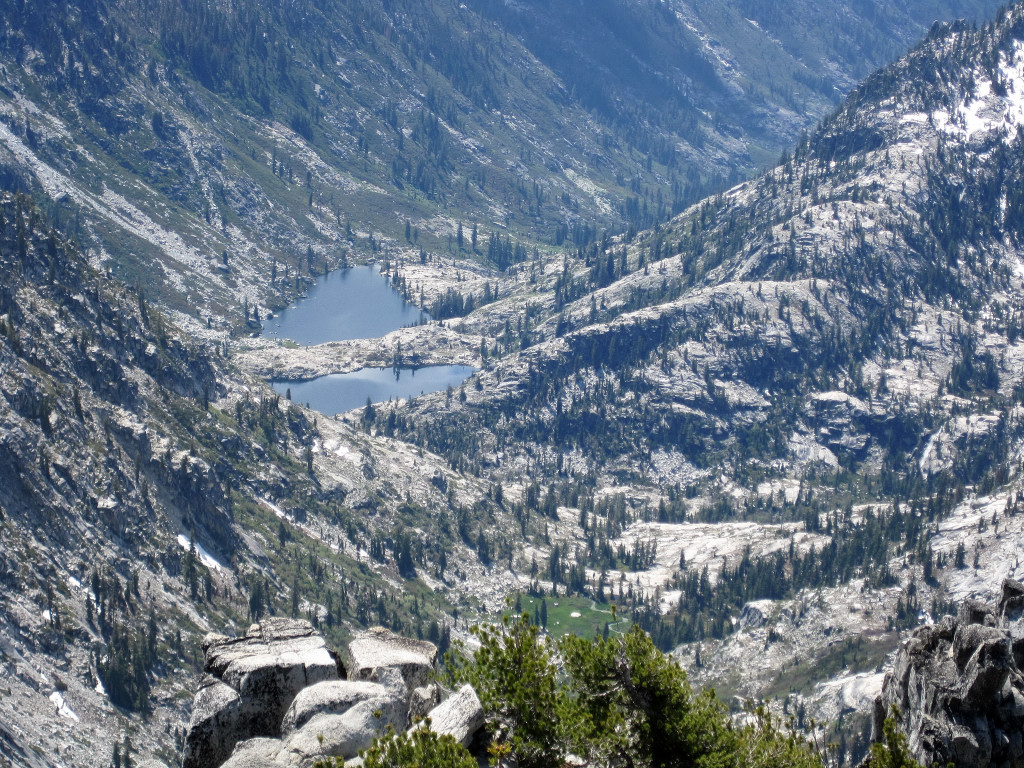
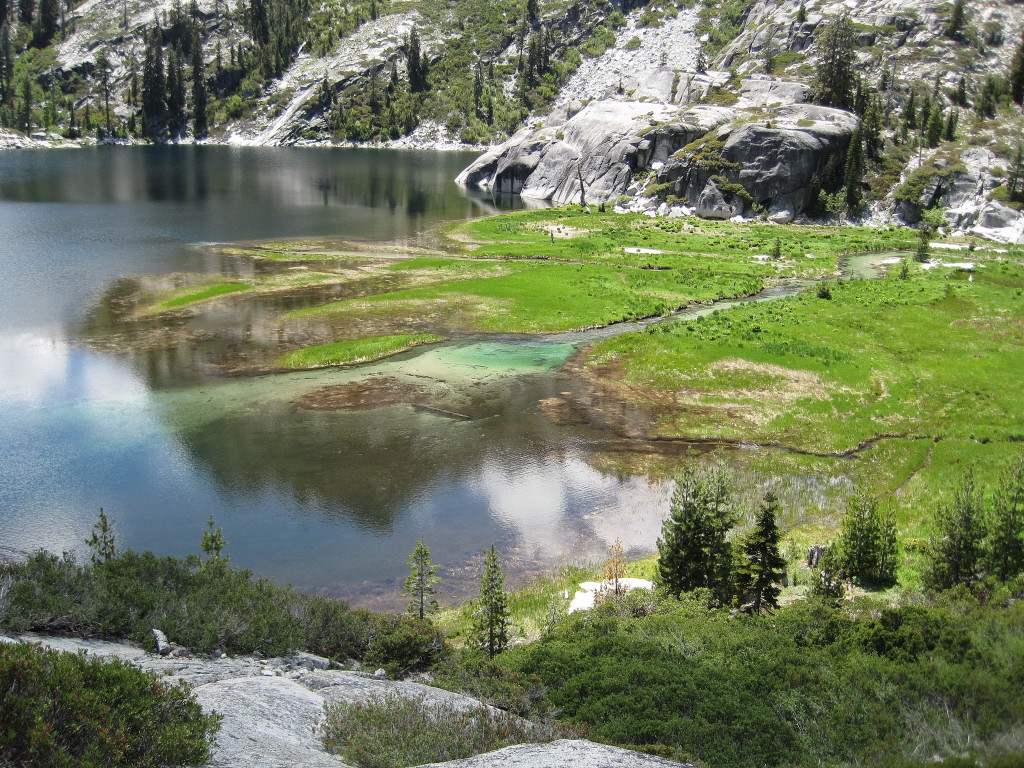
Upper Canyon Creek Lake
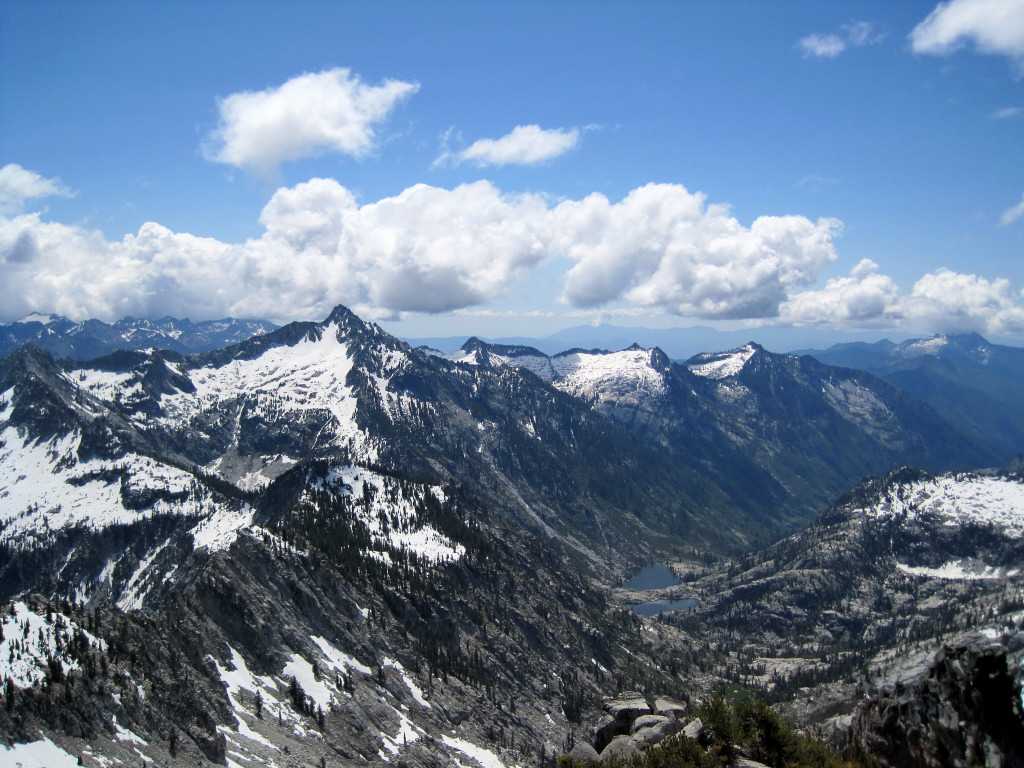
Panorama from Thompson Peak
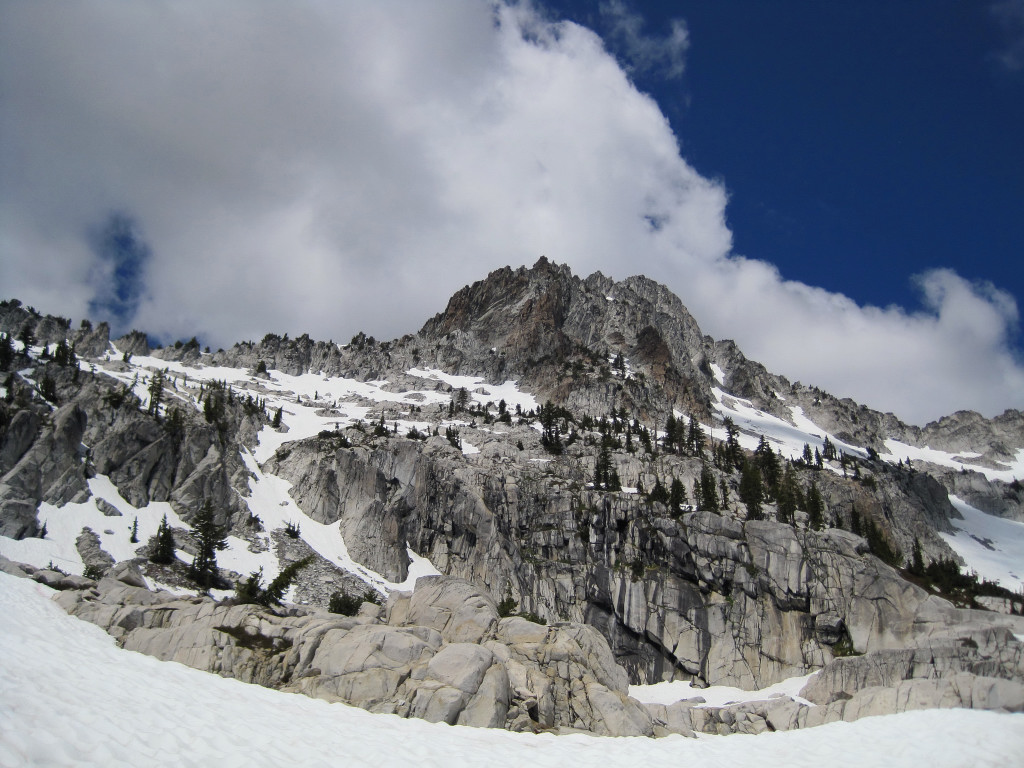
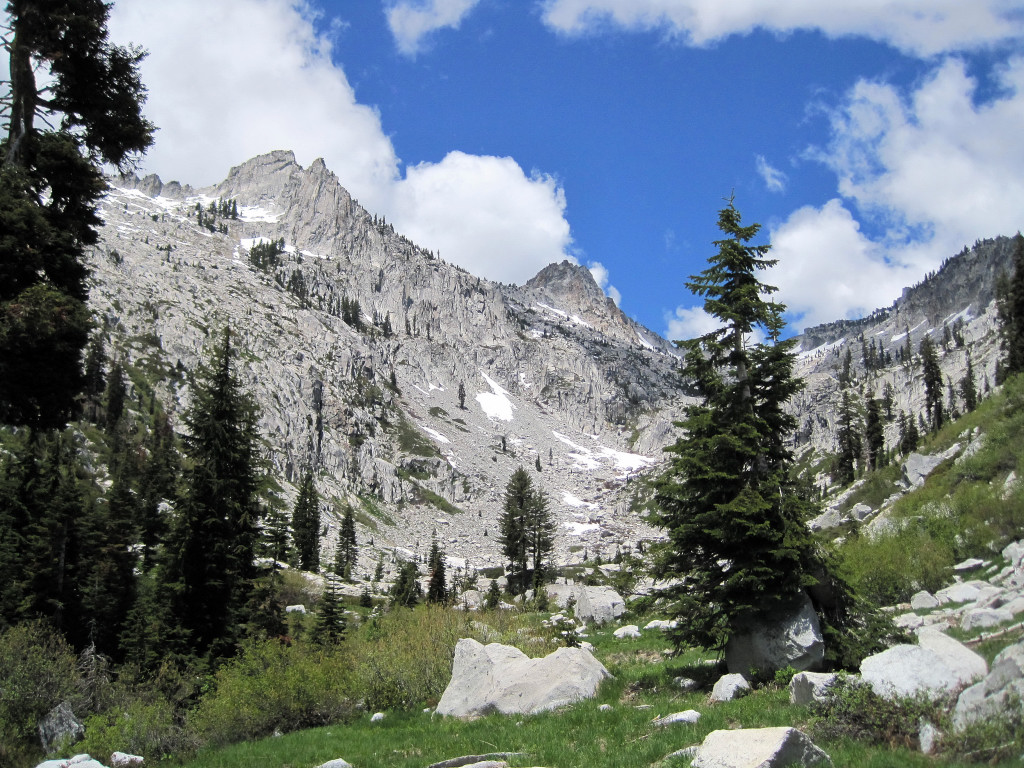
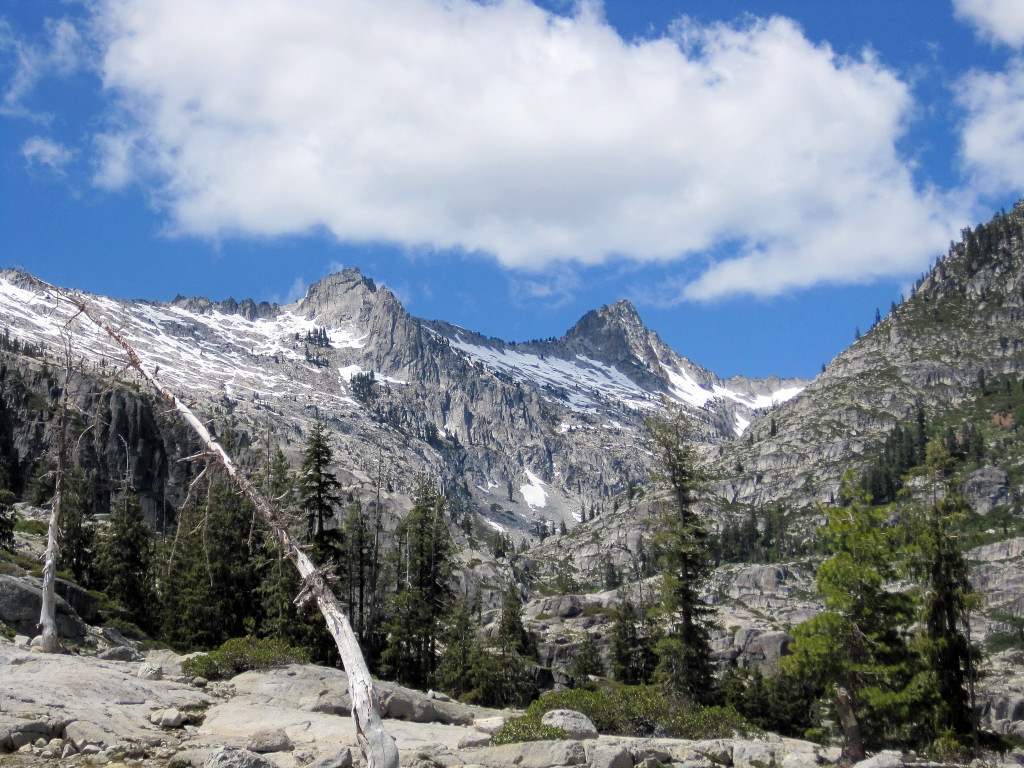
Topping out at just over 9,000 feet, Thompson Peak is the highest point in the Trinity Alps, which is a rugged section of the Klamath Mountain Range in northwestern California. The peak is at the headwaters of the most rugged drainage in the Trinity Alps, the Canyon Creek drainage, where several peaks rise above 8,800 feet. Due to the geographical location of these mountains, they contain elements of the Cascades to the north and Sierras to the south. Their height is not impressive when compared with the Sierras, but their higher latitude and proximity to the Pacific Ocean allow for significant winter snow accumulation and the existence of a few small glaciers.

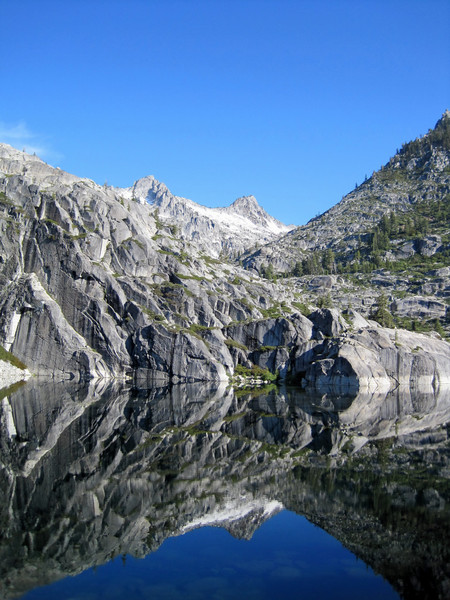
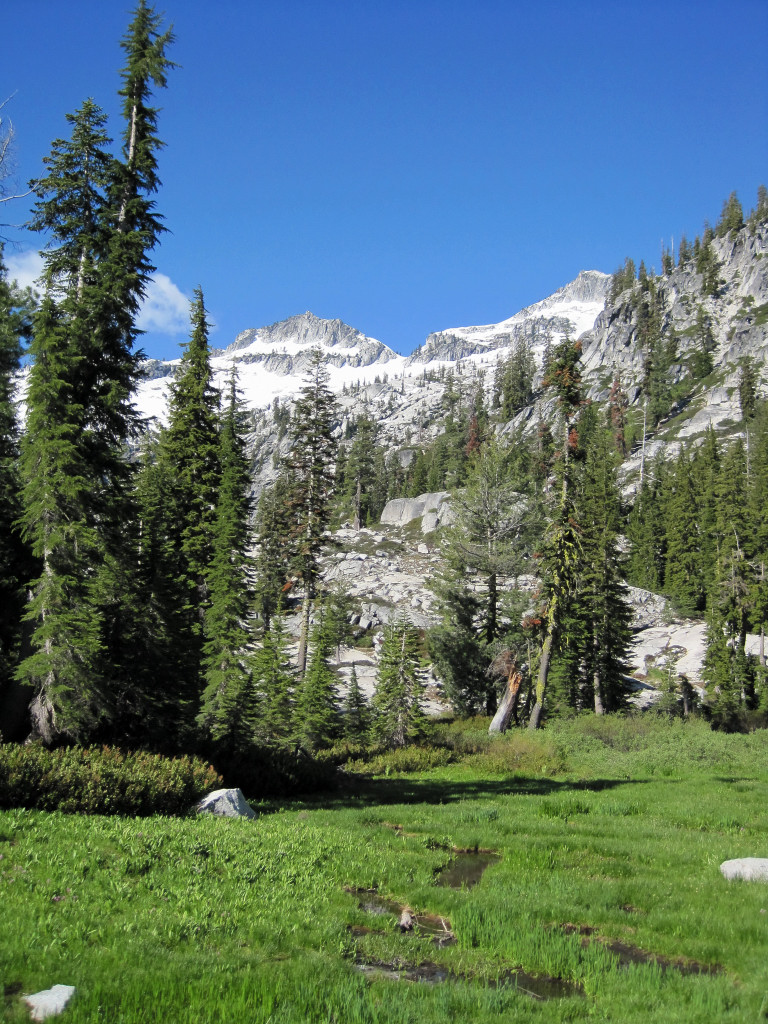
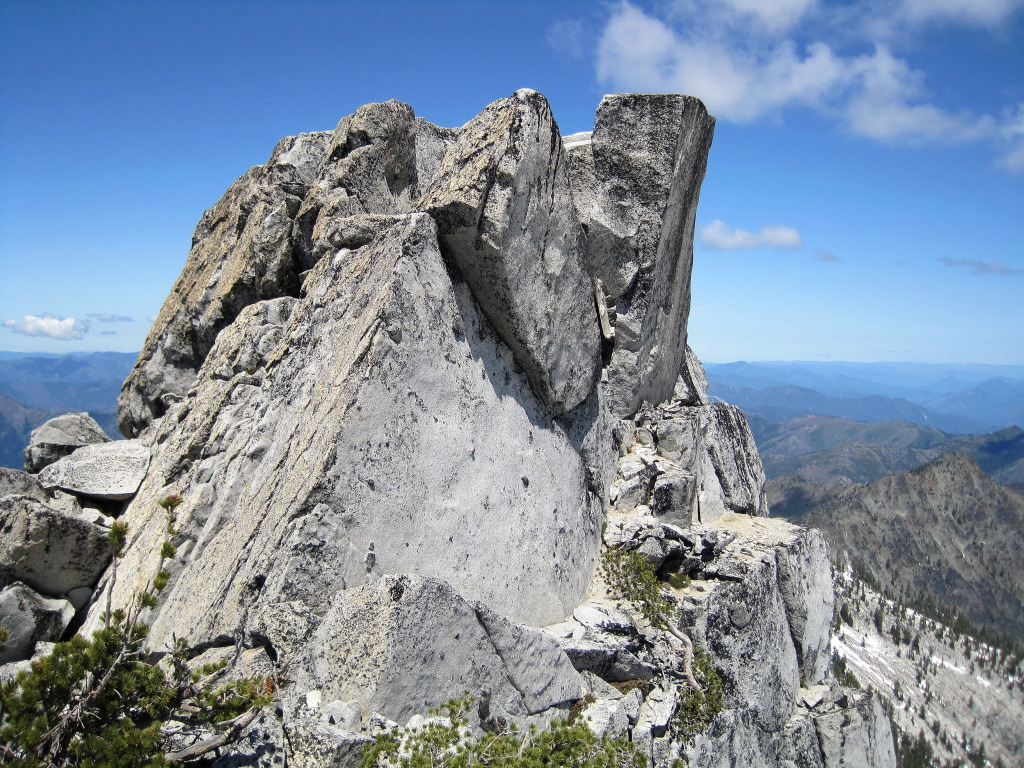
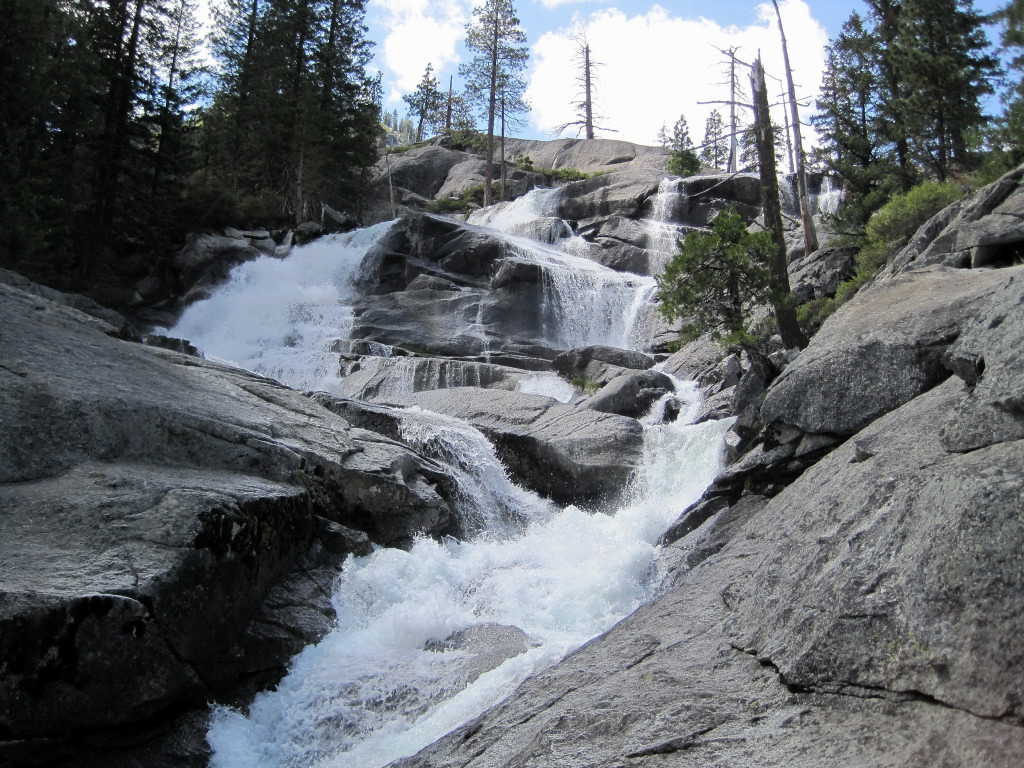
Trailhead elevation is around 3,000 feet and the first few miles are very runnable terrain. After the junction with Boulder Creek lakes at mile 7, the trail becomes rougher and ascends to picturesque Lower Canyon Creek Lake at 5,600 feet. Traveling through the lakes is circuitous and involves needless elevation gain to get around granite walls that come right down to the lake shores. Past Upper Canyon Creek Lake is a gorgeous meadow. From here, it took me awhile to find a route through cliff ledges to the next cirque to avoid brush. Once above the first headwall, travel became easier through more meadows and then a talus/scree ascent up the second headwall. One more meadowy area was followed by a third ascent into the highest snow-covered cirque at the head of the drainage. From here, I put crampons on my trail running shoes and headed up the snow slopes to the ridgeline between the Wedding Cake and Thompson Peak. The climb from the ridge to the summit of Mount Thompson is a slog through steep dirt and loose scree and then a class three scramble. The actual summit block is a bouldering problem and the easiest route I found was class 4. I reached the summit 4:52 after beginning and rested for 22 minutes enjoying the views. There were no fewer than four USGS markers on the summit pinnacle. I generally retraced my route on the return trip with a couple areas of better routefinding and a couple areas of worse that on balance saved a few minutes. The return trip took 4:28 including waterfall side trips and an ice bath in Upper Canyon Creek Lake!


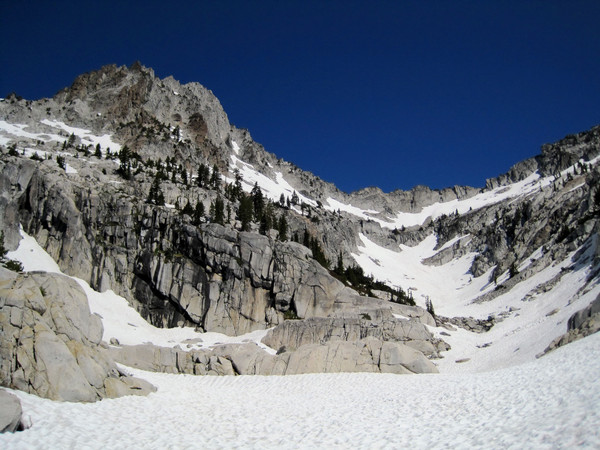
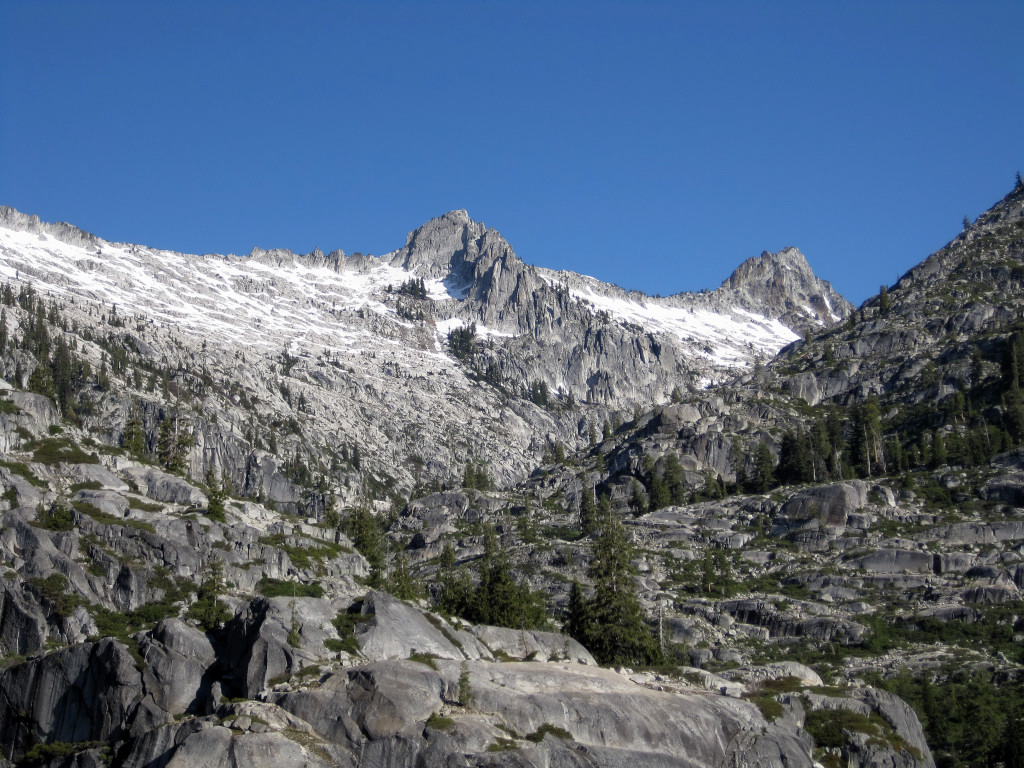
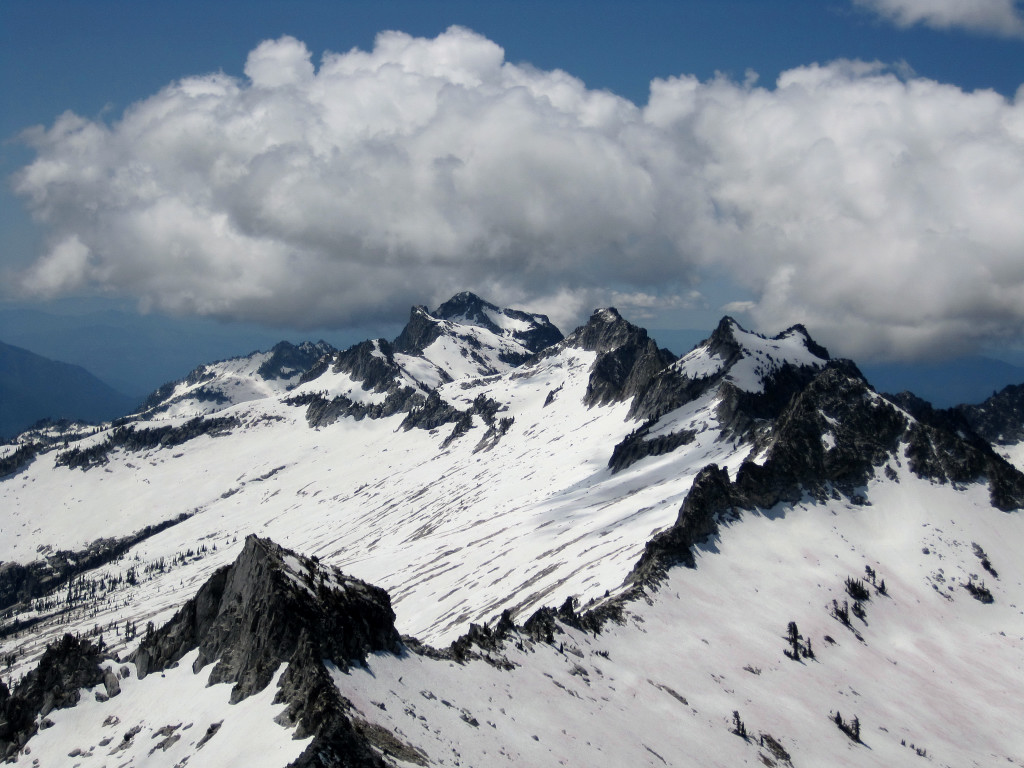
Final cirque still snowcovered.
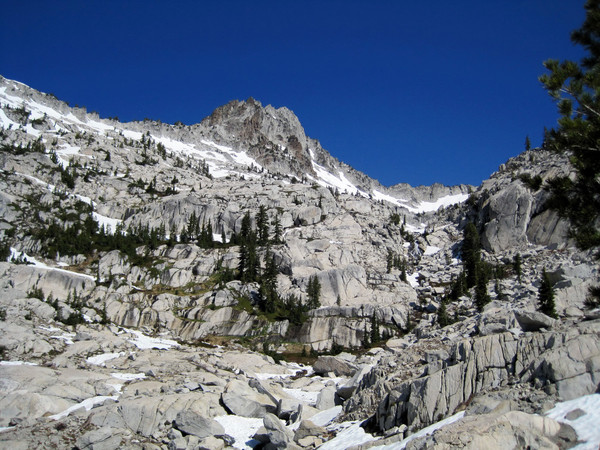
Granite everywhere!!

Sawtooth Peak

A look down at Canyon Creek Lakes from the summit

Mount Hilton (middle) and the Wedding Cake (bottom left)

Grizzly Lake

Summit block

Thompson Peak, the route goes up to a notch in the ridgeline to the left of Thompson and ascends the backside.

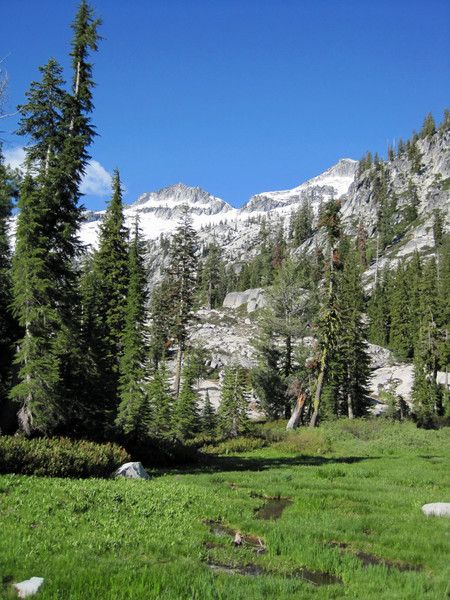
Gorgeous meadows
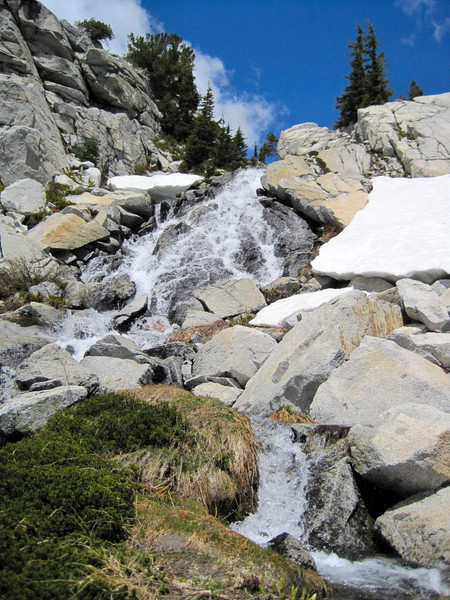

Outlet into Upper Canyon Creek Lake

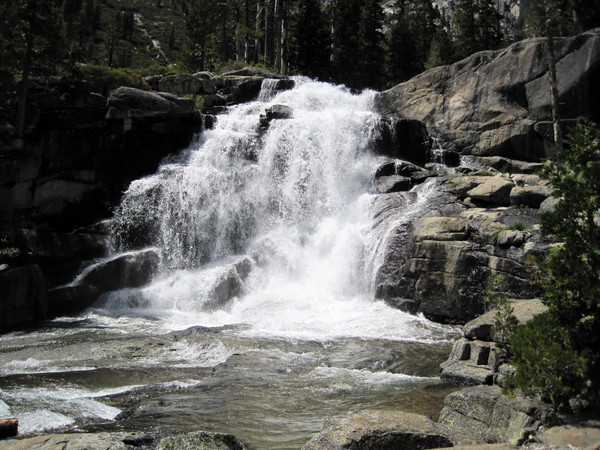
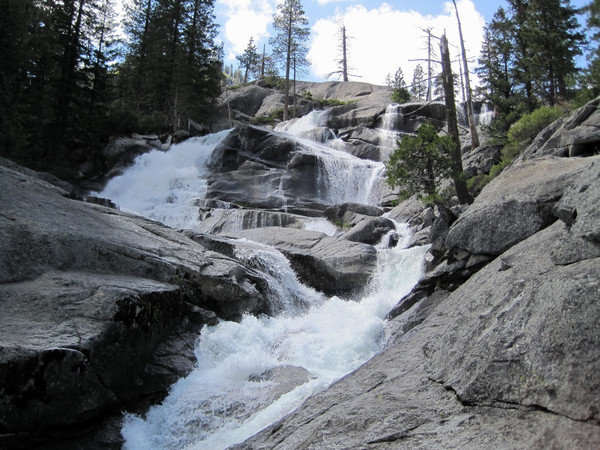
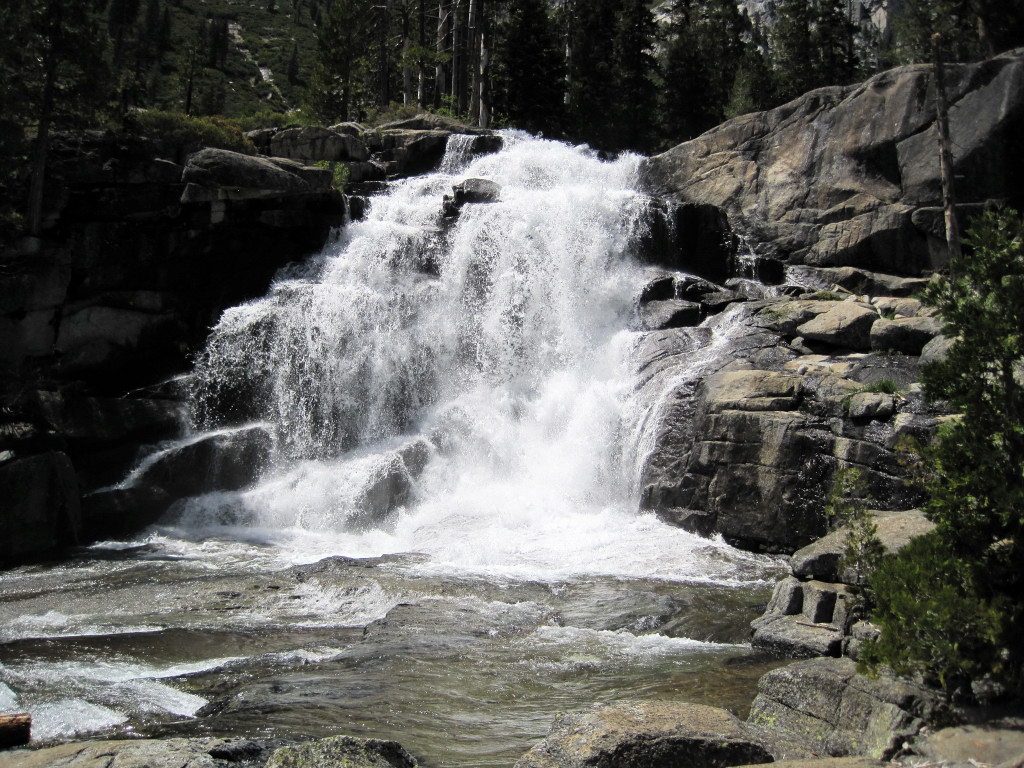
Waterfalls galore on Canyon Creek.

Gear Notes:
Ice axe and crampons (needed crampons for running shoes, otherwise probably not necessary), La Sportiva Fireblades, Ultimate Direction Wasp Pack
Approach Notes:
The Canyon Creek Lakes Trail is in excellent condition with no trees down and straightforward stream crossings on logs. No snow remains at Canyon Creek Lakes and the snow level is actually about 7,000 feet and melting fast.
-
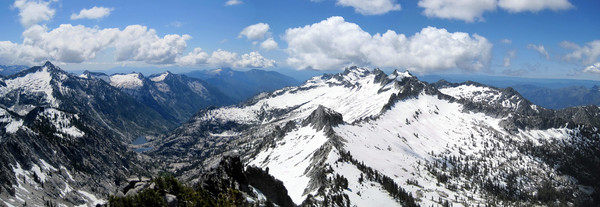
Trip: Fortress-Chiwawa Speed Traverse -
Date: 8/23/2008
Trip Report:
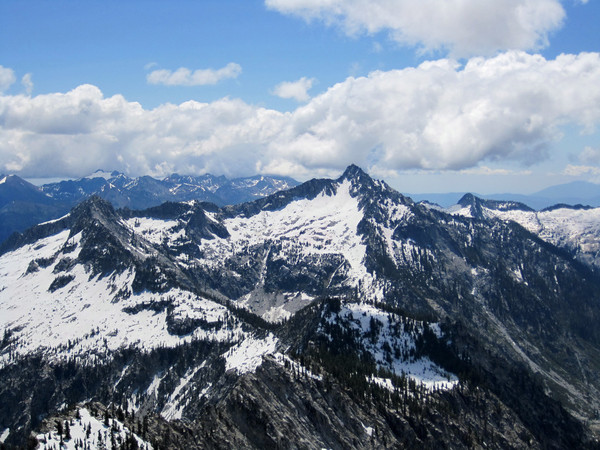
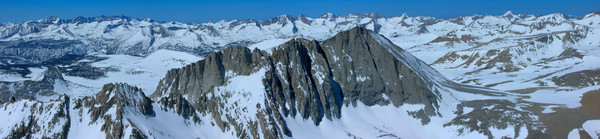
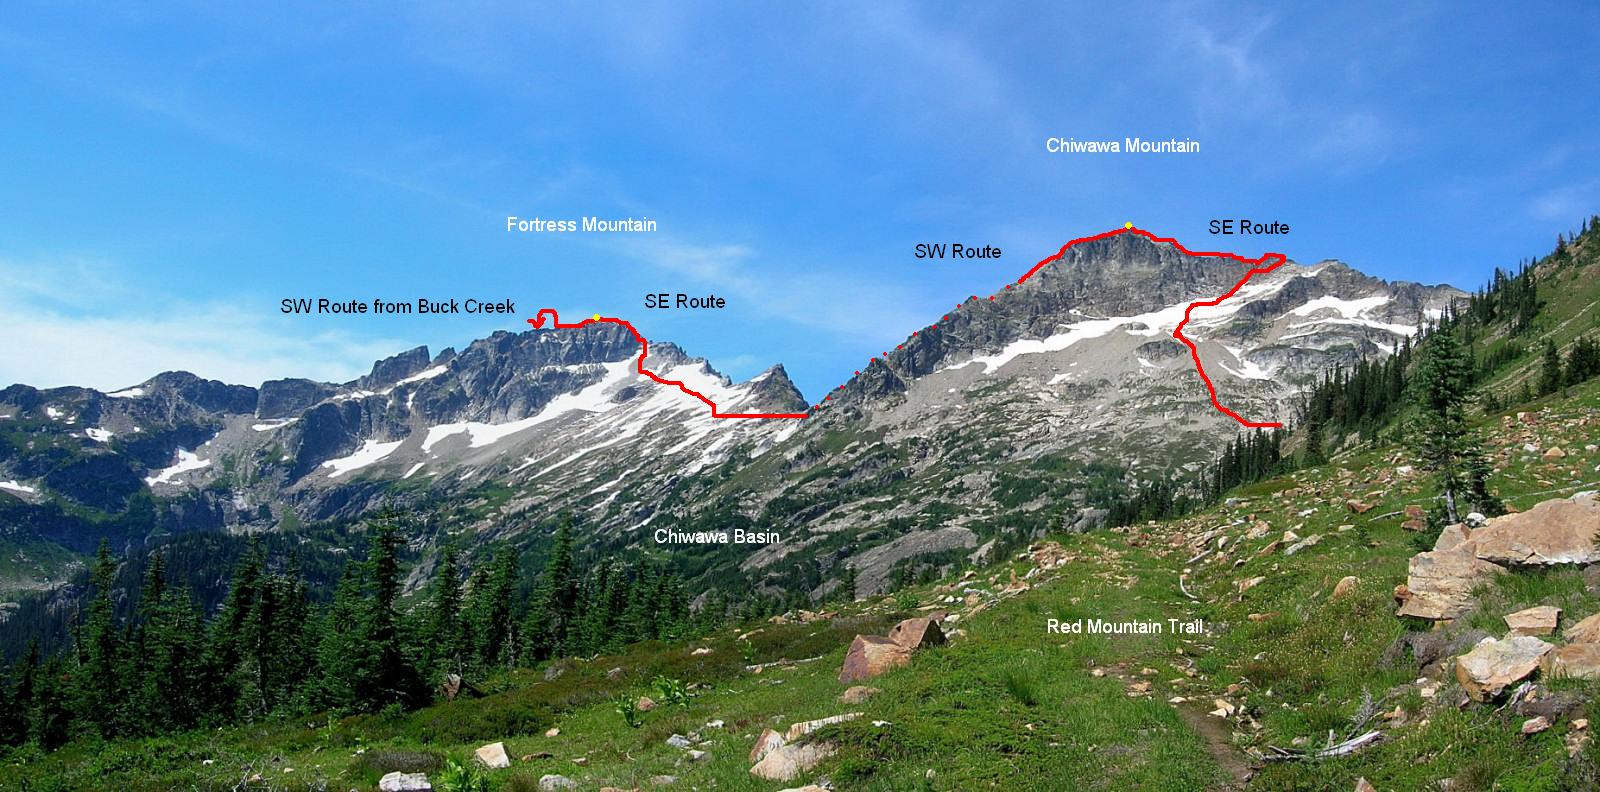
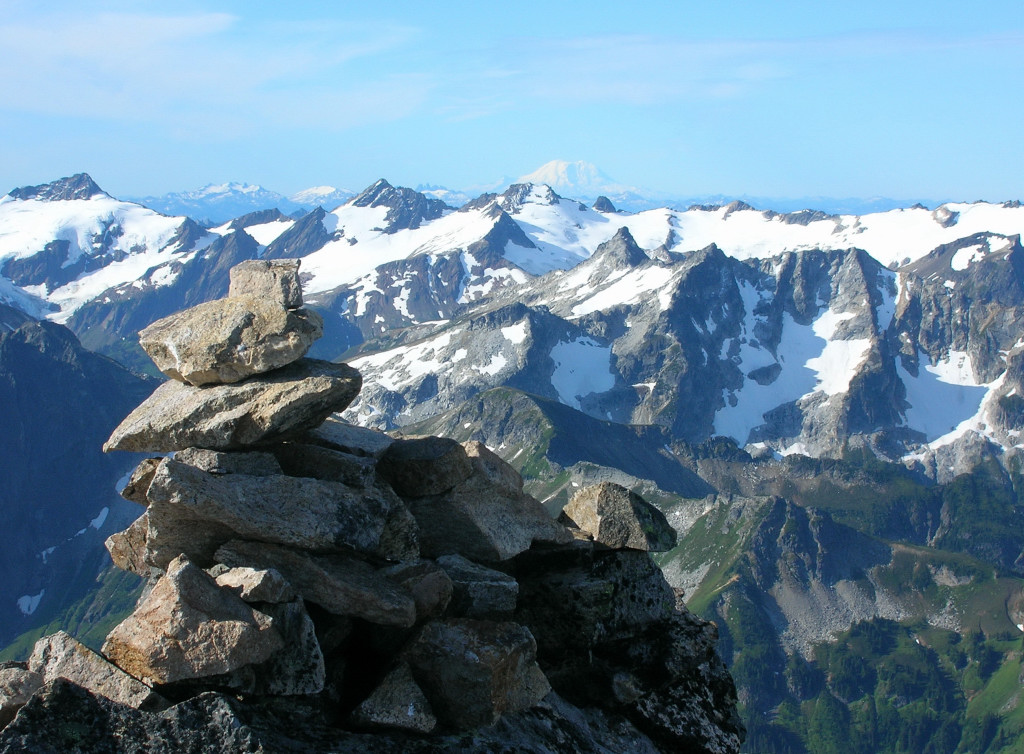
I traversed Fortress Mountain and Chiwawa Mountain in 9:16 roundtrip out of Trinity in a large loop utilizing the Buck Creek Trail and Red Mountain/Chiwawa Basin Trail. The only ground repeated was the final 1.5 miles making the route very aesthetic. The traverse began by climbing the SW route of Fortress, then down the SE route of Fortress, then a climb of the SW route of Chiwawa, and finally a descent of the SE route of Chiwawa. The weather and clarity were spectacular and I found that Fortress is one of the best viewpoints in the Cascades. Elevation gain for the loop is about 8,000 feet with around 25 miles.
Click images for larger version

Location (Elevation): Time Elapsed / Split / Real Time
Trinity - Buck Creek TH (2,772 ft) : 0 / 0 / 05:45
Turnoff Buck Creek Tr 9 miles (5,600 ft) : 1:41:53 / 1:41:53 / 07:27
Arrive Fortress Summit (8,760 ft) : 3:17:59 / 1:36:06 / 09:03
Depart Fortress Summit (8,760 ft) : 3:43:46 / 25:46 / 09:29
Fortress-Chiwawa Saddle (7,200 ft) : 5:07:27 / 1:23:41 / 10:53
Arrive Chiwawa Summit (8,459 ft) : 5:47:35 / 40:07 / 11:33
Depart Chiwawa Summit (8,459 ft) : 6:08:46 / 21:11 / 11:54
Top of Red Mountain Trail (6,400 ft) : 7:41:37 / 1:32:50 / 13:27
Junction with Chiwawa Basin Tr (4,800 ft) : 8:18:45 / 37:08 / 14:04
Trinity – Buck Creek TH (2,772 ft) : 9:16:06 / 57:21 / 15:01
I departed Sammamish 3 am and arrived at Trinity at 5:30 am, setting off at 5:45 am after some bars. The 9 mile jog up Buck Creek trail went smoothly although the trail was quite squishy from the recent rains. Upper Buck Creek was gorgeous with colorful meadows early morning light on Buck Mountain. I turned off from the trail and headed up towards Pass No Pass. I headed upslope before Pass No Pass through some light brush and cliff bands to open terrain and the snowfield leading up to the South ridge of Fortress. The improving views as I ascended spurred me forward.
The snow conditions were interesting due to the recent weather system. The initial heavy rains hardened the snow slopes and the back end of the system deposited a fresh coating of snow on top of it. The result was highly variable snow conditions. Some places were rock hard while others were powdery.
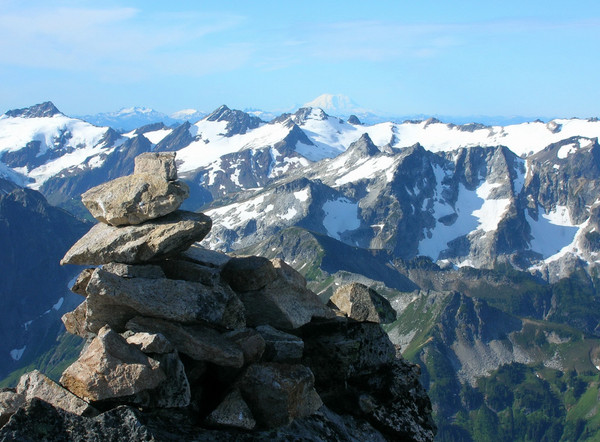
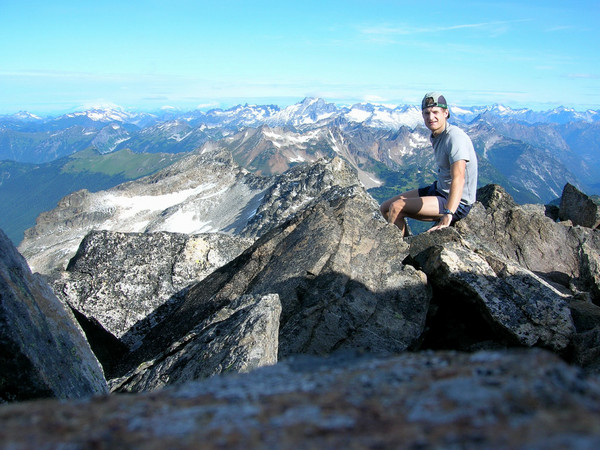
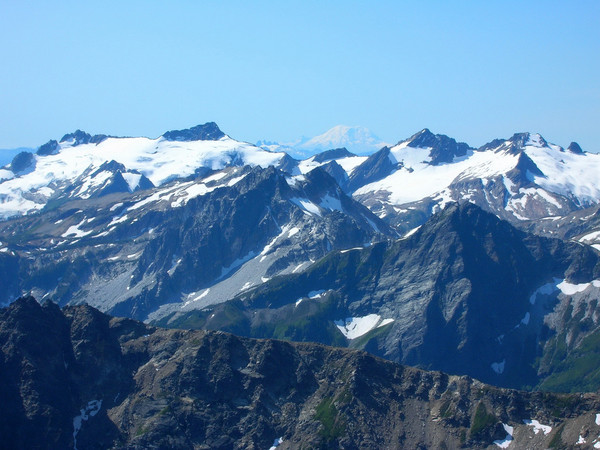
I arrived at the summit of Fortress at 9:03 am, 3:18 after starting at Trinity/Buck Creek TH. The views were amazing with the fresh snow dusting the summits and great clarity.

Clark Mountain.

Rainier behind Dakobed.
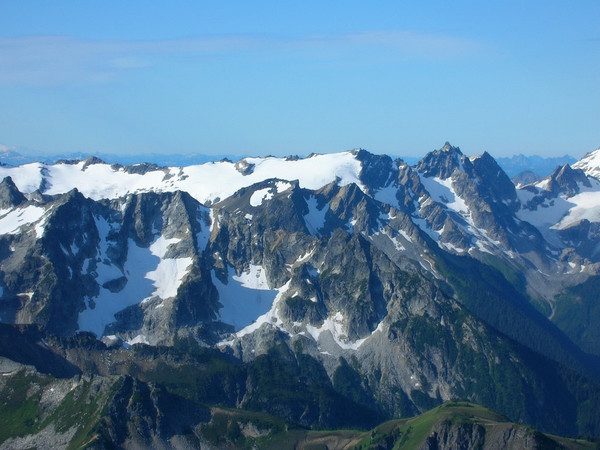

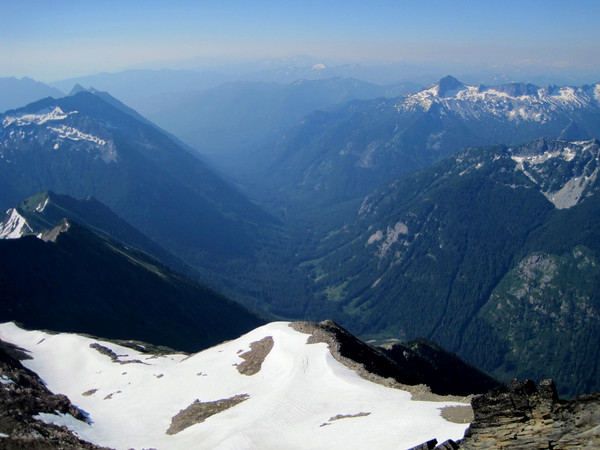
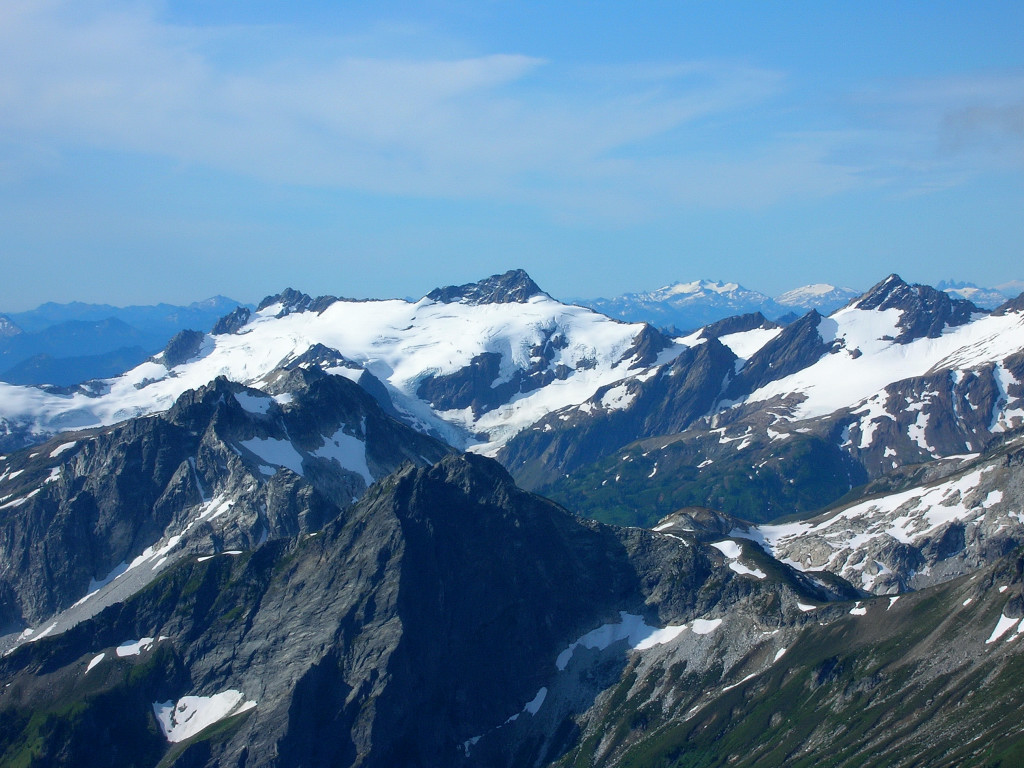
Suiattle and Honeycomb Glaciers.

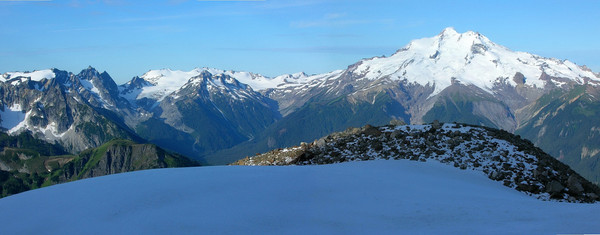
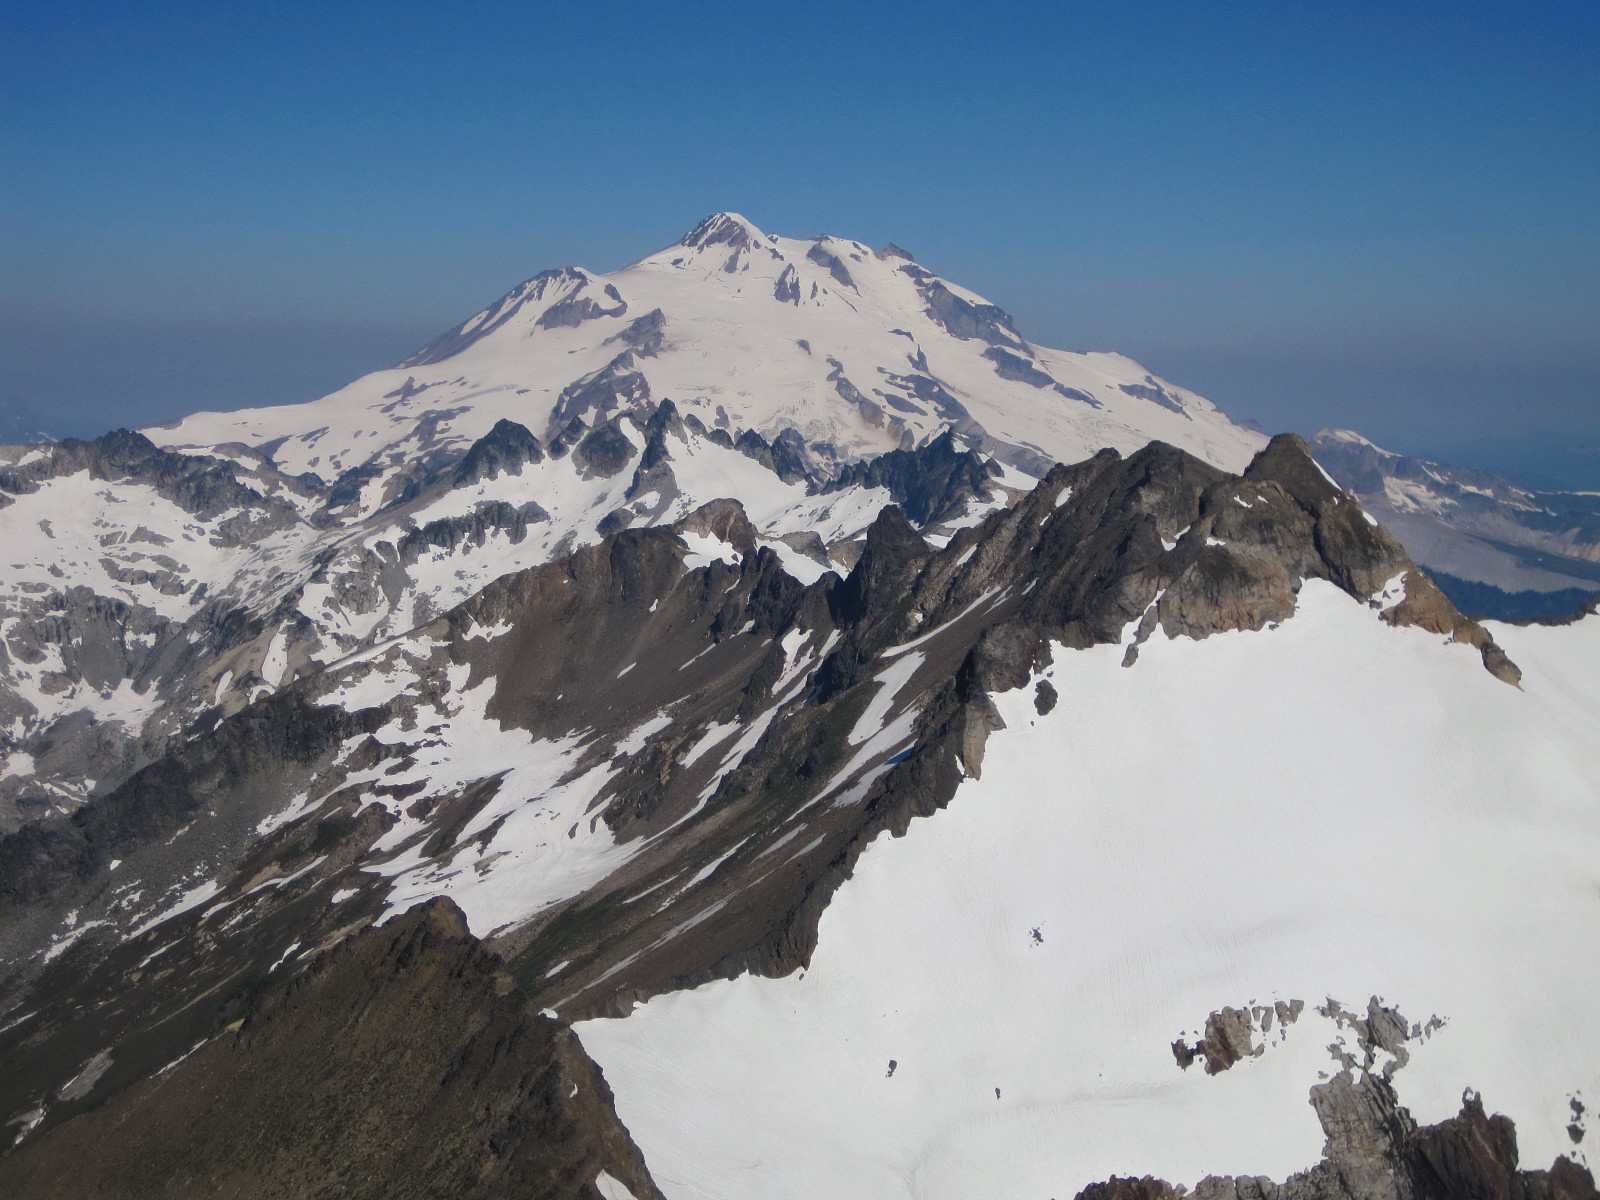
Glacier Peak


View to Chiwawa and Fernow, 7FJ, Maude.
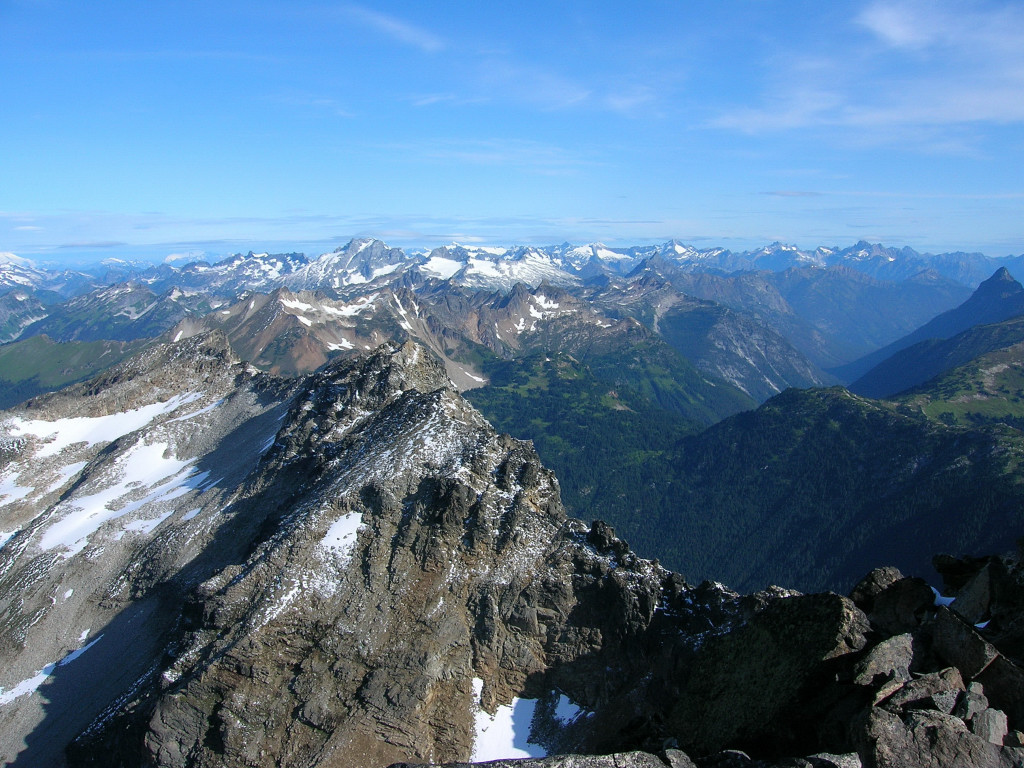
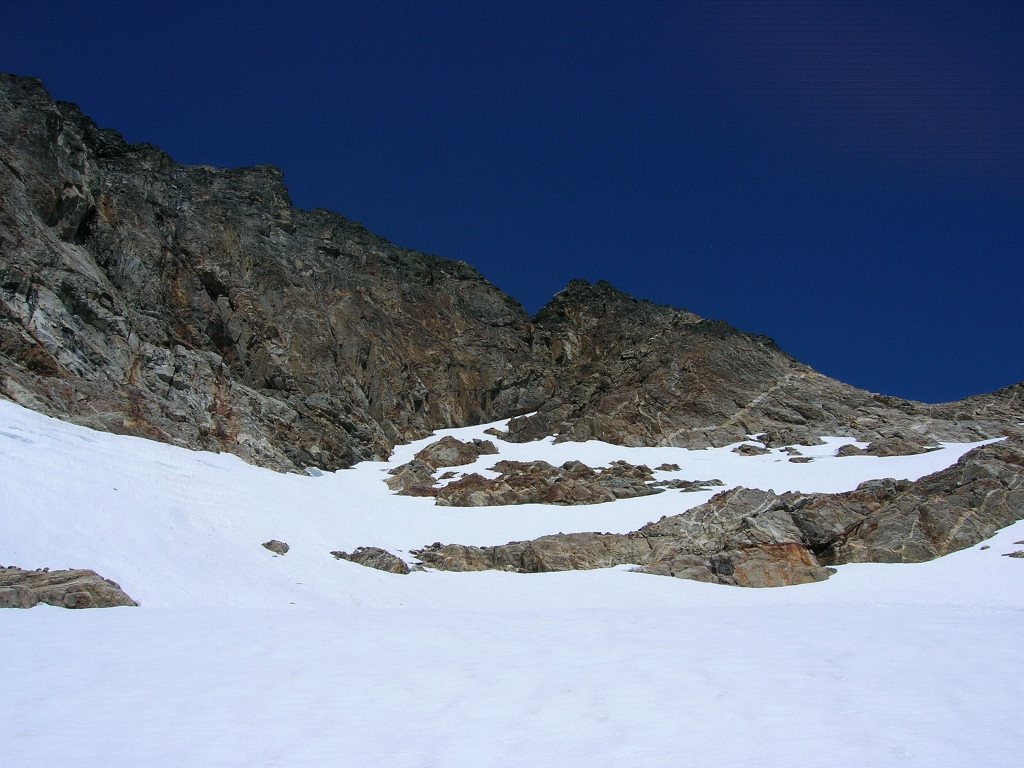
After a nice break on the summit, I continued down the SE route of Fortress. The class 4 moves at the top were interesting because the cracks were filled with snow. I took my time and reached the steep snowfield to find the snow rock hard (crampons essential). I downclimbed this bit until I reached the moderate snow slopes which had accumulated new snow and were easy to traverse to the Fortress-Chiwawa saddle.
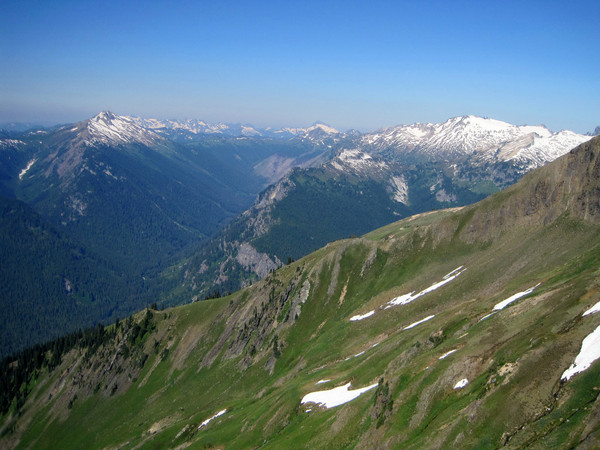
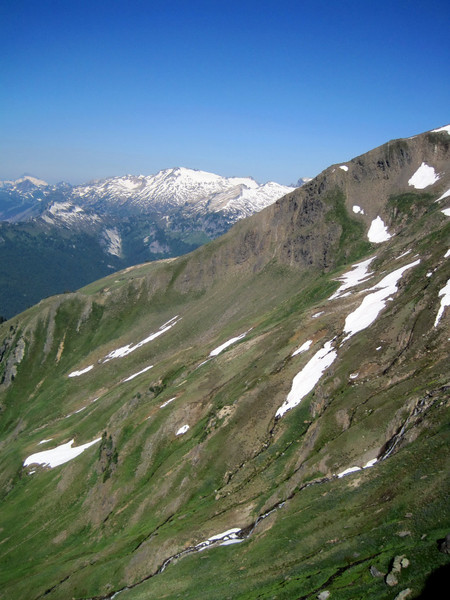
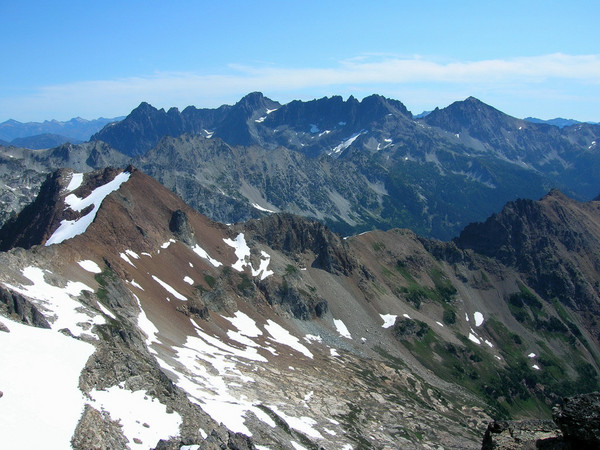
Chiwawa Basin.

Looking back at SE route of Fortress.

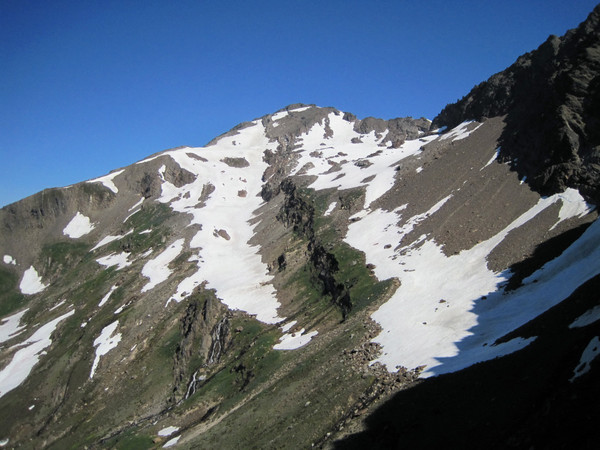
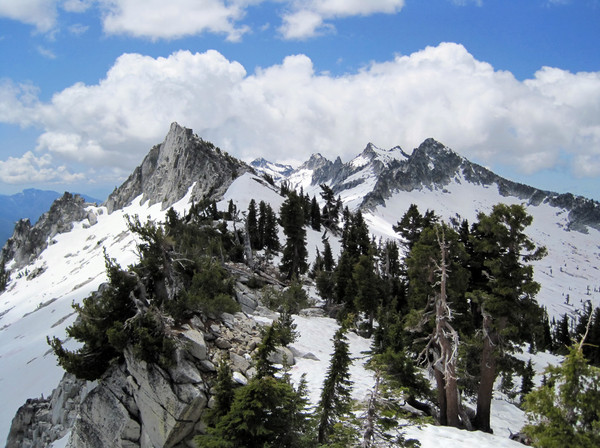
Chiwawa Mountain from near Fortress-Chiwawa Saddle.

Fortress Mountain.
Dakobed peaking above the ridge.
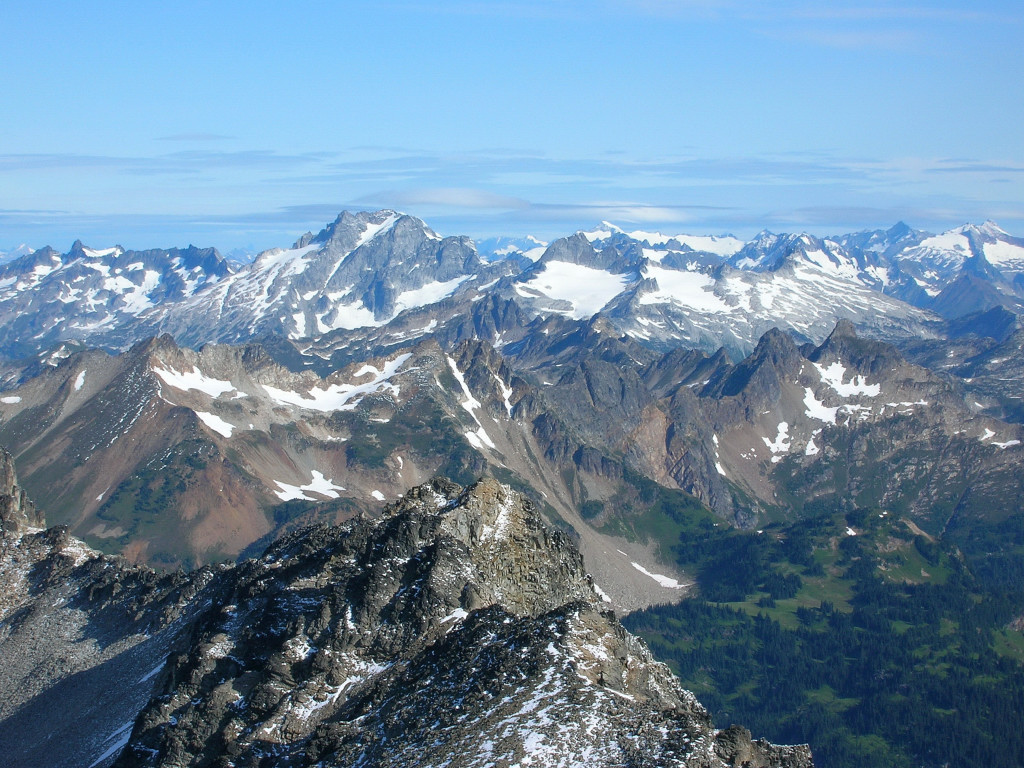
From the saddle, it was a slog up the SW heather and rock slopes to the summit of Chiwawa, arriving 5:48 after starting. More awesome views!

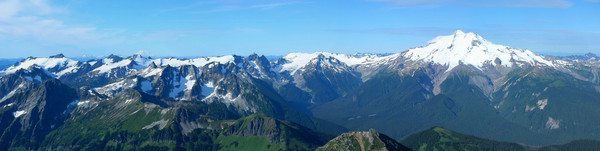
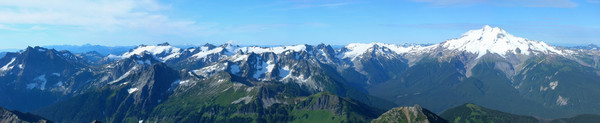
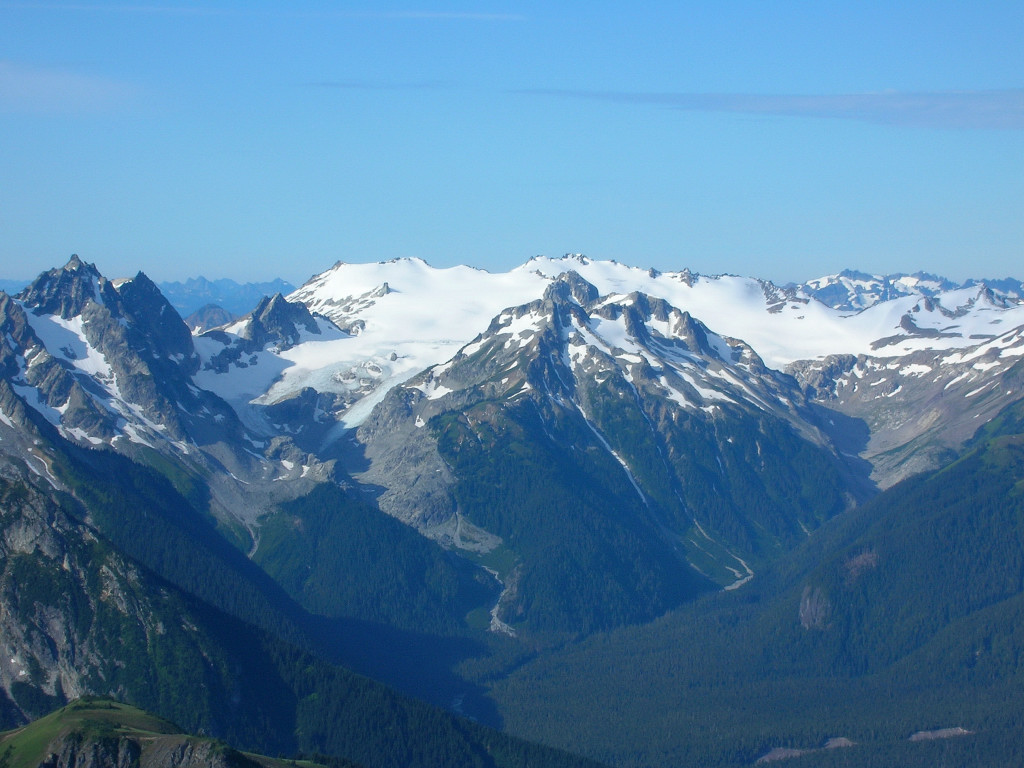
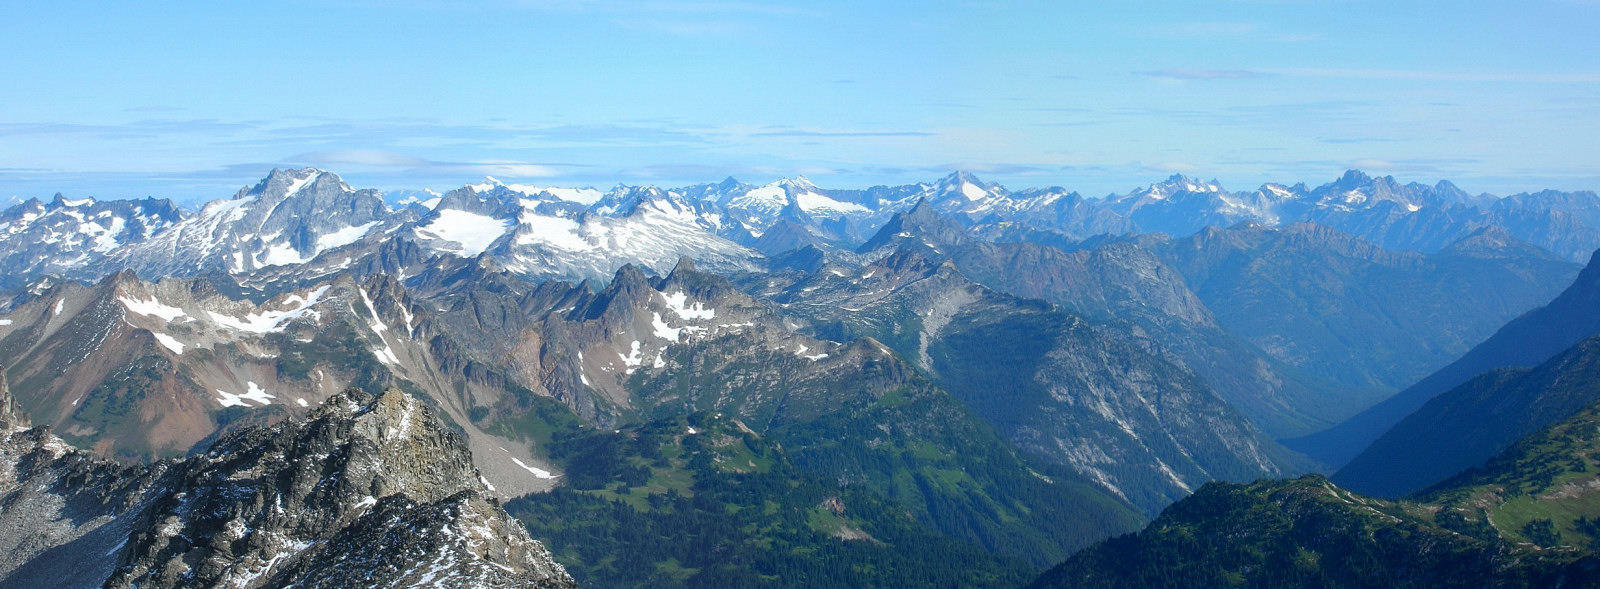
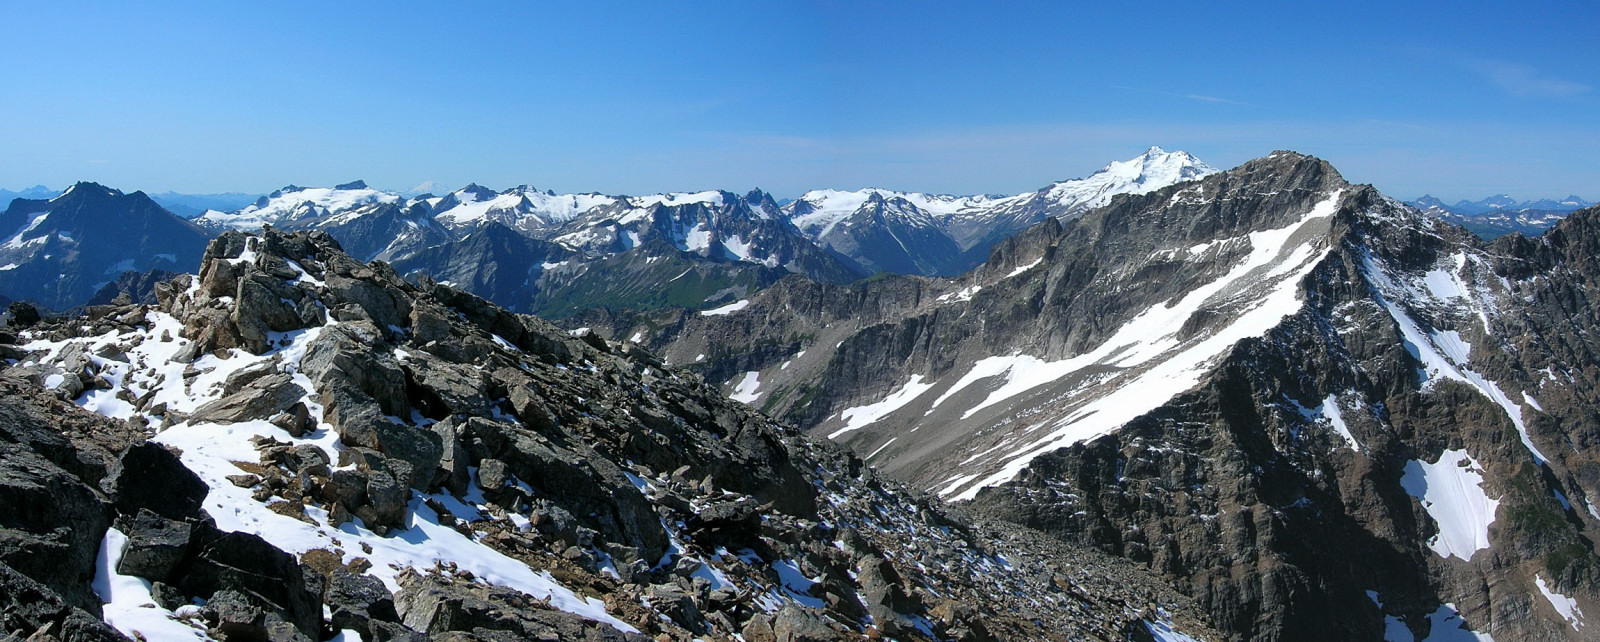
Panorama from Chiwawa Summit.

Glacier Peak and Fortress.
Rugged NE Face of Fortress.
Rainier framed between Clark and Luahna.
Copper, Fernow, 7FJ, Maude.
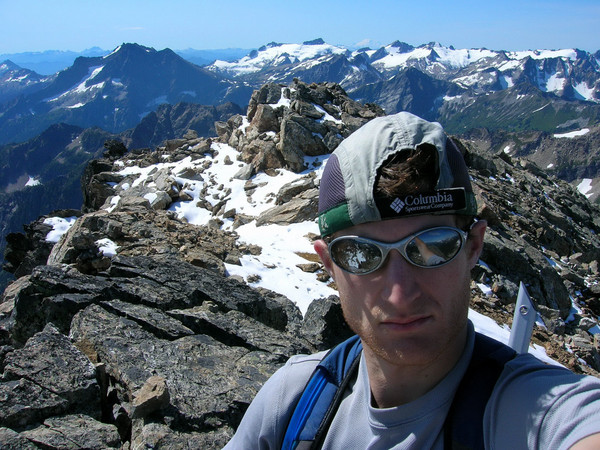
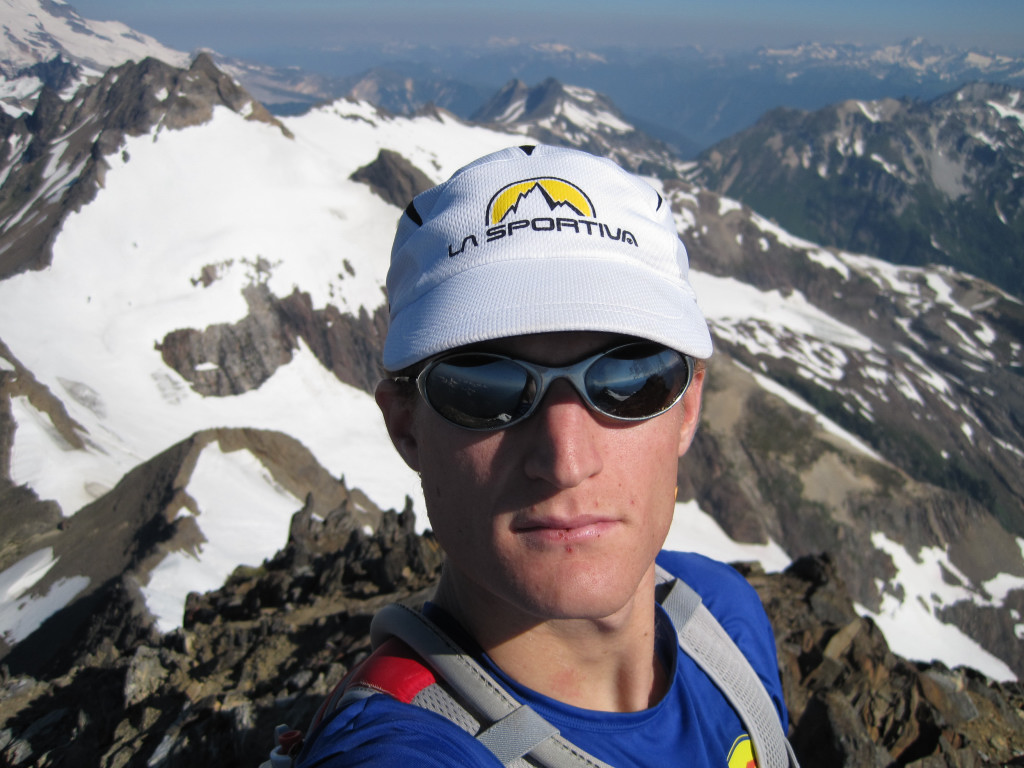
Summit shot on Chiwawa.
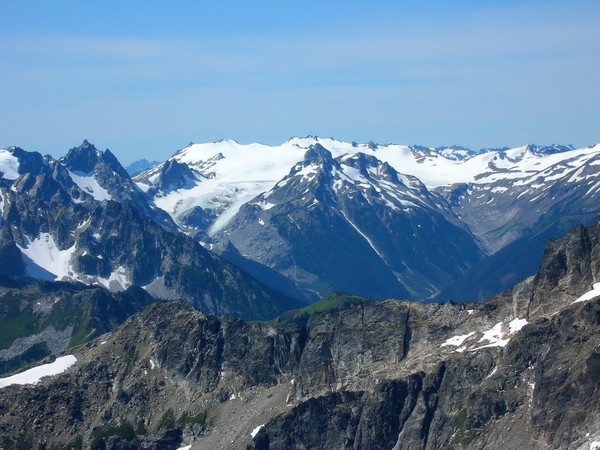
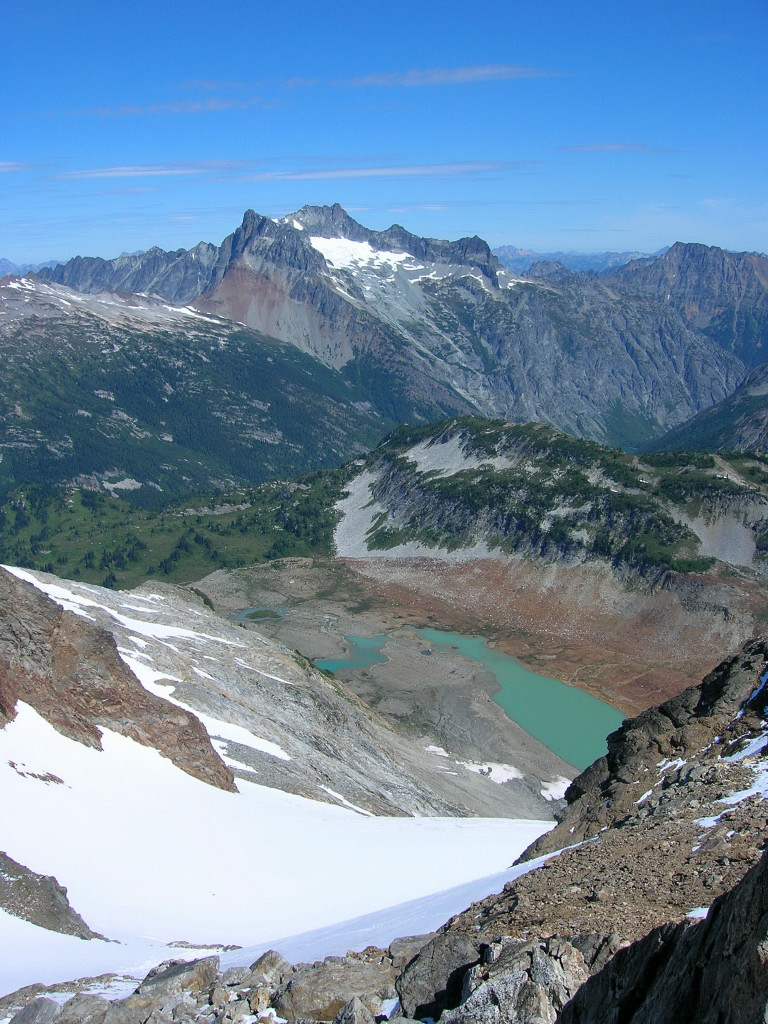
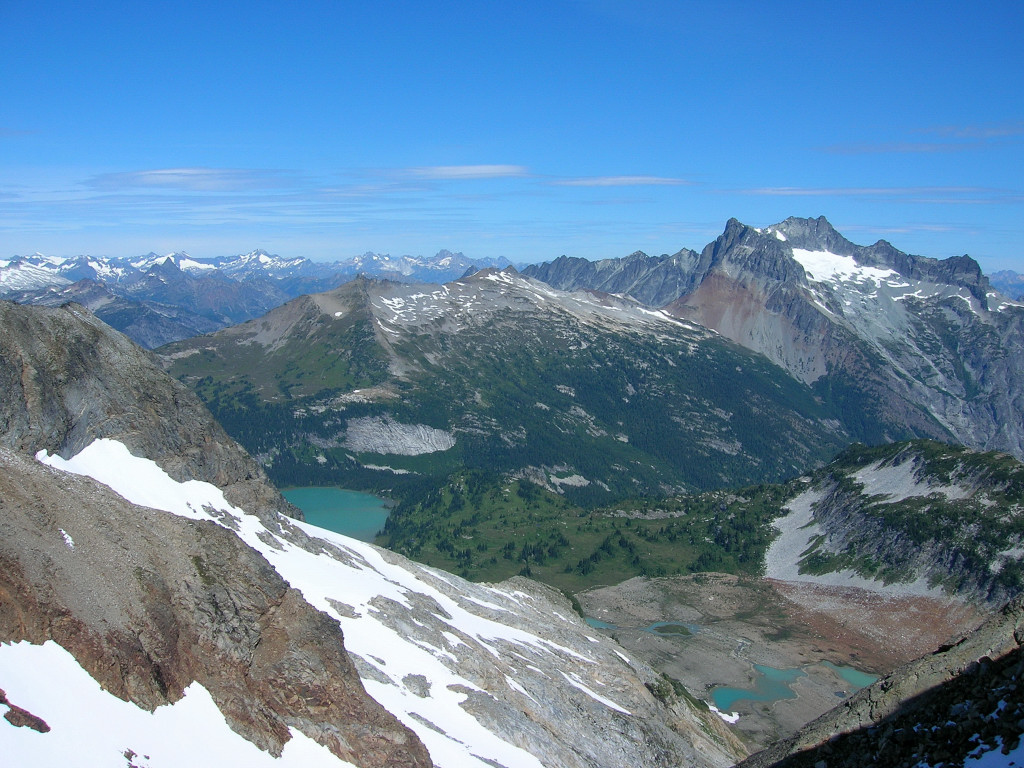
Continuing with the traverse, I began the descent via the SE route. The route actually uses the ridge trending northeast and then east of Chiwawa. Snow covered the rock here as well with exposure increasing so I proceeded carefully. The ridge narrowed with views down to Lyman Glacier and Lyman Lakes.

Lyman and Bonanza.

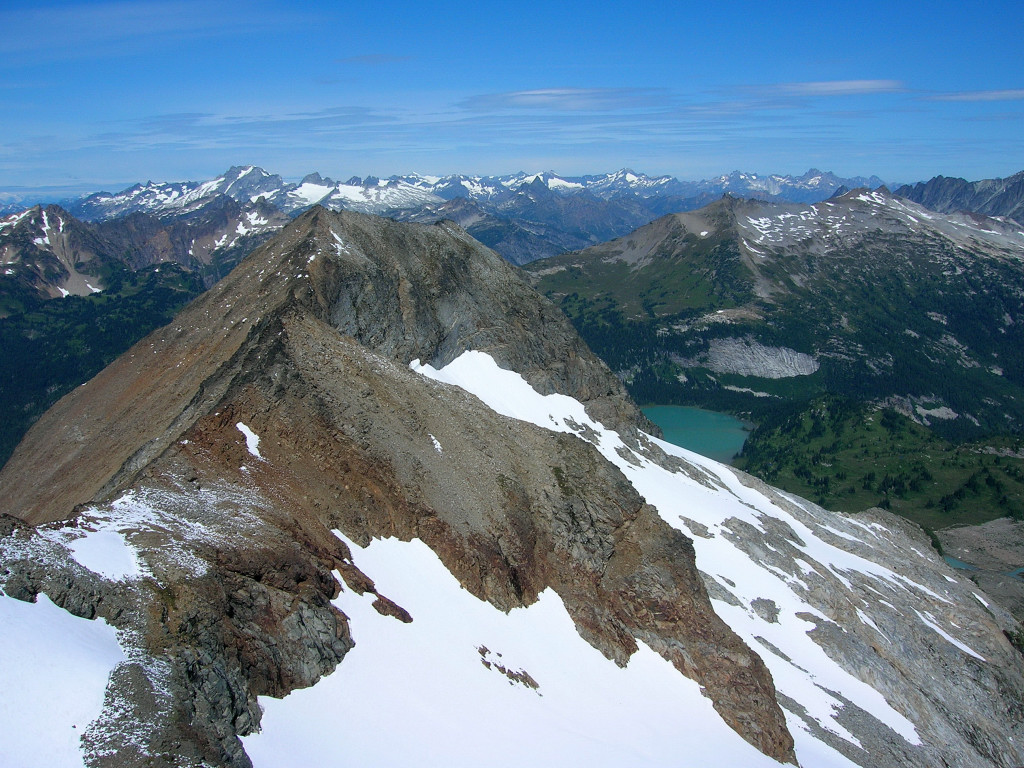
Continuing along the narrow ridge, the snow seemed far below and the rock was vertical so I was unsure if the route would go. I saw a nice ramp heading down the snowfield but it was on the other side of a gendarme. After looking around, I decided the only feasible route was ascending to the top of the gendarme. A few exhilarating class 4 moves and I was on top of the gendarme and from here the ramp was easily within reach.
Looking back at the summit of Chiwawa from the other side of the gendarme.

The ramp runs from the highest point of snow diagonally to the right.

Chiwawa’s rugged SE face.
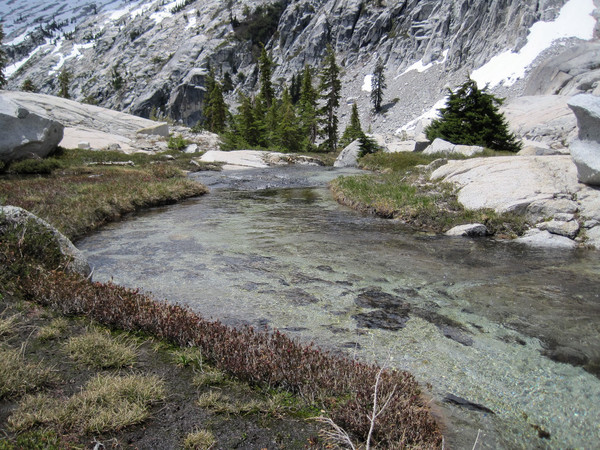
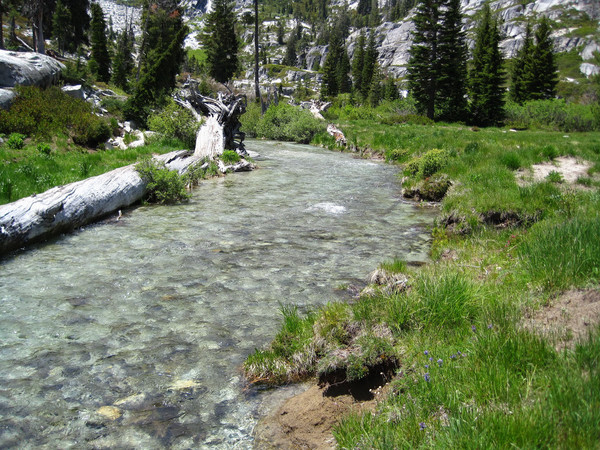
The extremely loose ramp brought me to some more steep snow and then fun glissading. A lovely traverse through meadows and streams in upper Chiwawa Basin brought me to the Red Mountain Trail. While unmaintained, this trail is actually in pretty good shape. I continued down through Chiwawa Basin and the final 5 miles to the trailhead.
This traverse had a little bit of everything – mountain trails to run, steep snow, rock scrambling, and stupendous views.

Gear Notes:
Crampons, Ice Axe.
Bear in mind there are couple areas of class 4 scrambling on this route.
Approach Notes:
Trails are in decent shape. The Red Mountain trail was surprisingly good considering it is hasn't been maintained in some time.
-
Fair enough. I wish all backcountry smokers were as environmentally responsible...
-
-smoking damn near 3 packs by the time we finally escaped downey and bastard creeks
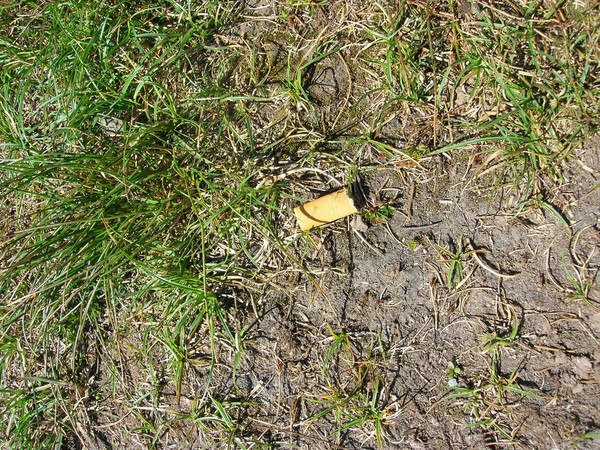
So is the Ptarmigan your ashtray?
-
The assertion was incorrect and I tip my hat to Joe Stock. Sorry for the confusion. I removed mention of record when I found out about it.
I agree that it is hard to take bad photos on the Ptarmigan, but I also had 265 photos to select from!
Thanks Blake, we both used trail running shoes, although the only consistent running was on parts of the Cascade Pass Trail and the Downey Creek Trail.
-
The philosophy for this trip was inspired by the Skoogs' one day ski of the Ptarmigan in June 1988.
From Alpenglow Ski History:
http://www.alpenglow.org/ski-history/notes/ms/lds-journal.html
p. 462: 1988, June 24, Ptarmigan Traverse, one-day ski crossing
With Carl Skoog. Starting at the end of the Cascade River road around 2 am, we climbed by headlamp to Cascade Pass, then cramponed to Cache Col. Descending to Kool Aid lake at dawn, we found shady frozen slopes, so we continued on crampons to Spider-Formidable col, where we switched to skis. We stopped for a late breakfast at Yang Yang Lakes (about 8:30 am) and continued to the Le Conte glacier. We stopped for lunch at White Rock Lakes (about 12:30 pm) and climbed tiredly to the col next to Spire Point (about 3 pm). No summit side trips were made on this trip. After a 45 minute rest, we traversed toward Spire Lake and dropped into Bachelor Creek where we removed skis. We struggled with the overgrown trail and finally reached the Suiattle River road around 11 pm.
From Outside Magazine:
http://outside.away.com/outside/magazine/200003/200003disp1.html
Lowell, on the other hand, may be the country's foremost long-and-far thinker, creating punishing single-day sojourns across some of the continent's most rugged terrain. Adapting psychologist Mihaly Csikszentmihalyi's idea of flow, a state of optimal experience, Lowell invented his own "flow day" by linking separate routes into a single marathon. The Skoogs' first flow day became a legend: Twelve years ago they compressed the Ptarmigan Traverse, a classic multiday summer mountaineering route in Washington's Glacier Peak Wilderness, into a single 21-hour randonnée siege. "On a whirlwind traverse like that," says Carl, "the mountains don't get smaller, they get more connected. You feel how the range flows together and get this sense of a whole that's missing when you do multiple camps."
We definitely experienced the "flow" of the range on our trip. This was our purpose for the trip, not peakbagging, which we had already accomplished on our traverse in 2004 when we climbed many of the summits along the way. Having done it both ways, I can say that both philosophies yield incredibly rewarding results and I wouldn't give up either experience.
-
Thanks.
I use a Nikon 5600 digital camera. It is 4 years old now but the photos are still great.
-
Trip: Ptarmigan Speed Traverse
Date: 8/14/2008
Trip Report:
Colin Abercrombie and I completed the Ptarmigan Traverse in 18:10 from the Cascade Pass parking lot to the Downey Creek trailhead. We set out at 2:05 am and reached the Suiattle River Road at 8:15 pm. The weather was perfect and the glaciers were in great shape. We did the Ptarmigan in 2004 which was very helpful for routefinding purposes.

Location (Elevation): Time Elapsed / Split / Real Time
Cascade Pass TH (3,600 ft) : 0 / 0 / 02:05
Cascade Pass (5,392 ft) : 55:03 / 55:03 / 03:00
Cache Col (6,920 ft) : 2:13:13 / 1:18:09 / 04:18
Spider-Formidable Col (7,320 ft+) : 4:59:33 / 2:46:19 / 07:05
Yang Yang Lakes (5,830 ft) : 6:20:09 / 1:20:36 / 08:25
White Rock Lakes (6,194 ft) : 9:50:45 / 3:30:35 / 11:56
Spire Col (7,760 ft+) : 11:54:44 / 2:03:59 / 14:00
Cub Pass (6,000 ft+) : 13:41:32 / 1:46:48 / 15:47
Bottom of Bachelor Creek (2,440 ft) : 16:29:45 / 2:48:12 / 18:35
Downey Creek TH (1,415 ft) : 18:09:36 / 1:39:50 / 20:15
[Car at Milepost 12.5: 20:48:24 / 2:38:48 / 22:54]
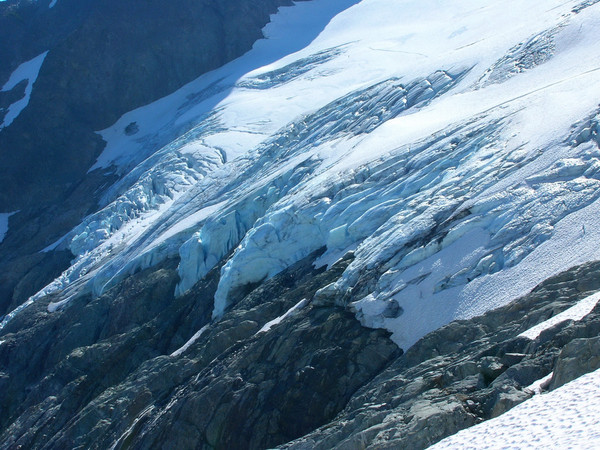
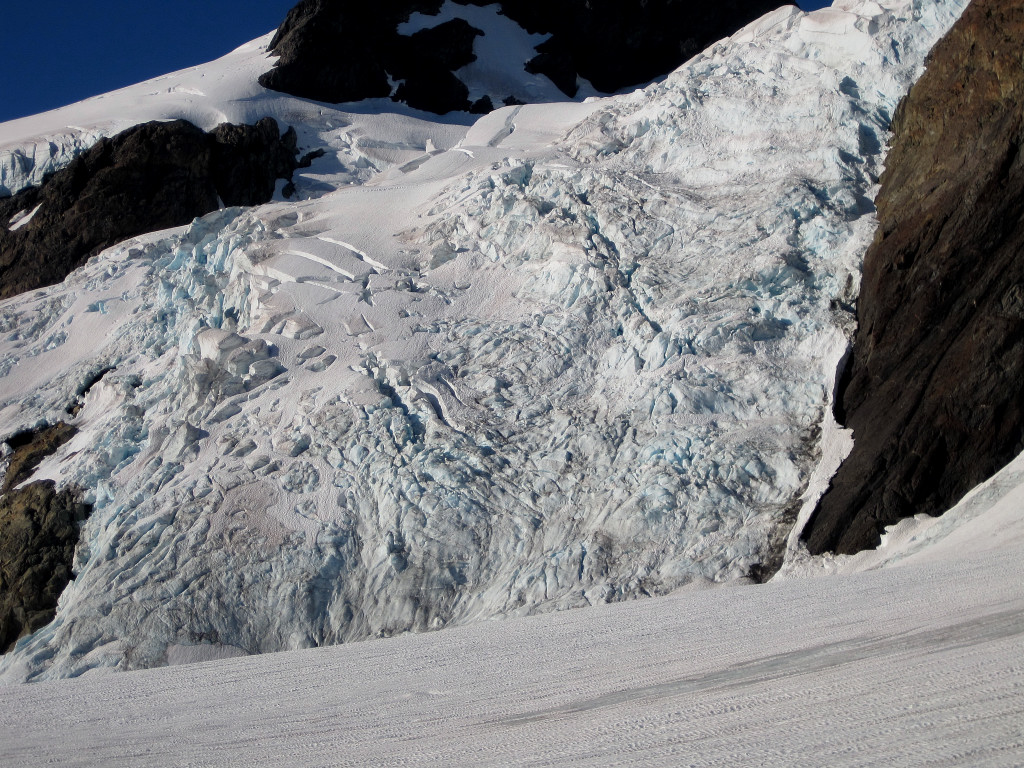
After doing the car shuttle Wednesday afternoon and evening, we rested at the Cascade Pass parking lot. At about 1 am we were awoken by icefall from the hanging glaciers on Johannesburg. The thunderous noise persisted for over 5 minutes. We set off at 2:05 am and after 55 minutes of walking and jogging we were at Cascade Pass. We continued up Mix-up arm and then ascended to Cache Col arriving while it was still dark at 4:18 am. On the descent towards Kool Aid Lakes we descended a little too low instead of traversing boulder fields. Once we realized the mistake we began an ascending traverse meeting up with the route heading towards the Red Ledge. The Red Ledge was straightforward with no moat issues yet. Once we rounded the corner, we saw the magnificent icefall of the Middle Cascade Glacier as the sun was rising.

Mount Formidable.
The Middle Cascade Glacier icefall.

Sunrise over Formidable.

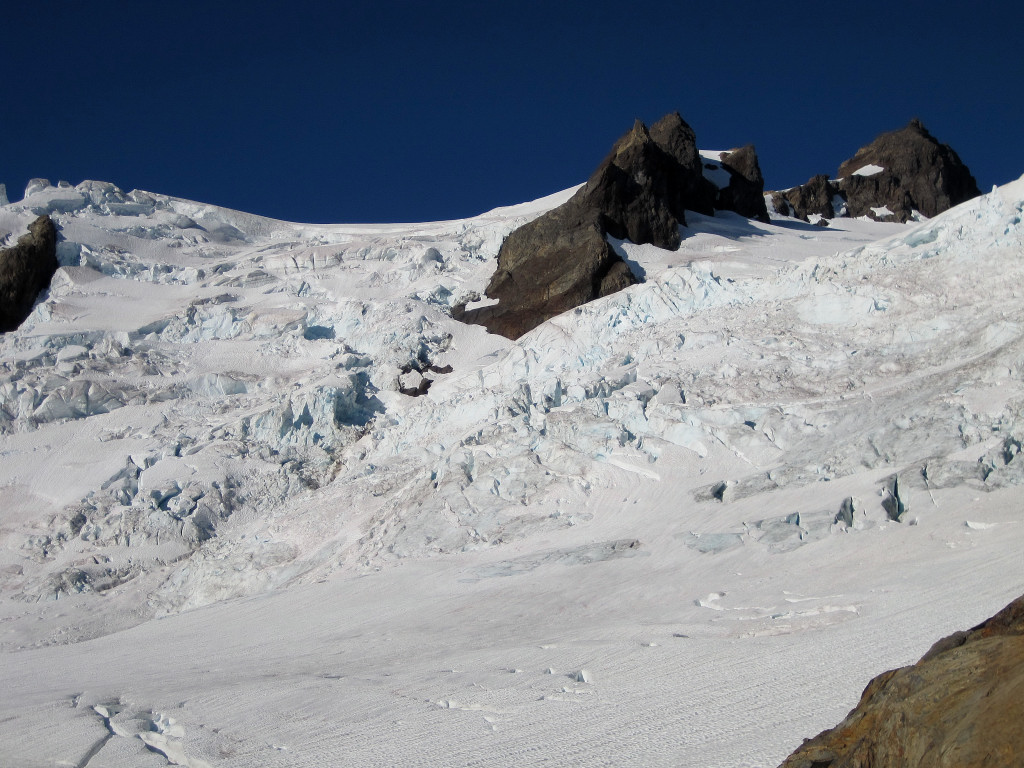
On the ascent to Spider-Formidable col, we had to make a small backtrack due an open bergshrund spanning from rock walls to the right to the center of the glacier. Ascending left of center was straightforward and we were at Spider-Formidable col in under 5 hours from the start.

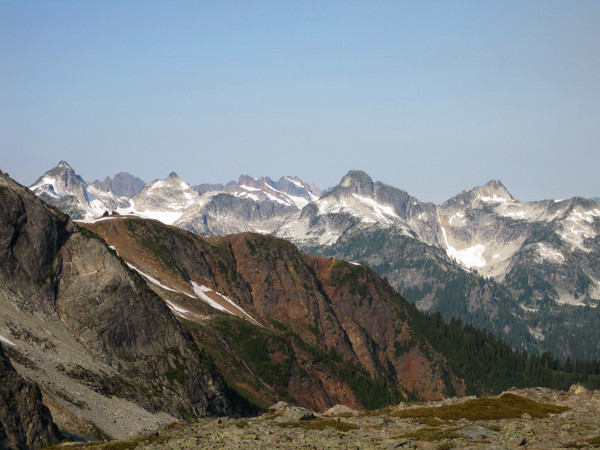
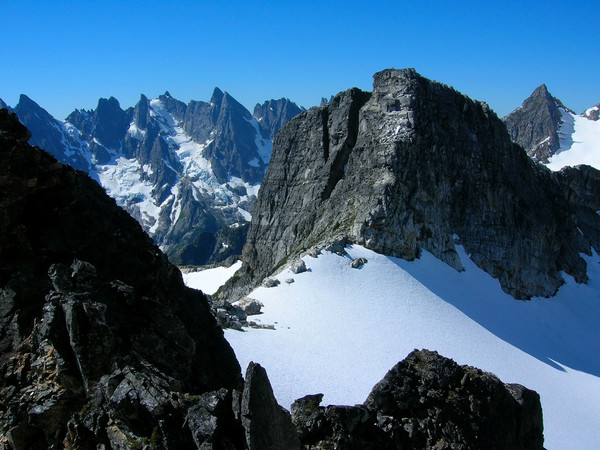
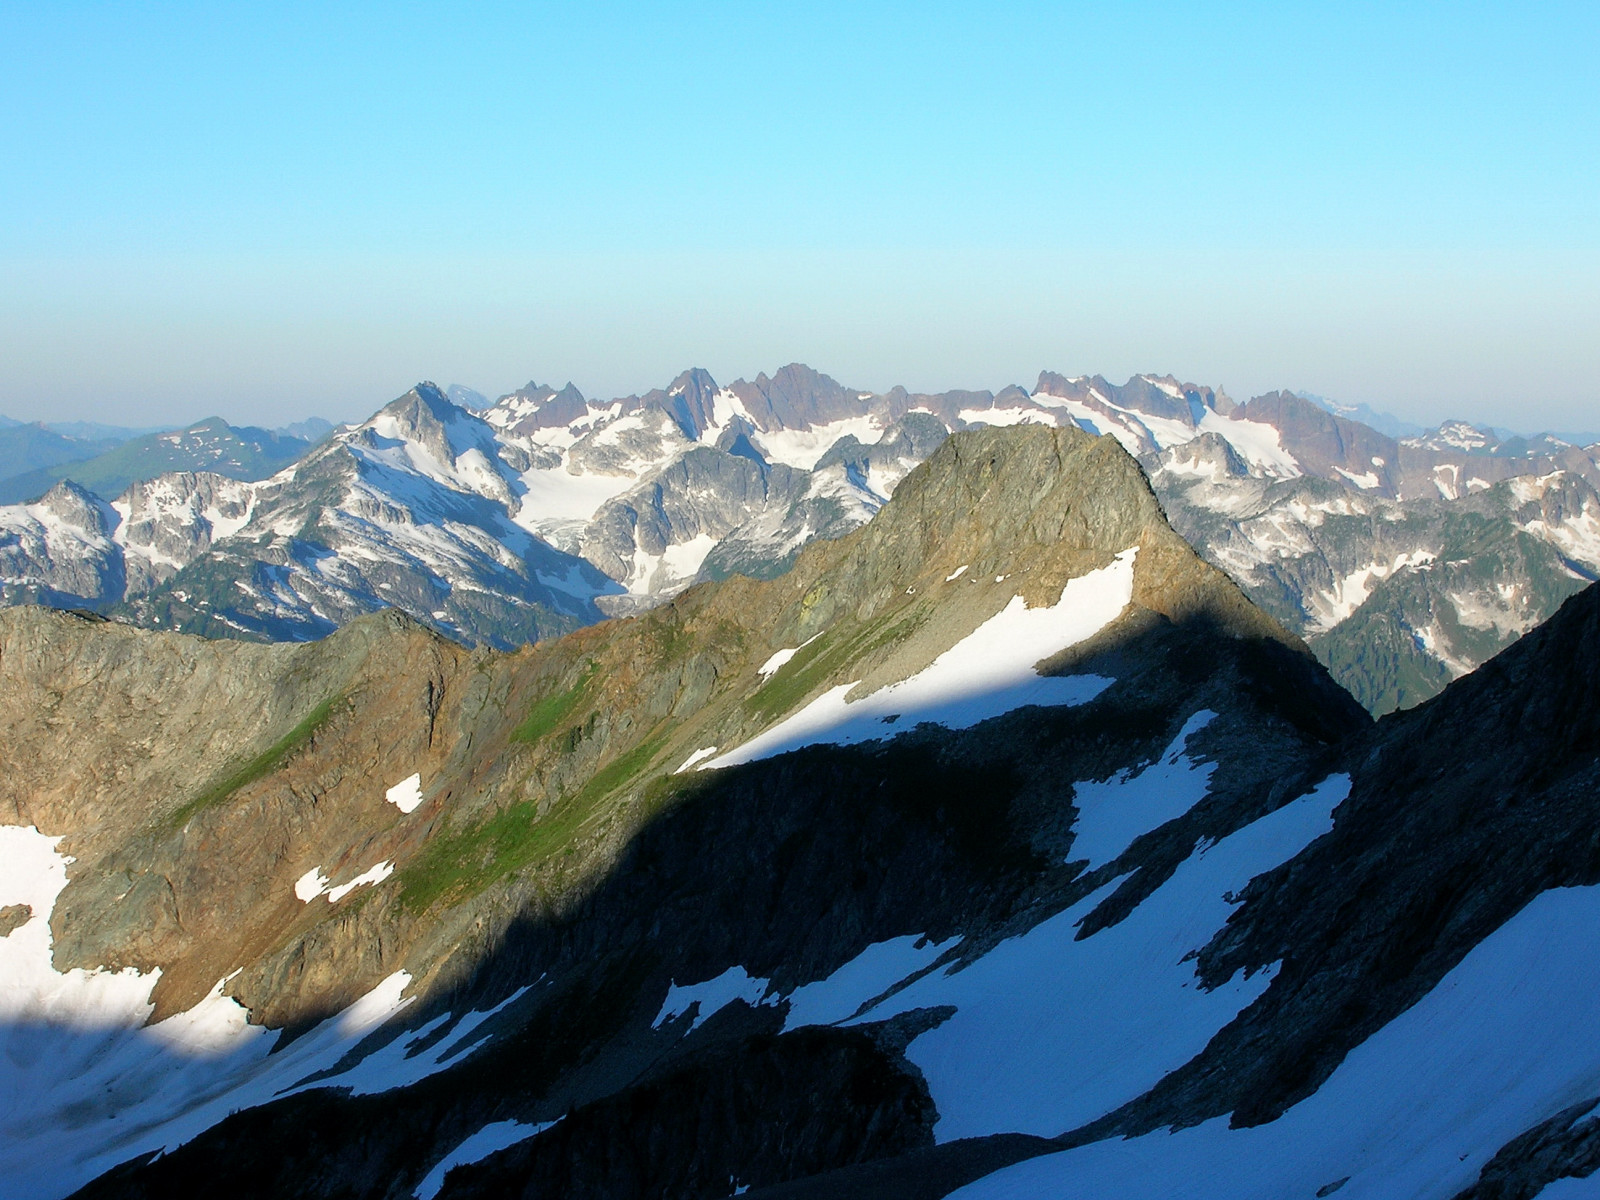
Buckindy Region


The steep snow from Spider-Formidable col was quite hard in the early morning and we downclimbed for a couple hundred feet before beginning a fast traverse down to mosquito infested Yang Yang Lakes (the only spot we encountered any mosquitoes). At Yang Yang we were met by a couple climbers who had fallen very ill and could not complete the traverse. We took their contact information and passed on their desire to be rescued to the rangers and sheriff’s office.


A quick ascent up to the saddle north of Le Conte Mountain brought us to the awesome traverse over to the Le Conte Glacier with up close views of glacial ice hanging over the rock buttresses and the wild Flat Creek basin.
Flat Creek Basin
Old Guard and Sentinel
At Sentinel Saddle we met Cascade Climbers JoshK and Ivan who were doing a south to north traverse. We chatted for a few minutes and then I continued the walk to Lizard Pass which was amazing with views in every direction. We took a break at the spectacular White Rock Lakes for photography and refueling.
South Cascade Glacier

Lizard Pass.

Gorgeous White Rock Lakes.


Dana Glacier


Re-energized, we made great time up to Spire Col on the Dana Glacier, which was also in great shape.
Sweet contrast.

Taking the third gully on skier’s right from the col, we made it down to Itswoot Ridge fast.
The classic view of Dome Peak
Dakobed and Glacier Peak
Traversing the basin down to Cub Lakes took longer then expected and the short but steep climb up to Cub Pass in the 90 degree heat was physically taxing. We thought gravity would take us down Bachelor Creek, not so fast! The upper part of Bachelor Creek is actually in decent shape and you can reasonably follow the path through the slide area. The most difficult section was the lower Bachelor Creek where thick brush made travel very slow. The brush, consisting of salmonberry, slide alder, and a sprinkling of nettles, has gotten thicker since our last visit and affecting a greater length of trail. We finally reached Downey Creek and knew the Suiattle River was not far. After a break, we jogged the final 6.5 miles, arriving at the Downey Creek trailhead at 8:15 pm.
We were not looking forward to the extra 8.5 miles of road walking due to the washouts at MP 12.5 and 13, but the road is flat and it goes by fast. Once we started walking we were able to reach the car in less than 2.5 hours, arriving at 10:54 pm.
Four summers ago after spending 4 nights on the Ptarmigan we would have never thought to do it in a single push, let alone 18 hours. In discussing this trip, we had hoped to go under 20 hours, but knew it could run longer a la Mount Fury last week. We were able to exceed expectations on the traverse portion, and despite Bachelor Creek taking longer than expected, a steady, consistent effort throughout the trip allowed us to make great time. Knowing the route and the smooth conditions on the glaciers were helpful. We left just enough energy to navigate brush-choked Bachelor Creek.
The Ptarmigan is a classic traverse for good reason - the terrain and scenery are amazing! To traverse all of it in less than one day was very rewarding.
Gear Notes:
axe, crampons, sunscreen
Approach Notes:
A few snow patches left on the traverse to Cache Glacier.
Stay left of center on Middle Cascade Glacier unless you want to jump an opening bergshrund.
The brush on lower Bachelor Creek is indeed getting worse.
The 8.5 mile walk on the Suiattle River Road is flat, easy, and fast. It is possible to drive around the washouts but it is dicey and definitely not suitable for larger vehicles unless you want to park in the Suiattle River.
-
Trip: Mt. Fury East Peak Single Push
Date: 8/5/2008
Trip Report:
Colin Abercrombie and I climbed the East Peak of Mount Fury in a single push in 25 hours roundtrip. It was one of the most scenic days I have spent in the mountains, but also one of the most exhausting. We were very fortunate to have perfect weather and great route conditions. I couldn’t have asked for a better partner for this undertaking and we were extremely happy to summit Fury after skipping it on our Luna cirque traverse in 2005.

Location (Elevation): Time Elapsed / Split / Real Time
Big Beaver Camp (1,800 ft) : 0 / 0 / 03:00
Big Beaver Log Crossing (~2,500 ft) : 2:36:59 / 2:36:59 / 05:37
Head of Access Creek (4,200 ft) : 4:45:44 / 2:08:44 / 07:46
Luna Col (7,200 ft) : 7:21:48 / 2:36:04 / 10:22
Arrive Summit (8,288 ft) : 10:48:52 / 3:27:03 / 13:49
Depart Summit (8,288 ft) : 11:20:13 / 31:21 / 14:20
Luna Col (7,200 ft) : ~14:50 / ~3:30 / 17:50
Head of Access Creek (4,200 ft) : ~17:20 / ~2:30 / 20:20
Big Beaver Log Crossing (~2,500 ft) : ~20:30 / ~3:10 / 23:30
Big Beaver Camp (1,800 ft) : ~25:00 / ~4:30 / 04:00
We rode the boat over to Big Beaver camp in the afternoon and got some rest. We were up at 2:20 am and off on the trail at 3:00 am. The Big Beaver trail continually undulates, but we didn’t feel the gradual inclines and declines at this point because we were fresh (not so on the way back!). We made good time to Luna Camp and then dropped down to the Big Beaver shortly afterwards. We stumbled upon a great log crossing in a short amount of time and began heading up the slope on the south side of Access Creek.
The going was rough at first with thick huckleberry but then the forest became open and travel was surprisingly fast. We crossed over to the north side of the stream where the slide alder patches began. We stayed on the north side until the 3,900 ft level and then ascended boulder fields up to the head of Access Creek. The mosquitoes were horrendous here so we kept moving. It felt good to reach the 6,100 ft notch in the ridge and see the classic view of the Southern Pickets.

I had forgotten how long it takes to traverse the basin and ascend to Luna col. We first descended a few hundred feet to a bench and then ascended steep heather, slabs, and snowfields to the col. The ridge walk from Luna Col to the Southeast Glacier was super fun with outrageous views in every direction.

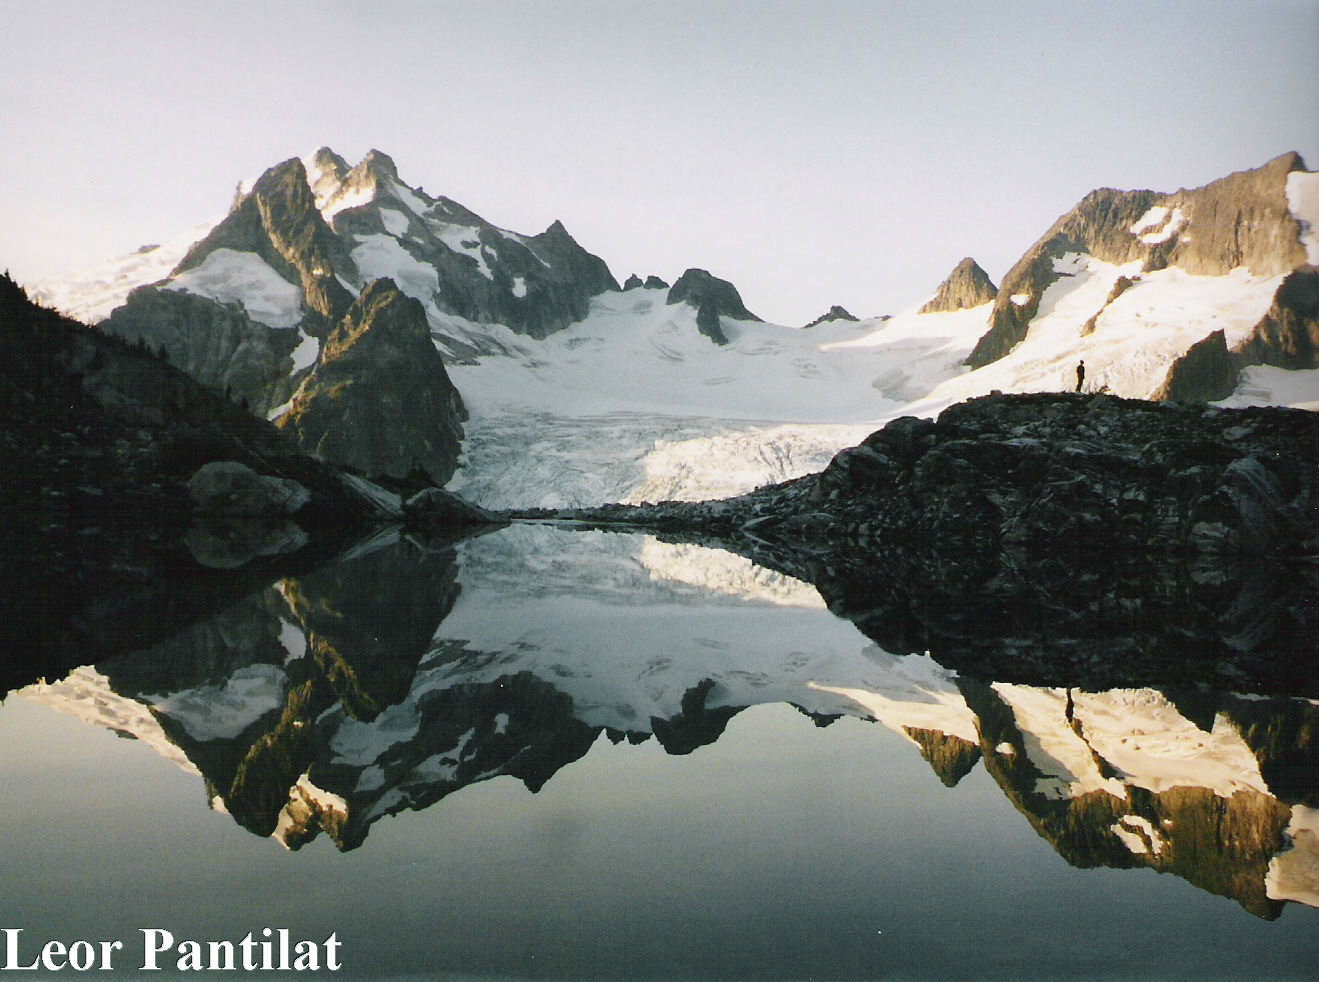
Luna Lake and Luna Cirque
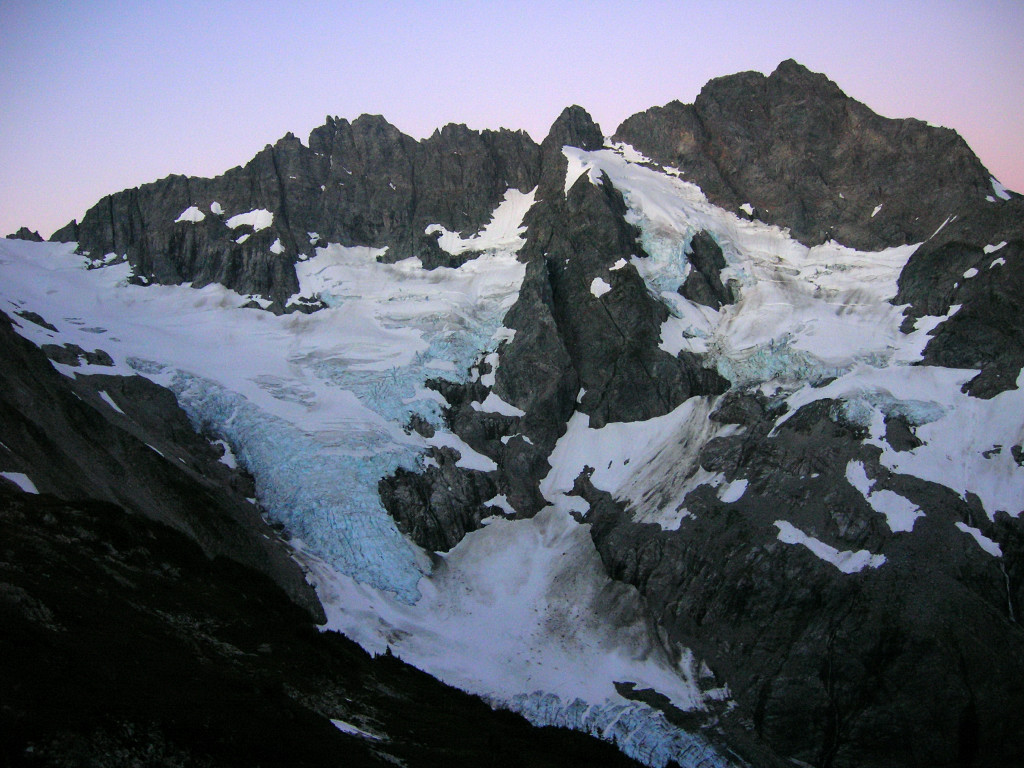
Mount Fury from the ridge.
Luna Cirque panorama from ridge.
Once off the ridge, we traversed snow slopes and rounded the buttress using a key ledge at 6,800 feet. The glacier was in good shape with few crevasses to negotiate, but we could see how this glacier could really open up later in the season or in a lower snow year.

Traverse to the Southeast Glacier

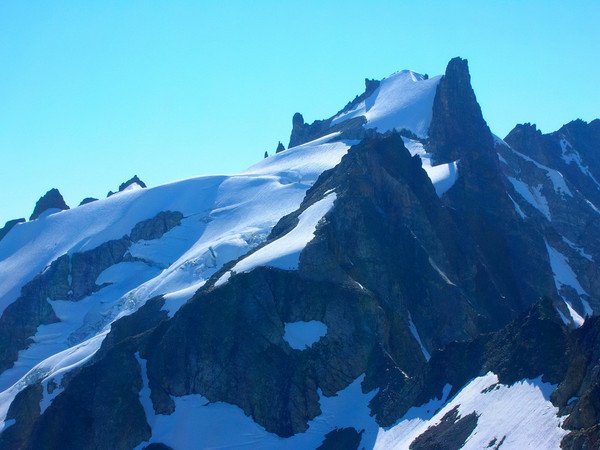
The Southeast Glacier of Fury.
The final couple hundred feet of 40 degree snow to the summit arête was tiring due to the heat and the effort we had already exerted, but we were very happy to reach the summit.
Final snow slopes to the summit.
We signed the register, ate, rested, and took photos for a half an hour.


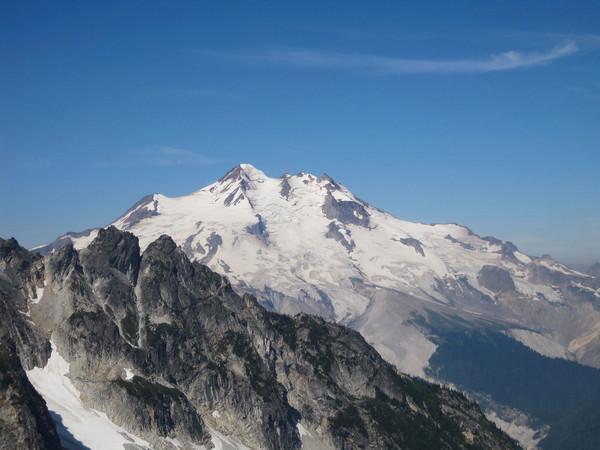
View of Fury West Peak, Baker, and Shuksan
Goodell Creek

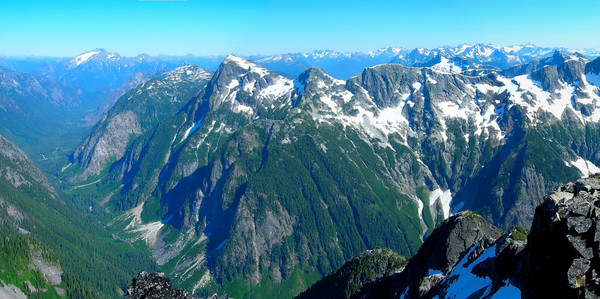
Summit panorama.
We were able to descend the glacier fast, but the ridge portion took longer because there is a net elevation gain on the way back to Luna col. We also stopped to soak in the tremendous views.

Glissading down from the snow arête.
Lots of taking crampons on and off. Here we decided to leave them on for a stream crossing.
Fury looking wicked in the afternoon.
Downclimbing the 5.0 step on the ridge.
Luna from the ridge.
View north to Redoubt, Spickard, and Mox Peaks.
We took a break at Luna col and then continued on hoping to cover as much ground as possible before dark. The descent down to the head of Access Creek took almost as long as the ascent with loose rocks and slippery heather. It grew dark just as we reached the woods on the lower part of Access Creek. Nighttime travel was slow through the brushy lower section, but we finally reached the Big Beaver and a found a log across the river a few minutes downstream of the confluence of Access Creek and Big Beaver. This was the 12 inch log mentioned in the previous trip report. I’m sure the easier, safer log crossing we used in the morning was just slightly further downstream, but it was dark and we were tired. Ascending the slopes on the other side of the Big Beaver, we missed the intersecting trail and spent a few minutes backtracking. We had intended to jog the 11 miles of trail back to the Big Beaver camp, but with 6 miles to go it was a walking affair. We finally arrived at Big Beaver at 4 am and got some much needed rest.
We had originally hoped to climb Fury in 20 hours roundtrip. Judging by the mileage and the elevation gain, this estimate seemed reasonable at the time. However, our memories from the 2005 traverse must have faded and we quickly found out that every off trail mile of this trip was rugged and physically taxing. There is definitely a price to be paid to climb Fury, but I thought it was totally worth it!
Gear Notes:
La Sportiva Exum Ridge Scrambling shoes, crampons, axe, jungle juice, gaiters.
Approach Notes:
Lots of mosquitoes!!
There are at least two log crossings across the Big Beaver.
We also walked back the 7 miles from Big Beaver to Ross Dam the next morning. Good idea?? No, haha.
-
Trip: Mount Williamson - North Fork Bairs Creek
Date: 4/13/2008
Trip Report:
I teamed up with Dave Johnson to climb Mount Williamson via the North Fork Bairs Creek Route. The climb was 12:43 roundtrip, with an ascent of about 8 hours, 35 minutes to enjoy the spectacular summit views, and a descent of around 4 hours. A route error cost us about an hour on the ascent and an extra 1,000+ elevation gain making for a total of nearly 10,000 feet of gain on the day. Dave brought skis and enjoyed the famous ski descent.

Location (Elevation): Time Elapsed / Split / Real Time
North Fork Bairs Creek Turnoff (~5,900 ft) : 0 / 0 / 03:01
Ridge Notch (7,200 ft) : 42:56 / 42:55 / 03:44
Fork in Bairs Creek (7,400 ft) : 1:36:47 / 53:51 / 04:38
Top of Couloir (13,000 ft) : 6:37:54 / 5:01:06 / 09:39
Arrive Summit (14,375 ft) : 8:07:14 / 1:29:20 / 11:08
Depart Summit (14,375 ft) : 8:41:51 / 34:36 / 11:43
Fork in Bairs Creek (7,400 ft) : 11:18:19 / 2:36:28 / 14:19
North Fork Bairs Creek Turnoff (~5,900 ft) : 12:43:43 / 1:25:23 / 15:45
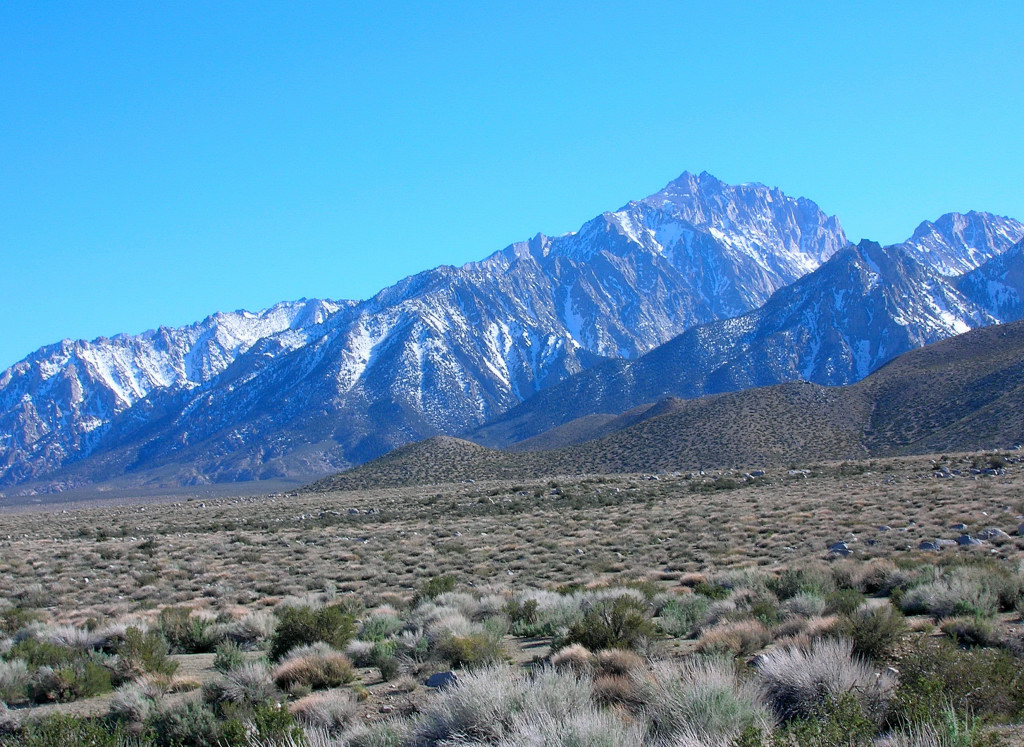
Mount Williamson is just north of Mount Whitney, but is considered by many to be a more complex and impressive massif. The peak is the second highest summit in California and the sixth highest in the contiguous United States at 14,375 ft. It is a huge mountain with an amazing 10,000 feet of relief right out of Owens Valley. With a summer-like weather forecast, I thought it would be a good opportunity to climb in the high Sierra and an objective like Williamson would rationalize the super long drive.

The North Fork of Bairs Creek is probably the most direct route to the summit (though not the easiest) with 8,500 feet of next elevation gain. The gorgeous glacier-carved cirque and couloir on the way to the summit plateau is very scenic. The route makes for an excellent ski descent in the spring with nearly 7,000 feet of vertical skiing possible. It also provides a complete tour of the eastern Sierra mountain environment from desert, to forest, to high alpine.
We left from the Bay Area Saturday morning and had a couple hours to check out the approach, which starts at around 5,900 feet next to the North Fork of Bairs Creek. The route starts in a high desert environment with cactus! The key is to find a 7,200 foot notch that allows access into upper reaches of the North Fork of Bairs Creek. On the recon trip we had trouble finding this notch, which is not obvious. We eventually located it and were happy to know where it was when we walked to it during the night. There is no trail, but the general idea is to stay on the ridge to the north of the North Fork of Bairs Creek from the turnoff. At about 7,000 you need to traverse to the left and once rounding a shoulder the 7,200 foot notch appears.
The notch is obvious on the descent and provides the only reasonable way through the cliffs of the lower canyon.
After the notch, a fairly level traverse over rocks and scree brings you to the valley bottom, where brush, waterfalls, and other complexities are encountered. The actual distance is small, but travel is slow through this section. At about 7,400 the North Fork splits and we took the left fork. Hard snow filled the gully making for good cramponing. At about 9,000 feet the route makes a turn to another gully separated by a small cliff. We did not see this turn in the dark and wound up ascending needlessly to 10,600 along the ridge before realizing the mistake. The recovery entailed a dicey descent down to the correct route that cost us an hour of time and quite a bit of energy.
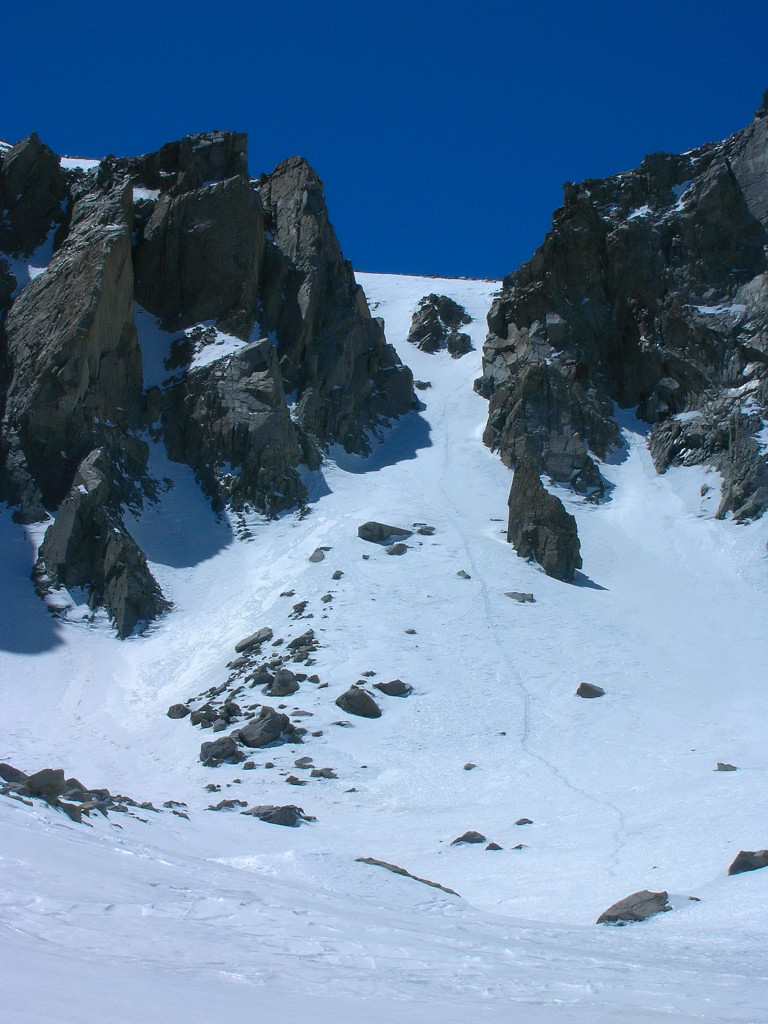
Back on track, the climb was straightforward through the gorgeous amphitheater of the North Fork Bairs Creek Cirque. A very aesthetic couloir allows passage to the upper reaches of Mount Williamson with snow and ice to 40 degrees.
The top of the couloir was at 13,000 feet and the final 1,375 feet of climbing was a slog over softening snow slopes (i.e. postholing) and talus.
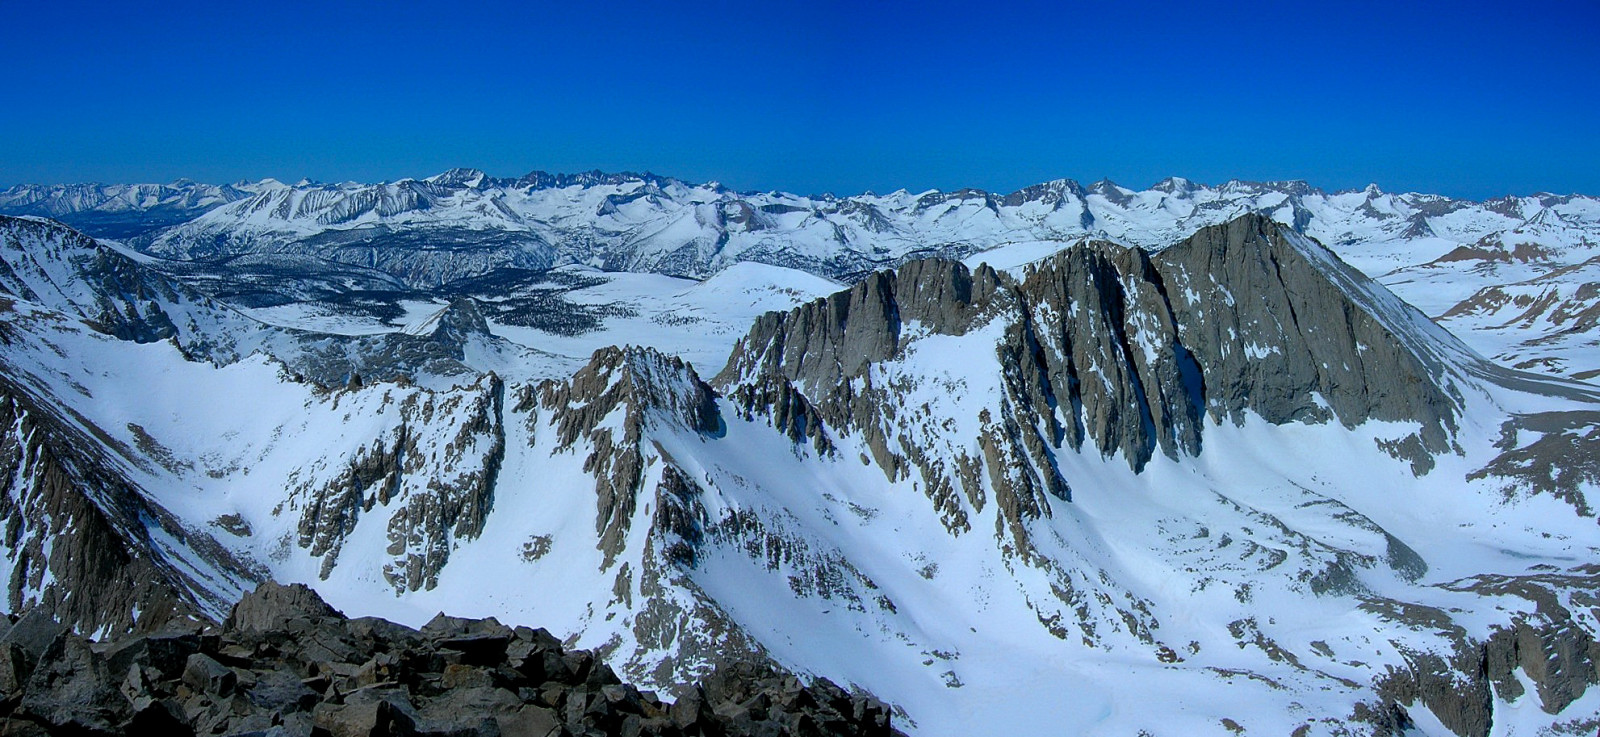
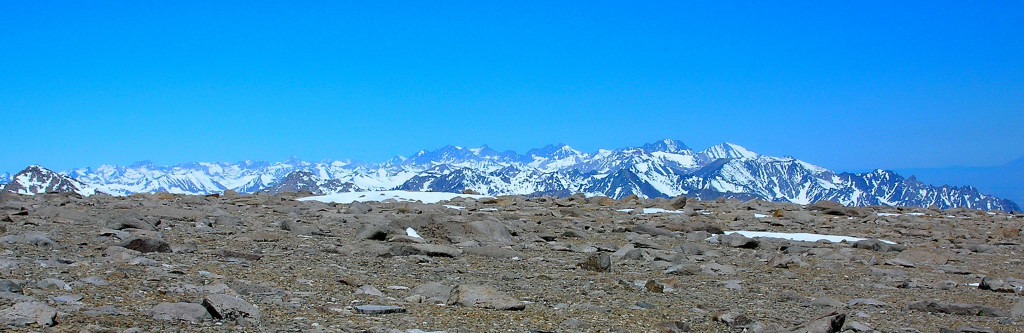
I was happy to reach the summit where I was greeted with stupendous 360 degree views, including Whitney, the Kaweah Range, the Great Western Divide, the Palisades, and Owens Valley. It was the best clarity I have seen in the high Sierra.
Whitney Area.
Mineral King Area.
The Kaweah Range.

Tyndall and the Great Western Divide

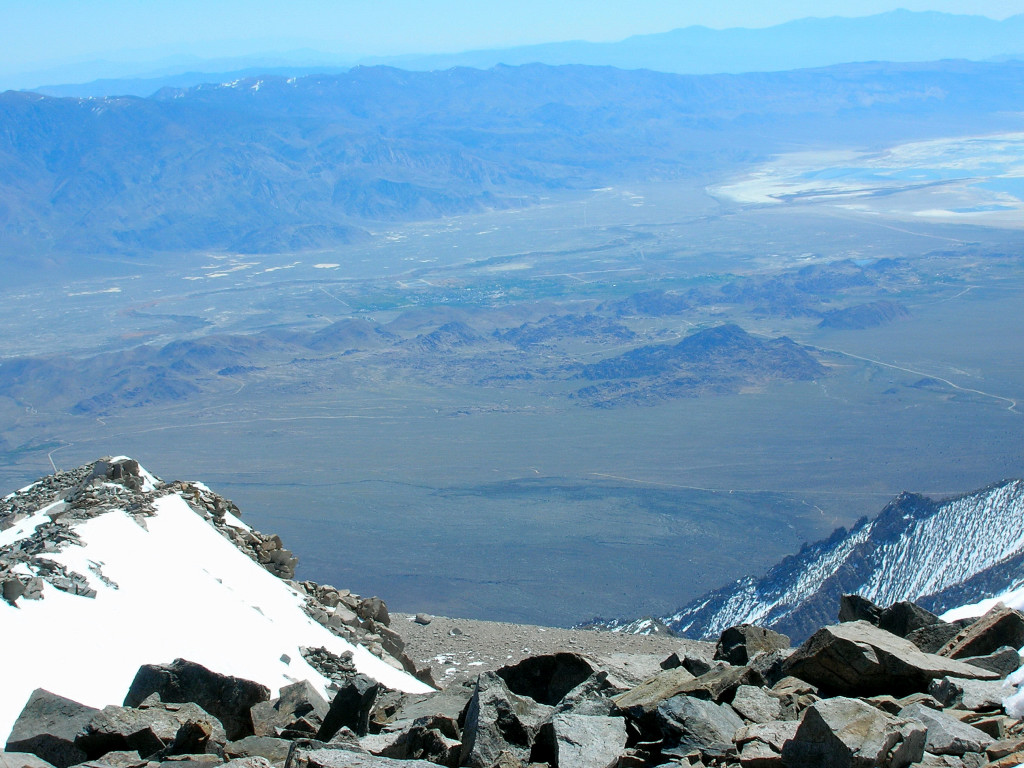
View of Lone Pine 10,000 feet below in Owens Valley and the Whitney Portal Road

While I glissaded and post-holed down the 7,000 vertical feet back to the split in the North Fork of Bairs Creek, David reaped the benefits of carrying his skis up the mountain and blew by me on the descent enjoying every turn in the corn! We were back at the car before 4 pm, very satisfied with an awesome climb.
Gear Notes:
Crampons (Kahtoola Aluminum), ice axe.
Approach Notes:
Stay on ridge to the north of North Fork Bairs Creek until 7,000 feet where you traverse left (west) to a 7,200 foot notch. After the notch, traverse the basin until you reach the creek where some brush and cliffs need to be navigated to the fork in the creek. Take gully if snow-filled. Otherwise, use the ridge line to the west of the left fork. If you take the gully, make sure to make a right turn in an open bowl at about 8,700 ft.
-
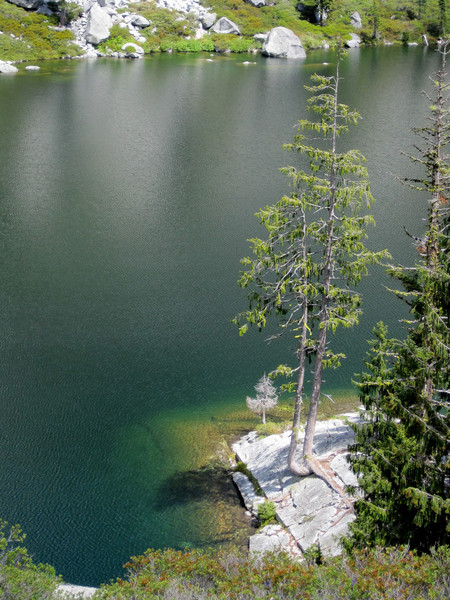
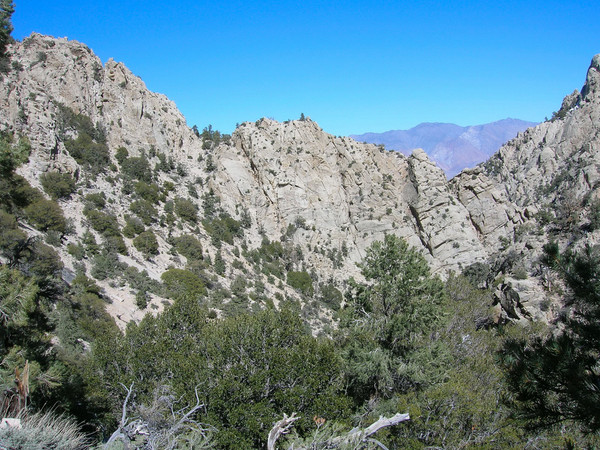
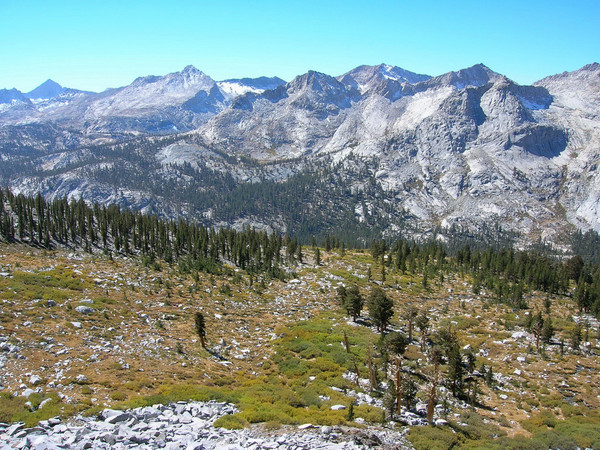
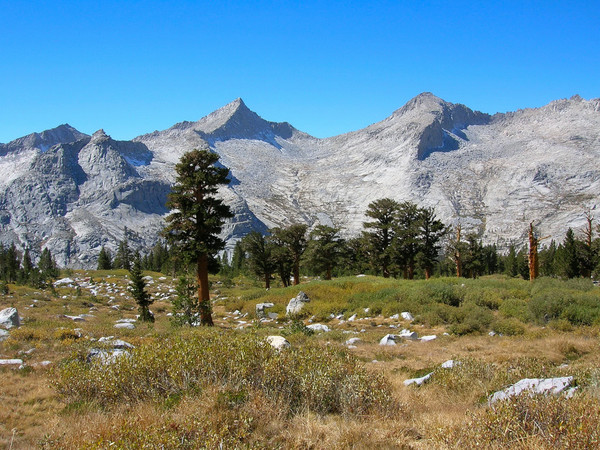
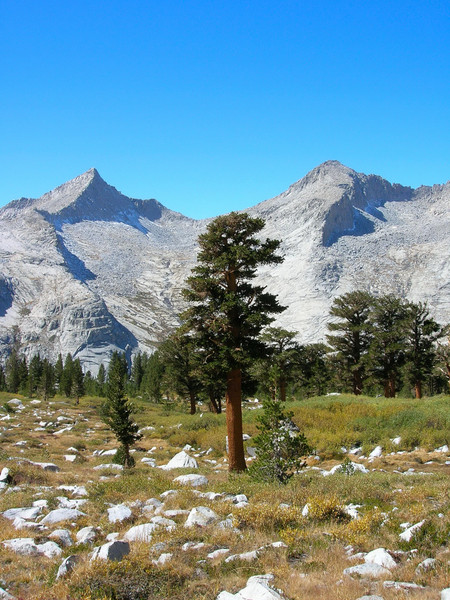
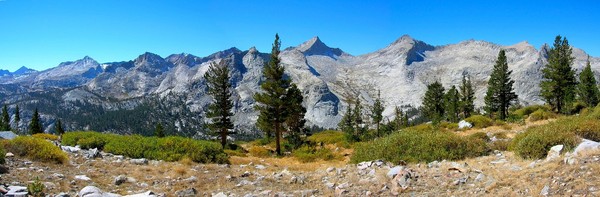
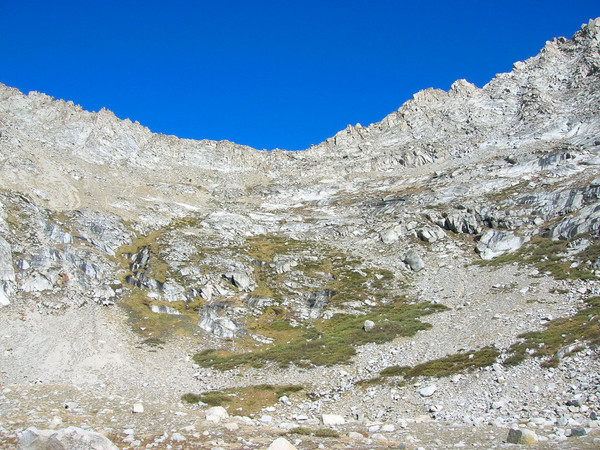
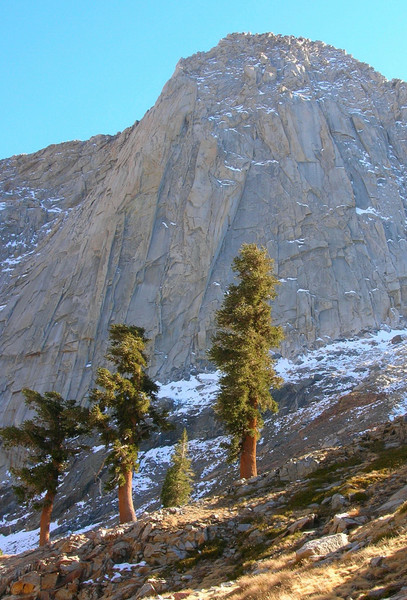
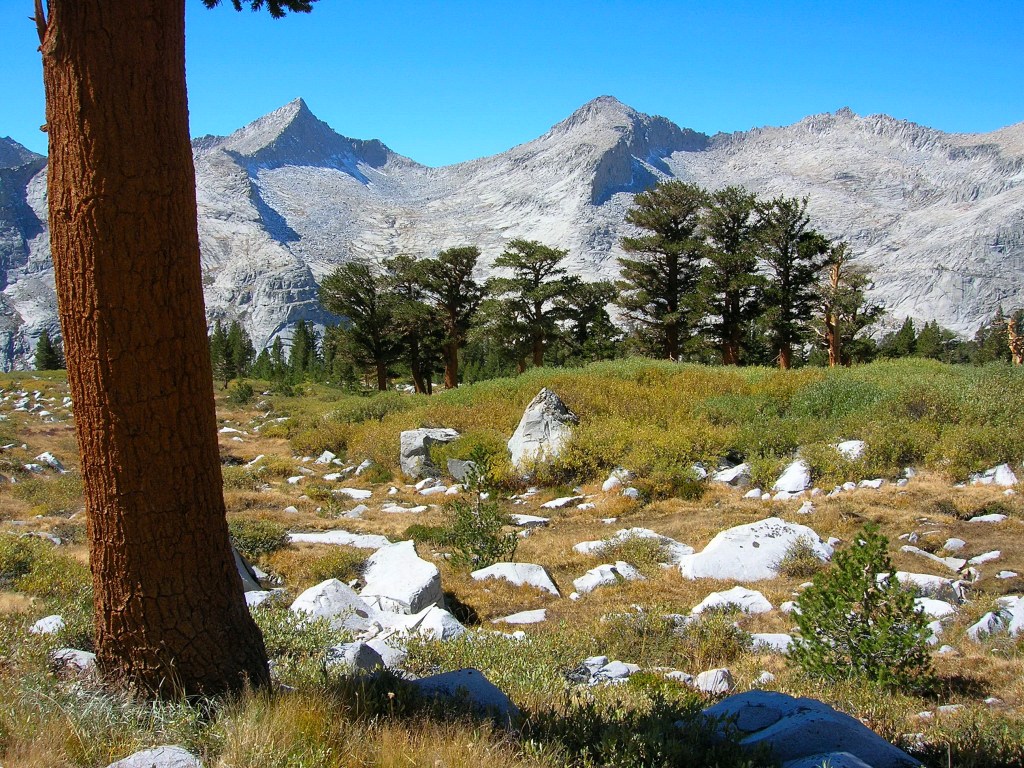
Thanks. These magnificent trees are Southern Foxtail Pines, which can only be found in the southern high Sierra. The oldest of these trees are estimated to be over 2,500 years old.

-
Trip: Black Kaweah Speed Climb - SW Face
Date: 9/30/2007
Trip Report:
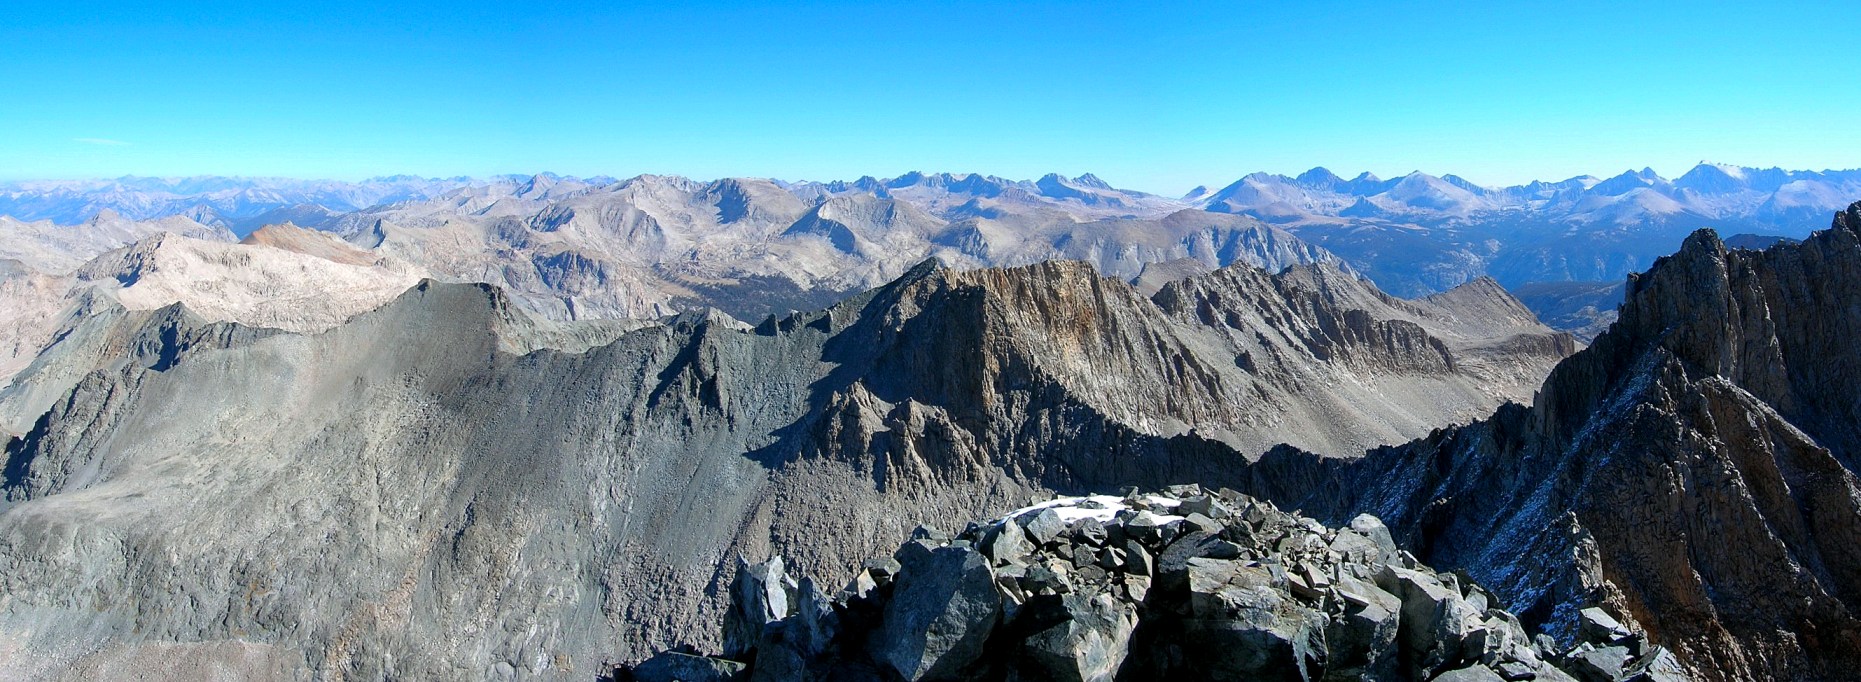
I speed climbed the SW Face of Black Kaweah in 15:35 out of Mineral King via Glacier Pass and Hands and Knees Pass. Described as "one of the great peaks of the Sierra," the Black Kaweah is high (13,680 ft), remote, challenging by any route, and in a highly scenic area. The climb entailed ascents of two high passes just to reach the base of the mountain and around 13,000 ft of elevation gain in all. We set out at 1:30 am and I reached the summit at 9:35 am, 8:05 after beginning. I spent 20 minutes on the summit to soak in the amazing views and peruse the extraordinary summit register, which dates back to 1924 and features entries from many of the climbing legends of the Sierra mountains. The descent down the SW Face went very slowly, but afterwards I was able to pick up the pace returning to the trailhead at 5:05 pm for a 7:10 return trip, and a 15:35 roundtrip.
Location (Elevation): Time Elapsed / Split / Real Time
Mineral King Trailhead (7,800 ft) : 0 / 0 / 01:30
Glacier Pass (11,080 ft) : 1:18.07 / 1:18.07 / 02:48
Hands and Knees Pass (11,145 ft) : 2:33.07 / 1:14.59 / 04:03
Little Five Lakes (10,476 ft) : 3:28.34 / 55.26.48 / 04:58
Big Arroyo Creek (9,520 ft) : 4:36.33 / 1:07.59 / 06:06
Tarn below Black Kaweah (11,560 ft) : 6:23.52 / 1:47.18 / 07:54
Arrive Black Kaweah Summit (13,680 ft) : 8:05.33 / 1.41.41 / 09:35
Depart Black Kaweah Summit (13,680 ft) : 8:24.34 / 19.00.71 / 09:55
Tarn below Black Kaweah (11,560 ft) : 10:24.16 / 1:59.42 / 11:54
Little Five Lakes (10,476 ft) : 12:15.36 / 1:51.19 / 13:45
[Hands and Knees Pass (11,145 ft) : ~13:20 elapsed / ~1:05 split from Little Five Lks / 14:50]
Glacier Pass (11,080 ft) : 14:39.09 / 2:23.32 / 16:09
Mineral King Trailhead (7,800 ft) : 15:35.17 / 56.08.78 / 17:05
We hiked Sawtooth Peak the previous afternoon to get acclimatized.
I was expecting it to be cold, but it turned out to be very comfortable with crisp and clear conditions. In fact, I was overheating in my sleeping bag and I never needed to use the two extra layers I brought. The climb started out from Mineral King with a 5 hour night walk up and over two passes under a full moon and calm conditions. We could see a bright Venus reflecting off the many alpine lakes. The first signs of daylight appeared as we reached the Big Arroyo. I enjoyed the early light shining on the Great Western Divide from the tarn below the SW Face of Black Kaweah. Unfortunately, my partner was feeling the effects of altitude combined with sleep deprivation and decided the tarn was as far as he was going. He would rest and begin the return trip while I continued on.
The chute on the SW Face requires careful attention and focus as there is copious loose rock over slabs and is sustained class 3 with some class 4 moves, especially in the beginning. Snow and ice in the lower part of the chute made some of the sections a little sketchy and after one particularly dicey section I decided I would turn around if I came across any more ice covered rock. Fortunately, the upper part of the chute was dry and I was able to continue to the summit. The descent down the chute actually took me longer as I carefully downclimbed the snow sections.
After a nice break at the tarn, I set off down to the Big Arroyo, taking in the stunning views of the Great Western Divide. I felt good and took many photos of the peaks and lakes which were not visible in the dark on the approach.
Early light on the Great Western Divide.

Black Kaweah’s shadow.
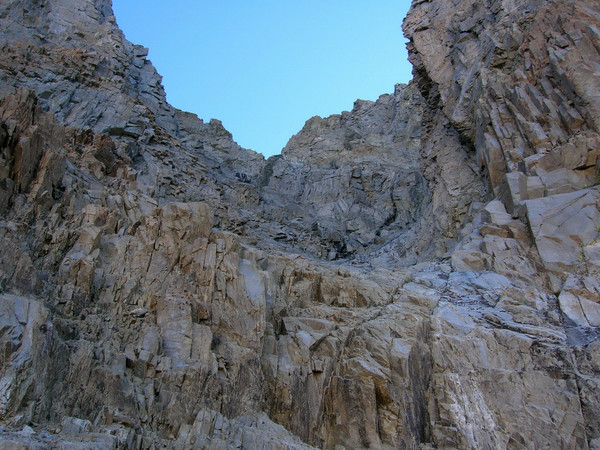
Main chute up the SW Face of Black Kaweah.
View form summit of Black Kaweah to the Great Western Divide and Big Arroyo basin.


Panorama to the Sierra crest. See enlarged panorama.

Summit shot.
Spectacular views!


Upper portion of main chute.
Sketchy snow and ice in the lower part of the main chute.
Snow and ice covering slabs in the lower part of the main chute.

Black Kaweah from below.
Tarn beneath the SW Face of Black Kaweah.
Black Kaweah Towers above the tarn.
Meadows and views of the Great Western Divide.

The Black Kaweah rises above the Big Arroyo.
Gorgeous alpine meadows.
The Kaweahs from the lowest of the Little Five Lakes.

Kaweah Range from the highest of the Little Five Lakes.
View from near Hands and Knees Pass.

Approaching Hands and Knees Pass. See enlarged panorama.
Sawtooth Peak from Hands and Knees Pass.
View down to Spring Lake from Hands and Knees Pass
The slopes up to Hands and Knees Pass
Spring Lake
View down to Spring Lake from slopes leading to Glacier Pass.
Approach Notes:
Up 4,300 feet to Glacier Pass via old trail that can be followed most of the way. Descend to Spring Lake and then ascend 1,100 ft of talus, scree, and class 3 scrambling to Hands and Knees Pass. A traverse across a sandy slope deposits you on a ridge above Little Five Lakes basin. Descend to the lakes and pick up the Black Rock Pass trail, taking it to the down to the Big Arroyo. From the Big Arroyo, ascend open forest slopes and then meadows to a tarn below the SW face of Black Kaweah.


[TR] Stanford Loop Adventure Run - 9/23/2009
in California
Posted
Trip: Stanford Loop Adventure Run -
Date: 9/23/2009
Trip Report:
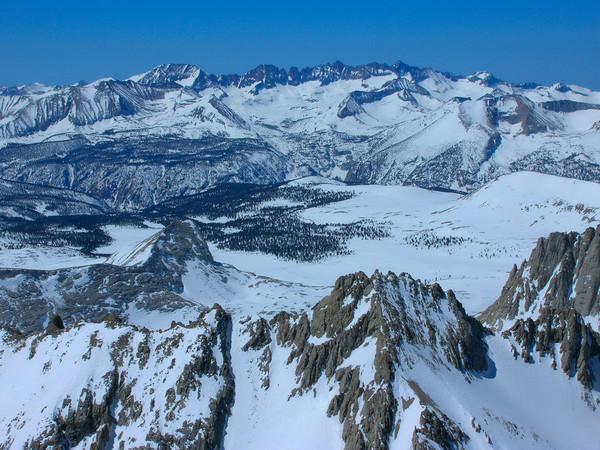
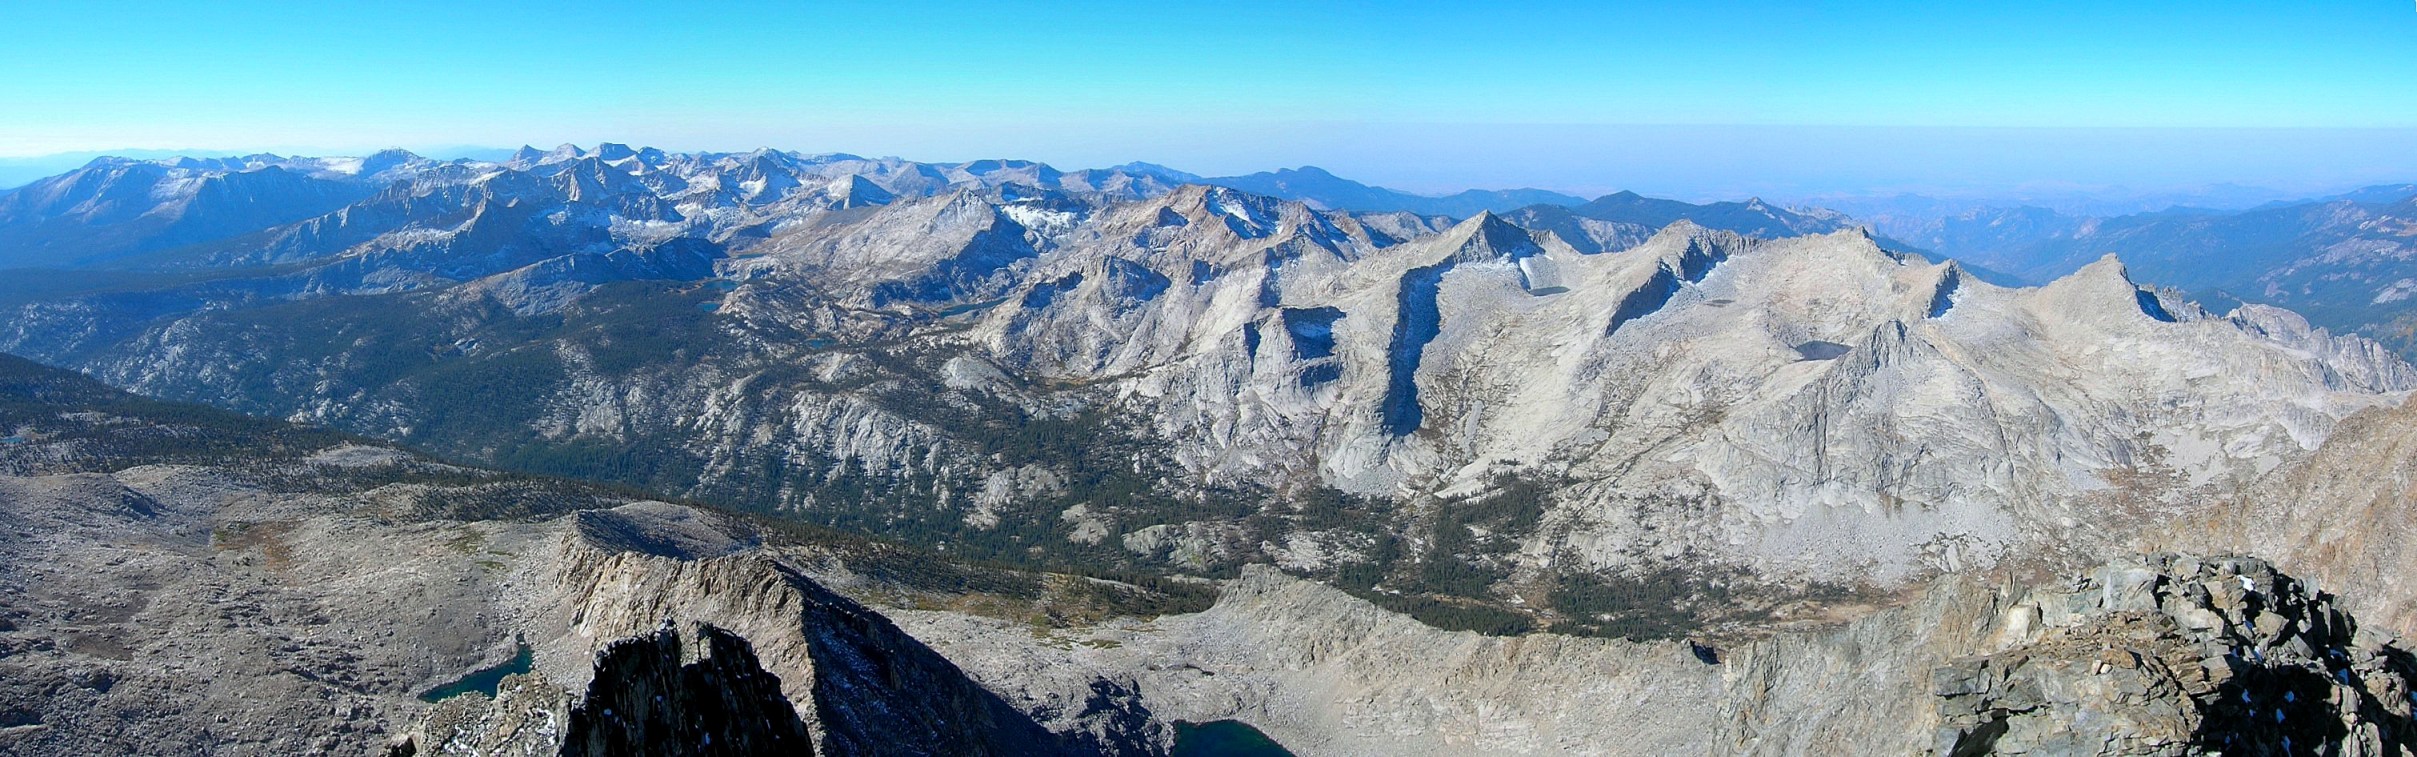
The Great Western Divide seen from the upper Kern Basin
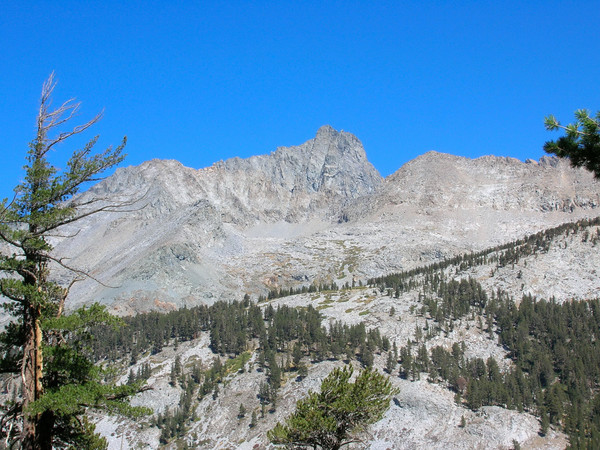
I designed a single large loop that entails nearly 40 miles and 14,000 feet of elevation gain with spectacular views into the heart of the Southern High Sierra. I call the route the "Stanford Loop" because it encircles 13,963 ft Mount Stanford, which is known as the “shyest” major peak in the Sierra because its position makes it only prominent from a small area. The loop includes four passes, two over the Sierra Crest (University Pass and Kearsarge Pass), and two over the Kings-Kern Divide (Forester Pass and Milly’s Foot Pass). There is extensive off trail travel, first in the climb up and over University Pass, and second in the traverse of Upper Kern Basin to Milly’s Foot Pass and down to Lake Reflection. The travel in the second off-trail portion is particularly arduous and cumbersome with extremely loose (kitty litter) class 3 downclimbing from Milly’s Foot Pass and several thousand feet of loose talus fields to negotiate in the descent to Lake Reflection. Despite the substantial and grueling effort that is required to complete this loop, I think it is the greatest single day tour of the Southern Sierras. Obviously, my travels in the Sierra are not thorough, but this one will be tough to beat. The route is a highlight reel and I was treated to constantly changing views, including Center Basin, Upper Kern Basin, the Kings-Kern Divide, the Great Western Divide, Lake Reflection, and Kearsarge Pinnacles. The remote and infrequently visited Upper Kern Basin is especially memorable with close views of the Great Western Divide. This area is typically only reached after a multi-day backpack and I did not see anybody from the JMT all the way to East Lake.
Location (Elevation): Time Elapsed / Split / Real Time
Onion Valley TH (9,192 ft) : 0 / 0 / 06:05
University Pass (12,640 ft) : 1:48 / 1:48 / 07:53
Forester Pass (13,057 ft) : 4:02 / 2:14 / 10:07
Milly’s Foot Pass (12,240 ft) : 6:38 / 2:36 / 12:43
Jct Bubbs Creek Trail (8,136 ft) : 10:02 / 3:24 / 16:07
Kearsarge Pass (11,760 ft) : 12:30 / 2:28 / 18:35
Onion Valley TH (9,192 ft) : 13:45 / 1:15 / 19:50
The prior day I made the 7 hour drive from the SF Bay Area. This is about as far as you can get from the Bay Area for Sierra access, but I knew it would be worth it. I started at 6:05 am from the Onion Valley TH under clear skies and crisp early-fall temperatures. The weather was perfect for the most part – not too hot and not too cold with excellent clarity. The climb up to University Pass went fast and before I knew it I was in awe of the view down to Center Basin and Mount Stanford from the pass. The descent to Center Basin goes relatively fast with gravel for plunge stepping. The setting in Center Basin is classic Sierra with small lakes, patches of pine trees, and towering Center Peak. From Center Basin, I traversed cross country around the Northern periphery of Center Peak and joined up with the John Muir Trail heading up to Forester Pass. It is along this stretch that perhaps the best views of Mount Stanford are seen. This trail is graded very well, and if I were acclimatized I would have been able to make better time here through more running, but I still made reasonably good time up to the pass in just over 4 hours after beginning.
[video:youtube]
Alternatively, the video can be watched on Vimeo
The descent from Forester Pass and through an open basin is very fast and soon I was off the JMT traversing around the South ridge of Caltech Peak and into the Upper Kern Basin. A small pass is reached before dropping down towards Lake South America (shaped like South America), and from here astounding views of the Great Western Divide open up. The hike across Upper Kern Basin to Milly’s Foot Pass is surprisingly long with several lakes and granite humps to negotiate – Milly’s Foot Pass is further than it looks! The most difficult portion of the loop is from Milly’s Foot Pass down to Lake Reflection. First a section of loose class 3 rock is encountered. Then, an “endless” talus field is encountered most of the way down to Lake Reflection 3,000 feet below. Towards the bottom, I failed to take the path of least resistance and wound up in some brush and cumbersome travel along the east shore of Lake Reflection; both energy and time consuming.
Finally at Lake Reflection’s outlet where the trail ends, I took a break to enjoy the views of Mount Genevra and Mount Jordan towering above the clear blue waters of Lake Reflection. The trail from Lake Reflection down to East Lake is more like a use path which precludes fast travel, but there are great views of Mount Brewer. The way down to Bubb’s Creek is beautiful with patches of Aspen trees in full fall color and an enchanting forest of old growth fir trees is passed. Once at Bubb’s Creek, I knew I had nearly 4,000 feet of climbing remaining. It was hot and dusty on the trail heading up to Vidette Meadows and was getting tired. The climb up to Kearsarge Pass was a real grind, but view of the Videttes, Kearsarge Pinnacles, and imperial Southern Foxtail Pines kept me motivated. I finally reached Kearsarge pass 12:30 after beginning at 6:35 pm as the sunset was beginning to set. The shorter fall days resulted in some night hiking by headlamp for the last 30 minutes. I was exhausted at the finish, but amazed at what I had seen throughout the day. I did not climb any peaks on this outing, but in many ways I accomplished more. University Peak and Mount Genevra were probably would probably only require an hour extra for each, but I was glad I did not succumb to the temptation to climb these mountains as I slowly grinded my way up to Kearsarge Pass at the end of the day.
Aerial Map of the Stanford Loop Route
Robinson Lake
Slopes leading up to University Pass
View of Center Basin from University Pass
Mount Stanford
Center Peak
Route from University Pass into Center Basin
Mount Stanford from the JMT
Lake below Junction Peak
View from Forester Pass
Kaweah Range
Famous section of the JMT below Forester Pass
The Great Western Divide from Upper Kern Basin
Mount Genevra
Mount Genevra
Kern Canyon from Milly’s Foot Pass
View from Milly’s Foot Pass
Class 3 scramble down from Milly’s Foot Pass
Route from Milly’s Foot Pass
Lake Reflection and Mount Bago
Gorgeous Lake Reflection
East Lake
Fall Color
Mount Bago
East Vidette and Center Basin
Southern Foxtail Pines
Bullfrog Lake
Kearsarge Pinnacles
Evening Light from Kearsarge Pass
Gear Notes:
La Sportiva Fireblades, Ultimate Direction Wasp Pack