


jiri
-
Posts
18 -
Joined
-
Last visited
Content Type
Profiles
Forums
Events
Posts posted by jiri
-
-
Chad, the first step was steepest at the top. Hard to guess the angle - maybe 70 for about 20ft. It felt like WI2+. It required front-pointing but the ice was quite featured. The second step was mellower and I was able to keep my feet flat most of the way.
-
Trip: Glacier Peak - Frostbite Ridge
Date: 8/2/2015
Trip Report:

I was looking at the north side of Glacier Peak for 3 days while climbing Dome Peak two weeks ago and wondering whether the recently (Nov 2014) reopened Suiattle River road would allow access to this side of the mountain. From what we heard the Milk Creek trail used in the past is in bad shape. The other option is to use the Suiattle trail and PCT which used to be significantly longer. Fortunately the location of the new bridge (opened 2011) over Suiattle river and the newly built section of PCT leading to it cuts the approach to reasonable 16 miles to camp. Starting at the end of the road at 1800ft it is roughly 7 miles to the bridge on Suiattle trail which is currently in great shape and then about 9 miles on PCT heading south. There were some blowdowns and mildly bushy section but overall easy hiking. We stayed at a camp on PCT at 5600ft in the East Fork Milk Creek basin. The plan for next day was to climb up the basin to a wide saddle at about 6500ft on climber’s left side of the basin, traverse onto the Vista glacier on the other side, climb the glacier to Vista-Kennedy saddle and follow the Frostbite Ridge route from there.
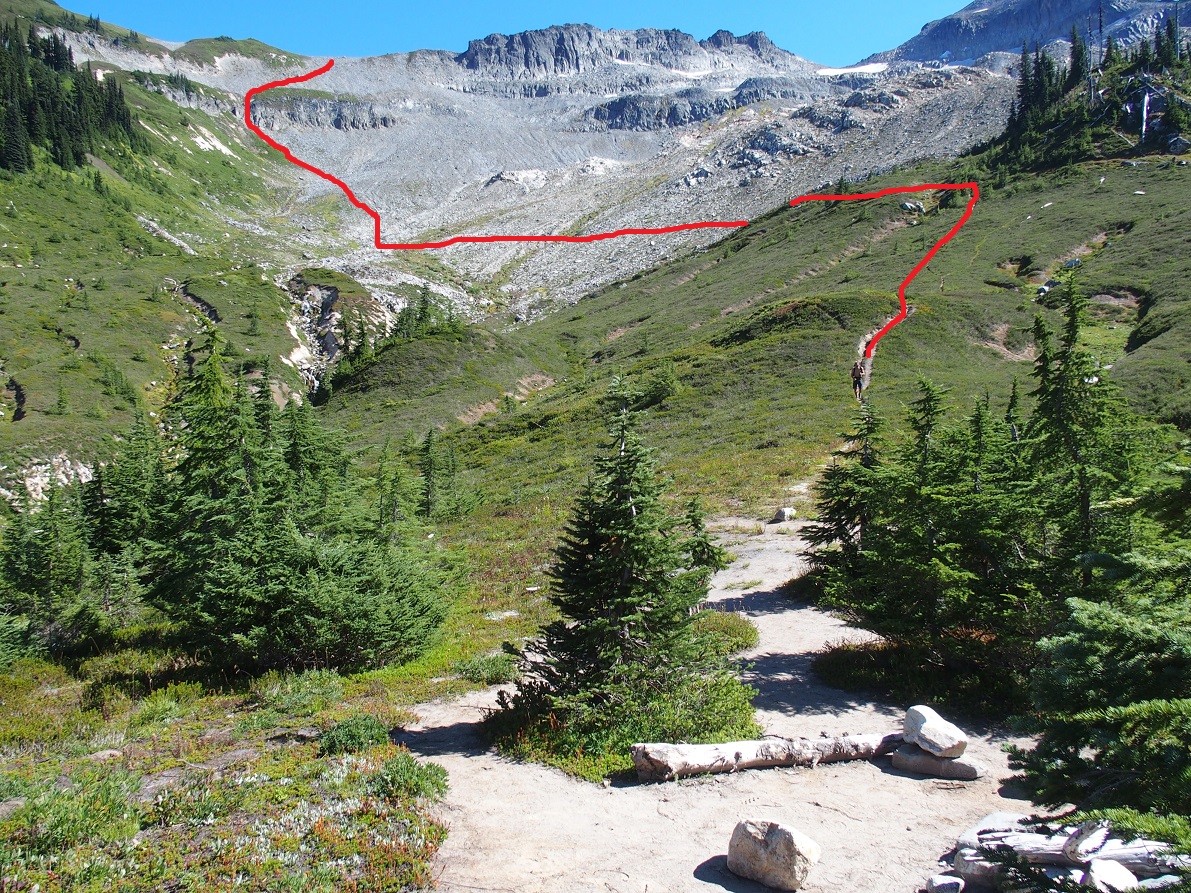
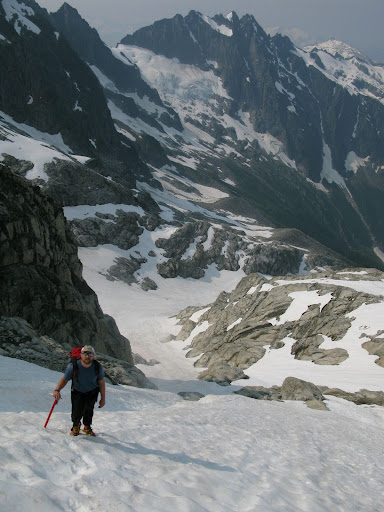
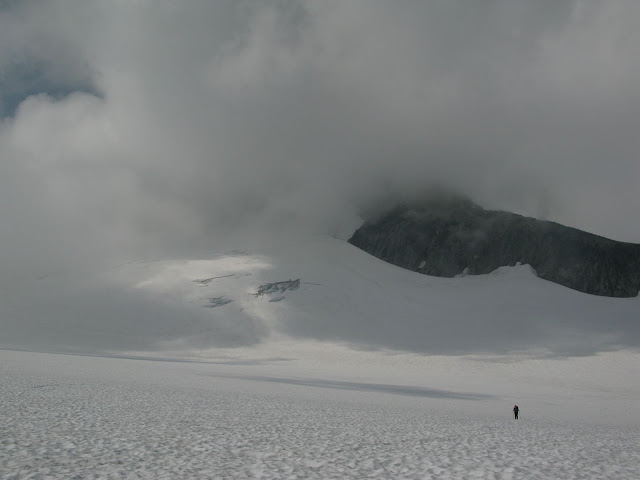
We left camp at 4am on Sunday. There is a rock band preventing taking direct line to the saddle. We went in the middle where the rock is eroded (class 3). It would go on either side. The saddle is wide and flat and could be used as a higher camp with great views but currently there is no water. The other side is mostly heather before it opens up but thanks to local fauna (marmots and goats) there are fairly decent steps. We followed the ridge for a bit from the saddle before starting the traverse and stayed around 6500ft close to the cliffs above until the end of the heather slope (1000-1500ft). There the terrain opens and flattens and become talus. Possible bivy sites with water access here. We did a slightly descending traverse across the talus and got on the icy head of the Vista glacier around 6200ft.
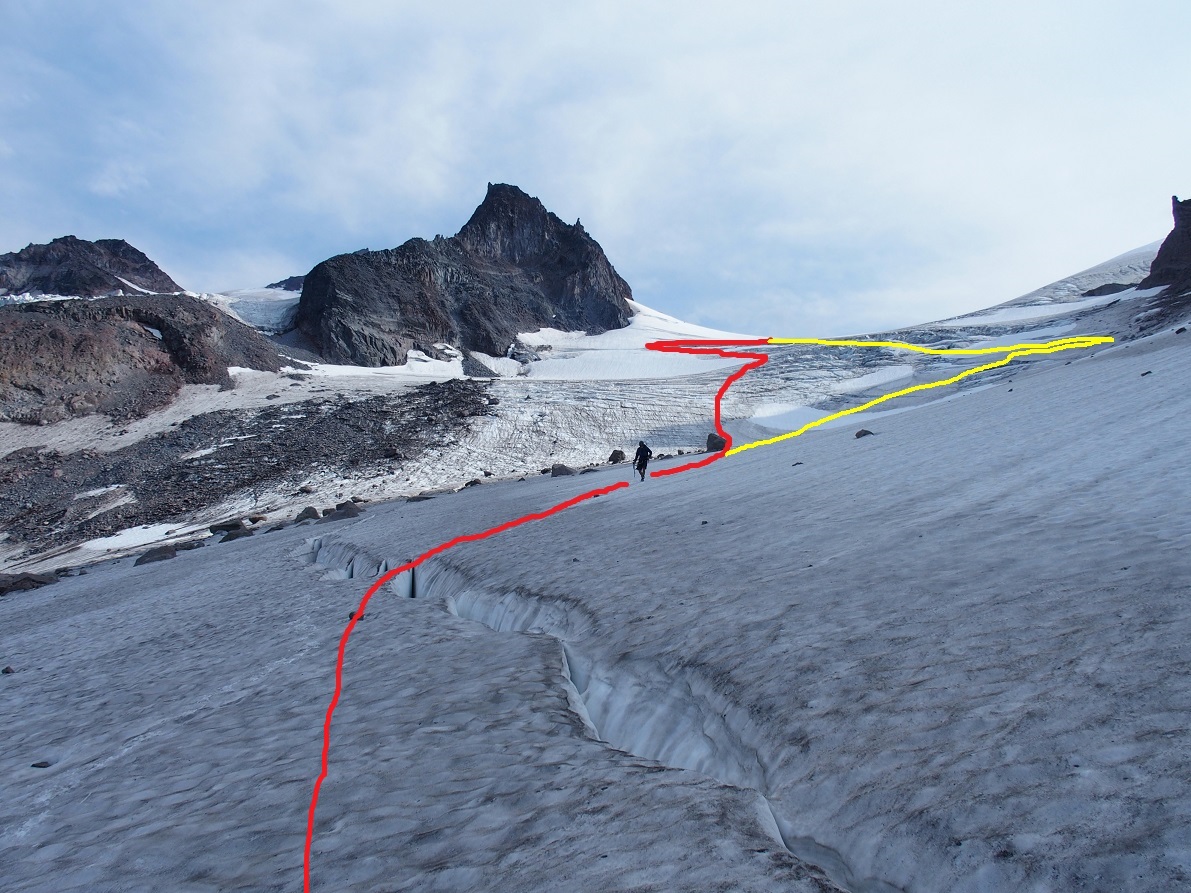
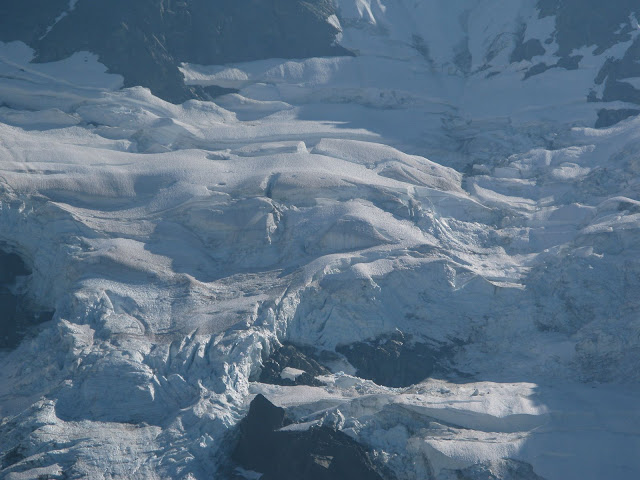
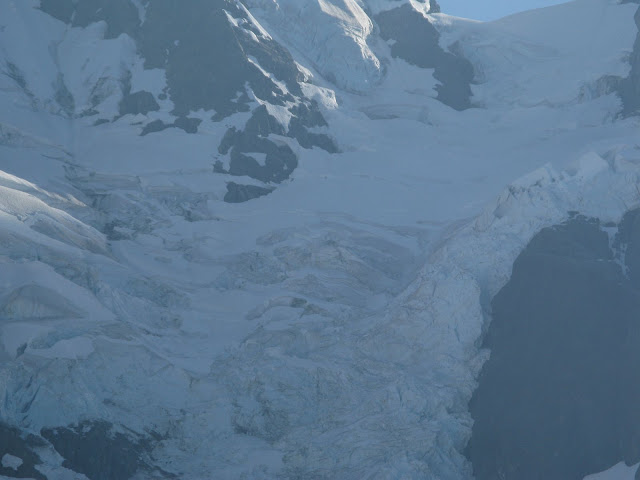
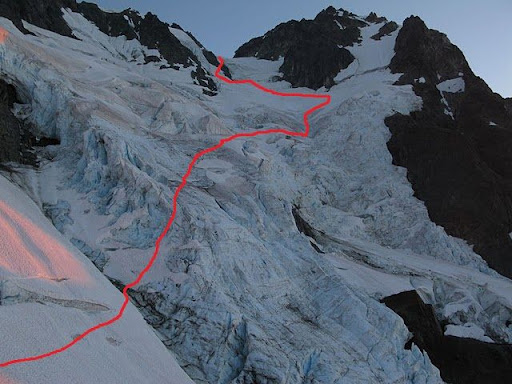
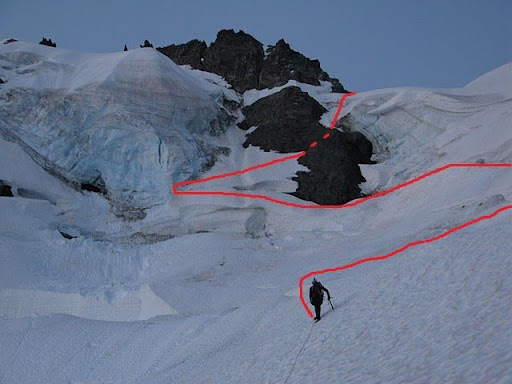
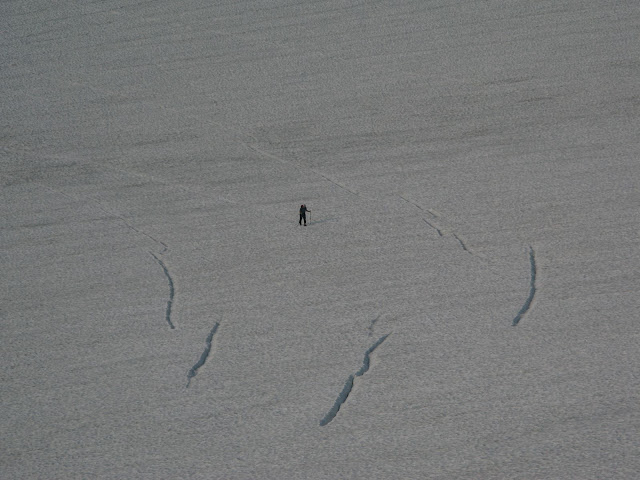
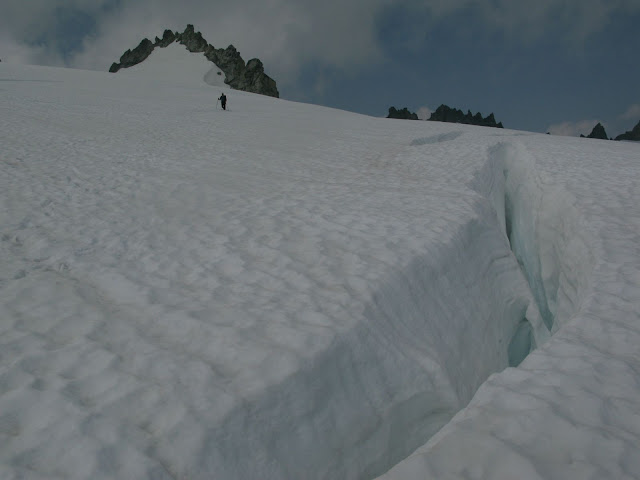
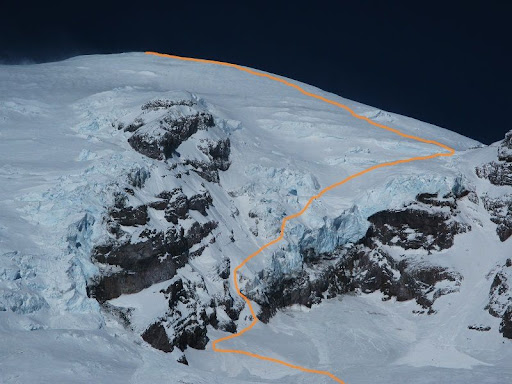
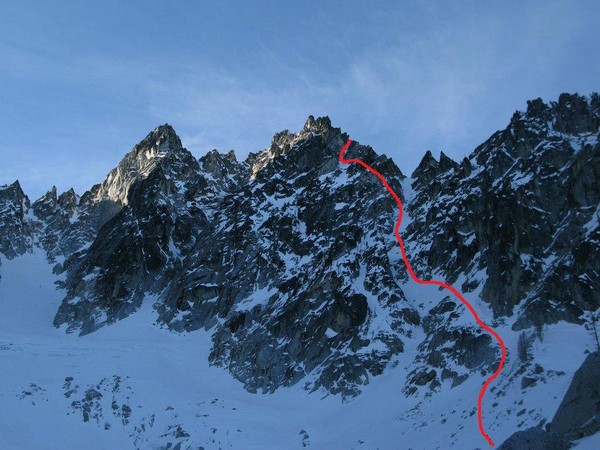
The Vista glacier is quite broken up in the middle around 7000ft but it was not a problem to zig-zag our way through it. On the way up we went up the climber’s left side – more cracks but no rock fall hazard (red line). On the way down we went climber’s right (yellow line) which has rock fall but seemed a bit quicker to get through. The glacier flattens above this section and becomes less broken up. We made it to the Vista-Kennedy saddle in about 3.5 hours from camp.

From the saddle the Frostbite Ridge route follows Kennedy glacier to where it meets Ermine Glacier at the start of the Frostbite ridge. The recommended left side was melted out or icy so we selected to follow the ridge crest on very soft sand. Just before the ridge steepens there was one very narrow section about 10ft long which was disintegrating below our feel. This was the sketchiest part of the whole climb. I believe we could have bypassed this by traversing below it on steep soft sandy slope on the Dusty glacier side. As much as the soft sand sucked going up it was very quick and fun going down minus the sketchy section.

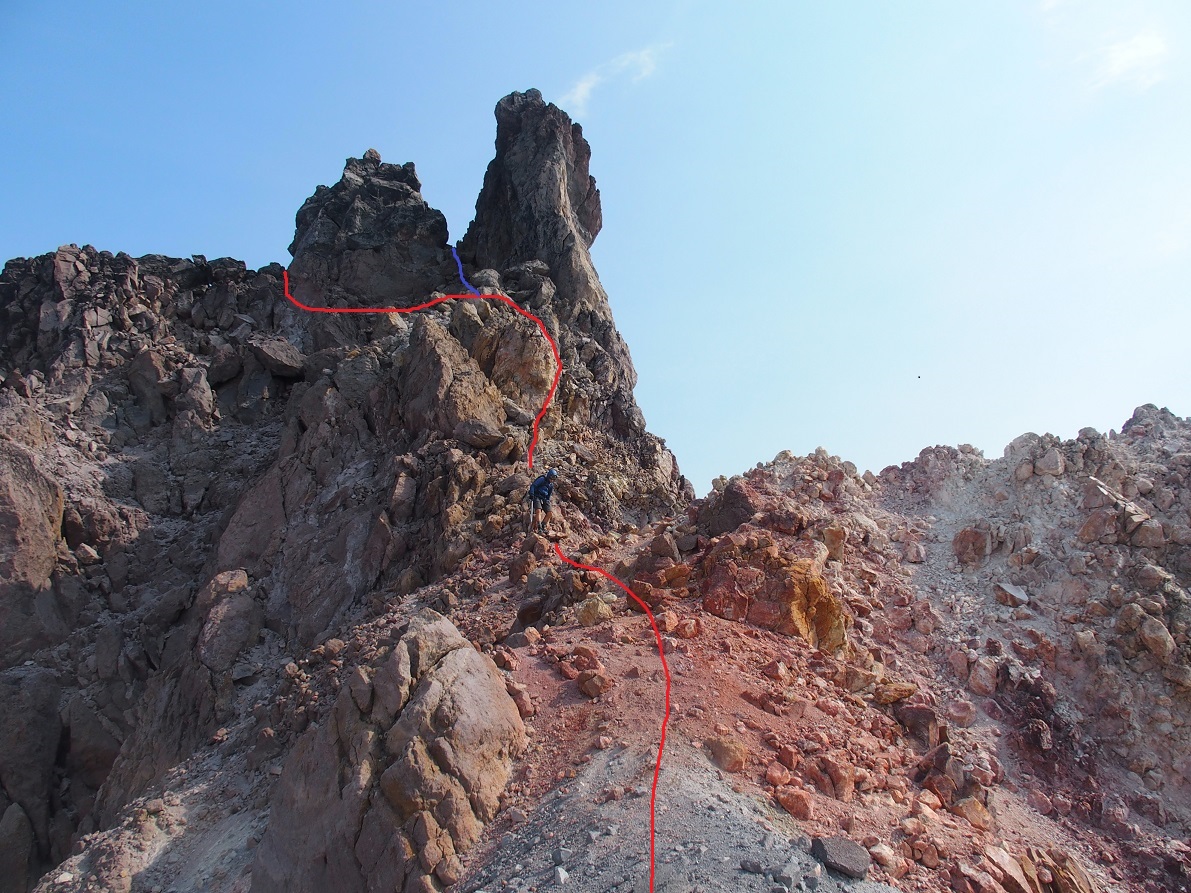
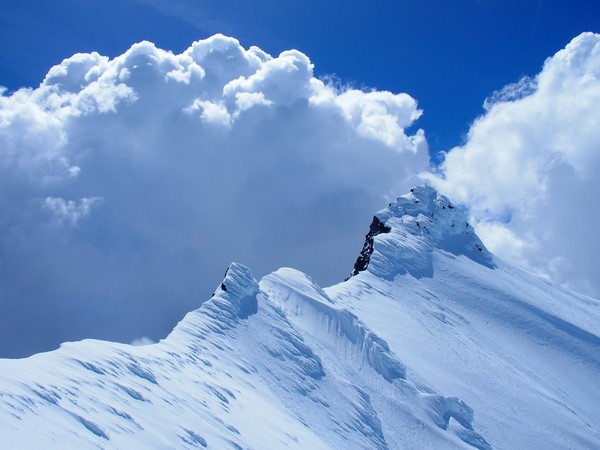
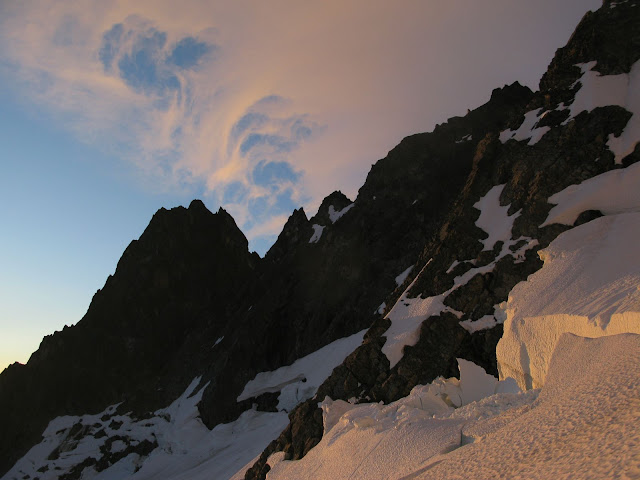
Upper Frostbite ridge

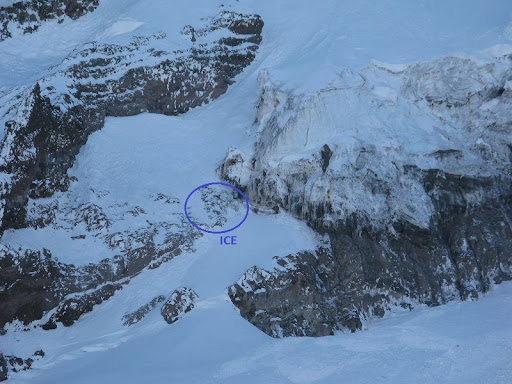
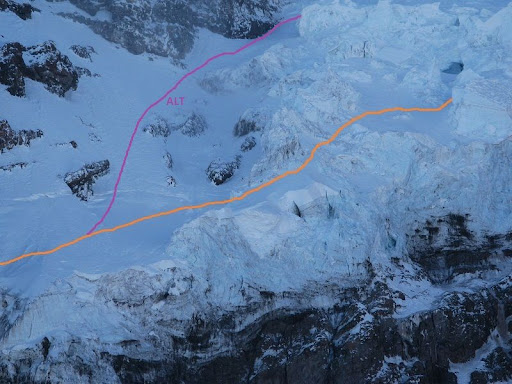
The route keeps following the ridge through a feature called rabbit’s ear. The first feature we ran into we named the rabbit’s dick. It was ice on the left so we chose the right side with easy snow patch. This took us a bit off route but we found easy ledge behind to get back on the route above the icy section and just below the ears.

There is a nice rest spot where we found water. From there it is class 3 between the ears which we did on the way back or class 3 to the right of the right ear and easy ledge behind to the short down climb which is also easy class 3.
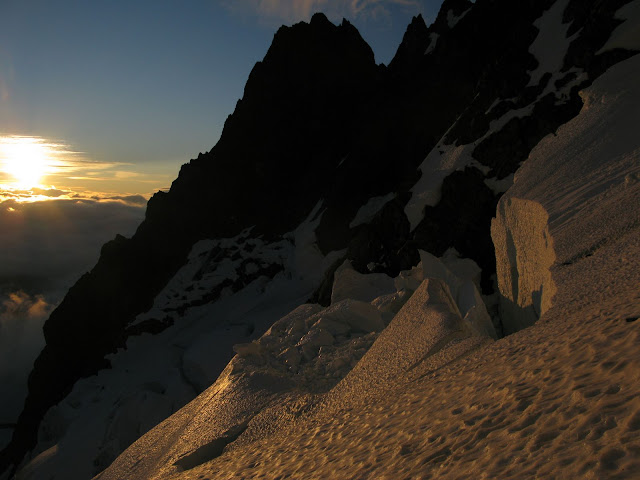
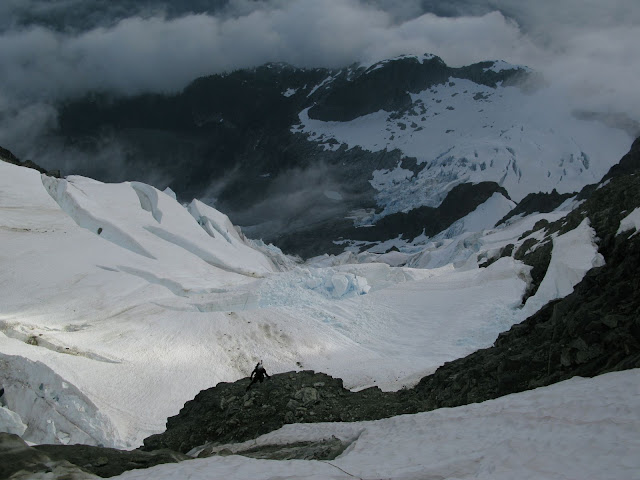
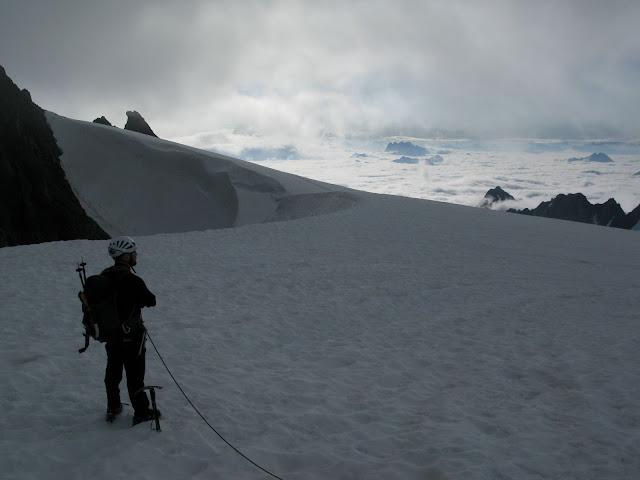
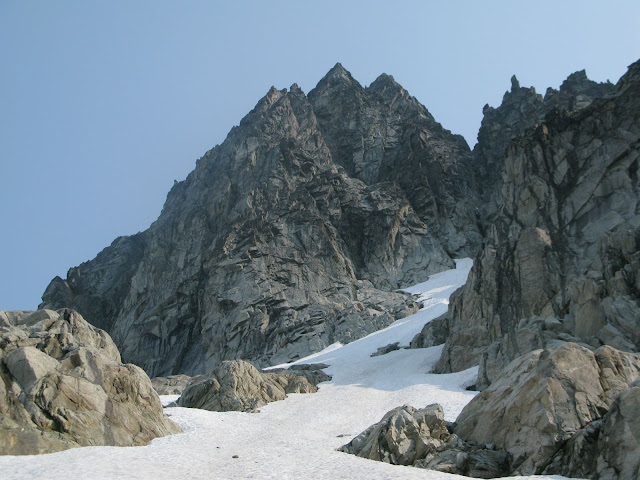
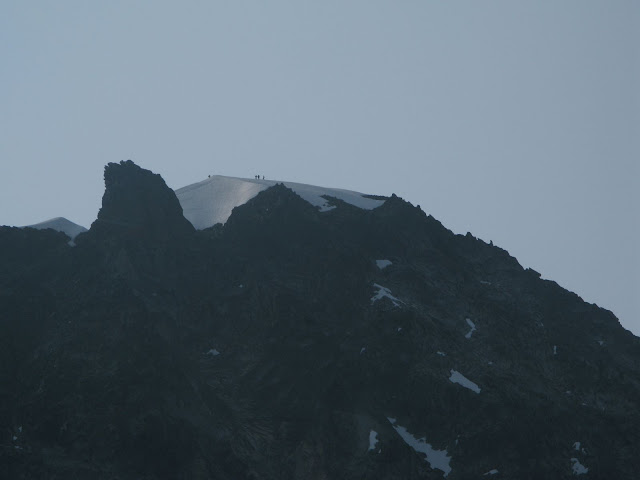
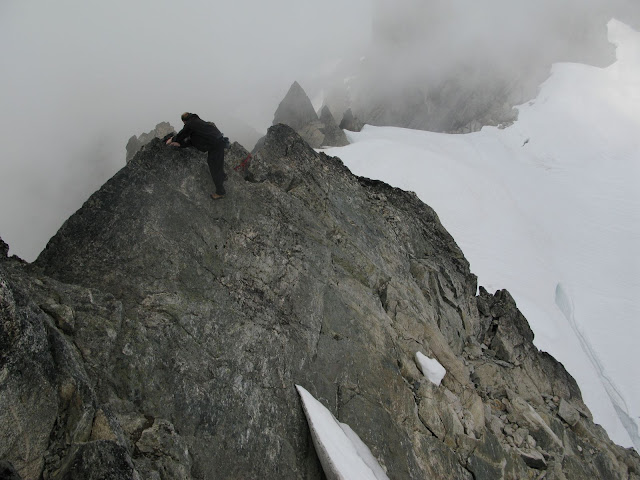
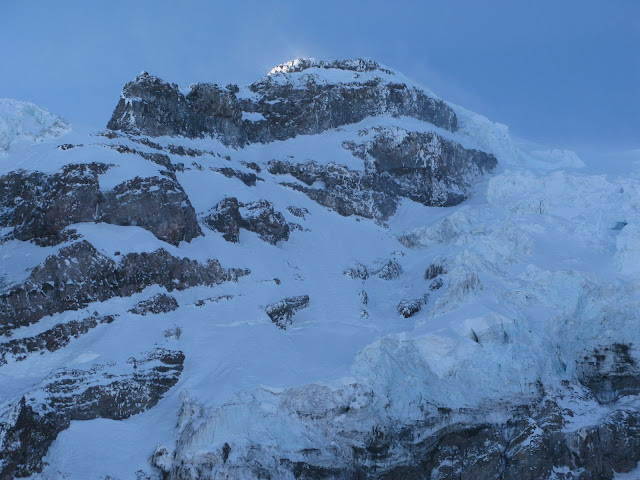
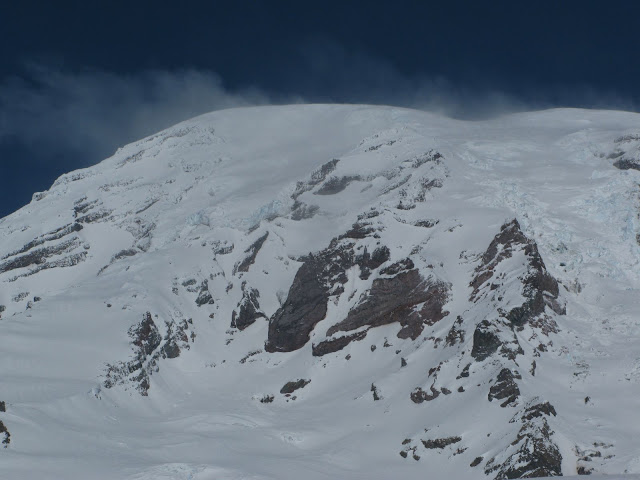
From the small saddle the upper section of the route comes into view.

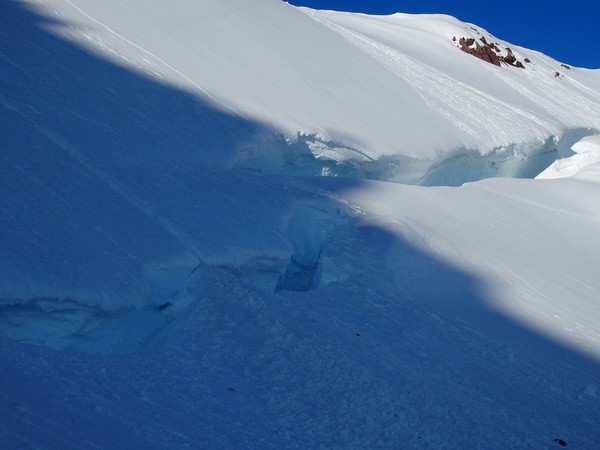
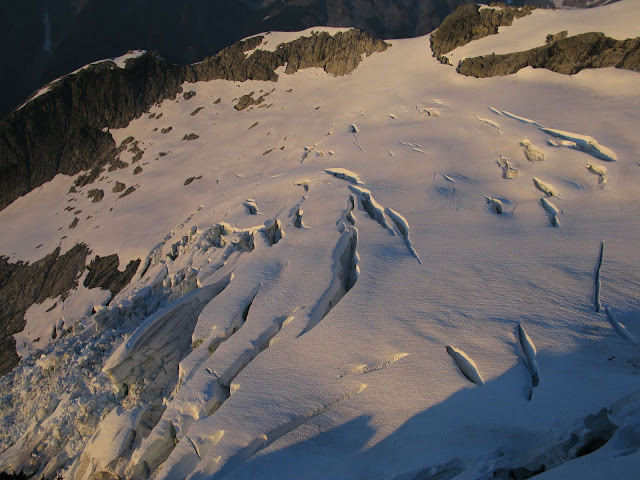
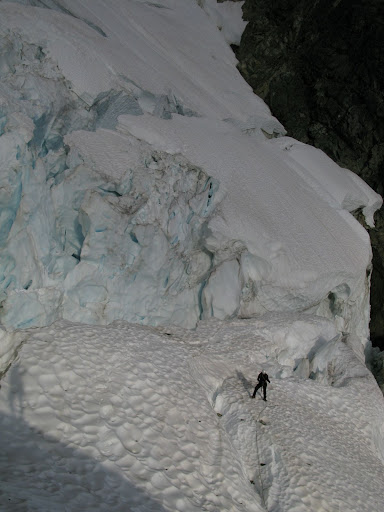
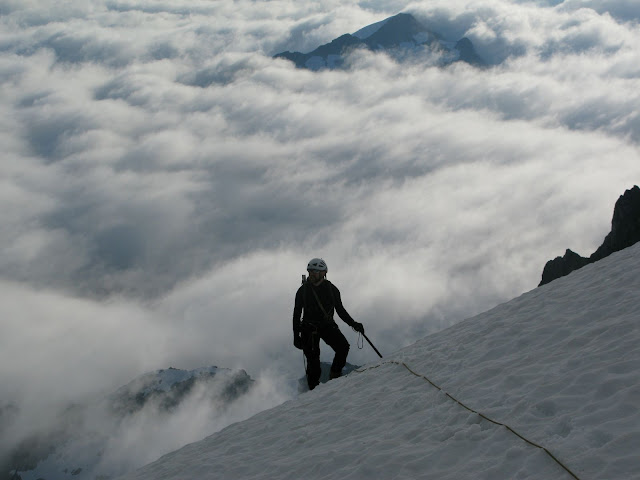
It start with short steep snow climb to the north section of the crater. The snow here was great for self-belay so we didn’t feel need to rope up and place protection. We followed the top of the rim to where it was easy to climb down to the crater.

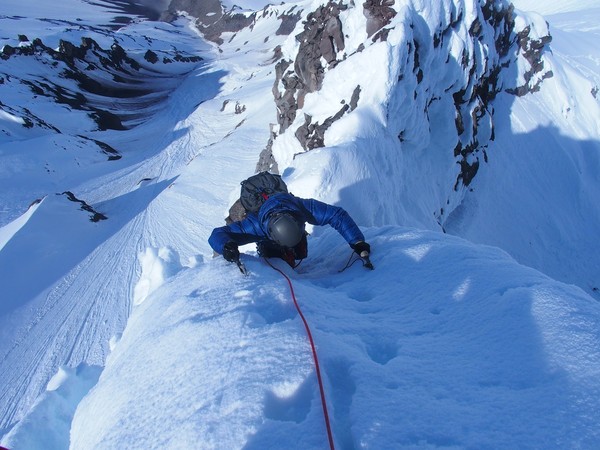
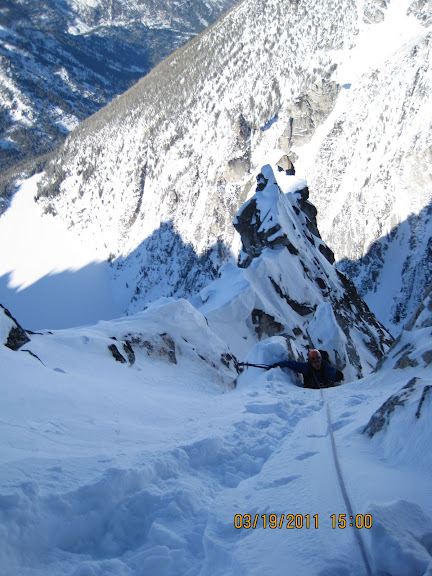
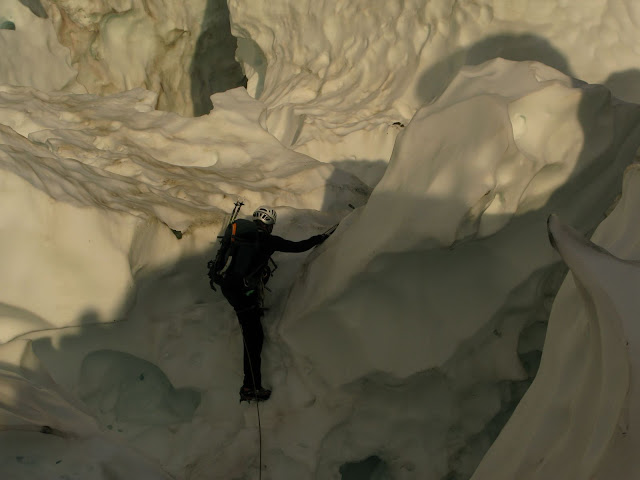
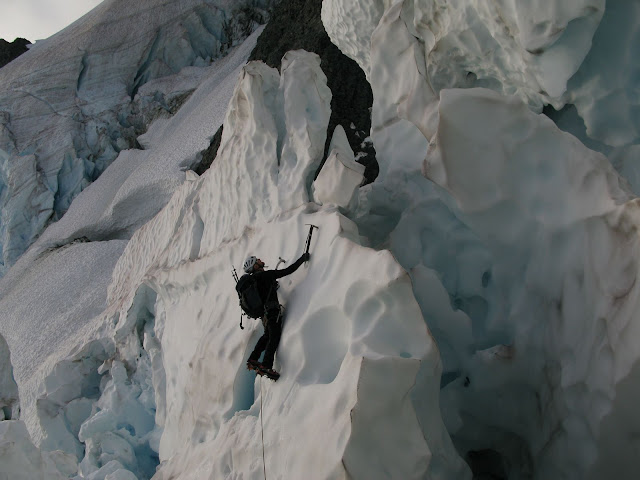
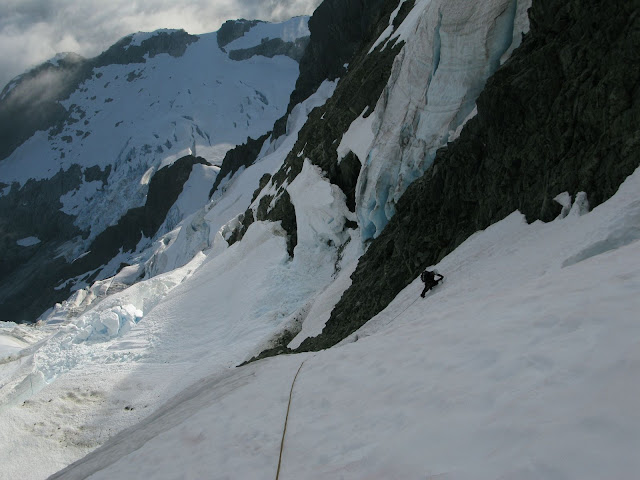
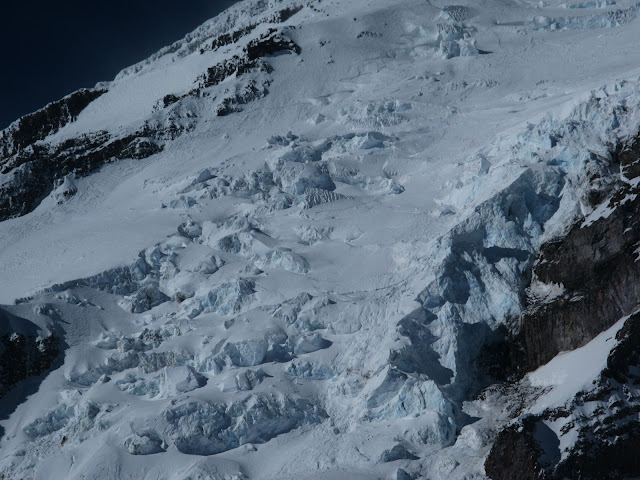
There was a lot of running clean water and established bivy spot at the W edge of the crater. The S side of the crater rim was hard ice in two steps. We solo climbed a bit up the first step before started to belay. Our 60m rope would have been long enough to belay from the bottom.

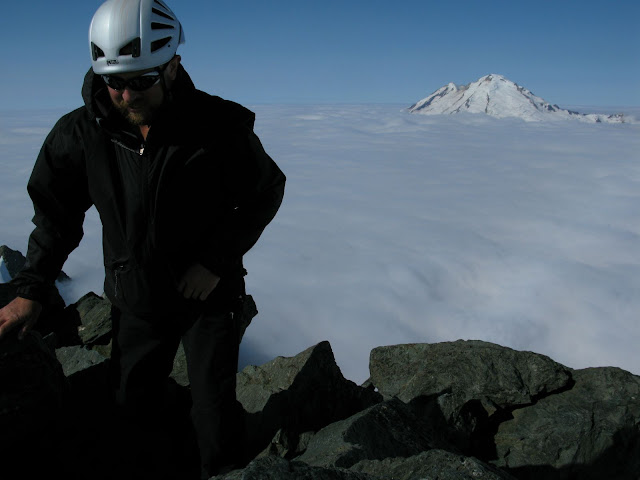
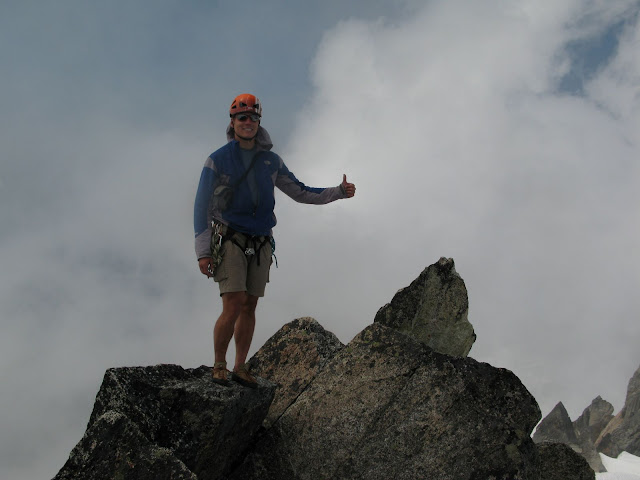
The second step is longer (2 pitches) but is less steep and we decided to simul-climb to the top which is a short walk to the summit where we arrived at noon.

To descend we did 3 30m rappels off of v-thread anchors with some down-climbing back to the crater and down-climbed the rest of the route arriving to the camp about 6 hours after leaving the summit. We hiked out the next day in speedy fashion covering the 16 miles in 4 hours of moving with one long break (some jogging was used).

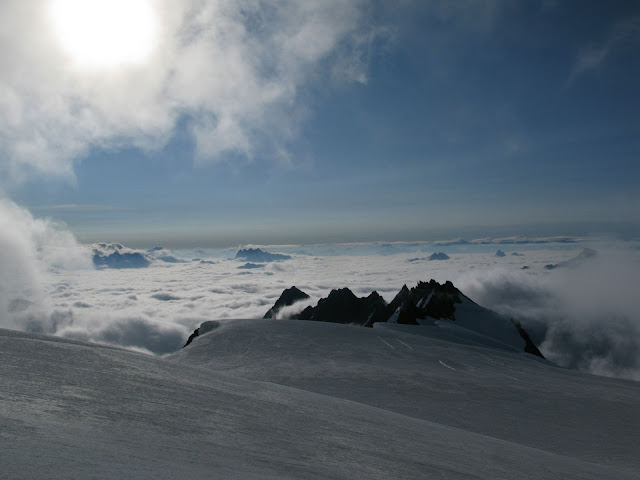
Looking back at Dome
Gear Notes:
60m rope, 4 screws, 2 pickets, steel crampons. We didn't use the pickets but we did not regret bringing them
Approach Notes:
16 miles on good trail
-
 1
1
-
-
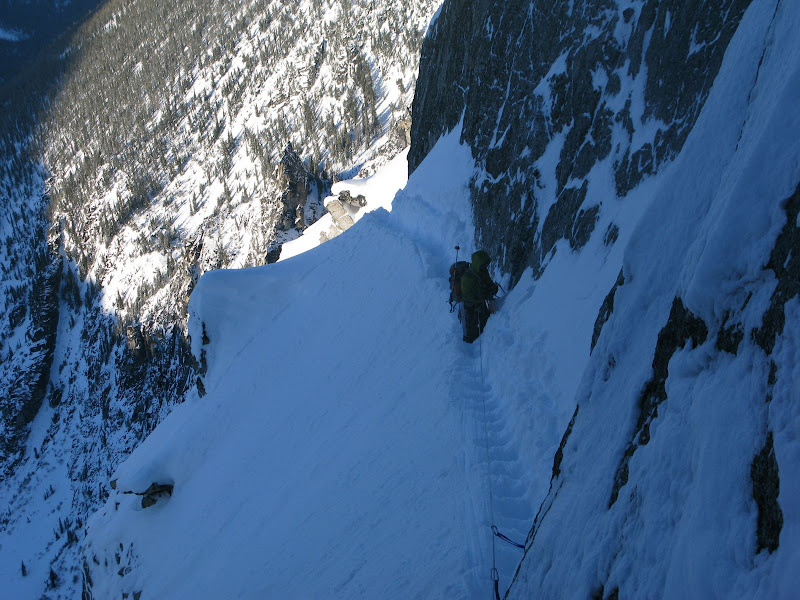
I was in the second party climbing Challenger over the weekend. Here is one picture taken on the way to Perfect Pass. The ledge we took felt pretty safe except 2-3 moves. Going back was a different story. It looked like the same ledge but felt a lot sketchier.
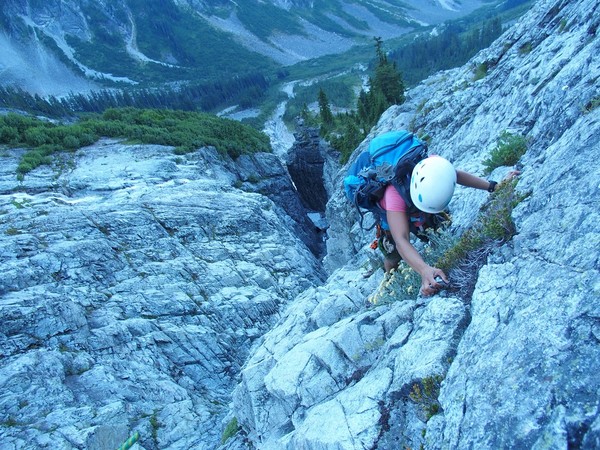
Note on getting to the Challenger Glacier. Going straight down from Perfect Pass looked nasty - loose steep scrambling with a moat problem at the bottom. We elected to go up the ridge and then doing a traverse onto the glacier crossing one rocky rib. It was very easy.
-
We went down the Whitewater glacier. It is longer but there was a booth path set from teams climbing that side. The snow was very soft below red saddle for about 500ft. Not what we were hoping for after a long day. The traverse below the pinnacle has a lot of objective hazard from falling rime ice. We had one close call.
-
Trip: Mount Jefferson - Jefferson Park Glacier
Date: 5/24/2015
Trip Report:
This is just a short TR about the conditions on the Jefferson Park Glacier. The glacier is in good shape with two solid ways to cross the bergschrund.
Two of us went up the avalanche cone and the second rope team up the bridge.
The knife-edge ridge and the summit pinnacle were completely rime ice covered.
Gear Notes:
For the 4 of us we had 2 30m ropes, 4 pickets, 4 screws, 2 small racks. With last weekend conditions the pickets were the most useful.
Approach Notes:
Whitewater TH
-
Anybody has a recommendation for a hand/finger specialist in Seattle area.
Last year I developed tendinitis in middle fingers on both hands. It got bad and I ended up receiving cortisone shots. It got better after a few month break but it came back when I started doing finger intensive stuff later last year. I stopped doing these activities and it’s been healing some but very slowly. Especially one finger is not doing well and has felt swollen for long time now and even a mild load on it resets any progress in recovery I’ve made. Things are a bit more complicated because I don’t currently have insurance but that should change soon.
-
On Sun 5/1 while skiing down from Camp Muir I fell a few times and during one of these falls I lost my camera. It's Canon G12. I believe is should be somewhere above 8000ft. I was skiing wide and away from the usual boot track so I think the chances it'll ever be found are slim. But one never knows.
-
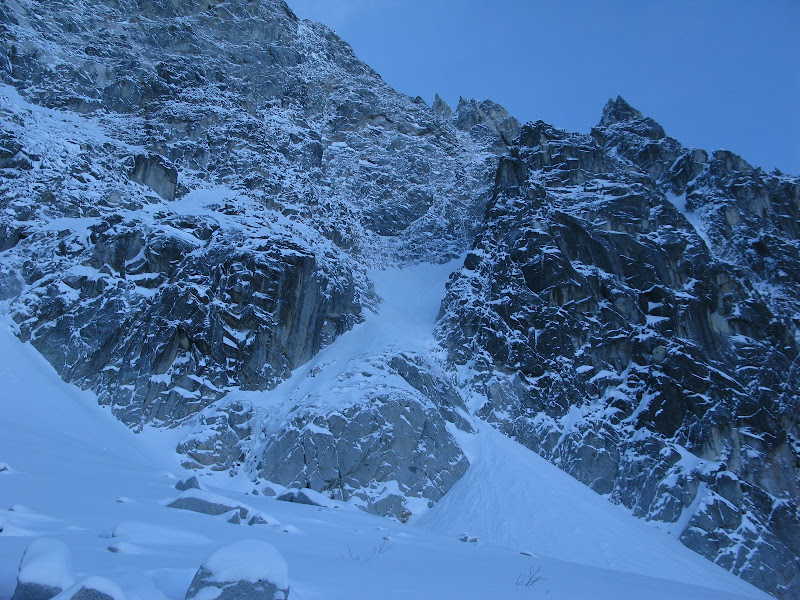
Here are some pictures from Saturday.
Triple Couloir entrance
Traversing around Dragontail's base. The wind at Aasgard Pass was about SE depositing snow on our side

The middle part of the cone was bottomless powder. The plan was to reach the constrictions above and turn around if things didn't improve
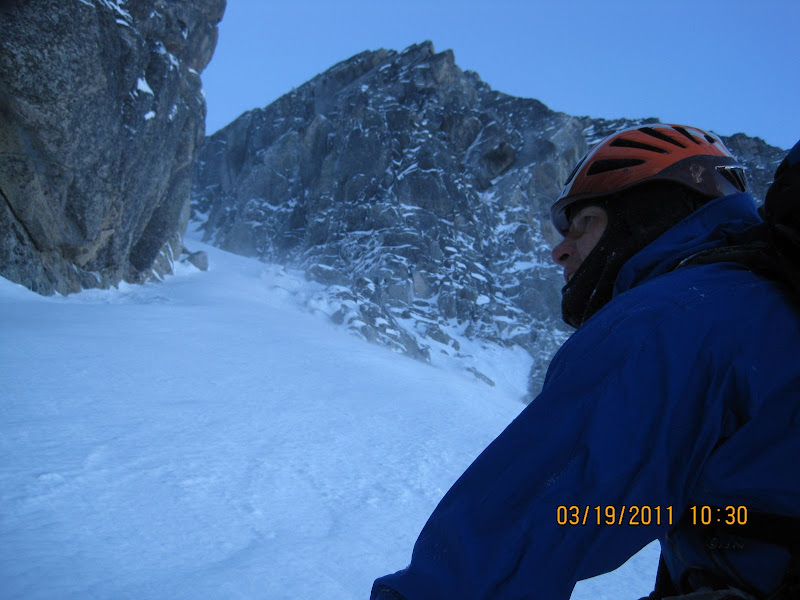
Conditions got better the higher we went
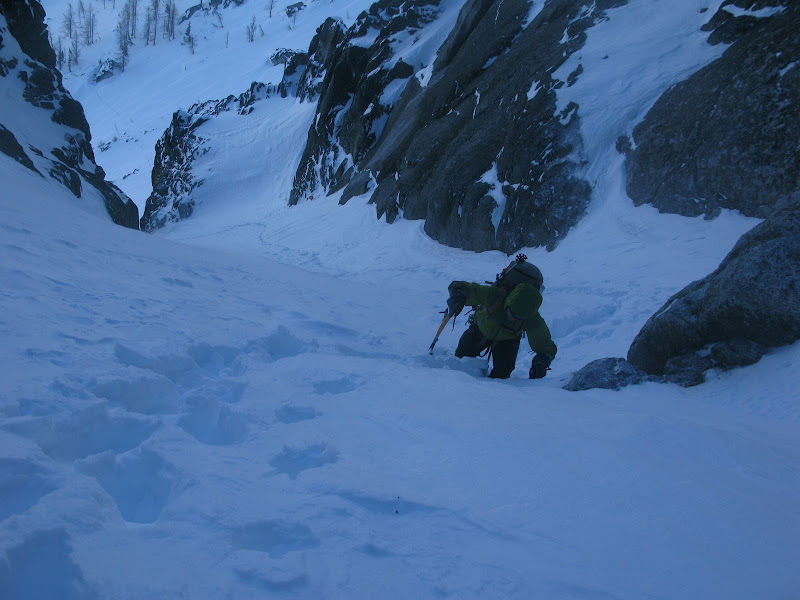
In some parts even the picks came in handy
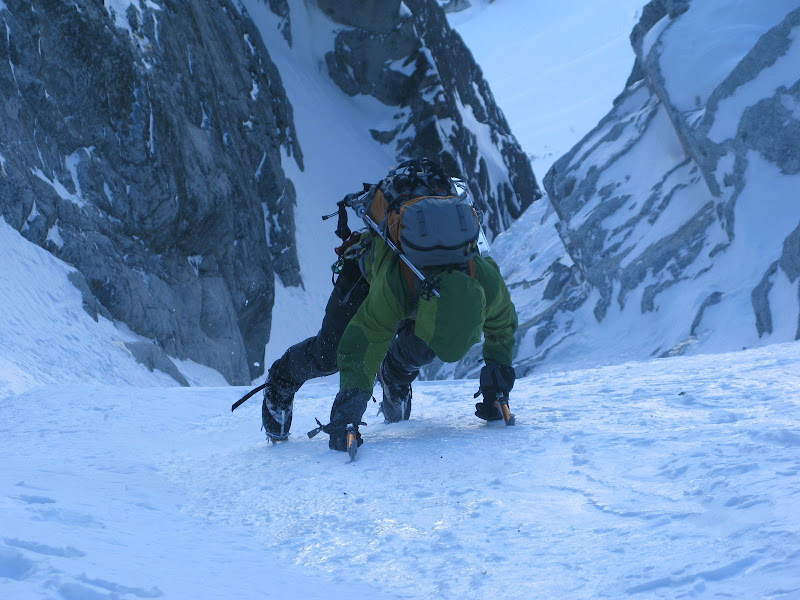
Jesse starting up the headwall
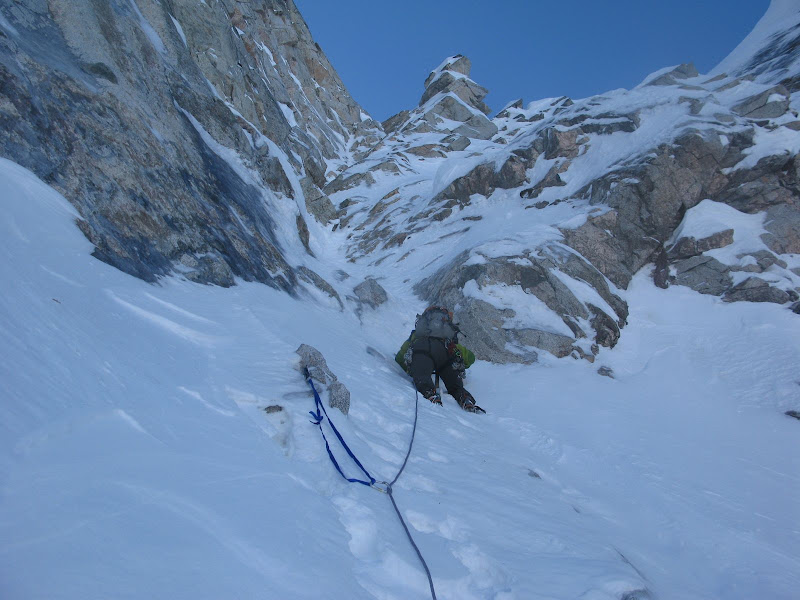
Exiting at the top of the headwall
The headwall was followed by two traversing pitches
-
Trip: Shuksan - Price Glacier
Date: 8/19/2010
Trip Report:
Jens and I packed up at the Austin Pass TH where we left my car that would wait for our return via the Fisher Chimneys. Then we jumped to in his car and drove back down hwy 542 and some 2.5 miles on what appeared to be recently improved forest road to the Nisqually Cirque TH. It was my first time in this area but according to Jens also the initial part of the trail seen some improvements and we were able to get to the other side of the Nooksack River on logs avoiding the traditional wading.
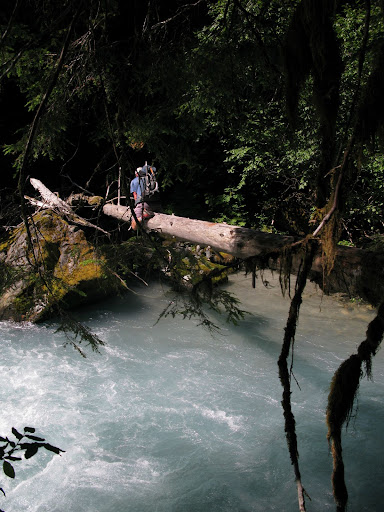
The first 3 miles follow an old logging road. The tricky part is to locate a climber’s trail that goes steeply down to the river. I noticed there was the Wilderness sign a few yards before this turn off which might serve as a good landmark. After getting down to the river we could see the most photographed crossing log upstream but it took a bit of work to get to it.
Log crossing
After crossing the river there’s a faint trail leading up to the lateral moraine above Price Lake. Staying on the trail was not all that bad even though we got sidetracked a couple of times but higher you go the easier the following gets.
Gaining the moraine was a happy moment for me. First you get Price-less views of the mountain and second it marked the end of tree needles behind my neck. As we were rounding the mountain following the moraine our route was revealing more and more of its secrets. This gave us a good chance to study the route and make plans for our line of ascent.
Entrence to the upper Price Glacier
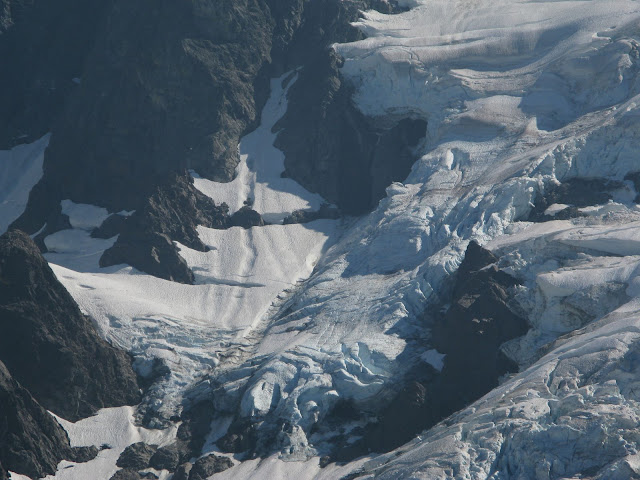
The middle section of the Price Glacier
The upper section of the Price Glacier
A few notes about following the trail here – eventually the moraine walk ends and it starts traversing a slope above the lake. It might be tempting to up to gain the ridge above to your left. Fight the temptation and keep traversing until it cliffs out, only then start heading up. When the terrain gets less steep start traversing right again on heather and slabs to gain the lower Price glacier without ever reaching the ridge. Here our approach turned into a glacier slog. My mind started aimlessly wandering around as we were heading up towards our intended bivy site. I guess it was drifting over the Austin Pass trail head when I realized the keys for my car were in Jen’s car. I gave Jens the good news. We were too close to the climb and too far from the trail head to even talk about turning around. The plan was to get down the mountain early to increase our chances of hitching a ride. Jens also suggested bivying on a knoll at the base of the Nooksack Tower to save time. Unsure about a flat spot to sleep on and having source of flowing water I reluctantly agreed. But we were not the first travelers passing by and we found two bivy sites. On a scouting mission after dinner I also found pools of water fed by a small snow patch so we had all we needed at one of the wildest bivy in the Cascades.
Lower Price Glacier
Price Lake
The route from our bivy
We got up at 3:30, shared one Via from my last climb I discovered in the pack and started climbing by 4:30. Right at the entrance to the upper Price glacier is the most dangerous section - a groove carved by ice block peeling off from the ice cliff above. After safely crossing this section with sound effects provided by the ice cliff above we gained a wide ramp in the middle and started trending to the right side of the glacier. The pictures I took the day before were showing some potential for route finding trouble in this section but everything went smooth. On the right side of the broken up section we got to a wide ice gully which provided morning exercise for the calves and also access to the low angle snow slope below the final obstacle – the wall to wall bergschrund. lly
Jens using piolet ramasse in the ice gully
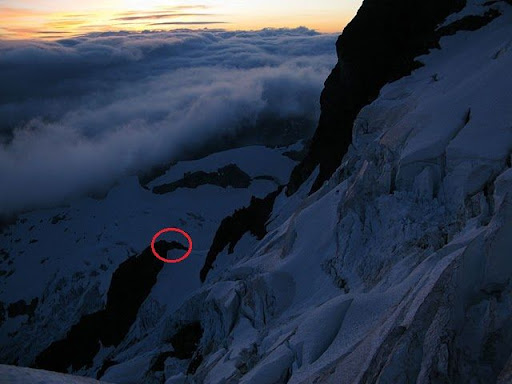
Looking back at our bivy (marked)
Crevasses below the final bergschrund
Nooksack Tower
Curly clouds above Nooksack Tower
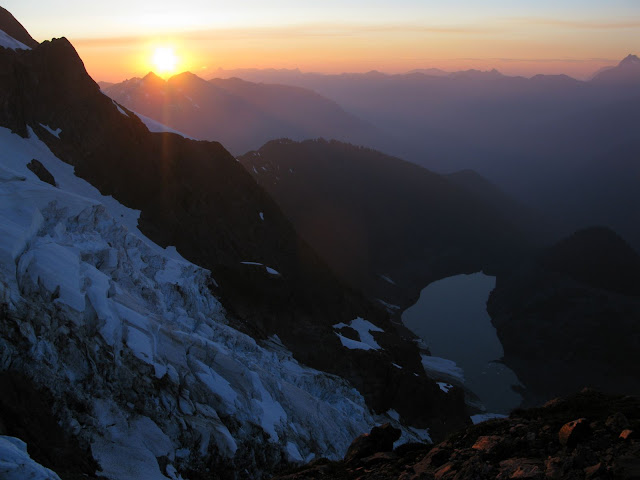
Sunrise
Jens spotted a connecting ramp system on the left side so we chose that as the most appealing way to bypass the bergschrund. To gain the ramp we had to climb one steep pitch inside the bergschrund. Once on the ramp we got a view of the right hand side rock bypass. The final bergschrund problem are currently two parallel bergschrunds and the rock bypass while looking possible would be more time consuming and difficult especially around the transitions from rock to snow.
Left-hand side bypass
Climbing through the bergschrund
Jens climbing ice flake to gain the ramp seen on the left side
First we followed the lower ramp to the far left to get around a crevasse. Once above the crevasse we traversed back right towards the rock. Here a little bit of class 3 scrambling took us to the snow and ice slopes above both bergschrunds. Once there the difficulties turned out to be over and soon we were on the flats at the top of Crystal Glacier and traversing towards the Sulphide Glacier and the standard gully of the summit pyramid. We left packs and gear at the base a scrambled up arriving to the top around 10am.
Two parallel bergschrunds and view of the right hand side rock bypass
Rock scramble
Jens and his piolet canne above the rock scramble – the last steep section on the route
A few more steps but no more difficulties to the top of Price
’Hey Jiri, we’re in the Himalayas’
I guess we are
Jens arriving to the top of the pyramid, Baker floating in the clouds
About 6 hours later I got to the Austin Pass TH a little bit ahead of Jens. I didn’t run into anybody I could ask for a ride on the trail which I thought would be easier that hitchhiking but luckily there was an older couple in a car at the parking lot that just finished hiking and was getting ready to head down. I asked them explaining how we screwed up and they agreed without hesitation. Thanks a lot for the ride again. After getting to the lower TH I drove back up in Jens’ car to get my car and Jens himself. By 5pm I was heading down the road for the 4th time but this time it’d be all the way home.
Overall the conditions on the route looked good providing exciting and fun challenges. I’d guess it will stay in the same shape a bit longer. One snow bridge at a bergschrund below the Nooksack Tower might be gone but there’s a way around it on rock. Most importantly the left side bypass of the upper bergschrund should still be good.
Gear Notes:
one ice axe and one tool, 4 ice screws, 1 picket, a little bit of rock gear
-
I had a chance to look at both on Friday and the NE face is all snow right now while the NW couloir is melted out with difficult moat problem at the bottom.
-
Trip: Dorado Needle - SW Buttress
Date: 8/6/2010
Trip Report:
With one day of good weather on Friday Jens and I decided to climb Dorado Needle. Having done the NW ridge a few years ago I was mainly interested in the SW Buttress route. After reading previous TRs doing this climb in a day seemed possible but we kept our options open. We left Seattle at 1am and were leaving the parking lot of Eldorado TH almost exactly at 4am. I guess we didn’t break any speed records but still got to the Eldorado-Dorado Col in a nice time of 5 hours. It seemed to us we were doing fine on time so decided to give the SW Buttress a try.
Eldorado Glacier
We stashed extra gear and food at the col to make our packs as light as possible and slid down the other side. There we gained the prominent snow-filled gully that took us to the climber’s right side of the blocky toe at the lowest point of the buttress.
South-West Buttress
Looking down the snow gully[/i]
Climbers on top of Eldorado
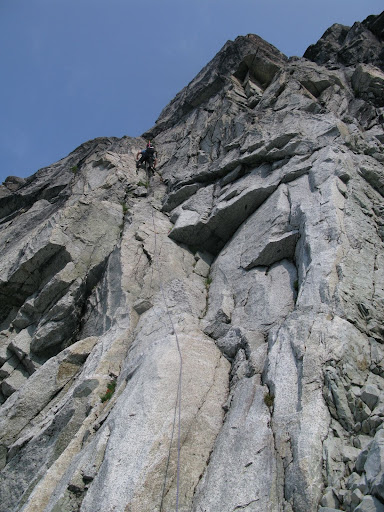
We gained the rock with minimal difficulties, geared up, switched to rock shoes and were ready to rock by 10:45am. To start the climb we picked a left-leaning, left-facing (summitpost calls it right-facing) corner. Going left from the alcove described by Nelson and Becky this corner is left of a chimney and is visible from below while the chimney is not. Halfway up the corner Jens send down a report of pretty solid rock and fun climbing so we decided to simul-climb.
Jens climbing the corner
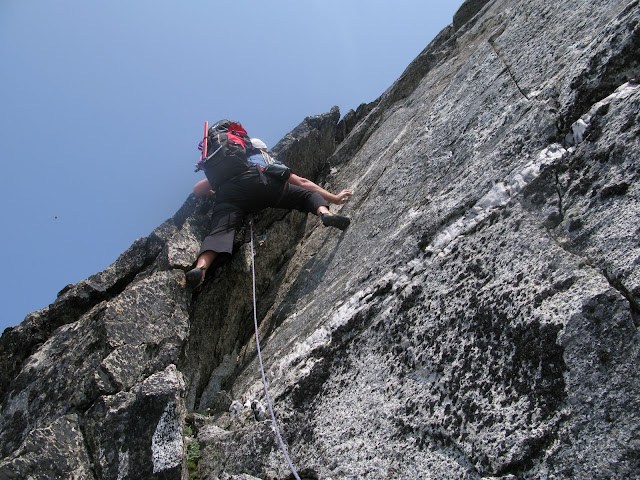
With 45m of rope between us the rope drag was taking some of the fun away from the climbing so we free-soloed the next lower-angle section until a point where the route goes to the left side of the crest of the buttress and gets steeper again.
Getting ready to free solo the next section

Climbing a short chimney to gain the left side of the buttress
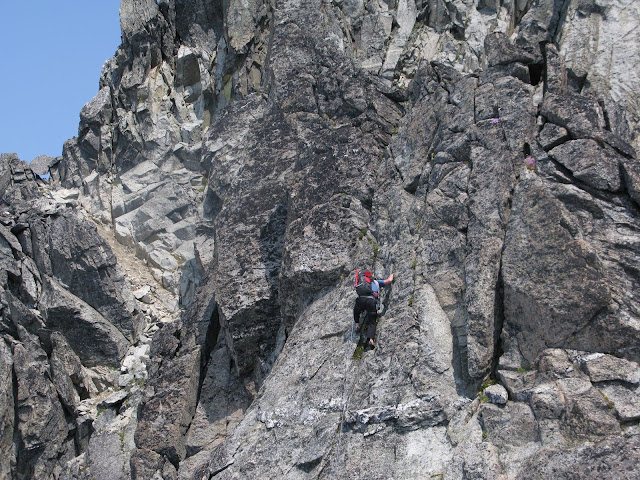
We gained the left side of the buttress by climbing a short chimney and kept simul-climbing until we got around a small tower where 3 fun pitches of slightly more technical climbing are encountered. By this time some clouds started rolling in from the west and prompted us to keep our pace at maximum as the prospect of being caught by rain or a thunderstorm didn’t sound good.
The last technical pitch
From the end of the last pitch we climbed down into a gully, packed the rope for good and scrambled to where our route joins the NW ridge route. We left the packs there and climbed to the summit where we arrived around 1:30pm in 9.5 hours from the car.
Jens and me on the summit

From the numerous mountain tops I have been to the summit of Dorado Needle is one of my most favorite ones. I wish we could stay longer but the clouds kept coming. We down climbed back to our packs and to the snow which is still continuous and reaches a short distance from the crest of the ridge. After a short snow run down the McAllister Glacier we got to our stashed gear and potato chips at the col by 2pm.
Down climbing the ridge from the summit
Back on Inspiration Glacier
Eldorado in the clouds
I’m not sure about Jens but the lack of sleep and the tiredness caught up with me on the flat of Eldorado Glacier. Coming down the boulder field felt longer than on the way up. We still made it back to the car unexpectedly before dark by 6:30pm.
It’s not always that everything including you, your climbing partner, route conditions and weather comes together and creates a great climbing experience. This time it did. Thanks Jens and thanks for trying to keep me awake with climbing stories on the way back to Seattle.
Gear Notes:
45m rope, small rack to 2" (no small gear used), rock shoes, ice axe, crampons
-
Trip: Mount Rainier - Nisqually Ice Cliff
Date: 2/21/2010
Trip Report:
I’d been interested in trying to climb Rainier solo for a while but I’d not done much about it until last week when I finally took the time to fill the solo climb request form and send it to Stefan Lofgren for approval. Thanks to Stefan’s prompt approval I was able to take advantage of the good weather last weekend.
Inspired by a trip report from 2006 when Hannah Carrigan climbed the Nisqually Ice Cliff solo my plan was to have a look at the same route on the way to Muir and climb one of the Gib routes if I didn’t like the look of it. From distance the route is very intimidating and I was not sure. I also saw ice fall right above the top of the Gib Chute so I scratched that route too. To make the final decision I went to Nisqually Basin in the afternoon for a closer look. Closer you get the more doable the route appears. I took pictures of various sections of the route and using zoom I was able to make out a reasonable passage around the edge of the ice cliff.
It was very windy on Saturday and Sunday was not supposed to look any better. Despite that two teams summited on Saturday. One via the Nisqually Icefall and another via the Gib Ledges. This fact helped me to leave camp Muir in the morning at 4am in 40 mph winds. I started climbing in stages. The first was to get to the Nisqually Basin and see if it’s protected from the wind. It was. Generally it is the case for the routes left of Gibraltar rock.
Next stage was to get to the bergschrund at the start of the ramp. I made a mistake in the dark and instead of walking directly towards the ramp I ended up too far left below the rock cliffs of the Nisqually Clever. This mistake put me in more danger than was necessary. I didn’t see or hear any ice fall during my time on or near the ice cliff. Still this stage was mentally the hardest since I saw two large ice falls from the cliff.
I felt in relative safety on the ramp and took a break right below the bergschrund. I decided not to move until I had enough light to climb without my headlamp. After about 20 minutes I started up the ramp. The bergschrund didn’t represent and had a nice solid bridge over it. Halfway up the ramp came the technical crux of the climb. It was some exposed rock with hard ice here and there. First I tried to traverse left through this section but it became too thin. I spotted fatter ice to my right and eventually negotiated this section that way. This was the last time I asked myself whether I really wanted to do this. I did have a 20m rope with me that I could use to get down this section if I decided to bail later.
The third stage was to get on the shelf. When I popped out I found it in a shape better than I expected. It was not as steep as it appeared from below and was covered with nice styrofoam like snow. At the top of the ramp is the route splits into 3 routes – Nisqually clever, Nisqually clever right variation and the Ice Cliff which follows the edge of the ice cliff. The clever variation looked the easiest with least objective hazard. It crossed my mind changing my plan but at that point I was very intrigued by the cliff route so I set off along the cliff edge with the clever variation being my backup. A few times the route put me close to the edge enough to see down the cliff. I was more amazing than scary. I really started enjoying the climbing. There was probably one or two places where I had to swing my tools otherwise it was climbing on solid snow. Soon I was on the other side on open glacier slopes with no ice fall to worry about.
At this point I was still protected from the wind. I went to the top of Gibraltar rock to see how bad the wind was. An option was to skip the slog to the summit and go straight down the ledges. I’ve been to the summit before and didn’t expect to find anything new up there. It felt as if the wind died down a little bit and I had plenty of time climbing only for 4 hours so far. So I decided to keep going up. This was probably my windiest Rainier climb and it was not easy going. In some hour and a half I was at the rim greeting with the only other two climbers that got that far that day. They were already on the way down so I had the whole crater for myself. I wish it was less windy to enjoy it. I didn’t have to cross any open crevasses except a few small cracks. I remember having to jump a few crevasses last year in March.
My tracks on the ice cliff

I descended the Gib Ledge which not surprisingly were in awesome shape as well. Actually the best shape I’ve seen. There were nice steps which allowed for fast moving and it took me only 2 hours from the summit to Muir.
Nisqually Icefall
Nisqually Clever
Wilson Headwall, Kautz and Furher routes
-
DC is an option. A patry of 2 descended that way on Sat 2/20. The fastest way down right now is to descend the ledges which is in great shape right now.
-
The schrund was really a schrund. I was in a party ahead of these guys. It took us about 19 hours round trip. We opted to take an alternative route to bypass the schrund. This route takes a couloir going left about 100ft below the schrund. It takes you to a notch still on the E side of the buttress. From there we had to do a snow traverse to yet another couloir that finally led us to the top of the buttress. From there is was about 45 minutes of enjoyable climbing to the summit.
Here's a picture of the route:
-
Can anybody recommend a good climbing guidebook for Patagonia? I'm planning to travel down there this winter.
-
downfall,
no email from your friend yet. I guess you should remind him.
-
I actually didn't find it. There were two guys climbing next to us on Tuesday 5/16 and they left behind a black Granite Gear stuff sack I'd like to return. Email me at jiri_richter@hotmail.com
Jiri
[TR] Glacier Peak - Frostbite Ridge 8/2/2015
in North Cascades
Posted
The pictures are hosted on imgbox.com and should be visible to everybody. The problem might be on your end. If there is a better place to host the pictures I can move them.