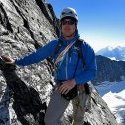
ldr66 Posted October 29, 2013 Share Posted October 29, 2013 (edited) Trip: North Cascades - Ptarmigan Traverse Date: 8/6/2012 Ptarmigan Traverse Though the Europeans created the buffet, surely it was the Americans to put the all-you-can-eat spin on it. This is the Ptarmigan Traverse: a high, alpine ramble that has something for just about every backcountry palette—and lots of it—with more than 40 miles of glaciers, lakes, meadows and peaks down the backbone of the Cascade range. The report below isn’t a comprehensive review or trip report but simply some answers to questions that, in hindsight, we would have found helpful. No doubt you’ve sifted through the mountains of info available online, so hopefully this adds something new. Difficulty If you’re a seasoned veteran of Cascade peaks the Ptarmigan will present few technical difficulties. Outside of a handful of steep snow sections, there’s relatively little that should worry you. On the other hand, if you’re an experienced backpacker looking for greater adventure, the Ptarmigan will feel quite challenging in places, and will tax you mentally as well as physically. Whichever the case, basic mountaineering, route finding and backcountry camping skills are prerequisite. I’ve climbed a bit in the Cascades and feel comfortable soloing steep snow and moderate rock. That said, there were two places that caught my attention. The first was the 100’ snow traverse onto the Red Ledges; it’s steep and quickly dumps into a moat below so a slip here would not be good. The second was the traverse of the upper Middle Cascade glacier. It’s fairly steep with crevasses below and if frozen, presents at least a mental challenge of staying focused on the narrow track in front of you. The Ptarmigan is mostly entry level when it comes to glacier experience needed. While you do cross glaciers along the route, they aren’t that active and crevasses are minimal. This doesn’t mean that challenges don’t exist, so be prepared. I make this point only to say that it’s not like wandering around the Emmons Glacier on Rainier looking for the next feasible snow bridge. For a trip like the Ptarmigan, I prefer to bring ski poles and try to keep the axe and crampons on the pack as much as possible. In hindsight I found the energy/time tradeoff to be in favor of using crampons a little more than I did, at least when the snow was frozen. A few times I got halfway across a slope only to realize that crampons would have been quicker and less fatiguing overall. Then there's the issue of route finding in difficult weather. While we had good weather most of the time, it’s clear that thick clouds would make things interesting. In hindsight it's all pretty straightforward but (if you're like us) you'd spend a lot of time double checking yourself). In late summer you’ll find a trail much of the way except the little bit of permanent snow and glaciers. Equipment Notes Light is right. The traverse offers great camping all along the way with plentiful water supply. All of the traditional camping spots are sup-alpine and offer at least some protection in weather or wind. In good weather a bivy sack would be perfect but bugs are likely in early season. The real question is what do you take in terms of boots and technical gear? I used the Scarpa Triolet, which I found to be the perfect balance of support, weight and walkability. Lighter boots will walk better but you’ll work more on hard snow or have to use crampons on more often. Any of the similar hybrid boots should be fine. I carried an old pair of trail runners for the approaches and camps in between. Unless your plans include rock climbing, there’s no need for rock pro or shoes. I carried lightweight aluminum crampons and an aluminum ski mountaineering axe and they were more than sufficient. A self arrest ski pole instead of an axe could be ideal. A 7-8mm, 30m ski mountaineering rope is fine for a party of 2-3. Since you won’t use this gear much and never for anything extreme, a minimalist approach works well. This might change if you want to do a technical rock route along the way but you can scramble many of the peaks with basic gear. Getting Down We did the trip the traditional way and started in the north at Cascade Pass. Climbing Mix-Up arm and traversing to the Cache Glacier present no real challenges and you don’t need any permits as long as you don’t camp before Cache Col. Once over the col the entire route is outside the National Park and so National Forest rules apply. The descent is a little trickier. We had thick clouds going up and over Spire Col from White Rock Lakes. The col is the lowest point on the ridge descending SE from Spire Point, at the head of the Dana Glacier. If you can’t see anything, here’s what to do: travel straight up the lobe of the Dana Glacier below Spire Point (easy to find), keeping close to the rock face that will be on your left. Using this as a handrail, find the first (and lowest) point in the ridge at the top of this lobe as the rock face curves around to your right. If you keep traversing up to your right toward Spire Point you'll only go higher and away from where you cross. In good weather it’s obvious but not so much in bad. Cross the col and scramble down the scree (boot track) to the snow on the other side, about 100-150' vertical. From there, traverse skiers right to the furthest gulley, just below Spire Point then take a sharp left down the wide, shallow gully. It’s all easy unless you head down the wrong gulley (we first took the gully right below the col and it ended in cliffs). From there the descent down Itswoot Ridge and into the Cub Lake basin is straightforward. Cliffs ring the basin but you’ll find the trail through these directly east of Cub Lake. Again, all this is easy with low snow and good weather. Once you climb out of Cub Lake basin to the pass above the headwaters of Bachelor Creek the descent begins in earnest. (Note: As of 2012 the trail down Bachelor Creek, which is no longer maintained by the FS, is at least a good quality boot track along the upper section where most of the route finding challenges exist. So, if you lose it in brush or snow, stop immediately and find it again, it is there.) Our descent down the upper portion of Bachelor Creek was straightforward. As the valley steepens the trail takes you through significant avalanche debris, mostly on your right. The only route finding challenge we encountered was between approximately 5000’ and 4000’ feet where the trail starts level out into the valley floor. You enter older avalanche debris (again, with Bachelor Creek on your right) and in this section it’s up, over and around logs and downfall. The trail is there, though certainly faint in places. Again, if you lose it, STOP, turn around and find it again. You’ll regret just charging ahead hoping to find it out there somewhere. This section isn’t long and once you get through it’s smooth sailing for a while. As for the infamous bushwhack section of Bachelor Creek, we found it to be much less formidable than legend would have us believe. In fact, it was almost fun if you adopt the right mindset. The trail is all there and easy to find, though it’s hard to see your feet most of the time given the dense brush. The great exception to this would be after a fresh rain (large trash bag with your arms poked through?) or if you’re carrying skis or anything that sticks above your pack. No fun at all. The log crossing is easy, again, taking you from Bachelor Creek being on your right to being on your left on descent. I say this because we seemed to be second guessing ourselves all along the way even though we read all the online beta beforehand. From there you just cruise down the Bachelor Creek trail until you get to the intersection with Downey Creek. At this point we got mixed up so I’ll explain what to do (this is really simple if you have the full USGS map for Downey Creek; ours ended with the upper reaches of Bachelor Creek so were guessing…and you know how you get when you’re beat). In our tired stupor, we assumed the trail crossed Downey Creek and descended the right hand side to the Suiattle River Road. This false view was supported by a faint trail that leads you to a log crossing Downey Creek, where once across you’ll find camps, flagging and other signs that others have been there before. (Part of our problem is that we assumed, falsely, that all these trails would be overgrown and more difficult to find than they actually were.) Instead, the trail crosses Bachelor Creek just a few yards upstream from where it dumps in to Downey Creek. There’s a good bridge and the near perfect trail picks up right away down the left side of Downey Creek to the Suiattle River Road. Once you get to the road it’s simply a matter of putting your head down for a few hours and pounding out the nine miles to the car. Again, this is simple if you have maps that show the trails. Much more could be said, but, again, this report just addressed some of the issues that we felt would be helpful for a first time group. Have fun and if you have any specific questions feel free to email. Lee Zach and Megan just before descending into White Rock Lakes Camp at White Rock Lakes Megan above Yang Yang Lakes The Infamous Log Crossing on Bachelor Creek White Rock Lakes Kool Aid "Lake" Zach just before the Middle Cascade Glacier Red Ledges LeConte Glacier Spire Col Megan above Yang Yang Lakes Yang Yang Lakes Upper Middle Cascade Glacier Looking back to Cache Col from Kool Aid Lake Bachelor Creek Bushwhack Mt Formidable Just past Art's Knoll with Mt Formidable in Background Art's Knoll Camp Dome Peak from White Rock Camp Edited November 5, 2013 by ldr66 Quote Link to comment Share on other sites More sharing options...
goatboy Posted October 30, 2013 Share Posted October 30, 2013 Wonderful photos of a sublime part of the range. Quote Link to comment Share on other sites More sharing options...
TobiasT Posted October 31, 2013 Share Posted October 31, 2013 beautiful shots Lee, and a useful update on the condition of the deproach. Thanks. Quote Link to comment Share on other sites More sharing options...
Manacus Posted November 2, 2013 Share Posted November 2, 2013 Nice photos! Love the PT. After Backpacker Magazine ran an article on the traverse billing it as the backpacker's Holy Grail, it has grown in international popularity and guide companies have started leading the traverse. I hope it maintains some of its pristine character. I was dismayed the last time I did it to find that some of the traditional camps were starting to become seriously eroded and impacted, and proper disposal of human waste was a real issue. I'm curious what you found in that regard. For future reference, there is a less exposed trail around the Red Ledges. Find it by following the lower fork of the trail that leaves from Kool Aid Lake (you lose a significant amount of time on this route, however). You should also be able to avoid the steepest part of the Middle Cascade Glacier by staying climber's left before heading to the pass. Quote Link to comment Share on other sites More sharing options...
Fairweather Posted November 2, 2013 Share Posted November 2, 2013 Nice pictures and trip. We did this in 2009 and spent three of our five days in the rain and hail. But the two nice days we did get were unforgettable. Manacus, I agree. Not to sound too elitist here, but guiding should not be allowed in this area--at least not in high-ratio groups. The Wilderness Act 1964: Section 4c - Prohibition of Certain Uses: Except as specifically provided for in this Act, and subject to existing private rights, there shall be no commercial enterprise and no permanent road within any wilderness area designated by this Act and, except as necessary to meet minimum requirements for the administration of the area for the purpose of this Act. . . Quote Link to comment Share on other sites More sharing options...
Josh Lewis Posted November 21, 2013 Share Posted November 21, 2013 Nice photos. Would love to make a return to this great place. Quote Link to comment Share on other sites More sharing options...


Recommended Posts
Join the conversation
You can post now and register later. If you have an account, sign in now to post with your account.