Search the Community
Showing results for tags 'cctripreport'.
-
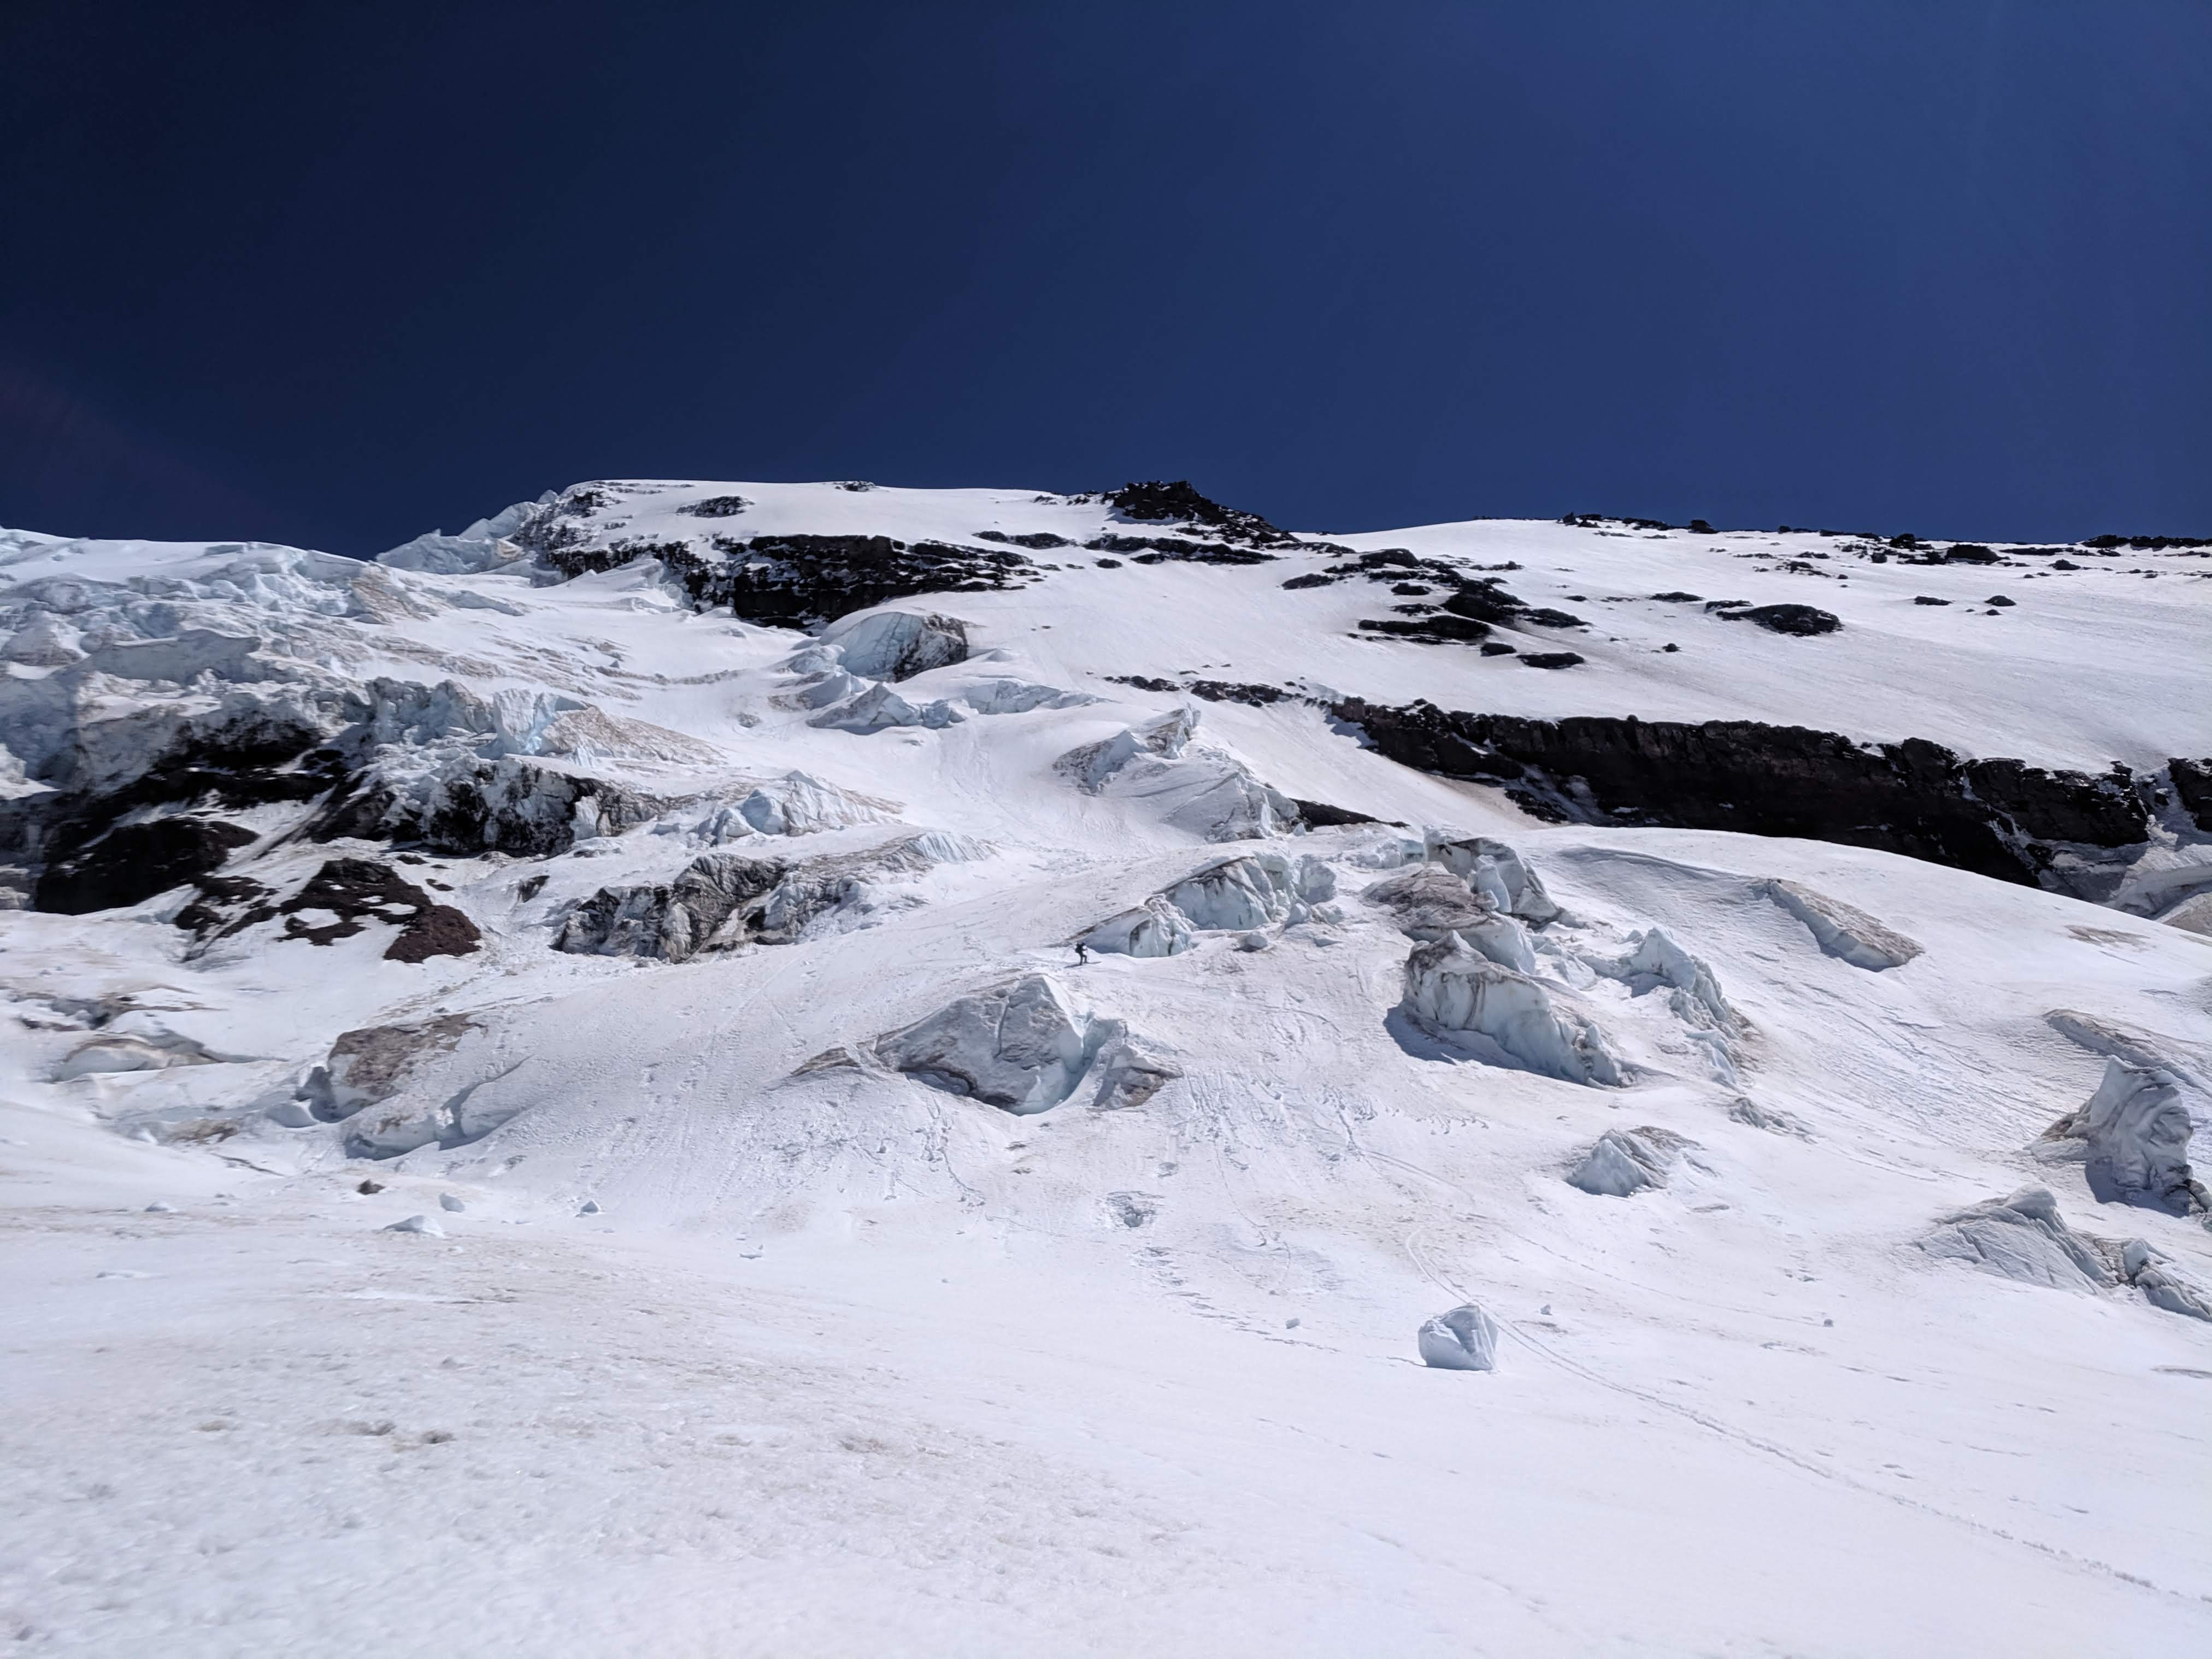
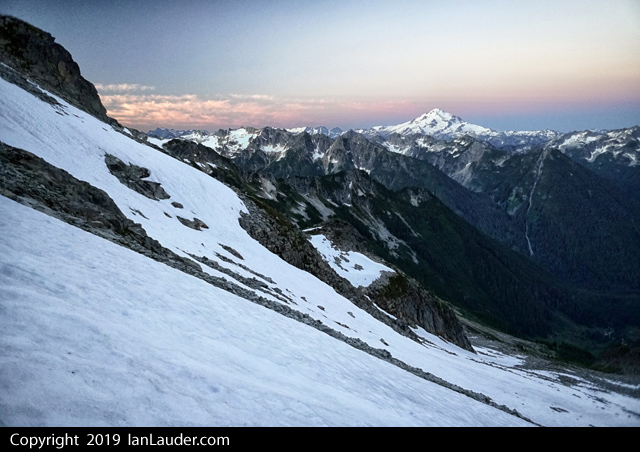
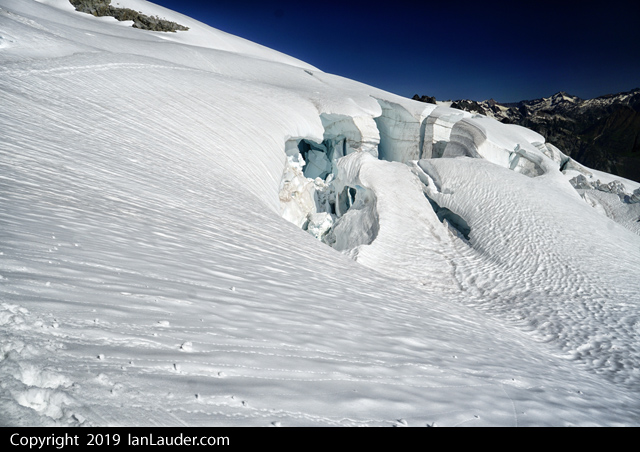
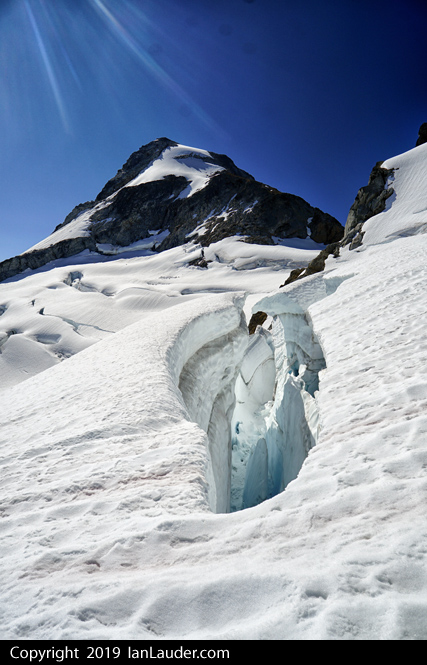
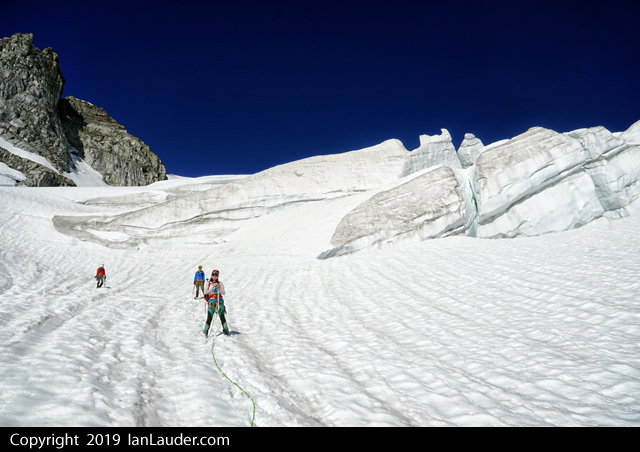
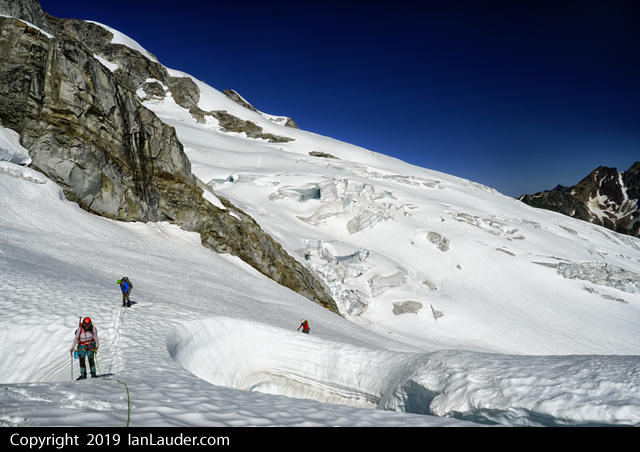
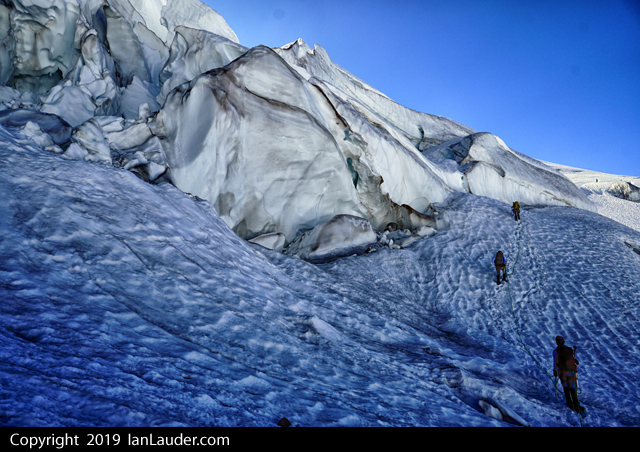
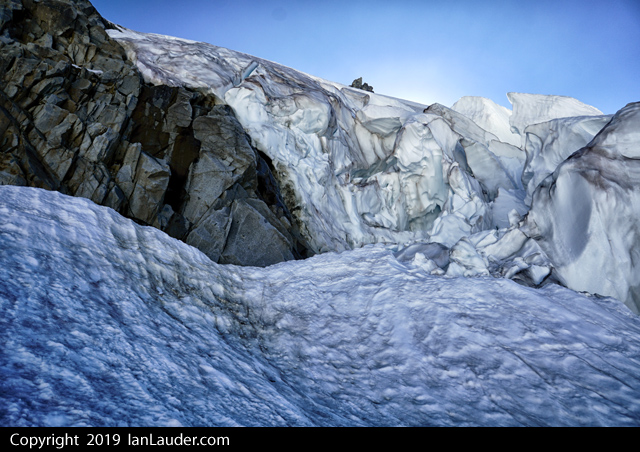
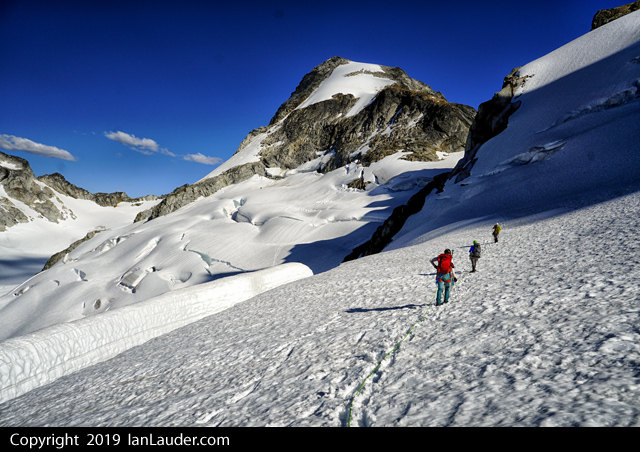
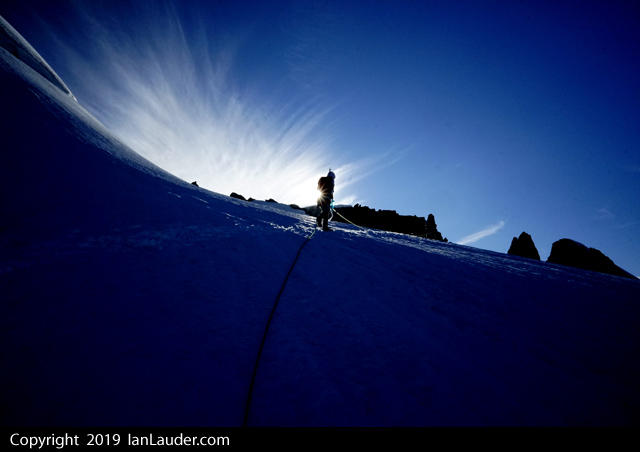
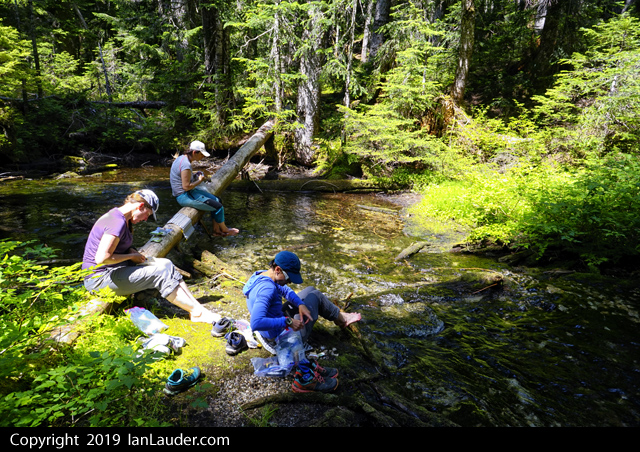
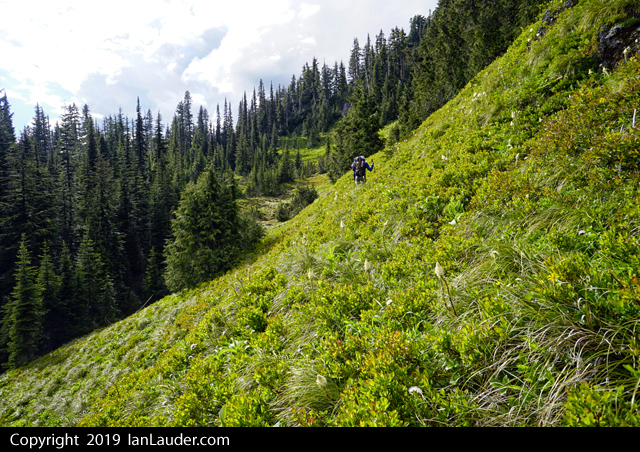
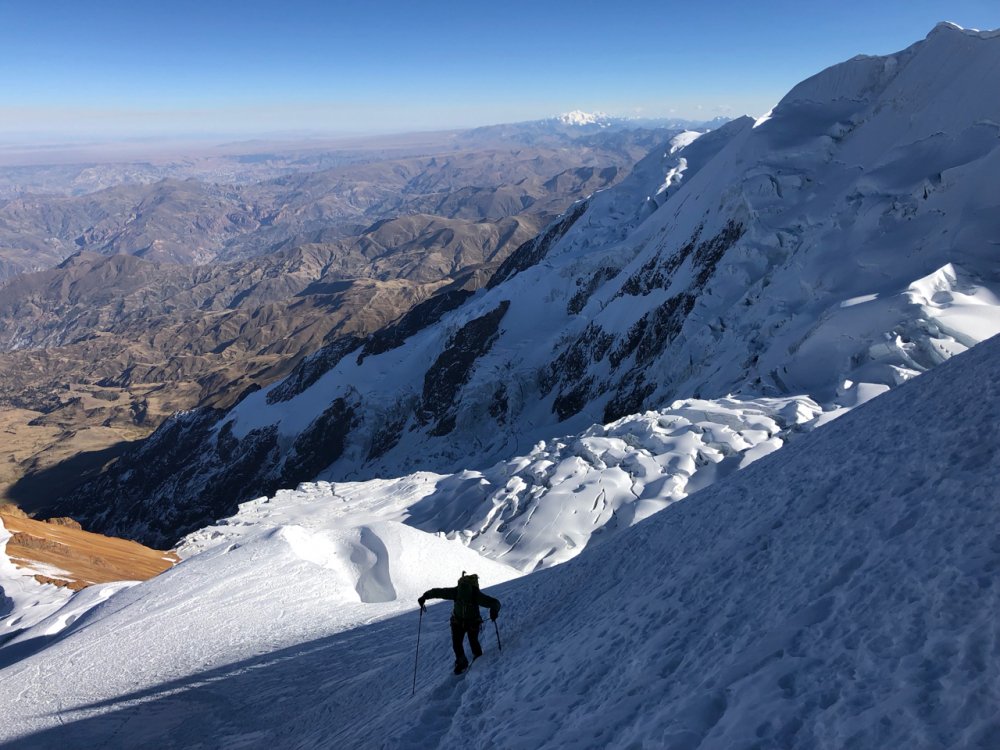
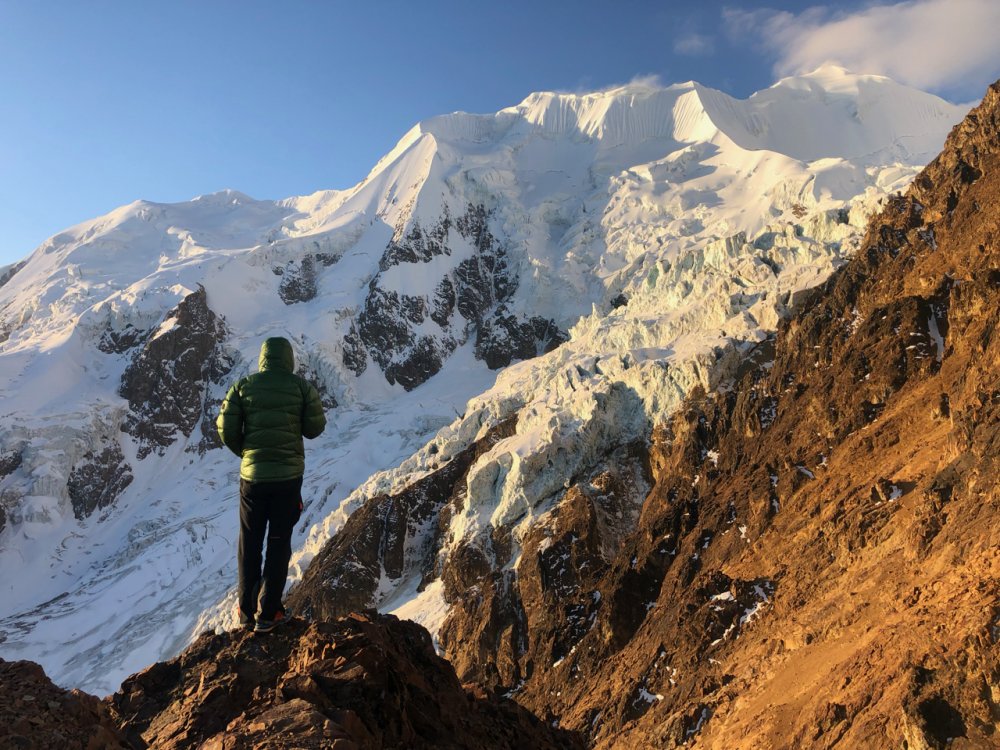
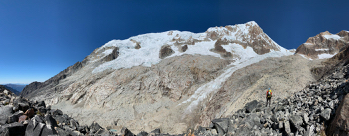
Trip: Cordillera Blanca, Peru - Tocllaraju - NW Ridge (D) (and others) Trip Date: 07/09/2019 Trip Report: I've posted a few trip reports on my site for my second trip to Peru's Cordillera Blanca. This range has many incredible objectives, relatively easy logistics, and is CHEAP compared to high altitude climbing areas elsewhere. Here's my report from Tocllaraju: https://spokalpine.com/2019/07/26/tocllaraju-6034m-northwest-ridge-d-ai4/ Gear Notes: Some screws, two ropes, pickets can be bought in Huaraz. Approach Notes: Make the donkey carry the good stuff
-
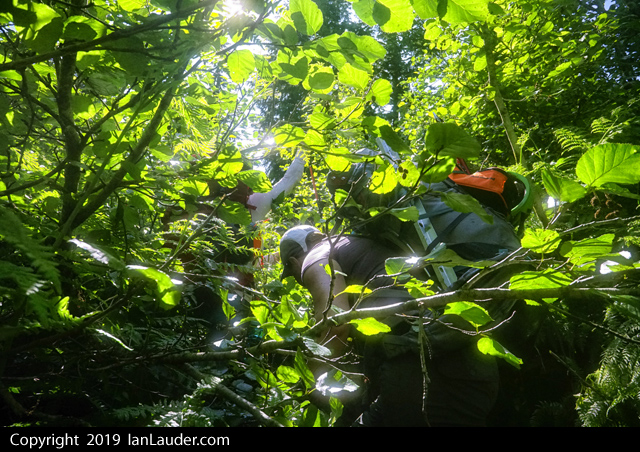
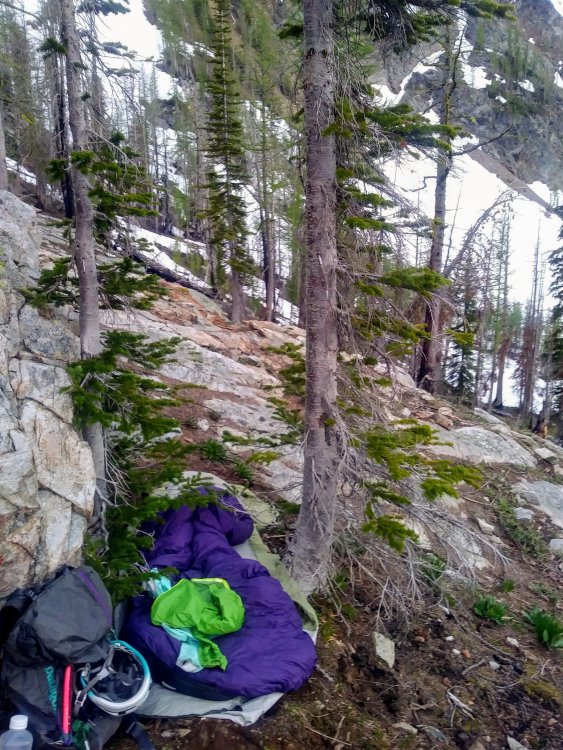
 Trip: Glacier Peak Wilderness - Dakobed Range Circumnavigation Trip Date: 07/13/2019 Trip Report: Did a nice two day solo circumnavigation of the Dakobed Range. Started at the White River TH, went up the Indian Creek Trail (completely overgrown, nearly impossible to follow) and took the PCT to White Pass. Then went into the Whitechuck Basin, over Kololo Peaks, down the Honeycomb Glacier, beneath Tenpeak into the Napeequa Valley. Bivied this pass before tagging Neyah Point in the morning. Took the brushy trail through the Napeequa and up over Boulder Pass and back to the trailhead. It totaled about 50 miles and 12k ft gain. All but four miles (PCT section) of this route were either off trail or on brushy trail, so the mileage was a little more difficult than one might think. The terrain from Kololo Peaks to the Napeequa was pure magic, some of the most remote, stunning scenery I have ever seen in the Cascades. Nothing about this route is too difficult, but there is substantial low angle glacier travel and a bit of tiring side hilling beneath Tenpeak. https://climberkyle.com/2019/07/13/dakobed-range-circumnavigation/ The off trail section of my route. 8 ft tall brush on the Indian Creek "Trail". Deer near the PCT. Nearing White Pass. Tarn in the Whitechuck Basin. On the Whitechuck Glacier. Honeycomb Glacier. Honeycomb Lake. Tenpeak Tarn. Butterfly Lake and Neyah Point. My bivy at Butterfly Pass. Sunset on Glacier peak and Butterfly Lake. Marine layer flowing over Butterfly Pass into the Napeequa. Dakobed and Tenpeak from Neyah Point. Following the stream into the Napeequa. Cirque of the Butterflies - a truly magical place. The Napeequa River. Grassy meadows don't tell the truth... slide alder! Boulder Basin. Gear Notes: Trail runners and poles. You might want crampons, ice axe, helmet, glacier gear depending on conditions and your safety levels. Approach Notes: Terrible, terrible bushwachking. The Indian Creek Trail was miserable.
 -
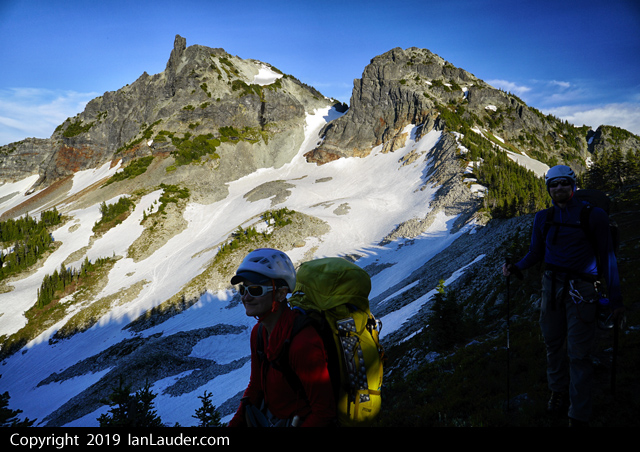
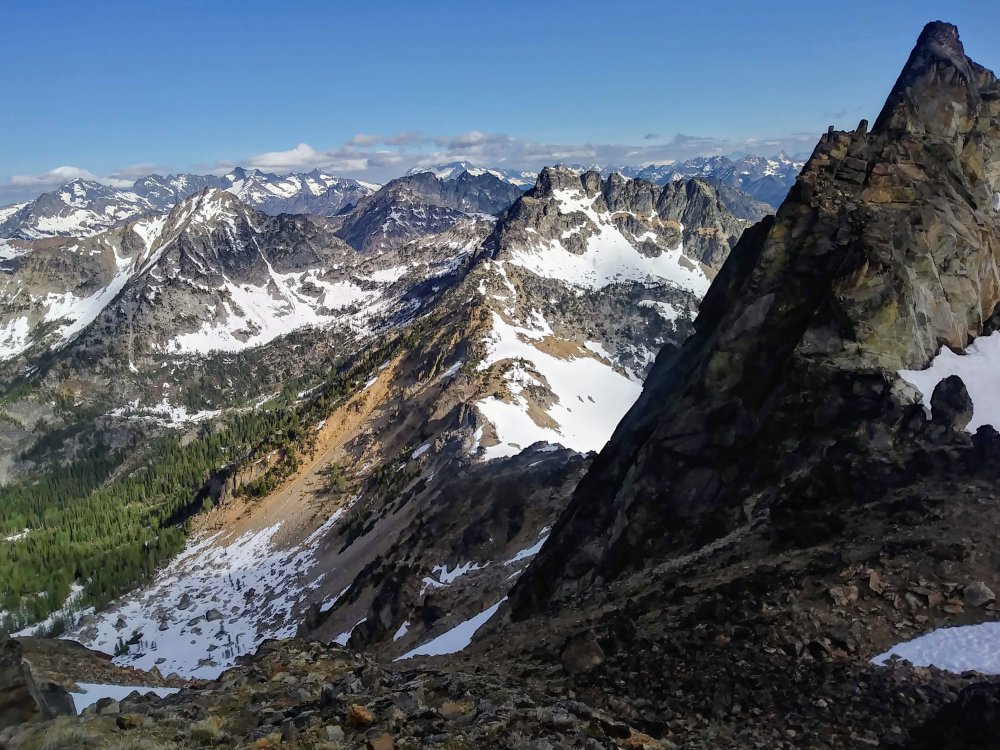
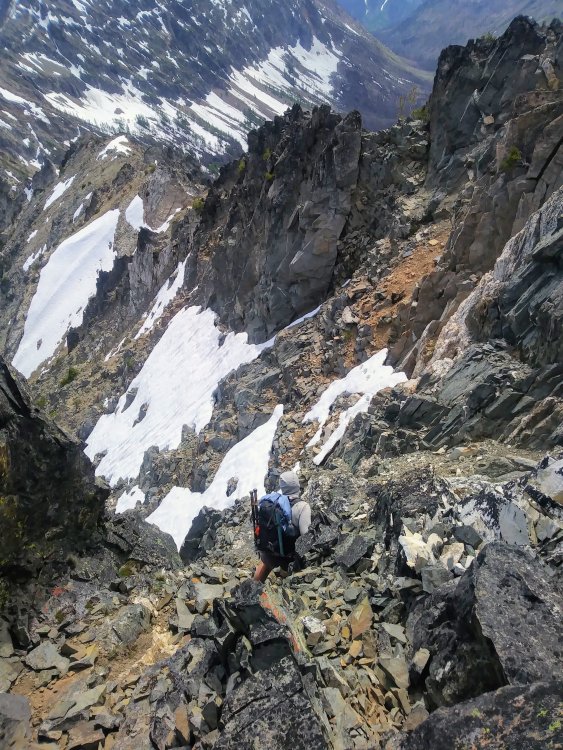
Trip: Sinister Peak / Dome Peak - West Ridge Trip Date: 07/21/2019 Trip Report: 3ish day trip to climb Sinister and Dome. Hiked in the first 6 miles on Fri night to 6 Mile Shelter. Saturday hiked the 8 miles in just over 7 hours to Iswoot Ridge (thick wet bushwacking for a mile, hornets and a bit of off-route travel here and there). 21 hour day on Sunday. The route to Sinister is just about out and we weren't even sure it the glacier would be passable. So we considered it a bonus if we could get there. Had to do a much longer downclimb and side traverse around the bergschrund and over another lower crevasse just to get started from the Dome saddle. There were faint previous tracks that went down a shorter downclimb and over a snow bridge that has now collapsed (you can see that 2 pictures down). Only had to backtrack from one path that was a dead end, then the final crevasse leading to Sinister had one small snowbridge left we could cross. Other than that the navigation was pretty straight forward even if it did involve some weaving around a number of large crevasses. Burned most of our time getting there and only had an hour before our turn around time to climb. We figured if we could do a quick run up we could make it in time to get back for Dome. After re-reading the route beta we had printed out that it was some 3rd class with a + move and then to easy 2nd class and no mention of gear or ropes we went up without rope and gear, which in hindsight wasn't a good idea. Turned out the people who had written that trip report had pitched it out and rappelled and one thought it was 4th class. Found that out after we got back. With approach shoes I thought the climbing wasn't bad, just 4th class exposure in a couple places. But everyone else had heavy boots which made those moves more thought provoking. The first 3rd+ moves after getting up the gully turned back half our group and the other 2 of us up higher had to descend a 2nd parallel gully that had a 4th class move to get down into. Plus I had to poach rappel slings off a couple rap anchors to use as makeshift handlines to lower down a couple moves on longer slab to get people down a move on each of the gullies. So if anyone sees a couple free hanging pieces of webbing, that was us... The gully that is snow filled that could be scrambled down early season was melted out to the point it cliffed out about 15 feet above a moat. So, we burned another couple hours getting a rope up to rappel down. The other half of our party walked back around to where we dropped the gear and was able to lead up about 20 feet next to the gully and tossed the rope over to us and we rapped back down. After doing some exploring where the right gully cliffed out and scrambling up climbers left and out of it and moving left about 10 feet its possible to get out of it without a rope, but would involve about 10 feet of kitty litter angled slab with questionable holds. We didn't have to resort to trying that as by then we had the rope to rap down with. In hindsight double checking what we did we were on route but it was confusing and didn’t match up with the beta we had. Plus 2 different gps devices showed us in different places which added to the confusion. Finding 4 rappel stations and 4th class climbing when we were expecting 3rd class made us wonder if we were on a different route. We could have done a better job digging around for more beta on this one. Busted back to Dome as fast as we could and barely had time to summit that just at sunset which was an awesome view. Spent the next 3 hours navigating back to camp in pitch dark. Halfway there 2 rechargable headlamps without spare batteries had died and we were navigating back with cell phones. Late dinner at 1am. Slept in late on Monday and had a more relaxed day with a long hike out with dinner at Taco Bell in Arlington at midnight. Good times. This one throws a lot at you. Might be one of our favorite trips so far - except for that getting cliffed out part. We'll be back but for the North Face next time. We got the best and hardest parts of that route, good enough for the first try on this peak. The concerning part turned out at the end of the trip. Back at the cars the next day ran into a guy who had the next morning summitted Dome right after us who had met a 20 something year old with little glacier experience and wearing tennis shoes with crampons and an ice axe doing the Ptarmigan Traverse who he saw following our boot tracks solo over to Sinister. And he had made it past the first bergschrund. No idea what the rest of his skills are or what he knew about Sinister. Gonna have to keep our eyes open for any reports on if he made it back and how far he got. If anyone hears about a kid soloing Sinister this weekend drop us a note how he faired. Gear Notes: 40m rope, light rack, ice axe, crampons, stuff Approach Notes: Heavy wet brush on the way in, dry and fairly beaten down on the way out.


-
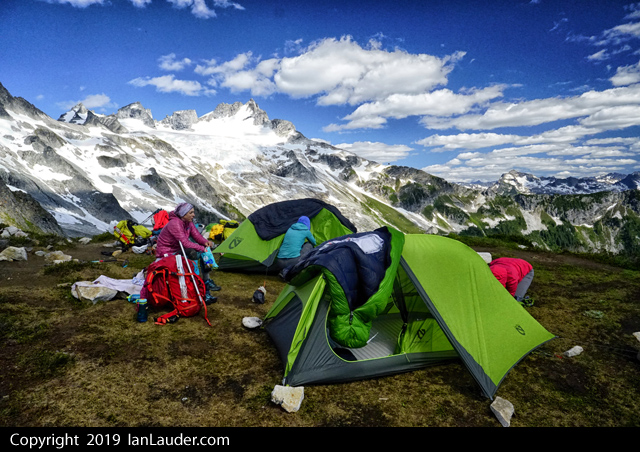
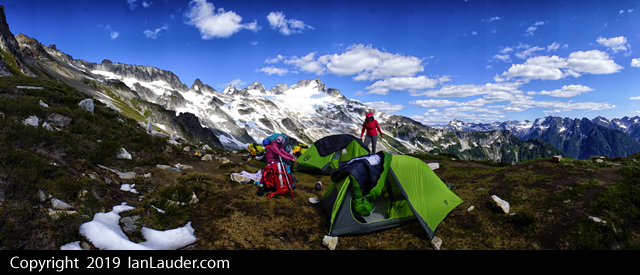
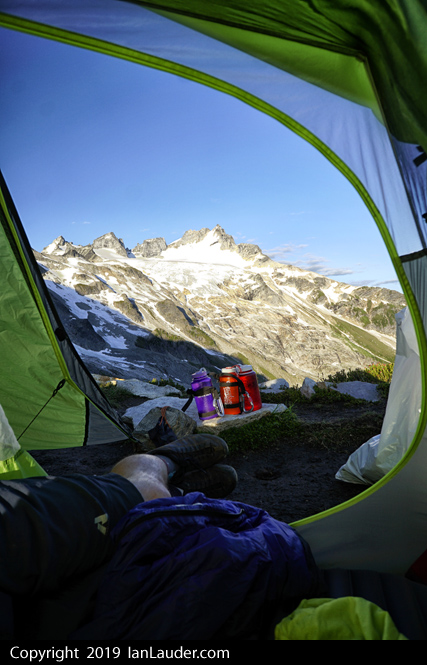
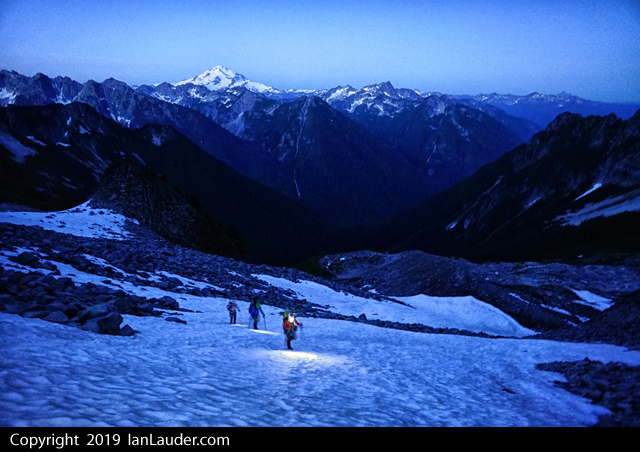
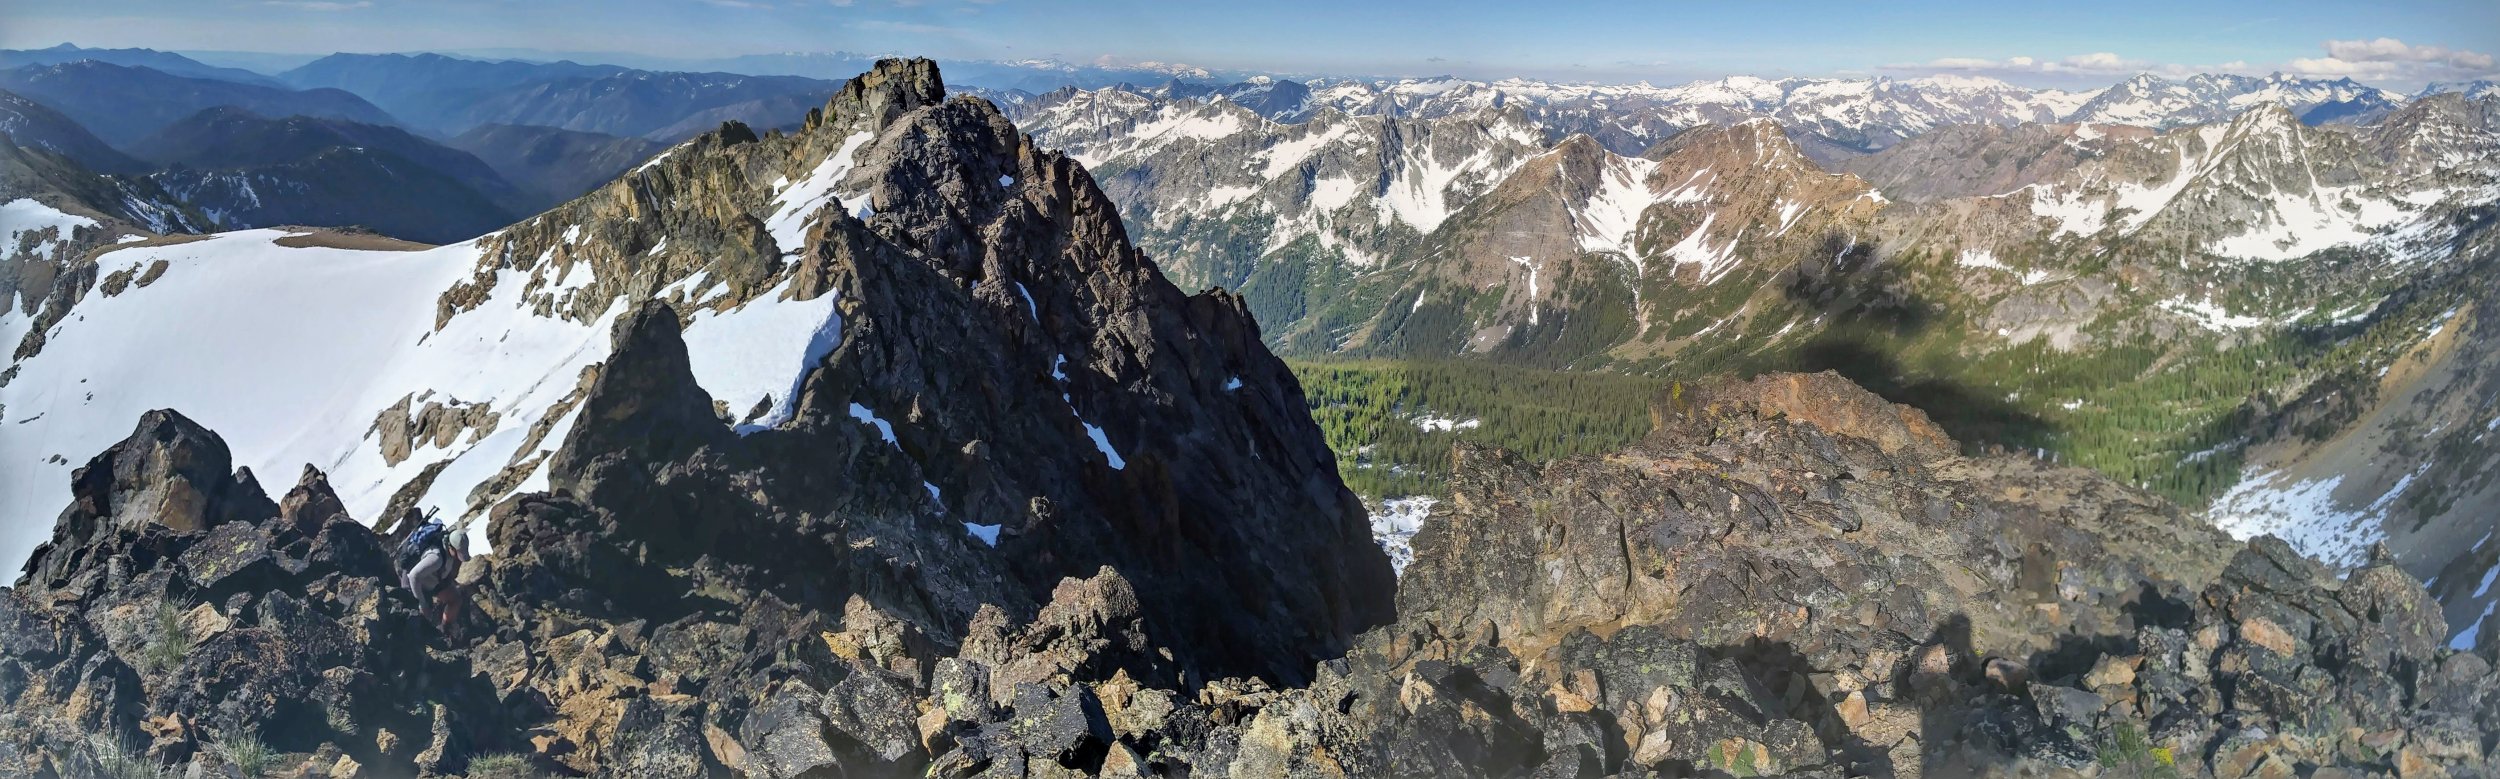
Trip: Alpine Lakes Wilderness - Mt. Daniel via Snoqualmie Pass (The Alpine Lakes Crest Traverse) Trip Date: 06/30/2019 Trip Report: Over the weekend, Logan and I completed a high route from Snoqualmie Pass to the summit of Mt. Daniel, traversing the remote 7,000 ft+ peaks we call the "Alpine Lakes Crest". We started at Snoqualmie, took the PCT to Chikamin, went over Chikamin, down to Iceberg Lake, up to the Overcoat Glacier, across to Summit Chief Pass, down to the Dutch Miller Gap Trail, up to La Bohn Gap, over Hinman, across to Pea Soup Lake, up Mt. Daniel and down to the Cathedral Pass Trailhead. 37 miles, 14-15k ft gain. The meat of the the trip is a spectacular 20 miles of nearly continuous off trail, above treeline travel. We didn't see a single other soul in those 20 miles. The crux was definitely traversing from the Overcoat Glacier to Summit Chief Pass. Stay high on the ridge and aim for the "key ledge" an obvious sloping ledge about 100 ft below the ridgetop that gets you through the obvious vertical cleft that splits the ridge. The scramble up to the Overcoat Glacier from Iceberg Lake was also a little cruxy near the top on the wet 2nd and 3rd class ledges. On a side note, we figured out a great alternate route up the Lynch Glacier. Climb the ridge on the west side of Pea Soup Lake to a snow finger and ascend this to the Upper Lynch Glacier. This gets you by the lower icefall, which is difficult to even access once the lake melts out. This region may not have any Bulgers, permits, or a national park to its name, but we think it is as raw, rugged, and stunning as any other part of the Cascades we have visited. We crossed four glaciers, passed dozens of sparkling lakes, and danced across remote summits. The terrain was huge: everything we dreamed of and then some. There were so many special spots I don't know where to start. And the line felt so pure and alpine. We did the traverse comfortably in two days, having to route find along the way. Our first day was 11 hours and second was just over 9, so it is definitely doable in one big push, but it is also worthy of 3 or 4 days to enjoy the marvelous spots along the way or maybe bag some more summits. If you want to get it, I'd recommend sooner rather than later because the snow cover makes all the boulder and talus less painful. For more details and beta, see: https://climberkyle.com/…/…/the-alpine-lakes-crest-traverse/ Descending Chikamin. Nice tarns on the backside of Chikamin. Iceberg Lake. Looking up to Overcoat Peak. Crossing the Overcoat Glacier. Chimney Rock. Summit Chief Pass. Little Big Chief. Williams Lake. Chain Lakes. Shoulder of Hinman. Lepul Lake and Baker in the distance. Hinman Summit views. Descending to Hinman Tarns. Hinman Tarns. Alt route: Ascend the ridge and snow finger on the right up to the Lynch Glacier. Pea Soup Lake. High on the Lynch Glacier. Daniel Summit! Daniel summit views. Racing down before the storm hits. Gear Notes: Waterproof running shoes, crampons, ice axe. Didn't bring a rope but some might want to for the Lynch Glacier. Approach Notes: PCT to Chikamin, then straight up the face.
- 7 replies
-
- 6
-

-

-
- high route
- traverse
- (and 1 more)
-
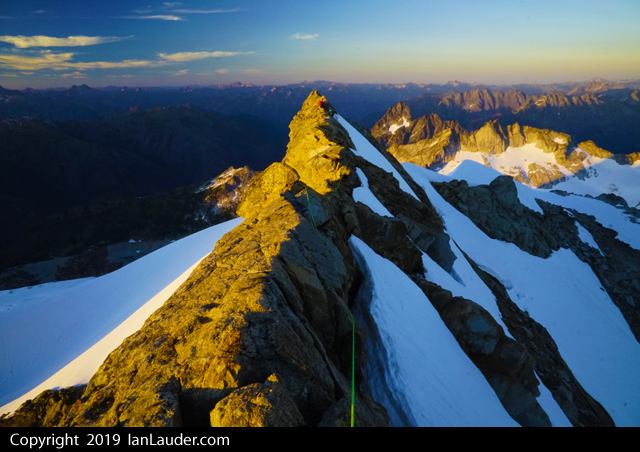
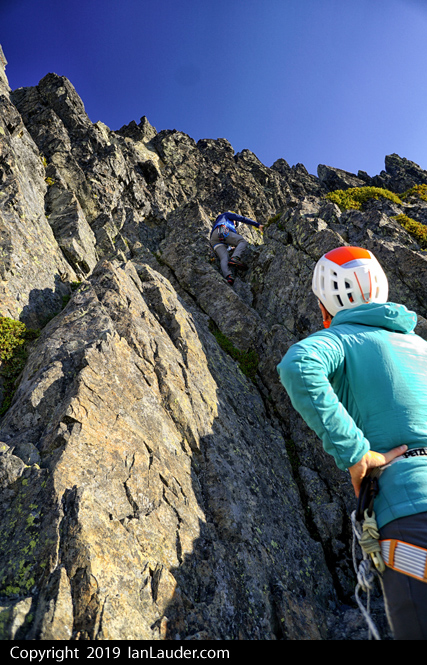
Trip: Forbidden Peak - East Ridge Direct Trip Date: 07/22/2019 Trip Report: Today my friend and I climbed the East Ridge Direct on Forbidden Peak 10.5 hours car to car. Spent last night at the trail head and started hiking very early. We got up into the upper basin around 4ish. I love how quick that trail shoots you out above the tree line. The approach was very manageable in the dark. We got up to the lone gendarme on the ridge and did a quick sorting of gear. We simul'd just about all of the route, taking turns leading out simul blocks. I thought the climbing and rock quality to be really good. Especially the 5.7 and 5.8 gendarme pitches along with the knife edge traverse section. We summited at 8:30 and stopped to take a few photos and rig the first rappel to get down to the east ledges. You see a lot of rap tat below you along the way while you're climbing but don't pay attention to any of those. I highly recommend doing exactly 5 single rope rappels that trend slightly east straight down from the summit. This puts you in easier terrain on the east ledges. I've seen a lot of talk about the ledges being terrifying and stressful. While I agree that they can be loose and manky, and you definitely don't want to fall, they were way more mellow than I was expecting. Just take your time and look for the occasional cairn. The decent back down from the start of the ridge to the car felt like it went really quick. This is a stellar route on a classic mountain and we had perfect weather to boot. Awesome day! Gear Notes: Single set of cams from .3 to 2", set of stoppers, 4 draws, 7 double length slings. Approach Notes: Light axe, aluminum crampons, and trail runners worked perfect.
-
Trip: Forbidden Peak - West Ridge Trip Date: 07/22/2019 Trip Report: Myself and my climbing partner climbed Forbidden Peak via the West Ridge on Sat/Sun. We ascended through the snow couloir, which seems like it will still be in for at least another week and maybe more. The couloir isn't as steep as I expected, and can be ascended using a normal glacier ice axe. We wore approach shoes with crampons, and that was fine (another team said they used micro spikes for the snow couloir and wished they had crampons). That was the route we descended and it was fast and easy. It took us a while to ascend/descend the ridge because we took an extra cautious approach and belay climbed the ascent (vs simul climbing) and rope rappelled the descent (vs down climbing or simul climbing). We left a few slings for rappels where there wasn't already a belay station setup on the ridge, and let an ascending party know the gear was new and theirs if they wanted it. A few folks at camp reported marmots chewing on tents and packs while people climbed, so we packed up on camp before we left in the morning and covered it all with descent size rocks. To pick up a backcountry permit for Boston Basin, we arrived at the ranger station at 6:25am (opens at 7:00). We were the second group in line and by 6:35am there were another 10-12 parties in line. Make sure you arrive early. Timing Wake-up: 3:00am Leave: 4:00am Arrive at ridge: 7:30am Arrive at summit: 12:30pm Leave Summit: 1:00am Arrive at camp: 7:30pm Arrive at car: 9:30pm Gear Notes: 70 meter rope (long rope helpful for rappels) Cams: .3, .4, .75, 1, 2 Nuts: Standard Slings: 8 singles, 3 doubles (I would do 5 singles and 6 doubles to have more extended clips to reduce rope drag) Crampons Carabiners: Carabiner for each cam and sling, plus 3 for nuts. Harness: I wore my BD couloir. It was great for the ascent and light to pack in. A bit uncomfortable for the rappels, but worth it. Approach Notes: To get from camp to the snow couloir we went climbers right (based on recommendation from another climber at camp), but you have to put on crampons pretty early for a steeper snow section. In hindsight, I would have ascended a little left of the middle, right up the rock slaps.
-
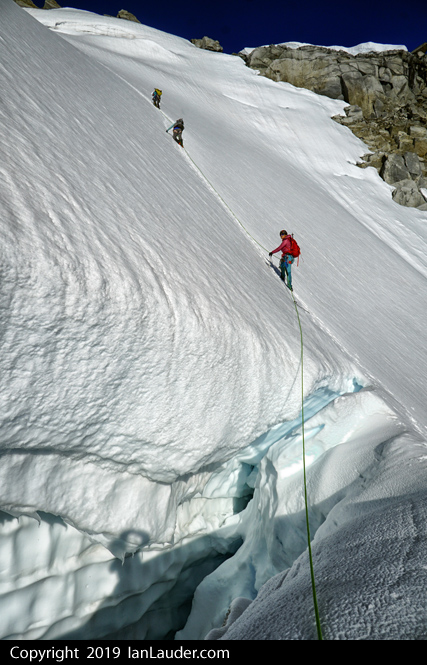
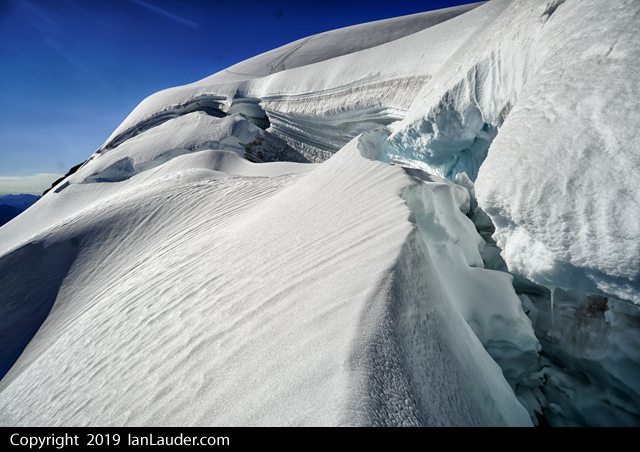
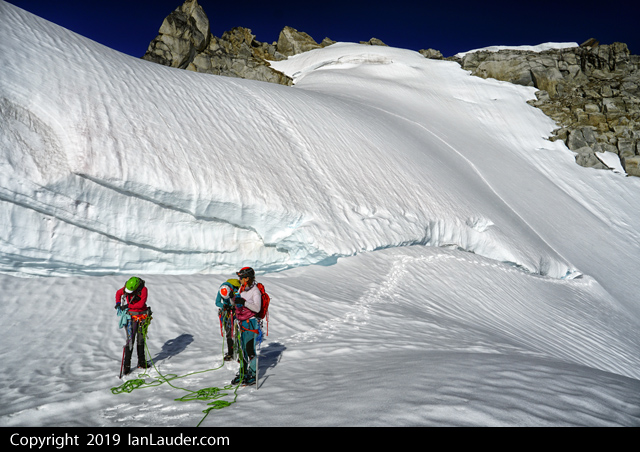
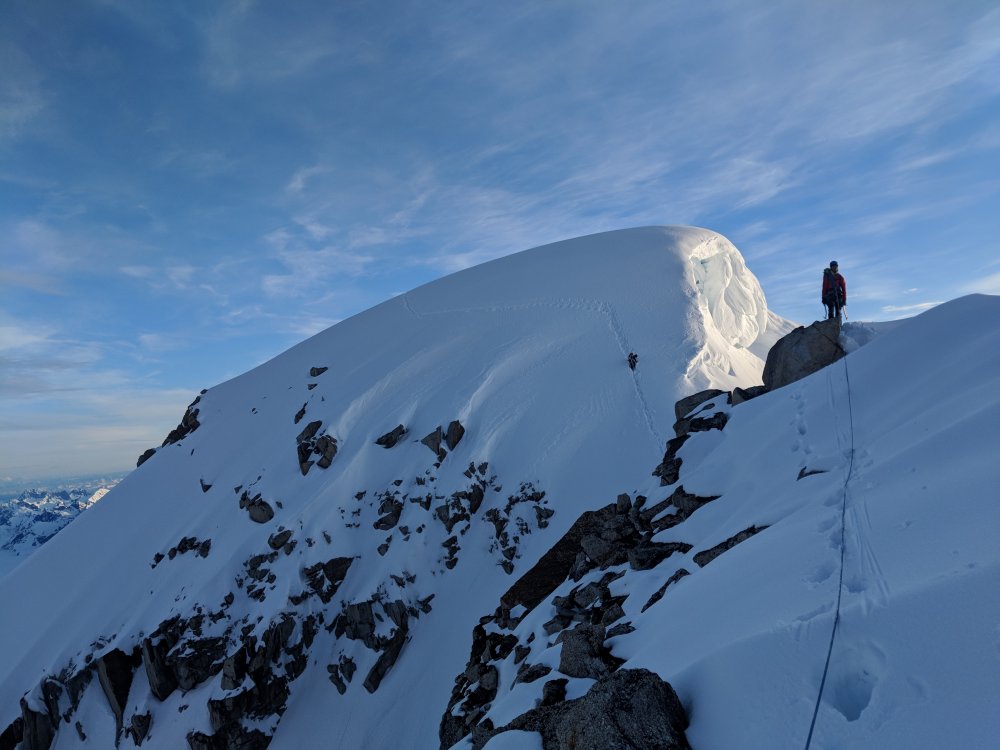
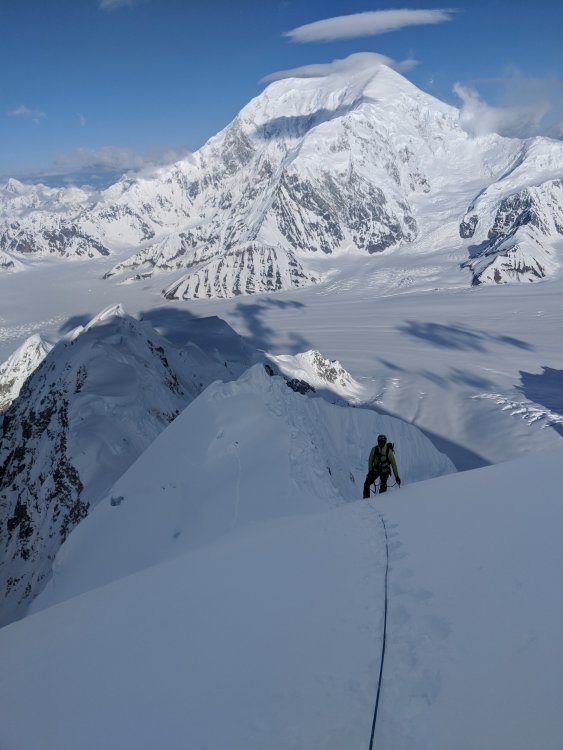
Trip: Alaska - West Ridge of Mt. Hunter (Begguya) Trip Date: 06/07/2019 Trip Report: It wasn't apart of the plan, it wasn't necessarily on our radar. My partner and I were coming off of a total failure. We had spent time and energy to attempt to climb the Cassin Ridge. We spent 2 and a half weeks acclimatizing and waiting for a proper window at 14,000’ camp. Including reaching the summit from 14’ camp round trip in less than 12 hours. We were feeling good and were poised to send. All the work was going to pay off, all the time, energy and money were going to come to fruition. After descending down the Seattle Ramp to close to the base of the Japanese Couloir, my partner started displaying signs of HAPE. He wasn't exactly a rockstar at altitude while we were acclimatizing, but this came out of absolutely nowhere. It was out of the blue and I didn't know how to react. It wasn't setting in yet, the fact that we had to keep walking downhill, right past the base of the route we had been planning on for months. It wasn't until we were walking out the Valley of Death in the middle of the day, sweating and scared. Chance (my partner) was feeling better as we descended and our plan was to head to 7800’ camp. Eventually making it to the safety of camp we contemplated what to do. It had finally sunk in, that we bailed on our main objective. I was pissed and mad. Not at Chance, but at the circumstances. Chance wanted to head back up since he was feeling better. I was adamant was that I wasn't going to go through all of that again. Knowing that there was no way he was going to be 100 percent. I told him to stay at 7800’ camp, while I go up and retrieve all of our gear from 14,000' camp. And boy did we have a lot of stuff at that camp. I ran up to the camp in less than 6 hours and slept the night at 14,000’. Planning on descending the next day. I packed up my 100-liter pack and 2 sleds full of gear. With so much gear I shuttled loads up and down Windy corner and Squirrel Hill. Against my wishes, Chance met me up at 11,000' camp to help the gear shuttling shitshow. We then made it down to 7800’ camp and discussed our options. We settled on heading down to the Airstrip where we had friends and booze. With maybe having a chance at the West Ridge. A few days go by and we get a solid 2-day weather window to try something. Chance and I settle on the West Ridge of Hunter, where we will be accompanied by our friends Ryan and Chris. Just coming off a successful ski descent of Denali via the Messner Couloir and were looking for some more exciting “climbing”, or so we thought. We leave at 6 pm the day before the weather window, skinning down to the base of the route at 6500’. The first section is snow and has some considerable overhead hazard. We are able to move quickly and make our way up to the Cats Ears, where we rappeled 2 60 meter rappels to the base of ice face. We kept trucking along the beautiful ridgeline until we got to the rock steps. Where the 5.8 Beckey Chimney proved to be more demanding than expected, a few more simul pitches of some easy mixed terrain brought us to a nice bivy at around 4 am. We then slept until 10 am and continued on the ridge. Some more rambling ridge terrain moved slowly on, as we were tunneling through cornices and were dealing with some deep snow. We finally got to the base of the “Ice face” which didn't have any ice on it. Just before hitting the saddle, Chance was downclimbing a snow face and he took a crevasse fall, fully overhead. After pulling him out, the 4 of us were a bit shaken. We still had lots of ridge to go and were unsure of the weather in the future. Ryan and Chris made the decision to bail back down from there. Leaving Chance and I a bit more out there than we were planning. We were sad to see those 2 go but knew that we were going to be able to move a bit faster and focus more on the climbing. We continued moving up, passing another easy mixed pitch and passing an overhanging ice serac feature that required legit WI5 ice climbing, even for just a body length. We made it to the top of the famed Ramen Couloir and got caught in a whiteout, with no ability to see where we were going, we decided to bivy again. Splitting one mountain house between us and taking rations for food. We had planned on a single push effort, but with the weather, we had decided to wait until the morning. After sending out messages for weather info, we had received confirmation that we would have a full day of climbable weather the following day. We slept and woke to beautiful clear skies and the ability to see the route in front of us. A bit of new snow, made trail breaking slightly more difficult but after some chest deep postholing, we ventured onto the Summit Plateau. The Plateau seemed safe and smooth, and we couldn't see any cracks. Honestly, we both got complacent (mostly Chance) and he walked up on me while I was trying to route find. The new snow had blanketed a massive crevasse and I popped in 25 feet. Dropping my trekking pole and a picket. I was fortunate to be ok and was able to climb out. We learned from our mistakes and kept going to the summit. The final 50-degree snow pitch turned out to be blue ice covered in 3 inches of snow. It made for slower progress than anticipated, but we were on the summit of Mt. Hunter after a short ridge traverse. We saw wonderful views of the South Face of Denali and all other parts of the range. Now we just had to get down. We descended back to the camp above the Ramen Couloir and finished our food, besides one single Gu. We made 5 or 6 V-thread rappels down the top of the Ramen Couloir and decided to unrope and start downclimbing. The conditions were great besides the final 1000 feet, where it turned into 3-inch breakable crust to bottomless facets. Eventually making our way to the base of the Ramen somewhere around midnight. Out of food and wasted we were unsure where the sneak around was. The Supertopo beta we had said to climb 700 feet up an “easy snow slope” We blindly started rappelling into a couloir and had to climb back out. Chance and I are great friends, but in this instant, we were mad at each other and tempers were flaring. We took a pause at 2 am and brewed up, realizing being mad wasn't going to solve any of our problems. We had a description, but couldn't pick the correct gully. Finally choosing one. Knowing that we could see the bottom of the couloir but not the middle. We choose to descend as any more time up there could turn out poorly. We left gear all of the places, using all of the slings we had, even expending my prusik cord. 1 nut anchors and shitty chossy cam placements led us down to more steep snow. Similar to the conditions in the Ramen but worse we made slow progress. This was where I had started to hallucinate. The snow was so variable that the mini slide paths in the couloir proved firm enough to front point down, whereas the rest of the snow surface proved slow and postholey. The trick of the slide gullies was to get out of them when the barrage of rocks and ice funneled down the 5 foot deep paths. It was a risk, but I wanted to get off this thing so bad, the safety of the Kahiltna was right in front of us. The whole ordeal from the bottom of the Ramen to the Safety of the Kahiltna lasted around 10 hours. We then walked back to our skis at the base of the route. While walking on the Kahiltna a heavy cloud layer moved in and started dumping snow on us. We just really didn't care. We were off and thankful to be alive. With no food, fuel and very little water left we continued the journey back to the Airstrip. Our GPS’s on our phones had died and were “walking blind”. Chance took us into the wrong basin mistaking it for the Airstrip, realizing just short of some extremely crevassed area. We finally make it back to our camp at the Airstrip and stuff our faces of bacon and sausages and chocolate. It's now 5 pm and we had been awake and on the move for the past 36 hours. Those 36 hours didn't contain the hardest climbing I have ever done, but they pushed Chance and I the farthest we have ever gone. Those 36 hours gave me the most intense time period my young adult life has had so far. And the best part was I fucking liked it. As of the time of writing, we were the only party to have climbed Mt Hunter in the 2019 climbing season. The only team to have climbed the full West Ridge in at least 2 years. And both at the age of 21, we believe we were the youngest team ascent of the West Ridge and possibly the summit of Mt. Hunter via any route. Not that any of that matters, but I like to feed my ego sometimes. Please reach out if you know of anything different. Gear Notes: 5 Screws, 2 pickets, a small selection of cams. Approach Notes: K2 Aviation


-
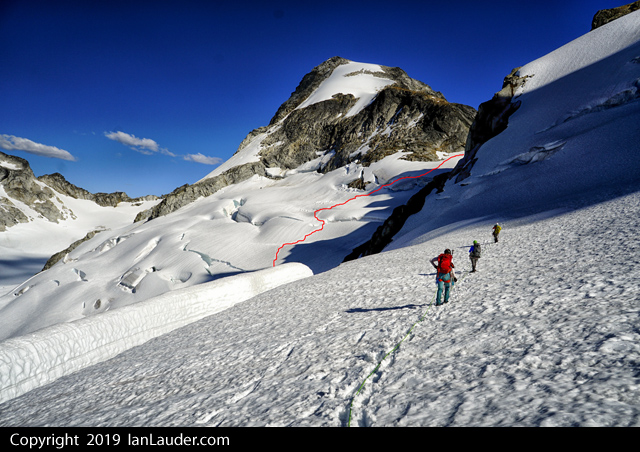
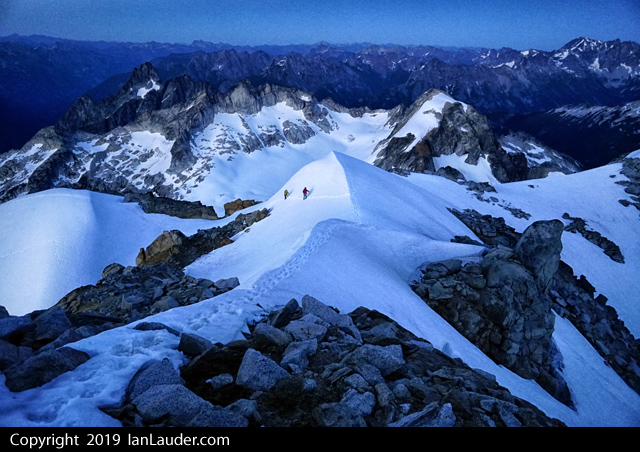
Trip: Mount Jefferson - Jefferson Park Glacier Trip Date: 07/05/2019 Trip Report: Jefferson Park Glacier was in our sights, but warm weather in the forecast made us a bit wary. The freezing level was around 13k with overnight temps on the summit in the low 40s. Glacier Peak was also on our list, so we opted to play it safe and plan for that instead. However, as the weekend approached the weather forecast was improving slightly for Jefferson and turning poor for Glacier Peak. Jefferson it is! I was excited since this would be my first climb in Oregon. On Friday afternoon, five of us met up at the Woodpecker Ridge trailhead. On the drive in we took note of conditions on the north ridge and the summit block. The ridge looked completely covered and the northwest face of the summit pyramid was a mix of snow and rock. Now the question was what the Jeff Park Glacier looked like and what we would find on the narrow ridge connecting the top of Jeff Park Glacier and the north ridge. At around 14:45 we took off on the trail in the direction of Jefferson Park. We considered camping at Jefferson Park, but discussed knocking off another 1000' and camping higher on the ridge so we could get a better look at the glacier in daylight. The skies were clear with the occasional cloud and the absence of trees on the trail made for a warm approach. Shortly after reaching the Whitewater Trail junction, we turned uphill for the ridge that sits east of Russell Creek and leads up to the toe of Jefferson Park Glacier. It seemed like 6800' was a common area to camp so that's what we aimed for, though there were also accounts of camping at 7400'. At this point we were still unsure of our descent route (Russell or Whitewater), so we planned to camp lower to avoid any unnecessary climbing back up to camp if we returned too low on the ridge. There was the occasional patch of snow on the way up the ridge and eventually we found a good spot around 6900'. It seemed like we were the only group up on the ridge. The lower shrund was long and extended well east under the active rockfall area, but looked easily passable. It was hard to tell what the upper shrund looked like so we would have to until morning to find out. With warm weather still in the forecast, we planned for a 0200 departure time so we could start getting some daylight as we approached the cracks on the glacier. The forecast also called for some breezy conditions the next day which we were beginning to experience at camp. After melting some snow we retreated to our tents with alarms set for 0100. It was 50°F when we woke up with clear skies and a light breeze. We gathered our gear and at 0200 were off, heading up the ridge. Shortly after, we passed a small bivy site at 7400' and then were standing on the glacier where we geared up as a team of 2 and 3. Still all by ourselves, we picked a direction and started uphill in the dark. Not too long after, we saw headlamps appear on the ridge to our left. A team of 5 was moving along the ridge and I thought they were heading up the north ridge route, but eventually they descended and joined us on the glacier at nearly the same elevation. We found out later they were camping in Jeff Park. They were moving pretty quick and passed by. The snow was in great shape, not too soft and not too hard which made for easy steps and good purchase with the crampons. There was a thick enough crust that you wouldn't punch through but it was still possible to drive your axe shaft all the way in to self belay as the grade steepened. As the other group reached the crevassed area below the shrund with a hint of daylight, they roped up and began placing pickets and simul climbing. This slowed their progress a little bit and we climbed to their left to avoid any ice debris from them, but unfortunately we didn't give them a wide enough berth. A large dinner plate sized chunk of crust released from their party and started falling between the two groups. We tracked it in the low light and at first it looked like it would miss us like some smaller ice pieces that fell before, but this chunk moved differently. The piece whizzed by me (2nd to last) less than 10' away and struck the last person in our party. He saw it coming and was able to somewhat shield himself where it hit his chest and arm, but it still took him off his feet and knocked the wind out of him. After a short rest and assessment, he just had a sore arm and ribs and nothing appeared to be broken. It could have been a lot worse... We continued towards the lower shrund, moving a bit further climber's left to avoid another incident while keeping an eye out for rocks above. The grade steepened to about 35° as we skirted around the lower shrund, but with the great snow conditions we felt very comfortable. The 2nd tools remained stowed and we didn't place any pro. Once we were above the lower shrund and traversed under Mohler Tooth we finally got a good look at the upper shrund to find a small crack that was easy to cross. Here we took a break while we waited for the other party to climb this section since it would have been a little crowded. After the other group was clear, we crossed the shrund and cruised up to the saddle between Smith Rock and Mohler Tooth. It was around 0700 at this point. The ridge looked to be snow free, so we stowed our crampons and waited for the group to get out in front of us so we weren't right on their heels. The ridge climbed nicely. Our lead did place a few cams and slung a few rocks along the way since we brought them, but it really didn't feel entirely necessary if you're comfortable with scrambling. I feel like I've climbed more exposed terrain that was classified as 4th class. The last part of the ridge before joining the north ridge was still covered in snow/ice, so maybe that portion is the low 5th class climbing I read about once it melts out. We put our crampons back on and finished the ridge to reach the north ridge. The group in front of us decided to descend down a snow gully to the glacier instead of finishing the snowy part of ridge, so we were finally able to get past. Now on the north ridge, we started the trek south to the summit pyramid. The snow was still firm and there was an old boot pack, so we made quick work of the ridge. The summit pyramid was a mix of snow, ice, and rock like we saw the previous day from the drive and it looked like the route to the summit was all snow/ice. At this point we grabbed our 2nd tools and the group of 3 lead the way. The first portion was a fairly steep (~60°?) mix of snow and ice, but we were able to make good purchase with the tools and crampons. A couple cams were placed and there was good ice for a screw. This first portion topped out at a rappel station at the base of the large snow patch, about a third of the way up the summit block. This was probably the toughest section to climb, but looking back at the pictures we likely could have made things easier by traversing a short ways under the summit block before heading up. But it was still fun climbing nonetheless! We then hiked up the snow and began a traverse south, underneath and to the west of the summit. The route would continue south and eventually turn east to wrap around the south side of the summit. This was the second portion of steep climbing, albeit easier than the first. Once again we protected this with a couple cams and a screw before reaching the plethora of slings at the summit. We made it! The summit was just big enough for the five of us to hang out and take in the views. From here we contemplated our descent route. The Whitewater Glacier was our default and there looked to be a nice rappel off the south of the summit down to snow which could then be easily downclimbed to the Whitewater (compared to making the traverse underneath and to the west of the summit pyramid to Red Saddle). The Russell Glacier was also an option, and with the still firm snow conditions and a good bootpack heading down the Mill Creek Glacier, we decided to give that option a go. We rapped off the west side of the summit, down to the snowy traverse section, and then downclimbed to the rappel station we first encountered on our way up. At this point the other party was beginning their climb up the summit pyramid. Another rappel and we were off the summit pyramid and heading down the Mill Creek Glacier. We followed the tracks and had a rough idea where we were heading based on views from the summit and a GPS route, but soon the tracks disappeared and we were left just making the steep snow traverse toward the Russell. We took the path of least resistance and soon found ourselves crossing a scree field before eventually reaching the Russell at 8600'. I think we took a pretty good route to the Russell. Perhaps earlier in the season with more snow one could traverse higher and enter the glacier at a higher point, but with the current conditions we found ourselves at a good spot on the Russell. Higher up there was a lot of exposed scree and the rockfall was very active. The next challenge was to descend the Russell and find a good traverse back to camp to avoid hitting the ridge too low and having to climb back up. Scree was the theme of this portion. We descended the Russell on snow, but soon had to start traversing which led to plenty of scree fields separated by snow patches. Again, we took the path of least resistance while aiming high. Eventually we found ourselves to the west of our ridge with only about a 300' climb back up to camp. Not ideal, but I think we took the best route we could all things considered. If we did it over again this time of year, I think we would opt for the Whitewater descent. I think the Russell earlier in the season with more snow coverage would be a good option, but once the scree starts to show it makes it a bit of a pain especially since most of it is a traverse. After a rest at camp, we packed up and headed down the ridge and out to the trailhead. It was a long day but a great day! A good mix of glacier, rock, and ice. Excellent weather and stellar conditions. I'm happy to put down Jefferson as my first Oregon volcano! Time Stats: DAY 1: (time, duration, split time, elev, total gain, leg gain) 14:45, 00:00, 00:00, 4500', +0', +0', Woodpecker TH Start 18:10, 03:25, 03:25, 6900', +2400', +2400', Arrive Camp Day 1 Splits: 03:25, TH to Camp Day 1 Total: 03:25 ----- DAY 2: 02:00, 00:00, 00:00, 6900', +2400', +0', Leave Camp 02:30, 00:30, 00:30, 7450', +2950', +550', Start Jeff Park Glacier 06:50, 04:50, 04:20, 9950', +5450', +2500', Top of Jeff Park Glacier 09:05, 07:05, 02:15, 10180', +5680', +230', Gained North Ridge 11:00, 09:00, 01:55, 10495', +5995', +315', Summit 14:50, 12:50, 03:50, 8580', +4080', -1915', Gained Russell Glacier 17:00, 15:00, 02:10, 6900', +2400', -1680', Arrive Camp 21:00, 19:00, 04:00, 4500', +0000', -2400', Woodpecker TH End Day 2 Splits: 09:00, Camp to Summit 06:00, Summit to Camp 04:00, Camp to TH Day 2 Total: 19:00 Day 2 Splits (excluding major breaks/waits) 06:20, Camp to Summit 05:00, Summit to Camp 03:00, Camp to TH GPS Route/Track: Our route can be seen and exported from here: https://caltopo.com/m/GB6S Photos: Woodpecker trail approach: Jeff Park Glacier: View from camp: Other party ascending Jeff Park Glacier (below lower shrund): Skirting lower shrund (Mohler Tooth to the right): Upper shrund (Smith Rock to the right): Smith Rock: North ridge and summit: Summit pyramid: Looking back (north) at the north ridge: First pitch on the summit pyramid: View from summit: First rappel: Traverse to Russell: Heading down the Russell: Gear Notes: Glacier gear, 2nd tool, light rock rack and a few screws. We had one 60m rope and one 30m rope. The 60m was nice to have for the rappels. Approach Notes: Woodpecker Ridge Trail
-
Trip: Sahale - Sahale Glacier/South Face Trip Date: 06/30/2019 Trip Report: We (team of 3) arrived at the trailhead around 6am and got moving a bit after. Immediately there was a bear on the trail, and it cut a few switchbacks staying near us as we made our way up. Made it to cascade pass in just over an hour, crossing a few small snow patches, and up to the base of the Sahale glacier by about 9:30 or 10am. Between the pass and the glacier we saw a ton of goats. We ate some food and then roped up. There was one open crevasse on the glacier. We started up the glacier, traversing NE, then NW up a short section of easy snow and arriving at the base of the south face on the pyramid. I started up with the rope and scrambled up and slightly right to the base of a corner with a crack which leaned to the left. This looked harder than the 3rd-4th class I was expecting. I had brought some gear and there were good placements all around, so I climbed straight up the corner, jamming my boots into the crack a few times, passing a sketchy weird fixed sling around a chockstone. I felt this went around 5.5 for 20-25 feet or so, and I was happy to have the pro. The rock in the corner was okay, but there was plenty of crumbling rock on the faces around it. After this, I hit a ledge and there was one more awkward move to the summit. We had climbed essentially slightly to the climbers right (5-10ft) of the rappel route. A single rappel with a 60m rope barely brought us right to the base where the snow ended, and we were back at the car by 4pm. Sahale: On route: Forbidden and Eldorado: Gear Notes: BD 0.75, #1 Smaller to med nuts 4 draws Approach Notes: Bear
-
 Trip: Glacier Peak - Standard - south rib via N. Fork Sauk River Trip Date: 07/7-8/2019 Trip Report: Two day trip up standard route with Abram. Seems about the best time of year. Several small cravasses to step over below Disappointment Peak. Snow conditions were optimal! Long approach and hike out. Go light. Thanks for a great adventure! Gear Notes: helmet, crampons, 30m rope, pickets (not used) Approach Notes: Trail to White Pass and White Creek drainage in good shape and snow free (several down trees, Mackinaw shelter finally collapsed...sad). Foam Creek drainage 95% snow free. Snow remains in upper basins, good boot track. Camp sites at Glacier Gap snow free.
 -
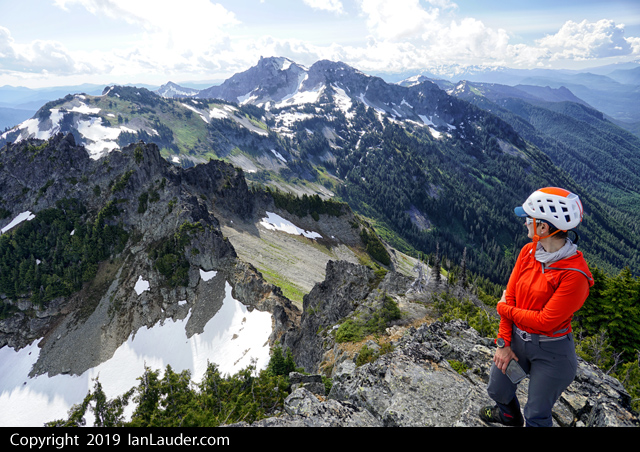
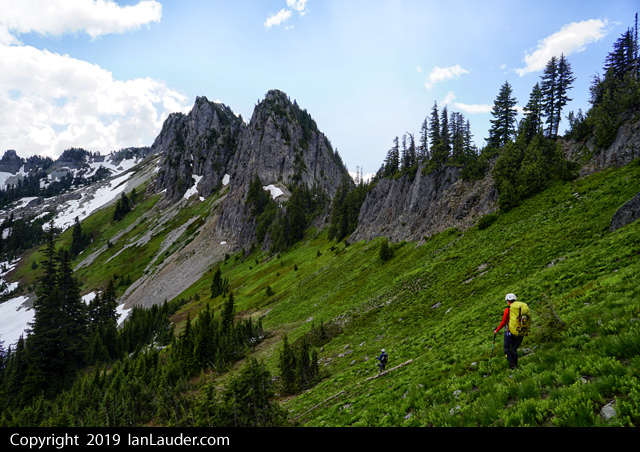
 Trip: South Twin, Jaw's Tooth, Skookum (Kloke), Little Sister, Cinderella - Green Creek Circuit Trip Date: 06/30/2019 Trip Report: Me and Dylan climbed the Green Creek Circuit per the "Cascades Rock" guide: Green Creek Arete to South Twin, NW Face of Jaw's Tooth, NE Ridge of Skookum, central arete on the NW face of Little Sister, then the west ridge of Cinderella. It was amazing. Lots of fun mostly easy travel on varied terrain with soloing, simul-climbing, downclimbing, snow, loose gullies. My kind mountaineering and classic Cascades style. I would say that the left arete on Little Sister might be better due to a section of scary detached blocks on the right one that we climbed. On the left one you would get more ridge scrambling which was amazing. 14.5 hours car-to-car, 7800', 13.4 miles. More terrain to be explored past Cinderella at left: Dylan on the final scramble to Cinderella: Looking back up Green Creek after a great day: Dylan in the upper Green Creek basin: Dylan eschewed my offer of a trekking pole in favor of looking like a doofus crossing the Middle Fork: Gear Notes: 30m rope got us off Jaw's Tooth with some easy downclimbing and was perfect for simul-climbing axe small rack Approach Notes: Per Darin, the Forest Service has actually cleaned up their part of the trail and it is getting moderate use to Elbow Lake.
 -
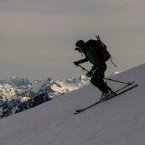
Trip: Mt Redoubt - NE Face Trip Date: 06/02/2019 Trip Report: We had a chill day into base camp on Friday, the trail brings you all the way to the basin, however is hard to follow at times (and hard bushwacking at times with A frame ski carry). As other reports mention there is a water fall that will get you quite wet on the approach (bring dry socks!). Near the waterfall and above there were some carins you can follow they will take you towards the Lake and the start to the South ridge, so once in the open we veered off the " carin "trail" to camp. Instead of camping in the moraine (as most beta seems to suggest) we opted to camp a bit lower closer to the river so we would easily be able to pick up overnight gear on our way out. We woke up around 4:00 and skirted towards the moraine and then up to the base of the NE face. The Face was mostly fun hard snow but near the top it was a bit soft. We then headed onto the rock for some interesting climbing in ski boots! Next we climbed steep snow to the saddle just to the right of the summit, this was quite mushy. We left gear at the saddle but it may be wise to bring with you as we found what looked like the rap line for the South route close to the summit. we then however down climbed back to our packs and skis, with one easy rap we were into down-climbable steep snow and then into some mushy skiing out of the couloir. We followed the south ridge route all the way back to our overnight gear skiing almost all the way to bivy spot. We then started back to our car getting to it around midnight. Gear Notes: N/A Approach Notes: N/A
-
Trip: Tatoosh Range - Tatoosh Traverse Trip Date: 06/30/2019 Trip Report: 12 peaks with 2 rock climbs in 2 days. 25 hours moving time. About 18 miles and about 9000ft gain. So, this isn’t one of those “fastest time” kind of trips, no trail running involved. Just 3 climbers with 25-30lb overnight packs and climbing gear. With our 9-day Pickets Traverse plan weathered out we kicked around ideas for the weekend and decided to roll the dice on the slight thunderstorm forecasts around Rainier to do the full Tatoosh Traverse. Picked up a camping permit at 7:30am on Sat at Longmire and were on the trail by 8:50 at the Snow Lake trailhead having left a vehicle back at Longmire. 4 hours in we tagged Stevens Peak after having done a long off trail traverse below Unicorn, some thick bushwhacking down into a snow filled basin that took us up to the saddle between Stevens and Boundary. Saw a fox right at the col as we popped up. From there ran the ridge back to the saddle and on to Boundary peak, from Boundary we were at Unicorn by 5pm and climbed the 2nd 5.6 route. From there went up and over Foss. Thought we spotted a boot track in some snow on the way to Castle and went to follow it, but it was a fresh bear track. Got to the base of Castle by 8pm and setup camp. 4 down on day 1. So, we would have to hustle to get 8 on day 2. Found running water at this point only in the basin on the way to Stevens, running off a wall on the backside coming off Unicorn and a convenient little stream right at the top of Castle near our camp. Rest of our water fills had come from stuffing water bottles with snow along the way. Up at 6am and on our way to climb Castle before 7. Finished off Castle, packed up camp and had knocked off Pinnacle within 2 hours. 6 down 6 to go. From Pinnacle headed over to Plumber then Denman and had those knocked off within an hour each. 8 down and 4 to go. Up next was Lane Peak which was a little trickier. We wound up scrambling up the narrow gulley that we remembered having ice climbed up last winter right to a tree that had a rappel sling on it. The gulley seemed to be 4th class or 5.0, easy climbing but really exposed but good rock (as opposed to the rest of Lane). Then we found a scramble path down climbers left of that gulley for the way down. #9 down and 3 to go. Had lunch and it was about 1pm at this point. Took longer to get over to Wahpenayo having to do a long traverse side hilling over heather and screen slopes then turning upwards about halfway to gain the ridge. On the other side it was a mix of snowfields and ridge running to get to the summit. #10 down and 2 to go. Some more steep heather and grass slope travel to get to the climbers trail between Eagle and Chutla and some more bushwhacking through trees. Right about when the predicted thunder would be starting, we were hearing some thunder nearby and started getting a little rain. But still had sun and blue sky to our South and we knew the thunderstorms were predicted more over Rainier to the North. At the trail we dropped packs and cruised up Chutla Peak crossing our fingers the thundercloud wouldn’t get worse. #11 down and 1 left. Cruised back down to our packs and did the short traverse over to the saddle and dropped packs again. Had a quick discussion about how we felt about the thunder and decided to get in the trees and start heading up Eagle as we still has some blue sky and sun to one side. #12 of 12 down and by the time we were back at our packs the storm clouds had moved off and we were back to blue sky. Long trail back to Longmire and back late evening before dark. After picking up the car shuttle and back to Ashford found the only place open to eat anything was the Highlander where we got a big pizza that was a combination of a little overcooked and undercooked but was everything we needed. Too tired to drive home we crashed in the cars in the parking lot across from Whittakers Bunkhouse. I must have been low on salt from sweating buckets for 2 days all I wanted for breakfast the next morning was a salty French dip and a bag of chips which I found at the bakery in Eatonville. According to the beta we read after the fact a full Tatoosh Range traverse of all 12 peaks with overnight gear takes about 2.5 days and involves hiking in the night before the start and finishing at twilight the "3rd" day if you count hiking in early on Friday for a Sat/Sun traverse. So, we did it 2 days flat without an early hike in. We started at 8am after getting permits on Sat. Did the longer and harder initial approach to Stevens. And finished at 8pm the next day before dark. And we didn't cut corners on the technical climbing where some people only do the easy pitches or the scramble routes. So, way to go team Rodica and Philip. Beast Mode. We just grabbed some gpx tracks we found somewhere and what we collectively remembered from having done most of the peaks individually or in small groups at one time or another in the past and winged it. Gear Notes: 40m rope, light alpine rack, ice axe, crampons Approach Notes: Snow Lake trailhead, lower traverse under Unicorn to basin up to saddle between Stevens and Boundary. Then after Stevens and Boundary did the standard traverse hitting all 12 peaks. Plenty of snow and water sources available for water. No bugs out. Great conditions.
-
 Trip: Mt Adams - Adams Glacier Headwall "Ice Extension" (IV, AI3+, 55 deg snow) Trip Date: 06/09/2019 Trip Report: @nkimmes and I climbed a variation of the Adams Glacier Headwall "Ice Extension" June 8-9. First ascent by @wayne and @YocumRidge July 4, 2011. Approach was straightforward from Killen Creek TH. Open air bivy at 7,000'. Minor glacier travel with little to no crevasse danger to base of the route. A long, moderate snow slope began at about 9000'. Some rock and ice fall as the sun hit the cliffs on the upper headwall. We solo'd a short WI2 pitch on the left side of the lowest cliff band at 10,400'. The WI3+ pitch began at just below 11,000'. In this case it climbed in one 60m pitch to the upper snow slope. Ice was a bit thin in spot but took 10 and 13cm screws well. From there we ascended a bit more to the rime at the base of the upper cliffs. We checked for an exit to the right but this is a no go. As mentioned in the FA report, the traverse to the left is sketchy with hardly any pro (hollow screws and some makeshift rimy/snow horns that I chopped out and slung). Unfortunately, the AI4 pitch in the left corner looked nothing like 2011, and was mostly rotten rock. Instead, we opted to traverse all the way left to the spine which divides the headwall from the next snow ramp over. We solo'd this to 11,800'. From there it's a long flat slog to the summit. We had initially planned a ski descent of the nf of the nw ridge. However, we watched another skier drop in and climb back up after about 1,000'. He joined us on the summit to report that it was completely bulletproof. We opted for plan b and found cruiser corn all the way down the north ridge to our bivy. 13 hours camp to camp. View of Rainier from the bivy. Ascent in red. Descent in blue. Solo'ing the WI2 pitch. Approaching the base of the WI3+ pitch. First moves of the pitch. Noah following the ice pitch. Route zoomed in. We actually stayed more left on the snow slope. Sketchy traverse. Summit! S Noah on the ski descent. Gear Notes: 2x10cm, 4x13cm & 1x17cm ice screws; 2-3 pickets Approach Notes: Approached from Killen Creek TH.
 -
 Trip: Mt Hood - Cathedral Ridge (via bike approach) Trip Date: 06/22/2019 Trip Report: Ever since I encountered this excellent-looking bike ride on the interwebs, I've been scheming to combo it with a climb of Hood. http://bestrides.org/lolo-pass-back-road/ I left the town of Zigzag (at a painfully low 1500 ft elevation) on my bike at 4:30am, and began the ascent up to the trailhead via FR 1828. The pitch was quite reasonable, I was worried about the bike ride with all my gear, but after popping it in my lowest gear I was able to putter up without too much effort. I reached the trailhead around 6am and began the hike up Timberline trail. Pretty fantastic misty-light-through-trees action on the way up. I downloaded a trip report of Cathedral Ridge onto my phone, but hadn't started reading it until I got up to McNeil shelter. The TR made it seem quite convoluted and exciting, which gave me a bit of pause since I was just going up solo in my approach shoes. The route turned out to be quite straightforward though. Between 7400 and 8800 it stays more climber's left of the ridge, and ducks right of the ridge around a big cliffband at 9200. At least the way I did it. I took crampons on & off a few times when nice snow slopes appeared, but I encountered nothing steeper than 40 degrees. And it probably goes without saying, but the rock was pretty shitty and loose. I summitted around 11am, and saw my first humans of the day. Largely uneventful on the descent, other than a few exhilarating glissade runs. The road surface on FR 1828 was a bit iffy, so I instead descended East Lolo Pass Rd, which just consisted of open straightaways at relatively mellow grades. I was really psyched on this trip! Really cool part of the mountain, although this was my first time up Hood so I can't really compare. Route: Gear Notes: Ice axe, crampons, bike Approach Notes: Zigzag --> Timberline trail
-
Trip: Colchuck Balanced Rock - West Face Trip Date: 06/23/2019 Trip Report: Some people use the solstice for really long days from sunrise to sunset, getting in as much adventure as possible. We used it to sleep in and still get in a full day of awesome climbing. Leaving the trailhead at 9am we made quick work of the hike up to the lake. From there it was uncharted terrain for the both of us. The climbers trail was way easier to follow than we expected, very well cairned and worn down. The wall looking very very good Two guys crushing Let it Burn. They looked very cool from our route. Such a cool looking route! The corner had one serious wet patch that thwarted my OS. Not bad at all though. I got very cold at the belay under the corner, making for some numb tips on the traverse. Sean about to onsight the freaking crux! Unfortunately I got no photos of the chimney. I thought it was fun. Sean did not. The descent to the base was pretty cruiser. About 50/50 kitty litter to snow. A fall on the snow could be pretty bad if you don't stop but definitely not worth bringing an axe on route, just be careful. There are currently no bugs at the base or on route. Overall the route is in great condition. Only one small wet patch up near the top of P4 and the only fixed gear is the nuts and pins at the top of P4. I cleaned a fixed nut out of the crux thinking my partner had placed it. It came out very easily. Our time came in around 11.5 hours C2C giving us enough time to go get some dinner in town. Gear Notes: Double rack .1-2 single 3&4. A bunch of slings and a single rack of nuts, mostly small. There is no longer a fixed piece at the crux. Sorry. Approach Notes: All snow free and in good condition.
-
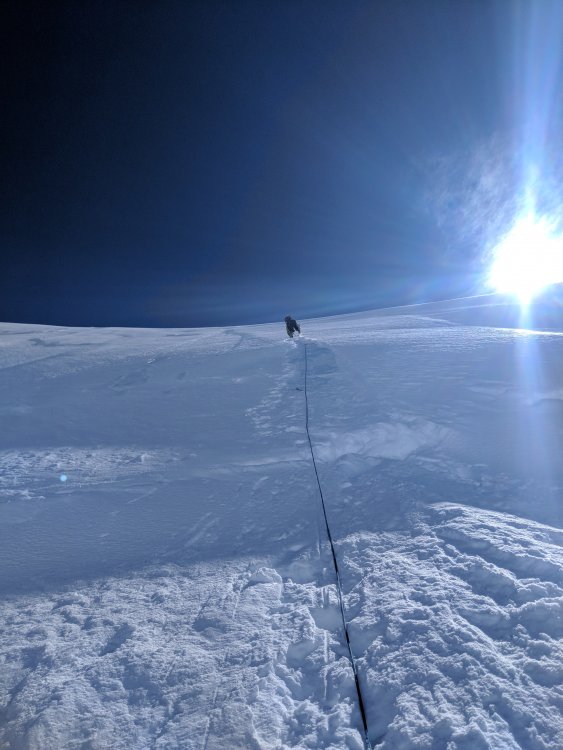
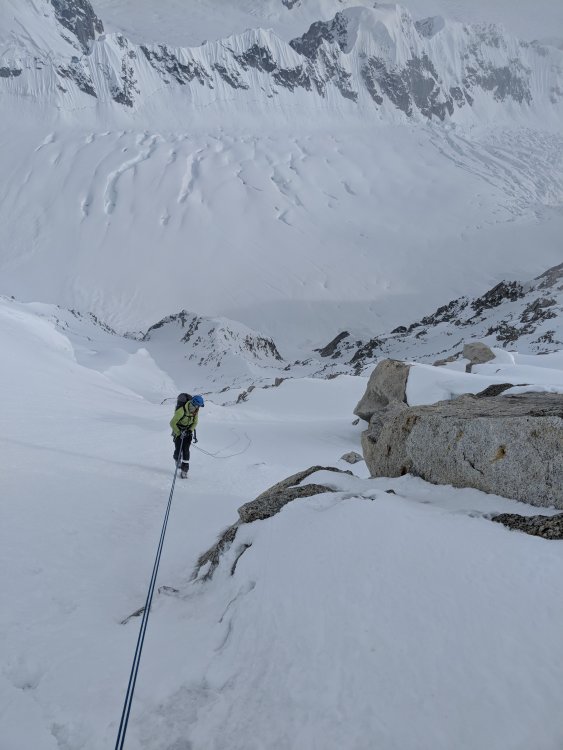
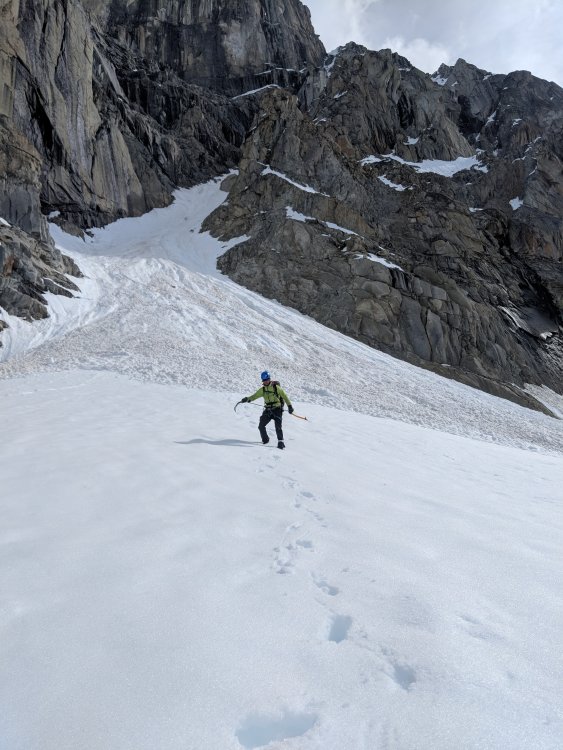
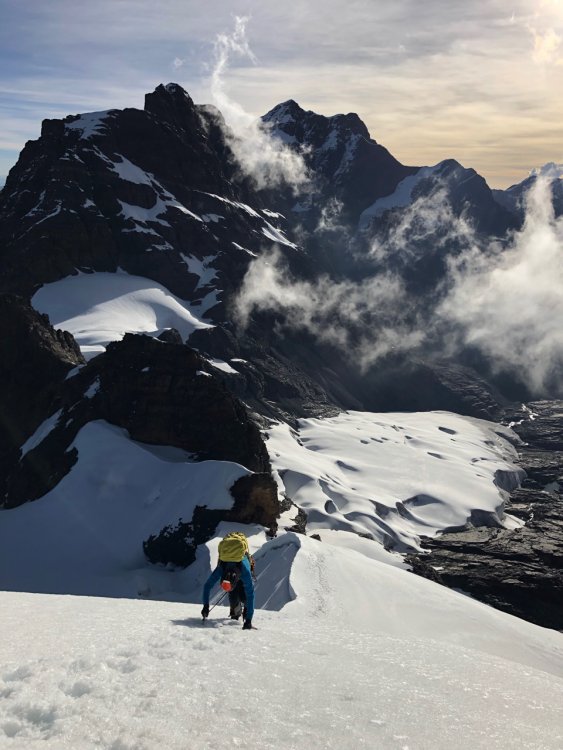
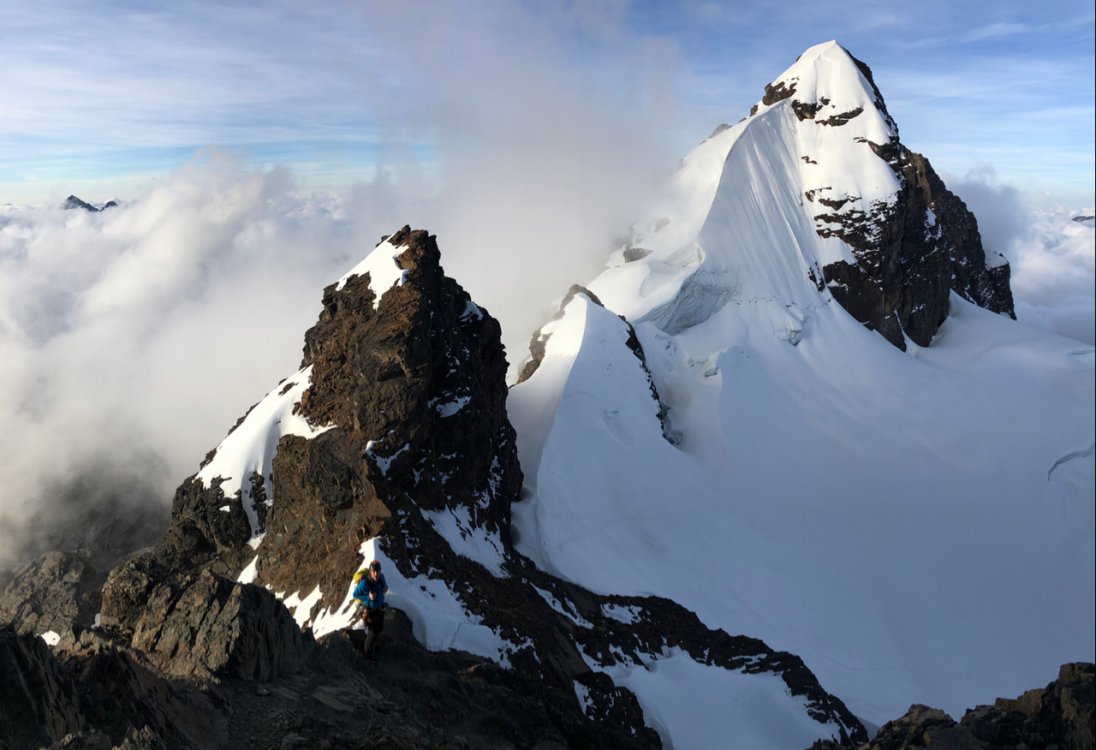
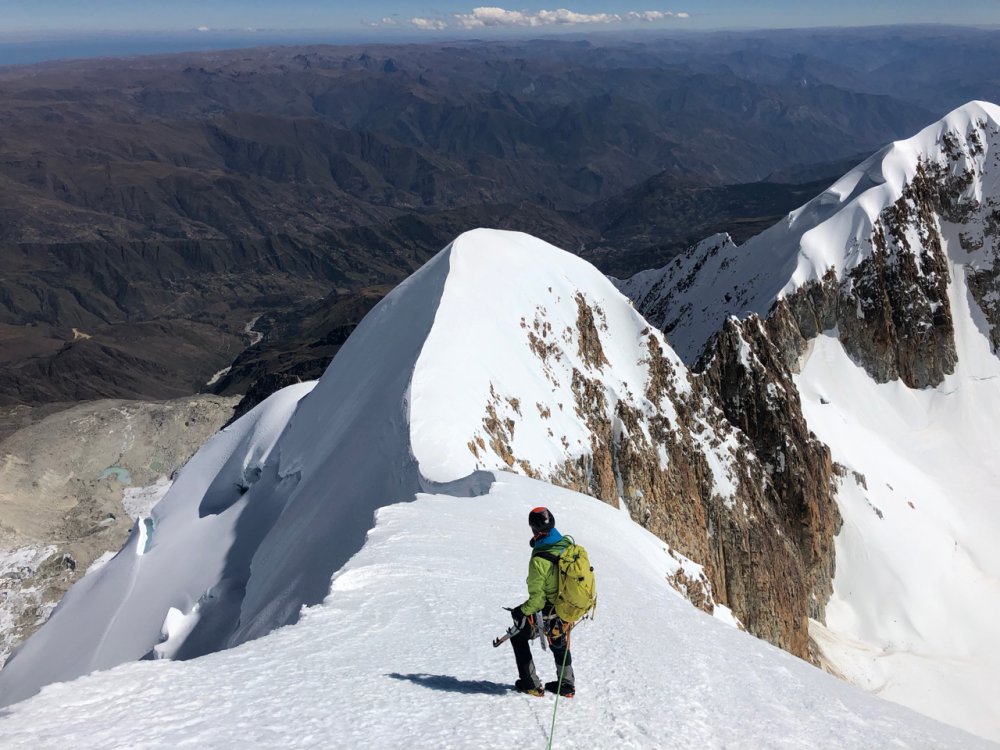
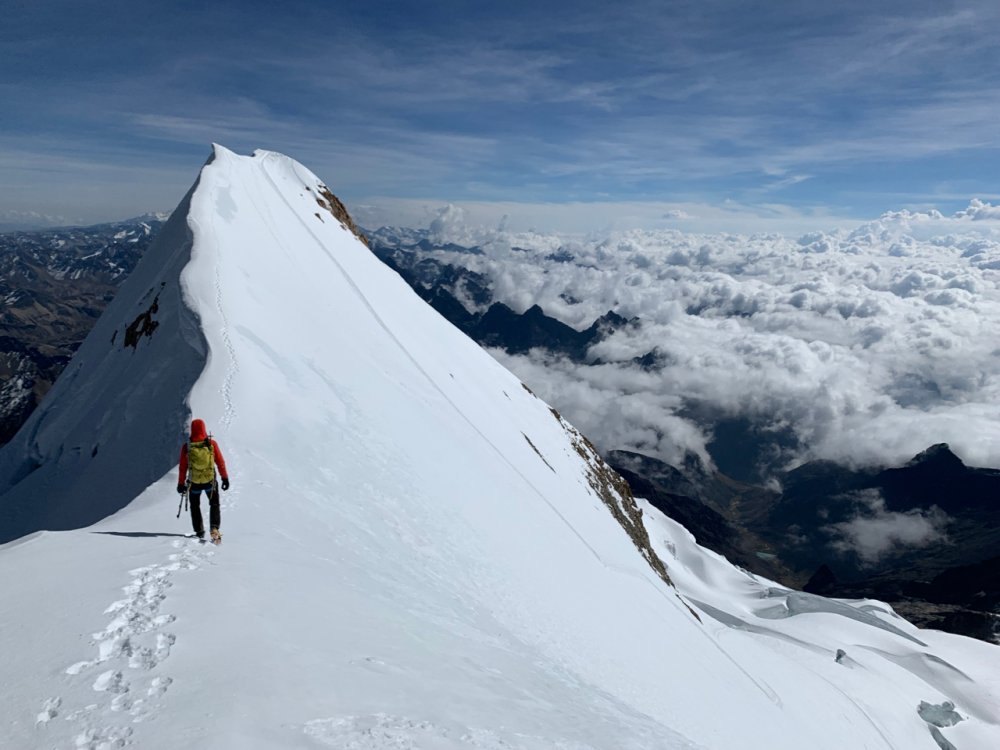
 Trip: Bolivia - Cordillera Real - Pequeño Alpamayo, Cabeza de Condor, Huayna Potosí, Illampu, and Illimani Trip Date: 05/26/2019 Trip Report: I just returned from a 3-week climbing trip to Bolvia and figured some folks here would be interested in hearing about the climbing down there. We stayed mostly healthy, had perfect weather and conditions, and the logistics went smoothly, which made it possible to pack in a lot of climbs: May 26 - Arrive in La Paz May 28 - Pequeño Alpamayo (17,618') - West-Southwest Ridge (III, AD) May 30 - Cabeza de Condor (18,530') - Southwest Ridge (III, AD+) June 2 - Huayna Potosí (19,974') - French Direct Route (III, AD+) June 6 - Illampu (20,892') - Northwest Headwall to Southwest Ridge (III, AD/AD+) June 12 - Illimani (21,125') - West Spur / Normal Route (II, PD) June 15 - Depart La Paz My partner and I had previously done similar trips together to Patagonia and Peru, so we felt comfortable designing our own itinerary and climbing alone without guides. I'd recommend this for experienced climbers who appreciate a "faster and lighter" mentality (and only if you have at least one person who can speak enough Spanish to get by). We bought Yossi Brain's 1999 Bolivia Climbing Guide and found enough beta online as well. We did a healthy amount of Google Earth scanning to identify camps and approach trails too. In my trip reports linked above, I've included Strava links with our GPS tracks to save others some trouble (just ignore if you want more suspense : ). In terms of logistics, we flew into La Paz, which is crazy city of nearly a million people in a valley with another million or so on the sprawling altiplano called El Alto. The city is an interesting experience in contrasts, with everything from folks living in dirt-floored huts to a shiny cable car system. La Paz is about 12,000' depending on where you stay and El Alto is about 14,000'. We opted to rent an Airbnb in La Paz for the whole trip as a basecamp (at ~$30/night, this was pretty economical). We started in La Paz for 3 days / 2 nights to acclimate before our first objective, which we deliberately chose to be one of the shorter peaks (Pequeño Alpamayo at 17,618'). This worked well for us. We slowly ratcheted up the elevation over the course of the trip and never felt worse than headaches and throwing up breakfast once. You can hop into the links above to hear more about our experiences and the routes. I've put a few pictures in here to whet your appetite! - Jeff Gear Notes: We brought 5 pickets, 8 ice screws, some nuts, and some pins, just in case. We ended up placing pickets only once or twice on the trip and simul-climbed or simul-soloed almost all of the terrain. Approach Notes: See each trip report for some details on how we got there and a GPS track.


-
 Trip: Chelan Mountains - Pinnacle, Cardinal, Emerald, Saska - 3rd class routes Trip Date: 06/13/2019 Trip Report: Tessa and I scrambled up the four tallest mountains in the Chelan Range on Wednesday and Thursday. I'm glad she's working on the Bulgers, otherwise these may not have been on my radar. The "Chelan Slam" was super fun: no rope or skis to carry, great weather, easy scrambling, snow still covering lots of the scree, lots of flowing water for drinking and shirt/hat dipping, good snow conditions for travel, amazing views, and a good amount of up and down. My summary: Pinnacle: 1 star Cardinal: 3 stars Emerald: 3 stars Saska: 0 stars We met up in Wenatchee at a park and ride a bit before 11 AM on Wednesday, and Tessa drove us up the Entiat River Road. We set off along the Entiat River and it felt like it was about a million degrees out. The turn off for Emerald Park Trail is marked by a burned up sign post. This area is neither brushy, snowy, nor emerald -- it is charred, ashy, and really frickin' hot in the sunshine. The trail is easy to follow though! We turned off this trail, away from Snowy Brushy Creek (flowing well), up toward Borealis Pass, before getting into the guts of Pinnacle. Looking up toward Borealis Pass A few marmots were spotted. I think Summit Post says it's 13 miles from the TH to Borealis Pass. We ended up going up a narrow talus/scree gully (not the beta, but it went OK other than the loose rocks...) to get up to the broad basin (snow here) on Pinnacle and then wrapped around the choss pile to get on top. Very sedimentary/slate-ish/exfoliating rock. Not much 3rd class at all. Great views of our other three objectives to the southeast. Panorama that Google Photos made me From there, we descended the proper way which was further west than where we came up, went back down over the pass, crossed the creek, then set out on the very charred/ashen landscape up toward Saska Pass. Luckily we found the somewhat difficult-to-follow burned out trail relatively quickly. The plan was to get up to the meadow camp described on Summit Post/Klenke for our bivy/setup for the next day, but daylight was going quickly and there weren't lots of great bivy spots (steepish terrain, dead but standing trees everywhere). We decided around 9:45 to stop at a slabby bench that had some tiny flat spots and was surrounded by some of the only green trees around (lots of larches in there!). I slept between a rock and a conifer, more comfortably than I expected! The moon, mostly full, was bright and the sky was full of stars.... Good enough The next morning we set off a bit before 6 AM up and over the pass (some snow, no crampons needed) to the side of the living, found the trail pretty quickly, and made quick work over to Cardinal. This North Fork basin was beautiful! Getting up to the sweet basin below Cardinal was quite straightforward, and then from the saddle over to Main Peak was easy, pretty solid rock, friction slabs, and a fun steep snow traverse with full-hilt axe plunges and solid feet. Minimal scrambling, great views everywhere! The descent included lots of fun snow running! From a bit above the saddle on Cardinal, can you spot Bonanza? We went back down to the trail, and next was Emerald. Emerald turned out to be a little more complicated (so many gullies, so many depressions between them, which one?!) but because of the minor shenanigans, we got a bonus summit (the north NORTH summit) and a few actual 4th class moves including an unexposed VB boulder problem up and out through a hole, which was fun. All that only cost us about a half hour total, and luckily it was very easy to get down and over to the correct gully and up the correct summit. Great views! Some peak identification: Bonanza, Maude, 7FJ, Goode. More fun snow running and boot skiing on the descent! Damn, that one is definitely taller.. Last was Saska, which sounded like the easiest of the group... but it also ended up being a choss pile of unimaginable proportions. UGH. Highly do not recommend. The best part of this one was that there was still a fair bit of snow on the lower third. This did not make up for the stress induced by the shitty, shitty rock everywhere on this thing. Interesting to notice about 5 different types of rock, 4 of which were really crumbly/peeling/disintegrating/etc. Pretty windy on top and we knew that we had a slow descent in front of us, so we didn't hang out long. I'm waiting for Tessa to get out of firing-line range Looking toward Saska Pass, I believe We headed back over the pass and picked up our sleeping bags/pads, I unloaded my last muffin onto Tessa, and we headed out in much cooler weather (thankfully). We played a few rounds of hanky panky, an interesting name for a pass-the-time word/rhyming game I learned going up to Bungundy Col in 2014. Tessa came up with a great one: her clue was waterfall, and the hanky panky was MOUNTAIN FOUNTAIN. Yesssss! So charred My feet were ready for the Chacos when we got back to the car at 9:45 PM. Great trip, thank you Tessa for this idea, and I highly recommend at least Cardinal at this time of year! Did you know?! You probably already did, but according to Wikipedia, the name Chelan derives from the traditional Wenatchi name Tsi-Laan meaning "deep water". Gear Notes: Brought light axes and crampons -- got out axes a couple times, never used pons. I was glad to have a helmet on Saska. Approach Notes: We took Entiat River -- you could also approach via the North Fork Entiat.
-
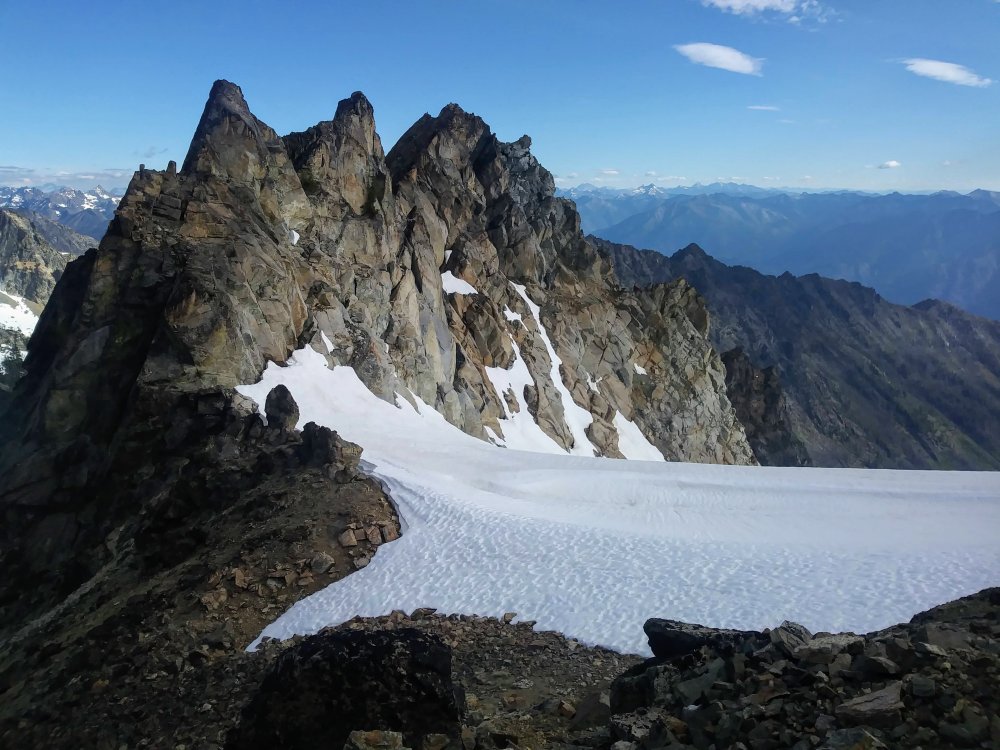
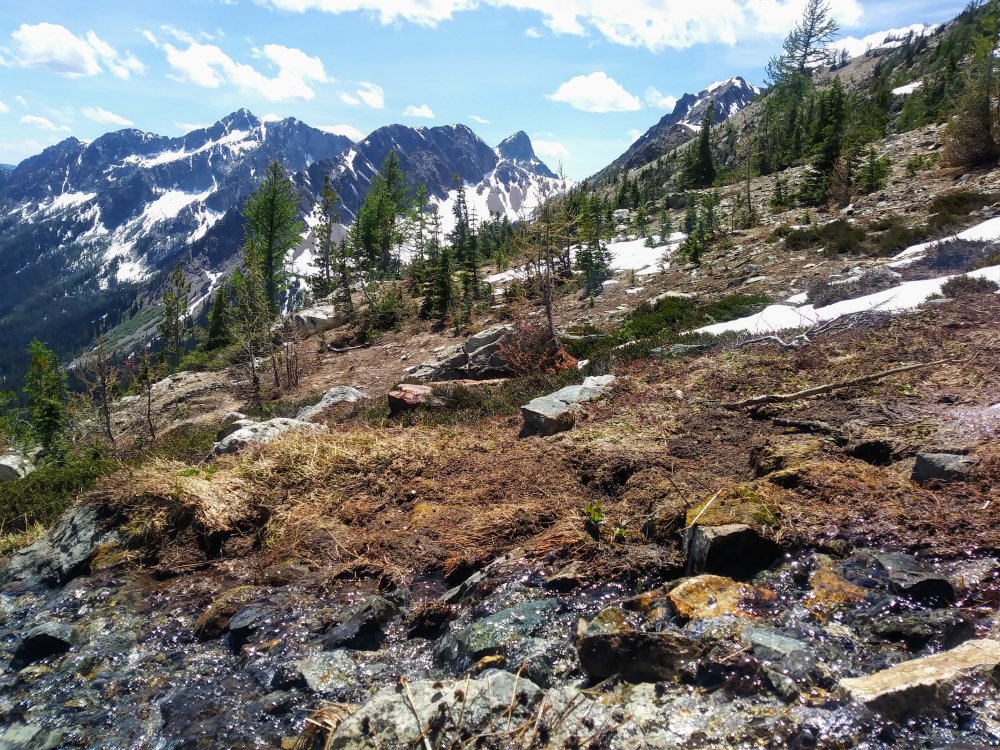
Trip: Eldorado Peak and Dorado Needle - E Ridge and NW Ridge Trip Date: 06/16/2019 Trip Report: Conditions are quite good in the Eldorado area right now. We made a casual ascent of Eldorado on our approach day and climbed the NW Ridge of Dorado Needle on Sunday. The climbing was easy but damn... that descent to the car was pretty punishing. Full trip report and photos: Spokalpine Gear Notes: Crampons/Axe for Eldorado. Light rock rack for Dorado Needle. Approach Notes: Wear a knee brace
-
Trip: Mount Constance - Finger Traverse Trip Date: 05/23/2019 Trip Report: This past Thursday, Zorina and I climbed Mount Constance via the Finger Traverse. I know there's a lot of route info out there, but this website needs trip reports and maybe someone wants a conditions update The trip was great: the route was interesting and in the conditions when we were there, a little taste of everything: talus, steep snow, scree-skiing, slab, class 3/4/5 scrambling, and sweet ridge-walking. And an improbable-looking giant summit block! Wednesday we made the approach to Lake Constance. We didn't want to mess around with bikes, but it wasn't a big deal. It's about 5 miles along the Dosewallips from where you can park to the turn-off for the unmaintained trail up to the lake. The trail is flagged/marked the entire way and easy to follow. Cool trail: burned out steep section, flatter middle section with crazy moss and enormous boulders (glacial erratics?!), and then some root pulling up top. Lots of blowdowns the whole way. Saw lots of wildflowers and trees in bloom, including rhododendrons, lupine, indian paintbrush, and a dogwood. Lots of some big beetle and an interesting black and yellow millipede-like insect. At the lake, we did have to cross some sections of snow to get around to the north side where there are a few camp spots. Bear wire and toilet intact! TONS of fish, wish I had a fishing setup! (I think we saw a sign that said after June 1, fishing is allowed.) The snafflehounds were out in full force, and it appears that one gnawed a hole through Zorina's water bladder (of course, right at the bottom...) In the morning, we got going around 6 AM and were on talus then snow and a bit of scree gully up to the notch with a rainbow behind us. Descending traverse over to the next gully system, and then up scree or more solid rock scrambling. Not bad! At the next (E-W) notch, a rising traverse and some steep snow. Working our way over, finding a few cairns, we finally found the finger traverse, which is exposed but manageable; it was still under snow for probably half of it (I think?) so it might be harder once all that melts out. As it was, there was a nice moat for your feet for part of it. Then some more ridge walking, some steep snow traverses, then a descending traverse to the base of a gully in these crazy choss pinnacles. Ridge scrambling fun, then to the summit block -- spiral scramble staircase up the back, and then you're on top! I really should have brought my skis... Photo by Zorina A pair of bald eagles soared on thermals for a good 3 or 4 minutes while we were up there. Spectacular summit views including Puget Sound and islands, Mount Baker, Mount Rainier, The Brothers, Jupiter, and Olympus! Photo by Zorina Photo by Zorina The descent was uneventful, with some down climbing and plunge stepping and boot skiing (both on snow and scree) and some glissading. The steep descent after the lake was not for the weak-kneed. Owch. Luckily, no one had broken into Zorina's car! A great ending. Times: 6ish hours up from lake, 3.5ish hours back to lake. Gear Notes: Light axe, light pons, 30m rope and a few nuts if you want to protect the finger traverse Approach Notes: Dosewallips River Road to road end; walk/bike road to well-signed turnoff for Lake Constance
-
Trip: Forbidden Peak - Beta photo Trip Date: 06/15/2019 Trip Report: Got a decently detailed shot of Forbidden from Sahale Glacier this weekend so I thought I'd share it. Zoom in and you can see the gully is pretty melted out. Nobody visible on the route from this direction at 12:20PM on Saturday. Just three people down on the glacier/snowfield. Gear Notes: N/A Approach Notes: N/A
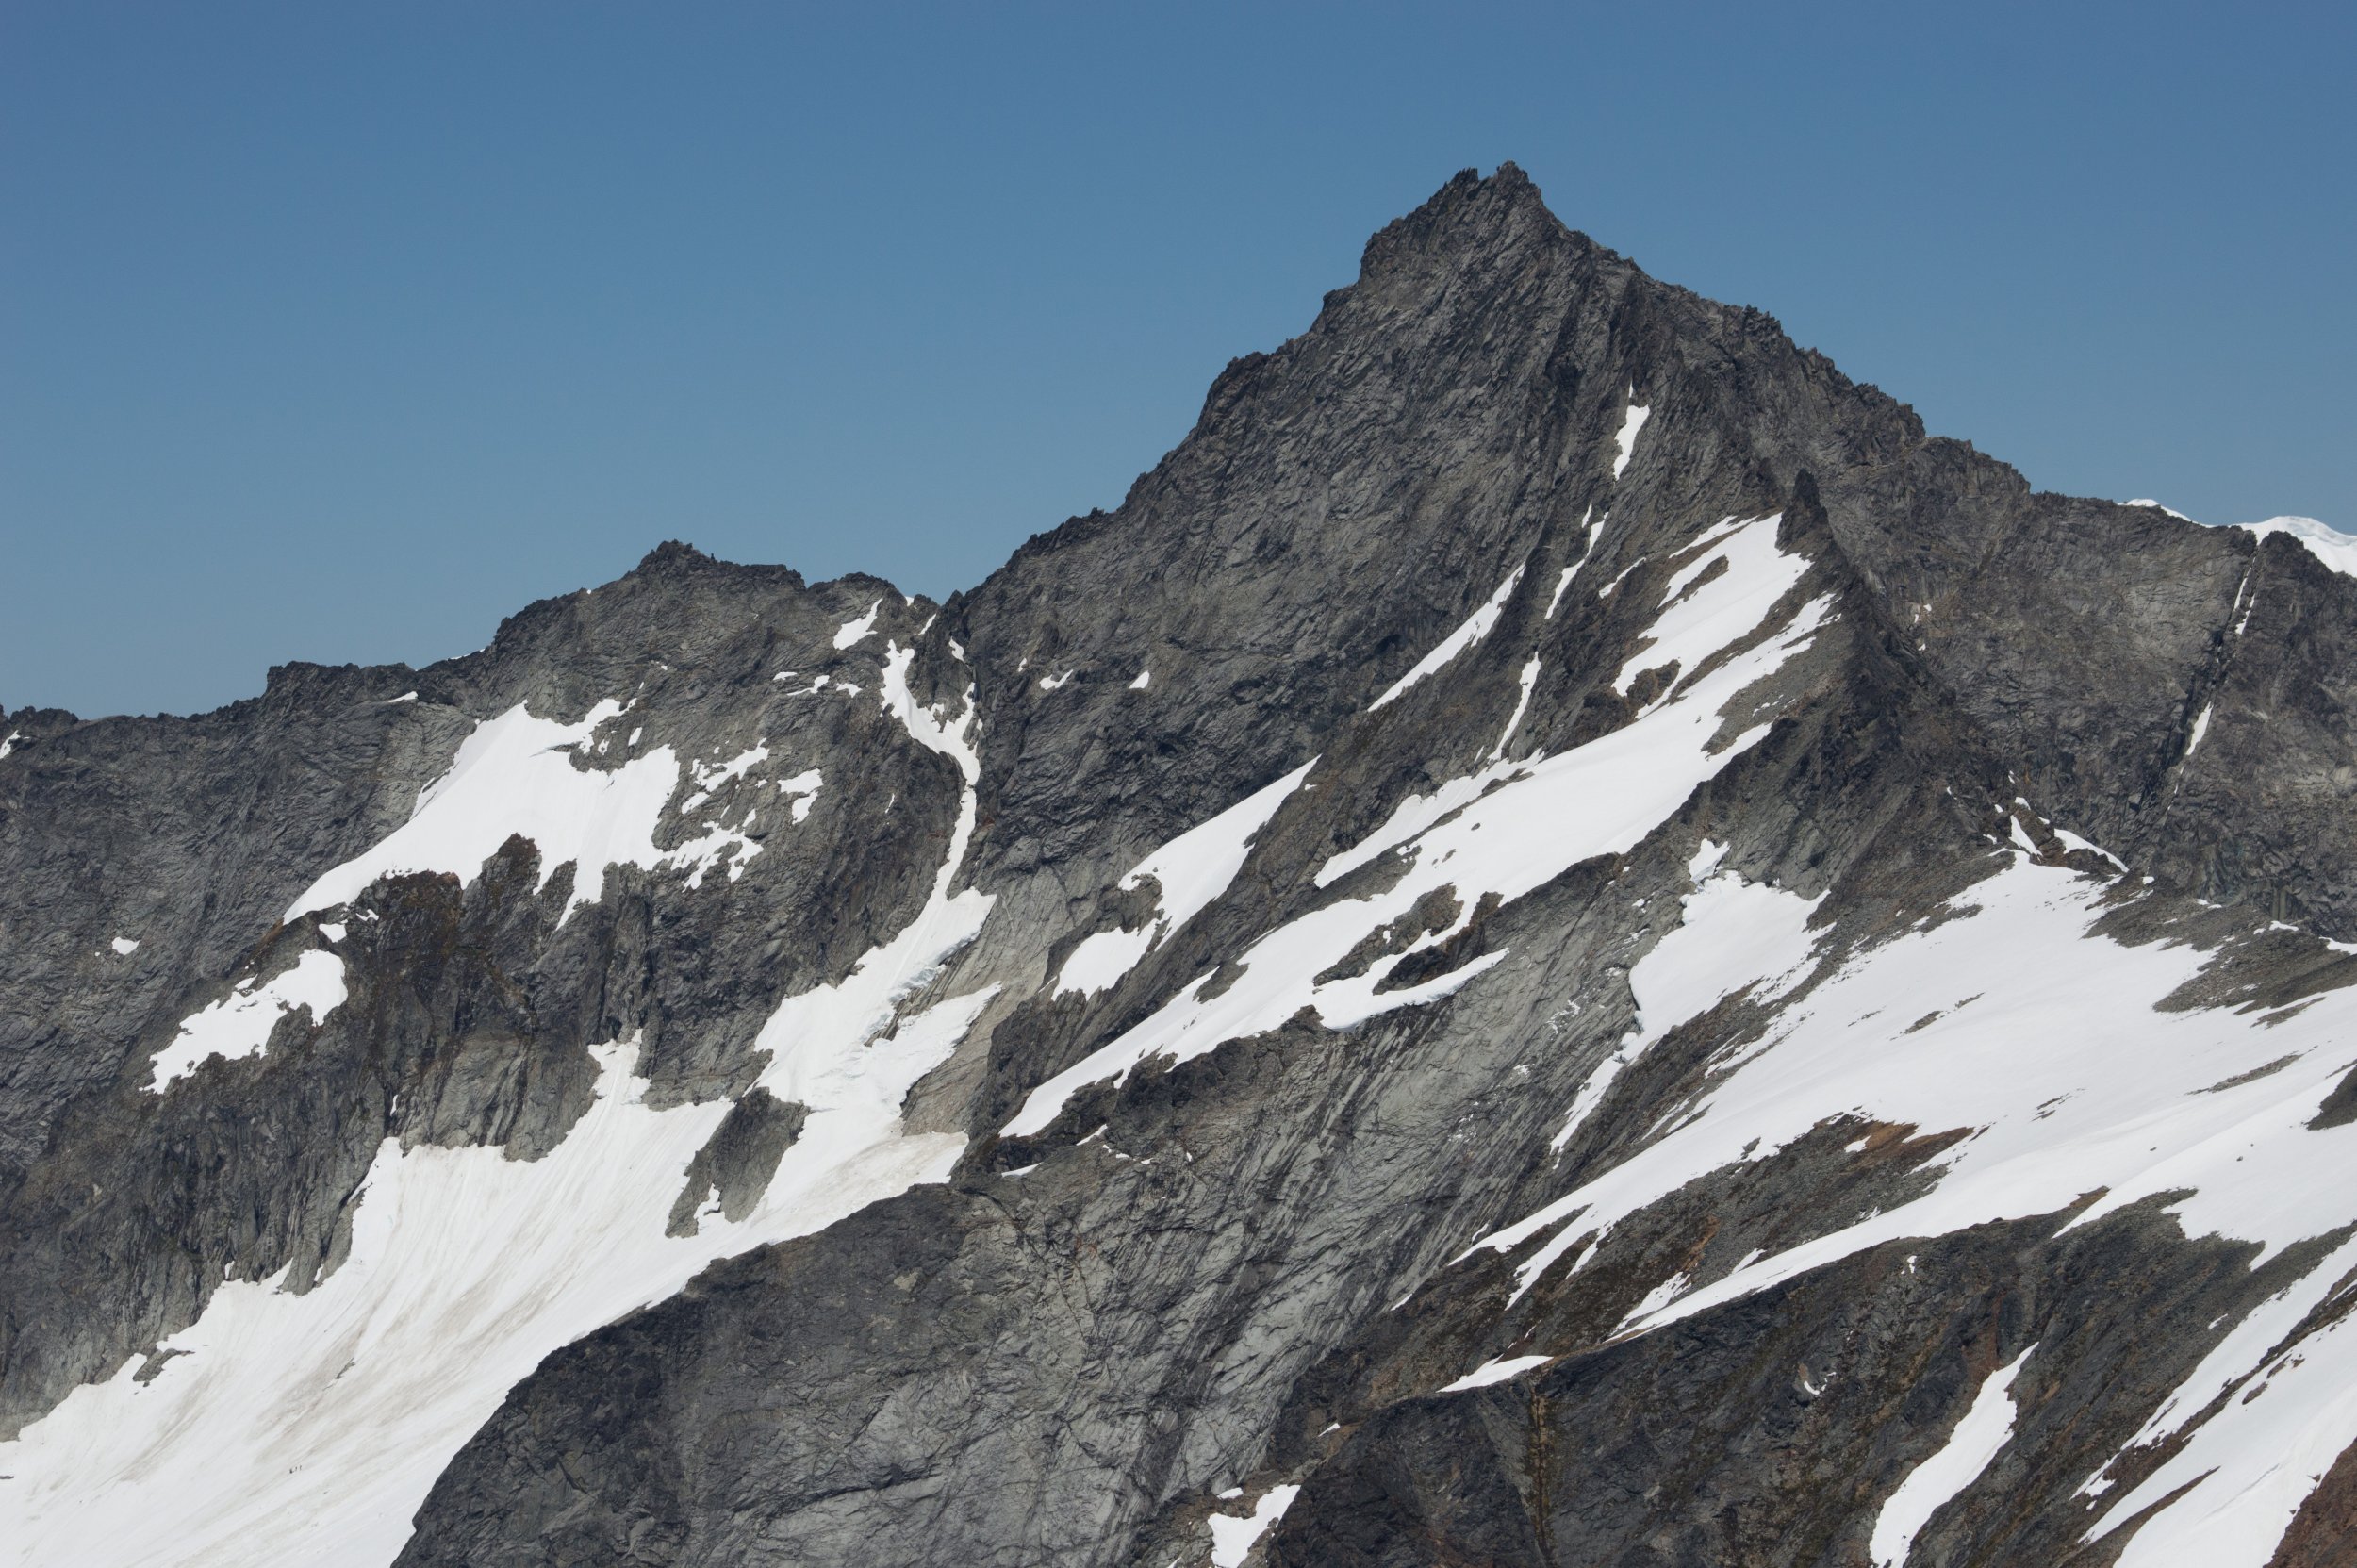
-
Trip: Colchuck Peak - North Butress Couloir Trip Date: 06/09/2019 Trip Report: The NBC is in fine shape right now, go get it! morning light on Colchuck Peak and Colchuck Lake: on the approach: looking up the couloir: there is one melted out rock band down low: enjoying the climb: on the upper face: summit city: goat-ville: Gear Notes: small rock rack; no ice screws necessary right now Approach Notes: trail is in good shape
-
Trip: Mount Adams - Adams Glacier Trip Date: 06/11/2019 Trip Report: Went for a night out to the Adams Glacier for a go at things. Just wanted to share a few notes. The road between Divide Camp TH and Killen Creek TH is nearly melted out and has one rutted snow patch passable with a decent clearance ride. There's still decent snow cover for most of the second half of the approach to High Camp. From the base of of the Adams Glacier we noticed a disconnected block above the left traverse exit out the top of the route. As the sun rose we saw light shinning through the sides and underneath the block. So we opted for climbing ice in some crevasses instead. There was a decent amount of ice fall and rockfall activity while we hung out on the glacier yesterday until about 1300hrs. If anyone heads out here over the next year for the Adams glacier any notes on the block above the left exit traverse would be appreciated. Gear Notes: Pickets, ice tools and screws, rope, harness, no snow flotation devices, suncreen, hot tub. Approach Notes: Walk trail to snow and then find your way.
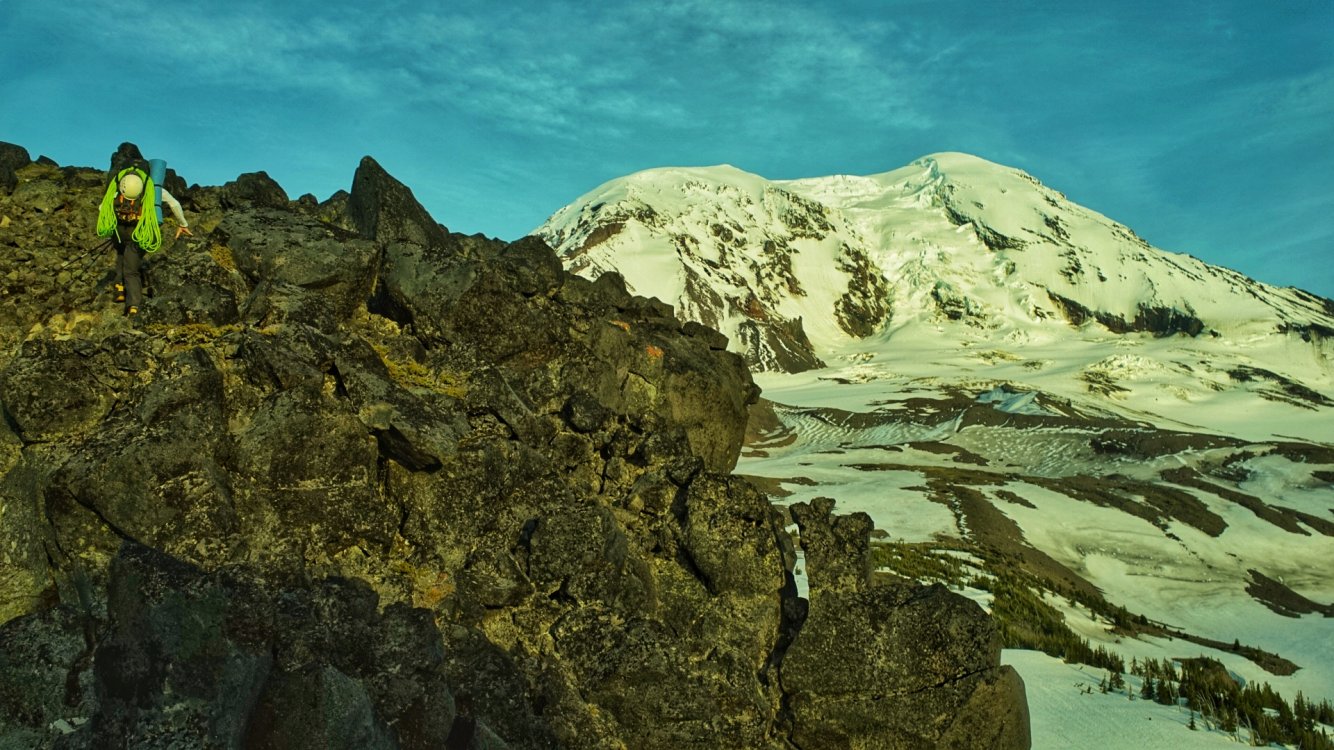
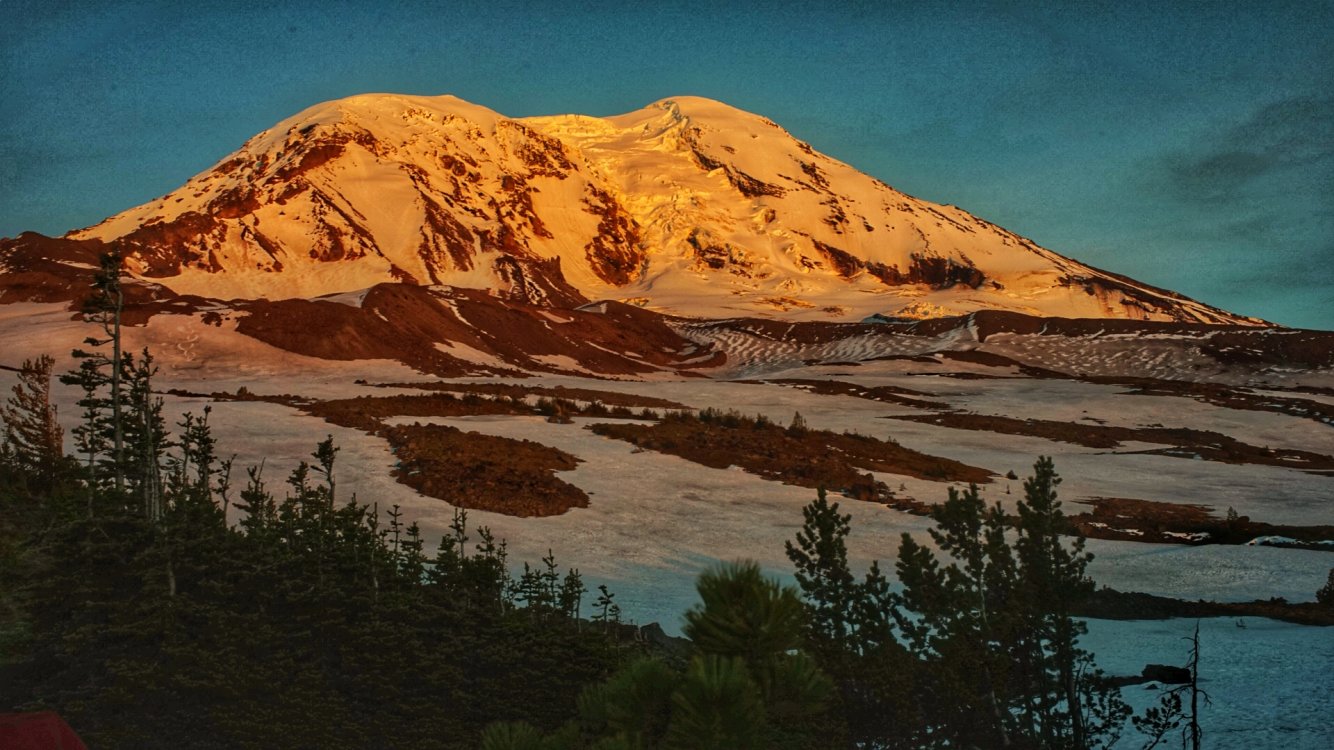

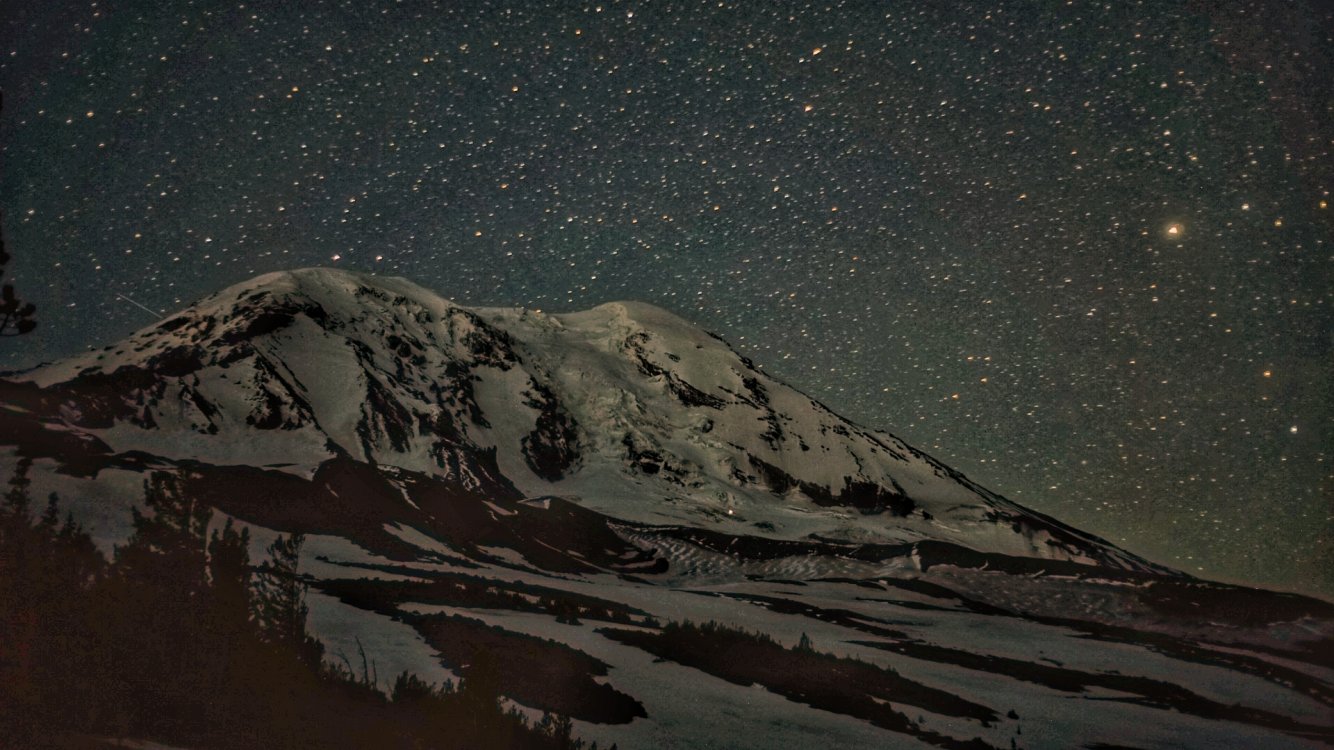
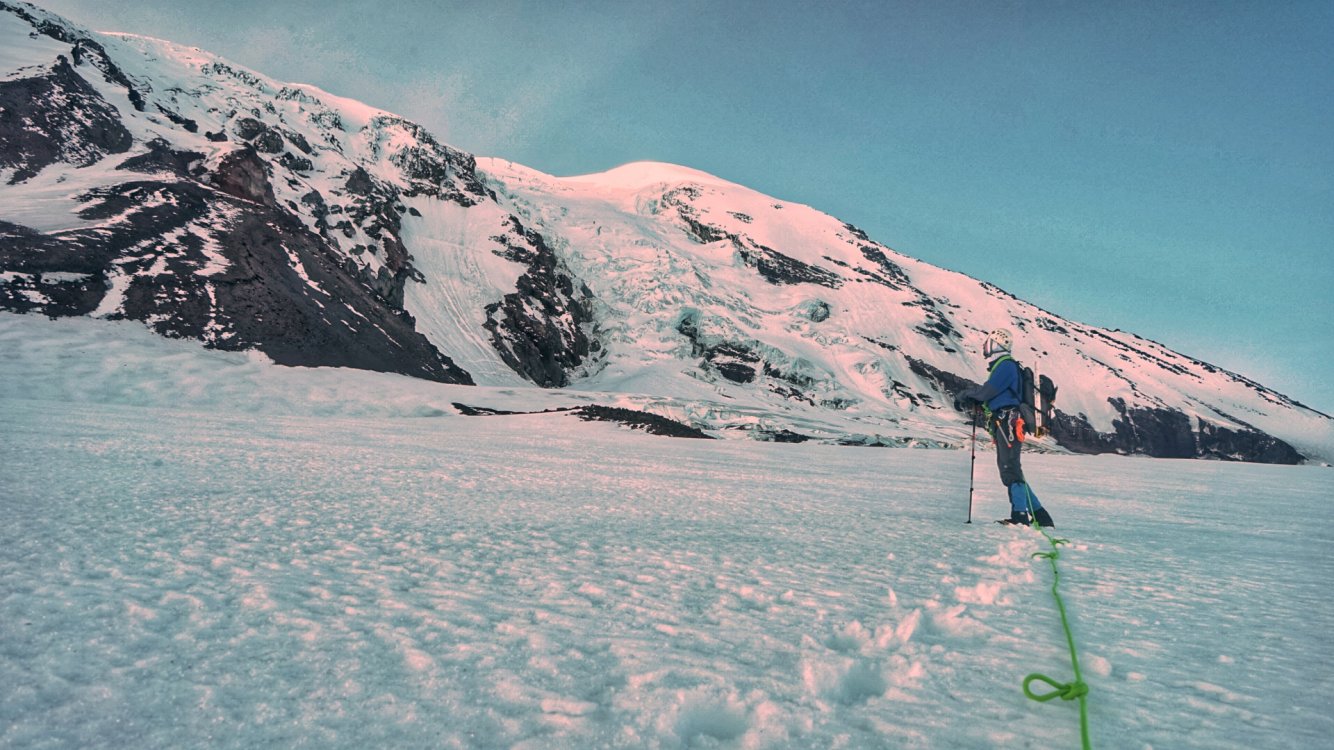

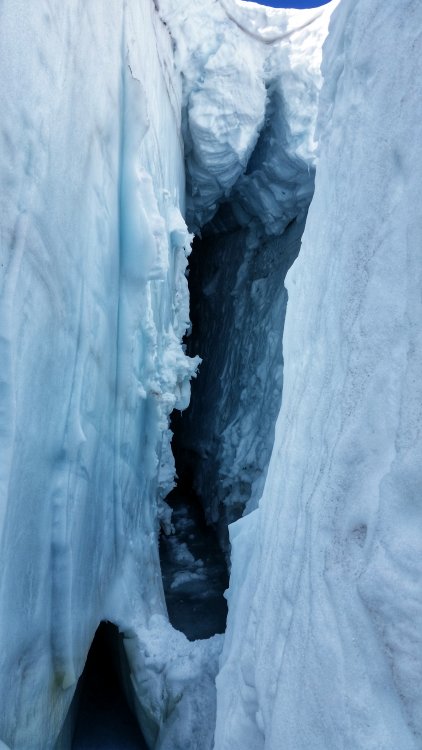
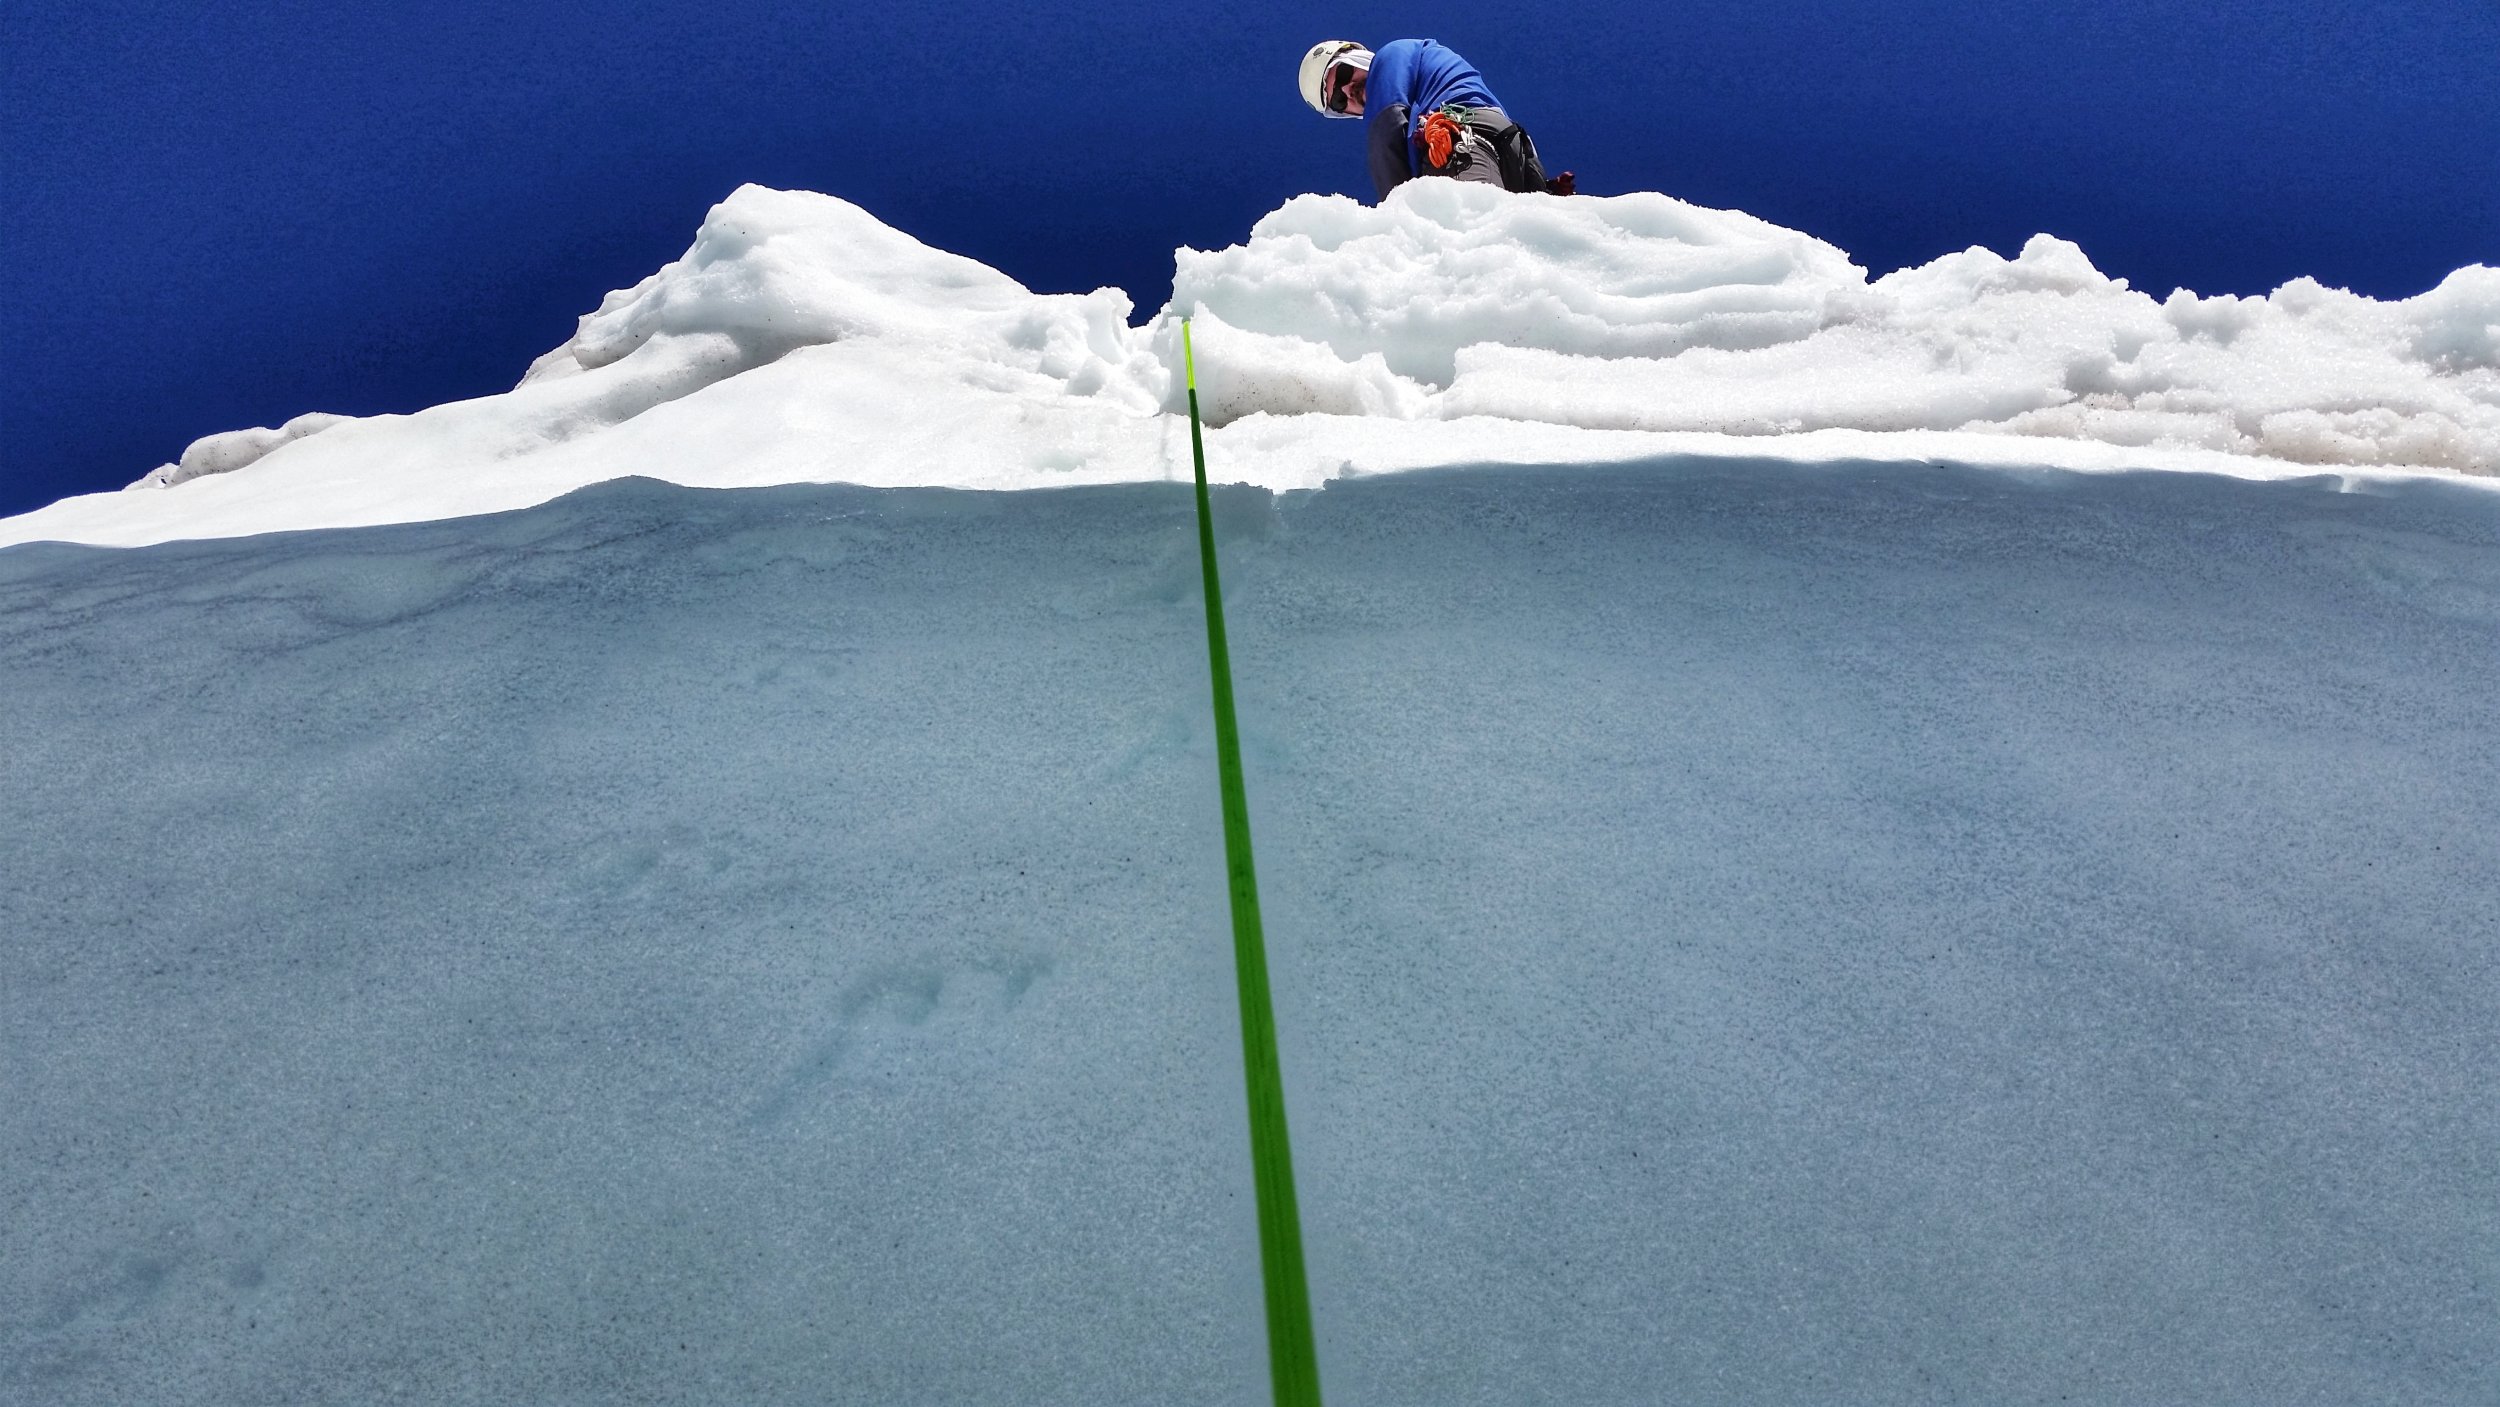
- 3 replies
-
- 2
-
-
- mount adams
- adams glacier
- (and 1 more)
-
 Trip: Mt. Adams - North Face Northwest Ridge Ski Trip Date: 06/11/2019 Trip Report: There's a good amount of beta out there already on this line, so here's a short conditions report. Left Hood River around 4:00 PM on Monday, hiking around 6:30 PM. We hit patchy snow about halfway to the camp, but decided it would be faster to keep the skis on our back and just hike it. Made a nice camp just short of the typical high camp ridge and enjoyed a nice sunset. Got a leisurely start the next AM, moving around 6:45 AM. We could almost ski to the base of the north ridge, just one or two short carries before hitting the ridge proper. Looking towards the ridge. Looking up the North Ridge with another climber ahead of us. The goats tracks went almost all the way to the top! From this vantage point, the ridge seemed really straightforward. We booted our way up for a while, and then hit a section with two option: either up a short chimney/scramble or over the ridge (we were on the left side) into a really loose chute. I headed up the chimney, which didn't go anywhere, and had to come back down and around. This didn't seem to lead anywhere: We did a bit of downclimbing and some traversing on frightening rock to get onto the N. Face proper, and followed some snow patches to get back on the N. Ridge. Once back on the ridge we slogged up for what seemed like eternity. Sloggin As the photos show, the snow was pretty wet and sloppy, and we saw some good sized naturals come down the Lava Headwall on our way up. I was pretty skeptical that our line would be in condition, but we figured there was only one way to find out. We topped out on the ridge around 1:30, and melted some snow and ate snacks, and were treated to views of Rainier, Goat Rocks, Baker, Glacier Peak, and the Enchantments (we think). Both of us commented on how much of a slog the N ridge felt. We both climb Hood pretty consistently in good time, but were amazed at how painful this route felt. From here we put skins on and headed across the ridge to get to the top of the Pinnacle, where our line started. Trevor is smiling because there's skis on his feet. Rainier in the background. Skinning across the top. That black dot in the middle is Trevor. We skinned to the top of the Pinnacle and dropped into our line around 2:30. The snow was excellent. Slightly grabby up top, perfect corn for the majority, and a little wet on the bottom. The line is truly amazing, with thousands of feet of fall line skiing that only gets steeper and steeper the farther you go. Trevor cruising on the upper section: Getting steeper: The choke is pretty wide, and had the best snow of the day. It took a little scouting and traversing to piece together the exit onto the Adams glacier, but it was cool skiing next to the seracs and crevasses. The Line: Overall, amazing ski line. I don't know why you would choose to climb the N. Ridge unless you're going down another way. If I were to do it over again, I'd probably find a different way up. Gear Notes: Axe, Crampons, Skis (why would you walk down a volcano?) Approach Notes: Beautiful hike through the forest.
.thumb.jpg.c4821b4d96db9c195ba7954d6508681a.jpg)
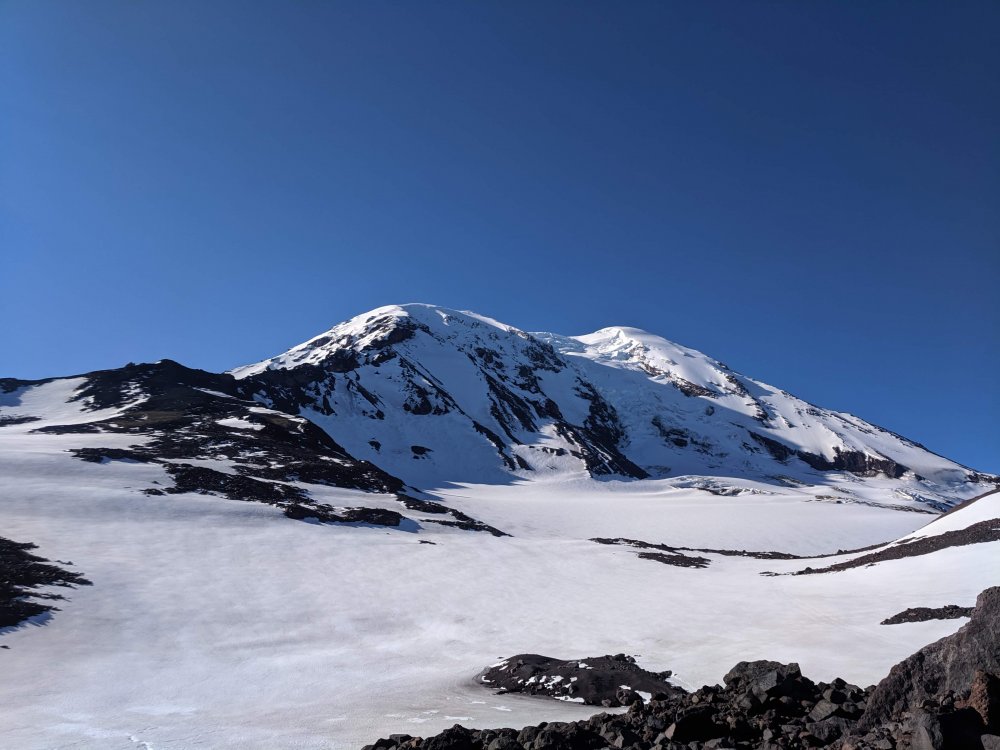
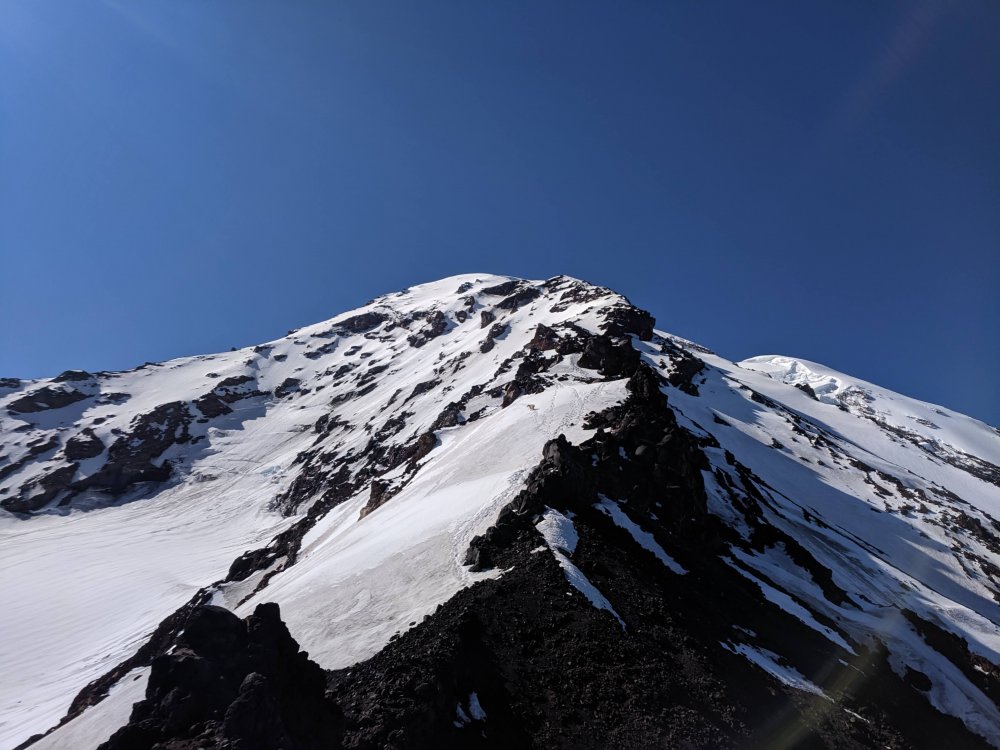


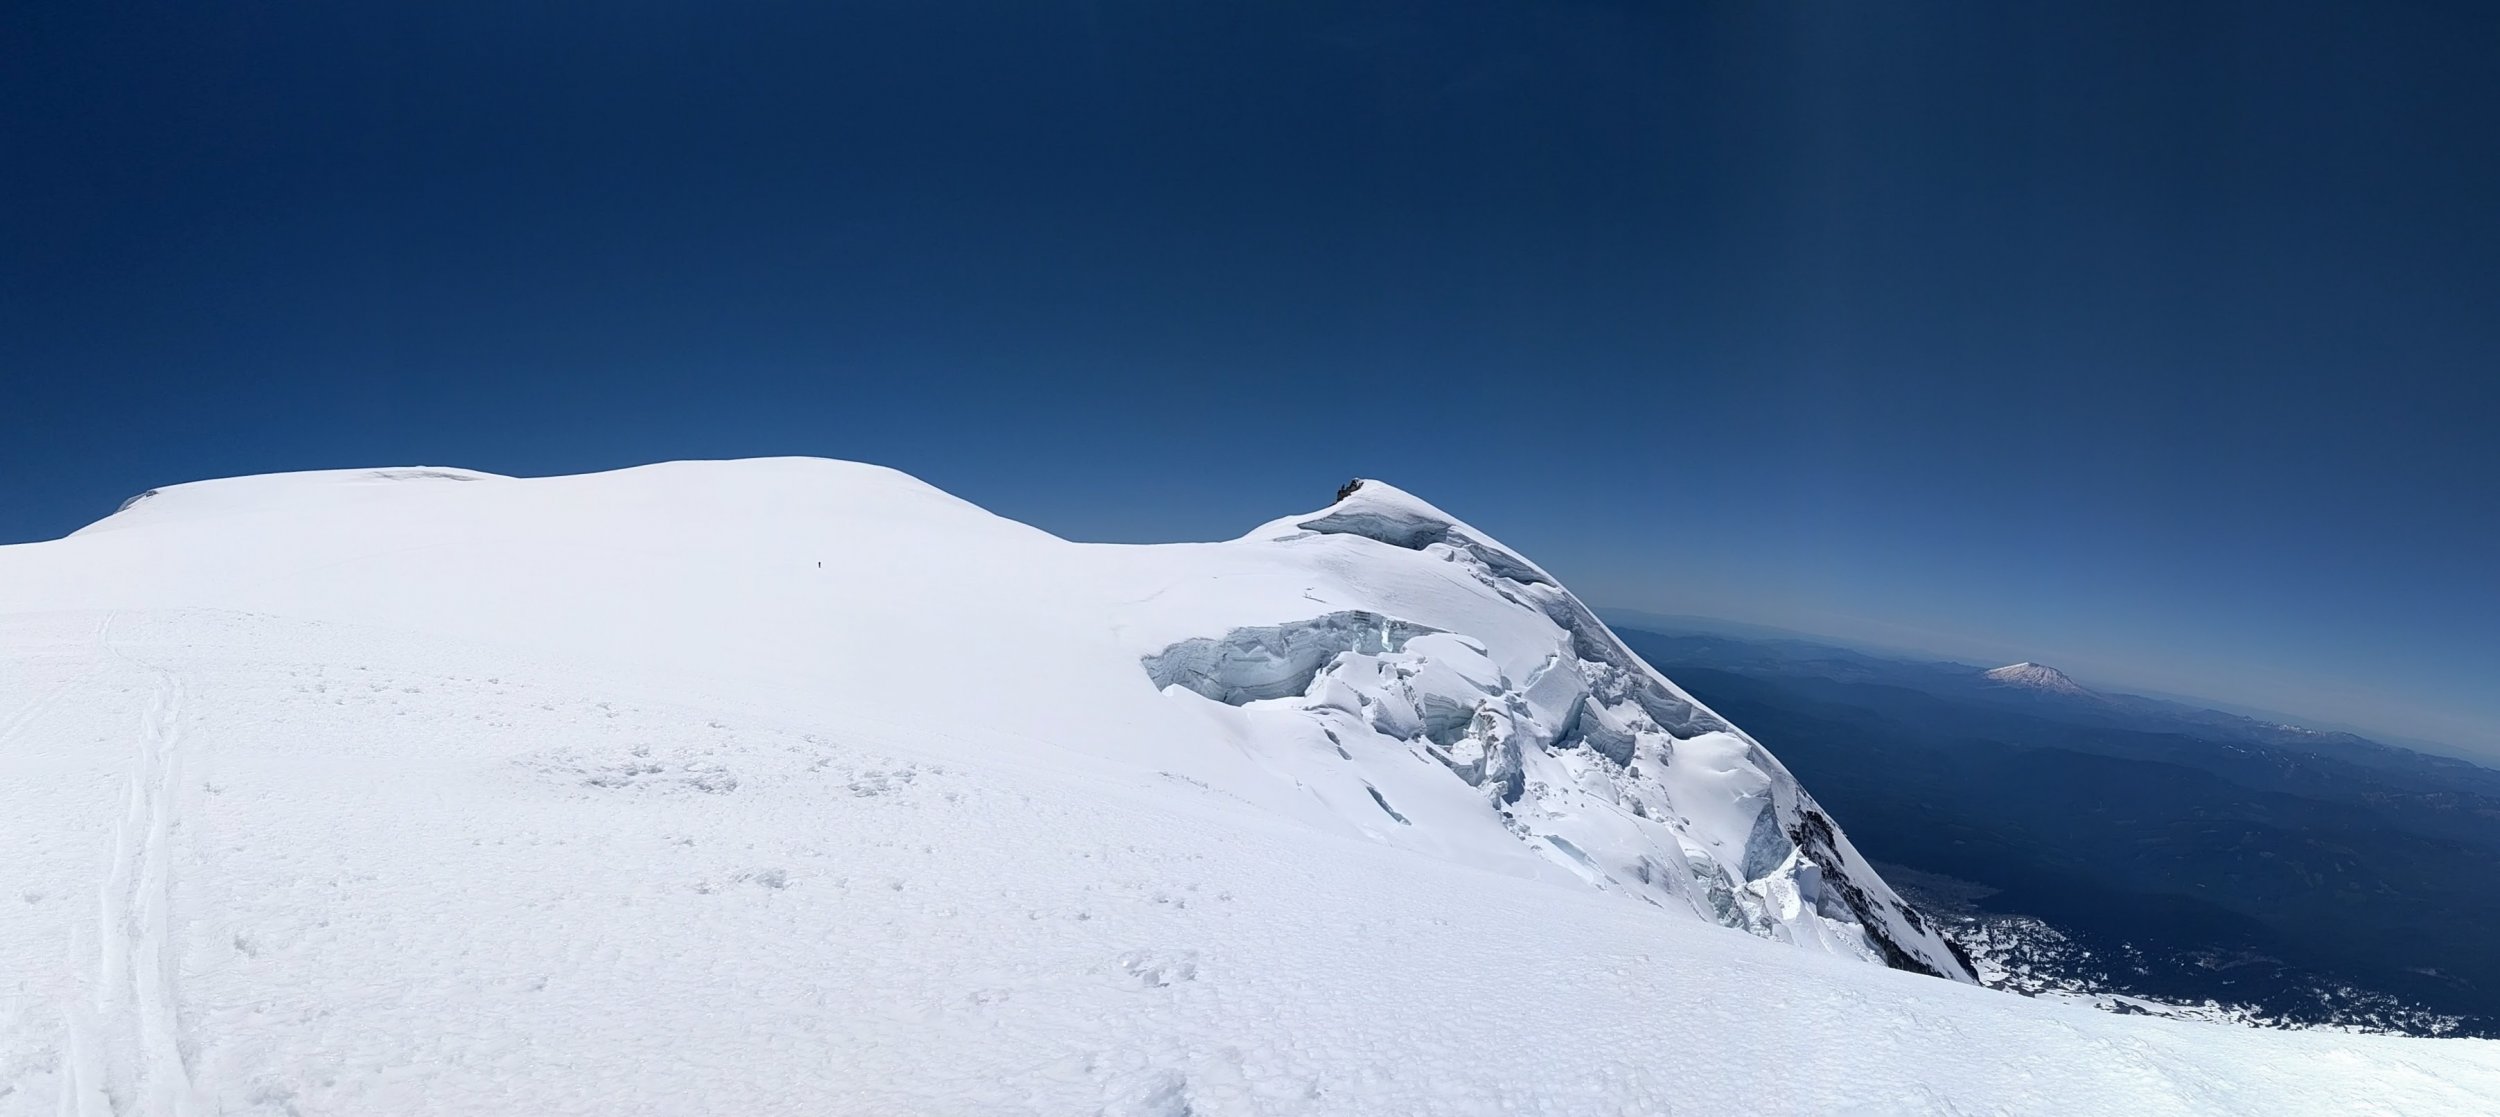
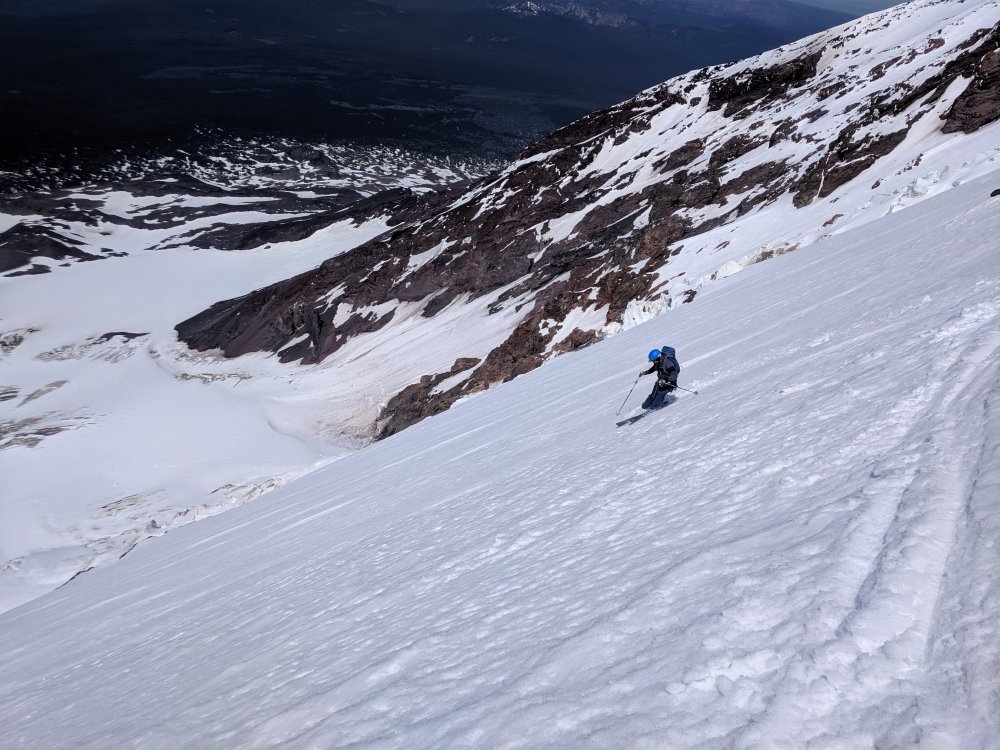

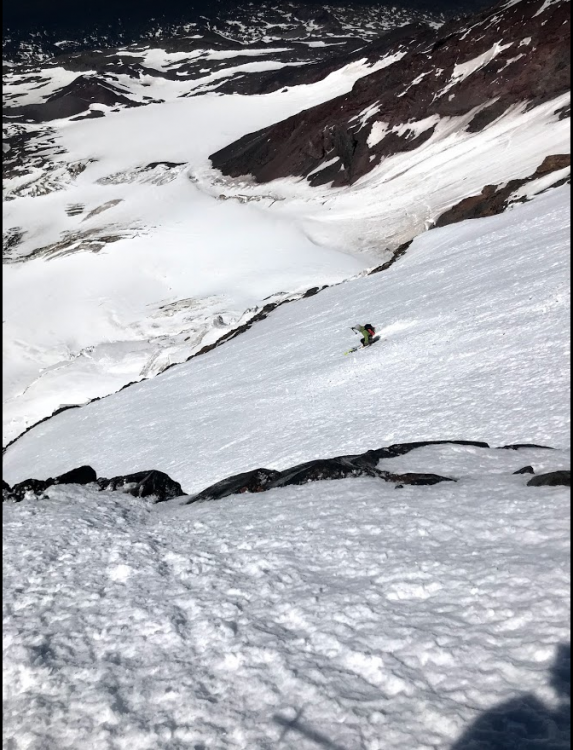

-
Trip: Diamond Peak - Corrigan Lk Trailhead Trip Date: 05/31/2019 Trip Report: Diamond Peak Directions Oakridge, to hills creek dam, road 21, to road 2149 and Corrigan Lake trailhead. There's only one small hiking sign on the right side (East Side) of the road. We left Eugene at 4am, and arrived at the trailhead at 6am and got on the trail at 615. The was snow within a .5 mile of the trailhead. One of our party had previously summited from this side so she became the group leader. After following the trail for a mile the snow covered it. Basically she headed uphill on the first hilly ridge we found. After an hour and half we started getting good looks at the western false summit, and our leader took a bearing to stay on course. When broke through the trees we opted to head up the ridge thad runs southwest off the false summit. The snow was still pretty thick but we decided to climb the rocks ona few of the gendarme? instead of the steep snowy slopes which were surprisingly firm. The forecast had thunder storms in the early afternoon, and looking south to Thielsen they were building in that area quite thick. (We camped at Diamond Lake that night and had an amazing lightning show. Check out my "Mt. Thielsen double rainbow lightning strike!!" on YouTube if you wanna see pictures. ) We kept moving up, and slightly to the right of the western false summit. That put us in great position to transition to the final section up the summit ridge without gaining unnecessary elevation. The snow was in great shape for climbing, despite strong wind gusts that were making us walk like drunken sailors. The summit was glorious. A few quick pics and we retreated to a small rocky area out of the wind. After some food, the fun began. Using some butt sleds and Avi shovels we dropped elevation super fast to the saddle of the false summit. The second drop was even faster, and longer. We were all giggling like little kids, and covered in slushy beautiful snow. We had taken a compass bearing to Corrigan lake before we glissaded, and followed that to the lake. Some of us swam, others napped, and then picked up the trail and hiked the one mile back to the car. Total Mileage: 8.4 Time on route: 7 hours 43 minutes Elevation gain: 4025 I included a picture of the south ridge for those interested in doing that route. The top still has a lot of snow for those wishing for the type of ascent. Here's a link the a video I made of our ascent of Mt. Thielsen the following day. Double Rainbow, multiple lightning strikes!!! Gear Notes: Butt sleds for the way down. Approach Notes: Bring a compass, because it's so helpful for navigating through the snow, off trail, and through the trees.


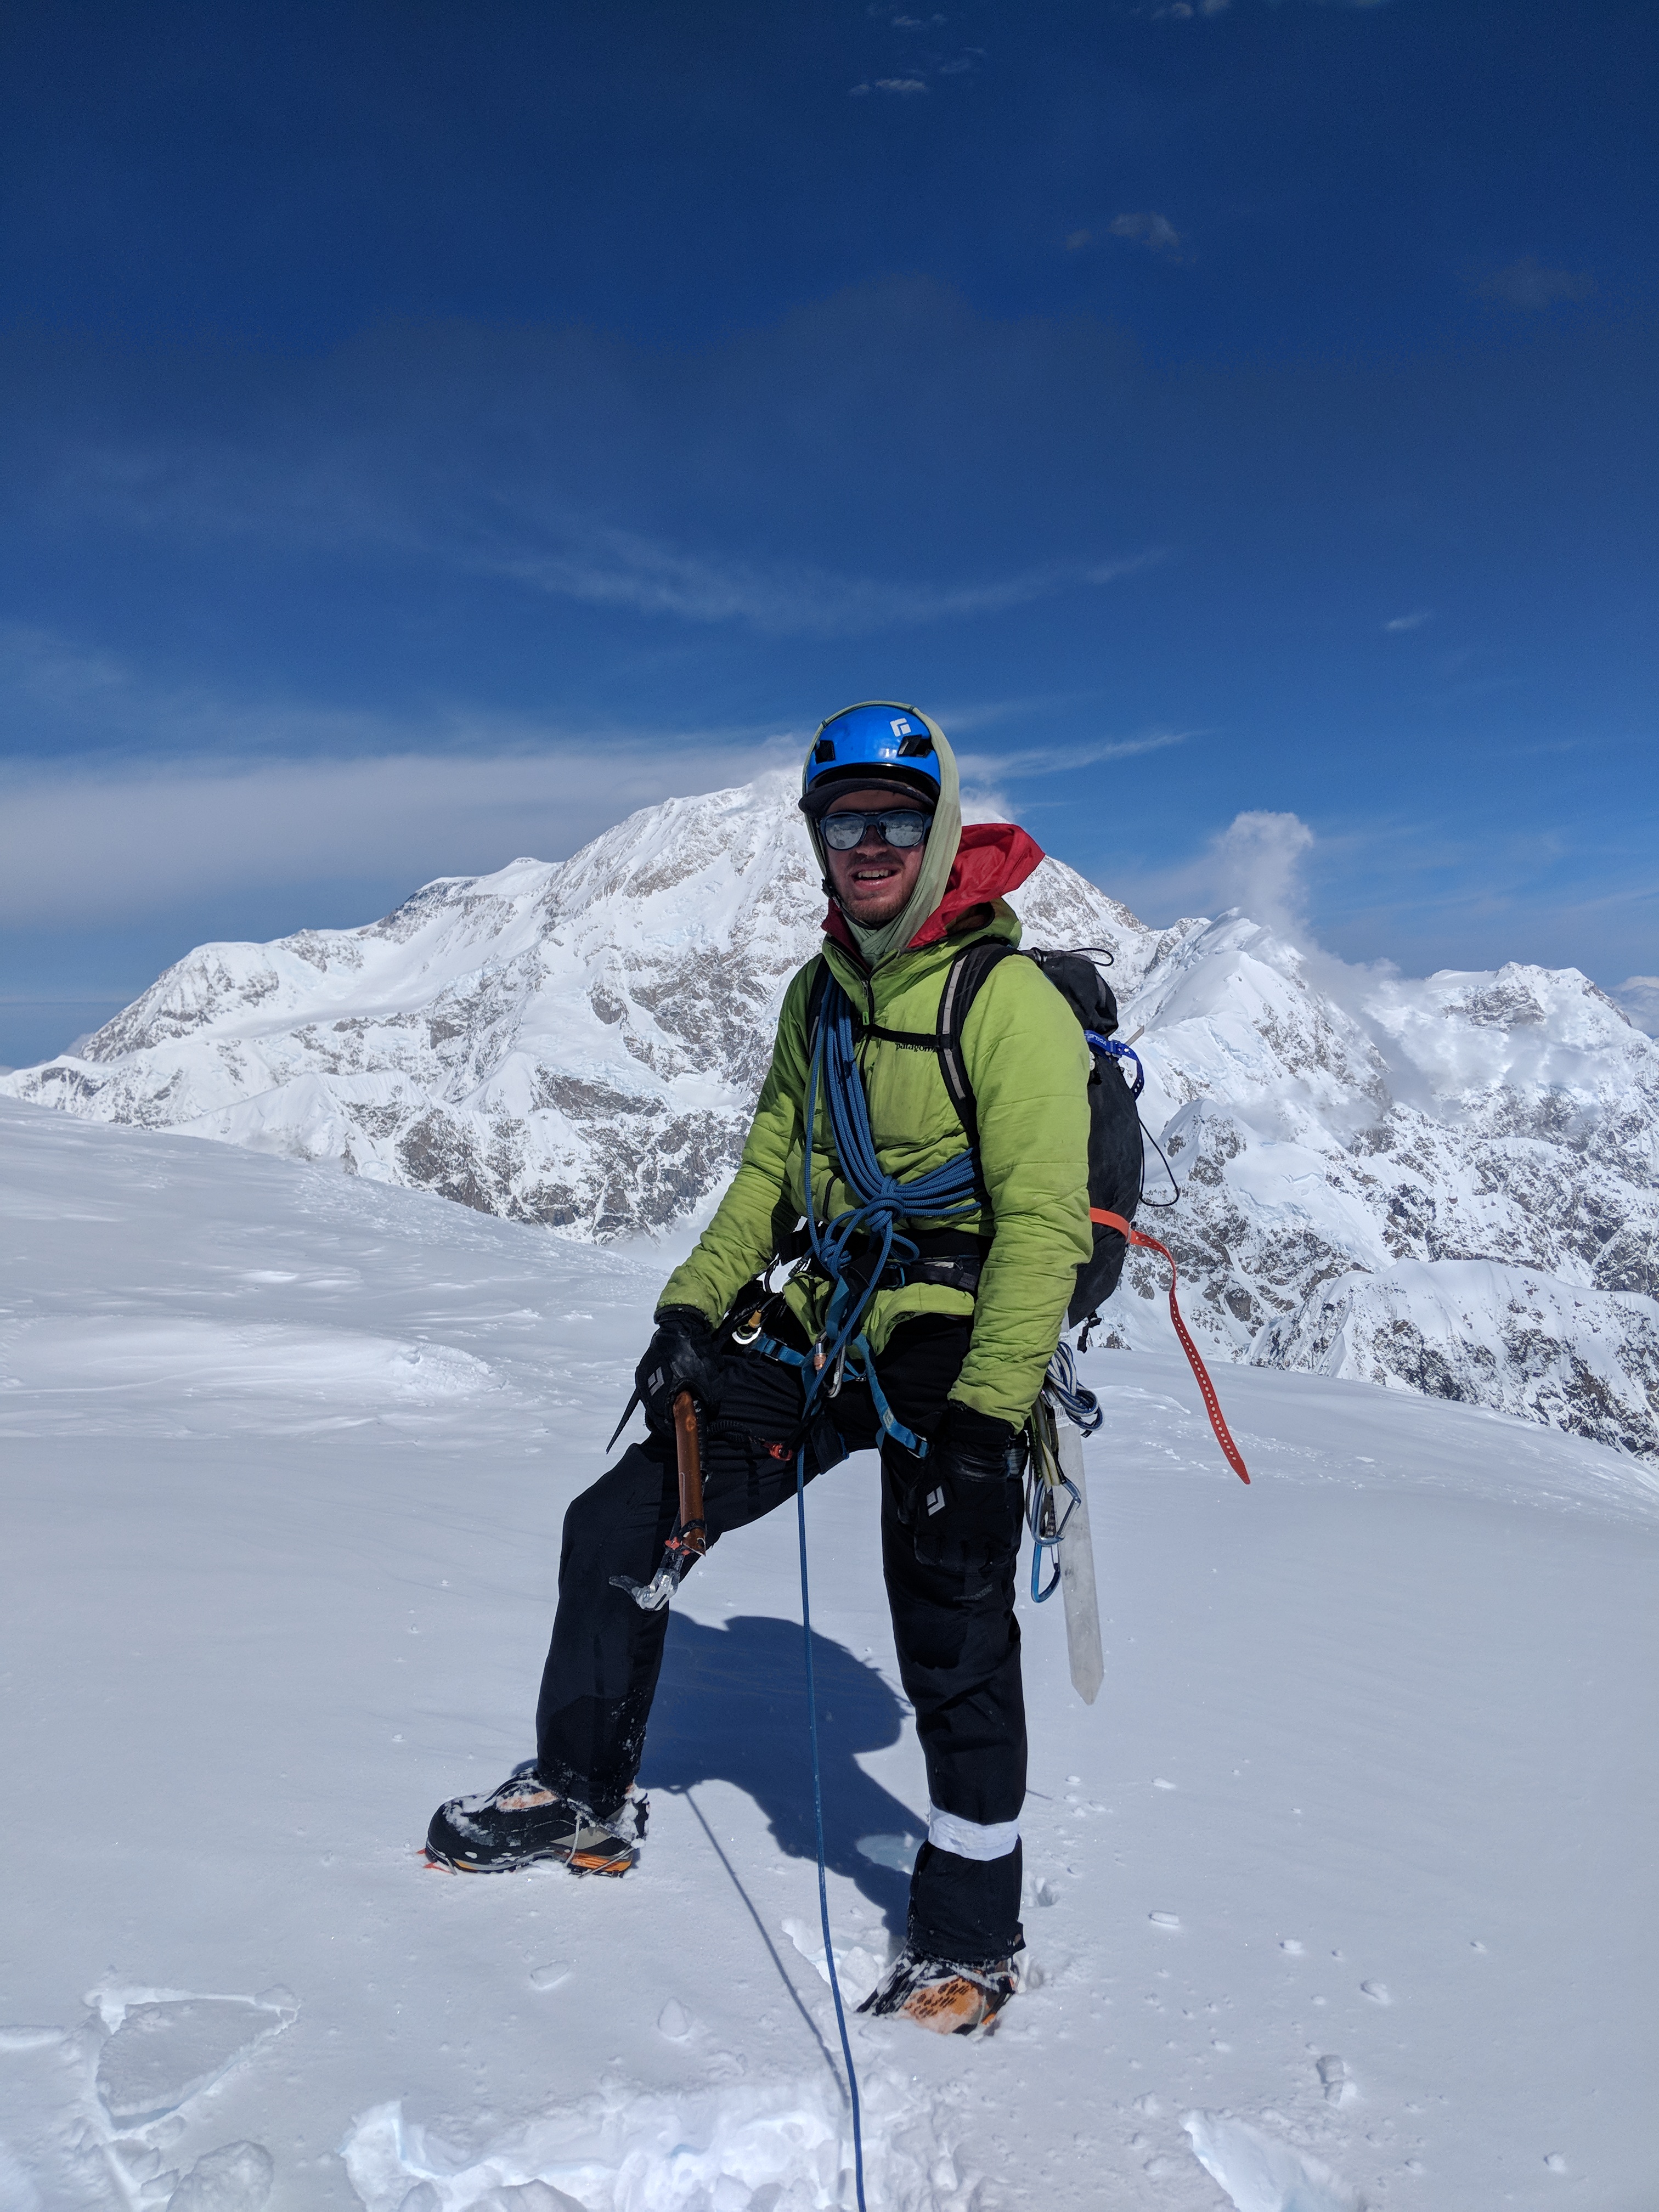
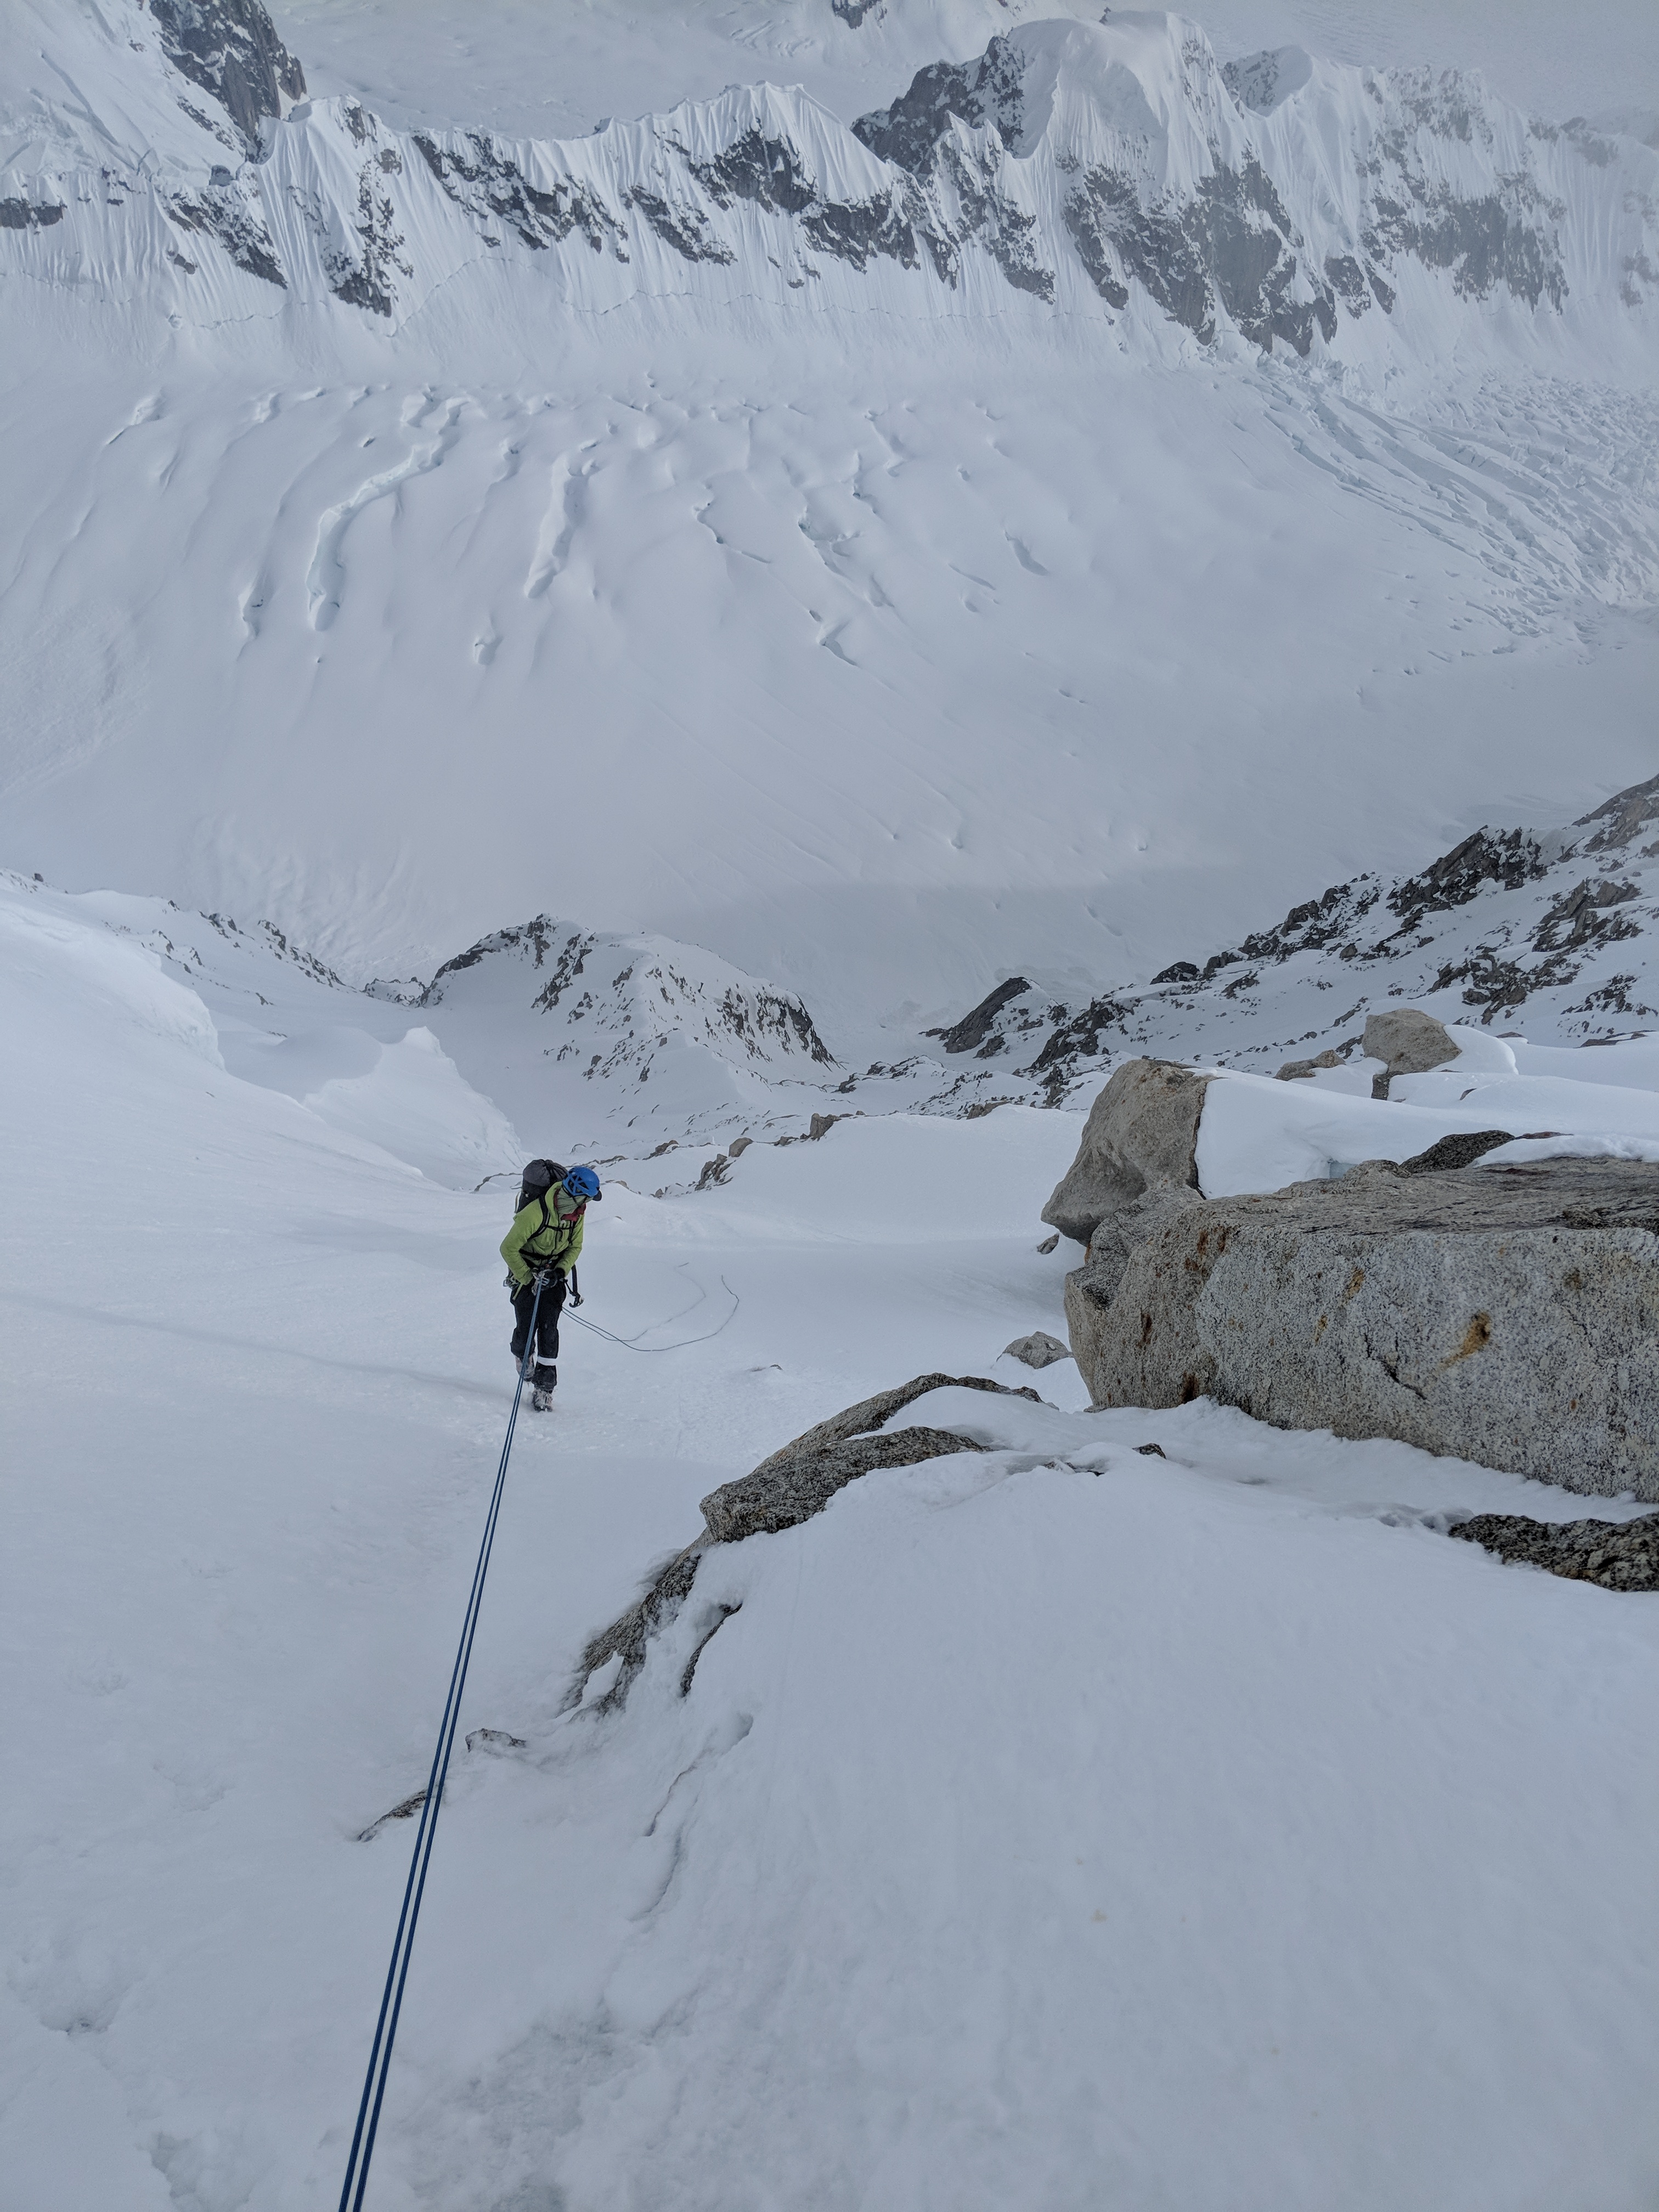


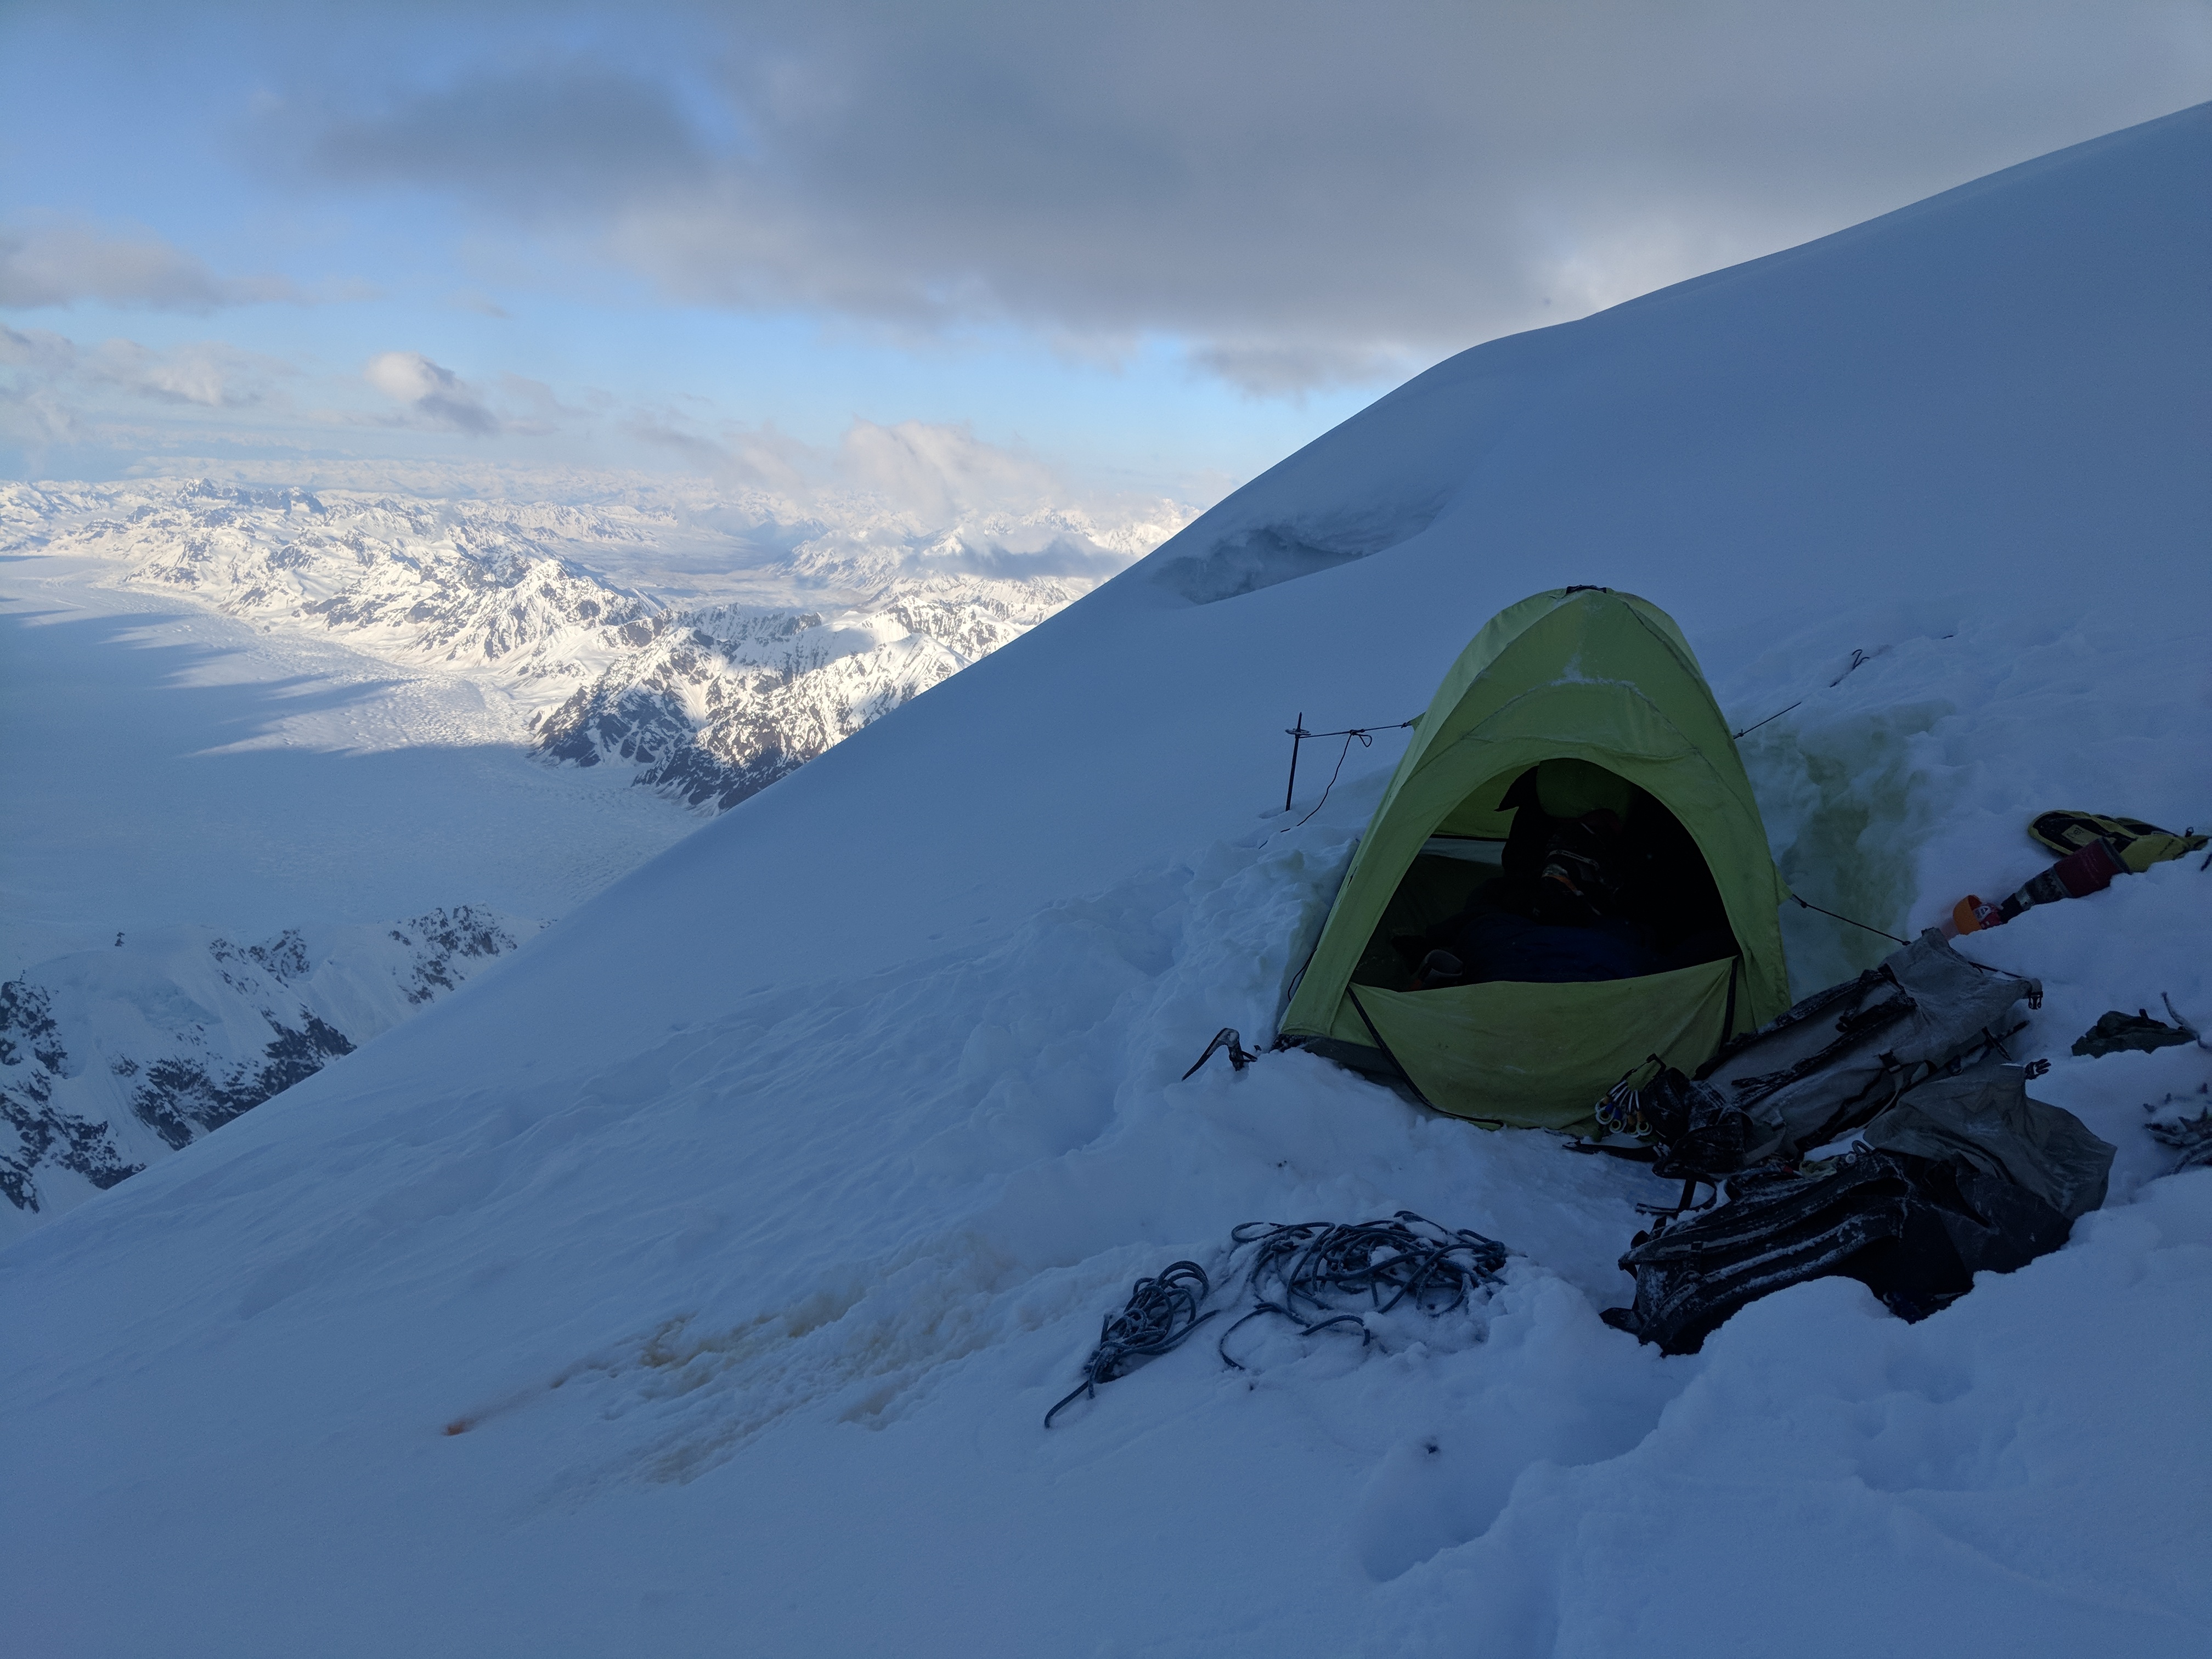
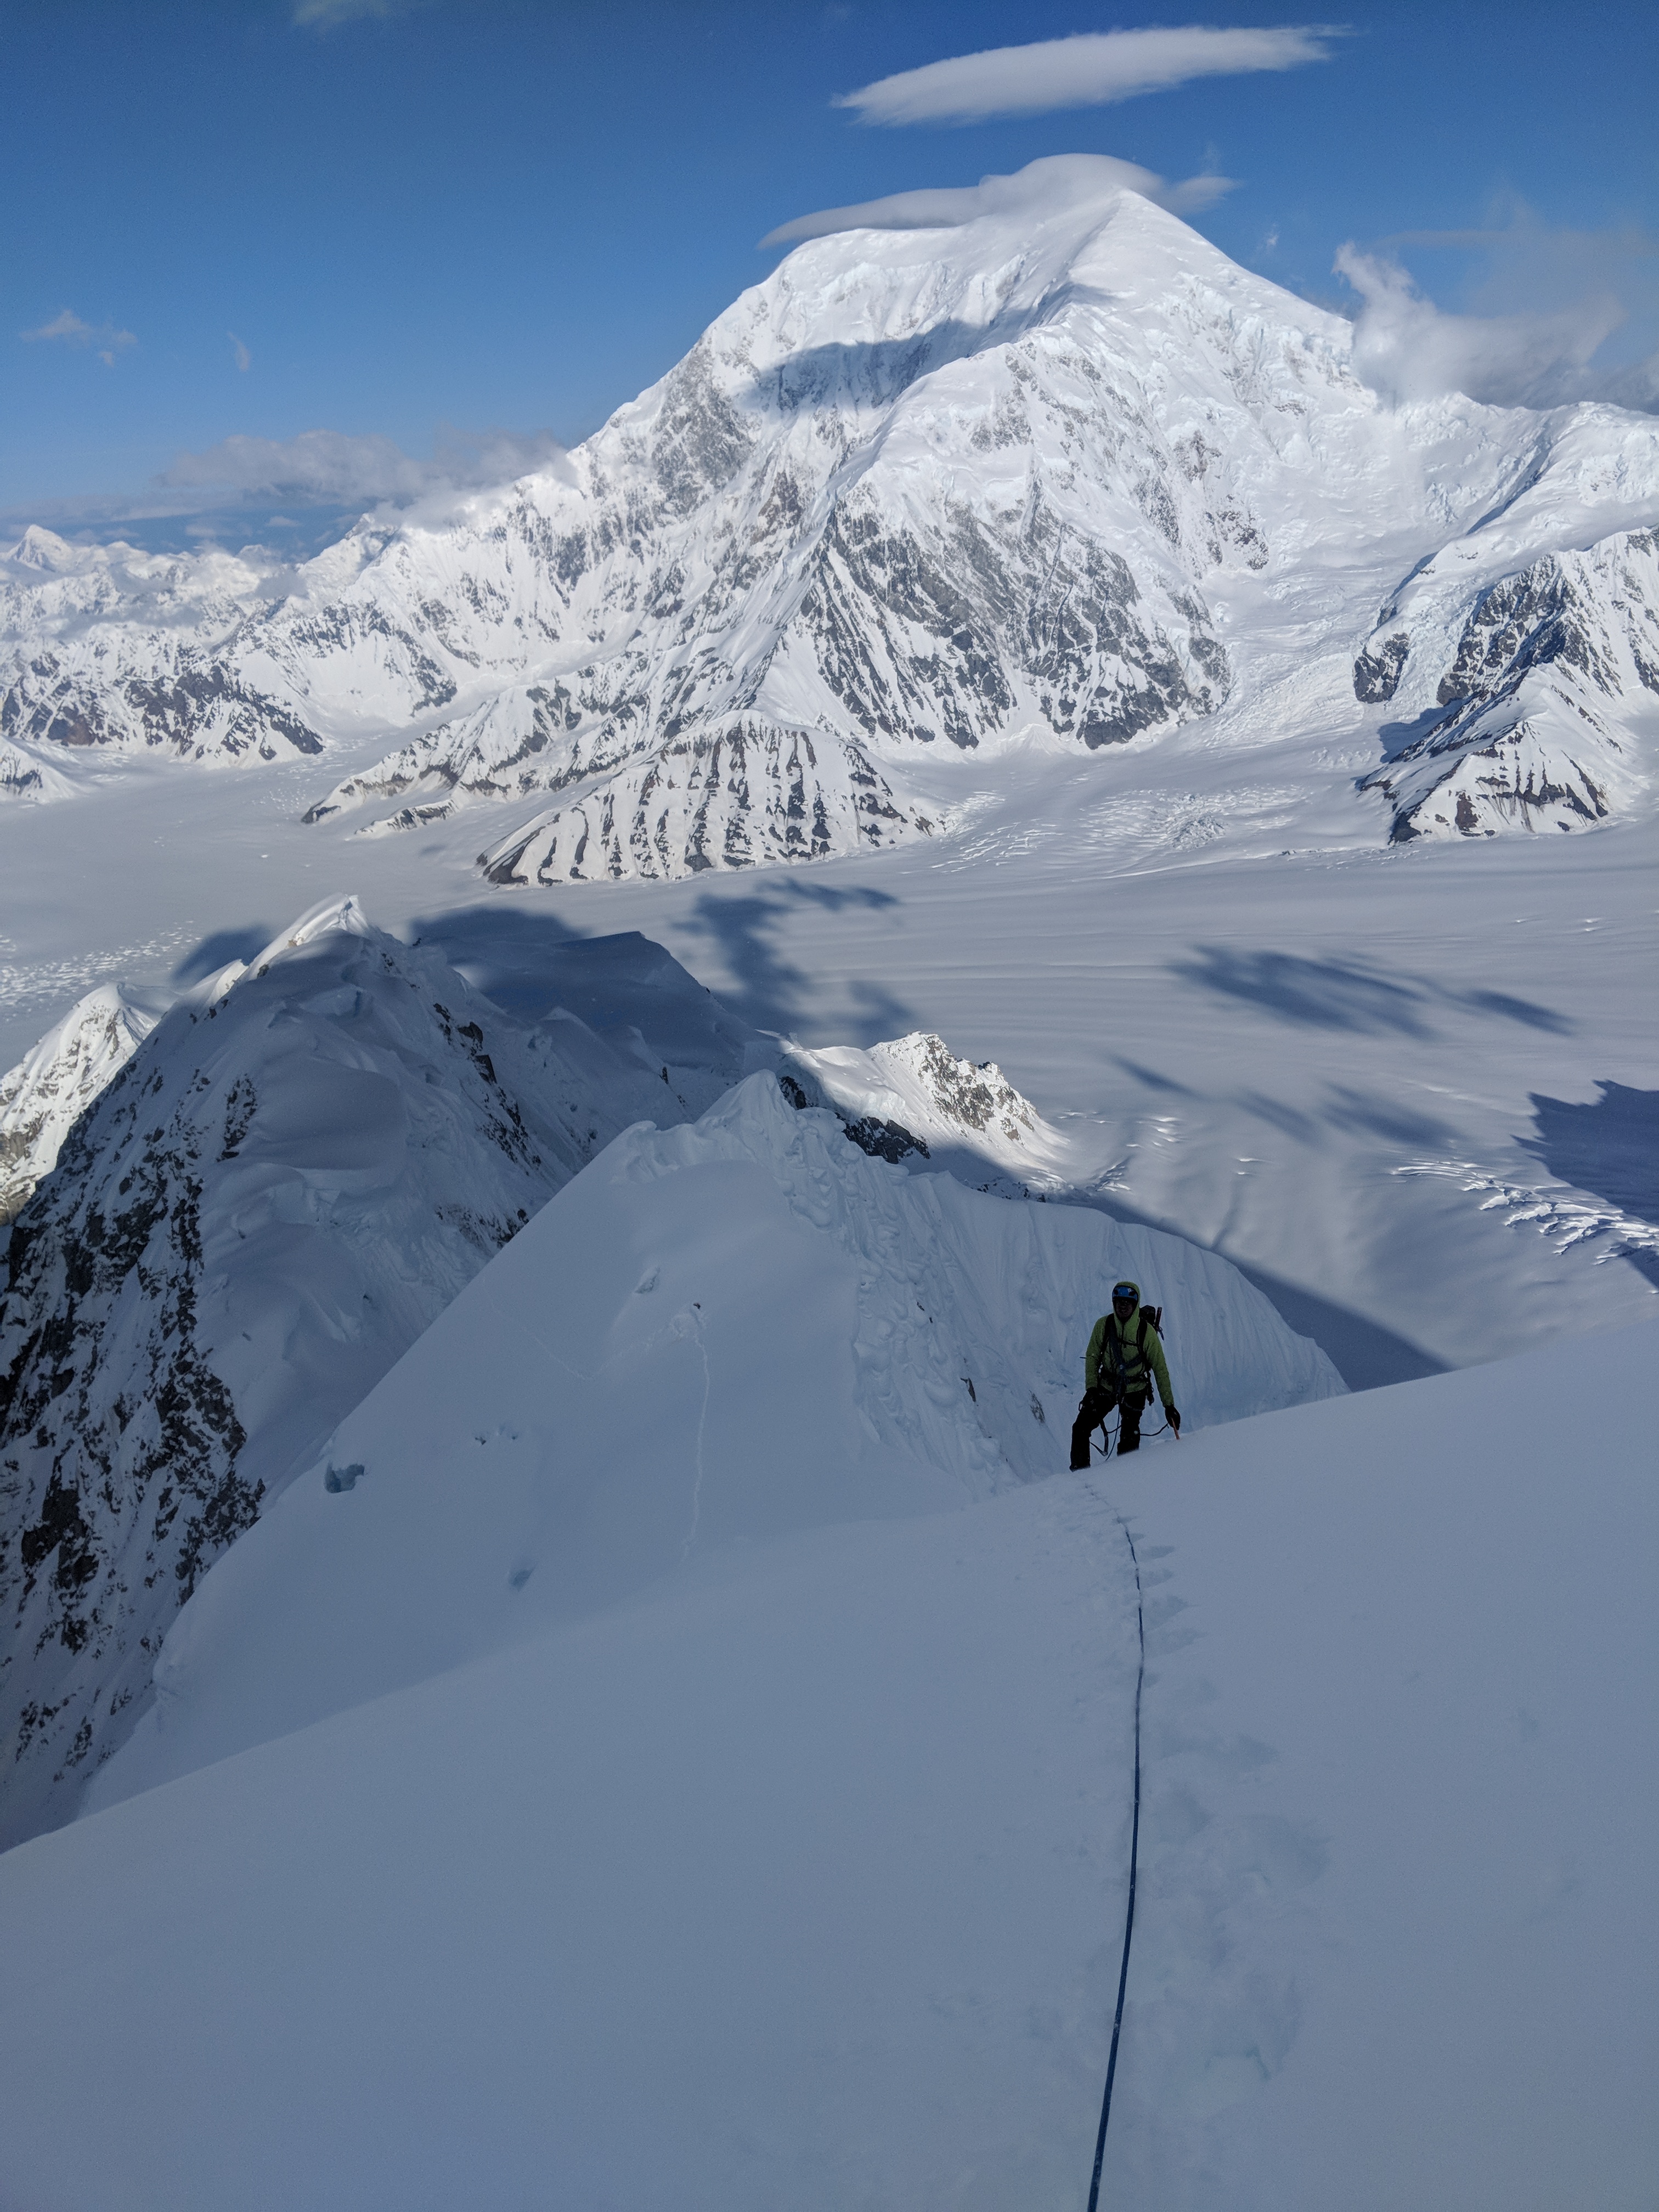


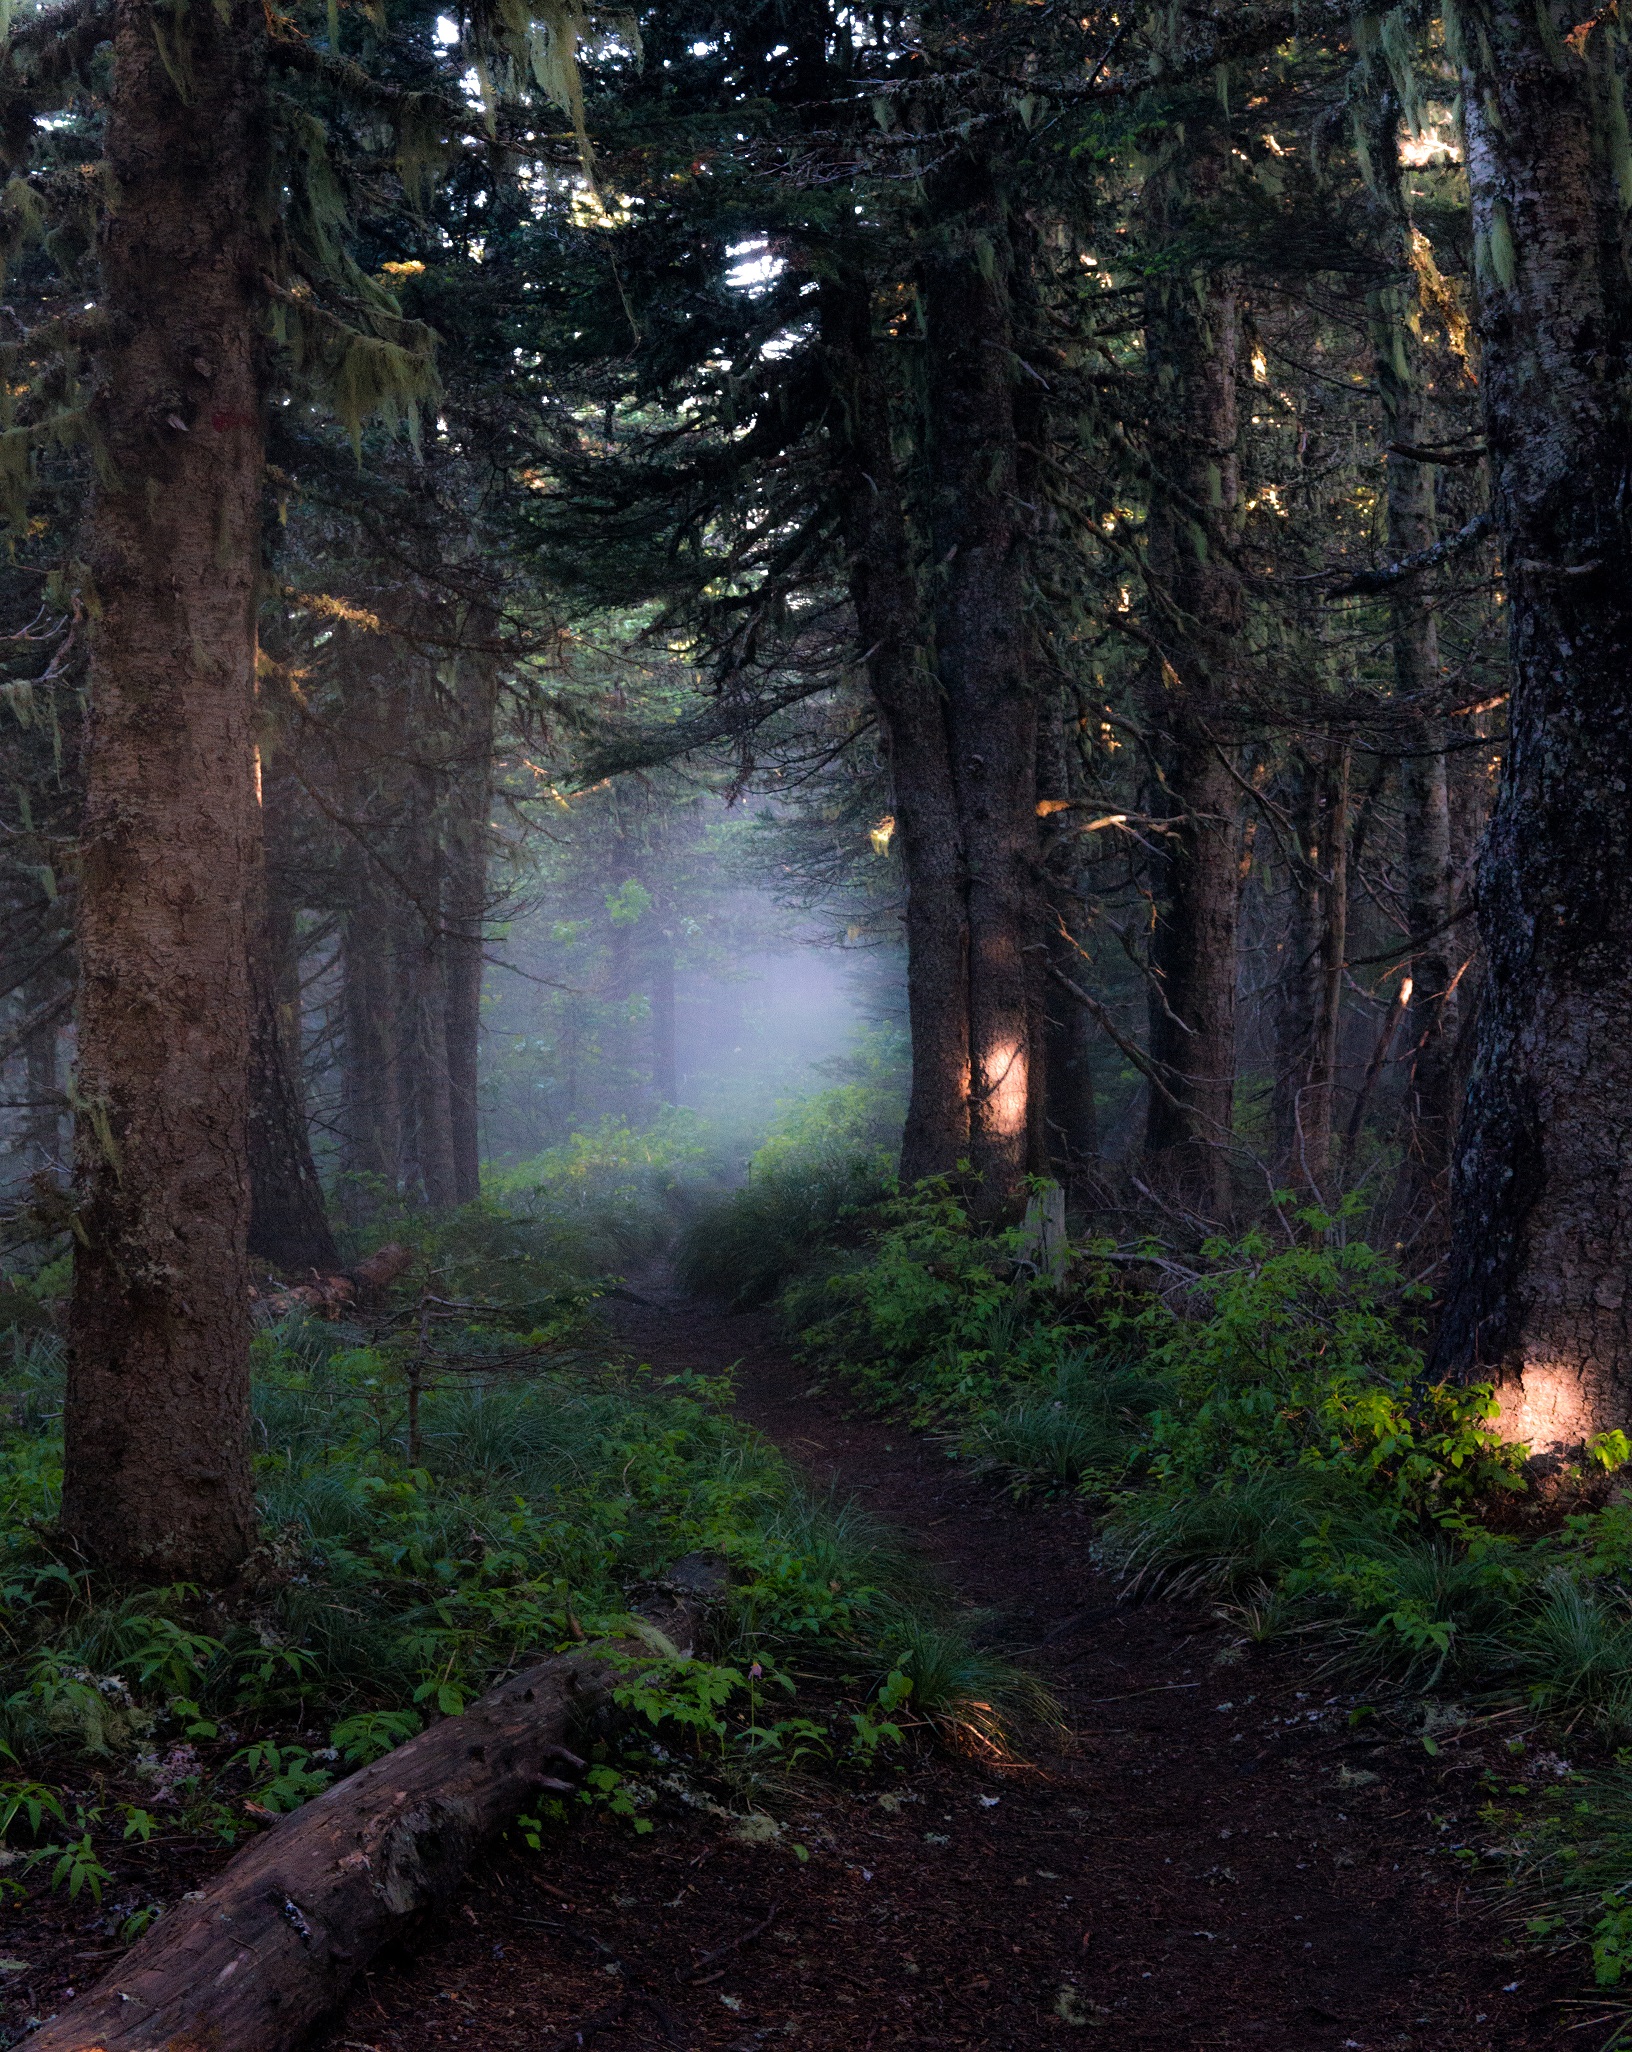
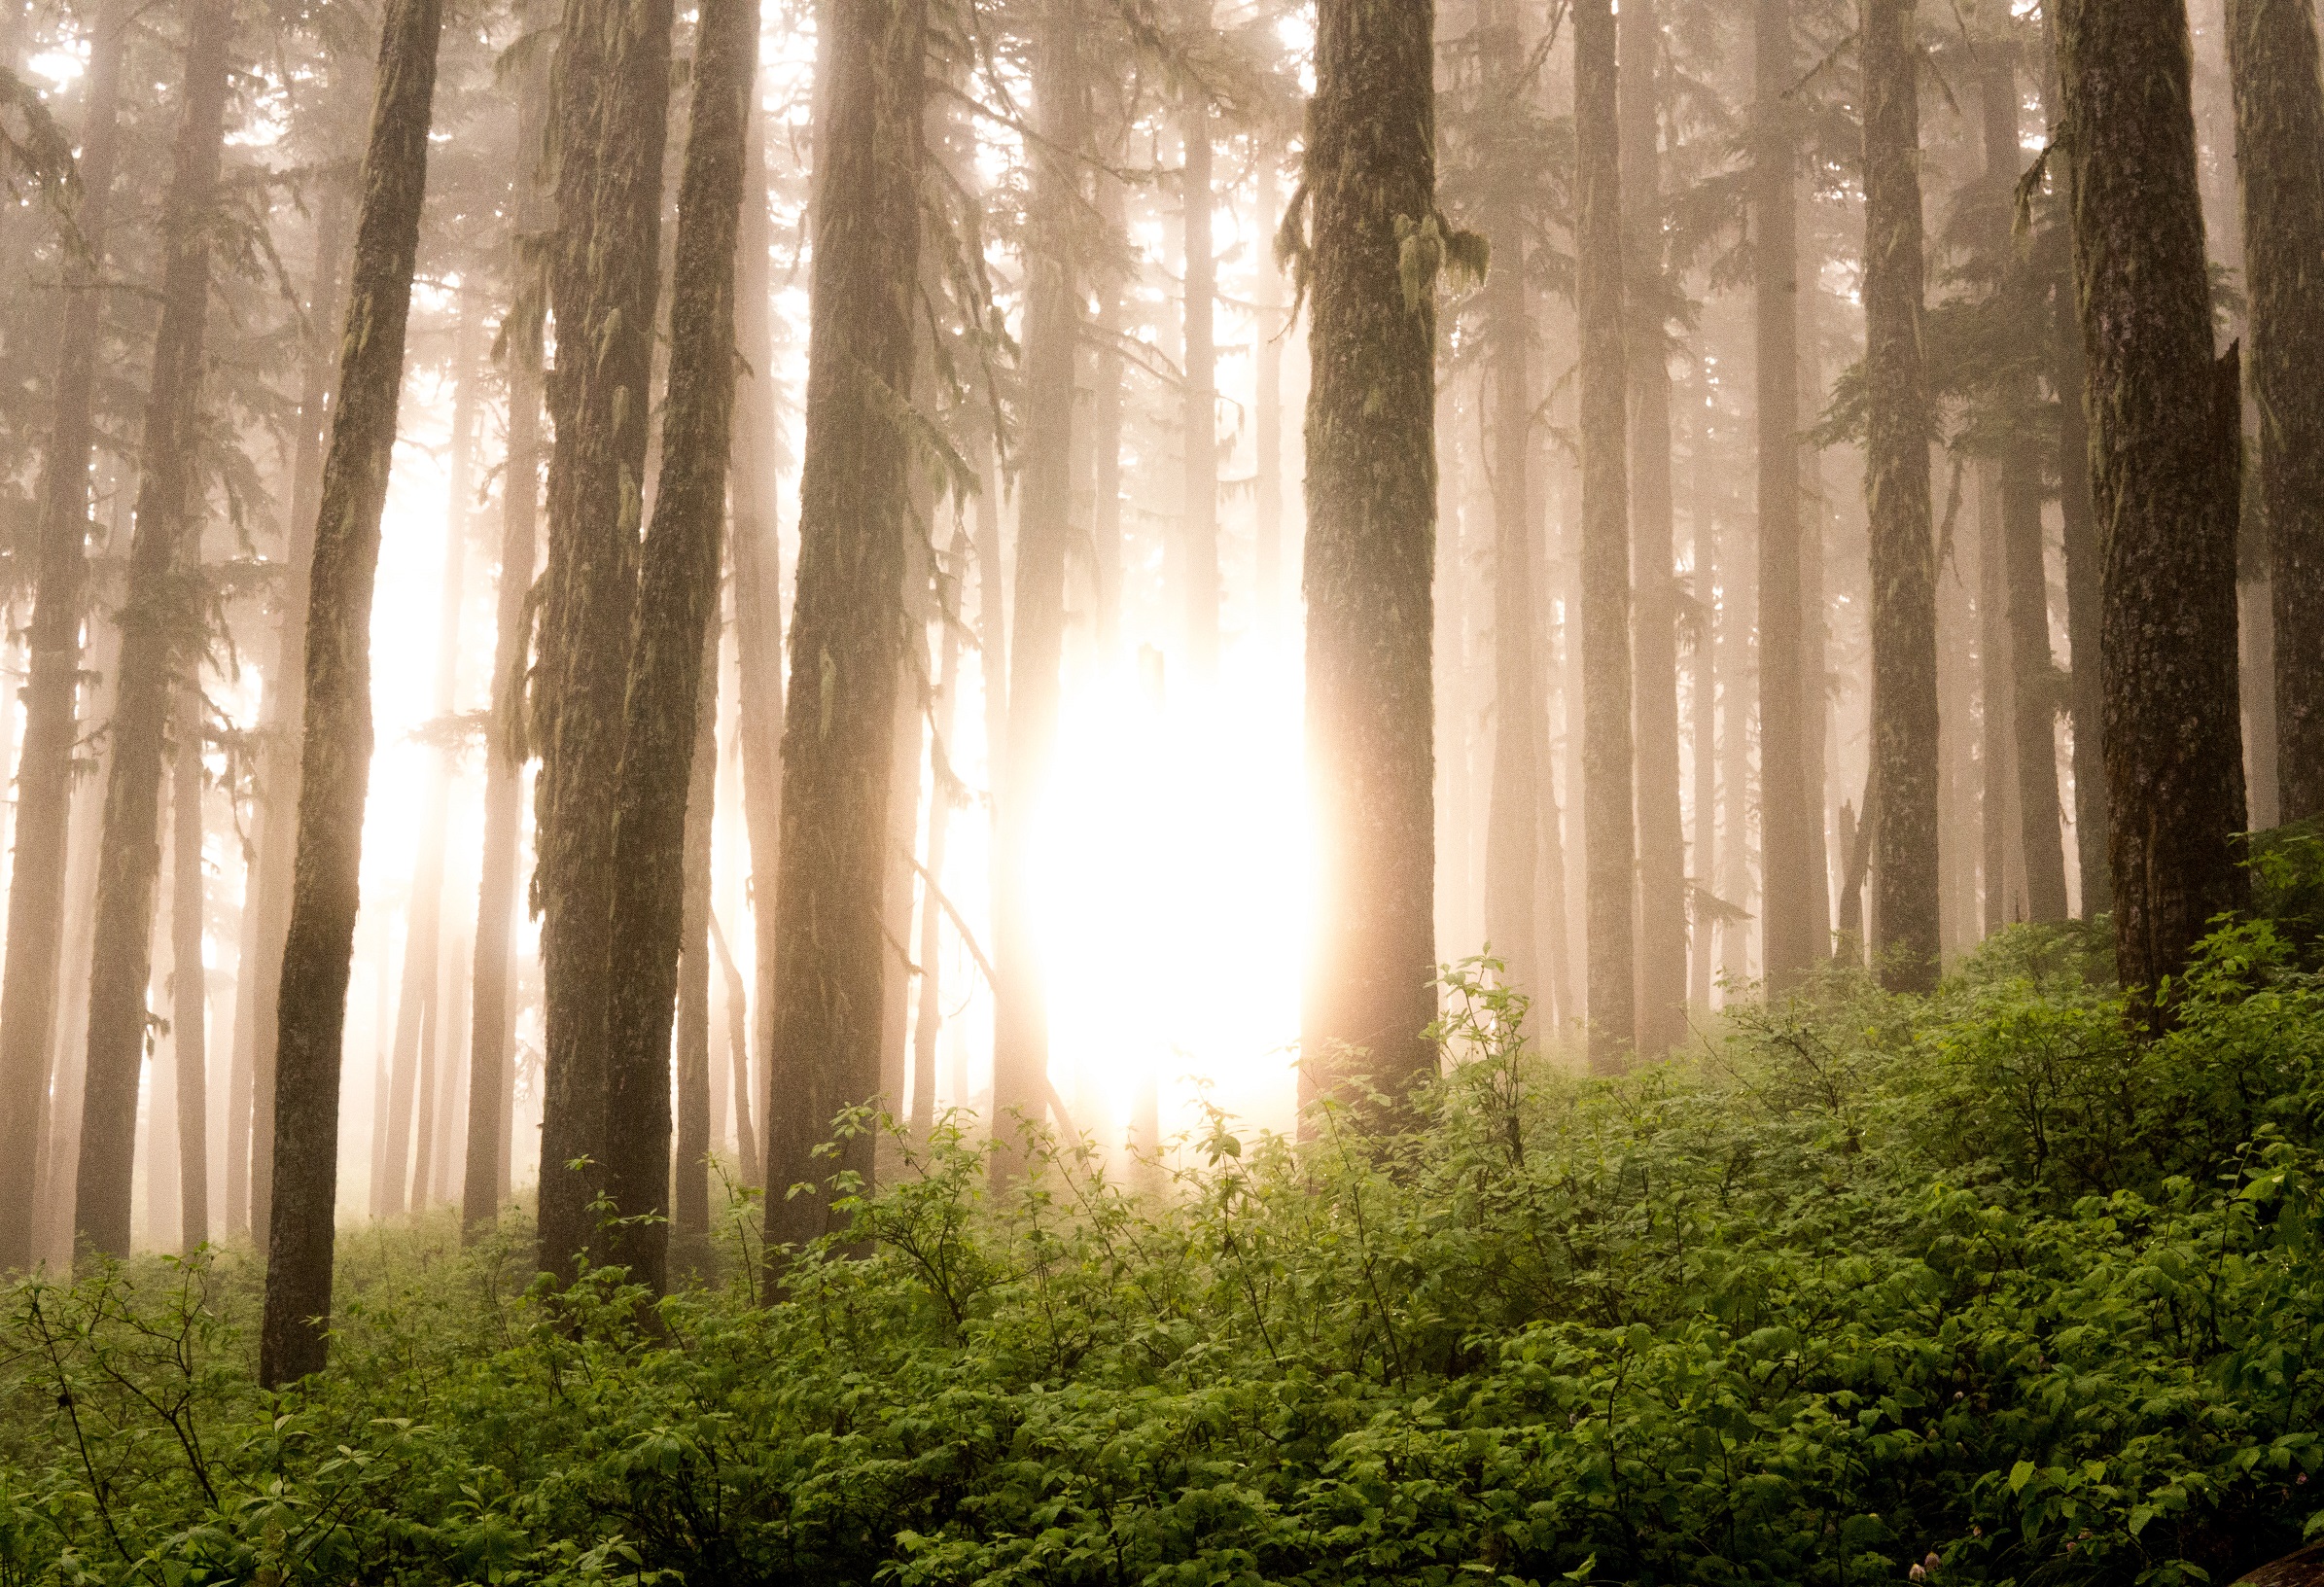

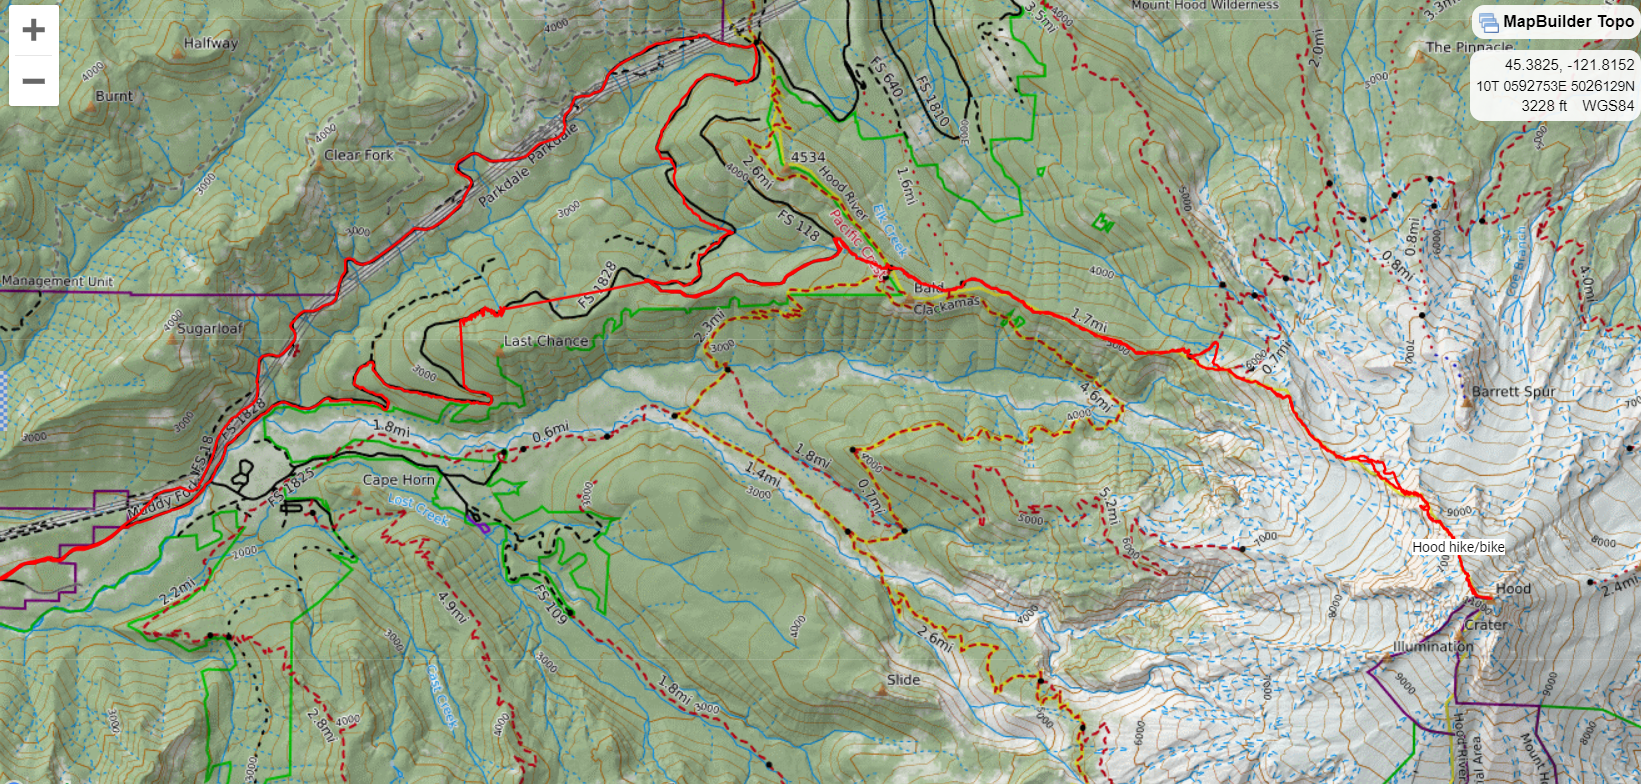
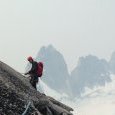

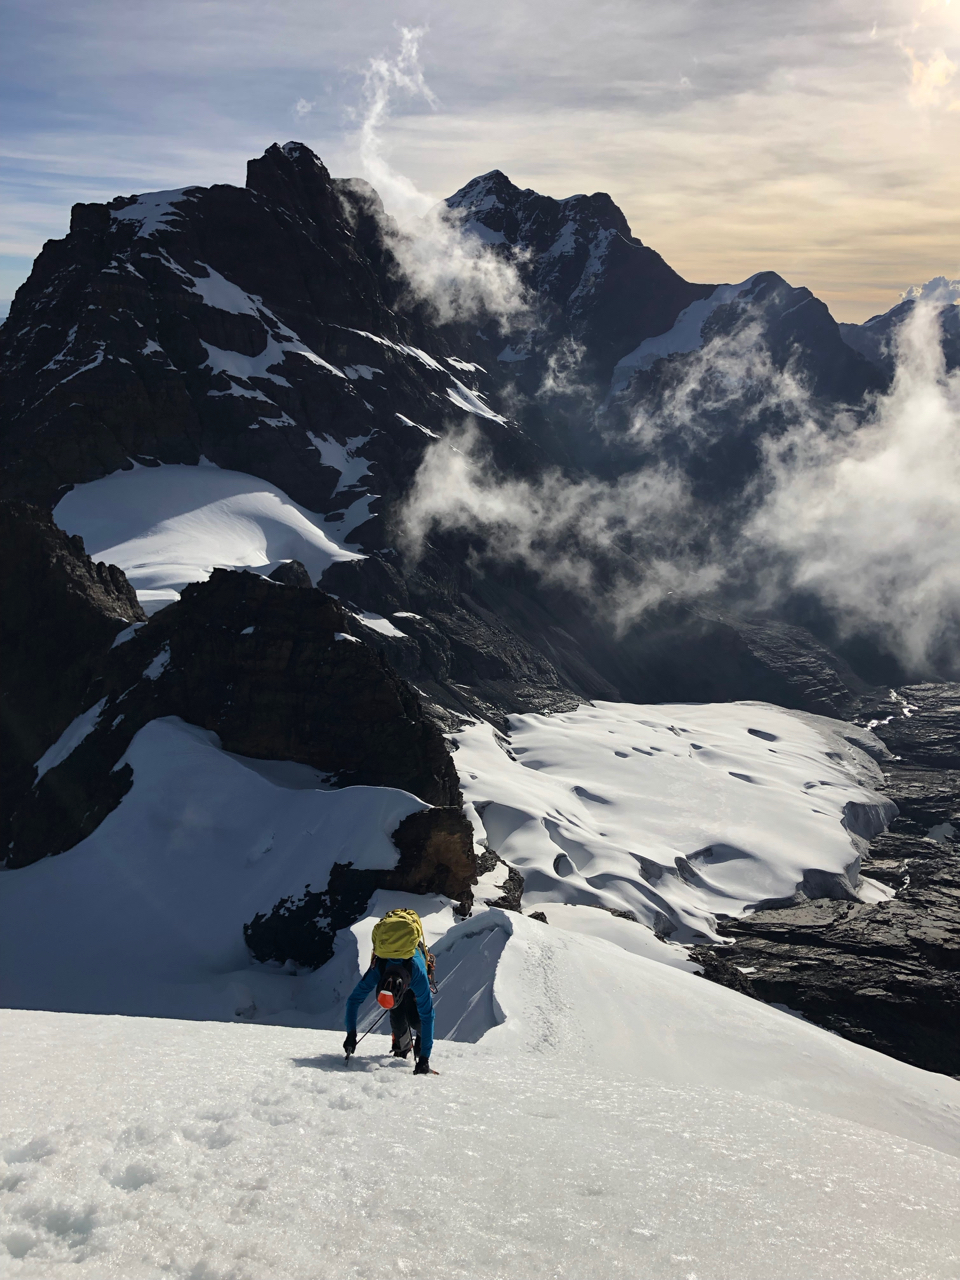


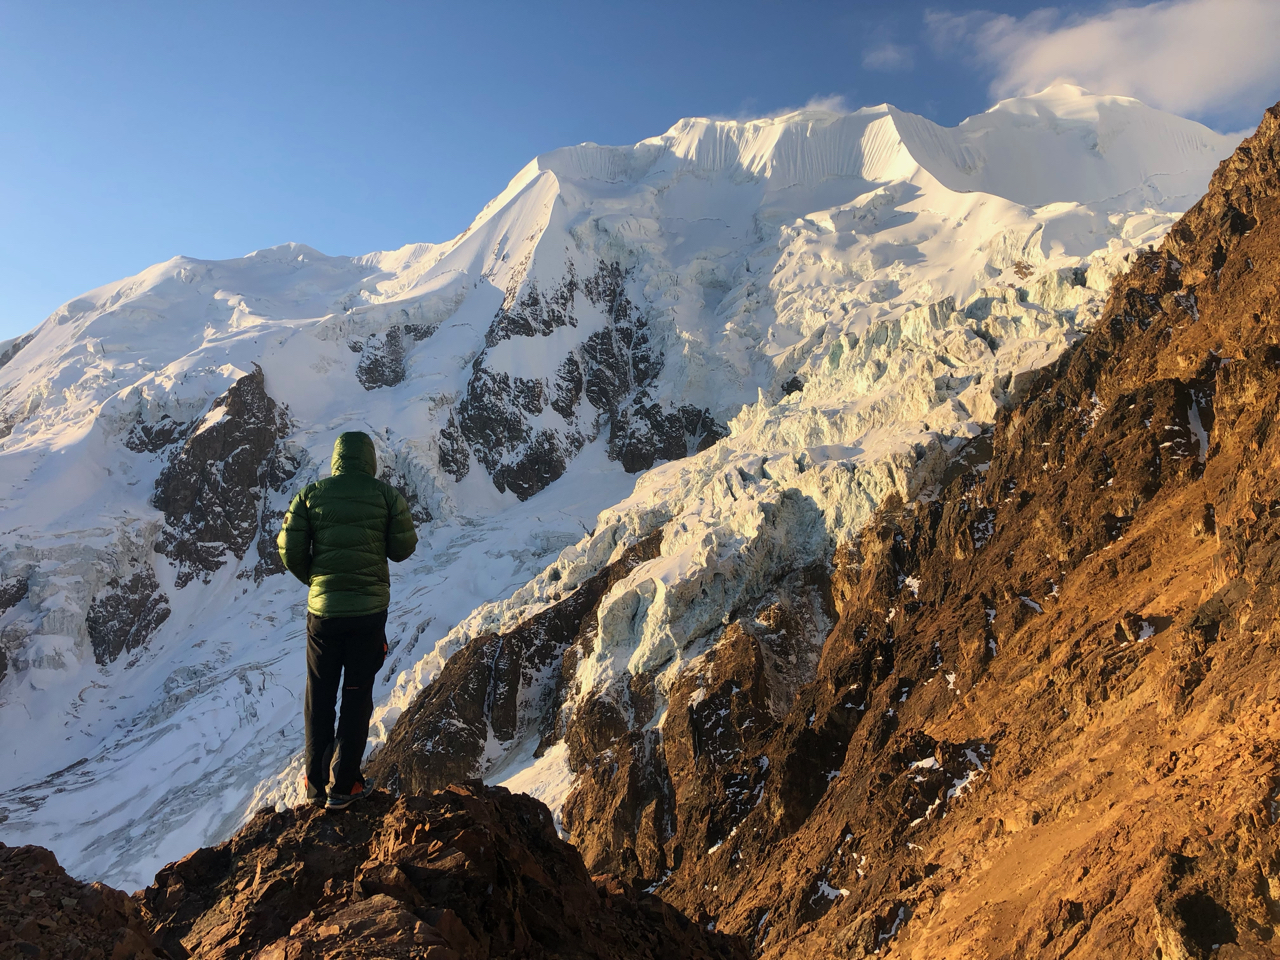
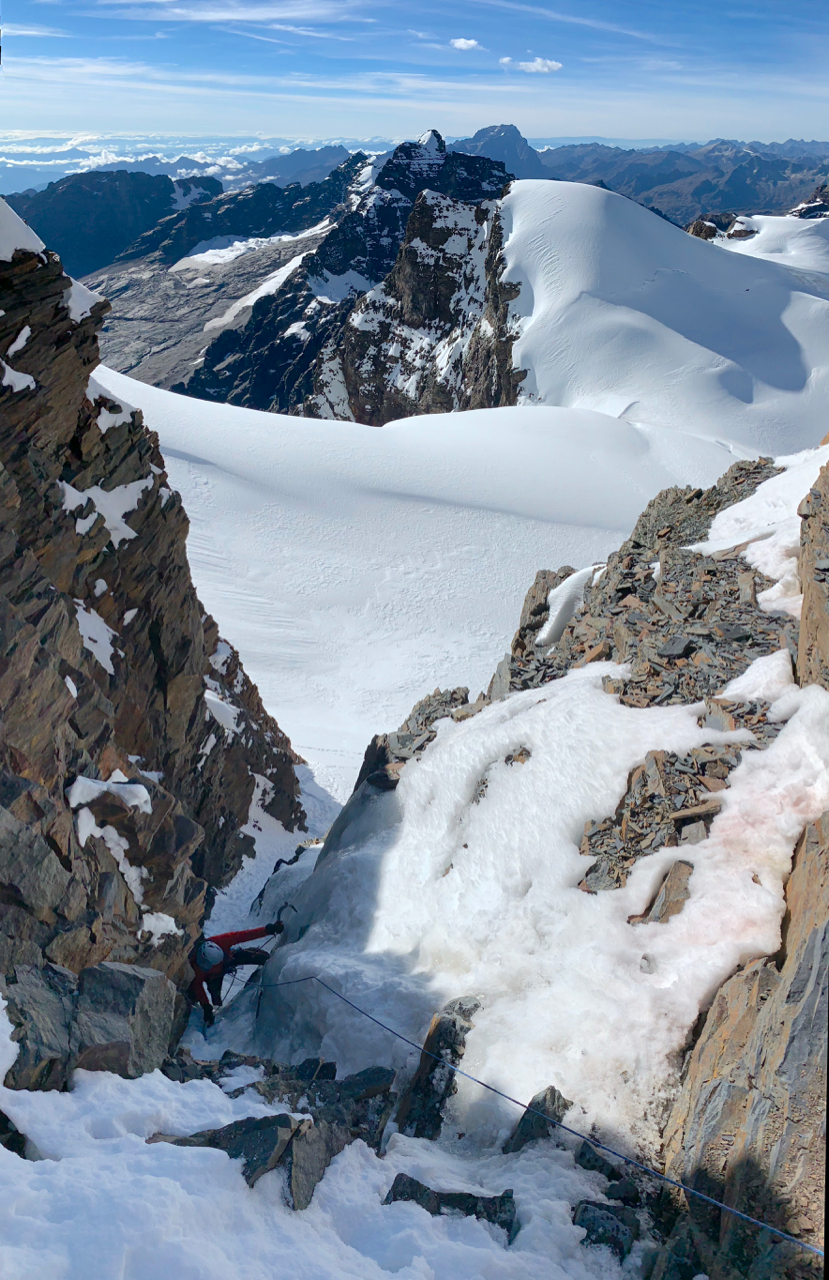


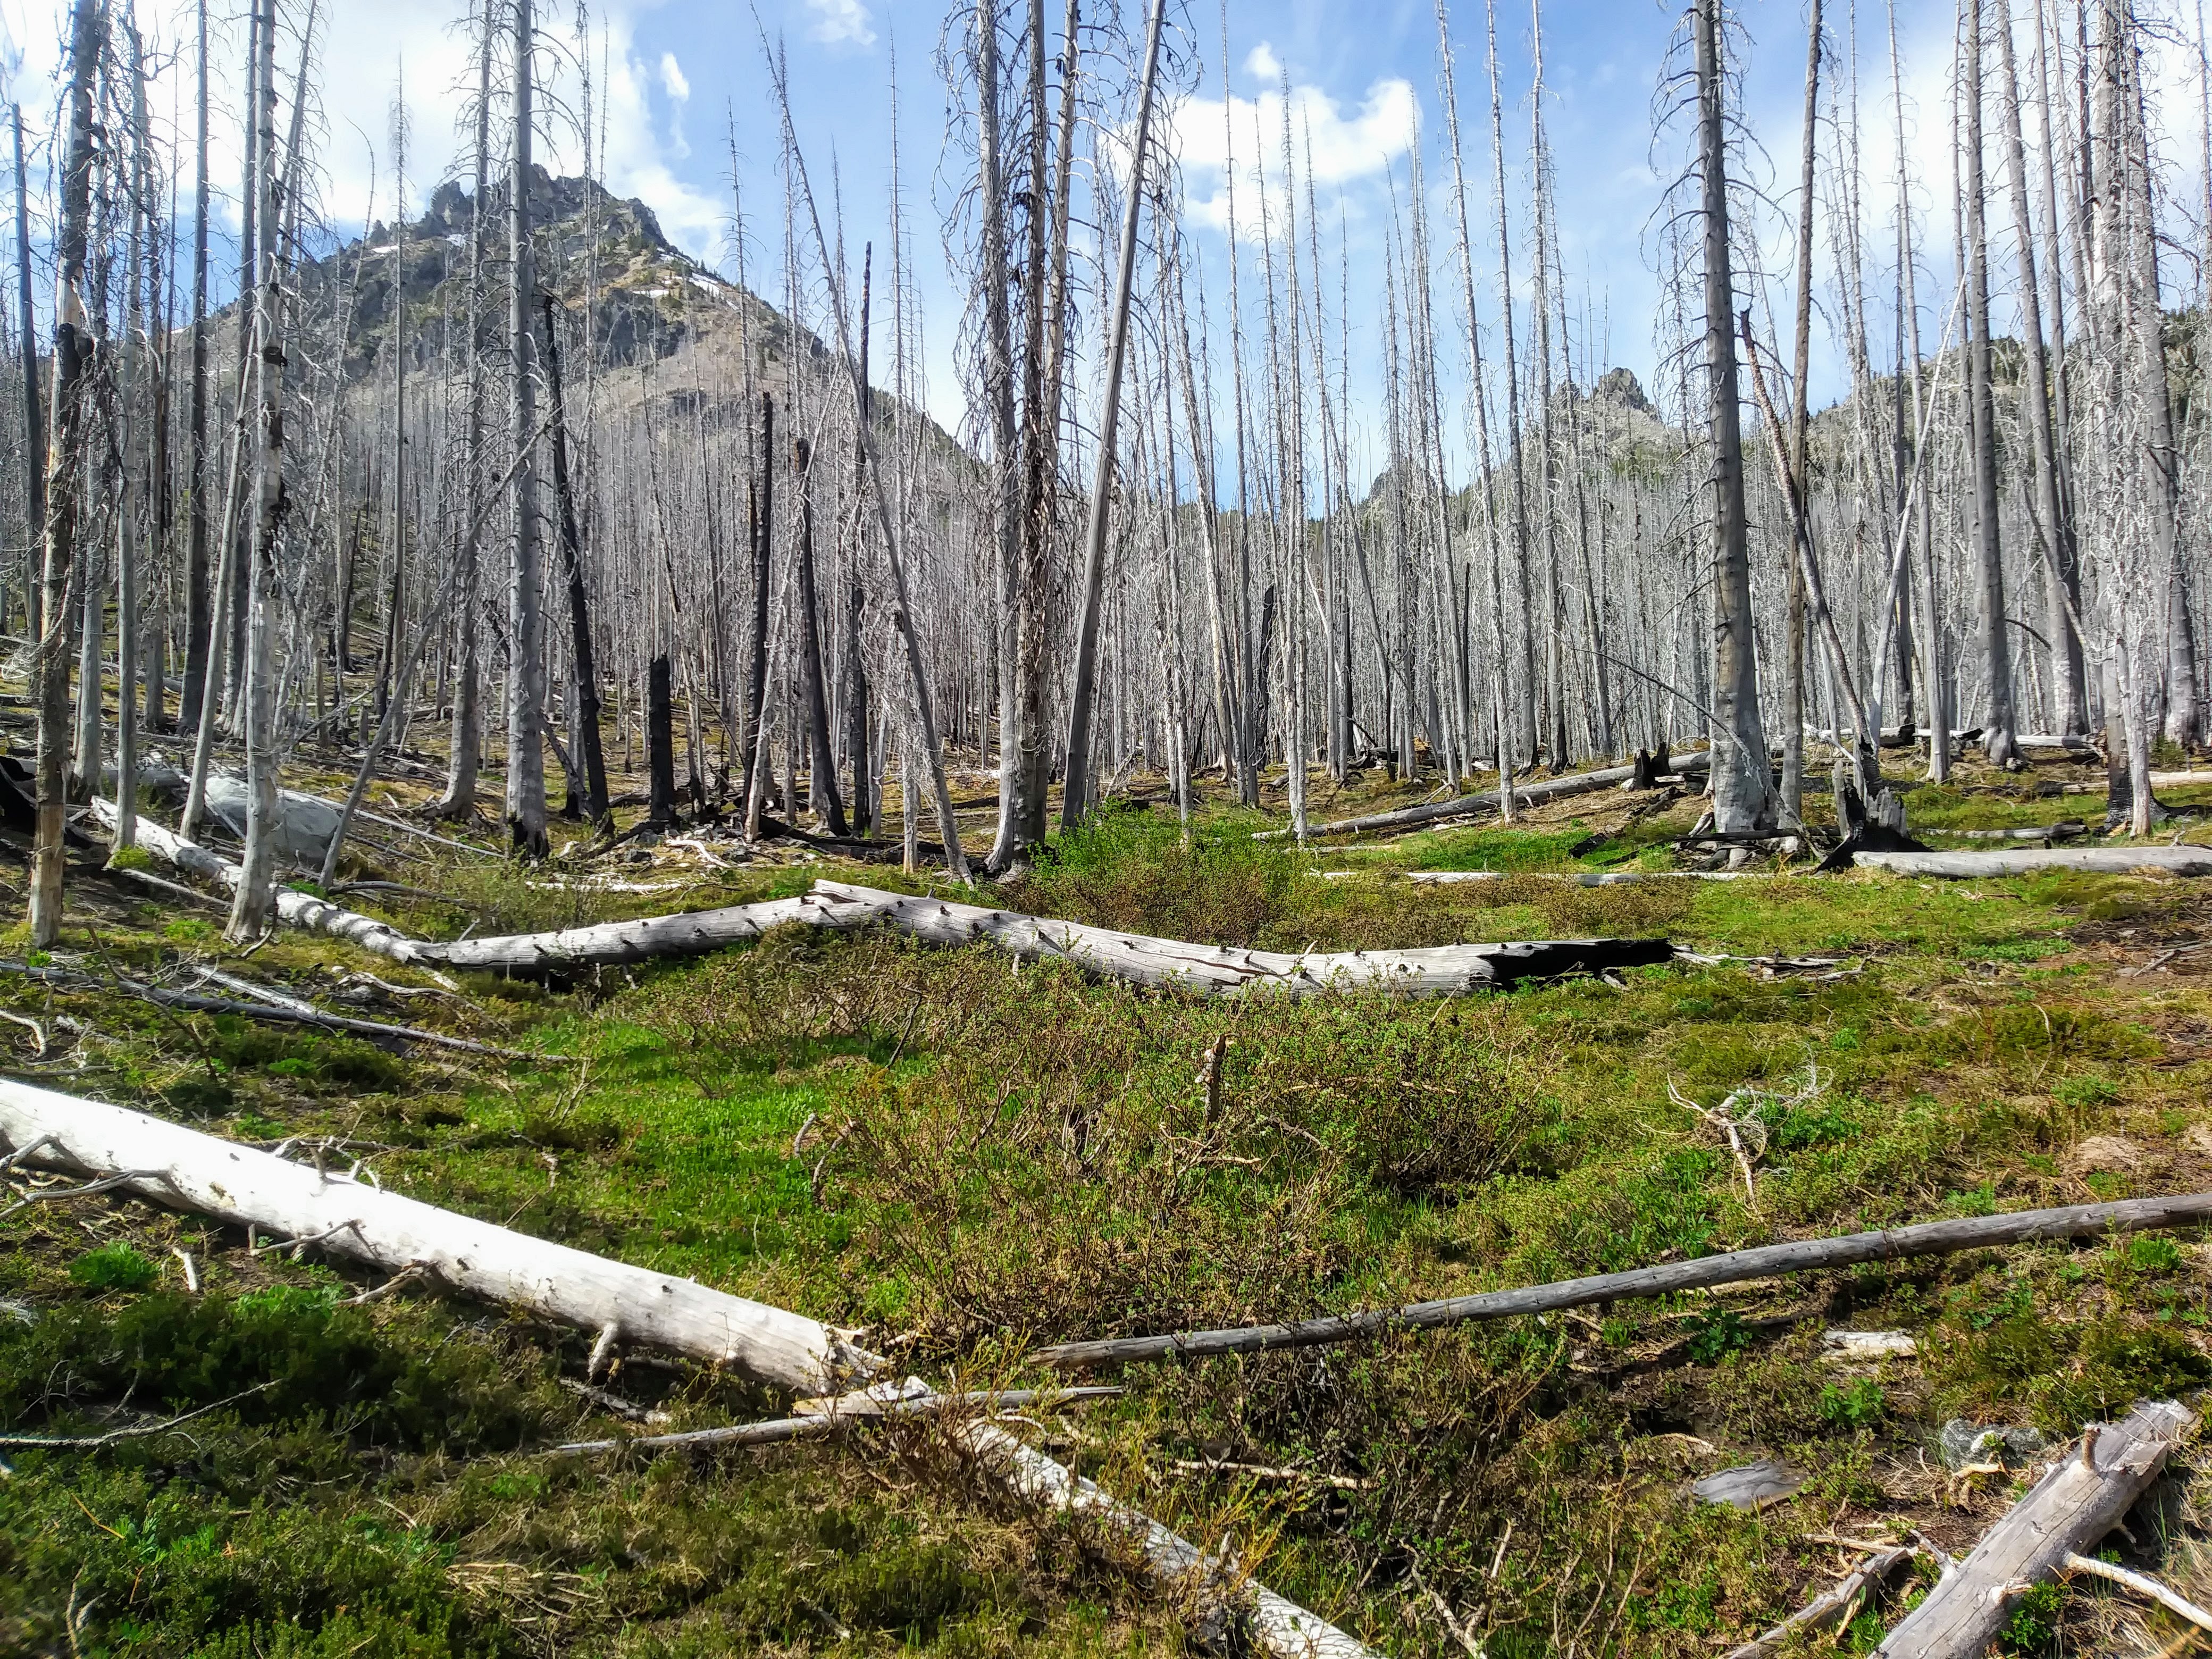


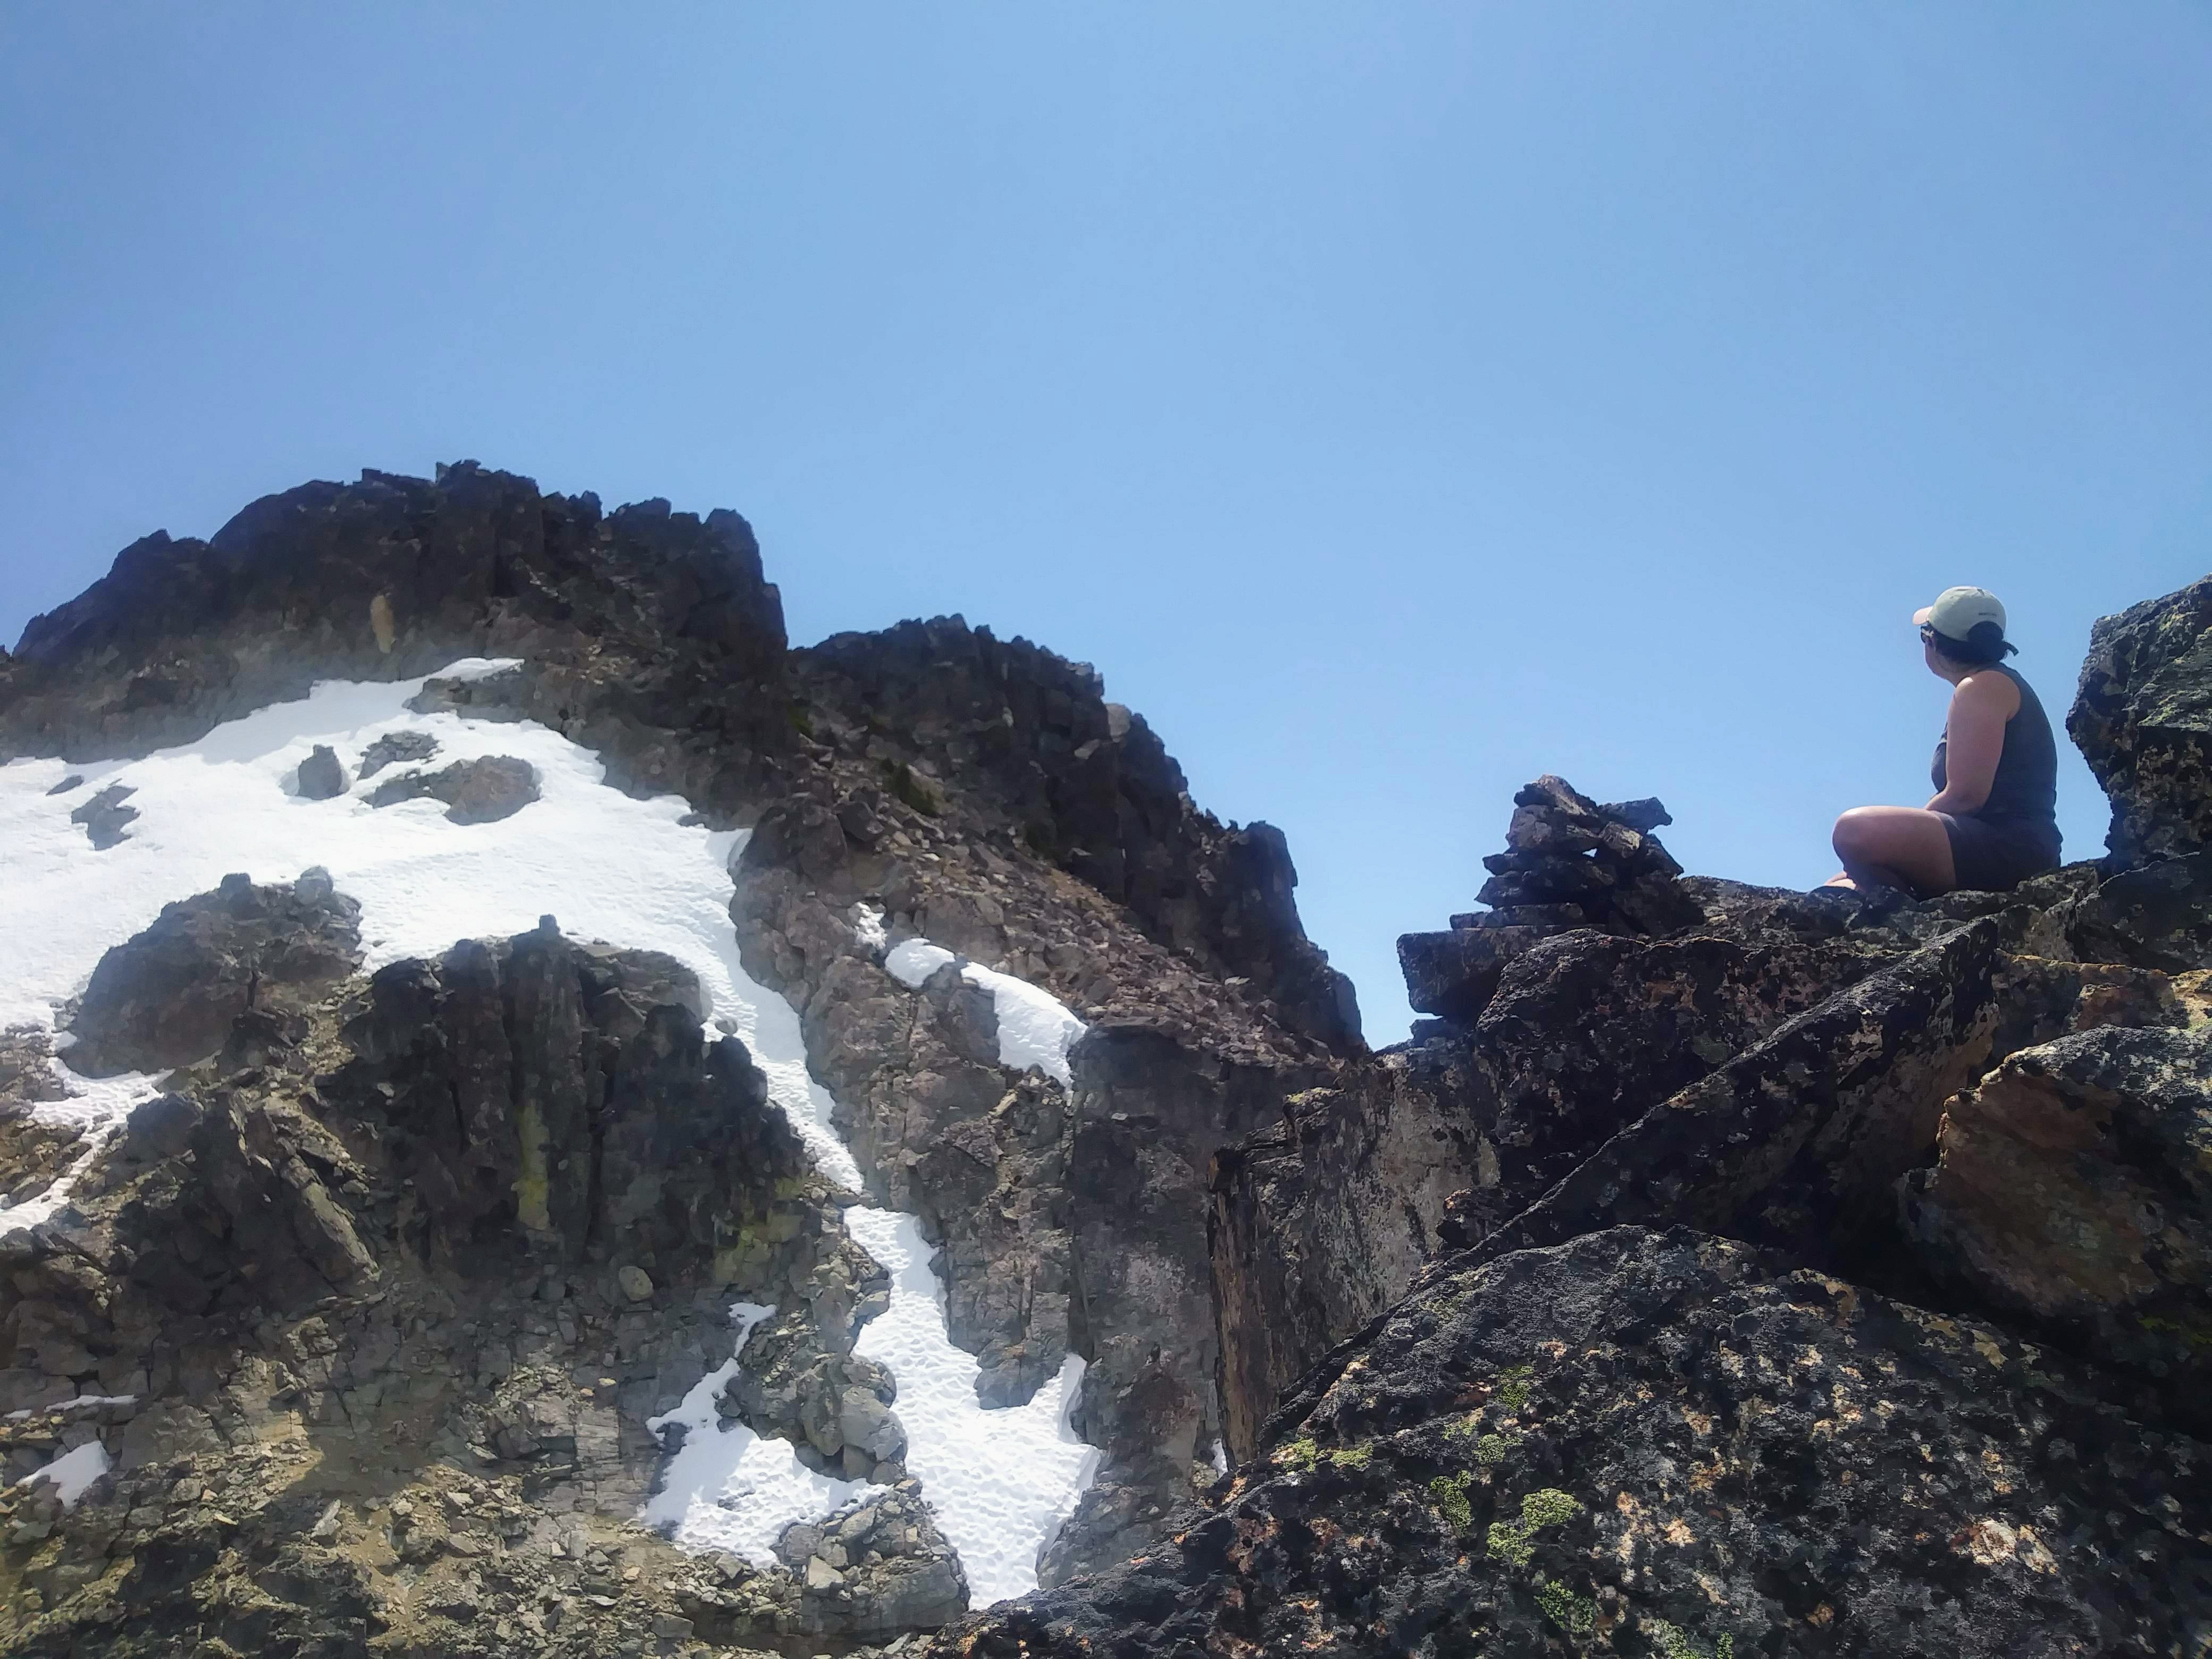


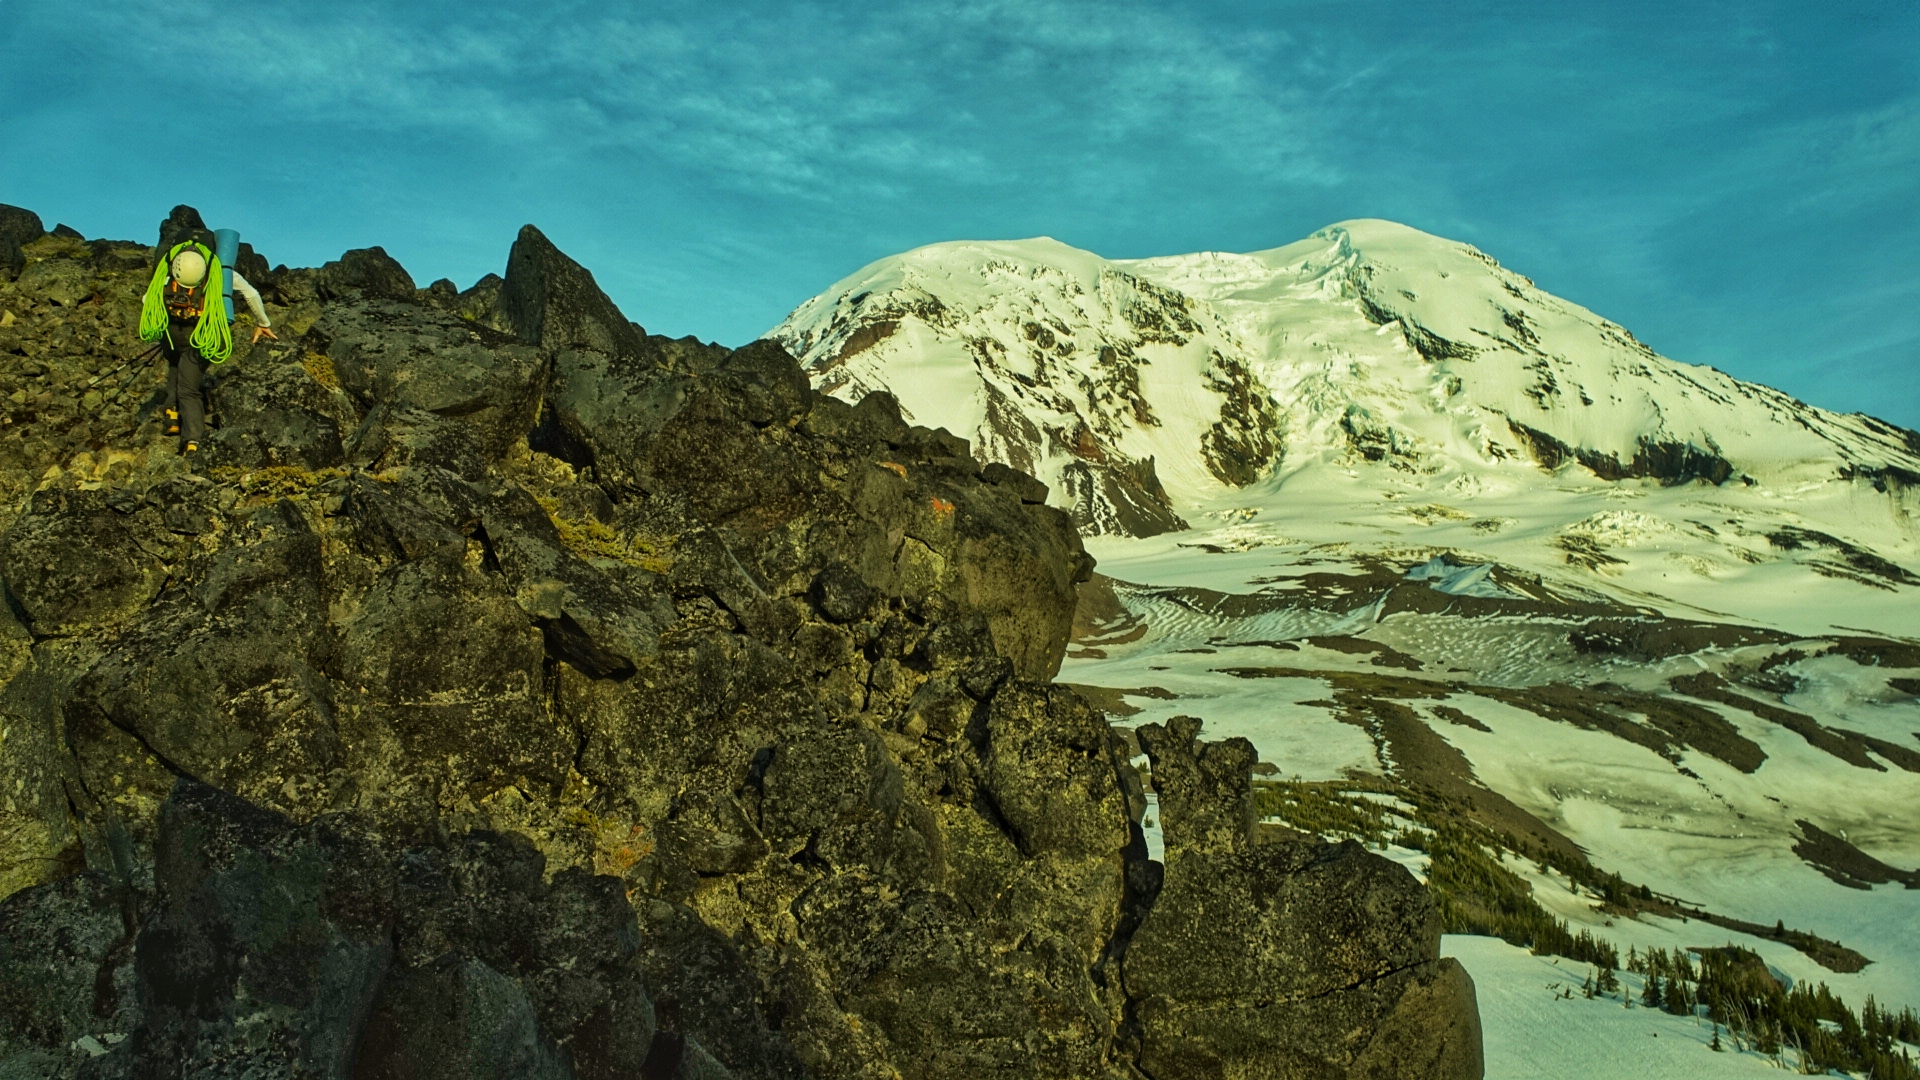

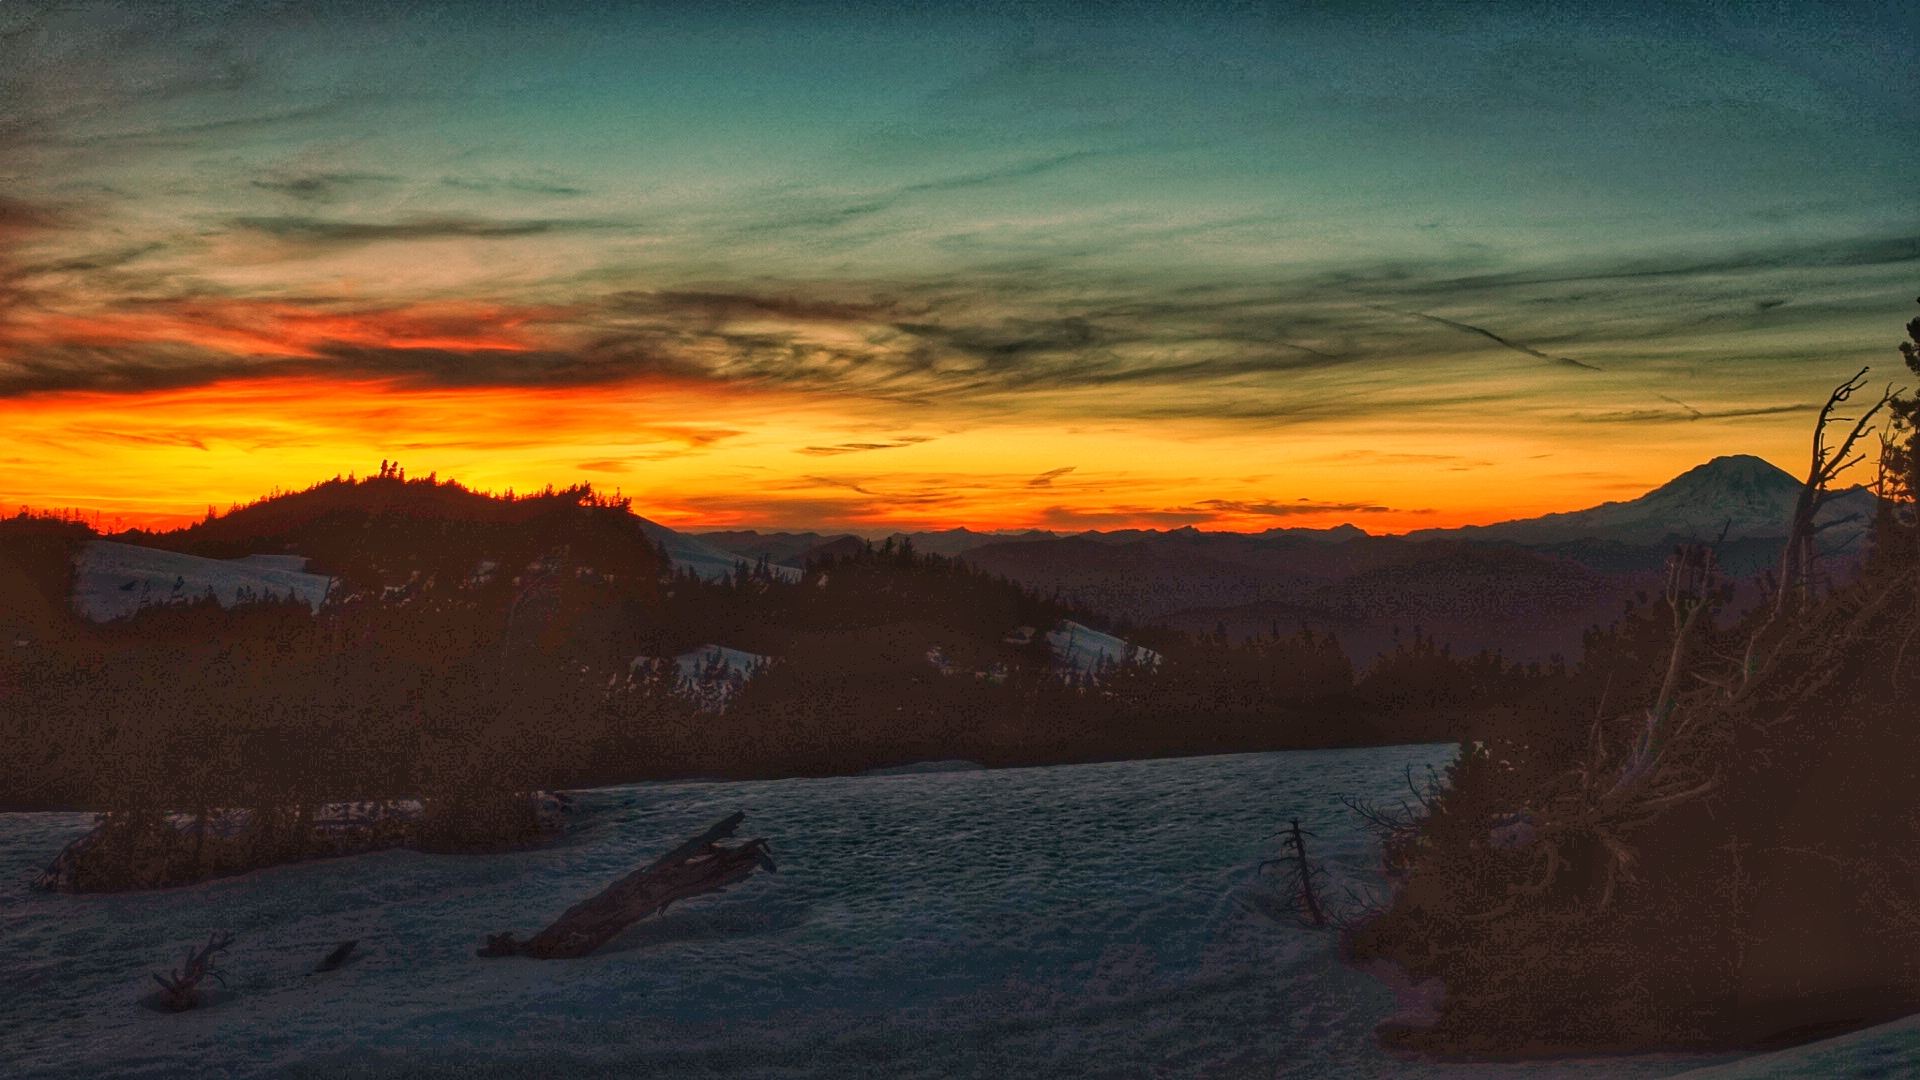
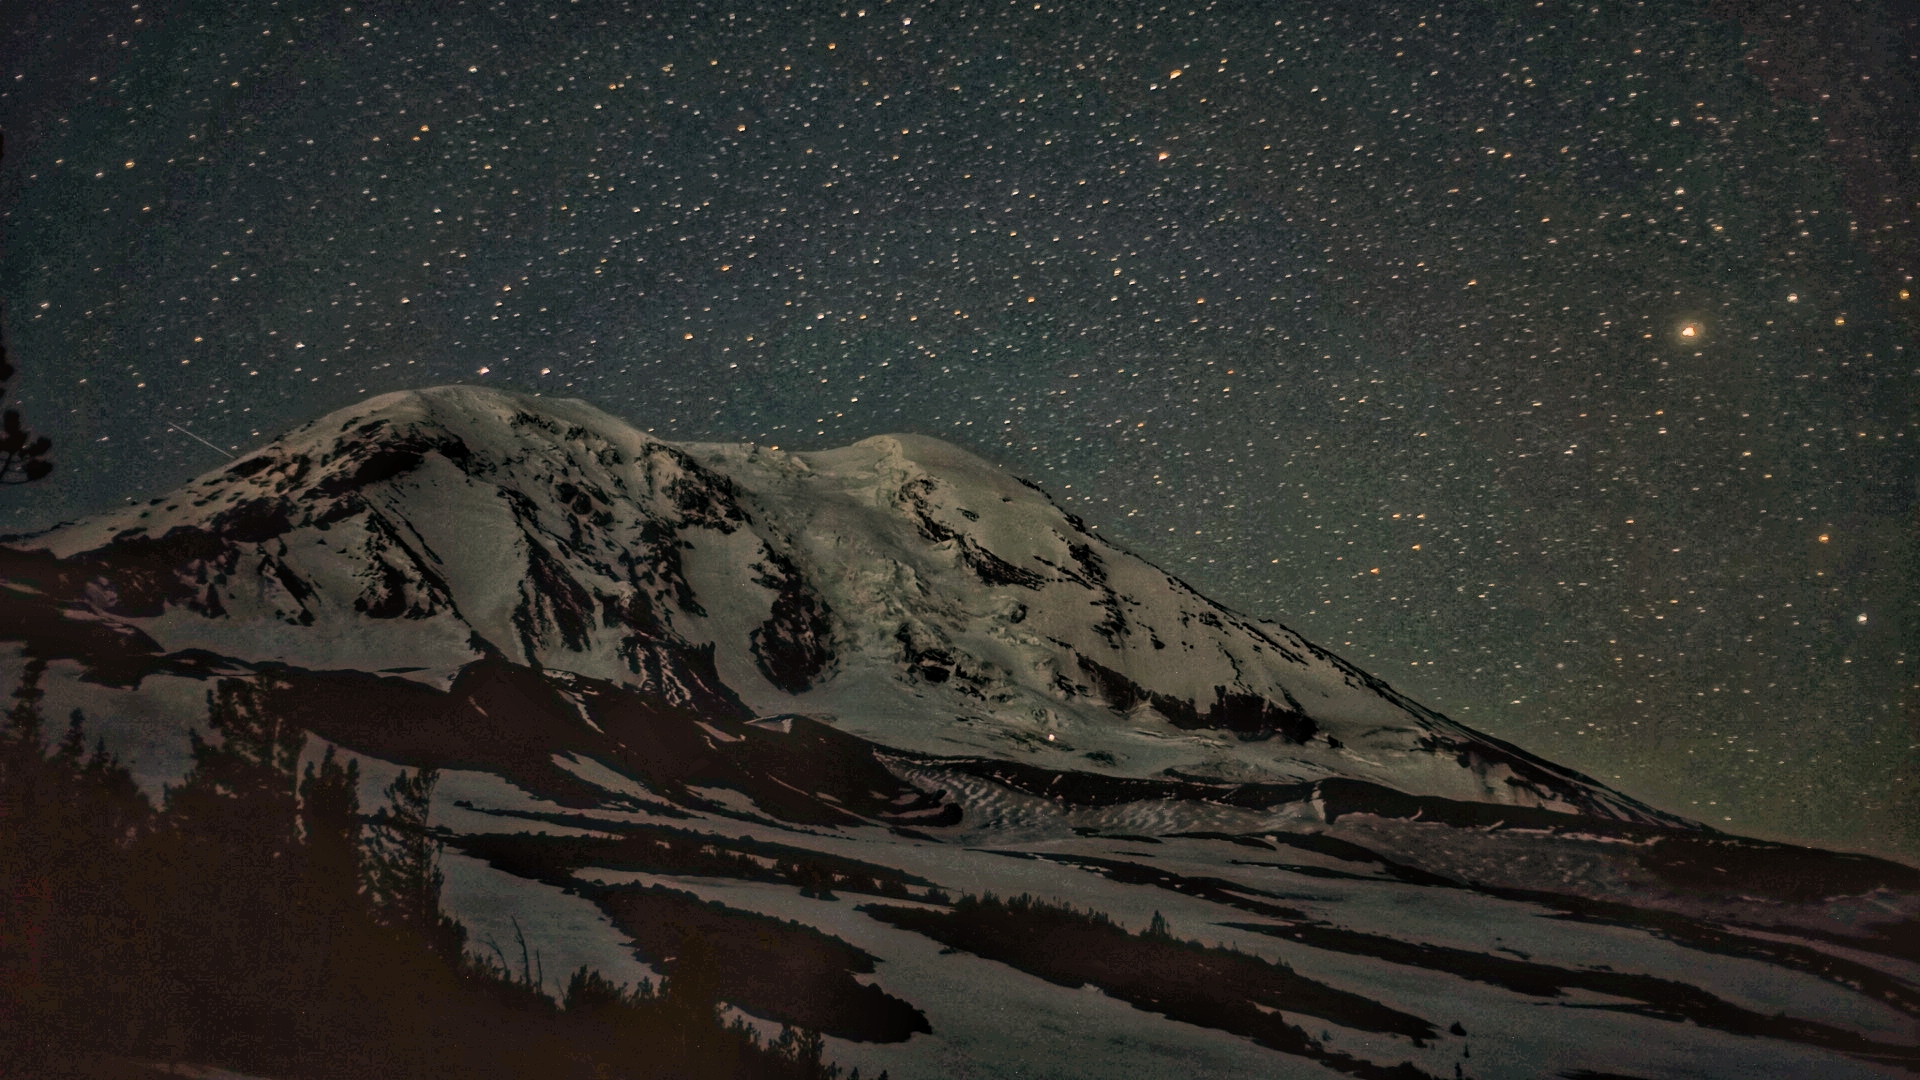
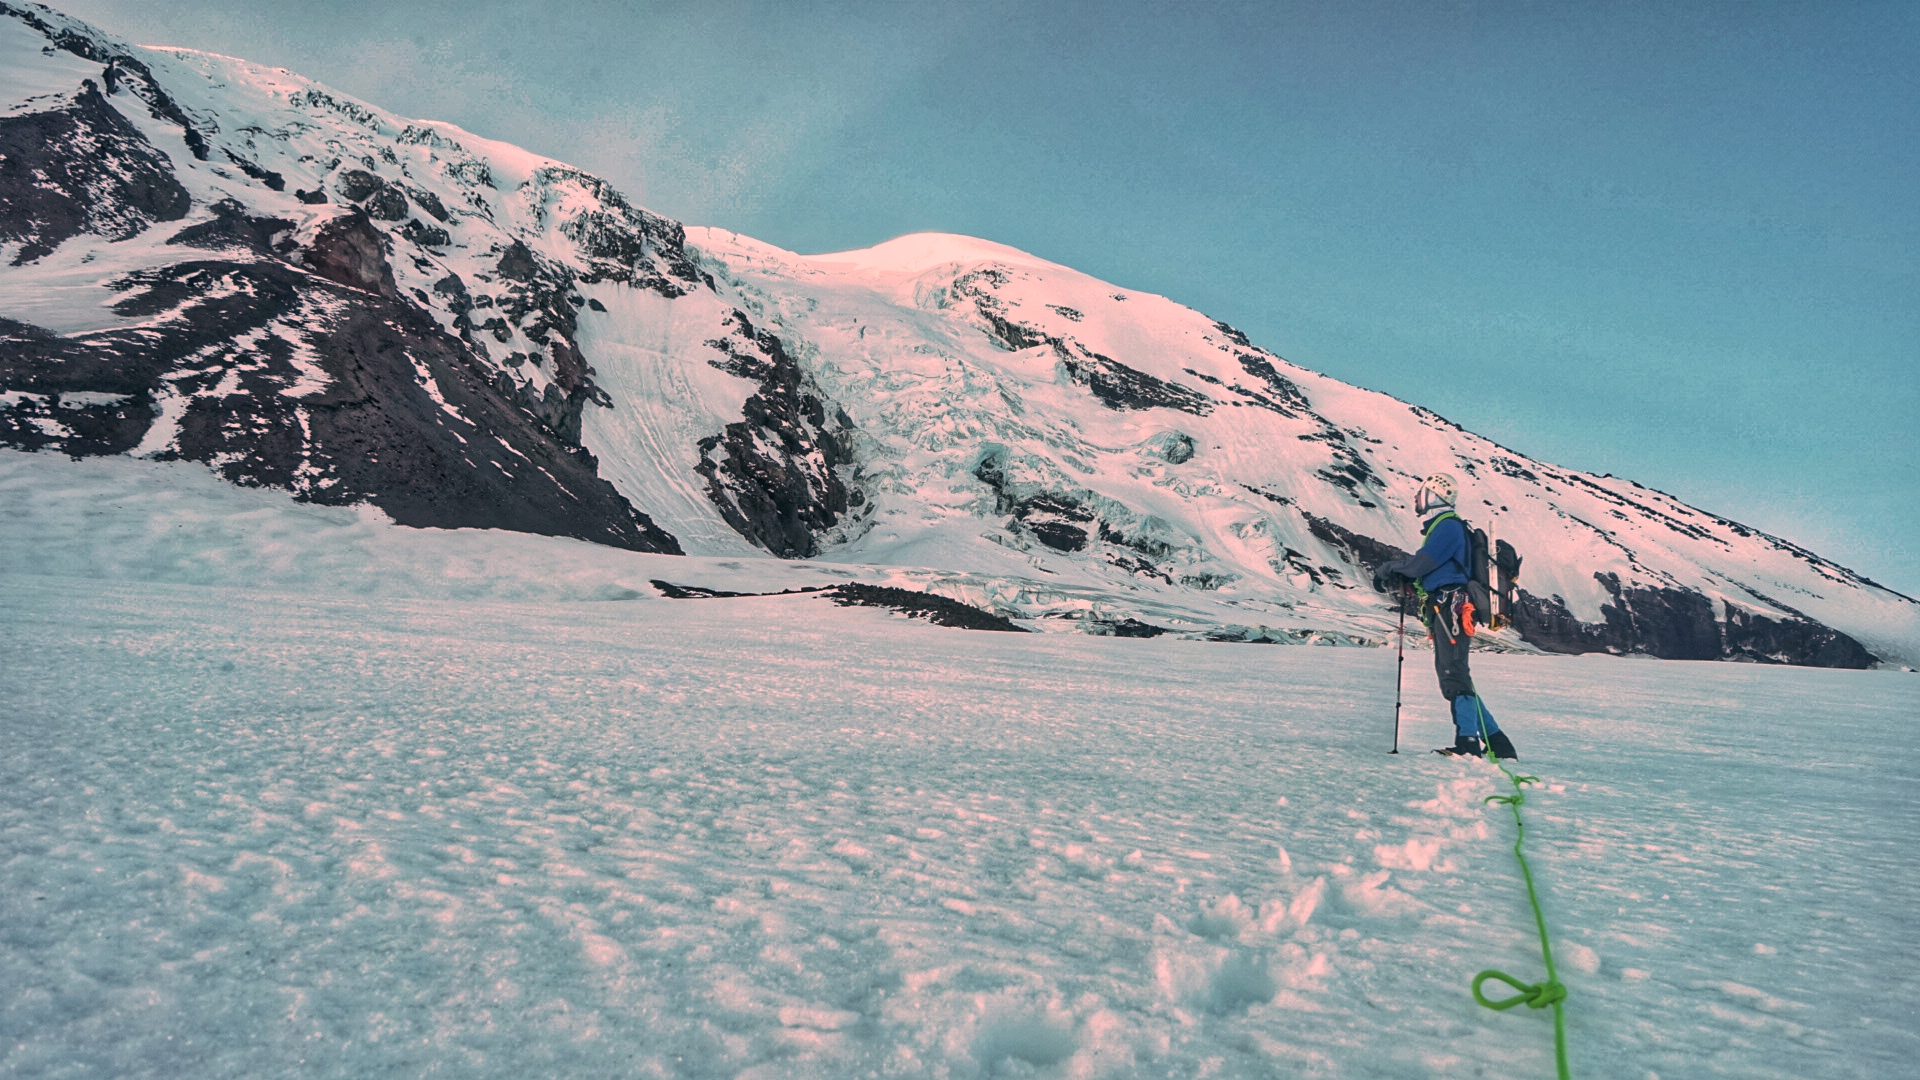
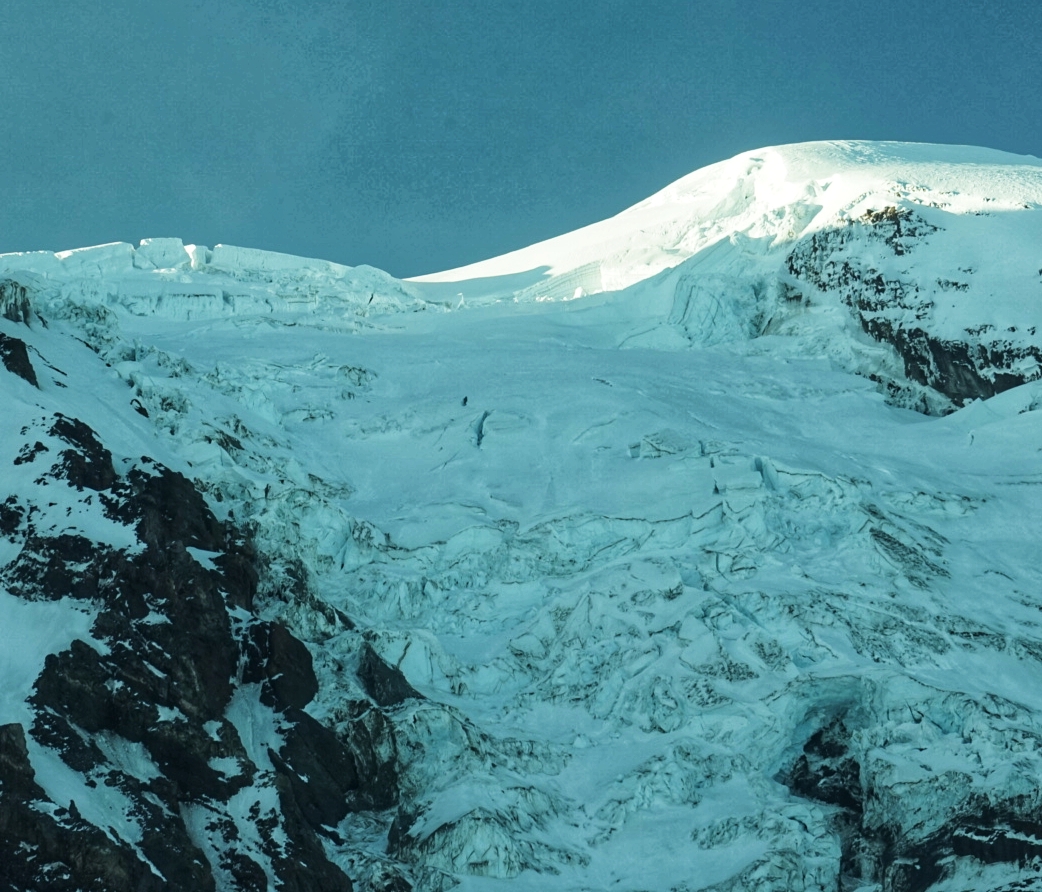

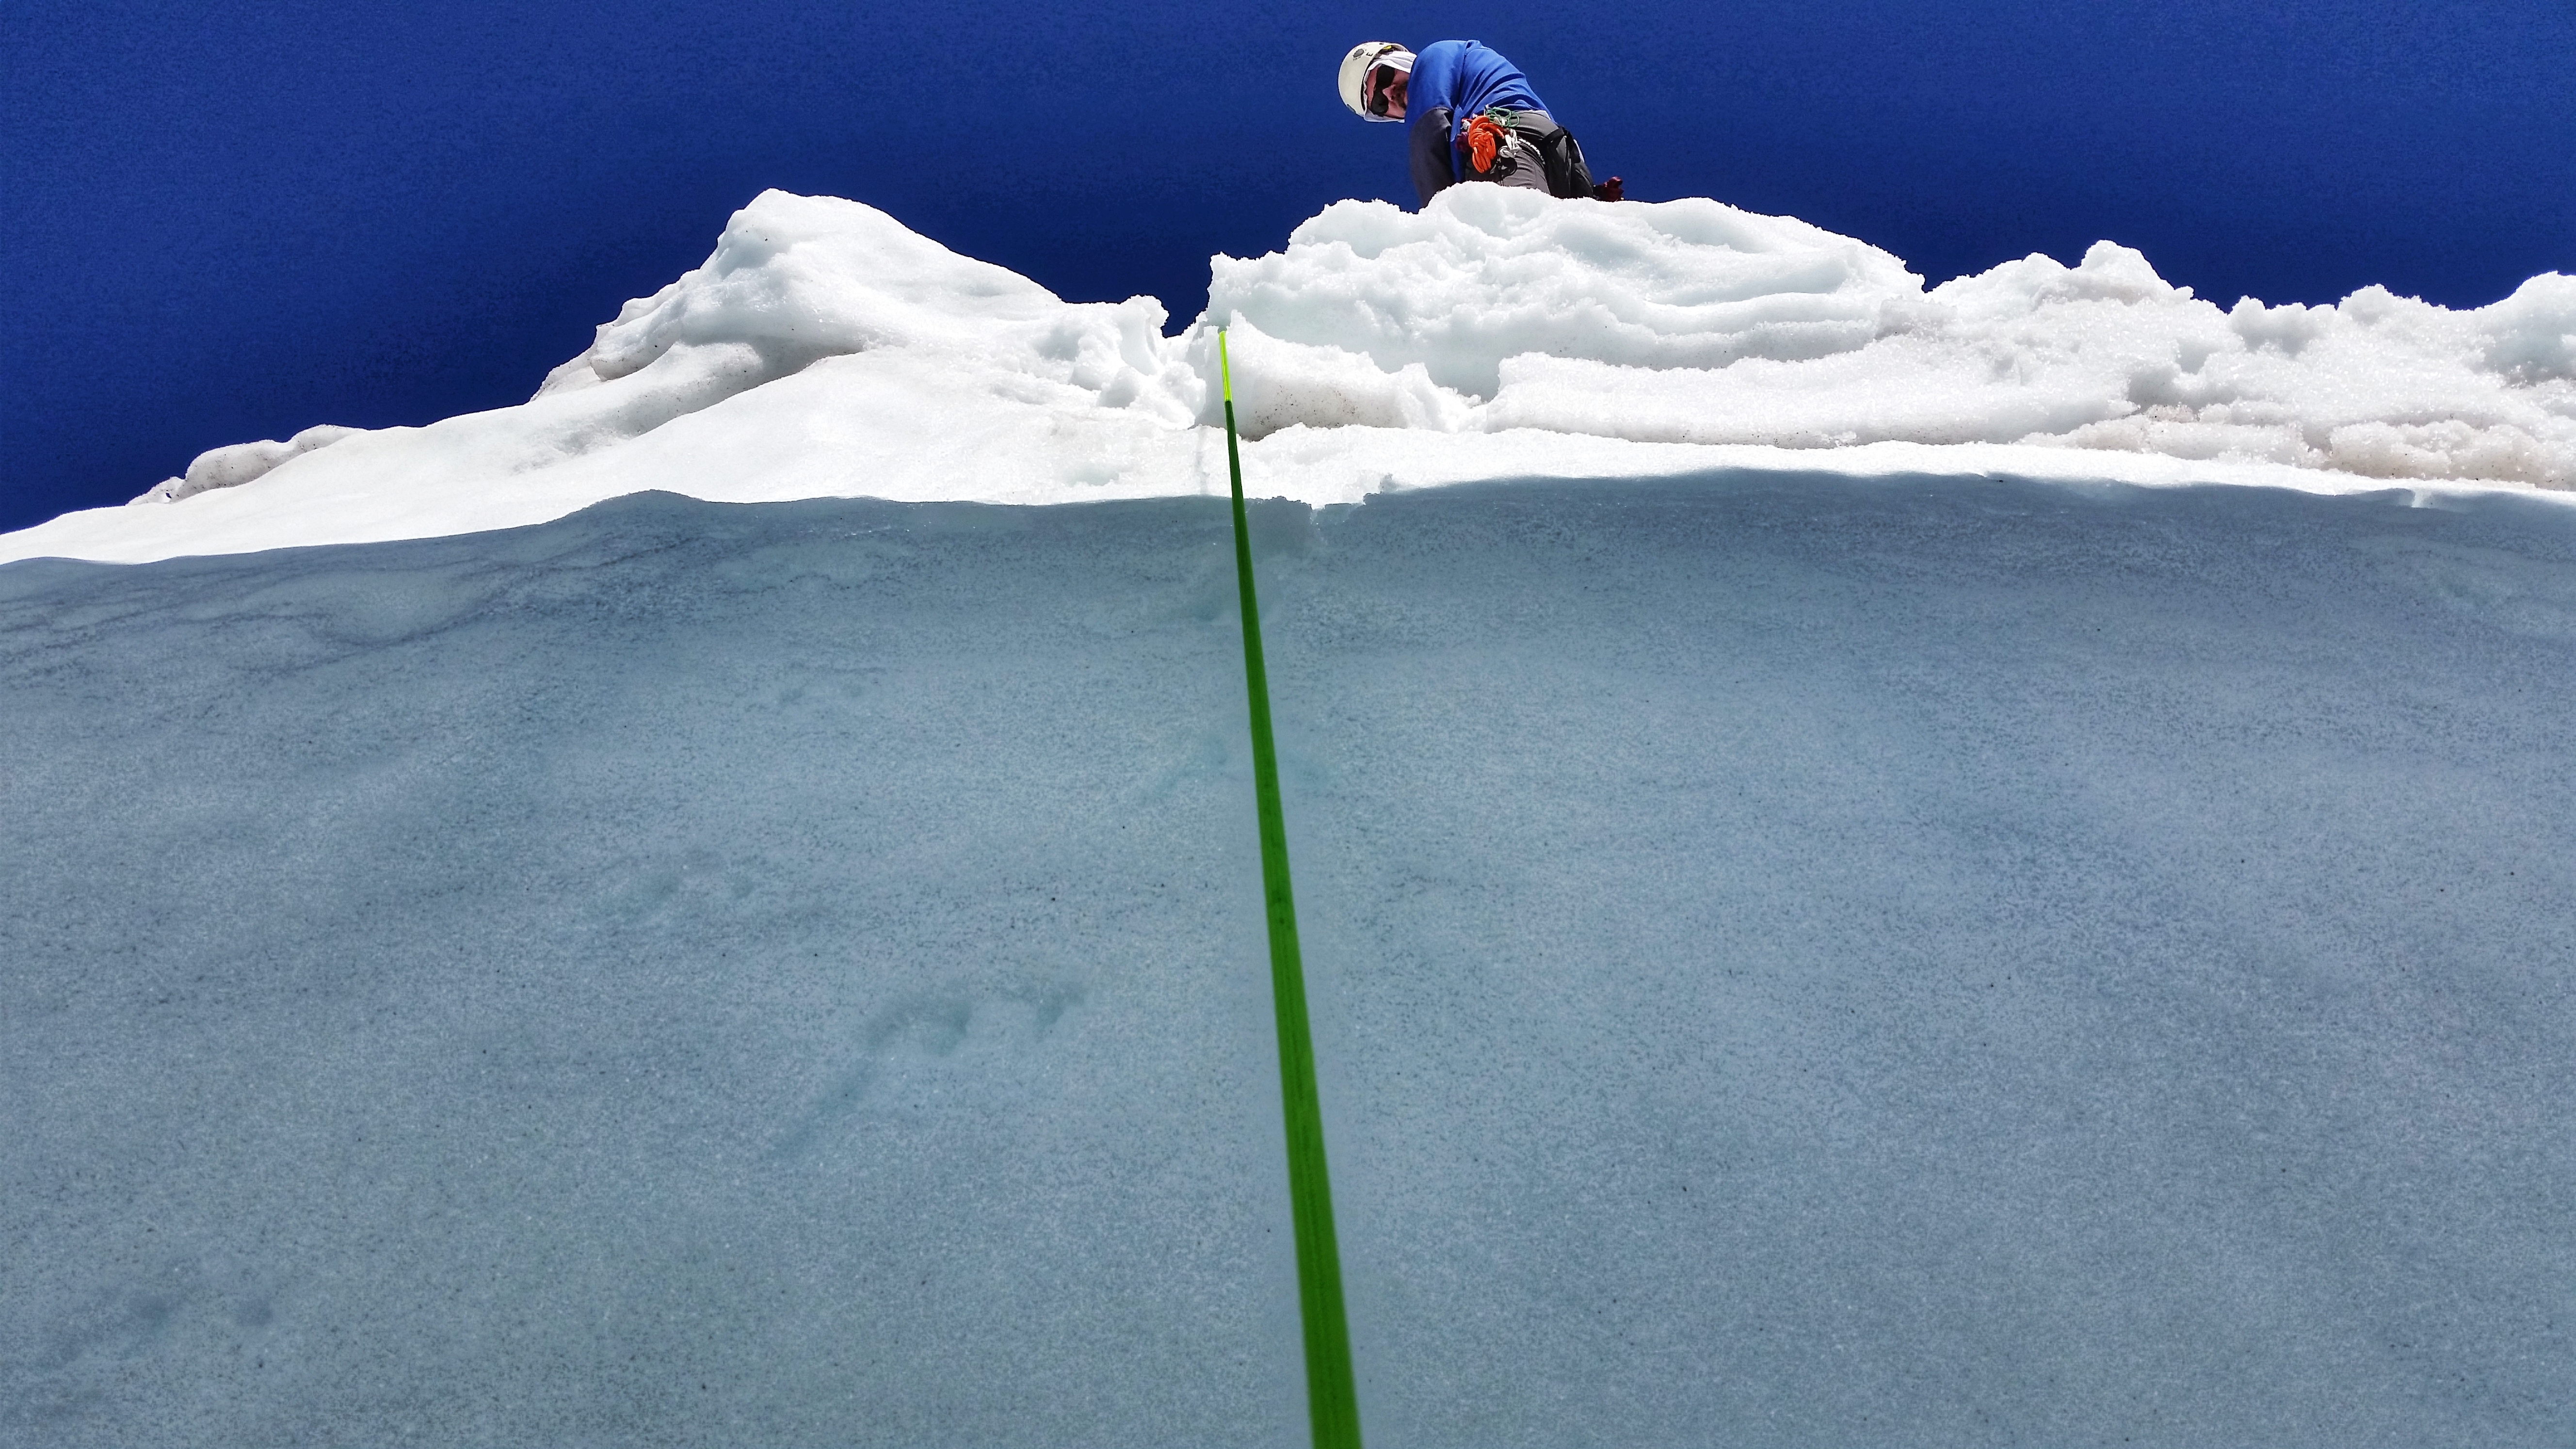
.jpg.02c16522203cfa1023c0521fcf17eaeb.jpg)