Search the Community
Showing results for tags 'cctripreport'.
-
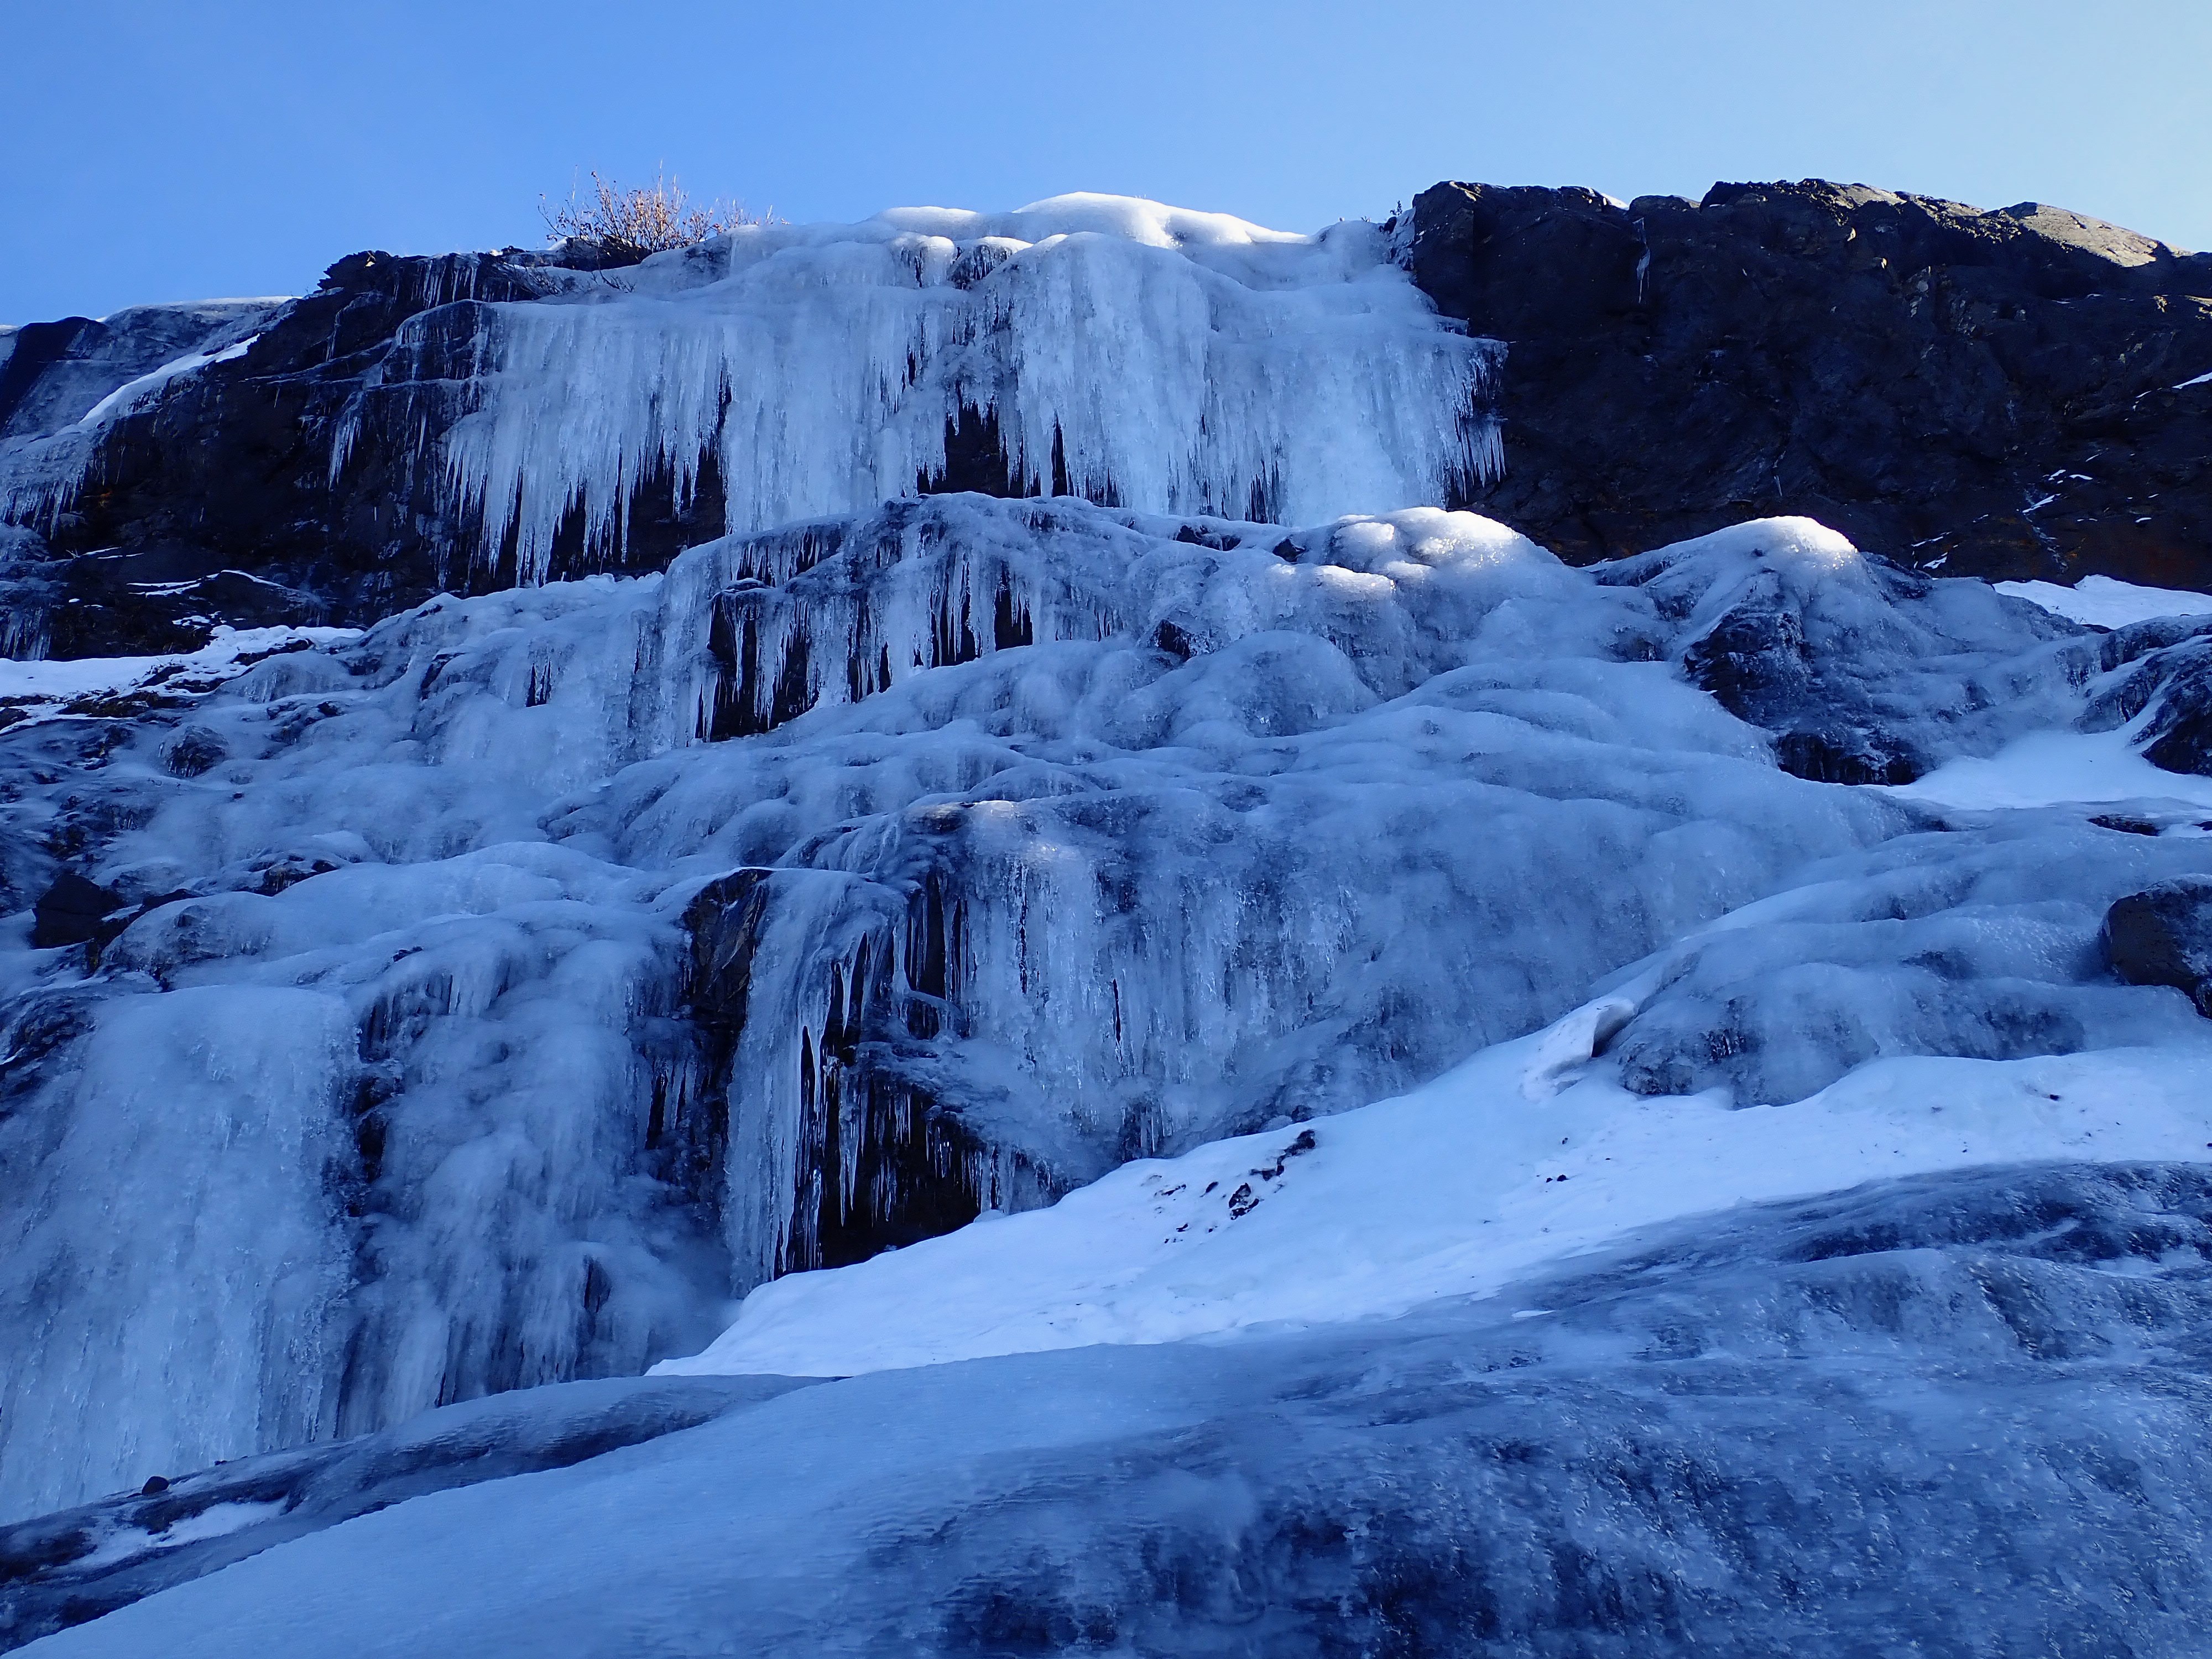
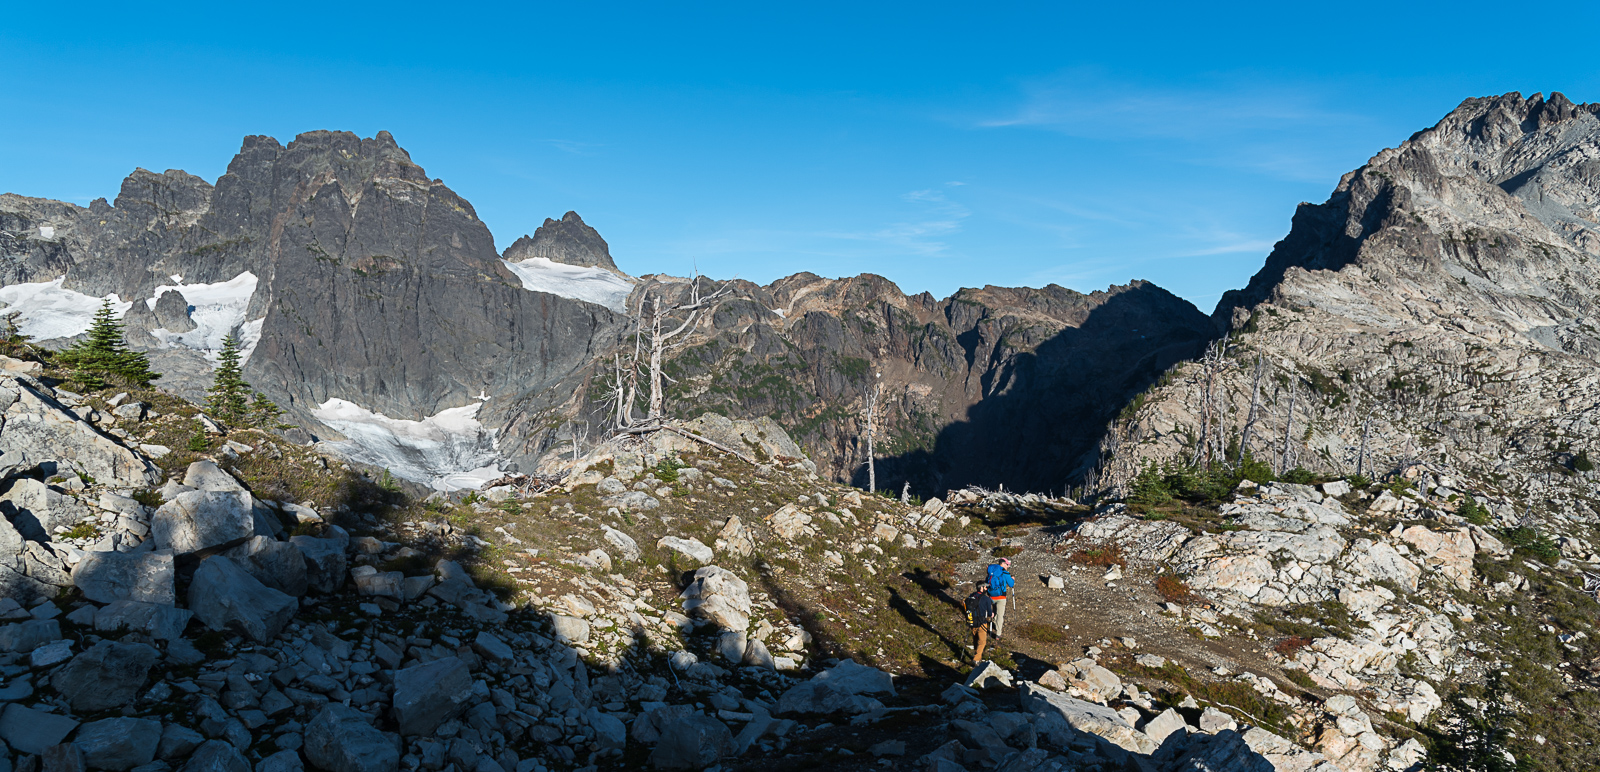
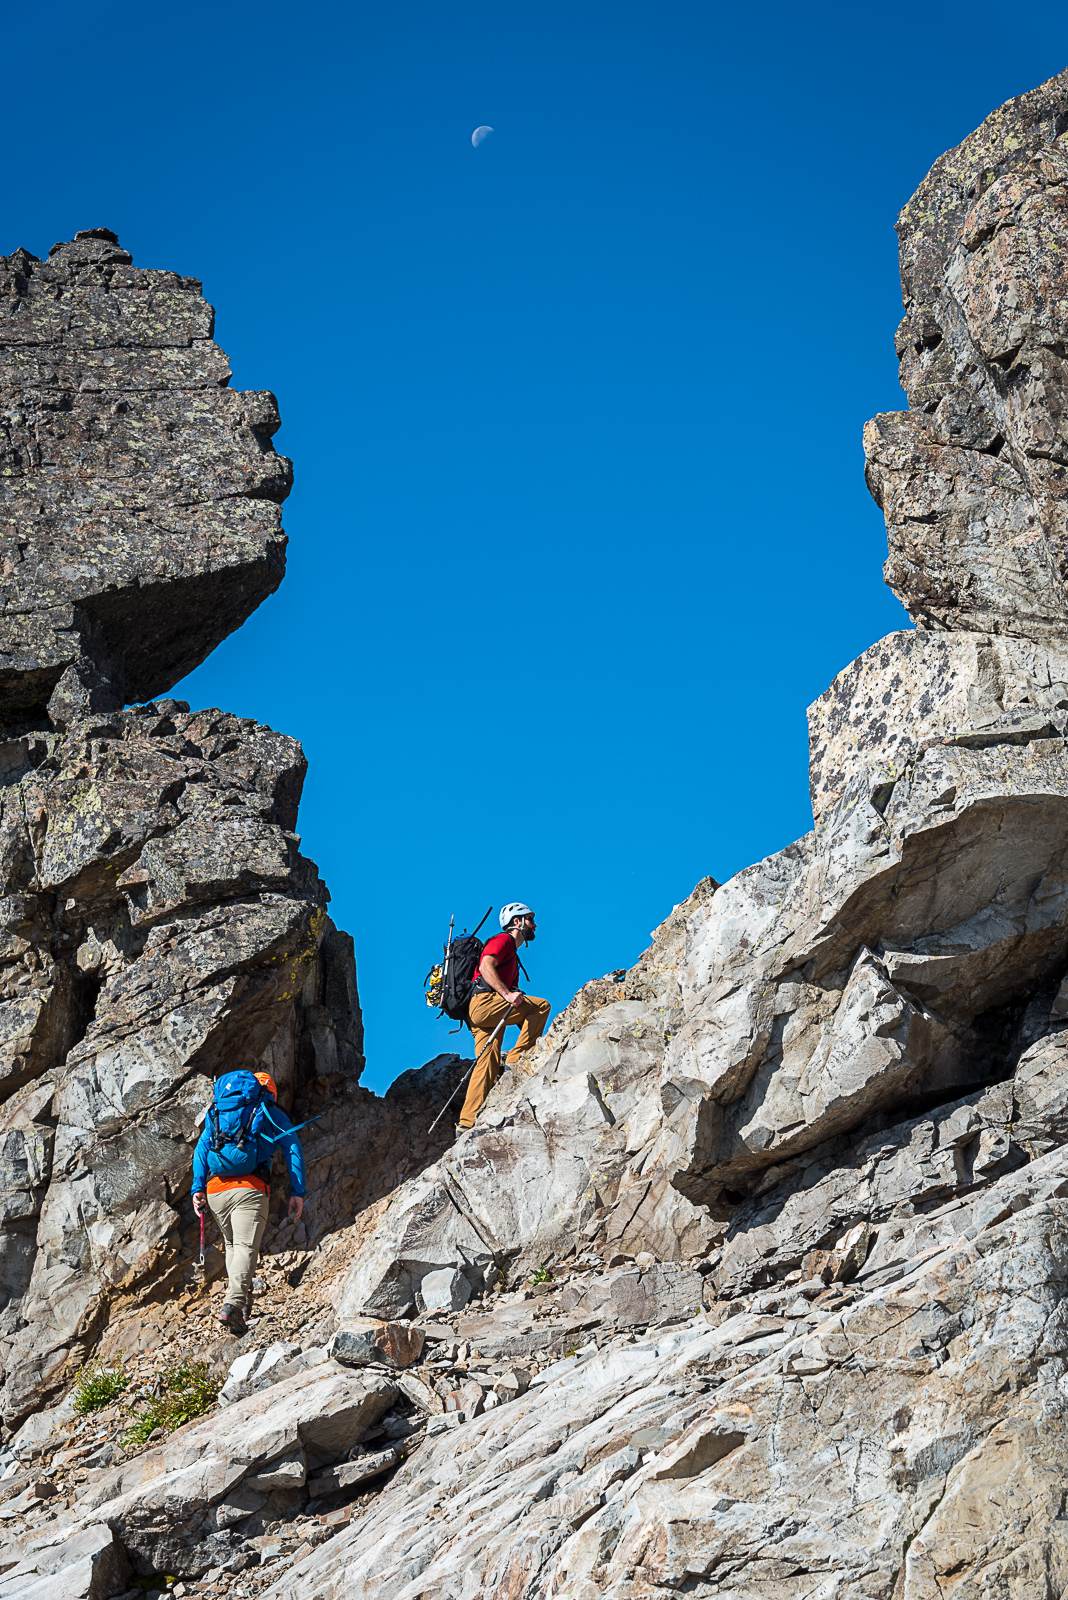
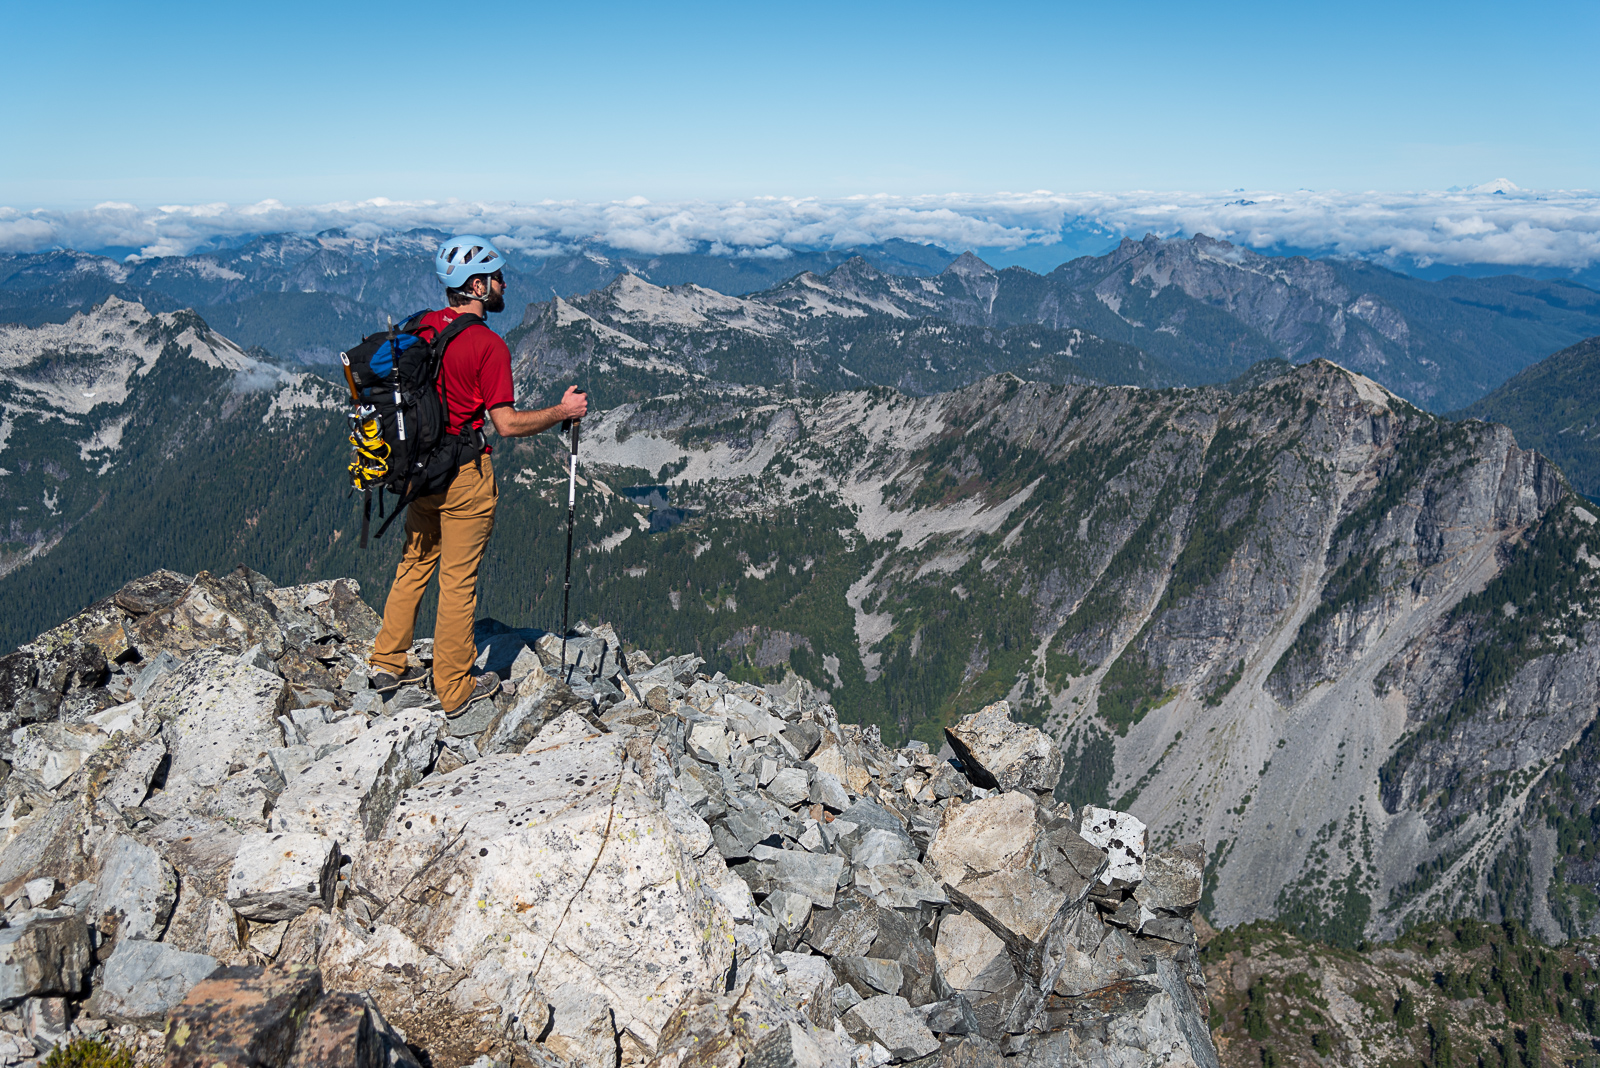
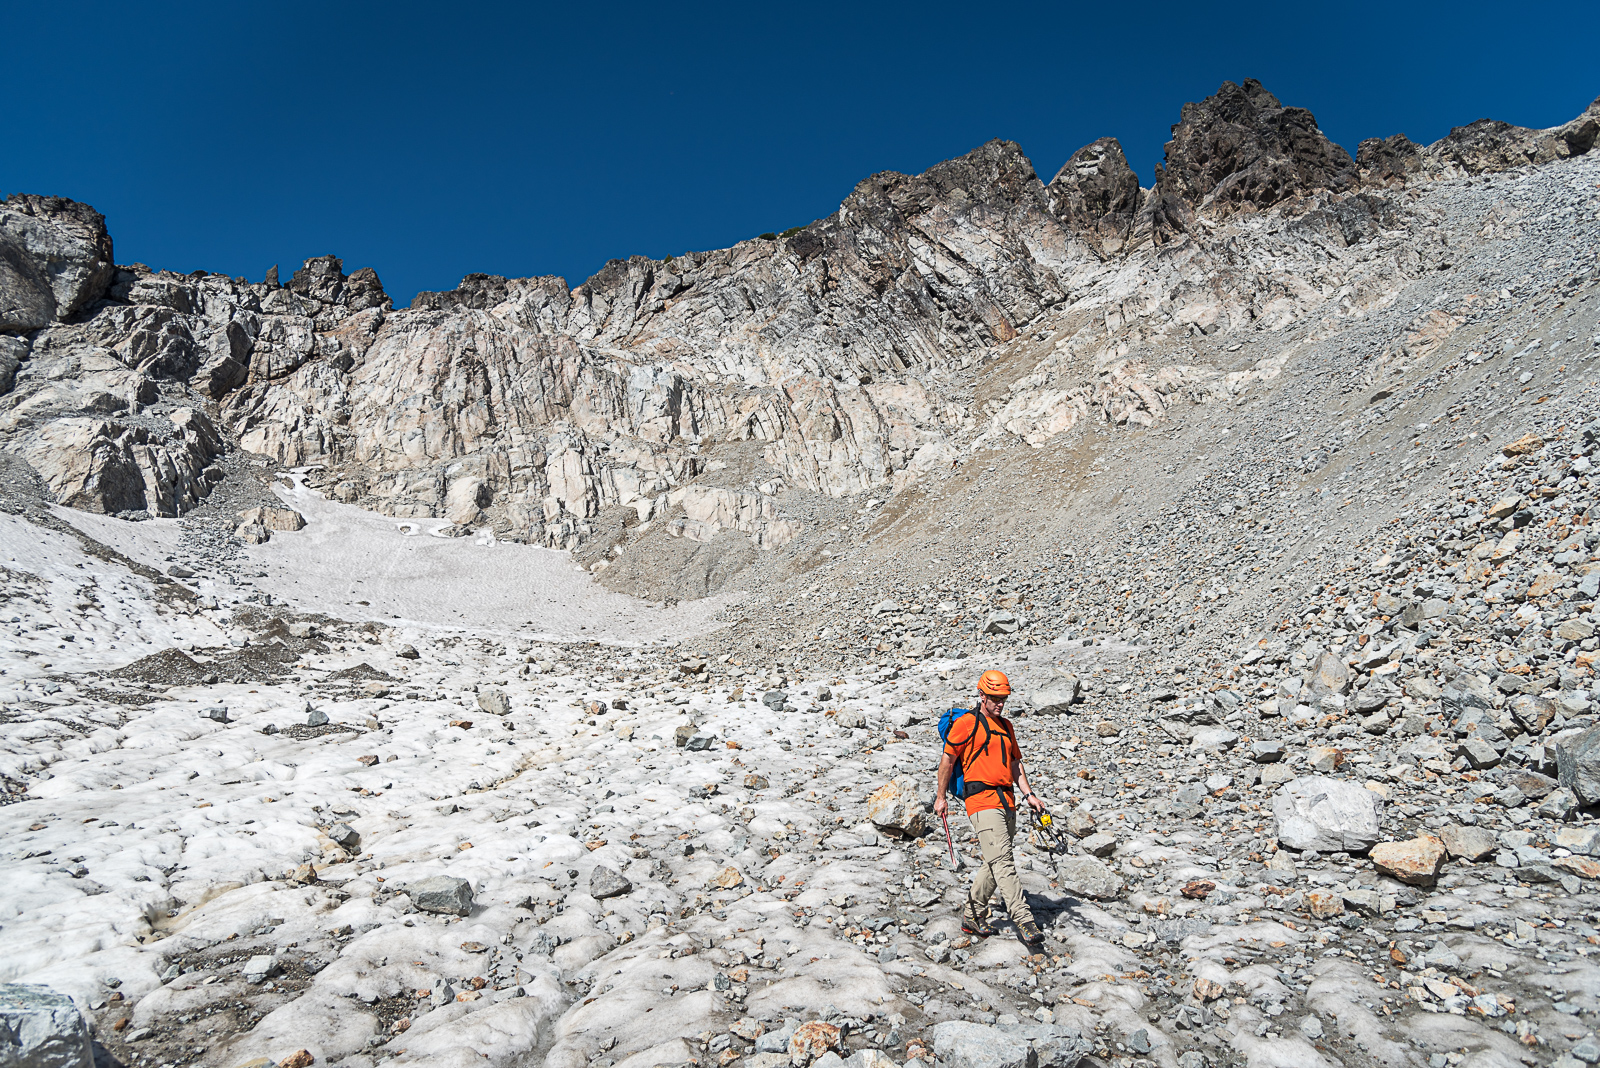
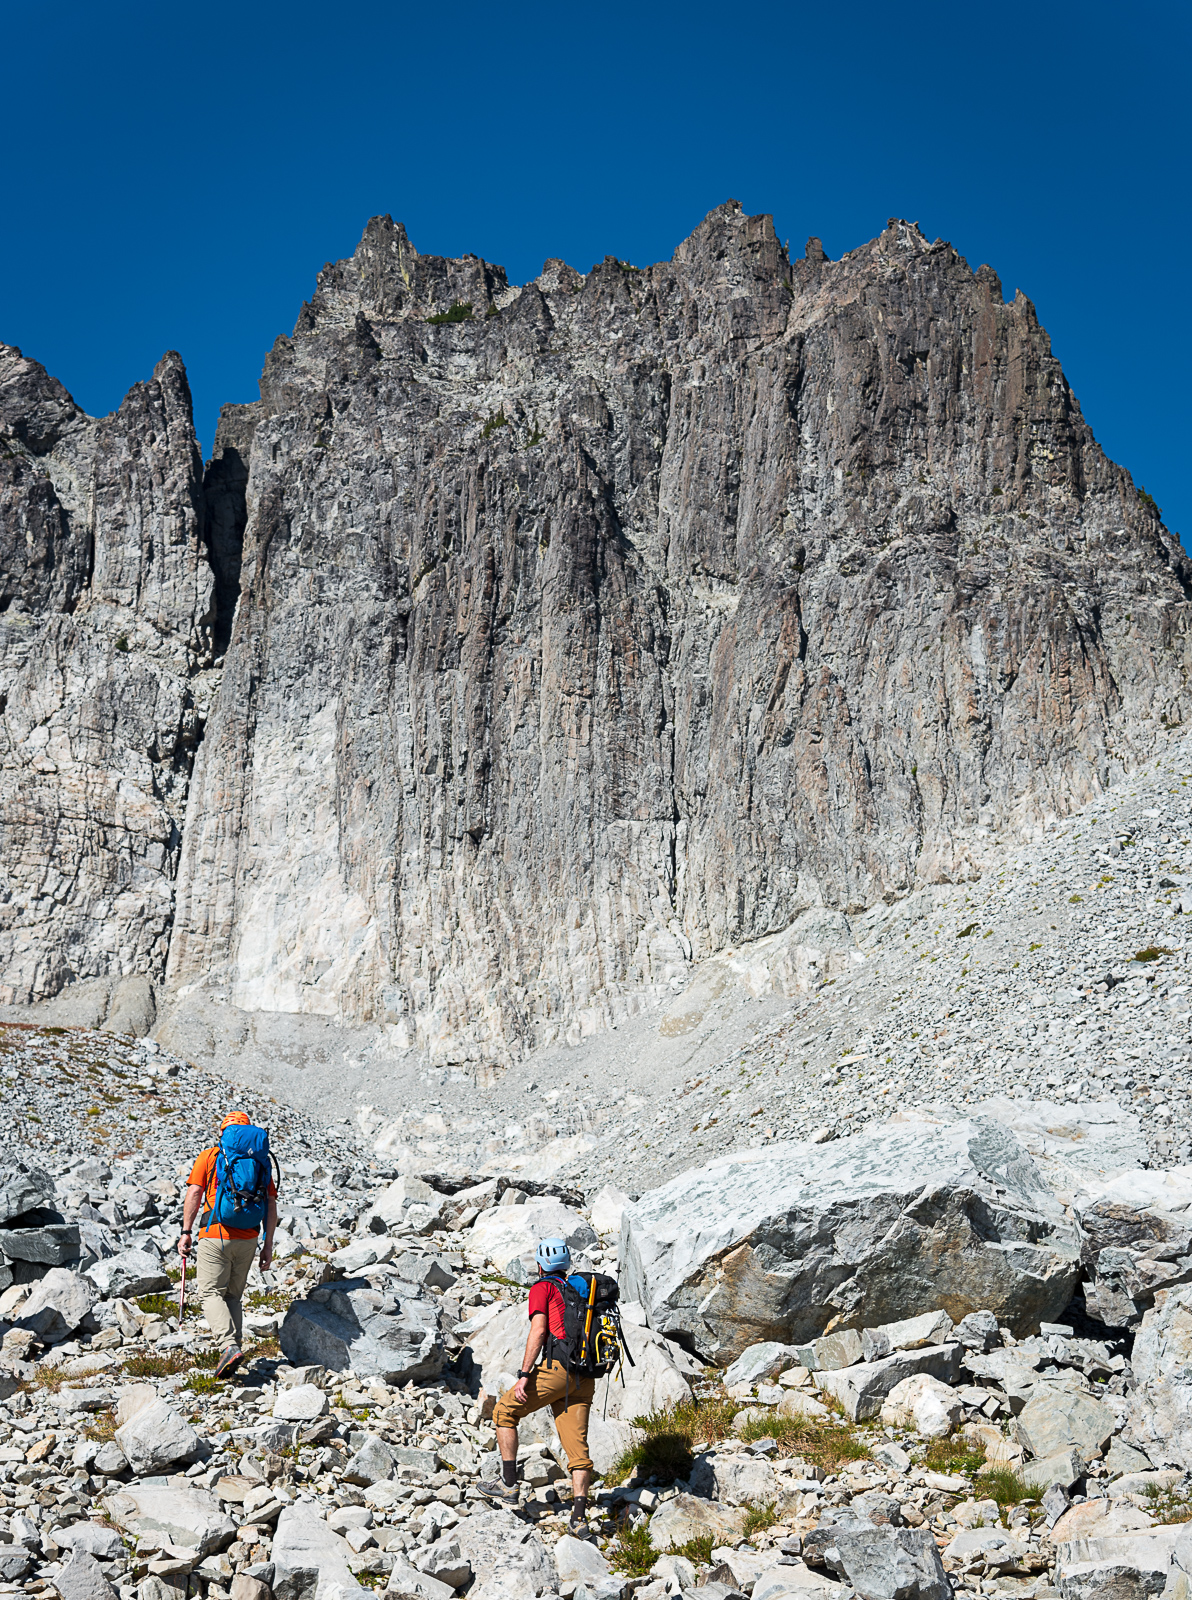
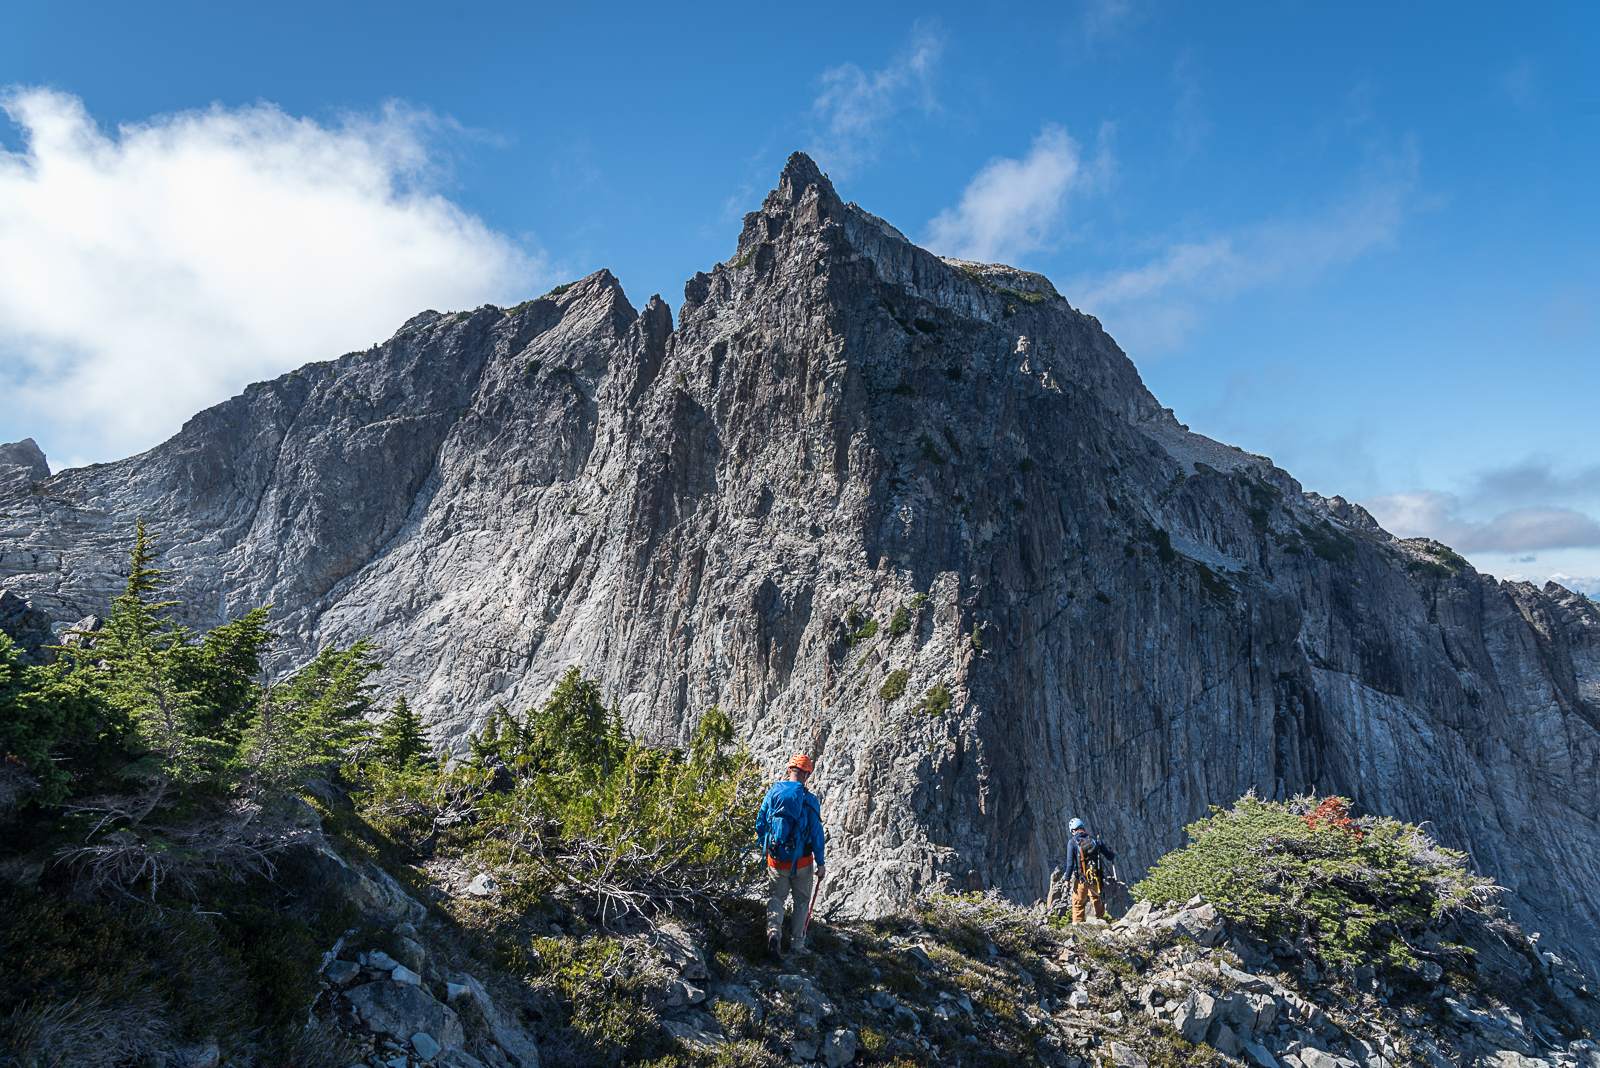
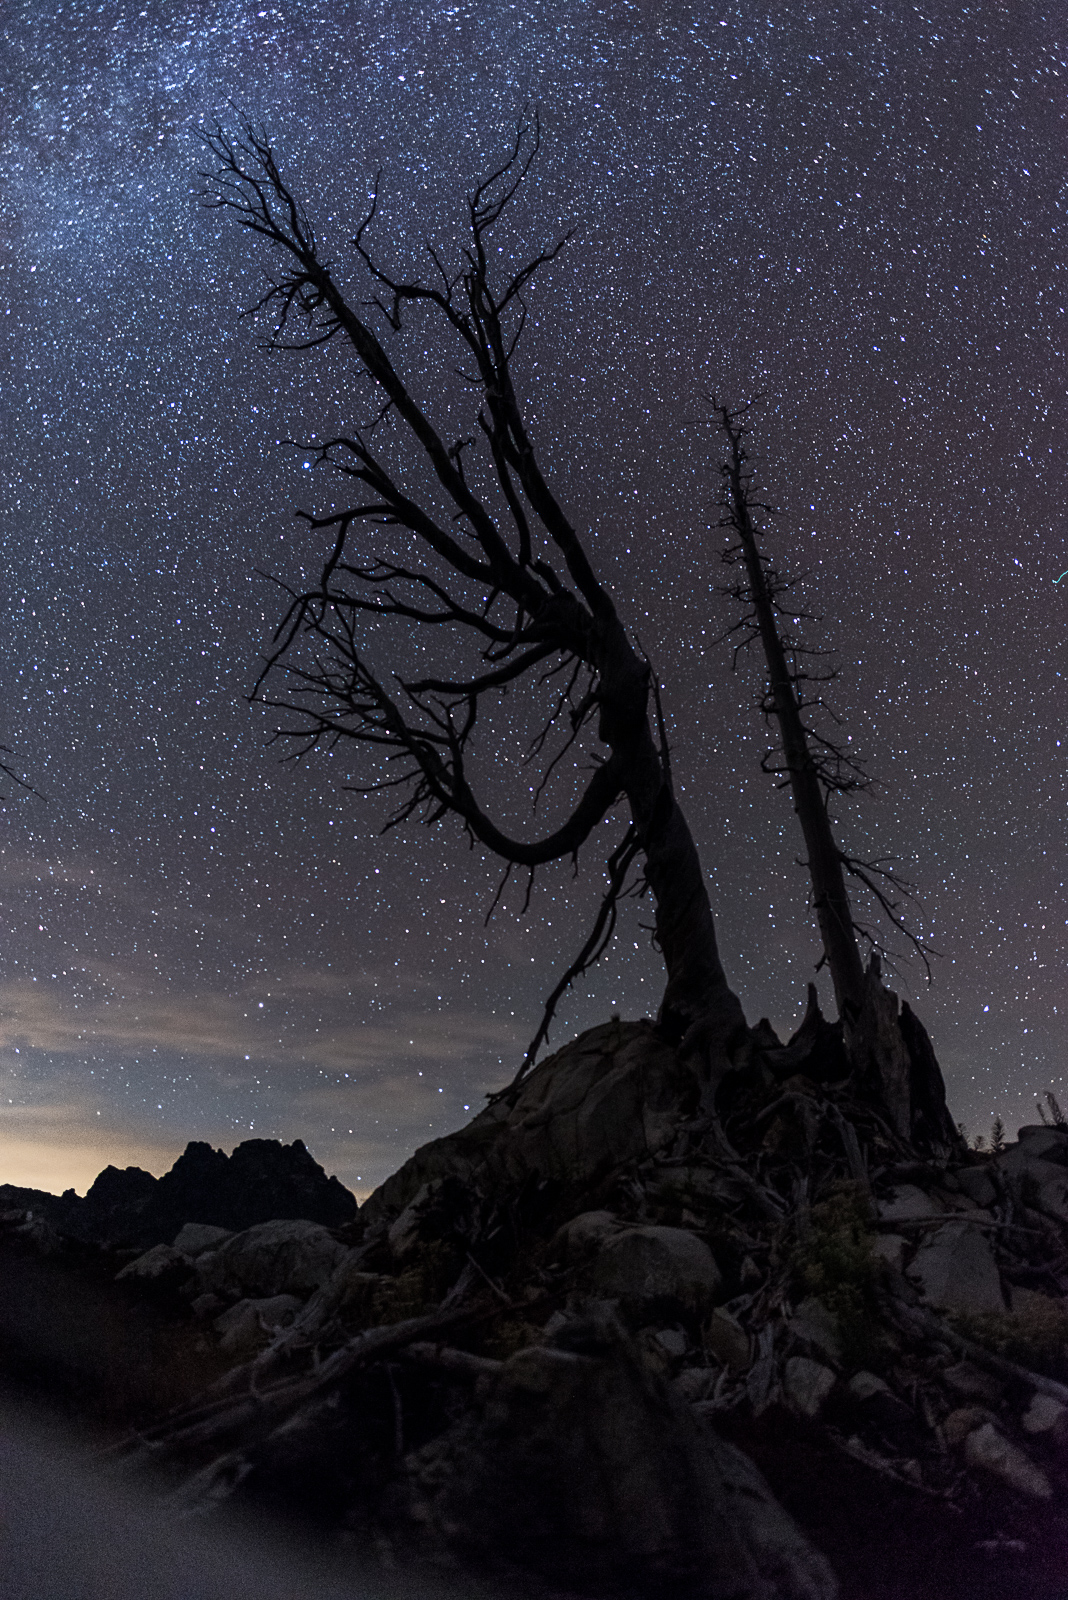
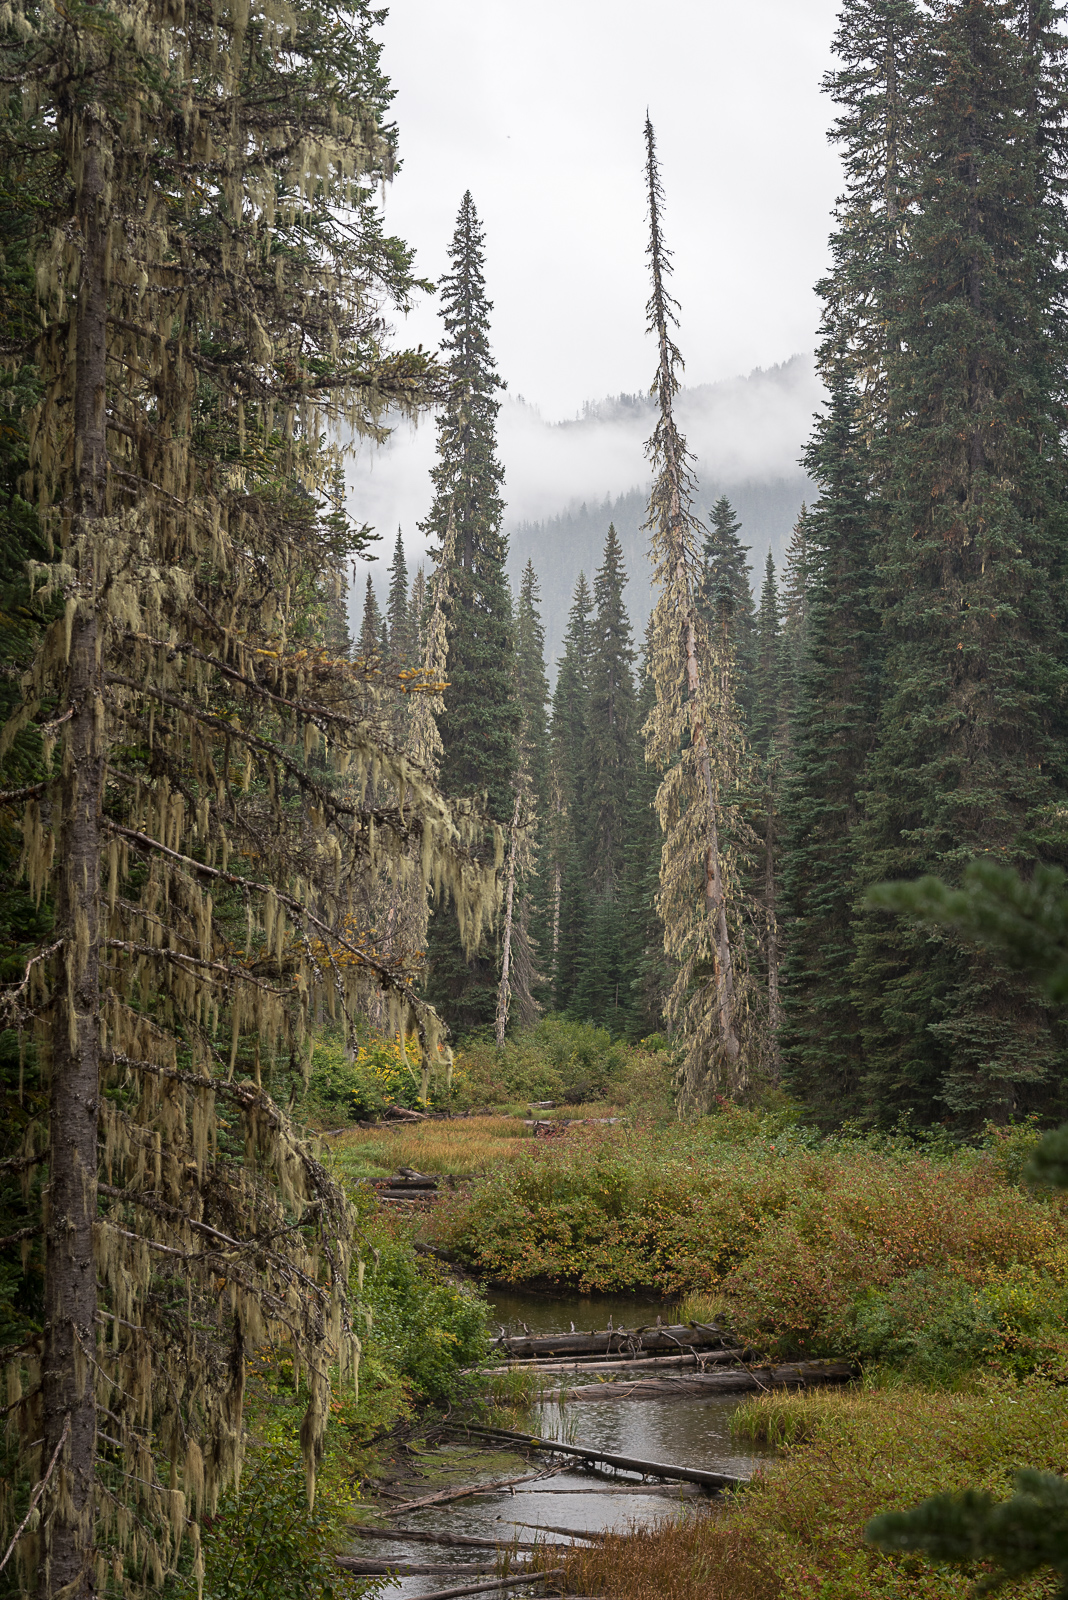
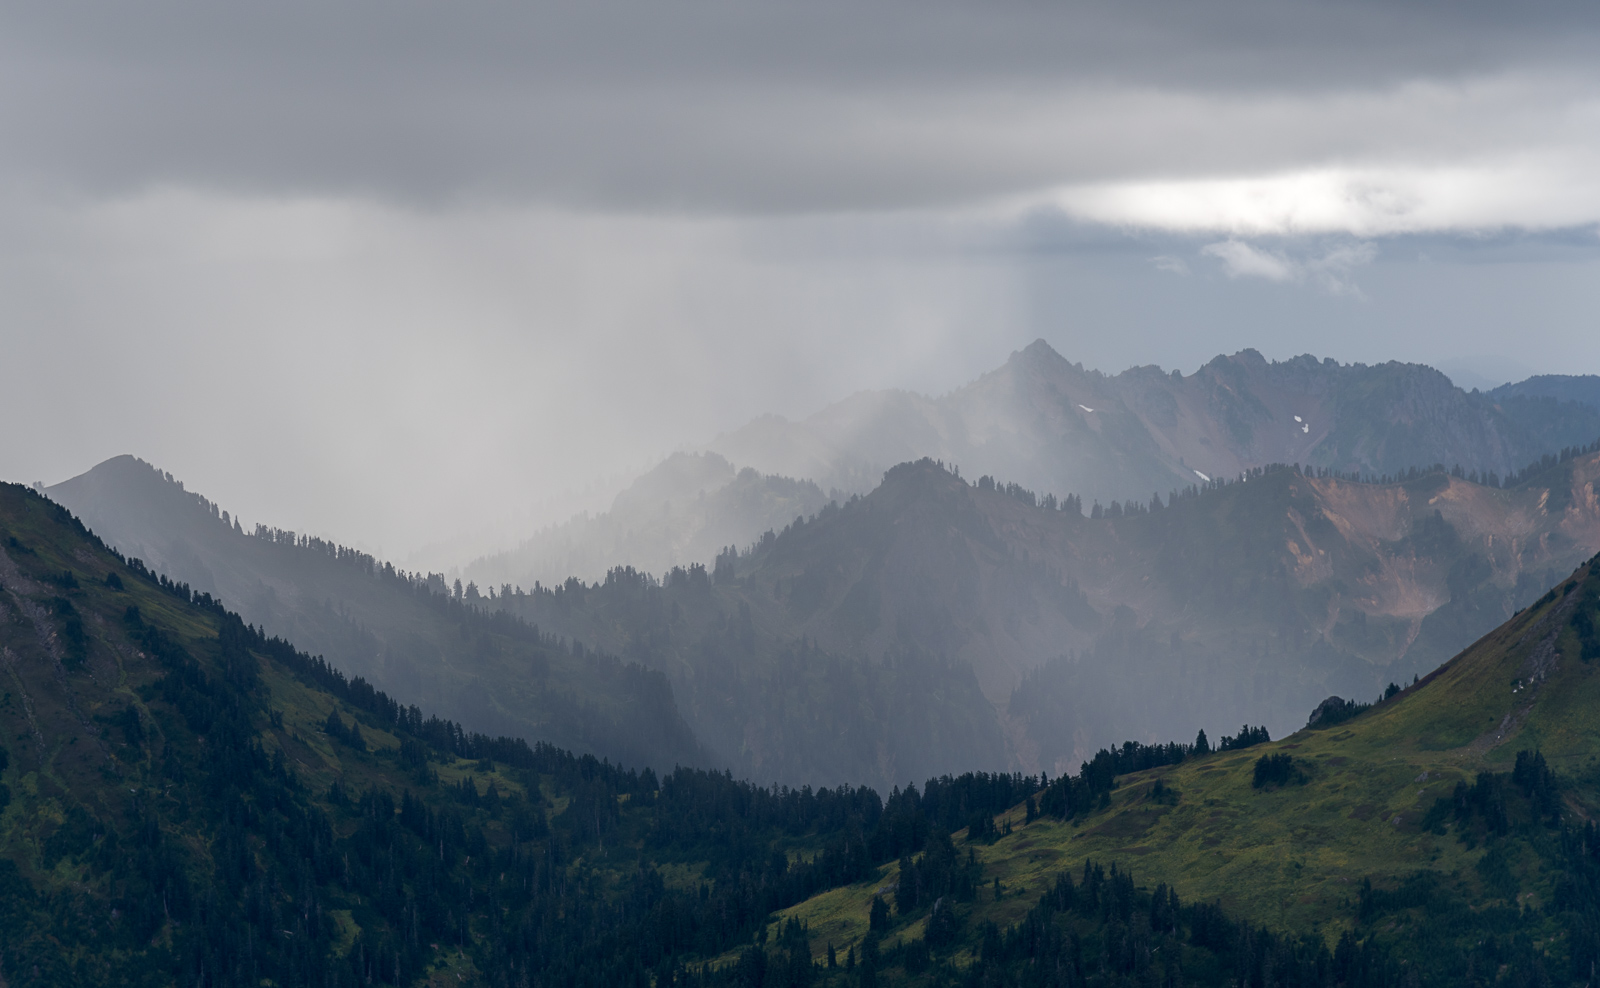
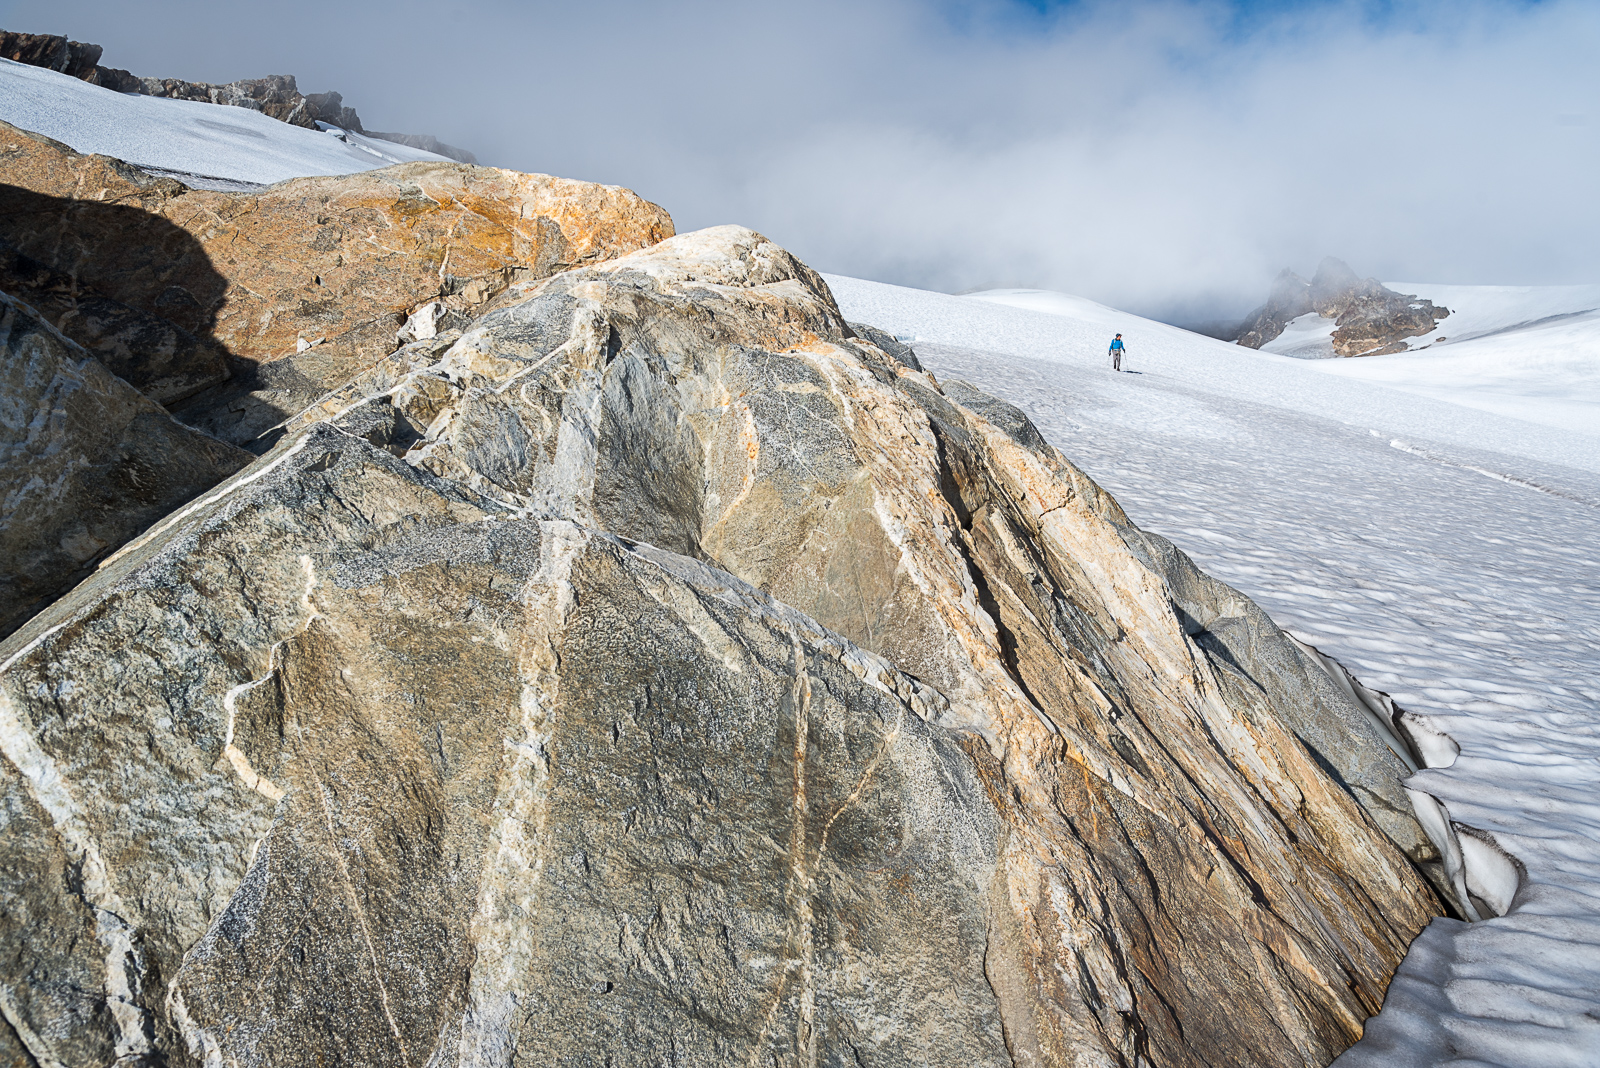
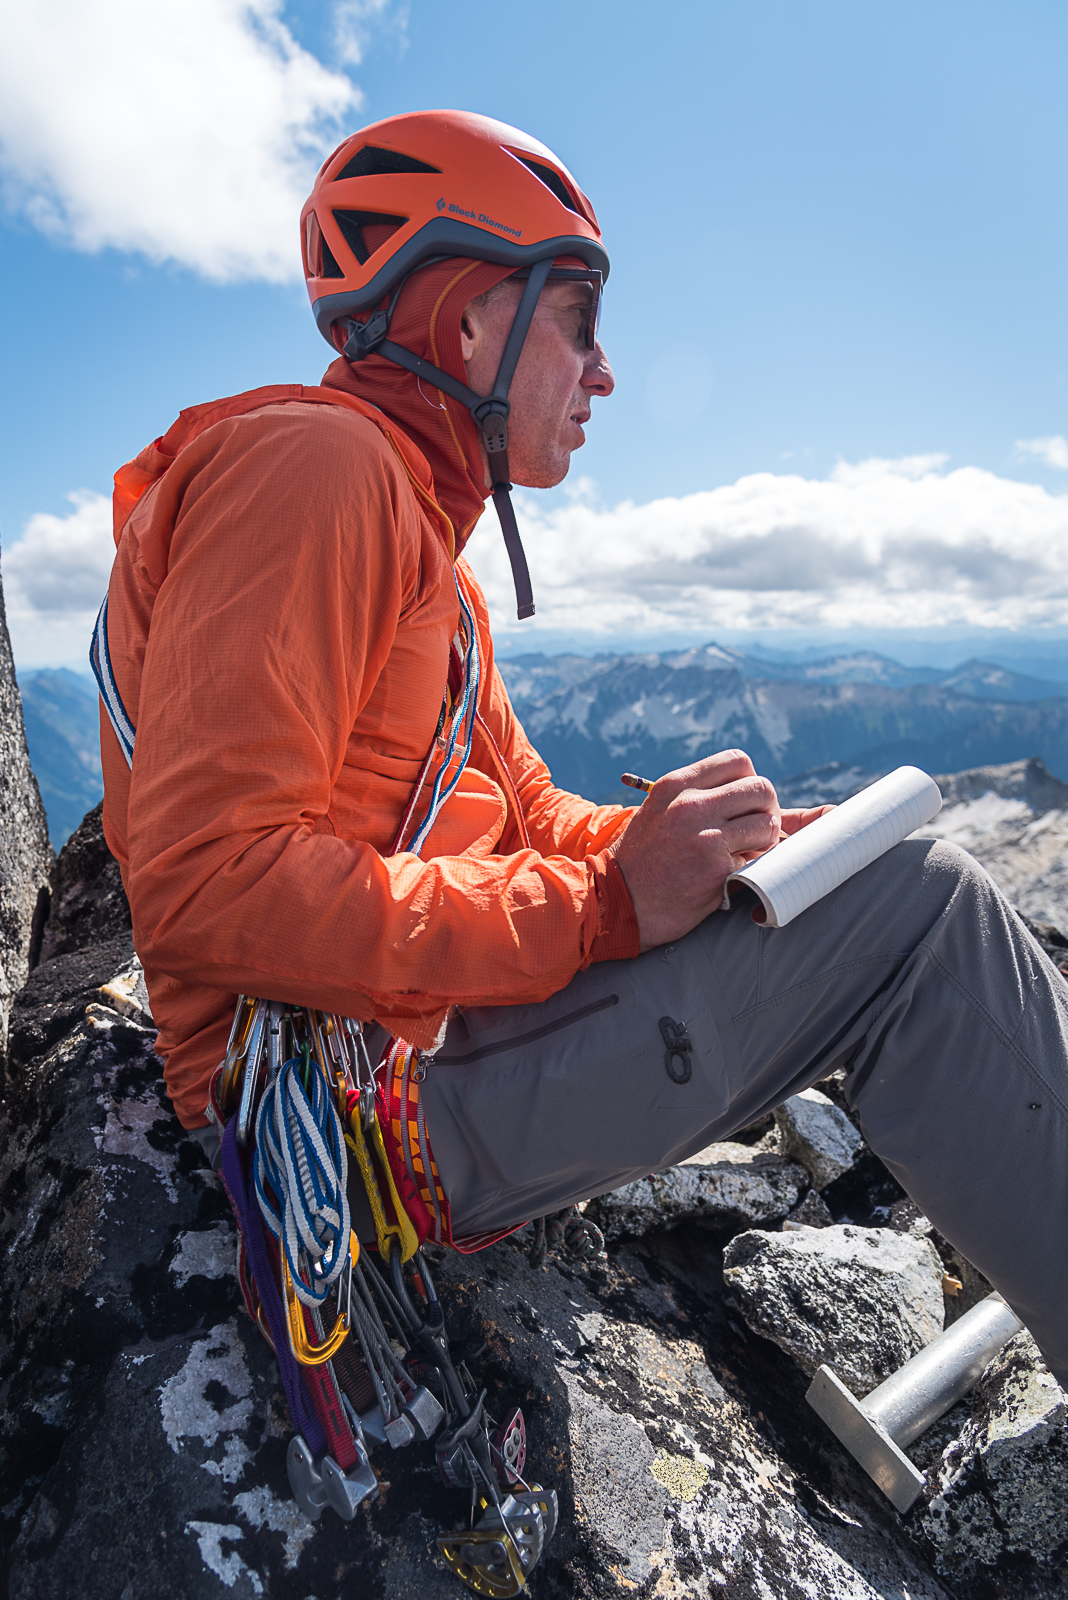
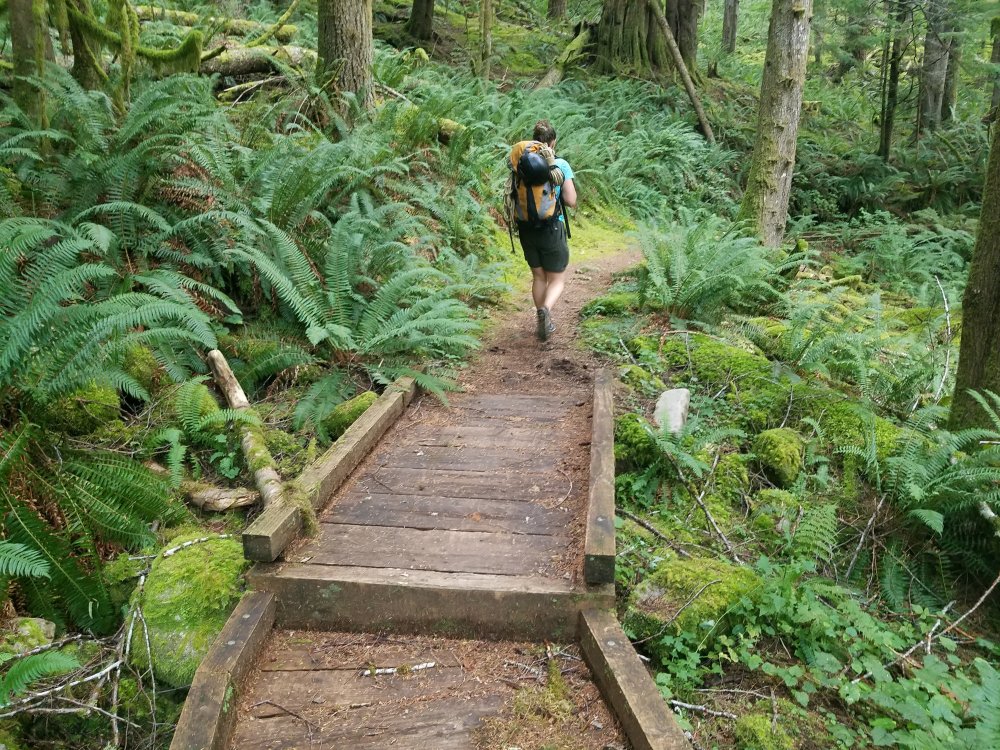
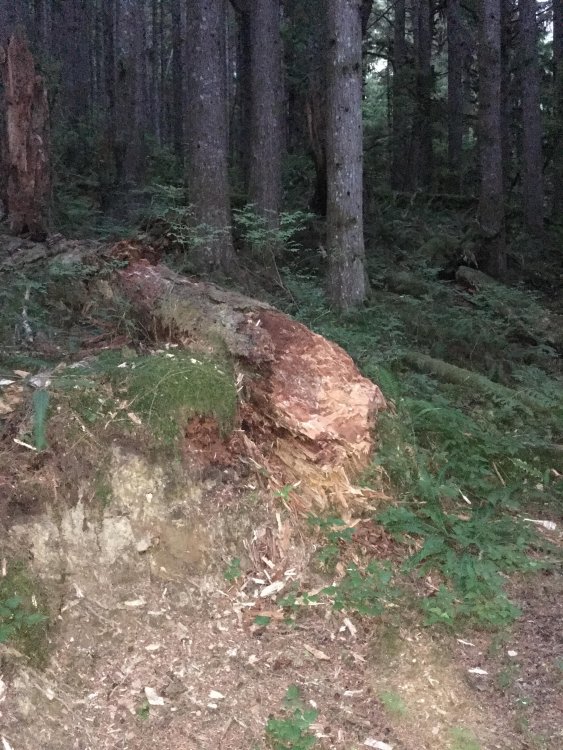
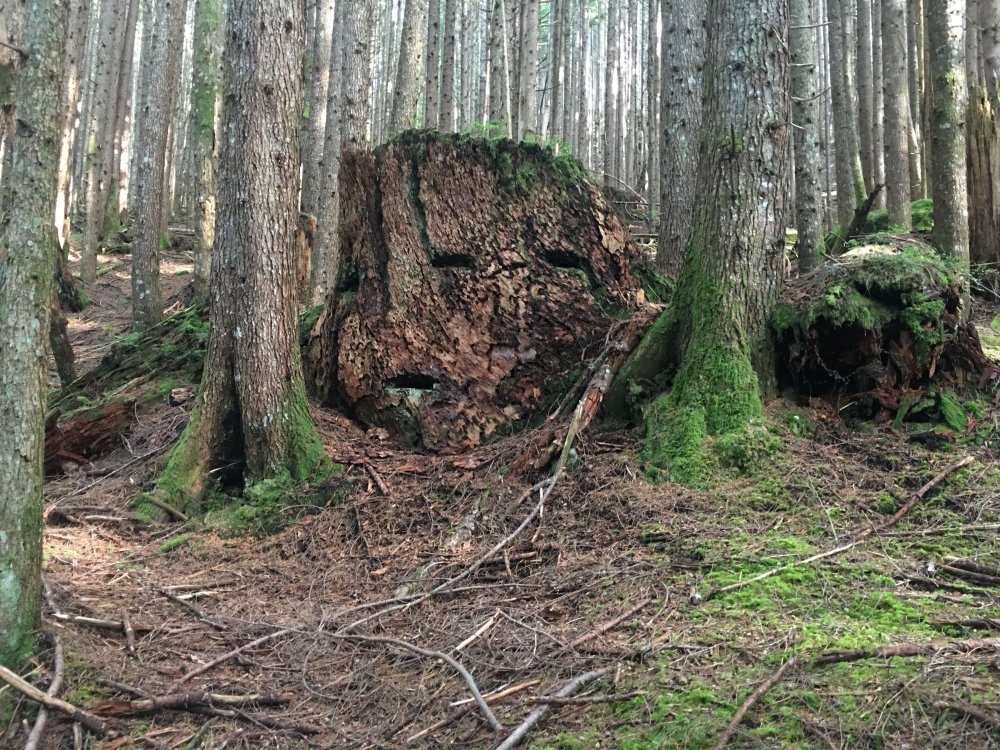
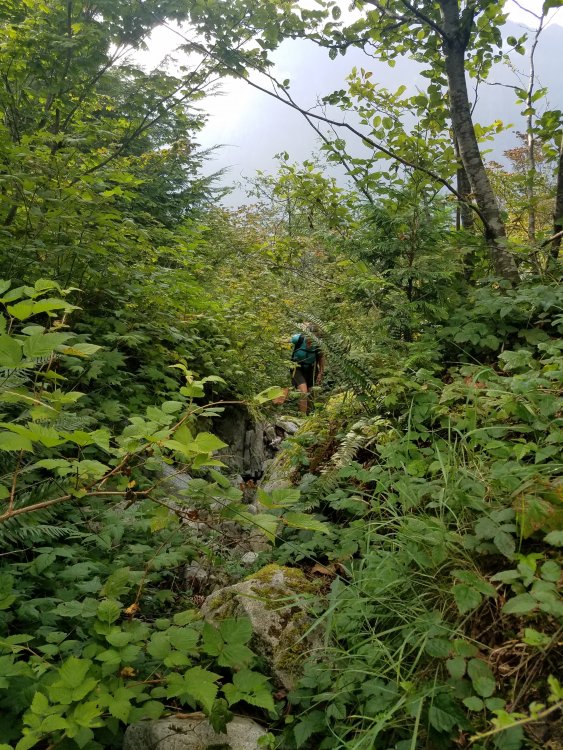
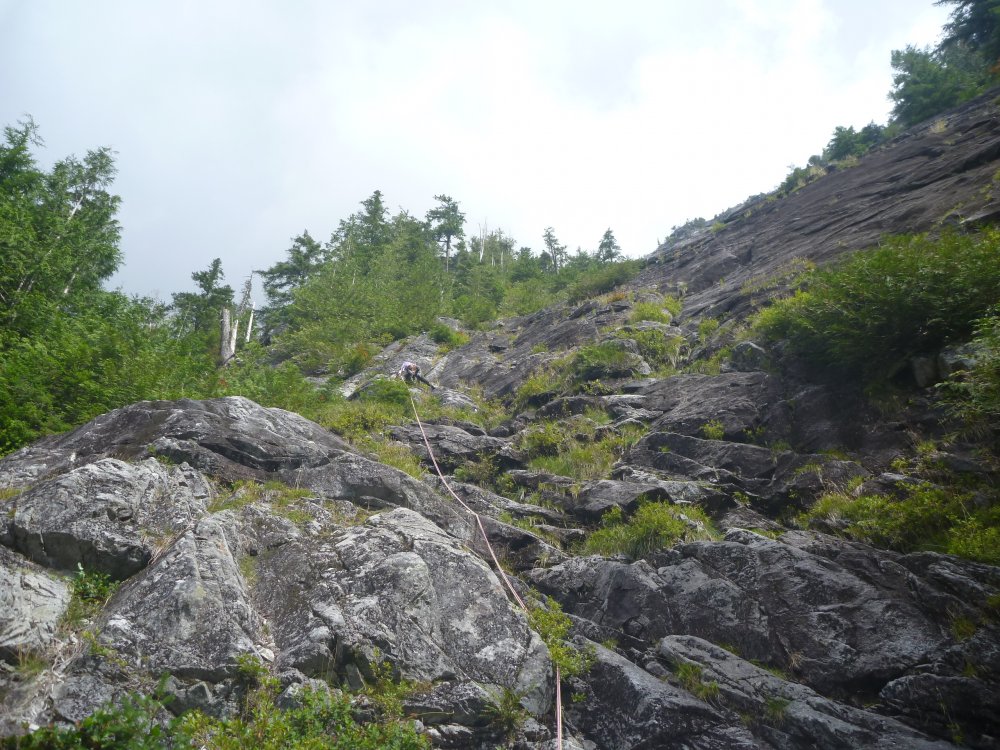
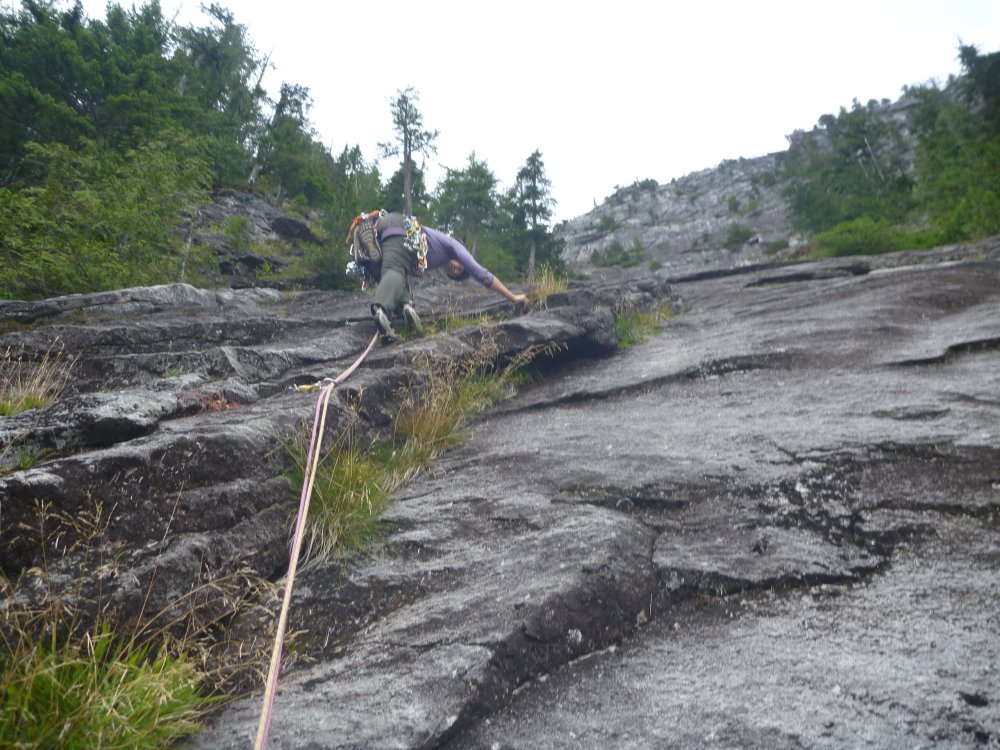
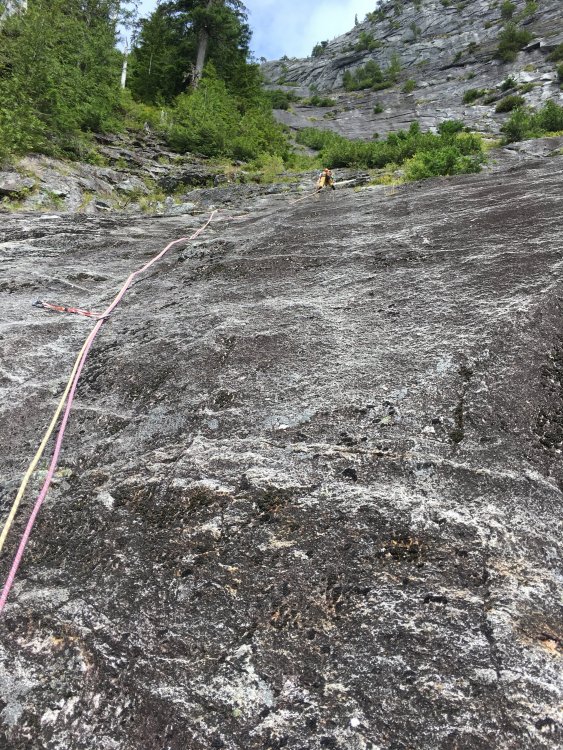
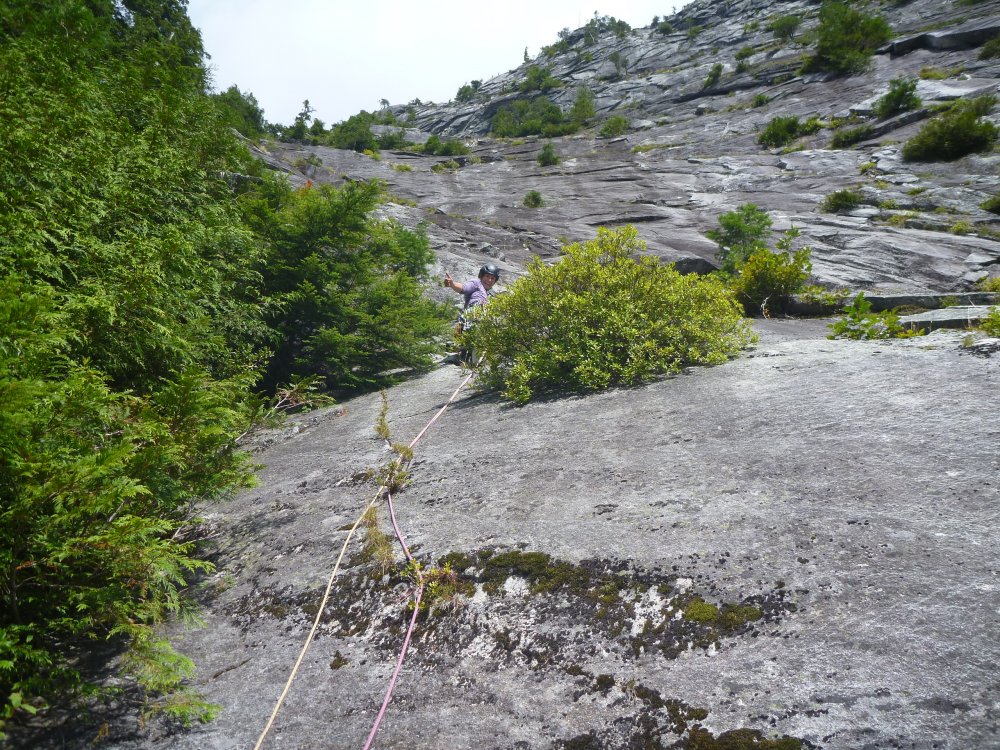
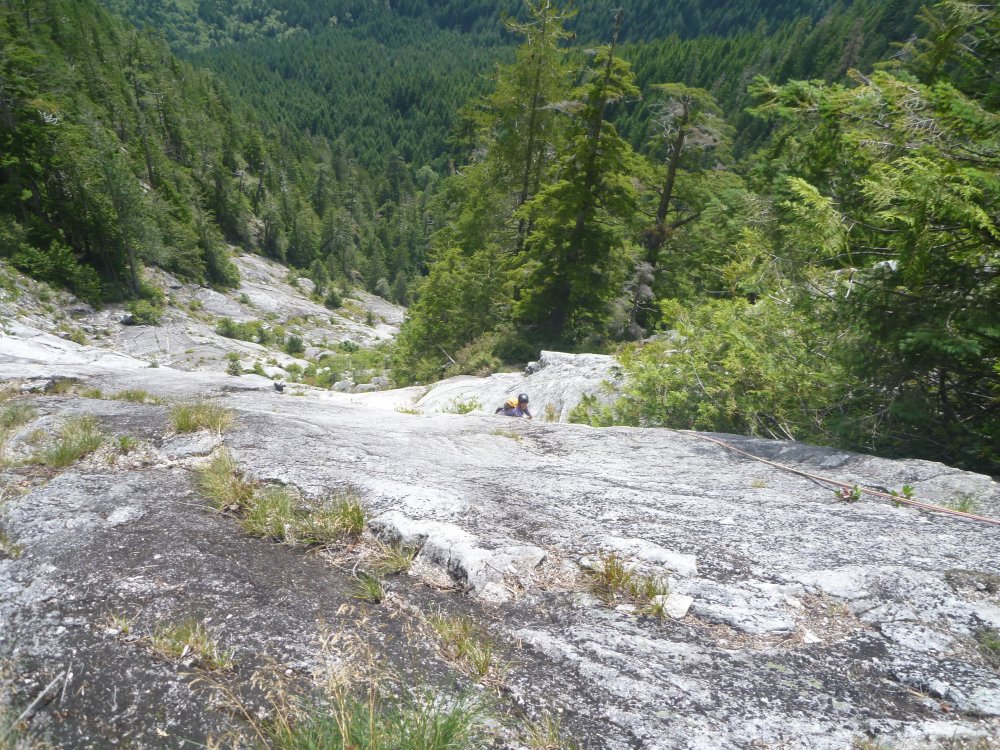
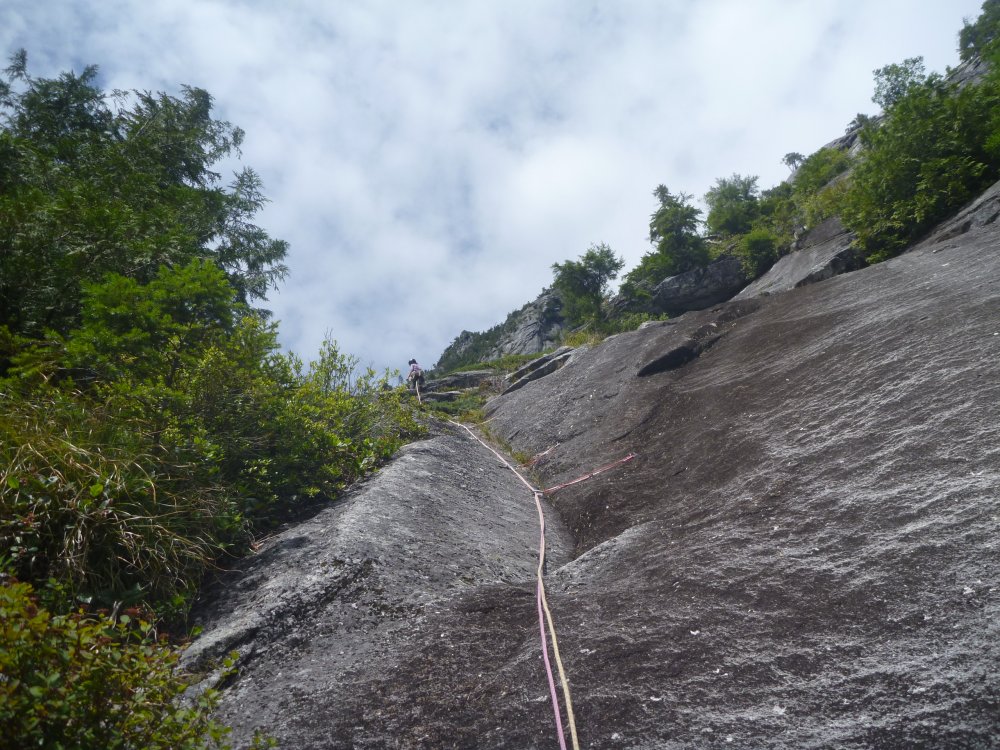
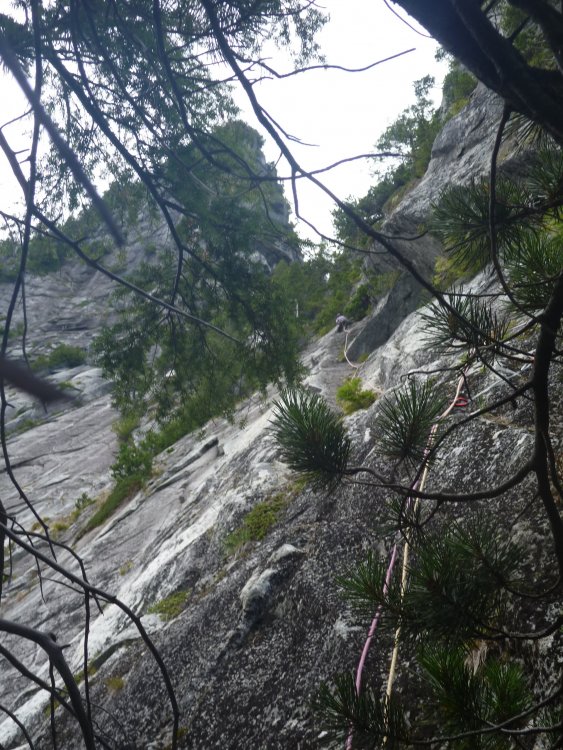
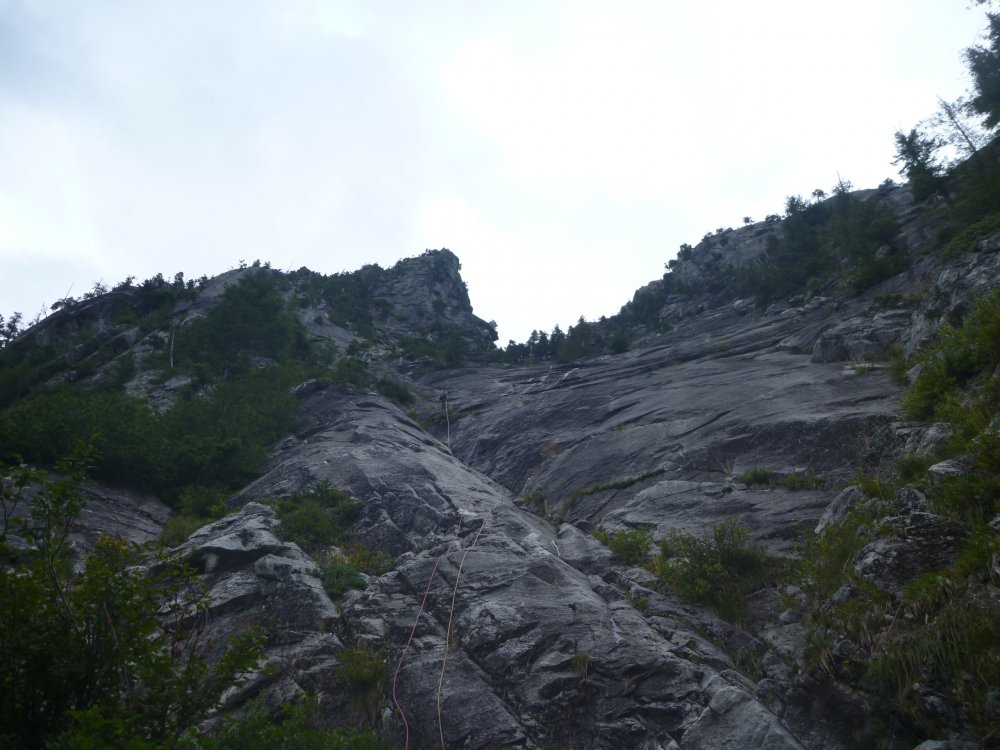
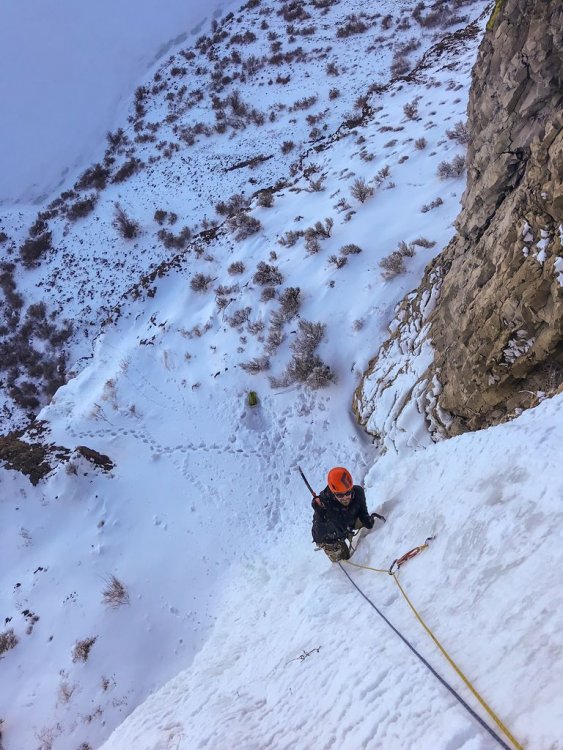
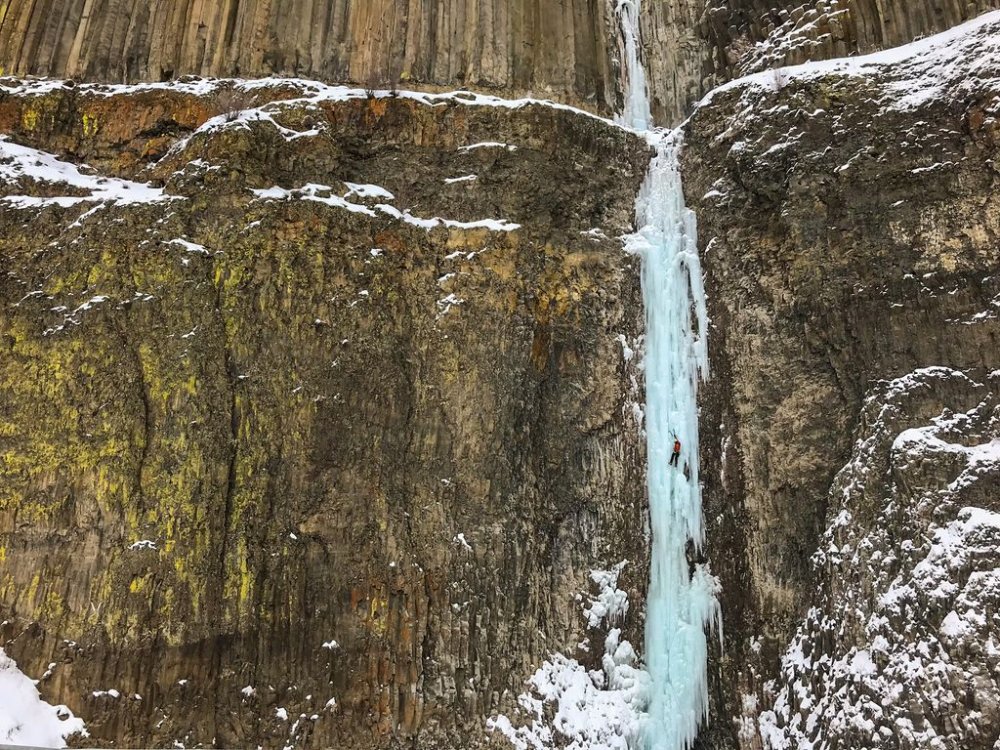
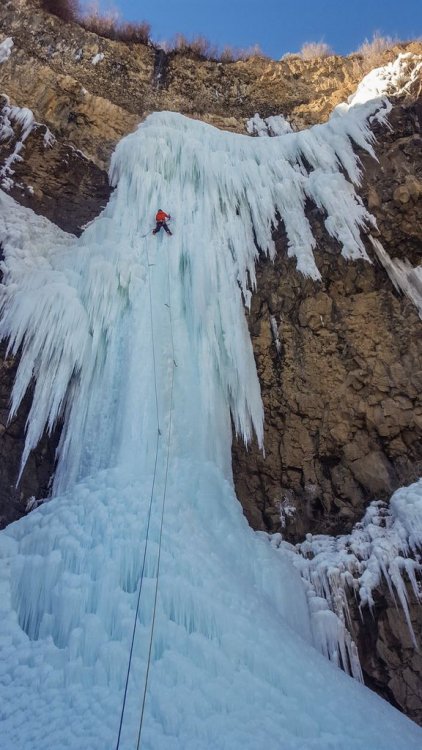
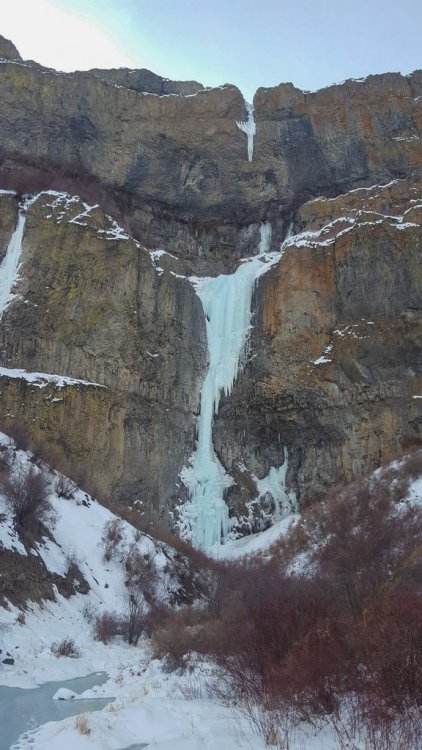
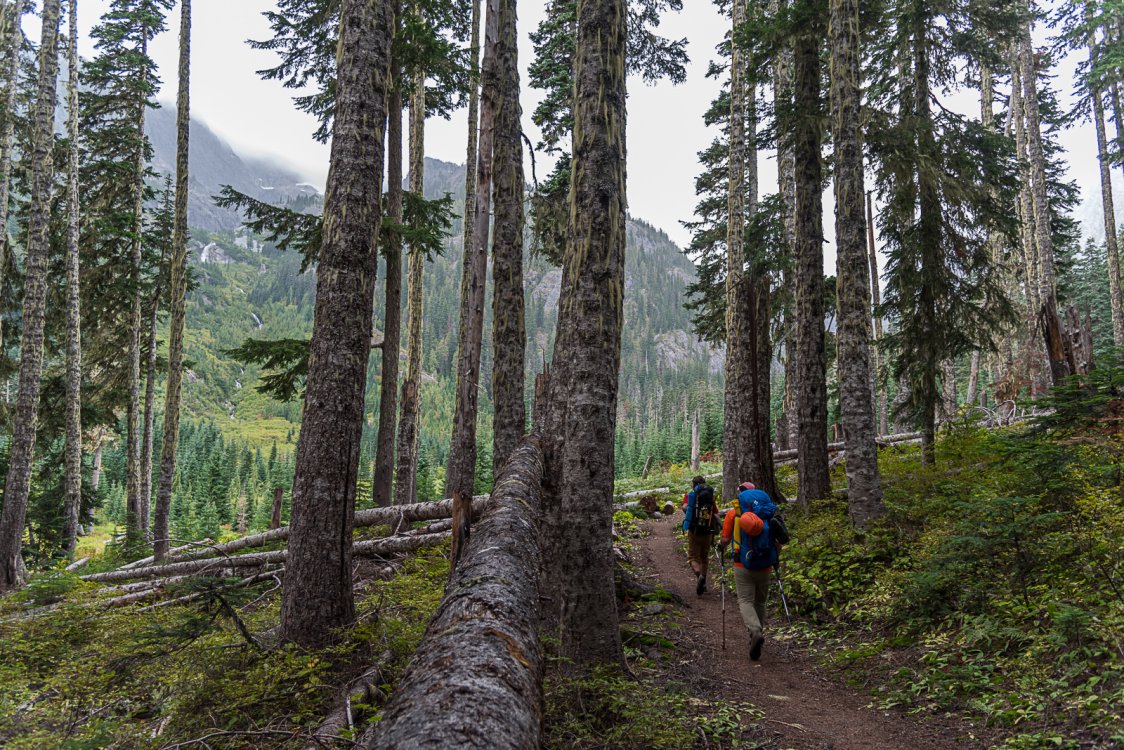
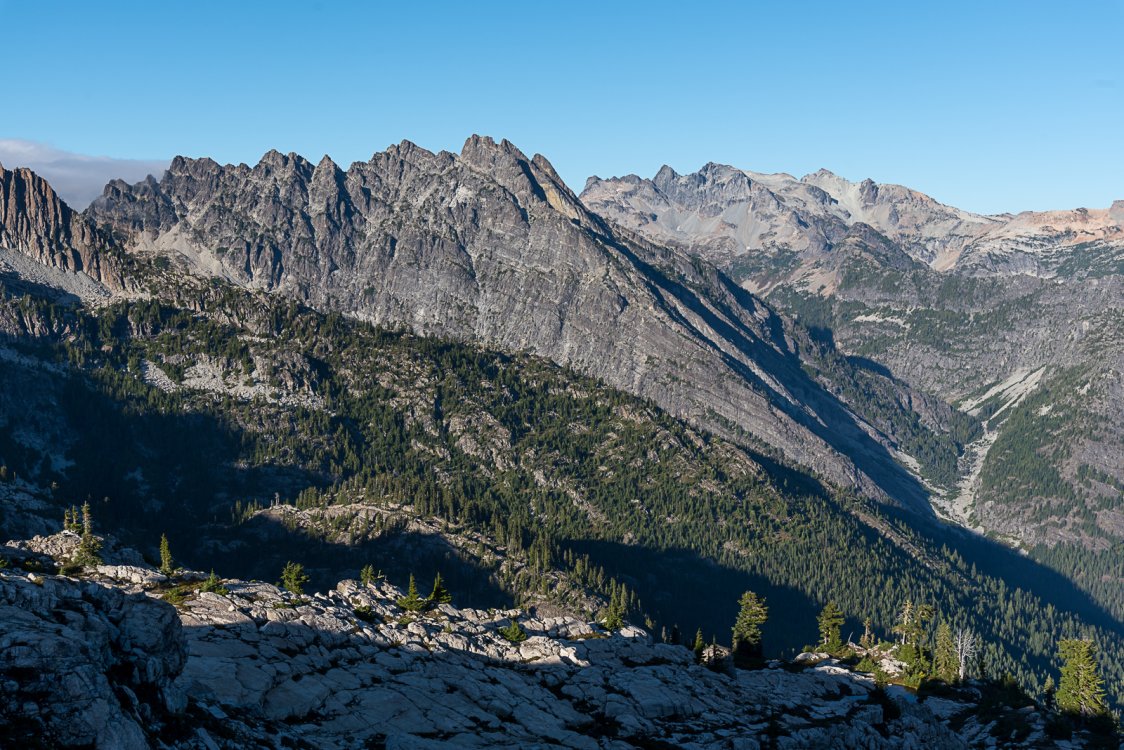
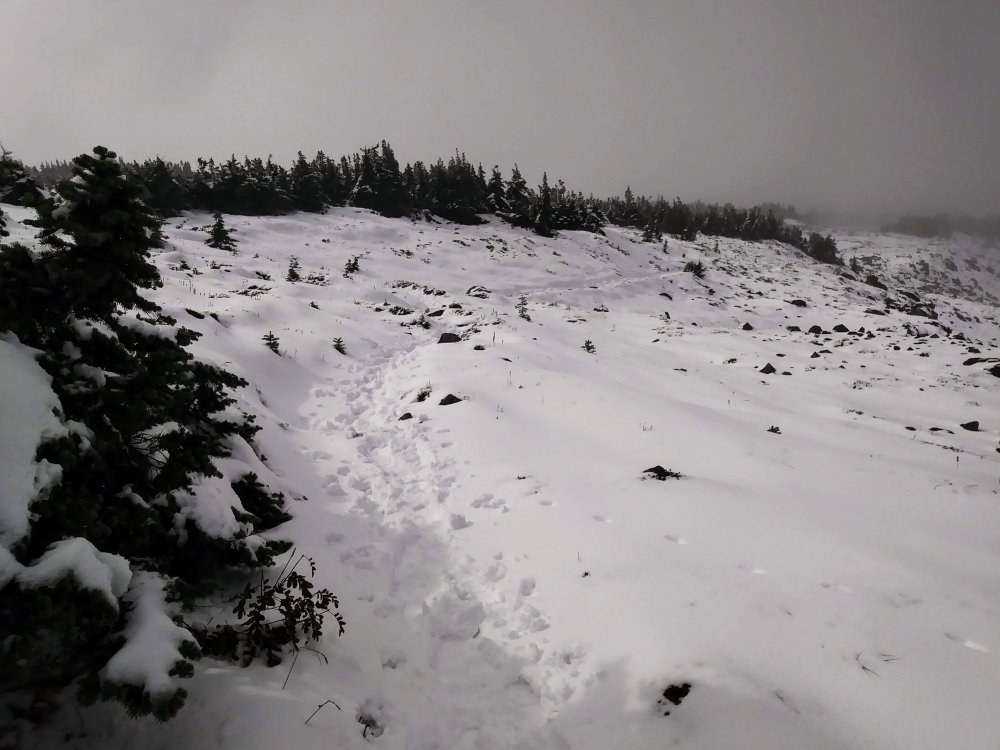
Trip: Quartz Mountain - Training Day Trip Date: 08/24/2019 Trip Report: After reading through Kurt's new book "Snoqualmie Rock" Training Day stood out as a climb to do. I convinced my wife to climb, found some friends to watch our kids and off we went. Unfortunately, we went 2 miles down the wrong path before realizing our mistake and turning around. Note: When parking at the CCC trail pullout, DO NOT START HIKING ON THE TRAIL FROM THE PULLOUT! My wife and I were just chit-chatting away, oblivious that the book said hike 100 meters up the road to the trail, and oblivous that we were walking away from the mountain rather than to it. After 2 miles, we realized our mistake and backtracked. 75 minutes lost, but we just chalked it up to an extra warmup. The approach description in the book is spot it. Here is the bridge with the step. Walk a couple minutes past the bridge and turn left (uphill) at this log. You should see a pink ribbon up the hill. The trail heads up, up, up. Keep following the flags (half of which are now on the ground) and the faint climbers trail as it appears and disappears. Pass Face Stump and keep going up. The trail gets into the overgrown wash and follows some cairns before entering several hundred meters of pure sticker-bush wacking. Finally we reached the base of the climb. The book says the rappel is just uphill. It is 200 meters of uphill bushwacking. We left our packs at the base but carried our approach shoes on the climb for the wack back. You can bushwach back in your climbing shoes, but that just sounds painful. Start of the climb. It goes at 5.6 and was easily protected. After the roof, go right of the small Go right of the trees above the roof on easy low-5th terrain and scramble to the belay. It if wasn't for this start, the first pitch can be easily scrambled without rope. Looking up at pitch 2. 2nd pitch is also a scramble. Could be combined with a 1st pitch simu-climb if not for that start. Teresa starting up pitch 4. Book says it is 5.9. Maybe one move of 5.9. It wasn't hard at all and very well protected. Heading up pitch 5. The anchors are hidden behind the bushes and it is 62 meters. Teresa had to come off the anchor and climb a few feet so I could get to the anchors. Teresa heading up pitch 6. The slab below the bush is clean but no bolts. We had to go left into the bushes which was dirty and wet. One bolt halfway up the slab would have made the start of this pitch really nice instead of dirty and wet. Pitch 7. The money pitch. 22 bolts of 5.10a slab. It is very well protected and one can aid through it quite easily. I ended up skipping 5 bolts or so, especially near the top where the bolts are next to a beautiful flake. I jammed the flake and passed three bolts before I knew it. The top of the pitch is the infamous tree grab. Looking down at the bush dive. I didn't enjoy this at all. The limbs are small and felt like they would rip out of the trees and any moment. I agree with other posters that a few bolts on the slab would have made this so much better. Pitch 8. Great climbing to the arete. Then the route goes up right through some dirty and trees. Going left leads to beautiful, clean slab and a couple of cracks. Not sure if left would go without needing a bolt between the blank spot between cracks, but it looks so much cleaner than where the route went. No pictures of pitch 9. It leavings a hanging belay over a couple small roofs. The roofs were dirty. Two bolts protect the move and it looks fun if clean. I ended up pulling on the bolts to get over the roof as the lichen and sand kept slipping under my feet. The rest of pitch ten is dirty and easy 5th, slinging a tree and climbing some loose blocks to the belay. There is a bolted belay, or a beautiful shade tree to belay from. I climbed under the tree onto a small ledge and belayed from there. To be honest, the climb could easily end here. Rapping down from the anchors would be a great climb. The last three pitches are low-quality, dirty, and scary, and didn't really add anything to the climb. That's my opinion at least. Teresa heading out on pitch 10. The moves to the detached flake and just beyond it were okay, but very dirty. Sand and lichen accumlate on this low-angle slab making it feel harder than it should have. Past the flake there is a section of unprotected, dirty slab moves to the anchor. One more bolt would have made this much safer and a quality pitch. Or even clean slab would have made this a quality pitch. Runout 5.8 on clean slab is fine. Runout on pine-needle covered micro-ledges is terrifying. Looking back at pitch 11. This pitch was horrible. If it was 20 feet lower on the clean slabs it would have been amazing. Instead it followed dirty, broken underclings with exfoliated rock, over a couple of trees, and across an unprotected finish on pine-need and dirt ledges. I couldn't see the last two bolts as they were hidden in moss, so I went straight up for a bit and saw I was clearly off route. I lowered off a sling (don't follow up to the blue sling!), kept traversing and found the two bolts. Funny thing is that there are two gear placements right above these two bolts, while there is no gear or bolts for the remaining 30 feet of unprotected 5.8 dirt slab. I found the biggest tree to belay from and brought Teresa up. Teresa took pitch 12 to the notch. It was easy 5.0 and she slung one tree. No issues, and she belayed at the biggest tree on the notch. Pitch 13 was harder to find. I thought it would go up the clean, black slab above the tree but it didn't. I took about 10 minutes of searching to find the bolts. The bolt I found was actually the third bolt, the first two being hidden in grass and moss. From the tree, go directly left on the small ledges. You will see the bolts. The belay tree is directly above her head. The first bolt is hidden at her feet. The second is hidden in the grass a few feet in front. Looking at pitch 13. It is wet but easily aided using the bolts. This is the start of the rappels. 8 full-length rappels got us down. They are full 60 meter rappels. Two are on tree stations, the other 6 are on bolts. The rappel route looks like an amazingly clean slab climb. Looking up from around rappel #4. All in all it was a decent outing. 14-hour car to car (including our 75 minute wrong-way hike.) I can't really recommend the last pitches unless you like run-out dirty slab. However, the first nine would make an amazing day on their own. This route needs to see more people to keep it in shape. Get out there and do it! Gear Notes: Rack up to 3". We brought nuts but never used them. We used maybe 10 pieces of gear on the whole route. Green and yellow alien, .4 through #3 BD would be just fine. Lost and lots of alpine slings. You don't need 22 slings though. On the 5.10a pitch, you can reach down and unclip the sling below you so you can get by with about 12 normal slings and 4 double slings. Approach Notes: Long, steep and spikey. There is a faint climbers trail, but it needs more feet to create a path through the bush-whack top.


-
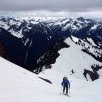
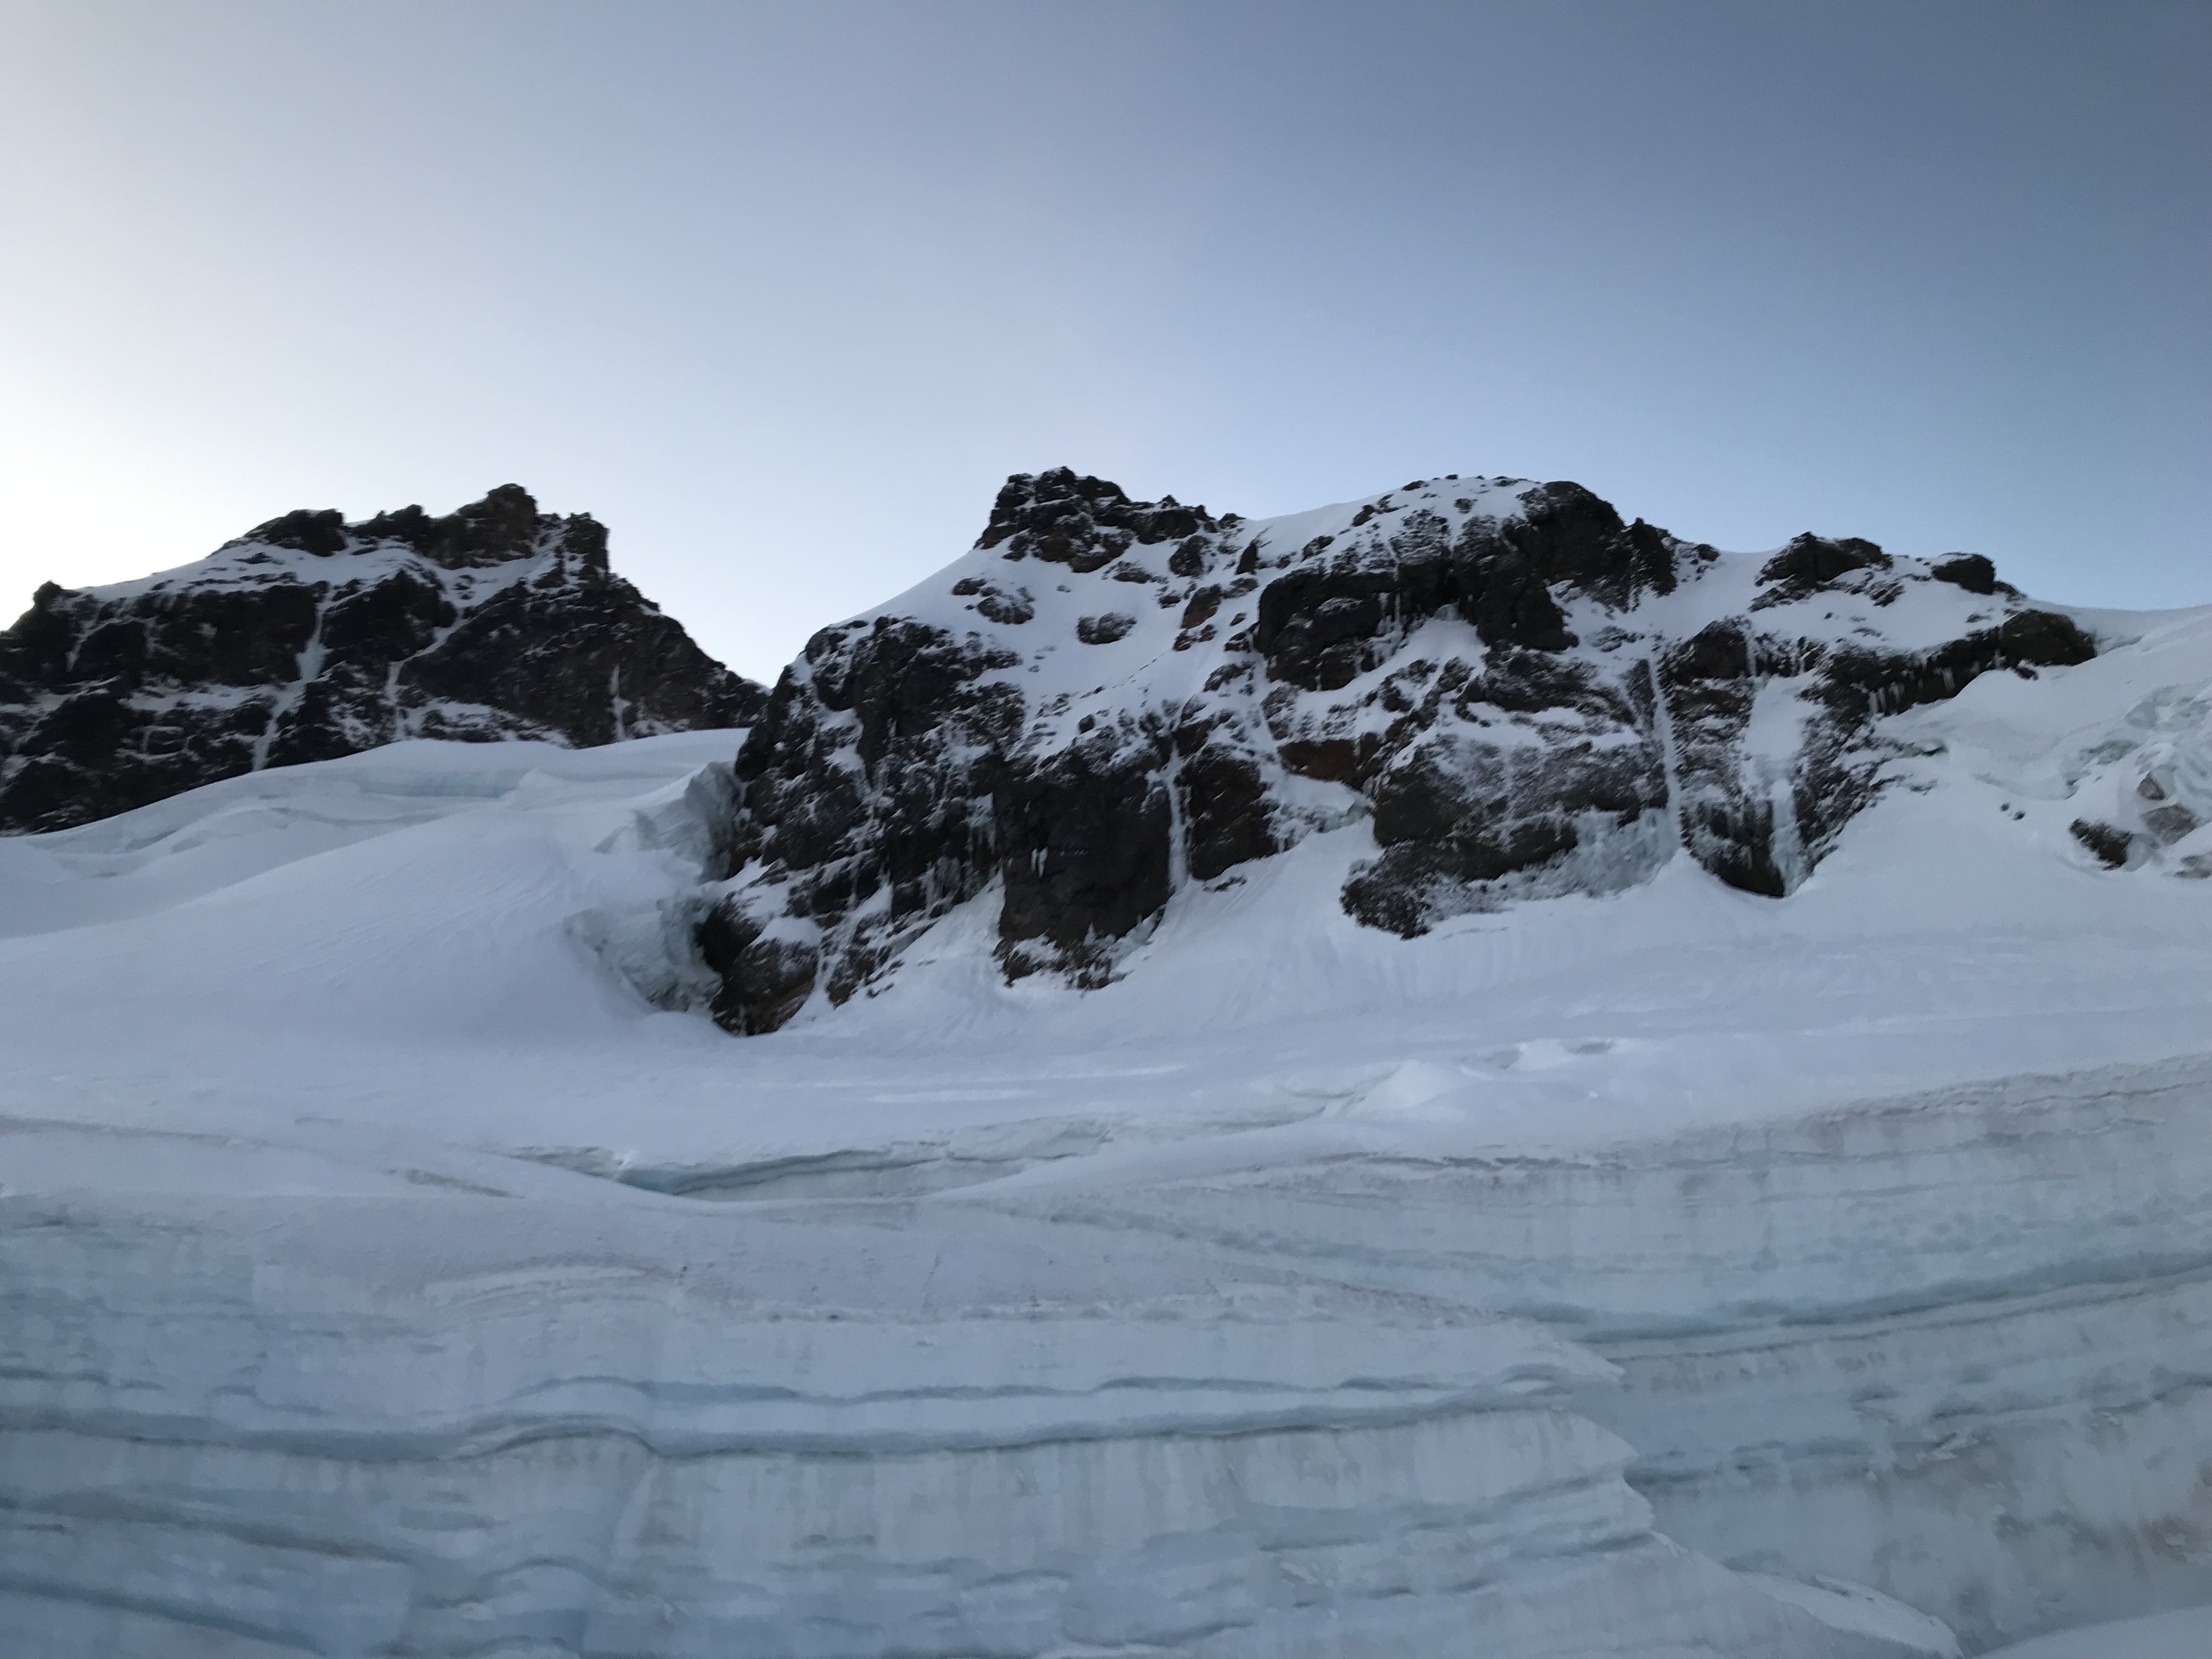
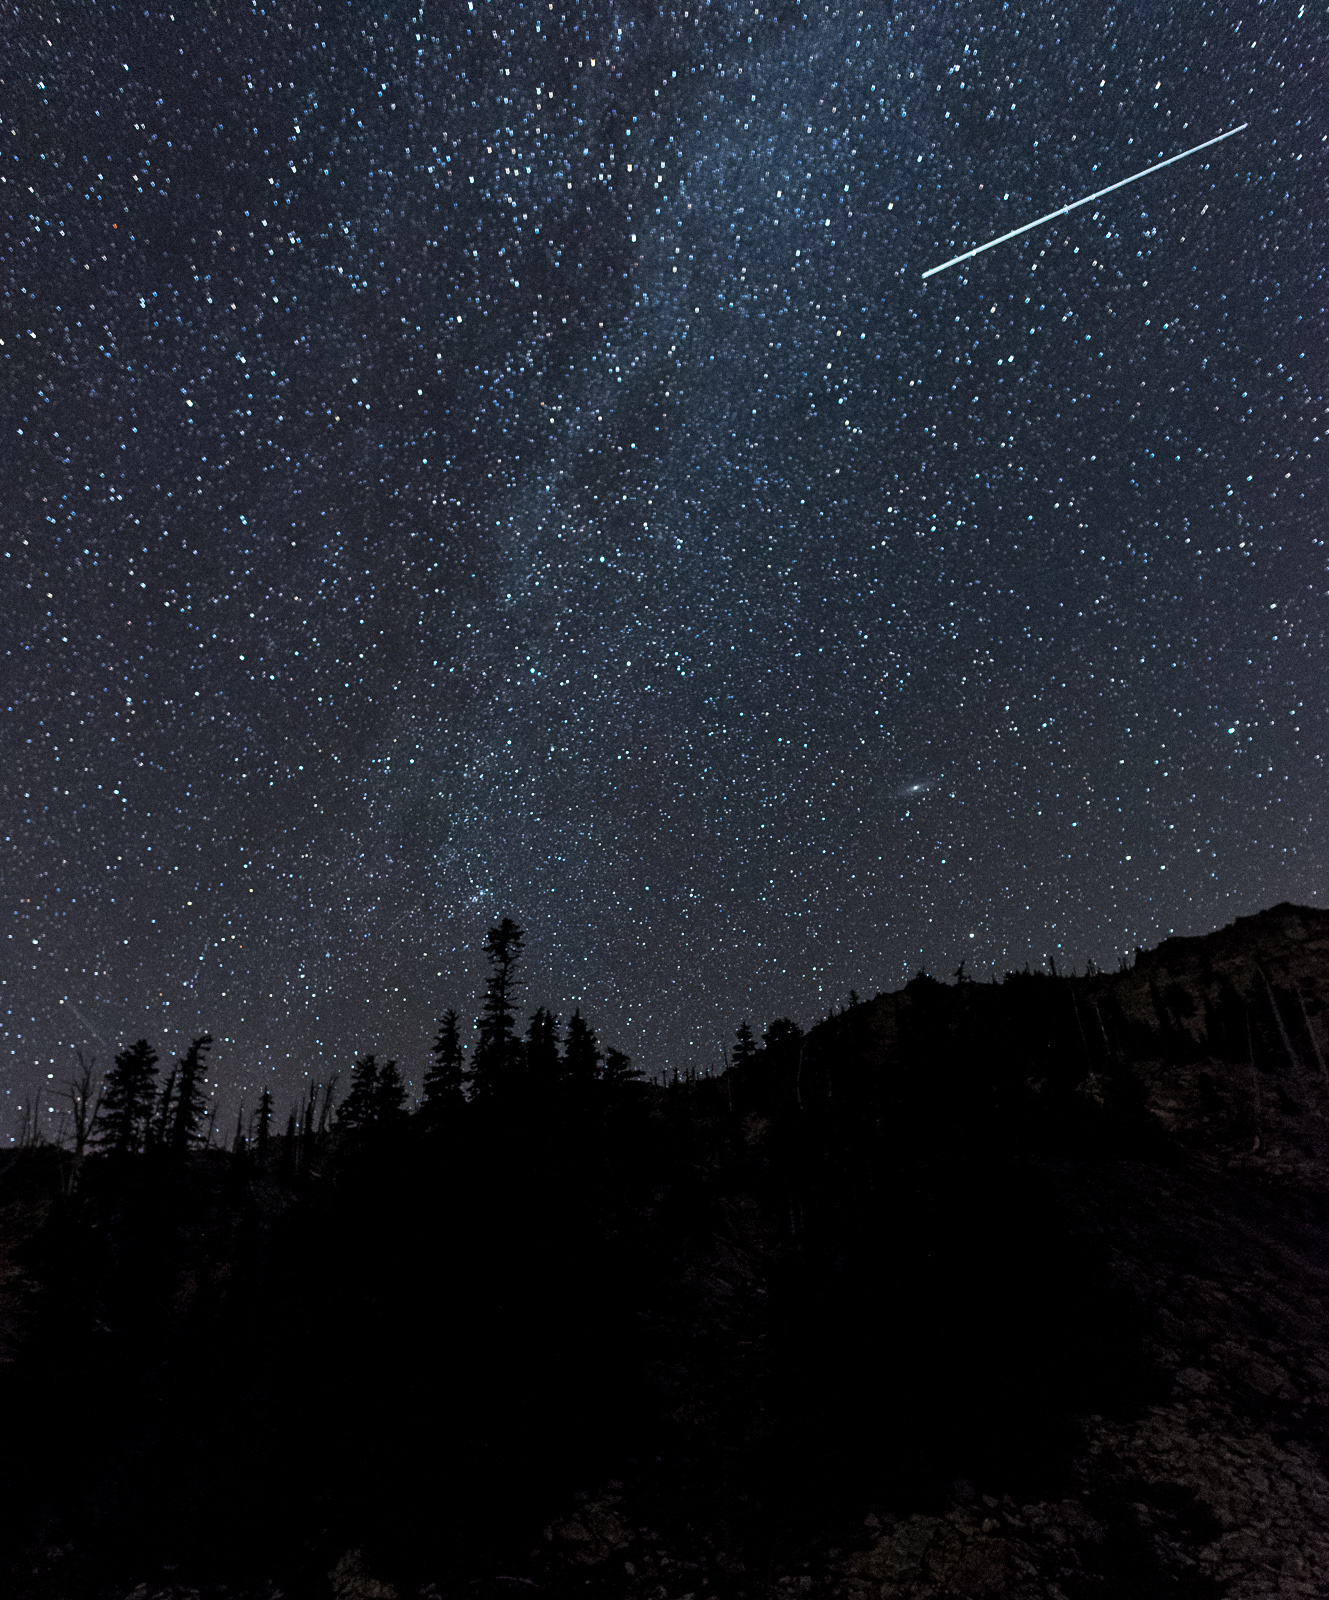
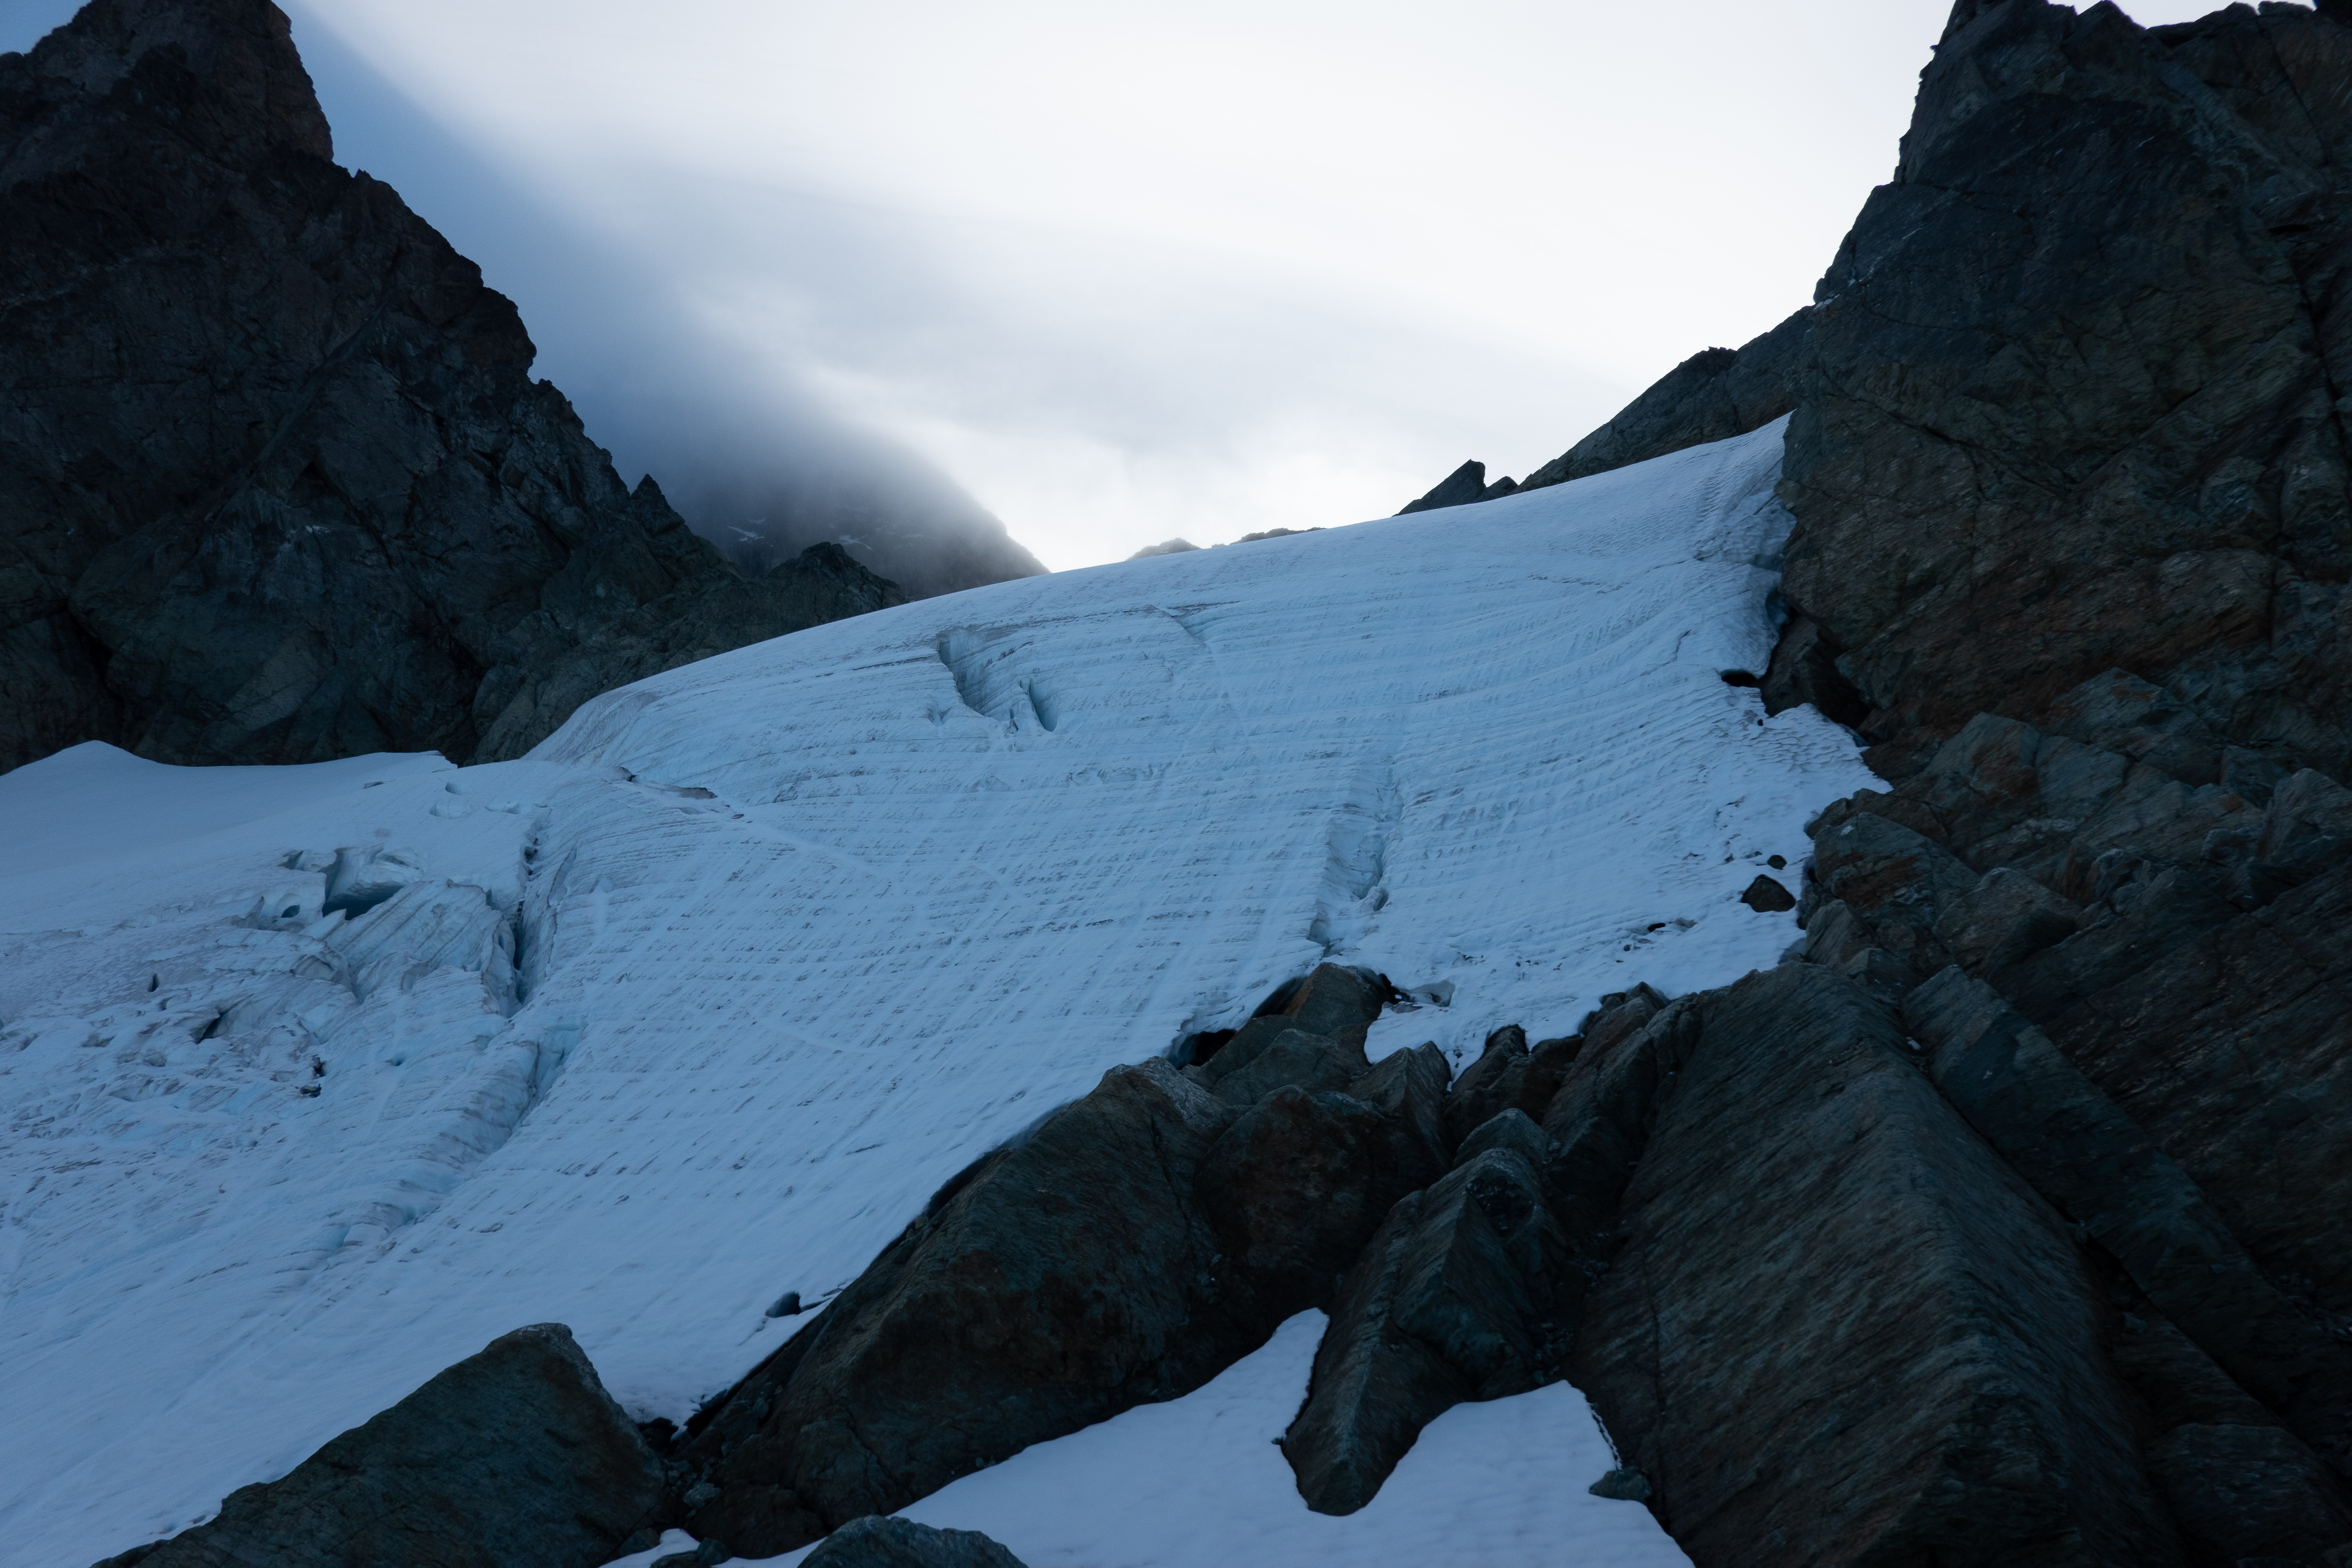
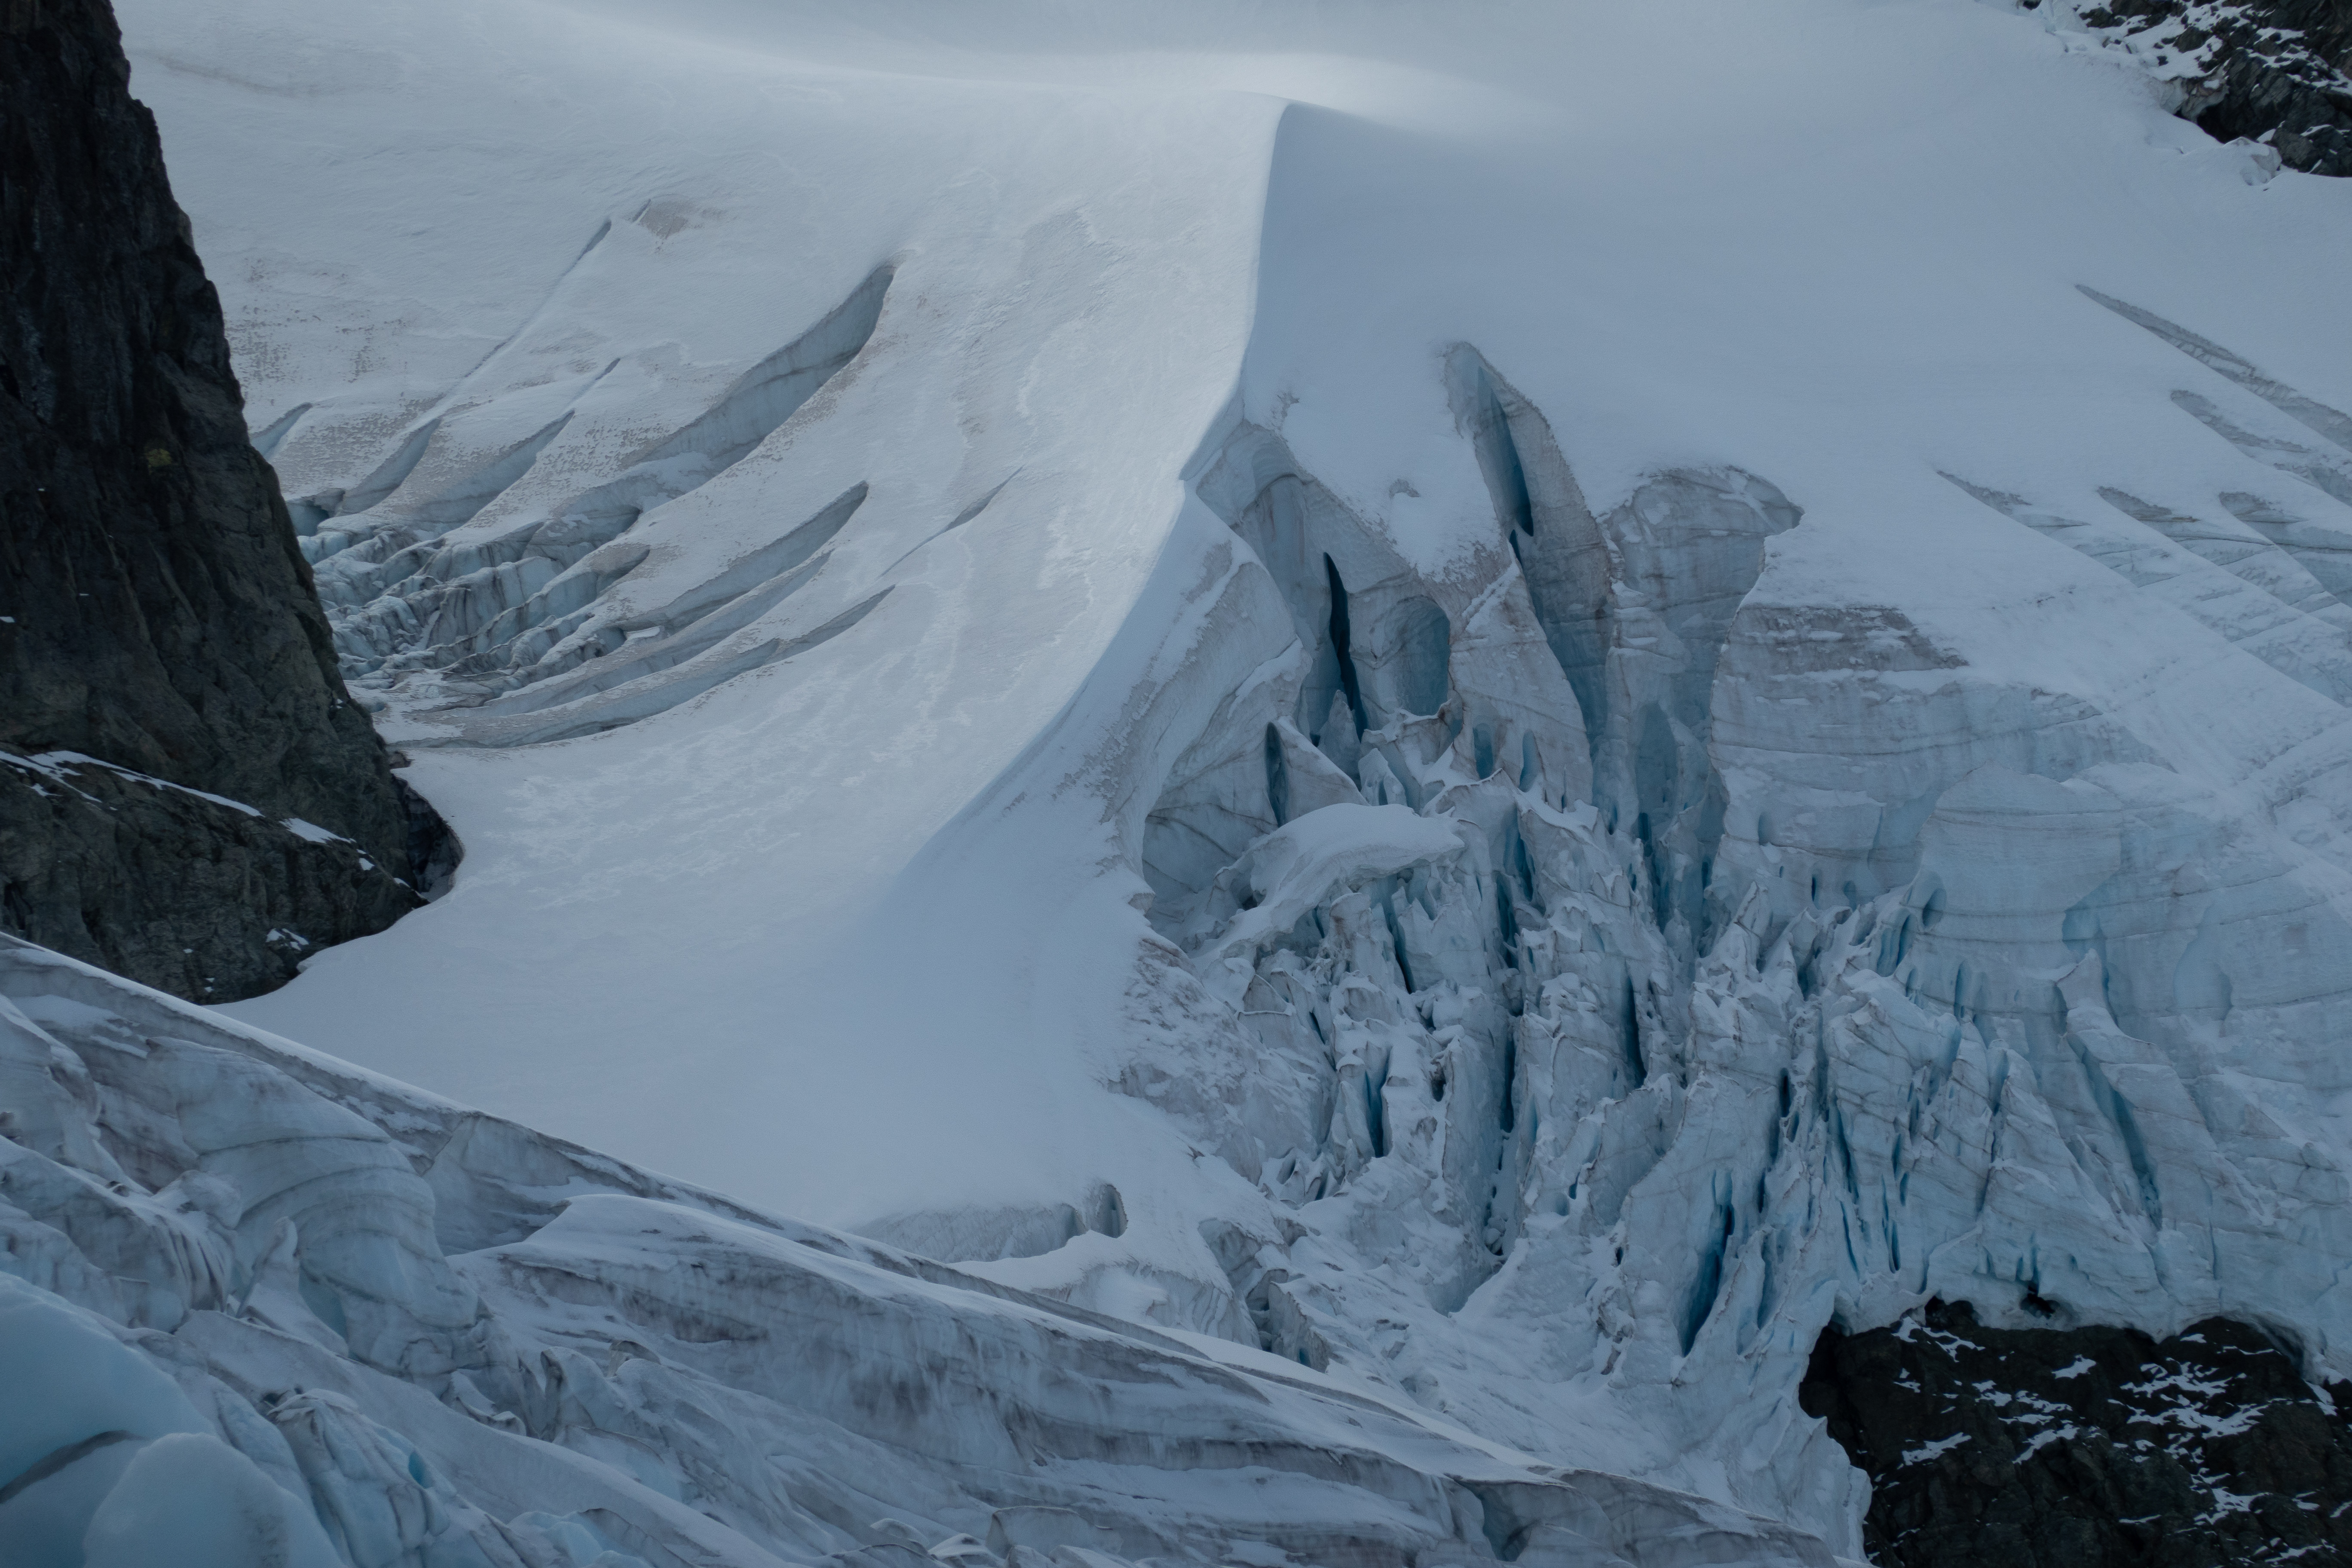
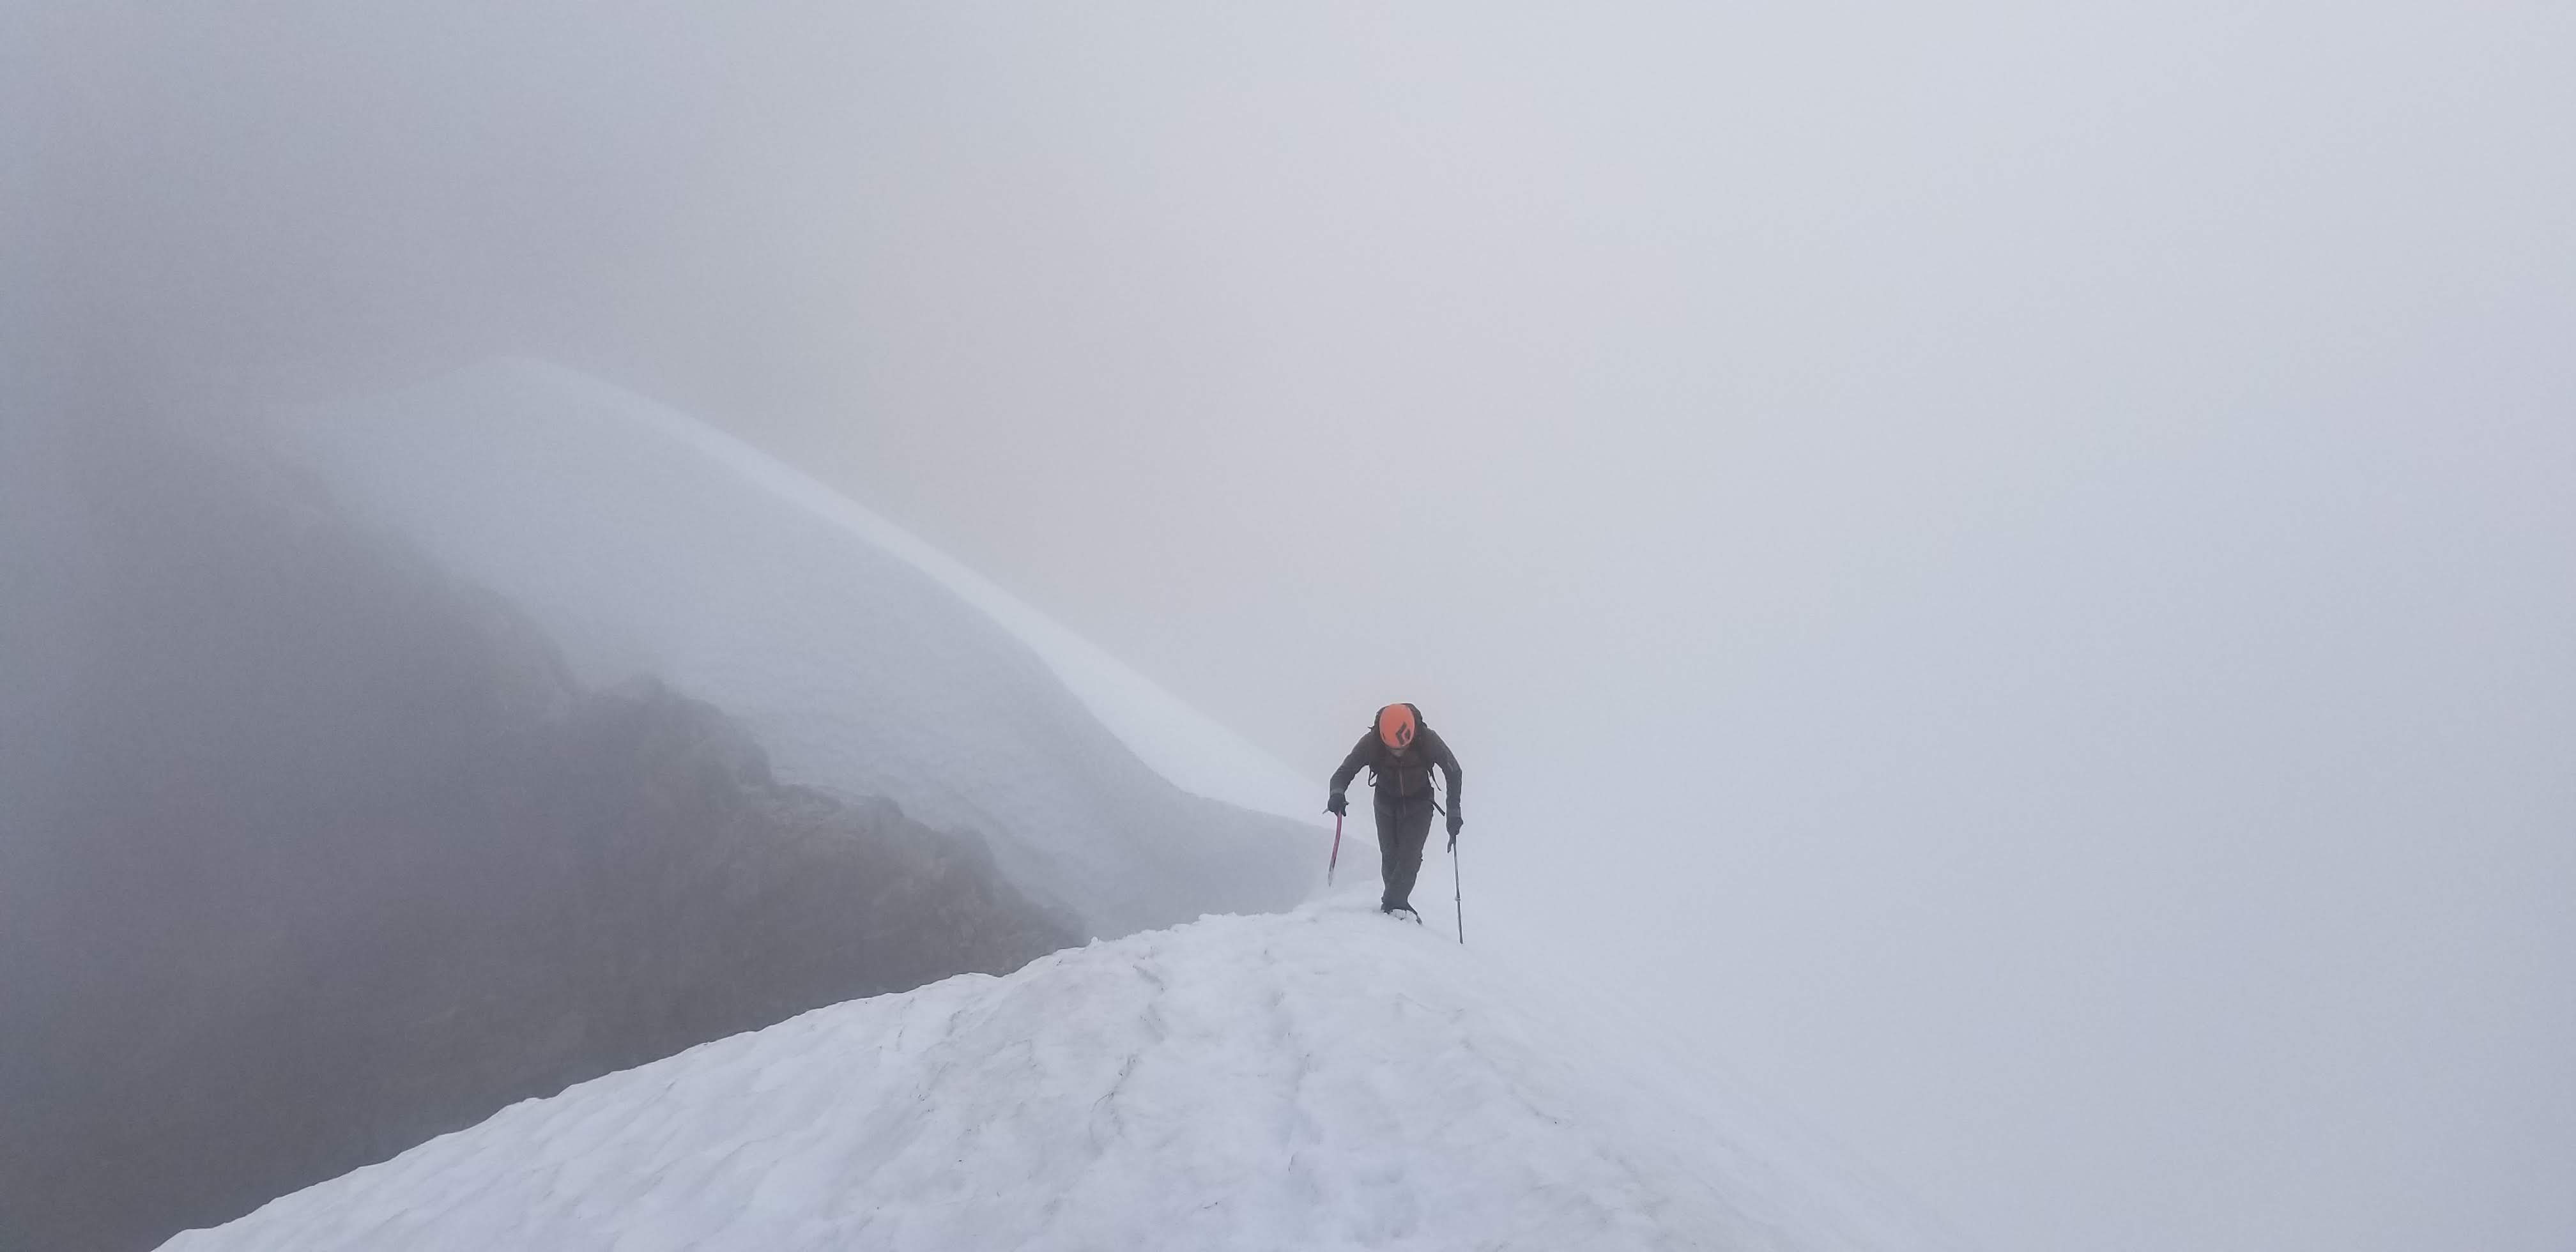
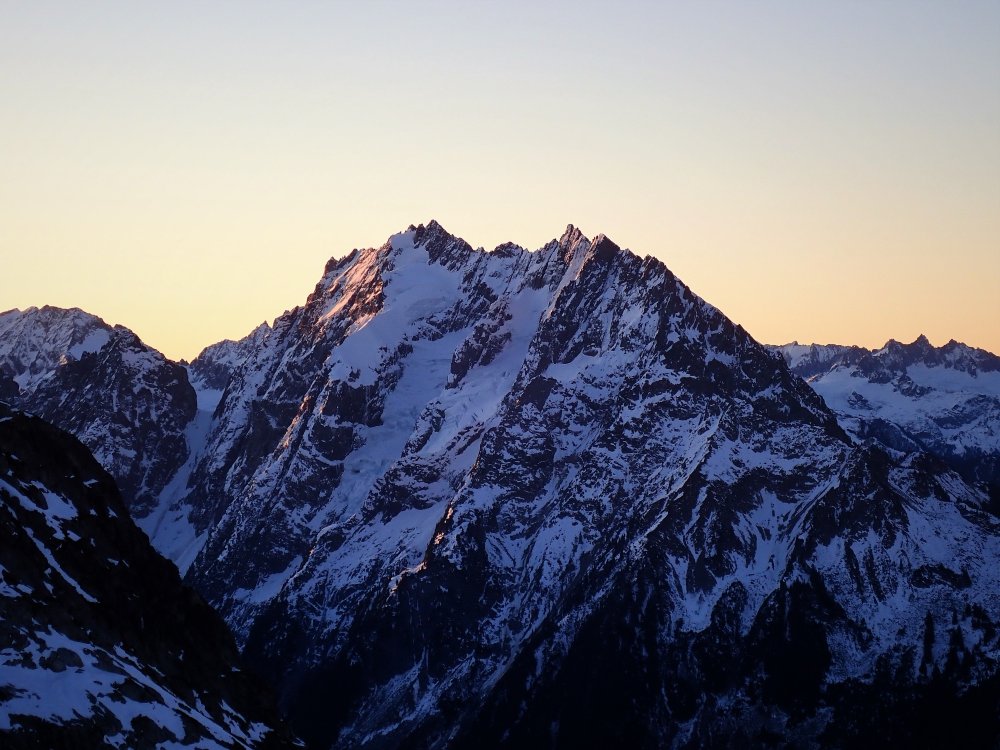
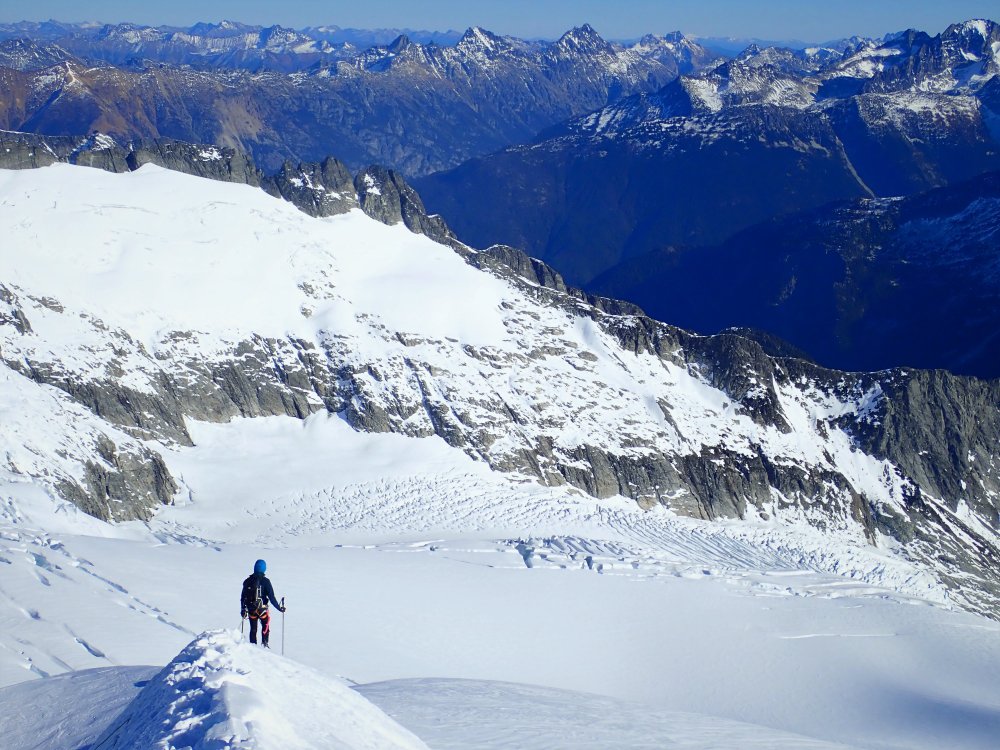
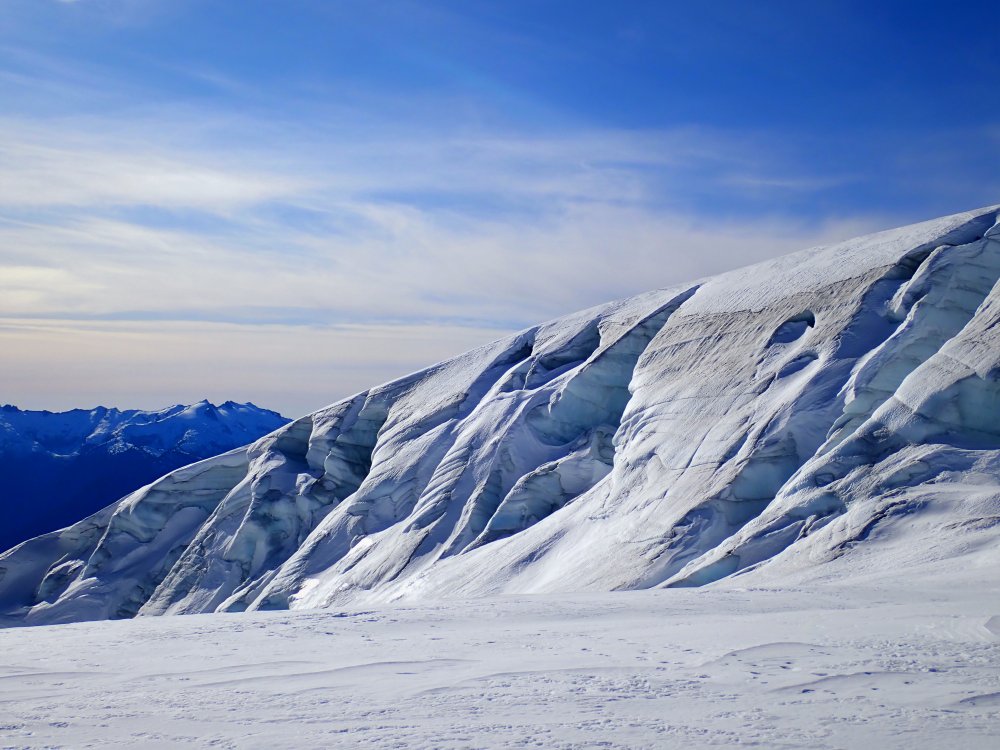
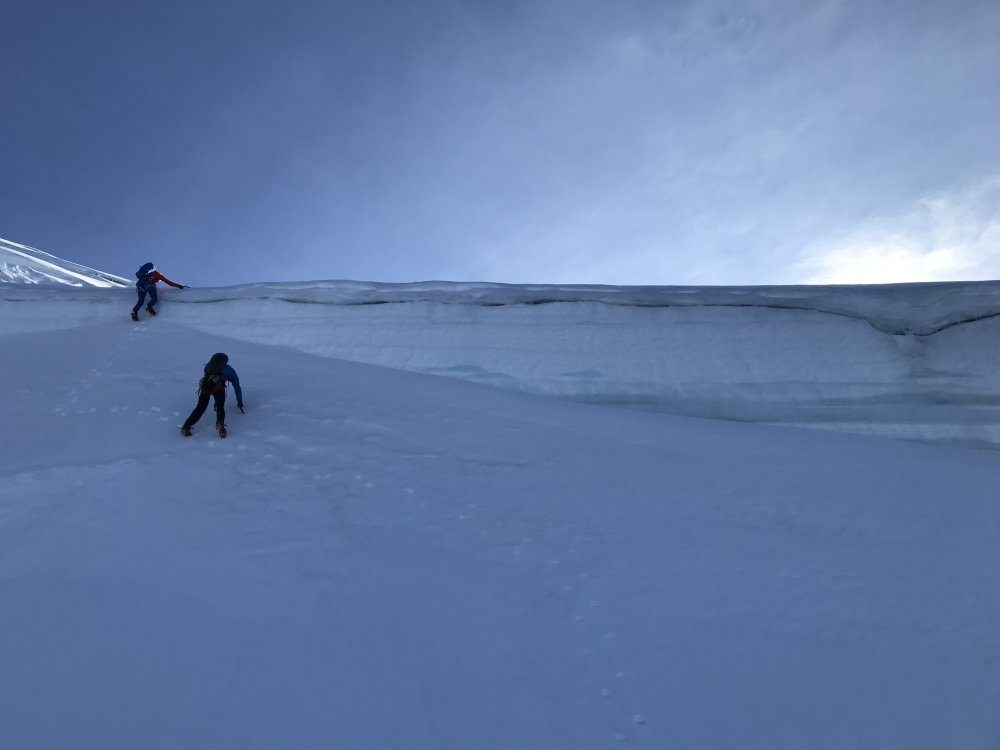
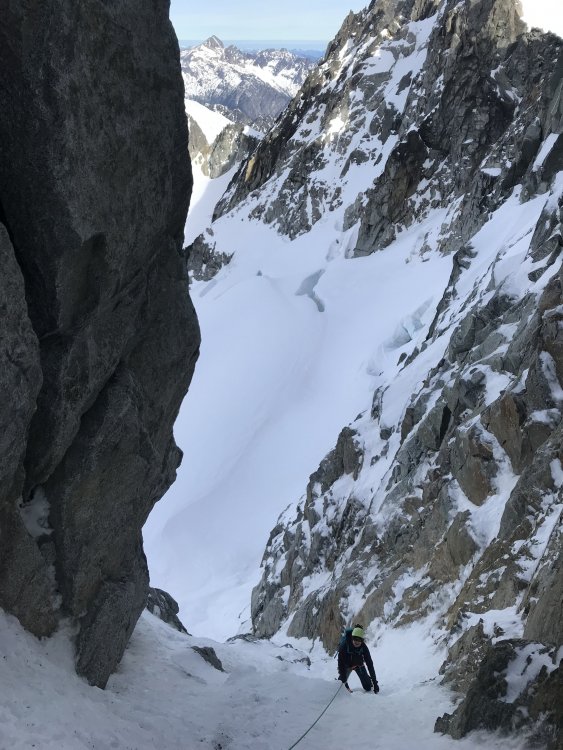
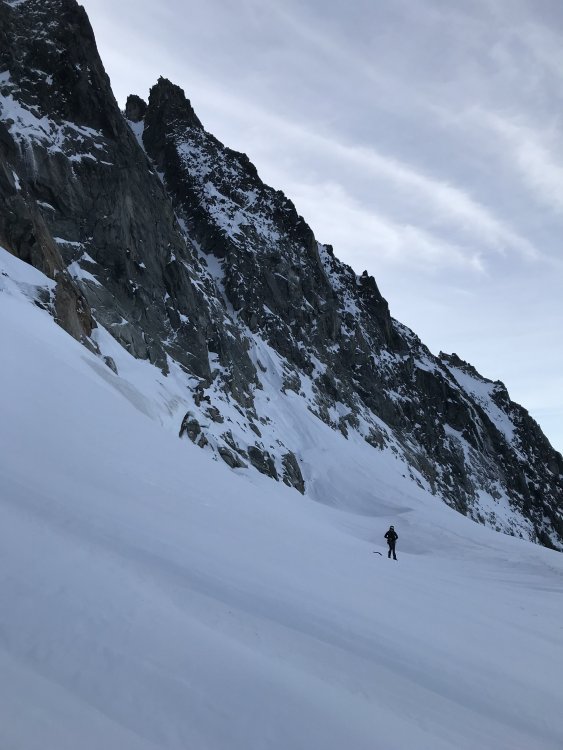
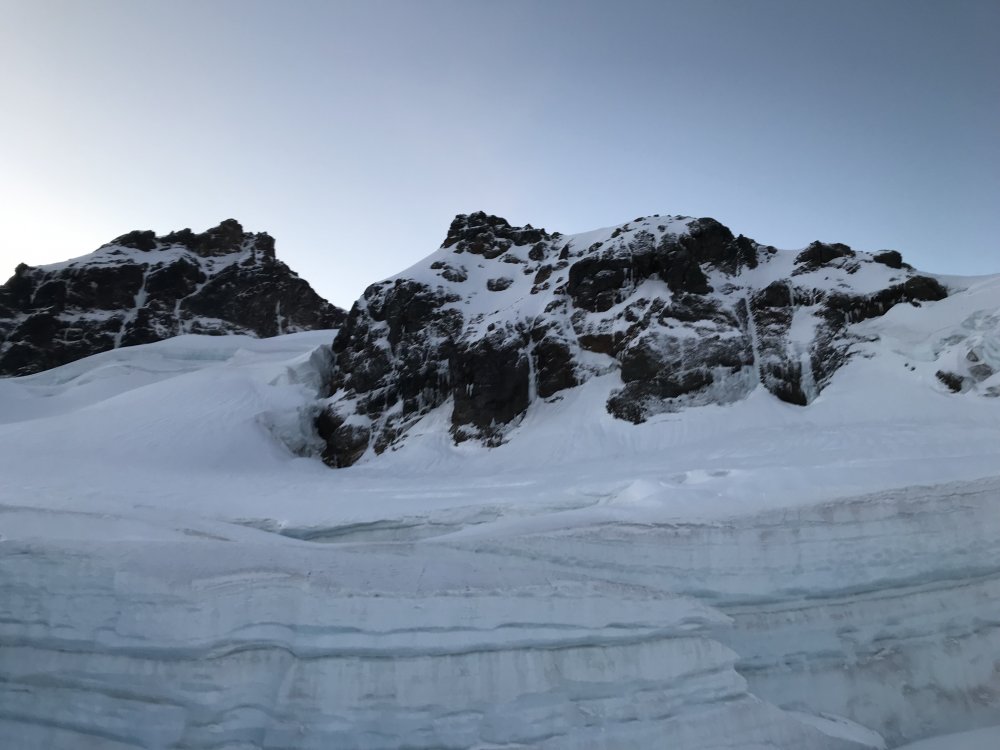
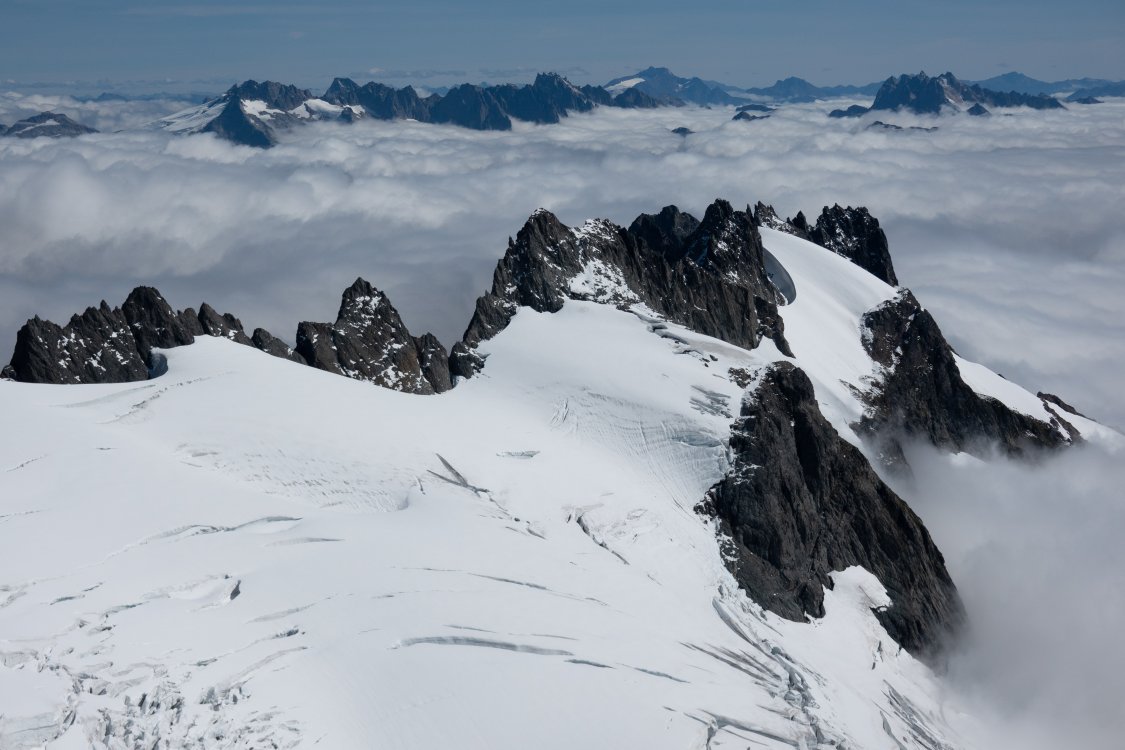
Trip: Eldorado Peak - NW Ice Couloir Trip Date: 11/06/2019 Trip Report: Anthony and I jumped on the bandwagon and ran a lap on the NW Ice Couloir of Eldorado on Wednesday. The approach was snow free through the boulder field and crevasses were easy to navigate on the glaciers. In the couloir, we encountered absolutely perfect conditions: fat WI3 ice steps, bomber snice. We never had to pull any thin ice or mixed routes, which seems to be an apparent miracle for this route. Everything about the route was great: the climbing, the position, the condition. It was simply the best alpine climbing we have ever done! The descent got a little post holy at times, but not too bad for a day in November! It took us 5.5 hrs to the base of the route, 8 hrs to the summit, and 11.5 hrs car to car. Go get it! https://climberkyle.com/2019/11/06/eldorado-peak-nw-ice-couloir-wi3/ We met a soloist, Shuan, out there. If he sees this, well, rad send! Nice cold wet log to cross in the dark. Jberg getting the first light. Warming up on the Inspiration Glacier. First view of the route. Approaching the first ice step. Typical ice conditions. So much fun! That famous knife-edge. Summit views. Heading back down. Towers upon towers! Ice ice baby! Gear Notes: 7 screws, a few tricams and nuts. Pickets could be helpful if you feel the need to protect all the snice. 70 m rope did the rappels in 2 rappels, may have been 3 rappels if just a 60 m rope. Approach Notes: No snow until maybe 5500 ft. Glacier is cruiser.


-
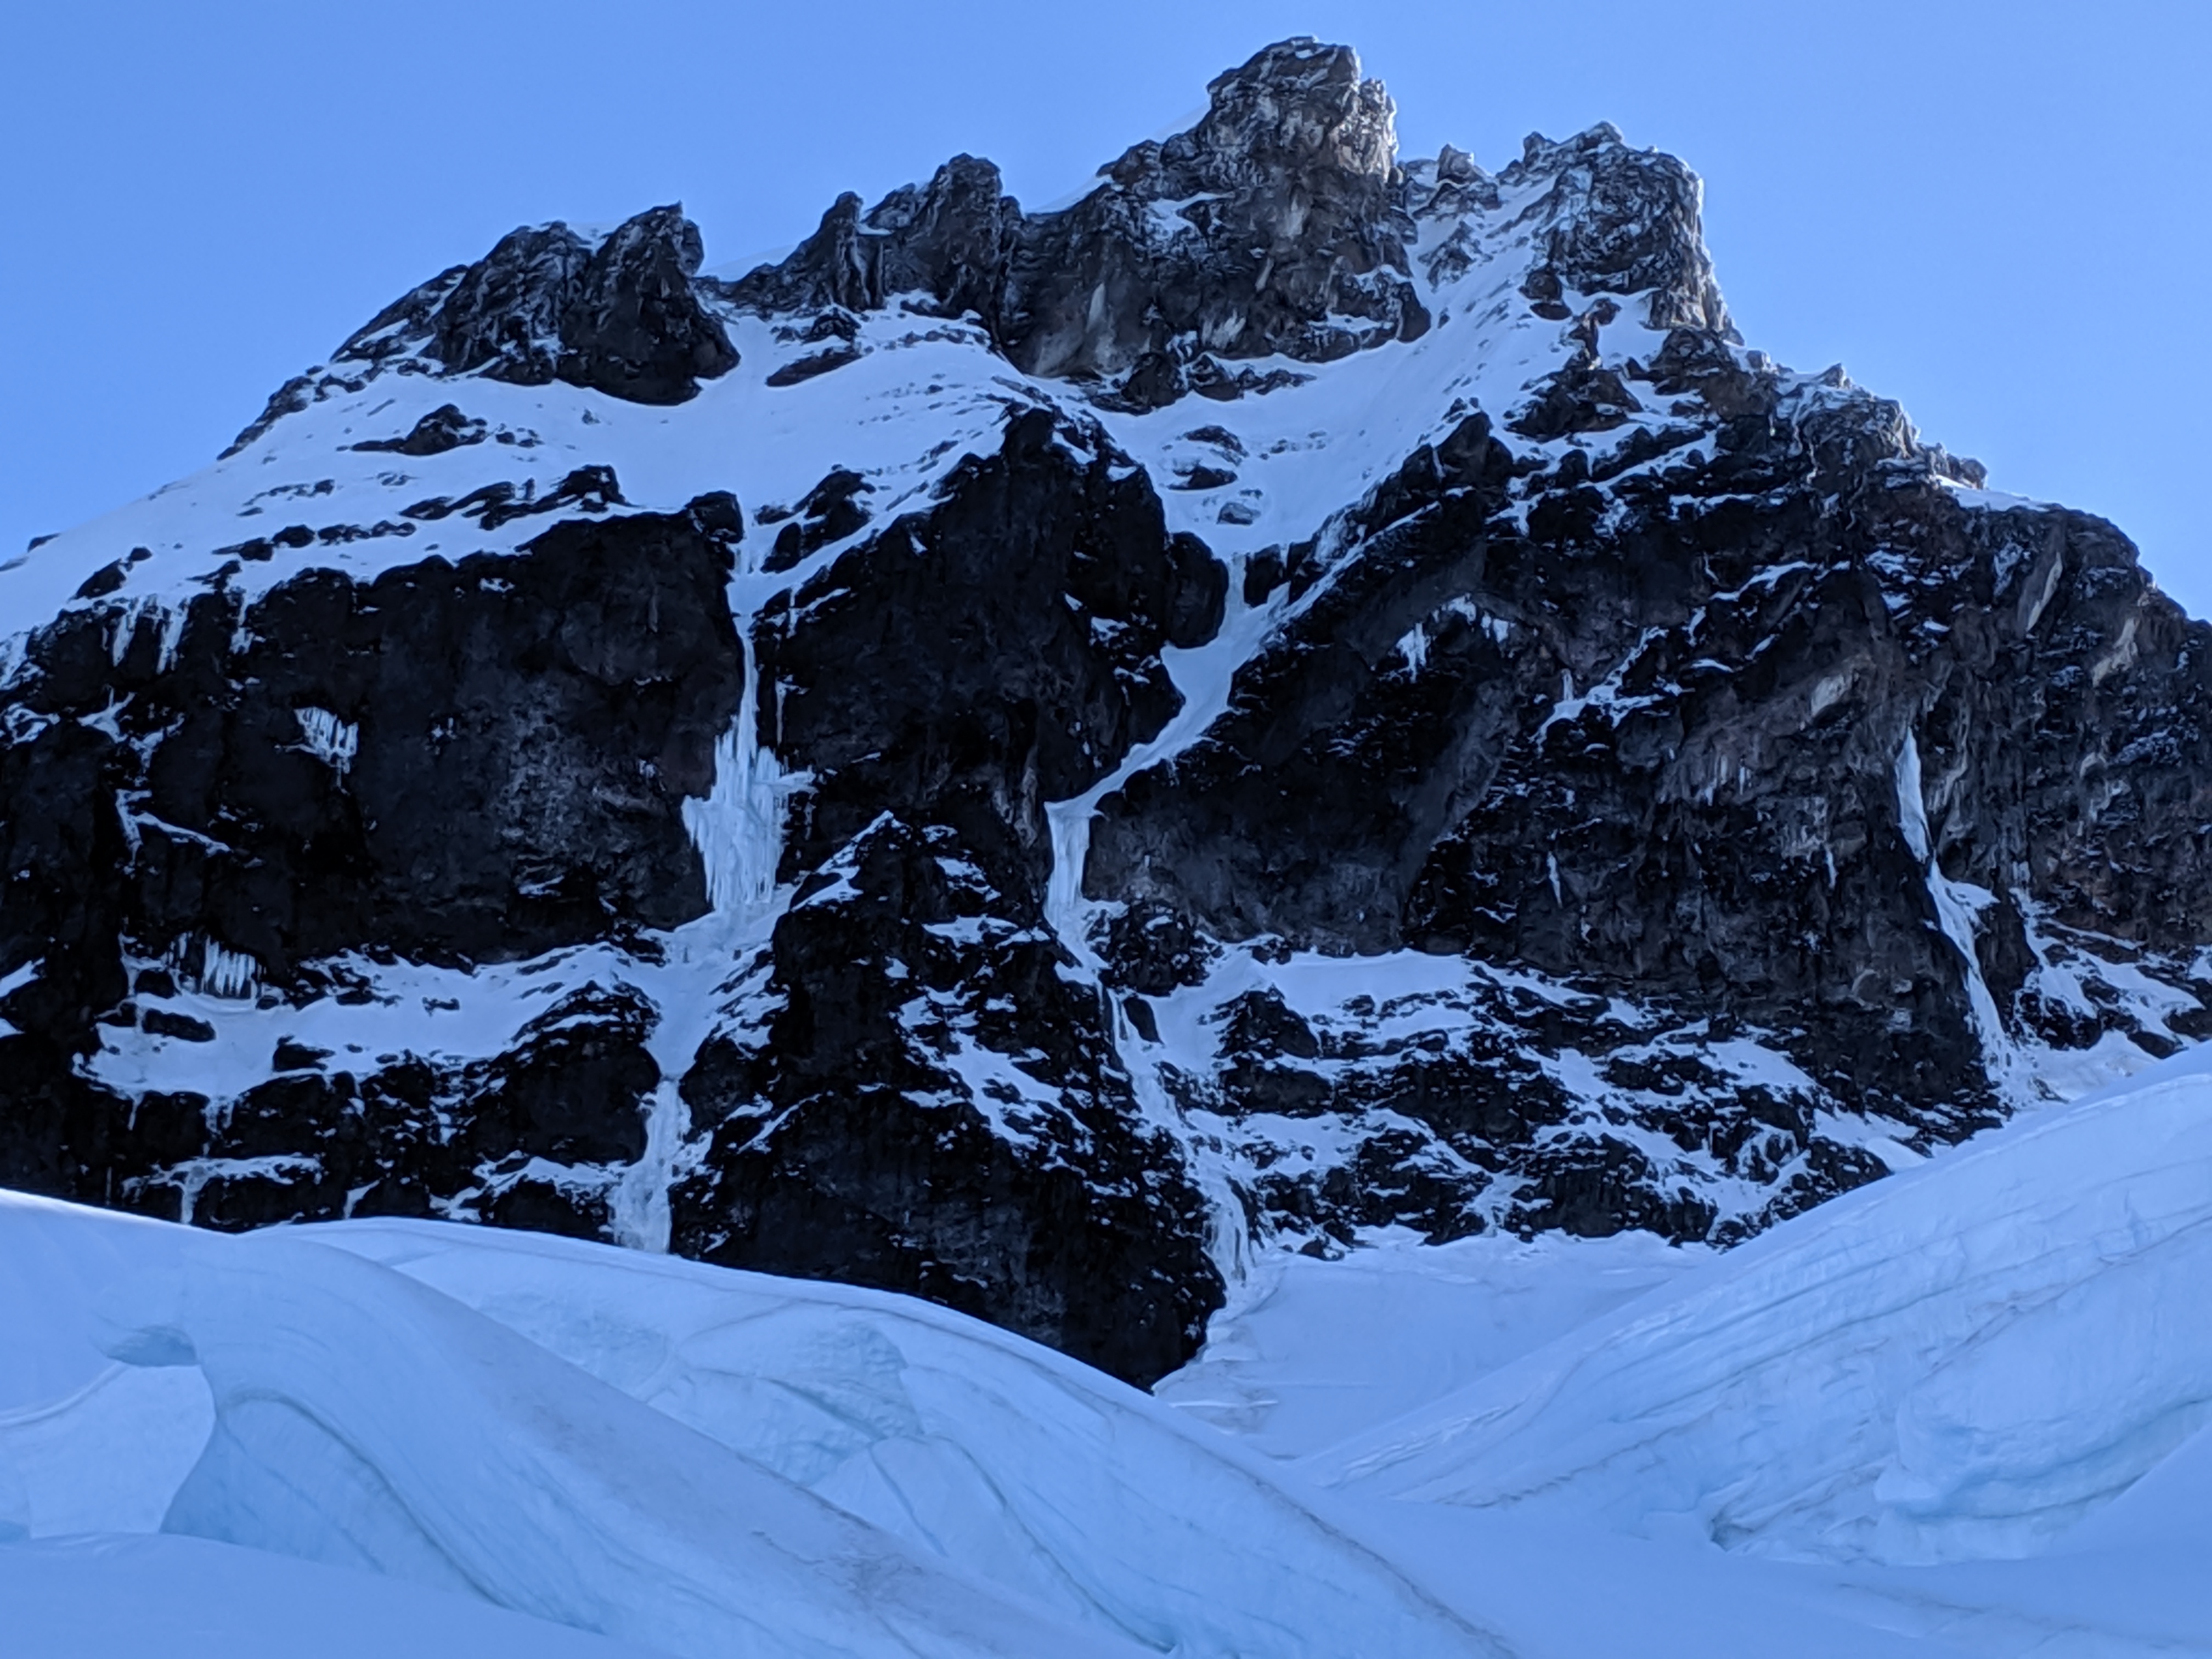
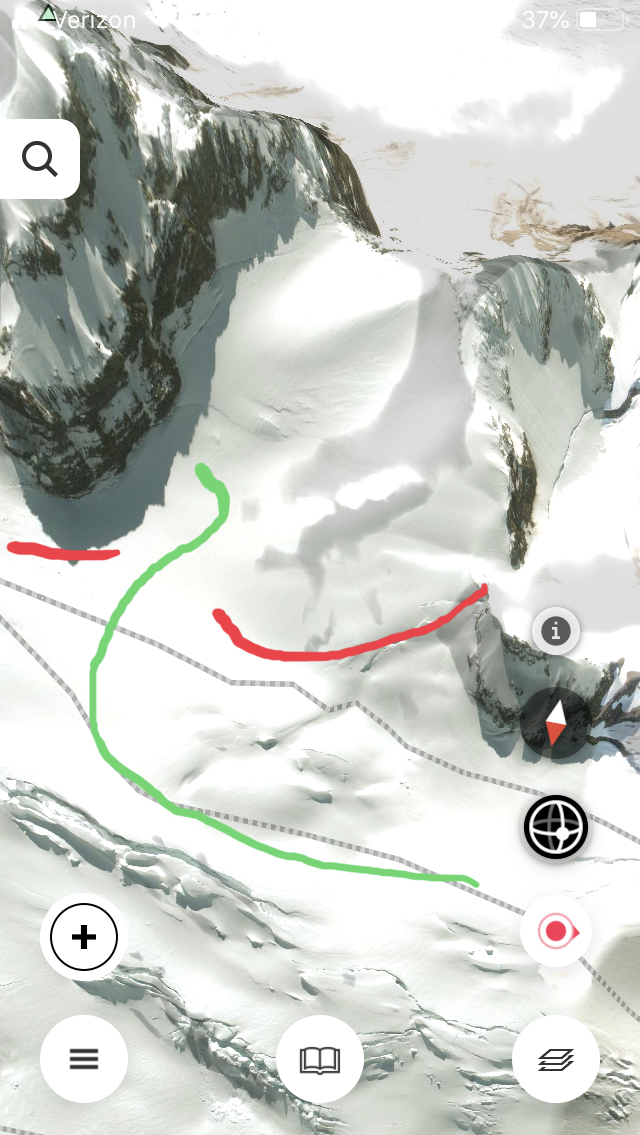
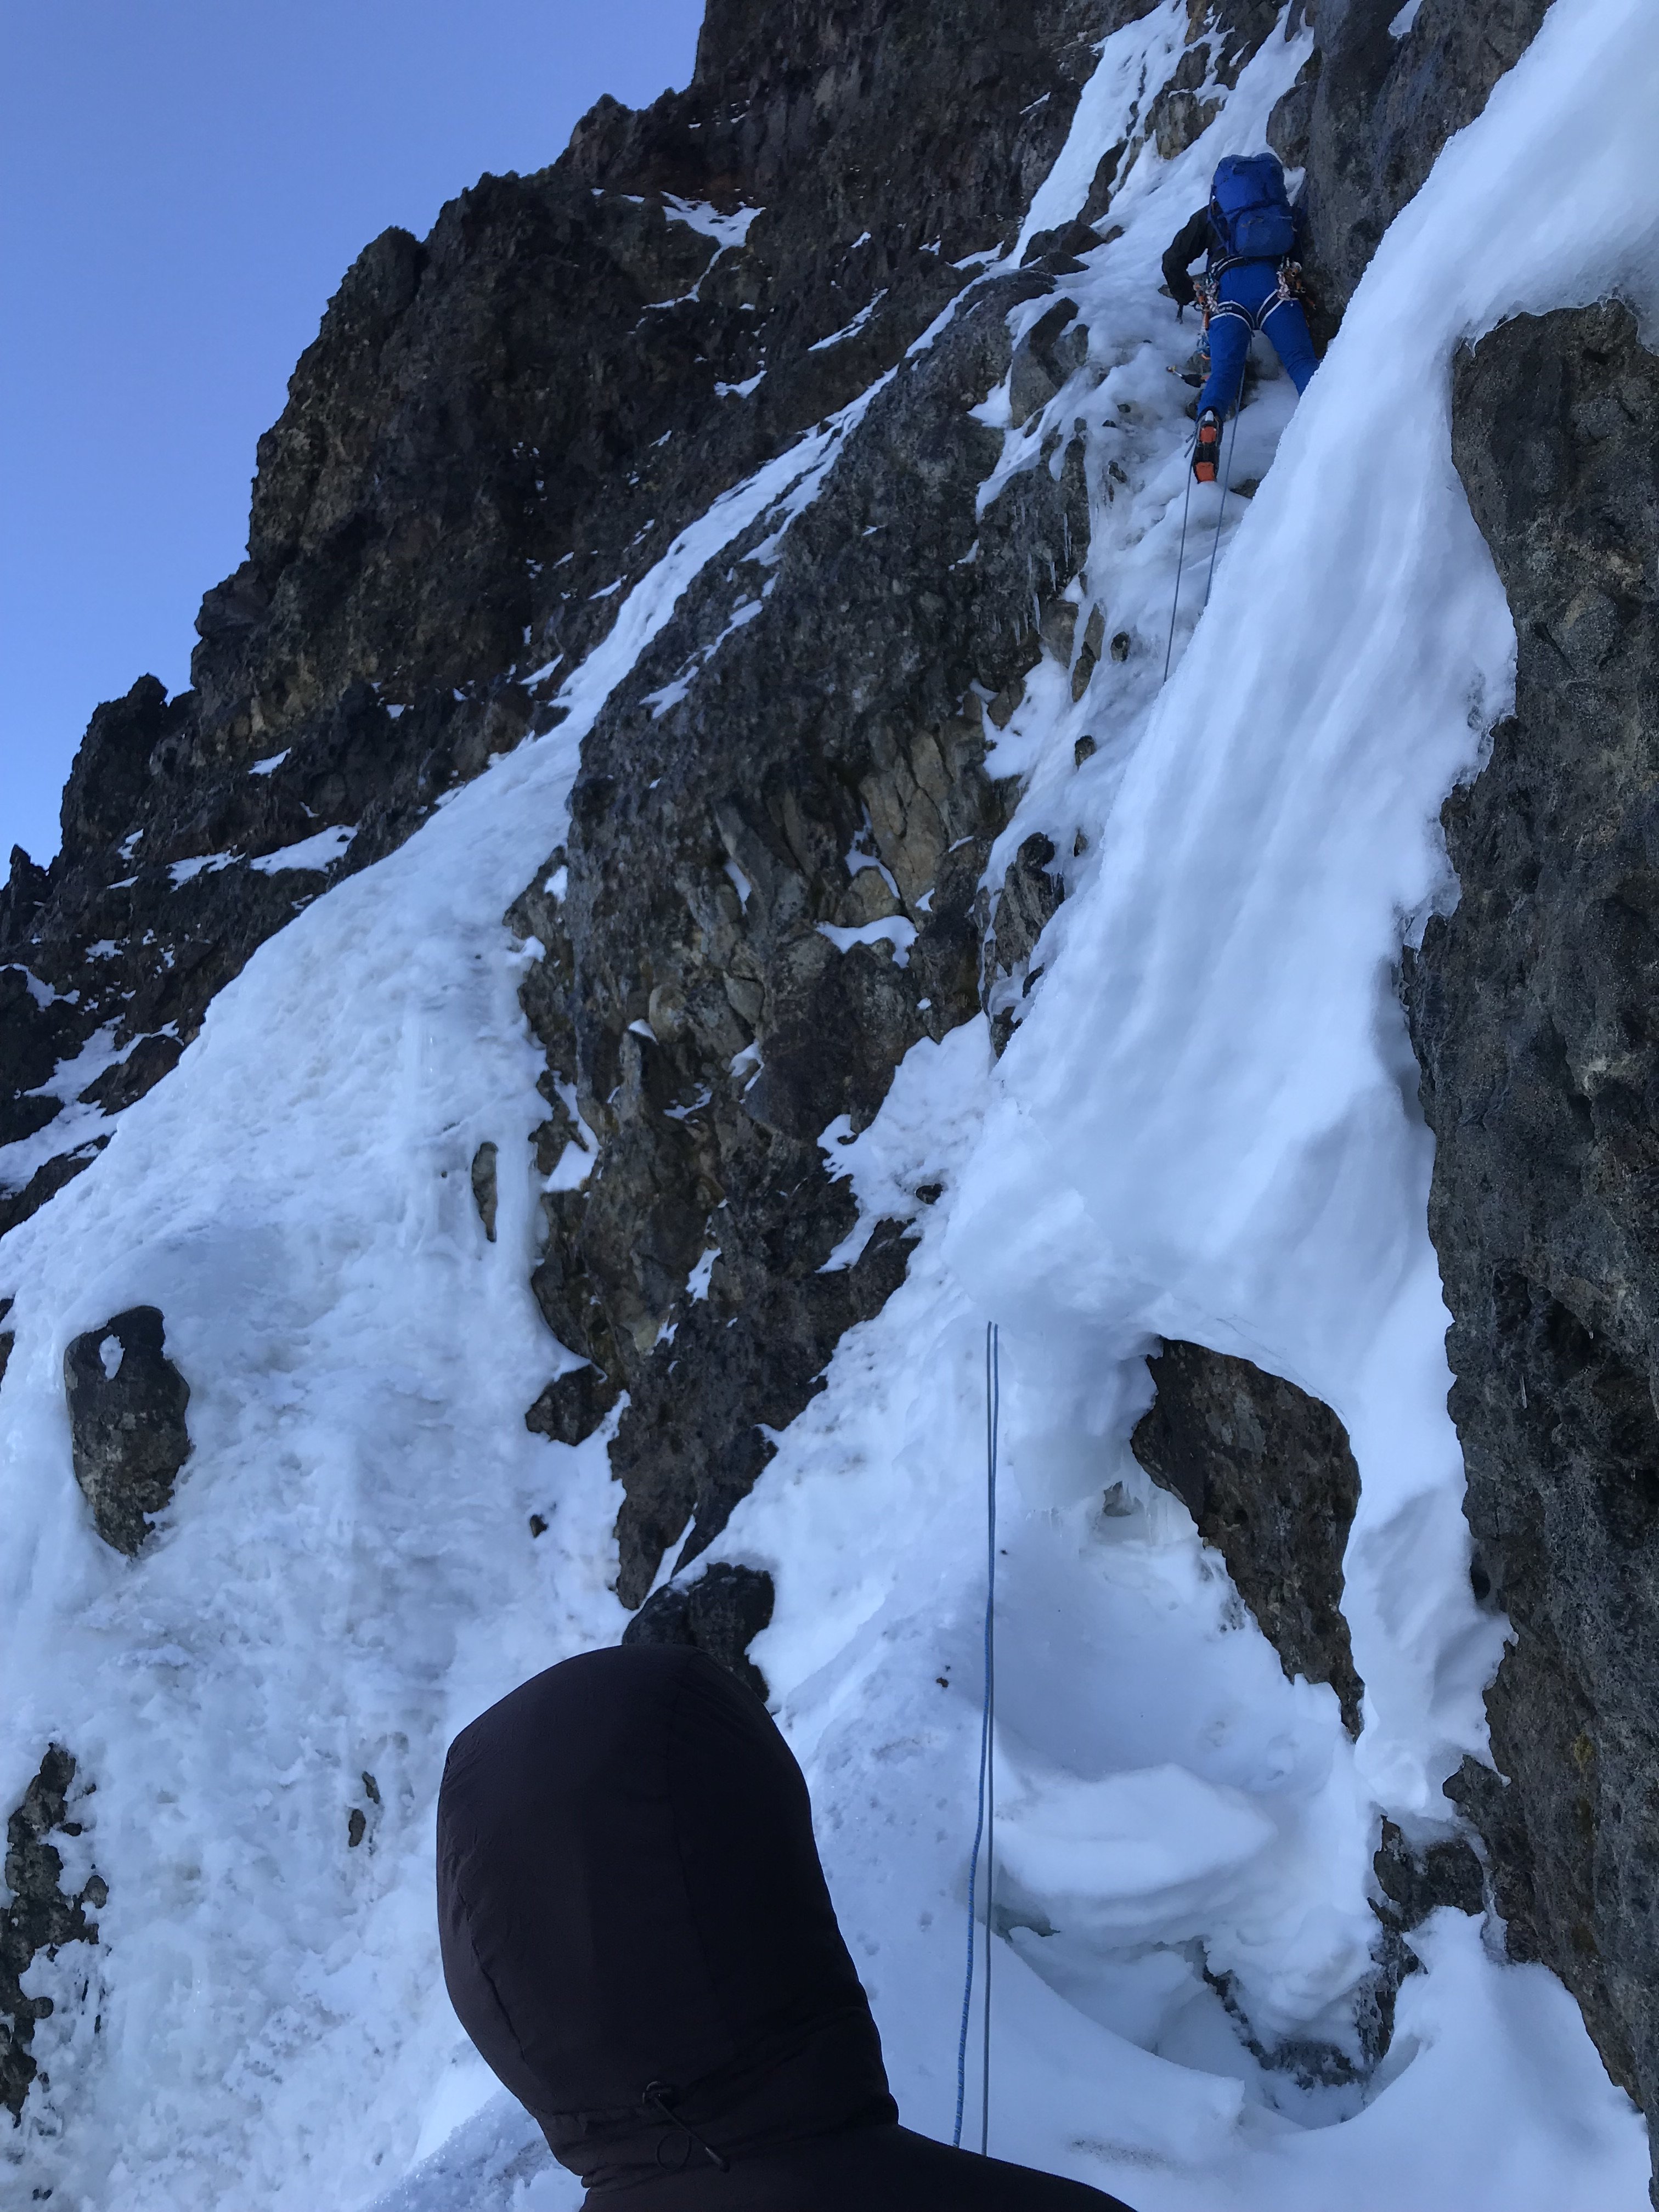
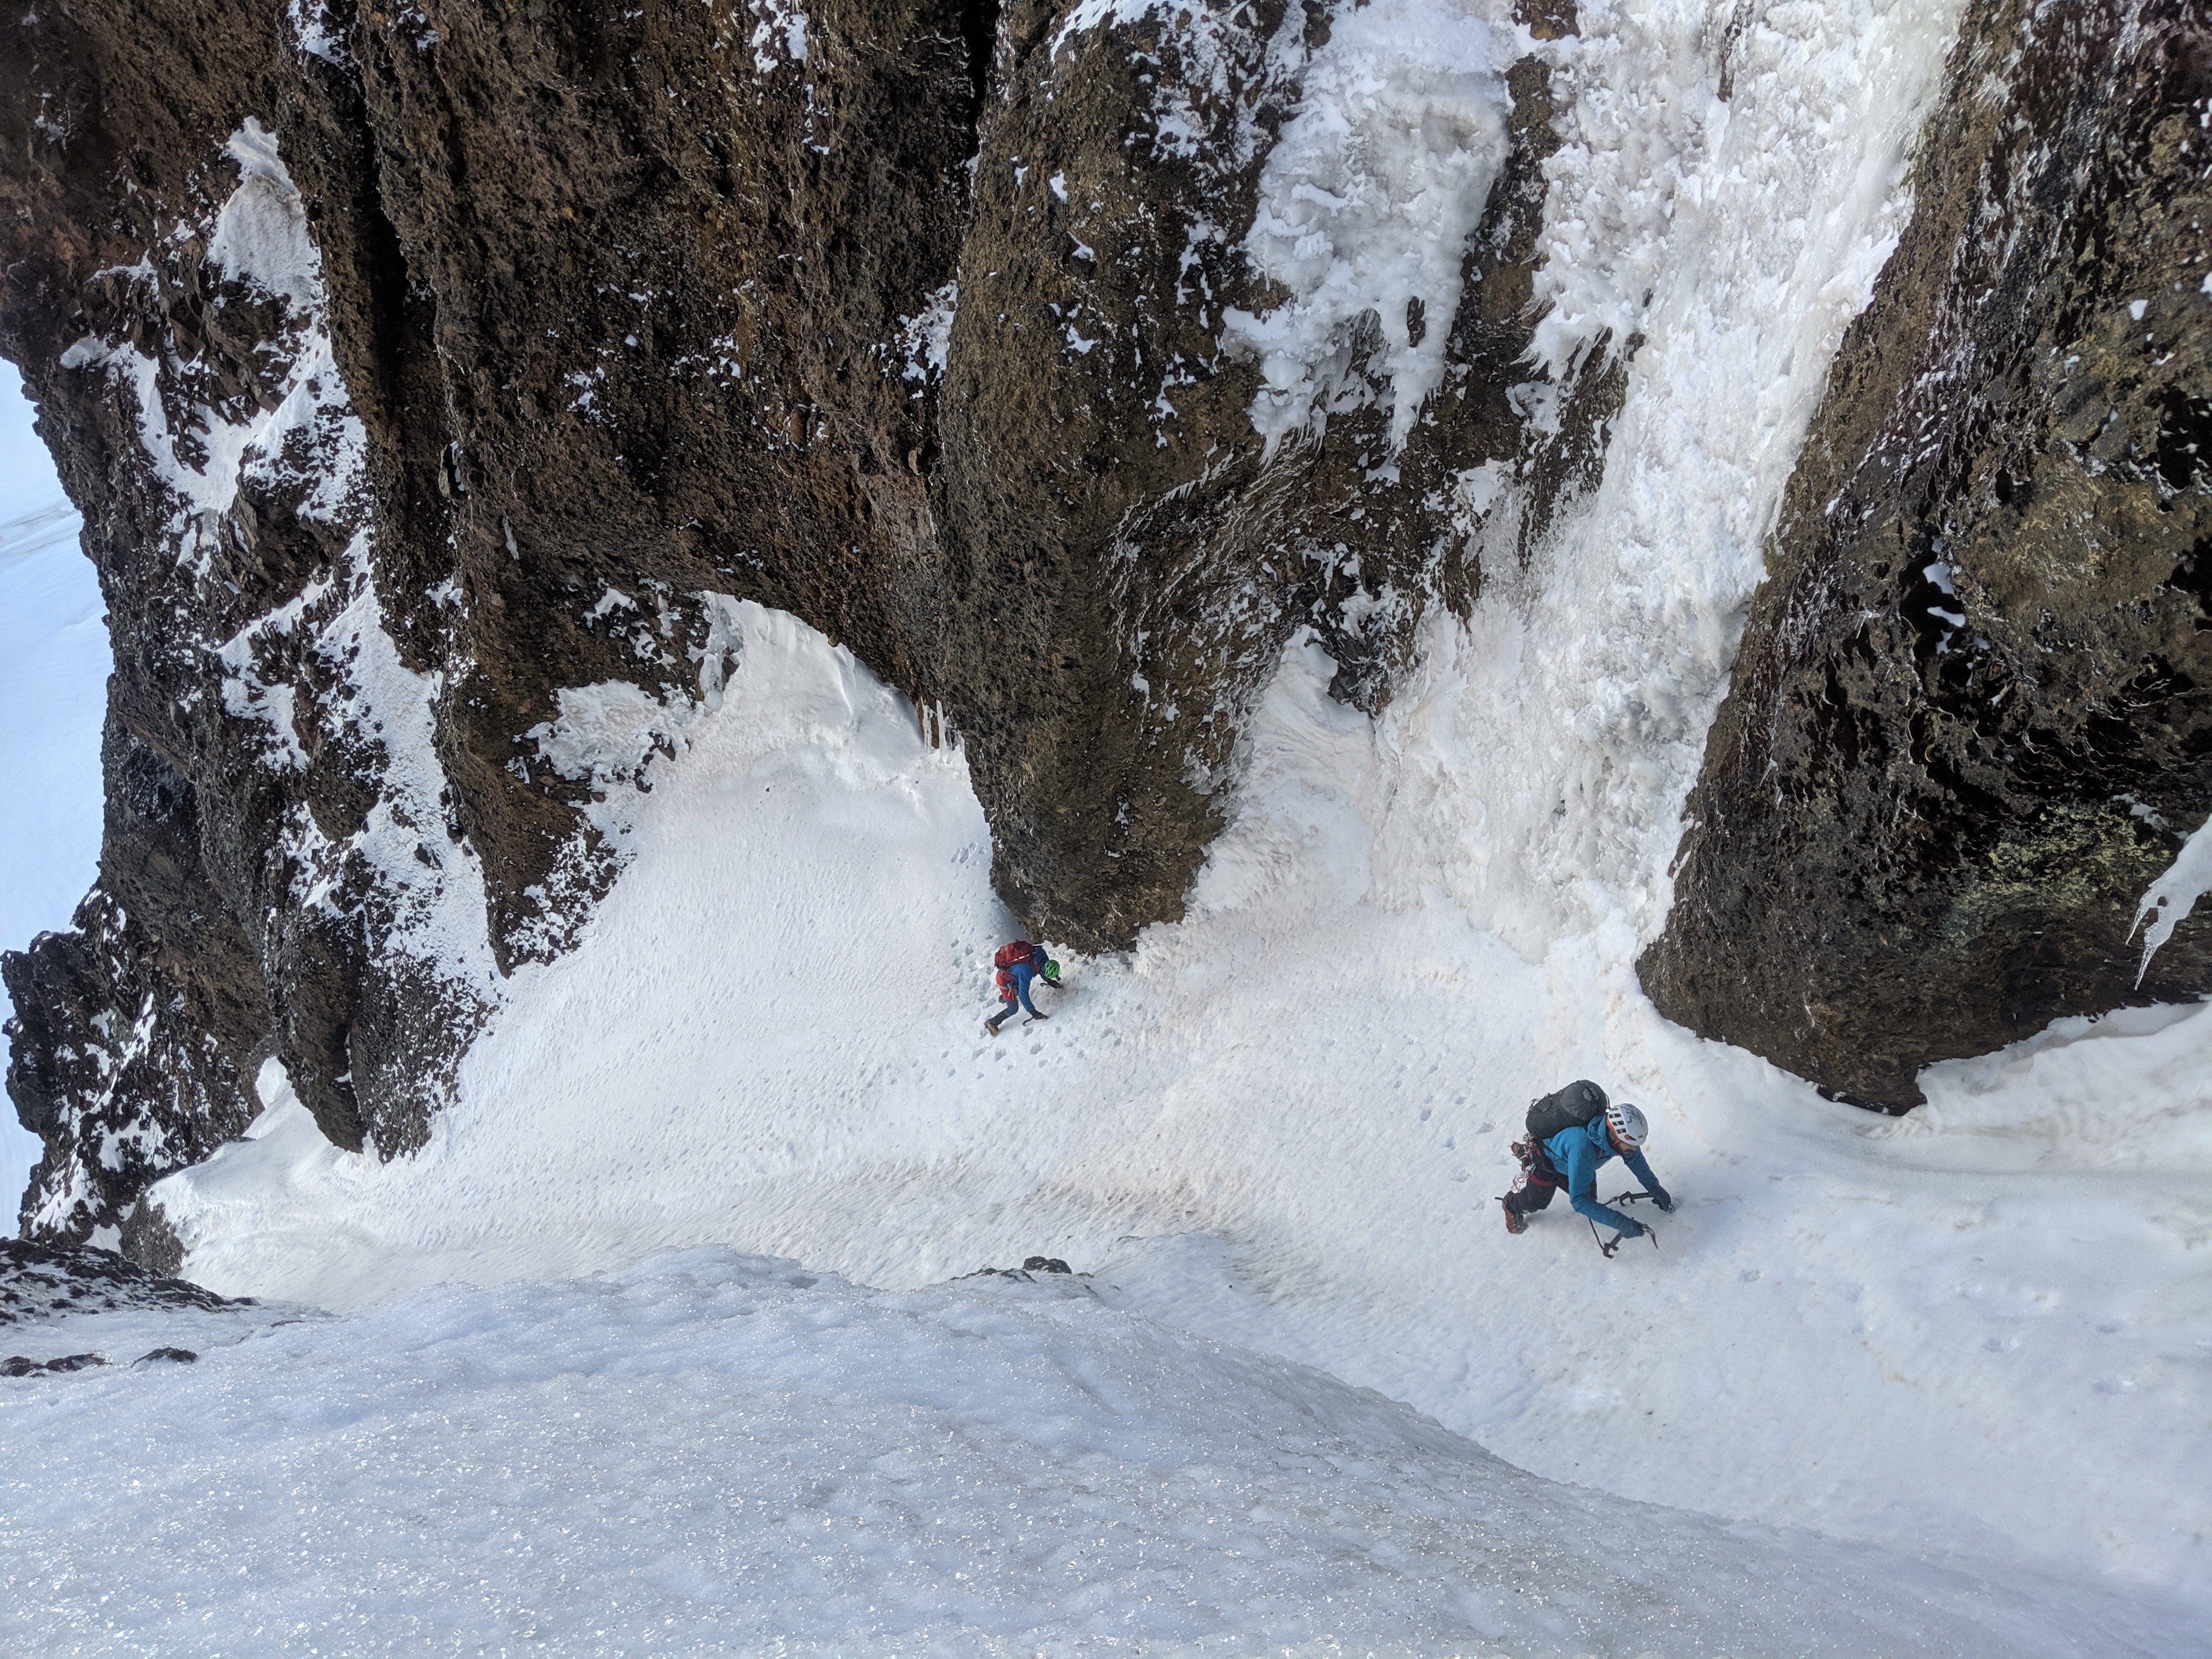
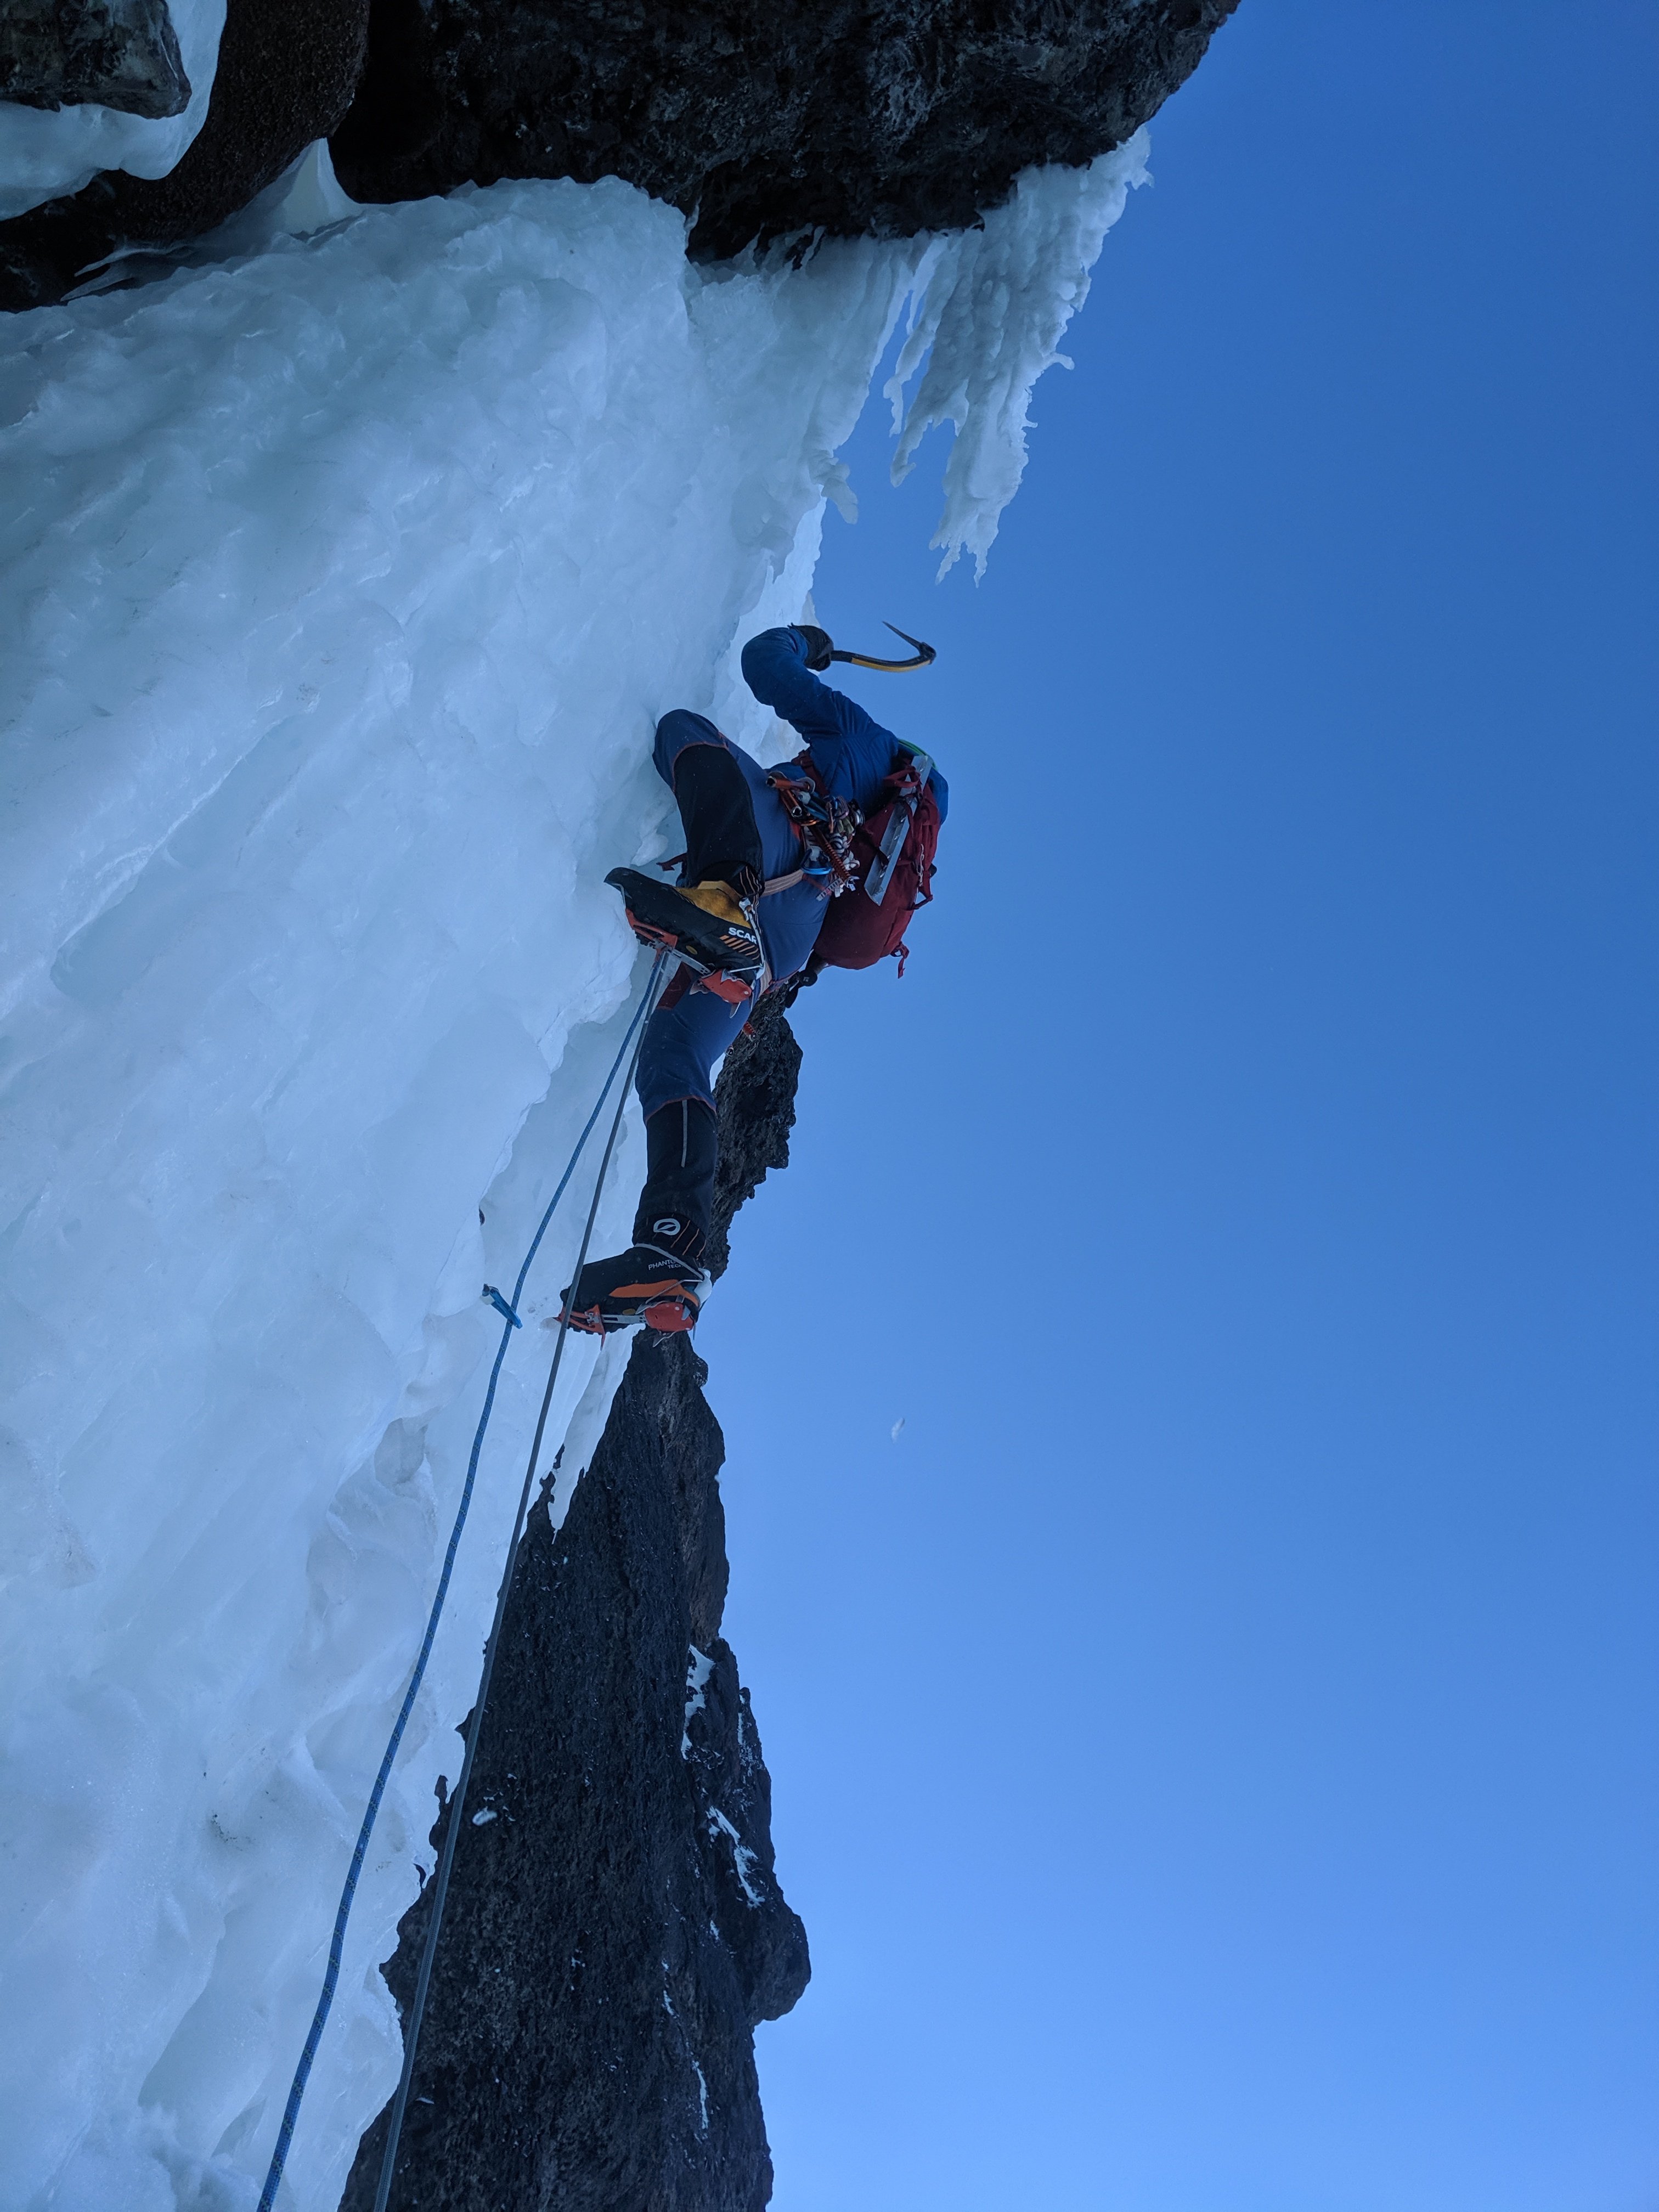
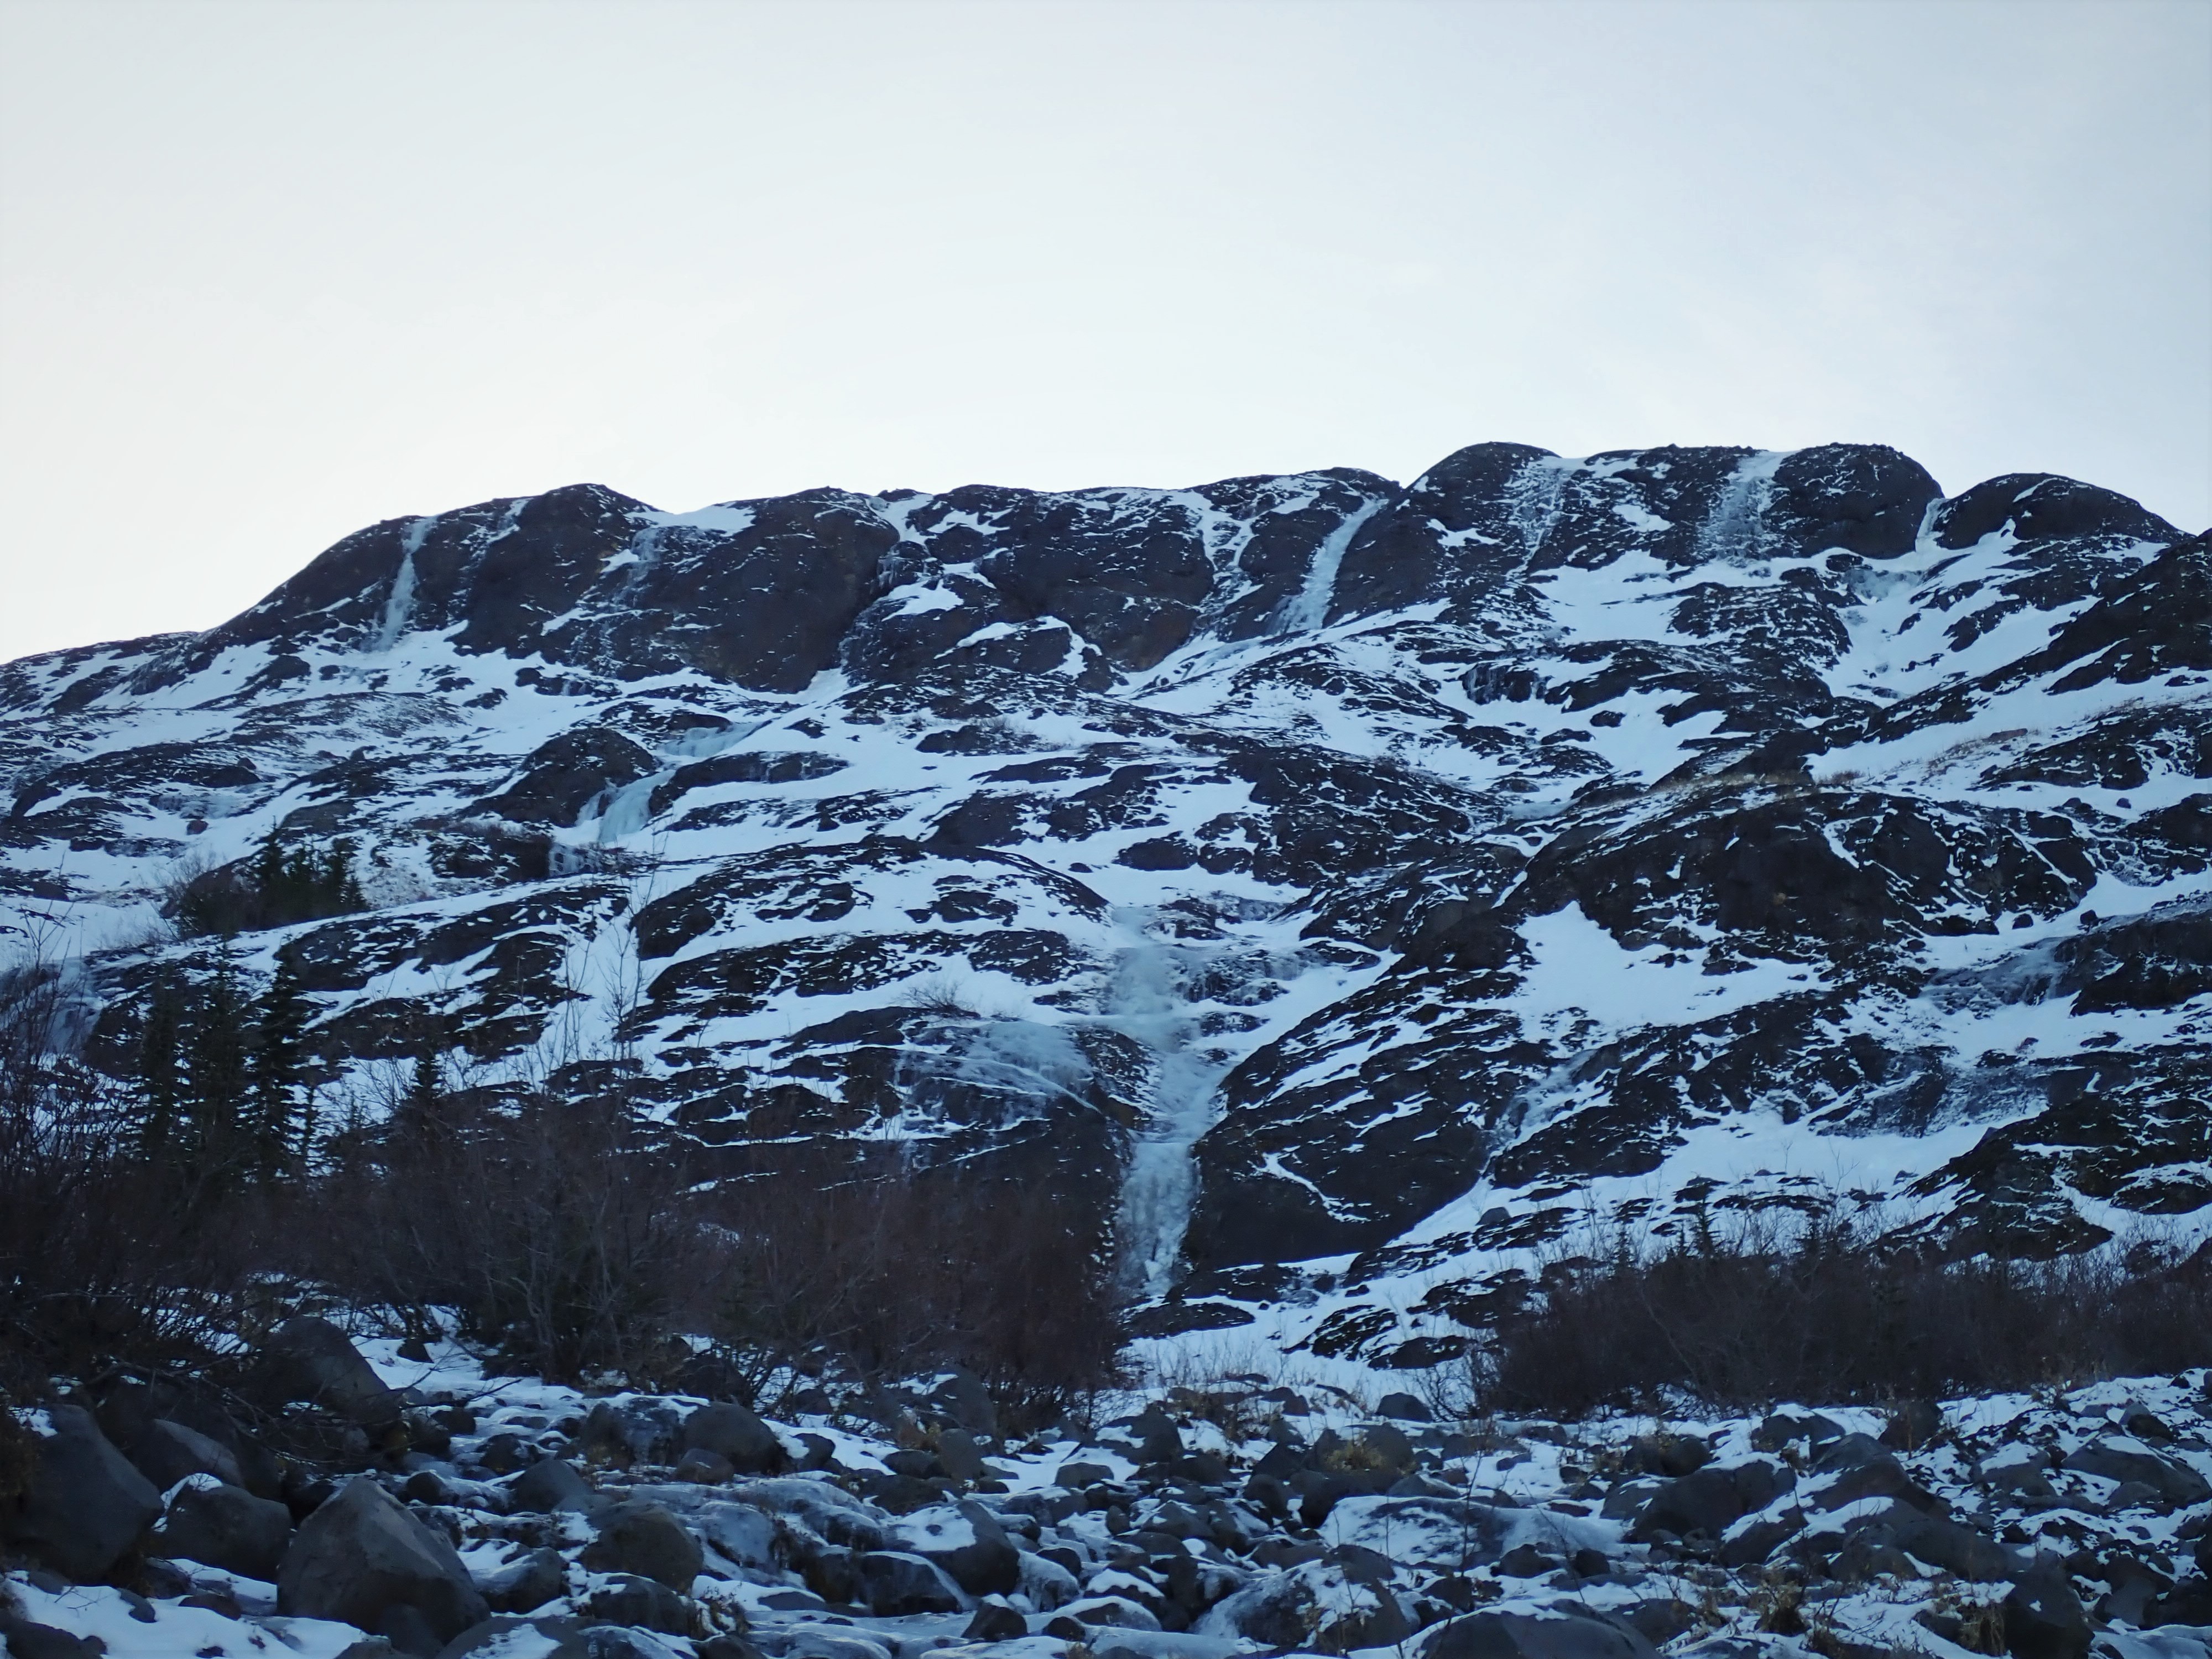
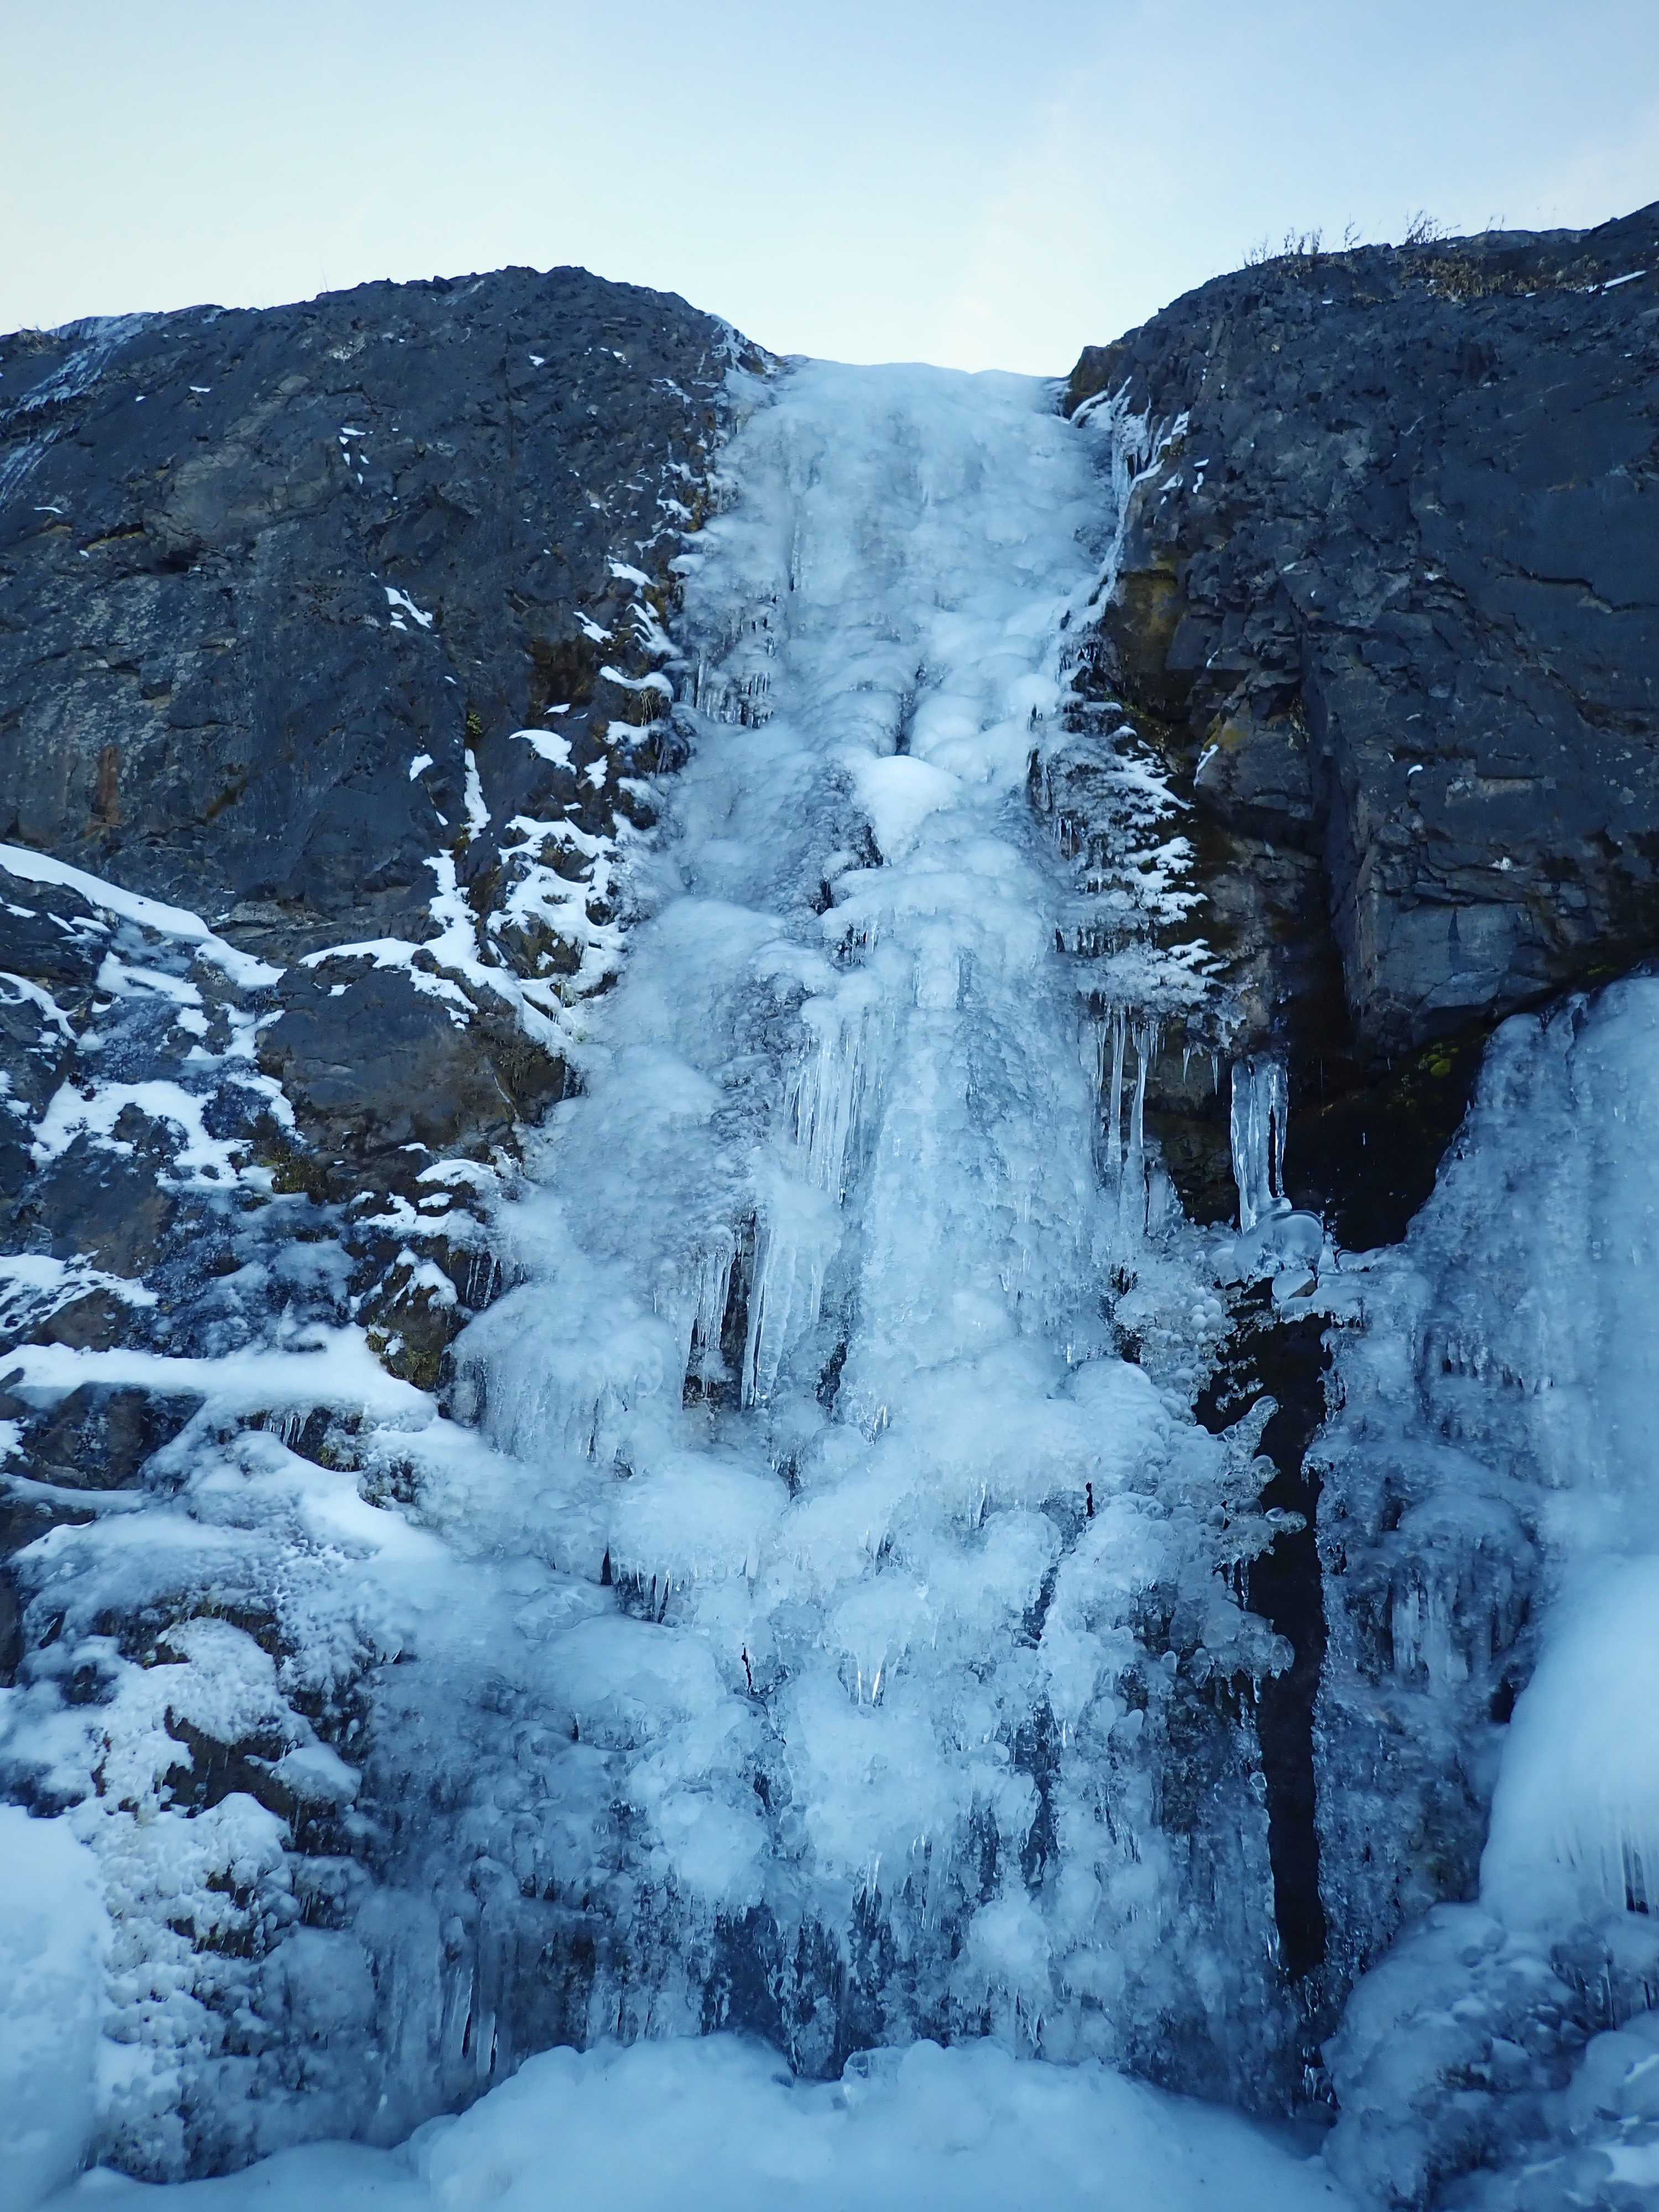
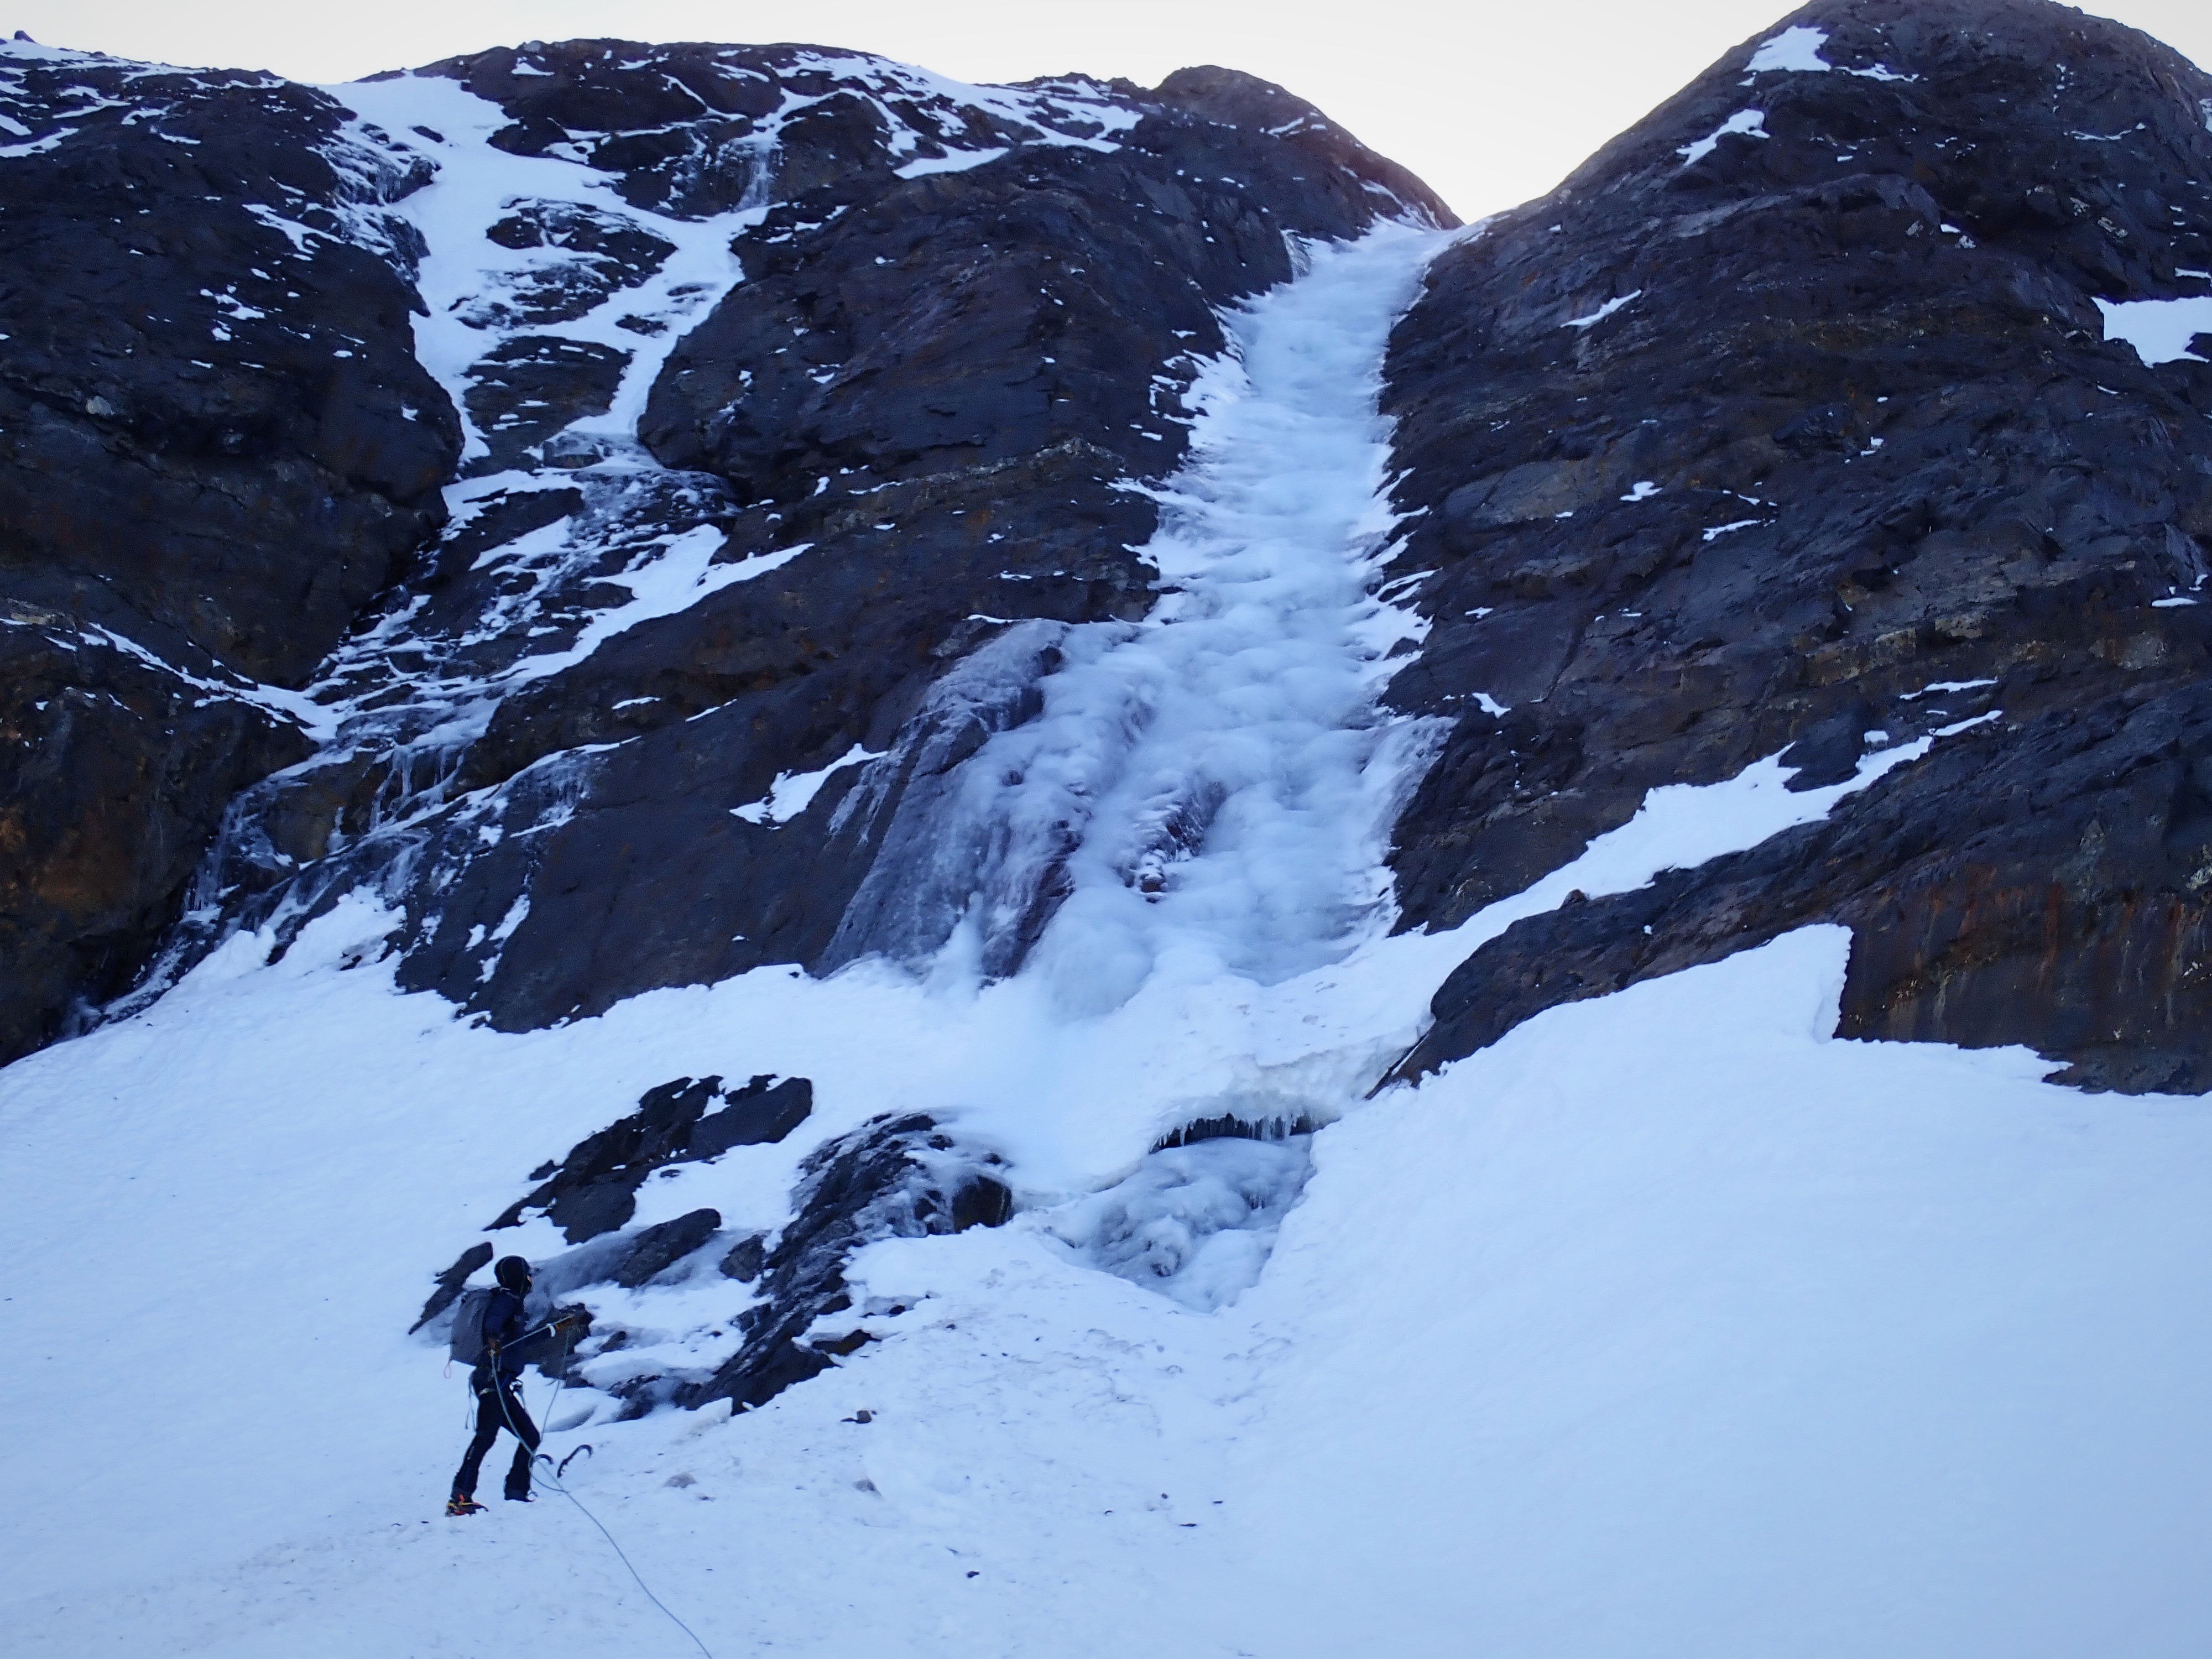
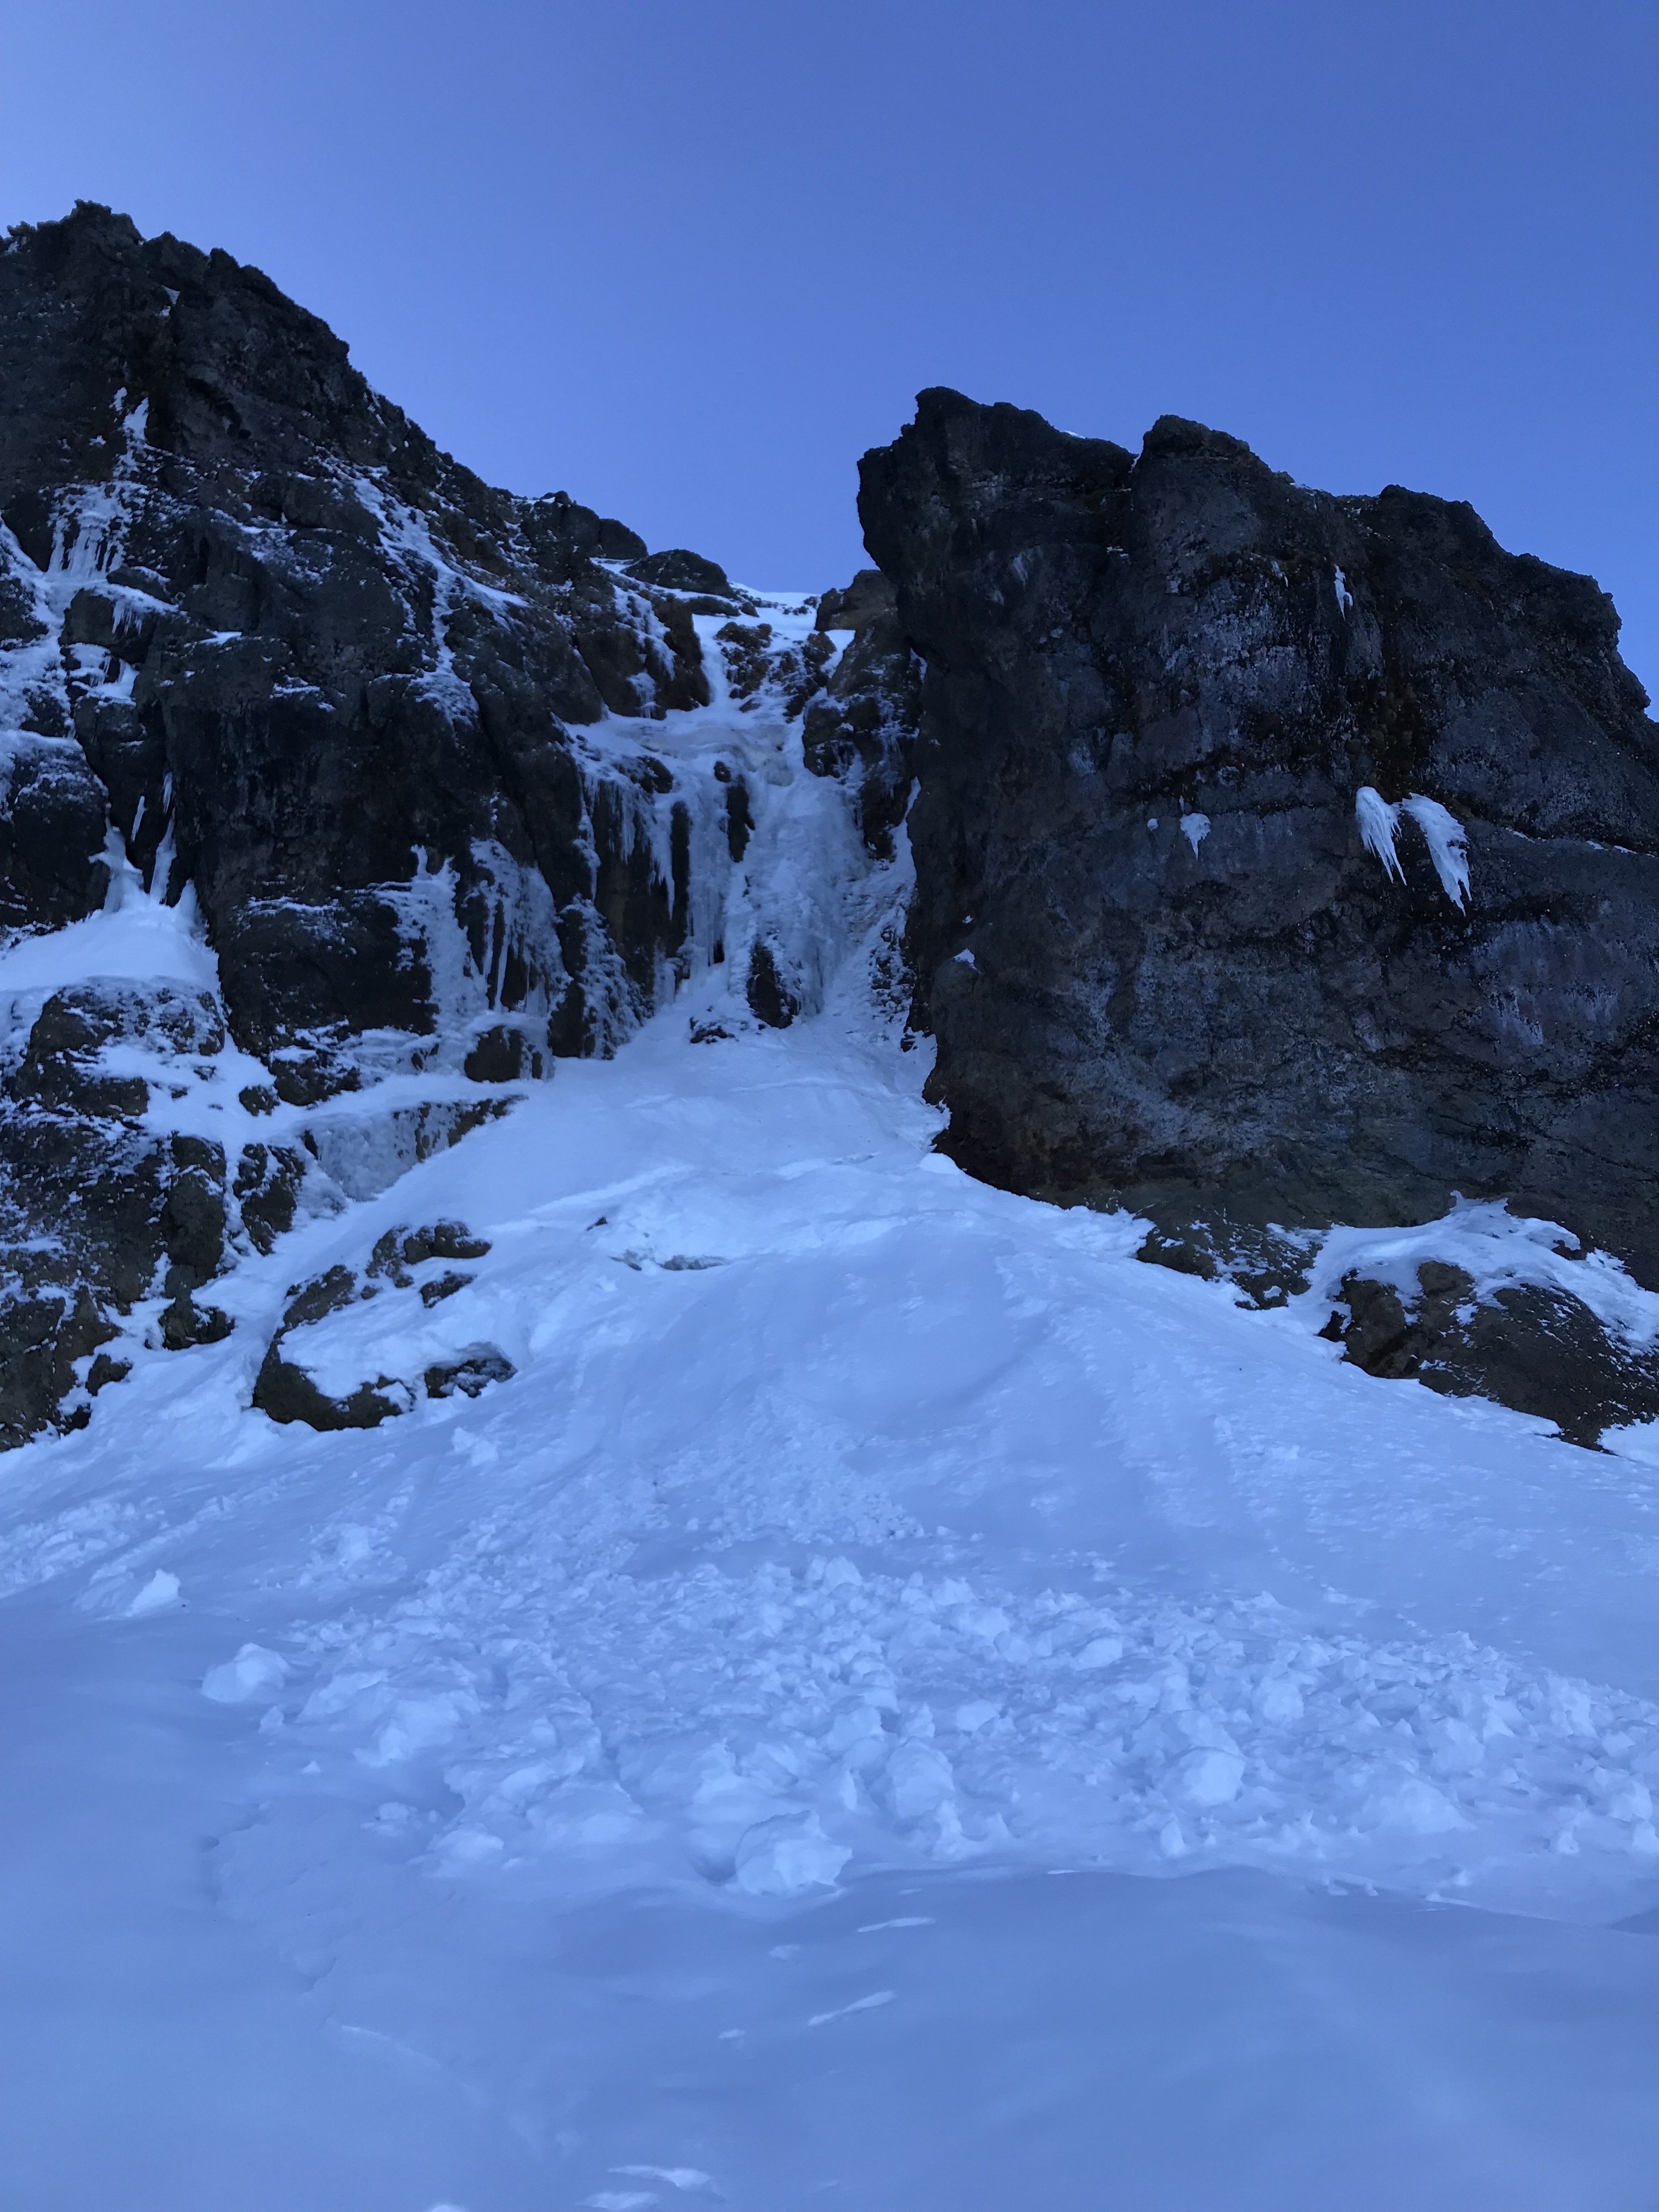
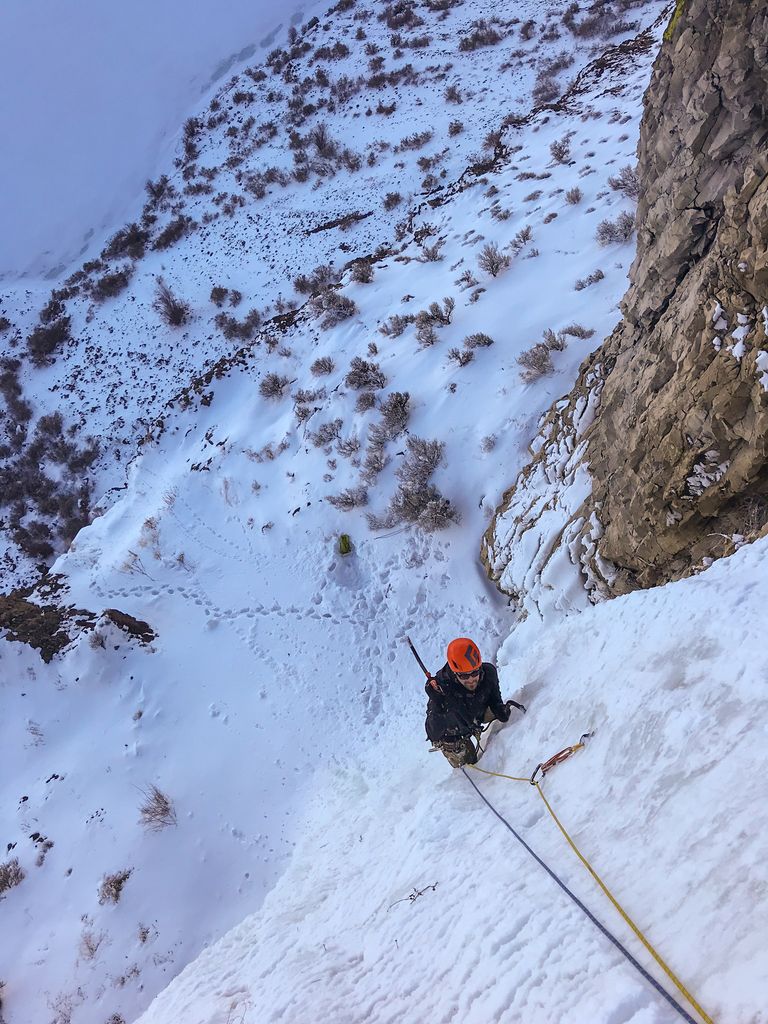
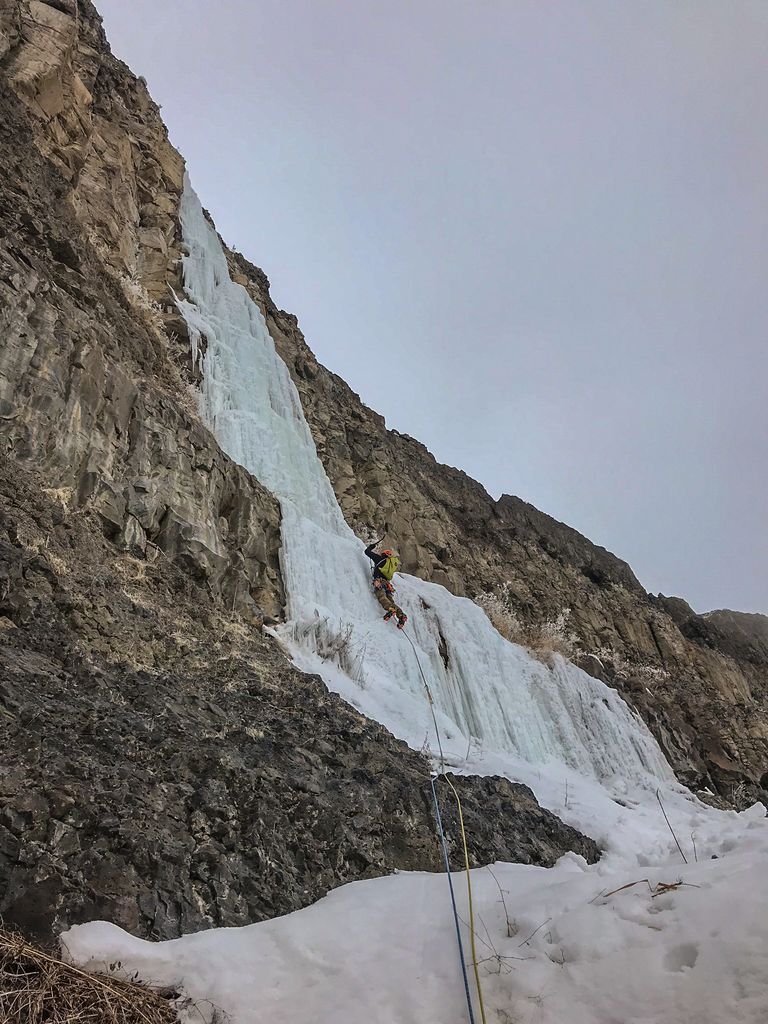
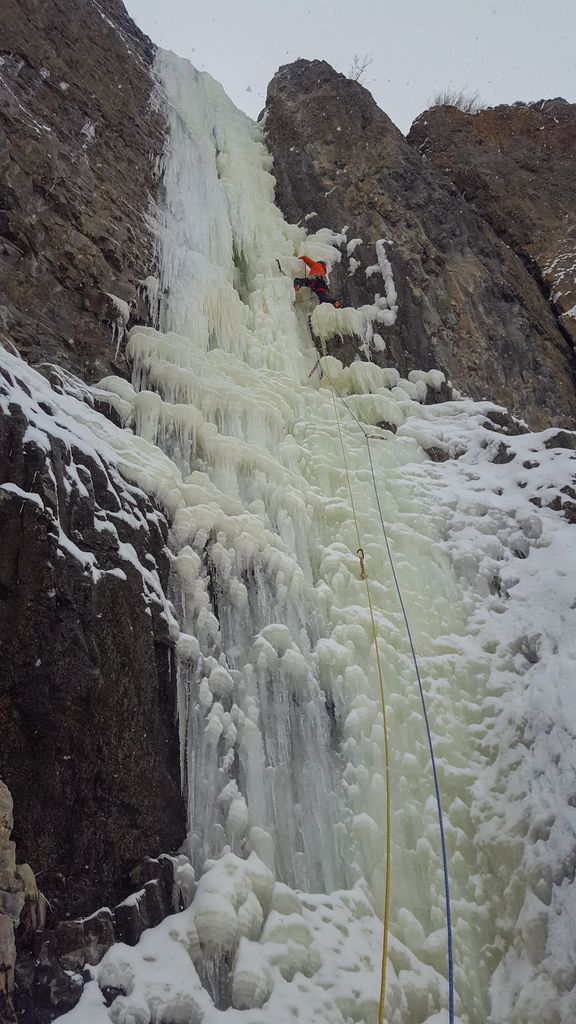
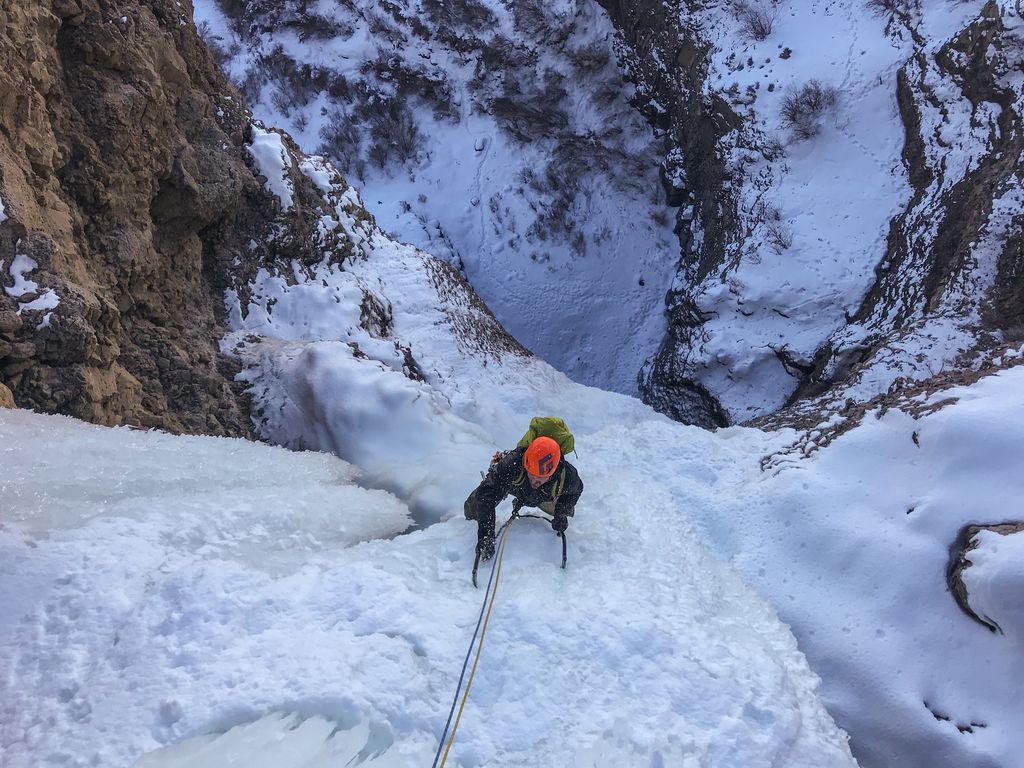
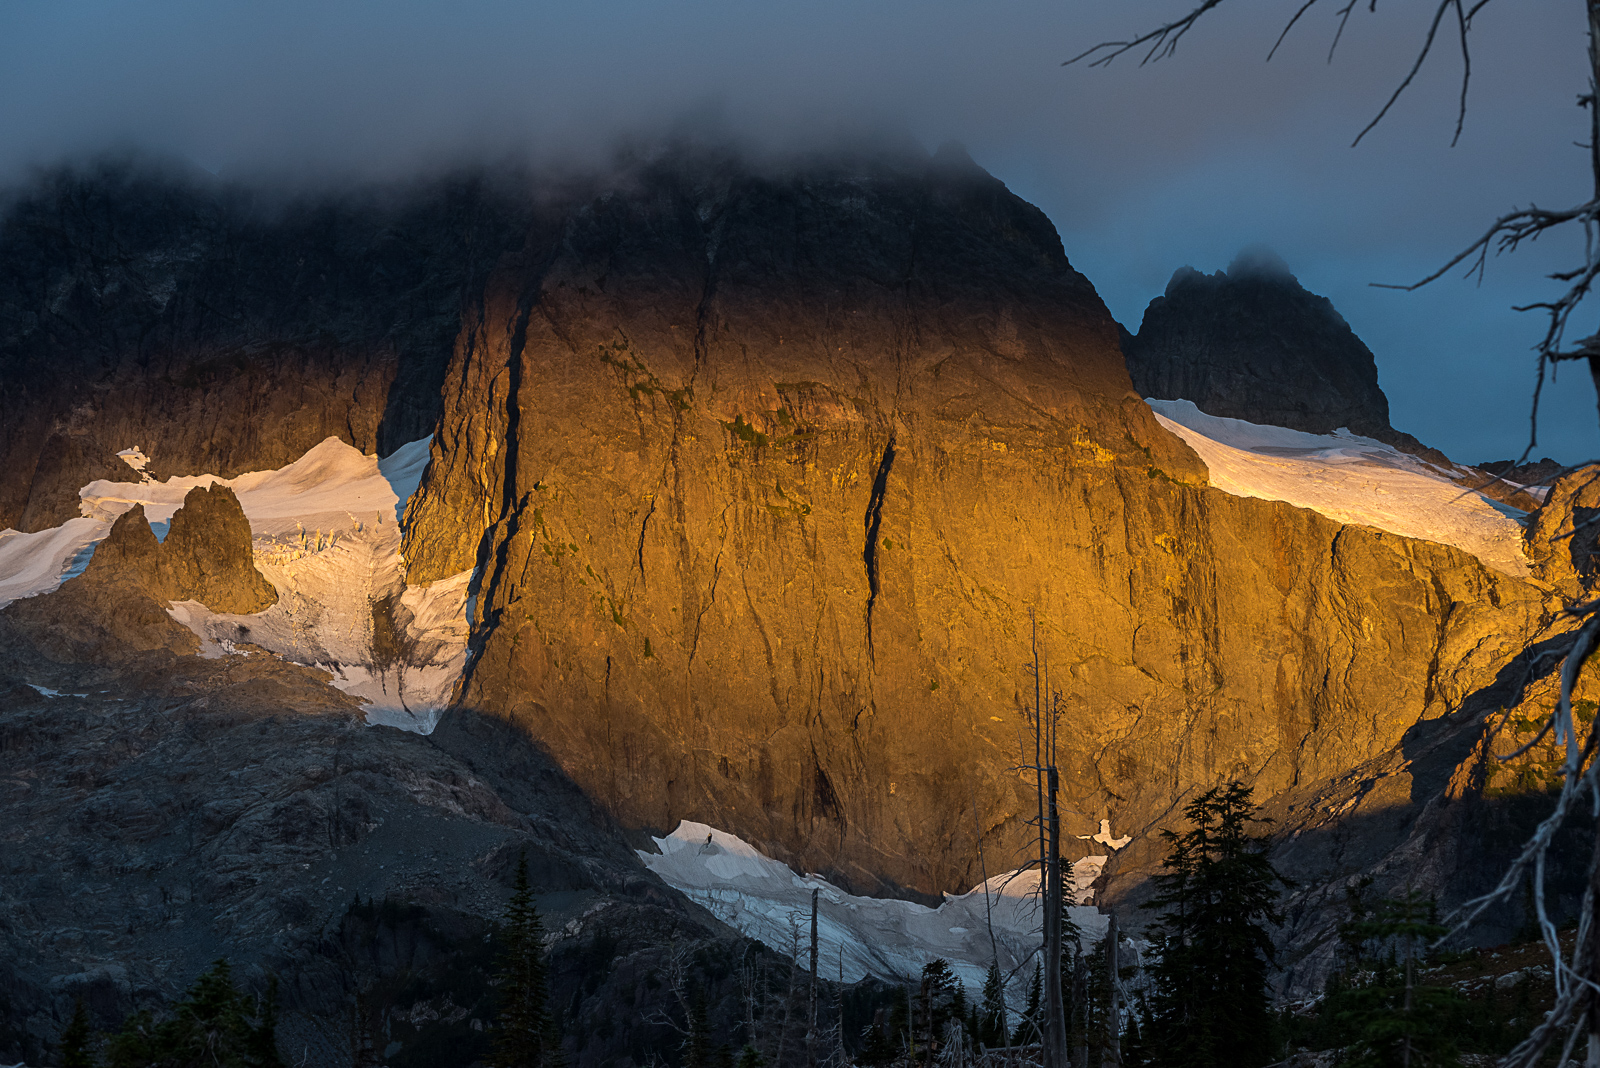
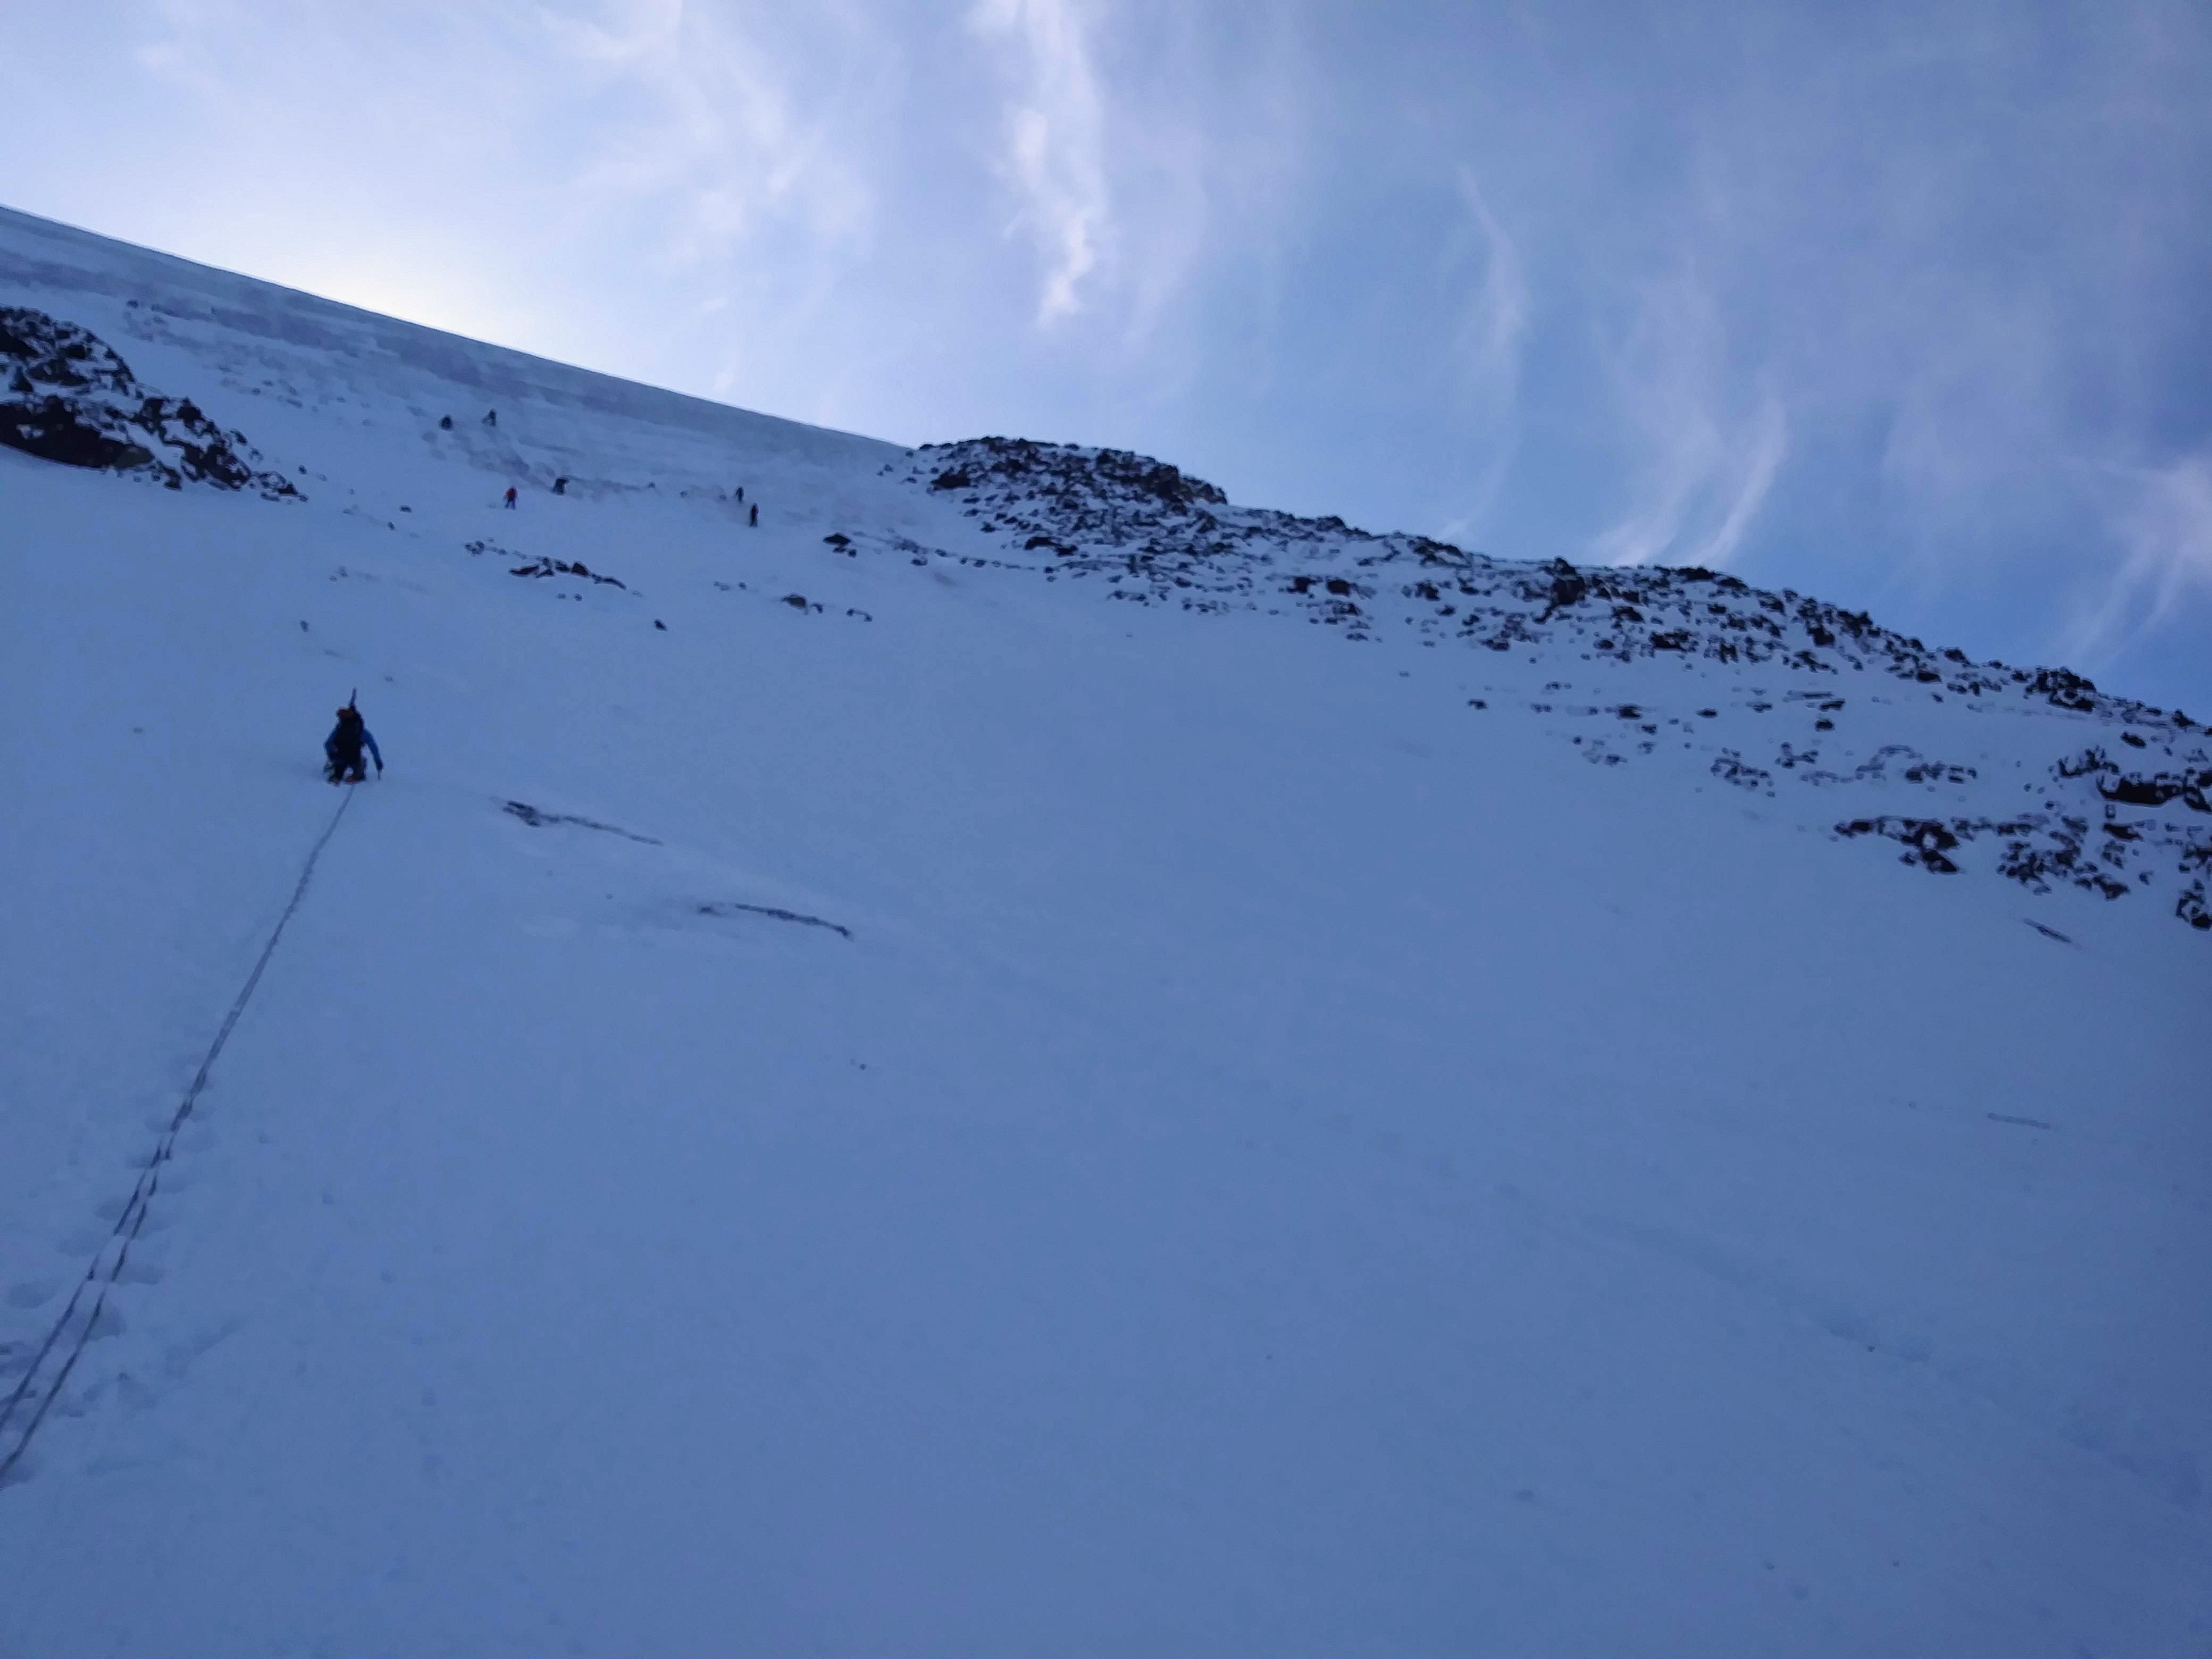
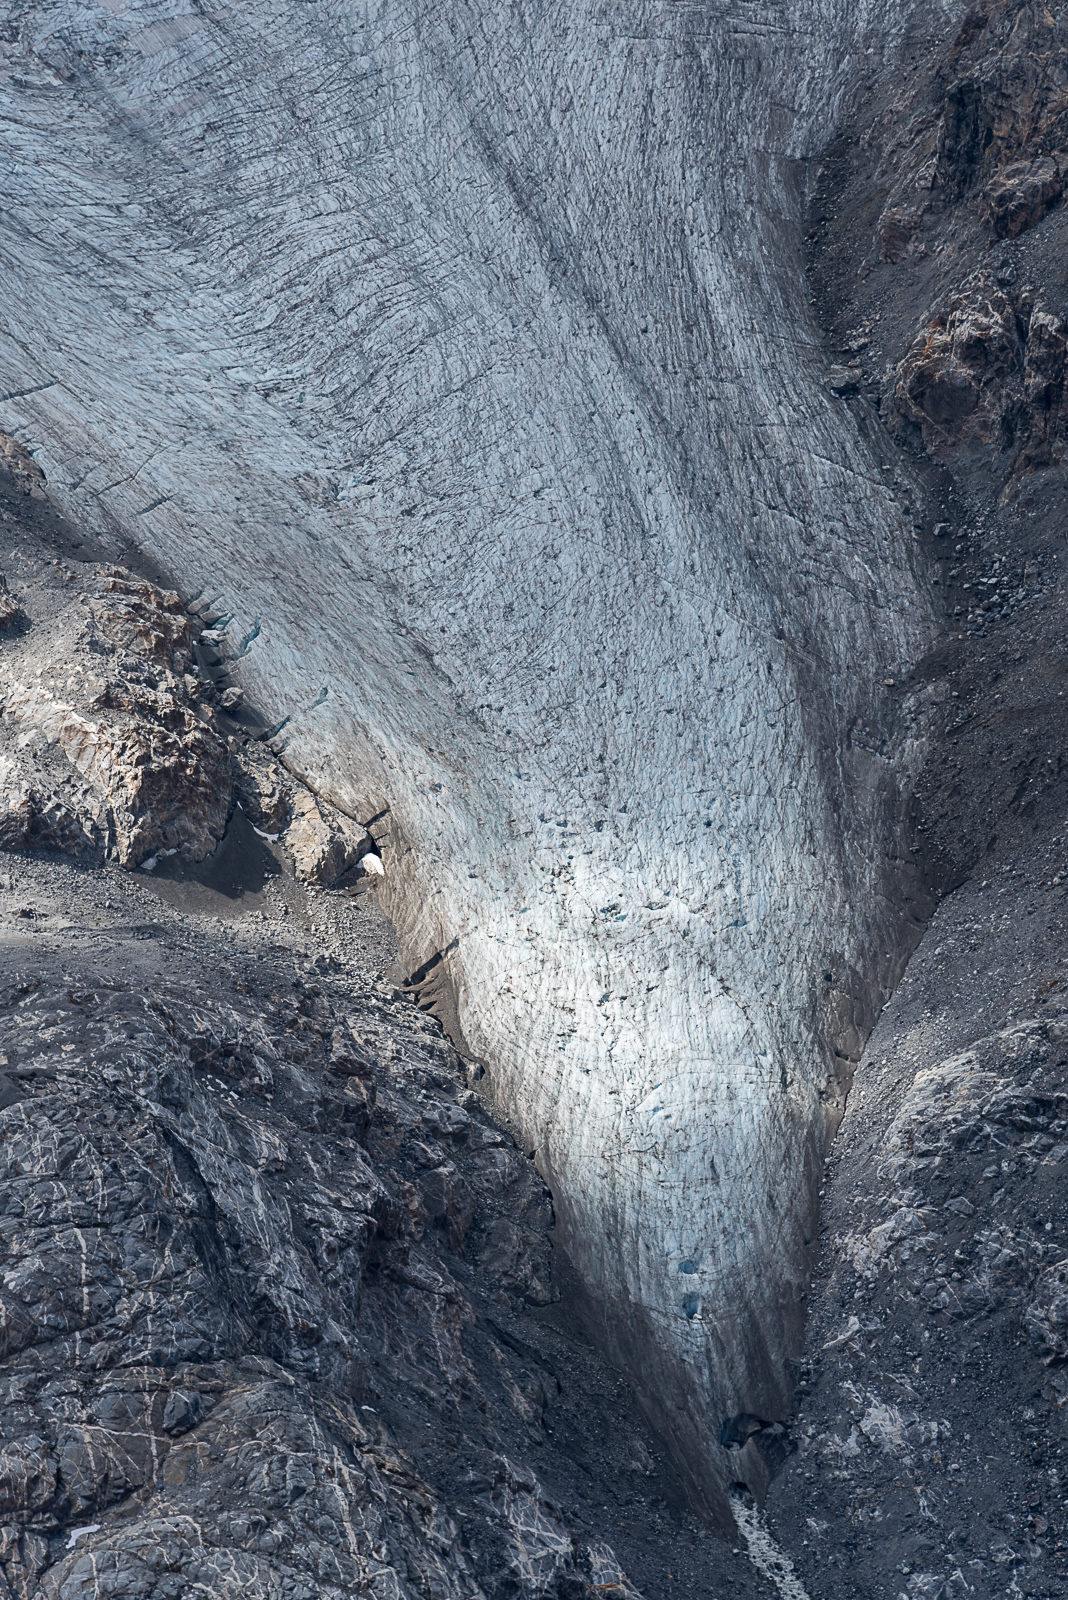
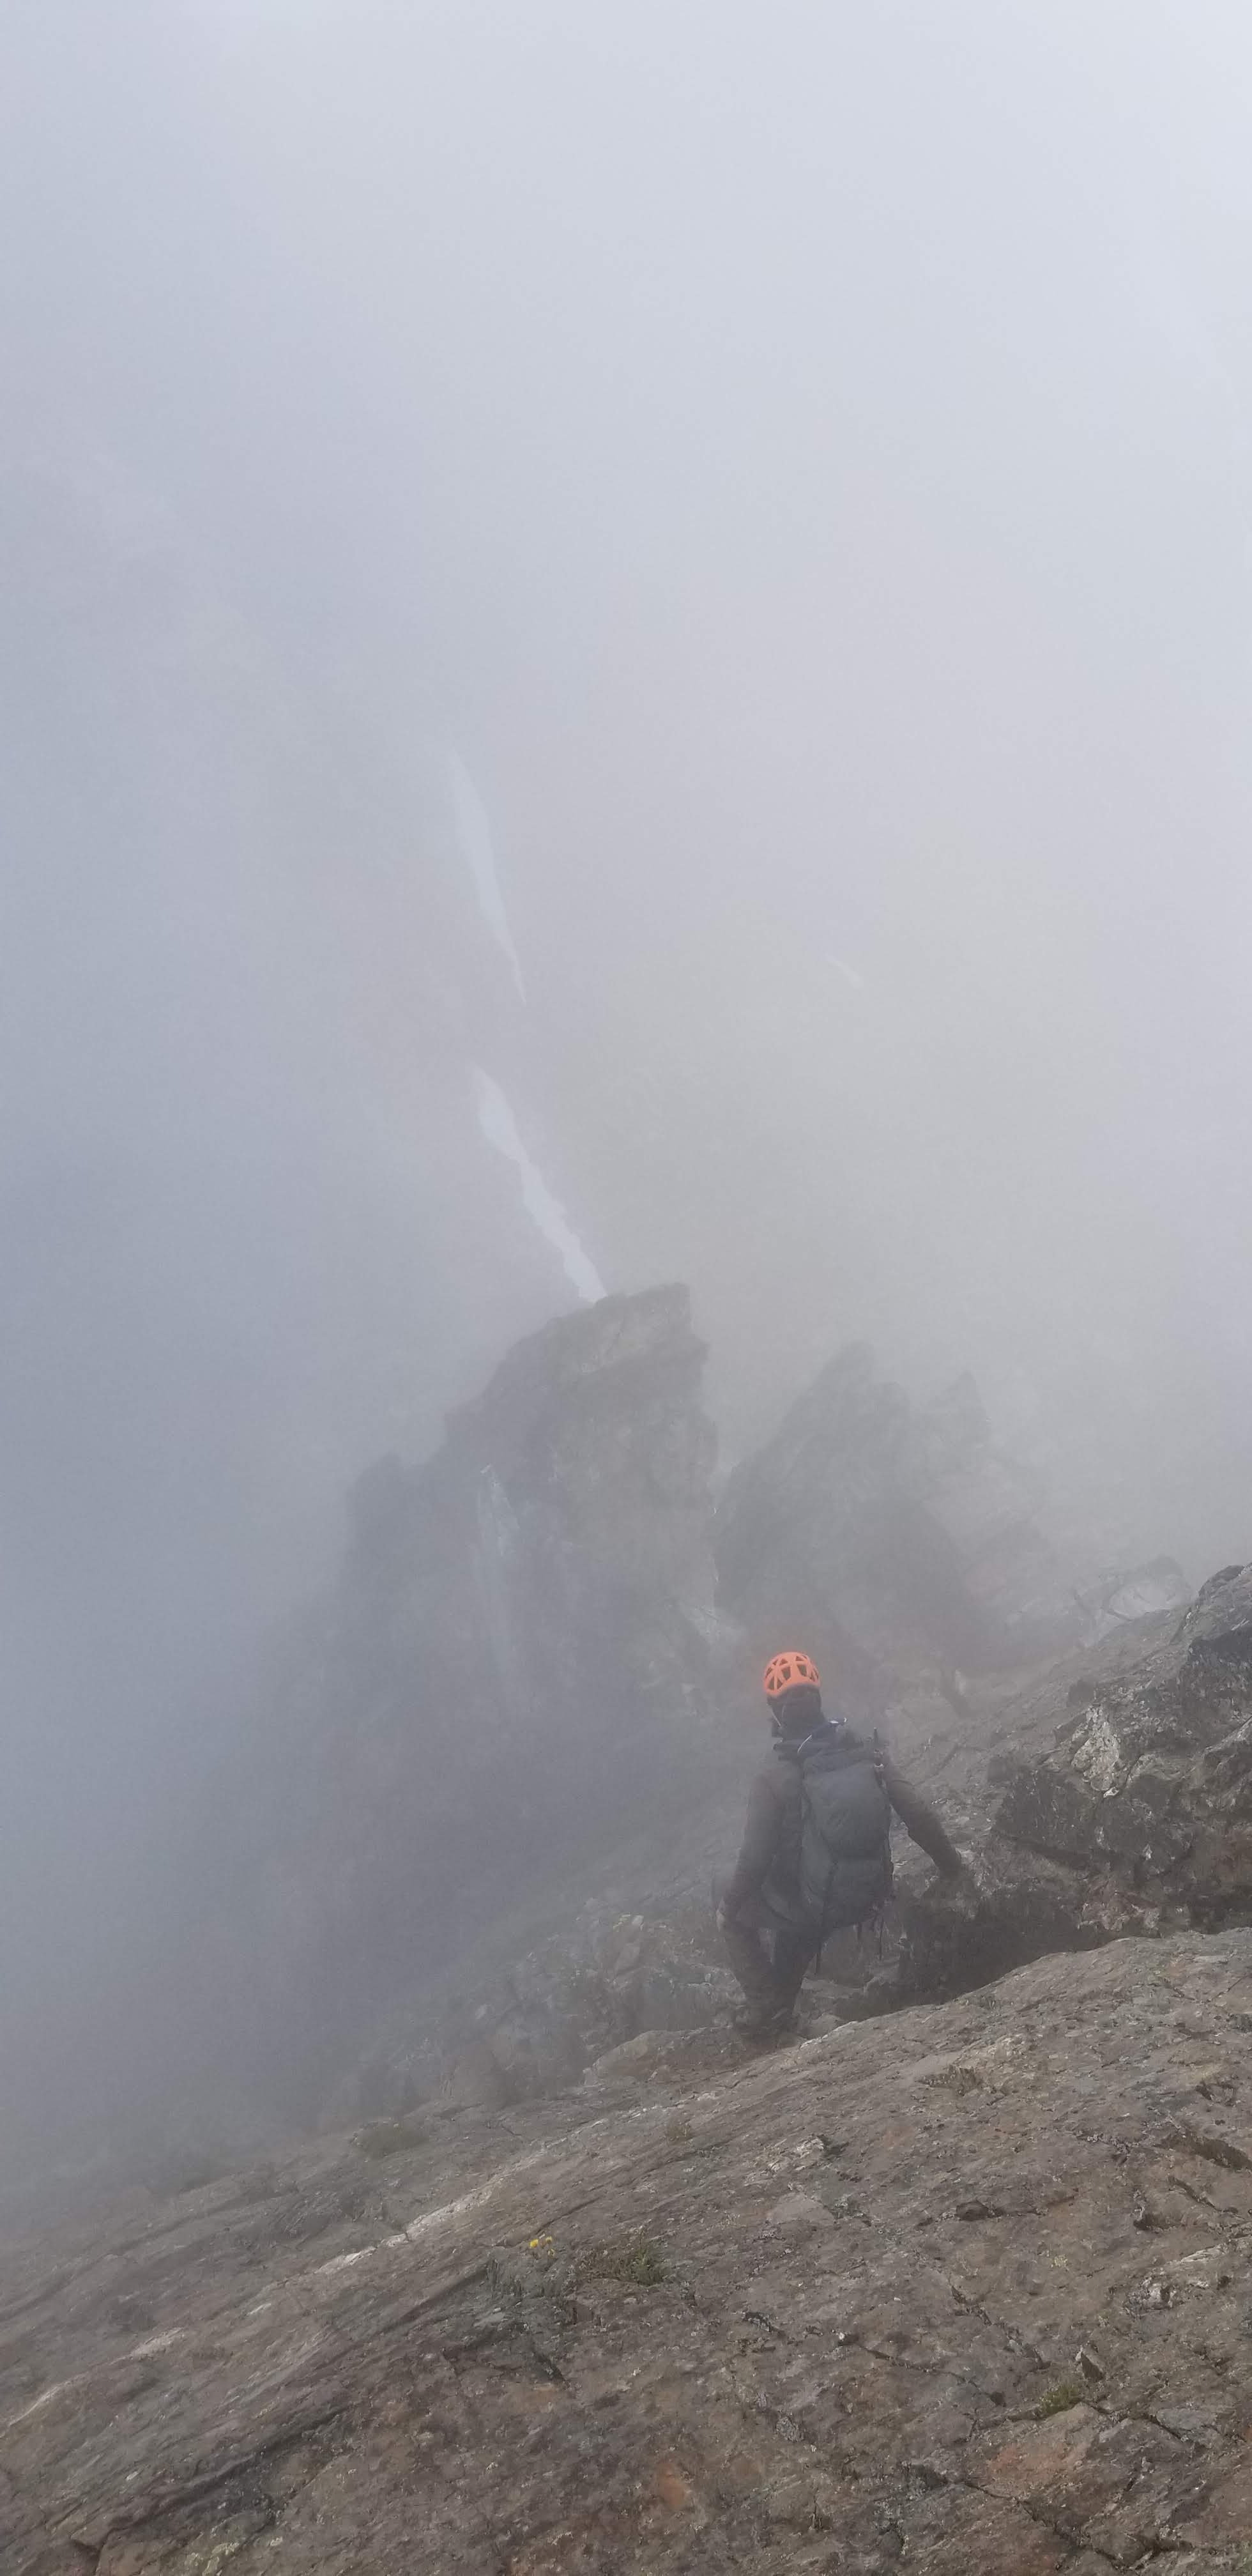
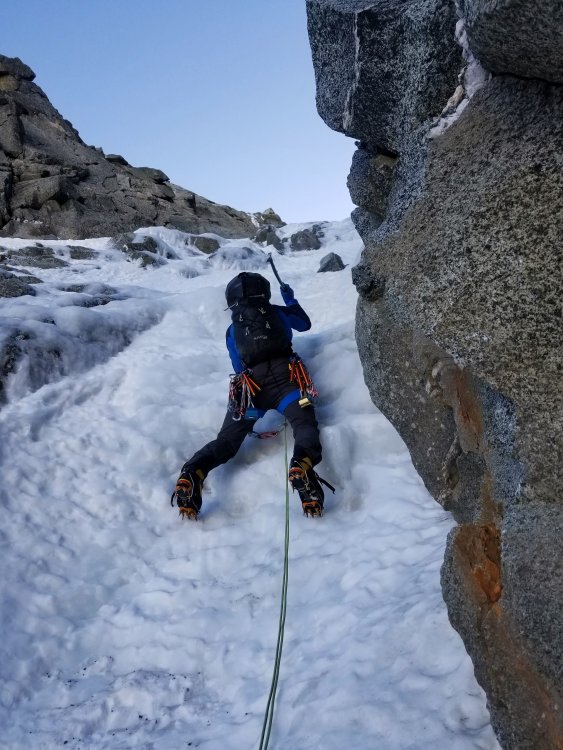
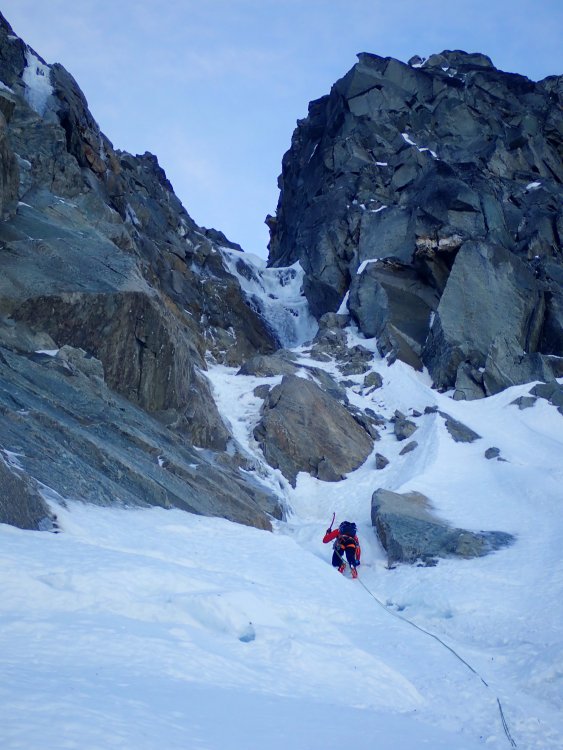
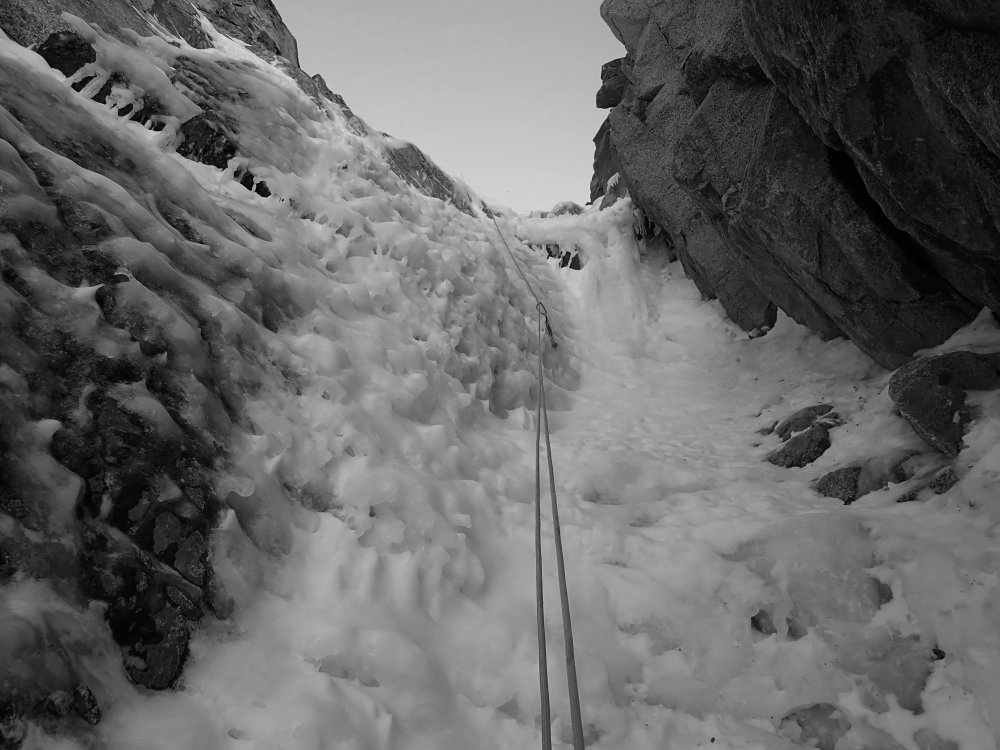
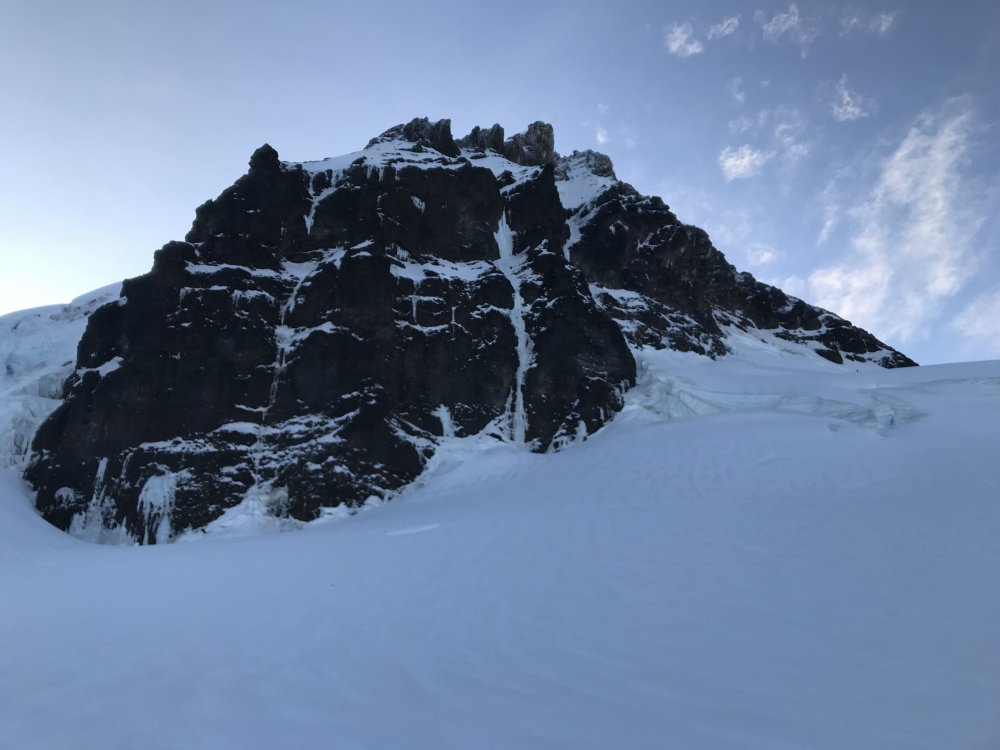
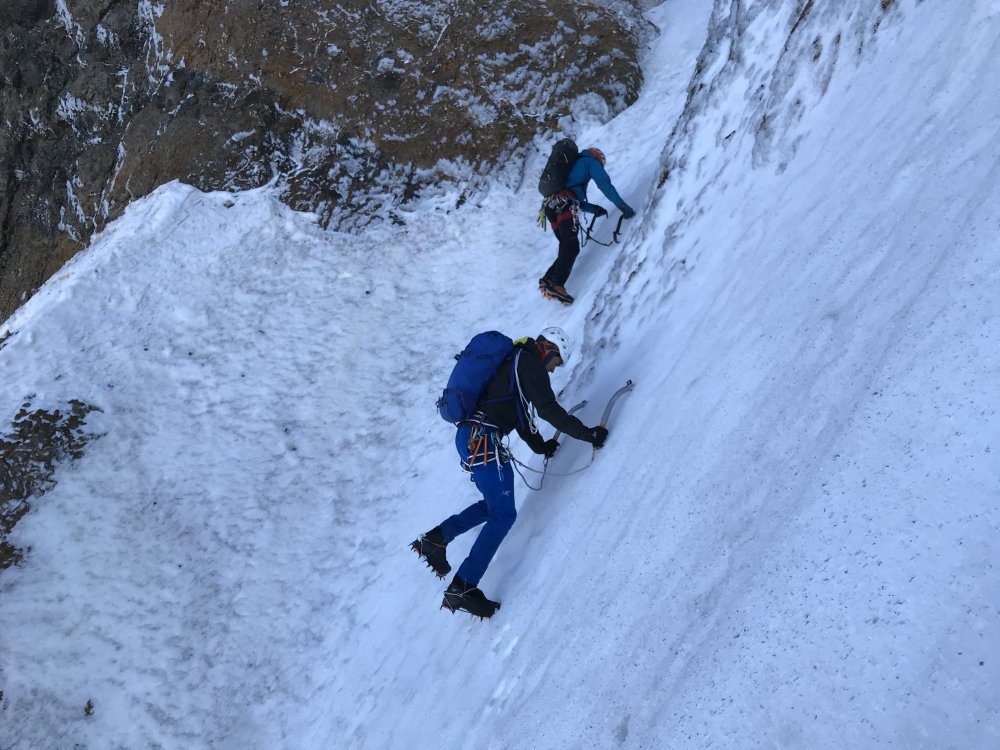
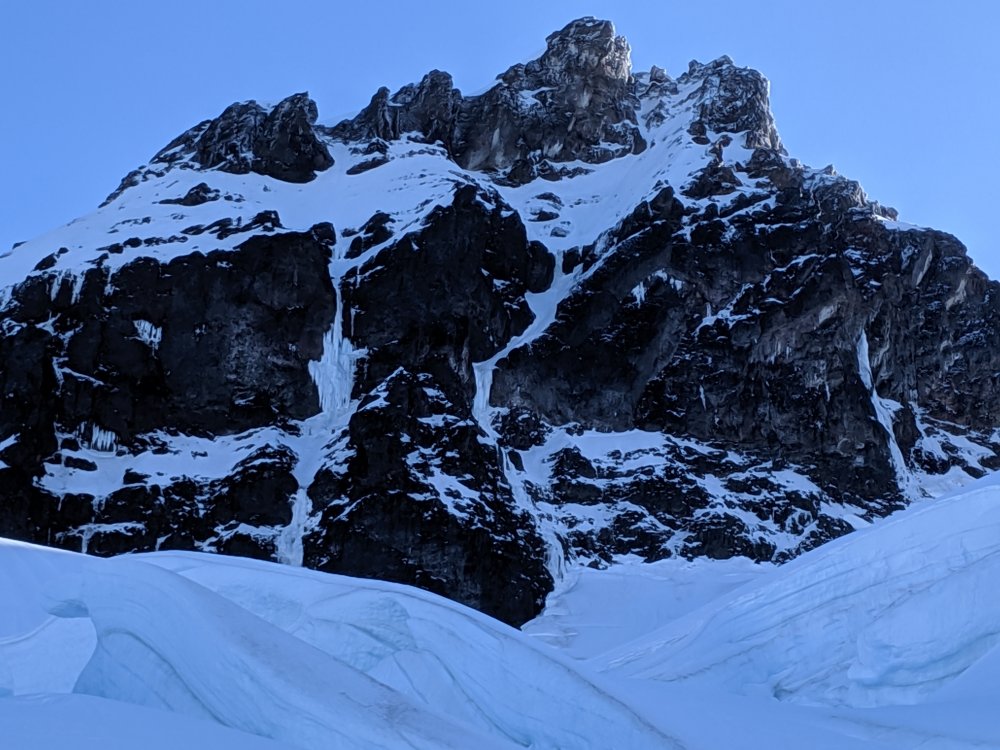
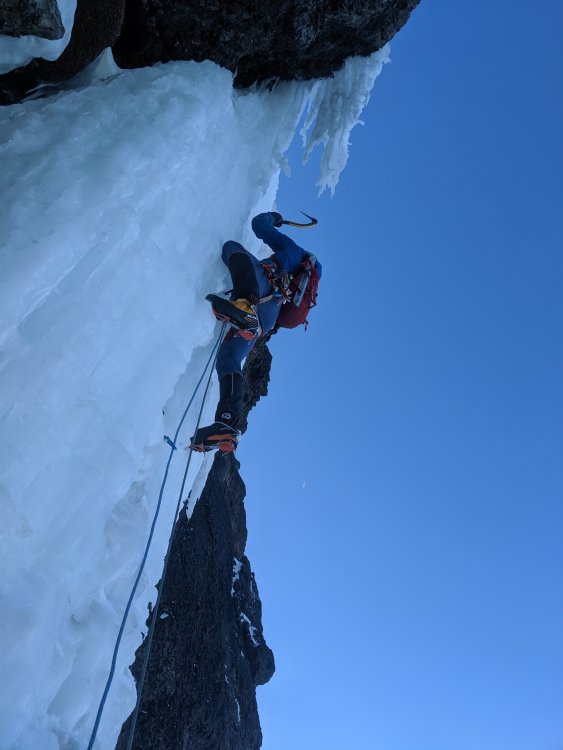
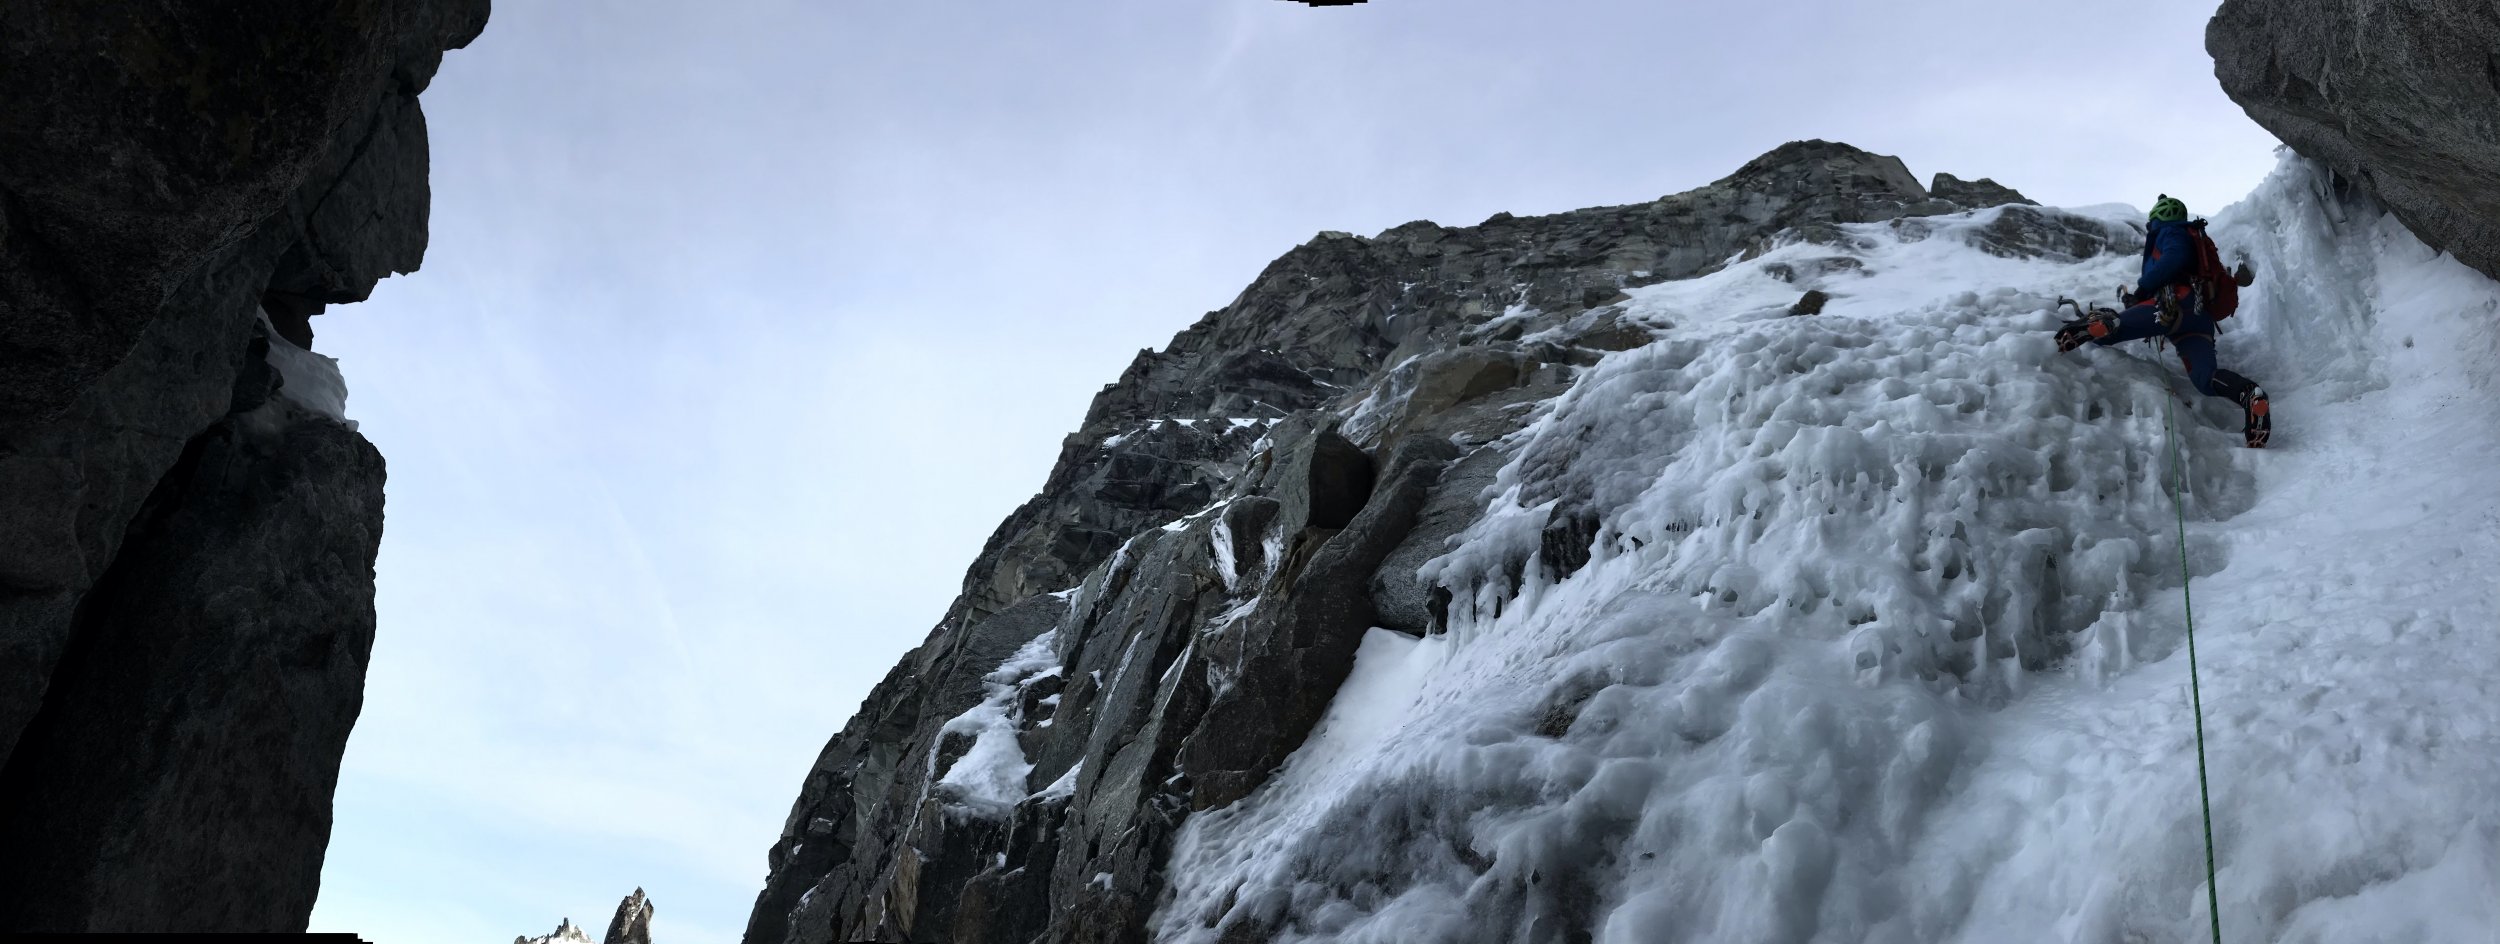
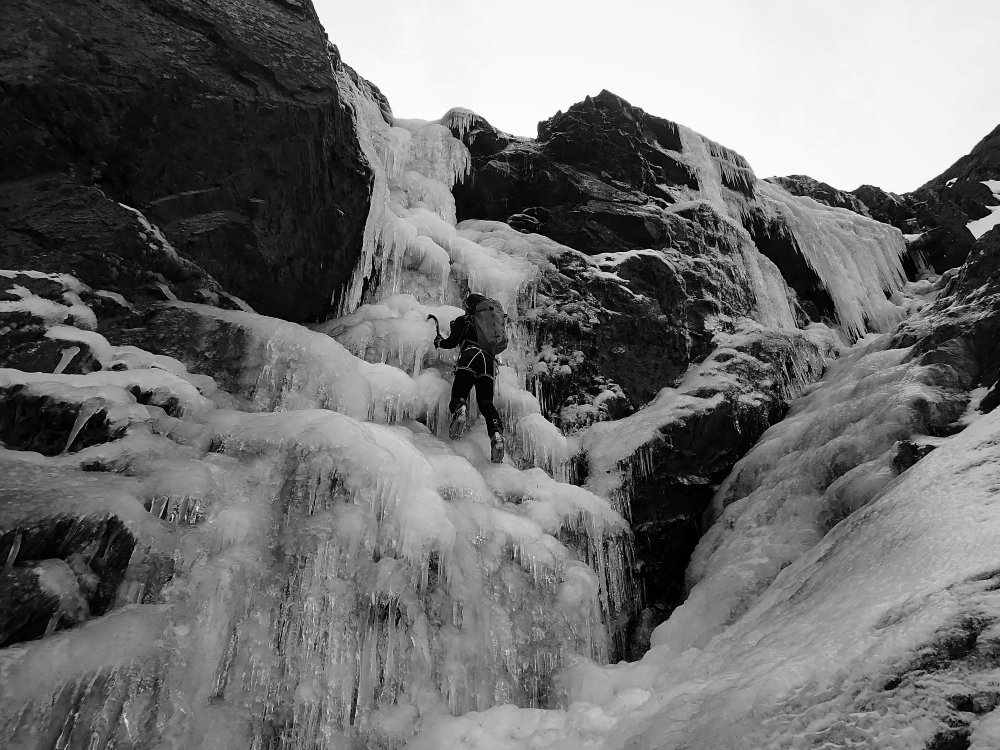
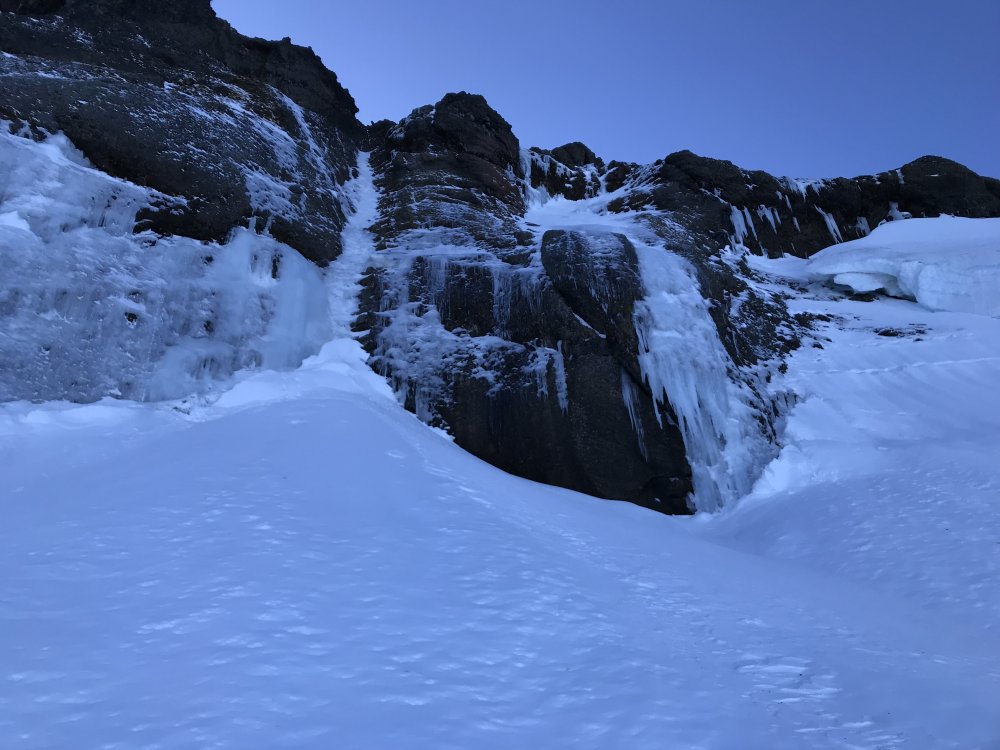
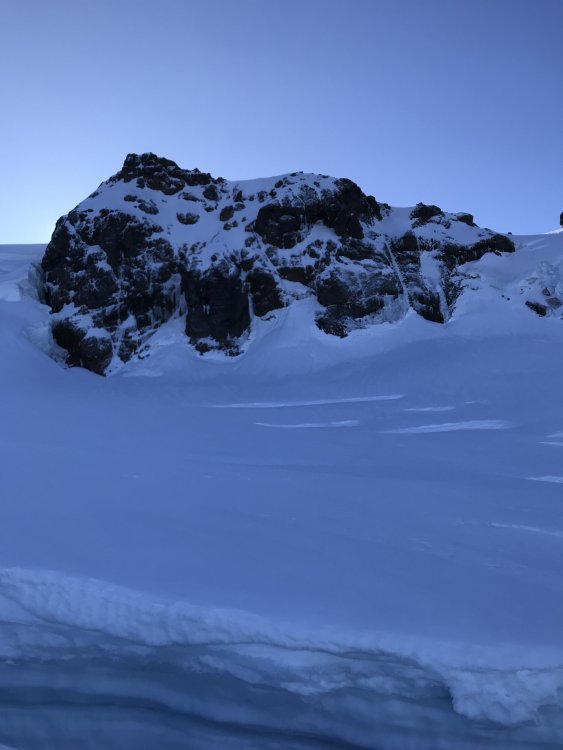
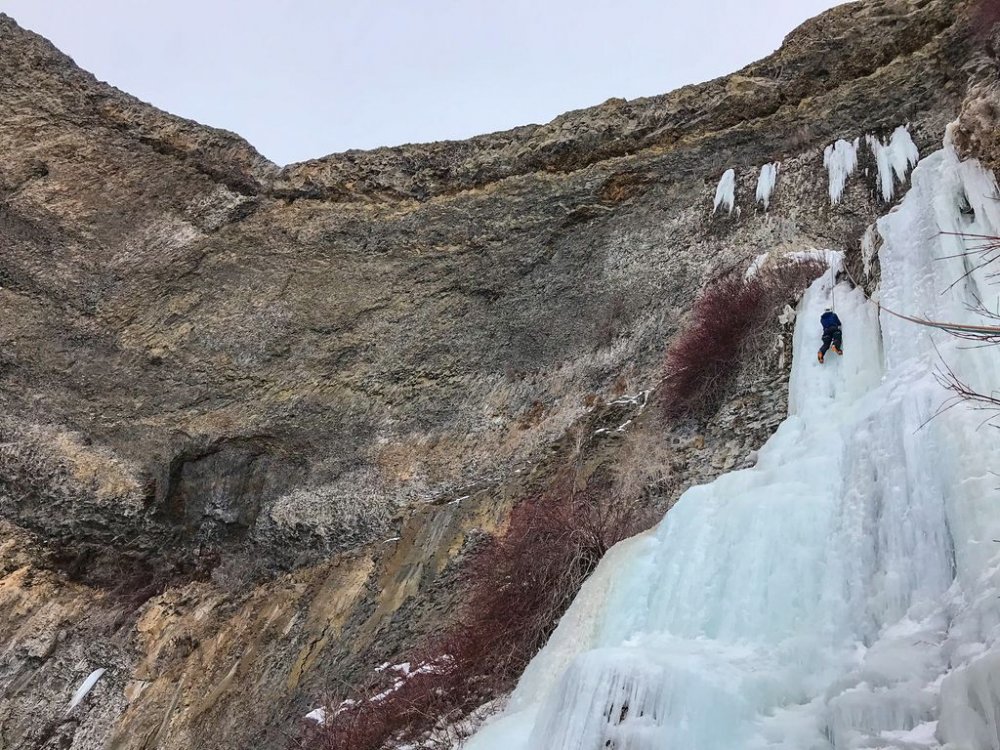
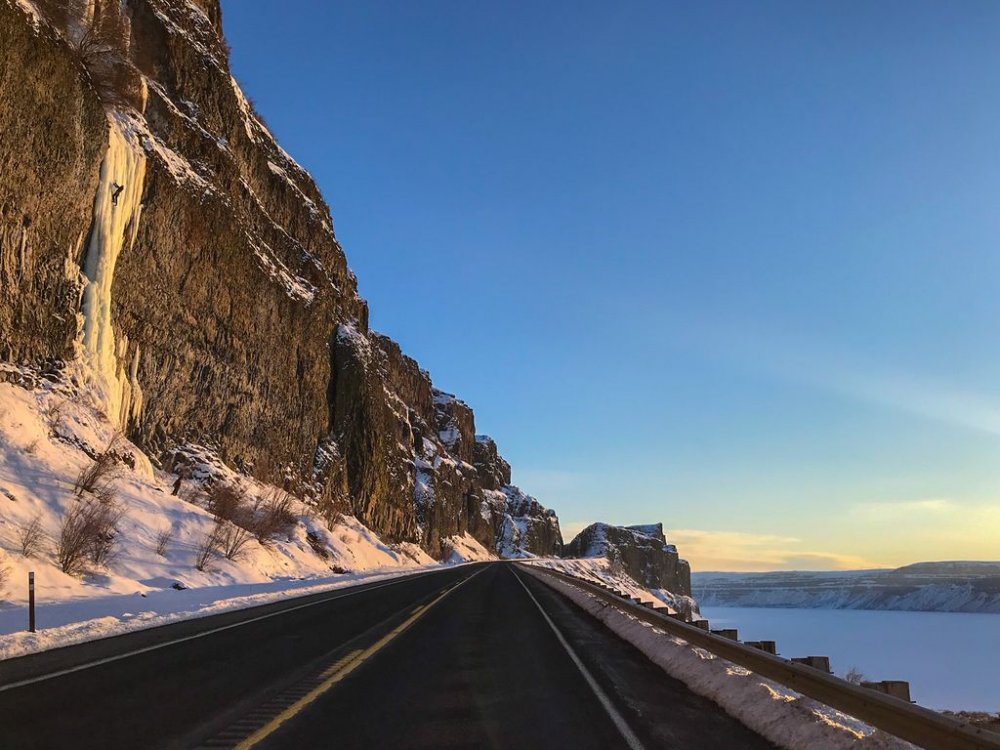
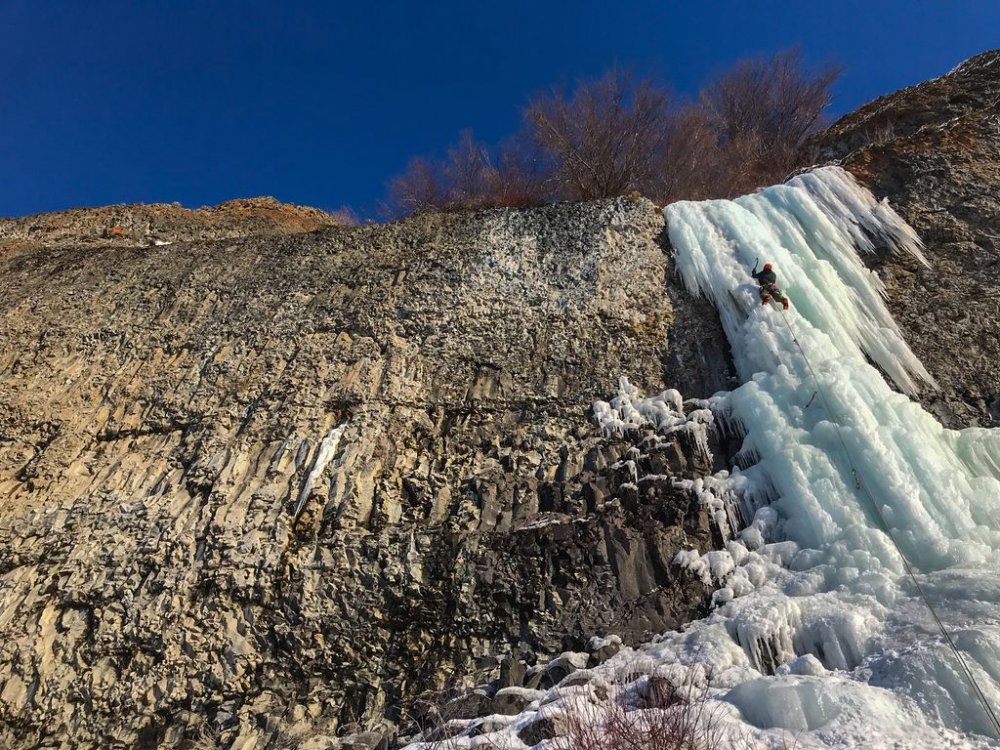
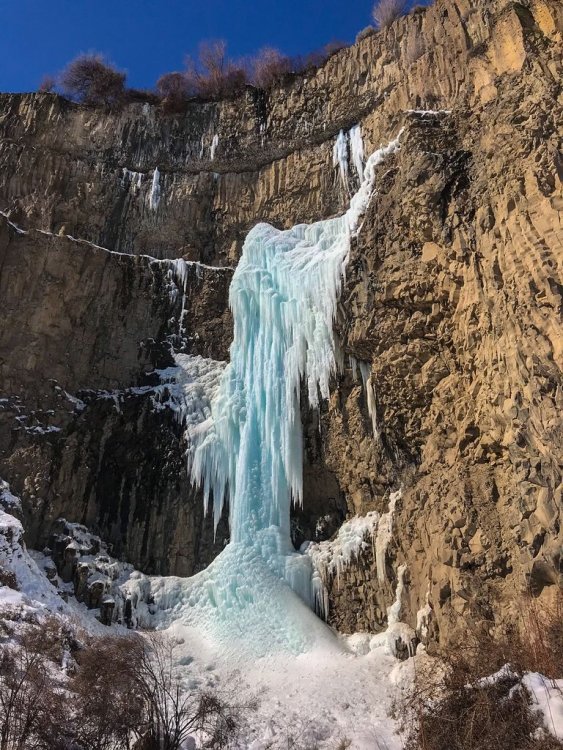
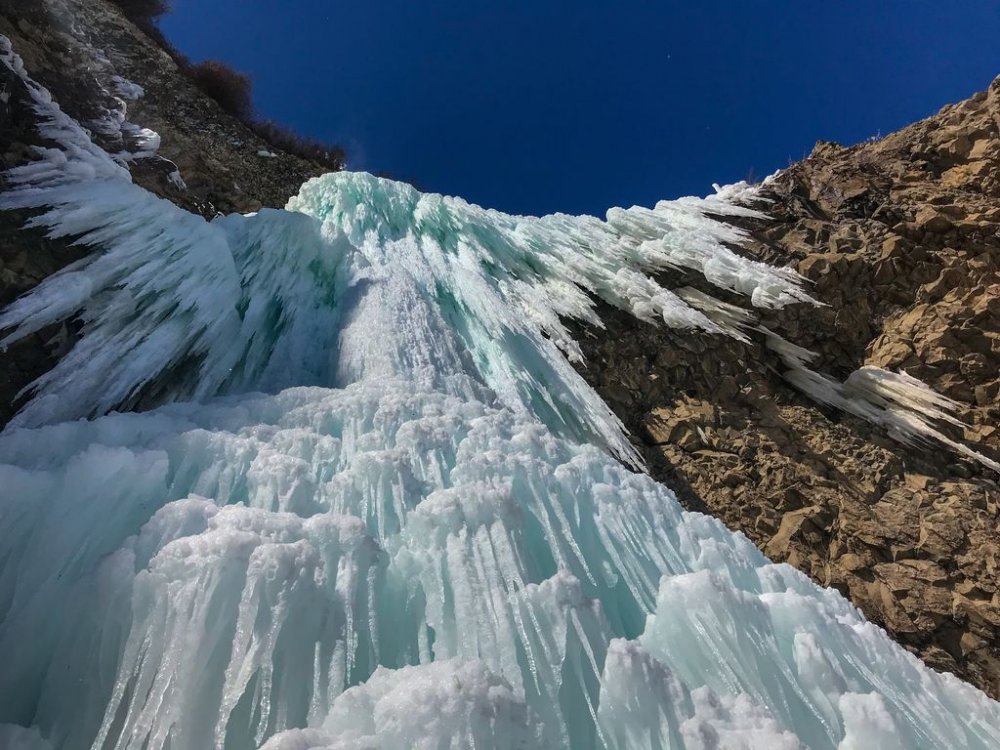
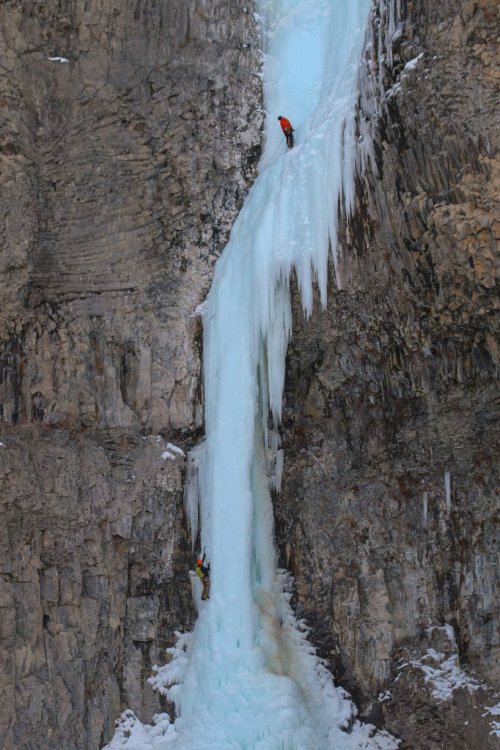
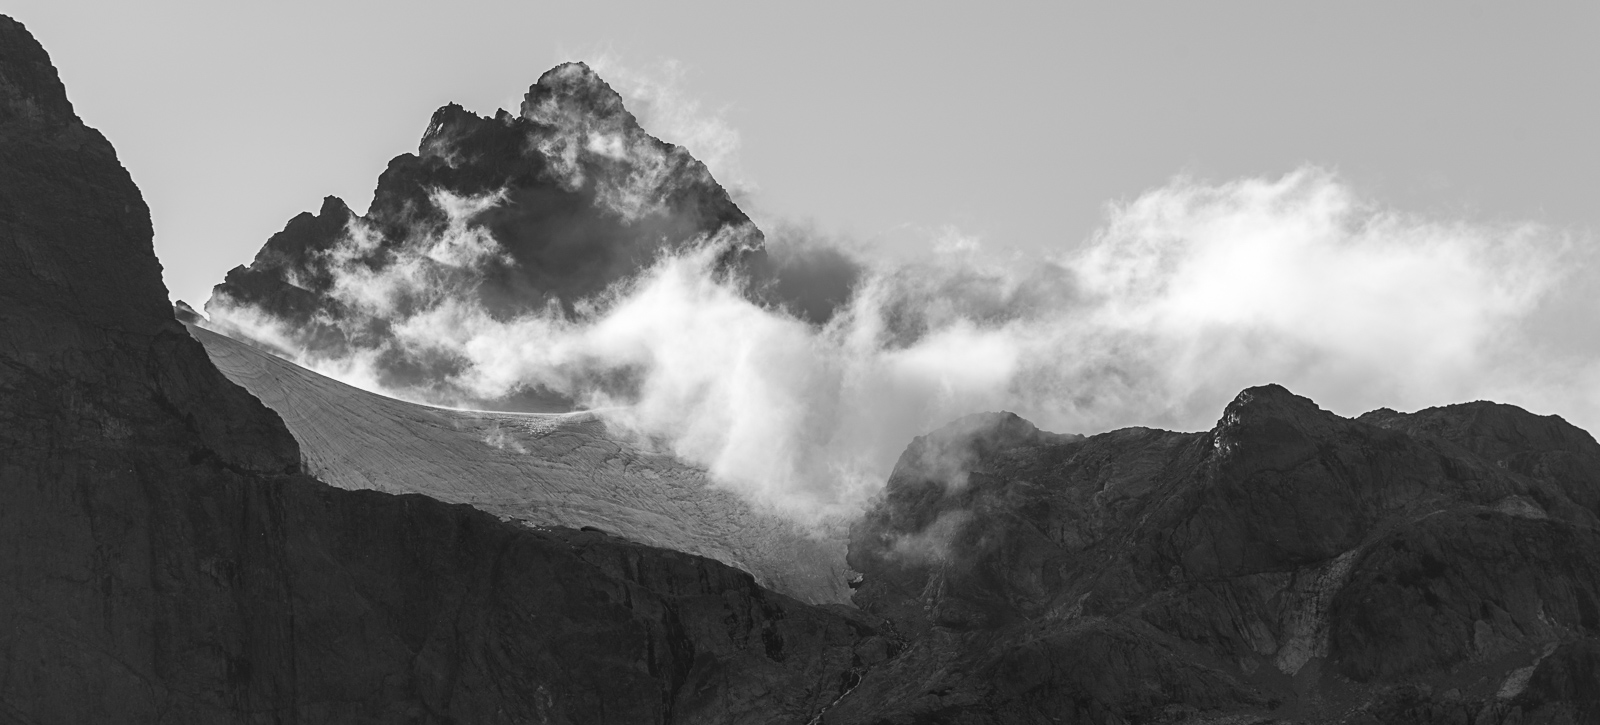
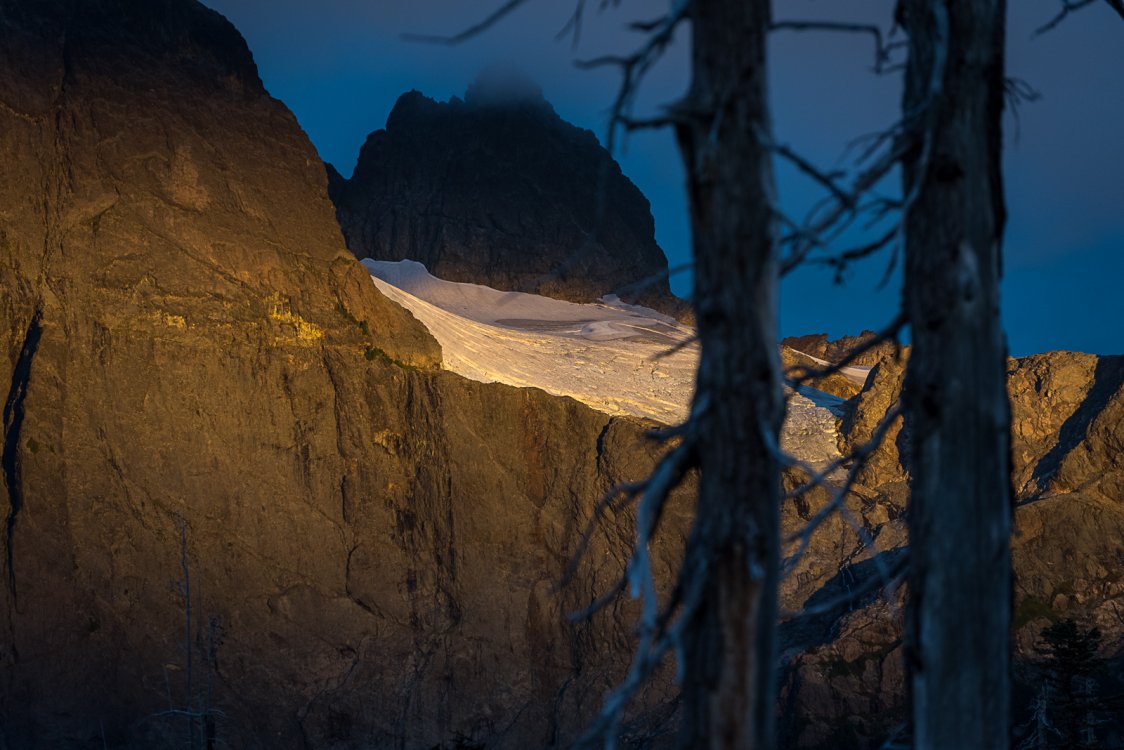
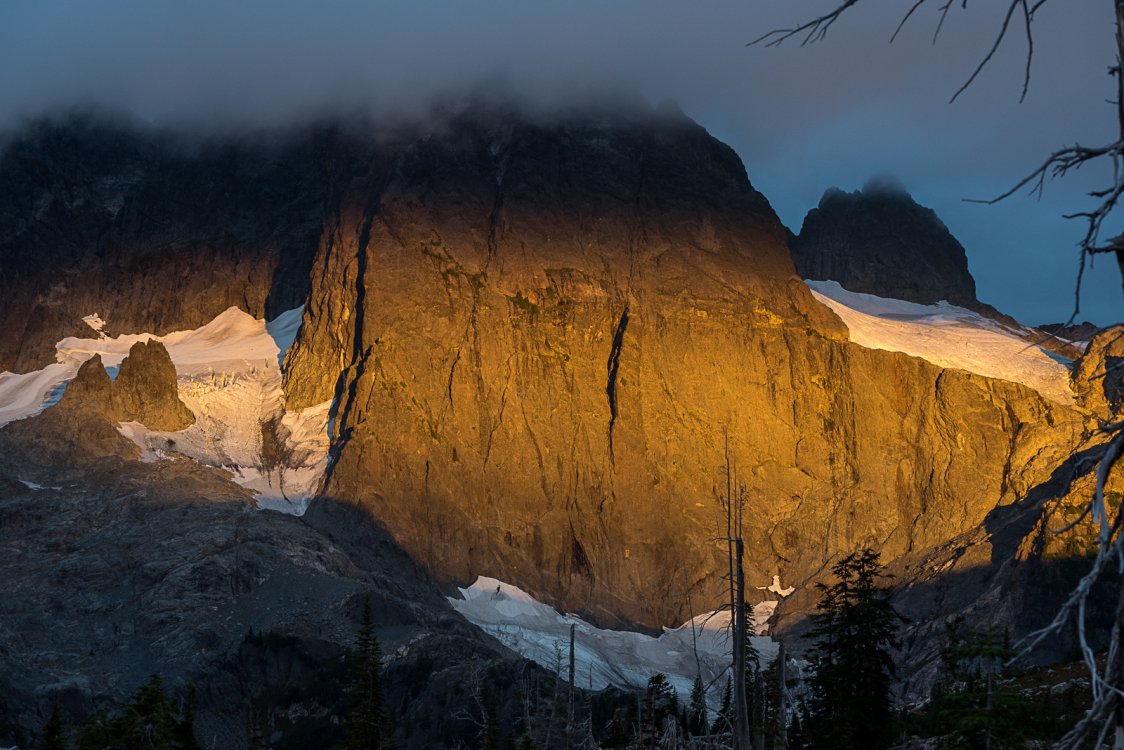
Trip: Colfax Peak - Cosley-Houston Trip Date: 11/10/2019 Trip Report: Not going to do a long TR here since there are plenty of TRs on the Cosley-Houston. This will just be a quick update on conditions for those interested. First off, I was wrong when I posted a week or two ago that the approach is heinous/convoluted. You just have to stay a bit lower now and wrap around to the base, it's not an issue as long as you don't go up too early. I guess I, and several other parties, tried to go up too early and got blocked by cracks so people thought it was going to be difficult. See the photo below outlining the current approach. Anyway, Eric Carter, Paul Greenwood, and I left the parking lot at 4:11, tried the new glacier approach, it went smoothly and we were soon at the base of the route. The first pitch is great, decent pro (better than last year). The crux pillar is pretty full-on right now. Maybe 20+ft of dead vertical ice, pretty chandeliered at parts which makes sticks less confidence-inspiring and pro a little trickier. Right now, the vertical section of the pillar is perhaps twice (or maybe 1.5x) as tall as it was last year. It felt very hard to me and 4s normally feel hard, so maybe its a 4+ or maybe it's just that I'm not in ice shape (mentally) right now. Anyway, if you go up there, expect it to be hard and bring the screws to make it "safe". Above there, the snow traverse below the next step is in (barely) but the ice also looks climbable. We opted to not climb it because there was a lot of stuff coming down, including golf ball size rocks and smaller ice, but it looks fun if you can get it in, the top out looked a little thin so a belay might be tricky. Above there it was a cruise, perhaps a little thin for the last 200ft, one 5ft section of actual ice over rock just before the top. We topped out 7hrs after leaving the car. Finally, the descent is straight forward and the major crevasse we were worried about proved to be a non-issue because it's filled in enough at one spot that it can be downclimbed. Feel free to reach out if you have any questions, I'll post a video of leading the crux pillar on my insta @porter.mcmichael Also, someone else got to the route before us as we were following several day old tracks up the route, awesome! Additionally, another team could be seen starting up the route as we were descending through the football field. Directions through the glacier: Polish is looking good... Anyone want a belayer up there? First pitch On the thrilling pillar... Entering the tight couloir to the top: Couloir near the top: View of Lincoln: Looking down over the problem crack: Looking back up: Lastly, a few route close-ups, sorry we didn't get an actual photo of the pillar! Thanks to Eric for a lot of those photos! Last time I climbed this route was exactly a year ago and the conditions were very different, as you can see here! Gear Notes: 12 screws, could use one or three less, brought a picket but didn't use it. Approach Notes: See above!

.thumb.JPG.868d7bc8be8d4b2a9eefe1c2a56dd702.JPG)


-
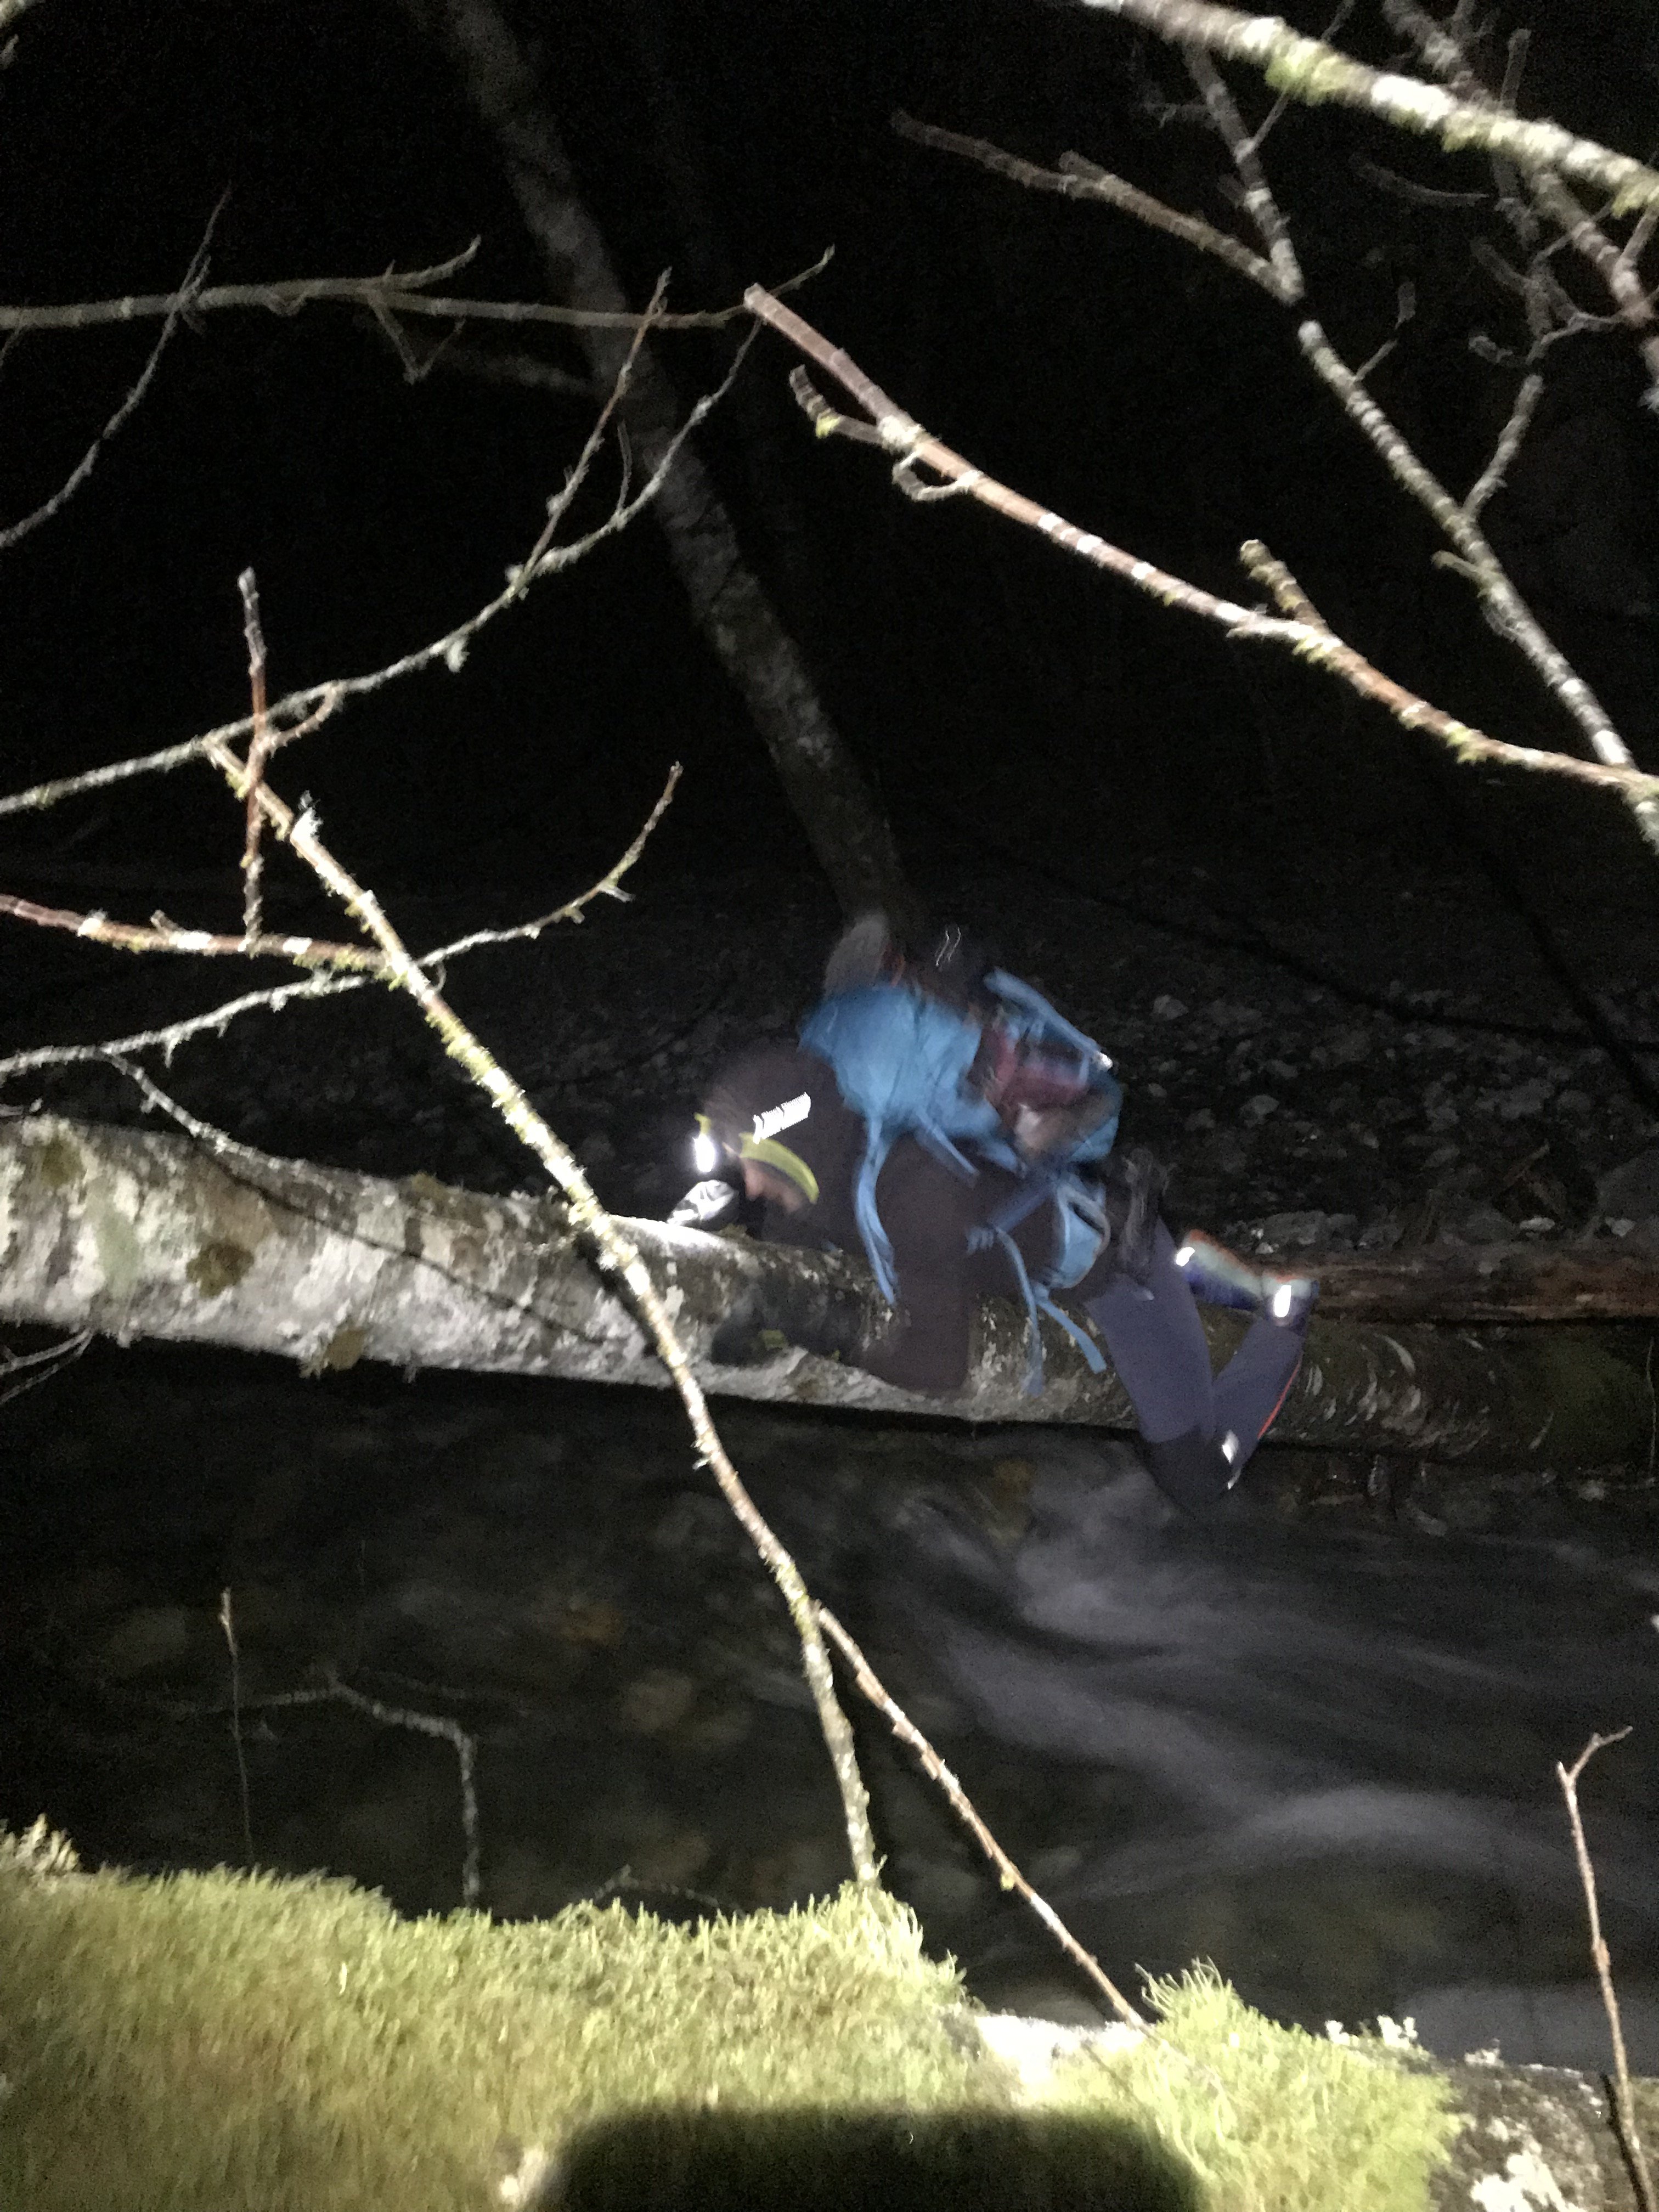
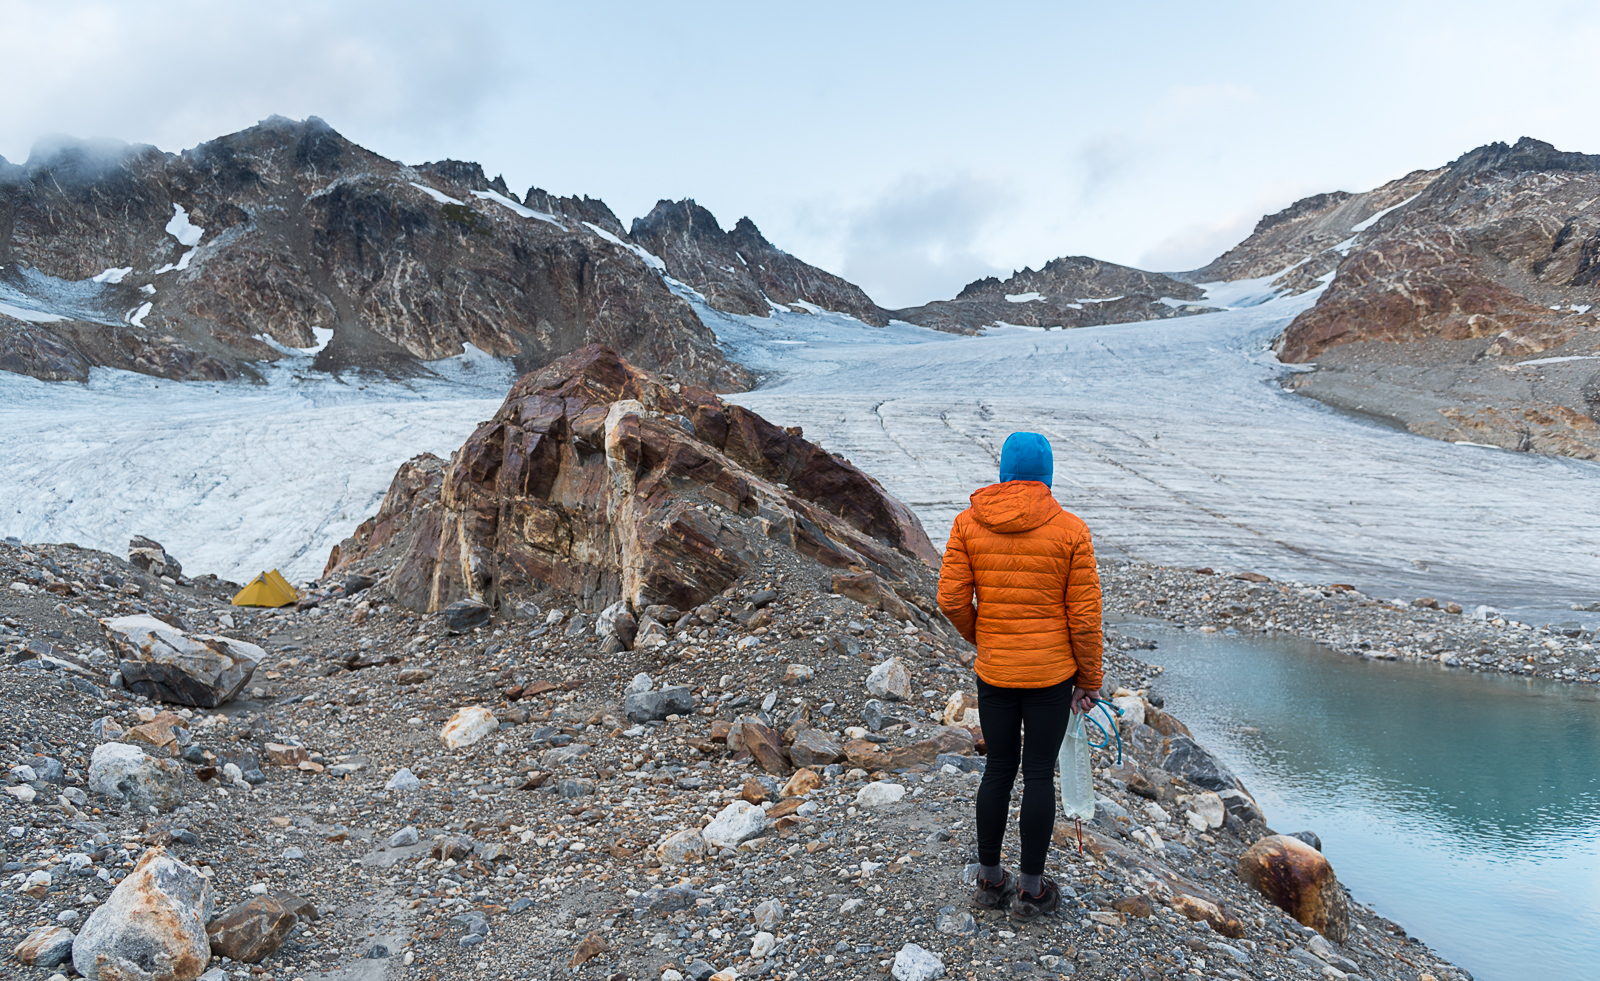
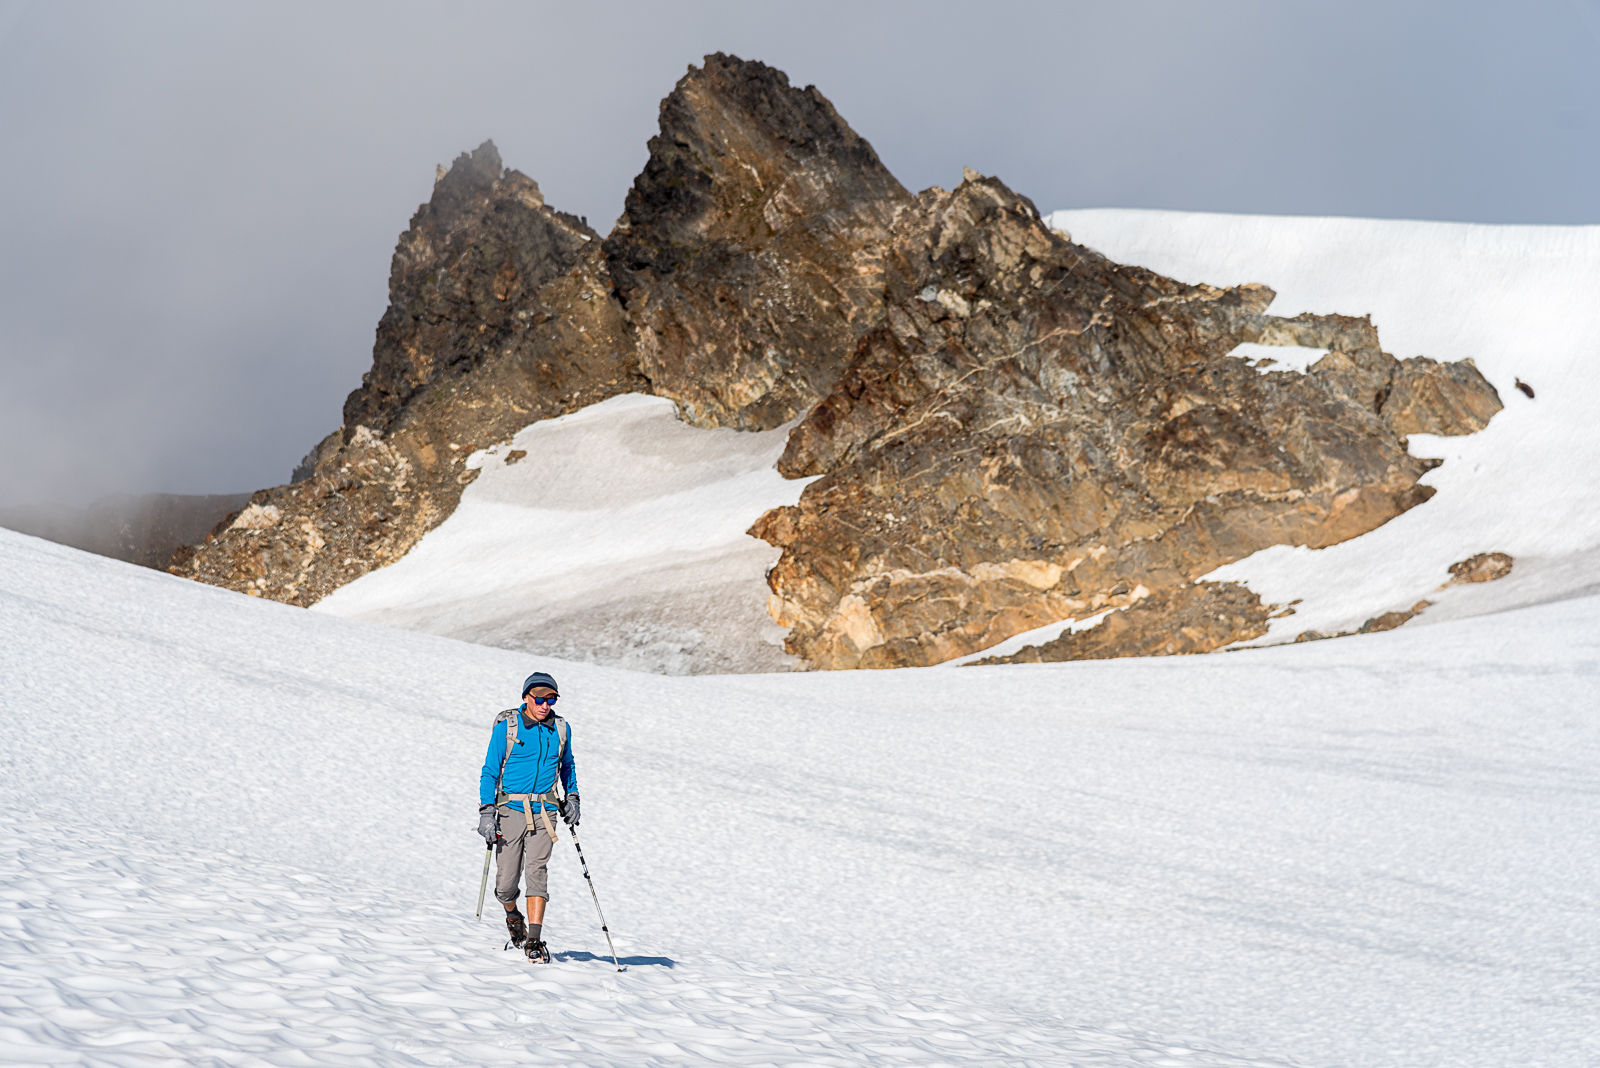
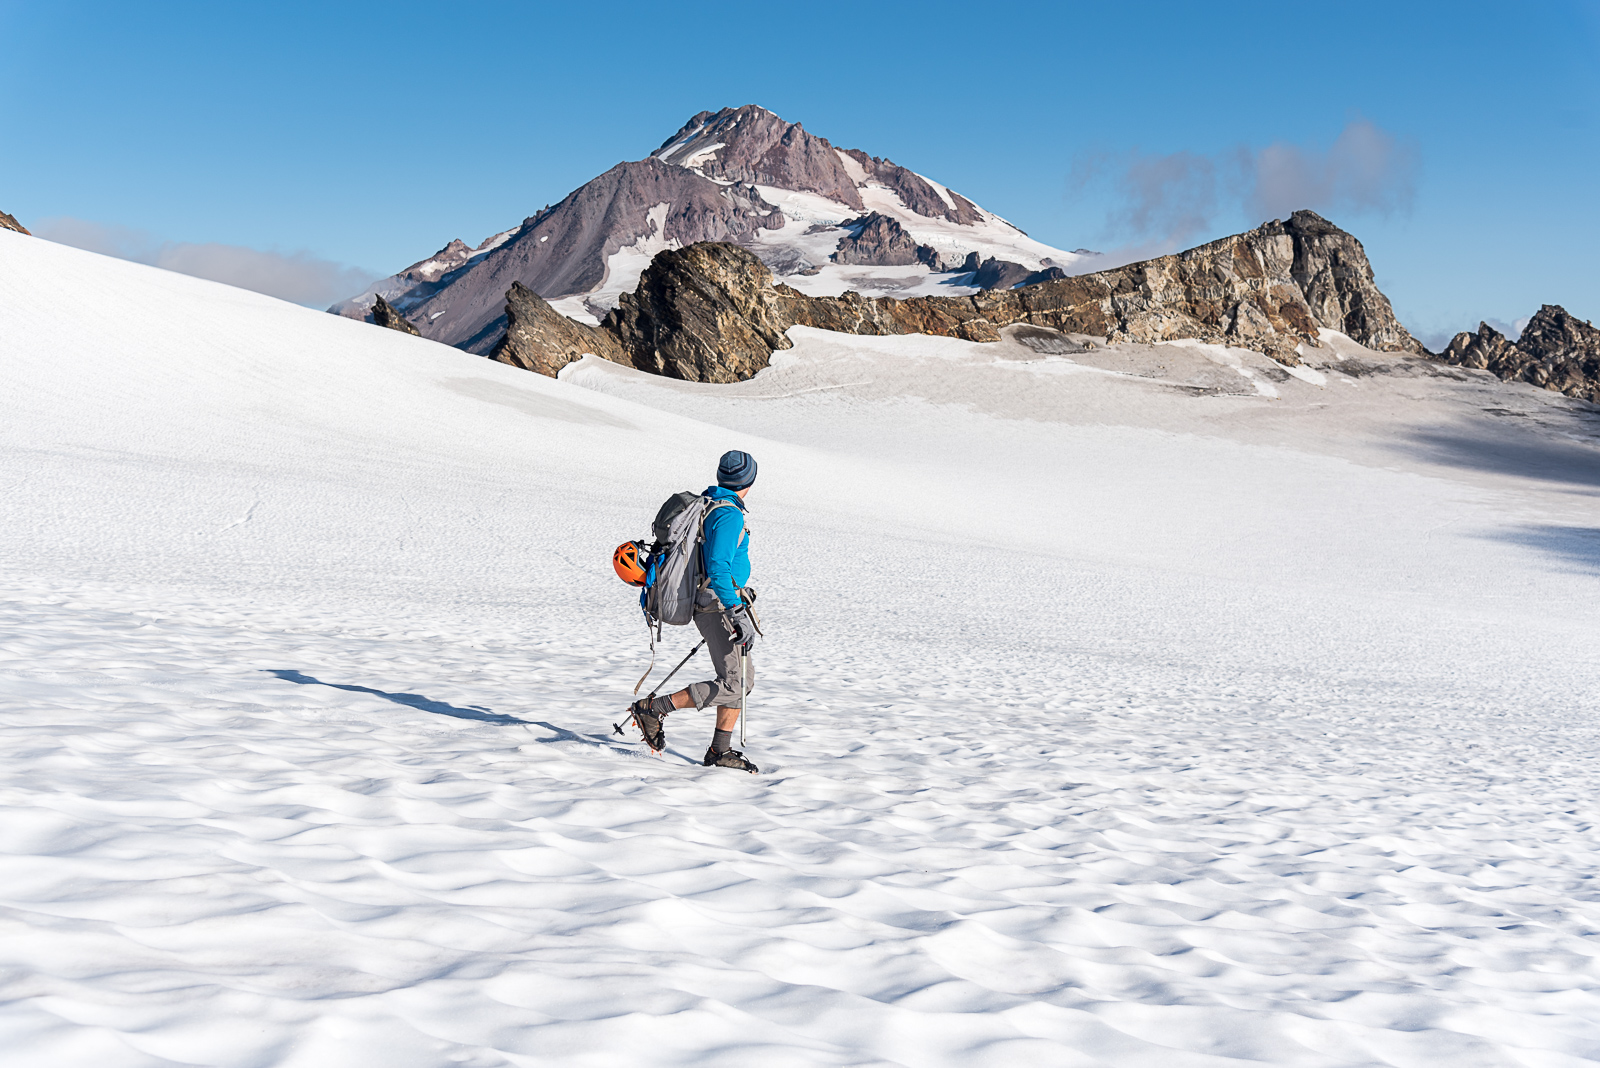
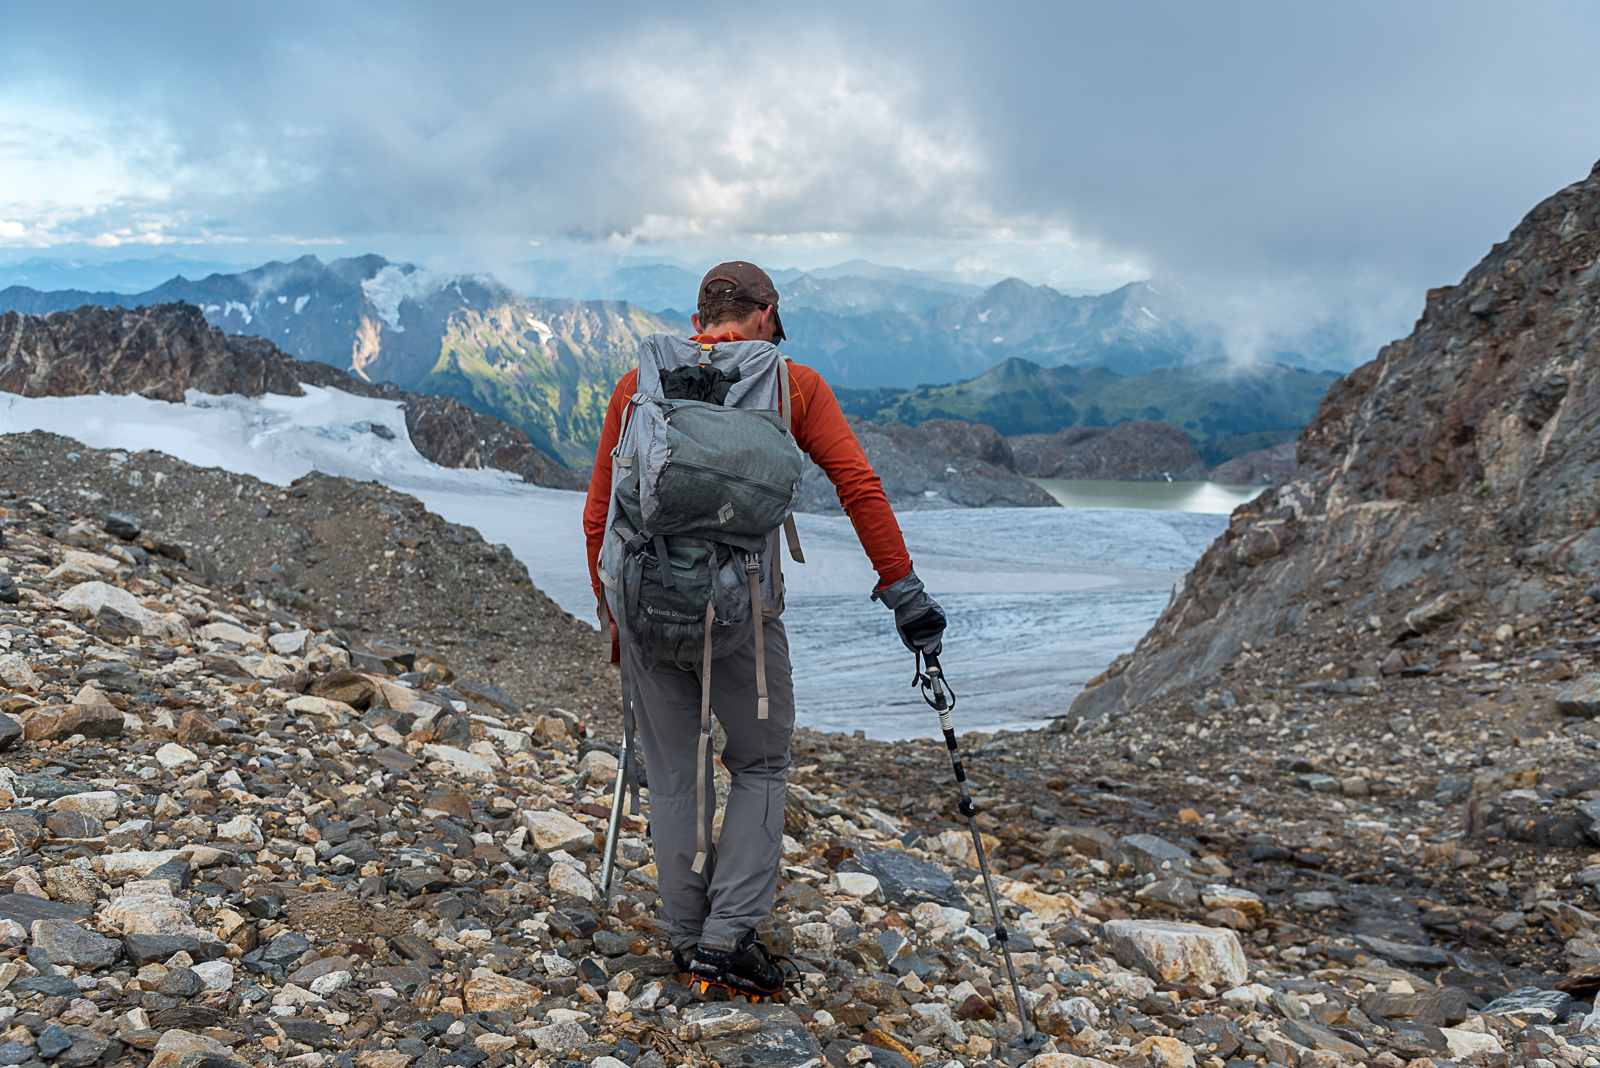
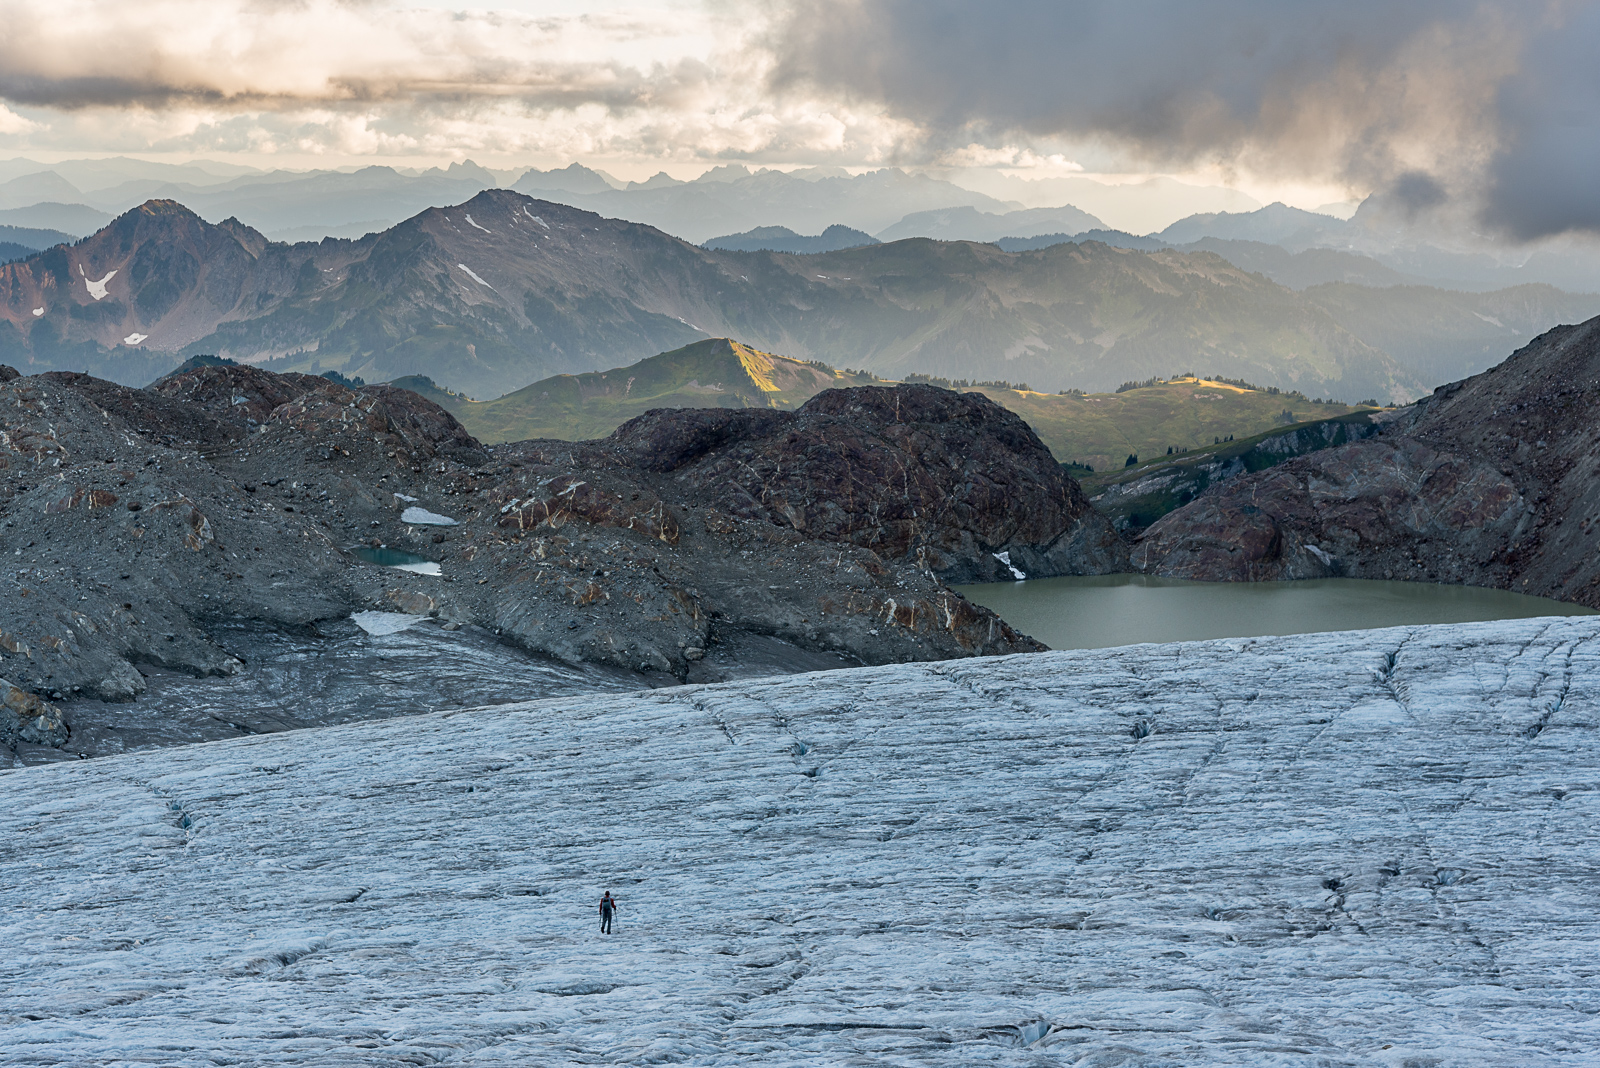
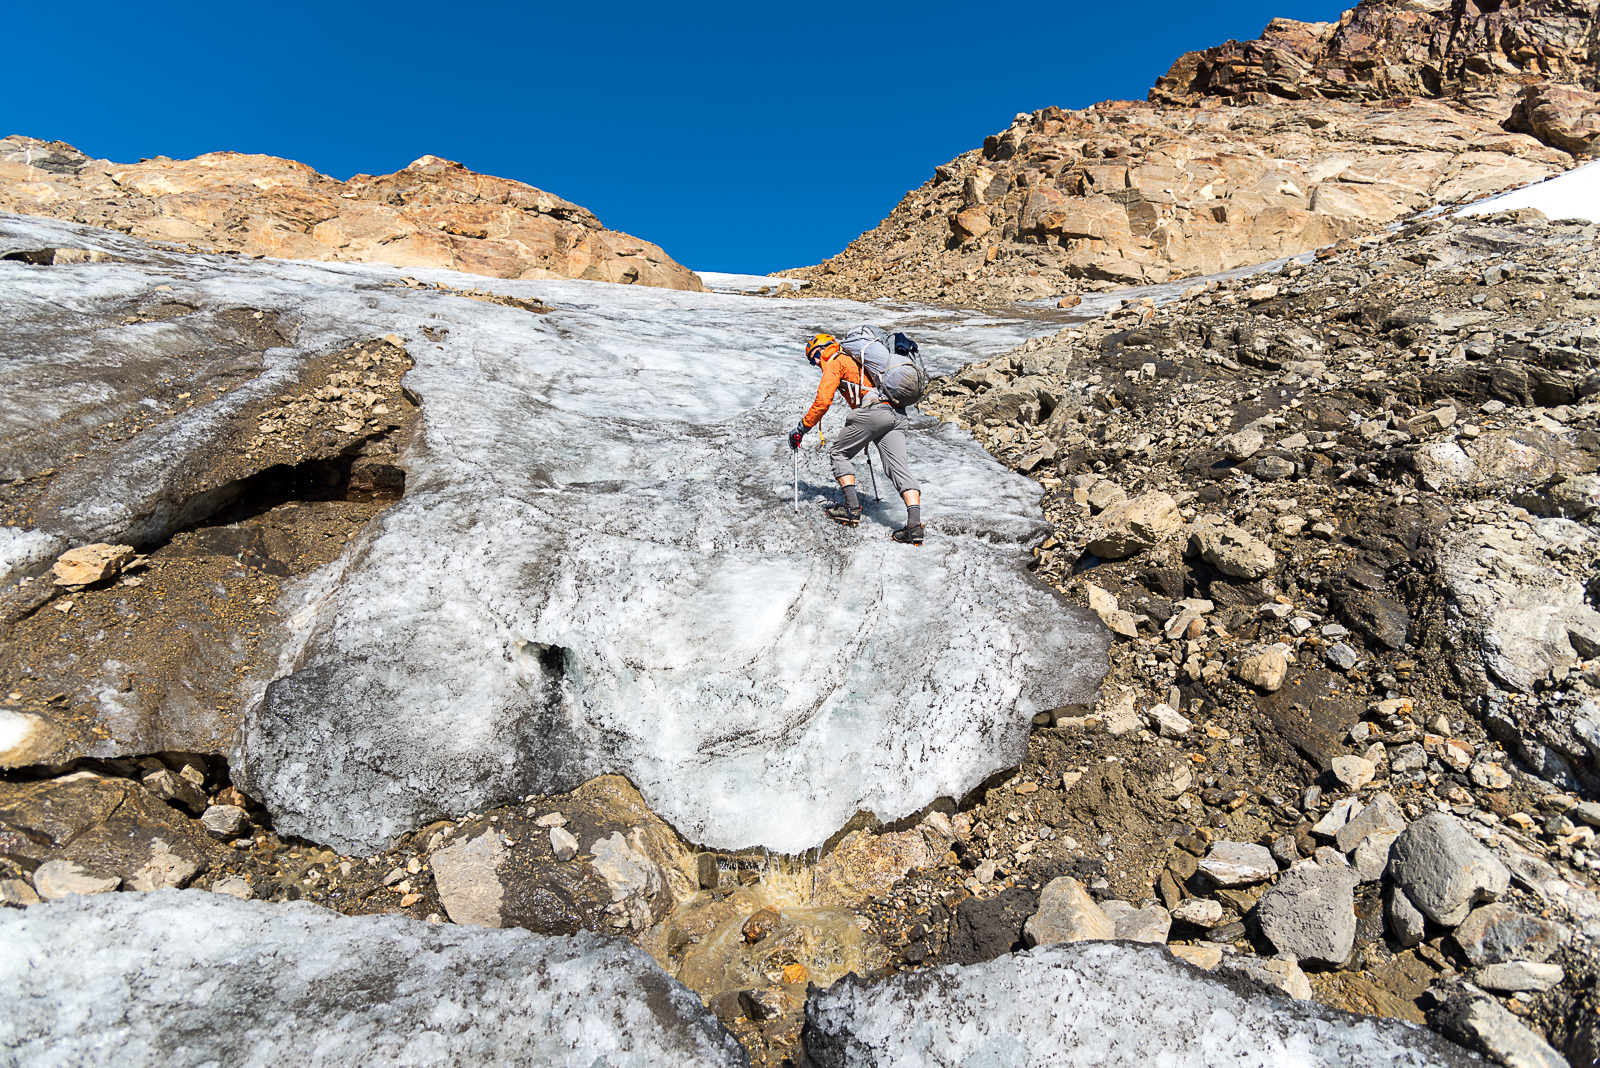
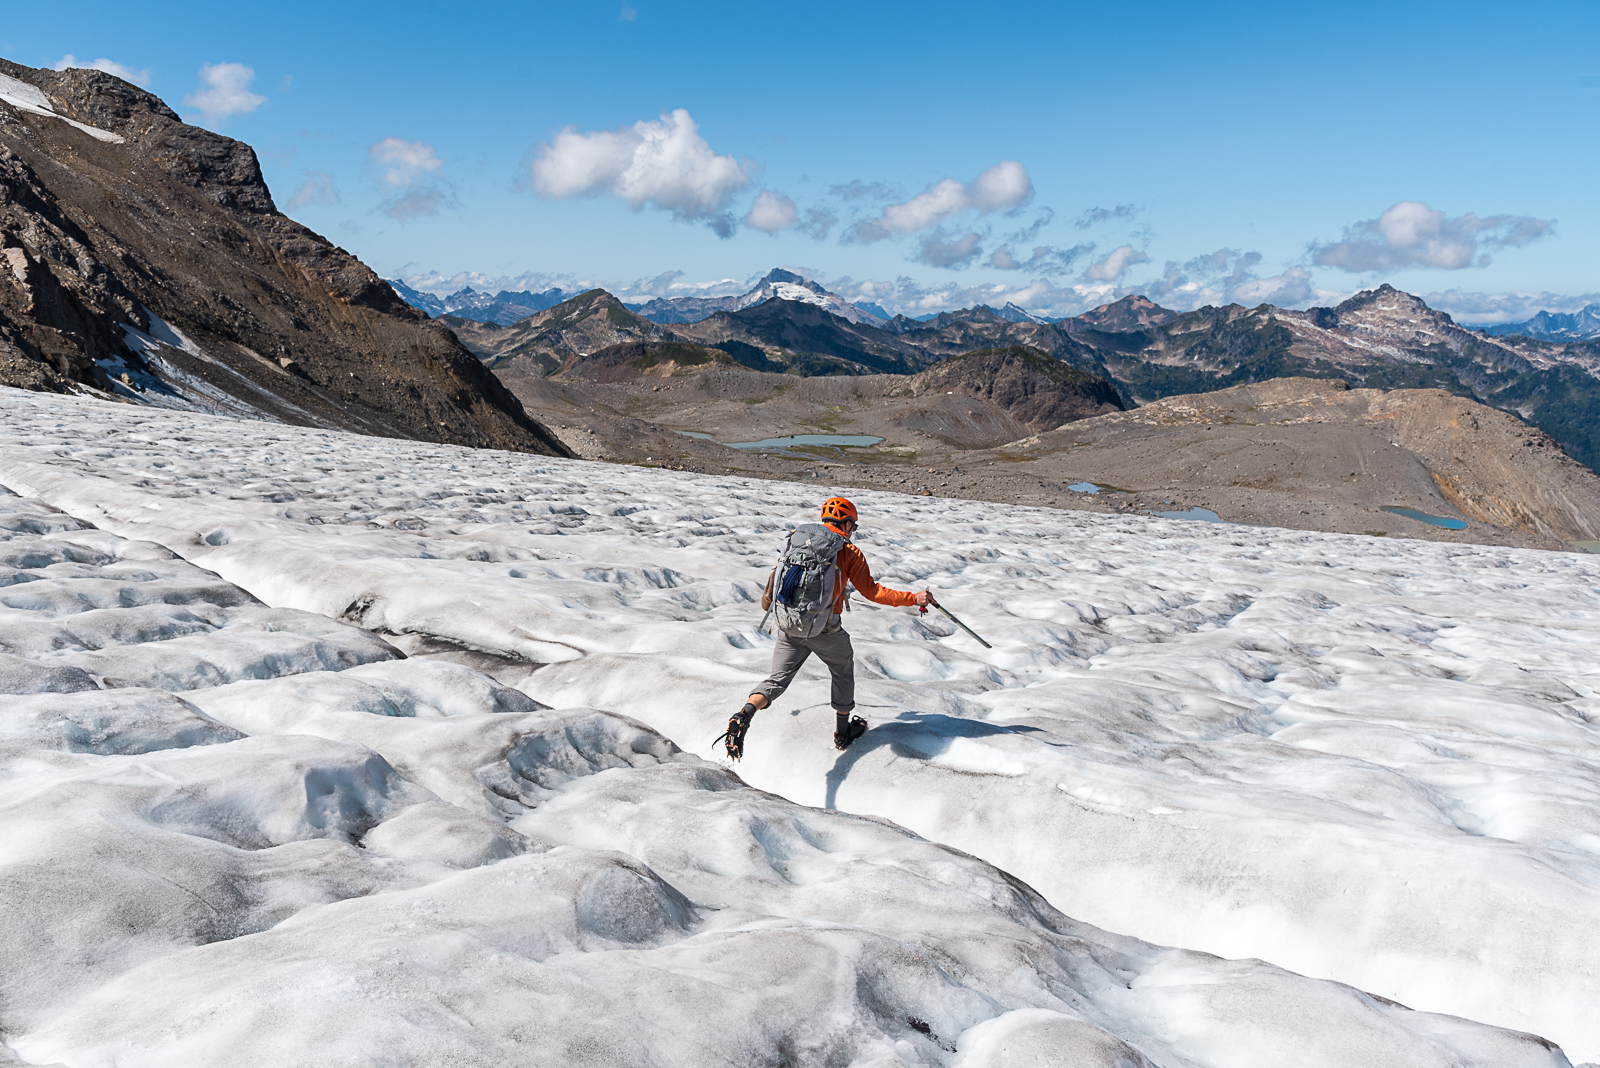
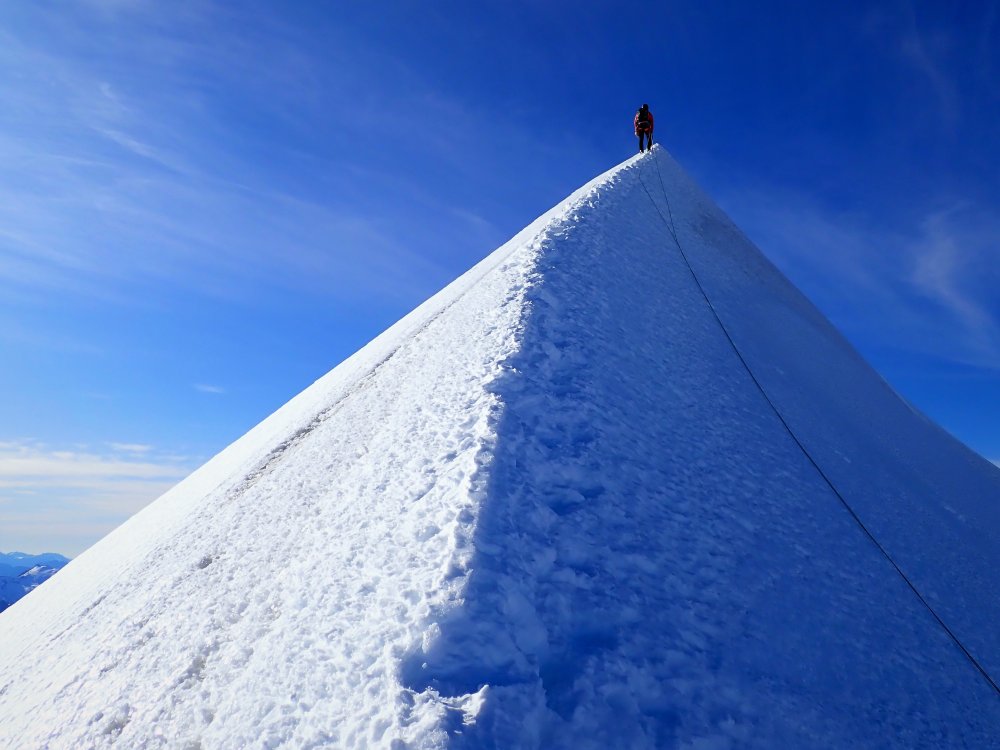
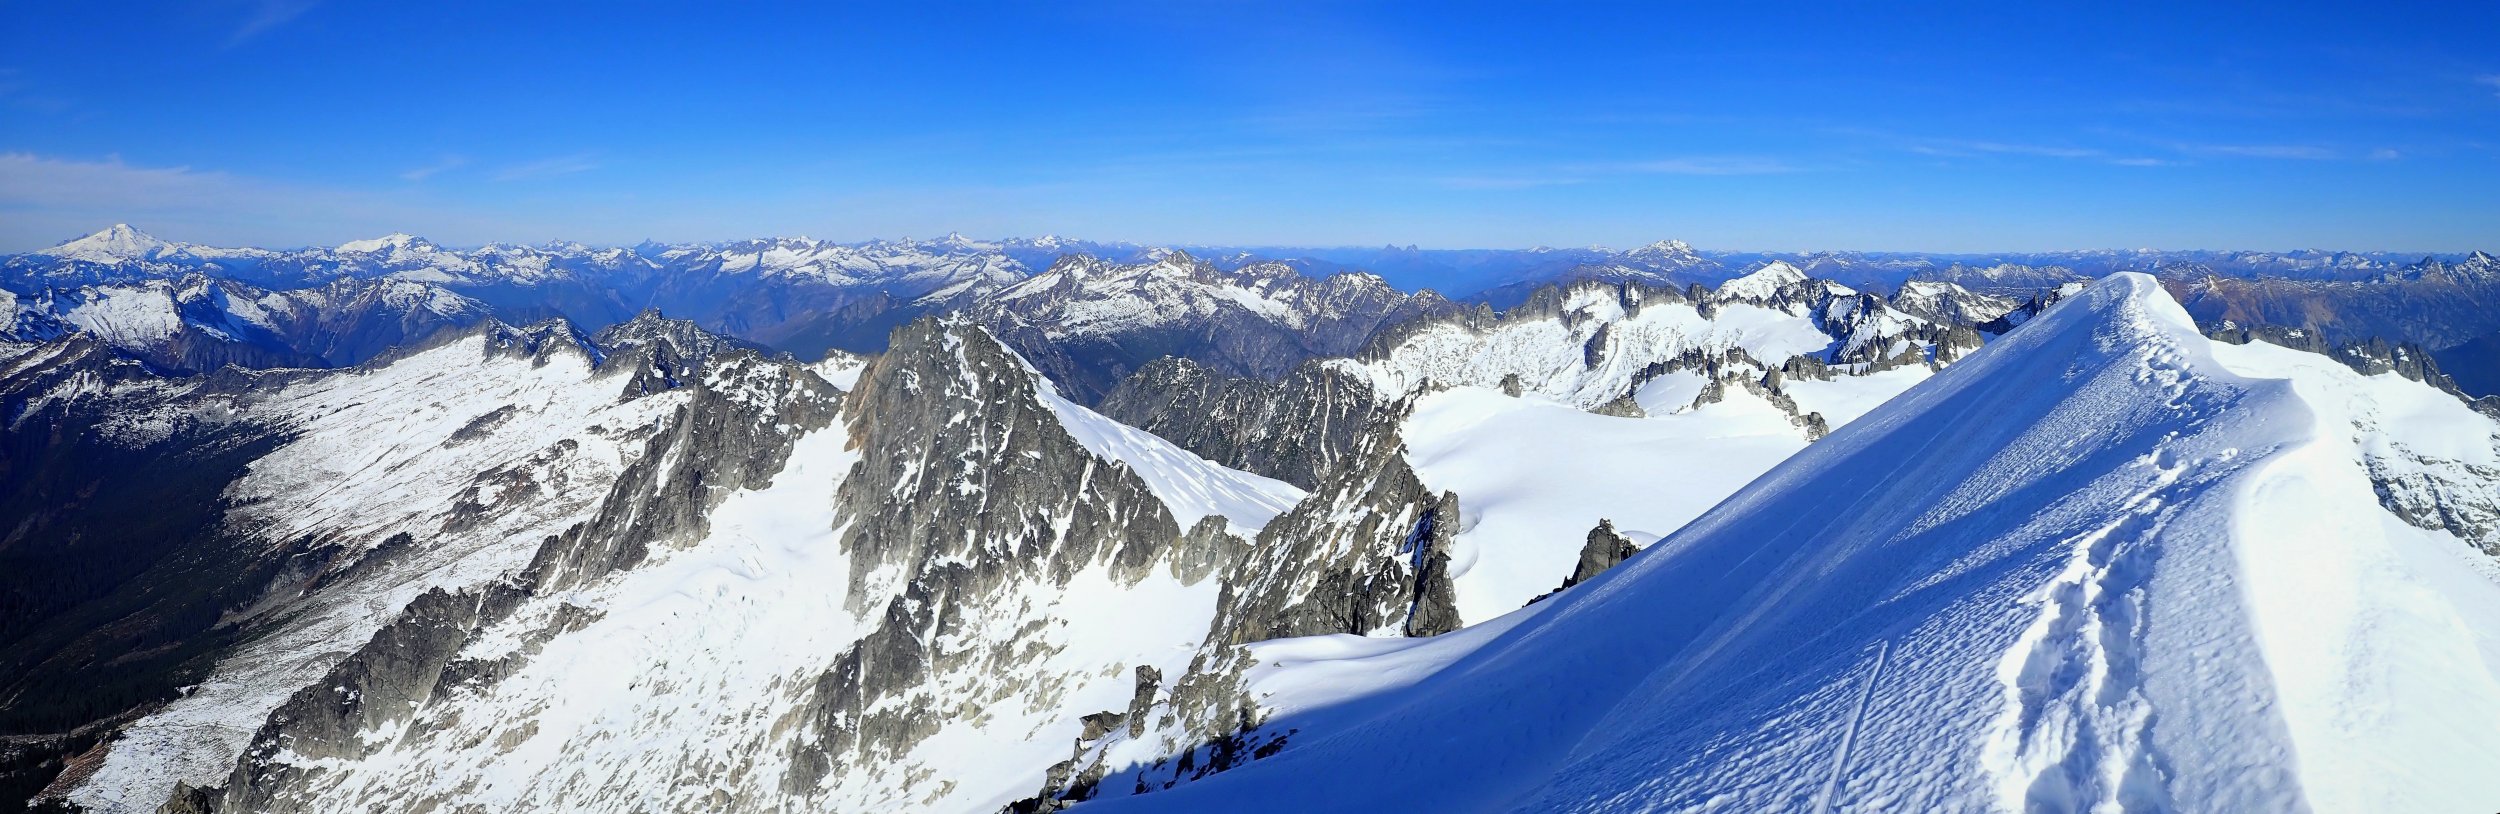
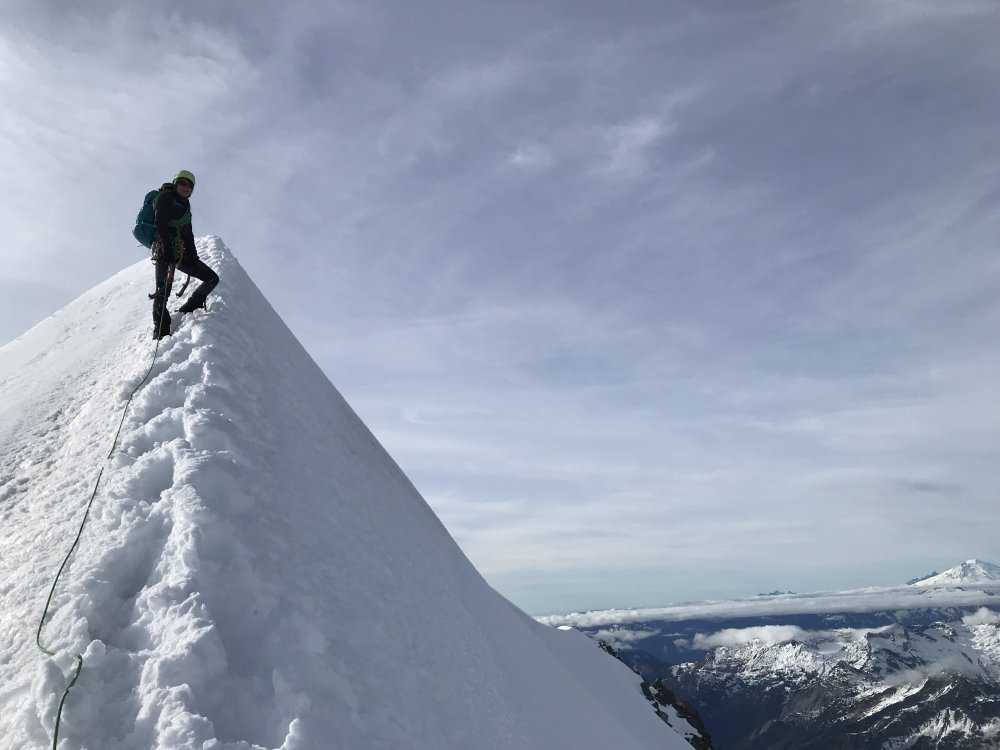
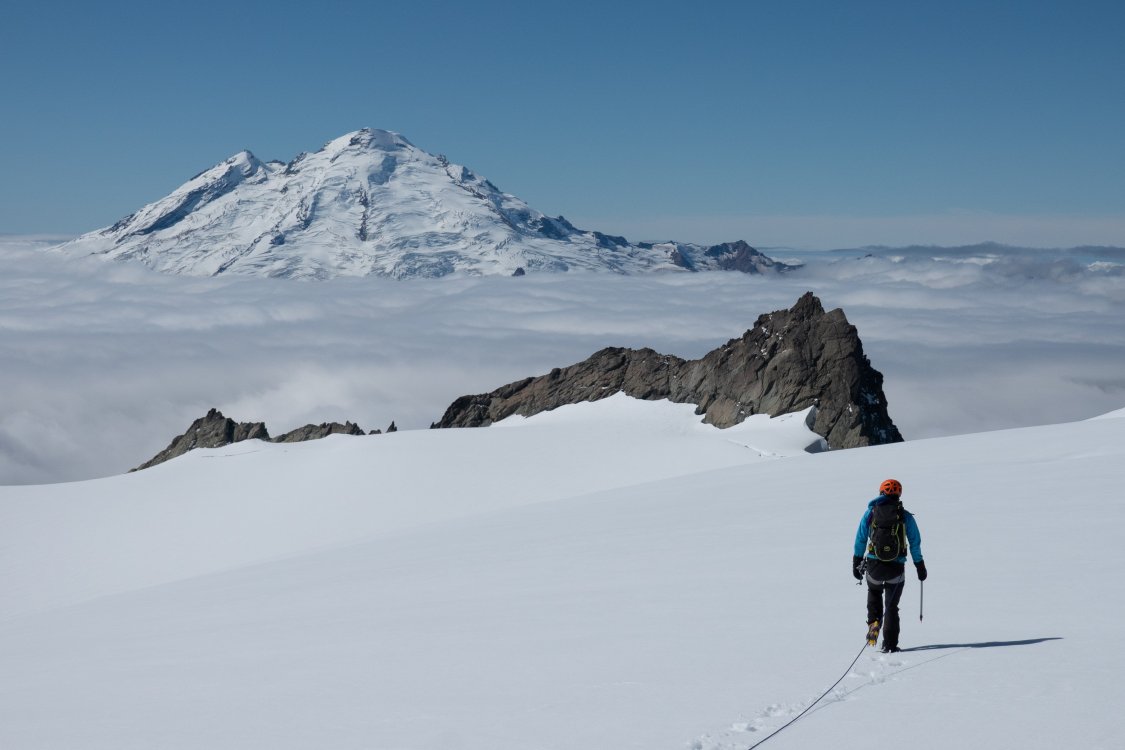
Trip: Eldorado - NW Ice Couloir Trip Date: 11/03/2019 Trip Report: Camille and I had a great alpine romp on Sunday. Fall alpine ice season is in full swing!! Anyway, we left Mt Vernon at 1 am and headed toward Cascade Pass. We arrived at the Eldo trailhead at 1:45 am. Confused? so were we. Turns out, it was daylight savings and 2 am became 1 am. We started uphill at 2 am. Immediately I realized it had been a while since I'd been up Eldorado as the giant log we used to use to cross was gone and the river had clearly changed a bit. We explored downstream for a dry option to cross and found an icy, uphill log. This worked but it wasn't graceful, felt like climbing a squeeze chimney. Once across, we started up the trail, it felt warmer higher, the cool calm air must have settled in the valley. Near the top of the boulder field, Camille took a spill and smashed up her shin pretty good, lots of blood, very deep (sorry, no photos). But, she's a trooper and after a tight gauze wrap, we continued up. Snow started at 5000ft right at the end of the boulder field. It was refrozen week-old snow, that was mostly supportive and we switched to boots above, around 6000ft. We cruised up to the flat glacier below the summit and saw two guys walking downhill toward us. They had technical tools and said they had climbed the couloir the day before and found great conditions. This was exciting news as the several days prior had 9 to 11k freezing levels and that had me worried about the condition of the route. With tracks to follow and knowledge of a high-quality route, we crossed to the east ridge campsite and stopped to put on crampons. It had taken 5.5hrs (7:30 am) at this point and the sun was just rising. From there we had tracks to follow in the snow crossing the inspiration glacier to Deans spire where we found a 2 piton anchor with cord for the first rap. (Lucky that we have tracks to follow) We racked up while we still had sun and rapped the first 30m. We brought a single 60m rope so we had to get a bit creative on the raps since we couldn't find an obvious intermediate anchor. I found a good spine to the skiers right and we went another 30m off an equivocation hitch. That brought us to above the last vertical step and there was a single small fixed nut (perhaps a bit rusty) on the side. I backed it up, sent Camille first, then pulled the extra gear and headed down. In retrospect, I should have just left another nut to back it up. The raps left us just about 100m from the base of the climb and it looked pretty ideal. (HUGE thanks to the guys before us who replaced the tat at the top anchor and left tracks for us to follow all day). We tied in and started up, just simuling up the steep snow. It looked like there was going to be a lot of ice and based on trip reports, most people preferred fewer screws and more rock gear but these were not the conditions we had. We brought 3 screws and a bit more rock stuff so I was pretty bummed and had to be quite selective with where I put screws. We simuled through about 70m of actual climbing before reaching a near-vertical step. There was a nice crock on the climbers right so I belayed there then started up the step. All of the following pitches were a blur, a lot of AI2 type ice, sparse gear (maybe not if you had 6 screws), and a healthy dose of simuling through progress captures took us to the top. What I do remember is a ton of very high-quality ice, slightly soft but not wet. Not too many dinner plating issues and one ~20ft step that was AI3+ or maybe even 4. Quite steep, found a great pin at the base and halfway up put in another screw. (see a video of this on my insta @porter.mcmichael) There was an equal amount of steep neve connecting the ice pitches and a few short sections of mostly unconsolidated sugar. One thing that was perhaps slightly alarming was due to the warm temps, there was a near-constant barrage of ice pellets coming down the couloir. Not a big deal until something bigger knocks ya off when you're 100+ ft run out. I never saw anything bigger come down and around the top, there wasn't much that looked like it could come off in a bigger way. I suppose this is to be expected on bigger funnel-like routes when it's warm. I think I did 4 belays in the couloir (could be 5 or 6) before topping out on a fun 30ft roll of wet ice. We tied off short and went up to the left about 40ft before gaining the ridge that led ~100ft to the summit. Spectacular as always. Seemed a tad knife-ier than normal which was fun! (I wore tights, sue me ) After a few photos, we headed downhill. It was now 1 pm and we (or maybe just I) were slightly confused about the whole daylight savings thing so when darkness would arrive was something of a mystery... The descent was cruiser until we got off the glacier. There, the snow got very soft and we started punching through the crust. This was slow, tiring and hard on Camille's banged up shin. We got down off the boulder field before true darkness set in. (Jburg looking dashing as always) Upon getting back to the river, neither of us wanted to bushwack to the sketchy log so we just walked through the river and hopped in the car for 16.5hrs c2c. Not the fkt I'll bet but we were worried about timing since we were going c2c and it worked out alright. Thanks for reading along and hopefully this provides some good beta for future climbers as well as anyone who wants to go get after it in the next week or two! See you in the mountains! ~Porter PS. I'll put a few first-person vids of the climbing on my Instagram @porter.mcmichael (Shameless plug) Gear Notes: Cams .3-2, 3 pins, a few nuts, 3 screws (10,13,19), forgot pickets, 1 would have been nice for the conditions we found, more would be nice for more normal conditions). Approach Notes: Standard now seems to be the rap by Deans, could use better rap stations (or I missed them or they're buried.)


-
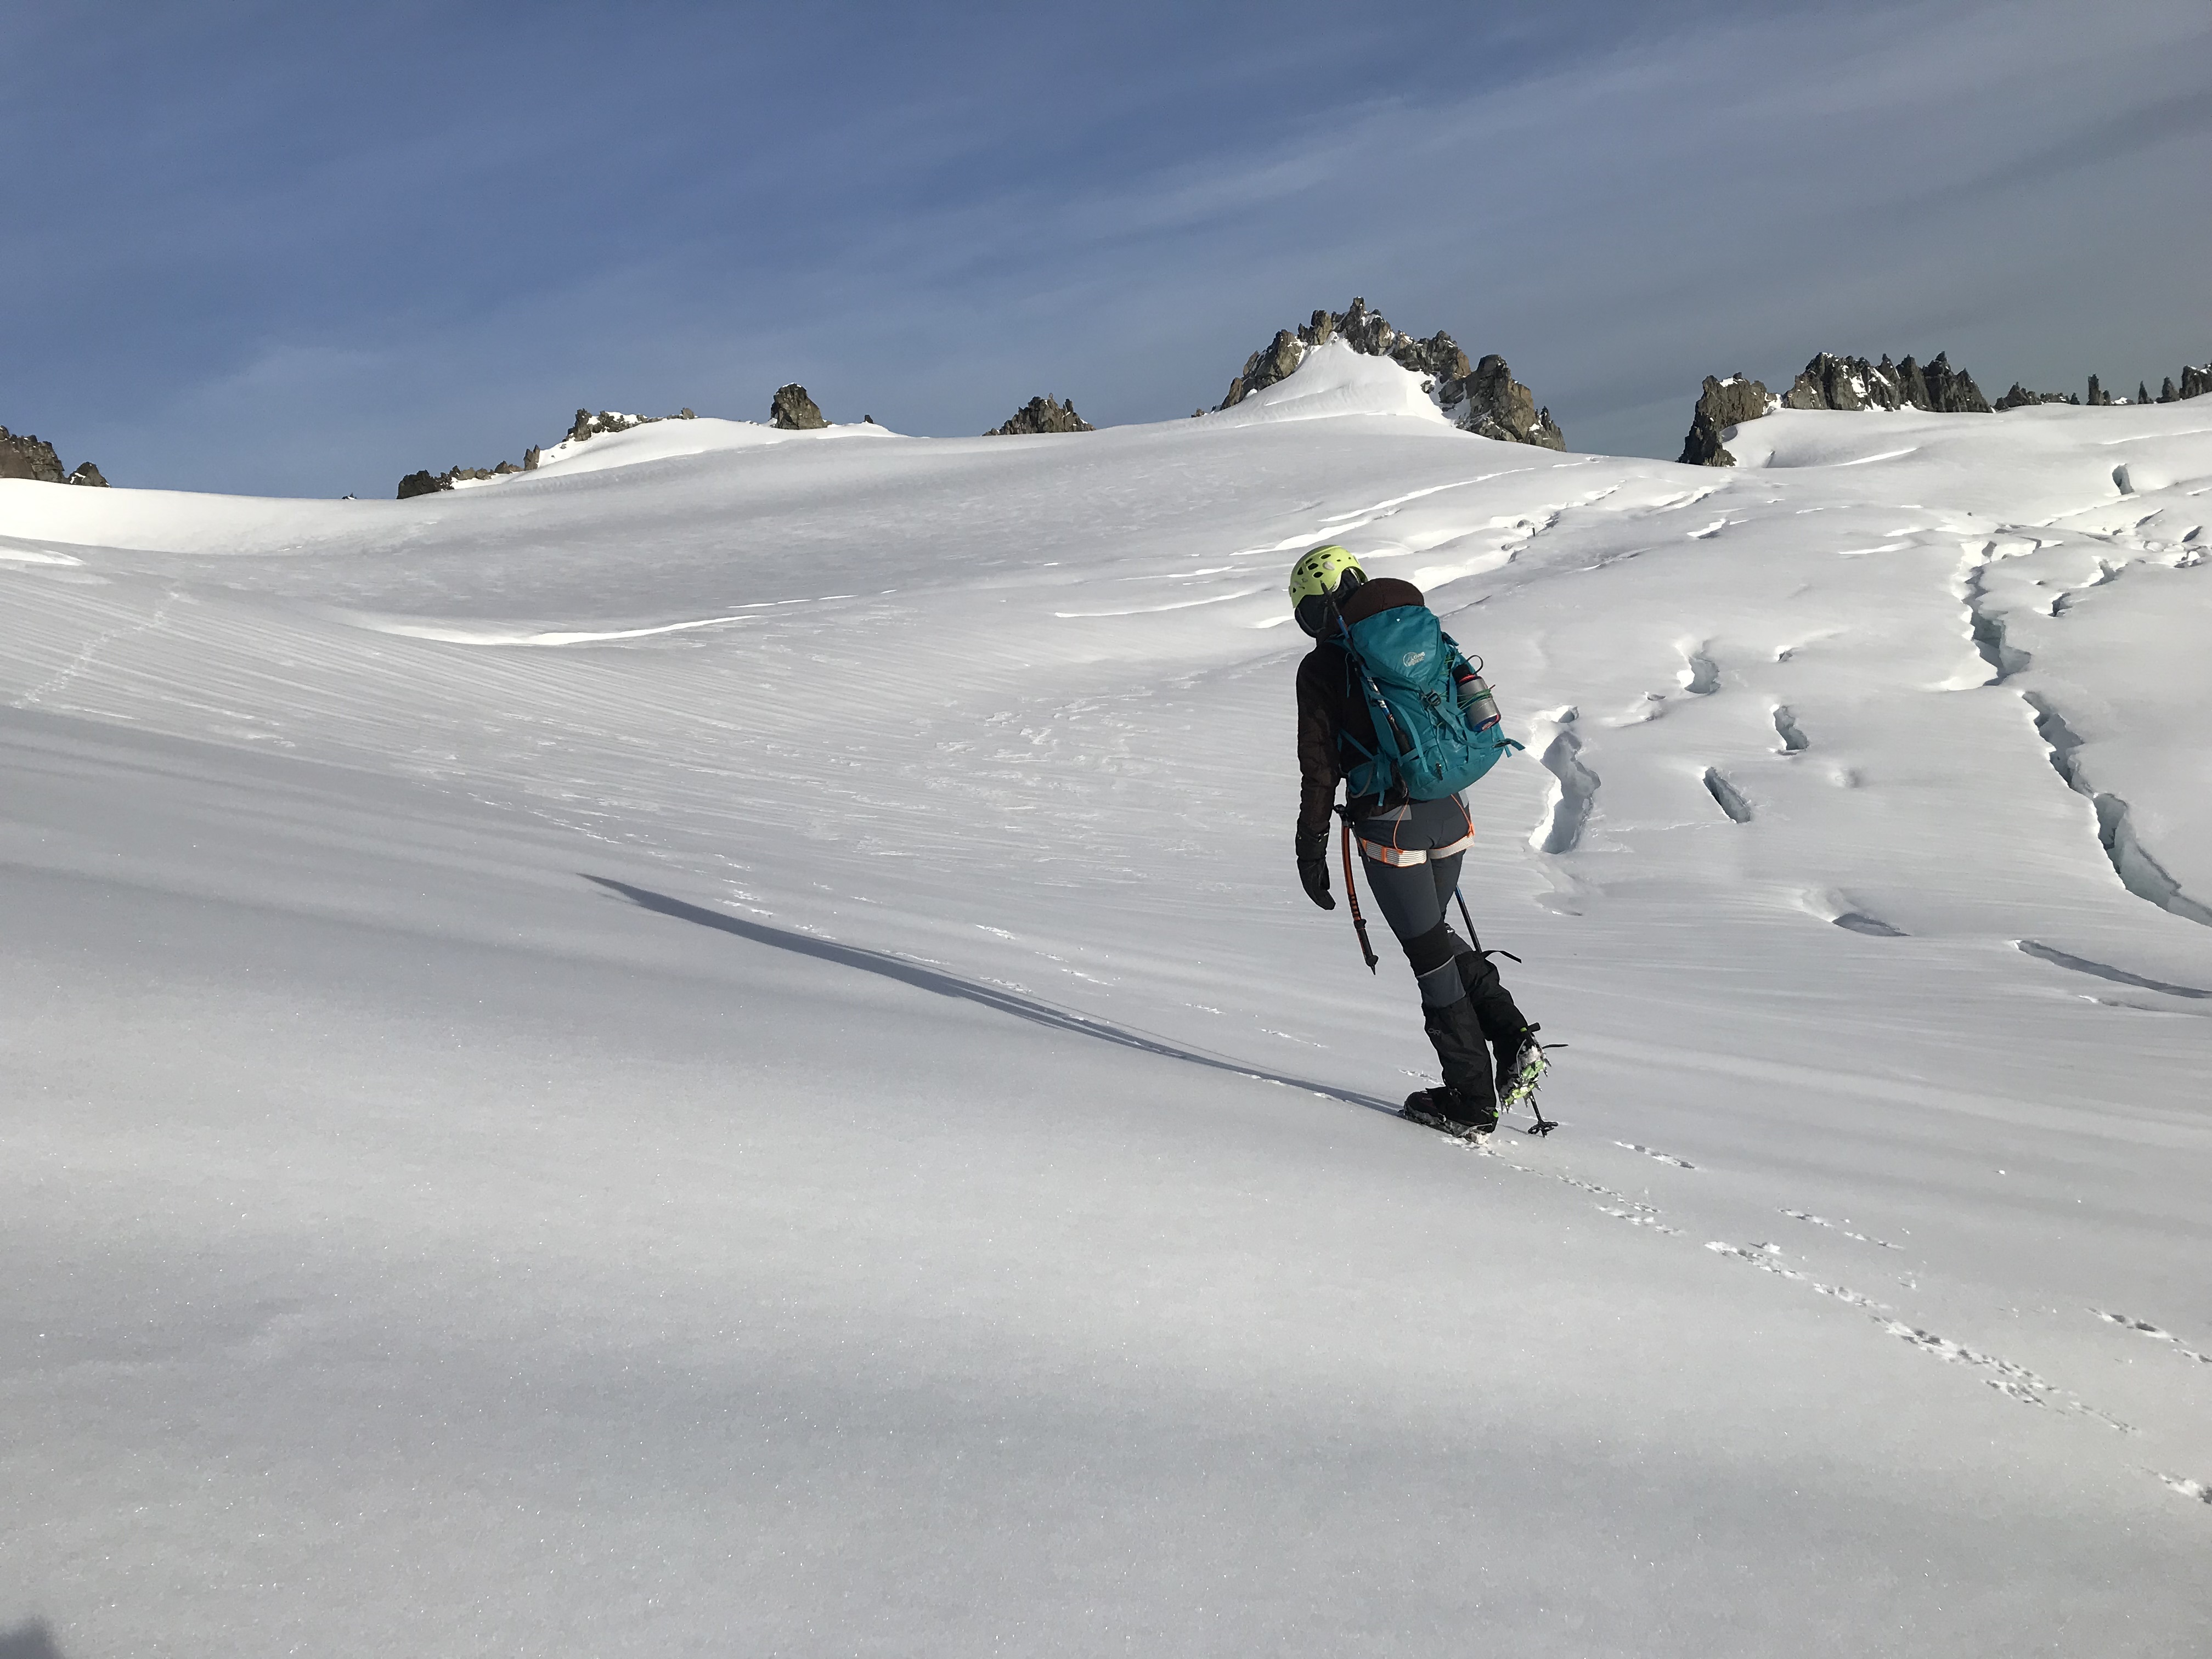
Trip: Eldorado Peak - NW Couloir Trip Date: 11/02/2019 Trip Report: Yesterday my friend and I climbed the NW Couloir of Eldorado Peak. Left town early morning Saturday and started hiking around 6:30. Used the log crossing directly across from the parking lot. Didn't investigate any of the others down stream but the recent culvert work on the road might have affected them. Currently snow starts at the tree line and no floatation is needed. Its very firm on all aspects/elevations. Theres an occasional loose dry pocket here and there. Hiked up to the toe of the east ridge and dropped off bivy gear. Started the trek over to the Eldorado/Dean col shortly after. Rapped out of the col with one 60m rap since we brought the twin ropes. Theres currently a two piton anchor at the top of the col with fresh cord. I didn't notice any other existing rap stations on the way down, but we weren't really looking. Dropped down a bit towards the bergschrund and got the first glimpses of the route, which looked to be in really great shape. We climbed it in three pitches followed by one simul block. The first pitch was the thinnest and protection was very sparse. The second and third pitches protected well and consisted of perfect neve with thick, vertical steps of ice. After that the angle of the couloir eased off we we decided to just simul the rest. Again, perfect neve with easier steps of thick ice. We got up to the flat spot below the summit ridge, ate and packed the ropes up. We arrived at the summit just as the sun was setting and were rewarded with a wonderful clear sunset that lasted all the way back down to us arriving at our camp. We were pretty damn tired when we got back. Hiked out this morning without issue, snow travel was still very easy. On the way out we ran into another group of two planning to climb it. This was such an amazing climb. Perfect conditions, perfect weather. Easily in my top ten routes. Looks like its supposed to stay nice for a bit longer, get on it if you can! Gear Notes: Cams to 2" (used mostly .3 through .75), assortment of pins, small set of nuts, ice screws 1x10, 3x13, 2x16 (used every size, would maybe toss another stubby on there). Ice tools and crampons. 60m rope(s) Approach Notes: Trail runners to the tree line. No floatation needed.
-
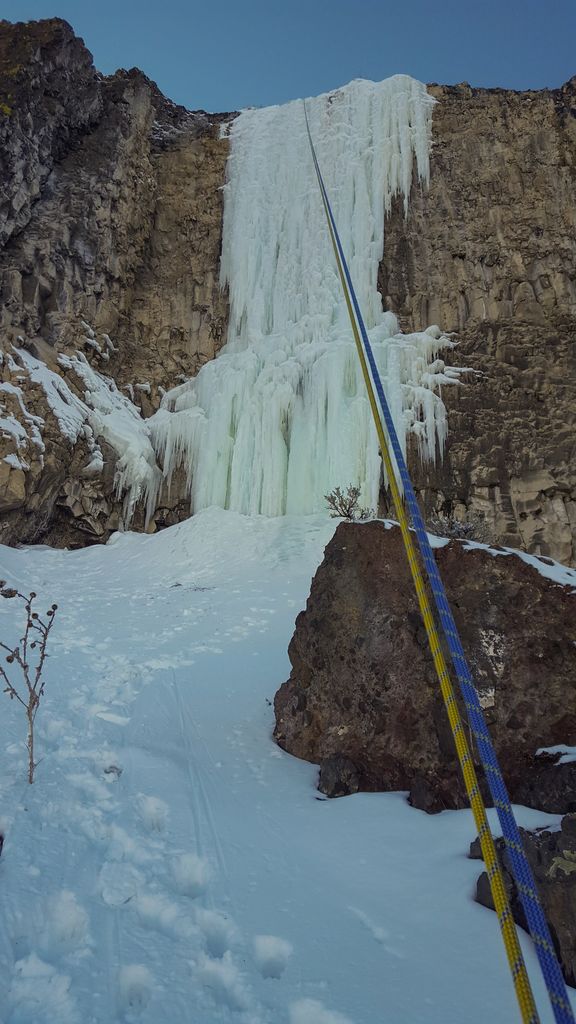
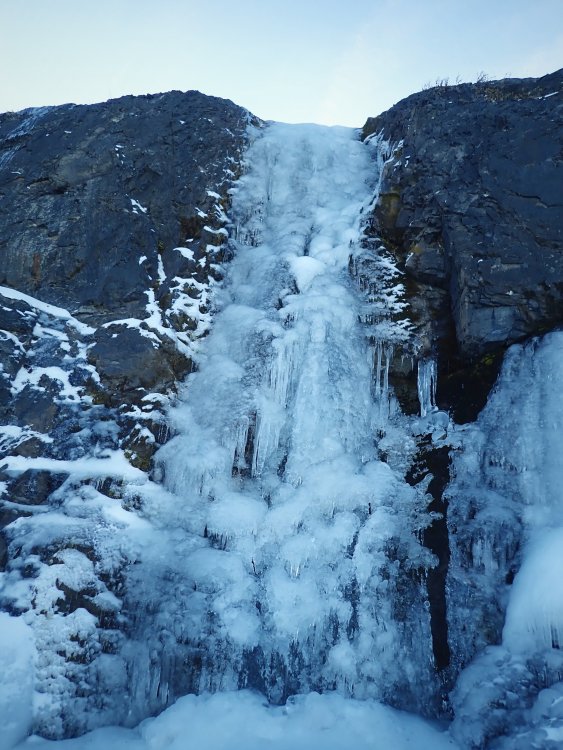
Trip: Mt. Baker - Heliotrope Ridge - Heliotrope Ridge Ice Playground Trip Date: 11/01/2019 Trip Report: Took advantage of the cold autumn weather and lack of snow to do a little easy ice climbing on the flows above the Heliotrope Ridge Trail before reaching the glacier overlook. There are an abundance of ice flows just 1-1.5 hrs from the car, mostly in the WI2-3 range. It is like a little ice playground. We climbed one super fun 4 pitch route that ended with the obvious ice gully that splits the upper headwall beneath the Coleman Glacier. All in all, it is super fun place with easy, safe, accessible ice and a great warm up for the season. Check it out! For more details see: https://climberkyle.com/2019/11/05/heliotrope-ridge-ice-playground/ Gear Notes: Ice is thick enough to take screws. All climbs are walkoffs. Approach Notes: Up the Heliotrope Trail, you will start to see frozen flows up and to the right as you go.


-
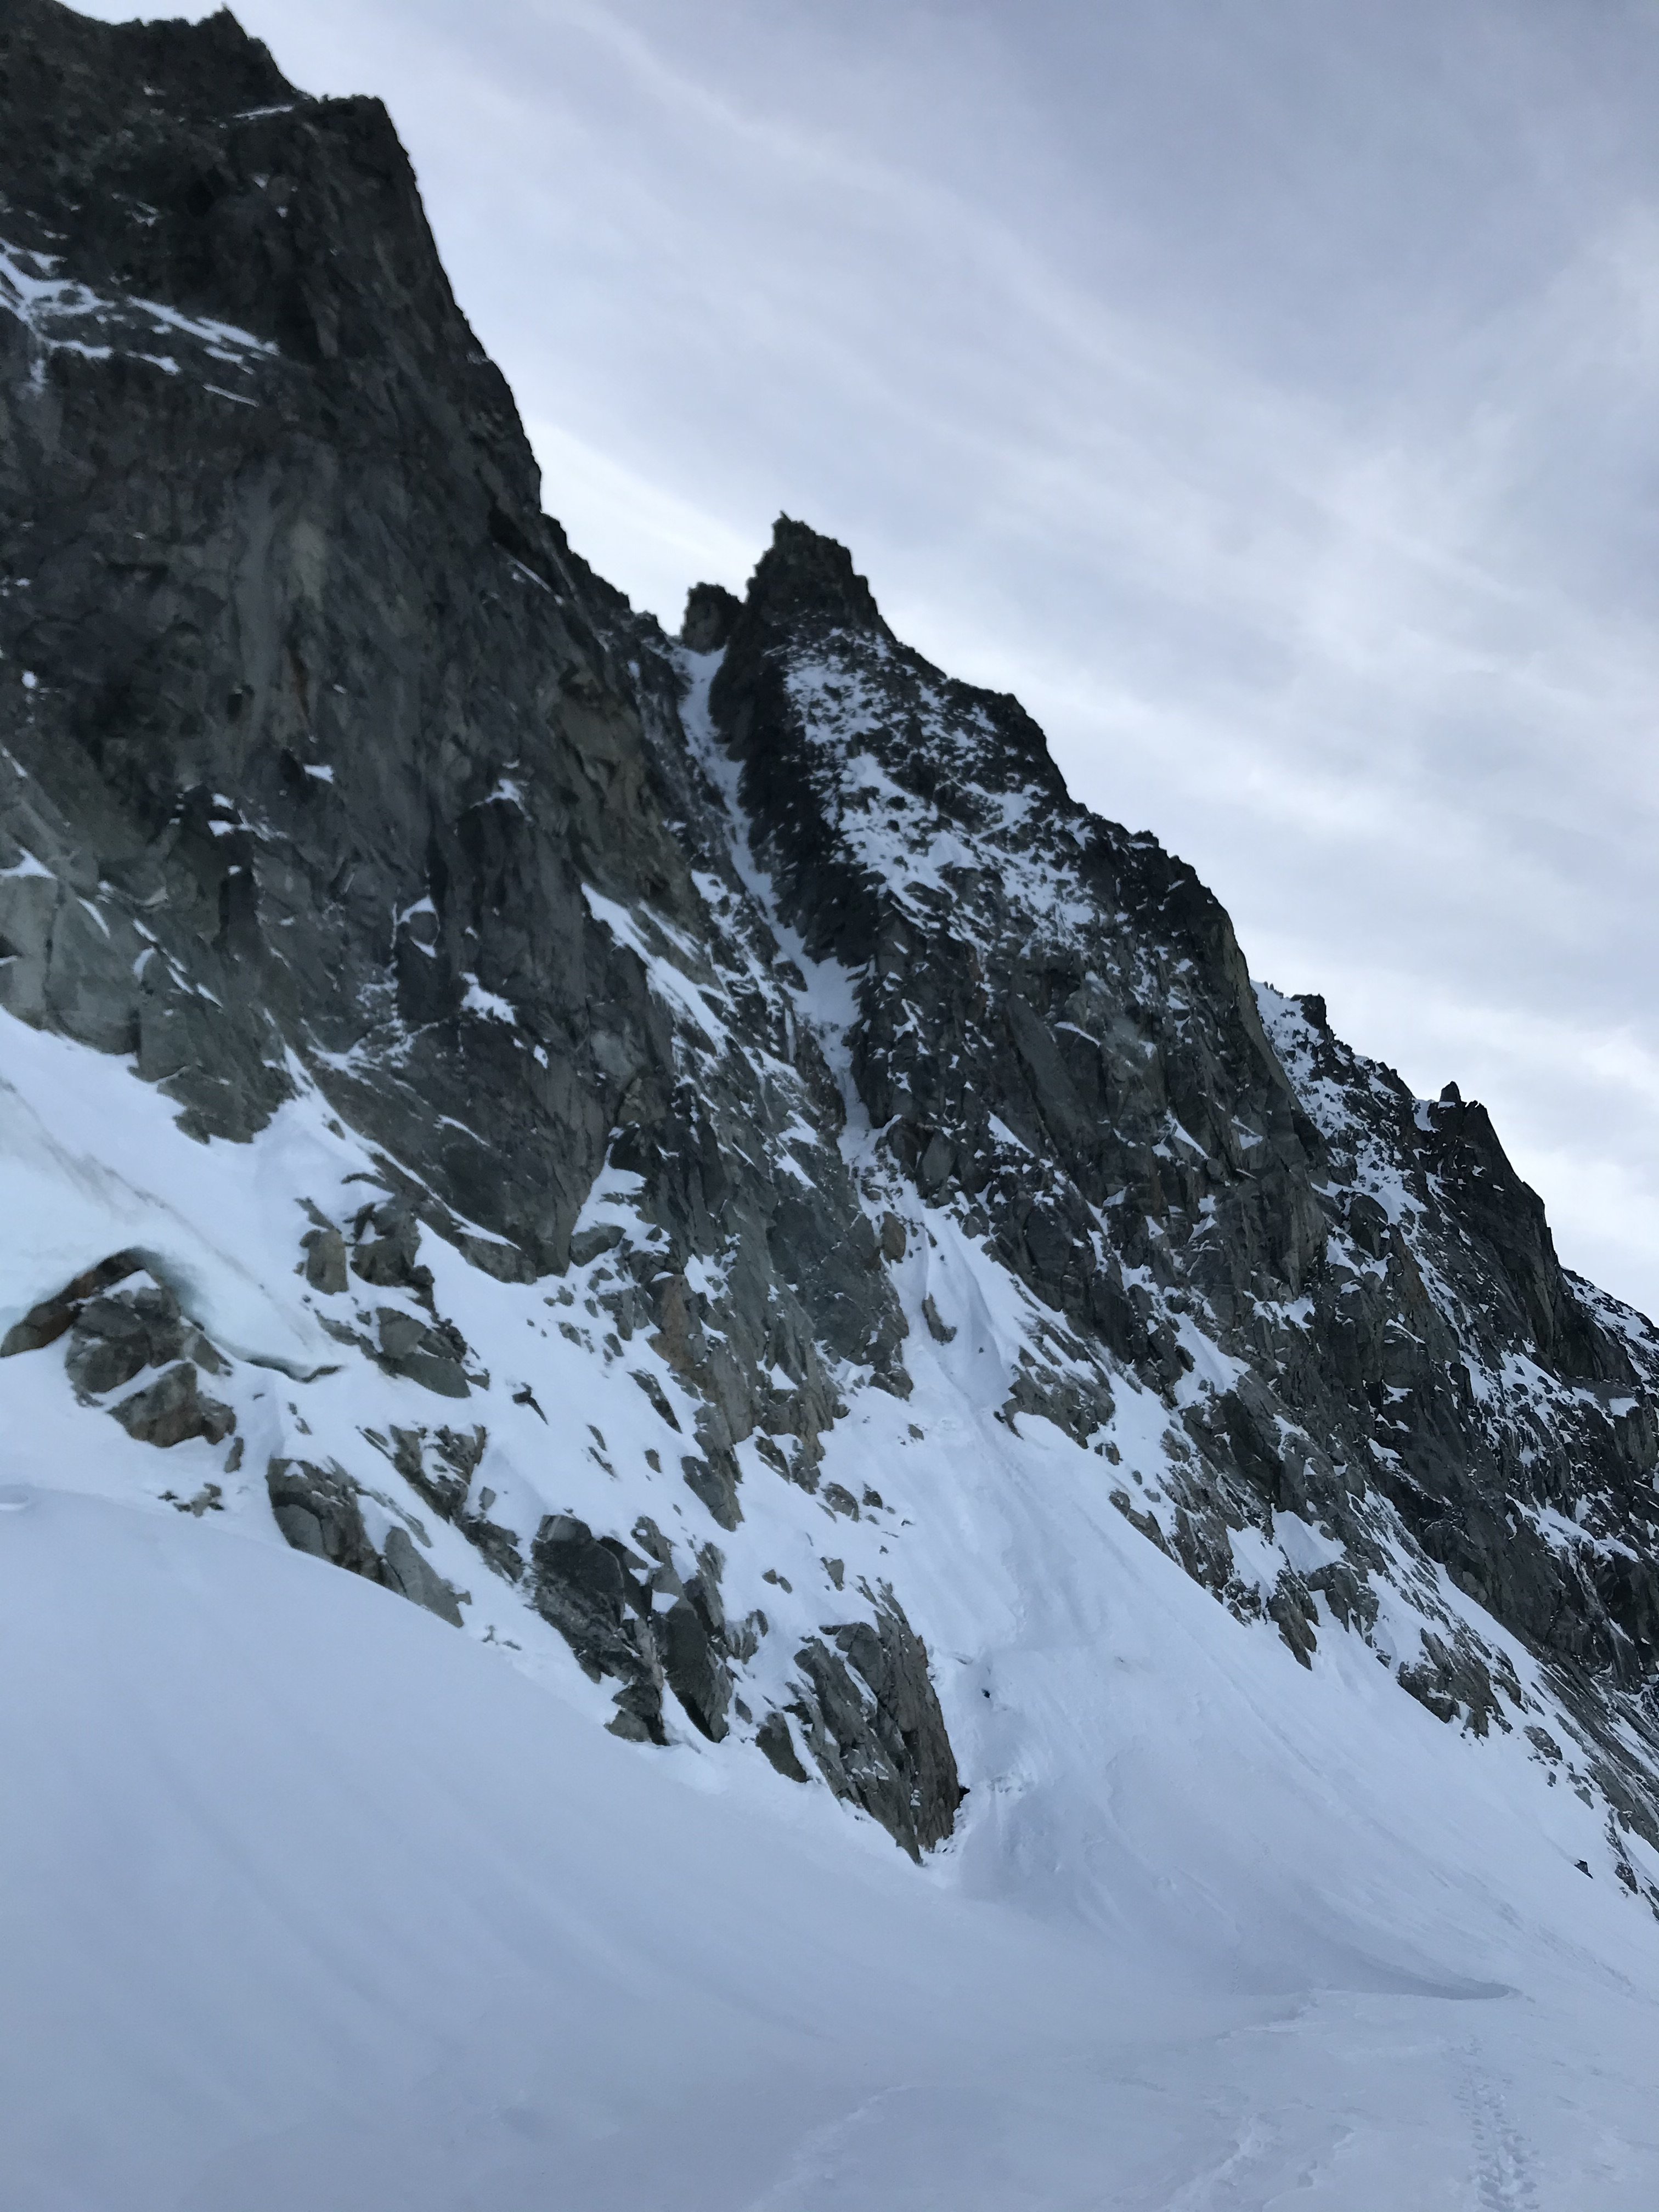
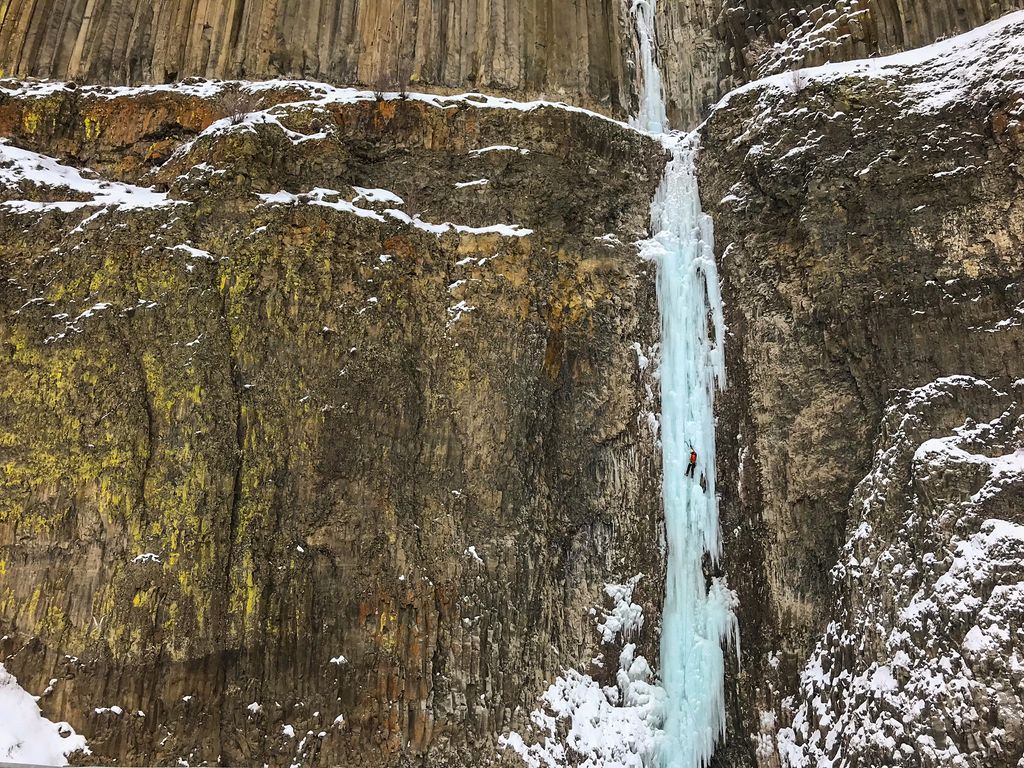
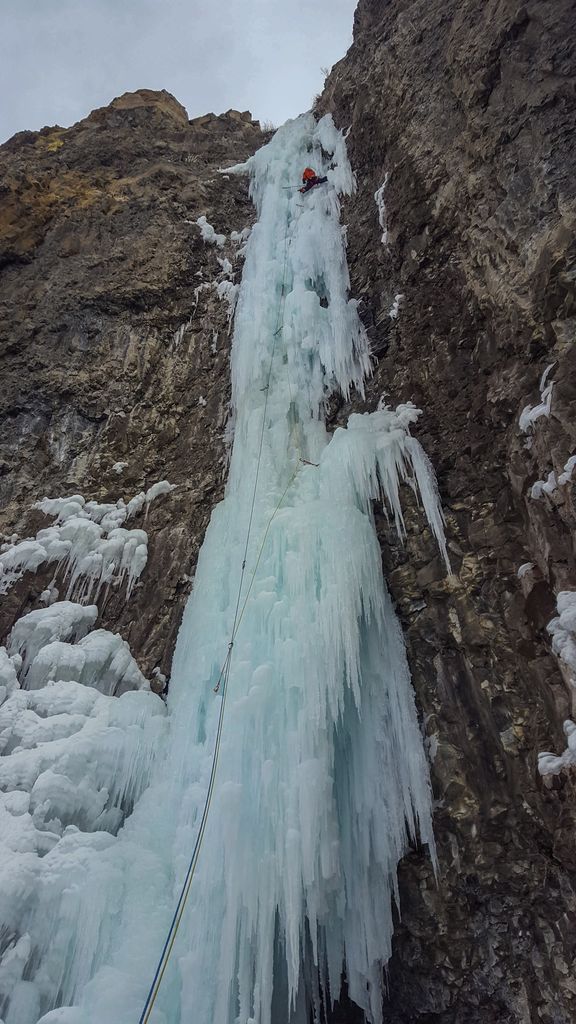
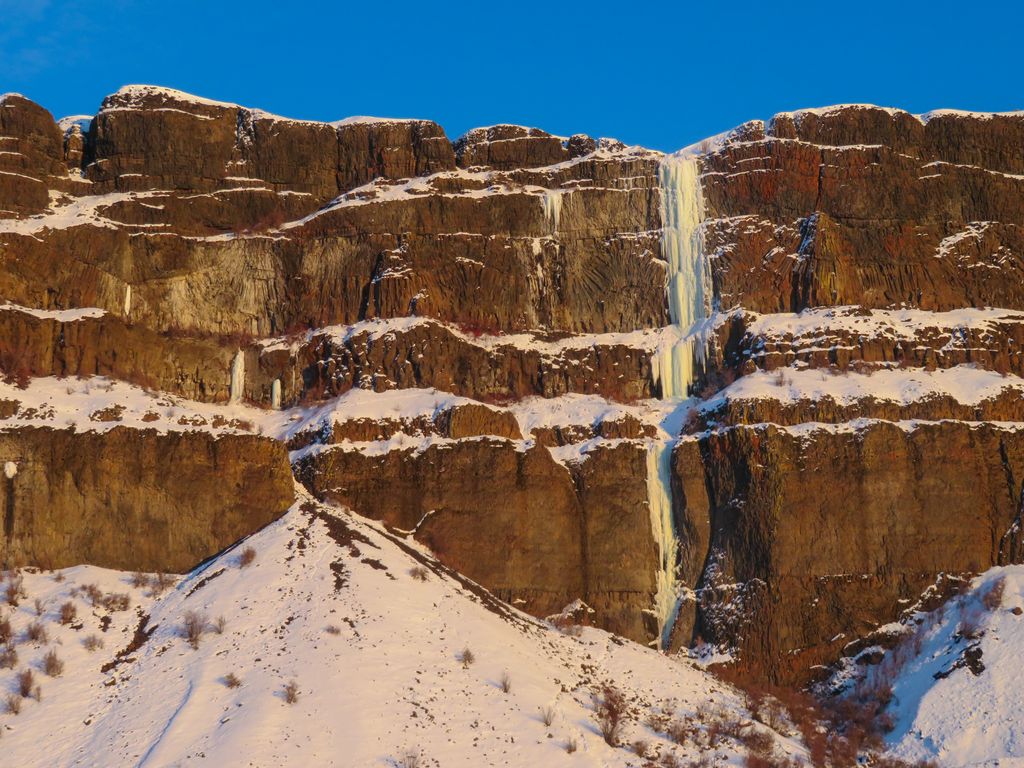
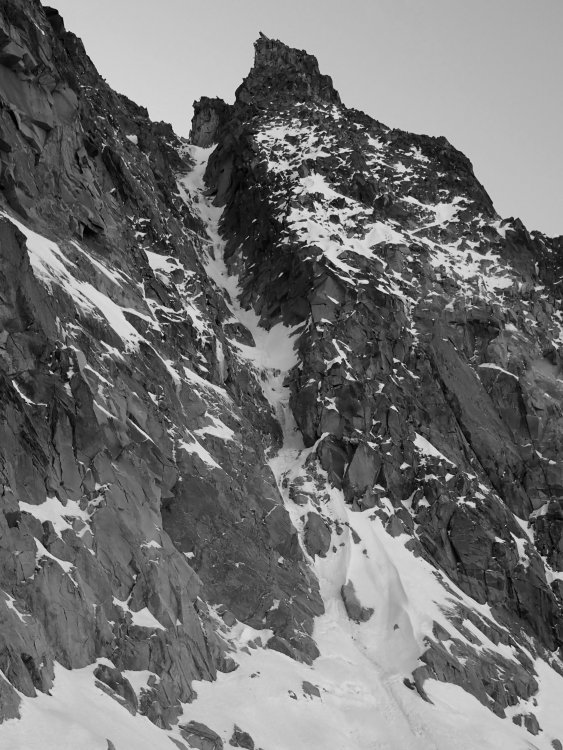
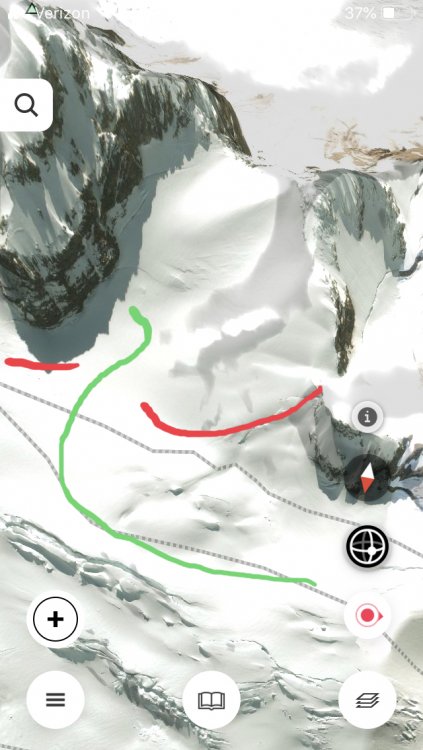
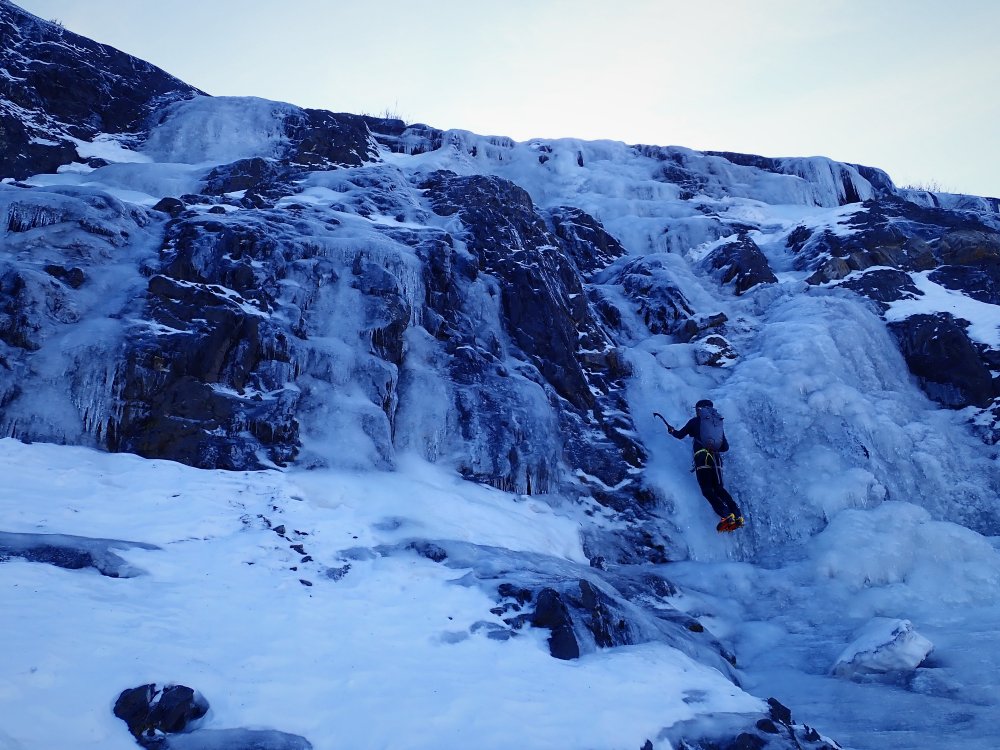
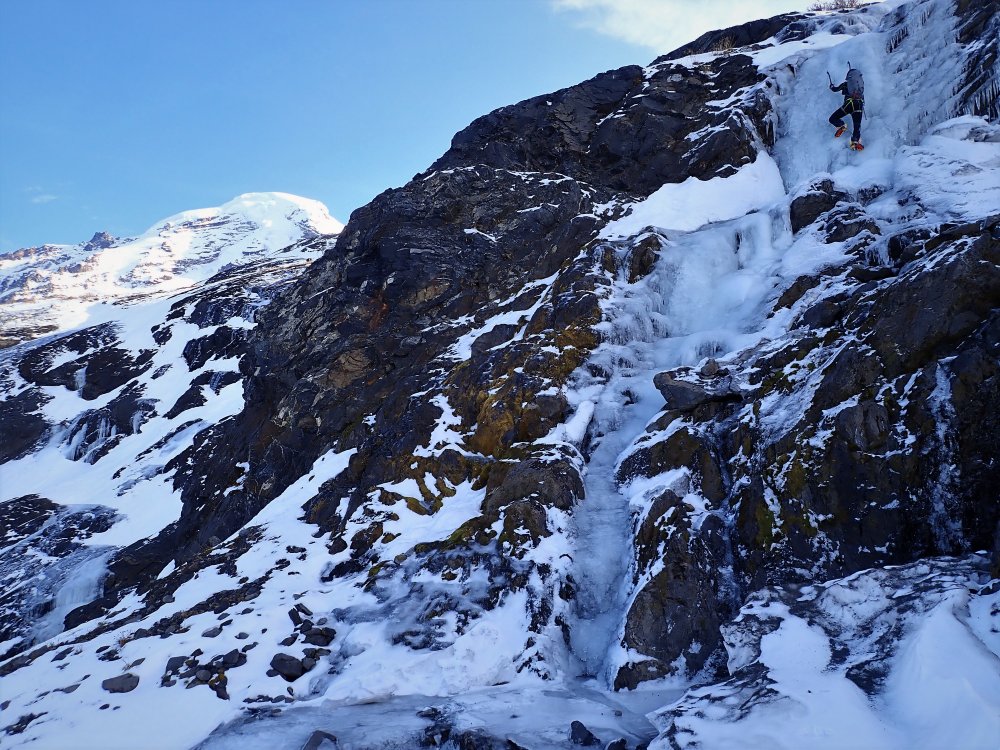
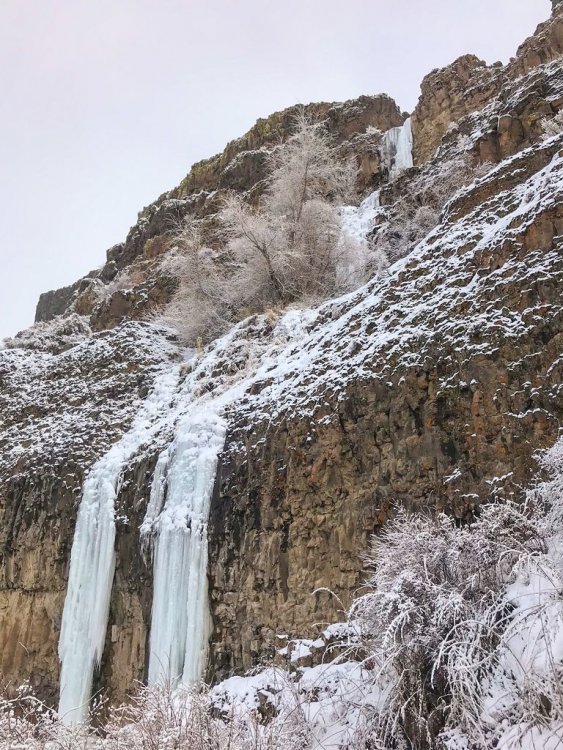
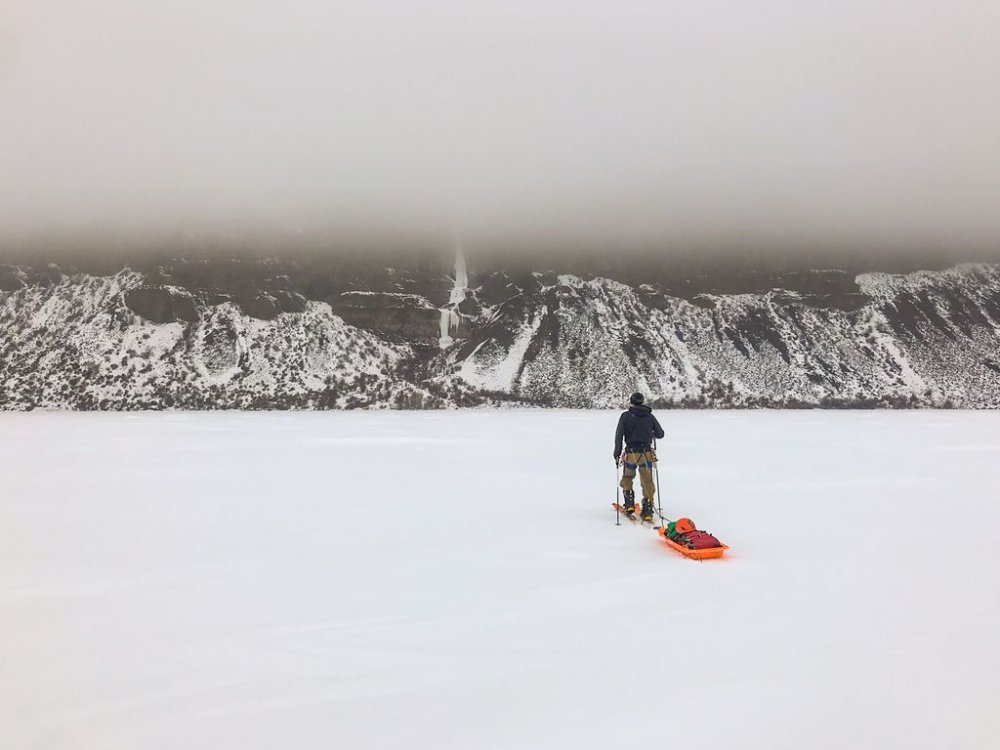
Trip: Colfax Area - Unnamed Ice Line Trip Date: 10/29/2019 Trip Report: I couldn't bring my self to go to class on Tuesday so instead, I woke up at 2 and drove out to Heliotrope trailhead with dreams of epic long solo ice climbing on Colfax. This didn't happen but it was still a great day. I ended up leaving the trailhead around 4 or so and cruised up the trail to the Coleman (microspikes on running shoes were perfect for all the ice sheets in the trail). It got light around when I got to the football field above the toe of the Coleman. The snow was very firm and icy from freezing levels being high (~8-11k) for a few days before dropping to 1600ft the night before. It was downright frigid up there but blue skies and generally calm conditions made it enjoyable. I knew that people had run into impassable cracks approaching Colfax 3 days prior and I found their tracks and followed them (WHY???). Naturally, they led me to a section of impassable cracks where I had been able to walk across last fall. I poked around briefly but didn't see anything promising. I could have rapped into the crack and climbed the far wall but there were obvious holes in new snow leading to darkness in the bottom so, being solo, I decided that wasn't prudent. Besides, the upper slopes of the Cosley Houston looked thin and the ice pillar looked a little thinner and taller than I remembered. I wasn't terribly stoked on soloing that, so I opted to turn and head down ~100 yards to a north face of a little peak that separates the Thunder Glacier and the Coleman. I saw about 4-5 obvious, steep long lines of ice leading to a steep upper slope. Basically a half-scale Colfax... I chose an obvious, fat, steep line that looked to be in the WI3 or 3+ range. Approaching the base, over some avy debris from last week, was fun and the steep snow to the base was great. A few hundred pounds of serac popped off and rumbled down a hundred feet to my left as I approached the ice, I knew I was out of the way, but it's still a little spooky to see/feel that so close. The first 100-130ft of the route were water ice with a few neve shelves. The movement was great fun and I was set up to self-belay if I felt I needed it. I never did but was glad to have to option close at hand. There were two steps ~15 ft each that were dead vertical or very close and felt very exposed. It was just right, a few brief moments of fear but mostly just good fun. Above the ice was ~400ft of steep snow with a few sections of ice. Right before the summit, the slope kicked up to perhaps 65 degrees for ~30 ft. There was a small cornice that could be stepped over (read: heel hooked) onto the top but I imagine other times of year the cornice could be problematic. I descended to the northwest down a steep glacier. I just had a 30m rope and did 3 V thread raps. Looking back I may have been able to avoid rapping all together by down climbing a gully/crevasse in the glacier. I debated hitting another line on the face but felt I had had my fill and chose not to push my luck. I took a nice walk down the glacier to my shoes and jogged down to the car, getting there around 1:30 pm. I enjoy the long peaceful days, solo in the mountains. It's good to have no one to bounce ideas off and be forced to make decisions without input. For those who want to hit Colfax this coming weekend, I've included a photo of an approach I believe will work to get to the face. Maybe you can go way lower and come in the east but up the face, I climbed (or up the glacier I descended) and over should bypass the problem crack and get you where you need to be. Gear Notes: 30m rope, a few screws, and a picket, used nothing. Approach Notes: See above
-
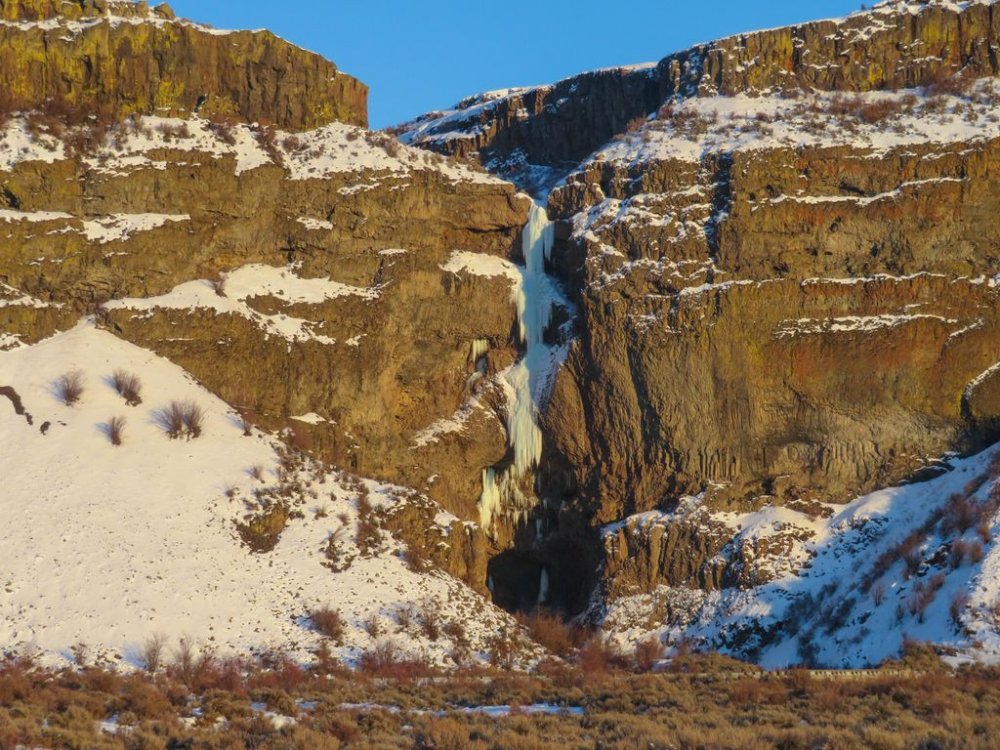
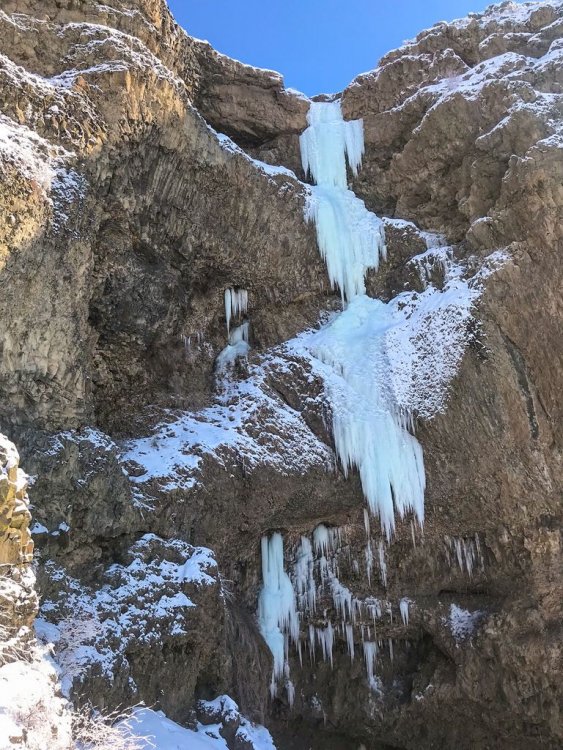
Trip: Colfax Area - Unnamed Ice Line Trip Date: 10/29/2019 Trip Report: I couldn't bring my self to go to class on Tuesday so instead, I woke up at 2 and drove out to Heliotrope trailhead with dreams of epic long solo ice climbing on Colfax. This didn't happen but it was still a great day. I ended up leaving the trailhead around 4 or so and cruised up the trail to the Coleman (microspikes on running shoes were perfect for all the ice sheets in the trail). It got light around when I got to the football field above the toe of the Coleman. The snow was very firm and icy from freezing levels being high (~8-11k) for a few days before dropping to 1600ft the night before. It was downright frigid up there but blue skies and generally calm conditions made it enjoyable. I knew that people had run into impassable cracks approaching Colfax 3 days prior and I found their tracks and followed them (WHY???). Naturally, they led me to a section of impassable cracks where I had been able to walk across last fall. I poked around briefly but didn't see anything promising. I could have rapped into the crack and climbed the far wall but there were obvious holes in new snow leading to darkness in the bottom so, being solo, I decided that wasn't prudent. Besides, the upper slopes of the Cosley Houston looked thin and the ice pillar looked a little thinner and taller than I remembered. (Photo: CH looks like it goes, maybe thin down low, and up high) (Photo: Colfax (left) upper half of CH and Polish routes. The closer face (right) has the ice lines I looked at. The line I climbed is hidden above the snow fan on the left. The dead straight smear near the right was climbed over the weekend.) I wasn't terribly stoked on soloing that, so I opted to turn and head down ~100 yards to a north face of a little peak that separates the Thunder Glacier and the Coleman. I saw about 4-5 obvious, steep long lines of ice leading to a steep upper slope. Basically a half-scale Colfax... I chose an obvious, fat, steep line that looked to be in the WI3 or 3+ range. (Photo: I believe this feature is unnamed and the line I climbed is also unnamed (and maybe unclimbed?) regardless, it's worth getting it out there that this exists for people to have a bail option/out of time option/easy introduction option near Colfax. (Photo: looking up at the line I climbed). Approaching the base, over some avy debris from last week, was fun and the steep snow to the base was great. A few hundred pounds of serac popped off and rumbled down a hundred feet to my left as I approached the ice, I knew I was out of the way, but it's still a little spooky to see/feel that so close. The first 100-130ft of the route were water ice with a few neve shelves. The movement was great fun and I was set up to self-belay if I felt I needed it. I never did but was glad to have to option close at hand. There were two steps ~15 ft each that were dead vertical or very close and felt very exposed. It was just right, a few brief moments of fear but mostly just good fun. Above the ice was ~400ft of steep snow with a few sections of ice. Right before the summit, the slope kicked up to perhaps 65 degrees for ~30 ft. There was a small cornice that could be stepped over (read: heel hooked) onto the top but I imagine other times of year the cornice could be problematic. I descended to the northwest down a steep glacier. I just had a 30m rope and did 3 V thread raps. Looking back I may have been able to avoid rapping all together by down climbing a gully/crevasse in the glacier. I debated hitting another line on the face but felt I had had my fill and chose not to push my luck. I took a nice walk down the glacier to my shoes and jogged down to the car, getting there around 1:30 pm. I enjoy the long peaceful days, solo in the mountains. It's good to have no one to bounce ideas off and be forced to make decisions without input. For those who want to hit Colfax this coming weekend, I've included a photo of an approach I believe will work to get to the face. Maybe you can go way lower and come in the east but up the face, I climbed (or up the glacier I descended) and over should bypass the problem crack and get you where you need to be. Below are a few photos from the bases of the other obvious climbs on the face for those interested! The straight-up thin line was climbed over the weekend and I saw their tracks and a bollard they rapped off on the descent. Gear Notes: 30m rope, used to descend, a few screws and a picket I didn't use. Approach Notes: See above


-
Trip: Colfax Area - Unnamed Ice Line Trip Date: 10/29/2019 Trip Report: I couldn't bring my self to go to class on Tuesday so instead, I woke up at 2 and drove out to Heliotrope trailhead with dreams of epic long solo ice climbing on Colfax. This didn't happen but it was still a great day. I ended up leaving the trailhead around 4 or so and cruised up the trail to the Coleman (microspikes on running shoes were perfect for all the ice sheets in the trail). It got light around when I got to the football field above the toe of the Coleman. The snow was very firm and icy from freezing levels being high (~8-11k) for a few days before dropping to 1600ft the night before. It was downright frigid up there but blue skies and generally calm conditions made it enjoyable. I knew that people had run into impassable cracks approaching Colfax 3 days prior and I found their tracks and followed them (WHY???). Naturally, they led me to a section of impassable cracks where I had been able to walk across last fall. I poked around briefly but didn't see anything promising. I could have rapped into the crack and climbed the far wall but there were obvious holes in new snow leading to darkness in the bottom so, being solo, I decided that wasn't prudent. Besides, the upper slopes of the Cosley Houston looked thin and the ice pillar looked a little thinner and taller than I remembered. I wasn't terribly stoked on soloing that, so I opted to turn and head down ~100 yards to a north face of a little peak that separates the Thunder Glacier and the Coleman. I saw about 4-5 obvious, steep long lines of ice leading to a steep upper slope. Basically a half-scale Colfax... I chose an obvious, fat, steep line that looked to be in the WI3 or 3+ range. Approaching the base, over some avy debris from last week, was fun and the steep snow to the base was great. A few hundred pounds of serac popped off and rumbled down a hundred feet to my left as I approached the ice, I knew I was out of the way, but it's still a little spooky to see/feel that so close. The first 100-130ft of the route were water ice with a few neve shelves. The movement was great fun and I was set up to self-belay if I felt I needed it. I never did but was glad to have to option close at hand. There were two steps ~15 ft each that were dead vertical or very close and felt very exposed. It was just right, a few brief moments of fear but mostly just good fun. Above the ice was ~400ft of steep snow with a few sections of ice. Right before the summit, the slope kicked up to perhaps 65 degrees for ~30 ft. There was a small cornice that could be stepped over (read: heel hooked) onto the top but I imagine other times of year the cornice could be problematic. I descended to the northwest down a steep glacier. I just had a 30m rope and did 3 V thread raps. Looking back I may have been able to avoid rapping all together by down climbing a gully/crevasse in the glacier. I debated hitting another line on the face but felt I had had my fill and chose not to push my luck. I took a nice walk down the glacier to my shoes and jogged down to the car, getting there around 1:30 pm. I enjoy the long peaceful days, solo in the mountains. It's good to have no one to bounce ideas off and be forced to make decisions without input. For those who want to hit Colfax this coming weekend, I've included a photo of an approach I believe will work to get to the face. Maybe you can go way lower and come in the east but up the face, I climbed (or up the glacier I descended) and over should bypass the problem crack and get you where you need to be. Gear Notes: 30m rope, a few screws, and a picket, used nothing. Approach Notes: See above
-
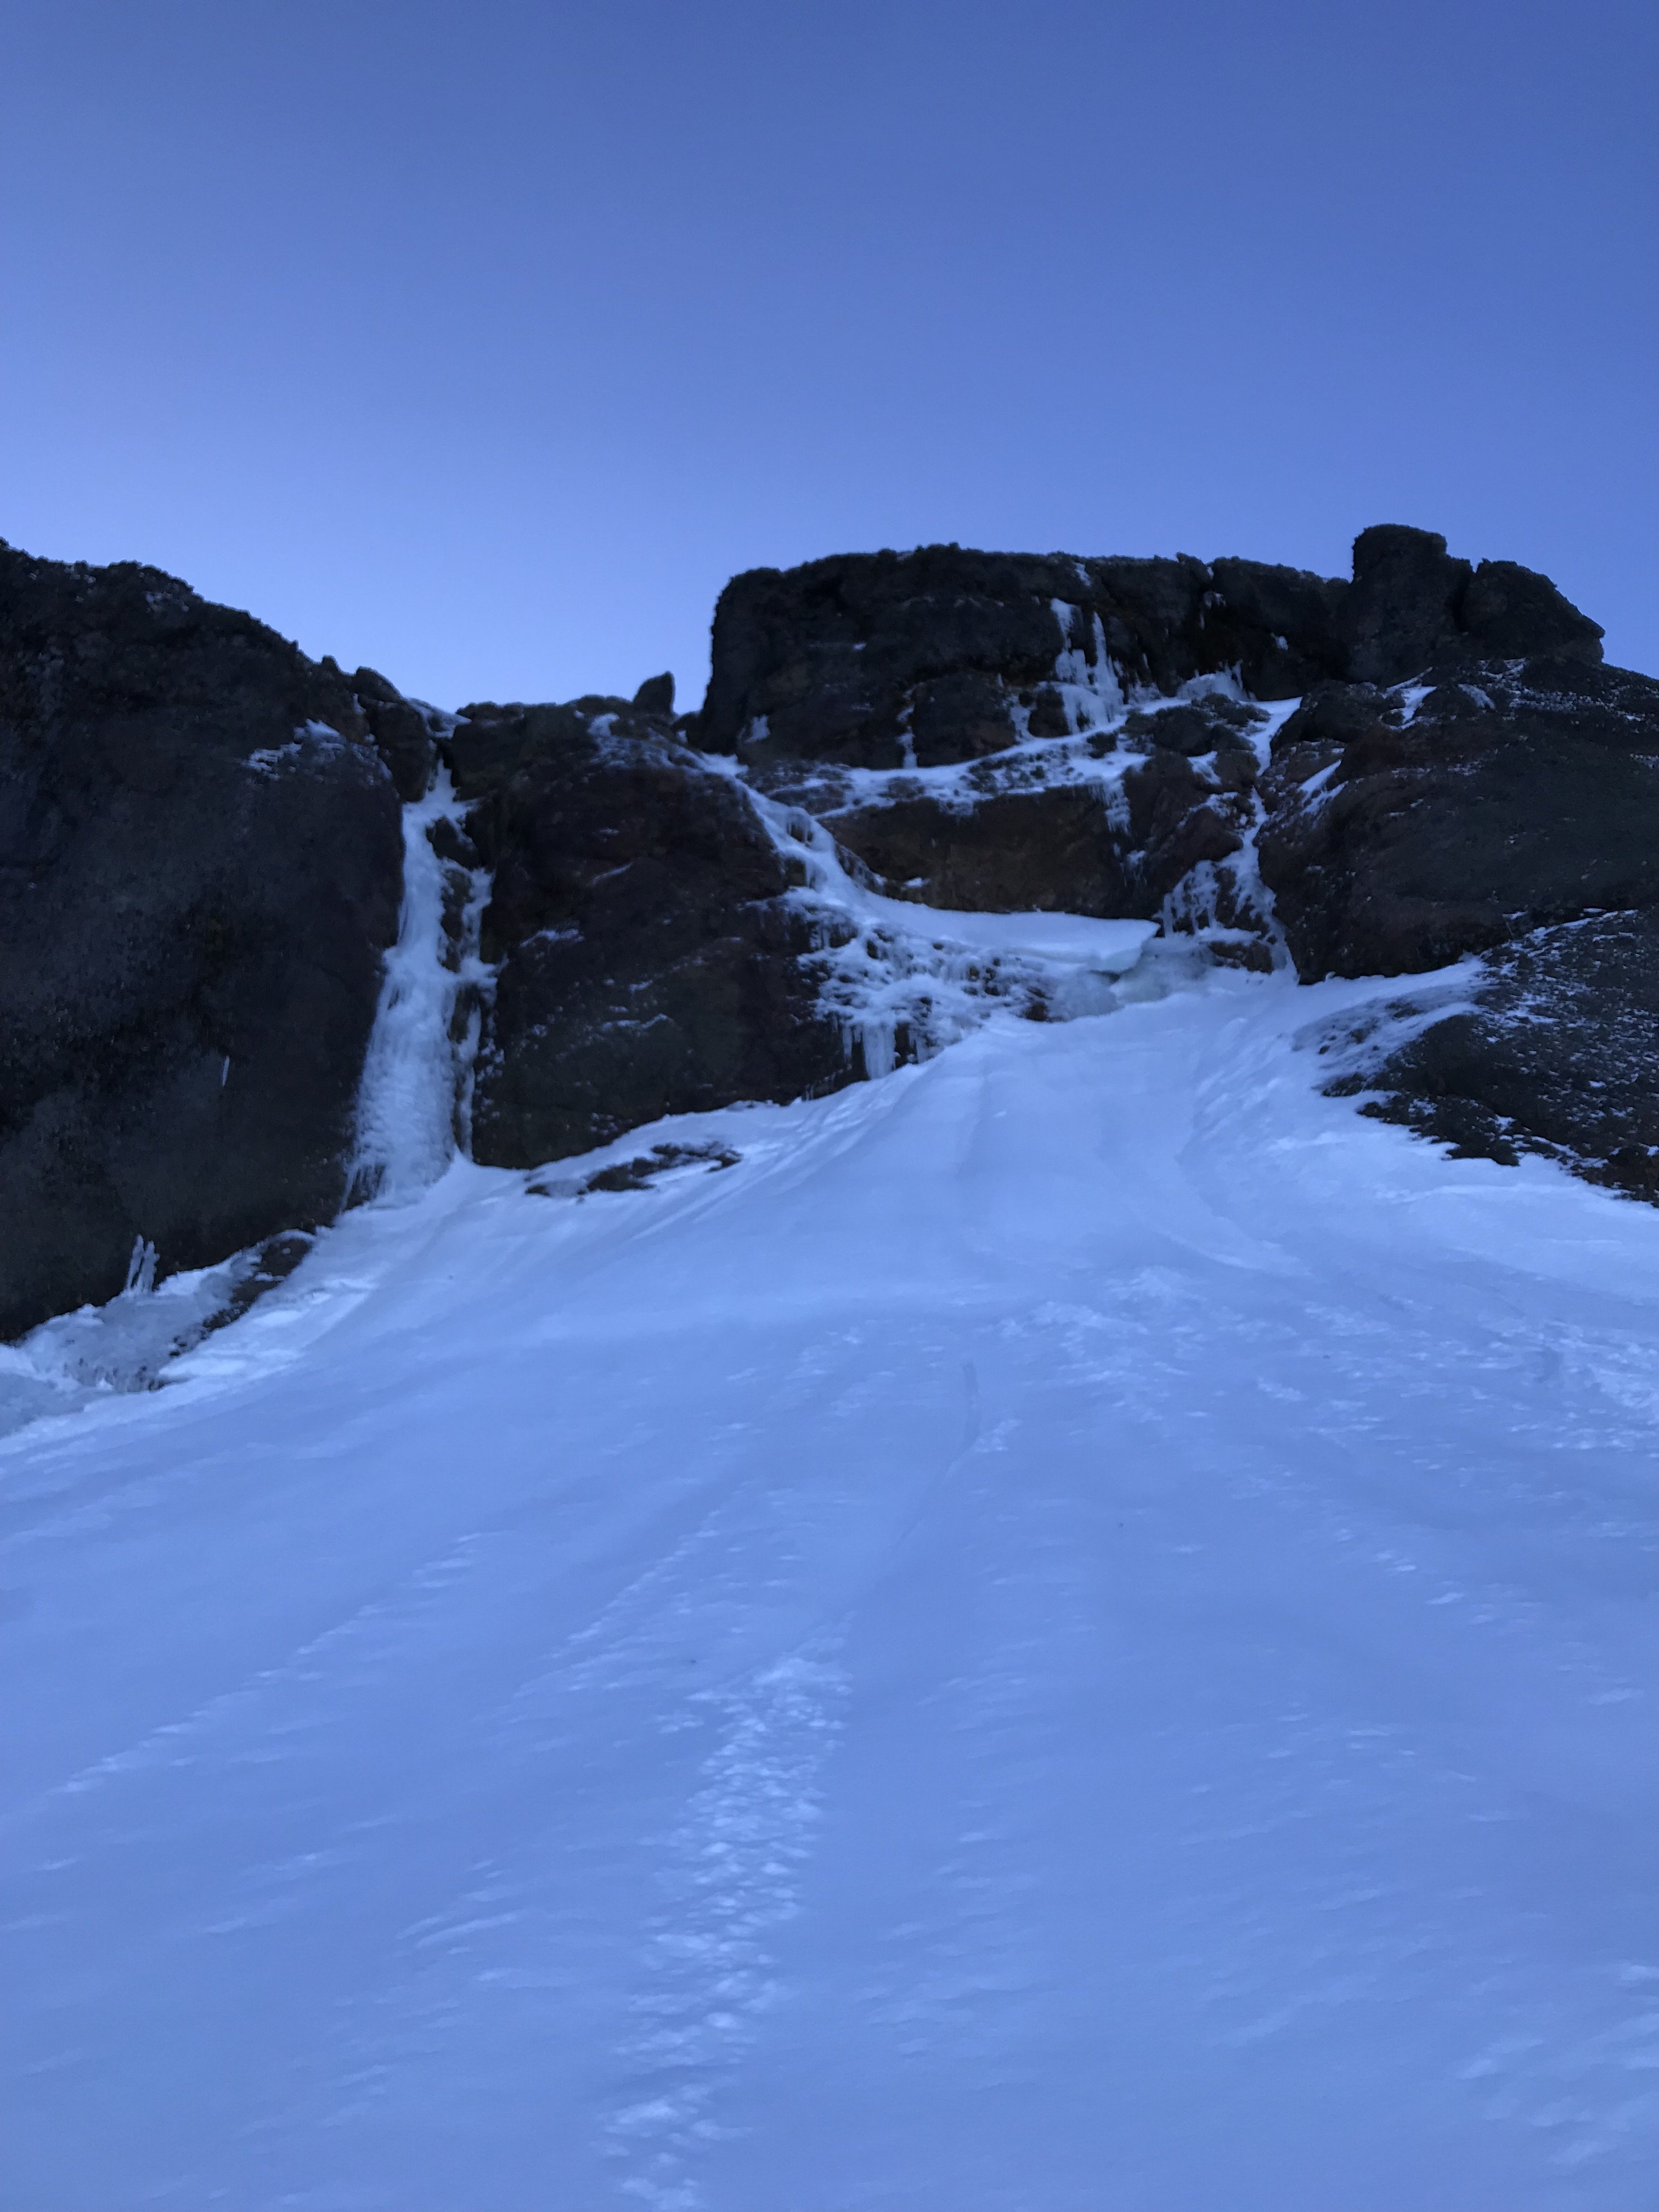
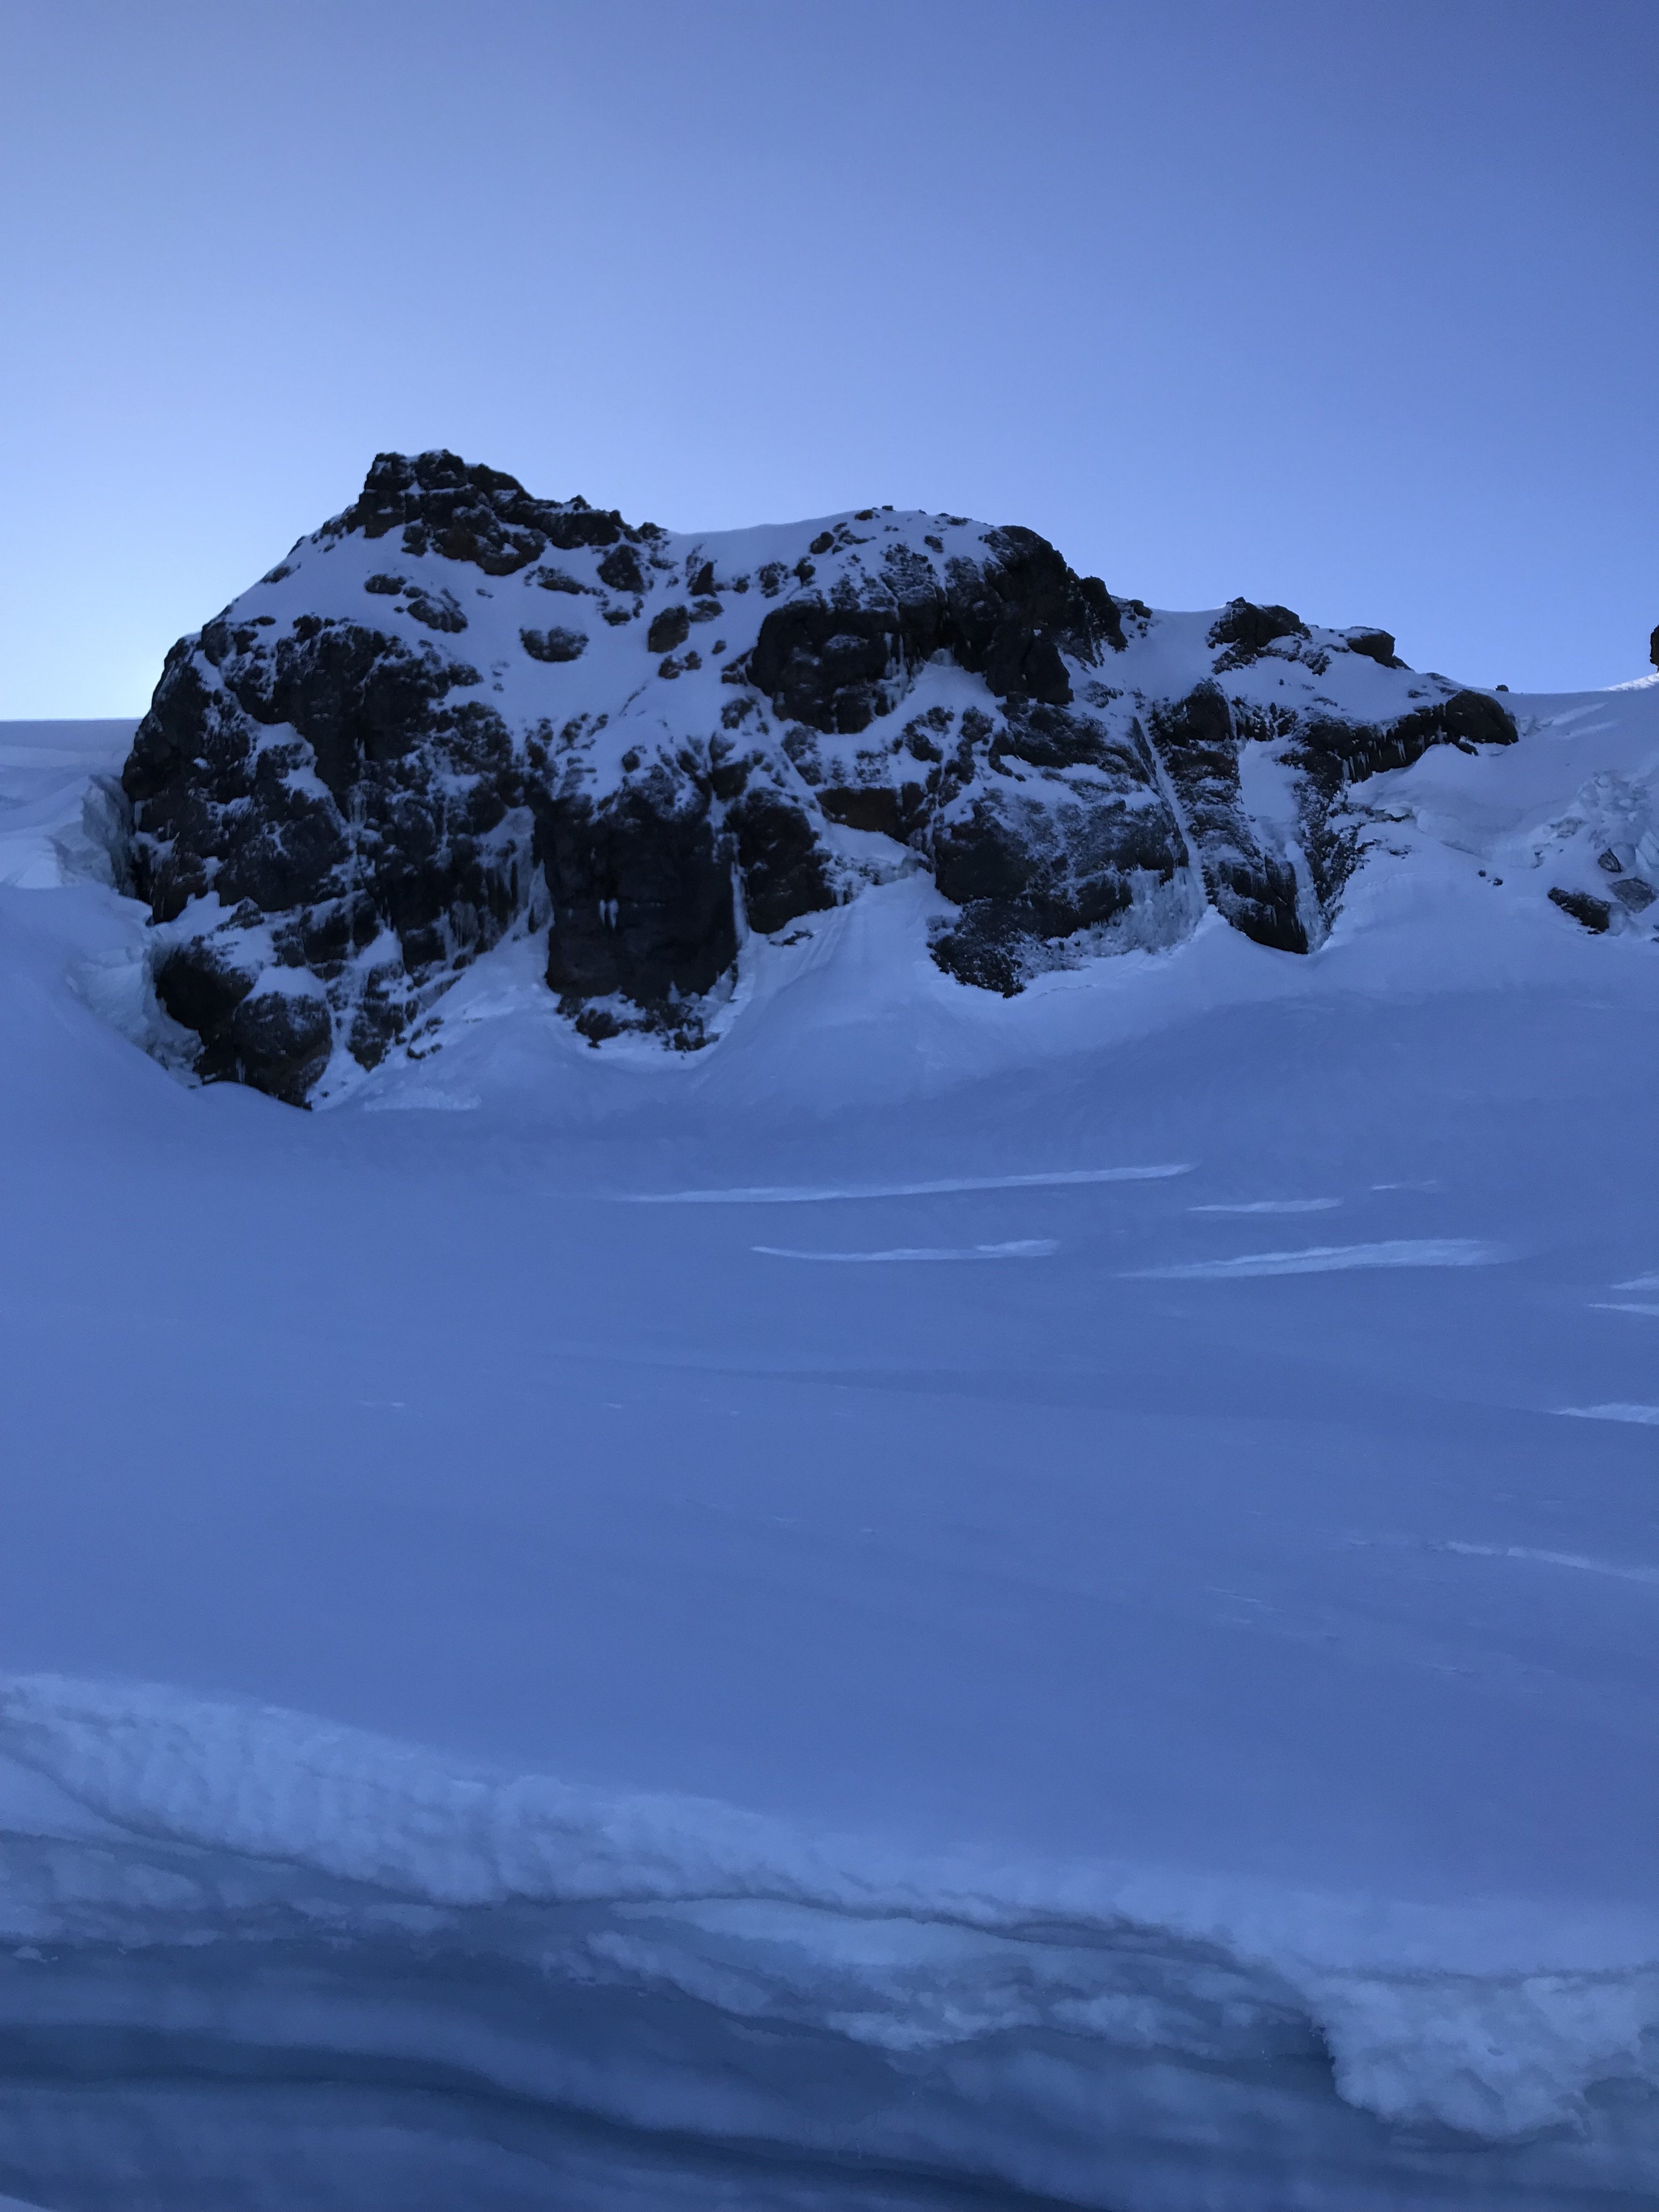
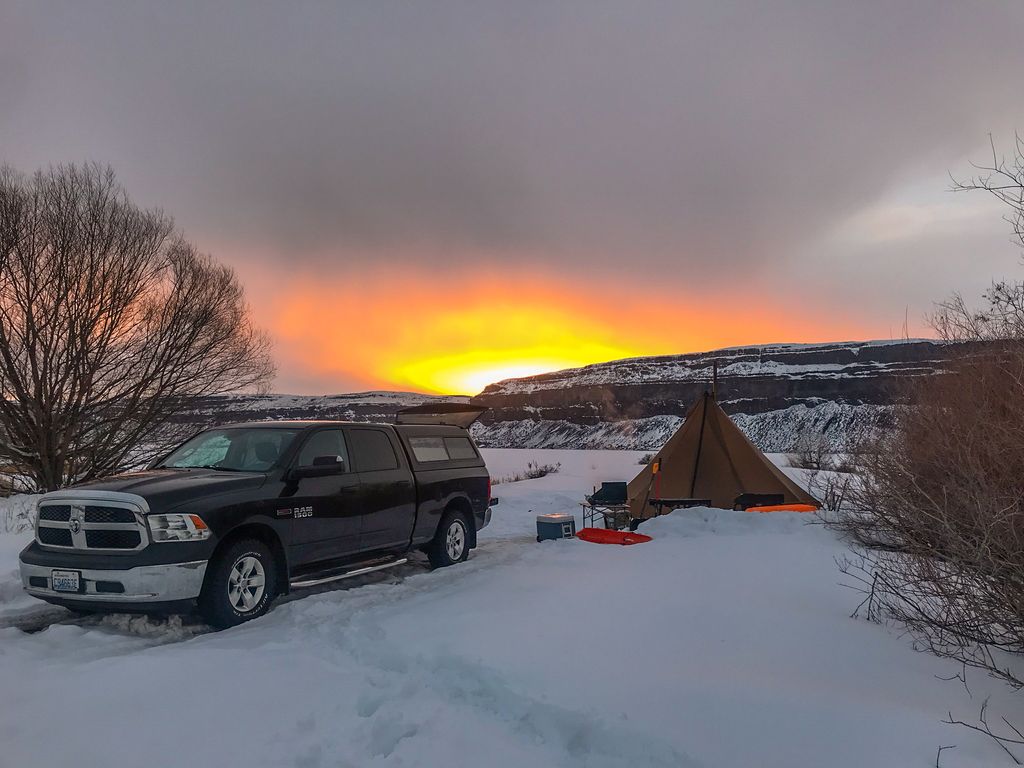
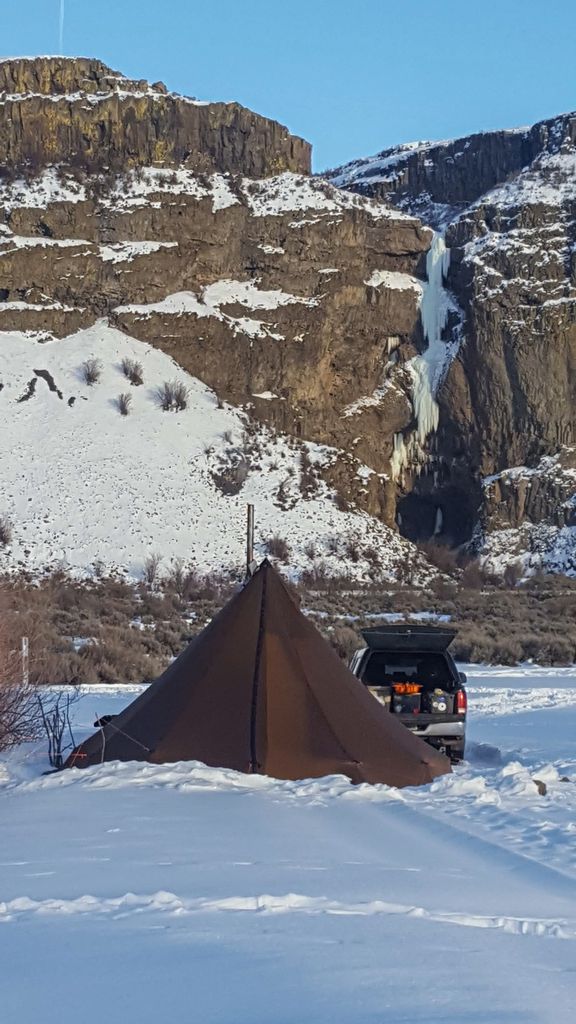
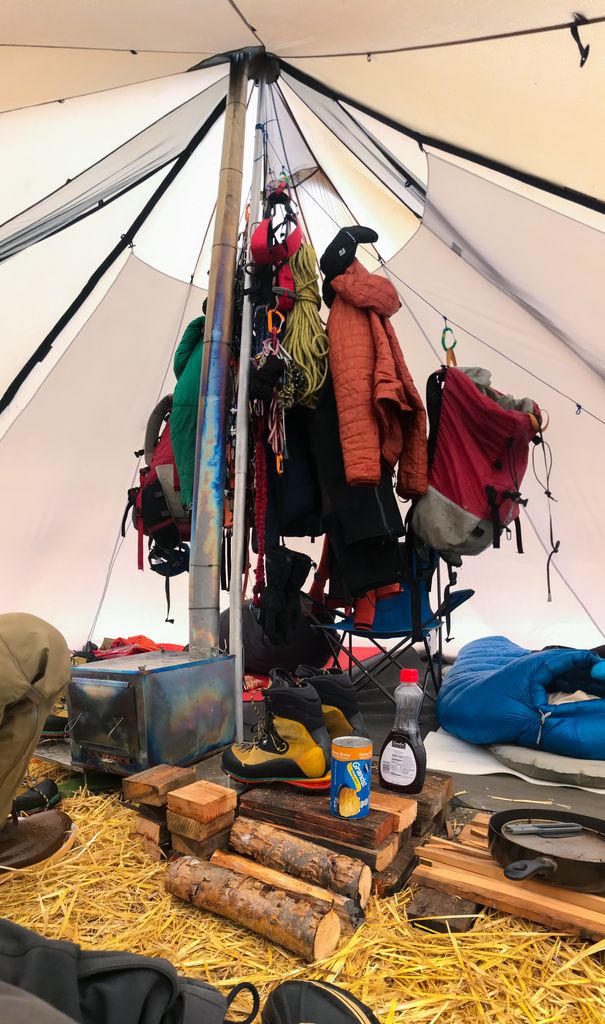
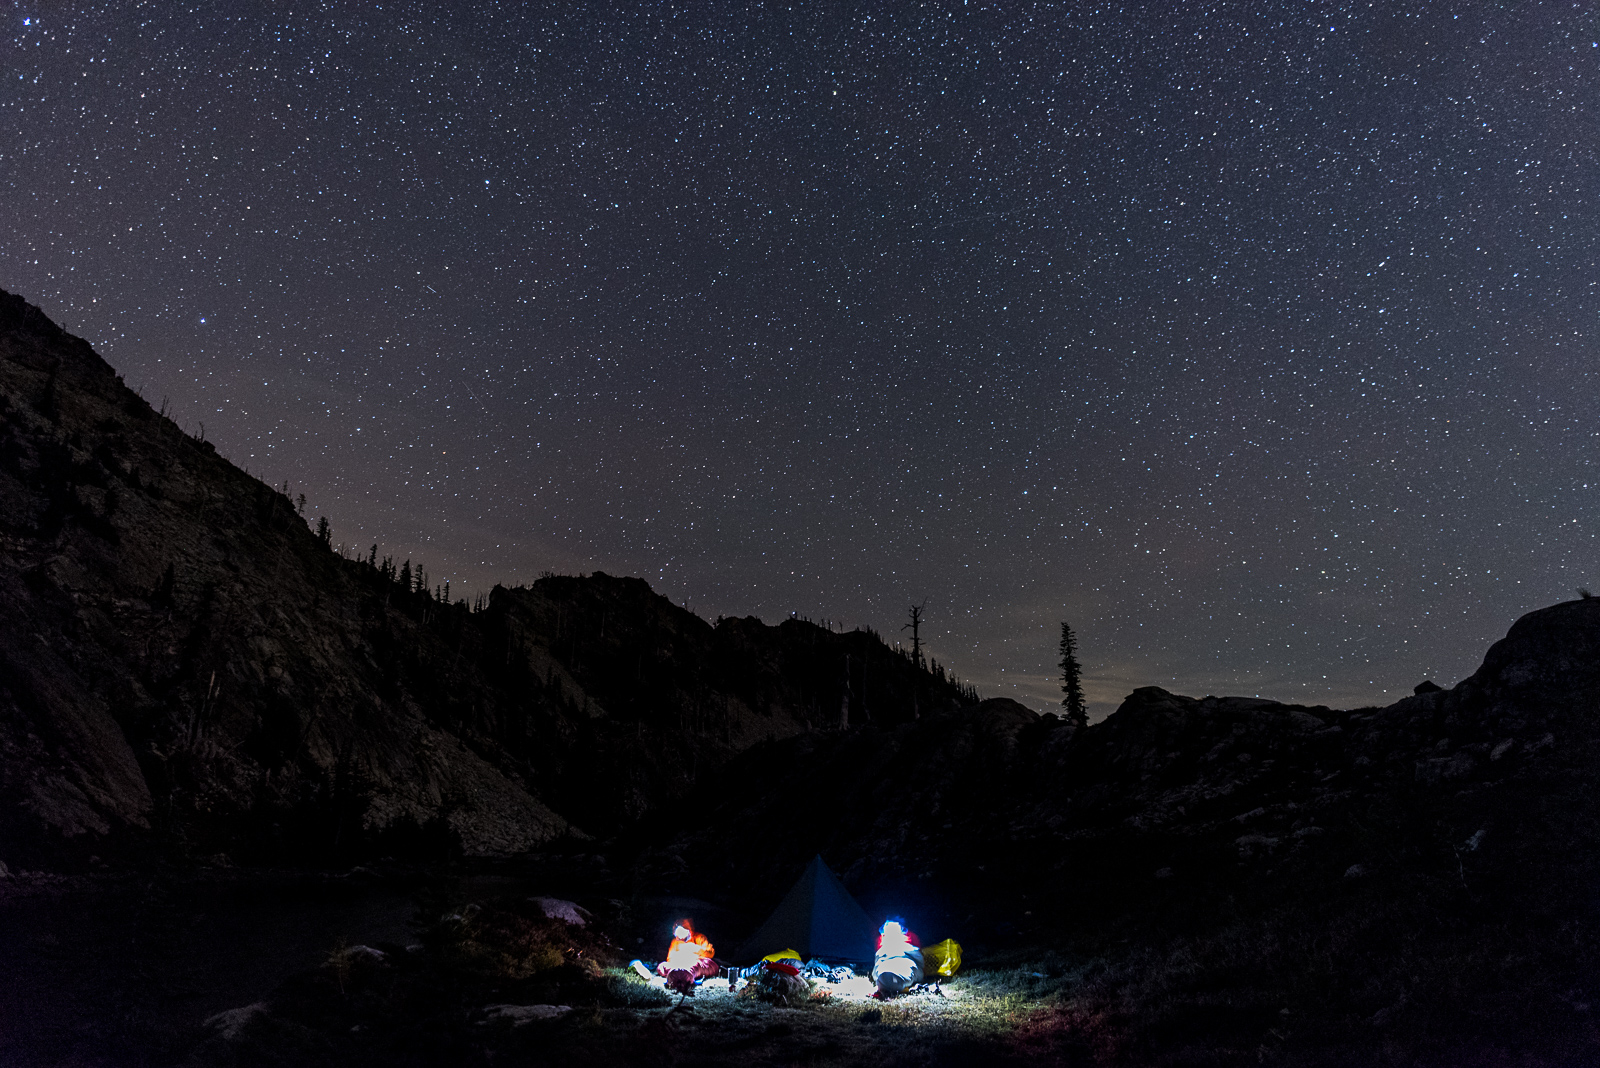
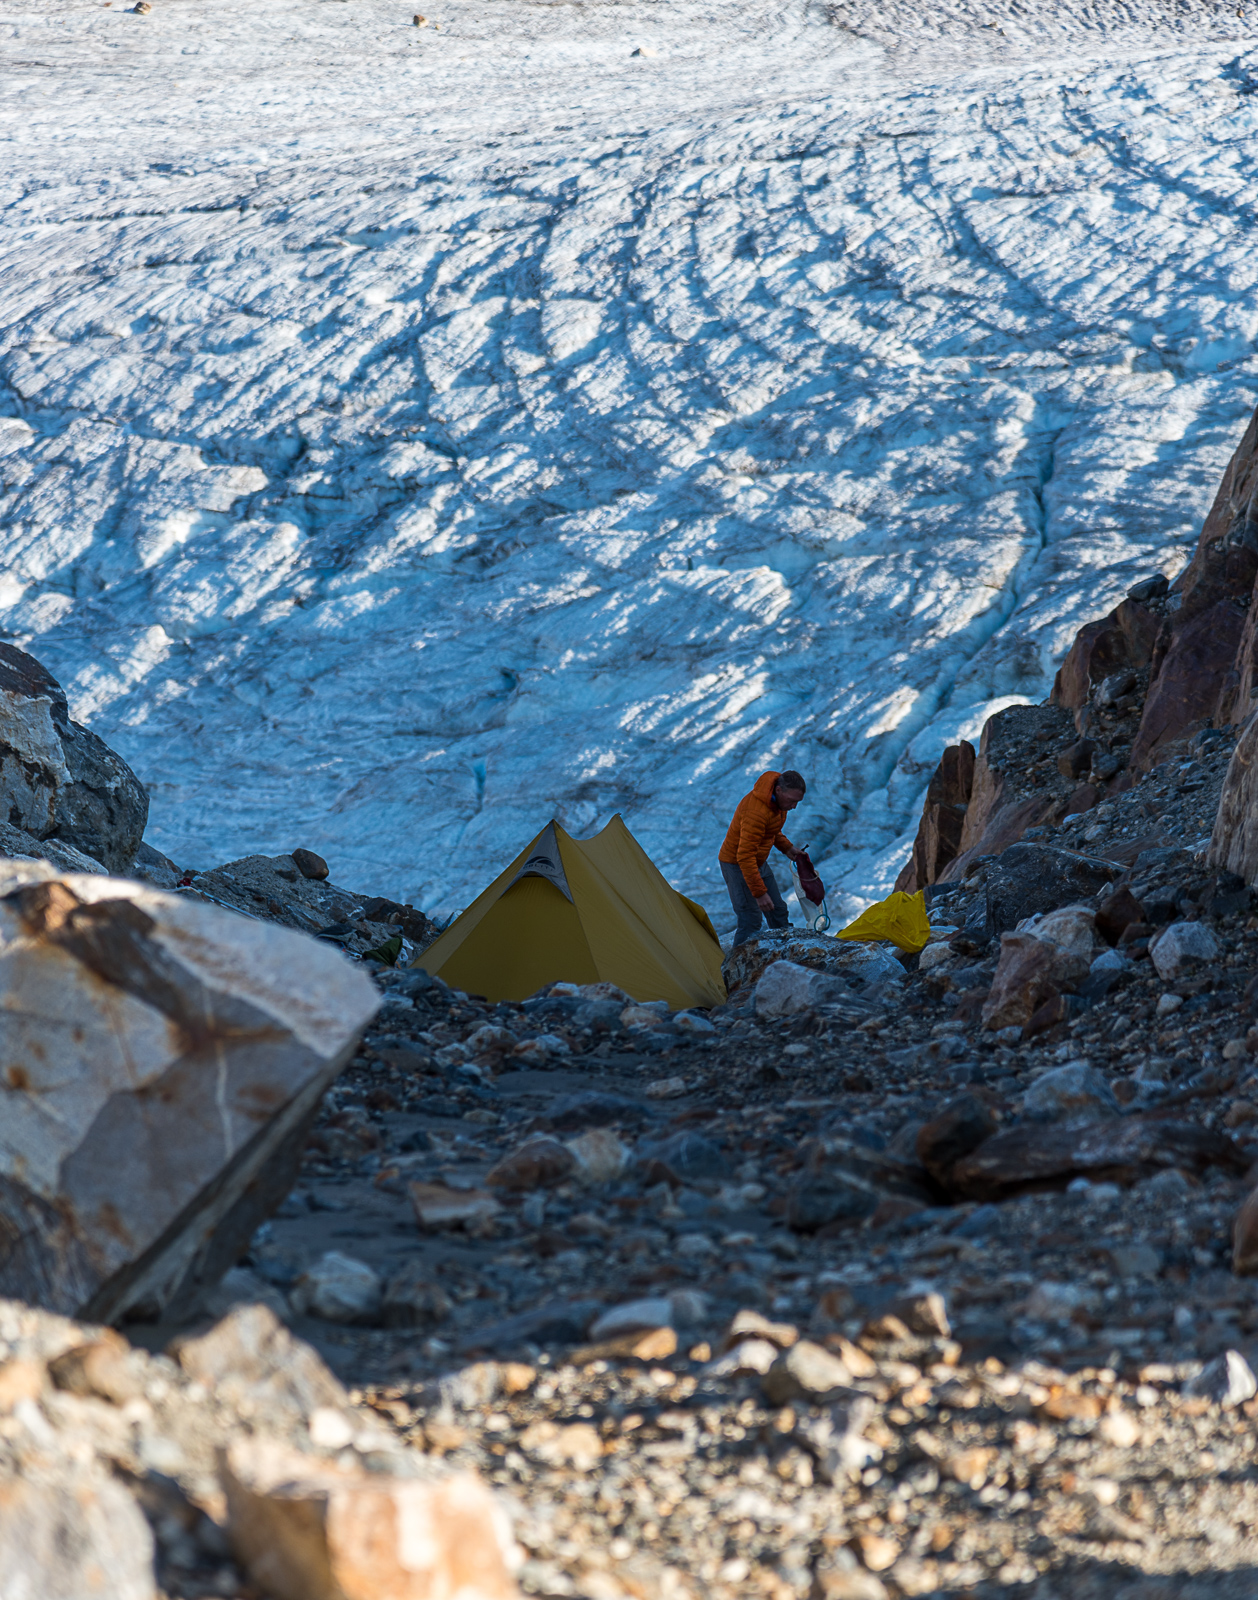
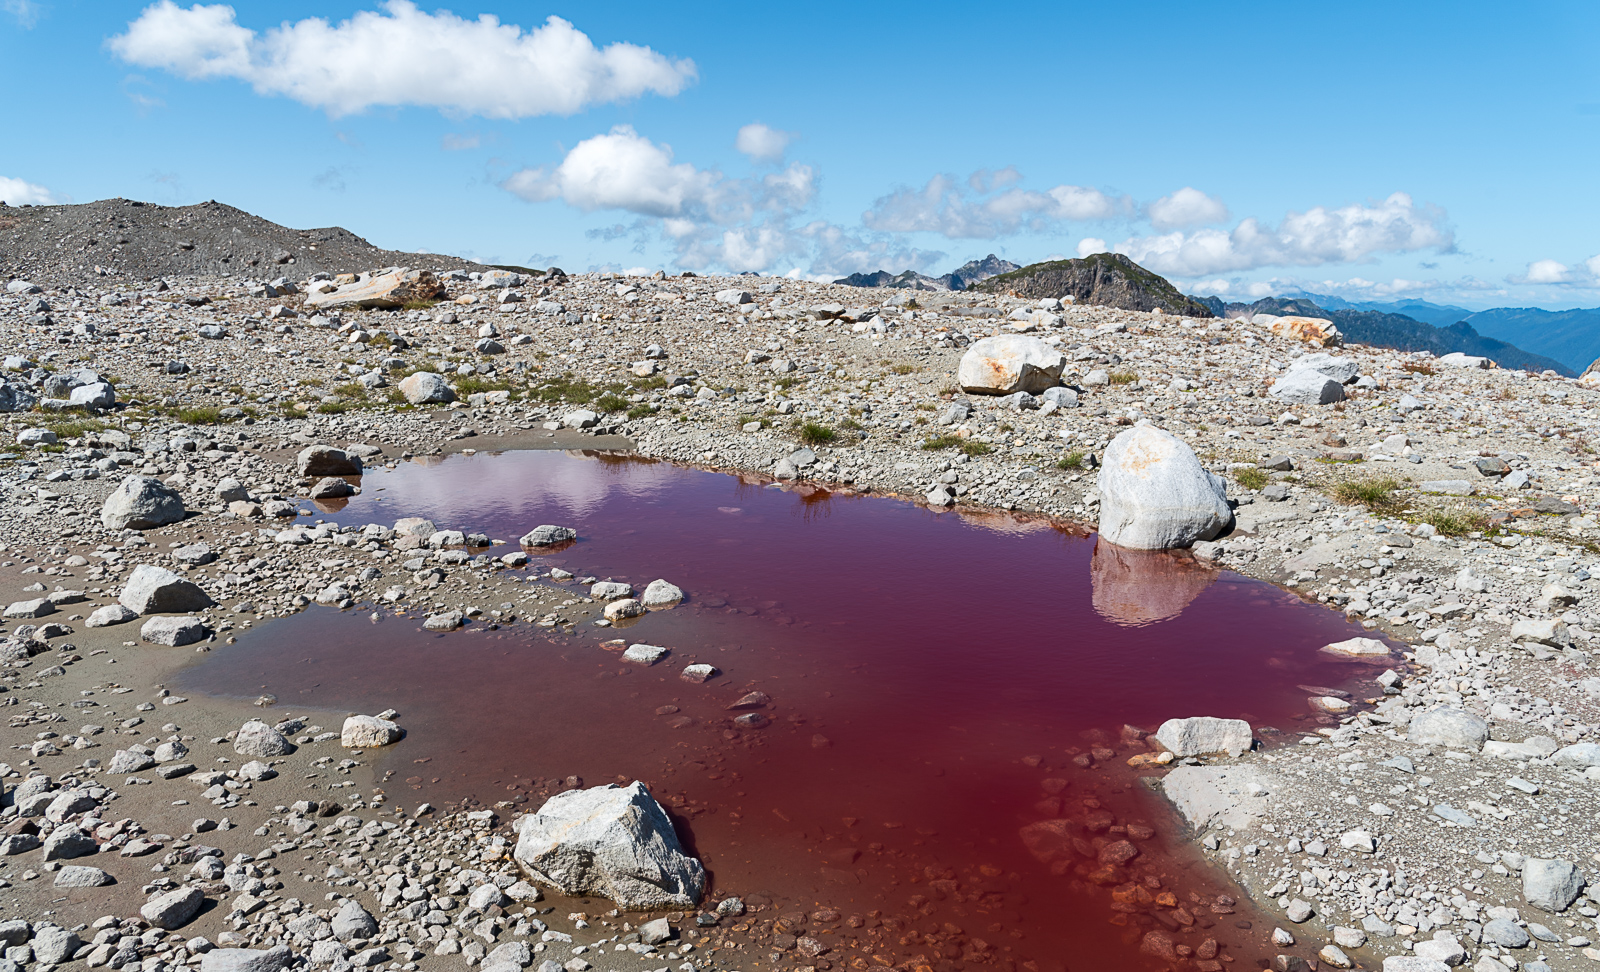
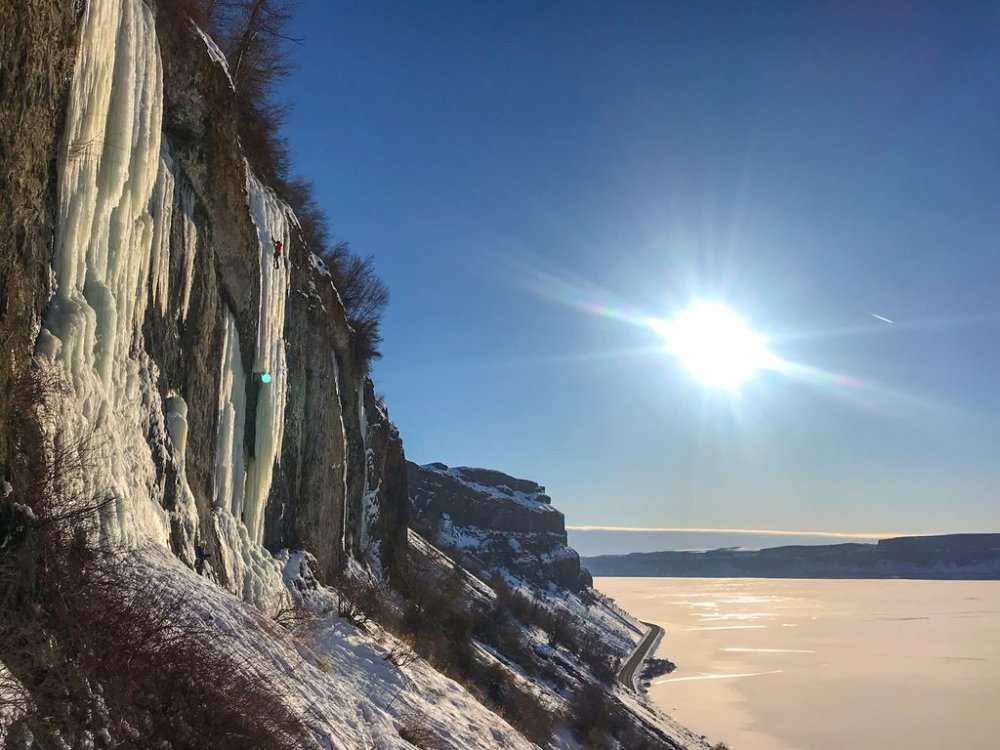
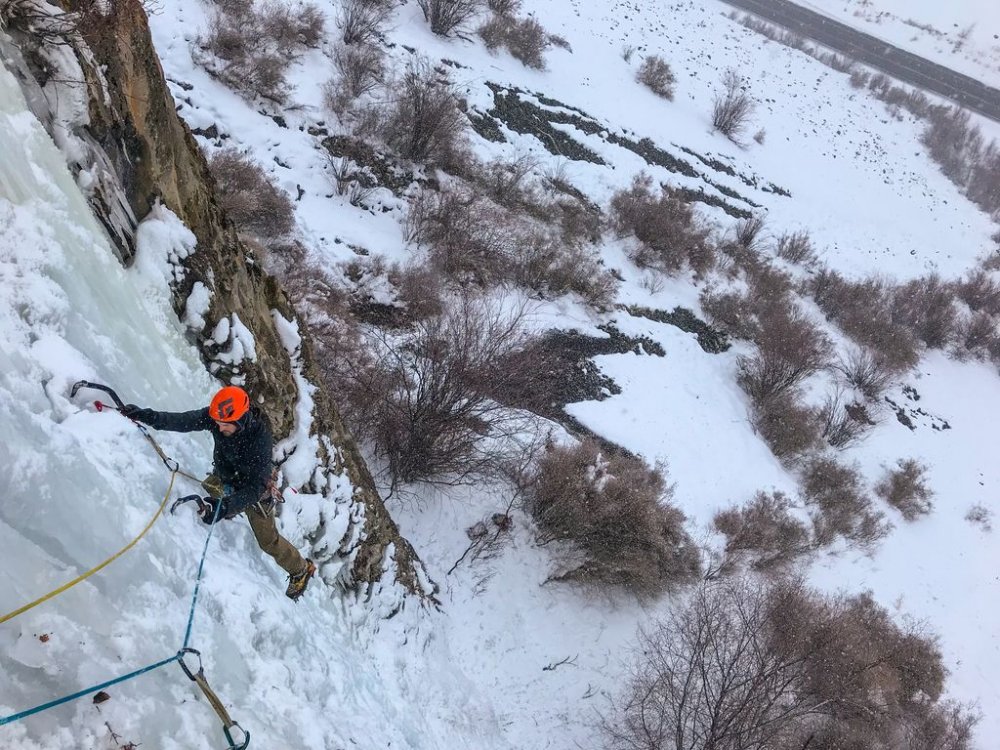
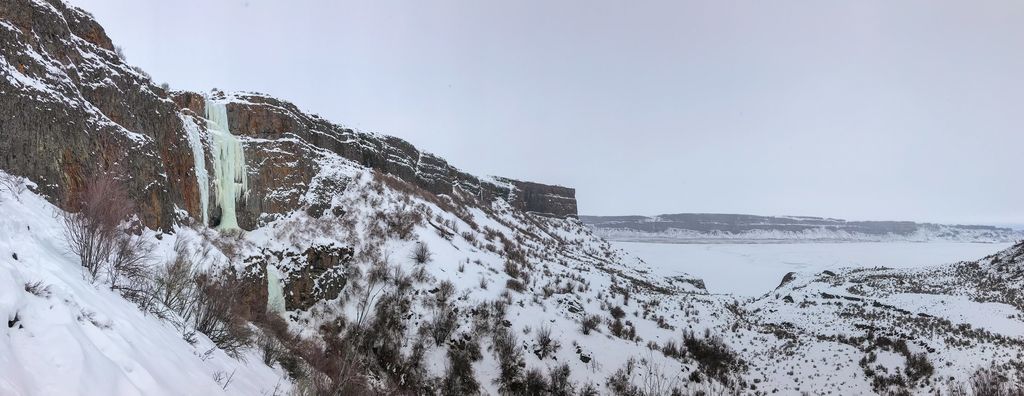
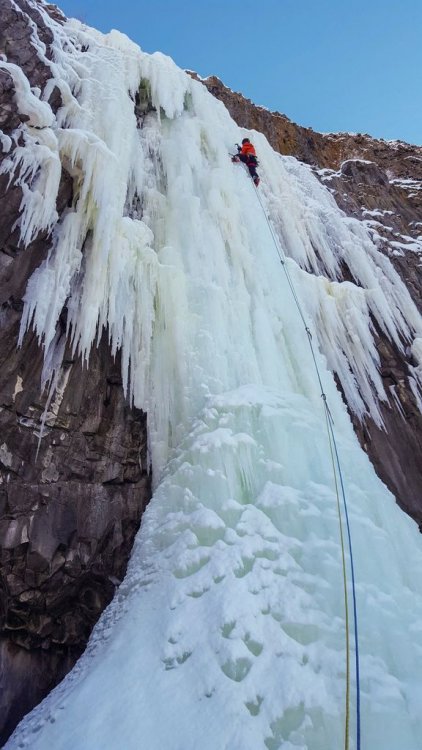
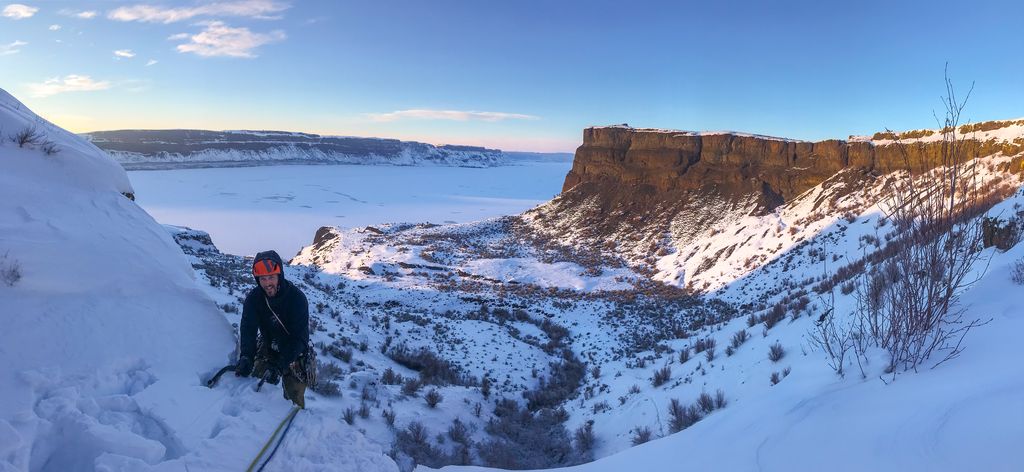
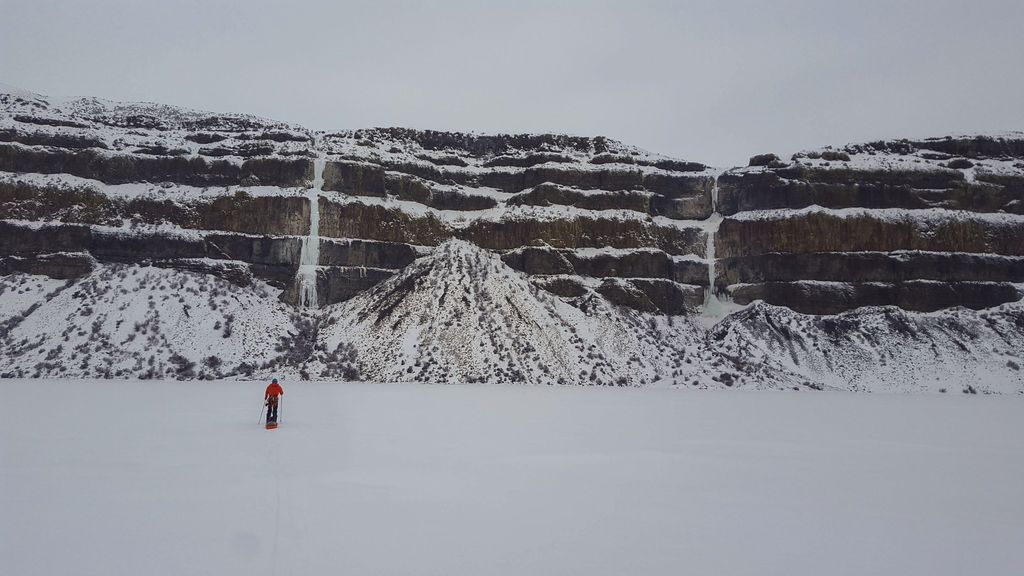
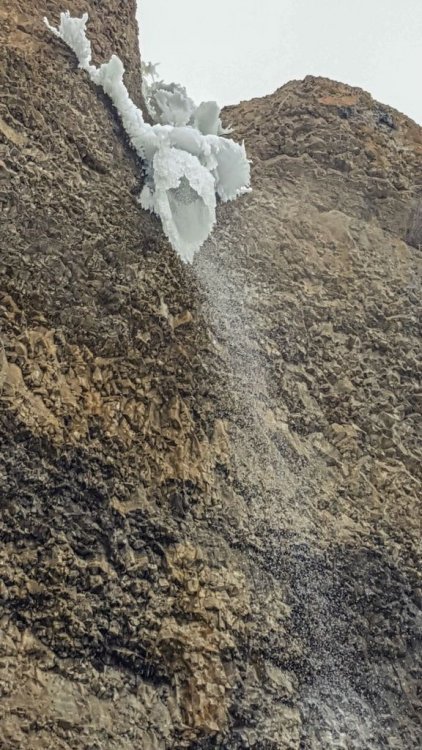
 Trip: Banks Lake, WA - Zenith, Emerald, Cable, Razorblades plus others Trip Date: 03/03/2019 to 03/14/2019 Trip Report: With reports of an incredible season at Banks Lake, my partner (Joe Peters) and I decided we needed to get over there. We drove over on March 3 to find a good place to set up a camp. Joe had to finish a couple things at work, but my wife Trisha came out to climb for the 1st two days until Joe got back. Then Joe and I were able to spend another 9 days climbing some of the wildest ice I have ever been on. Banks lake is that good!! I didn't list any grades in this trip report. Banks is a funny place and I found that grades were tricky to judge. In the end I decided that Wayne Wallace was right when he said..."Grades don't matter, everything here is hard." We camped in Joe's tipi tent which is pretty luxurious complete with stove for heat and drying gear. The best spot we found to camp was right across from Salt and Pepper. Camping limit is 15 days, it was free, and there was a toilet. We were able to sit in camp and stare up at Salt and Pepper every evening. Evening light in our camp. The view of Salt and Pepper from camp. (photo credit Joe Peters) Living it up inside the tipi. With that stove we could be sitting around in a t-shirt. It was absolutely essential for drying out boots and other wet gear after climbing every day. Here is a brief overview of our trip. 3/4 - Peewees #2, 3, 4, 6, and 7 3/5 - Climb below Emerald, Trotsky's Folly and Trotsky's Revenge (also called Phase Transition) 3/6 - Peewees #1 and 5 3/7 - The Emerald and Satan's Panties (also called Absent Minded Professor) 3/8 - Tea 'n' the Sahara 3/9 - The Cable and H2O2 3/10 - Unnamed climb Butch Cassidy in Moses Coulee 3/11 - Bombs over Old Baghdad (the climb across Banks lake at MP3) 3/12 - Shitting Razorblades 3/13 - Salt and Pepper 3/14 - Zenith I will just let the pictures tell the rest of story with a few captions. Peewee's Playground. I referenced these from right to left starting with 1 and ending with 8. Me leading Peewee #4 on the 1st day. A great place to start getting used to Banks ice! (photo credit Trisha Thorman) Craig Pope had just put up this line which he thought was probably an FA. It transitioned from the ice through the rock and out to the hanging dagger. It is Peewee #2 and he named it Turn the Page. This is a couple guys from MT climbing it on TR in the beautiful afternoon sun. The next day Trisha and I climbed this little flow. It was fantastic steep climbing that eased off about half way up. It is right off the road at the Emerald Pullout. It is amazing to me that there are so many of these lines that don't have names. Anywhere else and these good pitches of ice would all be named! Trisha doing a TR lap on Trotsky's Revenge. Day 3 Trisha headed back home and Joe arrived. Here Joe is arriving at the top of the fantastic Peewee #1. This is Satan's Panties (also called Absent Minded Professor). Rumor is that it hasn't come in for multiple years. It was a really fun multi-tiered climb that was a great warmup for the bigger climbs at Banks. The Emerald sits tucked up in a small valley above the main Banks Lake proper. It was a fantastic steep pitch of excellent climbing. It even faced north so it didn't get any sun to ruin the ice! Me leading the Emerald. (photo credit Joe Peters) Joe topping out on the Emerald at the end of a great day! With a cloudy day we decided to brave the lake and head across for some of the bigger lines. Thankfully the lake ice was thick and solid with no noises. The climb directly above me is Tea 'n' the Sahara. The one to my right is unknown.....it never came in this year unfortunately (or at least the dagger never touched down). (Photo credit Joe Peters). A closer view of Tea 'n' the Sahara. This was definitely my favorite climb of the trip. It consisted of 4 steep pitches each about 90-120 feet in length. The ice was typical Banks with plenty of excavating but the position and length of the climbing make it a classic for sure. Joe climbing the final steep 4th pitch. Looking back up at pitch 4 of Tea 'n' the Sahara from rappel. We were able to rappel the entire route with 2 rope stretching 70m rappels......take 70m ropes! (photo credit Joe Peters) The Cable....it is such an amazing, steep, crazy, gymnastic, different route. An absolute must do at Banks. Here Brian Williams is a little past halfway up the long pitch. Me leading the Cable. It is so good......just go do it! (photo credit Joe Peters) The Cable in the setting sun. Next we went to climb H2O2. Here are a couple of unknown climbers on it the night before. Yet another great pitch of climbing right next to the road. Here Joe is putting up H2O2 in the evening sun. The following day we drove over to Moses Coulee. Unfortunately Butch Cassidy and the Sundance Kid were pretty wrecked by the sun. This is an unnamed climb on the same road about 1/2 mile before Butch Cassidy. After reviewing the guidebook and talking with several other people this is actually Butch Cassidy. The climb between Butch and Sundance Kid is unnamed (although climbed). The WA ice guidebook has the wrong mileage to these climbs. Looking up at Unnamed route Butch Cassidy was awe inspiring. There were so many hanging daggers through the steep upper roofs. I gave it a go on lead but ended up sitting on a screw in the roof. I found out I wasn't fit enough to lock off on a tool and clean hanging daggers for that long. Still an awesome experience! Me approaching the large ice roof of hanging icicles. (Photo credit Joe Peters) The next day was cloudy so we headed back across the lake. This climb is right across from MP3. It isn't in the WA ice book and nobody seems to know what it is called. After staring at it disappearing into the fog above we decided to call it Stairway to Heaven. (Edit: sounds like it is called Bombs over old Baghdad) Here is Joe leading up pitch 2. The next day was time to get on Razorblades. This is a climb that had been on my list to do for a while and it didn't disappoint. Some years the first pitch isn't in or so thin that you can't protect it well. This year it was fat! Me leading up the crux first pitch of Razorblades. I don't think I have ever climbed ice by pulling on ice mushrooms with my hands instead of swinging my tools into the ice....fun but funky! (Photo credit Joe Peters) Finally after staring at Salt and Pepper every night for a week, we decided we needed to go and do it. The guidebook made the 1st pitch sound hard and scary. It climbs the loose rock on the left and traverses up the snow ramp to the ice. It was loose, but I found a decent pin and a couple cam placements. You definitely don't need a #3 C4. I would take a couple of KB pins and a set of cams from BD .3 to #1. The crux step of rock is easy 5th but it is loose and a fall would be very bad. Joe climbing up the steep ice of Salt and Pepper. It was a fantastic climb with big exposure. This is looking straight down for about 300 feet. We wrapped up our trip with Zenith. A fitting end to a fantastic trip. It was very fat this year but still steep and long! (Photo credit Joe Peters) Joe and I on Zenith. Being a roadside crag, many times a few people stop and watch. Sue Tebow was one such person but she was kind enough to leave us her contact information so we could get a couple pictures she took. It is always a treat to get both the leader and the follower in the same picture. Thanks Sue! (Photo credit Sue Tebow) A final parting shot of the huge deathcicle above Zenith. It was so fascinating to look up at but we wasted no time in getting out of there. It consisted of a thin hollow tube of ice that extended 30 feet or so below the cliff. Out of the center poured a huge amount of water. (Photo credit Joe Peters) Gear Notes: Ice screws and 70m ropes Approach Notes: Short and easy unless you are crossing the lake!


-
 Trip: Araucanía, Bio-Bio, Ñuble (Chile) - Lonquimay, Llaima, Antuco, Nevados de Chillán, et al Trip Date: 10/01/2019 Trip Report: I enjoyed two great weeks of skiing in Central-South Chile with Joe recently. We left Seattle on the evening of 9/29, skied our first turns on the afternoon of 10/1, last turns on 10/10, and I started my travel odyssey the next day, arriving back home on the 13th. This is the usual prime volcano season, but, as in the PNW, storms can come through at any time. The mountains received a strong and unusually cold storm right before we got there, so rather than skiing the corn we thought we would, we had to make do with dry powder. Luckily the weather was stable enough to get in a number of good summits. As we headed North, following the better weather, the snowpack changed into more typical spring conditions. Big highlights were skiing in the Araucaría (monkey puzzle tree) forests, the quality of the snow, some excellent food finds, and spending time with Chilenos. I'll let the photos speak for themselves. Lonquimay & Corralco ski area Lift-served pow at 5 pm Pow off the top of Lonquimay 4000 ft later Llaima Big graupel from thunderstorms the afternoon before Llaima's impressive summit crater with Lanín (left) and Rukapillán (right) Thousands of feet of moderately steep pow Tolhuaca (which we did not ski) Pucón vibes Antuco Freezing rain crust, Laguna del Laja, and peaks E Views of Sierra Velluda (right, near), volcanoes Callaqui, Lonquimay, Llaima, and Tolhuaca (left to right in distance) Great chalk transitioning into corn The road to Antuco Nevados de Chillán Antuco in the distance, "mountaineering" snow Alpenglow & ash coming from the Chillán Nuevo, Nevados left and Viejo right. View from Onai Thanks, Chopo & Fran! For those of you interested in making a trip like this happen, the detailed beta is pretty easy to come by. If you are perhaps interested in a guided trip, Joe will be offering one next year through Pro Guiding Service with similar dates. The focus will be on keeping it budget friendly and focused on good skiing. Some other little plugs: Coni at Masajes Pucón did an excellent job helping my tight muscles on our down day, highly recommend if you're in Pucón Onai hostel, run by Chopo Díaz, who is one of the most decorated freeriders in Chile, is an awesome place to stay in Las Trancas, near Chillán Gear Notes: Standard + ski lifts at Corralco Approach Notes: Aeromexico -> Santiago, Sky Airlines -> Temuco, rental Subaru XC
 -
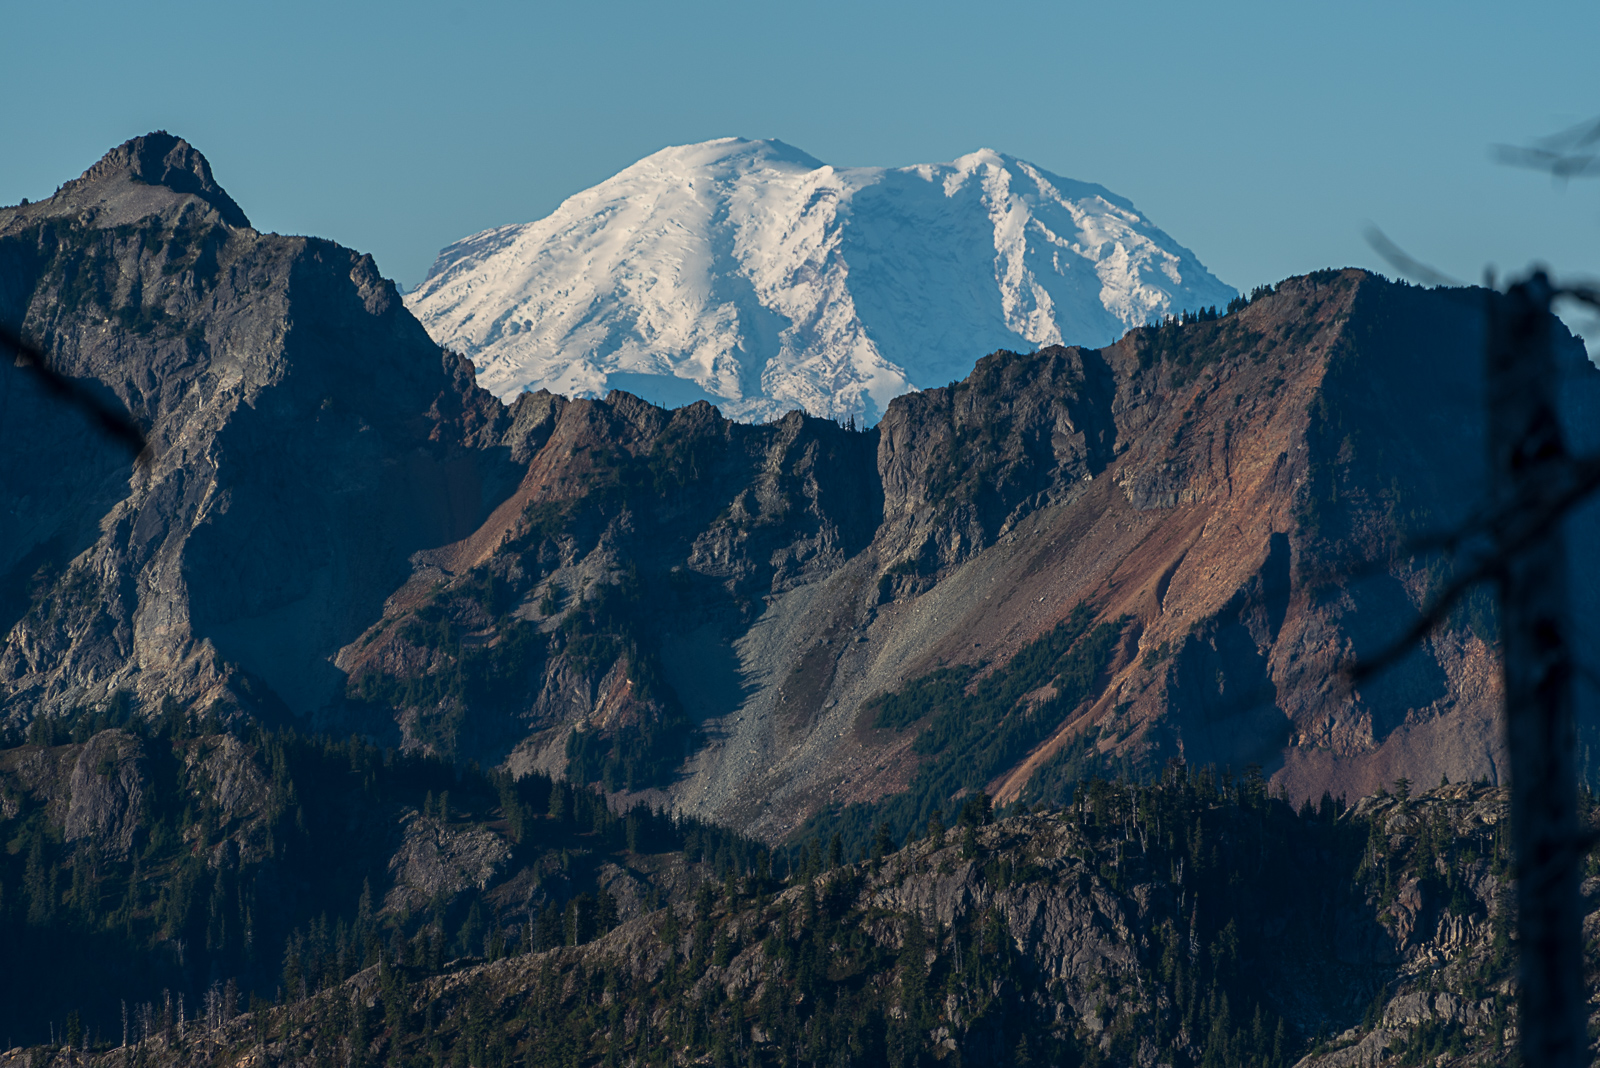
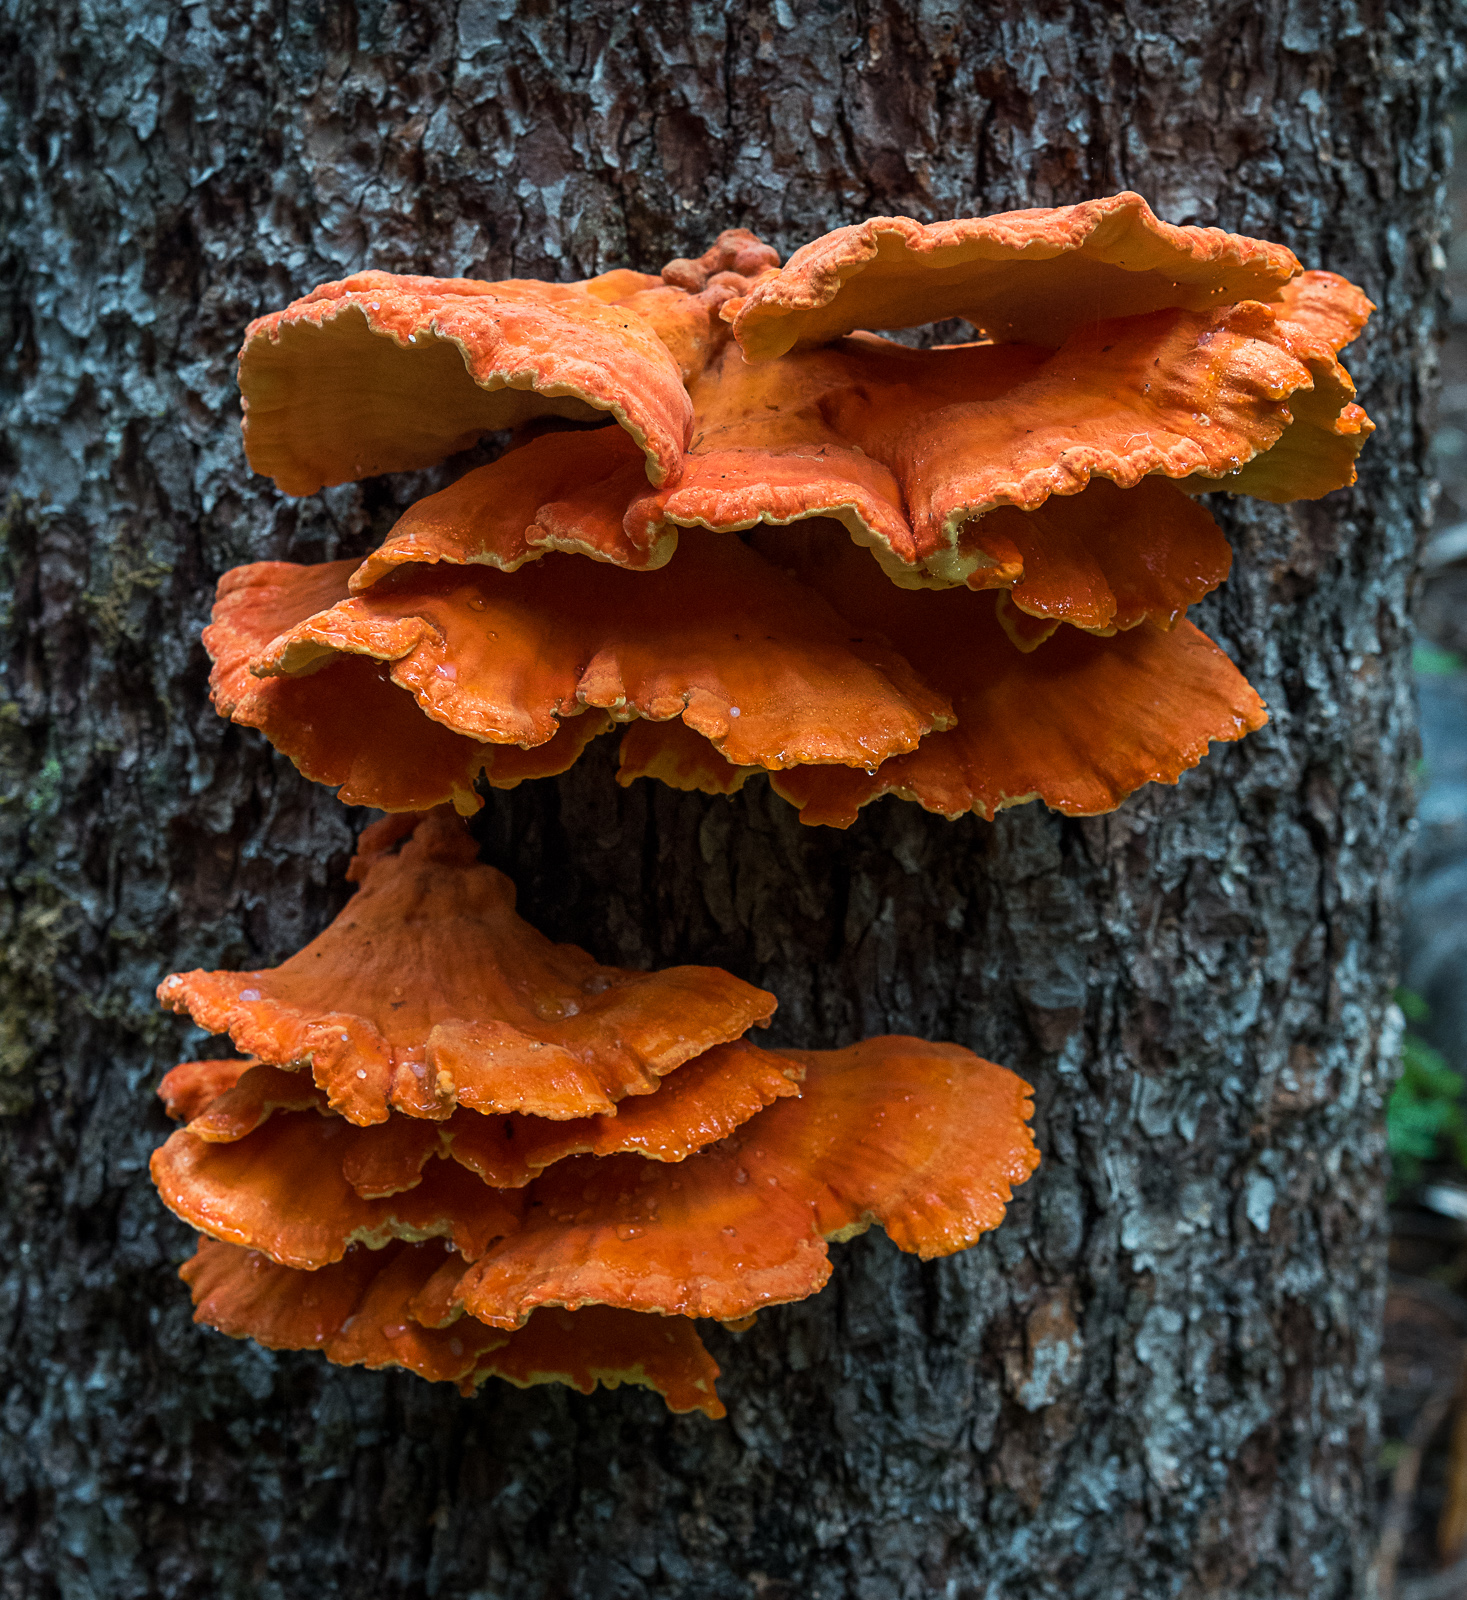
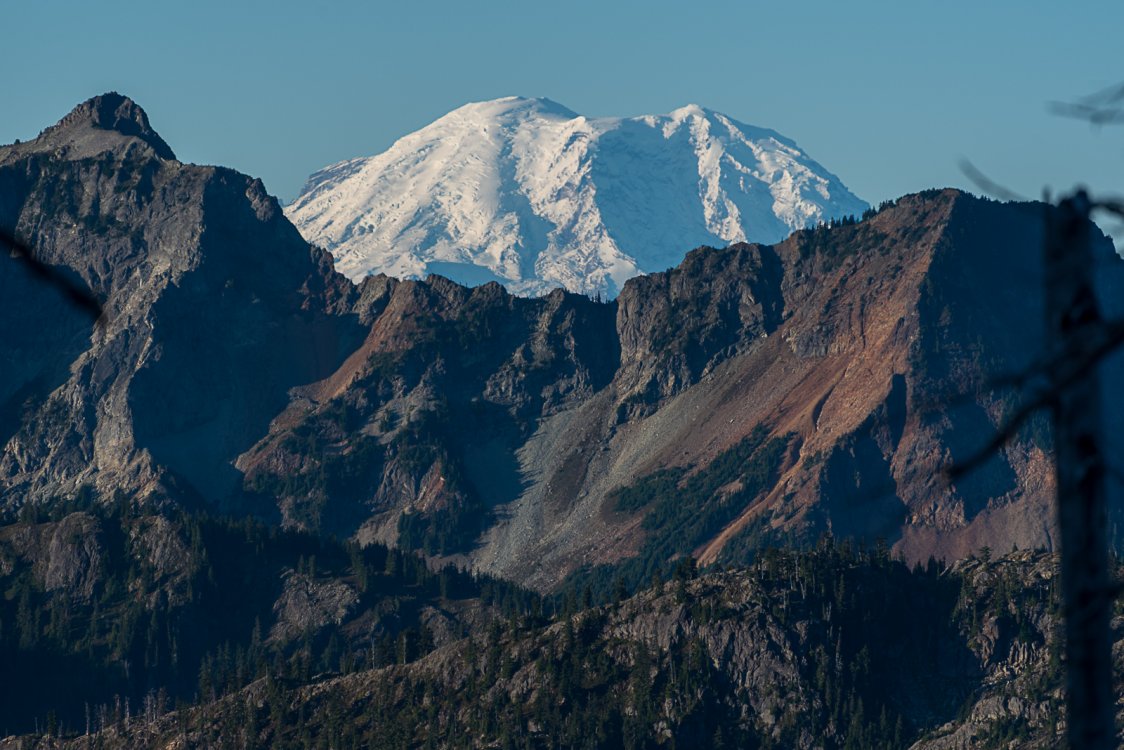
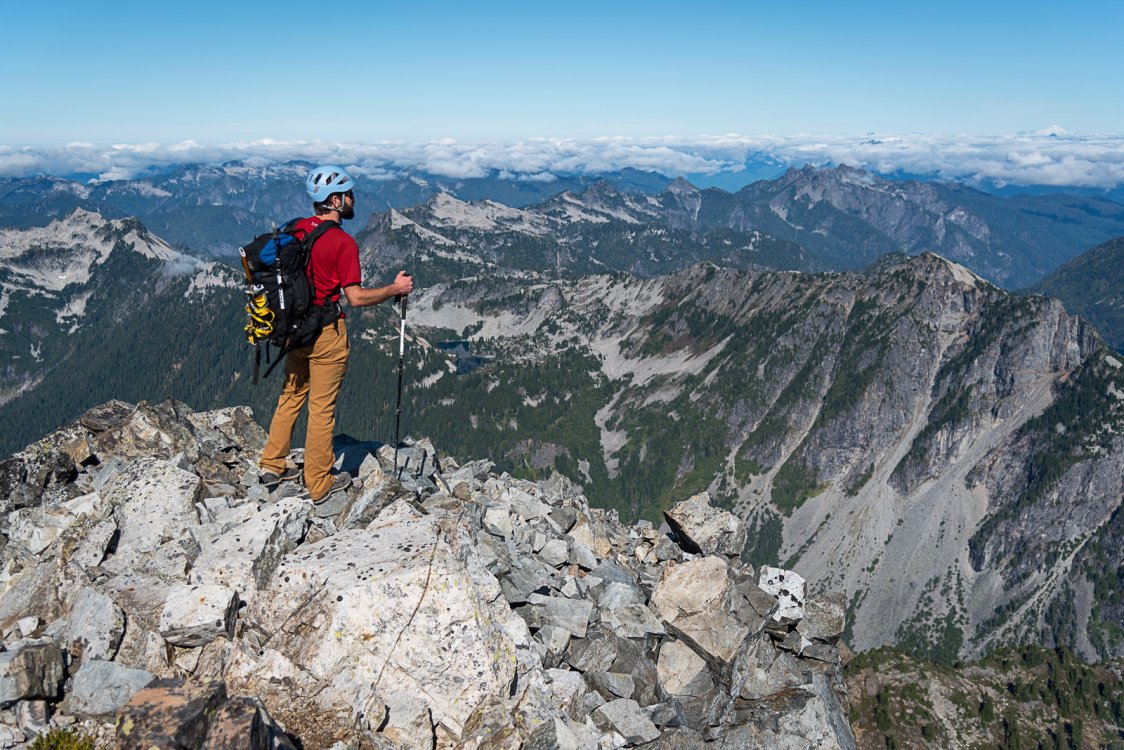
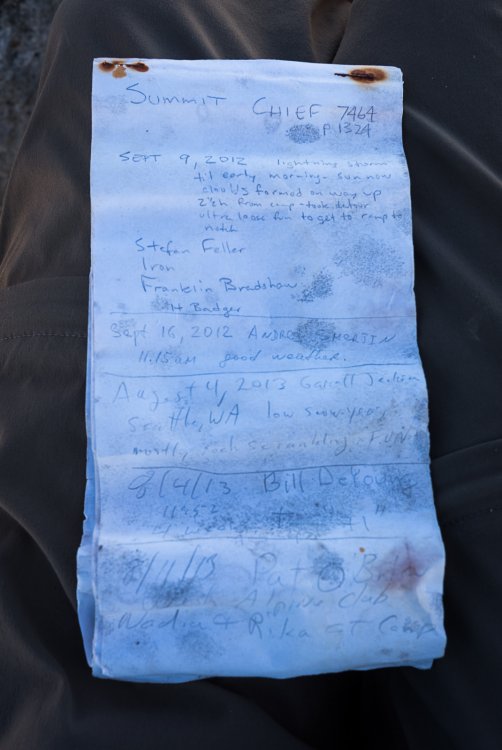
Trip: Summit Chief - Standard Scramble Trip Date: 09/21/2019 Trip Report: I'm normally not one to hike in and out in the rain, but desperate times call for desperate measure and the end of summer is one such occasion. So, armed with a glimmer of hope in the forecast we marched in to Vista tarns last weekend with our sights set on Summit Chief and Little Big Chief. The former was a Smoot and the latter, well, it looked cool. Spoiler alert, we got the Smoot (straightforward Cl. 3 once you deciphered the description correctly) but not the little one, which proved to be more time consuming in late season than we had the desire for. Still, the area has much to recommend, as you'll see in the photos below. It isn't nicknamed Snoqualmonix for nothing- probably the most rugged terrain south of Hwy 2 is found in this area, and not a lot of peak baggers....yet. Judging by the summit register on Summit Chief, this area is rapidly becoming popular. Going from 1-2 parties a year to 11 this year. So, I guess, I'm part of the problem. And so it goes. Lucky shot: East Face of Chimney Rock: Summit Chief on the left and Middle Chief on the right: Stuart and Waptus Lake: Rainier, Chimney Rock, Overcoat Peak (L-R): Summit of Summit Chief: RIP Franklin: Glacial recession is a bitch: Little Big Chief: We opted to scramble up here and enjoy the afternoon, rather than rushing to climb LBC and arrive at camp after dark: Last dip of summer in an unnamed lake on the way back from LBC : This one: LBC: Three Queens: Bear's Breast (L) and Mount Daniel behind on the right: Overcoat: Chimney Rock and Overcoat in early morning light: Chicken of the Woods: Cooper River in the rain on the way out: Gear Notes: helmet, ice axe, crampons Approach Notes: Pete Lake Trail to PCT to Vista Tarns. We cam out the Escondido ridge "trail" but I wouldn't recommend going up that way.


-
Trip: Columbia Peak - West Spur Trip Date: 10/06/2019 Trip Report: Sunny skies = had to get out. Light snow cover = nothing "in" season Solution = scramble! Columbia Peak from the Monte Cristo area, standard route. 21 miles, 5700' vertical, 11.5 hours. We had a great time I believe. It's always good to get out and get some sun in October and it felt extra sweet this year with all the crappy early fall weather. Columbia was a good choice, mellow, but with a couple of spicy spots to make it feel real. There were 3 or 4 places where a fall would have been gnarly and we had to introduce some mixed skills, but no ropes required. A bit more snow would make it better/safer still, so feel free to be inspired to hit this up yet this year. It was a fun shoulder season trip. @Albuquerque Fred please contribute some photos if you would. Max McHale is a lurker and thus will not be @mentioned. Fred and Max taking a break at Monte Cristo: An easy step below the gully: Fred descending the gully: Max downclimbing: Gear Notes: Axe, crampons, poles, bikes. Approach Notes: Bike wagon road 5 miles to Monte Cristo. Trail is in great shape, hit snow at the 4820' saddle and switched from runners to boots.
-
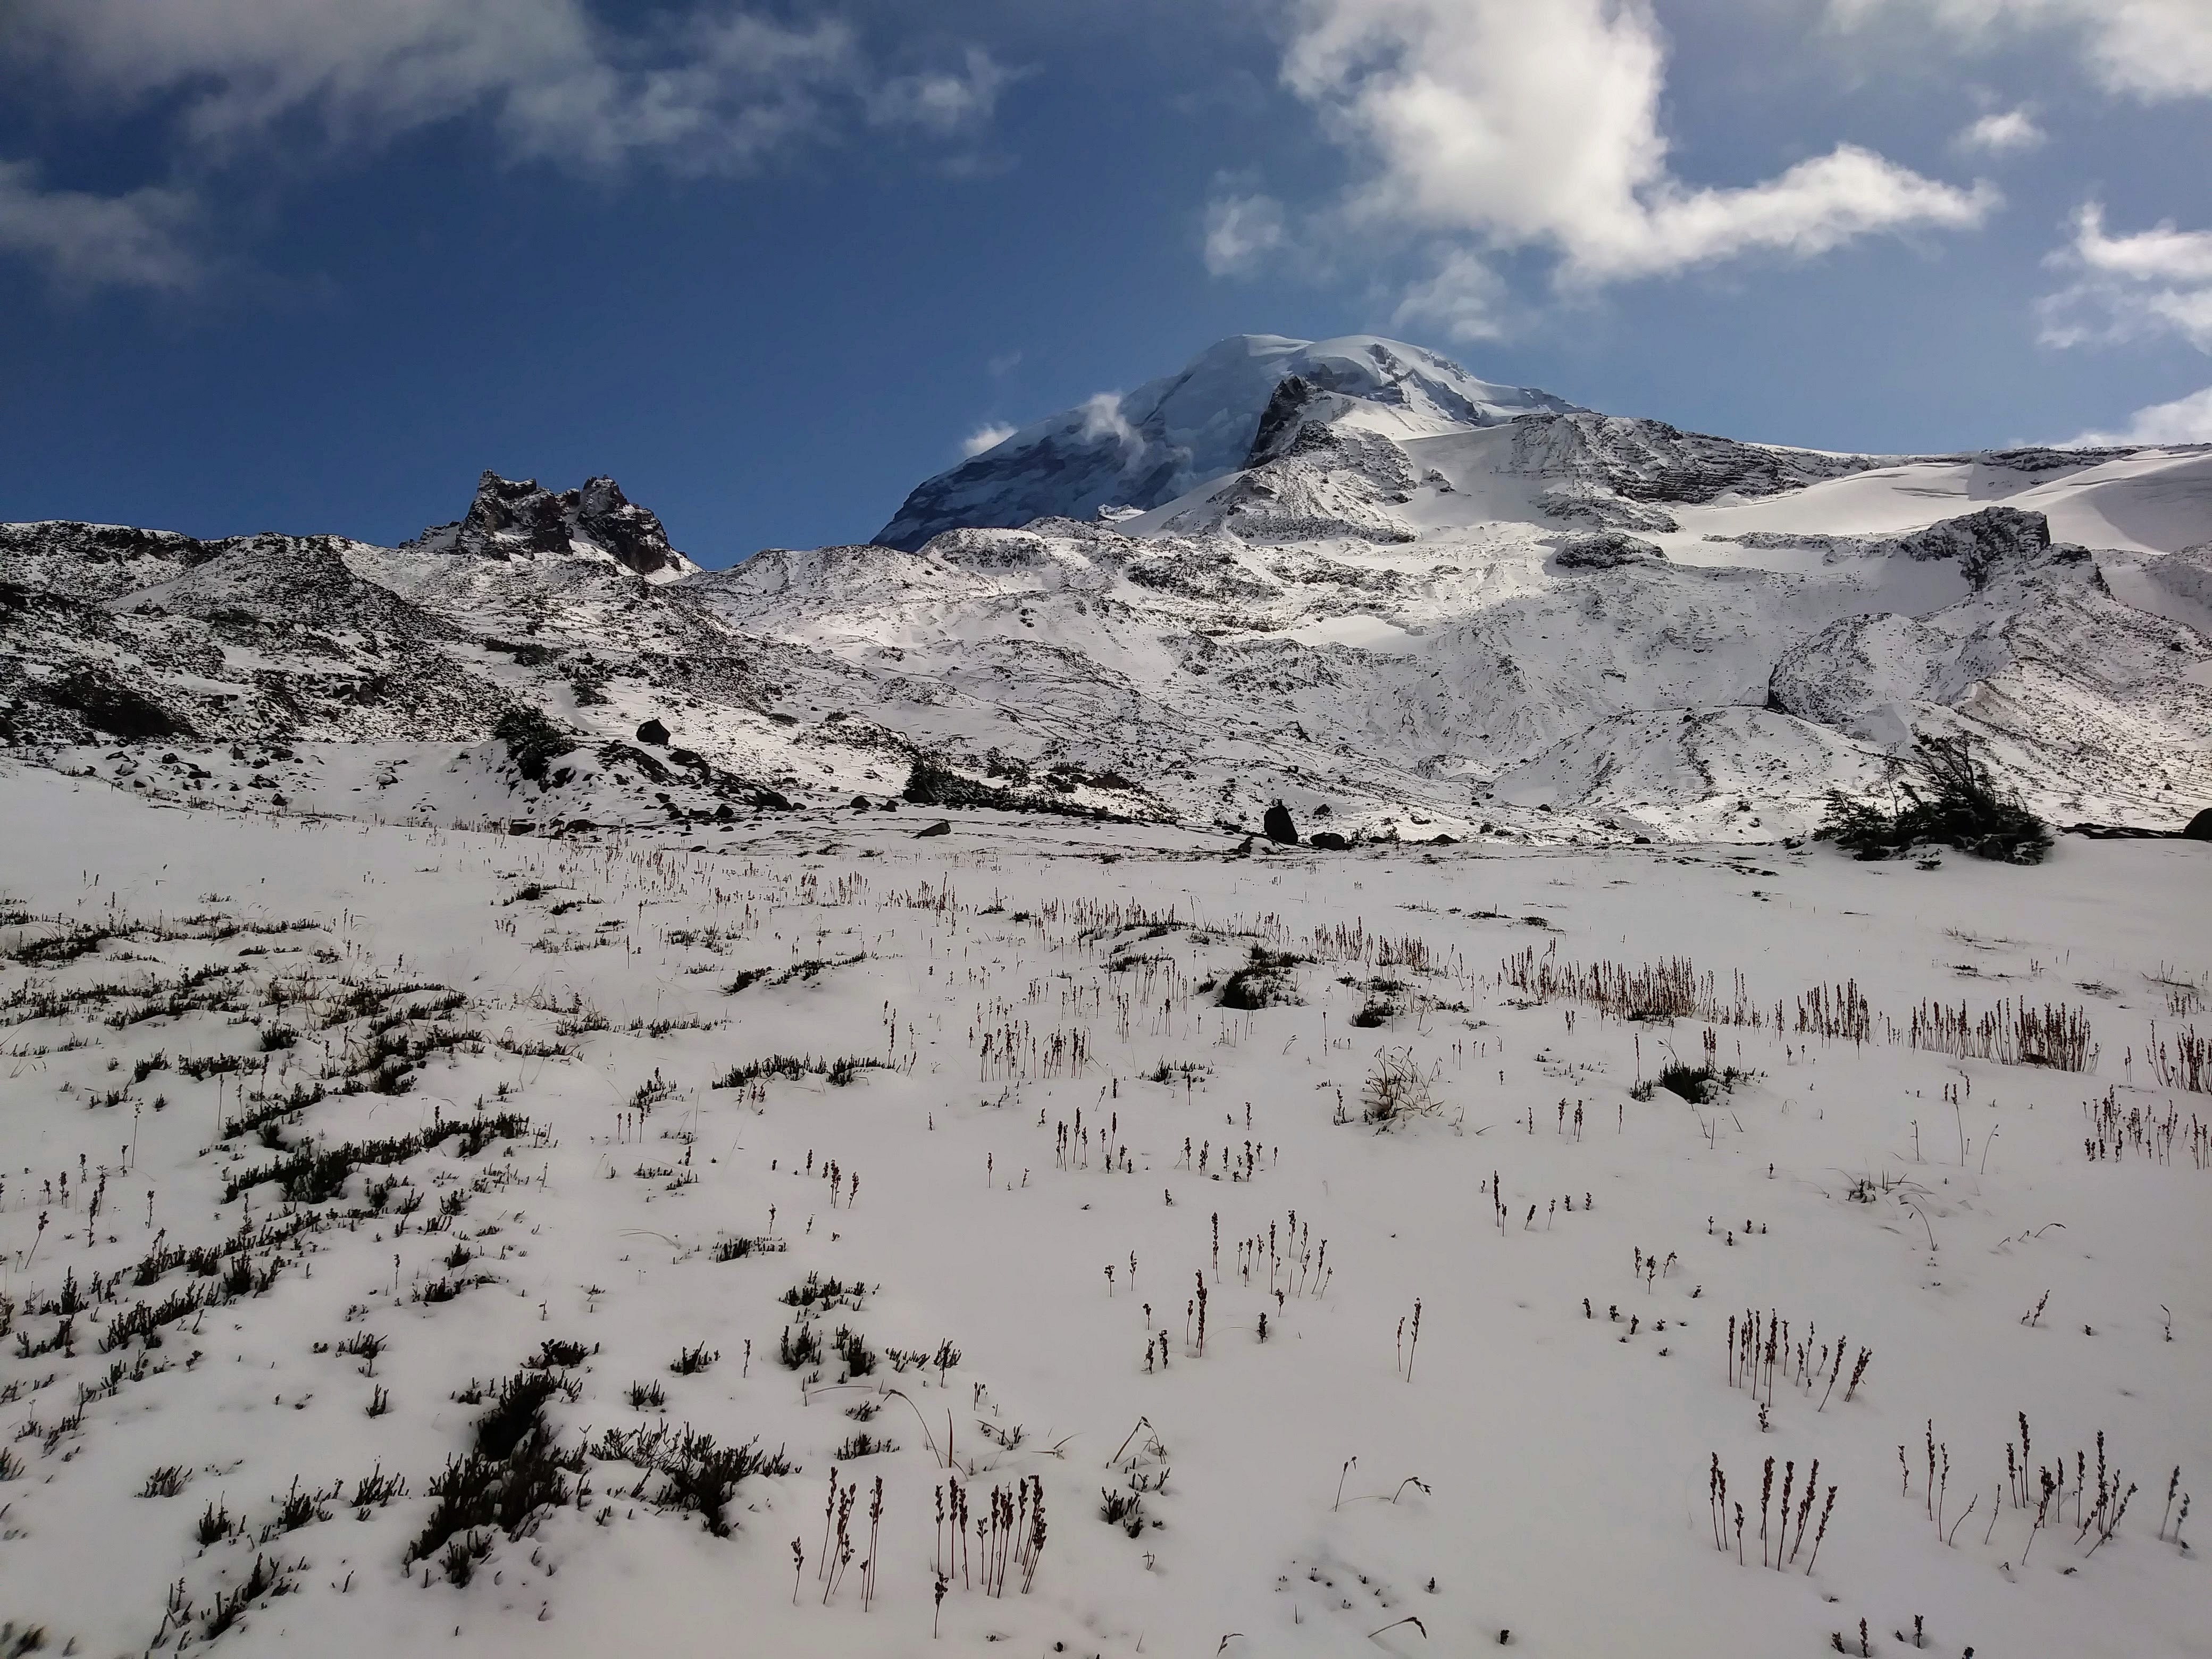
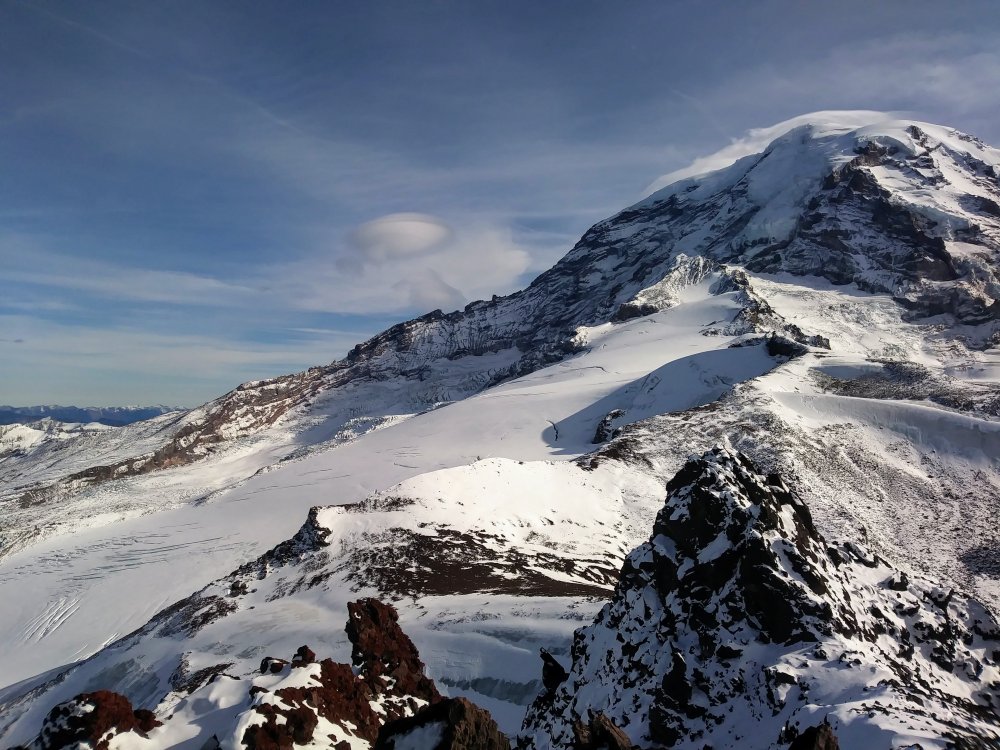
 Trip: Observation Rock easy ice + Flett Glacier skiing - North Face Trip Date: 10/06/2019 Trip Report: This past weekend, Aaron and I had a great trip with amazing weather, excellent conditions, and spectacular views! Spray Park trail On Saturday we set off into Spray Park and then in alternating snow/low clouds and hot sunbreaks we bumbled around looking for a supposed three-sided shelter that the ranger had told me about (not the one near Cat Eye lake and not the one just east of there...) but ended up finding a pretty great spot anyway. Things cleared up by the evening, beautiful sunset! Woke up Sunday morning to two-inch needle ice in the pebbles around our tent, and set off to the base of the north face of Observation Rock. We roped up, Aaron took us up the first third or so of the face (moderately steep snow), leaving two pitches of moderate alpine ice that we pitched out (alongside three pairs of Mountaineers...). Fun stuff! Fun! Photo: Aaron We slogged up to the summit of Observation Rock with Tahoma wearing a lenticular, got our views of the glacier down below we'd be skiing, Baker, Glacier, Stuart, MSH, and the littler ones... Walking up to the summit of Observation Rock Then descended around and east, finally put the skis on our feet, and had lots of glorious wind-packed pow turns! Aaron: "I've seen you excited, but I don't think I've ever seen you *this* excited..." Yahoooooooo! Photo: Aaron Photo: Aaron A spectacular way for Aaron to climb his first ice in Washington and break in his first pair of AT skis and for me to get my 24th month of TAY and lead some ice! Gear Notes: Tools, pons, skis Twin/half ropes, screws Approach Notes: Spray Park trail and onward/upward


-
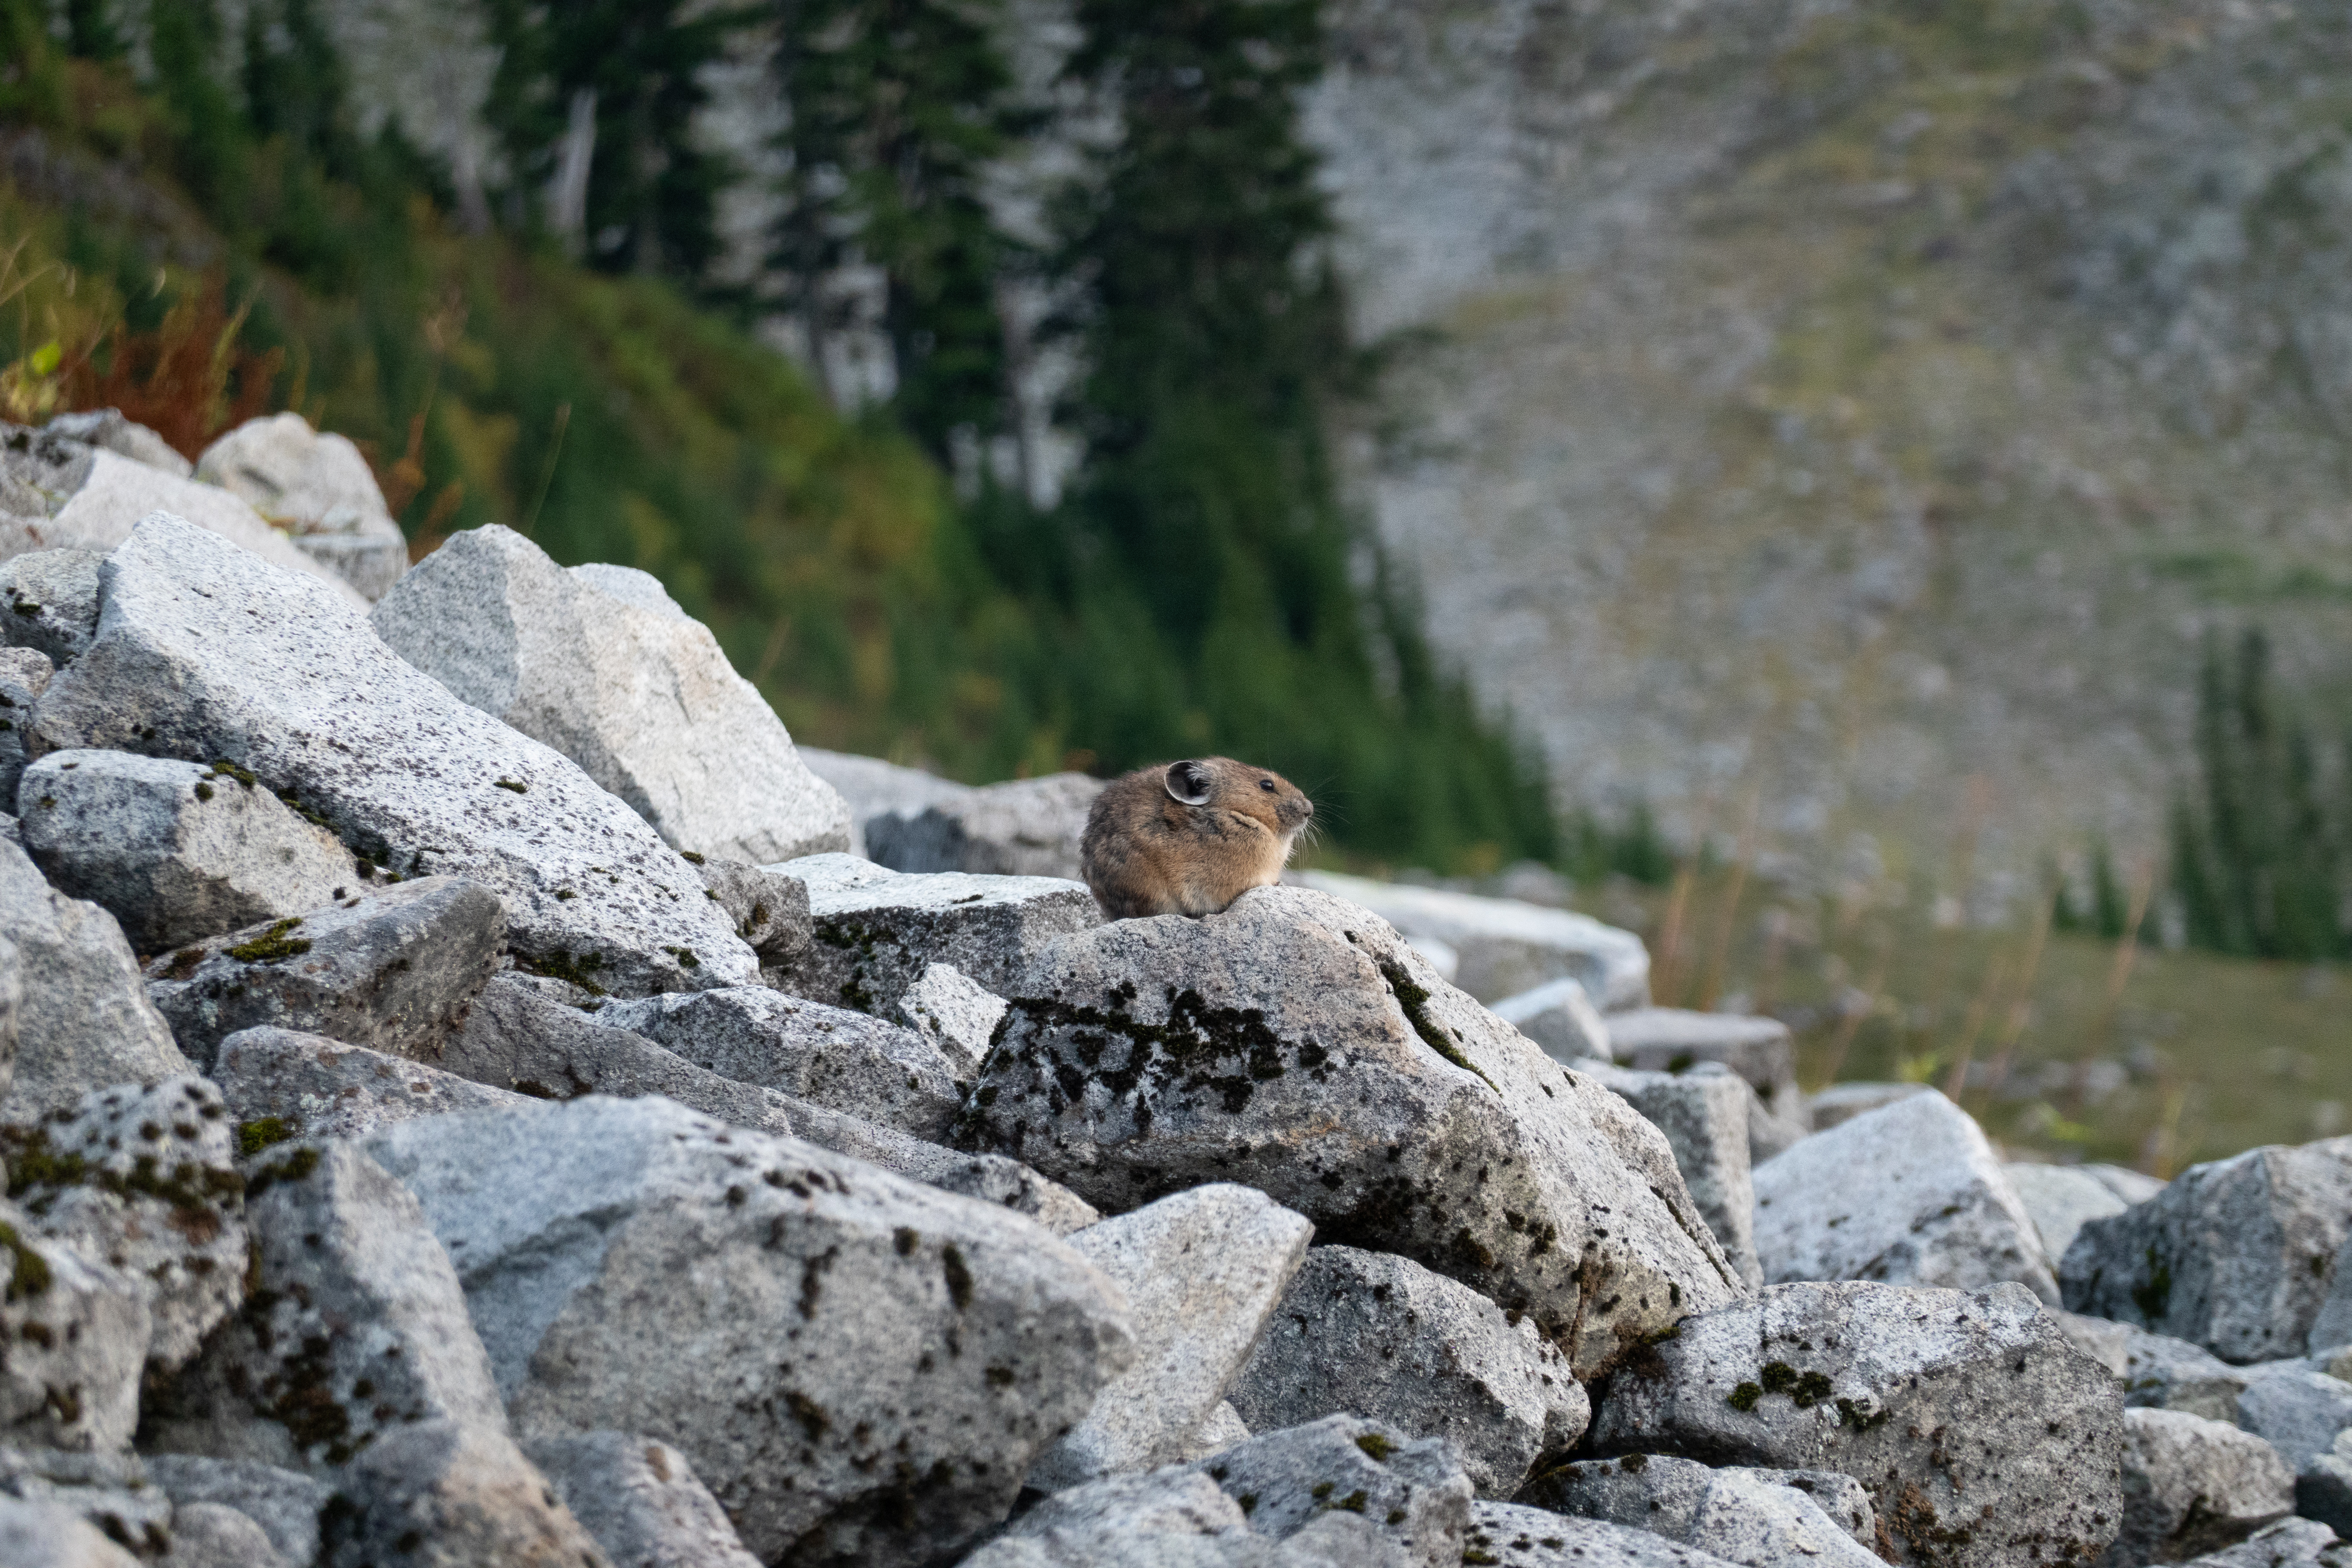
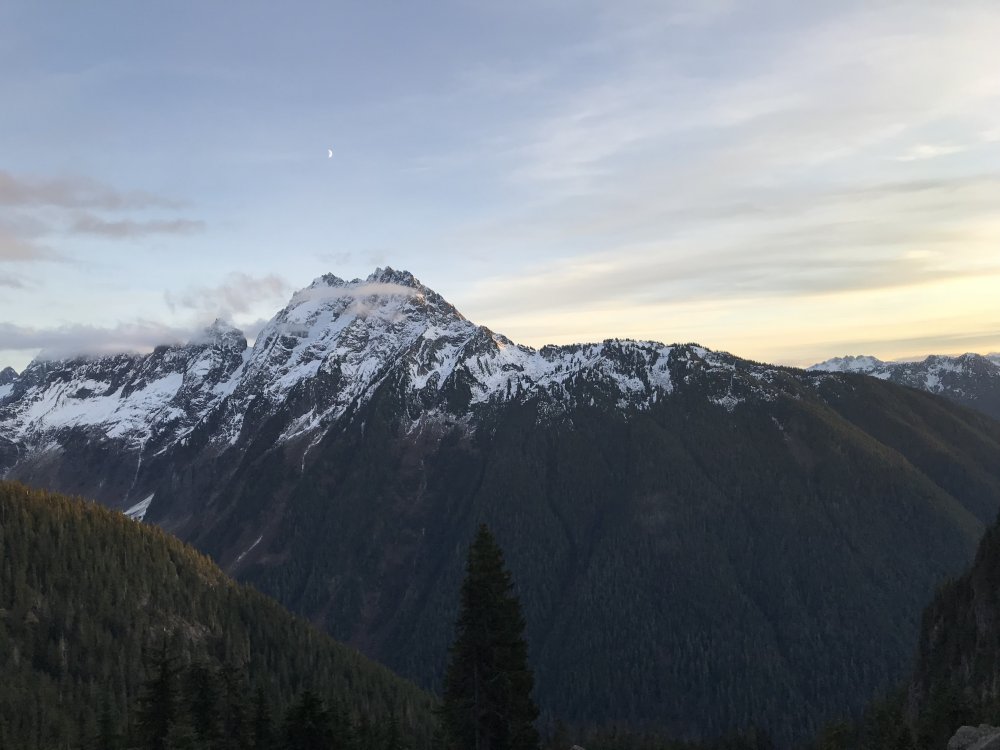
Trip: Shuksan - Fisher Chimneys Trip Date: 09/21/2019 Trip Report: Missed this mountain over the summer. Fortunately the snow has returned and it will be time to ski soon. I had never been on Shuksan in the summer before and it was pretty wild to see these glaciers without a thick coat of snow. Winnie's Slide was melted down to ice and two tools were nice. Upper Curtis was broken up but still easily navigable. Substantial fresh snow above 7.5k. S gully of the summit pyramid had an inconvenient amount of snow so we decided to try a circumnavigation of the summit instead. Couldn't find a reasonable way onto the Crystal Glacier so we made a short loose scramble up Point 8165 and called it good. Got back to the car right at dark for a 14 hour day. Photos: 1. Winnie's Slide 2. Hell's Highway 3. Spooky S Face of Nooksack Tower 4. Jagged Ridge and Seahpo Peak with the Pickets behind 5. Sulphide 6. Pika All photos: https://photos.app.goo.gl/mETUJJNBMGku3Tdr7 Gear Notes: 2 tools, a few cams, ice screws, 60m rope Approach Notes: Lake Ann to Fisher Chimneys


-
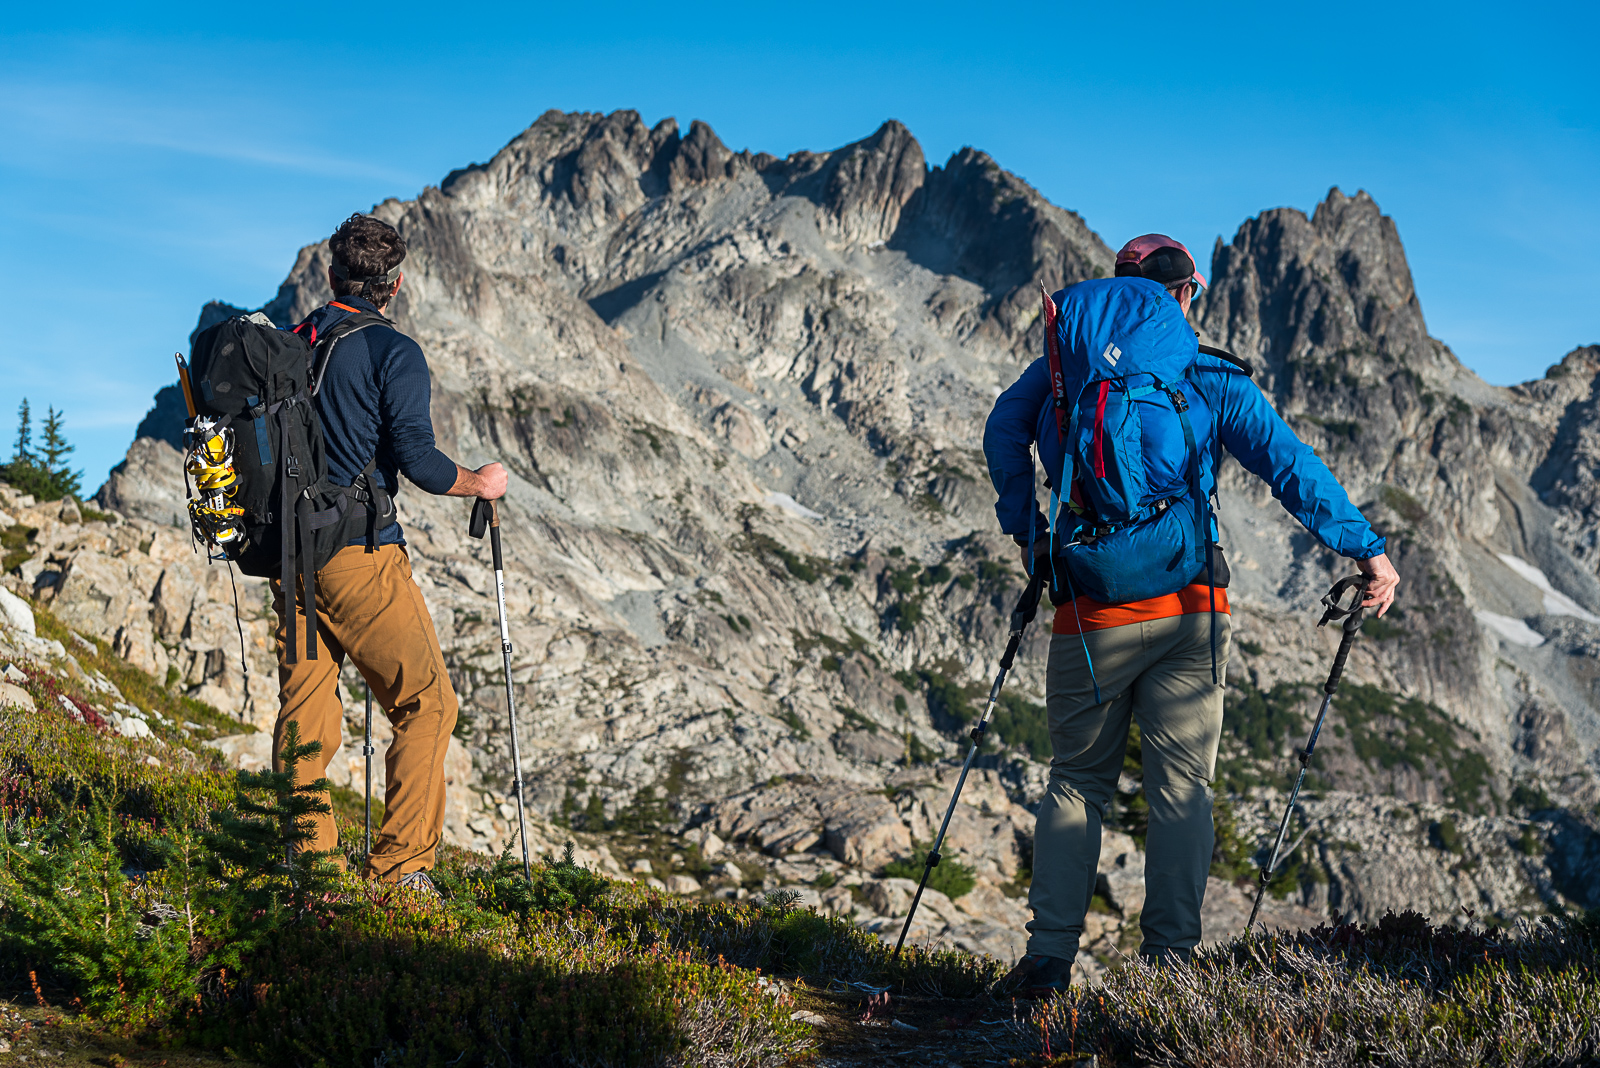
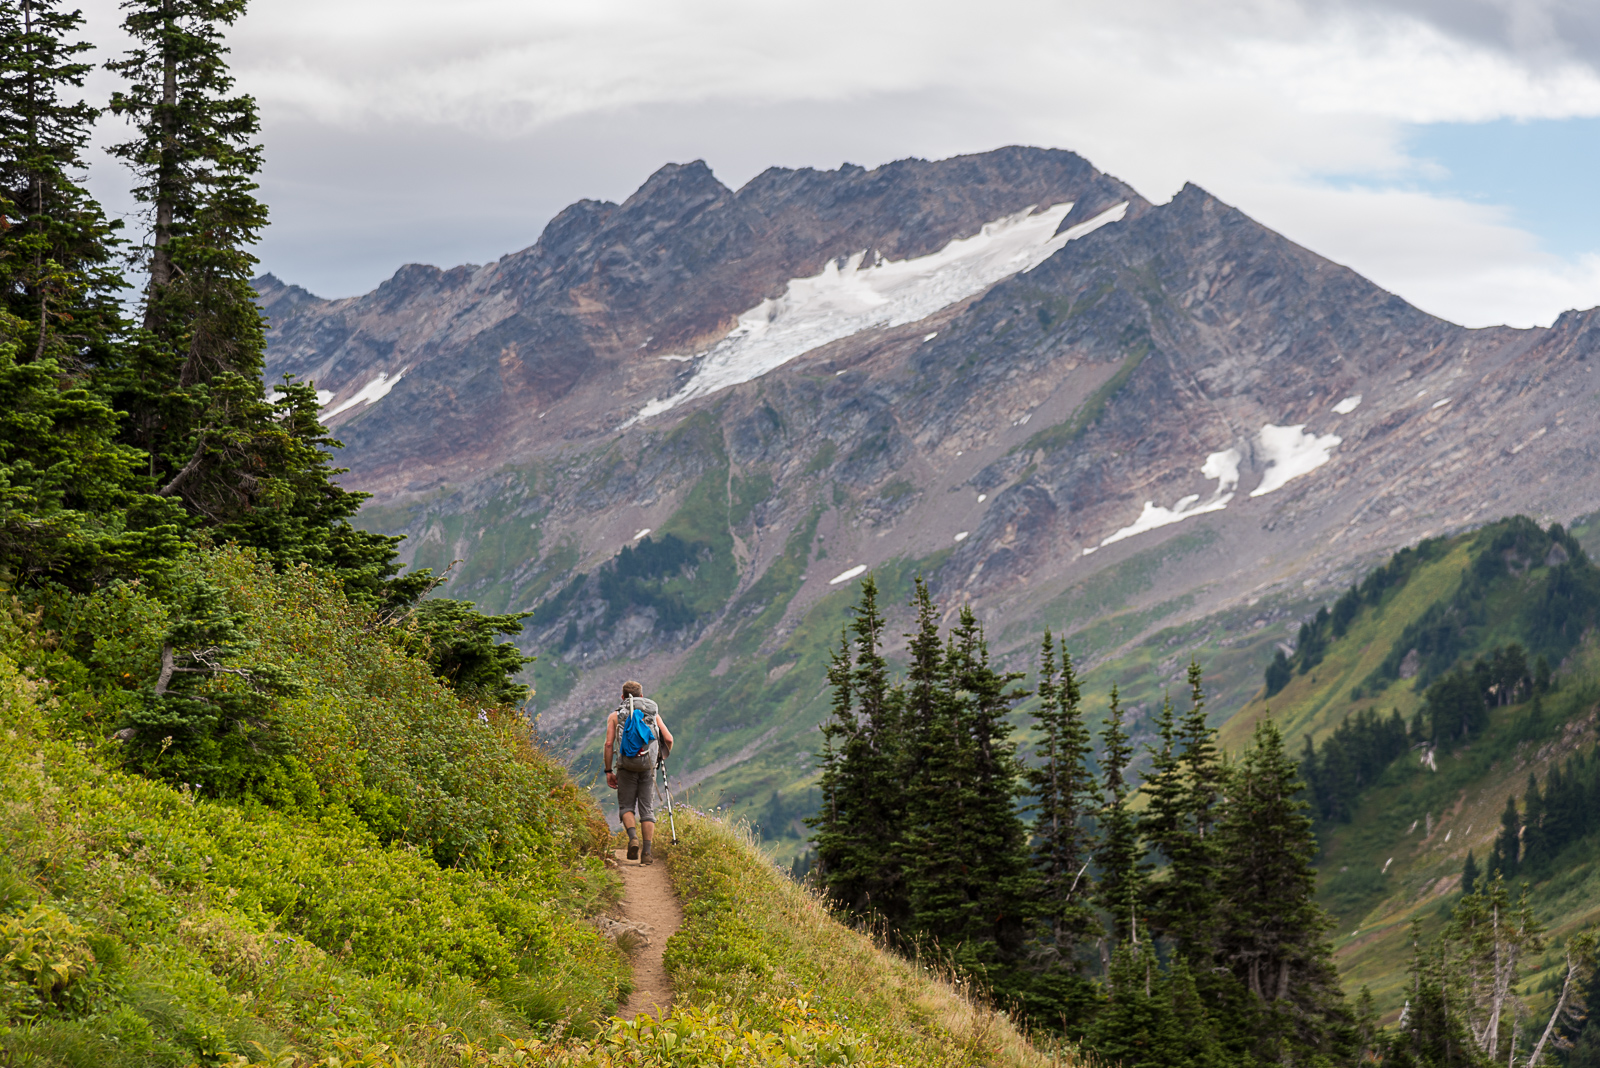
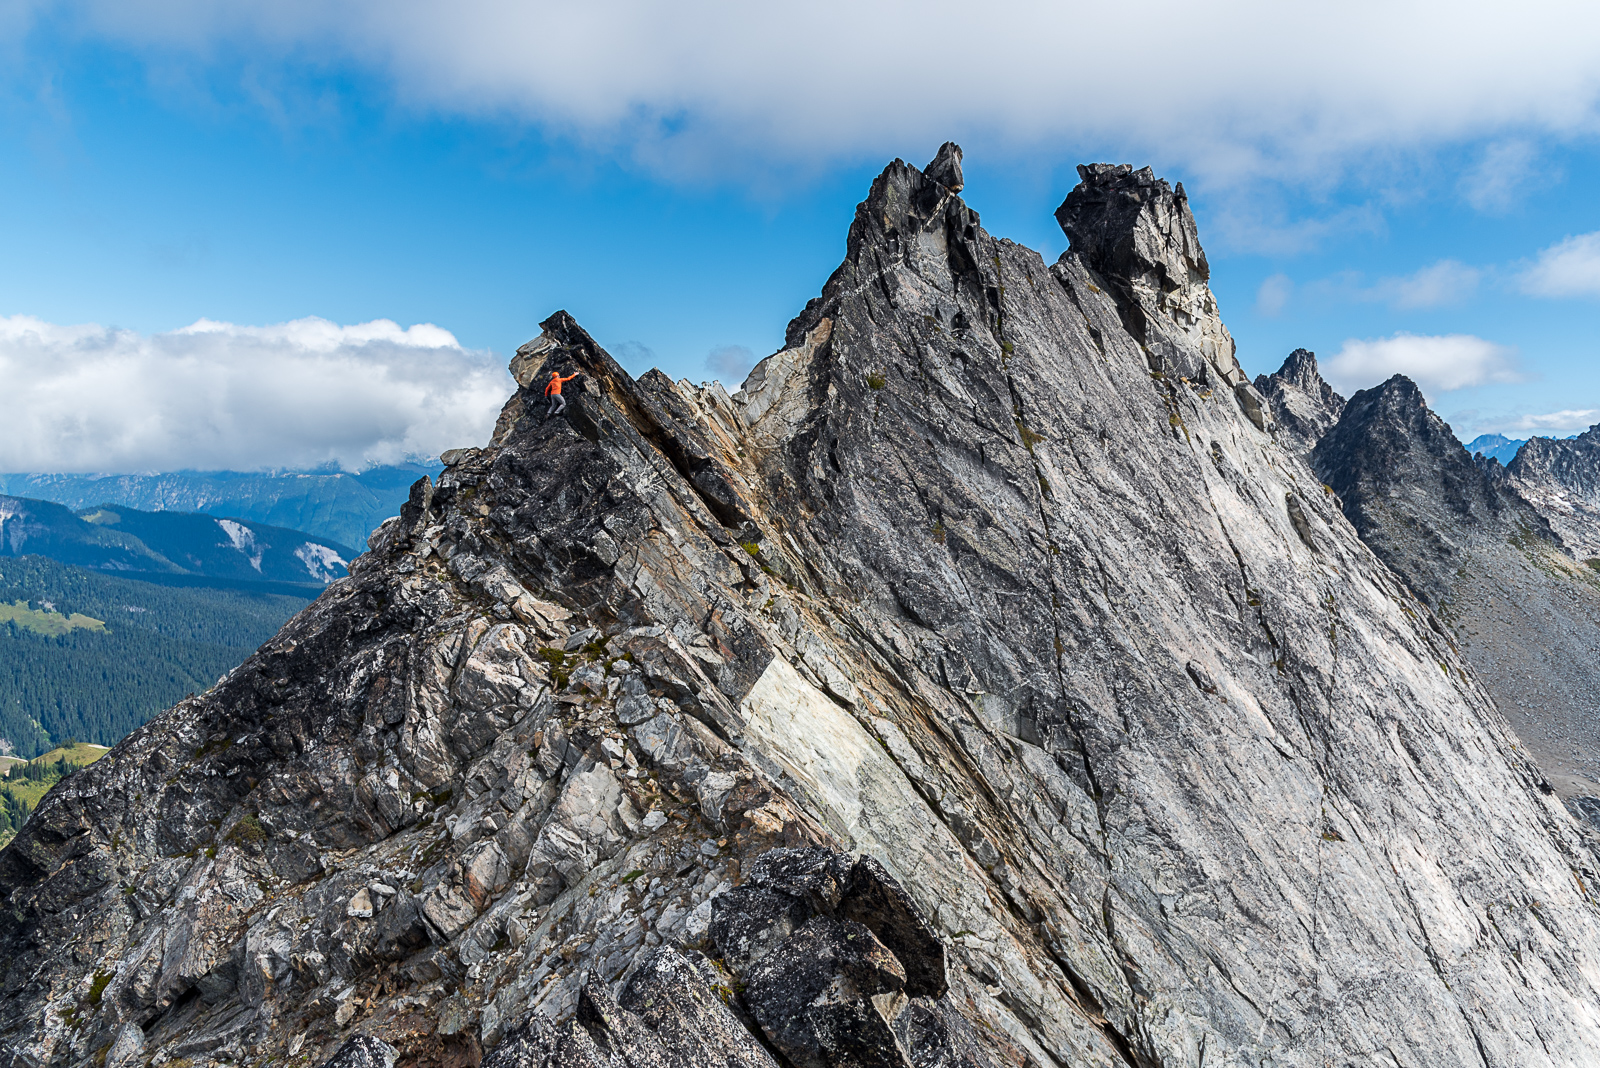
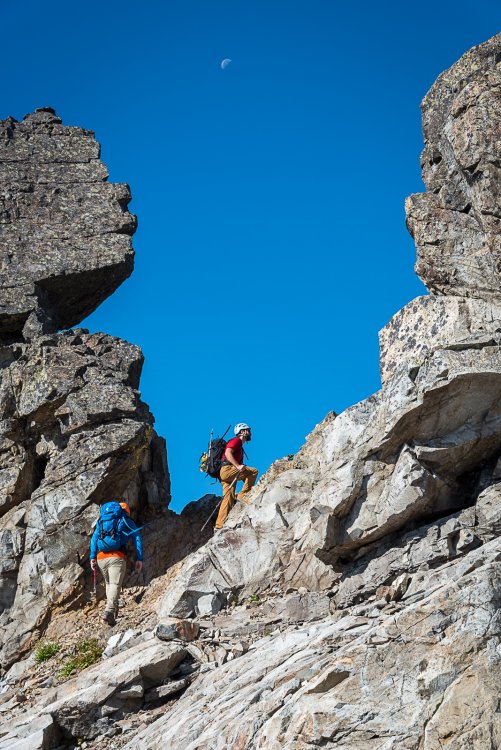
Trip: Mt. Triumph - NE Ridge Trip Date: 09/21/2019 Trip Report: On Saturday @willgovus and I climbed Mt. Triumph's NE Ridge in a day, roughly 16.5 hours c2c. Camped at the trailhead and set the alarm for dark and early. Only two other cars there, possibly camping around Thornton Lakes. Approach went pretty smooth through the brush around the lakes, felt like hiking through a car wash. Took about 4 hours to get to the base of the ramp before the notch at the start of the NE Ridge. The only snow travel was a ~50yd patch after the notch above Thornton Lakes. After that it was walking along mostly dry slabs. We made the mistake of staying little too high initially on the slabs only to get cliffed out, but found a mellow mossy ramp down lower on the slabs. I'd recommend staying low on the slabs until after crossing the big gully in the middle of the cirque. Climbing on the ridge was almost entirely done simuling, with pitched out sections at the cruxes. I thought the rock quality from after the vegetated beginning to the high gulley towards the top to be really good. The rock was damp here and there and keeping the soles of our shoes dry was a challenge. The 5.7 "off width" crack was pretty fun and protected well, even though a bit moist in spots. I imagine other, easier variations exist on the north side. After the high gulley we traversed the south side on heather ledges and scrambled up to the summit. The scrambling near the top it quite loose and nerve wracking and doesn't get any better when having to down climb. If doing this again I would bring the rope up to rappel down this section. It took us about 3 hours from the notch at the base of the ridge to get to the summit. It took about 2 hours to get back down to the notch at the base, mostly rappelling and simuling the lower angle sections of the ridge. Cant remember how many rappels we did exactly, though enough to make me glad we were only a group of two. Some rappels with a 60m rope ended up being just short of the next station which we delt with just by down climbing 5 to 10ft. Reversed the long hike out and got back to the car around 6:30pm. This is easily one of the more amazing ridge climbs I've ever done. This thing is long and delivers the false summit effect a few times along the way. Very happy to sneak in one more big outing before things get even more rainy around here! Gear Notes: Cams .3 to 3, set of nuts, 7 alpine draws and 5 double length runners. 60m rope is fine if you don't mind down climbing a bit of easy 5th to get to the next station a few times. Otherwise, if you have a 70m that's somehow lighter I'd bring that. Approach Notes: Approach shoes, aluminum crampons and a light axe
-
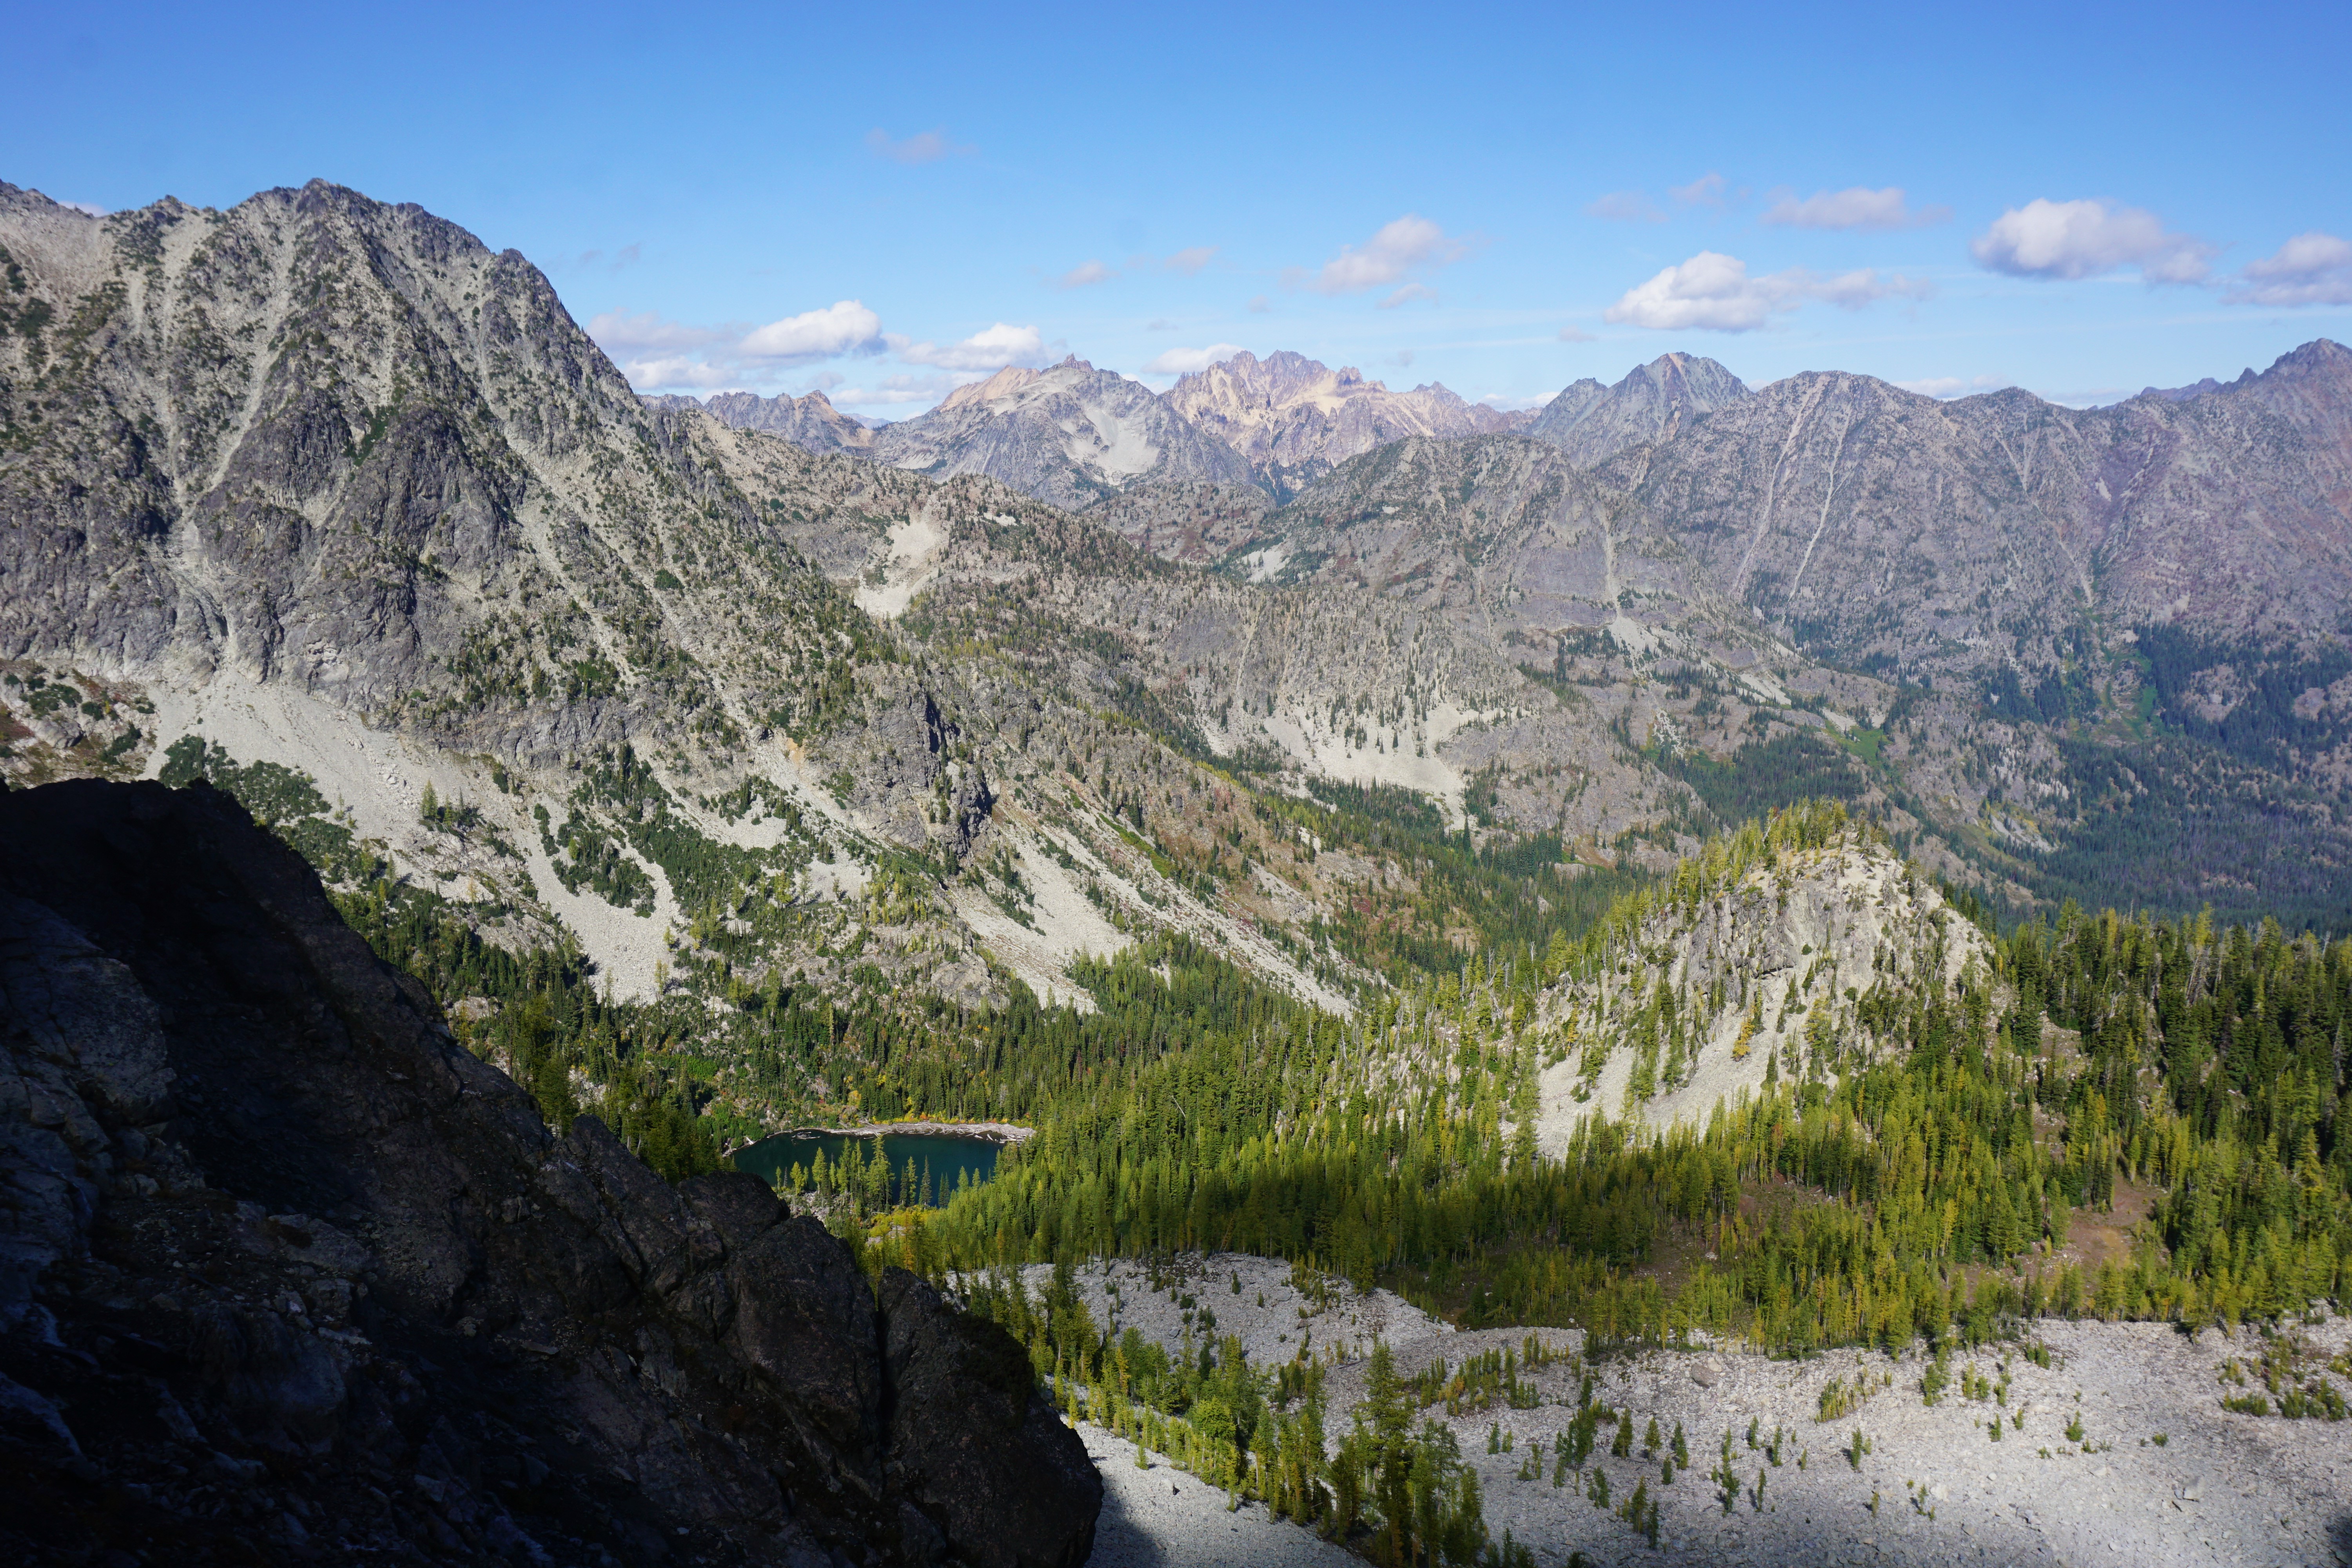
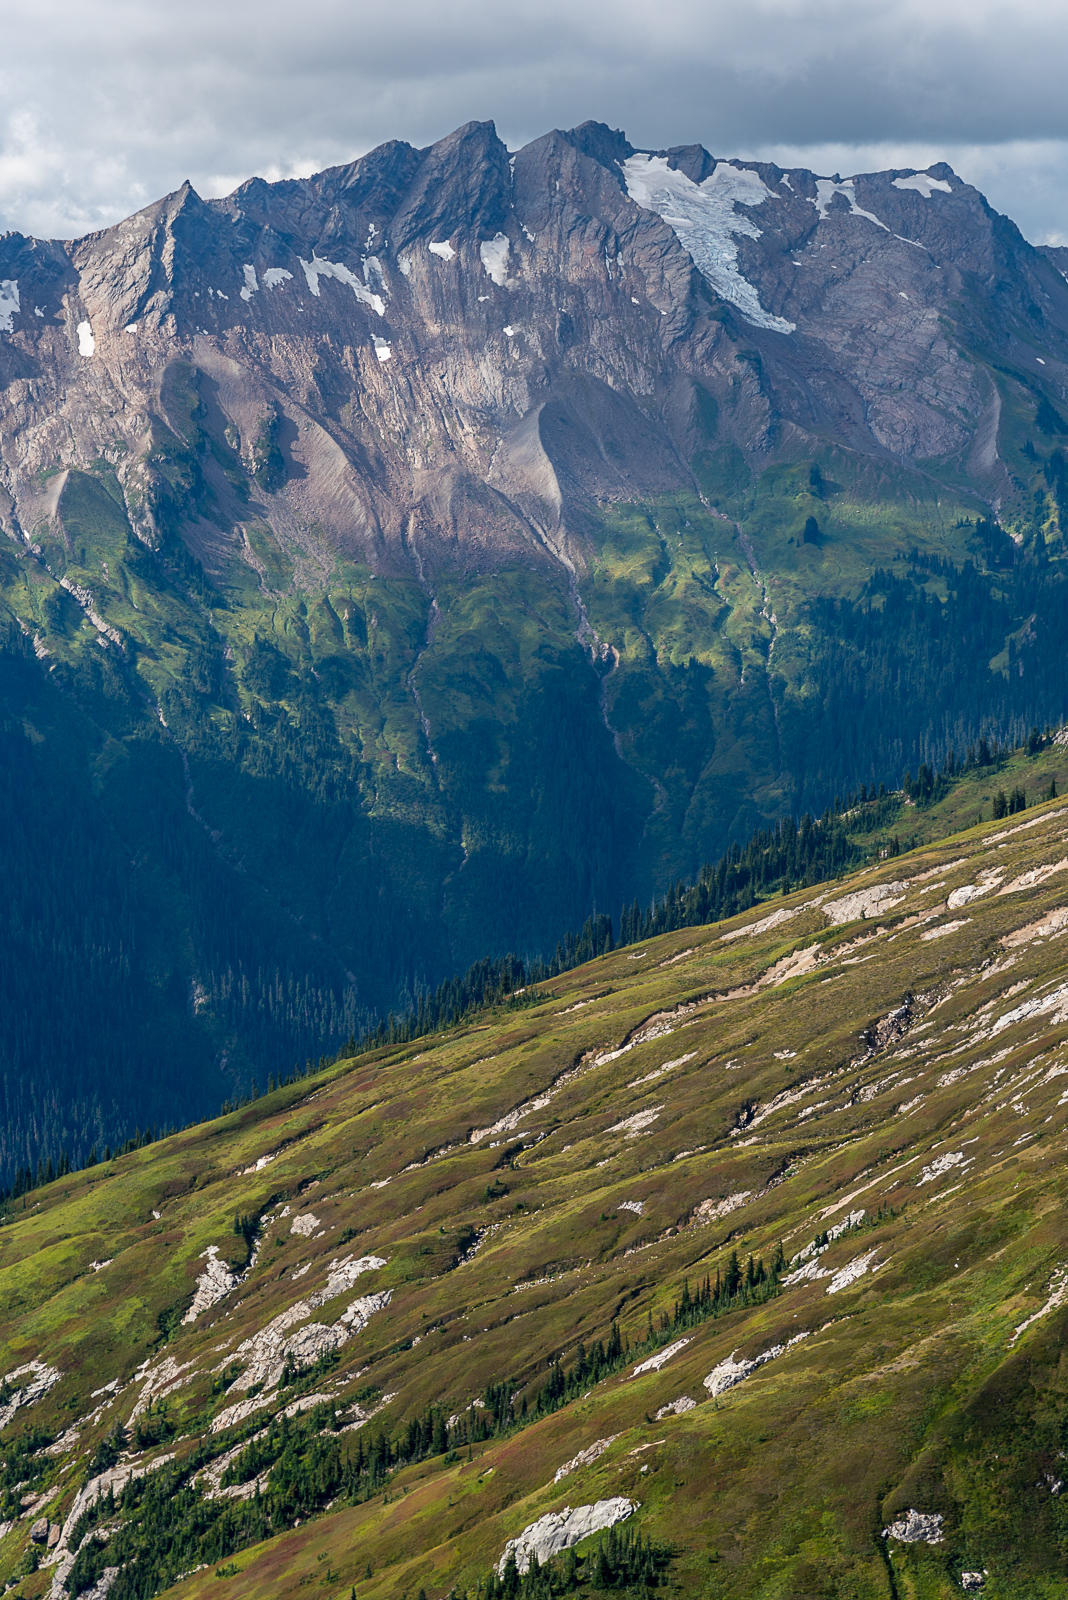
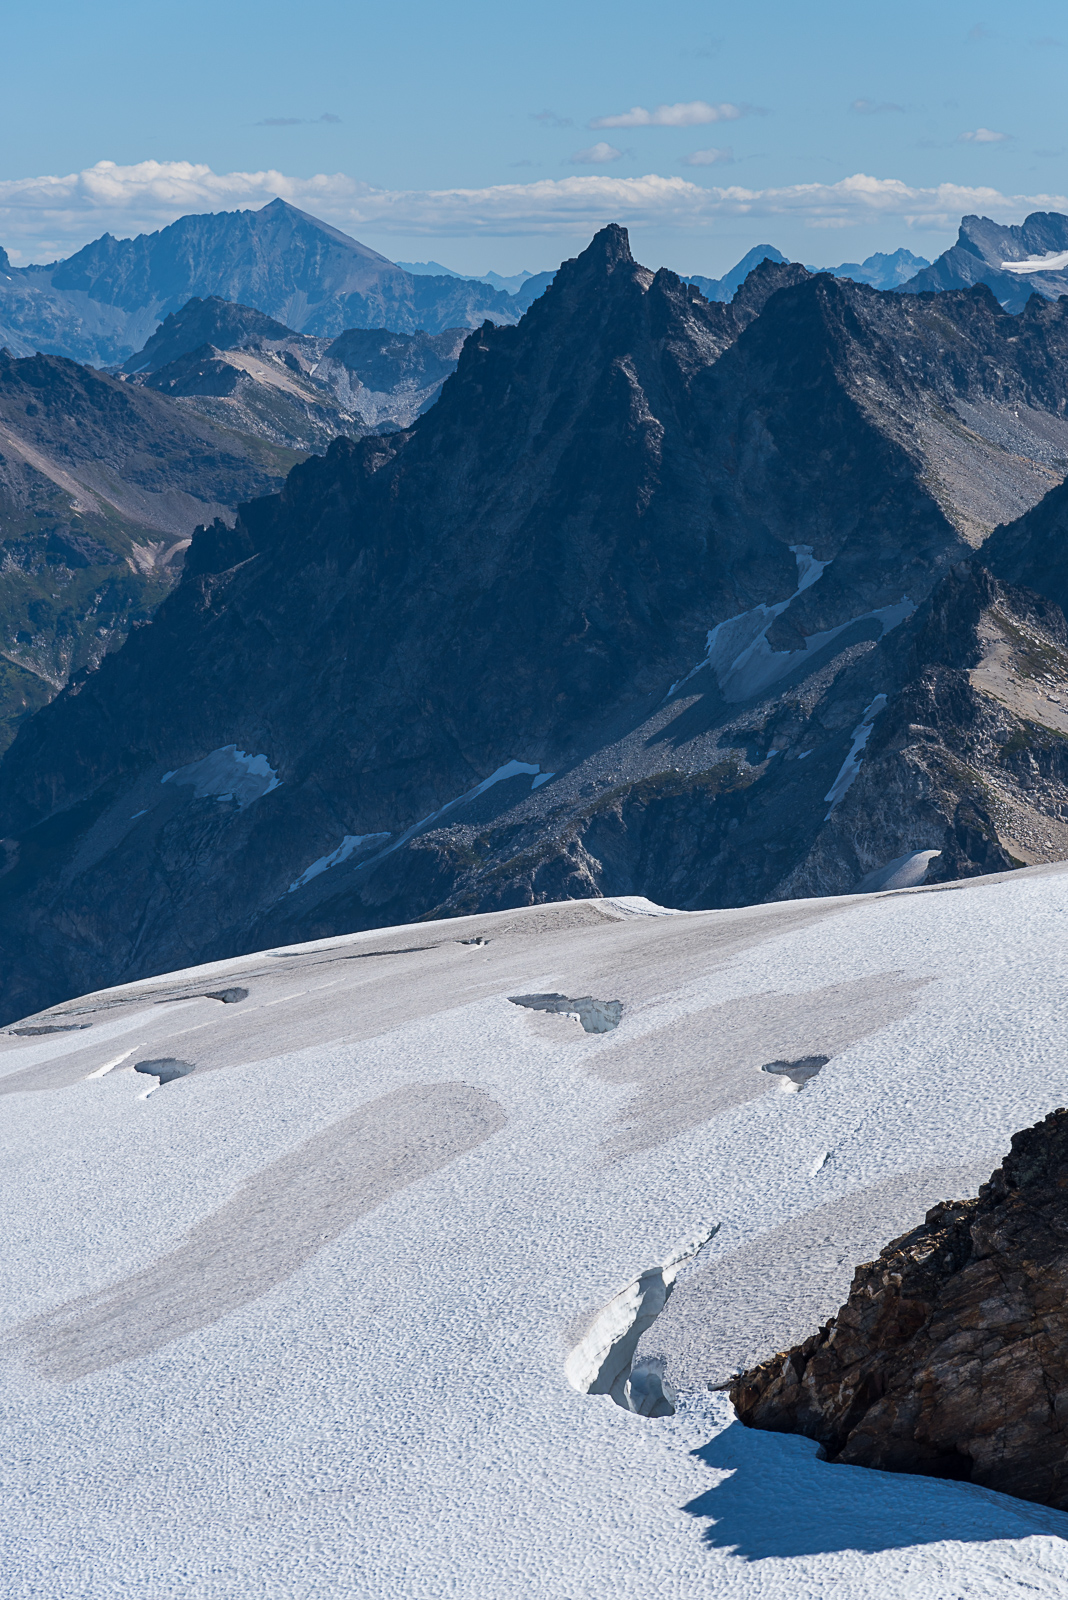
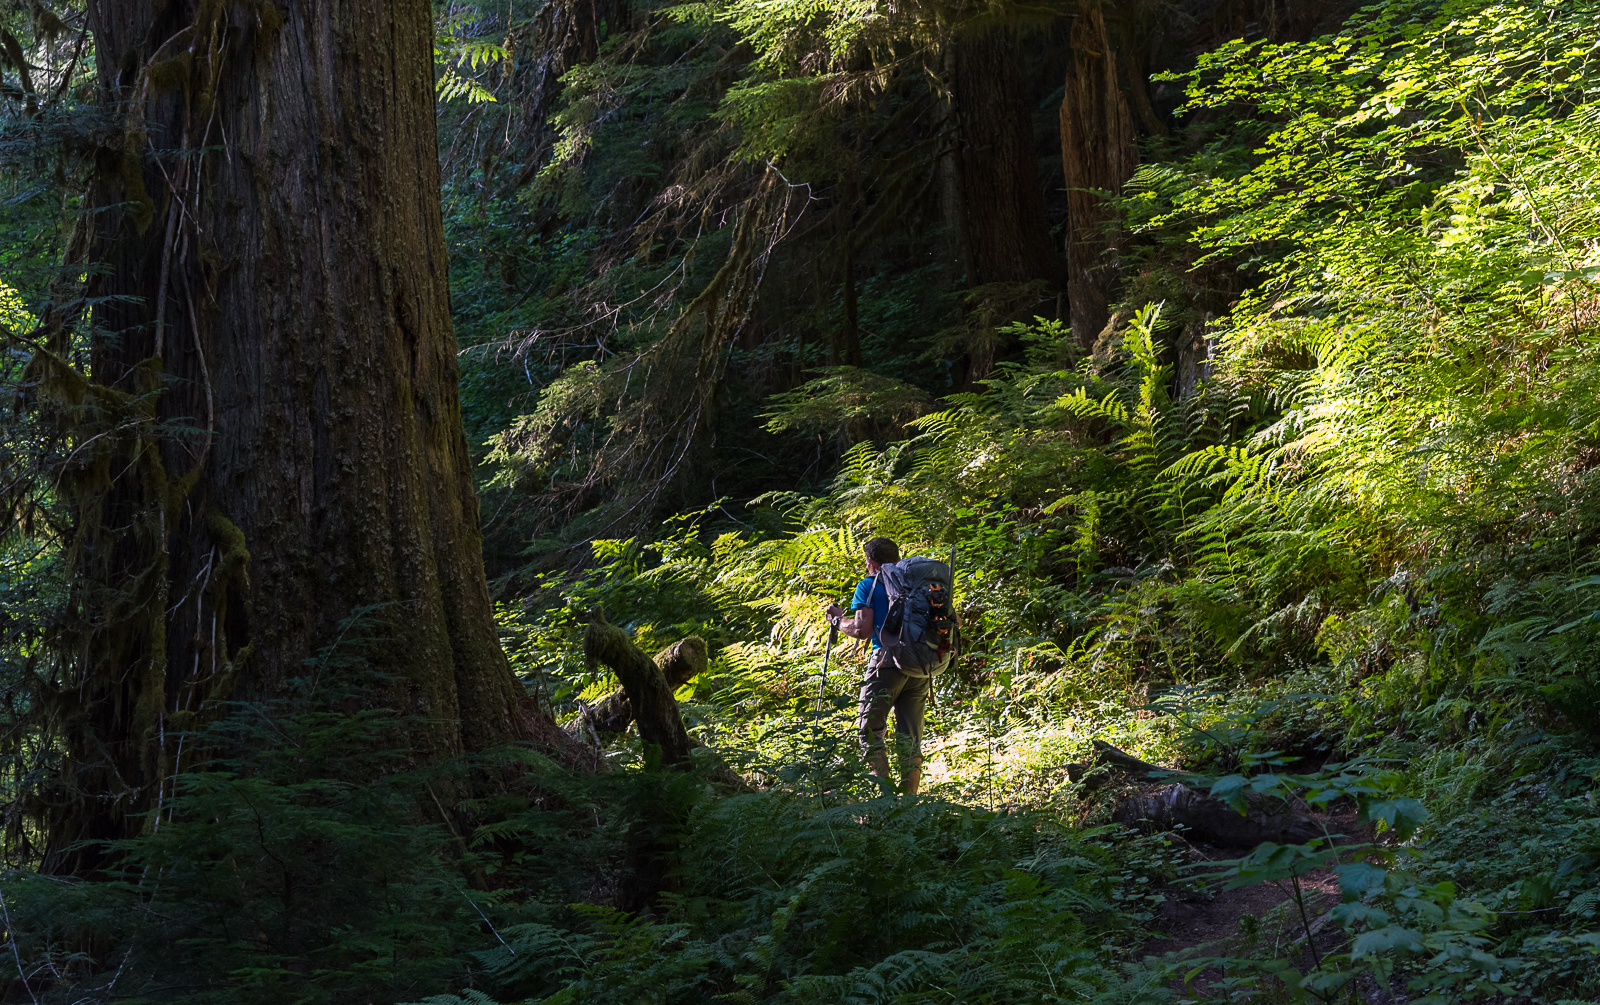
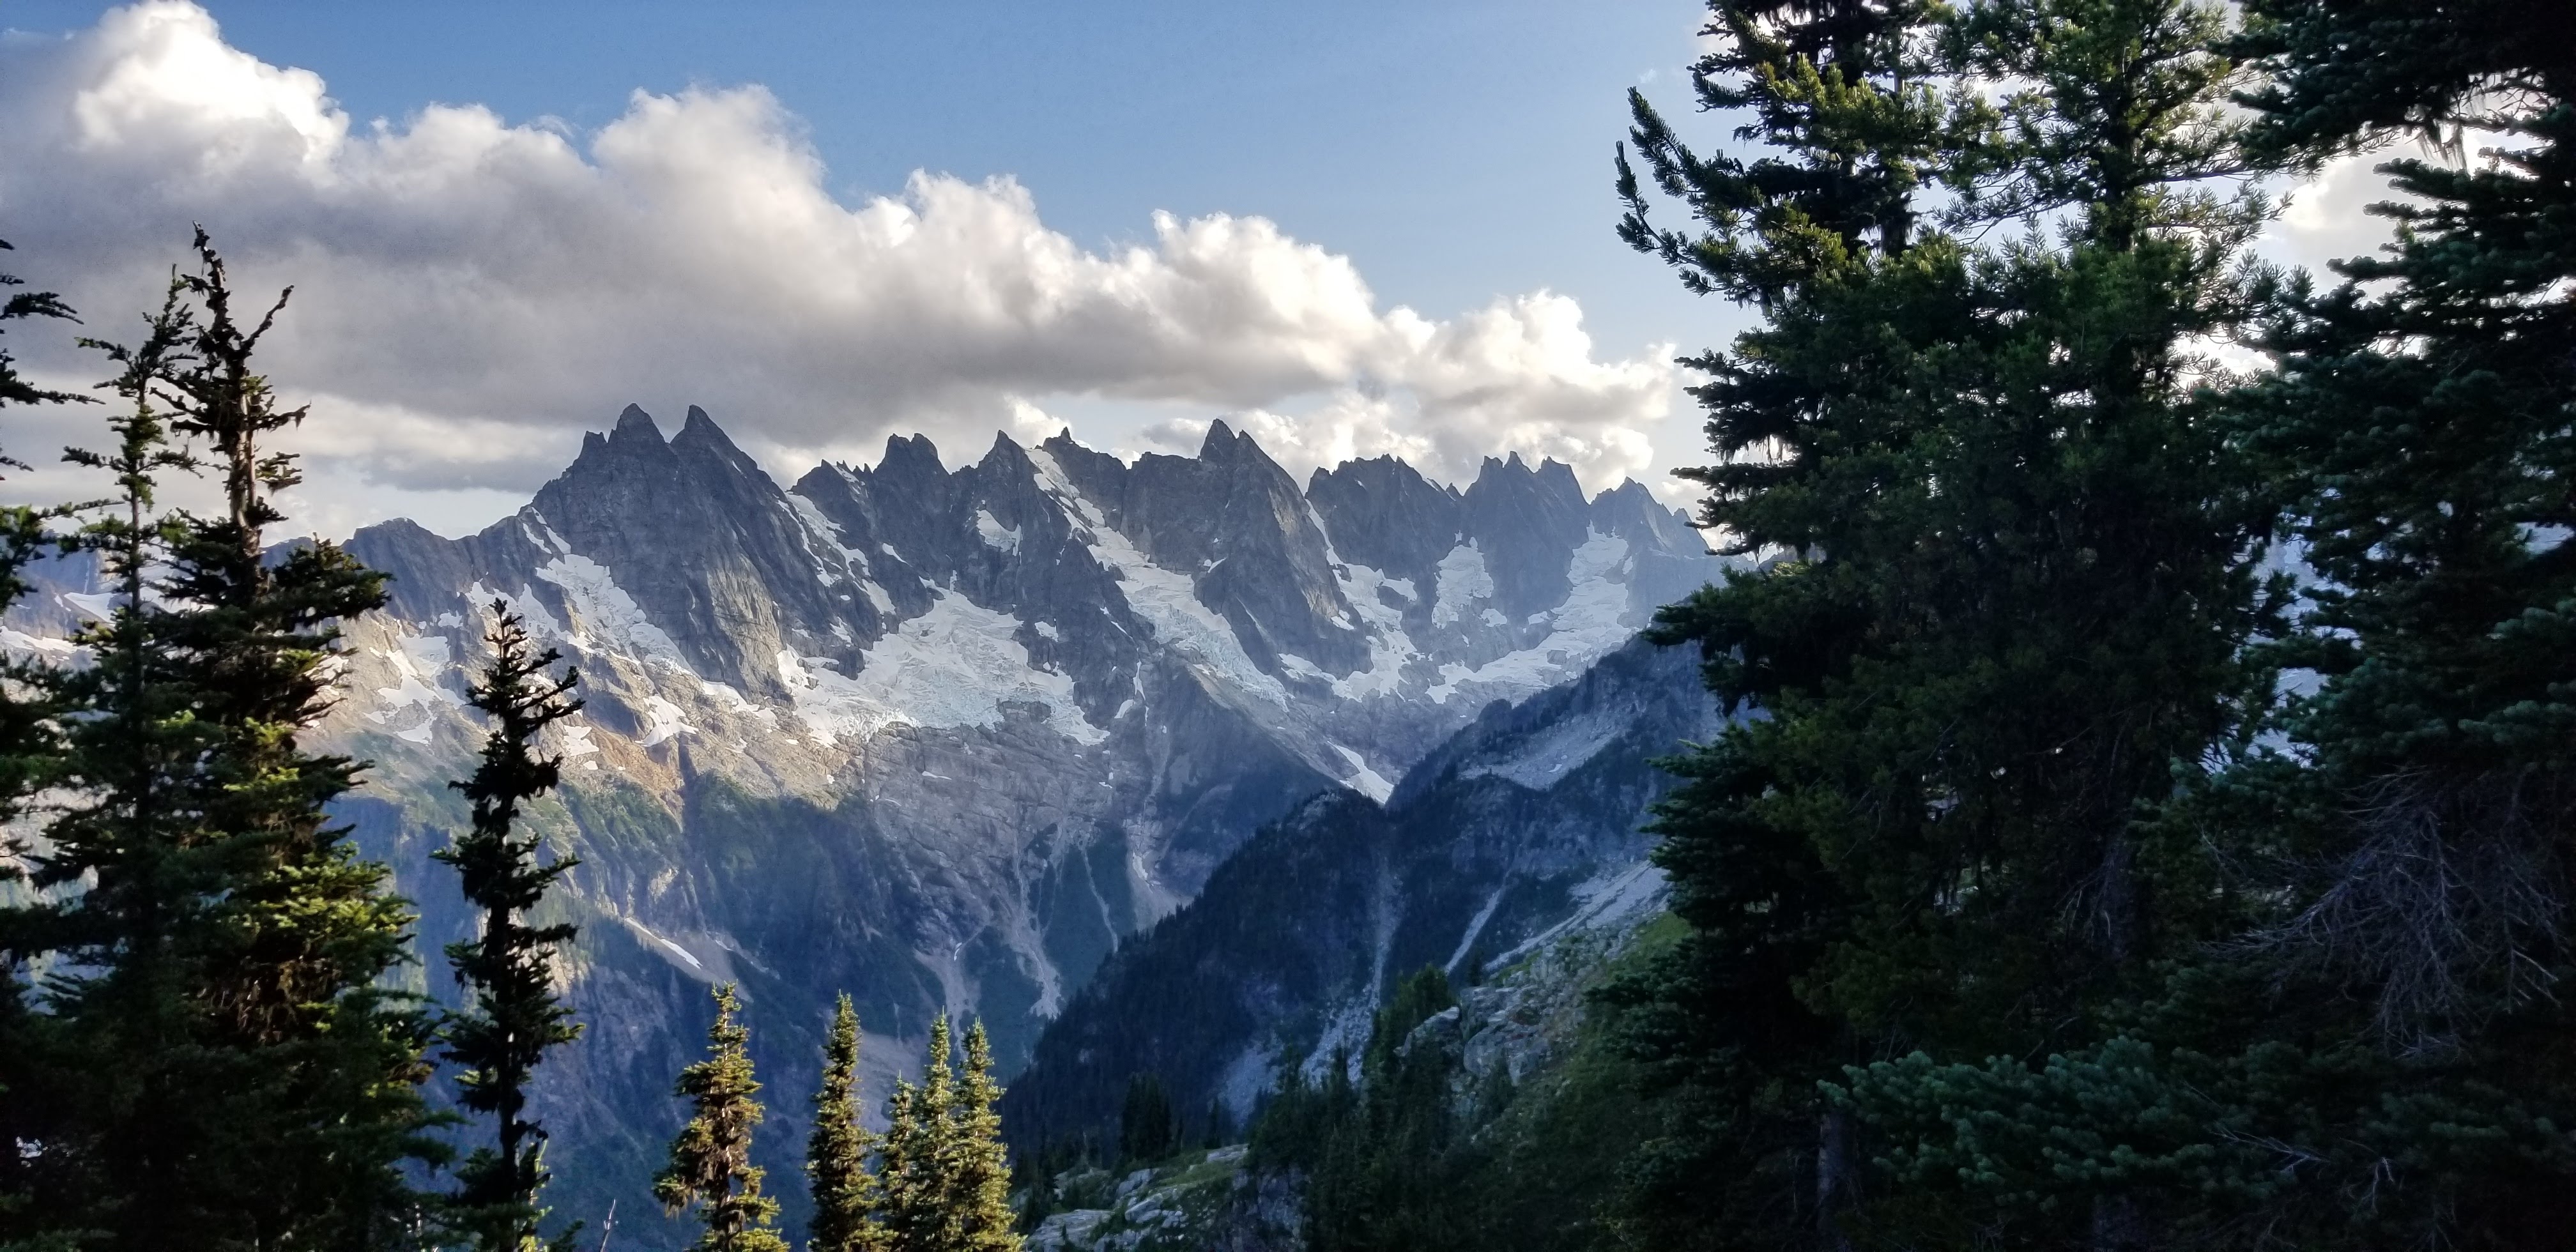
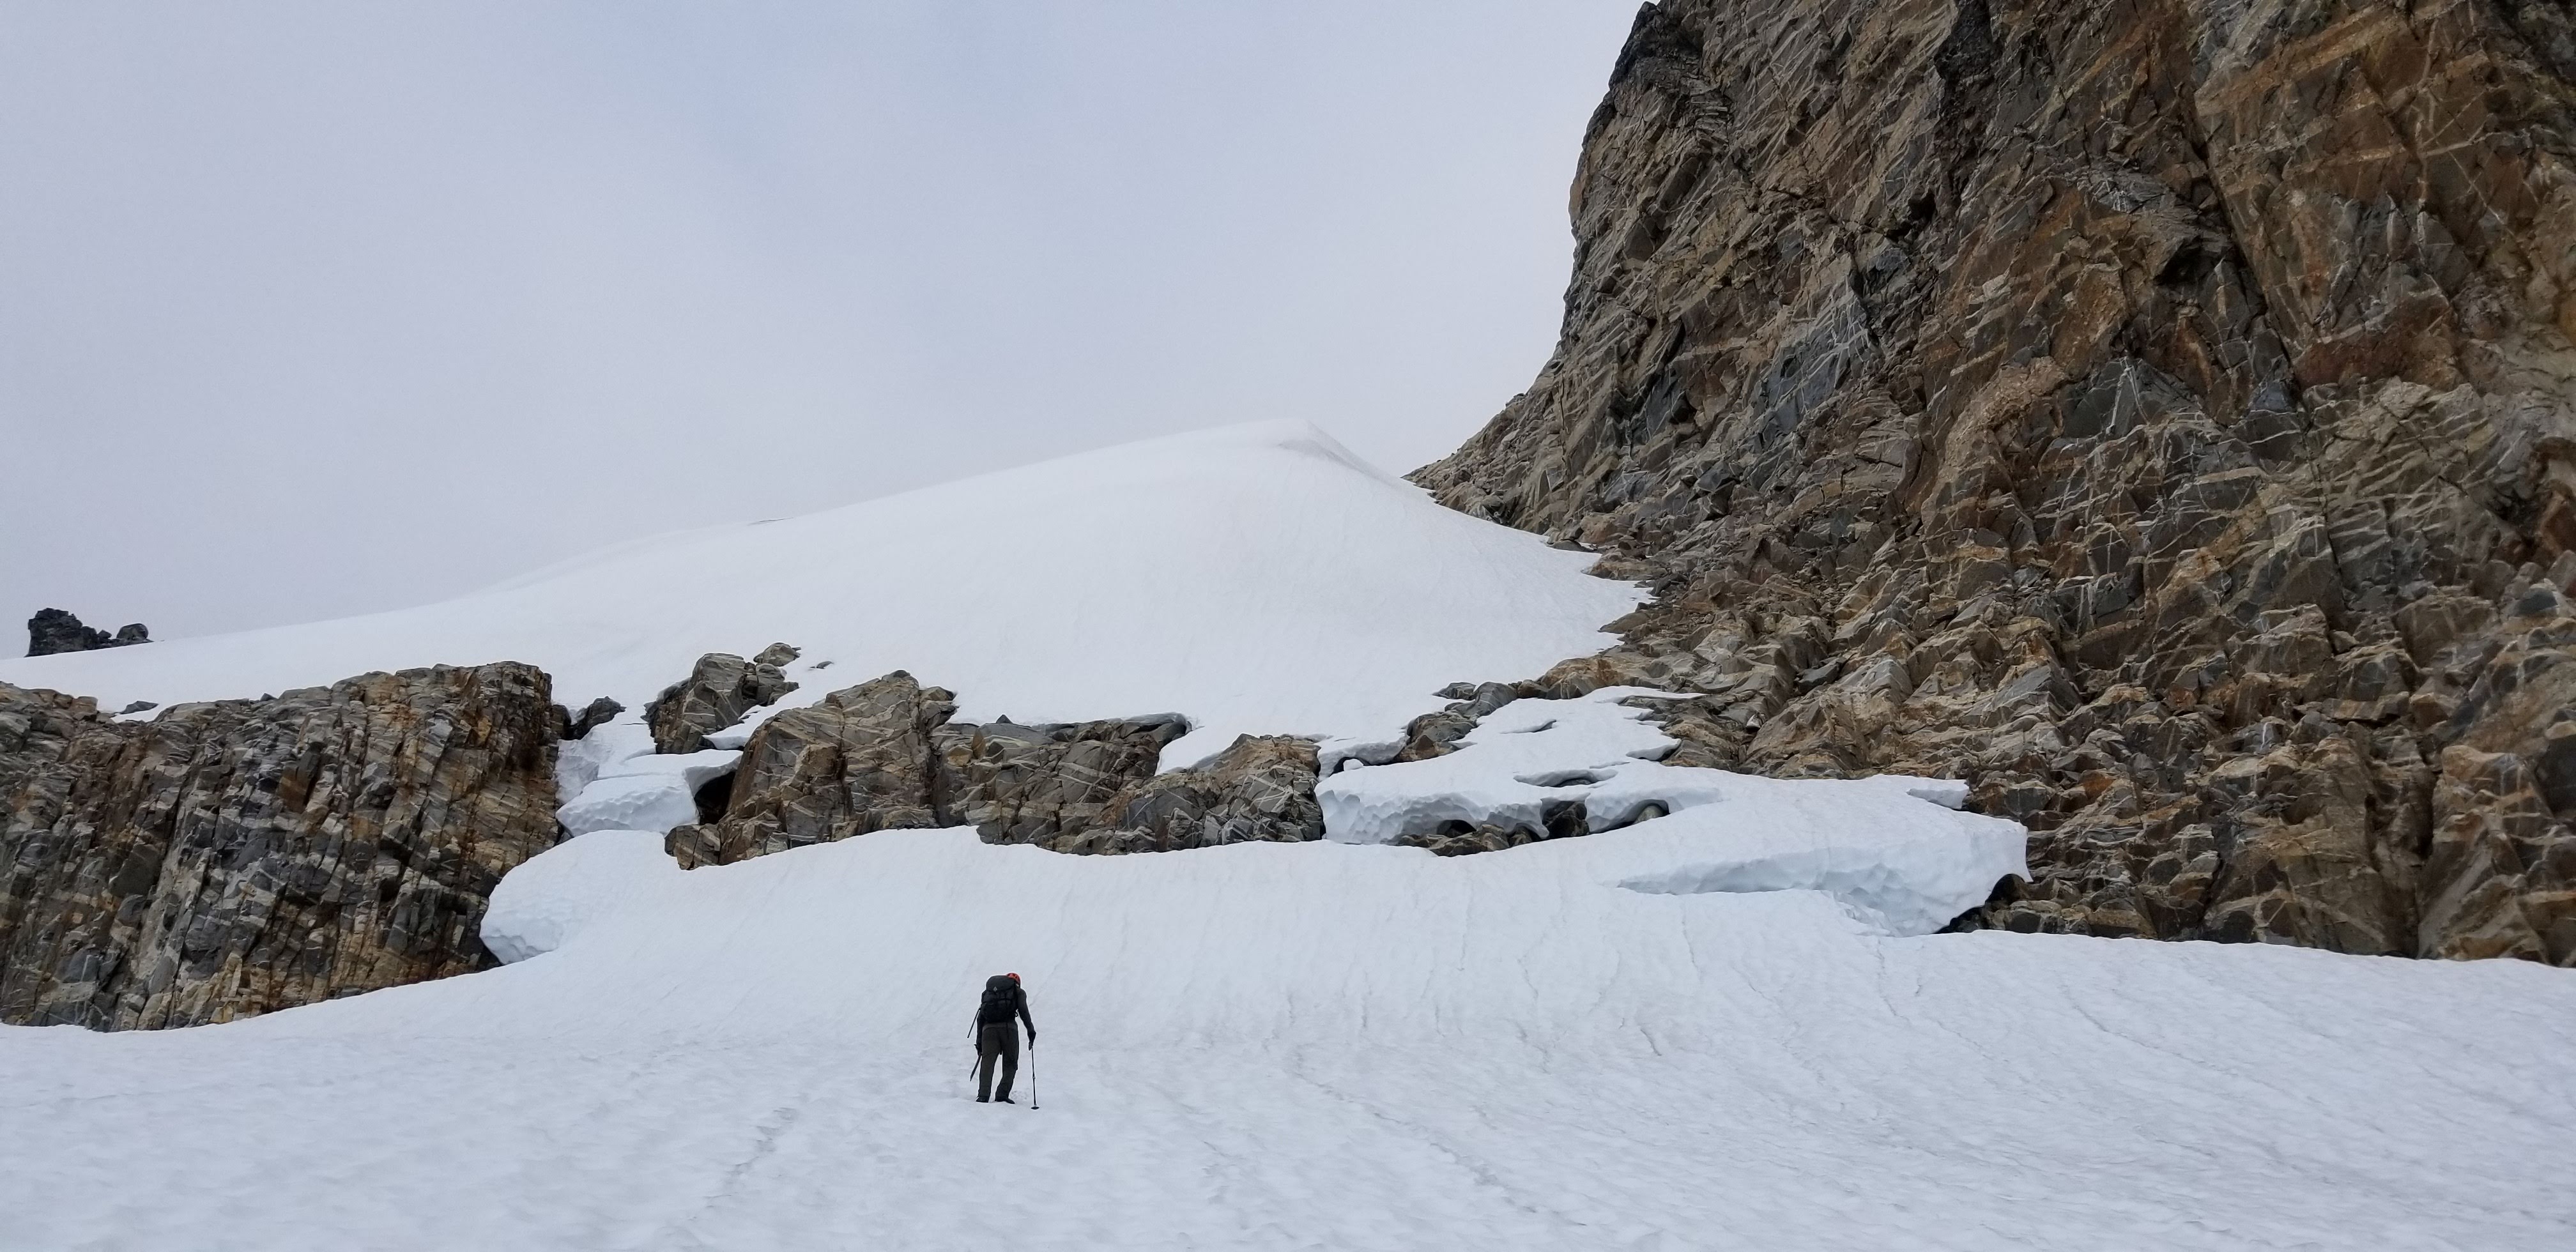
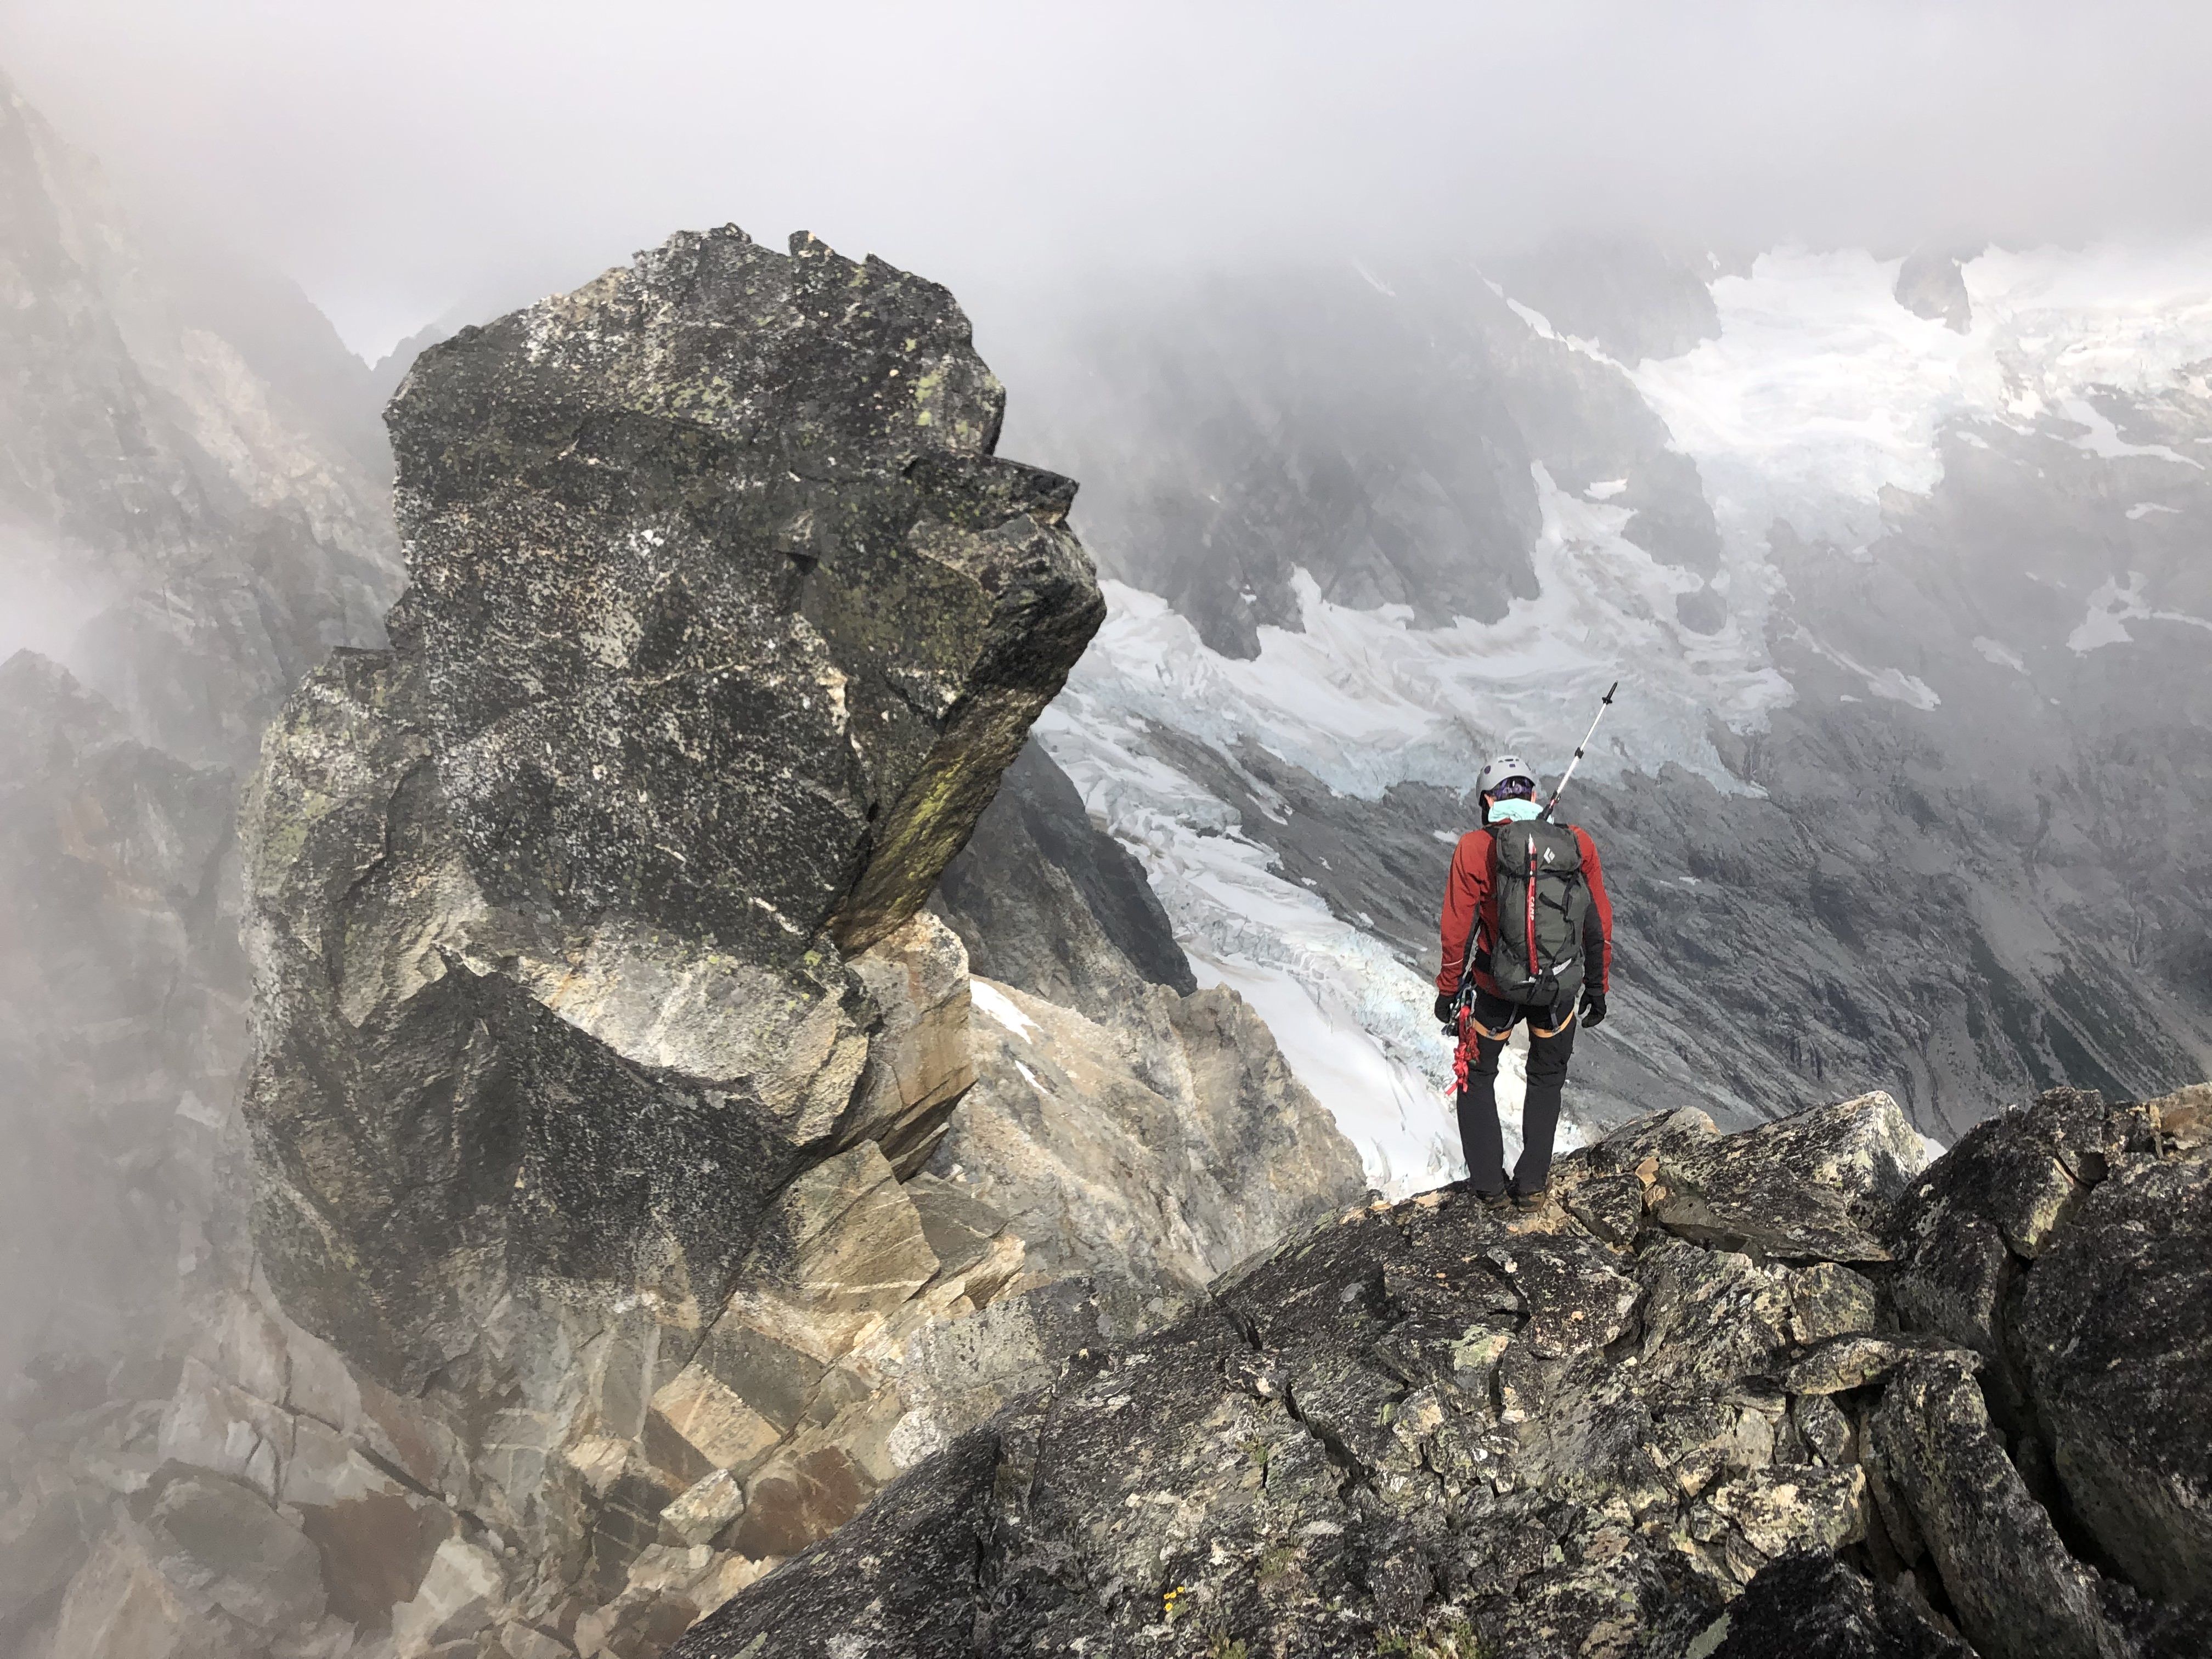
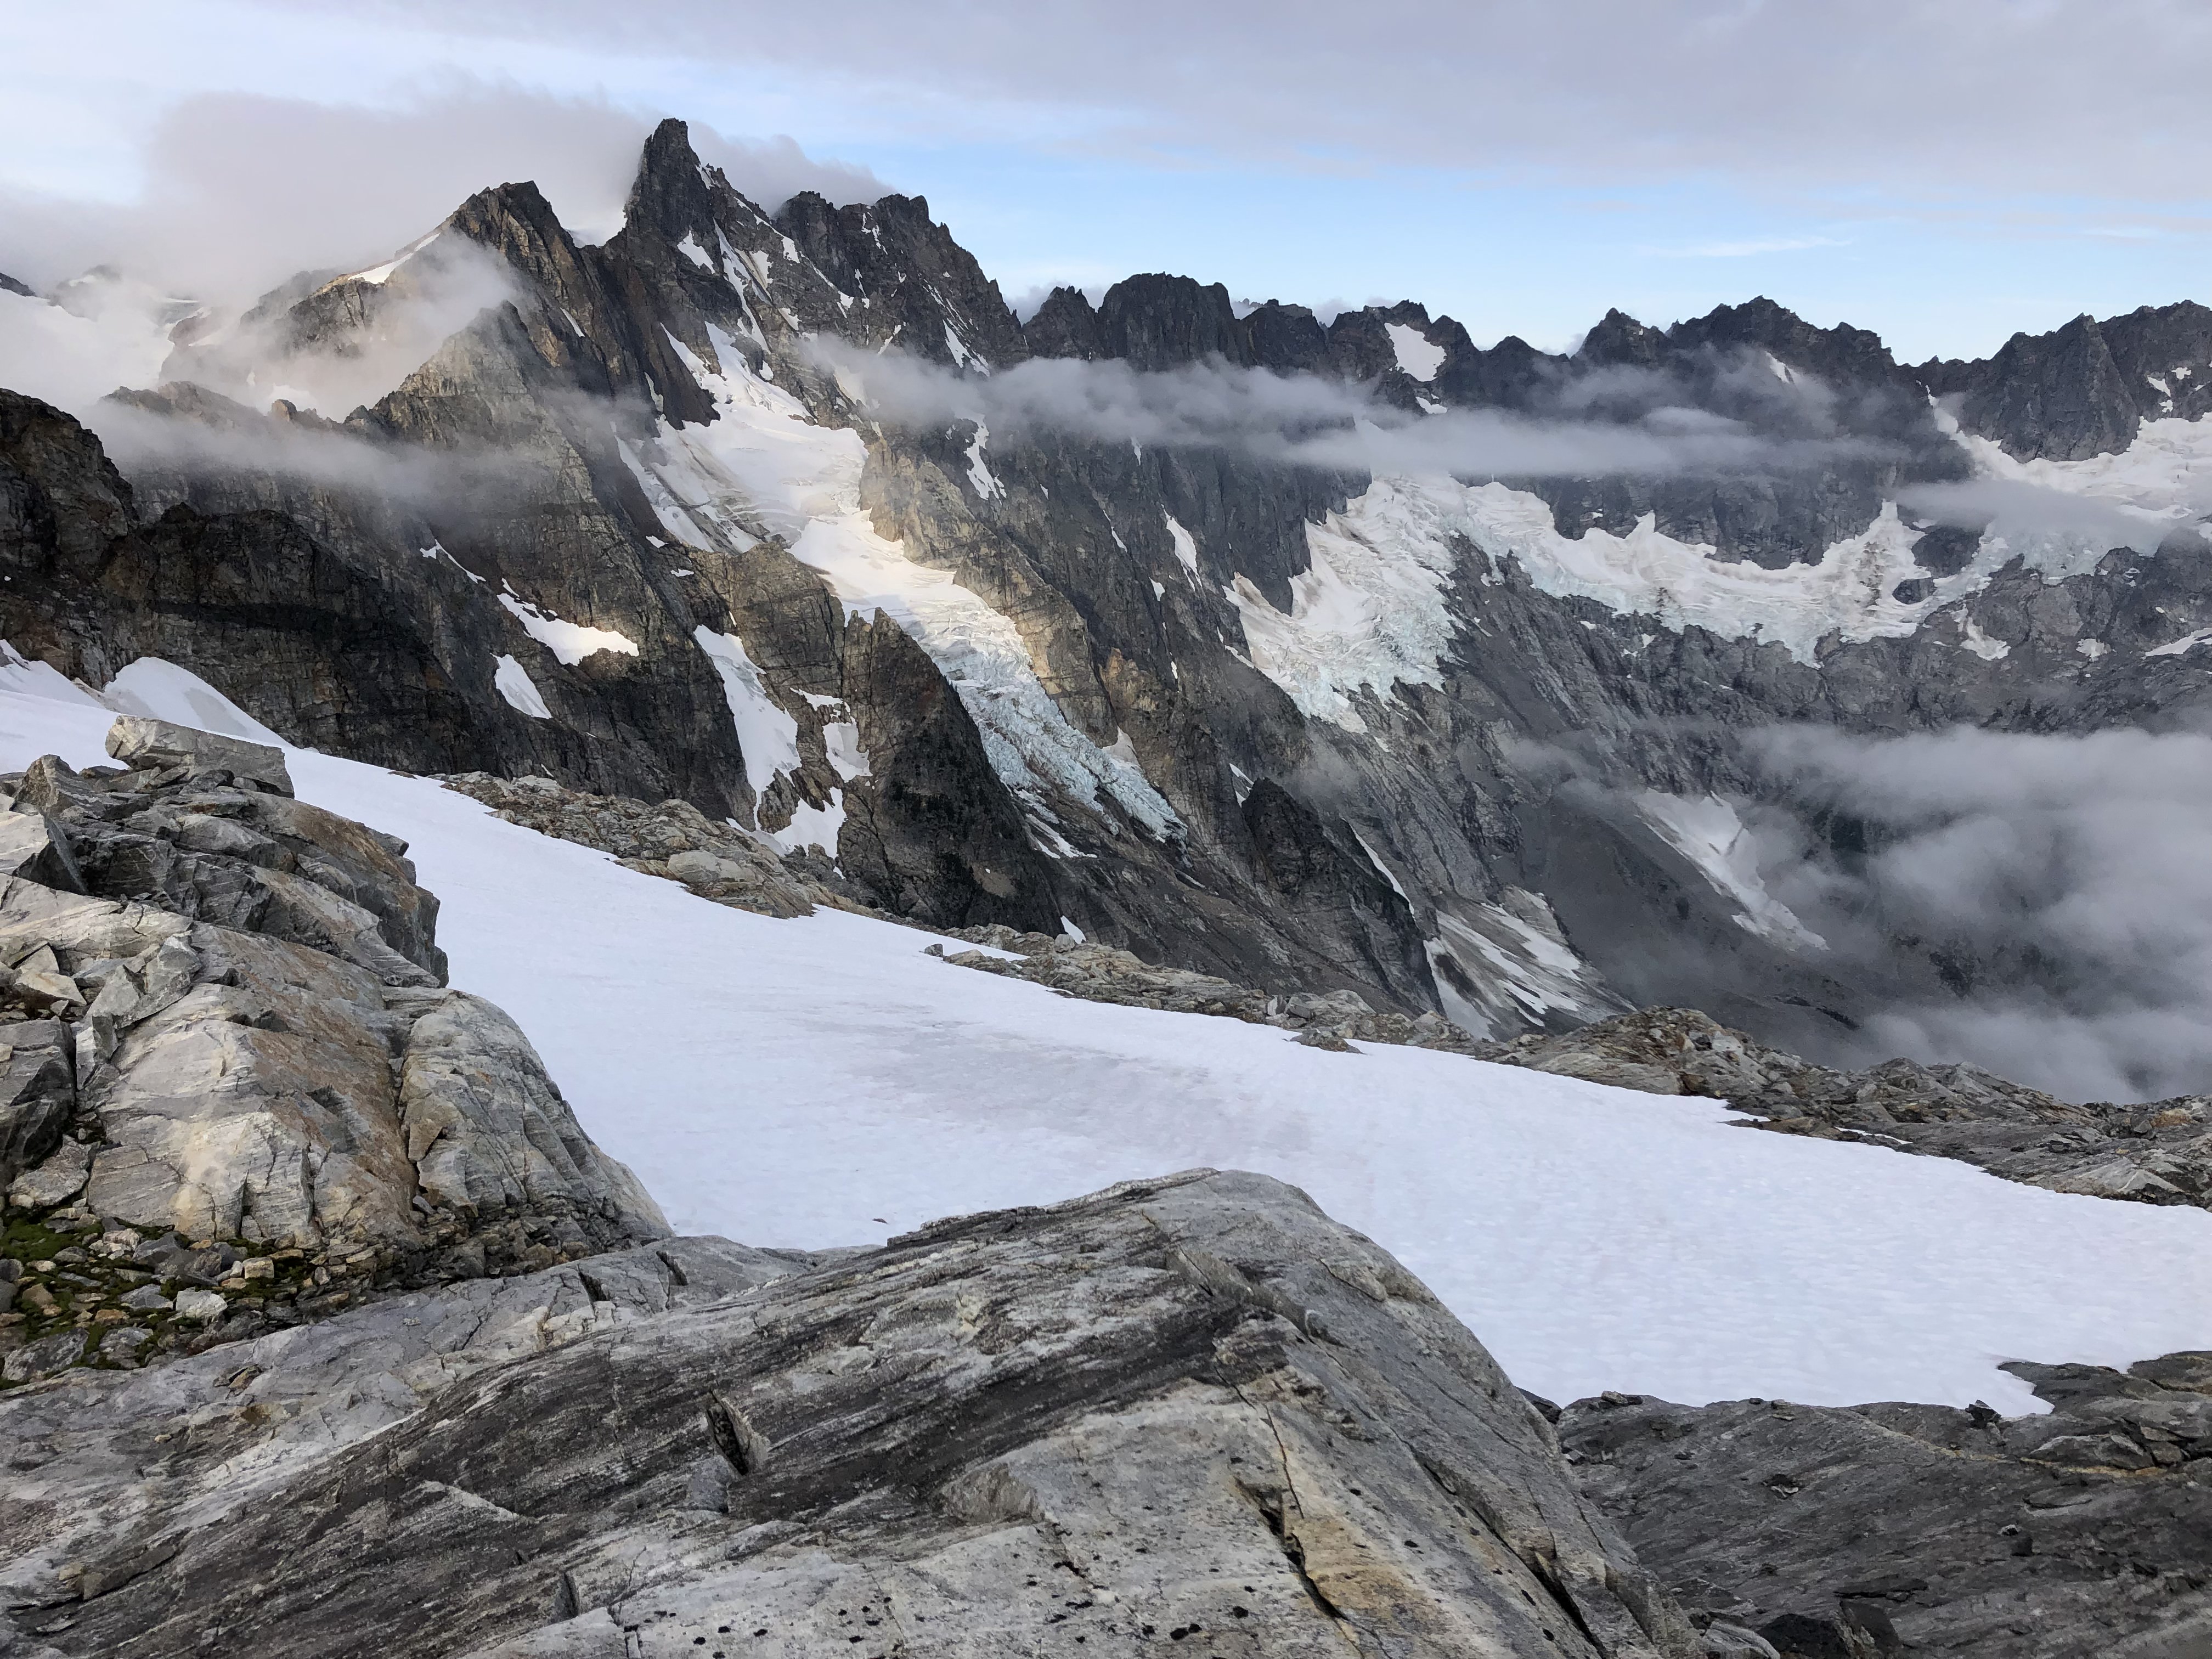
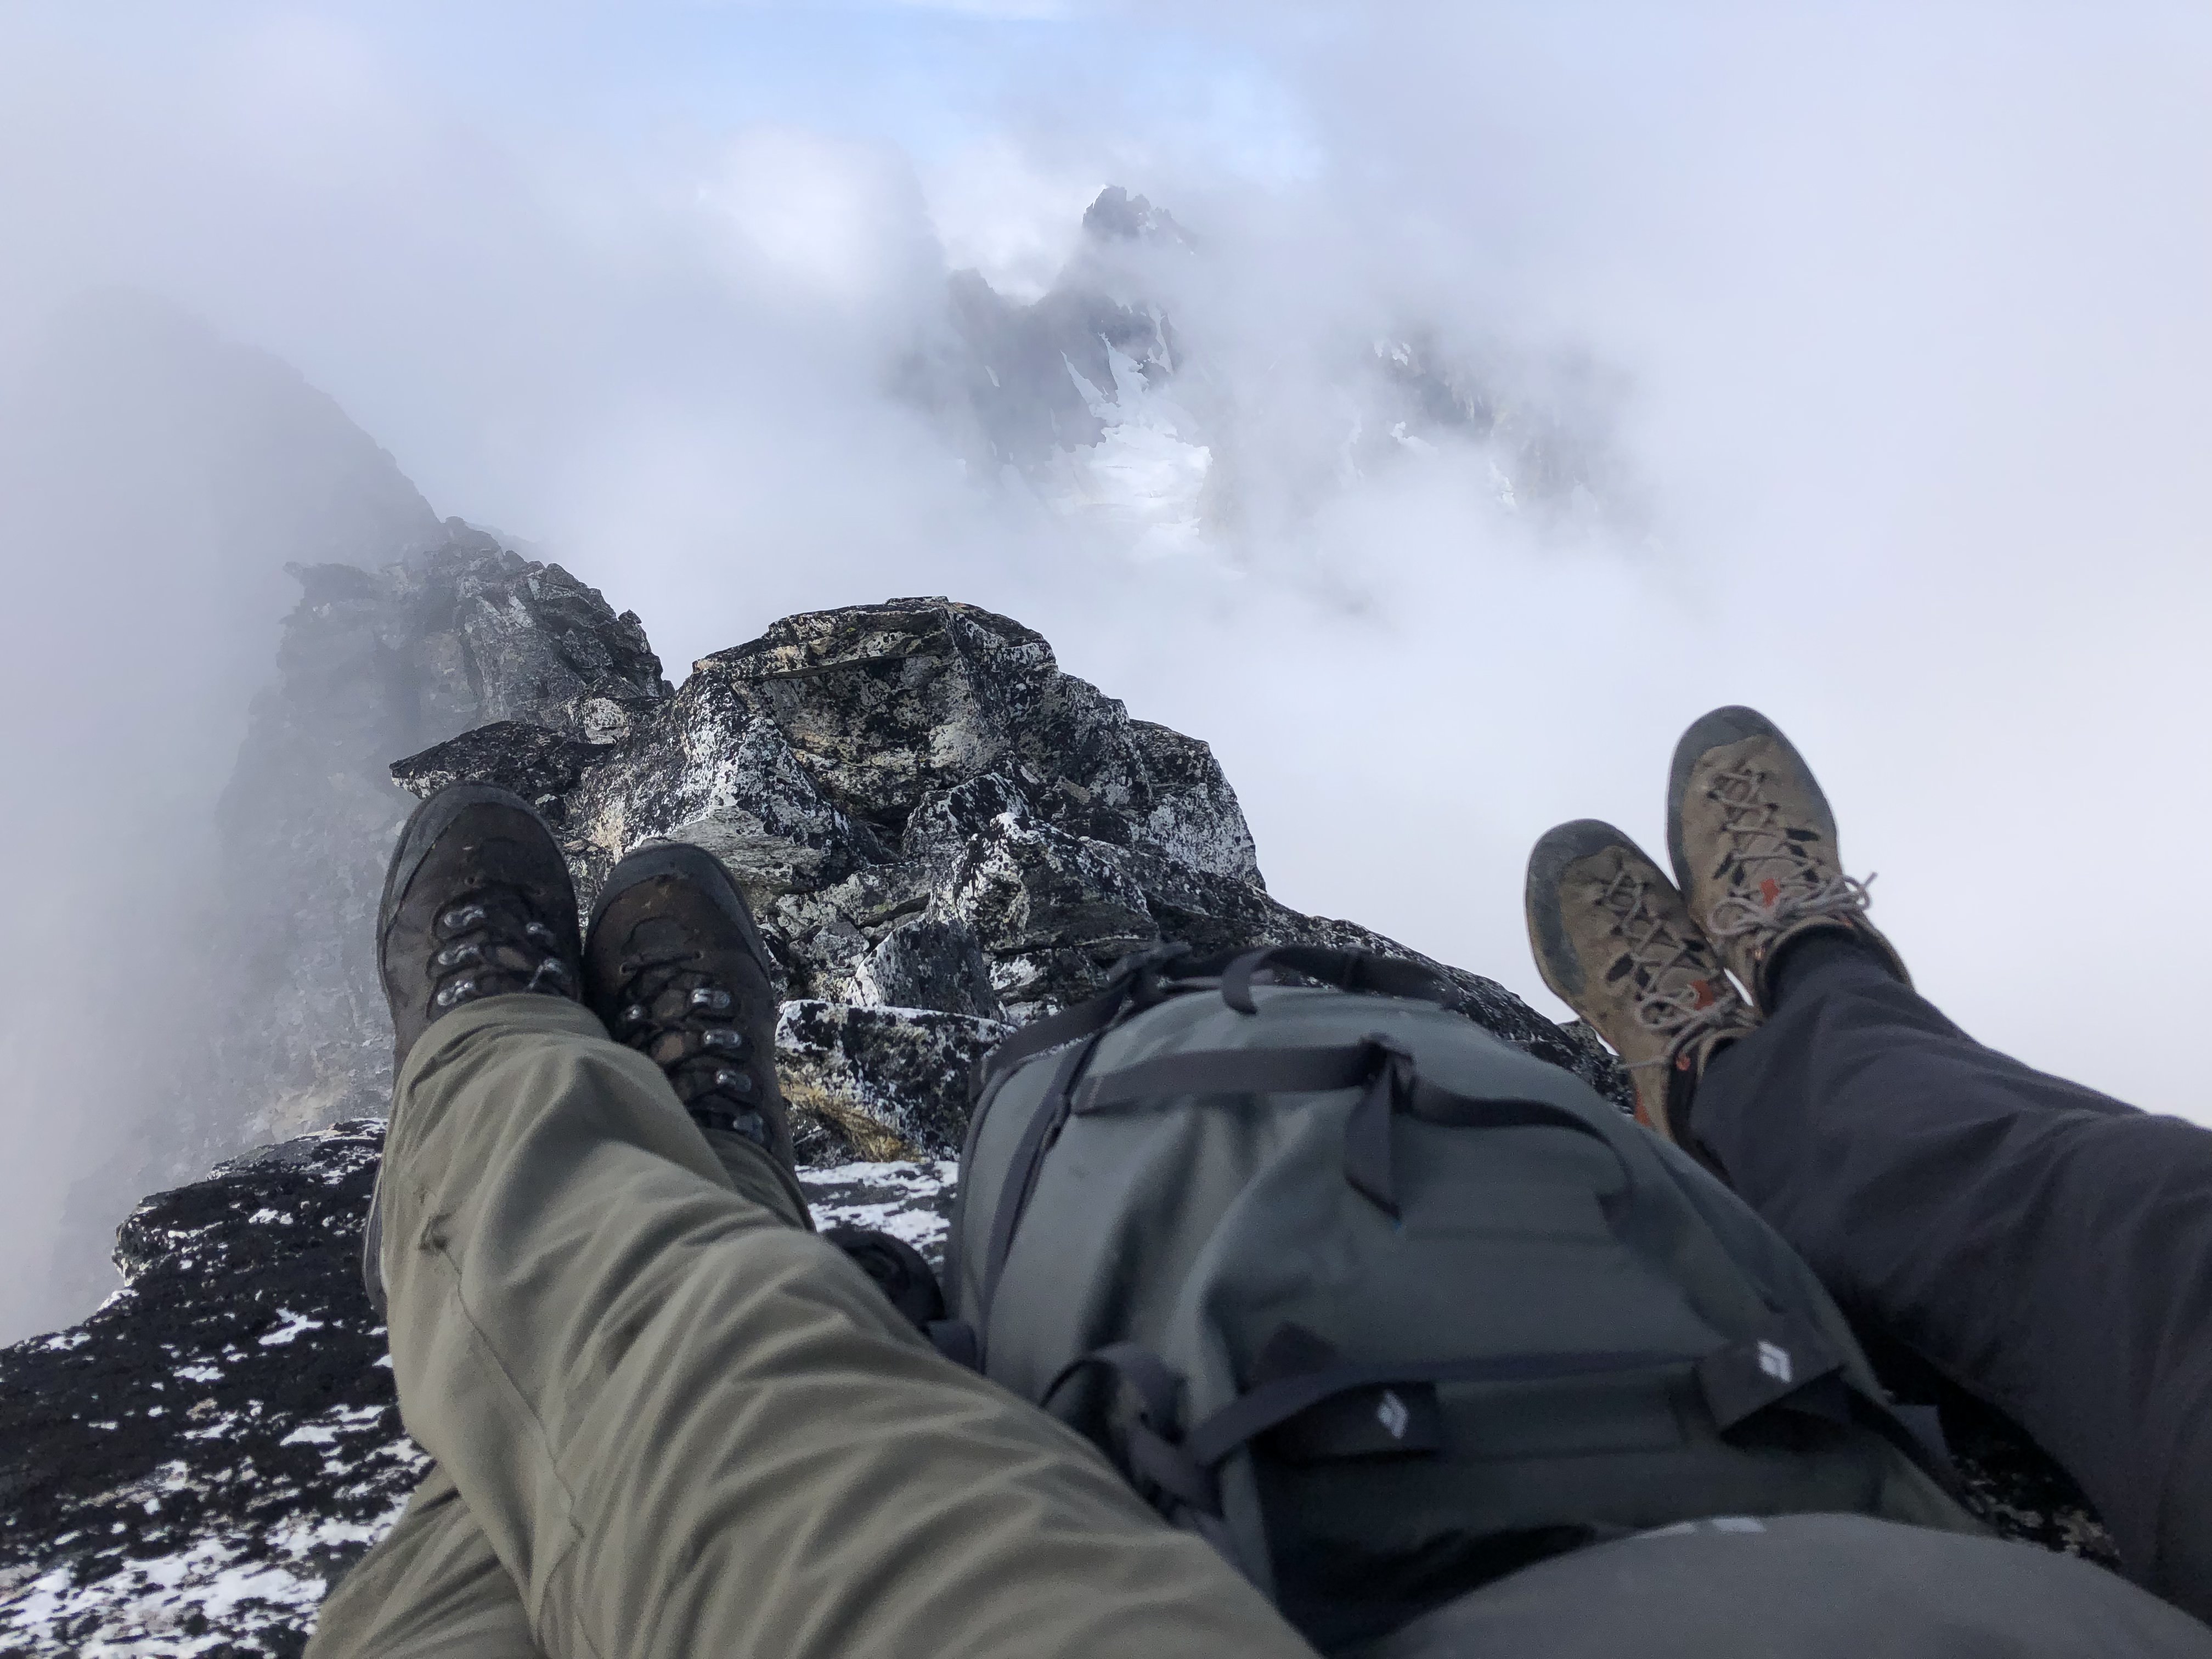
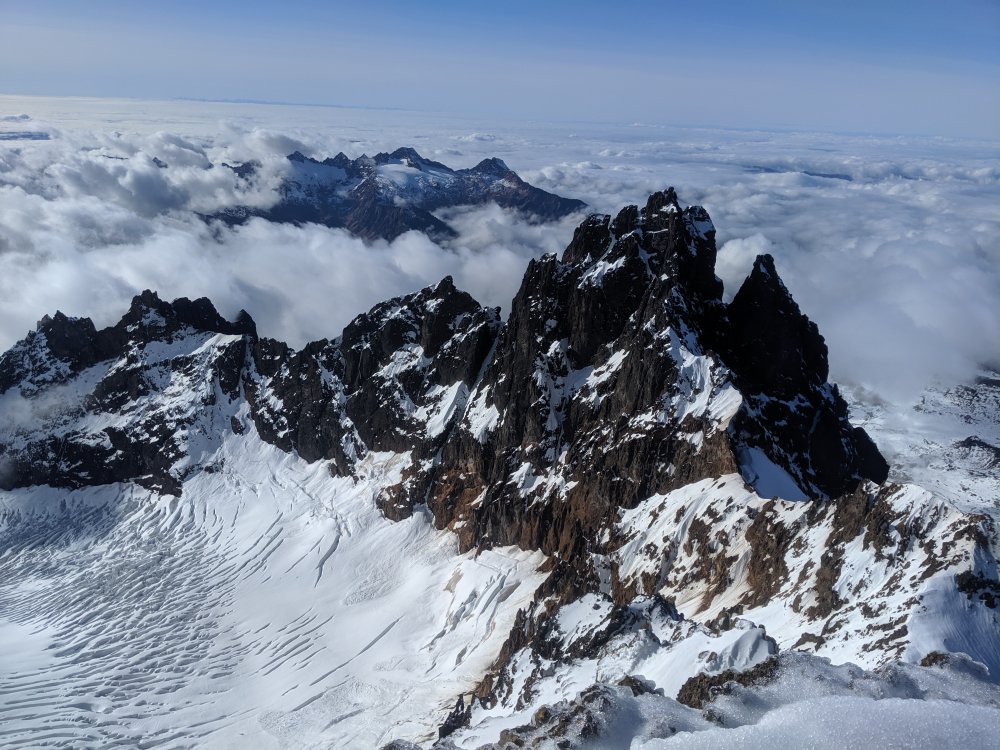
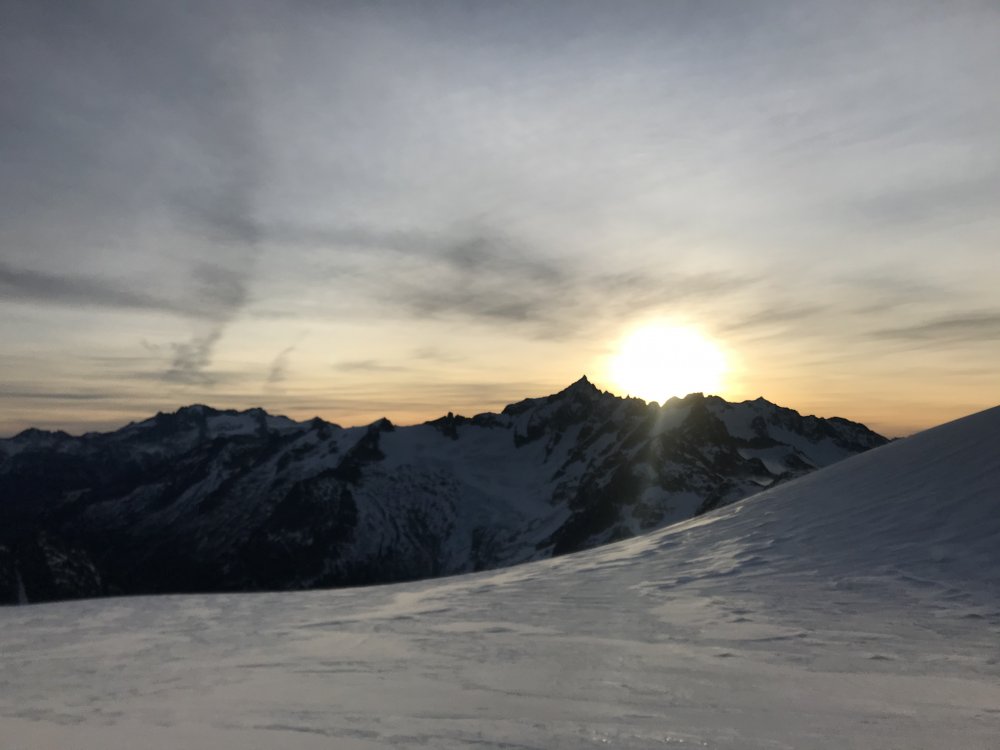
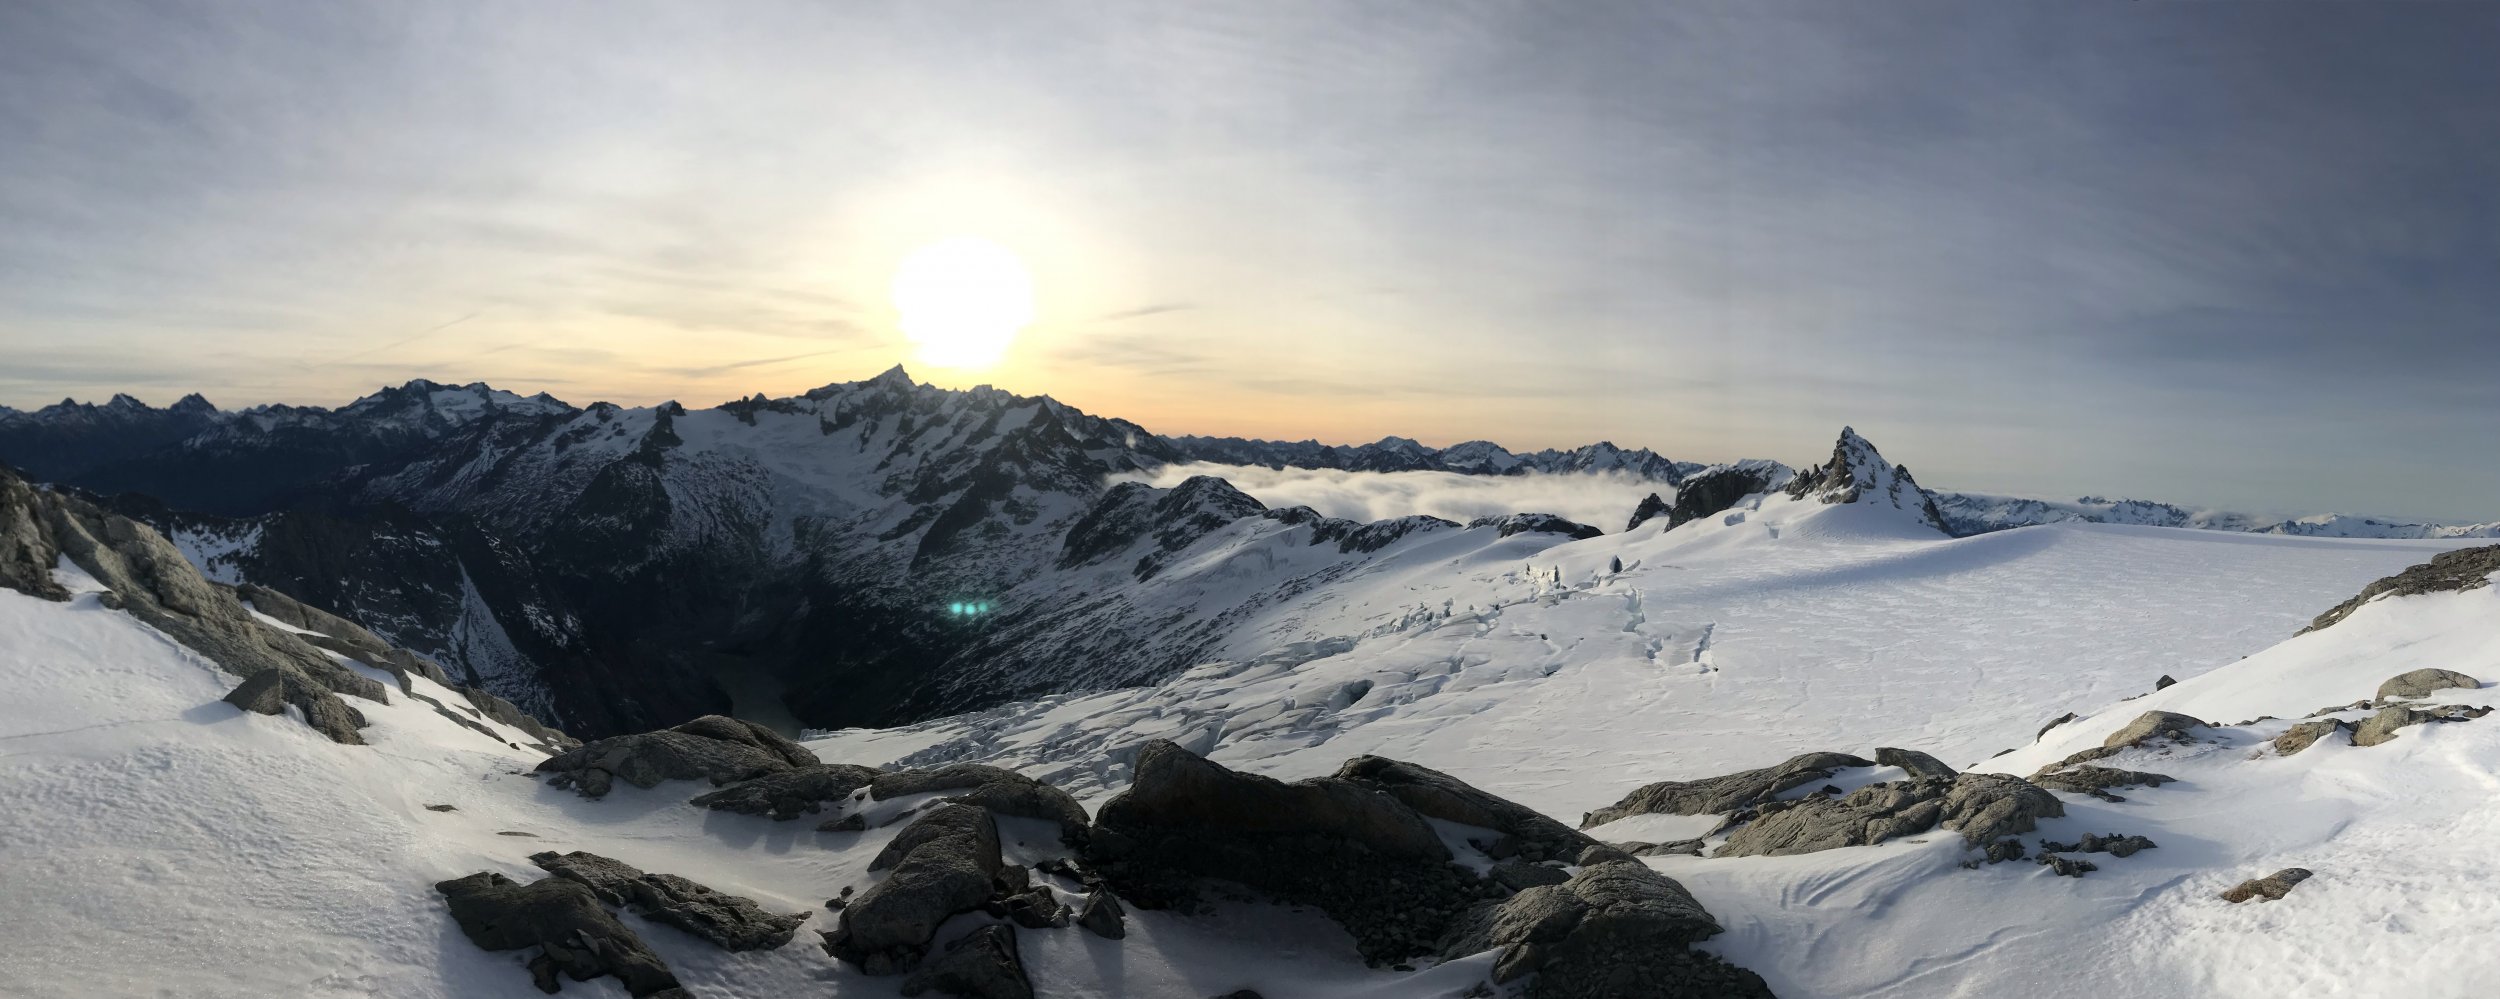
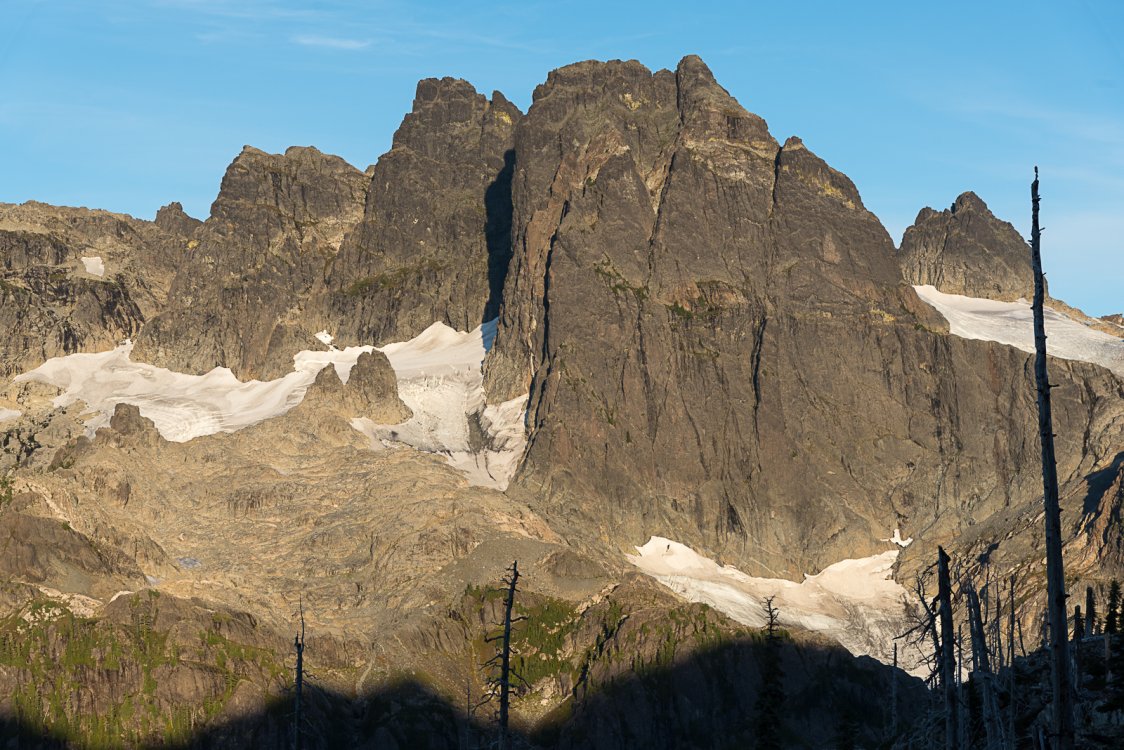
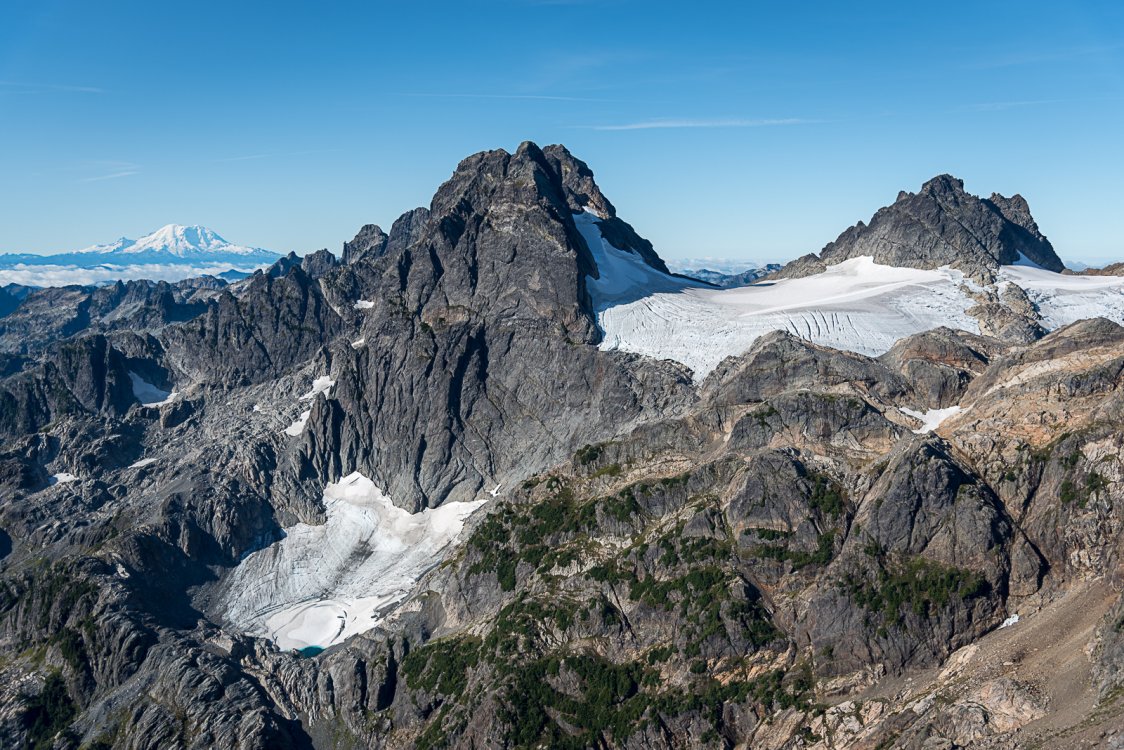
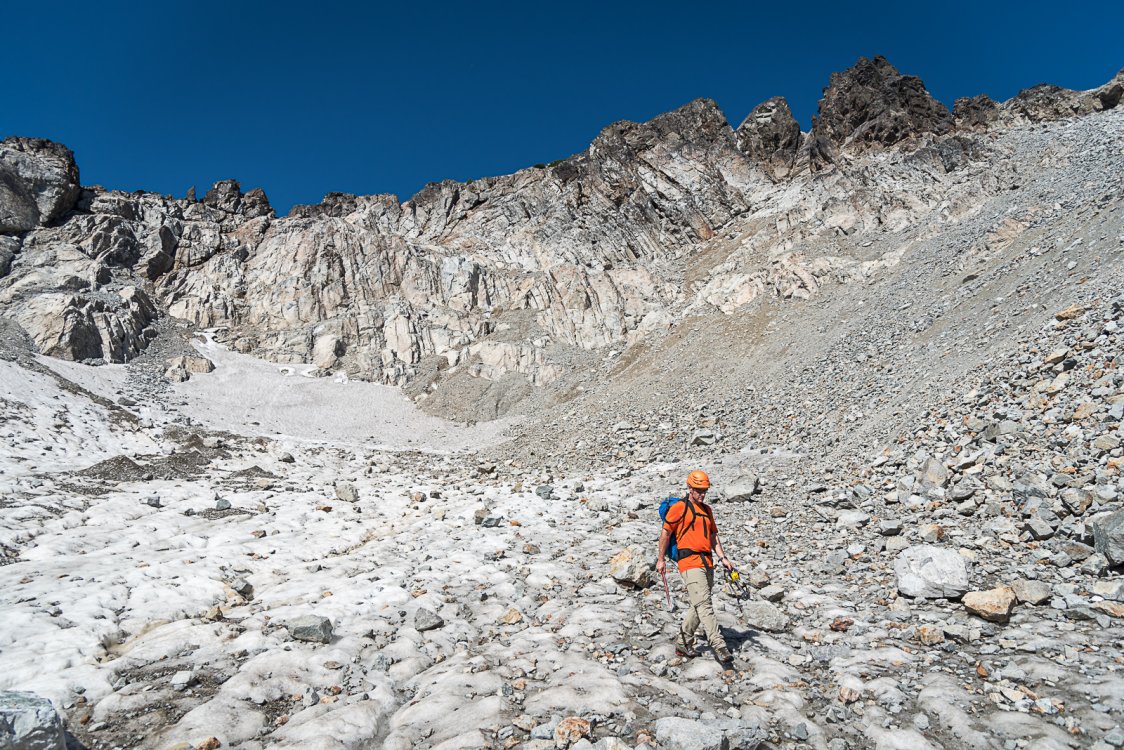
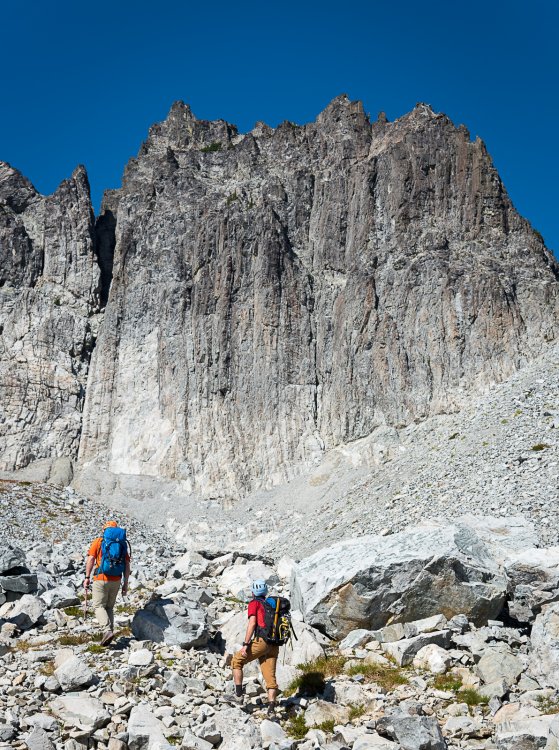
Trip: North Cascades - Isolation / Inspiration Traverse Trip Date: 09/21/2019 Trip Report: Isolation/Inspiration Traverse in Late-Season 2019 My wife, Julie, and I recently completed the Isolation/Inspiration Traverse over eight days beginning September 3rd and ending on the 10th 2019. After our return, I realized that our trip was almost exactly the route described by Doug Walsh in an excellent trip report titled “Isolation Traverse - Thunder Creek Alternate Finish 7/10/2013”. I debated submitting this report because of the route similarity. However, it seemed that our trip was also very different from theirs due to the late season of our trip, as well as the greater glacial retreat in 2019 vs 2013. I hope you will find value in the following. On Sept 2nd, we flew from our home in Wyoming to SeaTac, rented a car, purchased stove fuel, picked up a permit in Marblemount, and camped in the Colonial Creek Campground. The following morning, we parked our rental car near the Thunder Creek trailhead (in the Colonial Creek Campground) and hitched a ride to the Pyramid Lake trailhead (note: this was recommended since there have been a number of break-ins at the Pyramid Lake Trailhead). After the ~2 miles of NPS trail to Pyramid Lake, we climbed the boot trail (photo 1) to Colonial Glacier and Lake (photo 2). FYI: the boot trail is similar in nature (steep and long) to the Lucky Ridge Boot Trail, although we found it easier to follow. From “Colonial Lake” we forded the outlet (photo 3), ascended the low hills to the east and then followed a nice trail to access the glacier. In late season the lower part of the glacier was rock covered and blue ice. The upper portions were somewhat crevassed but easily negotiable. We found decent campsites along the western shore of Colonial Lake, excellent campsites atop the low bounding hills of Colonial Lake (photo 4), and superb campsites at, and near, the pass. The late-season descent from the pass to the Neve Glacier was over rock and boulders but still pleasant even for my worn-out knees. The Neve Glacier was a jumble of broken and very wide crevasses (photo 5). It took considerably more time than anticipated to negotiate--but it was beautiful and fun! We ended up at the western-most and lowest pass between Snowfield Peak and The Needle. We backtracked to the next col east to descend. In hindsight, the furthest pass to the east (adjacent to Snowfield Peak) would probably provide the most pleasant descent--especially in early season. The descent from the Snowfield-Horseman col was mainly over rocks and heather--again, very pleasant for the most part (photo 6). In early season this descent would be over snow. The descent trends to the SW and then turns back to the SE to gain the ridge between Snowfield Peak and Isolation Peak. Our objective was a prominent boulder-filled gully--which proved to be easier and more stable than it appeared from a distance. There were several lovely campsites along the top of the ridge. Once on the ridge, we enjoyed easy hiking towards Isolation Peak. The descent to the lake NE of Isolation Peak was largely thru heather and again, quite pleasant (photo 7). There is a trail atop the low hills bounding the NE lakeshore that crosses the lake outlet and heads up the steep draw east of Isolation Peak. This draw was okay without snow cover, but with some unpleasant sections. From the top of this draw (photo 8), you’re on the E shoulder of Isolation Peak (photo 9). We followed a trail south around the shoulder, through a boulder field, and continuing down through very steep and slick meadows (apparently the same route that Doug Walsh and Robert Crouse took--with similar results (lots of falling on our butts)). After some light ‘schwacking, we gained the beautiful and isolated ridge above Wilcox Lakes (photo 10). In late season there are several fine campsites in dry tarn beds along this ridge. The no-snow ascent to “Wilcox Pass” was pleasant. The descent was hellish 'schwacking--but mercifully short. Before leaving Wilcox Pass we inspected the ascent chute leading just N of The Coccyx. It was largely free of snow and looked confined and dangerous. We elected to climb directly W up the bowl S of Newhalem Peaks to a vegetated ledge system that led us back the the upper portions of the dangerous-looking chute. During our circuitous detour, we heard a number of large boulders bounding down the chute--confirming our cautions. The top of the chute was better (photo 11) but, still quite steep and difficult to the top. The descending traverse below The Coccyx was pleasant with some potential campsites at the base of the small glacier below the NW face of The Coccyx. Gaining the ridge SW of The Coccyx was easy. Once gaining the ridge, we had to walk back towards The Coccyx to find the descent. The crossing below Backbone ridge was delightful. We referred to the basin as “Bear Basin” after seeing six (or was it seven?) very well-behaved black bears feasting on blueberries as we hiked through (photo 12). Suitable campsites were not readily apparent to us at the start of this crossing but, we noticed several nice spots near the end of the crossing (on the slopes SW and below Early Morning Spire). The crossing into Marble Creek drainage was reasonable and allowed fairly easy access to the moraine N of Marble Creek. The moraine was steep but, had excellent footing and was stable--providing an efficient pathway to the upper reaches (photo 13). We had to do some tricky routefinding (and backtracking in several places) to gain access to the lower portion of the glacier (name?) leading to the col SE of Dorado Needle. To this point, we had enjoyed very pleasant weather. However, we were blasted by a very active thunderstorm--including welt-inducing hail--during our ascent of this glacier. As we ascended, we looked at the two options for crossing to the McCallister Glacier and chose the right-most gully (as recommended by Doug Walsh in his report). However, instead of being “elegant, scenic, zero stress and quite pleasant”, it was a nightmare for us in late season. The glacier ended several hundred feet from the top of the gully and the gully was full of steep mud and loose boulders. We frontpointed through this dangerous mess which sometimes felt like swimming. We were totally stressed by the time we reached the top--and we felt anything but elegant. Getting onto the McCallister Glacier was straightforward, although we had to descend a small boulder field in crampons to reach the ice. Fortunately, the sun came out and we enjoyed the warmth and fantastic views (photo 14, photo 15, photo 16). This was the last we would see of the sun for the remainder of our trip... I believe the remainder of our trip followed the typical Inspiration Traverse--we did most of it in dense fog (photo 17). We traversed E just S of Tepeh Towers then along the W face of Klawatti Peak to the col leading to the Klawatti Glacier. We did a short rappel off a bollard to get off of the McCallister Glacier and into the moat below the col. Then we did a 40 foot rappel to get from the col and onto the Klawatti Glacier. To avoid the heavily crevassed lower reaches of the Klawatti Glacier, we traversed almost to the base of the Austera Towers before descending. After leaving the glacier, we had a long descent over glaciated bedrock overlaid with loose “ball-bearing” scree. My old knees were starting to lose their mojo. We rounded the corner of the Austera Towers onto North Klawatti Glacier. The route to Lucky Pass (between Primus and Tricouni) didn’t look promising because of the breakup of the lower North Klawatti Glacier. To avoid that section, we decided to continue up North Klawatti Glacier--which then necessitated going over Primus Peak (photo 18) to reach Lucky Pass. The descent from Primus was complicated and slowed by the lack of visibility but, we eventually made it to Lucky Pass. We totally messed up on the descent from Lucky Pass down the Borealis Glacier--and, to my chagrin, it was my fault. Instead of traversing N across the upper portions of the glacier, we headed straight down. After some tricky routefinding, we managed to gain the rock rib that separates the upper Borealis from the lower. We spent a couple of hours scrambling around on this rock rib until realizing that it wouldn’t work for us--ugh! Julie identified the correct route which involved climbing back up to the upper portion, crossing to the north and descending the drainage back down to the lower portion of the glacier. After some exploration, we found the Lucky Ridge Boot Trail (note: if you’re looking at Borealis Lake from the south (above), there appear to be three small hills above the north shore of the lake. The trail is on the easternmost (right) hill). The trail isn’t hard to lose. I highly recommend downloading the GPS track referenced in a trip report titled "East Ridge of Primus Peak via Thunder Creek and Lucky Ridge" on Summit Post .org (link). When we would lose the trail, we always found that we could use the GPS to relocate the track. After descending the Lucky Ridge Boot Trail, we couldn’t locate a log crossing over Thunder Creek, so, we forded the creek near the old bridge site. We’ve since learned there is a log crossing upstream of the old bridge site. The hike back to the campground was uneventful but spectacular (photo 19). The trip took us eight days. We had planned for seven. We missed our flight as we were hiking down Lucky Ridge. There were a lot of great times and experiences but, with more type II fun than we anticipated. Of course, now that we’re back home, it was a totally wonderful trip--you know what I mean... The lessons we learned about a late season traverse (especially with continued glacial retreat) are to expect less snow cover, slower travel through rougher terrain, more difficult entrances onto and exits from glaciers, and more circuitous route-finding as glaciers break apart. These may be obvious lessons to every Cascade Climber (and maybe that’s why we didn’t see anyone else for seven of our eight days) but they were hard-earned lessons for us boneheads from Wyoming. Stay safe, have fun. Following is a link to our annotated gps file (gpx format): IsolationInspiration.gpx Gear Notes: Nothing special Approach Notes: Delta Airlines from Jackson, Hertz from Seatac...
-
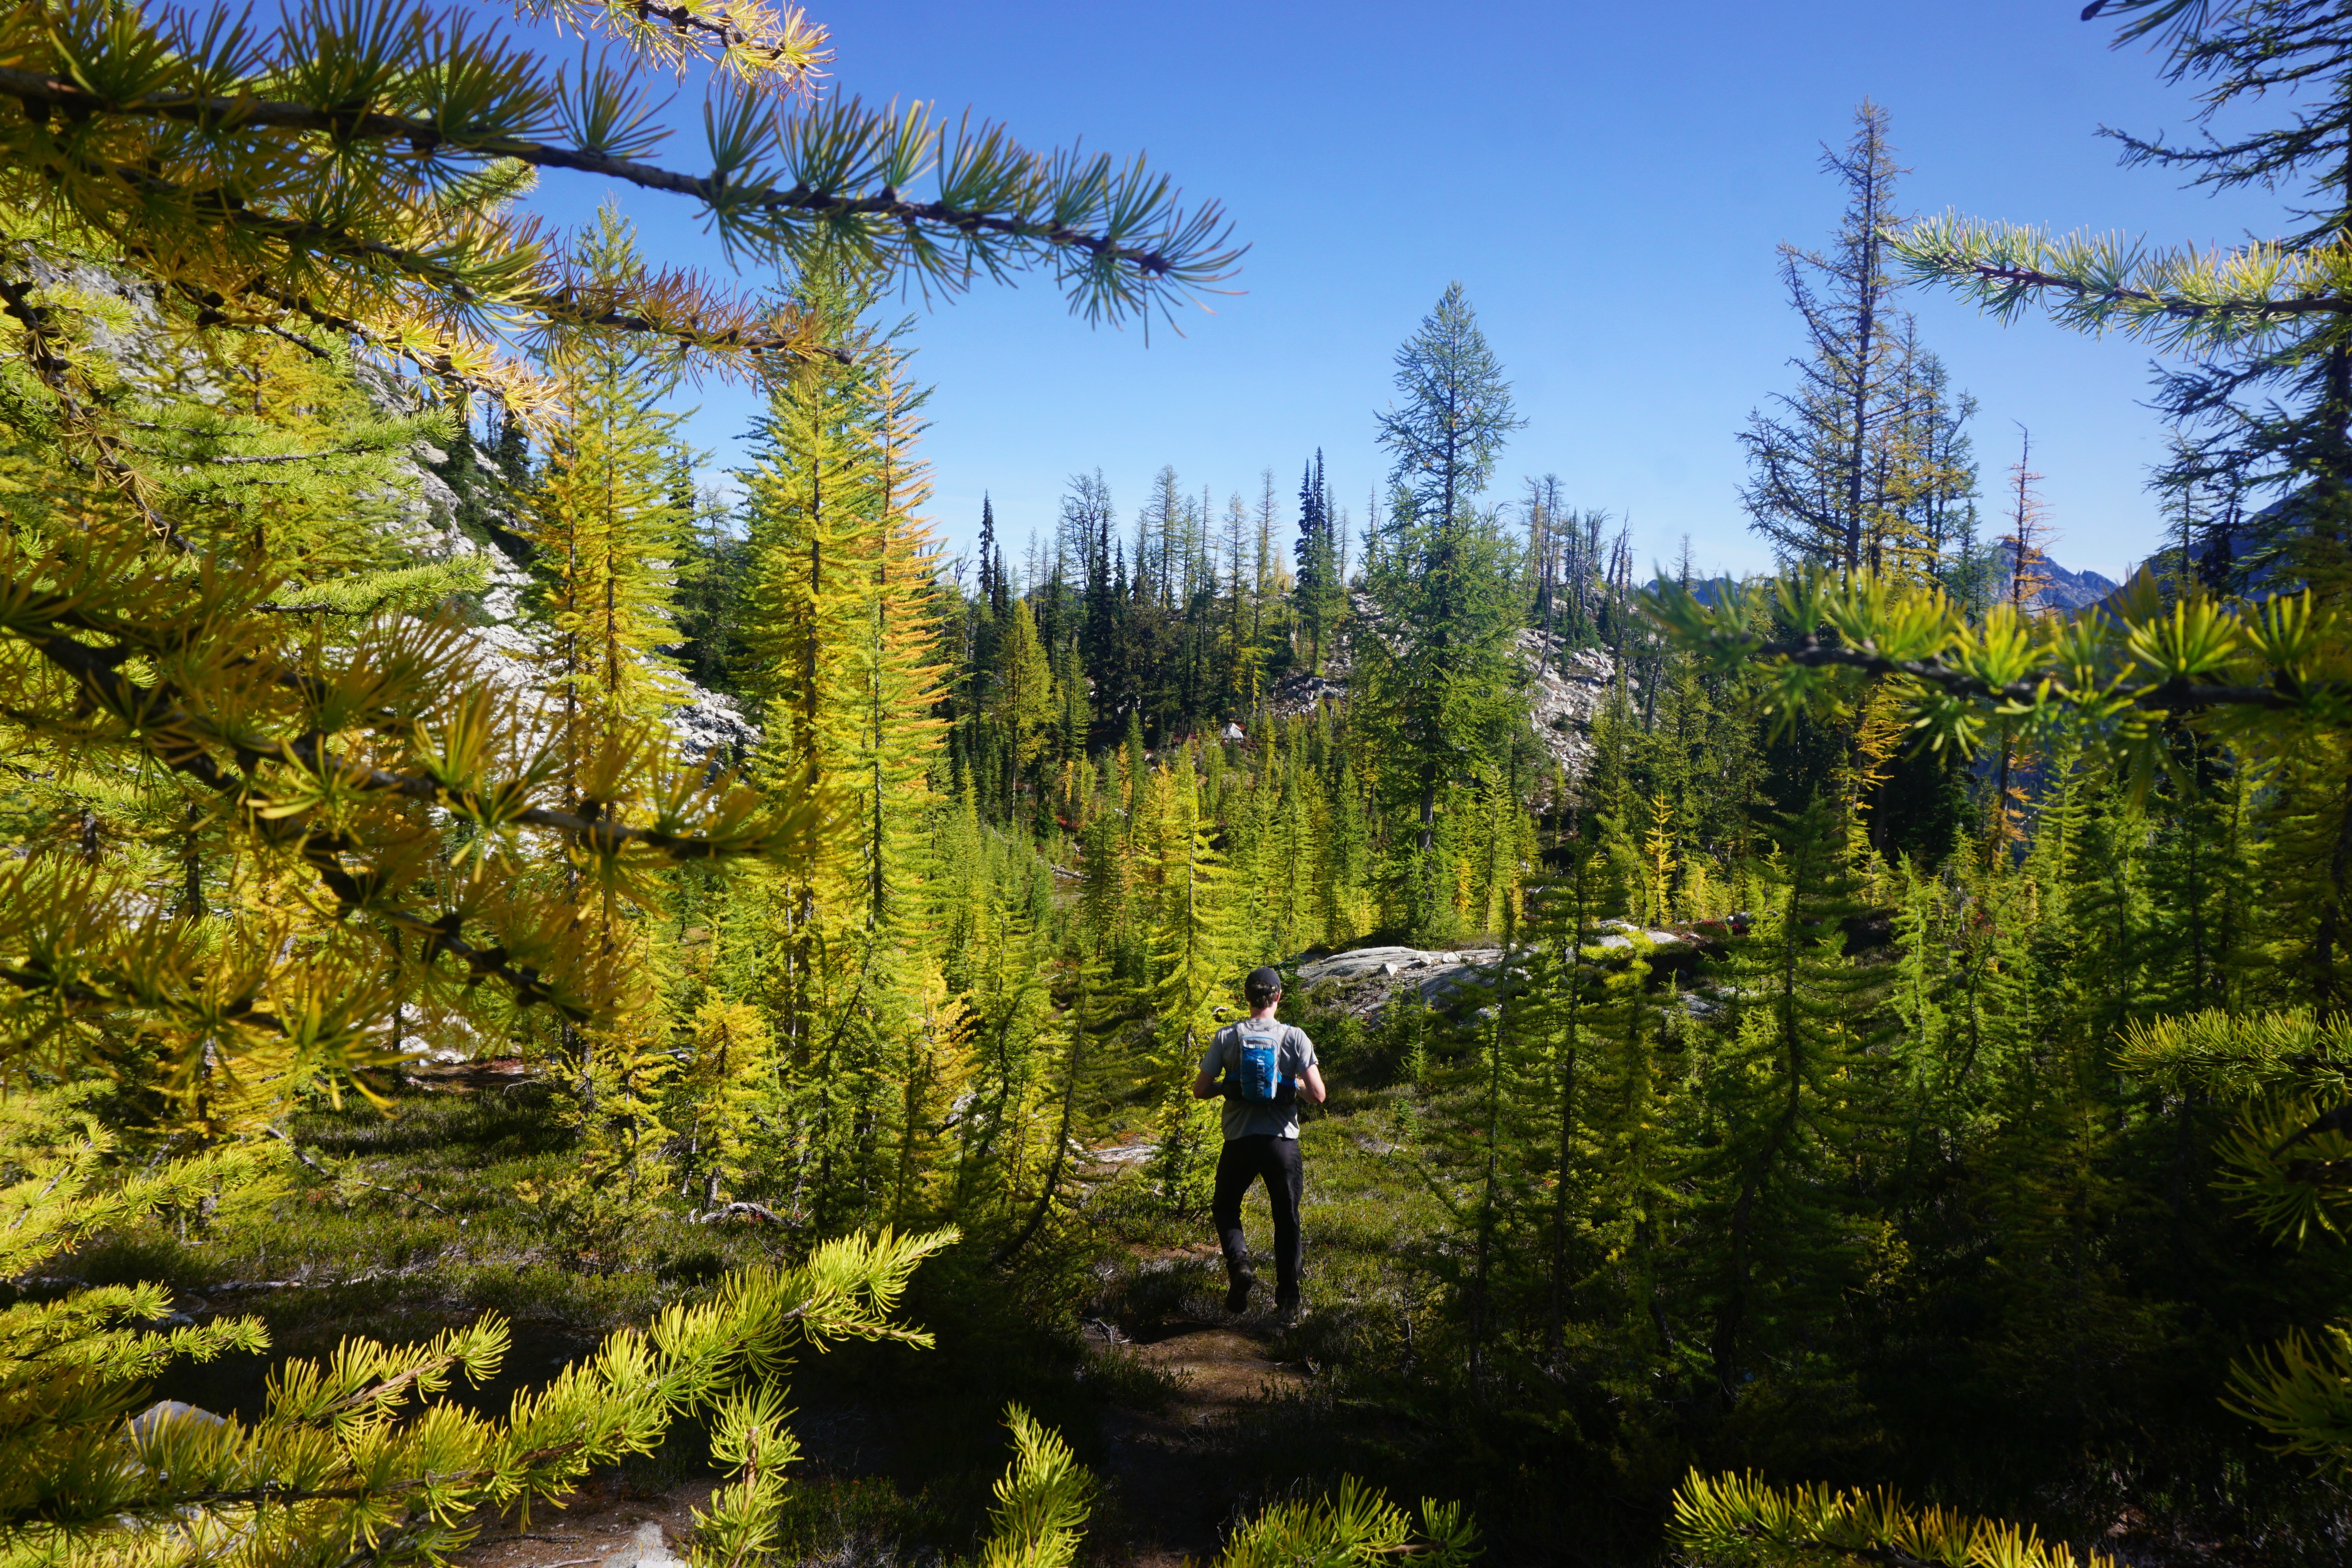
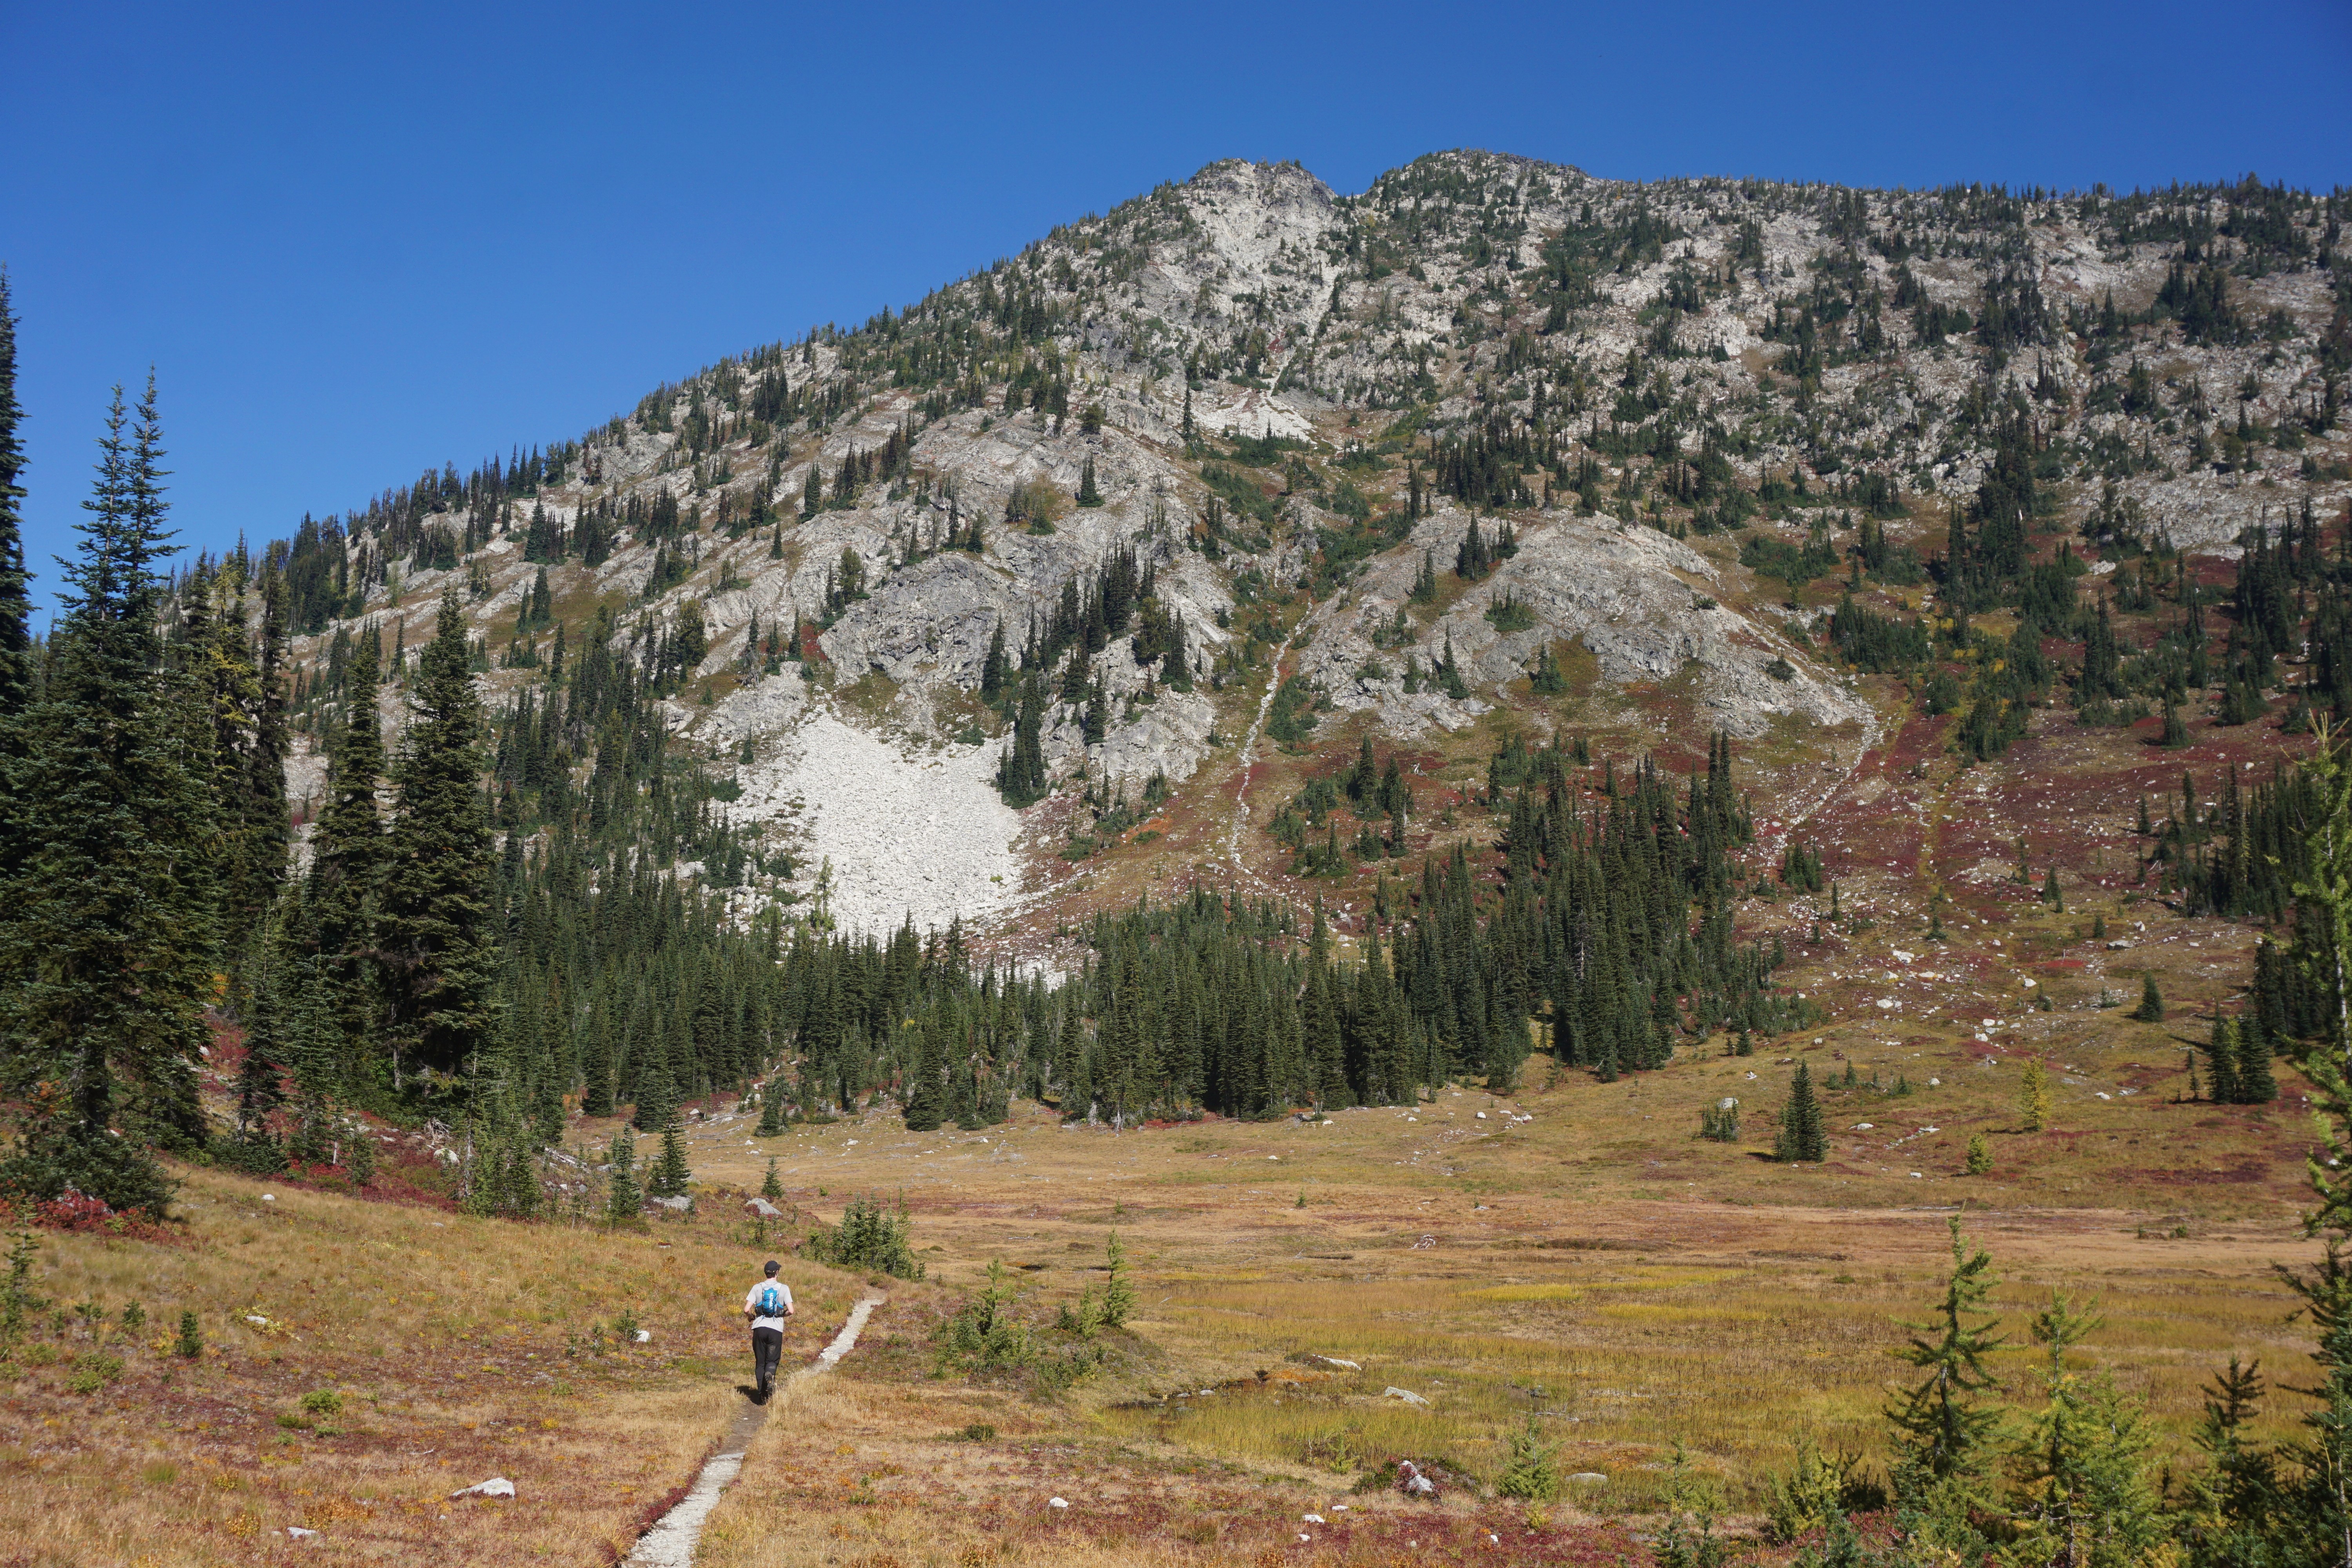
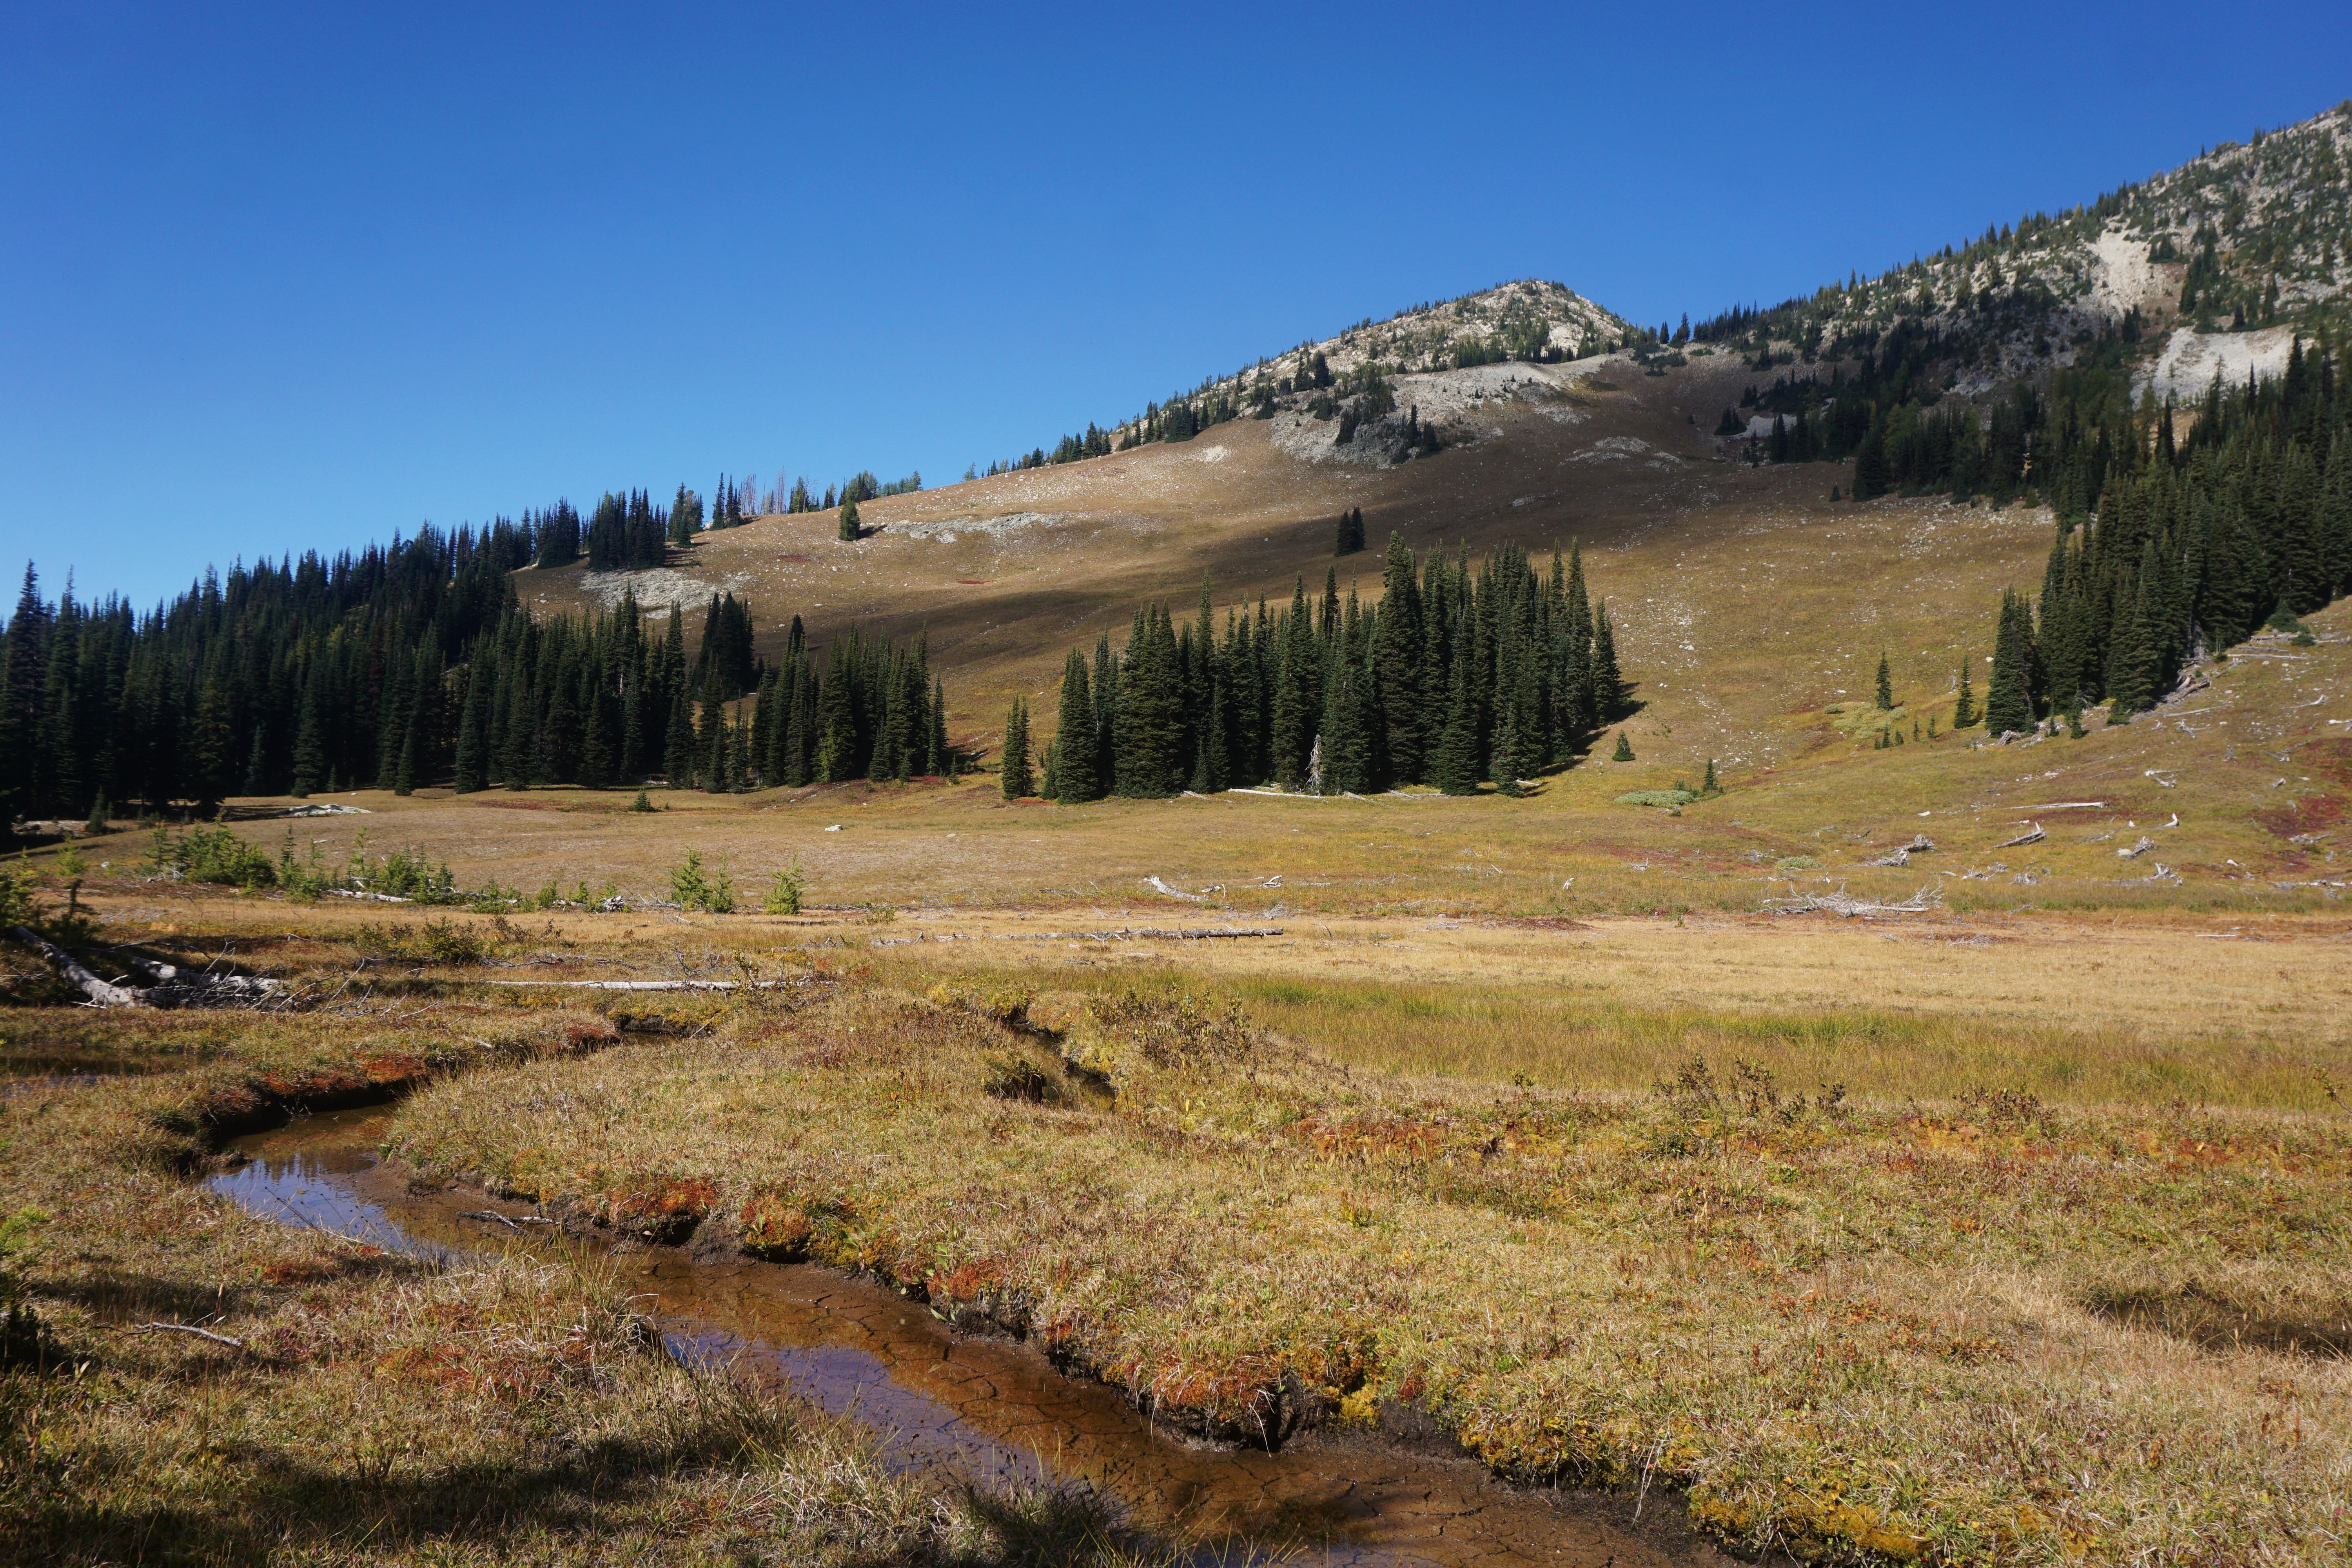
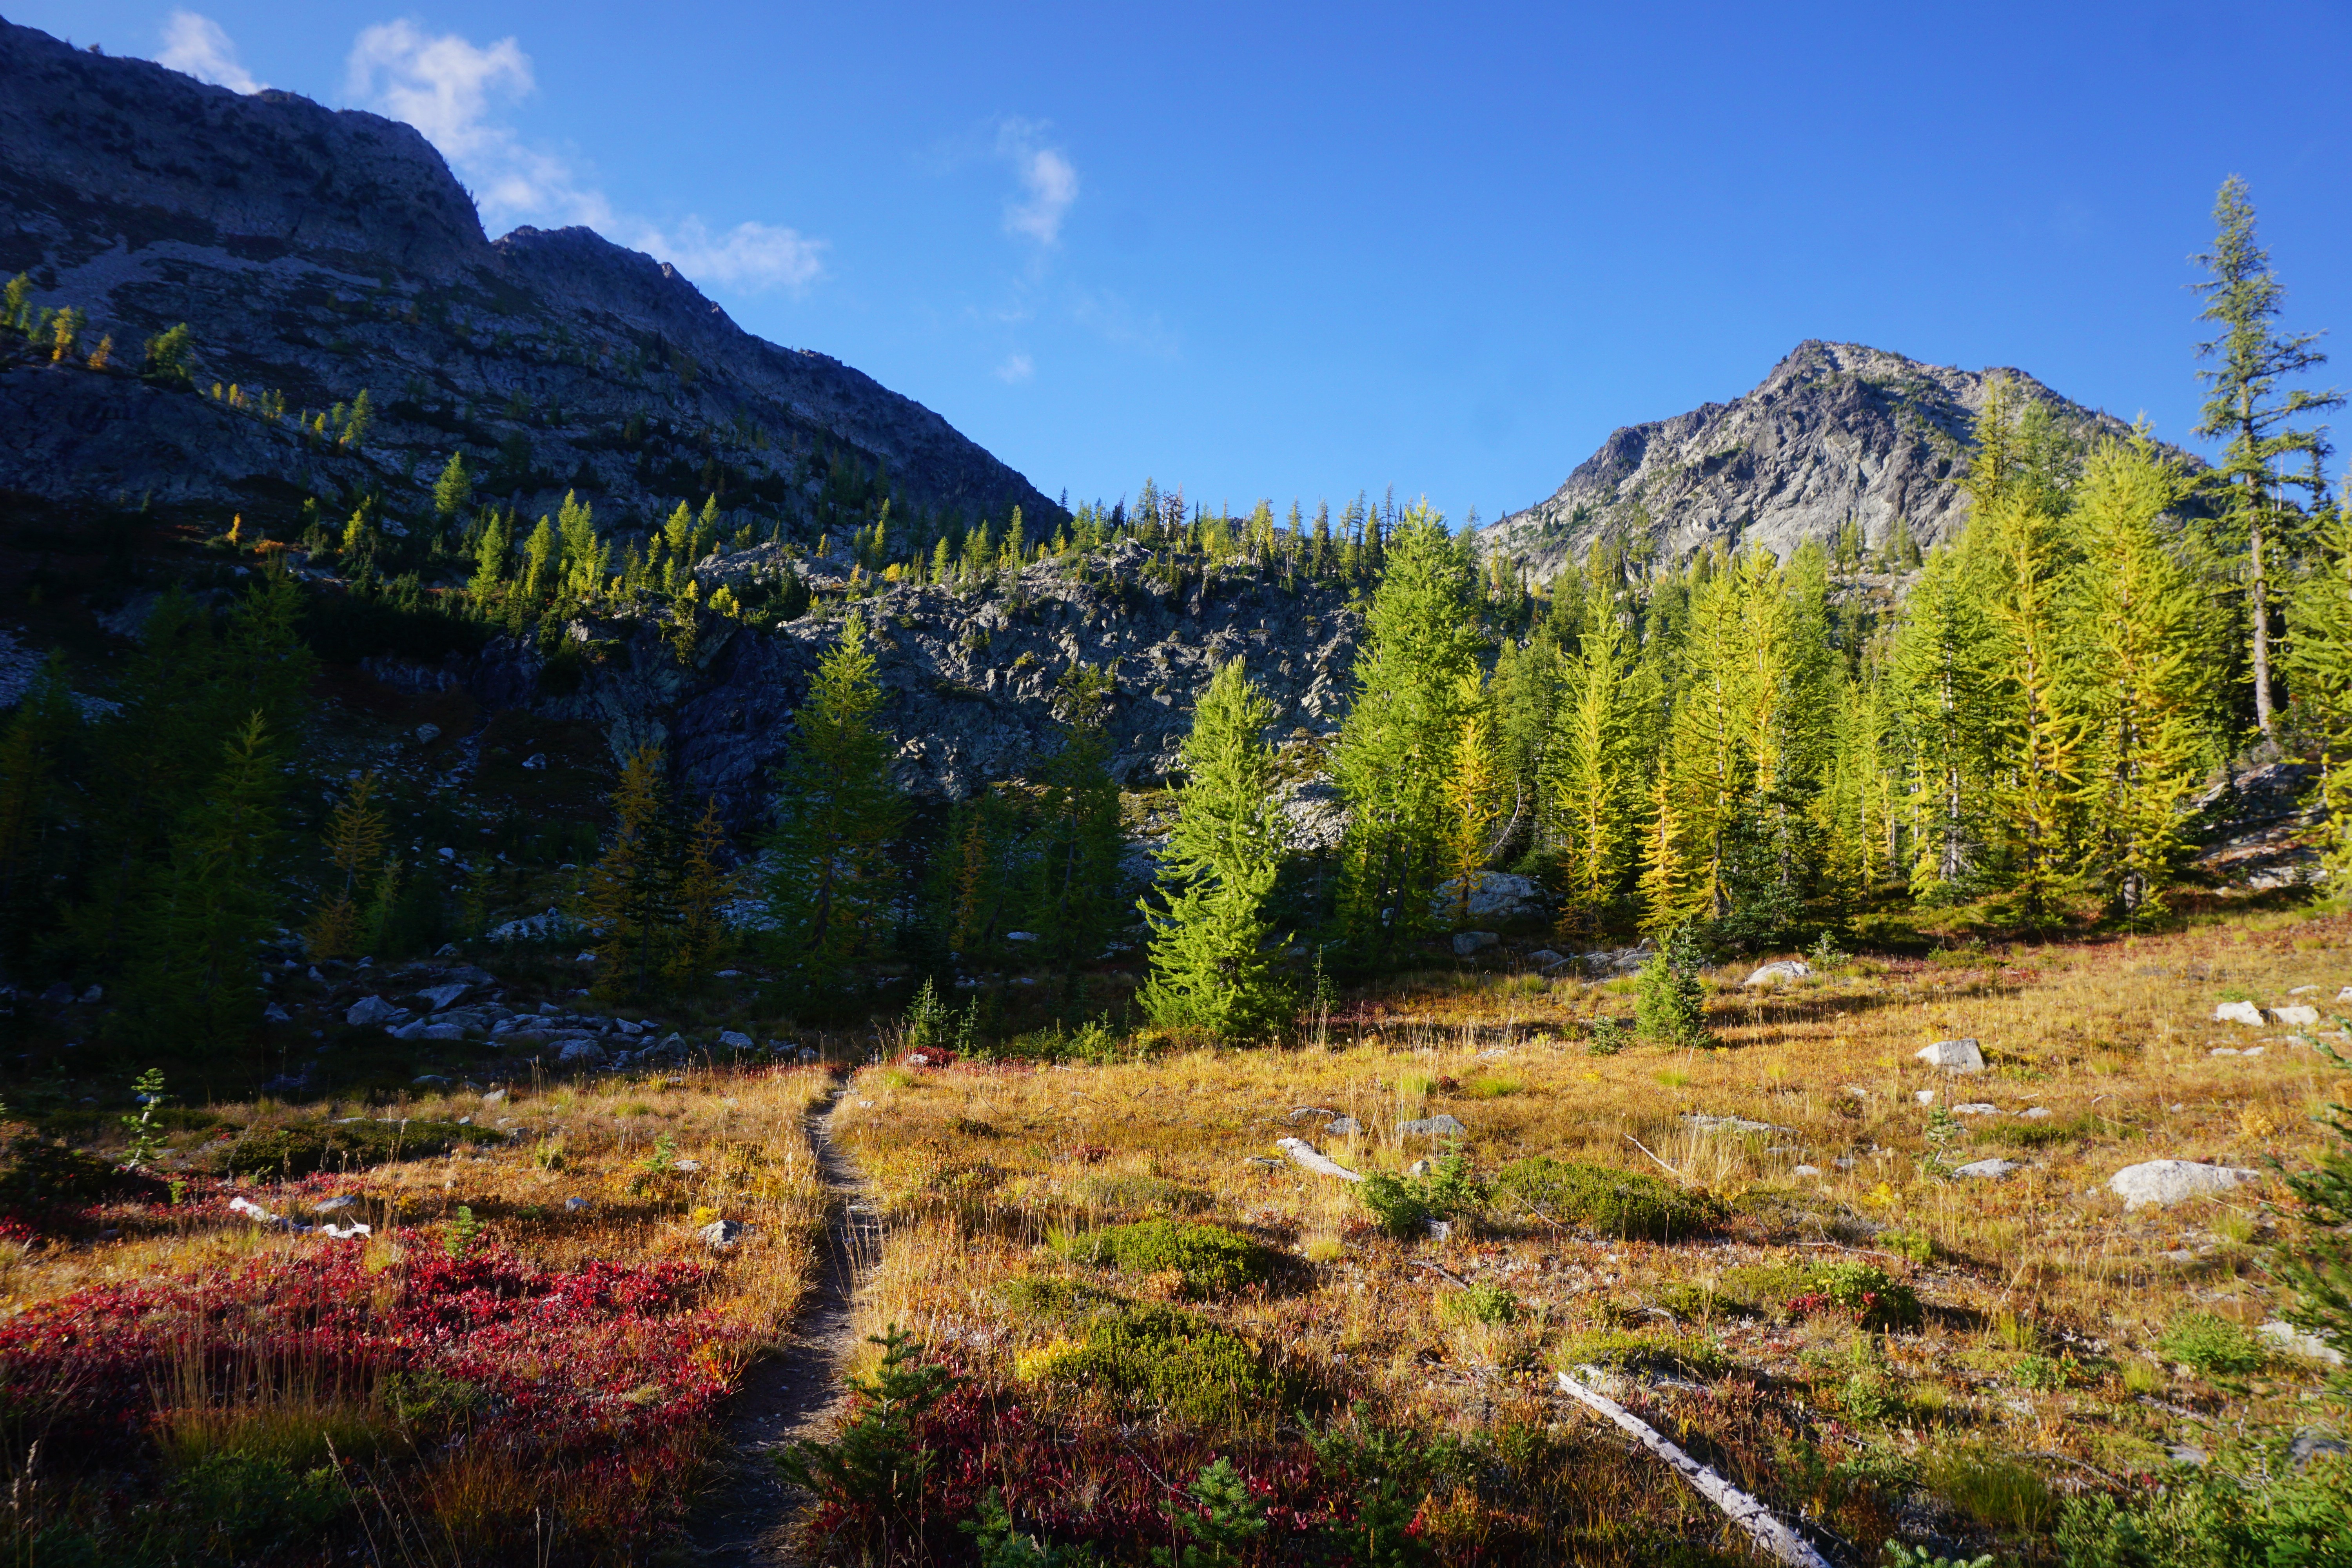
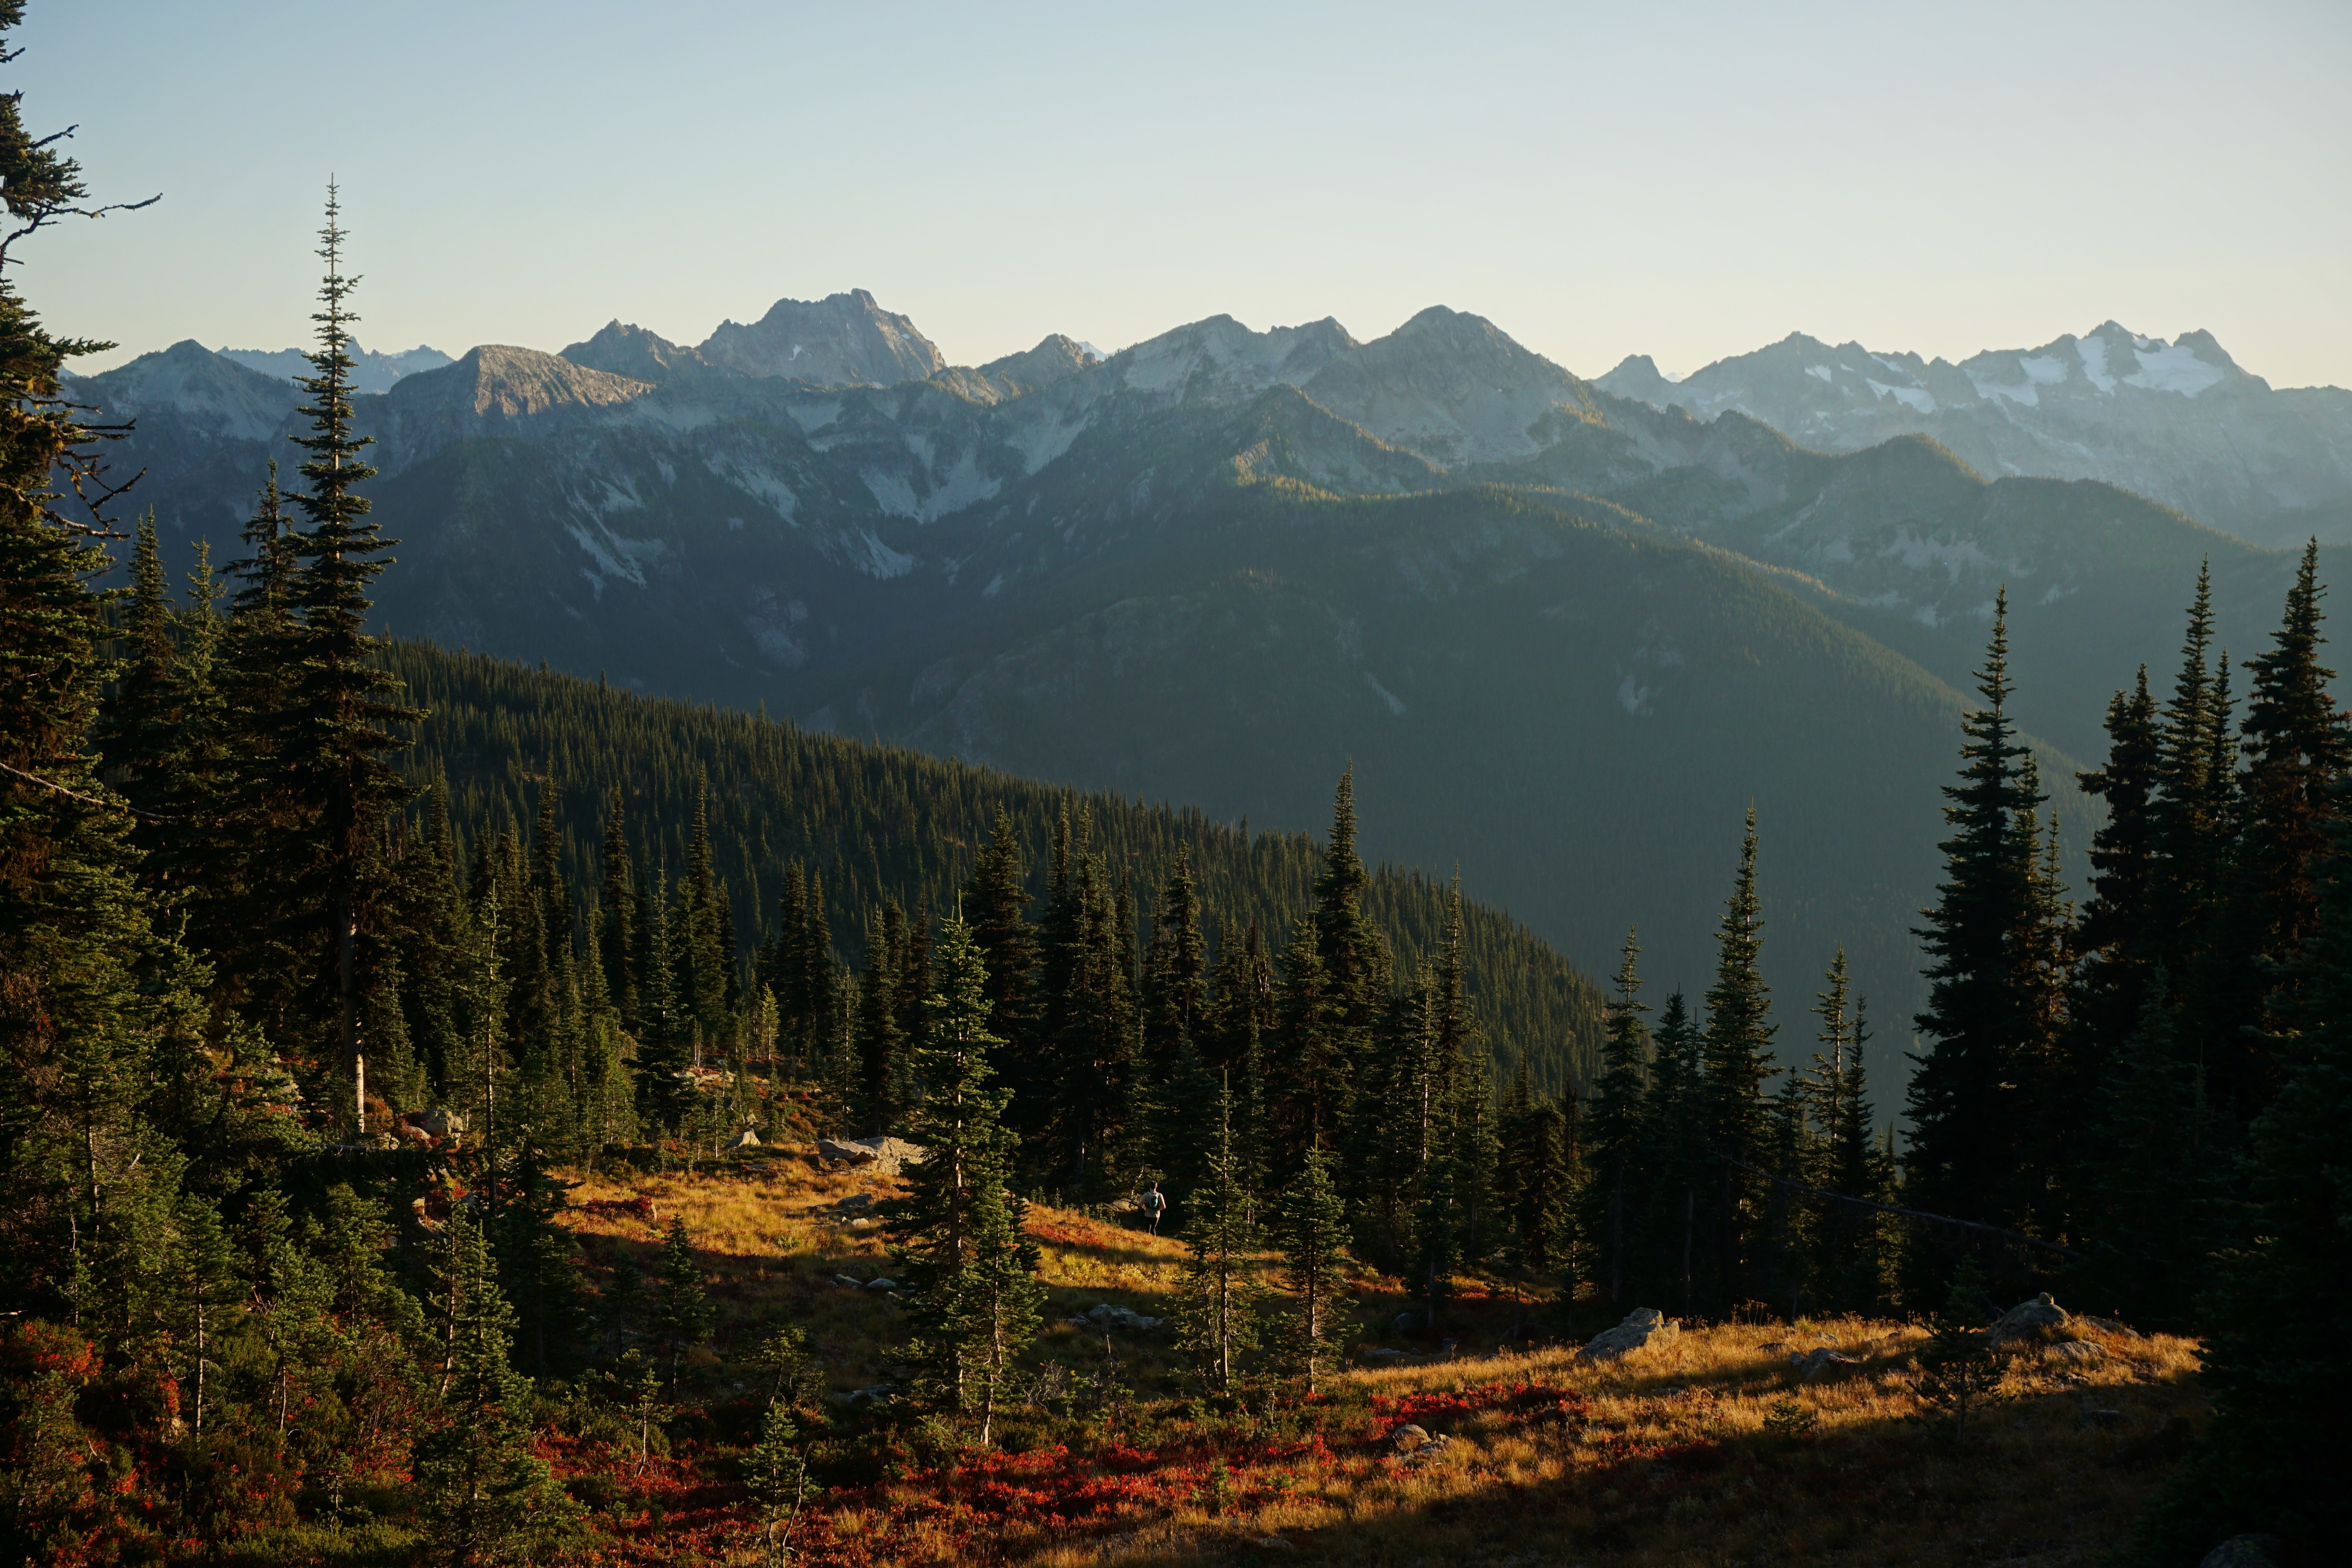
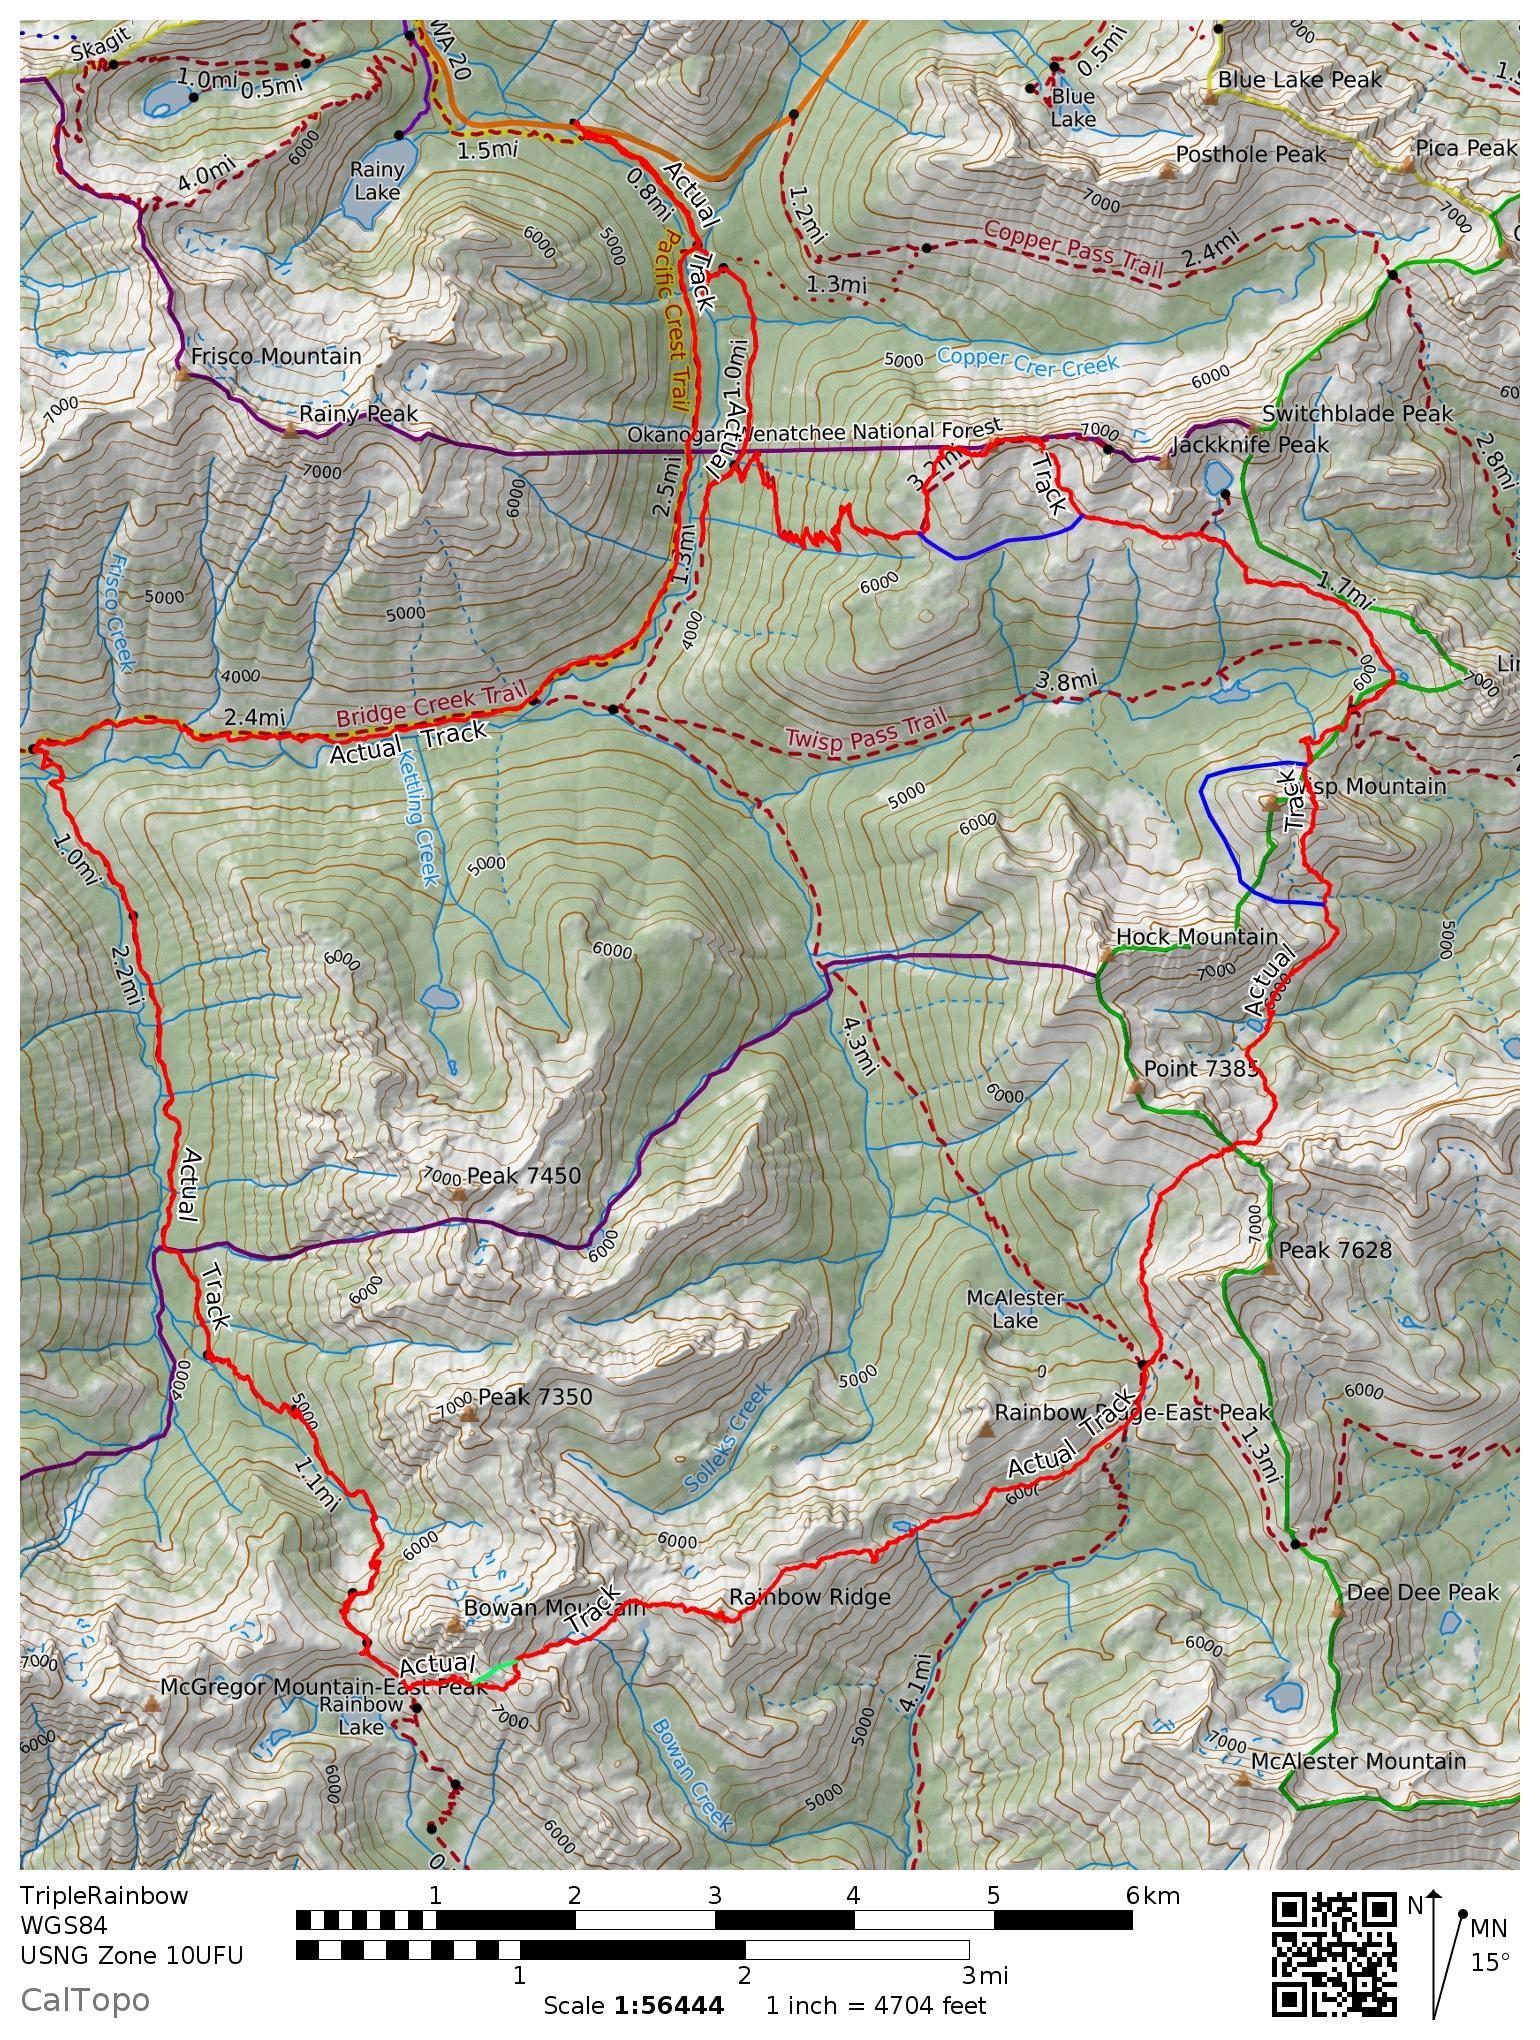
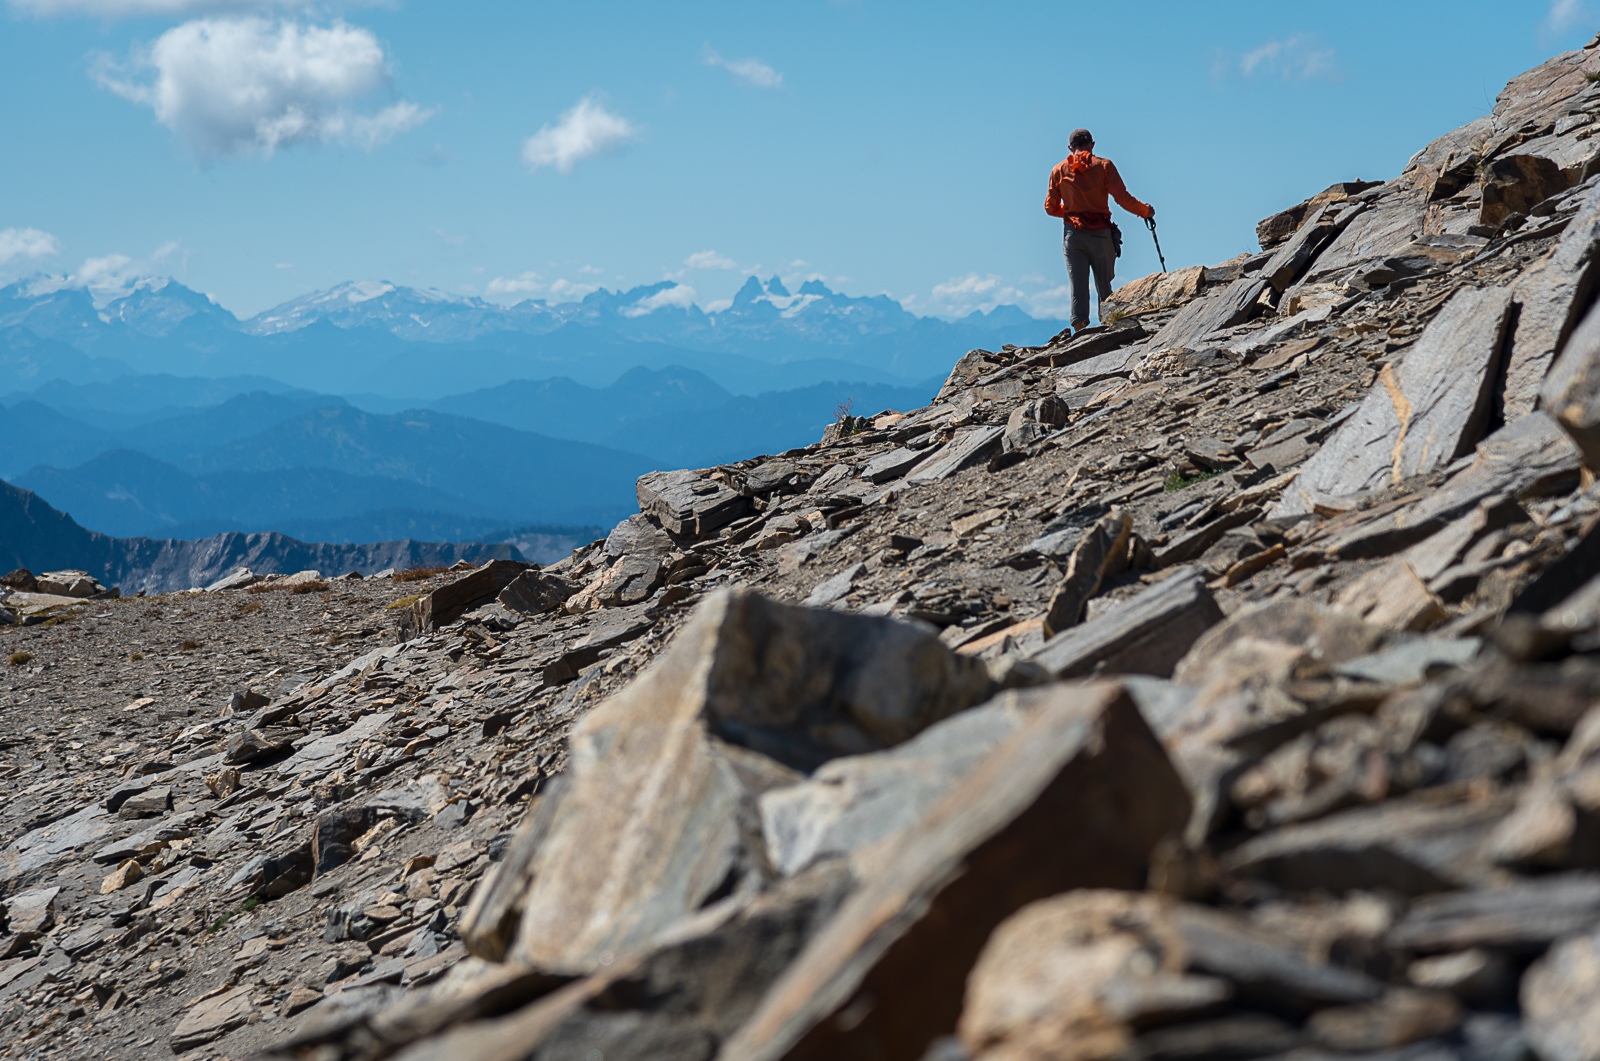
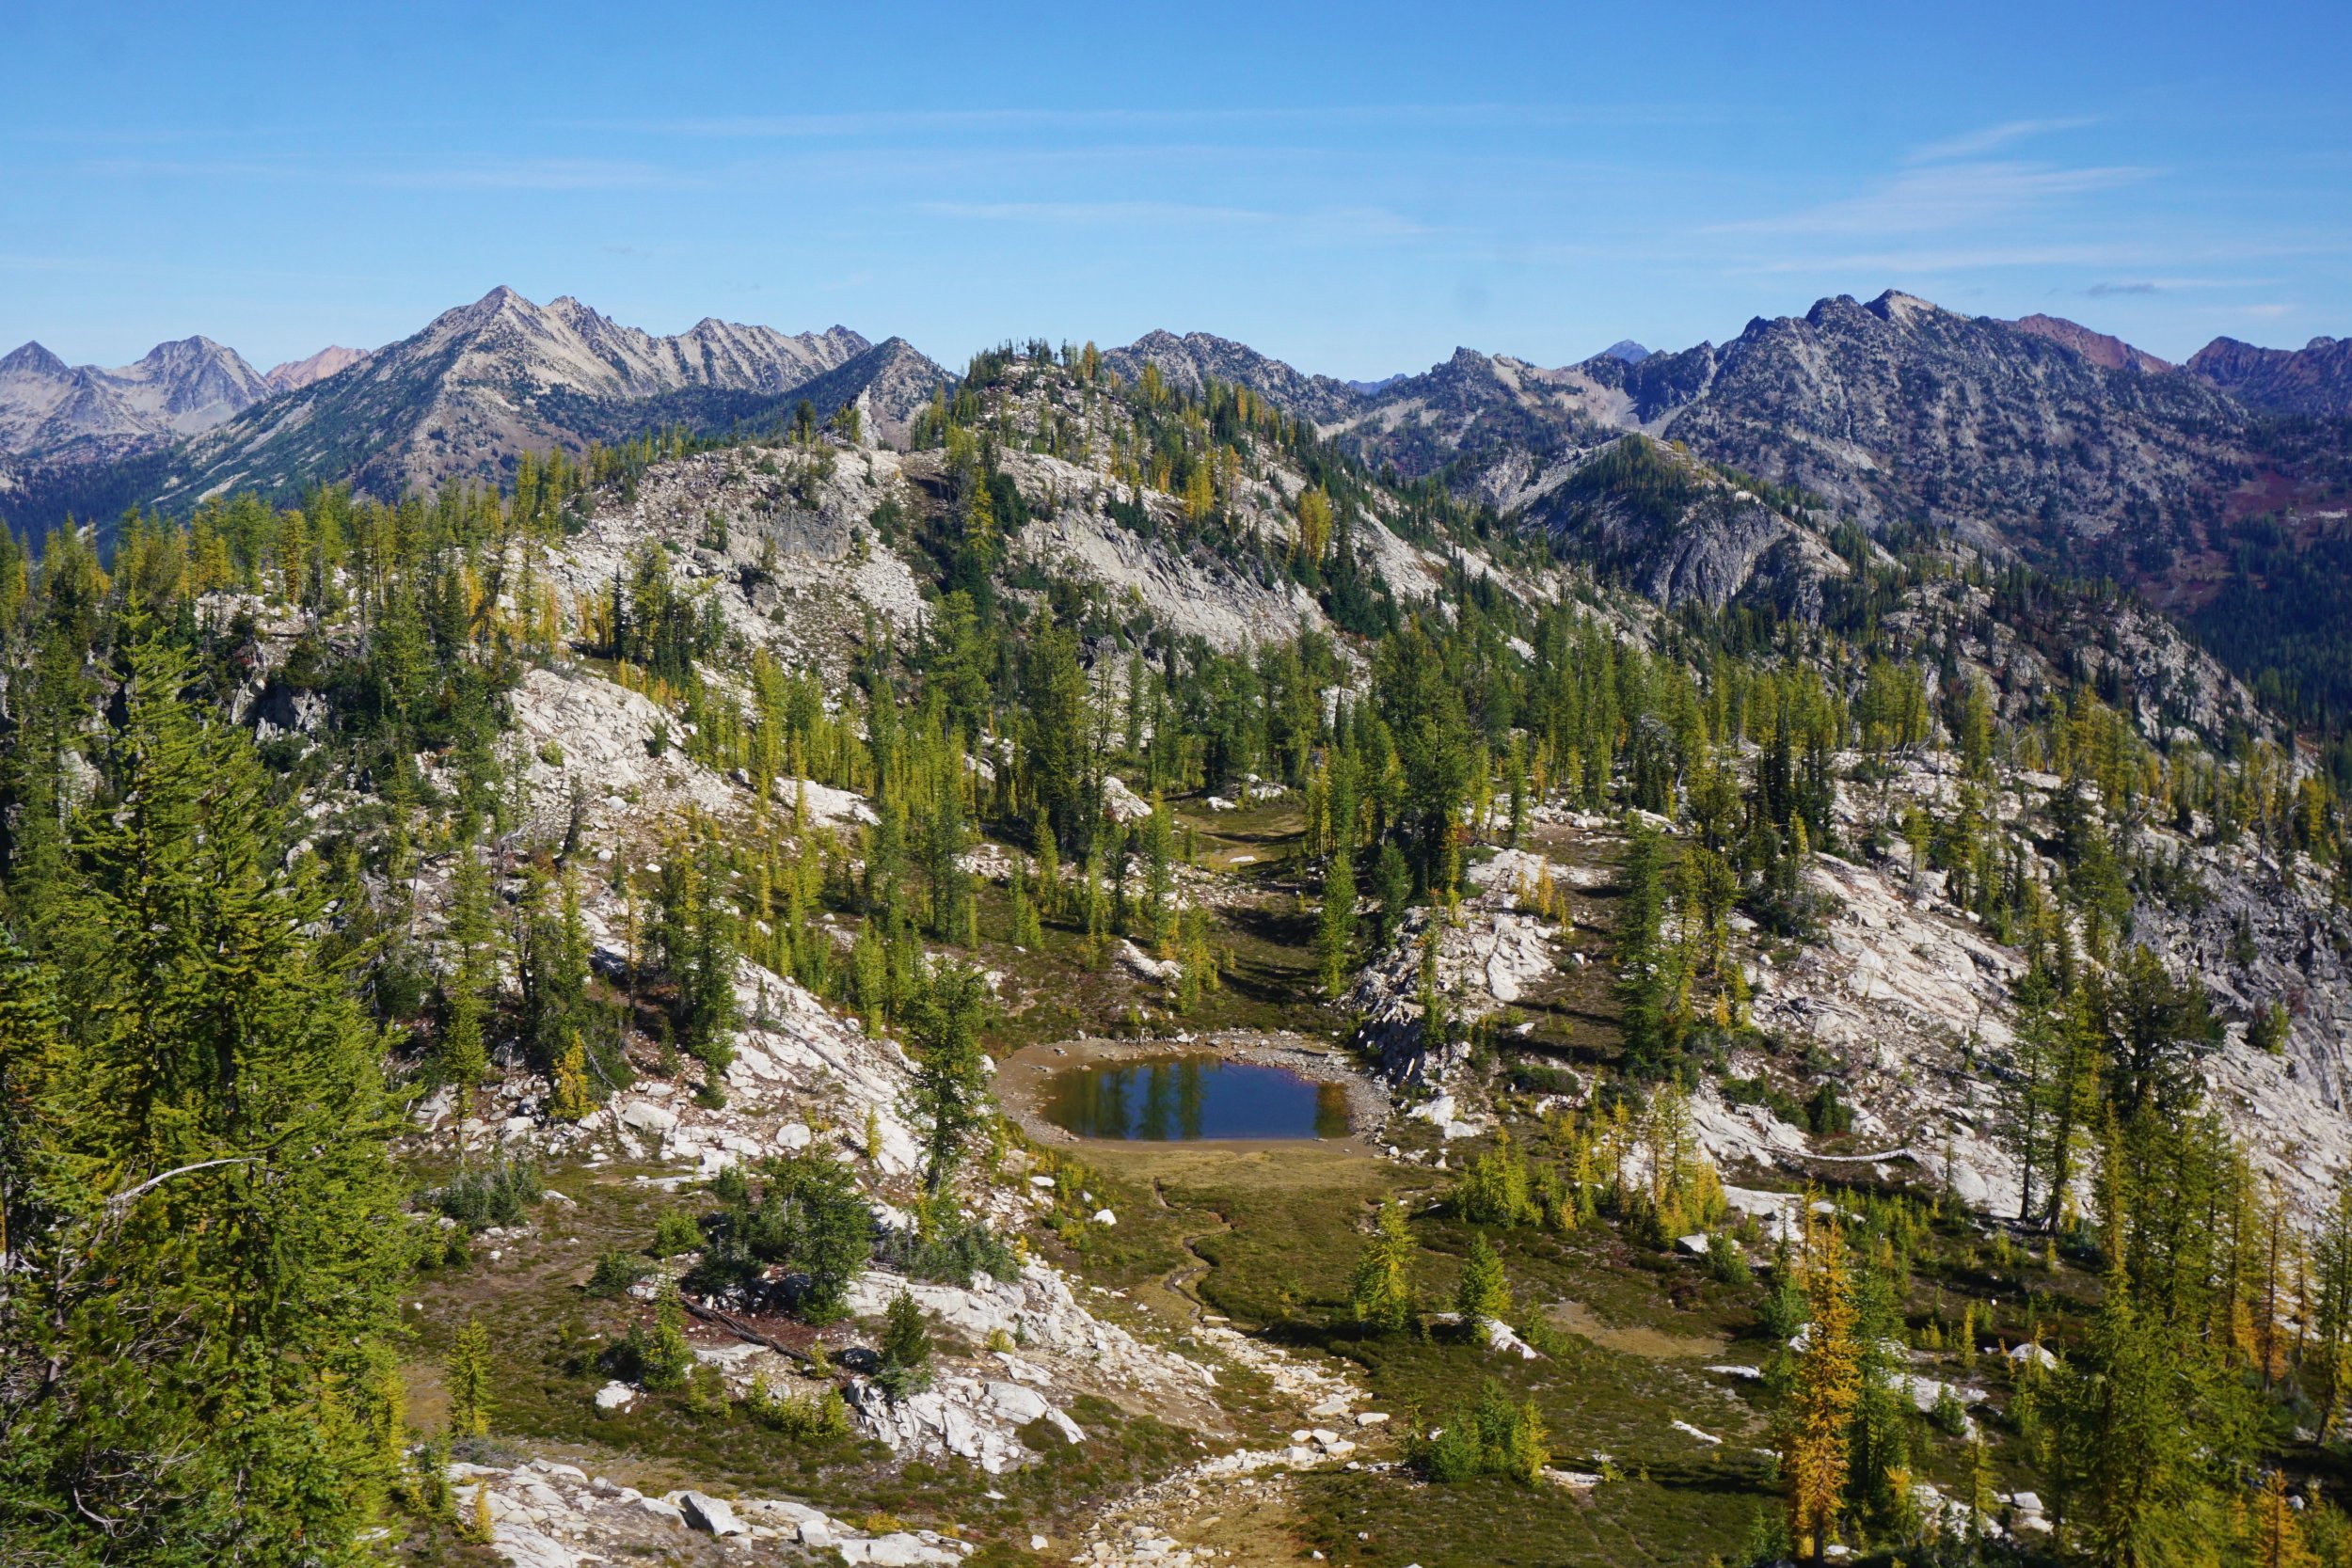
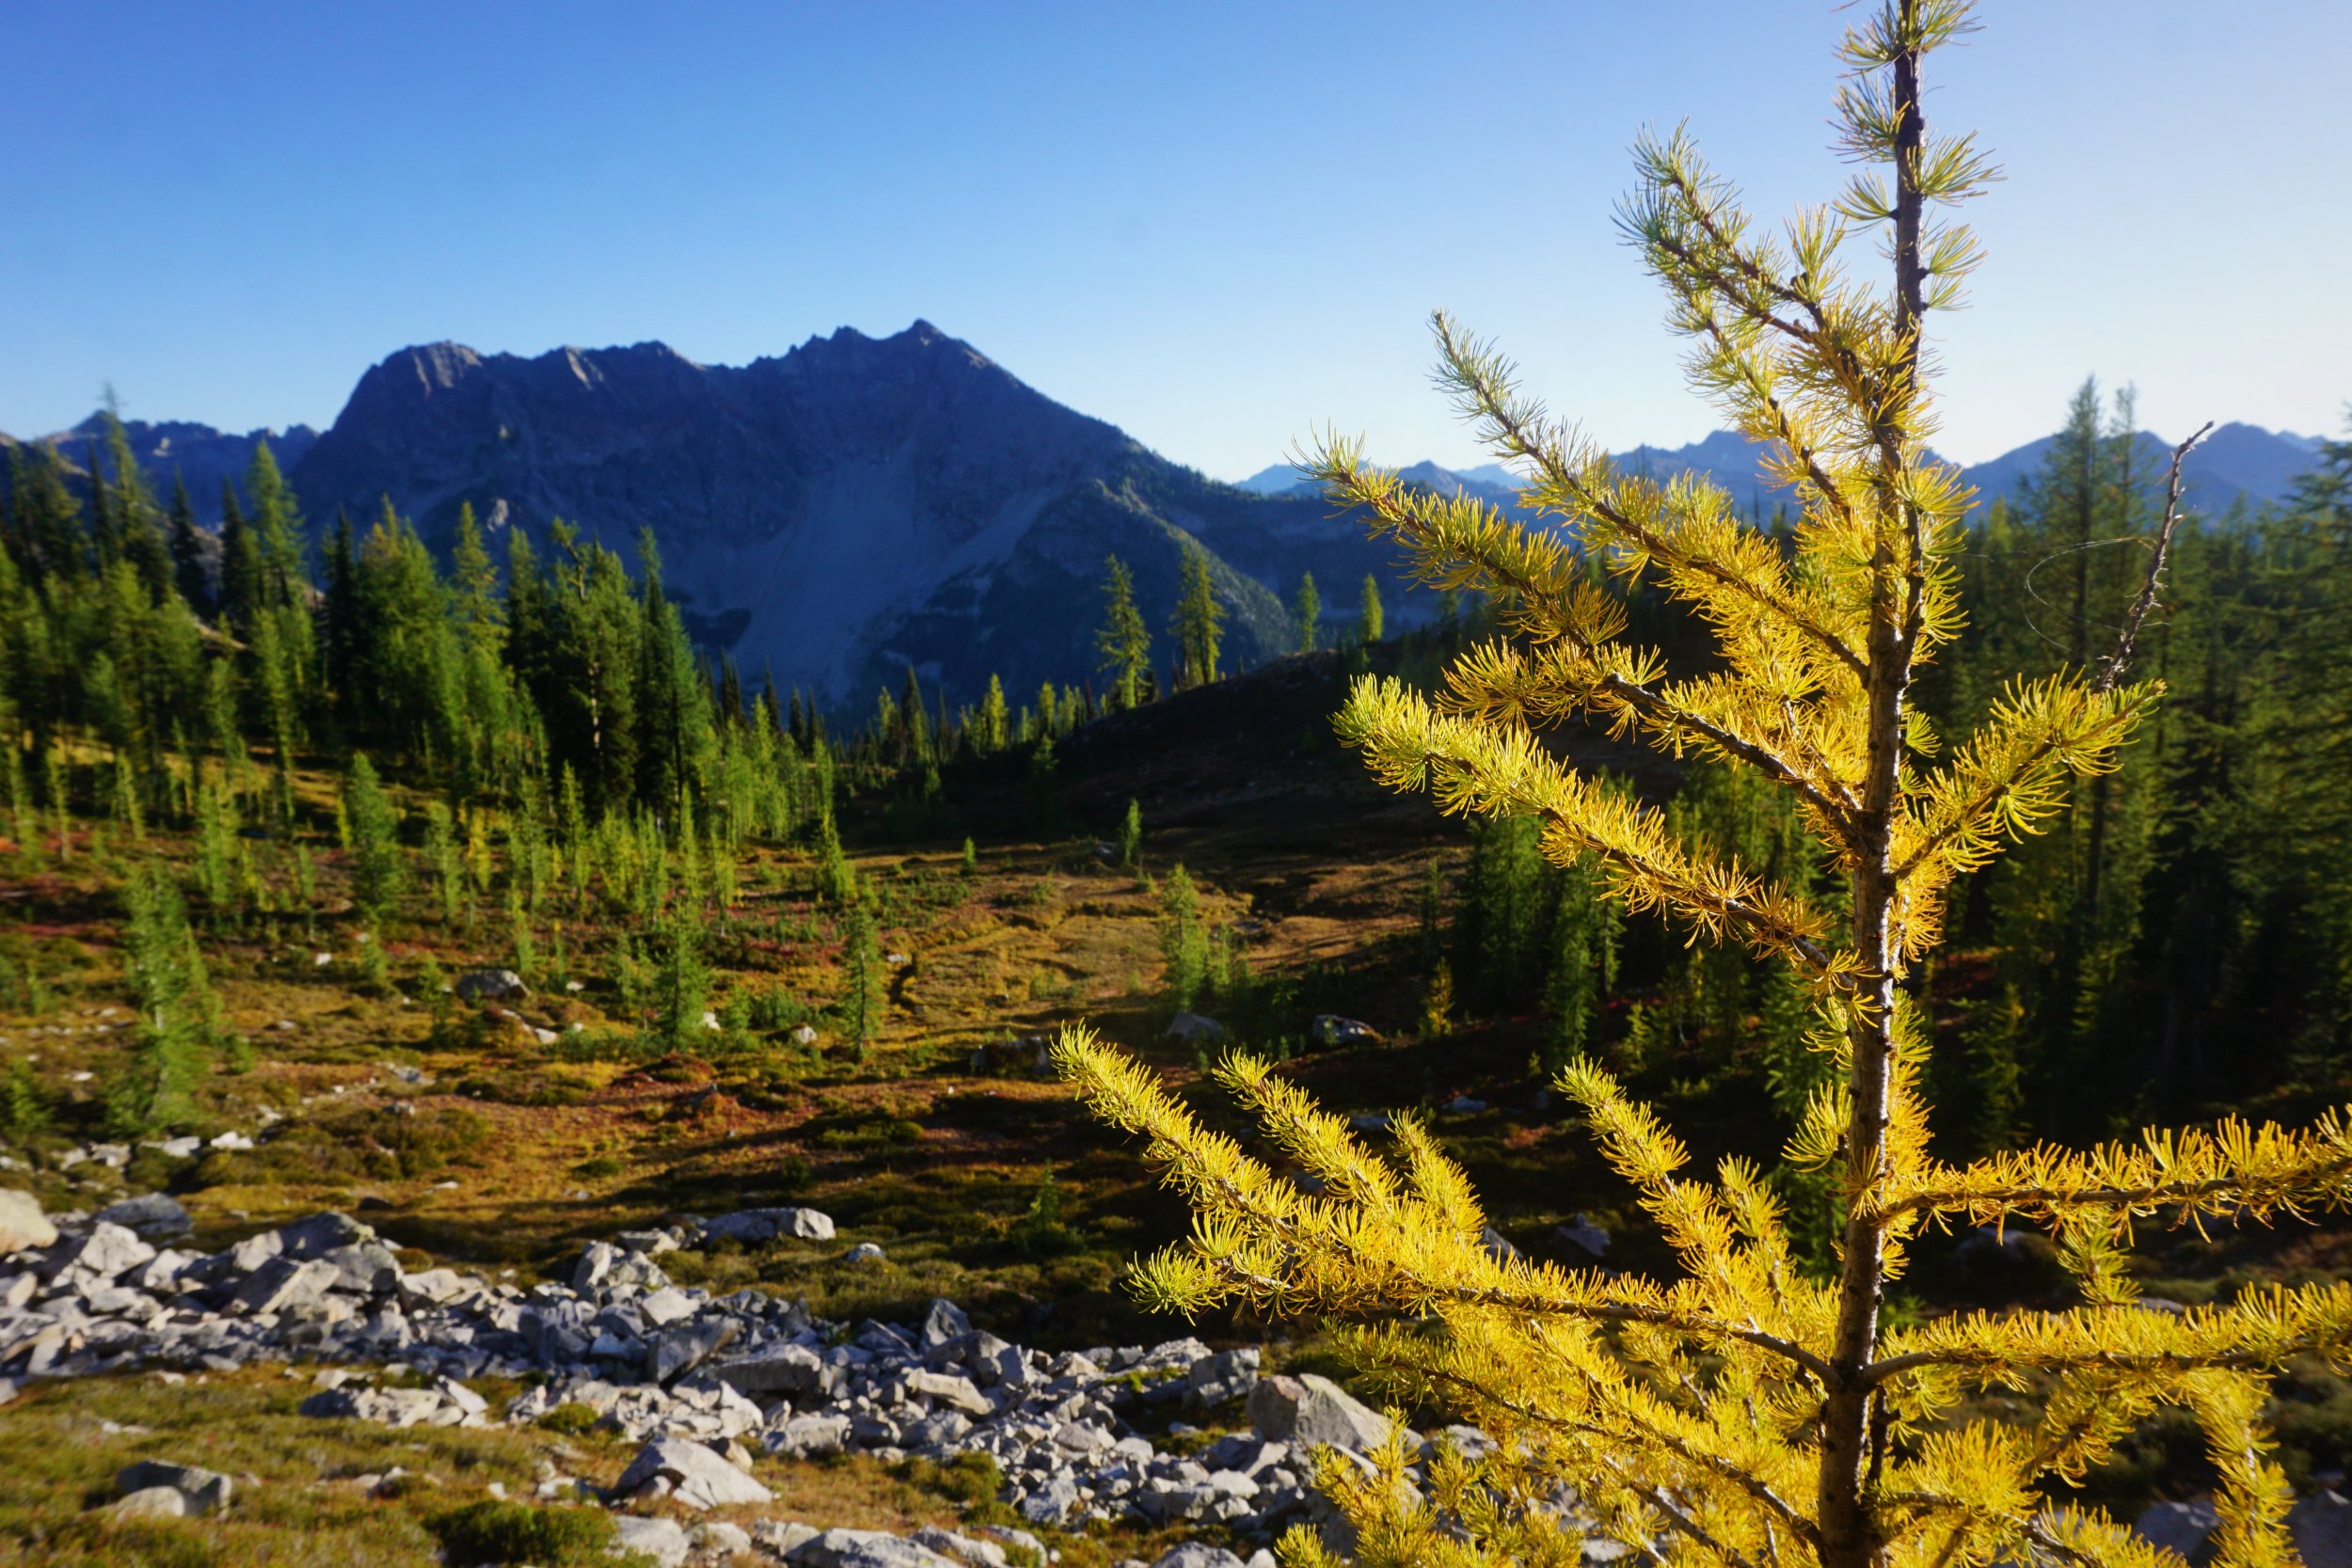
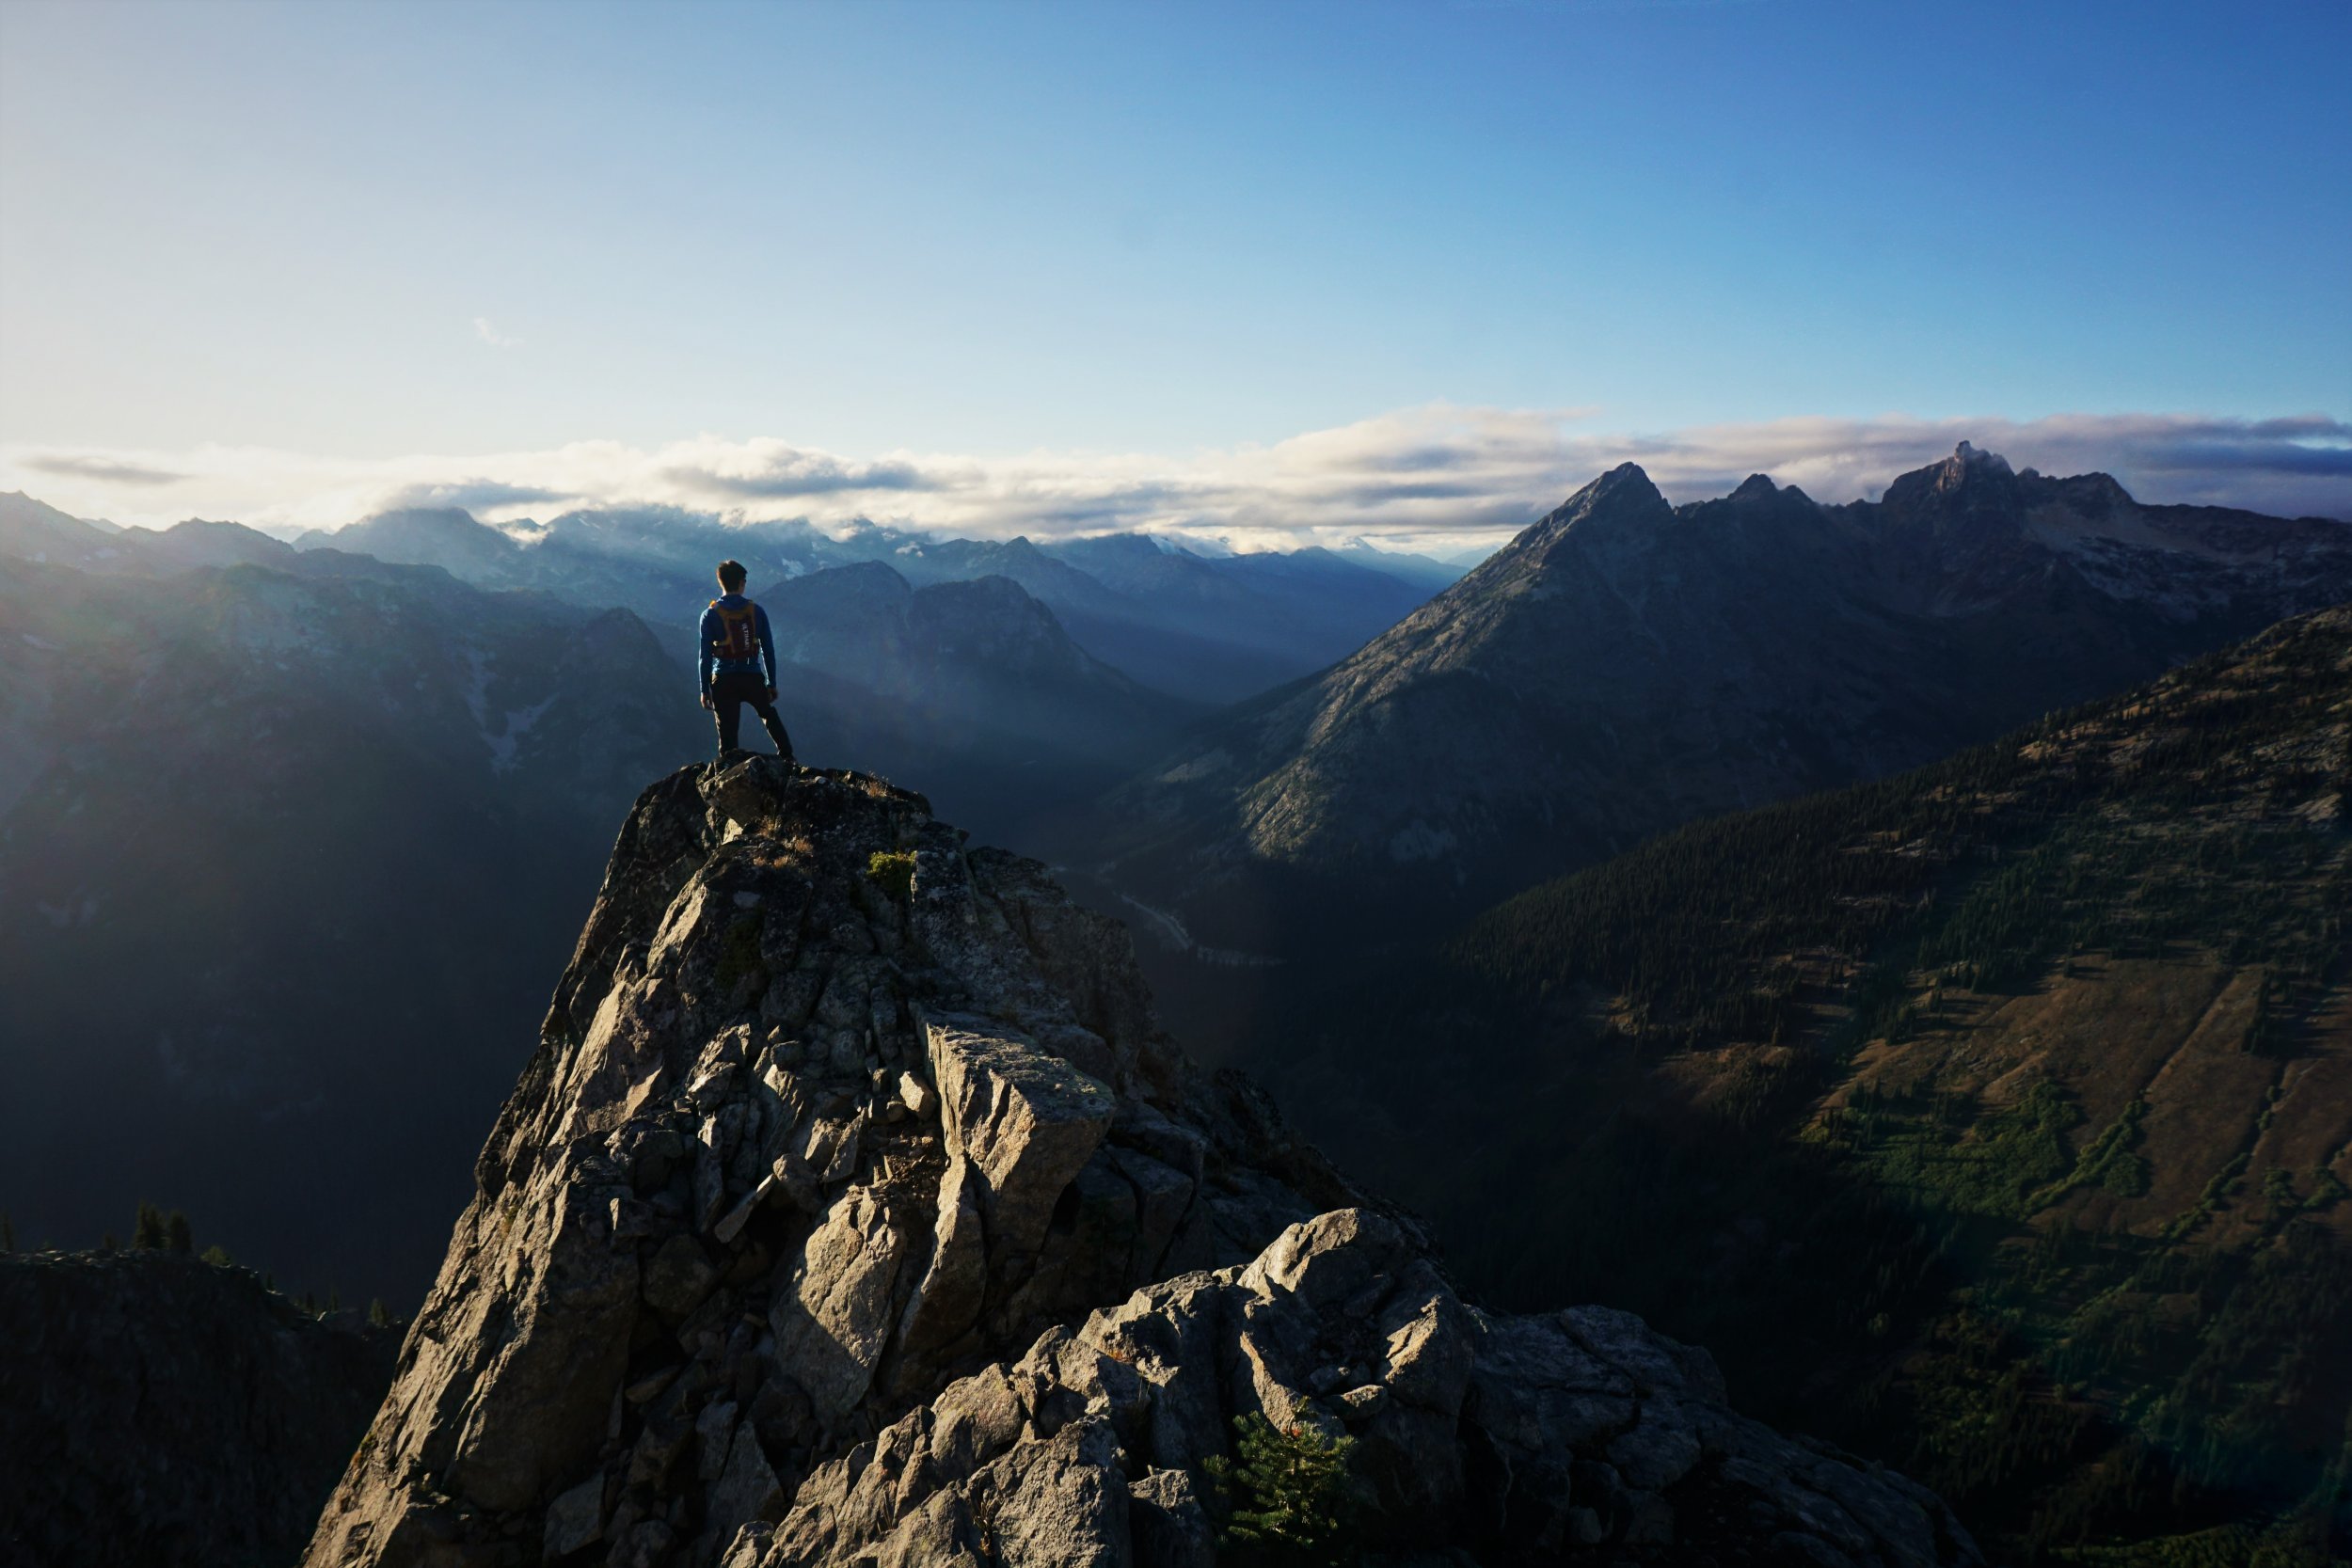
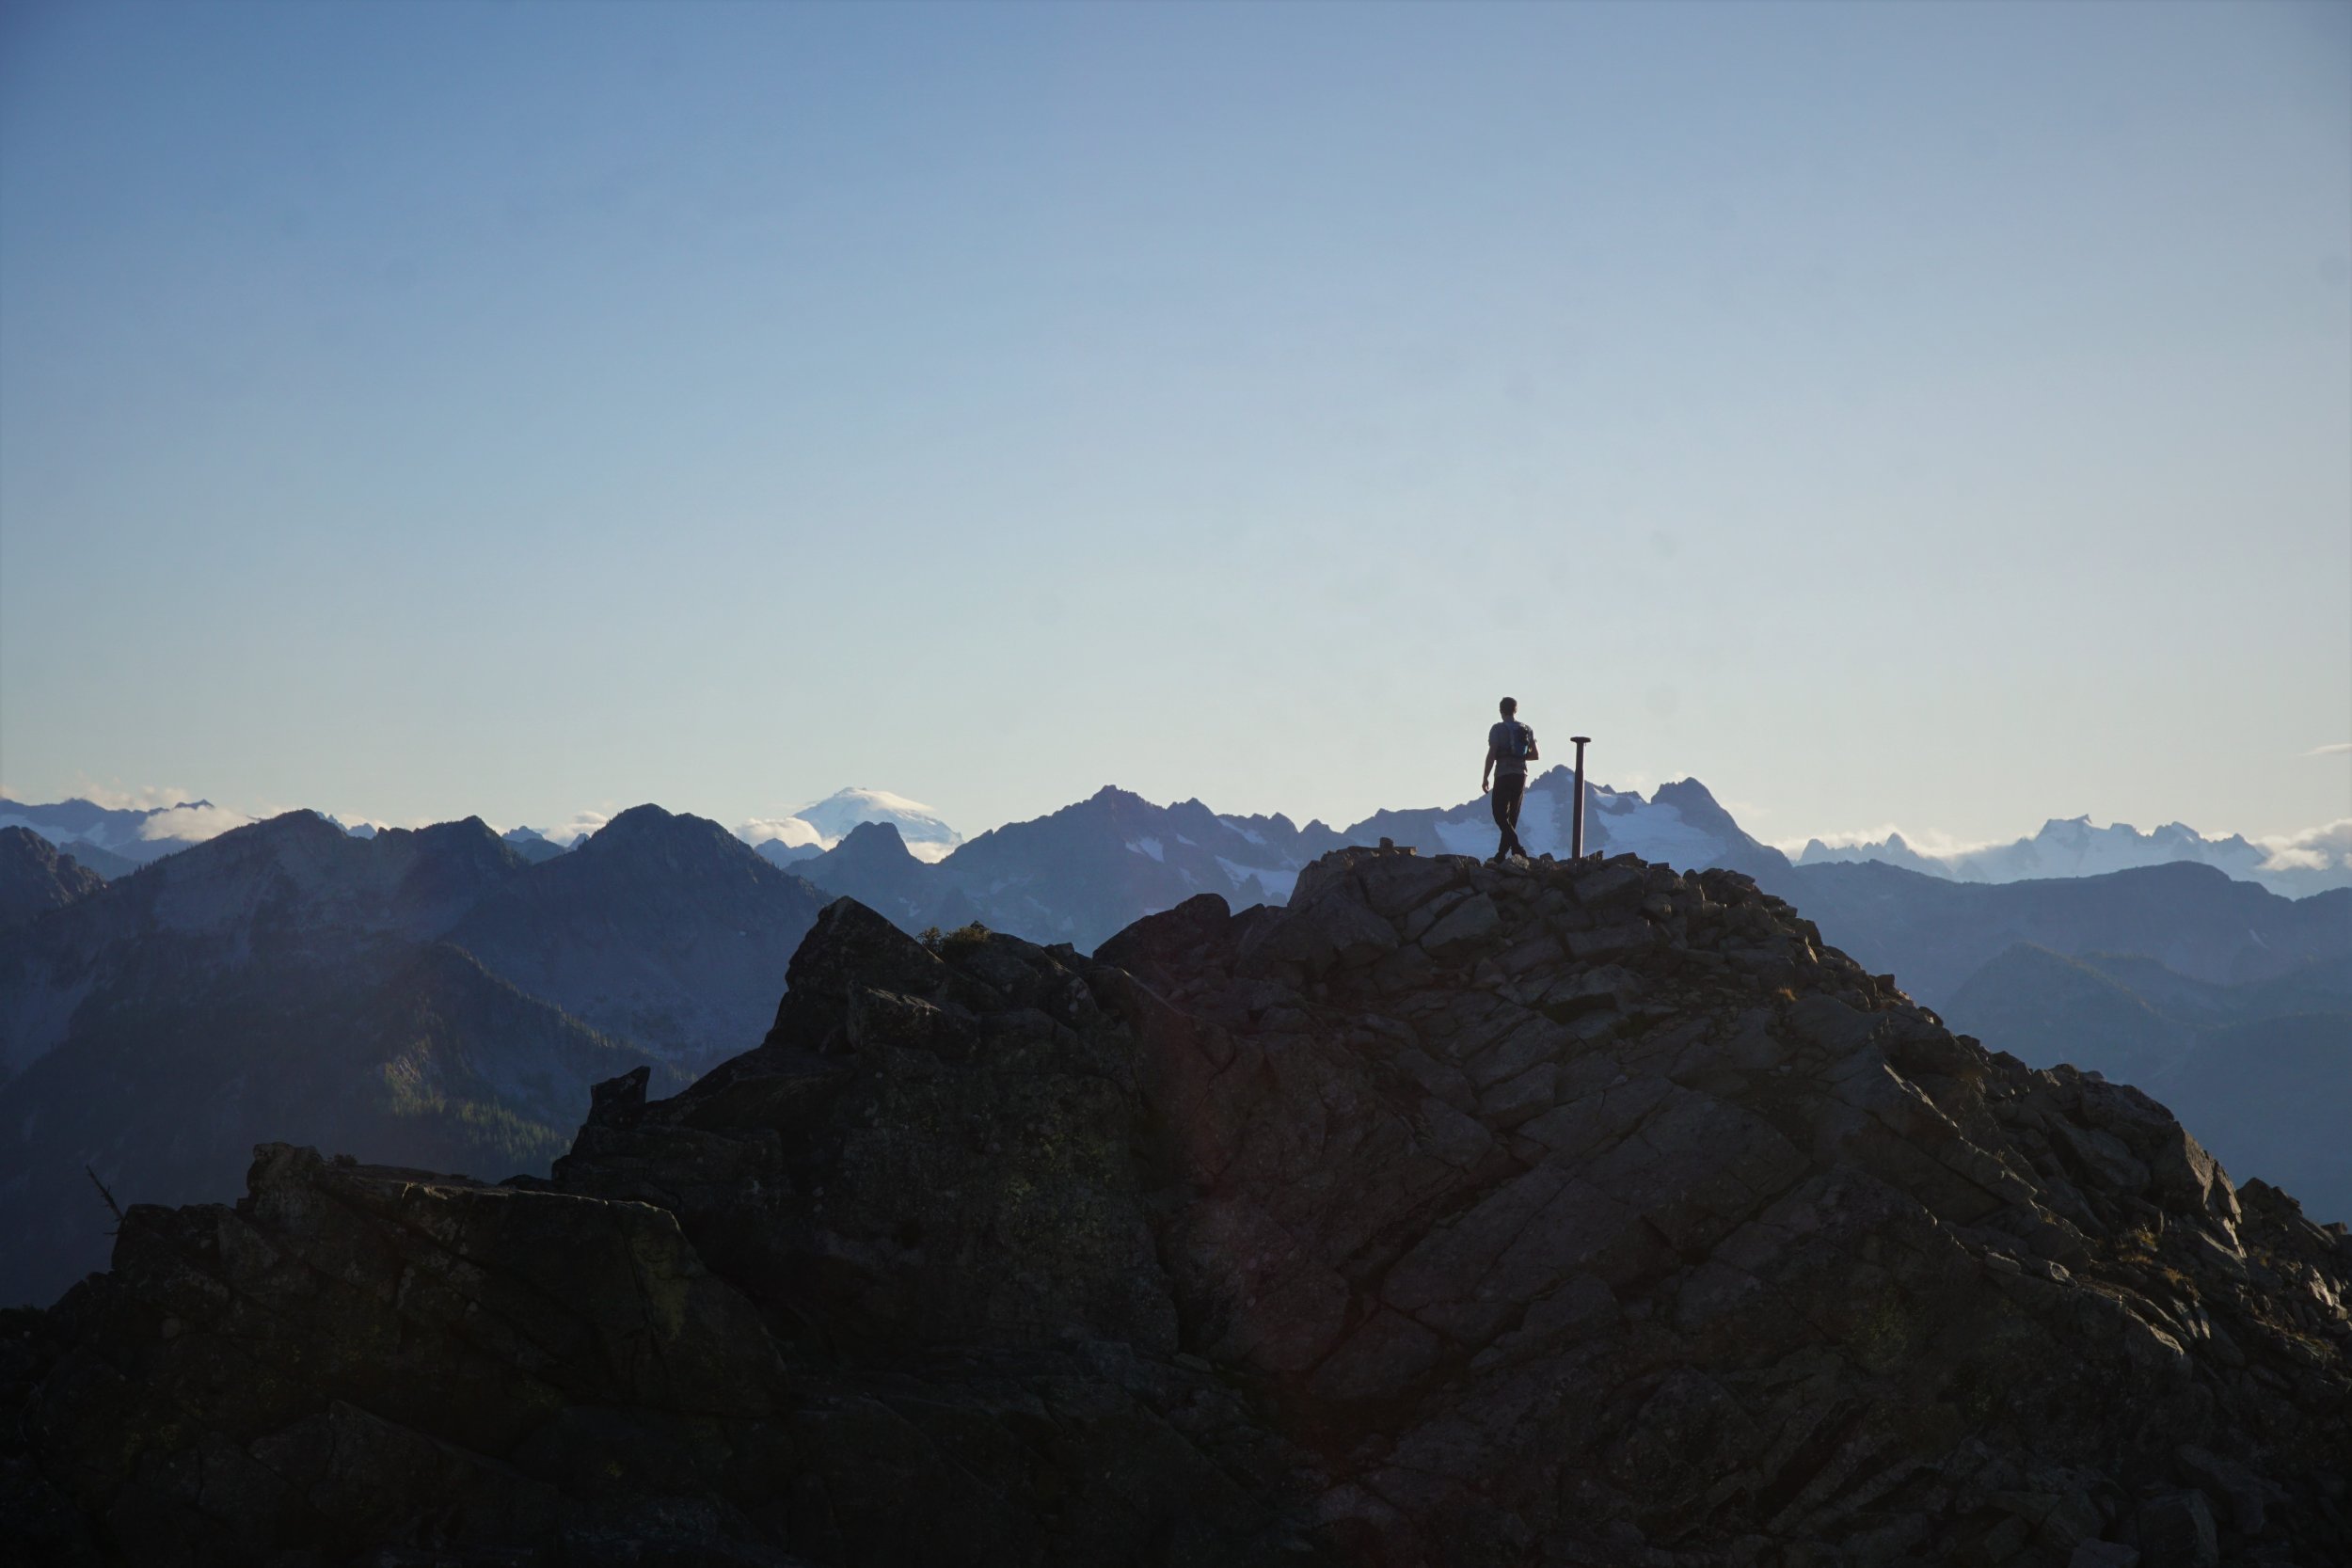
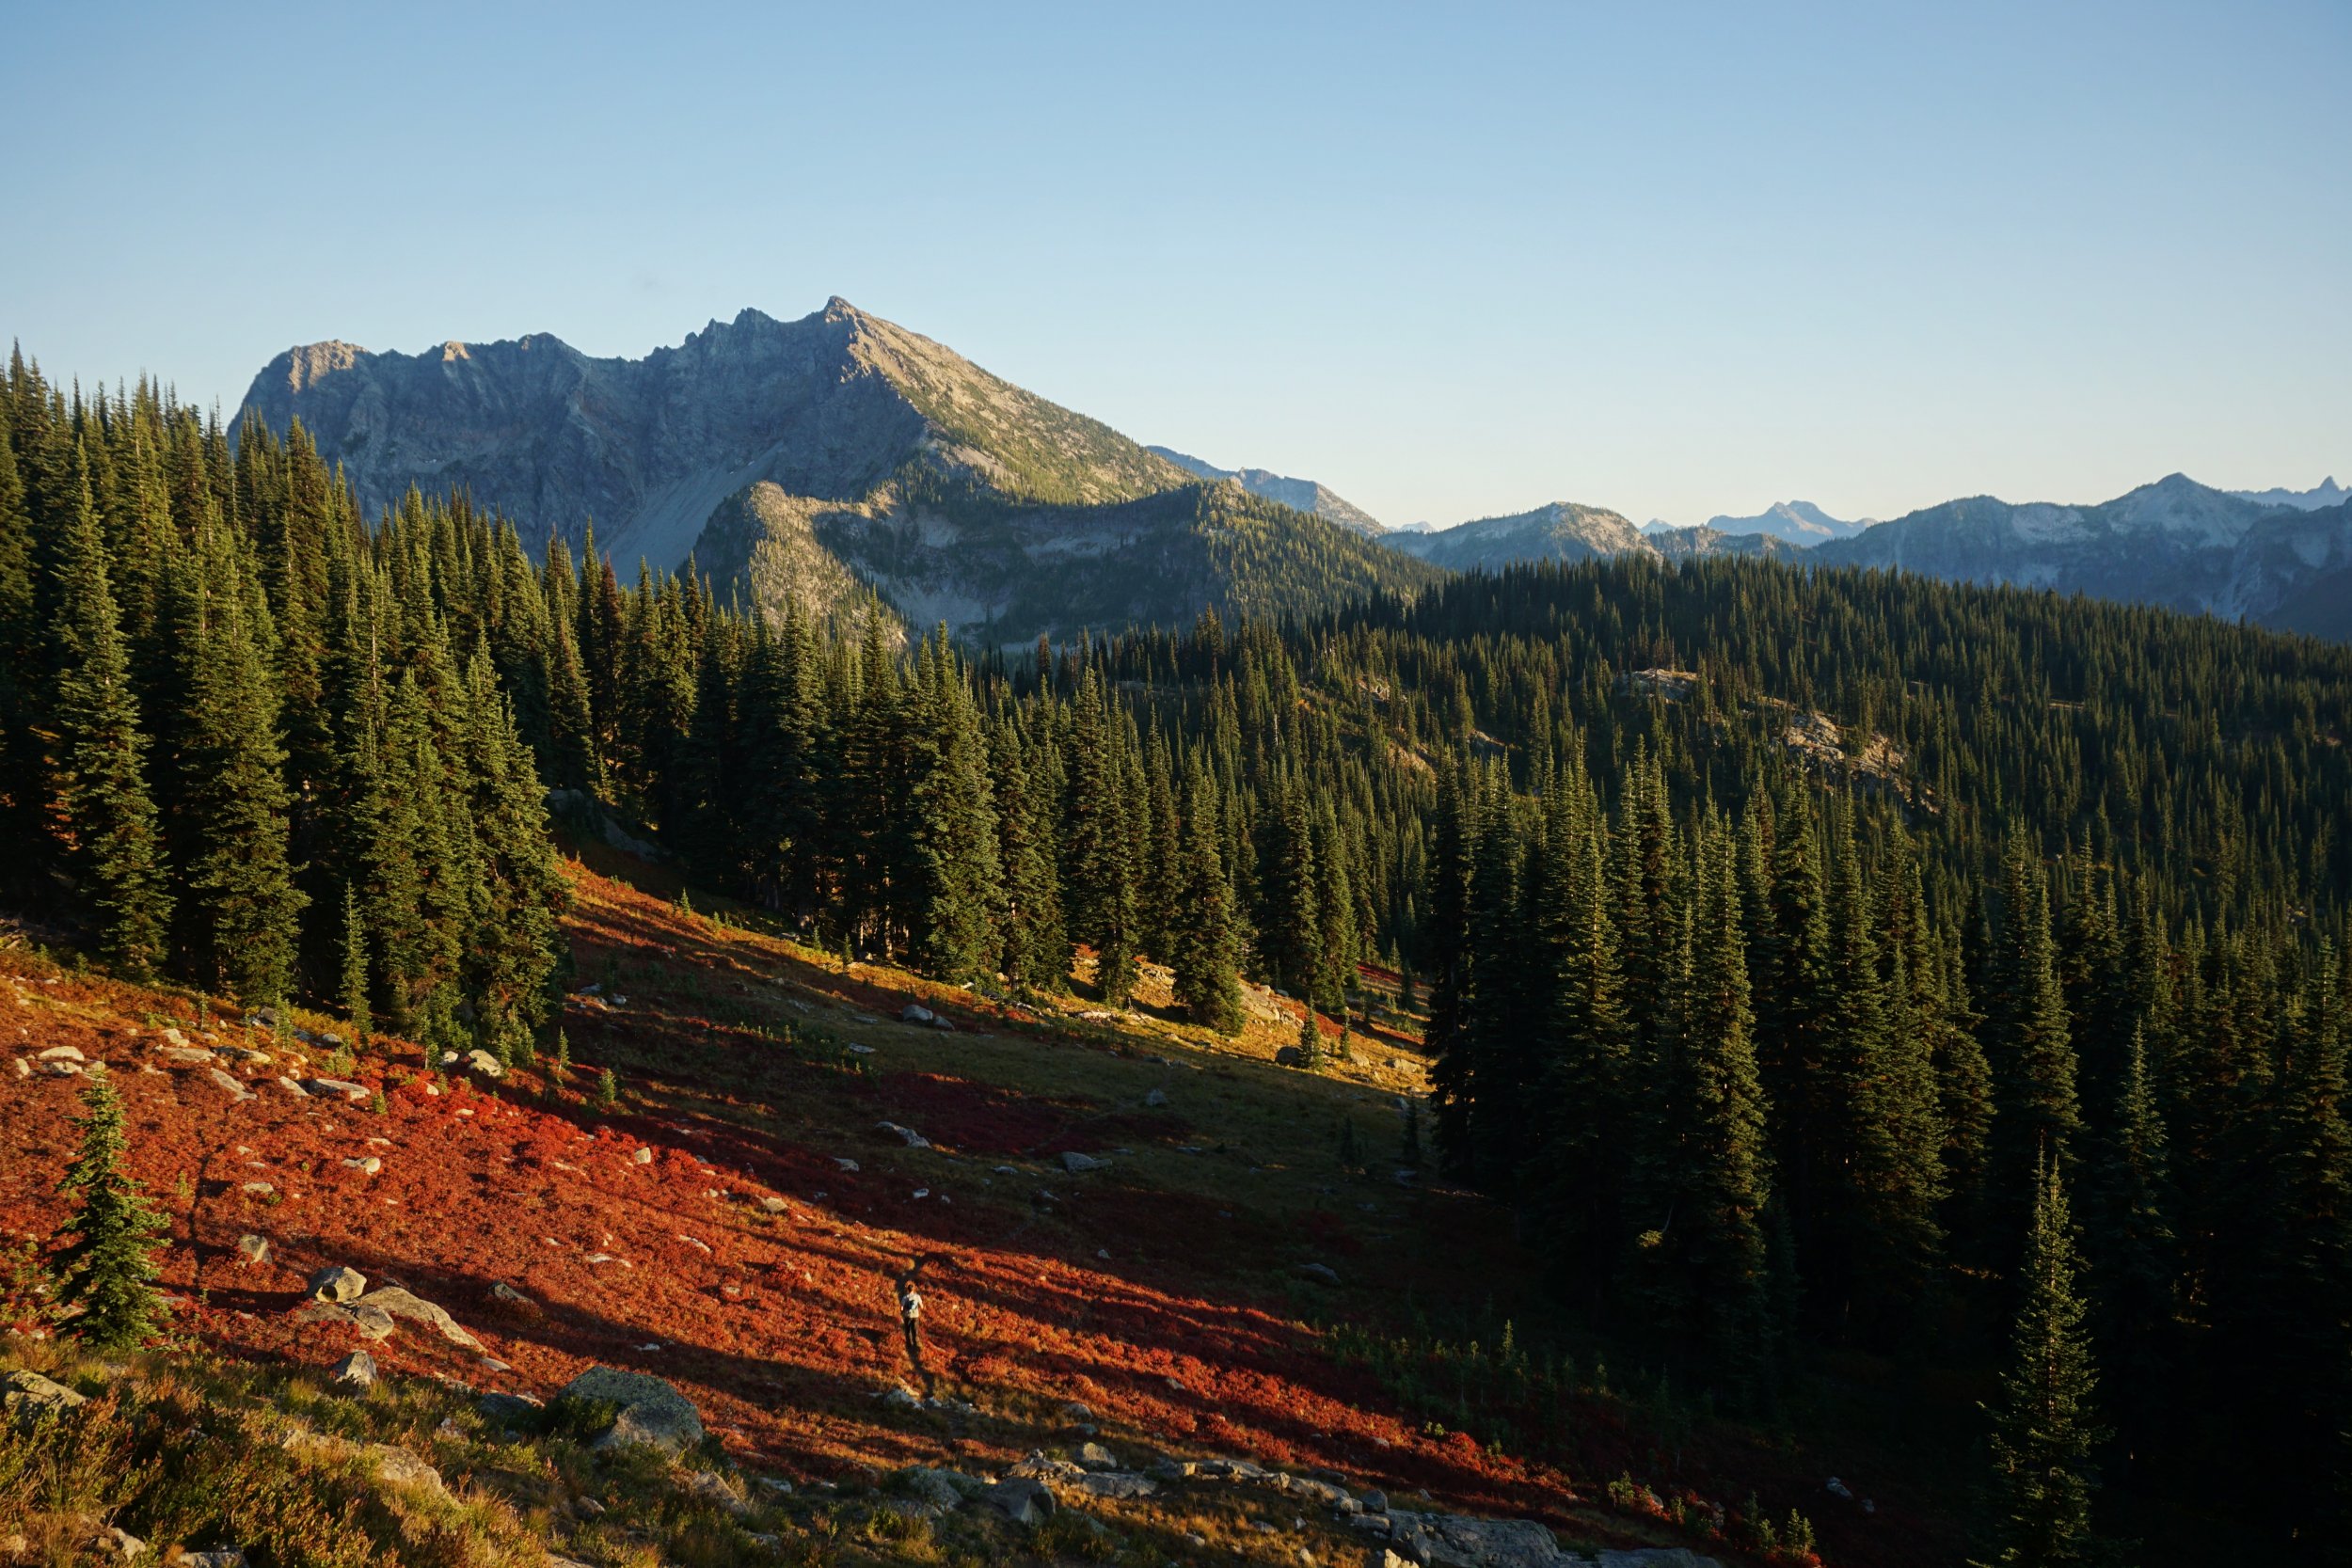
Trip: North Cascade National Park / Lake Chelan National Recreation Area - Triple Rainbow High Route Trip Date: 09/21/2019 Trip Report: @thedylan and I did a fun fall high route from Bowan Mountain to Stilleto Peak. It had three distinct off trail sections, the most stunning of which was Rainbow Ridge, so we decided to call it the Triple Rainbow High Route. Even though the larches were not quite full on, it was still just such a beautiful and inspiring day, with miles and miles of larches and carpets of red. We found the off trail travel to be generally very easy, with some more annoying north facing moraine descents, but nothing really over class 2 or so. In total, it was 30 miles (about 12 "off-trail") and 9.5k ft gain. It took us just under 13 hrs c2c, but we didn't always chose the optimal path, took some wrong trails in the dark, and took hundreds of photos. This is really an underappreciated area, and magnificent in the fall time! Cool rock on the McGregor Massif. Dome Peak and larches. Looking across Rainbow Ridge from the shoulder of Bowan. Lovely Rainbow Ridge. Cruising through larch groves. McAlester Pass. Another nice meadow. Looking at Twisp Lake from the south. Endless larches and red carpets. Another marvelous basin beneath Switchblade Peak. Getting towards Stilleto. Looking down to Rainy Pass. Stilleto Lookout Site. Beautiful meadows on the way down. @thedylan looking like a running star or something. Fun route! Gear Notes: Running shoes, poles. Approach Notes: PCT down bridge creek, then Rainbow Pass trail up to Rainbow Pass.


-
 Trip: Tenpeak and Kololo- Witness to Vanishing Ice - Standards Trip Date: 09/01/2019 Trip Report: The Cascades have become a bit of a gong show in recent years, and much more so on holiday weekends. This was on full display the Saturday of Labor Day weekend as @therunningdog and I slogged up the North Fork Sauk trail en route to White Pass, passing no less than 50 (!) people bound for Glacier Peak the next day. The overflowing parking area attested to the fact that many more were already up the trail, somewhere. But, unsurprisingly, nobody was headed to Tenpeak or Kololo and we left them all behind as soon as we left the Foam Creek route for the character building traverse to the White River Glacier. An unforecasted rain squall was bearing down on us as we crested the moraine below the glacier and gazed out on a large lake that wasn't on our maps. There was no way to cross the outlet (we had read) and the traverse around it looked tenuous at best with loose debris perched on steep slabs. But the alternatives were even worse so we rock hopped and chossed our way around to the bare ice, barely making it to flat gravel as the heavens unleashed. This is what we came for? Camp "Grim" was christened as we soggily established camp where ice was just a few years before. The weather cleared at dusk but the forecast for the next day was worse so we drowned our sorrows in whiskey and the Ron Burgundy podcast. Did you know that your brain shrinks to 65% of its normal volume during deep sleep so cerebral spinal fluid can pump around and flush out toxins? Ron didn't either. Anyways, the next day dawned so-so as expected but we didn't have anything else to do so began the tedious and long slog around the Hive, over the shoulder of West Tenpeak, and around to the Standard route on Tenpeak. While scenic, glacial recession in this area has made for rugged travel, sans snow. Expect a full day return. The regular route on Tenpeak is short, has a bit of fifth class, and is actually pretty decent. Given the approach (White River isn't a lot better), nobody will be surprised that it only gets a party or so a year. The register was placed in 1972 and appeared to have scrap of paper with Fred's name signed to it. This is probably the only register I've seen with that honor (if it is legit), as all others I've seen with him have been photocopies of the original entry. After a long while admiring the view (the weather had cleared) and delaying the tedious descent/return to camp, we bid adieu and headed for Camp Grim. On the way back we coined the acronymn "YOCO" to describe Tenpeak- as in a peak You Only Climb Once. Still, I thought it was worth climbing....once. Monday was clear and glorious as forecasted so we took our time climbing up to the col west of Kololo that would give us access to the what's left of the Whitechuck Glacier. Dropping packs we went for a scenic ramble up to the summit of Kololo, a fantastic viewpoint of the surrounding area. Nobody around for miles it seemed, but a short ways off we knew the masses were packing up and heading home. By the time we crevasse hopped our way down the bare ice and joined the climber's path, we didn't run into anybody until some horsepackers on the Foam Creek path who were picking up USGS gear. The hike out the NF Sauk was a lot quieter than on the way in, but enlivened by a few parties. The most memorable of which had a member who had packed AT boots all the way to high camp because "they were the only boots that fit my crampons". Wow! So, if the trails are going to be crowded, at least there's always the people watching. Captions refer to the photo below ..... Hiking in on the NF Sauk: Indian Head Peak: Uh oh: Camp at the toe of the White River Gl: Honeycomb Gl. crusin': Dakobed: West Tenpeak. We didn't summit because we didn't want to break out the rope: Snout of Honeycomb (L), Signing in on Tenpeak (R): Gneiss!: The magnificent desolation of the White River Gl.: Treat your water people: This is what we came here for!: What's left of the Whitechuck Gl.: Tenpeak is the dark tower: Whitechuck crevasse hopping: I've never seen a tarn like this, have you?: The ultra classic Sloan: I tend to forget what a nice valley the NF Sauk is: Gear Notes: half rope and light rack to 2" for Tenpeak. Ice axe and Al crampons. Helmet Approach Notes: Pick your poison. Long, rugged and scenic from NF Sauk or brushy and long from White River
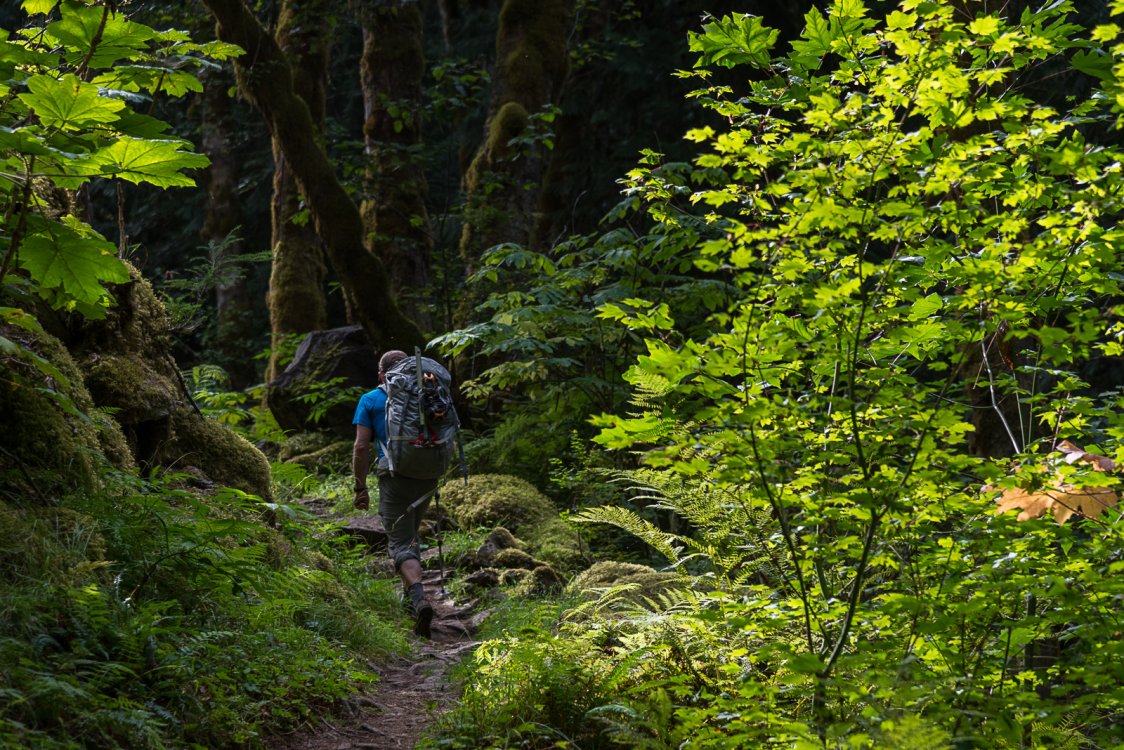
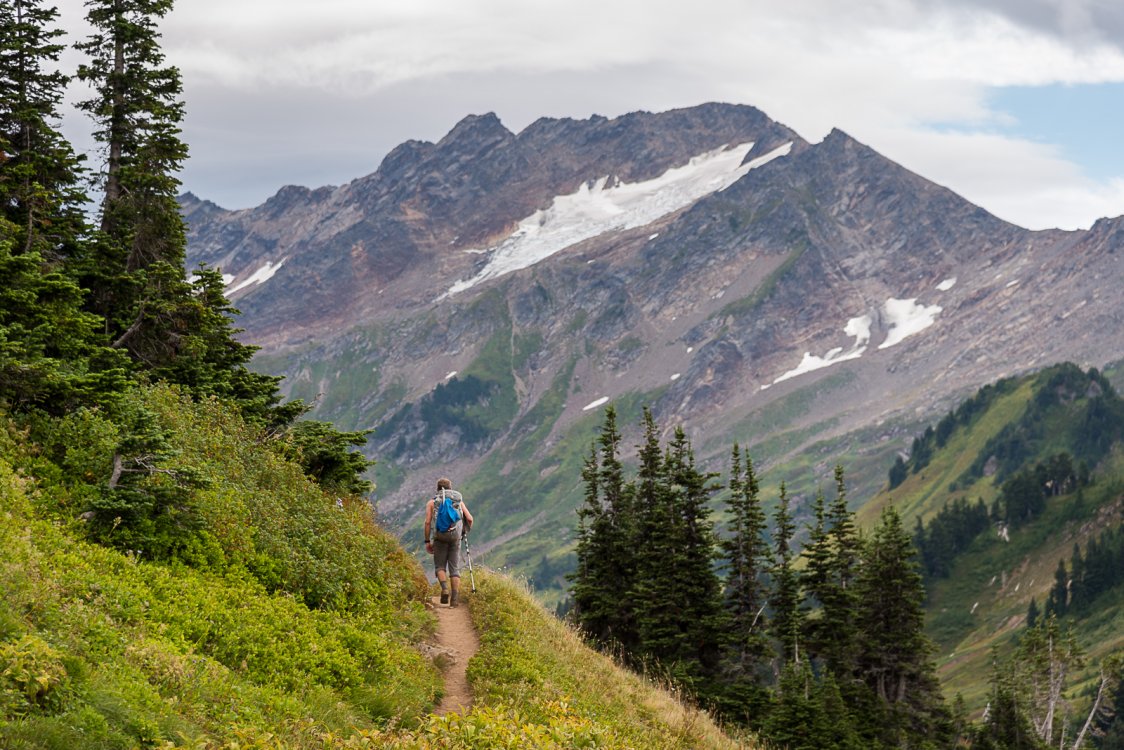


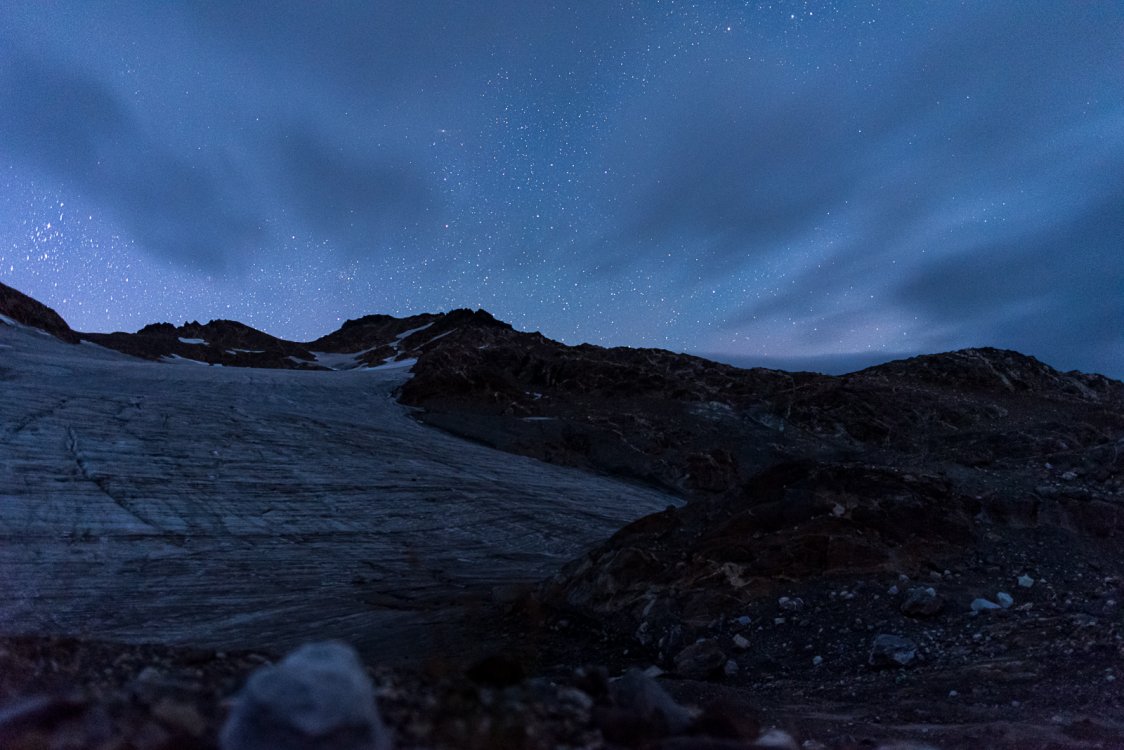
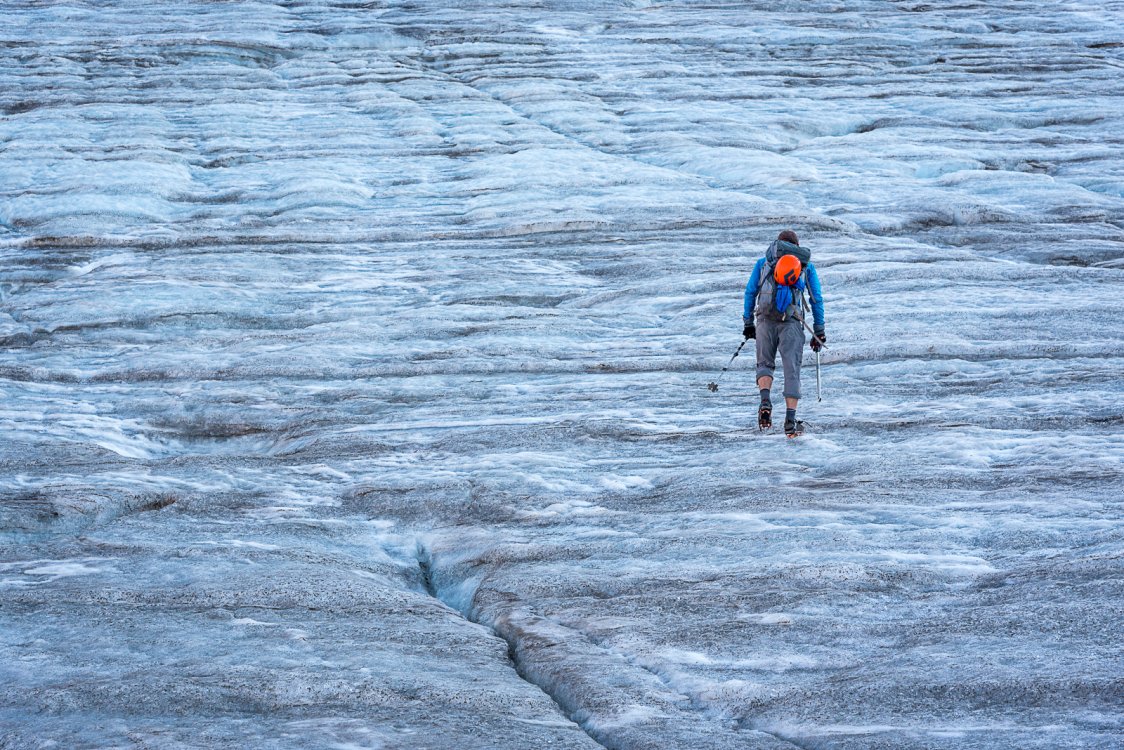
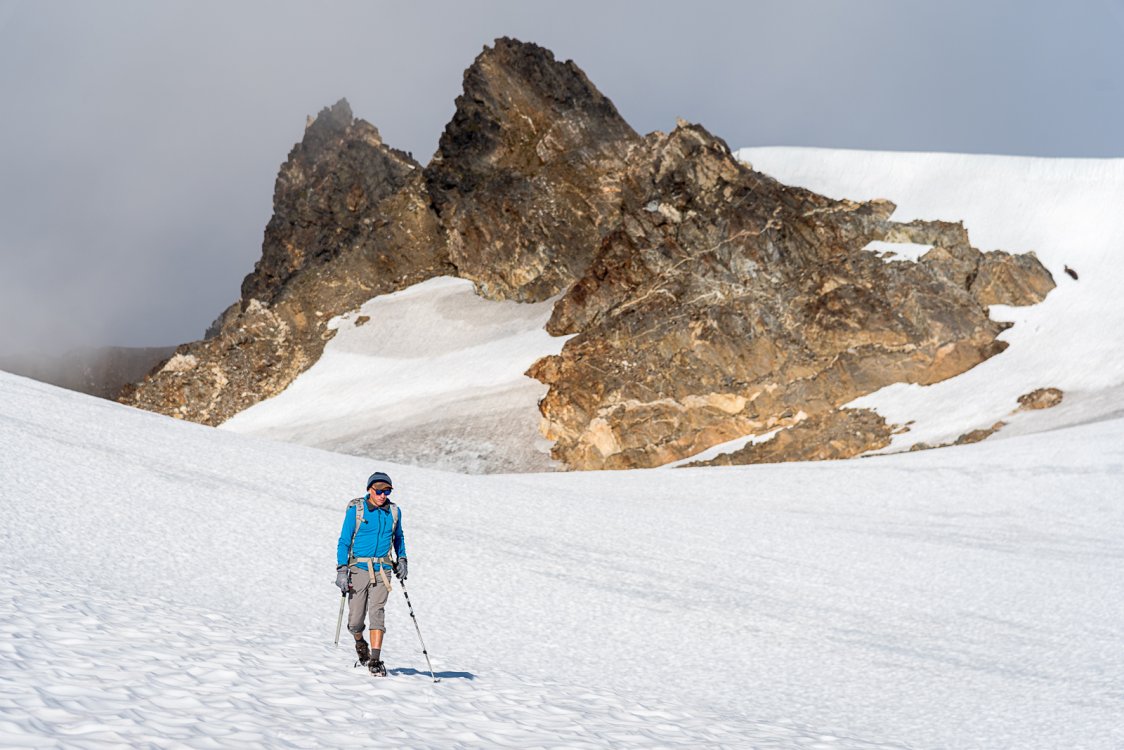

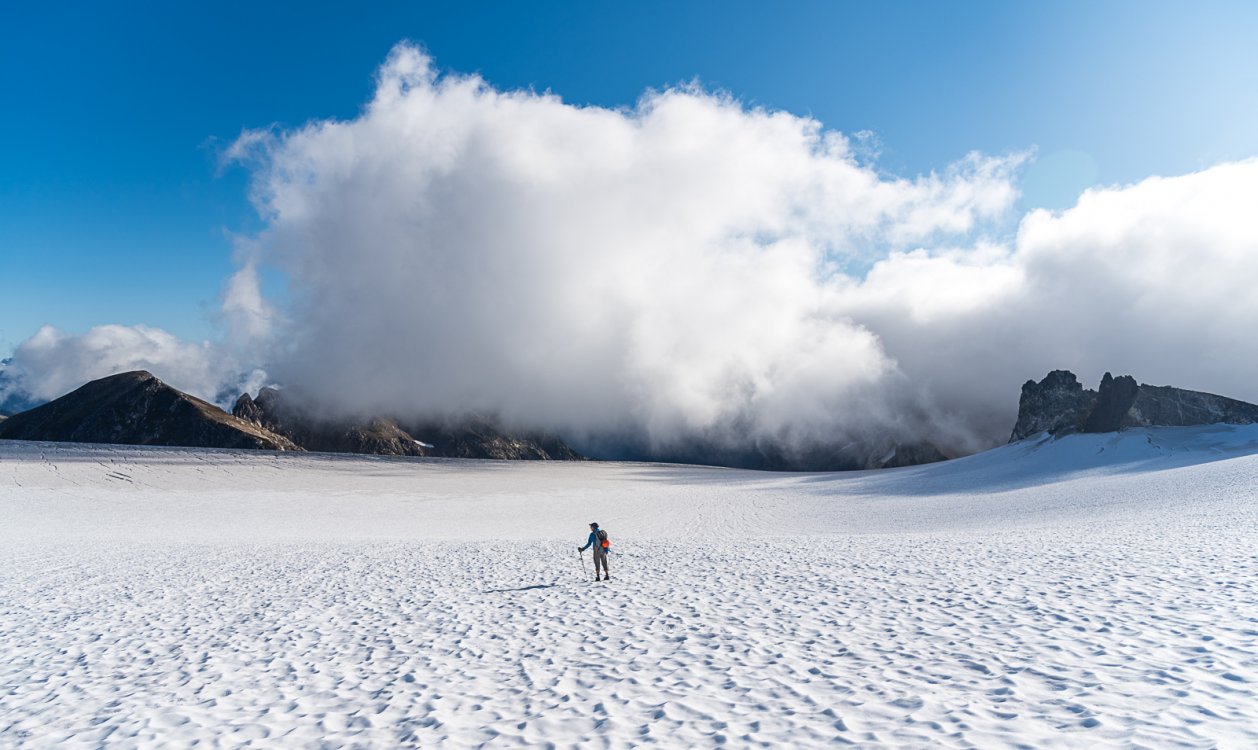


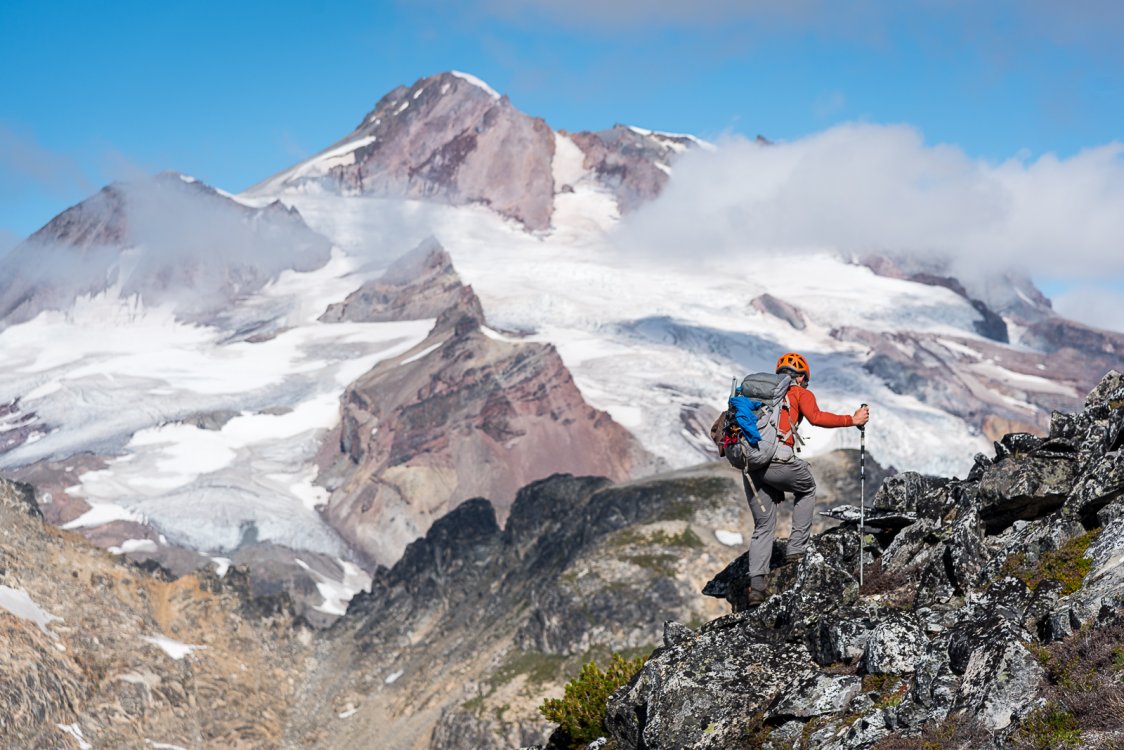

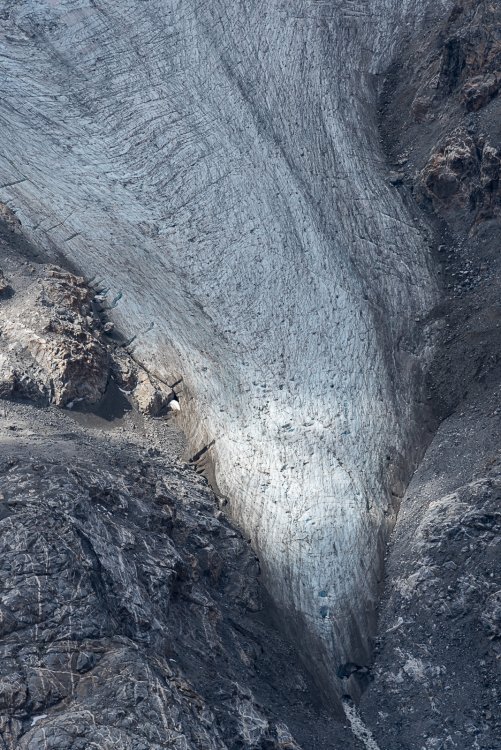


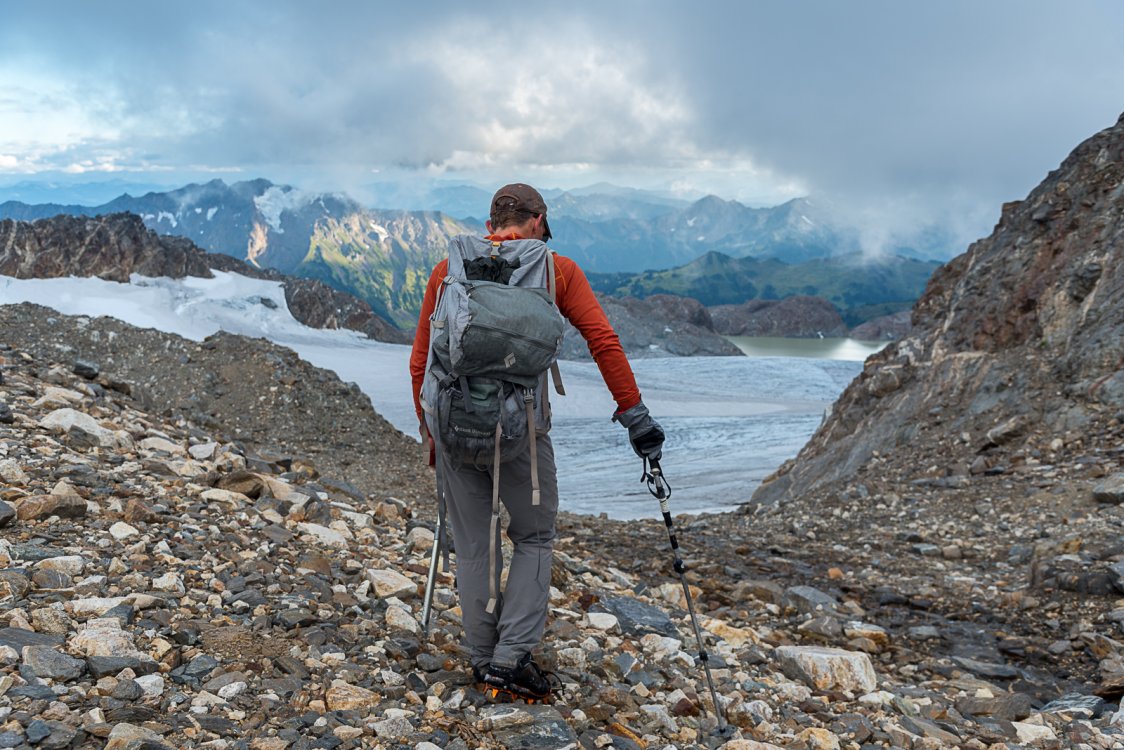
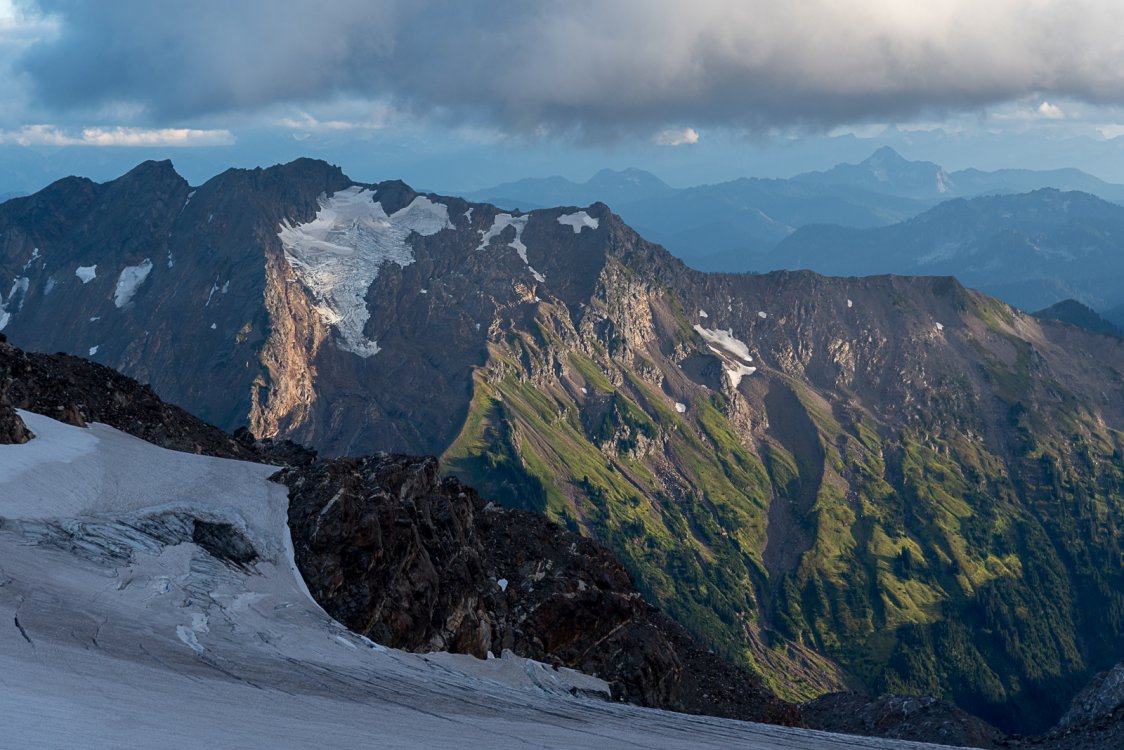
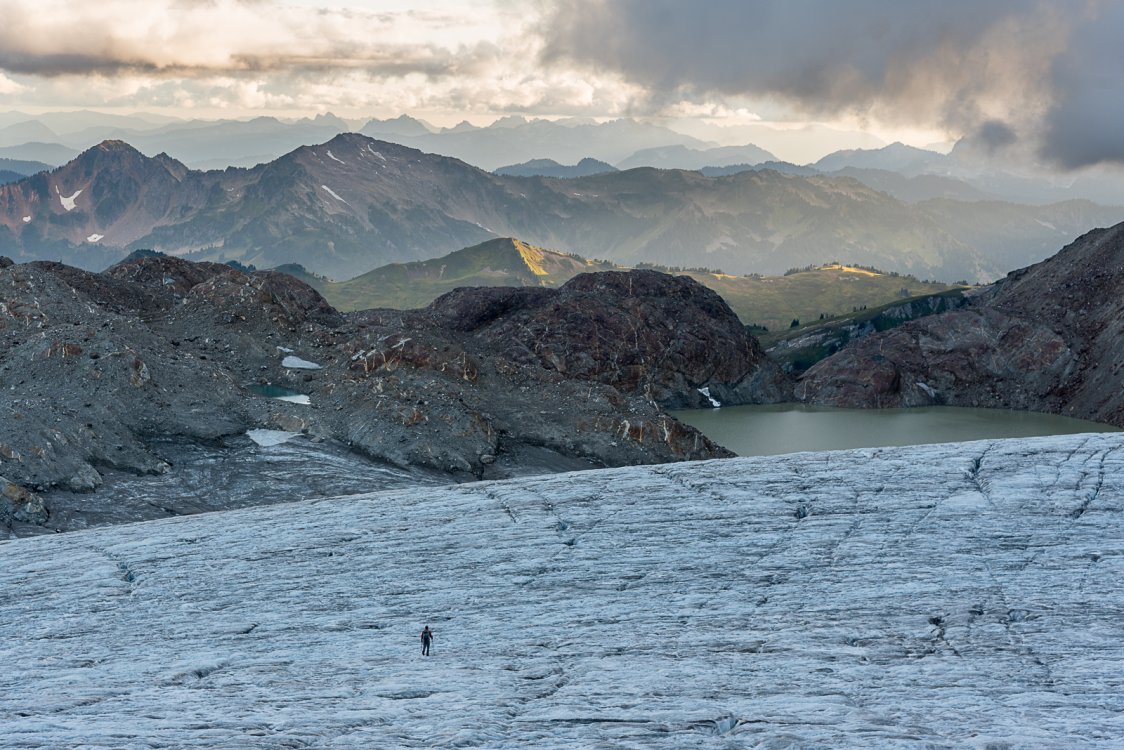

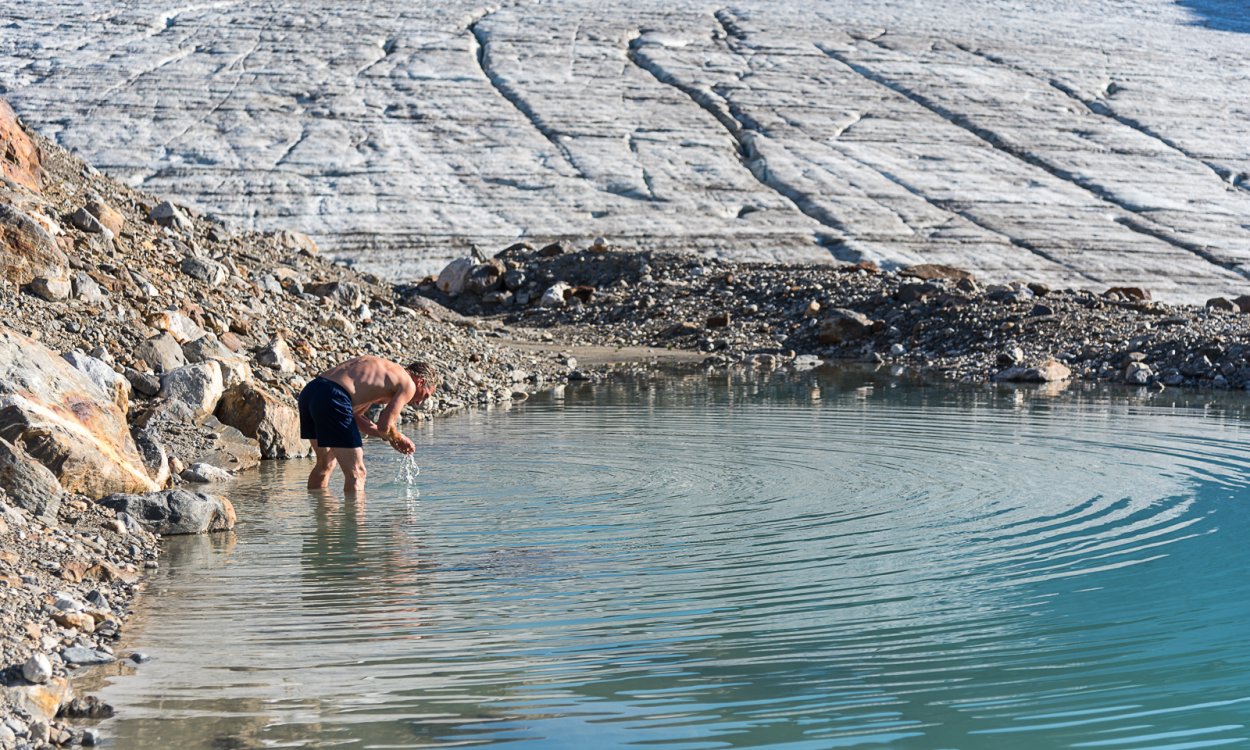
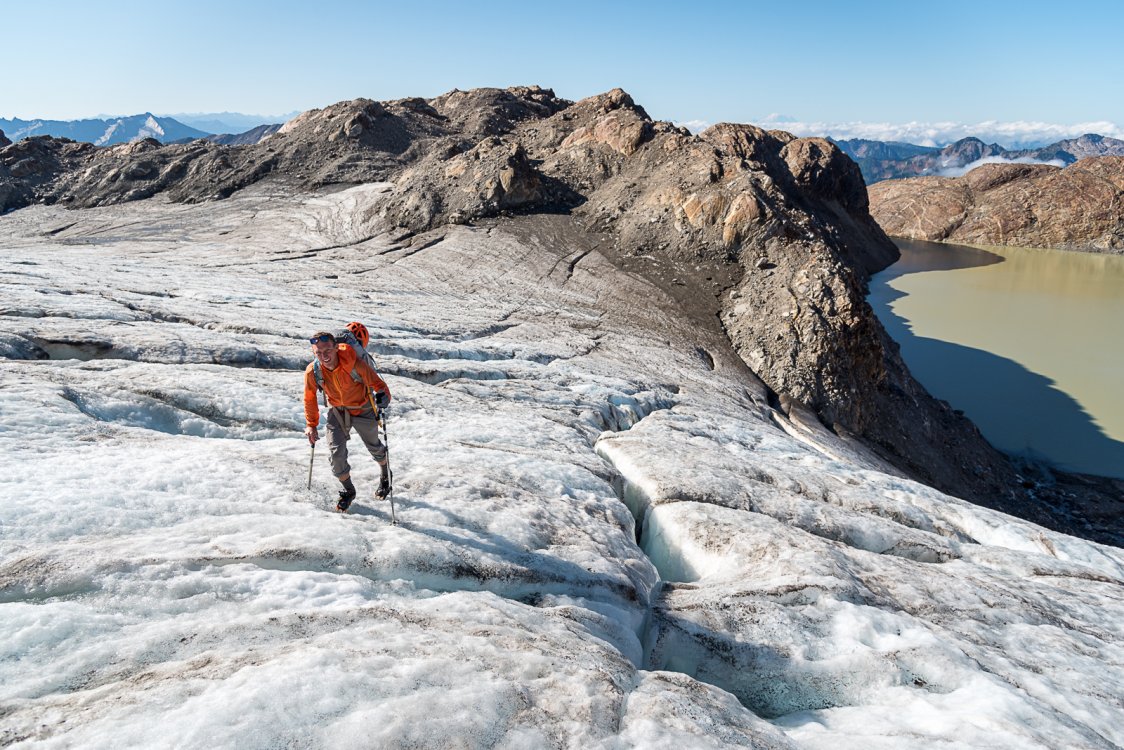


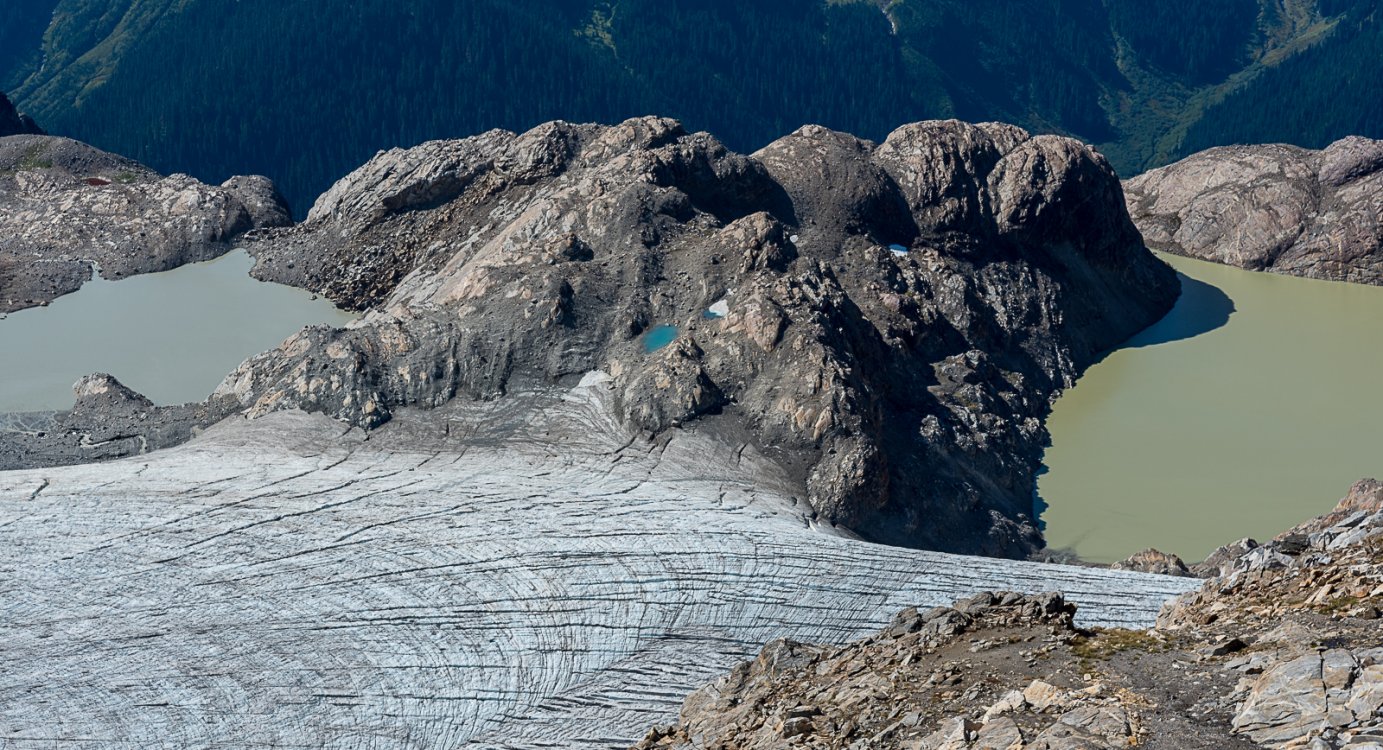


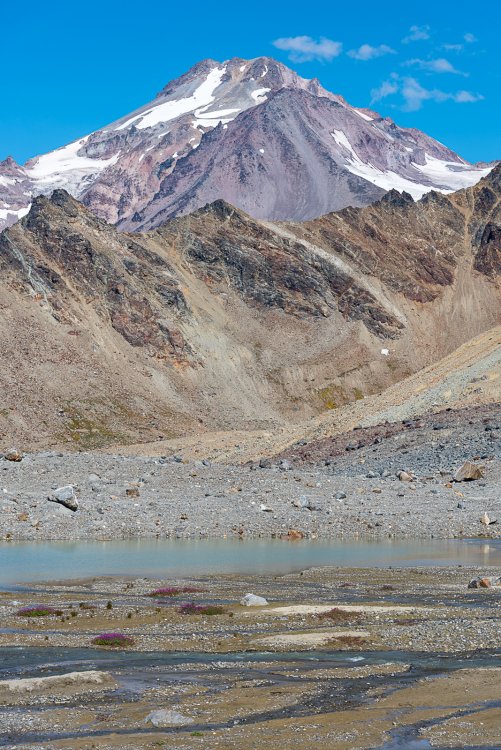


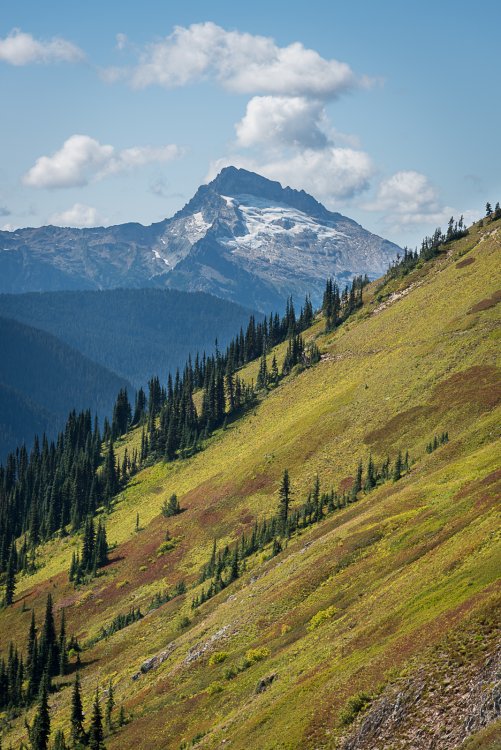
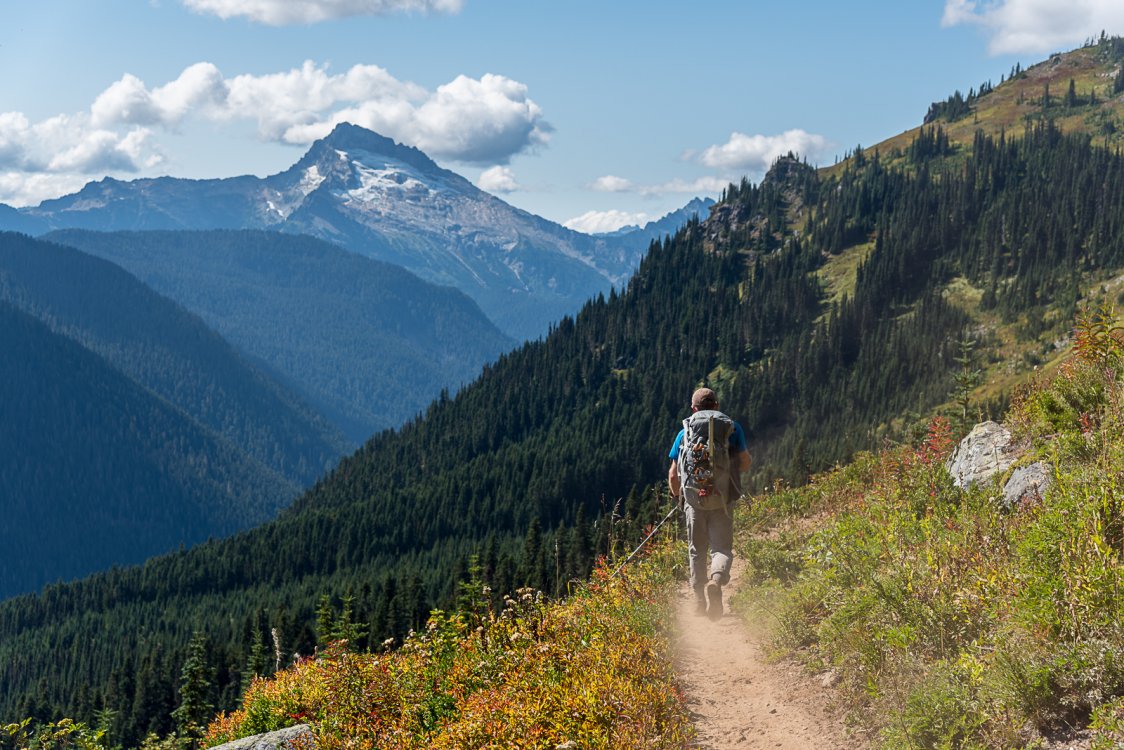
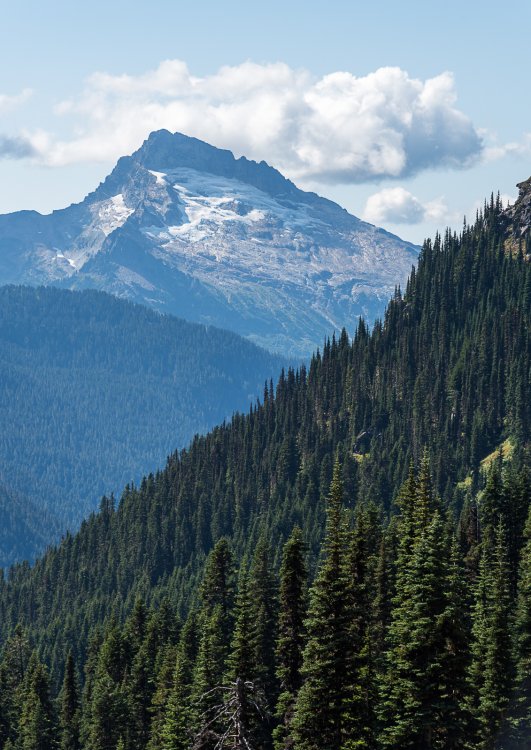
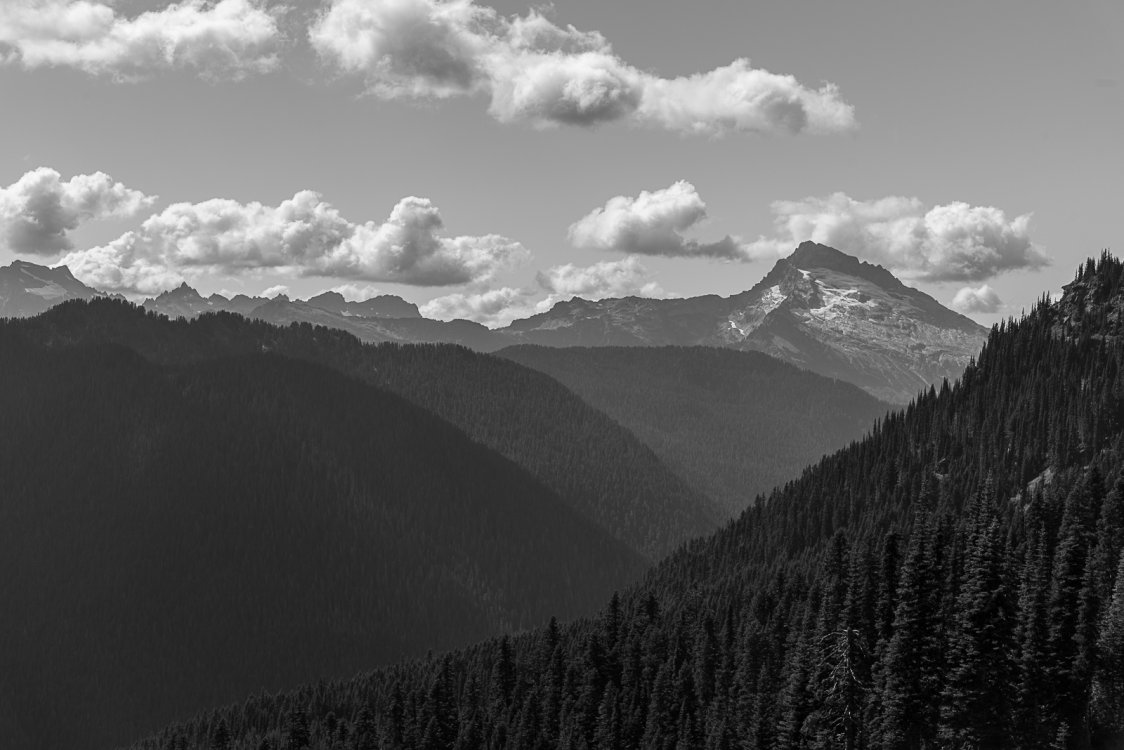

-
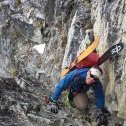 Trip: Mt Cleator - Tubby Needs Cheese 5.8+, 9 pitches, 1,000'+ Trip Date: 09/01/2019 Trip Report: It's been a spell since my last report; I offer a tale of an ascetic and a hedonist climbing yet another irrelevant obscurity in their quest for entertainment and raw truth. The weather forecast pointed them east, and Mt Cleator appeared to fit the bill. After a pleasant trail tramp past Buck Mtn and establishing camp, the dialectic duo scouted and debated a number of lines available, and provisionally settled on the cleanest looking one. The line emanates from near the main summit (not the N tower), and is a NW jutting rib that appears to share the granitic character of the pluton on nearby Berge--very little schist encountered. (Other options abound on the N side of this peak up to the N tower, but even these impaired codgers reckoned unappealing the primarily grubby schist on these longer lines toeing down more directly to Buck Cr. They agreed to buy beer for any whippersnapper climbing one of these lines.) For the full Cascades sub-alpinism experience, approach directly from a camp near Buck Creek, where the trail passes close to the creek. Romp up pleasant alp slopes to a band of cliffy terrain, then bunk-jungle up steep alder to pass a waterfall. This approach grants access to the upper basin and the several lines available on the northwestern quadrant of the mountain. For the descent enjoy the scenic trail tour return via Buck Creek Pass. Lots of wildlife encountered--bear, coyotes calling at each other (probably about the bear), deer, etc. The climb's more-technical and mental challenges are concentrated in pitches 2, 3, 8 and 9. (Unfortunately, not many climbing pics taken.) Pitch 2: while the self-styled epicurean showered his pathetic self with sod digging for pro and holds, the wannabe stylite laughed derisively. Pitch 3: the ascetic got his come-uppance, "I wanna go home", but eventually pieced together a lead to the crest of the rib. The middle pitches were more scrambly, mostly mid-fifth and easier. Pitch 8: a sweet, relatively steep and juggy corner. Pitch 9: interspersed short splitters and varied climbing, beautiful and exposed ridge rambling with steeper steps. P1: P3: P6(?), climber low center: On average, the over-indulger and the self-depriver make for a balanced human. In an alternate universe the roles could be switched, and maybe the pair would climb splitter cracks on impeccable stone; but in this one, they reconcile themselves to seeking new lines on inconsistent rock with their mercifully impaired memories. On this climb, a somewhat dirty beginning becomes more enjoyable higher (and with distance). It's difficult to get a well-defined shot of the line. Here's a flavor: Tubby Needs Cheese begins to the left of the shaded red streak on far right, a few hundred ft below that tiny spot of sunshine on the ridge, and continues up to and then on the right skyline. Tubby tops out in the horizontal strip of sunshine, or perhaps just out of view behind the pyramidal feature to the left of it. (The sunlit tower is in the foreground relative to the main summit.) Beckey's CAG vol 2 (2nd ed.) has a good pic of it along with Buck on page 160, swooping down from the main summit clearly marked MT CLEATOR. And from the west, hiking toward Buck Pass: A shot on the way home on Labor Day, TNC in the shade on right toeing down just left of the snow in the basin: More pics (recommend click on 'info' to see descriptions for many): https://photos.app.goo.gl/P2U5SJgB8jU1eQBo8 Gear Notes: Double rack through 3, a 4, some nuts. We didn't use our pins, but some folk might want to. Approach Notes: Park at Trinity. Buck Creek trail, etc. -- see above.
 -
Trip: Pickets - E & W Fury, Luna - Standards Trip Date: 08/15/2019 Trip Report: @Albuquerque Fred and I teamed up again... West Fury as the main event, East Fury happened to be in the way, Luna was convenient. Day 1: We took the water taxi to Big Beaver, leaving pretty late at 10:30am on Thursday. In about 4 hours of really good trail we were at the good log crossing right where it was supposed to be. A GPS was clutch here as there is no indication along the trail of where to turnoff and really no trail to the log. After thrashing some brush on the other side of Big Beaver Creek we wound up on the wrong (south) side of Access Creek. It is misplaced on the map by about .1 mile, shown to the south of reality; there is a tiny creek about where Access is shown on the map. After some bushwhacking upward we eventually found the climber's trail which was surprisingly good. I guess people heard about the 4G on the summit. We walked into Luna Col camp at 8pm, just in time to get one picture of the northern Pickets before they dissapeared for the next 3 days. Water is acceptably ample on BB trail and the traverse to Luna Col, lacking at the Col however. There is snow in the col and a tarn below the snow patch a 10 minute walk to the north of the col. Obligatory boat ride photo: The lake was a little low: Only good view of the southern Pickets, from the traverse to Luna: Our best view of the Furys: Day 2: We awoke at 4:45 am to lots of clouds. Onward to the Furies! Over 3 major humps and down into the basin SE of E Fury. It was all snow free which made for tedious travel. We found a ledge system at 6800' to round the SE buttress of Fury, then turned right and scrambled a talus and slab slope near a stream (last water!) We gained the east edge of the glacier at about 7400' due south of point 7820'. Crampons were required for the bare ice and moderately steep firm-ish snow ascending the east ridge of E Fury. There seems to be some mixed scrambling required at both the east and west approaches to the snowfield just below the summit. (We went up the east and down the west). Onward to West Fury! Down, up, down, up, down, up, down, up. Three towers and the summit block with loose crappy gullies between each. Tower 1: on a tip, we descended 100' on snow to a talus ledge, then scrambled up, left and up some more, then left again (you'll figure it out) to wrap around the tower not quite summiting. We soloed this. Oh, by the way, I should interject that since the lower glacier we were in total whiteout conditions and would remain so all day. This made route-finding challenging and despiriting. Tower 2: we climbed directly. Descending was trickier; scramble down an eroded dike/gully, when you approach a notch and a filthy gully on skier's right take to the arete and downclimb into the filthy gully. Legend has it descending the dike to the bottom leads to 5th class no holds traversing to get around the arete. Soloed all this. Tower 3: climb directly up a chimney just right of the obvious one. Easy soloing by now. Then we scrambled to the summit! Three times in fact; the whiteout kept making us think we were there just long enough to get excited, then another rise would loom in the white. Eventually we did make it and signed in as #22 in the register. We descended by rapping all 3 towers. Tower 1 required a 60m rope. Long and tedious trip back over E Fury, multiple basins, and many towers and rises back to camp. 12 hours round trip going hard, but with slow route finding. Morning right out from camp: Outrigger Peak and the south Fury Glacier: Mixed step on the east side of the summit of E Fury: Fred on the final summit ridge: Me descending somewhere between the Furies: Fred descending somewhere between the Furies: Gloruous summit photo on West Fury! Worth it for the views!!: Register: What, you dont mountaineer with manhattans? I left the shaker at home so we had to drink them warm, but it was pretty chilly out anyway: The rest is history. Sleep, lounge, climb Luna. We descended to Luna Camp day 3, then hiked all the way to the car day 4. Victory pose on Luna summit: Lots of this on the way out: The summit register on Luna was totally full, please replace it if you go there. 3 summits 49 miles 14,000' 12oz of manhattans Gear Notes: 60m rope for rappels Crampons Axes We took some rock gear but didn't use it. Manhattans Approach Notes: Big Beaver to Access Creek, cross Big Beaver Creek at 2520', cross Access Creek to south side at 3900'. Trail was great, trail into Access basin was decent climbers trail, good even, in places.
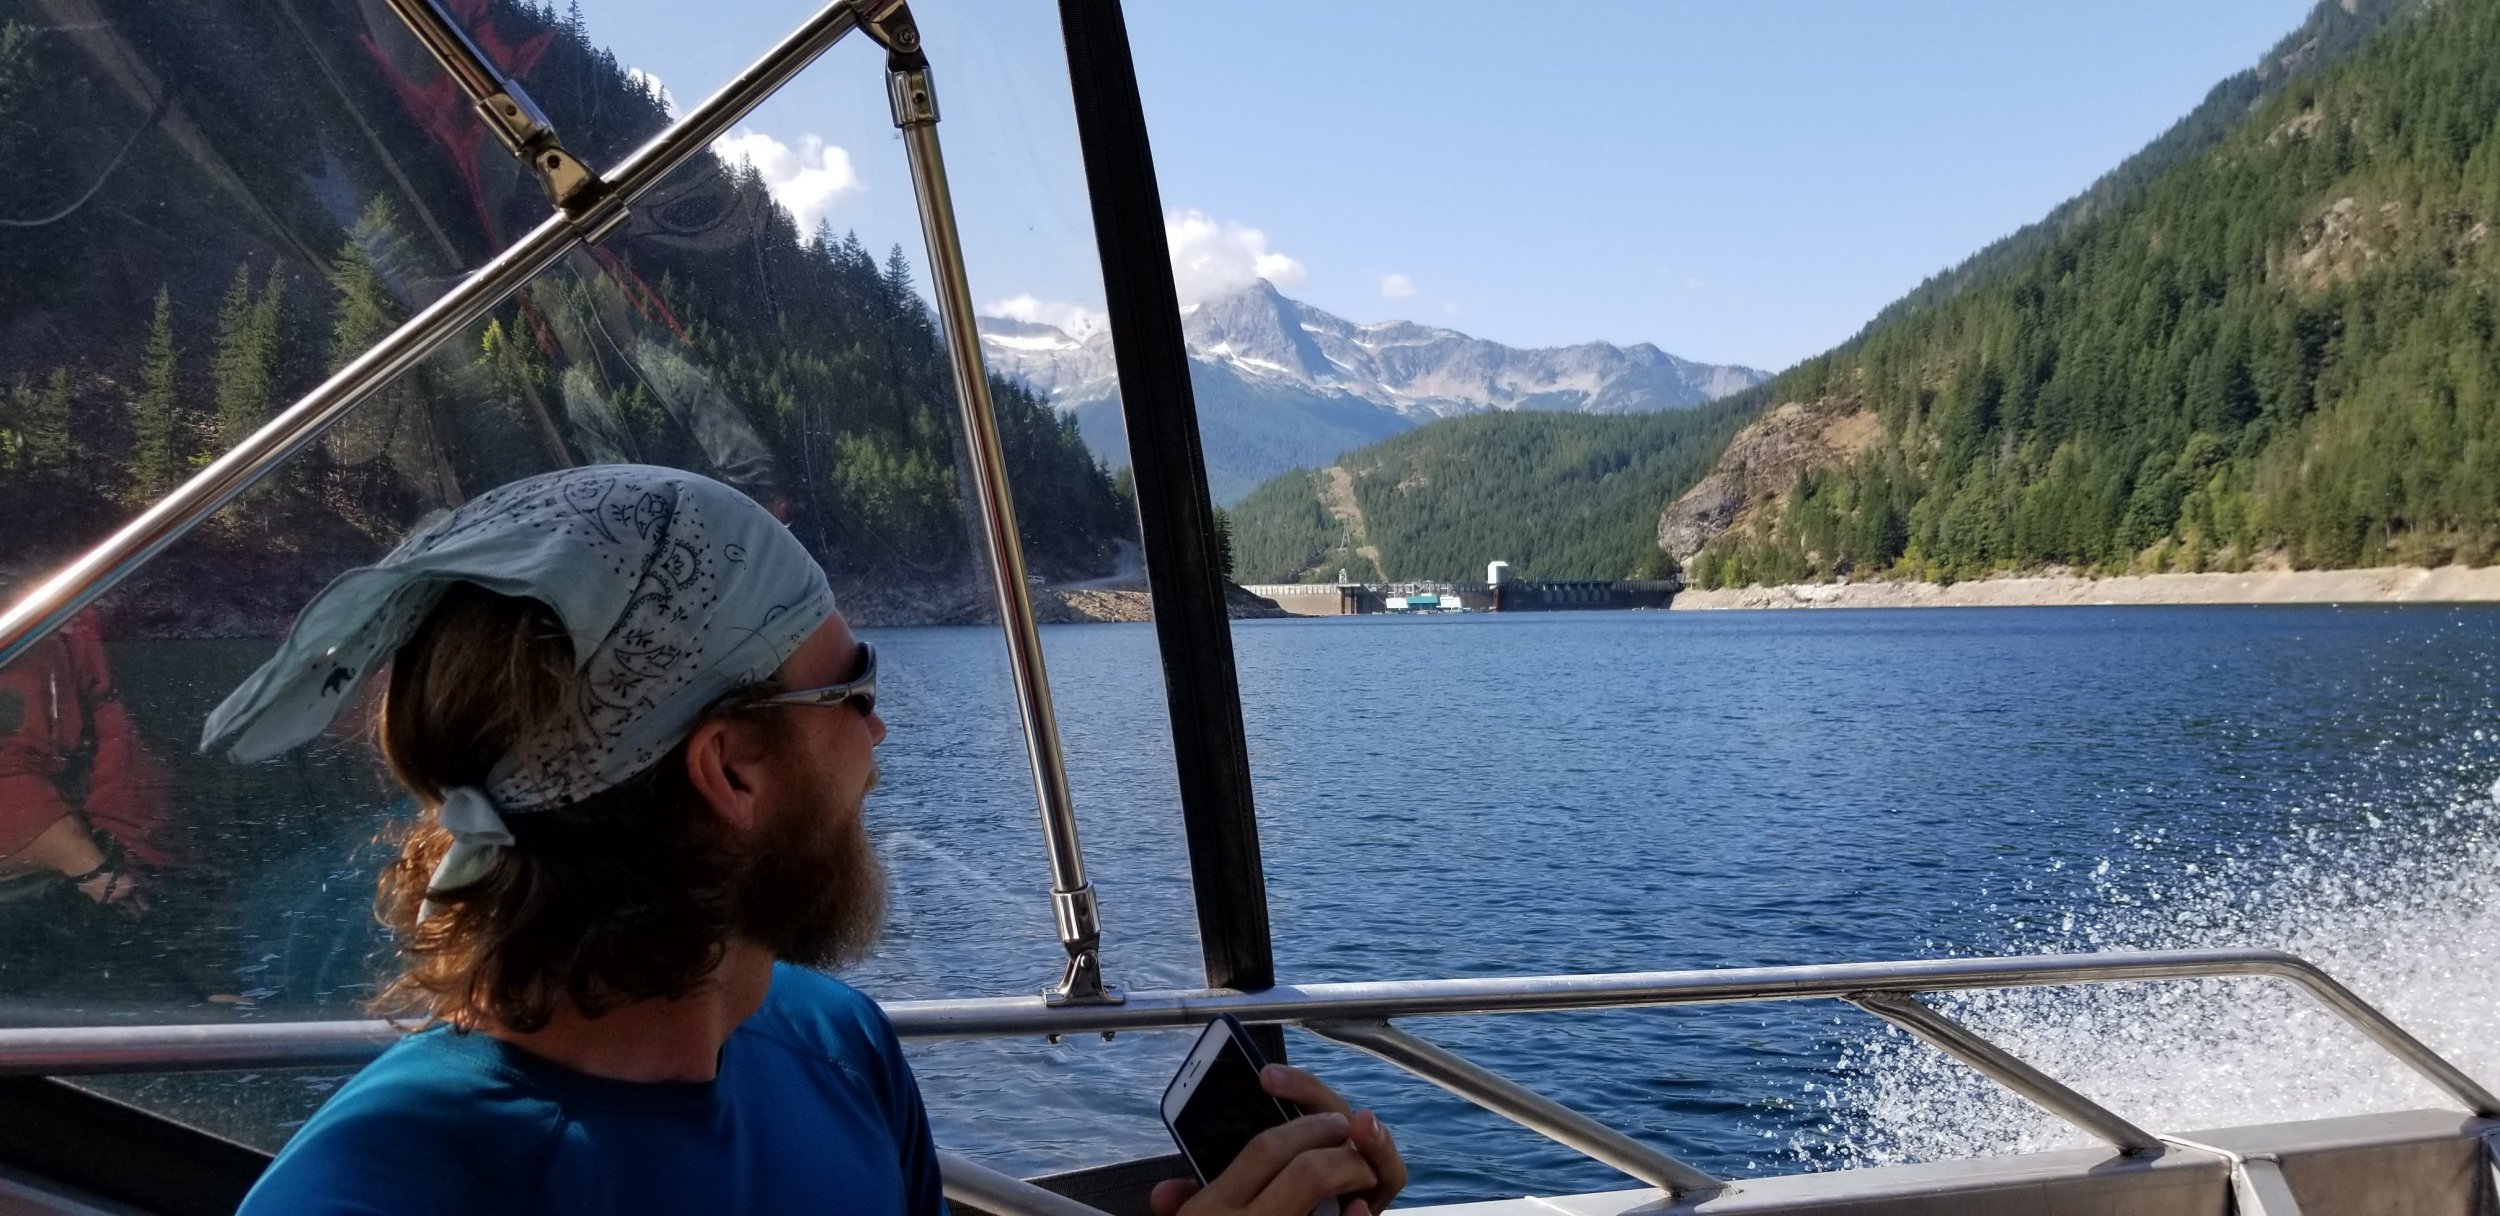

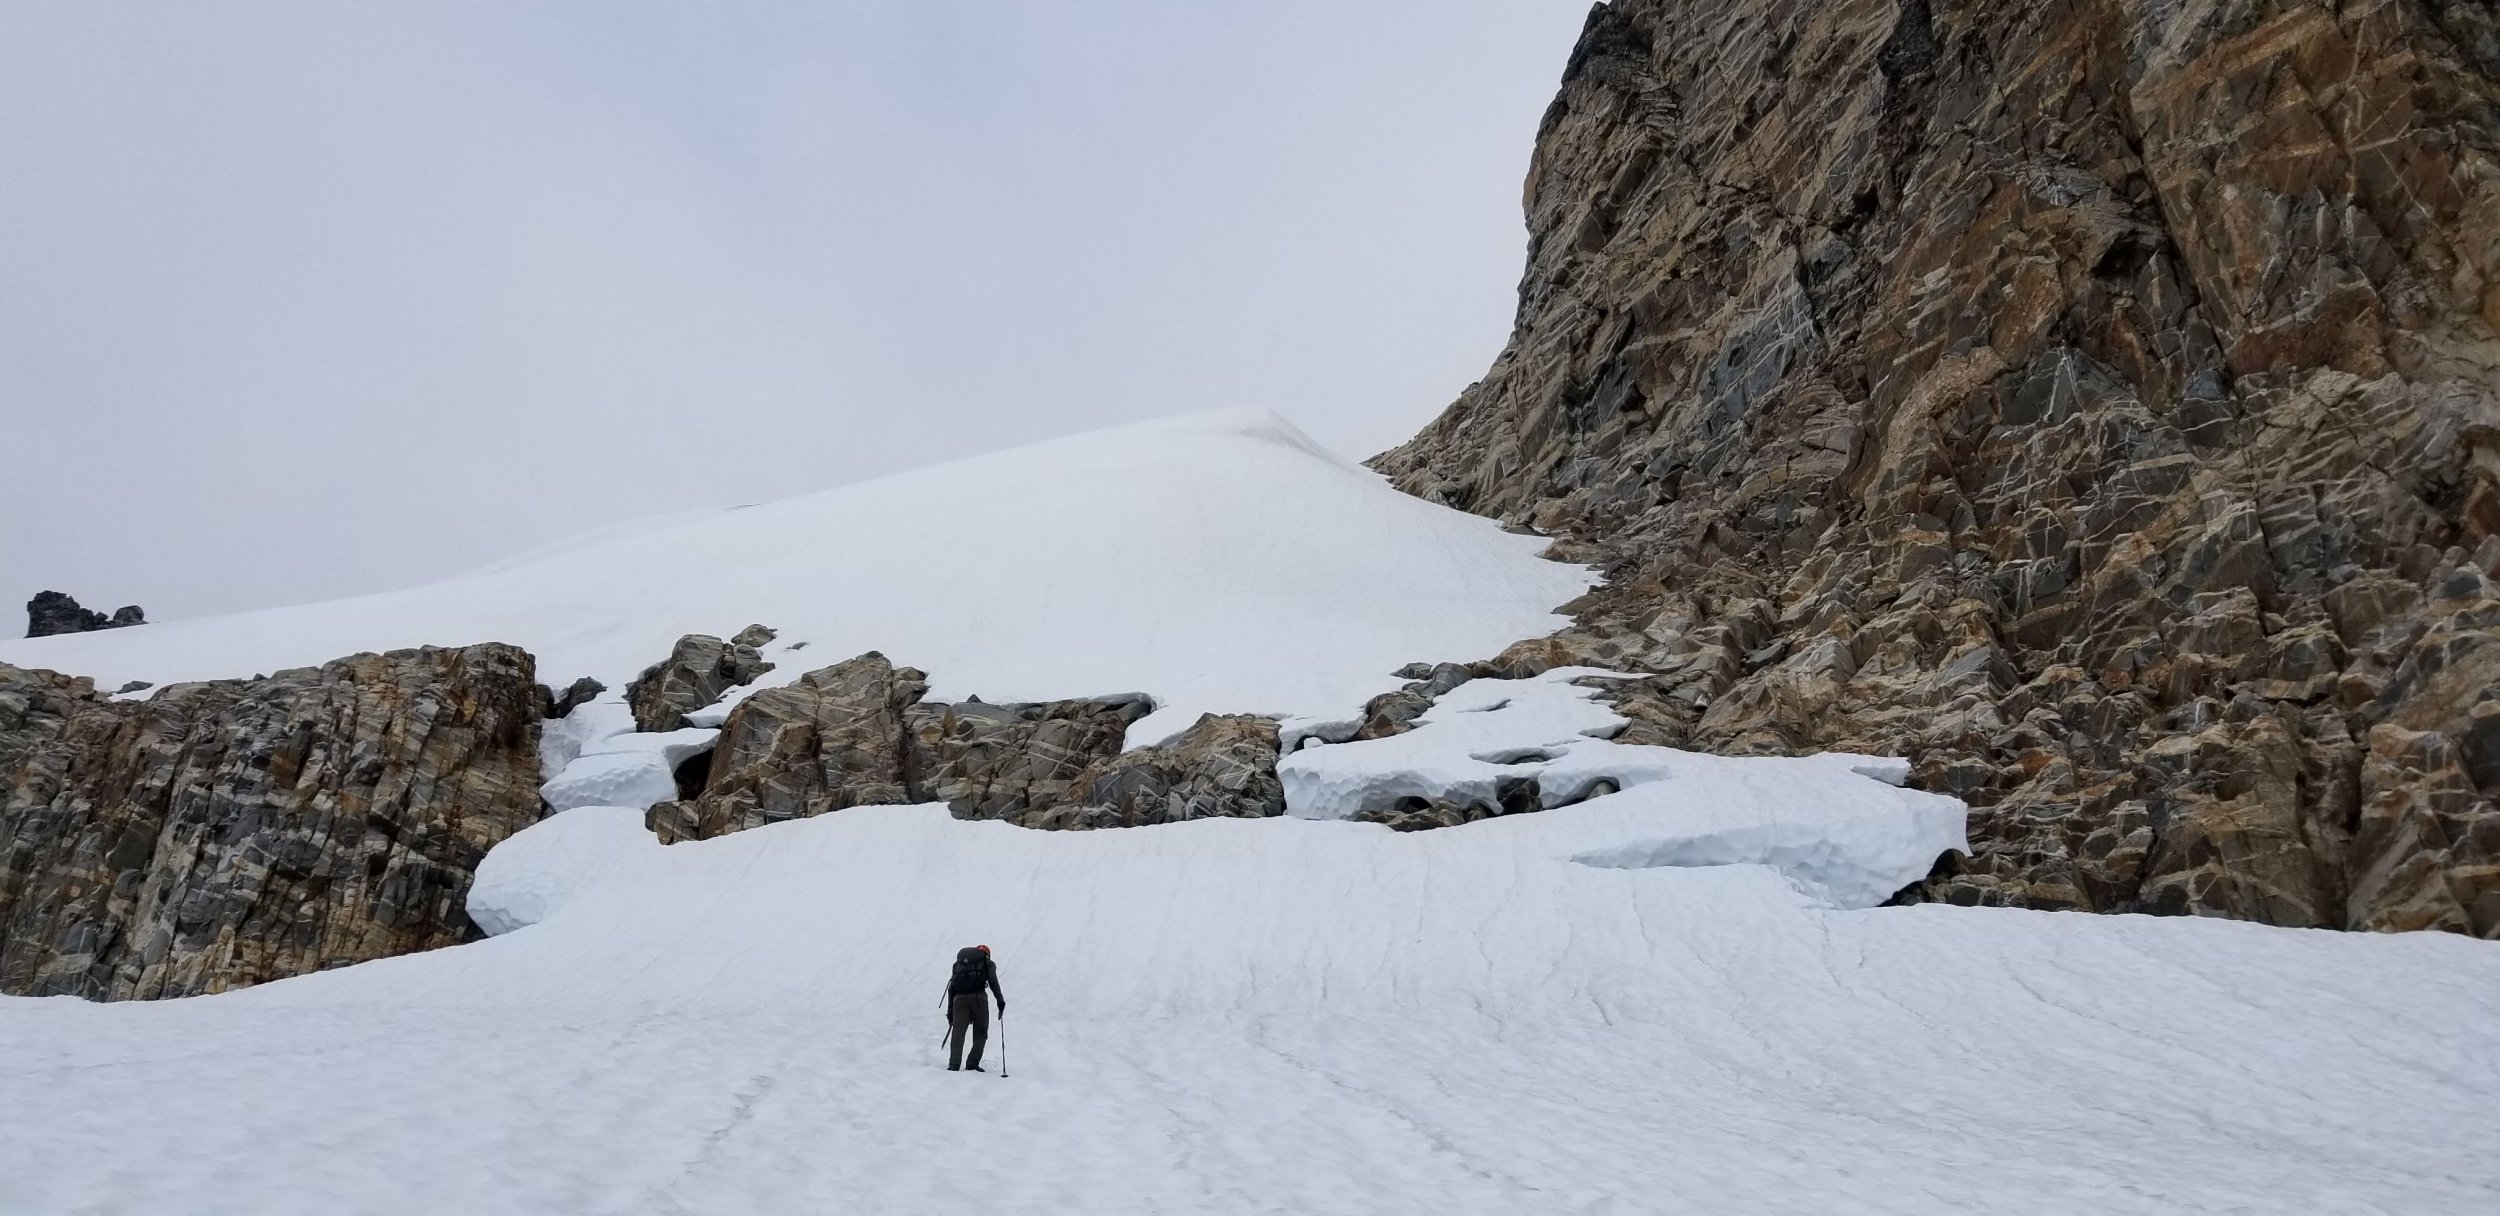
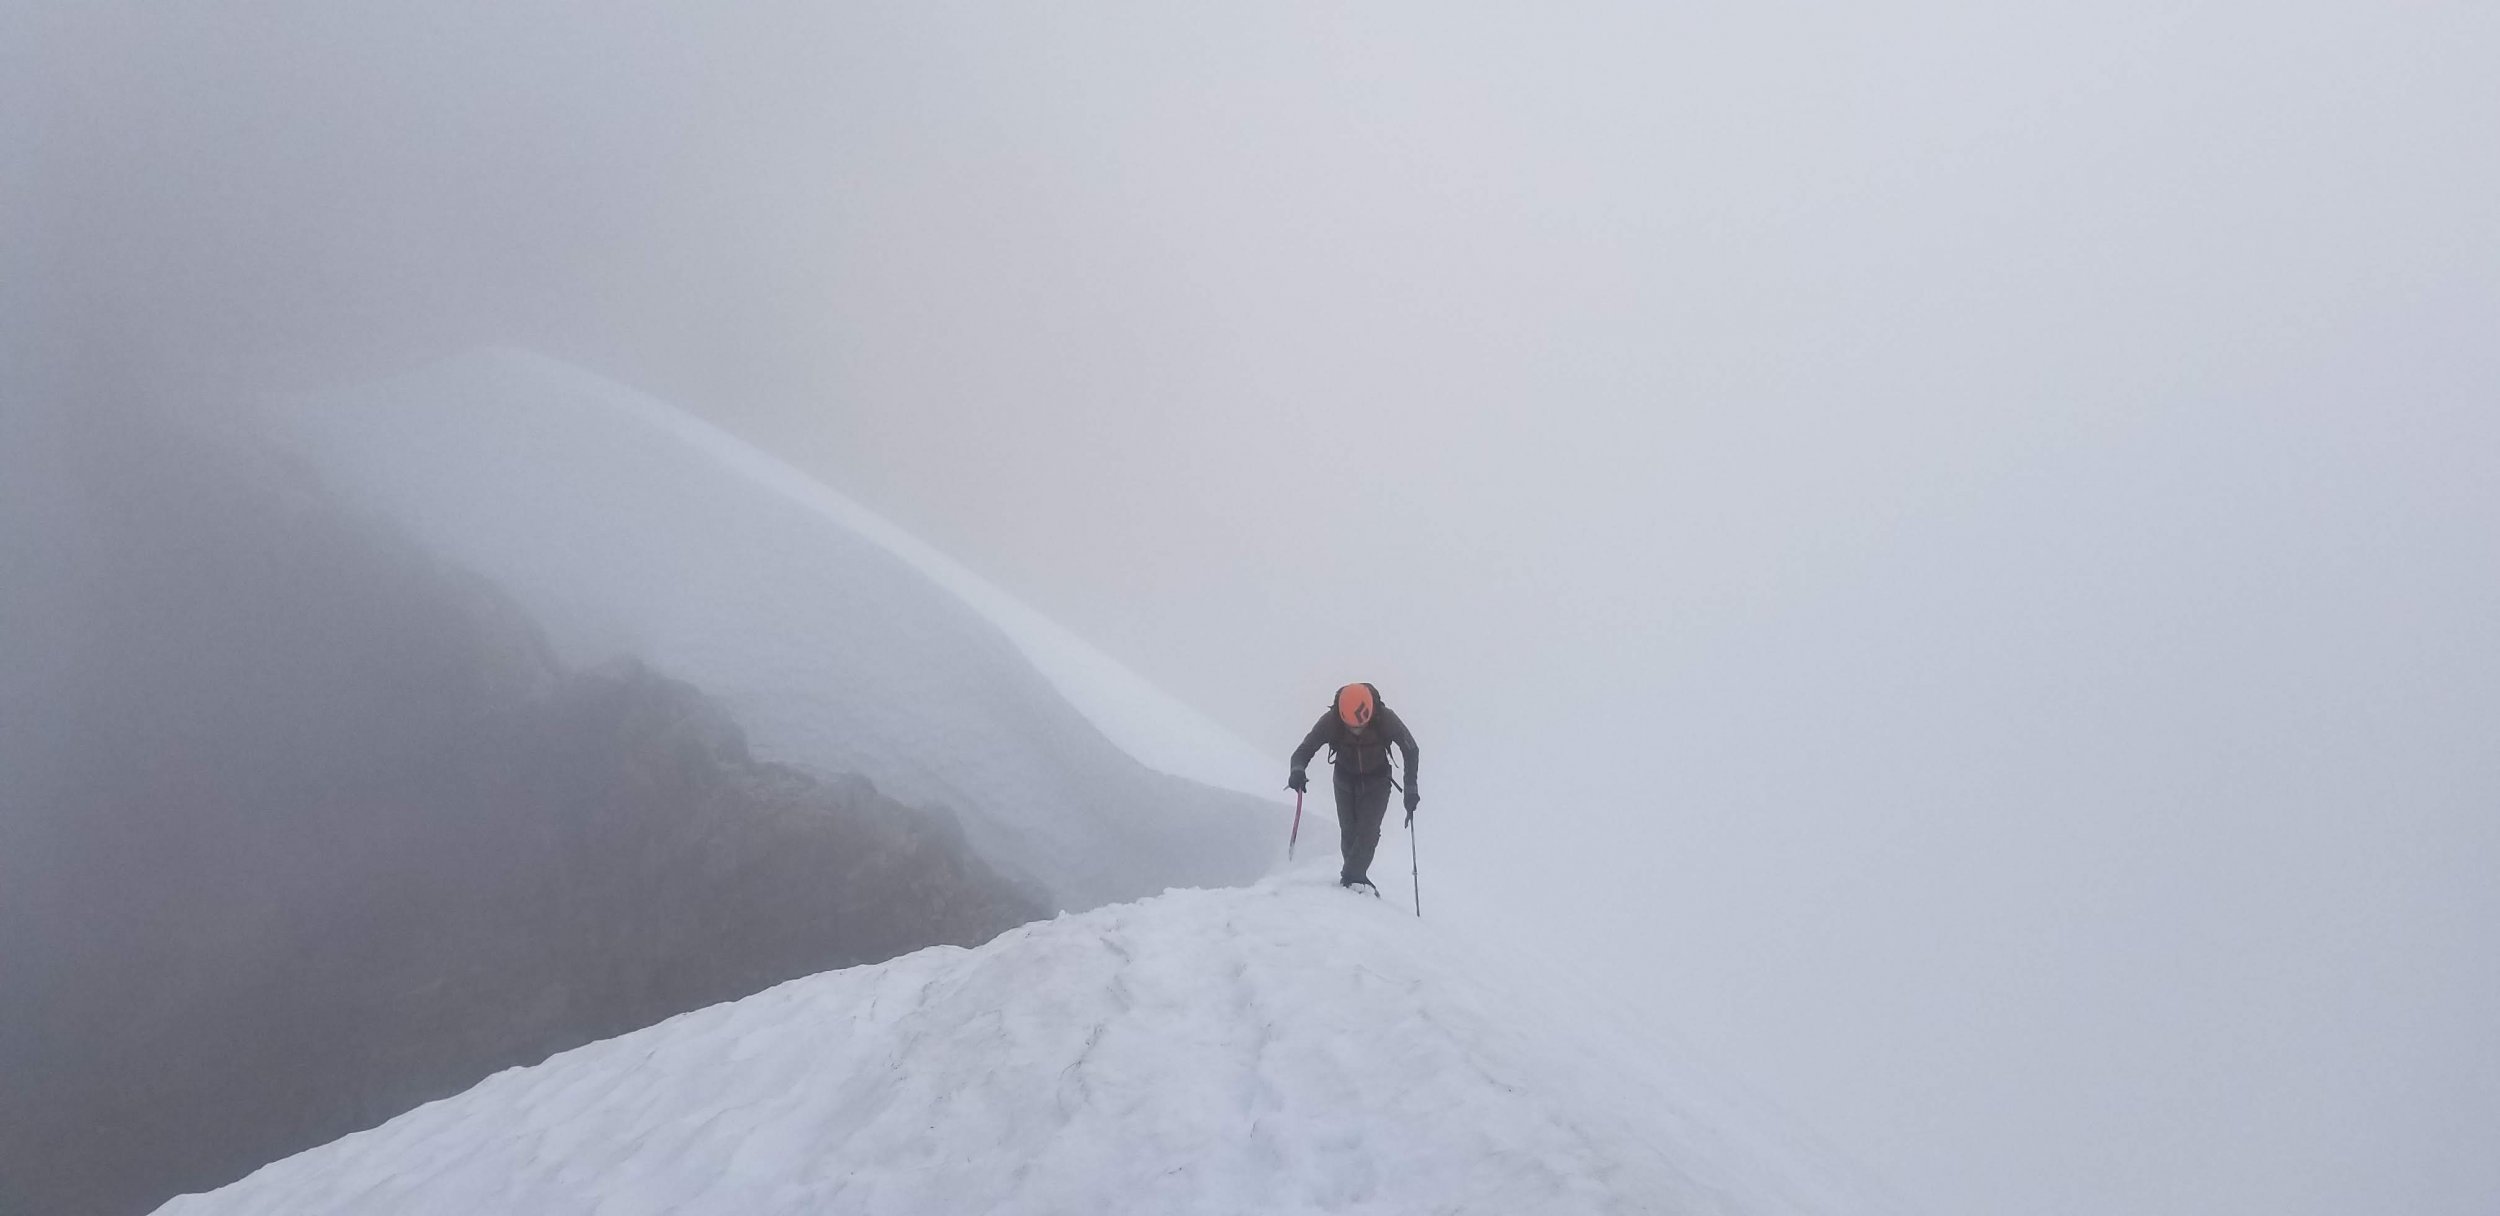
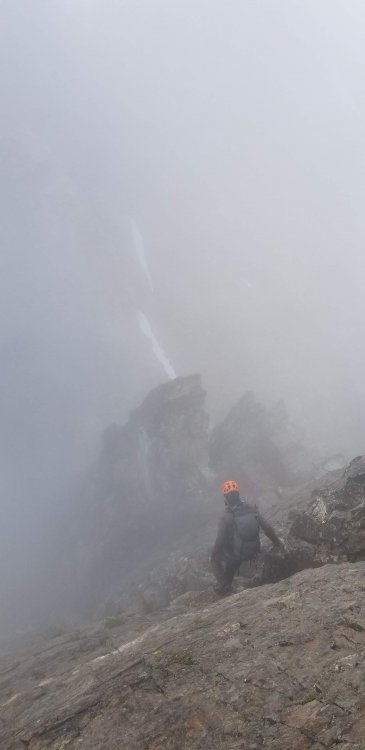
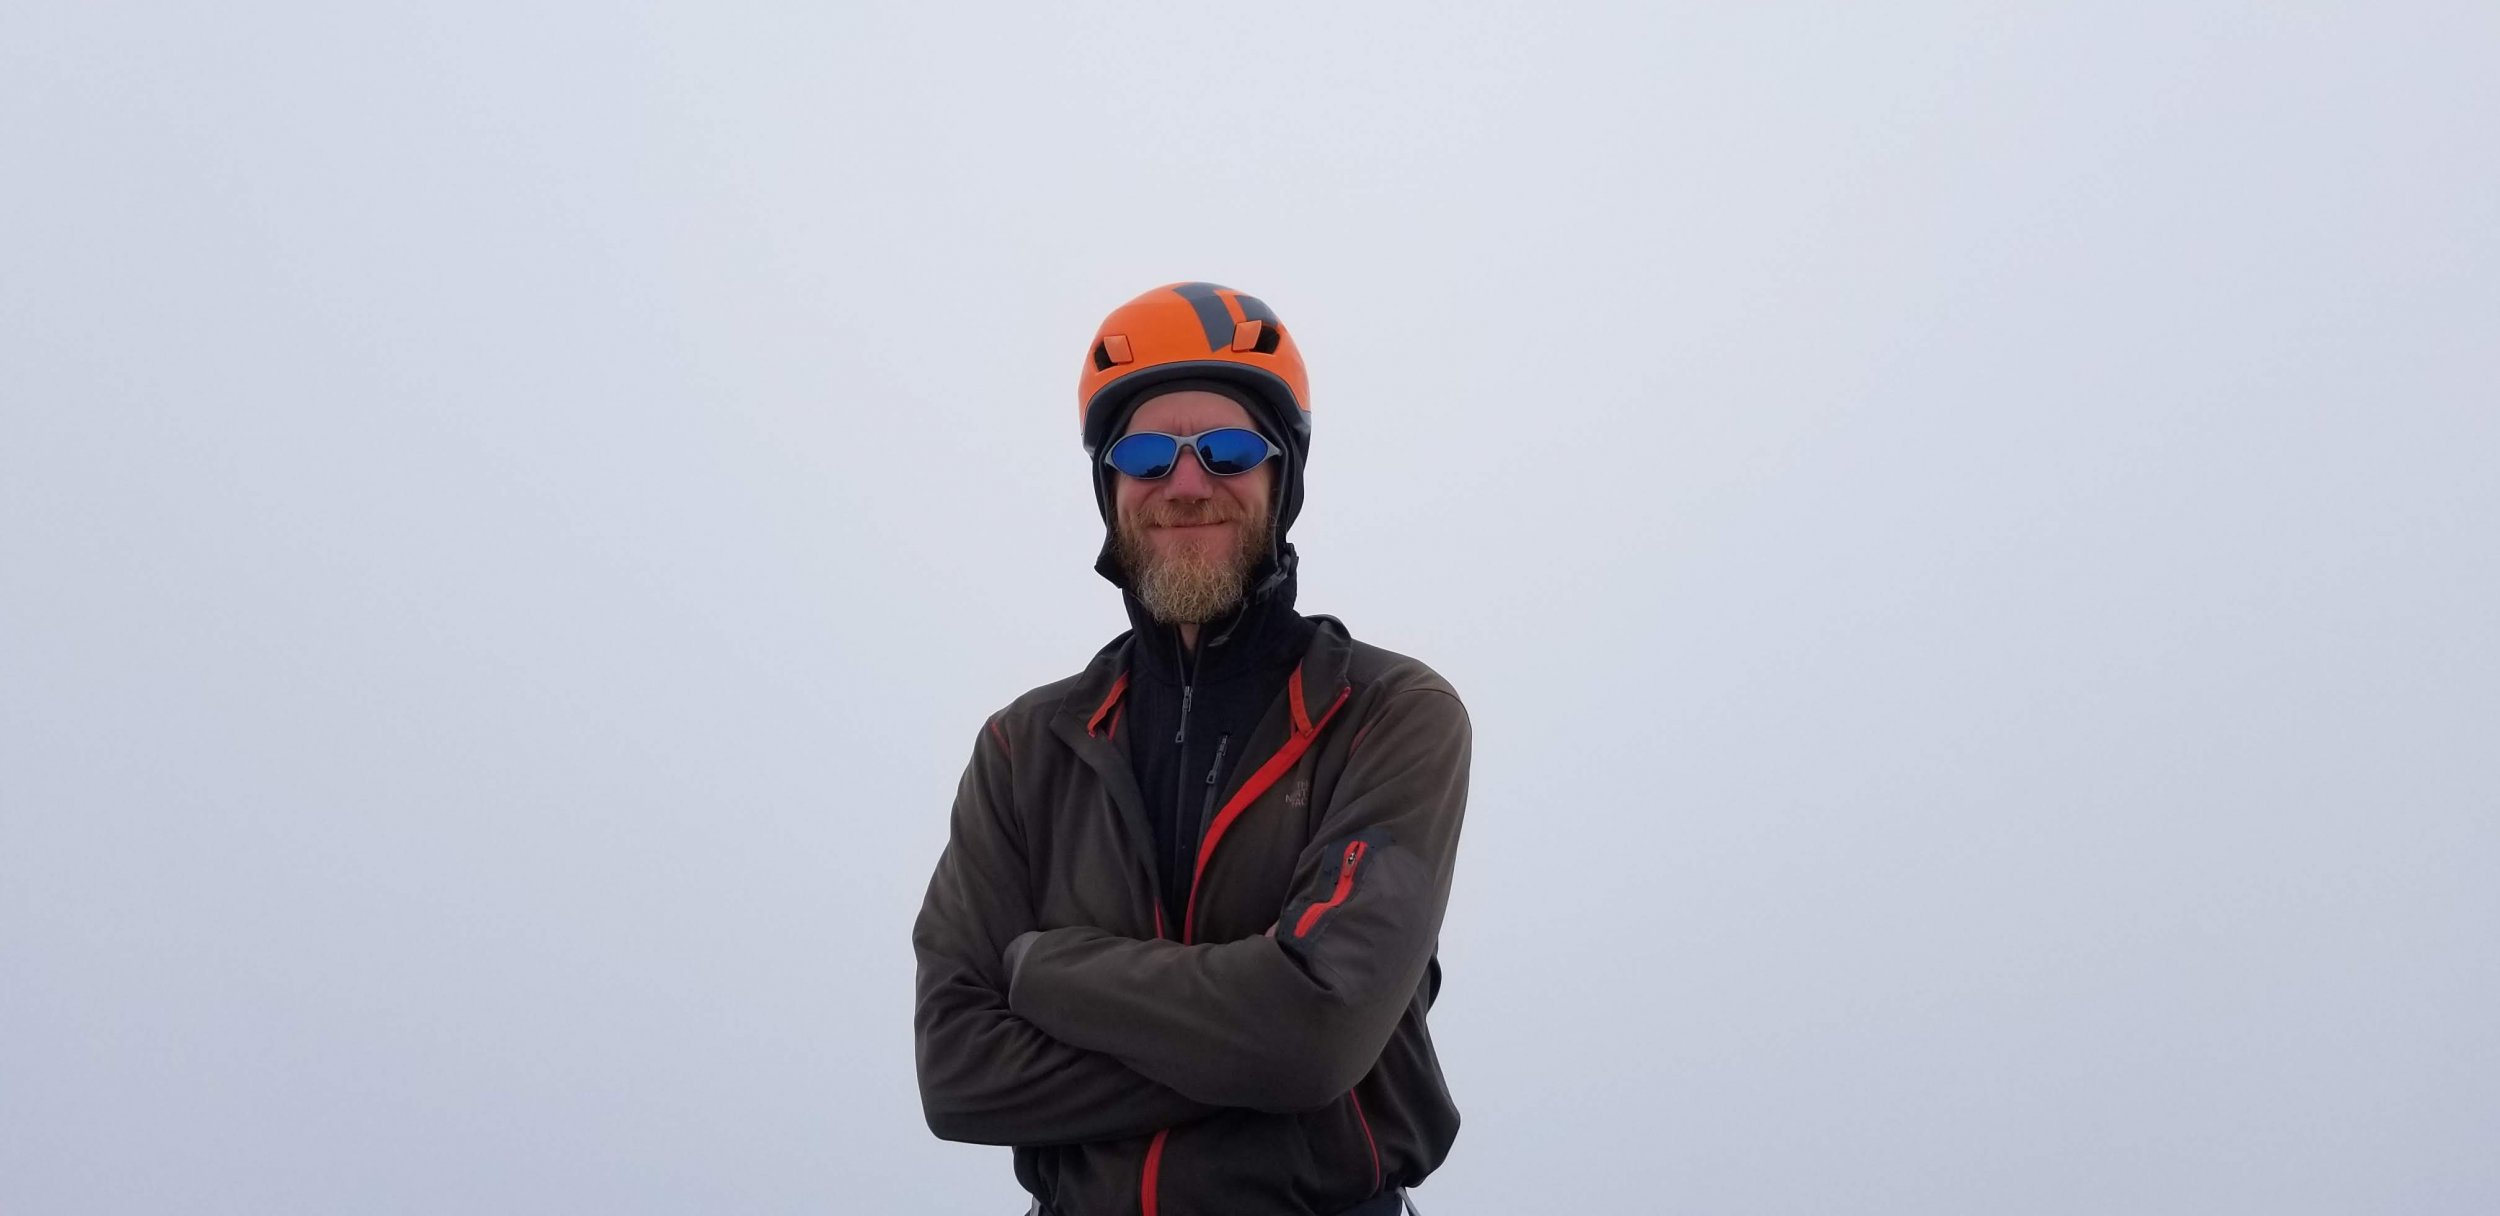
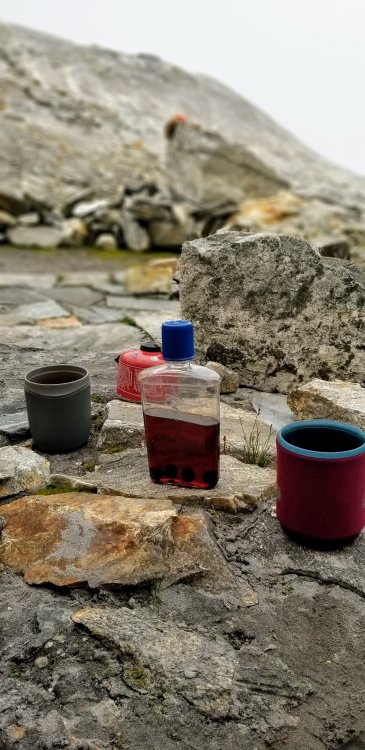
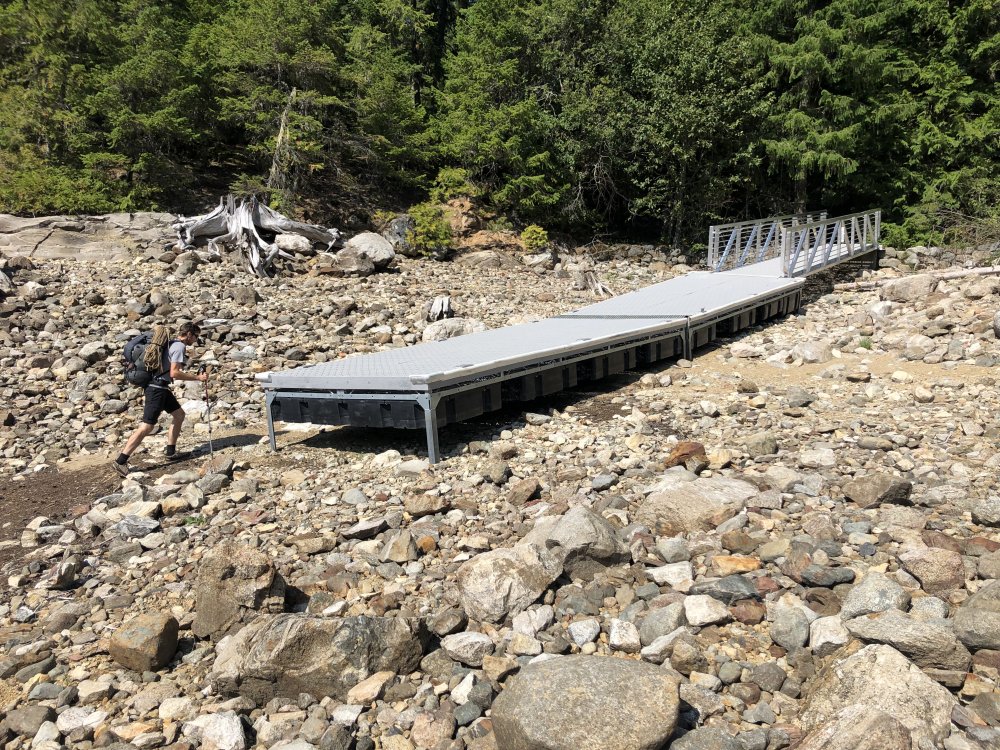


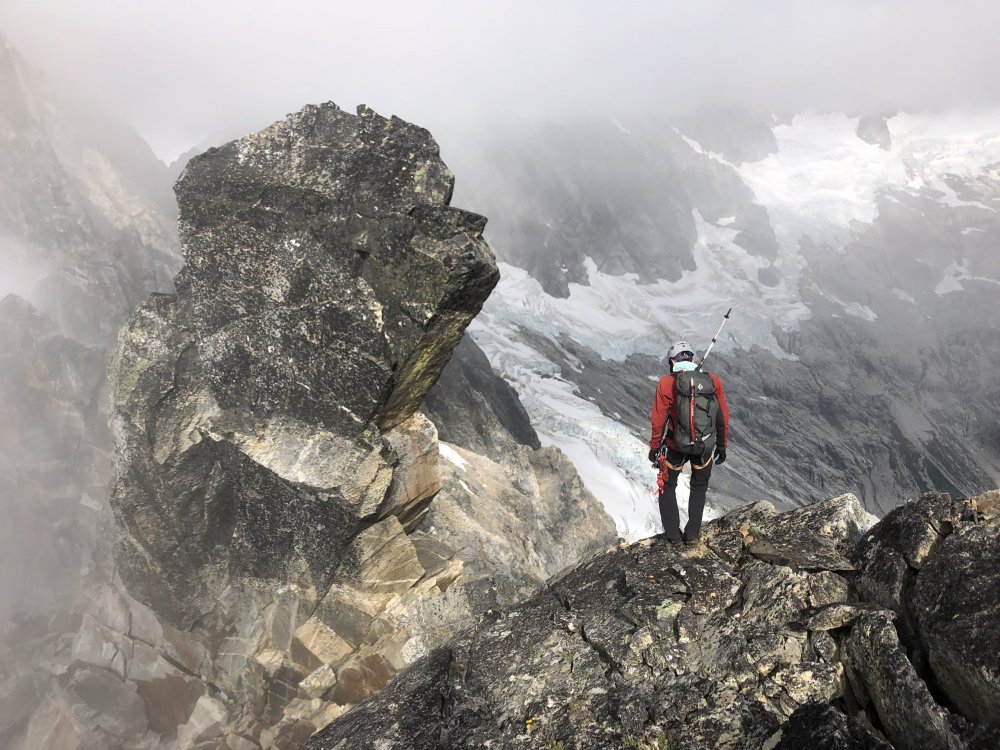
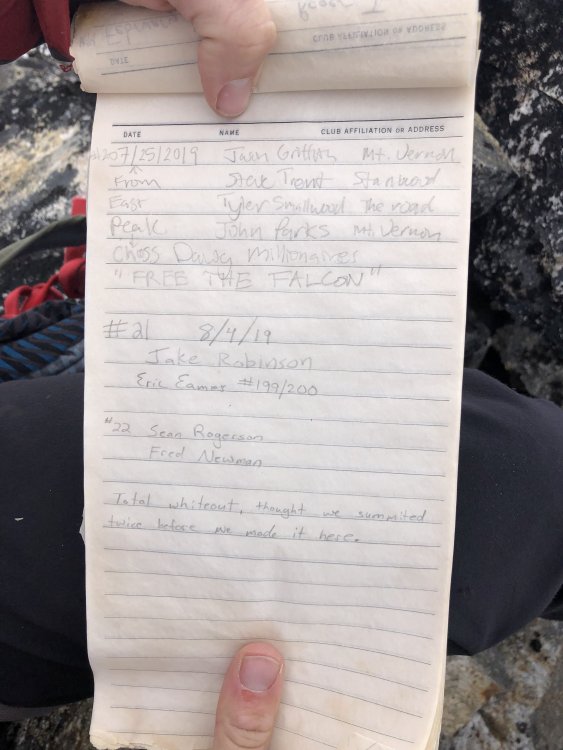
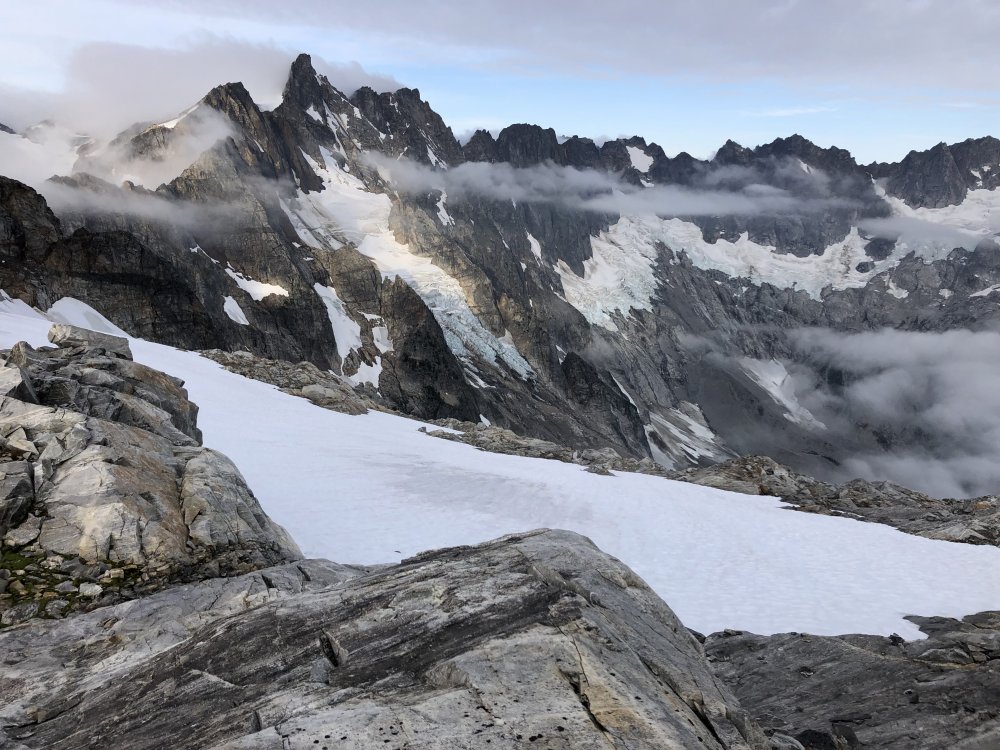
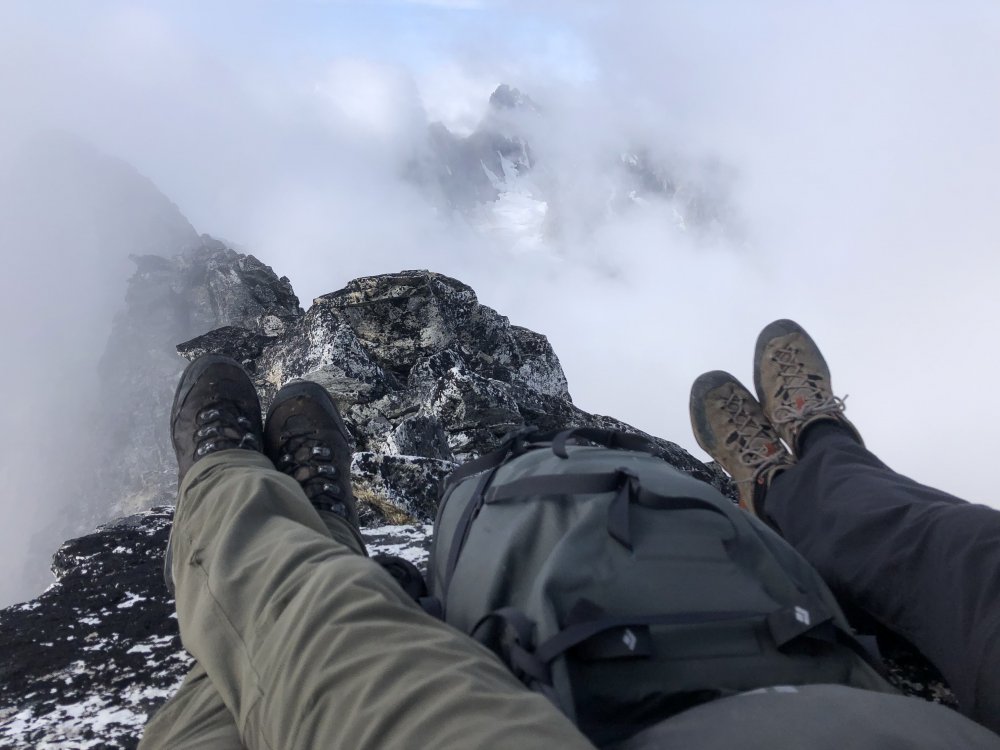

-
Trip: Black Peak - NE Ridge Trip Date: 08/24/2019 Trip Report: We climbed Black Peak via the NE Ridge, camping at the TH so we could get an early start. GPS Tracks Timeline: 5am - Leave TH 8am - Leave Wing Lake (after filling water) 9:30am - Arrive notch 10am - Start climbing ridge 10:30-11:30am - Deal with being off route in a shooting gallery 1:15pm - Summit 3:30pm - Wing Lake 6:15pm - TH Approach Leave from the Rainy Pass TH Hike along the trail to Wing Lake (~4.5 mi, ~2500' gain, ~500' loss) Strike out towards the saddle on the NW side of the peak (~1200' gain) Gaining the saddle In snowy conditions you can just kick steps straight up, with a short section (60m?) of particularly steep snow. See my previous TR on my attempt during snowy conditions. In dry conditions (what we had today), it's mostly a scree climb, with a short section of blocky 3rd/4th class scrambling. We crossed two small snow patches, though we might have been able to avoid the second one. We hit the snow around 9am so it was firm but not icy. All four of us had ice axes and approach shoes and two of us had microspikes. The microspikes were definitely helpful, but not totally necessary. The ice axes were also a nice safety backup, though perhaps could also have been left behind. The steeper snow patch was short and would have run out onto the rocky patch below, but not over a cliff. Once through the snow, we headed up the climbers right side of the slope leading up to the saddle, staying on relatively solid blocky terrain. We trended up and slightly climbers left, eventually working our way along a high ledge to the left to the saddle. Word on the street is that if you attempt to gain the saddle by starting on the left side of the slope, there's much sketchier terrain, with more kitty litter over rock. The climb Once on the saddle, we walked across some scree and then soloed up a short 4th class step. We then walked across a wide ledge and more scree around the left side of the ridge until we hit a gully. There we roped up and started simul climbing, as two rope teams of two, each on 30m ropes. We headed straight up the gully, which was mostly solid rock, until we gained a small notch. From here, we made a major routefinding mistake, dropping far back down the left side of the ridge and traversing along some easy terrain. We realized we were too far below the ridge (maybe 60m below?) and took a sharp right up a gully. Unfortunately, this turned out to be steep, loose and hard to protect. We were in two rope teams of two, and the rope movement of the first rope team dropped a ton of rocks on the second. Our last climber was hit in the helmet with a baseball sized rock. We had good communication between the teams though, and we eventually made it up the gully. Once back on the ridge, the rest of the climbing felt overwhelmingly better. We just stayed on the actual top of the ridge absolutely as much as possible, almost always climbing up and over gendarmes instead of around them. I don't think we dropped more than 10-15m below the ridge line for the rest of the climb. It was mostly 4th or low 5th, extremely exposed climbing along the ridge. There was one ~15m steep section of rock, maybe 5.5 or 5.6. There was definitely some loose rock, though not nearly as bad as the rock in our off-route gully, and overall I found the climbing to be fun and engaging with excellent views. Near the summit, the angle eased considerably and we were able to pass quickly along 4th class terrain on the right side of the ridge until we reached the summit block. From there we soloed up to the summit. We did the climb essentially in two long simuls, though frequently with only one piece per rope length. The descent We downclimbed the same north side of the summit we'd come up, then walked around to the S ridge descent. We looked closely for cairns on the entire descent, and we were able to make the whole descent without once needing to use our hands to scramble (the first time I climbed Black via the S. Ridge, I remember I ended up doing a short section of scrambling - turns out that was unnecessary). Gear Notes: - 30m rope - 0.3 to 2 - doubles: 0.4 to 0.75 - 10 nuts - 8 singles - 7 doubles - 2 tied doubles - 2 cordalettes There was no place where large gear was necessary, but I was happy to have my #2 in reserve a couple times just so I could quickly place and move on. A few more pieces might have let our simuls be less run out, or we could have placed more often and done it in 3 simul pitches instead. Approach Notes: -
-
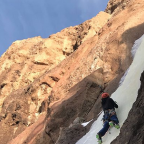 Trip: Indian Himalayas (Thailand too) - multiple Trip Date: 07/15/2019 Trip Report: My wife and I spent 2 months in Asia (1 mo India, 1 mo Thailand and Cambodia) this summer. Most of the trip was non-climbing, but we did get to do some cragging and got into the Zanskar region of the Hiumalaya for what I termed a "mini-exped." We learned quite a lot about logistics and have some insights for how to do this sort of thing on the cheap (not the rep of the Himalaya I know) which I thought I'd share here for others interested in getting out/up. Transport is the biggest logistical difficulty I'll mention here. Getting you and your gear to a "trailhead" or basecamp is the most difficult. If you want this part of the trip organized for you, figure out where you want to go and then contact Rimo Expeditions, these guys are by far the most experienced and dialed exped support company for Indian side of the Karakorum, Ladakh, and just about anything in the Indian Himalayas (Zanskar, Kishtwar, etc.). This will be expensive but still relatively cheap compared to the US for what actually needs to happen in terms of vehicles and people doing what you want on really f**ked up roads. If you want to avoid this, you can still go full dirt bag but it will require some discomfort on your part, a minimal kit, and lots of patience. There are several forms of transport in this area, all work, some are way better than others for your given objective. If you are truly light-weight you can rent/buy a Royal Enfield motorcycle and load up (you could even go KD-in-Kyrgyzstan style and ride a bicycle). This requires that you are very comfortable driving in some seriously narrow, rough roads with traffic. If you think that crappy dirt roads in the western US conditioned you for this... think again (its truly next level in terms of rugged, poo-yer-pants driving). The next level is to rent a "taxi" (jeep). This will be expensive but very convenient as you can have the guy drop you where you want. Expect about $100 per day which will get you sometimes as little as 100 miles of road travel. You can also get a shared jeep where you pay for your seat but this will only get you to near the area you are trying to go and your bags have to fit in the roof rack and share space with other travelers. We did this on the way out to our objective, got dropped at a tent-stay place by a village, then organized a private jeep (very beat up) with a local to get us and our two porters to the actual start of hiking. The problem with this and having a flexible itinerary was arranging pickup (sat phones are banned by India in this region due to fear of terrorist organization. Buses are quite cheap, bags are an issue if you are going heavy. They are also slower than taxis and can be rare to non-existent in remote areas. Hitch-hiking is possible, but most people will expect you to pay them something. My wife and I were able to hitch-hike on Tata trucks (India's semi-trucks) driven by some friendly Kashmiris to get back to the town of Kargil. This was a an extremely LONG but enjoyable and interesting way to travel (no issues with the amount of bags if you don't mind them getting very dusty/muddy/wet. The next issue is food. There are grocery stores (not what you're used to) in major towns (Leh, Kargil, Manali). Finding dry goods is hard. We went with quite a bit of canned goods knowing that our approach from road to basecamp was short (3-4 miles) and we would have a porter or two to help us carry stuff. You can easily buy lots of ramen packets and also poha (rolled potato flakes that can be cooked like instant rice). You can get some bars, instant oat meal. Peanut butter can be found but is expensive and will taste more like thai peanut sauce than PB we have here. Dried fruit, nuts and candy bars are easy to get. Bringing gear from the US is tough with the standard array of airport "security" (read bureaucracy) BS you will encounter. Groups like Rimo can provide you with high quality camping stuff (pads, tents, cook stoves, etc.). If you are renting it can be good in both price and quality, just make sure to reserve early in the year for a company like Rimo and check the items carefully before taking them out in the field. I would plan to bring your own climbing gear, sleeping bag, and light tent or bivy sacks if you are planning to sleep on route. All other camping equipment you can get in Leh, probably Manali, Kargil you'll probably be out. Here's our itinerary, then I'll tell you what I would change if I went back with a climbing focus... Flew to Delhi, train to Chandigarh, private taxi to Manali (6500') 5 days in Manali with day hikes to 8000' and 11k' Two day Himachal Tourism bus to Leh (day 1 go over 13500' pass, sleep at 10k', go over multiple passes 3x 15k' 1x 17k', arrive in Leh 12.5k') Spend 6 days in Leh with easy walks, buy food, get rental gear, research and finalize objectives. Bus to Kargil (11k'), spend night, shared taxi to Rangdum (14k'), spend the night, private jeep and hike to foot of glacier at 15k'. 5 nights sleeping at foot of glacier (15k') day 1 navigate toe of glacier and dial in approach route, day 2 go up ridge next to glacier to 17k' (shut down by knife edge of stacked blocks), day 3 rest (boulder around camp), day 4 go up different ridge to 19k' (shut down by overhanging rock band), day 5 hike out If my goal was to climb in the same area, or other areas North of the Himalaya crest in summer I would change it up and do the following... Acclimatize before hand on mountains in the US and fly straight to Leh at 12k' plus (book Delhi to Leh separately with a discount airline as it will be way cheaper). Gear up and buy food in Leh. If it were me, I'd go pretty light and ideally have 4+ people who I was going climbing with. This way you can hire a taxi/jeep at a reasonable cost per person to get you and your stuff to your area (jeeps can fit 7 passengers with limited room for bags in the back and a roof rack). If you need a couple porters you can probably just find them the week of if in Zanskar and most other areas of Ladakh, but be specific about what you want (lots of people speak just enough English that you think they understand) and use lots of pictures (most villages will hav no electricity or internet so be prepared). If in the Karakorum the proximity of the border means that the army will over pay porters and it will be difficult to find people, pack animals may be the way to go for getting to the glacial travel part. If in doubt I'd hire Rimo for logistics. Other thoughts... -snow can be really soft and slushy, look for hard freezes and plan to travel during those times -sunny aspects can actually be more consolidated on steep slopes -everything is bigger and takes more time than you think, especially figuring out approaches through glaciers, rivers, scree, etc. Feel free to message me with Qs. Here are some sweet pictures for your viewing pleasure (apologies for the crap iphone pics)... "trail head" approach to BC bouldering at BC views from a ridge less ideal views from another ridge bailure time make-shift gaiters hitch hiking w/ our homies #freekashmir #modiisafascist luxury hotels (slobber slobber) and NO, I won't tell you where this is Summary: It's cheap, the peeps are nice, place is easier to deal w/ than you probably think... go get it! P.S. Thailand is fun too... Gear Notes: rented tent/pads/sleeping bags/stove bought with: light axe and pons Approach Notes: fly, train, bus, taxi, jeep, walk
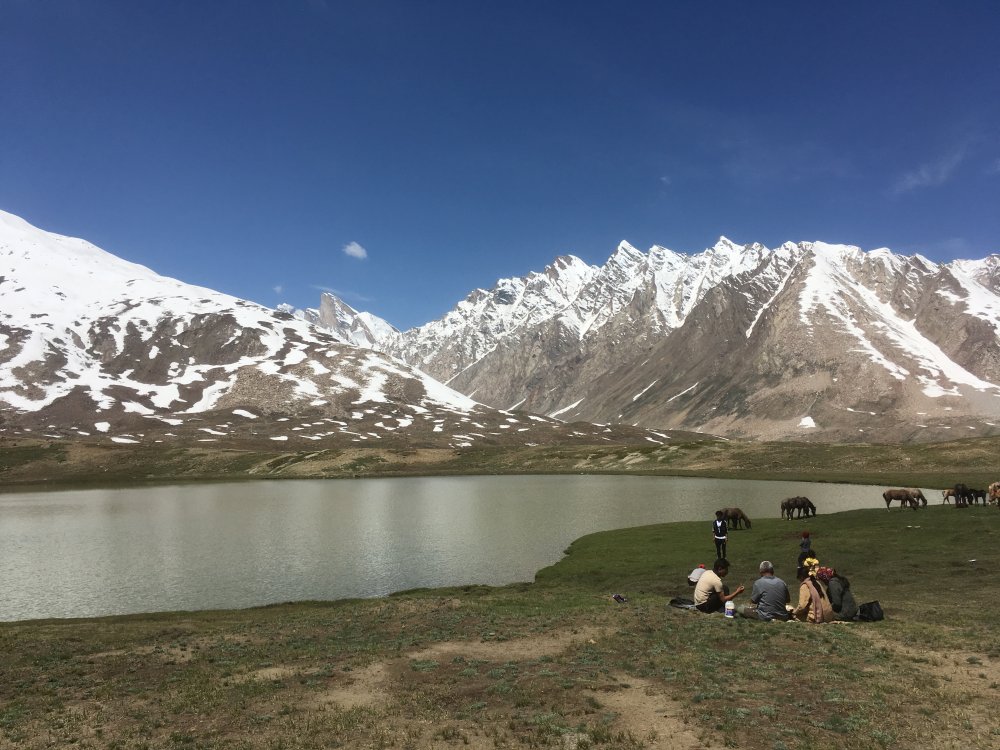


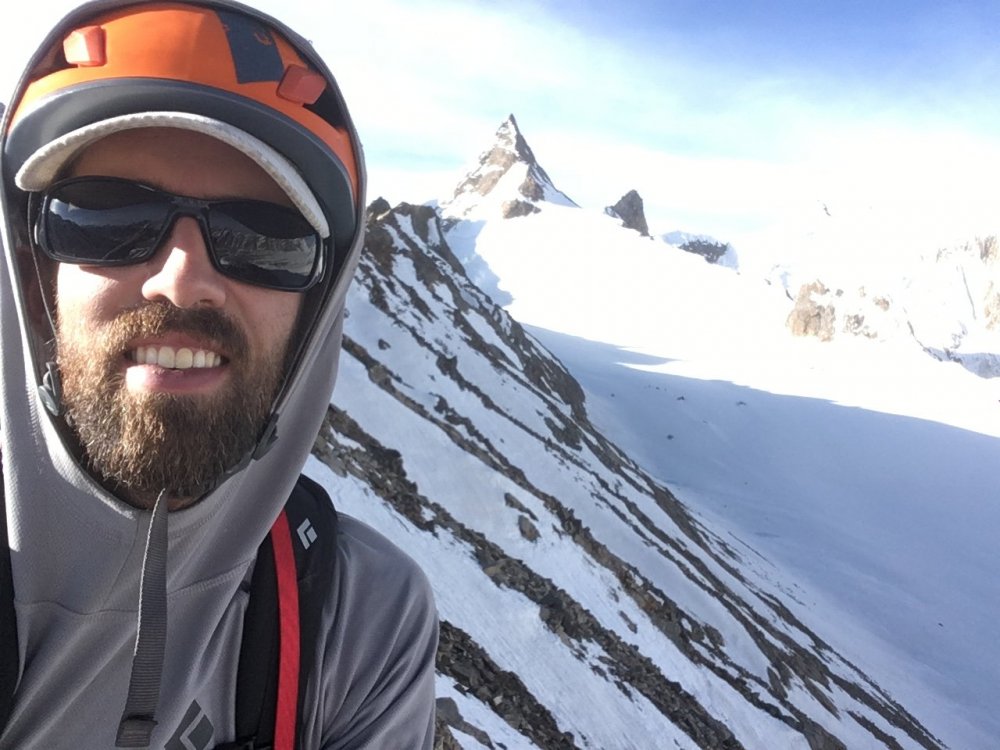
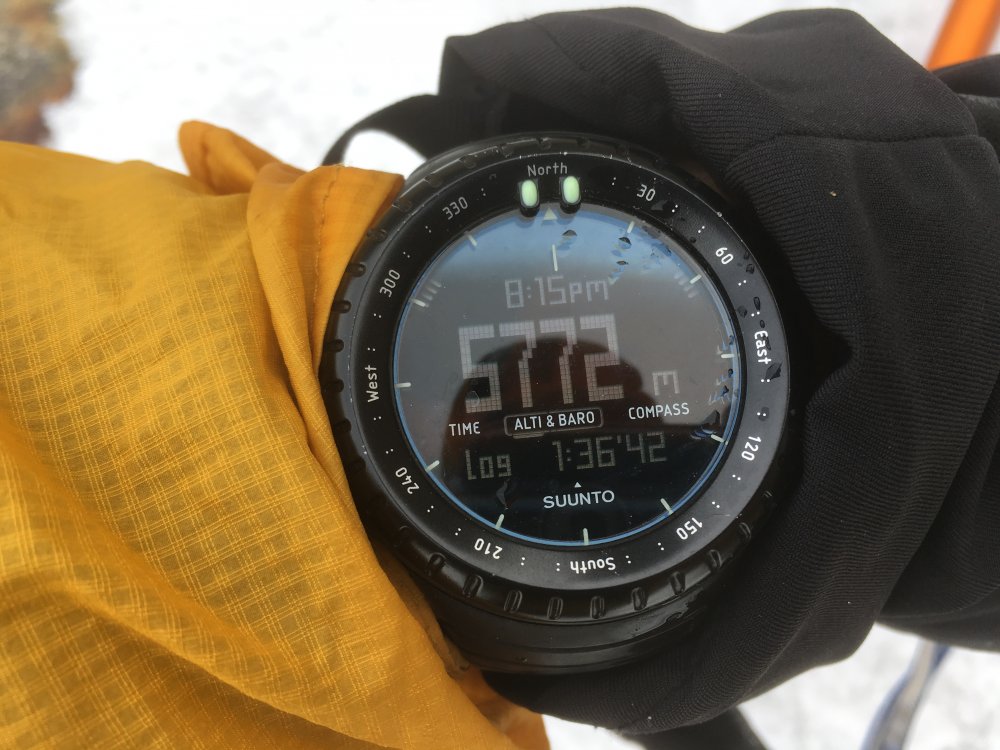

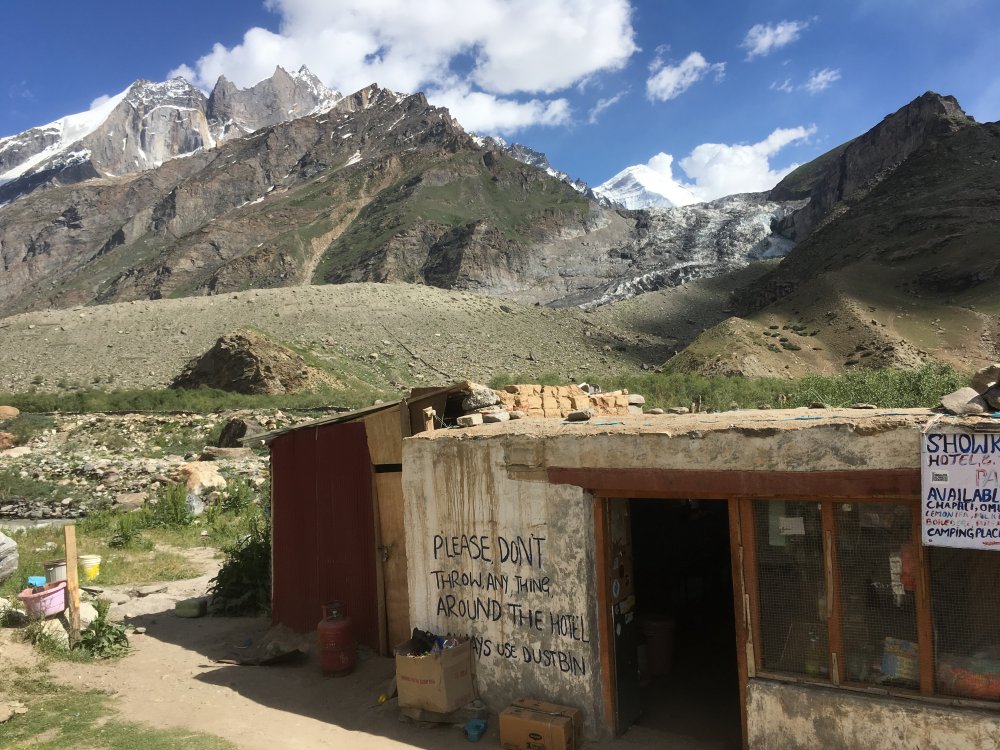
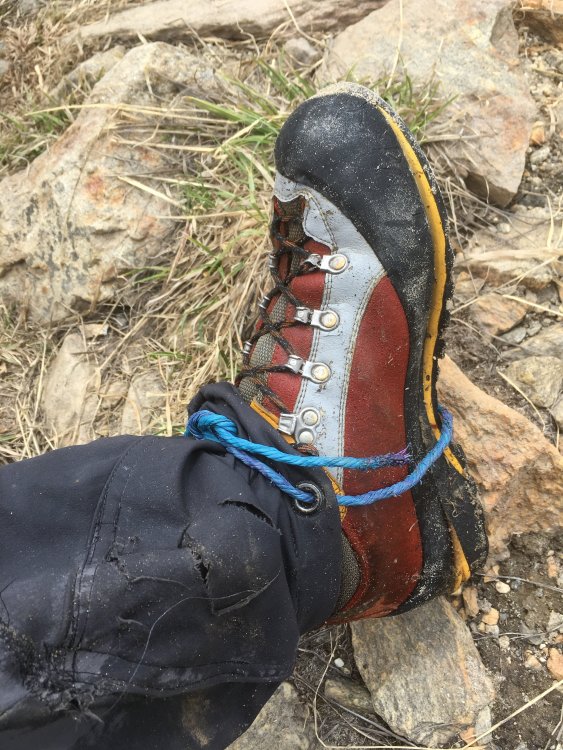
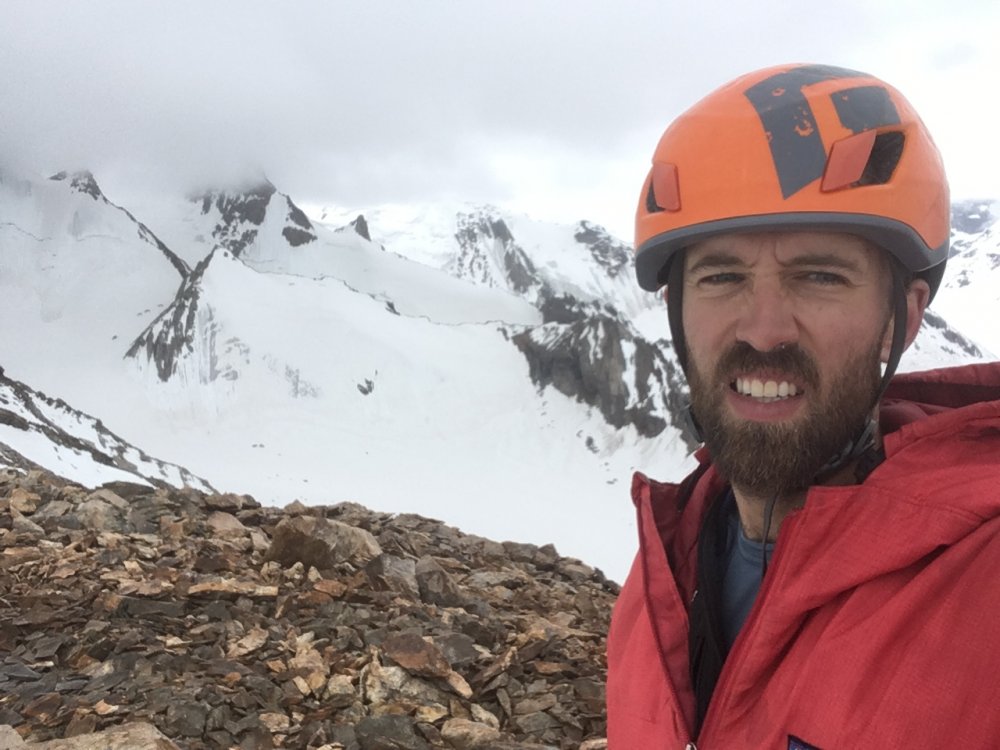
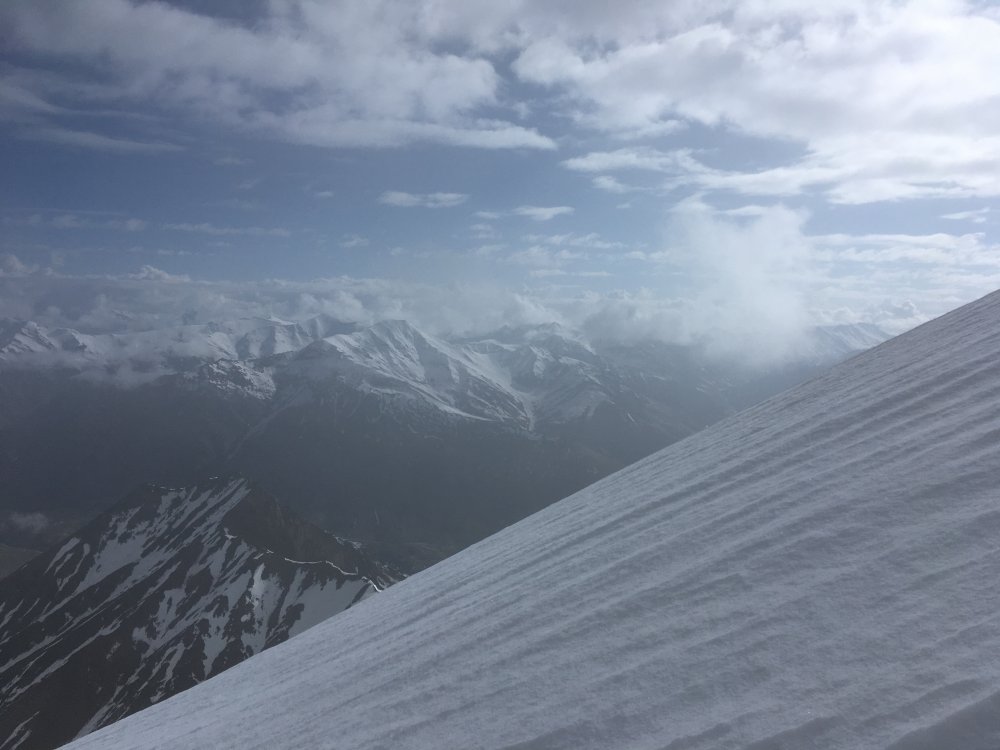
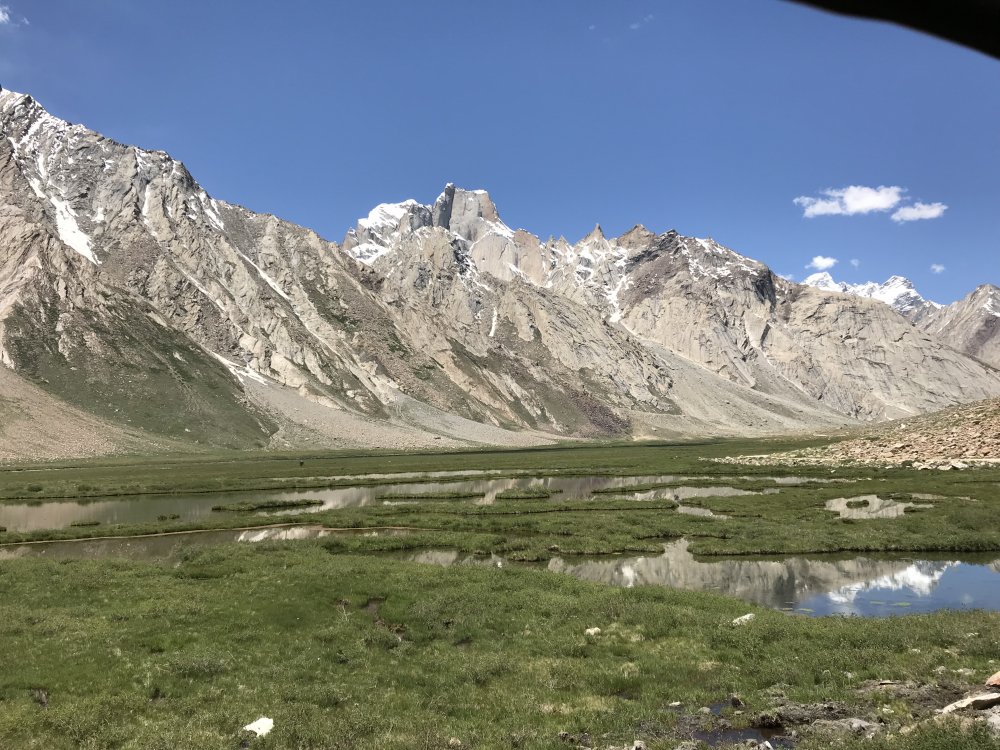

-
 Trip: Alpine Lakes Wilderness - Thunder Robin High Route Trip Date: 09/07/2019 Trip Report: I did some off trail exploration, connecting the high terrain between Thunder Mountain Lakes and the Robin Lakes. I found the terrain to be surprisingly rugged and remote feeling, despite never being more than a mile or two from the PCT. There was a lot of talus and steep heather and not too much brush for the area. My general route: traverse south from Thunder Mountain Lakes, cross into the basin above the Deception Lakes, traverse the west side of Mac Peak, down to Talus Lake, up over the next pass, down to Lake Phoebe, and up past the Granite Mountain Potholes to Robin Lakes. Then I took the PCT back to the Surprise Creek TH, where I started. It made for about 29 miles and 10k ft gain. For more details, see https://climberkyle.com/2019/09/07/thunder-robin-high-route/ Evening above Lower Thunder Mountain Lake. Sunrise on Mt. Stuart. Sunrise over Square Lake. Sunrise over Daniel and the Deception Lakes. Basin west of Mac Peak, lots of talus. The ridge north of Talus Lake. Lake Phoebe. Granite Mountain Potholes. Robin Lakes. Surprise Gap. Gear Notes: Lightweight bivy kit, poles, La Sportiva Ultra Raptors for the gnar. Approach Notes: Surprise creek trail to Trap Pass to Thunder Mountain Lakes.
 -
Trip: Dragontail Peak - Dragons of Eden Trip Date: 07/19/2019 Trip Report: Sean and I have been having too much success lately. So we decided to step it up a little bit and give DOE a go yesterday. We promptly got our asses handed to us, but made it up in reasonable time. Taking our time on the approach due to a nice morning rain, we made it to the base in 3ish hours. I will say that this route has one of the shortest approaches in the range. The first pitch is properly dirty and harder than it looks. Looks like 5.8, feels like 10- dirty. The second pitch is so sweet! but like the rest of the route, needs some more traffic to make it even more enjoyable. There is a guillotine flake at the start that looks bad, but is solid, this is kind of a theme of the route. I linked this into the 5.9 pitch and belayed from below the crux on a big fat ledge. Sean coming up to the pitch 2 belay in the sun! This wall is COLD and doesn't get any real sun until late in the day. This was the only sun we got all day. From there we rested up and Sean gave the crux a solid effort, no send but that pitch is really fun and you're more likely to hit the pedestal as the follower unless your belayer isn't paying attention. Looking up at me on the headwall. The whole headwall seems to be comprised of scary hollow sounding tombstone flakes. They are solid for now, but it still made it feel pretty heads up for me. The position is all time exposed if you build a belay in the middle of the pitch, which is what we did. The second headwall pitch is hard and scruffy. Still a little crumbly, but takes great gear. I can't believe that Jens onsighted that pitch before it was properly cleaned, so awesome! Sean trying to untie his knot. Psyched on life and ready to start the scramble up to the summit. Can you spot Sean in his granite colored jacket? We soloed the NE buttress until this spot. I had read in Steph's TR about how loose the notch was, It is indeed absolutely horrible. The first hold that Sean grabbed in the gulley proper tore loose and triggered a big slide below him. To get around it he went up and right, then down-climbed to the rap station. We flicked the rope down and I TR'd directly up the notch. I can't stress how gross the rock is, but I guess it could be worse. We brought a tagline to bail and haul a pack. This allowed us to make one full 60m rap down the other side. Still more loose rock but a pretty straightforward rappel. From where the route drops you, you don't need snow gear to get down. Some fun scree and snow skiing took us down to Aasgard and the usual jarring hike down the pass brought us back to our packs. Overall it's a great route! Too hard for me to give a good RP attempt from the car right now, but I now have something to train for. Like others have said, with some more traffic this route would clean up well! I even think the average 10+ climber with some alpine aiders and a slightly bigger rack could have fun on it. Next time I come back I will probably rap the route. It was cool for both of us to top out since it was our first route on D-tail, but the NE-Butt is mostly just exposed loose walking and not a good route. Gear Notes: Doubles .3-3 and Triples .4-1 12 alpine draws Small set of nuts 60m 6mm Tagline Approach Notes: Around the lake and up to the base of the waterfall, then right over the waterfall and up some loose 4th class to the base. If you're gonna leave gear at the base, hide it under a boulder before you cross the waterfall.

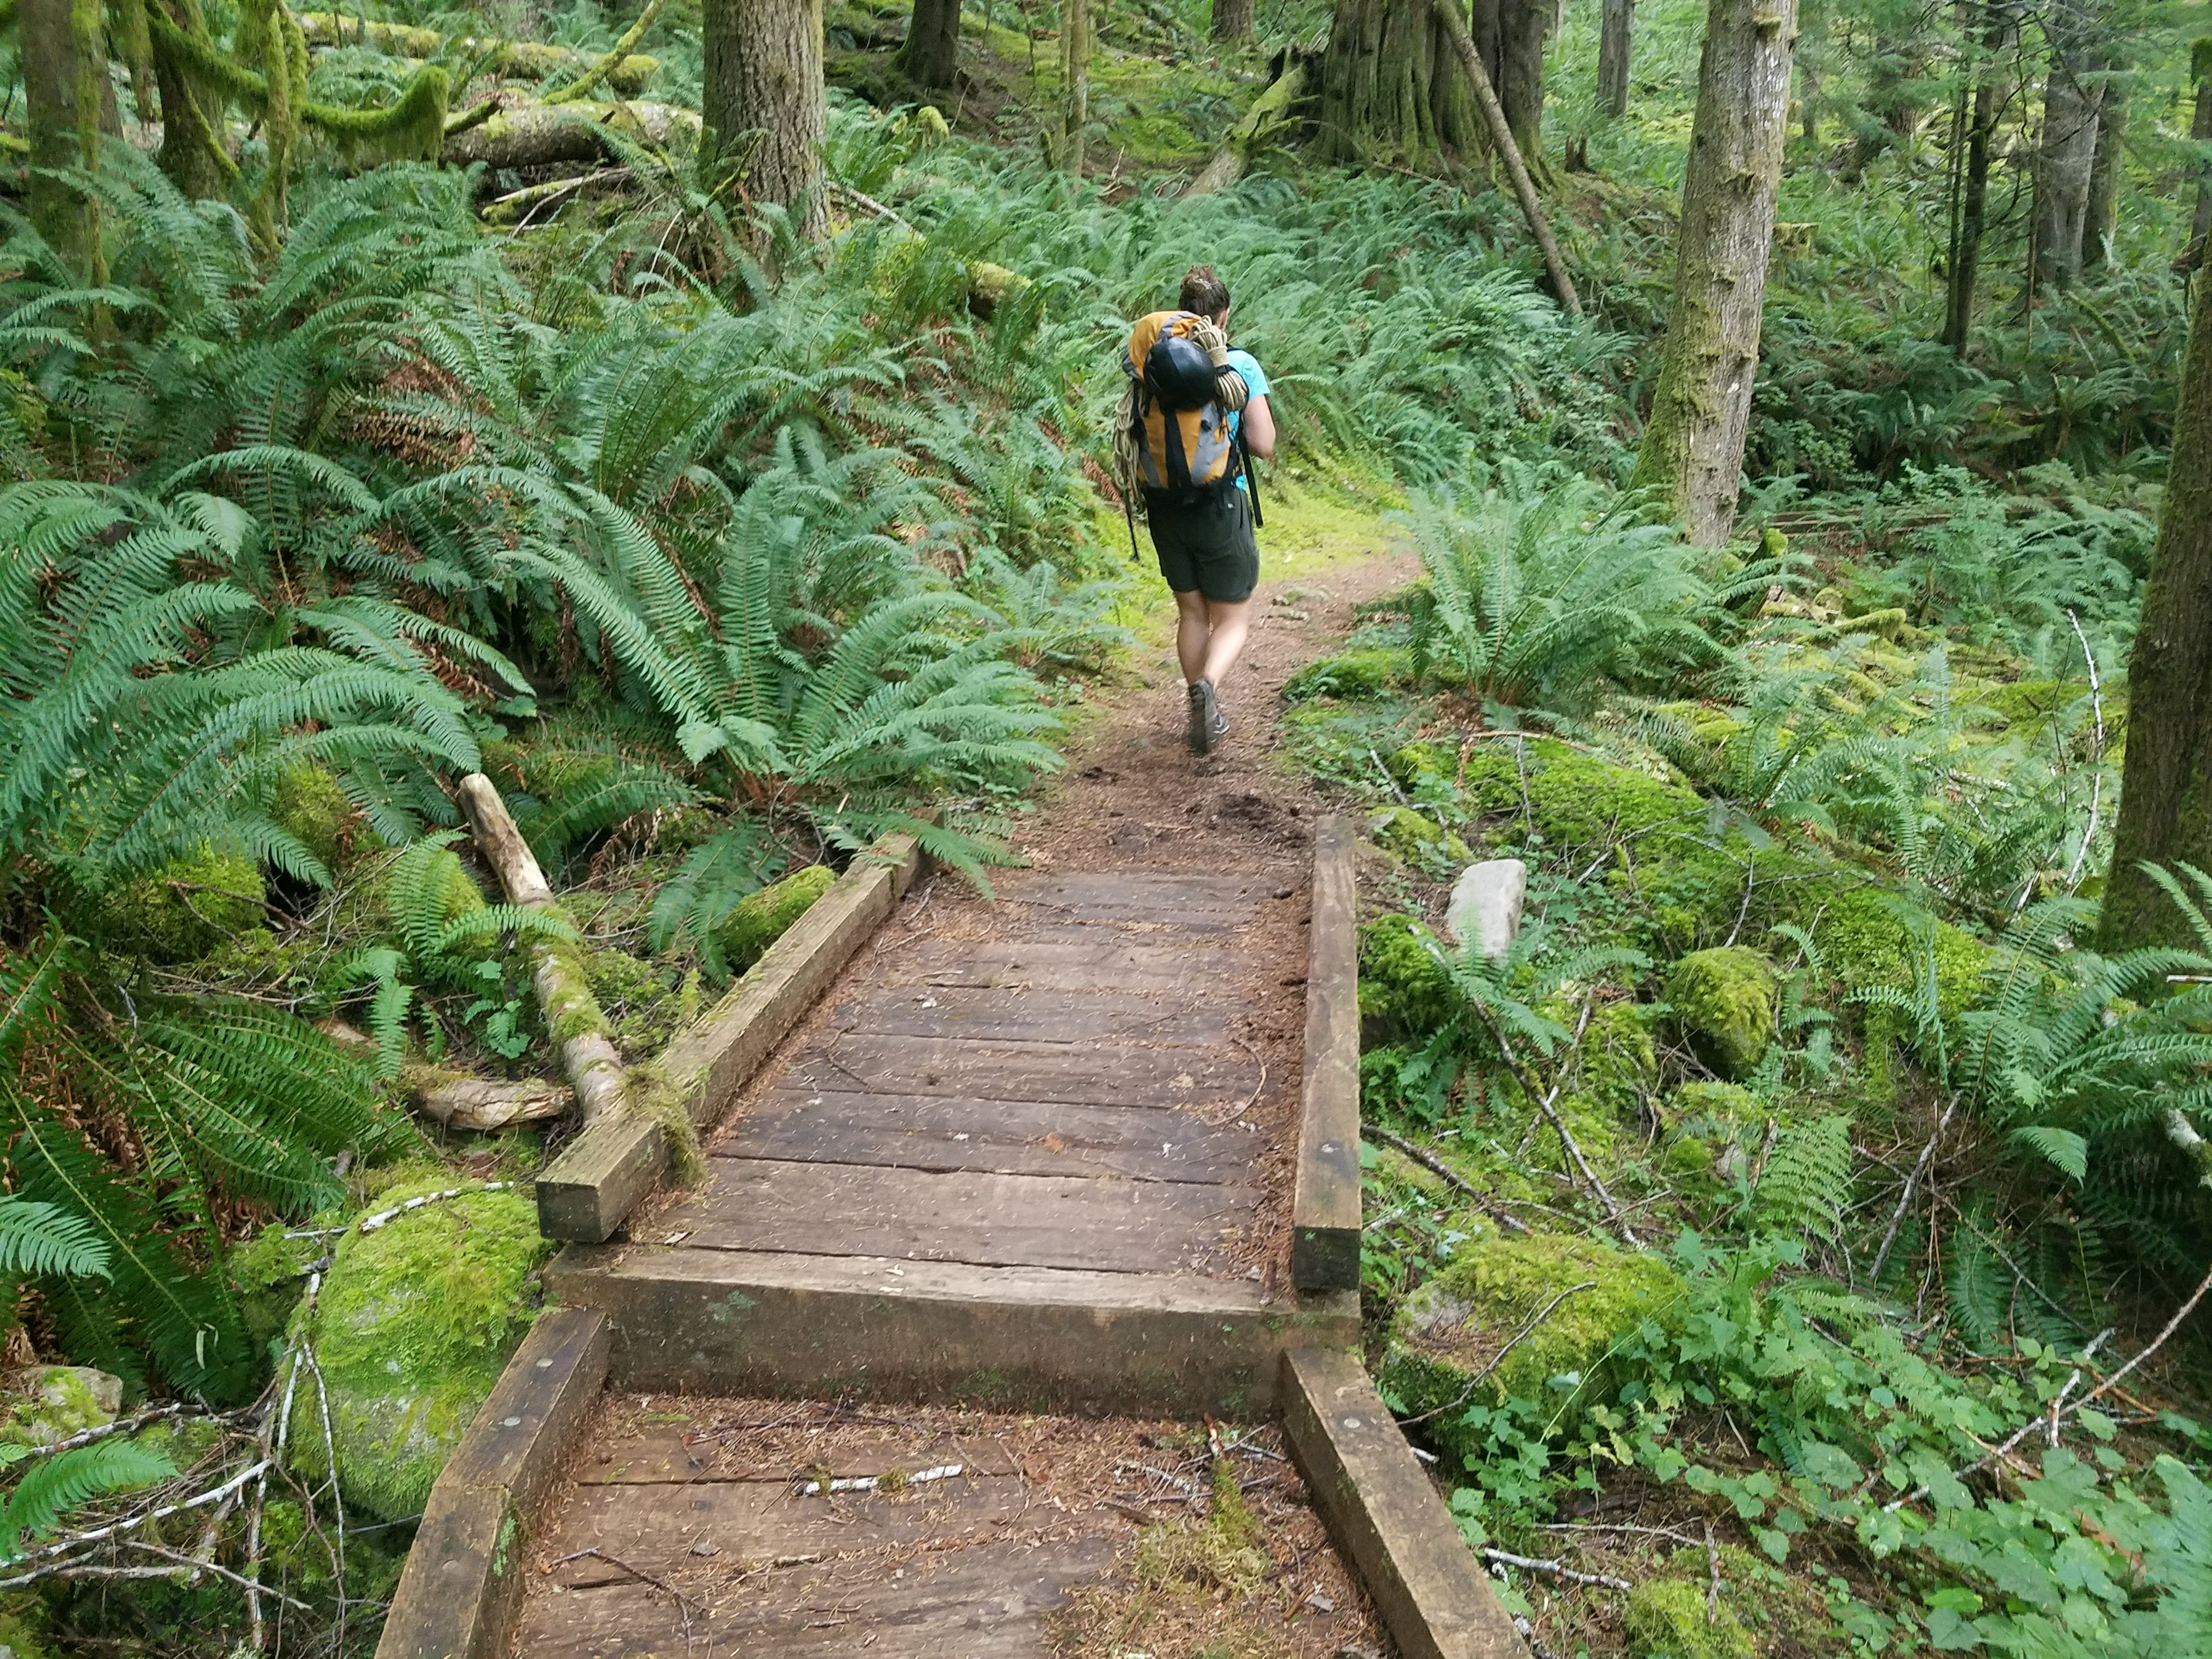

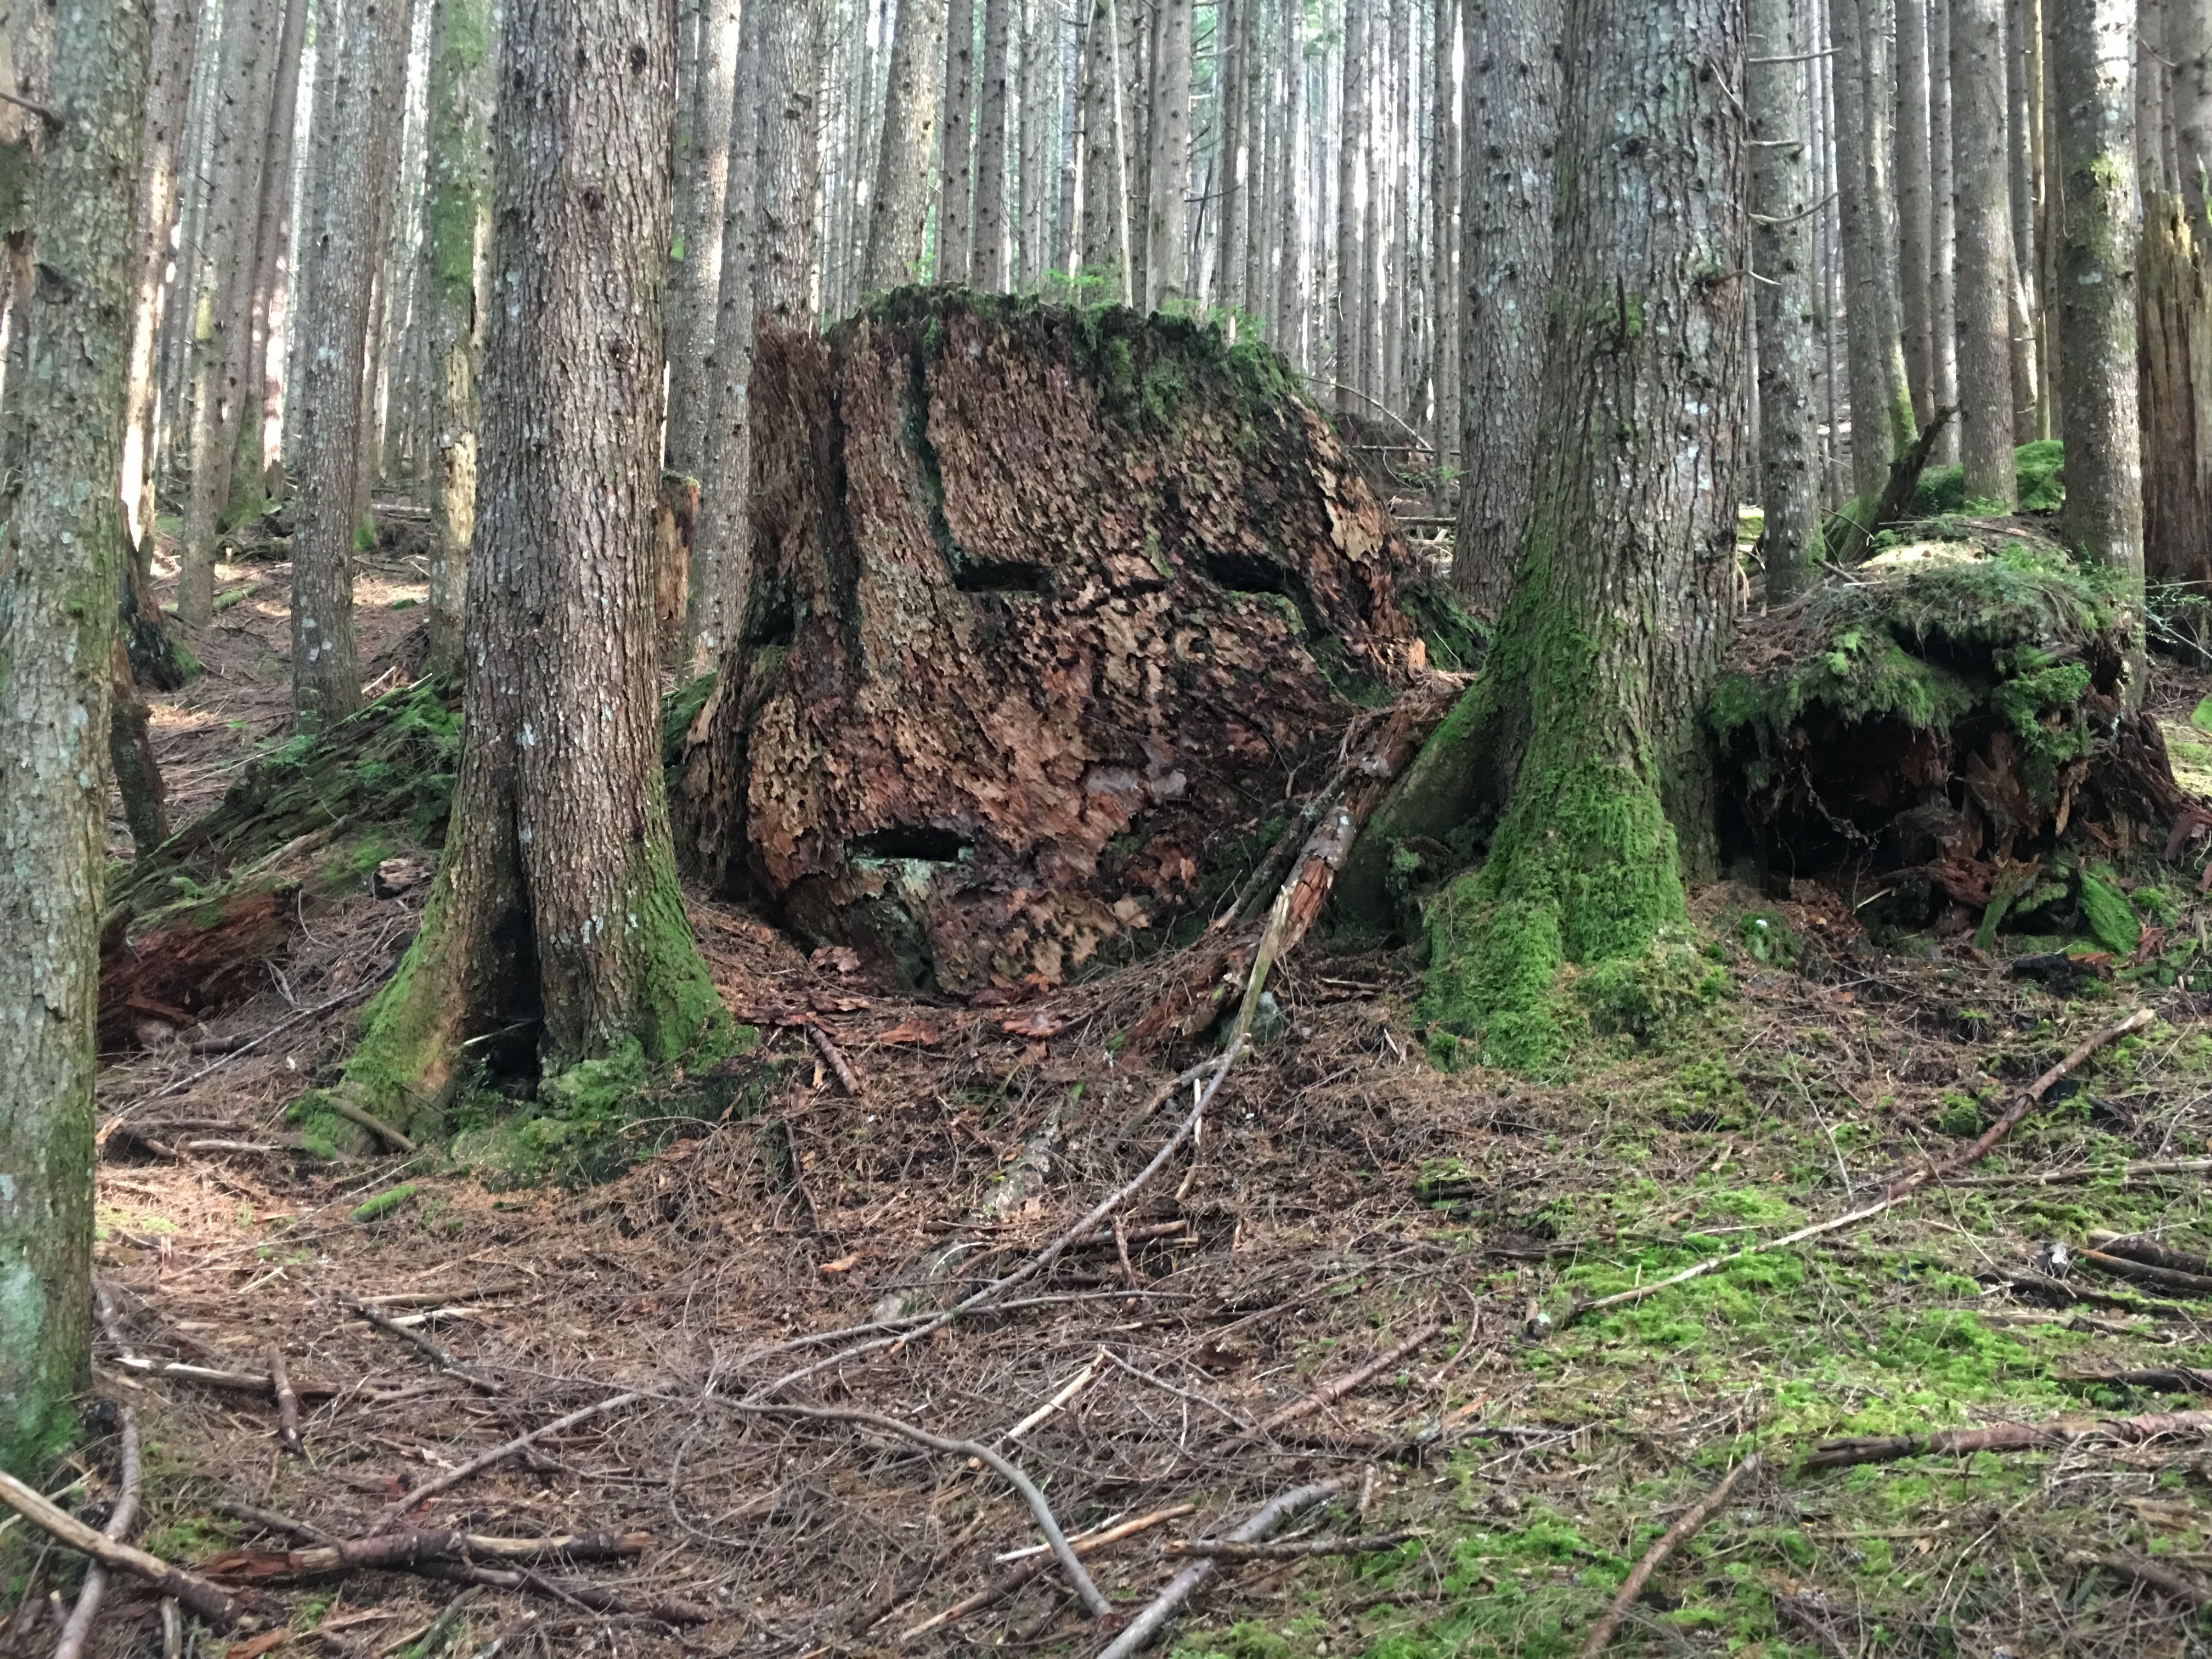
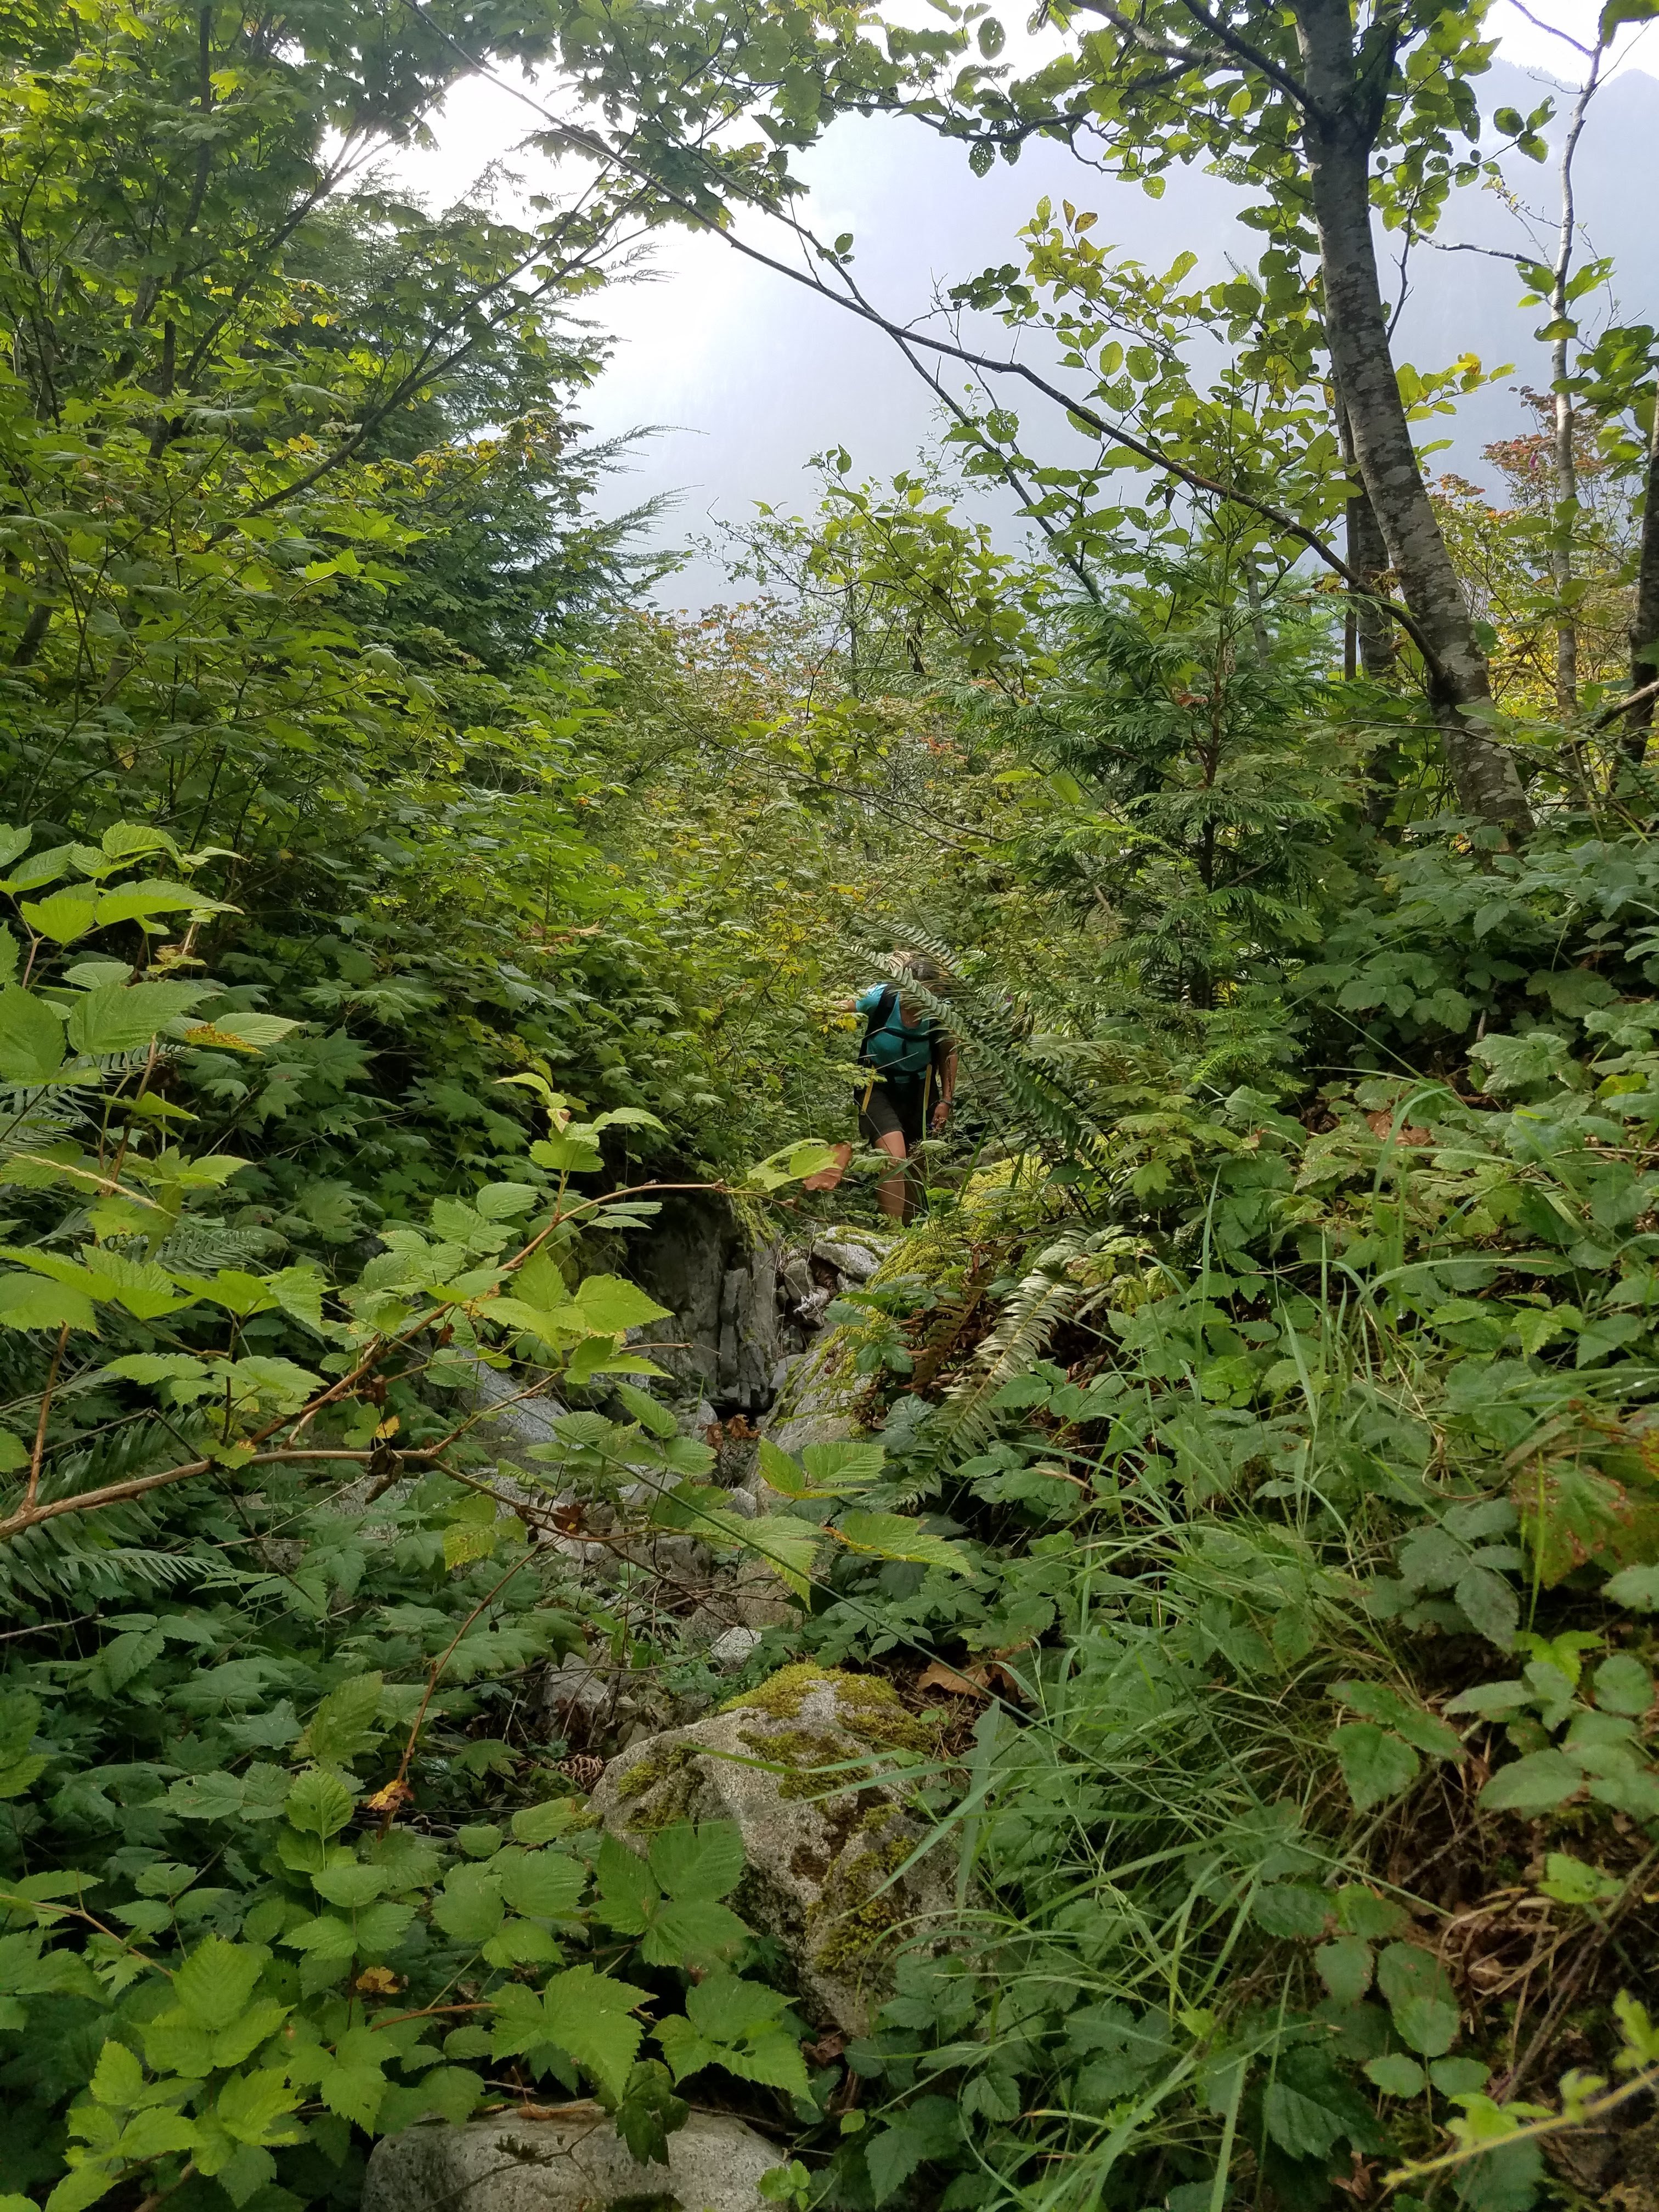
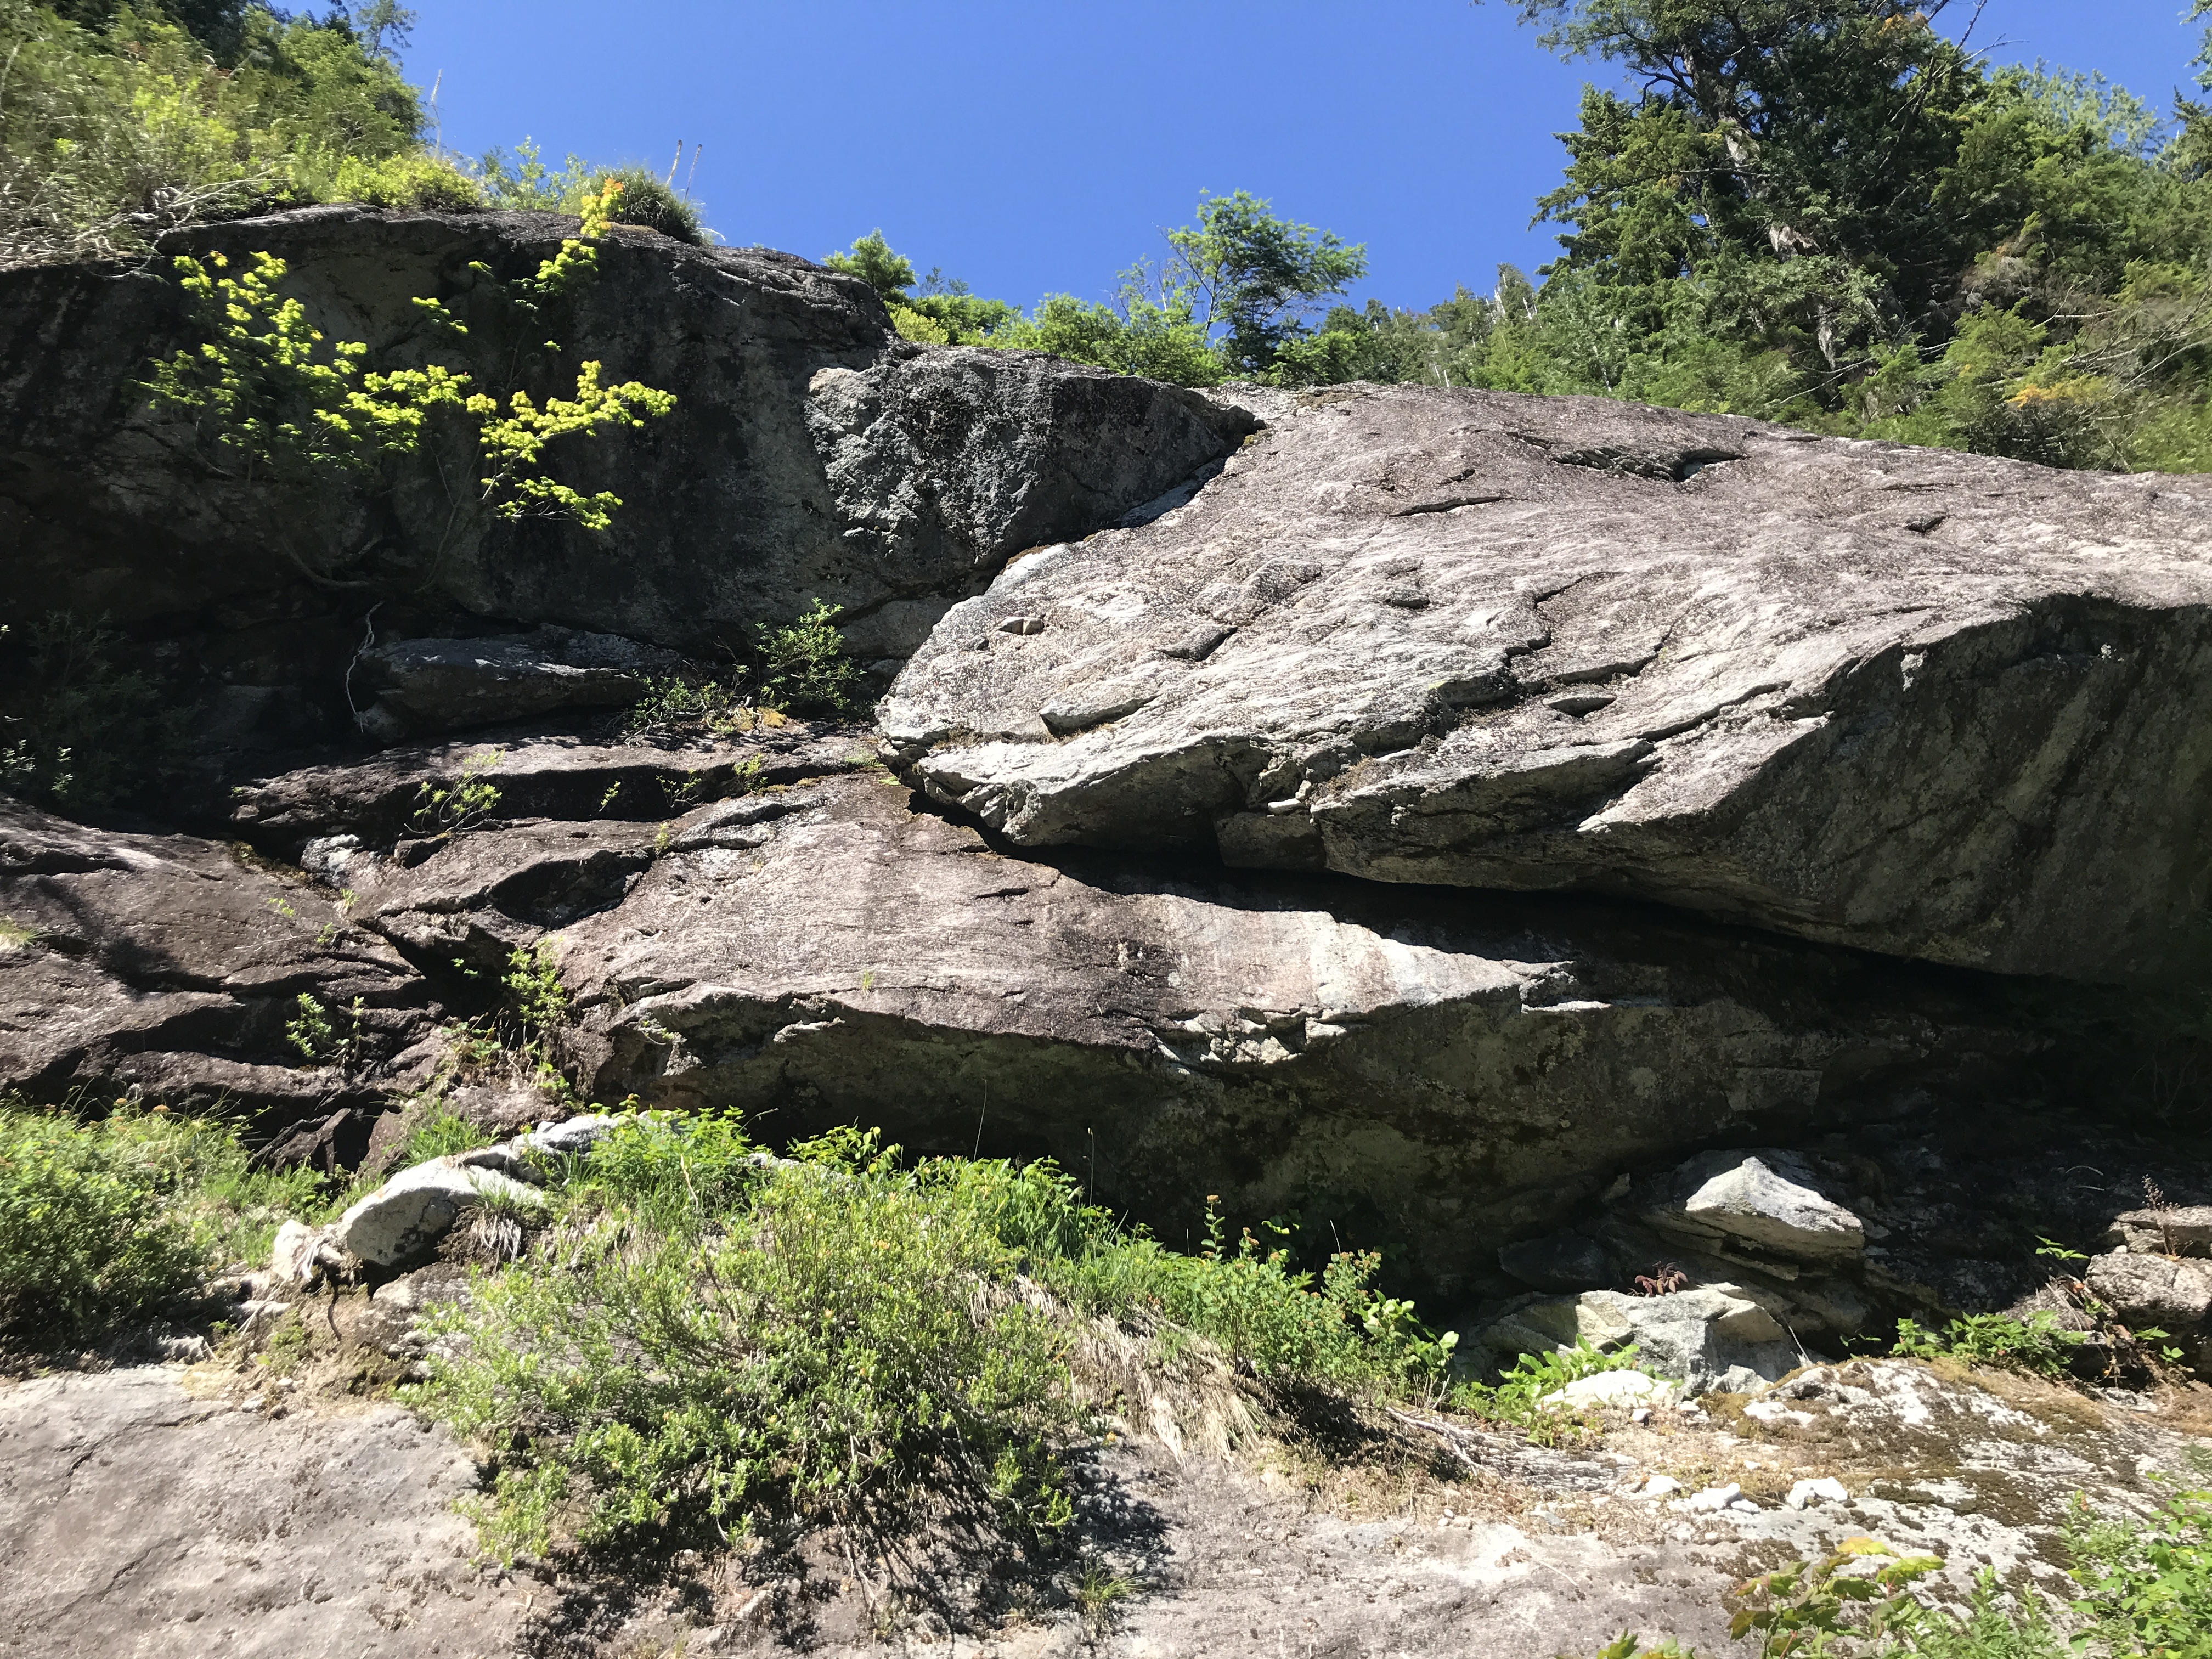
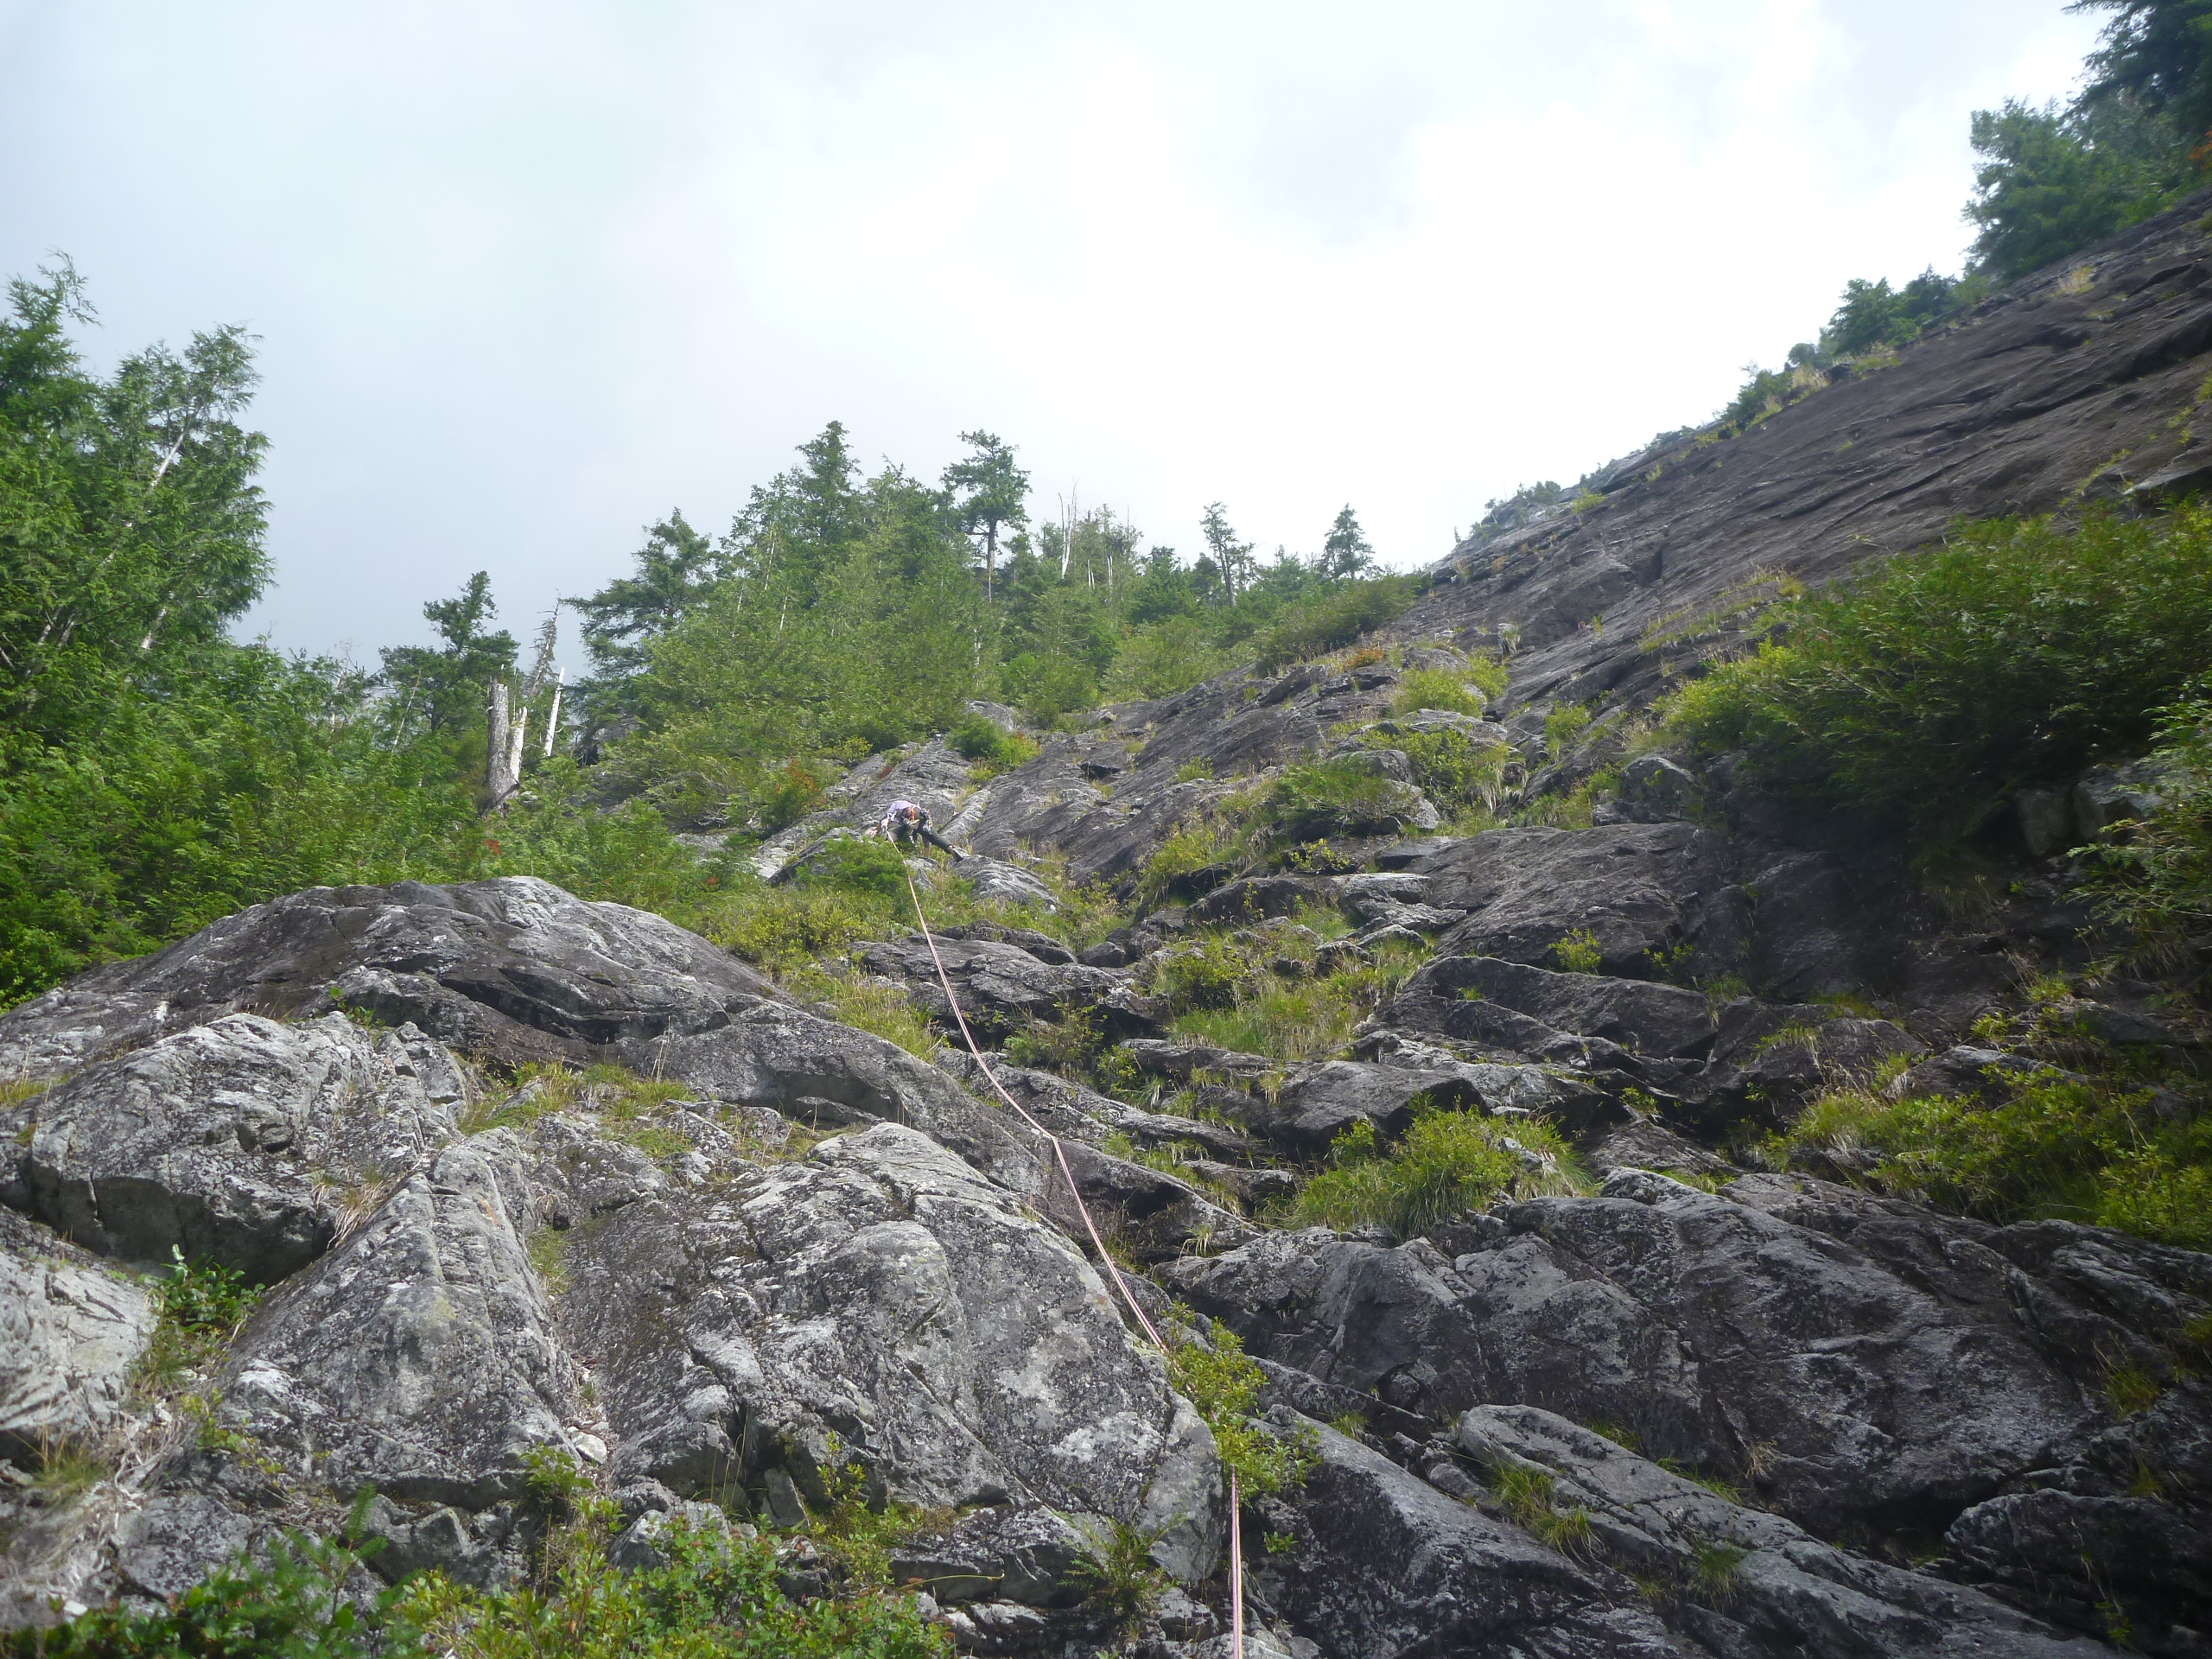


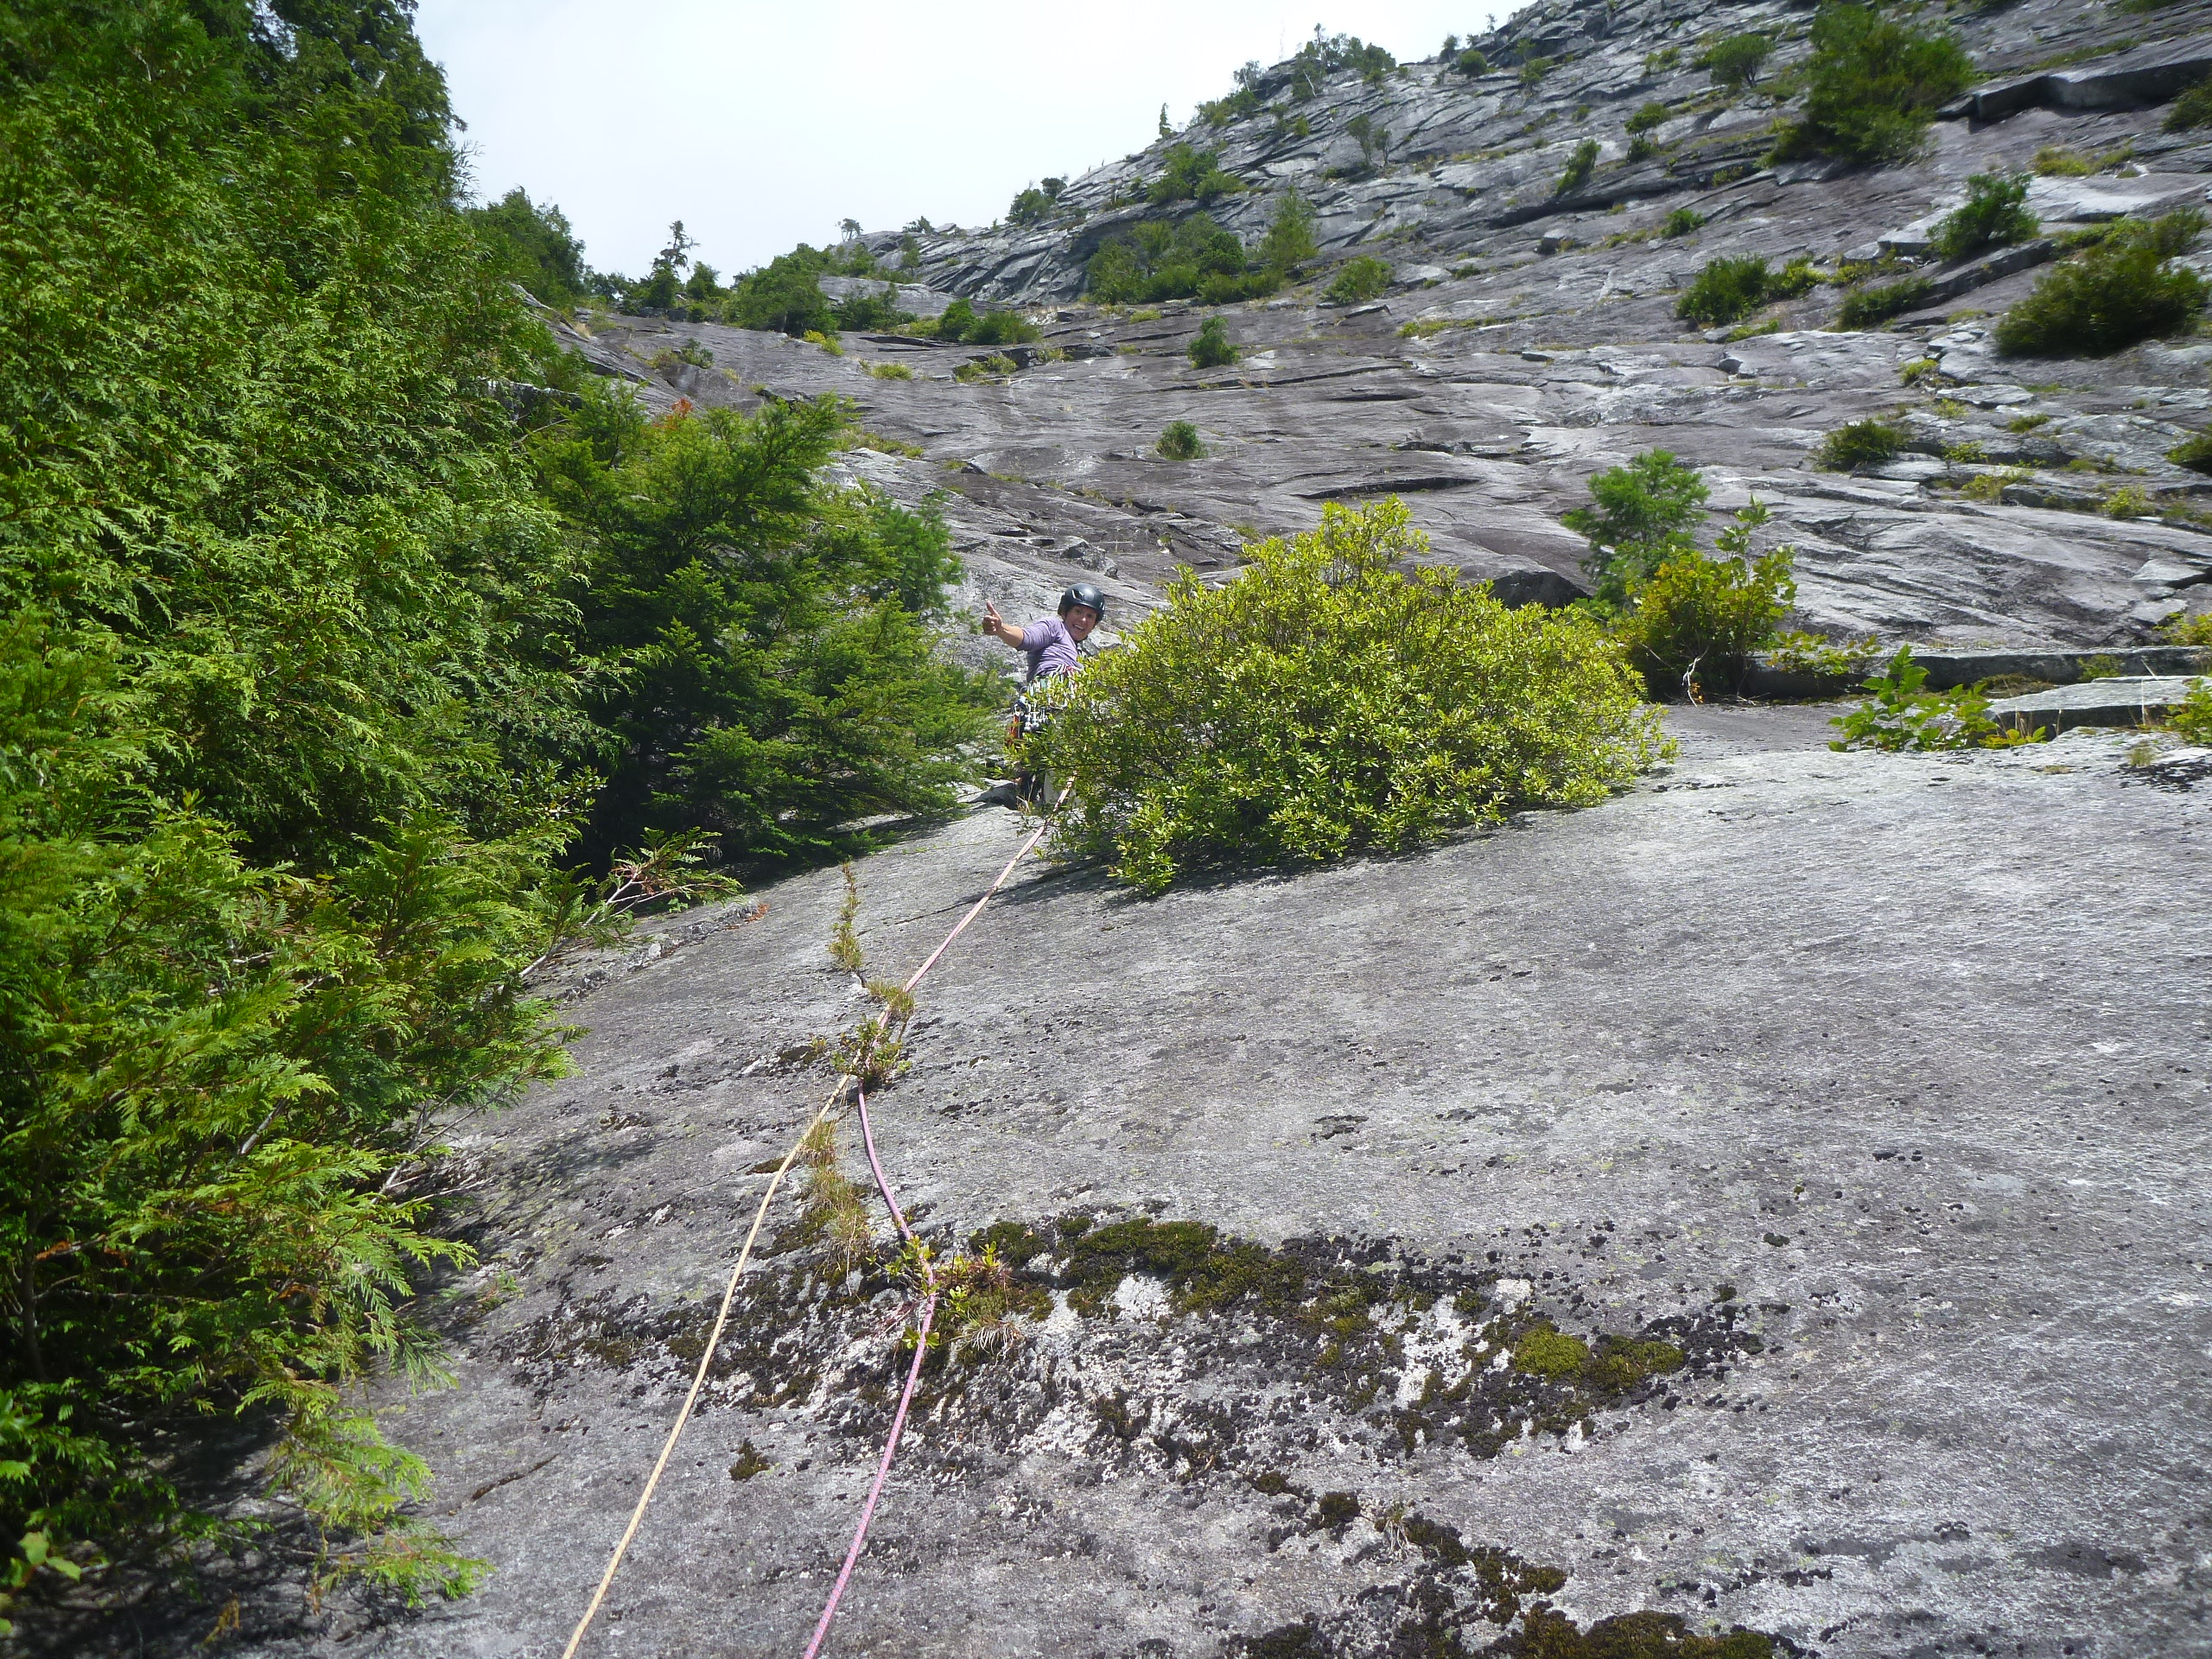
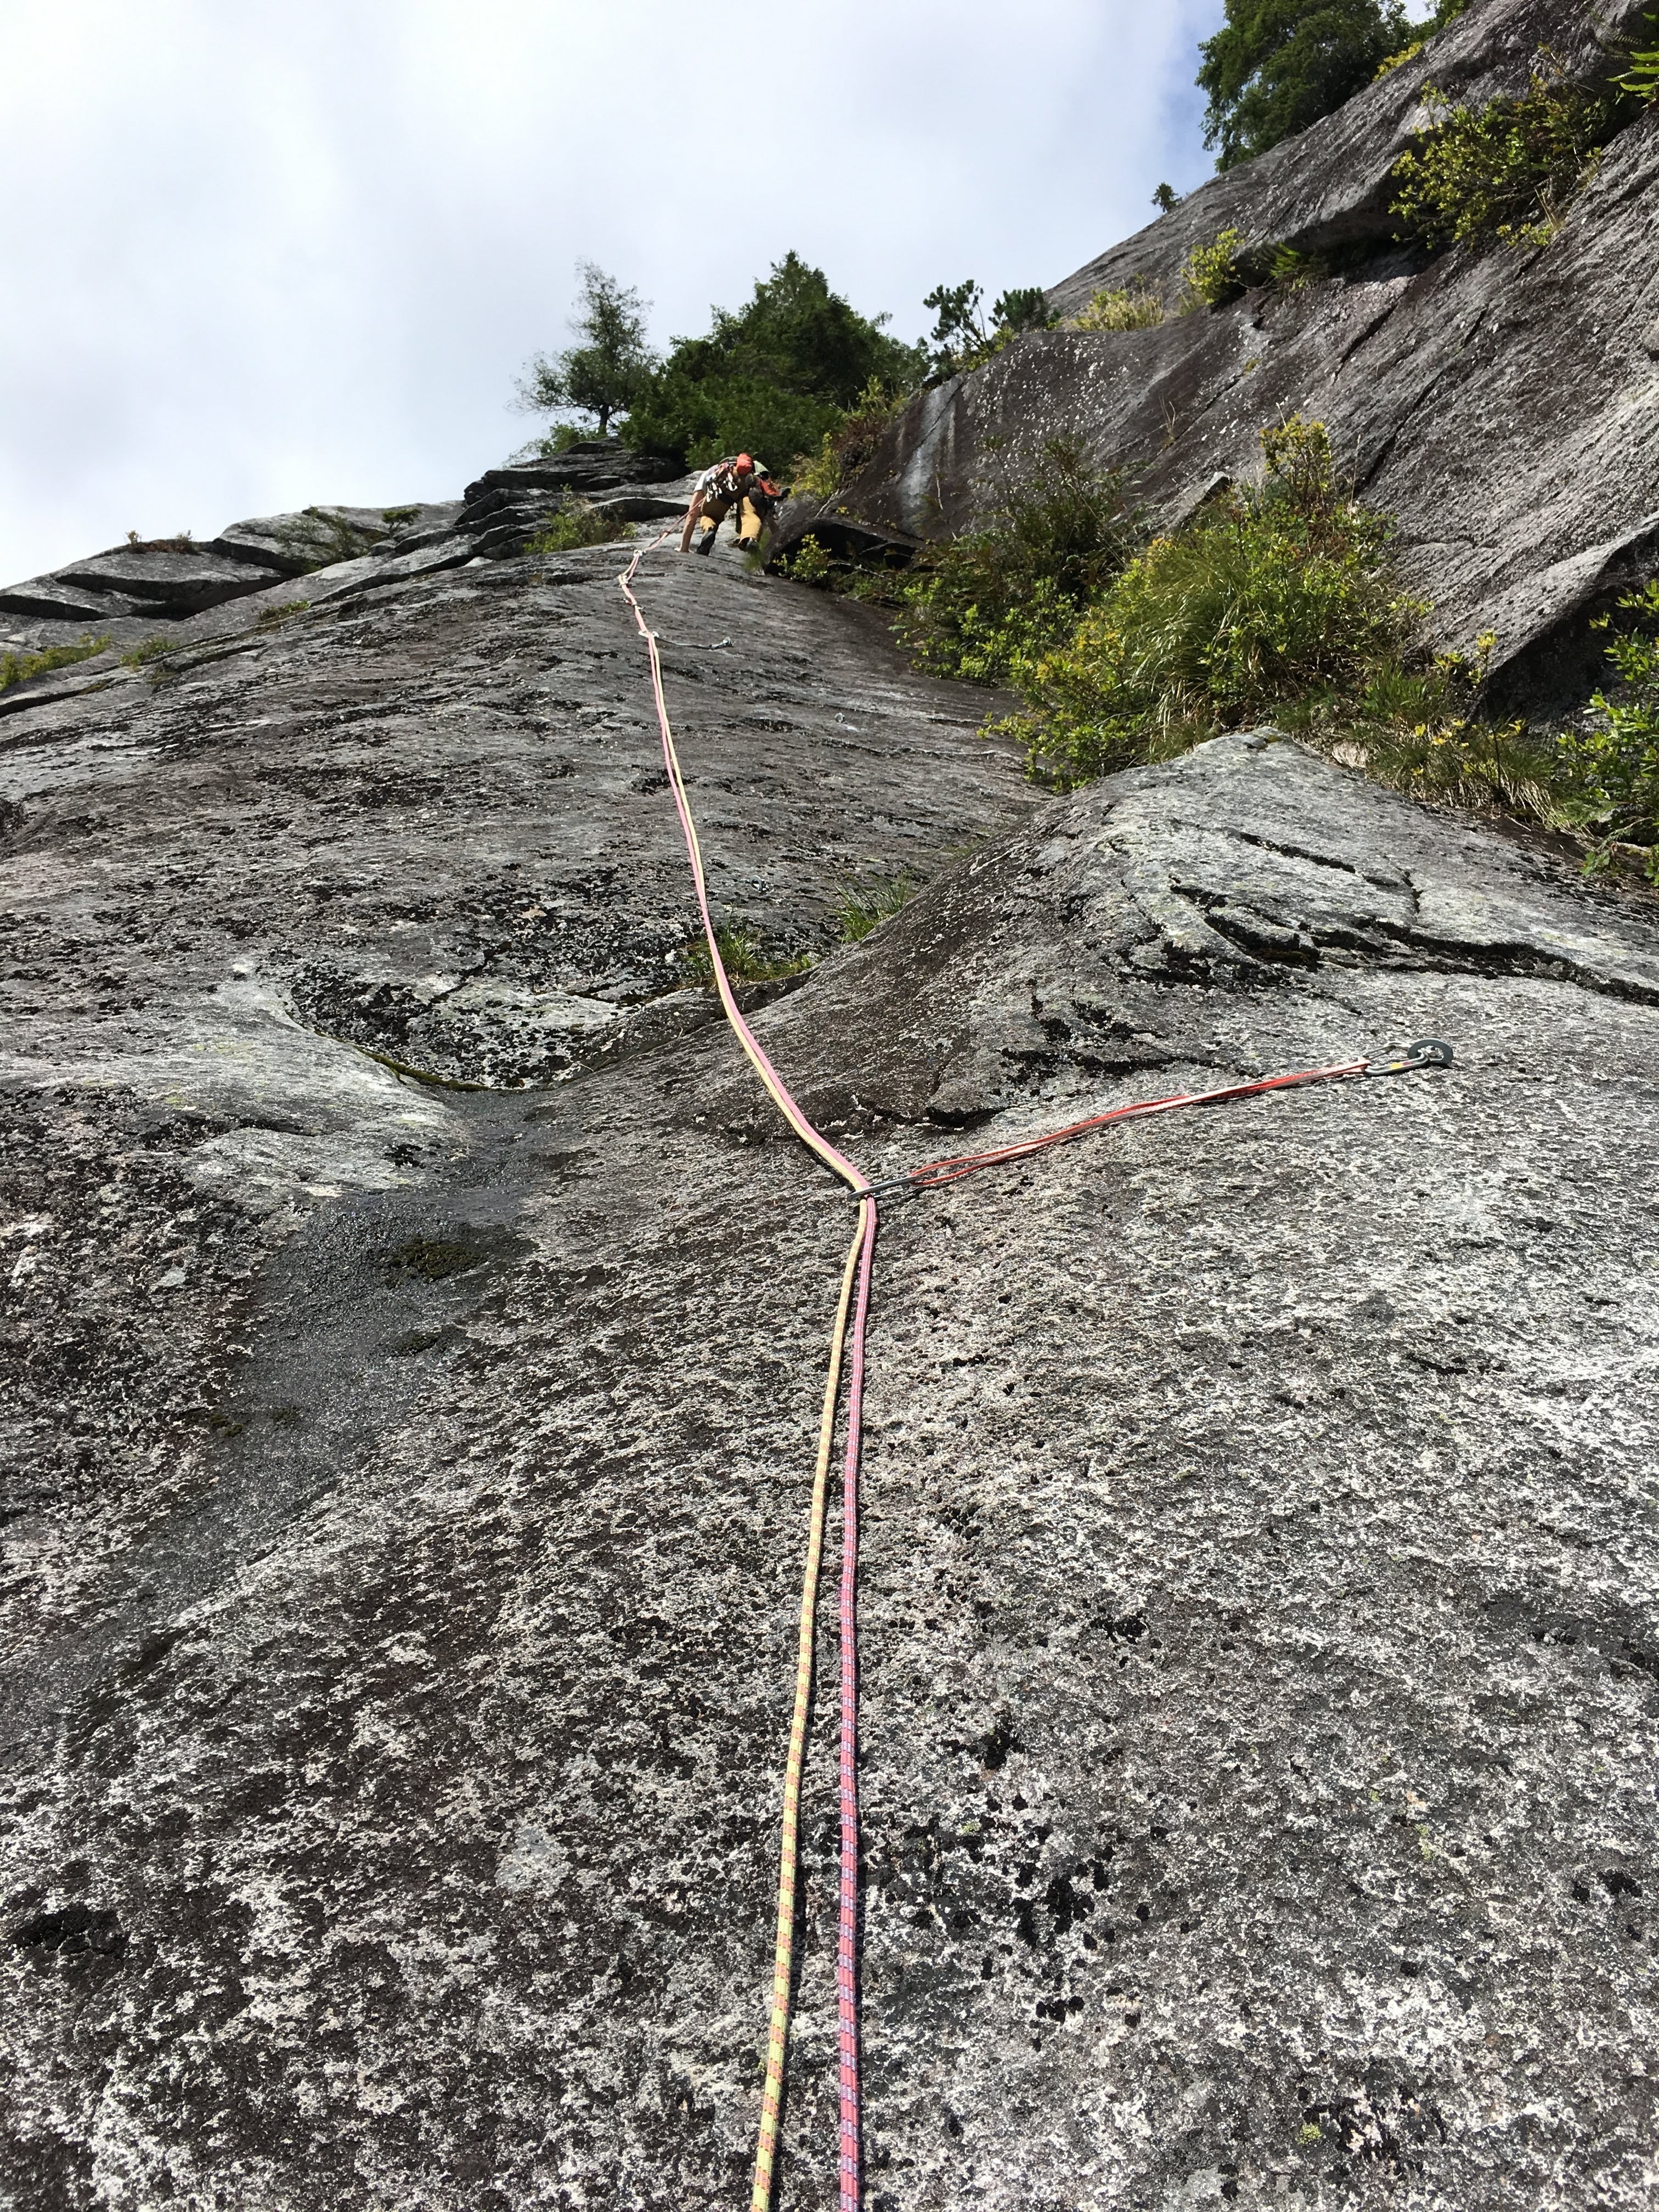

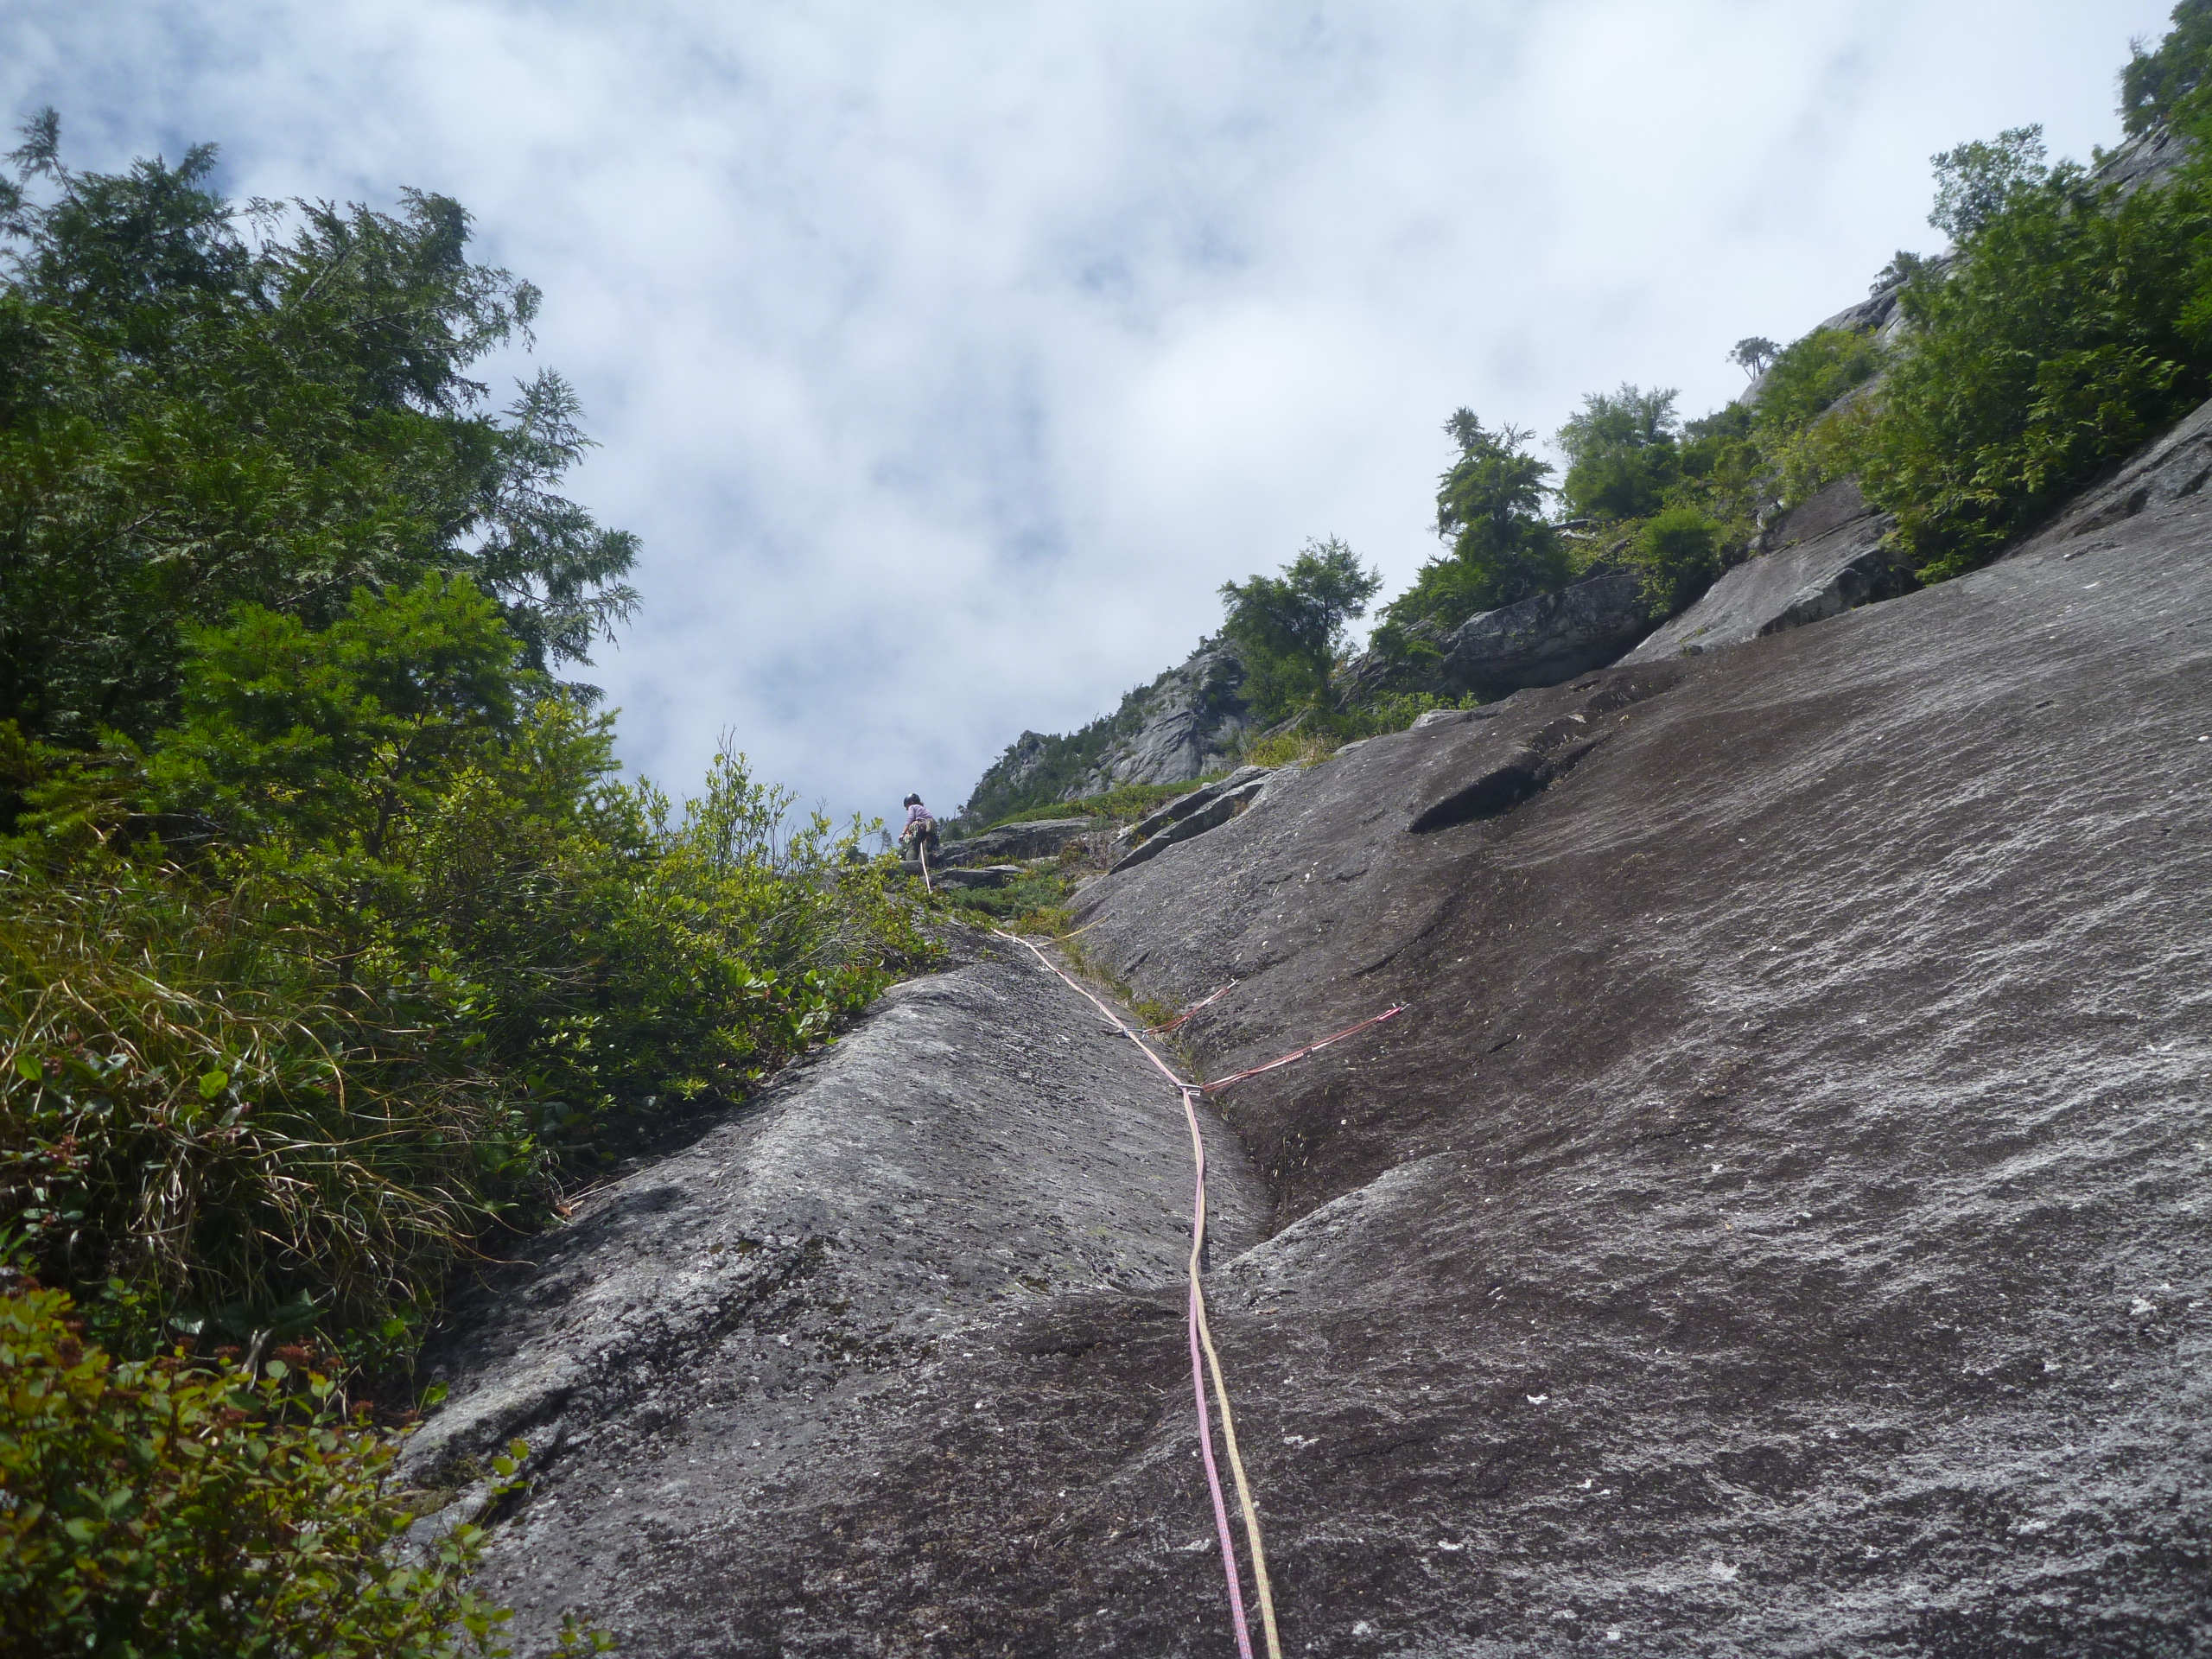
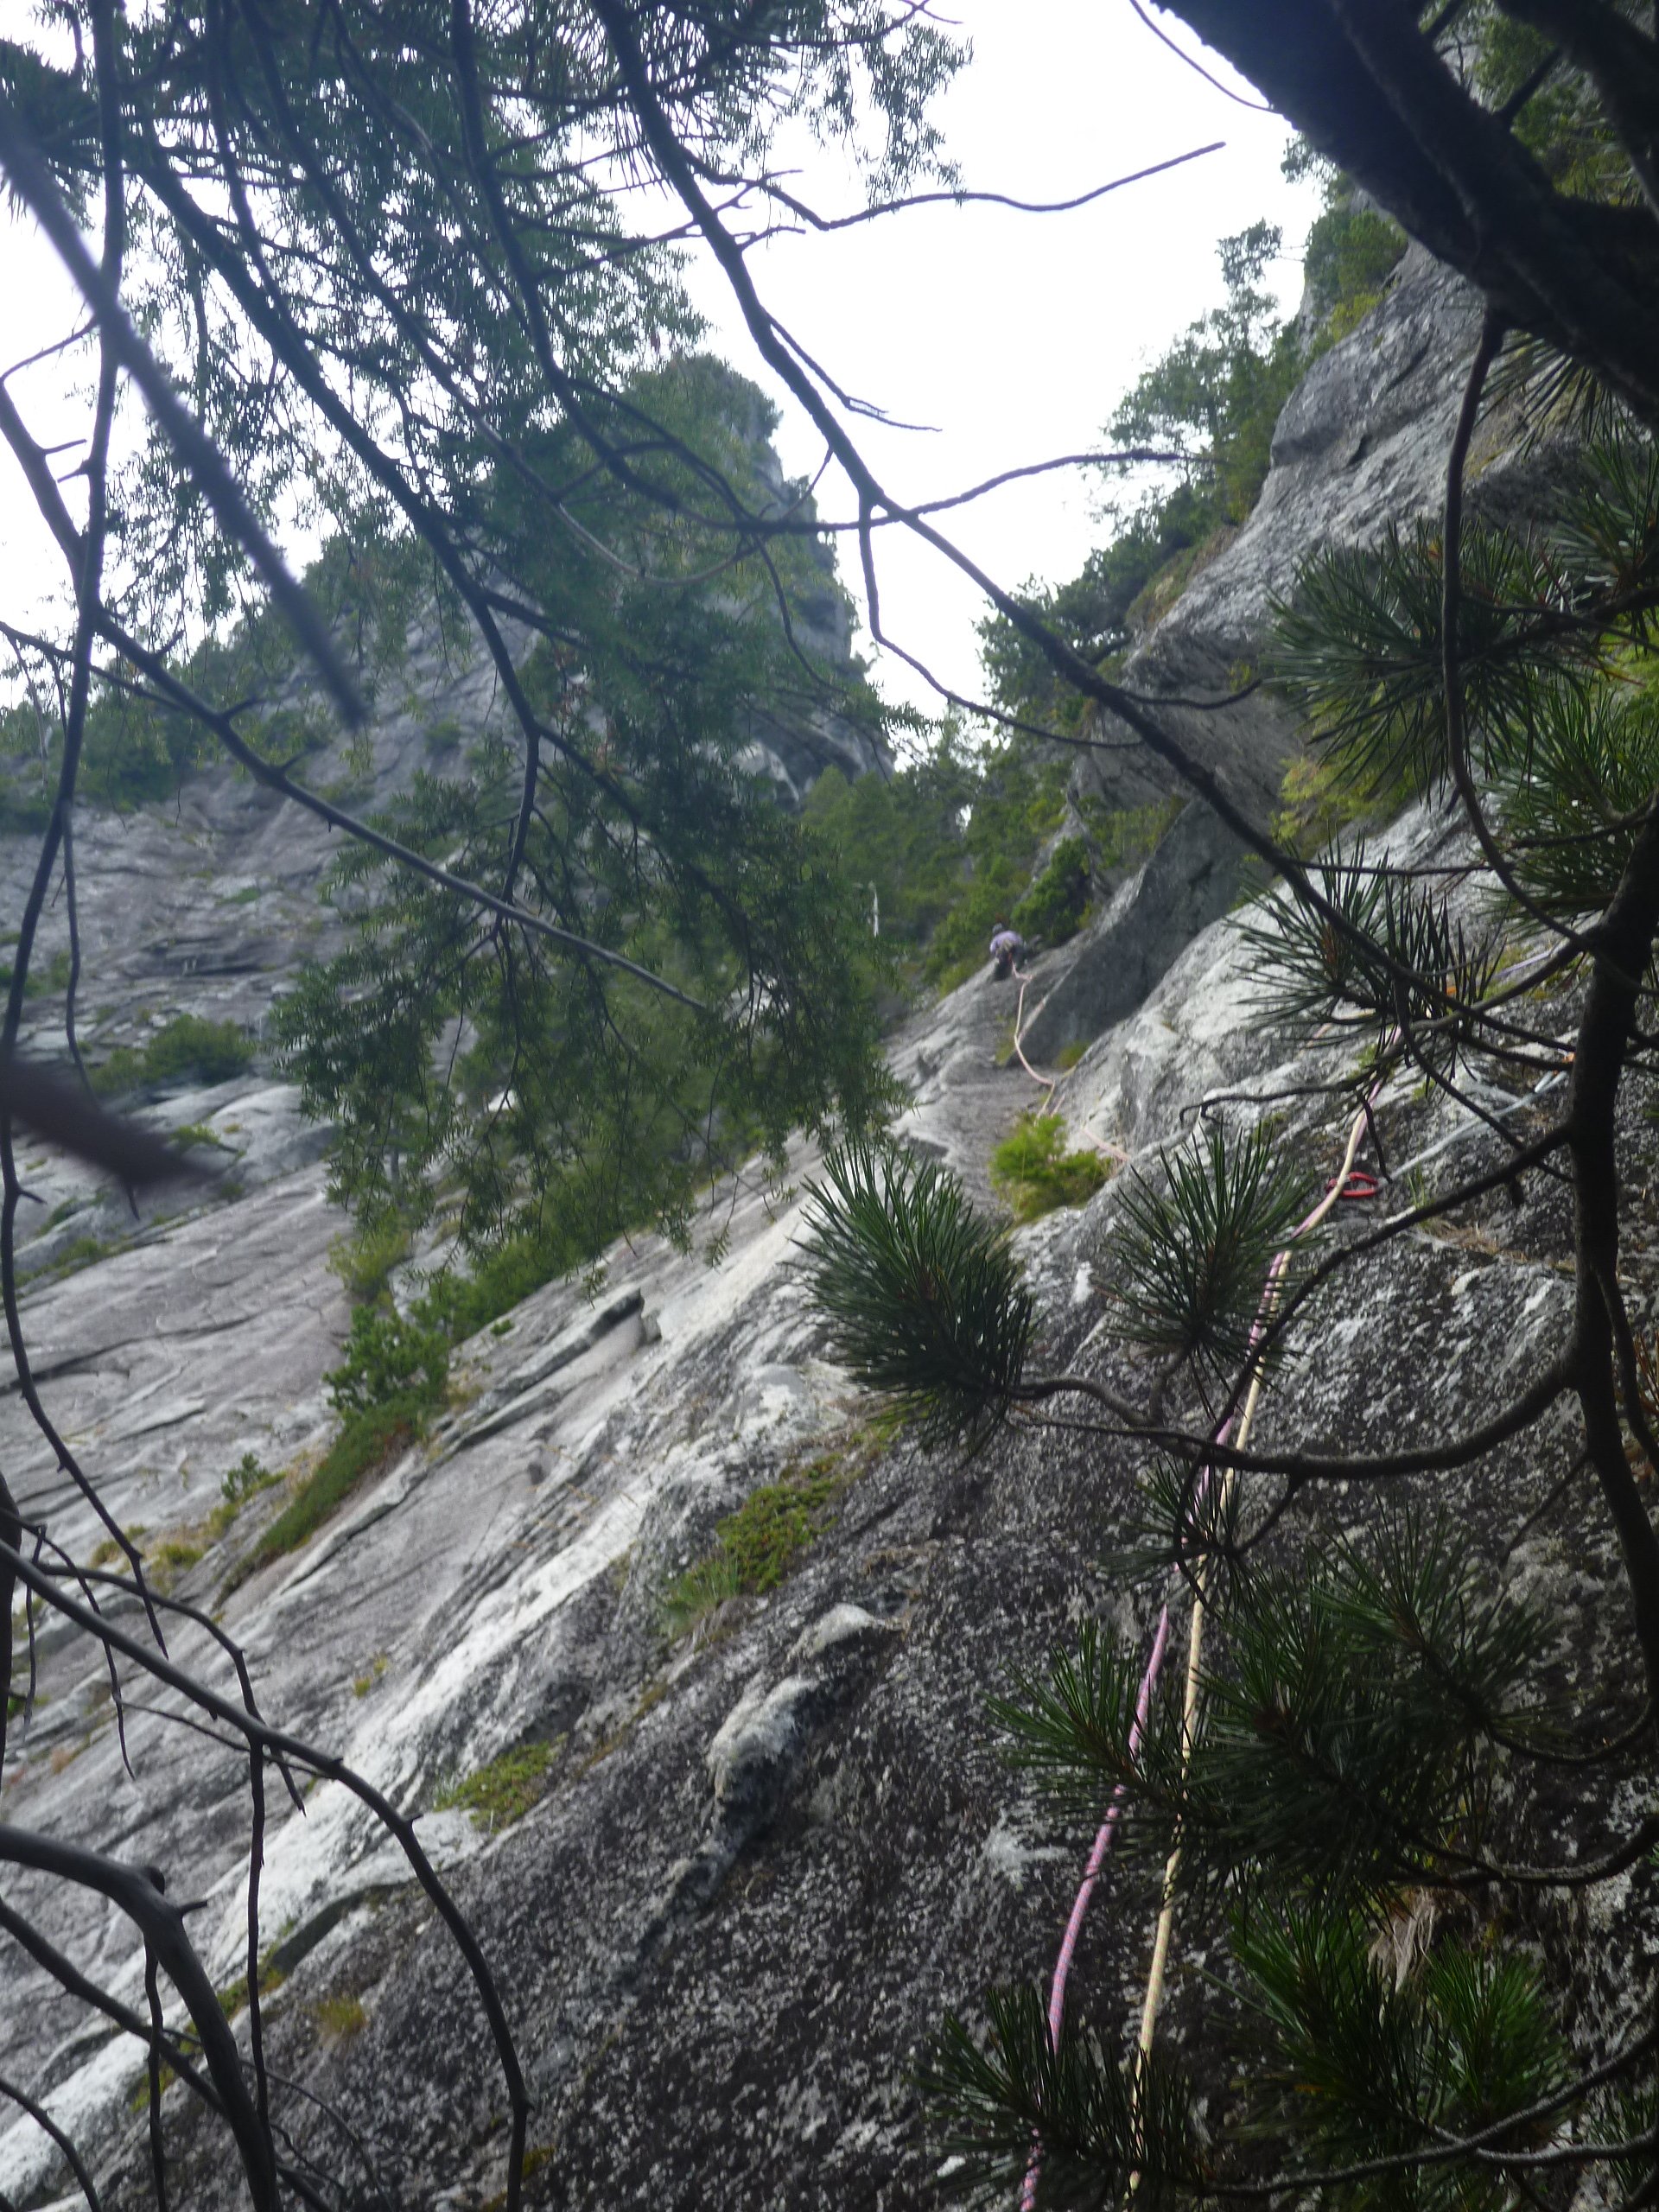

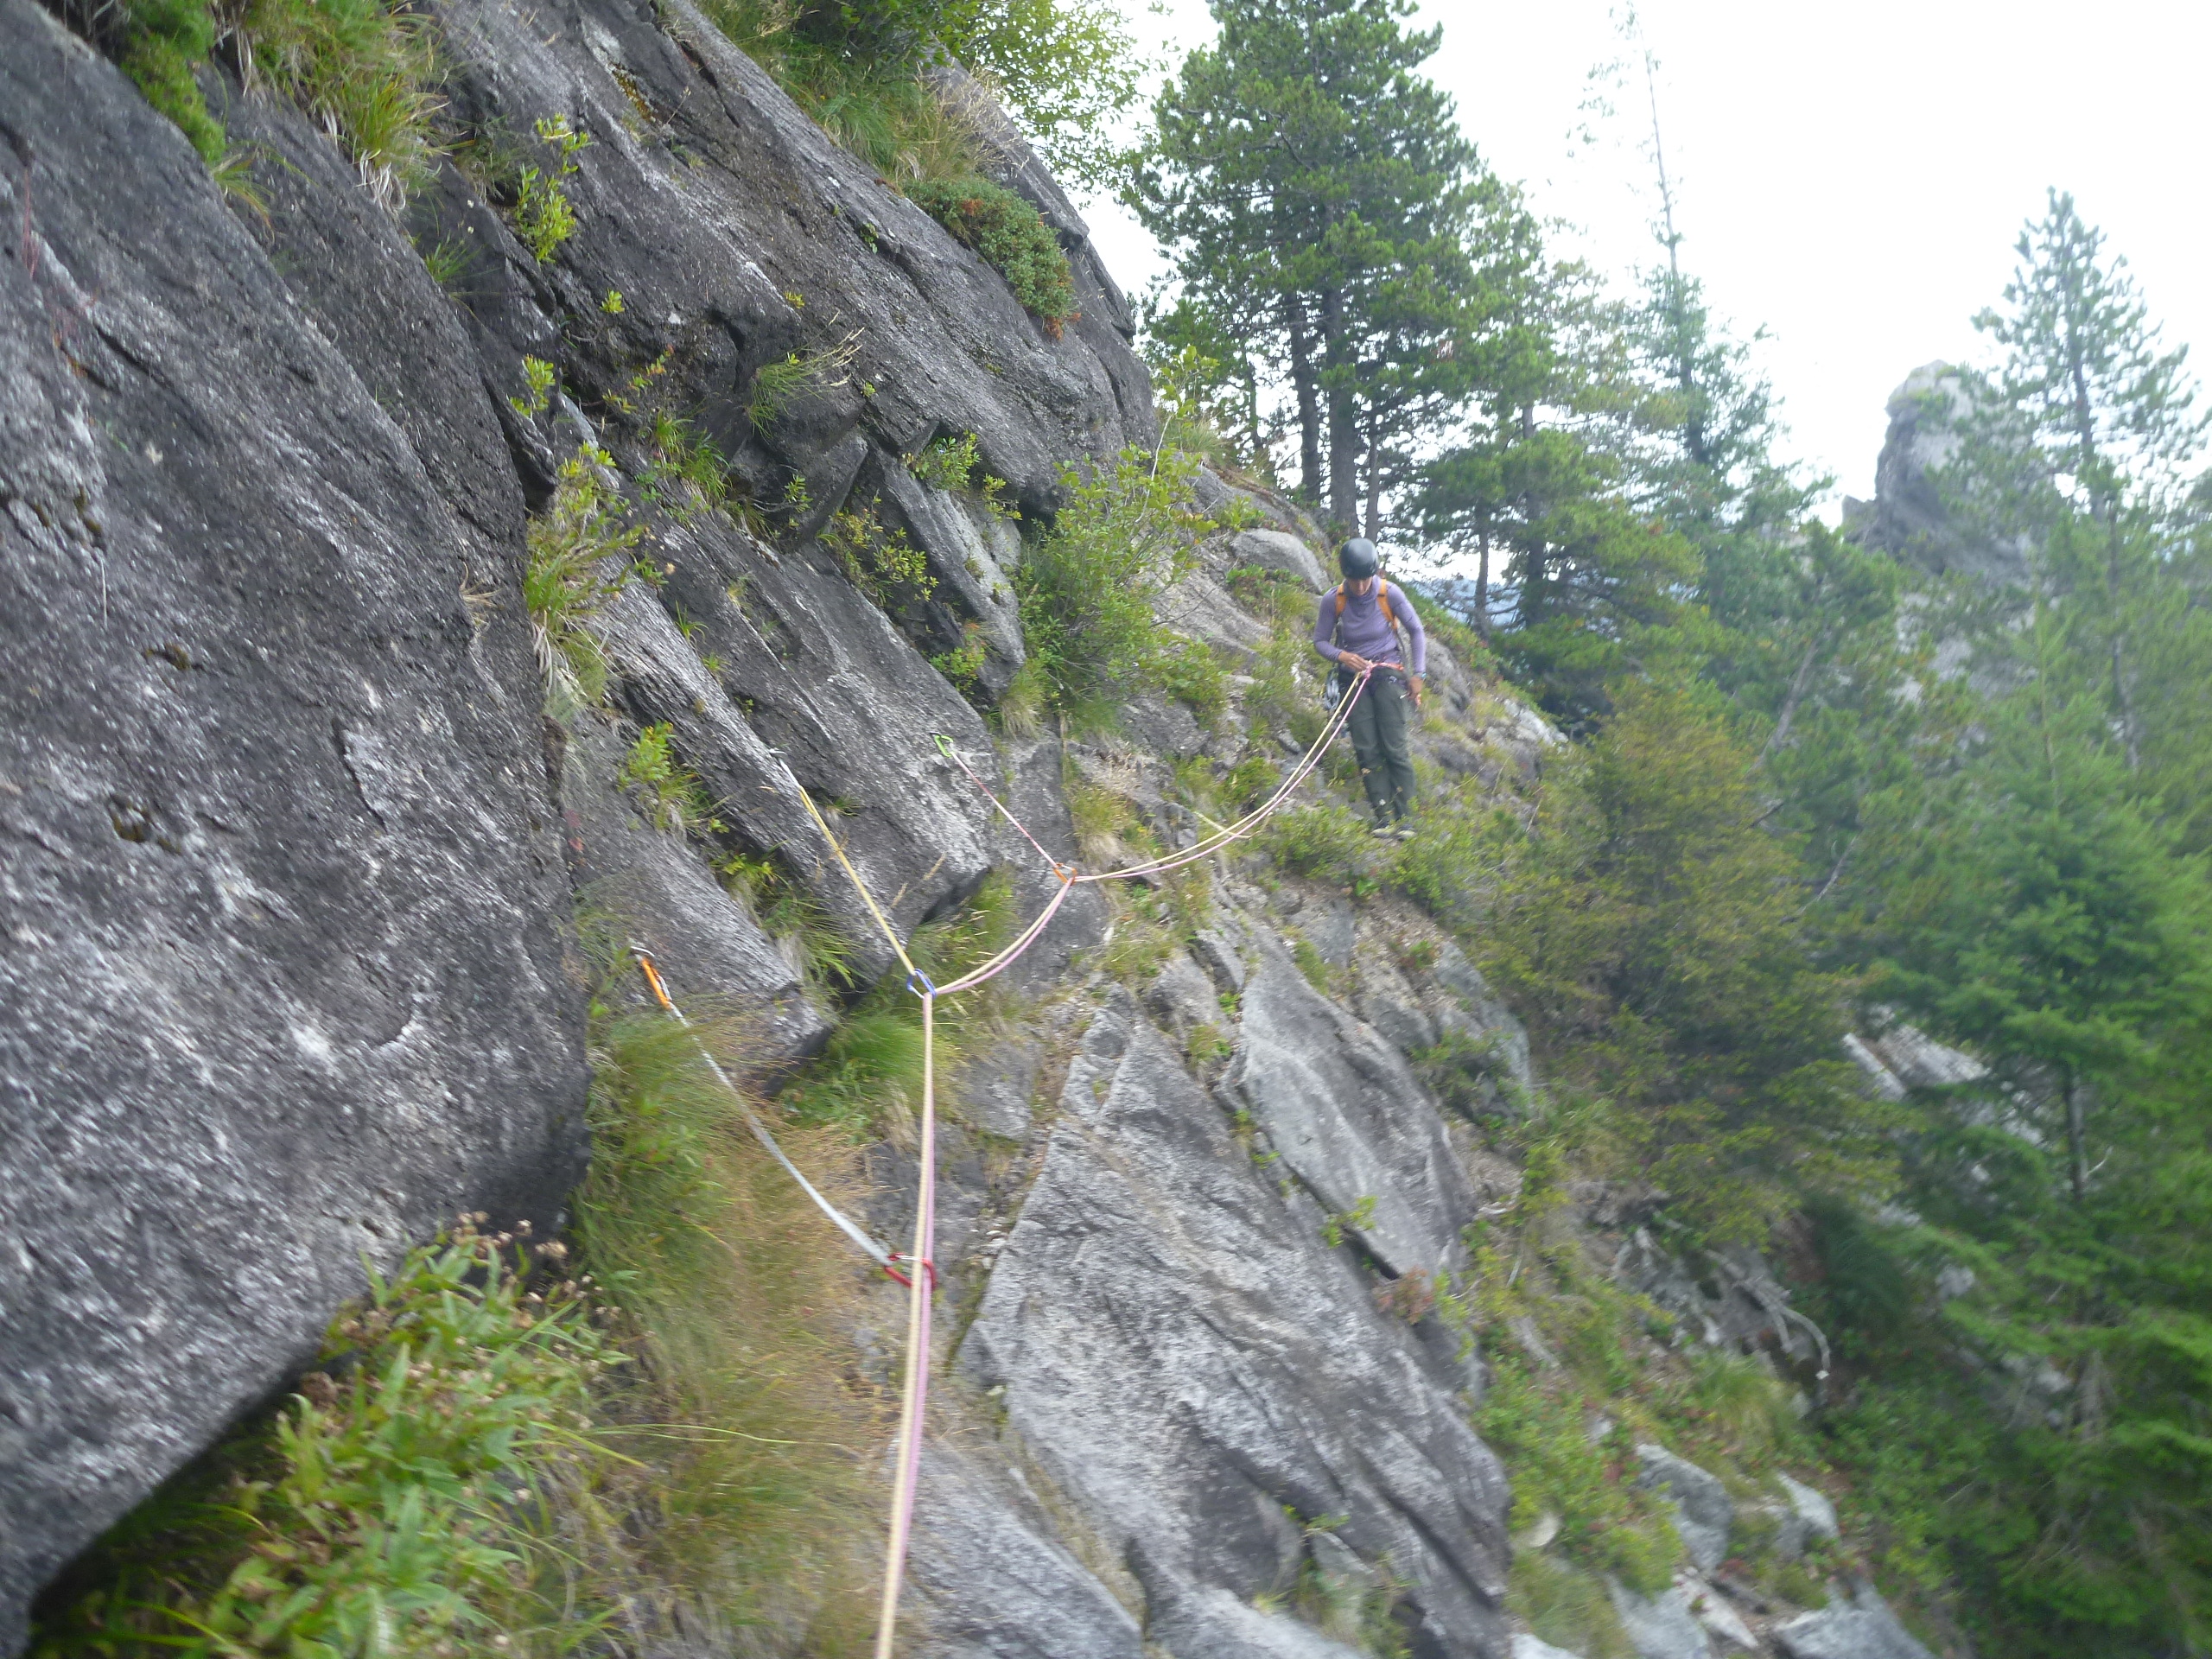
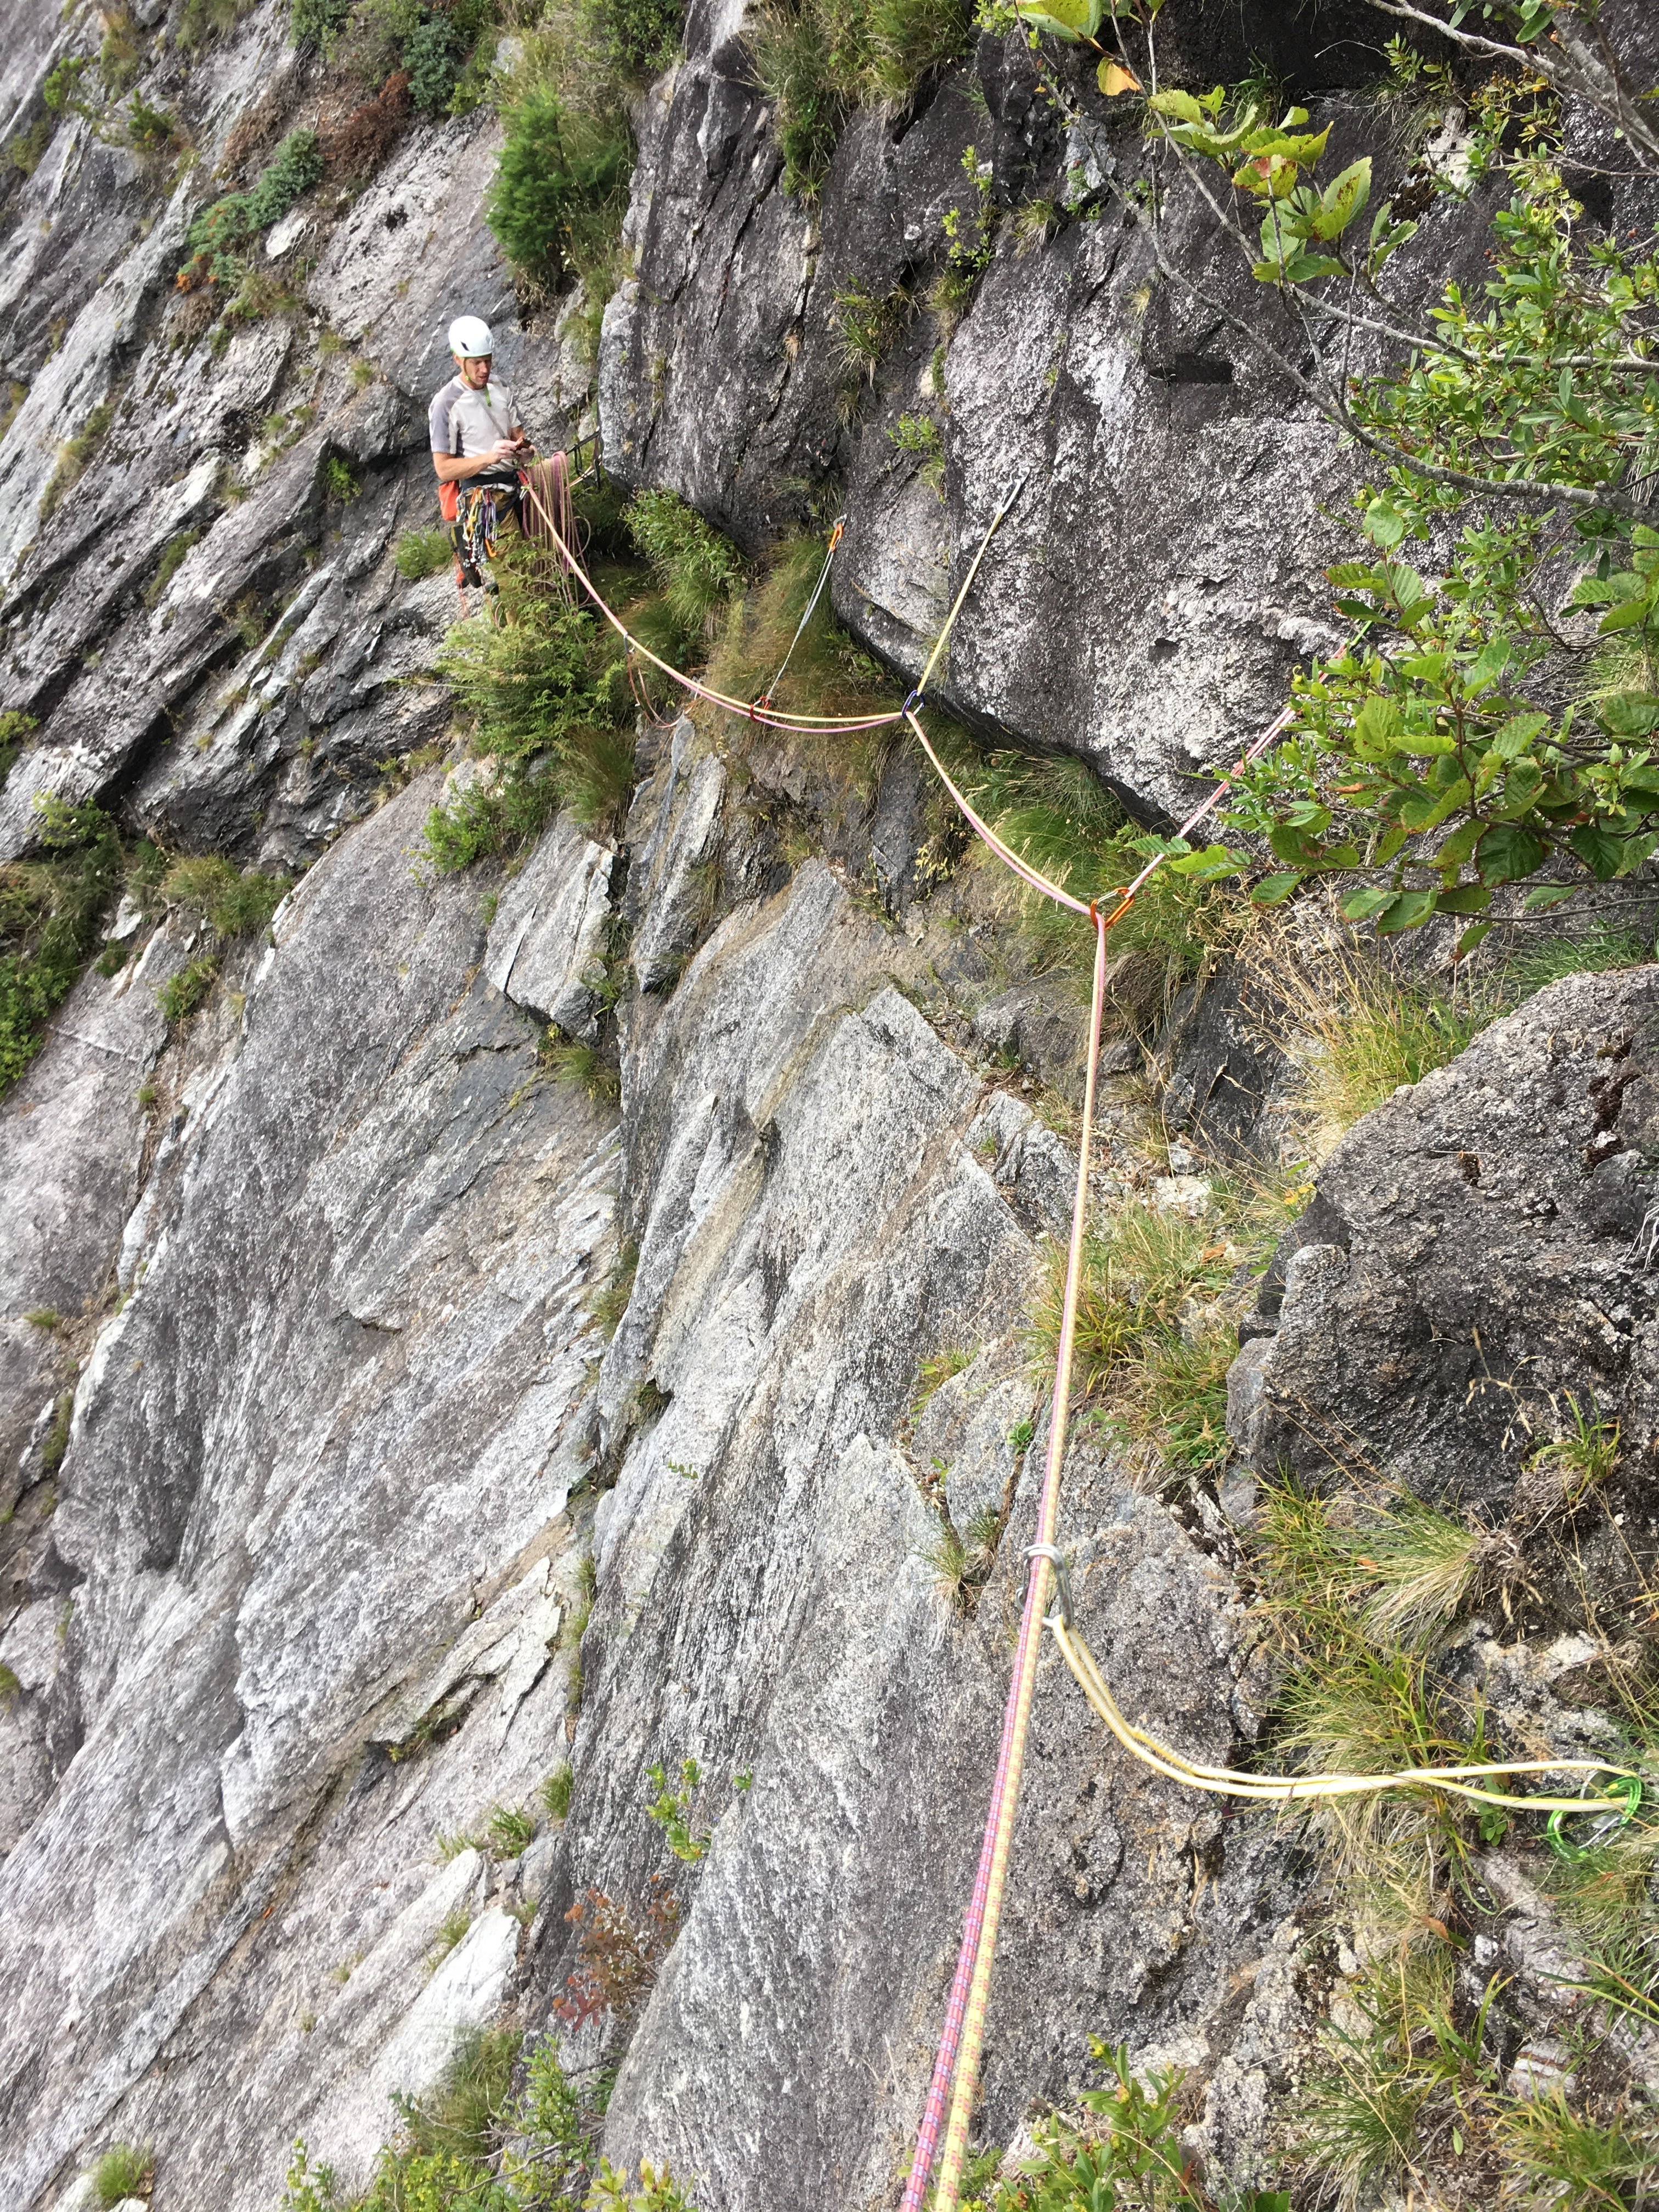


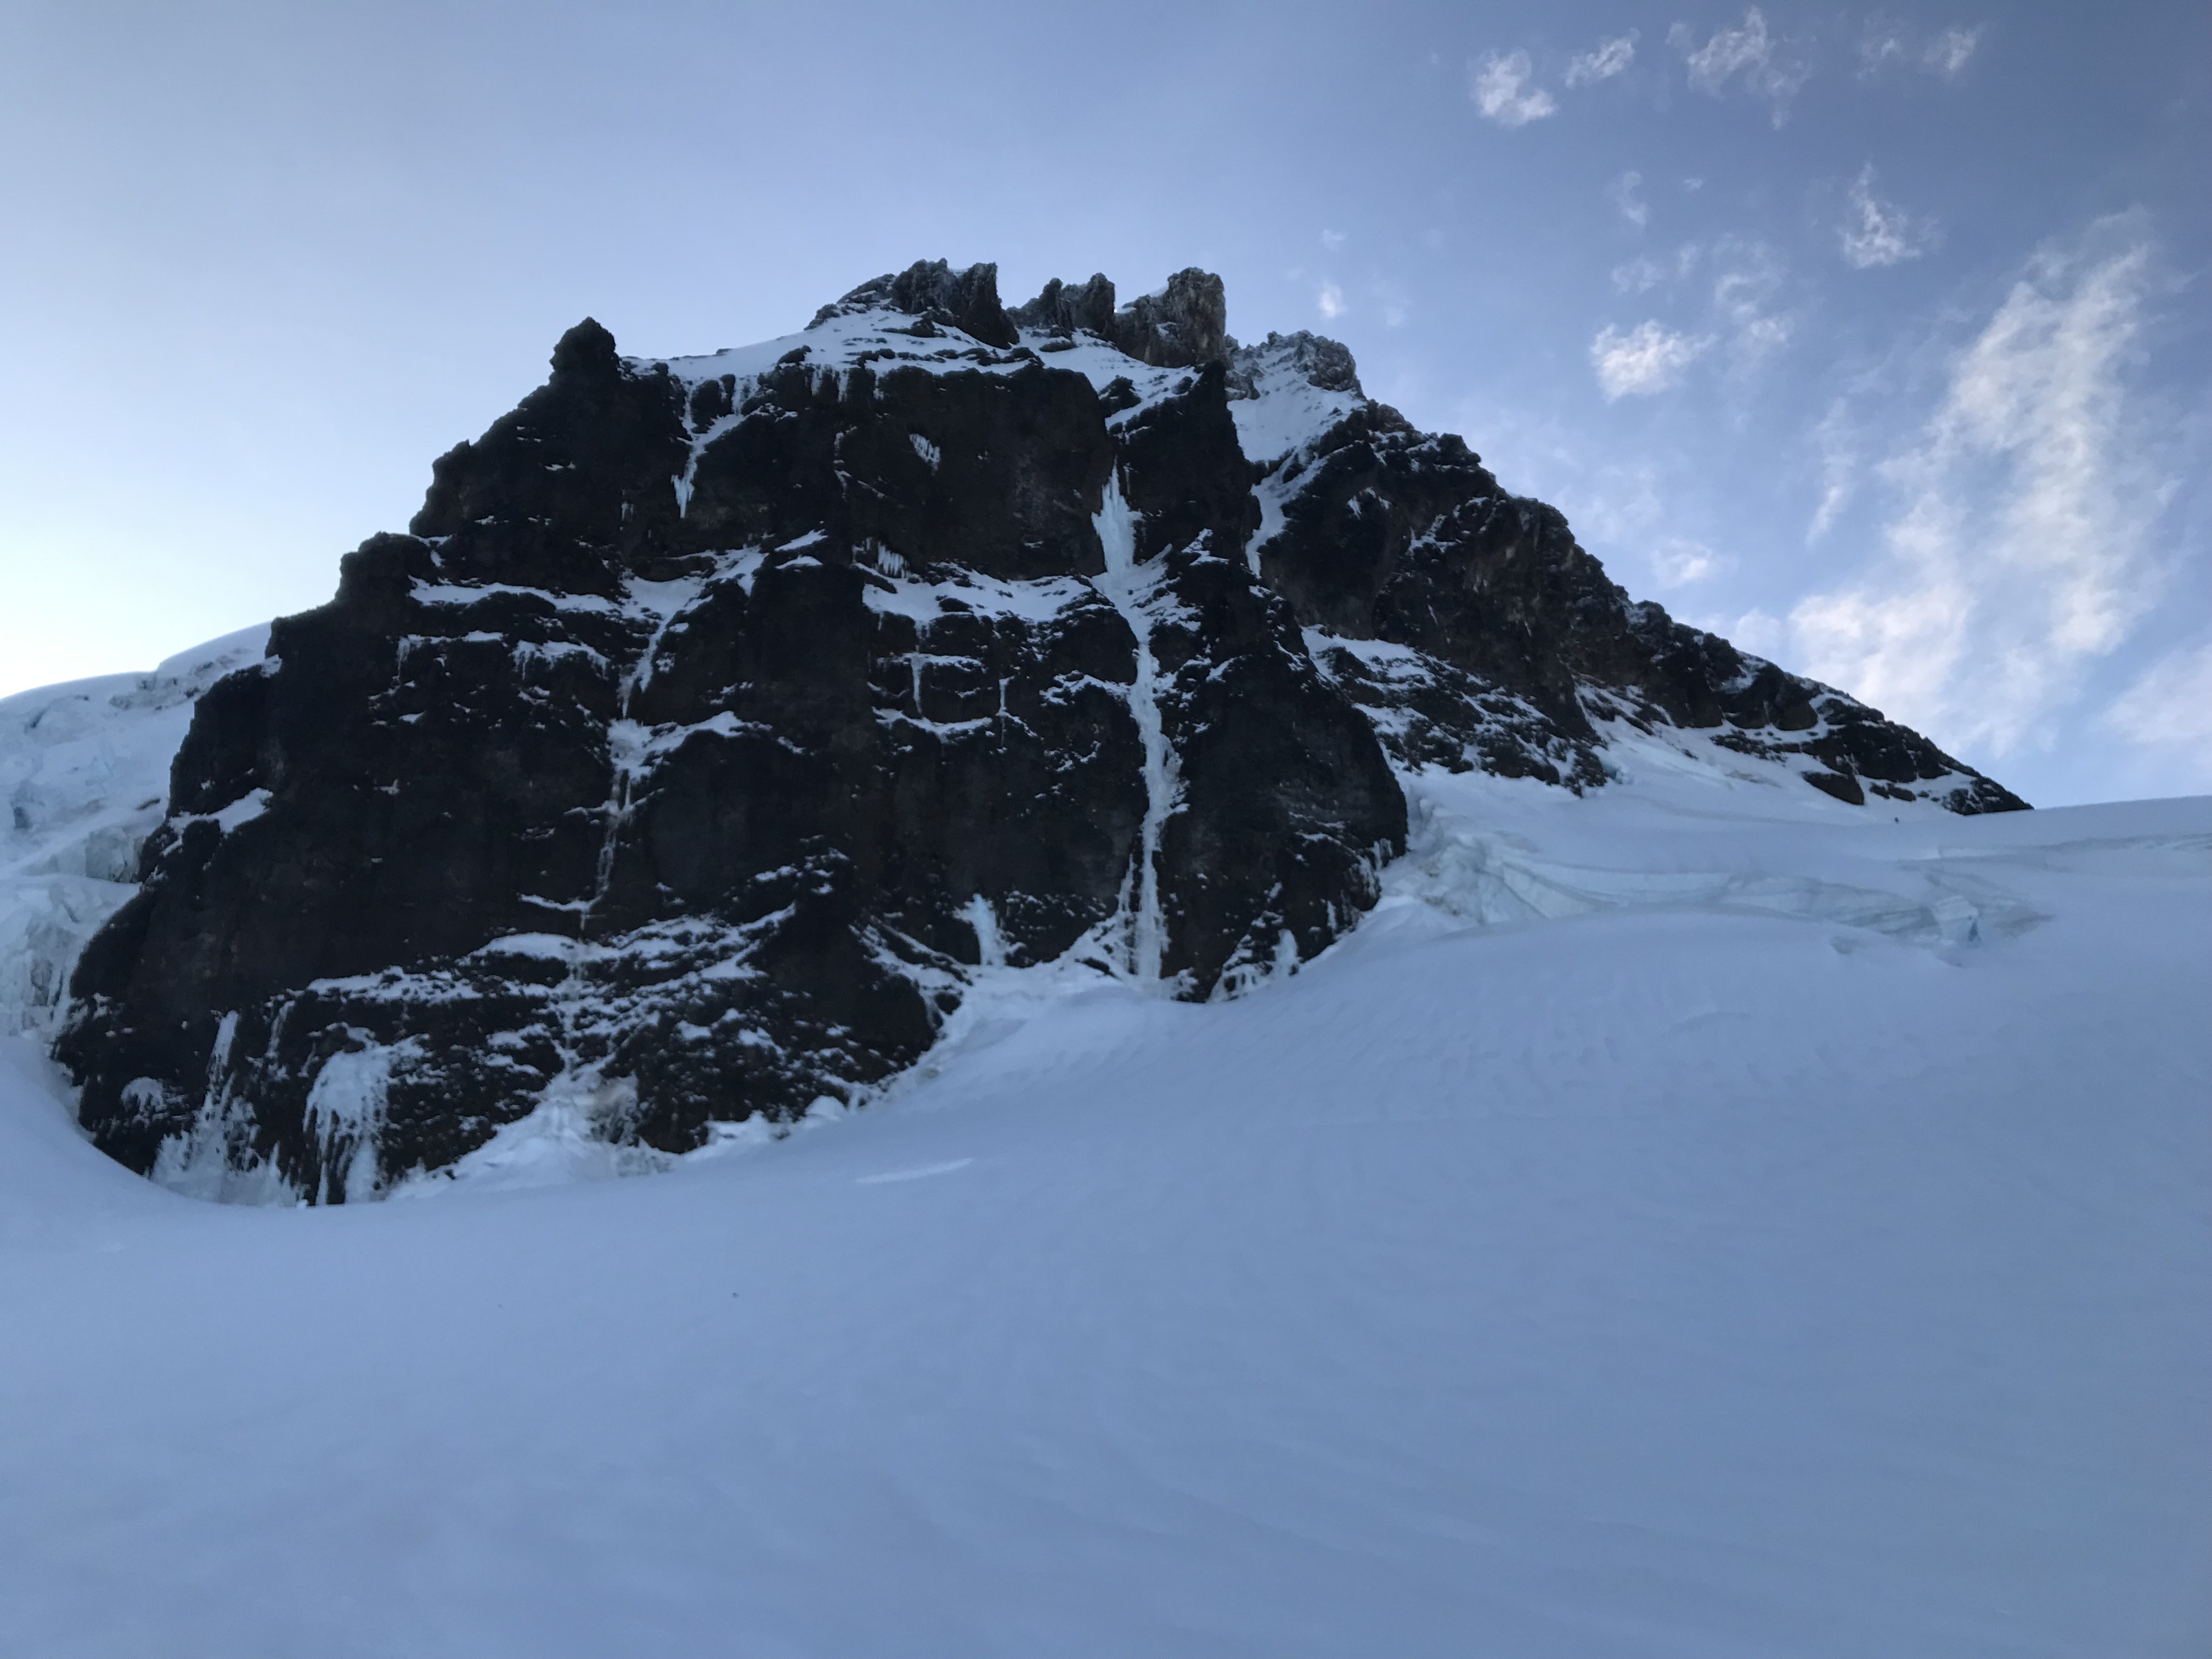


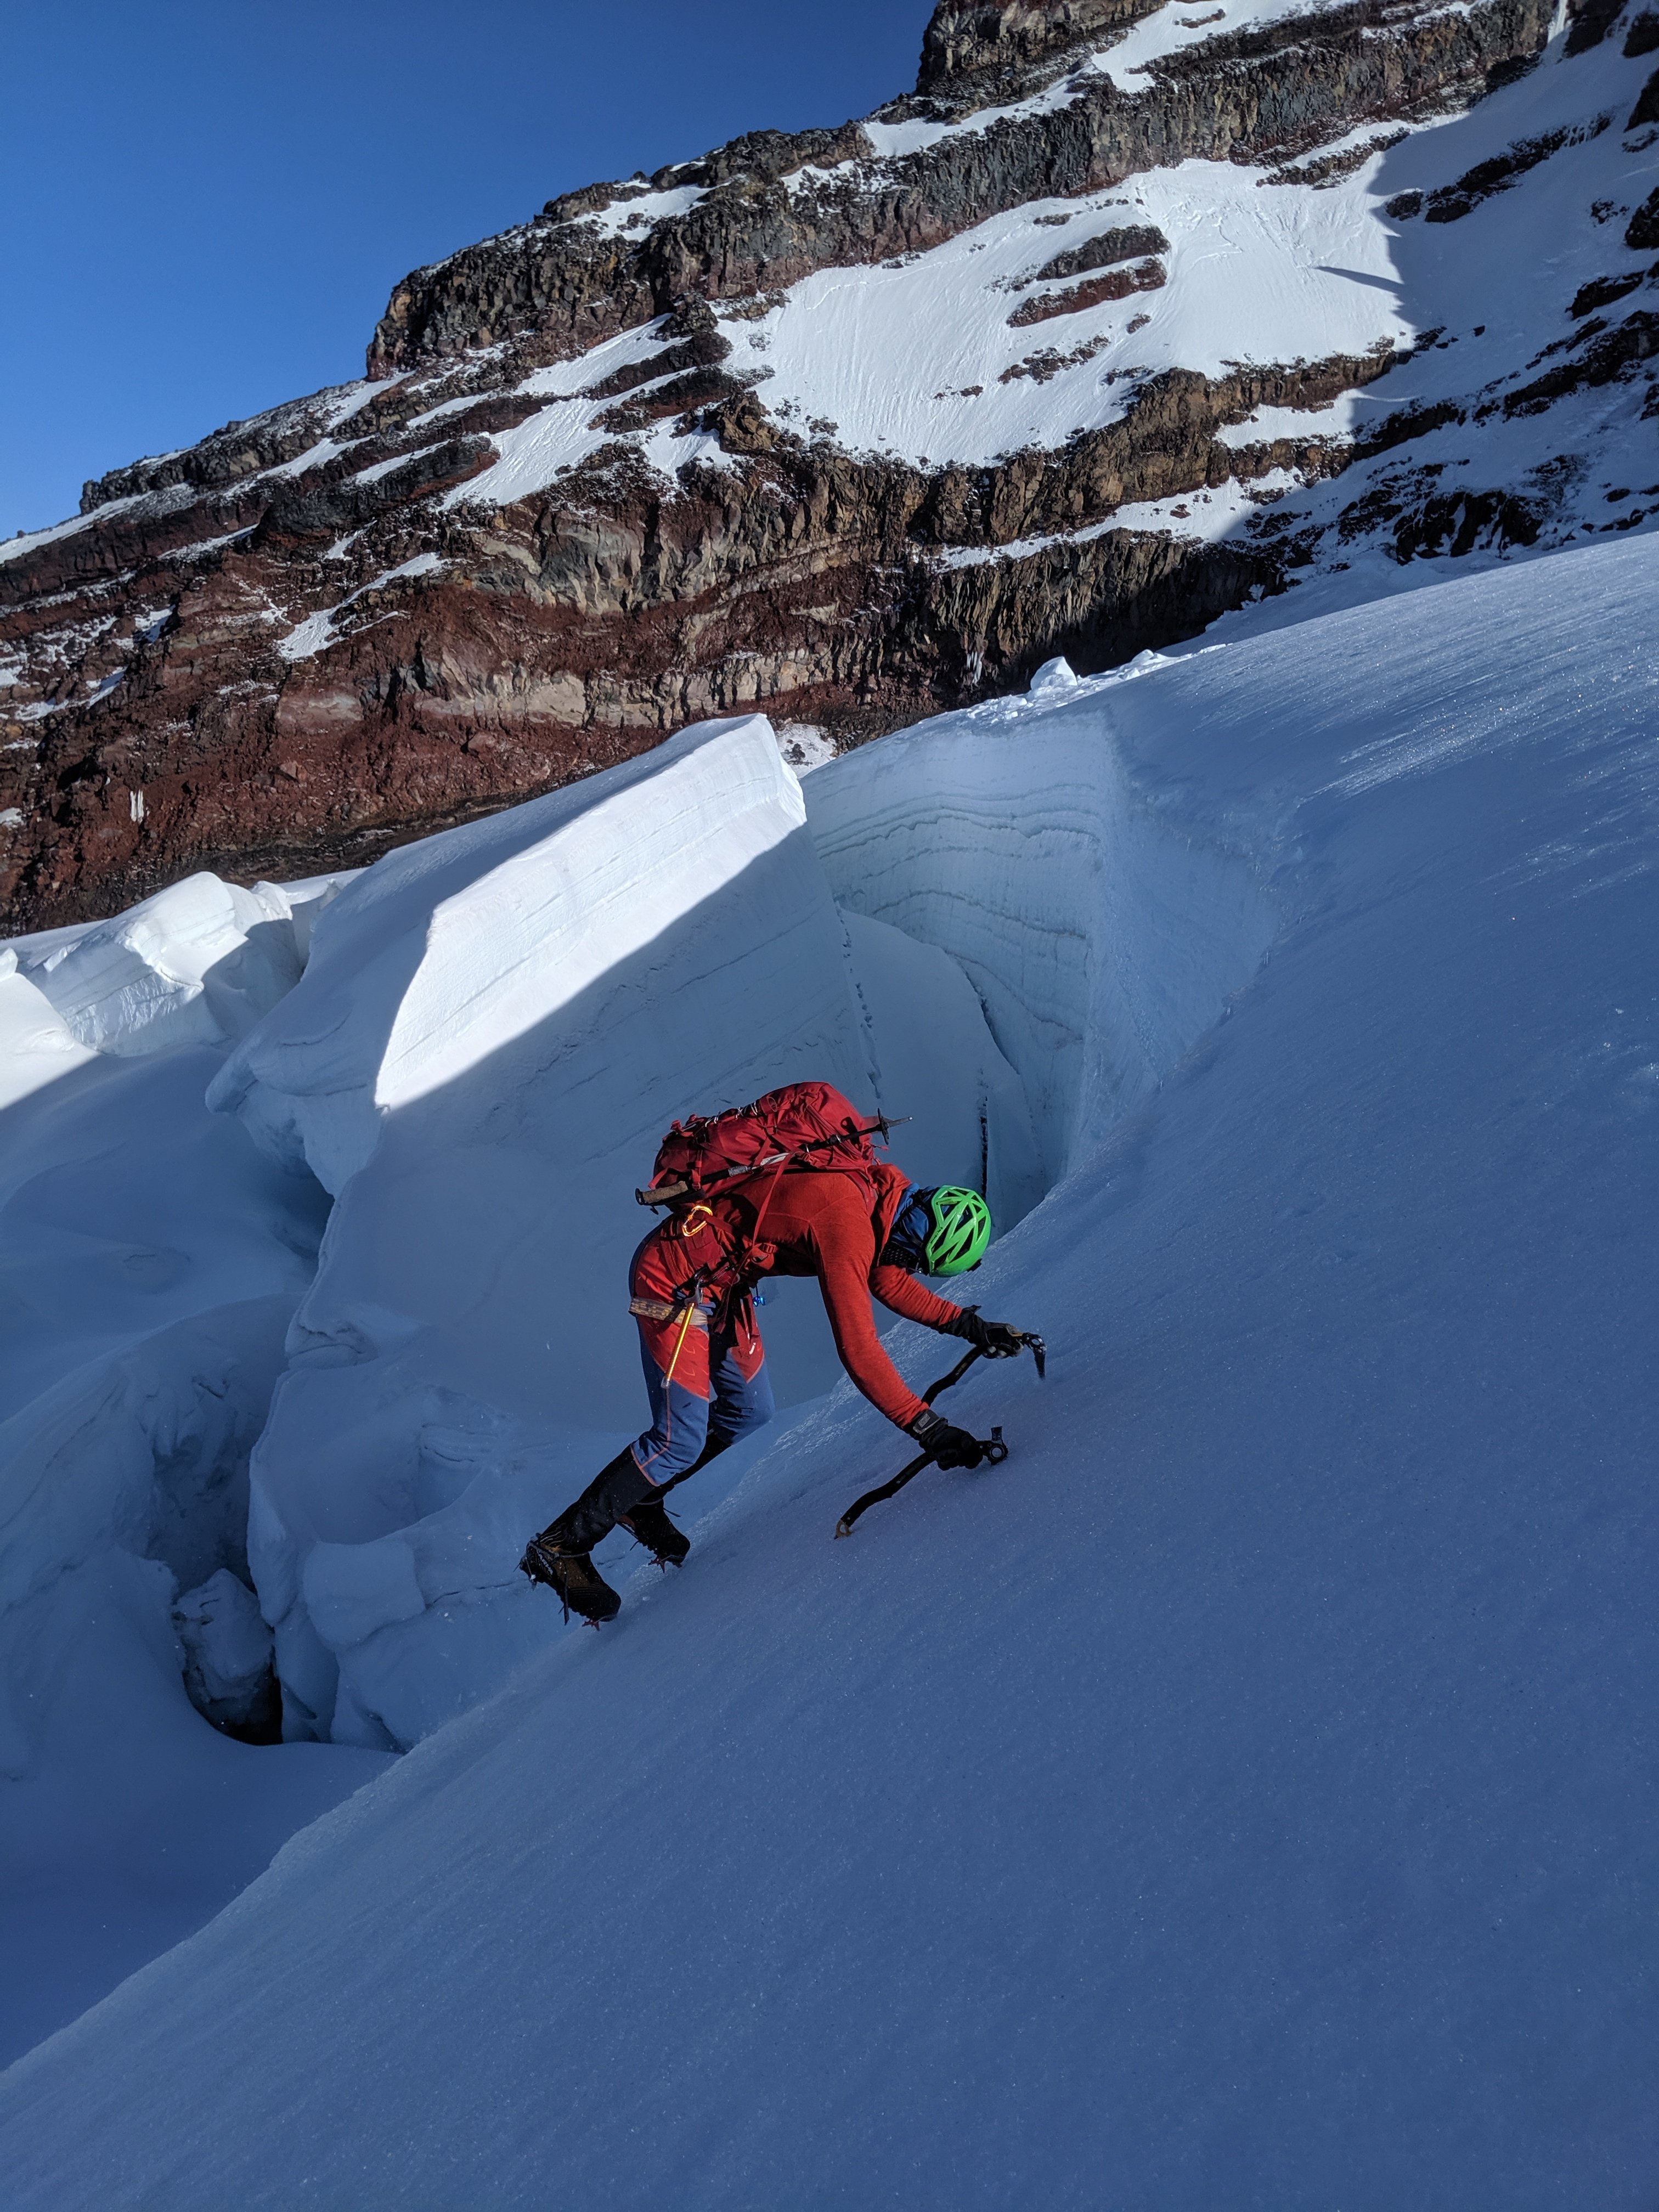
.JPG.381625e42c0fcaa431e85cd41c2ace5d.JPG)