-
Posts
9 -
Joined
-
Last visited
-
Days Won
3
Content Type
Profiles
Forums
Events
Everything posted by samueleley
-

[TR] West McMillan Spire - West Ridge 06/06/2023
samueleley replied to samueleley's topic in North Cascades
I can't recommend it enough -
[TR] West McMillan Spire - West Ridge 06/06/2023
samueleley replied to samueleley's topic in North Cascades
Very good to know... Thanks @JasonG! Had my Sony a7rii and just a 24-70! With a chest harness setup similar to one you suggested to me last year in a comment! -
[TR] West McMillan Spire - West Ridge 06/06/2023
samueleley replied to samueleley's topic in North Cascades
Thanks so much for your kind words, @dougd. So happy to write these as long as folks find something worth reading in them! I would be more than happy to send you some of the full-size images of Triumph I took (including the one included above) if you'd like. Just shoot me your email in a direct message. -
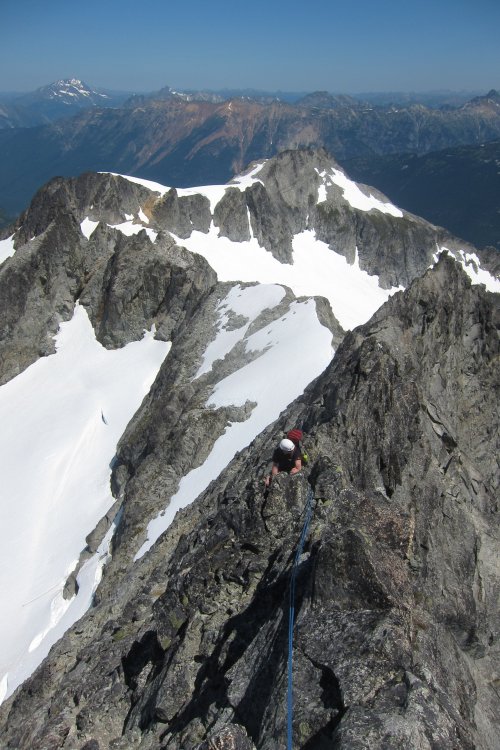
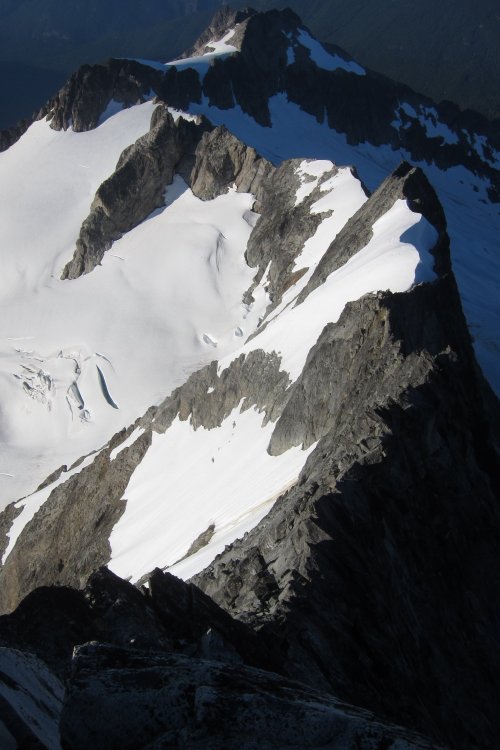
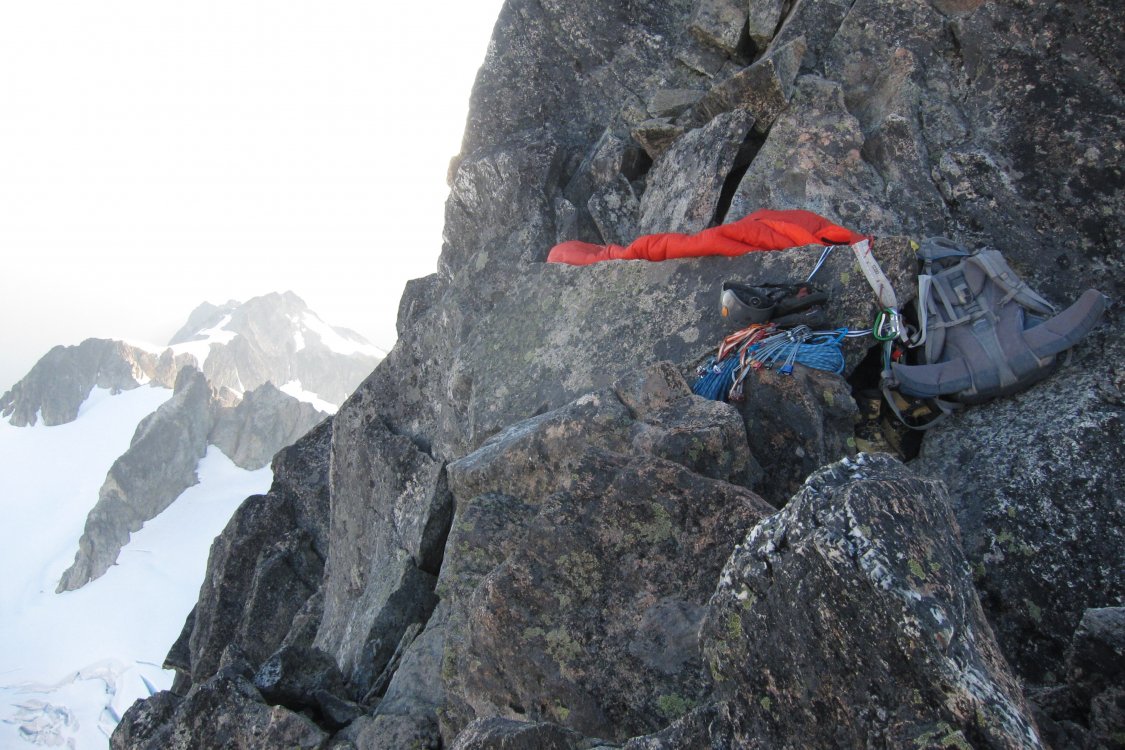
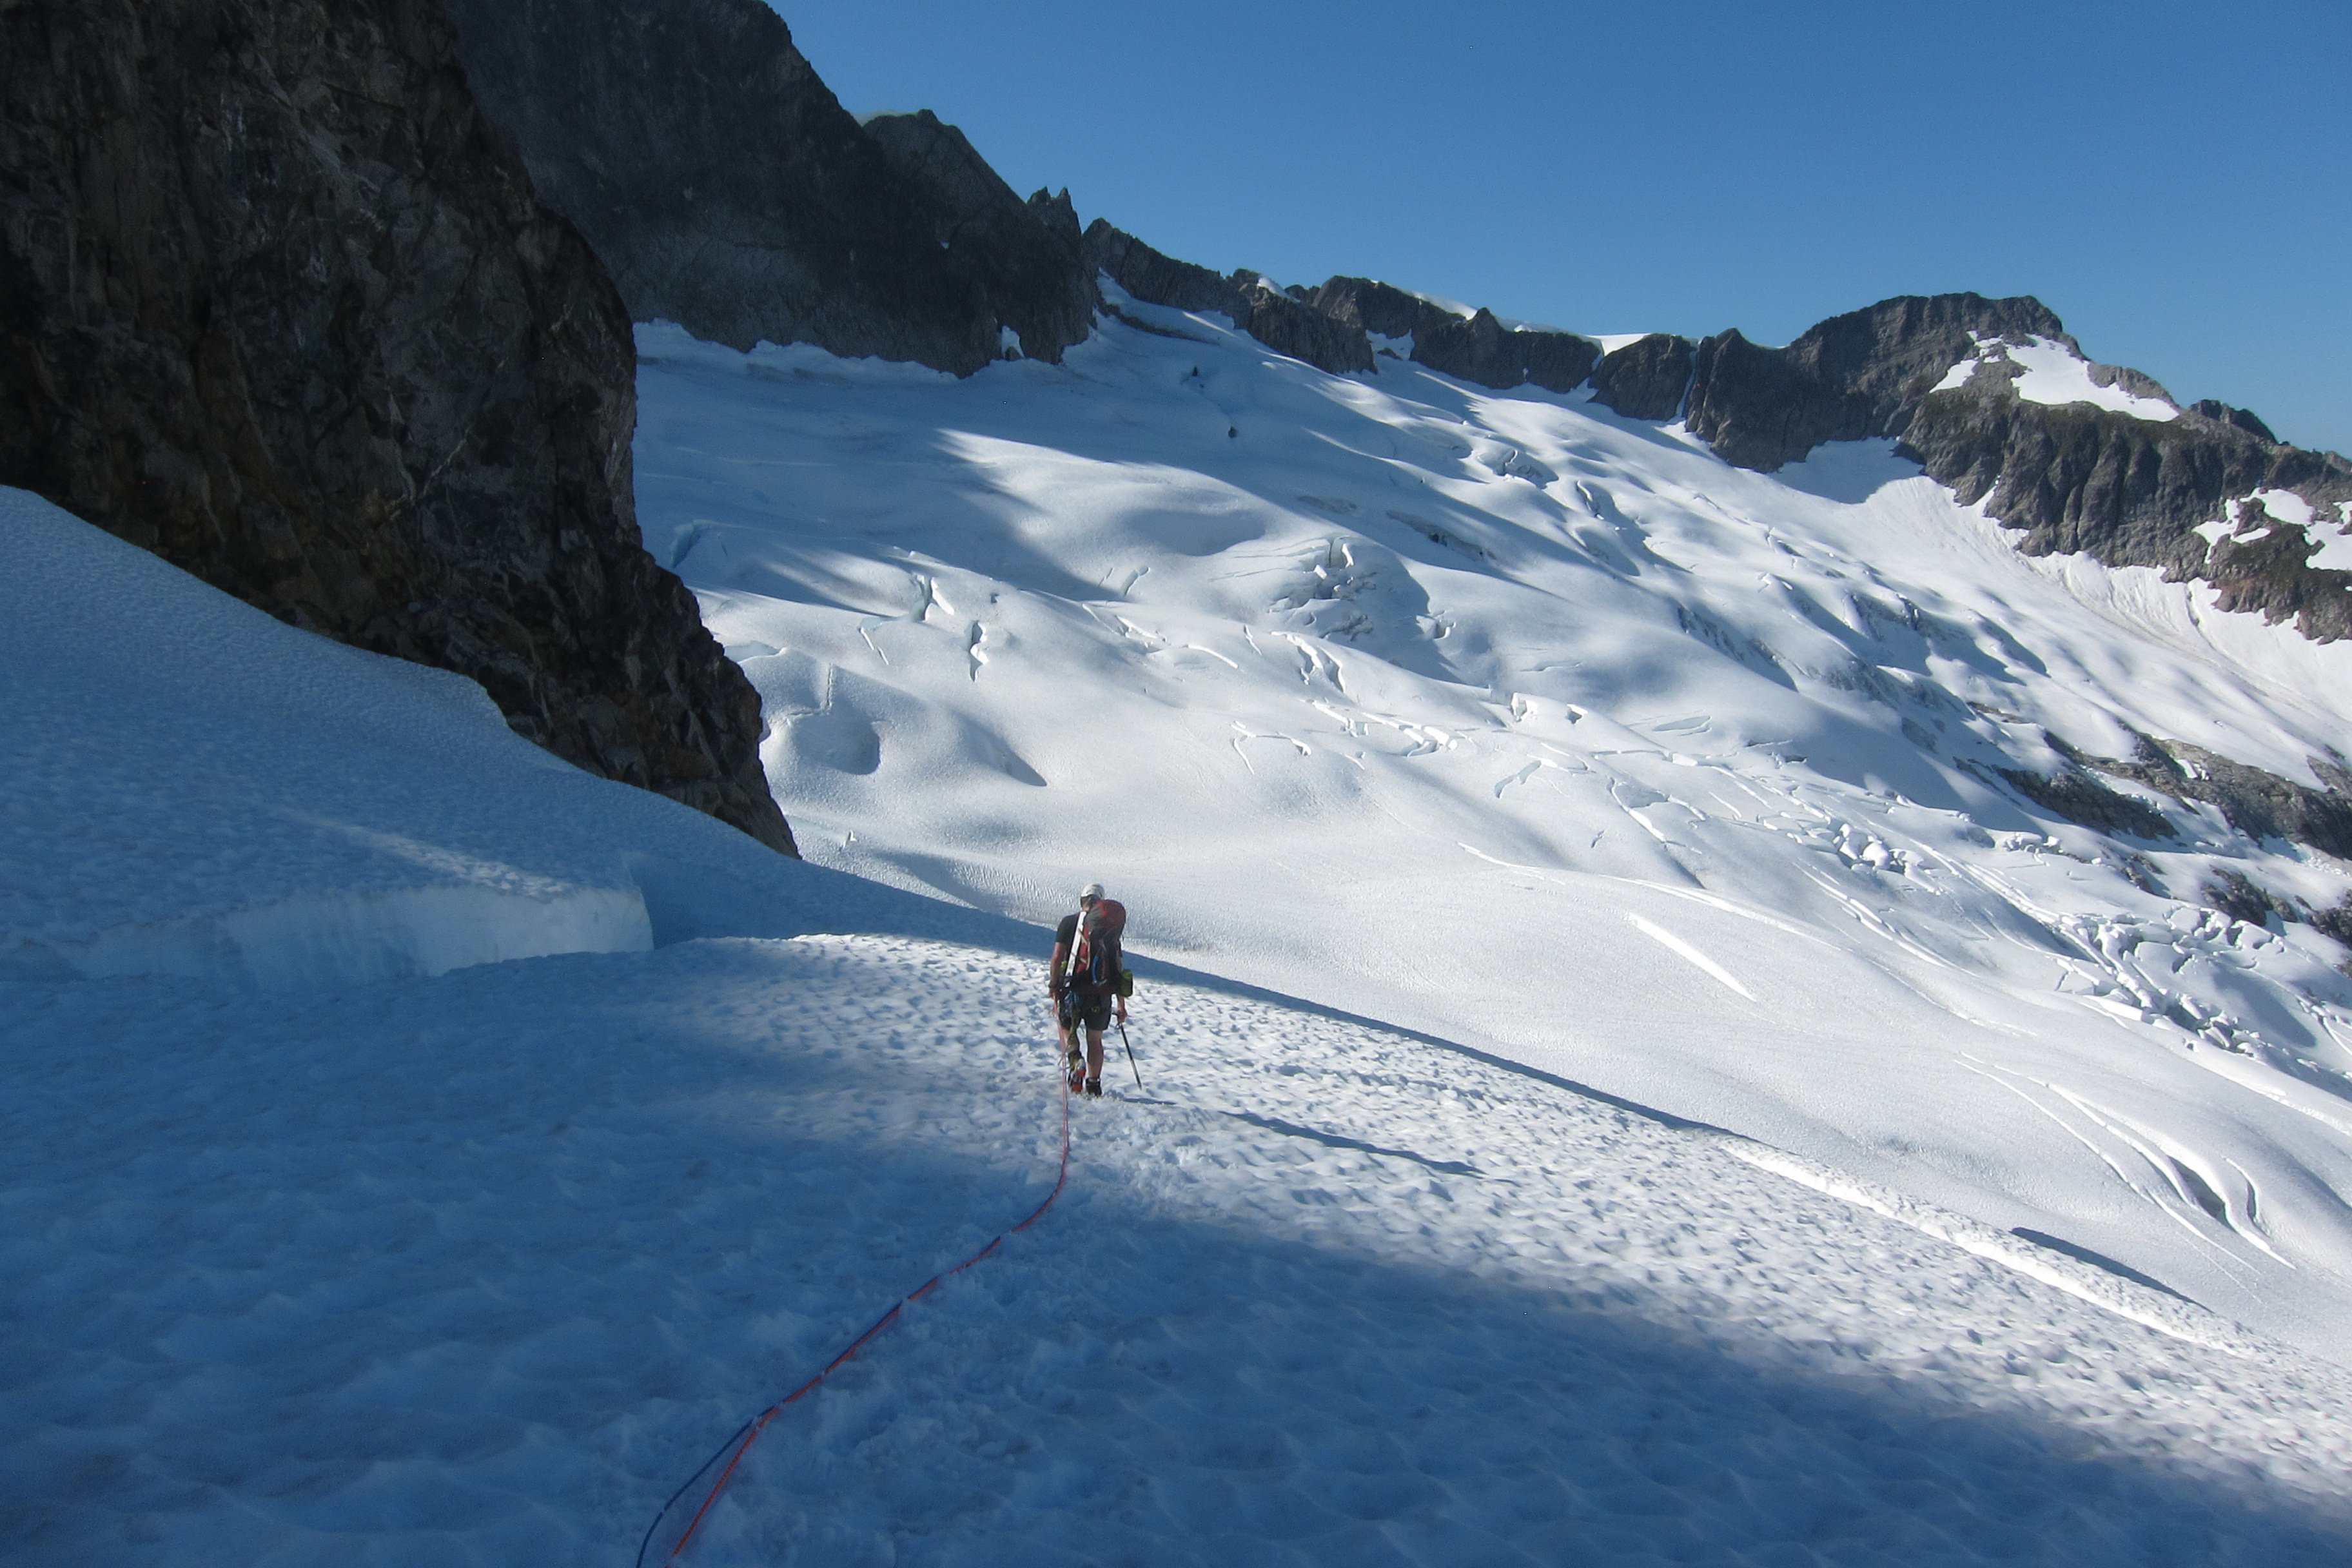
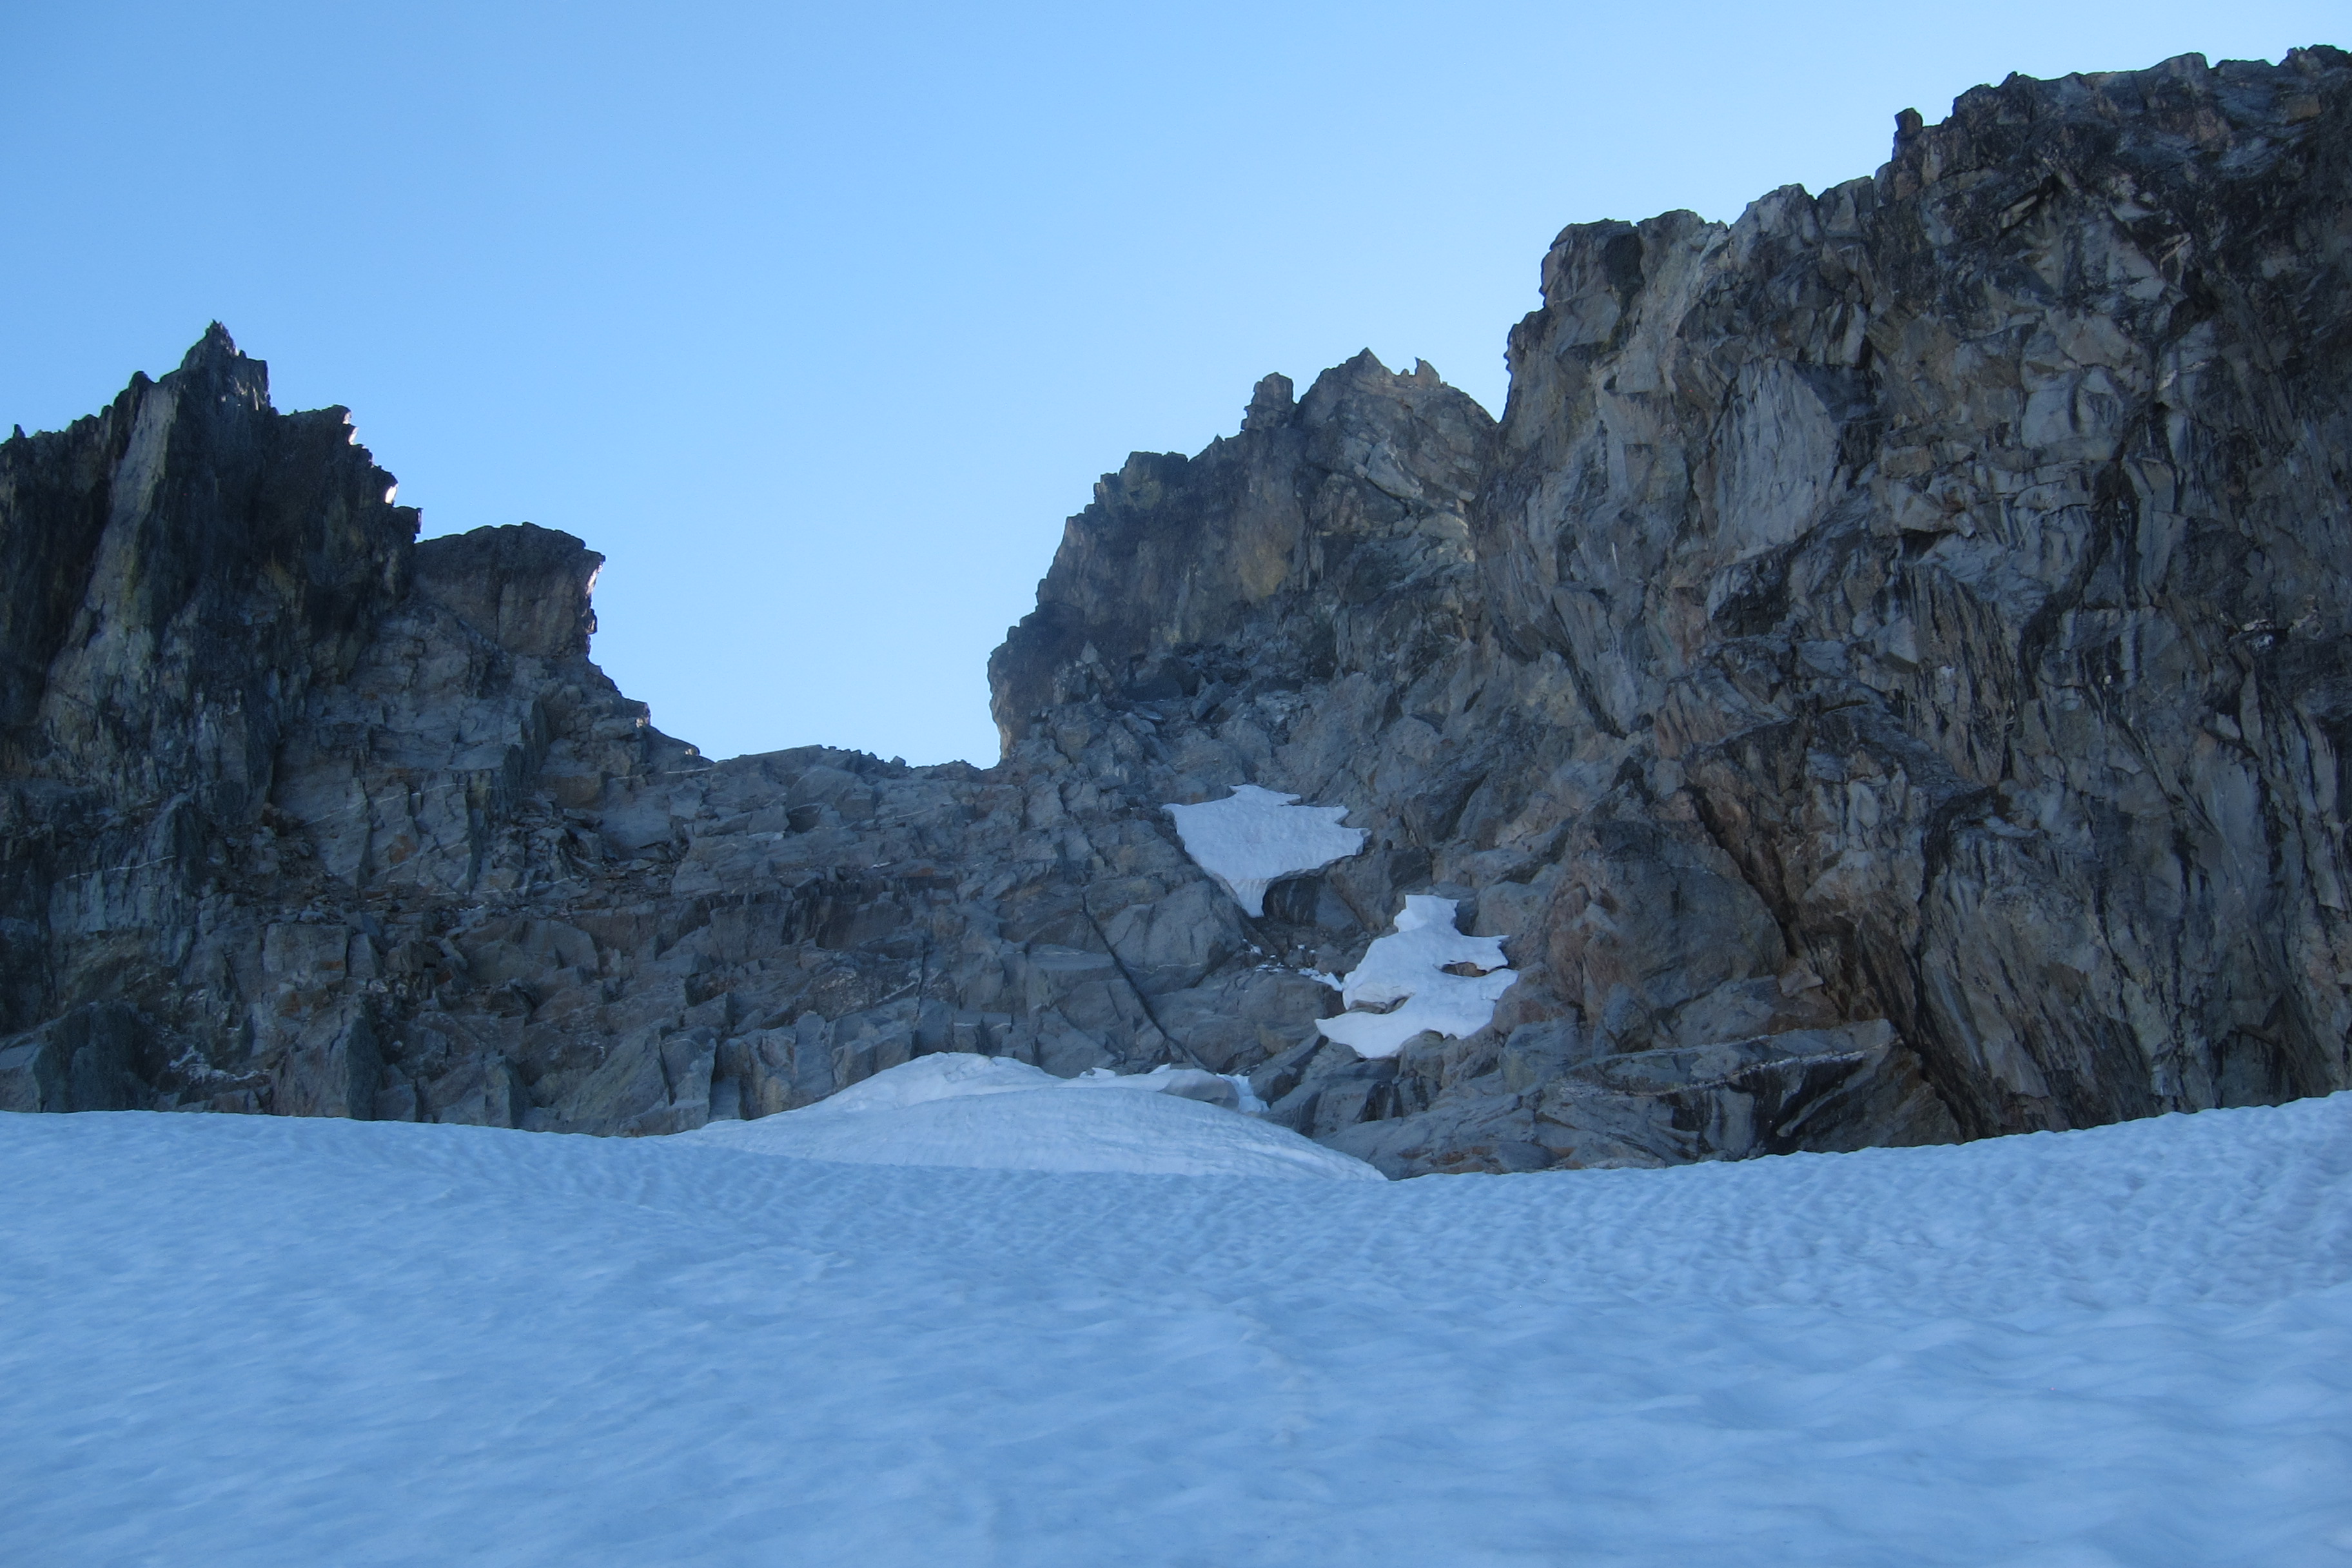
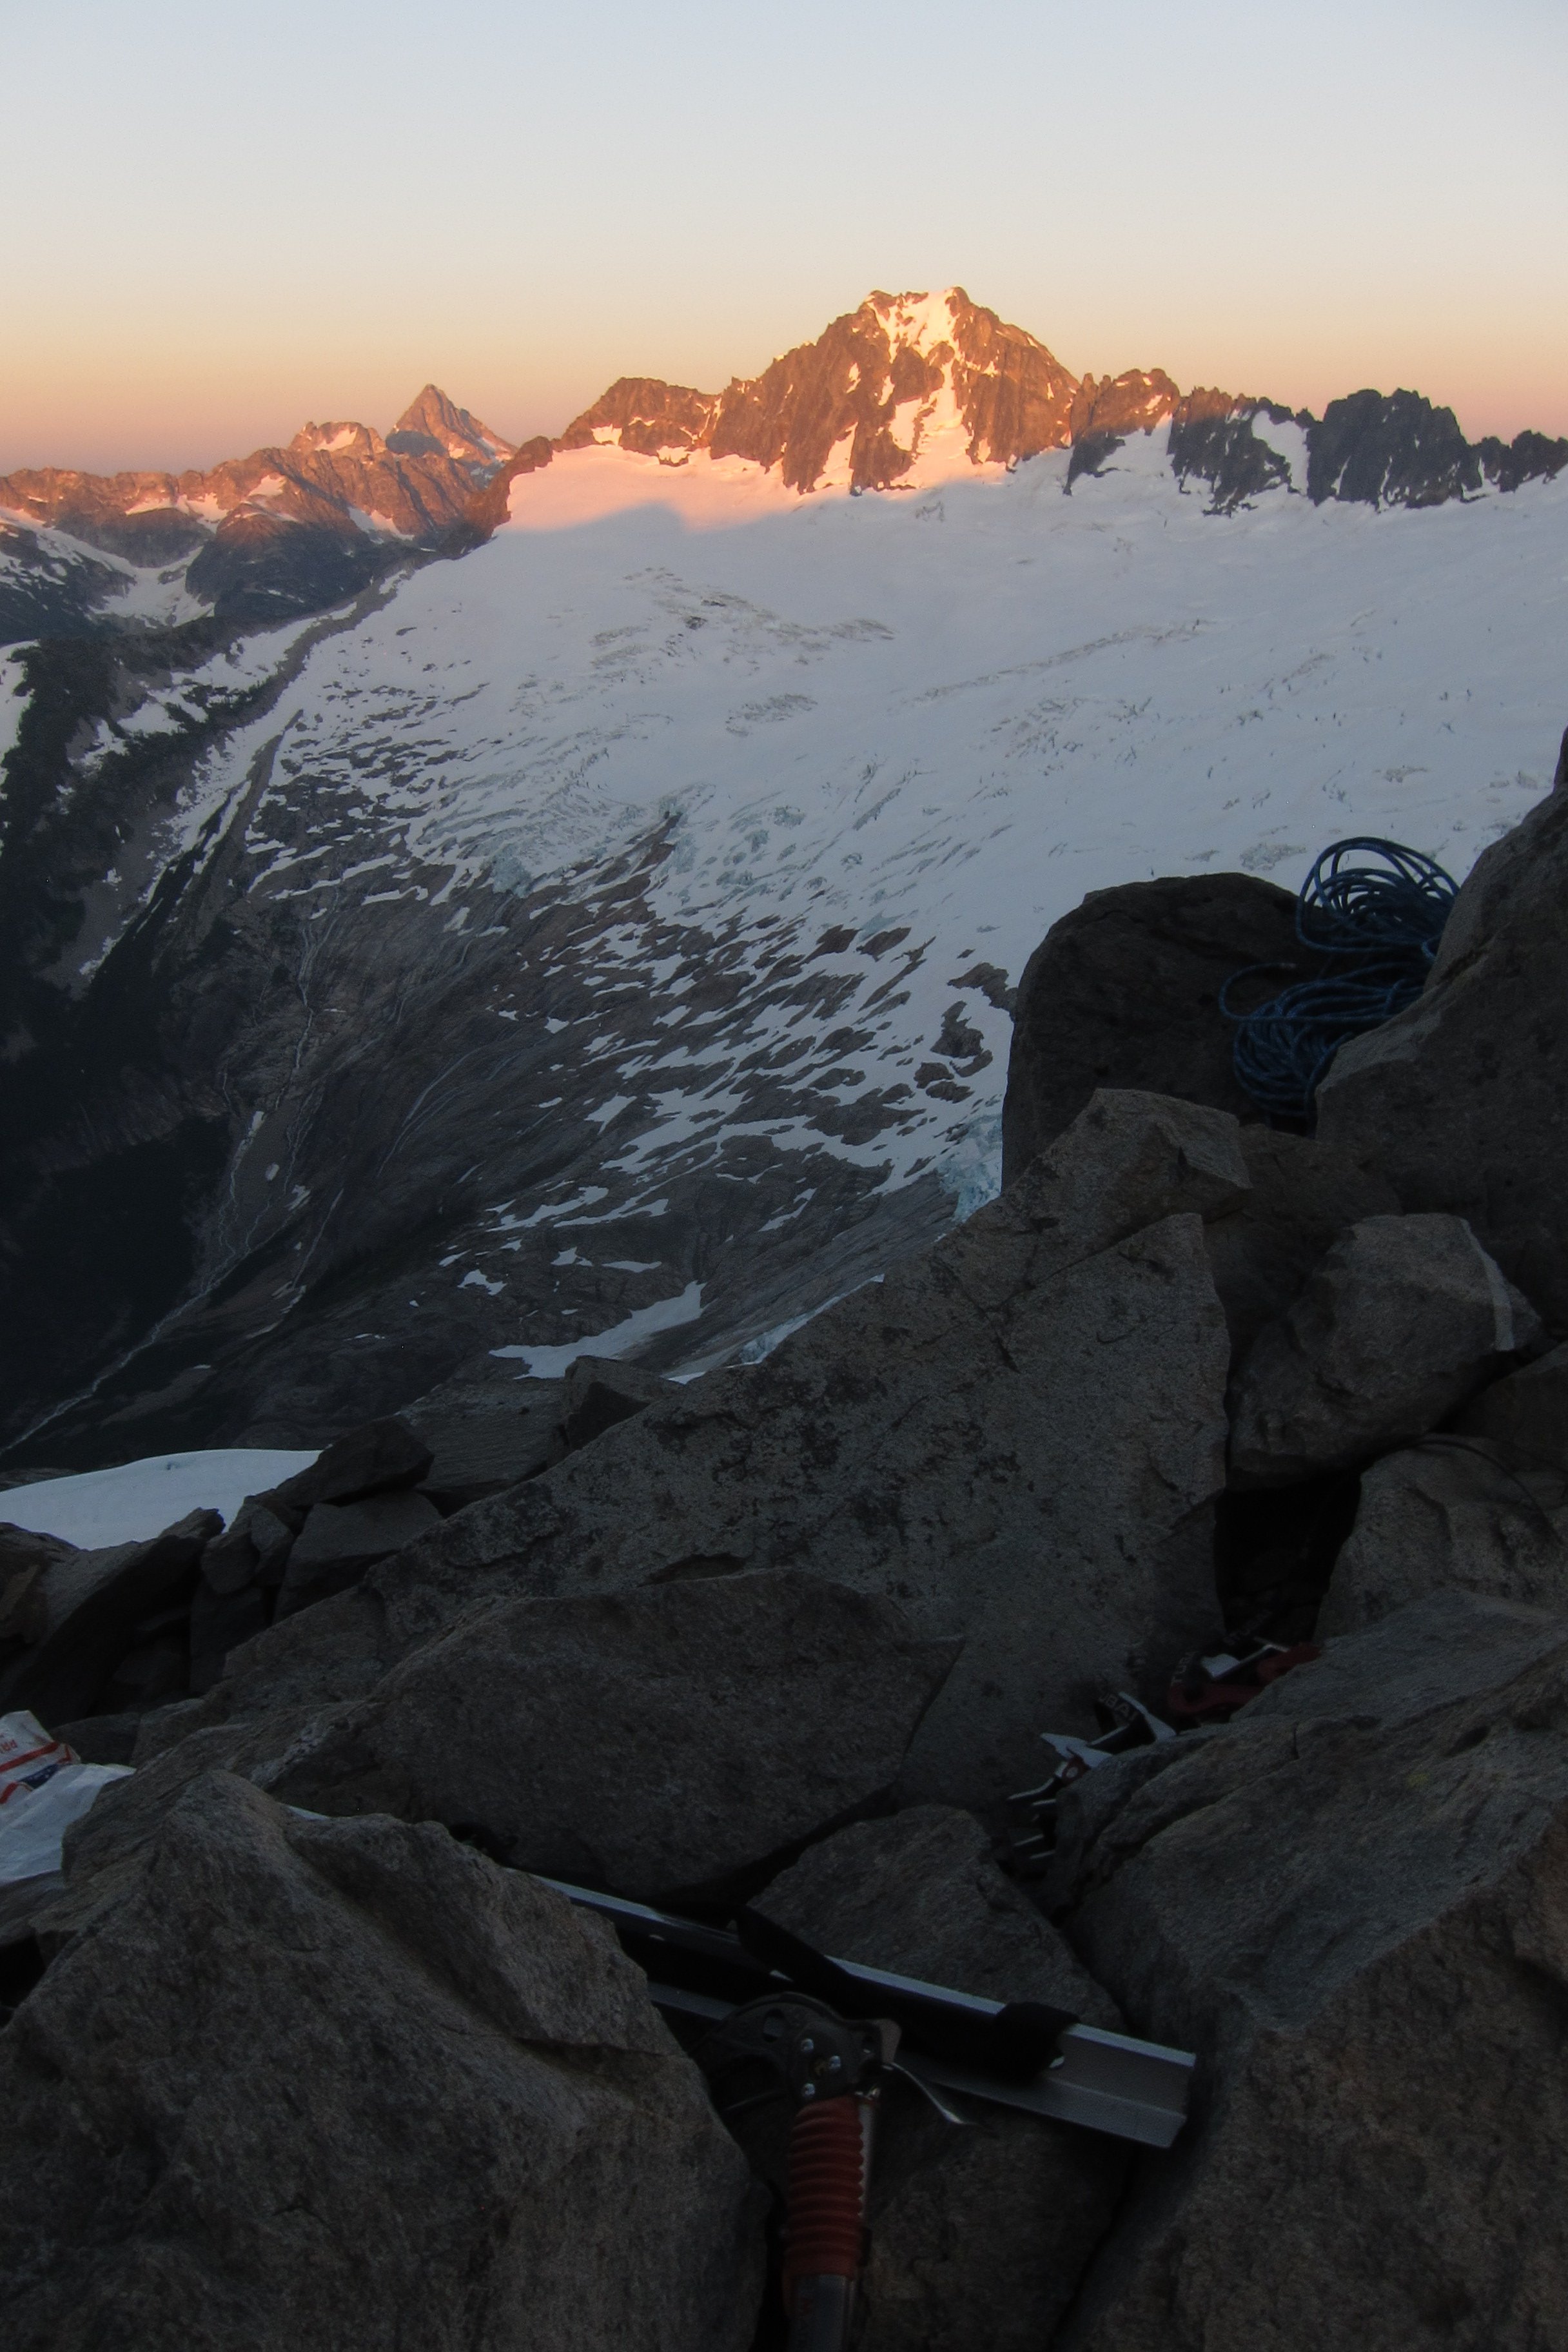
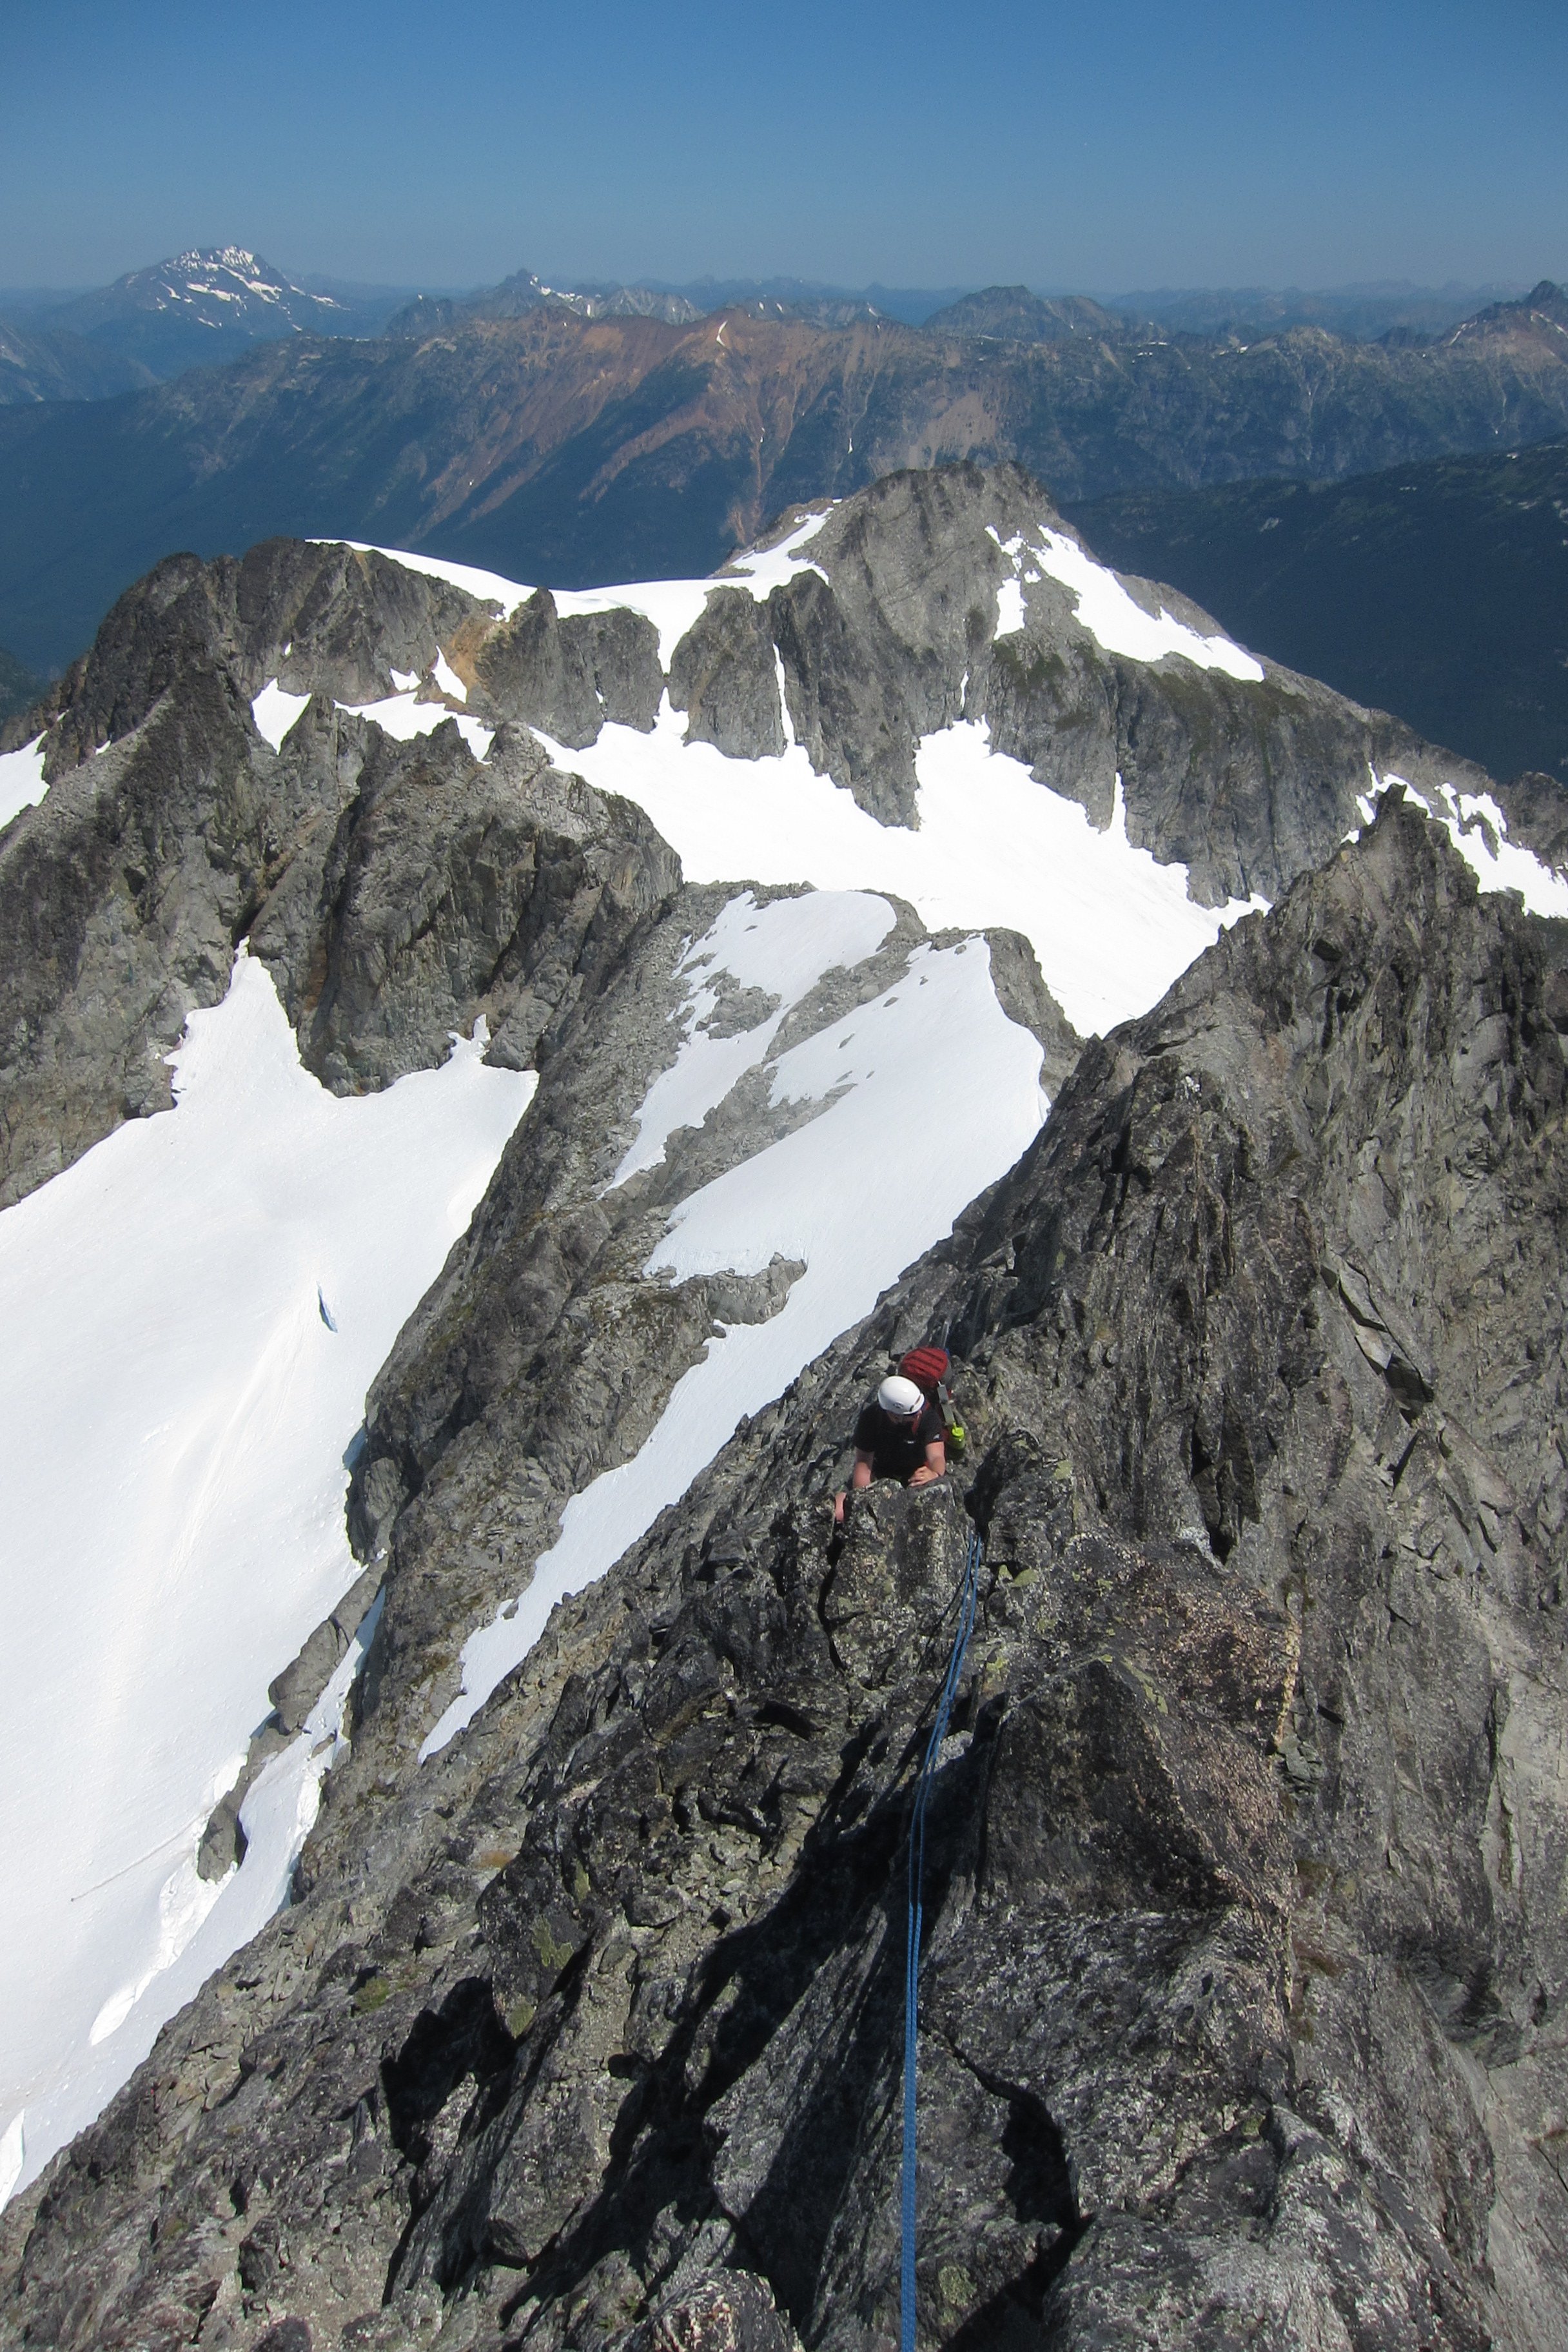
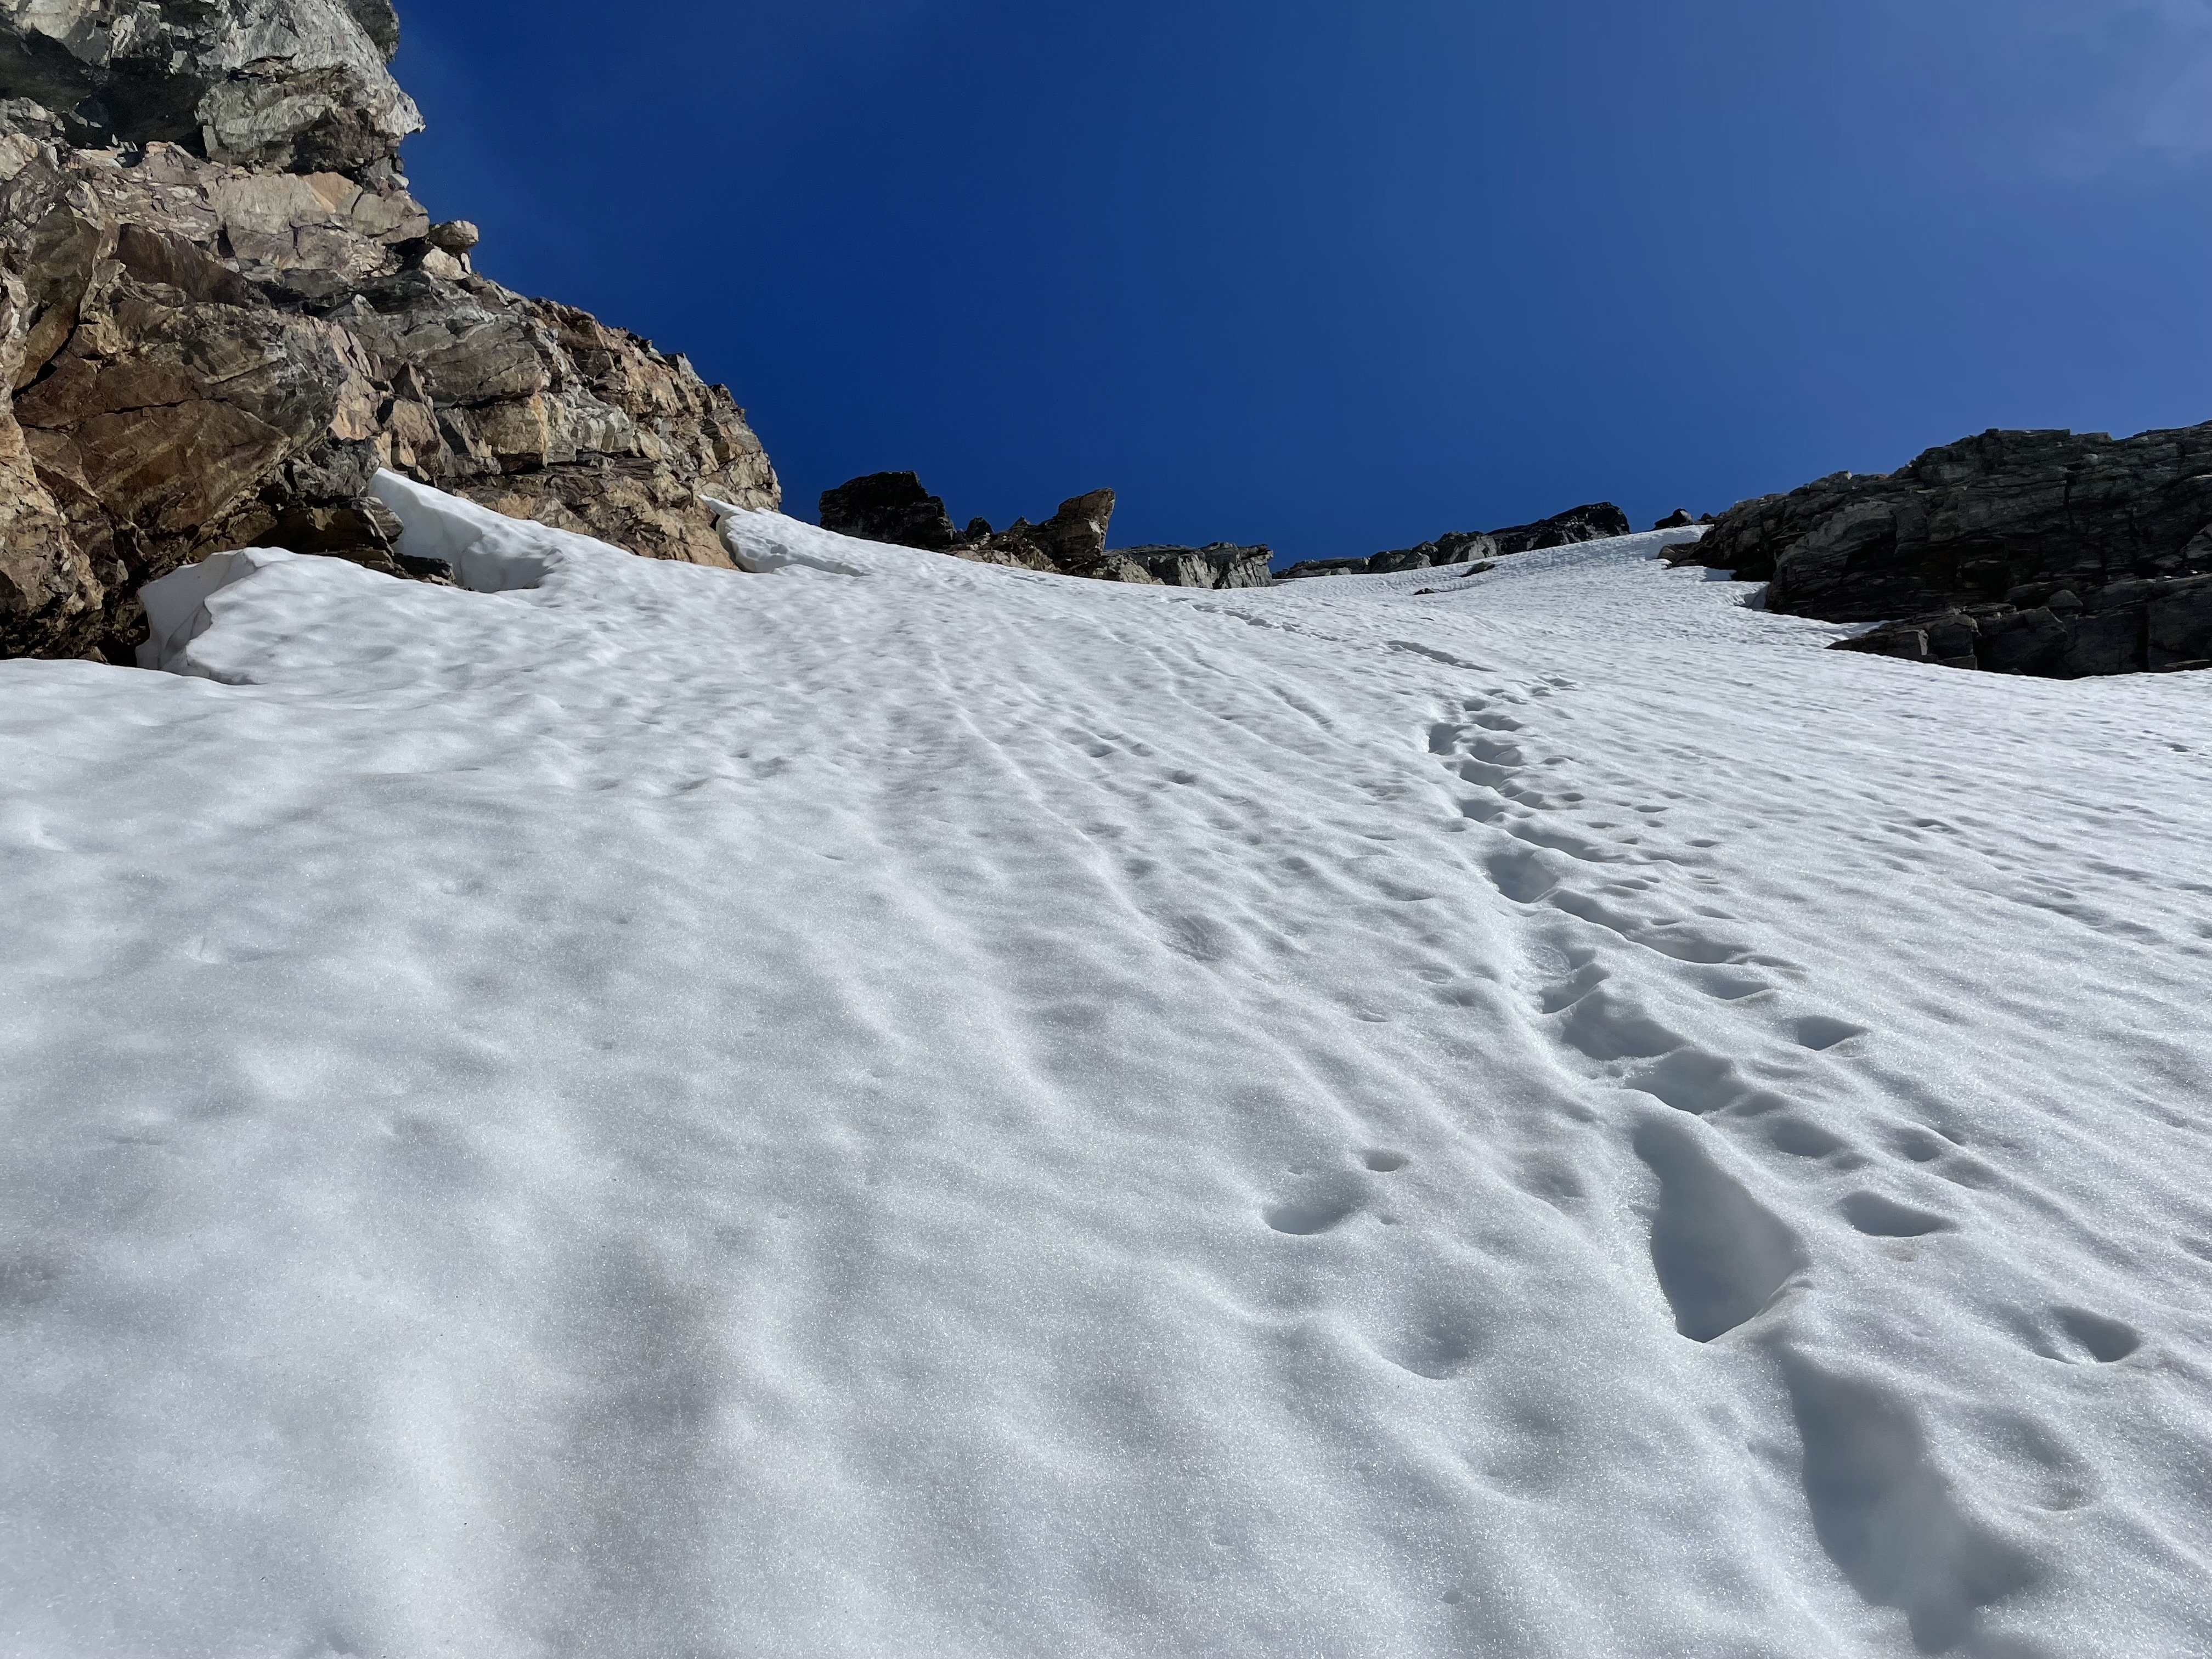
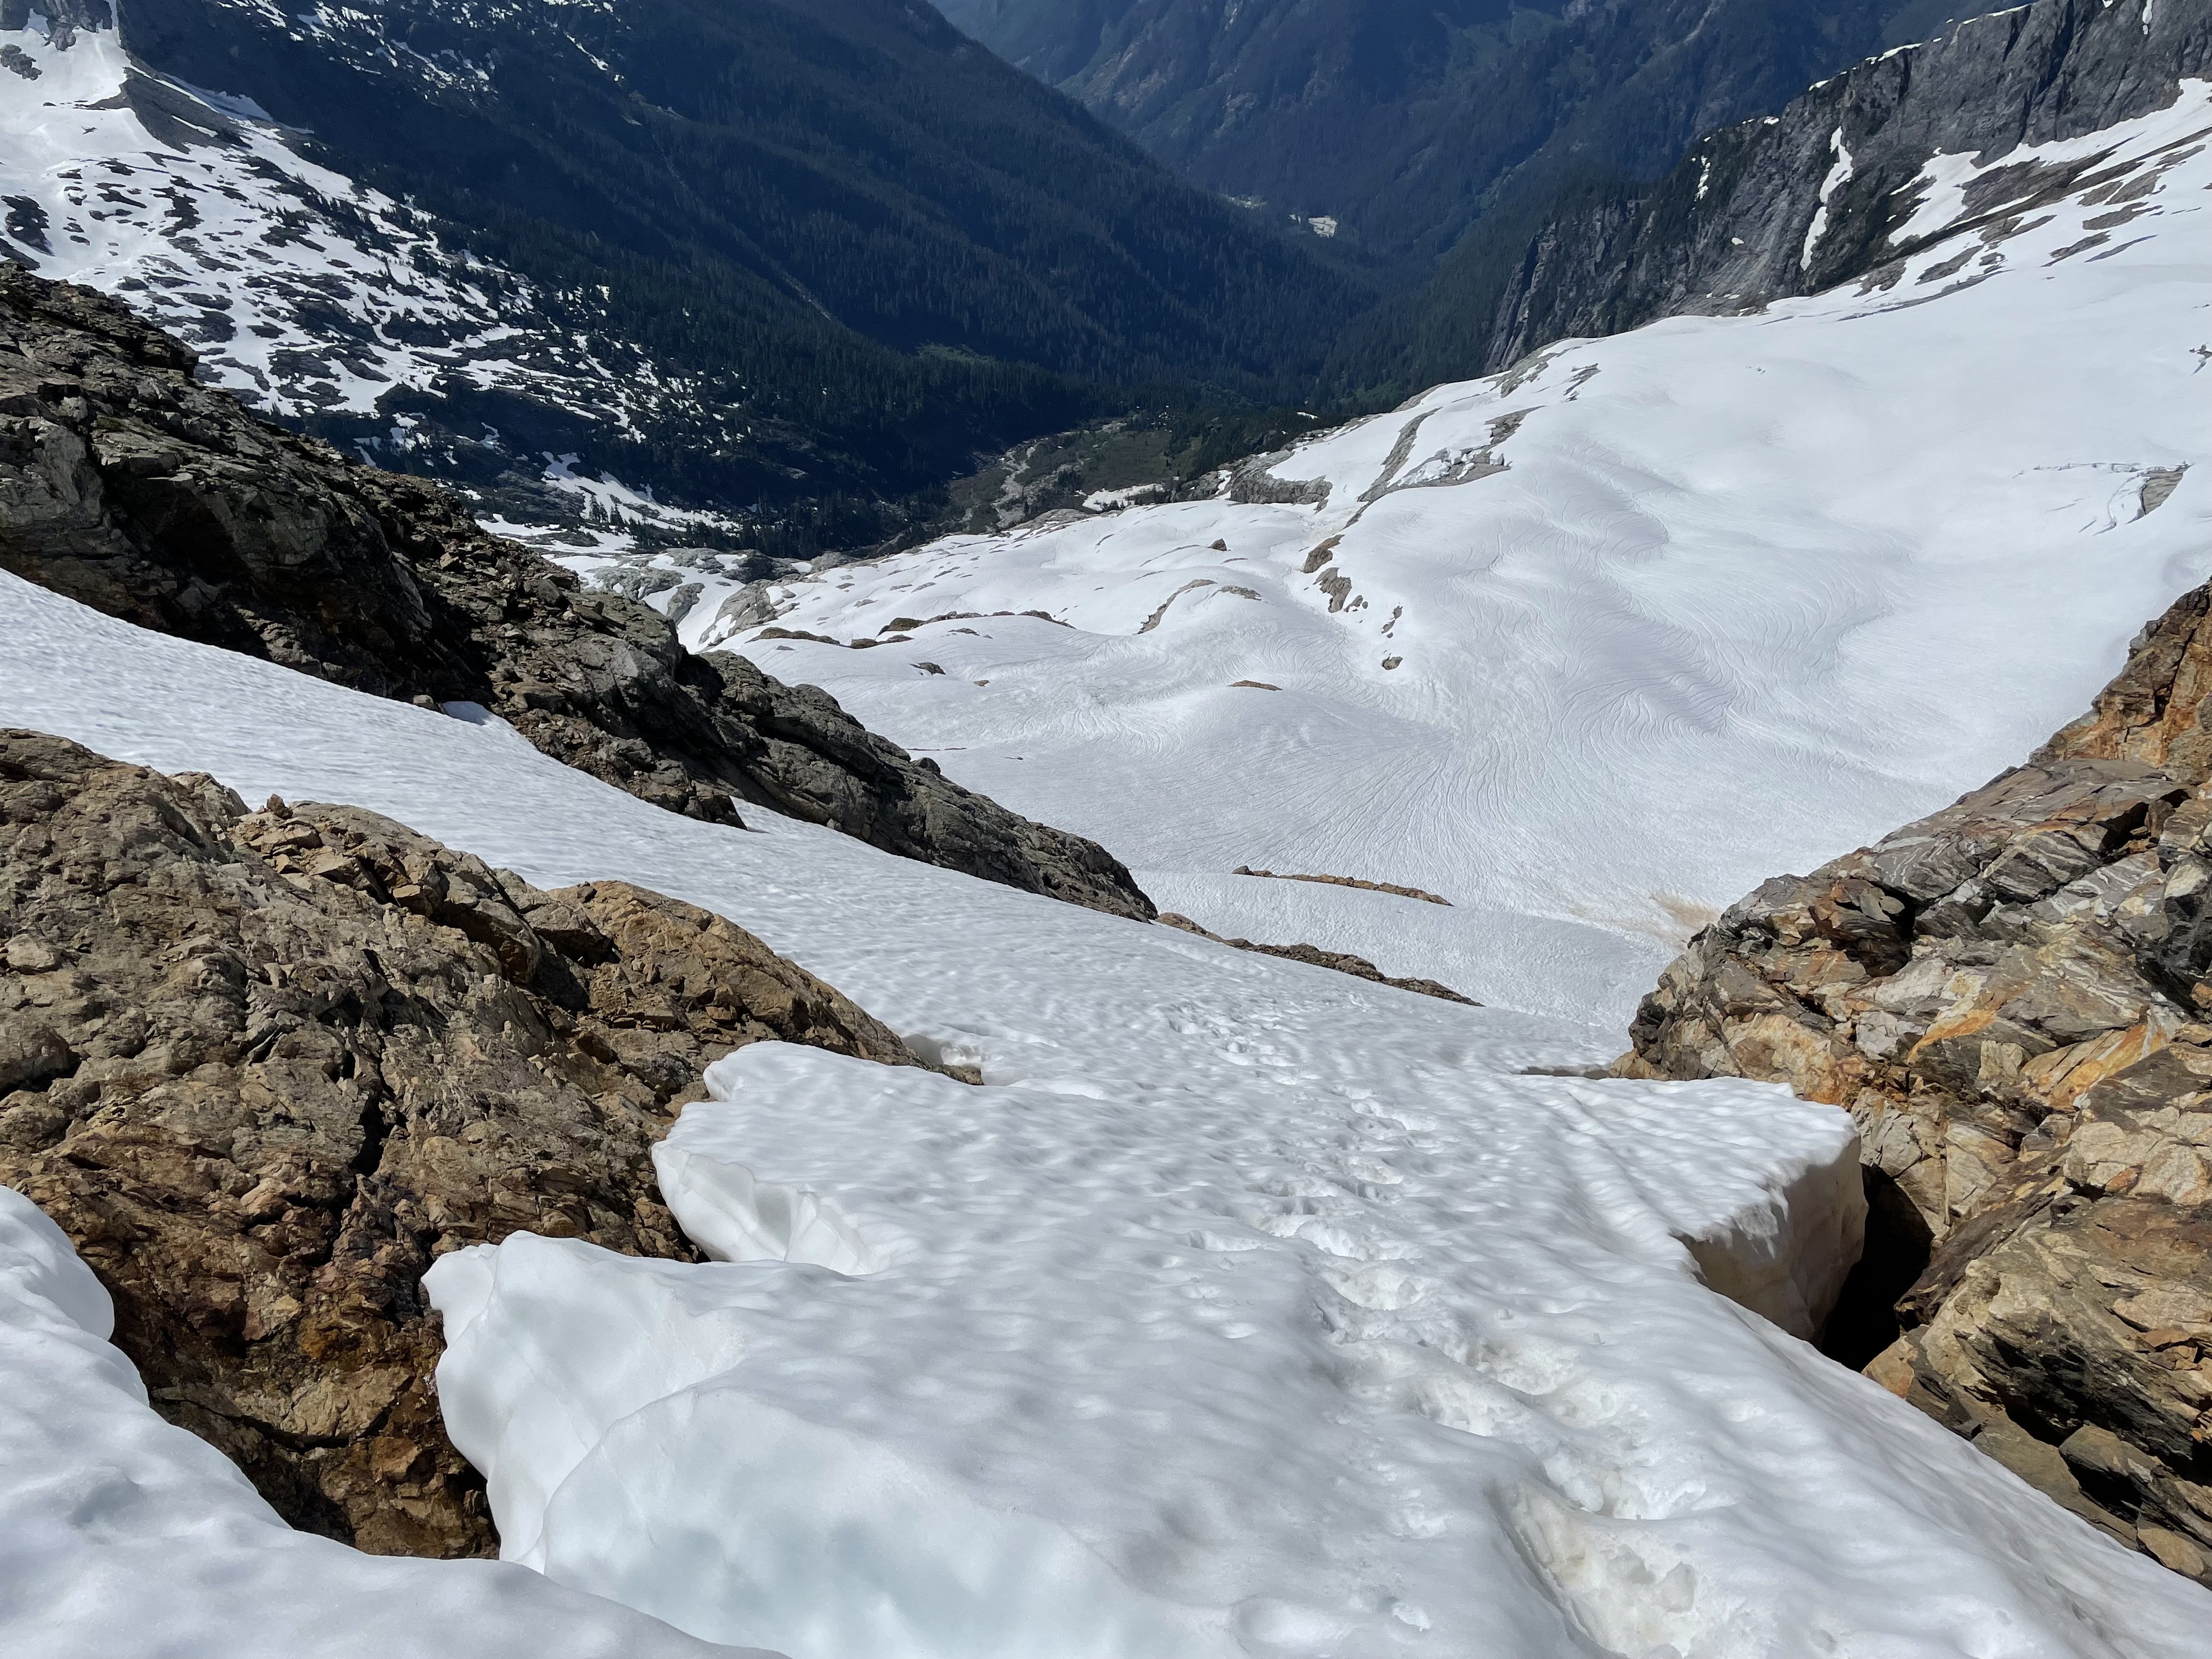
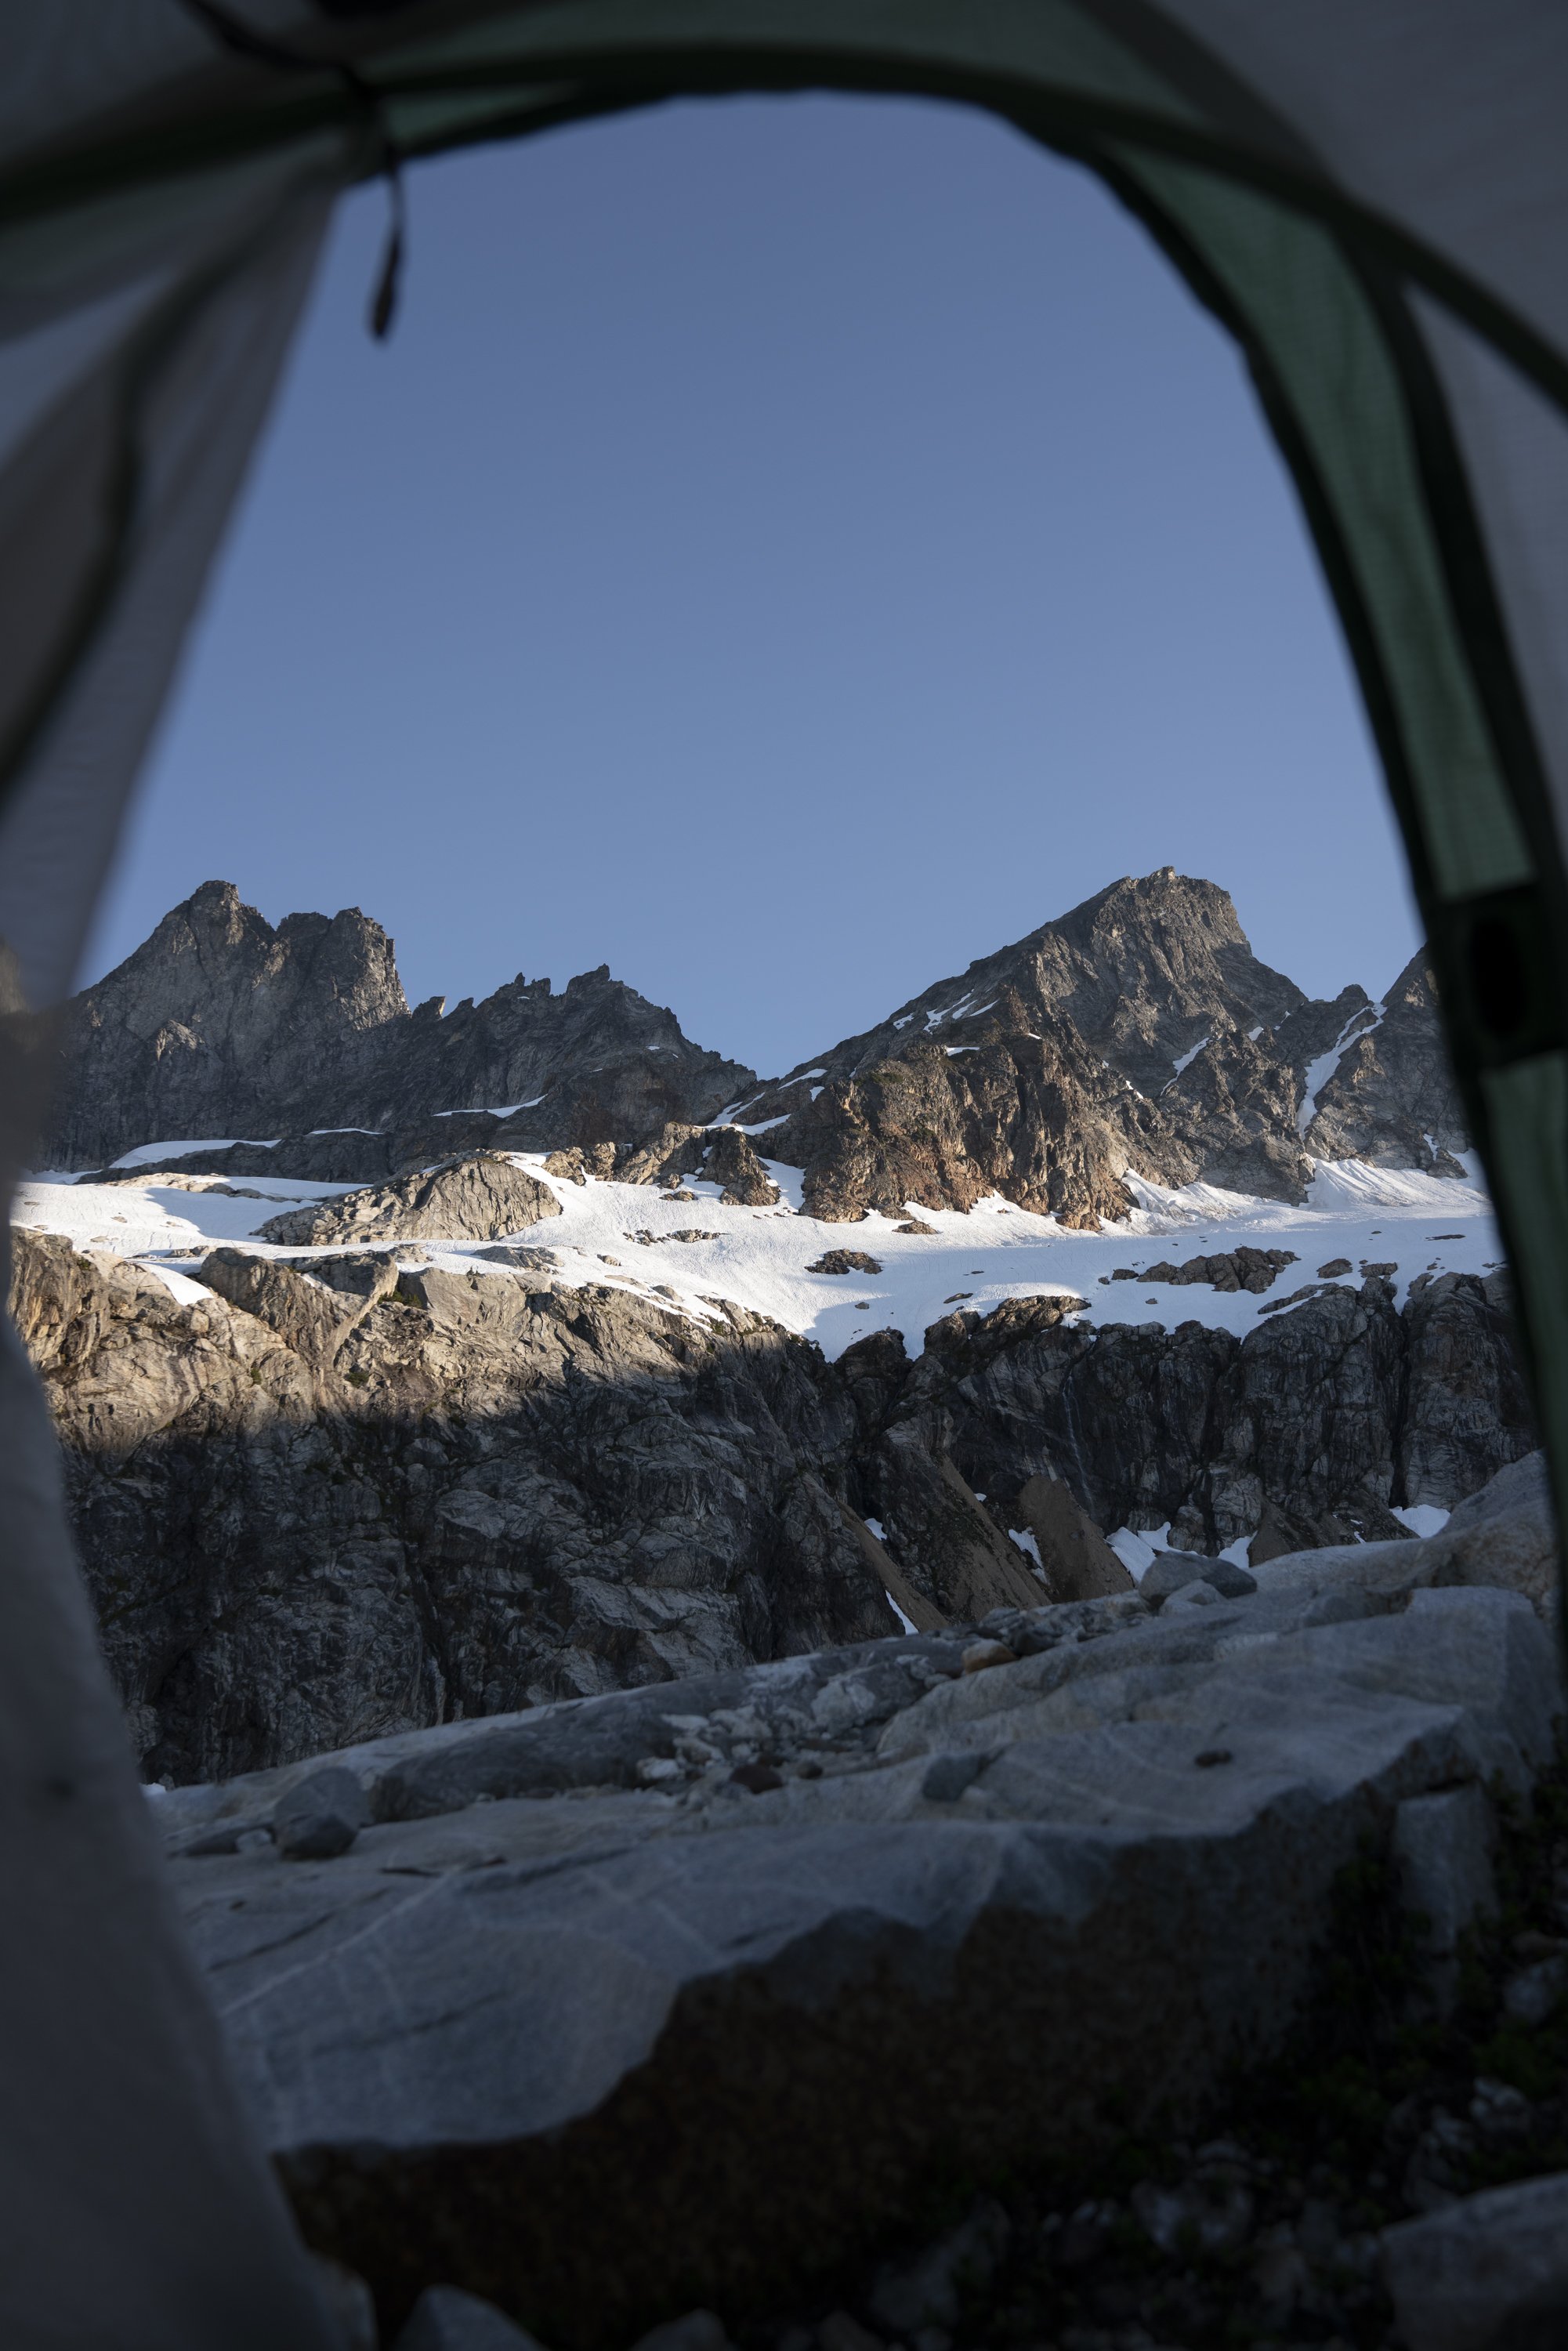
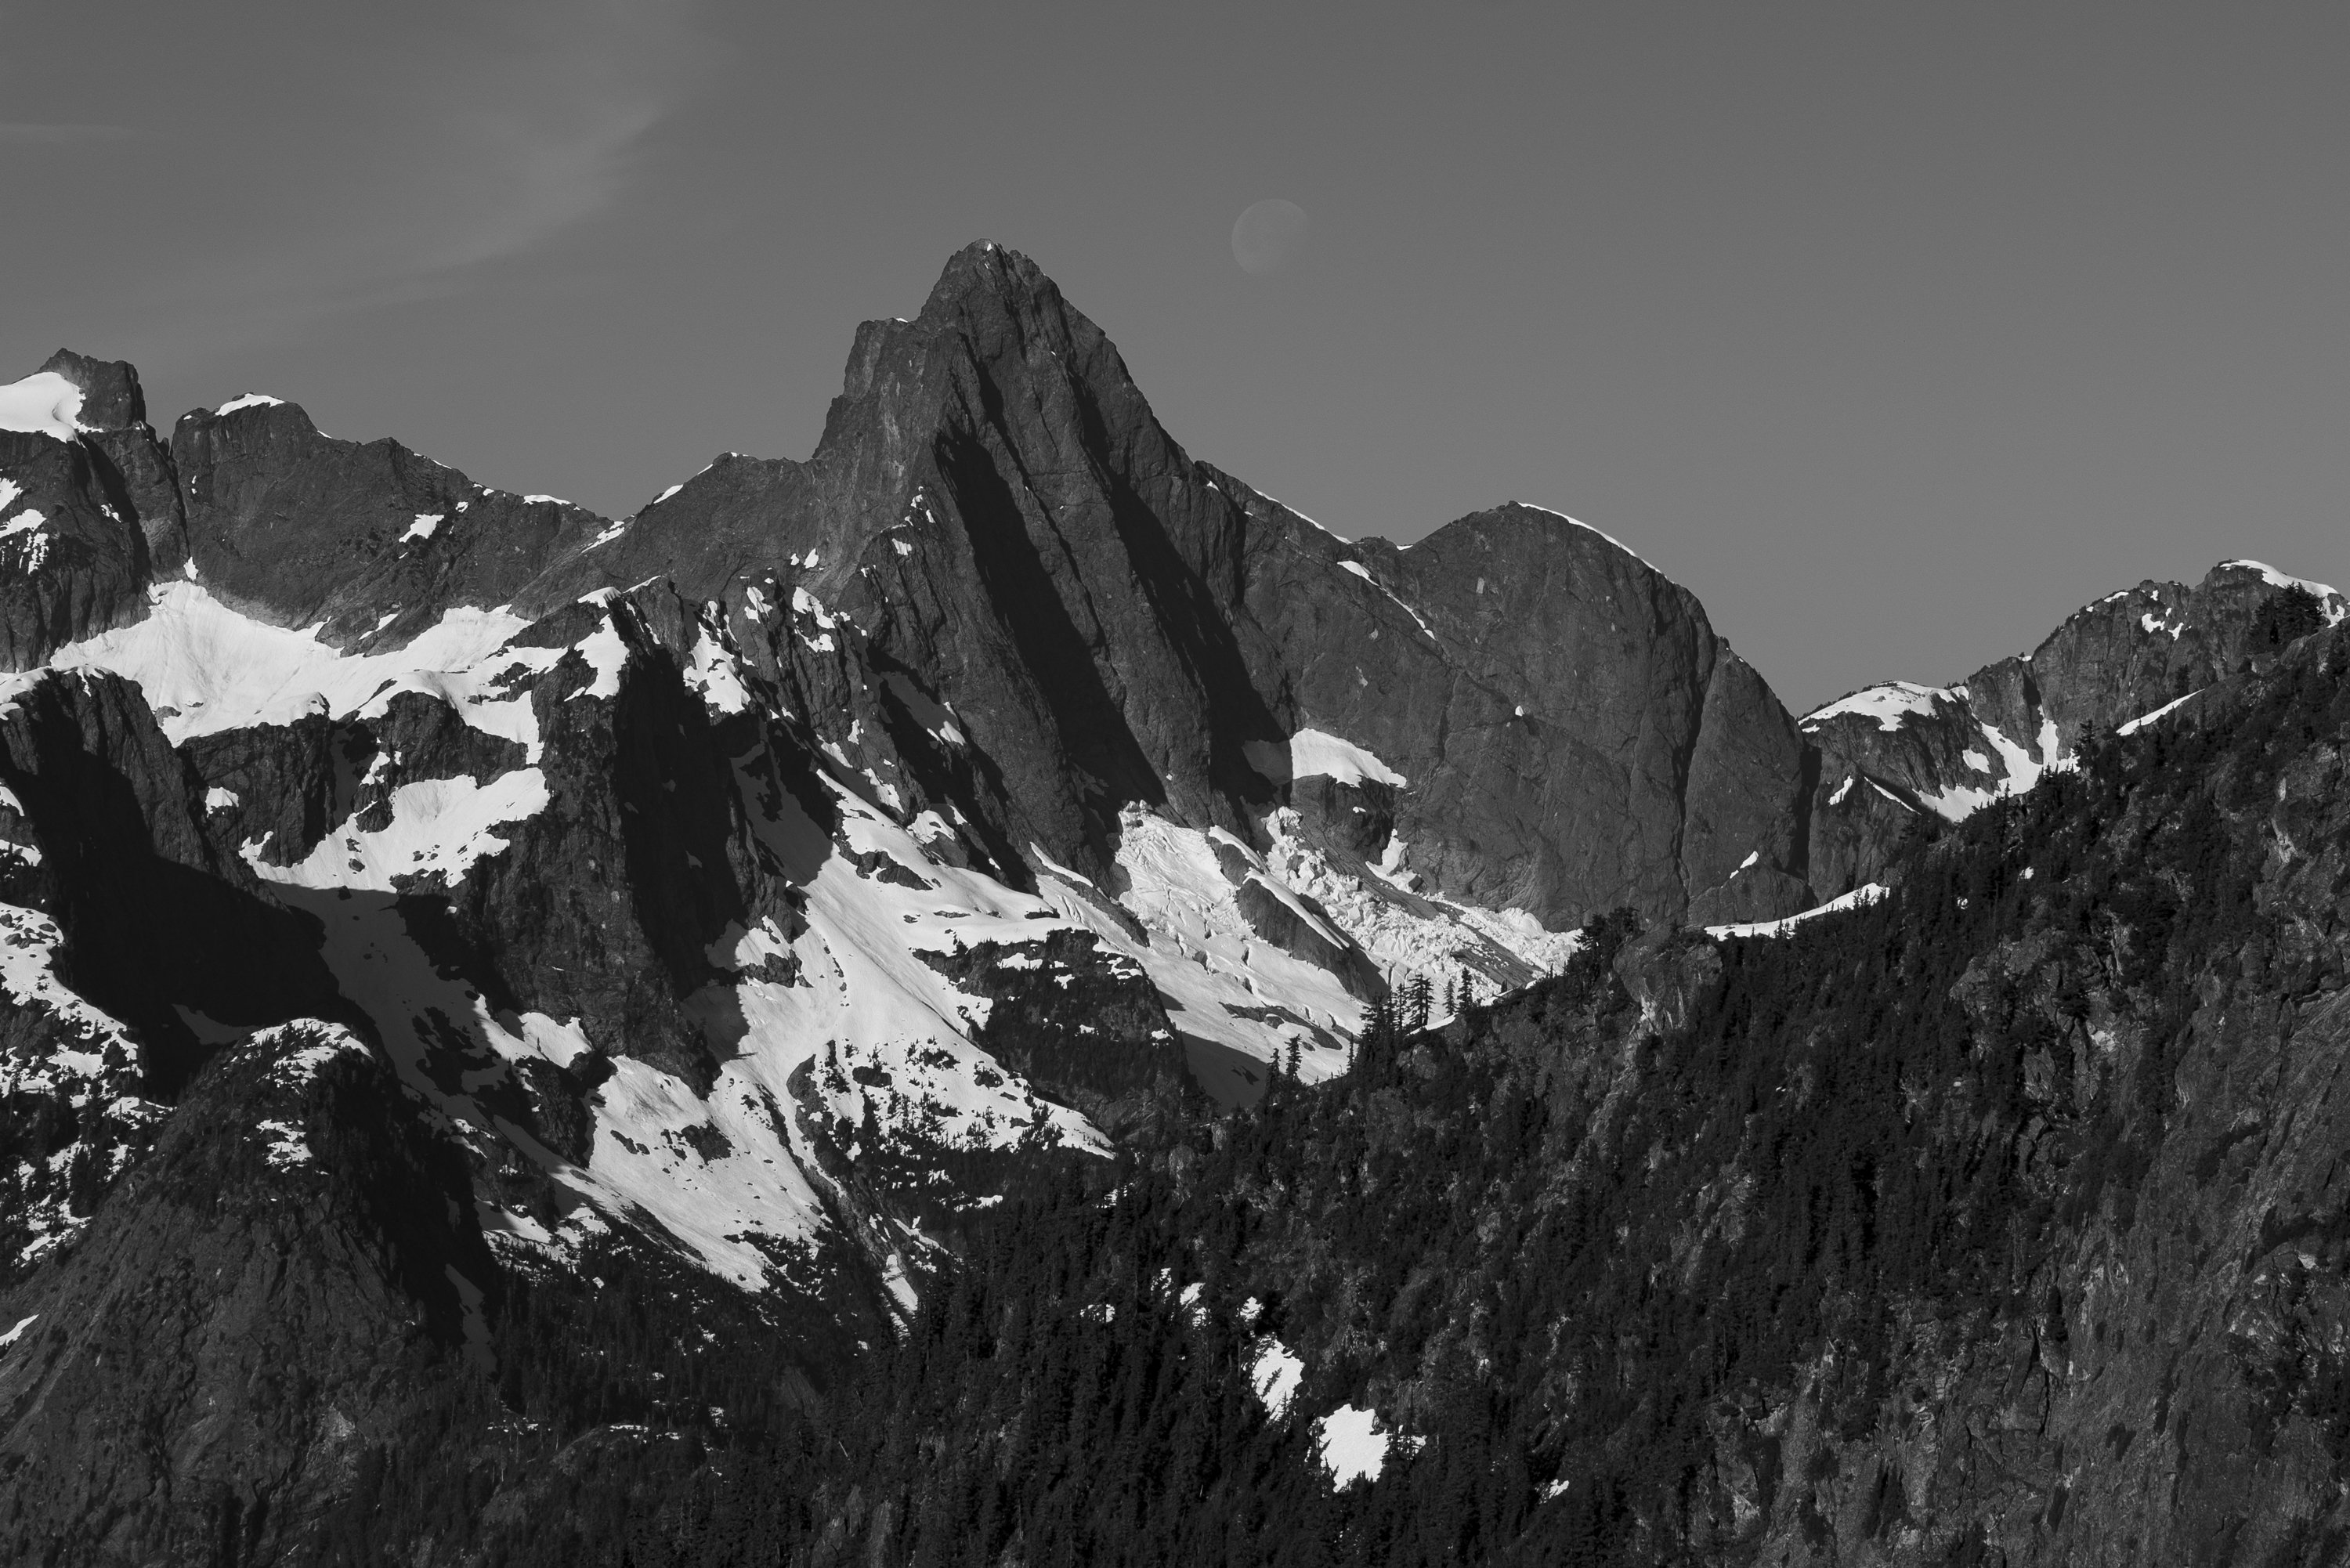
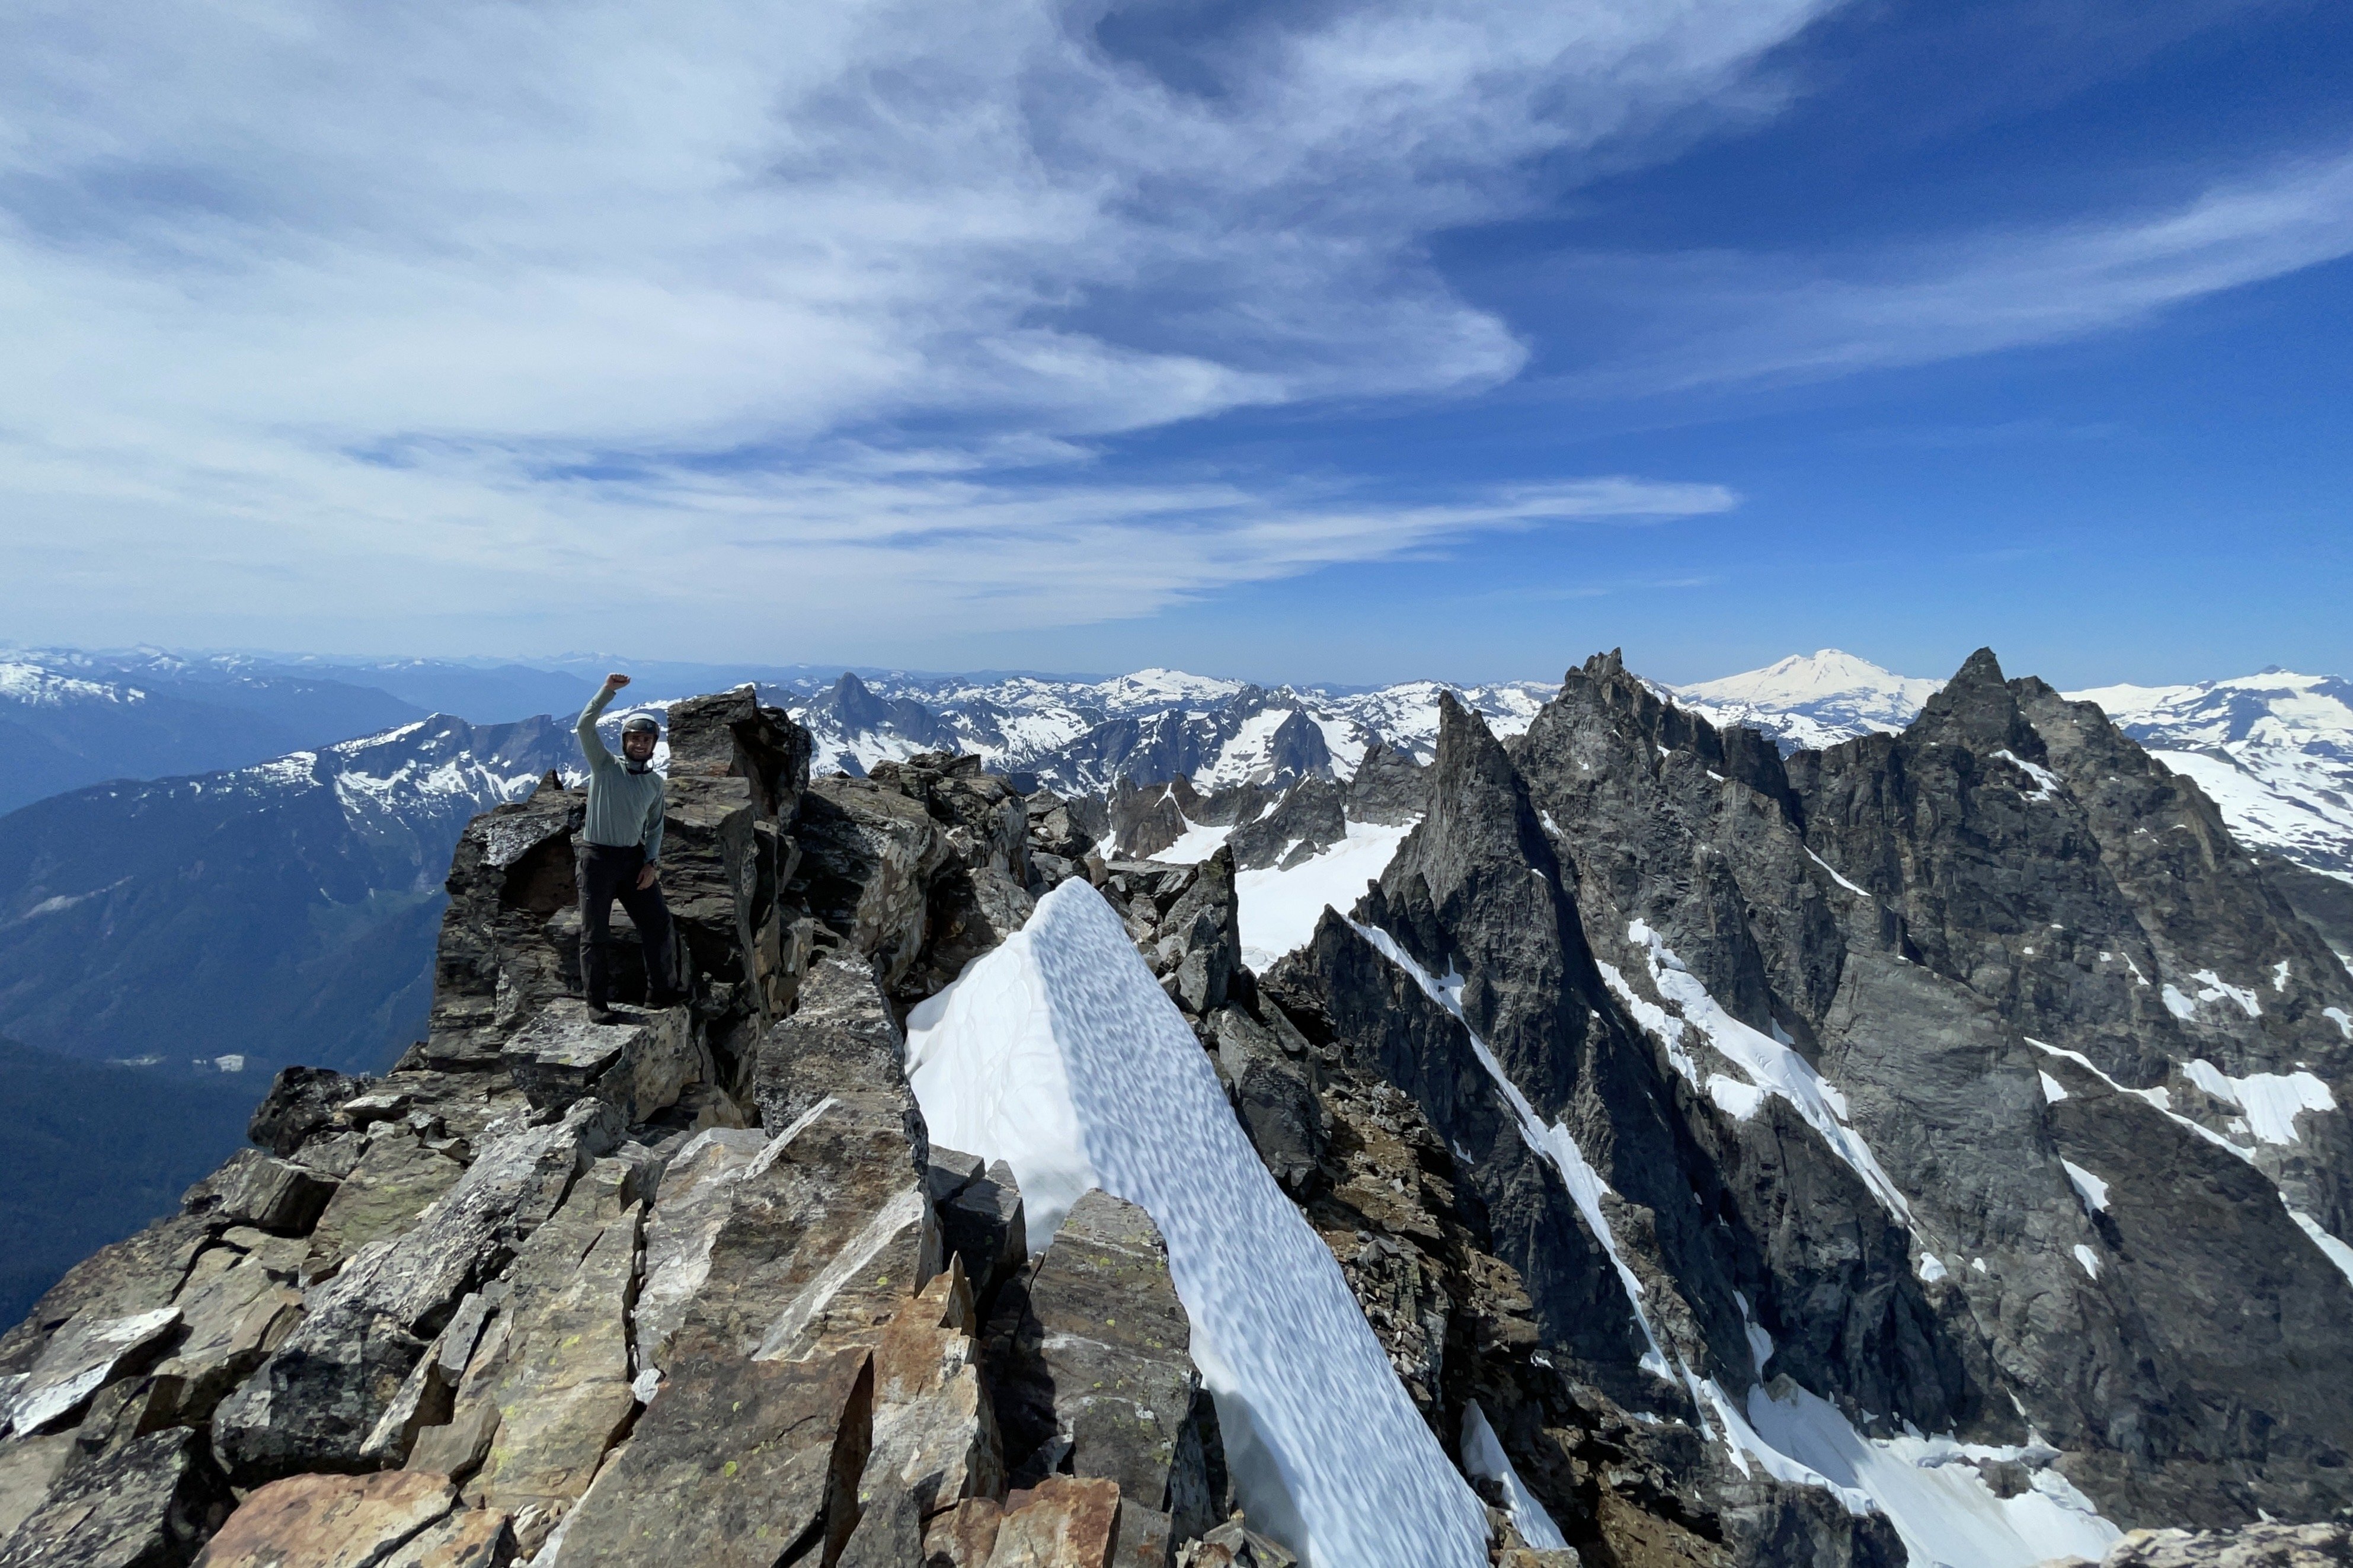
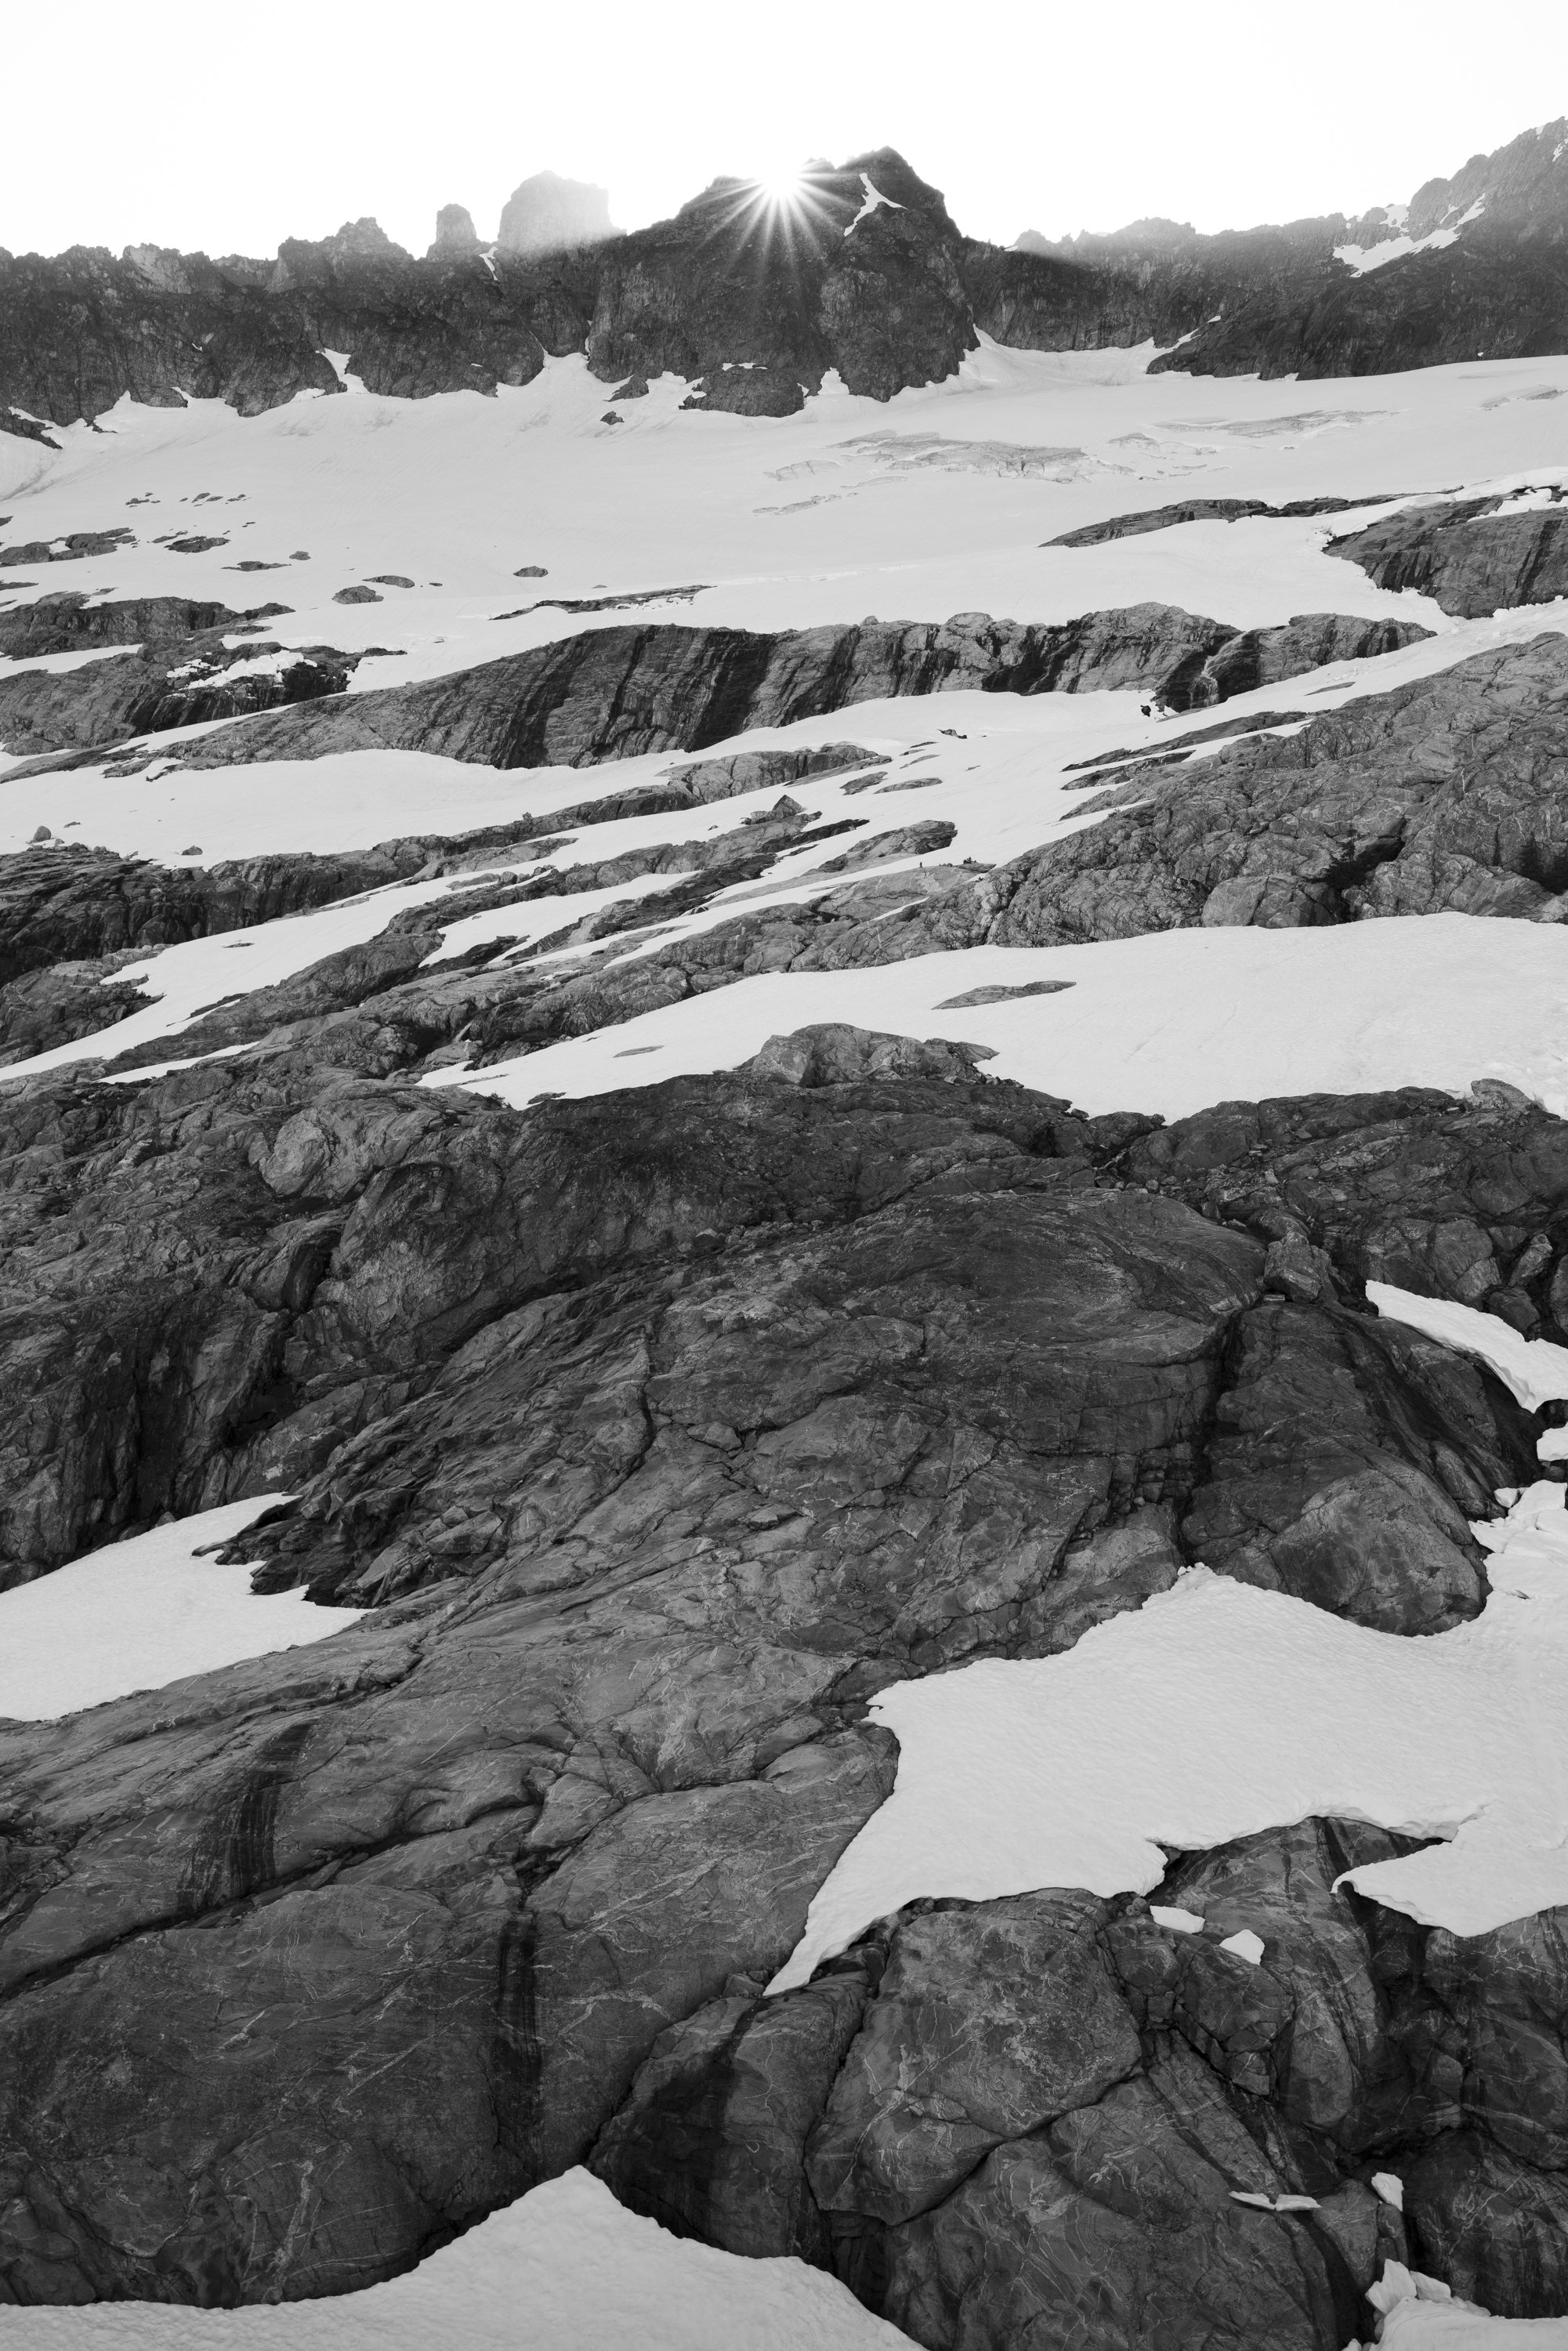
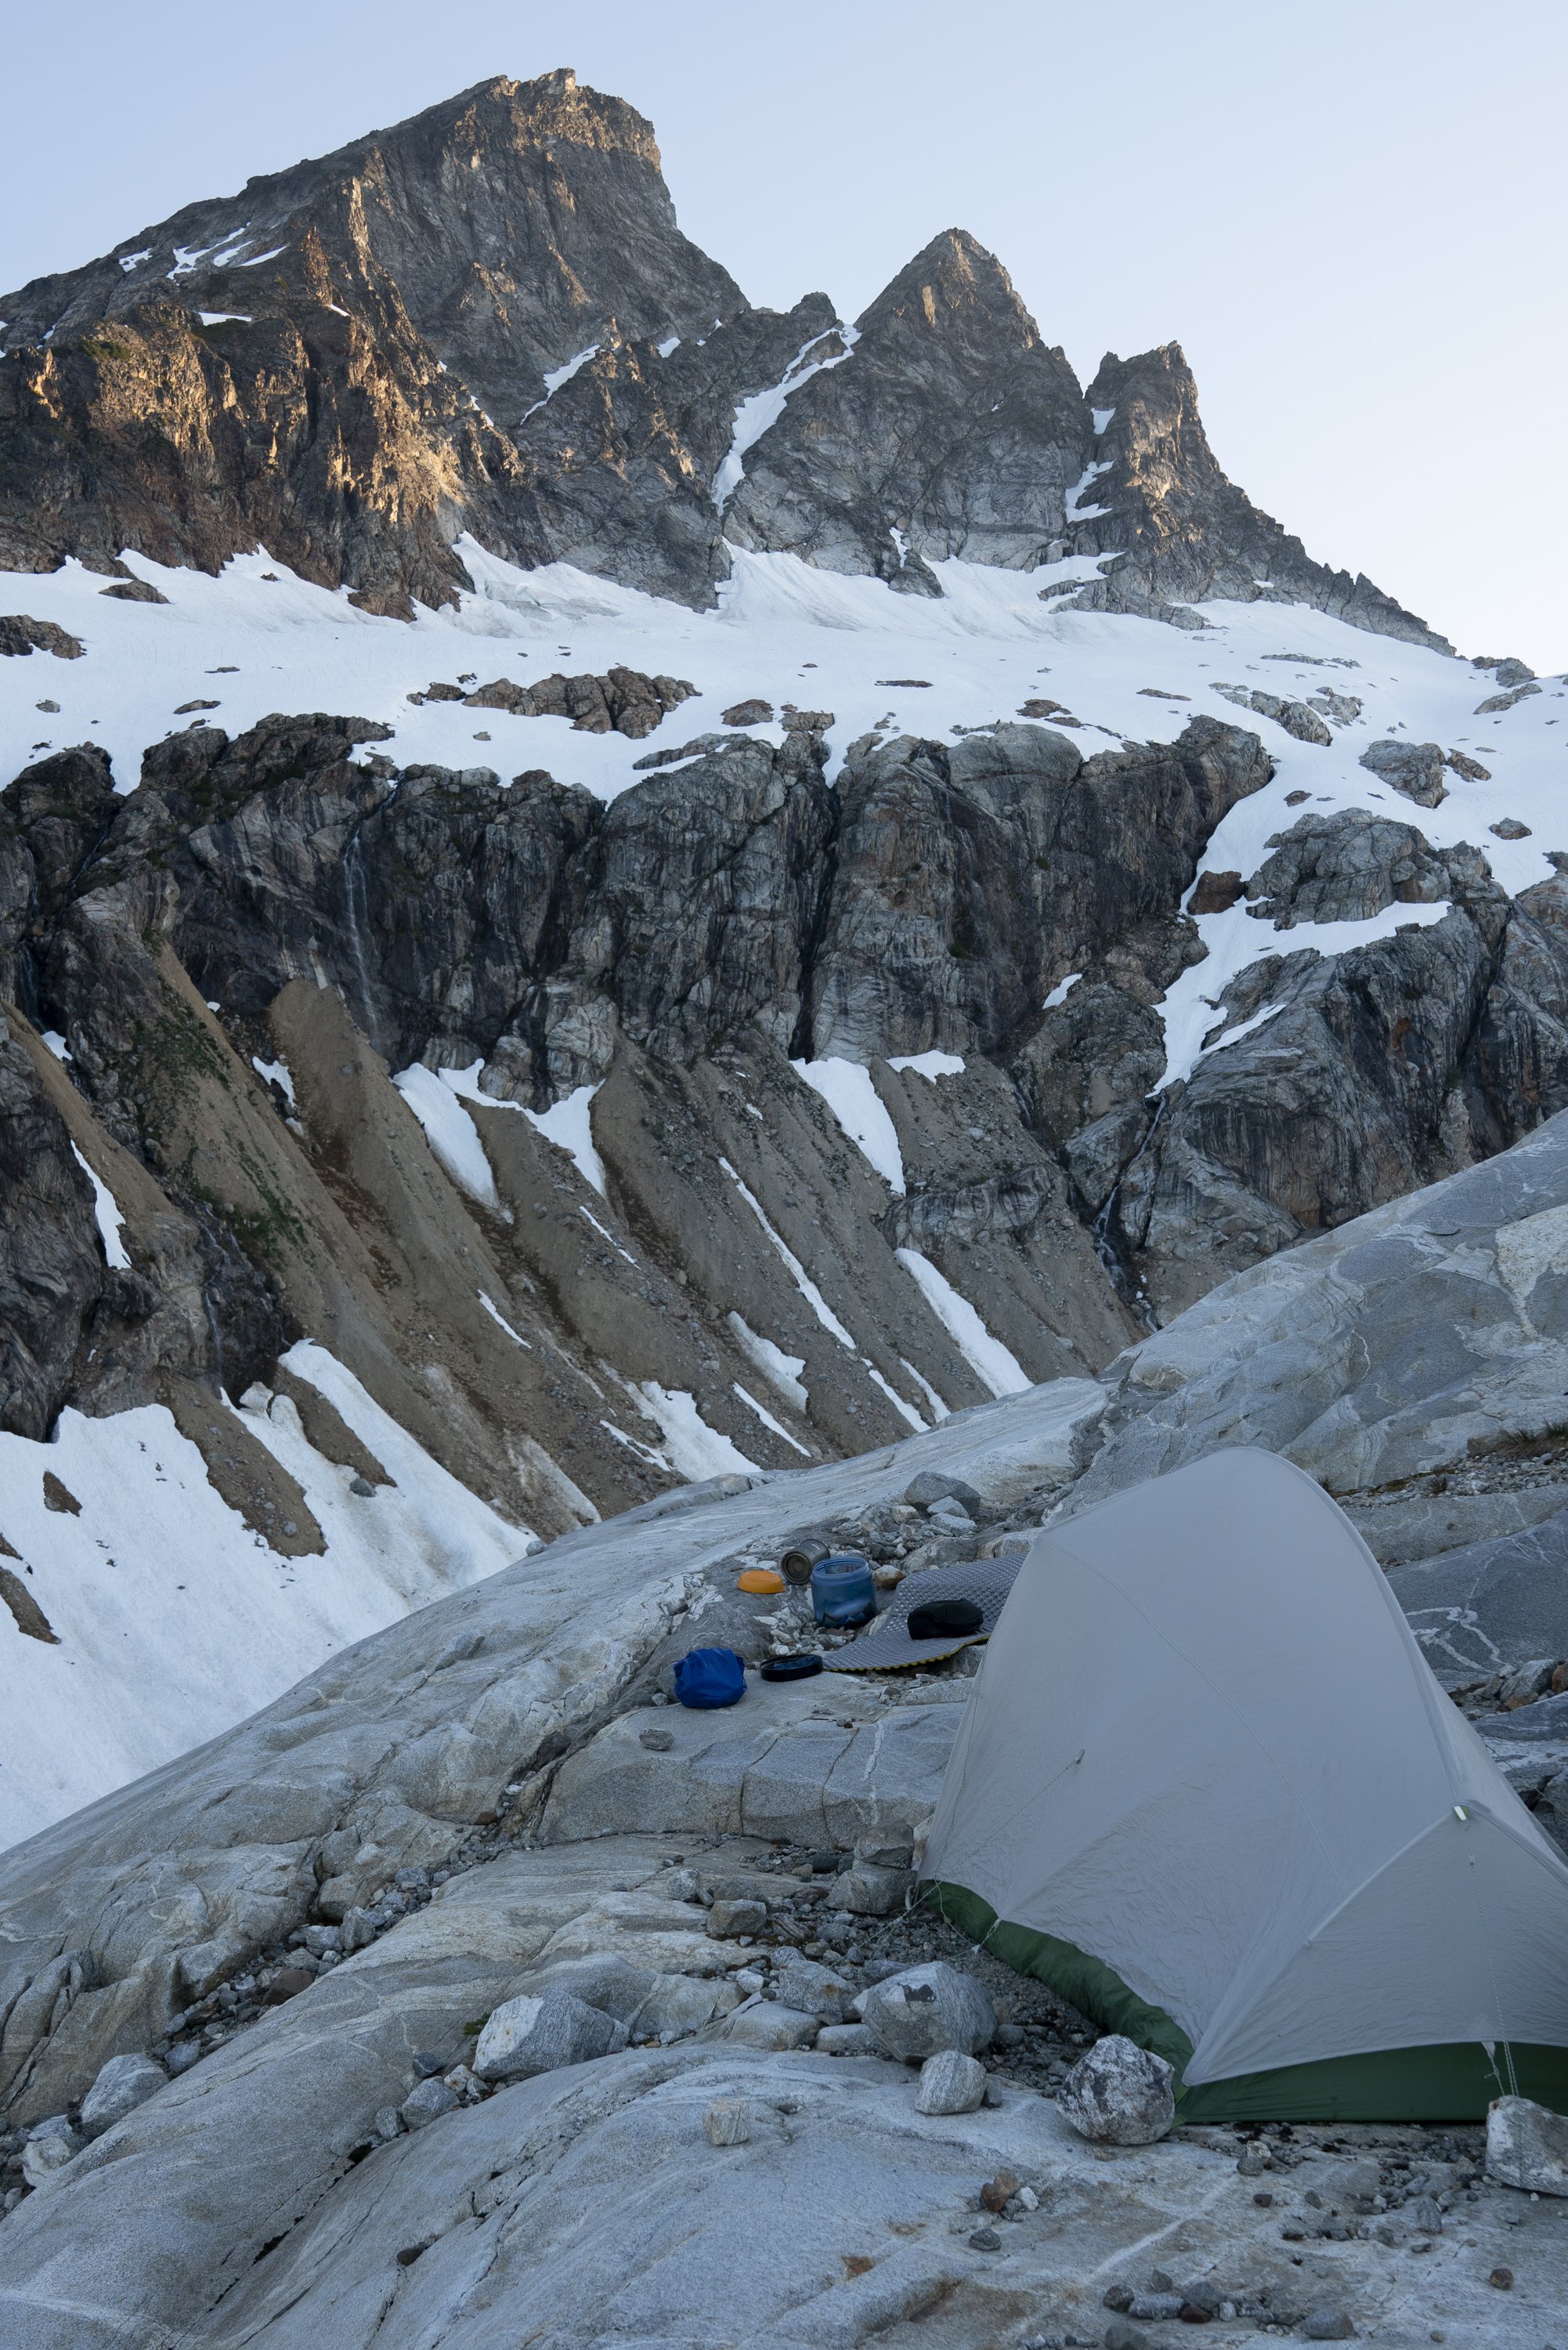
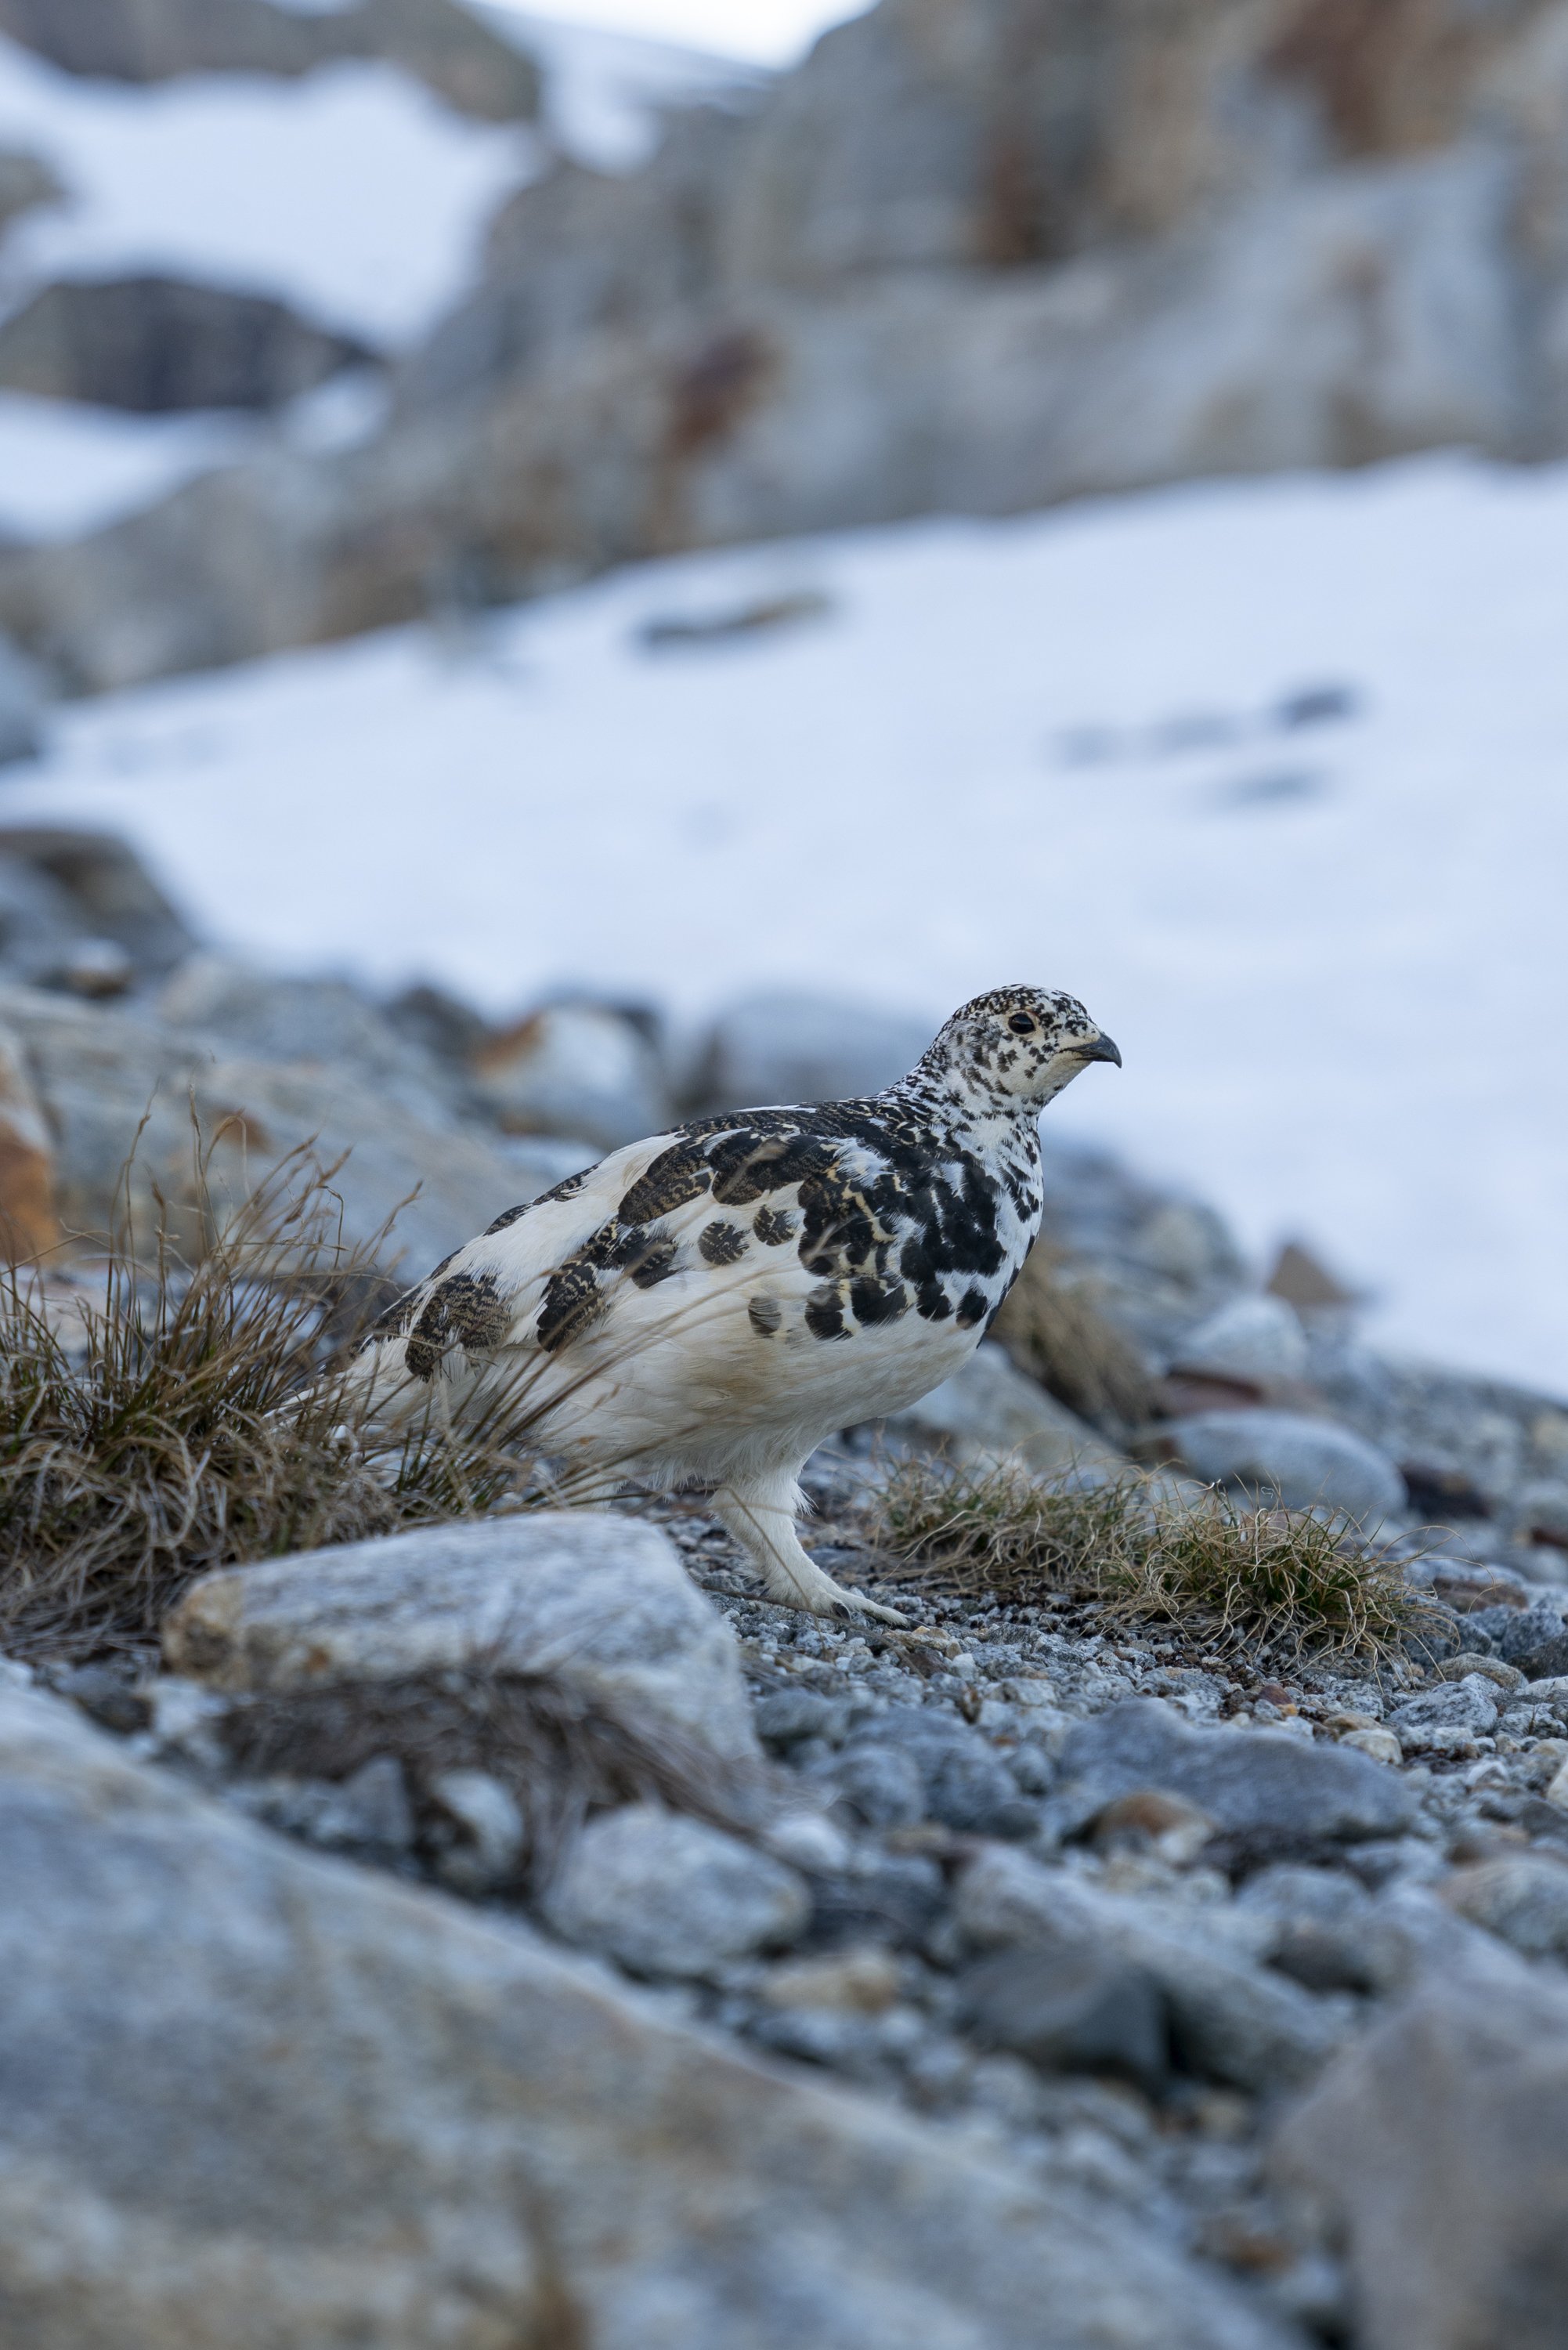
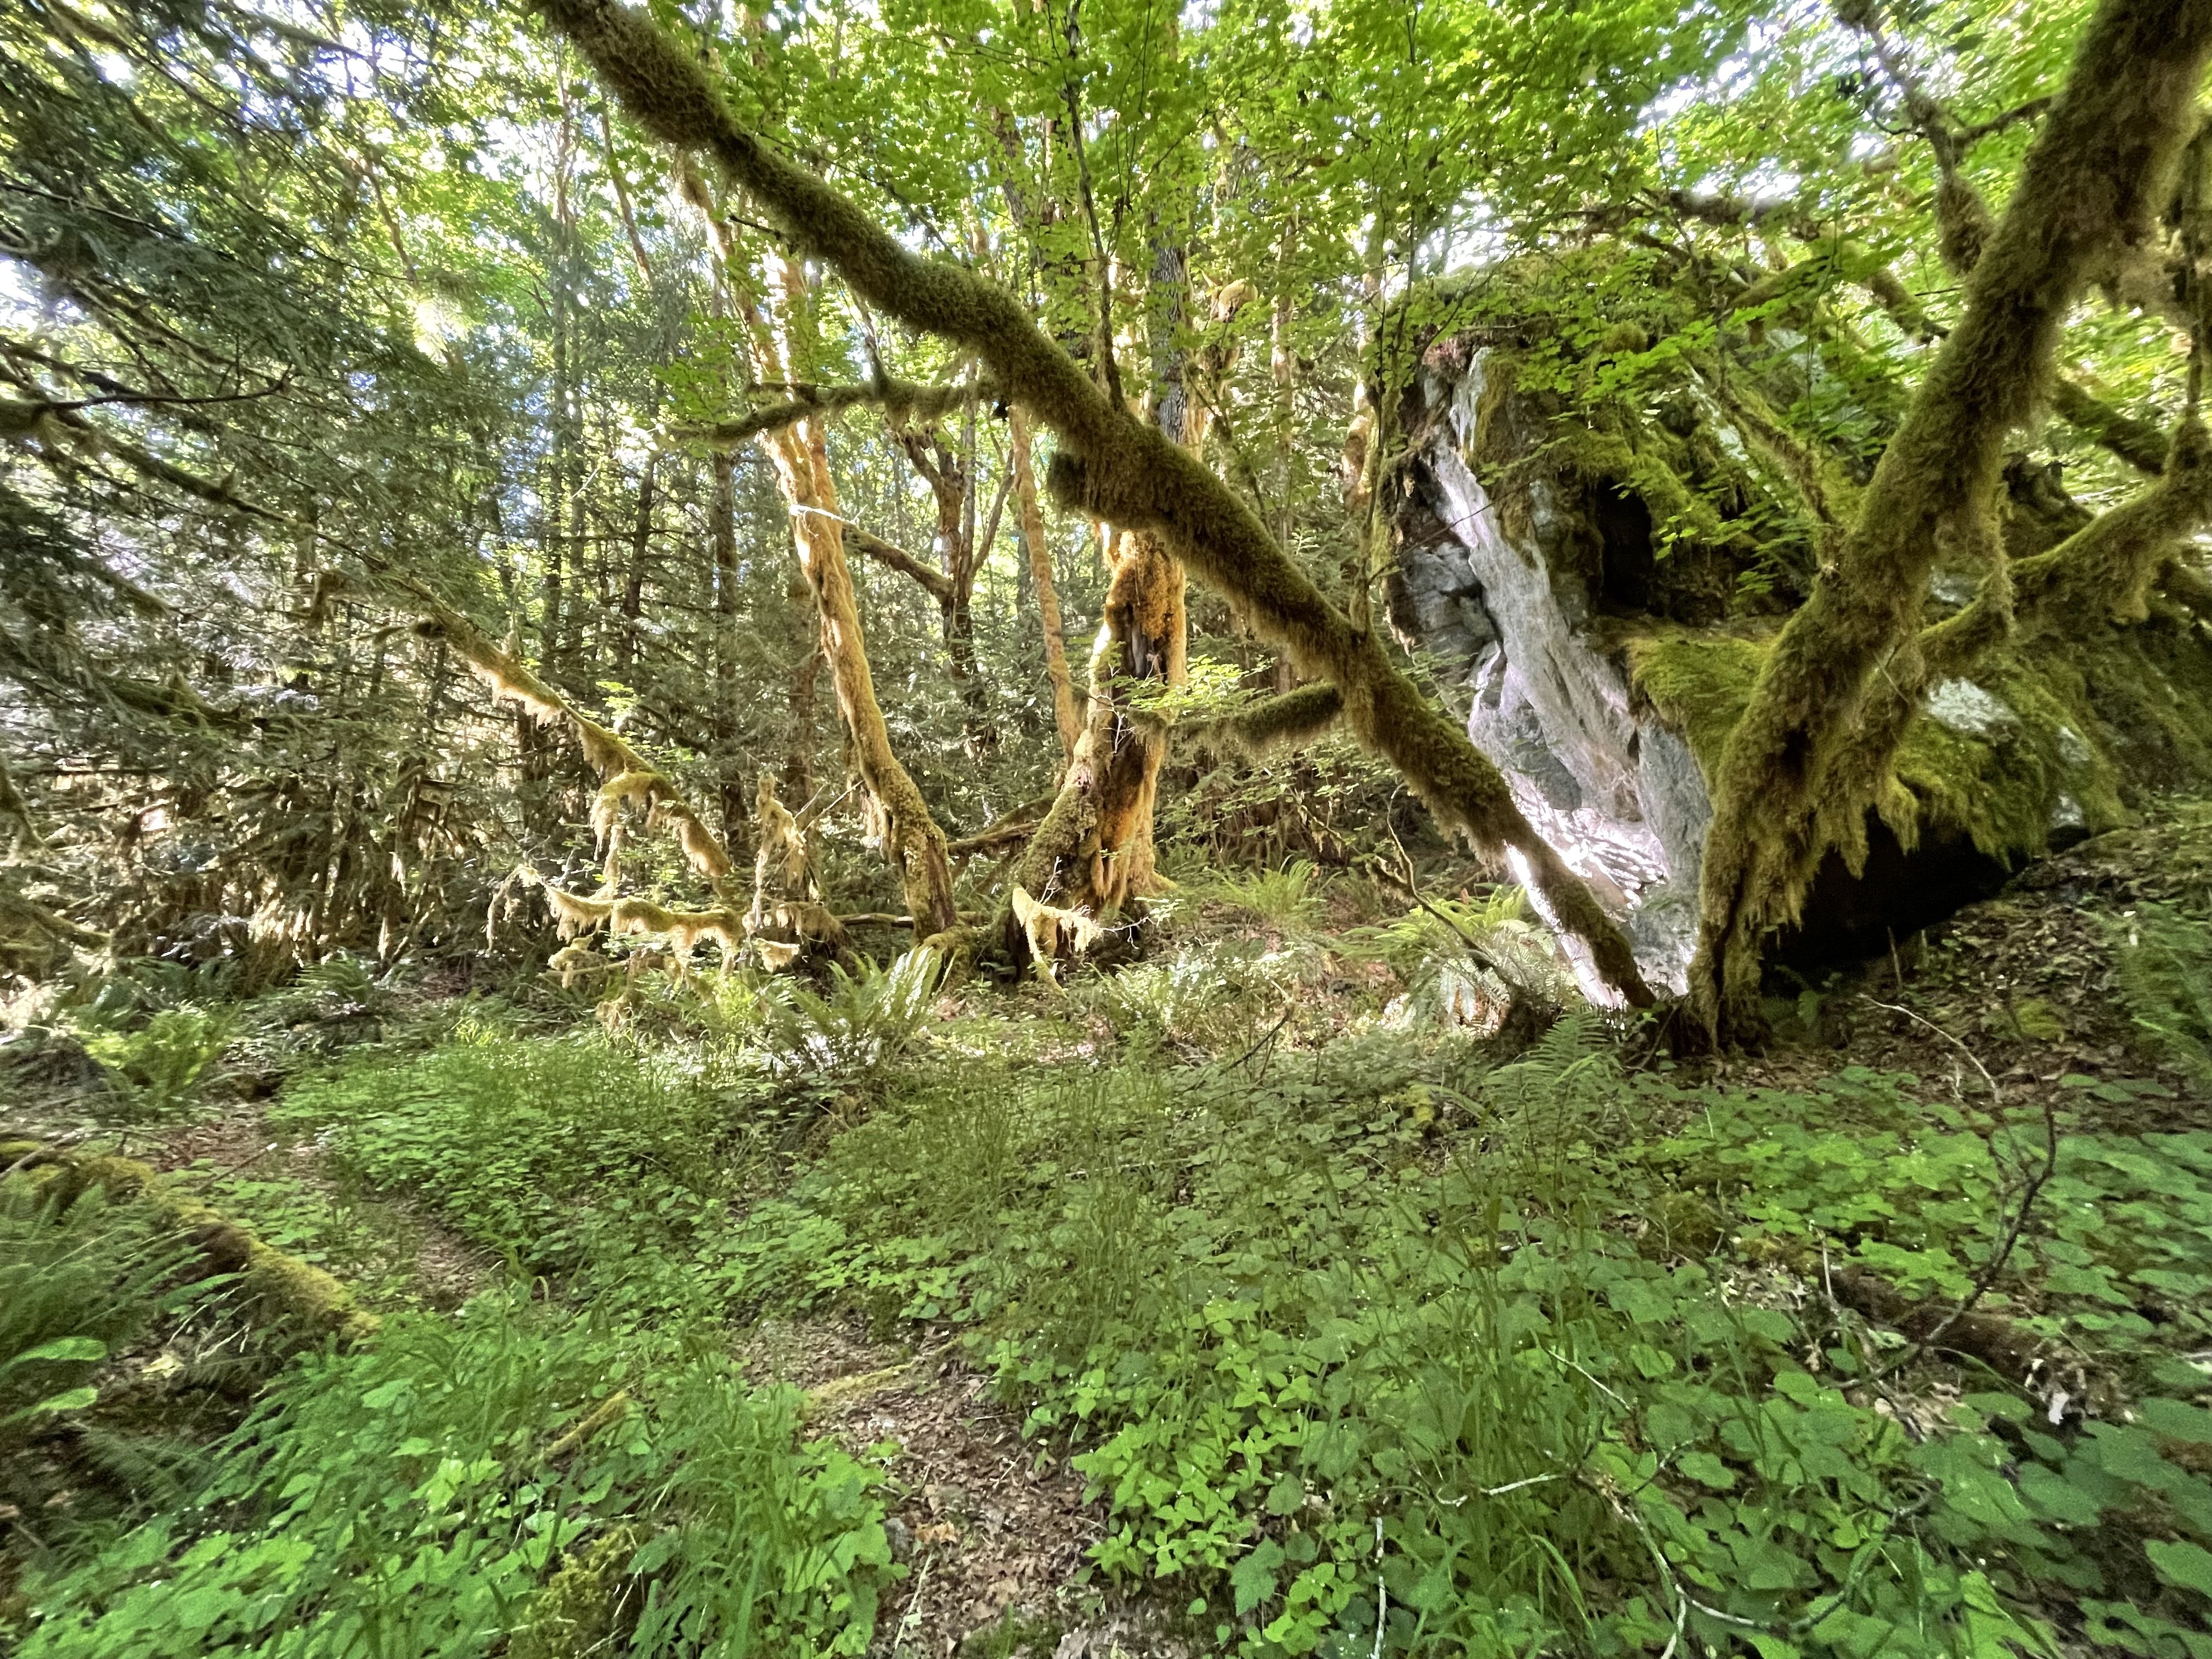
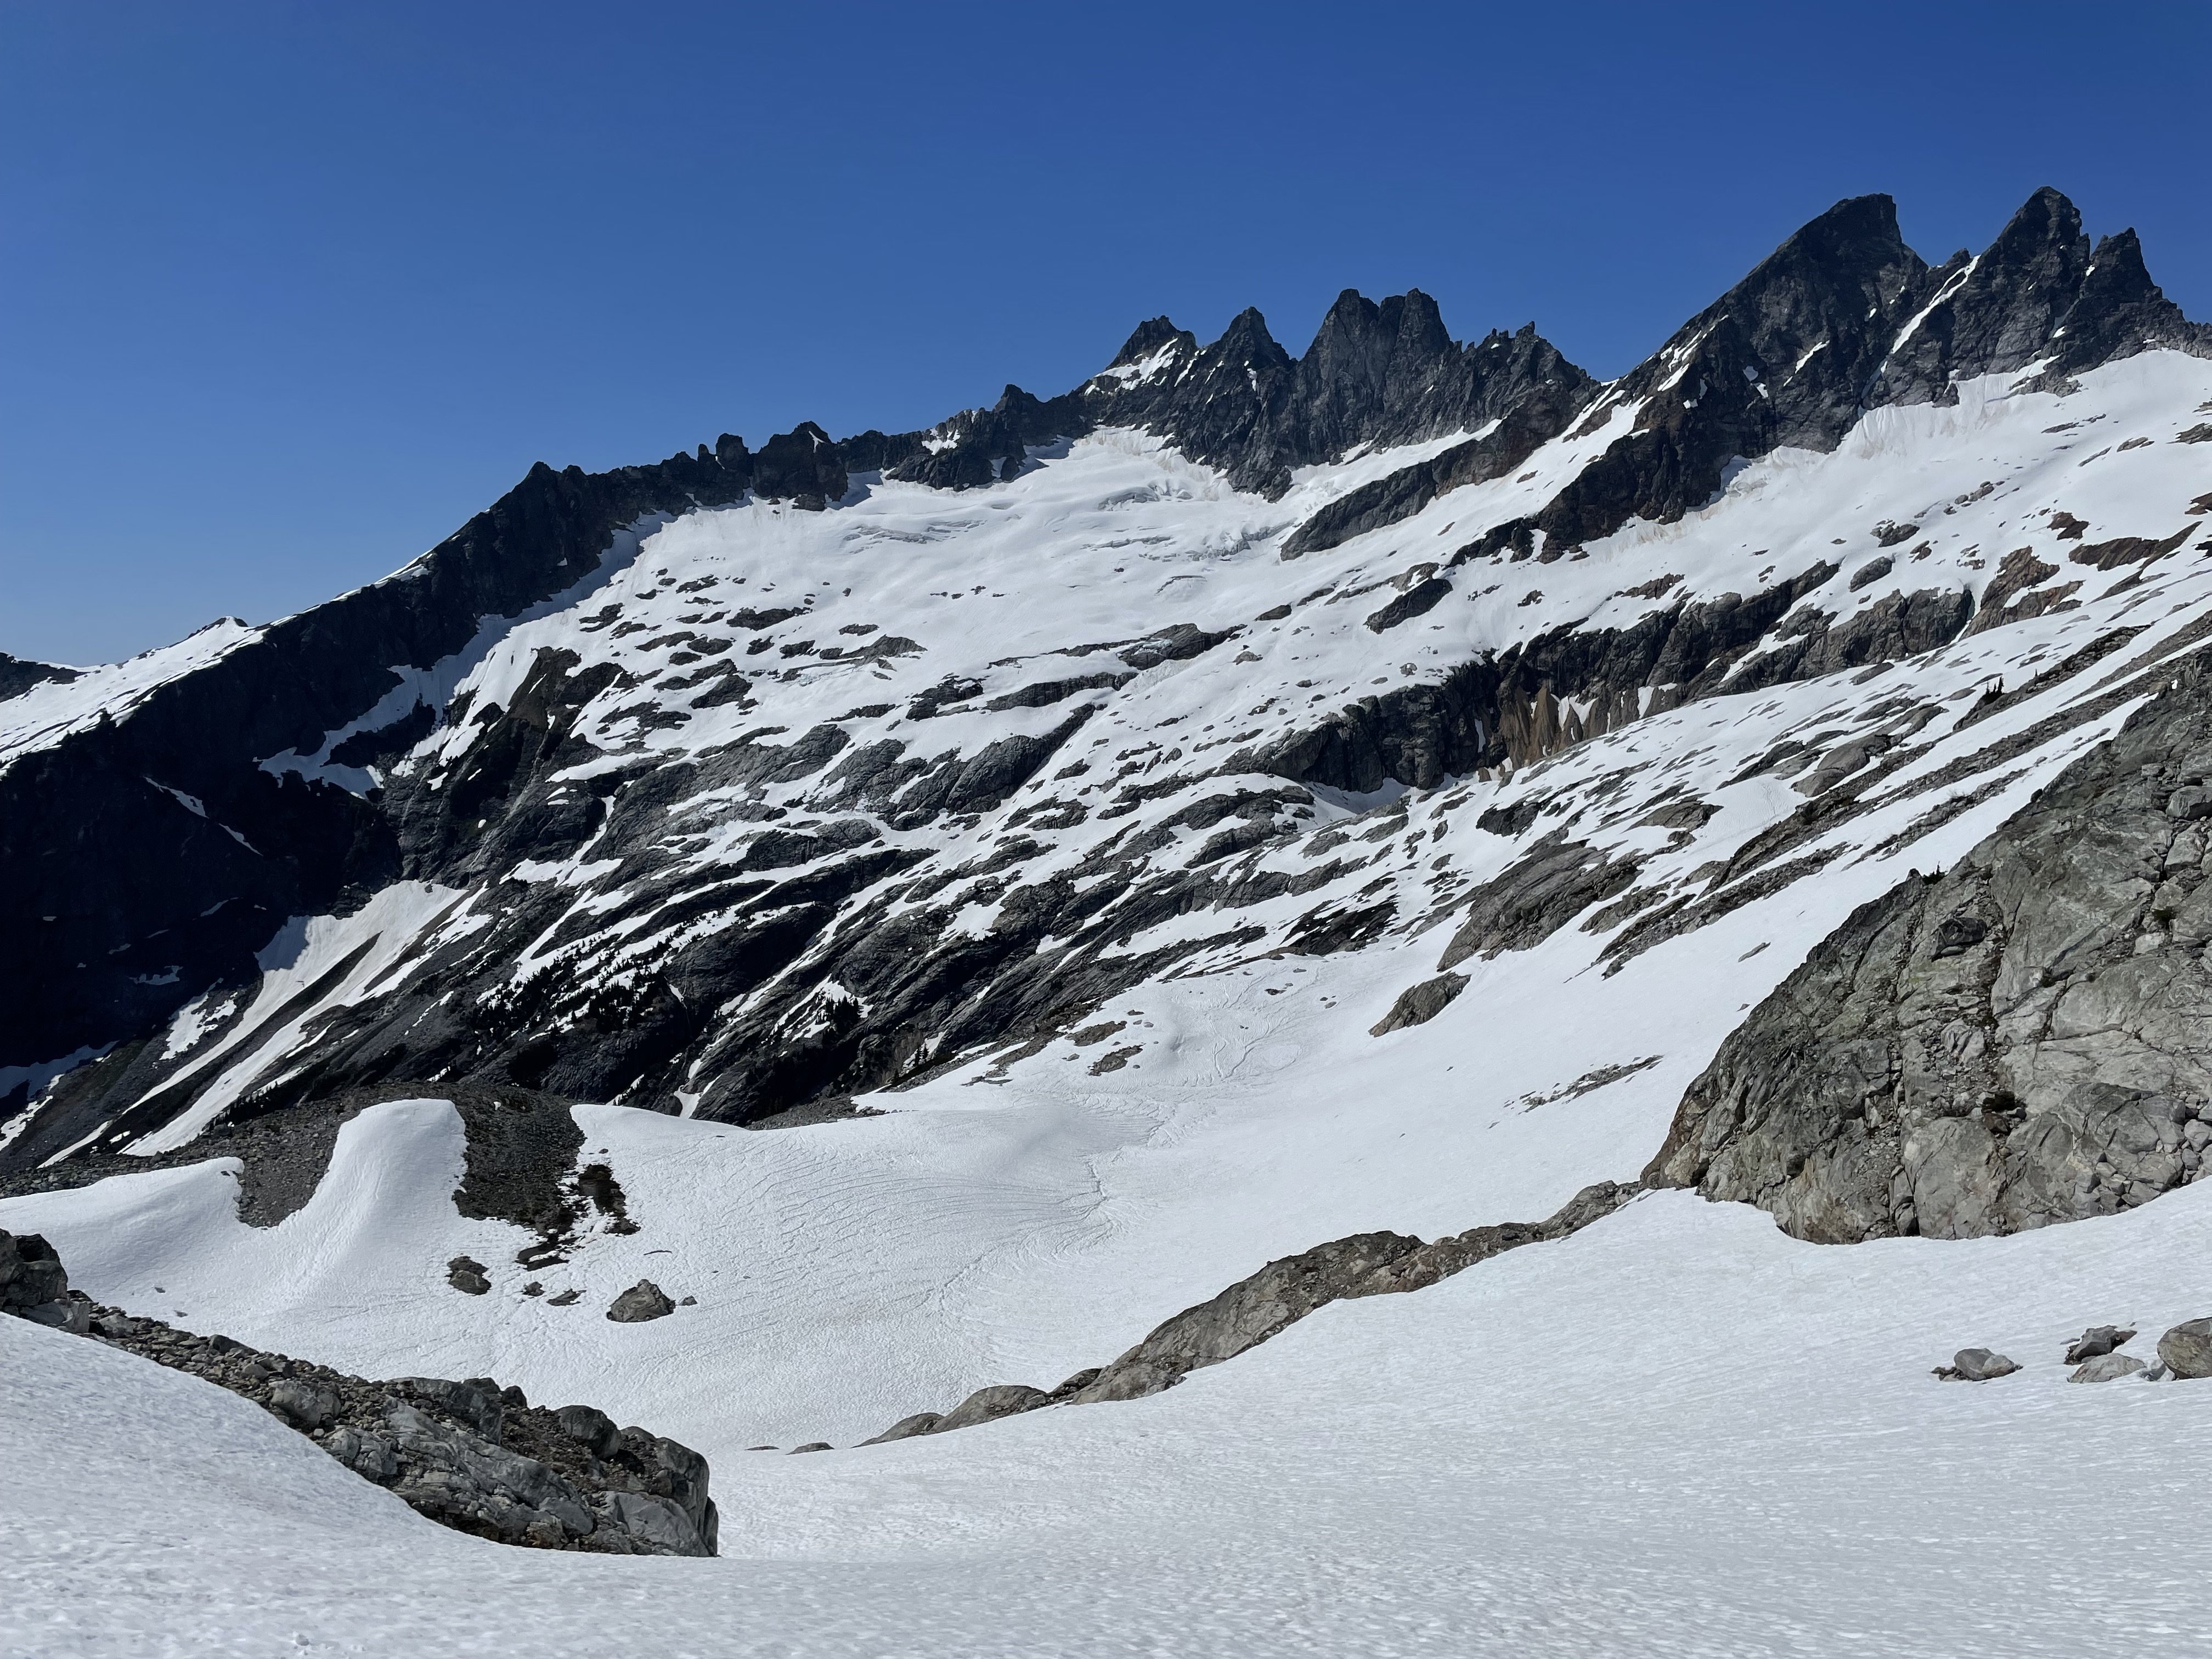
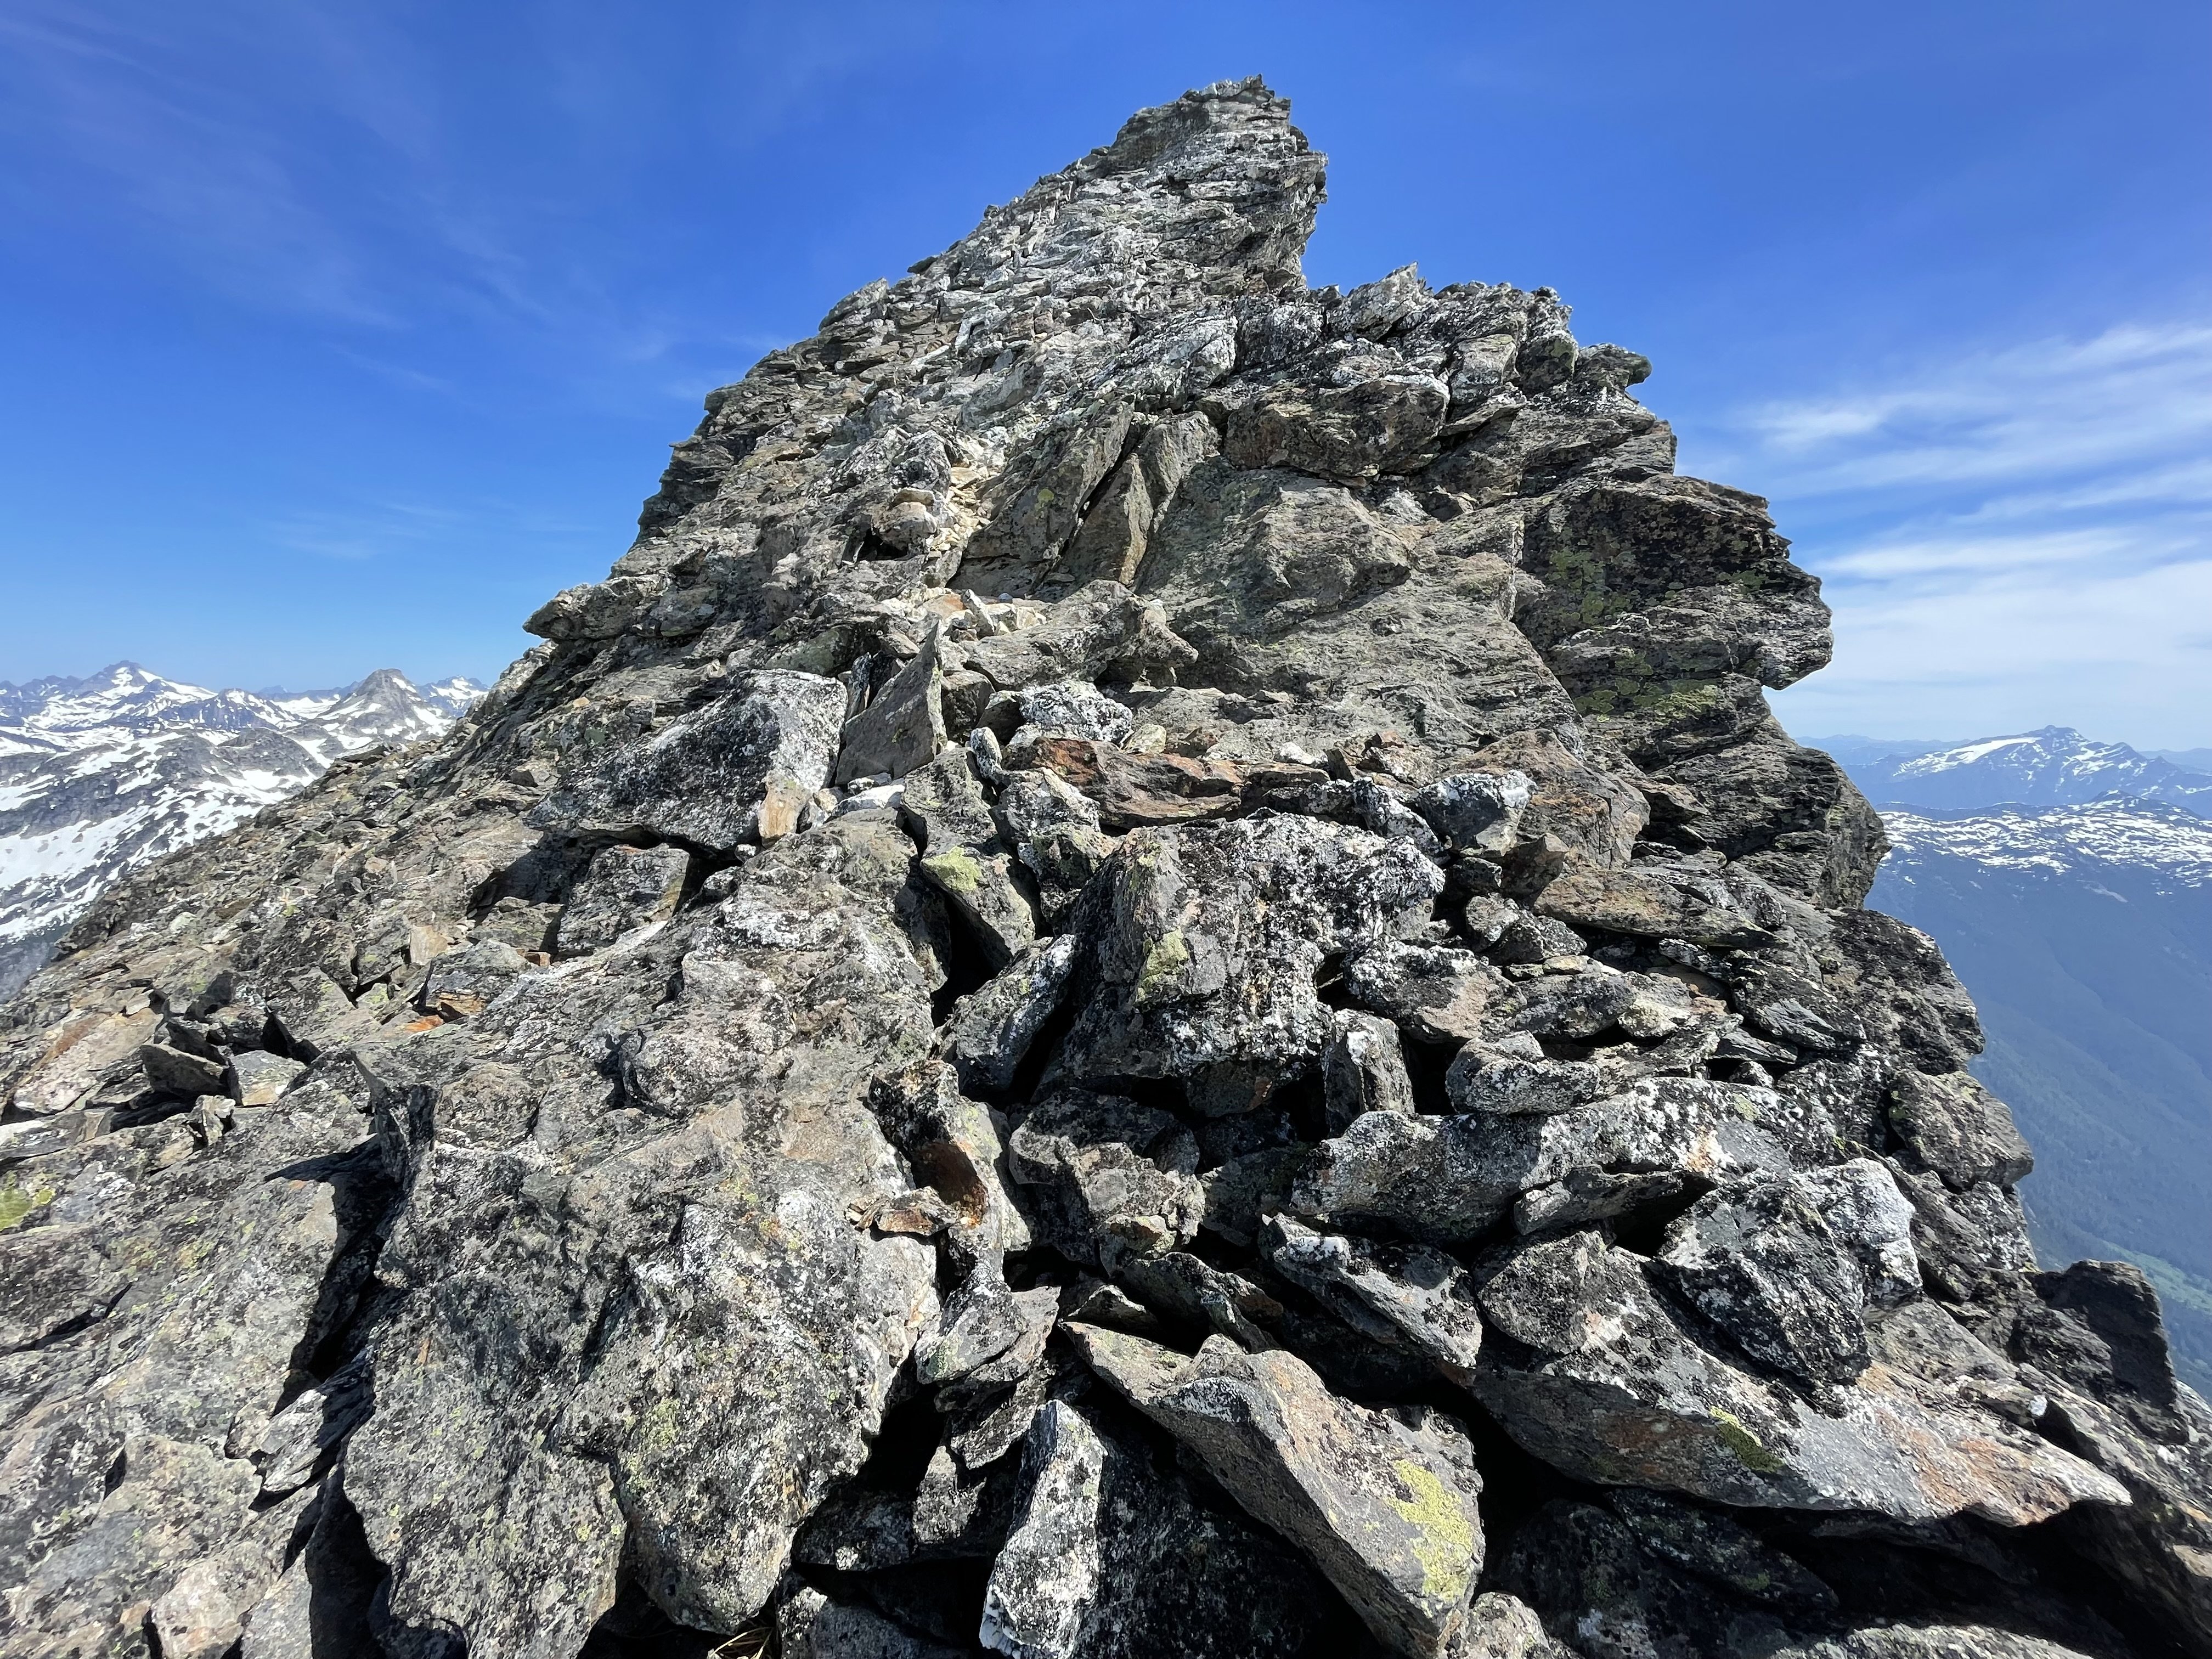
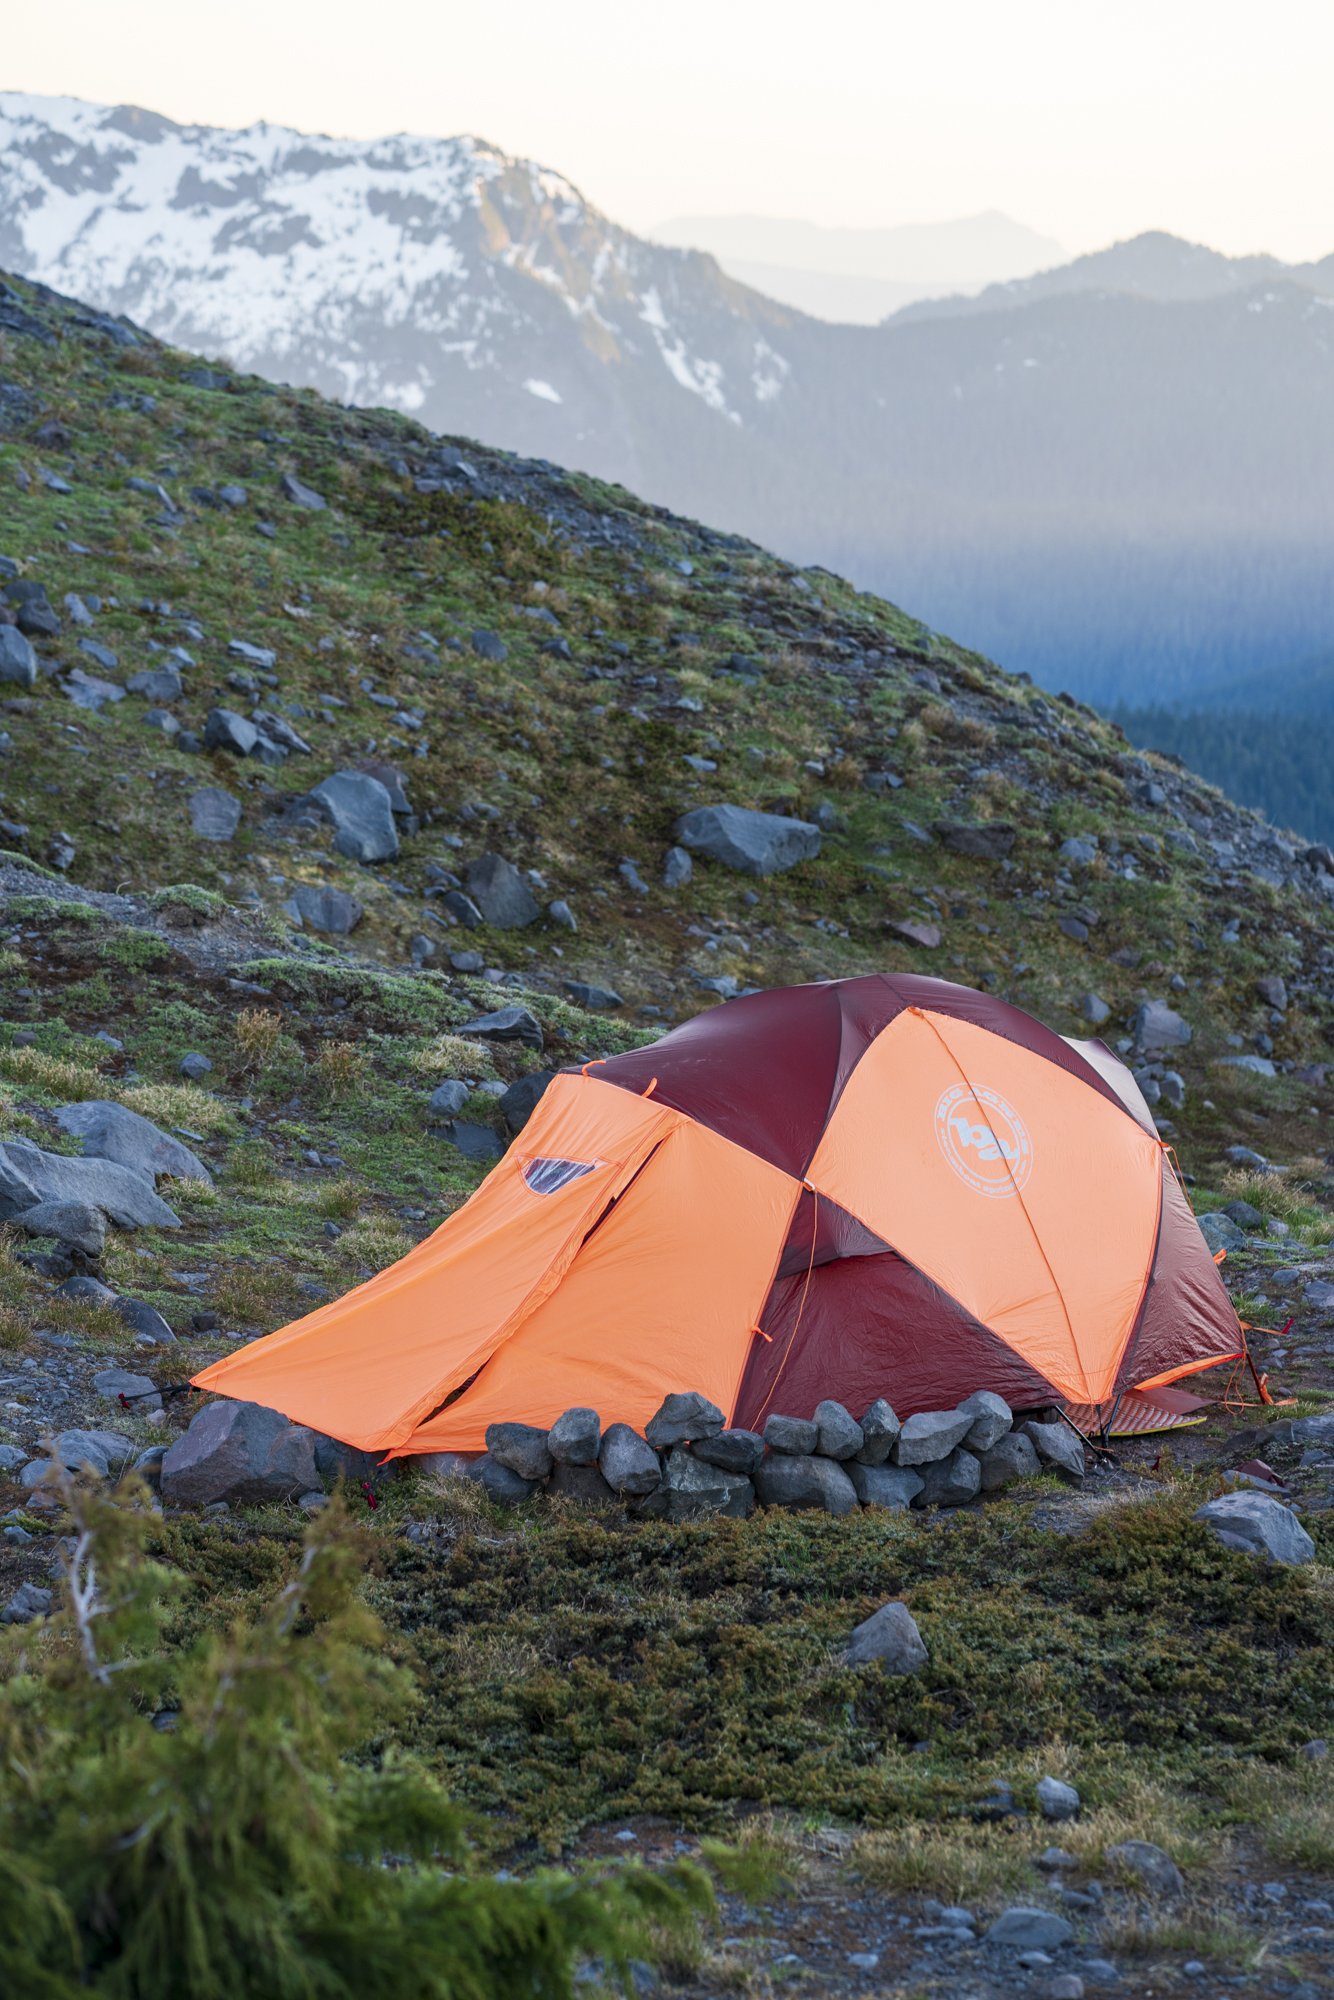
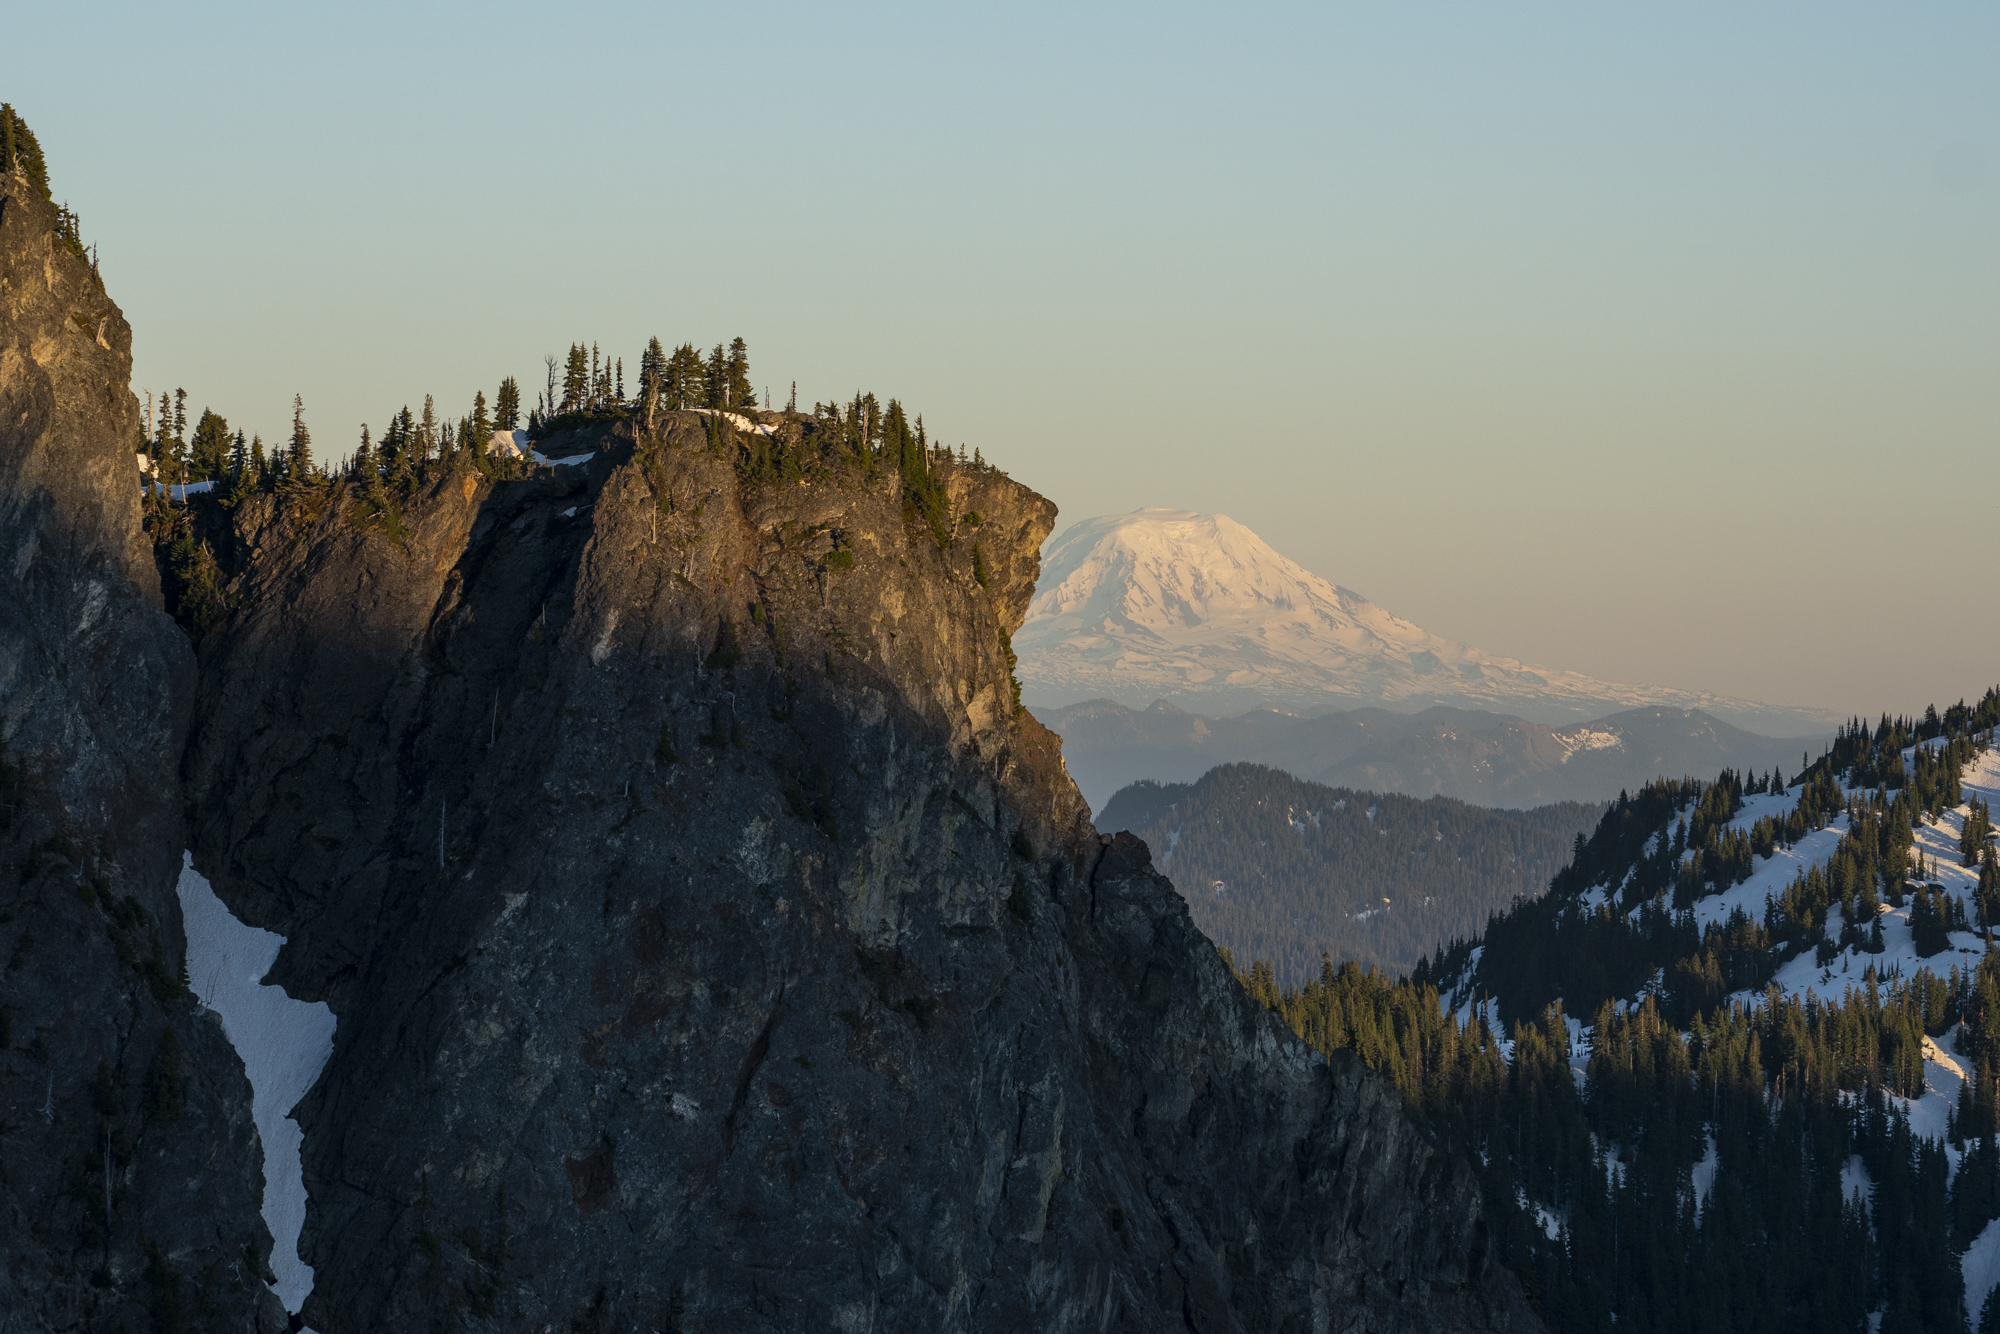
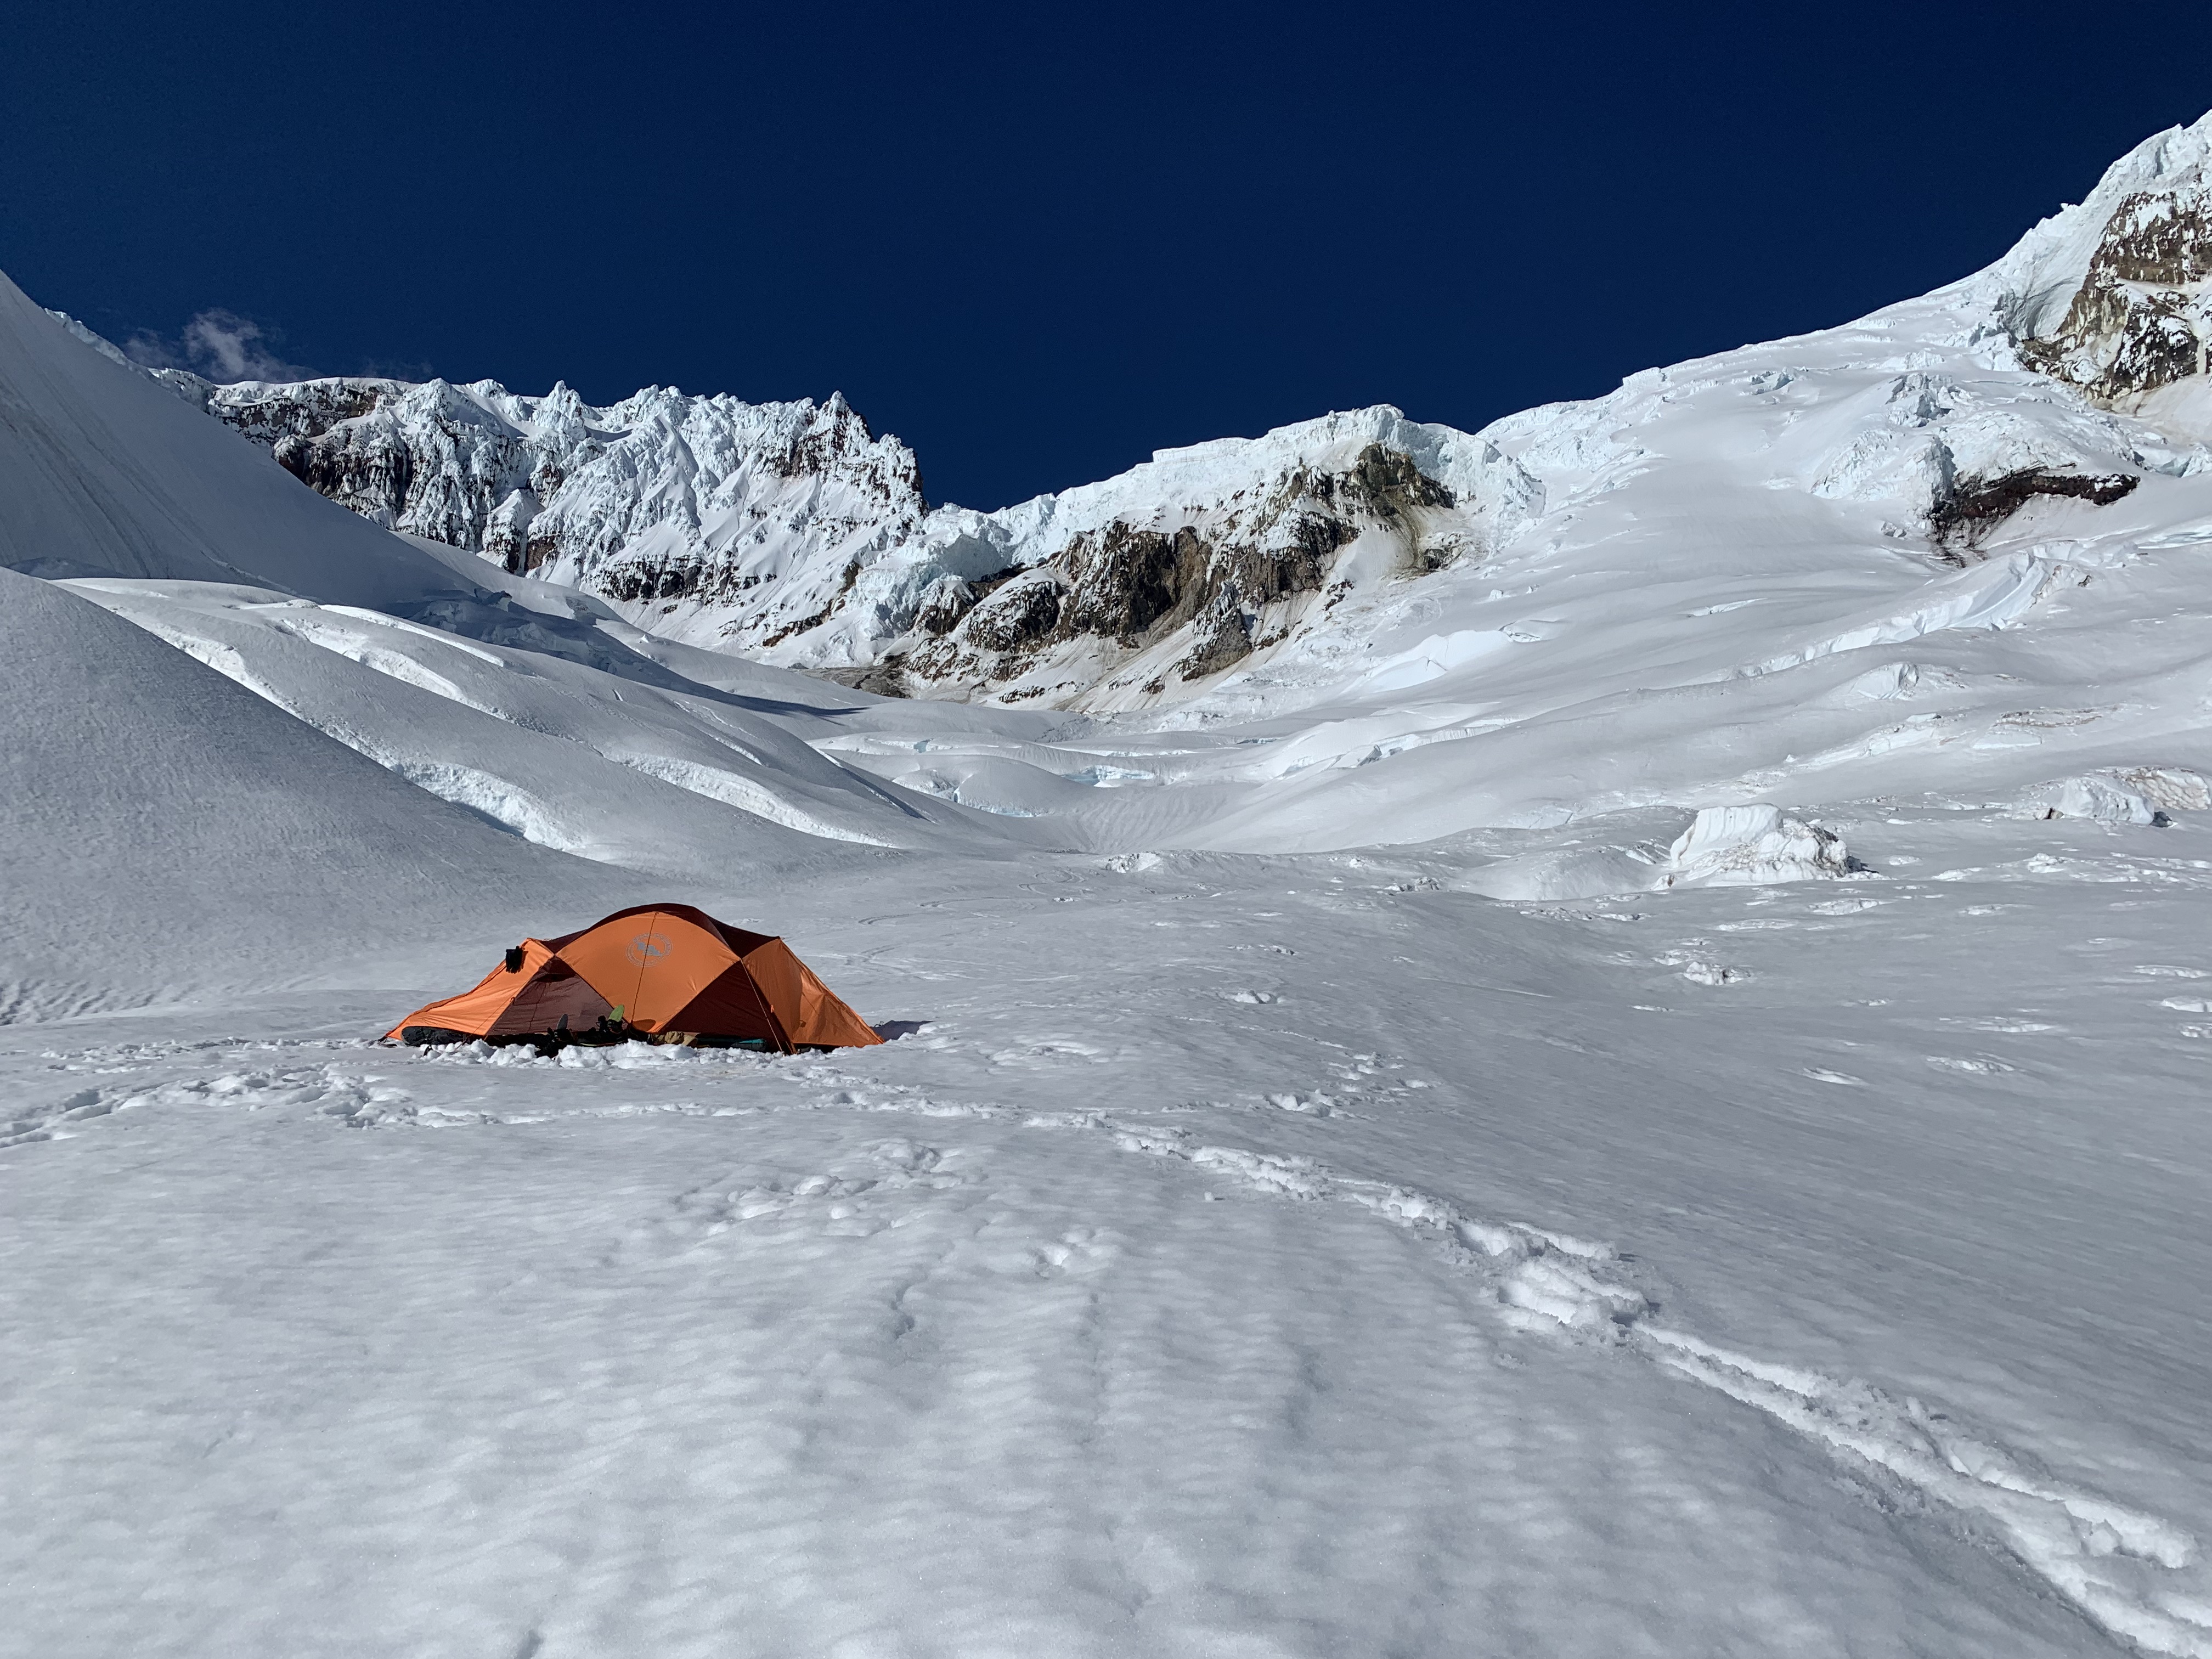
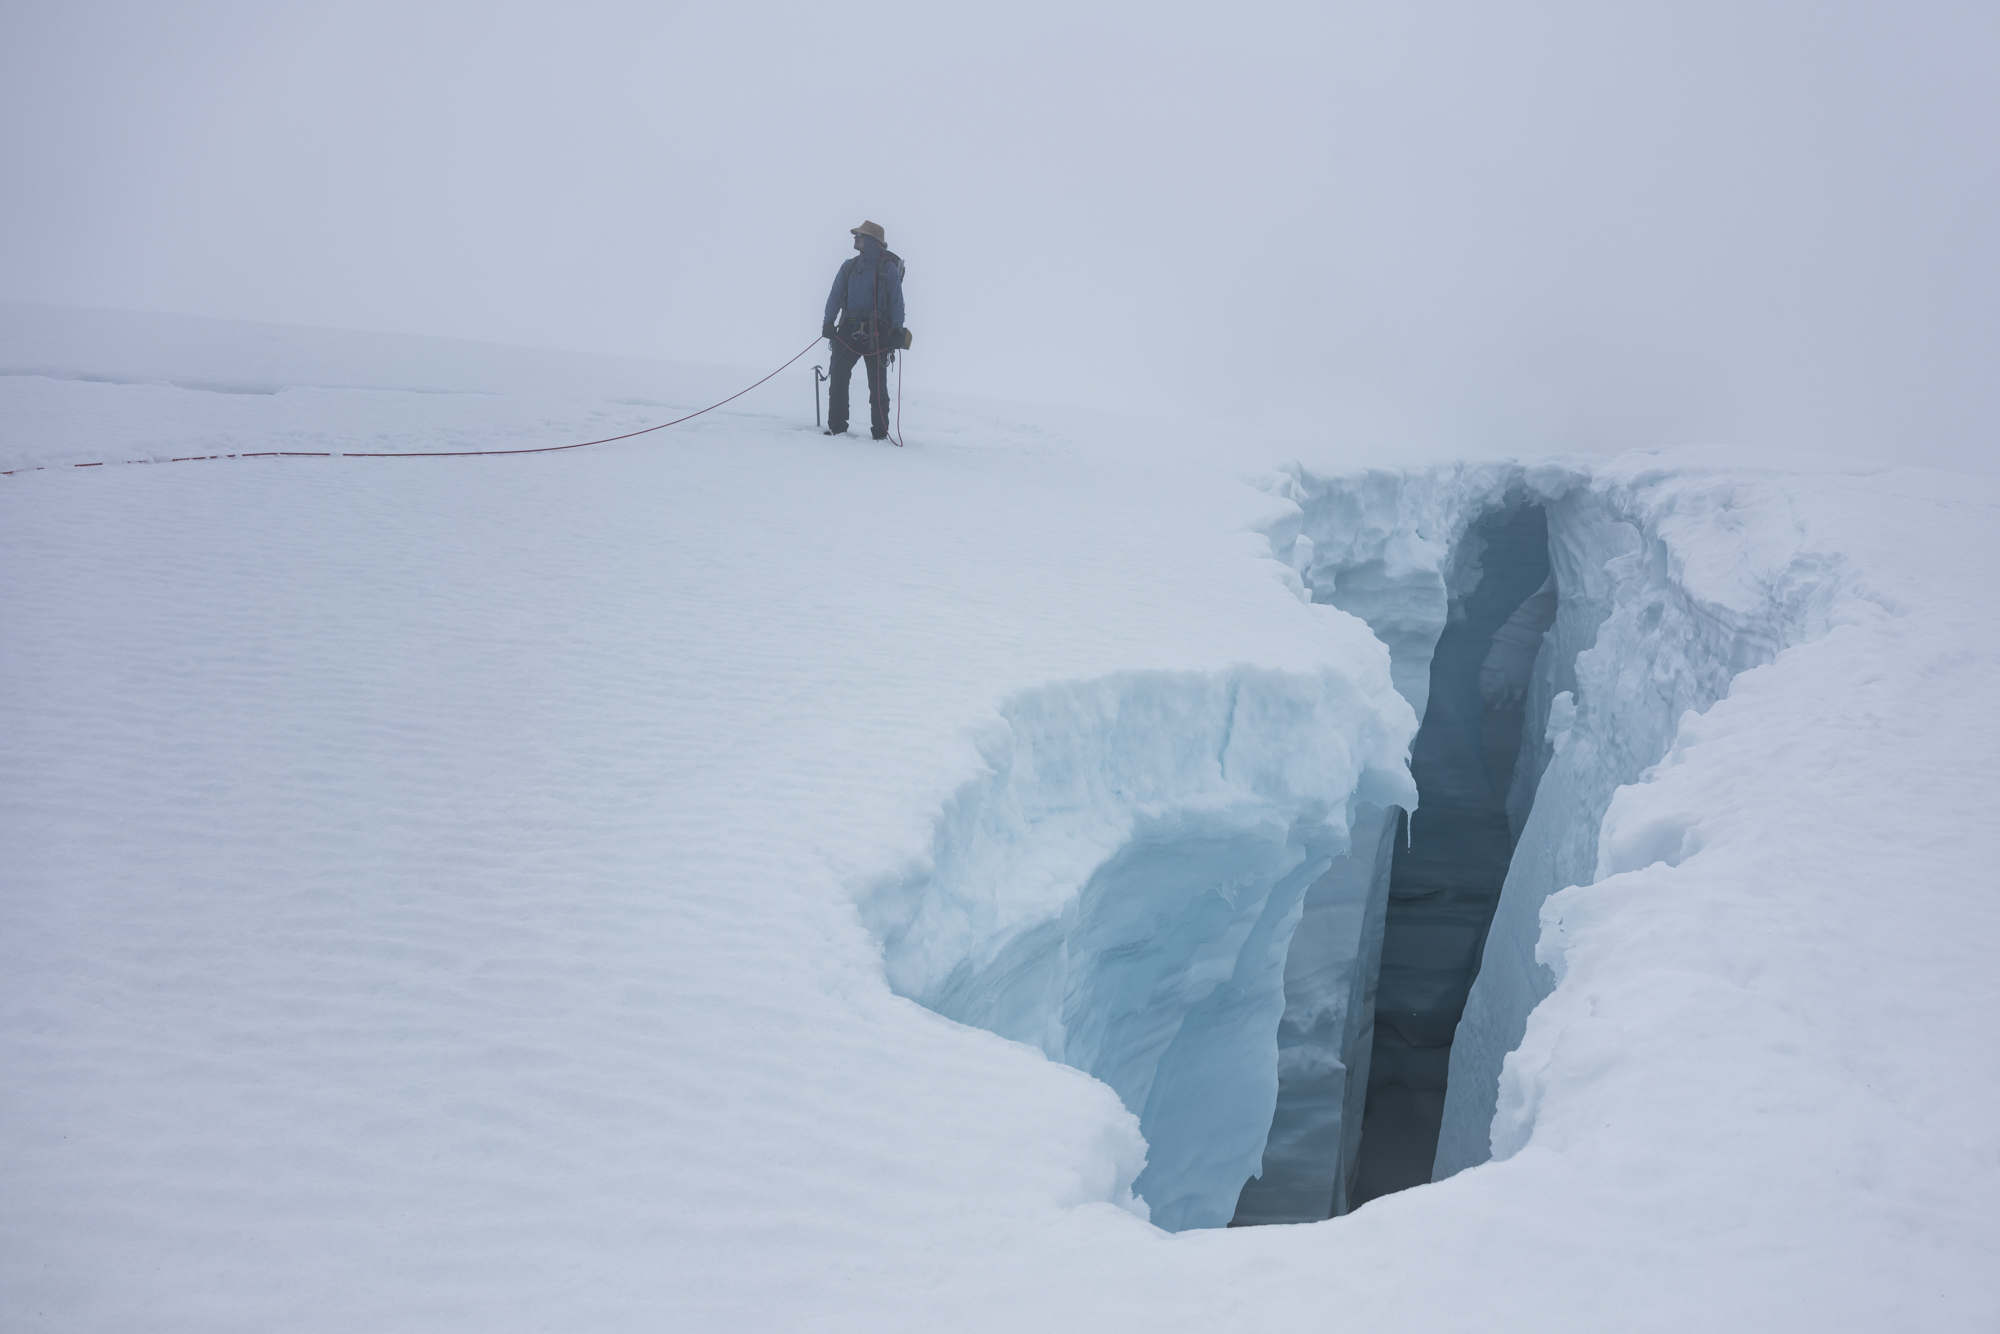
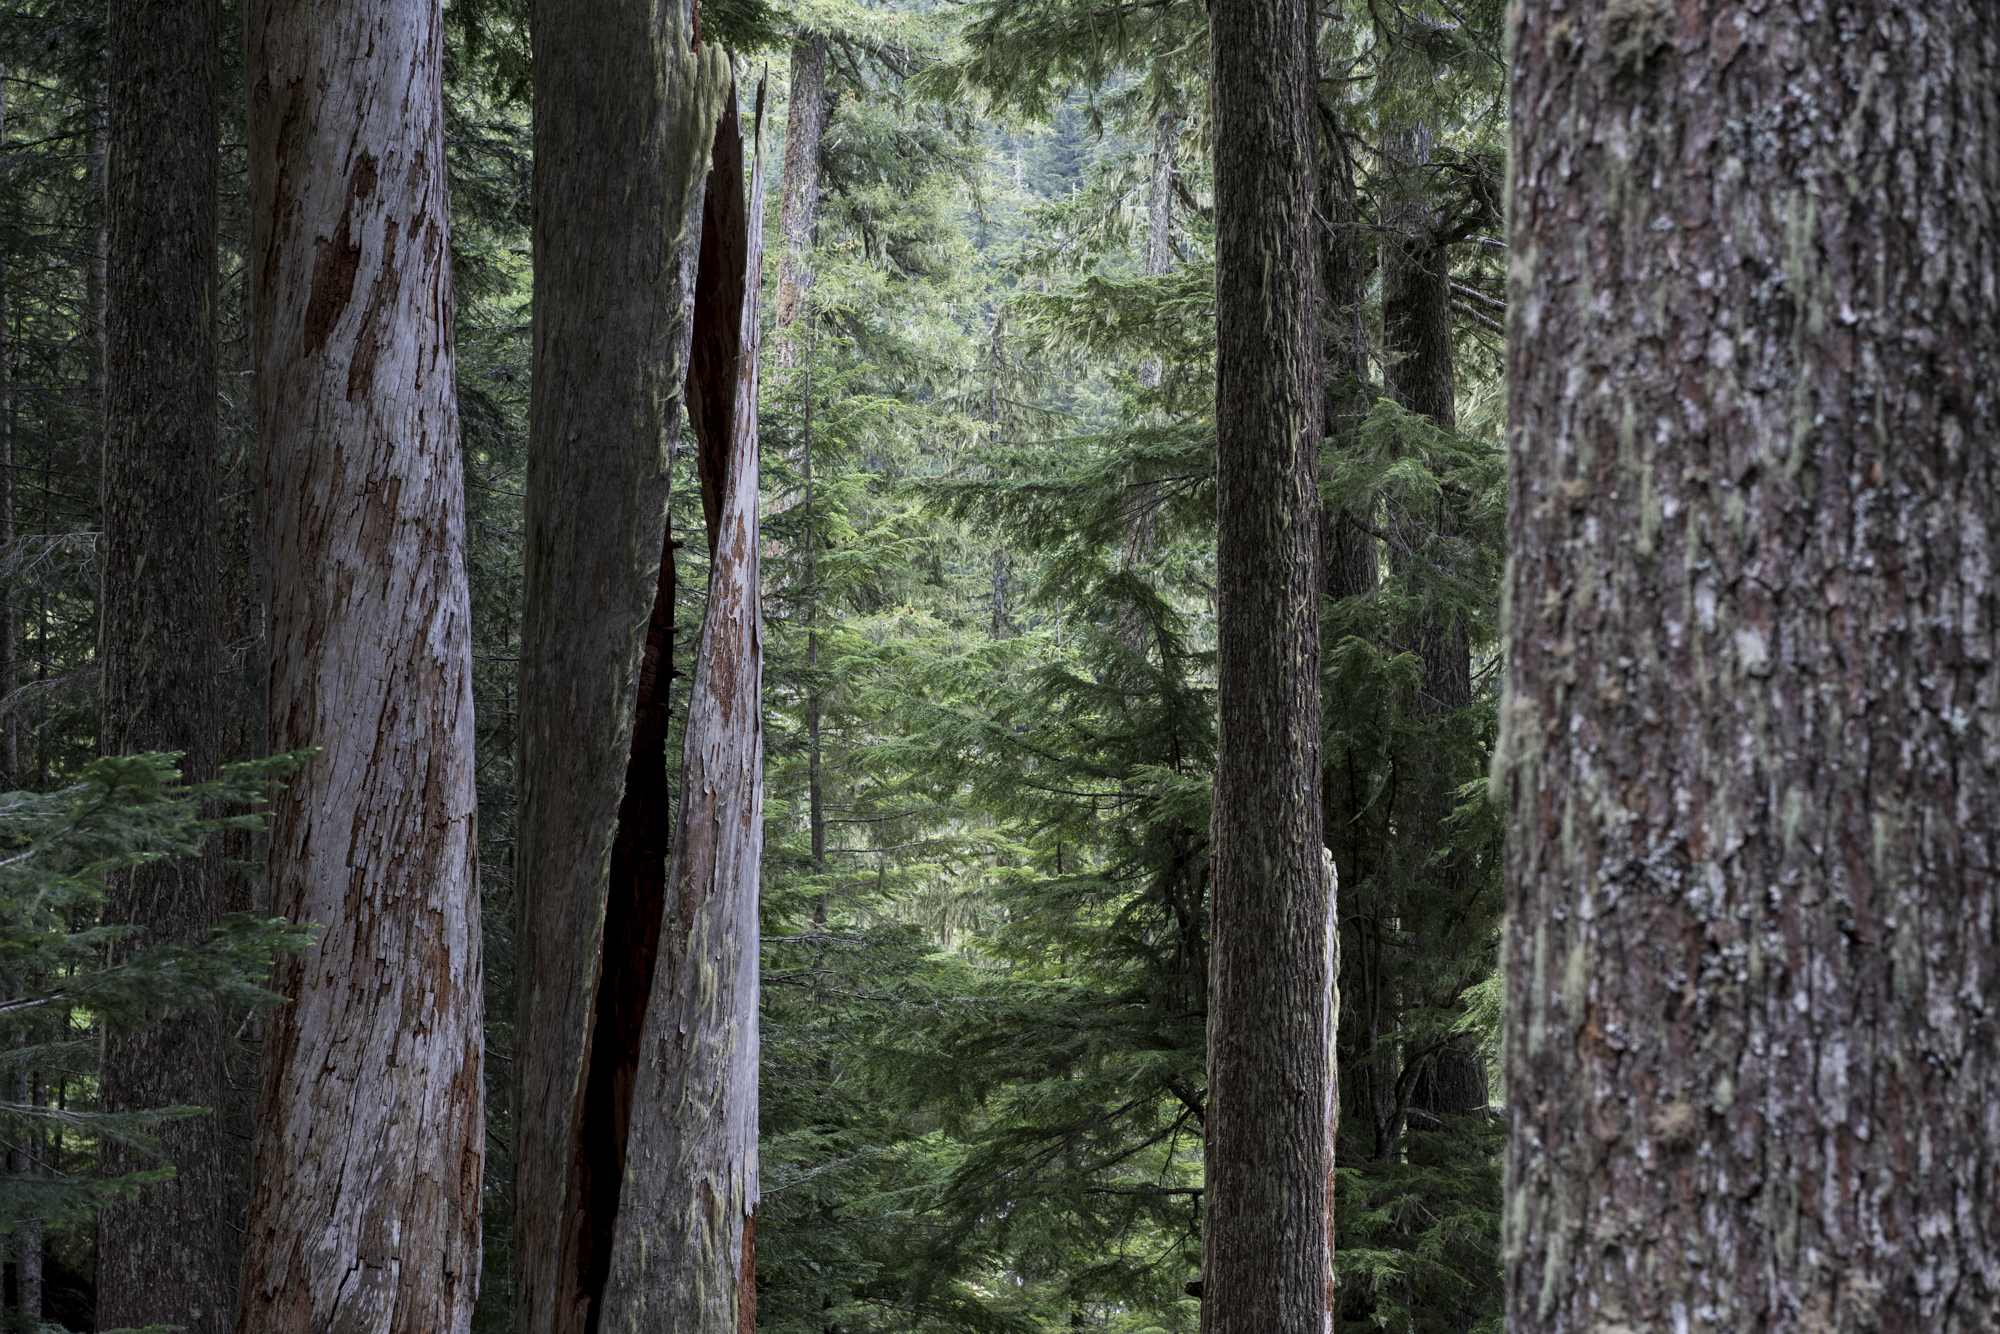
Over a luxurious 3 days, from June 6-8, I soloed West McMillan Spire via the West Ridge. In an era of impressive Southern Picket link-ups and car-to-car climbs, this was much more of your everyman’s Picket trip. And luxurious it was. I’m not sure I’ve ever had this much Type 1 fun in the North Cascades before! Approach Much has been written about the approach to Terror Basin and West McMillan Spire via the Goodell Creek Trail, and with more detail than I’d be able to remember anyways. I’ll add a few notes from the approach about things that I found noteworthy and try to comment on current conditions. Generally, I found the approach to be one of the most pleasant I’ve encountered in the North Cascades. The 4-mile walk in from the parking lot to the turn off up to Terror Basin is a beautiful, gradually rising stroll along the river and through cedar and ferns. It is brushy at first, but then opens up nicely for most of the second half. The trail crosses two creeks, one about a mile in, and the second just before the trail turns up towards Terror Basin. Both are crossed easily by rock hopping right now. I didn’t even get my shoes wet. Score. It took me about 1.5 hours to get to the turn off (at about 1,750 feet) and begin the climb up to Terror Basin. Note that the second creek crossing is your last chance to fill up on water until you get to the heather bench about 3,500 feet above you. Goodell Creek Trail The climb from the turn off up to the heather bench (where the trees begin to clear at around 5,100 feet) is steep but consistent. The trail is always there, no bushwhacking required. If you find yourself thrashing in the woods or searching for evidence of the trail, you’ve probably lost it - backtrack and try again. I did find it much easier to lose the trail on the way down (many times) than on the way up (zero times). Something something rushing back to an air-conditioned car. There is one notable spot on the descent where it’s very easy to lose the trail: at about 4,000 feet you emerge into a small boulder field from the right (when descending) and the trail continues along the right border of the boulders before exiting at the field’s lower right corner. My instinct suggested continuing straight down or leftwards across the boulder field but these are both wrong. I found the notorious root scramble at 4,900 feet to be very reasonable and might not have thought twice about it if not for the discussion in many previous trip reports. It’s little harder to get back down than to climb up but the roots are strong and the feet are good. Almost immediately after the scramble, you break out onto the heather bench with glorious views of Terror Basin and the traverse you have to make to get to the access gully and notch. It took me about 2.5 hours to get to the bench from the turn off. Right now snow cover begins at 5,100 feet and is pretty consistent from there all the way in to Terror Basin and beyond. I’d estimate that about 80% of the route from the heather bench to the notch leading into Terror Basin is covered in snow. I found that having a GPS track of the route to follow was very helpful because much of the trail and its cairns are buried. Roughly 2 hours from bench to notch. The descent from the notch into Terror Basin is nearly all snow except for a very narrow band of rock slicing across the gully just below the notch. The classic campsites in Terror Basin are all currently completely snowed in. Terror Basin from 6,200' notch Notch from Terror Basin Camping The only off-snow camping I could find was just before the crossing of Terror Creek, on the rock bluffs on the east side of the outlet of the glacial lake. There are several small sites for 1-2 person tents here. The views across to Mt. Triumph and up to Inspiration and McMillan are simply stunning from this perch. Some trickles of water run through there right now, but the snowfield feeding them will likely melt away later in the season. It was about an hour of down sloping traverse, all on snow, to get from Terror Basin Camp to the campsites by the glacial lake outlet. Camp by Outlet Moonset over Mt. Triumph Rock Ptarmigan? Inspiration and McMillan from Camp Sunset Climb Since I planned to stay another night in Terror Basin after climbing West McMillan Spire, I had a relaxed breakfast and left camp at the very civilized hour of 7:45am. After a few minutes I was down to the glacial lake outlet and some minimal scrambling on rock on the west side of the outlet brought me to snowfields beneath Inspiration and McMillan Spire that I took all the way to the base of the gully that leads onto the McMillan West Ridge. The gully is still filled with snow all the way to the saddle, though the snow has narrowed to less than 10 feet across near the top. It felt like about 45 degrees at its steepest angle. Crampons and a light ice axe were nice to have. Arriving at last in the saddle is breathtaking: Mt. Fury, Luna, and the rest of the Northern Pickets dominate to the north, with Redoubt beyond, while Triumph and Eldorado and Glacier Peak loom to the south. Inspiration Peak rises jarringly from the saddle and the route up McMillan arcs up and out of view to the east. The climb up the ridge begins on well-trodden but very loose scree switchbacks before steepening into a section of larger chossy rocks. After a slight depression in the face that still held a snow finger when I climbed, the rock steepens again but is better in quality than lower on the route. The final 200 feet to the summit ridge line were incredibly airy and felt solidly like Class 4 climbing to me. The 5,000 feet of exposure down to McMillan Creek to the north will be hard to ever forget. Finally, I followed a series of cracks in great rock for about 40 feet that led to a final scramble over large blocks onto the knife edge ridge to the true summit: a walk through the sky. The summit block is an unbelievable place, large enough for perhaps two people, towering 3,900 feet above Azure Lake and 5,000 feet above McMillan Creek. It had taken me a little over 3 hours to summit from my camp. I spent another hour and a half sitting on that summit in awe. The final 100 vertical feet onto the summit ridge The descent was more challenging than I’d anticipated from prior trip reports and from my own ascent, both in terms of navigation and difficulty. It’s helpful to carefully remember your route through the final 200 feet of ascent to be able to backtrack easily. From there, following the path of least resistance worked well. I trended towards skier’s left on the descent because the exposure to the right felt too great to me for down climbing. After this careful crawl off the peak, I was back at my stashed crampons and ice ax in the saddle, down the gully, and jogging down the snowfields in hot afternoon slush. A nice warm bag of Swedish Fish awaited me when I arrived back to camp in the early afternoon. Exit The retreat back to the car the next day was largely uneventful. I left camp at 6:50am in order to reach the notch before the sun could hit the snow. I did encounter a black bear in the Terror Basin Camp area. He seemed uninterested in me so I carried on quickly up the steep snow to the notch (hoping that it was too steep for him to follow?). It took me just over 7 hours to get out from the glacial lake outlet camp to the parking lot. Rarely have I enjoyed a stretch of days in the mountains as much as I enjoyed this one. I hope others find the time to explore this part of the range this season, it is truly special.


-
[TR] Tahoma / Mt. Rainier - Tahoma Glacier 06/26/2022
samueleley replied to samueleley's topic in Mount Rainier NP
Kind words, @JasonG. Mean a lot coming from you! I did indeed have my trusty a7Rii out on this trip, though the crux photos are all iPhone shots. Still getting the hang of having my mirrorless out and ready when the climbing feels hard. -
[TR] Tahoma / Mt. Rainier - Tahoma Glacier 06/26/2022
samueleley replied to samueleley's topic in Mount Rainier NP
Agreed! Though I never experienced the online personas, can very much attest to the genuine kindness of those two in person -
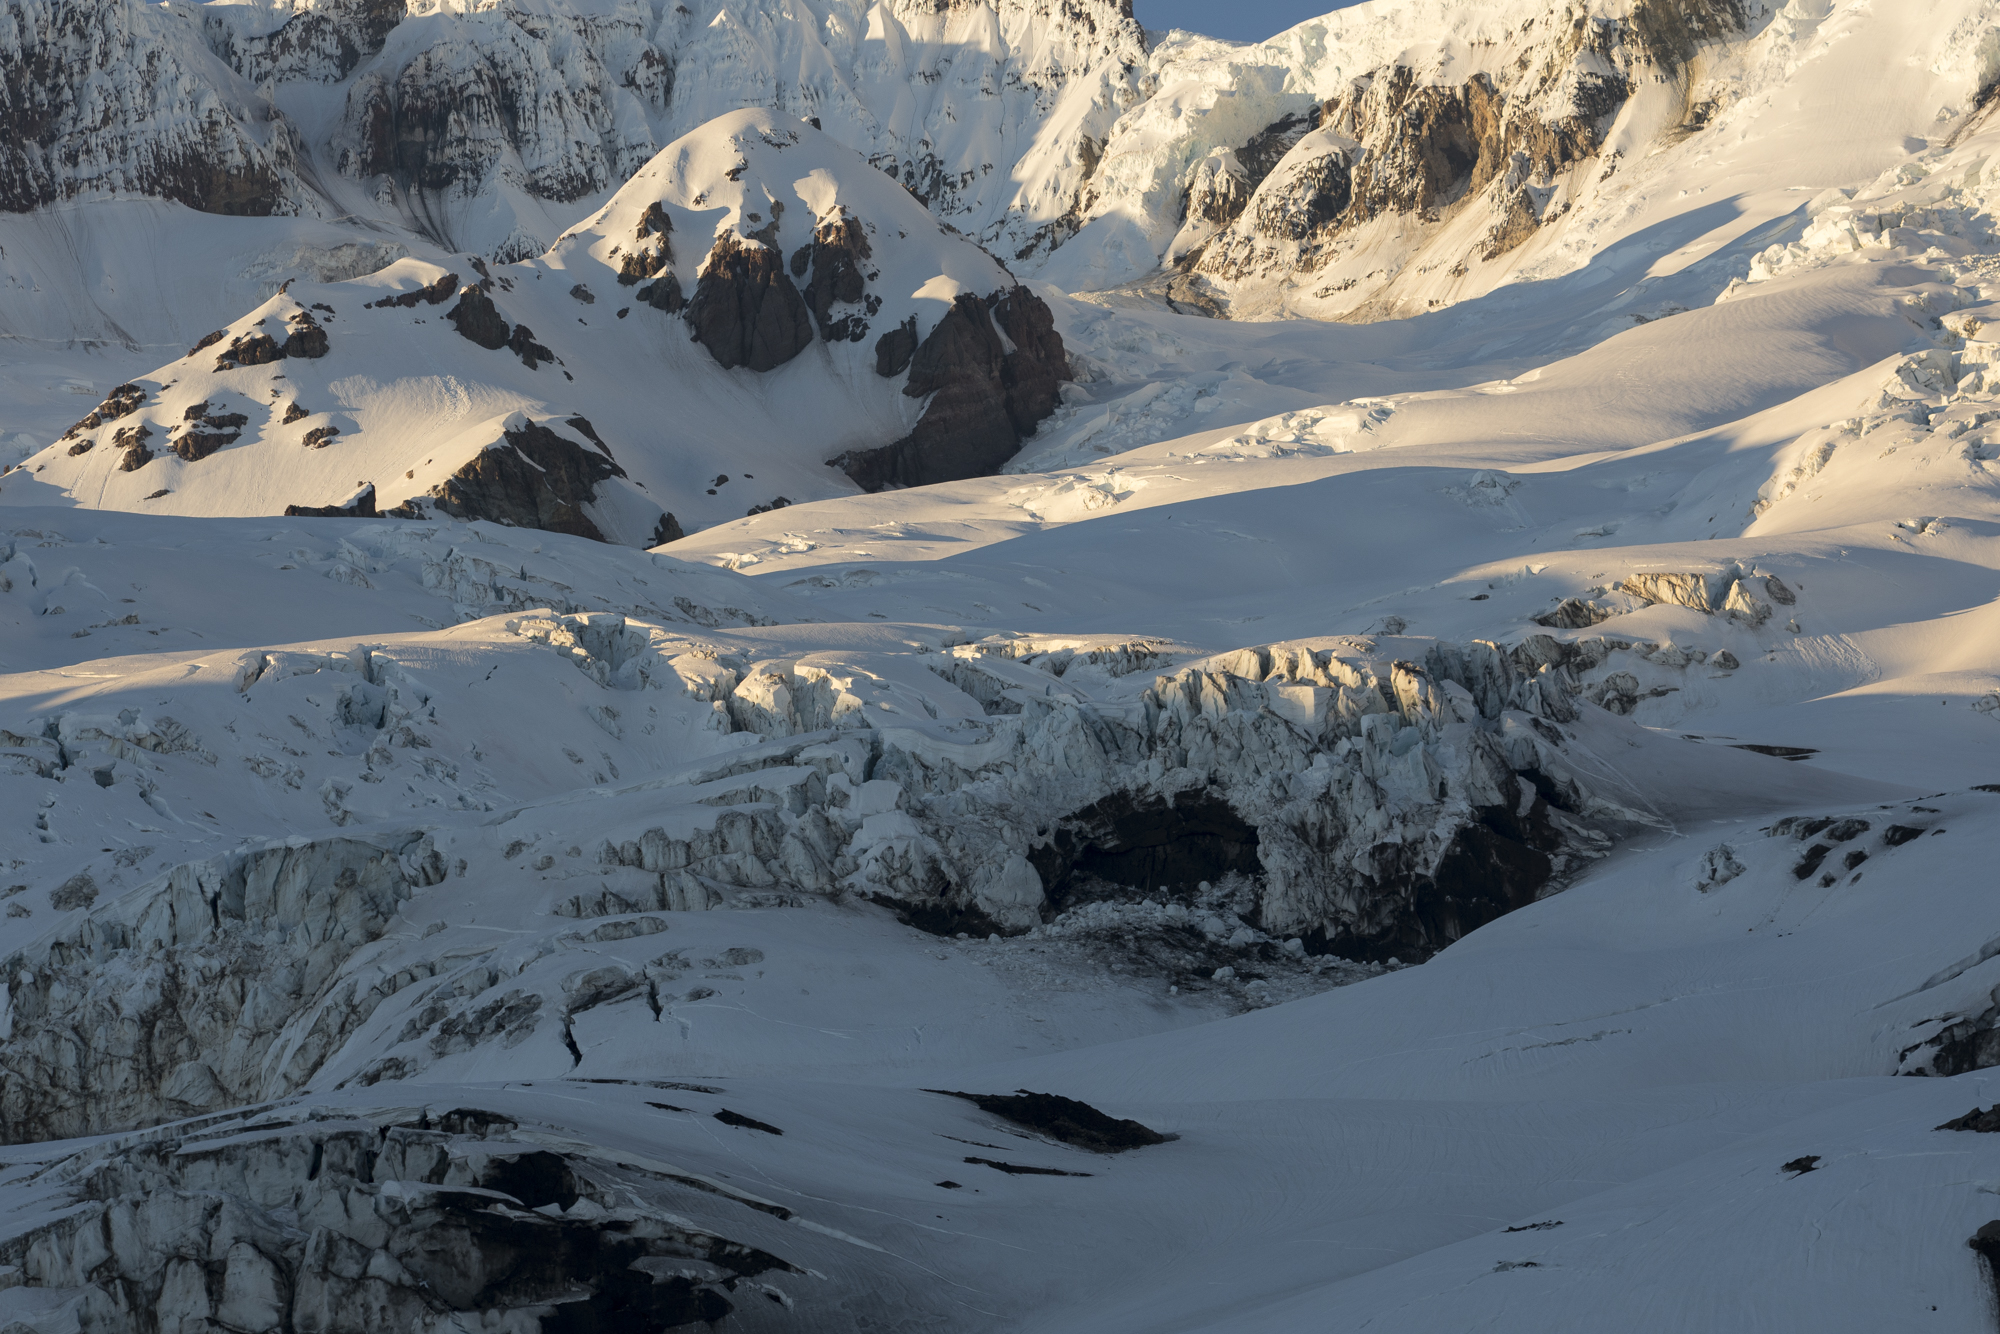
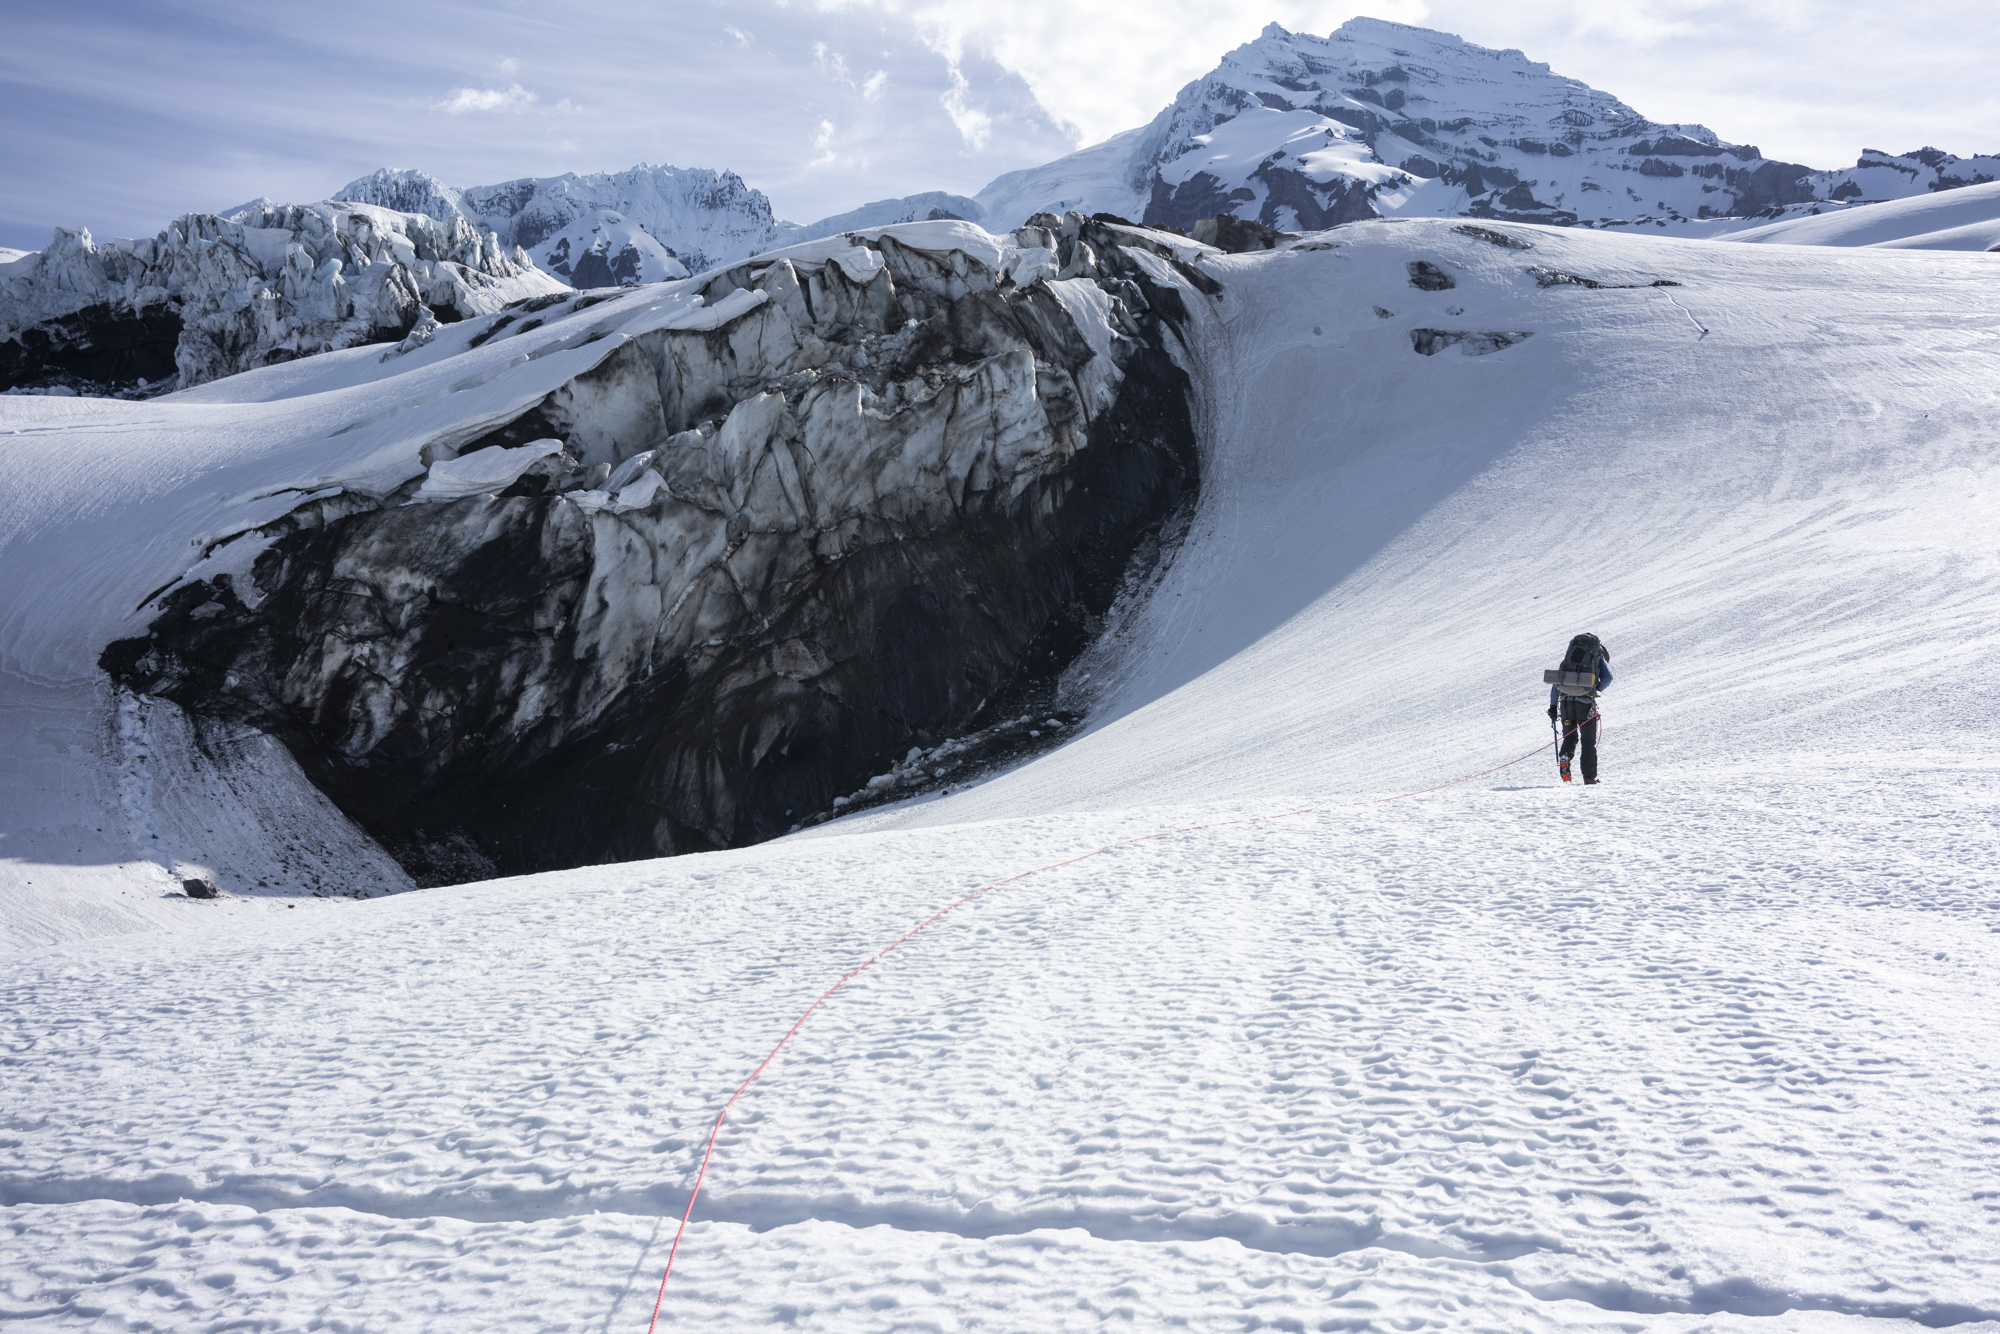
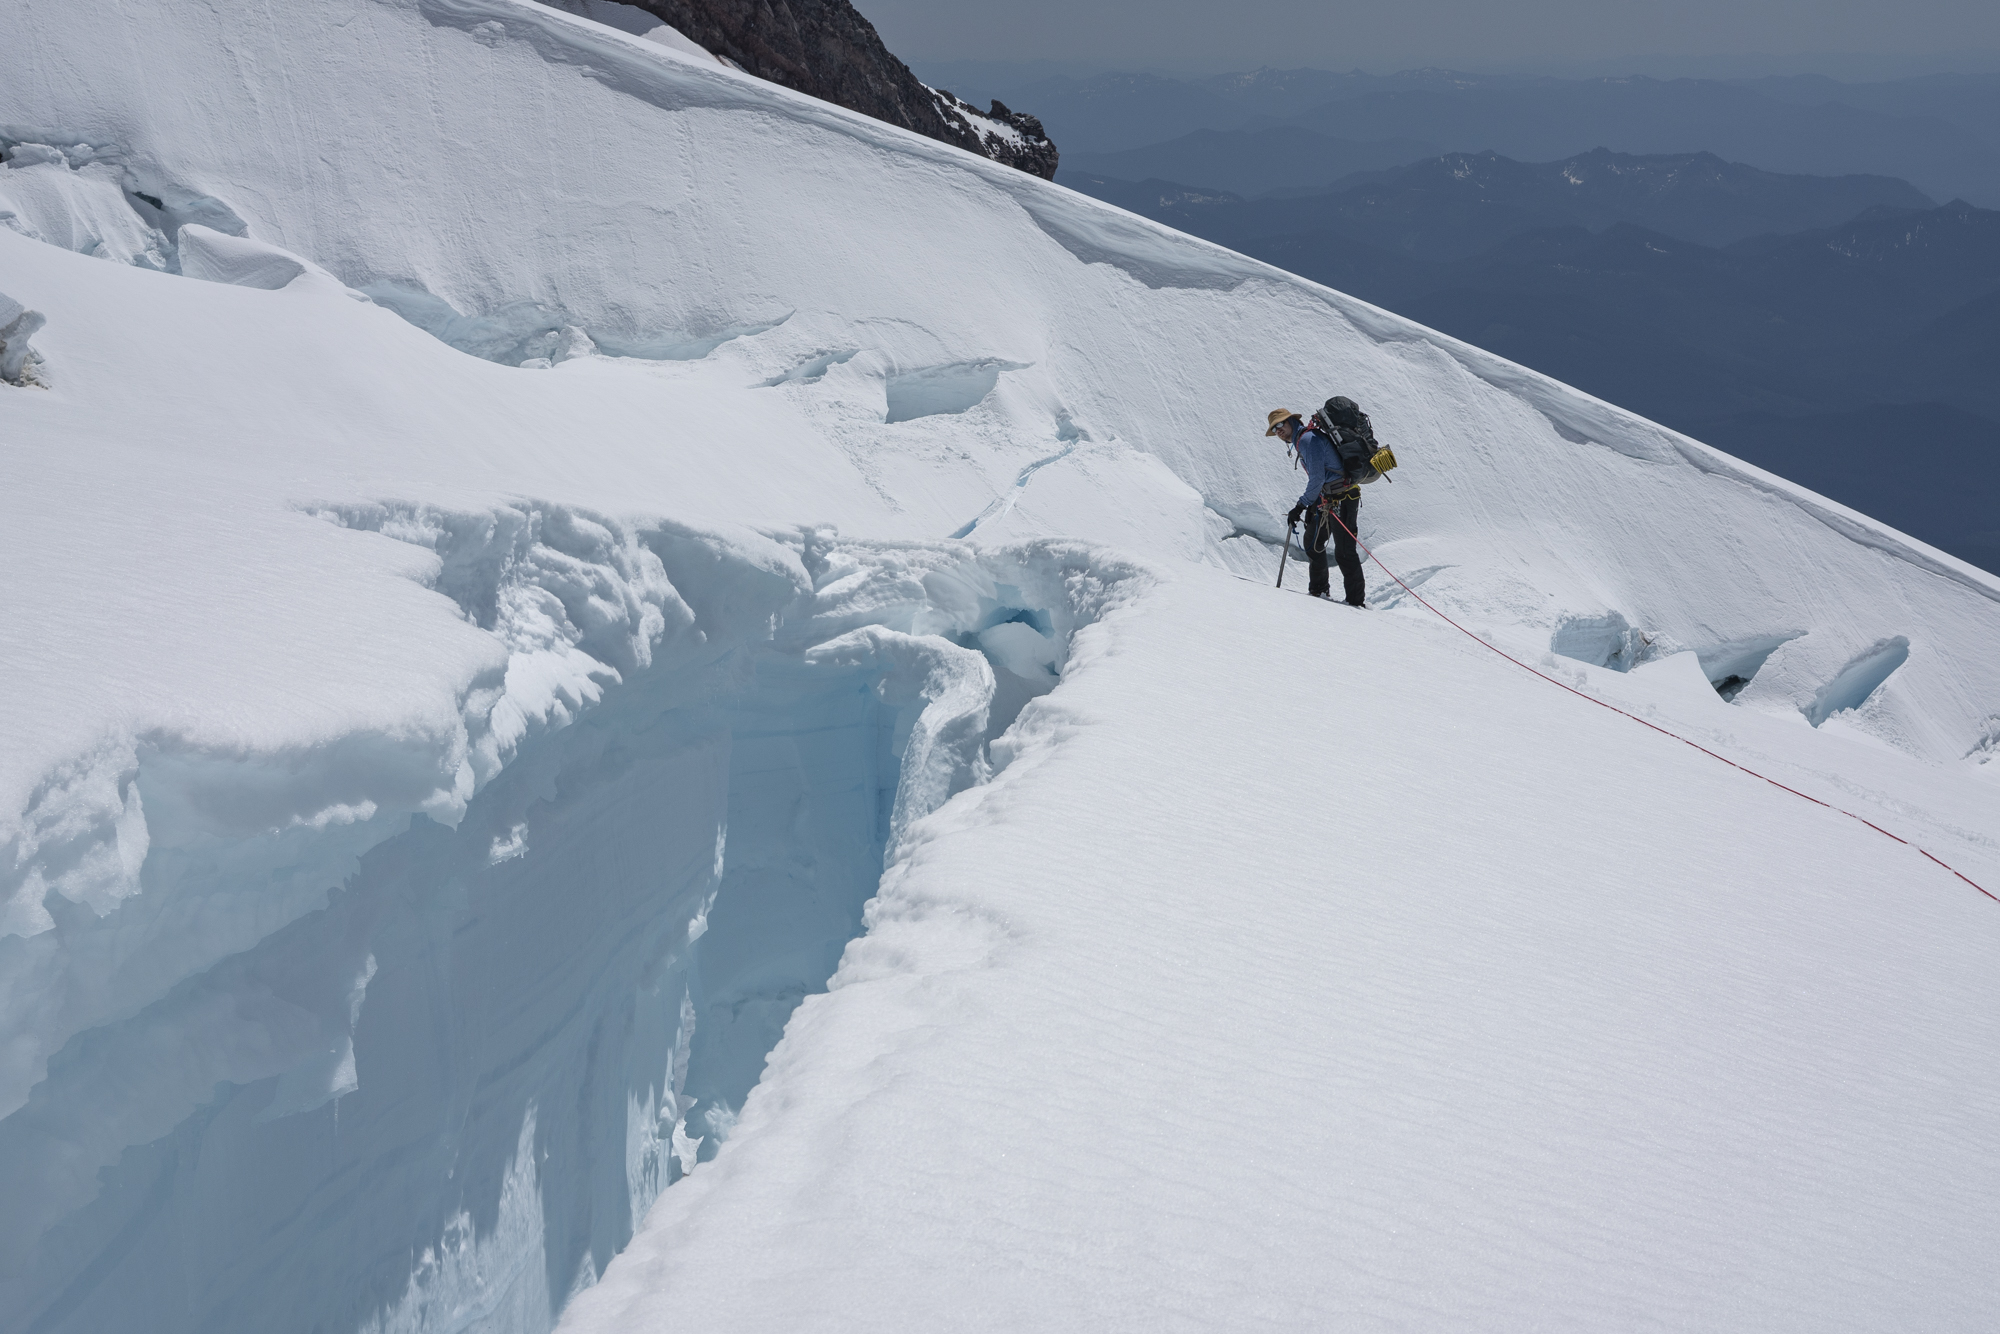
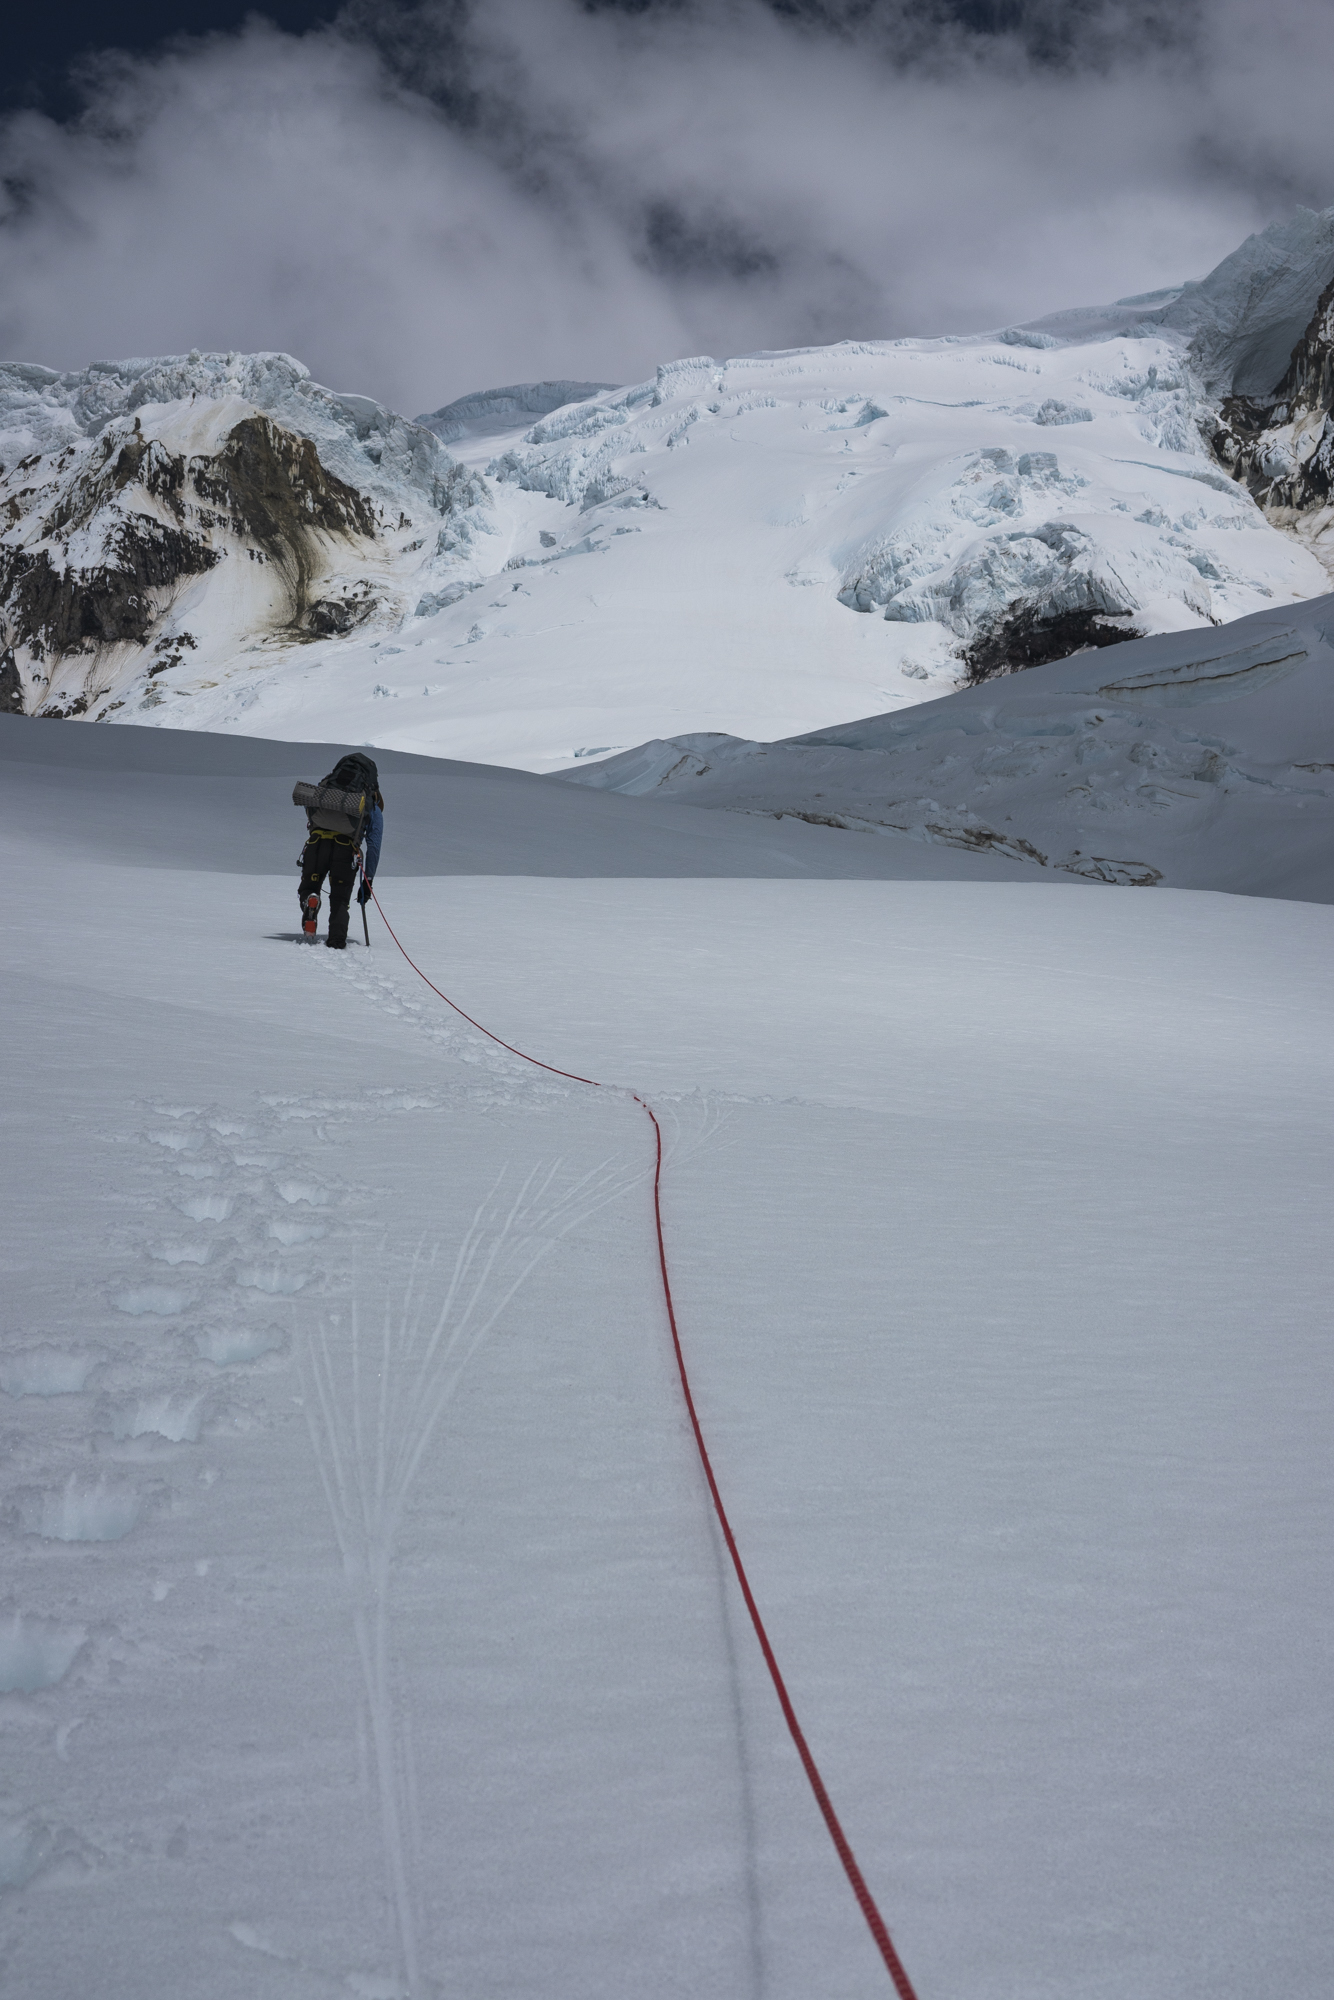
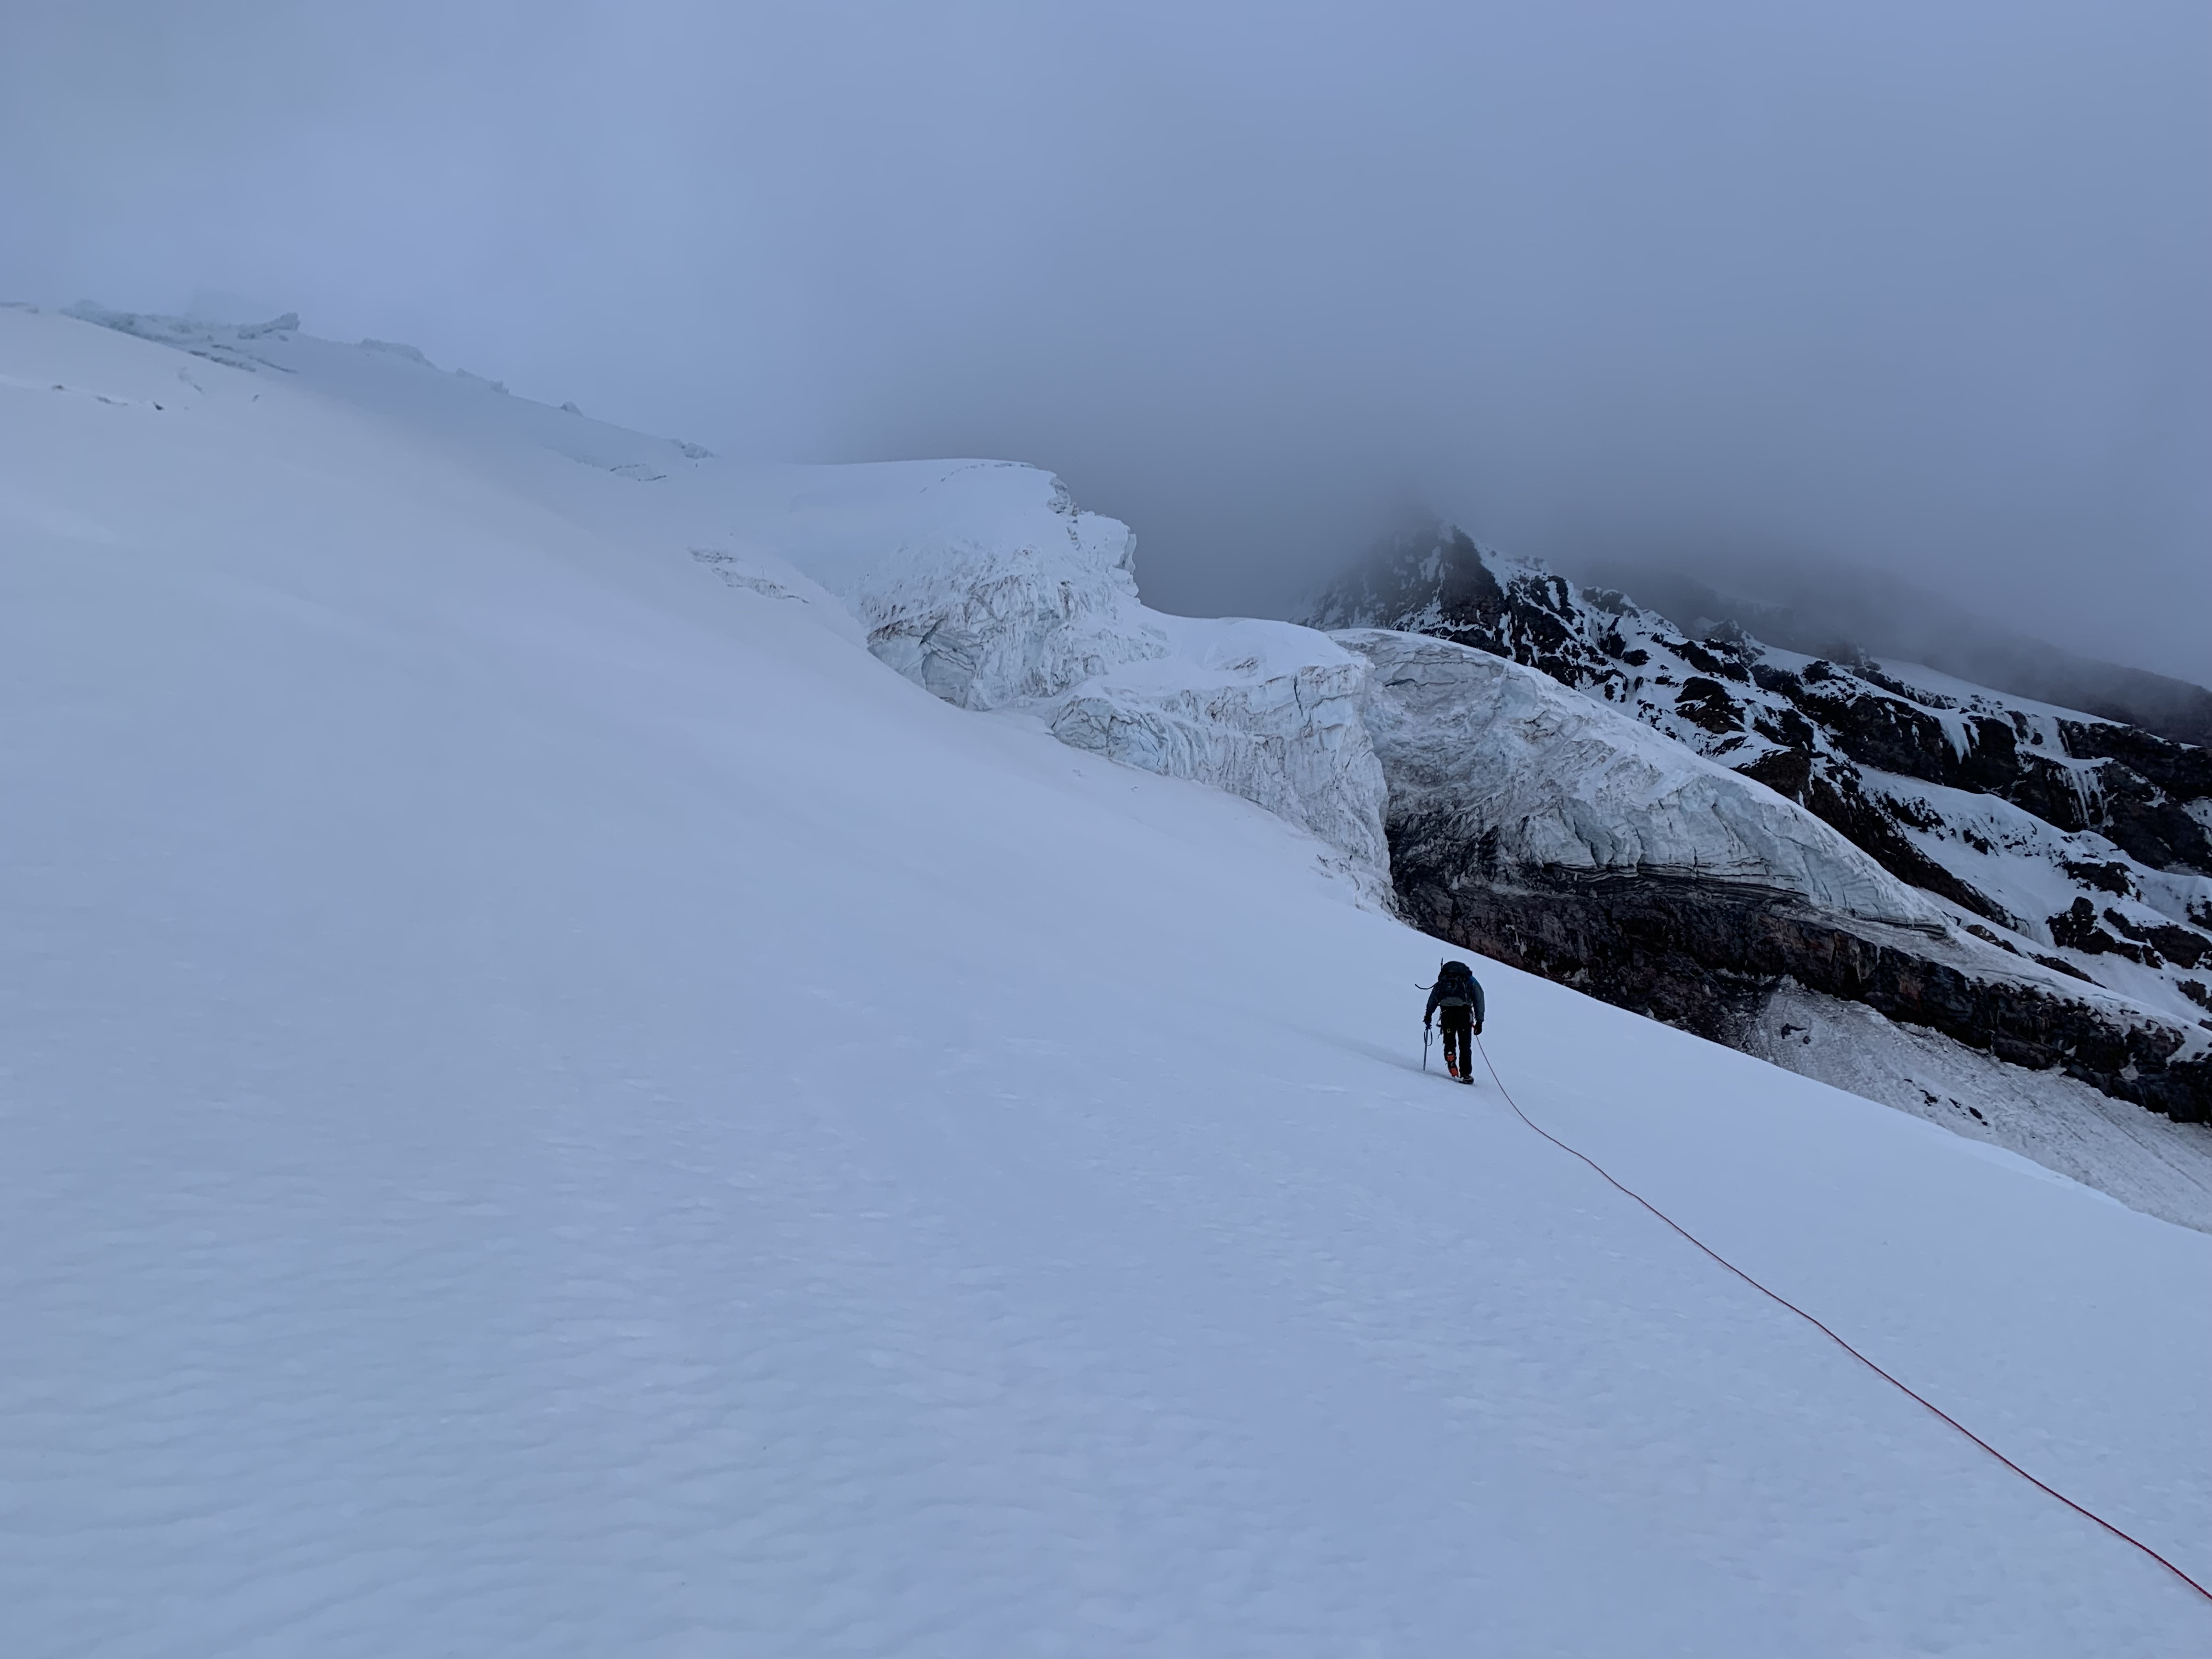
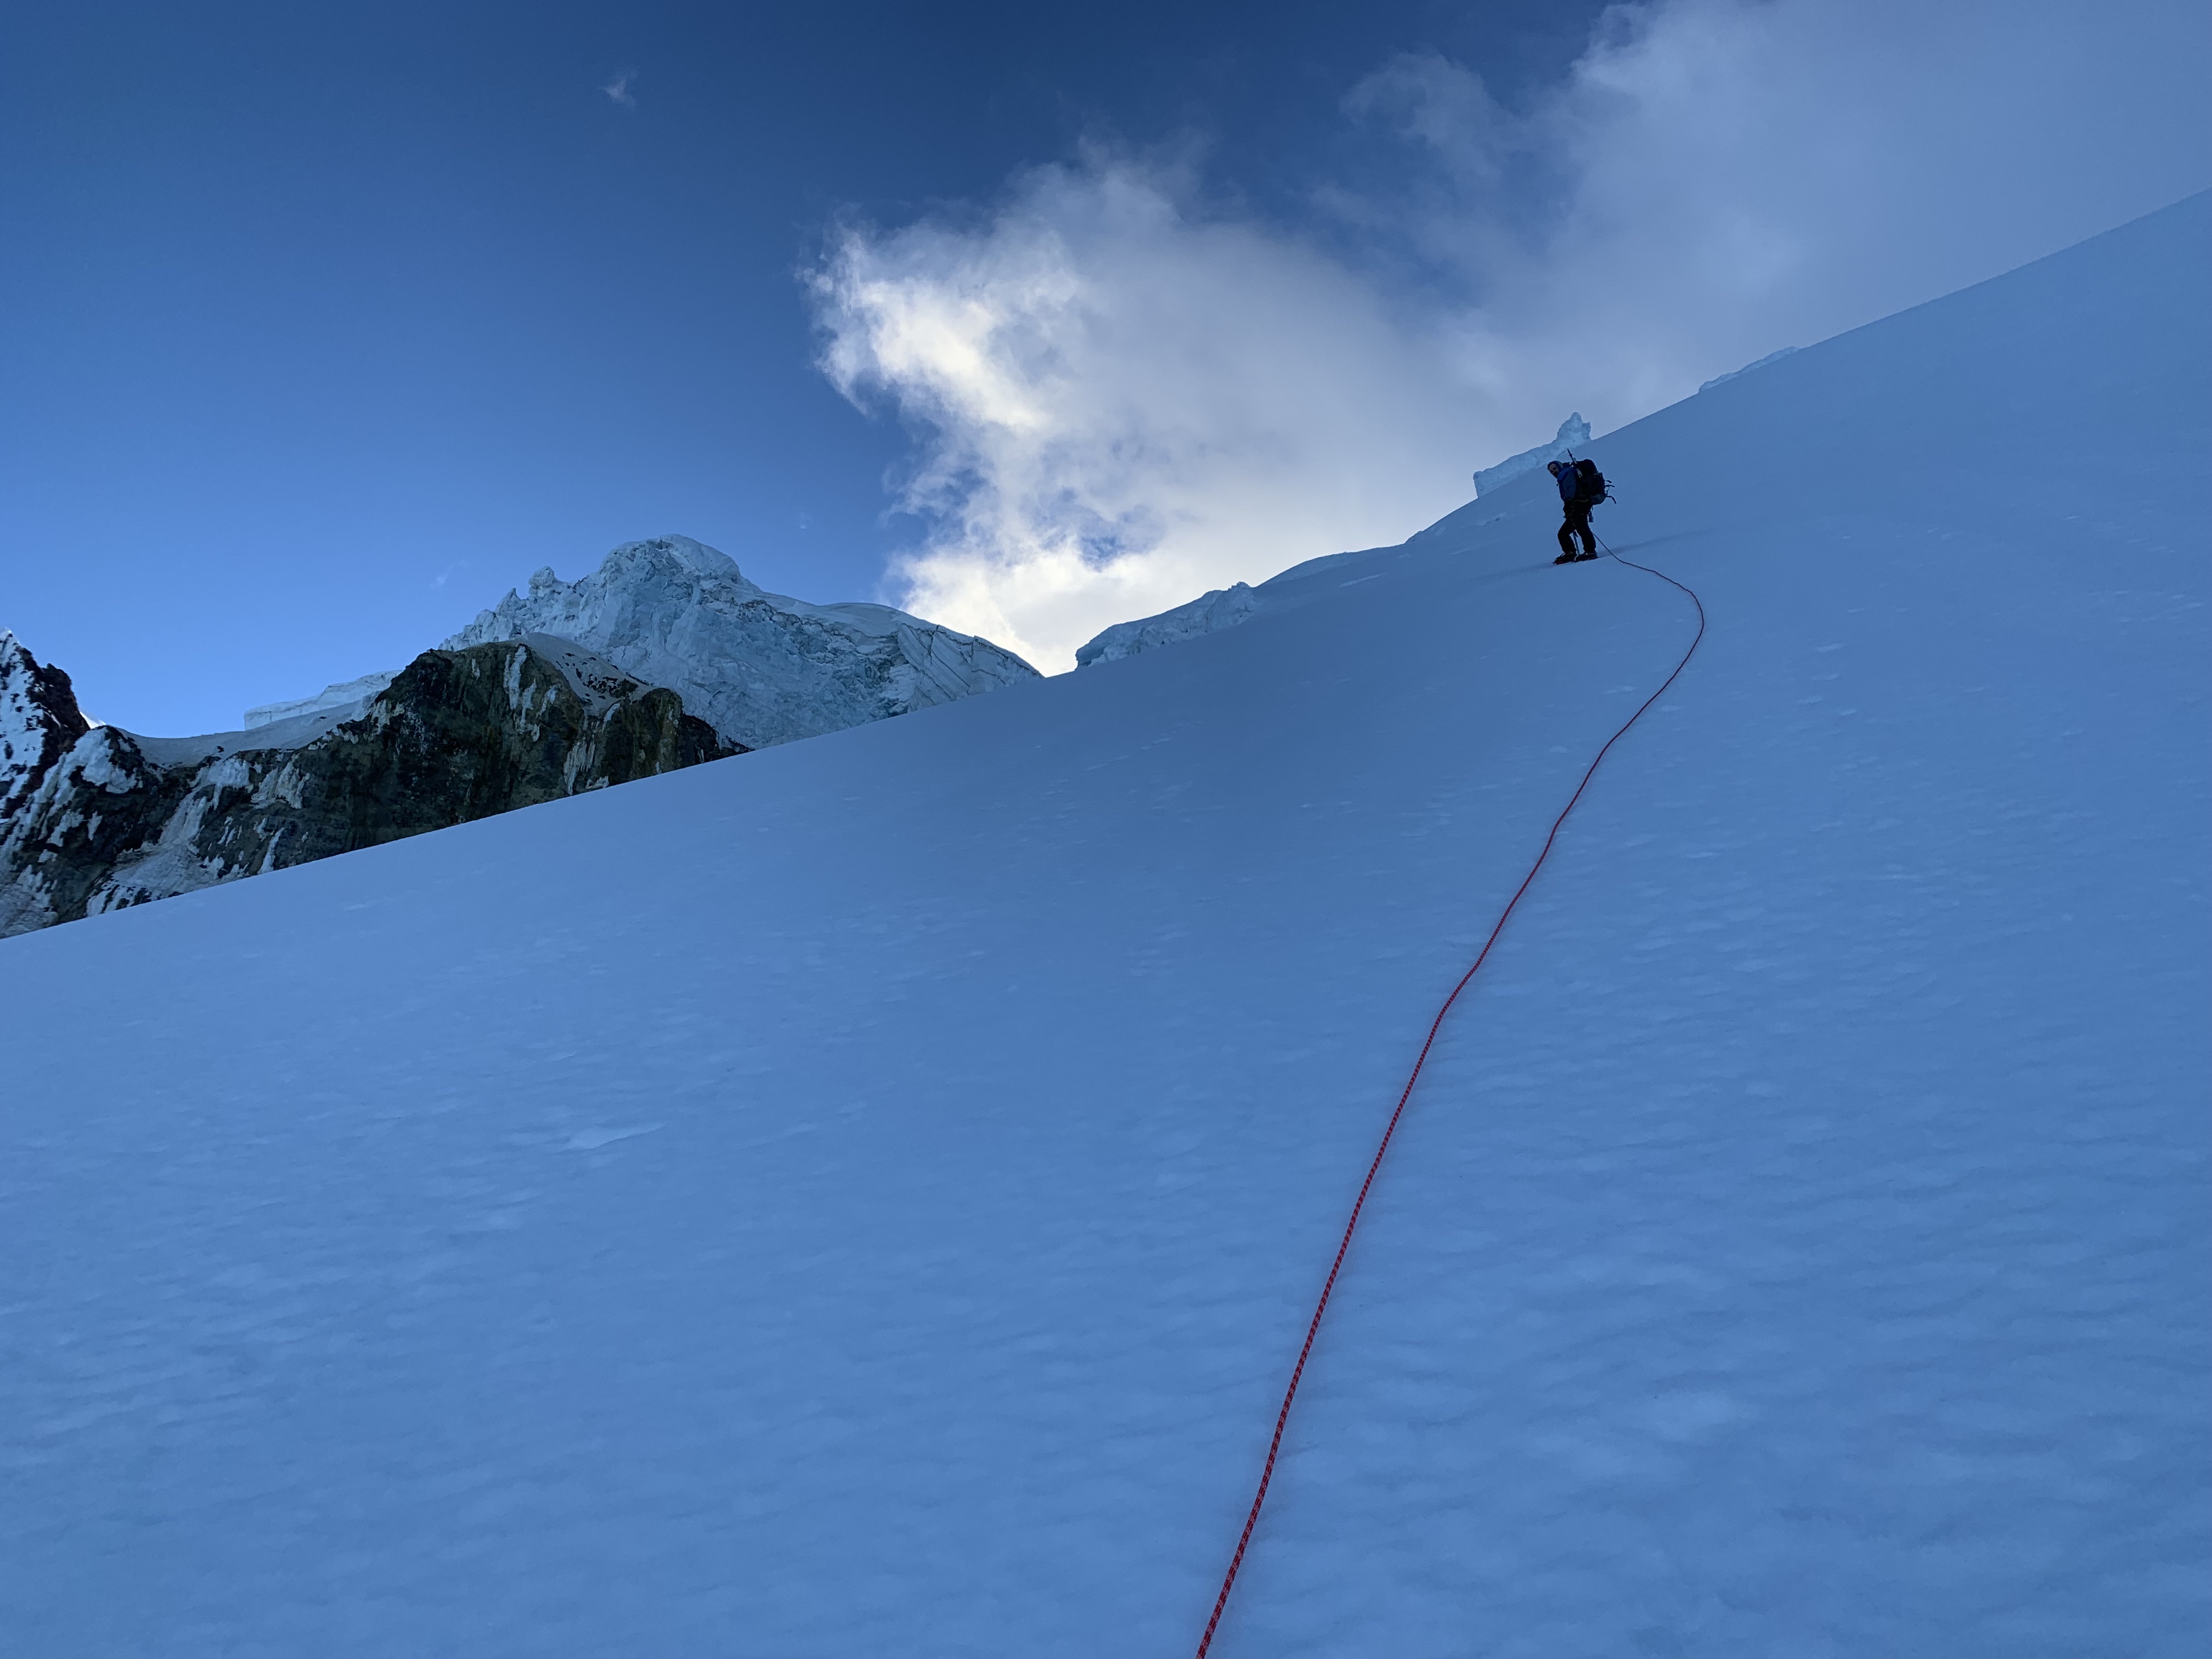
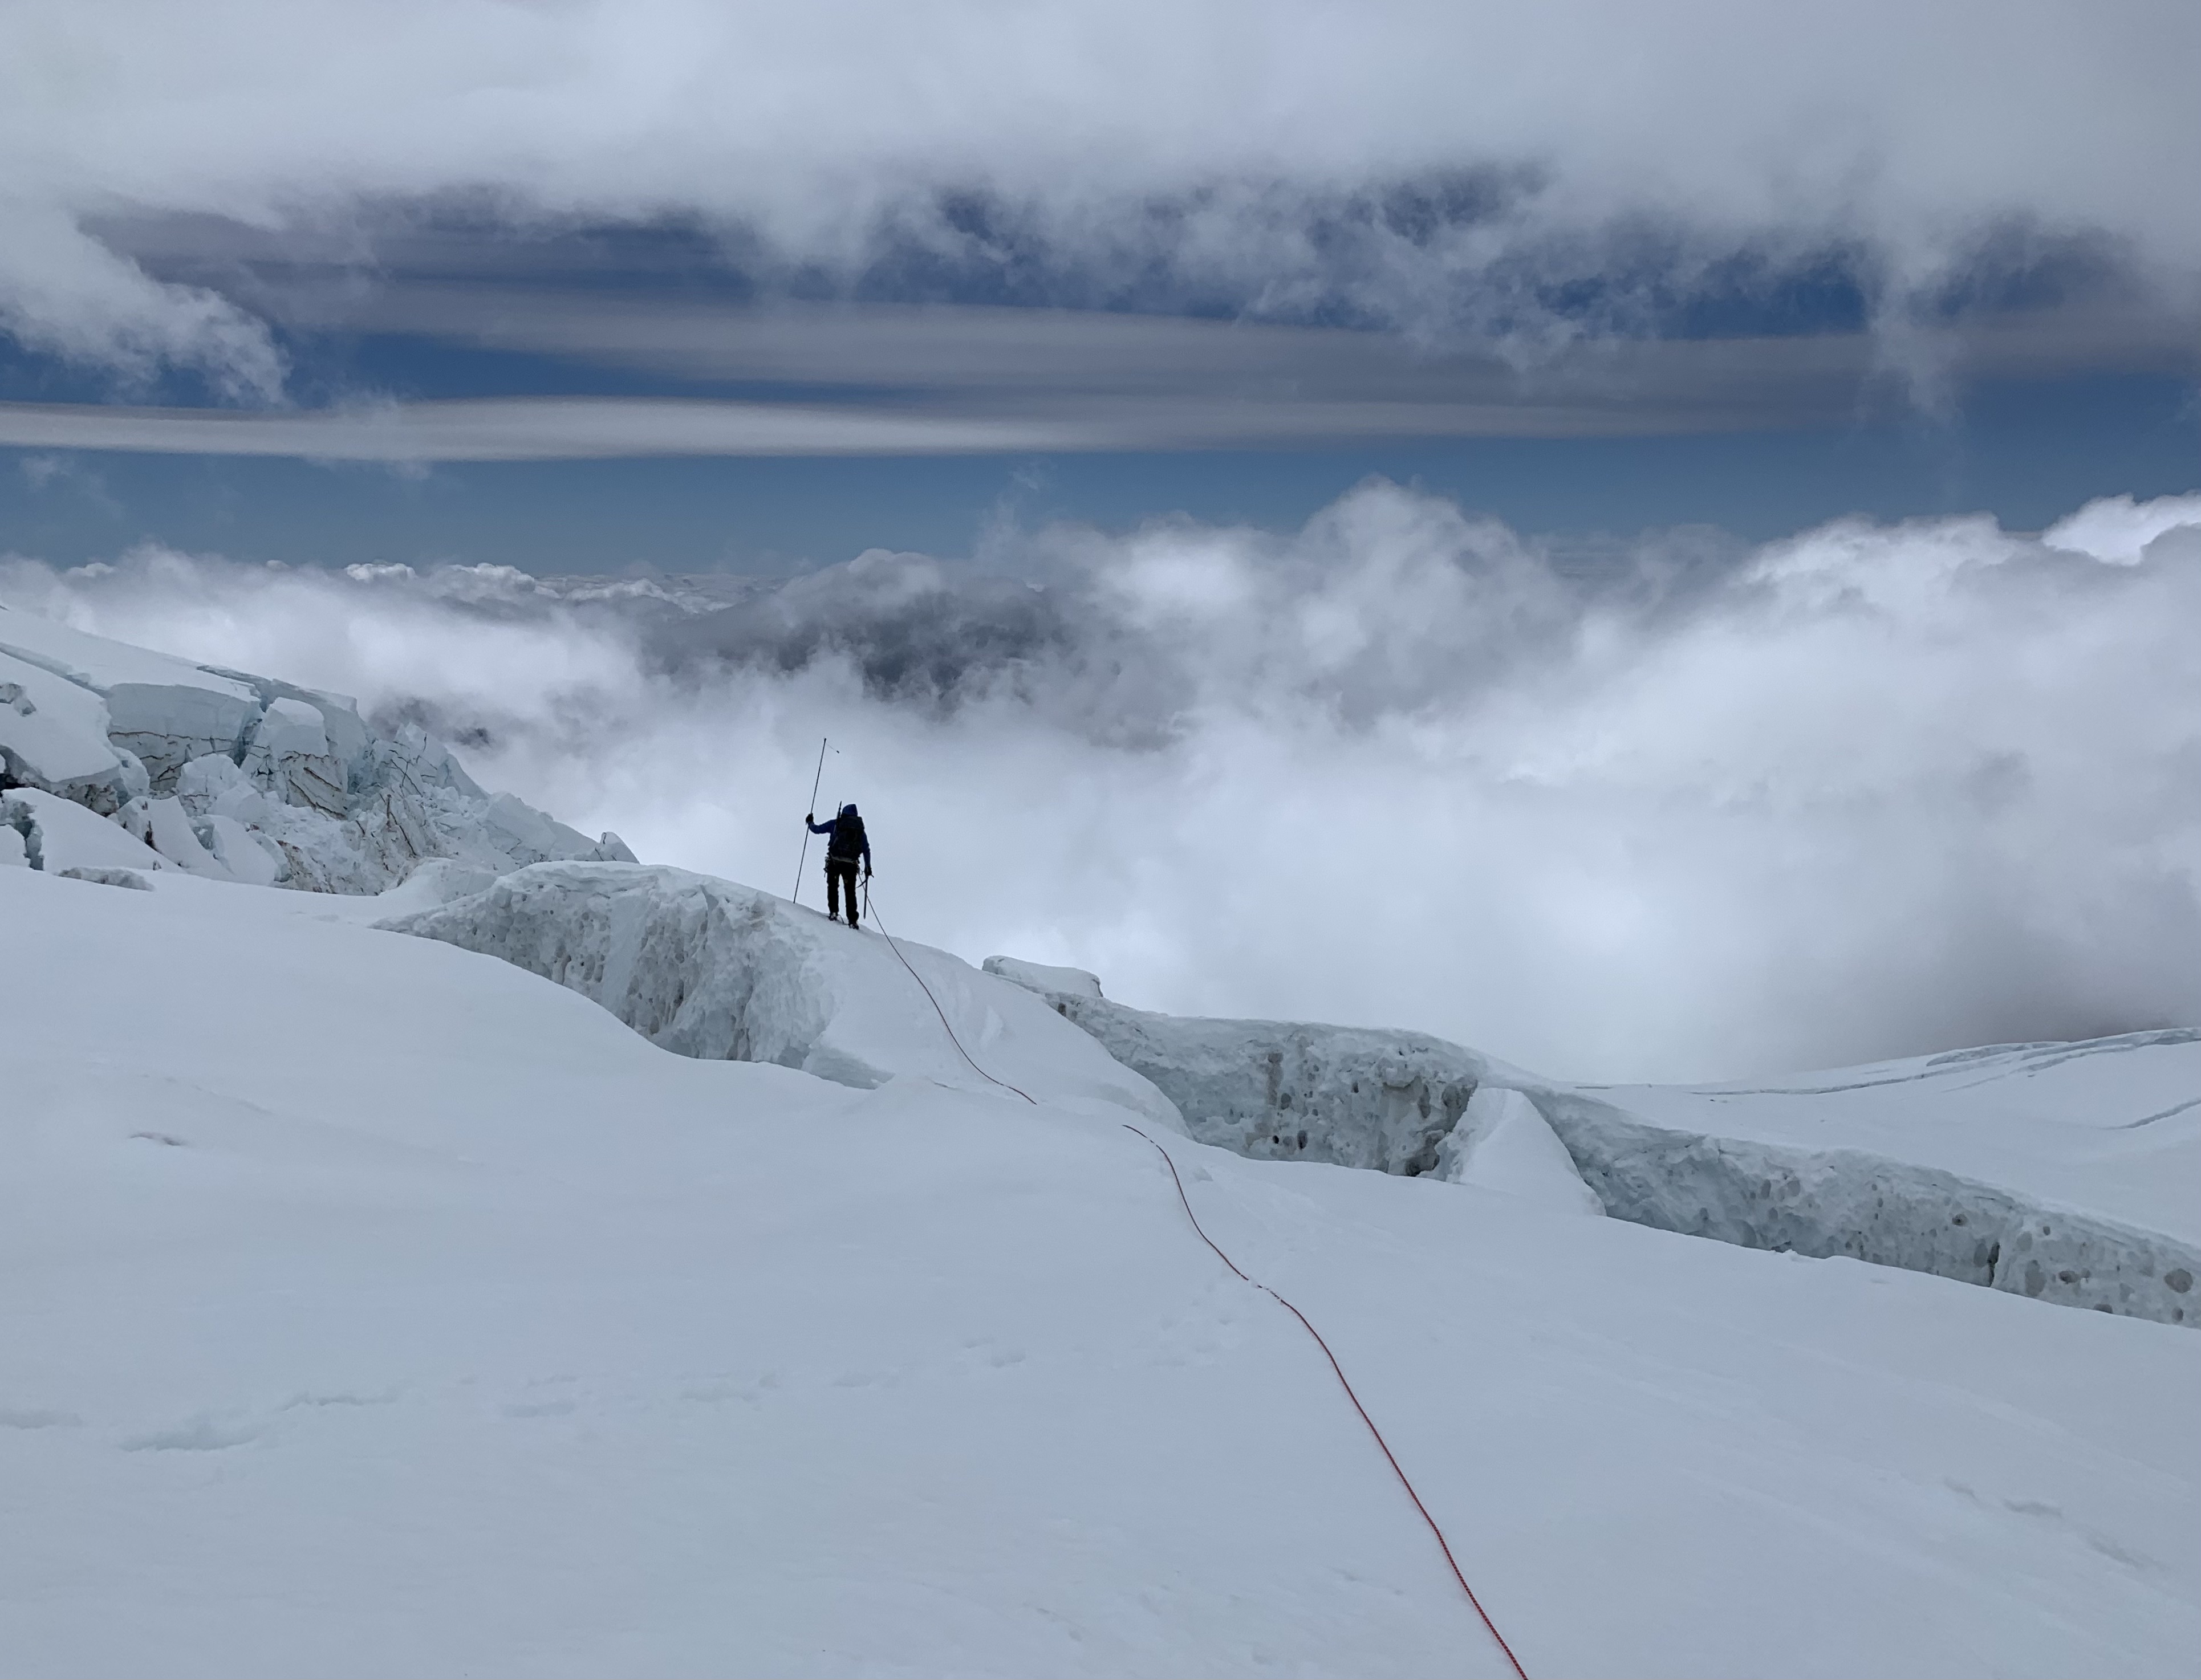
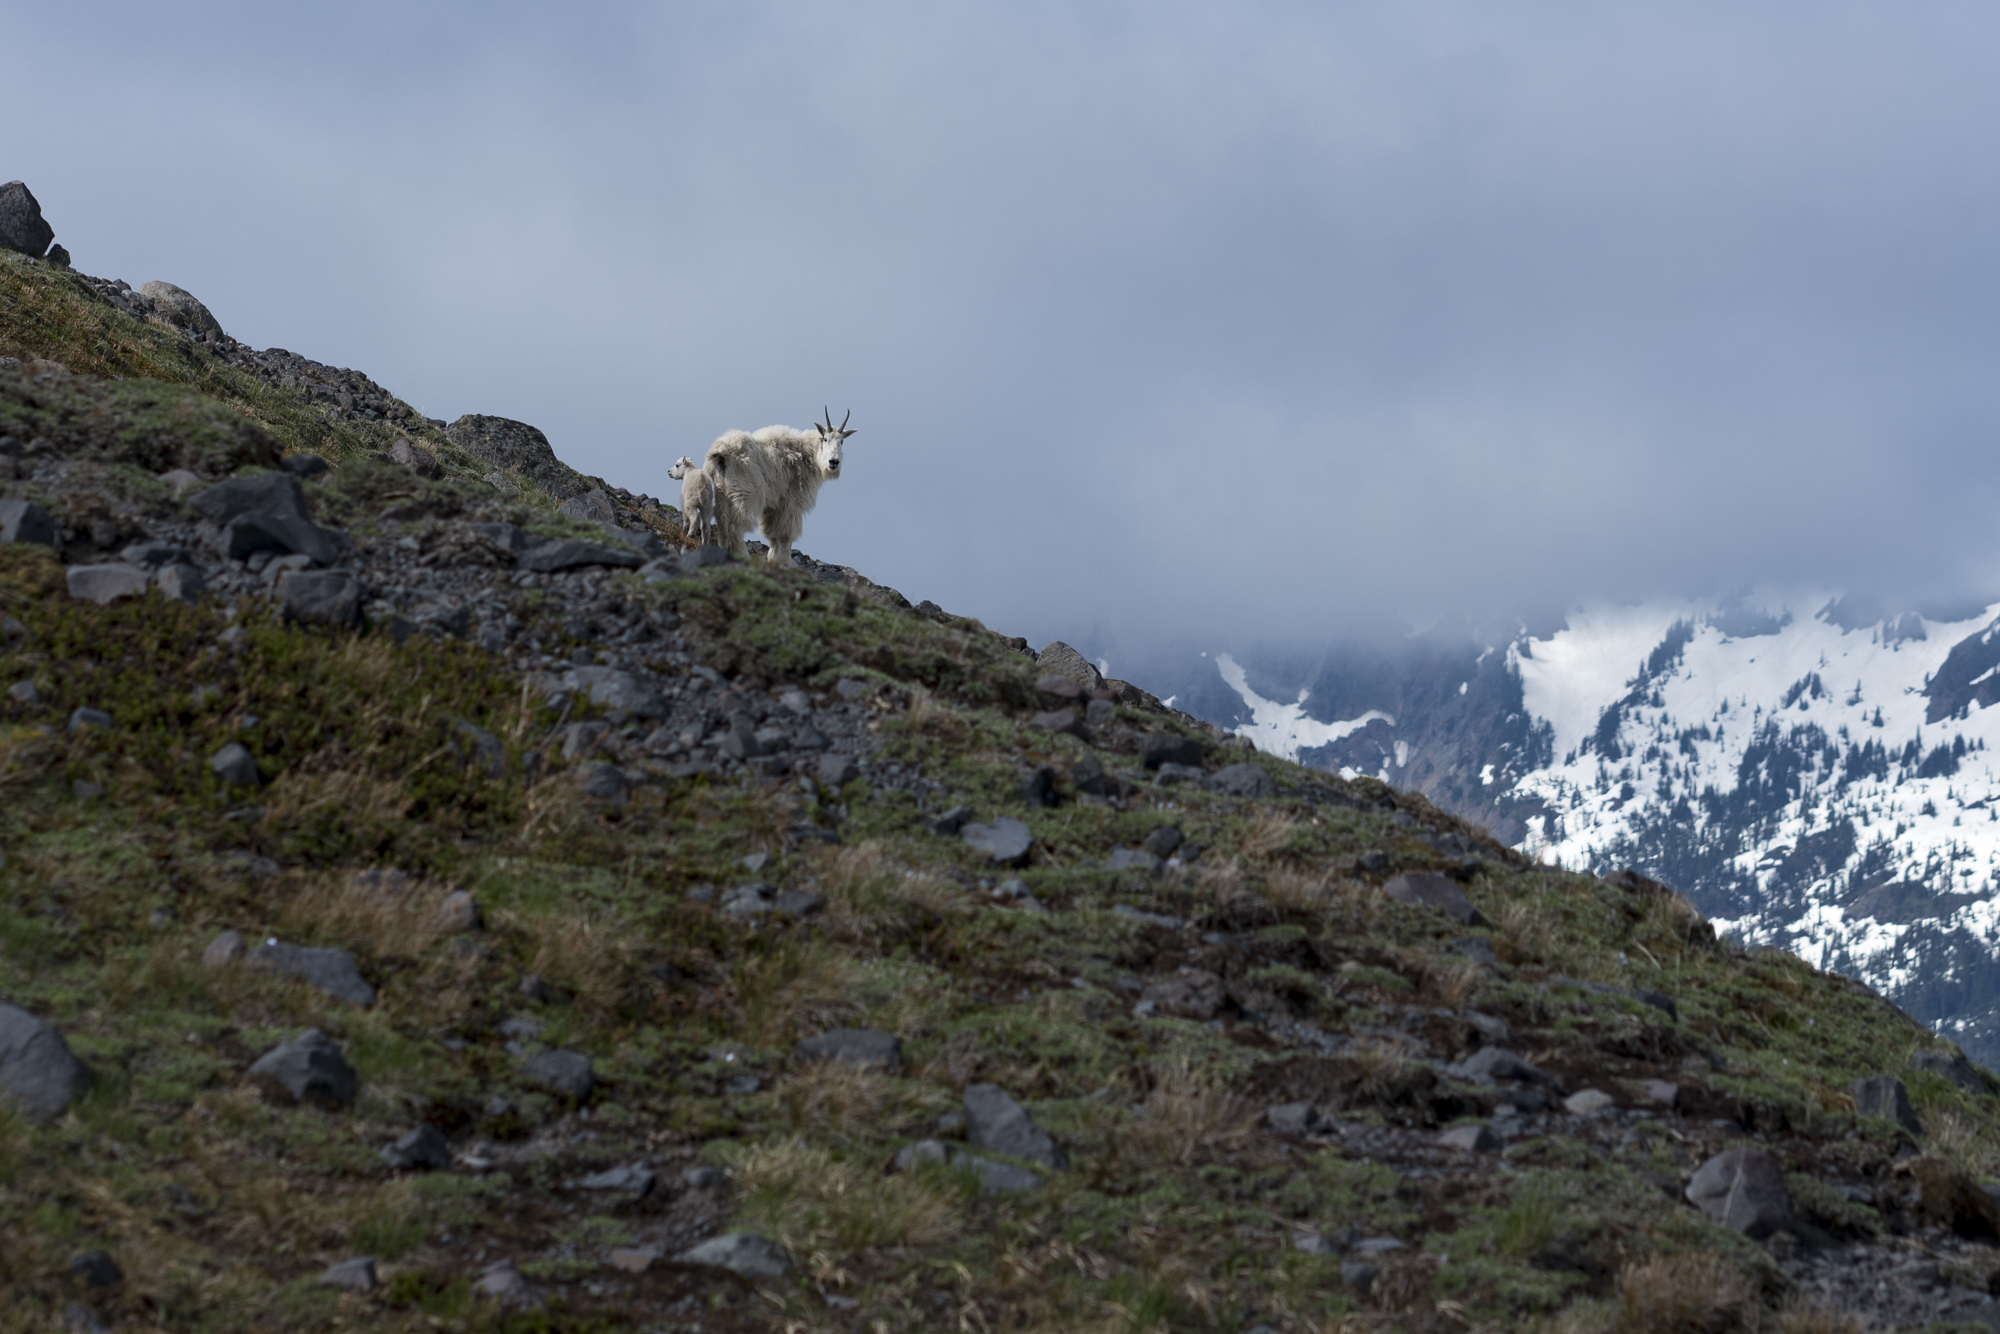
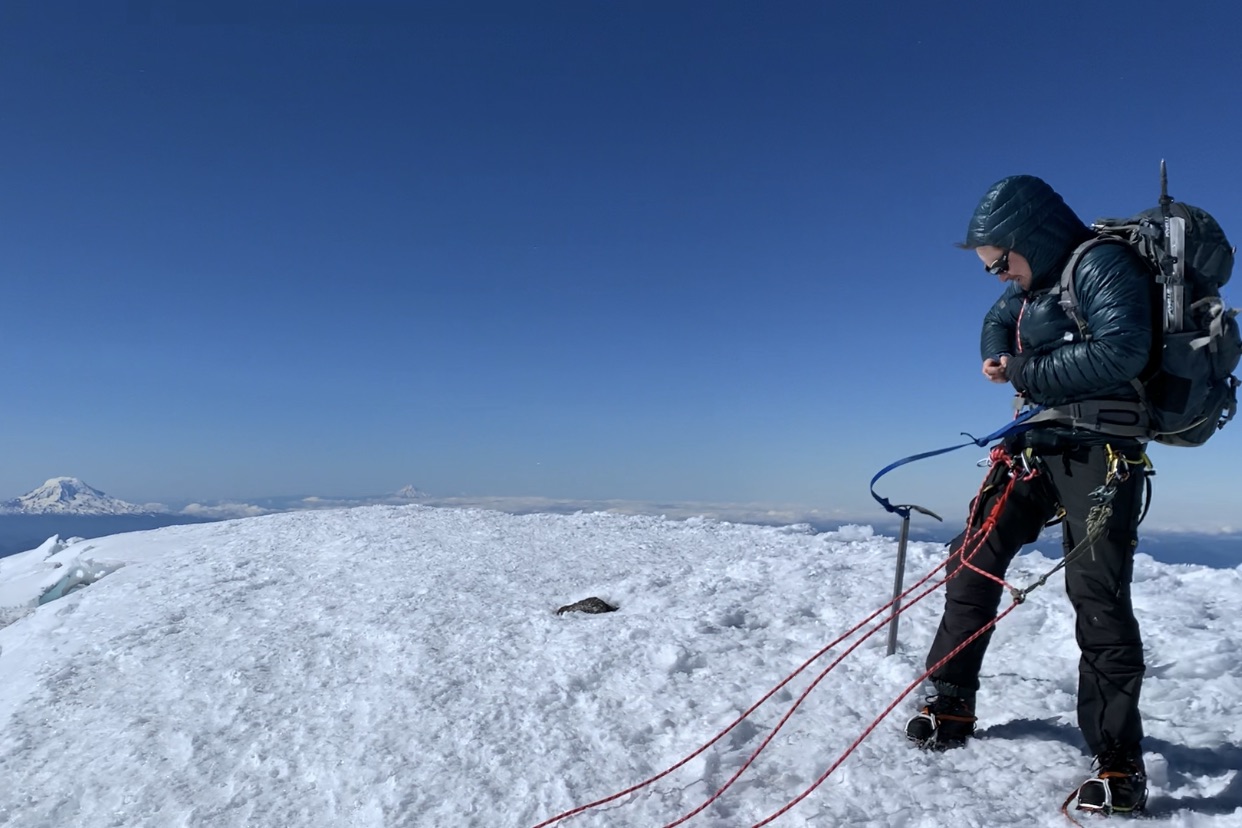
Trip: Tahoma / Mt. Rainier - Tahoma Glacier Trip Date: 06/26/2022 Trip Report: A constant search for adventure, solitude, and punishing elevation gains led Tom and I to attempt Mt. Rainier’s Tahoma Glacier from June 26-29. Spring conditions in late June beckoned with the possibility of easier route finding on what we’d heard was a notoriously broken glacier. Our hope was to ascend straight up the Tahoma Glacier from Emerald Ridge, avoiding the detour to the Puyallup Glacier if possible. This turned out to be entirely possible with current conditions on the Tahoma. Day 1 After grabbing a permit at Longmire on Sunday morning, we departed the Westside Road parking lot around 10:30AM. We soon turned off onto the Tahoma Creek Trail and subsequently lost it shortly after it crossed onto the creek bed. Though ascending the creek all the way to the Wonderland Trail wasn’t terrible (actually quite beautiful), after descending the actual trail on our way back, I very much recommend trying to keep to the trail. Not only is Tahoma Creek Trail gorgeous, it’s easier going than the rocky creek bed. Keep your eyes peeled for spots the trail re-enters the woods along the left creek bank, though they are admittedly quite well-hidden. It took us about 5 hours in total to ascend to Emerald Ridge from the parking lot, with the last half mile or so covered in rapidly melting snow. The lower Tahoma looked navigable so we decided to head straight up the glacier from there rather than continue around to Tokaloo Spire and the Puyallup. We took a moraine to the hill at the very end of Emerald Ridge and found a perfect tent site for our low camp at 6000 feet (5.5 miles from parking lot). There was even a trickle of running water to avoid melting snow. Emerald Ridge Campsite Adams from Emerald Ridge Looking towards St. Andrew's Rock Day 2 We were off the next morning around 8AM with the goal of establishing a high camp near St. Andrew’s Rock. We began the ascent on climber’s right up a ramp and around a few broken bulges before eventually cutting leftwards towards the center of the glacier for the rest of the ascent to high camp. Overall, we found the Tahoma Glacier entirely navigable, with only a handful of snow bridges warranting probing. Anywhere that we chose to cross a bridge there seemed to be alternate ways around or over the crevasse, so we were never left feeling stuck or cornered. At around 10,400 feet we found a flat shelf on the glacier to dig out a tent platform that seemed clear enough of icefall hazards from the two massive séracs on either side of the Upper Tahoma route. It was 3:30PM (7.5 hours and roughly 2.5-3 miles from low camp). We relished some much needed shade in our tent and listened to the calming sounds of ice and rockfall from the towering walls on three sides. The Upper Tahoma looked in superb condition with multiple possible paths to the summit cap so we decided to avoid the Sickle. The forecast called for dropping temperatures and a chance of showers the following afternoon, so we decided to be up and moving early to avoid freezing in whiteout conditions on the summit. High Camp at 10,400' Day 3 We were up at 2:15AM and made the decision to take down the tent and stash it with extra gear in a snow pit because the wind coming up the glacier overnight was relentless and seemed to be increasing. We were off at 3:45AM with the first hints of dawn appearing above Liberty Cap. Some fortuitous ski tracks from a bold ski descent of the Sickle the day prior (strong work from that duo) helped us find our way through the massive crevasses separating the route proper from the glacier basin. It was just above freezing and we found firm but good cramponing conditions on the bottom 2/3 of the route. As the sun rose, the snow steepened into a series of ice cliffs/shelves in the upper third of the route and we punched through the first line in a gully on the left that is bisected by a crevasse that will eventually make that path unnavigable (another gap a few hundred feet right of this one also looked reasonable). We then crossed rightwards up a steep slope and then crisscrossed left and right across the face 2-3 times seeking alternating ramps through the steeper ice shelves. We never felt the need for a picket or ice screw and never required a second ax. The wind was out of the southwest and getting stronger as the morning went on. By 8AM we had climbed through the last of the shelves and found ourselves on the thankfully relenting steepness of the summit cap in temperatures that were well below freezing. We hit the West Rim just after 9AM and reached the empty summit at 9:15AM in winds too strong to stand upright in. Unable to even shout our congratulations to each other in the wind, we snapped a few hasty summit photos and promptly retraced our steps across the ice cap to the Upper Tahoma. Summit! We downclimbed through the shelves and finally made our way back to high camp by 2PM (5.5 hours up, 4.5 hours down). The snow was softer on descent as direct sun begins to hit the route at 9AM this time of year. We packed up our high camp and proceeded down glacier to low camp around 3PM. After a 3-hour slog through slush and intermittent zero-visibility fog (which would have required a GPS track if our footsteps from the day prior weren’t still visible), we arrived back at our low camp on Emerald Ridge around 6:15PM, 14.5 hours after departing for the summit. Day 4 After 10 glorious hours of sleep, a very relaxed breakfast, and a brief visit from a mountain goat (who seemed moderately disappointed that we were occupying her ridge line) and her baby (who seemed completely oblivious to our presence and instead very preoccupied with jumping around), we began the trek down the Wonderland Trail towards the car at 11:45AM the next day. We found the upper end of the Tahoma Creek Trail and marveled at what we had missed by taking the creek bed on the ascent. Tahoma Creek Trail During our descent of Tahoma Creek Trail we had the good fortune of crossing paths with Pope and Dwayner, two apparently (formerly) prolific CascadeClimbers contributors. Such a joy to chat about routes and a bit of Rainier lore and history with you two, thanks for imparting some wisdom onto us relative Rainier rookies. Overall, in its current condition, the Tahoma offers spectacular isolation on a completely different aspect of the mountain, lengthy glacier travel, and a moderate final climb to the summit cap. Gear Notes: Probe was necessary. Didn't require pickets or screws in current conditions. Approach Notes: Try to stay on the Tahoma Creek Trail if you use it for approach.
-
[TR] Forbidden Peak - North Ridge 07/15/2018
samueleley replied to samueleley's topic in North Cascades
Thanks @JasonG we'll give that a try next time! -
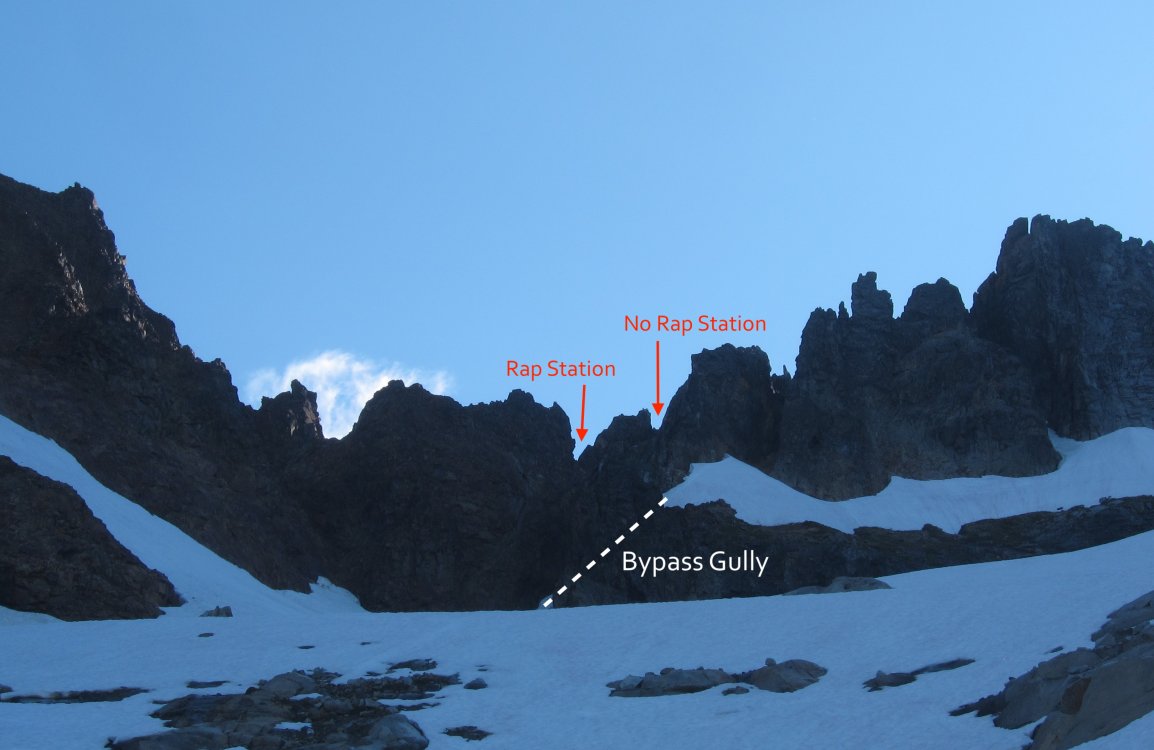
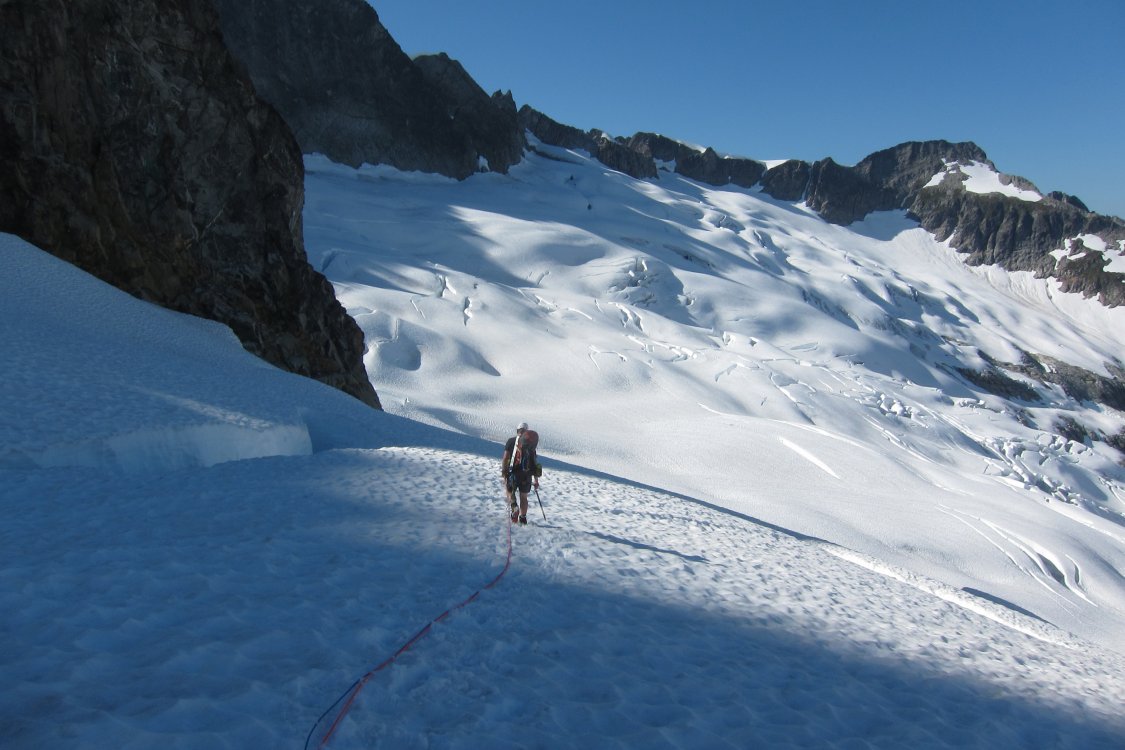
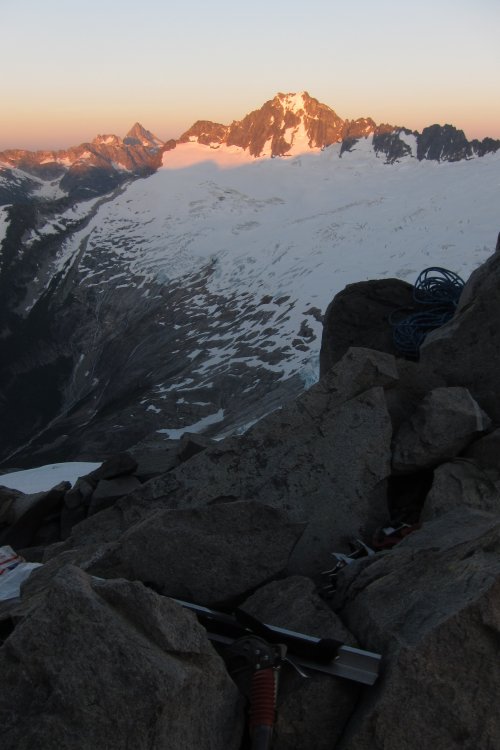
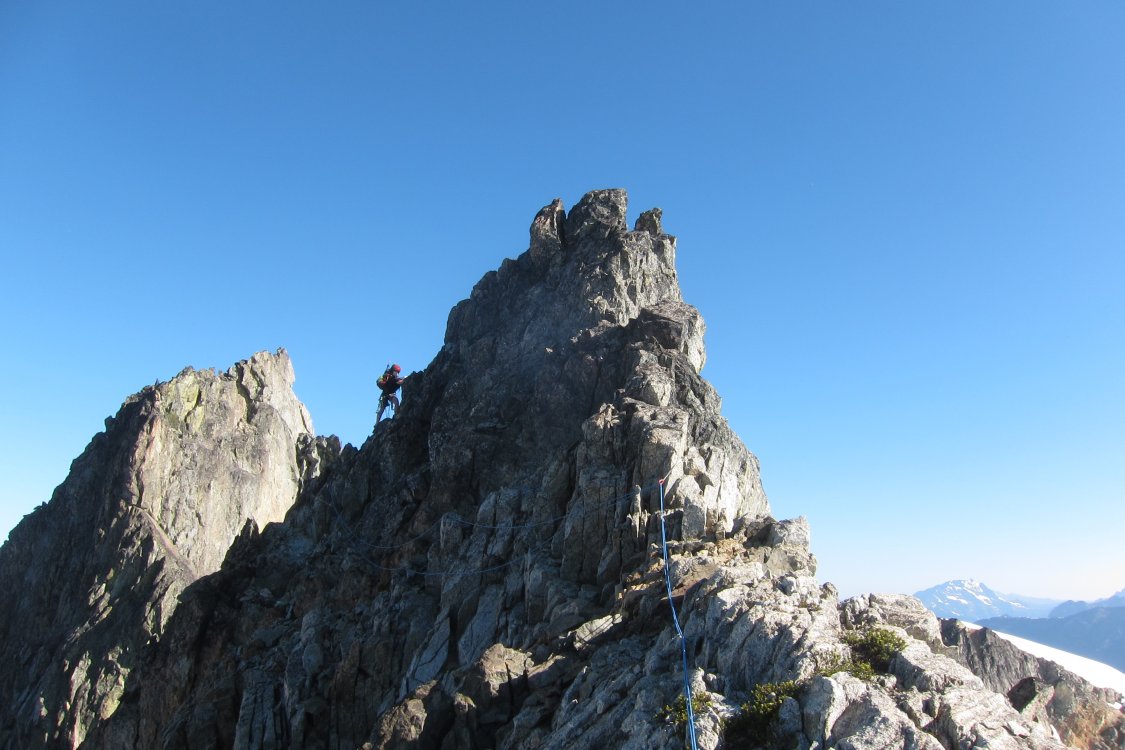
Trip: Forbidden Peak - North Ridge Trip Date: 07/15/2018 Trip Report: From July 15-17, Tom and I climbed the beautiful North Ridge of Forbidden in a slow but safe/deliberate fashion. The ridge was the longest alpine rock route either of us had attempted yet but we hoped to be able to pull off all the technical climbing in two days. We left the Eldorado Creek parking lot around 9 AM and reached the base of the Sharkfin Col bypass gully around 1:00 PM. The gully is in great shape, still filled with lots of snow. We crossed to rock below the top of the gully and made the mistake of climbing to a notch that was too high and too far east along the ridge. We found no sign of a rap station and had to downclimb to the notch to climber's left of this higher one to find a spot to rap over to Boston Glacier. The Sharkfin Col notches & Bypass Gully Right now a single rap brings you safely to a large pile of icefall debris that you can navigate to get onto the Boston Glacier without difficulty. There were multiple other rap stations along the way down to the debris from the notch. The traverse to the North Ridge from the rap was easy and took us about an hour. The Boston Glacier is in great shape. The gully to access the bivy notch on the North Ridge is almost completely melted out but the moat is still passable. We crossed to the rock and found a third class move and then a short second class scramble to gain the notch. Bivy Notch center-left We found another pair of climbers enjoying the afternoon at the notch. Their goal was the NW Arete and we had a great time watching them fly up that route the next day from our positions on the NR. Great meeting you guys! After a quick dinner and a birthday cookie for me, we settled into the two smaller bivy spots for the sunset and sleep. I did wake up around 2:30 to find a snafflehound gnawing away at the brim of my hat so be careful out there with your salty things, kids. We think the same little guy took a pair of socks that mysteriously disappeared overnight. Sunset on Buckner from the bivy notch We started off the next morning at 7:50 AM and quickly moved through the 5.6 crux left-leaning corner that rises almost straight out of the bivy notch. It was just fine leading it in mountaineering boots with an (overly) heavy pack. From there we encountered mostly moderate, super fun third class scrambling all the way to the lower snowfield. We simul-climbed to the lower snowfield, but there were stretches where the rope didn't feel necessary. Tom follows shortly after leaving the bivy Both snowfields are still completely covering the ridgeline, so a bypass on rock on climber's left isn't available. We put crampons on to cross the first snowfield, which was pretty flat and easy to get across without an ax. The climbing above the first snowfield felt harder than the lower ridge and we climbed mostly on the left (east) side of the ridge on ledge systems and in gullies. We almost exclusively simul-climbed and placed a lot of cams and slings. I felt there was at least one low/mid fifth class move to get back up onto the ridge crest from the left side of the ridge. Once back onto the ridge crest we found lovely, exposed, knife edge climbing on solid rock all the way up to the second snowfield. The ridge between the lower and upper snowfields We reached the upper snowfield around 12:30 PM and stopped to melt snow to refill our 6L of bottles. This turned out to be a good move because we didn't encounter snow again until midday the next day. The upper snowfield has a much steeper angle and an ax and crampons were definitely nice. The climbing above the upper snowfield felt like a significant increase in difficulty from what we'd encountered along the ridge between the lower and upper snowfields. We slowed down and pitched out the climbing in short pitches several times. We carefully considered our route-finding decisions. Teams with more simul-climbing experience in fourth class terrain could move through this section much faster than we did but we felt better with a belay on several occasions. We climbed on both sides of the ridge as well as on the ridge crest itself following good cracks and solid rock. The climbing was steep but mostly third/fourth class with a few moves that felt like low fifth. We watched the pair we'd met at the bivy notch dance up the upper pitches of the NW Arete which was great entertainment as we slowly but surely moved up our ridge. Just below the summit we left the ridge to scramble up a third class gully on the right (west) side of the ridge before reaching the top at 6:20 PM. The North Ridge from the Summit We quickly began our descent of the West Ridge with three single rappels from obvious rap stations. After the third rap we lost all sunlight and stopped to bivy for a second night about halfway down the West Ridge. We found two relatively flat spots to lay out our packs and some rocks to make for a surprisingly enjoyable night in a relatively precarious spot. Some trail mix and beef jerky served as dinner but we fortunately had plenty of water left. We watched a beautiful moonset and headed to bed. West Ridge Bivy We were up by 6 and could already see several teams starting off up the West Ridge from the notch. After a Clif Bar, we made one more rappel down to ledges that we could scramble along to get down to the West Ridge notch. Two full 60m rappels got us down the Cat Scratch gullies to Boston Basin. Gear Notes: Two half ropes (only used one, except in the Cat Scratch rappels) 9 cams from 0.3 to 2 with alpine draws (used every one) Rack of nuts (used two, didn't need them) 8 slings (used every one) Mountaineering boots Approach Notes: Don't climb to the highest notch in Sharkfin Col