Kuato
-
Posts
66 -
Joined
-
Last visited
-
Days Won
20
Content Type
Profiles
Forums
Events
Everything posted by Kuato
-
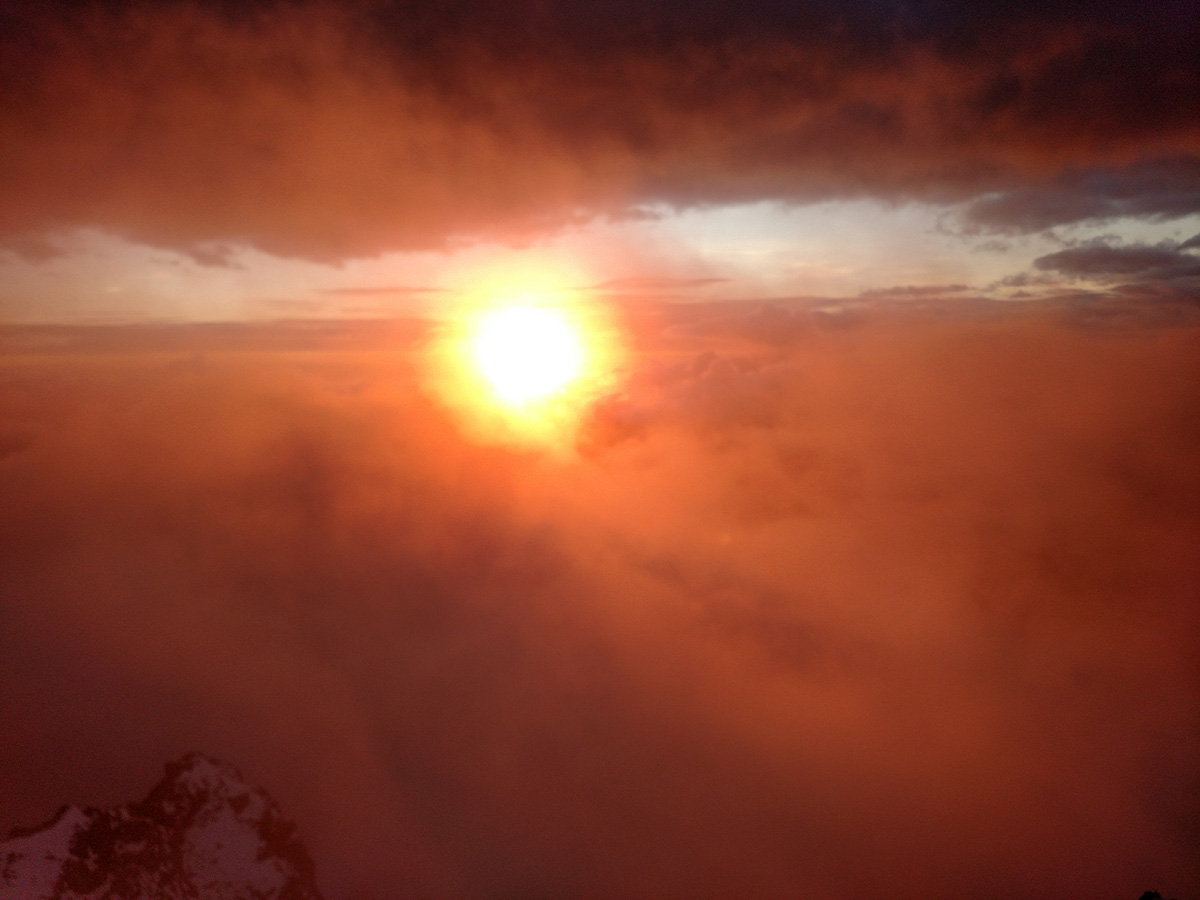
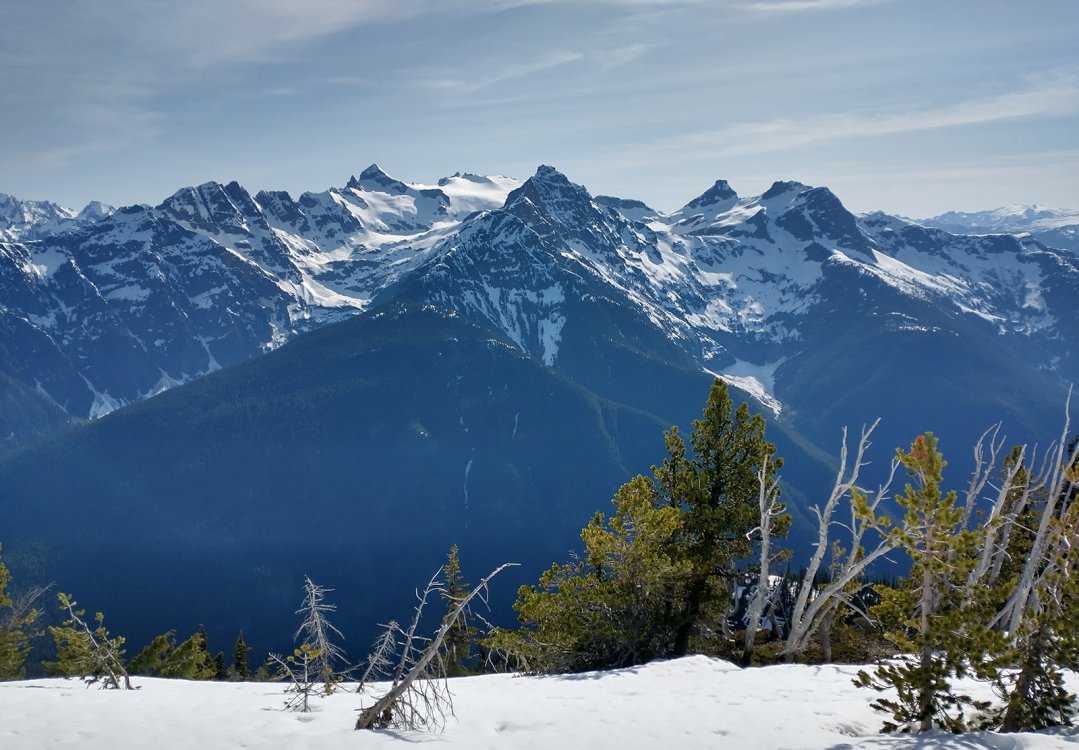
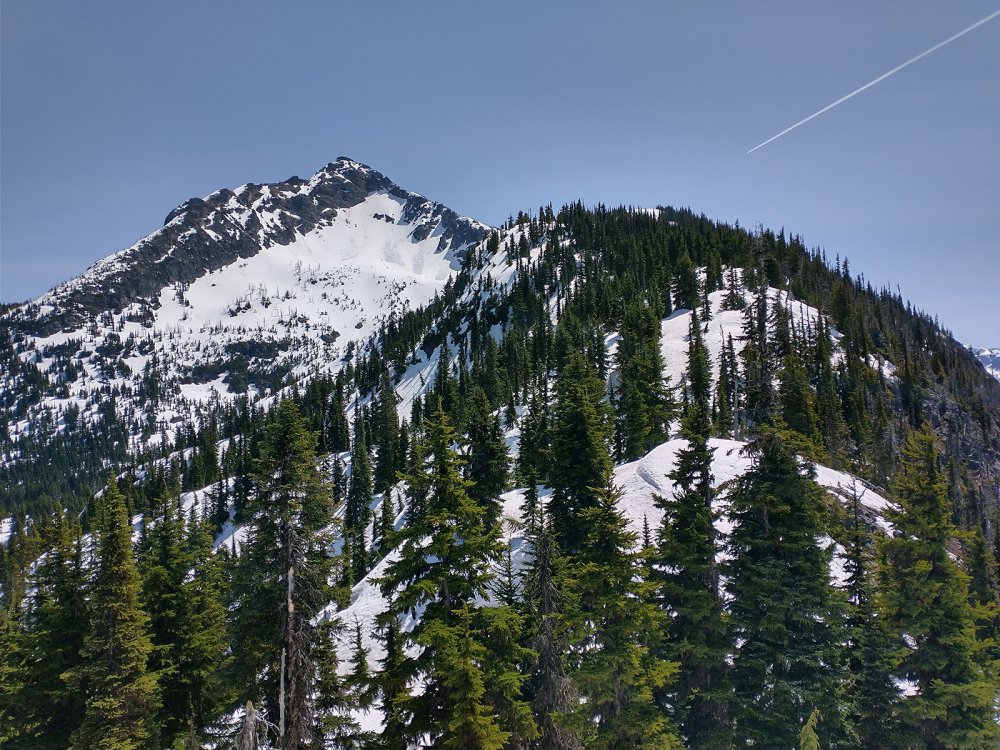
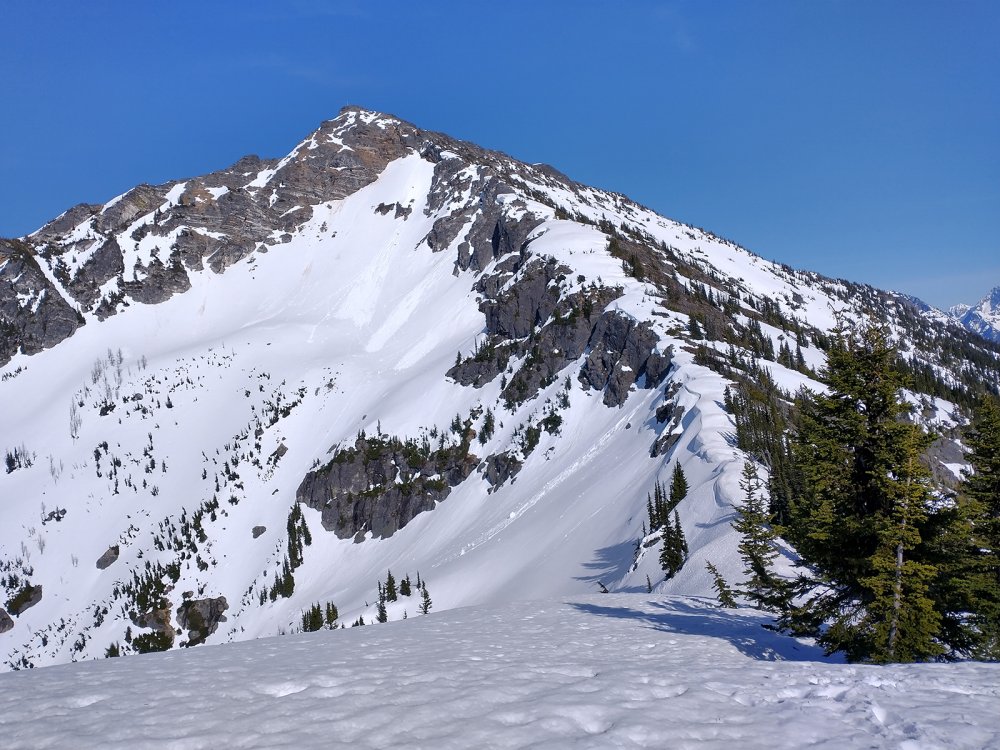
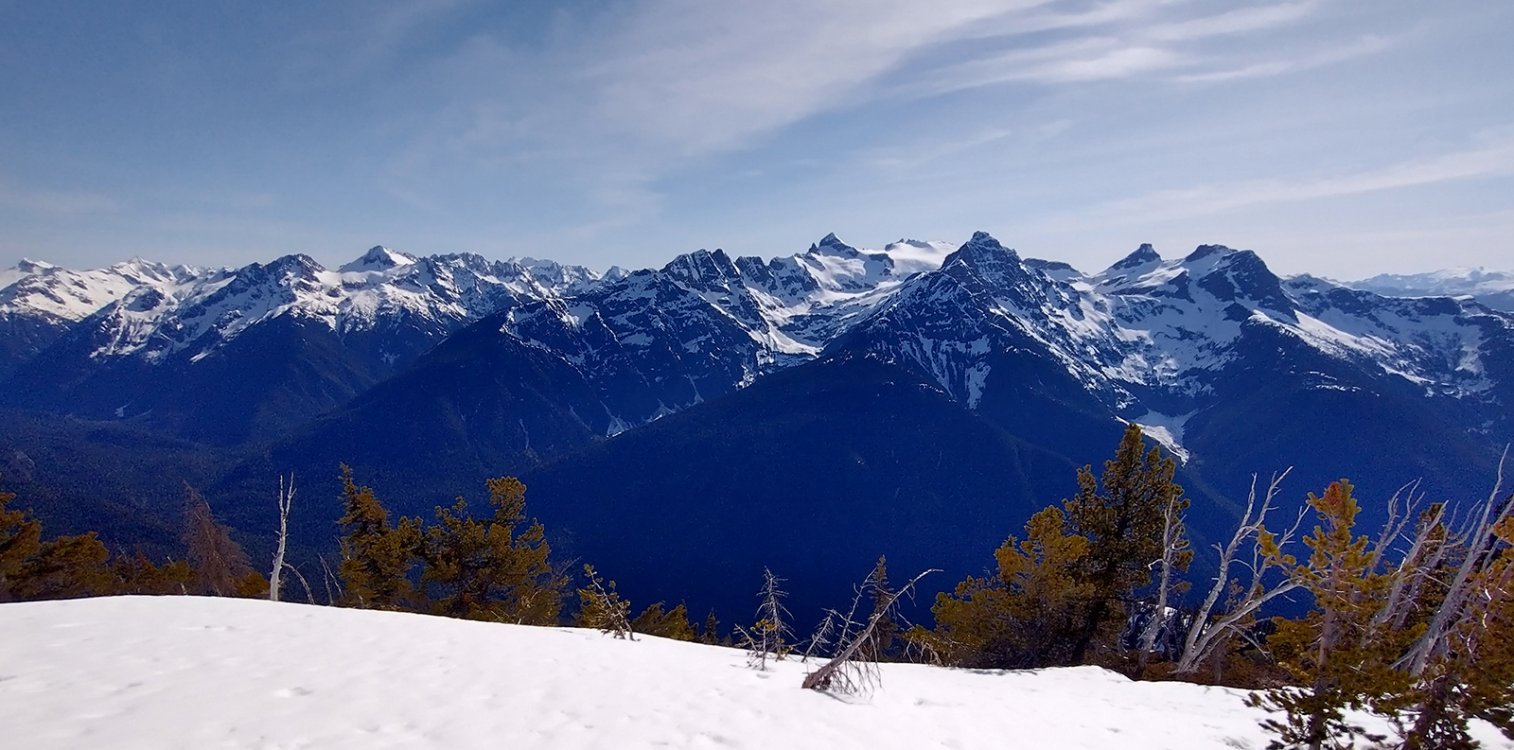
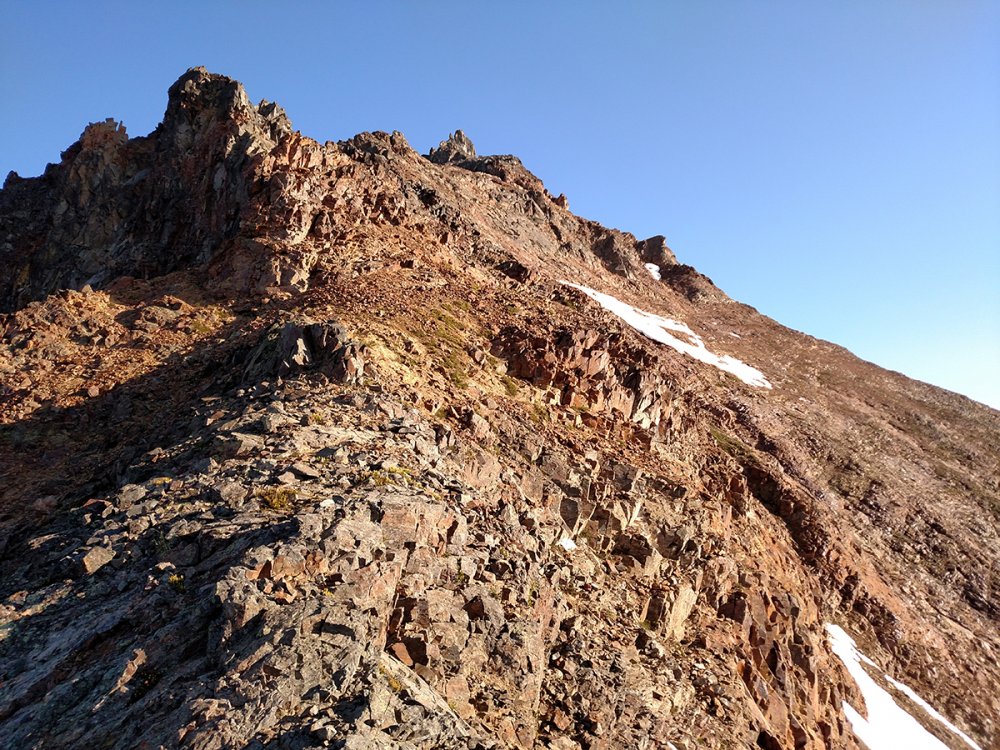
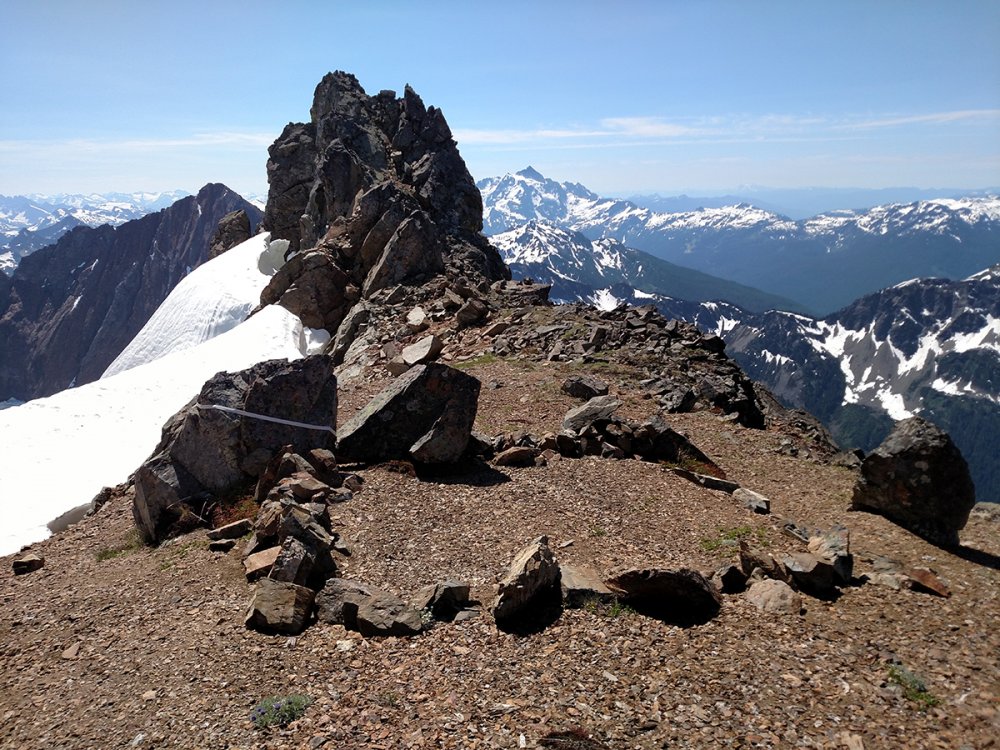
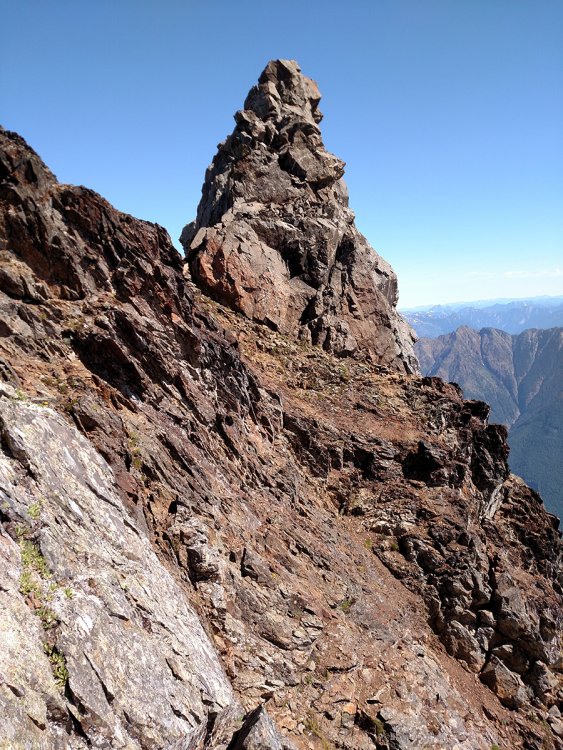
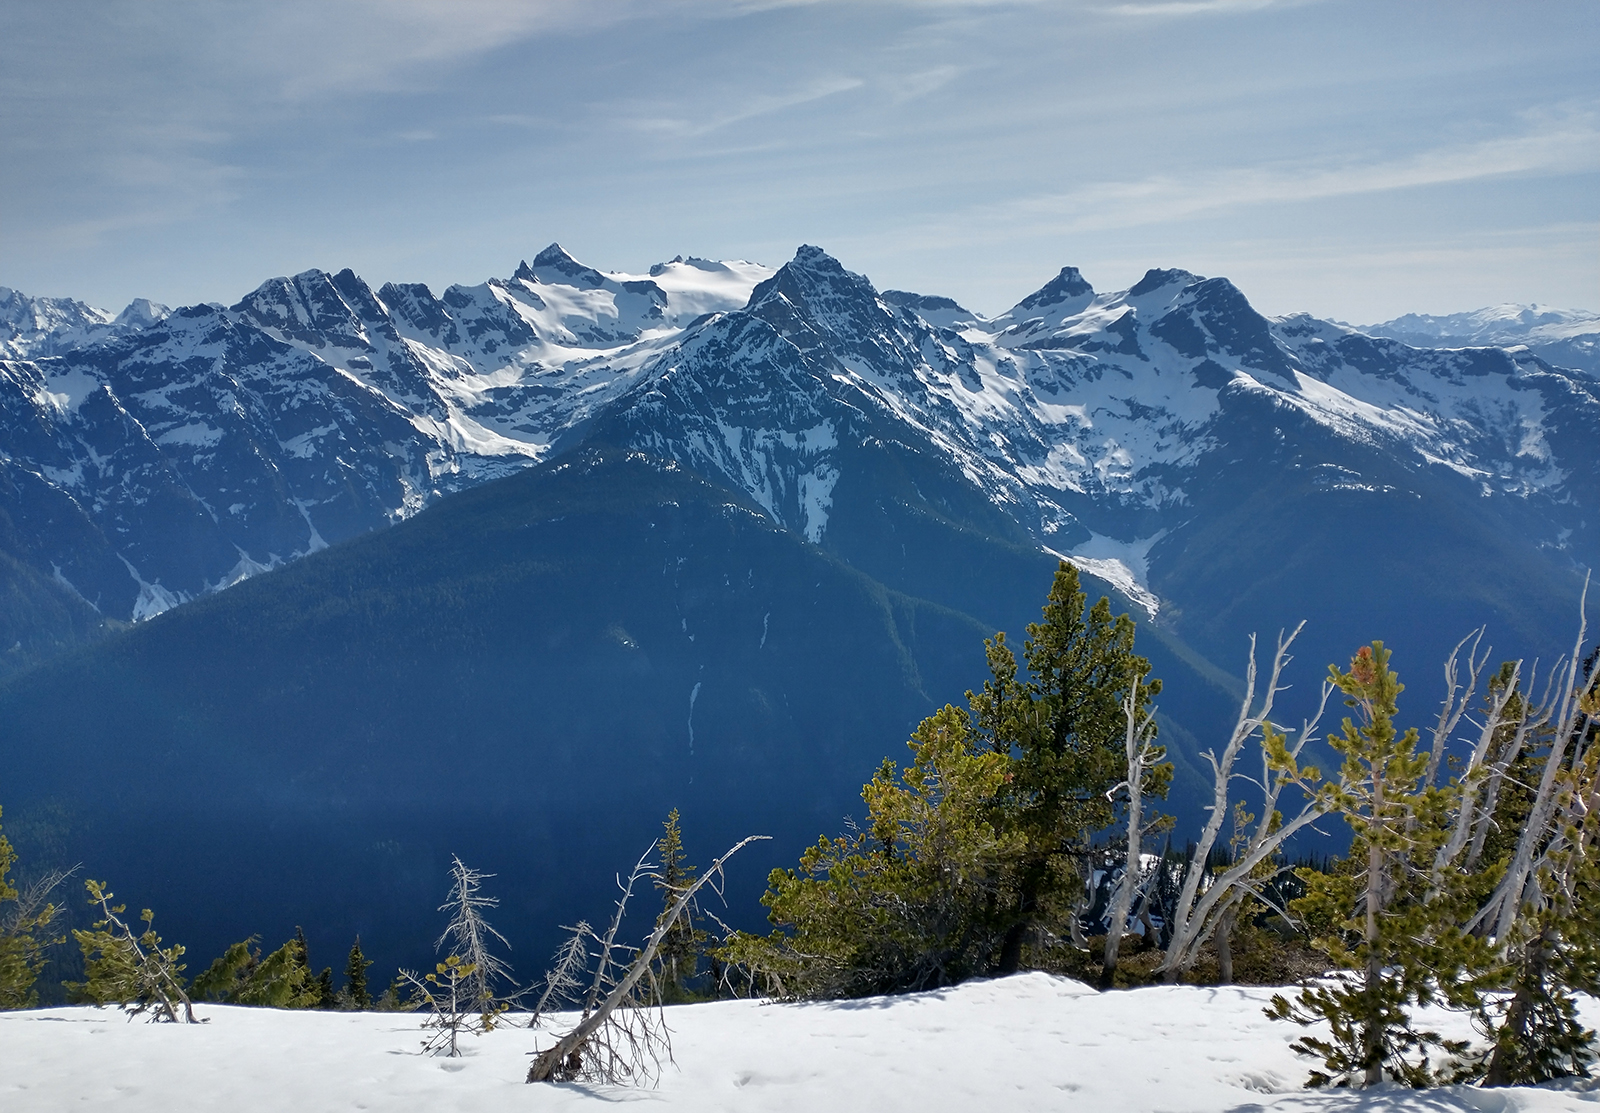
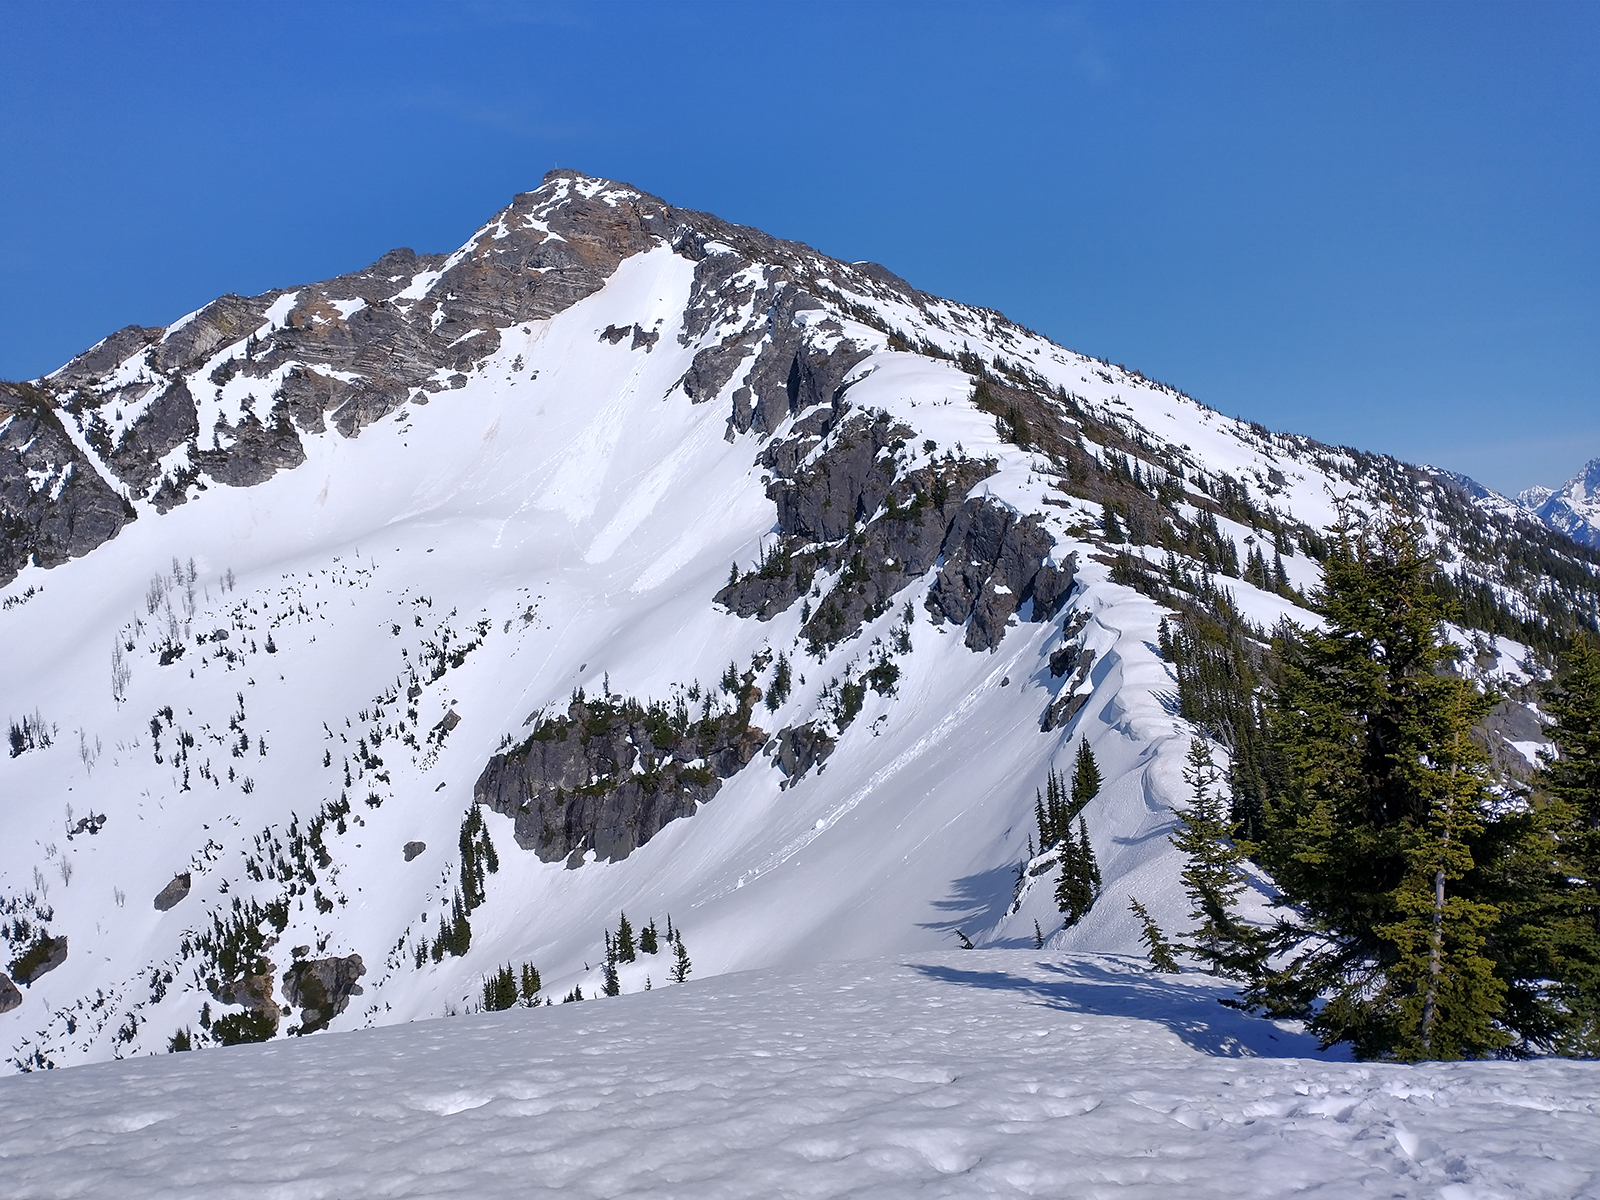
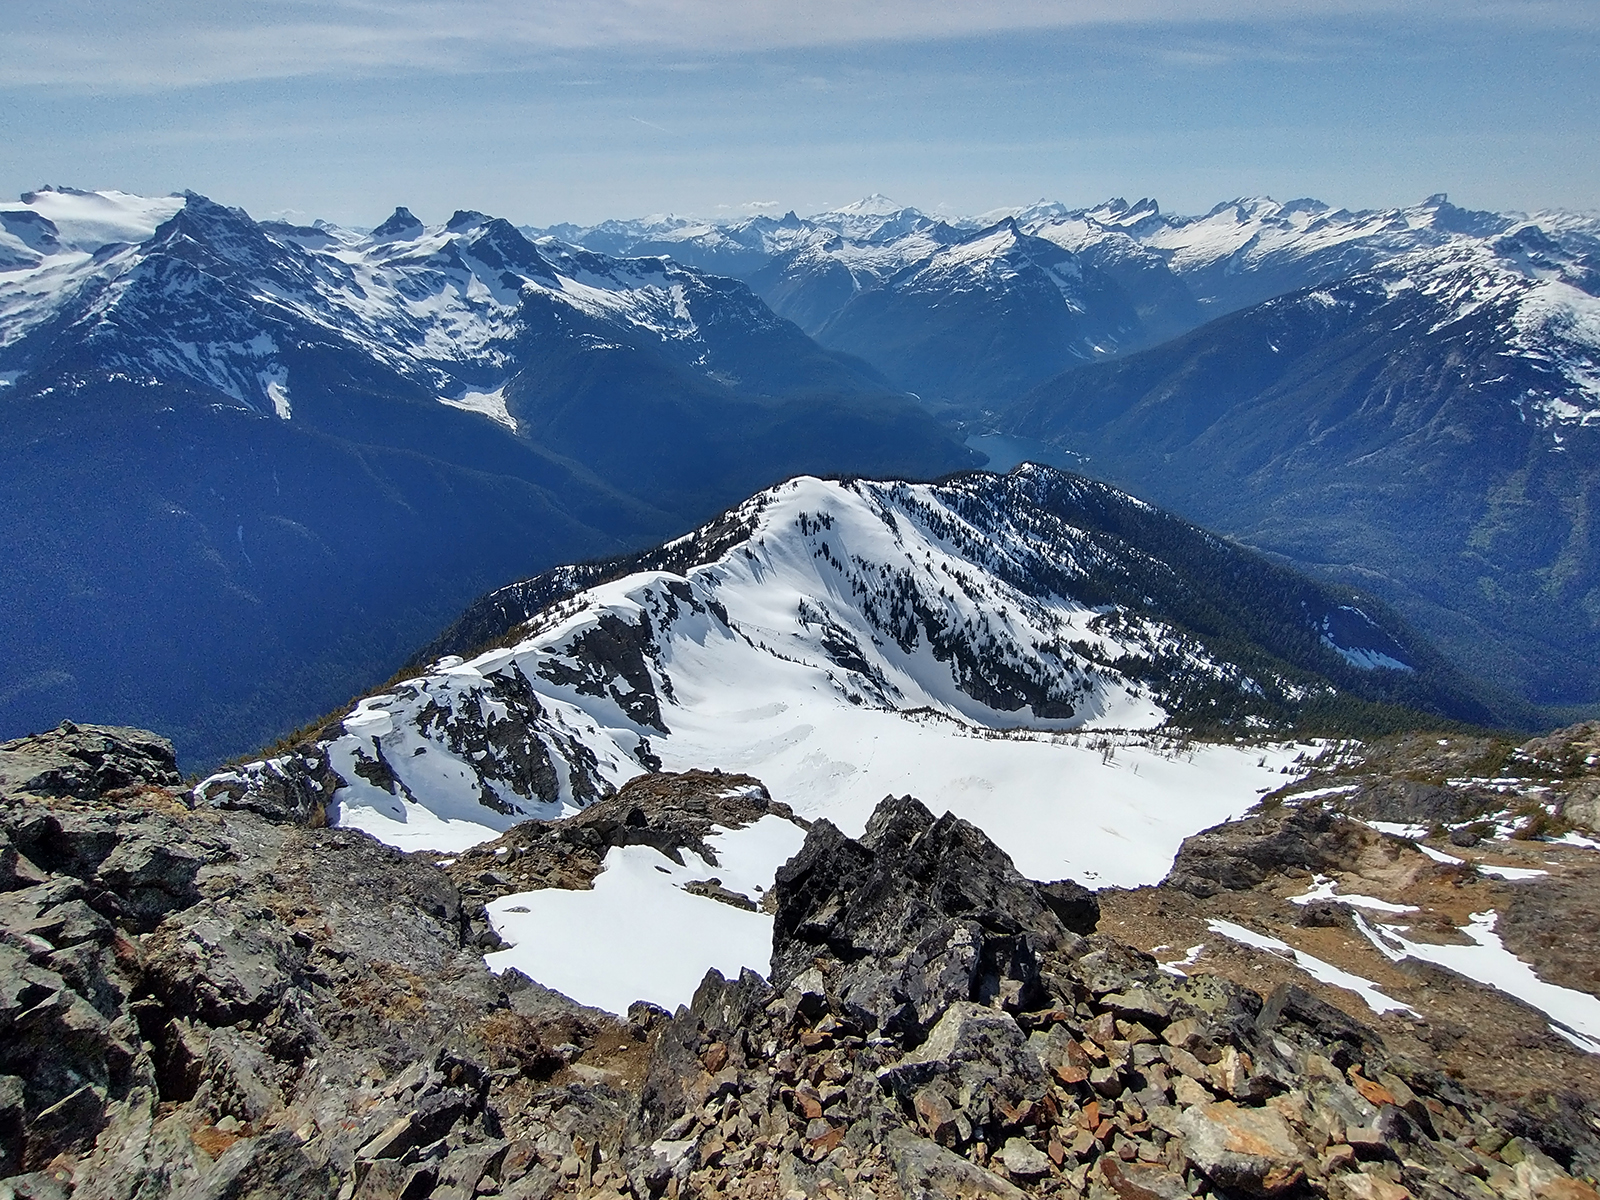
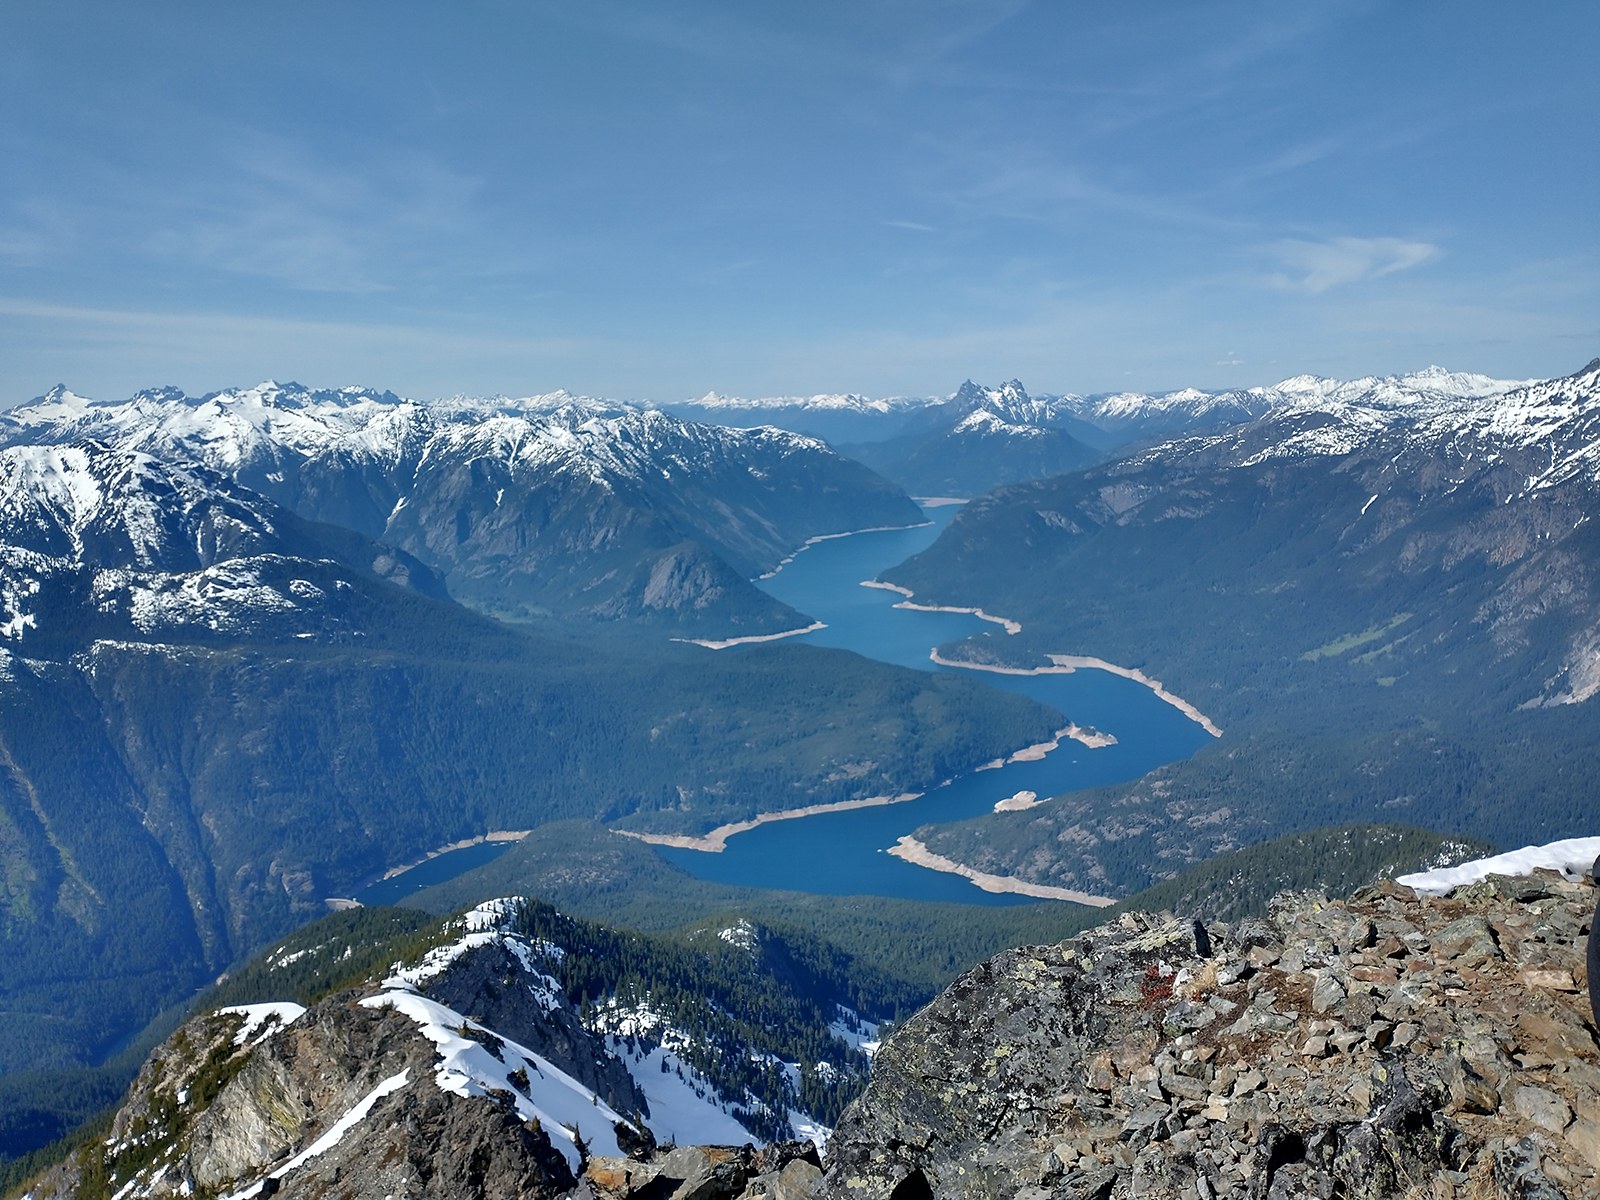
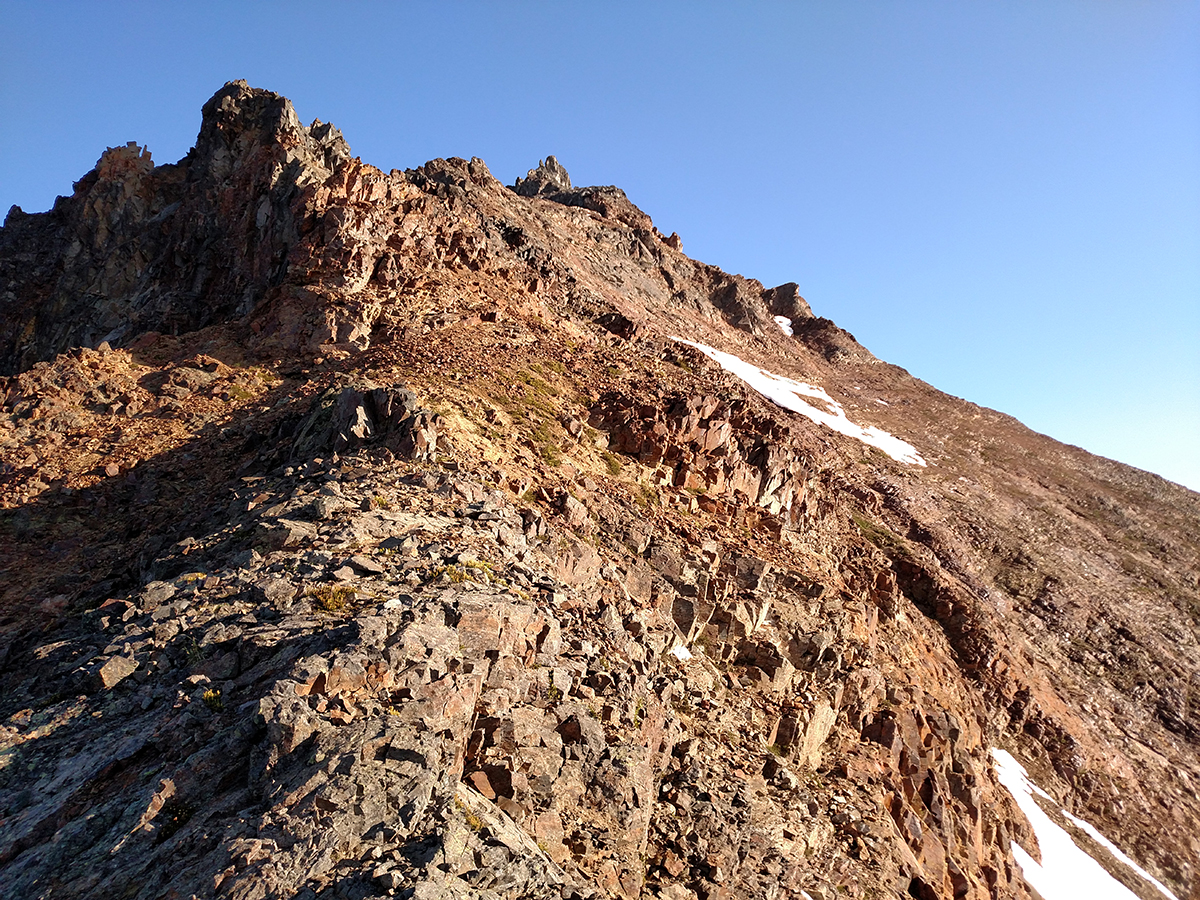
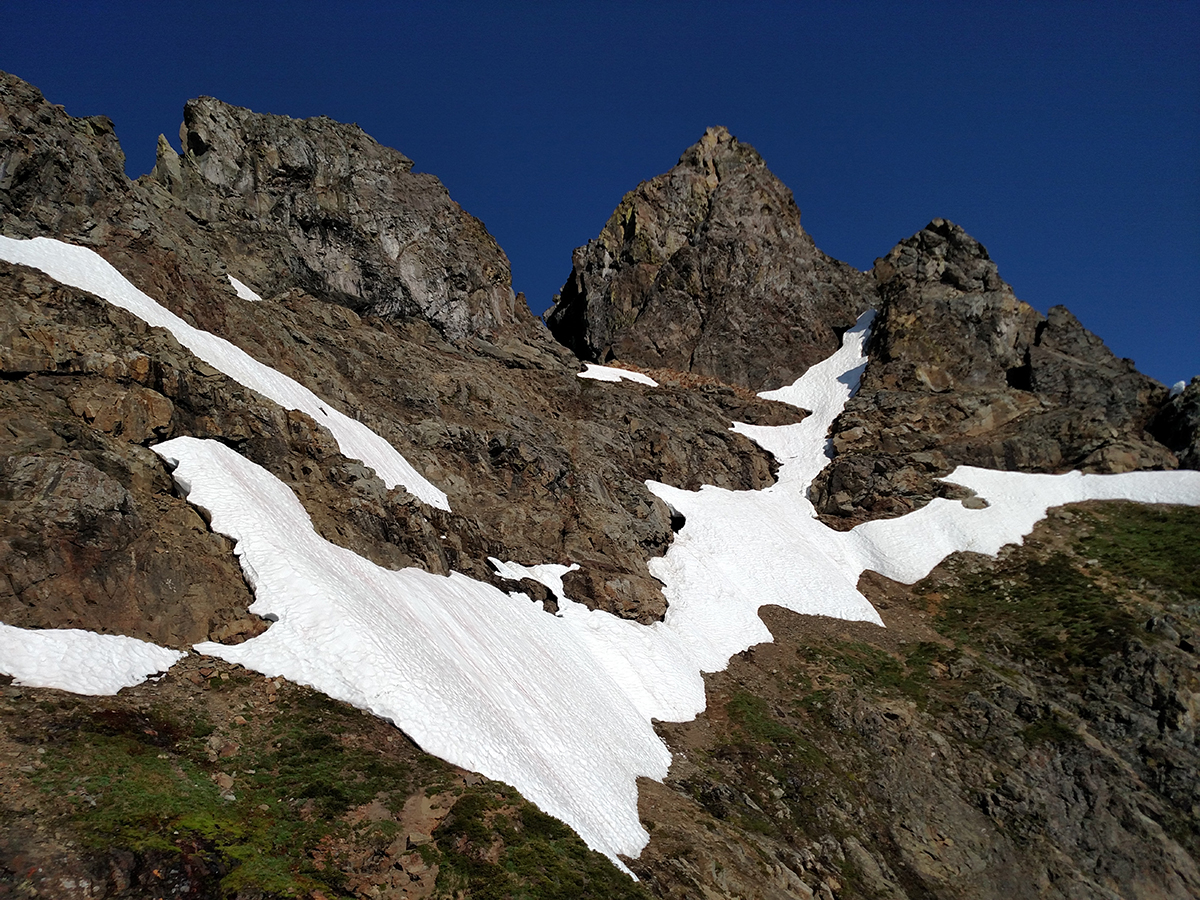
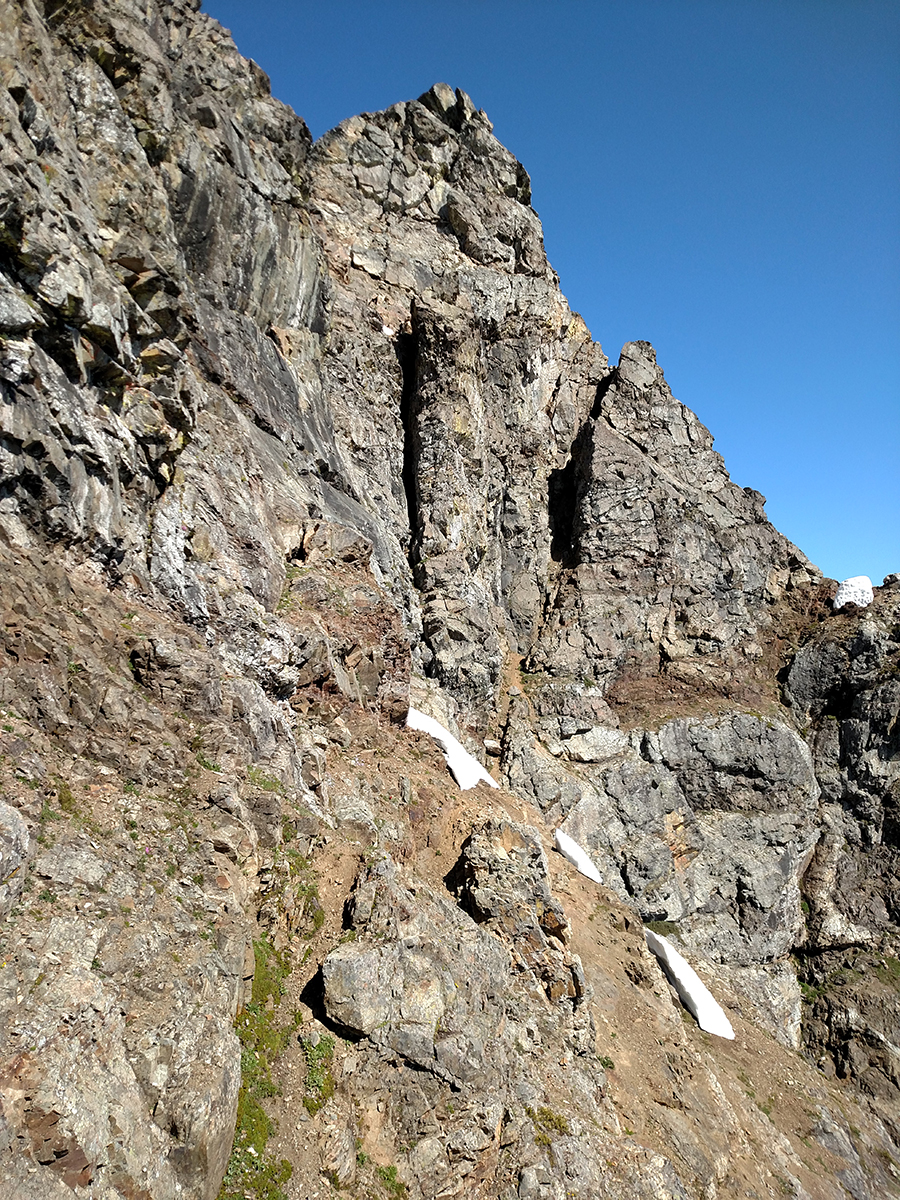
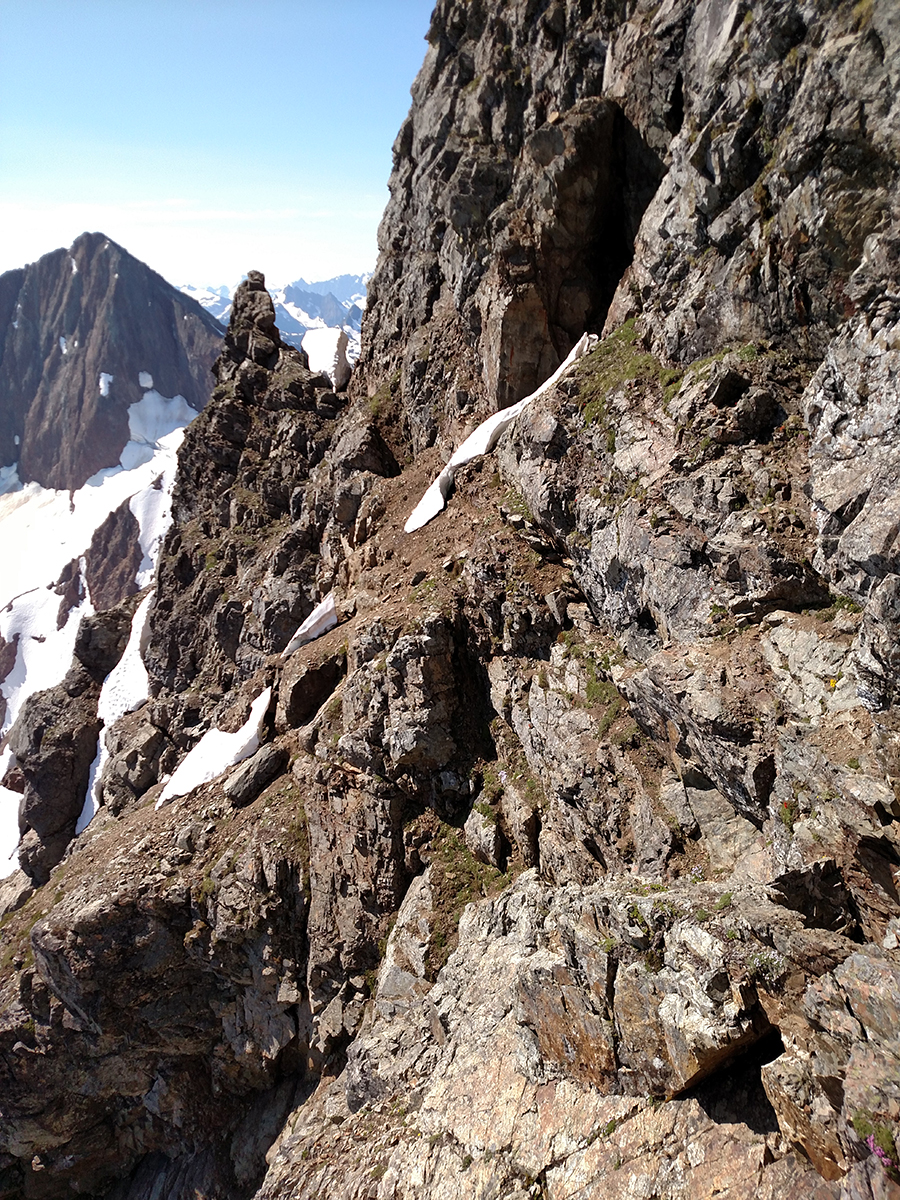
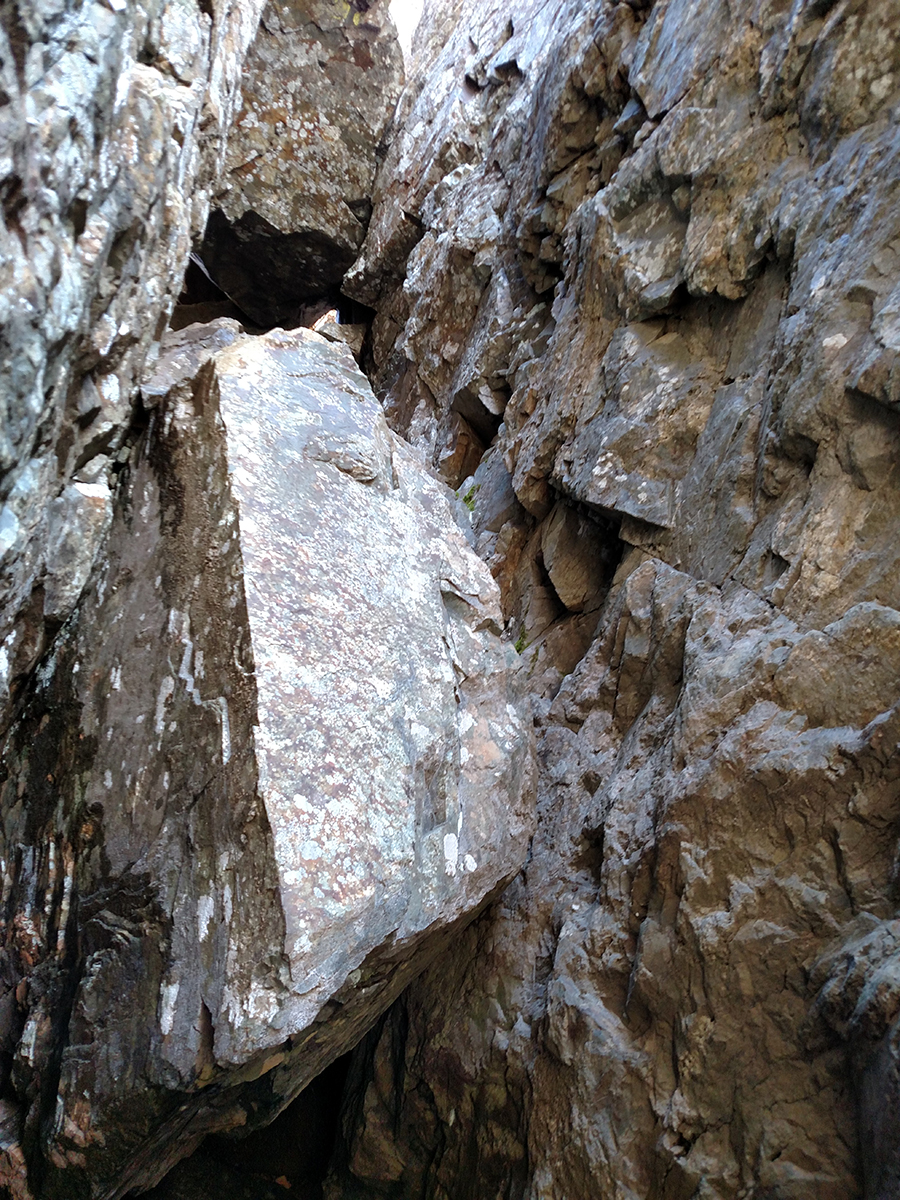
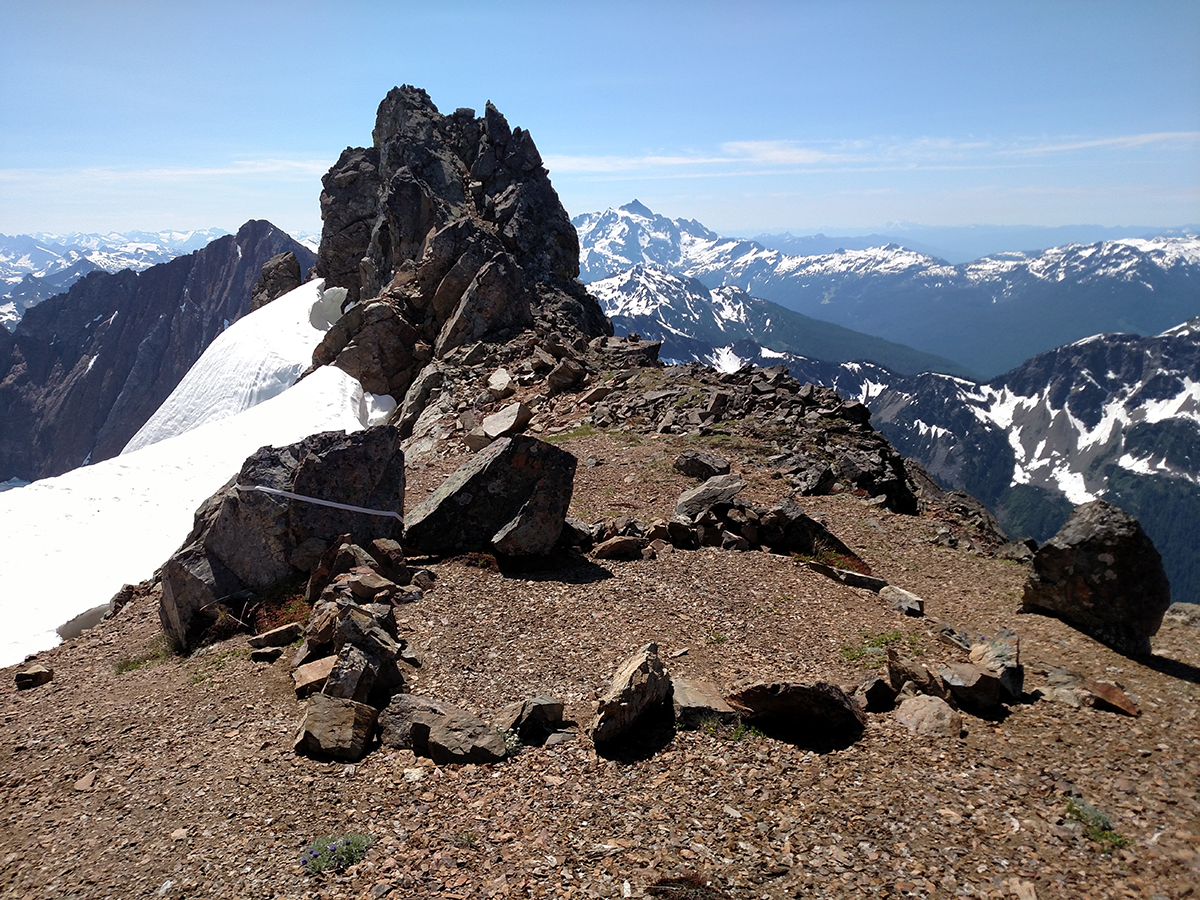
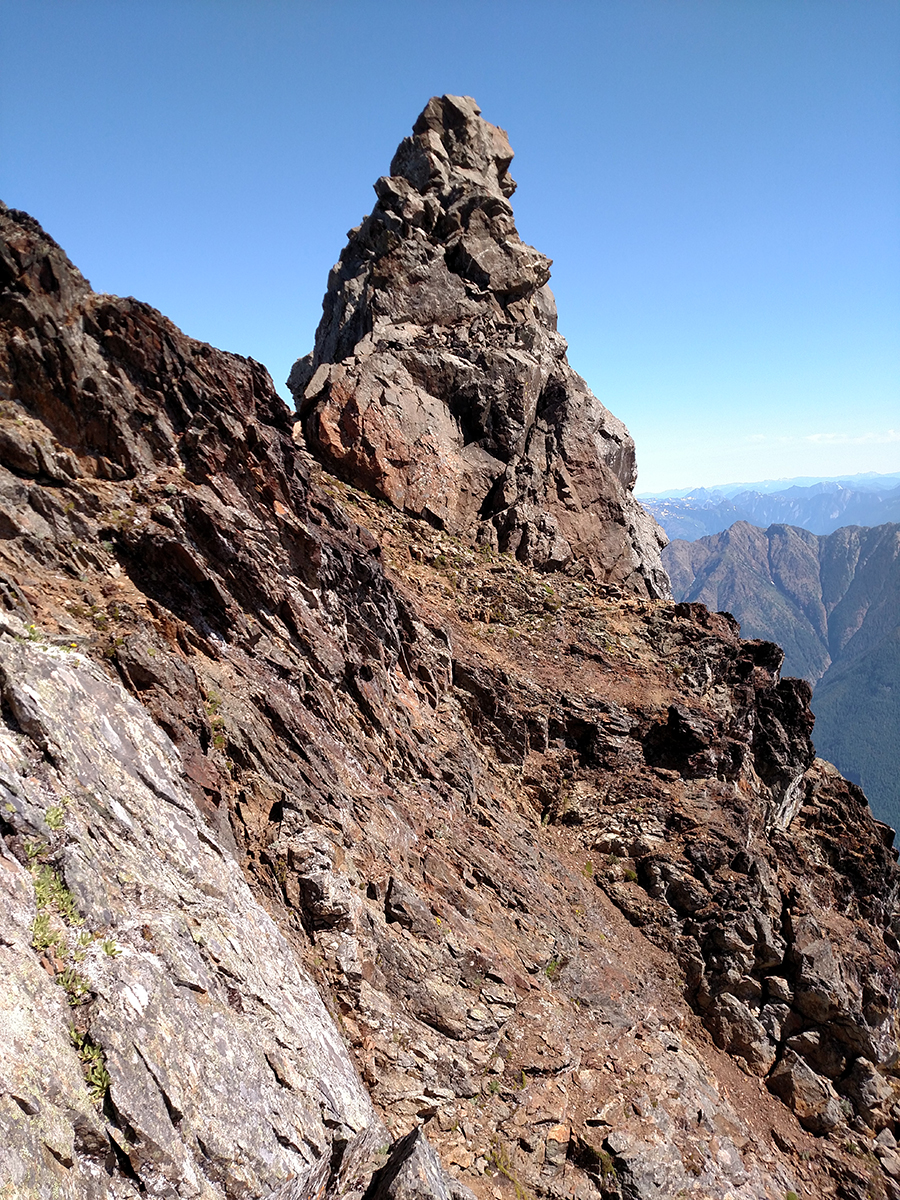
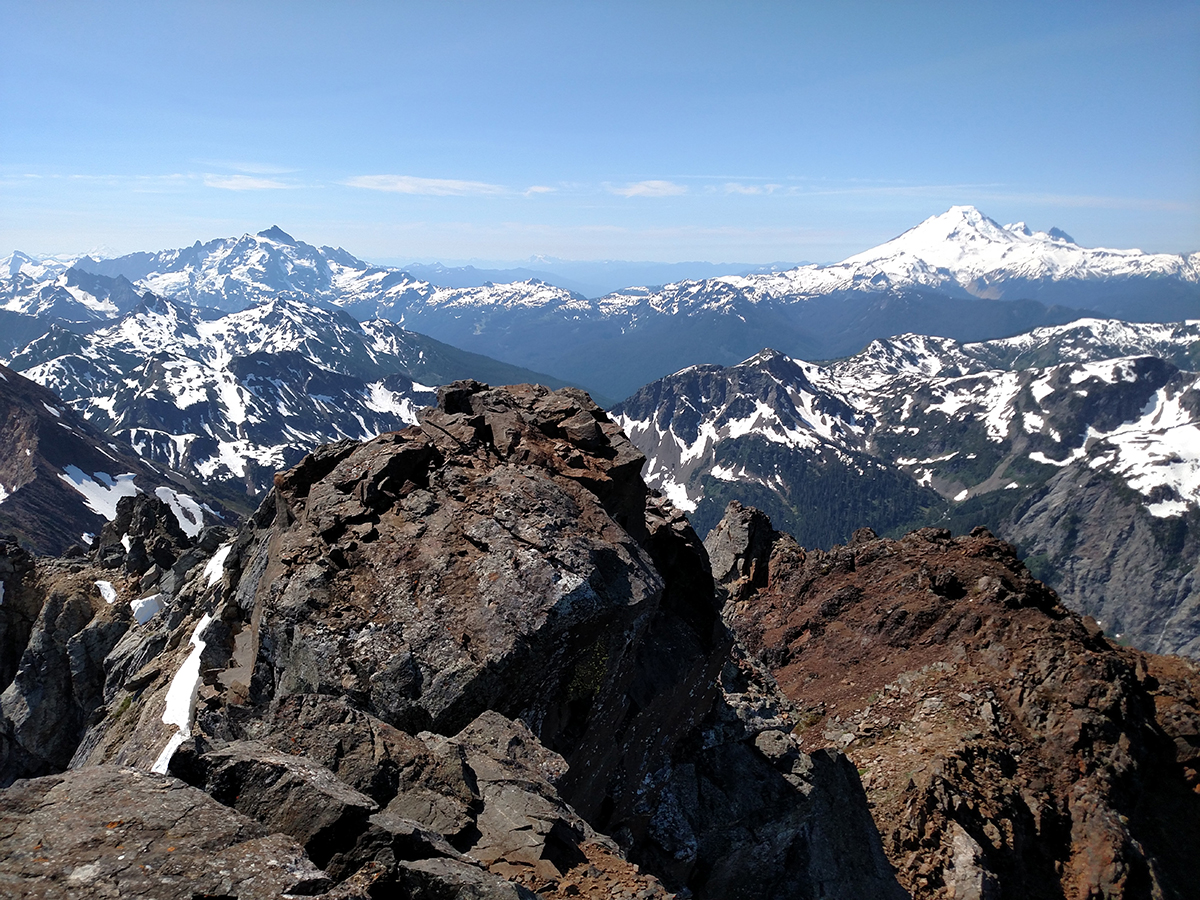
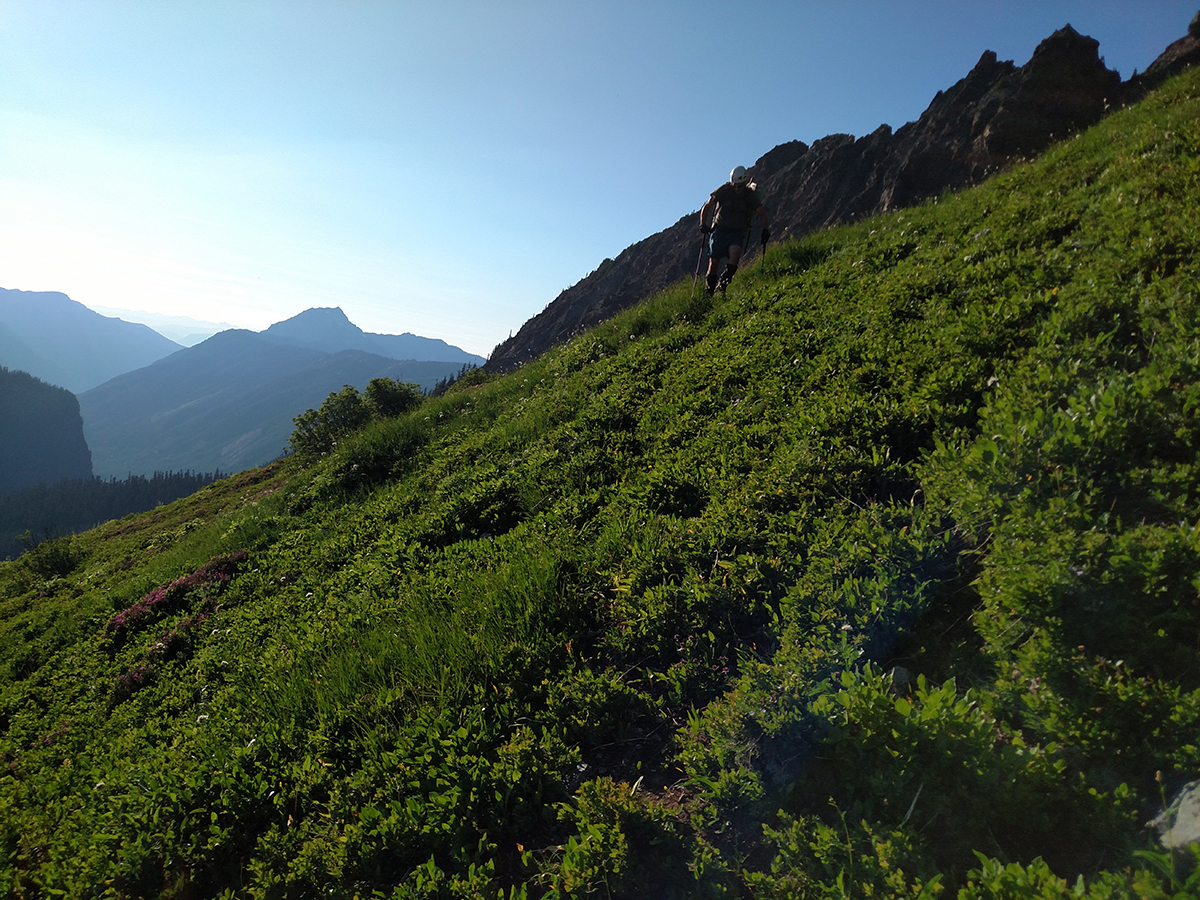
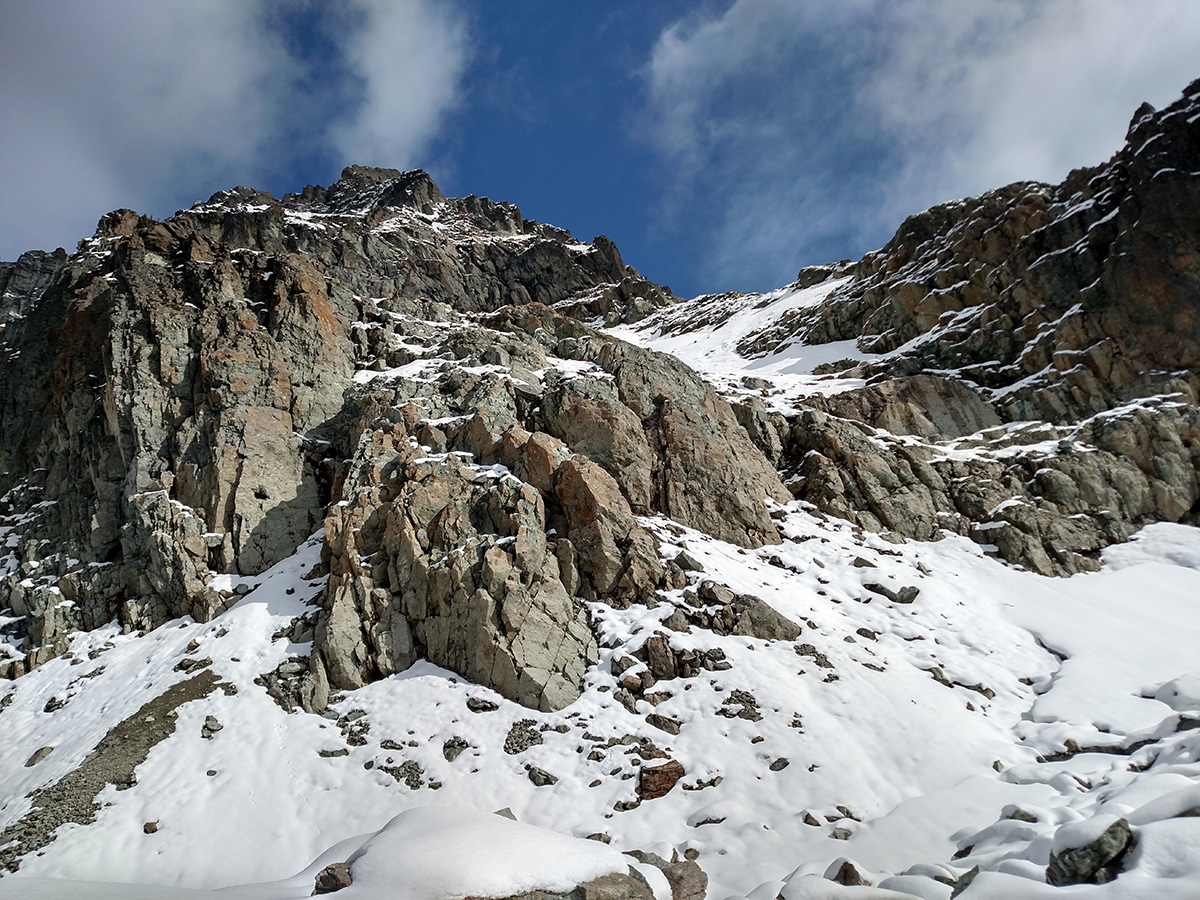
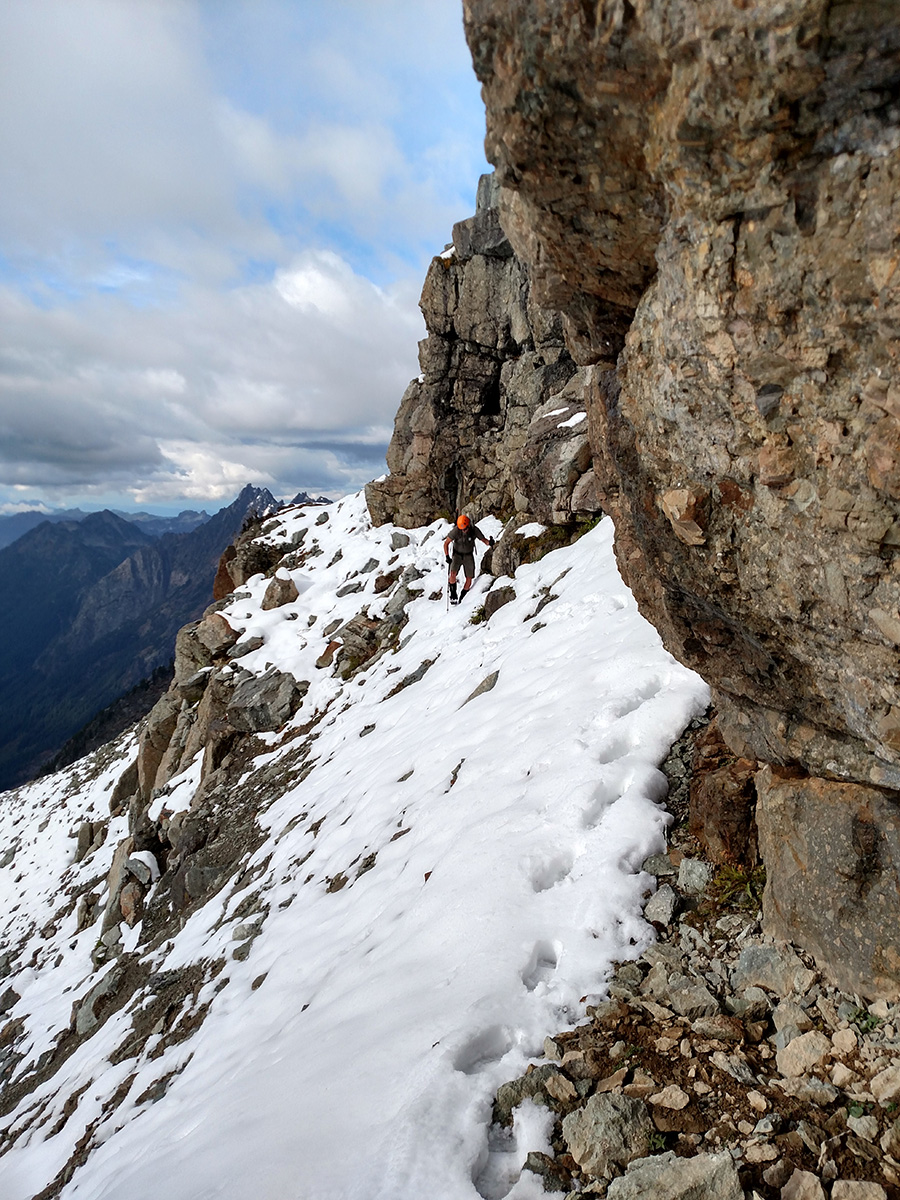
Trip: Ruby Mountain (7408') - Northwest Ridge Trip Date: 05/15/2021 Trip Report: I climbed Ruby Mountain (7408’), Northwest Ridge Route. This is usually referred to as the winter or snow route, although there is snow on all routes right now. I’ve been thinking about climbing this mountain for a while but always thought it would be too short or too easy. It is not short and it is physically demanding. Prepare for a long day and lots of climbing in a short distance. This mountain has some of the best views in the North Cascades. Weather was perfect, probably about 75 degrees. Snow started at 3800’. Water was scarce after hitting the snow but small amounts can be found coming off the melting snow. Brought crampons but didn’t need them. Snow was soft nearing the summit slope. I brought a trekking pole and a Whippet. I broke the bottom off the trekking pole on the way down. An ice axe would have been useful. I spent an hour off track on the downhill. Somehow I went down an attached ridge that overlooked the Diablo Lake lookout. I had to cross steep side hill snow to get back on route, which sucked. Some Tips and Notes: 1. This is a long day trip. Took me 12 hours. I’m not a cyborg or super slow, somewhere in the middle. 2. Follow the faint climbers trail going up through the steep rock sections. 3. There are several flat areas heading up the ridge that would work well for camping. 4. An ice axe would be a good idea to bring along, as the snow gets pretty steep in sections. 5. Snow starts at 3800’ and water supply is very limited after. 6. The summit ridge is class 2 with a few sections of class 3 on fairly loose rock. Travel Time for reference: Car to Summit 8 hours – Summit to car 4.5 hours Gear used: Trekking Pole, Whippet, Helmet & Work Gloves. View on the way up. Colony Peak, Paul Bunyan's Stump & Snowfield Peak in the back. View heading up to the top of the Northwest Ridge. Summit Ridge & Summit. View looking down the Northwest Ridge. View looking North from the summit. Great mountain for scouting future climbs with mountain views 360 degrees. Expanded View looking west on the way down. Left to Right - Primus Peak, Tricouni Peak, Snowfield Peak, Colony Peak, Paul Bunyan's Stump. Gear Notes: Gear used: Trekking Pole, Whippet, Helmet & Work Gloves. An ice axe would be a good idea to bring along. Approach Notes: I parked in a turnout on the north side off of Hwy 20. The turnout is 2.8 miles past the Colony Creek Campground heading east and .4 miles from the John Pierce waterfall bridge heading west. The route starts across the highway at 1900’ on the left side of a boulder field. A faint climbers trail is present that leads around the numerous steep rock sections. It would be a good idea to keep a GPS track going up to retrace the route on the way down. I didn’t and it added to the adventure.


-
Trip: Mount Ann (5840') - East Ridge Trip Date: 01/23/2021 Trip Report: A buddy and I climbed Mount Ann this weekend. Snowshoe trip in perfect winter weather. We started from the Mount Baker Ski area. We headed up and over Austin Pass heading towards Lake Ann. We climbed up the north basin between Han Peak and Mount Ann, to the east ridge, to the summit. Temperature was fairly cold, water bladder hose kept freezing along the way. Snow conditions were pretty good, varying between a frozen crust to 6" deep powdery snow on a crust. The snow on the steeper sections was a bit slippery, the top 4" or so wanted to slide on the crust beneath. Surprisingly there was running water available along the route. Great trip and workout for a day climb. Awesome views. Trip distance was around 12 miles round trip. Travel Time: Car to Summit: 5 hours Summit back to Car: 4 hours We started at 8:30am and finished at 6:15pm in the dark. We brought lights but didn't need them, the moon supplied enough light to see. Gear Notes: Snowshoes, Trekking Poles, Whippet. The Whippet worked great on the steeper sections. Approach Notes: Mount Baker Ski Area to Austin Pass to North Basin to East Ridge.
- 1 reply
-
- 3
-

-

-
Great pictures. Looks like a nice winter climb. Where is Welker? Who hauled up the documentary film crew in their backpack?
-
Trip: Mount Shuksan - Fisher Chimneys Trip Date: 10/03/2020 Trip Report: Mount Shuksan (9131’), Fisher Chimneys Route Trip Report – October 3-4, 2020 I Climbed Mount Shuksan (9131’), Fisher Chimneys Route over the weekend going solo. Class 3-4 with steep ice/snow sections. I’ve been thinking about doing this route for years. A weather window opened up and I had the time and motivation to finally make it happen. I figured late season would have less people on route which would make the climbing safer and faster. I Started from the Austin Pass/Lake Ann Trailhead at 9:00am Saturday, finished 7:00pm Sunday. A glorious weekend in the North Cascades! Overall this is a great climb that tests your skills and pucker factor. Tips and Notes: ) I did this climb as a two day trip. Worked out well. 6 hours on day 1 to Camp above Winnie’s Slide (7100’), 12 hours on day 2 from camp to summit to car. Day 2 was long but not too bad. ) Water Options: Lots of water on the way to the Start of the Fisher Chimneys. Next water source was at the camp at the base of Winnie’s Slide and at the camp above Winnie’s Slide. Nothing in between. There is water along the route to the summit, but it is very difficult to get to. Water up at the base of Hell’s Highway for the trip up and back. ) Camp options: There is a camp on the ridge at the top of the 1st Chimney section just before the talus field to the 2nd Chimney – 2-3 spots. There is a camp at the base of Winnie’s Slide – 2-3 spots. There is a camp at the top of Winnie’s Slide – 6-7 spots, great water supply, best camp in my opinion. You can camp above Hell’s Hwy but you will be on snow and will need to bring water or melt snow. ) Spicy Sections: Winnie’s slide is mostly pure blue ice right now and it is steep. I climbed the left side in between the crevasses as it looked better to me. It was a mix of shitty ice and icy snow but worked out fine. The Top of Hell’s Hwy is mostly ice and the best option was climbing the knife edge to the upper section. It is exposed and the ice/snow is not that great but it worked out fine again. ) Equipment Considerations: I brought Steel Crampons and two Ice Tools. This worked well for me. I didn’t bring a rope but could definitely see where it would be very nice to have one, especially for Winnie’s Slide. Going up and down the icy sections without a backup required total focus and perfection. Bring a rope if that would be a problem. ) Travel Time for reference: Day 1 – 9:00-11:30am Trailhead to Start of Fisher Chimneys, 3:15pm arrived at top of Winnie’s Slide Camp 7100’ - 6.25 hours. Day 2 - 7:00-10:00am 7100’ camp to summit, 12:30pm back to camp, 7:00pm back to TH – 12 hours. Gear used: (2) Ice Tools, Steel Crampons, Trekking Pole, Helmet Start of the Fisher Chimneys Defined trail along the Fisher Chimneys A Class 4 section of Fisher Chimneys Upper Fisher Chimneys starts on the other side of the talus field right next to the large rounded boulder with the shadow. Right side of Winnie's Slide from lower camp. Left side of Winnie's Slide from lower camp. I went through the lower part of the crevasses and went straight up. Beginning of Hell's Hwy. Note the location of the climbers on route. I climbed the rock ridge to that location to start the Hwy. Hell's Hwy from 7100' camp. The knife ridge on the right was the best route up. Upper Inside Corner of Hell's Hwy. Icy Steep and nasty. Looking back on Hell's Hwy at the top of the knife ridge. Shuksan Summit Pyramid. A fair amount of snow on route. Snow was firm with ice in spots. Party on the Summit. 8 other climbers thinking maybe late season would have less traffic. Only so many weather windows left for the year. Clouds moving in as I was heading back to the trailhead. I hit the weather window perfect! I would hate to be on the Fisher Chimneys in the rain. Gear Notes: (2) Ice Tools, Steel Crampons, Trekking Pole, Helmet Approach Notes: Started from the Austin Pass/Lake Ann Trailhead
-

[TR] Storm King Mountain (8515’) - North Ridge Route 09/05/2020
Kuato replied to Kuato's topic in North Cascades
Sitting on the summit I was eyeballing the South side route. Compared to the North Ridge, it looked like an enjoyable walk up. I was thinking I could have done an up the North Ridge and down the South route, but that would have made for a hell of a lot of walking. My feet were done by the end of the trip and I had pretty comfortable shoes. I climbed Goode going up the South Gully a couple years ago but didn't have time to hit Storm King on the same trip. I couldn't find a trip report on the North Ridge Route of Storm King, so now there is one. If your feeling up for a beat down, it's a great route. -
[TR] Big Chiwaukum and Snowgrass Mountain - Standards 07/04/2020
Kuato replied to KaskadskyjKozak's topic in Alpine Lakes
I was the climber that you meet on the summit of Snowgrass. We chit chatted about your climb up Monte Cristo with the river of water flowing up your sleeve. The NE Ridge route next to the steep ass snow on the NE Face route is pretty nice. Mostly class 3 with some 4 toward the top, some loose rock but overall very enjoyable. Leading up to that the ridge is easy traveling. The runout on that NE Face route would be bad news if one was to slip.
-
Trip: Storm King Mountain (8515’) - North Ridge Route Trip Date: 09/05/2020 Trip Report: Storm King Mountain (8515’), North Ridge Route Trip Report – September 5-7, 2020 I climbed Storm King Mountain (8515’), North Ridge Route. I tried this route last year at the end of July but under estimated the amount of time, effort and amount of route finding required to do the route and had to turn around before making the summit. This year I still under estimated the time and effort required but was able to make the summit due to better beta from my previous attempt last year. It took me 3 days. I started at the Bridge Creek Trailhead off Hwy 20 just east of Rainy Pass. It was an out and back trip using Bridge Creek Trail to North Fork Trail into the North side of Goode and Storm King. The trail is in excellent shape all the way to Grizzly Creek Camp. After Grizzly Creek Camp the trail gets overgrown but is not hard to follow. The adventure starts when you cross the North Fork of Bridge Creek. Down low, after crossing the creek (3100’-3200’elevation), heading up the rocky brushy slope I almost walked into a large Wasp nest in the middle of the faint climbers trail. I got lucky and made a detour around the nest without incident. I followed a faint trail up the tree lined ridge between Goode and Storm King. The ridge tops out at 4700’ on a nice wide fairly flat plateau that would make a great camp, no water though. I continued up the ridge to about 5100’ and started my traverse over to the bottom of the North Ridge of Storm King (5000’). This is the easiest spot to gain the North Ridge of Storm King, right at the base of the glacier. The rock is a mix of Class 3, 4 and low 5th in spots heading up. On either side of the ridge it is steep, sheer rock so you will know if you are off route. It took me 5 hours to go from the base of the North Ridge to the Summit. I summited late at 6:00pm so I headed down to find a place to bivy at about 7200’ next to the snow field separating the upper and lower mountain. I got up early the next morning and started down at 6:30am. Once back at the bottom of the North Ridge I headed straight down and diagonal toward the creek valley below. On the map it looked like the easiest way down (contour line wise). Even though it was the easiest way down to the main creek, it still involved coming down several 10’ vertical drops that required careful Vege-Belaying technique. I usually hate Slide Alder, but in this case, I was very happy it was on the down route as it was very useful. Overall the North Ridge of Storm King is a tough climb. The approach is difficult, the exit is difficult, and the ridge requires your full attention. The trail into the area is long and you will need comfortable shoes to save your feet. There was a search and rescue helicopter flying all over the creek valley and up to the base of Goode on Sunday the 6th. Looks like they were doing a rescue. They spent some time parked on an island in the middle of the creek below. It was a good reminder to keep my shit wired tight doing this route. Hopefully all went well for the rescue operation. Some Tips and Notes: 1. This is a long trip. I should have spread the pain more evenly over the three days. Day 1 go as far up as you can to camp. I thought Grizzly Camp was far enough on Day 1, it wasn’t. 2. The climbers trail up the tree cover ridge between Goode and Storm King is steep and hard to follow. Mostly just look for skid marks from animals and humans to stay on route. 3. There are good camping options at 4700’ on the tree covered ridge and above. The 7200’ bivy spot on the side of Storm King is pretty good, If I had more of my gear with me it would have been very pleasant. There was water all along the route where there was melting snow/glacier. 4. A rope would probably be a good idea to bring along. Rappelling would have been nice in several spots but you would definitely have to watch for loose rock coming down on you as you rappel. A didn’t bring a rope to save weight and it worked out fine for me. 5. I brought an Ice Axe & Crampons and didn’t use them. Maybe early in the season they would have been needed. Travel Time for reference: Day 1 (TH to Grizzly Camp), 4.5 hours – Day 2 (Grizzly Camp to Summit to 7200’ bivy), 12.5 hours – Day 3 (7200’ bivy to TH), 14 hours. Gear used: Trekking Pole, Helmet, Ice Axe, Crampons, Full Gaiters, Work Gloves Wasp nest down low after crossing North Fork Bridge Creek around 3100-3200' Climbers Trail up tree cover ridge between Goode and Storm King View from 4700' ridge plateau Potential camp at 4700' ridge plateau Full view of North Ridge of Storm King. Start of ridge is the at the bottom right where the heavy shadow is (5000'). North Ridge start location (5000'). Get used to this view for the next several hours. View off to the side of the North Ridge. Storm King - "Where Echoes Go To Die" - I believe it, must have been climbing the North Ridge. Goode looking sexy like usual. Wish I had more time on the summit to enjoy the view, it was stunning. End of the Exit route. Farewell Storm King - North Ridge. Until we meet again, may God hold you in the palm of his hands. Gear Notes: Trekking Pole, Helmet, Ice Axe, Crampons, Full Gaiters, Work Gloves - Didn't need the Ice Axe or Crampons Approach Notes: Bridge Creek Trailhead - Bridge Creek Trail to North Fork Trail & back
-
Trip: Chiwawa (8459') & Fortress (8674') Mountain - East Ridge Trip Date: 08/29/2020 Trip Report: Chiwawa (8459') & Fortress (8674') Mountain, East Ridge Trip Report – August 29-31, 2020 I climbed Chiwawa Mountain (8459') & Fortress Mountain (8674'), the East Ridge Route for both, in a big loop. It took me 3 days but can be done in 2 long days. I started at the Trinity Trailhead off Chiwawa River Road North of Lake Wenatchee. I went up Trail 1550 (Chiwawa River Trail) all the way up along the side of Red Mountain to about 6580’ elevation. The trail is in pretty good shape and narrows to a goat trail towards the end. I traversed diagonal and up toward the East Ridge of Chiwawa Mountain. I got onto the East Ridge of Chiwawa Mountain too early, as it look pretty nice from below. The rock was rotten, loose and steep along the ridge until I was about ¾ the way to the summit. I ended up using ledges and goat trails to get onto the better part of the ridge. Travel was slow due to the rock quality. There is a ridge/buttress that drops South from the middle of Chiwawa, you want to go below and around that before heading up to the East Ridge. Doing this will avoid the majority of the rotten rock on the lower part of the ridge. I summited Chiwawa around 5:00pm and setup camp on the summit. There is a campsite on the summit that is nice that has room for two maybe three if you want to get close. It was surprisingly cold and was fairly windy. I was glad I brought extra insulation. I had a water bottle next to me that was half frozen by the morning. If there was precipitation, it would have snowed. I started out for Fortress Mountain from summit camp at 8:00am. There is a really nice camp at the Col between Chiwawa and Fortess at about 7200’. It has plenty of room for tents and good access to water. I would have camped here instead of the summit of Chiwawa if I had known it was there. Although the Chiwawa summit camp was nice & had a great views, just no water. I used Crampons and an Ice Axe crossing over to the East Ridge of Fortress on firm snow. I climbed a gully of loose rock, class 3 some 4 to get onto the East Ridge of Fortress. Once on the ridge the rock was decent. The 4th class step to get to the summit is exposed, so make sure your holds are good. I summited Fortress around 12:30. Fortress Mountain has one of the best views of Glacier Peak that you can get, enjoy. I headed down to Pass No Pass from the summit. I initially headed down the northwest rocky ridge thinking it was the correct way down, it is not, the rock turns to loose steep garbage. I corrected my course and headed down the ridge that leads toward the beautiful grassy meadow plateau (another great camping option) heading north toward Glacier Peak. I kept heading down the ridge until I reached Pass No Pass which is also a fantastic camping area. I headed down light trail to the main Buck Creek Trail #1513 and followed this trail all the way back to the trailhead. Overall the loop trip was very nice. The rock on these two mountains is loose for the most part so be ready to slip and slide. The views are fantastic. Fall is in the air so be ready for cold temperatures. Some Tips and Notes: 1. Chiwawa’s East Ridge is mostly steep loose rock. Connect to the East Ridge after you round the South buttress/ridge to avoid most of it. 2. The trail from Pass No Pass to Buck Creek Trail splits into several different trails along the way. You will have to do a bit of head scratching. As long as you are heading down you should run into the Buck Creek Trail. 3. Along the route there are good camp spots at: The summit of Chiwawa (no water), The 7200’ Col between Chiwawa & Fortress (good water source), The grassy/sandy meadow plateau below Fortress 7100’ (some water), Pass No Pass area (good water source), several campsites along Buck Creek Trail. 4. Buck Creek Trail is long and boring so bring comfortable shoes. Travel Time for reference: Day 1 (TH to Chiwawa Summit), 9 hours – Day 2 (Summit of Chiwawa to camp off Buck Creek trail), 10 hours – Day 3 (camp to TH), 2.5 hours. Gear used: Trekking Poles, Helmet, Ice Axe, Crampons Chiwawa Mountain (right) & Fortress Mountain (left) from west side of Red Mountain on Chiwawa River Trail. Upper Chiwawa River Trail on side of Red Mountain 6500' elevation. Chiwawa Mountain East Ridge on Traverse from side of Red Mountain. Sample of lower East Ridge rock on Chiwawa Mountain. Chiwawa Mountain Summit Camp (8459'). Snow crossing from 7200' Col to Fortress Mountain East Ridge. Fortress Mountain East Ridge. Fortress Mountain Summit (8674'). Pass No Pass & Helmet Butte. Gear Notes: Trekking Poles, Helmet, Ice Axe, Crampons Approach Notes: Trinity Trailhead. Chiwawa River Trail 1550 up the side of Red Mountain. Buck Creek Trail 1513 return to TH.
-
[TR] Mount Challenger - Eiley Wiley Ridge 08/17/2020
Kuato replied to dadoufergy's topic in North Cascades
Fantastic trip report with great beta! Climbs like these are what you remember for a lifetime. The weather out in that area changes so fast. I got lucky doing this climb by way of Whatcom Pass a couple years ago. The weather was looking nasty right up until two hours before go time, and then like a sign from God, the clouds parted and the conditions went to perfect. It's the journey and the struggle that makes the climb. -
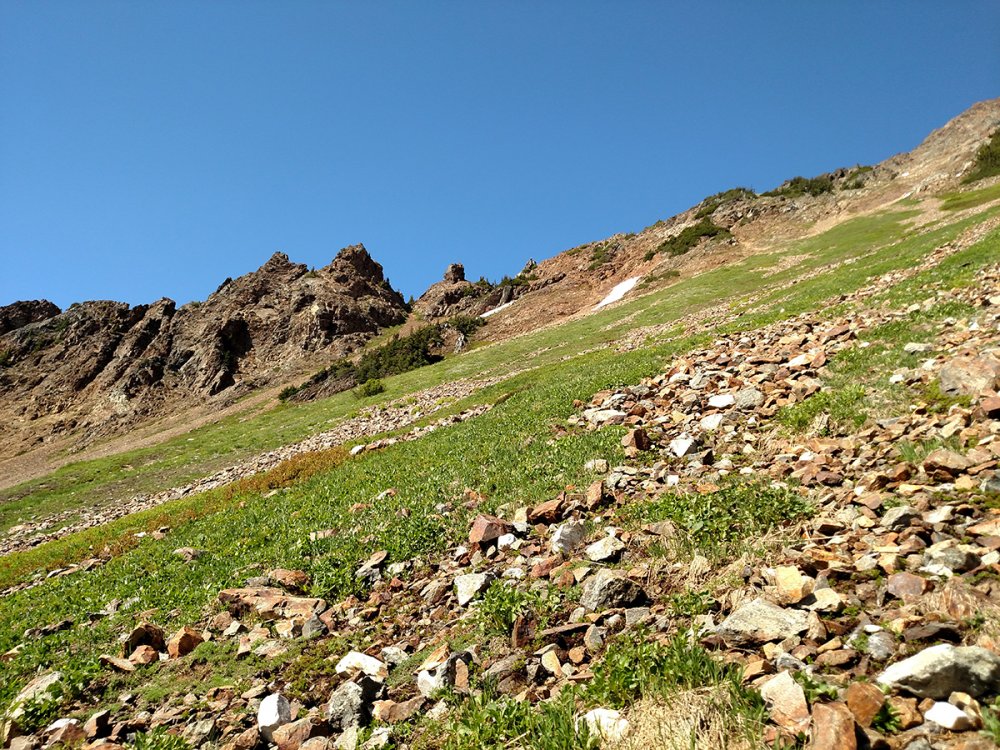
Trip: Abernathy Peak - Northwest Ridge Trip Date: 08/22/2020 Trip Report: Abernathy Peak 8321’ Trip Report – August 22-24, 2020 I climbed Abernathy Peak, the Northwest Ridge Route, over the weekend. This route can be done in 2 long days, I started late so I stretched it into a third day. The weather was perfect all weekend 70’s – 80’s. I started at the Cedar Creek Trailhead off Hwy 20 about 5 miles West of Mazama. I went up Trail 476 (Cedar Creek Trail) about 8.5 miles. At 5600’on the trail I took a hard left off the trail heading East along the 5600’contour line heading toward the South Fork of Cedar Creek. The bushwacking on this approach is pretty nice by Cascade standards. Most of the brush is waste deep and not super thick, so navigation was pretty easy. Once to the South Fork of Cedar Creek, I follow up the East side of the creek to Lamont Lake (6640’). Getting up to the lake requires some work, either a loose rock gully or some Class 3 rock. The camping along Lamont Lake is fantastic, lots of room and flat areas for tents. Just before heading out in the morning from the lake I was serenaded by a pack of coyotes for about 30 seconds from somewhere on the other side of the lake. They must have felt that it was a glorious morning too. I climbed up a gully on the Southwest side of the lake that lead to the Northwest Ridge leading to Abernathy Peak. The gully is loose rock and steep up the middle but there is a goat trail off to the right side which is a better route. Once on the Northwest Ridge to Abernathy the travel is very nice, lots of potential for camping. About halfway to Abernathy Peak you will start hitting 2nd & 3rd Class rock that will take you to the summit. Some of the rock on the ridge is exposed but fairly solid. There are a couple plateaus along the way up that you could camp on. Overall the climb is very nice with decent views and you get to checkout some history in the old mining area. The trail approach is nice with several camping options along the way. Most people on this trail are day hikers, I was the only climber in the area this weekend. Some Tips and Notes: 1. There are several camp spots along the Cedar Creek Trail & great camping at Lamont Lake. 2. The bushwacking to Lamont Lake is not bad compared to the Westside of the Cascades. 3. There is about 600’ vertical of steep gully or Class 3 rock to get to Lamont Lake by way of the South Fork of Cedar Creek. There may be an easier way but this was fine for me. 4. There is no water on the Northwest Ridge to Abernathy so bring what you need from the lake. Travel Time for reference: Day 1 (TH to Lamont Lake), 7 hours – Day 2 (Summit & back to lower camp off trail), 11 hours – Day 3 (back to car), 1 hours. Gear used: Trekking Poles, Helmet, Full Gaiters, Work Gloves. The camping at Lamont Lake is very nice, worth the bushwack! Gully climb up from Lake Lamont to the Northwest Ridge of Abernathy Peak. I climbed the gully closest to the 1st pointy peak, you can see the goat trail at the base of the peak. Northwest Ridge to Abernathy Peak. Nice relaxing ridge climb. Some old mining equipment along the route. Summit View - A good peak to plan other climbs from. Gear Notes: Trekking Poles, Helmet, Full Gaiters, Work Gloves. Approach Notes: Trail 476 (Cedar Creek Trail). Bushwacking to Lamont Lake.
- 1 reply
-
- 5
-

-
-
Trip: Mount Ballard - West Face Trip Date: 08/08/2020 Trip Report: Mount Ballard 8320’ Trip Report – August 8-10, 2020 I did a solo 3-day climb of the West Face of Mount Ballard. The weather was perfect all weekend 70’s – 80’s. I started at the Canyon Creek Trailhead off Hwy 20. I went up Trail 754 (Canyon Creek Trail) to Trail 755 (Mill Creek Trail) to Azurite Mine for Camp and back the same way I came in. The bushwacking on this approach is thick, slow, tedious and outright sucks for long periods of time along Trail 755. Trail 755 could potentially be a nice trail if it had some serious trail maintenance, but without it, it is basically a very overgrown climbers trail that shouldn’t even be listed on the map as a trail. The Climb itself is a mix of class 2, 3 & 4 steep loose rock. Going up is not too bad, coming down is like trying to climb with roller blades on. Every other step is slipping and sliding. Overall the climb is a good workout with great views and you get to checkout some history in the mining area. The old timers in the area were some tough badasses for sure. Some Tips and Notes: 1. Bring full gaiters, long pants and long sleeves for the extensive bushwhacking required for the approach. I would also add a helmet, glasses and fairly thick leather gloves for extra protection. Any Skin exposed will get ripped up. 2. Trail 755 (Mill Creek Trail) is very hard to stay on for about 2 miles of super thick bushwacking. 3. Trail 755 ends in a washout just before the Cady Pass trail connection at 4000’. It is not marked at all. You will need to remember this spot or mark it for your return trip or you will walk right by it and not know. 4. There is not much access to water on Trail 755 until about 3600’ and several hours of bushwacking, water up at the Mill Creek Crossing before trail 755. 5. The Bridge across Mill Creek on the Canyon Creek Trail has collapsed into the creek. You can still get across the bridge due to some rope and footholds nailed into the old bridge sections. 6. Once past the super thick bushwacking the trail alternates between old road and thick overgrown trail until about 1 mile from Azurite Mine. Then it turns into an old road hike. 7. The climb up from Azurite Mine to the Summit is steep loose rock 95% of the way. 8. The true summit is the South summit, probably about 8320’. I don’t know why it is not on the Bulger's list, it is high enough for the list. 9. Stay in the treeline as much as you can going up and down, the traction is far better than what you will find in the middle of the rock slope. Travel Time for reference: Day 1 (approach), 8.5 hours – Day 2 (summit), 10.75 hours – Day 3 (back to car), 5 hours. Gear used: Trekking Poles, Helmet, Full Gaiters, Work Gloves. Collapsed Bridge Over Mill Creek Turn for Trail 755 (Mill Creek Trail) One of the nicer sections of bushwacking on Trail 755 One of the bizarre clear road sections in between thick bushwacking on Trail 755 Road leading to Azurite Mine Azurite Mine Site - kind of creepy but could definitely serve as shelter. Route from Camp - Summit is the pyramid shaped peak in the middle. Water break Gully to Col between the False Summit (Left) and the true South Summit (Right). Gully is on the far left side of the mountain (North) False Summit originally surveyed as being the summit at 8301' True Summit (South) 8320' - peak on the left Climbing along the summit route. Summit of Mount Ballard 8320' ish One view from the summit - Azurite Peak in the middle with Golden Horn and Tower Mountain in the background. You almost forget the soul sucking bushwack that it took to get here. Gear Notes: Trekking Poles, Helmet, Full Gaiters, Work Gloves. Approach Notes: Be prepared for thick bushwacking for hours. Slide Alder, Stinging Nettles, Devil's Clubs.
-
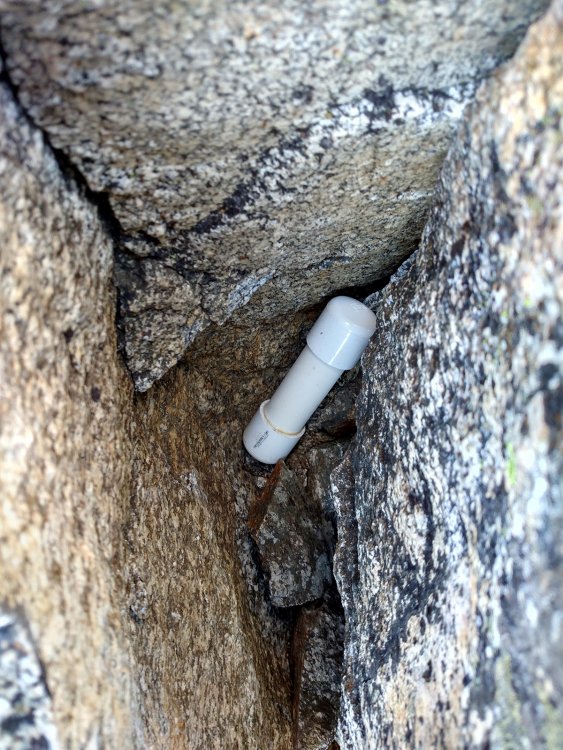
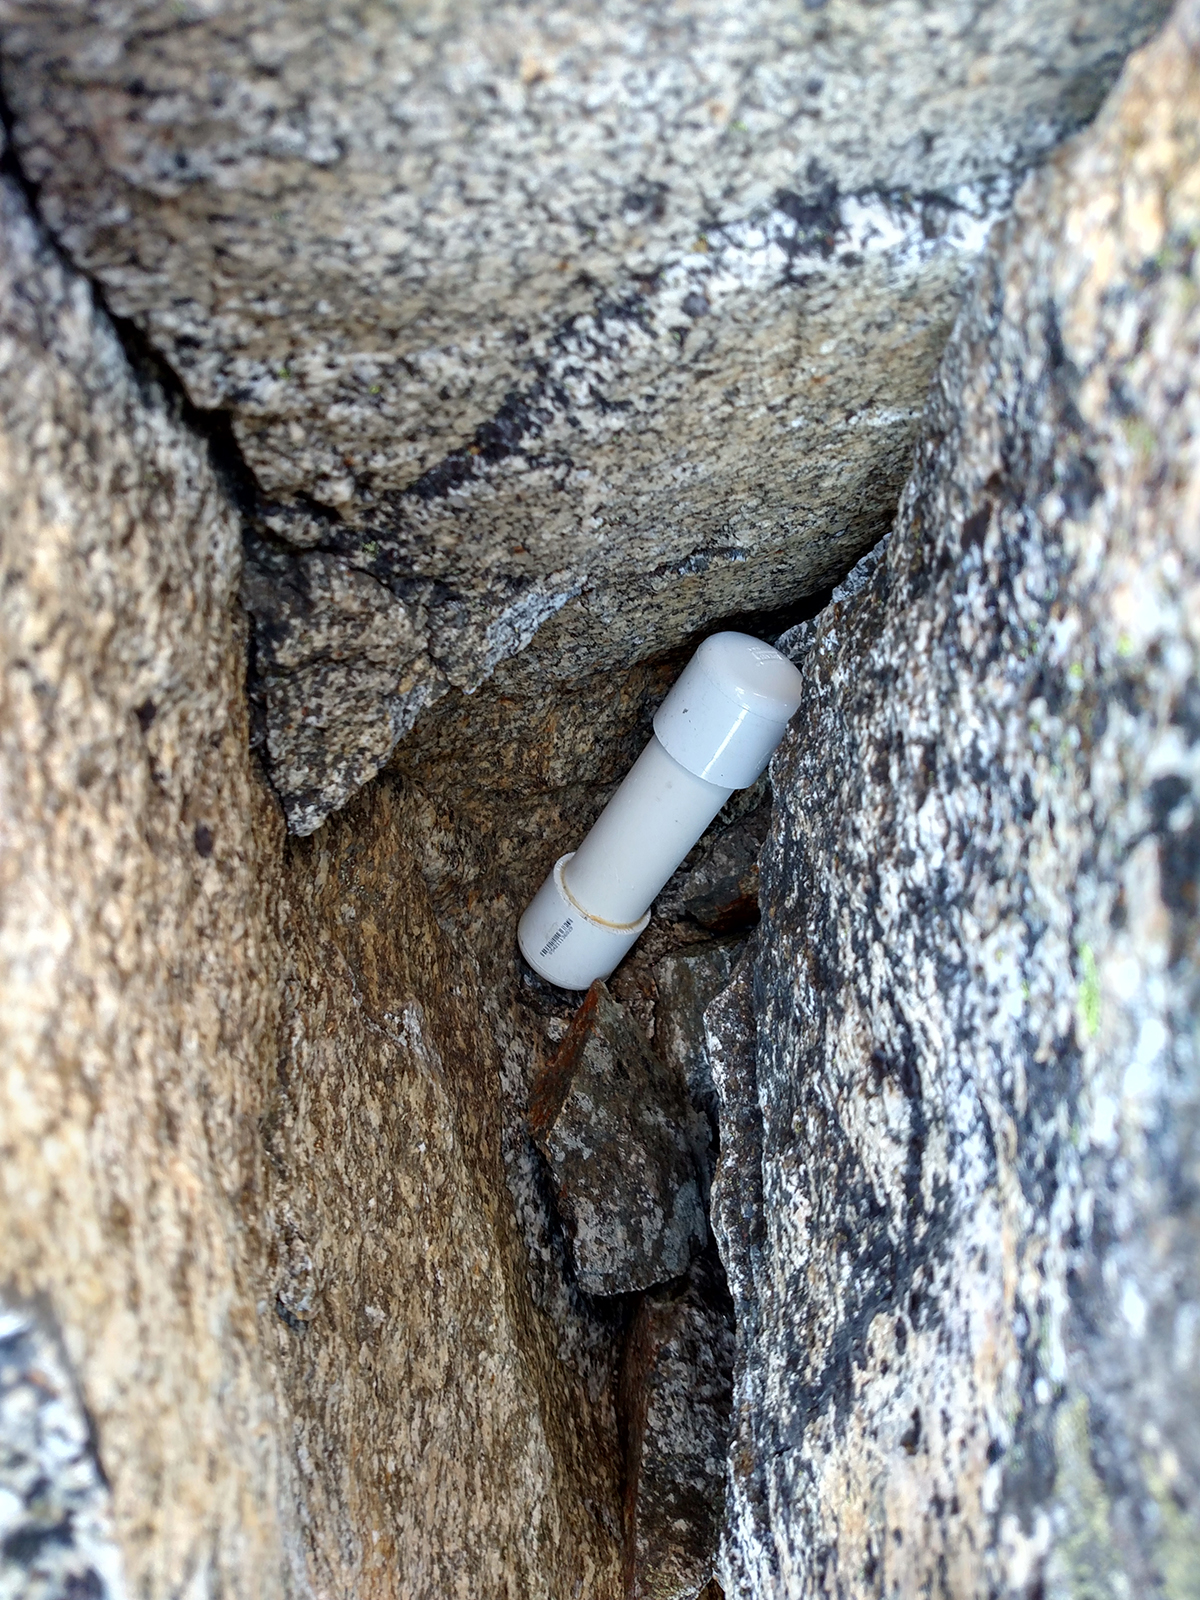
Responding to fromsealevelbaby, the summit registry is about 3 feet down from the very top of the summit in a crack in a PVC pipe container.
-
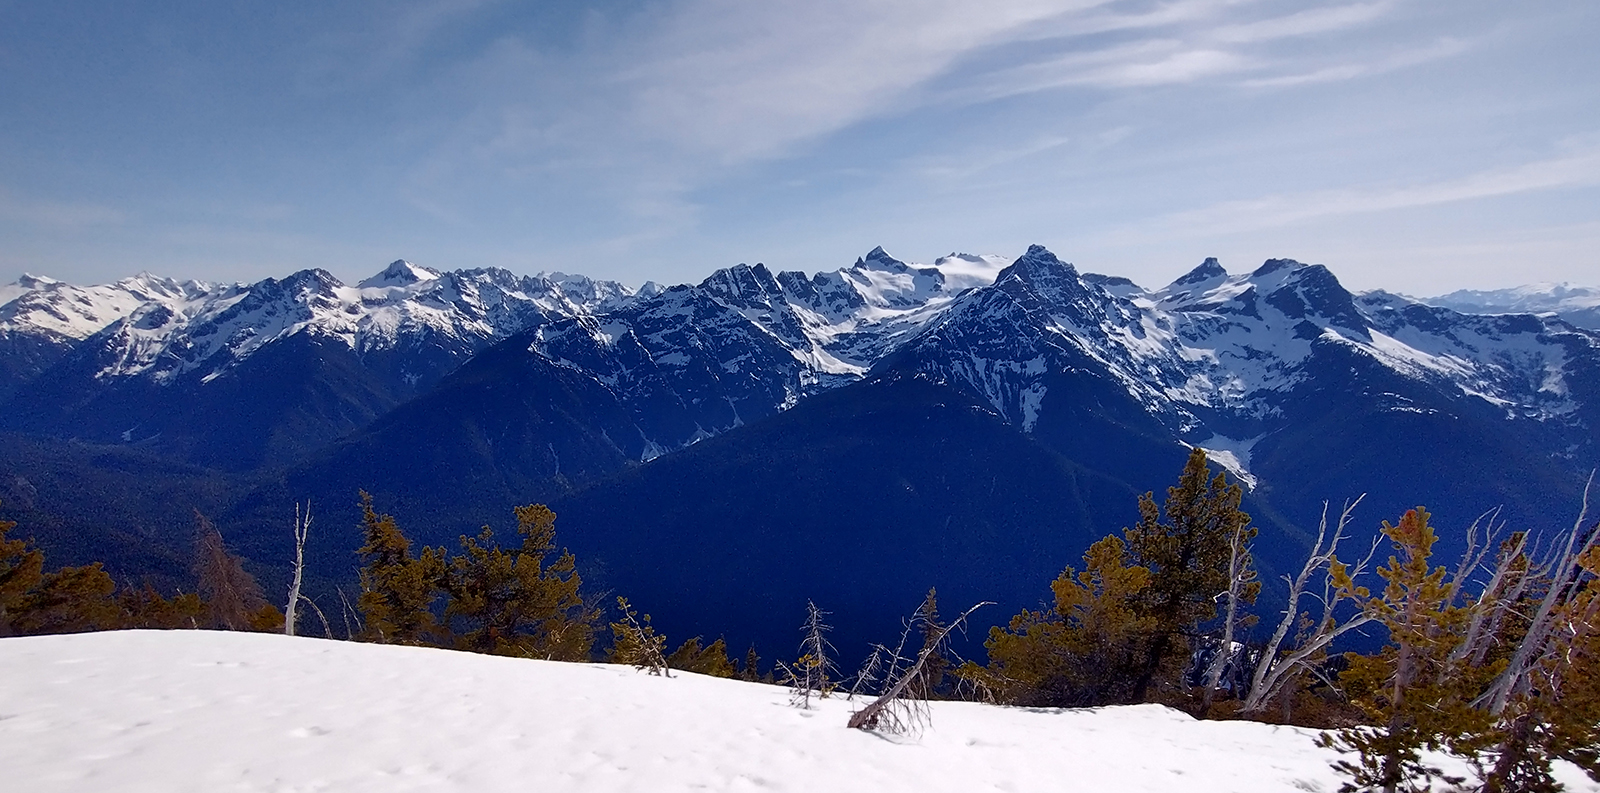
Trip: Mount Terror - West Ridge Trip Date: 07/25/2020 Trip Report: Mount Terror 8151’ Trip Report I did a solo 3-day climb of the West Ridge of Mount Terror over the weekend. The weather was perfect all weekend and hot (80’s). Very few people do this climb in a given year. I was the first person on the summit registry this year. This is a climb you earn through suffering but the payoff is worth it. This climb tests your navigation skills, fitness, and your overall mountaineering skills. I was thinking about not bring a rope for the climb since I had heard there is a 4th class route up the steep start of the ridge climb. I was glad that I brought the rope. The supposed 4th class route looked like dog shit in my opinion, and I climb some loose, nasty rock on a regular basis. The low 5th class route up the middle looked pretty good, so I climbed that instead. I would not want to climb down that section, one slip and you are FUBAR. I brought a 30 meter glacier rope for rappelling and it worked perfectly for this trip. Some Tips and Notes: 1. Bring full gaiters for the extensive bushwhacking required for the approach. I brought half gaiters and wore shorts to start because it was hot and it saved some weight. My legs now look like hamburger. 2. The 30 meter glacier rope worked great for me but a longer rope would give you more options. There are plenty of anchors already established. I brought anchor material but didn’t need it. 3. DO NOT LOSE THE TRAIL. If you lose the trail go back and find it. The terrain in the Pickets does not suffer fools. You can wander for days out there and still not get anywhere. 4. Crossing Terror Creek sucked! The water is high right now and moving fast. The only place I found to cross was about 15 minutes downstream of the trail on the nice side. It was a log that goes about 2/3 of the way across the creek to some rocks that you can jump on to get across. It takes twice as long on the nasty side to get back to the trail that goes straight up the ridge. Falling in the creek at that spot would be bad. 5. Water on the ridge up to camp is non-existent. Get all the water you will need at Terror Creek before you start up the trail going up the ridge. There is no water from 2200’ to 5600’. 6. The trail heading up to the ridge is one of the steepest climber’s trails I have ever climbed up. I tapped out at 5600’ on day 1. 7. There is a sharp turn in the trail at around 3800’ that puts you on the ridge in a nice spot. It is marked well with a dead tree that has a stick across it and flagging tape. 8. There is still a lot of snow above 5600’. I was on snow until the very top of the Terror Col on summit day. The snow in the gully to Terror Col is steep, and when it is soft it is nerve-racking. Travel Time for reference: Day 1 (approach), 9 hours – Day 2 (summit), 11.5 hours – Day 3 (back to car), 6.5 hours. Gear used: Ice Axe, Trekking Poles, Crampons, Helmet, 30 meter Rope & Harness. Rocky tent platform at Terror Creek. If you don't come across this spot, you are off route. Trail start on the other side of the Terror Creek for the death march up the ridge to bliss. Remember this spot, it is very important. Terror Creek crossing location. It is not as nice as it looks. View of the route to Mount Terror gully from the 6400' camp at the Barrier Col Base of Terror gully (full of snow). Yes, it is that steep. Potential 4th Class section up to West Ridge? I call bullshit. Side view of lower part of 5th Class up ridge. Straight on view of wall you will be climbing. It doesn't look quite that steep in person. View looking down the 5th class sections. Heather goat trail that leads to the actual summit block. Airy summit. Summit Registry, Thanks Fay Pullen! Is the effort worth it? The pictures do no justice to the beauty of the area. Gear Notes: Ice Axe, Trekking Poles, Crampons, Helmet, 30 meter Rope & Harness, Bring Full Gaiters for the bushwhacking. Approach Notes: Terror Creek crossing sucked, See Tip #4. Limited water on approach, See Tip #5
-
[TR] American Border Peak - SE Traverse Chimney Route 07/14/2018
Kuato replied to Kuato's topic in North Cascades
Apparently the climb sees so few climbers they don't even bother with a summit registry, couldn't find one anywhere around the summit. -
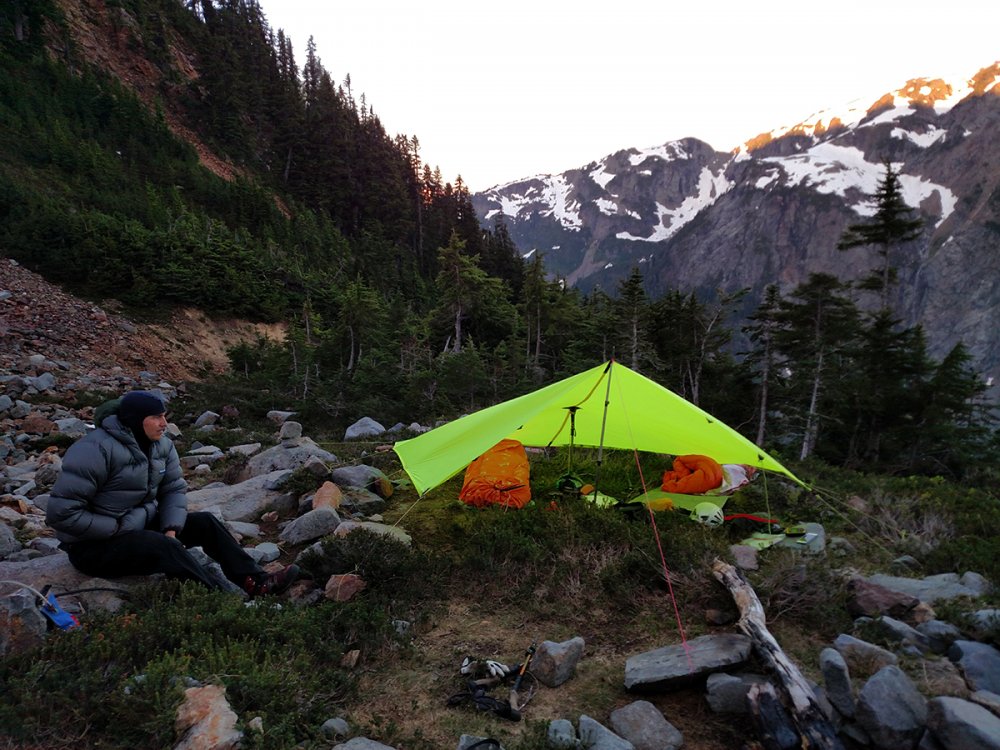
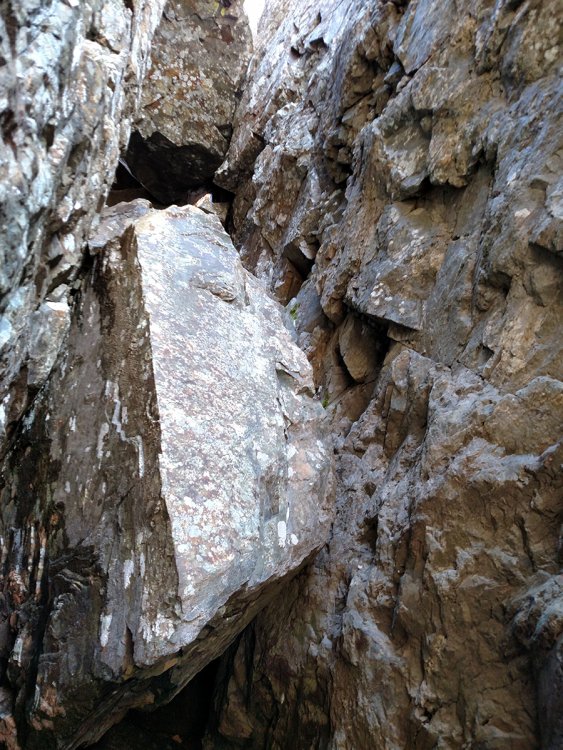
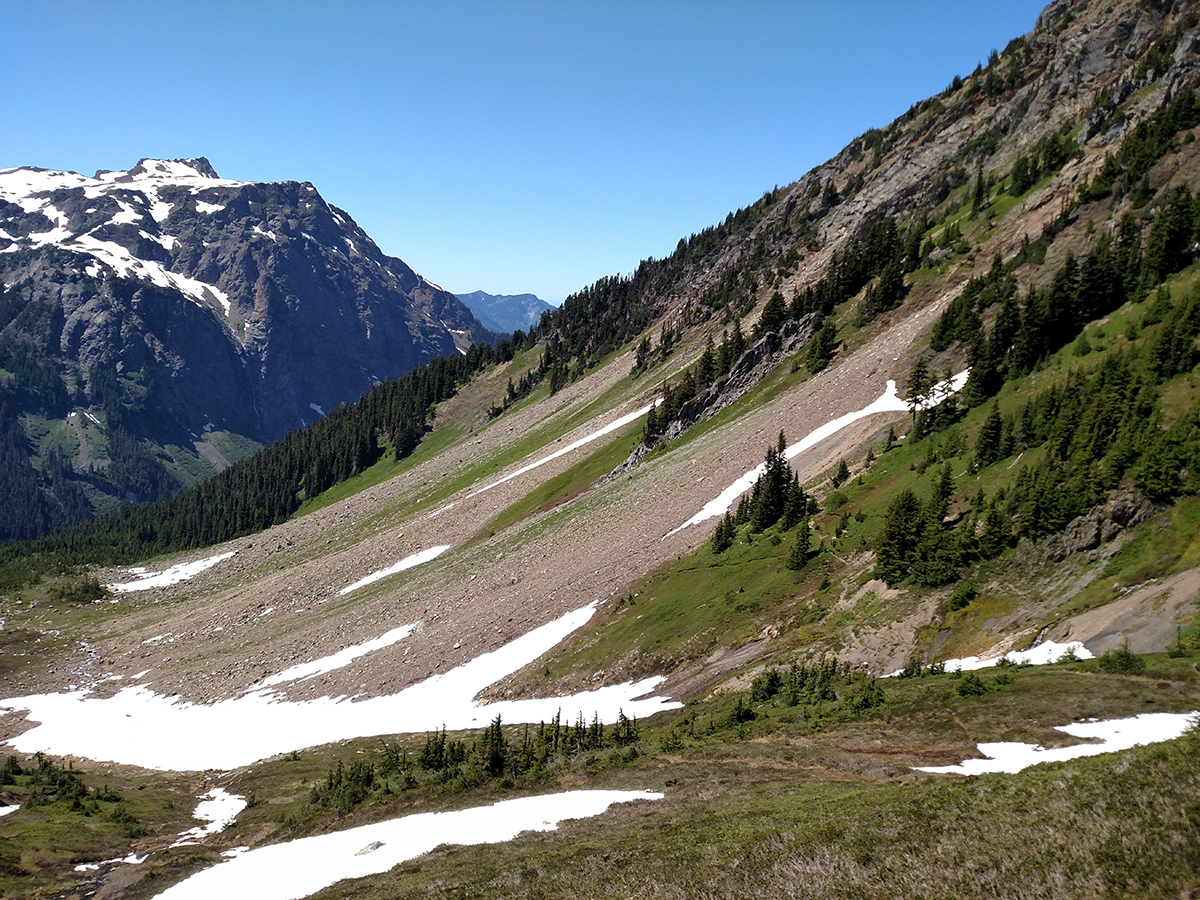
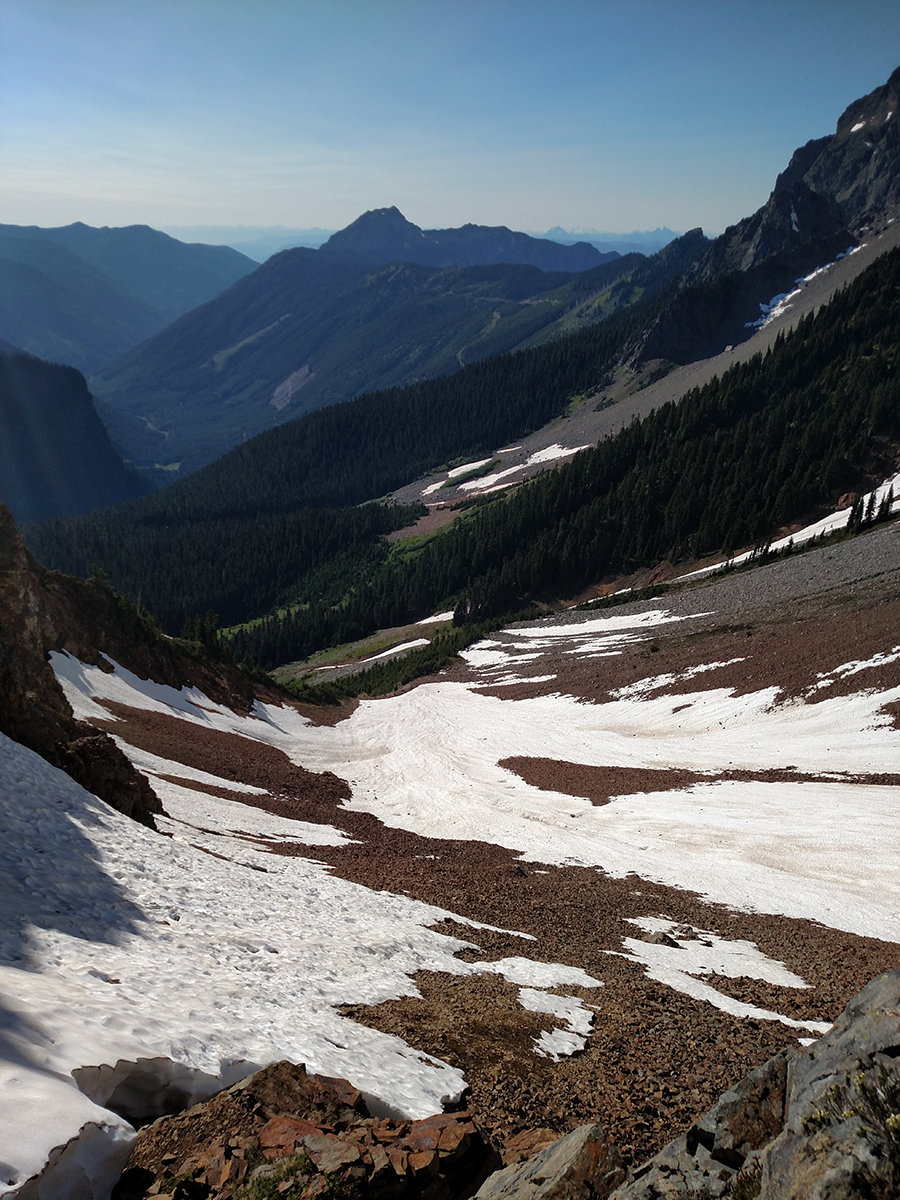
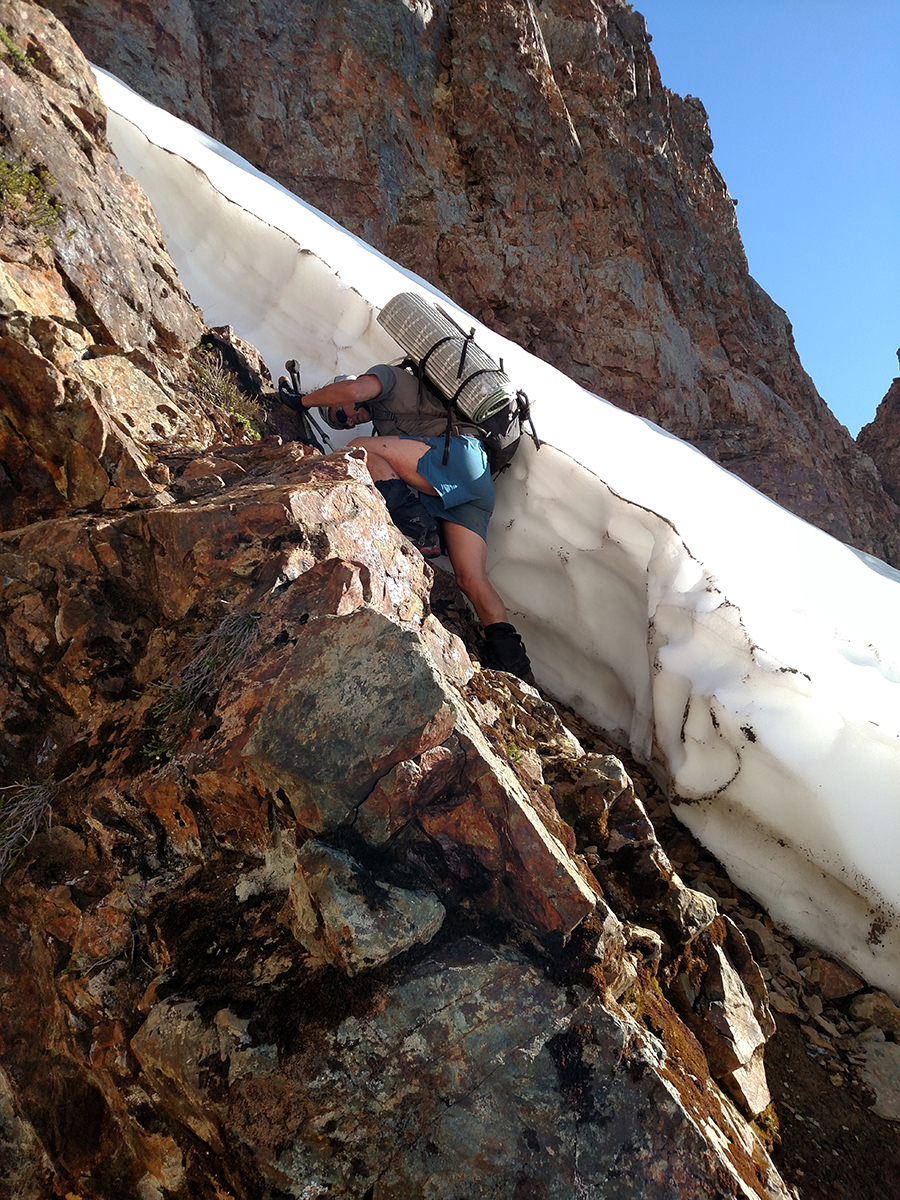
Trip: American Border Peak - SE Traverse Chimney Route Trip Date: 07/14/2018 Trip Report: Cascade Pass Road was still closed past the Eldorado parking area. Well shit! Time for plan B. Or Plan A if you like an epic climb for the ages! I texted DanO and asked if he was ready for some pain, he said sure. I see several reports of American Border Peak being climbed in September and I thought, "Why not try it in mid July and take one for the team?". Twin lakes parking was packed because the weather was perfect and it was the weekend. We arrived at the trailhead and were on the move at 11:30 am. There were several patches of snow to cross along the way to High Pass which was a bit tedious but it was part of the glory of early season. Once to High Pass we started down into the 1st gully. A word of advise, stay low in the gully and wrap around the bottom of the rib through the trees to the 2nd gully. We went high in the 1st gully to cross to the 2nd gully and it resulted in slow travel and a skinned ass, again adding to the glory. 1st Gully from High Pass 2nd Gully looking toward 6300' Gully to Col The second gully was quite pleasant, less rock and lots of green. We aimed for the notch at 6300'. Getting up to the col and down to the 3rd gully required some patience with the loose rock. We reached camp at the base of the talus slope in the 3rd gully at 6:00 pm. 3rd Gully from 6300' Col Camp at the base of the talus in the 3rd Gully DanO decided he was fine with hanging out at camp for summit day so I left for the summit solo at 5:45 am. It has been said that this route to American Border Peak has lots of loose rock and that is the absolute truth. Make peace with slipping constantly or it will drive you insane. Rocks will be falling so if you are climbing in a group, keep it tight or spread out. The terrain is steep to go along with the loose rock so make sure of your footing or pay the piper. I topped out on the 6900' col at 7:15 am. I was happy to see the snow was not an issue for the SE traverse to de Gaulle's gully. After getting to the top of de Gaulle's gully, I had to take some time to figure the best option for crossing the snow covered, steep hillside as well as the snow filled gully up to the ledges. It was gut check time. I decided to climb down and diagonal to the base of the snow and edge along to the base of the snow gully. The snow gully was steep and the snow was not in the greatest of conditions. I followed some goat tracks up the snow gully carefully kicking steps and planting my ice axe. I love mountain goats! They always seem to be looking out for me on the mountain, like guardian angels. I was very happy to make it to the top of the snow gully without incident. Once to the top of the snow gully I could see the route had very little snow remaining. The ledges leading to the chimney were wide enough to move fairly quickly. There are 3 chockstones wedged in the chimney. The bottom chockstone requires the most skill to climb. Since I was going solo, I decided to do the 4th class work around to get above the bottom chockstone. The rest of the chimney is still solid 5th class so take your time. Once to the top of the chimney you will have to go under the top chockstone and wiggle through a hole commonly referred to as the keyhole. It is a tight fit so you will probably need to push or pull your pack through separately. There is a great camp site below the summit after the keyhole. The summit from the keyhole is class 3 to 4. I finally reached the summit at 10:45 am. The view was great and I was feeling good. Time to head down. I started down from the summit at 11:20 am. There was a new rappel sling around the top chockstone complete with a donut, very nice. I had a 40m static rappel rope that worked perfect for the rappel down the chimney. There is a second rappel station halfway down the chimney. I rappelled the majority of the way down the snow gully then worked my way across the ledges above the snow to get to the top of de Gaulle's gully. The rest of the descent to camp was loose rock slipping and sliding but controllable. I arrived at camp at 4:00 pm. DanO was happy to see me alive and in one piece. The summit and back took a lot of time. I needed to be back home the next day so we decided to pack up camp and head out. We made it back to the car at a midnight exhausted and happy to be done. The night was beautiful and full of stars. This is a challenging climb and I am glad that I waited a few years to get more experience on other climbs before attempting it. This will go down as one of my favorite climbs. We are not freaky fast climbers and we are not super slow either. Taking that into consideration, here are the times for the climb. Day 1: 11:30 am (left car) to 6:00 pm (camp) - 6.5 hours Day 2: 5:45 am (camp) to 10:45 am (summit) - 5 hours, 11:20 am (summit) to 4:00 pm (camp) - 4hr40min, 5:30 pm (camp) to Midnight (car) - 6.5 hours. Total time for Day 2 - 18 hours Doing this climb earlier in the year is a lot slower than later in the year. If I had to do it again, I'd do it in 3 days and enjoy the experience. We brought crampons, ice axes, trekking poles and a 40m static rappel rope and we used everything. Gear Notes: Crampons, Ice Axe, Trekking Poles, 40 meter static rope, Helmets Approach Notes: Started from Twin Lakes parking lot.


-
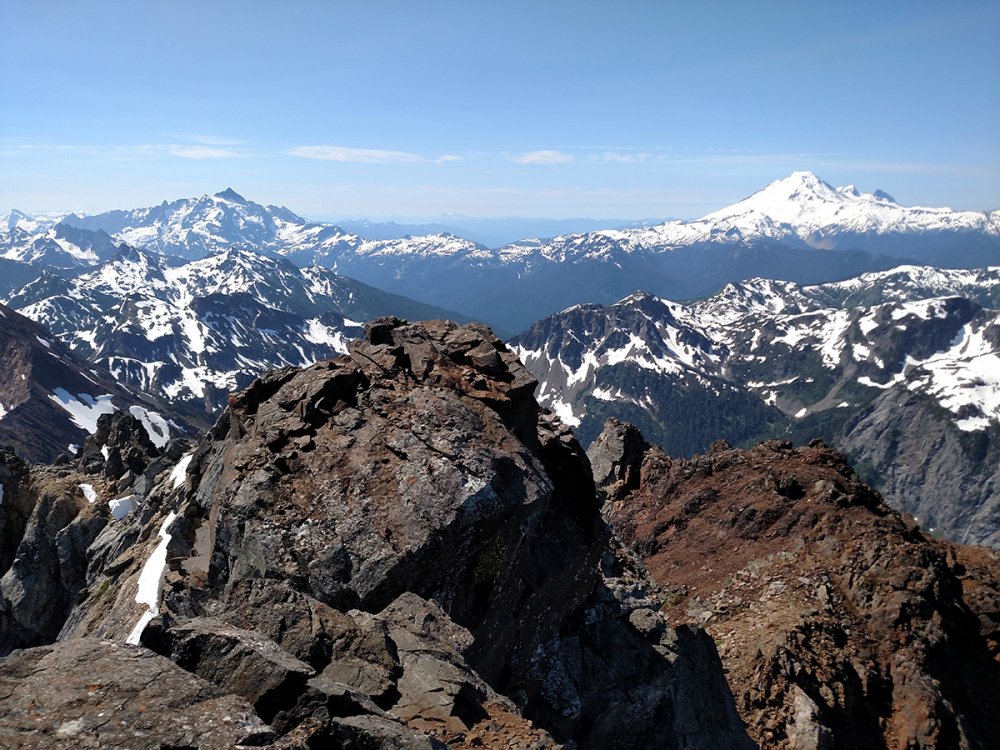
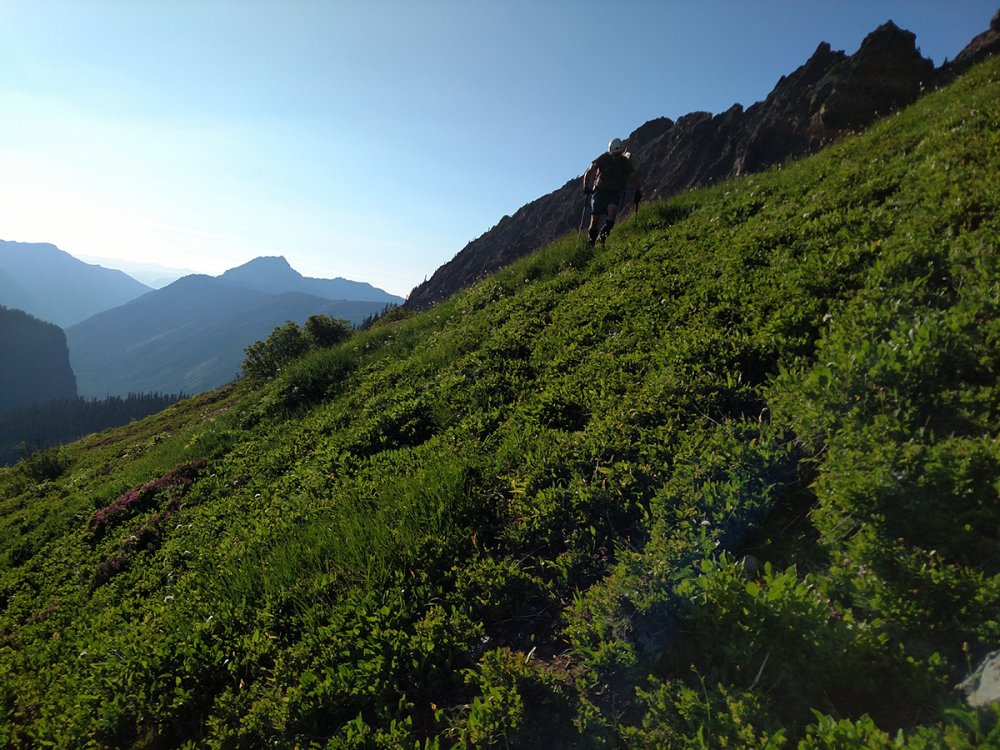
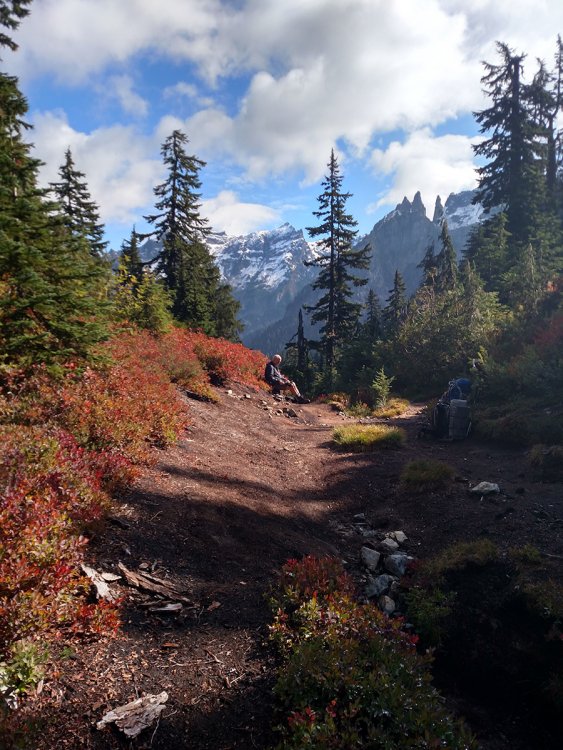
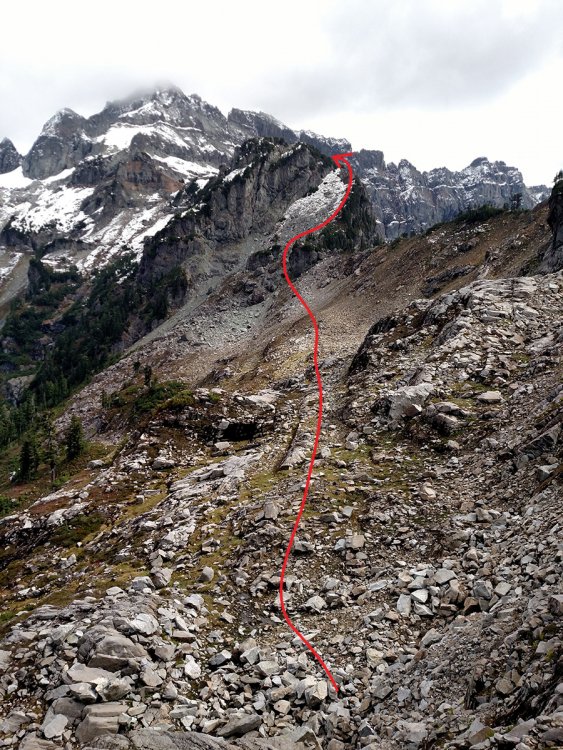
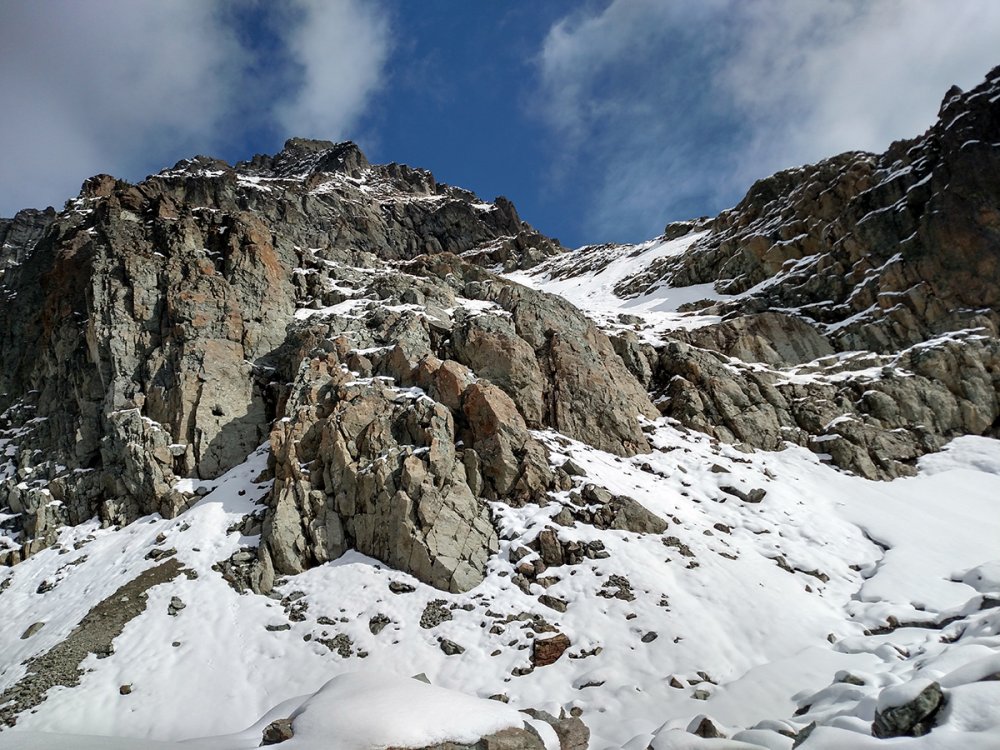
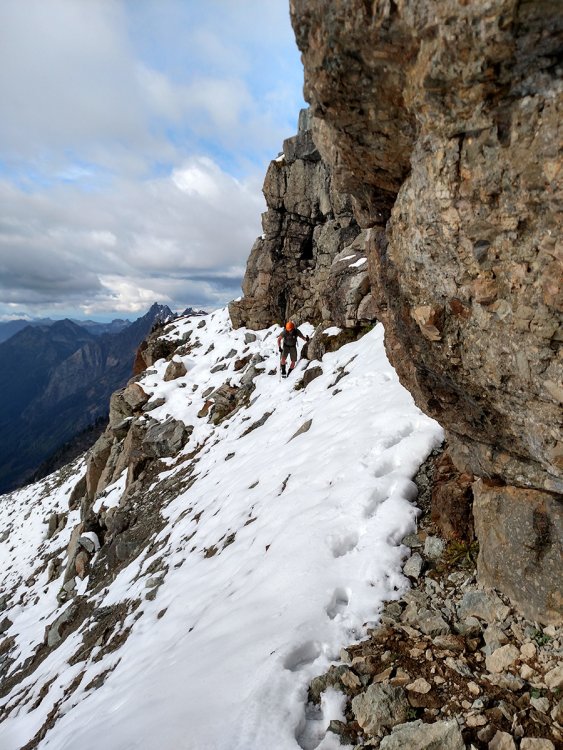
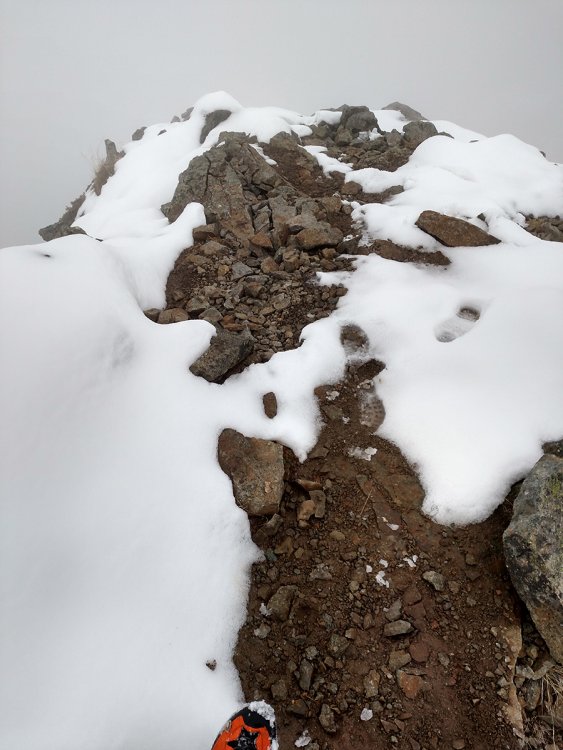
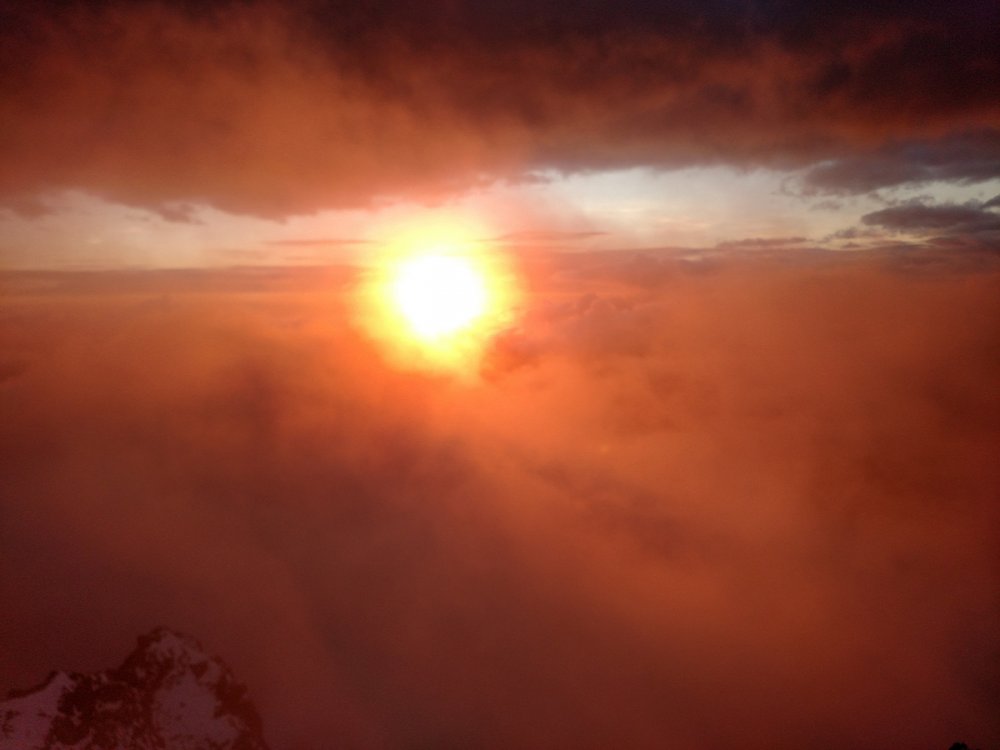
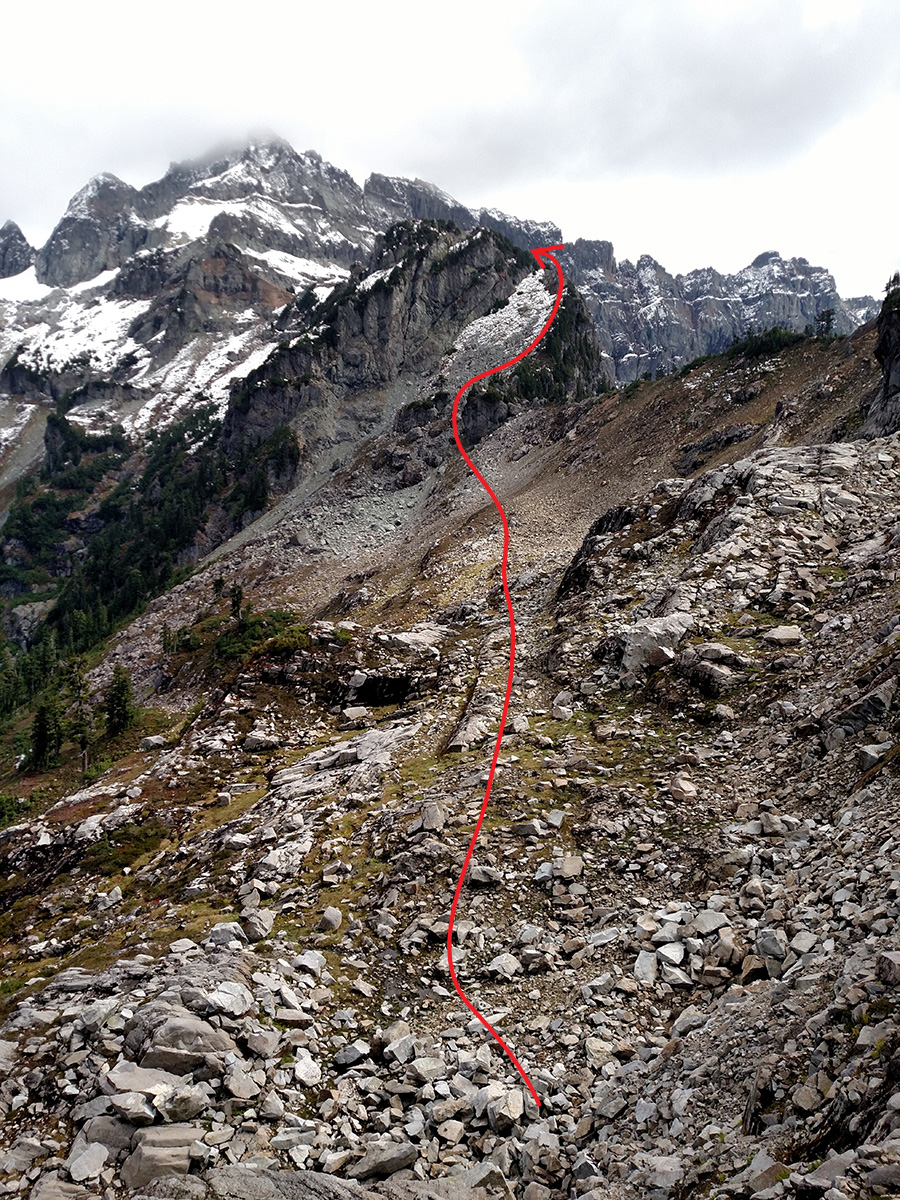
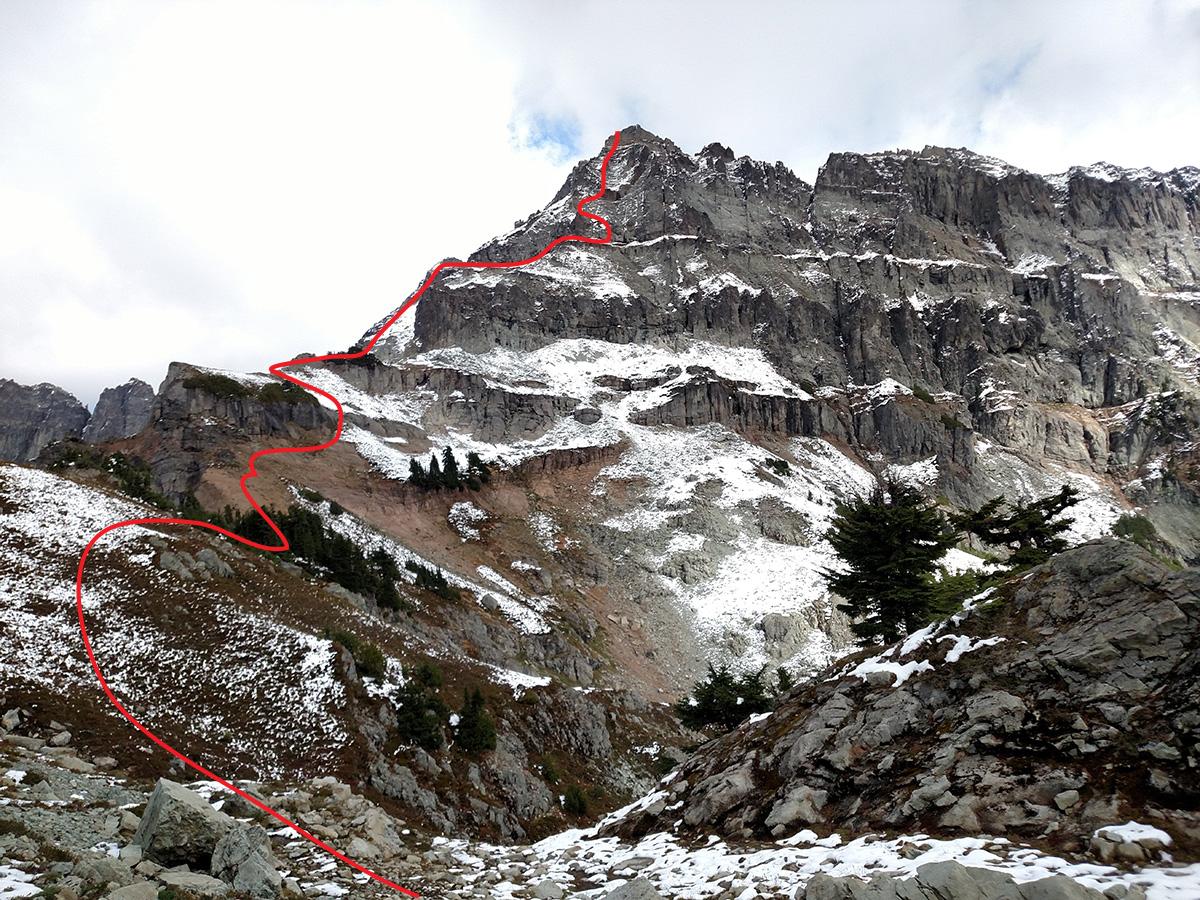
The weather was looking good for the weekend so I texted DanO, we decided to hit Columbia Peak. The peak was supposed to be mostly class 3 with some class 4 sections, according to what I had read, which sounded perfect for late season. We parked at the gate of the new road going to Monte Cristo and started riding our bikes at 7:30am. We arrived at Monte Cristo and parked the bikes. We made it to Poodle Dog Pass at 10:30am. The weather was perfect, classic fall hiking. We made it to the turn off at 5100' at about 12:00. We were making good time so we decided to bag the summit on day 1 while the weather was holding out. We dropped all non-essential gear and started for the summit at 1:00pm. We started hitting snow around 5300' on the route. The climber's trail was half covered in snow. We were in solid snow by the time we hit the base of the 1st gully. The rock step to get to the 1st gully was solid 4th class maybe low 5th class for about 20 feet. The gully itself was basic class 2 on loose rock (thankfully covered in snow). Once to the top of the 1st gully we ran into a ledge heading to the right toward the SW Face. The ledge was also class 2, but snow covered, so travel was slow and steady. The ledge went around the corner to the base of the SW Face. There was an 8 foot section of low 5th class rock to get into the SW Face gully. The SW Face gully was partially covered in snow and wet rock. The rock in the gully was down sloping, loose and steep, combined with the wet snow, the SW Face had our full attention. A slip would have been bad so we traveled slow and sure. We stayed to the left side of the gully as much as possible since it had the best options. Clouds started moving in and covering the gully and summit block. We made it to the base of the summit block and attempted to corkscrew around to the top (per the standard route) but the snow was making the route up dangerous with a piss poor runout to certain death. DanO decided he was happy making it to within 50 feet of the summit and elected to wait for me to summit via the SW face of the summit block. I found some decent holds going up the middle of the summit block on what looked to me to be low 5th class. I went for it. The summit view is supposed to be fantastic. The only view I had was of the inside of a cloud, but the summit was achieved at 5:30pm. We started down carefully making sure our holds were good since the traction was less than ideal. We made it across the ledge at the top of the class 2 gully just as the sun was going down. The view was incredible as the sun split between a high and low bank of clouds. I imagined this is what the dawn of time must have looked like as life was birthed into the great vastness of existence. I could not help but smile and nod my head at the display we were witnessing. One moment in time I will never forget. We broke out the lights and worked our way back via GPS to our gear stash at 9:30pm. We worked our way back to the main trail on the ridge to setup camp. We left camp at 11:00am and were back at the car by 3:00pm. This climb is commonly rated as a class 3 with sections of 4th class, I'm assuming in dry conditions sans snow. I would rate the climb we did as having more class 4 than class 3 with sections of low class 5. The rock is loose, steep and down sloping. I would not recommend doing this climb when it is wet. Gear Notes: We brought overnight supplies, mountaineer boots, trekking poles, ice axes & crampons. We didn't use the crampons. I was glad that I brought a water proof shell layer as the temp dropped and the wind picked up heading to the summit.


.thumb.jpg.fc748404e0290168e90d1cf6b40ed70e.jpg)
.thumb.jpg.6da586144e112253e5f9cd63e5da9e1e.jpg)


.jpg.ee46d0731431bec186f6da11ce0da21d.jpg)
.jpg.7bf37fc6a58b0577fa30c0c8fe4cd20b.jpg)