


Michael Telstad
-
Posts
111 -
Joined
-
Last visited
-
Days Won
36
Content Type
Profiles
Forums
Events
Posts posted by Michael Telstad
-
-
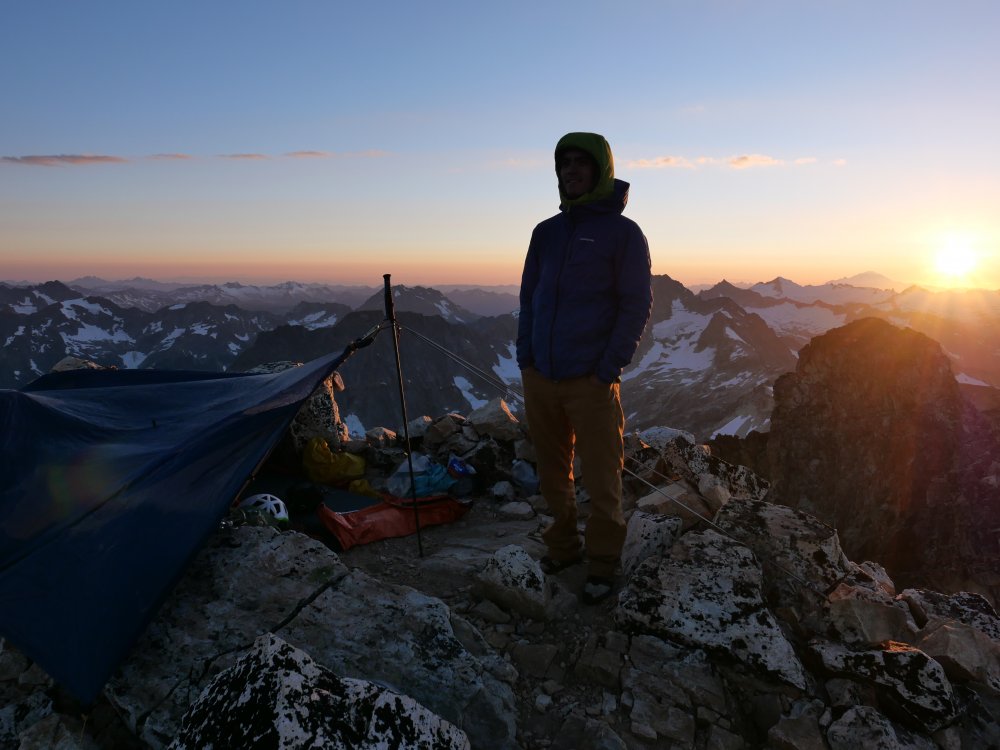
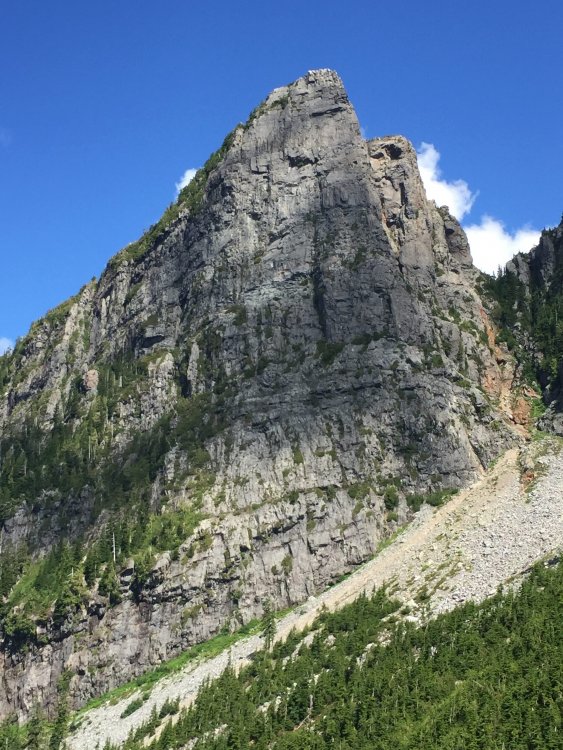
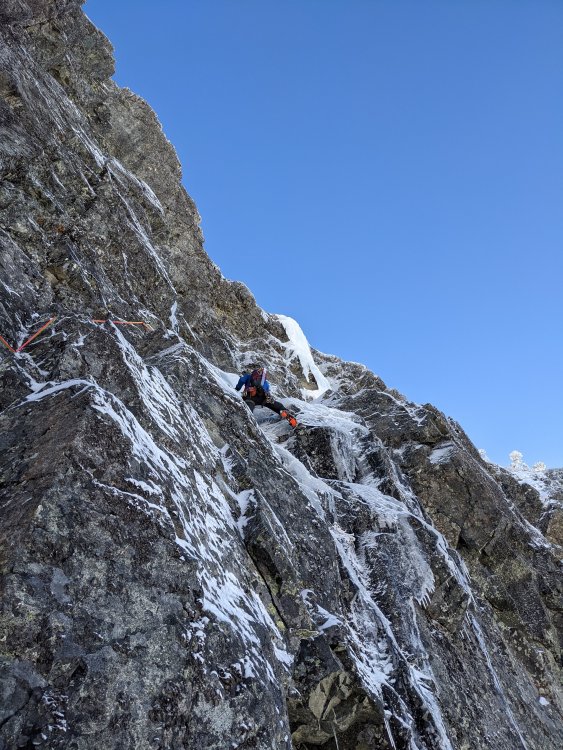
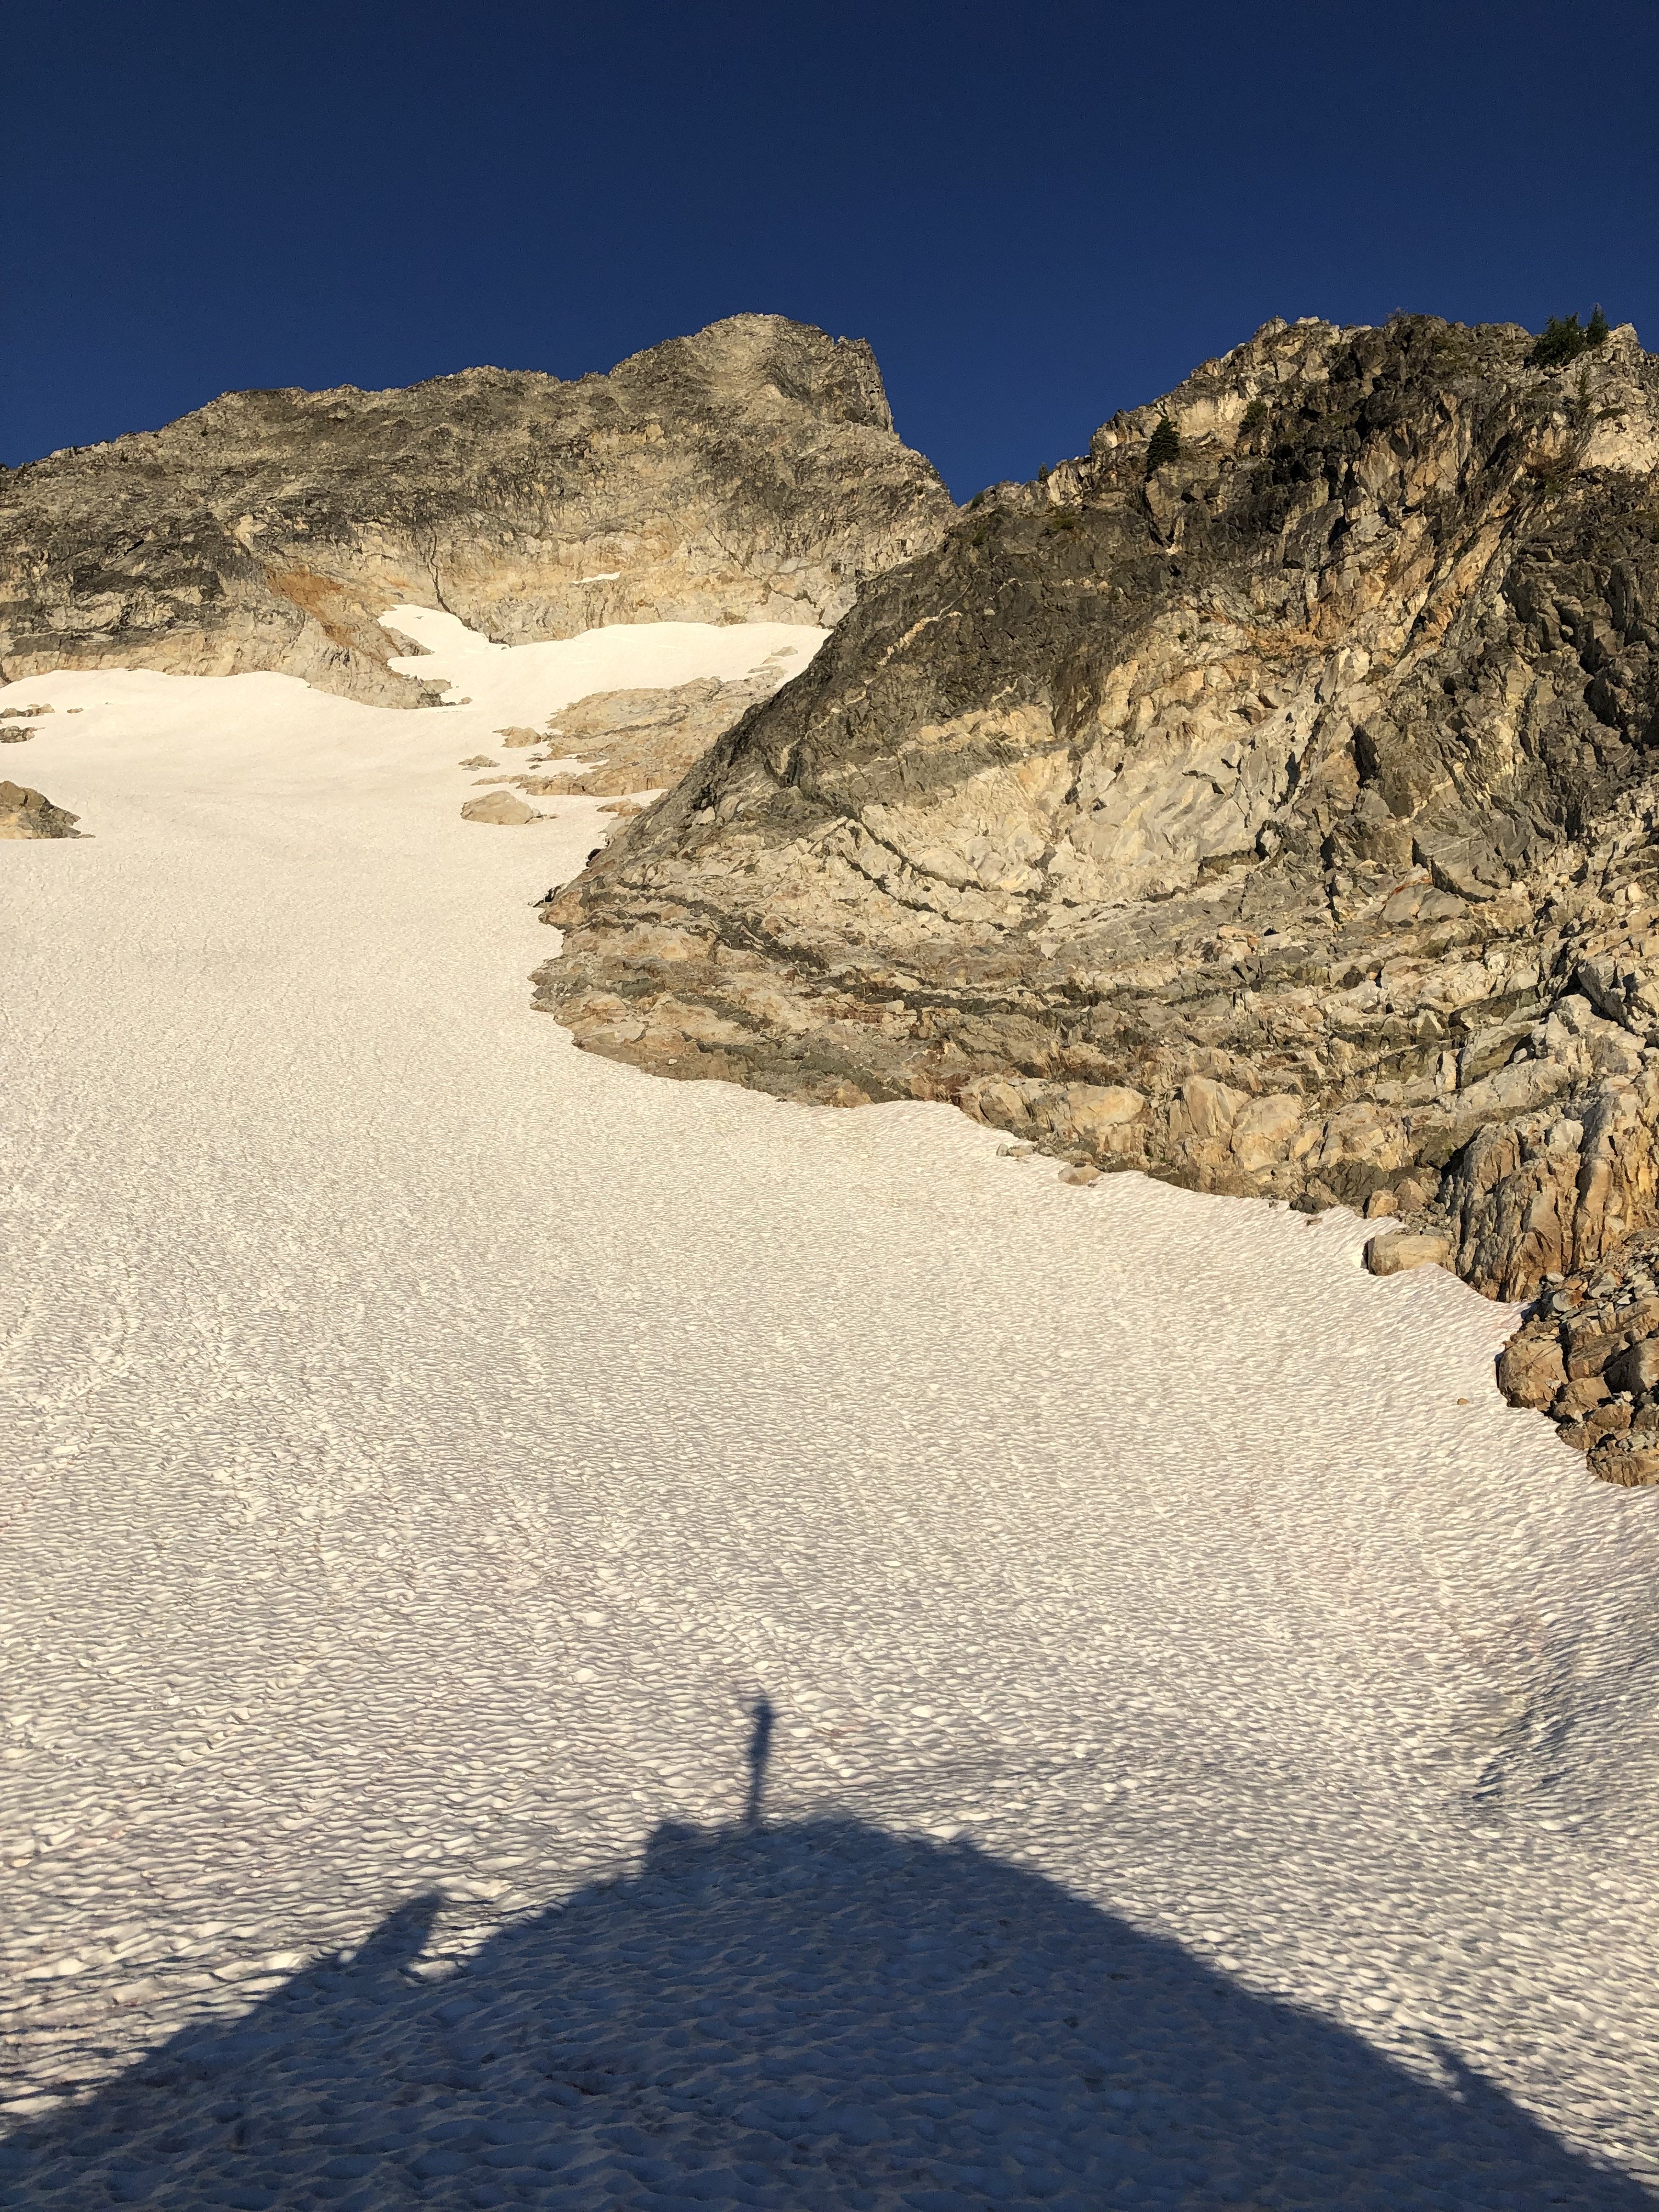
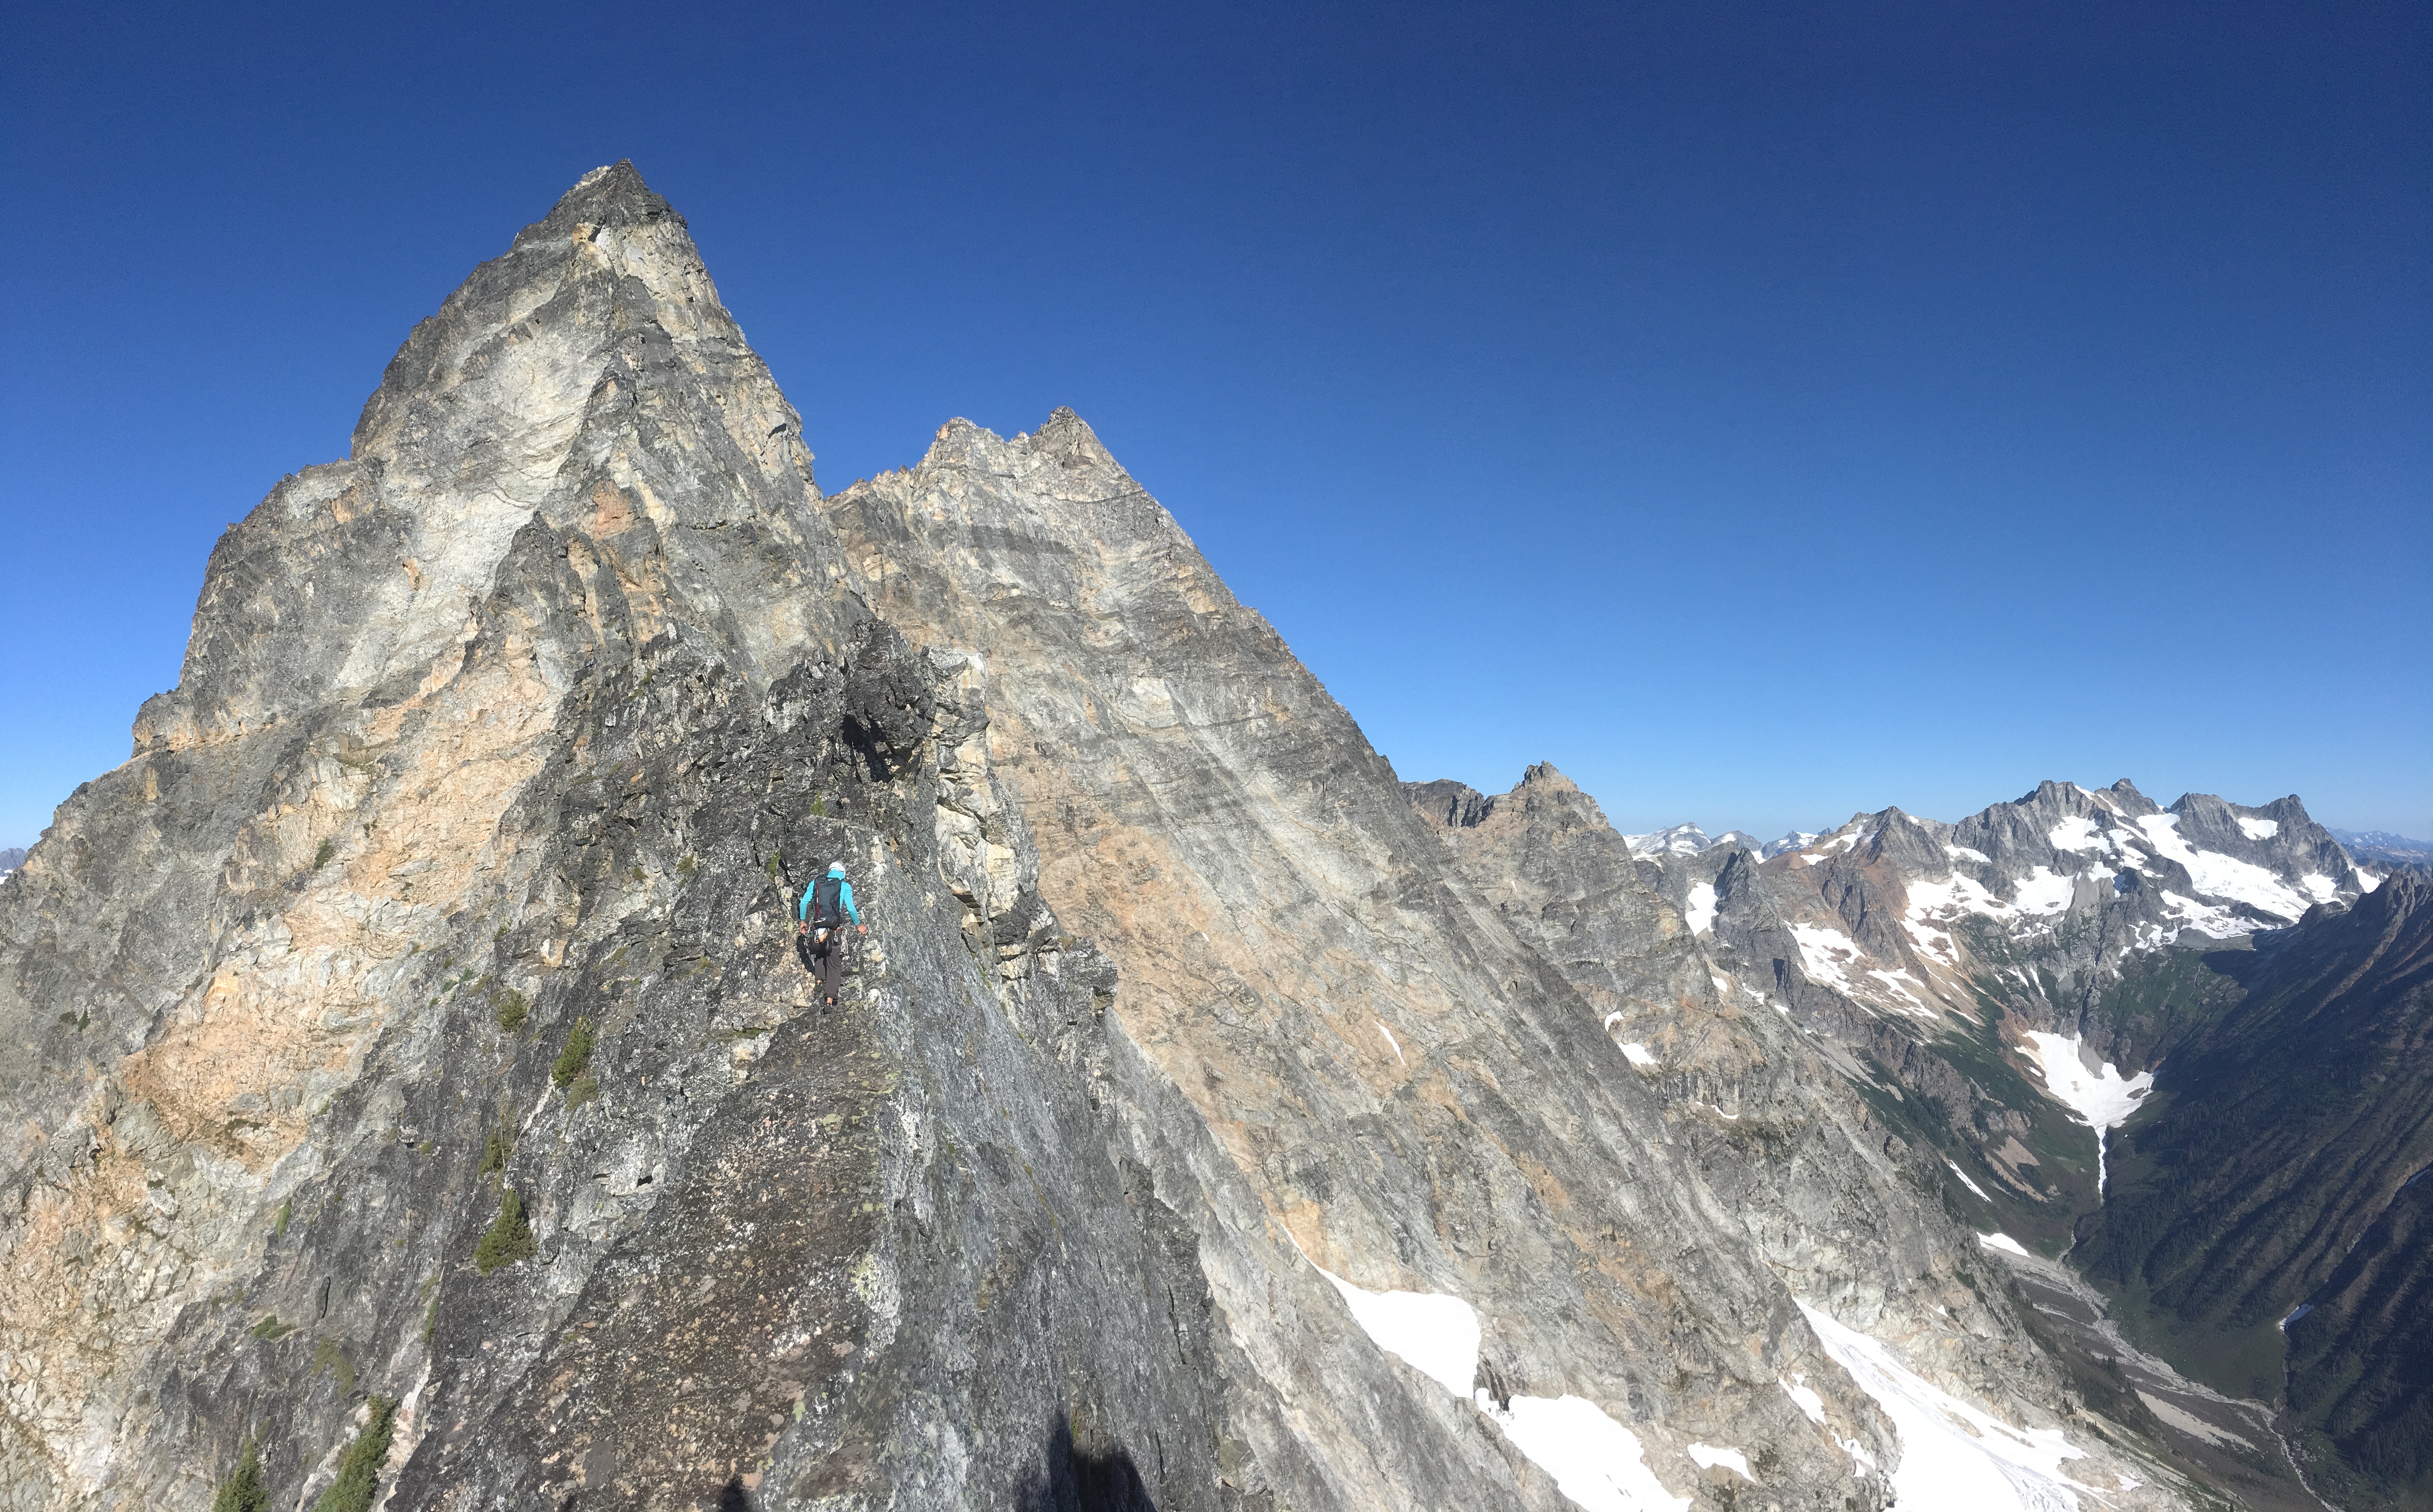
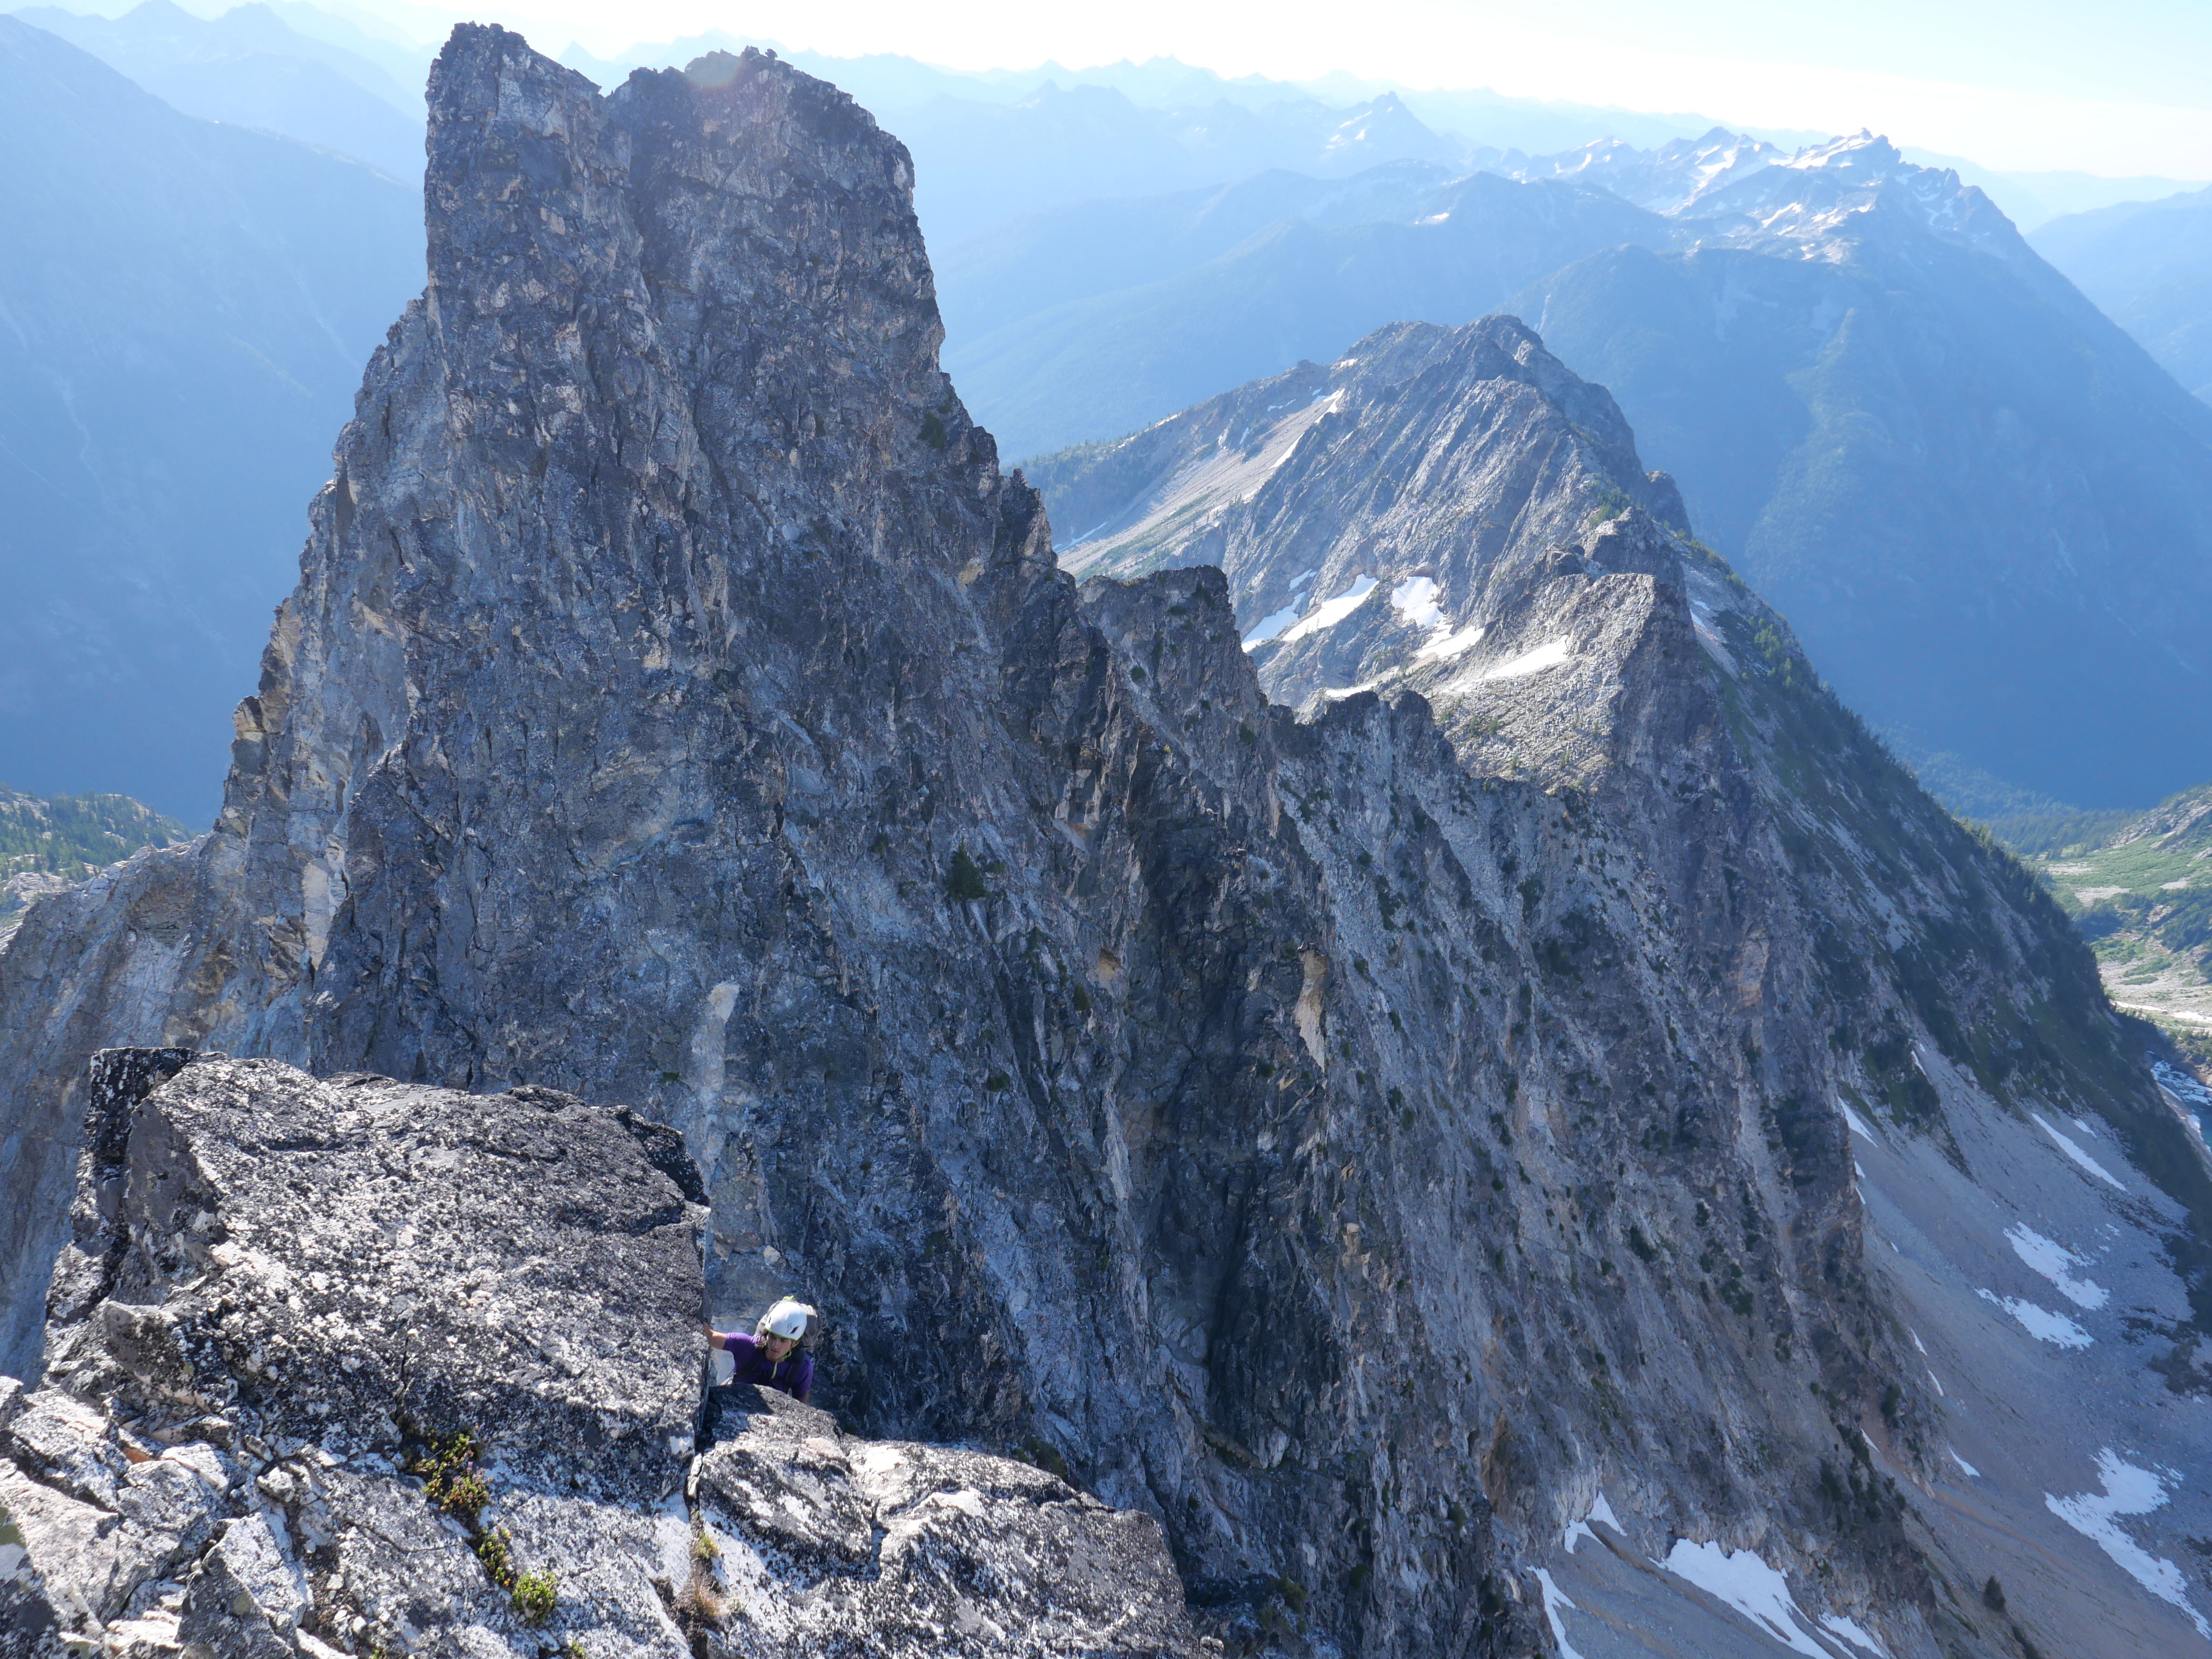
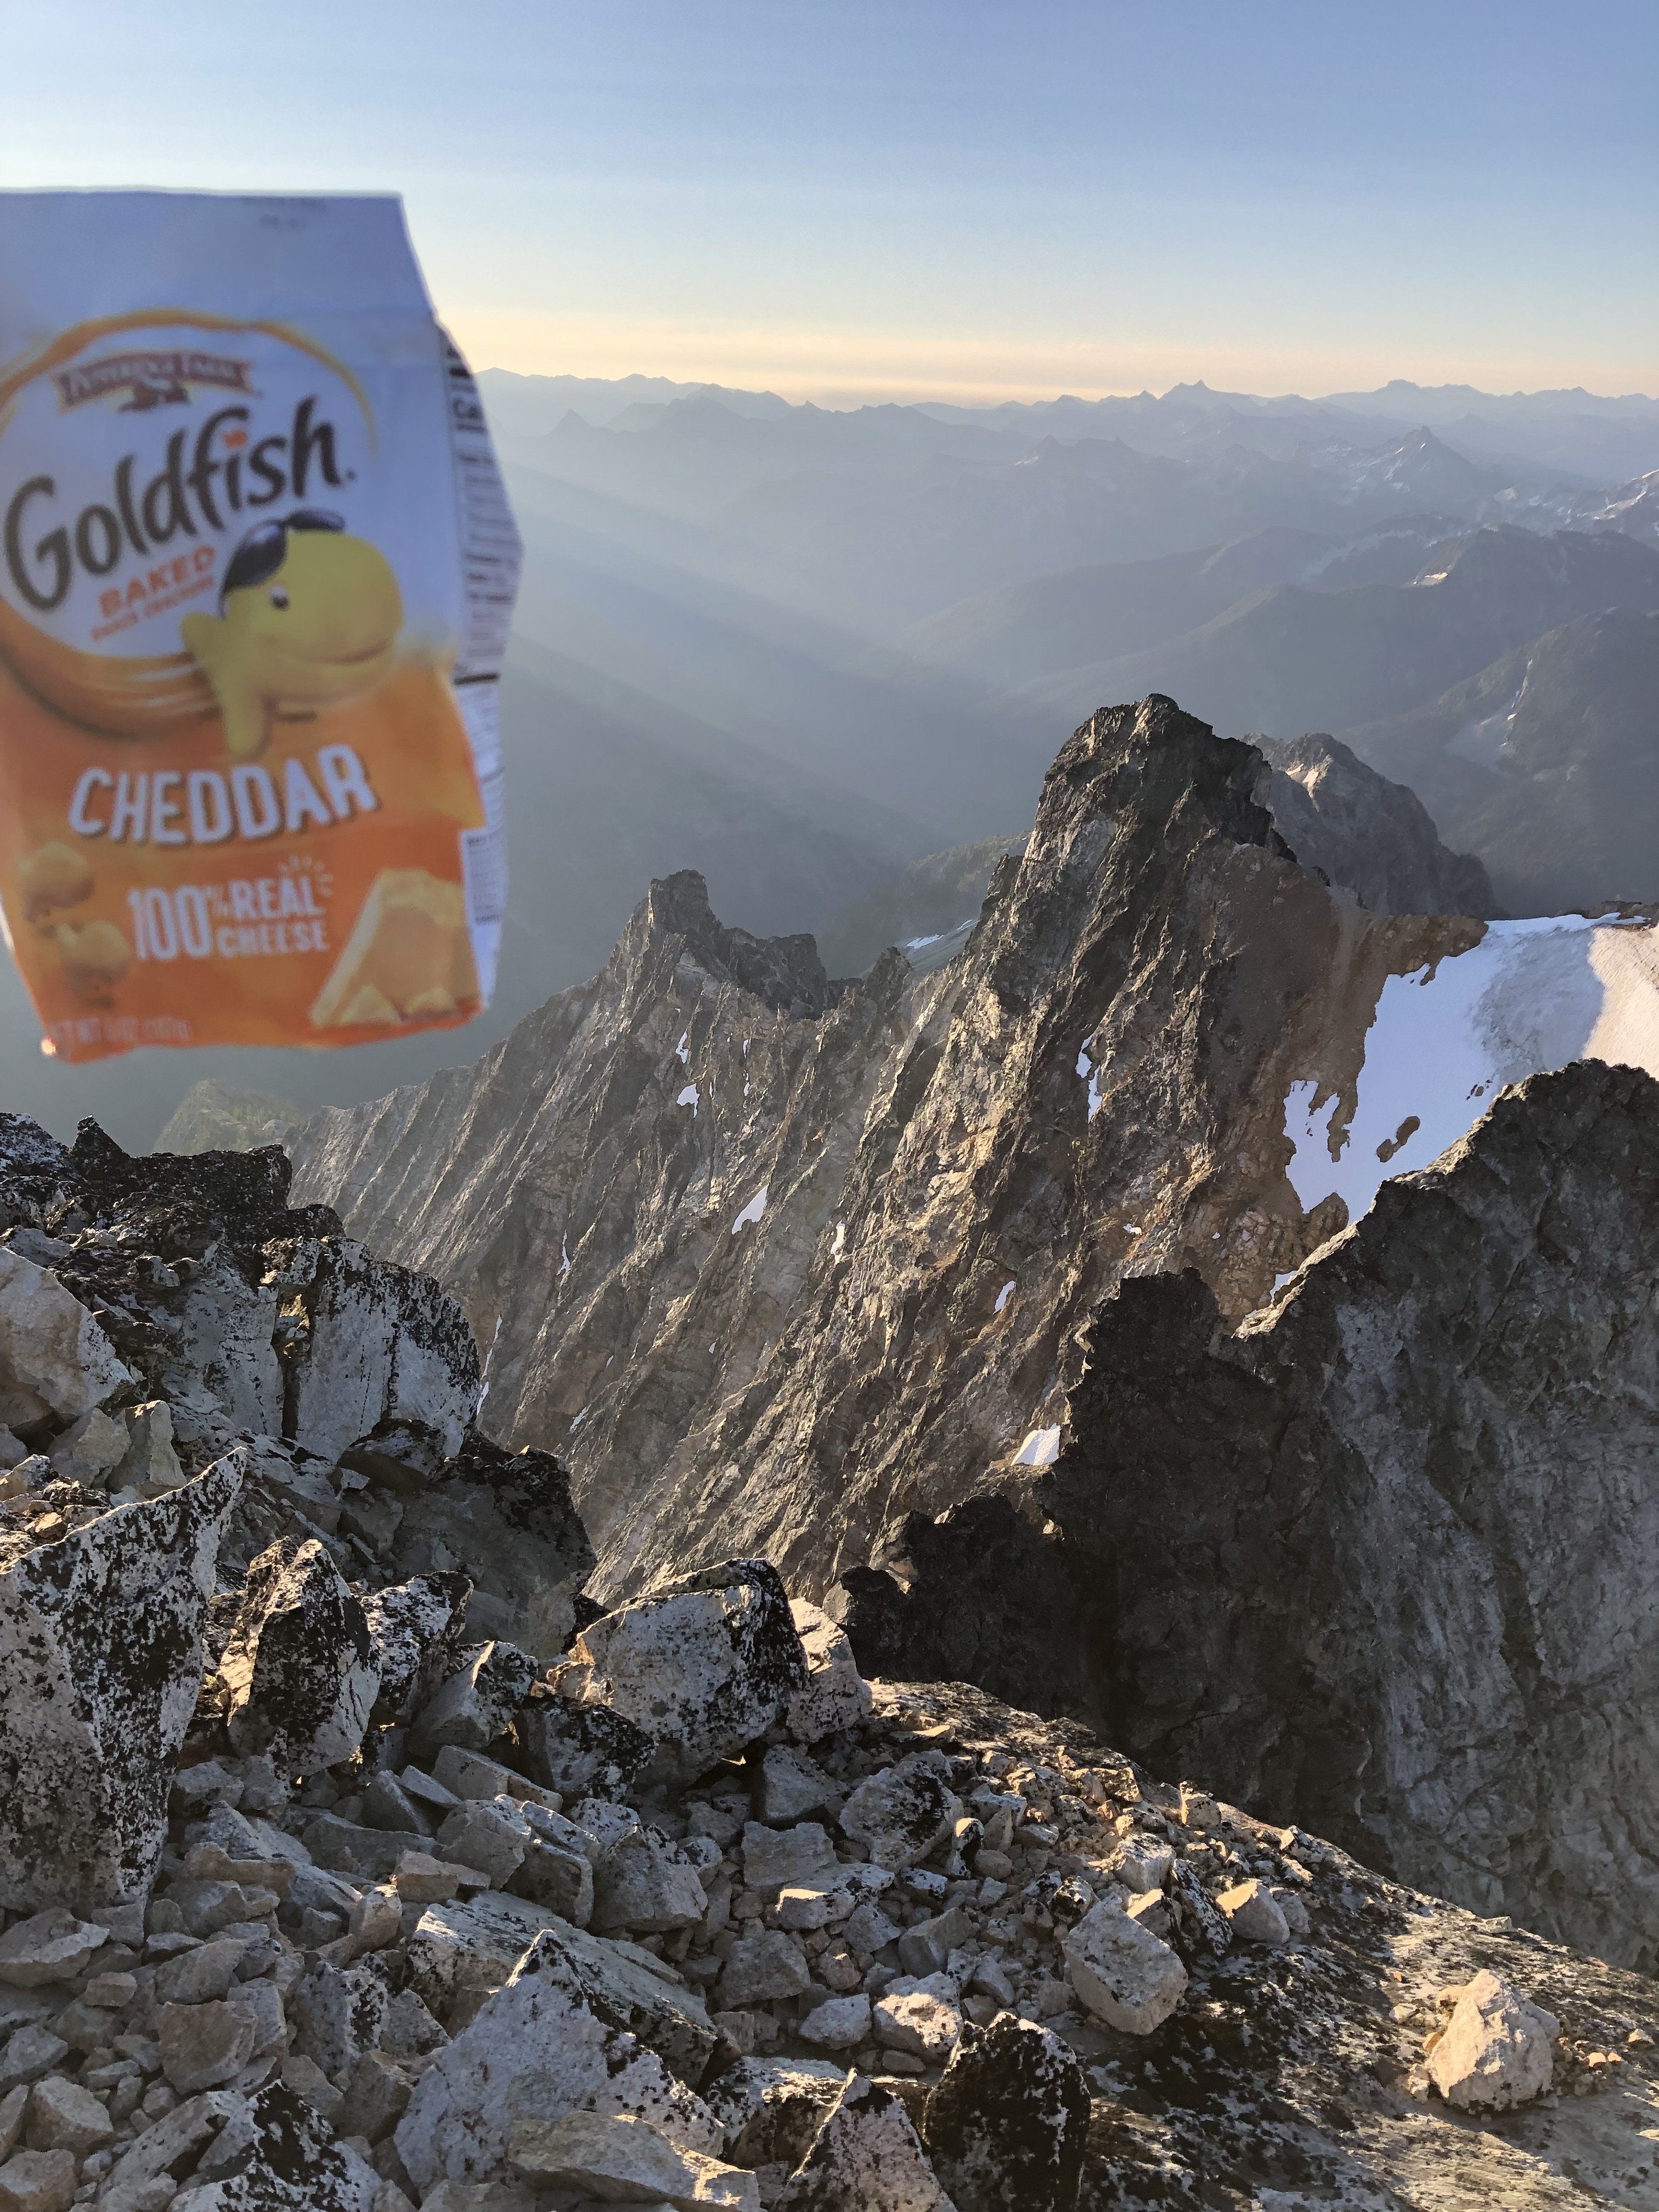
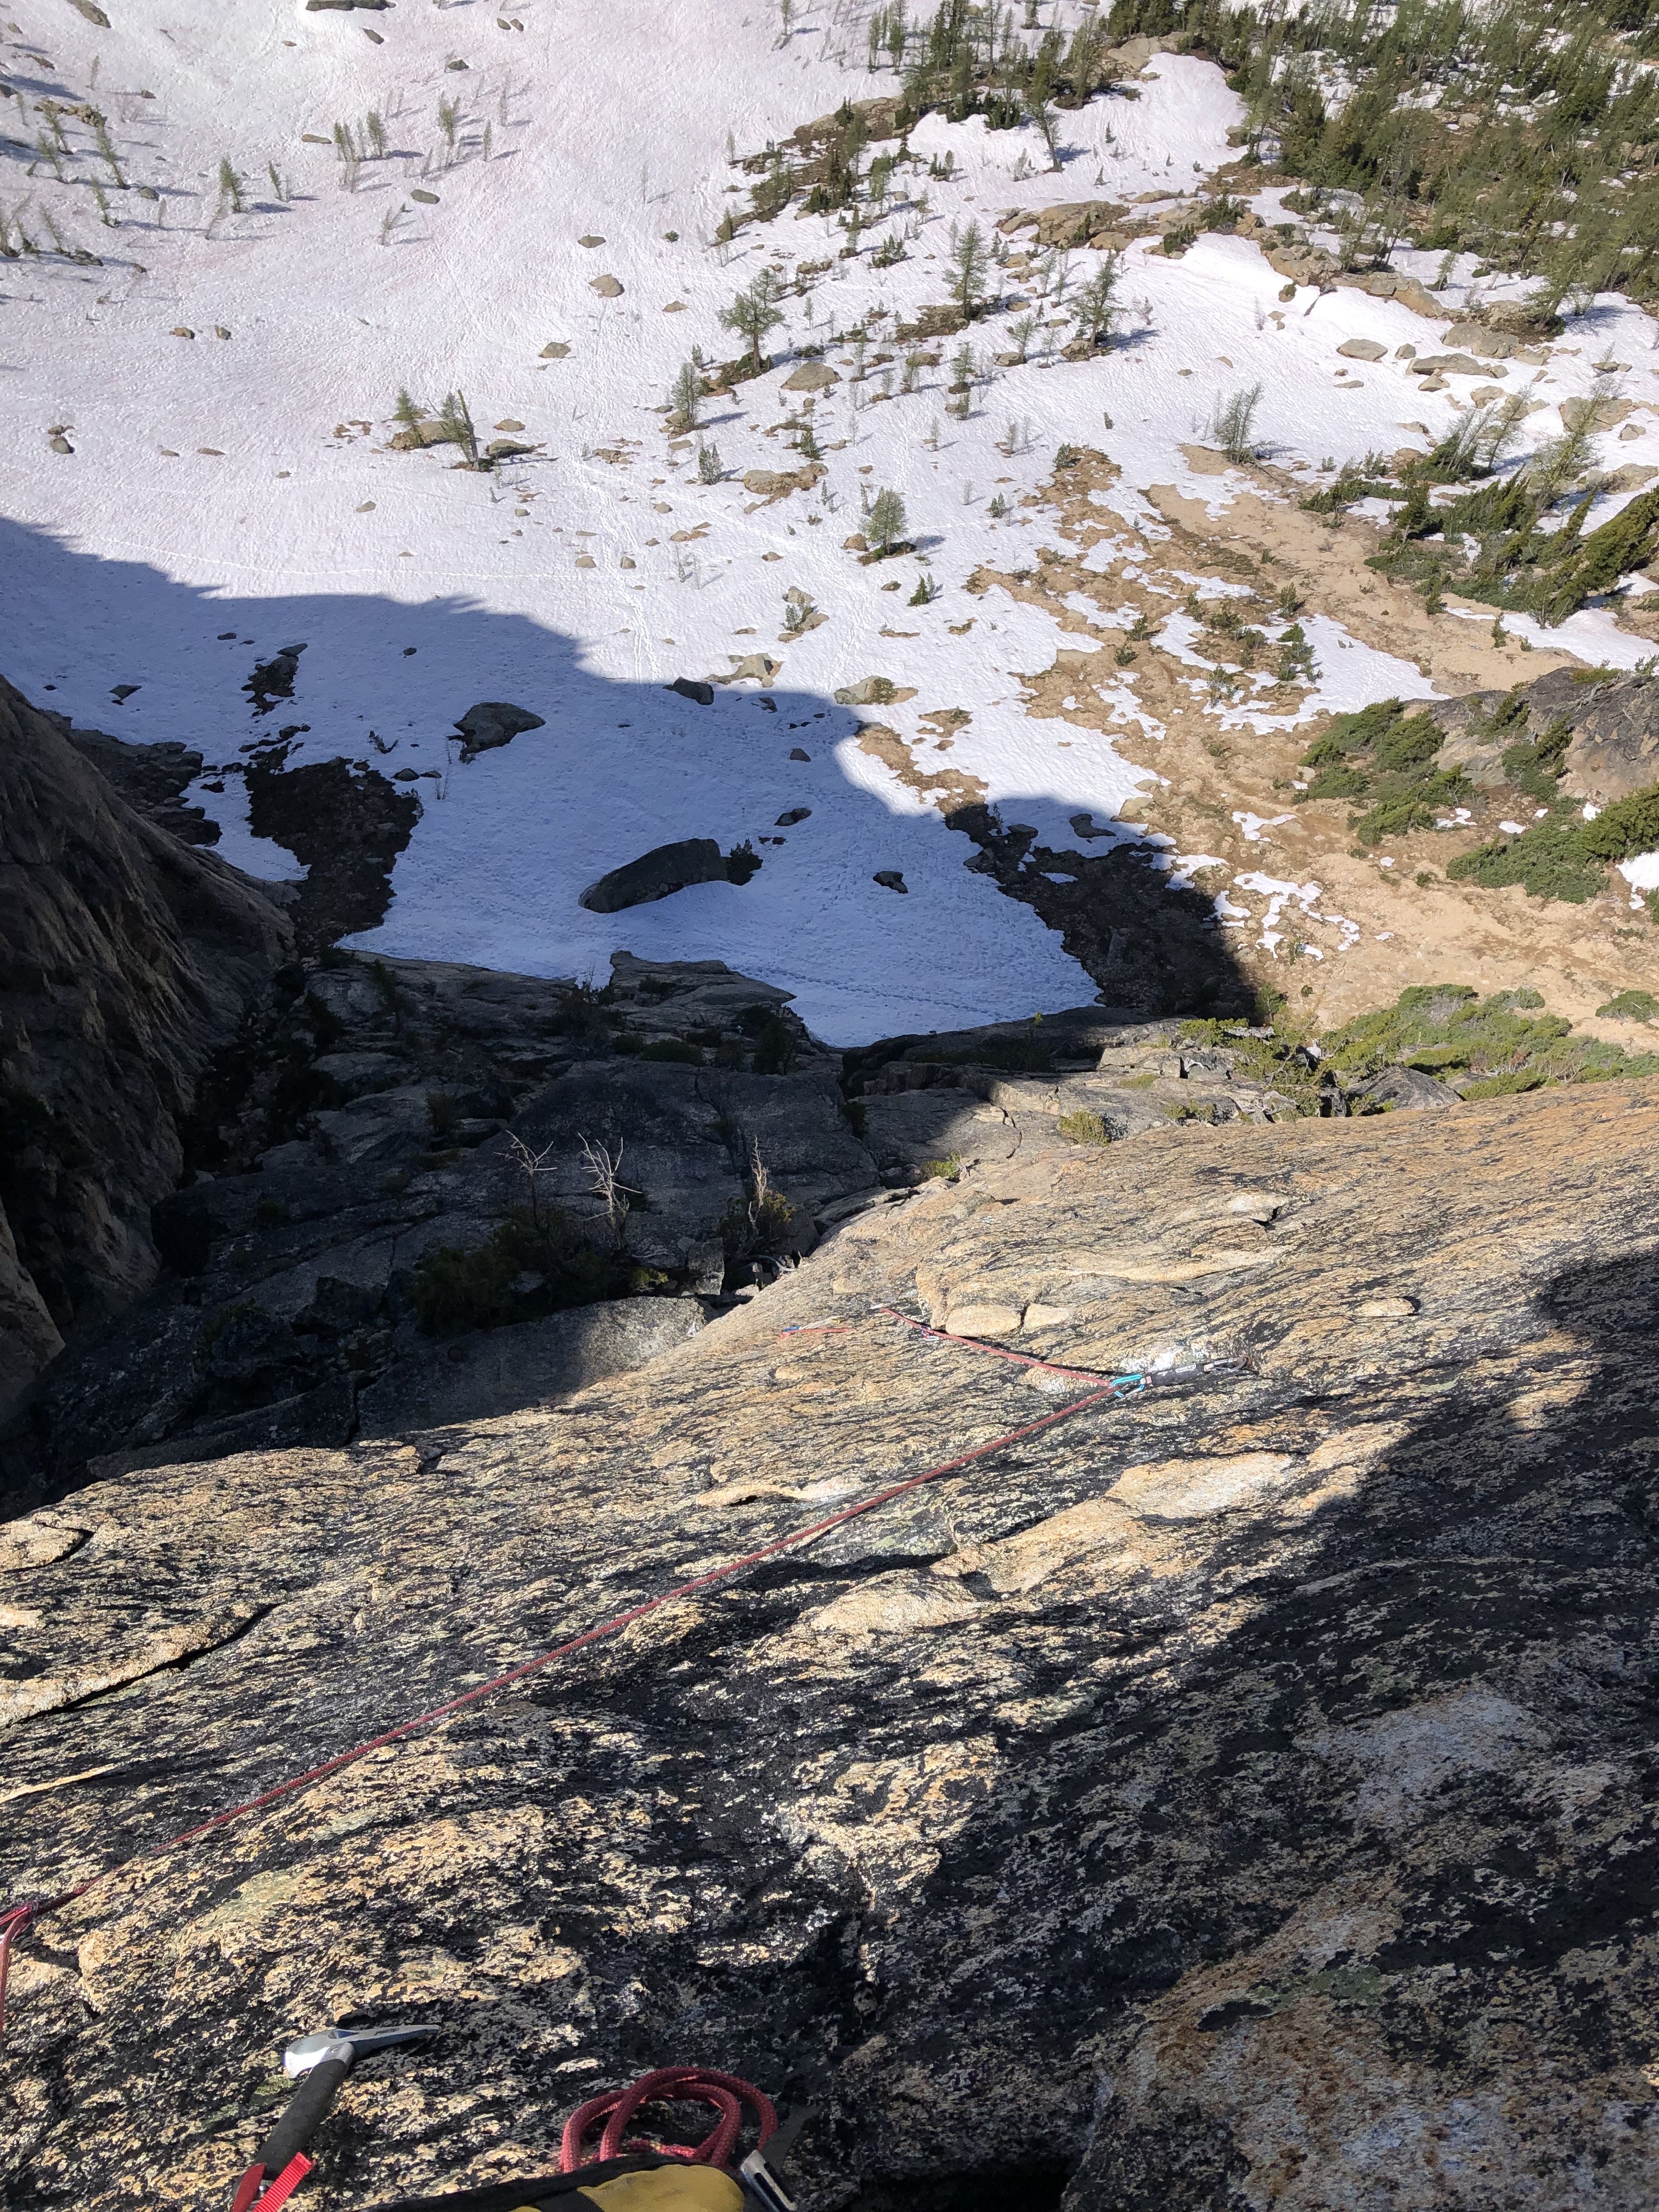
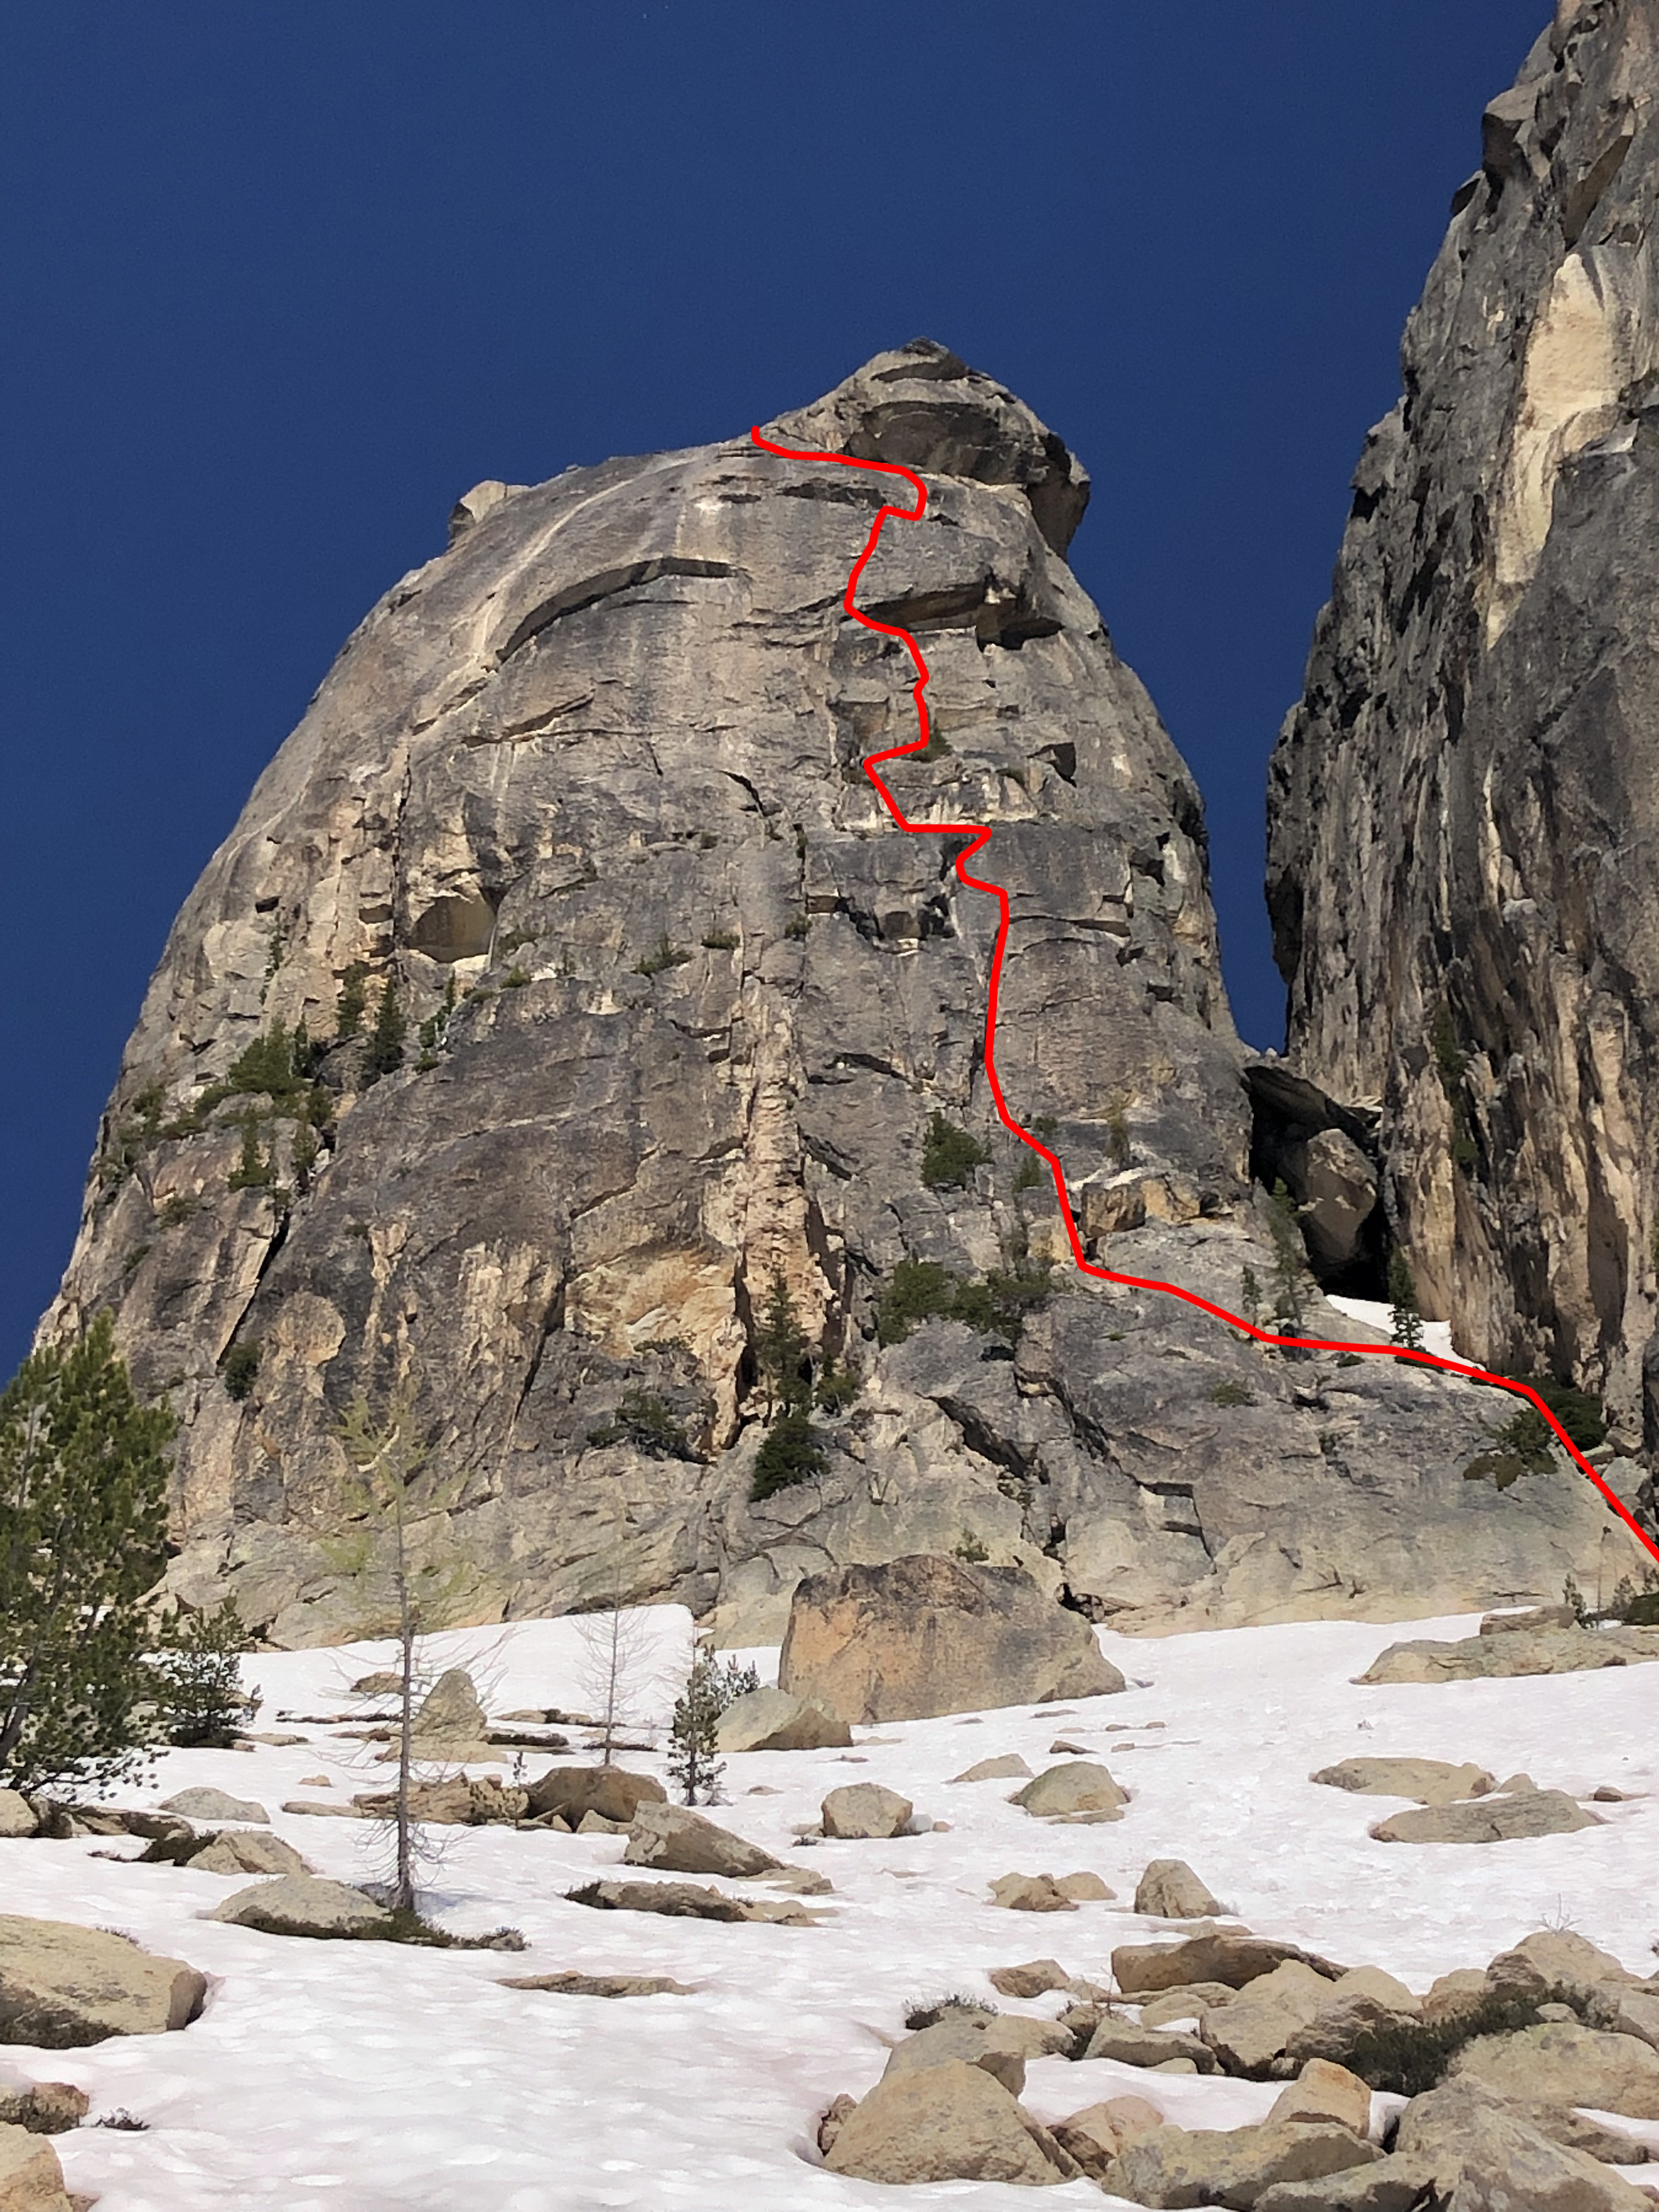
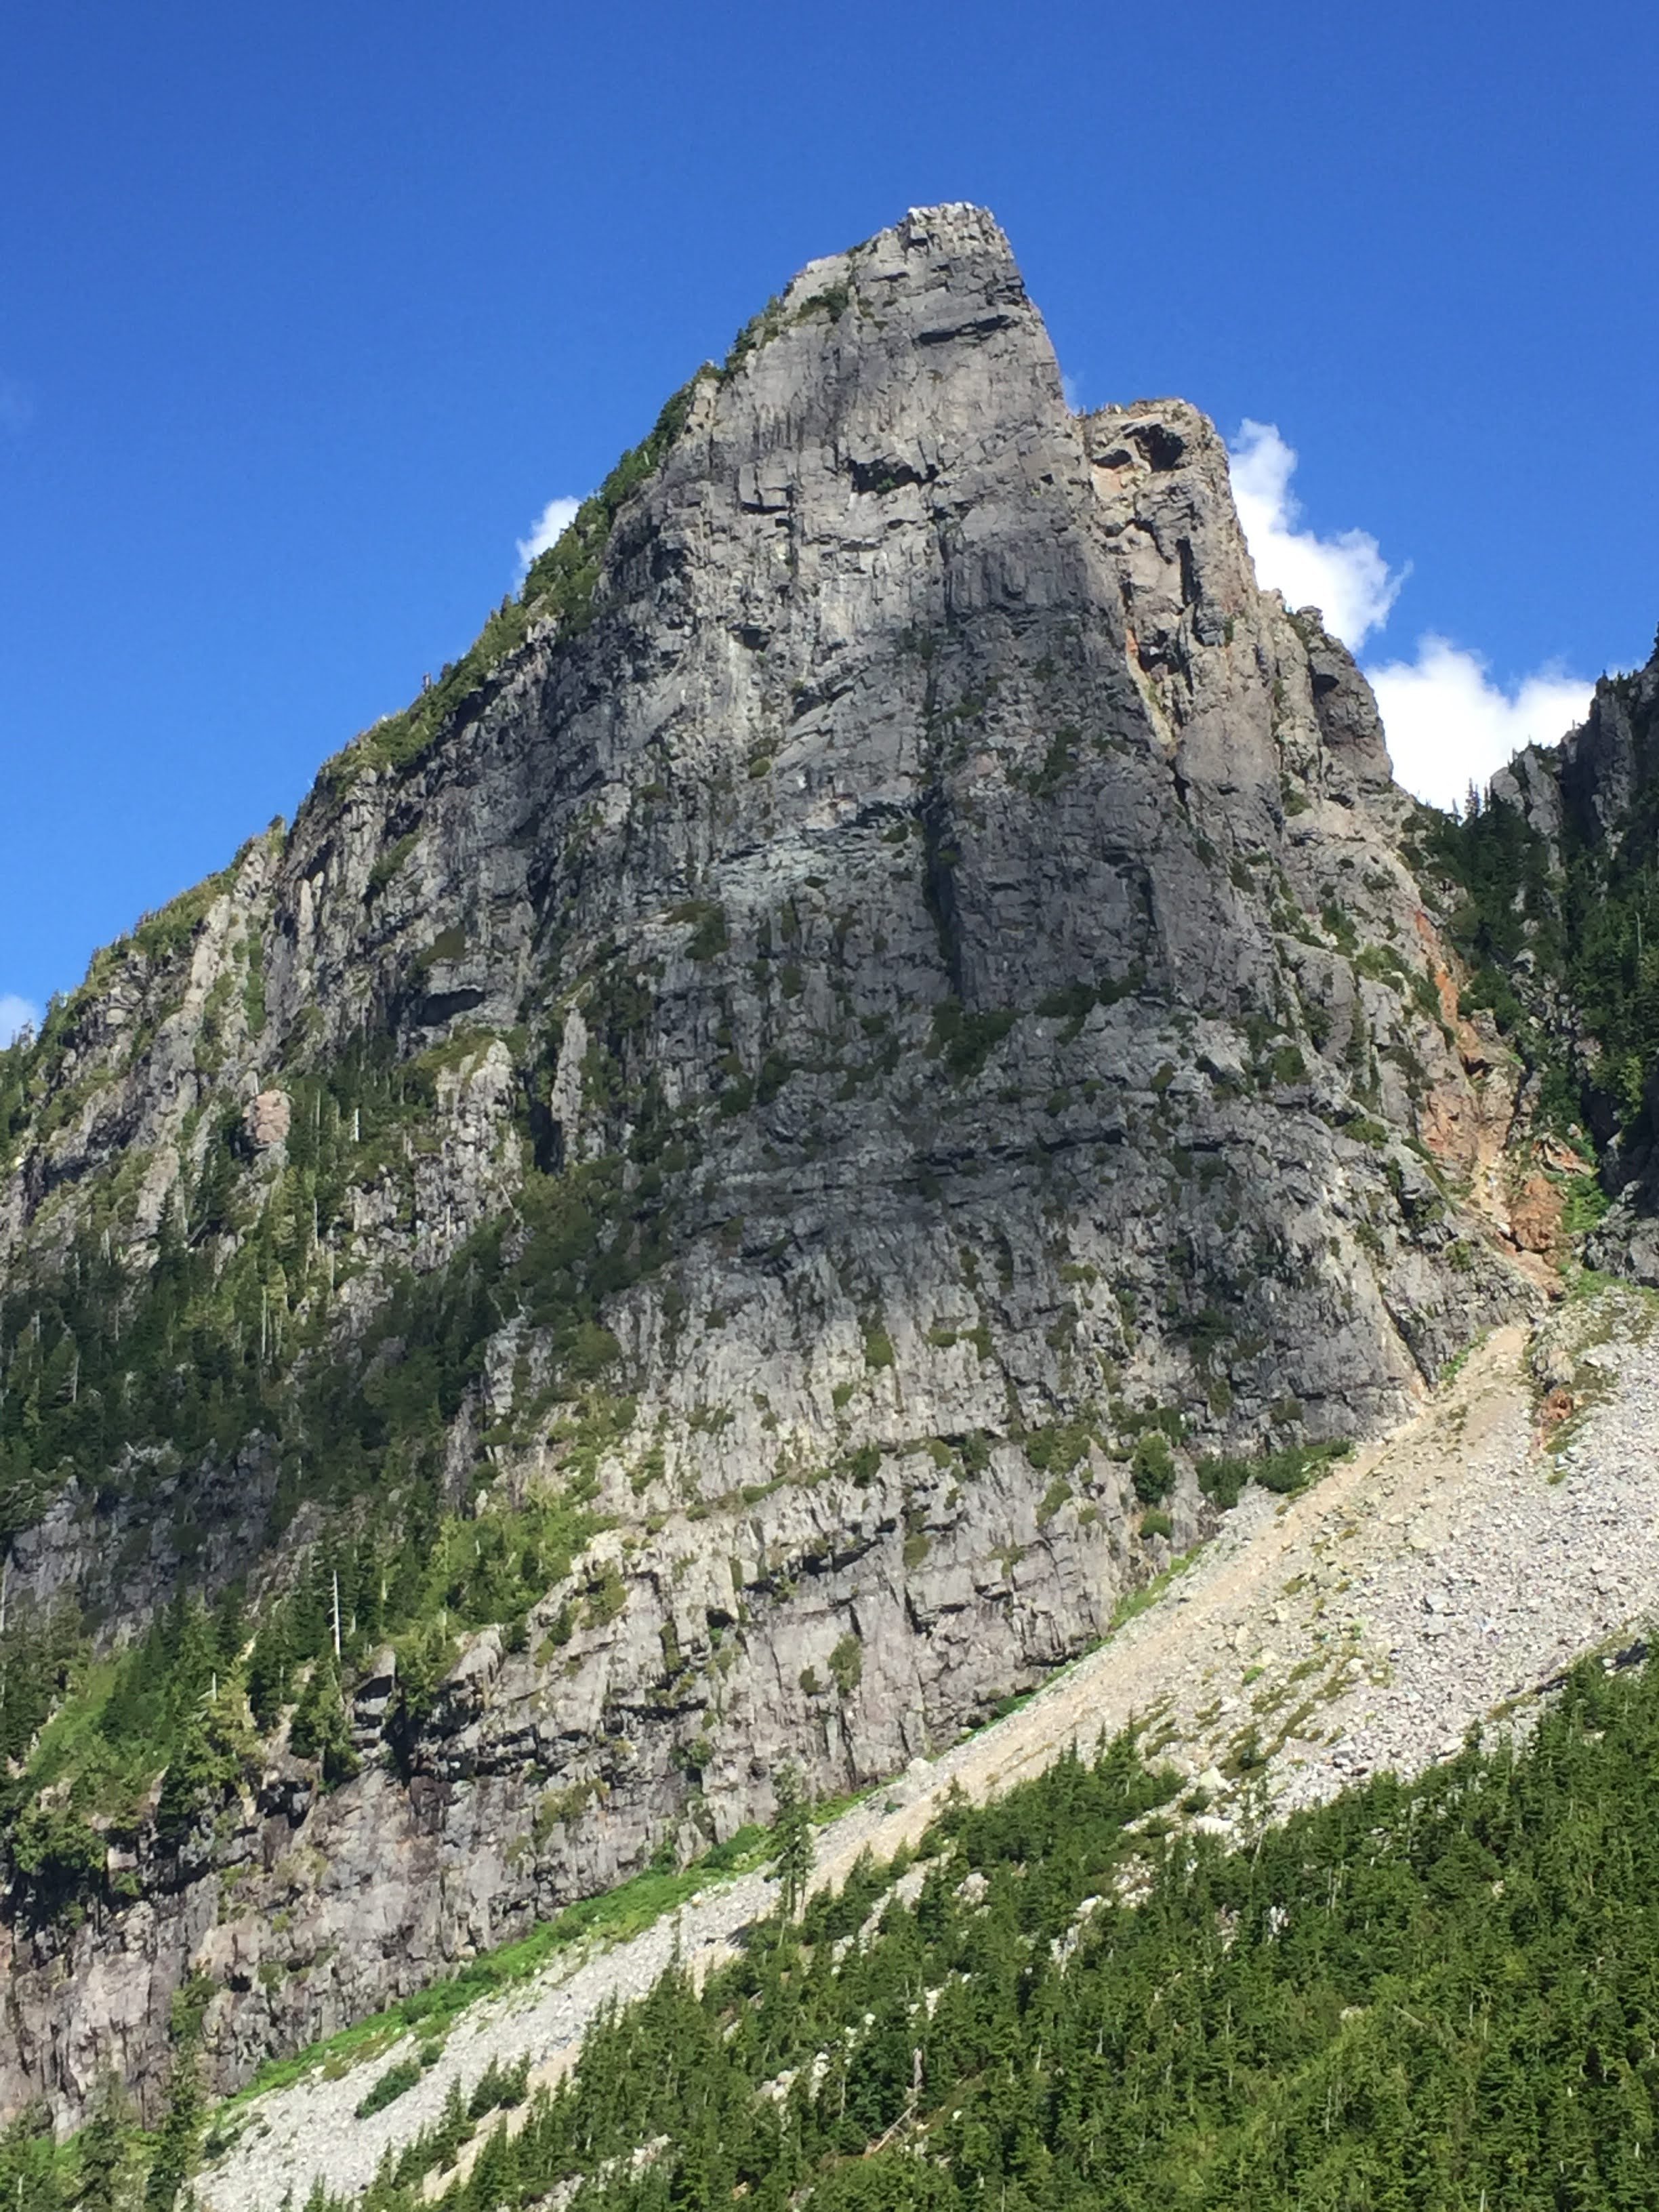
Trip: Mount Goode - Megalodon Ridge
Trip Date: 07/19/2021
Trip Report:
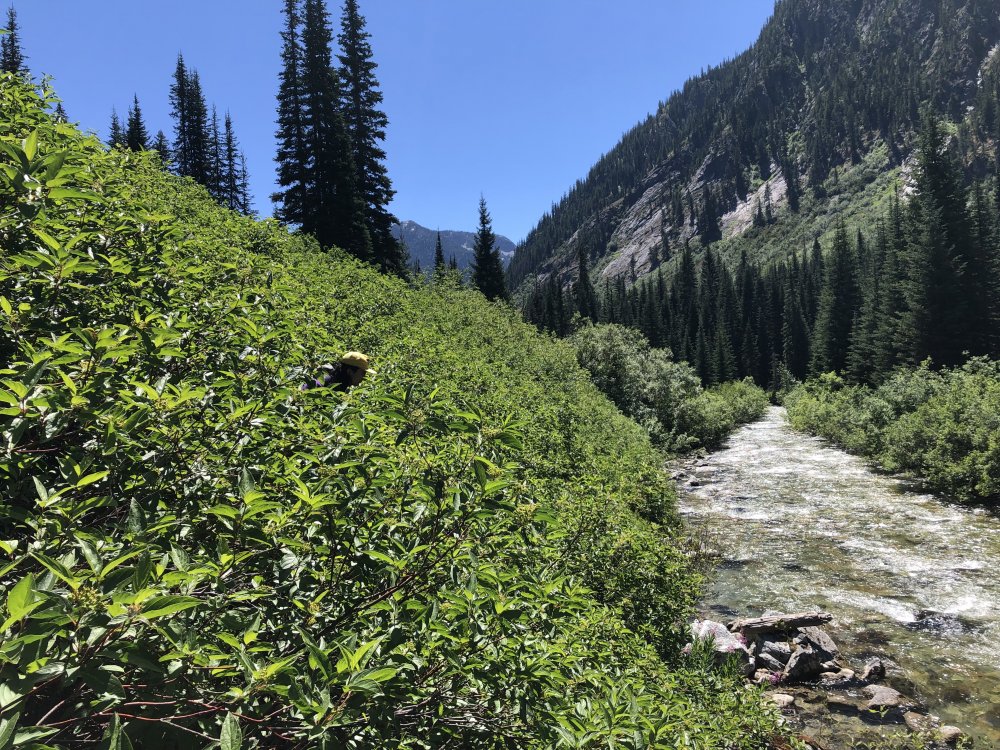
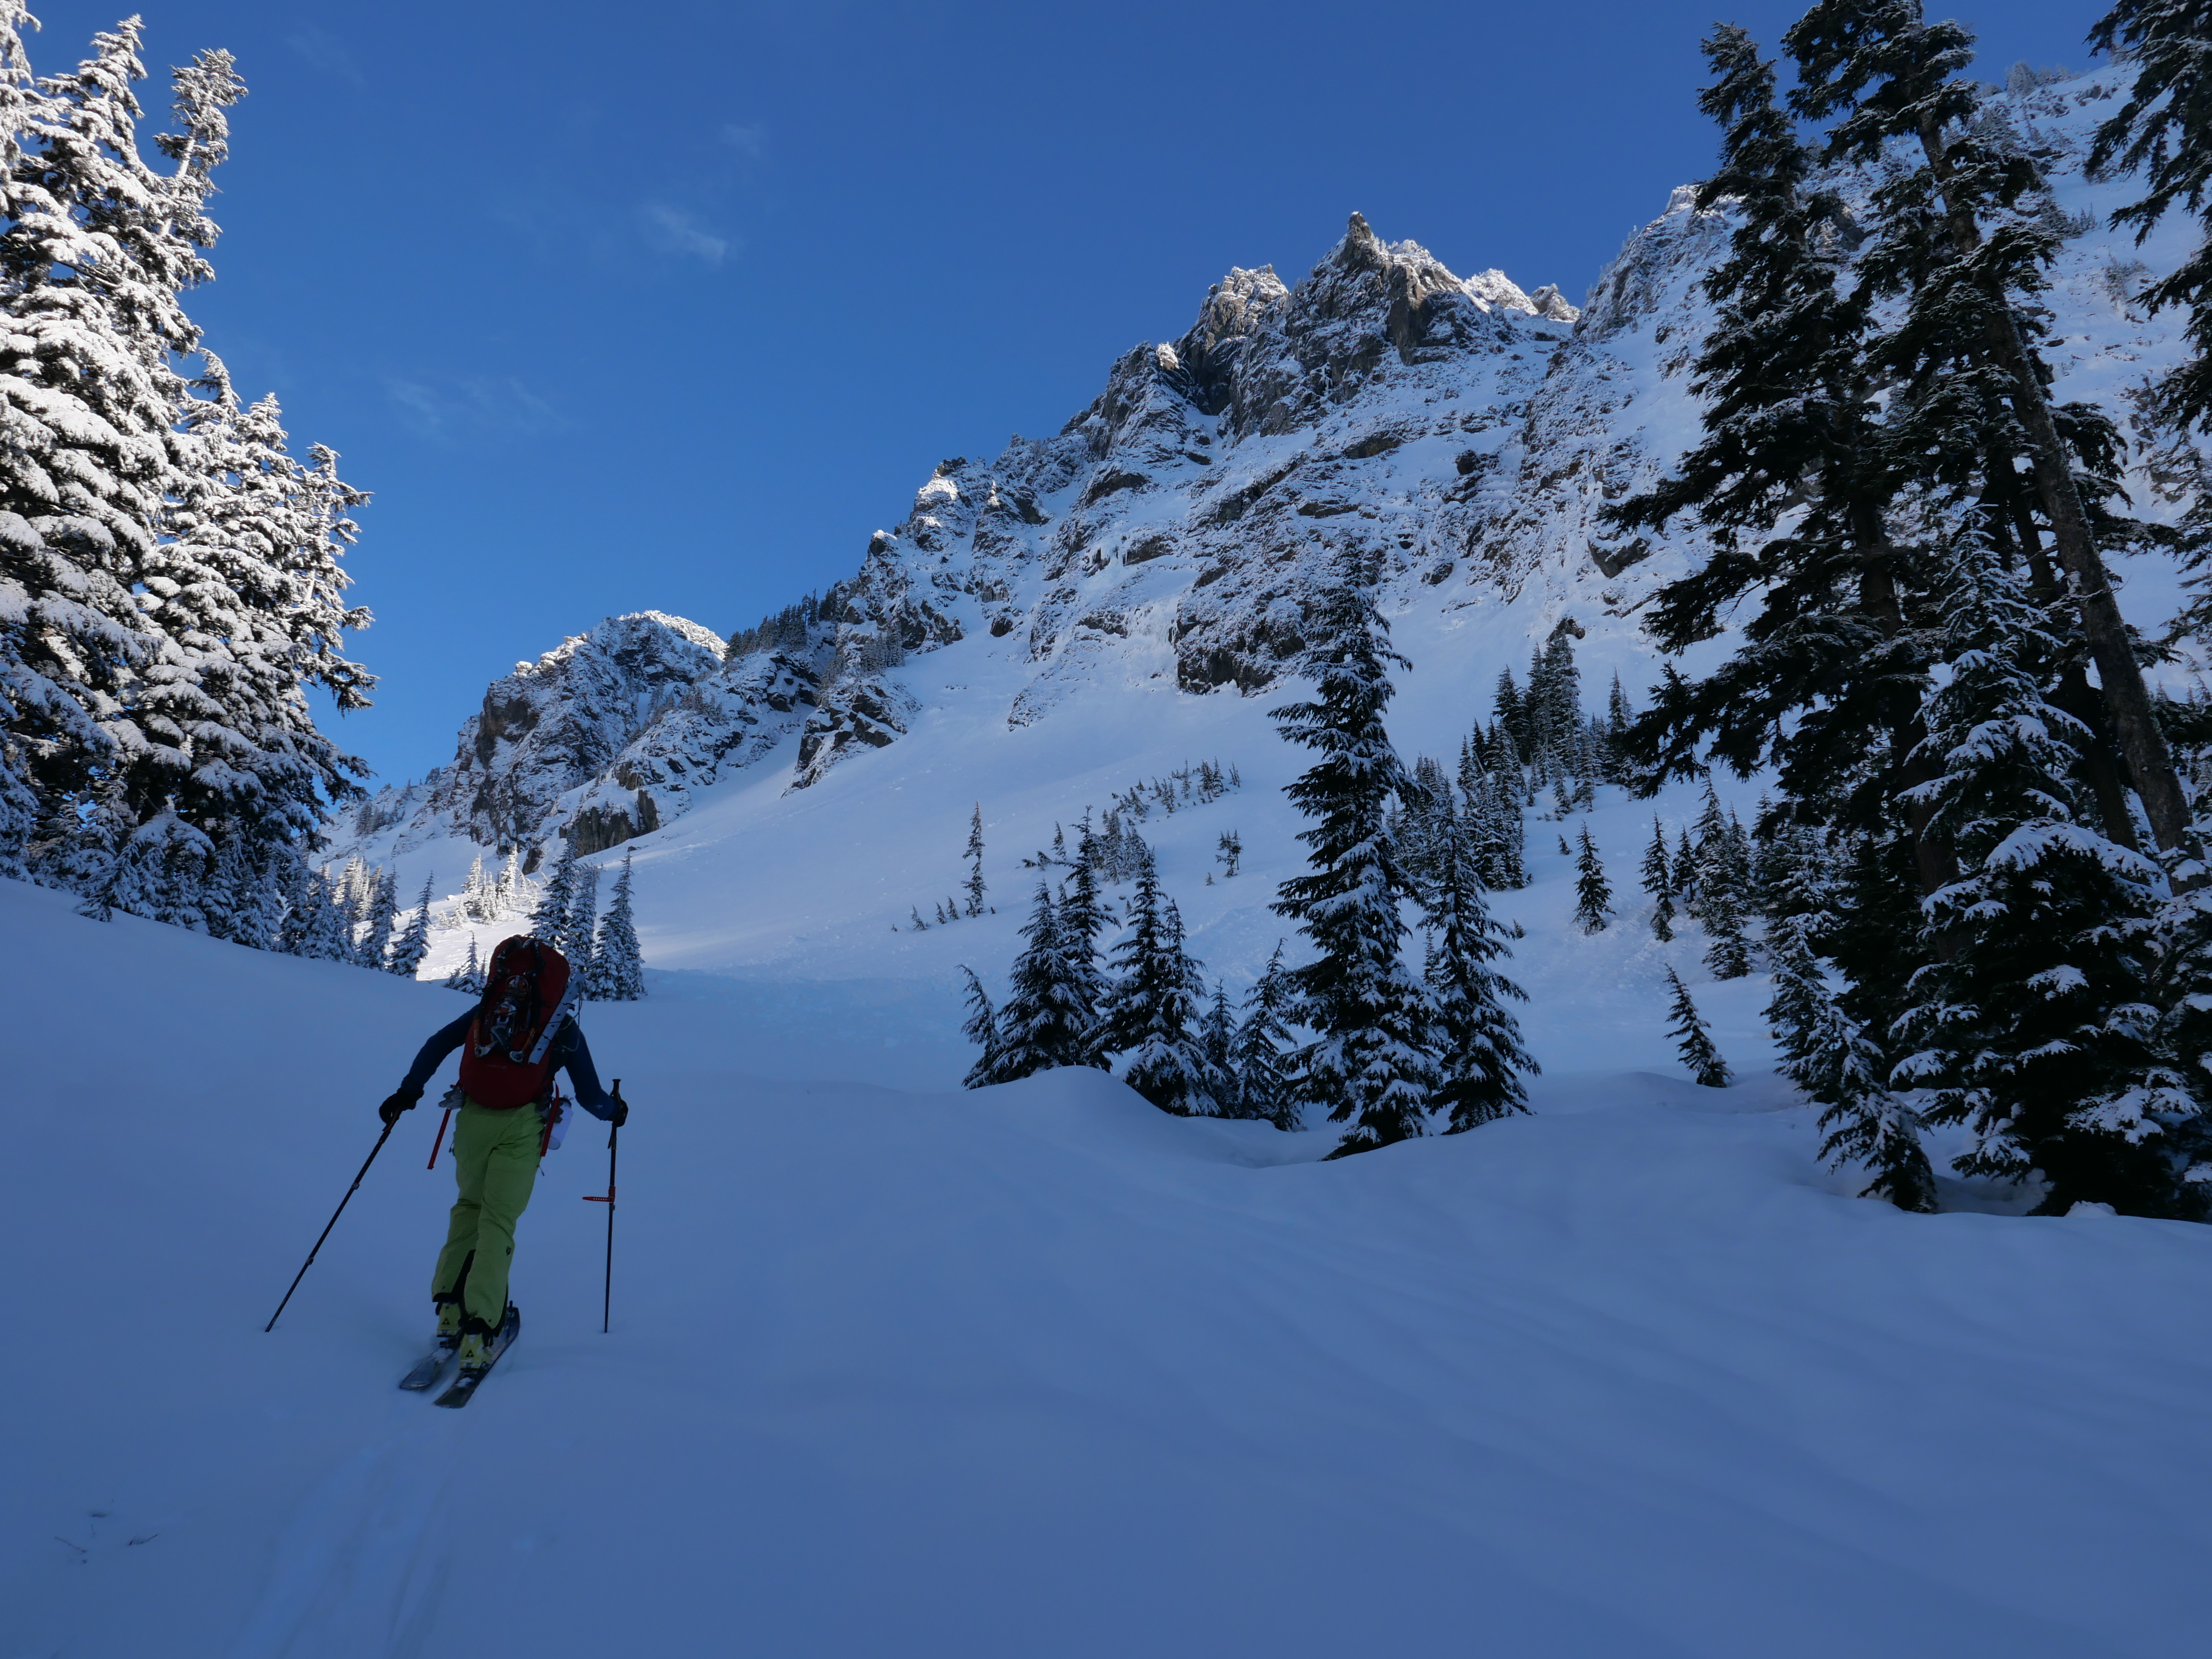
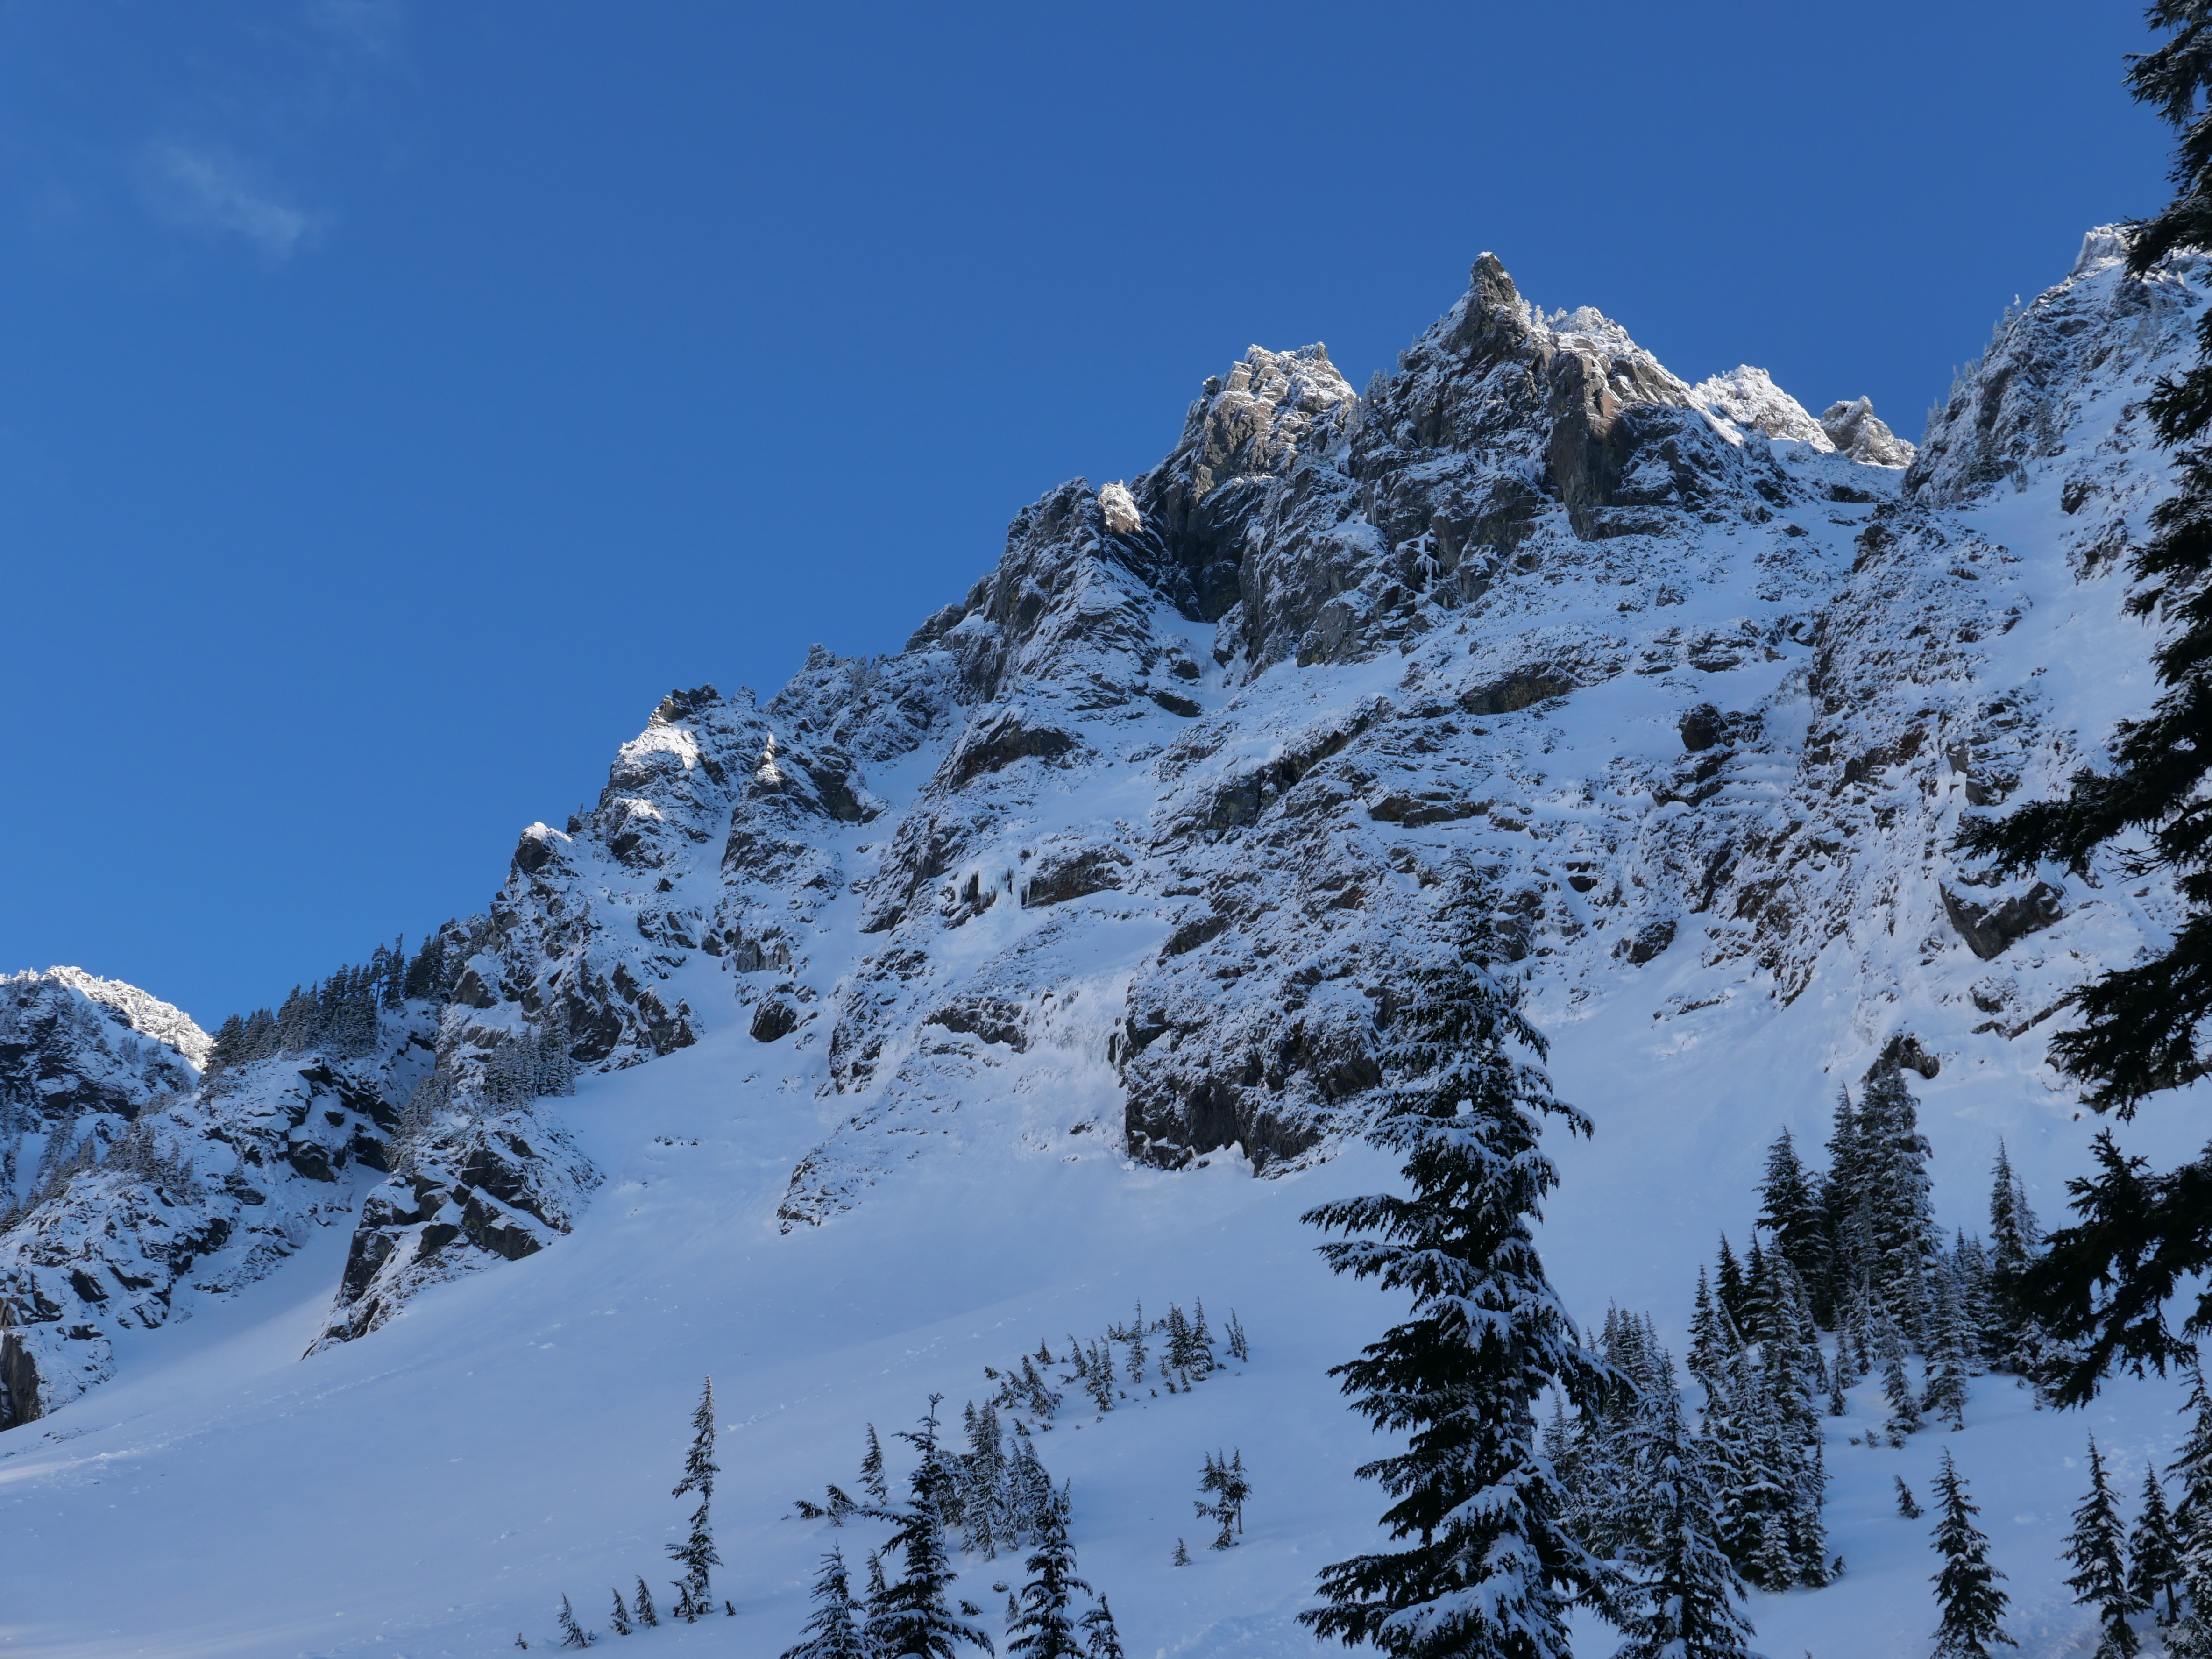
“Hey bear!” I shout, followed by a convincing monkey call from Sean. We are only a couple hundred yards away from the trail, but swallowed deep in the eight foot tall slide alder of the North Fork of Bridge Creek. Maybe we’re off route, maybe there is no route.

A couple days prior Sean and I had been throwing around ideas for the weekend. Sean was interested in something hard on CBR, while I was craving some choss and adventure. Being the great friend and partner that he is, Sean agreed to my idea of Goode, and adjusted his schedule to fit mine.
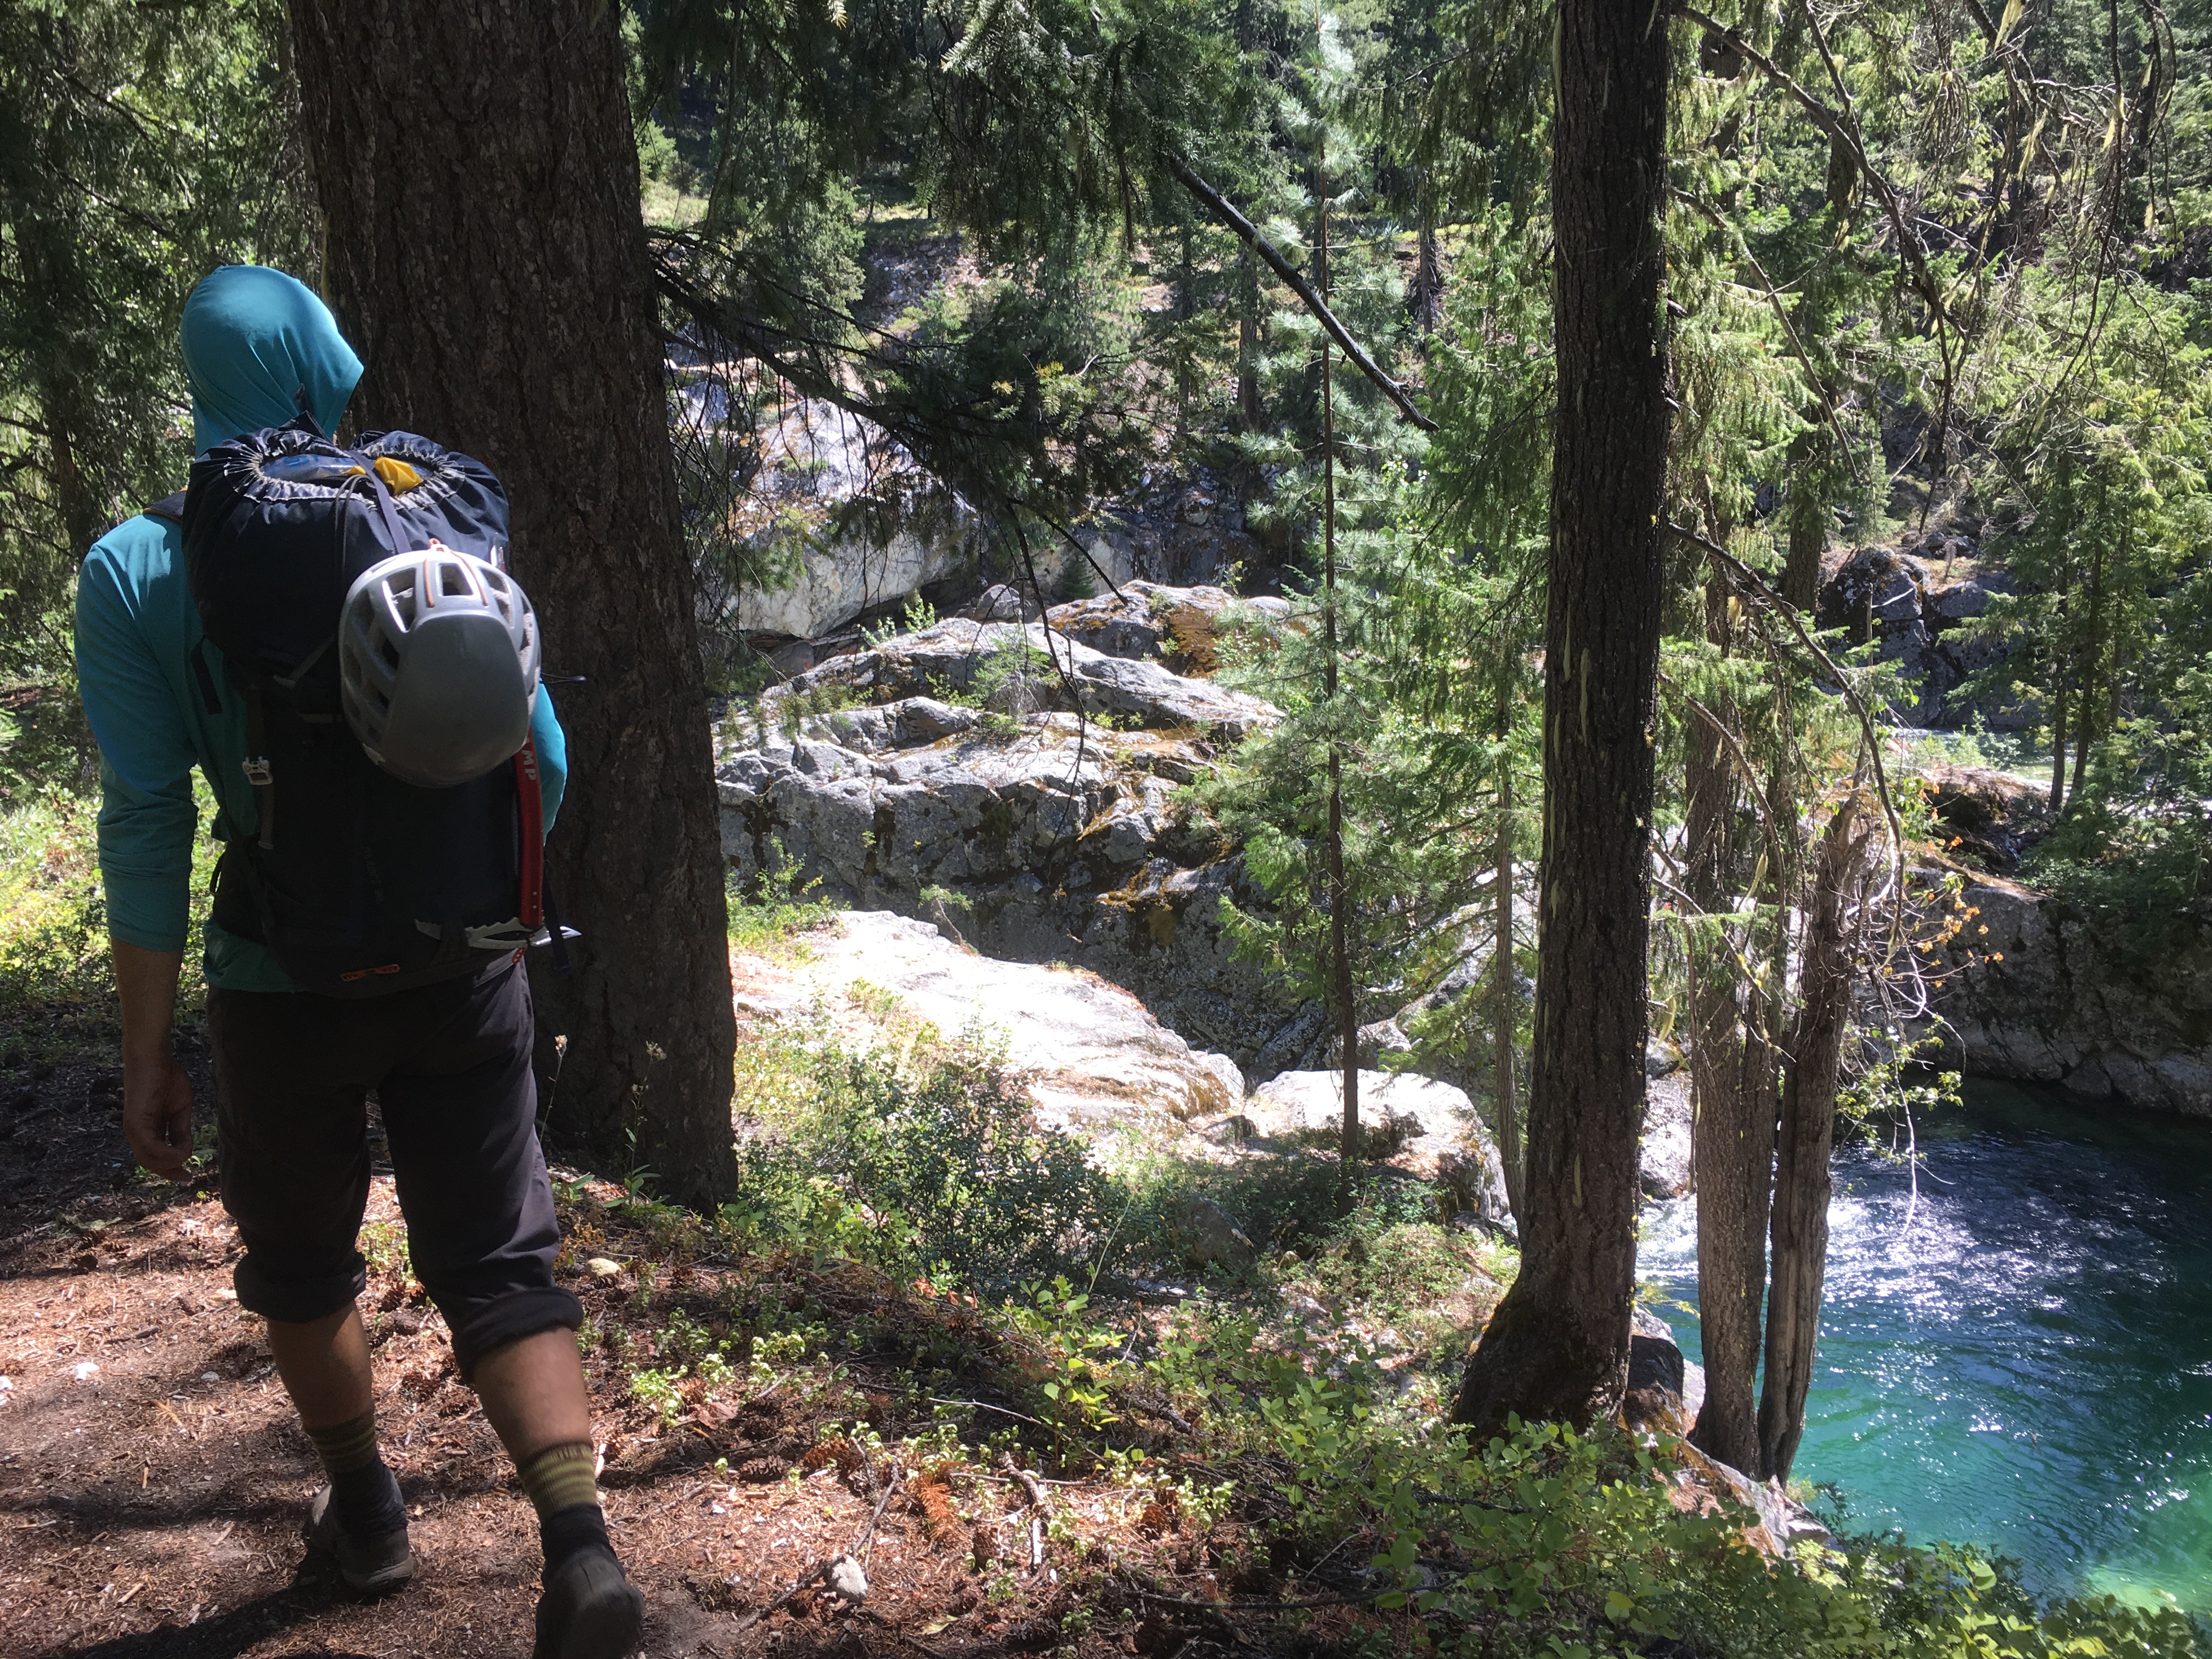
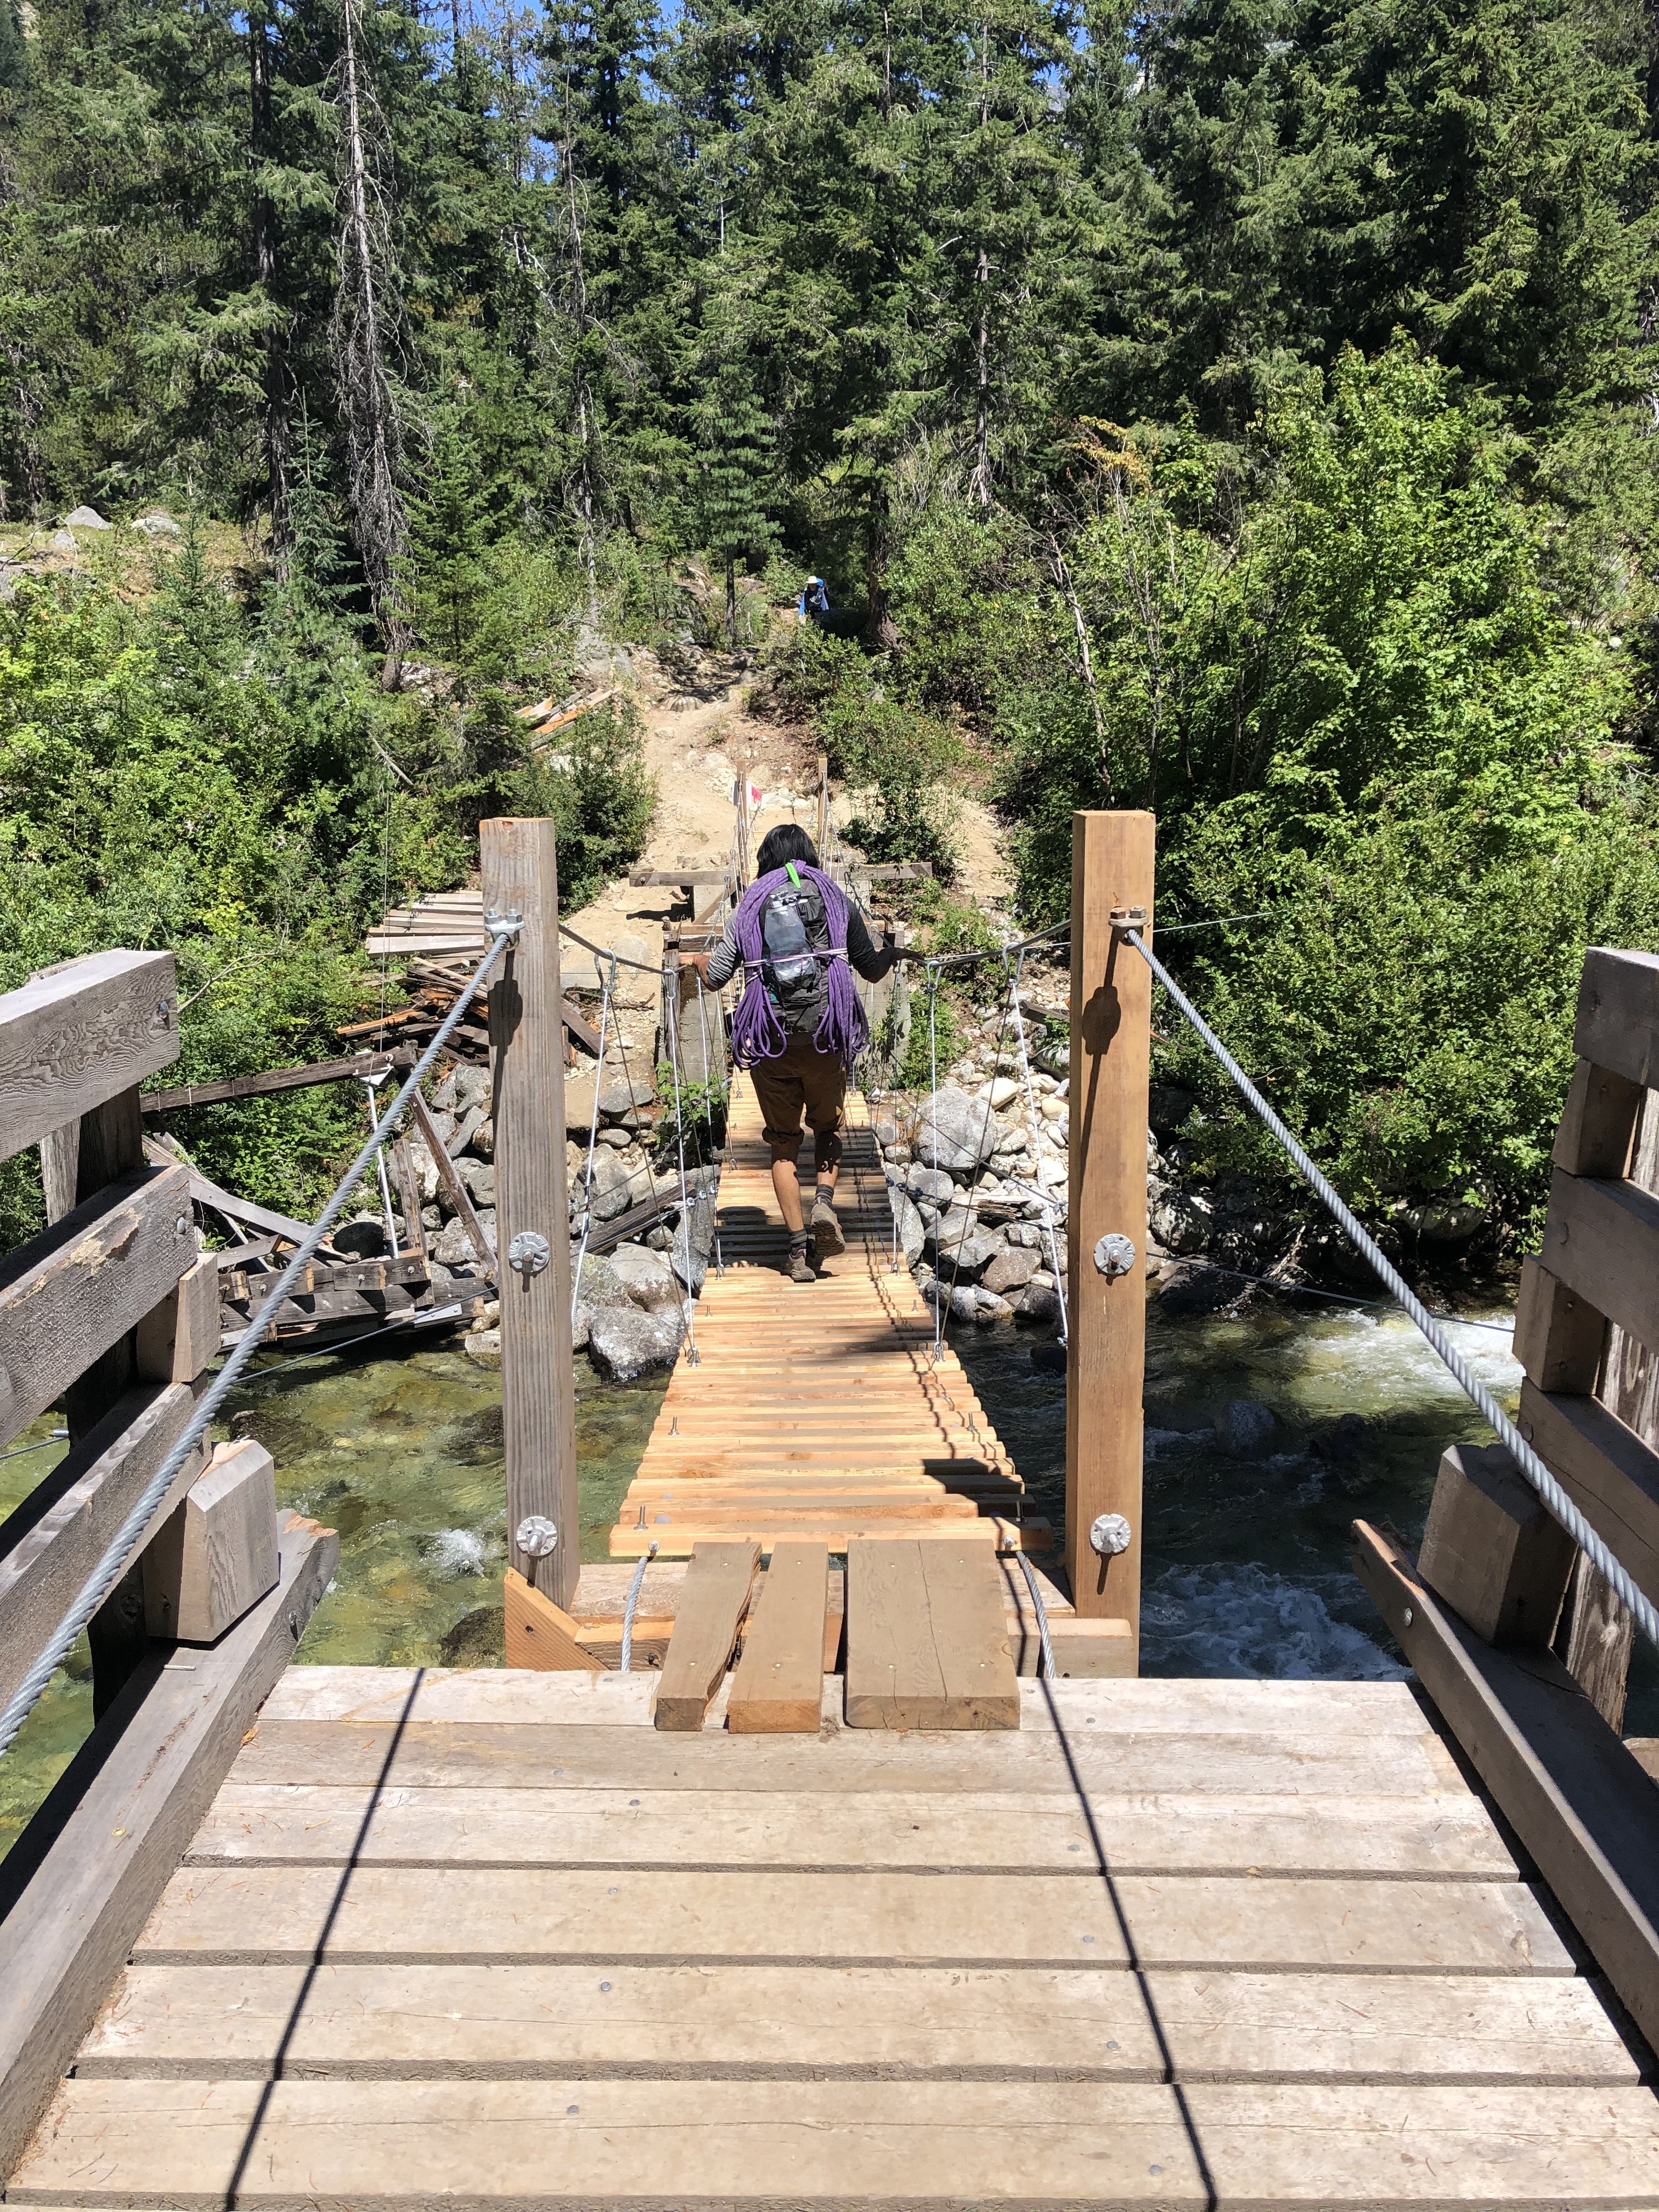
Meeting at the parking lot on Sunday, I ask Sean how comfortable he is soloing most of the ridge. He’s psyched on the idea, and I’m psyched to slim down the rack. I ditch the 4 and a few other pieces. With that I grab a couple bubbly waters to stash in a creek along the way and we’re off. In classic fashion, Sean takes off jogging almost immediately, it feels so good to be moving.
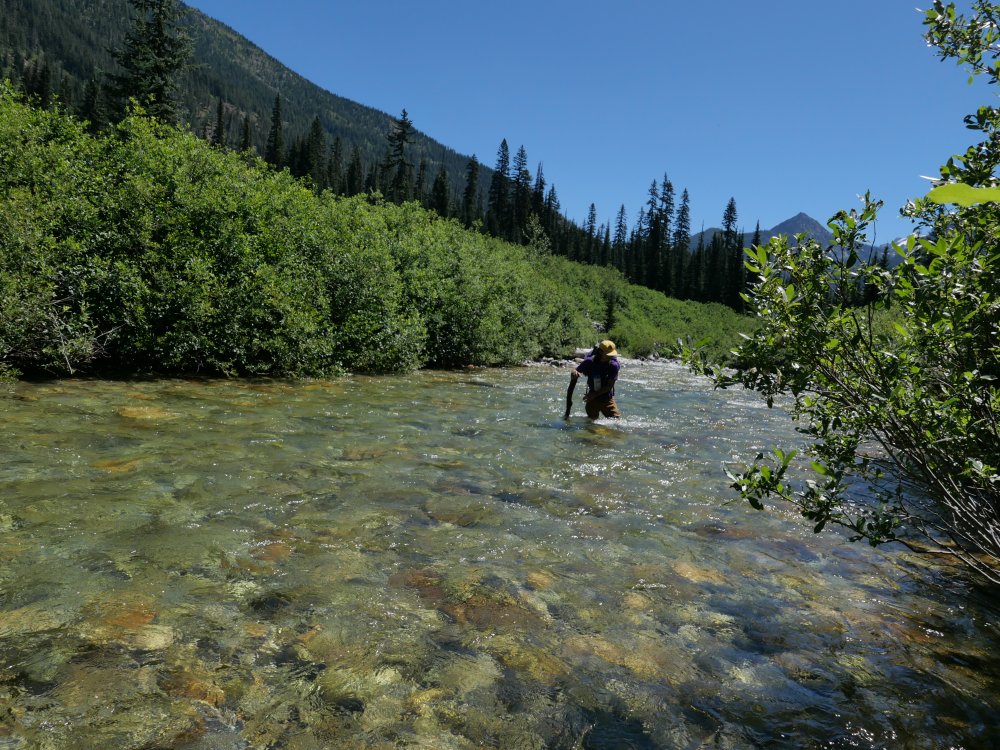
The hiking flies by and we soon find ourselves stumbling down an alder infested hillside down to Bridge Creek. With no obvious entry point on the other side, we start hiking upstream along the river bank until the alder overtakes us, and we’re forced to wade up stream in the biting glacier melt water. Just in time for my feet to go fully numb, I find a narrow tunnel through the brush and out of the river. After a brief bout of screaming barfies we’re off and moving again. From this point, things got a little weird. All previous reports of this route seemed intentionally vague about how to gain the ridge. The alpine basin that looked like steep meadows on the map proved to be alder choked waterfalls. After re-reading Dan’s TR, I’m pretty sure we cut up the hill too early and endured some hellish bushwacking. Following the waterfall a little further seems like a better idea.
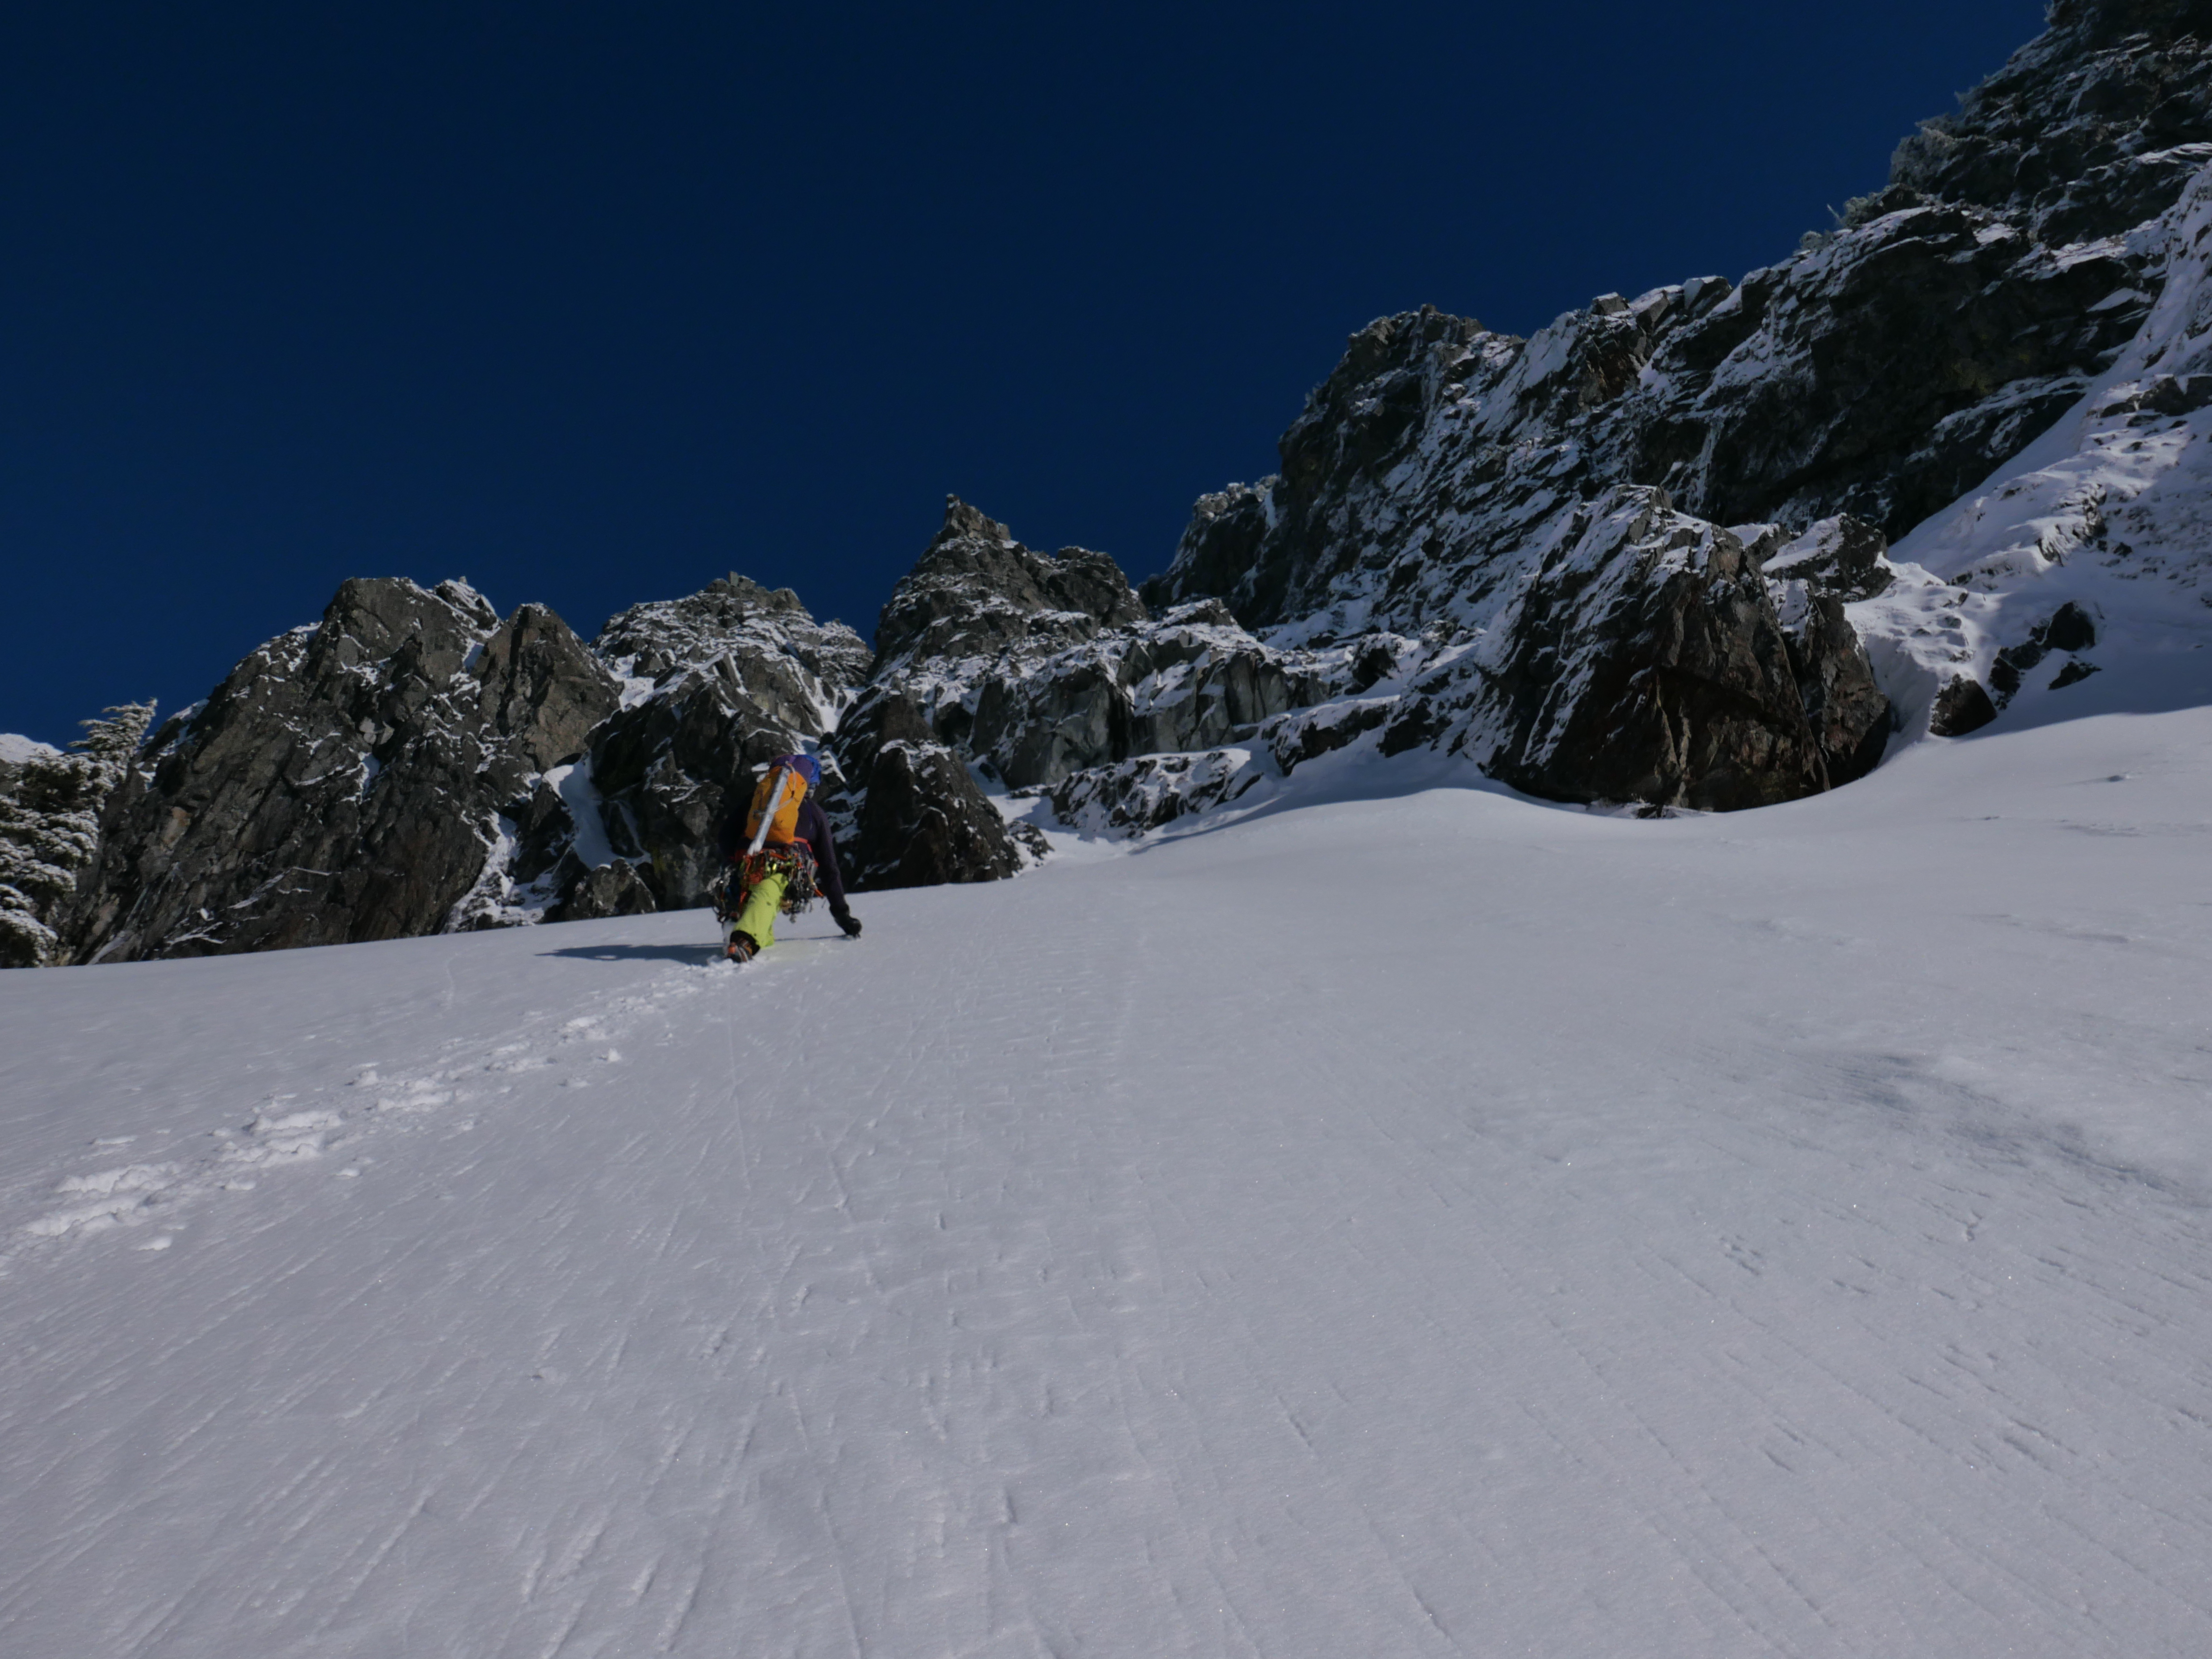
Once re-birthed from the thicket, we followed a loose low 5th class gully up to the ridge crest. Freedom at last! The trudge up the treed ridge felt like it went on for eternity. Every roll, followed by another buttress and so on.
It was at this point in the day that the true enormity of Jens and Dan’s single push effort set in. We were tired, and the idea of continuing up the ridge did not appeal. Maybe with tiny packs and perfect approach beta, but even then... As we tucked in for the night, a small plane flew circles around the summit. I assumed it could only be John Scurlock.

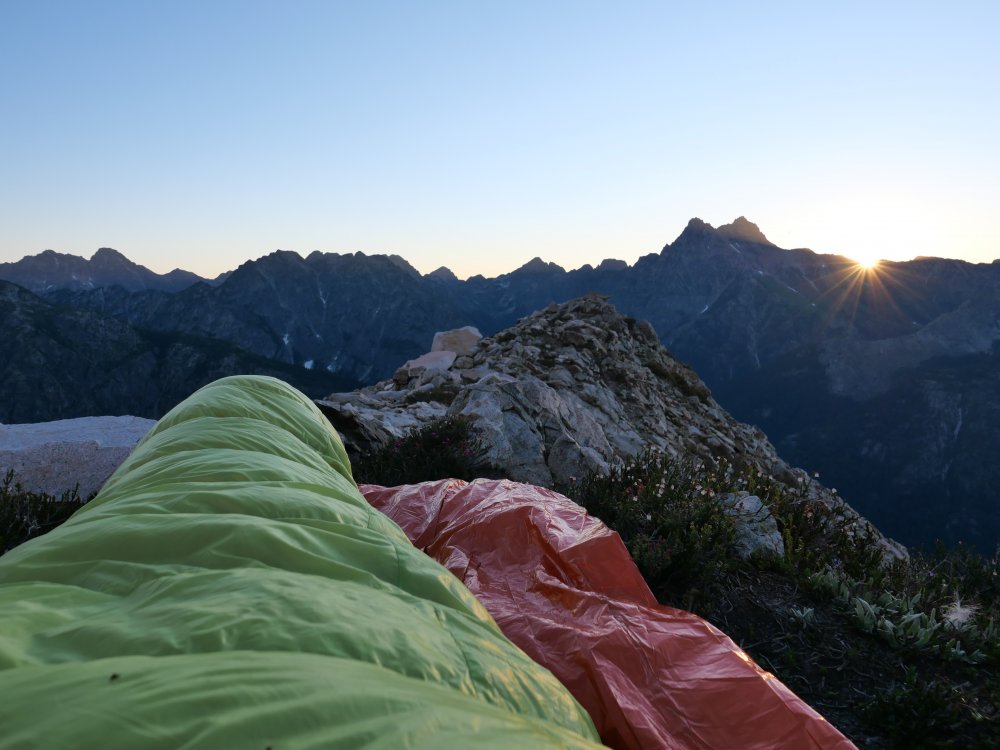
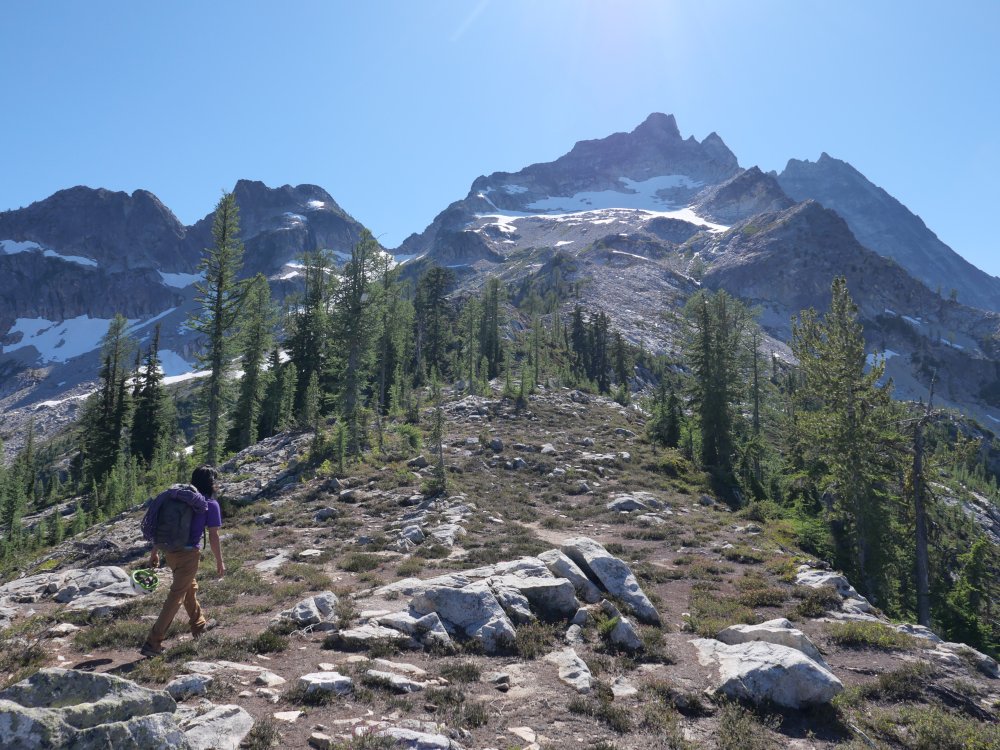
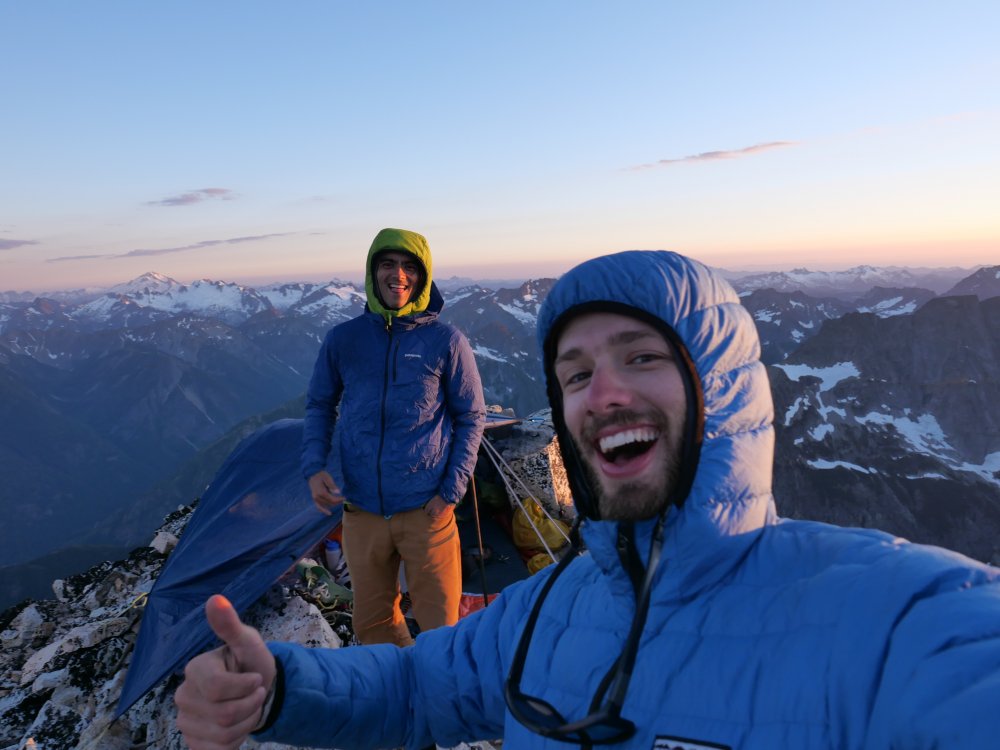
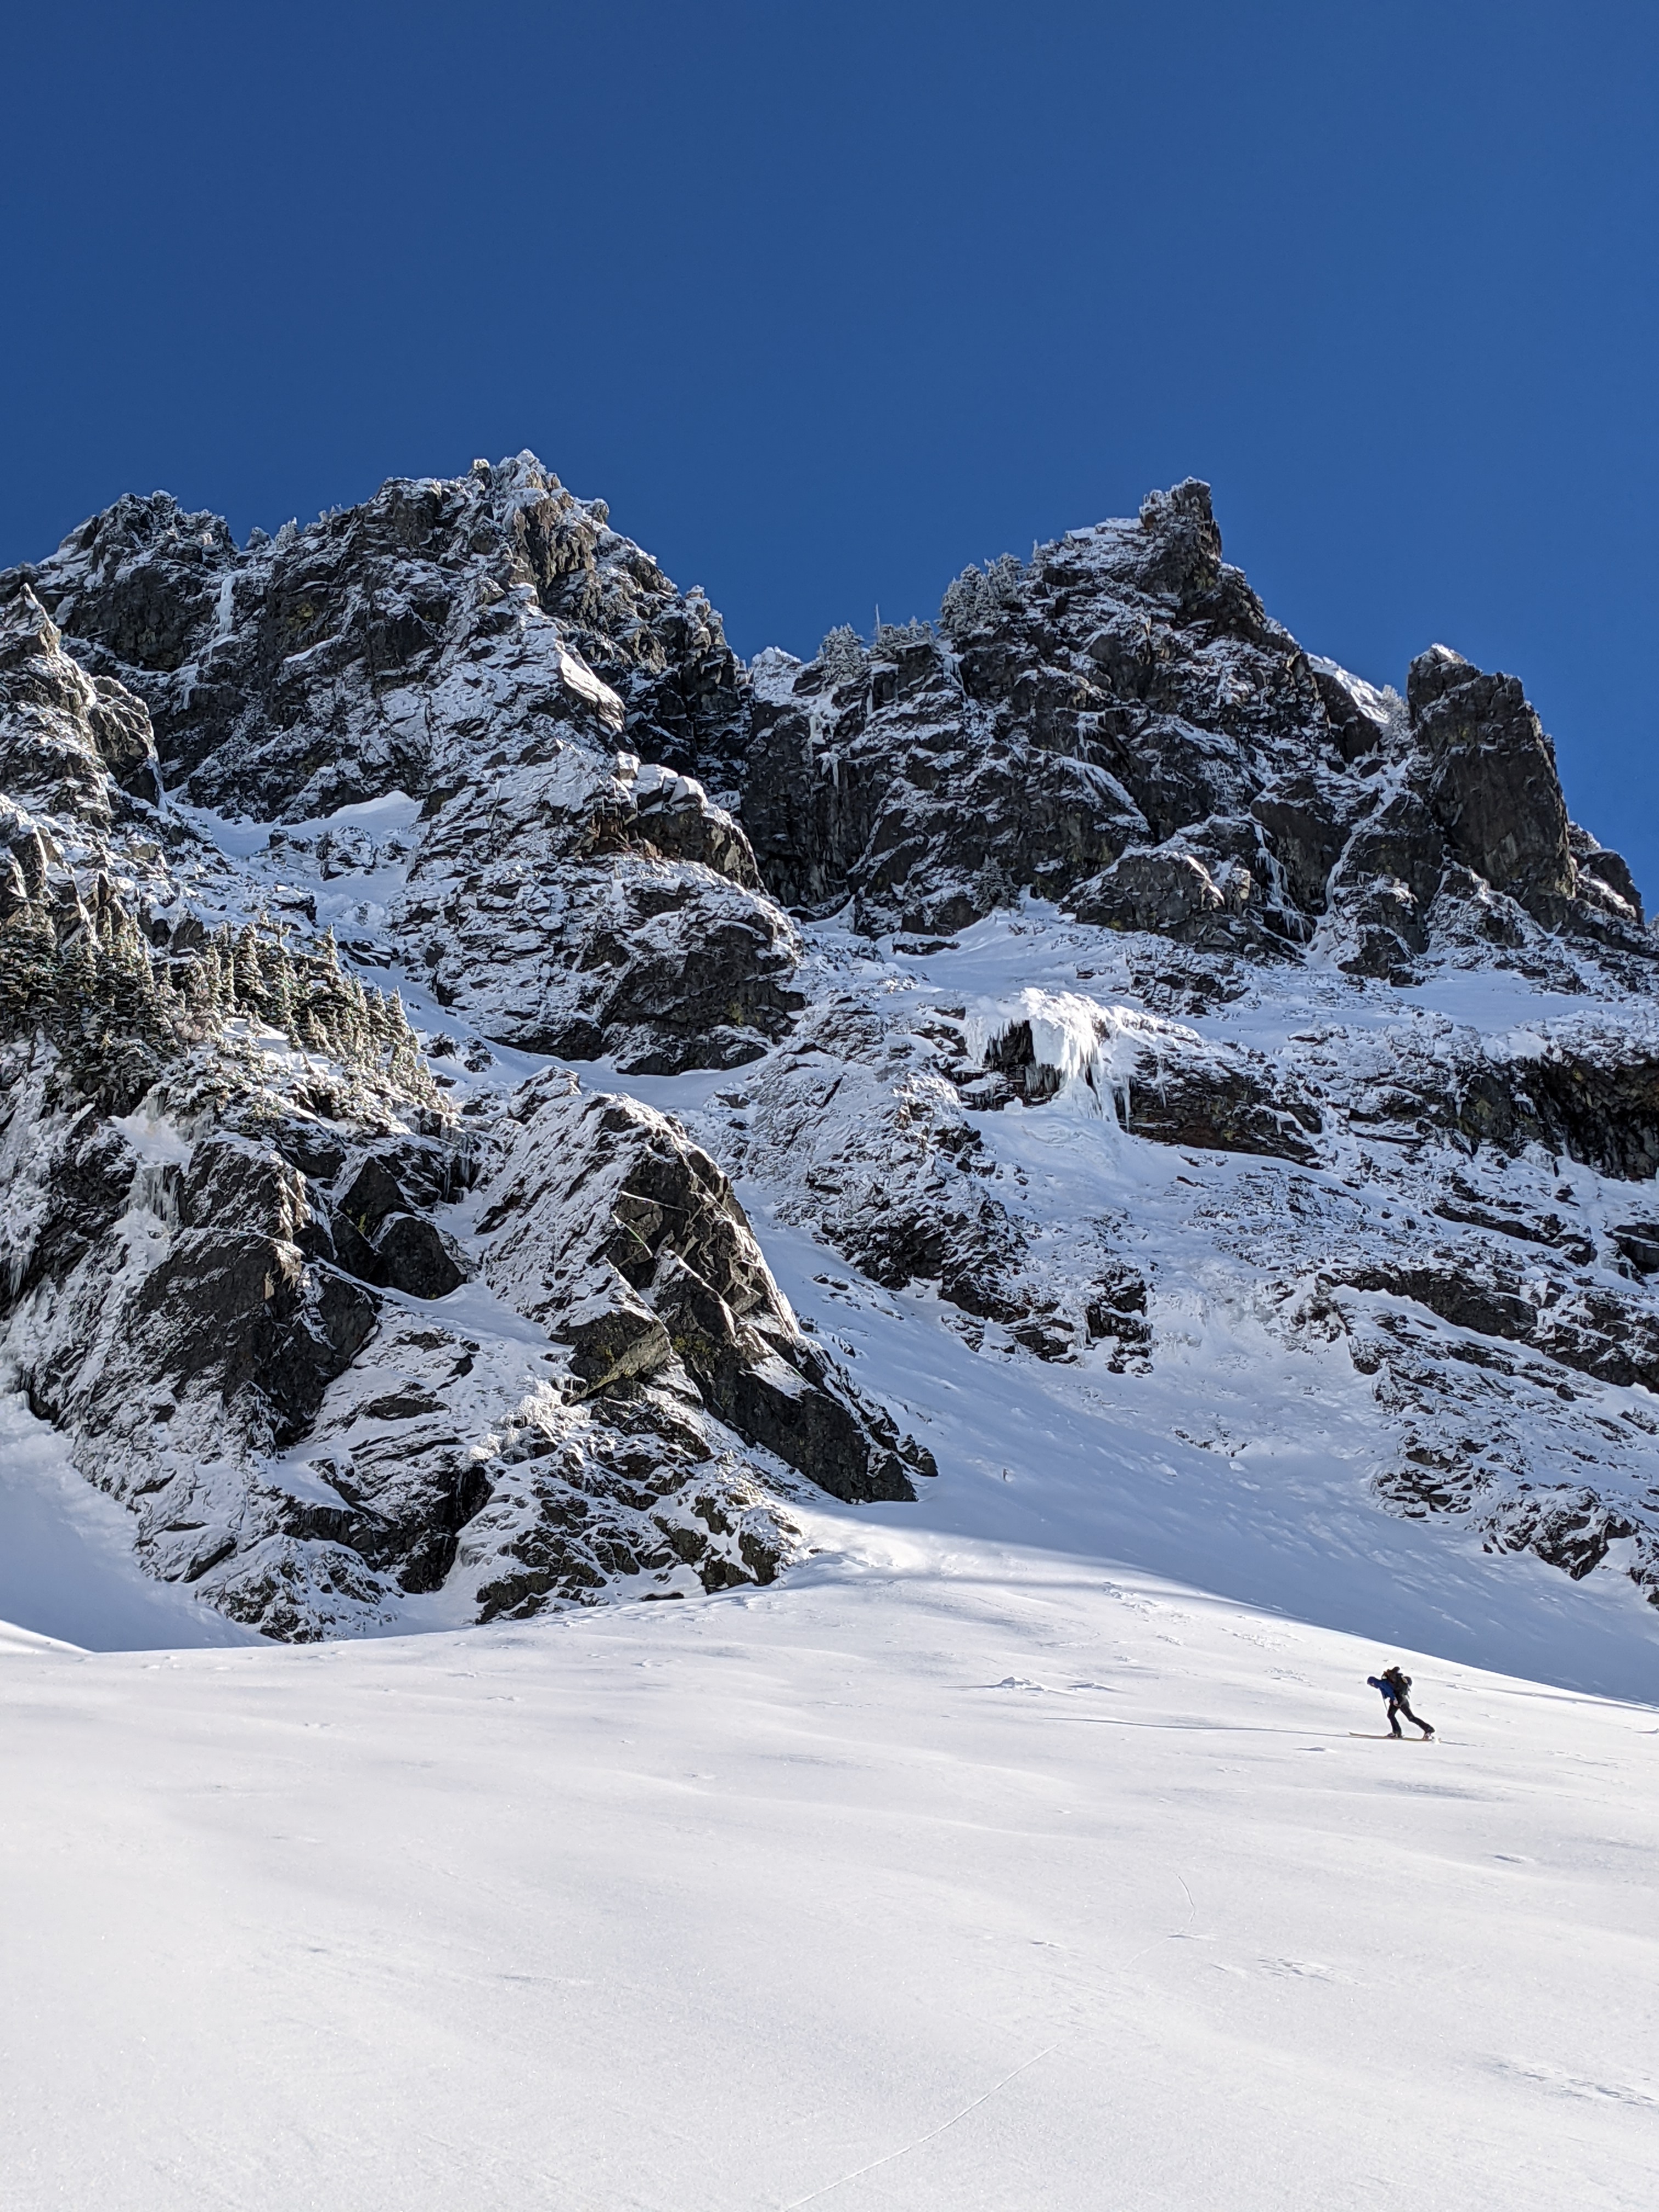
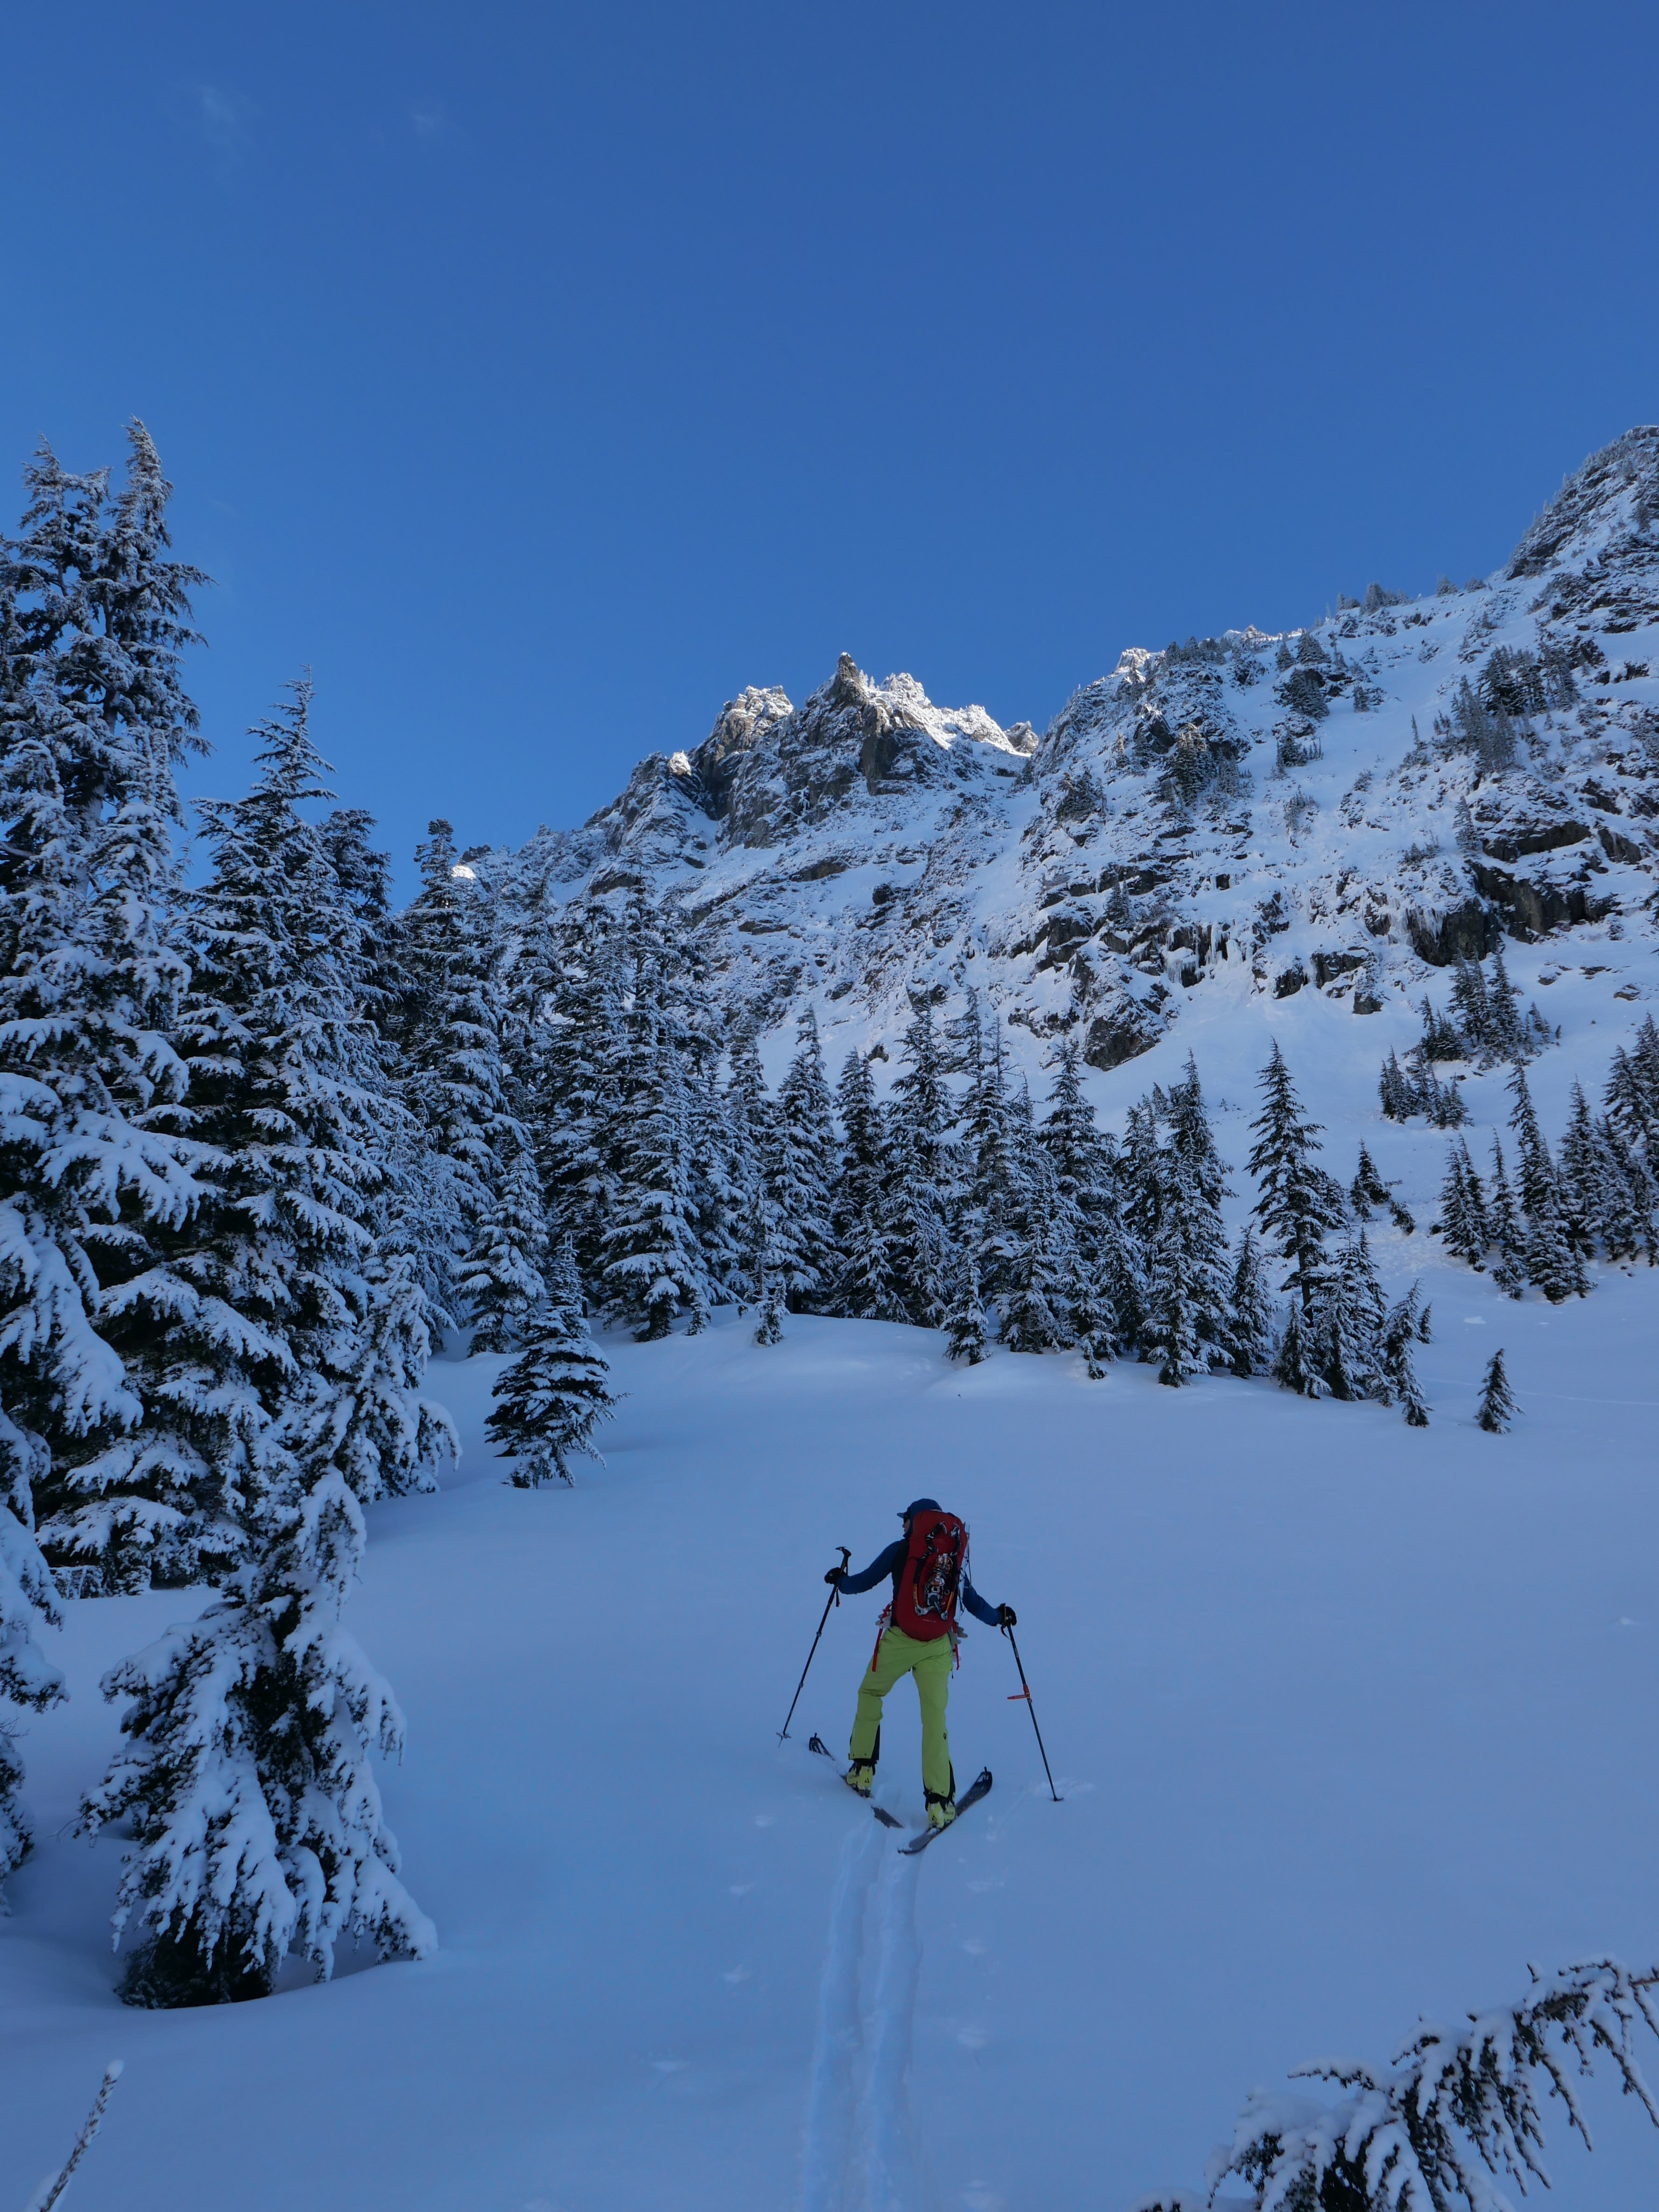
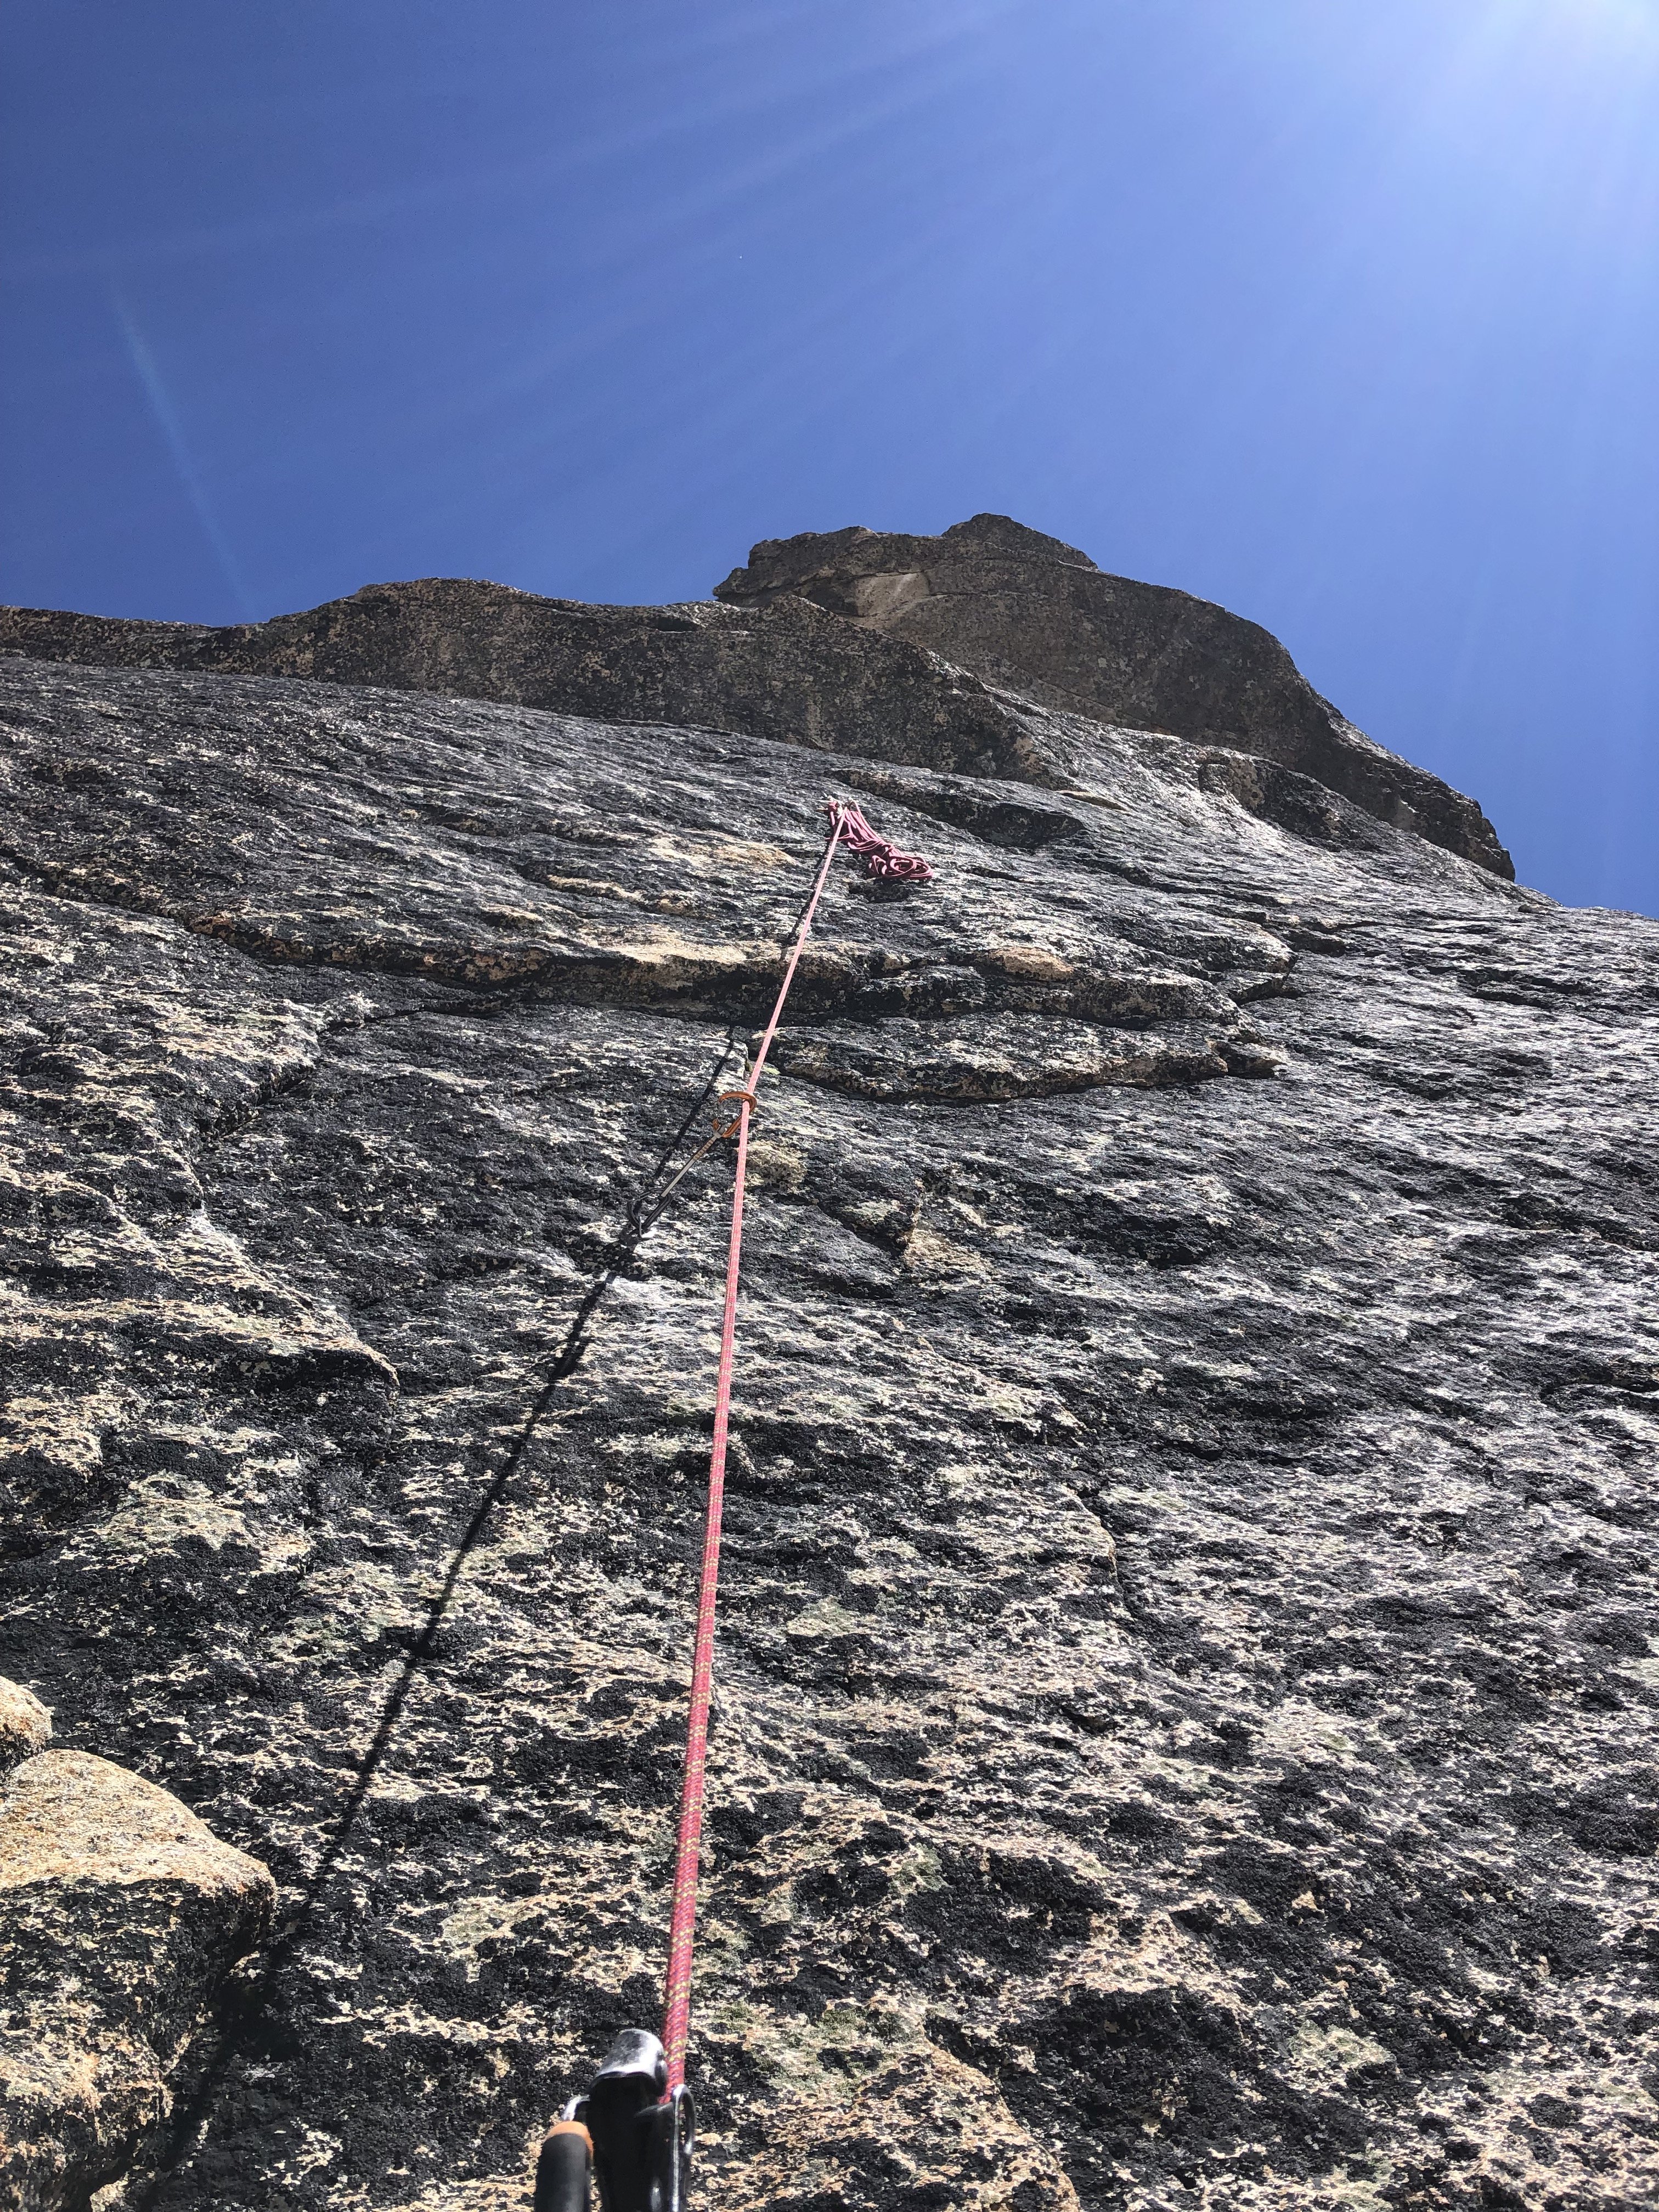
After a nice night nestled into a bed of heather, we woke with the sun and enjoyed a warm pot of coffee to start the day. The initial part of the ridge proper was phenomenal. Highly textured white stone flowed up the mountain in a stunning spine feature. This section up to the first point would be a classic route on it’s own. I can not overstate how good the rock was through this section. Just perfect scrambling.

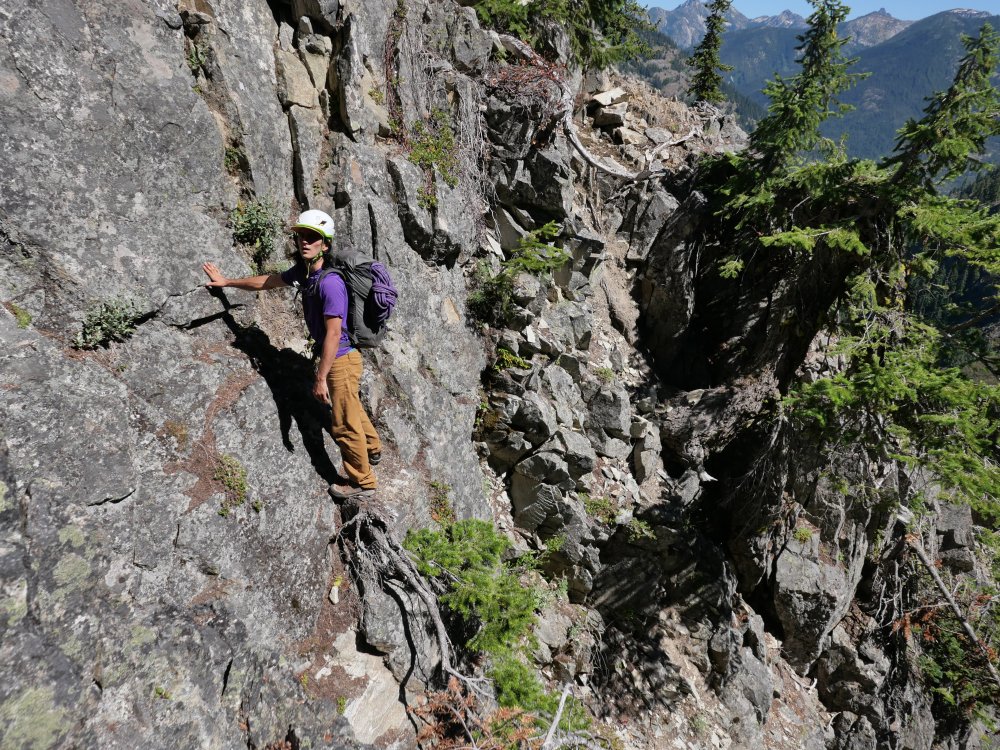
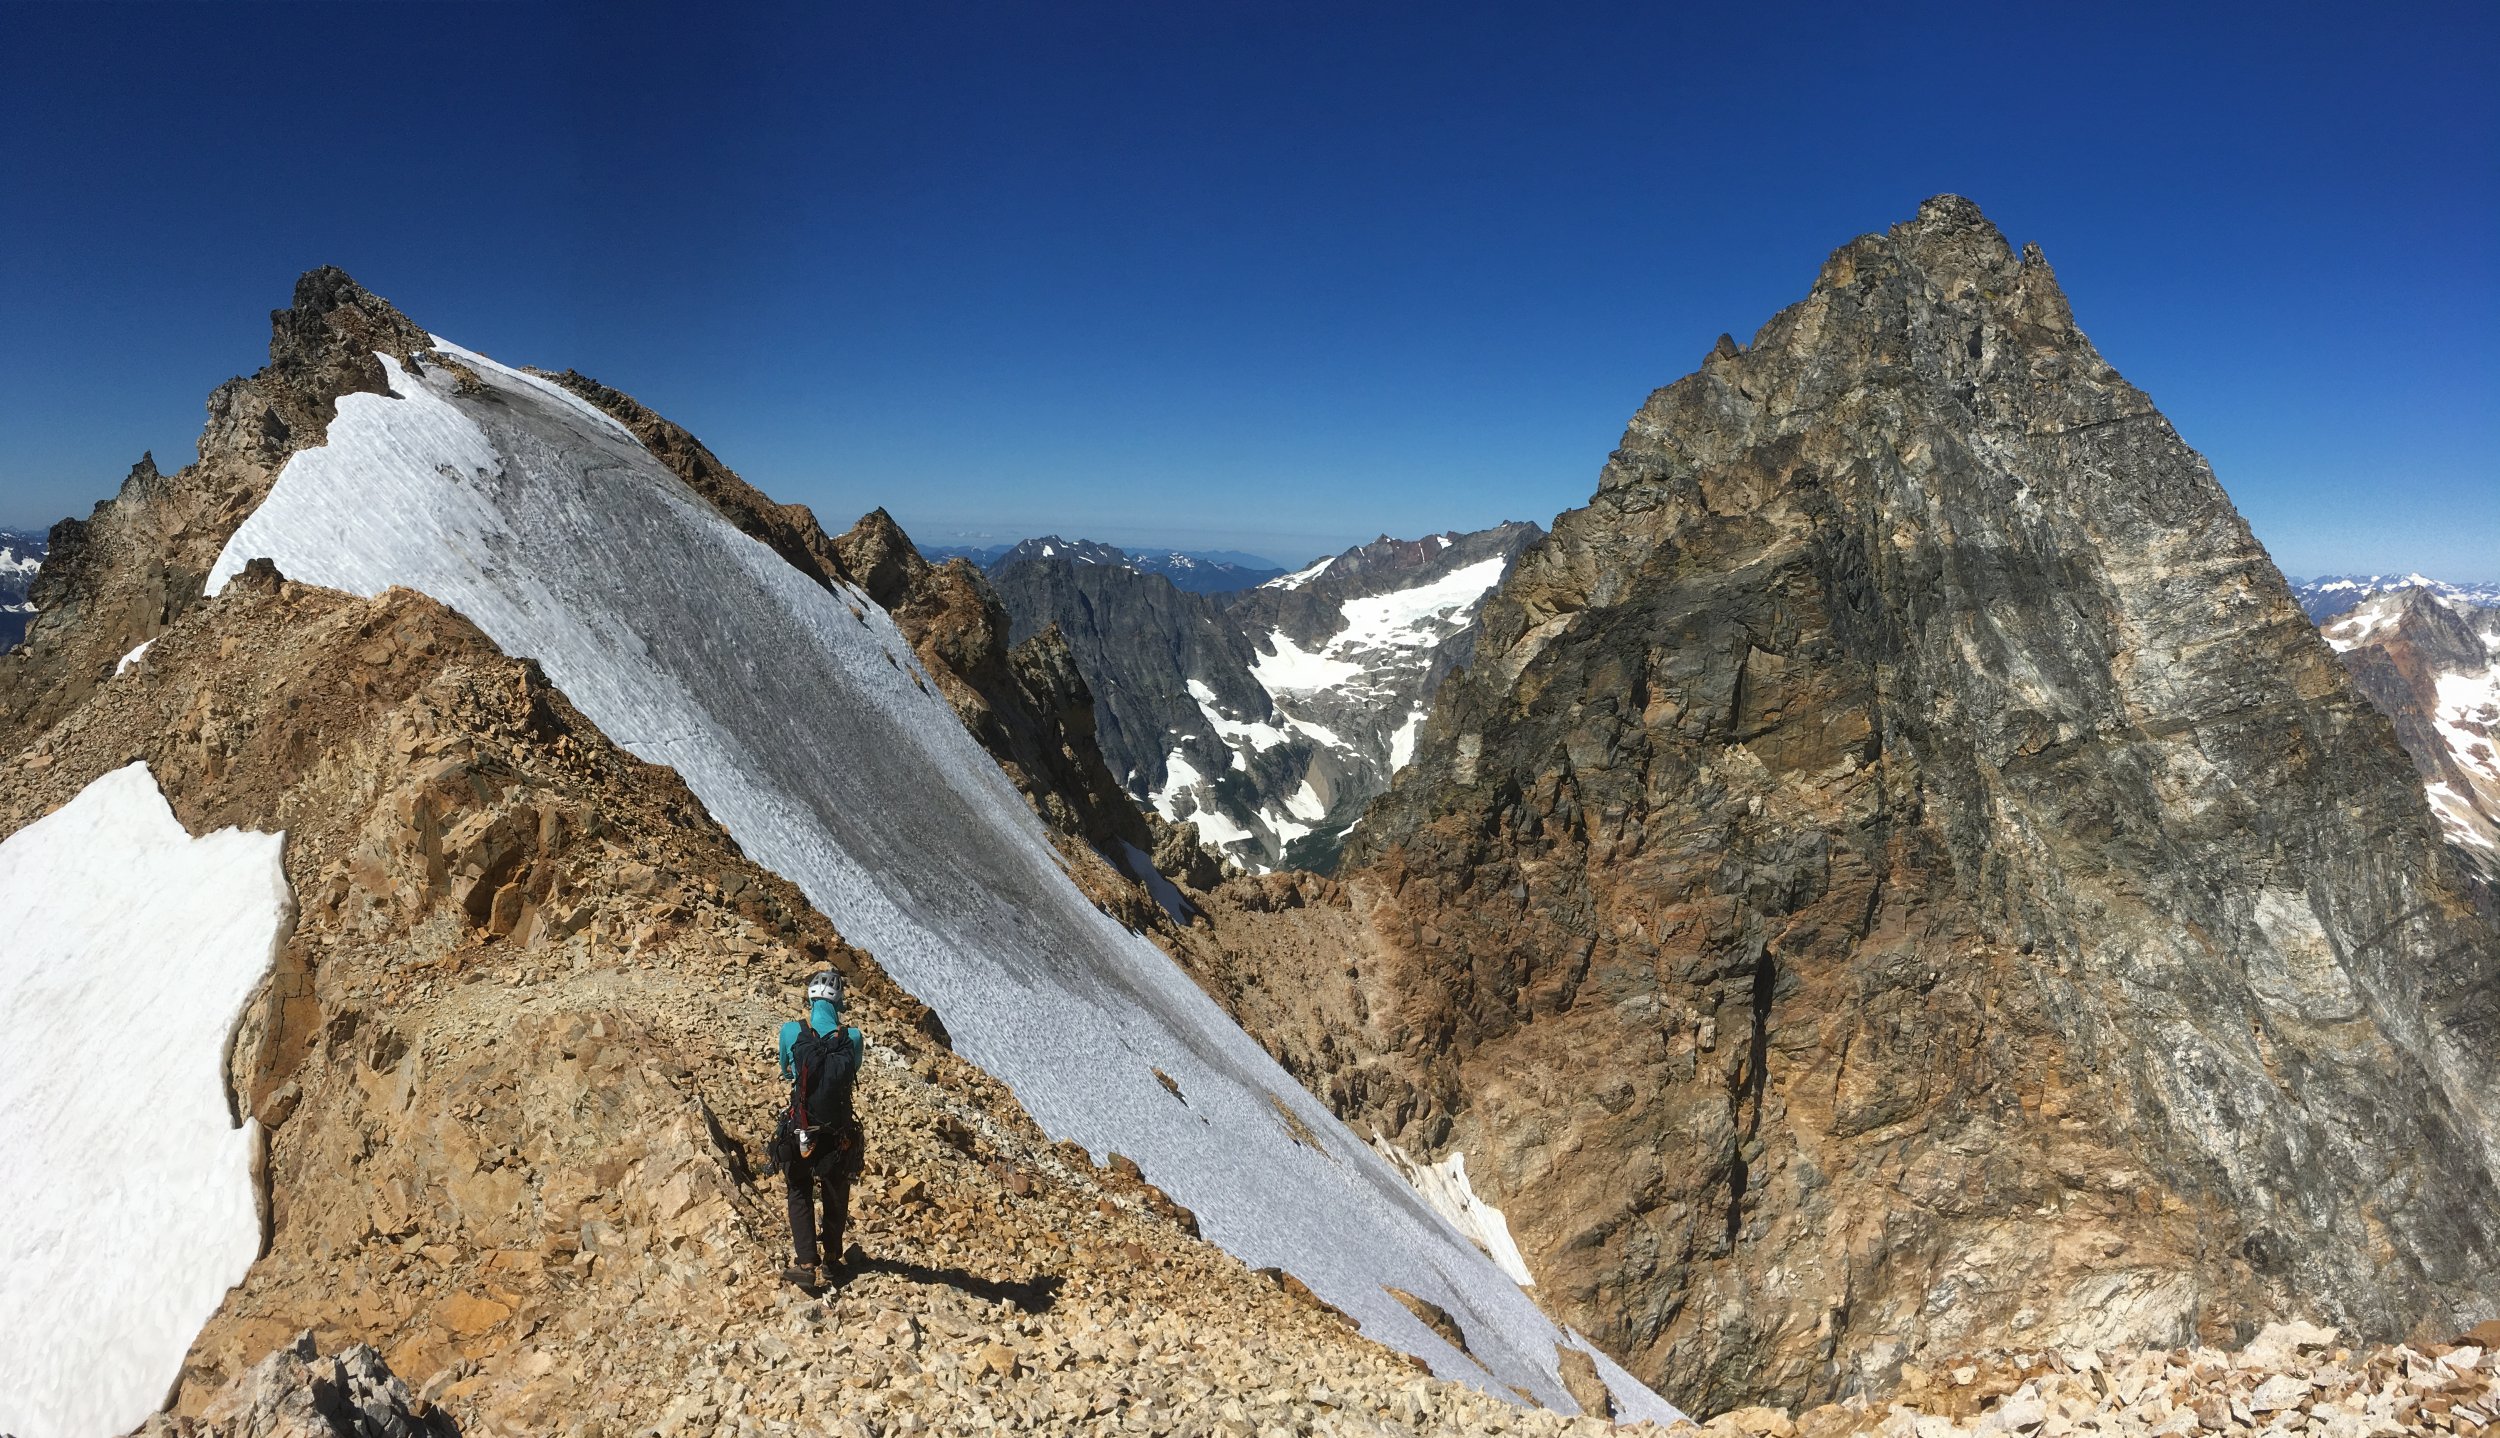
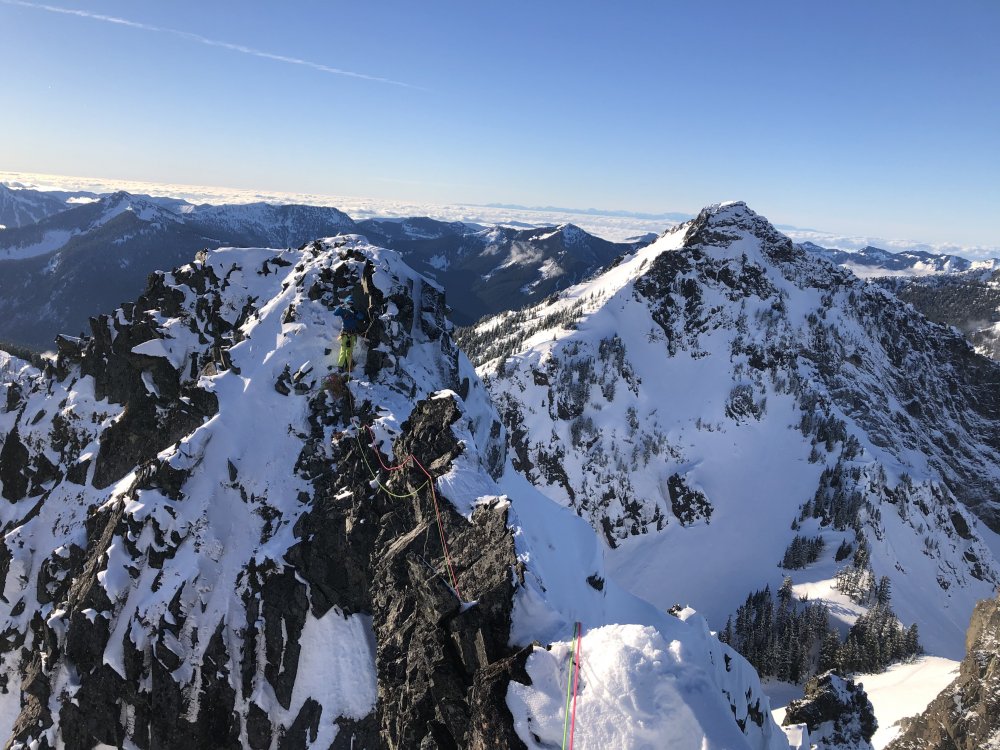
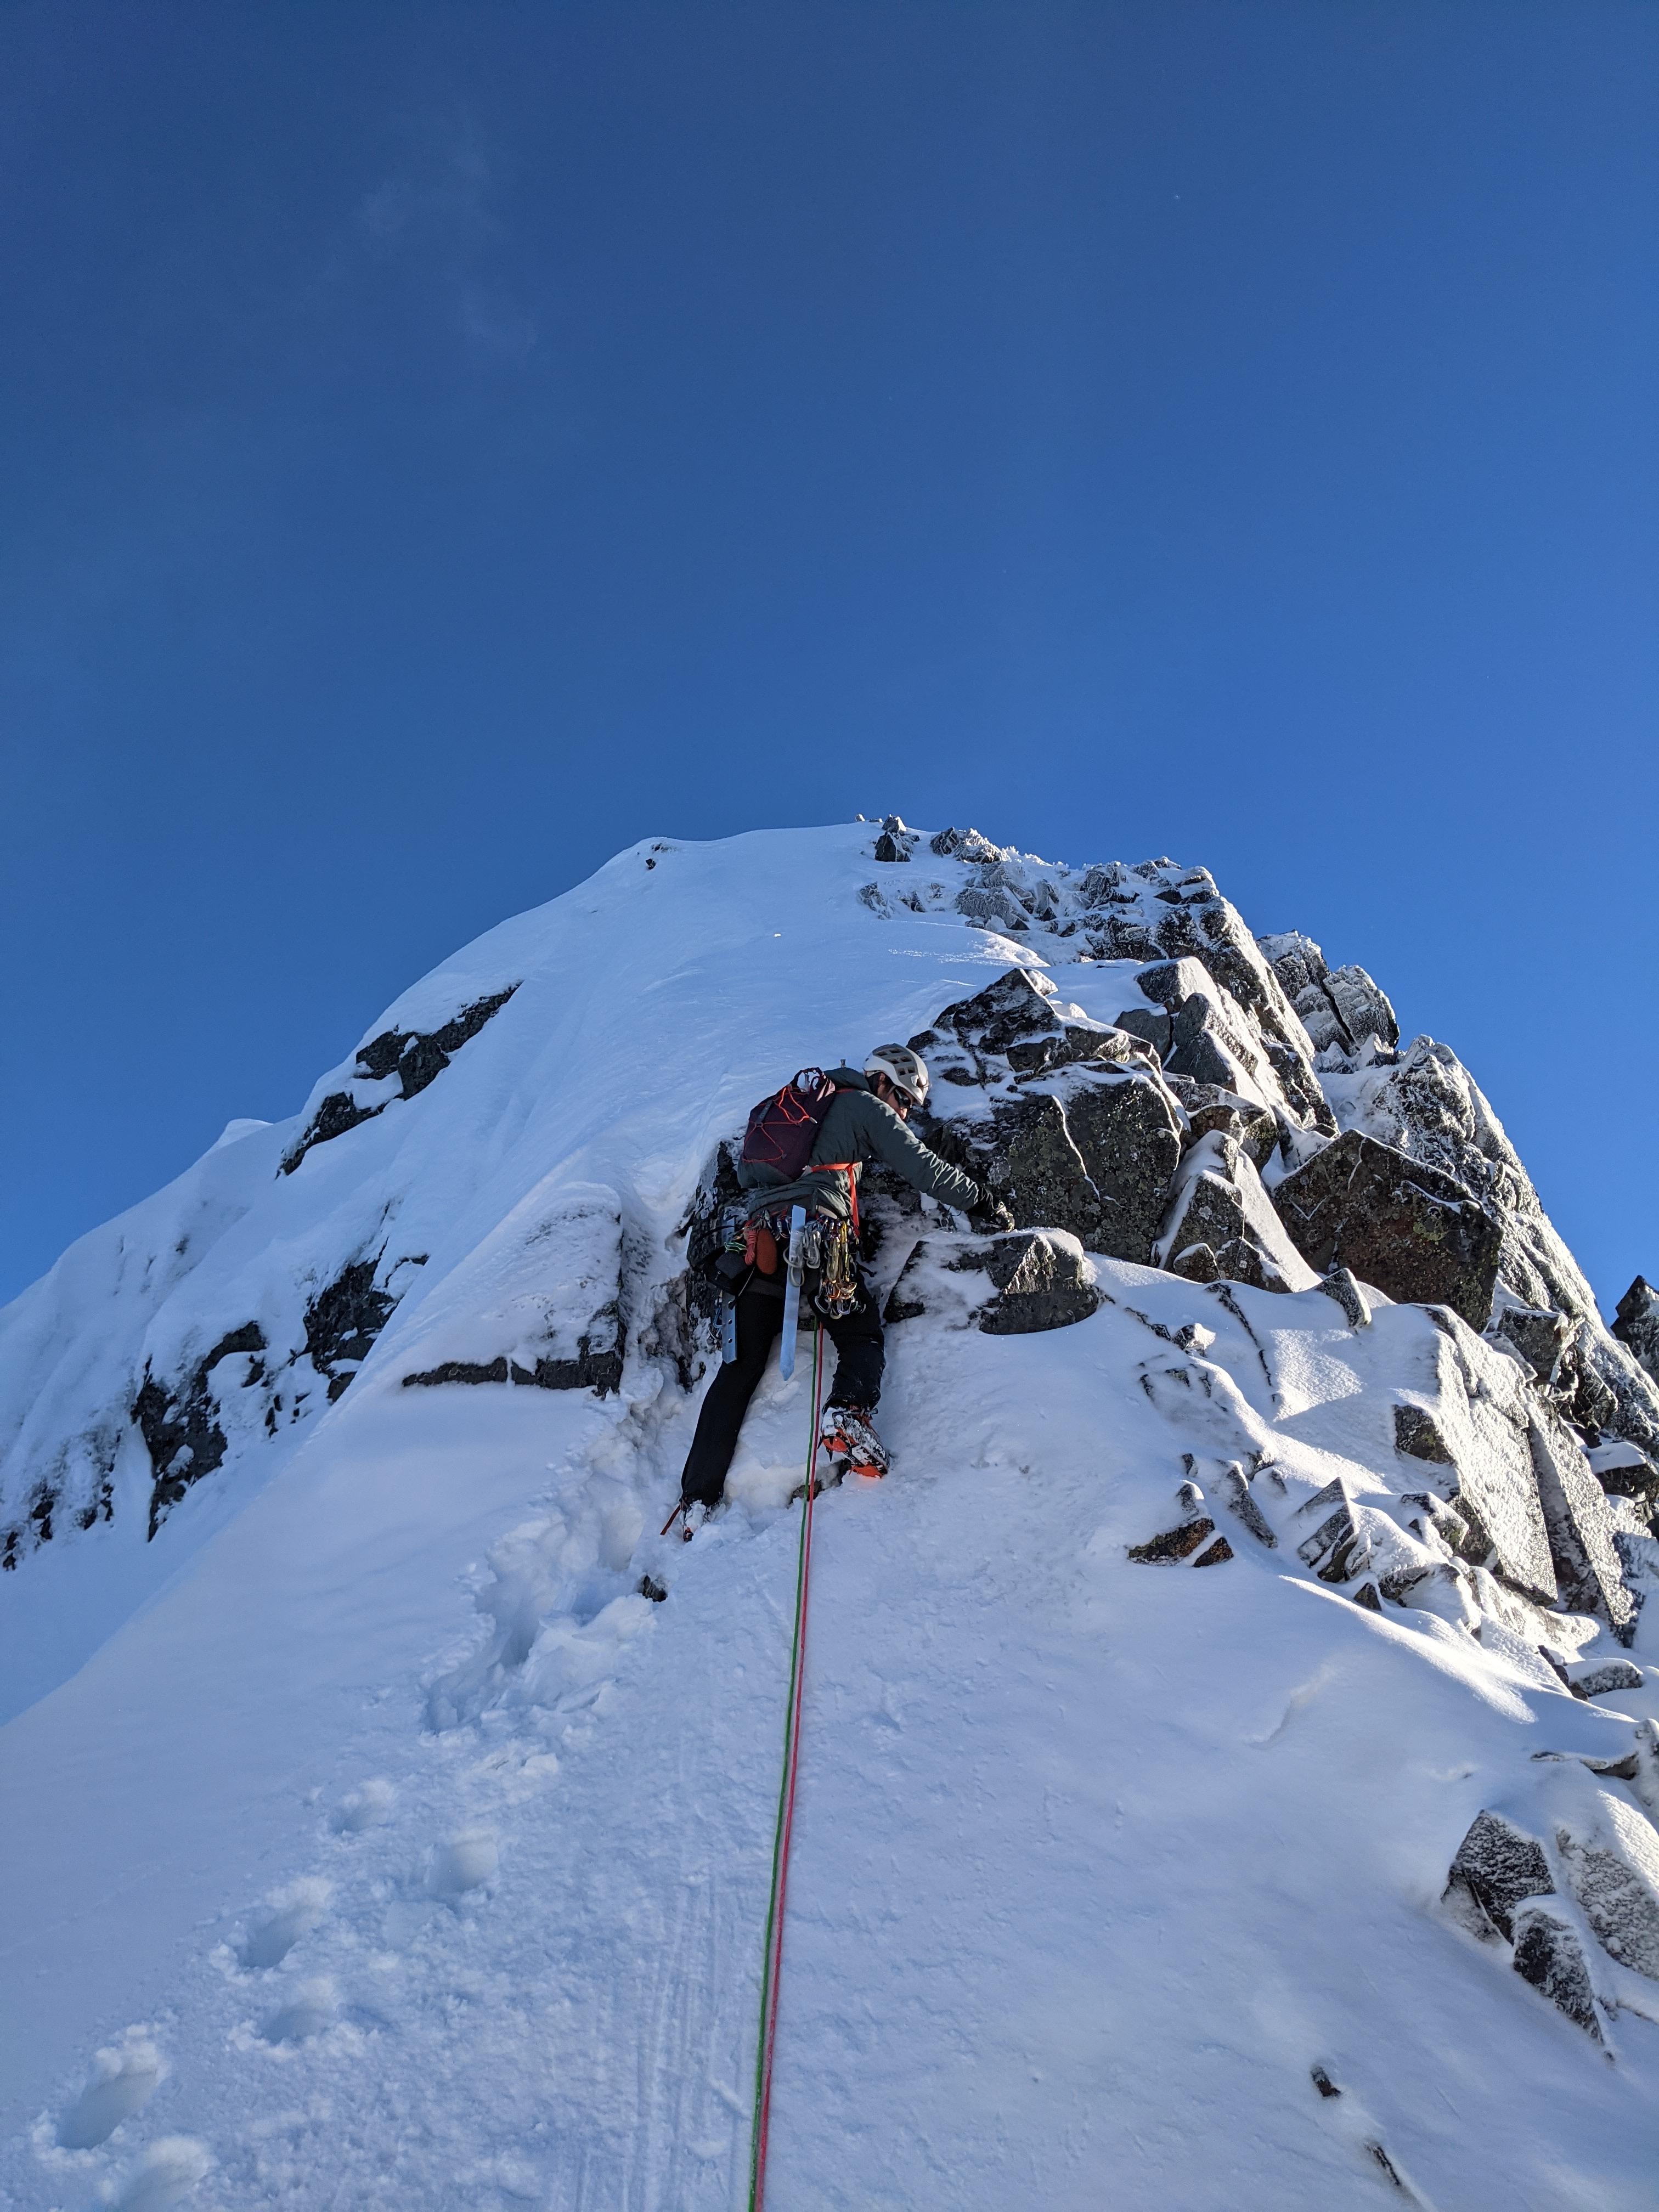
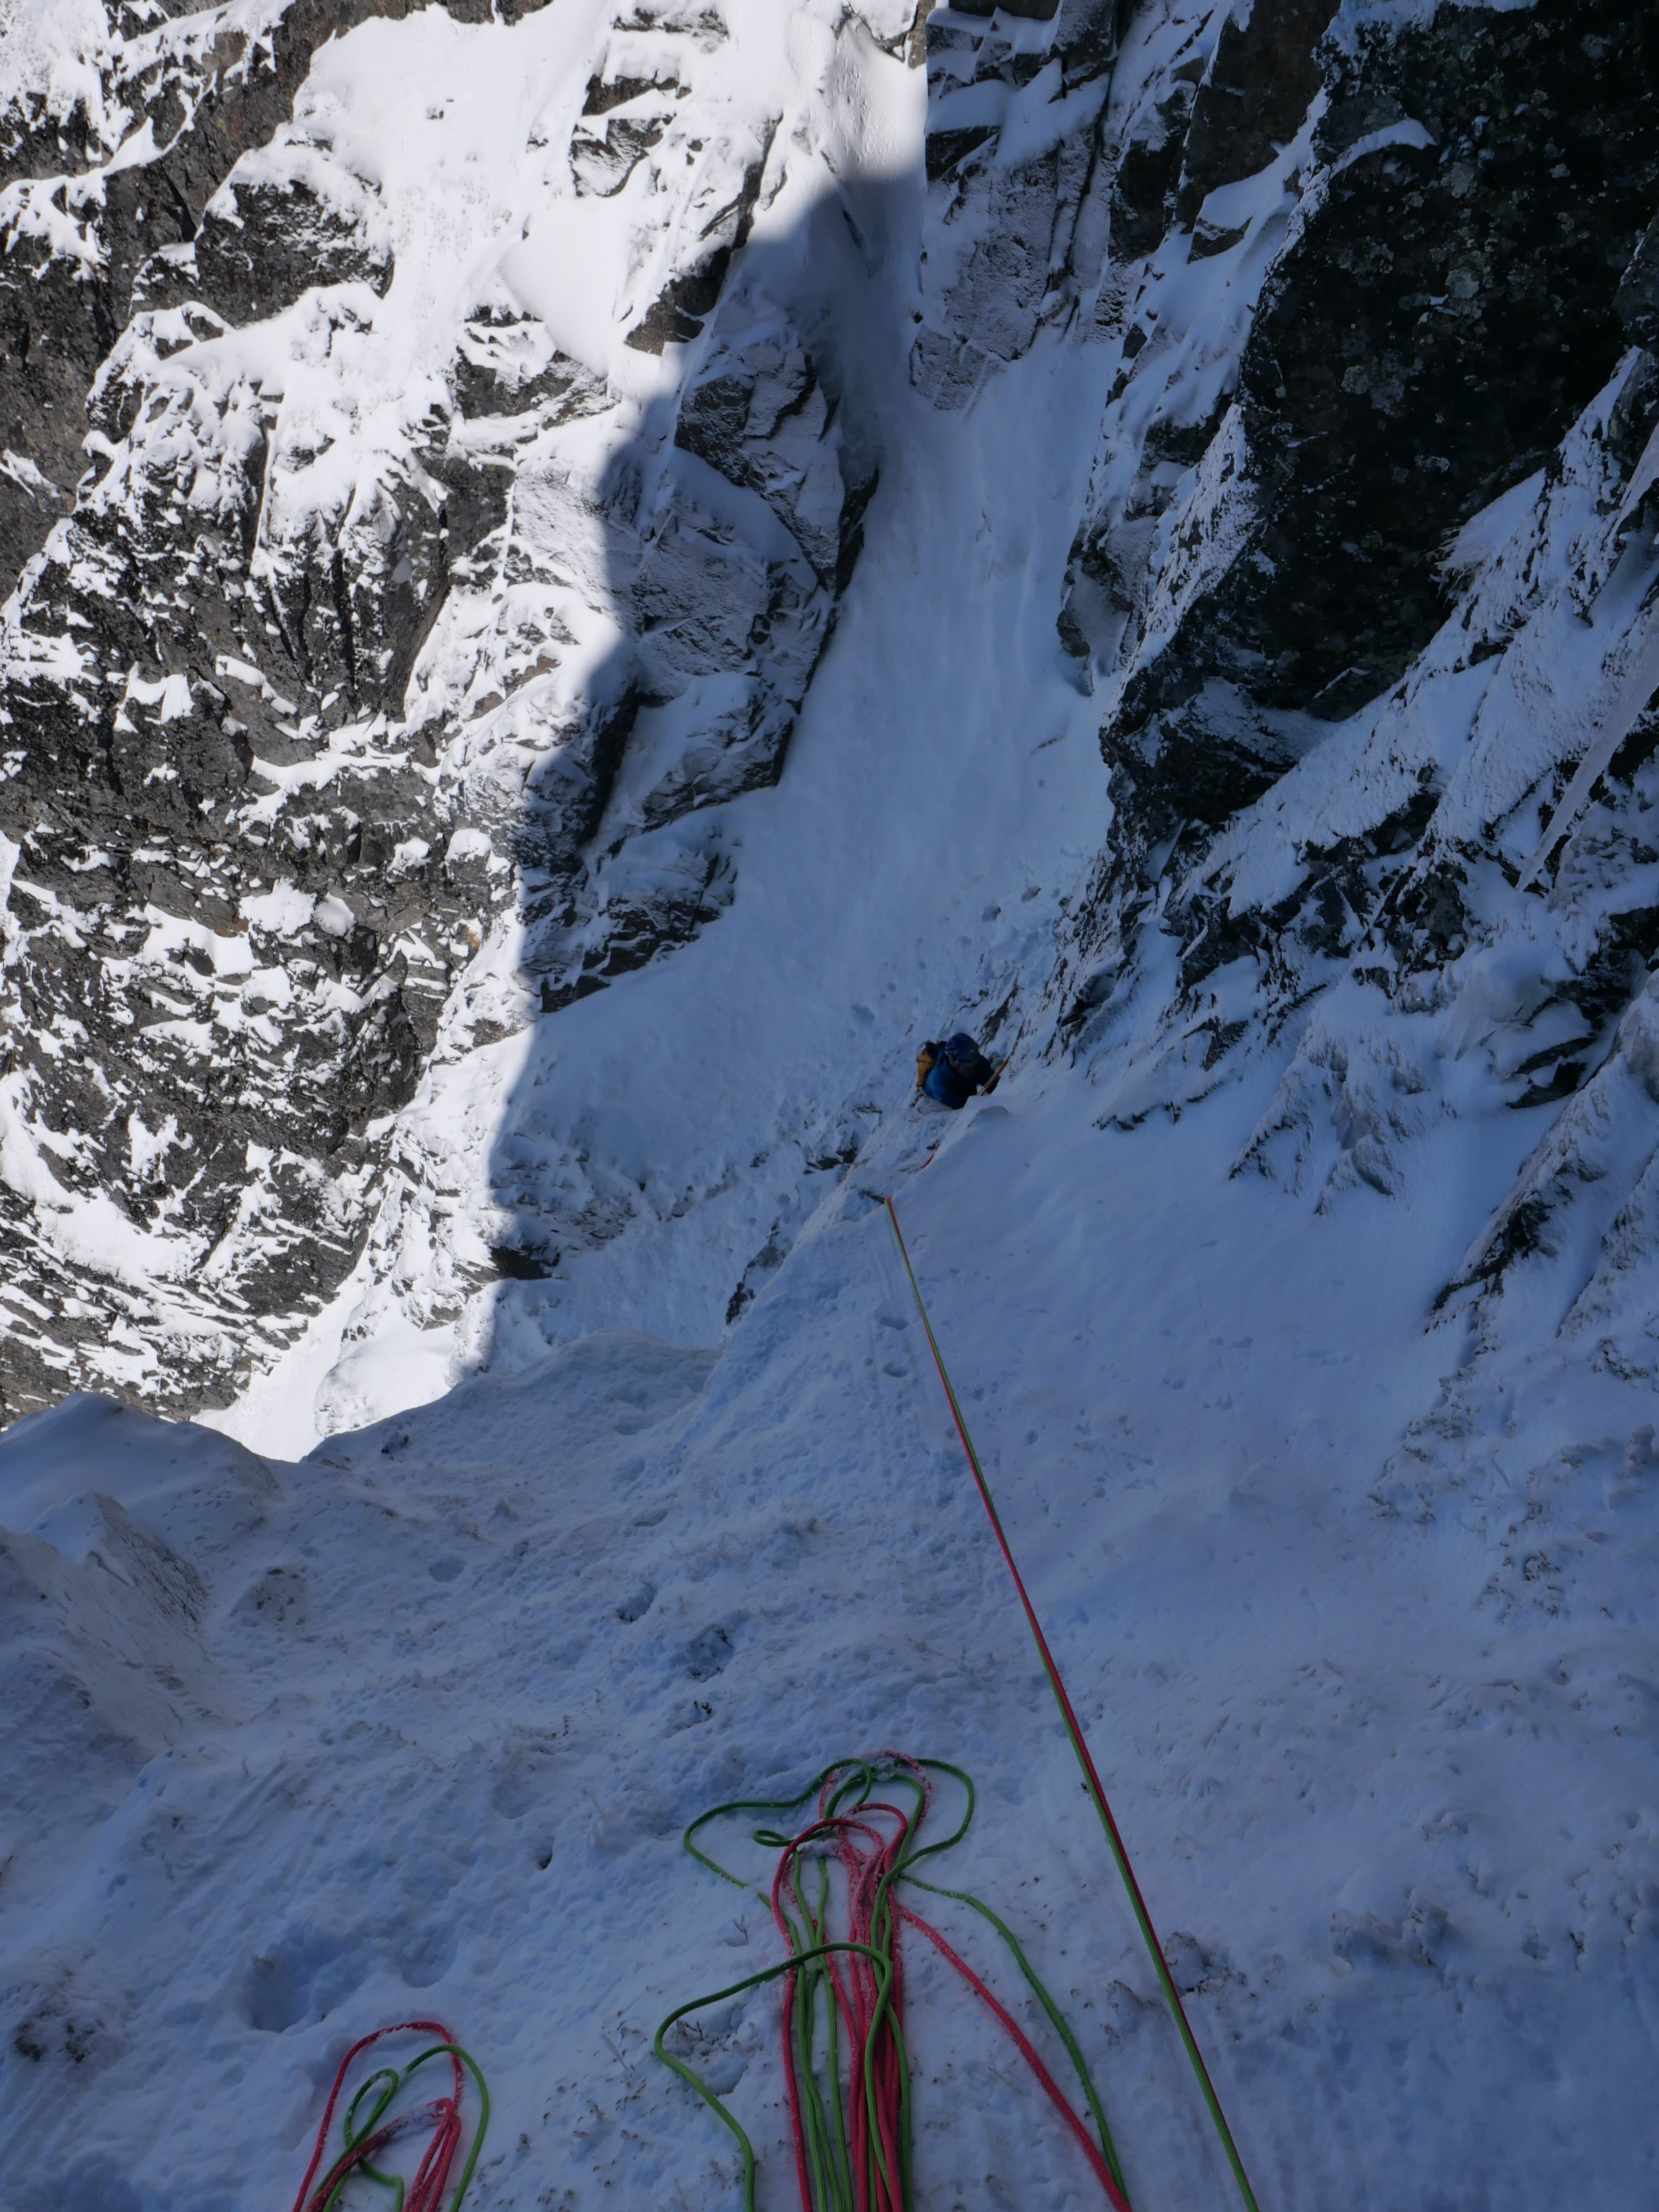
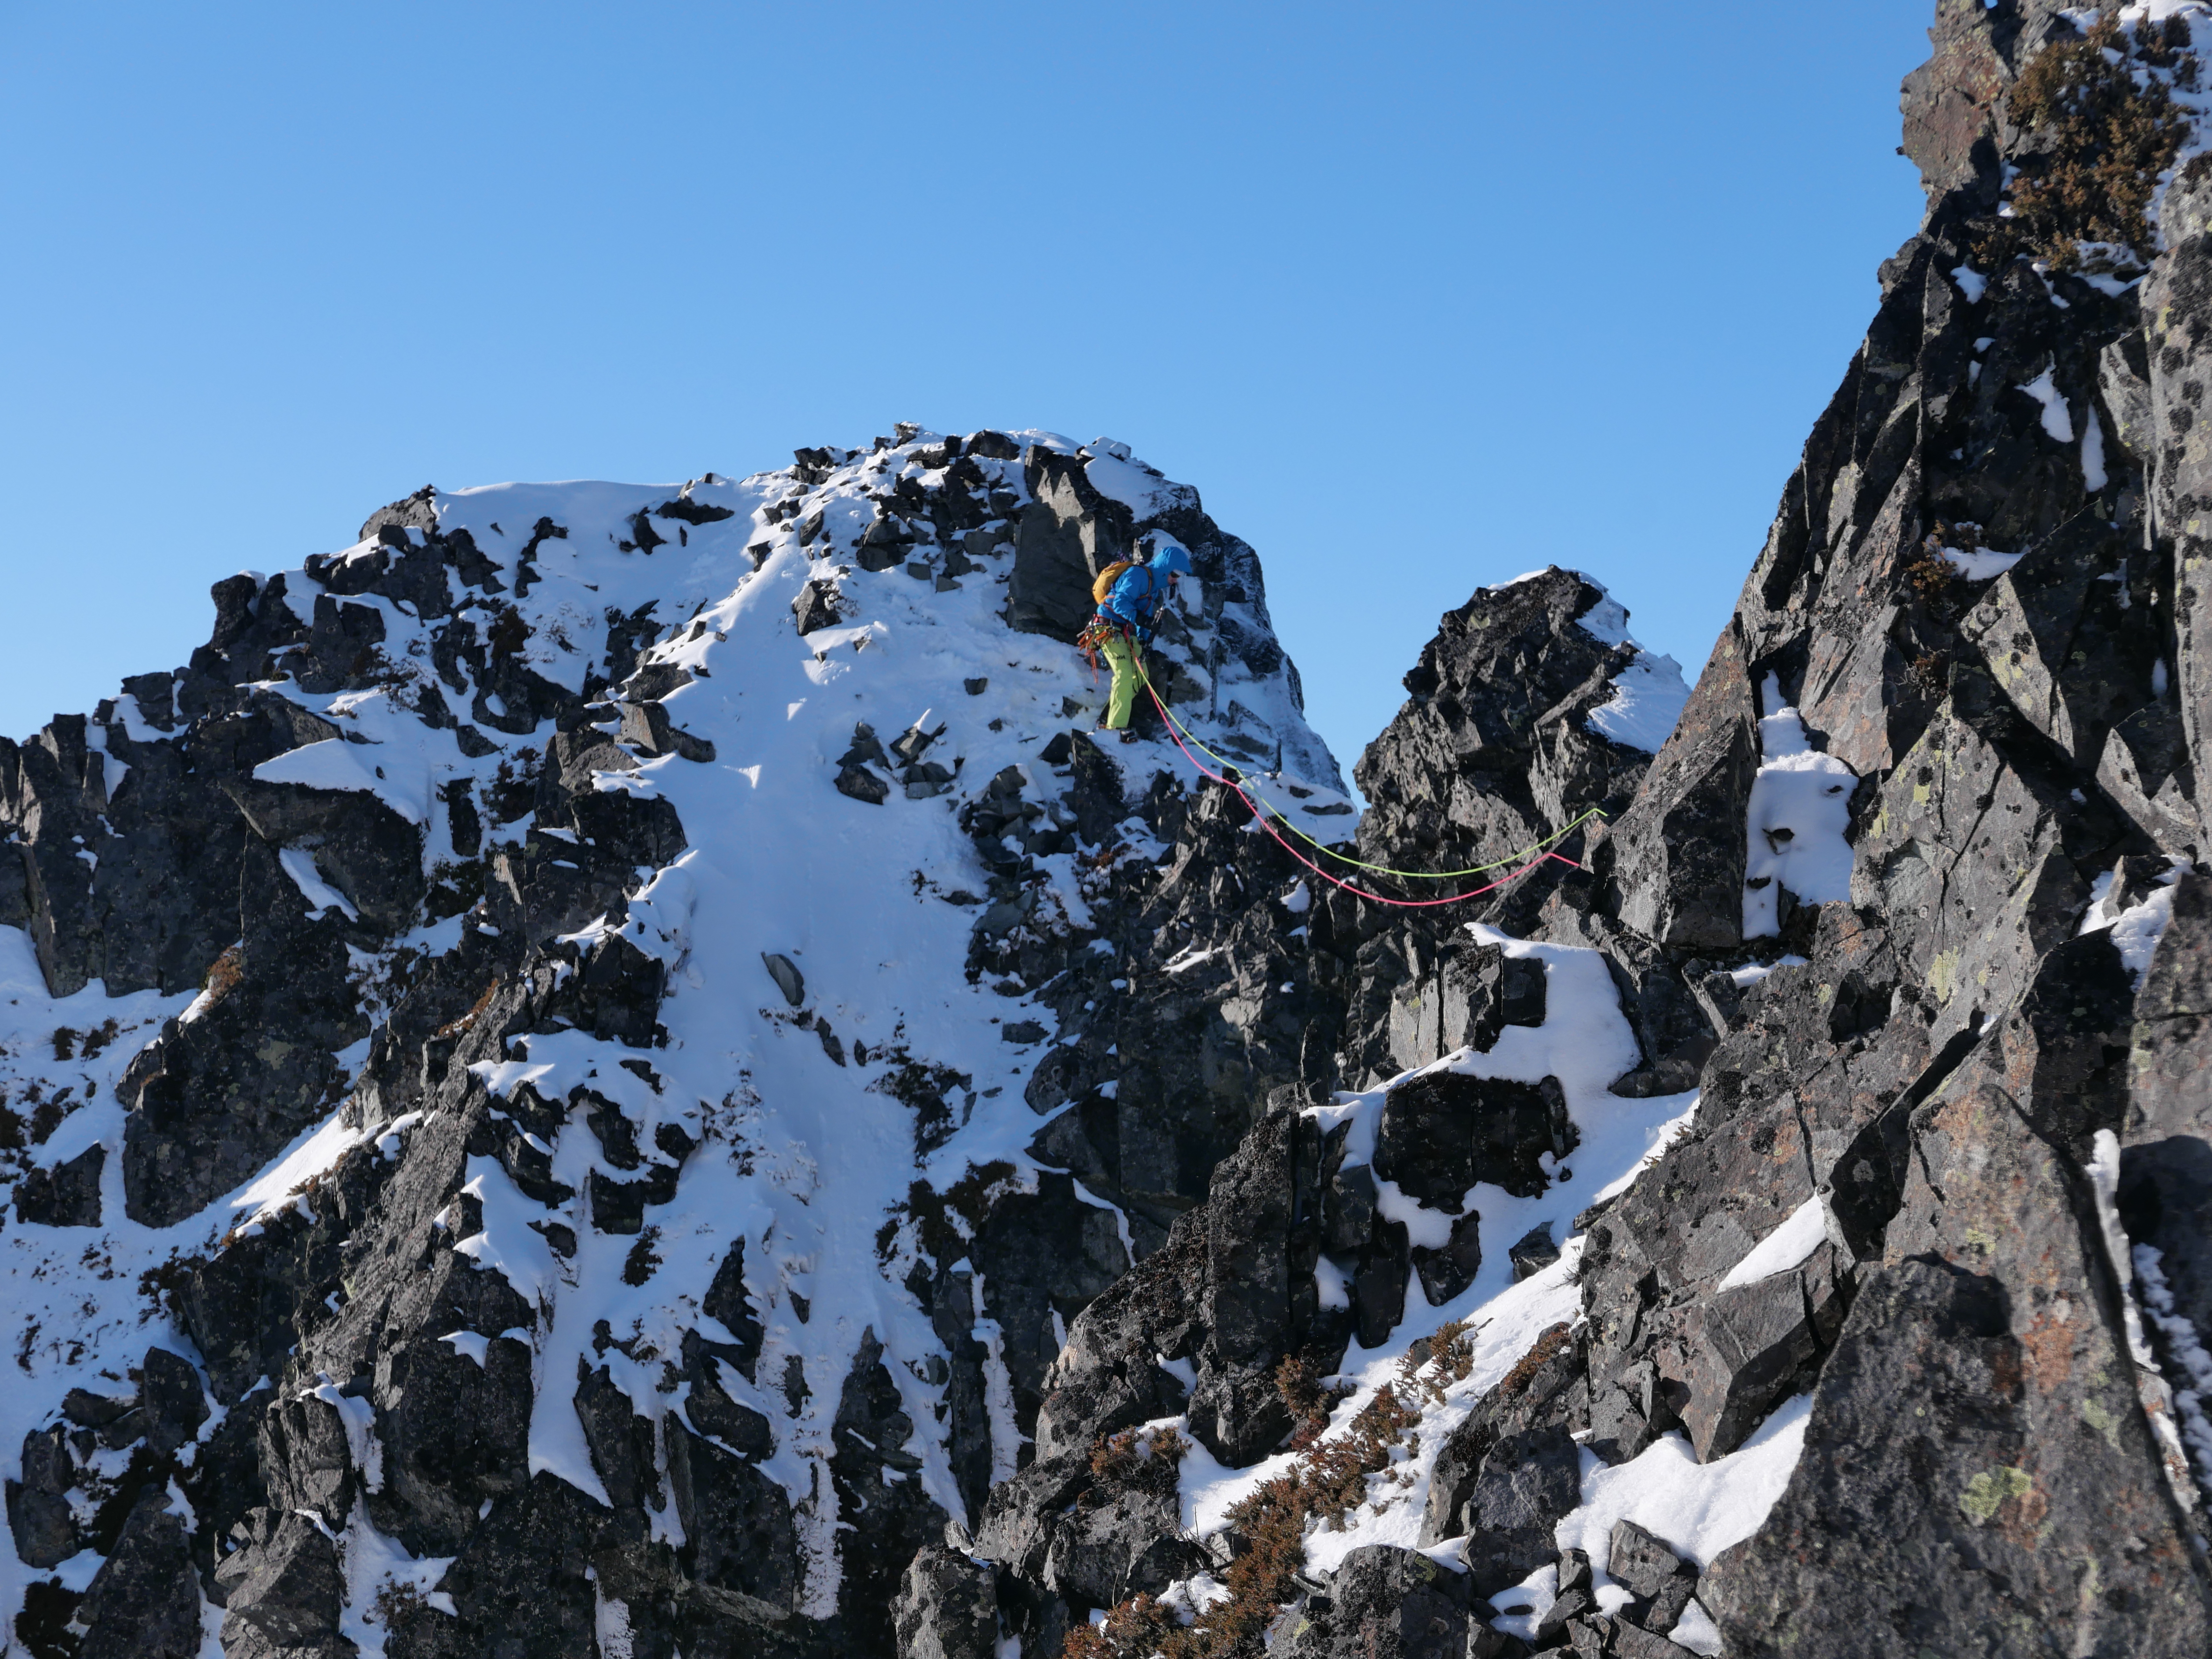
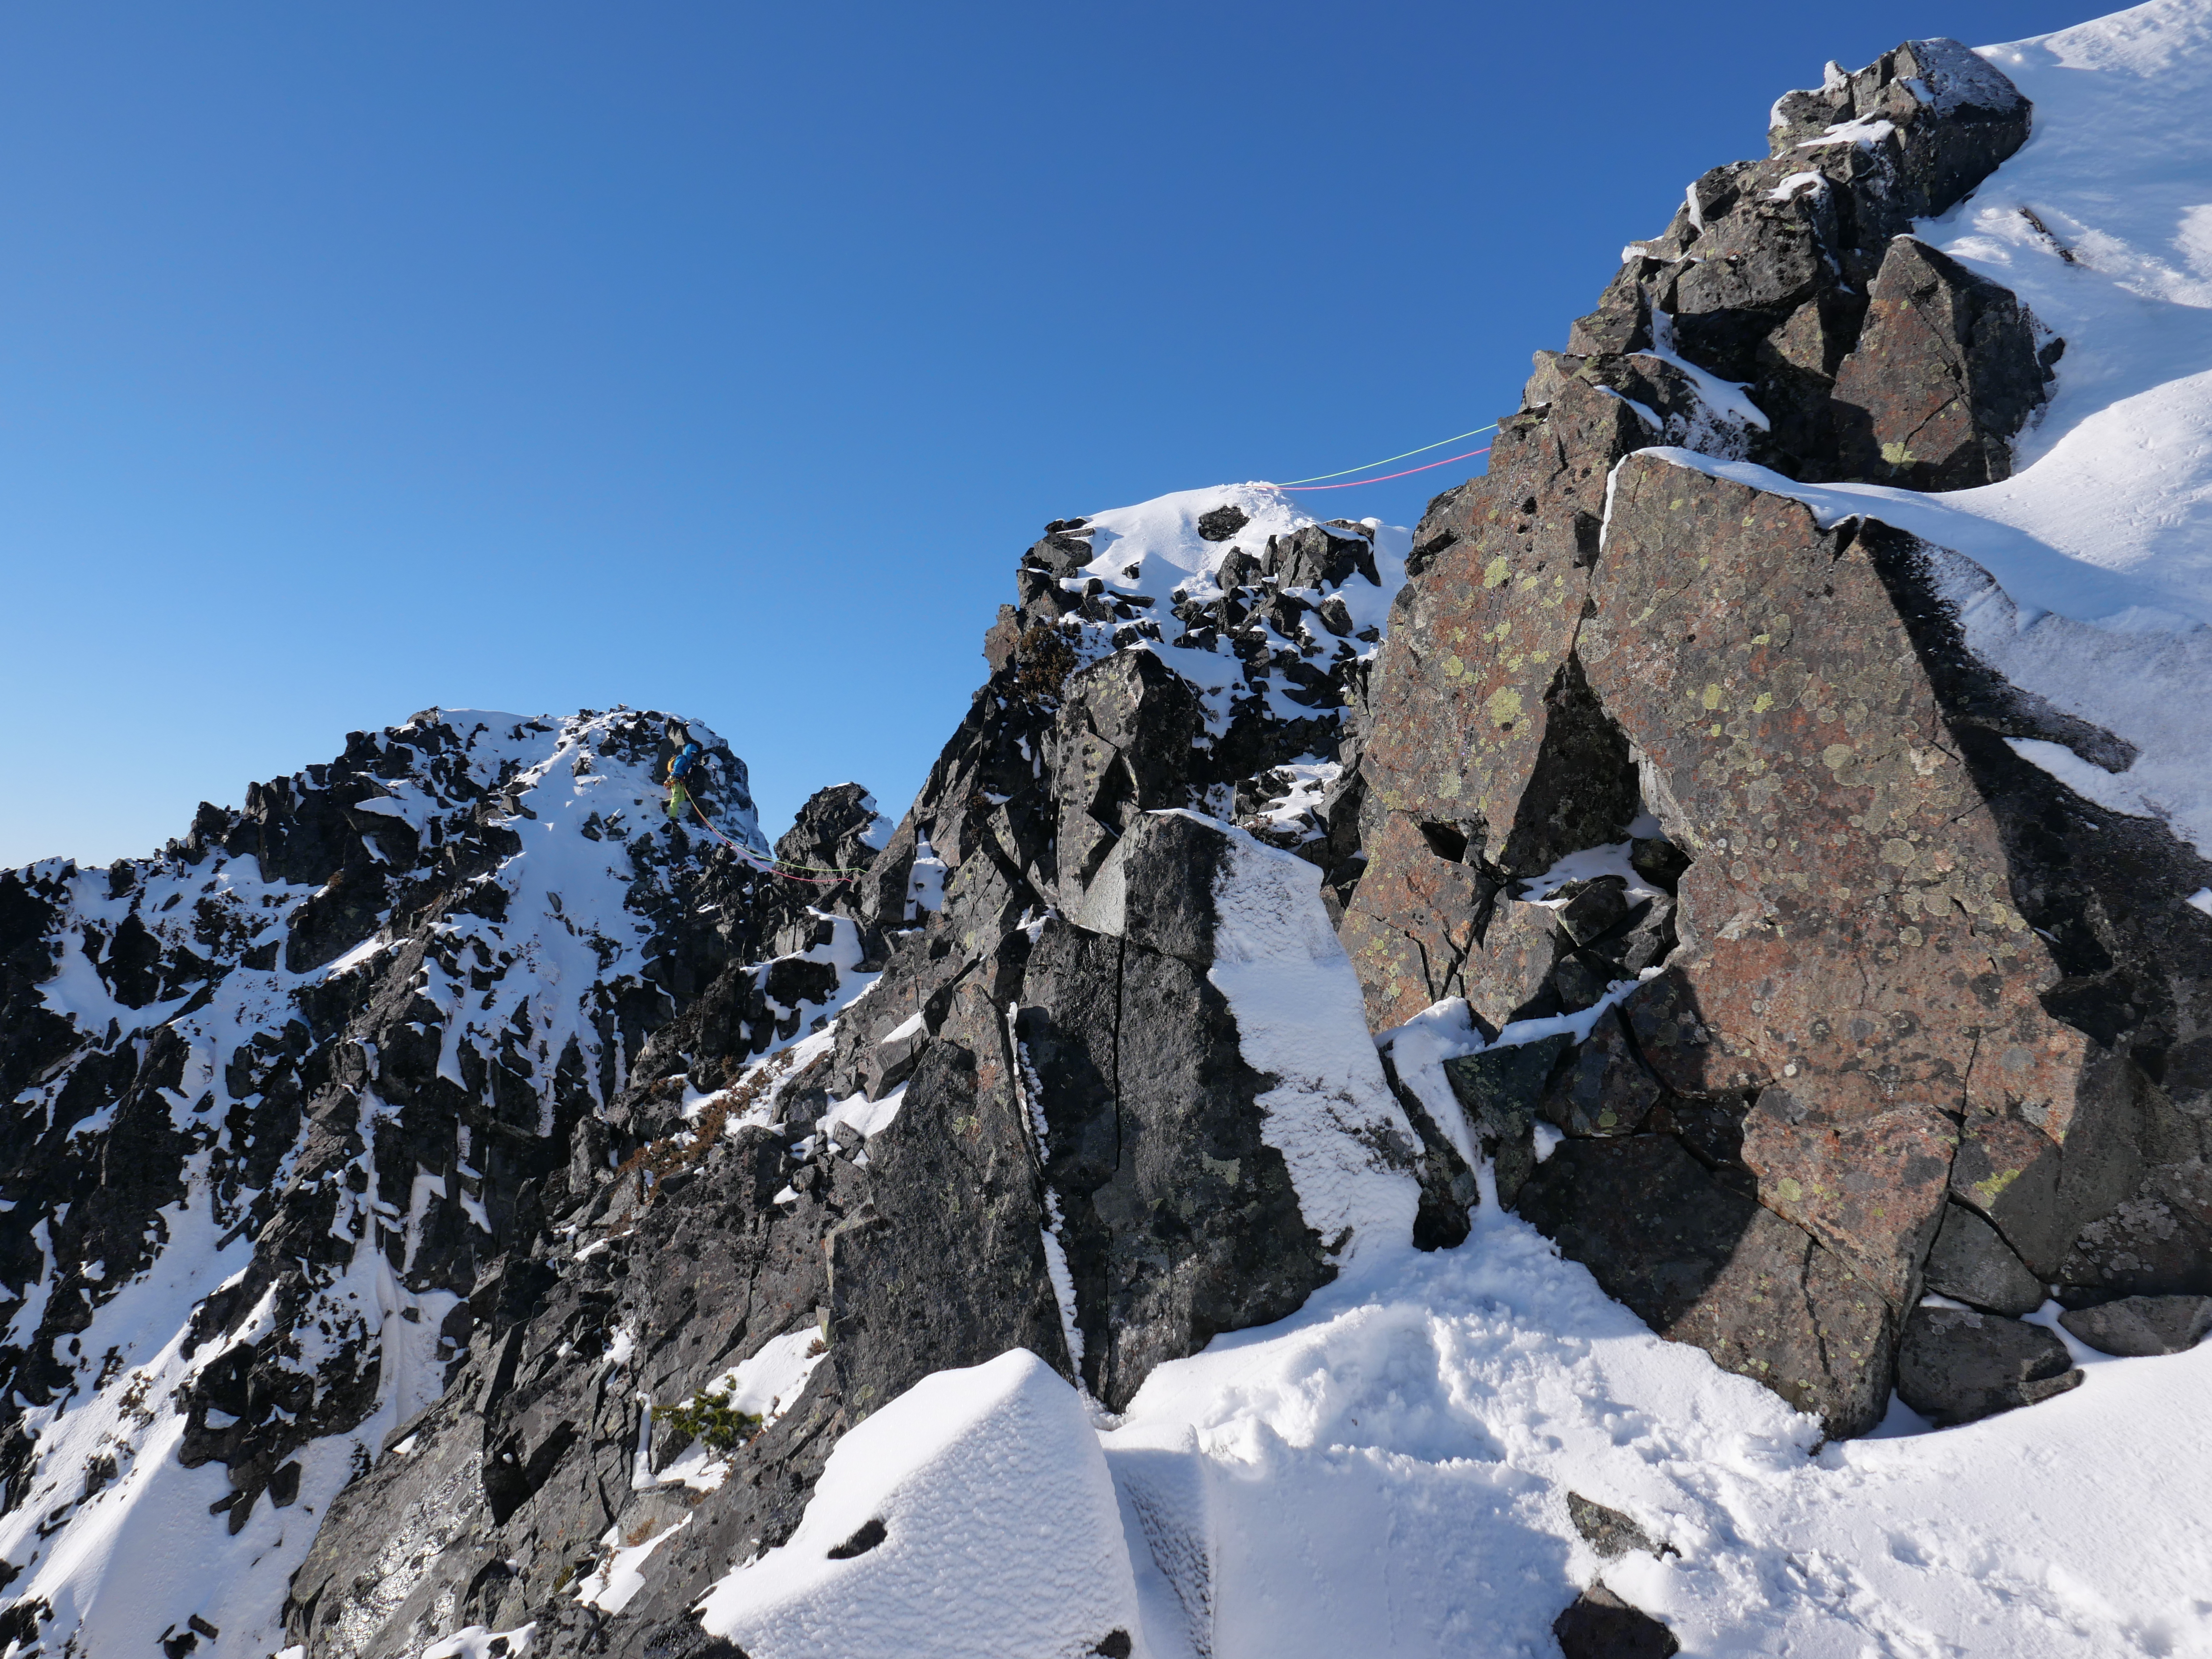
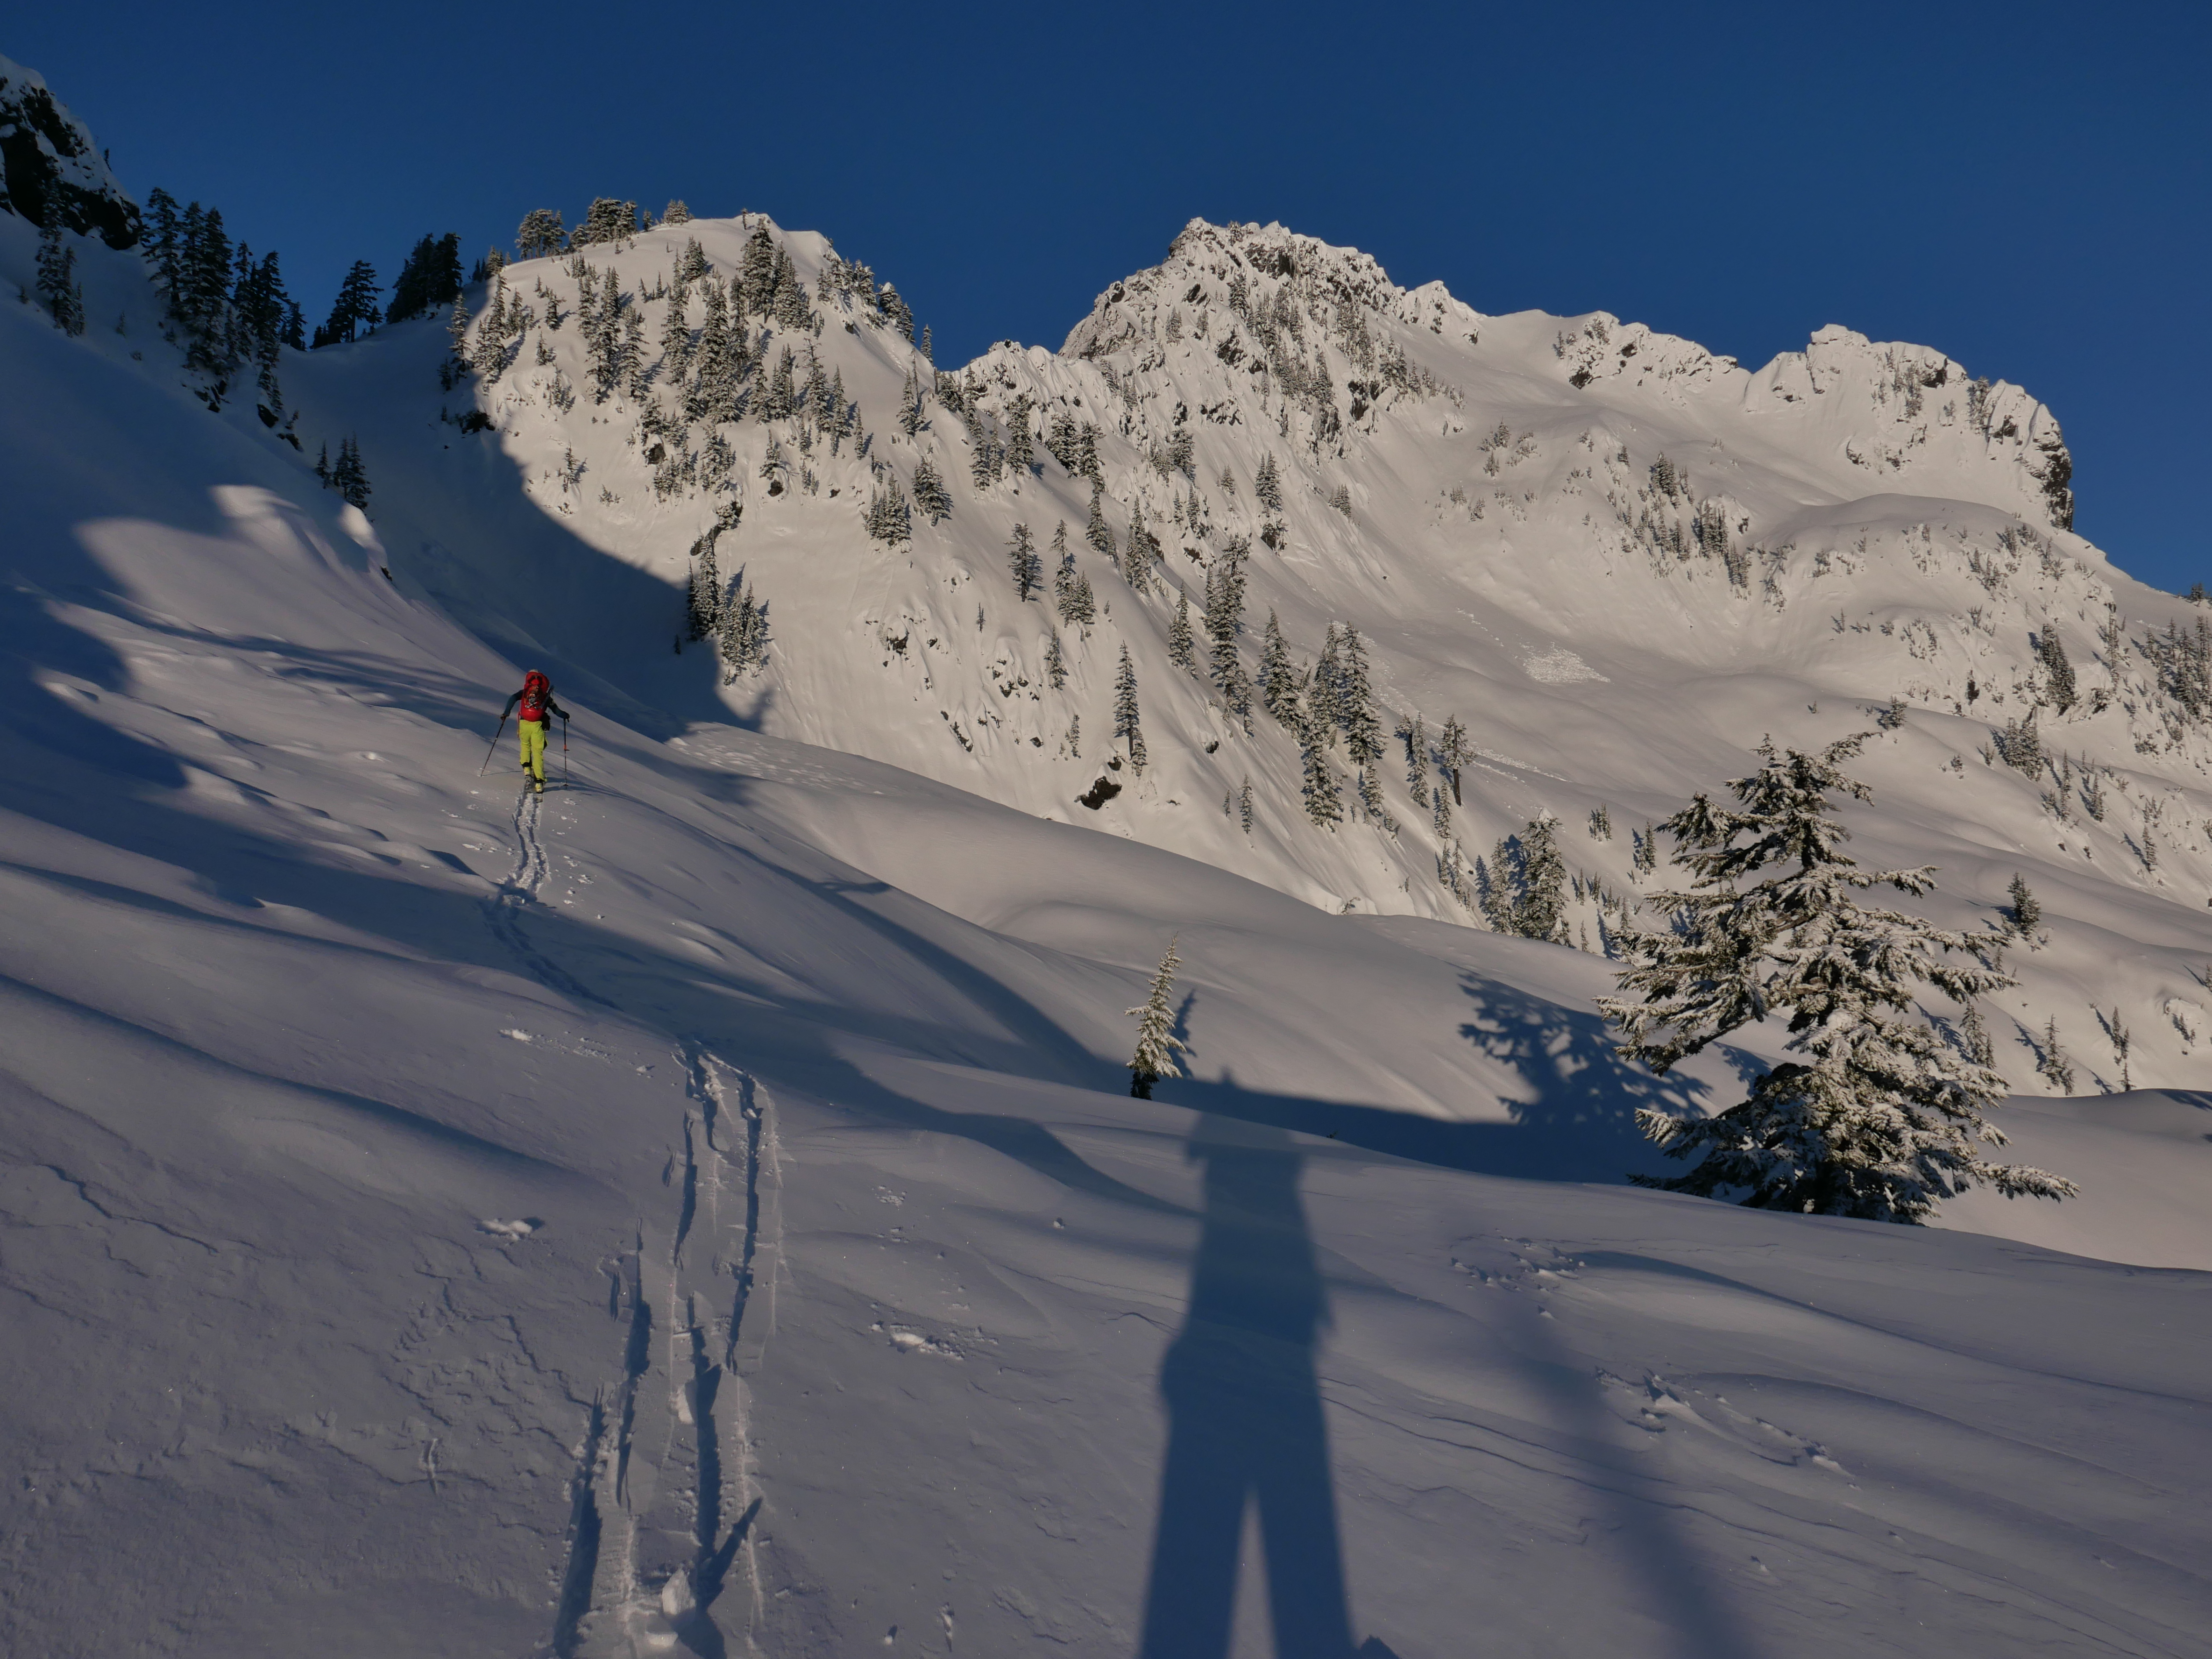
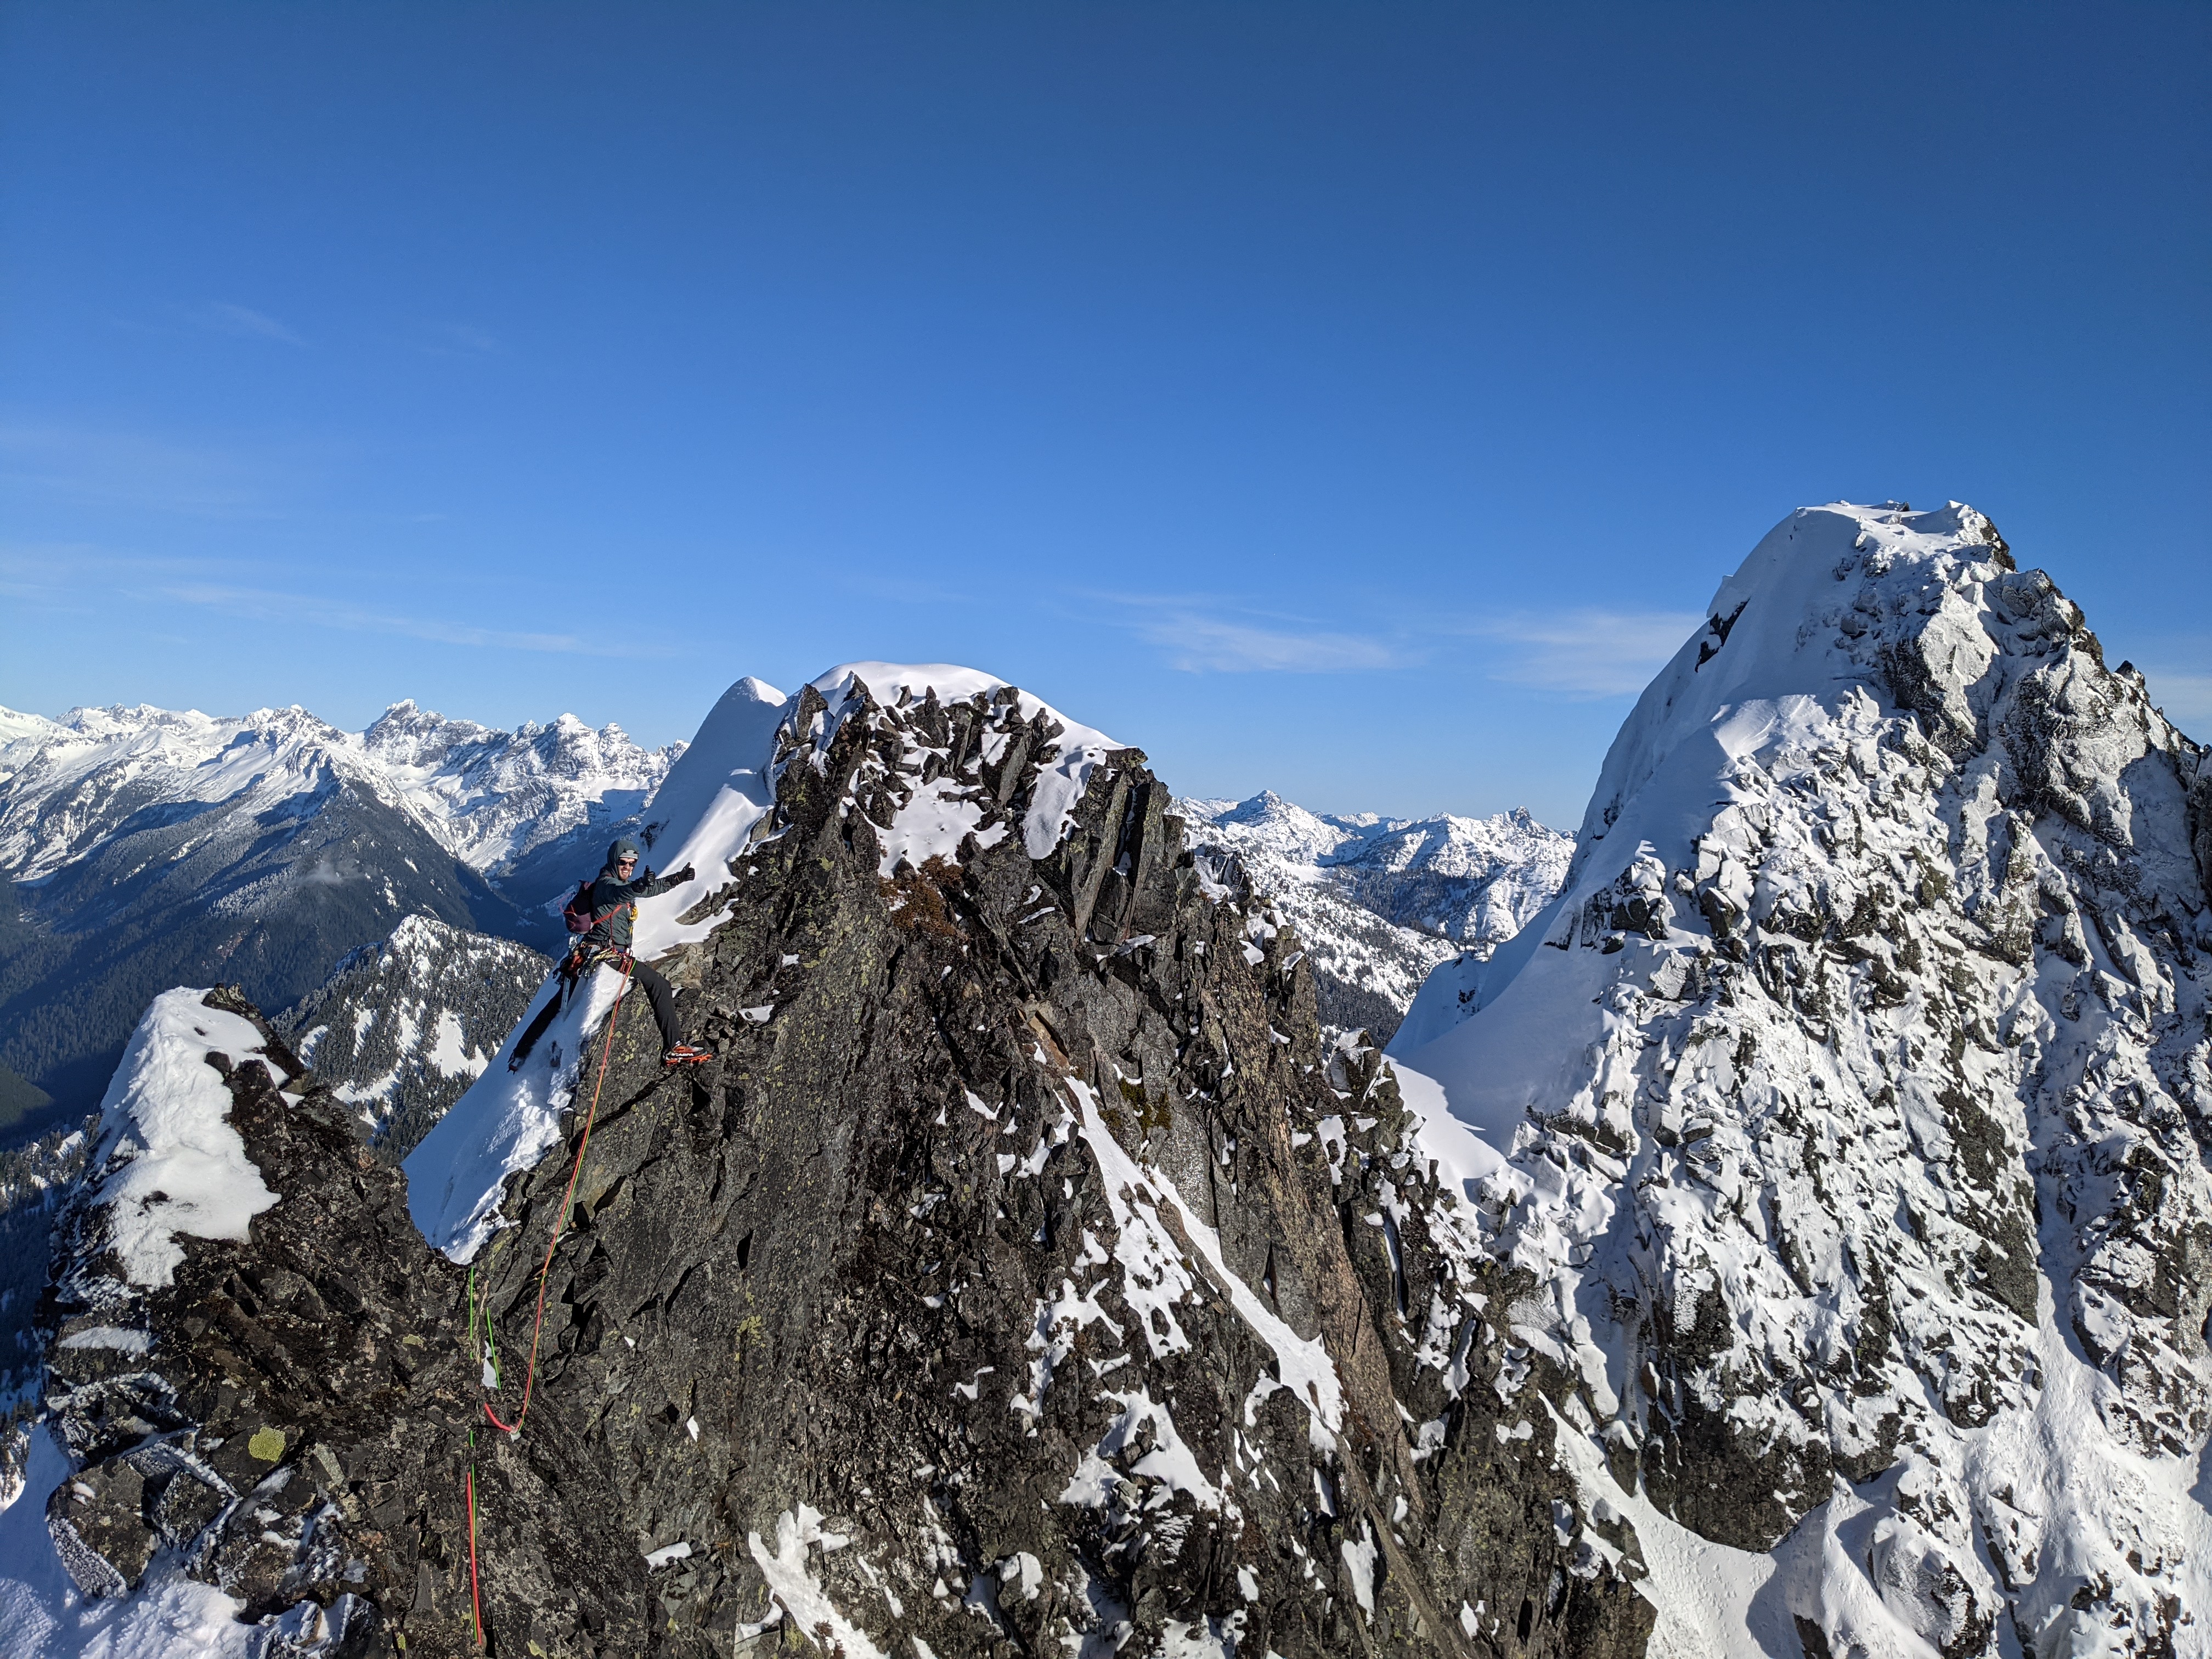
Now atop point 8200, a cold wind ripped from the shady south side, adding to the intimidation of the ominous drop off ahead. Rather than onsight down-solo into the abyss, we opted to rope up here and simul down to the notch. This section did not boast the same quality rock, but made for comfortable down climbing with adequate protection. Once down, we again unroped and began back up to SE peak. Scrambling across this ridge was an incredible experience. I found myself falling into a flow state unlike much other. The climbing isn’t too hard, nor very sustained, so you are really able to enjoy the movement.


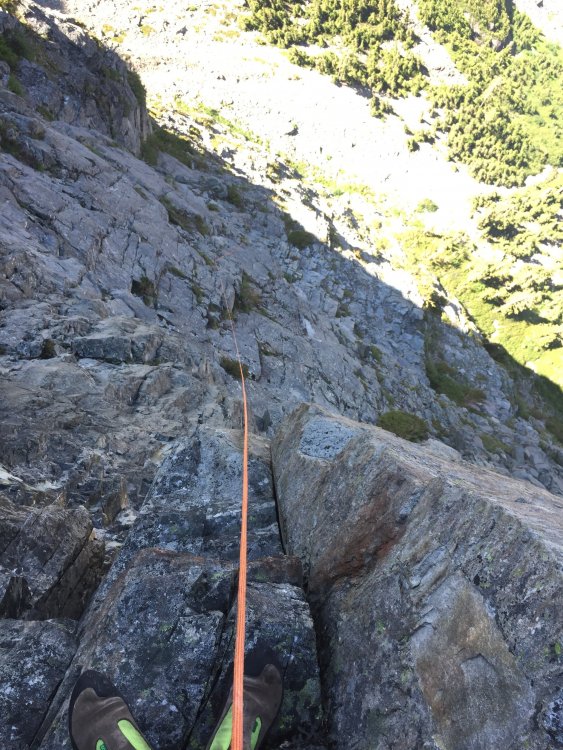
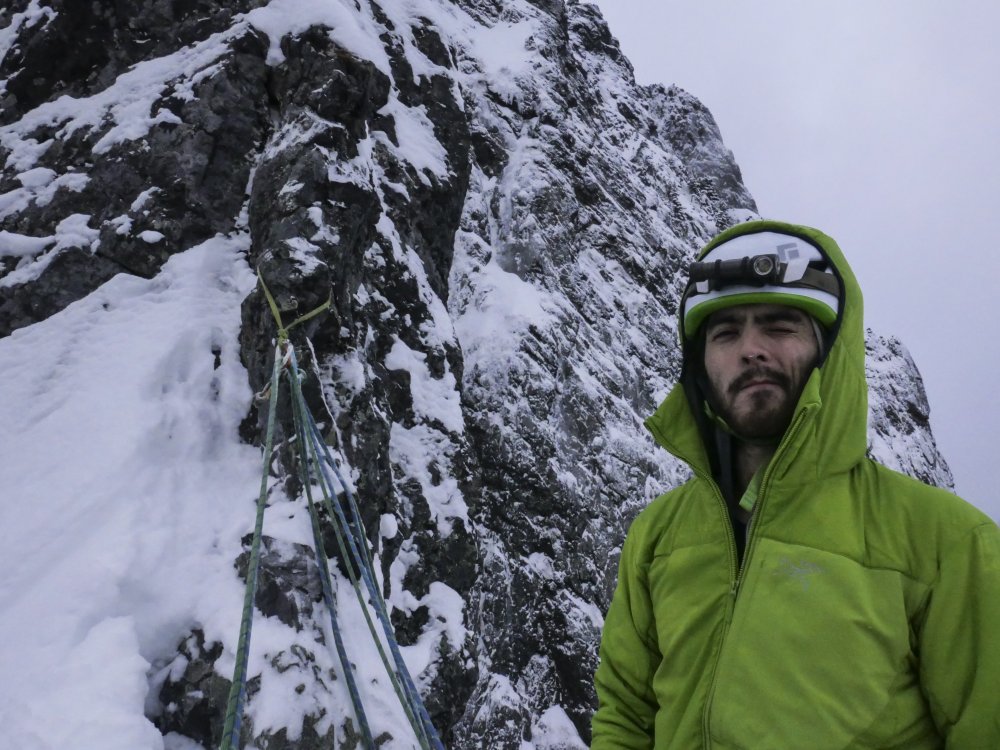
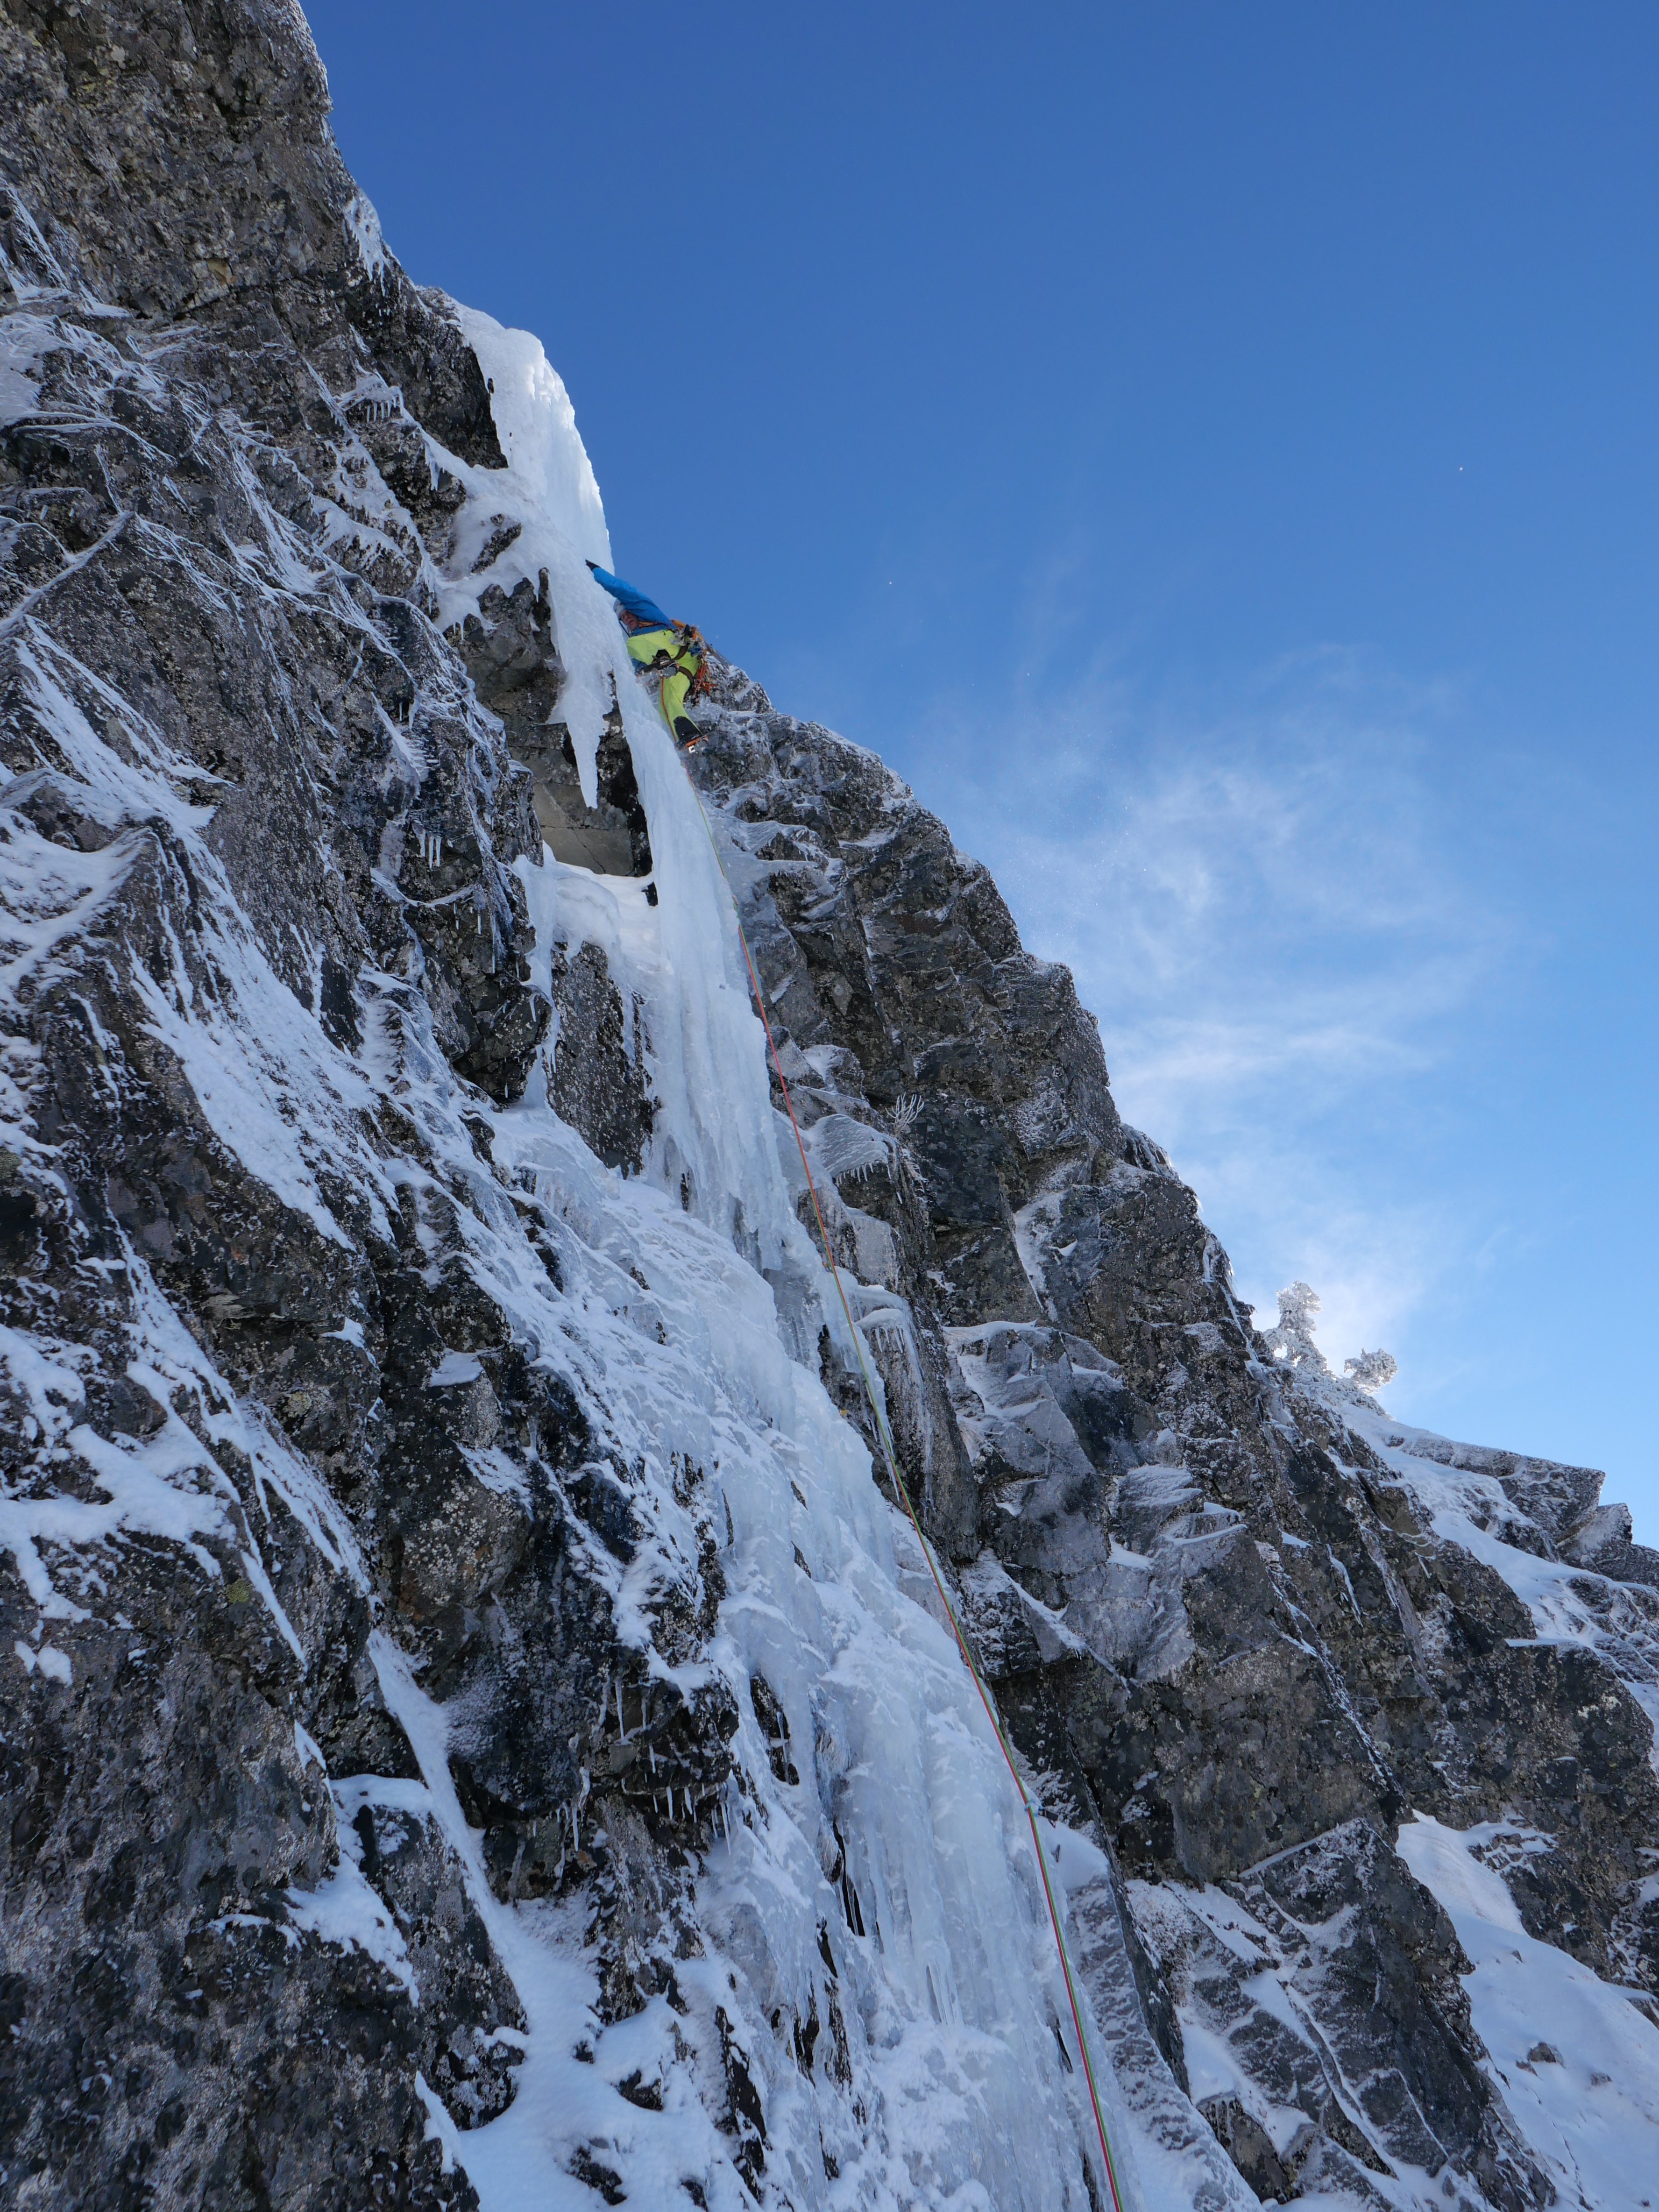
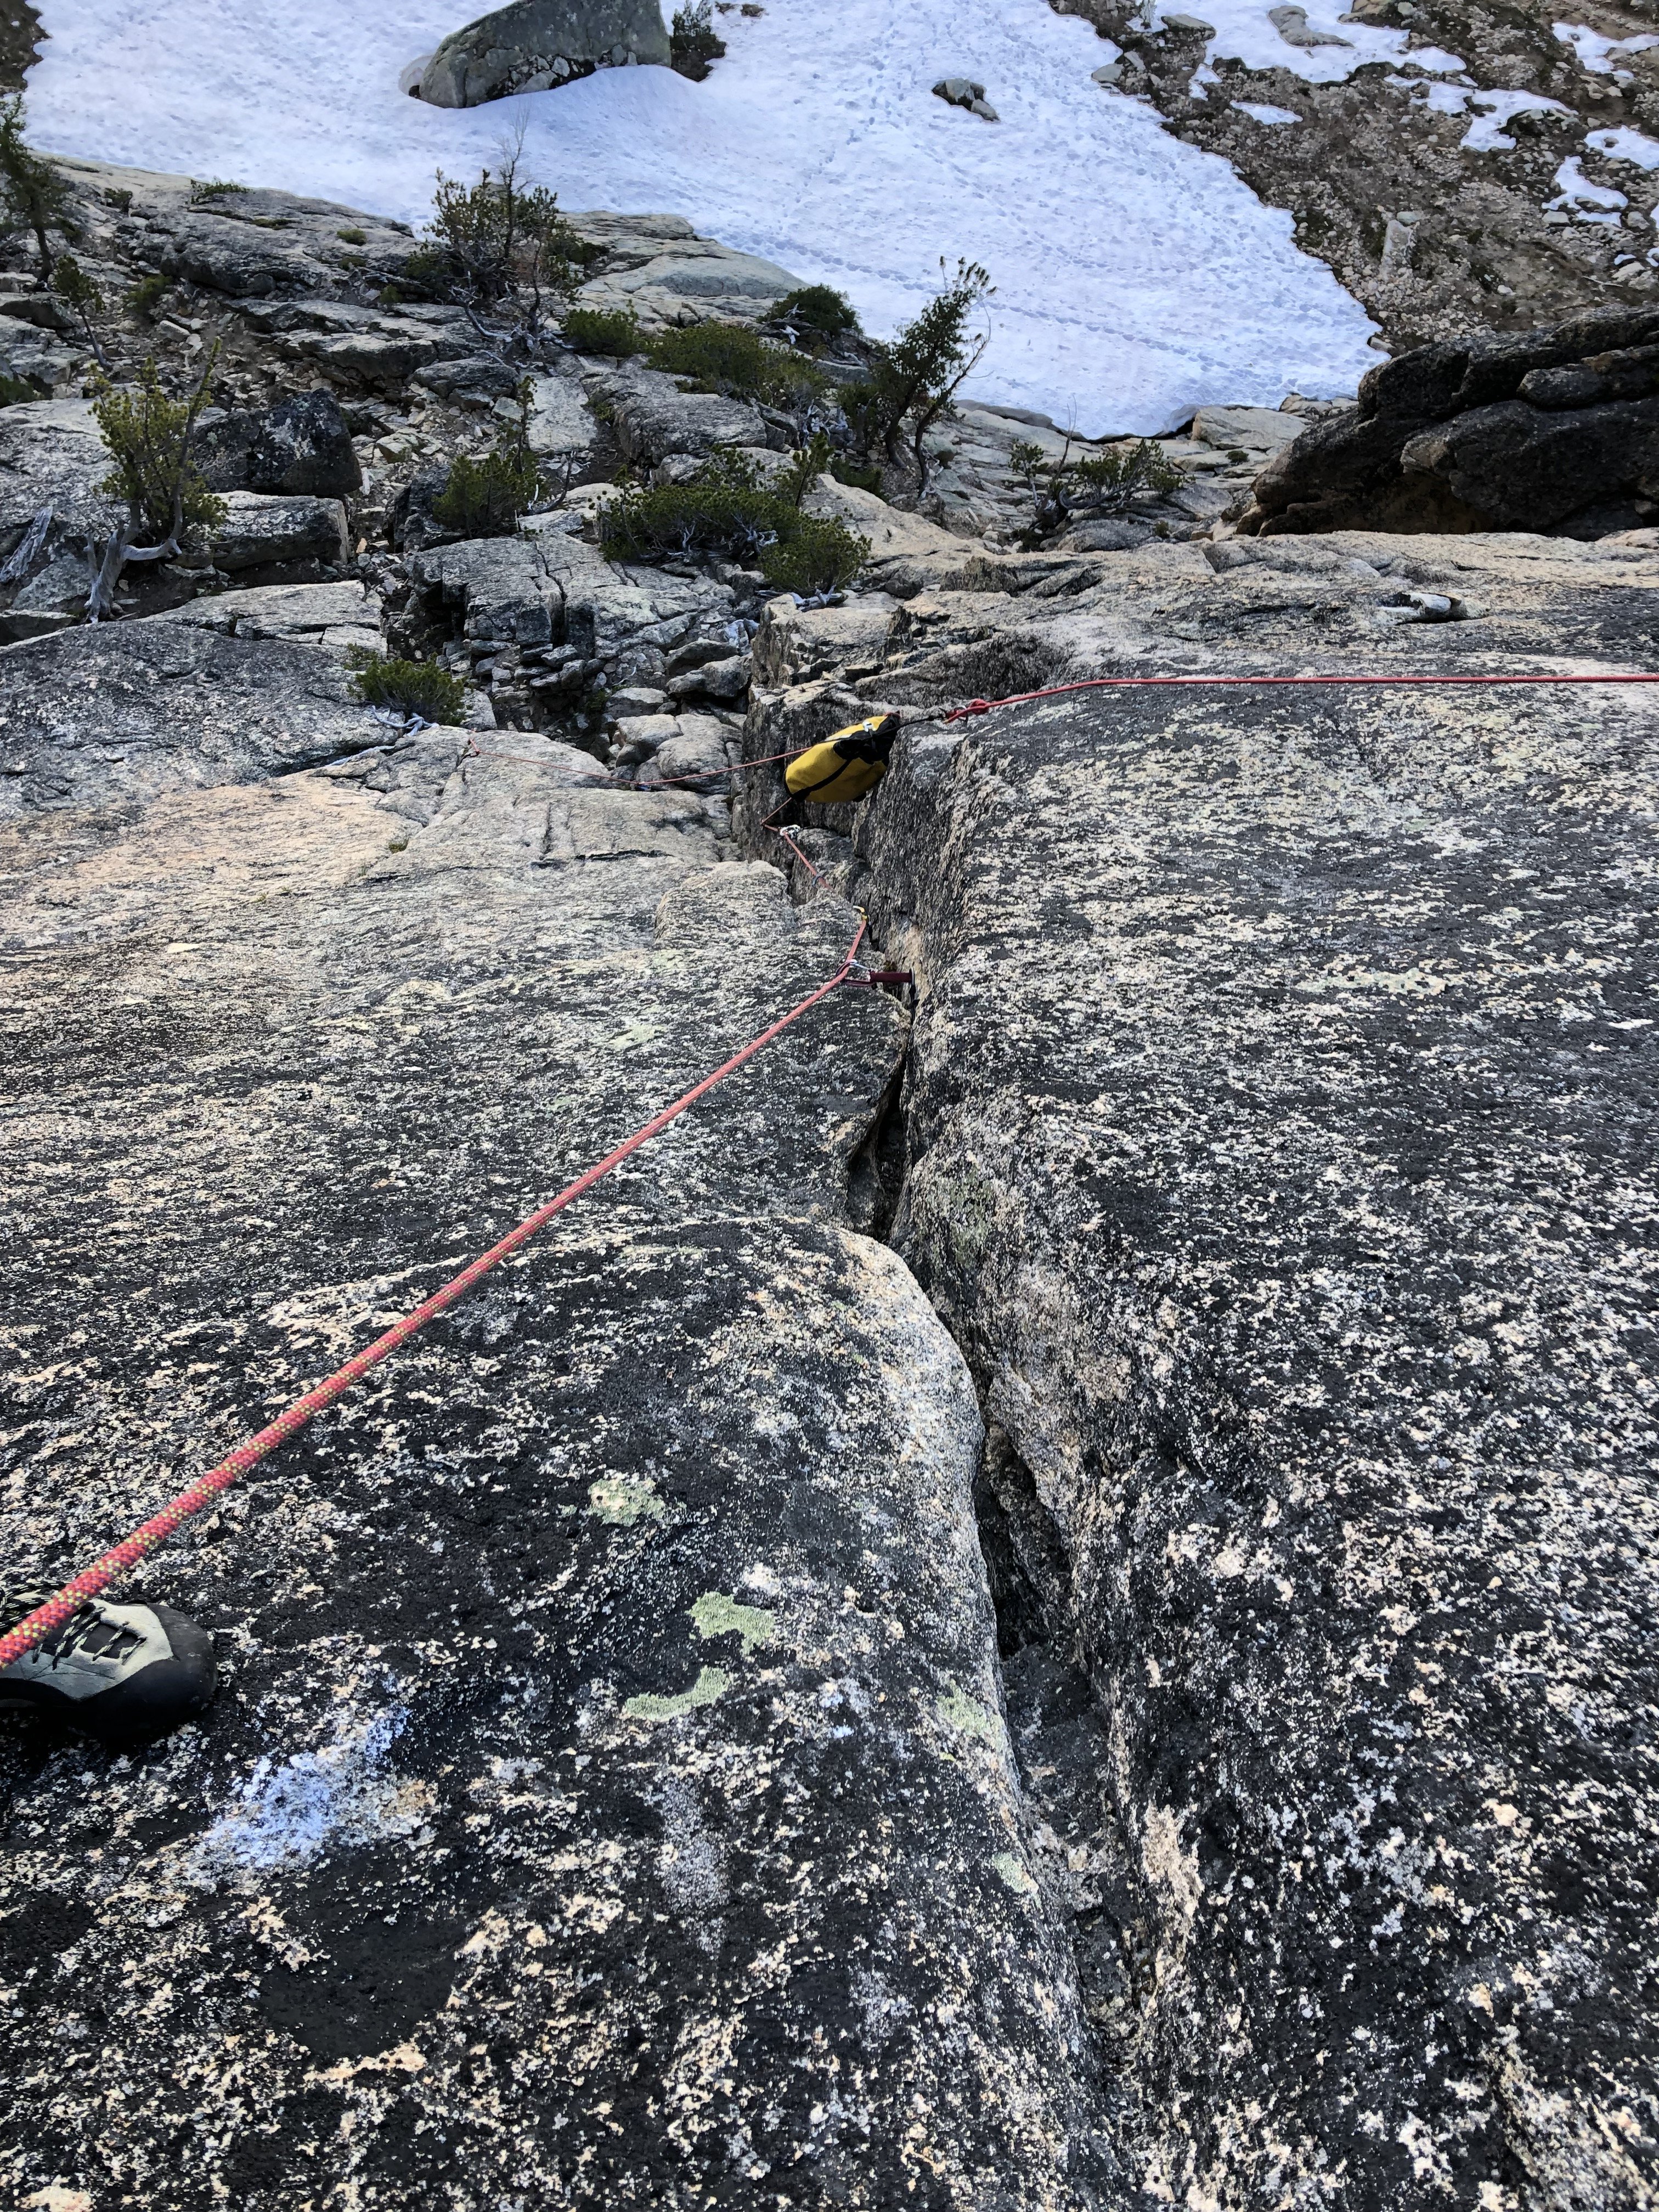
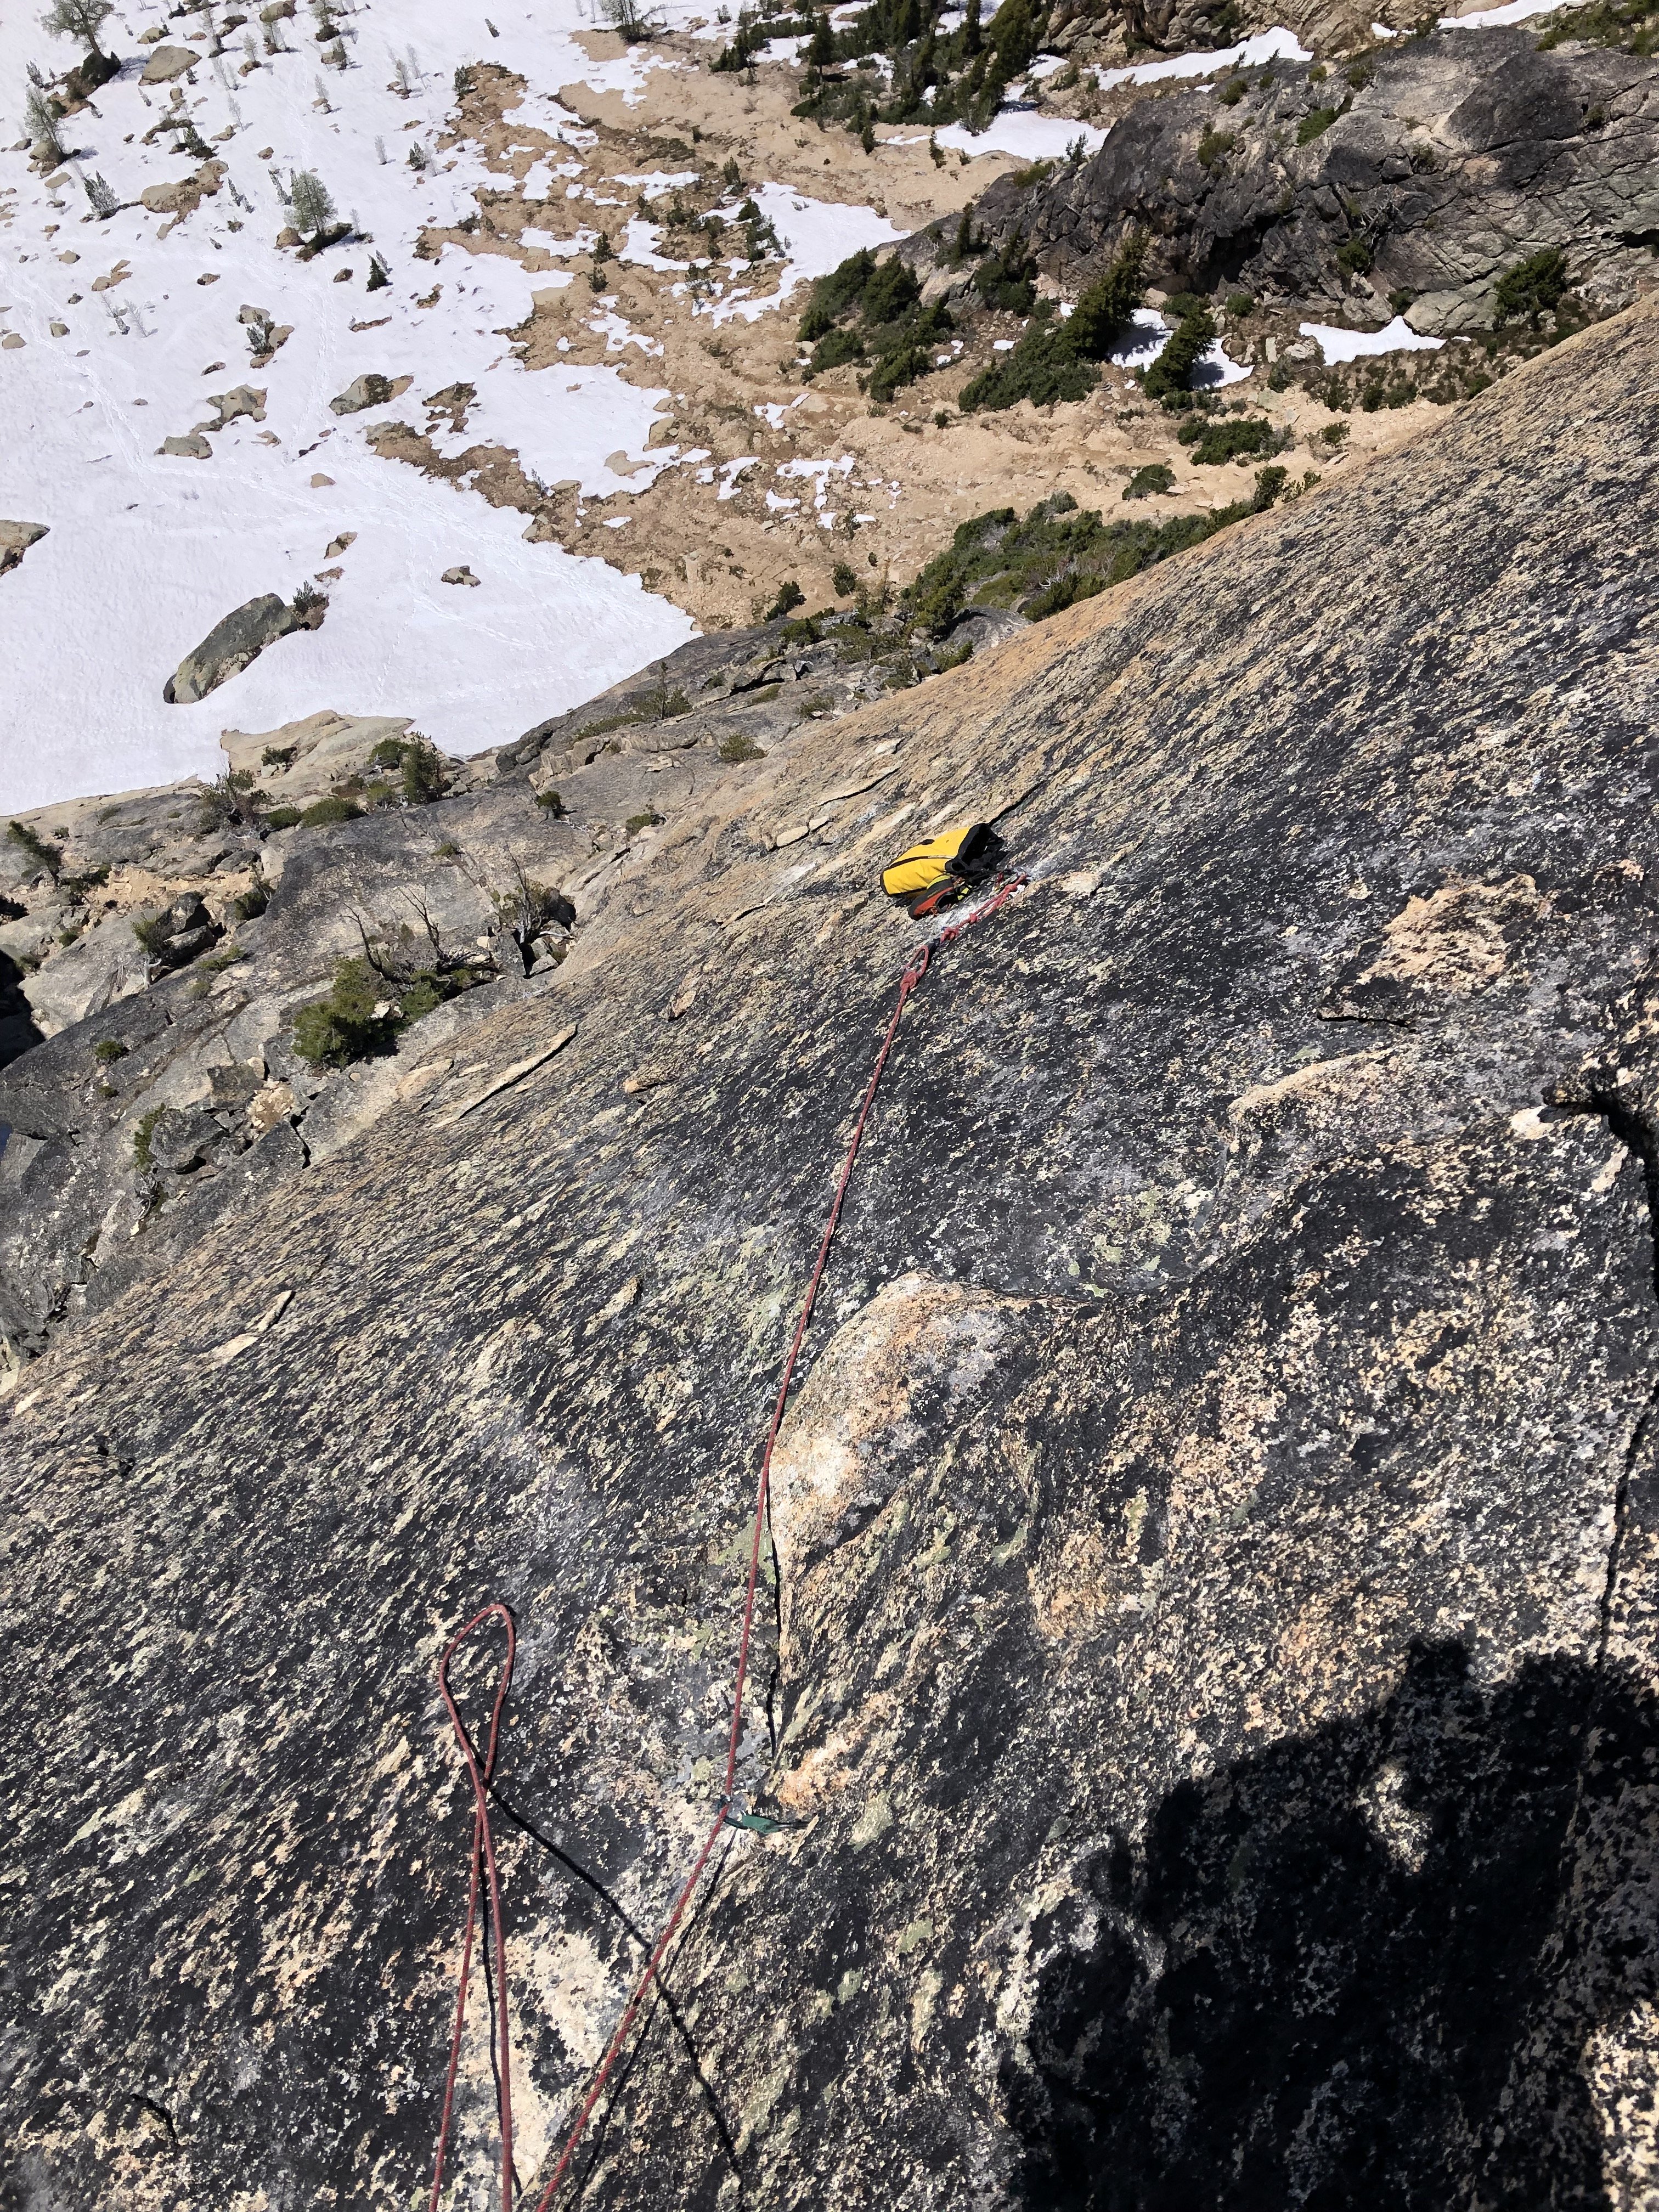
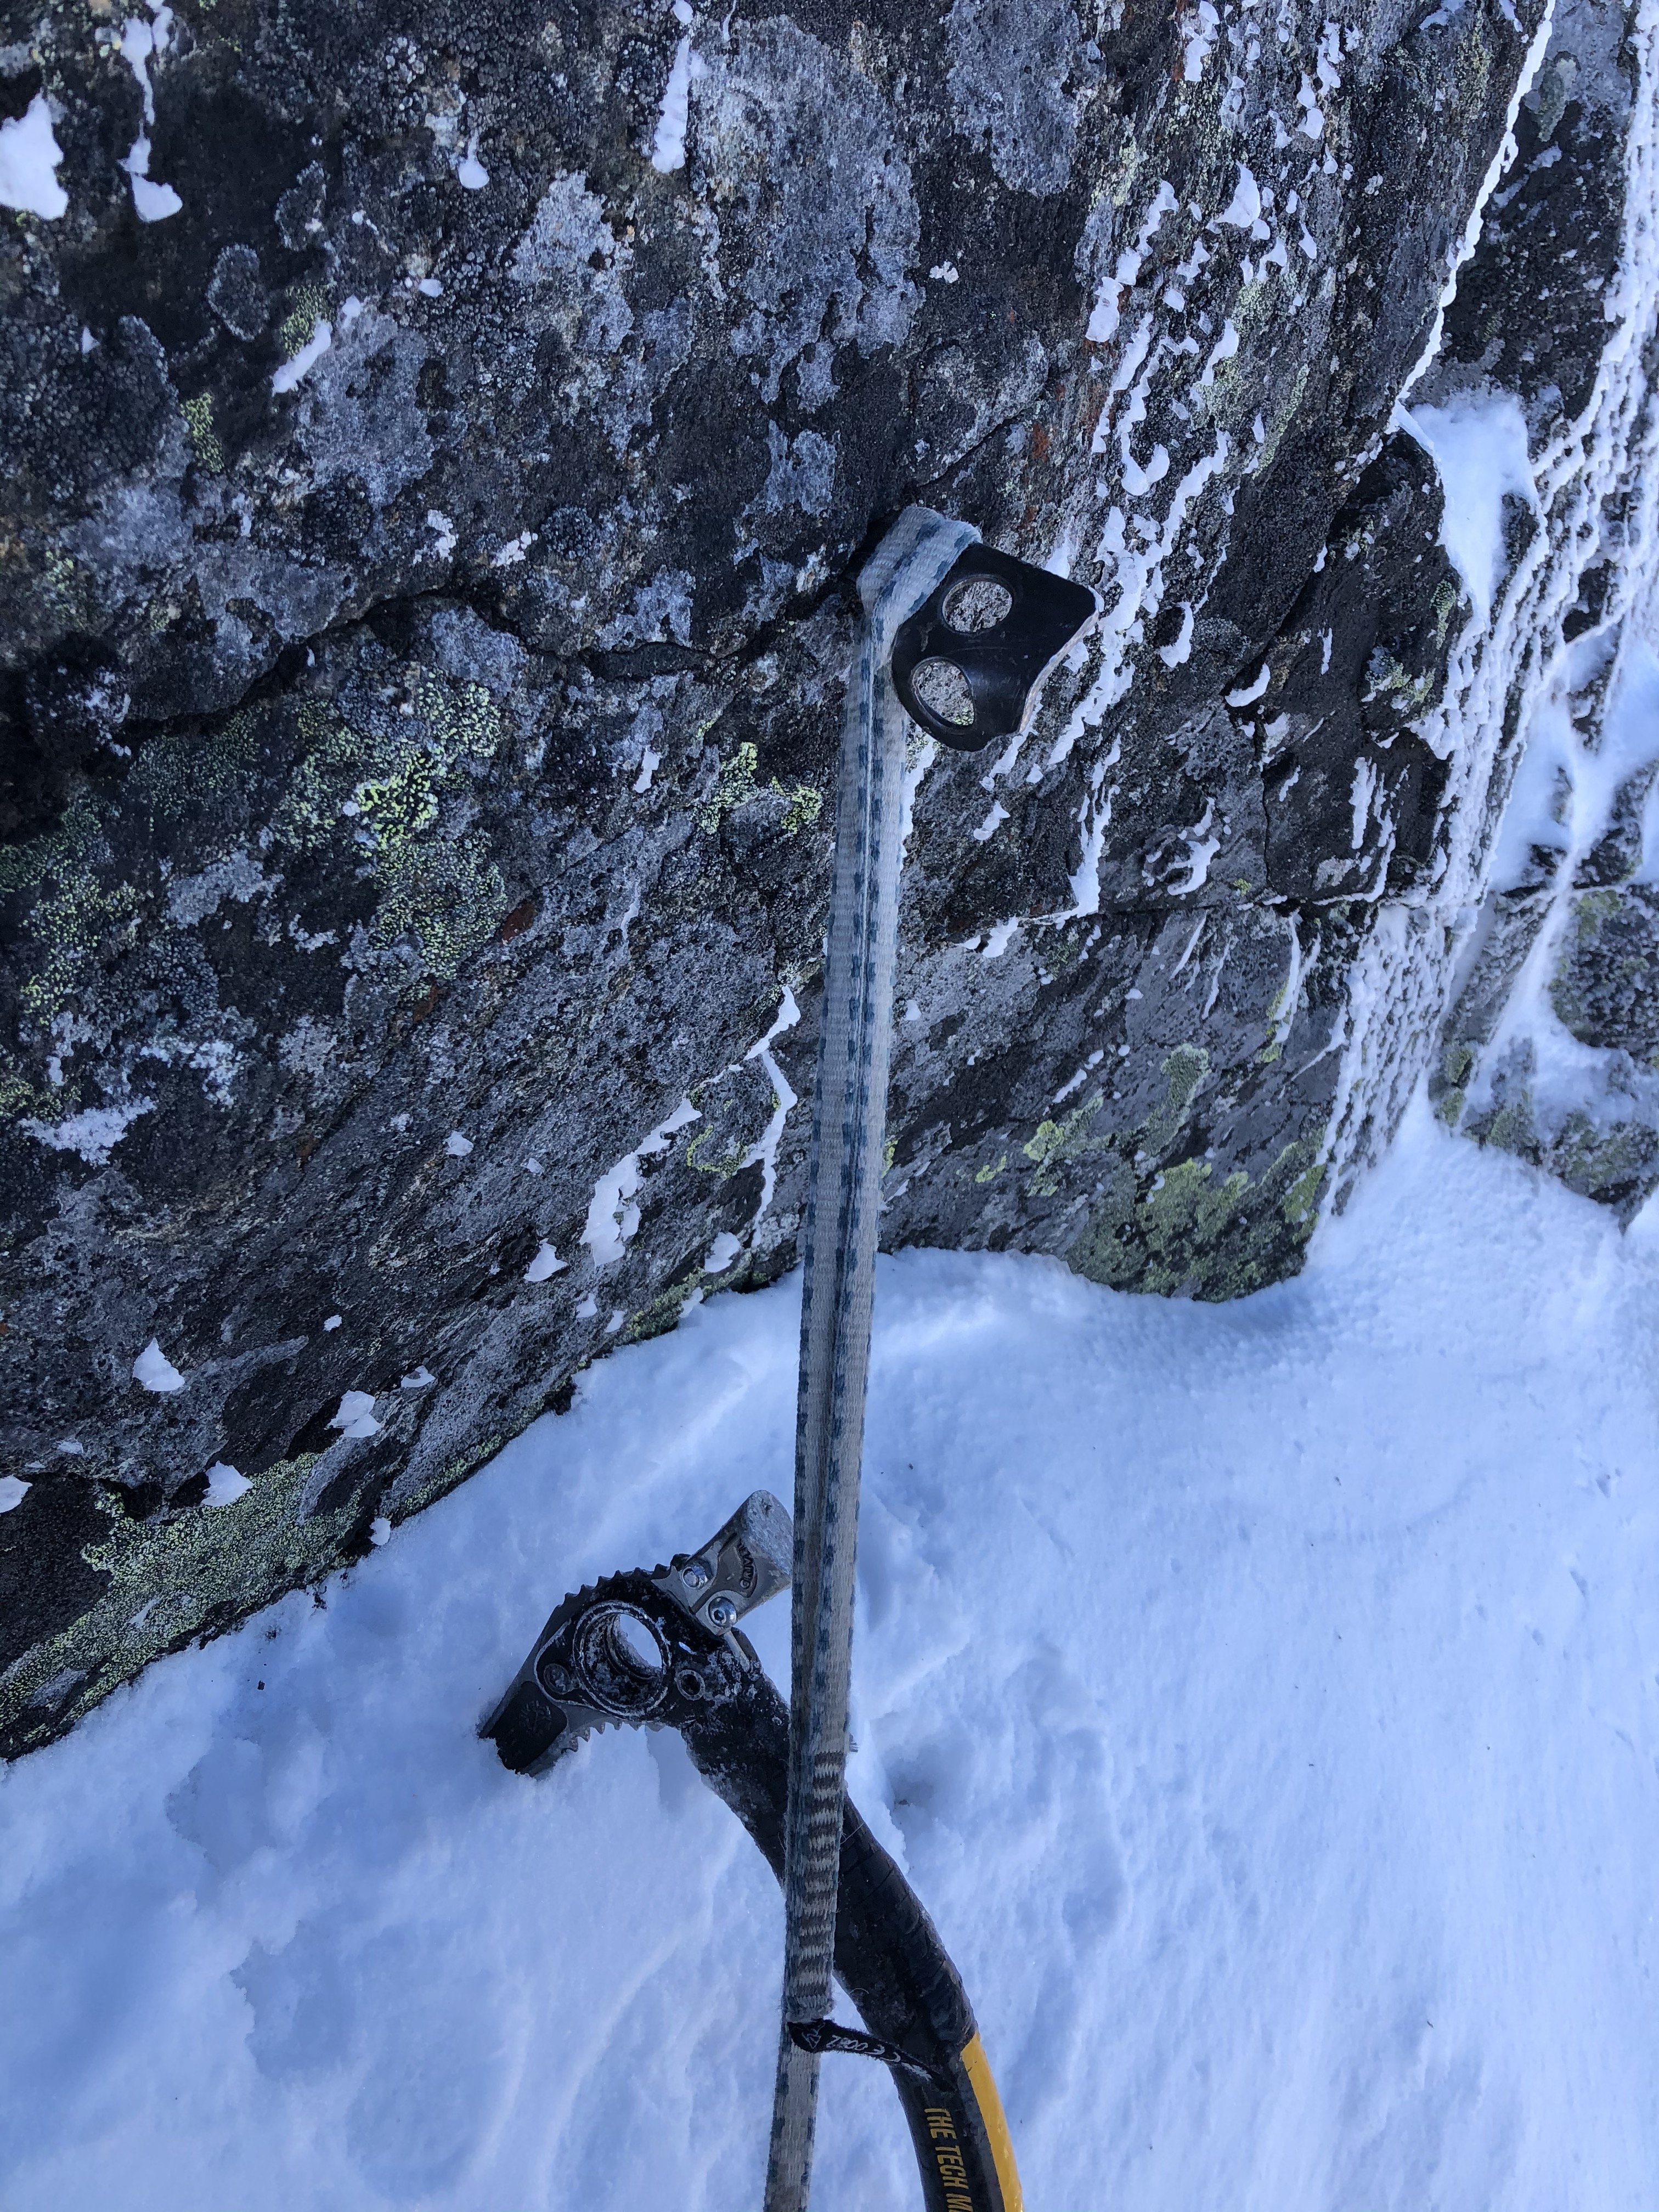
Finally below the headwall, we roped up again. I lead a long somewhat loose and scary pitch of 5.9 slightly to the right of the FA party’s route. It went, but I can’t say I recommend it. Sean then took the lead, and after bailing on a N-side option, led an incredible 55m pitch up and left through splitter corners and up a striking arete feature. This pitch onward is definitely the same route that the FA party took. The last ~70m pitch took me up a very poorly protected arete composed of brick sized loose blocks up onto the ridge. As Blake says, “no lifeguard on duty here”.
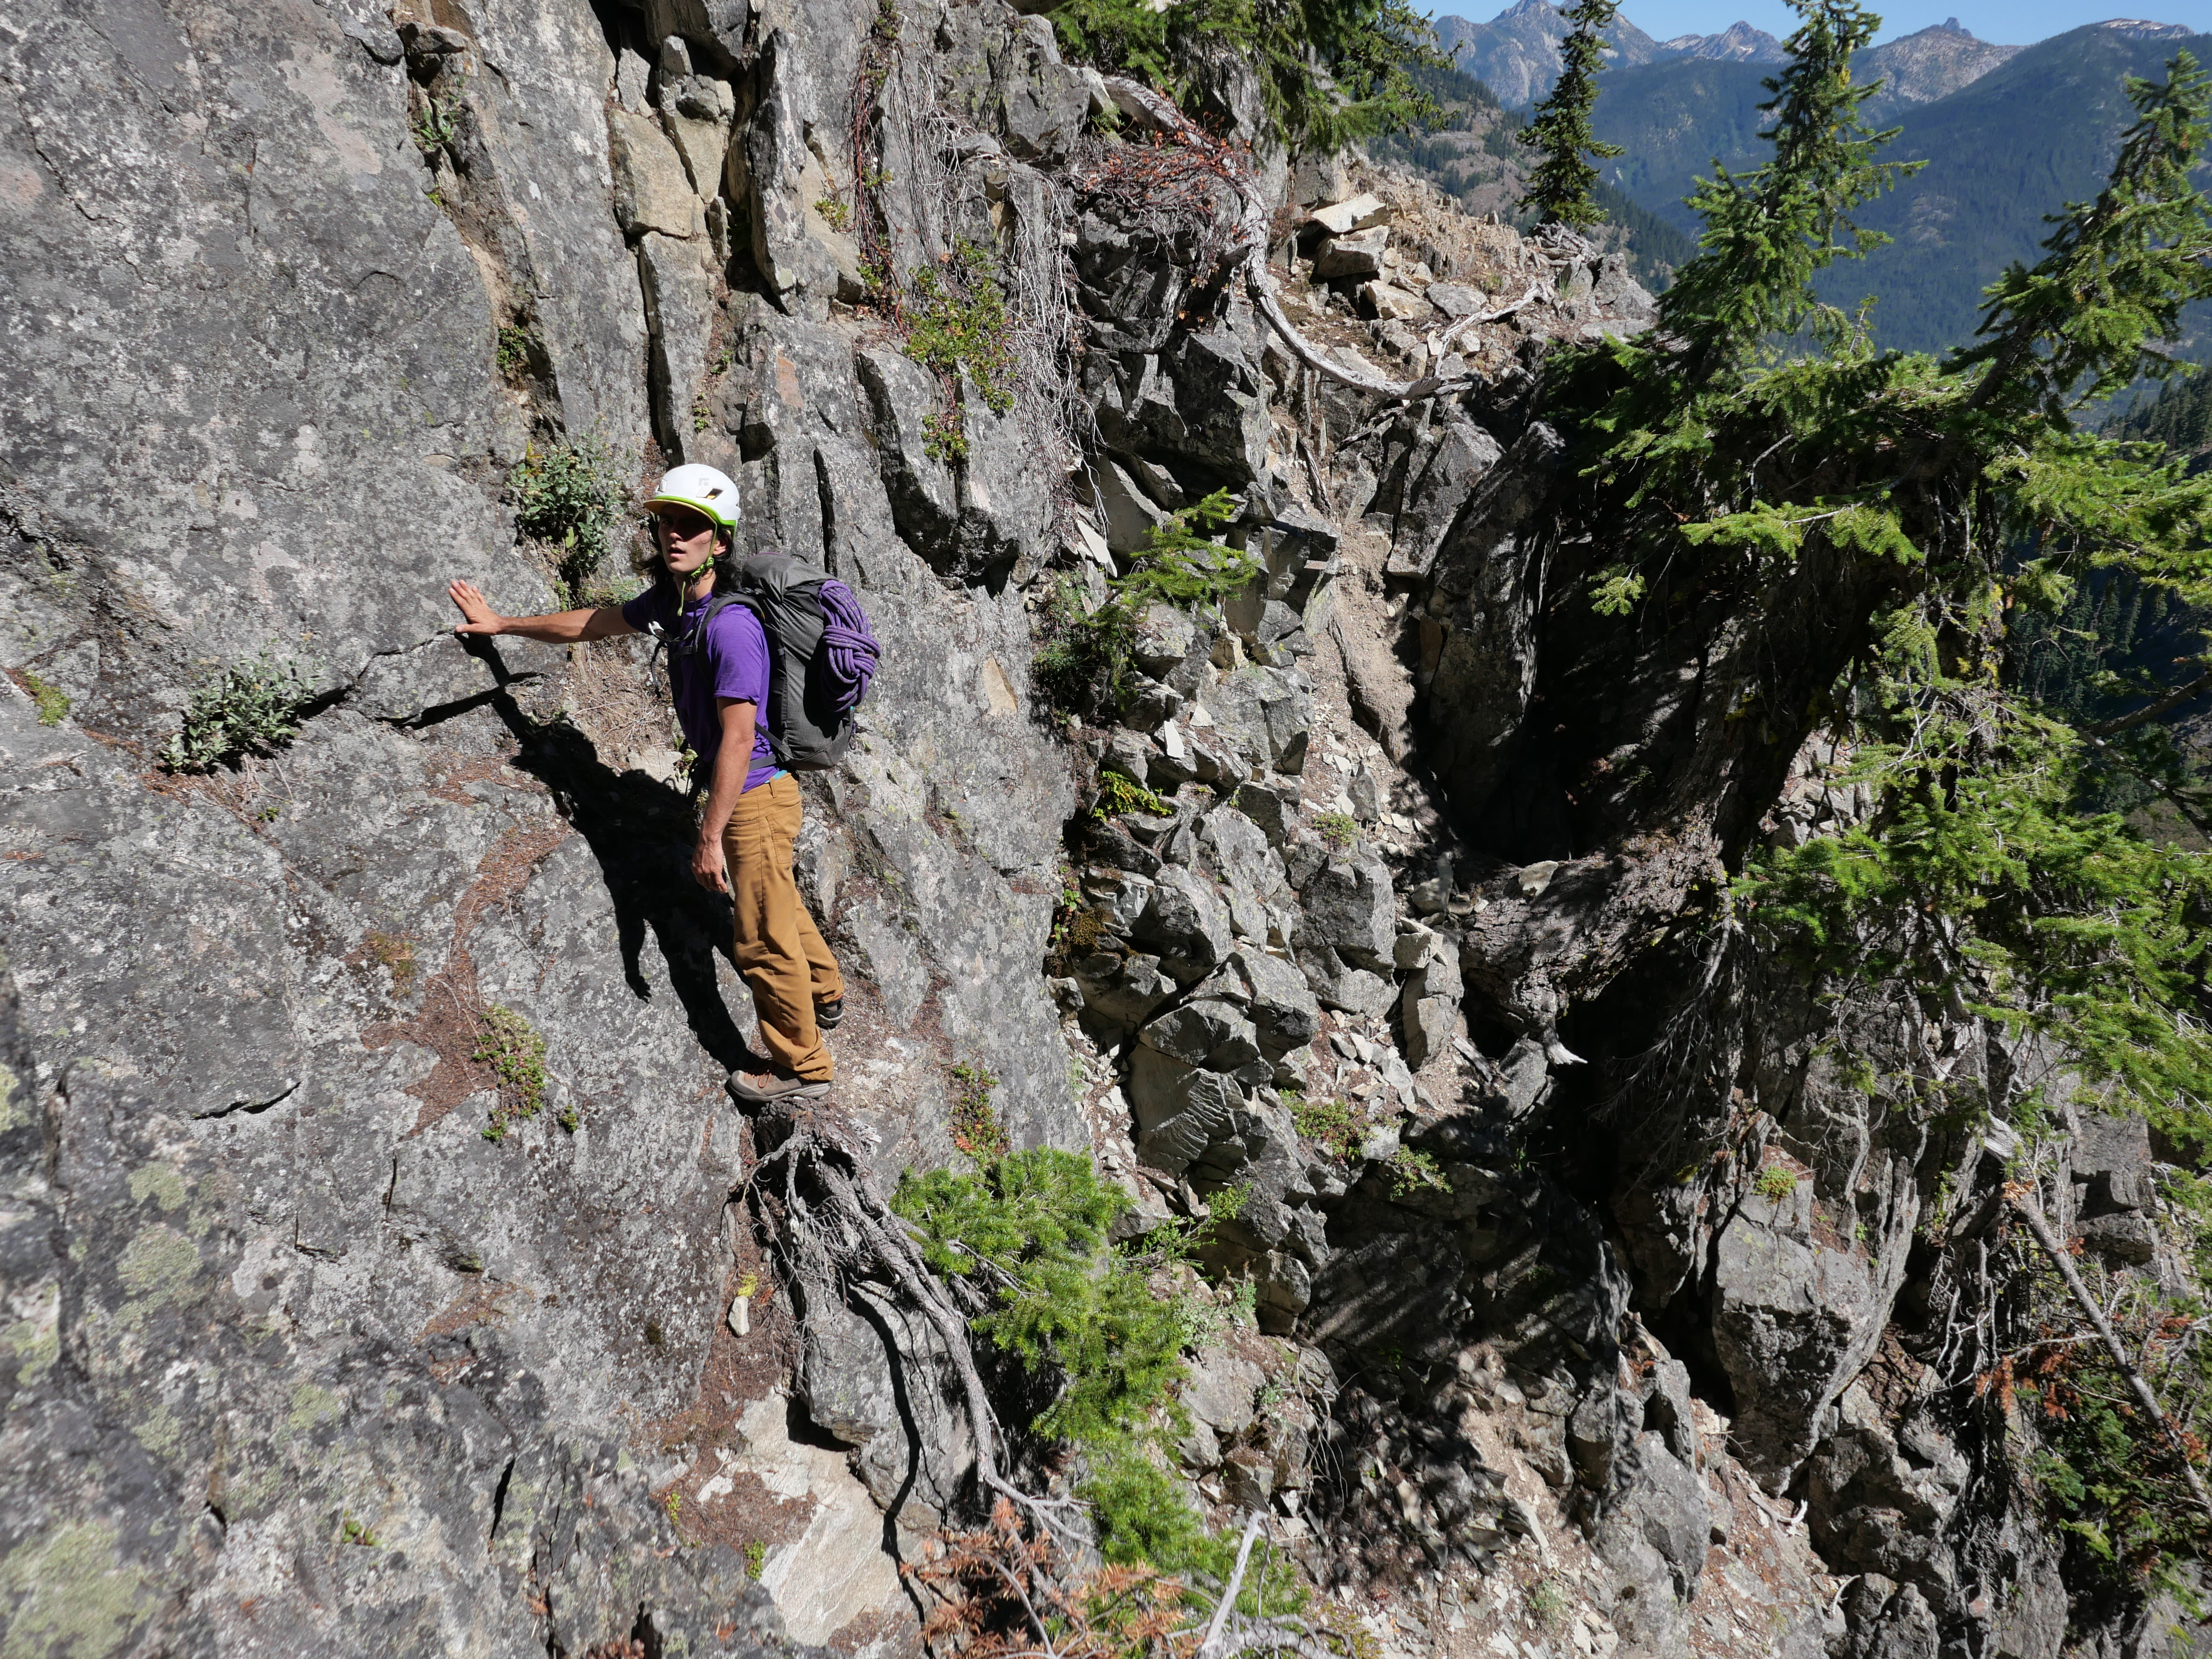
Sean questing the wrong way.

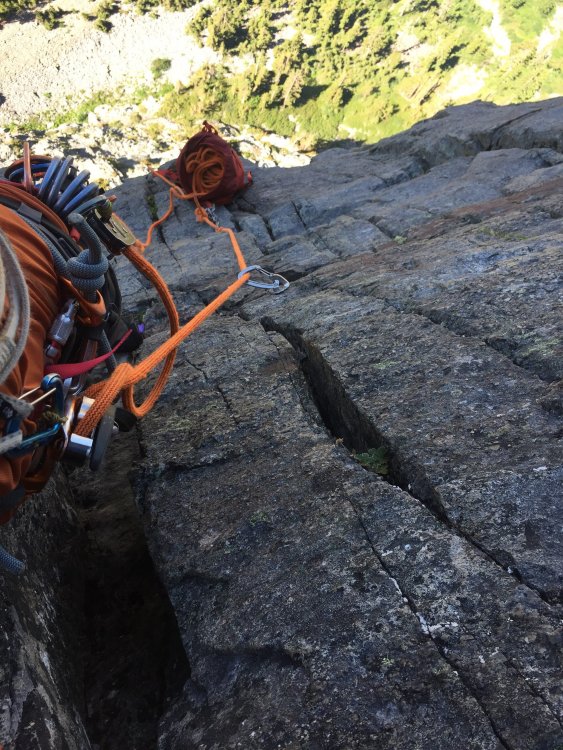
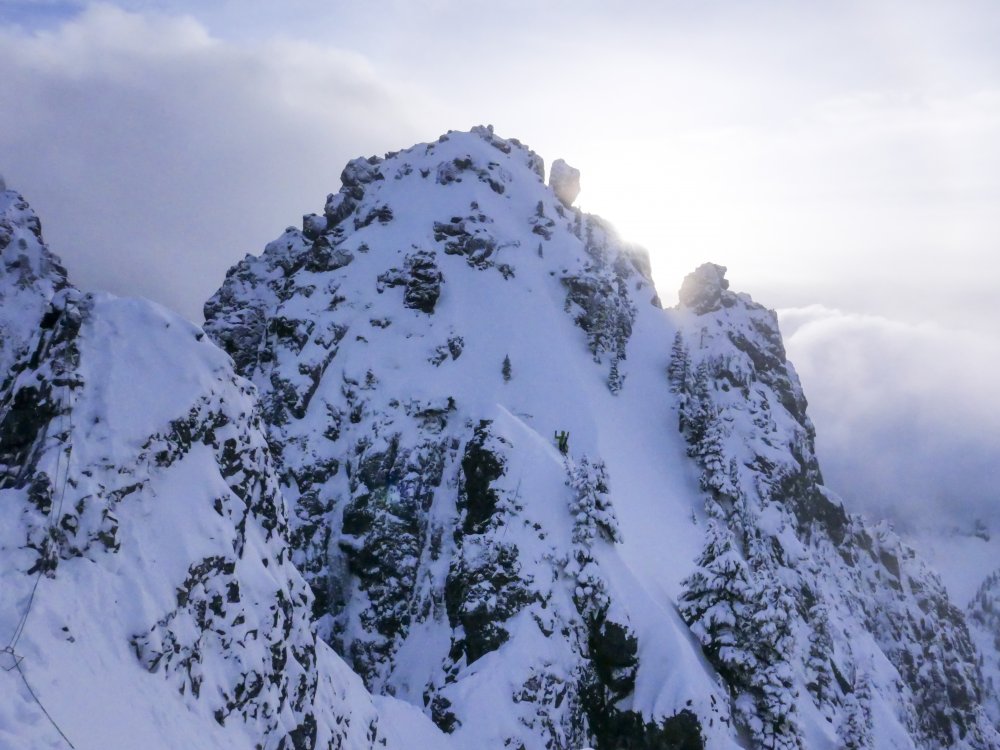
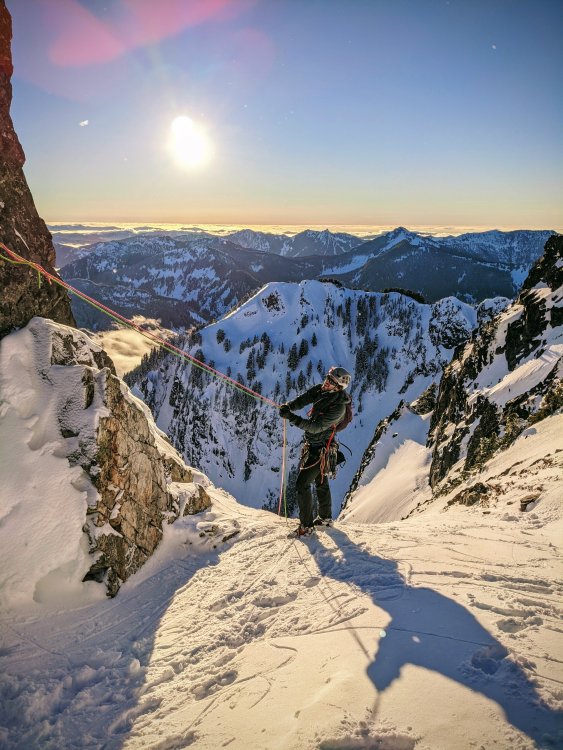
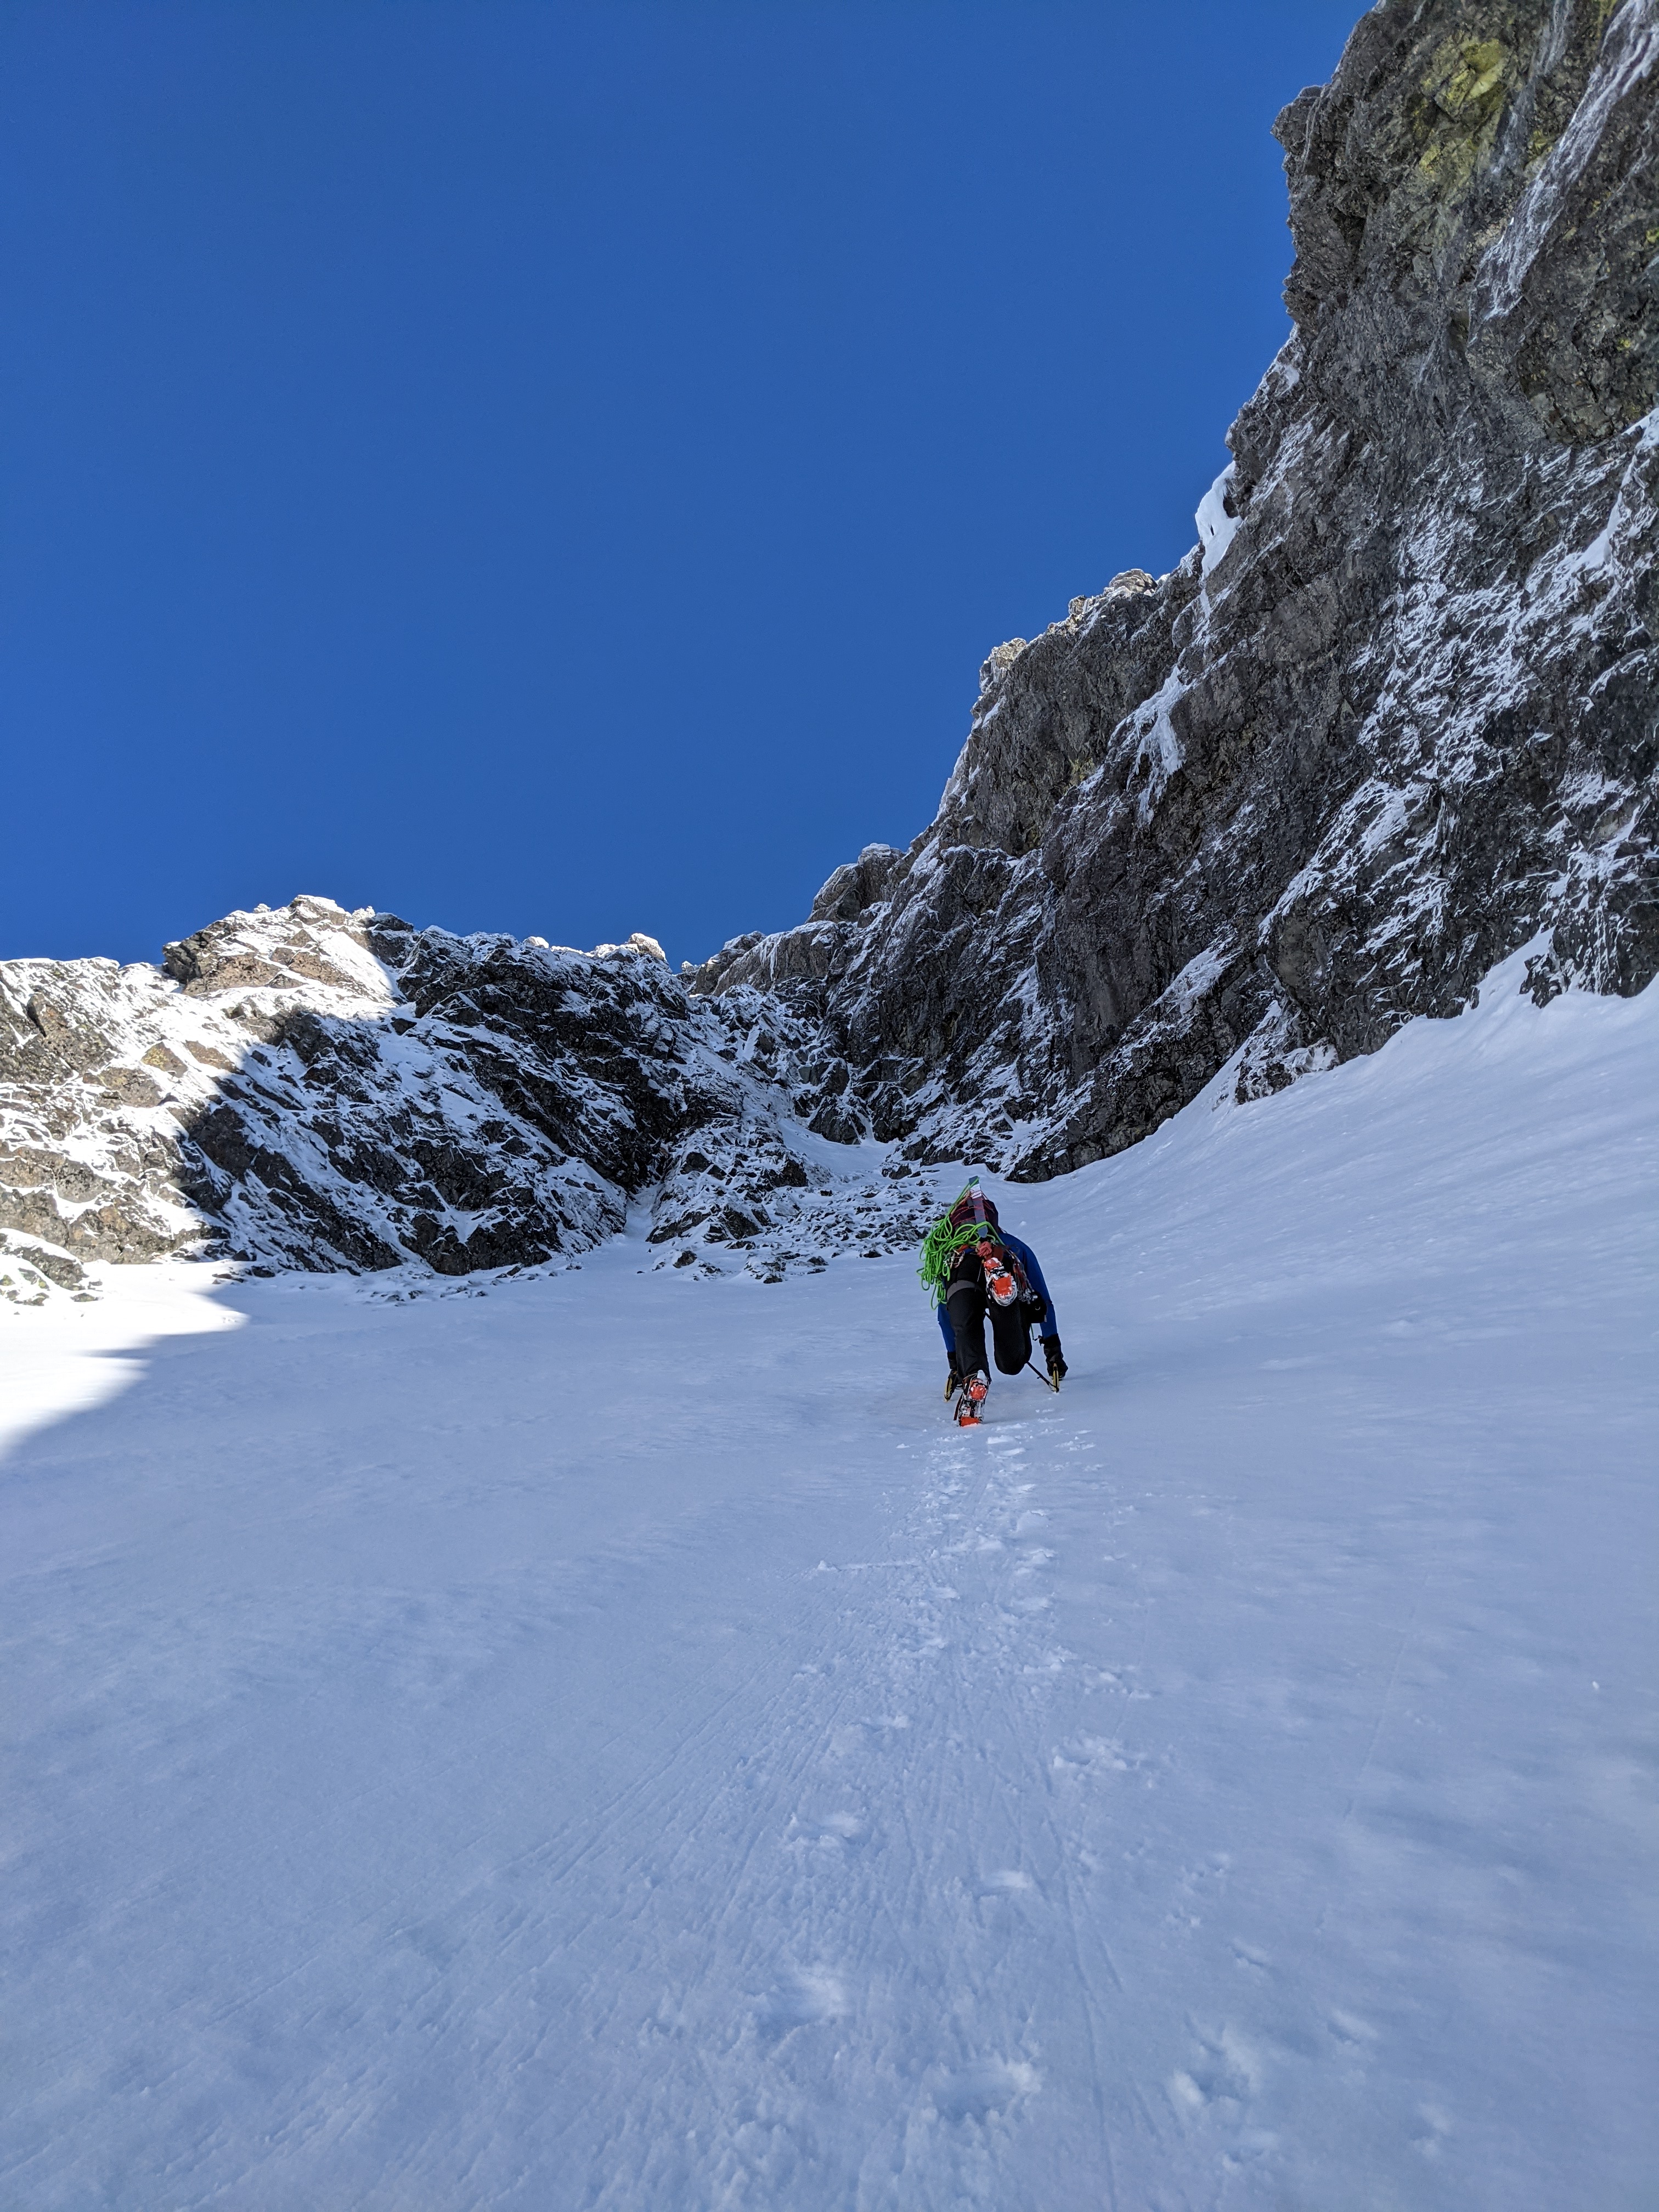
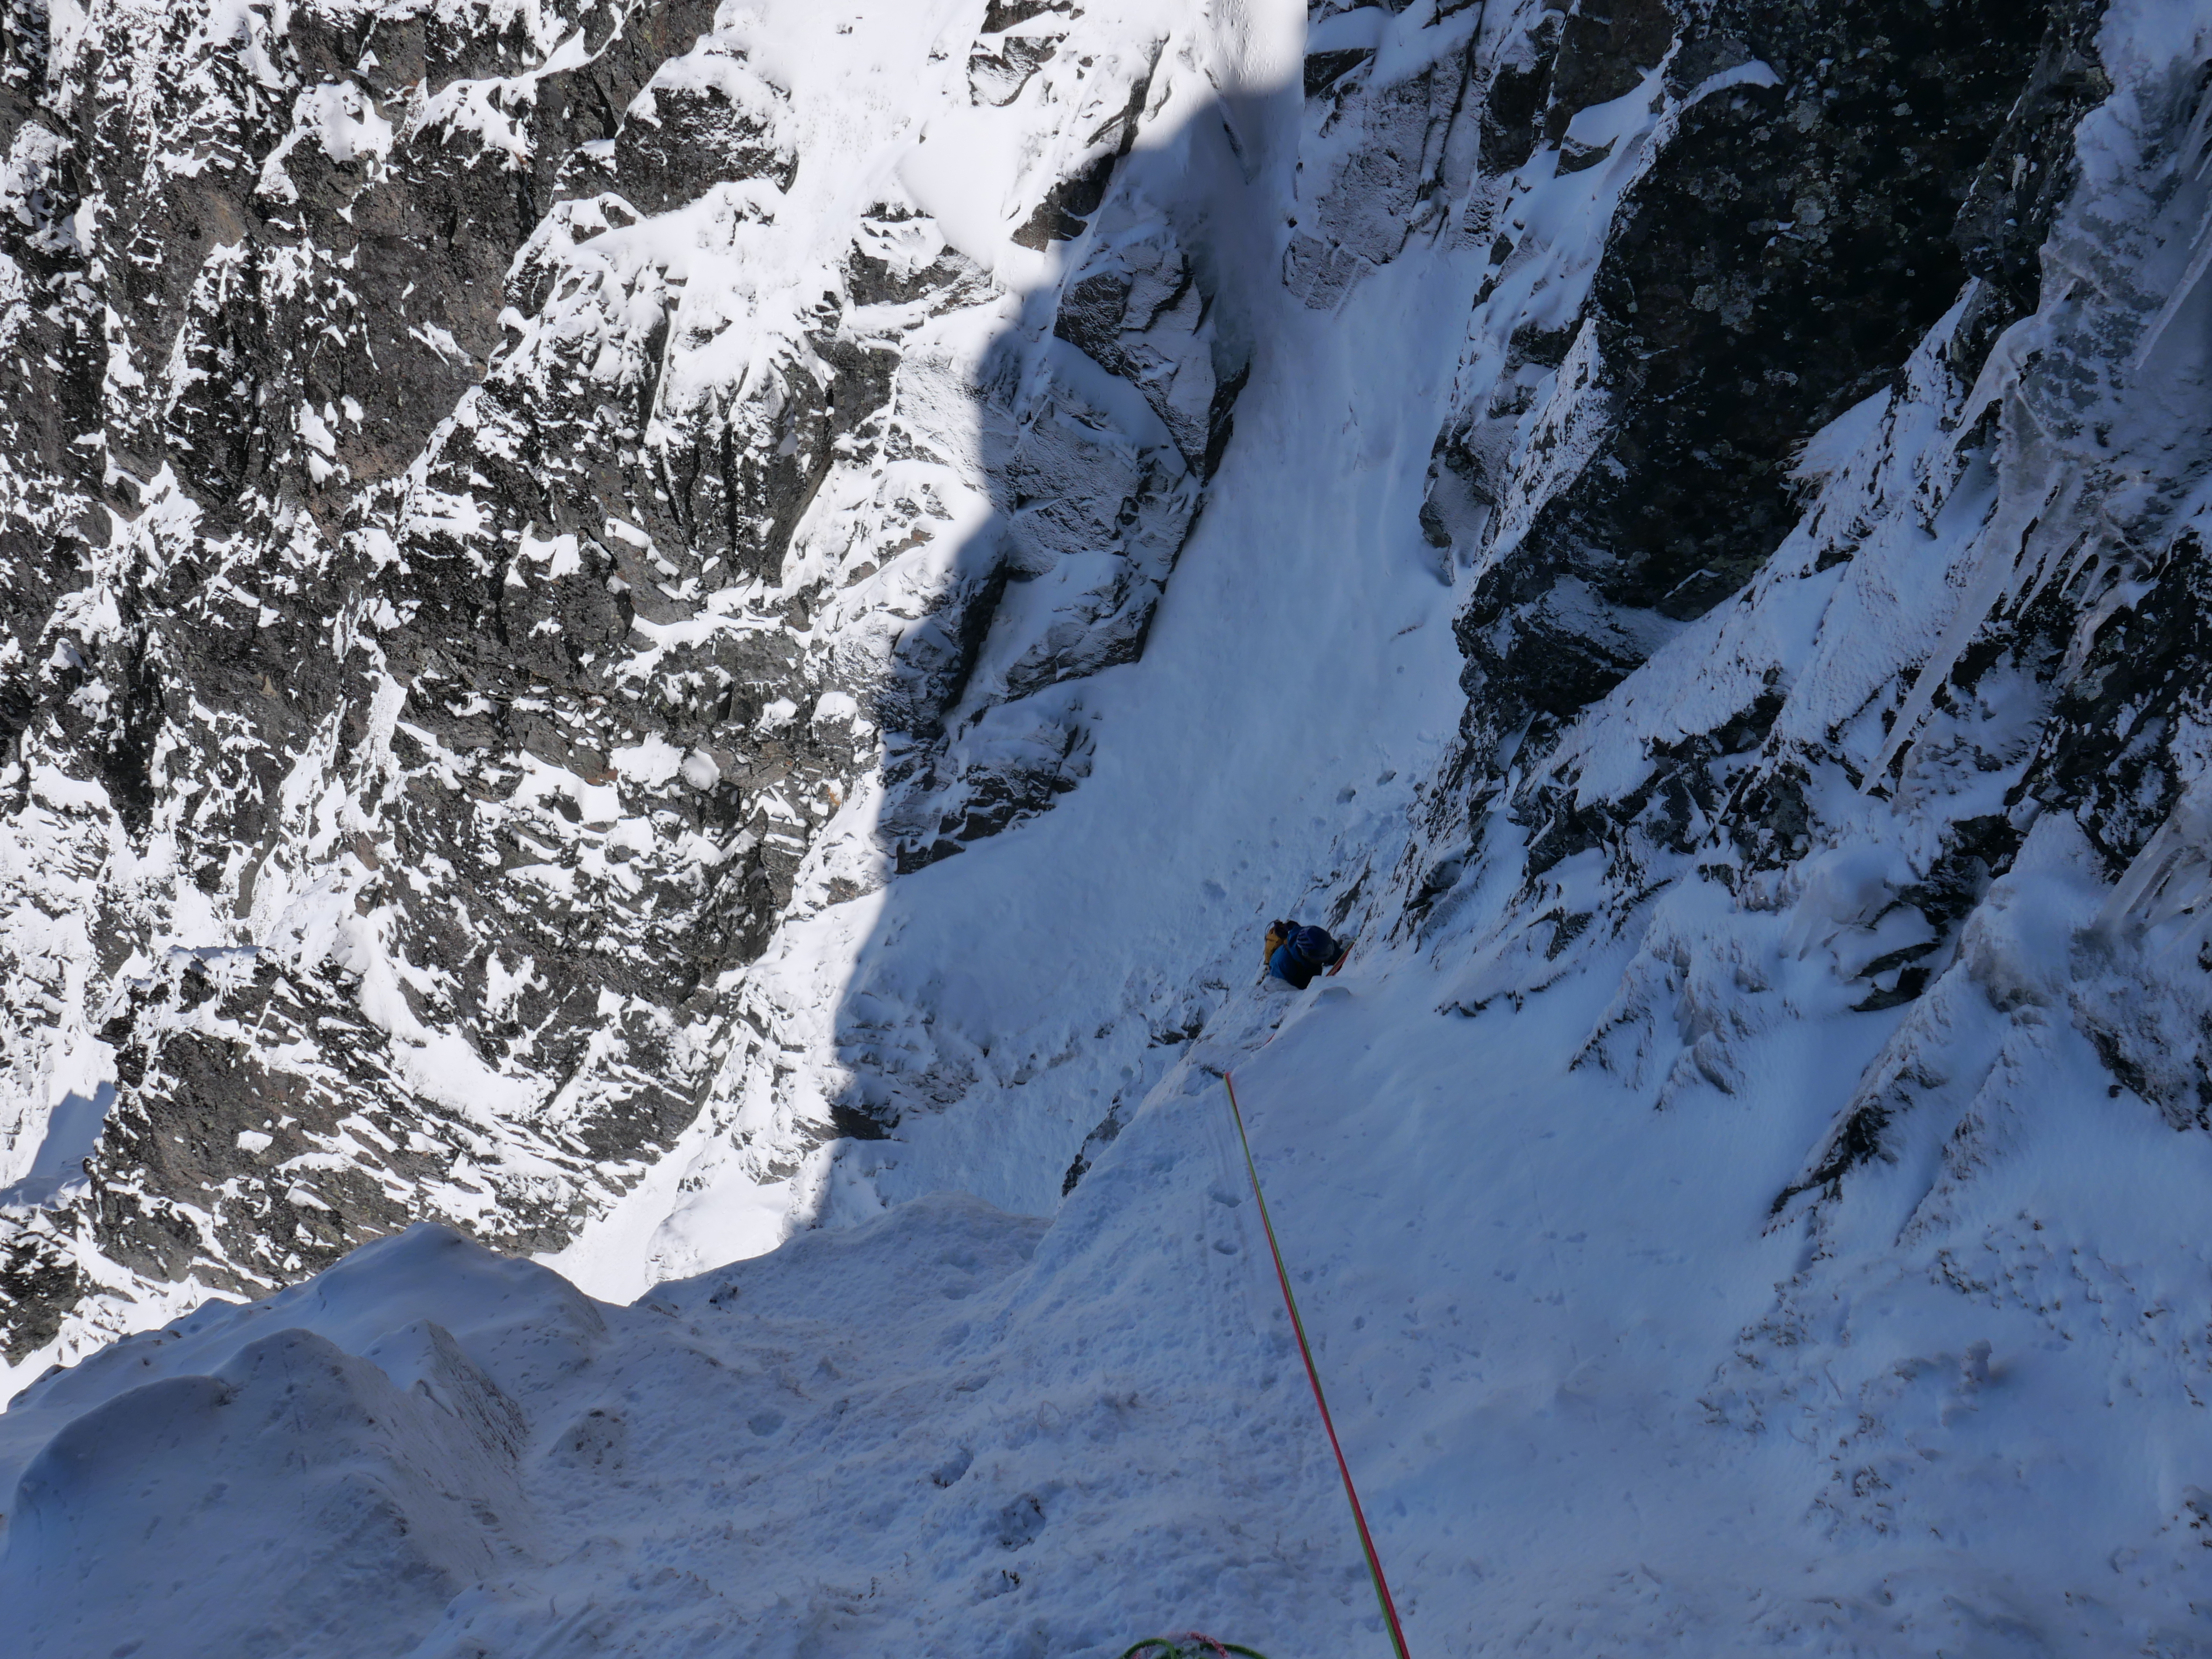
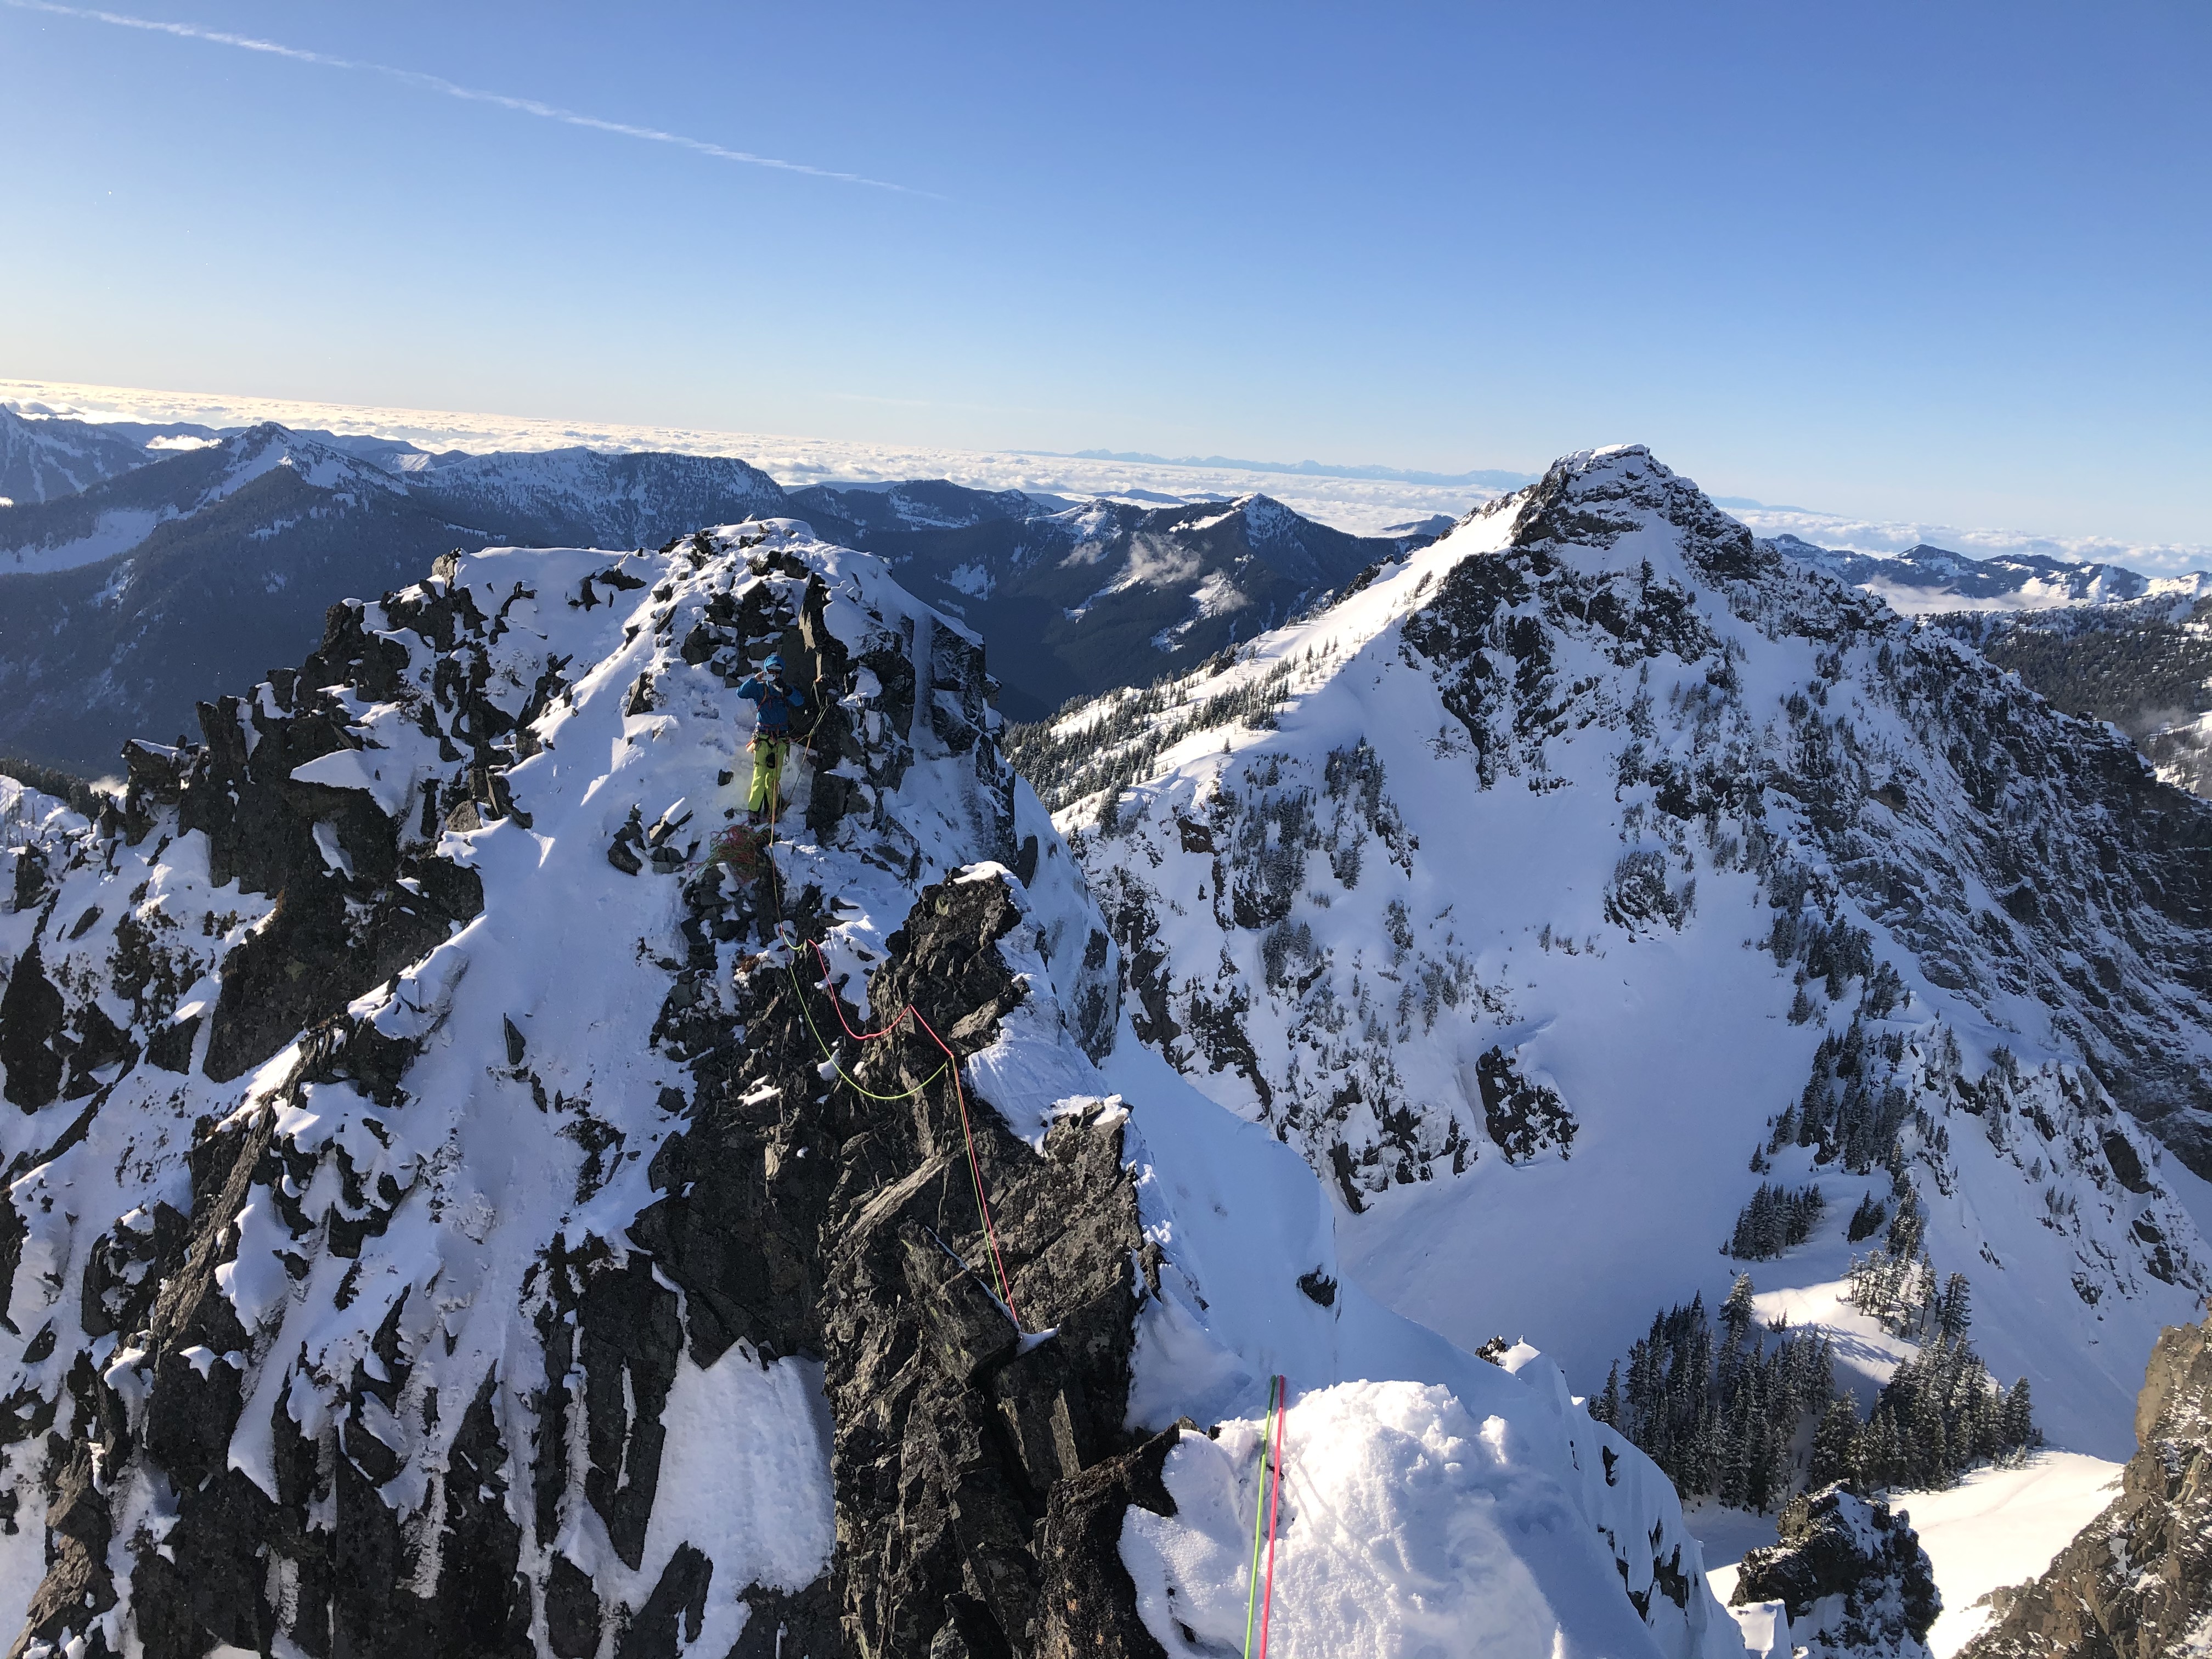
Now with the biggest obstacle behind us, we basked in the sun before unroping and scrambling down to the snow patch, and top of the ski line. Things had gone very smoothly up to this point, so we took our time hanging out and brewing up. Sitting there looking at the steep grey ice, and rotten gendarmes was making me nervous. We only had one chintzy light axe between the two of us and no crampons. If there wasn’t a way around, we would be in a pretty bad spot. As we scampered further up the ridge, I theorized how we could dead-man some rocks to rap down the snow and swing over to the other side. Once over the ridge, I was relieved to find a casual (albeit shitty) scree slope taking us around the back side.
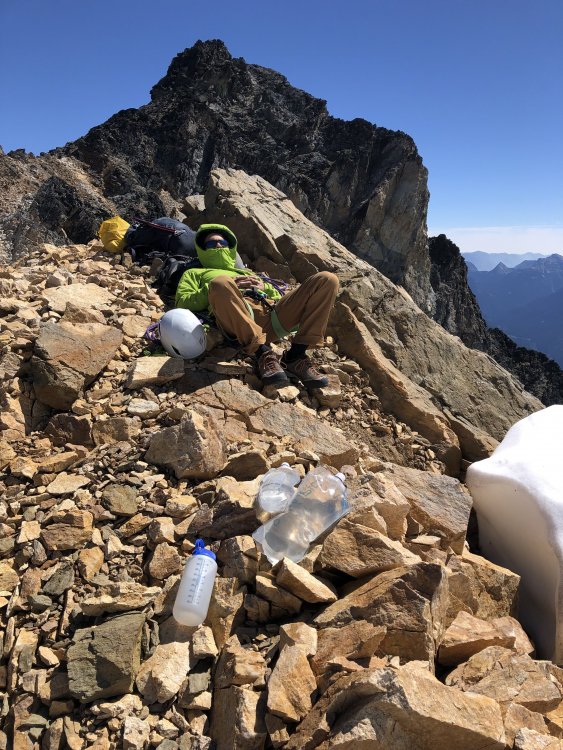
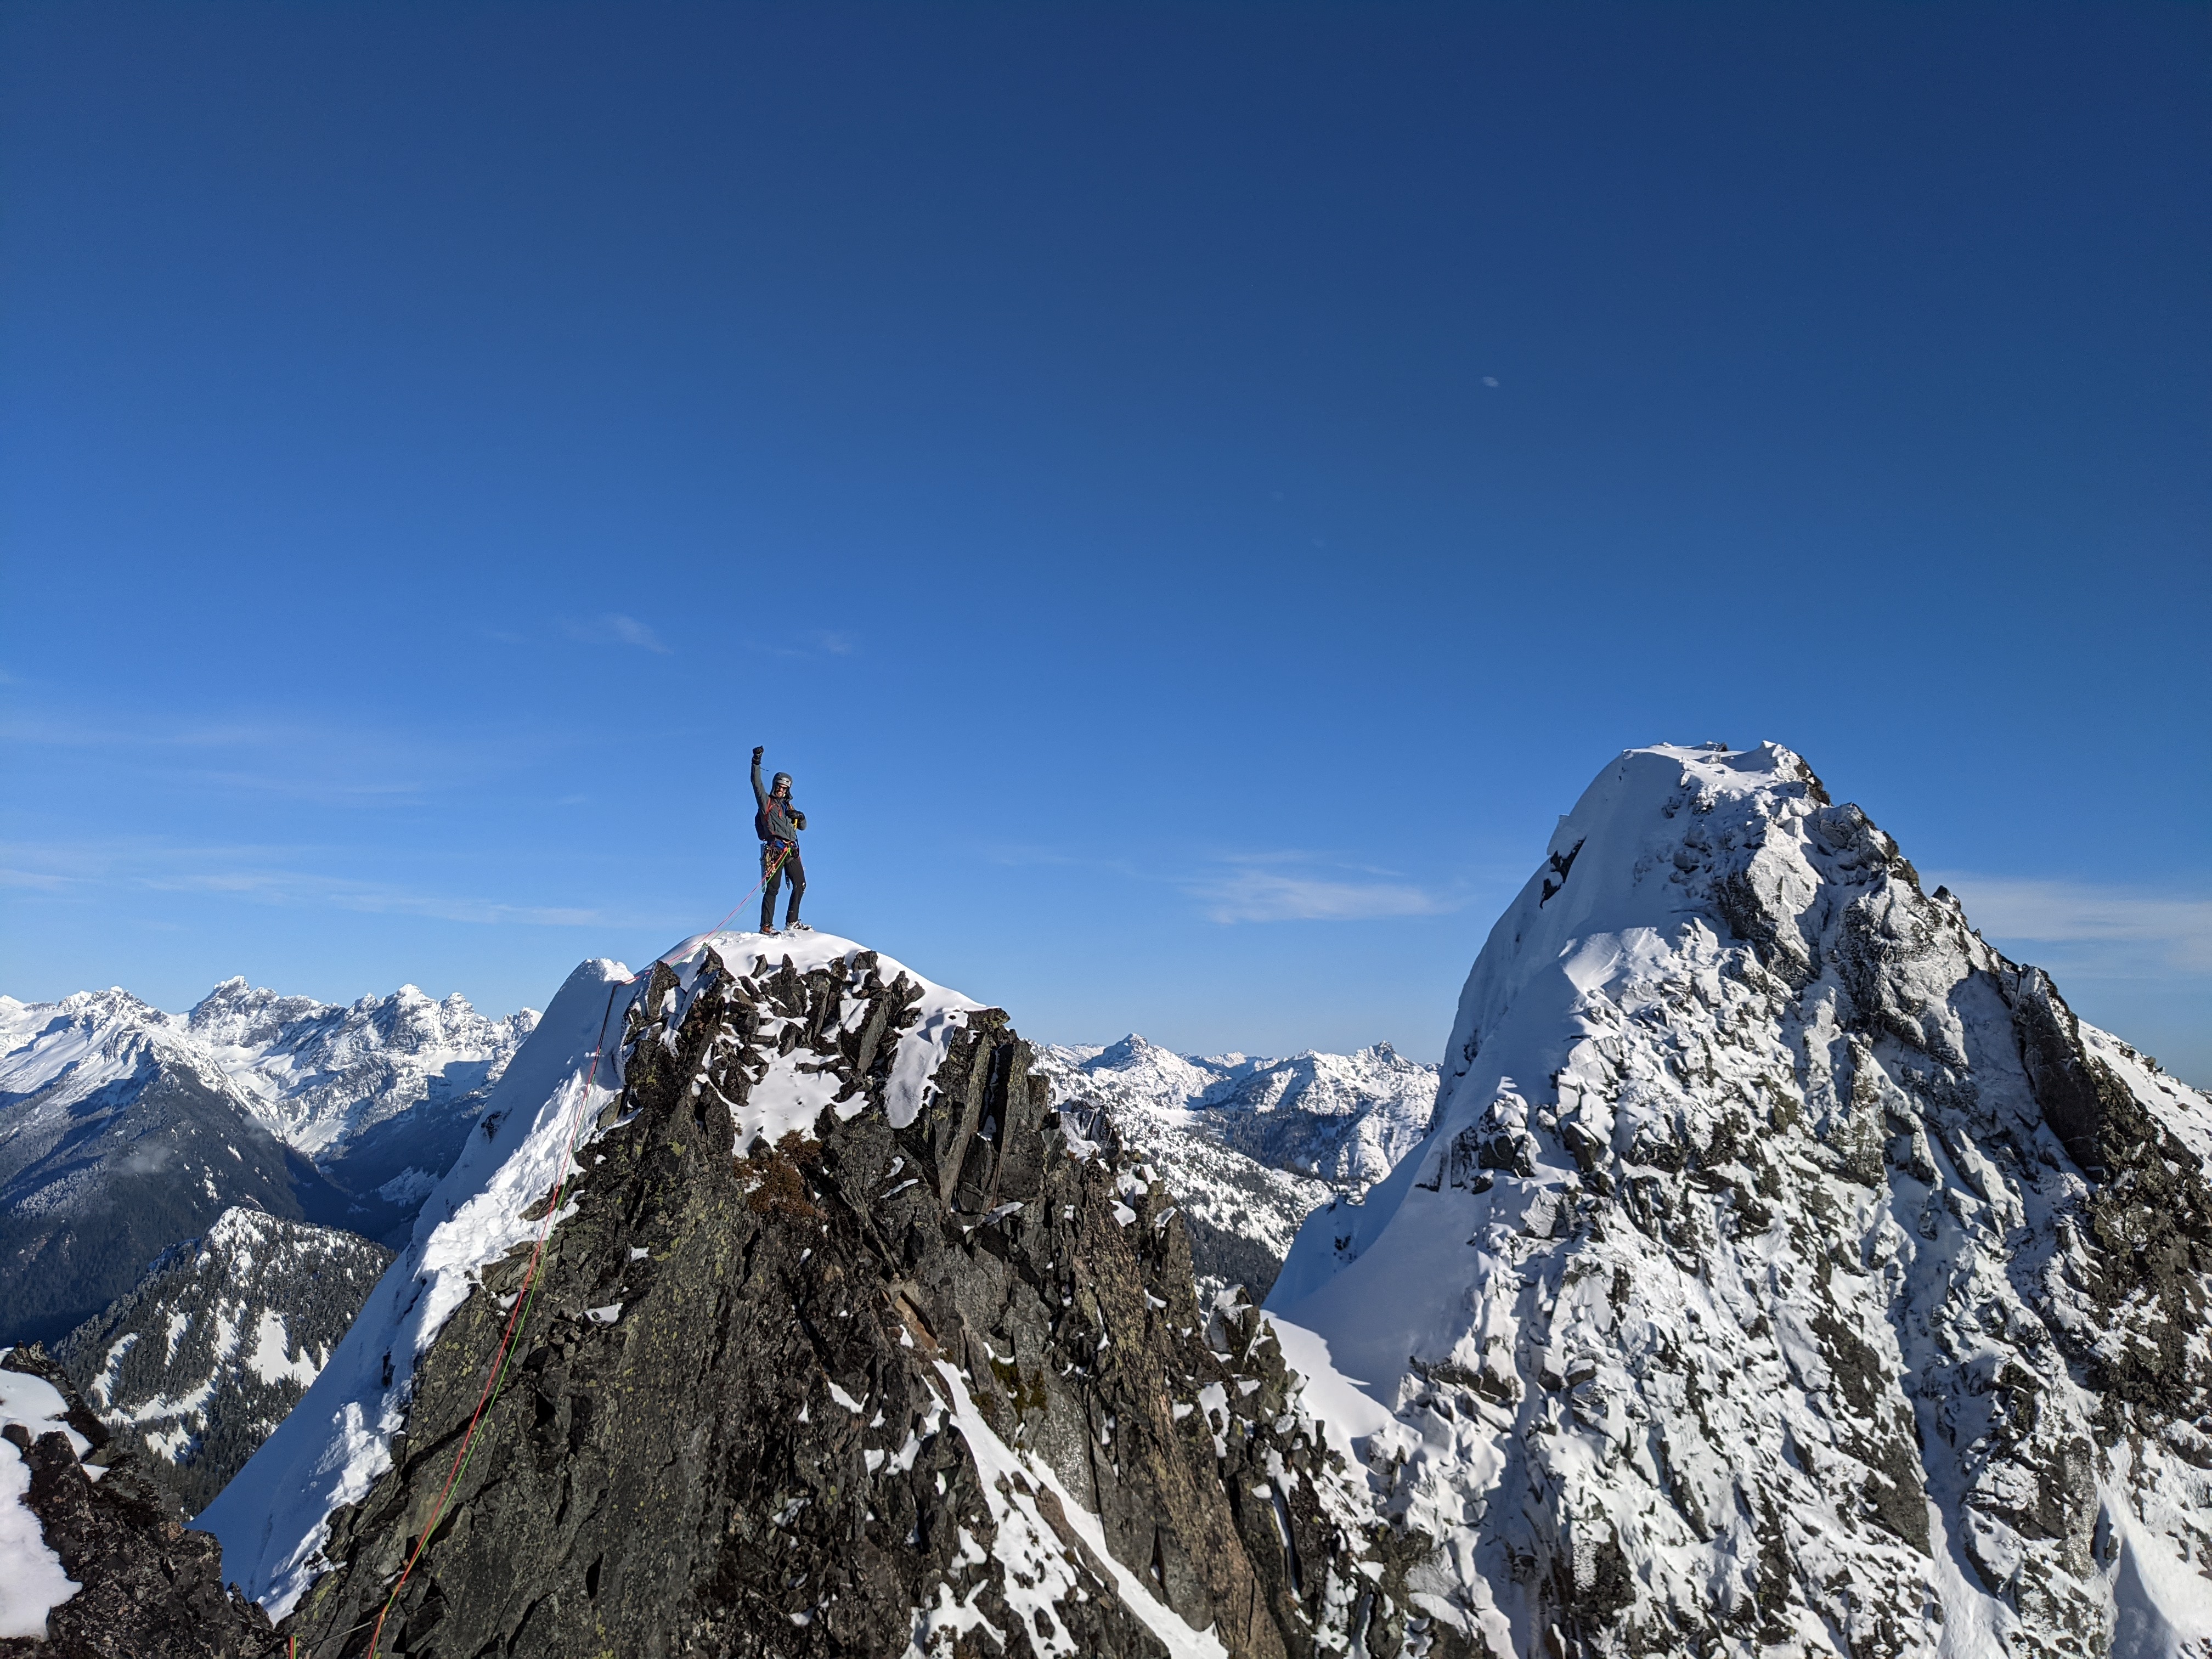
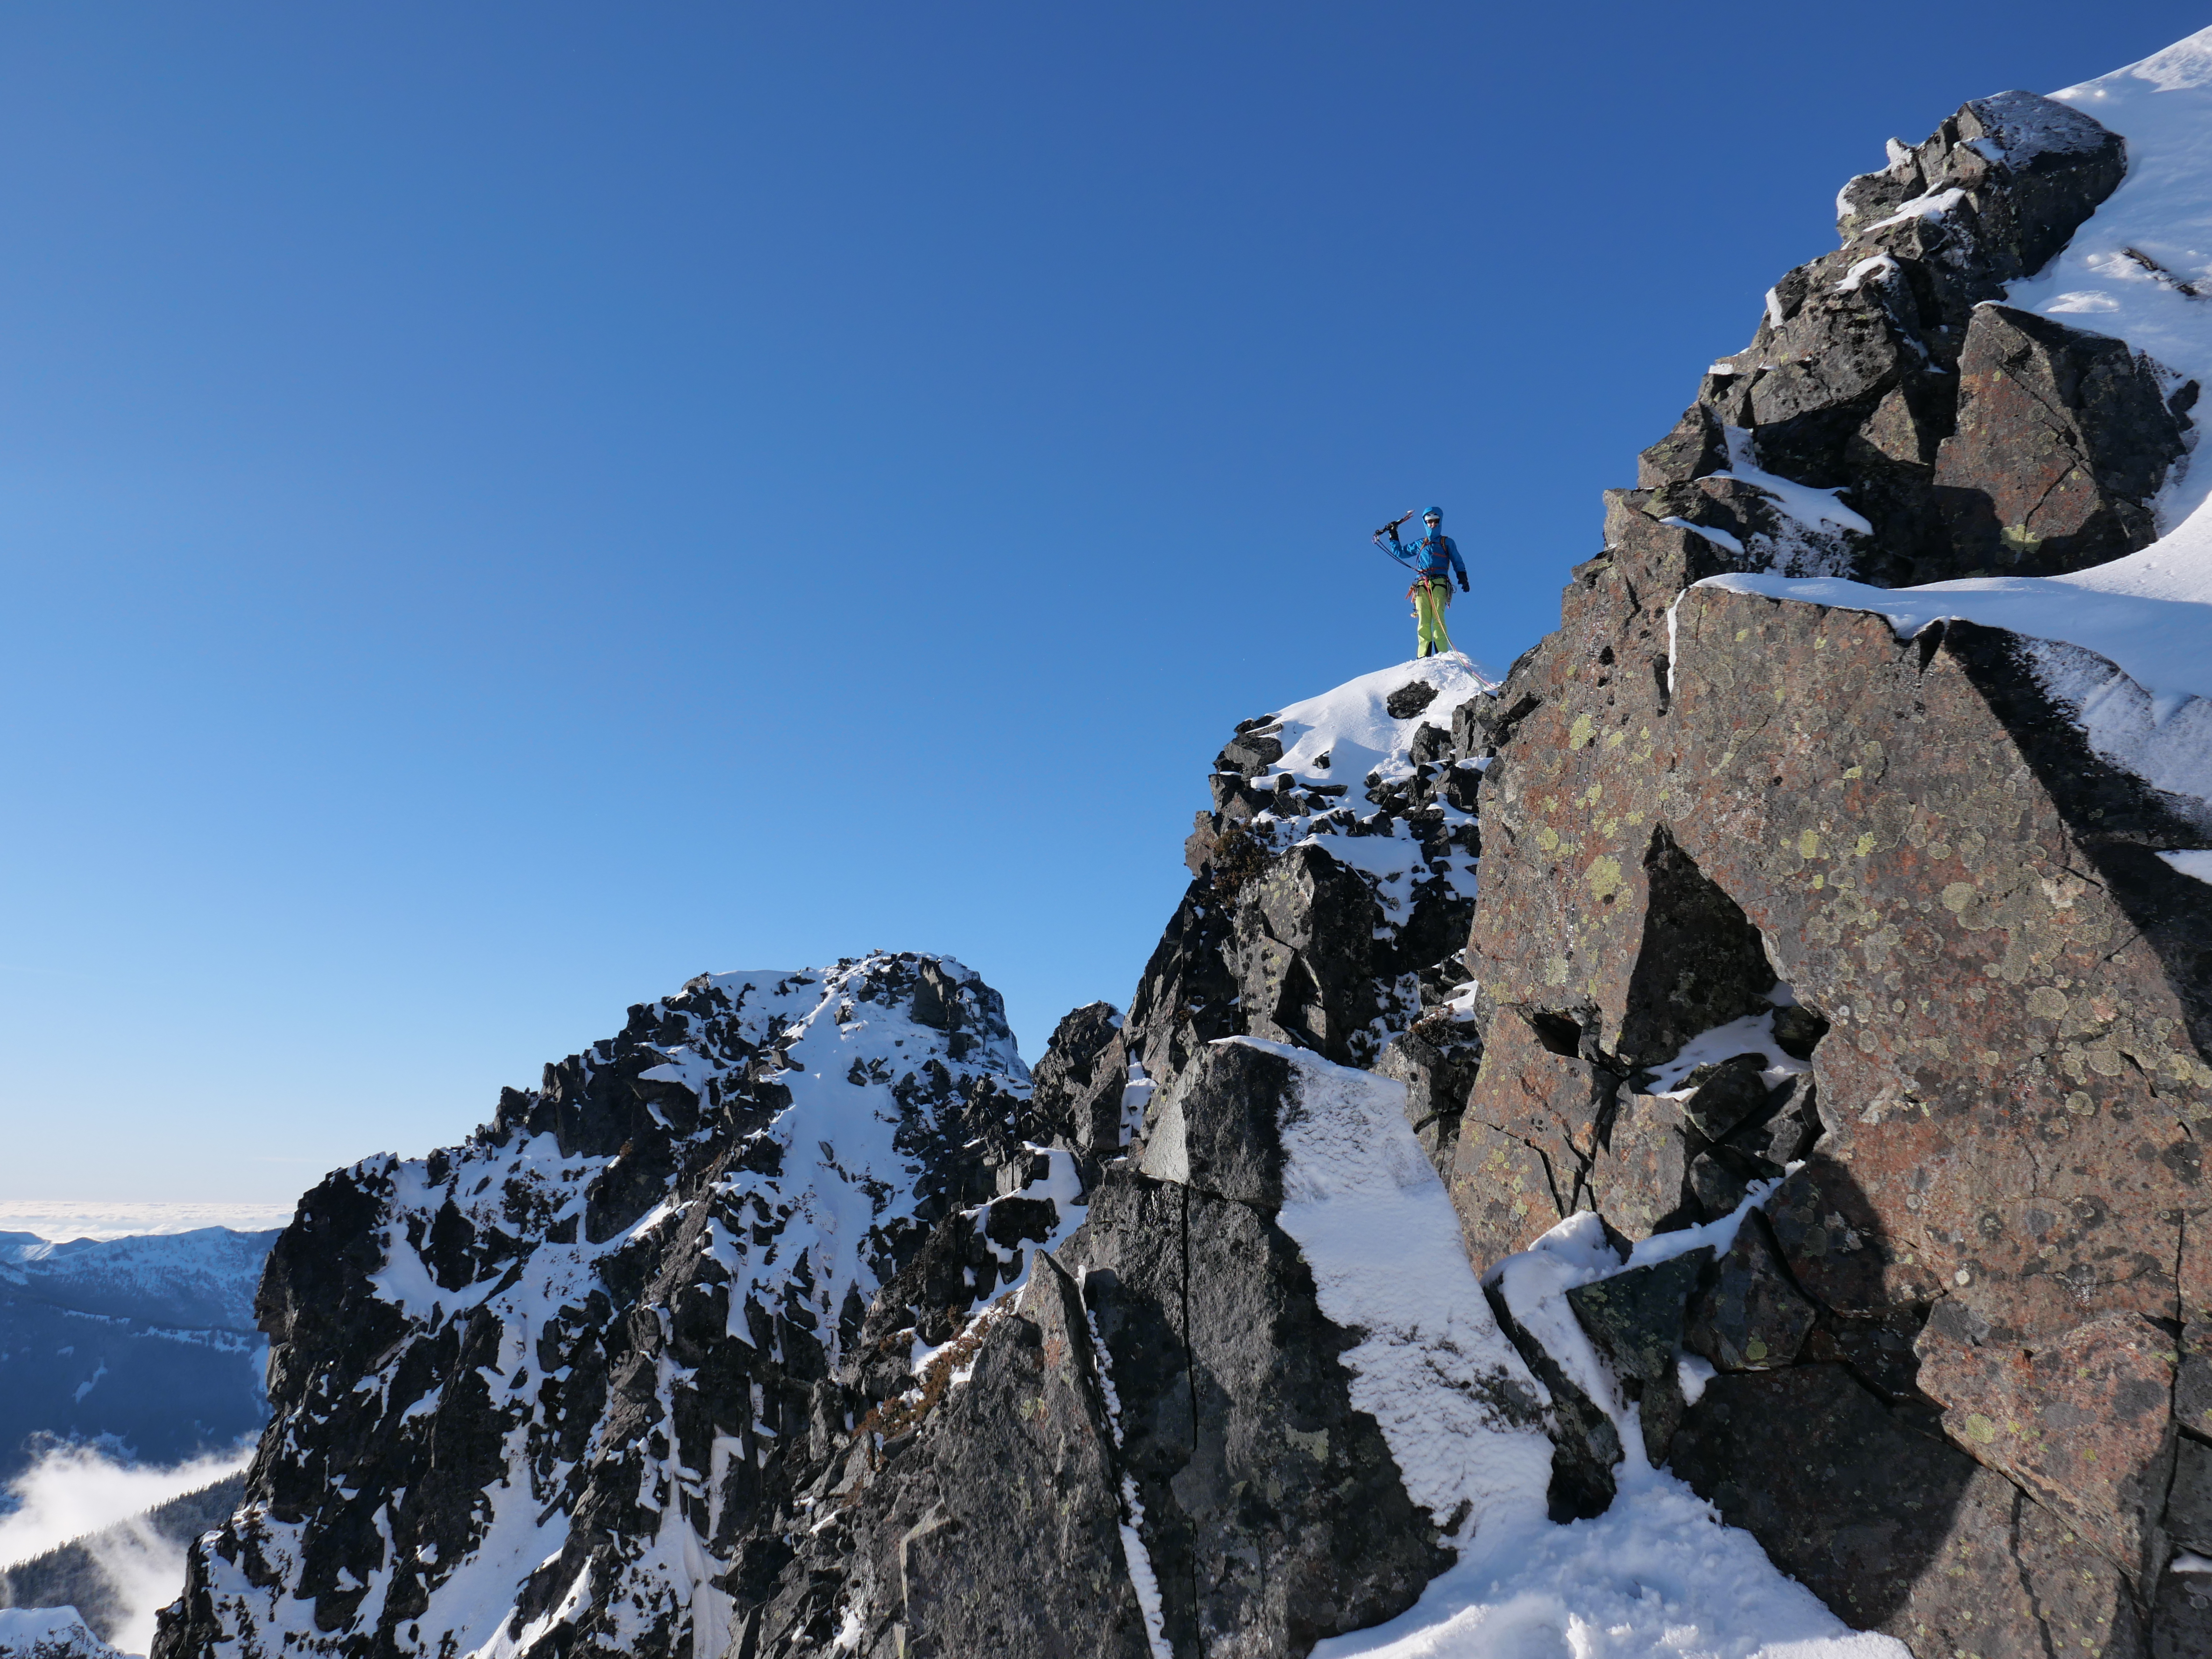
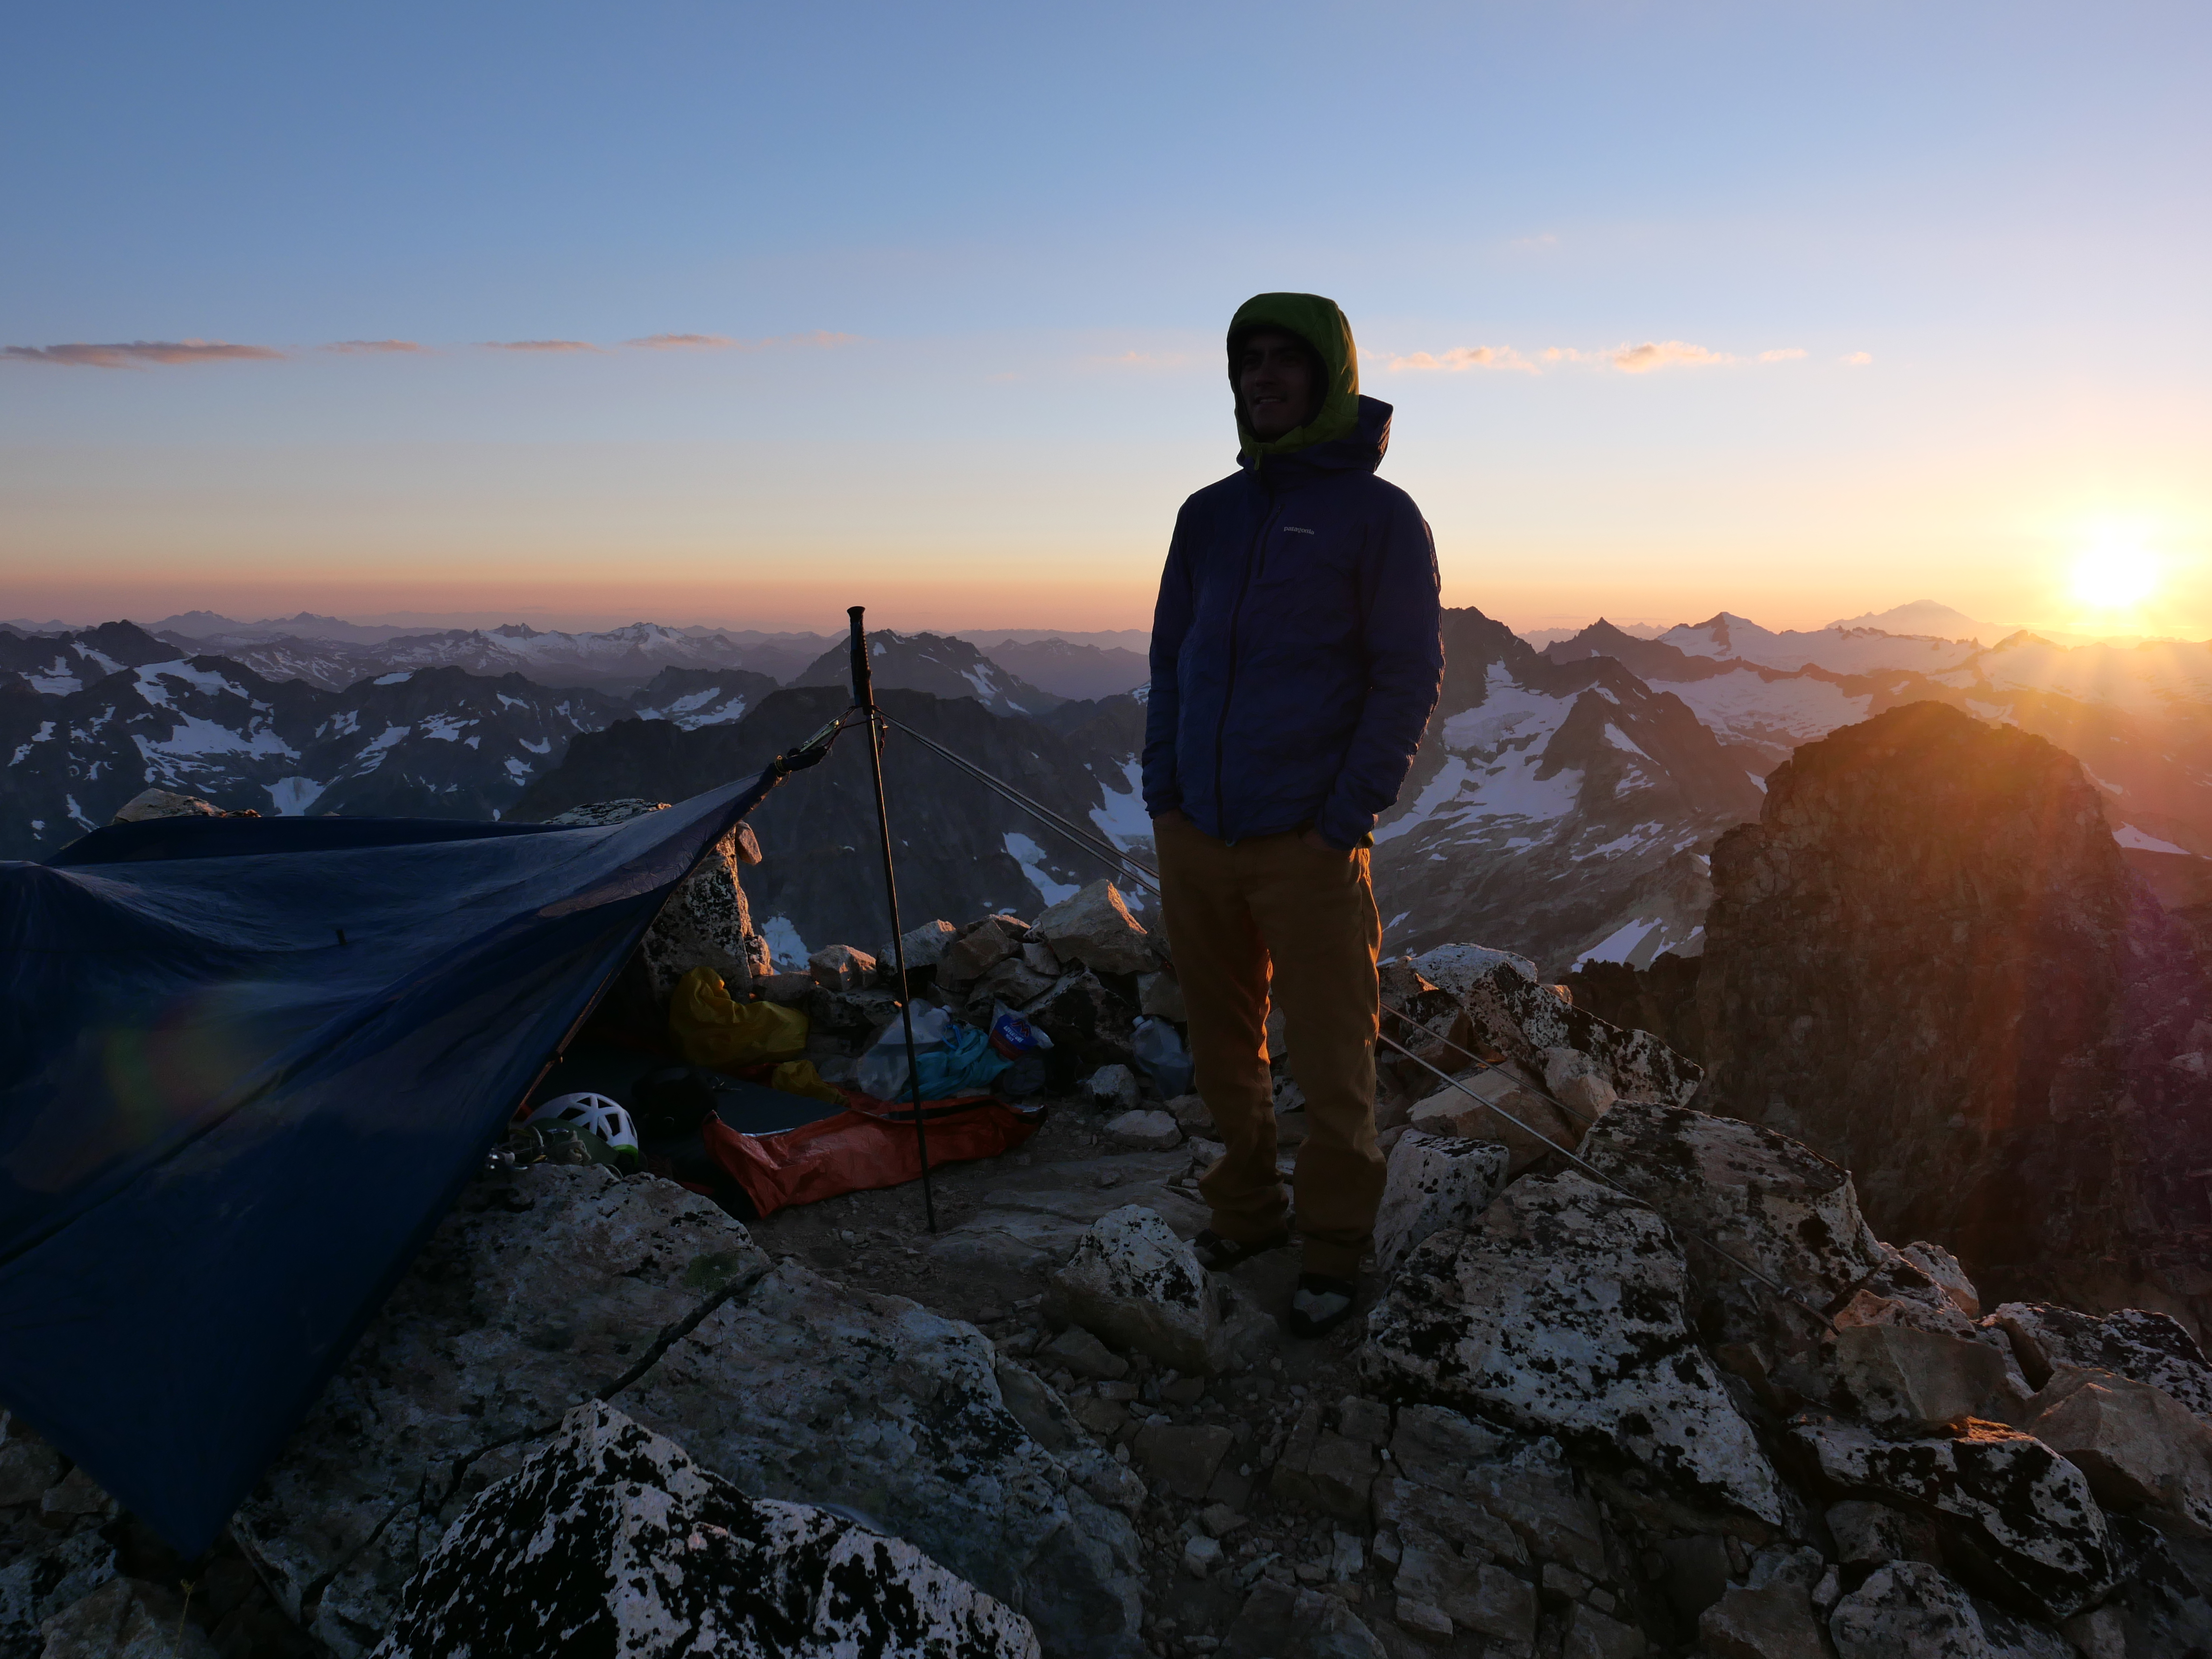
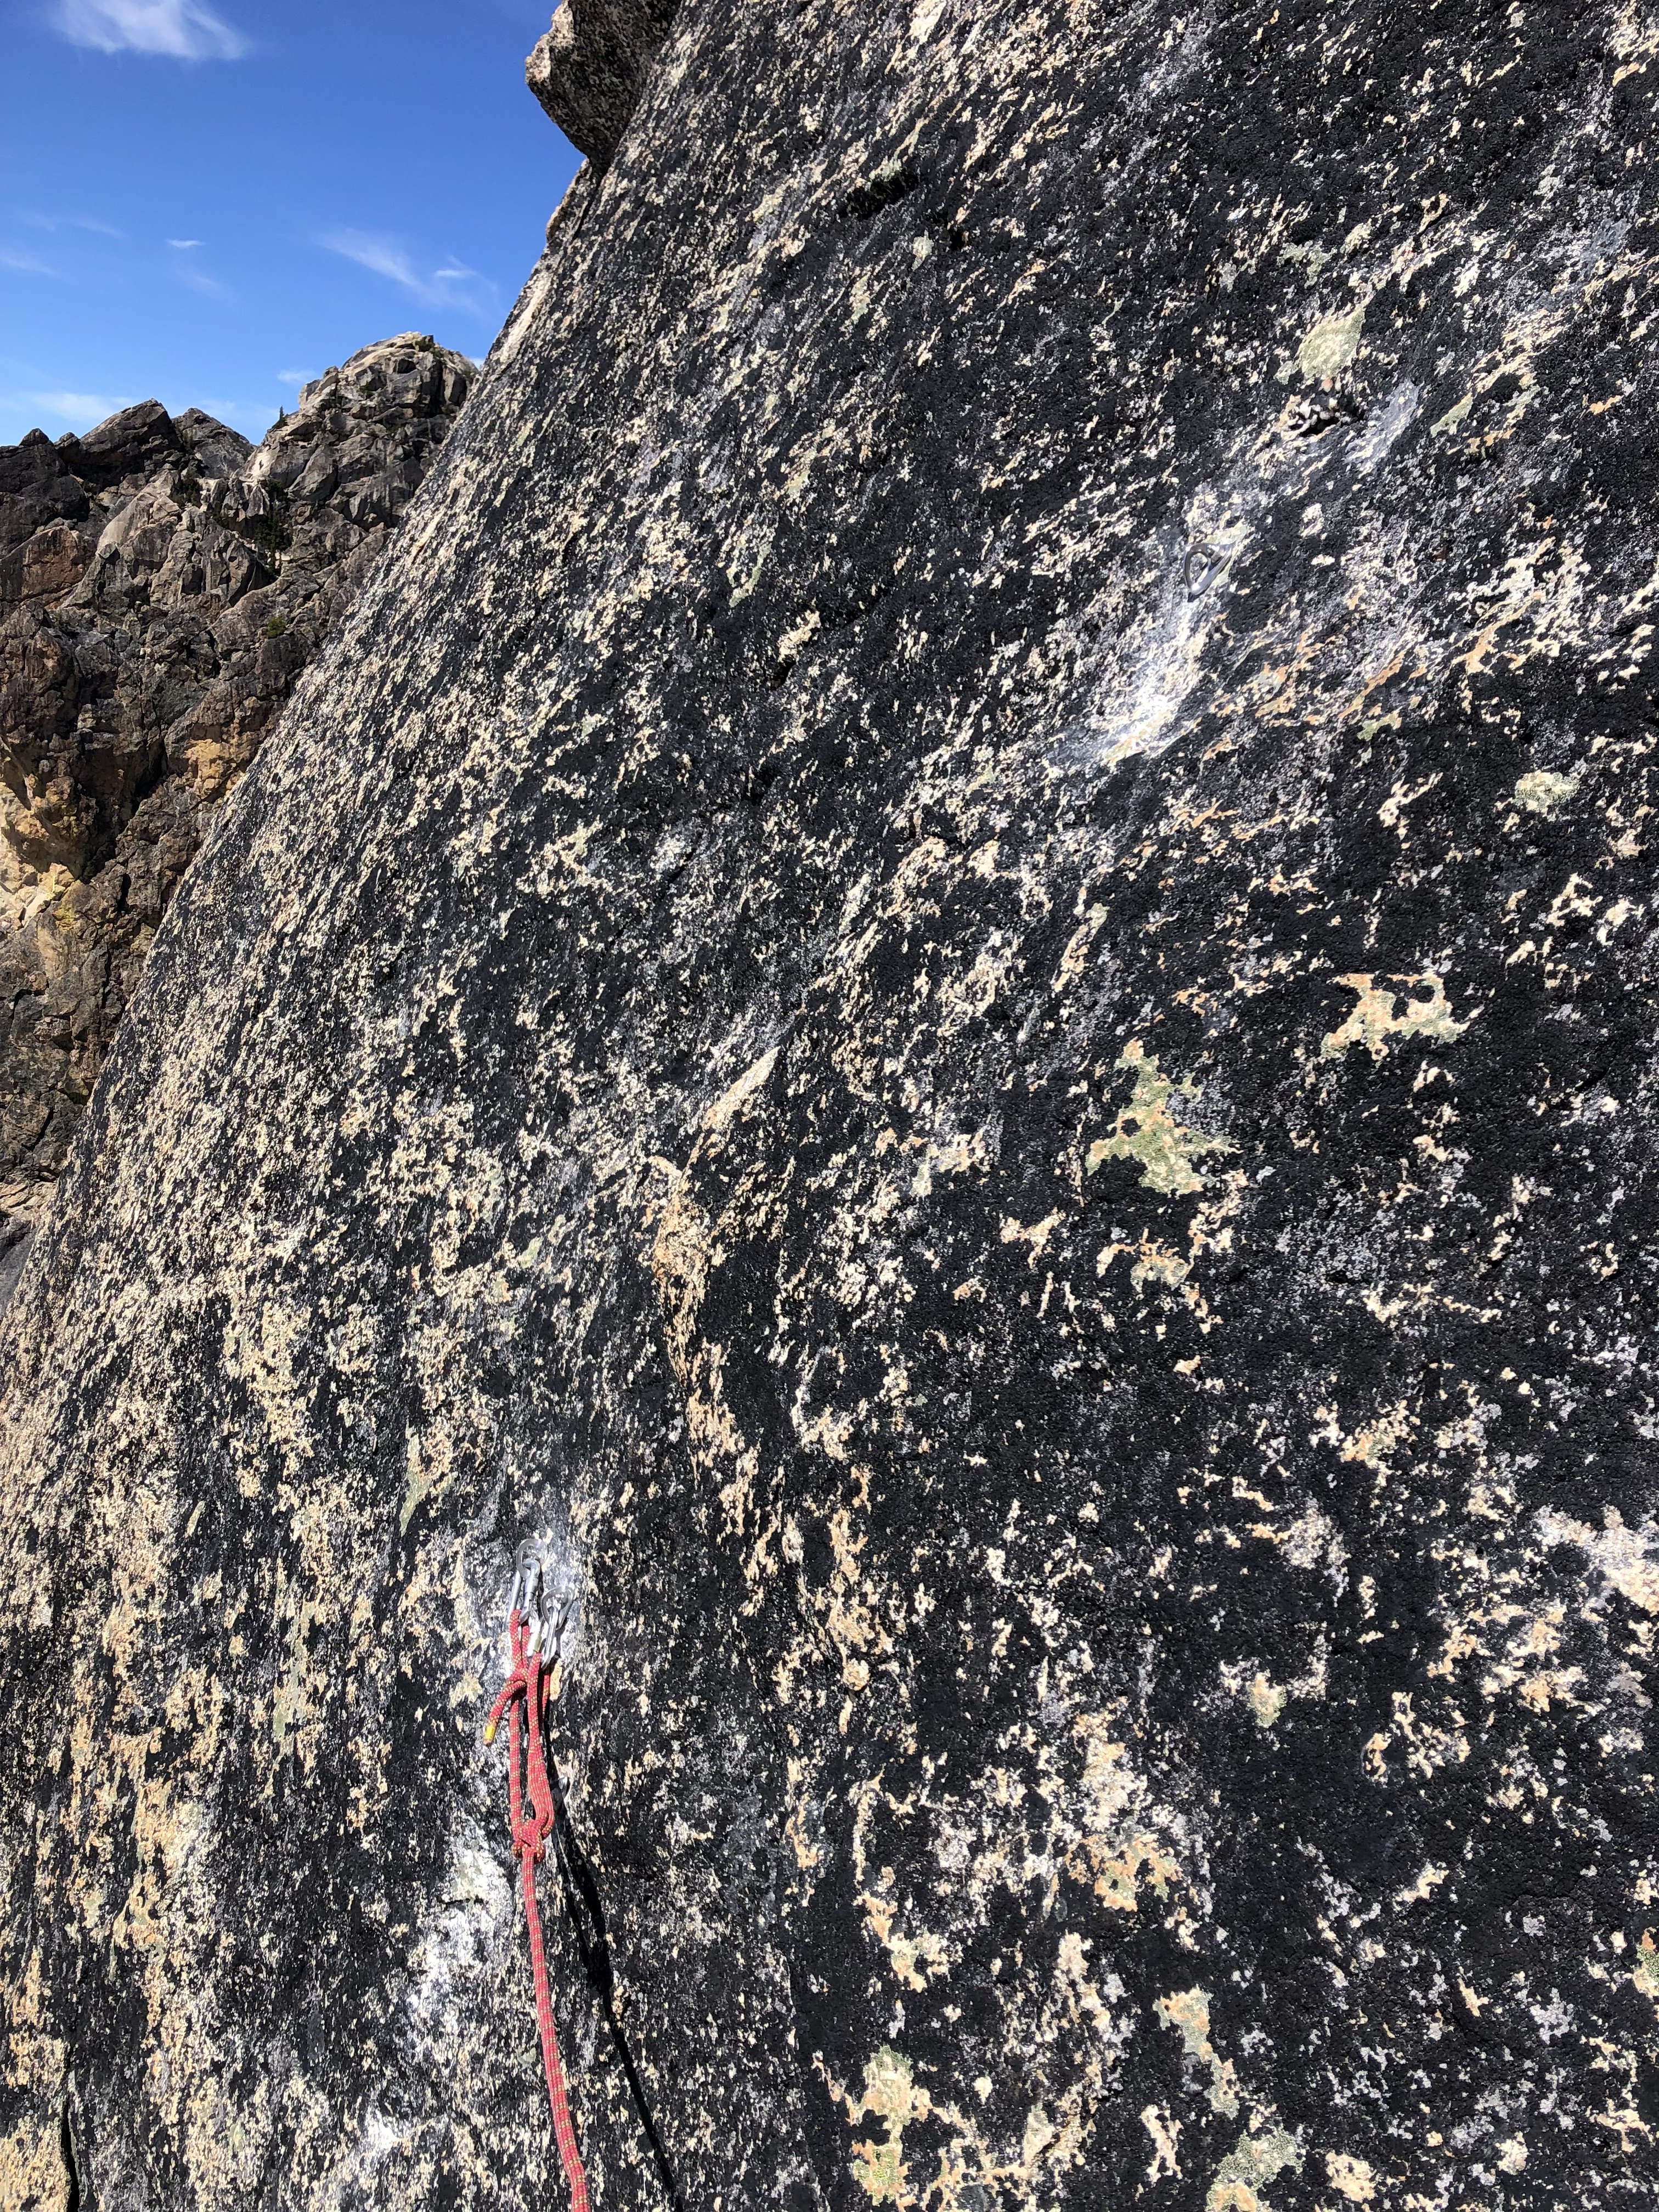
More scrambling took us through looser and more convoluted gendarmes up towards the Black Tooth notch. Roping up one last time, I lead down and around the final gendarme into black tooth notch. I found this pitch to be easier than the proposed 5.10 grade, probably 5.8 or 5.9 and truly well protected. Maybe after 11 hours of FA questing with big packs this could feel like 10-. A short simul block took us to the summit and nap time!
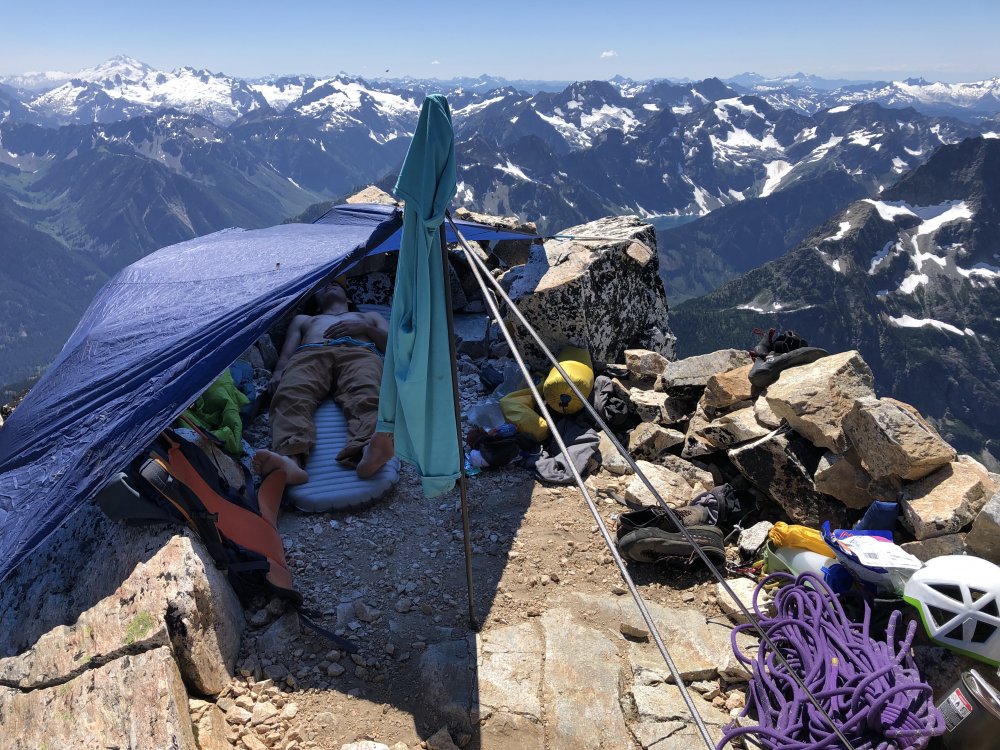
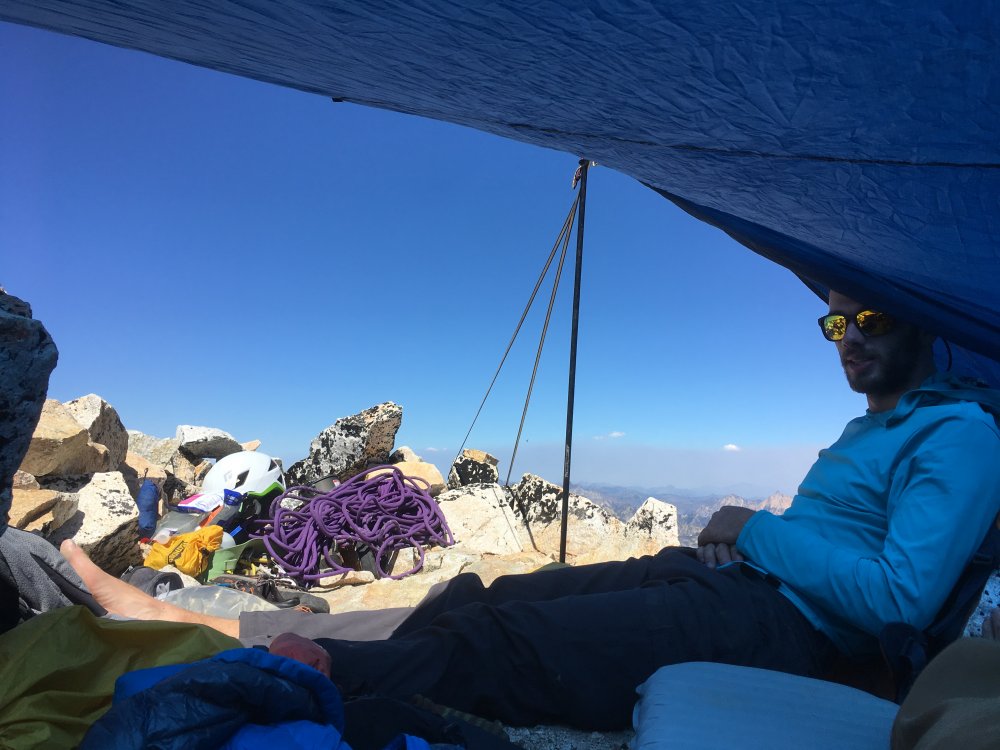
Having mentally prepared for an epic 12+ hour day, I was pleasantly surprised to arrive on the summit in the early afternoon with plenty of day to spare. We had full water bottles and a full seven hours to nap and enjoy the views. Life is Goode!

The descent sucked, and the hike out only sucked for the last hour.

Too many good photos to share in this TR. Our full photo album can be found HERE
Gear Notes:
If Simuling/pitching out most of the ridge Double rack .1-2 Single 3&4. If scrambling all but the cruxes, a single rack .1-3 should be fine. Small cams in the .1-.2 range are most useful. Fish themed snacks.
Approach Notes:
IDK, try and gain the ridge as soon as possible? Follow the waterfall? Maybe someone who has done it right will chime in.-
 5
5
-
 1
1
-
 5
5
-
-
2 hours ago, rat said:
i'm not surprised you couldn't reach steve risse as he is dead. not sure about his wife. http://publications.americanalpineclub.org/articles/12199432900/Steven-Craig-Risse-1952-1993
it was clearly not so much of a "death route" that you couldn't rope solo it & the route has been retro'd 2x already. http://www.supertopo.com/rock-climbing/Washington-Pass-North-Early-Winters-Spire-Labor-Pains
the internet is such a hard place to find info.....
I'm aware Steve passed away. I was also aware that it had some bolts replaced already.
Regardless of the previous rebolt, consensus was still that the route was in unnecessarily dangerous condition. Both parties I know who have climbed it, Wayne Wallace and John Plotz both agreed that some pins should be replaced with bolts, and the anchor updated.
It seems that I may have been off base adding the bolt above the P3 anchor. However I stand by my decision, and believe that it retains the character of the route.
If I hear from enough people who have climbed the route that the bolt is not acceptable. I am happy to spin it out and mask the hole.
-
30 minutes ago, underscore_child said:
Couldn't get permission... like you couldn't contact the FA party or you did and they said no?
(far be it from me to criticize someone making the effort to hand drill to make something safer, I'm just wondering)
I wasn't able to find contact info for them. I honestly didn't try too hard though...
-
Trip: North Early Winters Spire - Labor Pains (Retro Bolt)
Trip Date: 06/21/2021
Trip Report:I know, I know, I'm sure someone will be upset that retroed this hardman test piece but hear me out. Labor Pains has been on my to-do list for years, but I was just too intimidated by its reputation. I knew that when I did eventually climb it, I wanted to replace some of the hardware to make it less of a death route, all while retaining it's character.
Since I wasn't able to get permission from the FA party, I committed to doing it in the best possible style I could manage. I self belayed every pitch in it's original state, then replaced the hardware I felt was warranted on the way back down to clean the pitch. I placed 3 bolts total, all hand drilled.
As far as the climbing goes, I thought the grades listed on the topo were largely quite soft. The one exception being the 11a mantel on P4. If climbing this with a partner, rope drag would be a serious concern. I might actually consider climbing this with half ropes to mitigate the drag, but proper slingage should help considerably.
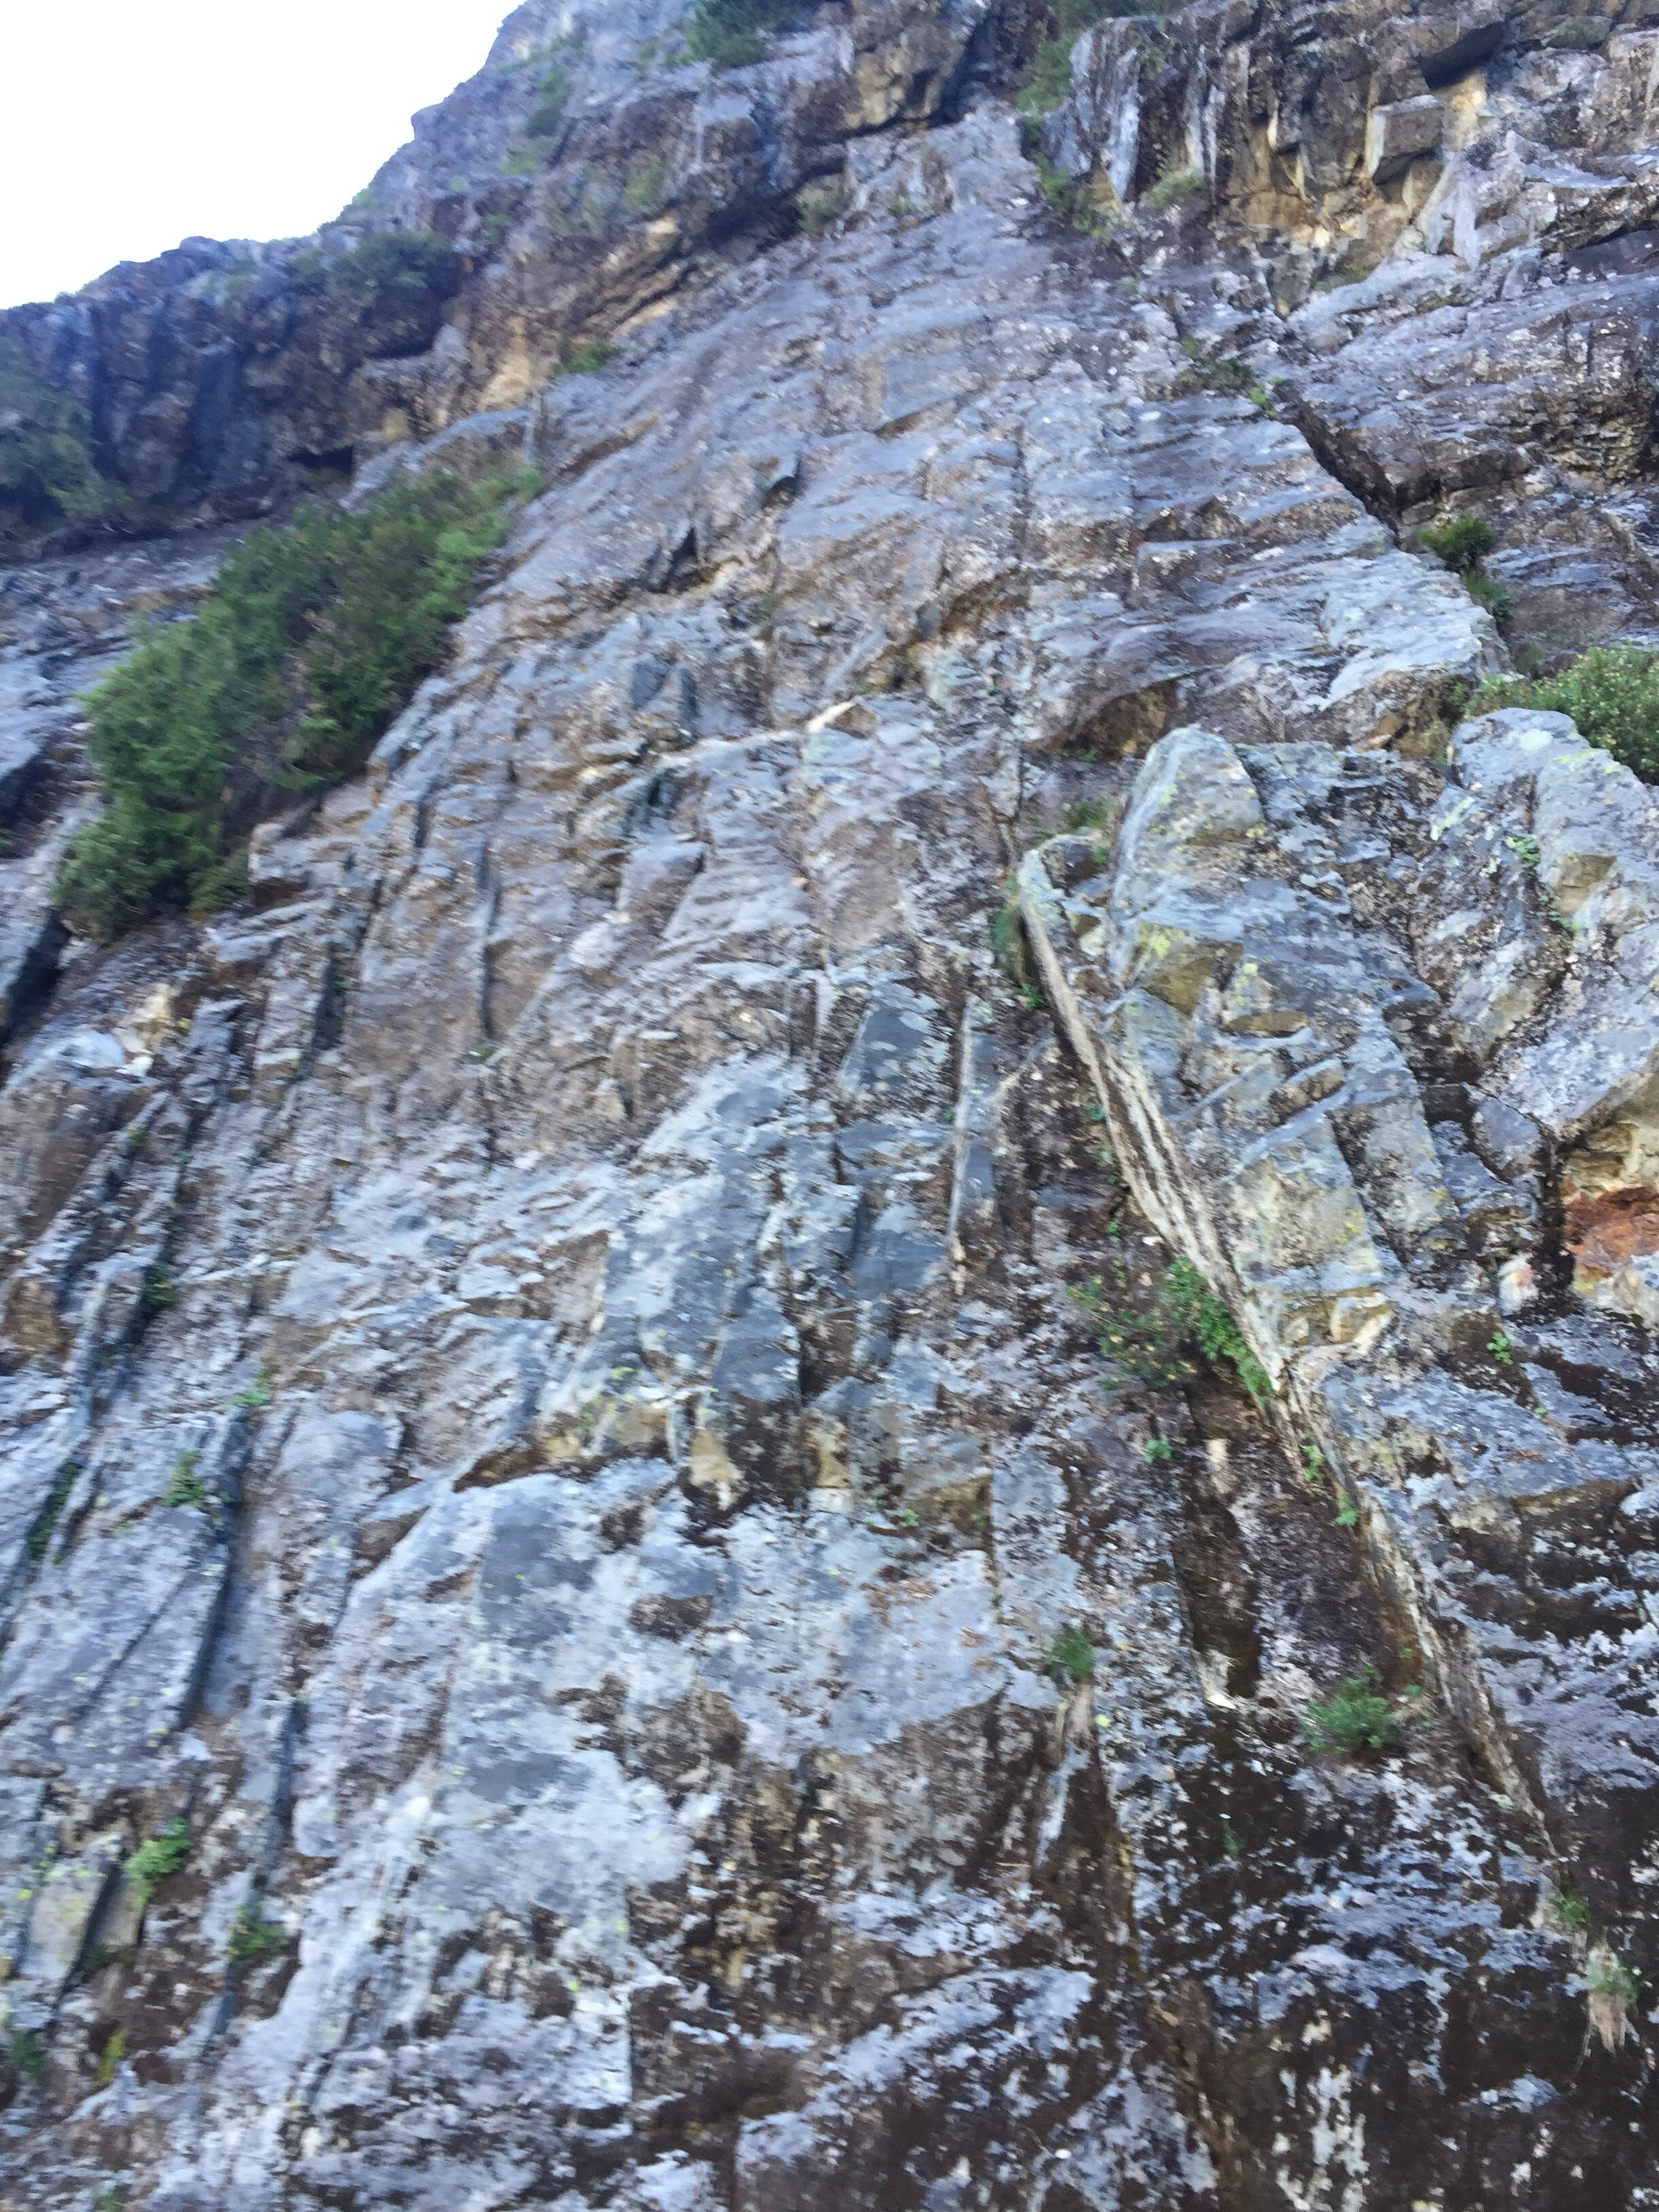
P1 5.0: Start up Chockstone route, then traverse up and left, through a loose chimney system to the ledge just below P2. Confident parties should just solo this, however the looseness should be taken into account.
P2 5.10: Climb the somewhat crumbly right facing corner system. This pitch protects well enough, and is the only pitch you really want the #3 and #4 on. The bulge is much easier than 5.11. Once above the bulge, slab left to a thin corner system and up onto the sloping ledge above.
Looking down P2 from just above the bulge.
P2+ 5.9?: I recommend moving the belay up to the ledge above. A horizontal overlap and sloping ledge will provide a good stance for the next pitch. You could even move all the way up to the base of the thin cracks if you wanted to.
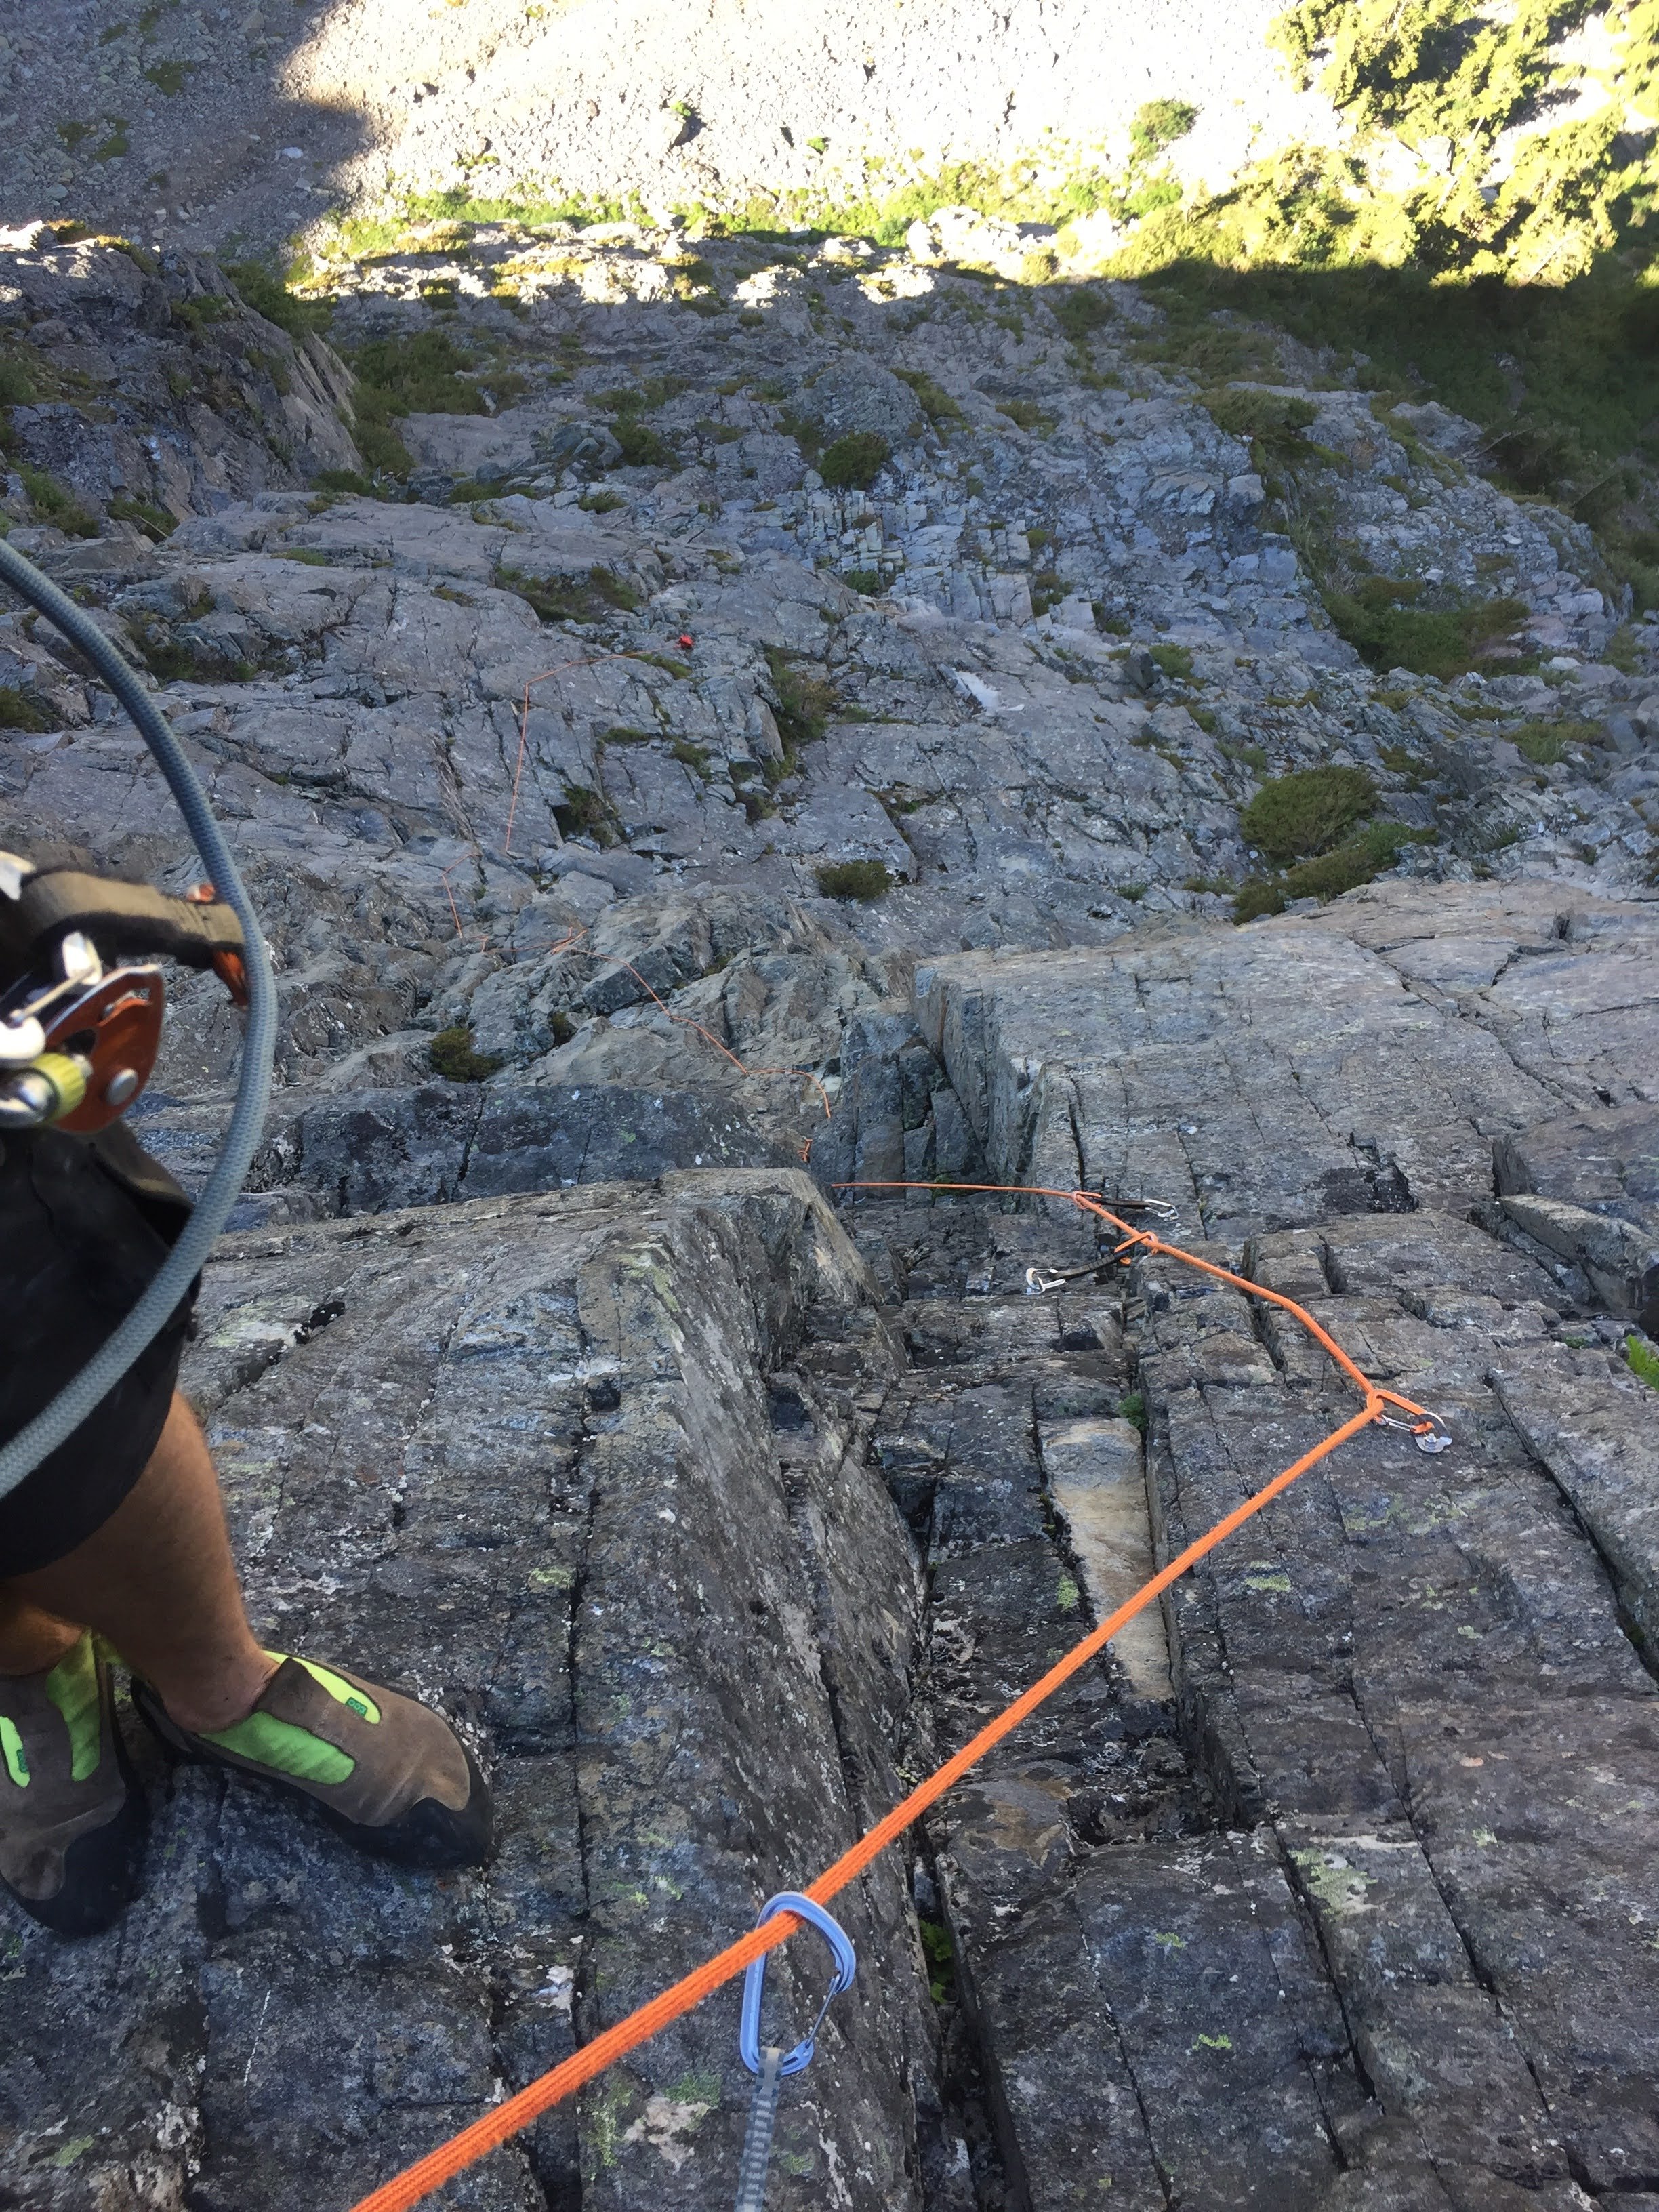
P3: 5.10+: Aim for the obvious thin crack above. This "mini west face" is actually a double crack, with the easier of the two being the right crack. Once through the seam, traverse left below the roof, and look for the bolt around the corner. I determined this bolt to be in good shape, and not yet in need of being replaced. I re-drove the piton above it, and it can be adequately backed up by a .1 cam just to the left of the pin. Replacing the pin with a bolt would be nice, but I determined the pin, supplementary cam, and proximity to the bolt to be safe enough.
Continue over the bulge on cool flakes to where you will now find a new shiny bolt. This used to be a rusty pin behind a flake. The pin turned out the be pretty damn good, but certainly not sustainable. More somewhat runout climbing takes you to the right, then back left to the newly updated bolt anchor.

Broke my tuning fork before I was able to remove the old button head. It now suits as a good spot to hang your shoes.

The old pin, and the new protection bolt.
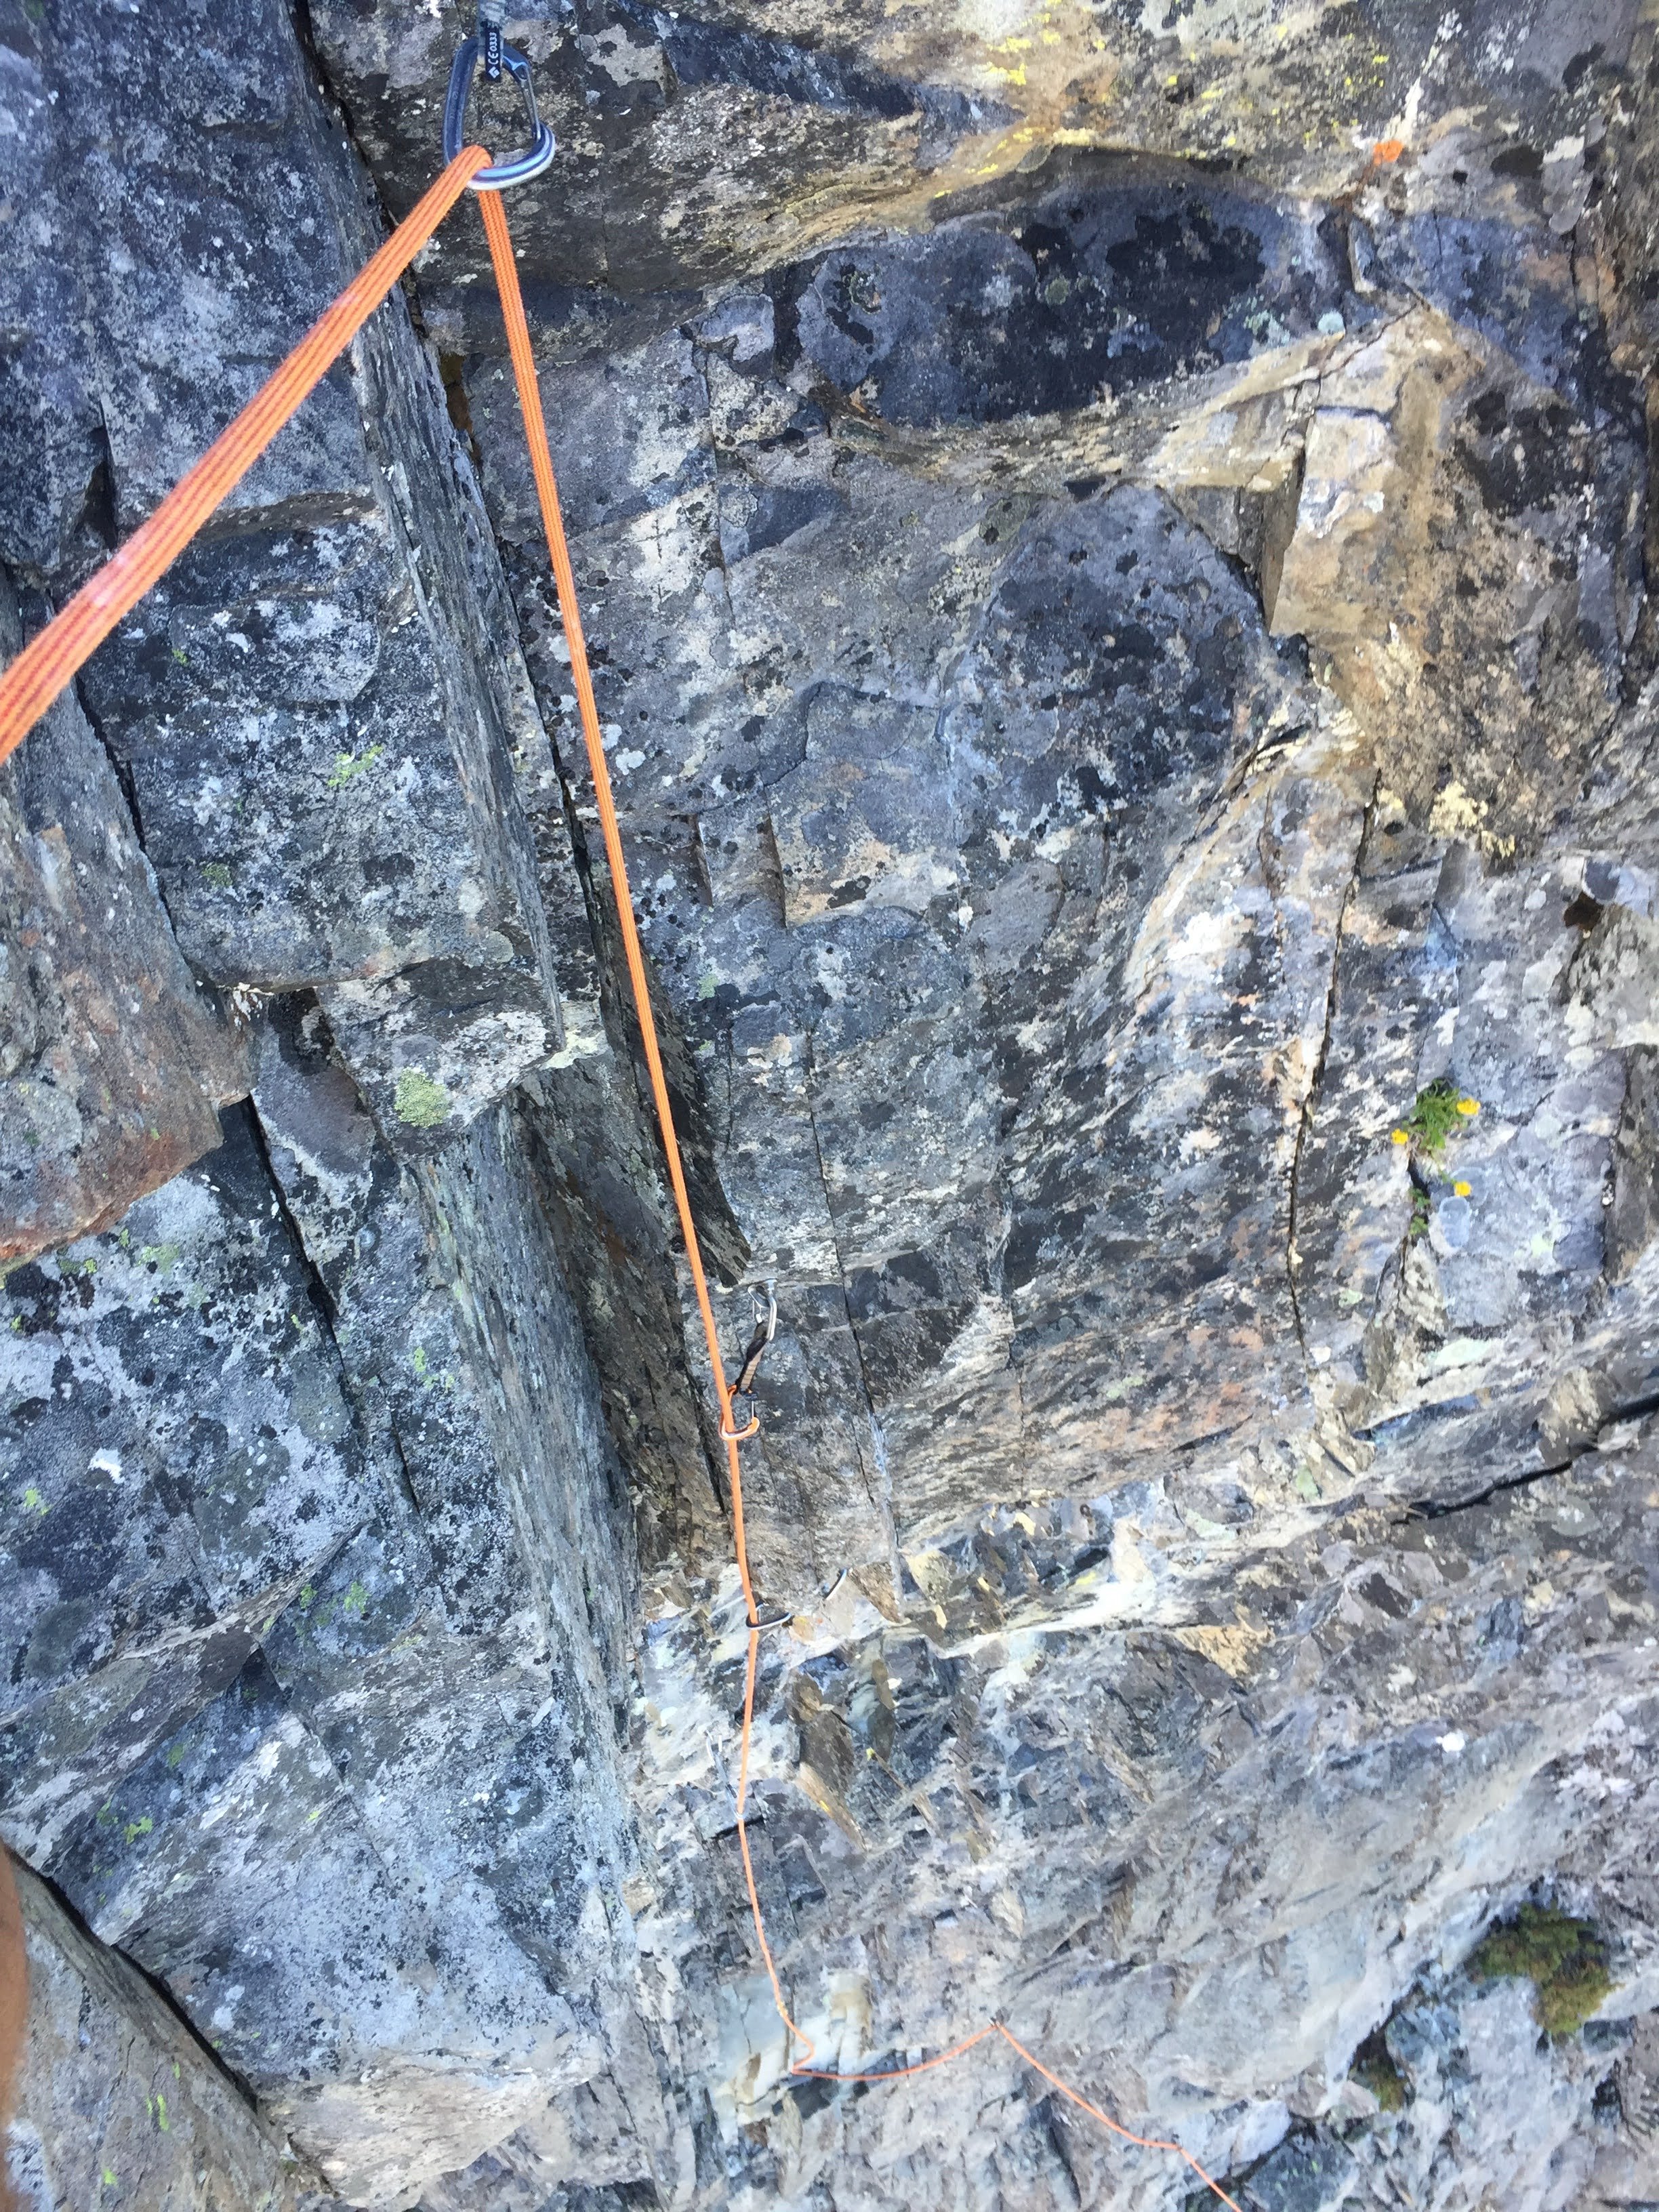
P4 5.11a: From the bolted anchor, step up on good edges until you can reach the new bolt up and right. Slab your way hard right under the loose flakes to the sloping ledge. A thin crack which takes good pro will take you up and over a steep bulge. The topo calls out a "not so great fixed pin" which was gone before I got there. If you are already feeling some rope drag, I recommend belaying on the slab just above the mantel. The remainder of the route climbs flakes and cracks up and left on licheny but easy terrain.
The previous runout straight off the P4 belay.

The new bolt that protects you from falling straight onto the belay.

Overall I thought this routes reputation was a bit overblown. In it's previous state, all the hardest climbing was well protected, but some falls could have been catastrophic. As it stands now, I truly believe I was able to retain the adventurous excitement of the route, while mitigating the danger. It is still PG13, as bolting all the runouts would be unreasonable. Get on this route, It's really fun!
Gear Notes:
Double rack from micro to #2. Single #3 & #4. Standard rack of nuts plus some brassies might come in handy. Many shoulder length slings. 70m rope to take advantage of the W-face raps.
Approach Notes:
Standard Blue Lake approach-
2
-
1
-
-
Those are incredible! Definitely the best picture I've seen of the north face. Would you ever consider taking close up photos certain faces upon request?
-
17 hours ago, Doug_Hutchinson said:
I climbed it last October so get ready for my TR in about two months...it's gonna definitely kick Michael's TR's ass
Better start working on it now!
-
2 hours ago, nonbasketless said:
Grigri is main protection... what's that second device? Some kind of backup? Is the rope bag fixed at the anchor?
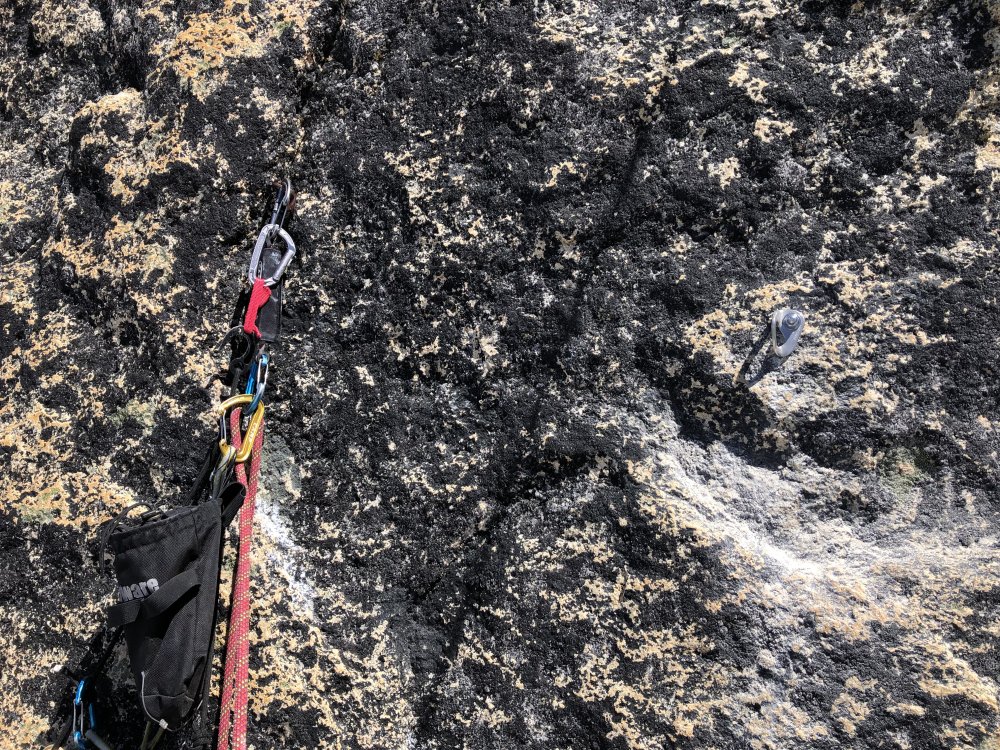
The second device is a micro traxion clipped off to my gear loop. It is used to create slack on the brake side, that way the weight of the rope doesn't lock the grigri. Rope bag is just my a backpack clipped to the anchor. I tie slip knots every so often as I flake the rope into the bag. This prevents from hopelessly sliding down the rope if something goes wrong, but not from complete device failure.
-
1
-
-
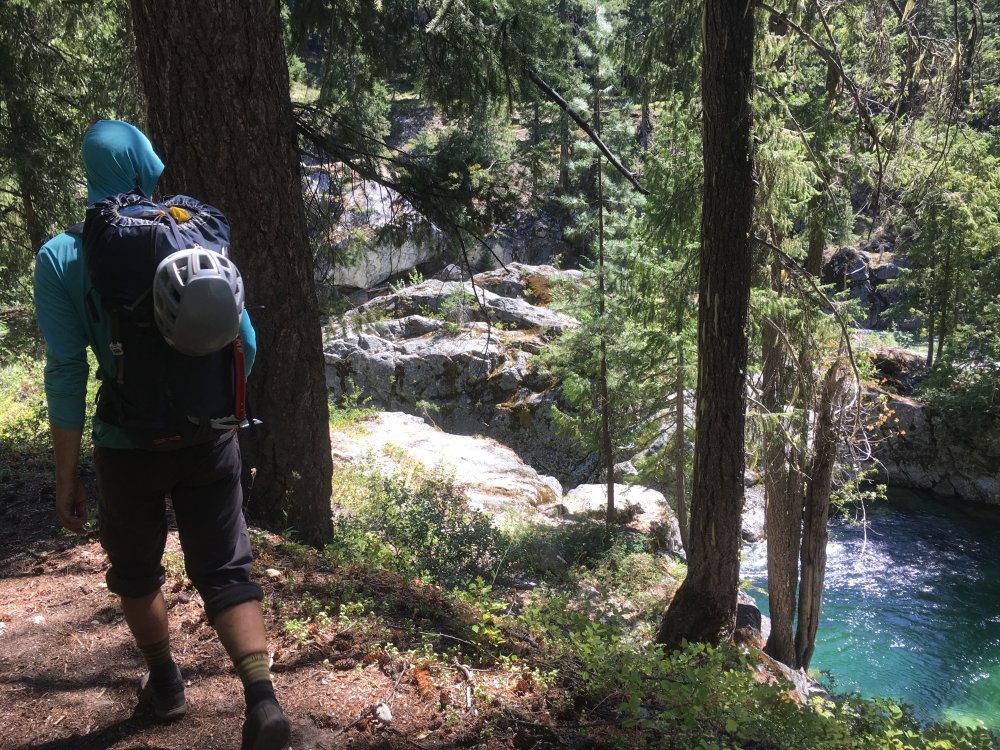
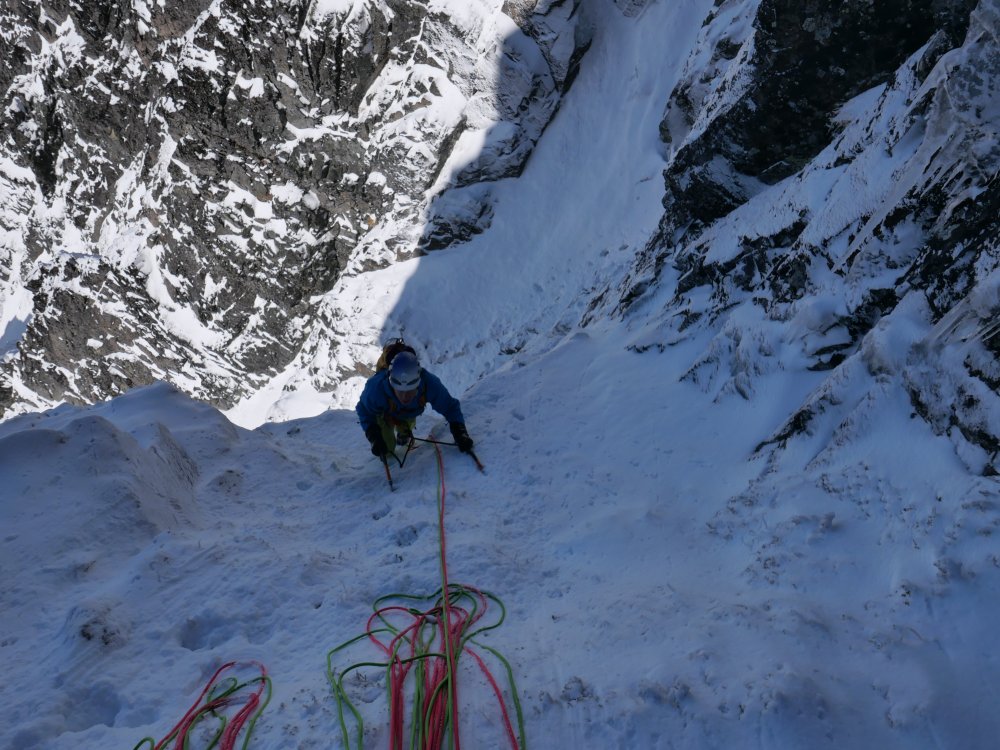
Trip: Morning Star Peak - Beyond Redlining (Rope Solo)
Trip Date: 08/04/2020
Trip Report:Preface: I just got back from a long weekend at Smith to escape the hot pow and persistent weak layer. Drytooling is fun and all, but I wanted to remind everyone how much more fun summer rock climbing is than winter climbing. Anyways, on to the long overdue TR.
I like to climb a lot. With a 4 days on, 3 days off work schedule, I have a lot of time to do so. I also like to spend some time alone in the mountains moving at my pace and enjoying the little things.
Over the last several years I have dabbled and somewhat perfected my rope soloing system. It all really started with a sketchy half belayed, half solo ascent of a seeping Ground Hog Day out in Leavenworth in 2017. After numerous other climbs, I finally came up with a system that worked for me, and in early April 2019 I rope soloed Outer Space in just around 4 hours base to top. Pitching everything out and reclimbing every pitch on TR solo. Two months later I came back and soloed everything except the crux pitch and the 3 other 15ft insecure cruxes which I pitched out. That hand crack pitch without a rope is an incredible experience.
Jump forward to last August and I am as driven as ever. The thought of another lockdown pushing me to eek every ounce of adventure out of my days off. Then the news came out about a new 11 pitch 10+ alpine sport route. It seemed like the perfect route to test myself on.
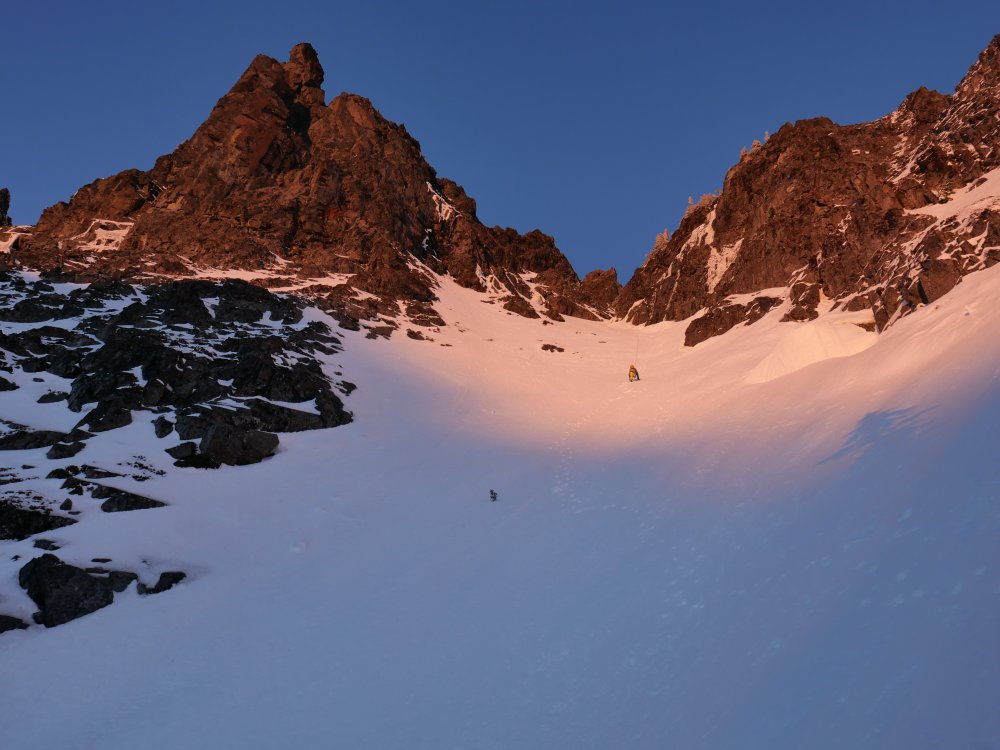
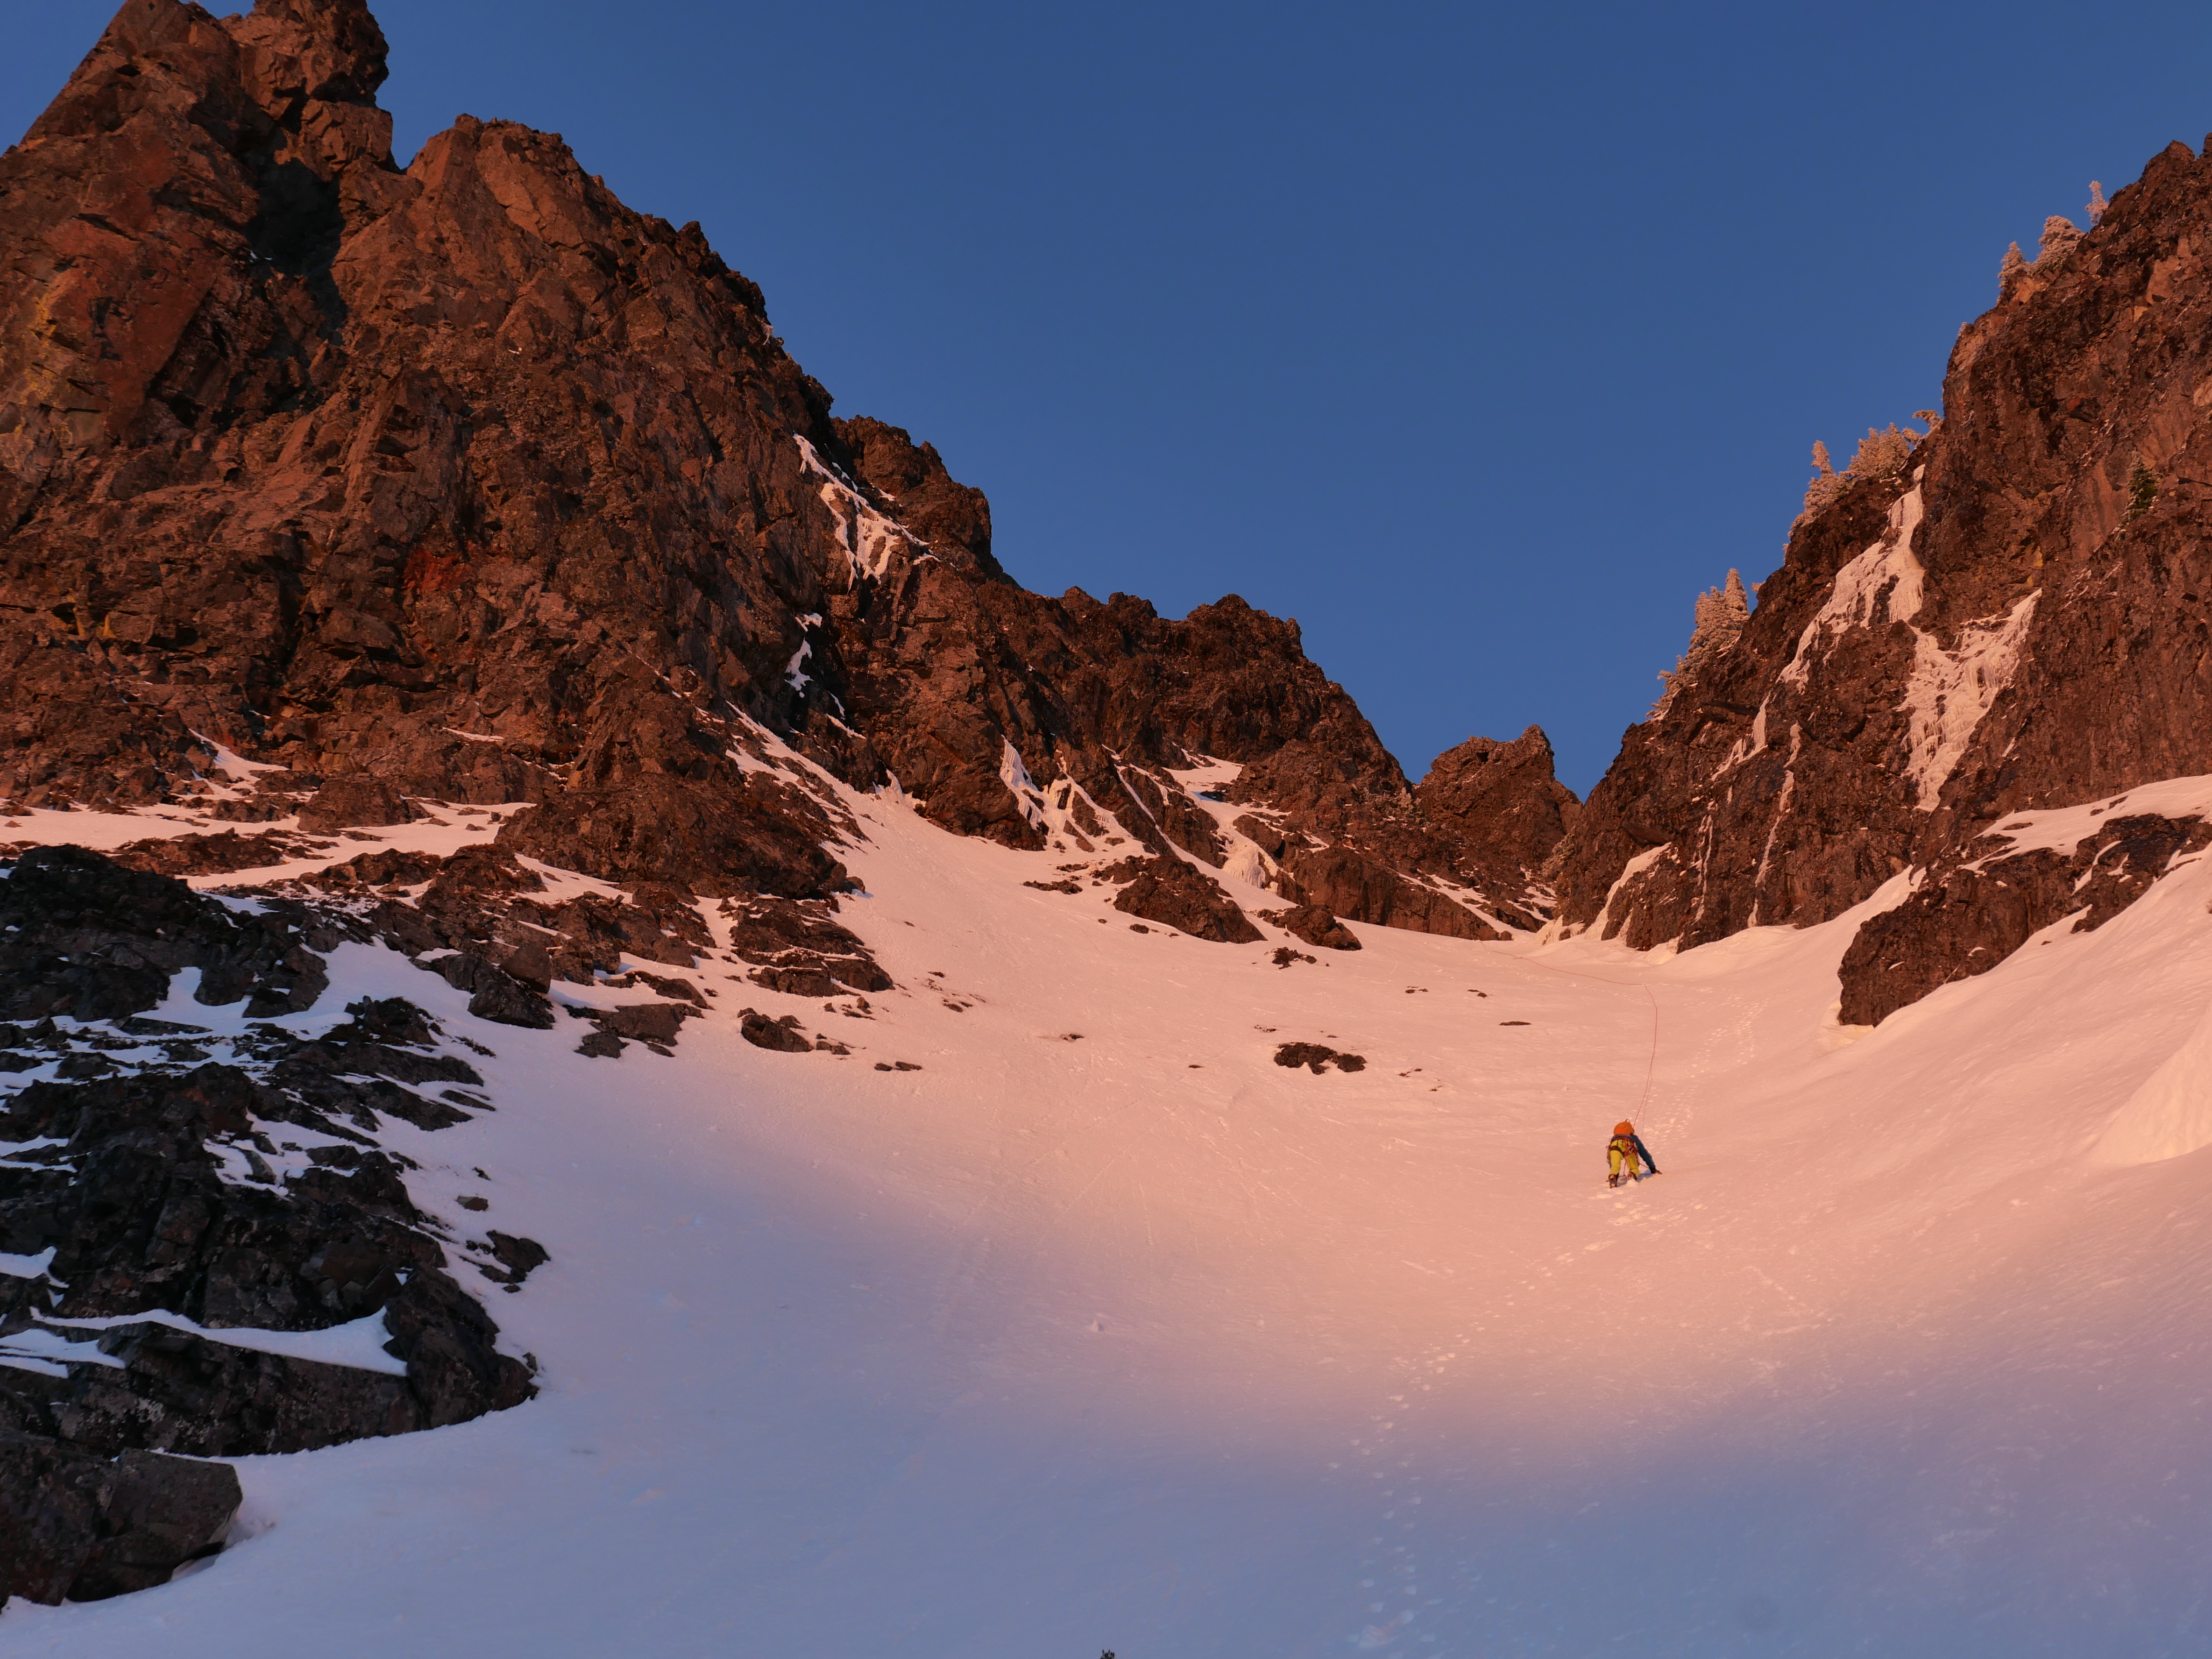
On August 4th I grabbed a stupid number of draws and loose krabs and drove up to the Sunrise Mine trail. The approach was nice, but brushy and wet from the morning dew. As I passed a few parties of hikers in the upper basin, it was looking as if I was going to have the route, if not the whole wall to myself!
Once near the base of the wall, I was very glad to discover that the spring at the base of MHC was still running. For weights sake I had brought a total of 0 ounces of water for the hike up, fully relying on a recent report that the spring was alive and well.
The route was easy to find from the spring, I simply walked back along the wall keeping my eye out for some shiny new bolts marking the start of the route.
The first pitch was fun! A long 55ish meters of engaging varied climbing that gets you on your toes right off the bat. By the end of that pitch, I was feeling rusty and my feet already hurt. This was going to be a great day.

Blurry picture of P1
In an effort to move efficiently I had decided to try and link as many pitches as possible. For some reason at the time 35m+40m=65m, meaning I would have just enough rope to link pitches two and three. As it turns out it actually equals 75 meters, and Rad’s pitch lengths are spot on. This left me tugging at my rope a couple feet above the last bolt, trying to pull every last bit of rope stretch the rope would give me. To no avail, I backed off and downclimbed back to the final bolt. I then proceeded to assess and bounce test the fuck out of that bolt. The rock is good, and the bolt is well placed. I decided to call it my belay and continue as normal, rapping down to clean the pitch.
The next two pitches linked without issue, and honestly while writing this several months later I can’t remember anything about them.
Now below the first crux pitch with the cobwebs dusted off I was feeling good and moving fast. Following the most obvious bolt line took me up to a steep corner system. While trying to suss out the moves from below I happened to glance over and notice a couple bolts far to my left. Much to my annoyance I had inadvertently started up the 11+ unfinished direct line. Luckily I was still at a point where I could downclimb back on route and finish the correct pitch. It went off without a hitch.
This was the first pitch that I did not clean “cleanly”. I did not jug any of the pitches, instead I would repeat the pitch on TR solo, pulling on the rope or draws to use as little energy as possible. It seemed to work well, and was by far the fastest option.
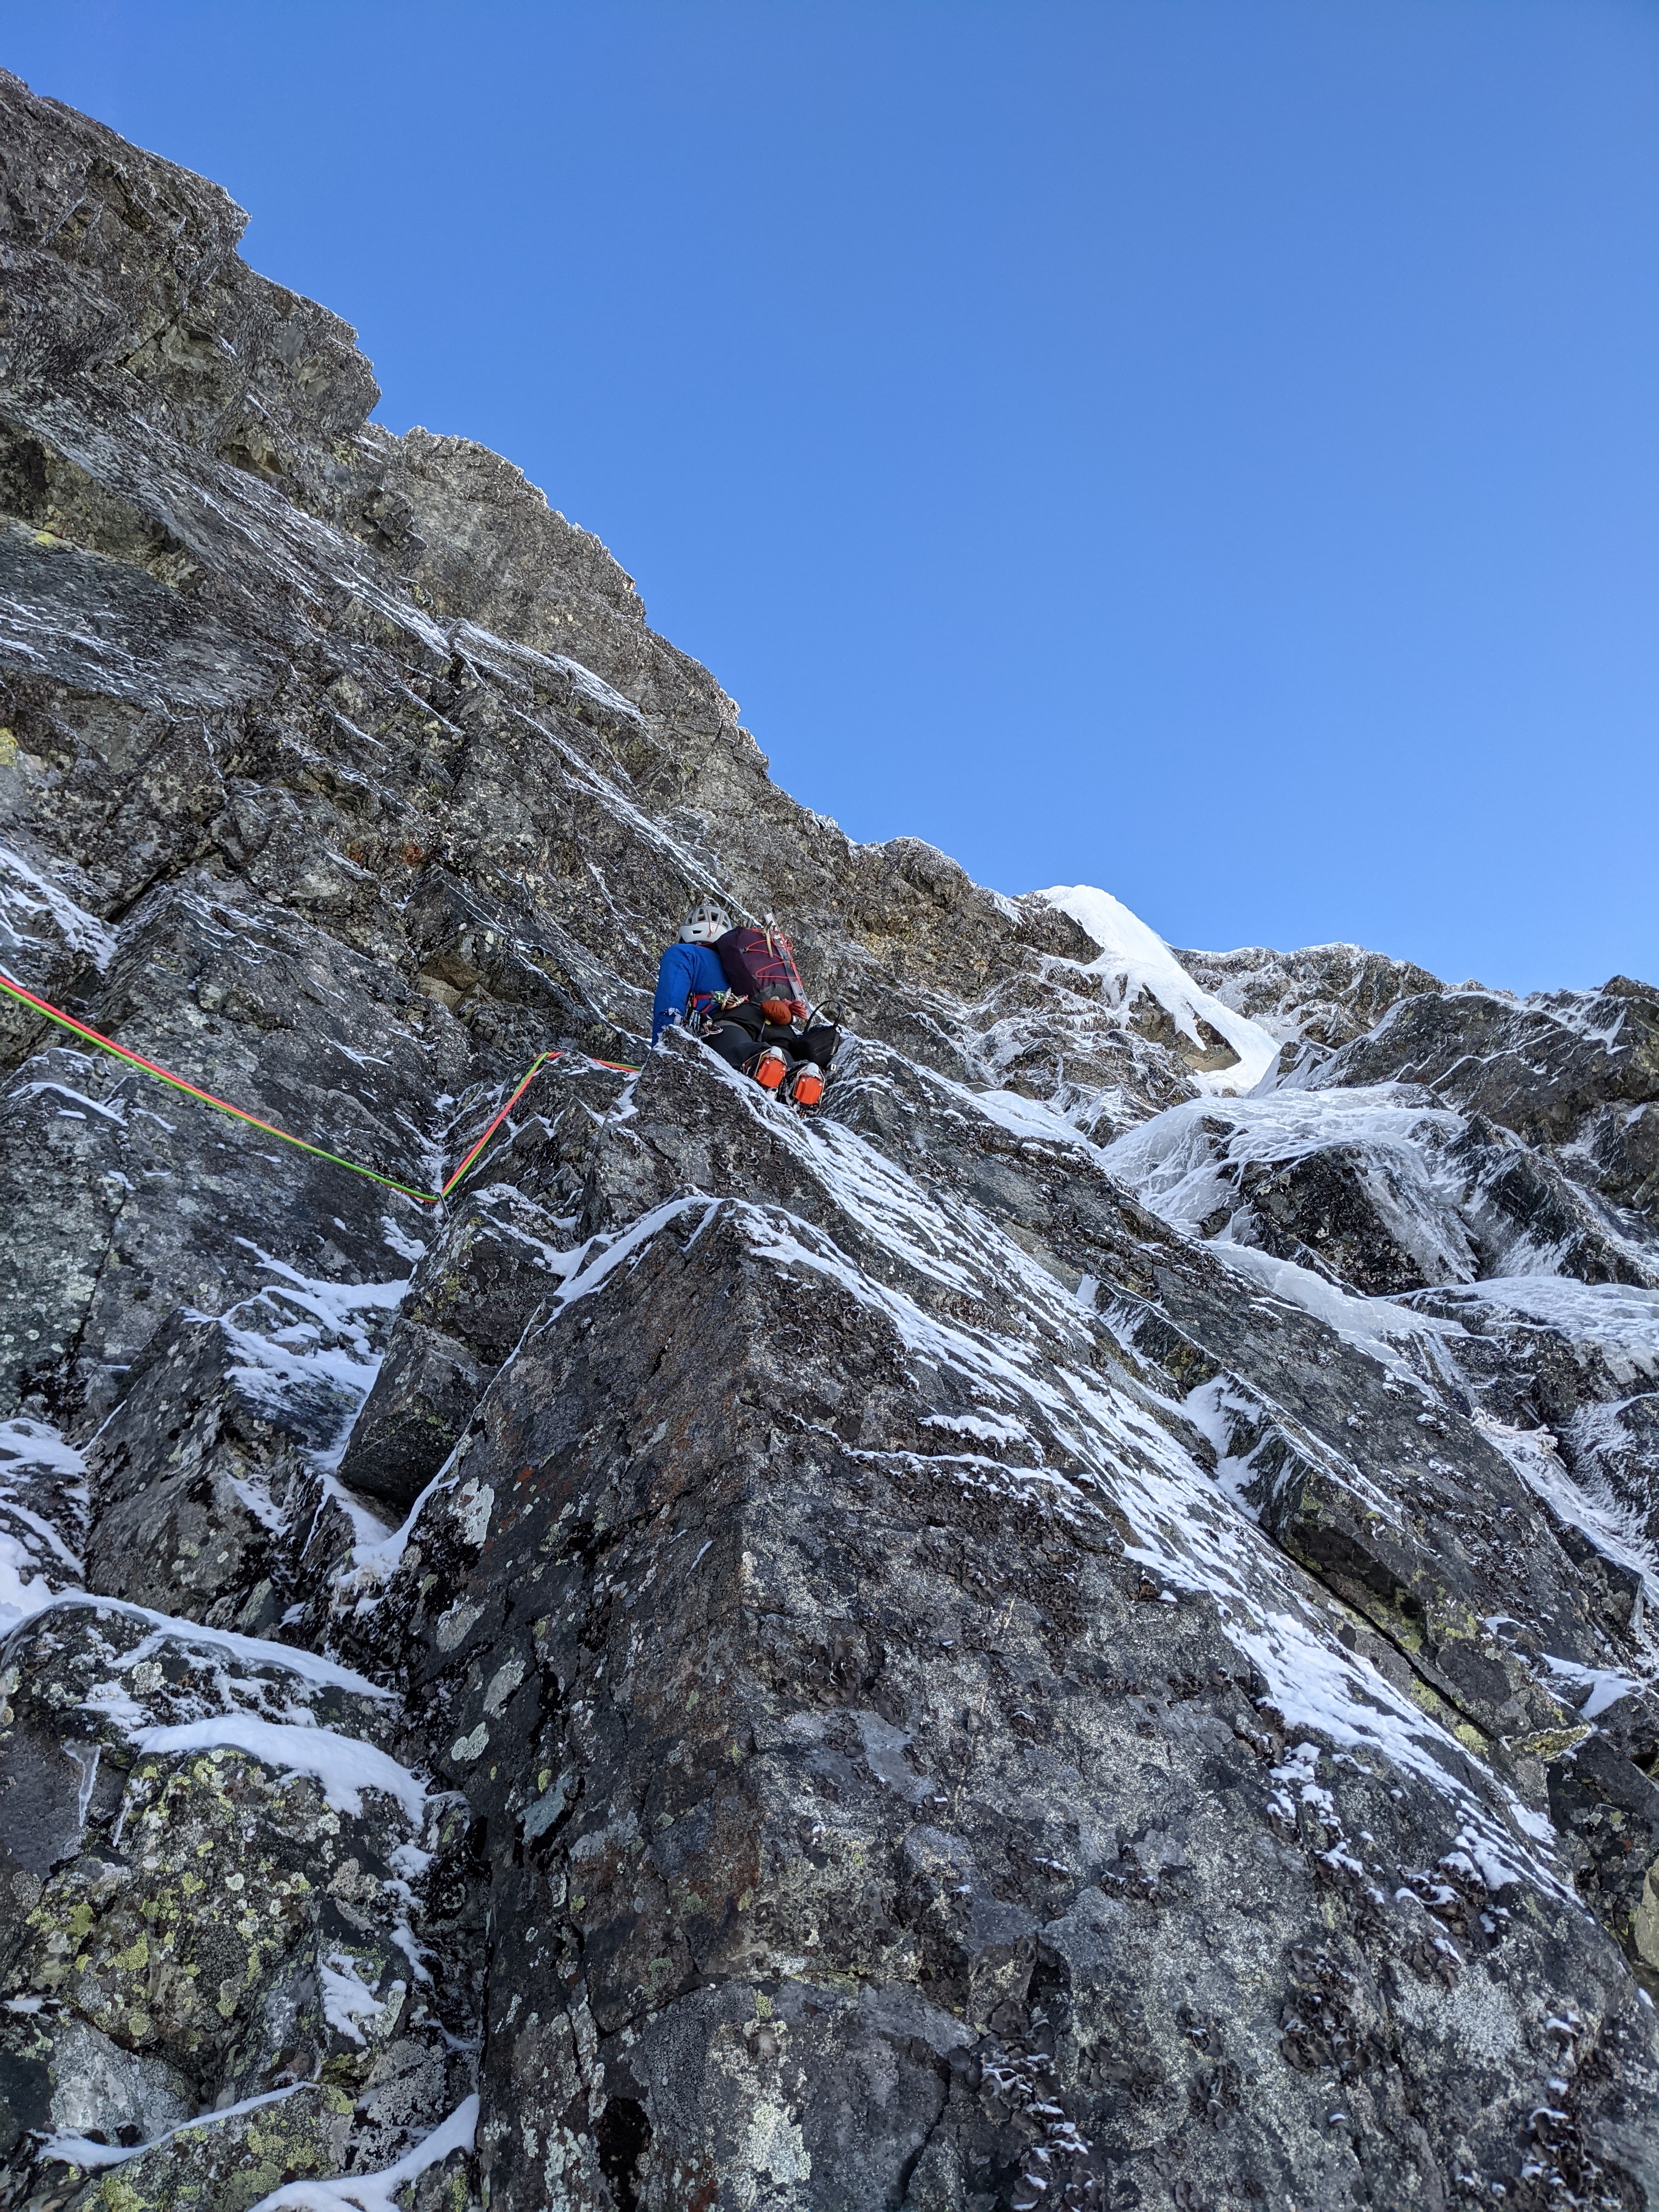
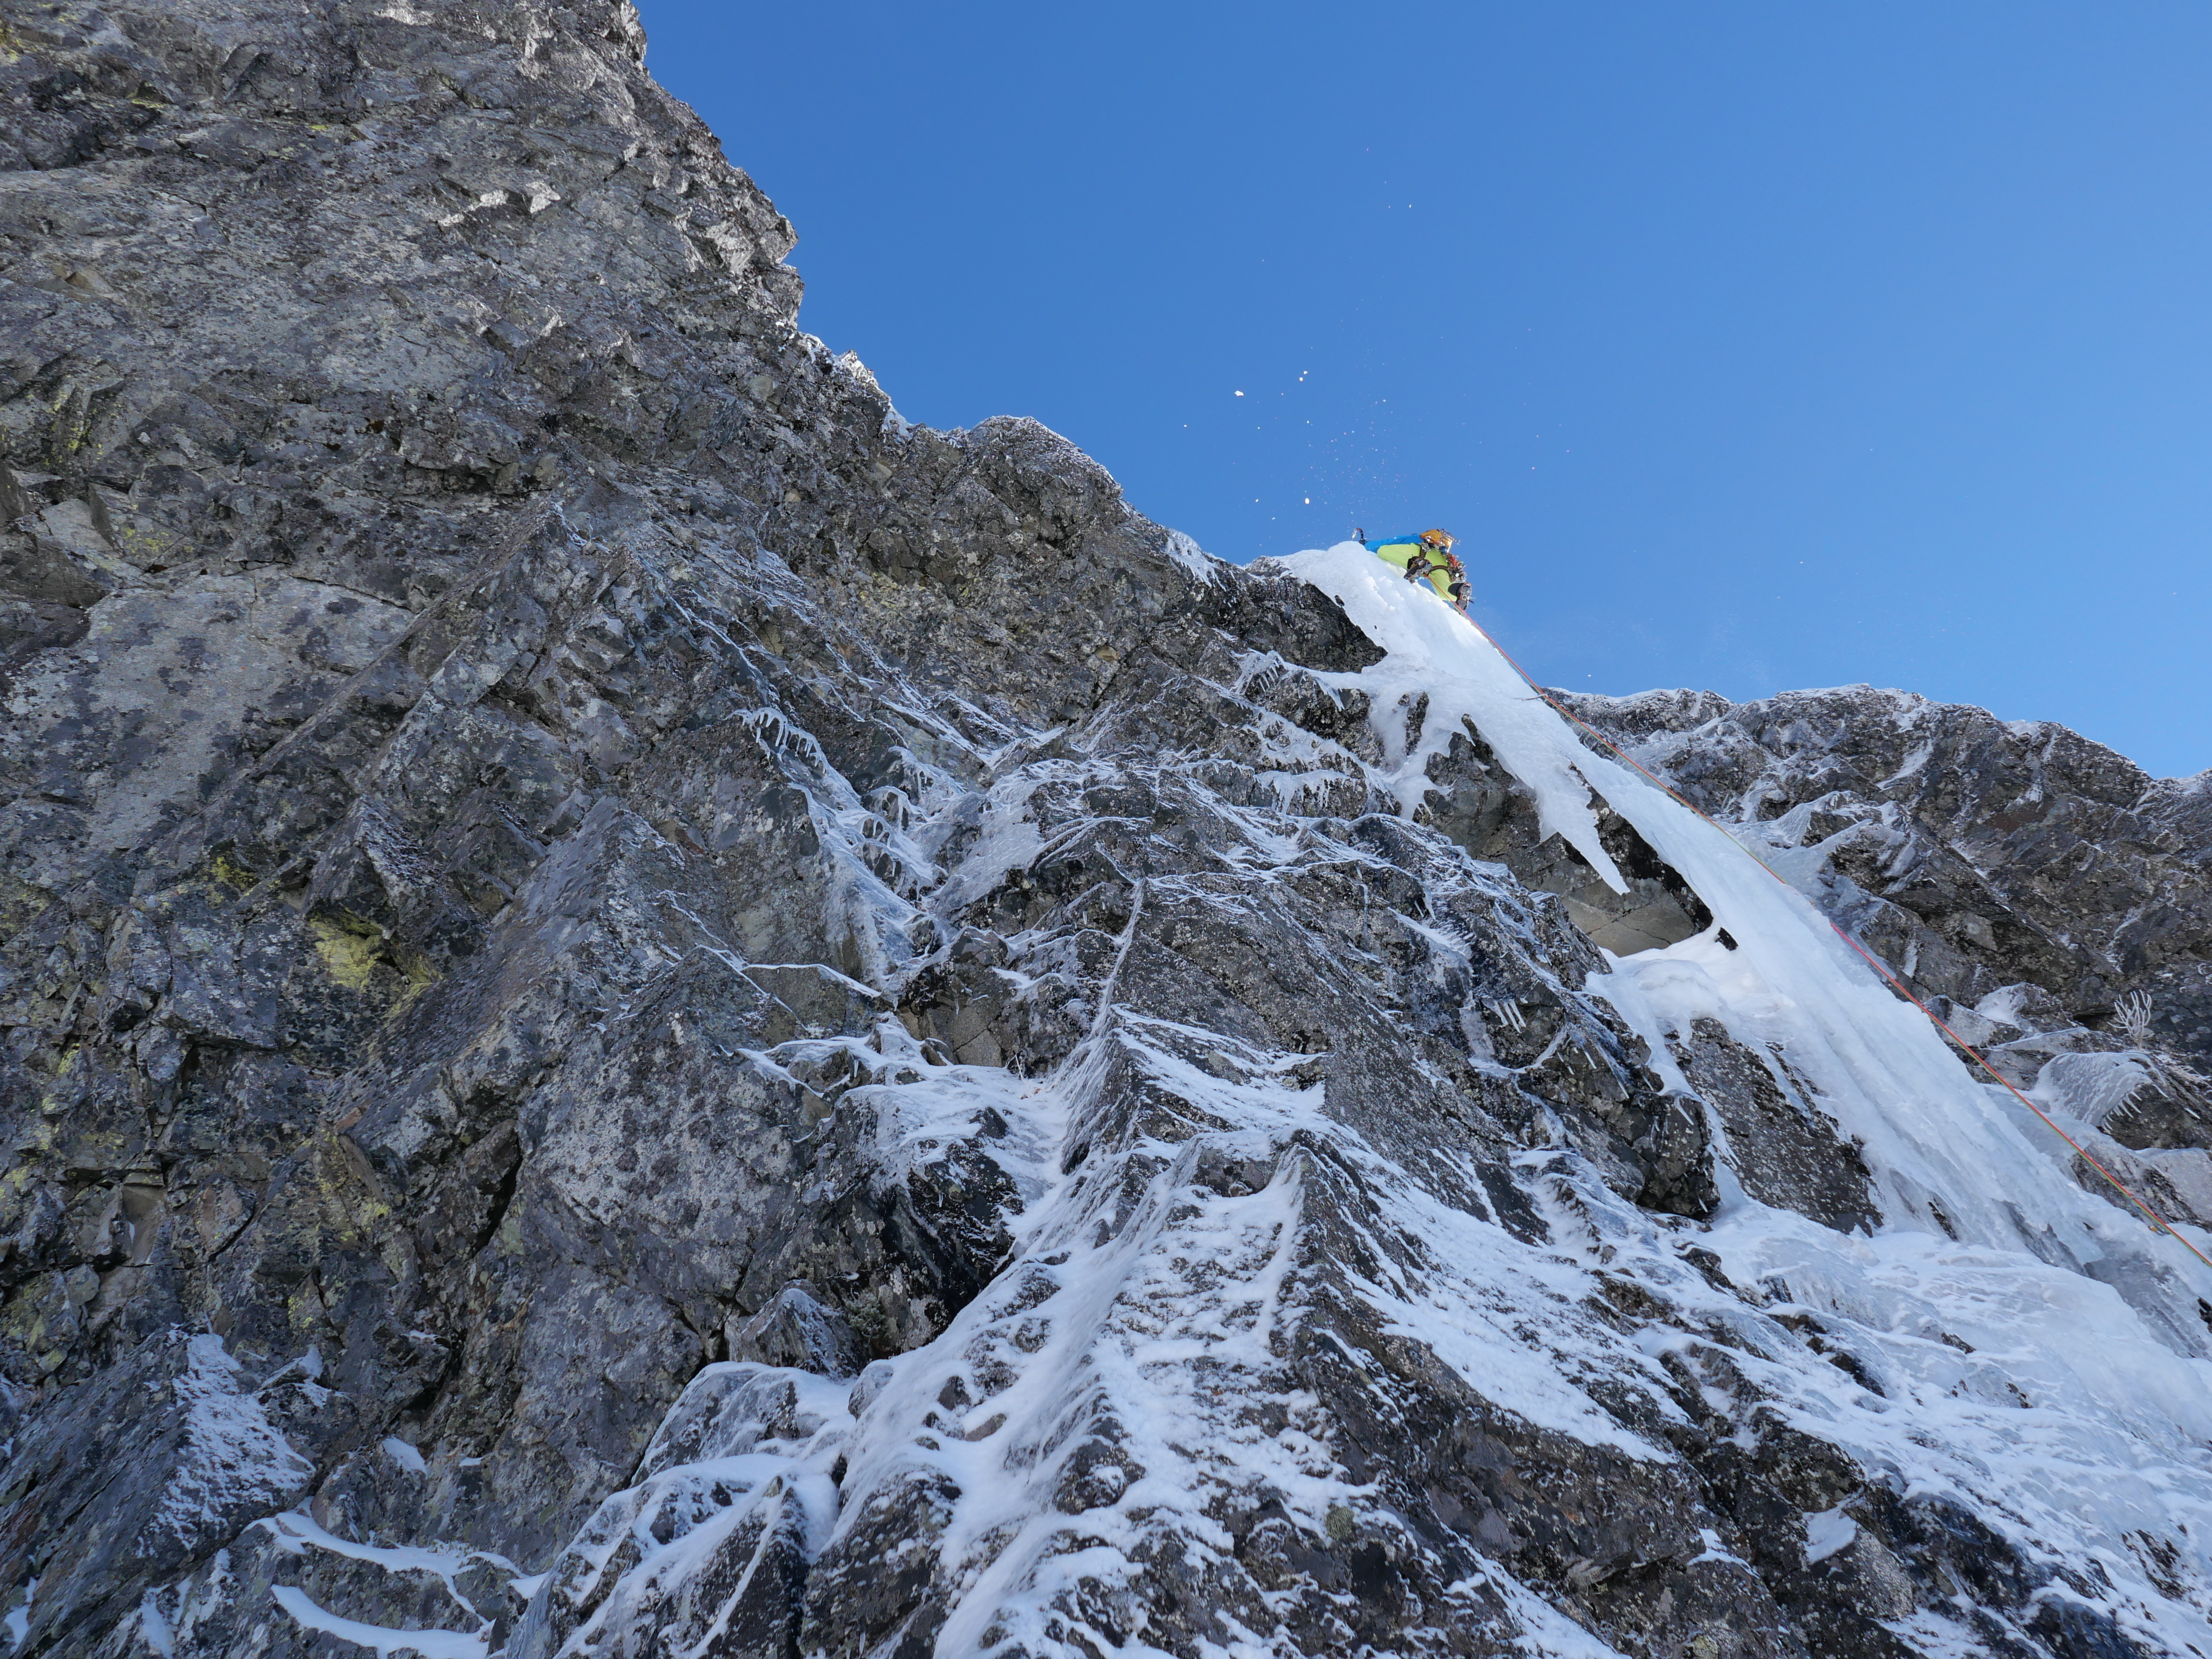
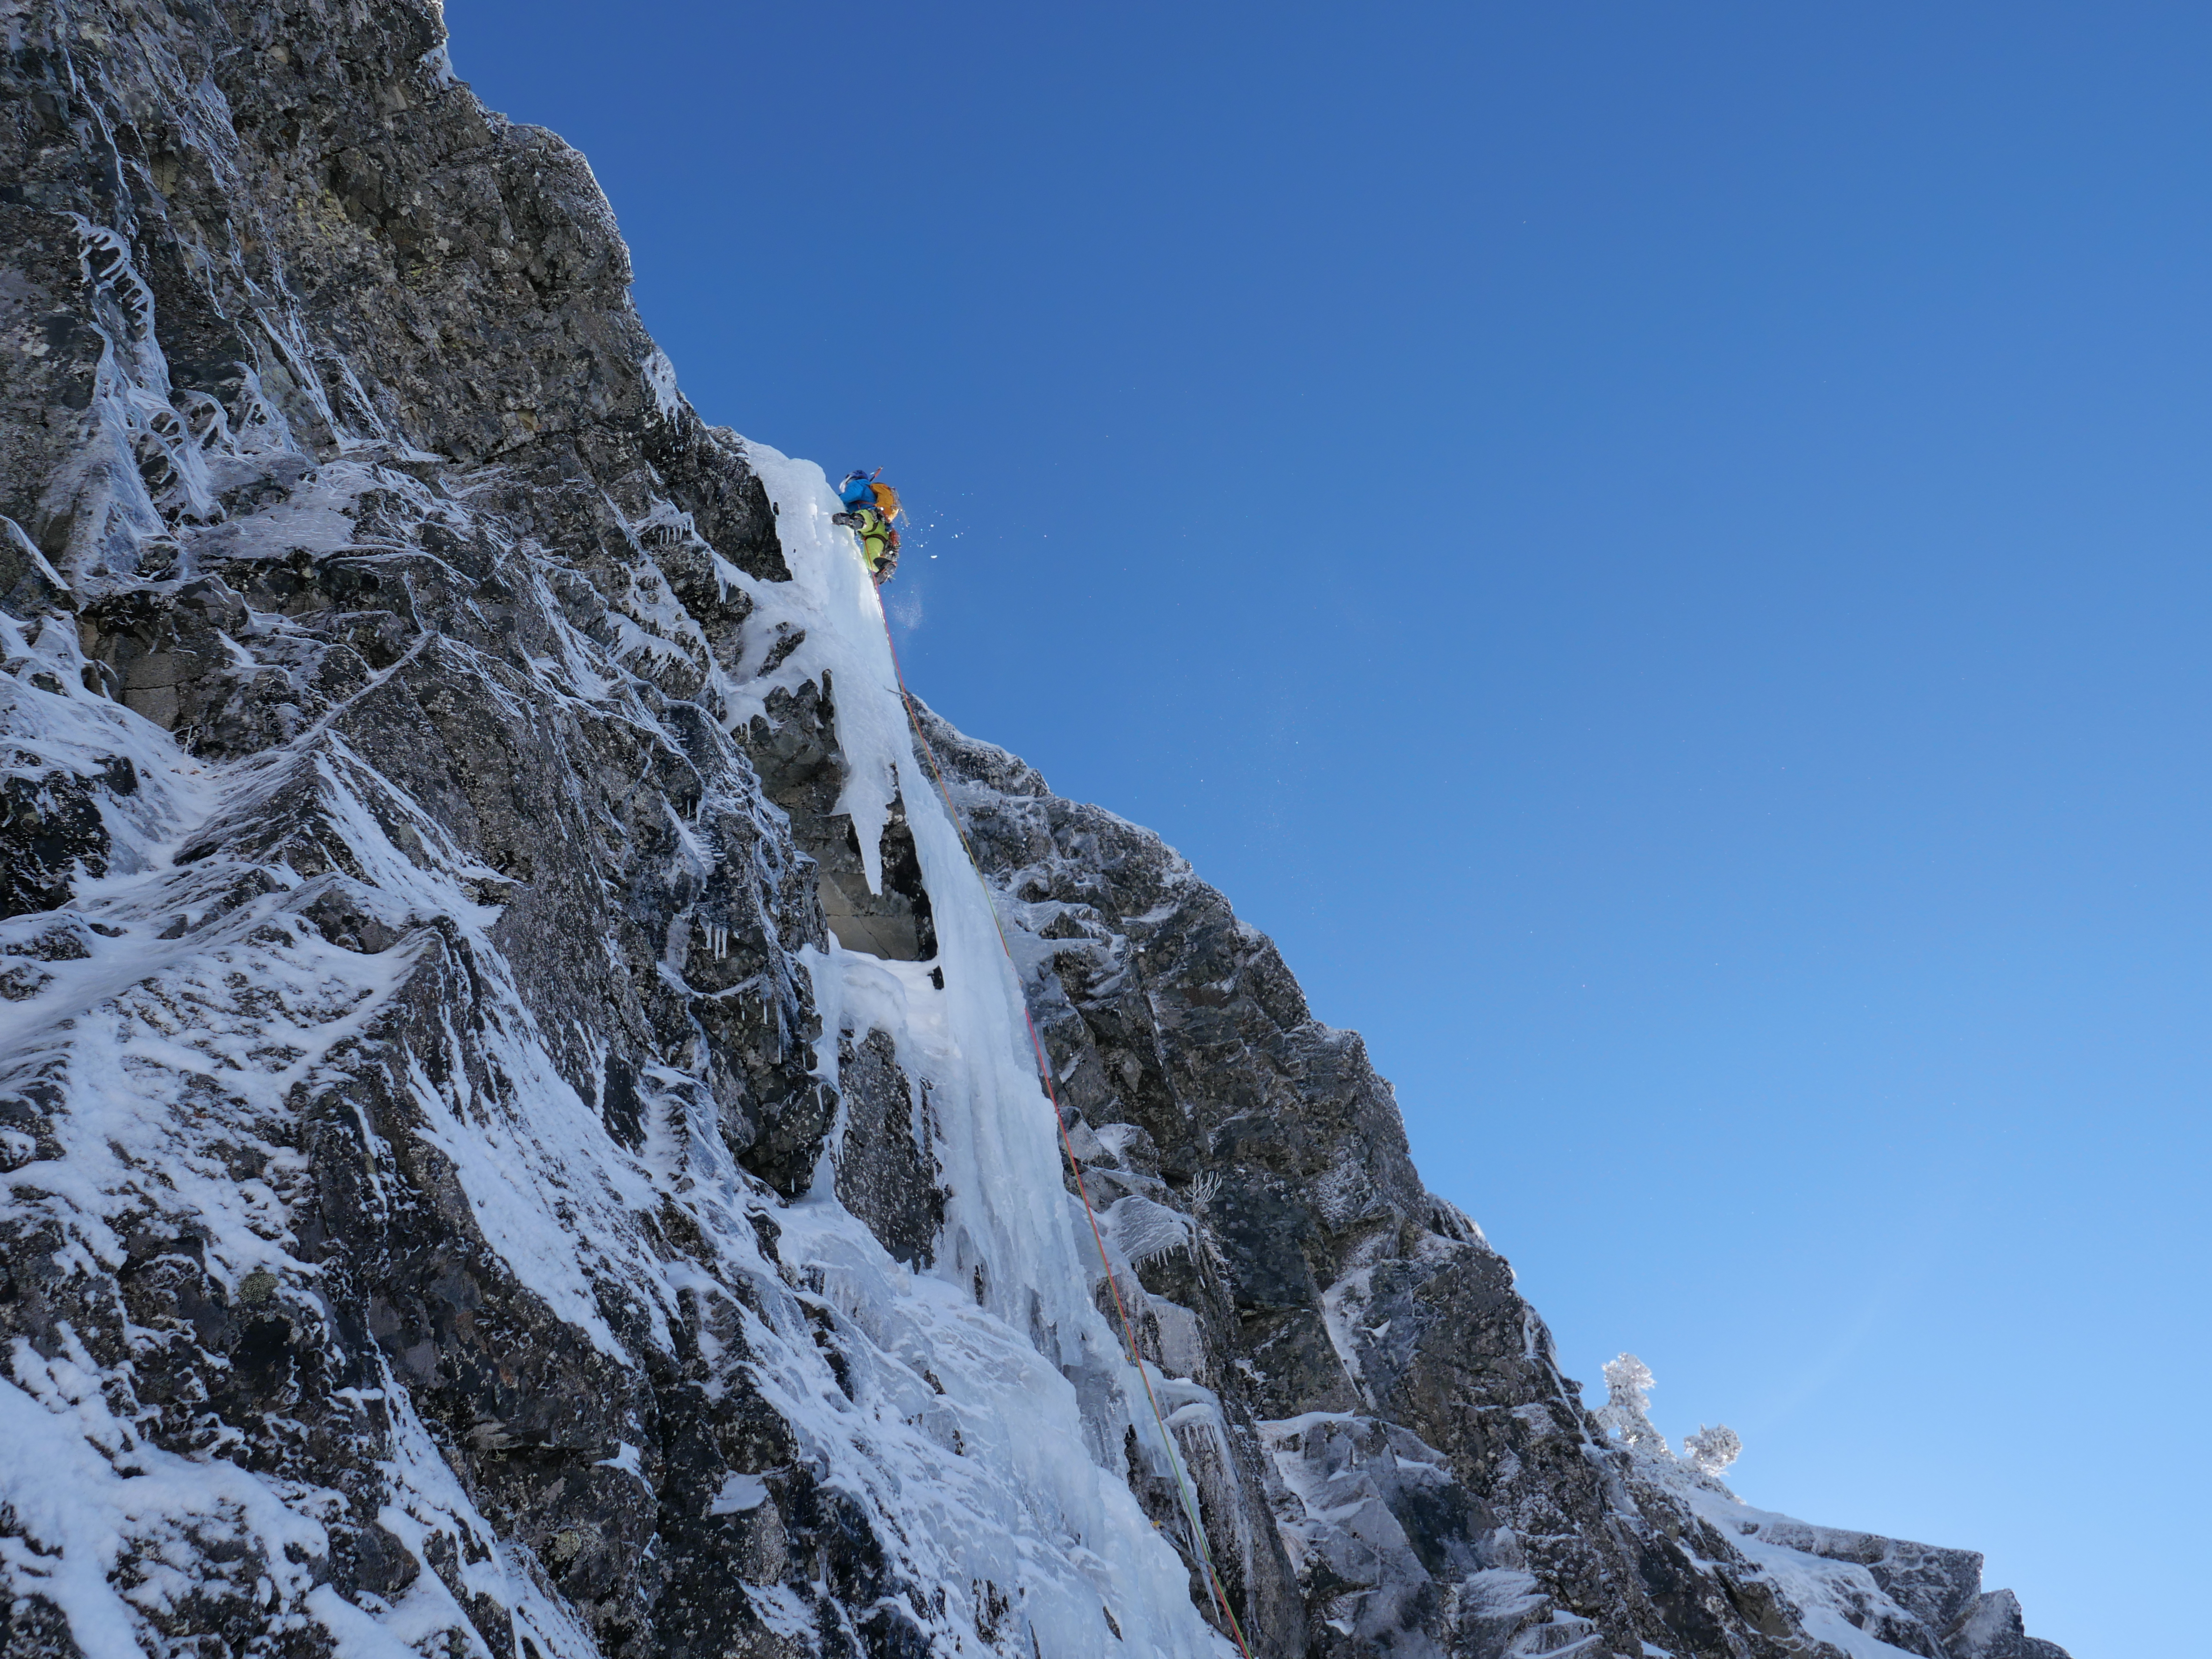
The headwall pitches now loomed above, a long line of bolts weaving their way through corners, roofs and overall blocky complex looking terrain. I somehow managed to link both pitches together cleanly, making for a single mega 65m pitch through the headwall. By the time I reached the crux corner of pitch 8 I was already pretty pumped, but discovered a tricky stem/drop knee right in the middle that allowed me to rest, figure out the moves and futz with my grigri. The climbing is 3 stars, but the position is all time!

Looking down the headwall pitches, the rope showing the way.

The routes crux IMO
Looking back up the pitch(s)
One more time looking down the headwall to show steepness.
The next two pitches offered some more excellent climbing, but also some of the worst. There comes a spot on P10 where the rock gets incredibly dirty and friable, with the next bolt just out of view above a bulge. I damn near pitched off this section trying to figure out if I was on route or not. I was, and it all worked out just fine.
At the base of pitch 11 I finally took a real “shoes off” break and sat on a really nice flat ledge in a desperate attempt to depump. Having taken no real breaks up to that point, the constant climb-rap-reclimb had started to take its toll. Too antsy to get to the top, I saddled up and kept climbing. Much to my relief, the final crux was an awkward slab move! No forearms required. It took a bit of ups and downs, but my sore toes stayed where I wanted them, and it was all over in a move or two. The hardest part of the day was by far leaving the summit to clean and reclimb that last pitch. It’s over! JK no it’s not.
Now at the summit I ran into a sneaky team who had just topped MHC. They were very confused how I got up there. I filled out the register, high fived myself for a good climb and started over to the raps. It was at this point that I realized I had forgotten both my ATC, and the rap beta. Having climbed MHC ~4 years ago I had assumed I’d remember. A couple raps, one damn near stuck carabiner block, and some totally botched routefinding later I was safe and sound on the ground. I then hiked out and blah blah blah it's pretty up there.
Overall I really enjoyed this route. It had a little bit of new route funk, but was really quite clean for how long it is.
Good looking mountain!
I’m sure someday I’ll whip, my grigri will explode and I will fall to my death. Will someone please sell me a Silent Partner for a reasonable price? I’m a poor gear shop employee that doesn’t want to die.
Gear Notes:
I brought something like 15 draws and 10 loose carabiners. Normal people not linking pitches should bring 17 draws. Beal Escaper just in case, 70m rope. I now own an 80m rope for stuff like this.
Approach Notes:
It's pretty obvious. If you have any questions check out the MP listing-
2
-
1
-
4
-
-
Did you get those custom made? FF doesn't make the Volant pants in that fabric.
-
Stop it! You're reminding me how much more fun it is to climb dry alpine rock.
Looks like a stellar trip!!
-
1
-
-
About time! THIS is what retirement is for, not all that free heeling you've been doing. That thing looks way cooler than I expected! Way to go you filthy barn animals.
-
2 hours ago, JasonG said:
Agreed that I'm quite impressed with winter ascents, hard to fathom!
I haven't climbed any of the summits in the summer, so take everything I'm about to say with a grain of salt.
It seems to me that apart from the days being shorter, the climbing might be overall easier in the winter. Everything that is under dead vertical gets filled in with snow or ice, so you don't have to deal with runout slabs or vertical bushwacking. Just runout snow and ice climbing, which in my opinion is better.
-
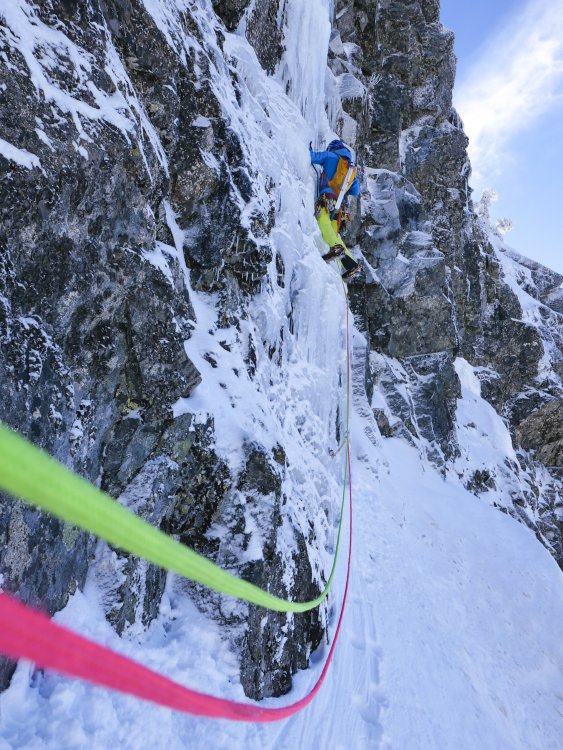
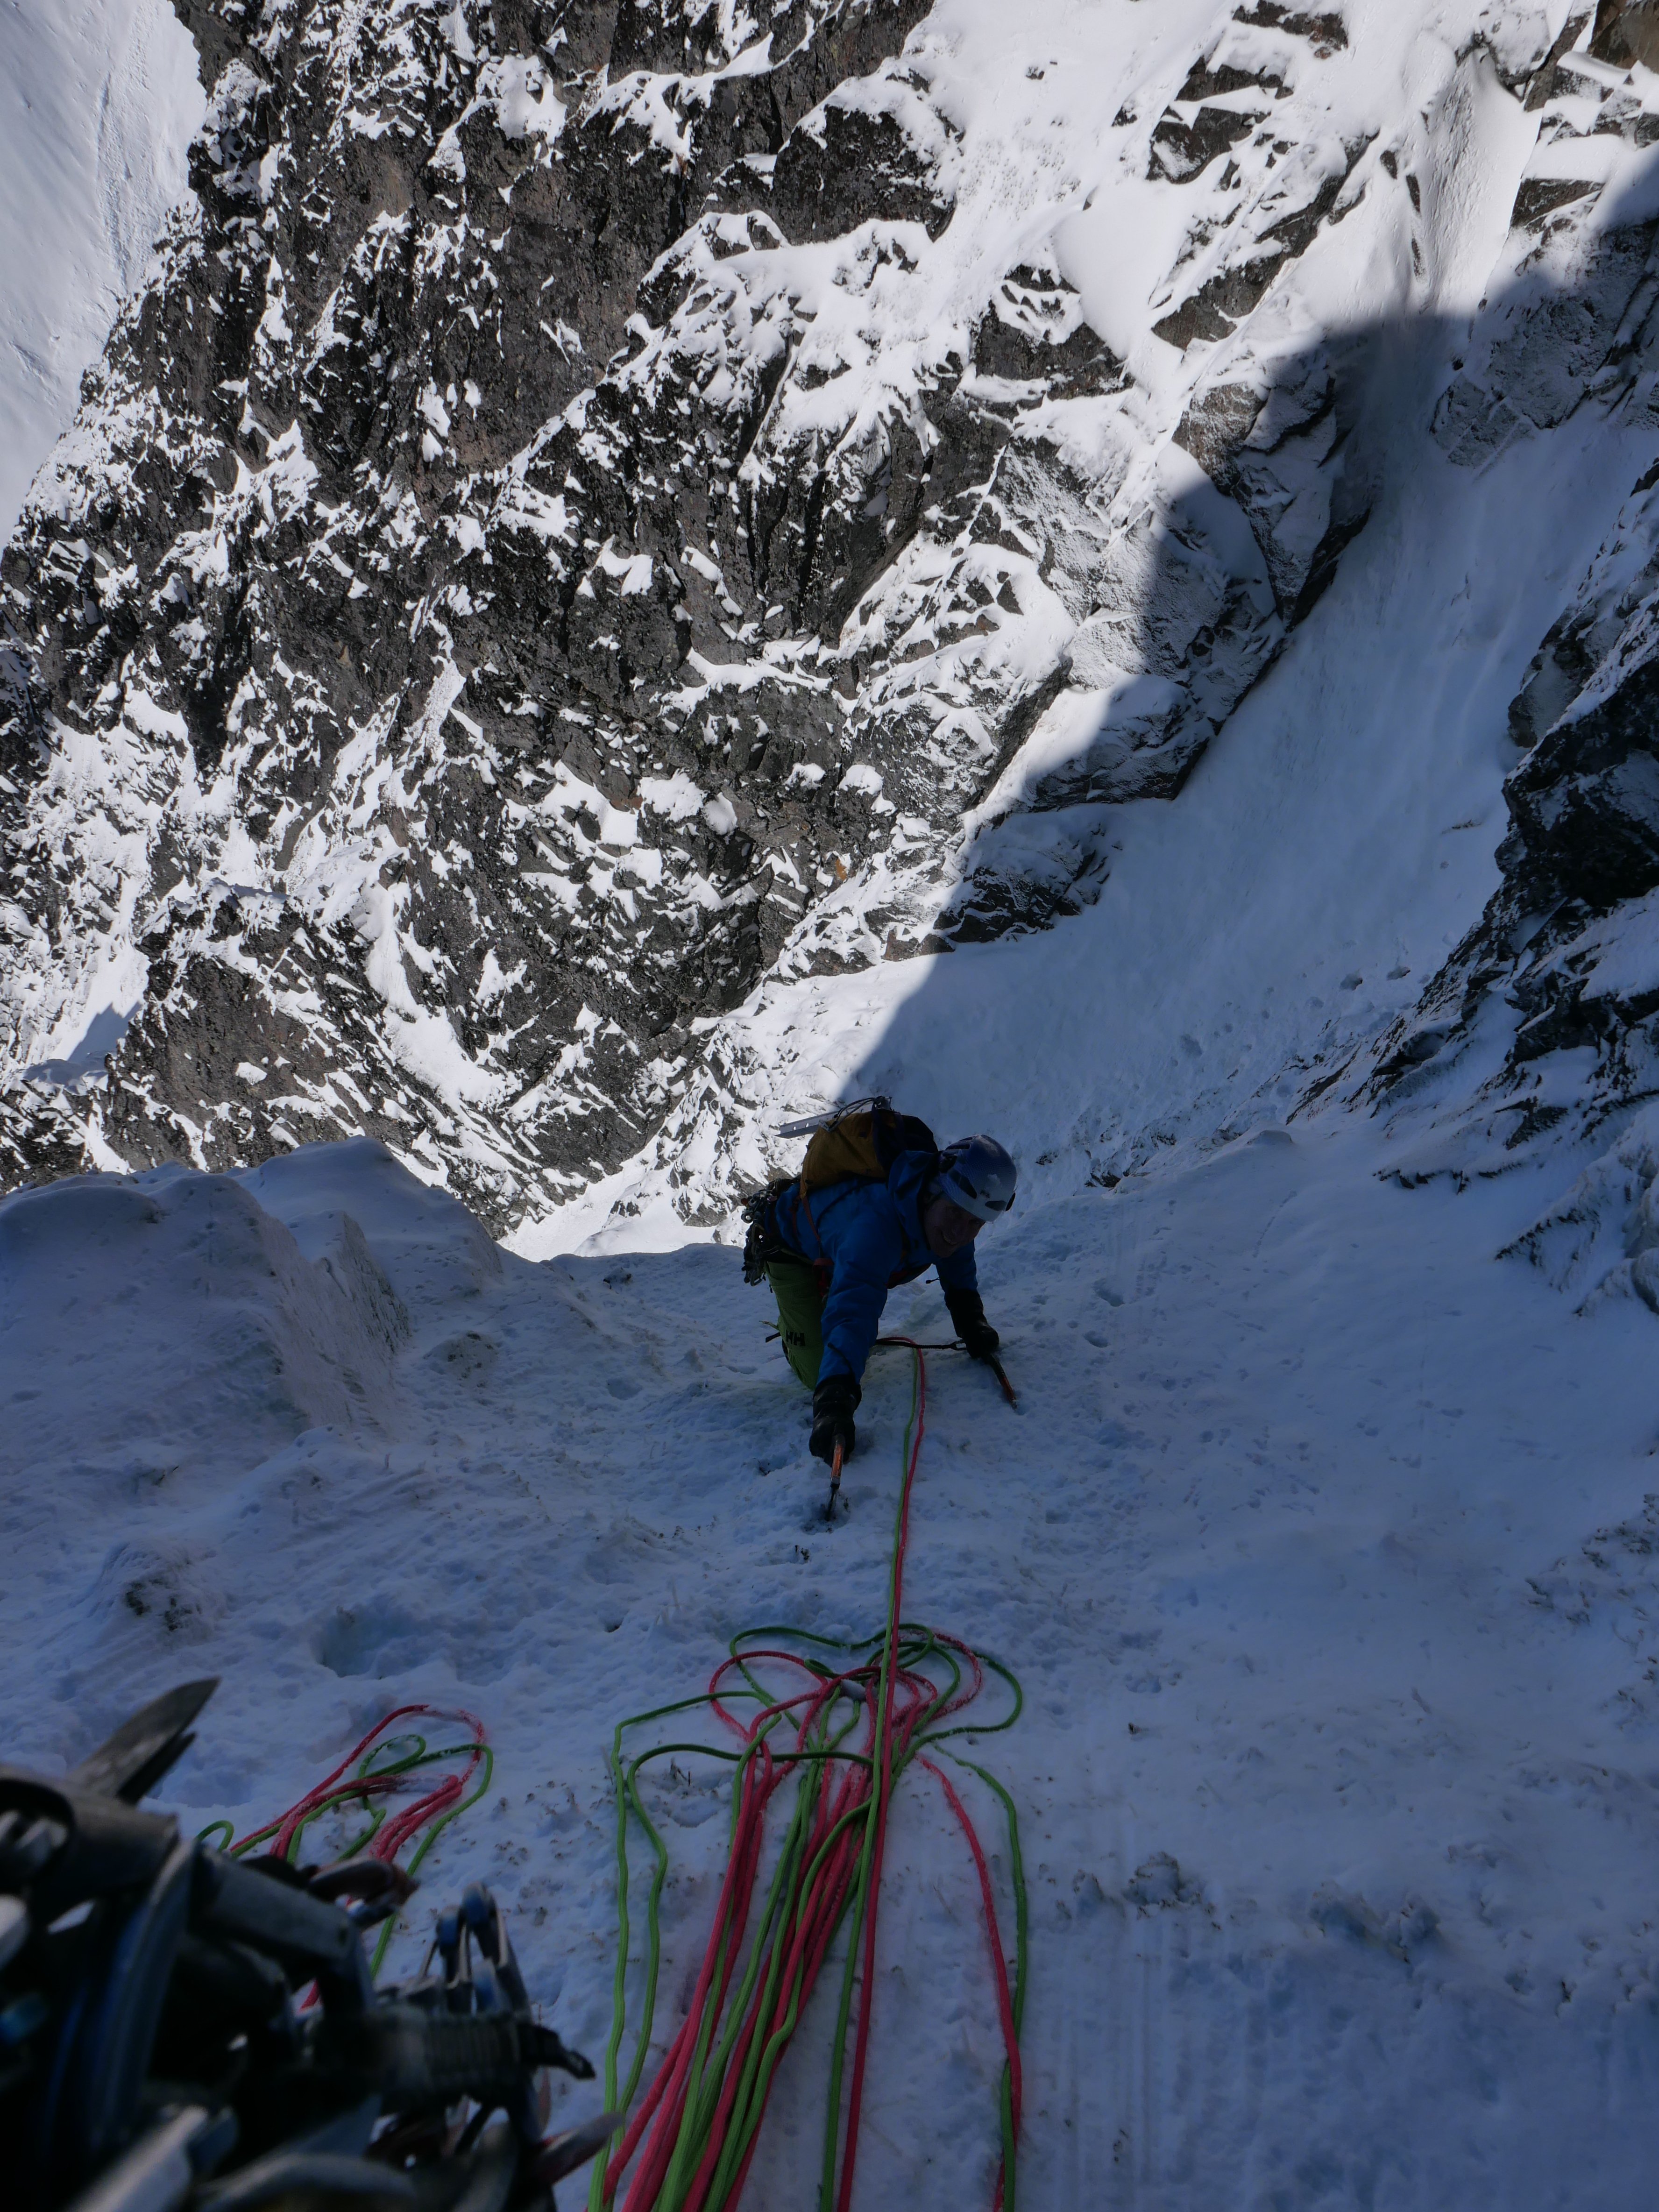
Thanks for writing this Sean! It's an honor to be apart of the first full N-Index winter trip report. This route is so much bigger than I could have imagined. In it's current condition there is a direct ice line that bypasses the N-rib mixed climbing and goes straight up some sweet looking alpine ice. I wish we would have taken this, as it would have shaved probably an hour or more off of our climb. I would probably give the route in these conditions AI3- M5.
Strava Track HERE
And the only decent photos I got from my camera.
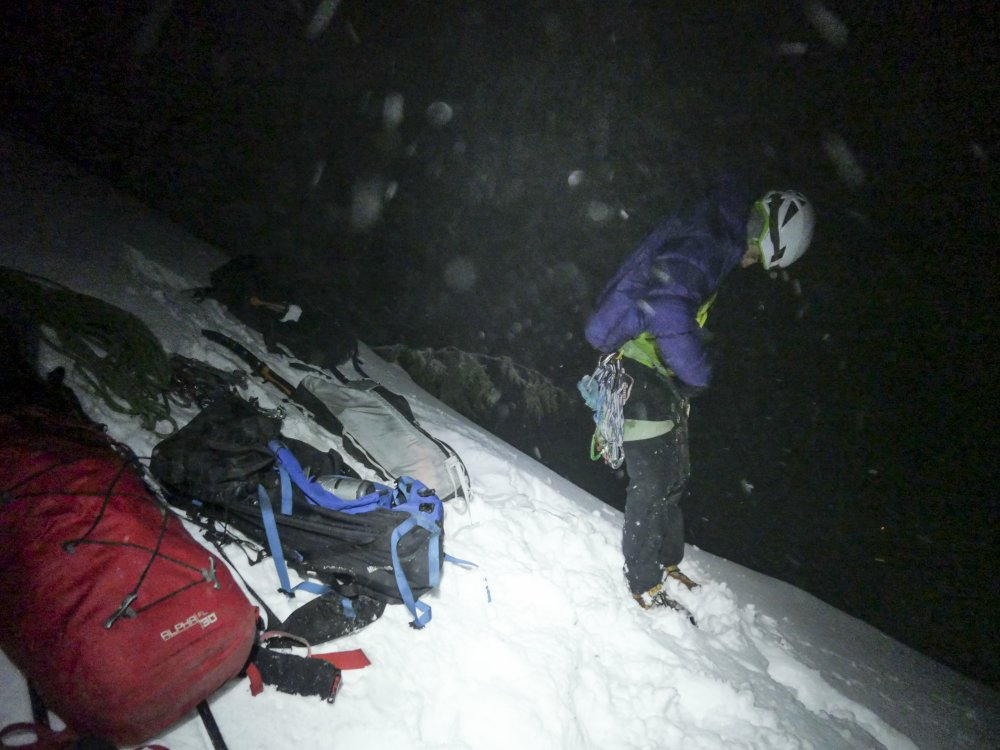
Racking up at the base
The belay below the N-rib
Sean leading across the gendarmes
-
4
-
3
-
-
16 hours ago, JonParker said:
It’s sketchy, go get it!
")
I would like to point out that we intentionally didn't give it a PG13 rating. We thought it protected adequately for this type/difficulty of alpine climb, but was certainly no clip up.

-
22 minutes ago, The Real Nick Sweeney said:
How long did the approach take you?
About 3.5hrs with a 6am start. Should have left earlier as all of the ski out ended up being in the dark.
-
1
-
-
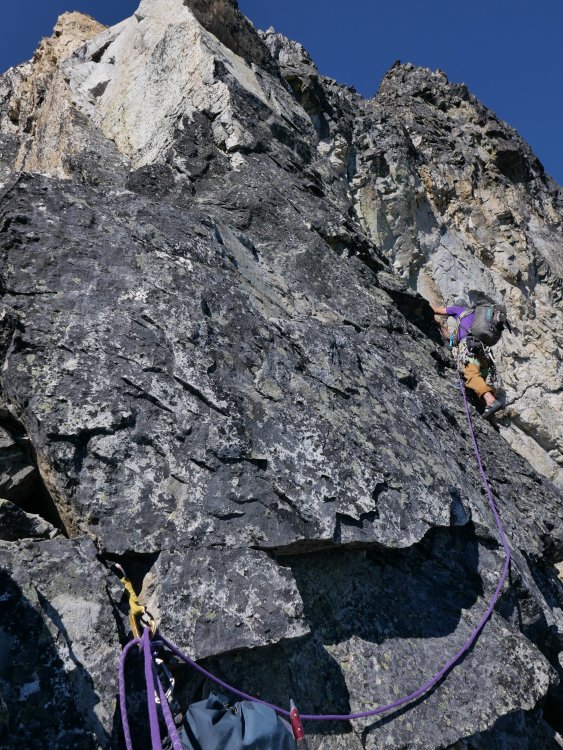
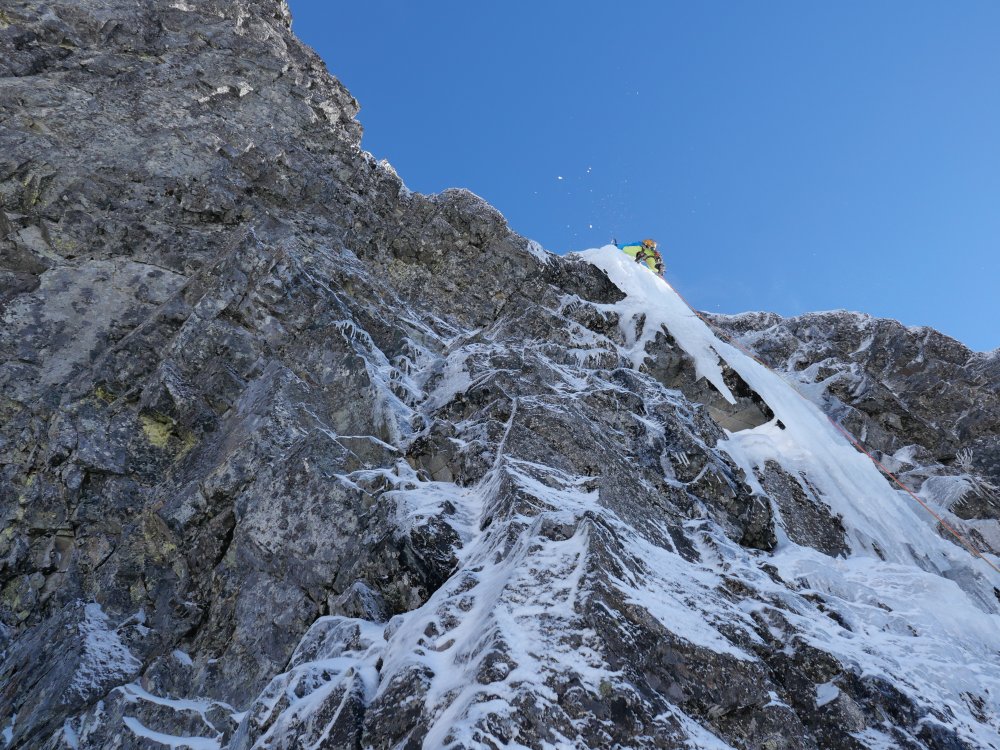
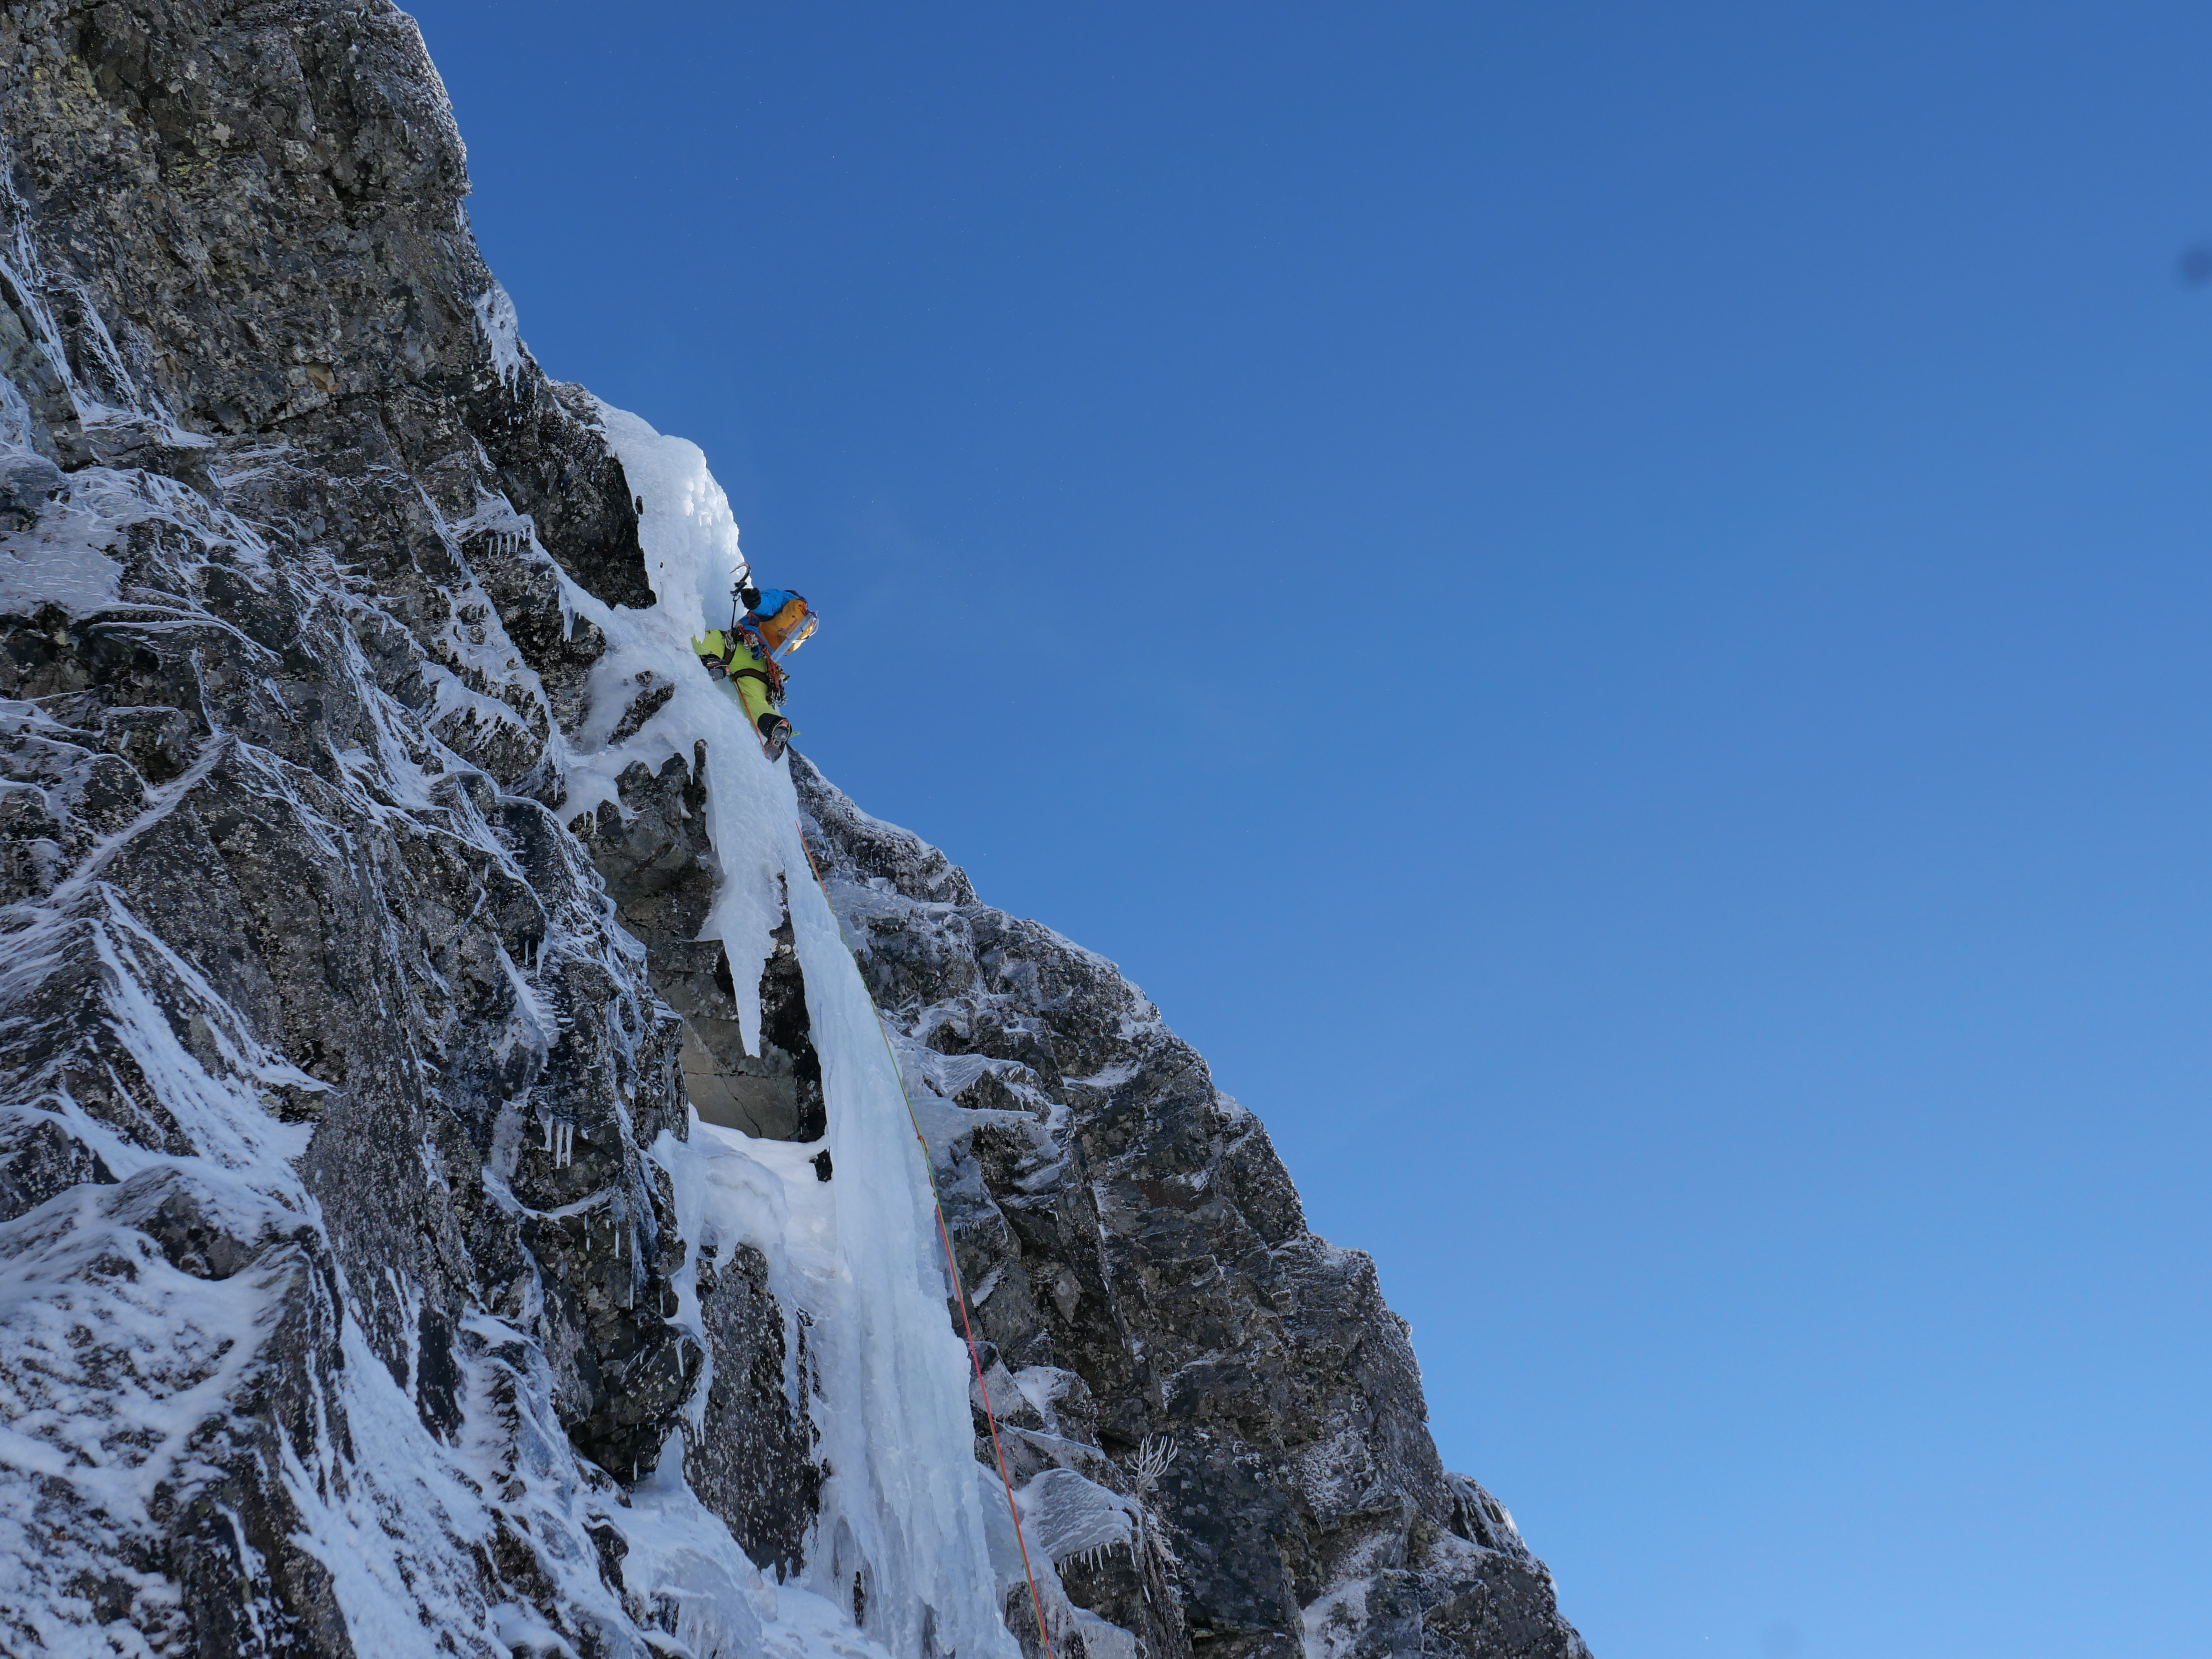
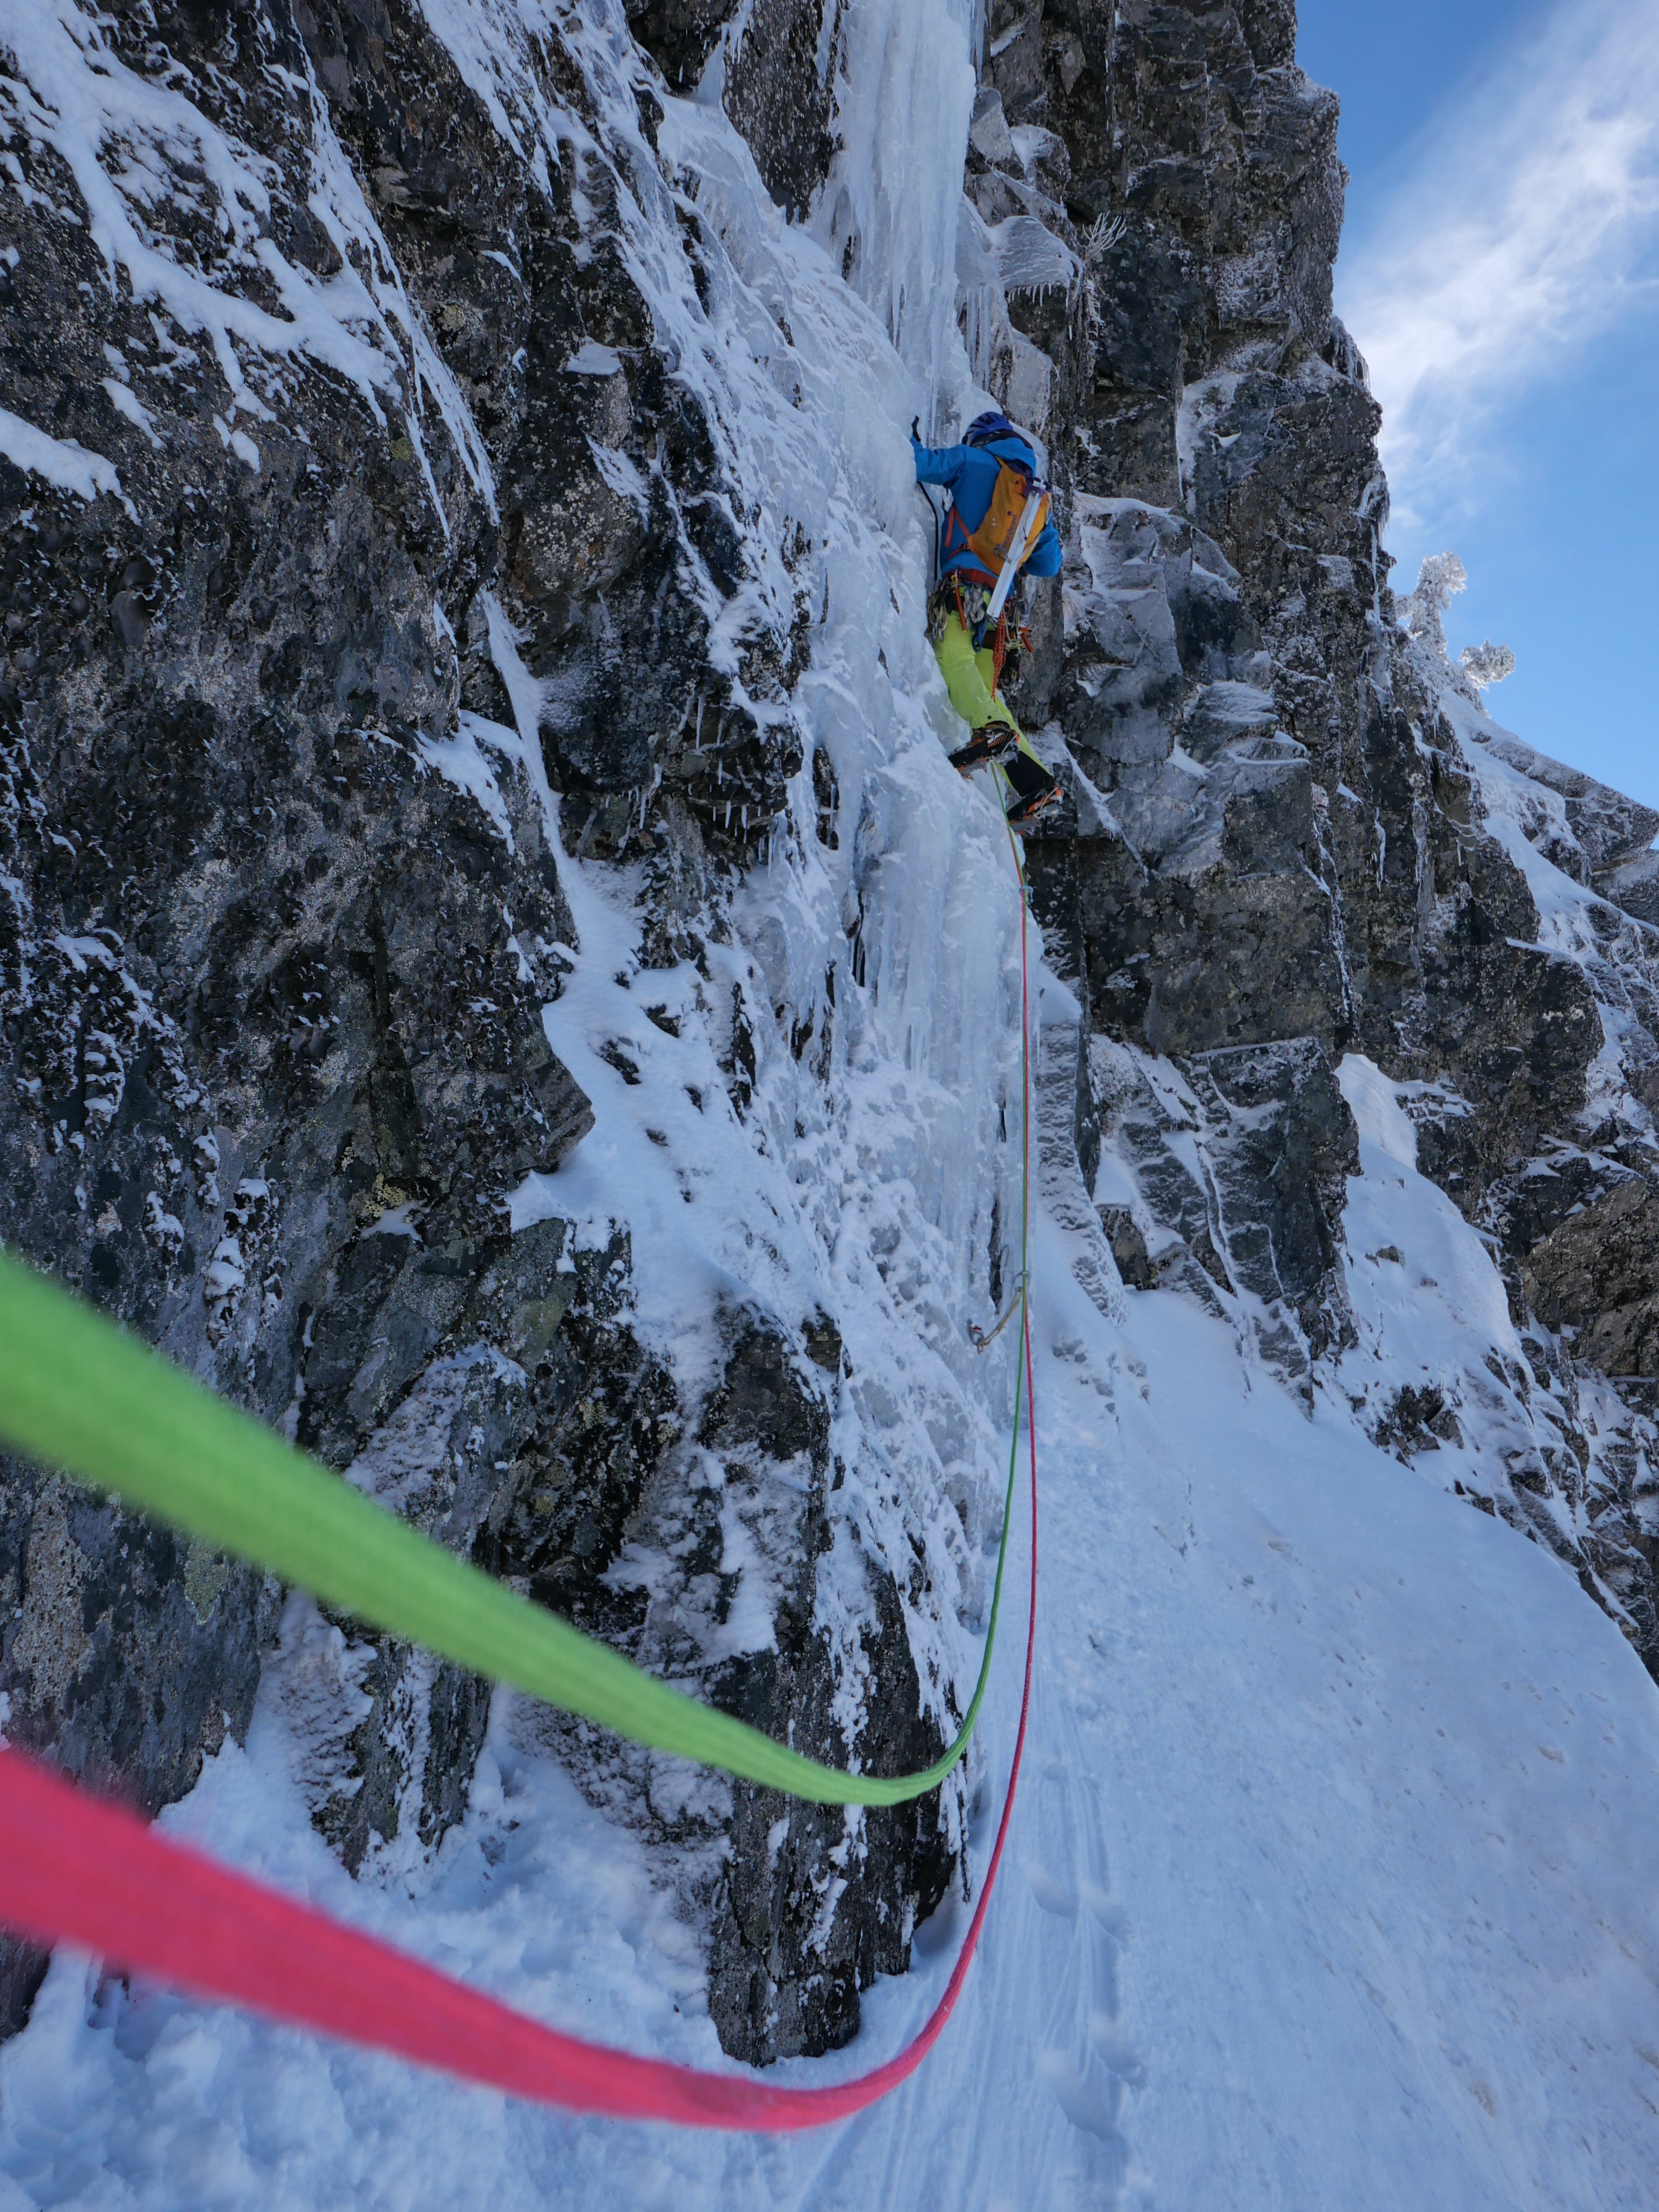
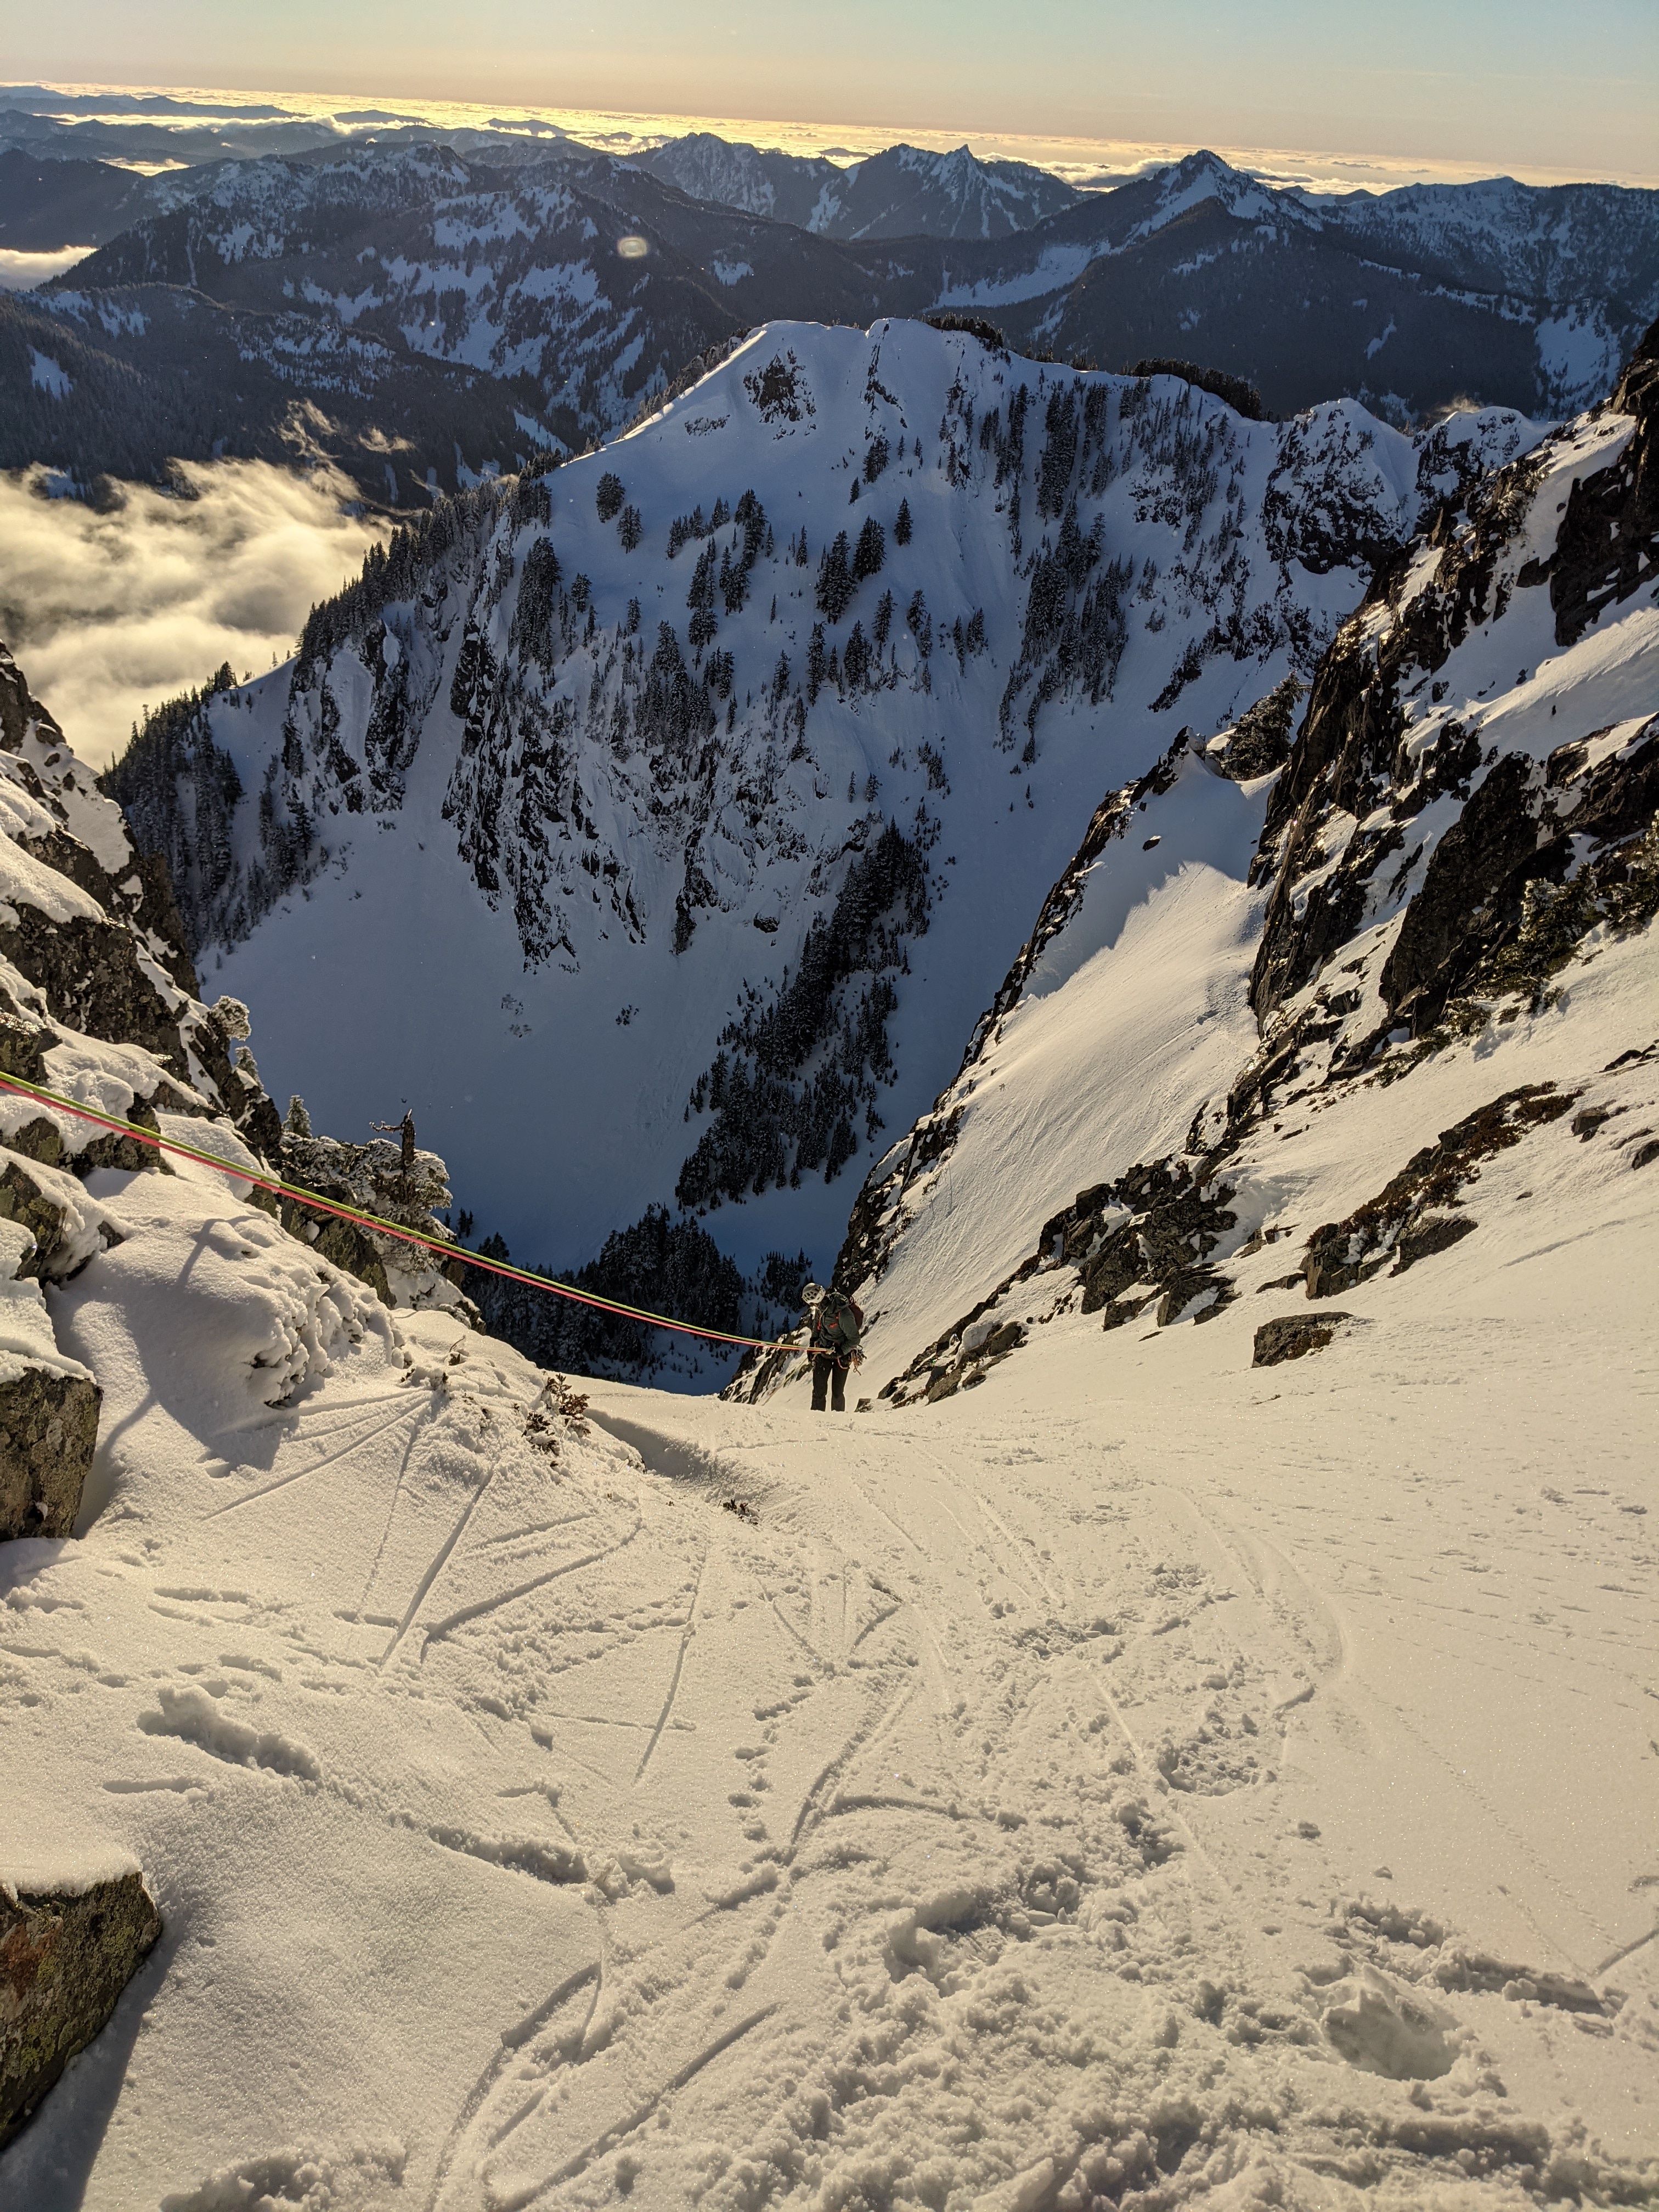
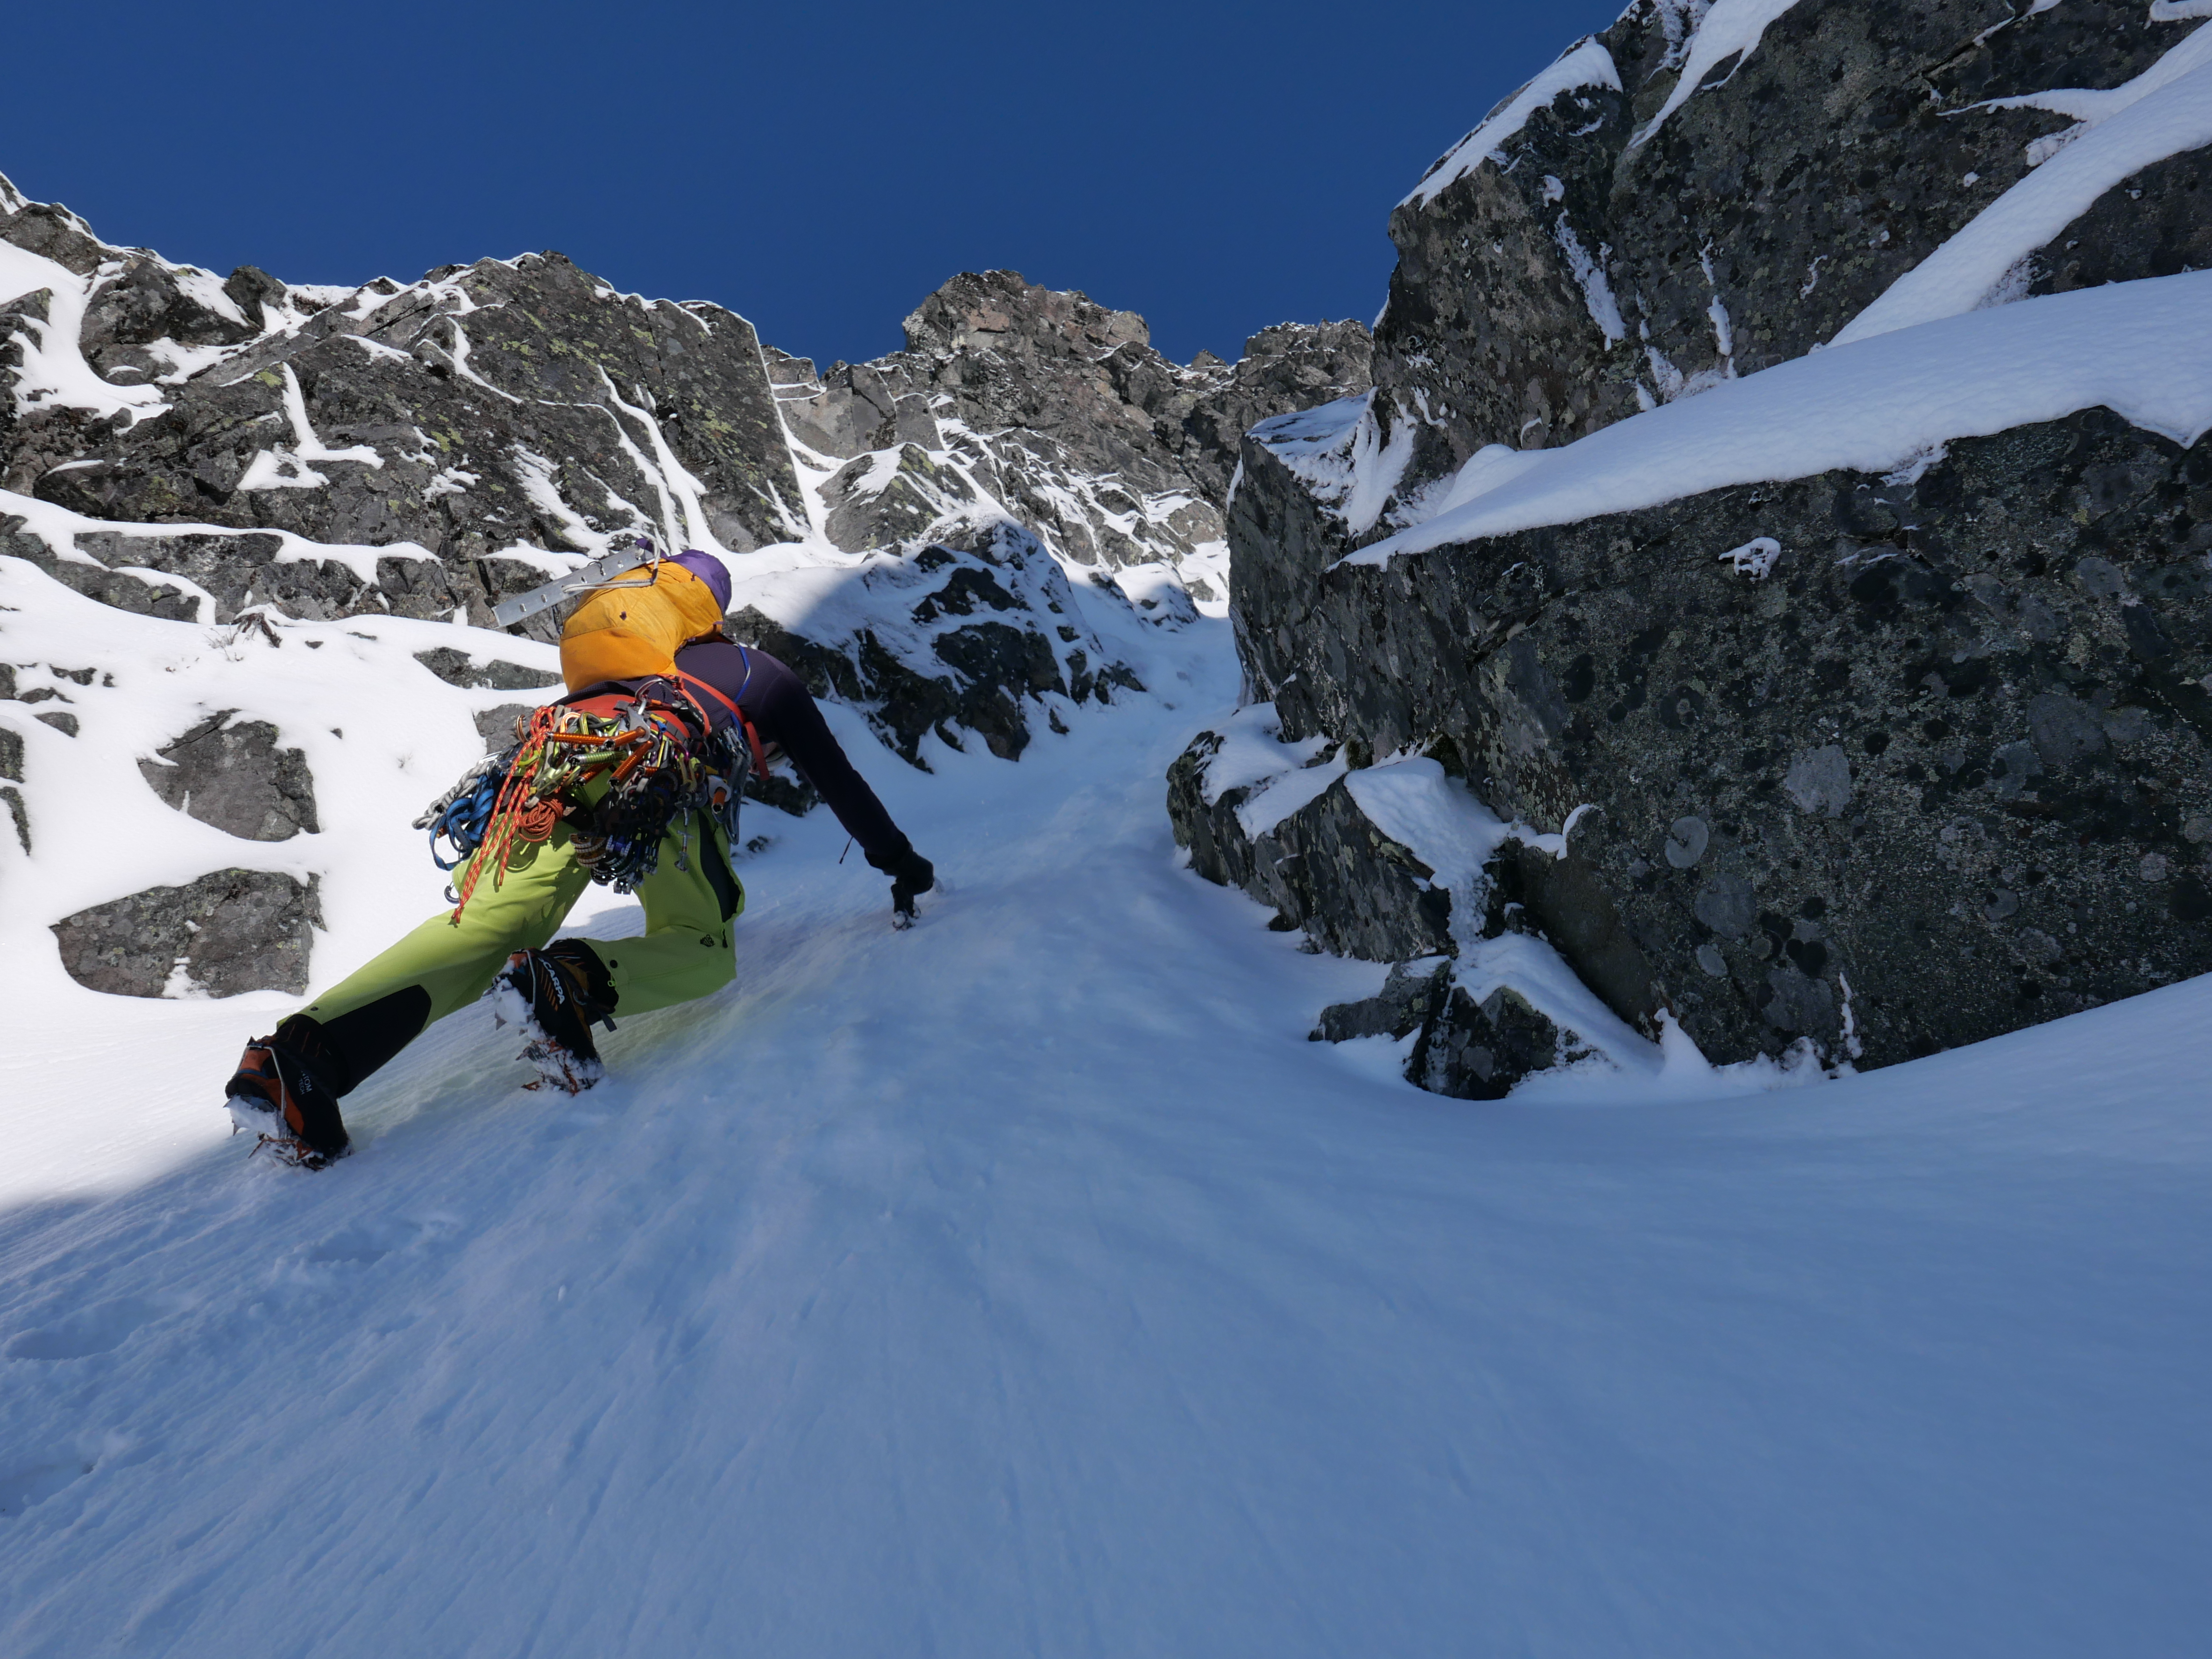
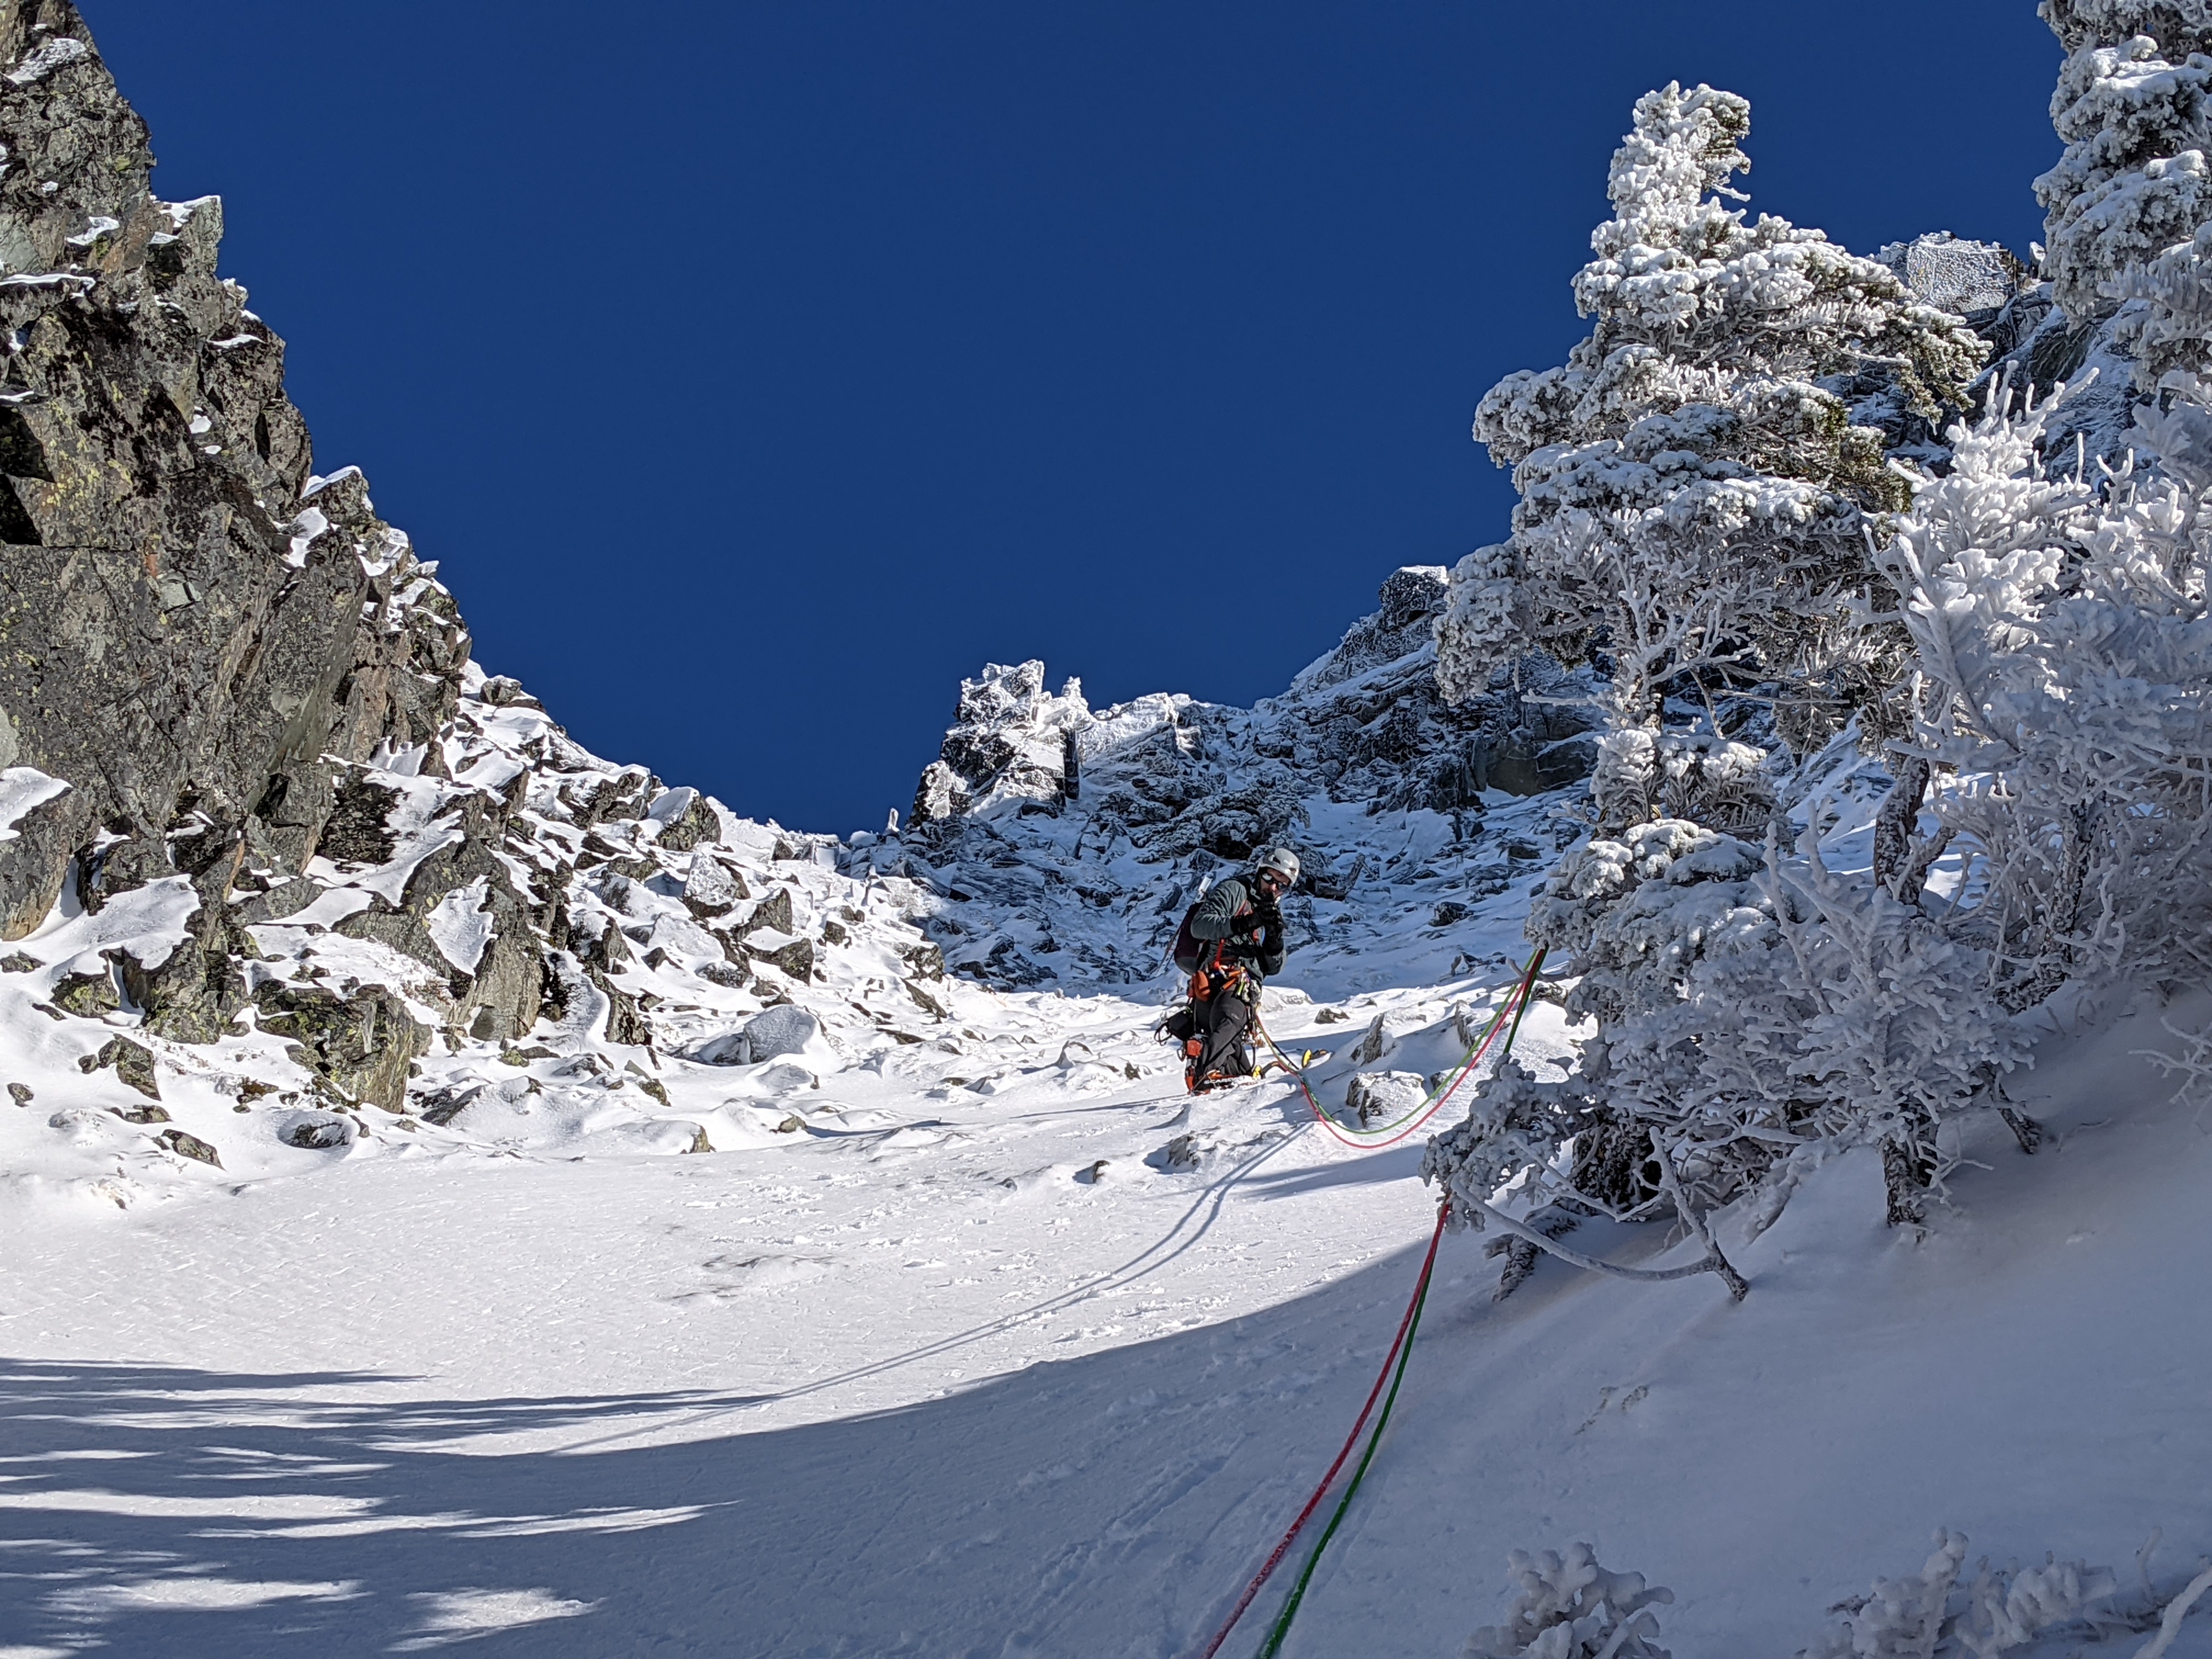
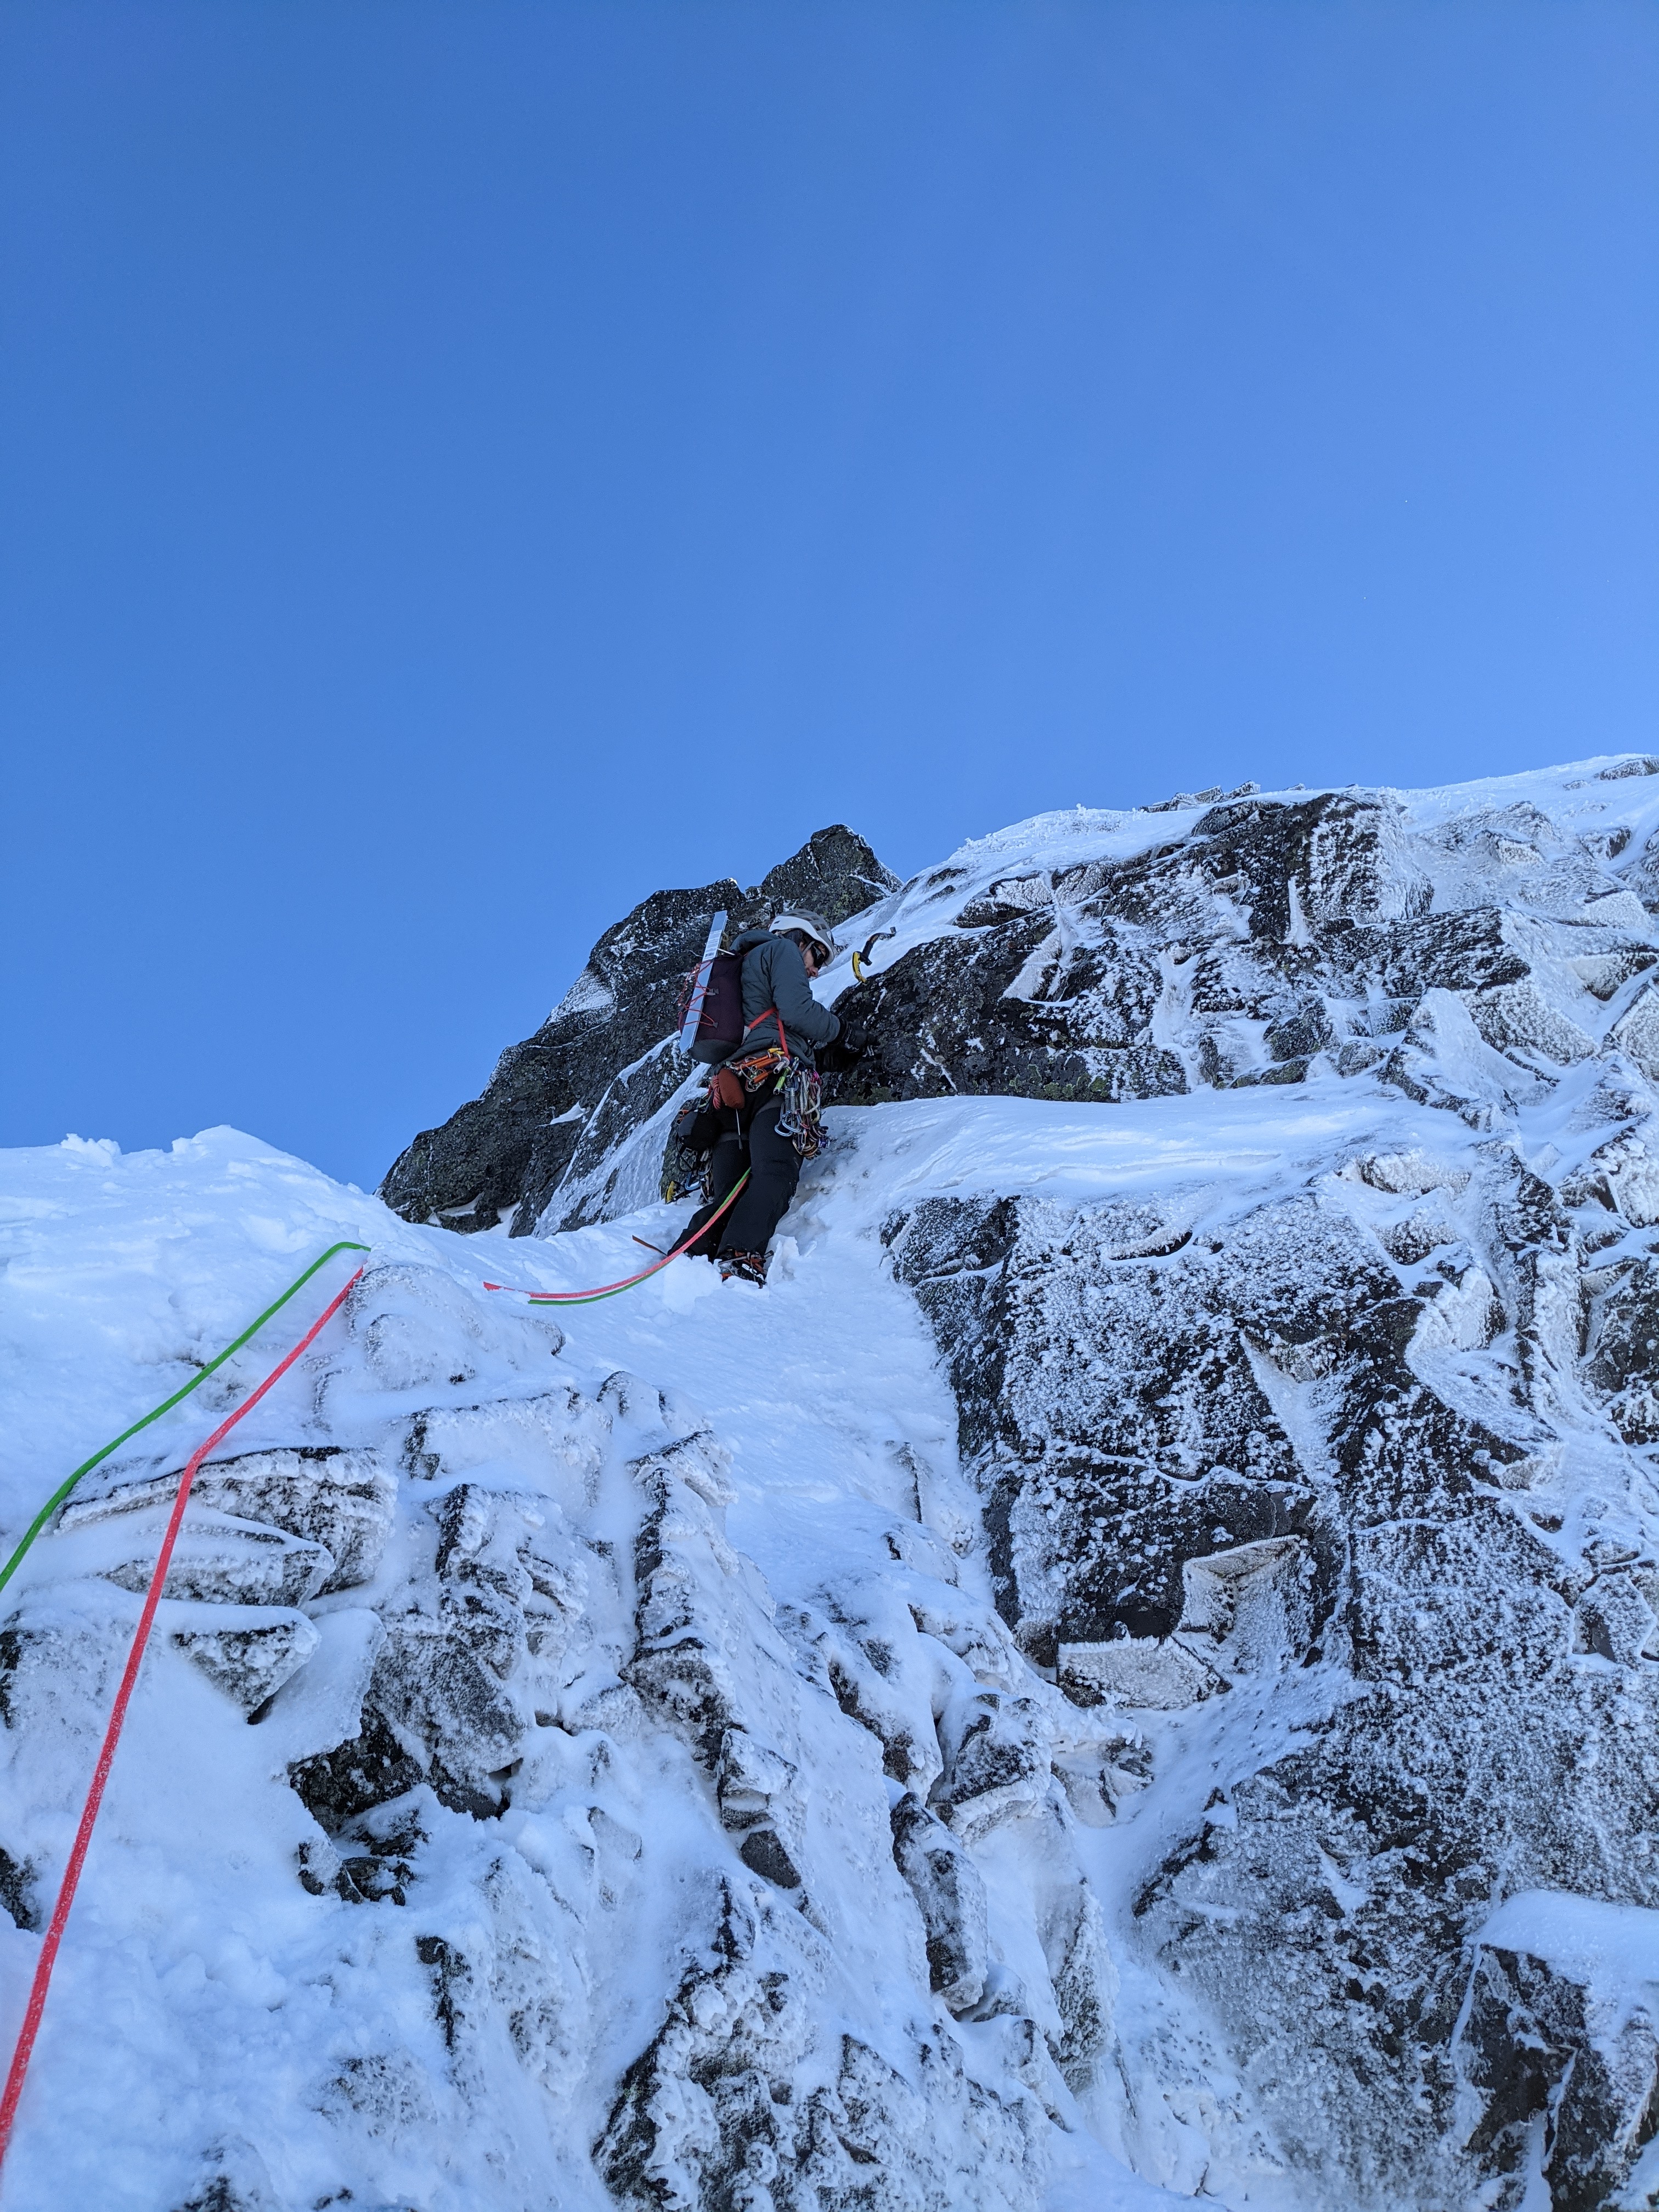
Trip: Chair Peak West Face - [FA] The Upper West Side (WI4+ M4)
Trip Date: 01/18/2021
Trip Report:Grade Update: Doug and I agreed to upgrade the route from WI4+ M4, to WI5- M5 when submitting to the AAJ. This decision was made to align more with the grades of the Canadian rockies. Keep in mind that this route is immensely condition dependent.
Yesterday @Doug_Hutchinson and I skied out to the west face of Chair with low expectations and too much weight on our backs. As far as I can tell, this face has seen little to no winter climbing activity and was completely off my radar until @Kyle M showed me some photos.


Our route started by slogging up ~700ft of steep firm snow with a couple easy ice chokes along the way. Nothing worth roping up for. The sun starts hitting the lower snow slopes around 10am, so I would recommend timing things so you start climbing no later than 10:30.

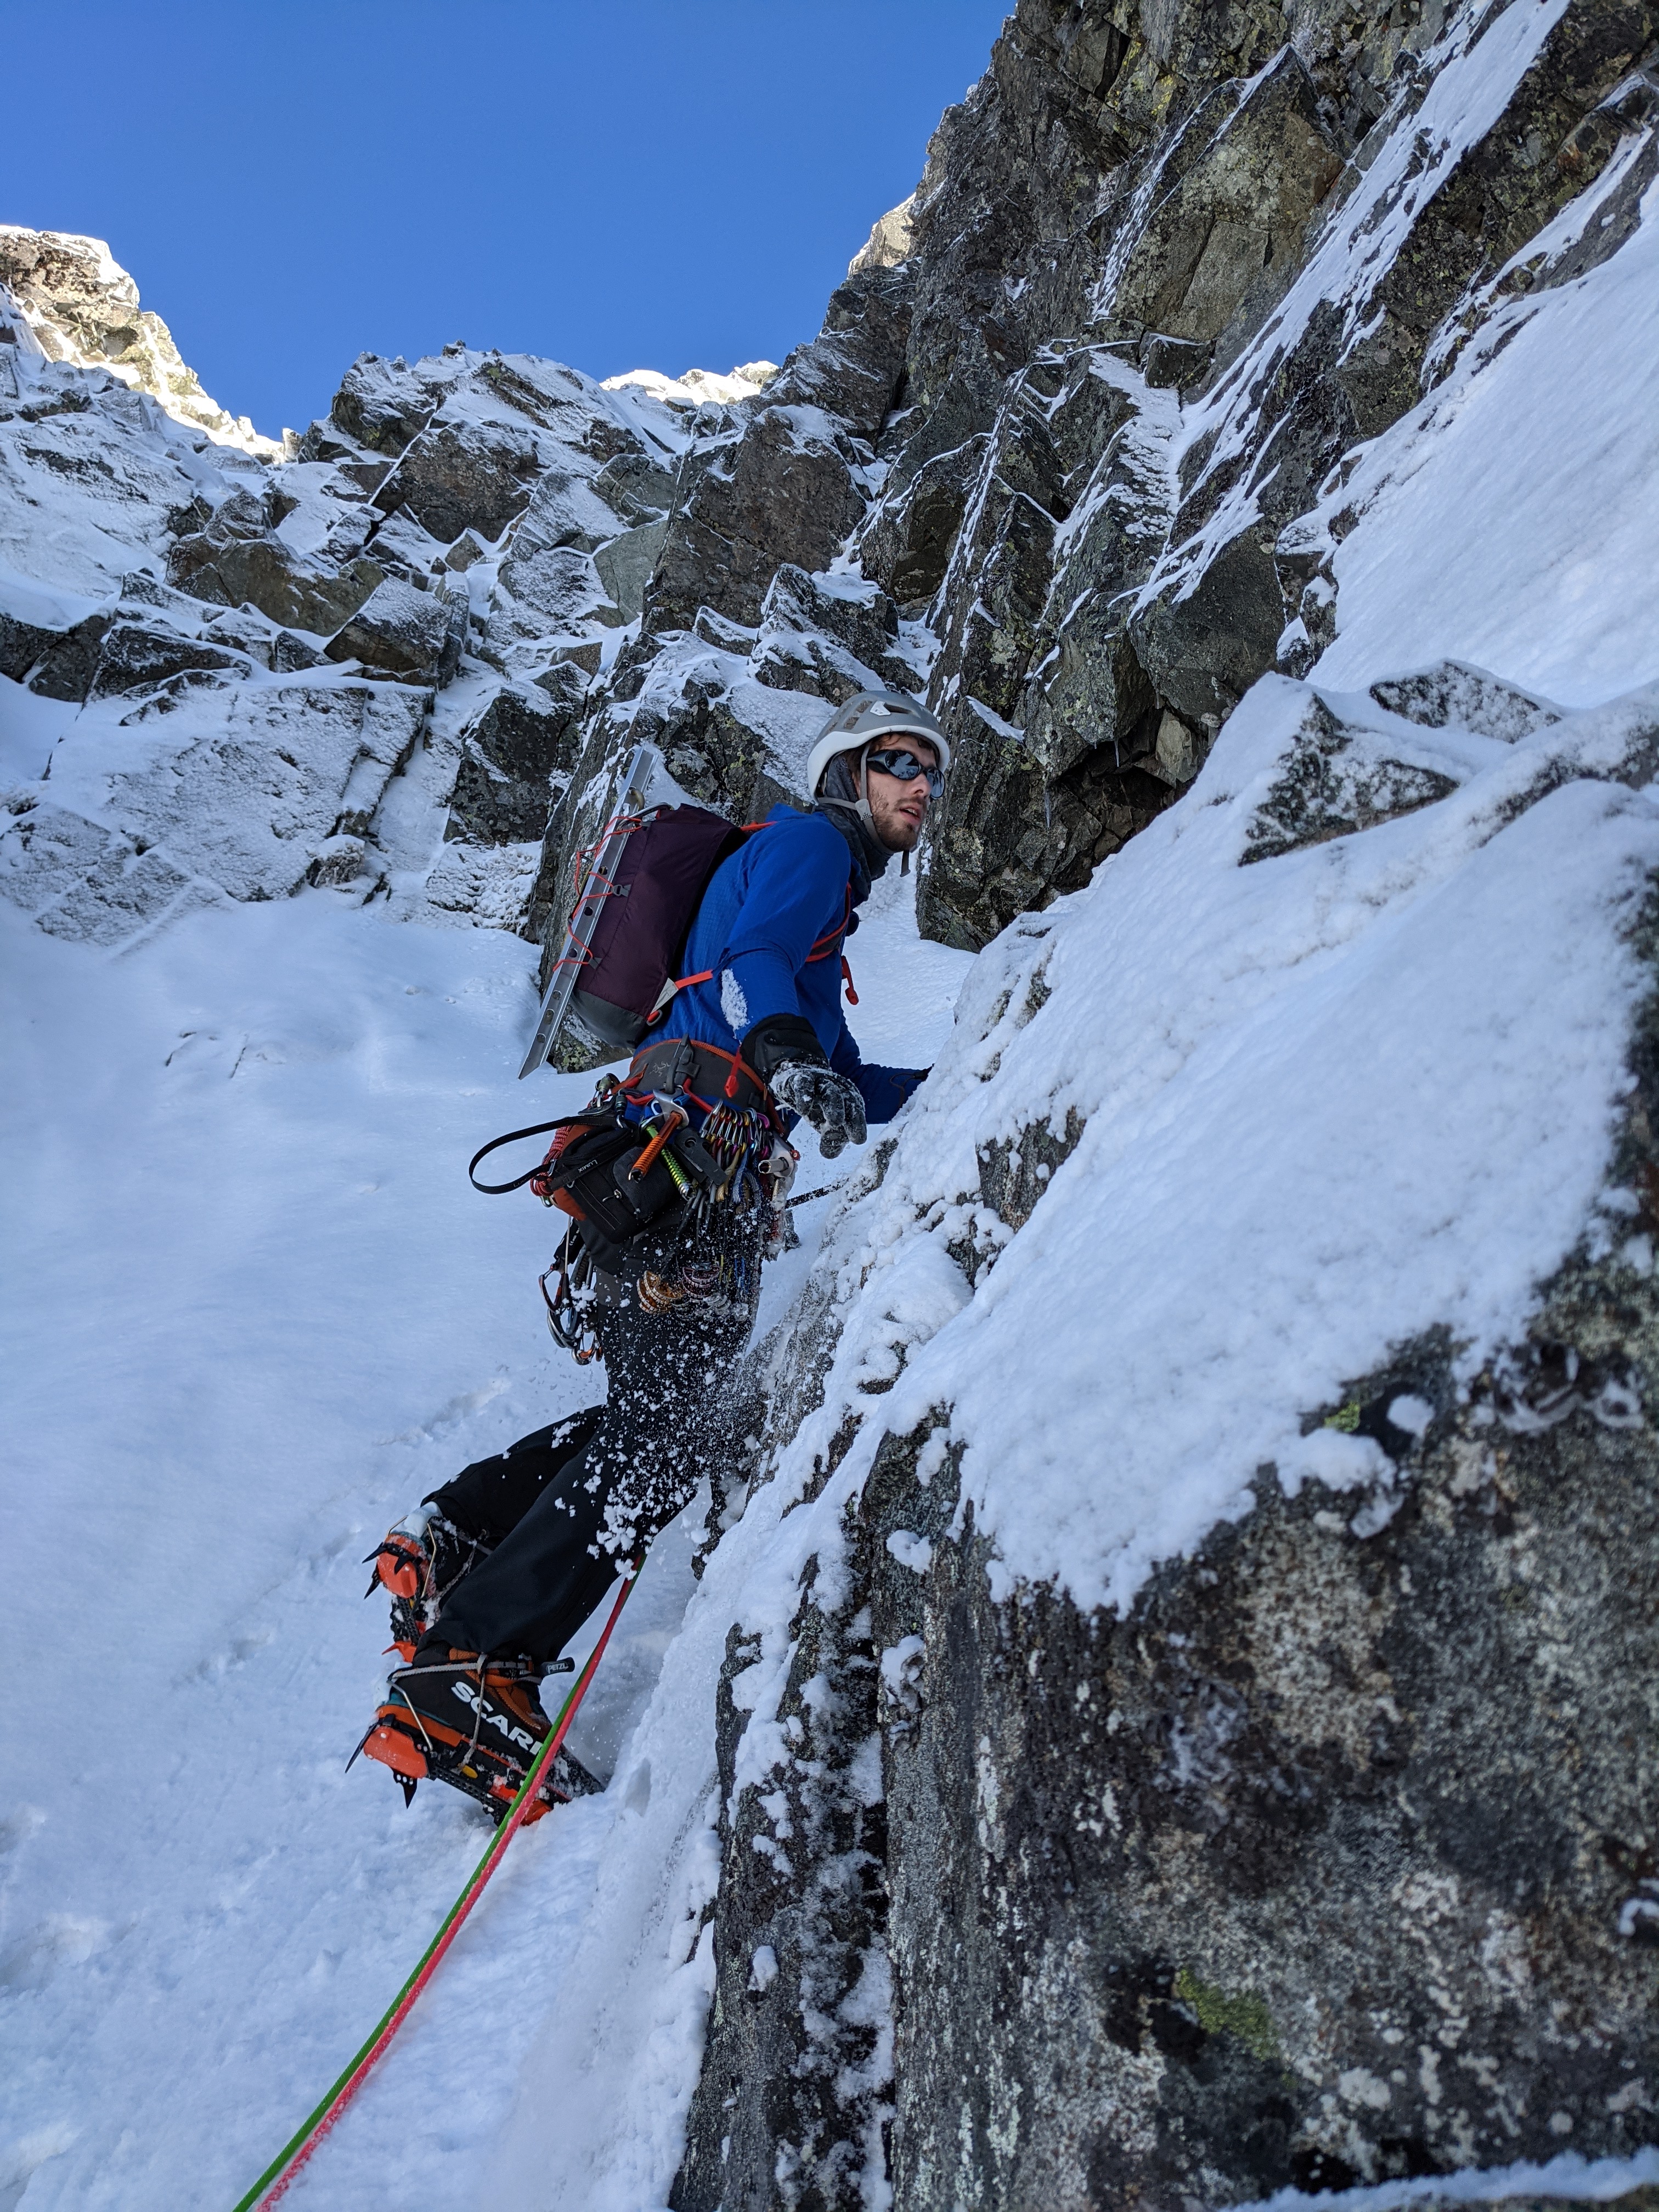
After the slog we arrived at the head of a small alcove where we kicked out a platform and roped up. Gear for a belay is hard to come by, take what you can get.
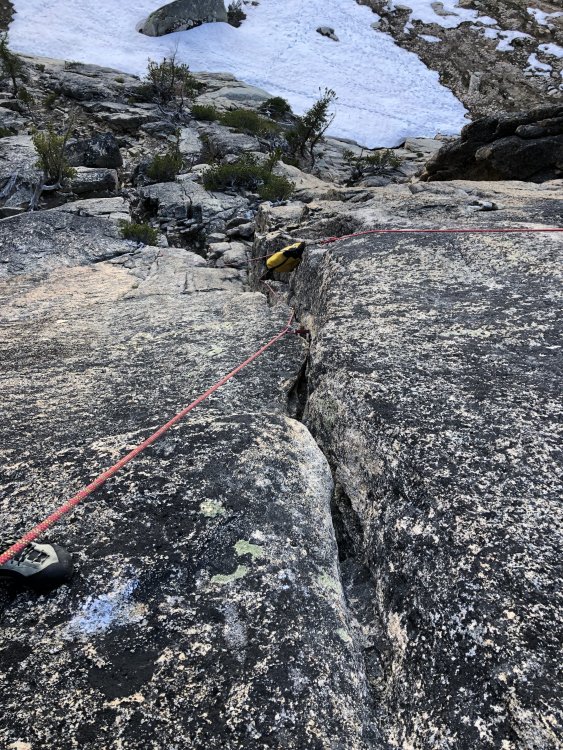
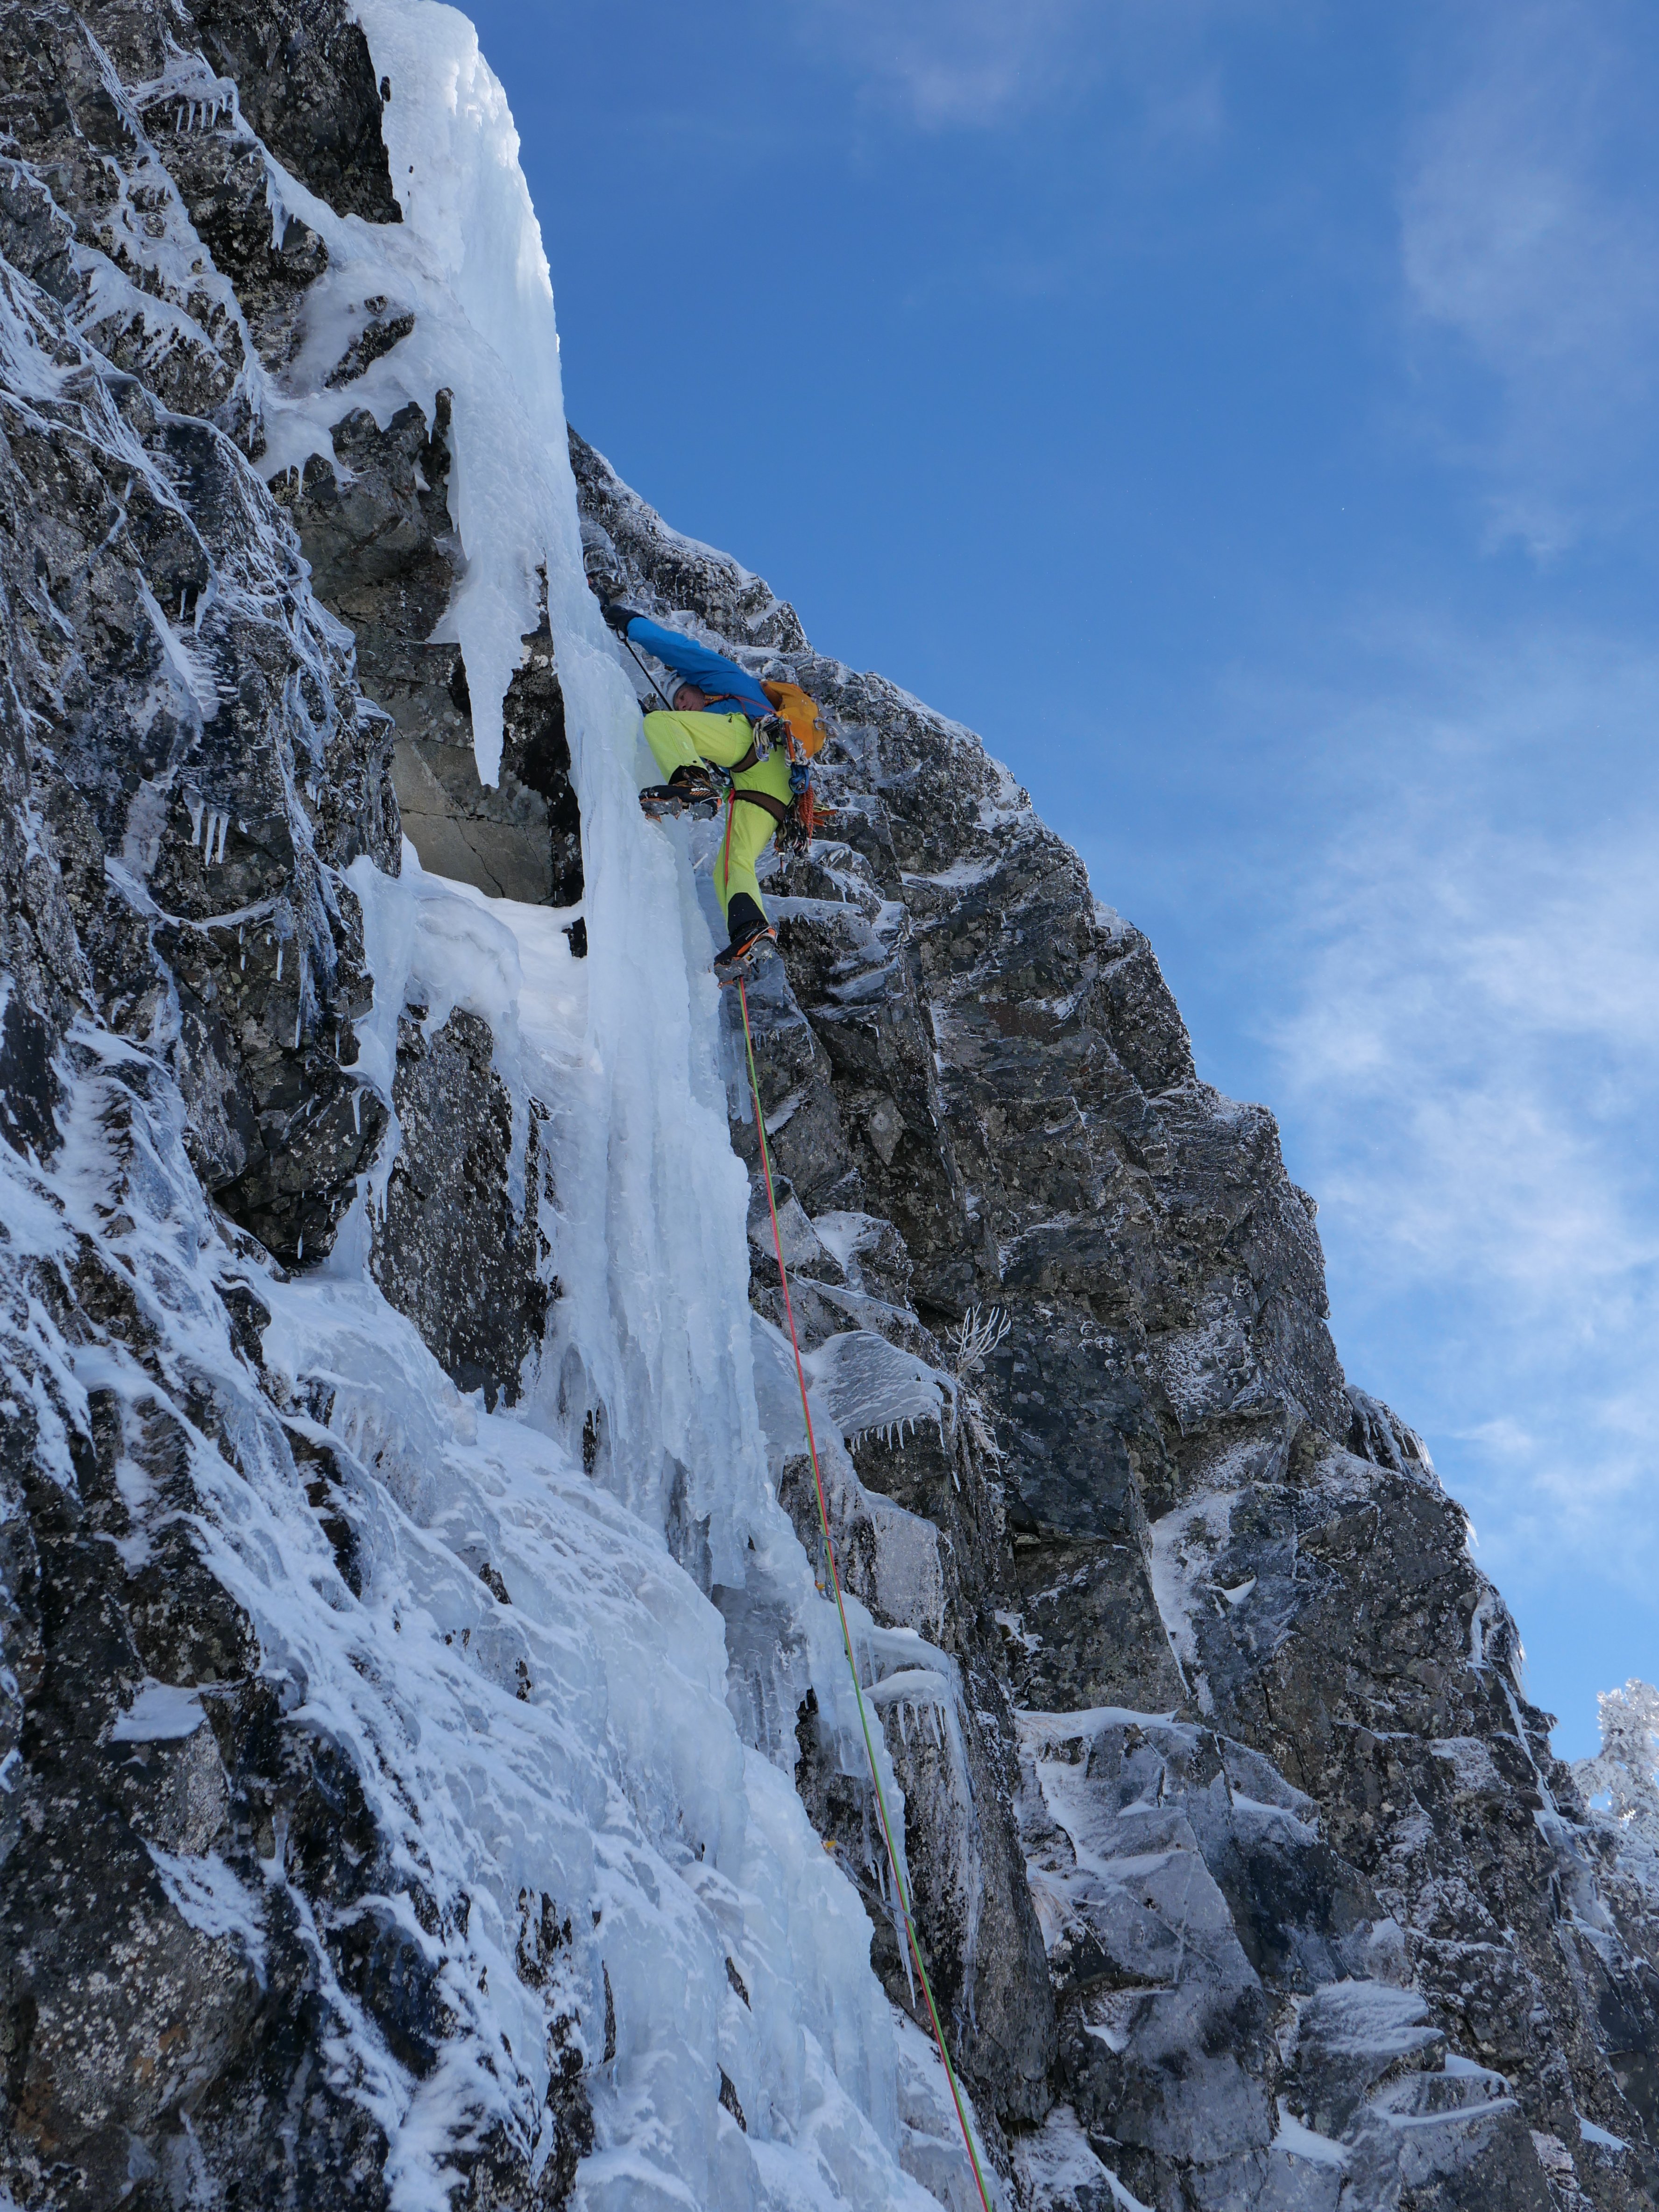
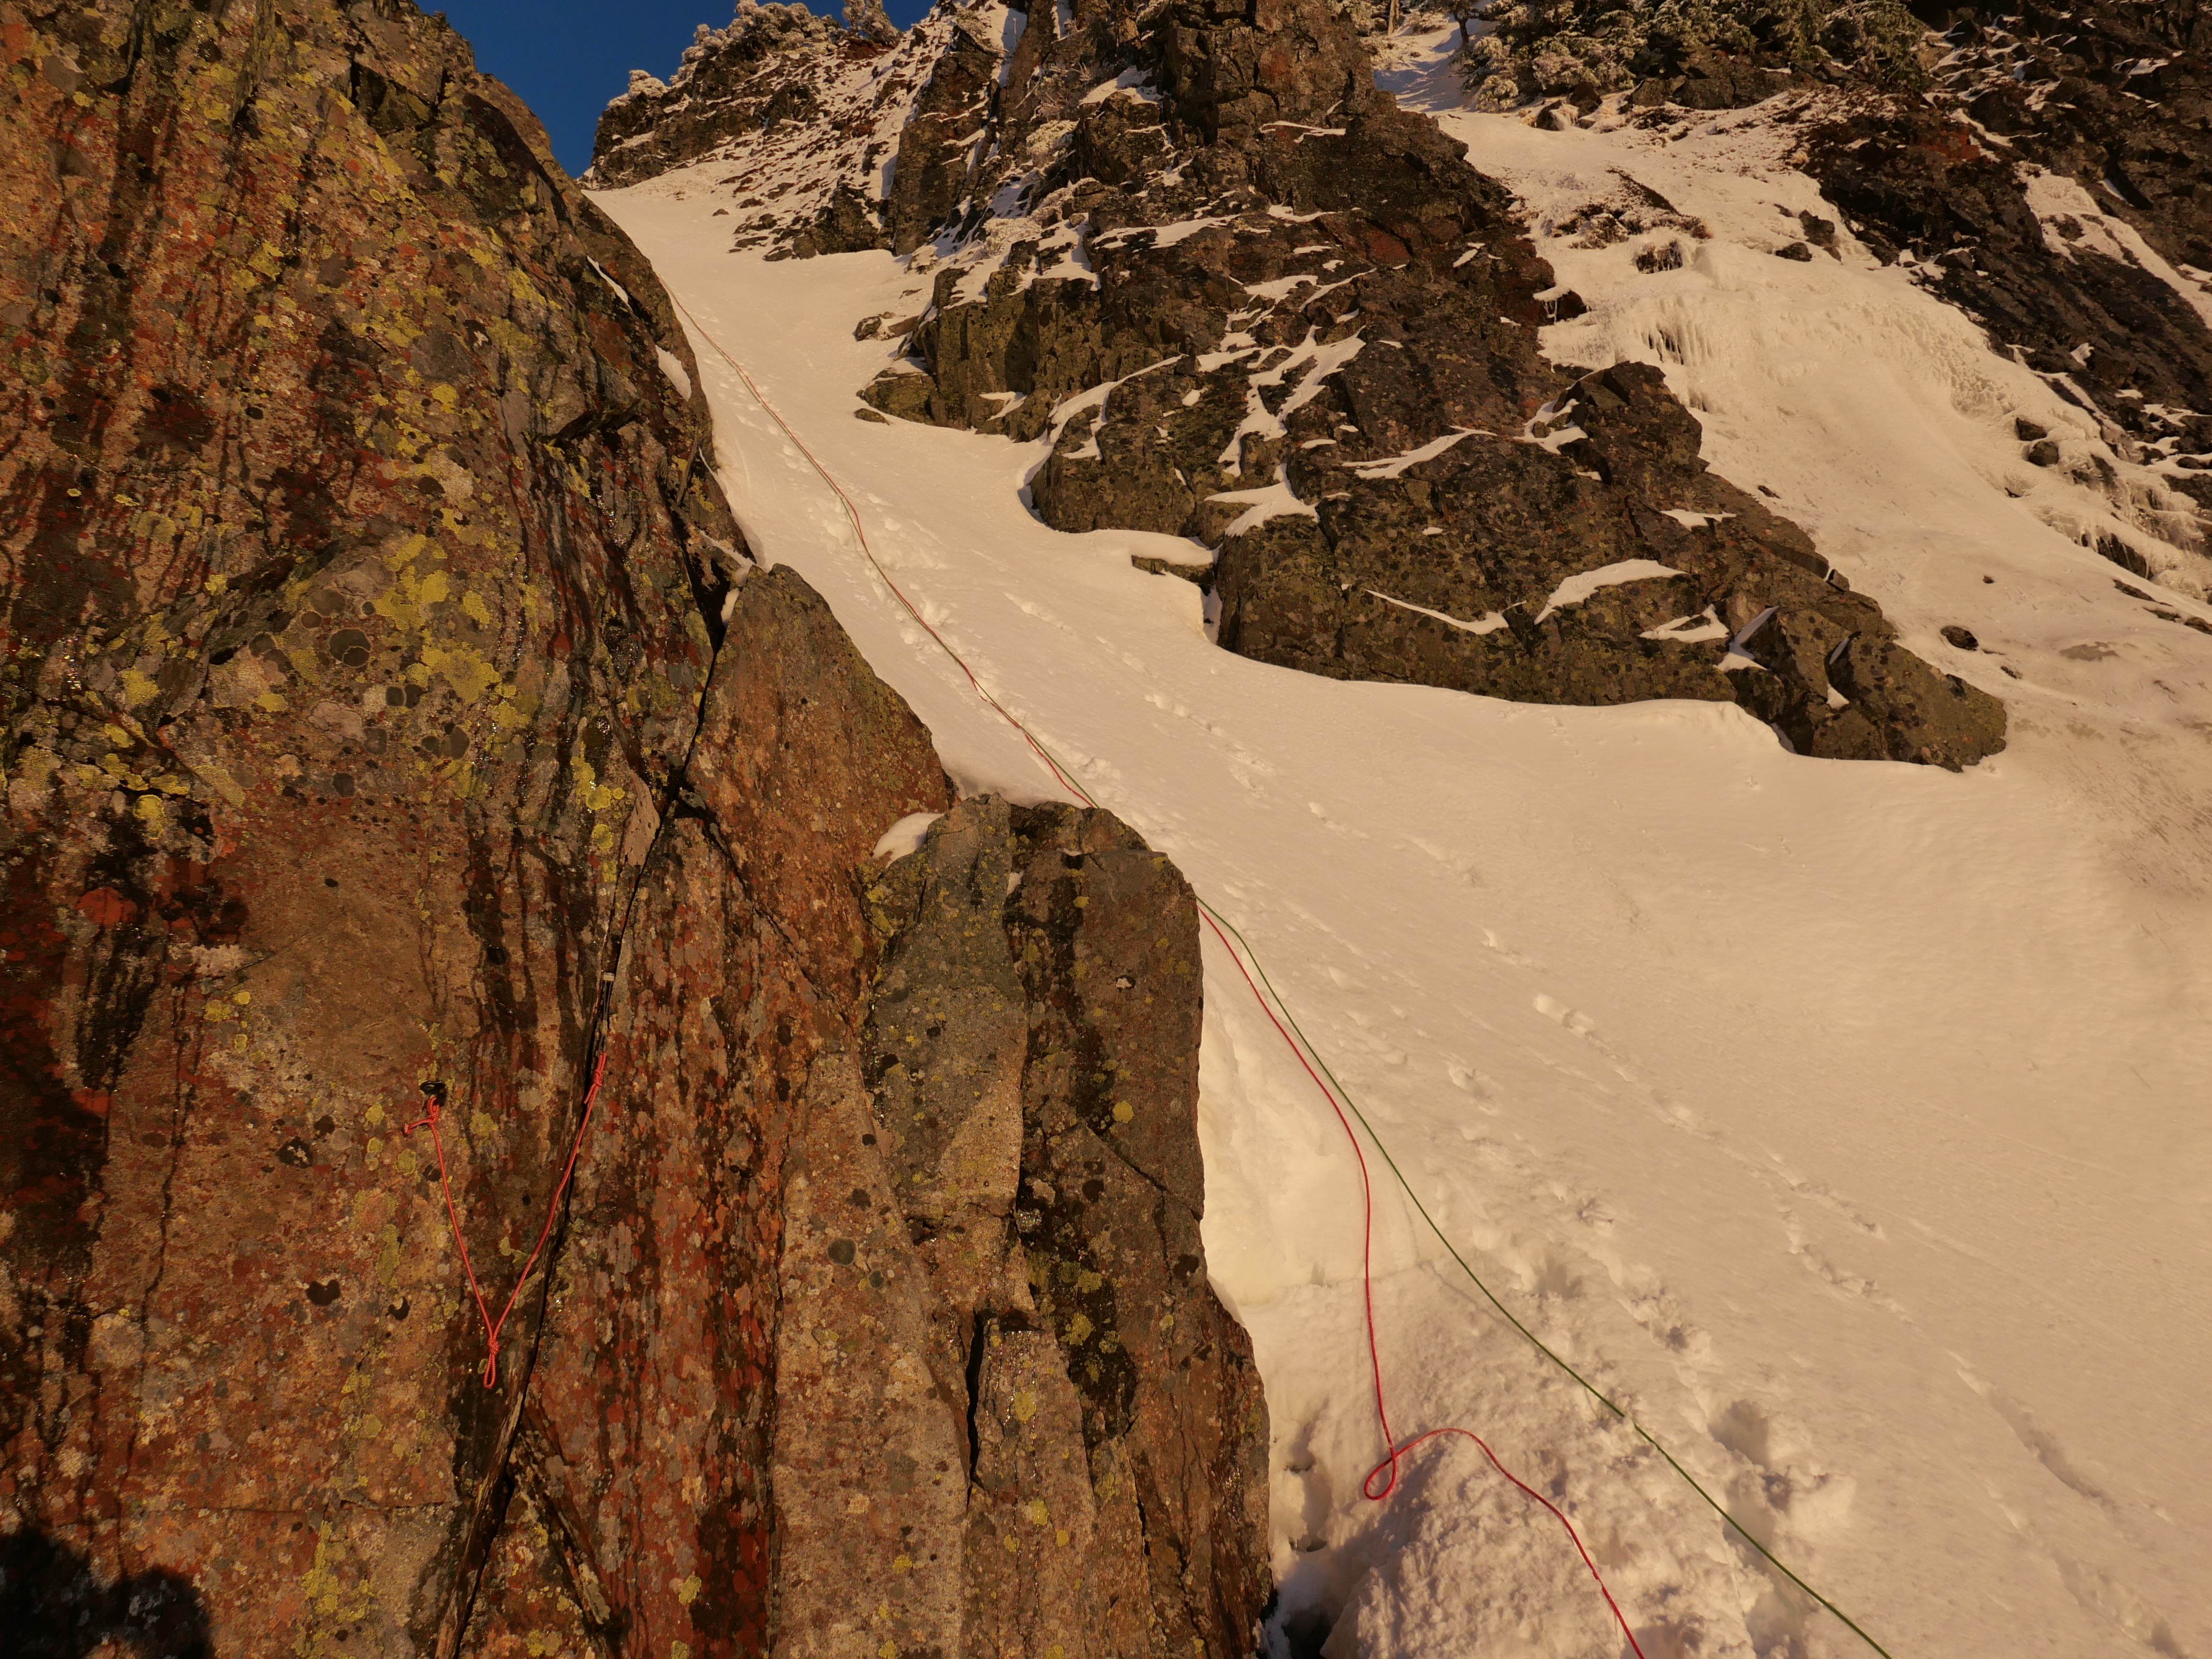
I took the first pitch which ended up being a tricky 20m M4 left facing corner system. Nothing was ever really that hard, but protection was difficult, and the rock quality left something to be desired. A really cool looking super direct mixed pitch can be found just to the right and would probably go at M7.
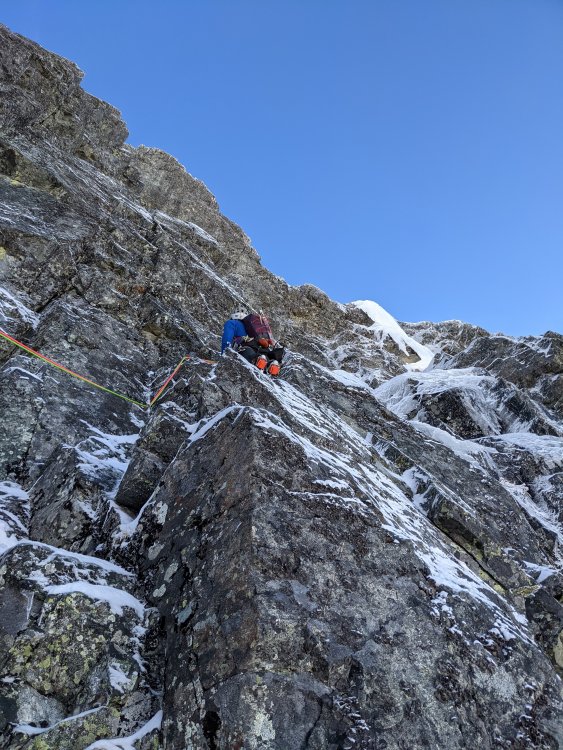
Doug then took the lead on the money pitch. While only about WI4+, this pitch proved to be a pretty serious lead. The crux required climbing into an alcove behind a detached curtain, grabbing a rock hold with your right hand and swinging over a bulge above your head. Not your usual WI4. This pitch took good 10 and 13cm screws, but not always where you want them. One could probably bail back to the snow from here with 2 ropes.
Moving forward we climbed a full 65 meters of scrambly snow/rock/ice up to a scottish looking headwall, and up a ramp to the left. Belay off a small tree that may be buried in different conditions. I have a hunch you can go either right or left, not sure which is easier.

A short sketchy mixed pitch took us up to the false summit. Not hard, just tenuous and poor pro.

^Placing the only piece on the pitch

^The piece
The route finished with a classic Au Cheval alpine ridge traverse with snow and ice on the north side, and warm dry rock on the south. This traverse is VERY poorly protected, and definitely not straight forward.


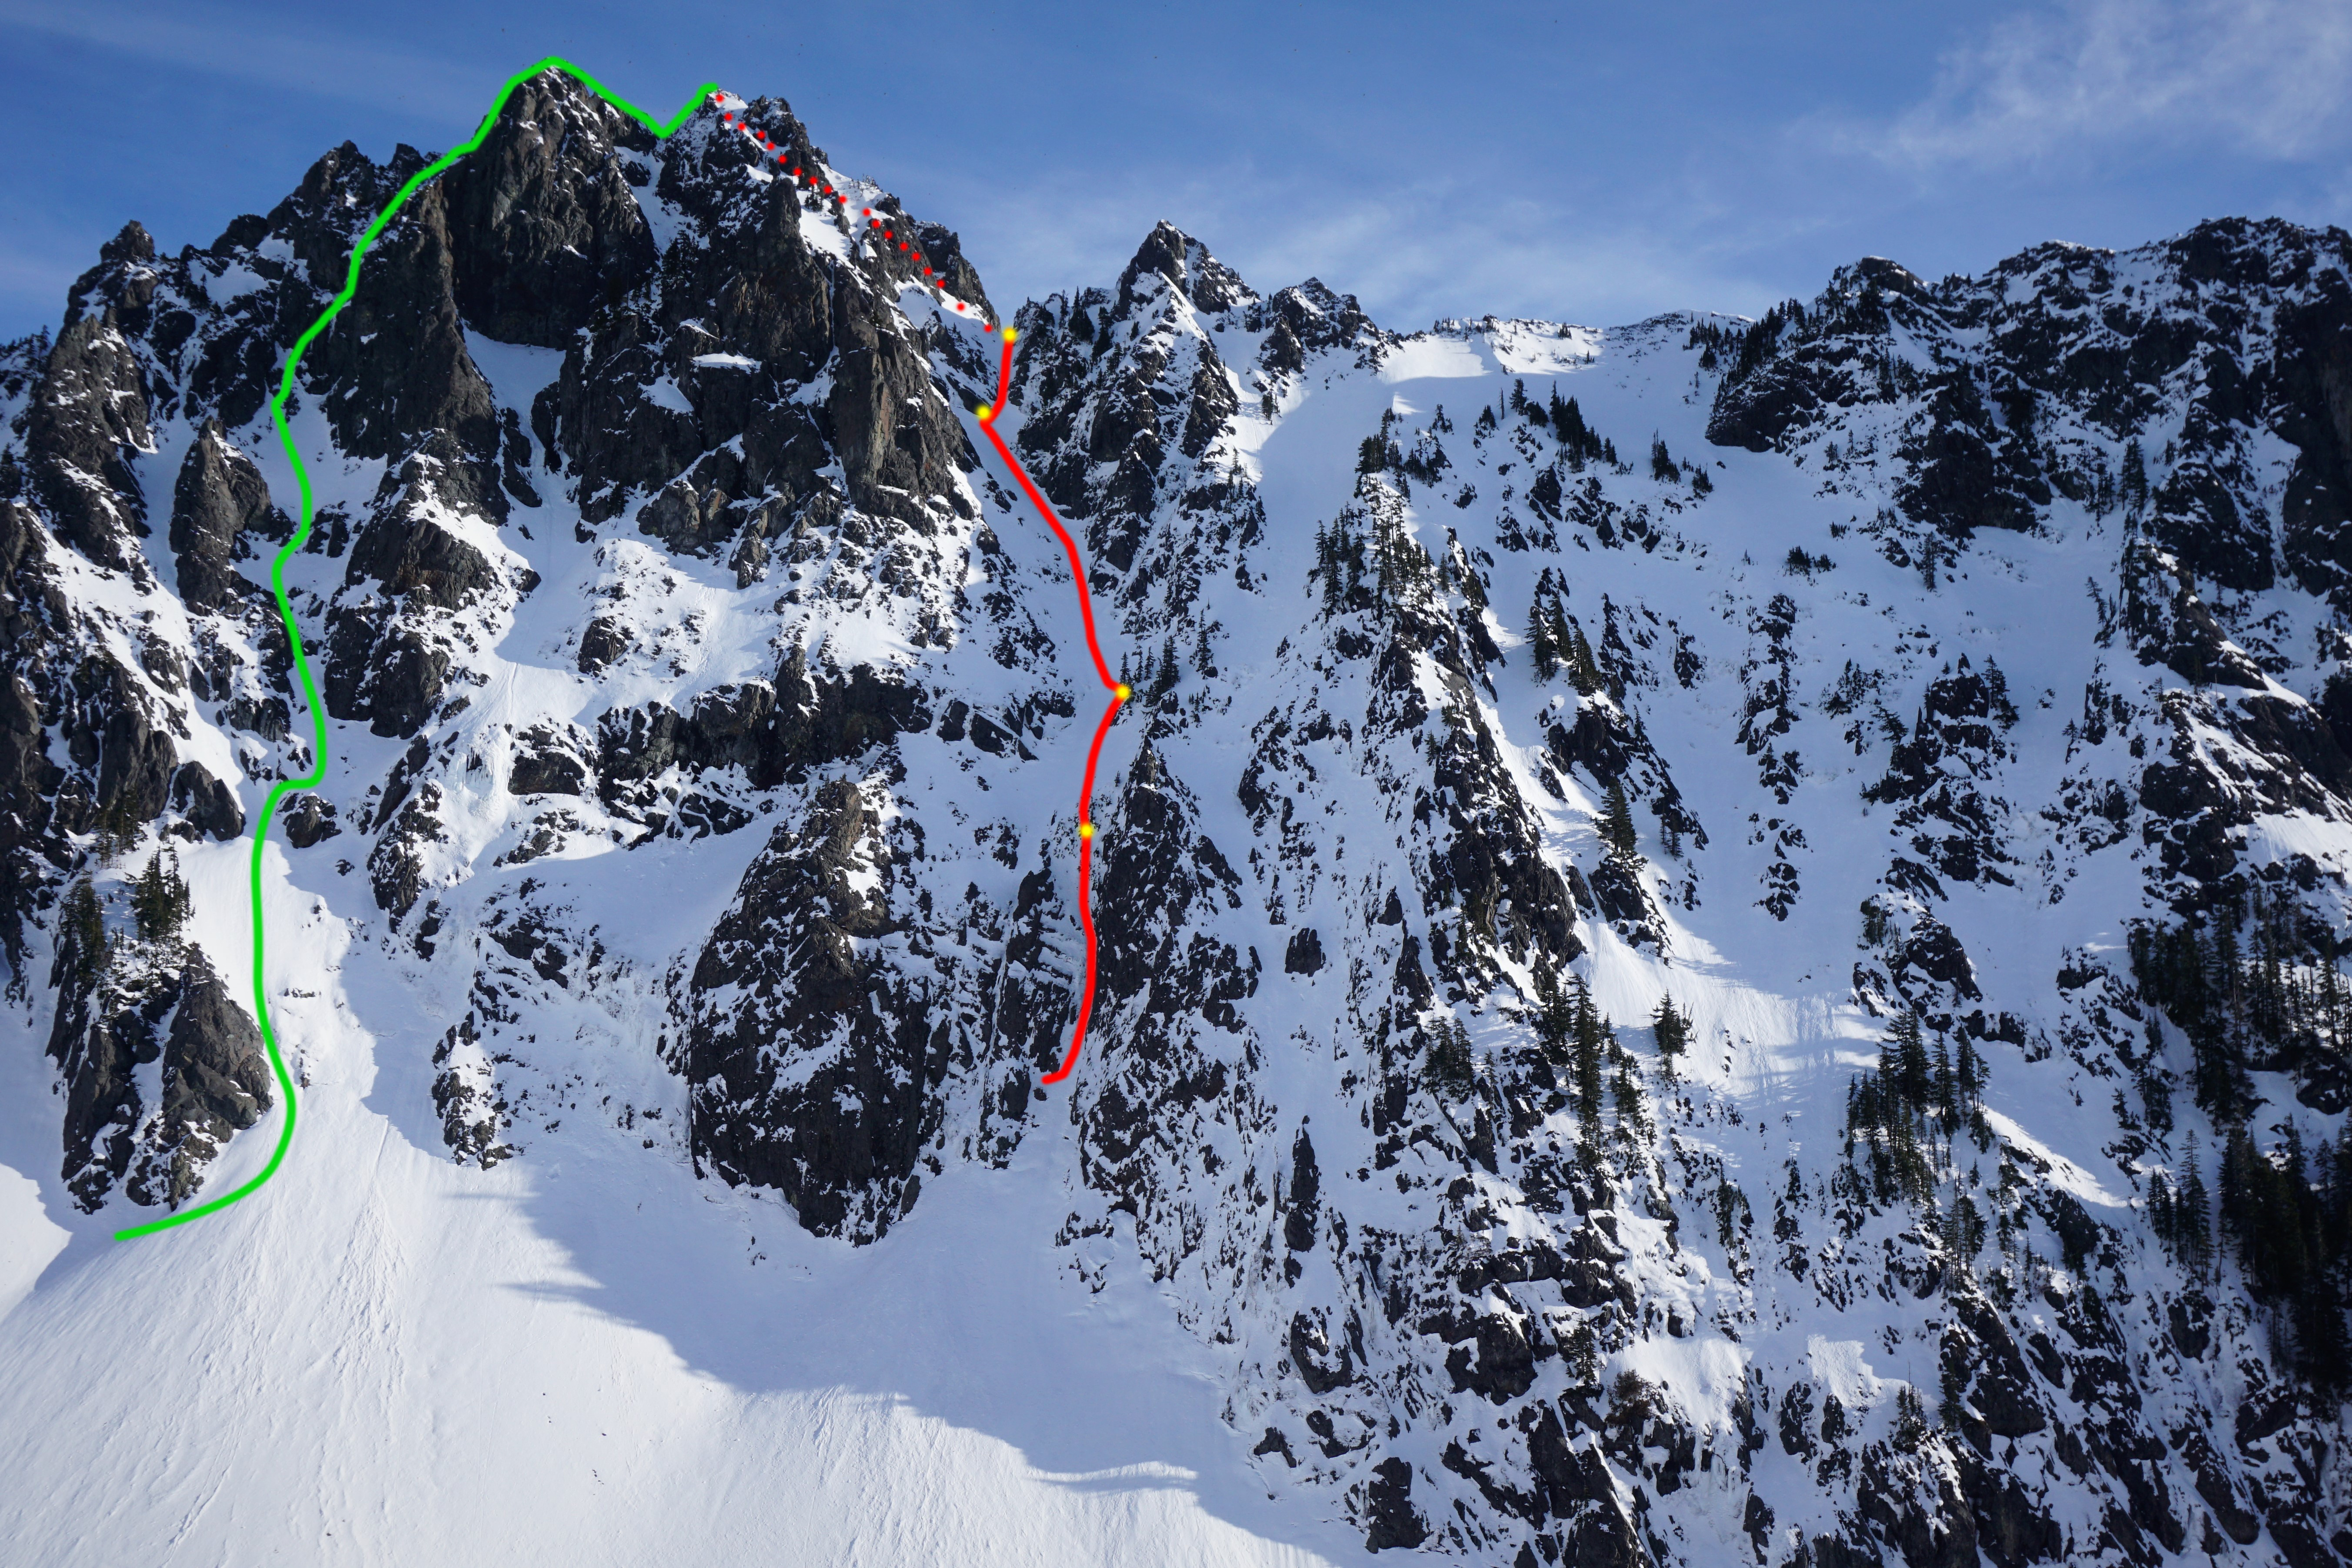
Descent: There are two good options for the descent. The best option by far, is to do this route as a carryover, foregoing the skis and descending the normal route to the east. This requires very firm conditions, but would be much shorter. Since we left our skis in the Melakwa valley, we were forced to descend that direction via a long snow gulley opposite of the standard rappel anchor. The first rappel shares the piton anchor with the standard descent, just in the opposite direction. We left a piton and nut anchor 60M down to the left for future parties. This rappel only got us half way to the next worthy tree, luckily the snow was good for down climbing, but we were well aware of the exposed cliffs below. Two more raps off trees took us to the schrund.
Ski back over Bryant col, or for bonus points, continue out via the second half of the Chair peak circumnav in the dark.
Link to my Strava track can be found HERE for approach and descent help.


Get on this climb! We thought it was pretty classic, and likely not in good condition very frequently. Reach out to me with any beta needs!

Thanks to Kyle M for this photo! Green is the route, Red is the descent, and the Yellow dots are rap anchors. The last rap is in a bushy tunnel that may be difficult to find for future parties.
Gear Notes:
Single rack .2-2, stoppers, KB's and Bugaboos. 6-10 Screws 10-16cm most useful. 2 Pickets brought but never used (per usual). 60m twin ropes.
Approach Notes:
Ski or boot up and over Bryant/Chair col via pineapple basin. Descend over to Melakwa lake, and up to the base of the wall.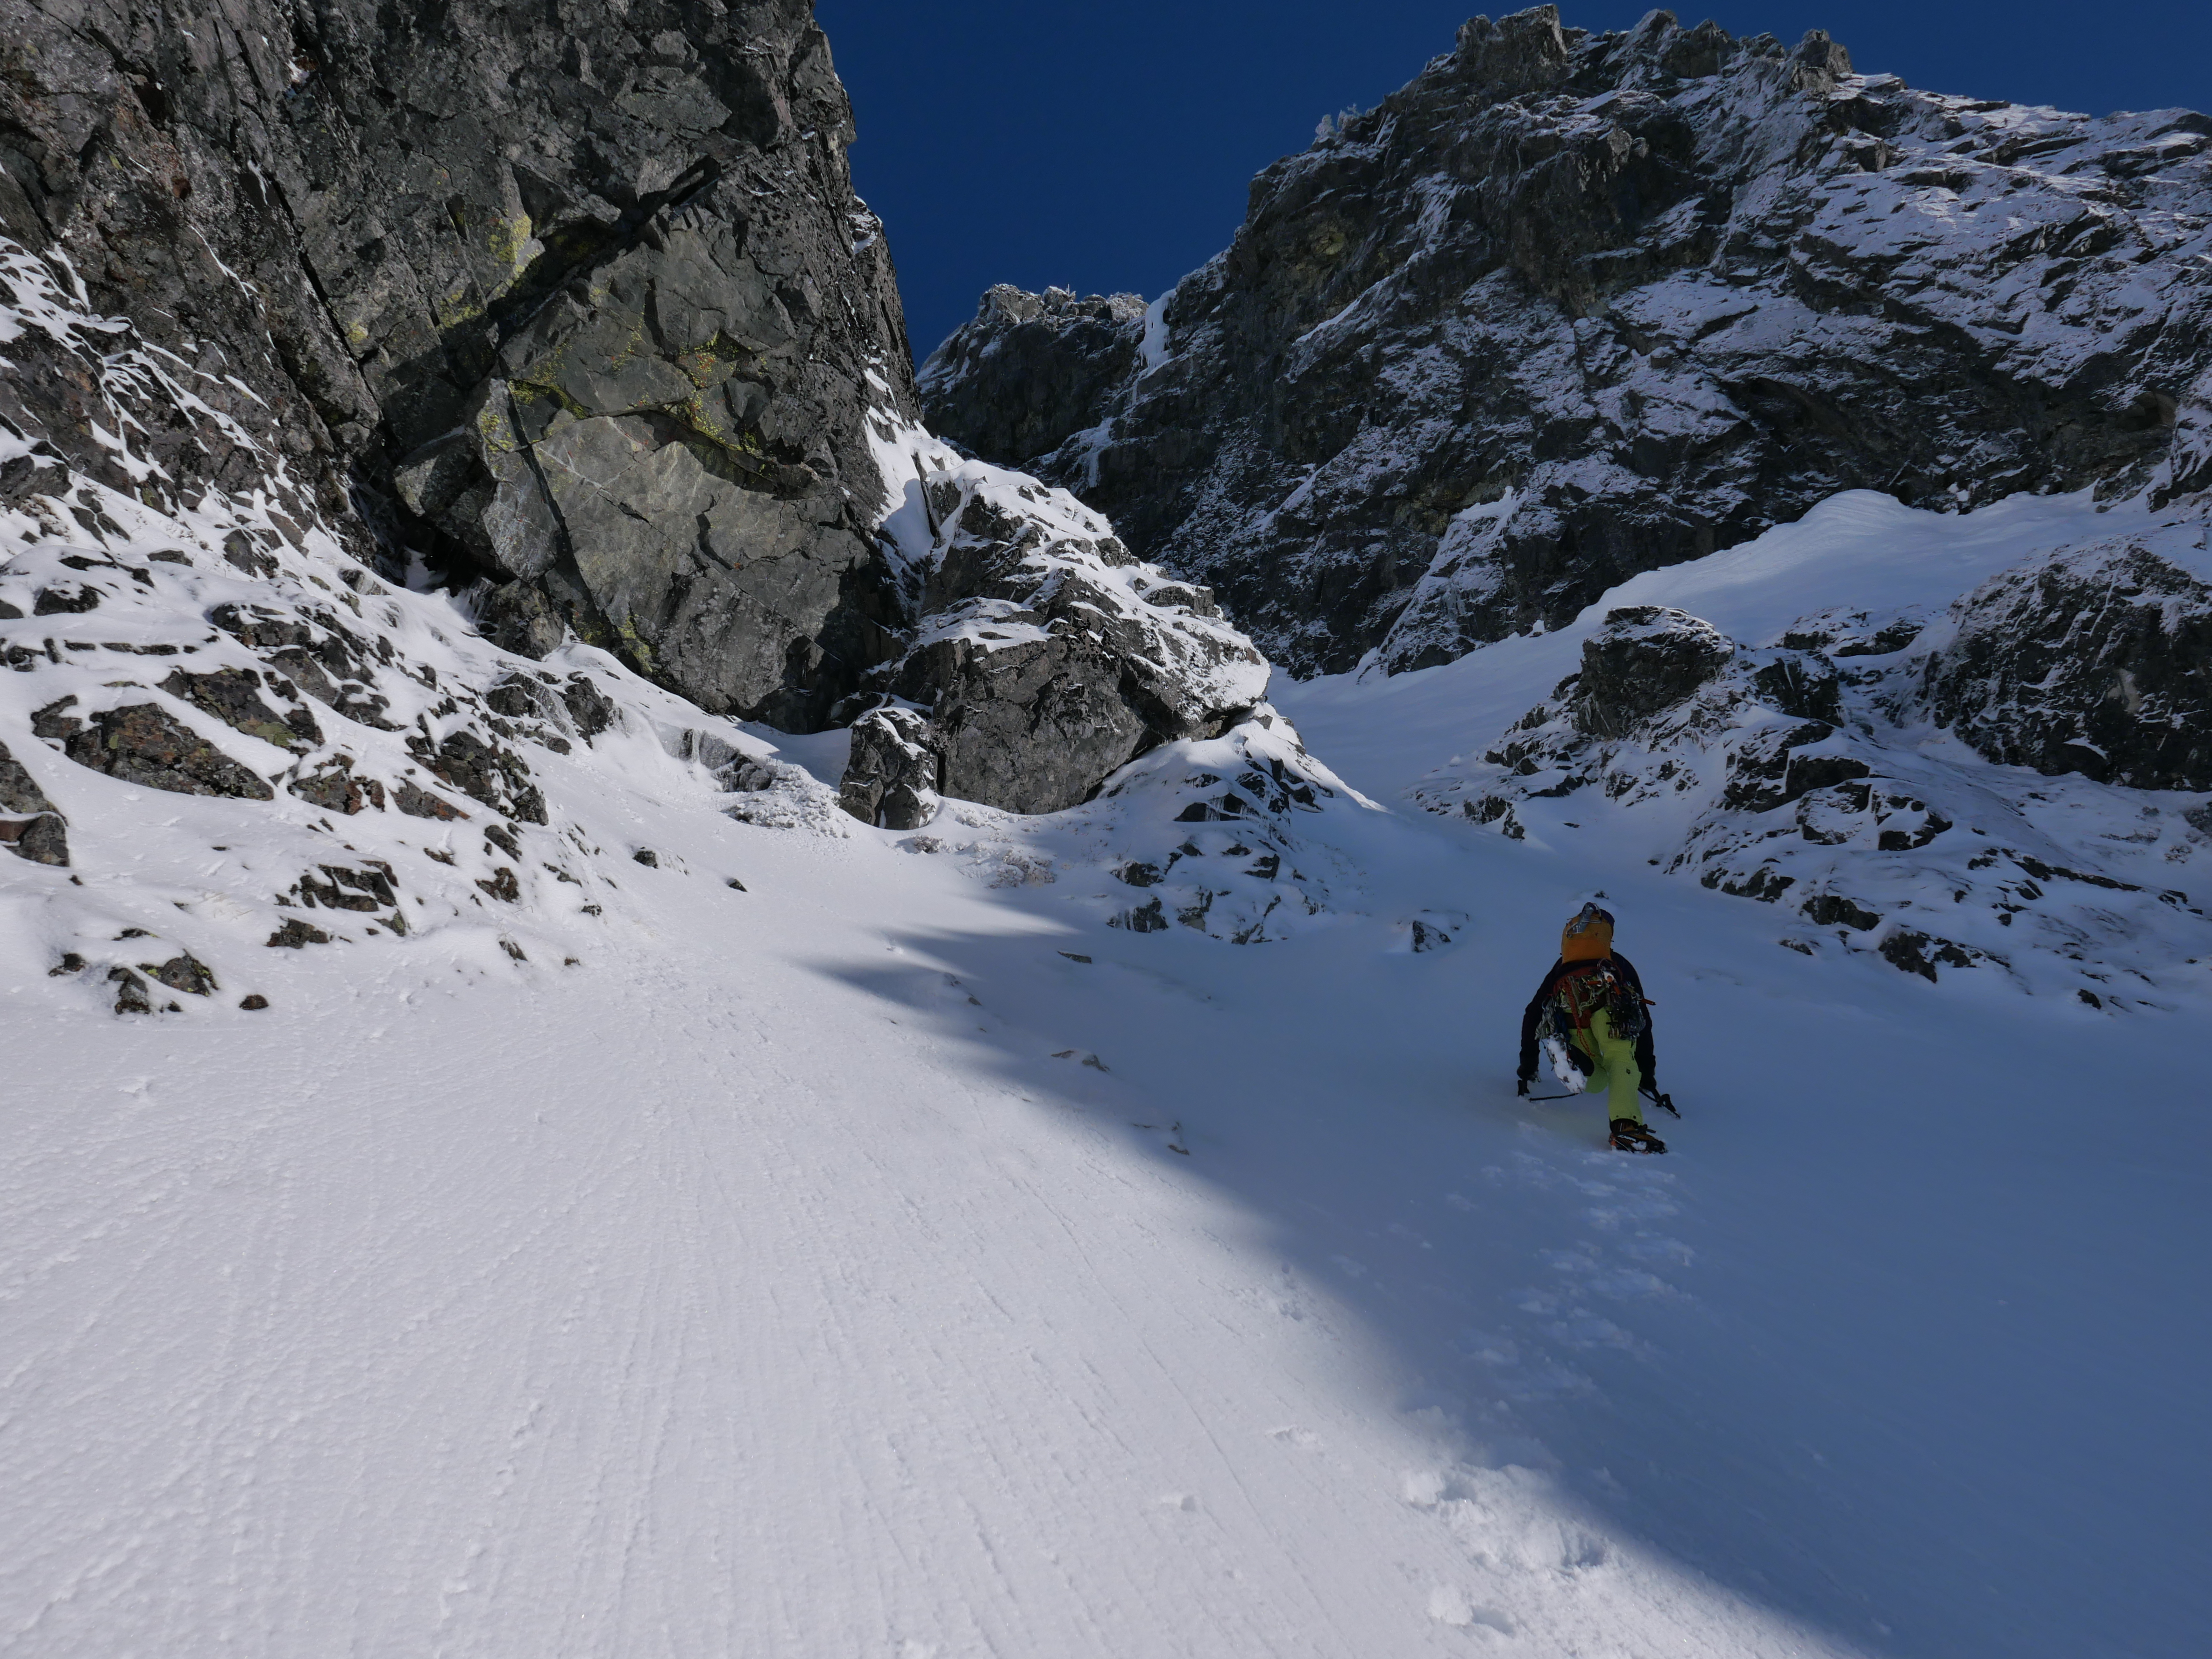


-
6
-
8
-
-
On 1/8/2021 at 10:22 AM, AquaFresh said:
Anyone have knowledge of ice conditions around Strobach Mtn?
39 degrees and raining today on the summit according to Meteoblue.
-
1 hour ago, Alisse said:
It's called that because when six inches of fresh grace the hills, you gotta bring your rock skis, riiiiight?!
AKA Sharktober.
-
2
-
-
Woah, gnarly to see what Winnies slide to Hell's Highway look like in the summer!
-
@Ben Johnson You were on the right track! The key is never taking the same route twice. As far as I'm aware the Wright/Pond also is waiting for a second ascent by someone other than the FA party. There is so much potential in that little zone!
-
Hell Yeah! I had been looking at that line up there as well! Glad you guys put in the work to clean it up for the masses, It's certainly not the most pleasant approach. What obscure route were you guys originally planning to climb?
-
On 8/27/2020 at 8:40 PM, dberdinka said:
Fred Beckey, on at least his first attempt, approached Slesse from south of the border. Probably Twin Lakes down into Silesia Creek. That would a fine and historic adventure to recreate in this summer(s) of Covid. Be careful, the border patrol seems to be flying the border on a daily basis though hard to believe anyone would be trying to get in.
I mapped it out. It doesn't look too bad, apart from it being over 50% bushwacking...
-
@mtangemanNothing new on my end. What part of the wall is Cascade Mall on? I haven't heard of that one.
-
1 hour ago, kukuzka1 said:
Whats the grade? looks kinda interesting
https://www.mountainproject.com/route/113868664/wright-pond
It looks way more fun.


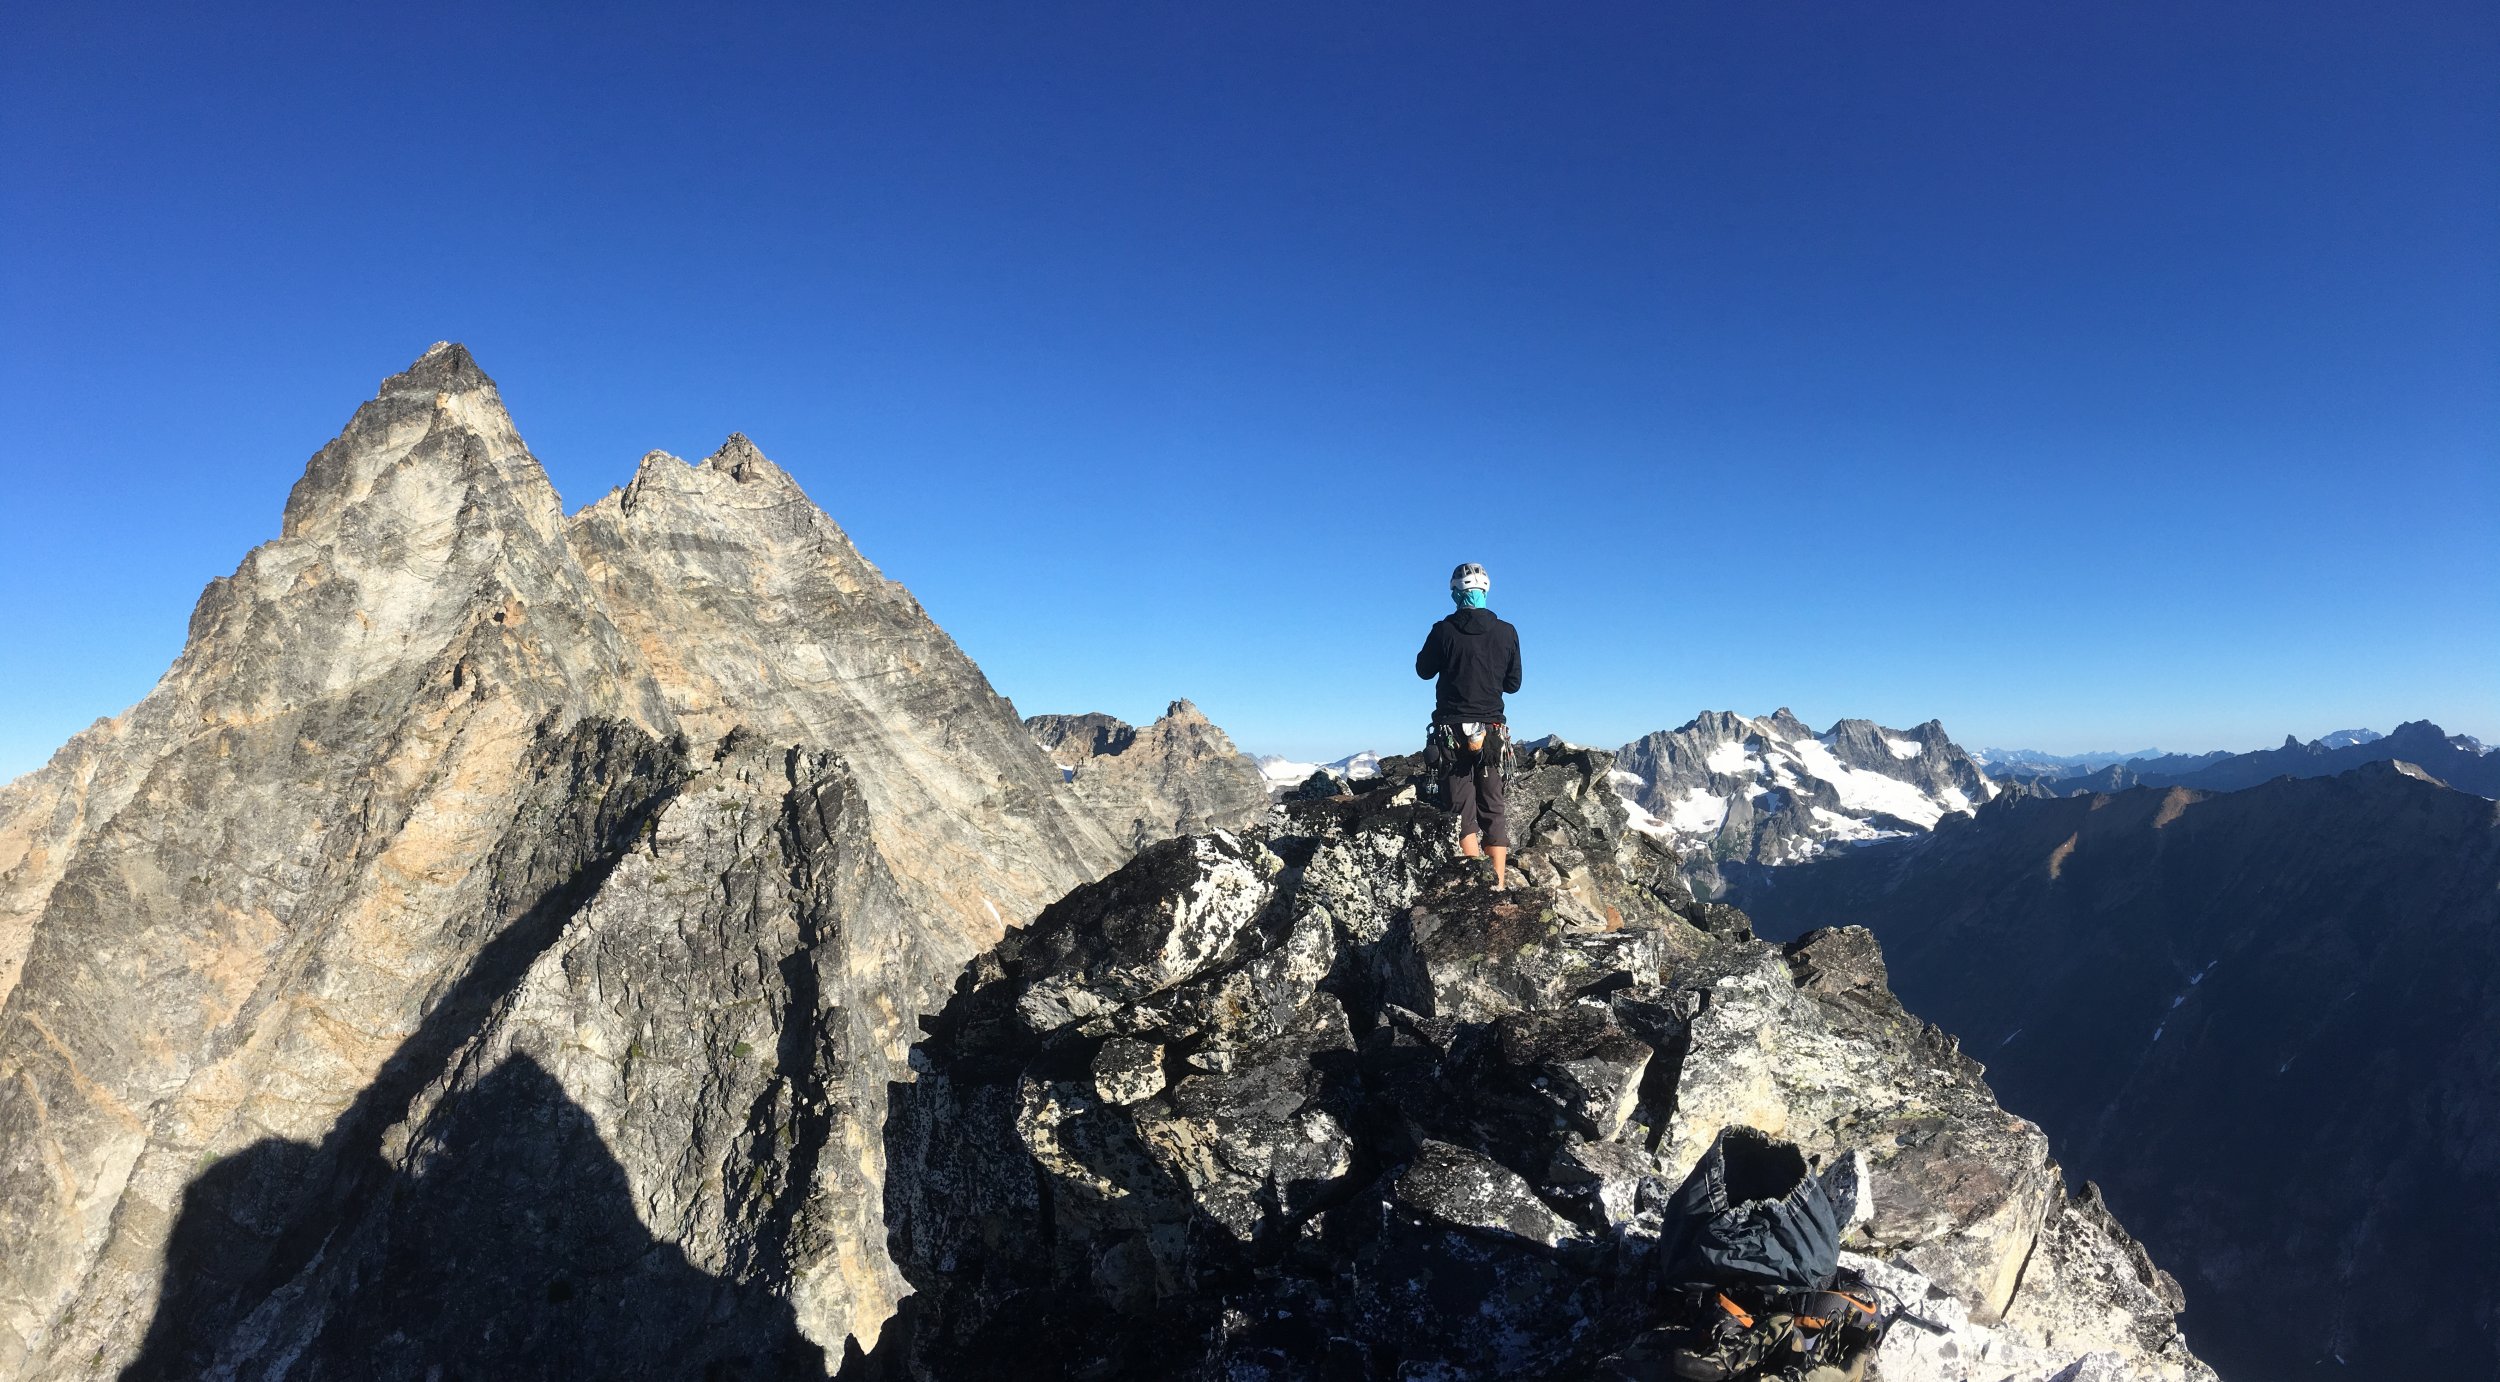
[TR] Stuart Range - Stuart Range Traverse 08/30/2021
in Alpine Lakes
Posted
Trip Date: 08/30/2021
Trip Report:
I was Initially a little hesitant to write this report as it was certainly nothing groundbreaking, I don’t really have any super helpful beta and it just kinda felt like I was stroking my ego. Anyhow, here is a short report of beta I wish I had for the traverse. I'd also like to echo that this is basically a long dry sidehill. If you are expecting a bunch a great climbing, think again. It felt like a dangerous hike.
The other day I climbed the Stuart Range Traverse over about 31 hours, including a 7ish hour nap near Prusik. I decided to start on the W-ridge of Stuart via Ingalls and out to the Snow Lake Trail. This is the straightest line on the map, and that appealed to me for some reason. Thankfully my friend Alastair was generous enough to shuttle me back to my car the next day. Thanks bud!
The first crux for me was getting over to the east side of Sherpa. It seemed that one with a rope could easily rap over the other side of the summit and continue on their way, unfortunately I didn’t have that luxury. I chose to down climb the S couloir a little ways, and then follow a ledge system around the mountain to the east. This worked out in the end, but was time consuming and a bit circuitous.
The next crux for me came at Argonaut. In classic fashion, I had only gathered just enough beta (literally just a picture looking up the S-face) to not fully epic, but not quite enough to know where I was going. I opted for the first gully (pictured below) up to the ridge, hoping for straightforward traversing to the base of the S-face. I encountered anything but. This side of the mountain consists of an incredible grouping of gullies, towers and fins. While striking, it makes for slow arduous travel. I later learned that other solo travelers had dropped low down to approach the face straight on. This would probably be faster/less stressful, but not nearly as cool. I eventually got where I needed to go.
Getting off of Argo was definitely the most stressful part, and the spot that I really wish I had a rope. I ended up walking down to a 2-bolt 1-pin rap anchor, and down climbed from there. This bit was loose, slabby and just no fun. While not necessary, a rope here would be really really nice, especially after all the terrain you’ve already covered for the day. This spot also seems to seep earlier in the season, so a rope might be required most of the year. I believe there is a rap/downclimb route to climbers left that may skip it. More downclimbing on better rock took me down to the basin. A small snow patch below Argo provided a tiny trickle of water for me to fill up with. If It wasn’t for this, I would have only had one liter for the rest of the traverse.
The rest of the traverse is mostly walking unless you stick to the ridges. The snow free walk off of D-tail is chill and cairned right now. I’ll certainly be taking this route in the future for getting off D-tail late season. There is a small glacier at the pass between Boola Boola Buttress and Lil A. When I hiked by, there was standing water between the dirt and ice. This may be a spot to fill up, but I didn’t look too closely at how nasty it was.
GPS track found HERE
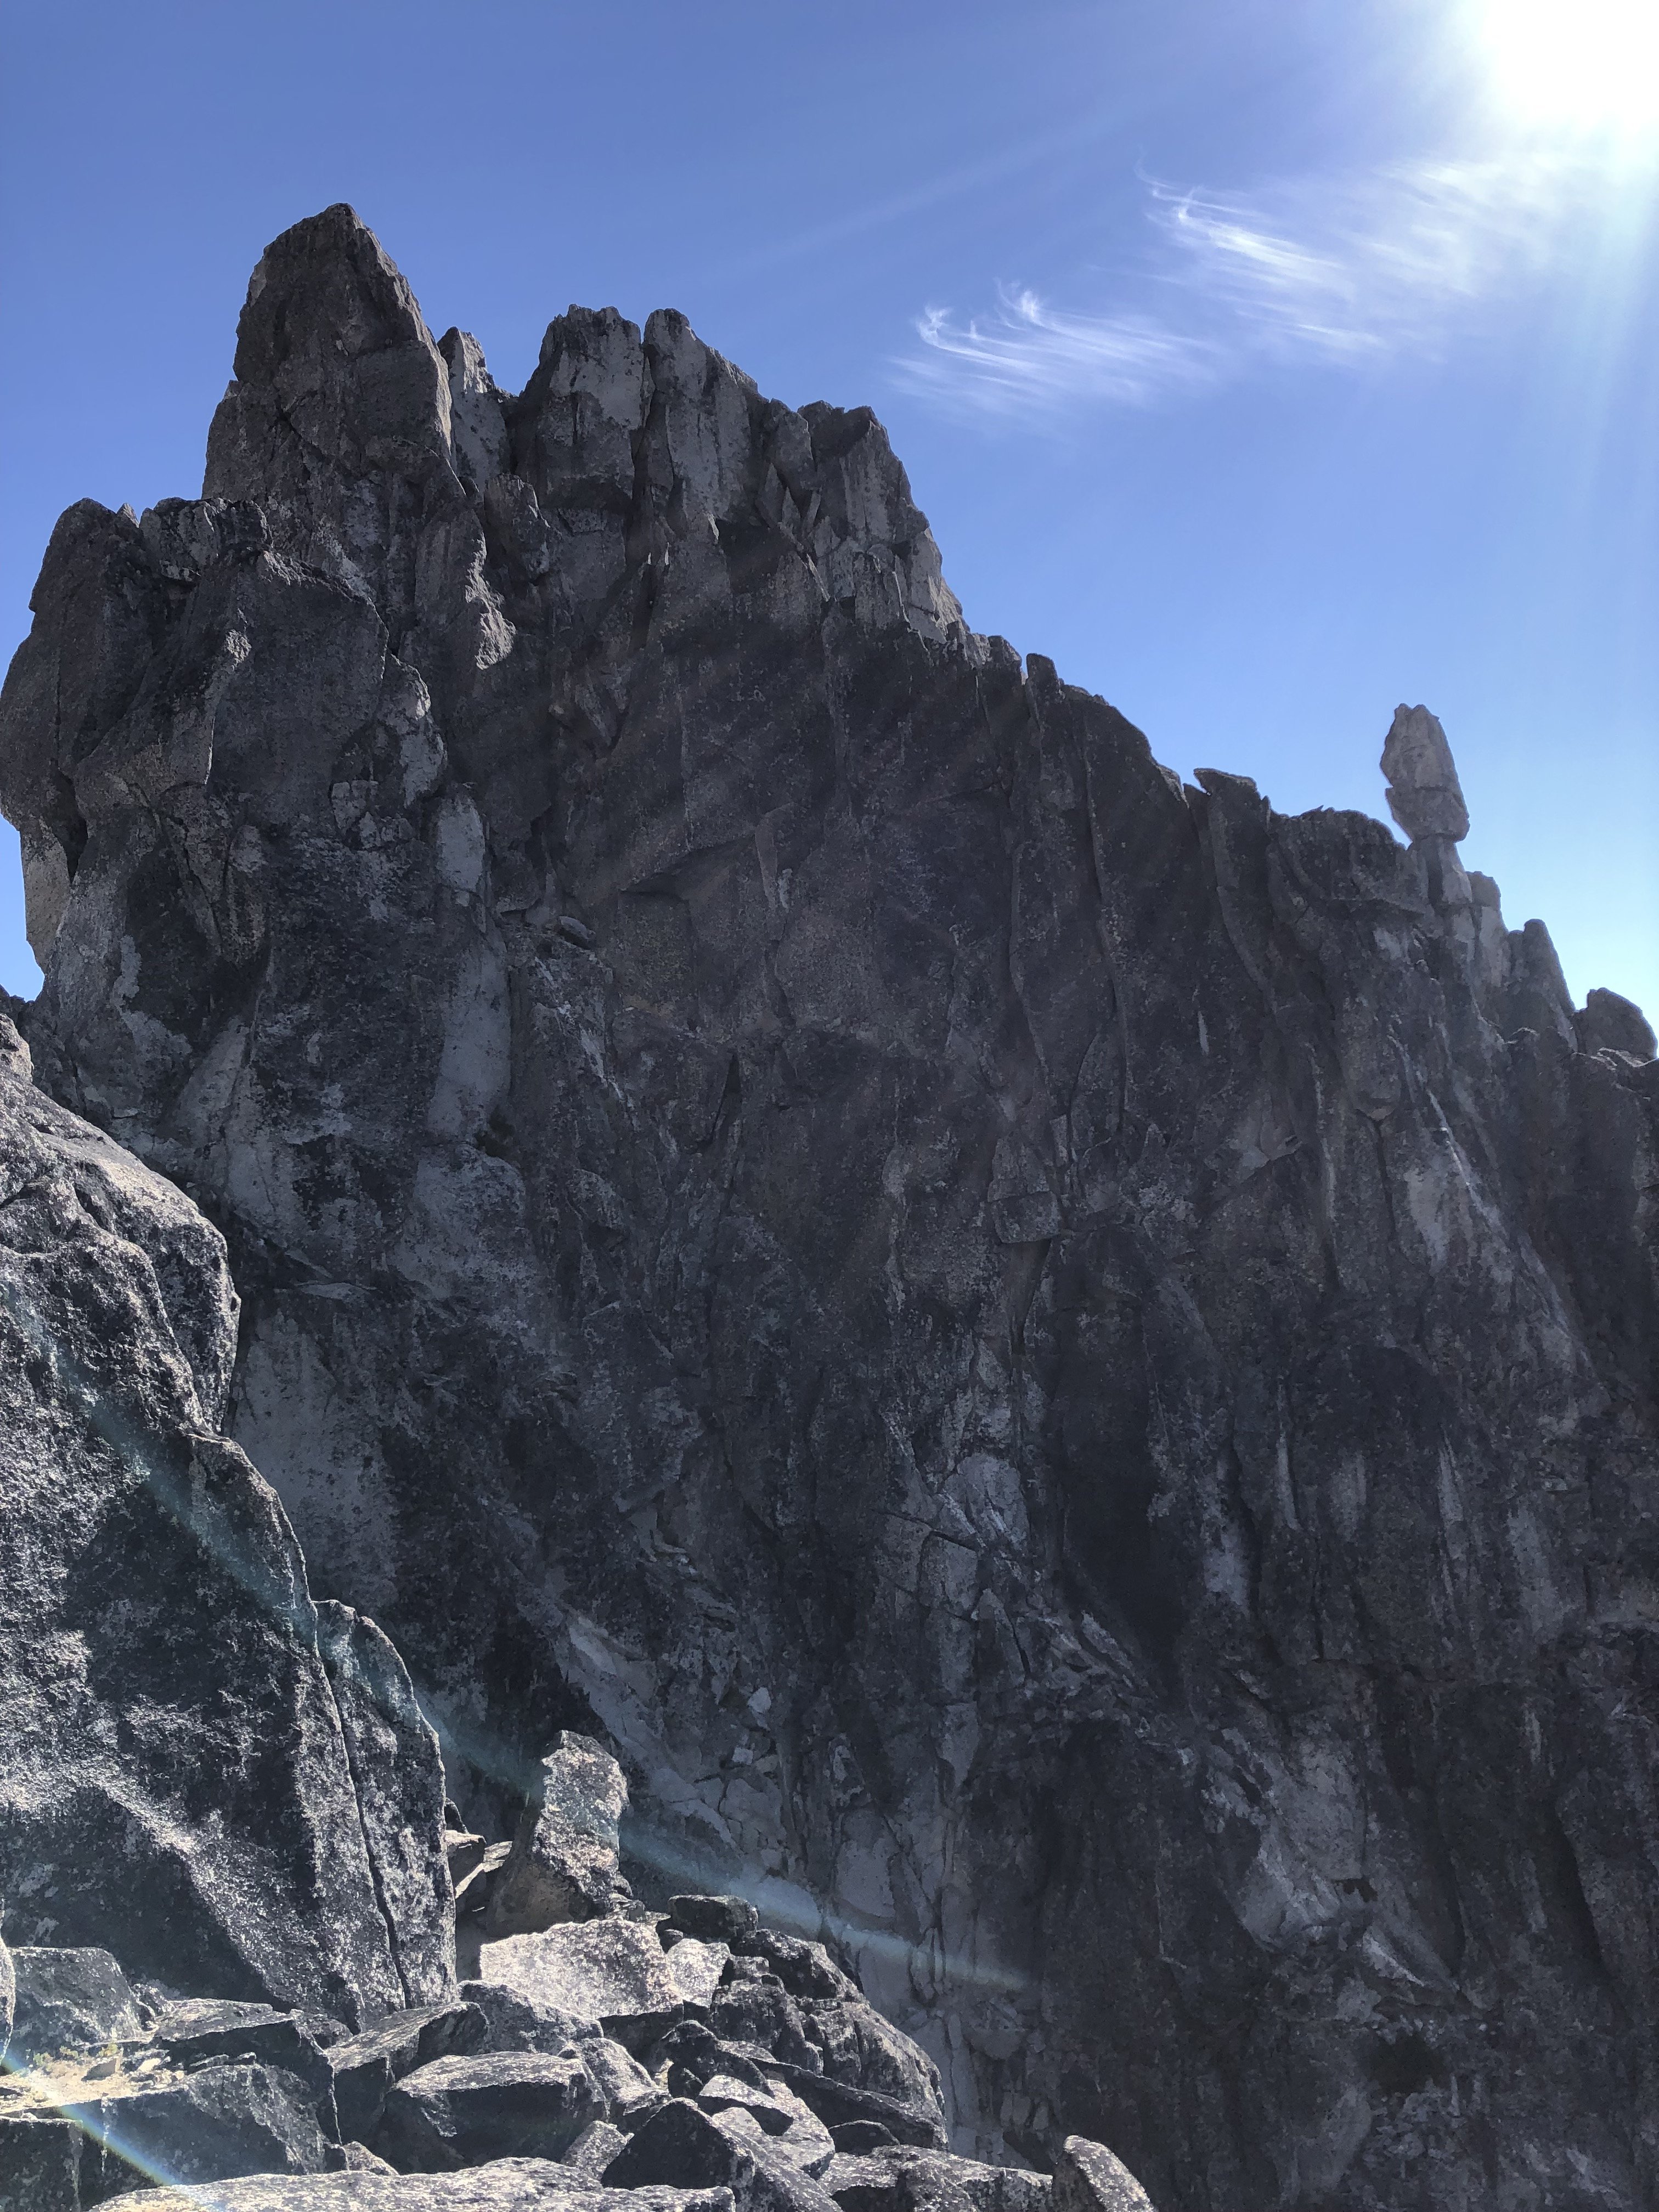
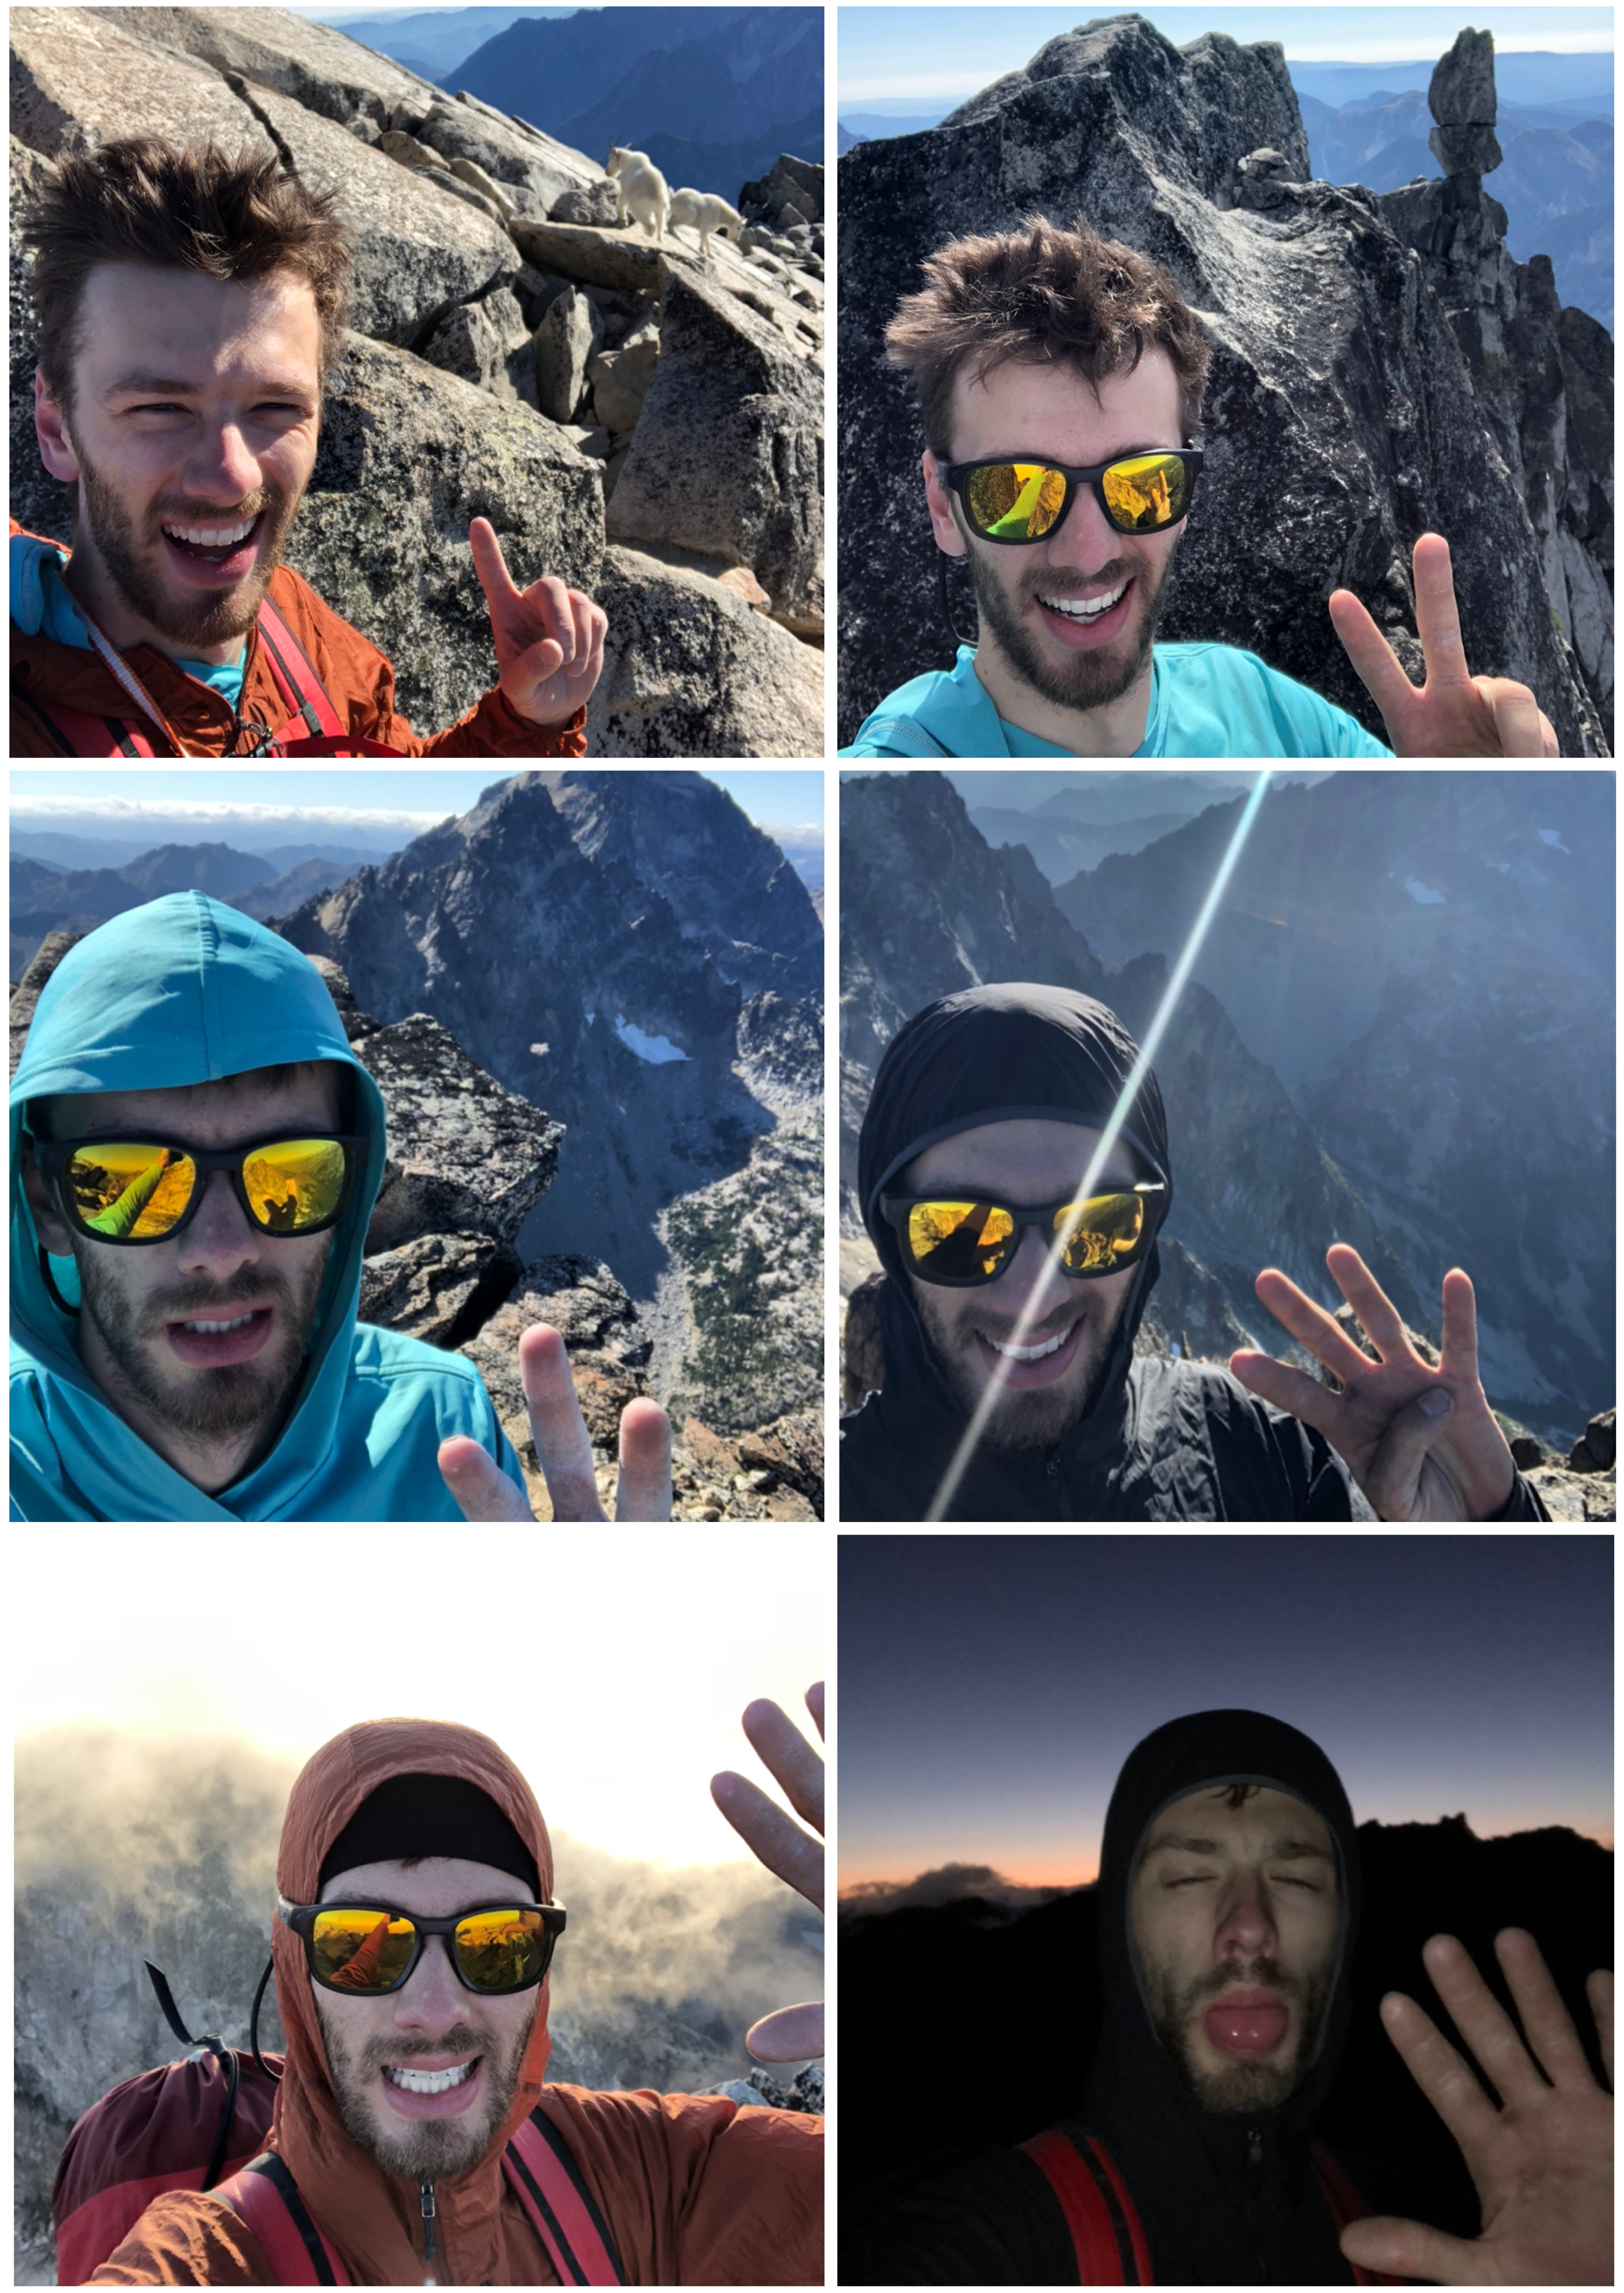
Here's a photo dump for inspiration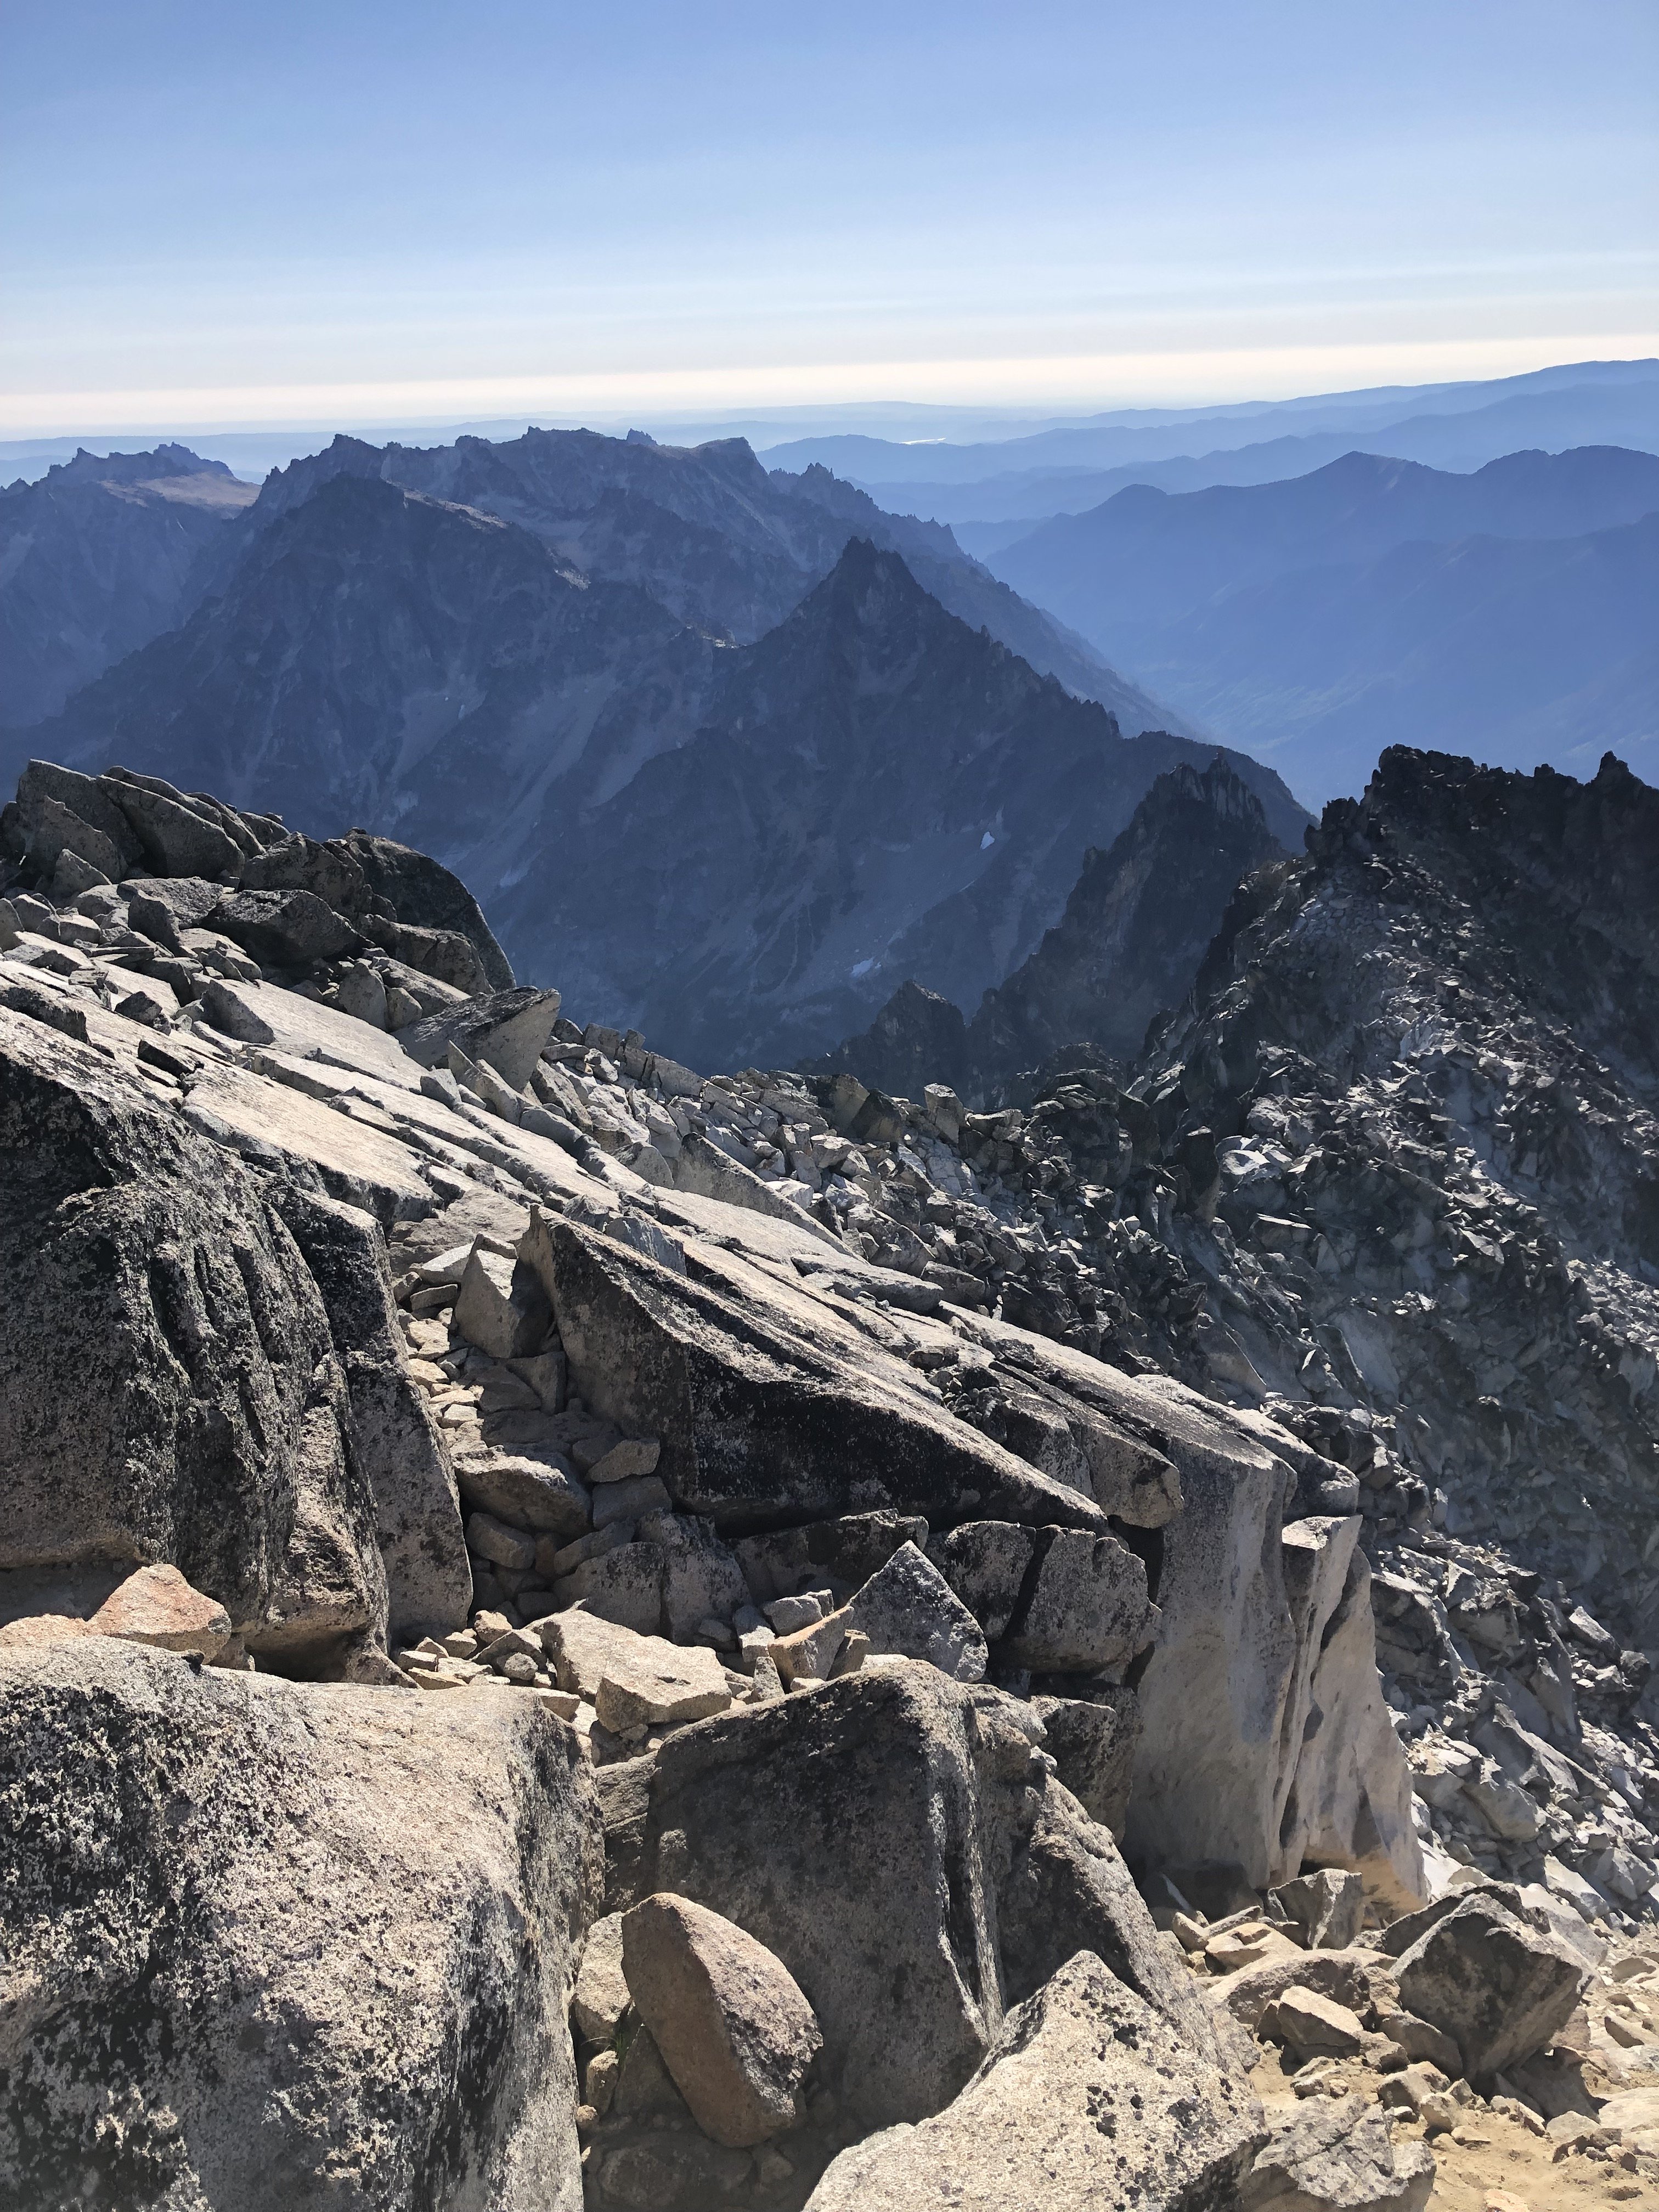

Gear Notes:60m 6mm tag line, Dyneema sling for harness, Reverso + Locker would be a perfect rap kit. Minimum 3L water storage. Good music to keep you company. Brought rock shoes but never used them. Trail gaiters are $$$!
Approach Notes:
Choose your own adventure