mutz
-
Posts
43 -
Joined
-
Last visited
Content Type
Profiles
Forums
Events
Everything posted by mutz
-
All items SOLD, thanks!
-
Bump - ice tools still available. Make an offer!
-
[TR] Slesse East Pillar Attempt and SE Couloir Descent - 9/26/2017
mutz replied to mutz's topic in North Cascades
Cool, guys, thanks a lot for the help! -
Trip: Slesse East Pillar Attempt and SE Couloir Descent - Date: 9/26/2017 Trip Report: A few weekends ago, Jimmy and I spent two nights and days up at Slesse camped at the propellor cairn. Here are some notes from the trip that include details on our East pillar attempt and a descent of the SE couloir from the summit. Day 1 - East Pillar attempt I think Jimmy and I were more excited to just be away from life and the computer for a bit, so we both failed to set an alarm. Our plan was to wake up and climb the East pillar in a day, with an intention of returning down Marc Andre's new descent route. I opened my eyes at what was probably a good 530 or 6. The fact that I didn't know the time reflects our over-confidence and lack of planning, both of which we would pay for later. We did breakfast, coffee, then headed toward the approach to the route. [img:center]https://ci3.googleusercontent.com/proxy/17vM8_tAz5Vhtv5lMT_n1Zqa5OpddqTE83GPk4ZDJqkBHIs_x8NNWMz9bAWryeLqxrKOZsyknnKEU4_Jb1selr-TDErp2eZ9OC26fzrySOaM48X20rhBug6Mpq1dXGgcsZI1GWOvM8OjWfbAT1I-0mGf9qjDyHuu1aY=s0-d-e1-ft#http://chasingmastery.com/wp-content/uploads/2017/09/ridge-crest-below-east-pillar-copy-1024x682.jpg[/img] Jimmy nearing me where the ridge crest meets the East Face/Pillar. The propeller cairn is on the slabs in the lower right. Approach I was more interested in the direct approach up the slabs, then heading up what are supposed to be 3 pitches of 5.8-5.10 terrain to the start of the book pitches. This approach method is documented in Blake's book, Cascade Rock. I was less interested in the other option, which was to gain the ridge crest that runs down from the route to the notch used to access the NEB from the propellor cairn side. In the end, Jimmy and I decided to go with this second approach option, which was listed in other books (specifically Fred's red guide). It required a full 60m pitch + some simul-cimbing of what varied from 5.5 to 5.8 to gain the ridge 100m up from the notch. We then did another 5.9 pitch which passed left around a roof/capped ramp, over a slab with a piton or two (we found a second one on the descent), and up a one-move-wonder-but-still-challenging-in-approach-shoes-left-slanting-wide-crack to some small trees. From here we simuled and simul-soloed (placing faith in terrain belays) to reach the base of the first 5.10 pitch (pitch 2 in the Mclane guide). Most of the ridge crest from this point contained really easy scrambling on heathered slopes and boulders, but we simuled as I've promised myself lately that I would push for simul-climbing rather than soloing in an effort to reduce controllable risk. I'm beginning to believe that simul-climbing is actually a lot less riskier but not too much slower if done right. We would continue in this fashion through the initial 5.8 corner to the base of the 5.10 pitches. At the base of the 5.8, we found two rotting pitons which we would later use on the descent. The approach could be done in 2 hours at reasonable pass by a fit party. Route attempt Jimmy led the first 5.10 pitch in two, splitting it up mostly due to some route finding challenges above the left-facing corner and proceeding flake. His second lead deposited us at a belay under a small roof feature on two quarter inch bolts. This total first pitch is probably 40 meter in length, with 10 m of climbing after passing the bolt mentioned in several guide books. From this bolt above the flake, go up and move left around the small overlap/corner and then up through the small overlap. Though we had planned to lead in blocks, I took over the lead at the bolted station in hopes that I would be able to move faster as the better rock climber between the two of us. To my own dismay, I felt gripped and out-of-touch climbing up the technical face where I found protection via set space, rusty button heads. I clipped two, then reached the third after placing some small cams behind a hollow-sounding flake that did fortunately hide a great pin. At this third buttonhead, I gave paused to whether the route went right or left. Unable to find the fourth bolt marked on the topo to guide me, I traversed to the left, reversed the moves, climbed up, reversed the moves, then longingly looked out right to what seemed to be easier climbing. I started out right, but then stopped midway through some moves I didn't want to reverse . It seemed like the right path, but I didn't want to find myself well above the old rusty button heads on harder terrain. [img:center]https://ci3.googleusercontent.com/proxy/oAR5Df5go9Lf6n-7BKe47F3lFExU4QKGDSsYg5tJ_cIy3iW-OZK8eVQGyrcCquQHfDSy9YDjeftbVxGSdSWxXAjSi5WcP5pW7cLghYzXxR7XU-u8b1CXP8XR5LAd5Eq1=s0-d-e1-ft#http://chasingmastery.com/wp-content/uploads/2017/09/DSC08601-1024x683.jpg[/img] First 5.10 pitch route finding [img:center]https://ci3.googleusercontent.com/proxy/w6hblqExpQONFQaH5SUxyJlci9NPI0SAaEbZ5sqMI2_MYey4UglEUYlP-8ACD0ttQqq5y602YAbLourBa3-e6QyBCDF-vg90qCubPlR8JNXm5Y97h_gI=s0-d-e1-ft#http://chasingmastery.com/wp-content/uploads/2017/09/DSC08602.jpg[/img] Good pro! We were only two pitches up at this point, but Jimmy and I took tally of our situation. We decided that it was time to go down. While only noon or so, we were on track for a long route at our current pace. This followed by a long, complex, and unknown descent (the SE couloir descent I'll discuss below). Without any bivy gear whatsoever, we were both interested in coming back stronger and more prepared than pushing our way up into a forced bivvy. Learning from our failure In camp that night and in the following days we would discuss turning around. On one hand, with so much day left, it seemed a funny choice: why forsake a spectacular 'tick' because it would have involved a little bit of suffering? We were through some of the harder climbing already (there were just a handful of 5.10 pitches). Through consideration of our decision, I think we both have come to admit that we have moved past the glorification of suffering and epics, and become more willing to acknowledge mistakes in evaluating our preparation, skill level, the route. Suffering and epics are sometimes part of the game, but they are not what I enjoy about climbing. Looking back, I am thinking climbing through those moves encountered on the east face. I know I could do so with poise, BUT, it would take me more time to choose to accept the risk. I was unable to commit to that commitment under the time pressure. I think what I had failed to do, and a huge reason for the lack of confidence I felt in committing to moving up on my pitch (and more generally the route) was the huge gap between my expectations for the route and reality. I expected moderate climbing on discontinuous cracks that could be protected to a reasonably degree. Instead, I had found face climbing on marginal protection via hard-to-inspect in-situ gear. The situation was challenging to confront and reason through in that moment. Dissecting our failure on the route even further, I would also identify these other causes: Our lack of ability to build a set of expectations on what we would find from guide book literature. Cascade's Rock indeed describes the climbing on the East Pillar as an "inobvious line via face..." climbing. Somehow we read passed this. The time-and-place decision making due to our lack of research reduce our confidence: "should we take the direct approach or gain the ridge near the notch and traverse from there?" I think these sorts of discussions, when just starting the day, are a far cry from the excellence in execution often required for complex climbing objectives. Lack of the appropriate gear. Bivvy gear, pins, or bolt kit would all have made continuing up a more reasonable choice for us. Quite coincidentally, near the time of writing this, I found this article by Arno of the Rock Warriors' Way: https://warriorsway.com/the-importance-of-doing-a-thorough-thinking-process/. Arno's suggestion of defining a goal, the consequences and a plan seems like one way to consider taking a more calculated approach to planning an objective like this in the future. Whatever, the approach next time, I am excited to go back for the East Pillar. It represents a challenging climb from which I will probably learn a lot more. The "improbable" line it weaves just left of the East Face is appealing, the ambiguity of the features from afar leave me wondering what will be up there. It will be fun to return stronger physically and mentally. Day 2 - North East Buttress and SE Couloir descent option [img:center]https://ci4.googleusercontent.com/proxy/5XYdTTT3XRJ1-OUdjJzfFjM1S-g2JxY1fEnpA6xgKI5AEKtqxc1SeiubNK5PfUo_pHGDAjcjfyDY-Oy3-Hj1Fp3rAiIZfWZon2gFZ1jrcIgqmUsBn4rt=s0-d-e1-ft#http://chasingmastery.com/wp-content/uploads/2017/09/DSC08644.jpg[/img] The classic NEB shot Our feeling of lack of preparation then leaked into the rest of the weekend. We had headed up to camp at the start of the weekend with route information for North Rib, NEB, East Pillar, and Navigator Wall. The evening of day 1, we contemplated what to tackle with our remaining time and energy. The Navigator Wall seemed too ambitious given our experience that day on the East Pillar, and returning to East Pillar with a more developed strategy and set of expectations, though somewhat enticing, didn't seem logical. We had climbed the NEB before, and climbing the North Rib would required inventing a new approach from the propellor cairn (feasible, has likely been done before, but an unknown to us at that moment). In the end, we decided to climb the NEB, but then to investigate a new descent route pioneered by Marc Andre Leclerc. We brought a very lightweight bivvy kit so that we could try to link the NEB into the North Rib via the crossover if we reached the summit after the former in some ungodly time. With a minimal bivvy kit, we would be able to decide on the summit after the NEB if we wanted to push into the day and evening or instead just begin the new descent option. North East Buttress We left camp at 3am and got to the summit around 1030am after simul-ing the entire route, which I guess went in something like 4 hours after accounting for the approach. We did it with a 60m rope and a double rack between .3 and 1" cams, with a single #2 and single #3. We shortened the rope to 40m for most of the climb but used the entire length when simul-climbing through the 10a crux pitch. This allowed Jimmy to build a belay above on a nice ledge before I reached some of the more difficult climbing passing through the roof. We did five pitches total. In all: 1) one from library ledge to a book pitch below the 5.10, 2) one approaching and through 5.10 to next good ledge. 3-5) Then three more simul blocks, split as we met a friendly party of two near the summit. [img:center]https://ci4.googleusercontent.com/proxy/ilYWHJb1QzS2AmuTWPw0Jv7kaA63Kdav2SvOHaTqMDcFK-UxRt97w2Ay9L52CXagnLBYfj7ML8CHpo1ziRILy_fQKEML6iW7VPJat5NhPflzCP9tt_6_DOGzzufaGsRw=s0-d-e1-ft#http://chasingmastery.com/wp-content/uploads/2017/09/DSC08630-683x1024.jpg[/img] Jimmy climbing through the 5.10 pitch on the NEB SE Couloirs Descent While the climb took us 6.5 hours from camp at the propellor cairn to here, the descent took us about 7.5. It was long, complex, and much more technical than the crossover. Marc Andre provided more than enough information to tackle it, but I'll elaborate here to provide a second opinion for those that are looking. We chose to take the descent in order to understand the value it might add as a way down for future climbs on Slesse. Hopefully some details will allow you to descend it in a faster manner than we did should you choose to take it. First high-level thoughts on this descent option: The south couloir as a descent option is optimal for those who have a reason for getting to the back of the east side of Slesse or the propellor cairn. It is not necessary in any manner for folks headed back to the car without stashed gear. The crossover descent, while it feels long, is much simpler and more appropriate for most parties. Parties considering this route should have ability to rappel/down-climb hundred and hundreds of feet of complex terrain with lots of loose rock. The descent is much more complex than the crossover. There aren't many mandatory rappels, or maybe any, if you are comfortable down-climbing 5.7. There exist only a few n-situ stations or obvious paths to follow. Most of the descent is 3rd class at a minimum with many 4th and low 5th areas. I wouldn't call the route-finding difficult, but it requires making many small route decisions over its entire duration. I would break it down this way: Summit to base of 1st set of cross over rappels - We traversed along the summit of Slesse to the south, following the cairns to the two rappels made by most parties to get off the summit block. These rappels (or down-climbing) deposit you on scree slopes on the west side of the summit. To the north (skiers right) is the direction taken to the cross over descent. Here the SE couloir descent heads left. You must reach the col that can be seen below the South summit of Slesse. You can get there by down-climbing a couloir just to the left of the ridge crest straight down the hill in front of you, and then by wrapping around on 3rd, 4th, and 5th class terrain to reach this col. A faster way might be to create a new rappel station on the top of tower/out-cropping to skiers left, and then to rappel onto the scree slopes. From here you would then traverse to the col, having skipped some circuitous down-climbing. Col to summit of South Summit of Slesse - To reach the top of the south summit, you can do what I did - lead a crazy pitch of 5.10 on stacked blocks in approach shoes, or you can take the easy way around. I recommend the later. When Jimmy followed the pitch I did in approach shoes, he literally yelled "Jeennnnggaaa" as a good joke. To take the easy variation, scramble up the buttress beneath the south summit from the col on low 5th terrain. Traverse to the right when it reduces in angle. Do this INSTEAD of heading straight up through the somewhat attractive but steeper looking corners above. They are more challenging than appears from below.. Gain the summit. Scramble from the south summit of Slesse down to the SE Couloir - Relatively straight forward. Down-climb to the south on third class screen slopes and gullies until you reach a short 5th class step. I lowered Jimmy down on a belay through this final step after we spent a lot of time trying to find a good anchor. I then down-climbed on the far skiers right. This puts you in at the top of the SE couloir. [img:center]https://ci4.googleusercontent.com/proxy/M85fQGEfWOw5okFH8iDyvitt7LaK2HUUZEriElRg7m9kOXWOvQgzfXvV0hSSVEzWs8h3UhK12HMvzsx8CmuEXnaF3OG630VgXJQjdB4tnIryVNT6fvbj=s0-d-e1-ft#http://chasingmastery.com/wp-content/uploads/2017/09/DSC08651.jpg[/img] Looking up towards Jimmy as we down-climb the south summit of Slesse Descending the SE couloir to the split - Stay in the SE couloir until you can trend out on grassy ledges out left. Stay just to the left of the couloir on the grassy ledges, but do not wrap around the ridge to skiers left more than 20m or so from the gully at any point After descending 200-300 feet, we rappelled off a block or two on the grass ledges (4th class slopes). When the couloir split was about 50m below us, I lowered Jimmy the length of the rope so he could keep scouting ahead, then dropped the rope to him and started down-climbing. Here, one must eventually return to the main gut of the couloir to descend the last 10 meters to the split. [img:center]https://ci3.googleusercontent.com/proxy/f0NWO1nTIgrFsI5ZX-W_NgjbNuPJm59nB6gAMfi5ymw1u3sw9jTtWLOcFaLY-V8bQbNI42zh0I2eihDXSkdFTommmV7MFETt_OV4l6bz2LDOm1BAR27Q=s0-d-e1-ft#http://chasingmastery.com/wp-content/uploads/2017/09/DSC08656.jpg[/img] Jimmy headed down the heathered boulders just skiers left of the SE Couloir [img:center]https://ci6.googleusercontent.com/proxy/m_grz-onUqMKpLxgAM2jqnIxxxFd0-3OKcYjpUwQK8X4Ks3w-4H5Eni07i6kxMy2isEbmAmkf0pcxZzIWBXL860VdQG-zrTT5HJ1Vdp1FEm8uPkJf0RU=s0-d-e1-ft#http://chasingmastery.com/wp-content/uploads/2017/09/DSC08659.jpg[/img] Jimmy at the base of the SE couloir with just one last bit to go. From the split of the couloir to the slabs way below - Take the left split, which runs down underneath the navigator wall. Make 3 rappels, we left or found several single nut rappels that we trusted. These exist but it will require a careful eye to find them. The first is on the Navigator wall side of the couloir, the next two on the other side. A third 30m rappel puts you a short scramble from the heathered slopes directly beneath the Navigator Wall. Contour skiers left across these slopes aiming for the large rock horn. Traversing the last few meters to this horn is exposed and hair-raising. Rappel from this horn 30m onto a grassy ledge. From here, you must traverse skiers left and down again to more solid rock on heathered footholds and rock that is poorly held by the slope. Be careful. After your gain better rock down and to the left, begin looking for stations again. From here there are 4-5 rappels down to the slabs below. Some of them are older, some younger, and it seems they are for different rope lengths so take your time with this last part of the descent to make sure it is done right. I wish I had more pictures to go along with the above, but I think competent parties who have the right skill level for this descent will do great as long as they give themselves plenty of time. Link to my blog with this TR: Slesse East Pillar Attempt and SE Couloir Descent Chris
-
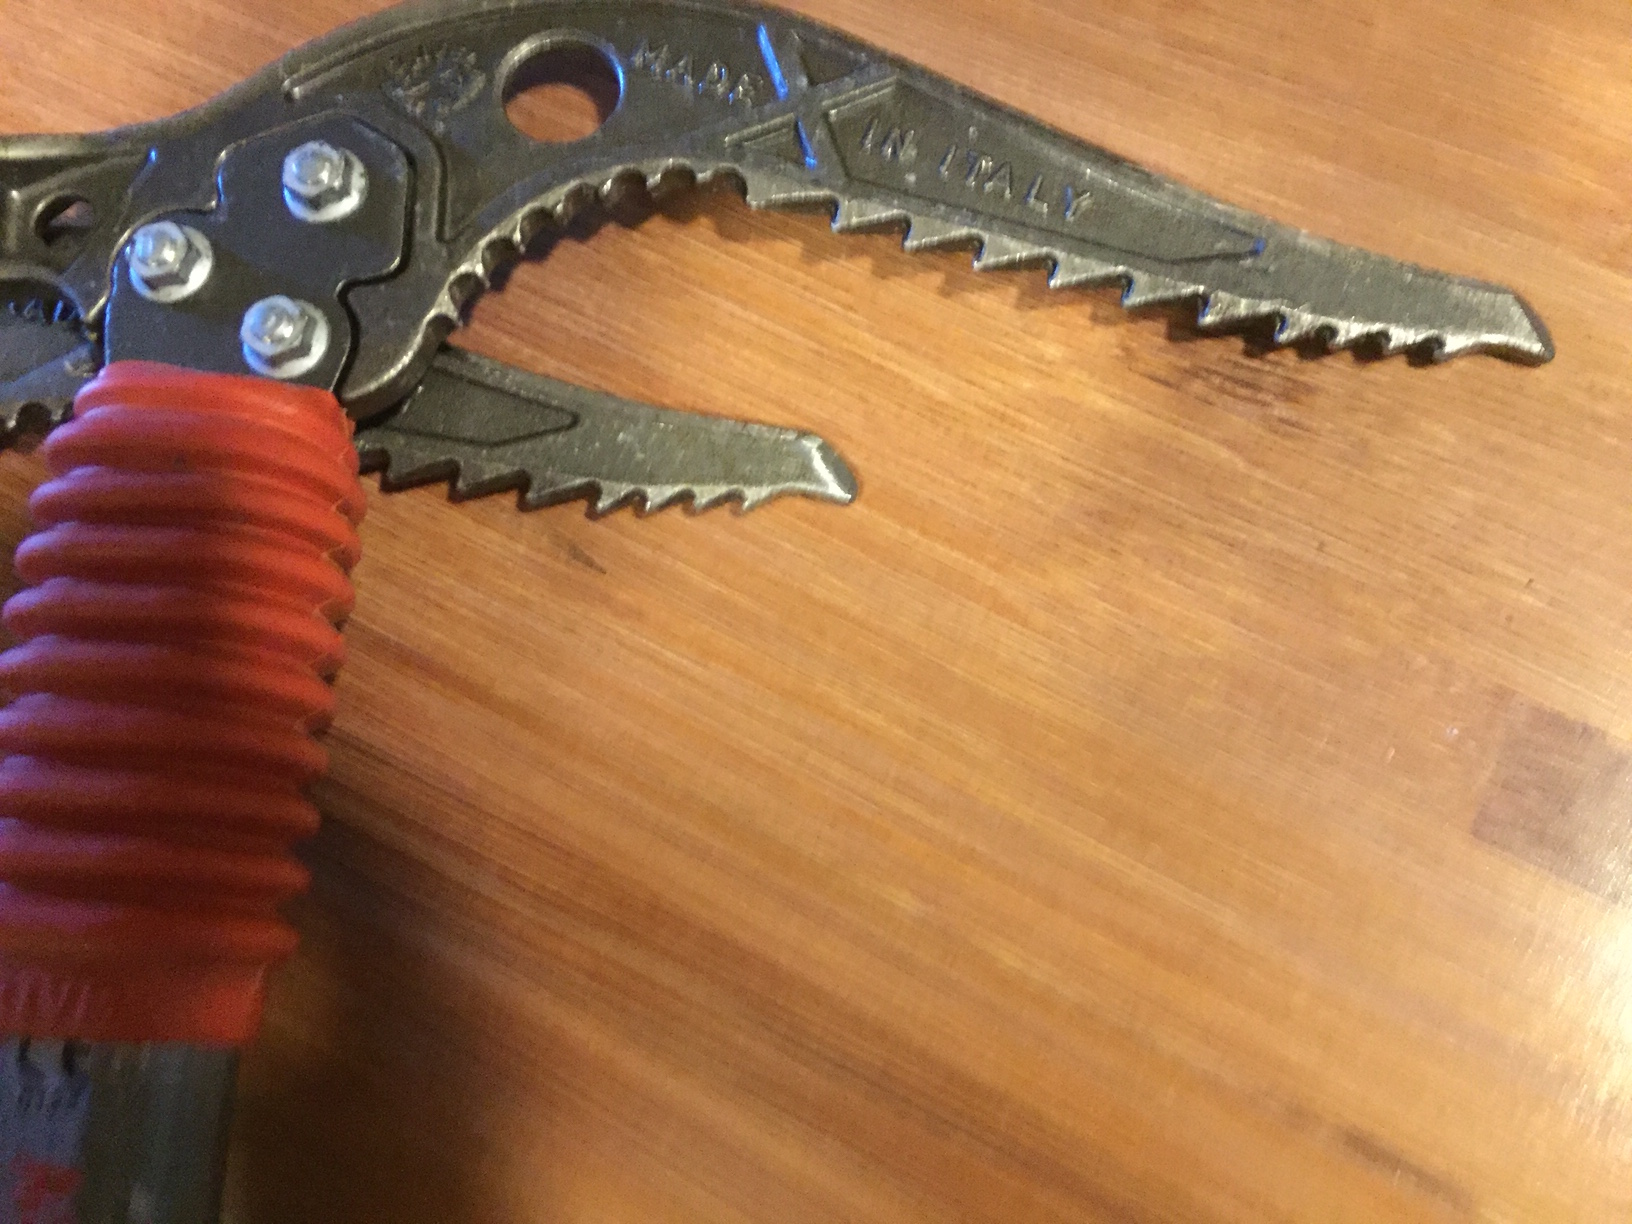
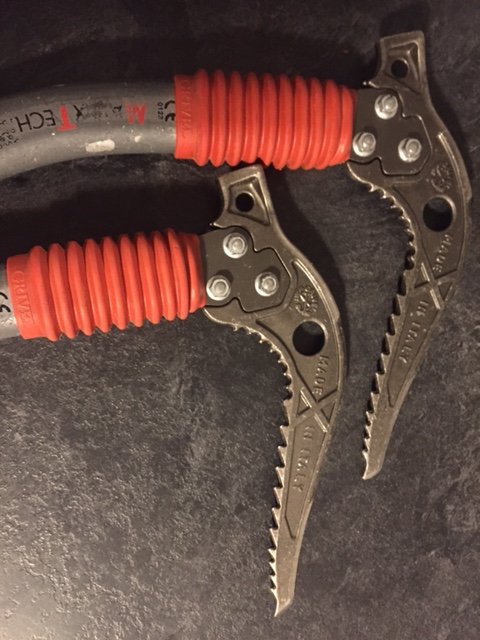
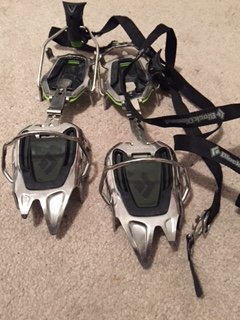
The sweet spot for the Snaggletooth crampons is definitely steep snow, neve, and easy water ice or rock. They destroy brittle ice, but fortunately you don't find much of that in the cascades. I've climbing some short grade 5 pitches in them and up to m6. I think they are the perfect all around crampon for around here unless you are doing a lot of water ice climbing. Do pretty well in the rotten ice often found in the cascades, as they don't sheer through like vertical points would.
-
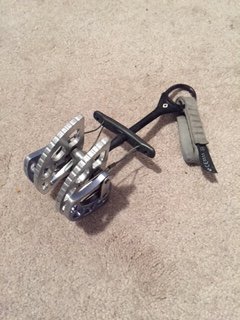
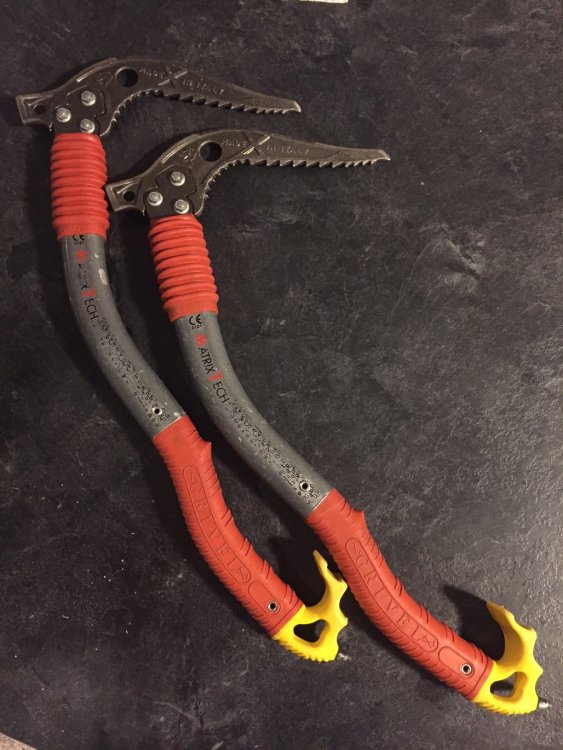
For sale [HAVE A BUYER] BD Snaggletooth crampons, used. Still in great condition. Straps still original length. $85/95 shipped Grivel Matrix Tech Ice Tools, used. Still in great condition. $180/ for pair/195 shipped [sOLD] BD #4 camalot, used. Still on good condition $40/50/shipped In bellingham but can ship, meet, or hand off next time in Seattle as convenient. You pay shipping over $5

-
A few weeks ago, Eric Wehrly and I headed up to Half-Moon to attempt some sort of squeeze job between routes that already exist on the NW aspect. One of them, Digging for Dreams, made it into Cascades Rock and we were curious what else might still be lingering (see: http://blog.alpineinstitute.com/2012/04/first-ascent-diggin-for-dreams.html). Of course, Eric and I didn't make it to Half-moon because of our short attention span. We cut off early to Wallaby and climbed what may be new terrain (or really old terrain - we were not sure based on what I remember being Fred's non-descript descriptions, or maybe Stecks?). Regardless, it was an adventure for the soul. We left no trace of our passage, so the line's next 'first ascensionists' should have just as much fun as we did. One photo I captured makes the climb look worthwhile: During our adventure we spotted some interesting terrain on Half-Moon that I do believe is was climbed. I went back this weekend with Jimmy to check it out. We probably should have been concerned that the gaping Bombay flare would block passage to the stellar looking pitches above, but alas, we are young and stupid. With big cams in tow, Jimmy and I wandered up to the base of the West ridge of Half Moon beneath this feature. We climbed an approach pitch that turned out to be both harder and most interesting than expected. From here, Jimmy then embarked on his quest for glory up into the gaping flare, henceforth known as "The Maw." The Maw: Disintegrating footholds and a suspect nut placement that nearly pulled off the block when tested led to some decent small cams that allowed Jimmy to reach the roof. He then stemmed, crawled, and tunneled his way towards the light. After plugging the #5, Jimmy then "rode the sail" so to speak - exiting the chimney required placing full trust (both hands and feet) on a refrigerator door sized flake. Miracles worked themselves and around the corner he went to bring me up. Following this with a pack was not easy. In the end, our route ended up shorter than the neighbor next door to the left ('Digging...'), but we still found adventure to say the least. Beyond the Maw we found 3 more pitches of fun finger and hand cracks. P1: 5.8 (20m) Belay beneath the Maw in extremely suspect rock. It quickly turns to higher quality stone offering fun a fun thin hand crack. Belay on 1-2" cracks between glued flakes and blocks in the back of the flare. P2: 5.10- (25m) Enter the Maw. Climb right from the belay up past a few delicate horn features to find a few small cams in the broken face. Continue up into the upper reaches of the flare, then climb towards the light. Exit past the flake and belay on the second ledge beyond. P3: 5.10- (30m) Climb up a seamy crack to the right of the rotten chimney via delicate lay-backing of the arete. Continue up to wide cracks and a belay on the slab on large cams. P4: 5.10- (40m) Aim for the middle of the three cracks (finger-size), climb this, and continue up amazing finger and hand pods to a belay under a roof. P5: 5.9 (40m) Traverse right around the corner, and then up small hands leading to a #3 crack to the top. At the hand-traverse that finishes with a mantle on a rotten block, continue traversing right to reach the top of Choi Oi Tower. Though Eric didn't join us on this adventure, he was there in spirit. Because of the nature of the climbing and because we are skeptical of his boyish blond hair at 50, we've decided to name the route: "Uncle Wehrly's Toupee." It may share part of one pitch with Digging for Dreams, specifically the start of our pitch 3. More photos here
-
I have a pair of Grivel Matrix techs for sale. Both have a hammer. Great for easy mixed climbing (they are very slight and well shaped), and blasting up some steep snow or ice on Cascade Volcanoes. Asking $250. The picks, and tools in general, are in great shape, and the nuts holding the pick on are not worn out (a problem that can make them hard to replace if you are a super crusher and put a lot of wear on these).

-
You guys totally crushed Jamie! Awesome. heard you and Ellie encountered a note about a lost party in the summit register!
-
Nice!!
-
A quick report after scooping Acid Baby this weekend. The route is dry except for the pitch off the ledge. I did some icicle bashing and some lie-backing on an upside down verglass coated horn to get through the 10m of the ledge, but after that beautiful clean, dry, granite. Other than that the goods are for getting. Brought the rack suggested in Cascades rock,...great. 1x4, 1x3, 2x#2 -> .3, 1x blue and purple metolius 10 slings/draws are plenty The road is essentially snow free, bring a bike. The effort required to ski anything below the lake makes skis a questionable tool at best unless you are heading up to ski in general. I think walking on across the middle of the lake is at an end for the season except for those who are quite bold. Let it begin.
-
Sold. tthanks
-
haha. yes, JasonG, I was on Fallen Angel, and yes, tanstaafl, you've got to love the optimism!
-
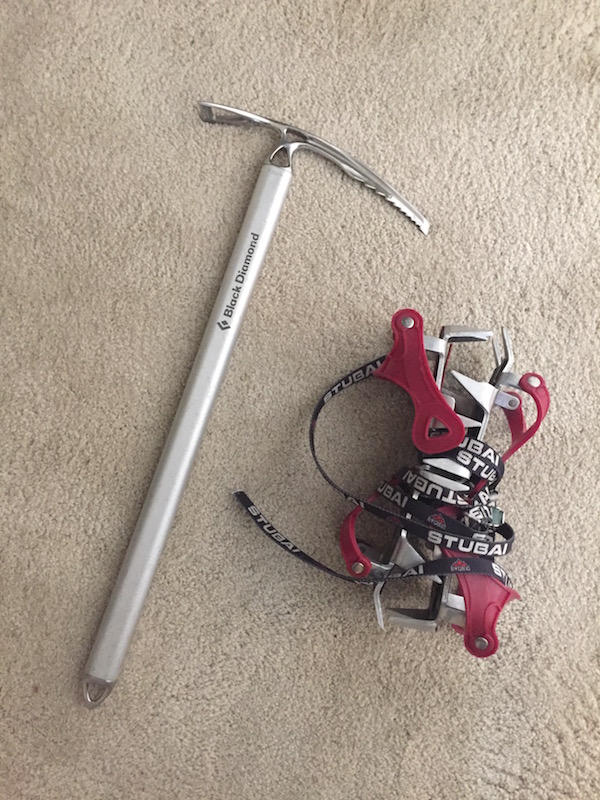
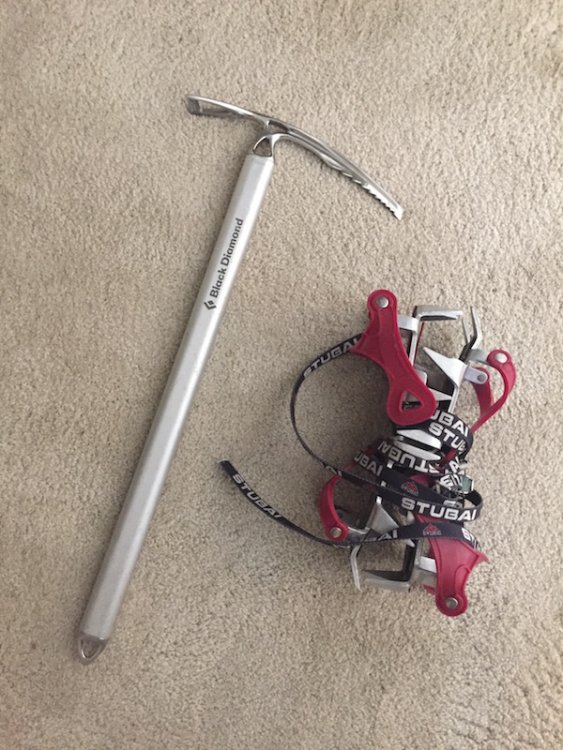
Selling two items that are perfect for mountaineering objectives around Cascades. The two items I would like to sell are: -Black Diamond Raven Ice Axe (55cm, https://www.backcountry.com/black-diamond-raven-pro-ice-axe?rr=t) -Stubai Aluminum Universal crampons (http://www.backcountrygear.com/stubai-ultralight-universal-crampons-silver-red.html?gclid=CjwKEAjwlpbIBRCx4eT8l9W26igSJAAuQ_HG3twBWI4ozjZoUeCfB50uZrla7TgCm76UIJv3x7mXthoCNIHw_wcB) These items have both seen minimal use and are in great shape. I am interested in selling them together for $100 More photos available upon request. Photo here:
-
Oh, and Eric's wife had to come pick us up. I don't think she must like me very much. Last time he and I went out, we missed our check-in time and she was on the verge of calling S&R
-
Ha! It went something like this: -checked the engineering of the gate locking system just to be sure Eric and I couldn't outsmart the system - no luck -slammed two beers each -filled out pack with the remaining food we had - 1 satsuma and a pack of shotblocks and started walking -we saw our first car on mosquito rode, after 1.5 hours of walking down the logging road. they were going the wrong way and wouldn't stop, -it was now dark and raining, and we still didn't have service -finally made it to a bunch of homes, unfortunately no one would open the door for us: two sketchy males walking around at 730pm on monday night -finally stood in-front of on-going traffic and waved our arms, forcing the next car to stop (2nd one we had seen in 3 hours now) -convinced the guy to give us a ride to the general store, where the store manager allowed us to use his phone and sit and drink beers while he told stories of living in the country, and they were definitely good stories... The end.
-
$75
-
Sold, thanks
-
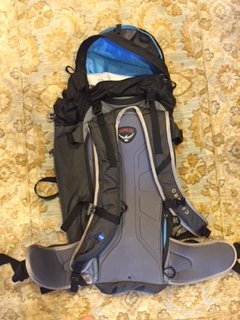
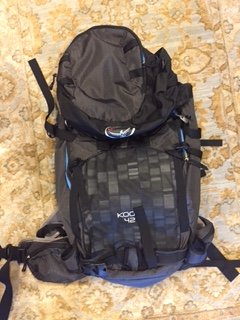
I have a black version of this pack here: https://www.ospreypacks.com/us/en/product/kamber-42-KAMBER42_503.html I believe it is last years model. It looks brand new, and has been out on one adventure. I have a different pack and won this in a raffle. $120. Send me a message.

-
I have a size harness that will probably work for you. Its a glacier harness 2 years old. Used about once. Can you send email and I will send a photo?
-
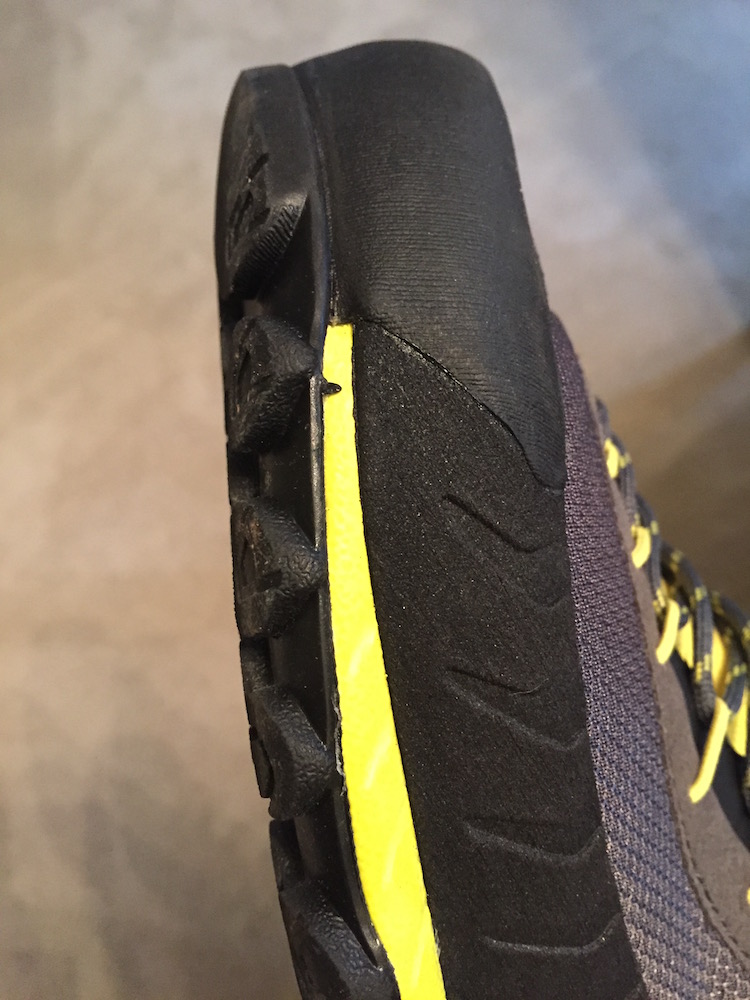
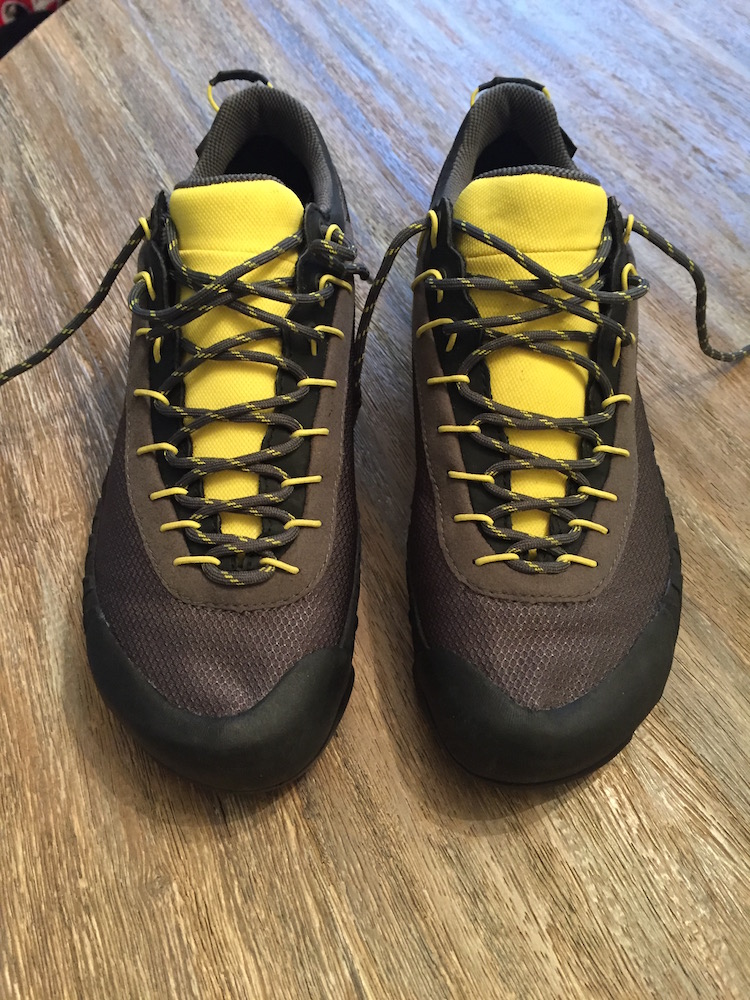
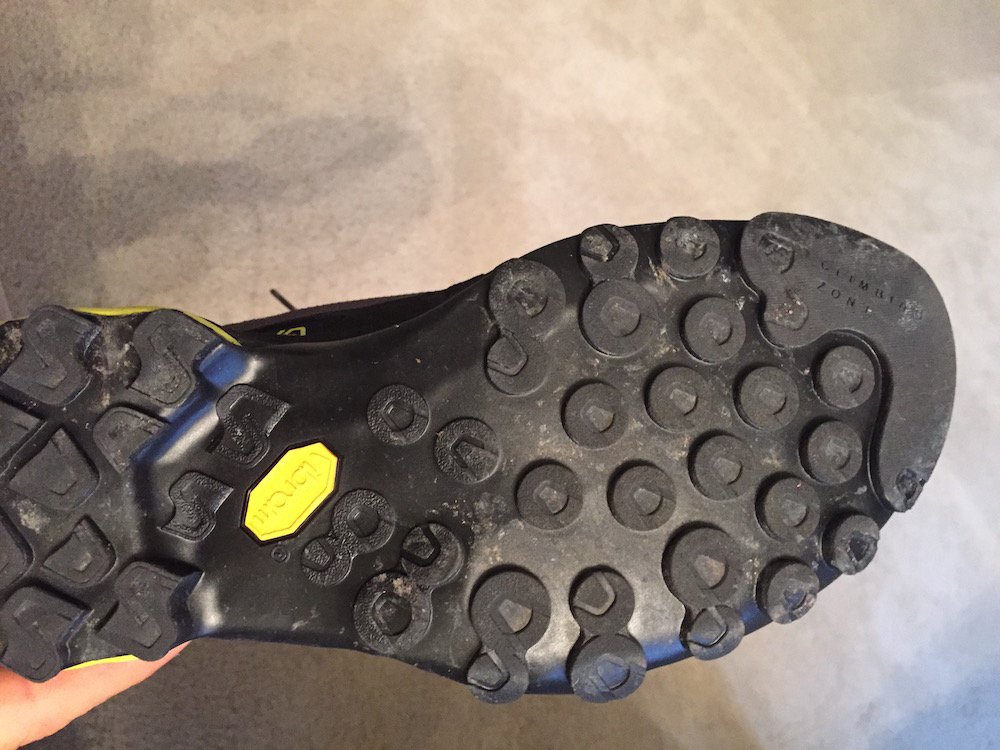
La Sportiva TX3, Men's 42 From the manufacturer: "A synthetic sticky rubber outsole built to traverse the high mountains. Trudge through the canyons or simple get to wherever you ant to go. " From me: -Vibram sole with climbing zone (sticker rubber) in the from should make them more durable then a regular shoe. -Some kind of synthetic mesh (La Sportiva calls it "polymesh) makes the shoes really light I literally wore them to the grocery store to see if they will fit but they are too small for me. Just a little bit of dirt on the sole but otherwise brand new. $85.


-
We drove up the road about a mile, and that was in a mazda w/o snow tires. With good traction you could probably do two miles now. There seems to be logging activity every morning on the road during which they open the gate. We passed through at ~645am (open), but it was locked when we returned (~5pm). We then had to return the next morning for the car (~630am, open again). Drive through at your own risk!
-
I cannot for the life of me get my copy and paste content to show up here, sorry for the plug, but going here instead. http://chasingmastery.com/exploring-the-sisters-west-ridge-of-north-twin/
-
(Photos here, cannot be bothered with trying to upload them). If I have learned anything about “winter” climbing on the west slopes of the Cascades, its that getting the conditions just right is both luck and an art. Sure if you get a big high pressure window and ice flowing down tree trunks its one thing, but for the rest of the year, finding good sports action is hard. After bailing on much grander plans that required a better weather forecast and snowpack, Eric Wehrly and I decided to do a little short day jaunt into the sisters with skis. We were stunned by the fun climbing and the great conditions we found. Great sticks into ice and snow between discontinuous gullies that hold 3, 4th, and easy mixed terrain made the West Ridge quite enjoyable. Approach We followed the standard approach to the west ridge of North Twin Sister. This entails driving Mosquito Lake road until you can go left on a logging road that parallels the middle fork of the Nooksack river. There is plenty of beta out there, I am not going to repeat it here. Most of the time, this is eventually blocked by a big metal gate, managed by the logging company, 5 miles in. Eric and I thought we were quite lucky to see the gate open and blasted right through it (mistake??). We followed the road via GPS coordinates he and I had put together before parking the car where snow on the road made further travel unlikely. When done as a summer scramble, most folks either run the road or take bikes, depending on how light they are going. We had opted for skis to make the best of a snowpack we expected to find at about 2000’-ish. We left our tennis shoes in the car and did the approach on skis, separated by some brief sections of road walking. A GPS of some kind is quite useful for the approach as there are many spurs on the logging road you are following. The technology exists, you might as well use it. We arrived at the base of the west ridge after some fun conversations and easy uphill. There were just a few sections of Cascade shenanigans, like crossing a of a small creek. Here, we were both either seasoned enough or dumb enough to not take our skis off and did a sort of stem move across rocks to regain the bank on the far side. Instead of following the approach to the ridge for the last half mile, we opted to contouring on the north side of the rib of North Twin that becomes the west ridge. This seemed necessary based on growth of the trees along the ridge that would have made pushing skis uphill difficult. I am still recovering from the amount of bush-whacking he and I did this summer, so we avoided the unknown at all costs. See track. Climb In summer the climb is a 3rd/4th class adventure where proper route-finding makes it a very manageable solo affair. I estimated that between the deep winter snowpack and some melt freeze cycles, we would find good snow and mixed travel conditions with just a bit of technical movement. It would only be hard if we wanted to make it that way. Thus, we left the rack at home and brought harnesses and a short rope only for any necessary rappels to drop into our descent ski. Our climb was a nice argument for new school versus old school. Eric brought two straight shafted tools, each with wrist straps. I didn’t even know people used those anymore. I carried more modern weapons (pair of Grivel Matrix sticks). My curved tools didn’t plunge as well as Eric’s 90s era mountain axe’s. Conversely, I had quite a bit of fun as we tooled and swung our way to the summit, seeking out easy ice and mixed climbing where it could be found. There was a good melt-freeze neve in several of the small couloirs, and even some alpine ice in others. Though we brought crampons, we stuck to boot-only climbing, probably out of laziness more than anything. There were a few crux sections where we made scared ourselves just enough to feel accomplished. At one point, Eric and I both completed a full “straddle move to beached-whale to double alpine knee” maneuver to top out on one of the lower steps. I might have even done a bit of O-dub-ing in that section to keep it real. We topped out, bagged the summit, then picked a line for the descent after an assessment of the snow conditions and avalanche hazard. Descent Eric, a grand-master of skiing improbable lines in the Cascades, led the decision-making on the terrain we would descend. He and I dug into the layers just below the summit to find an expected dense rain crust with a well-bonded 4-5 inch, highly non-reactive layer on top. It would probably take a bomb to make anything go big, so we skied what was probably the most aggressive line possible, but not without a few ski cuts and otherwise good terrain/group management. The most dangerous aspect of the descent was probably heavy sluff on the rain crust that locked you into your turns. Our descent from the summit was probably some of the most variable skiing I have done this year, ranging from a nice, carve-able, styrofoam wind slab to the hard rain crust. Below 4500 ft, we found a fun spring corn-like texture before it got soupy. We skied our way to our original up-track on the north side of the west rib, contoured a bit, then made it through the trees back down to the road. A few free-heel pushes later, we made it back to the car, again with intermittent road walking. Now for the moment of chance we had been waiting for. Would the road be open, like the arms of a loved one, beckoning us home, or closed, like the gates of Mordor, committing us to a long walk to reach humanity.
-
Price drop to 350! Get em!!