-
Posts
9 -
Joined
-
Last visited
Content Type
Profiles
Forums
Events
Everything posted by Pete Wojcik
-
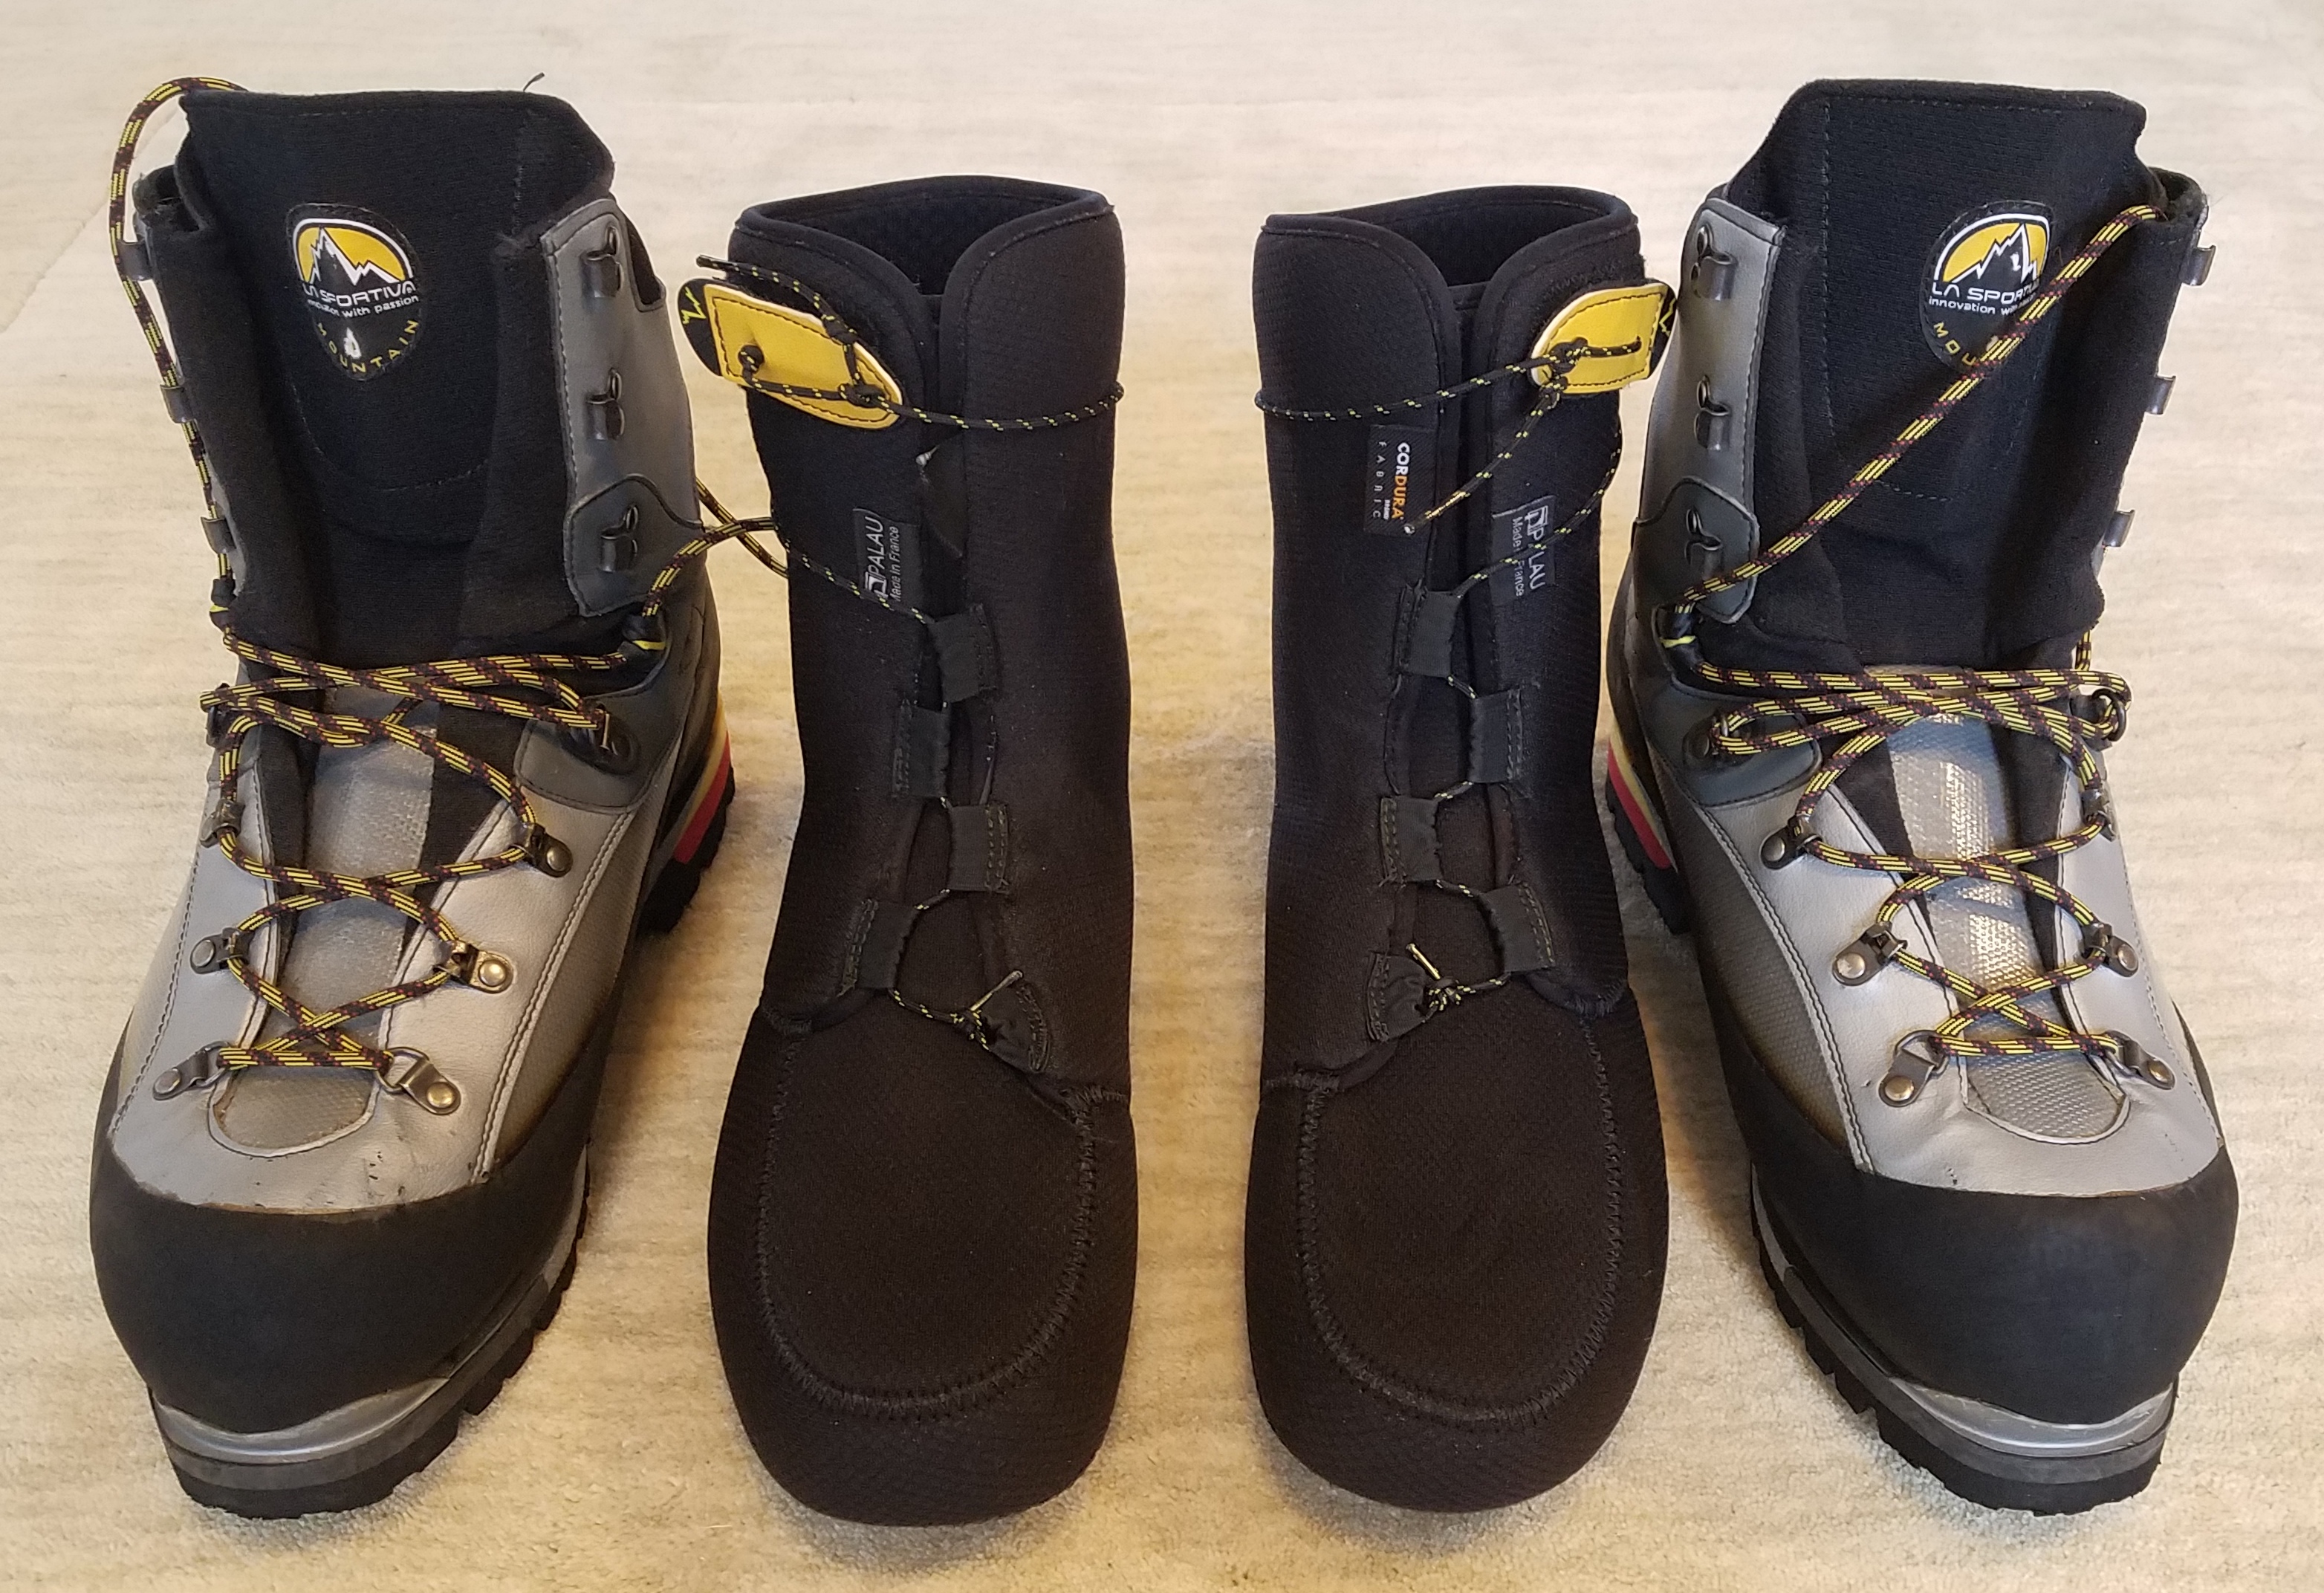
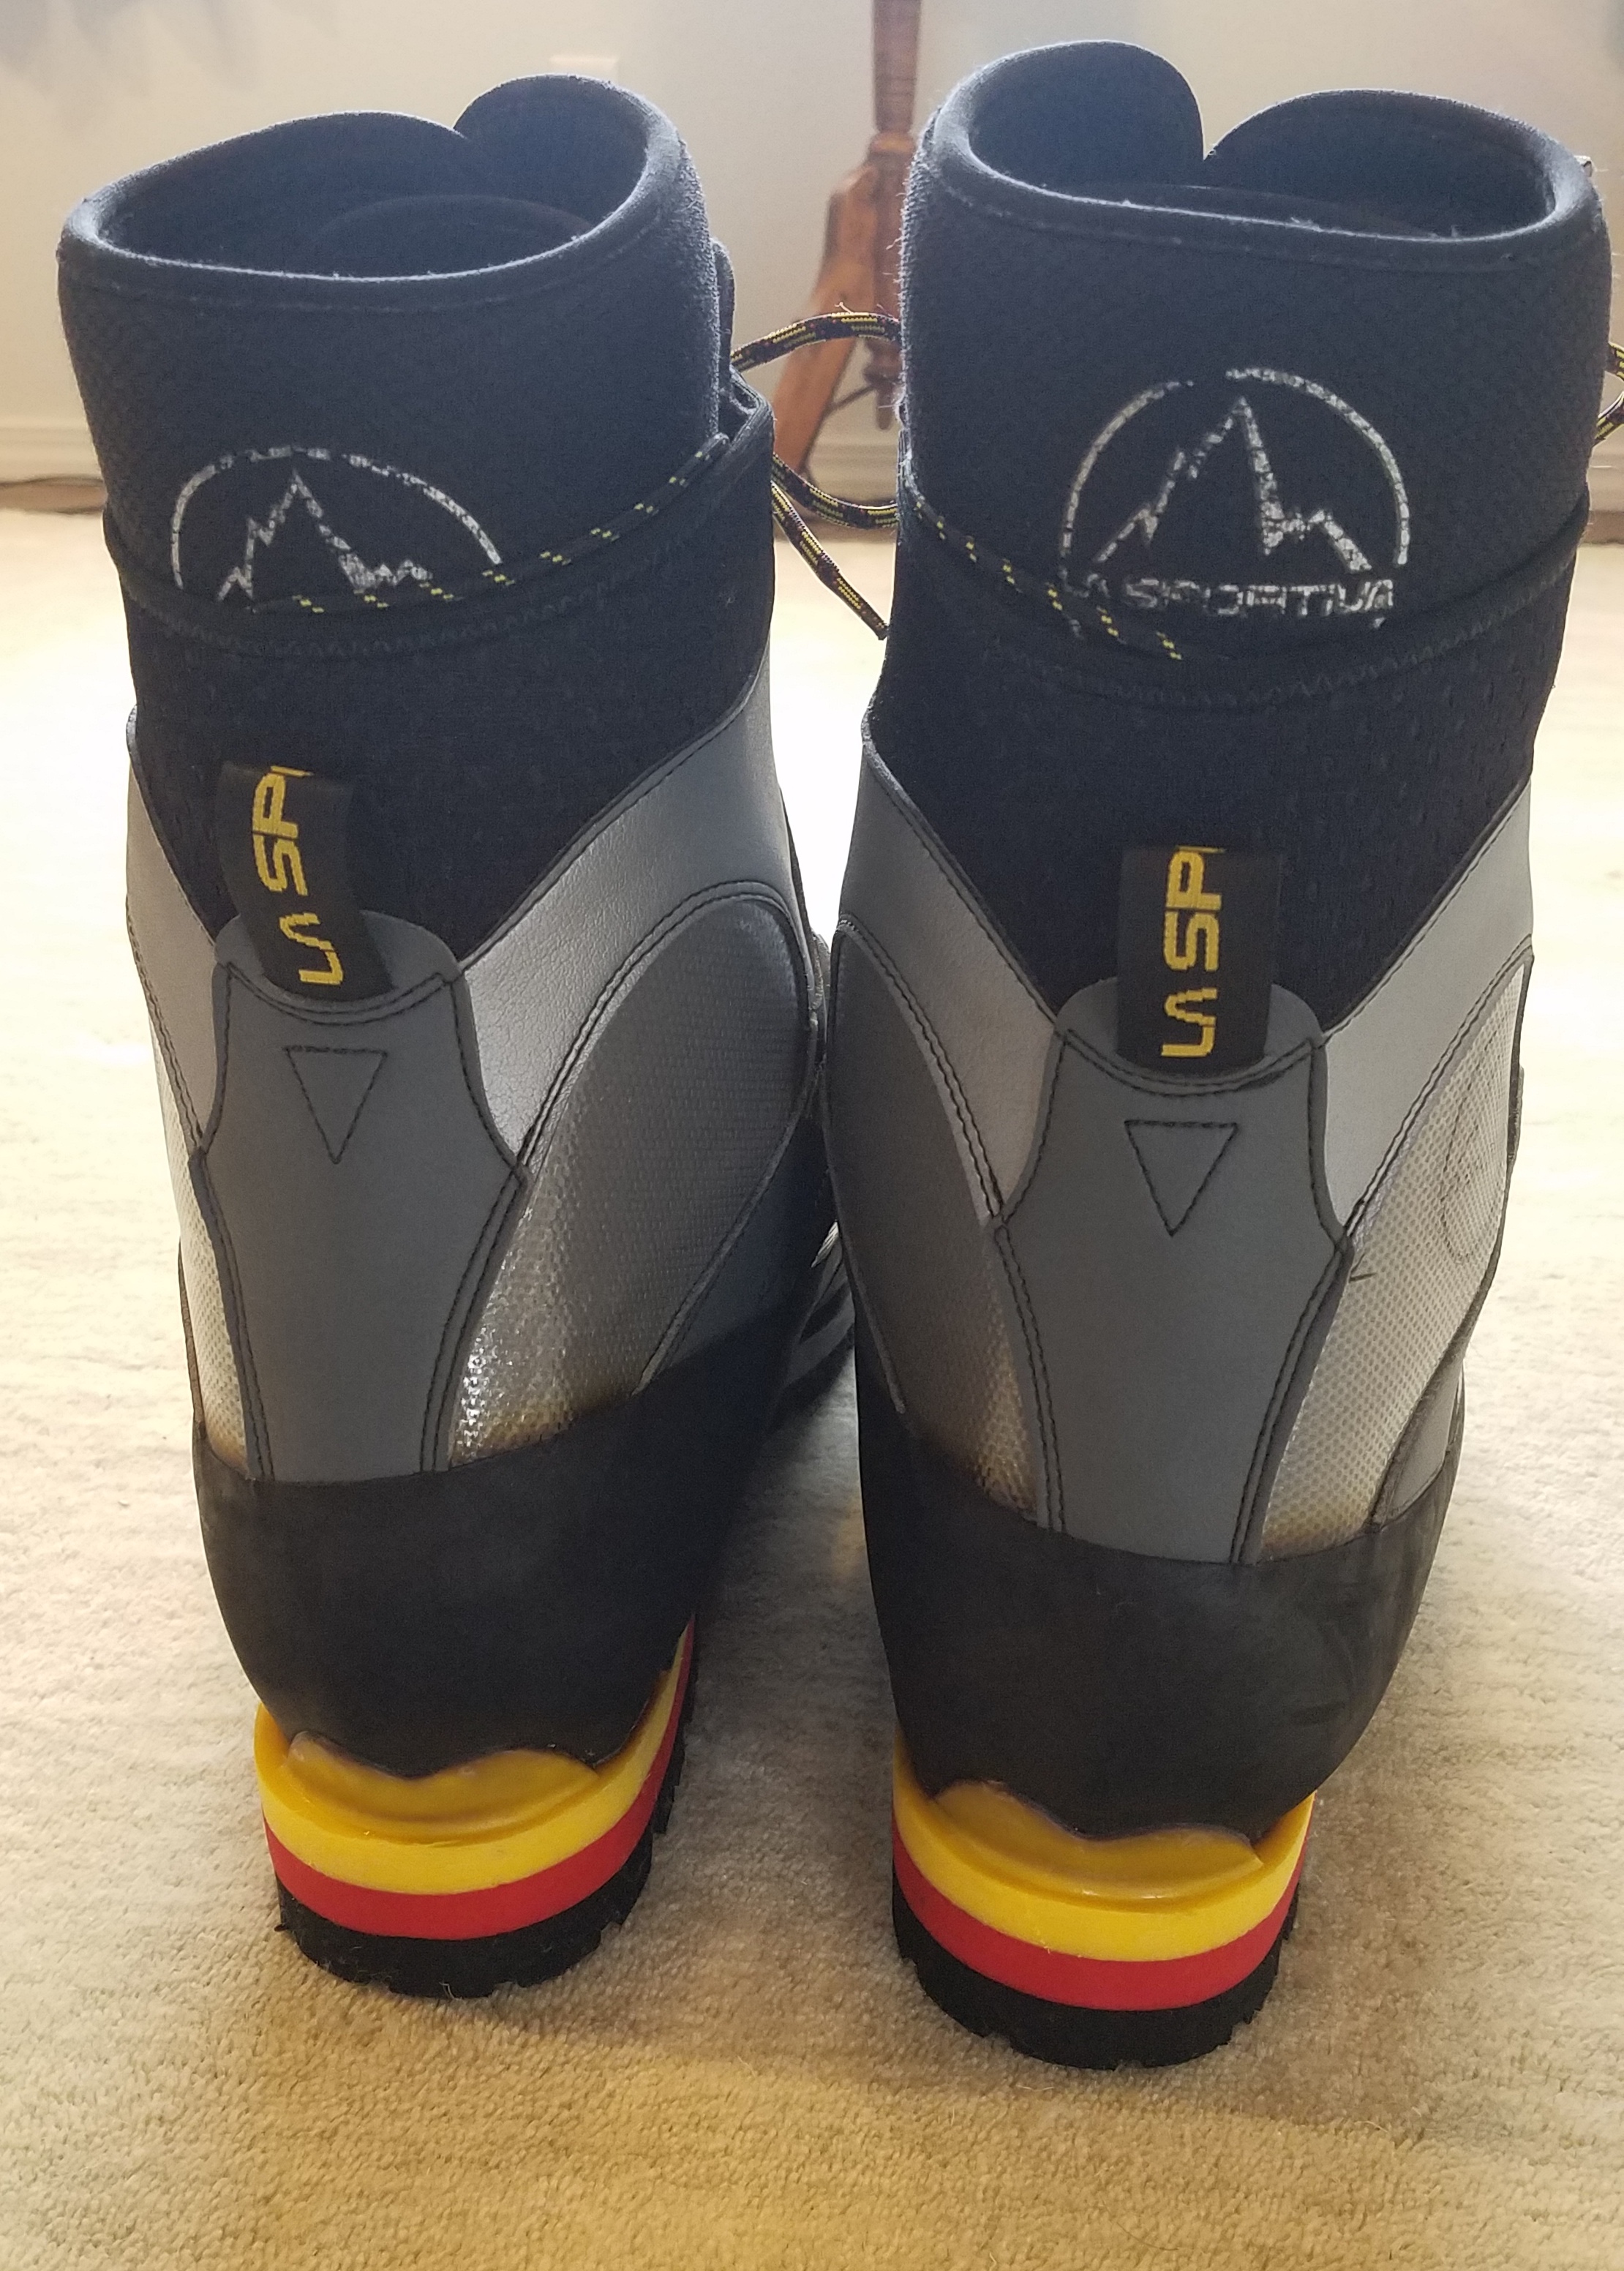
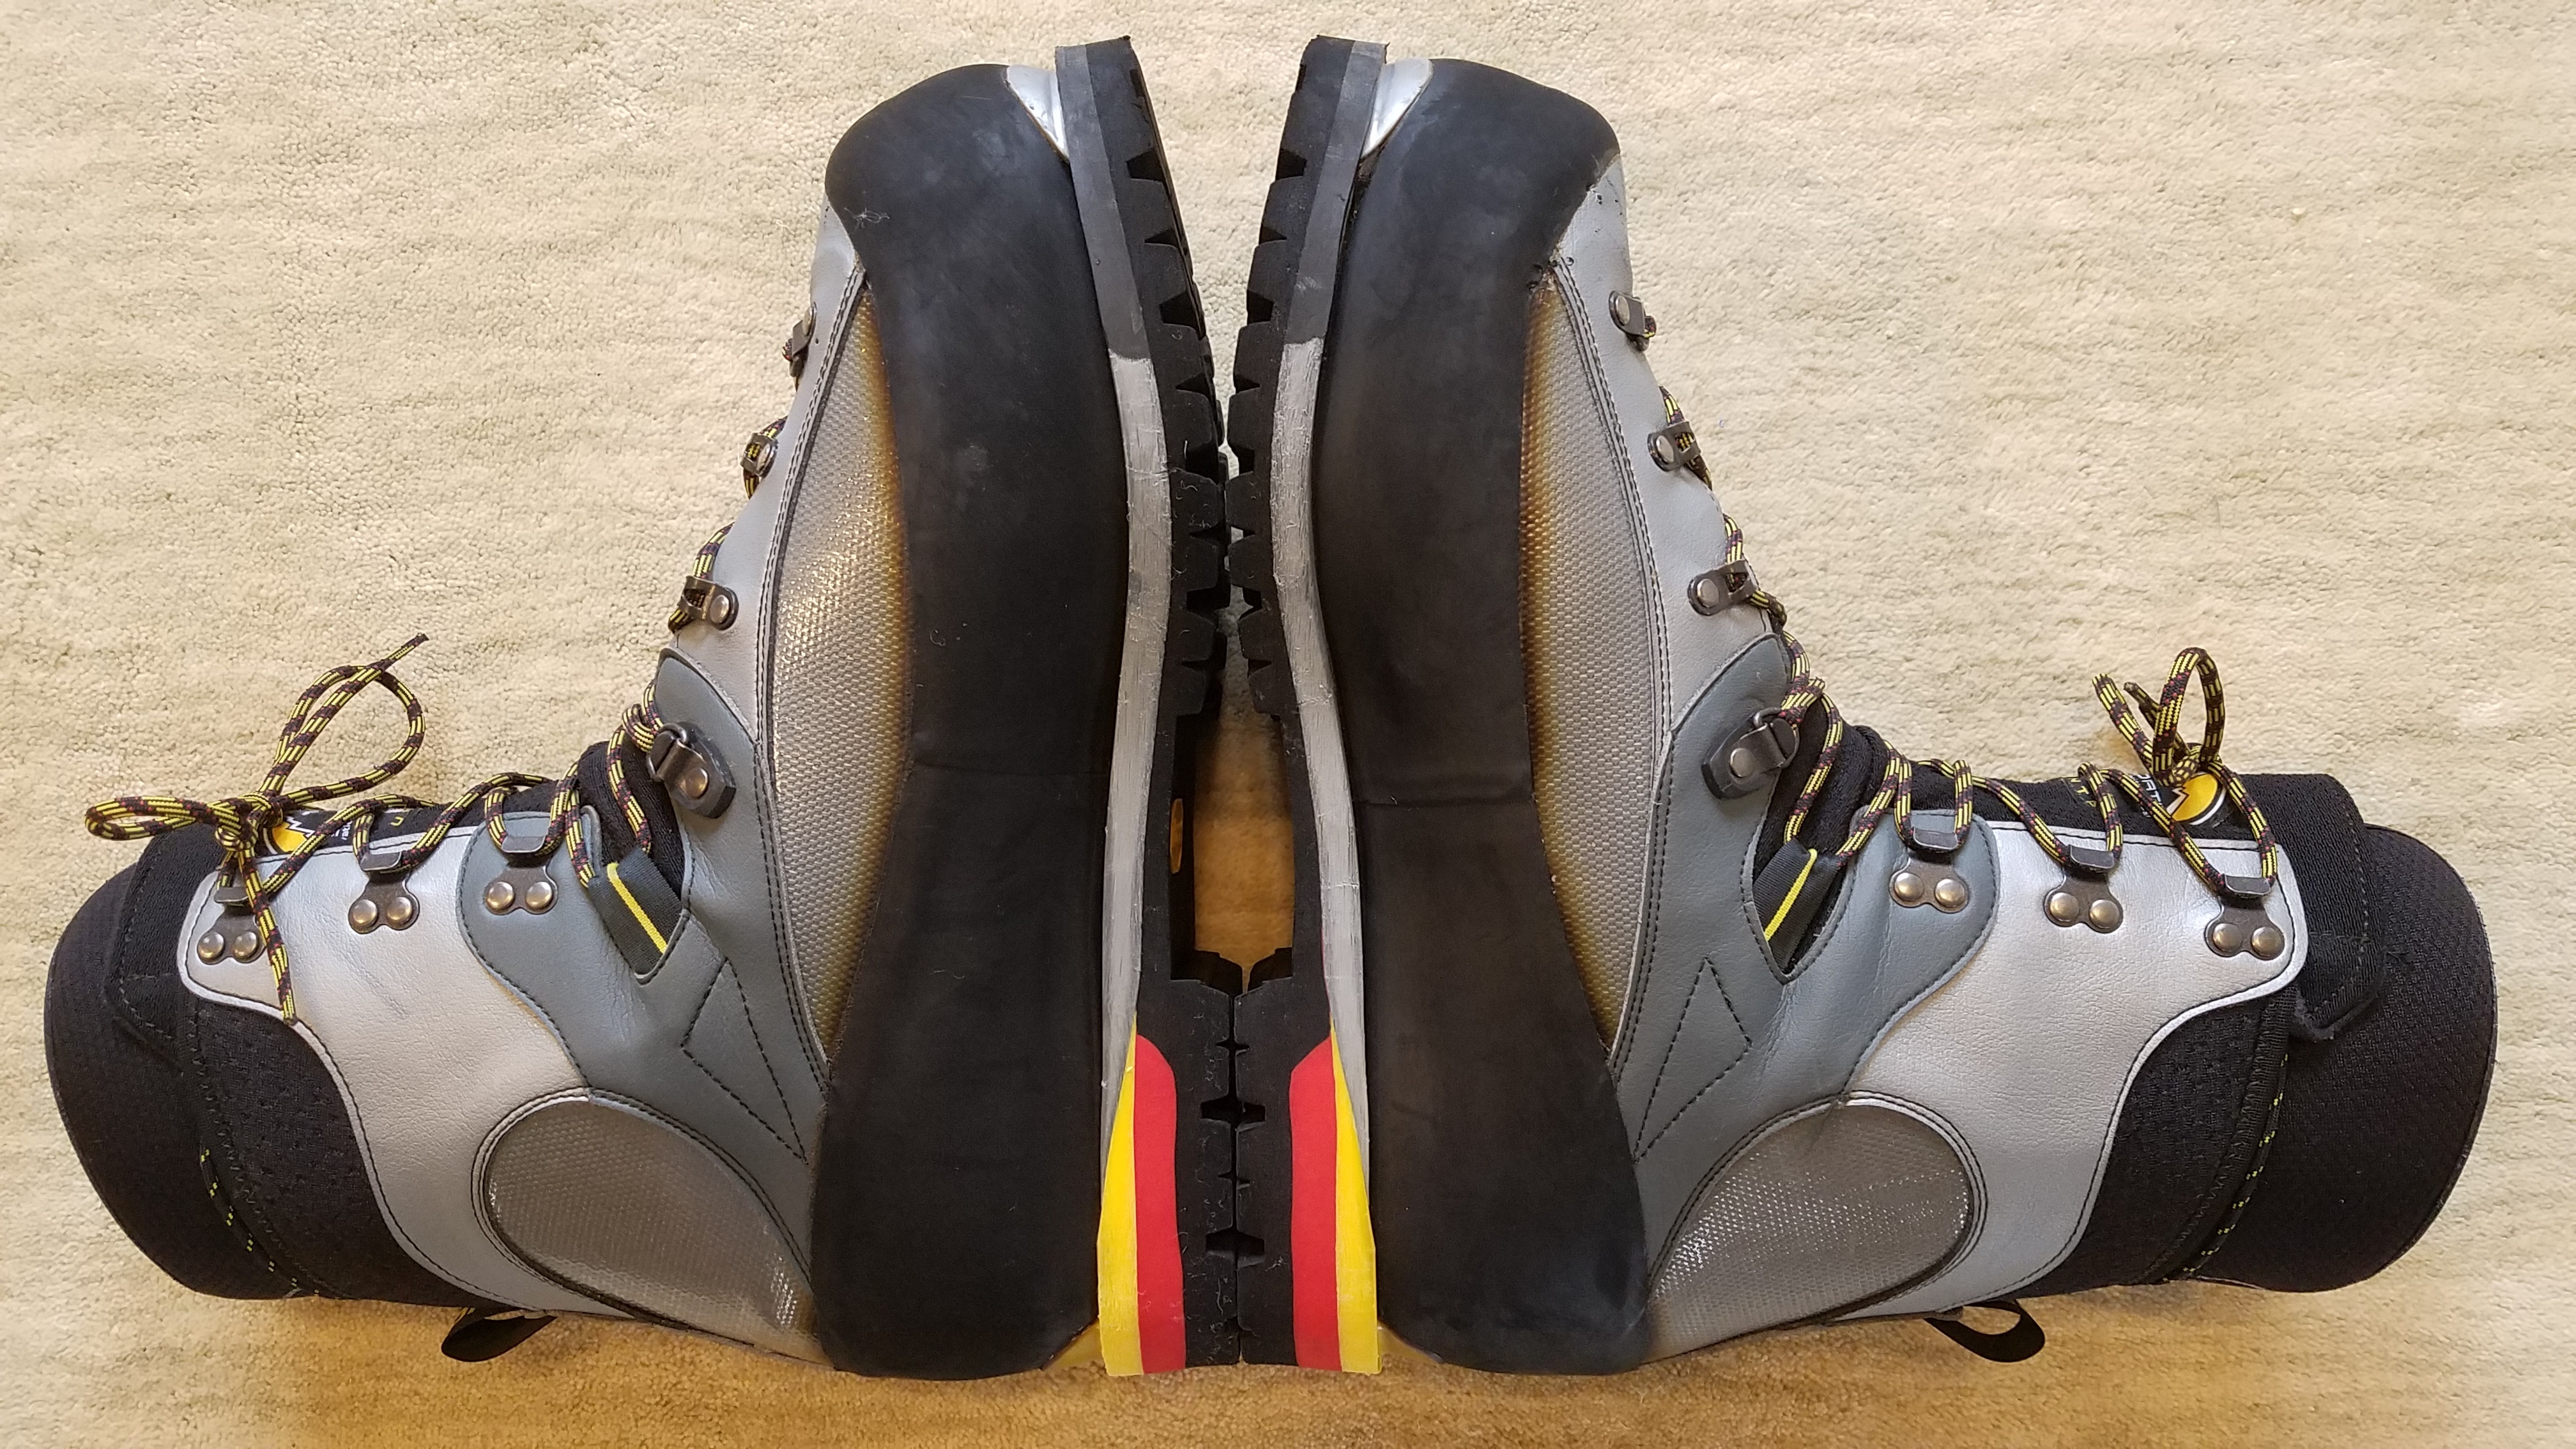
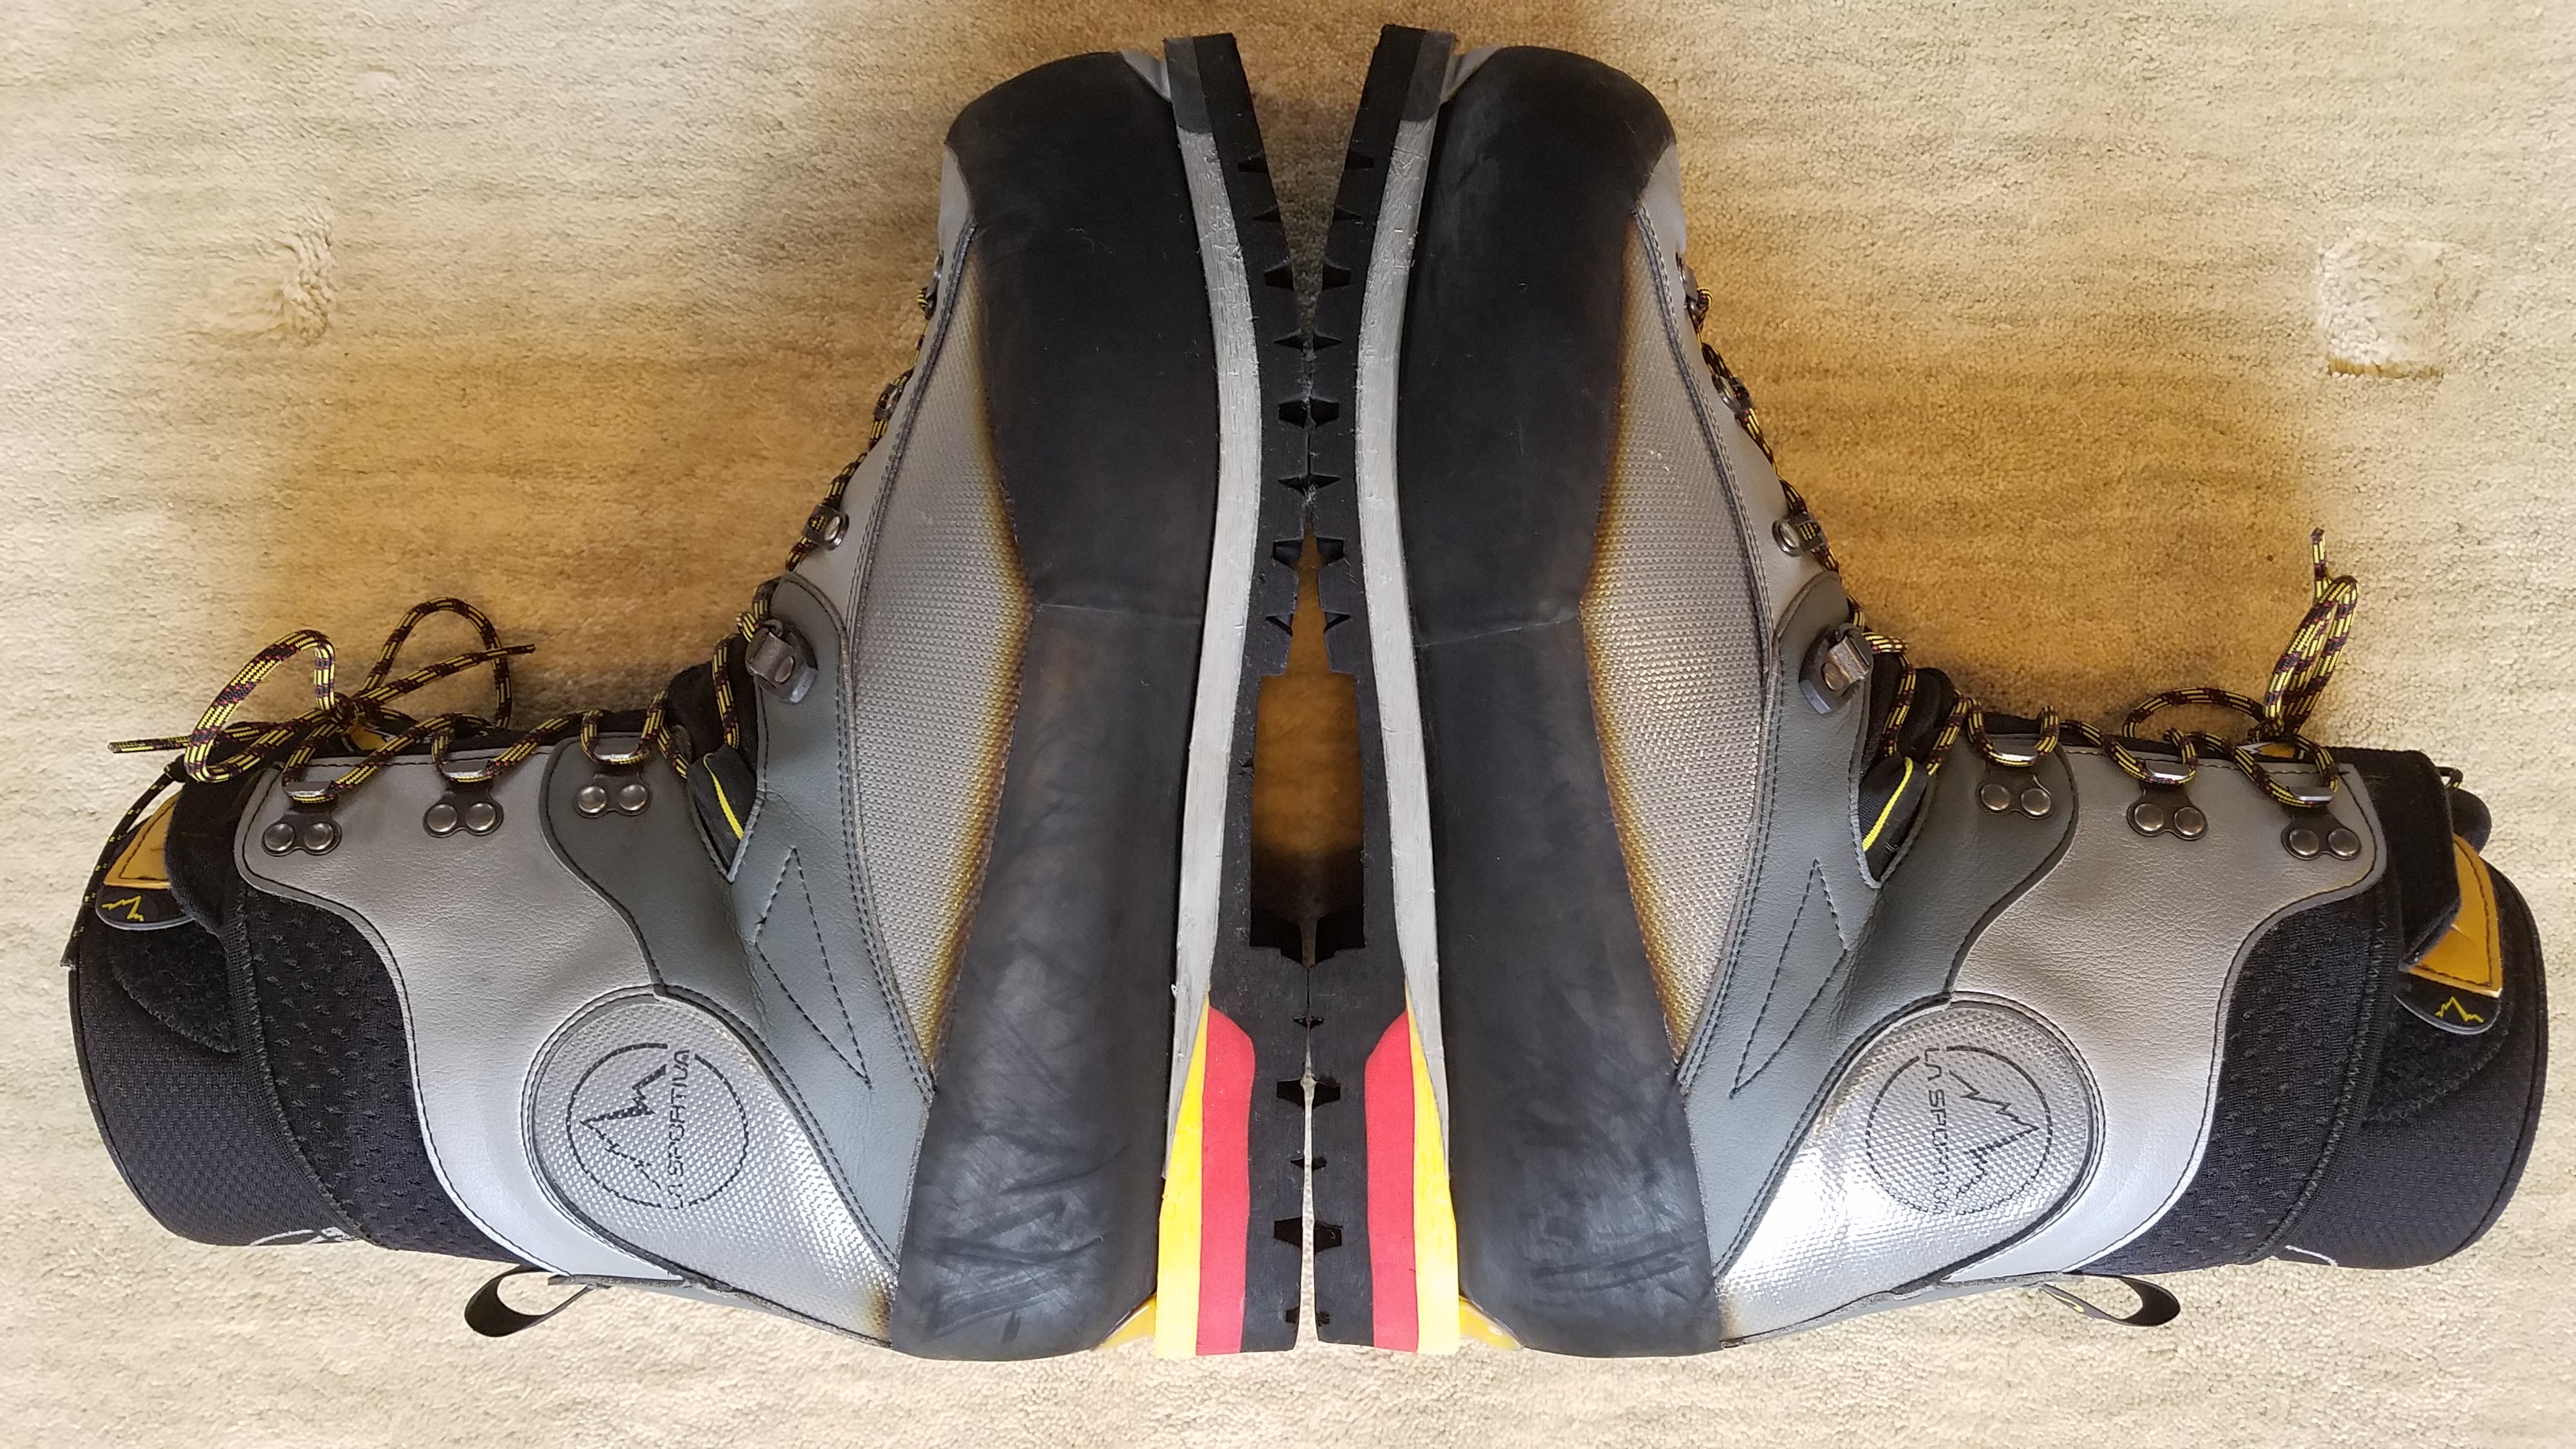
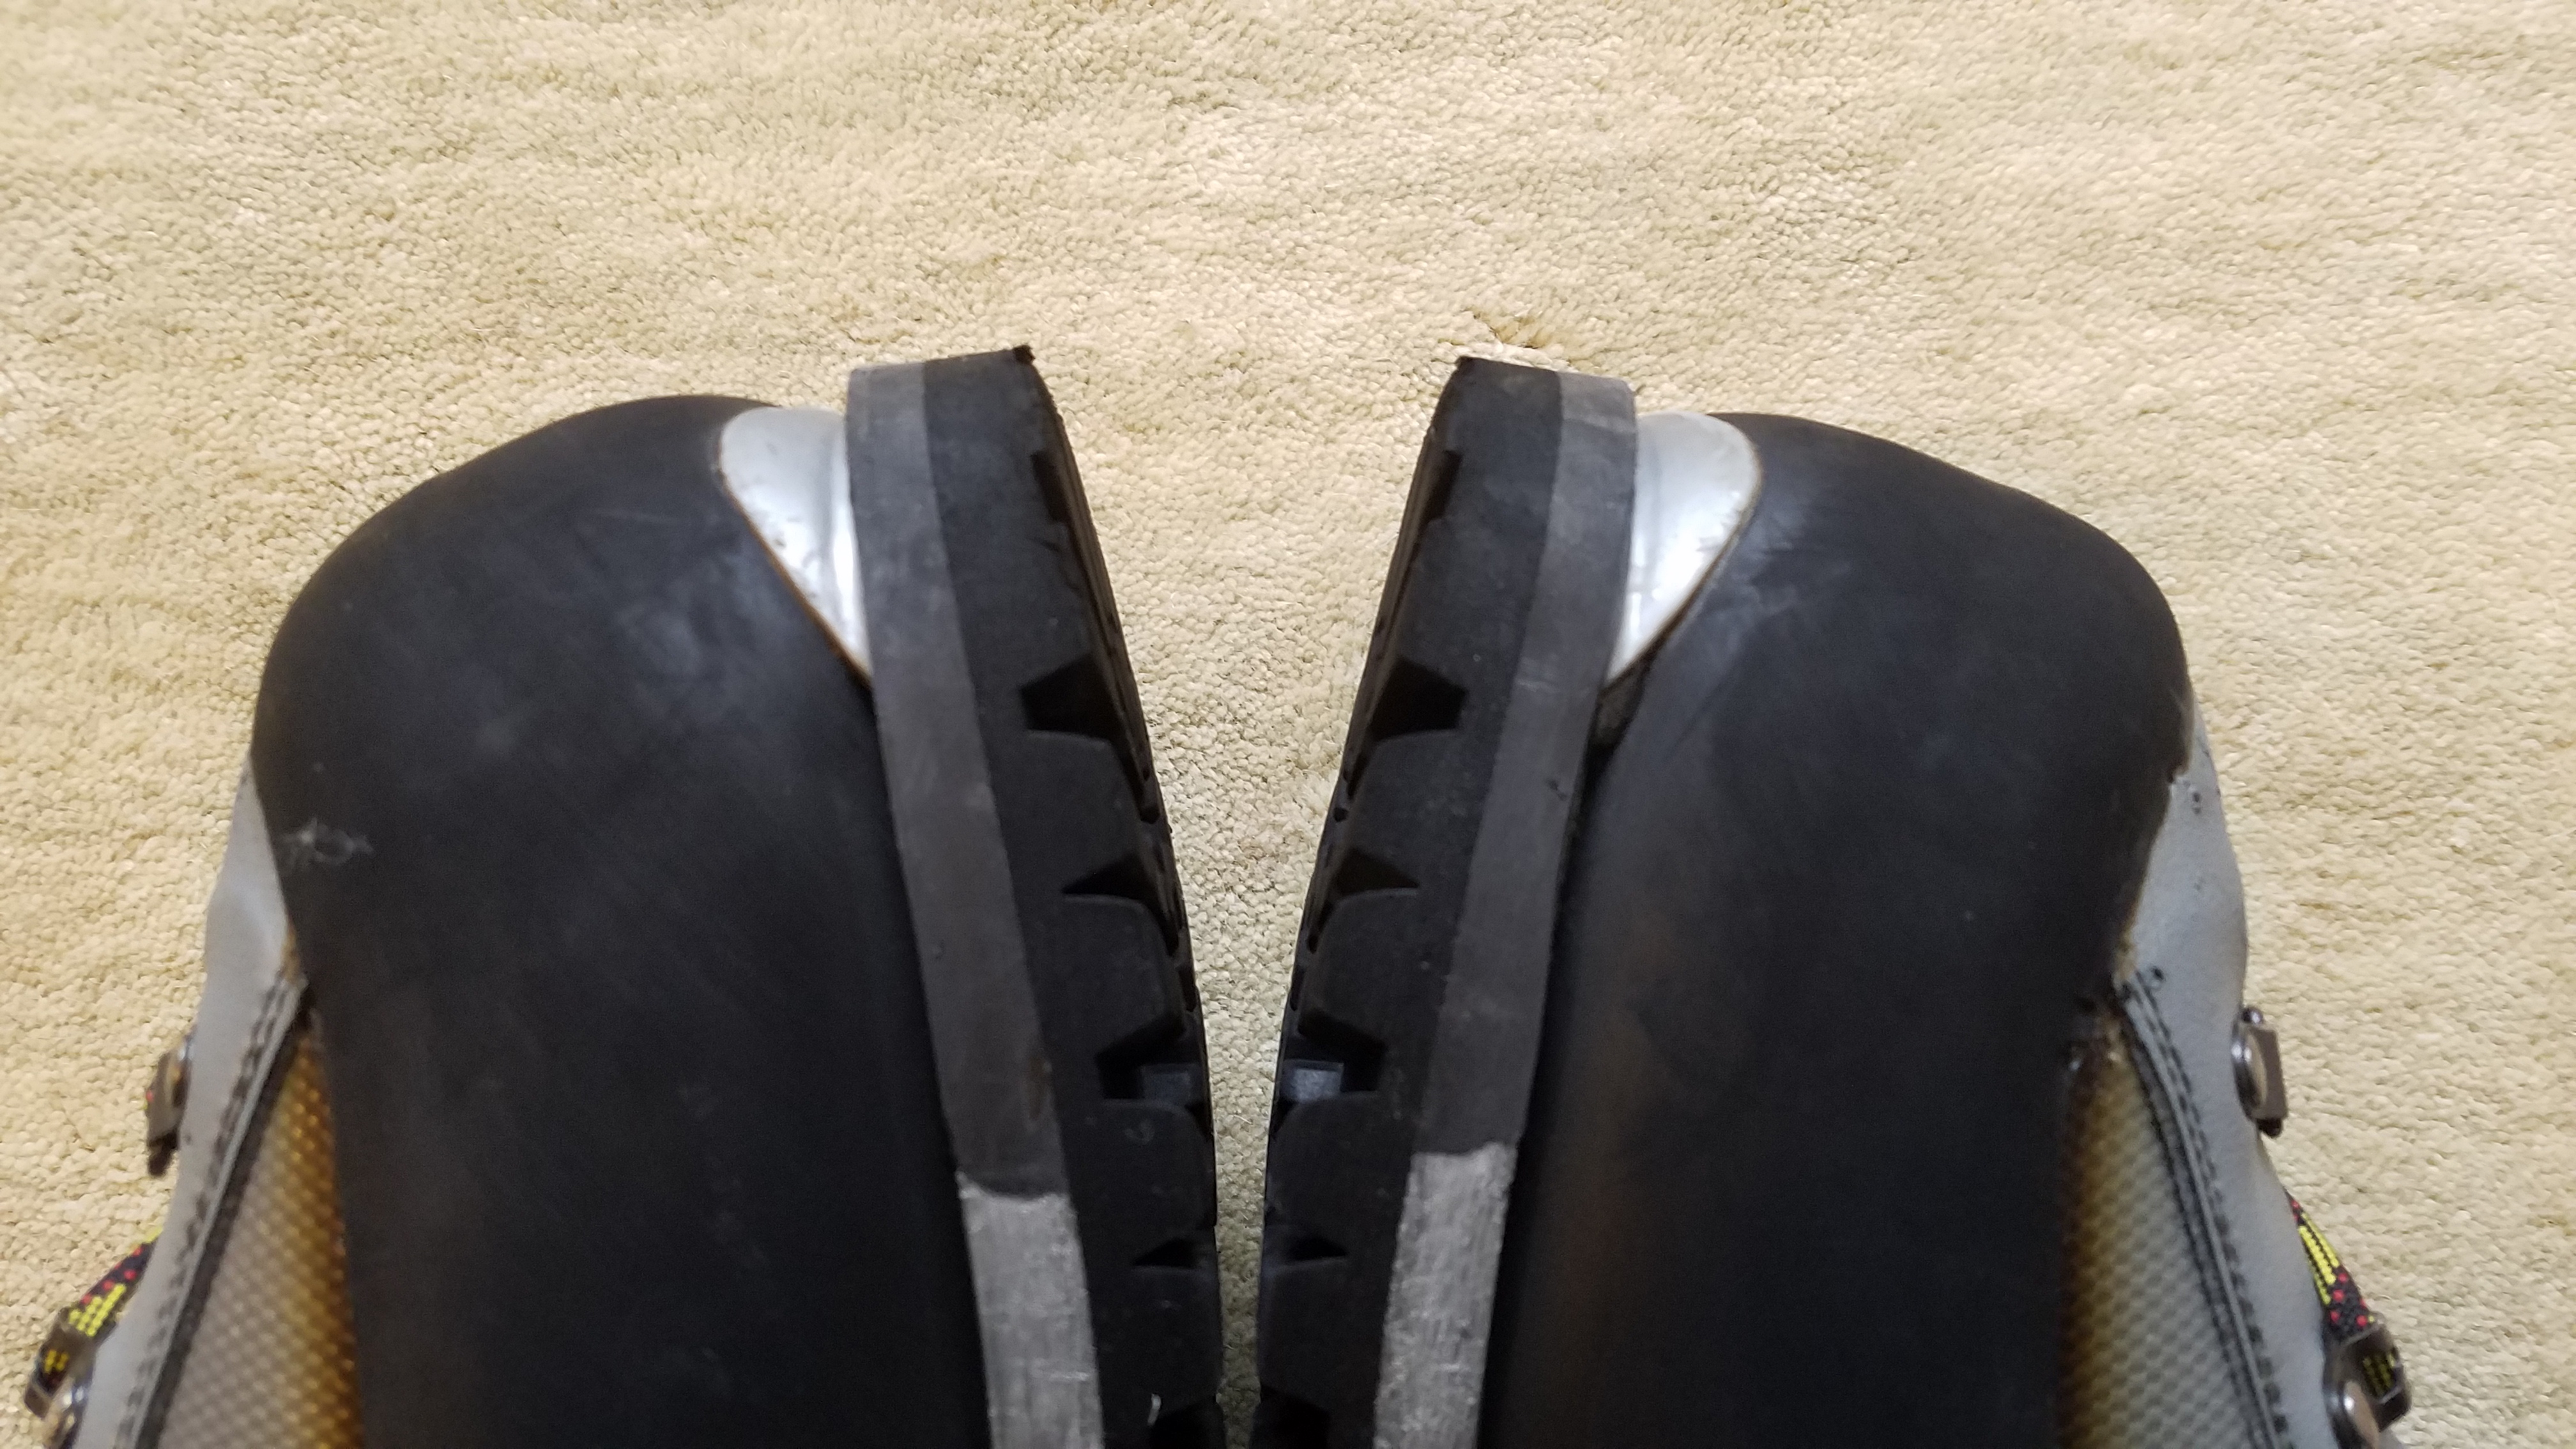
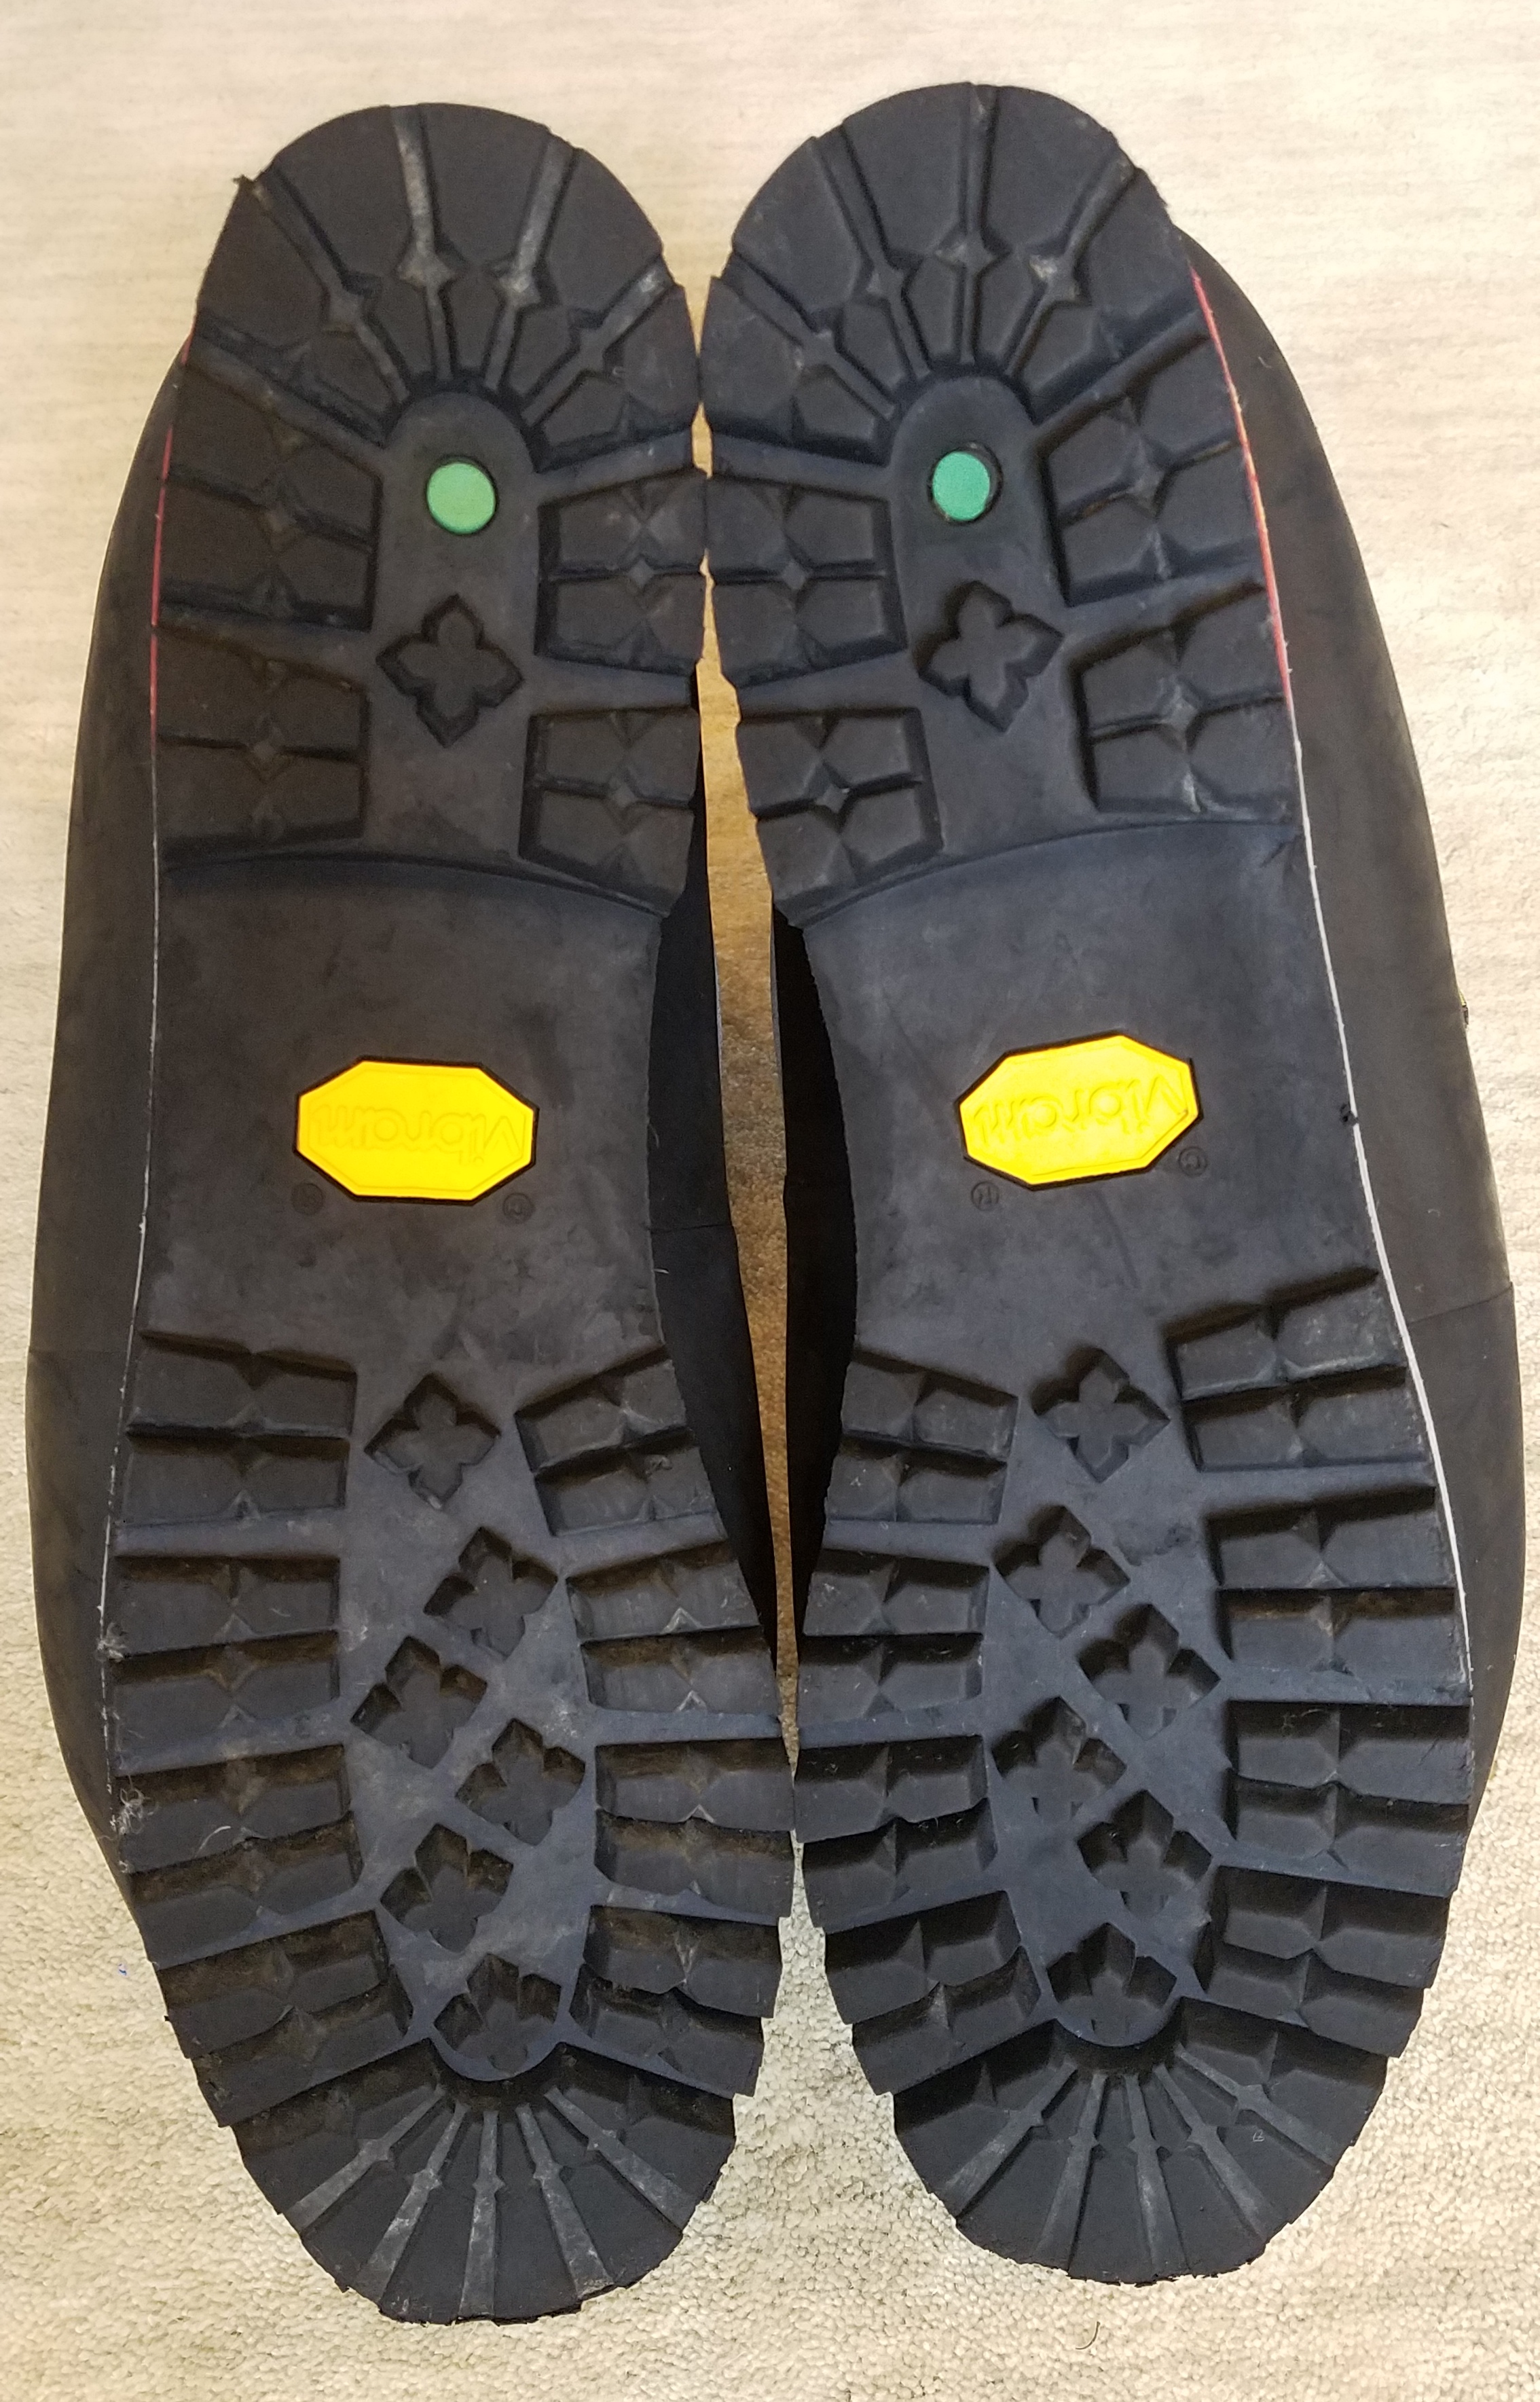
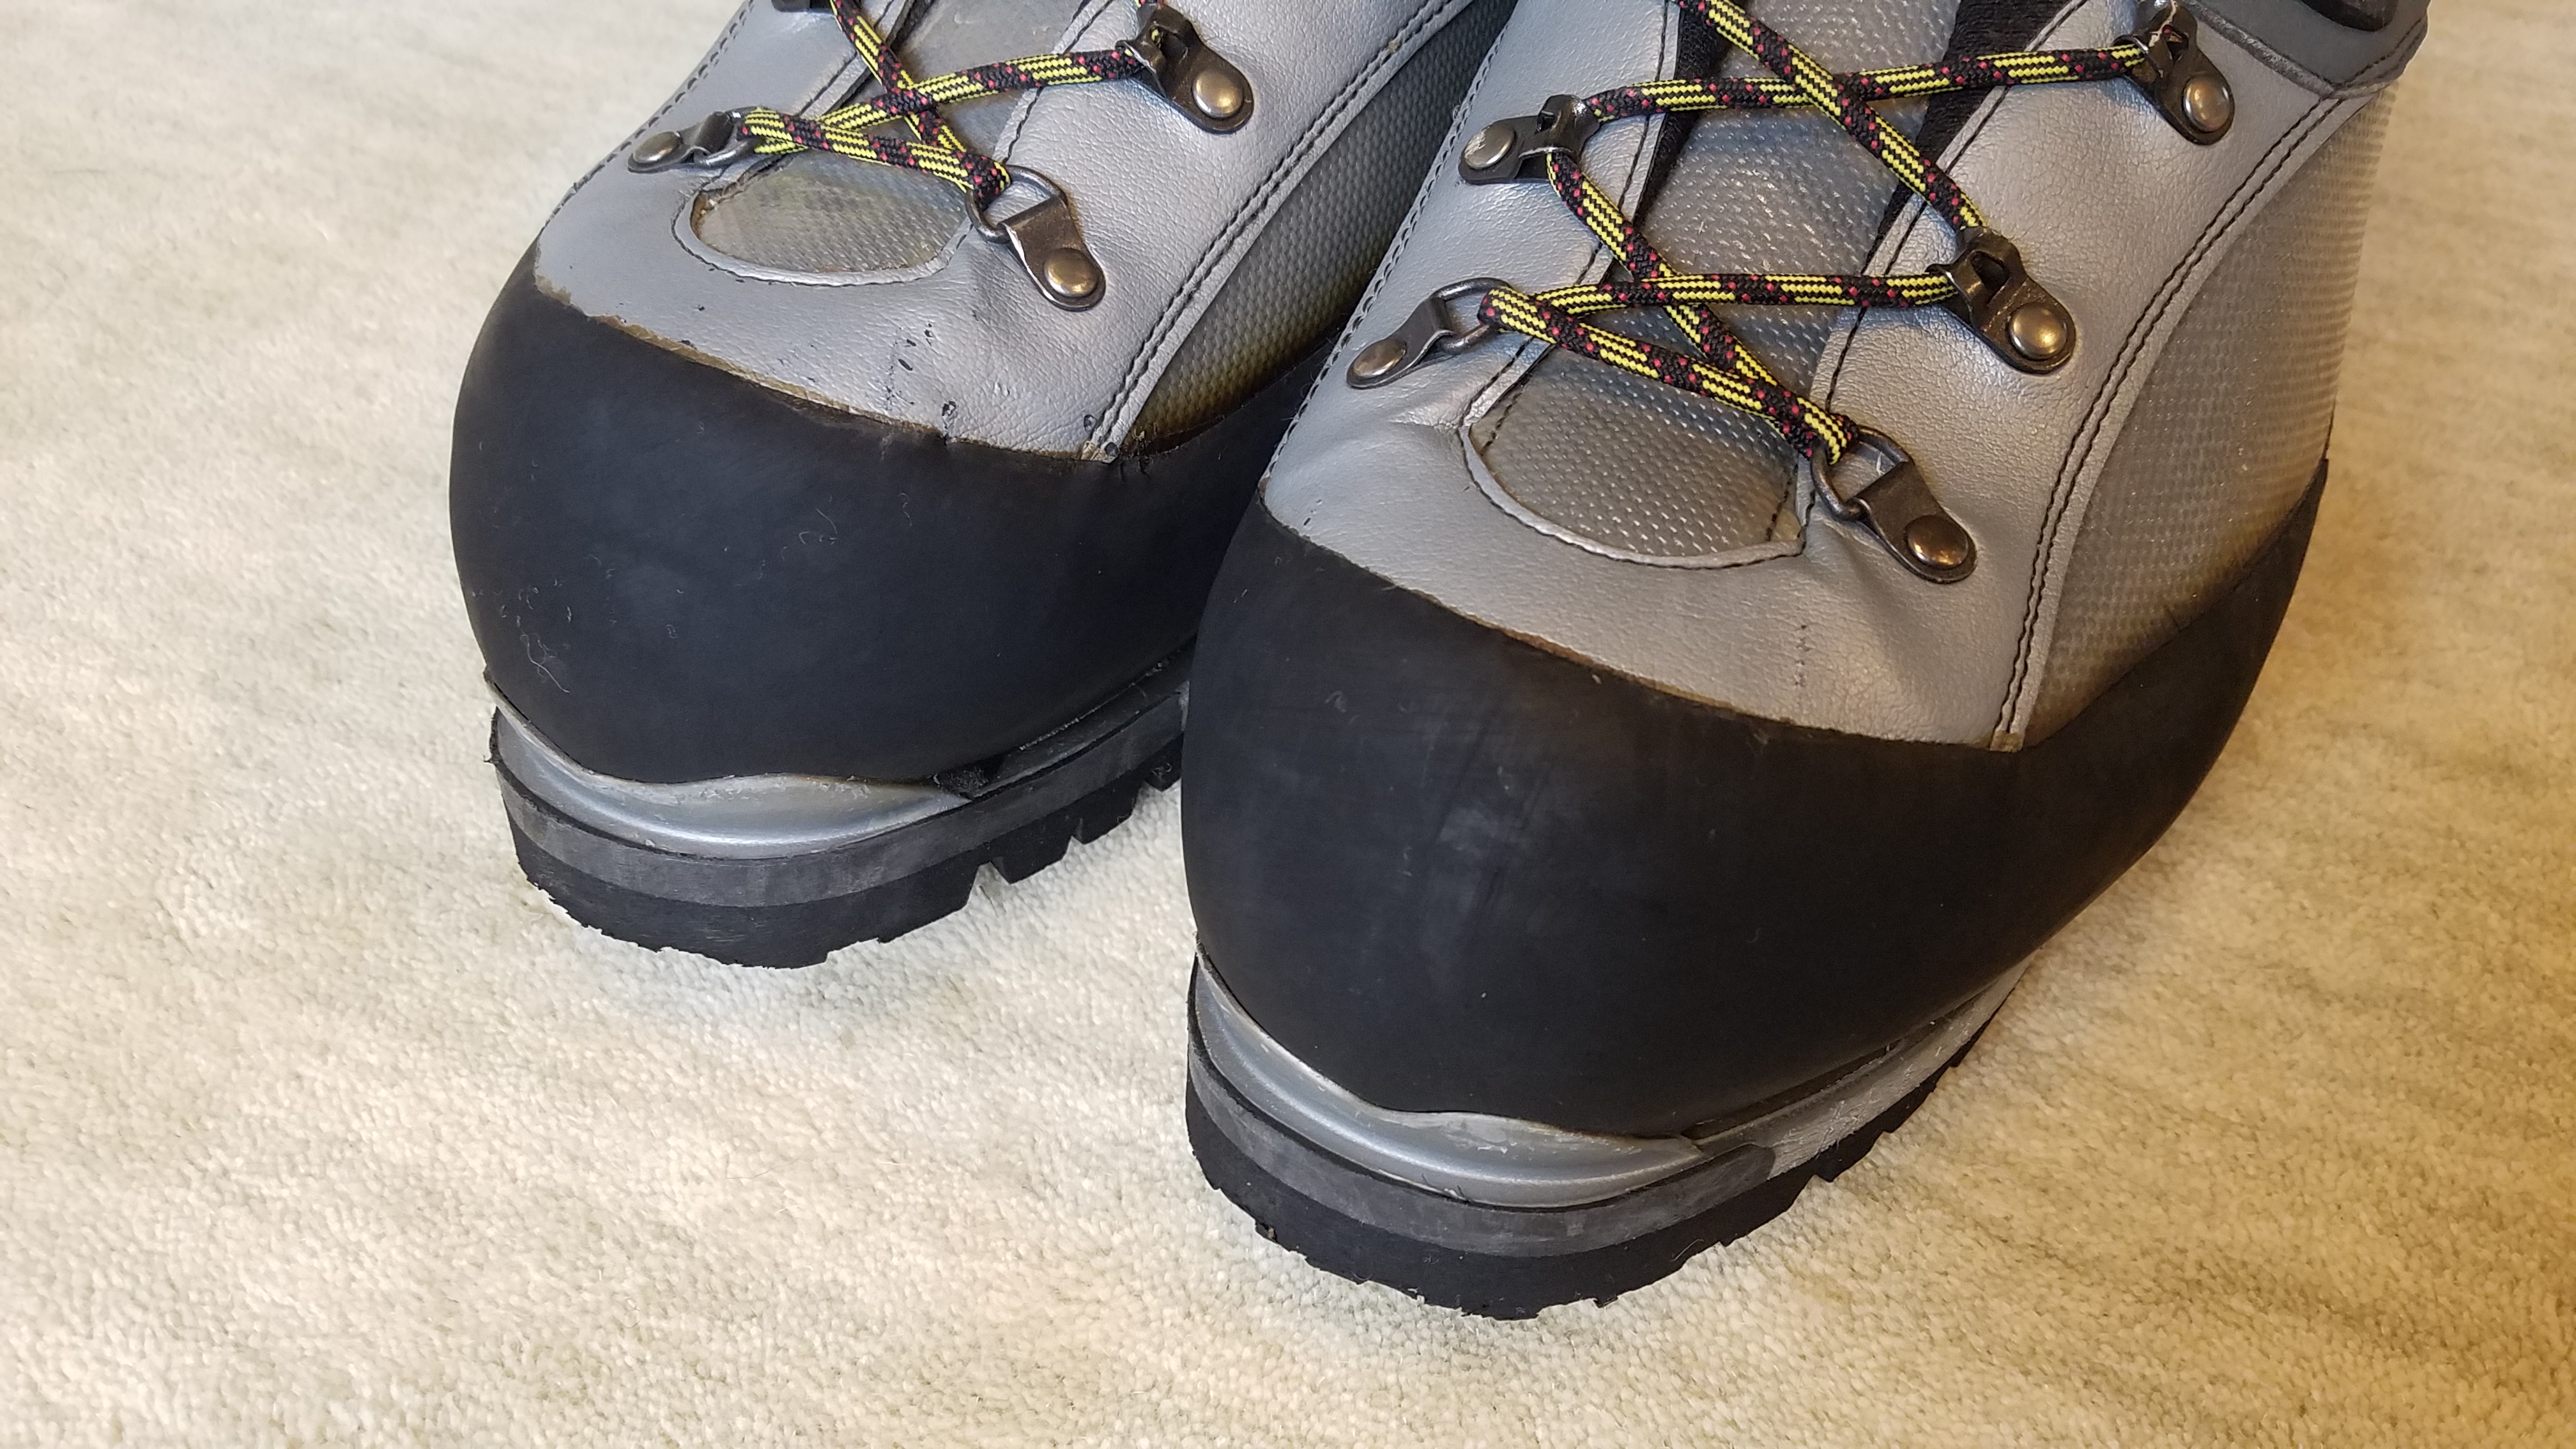
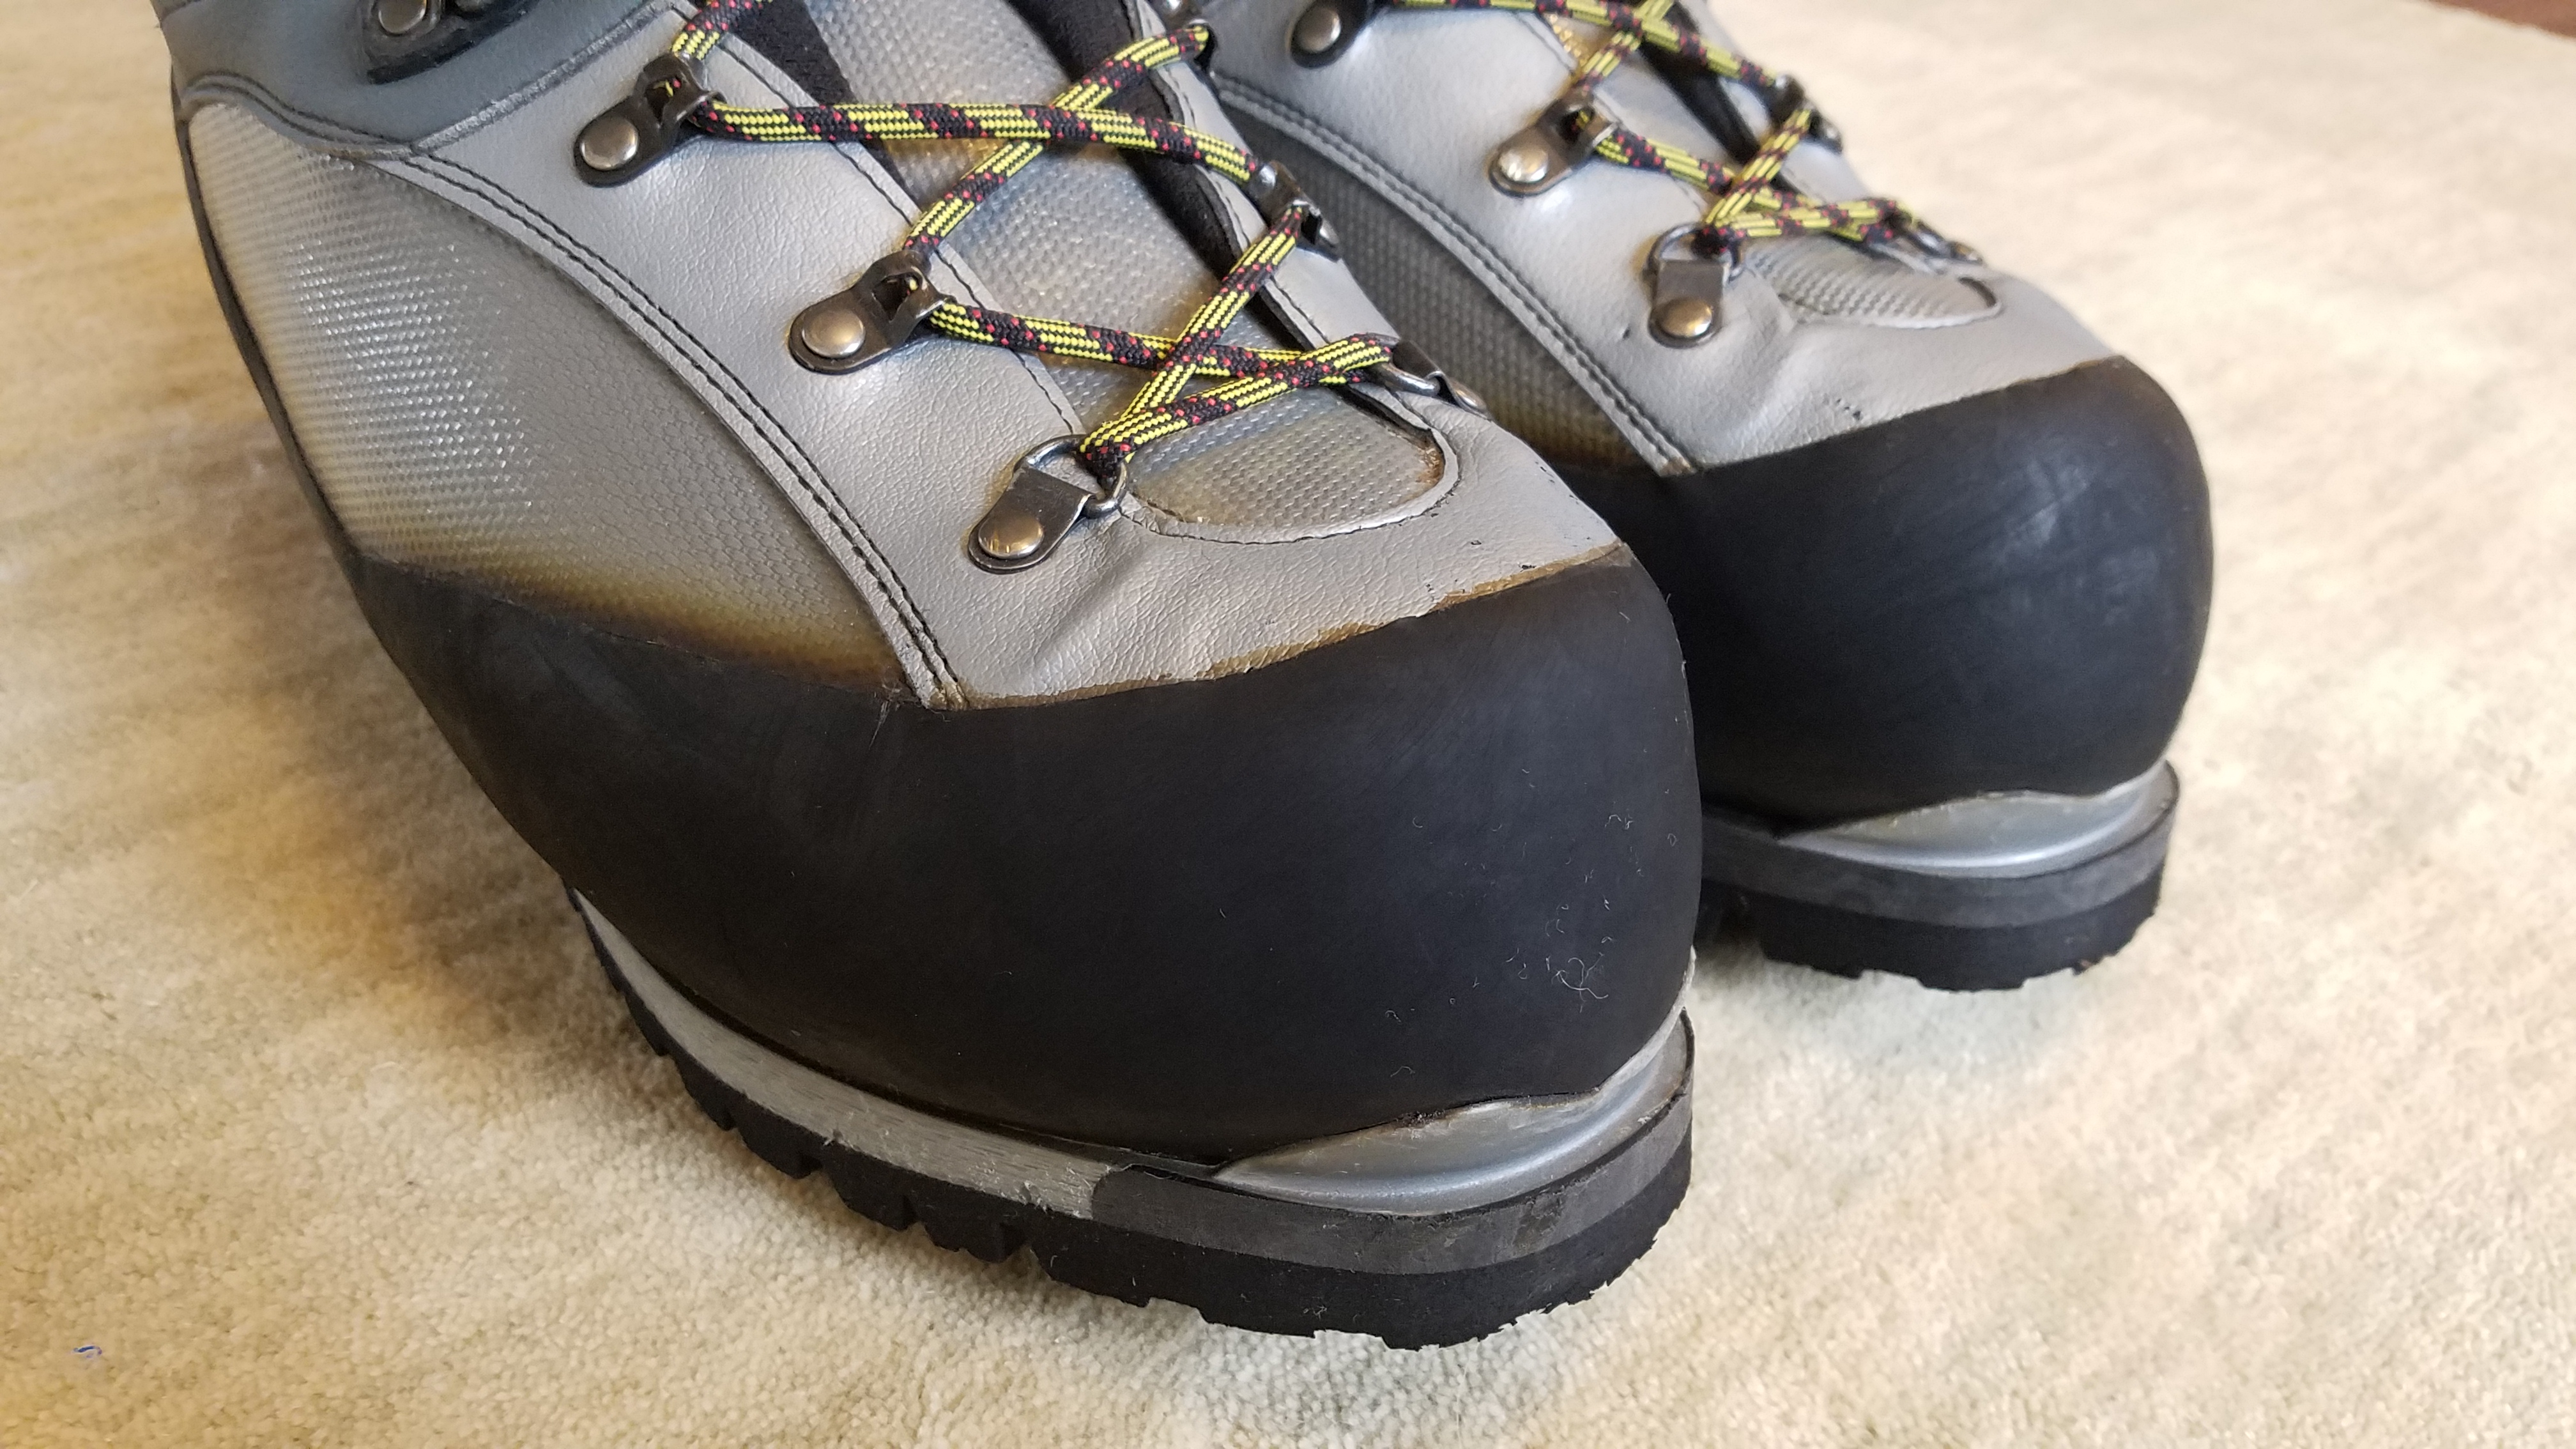
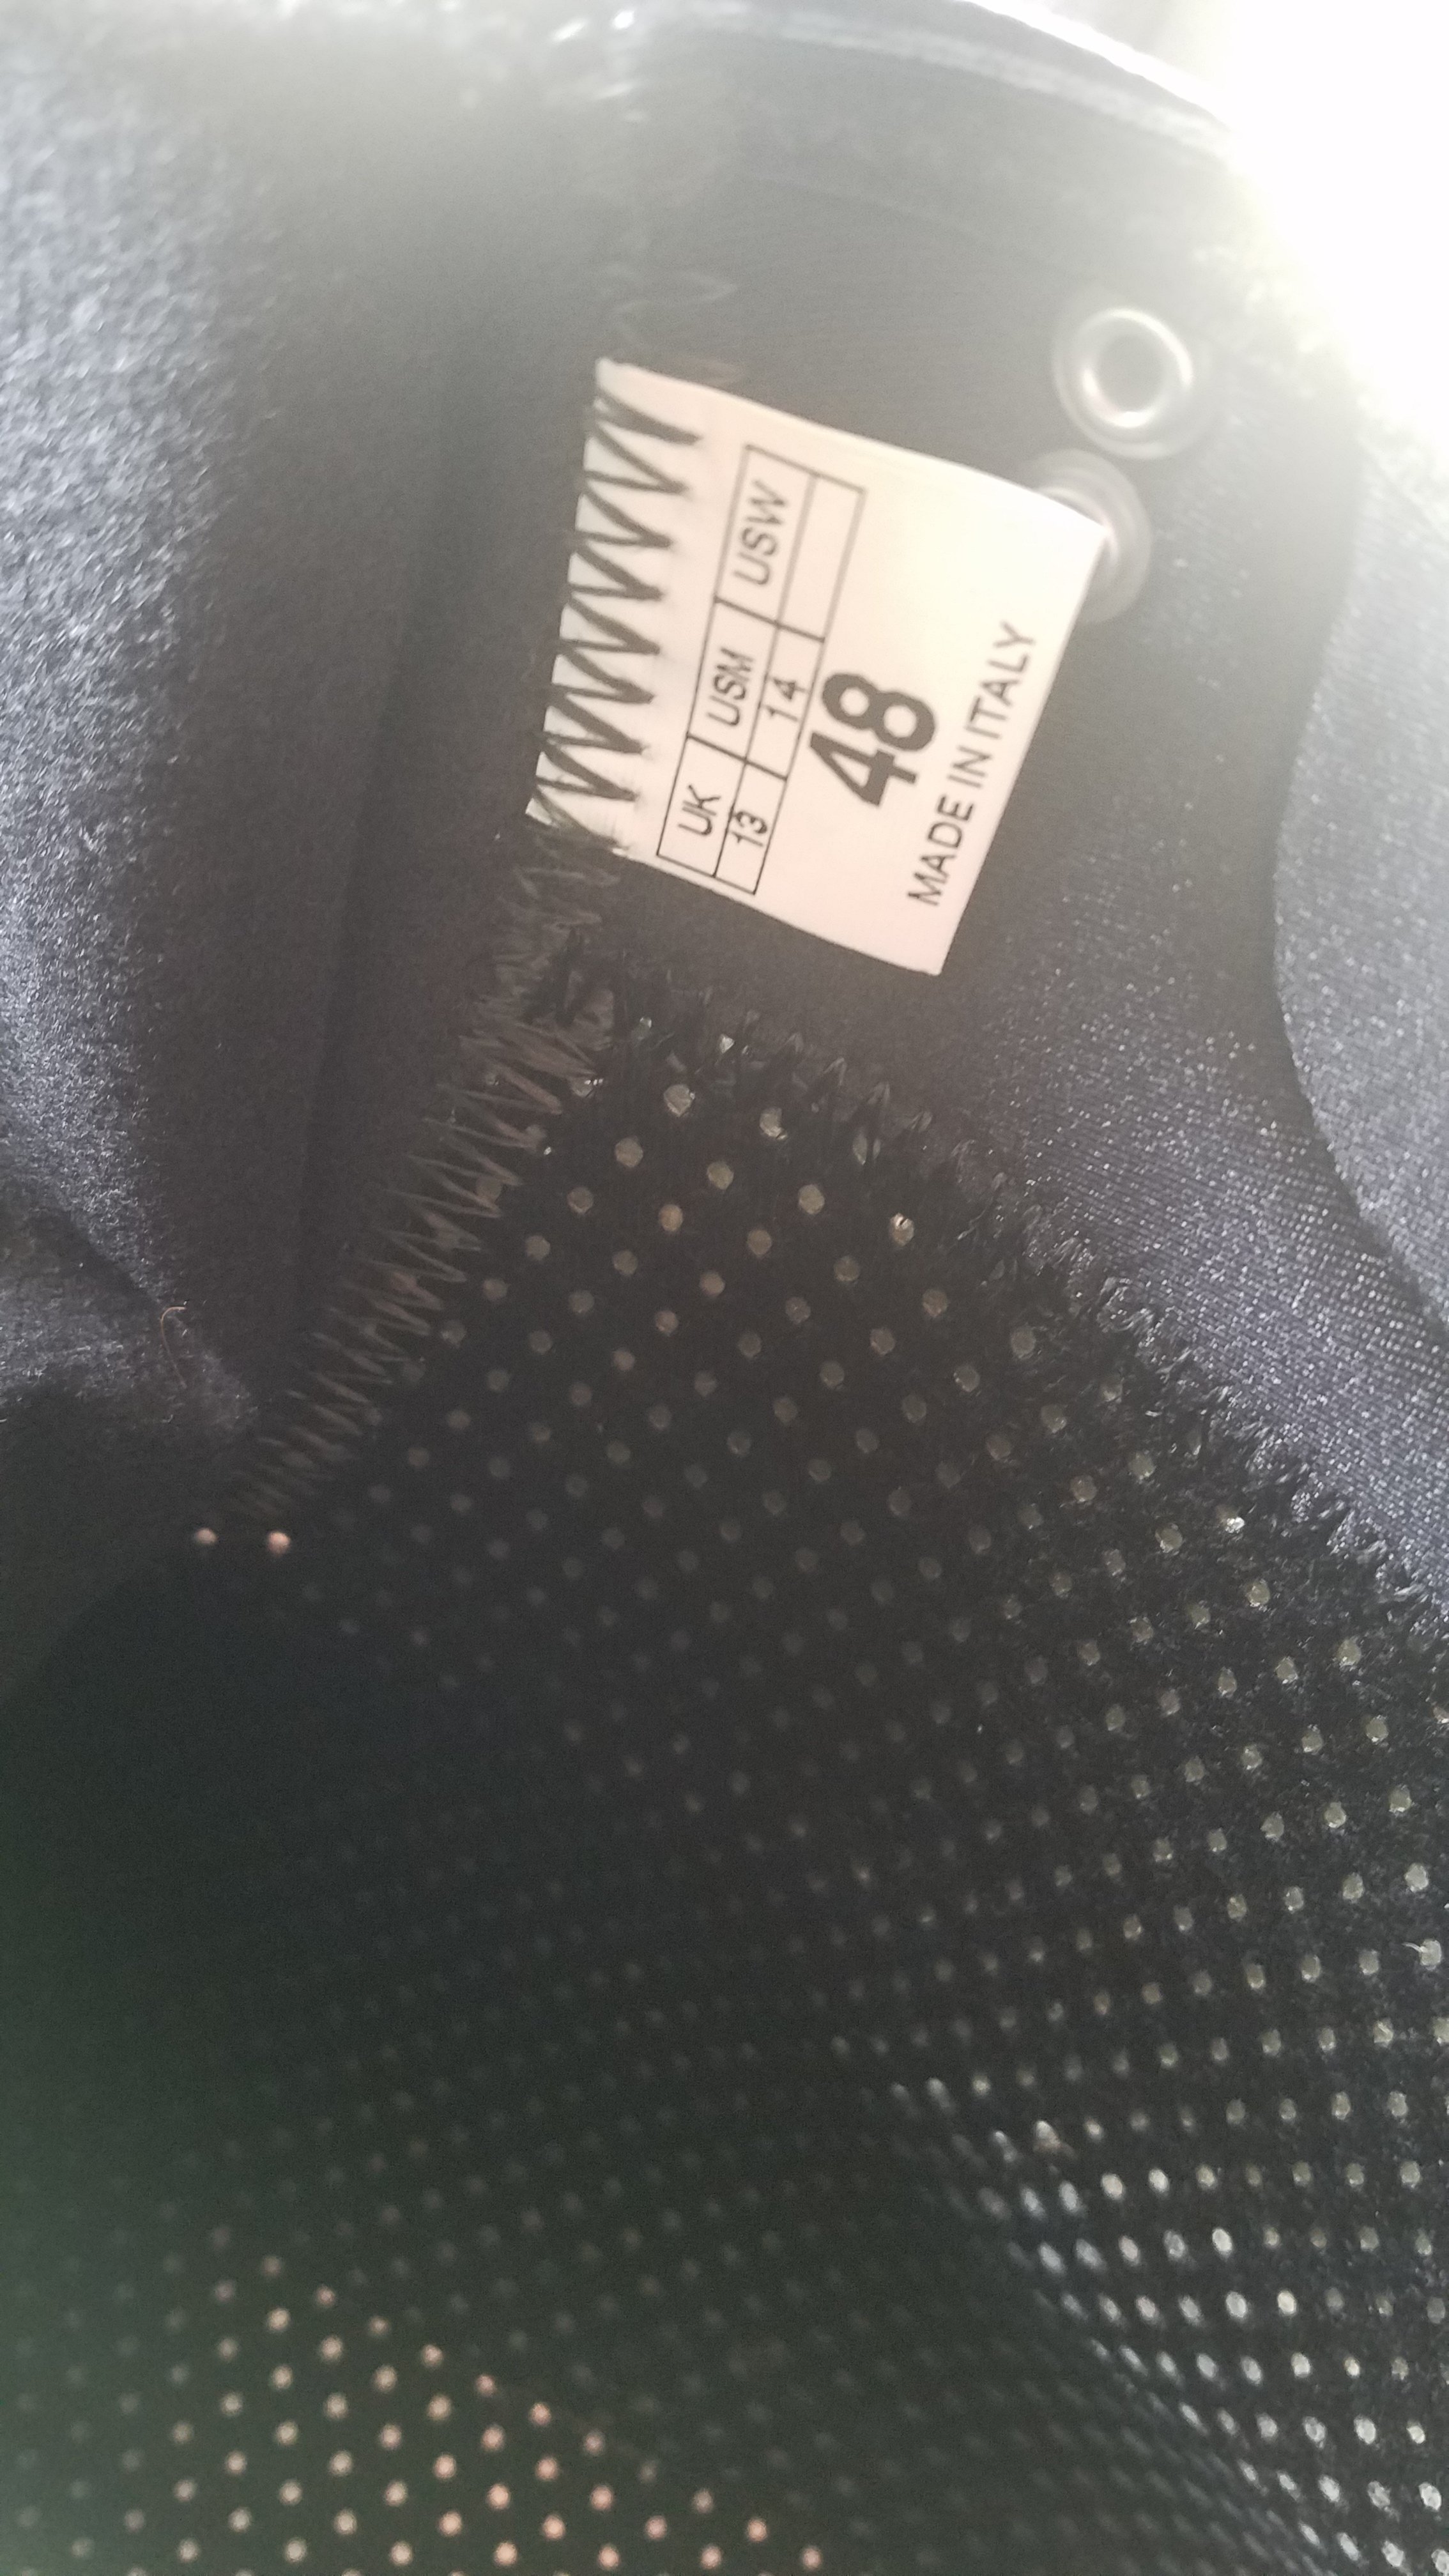
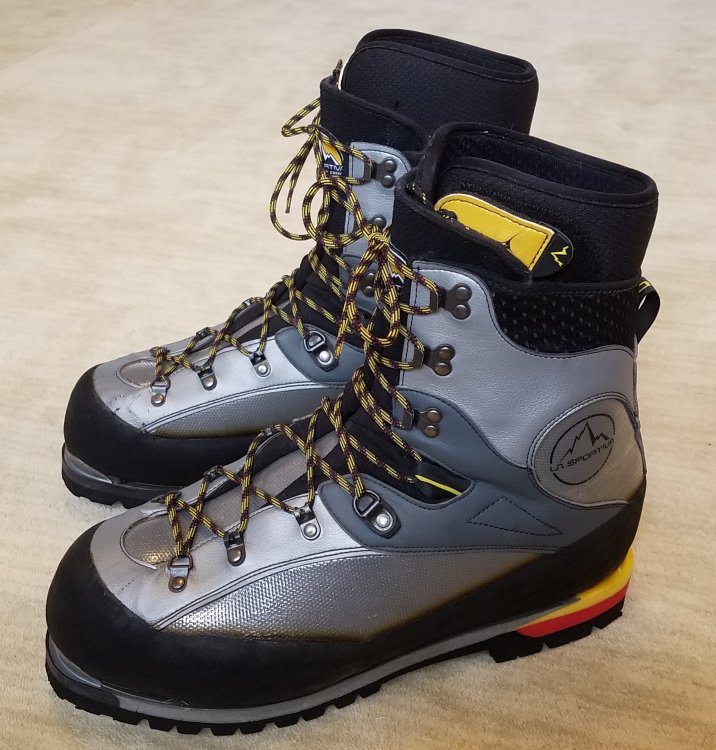
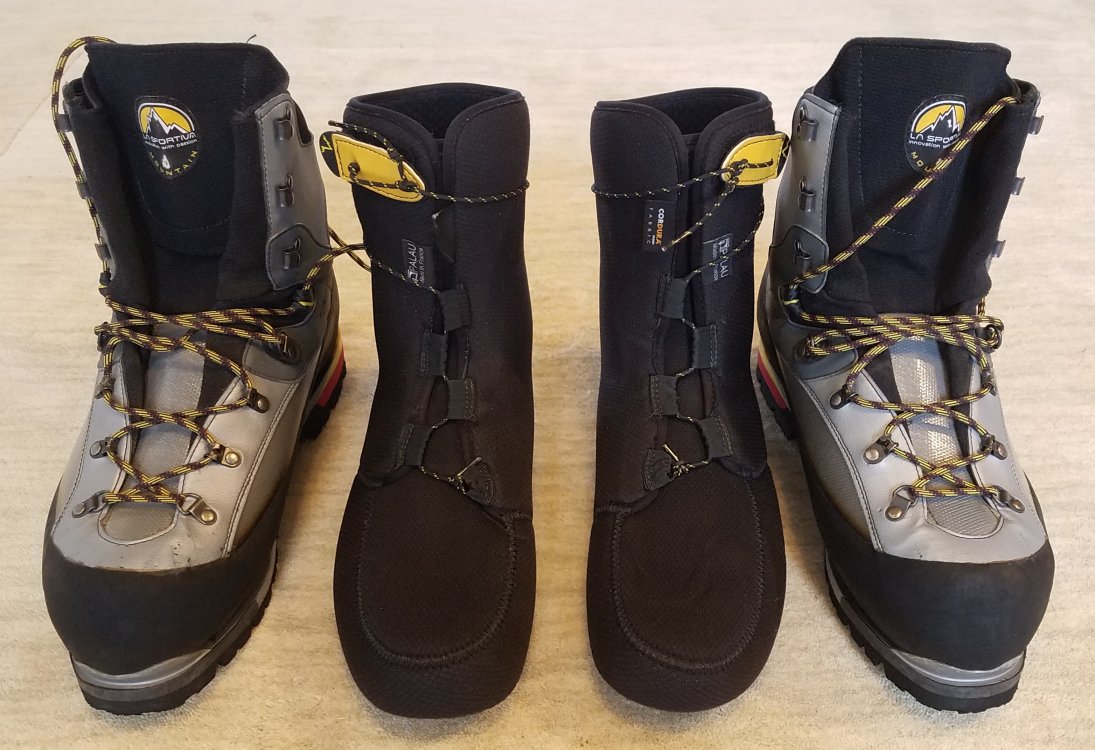
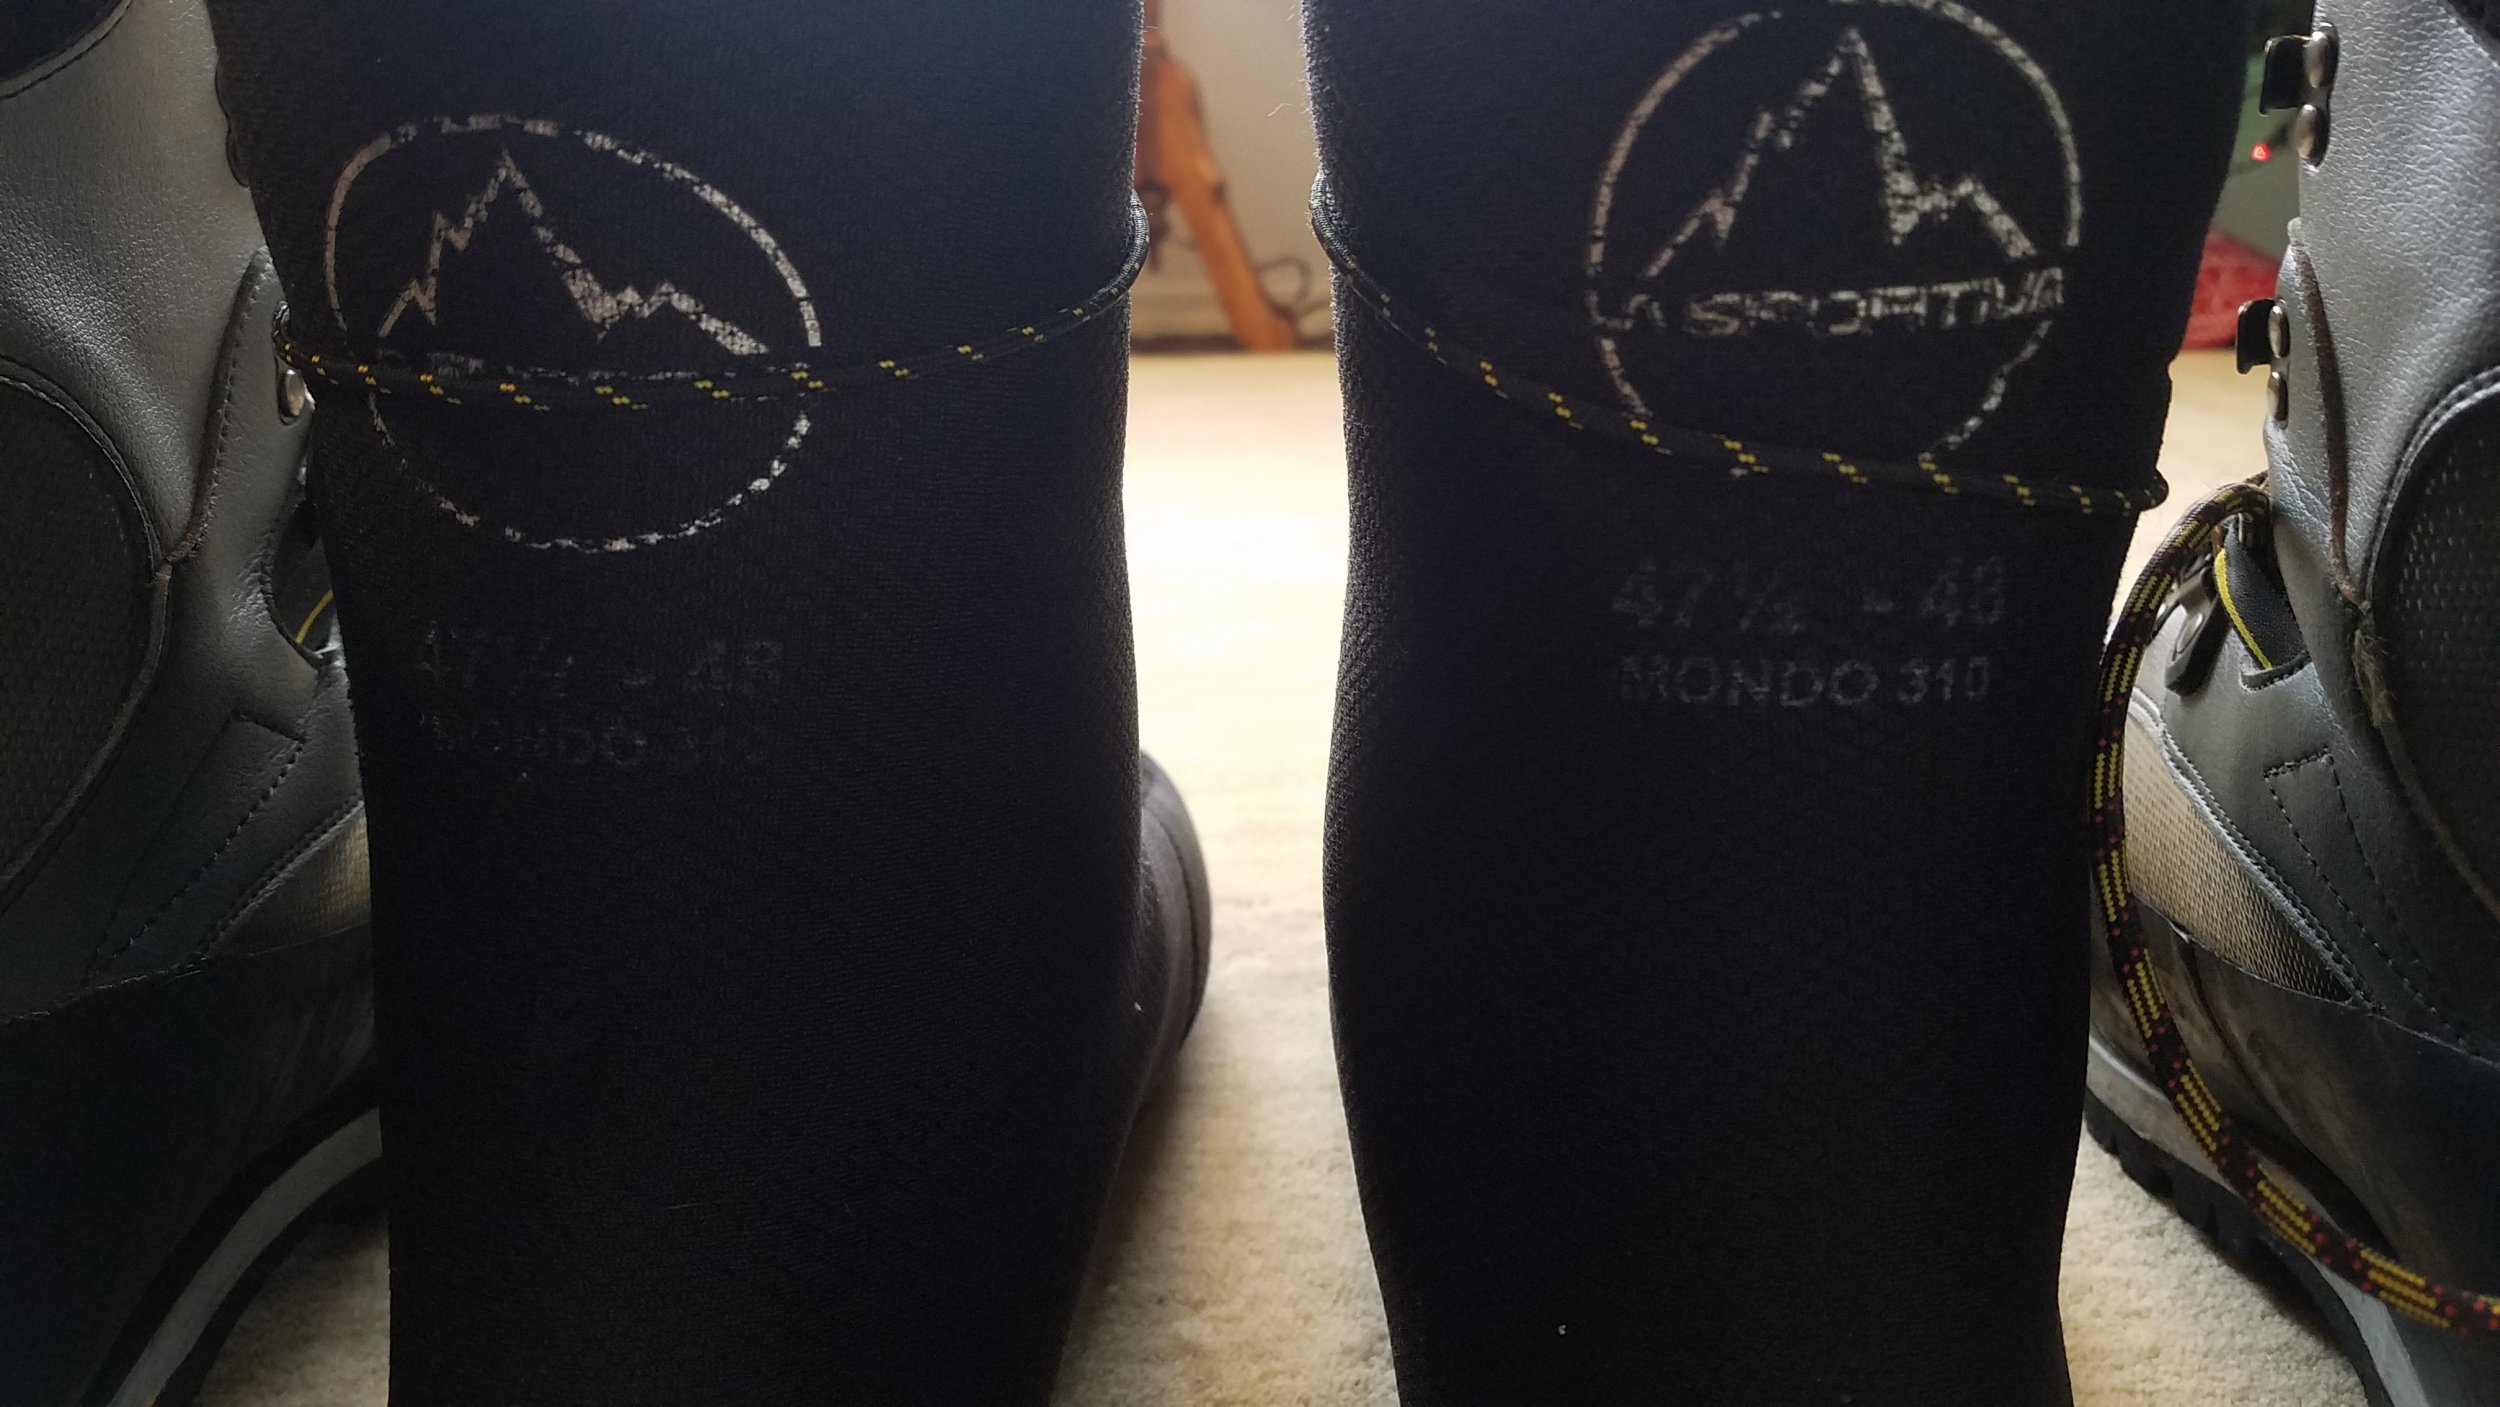
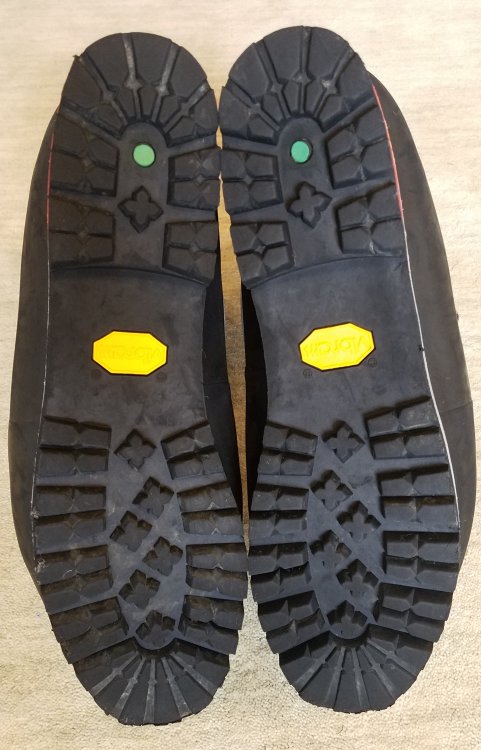
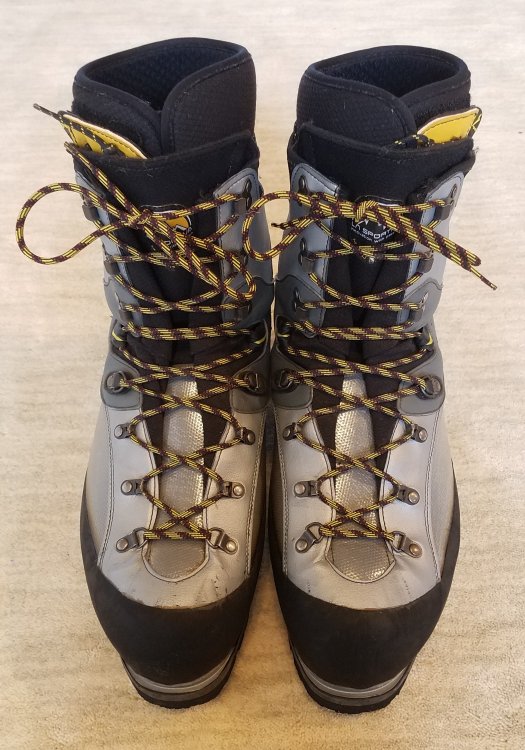
SOLD Lightly used pair of La Sportiva Baruntse Boots Size 48 (US Men's 14)$350 Shipped to the lower 48. Payment via PayPal.See pictures for condition. They are in great shape and have not been used much. Liners molded once and can be molded again.Please contact me if you have any questions, thanks.More information: https://www.sportiva.com/baruntse.html


-
bump for added items
-
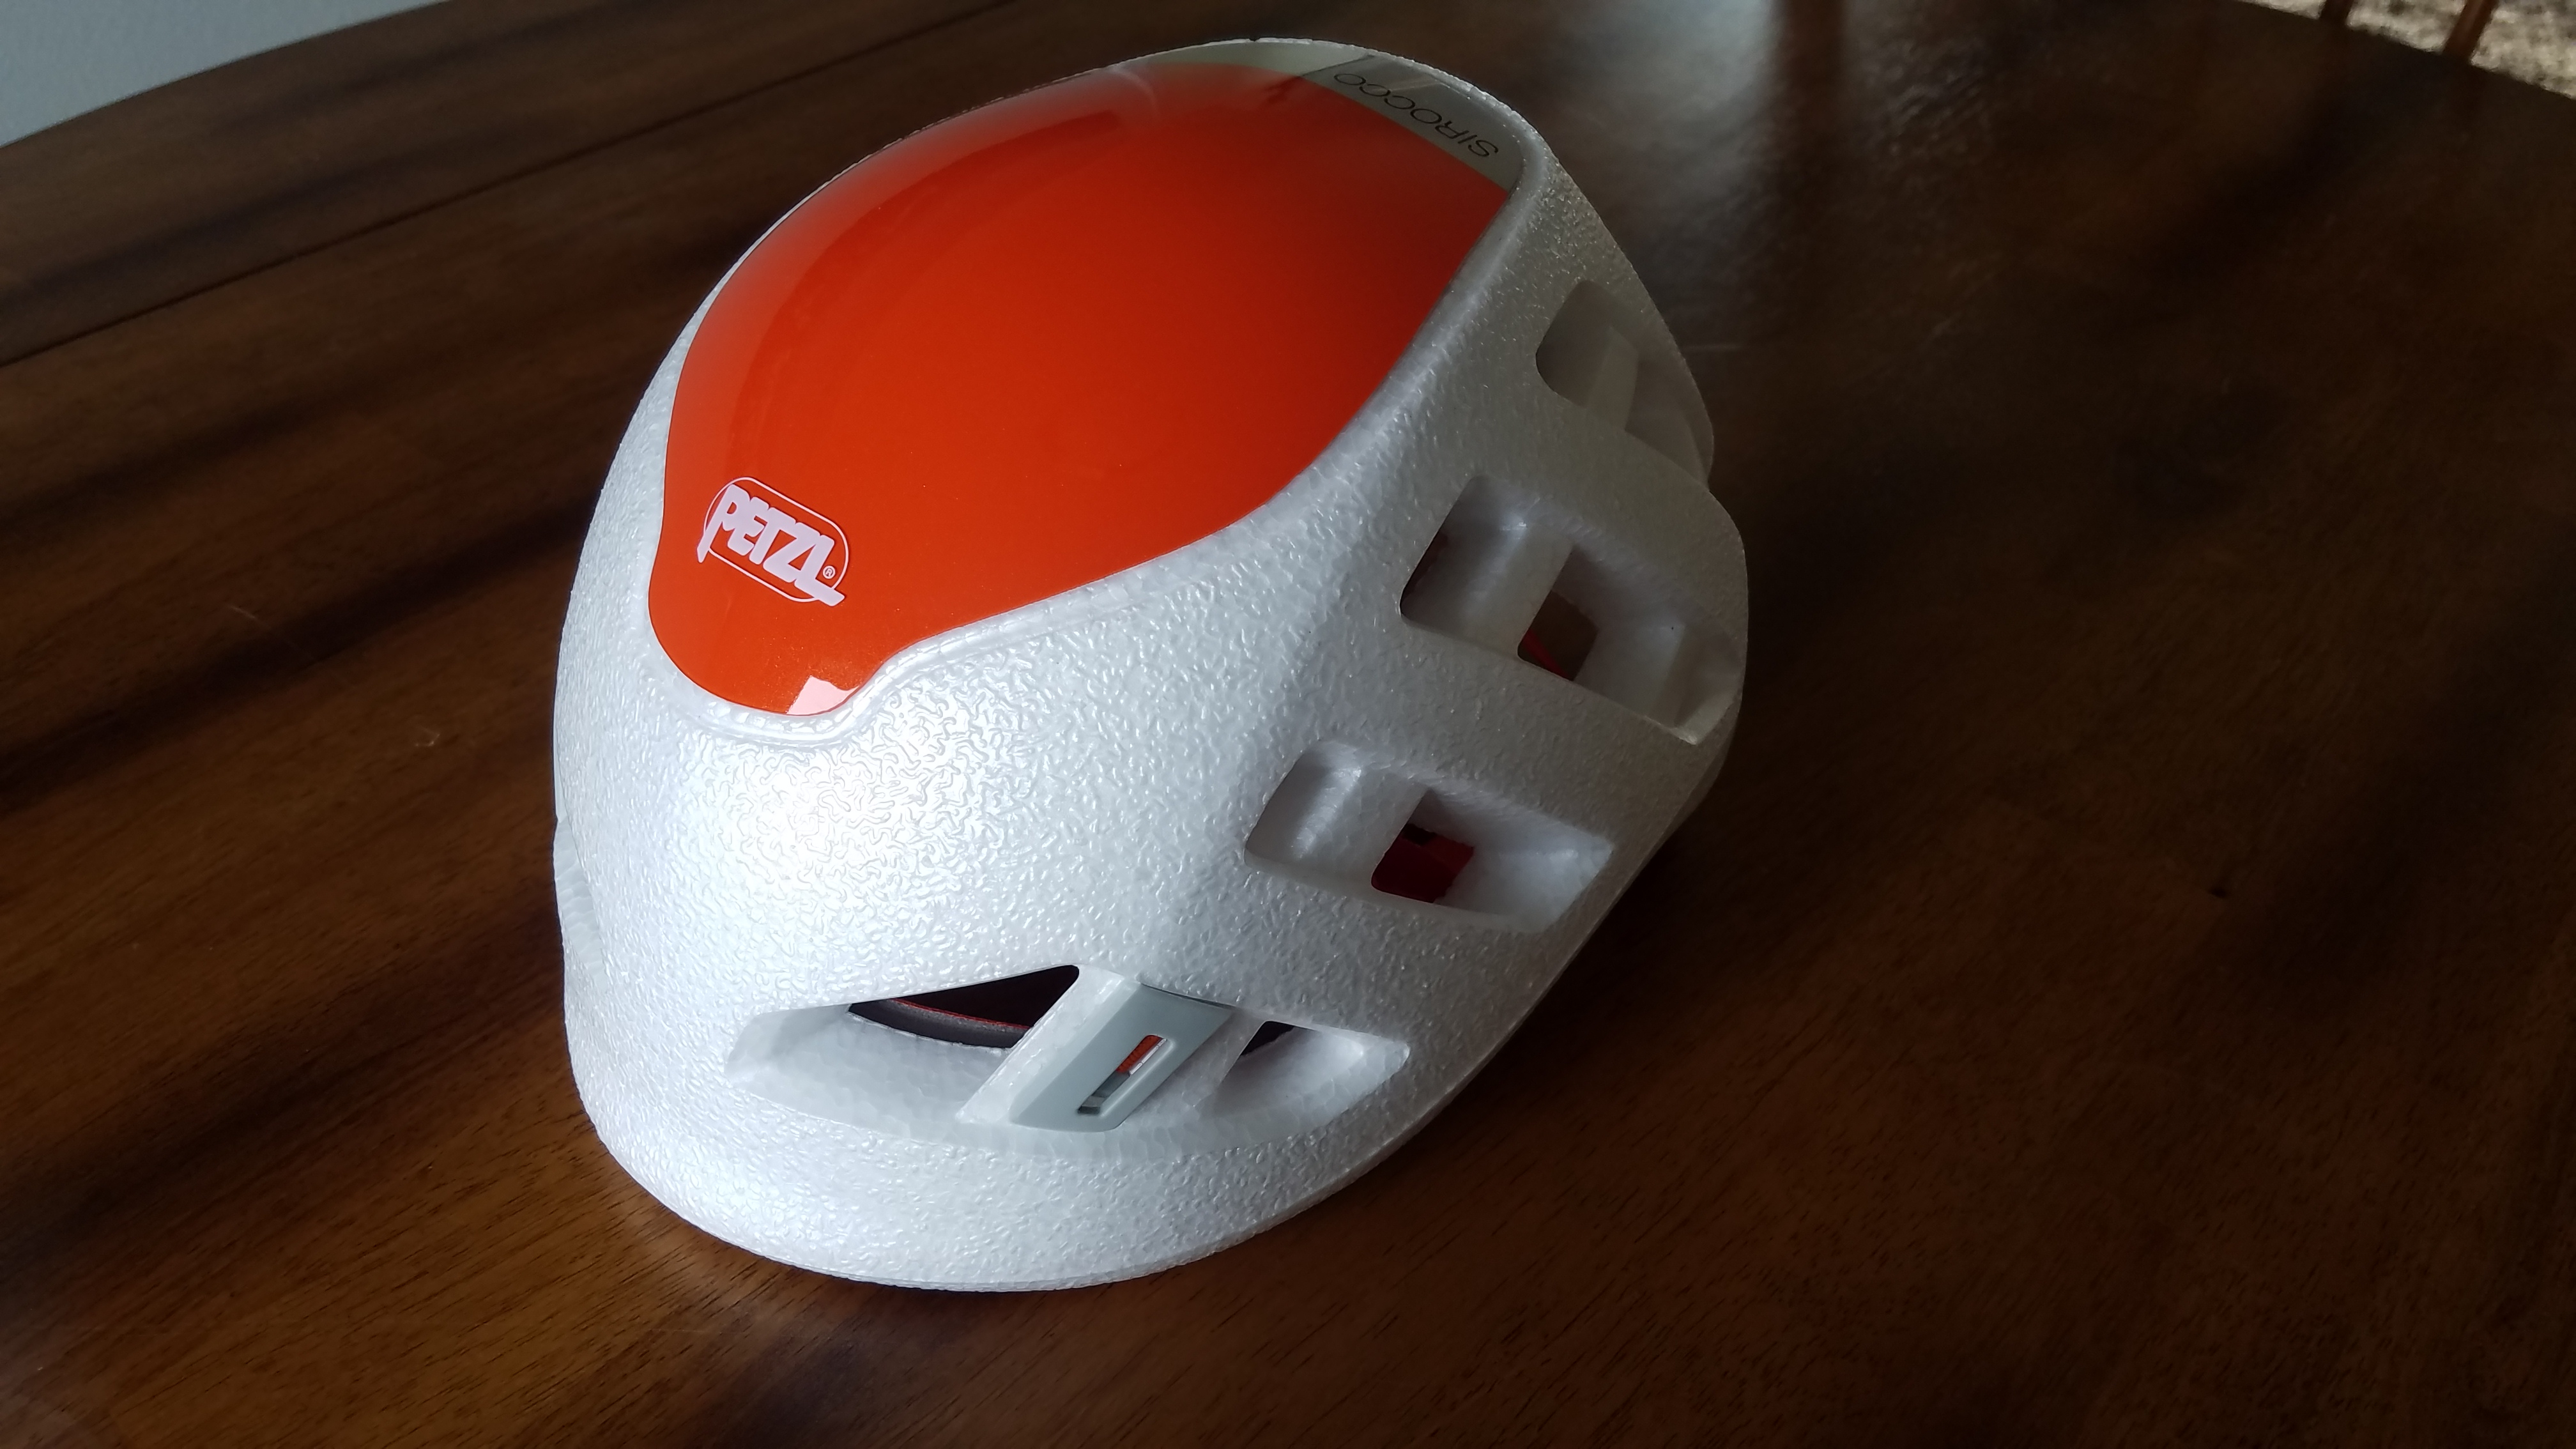
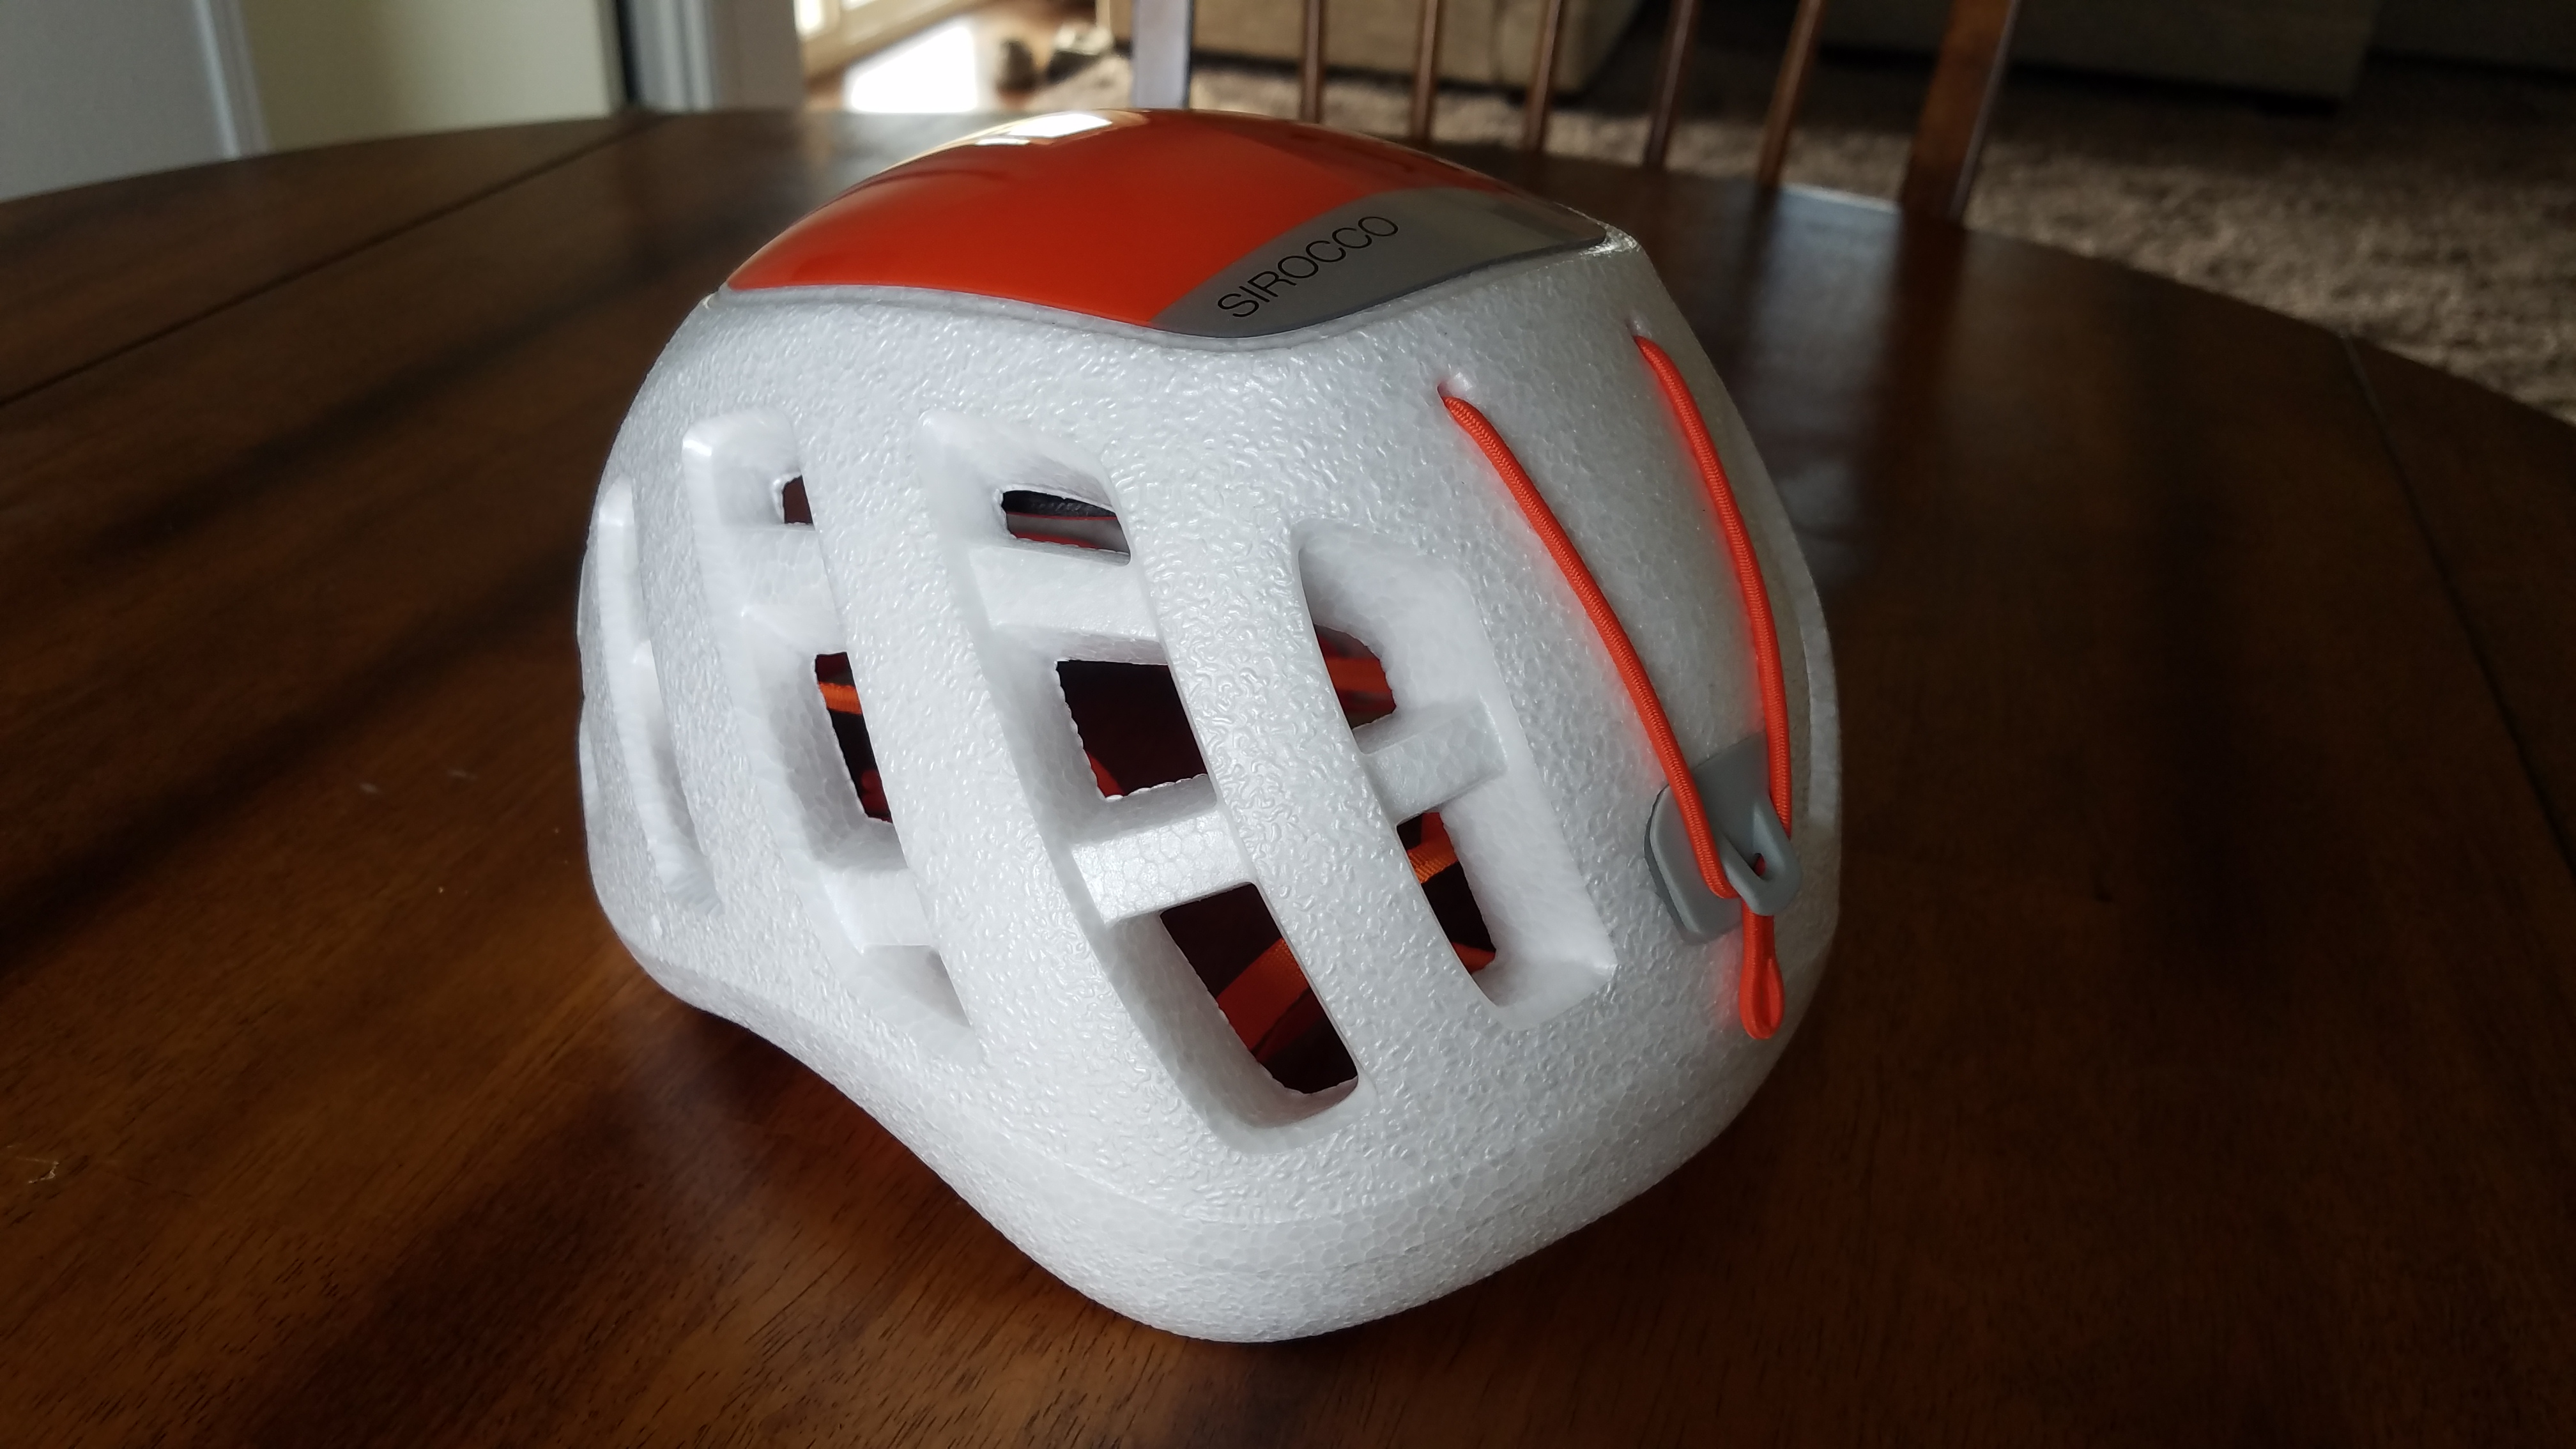
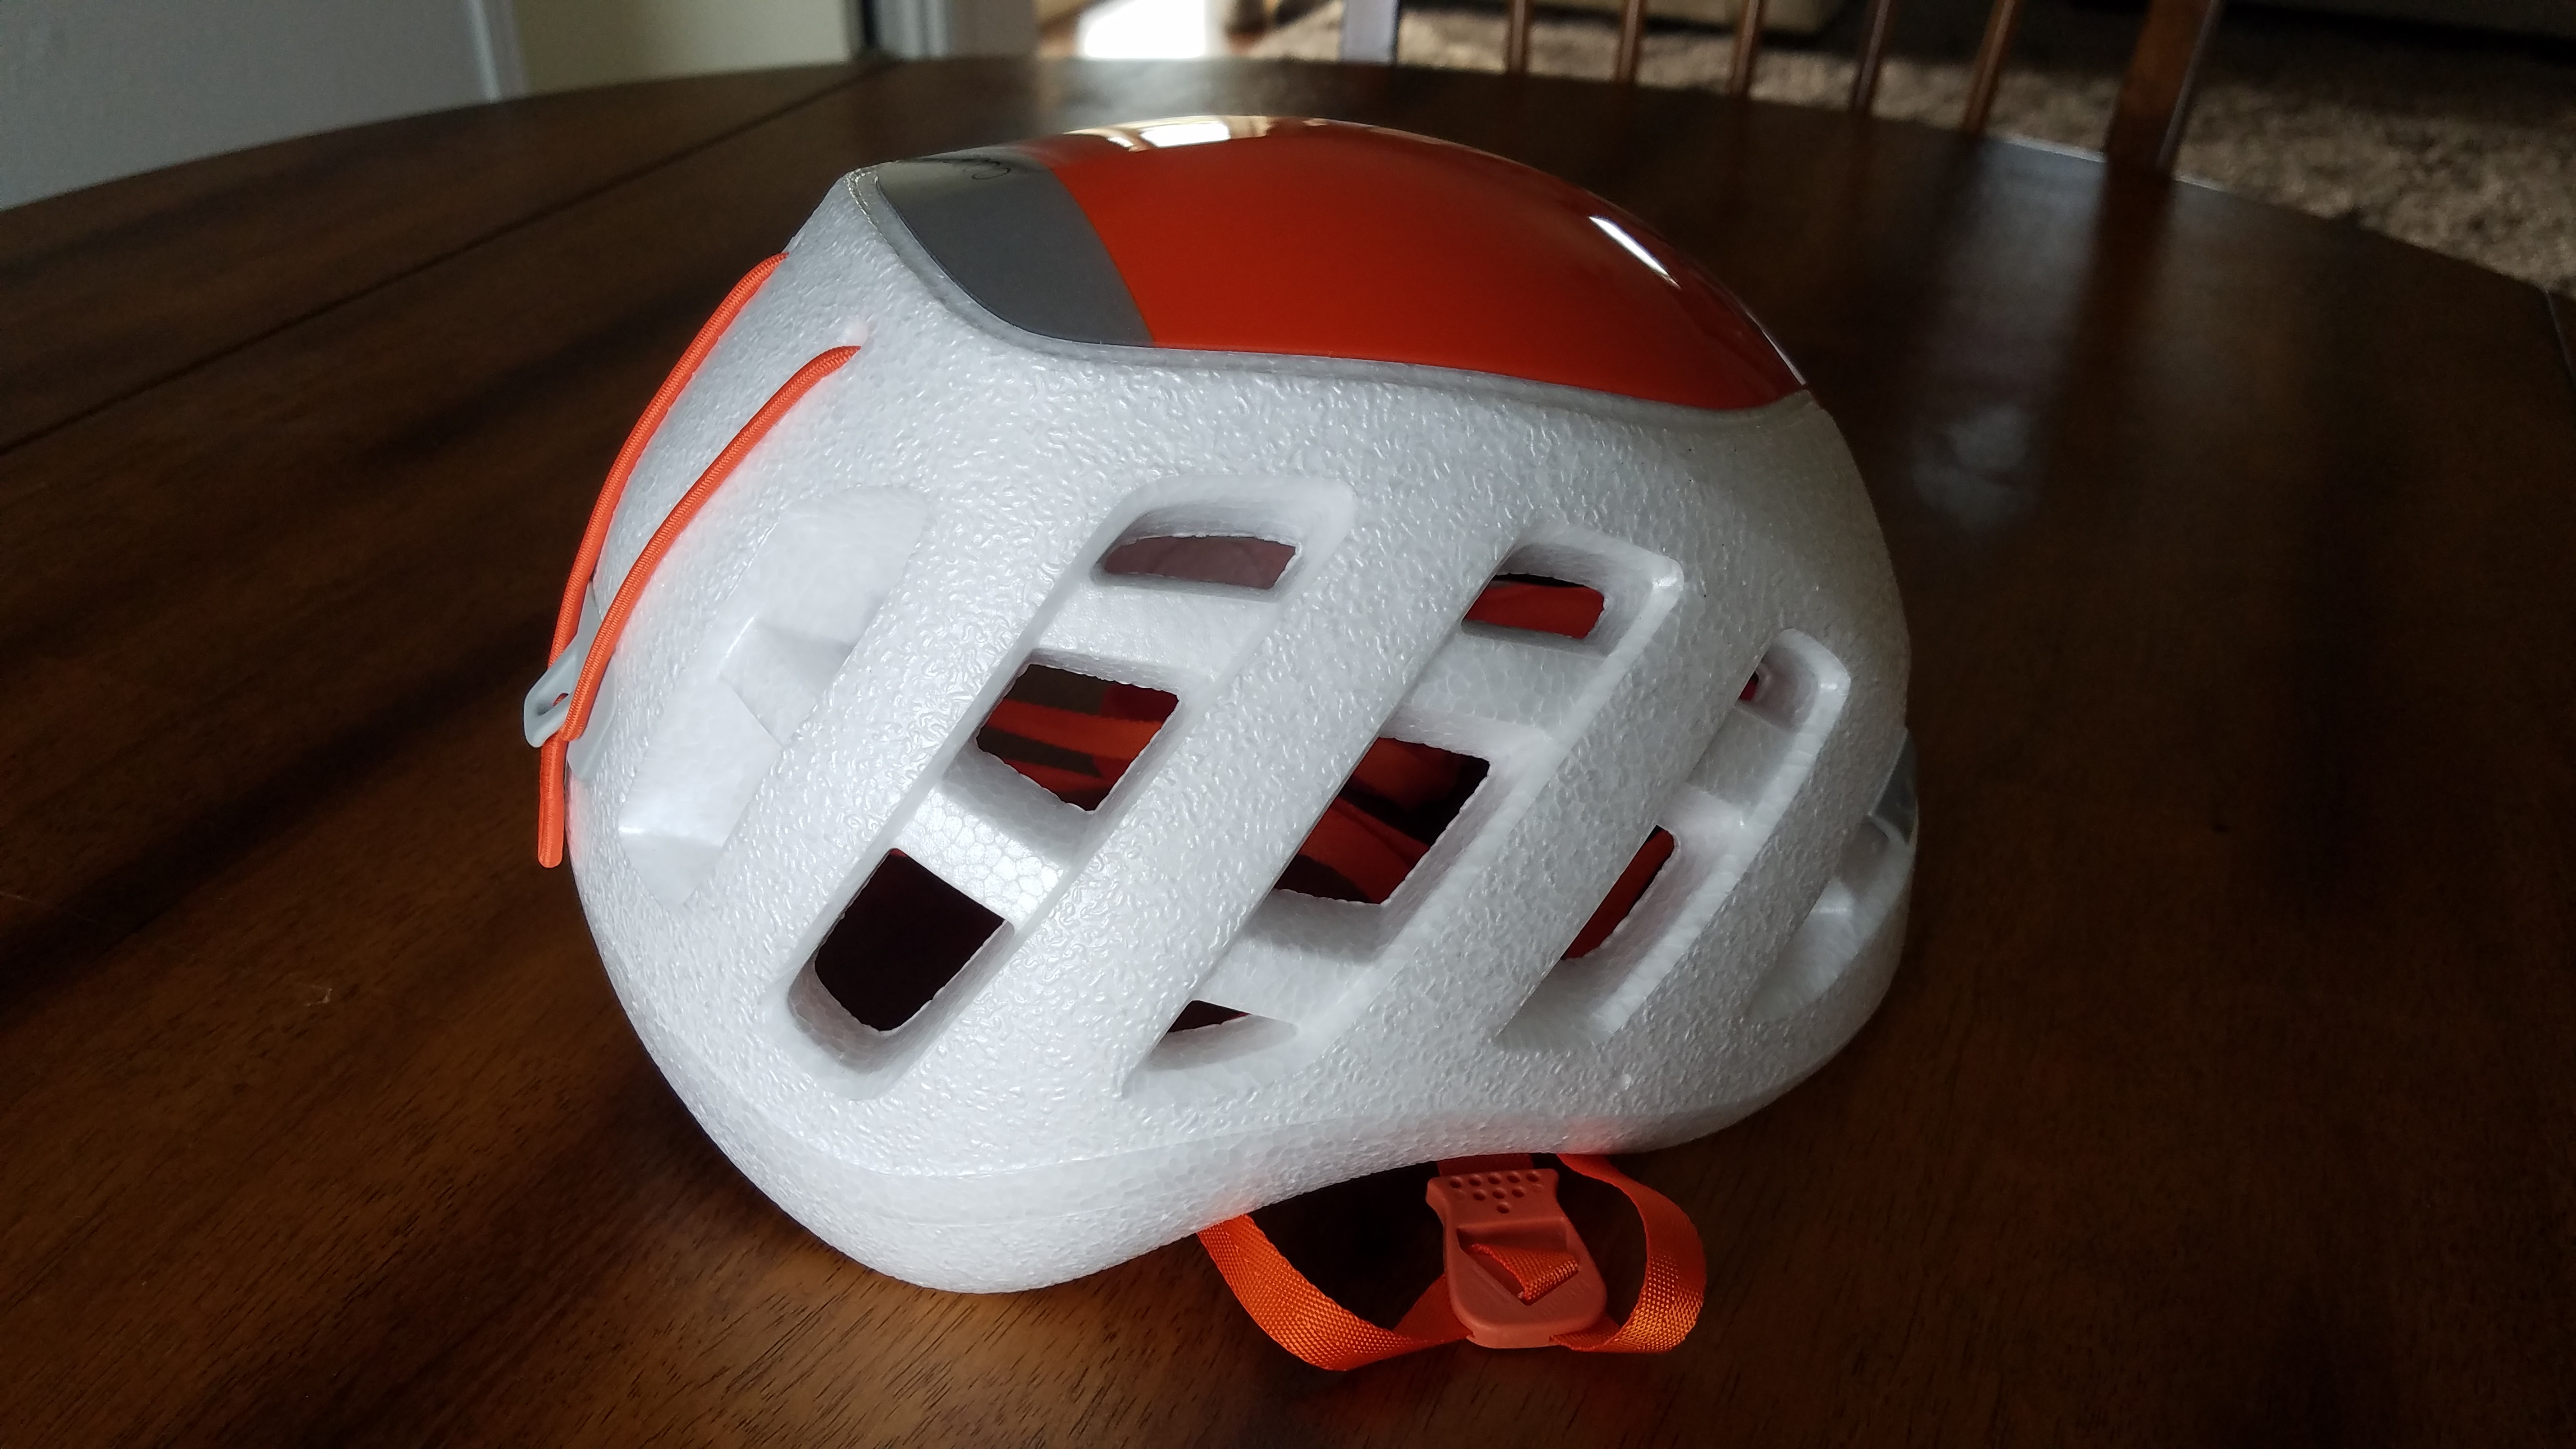
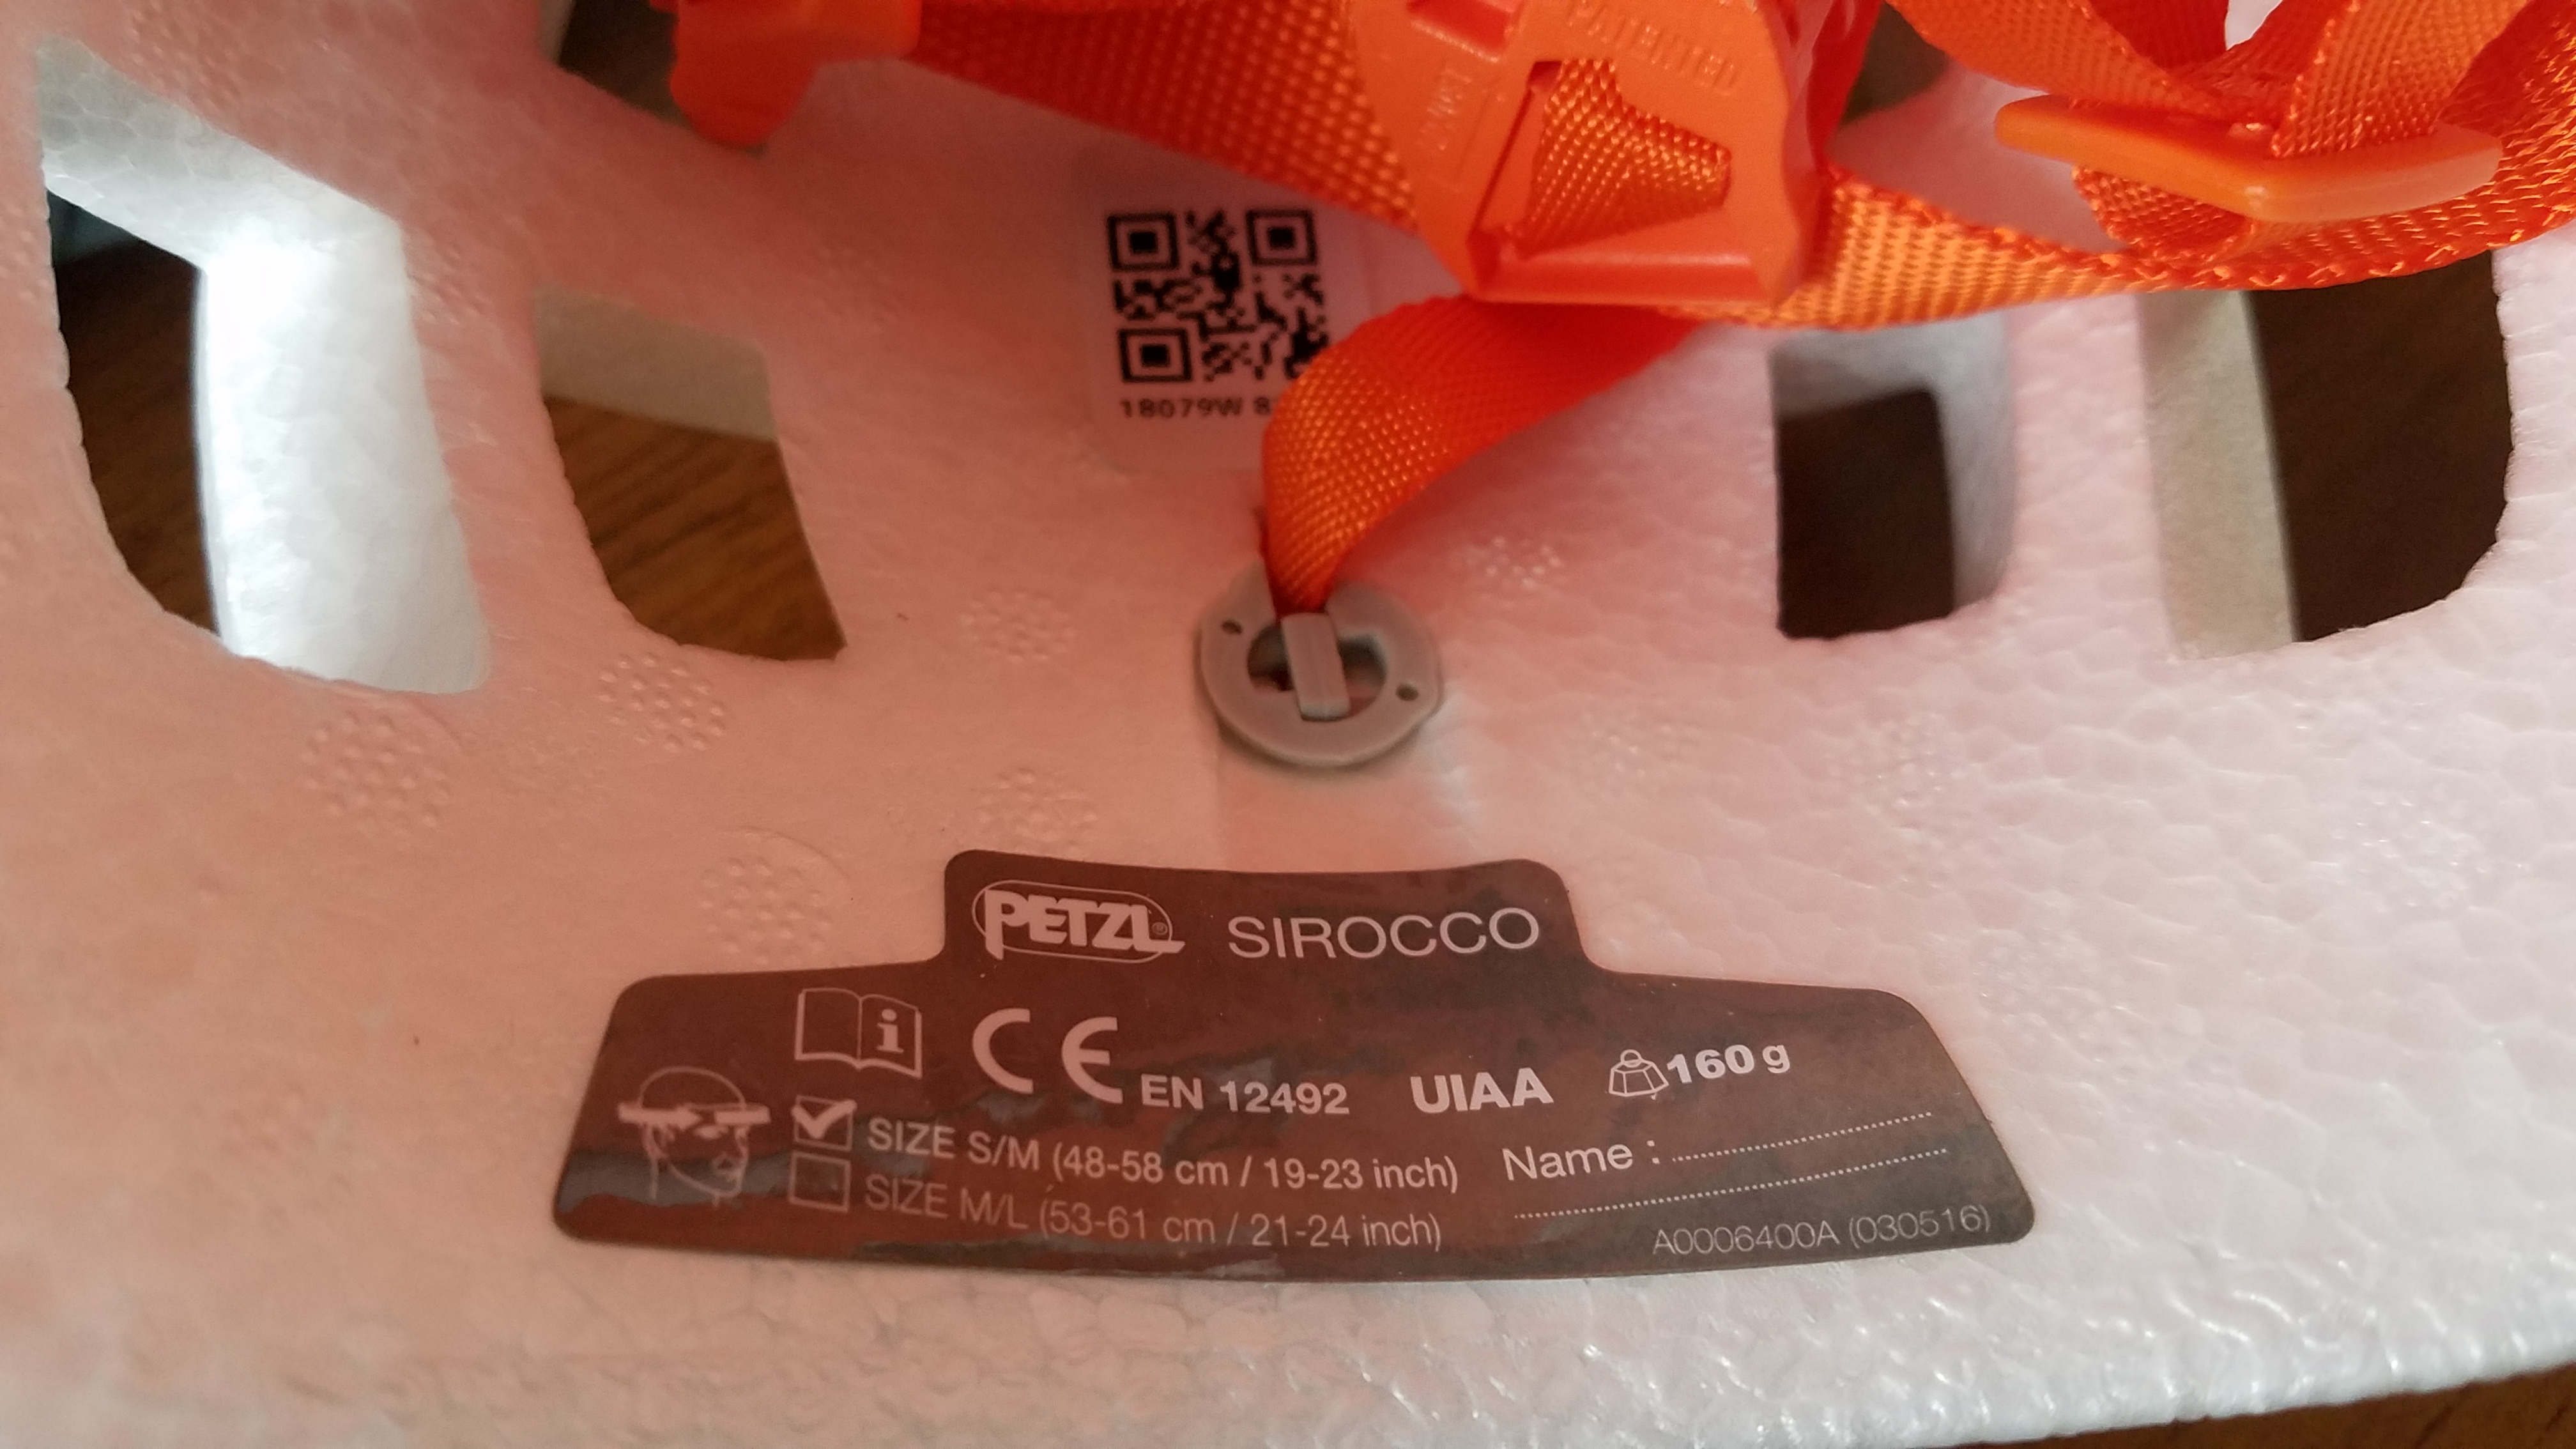
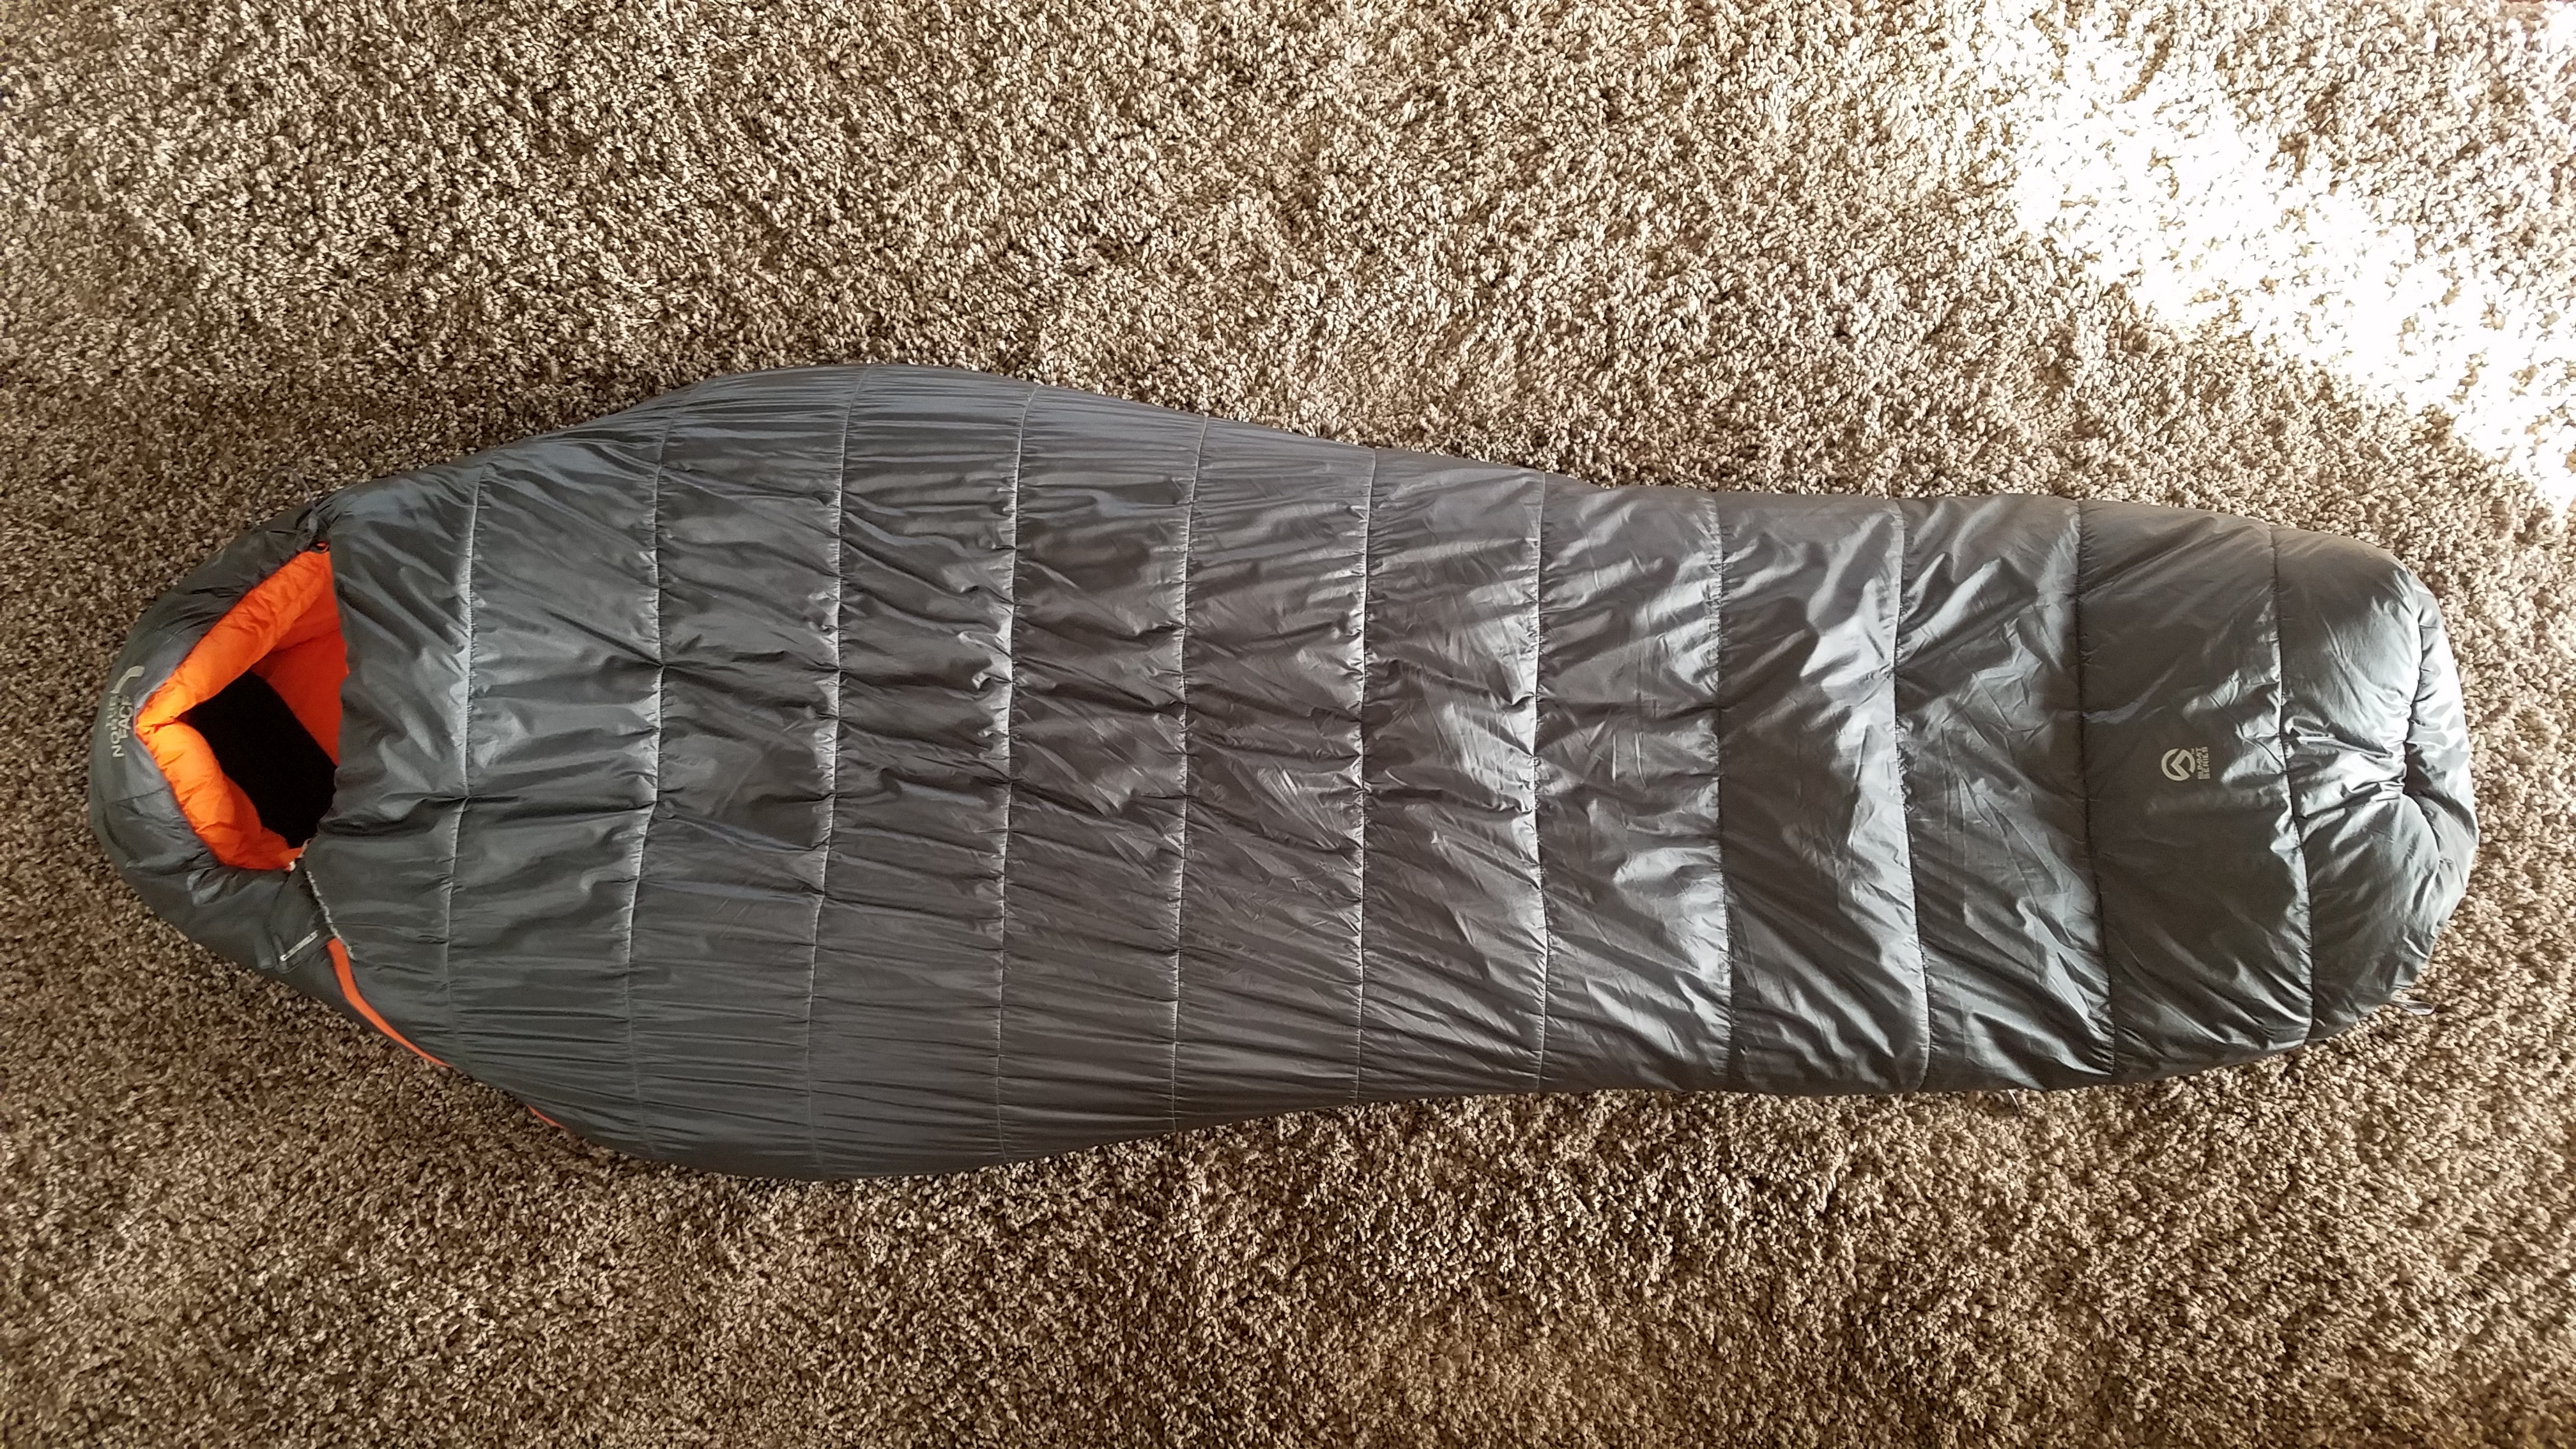
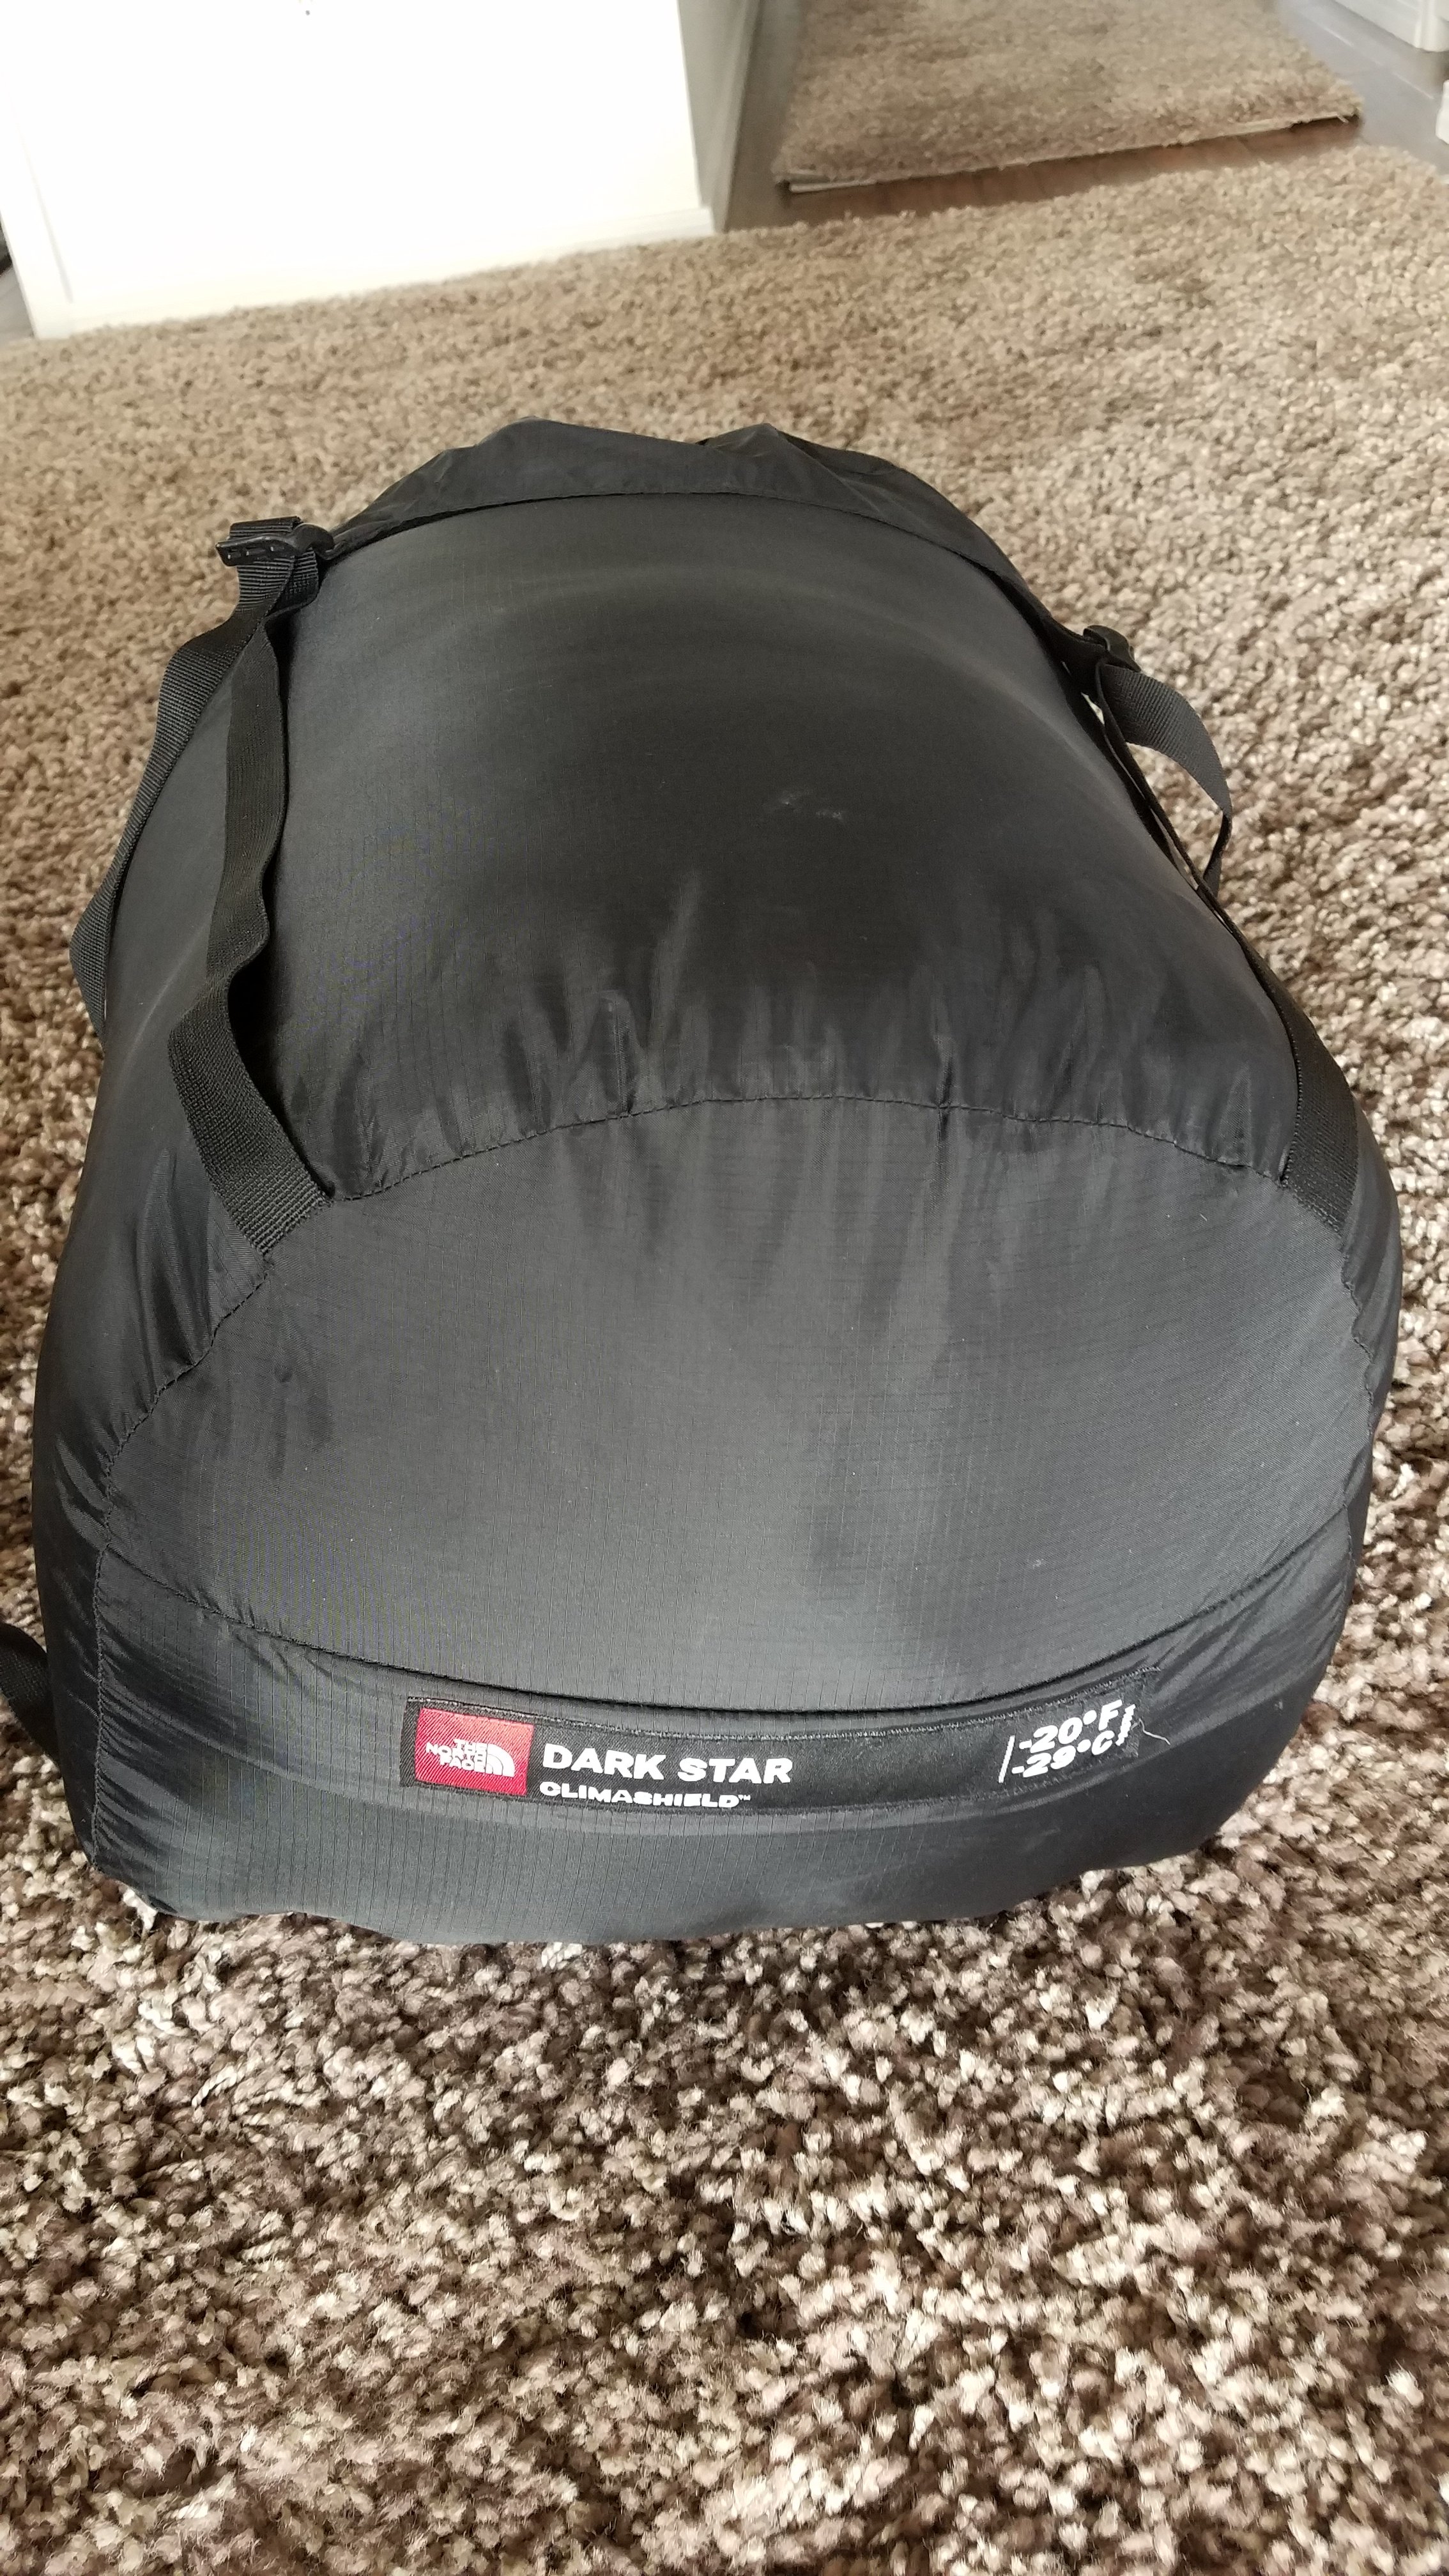
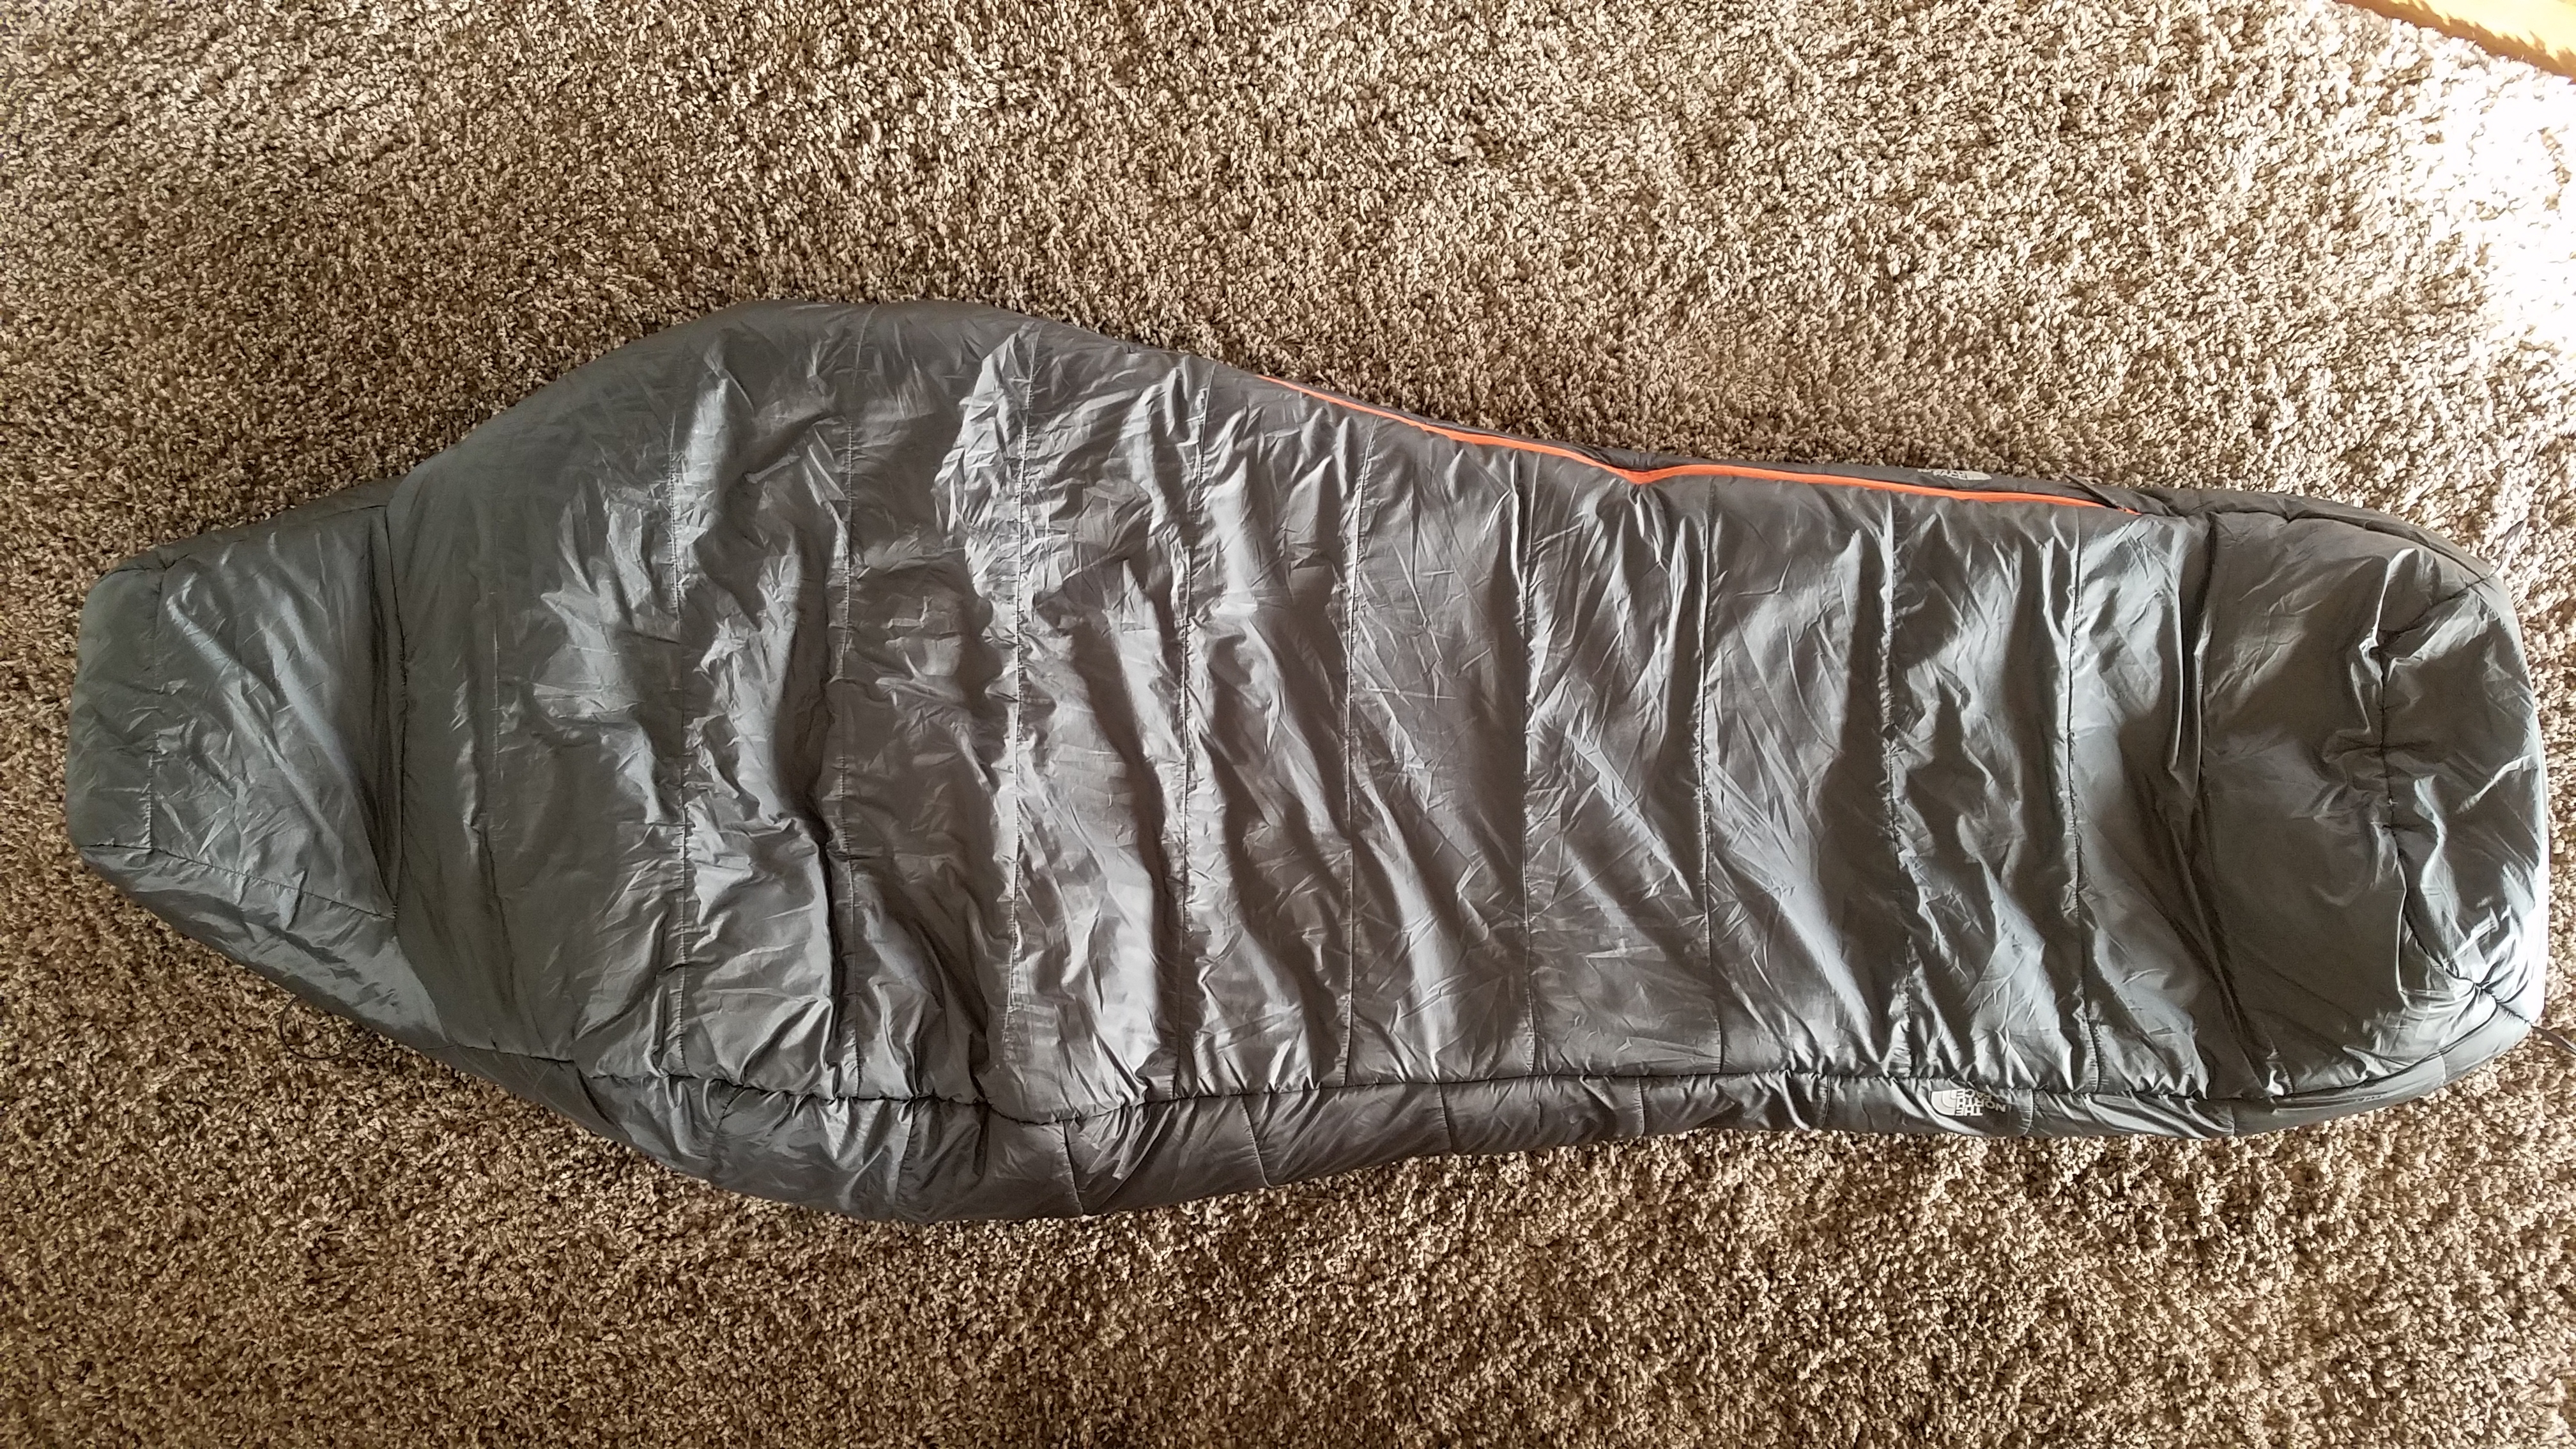
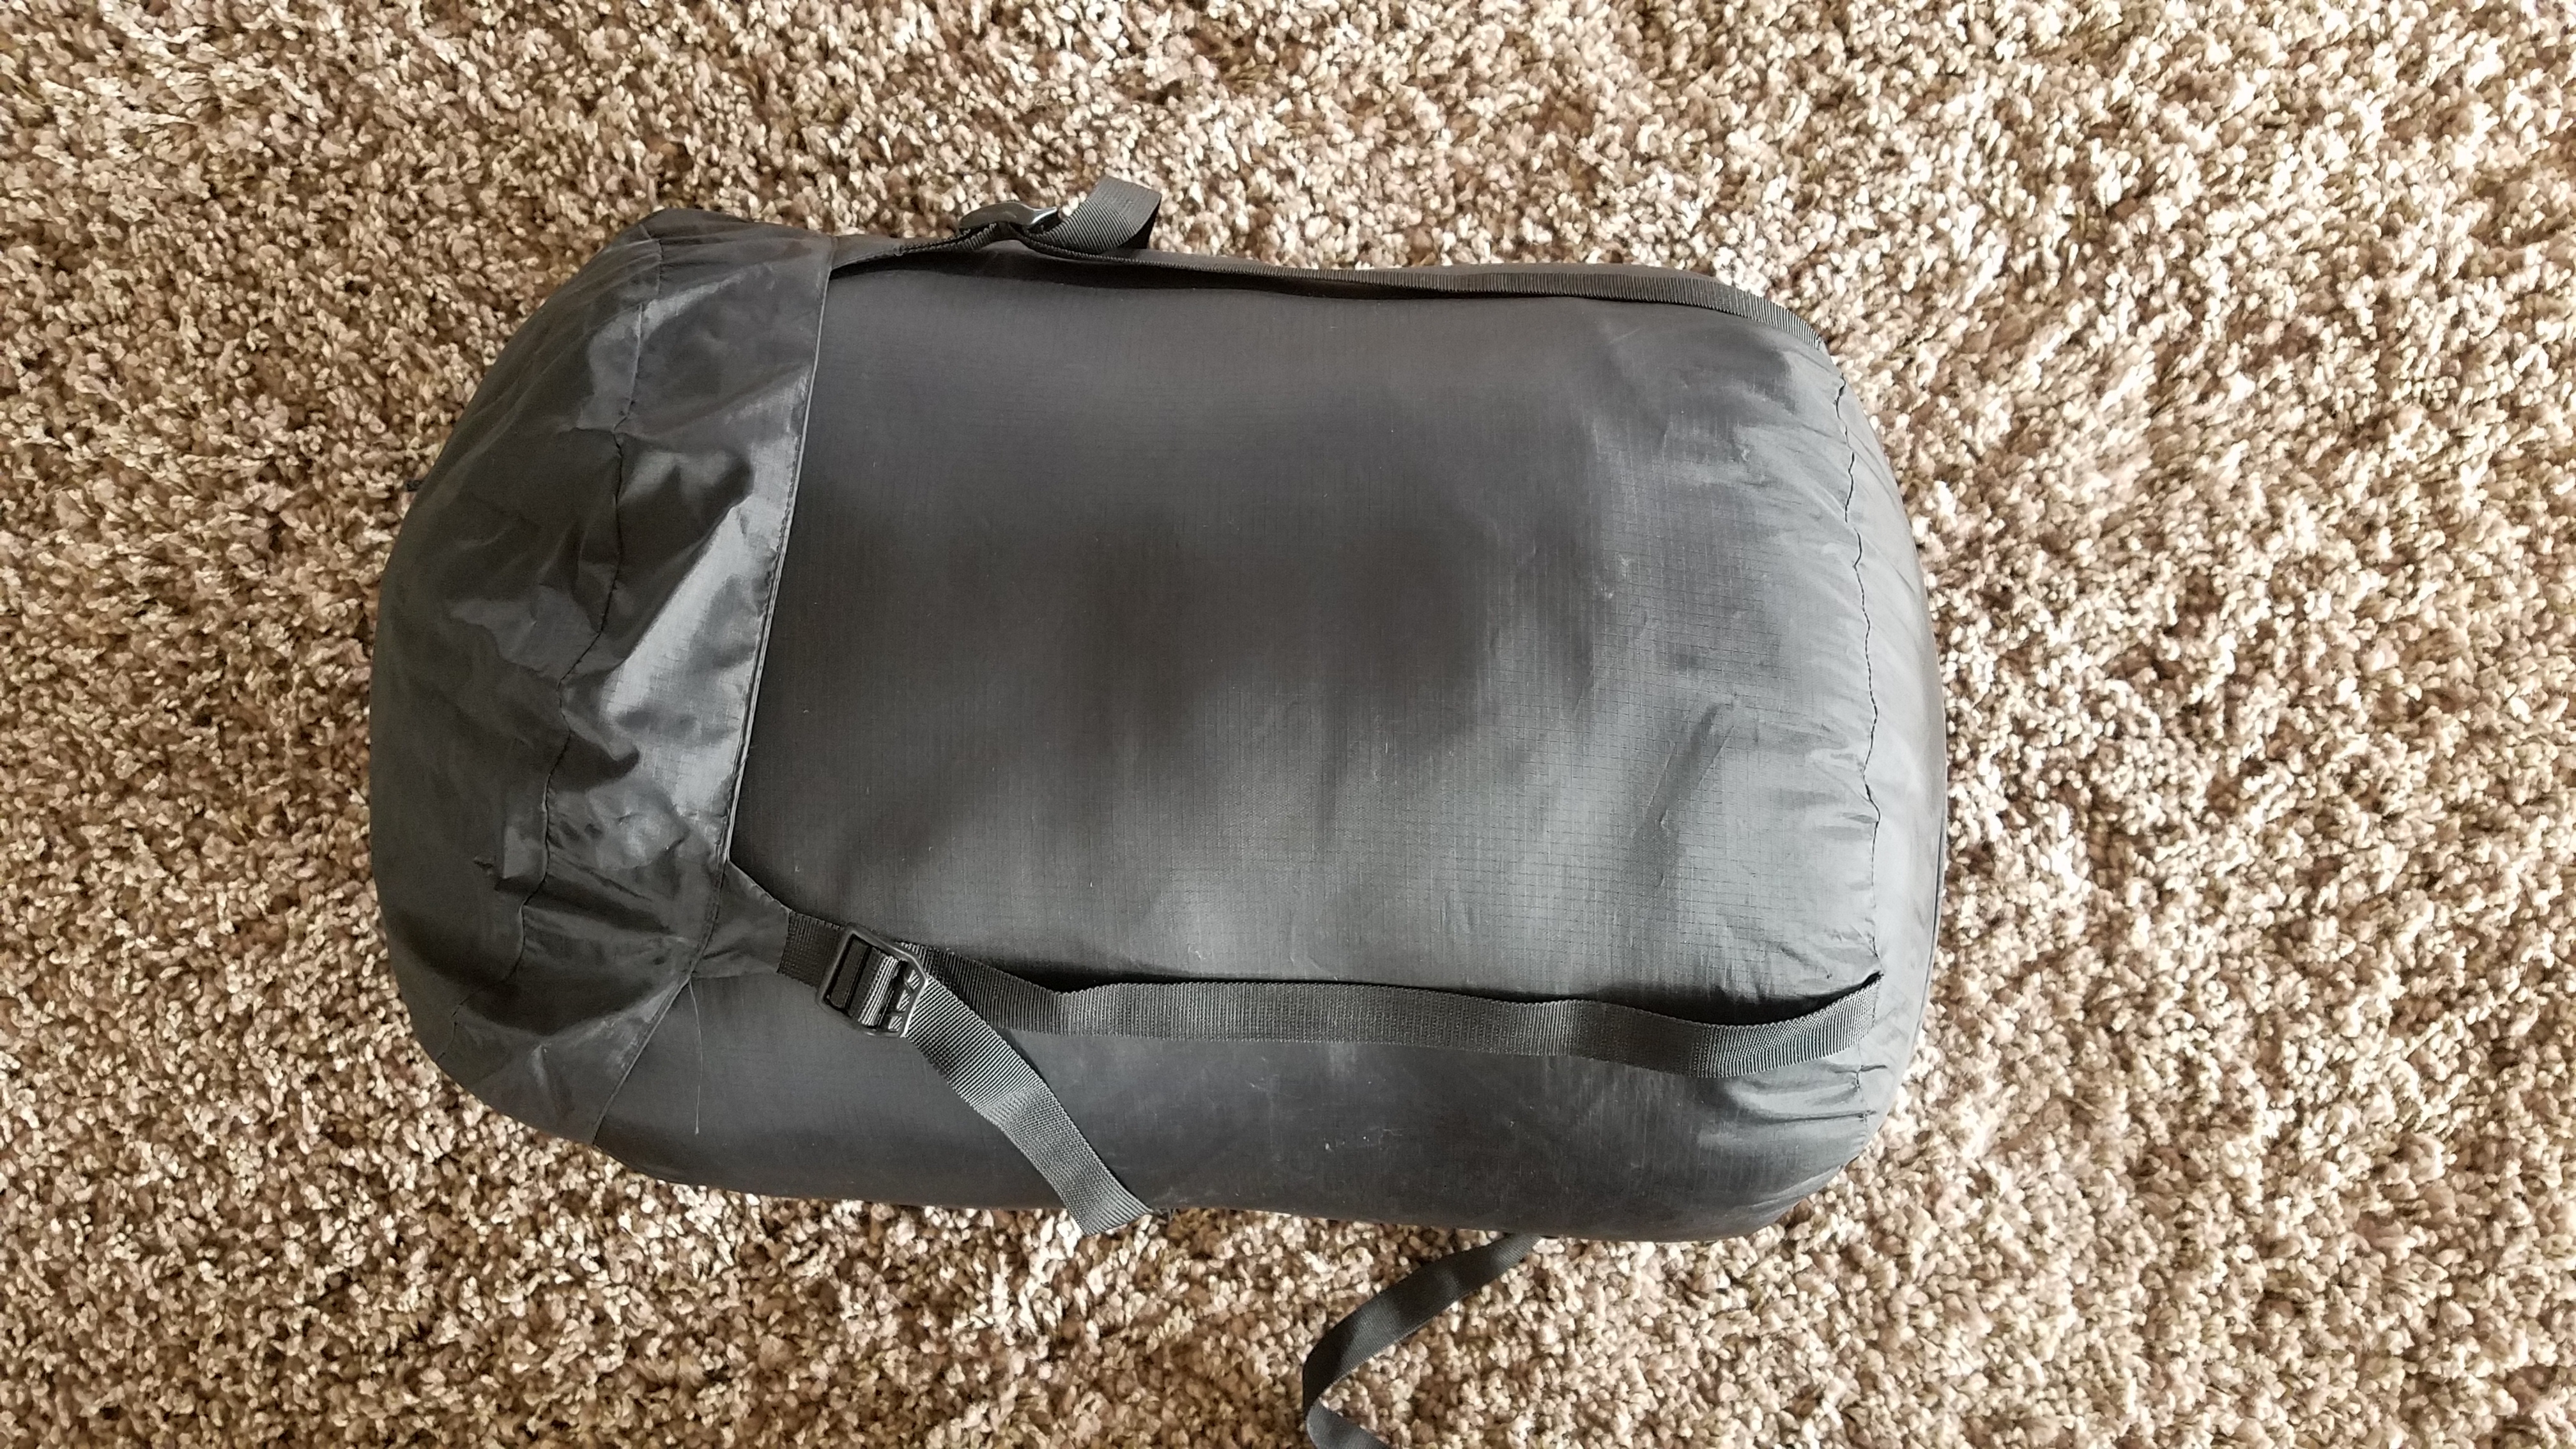
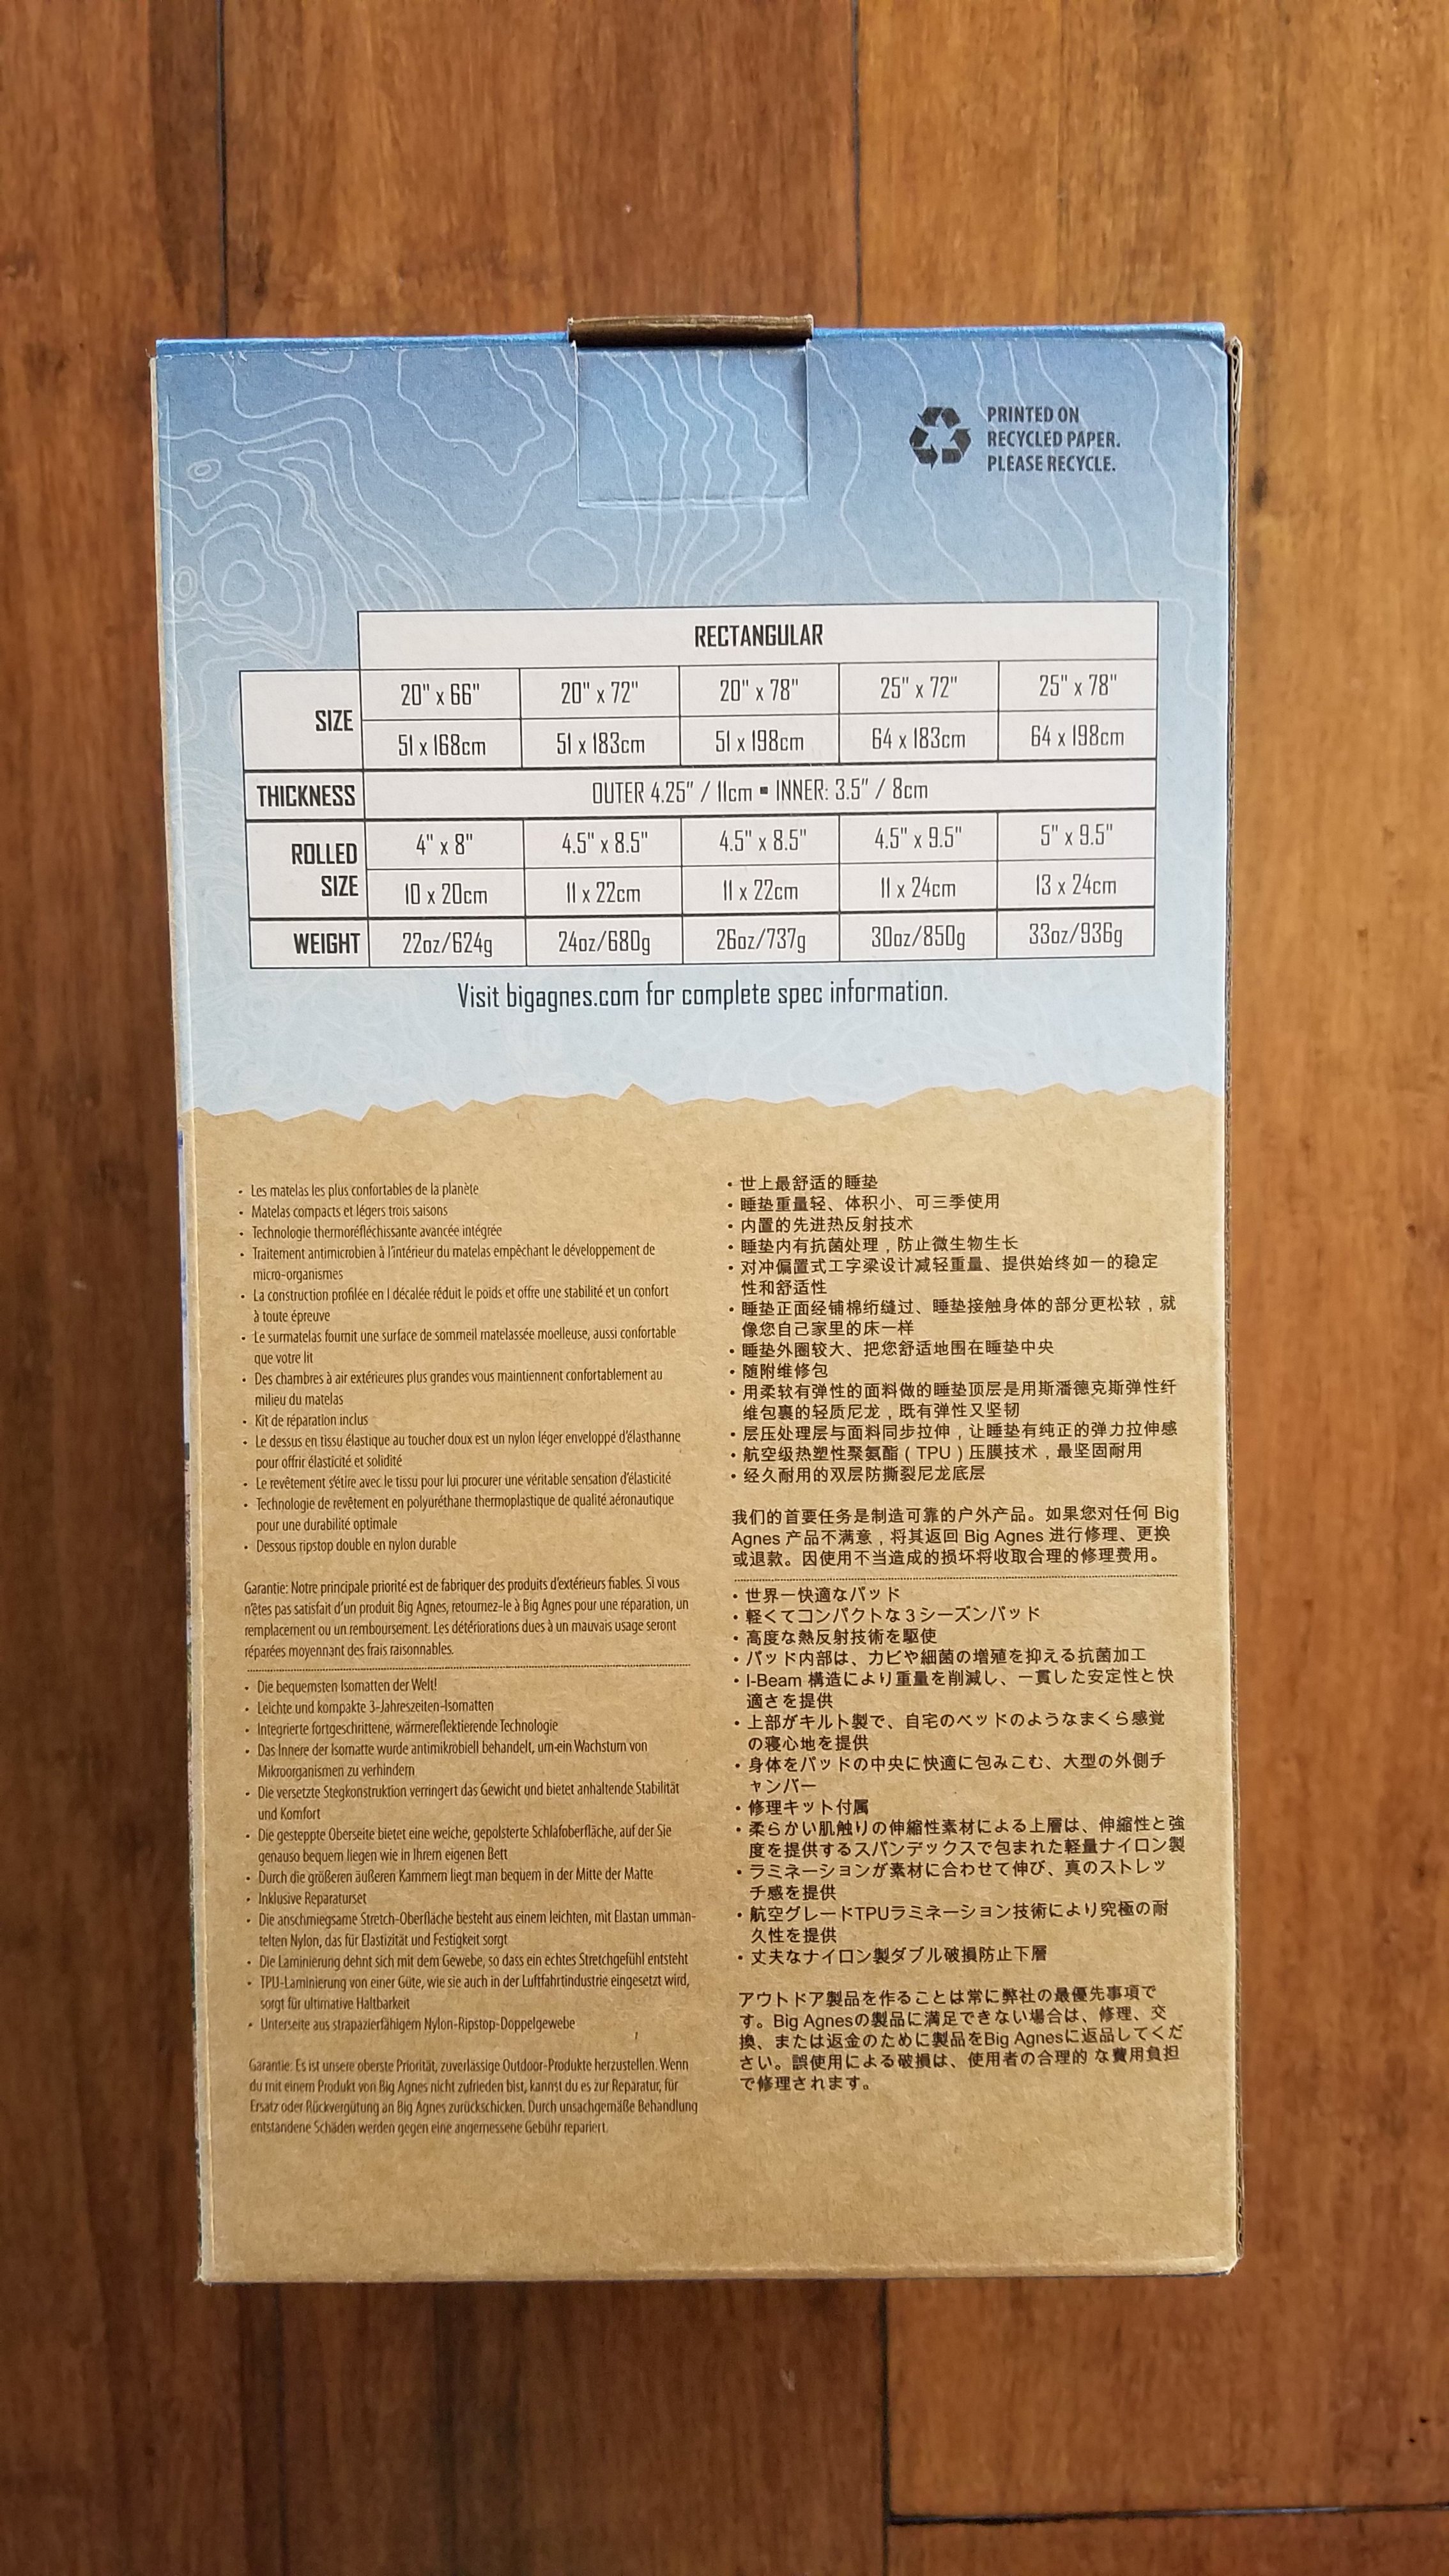
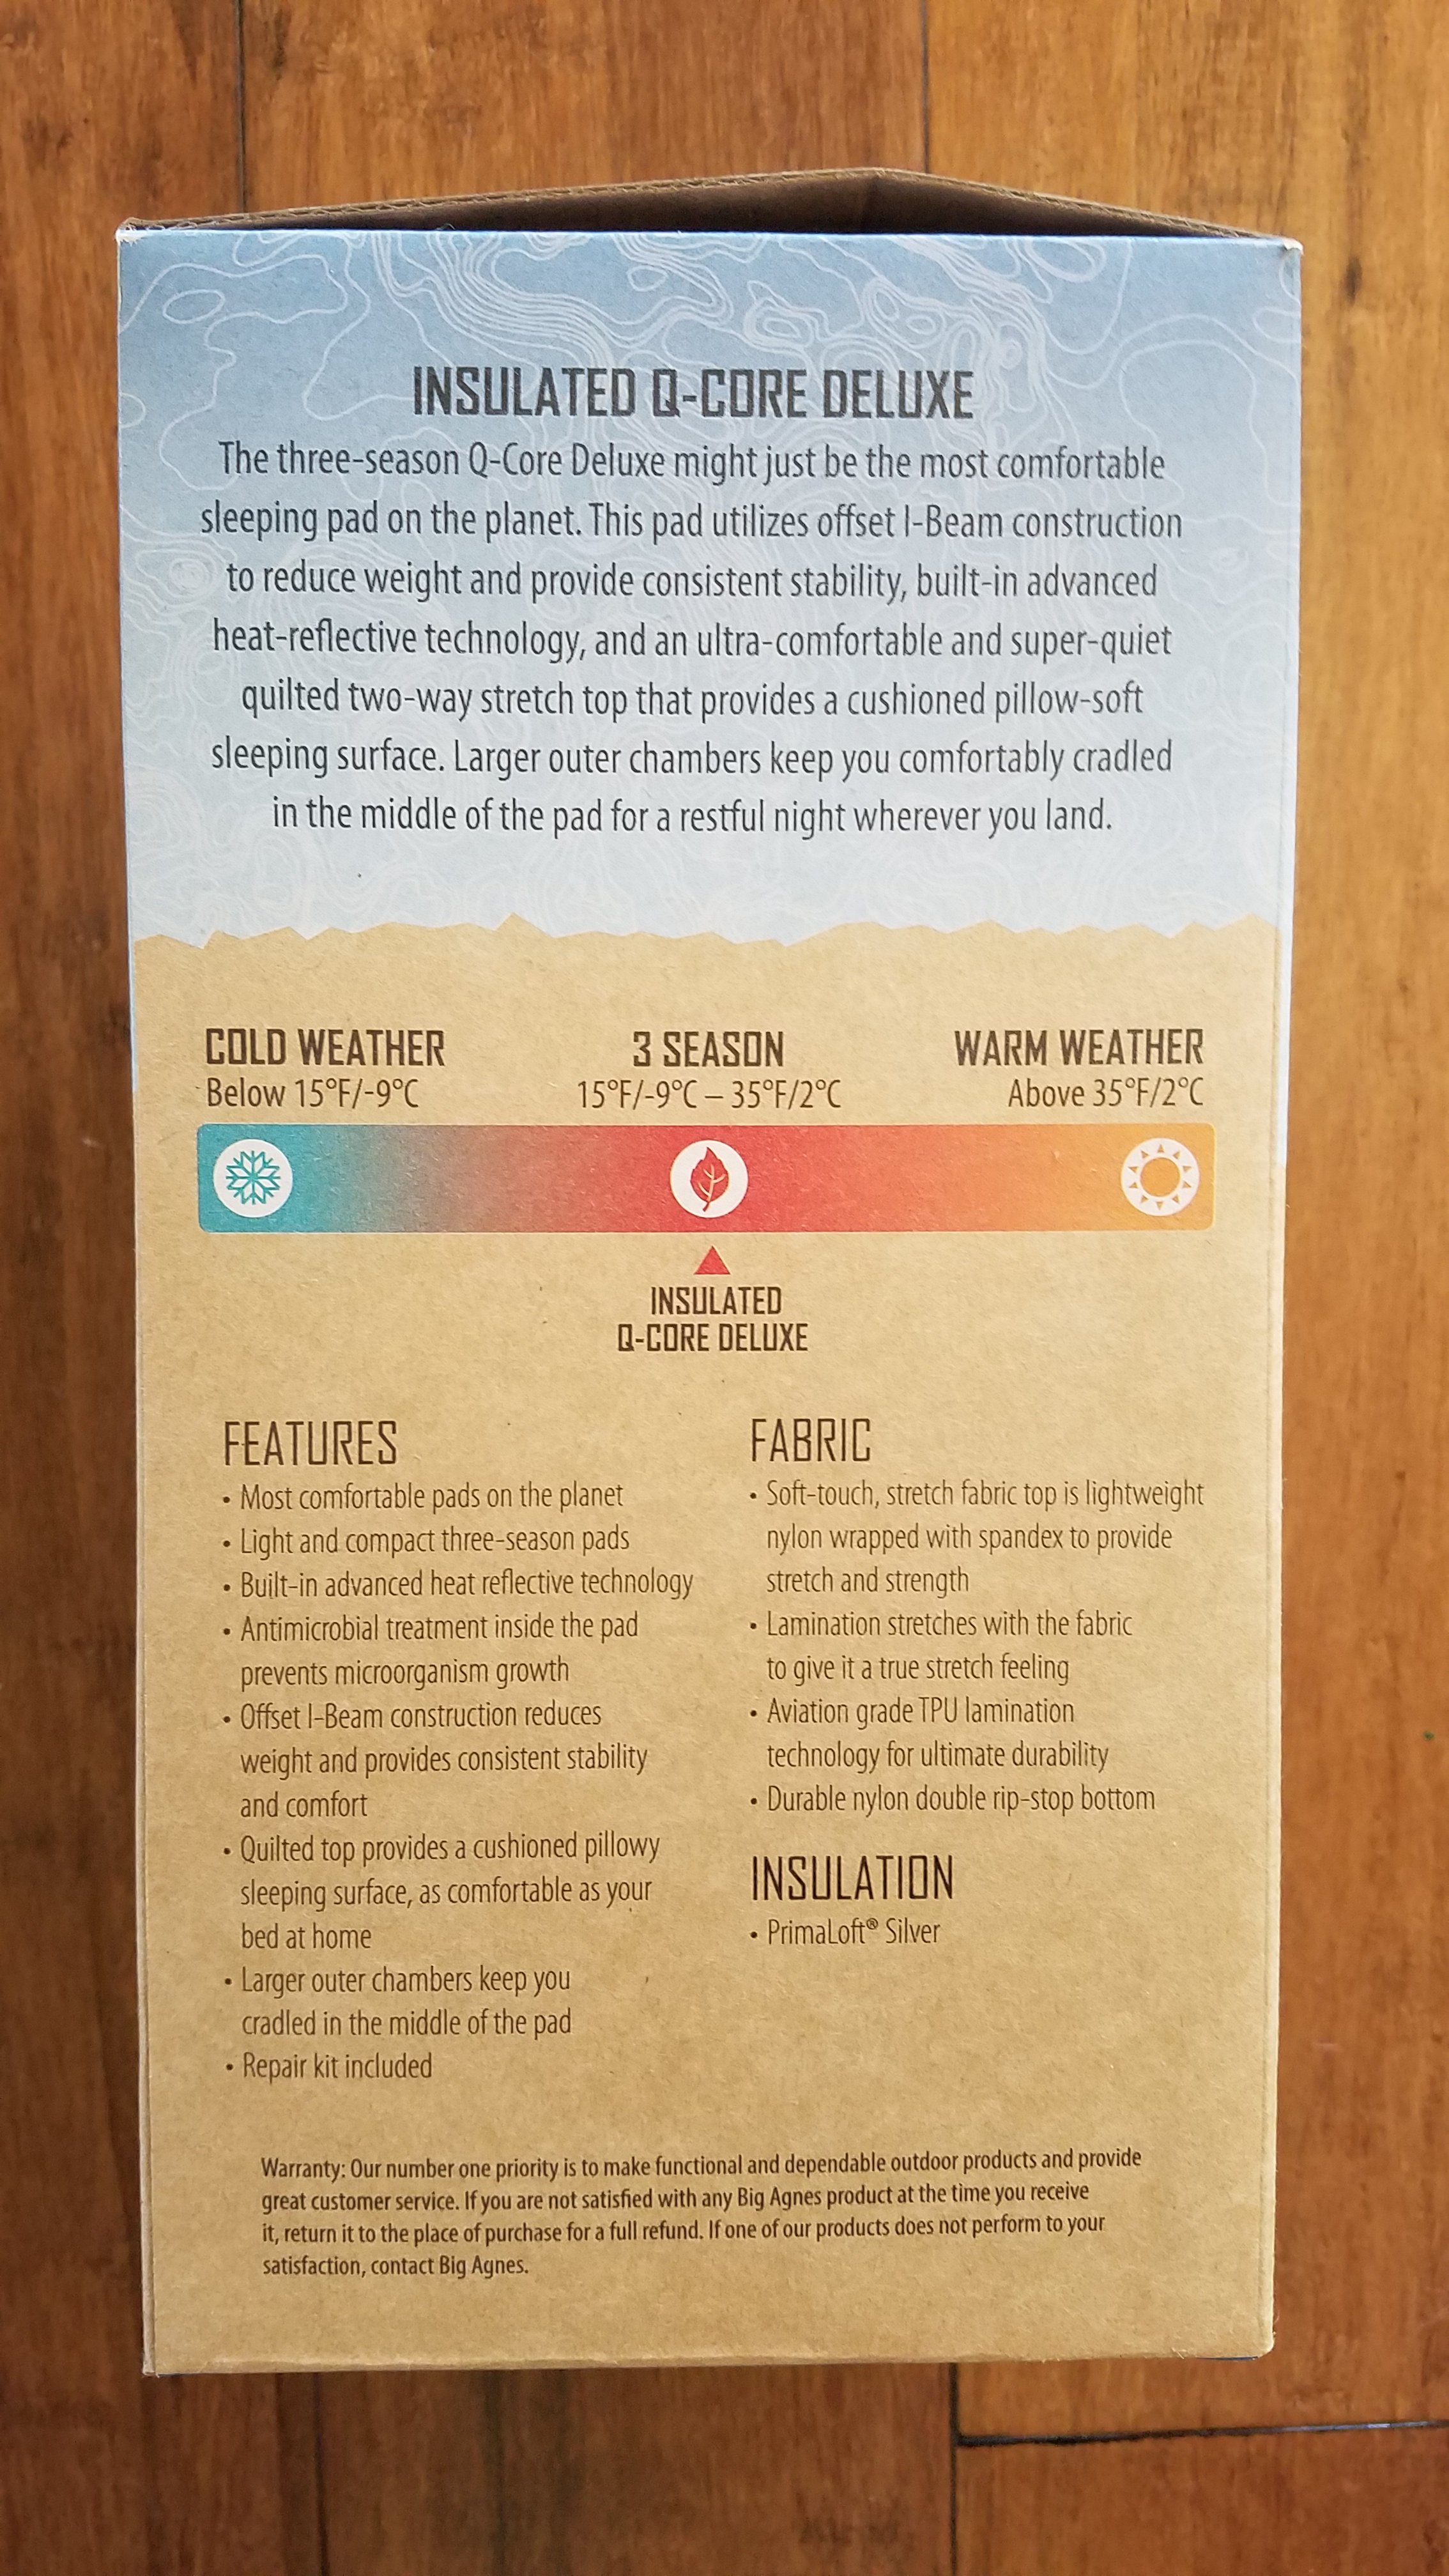
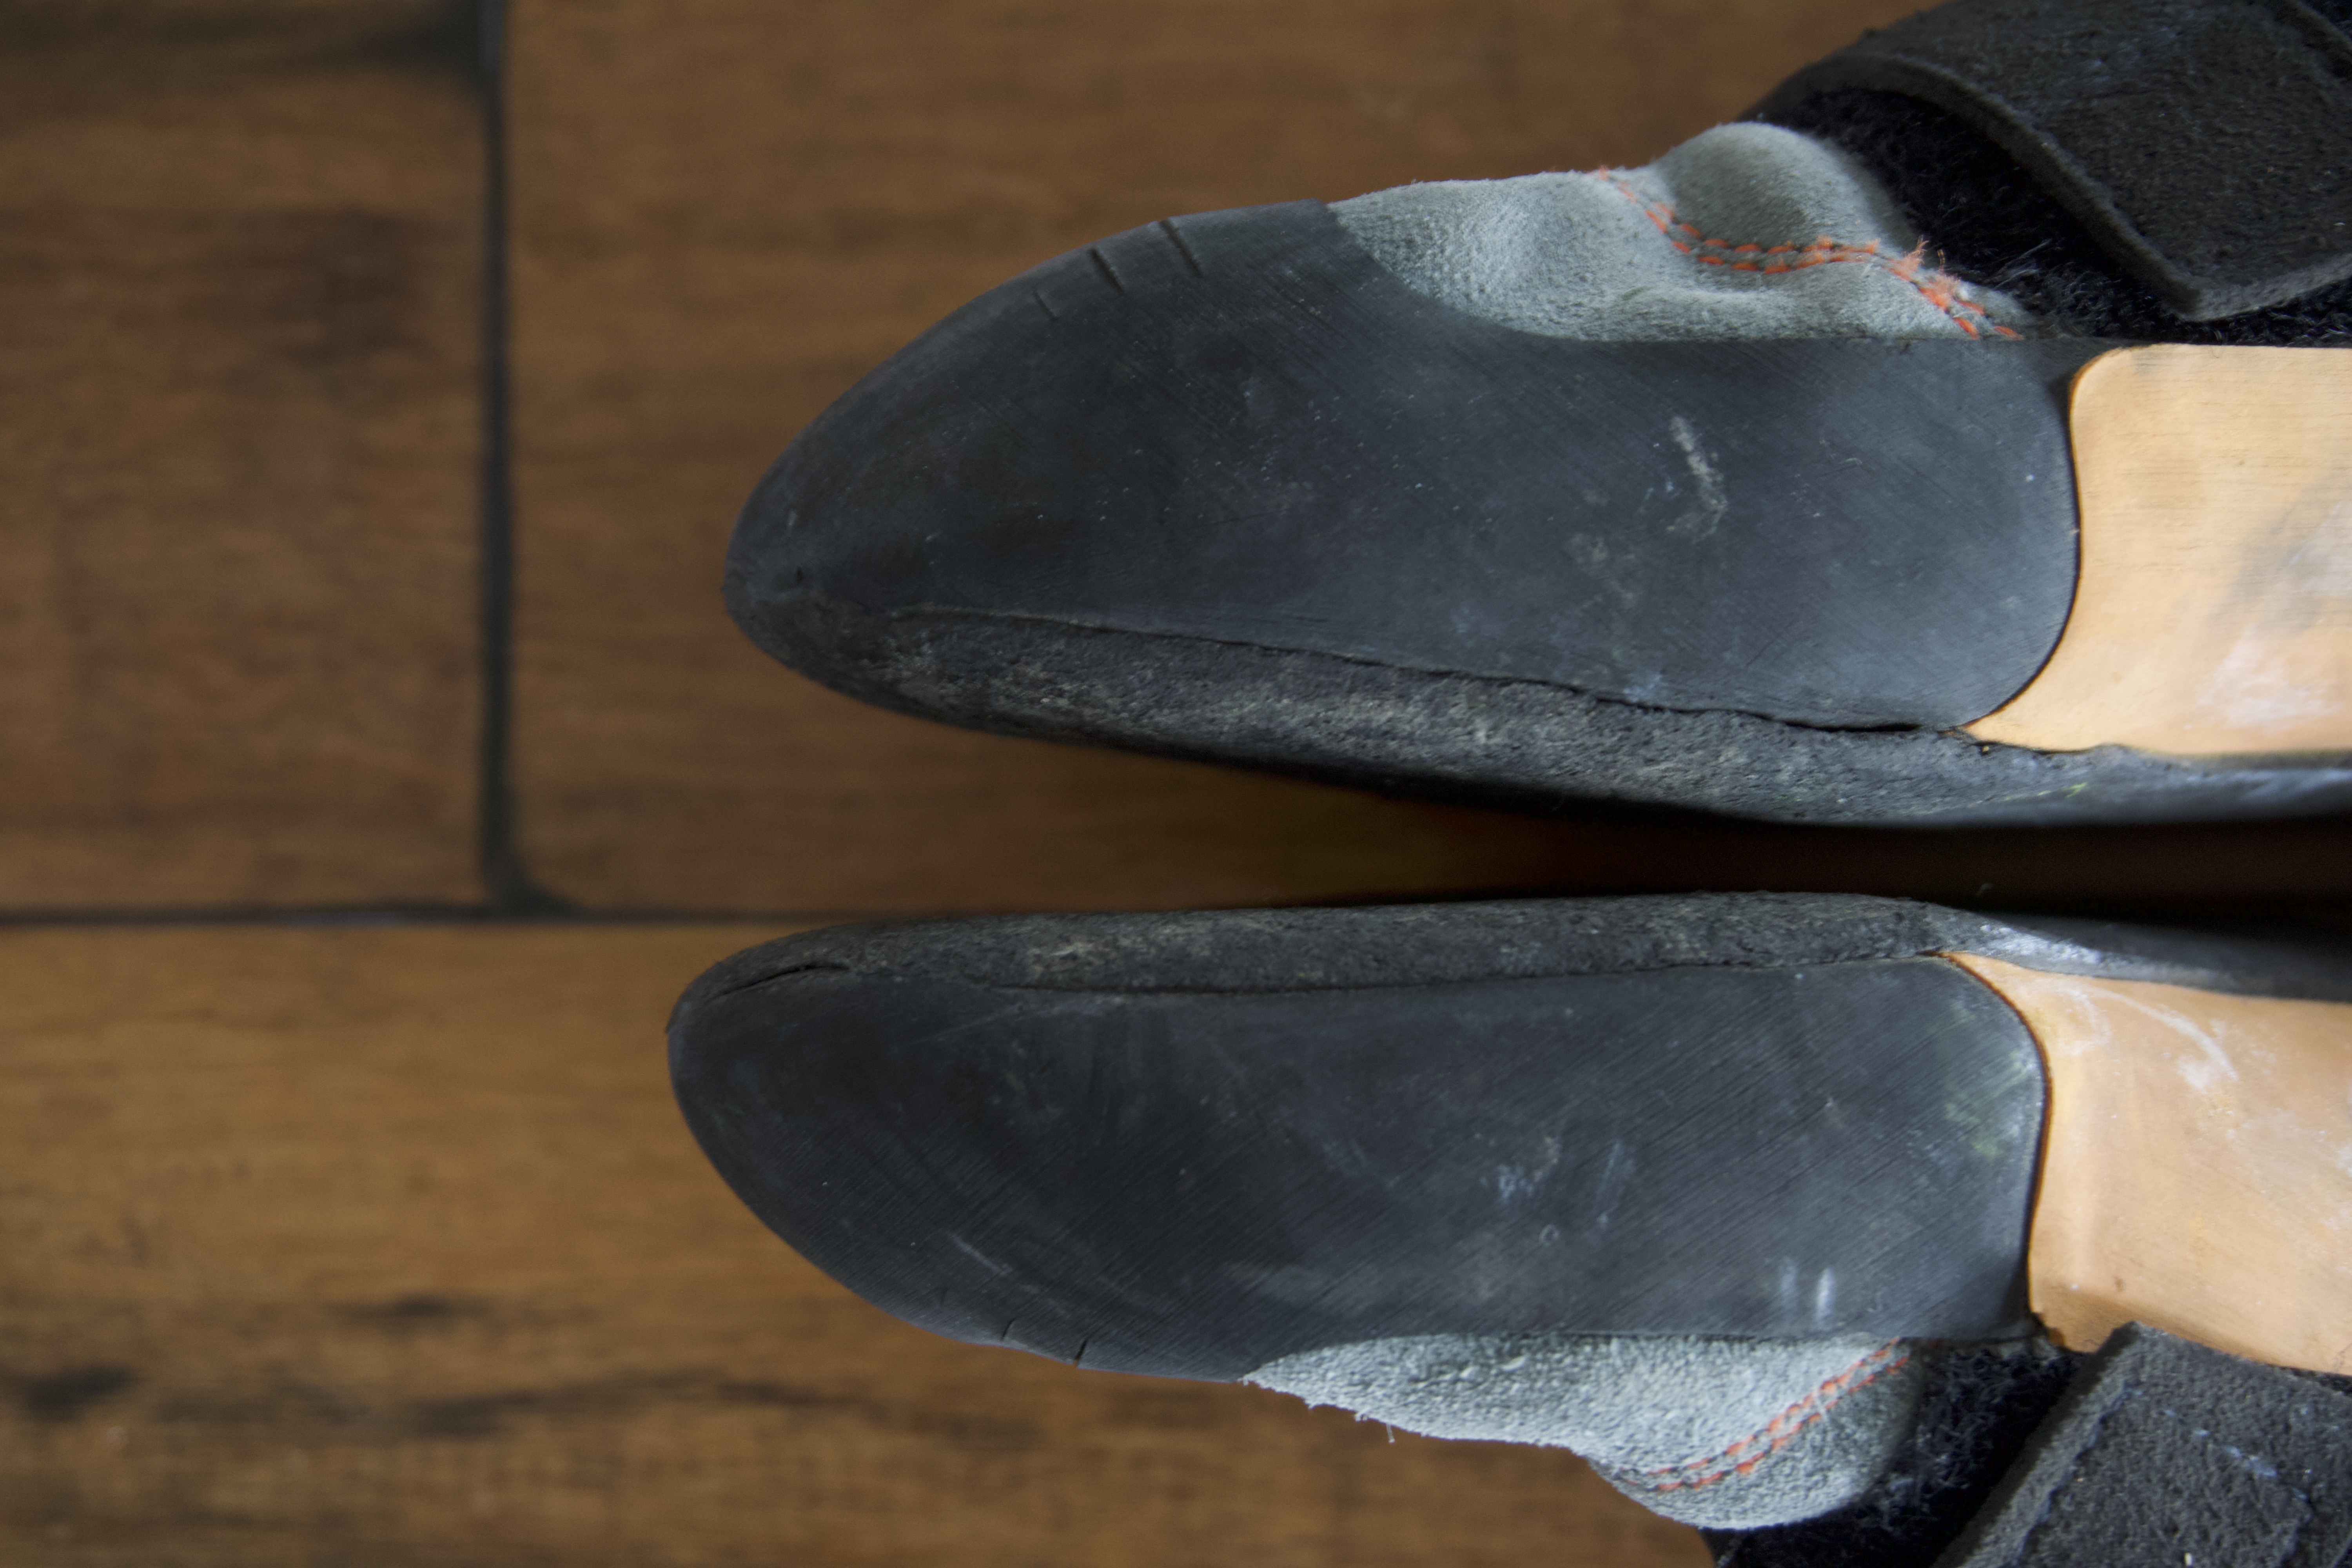
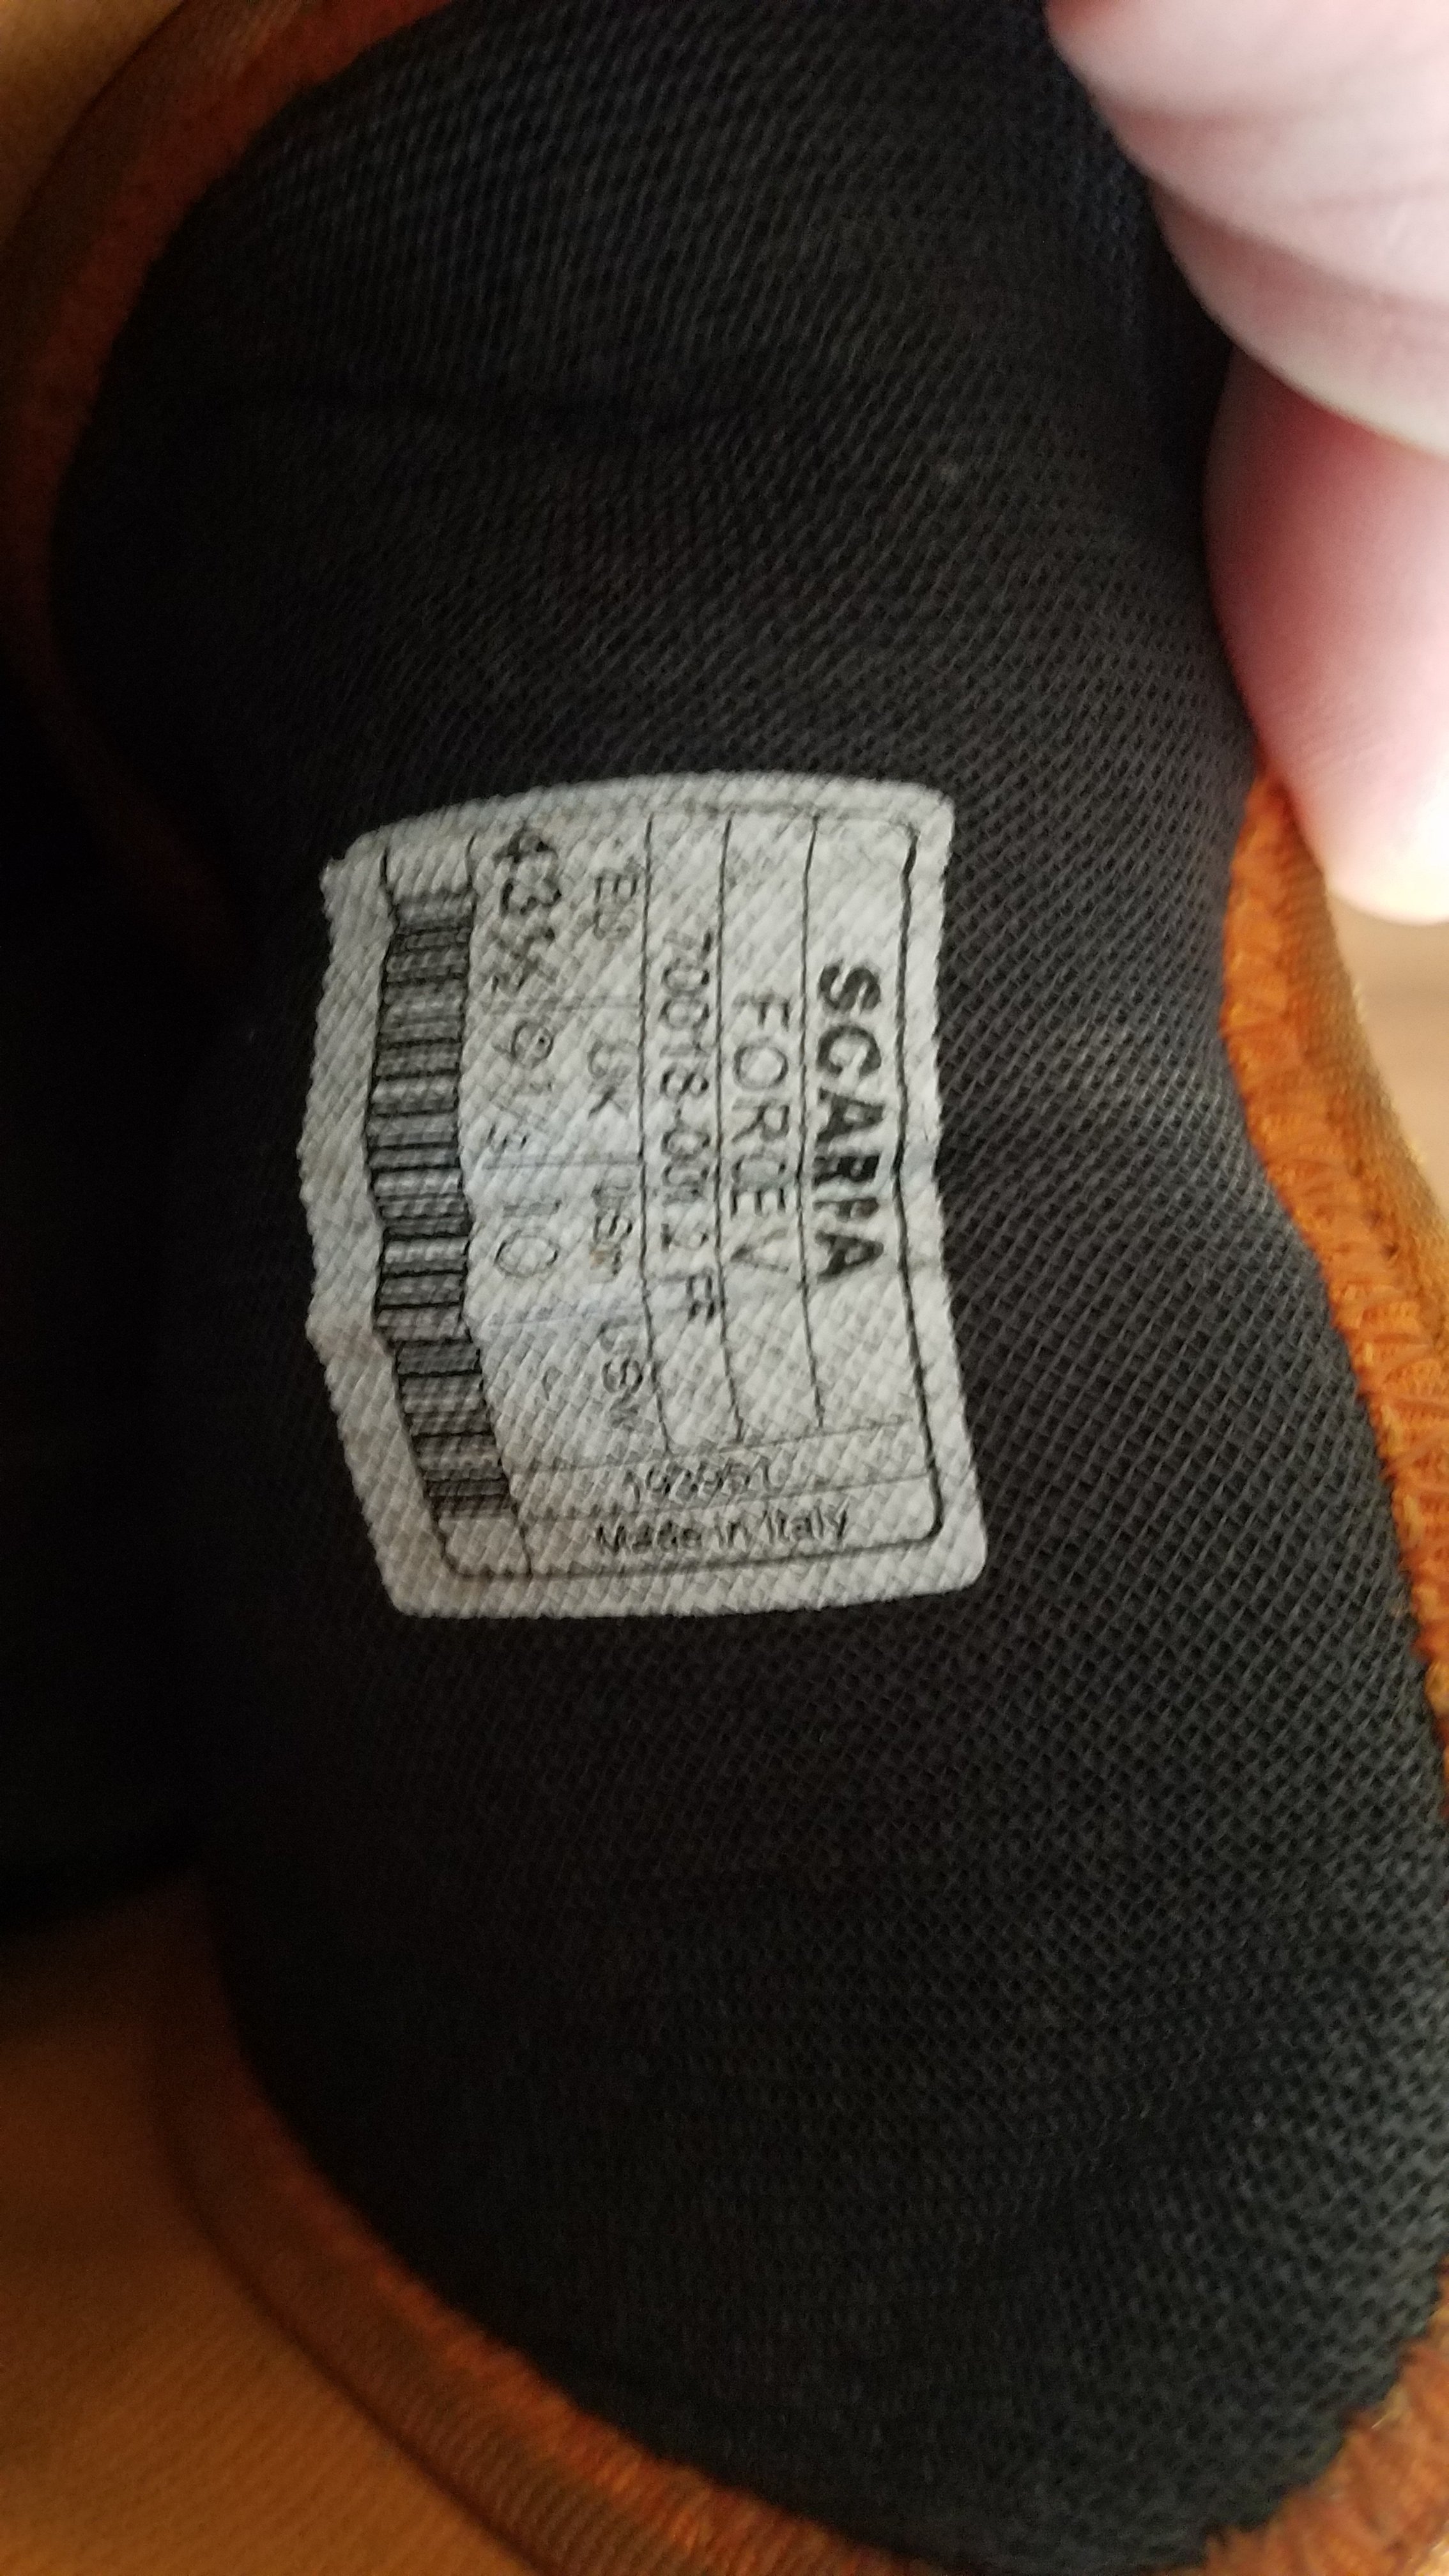
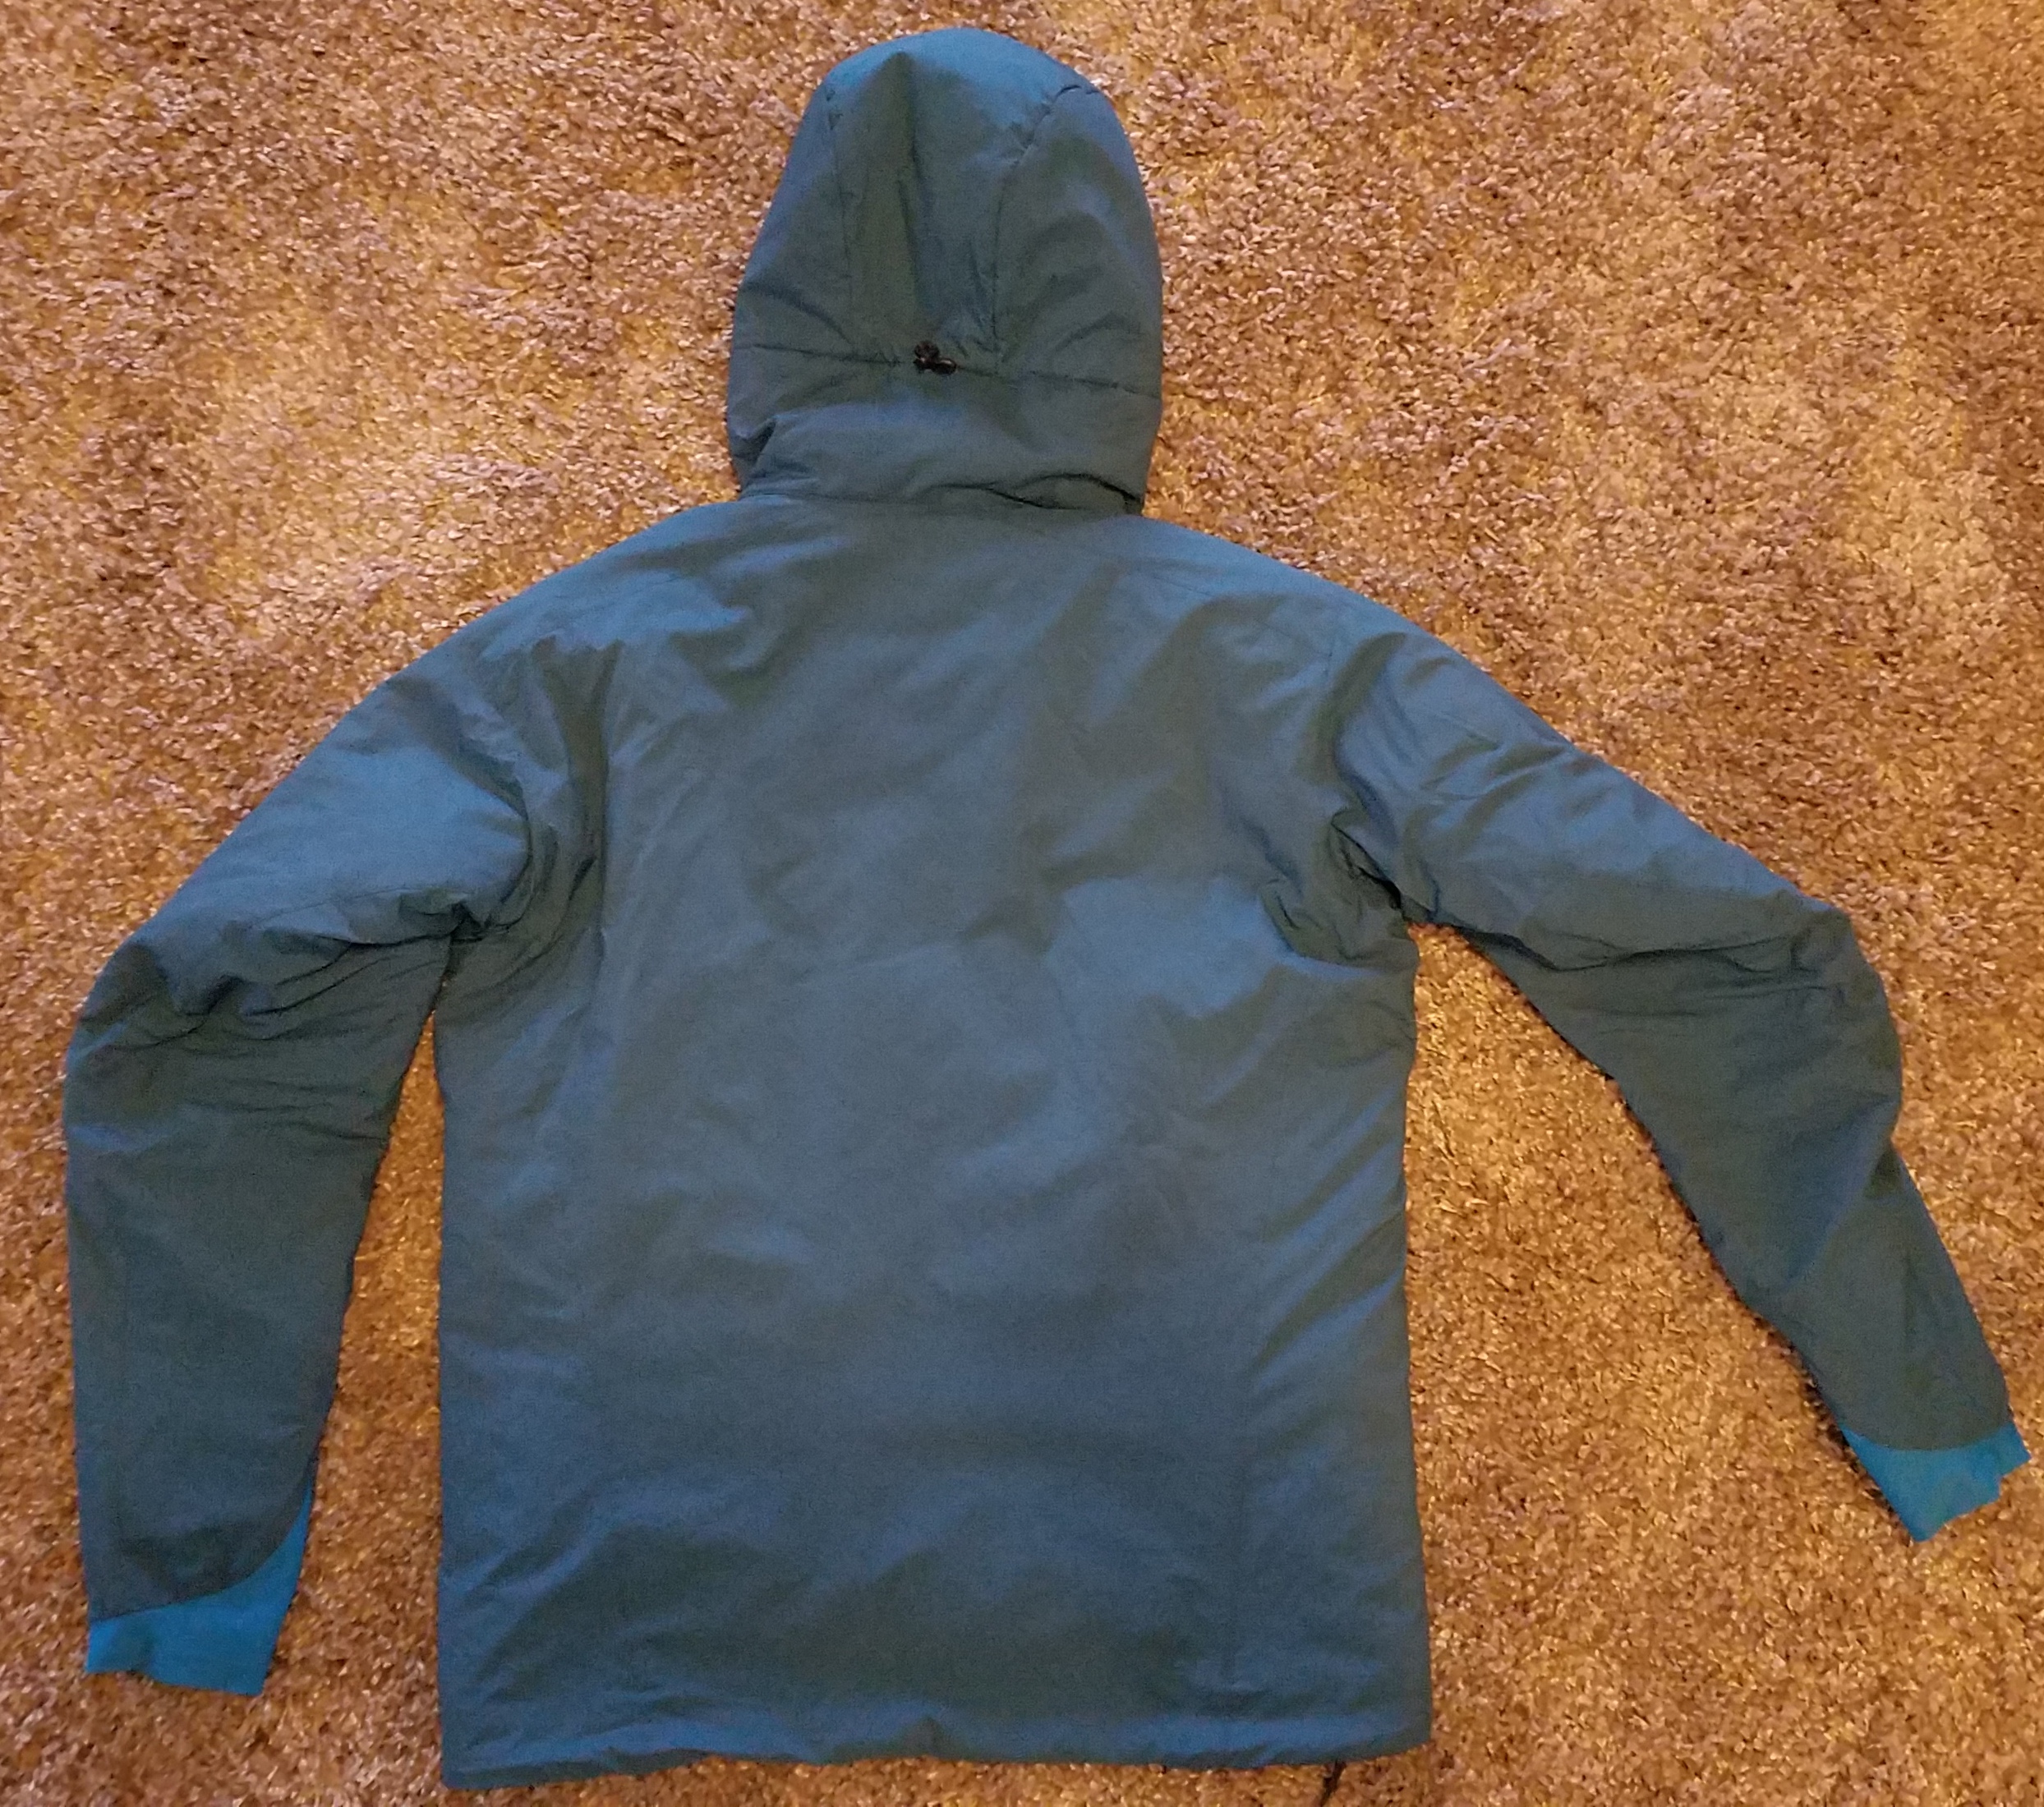
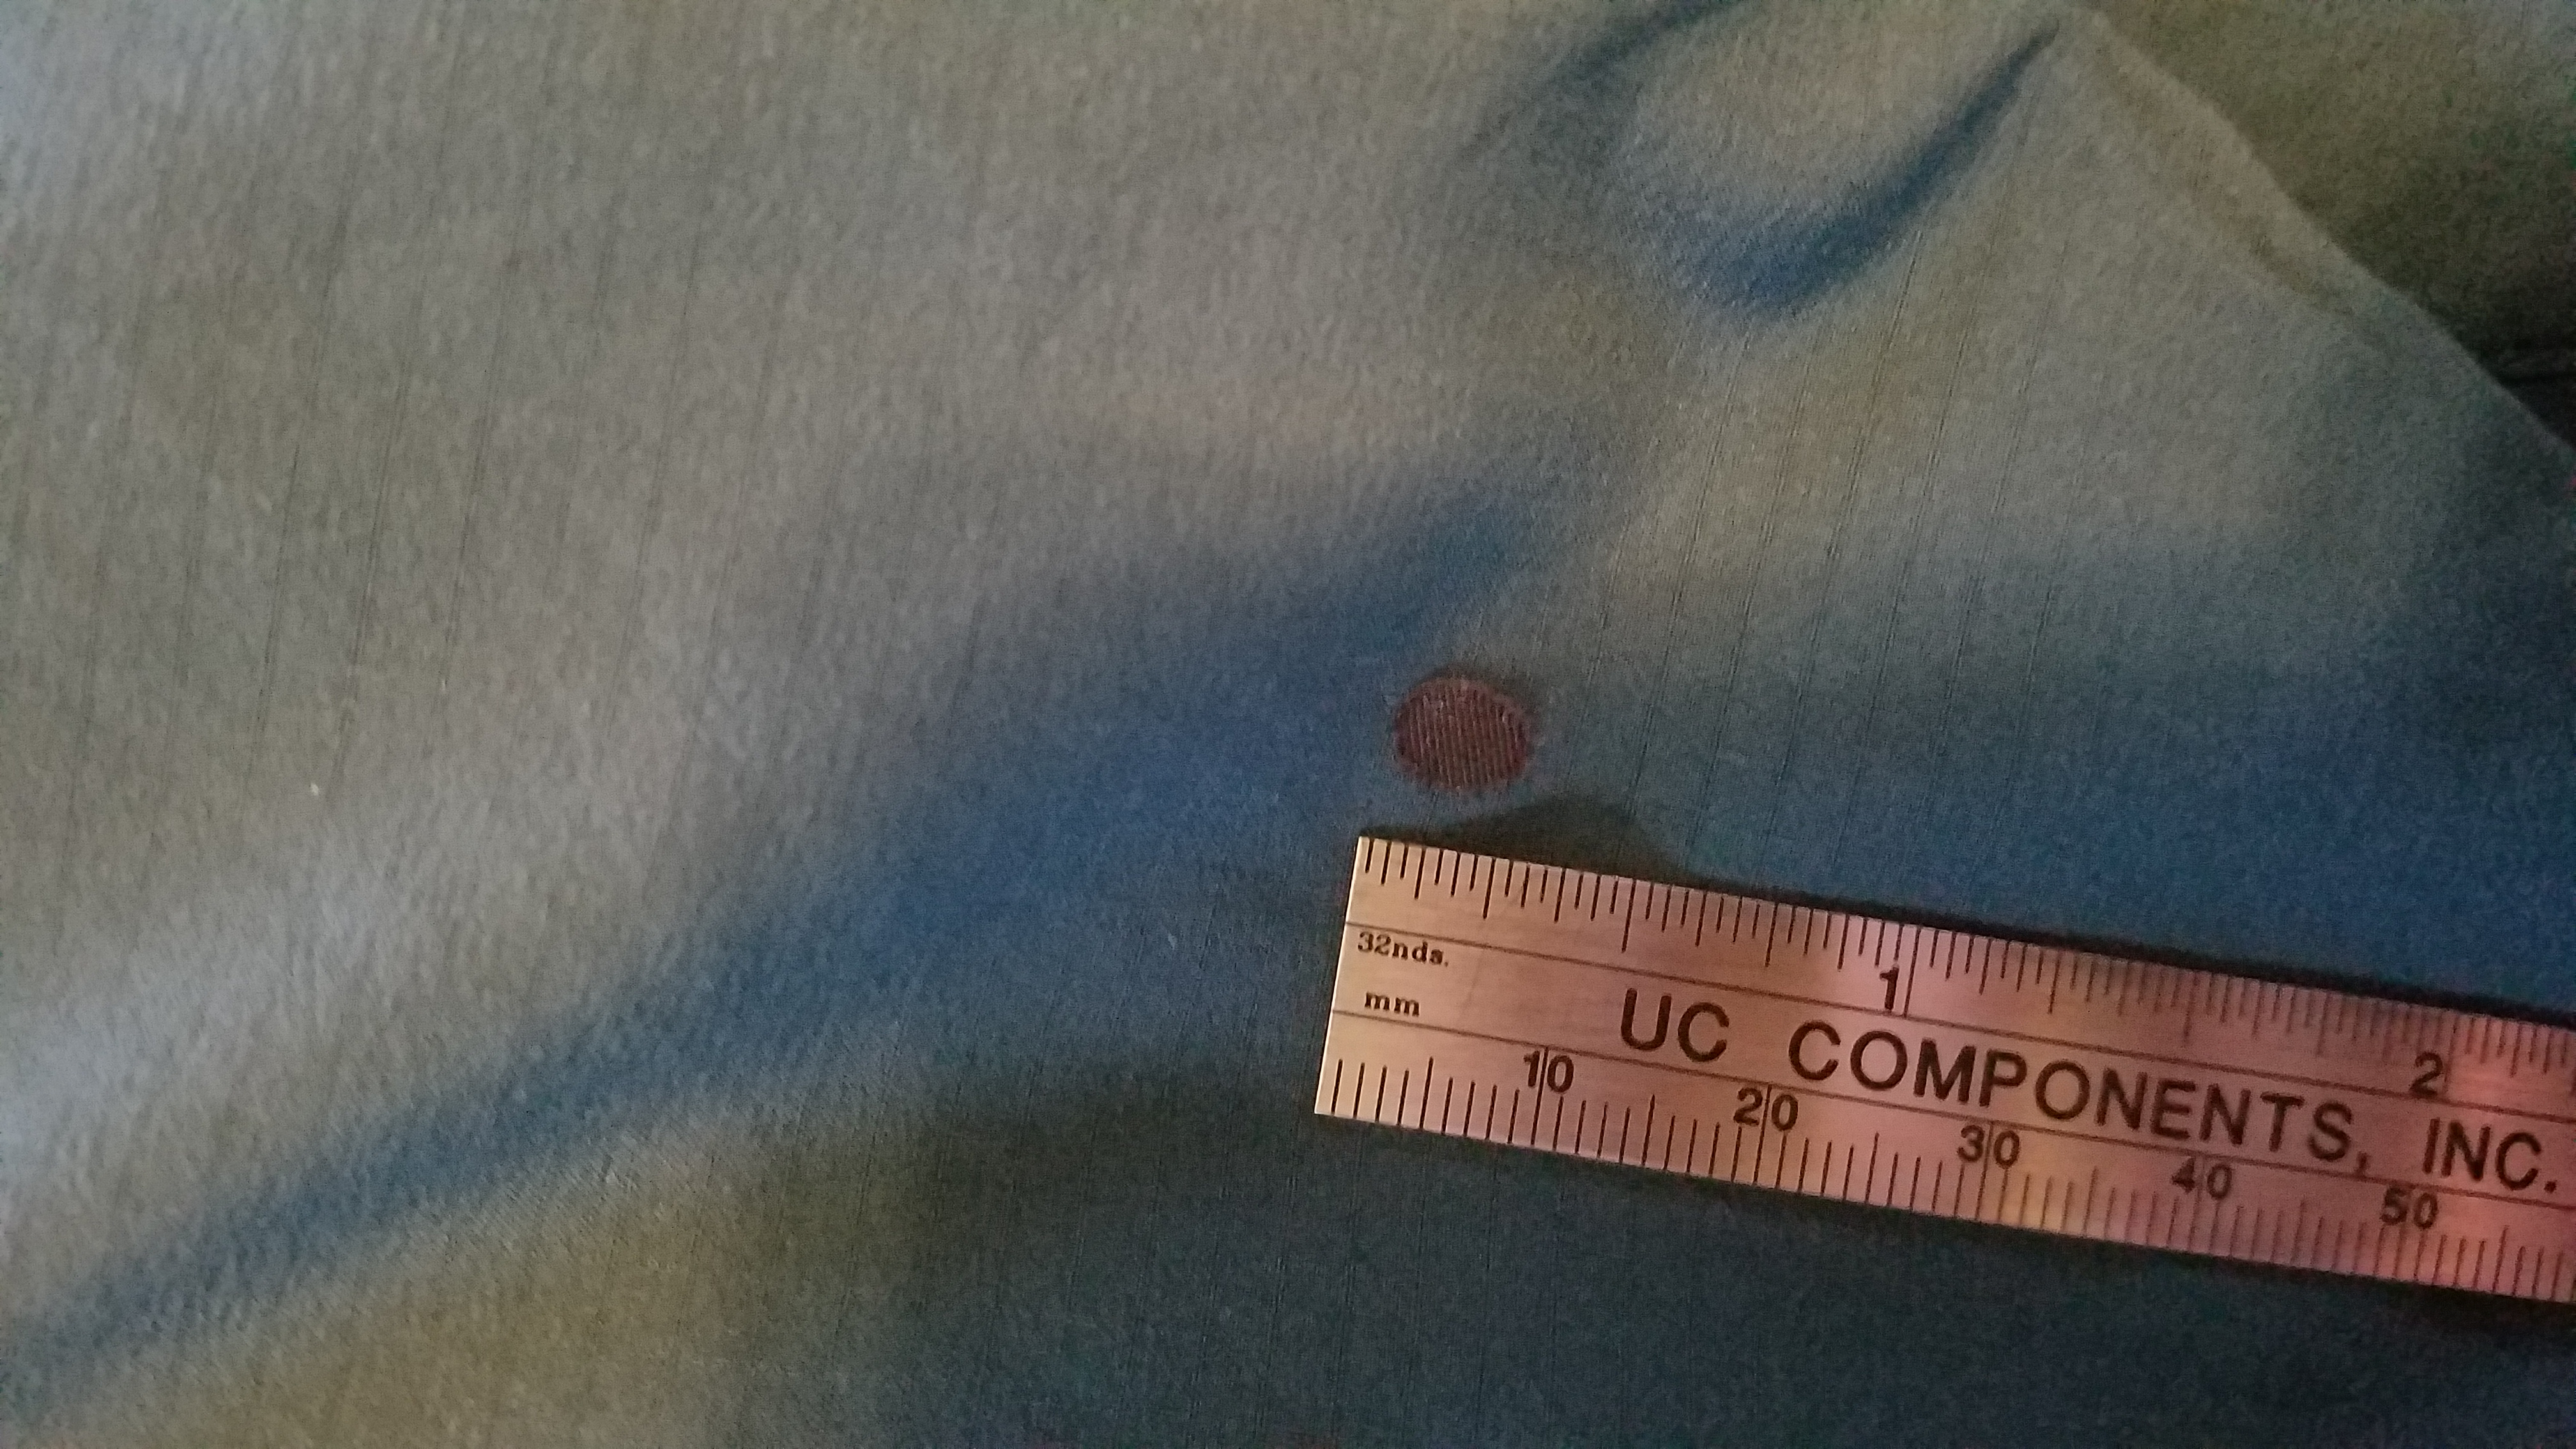
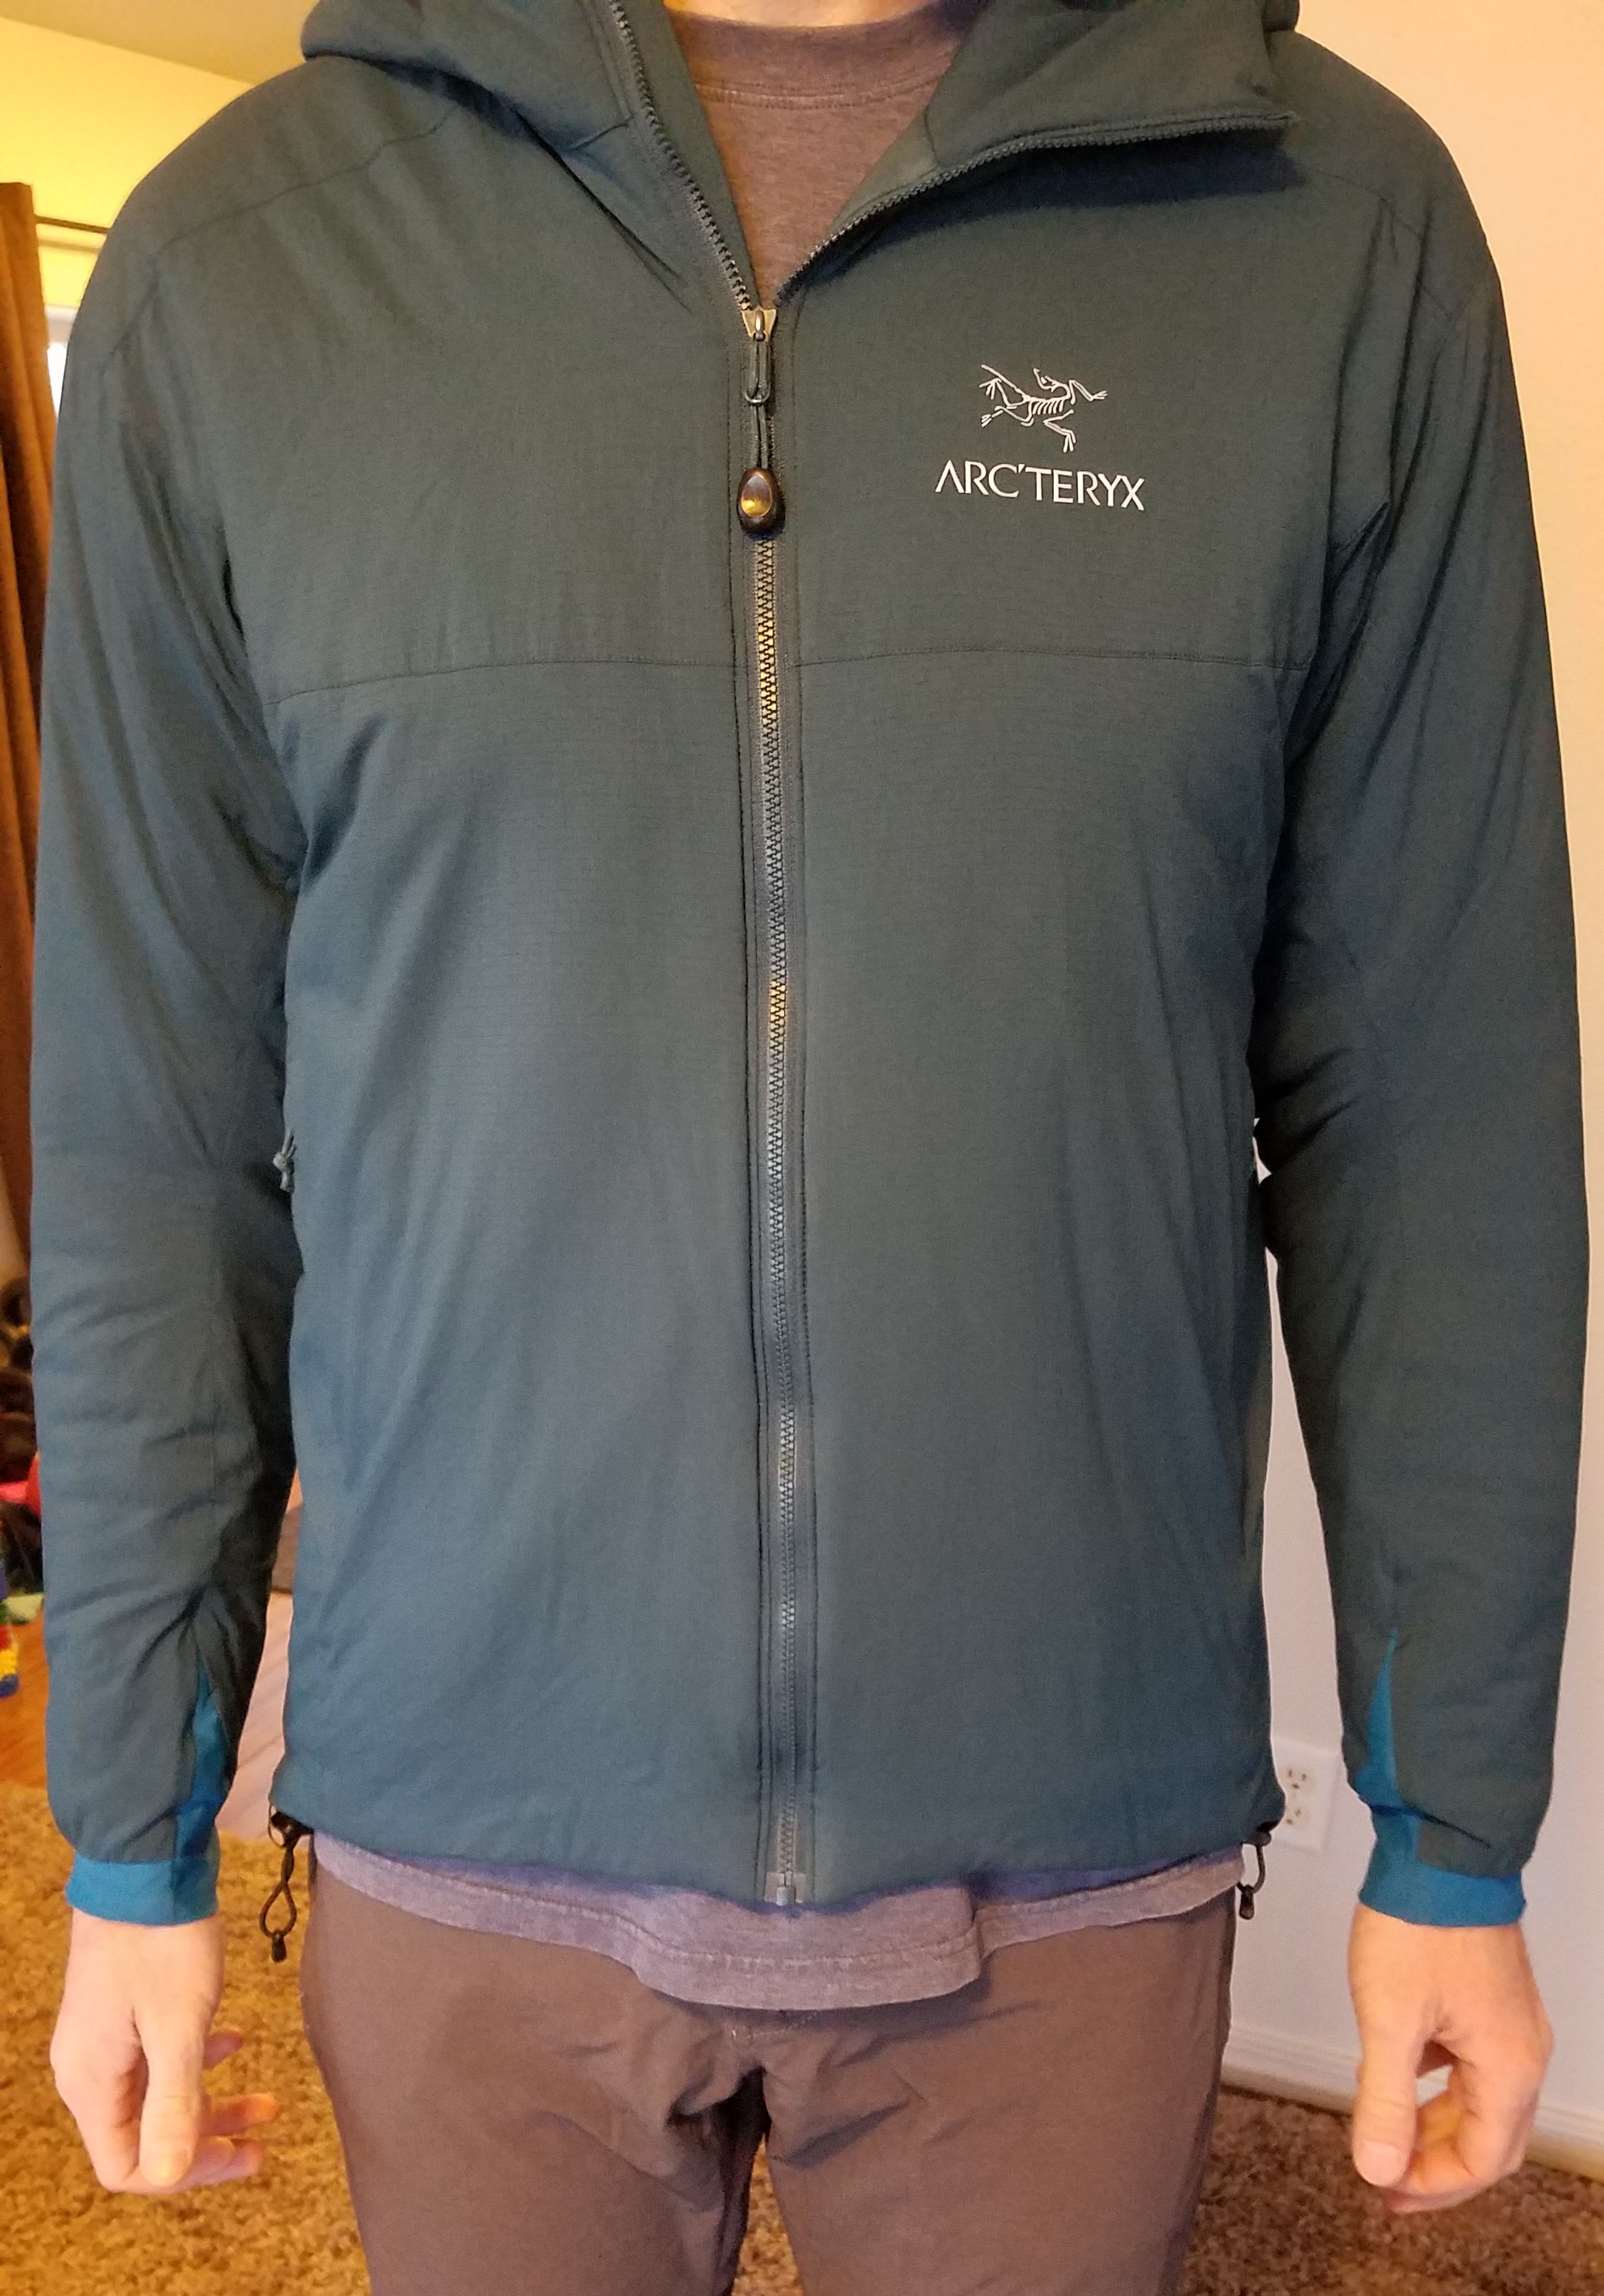
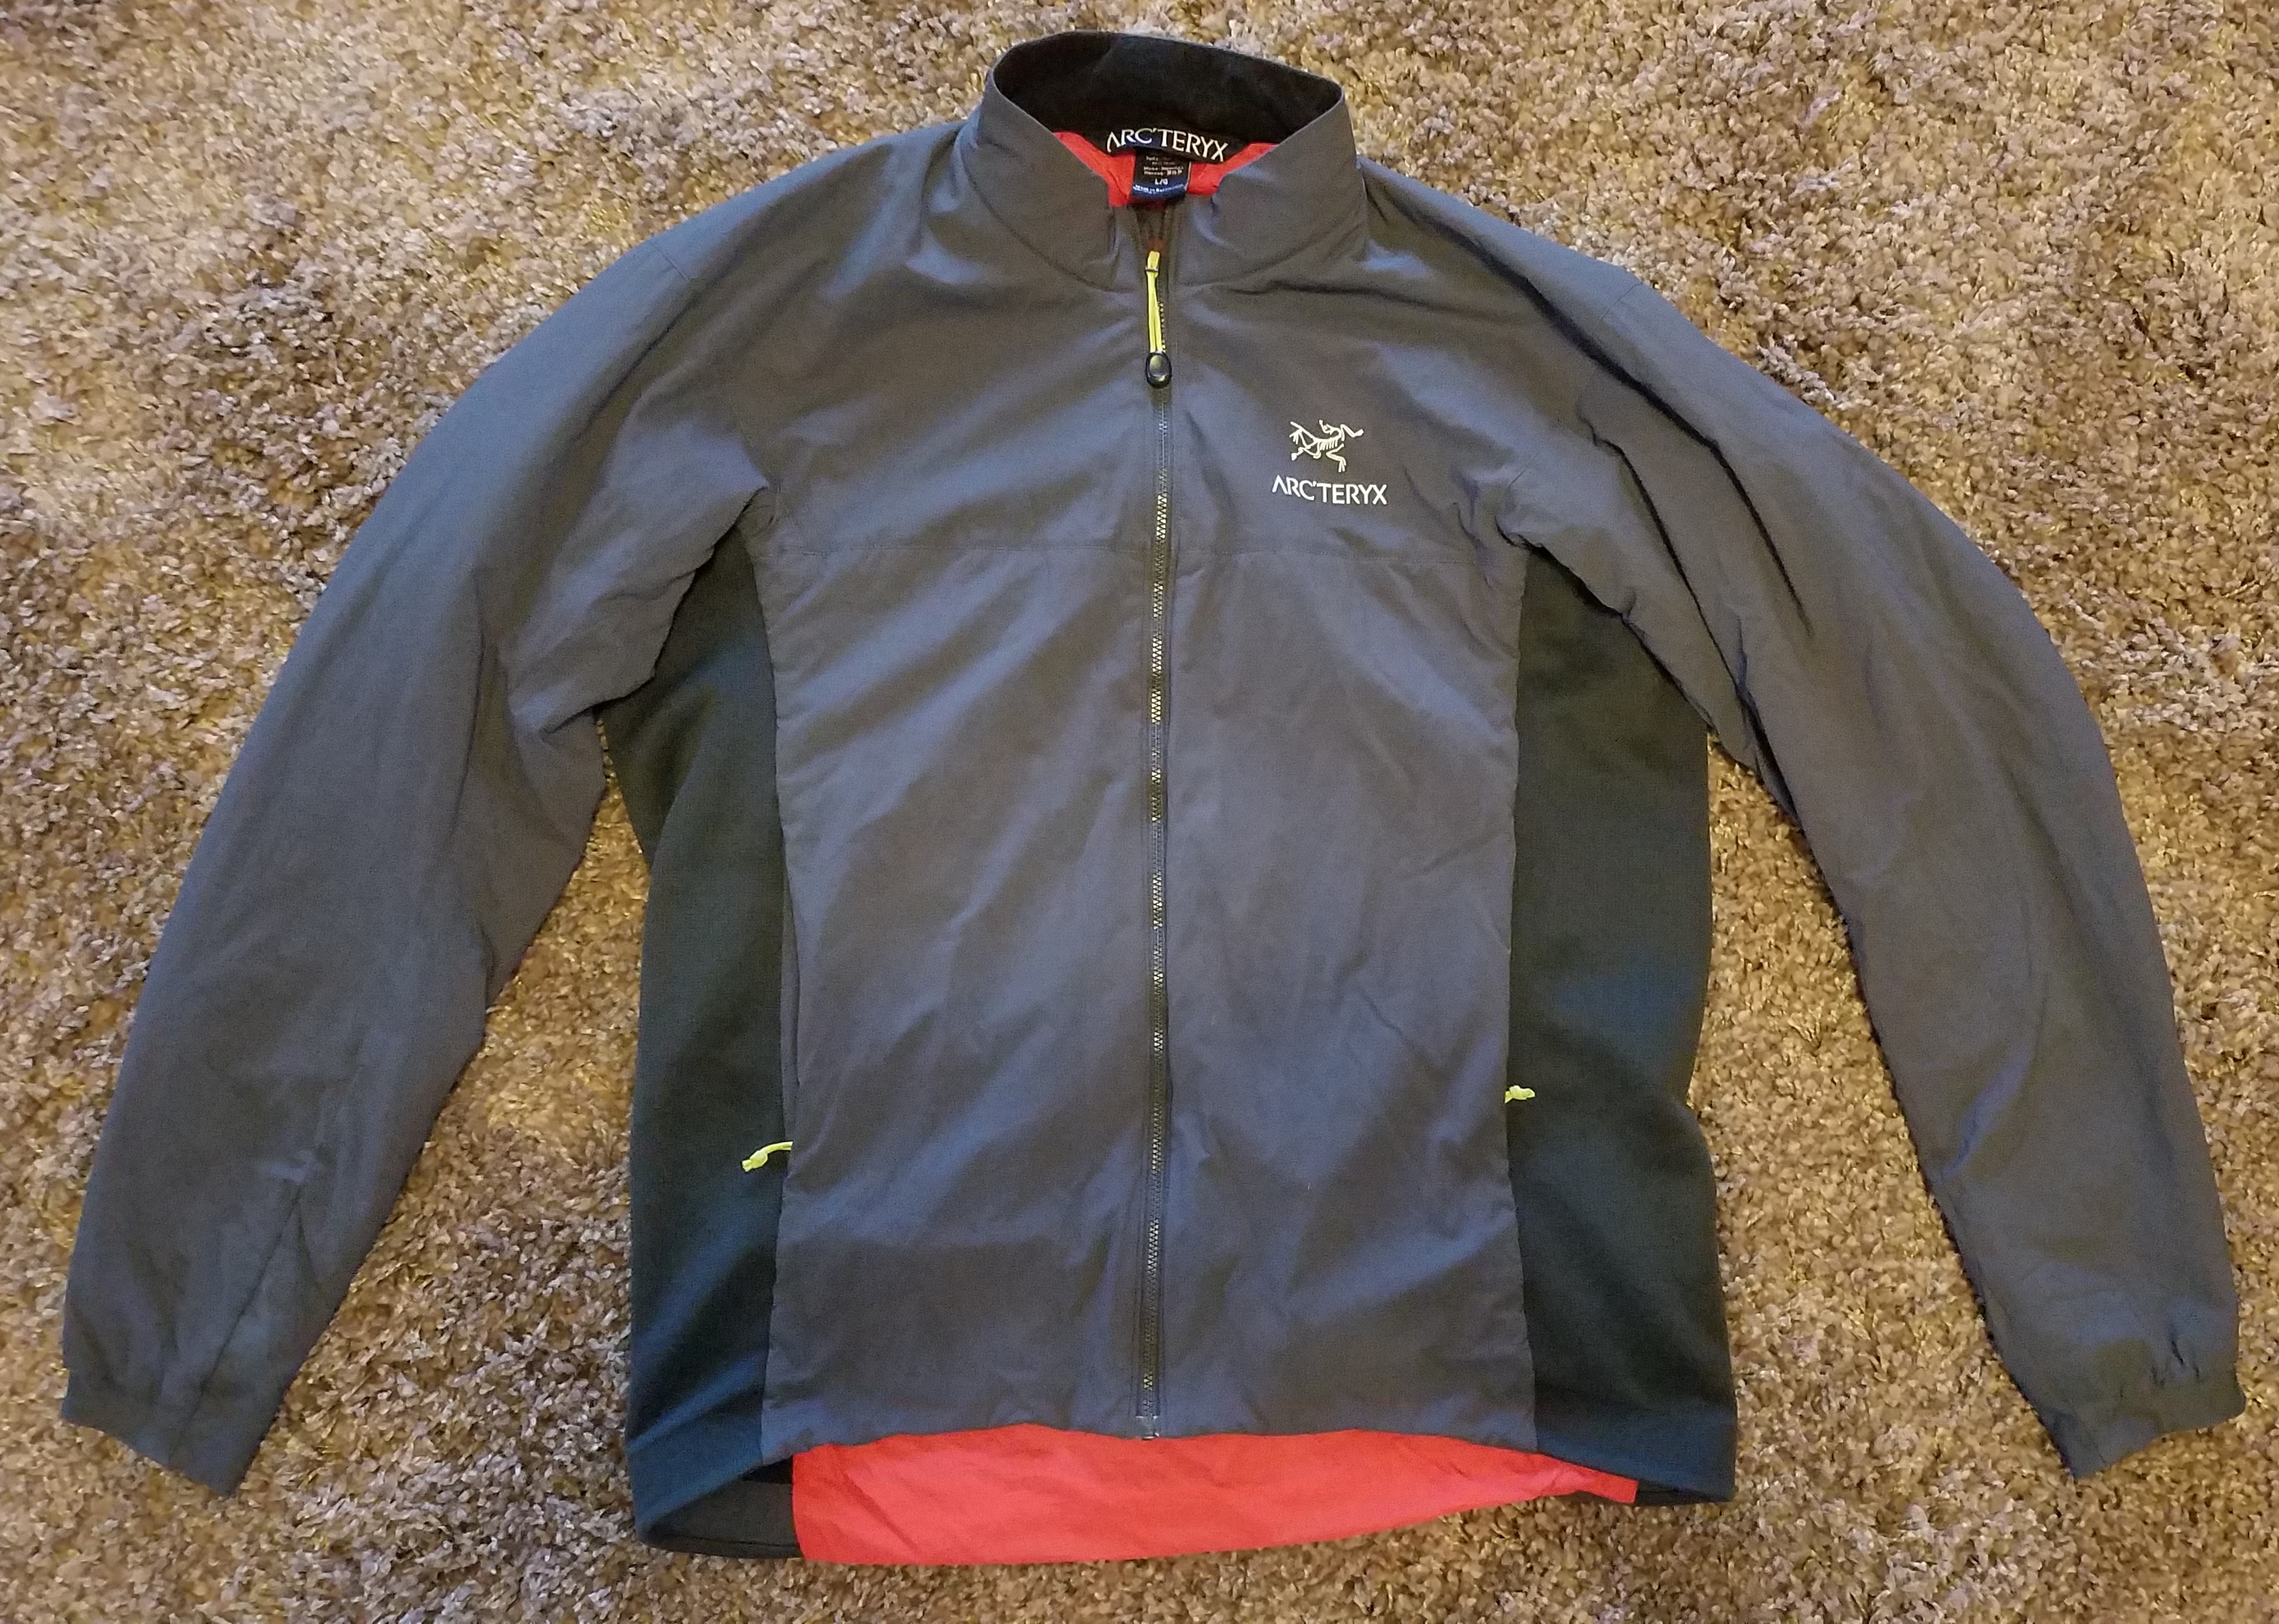
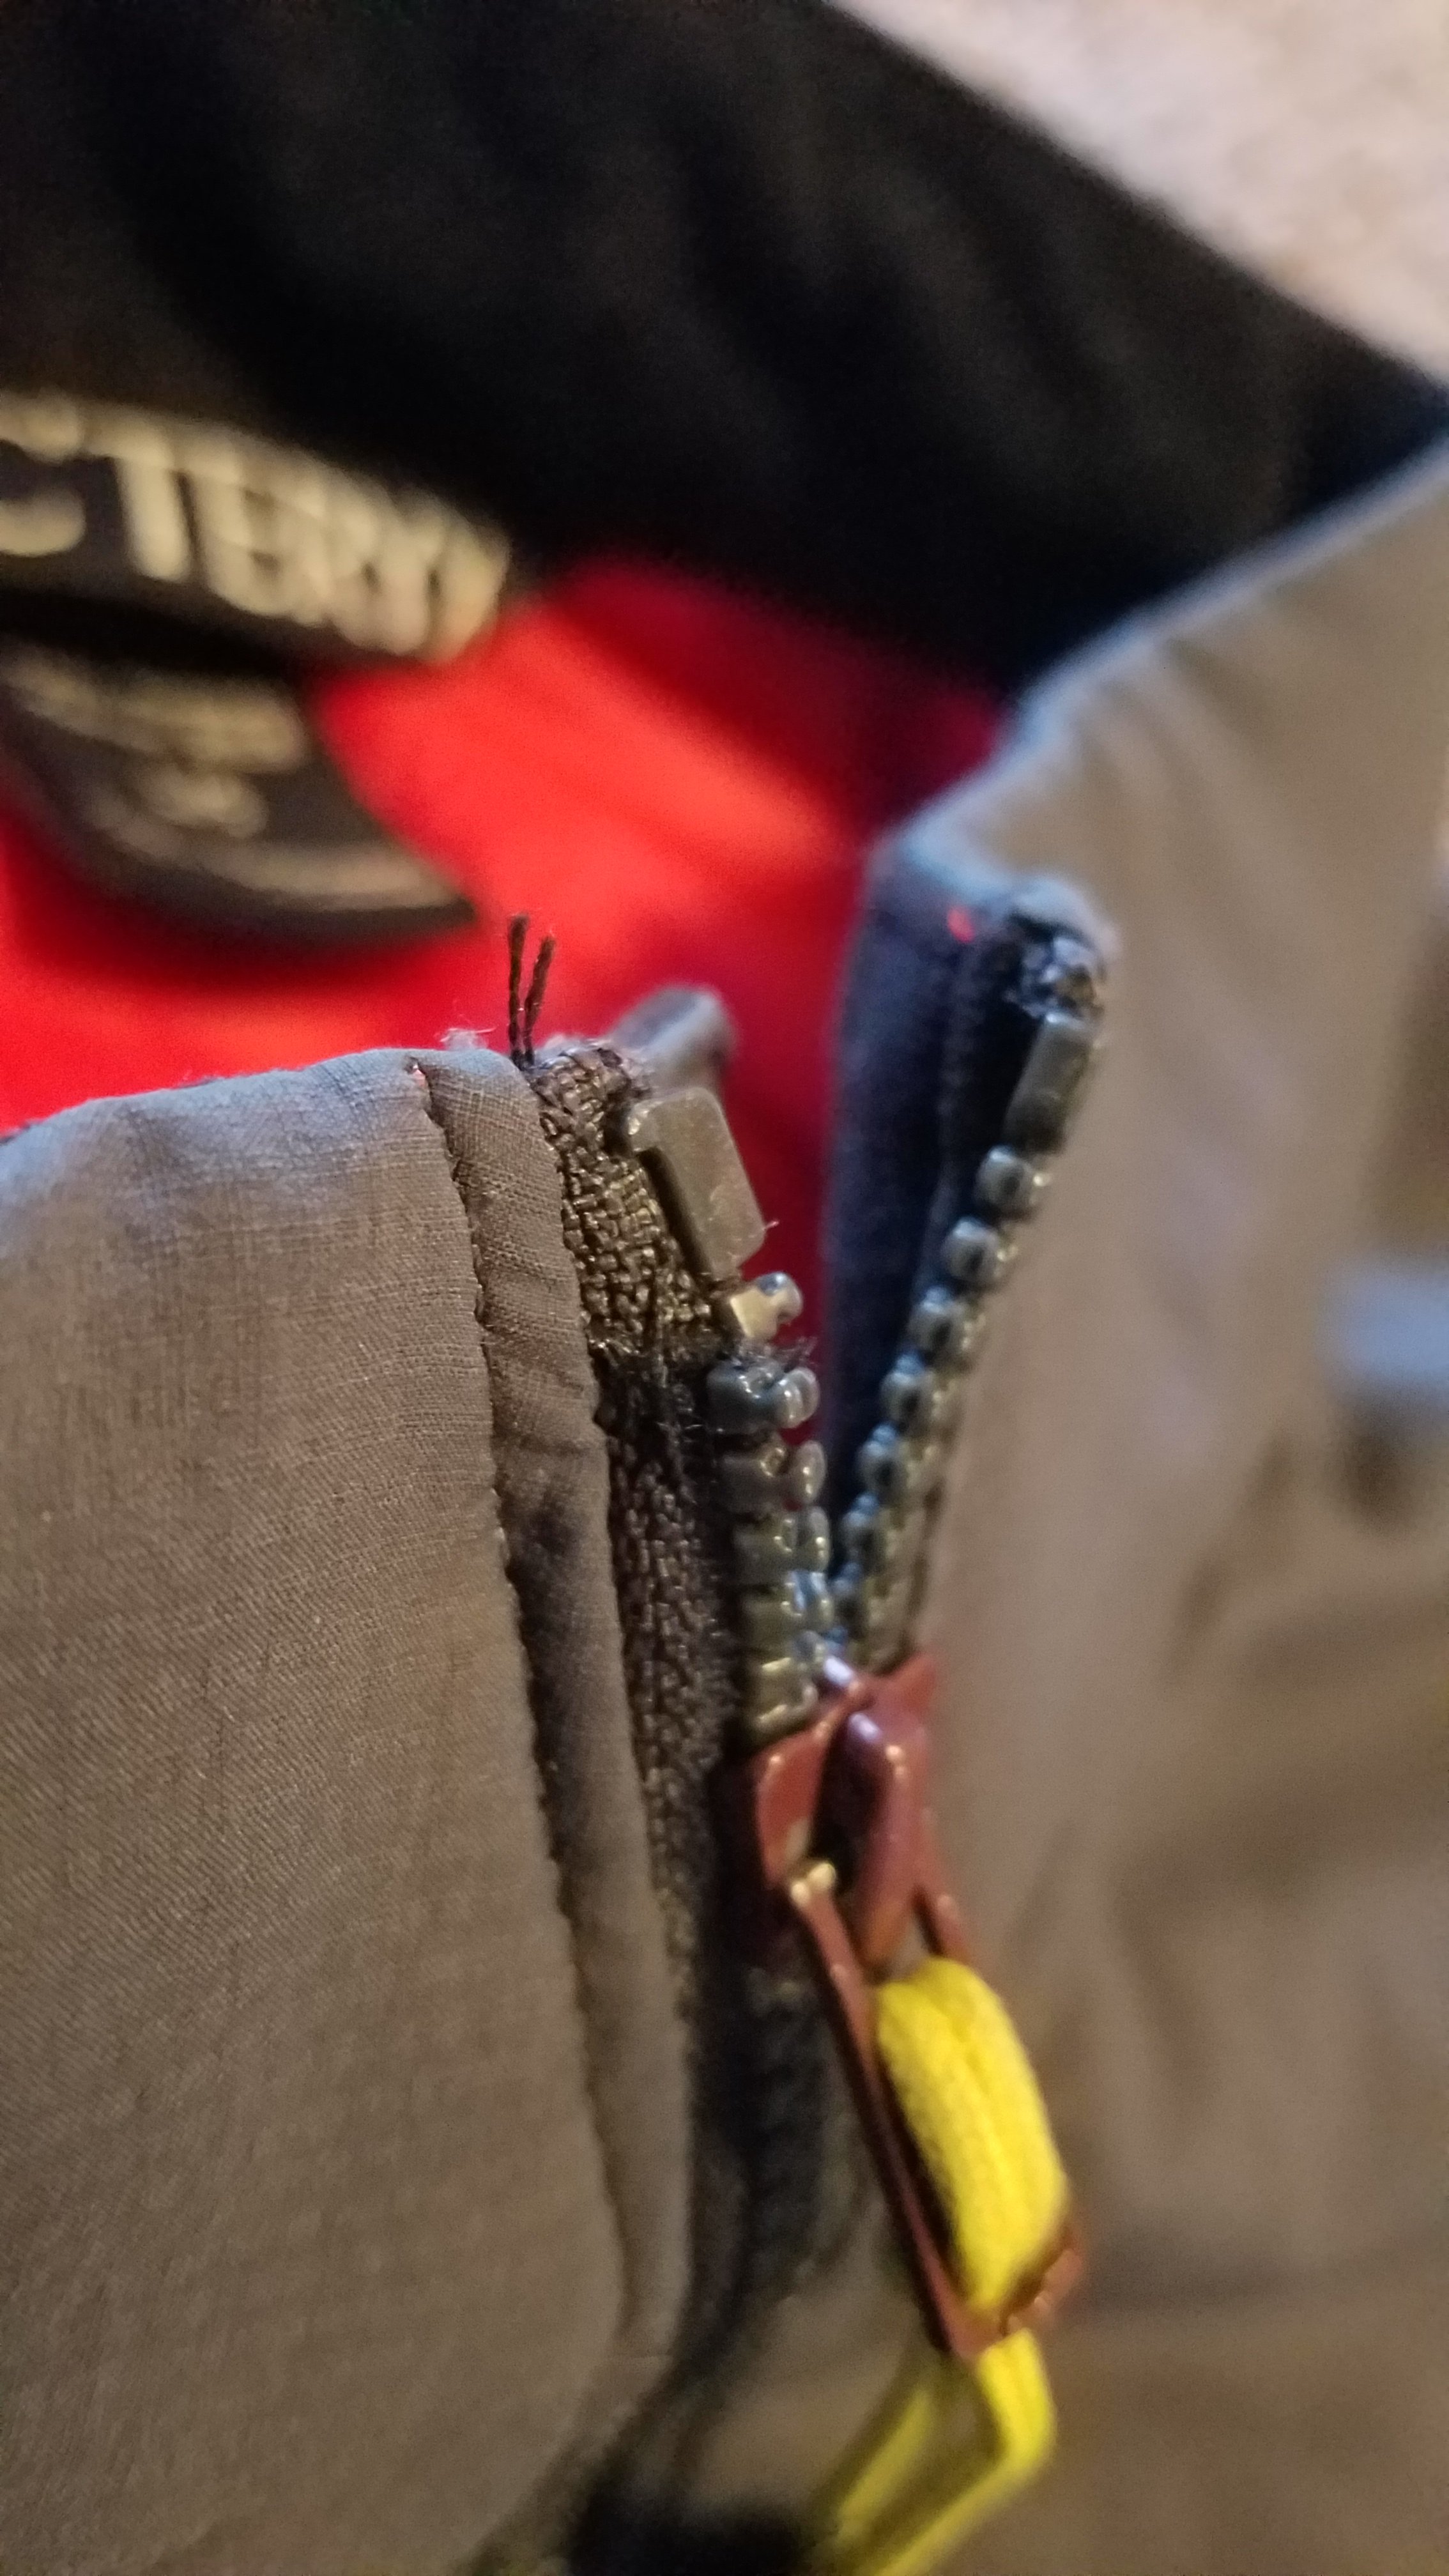
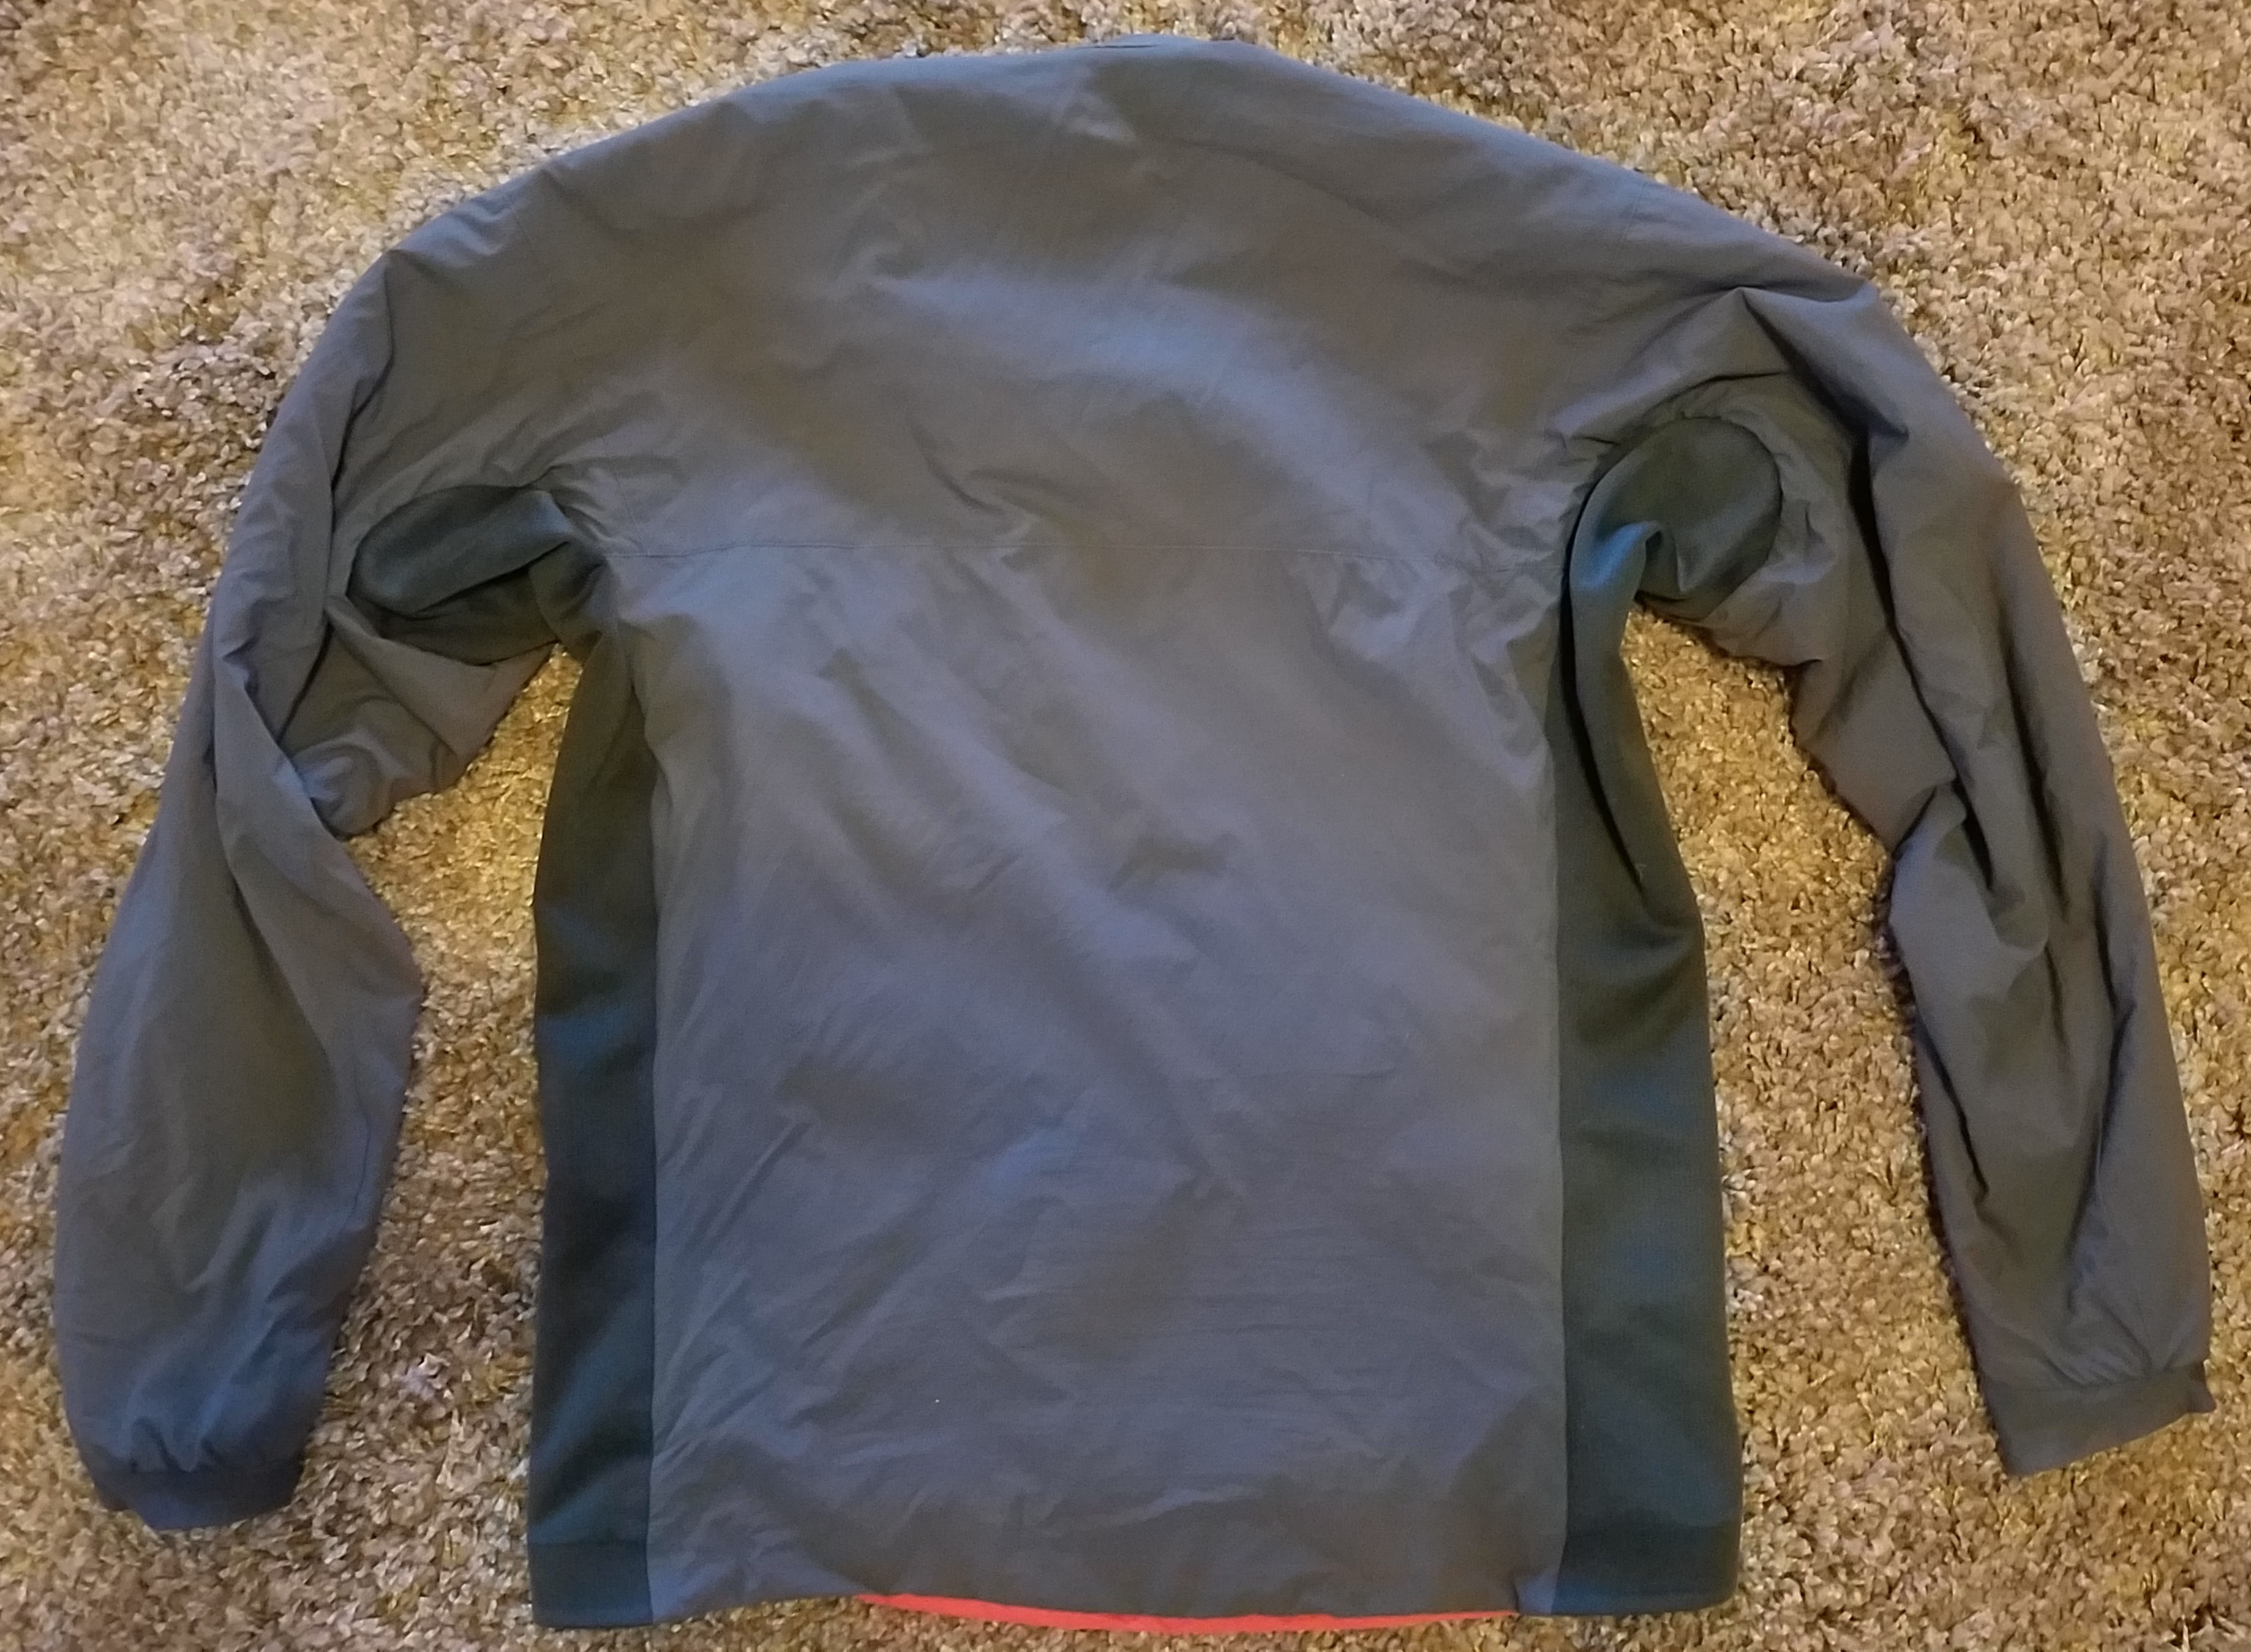
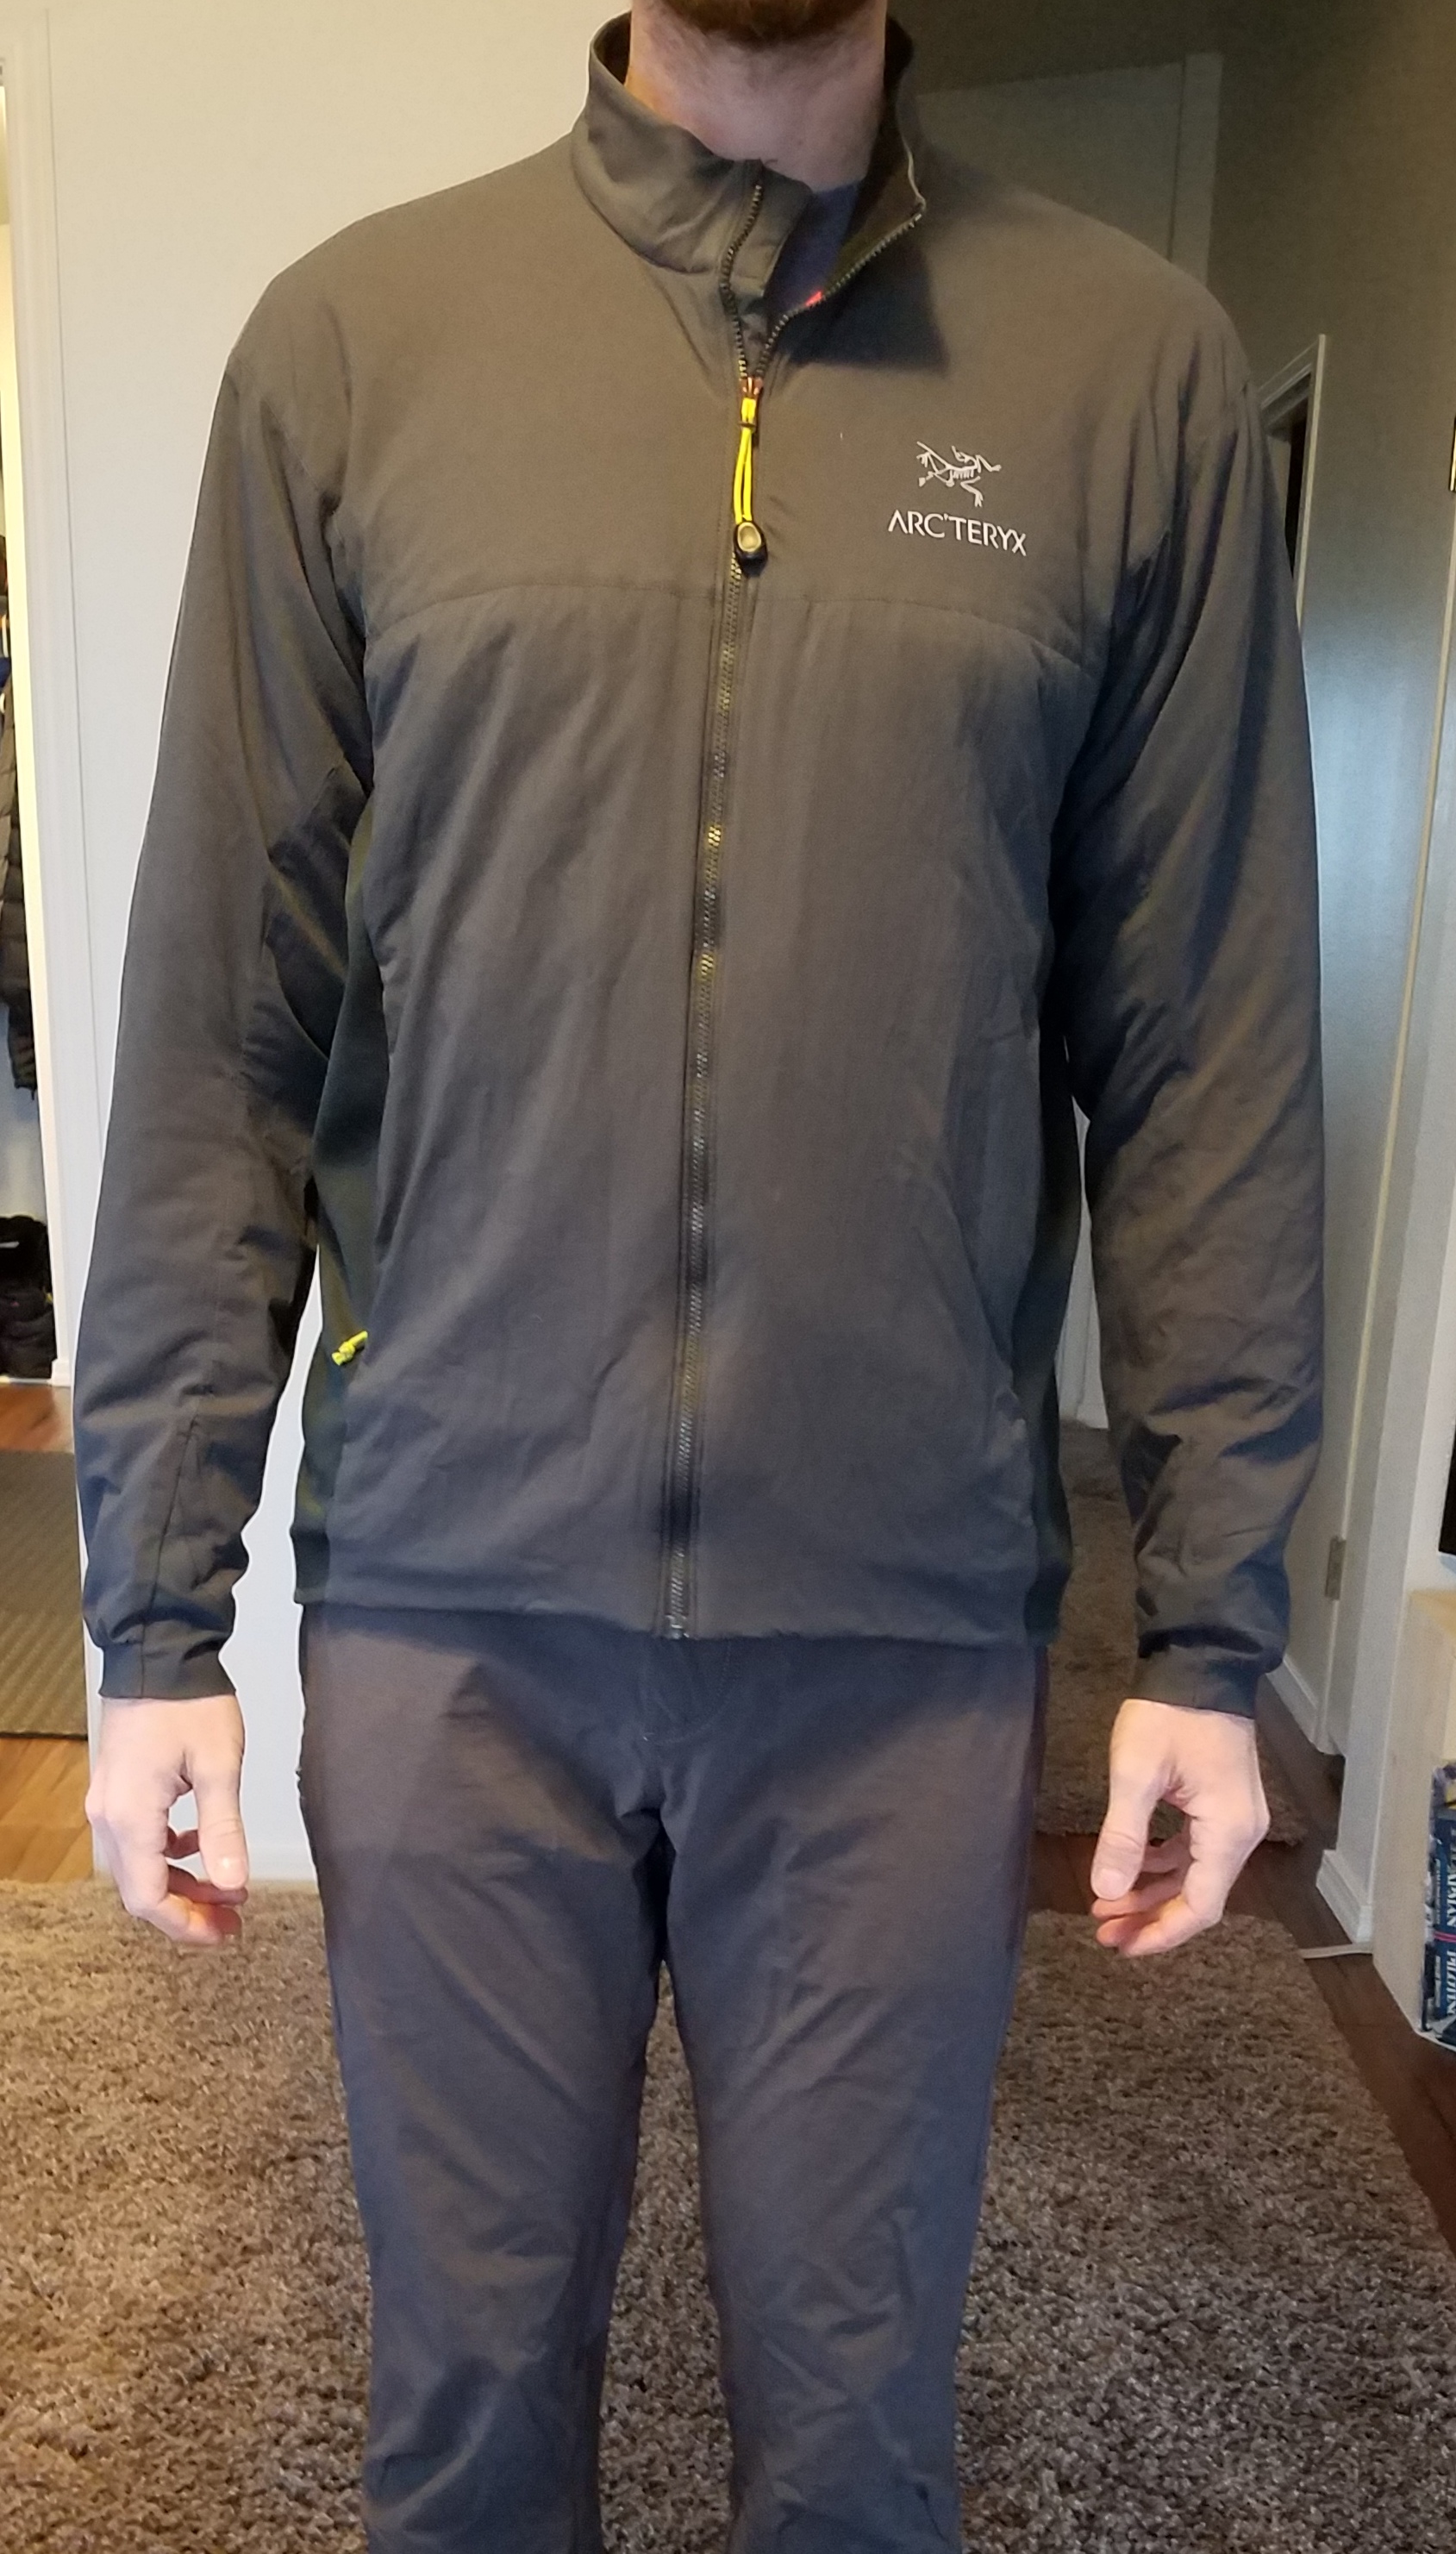
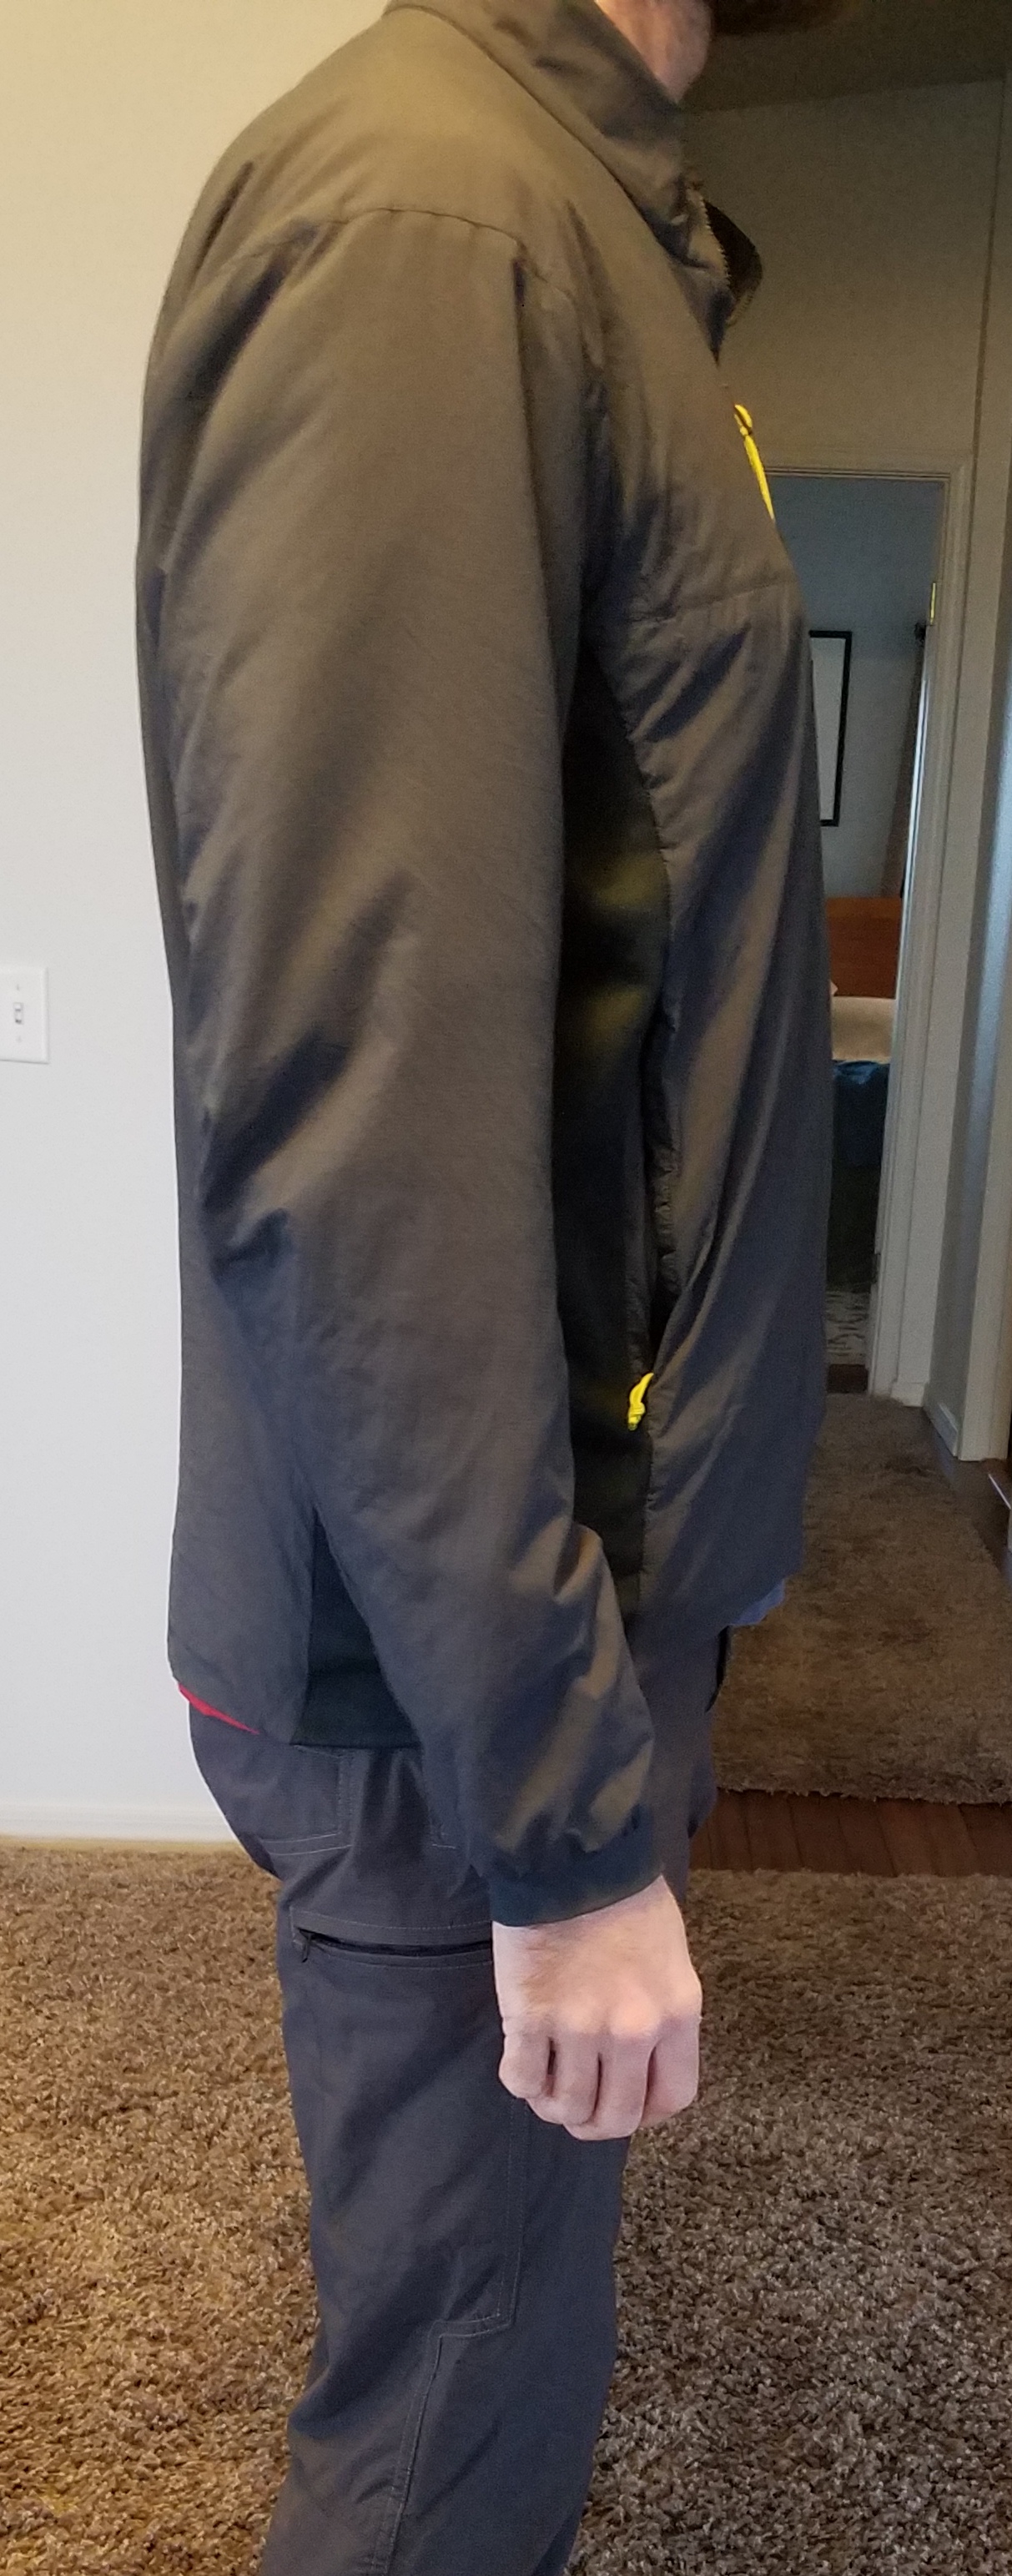
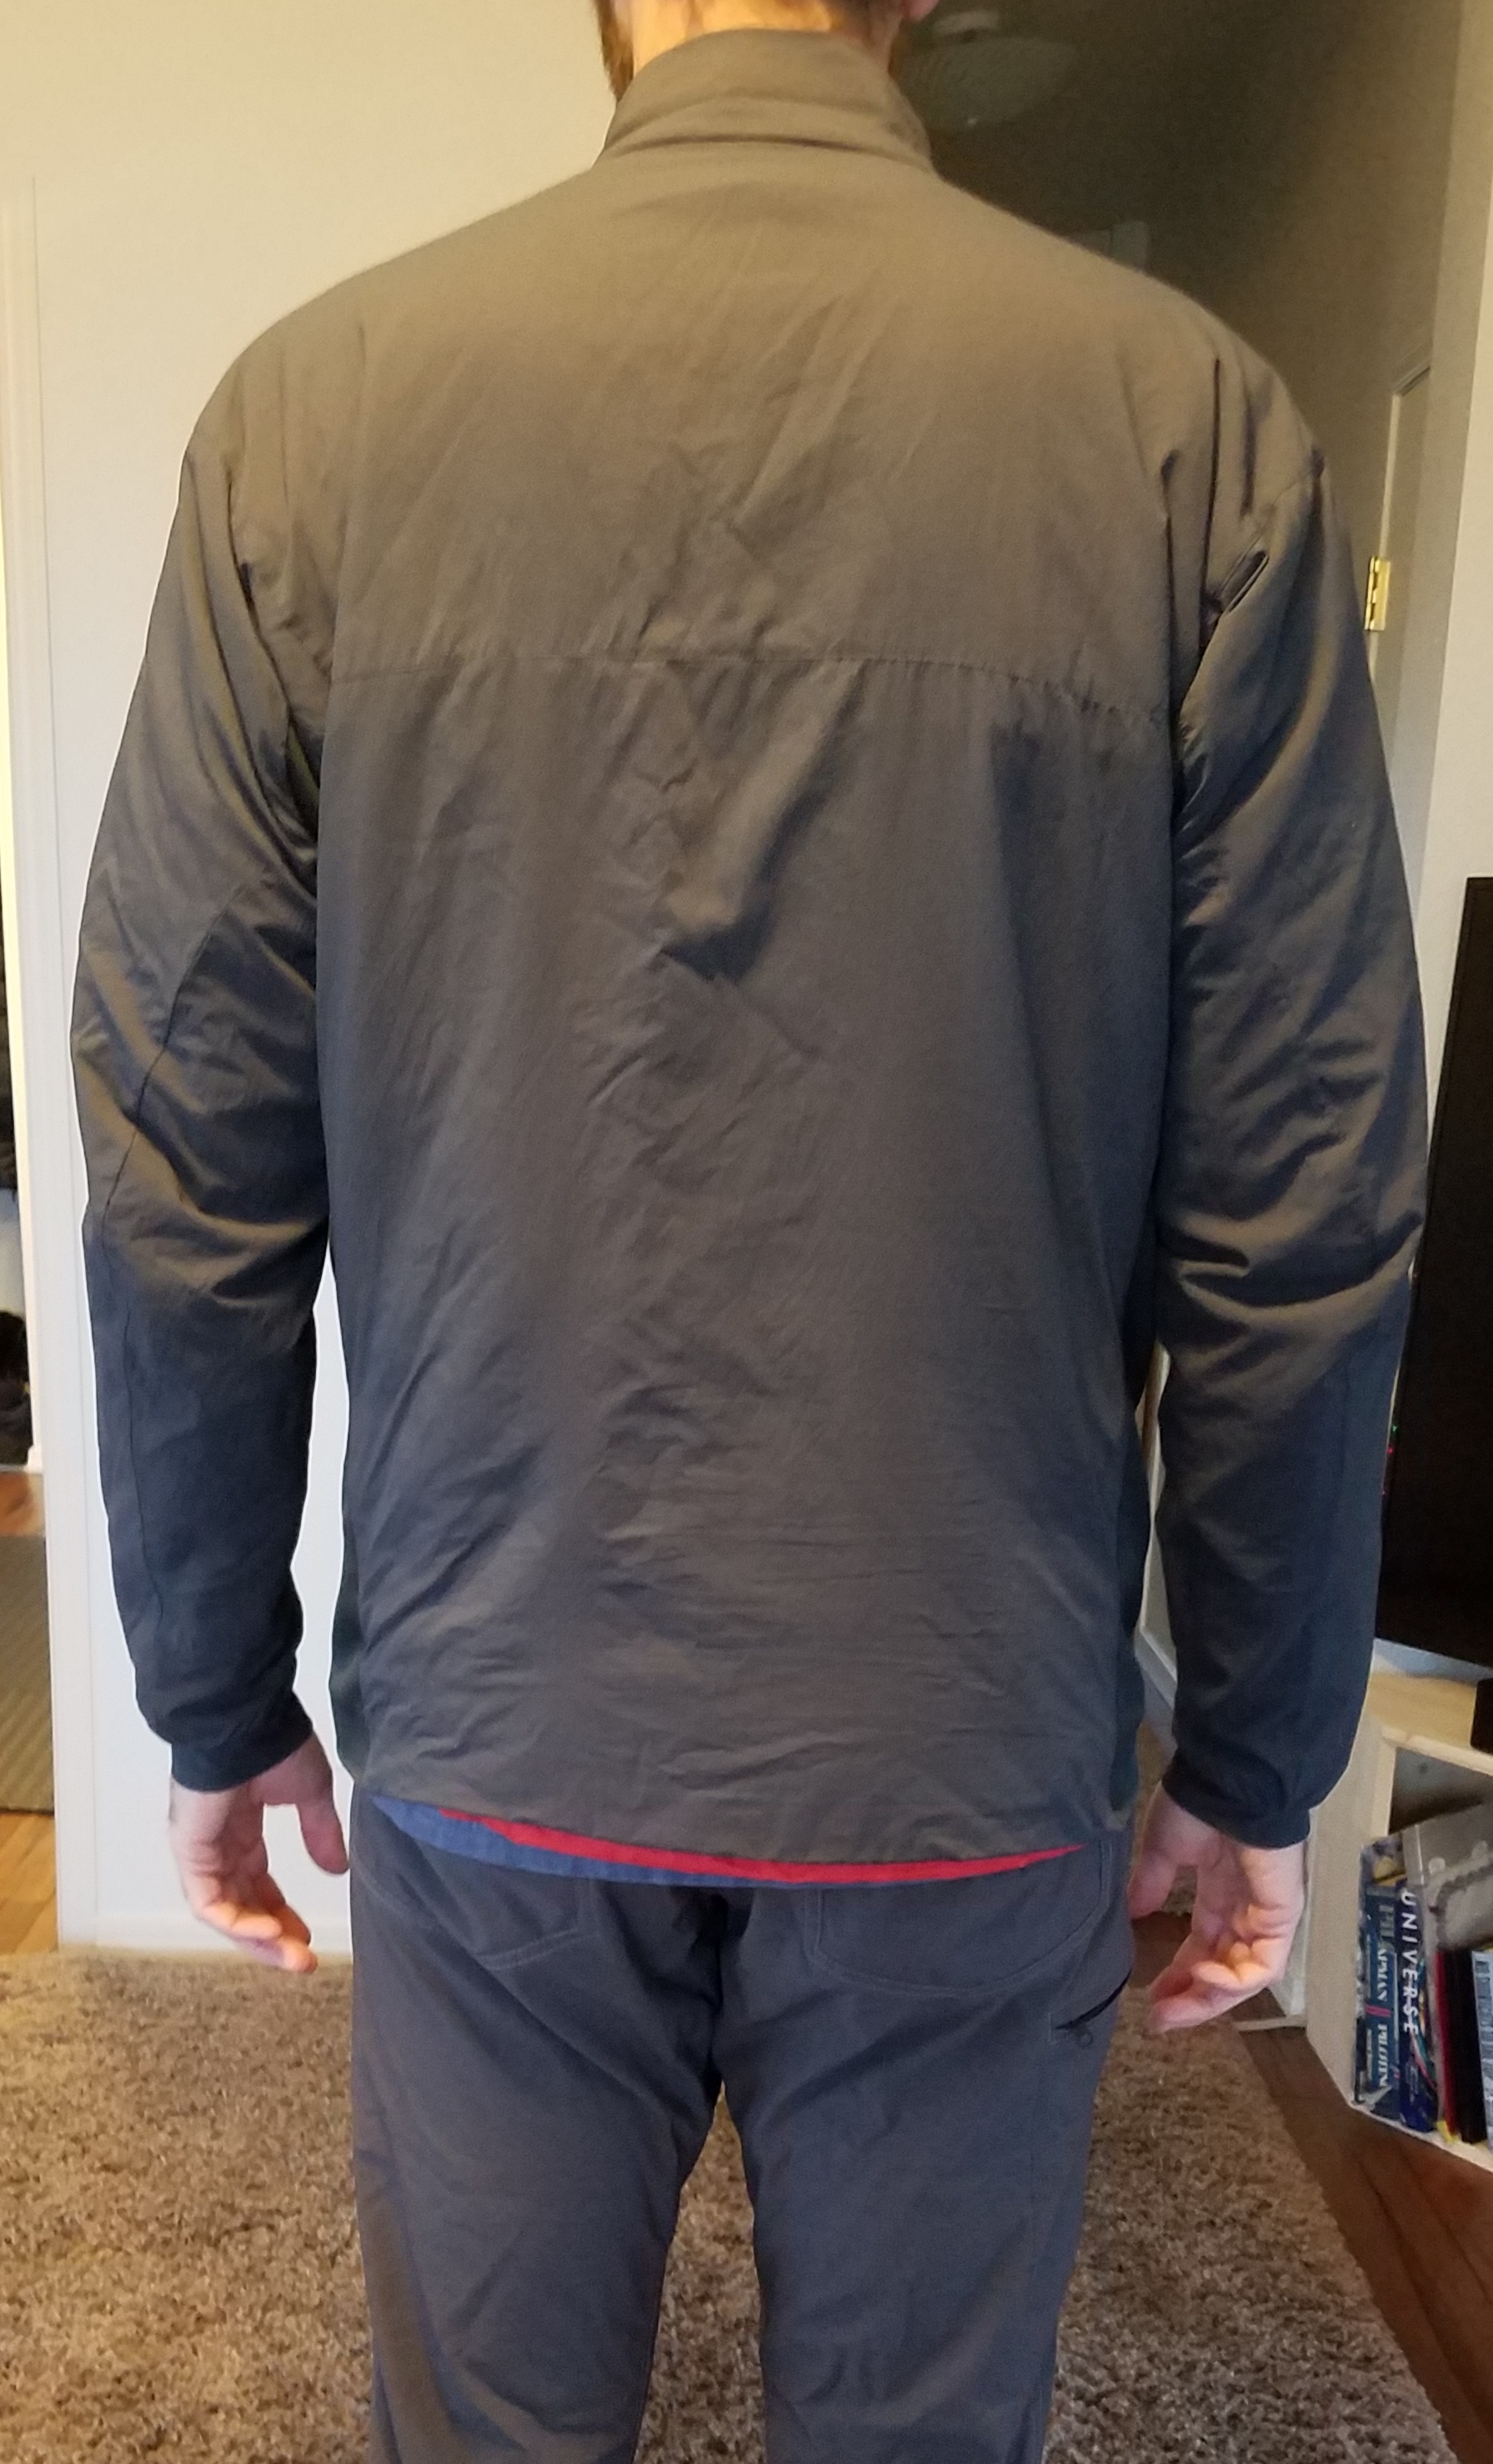
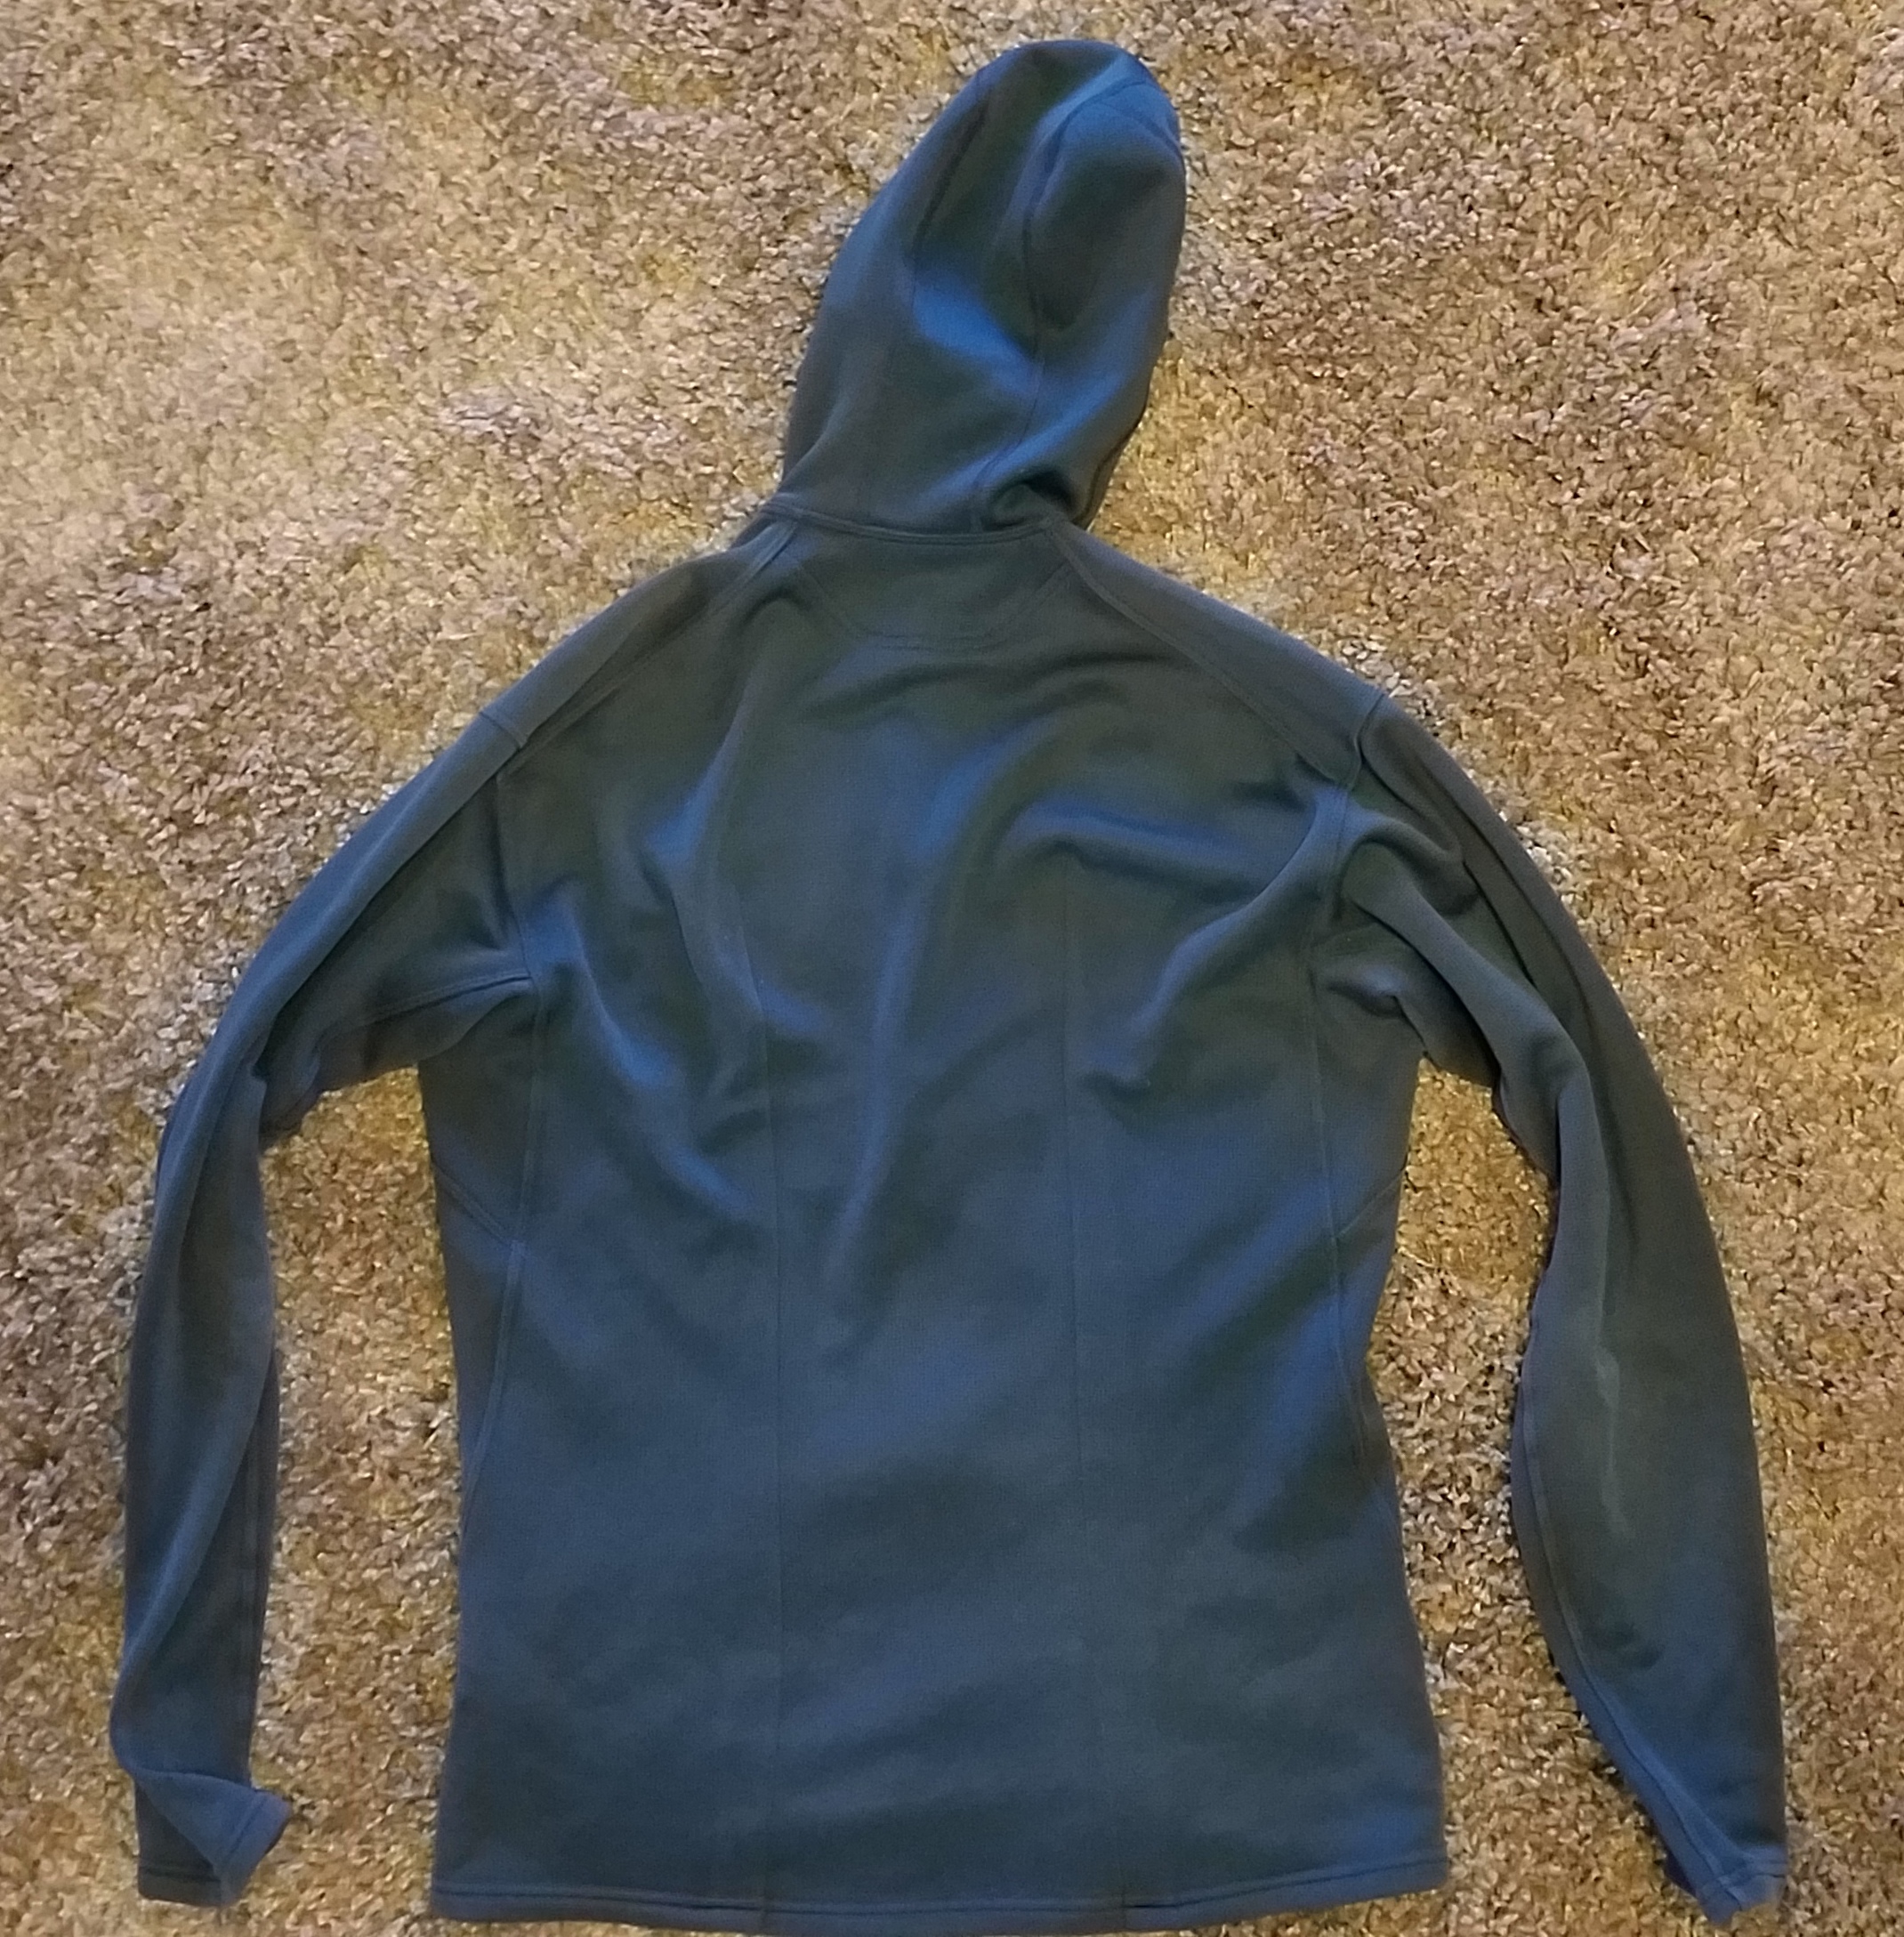
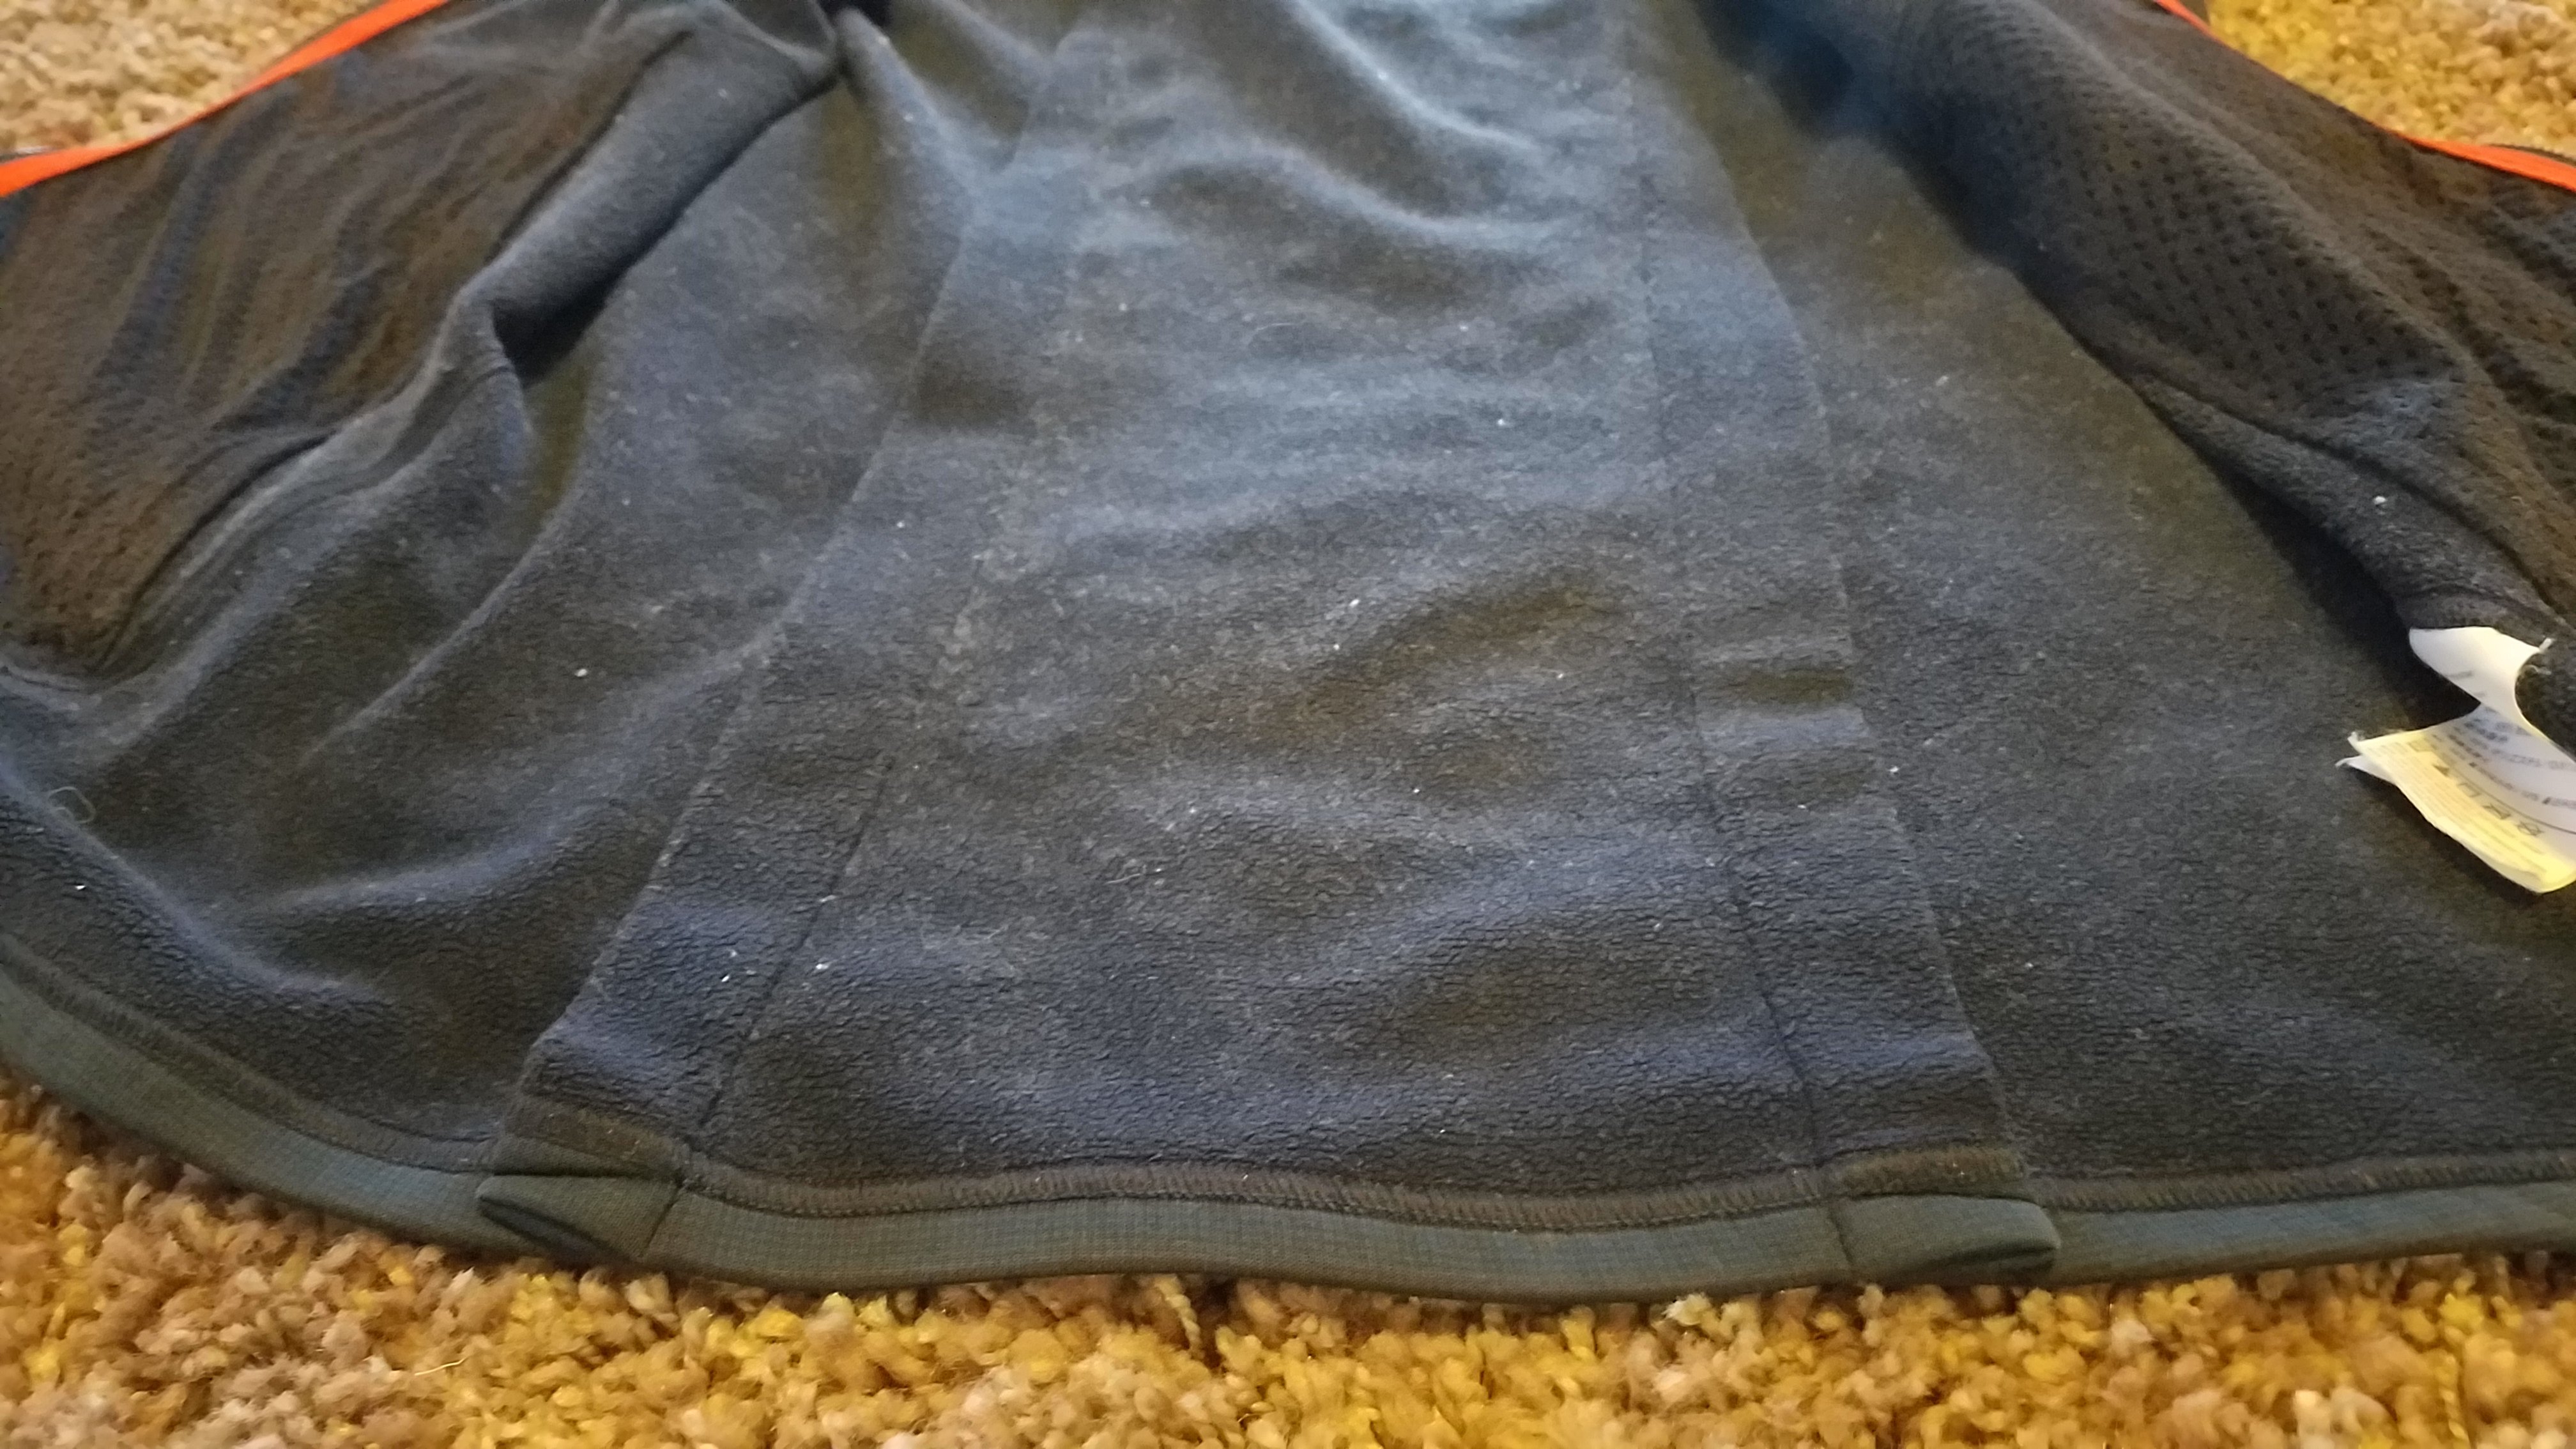
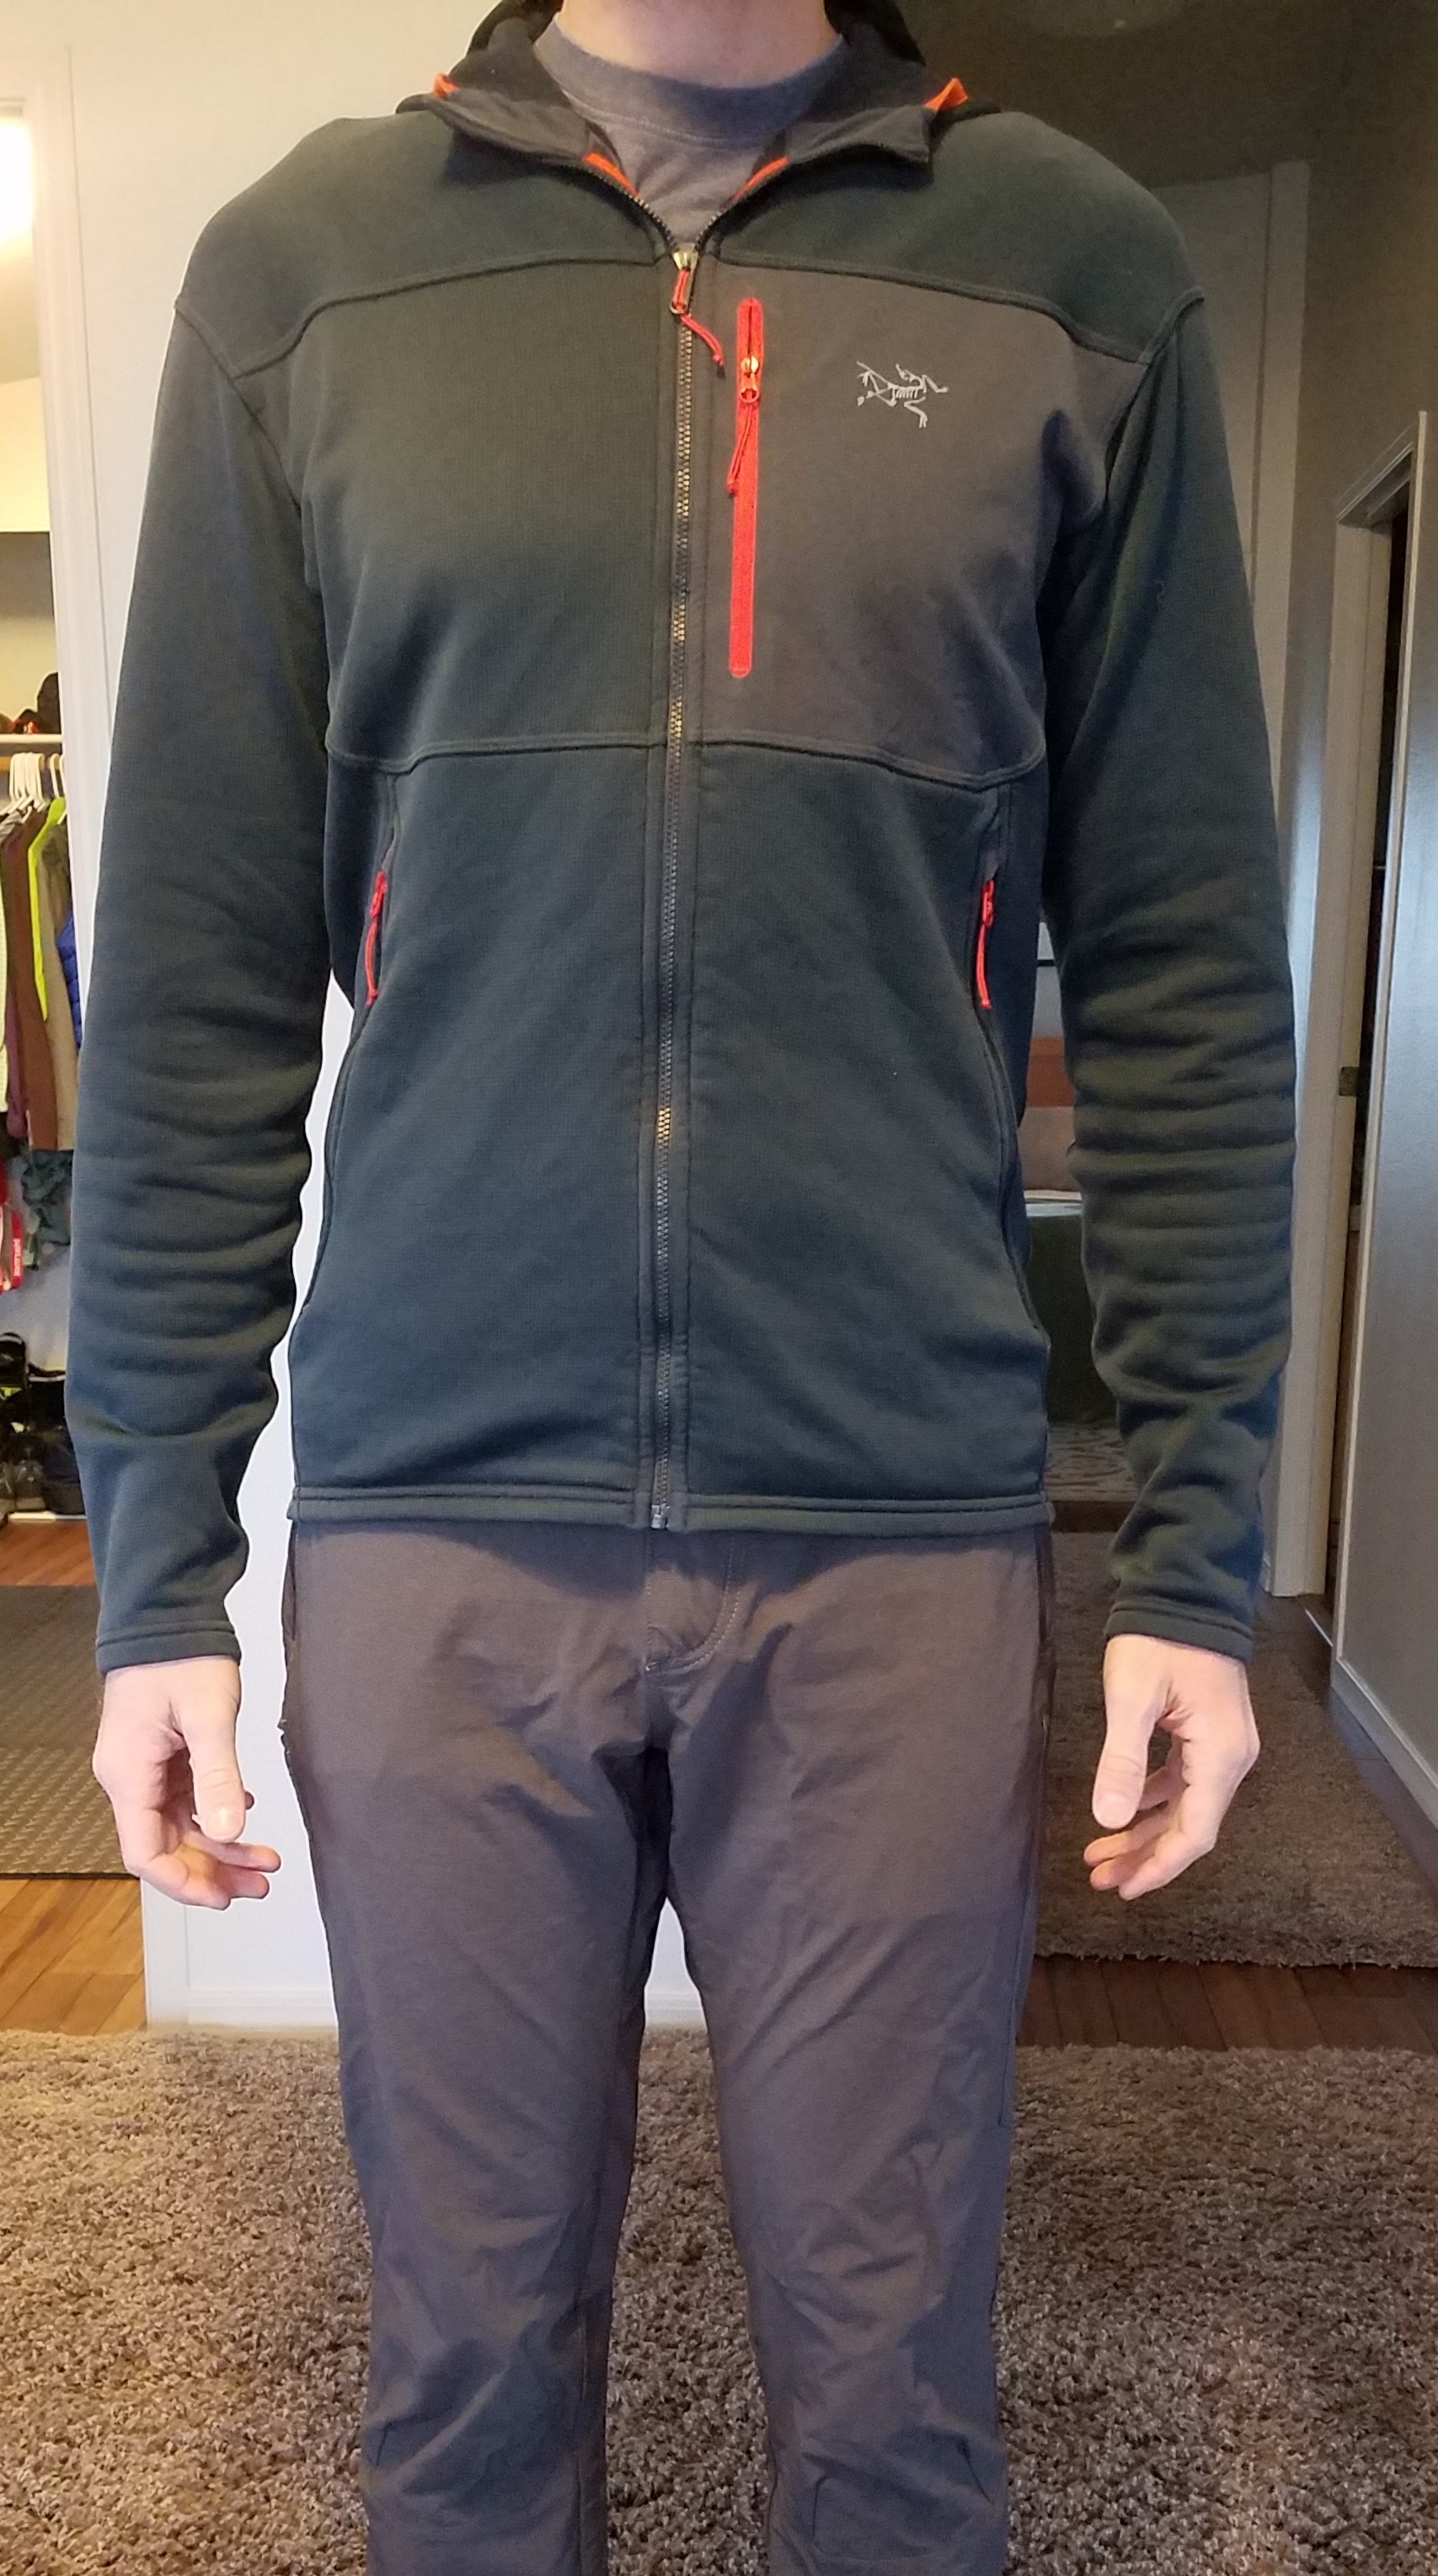
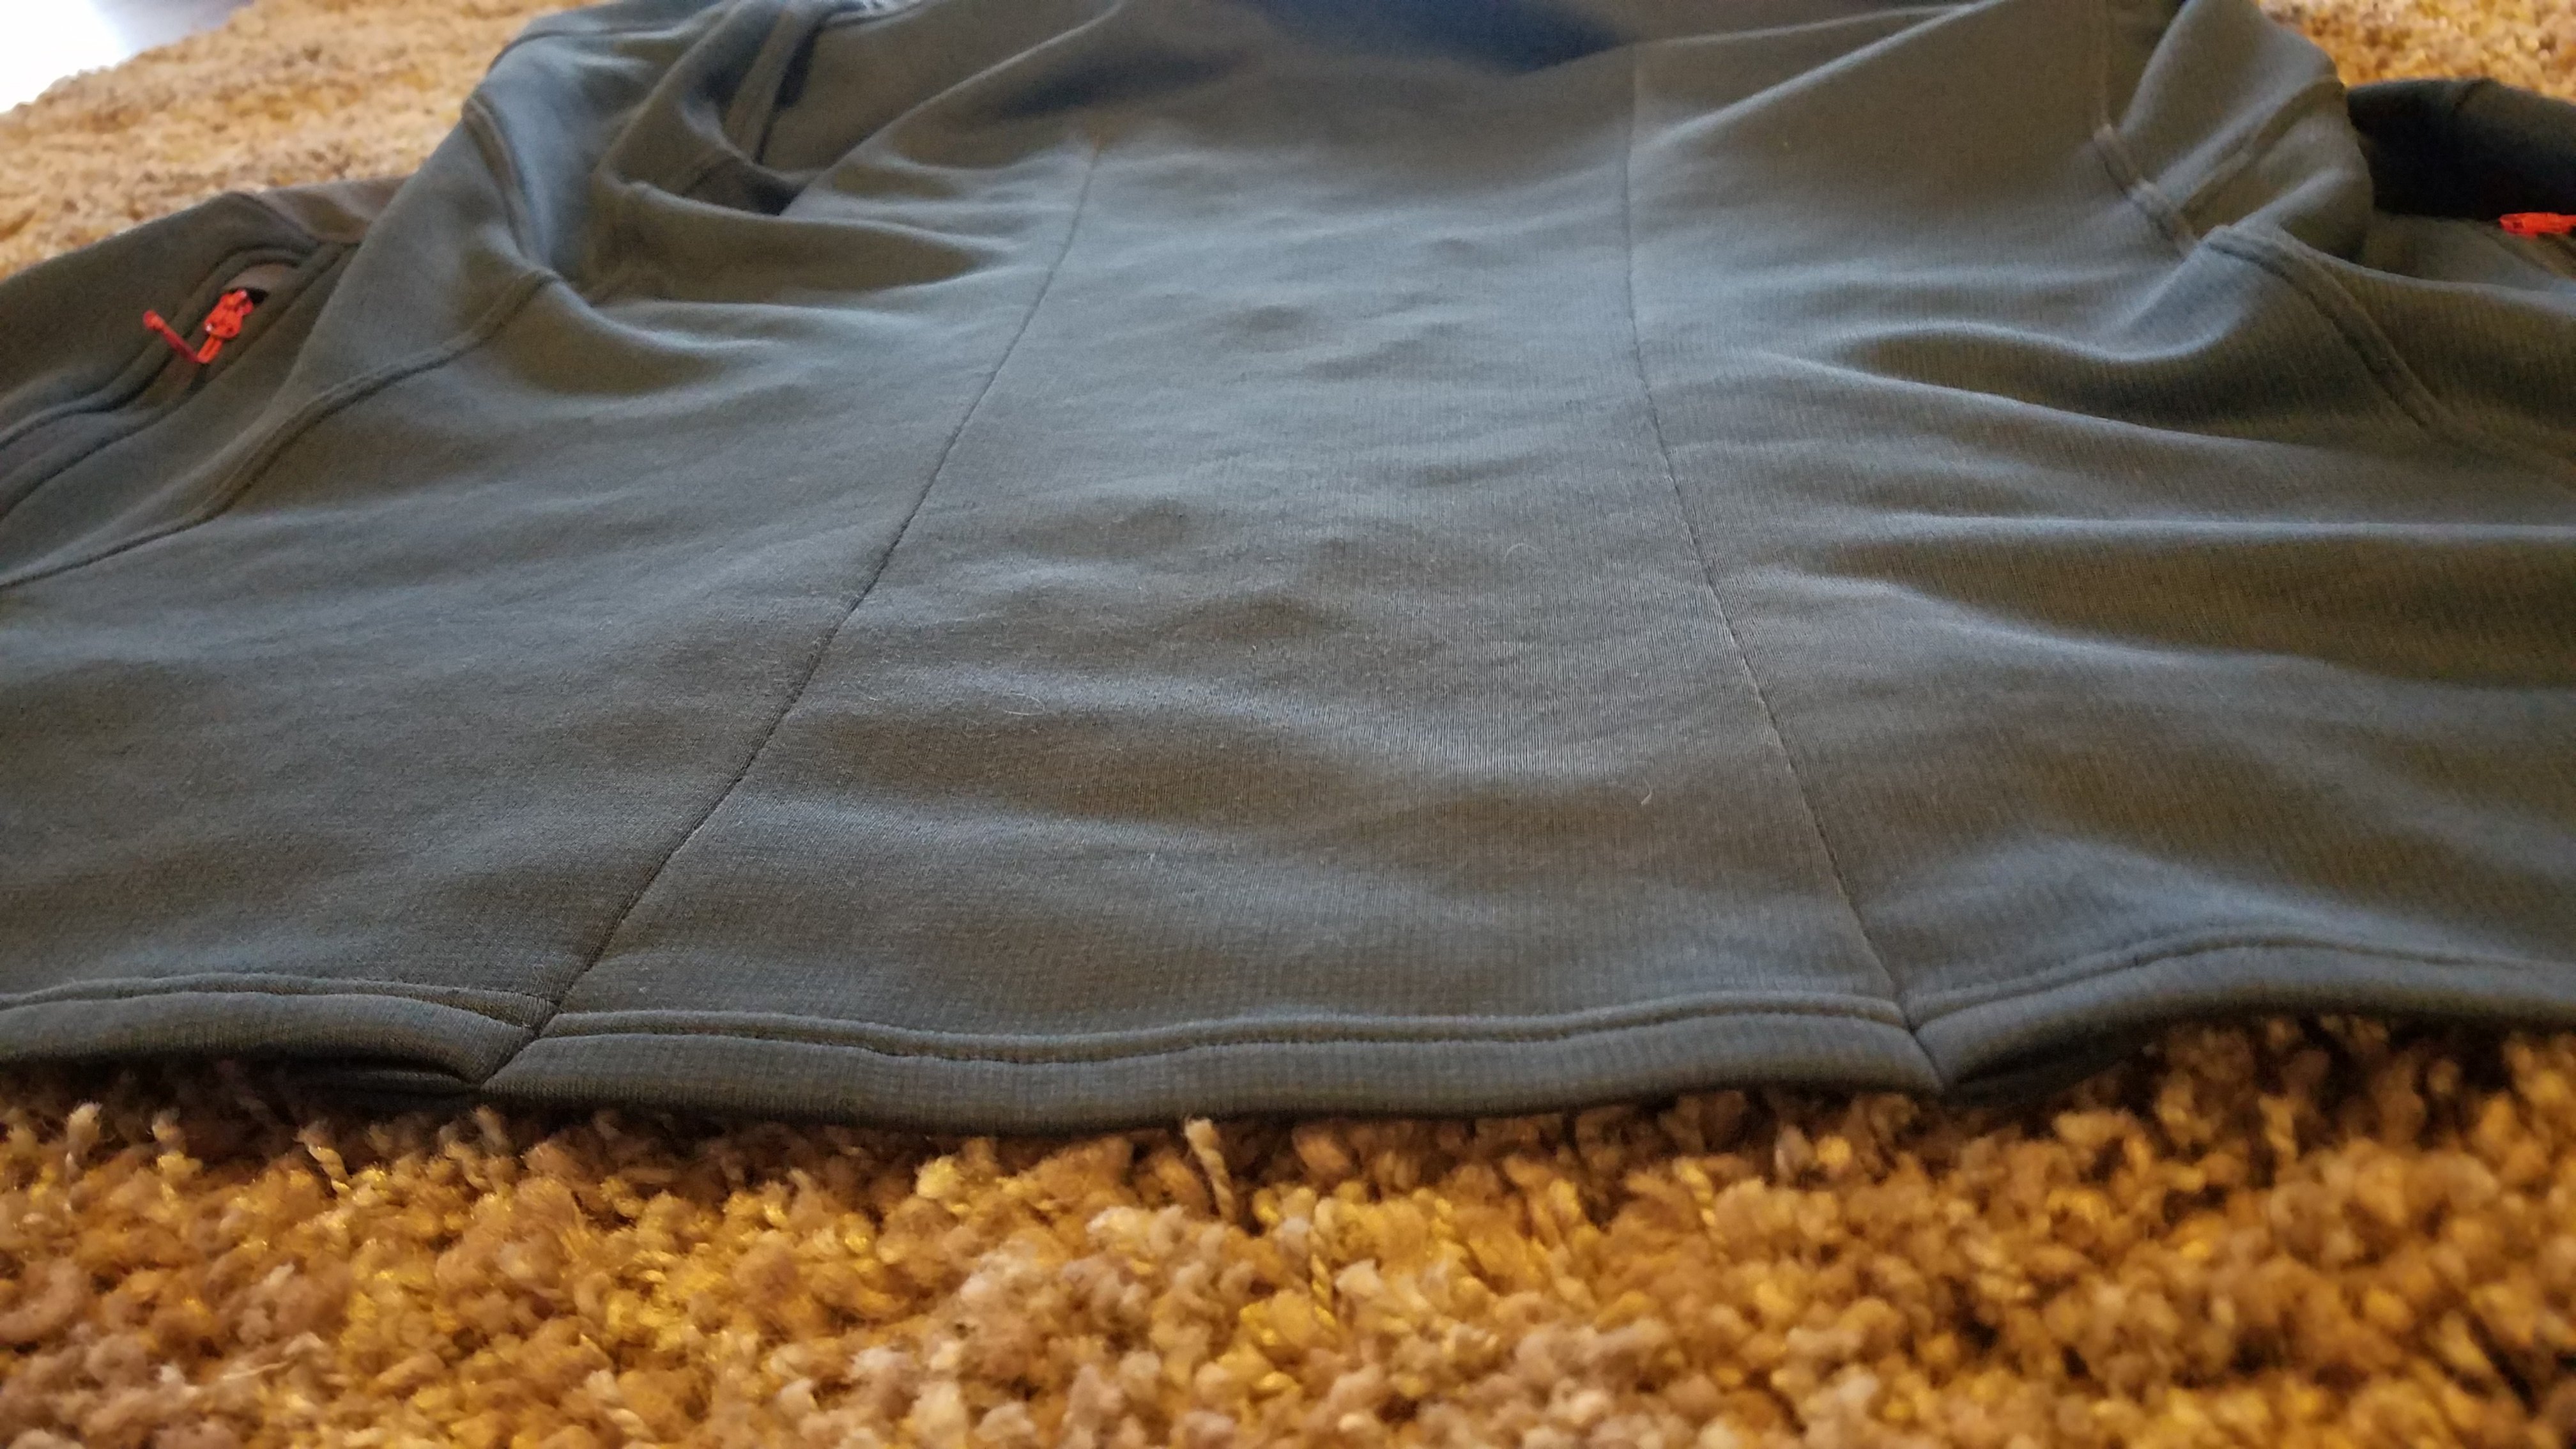
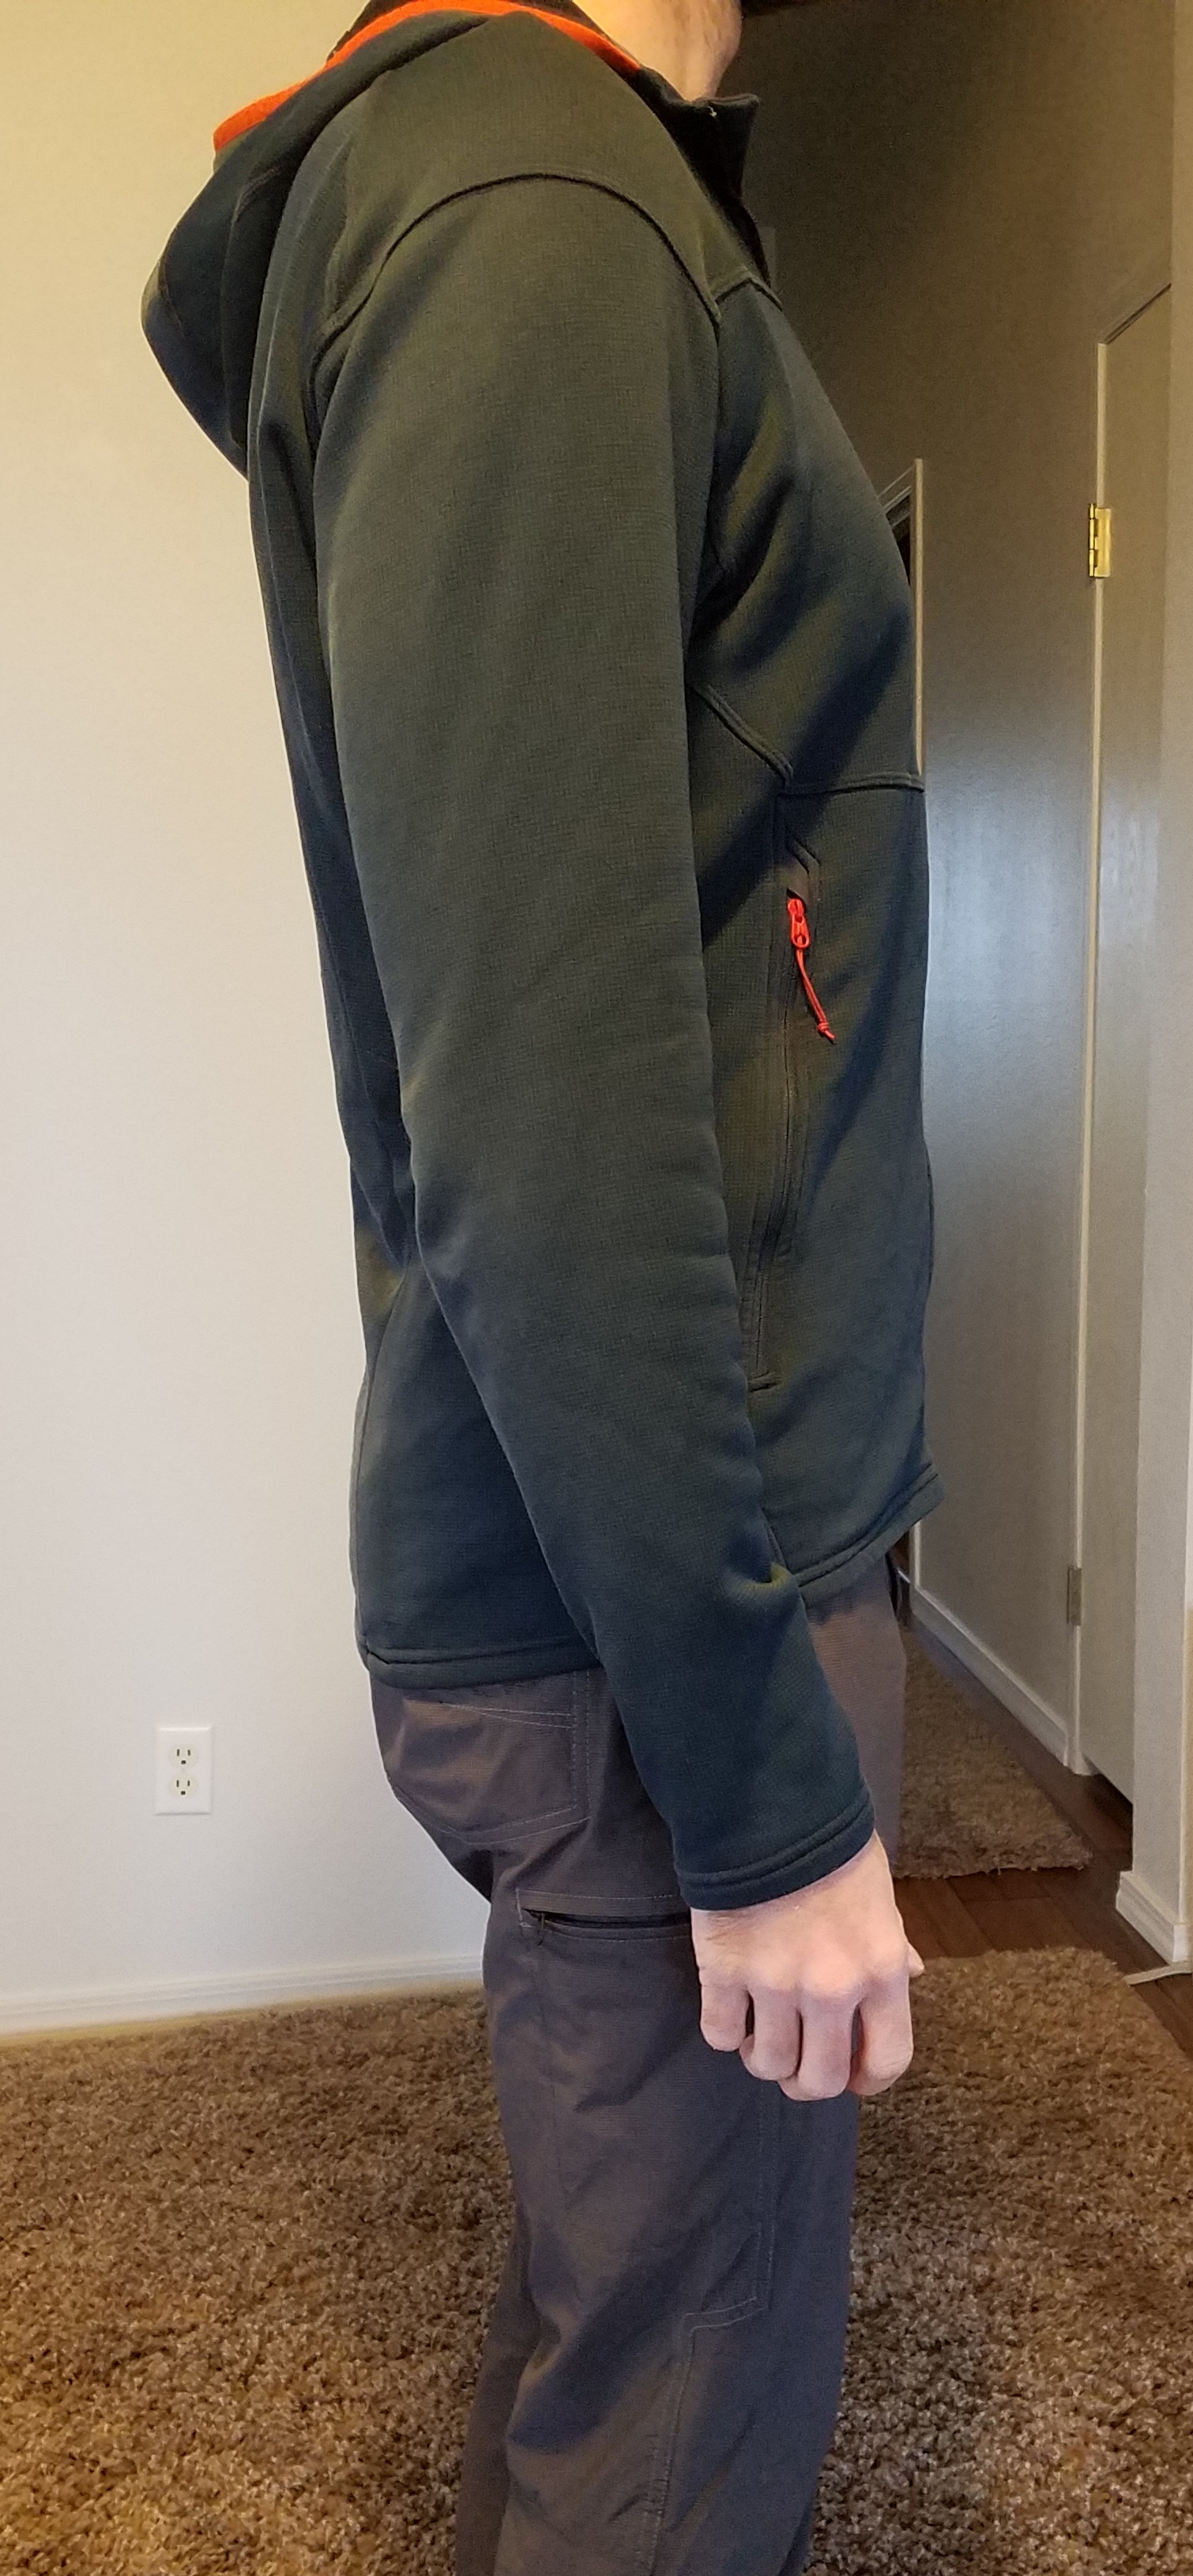
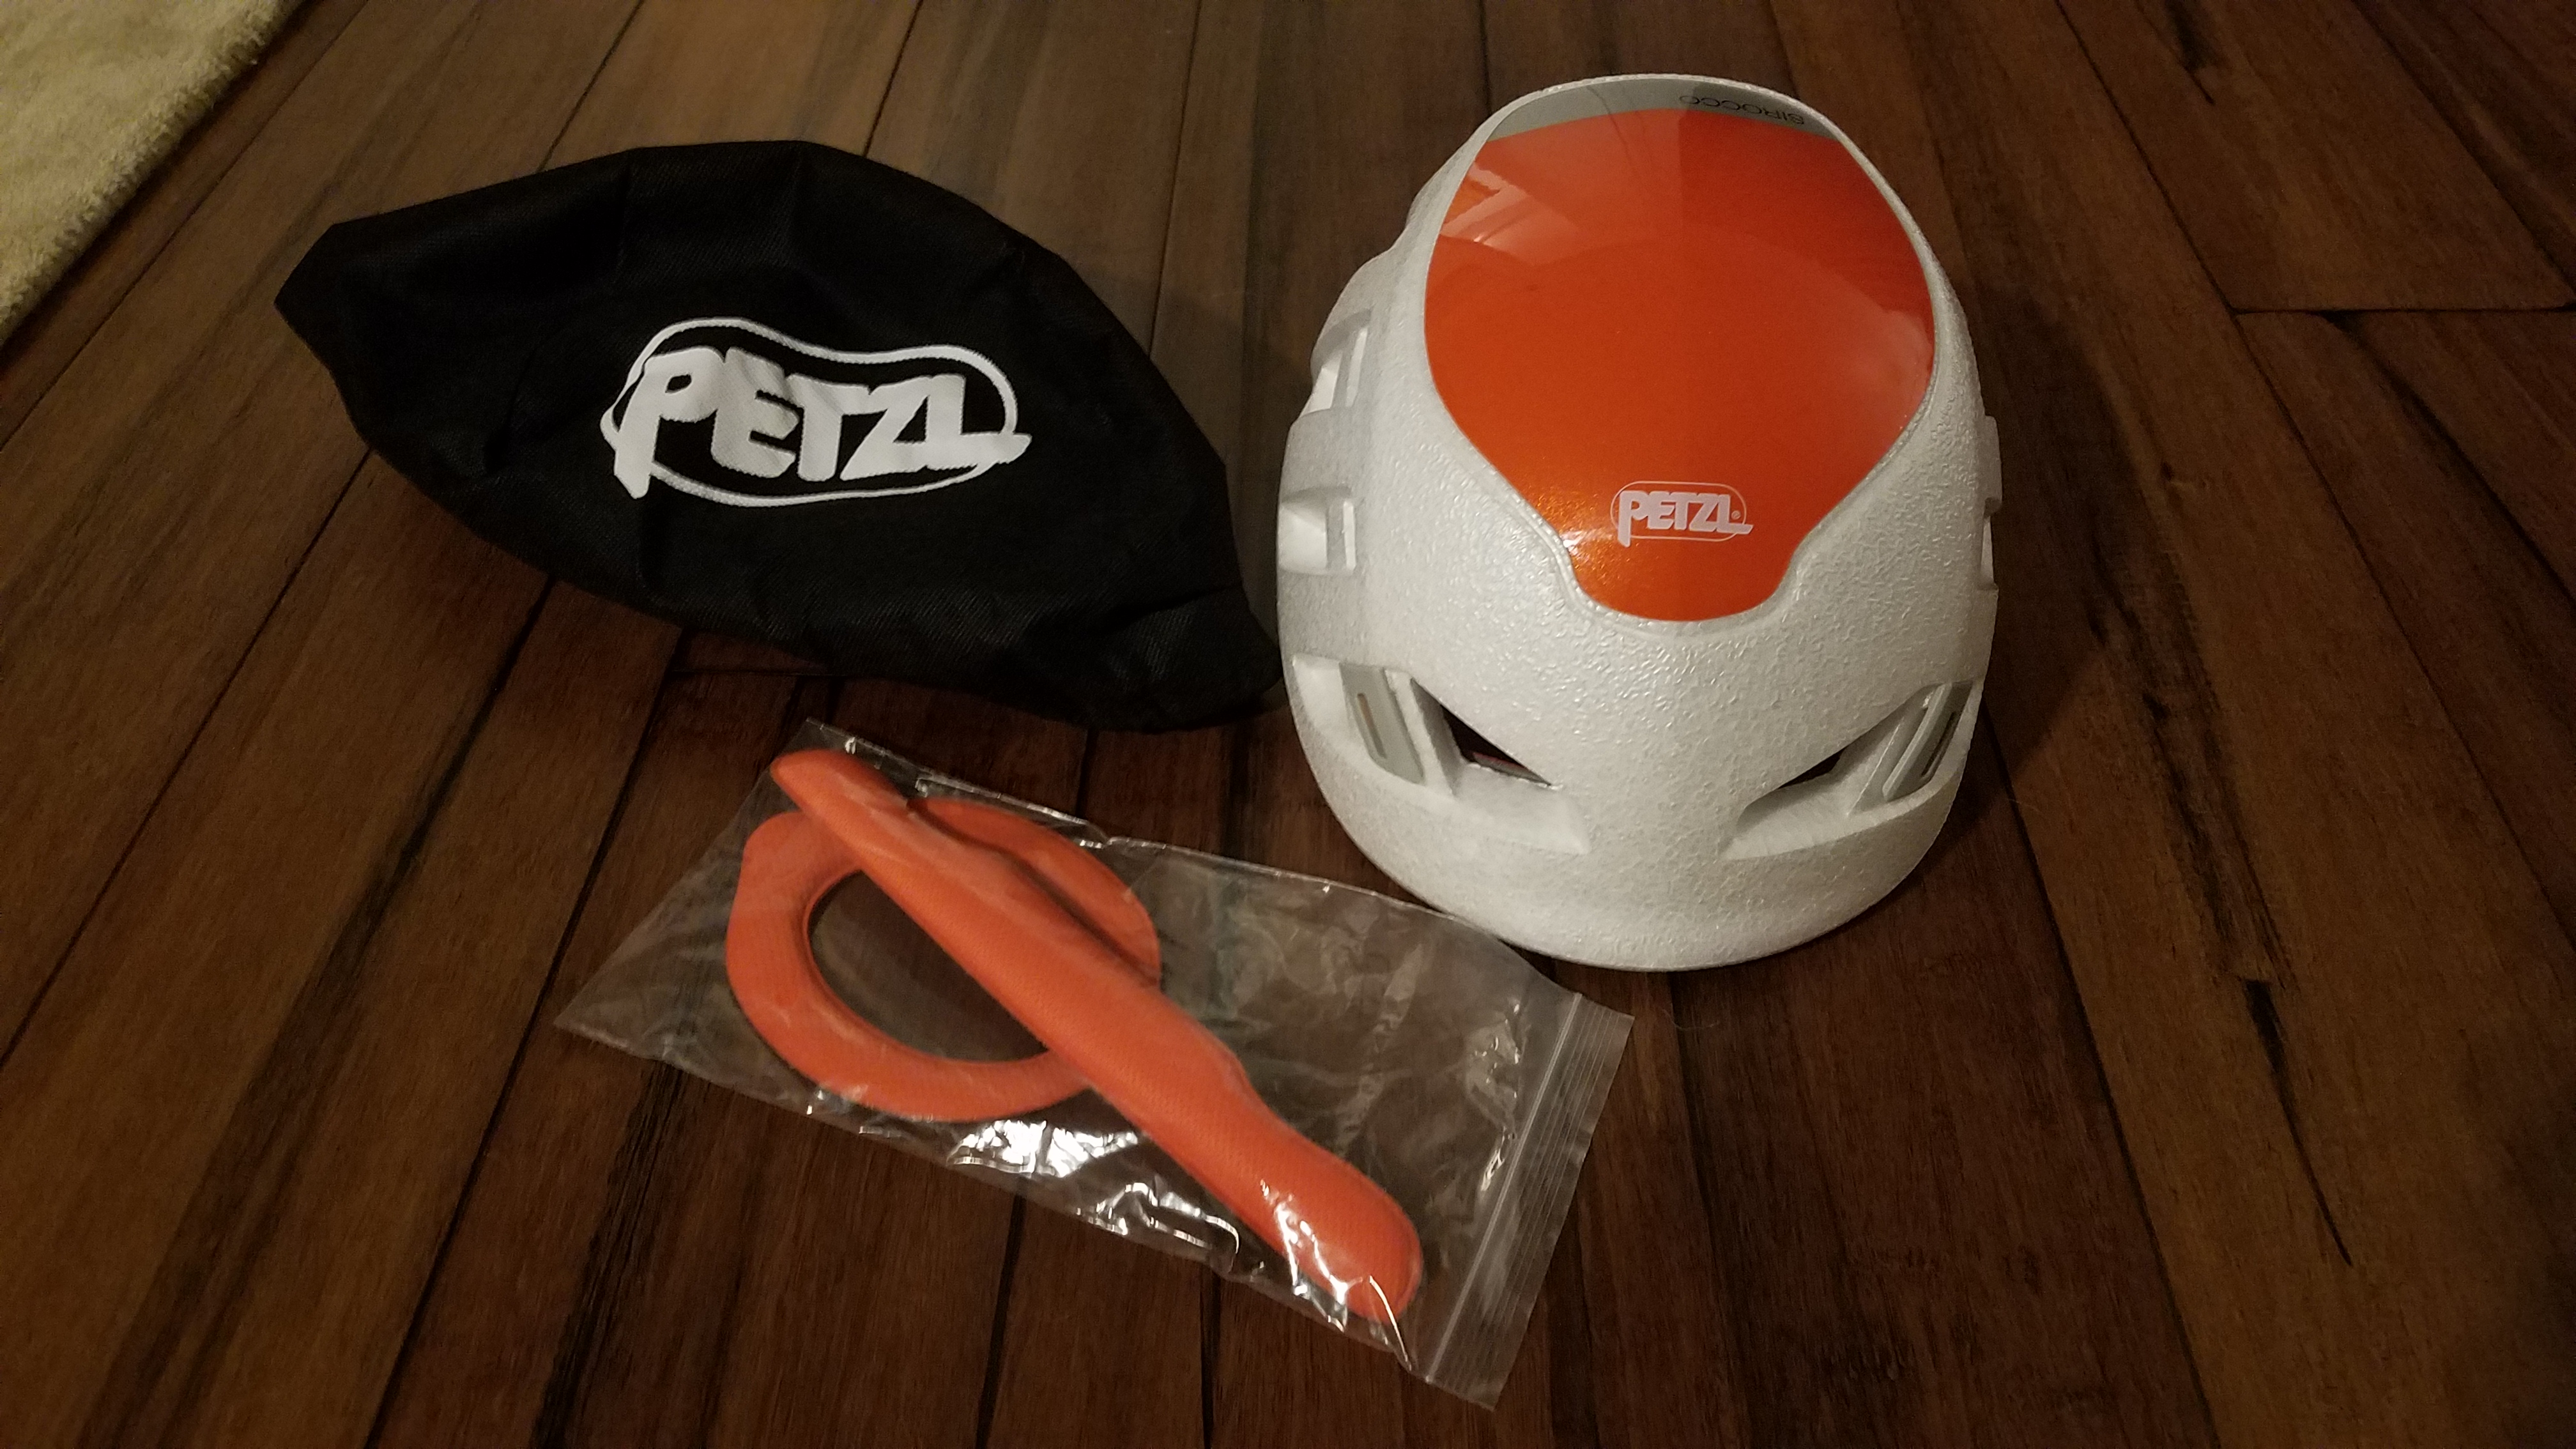
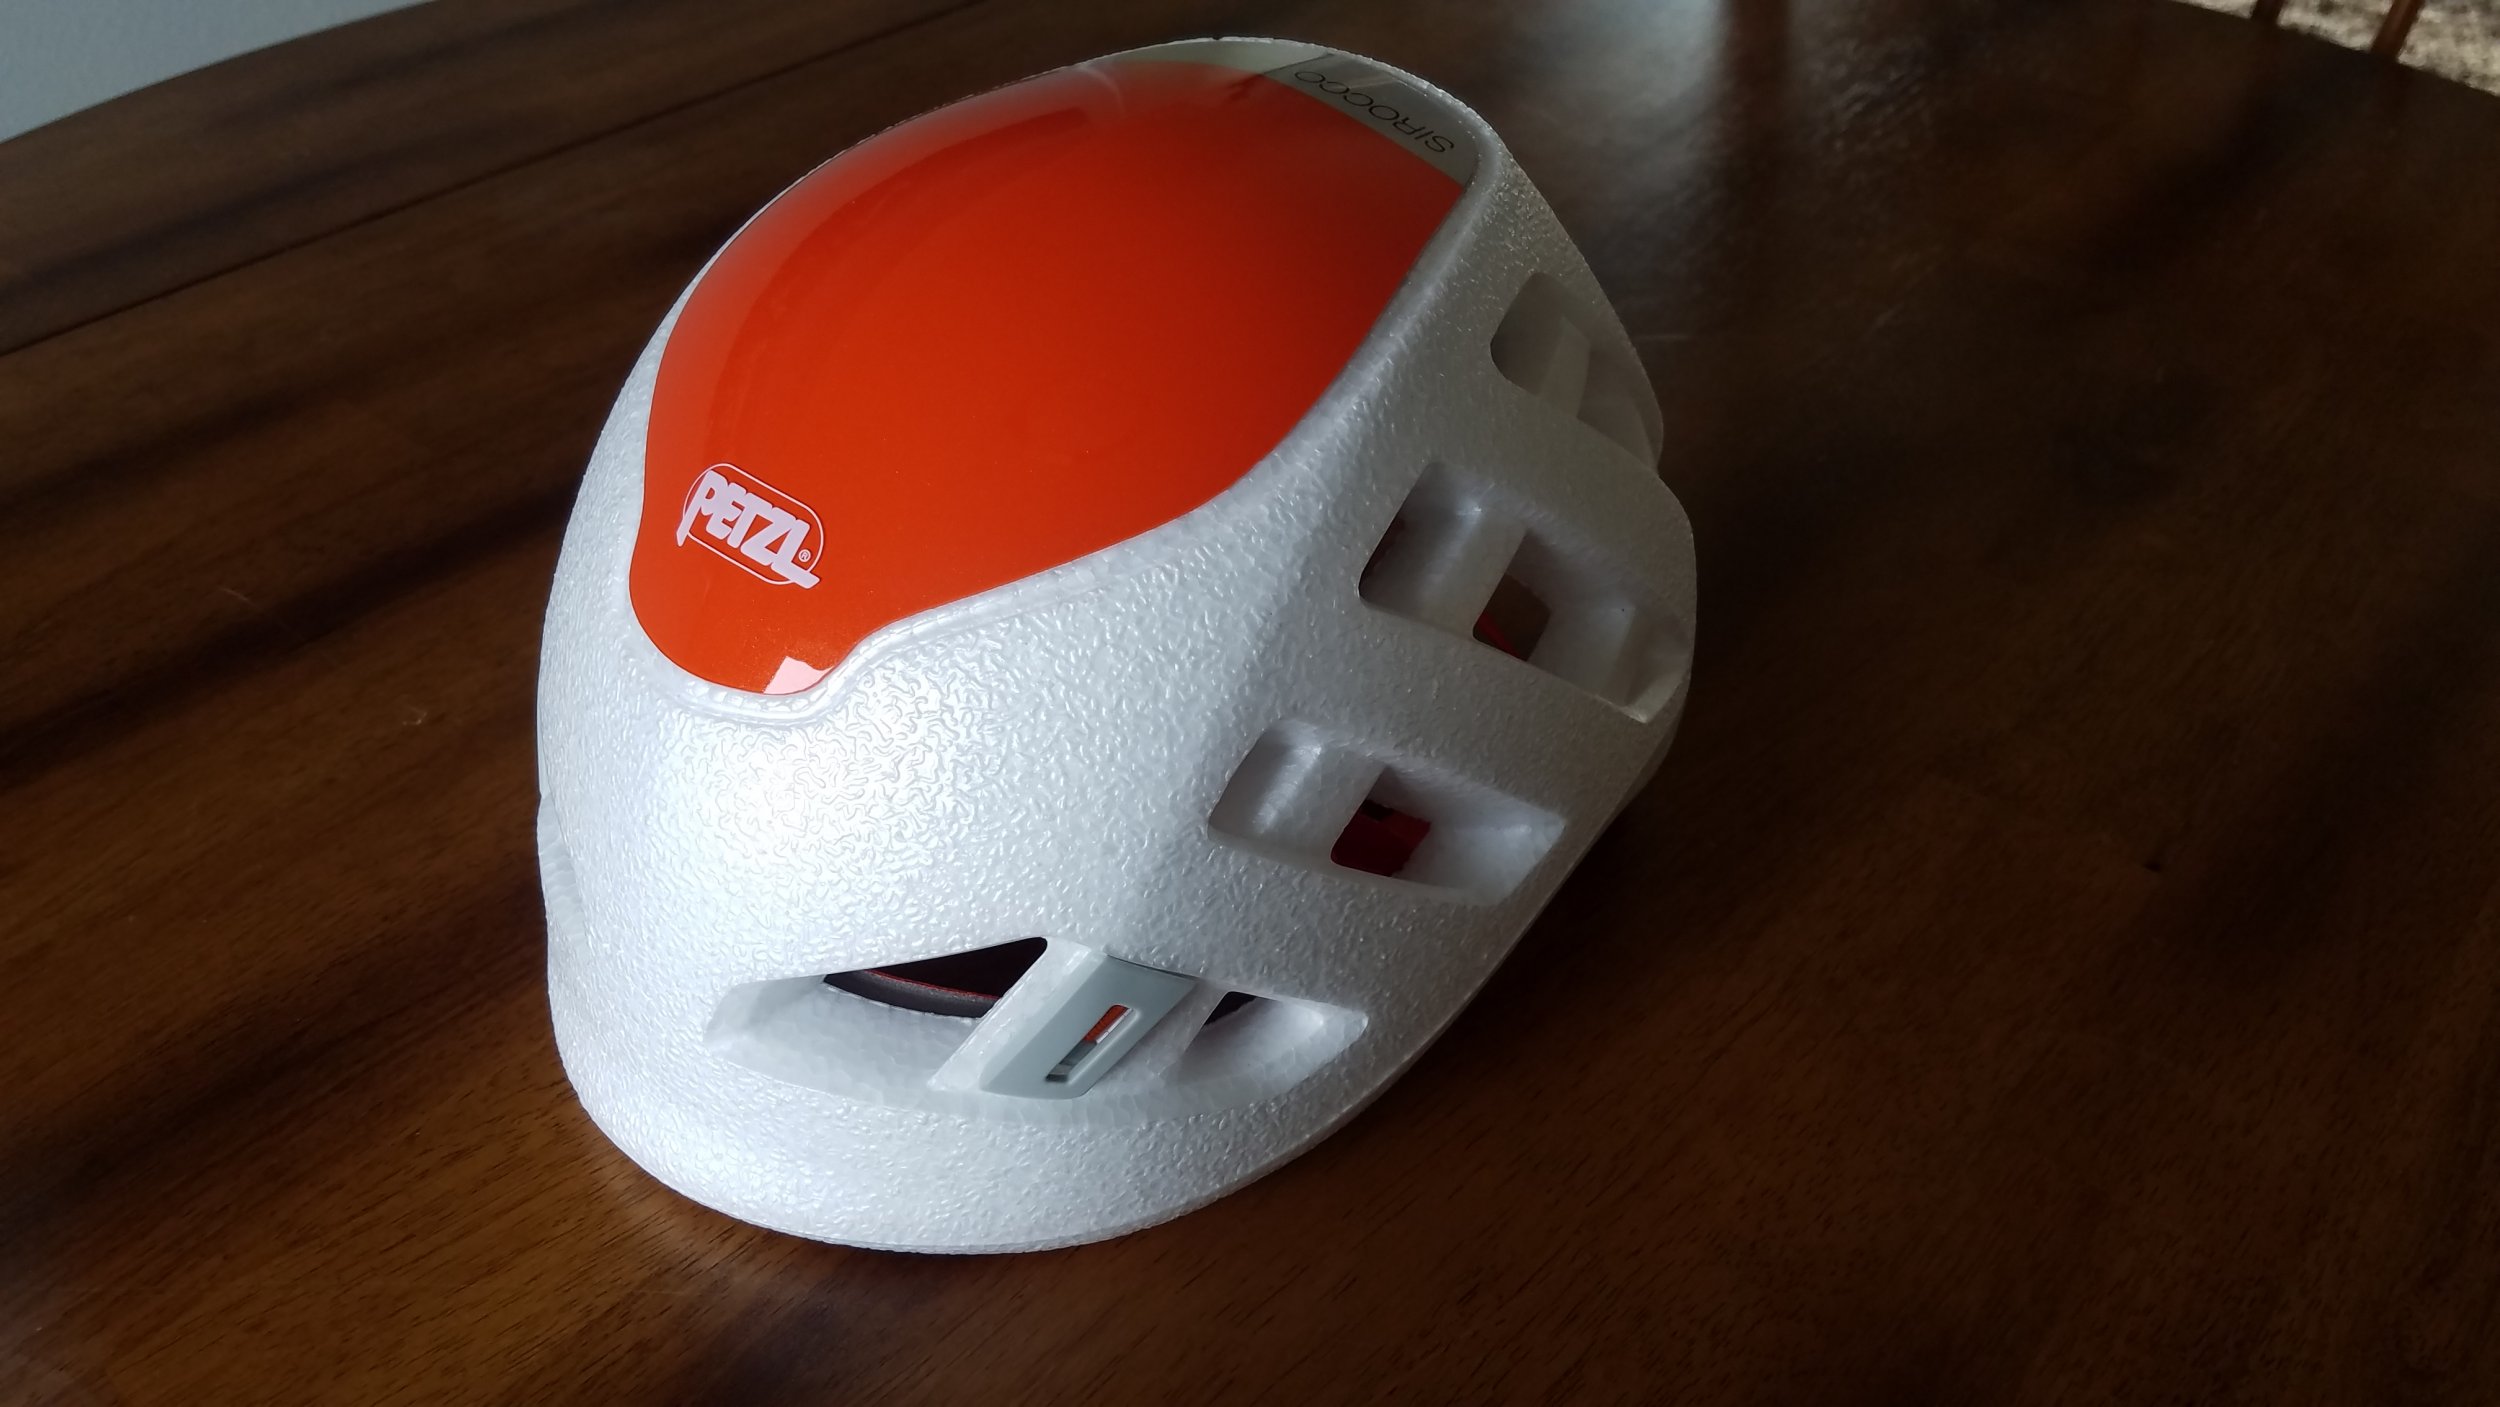
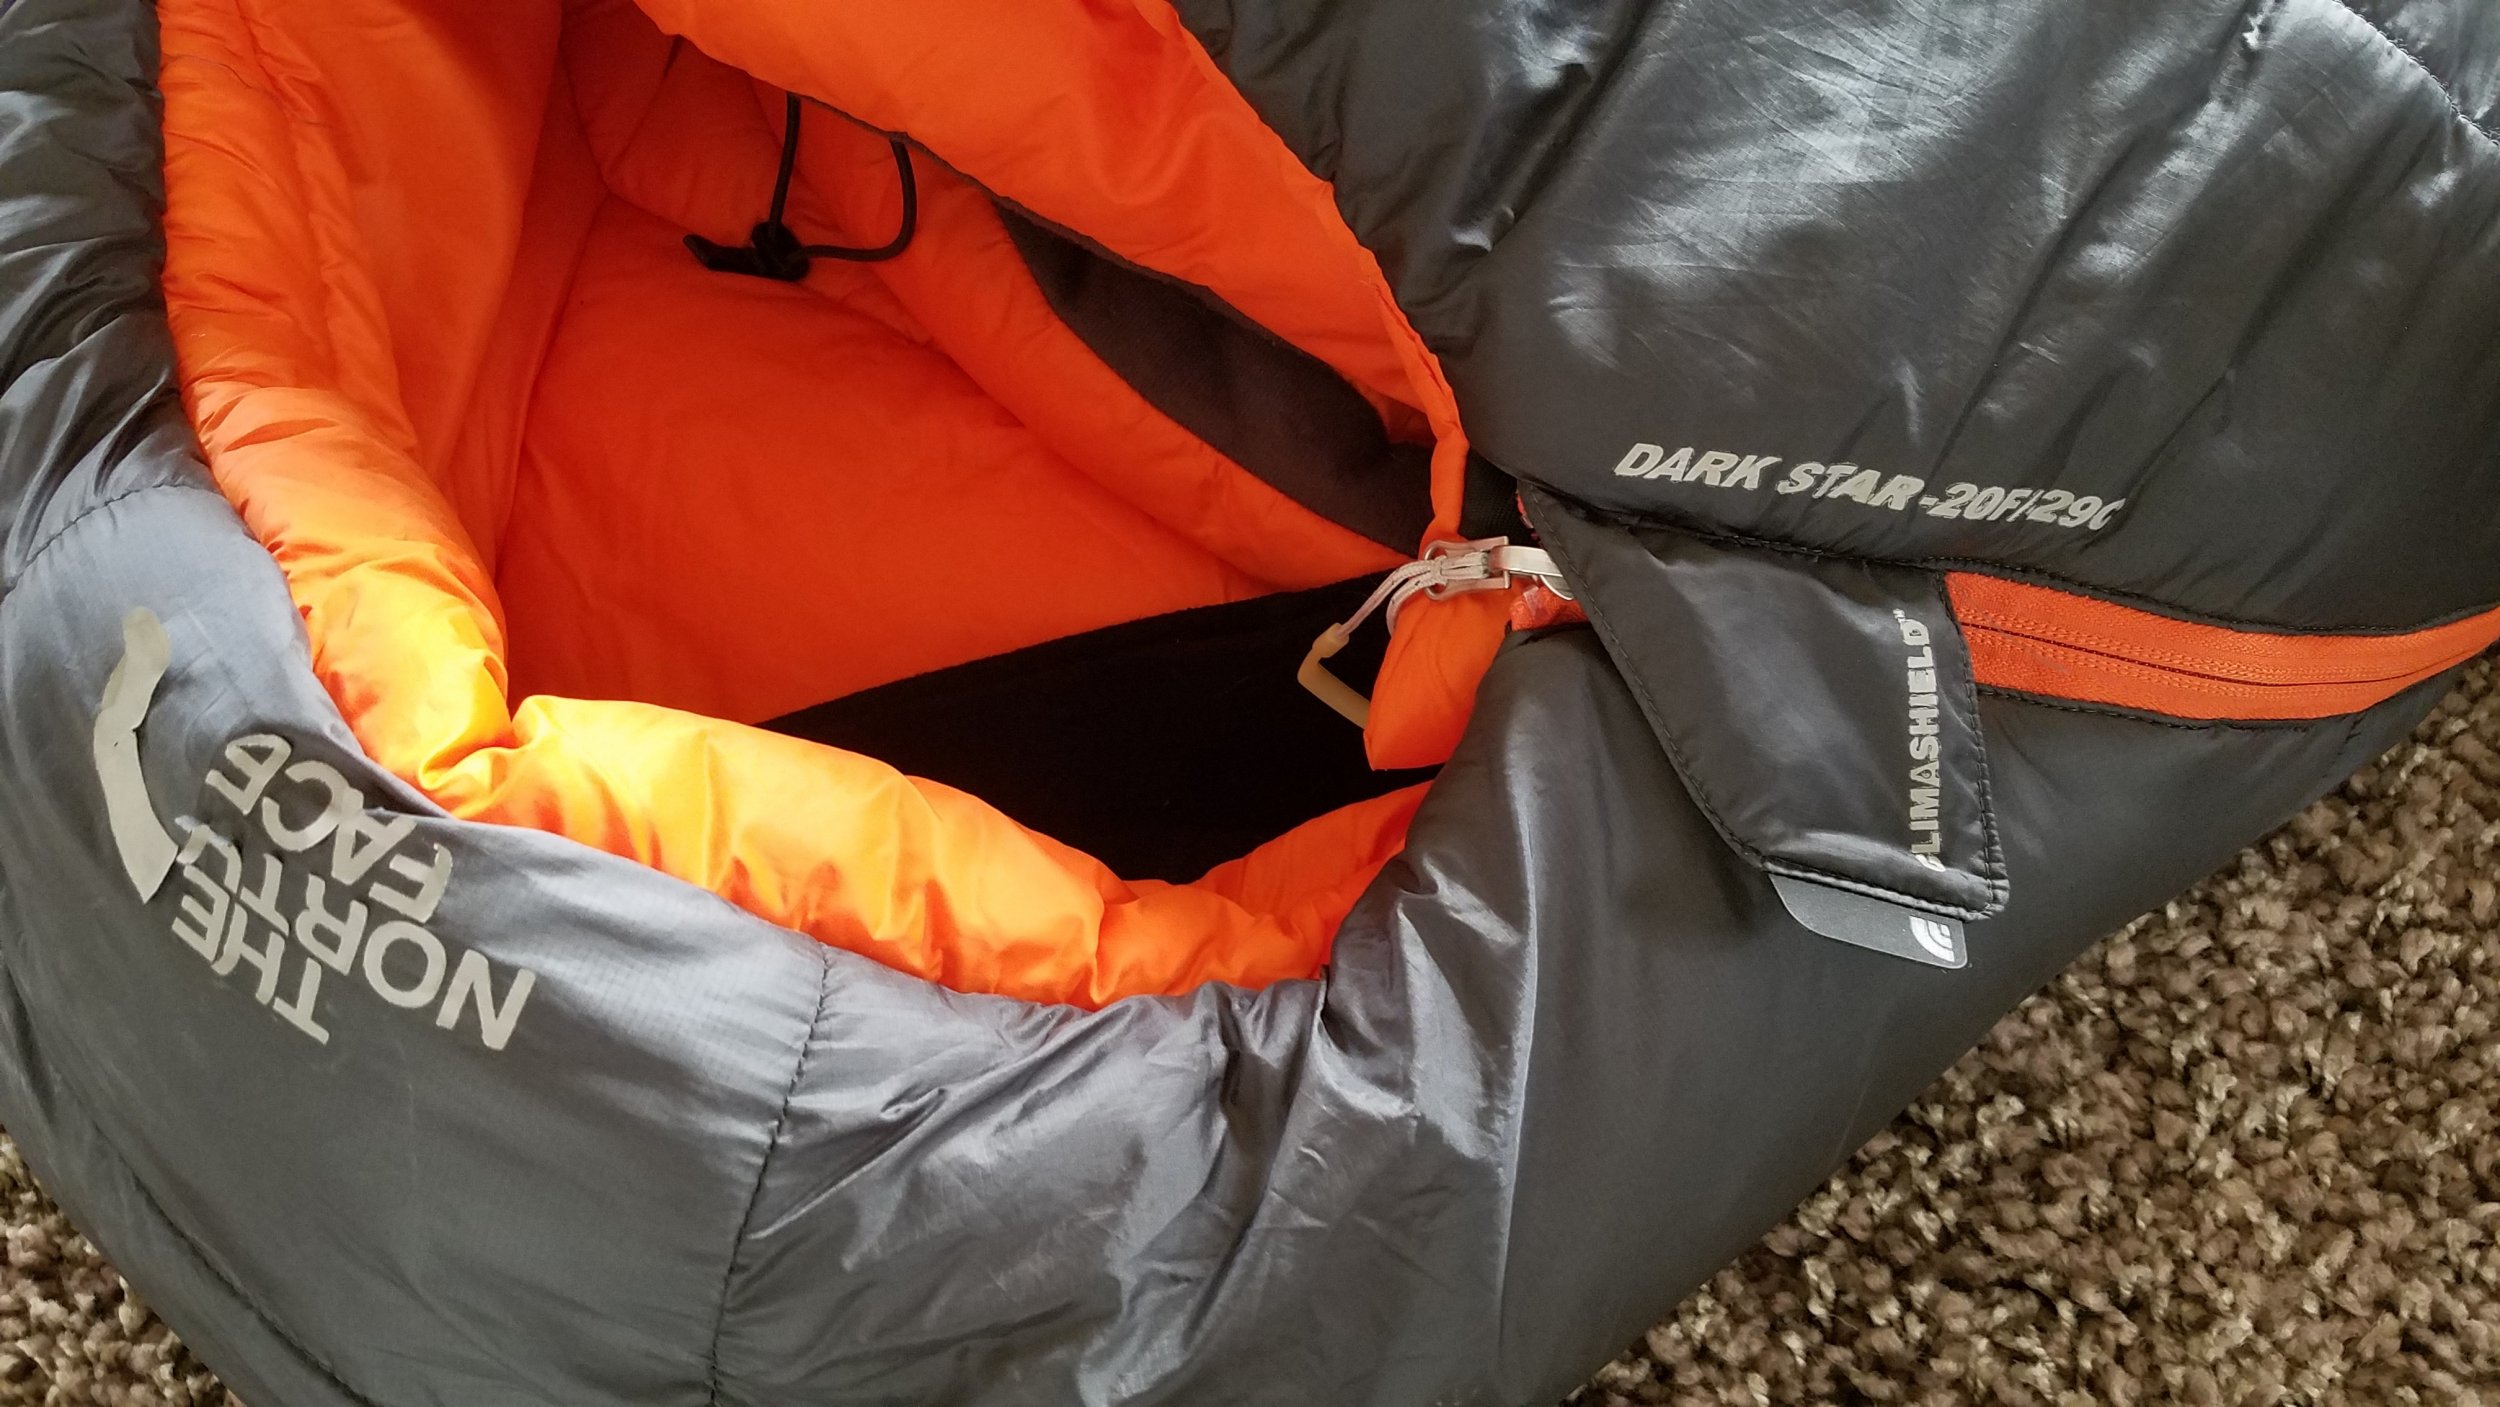
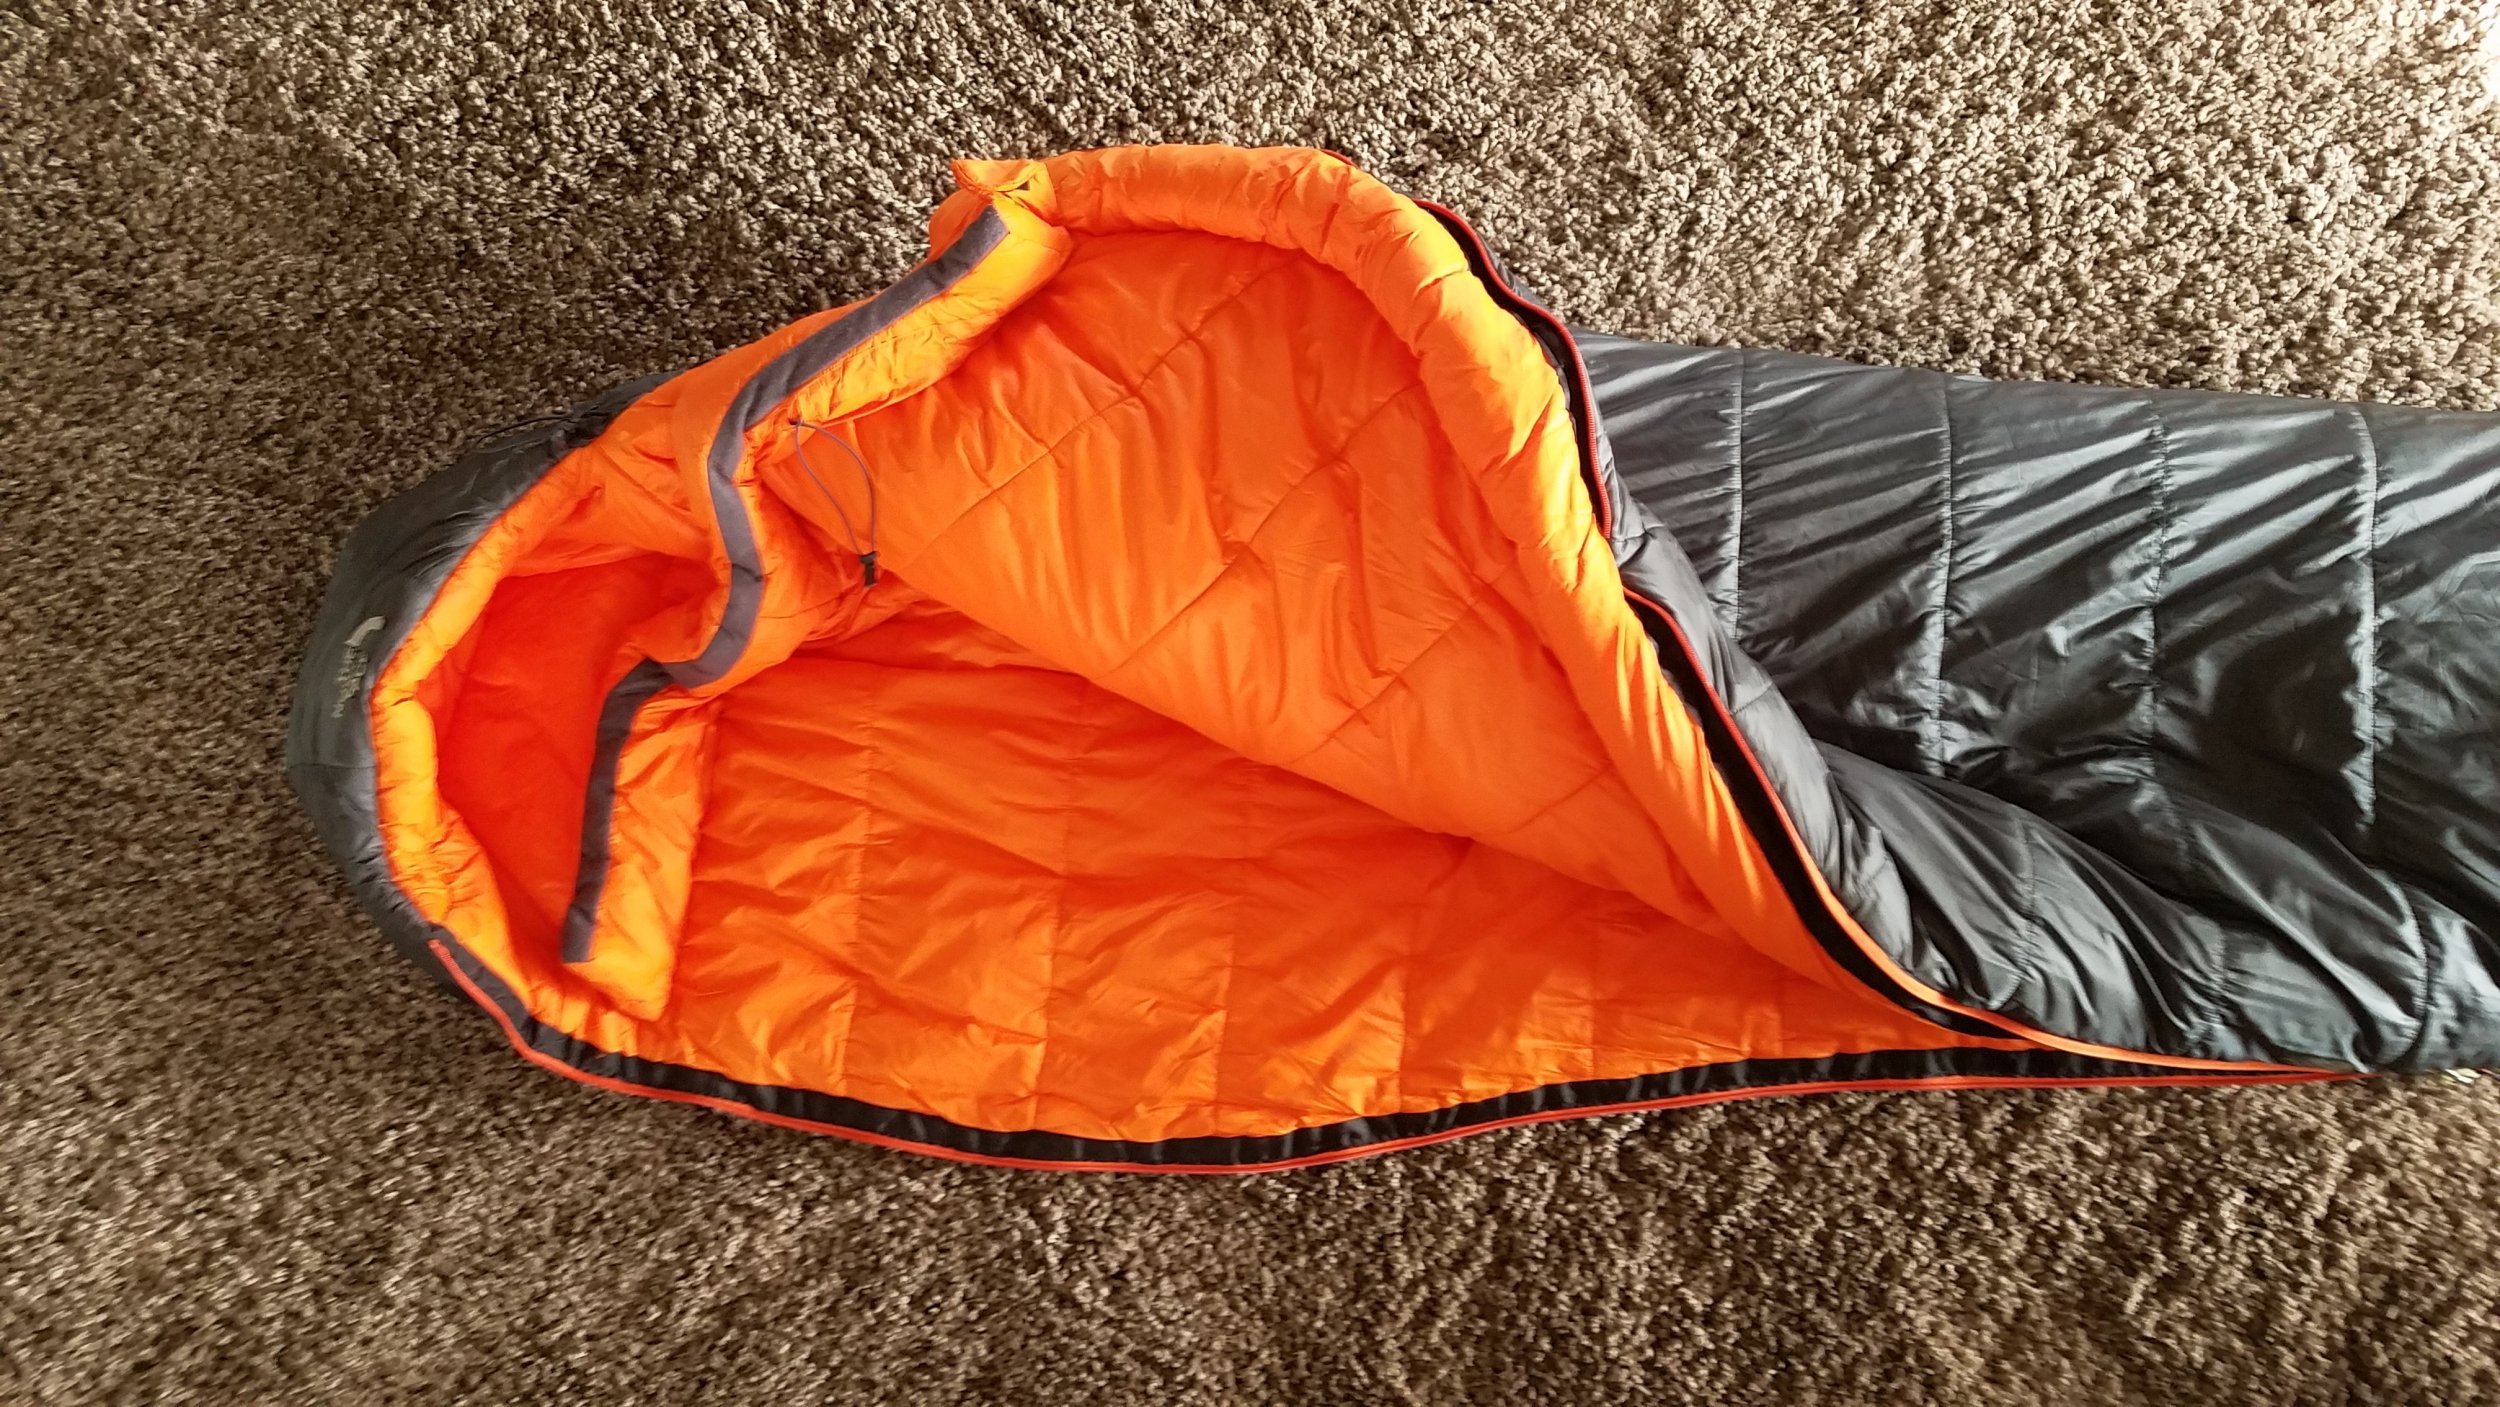
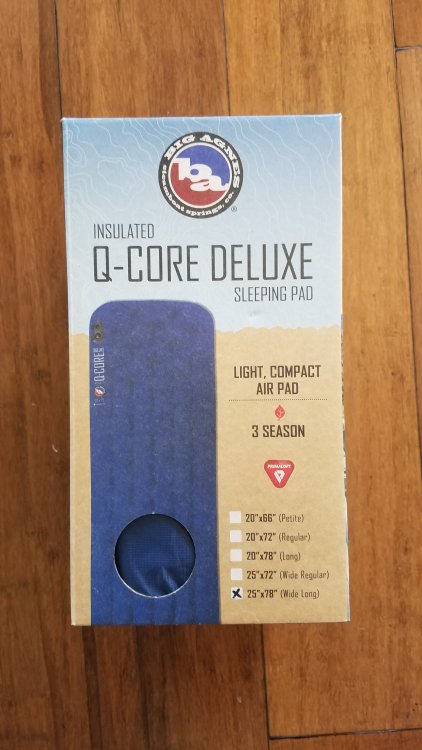
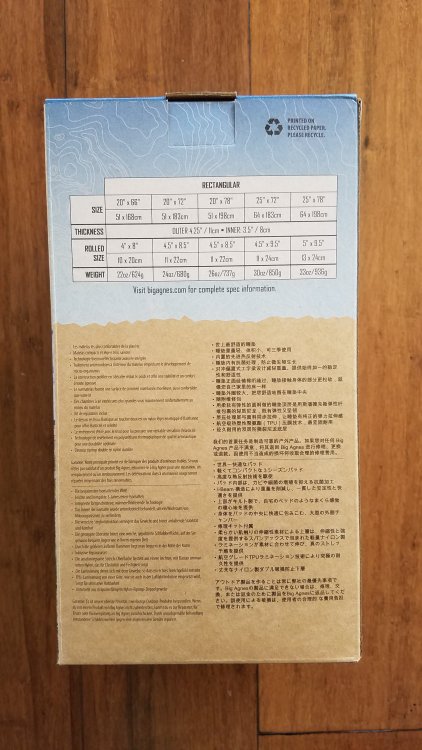
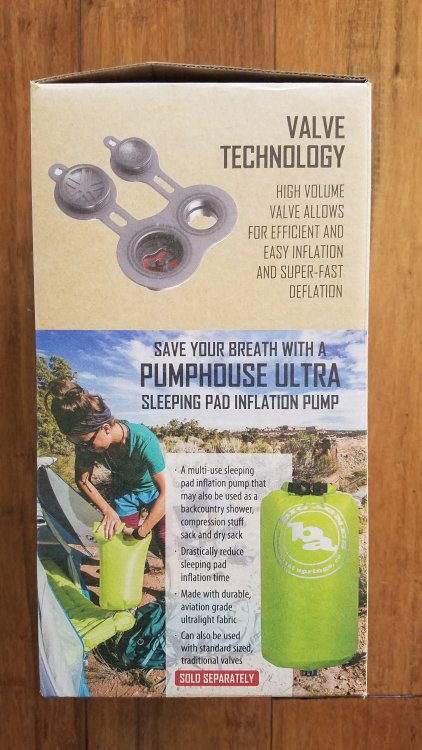
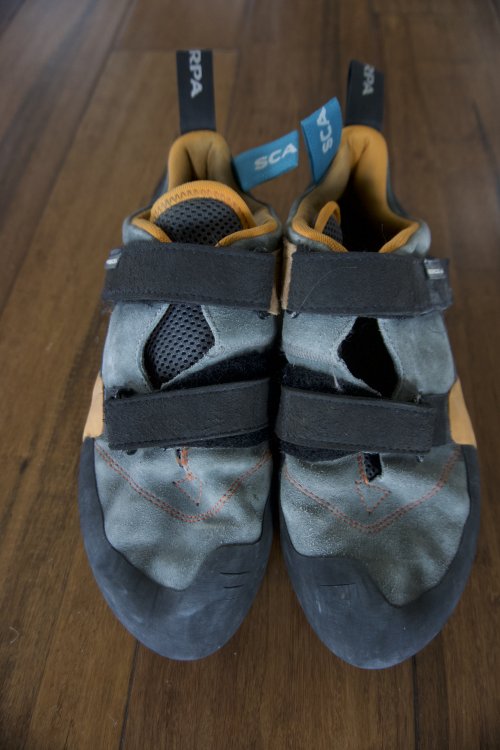
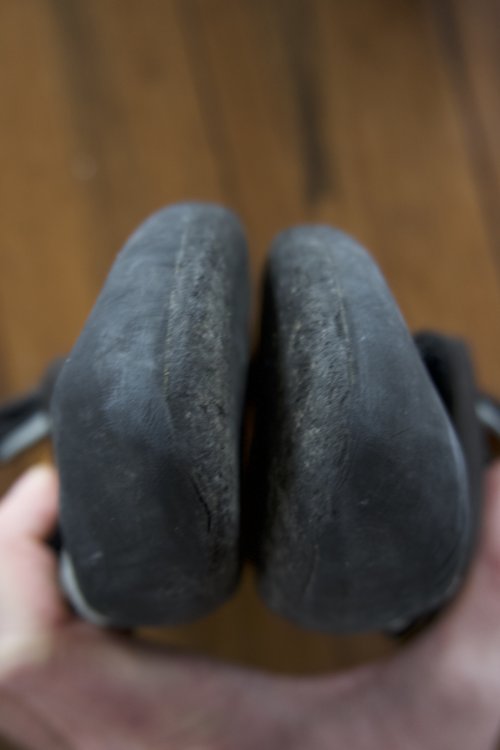
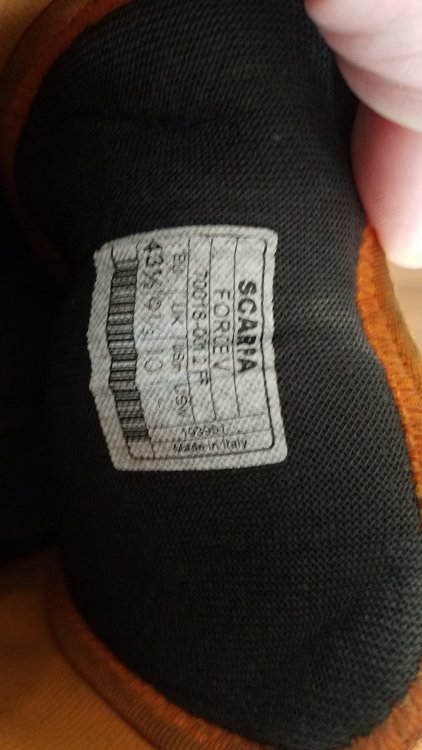
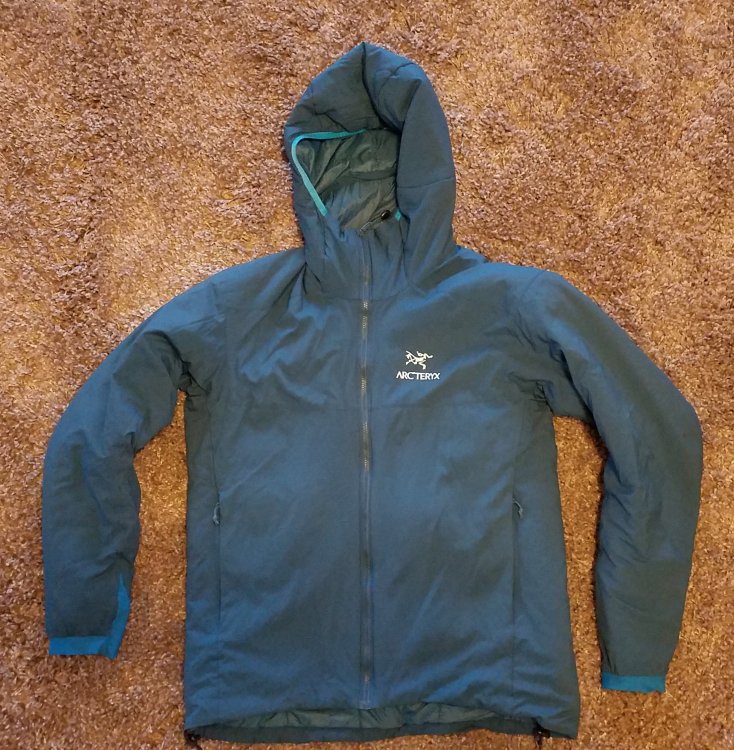
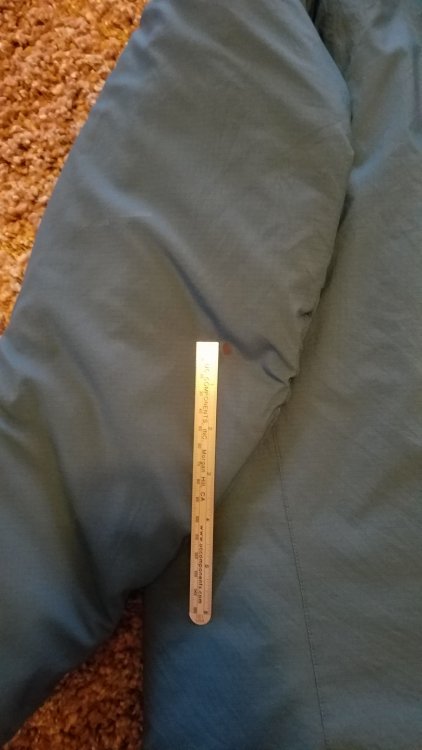
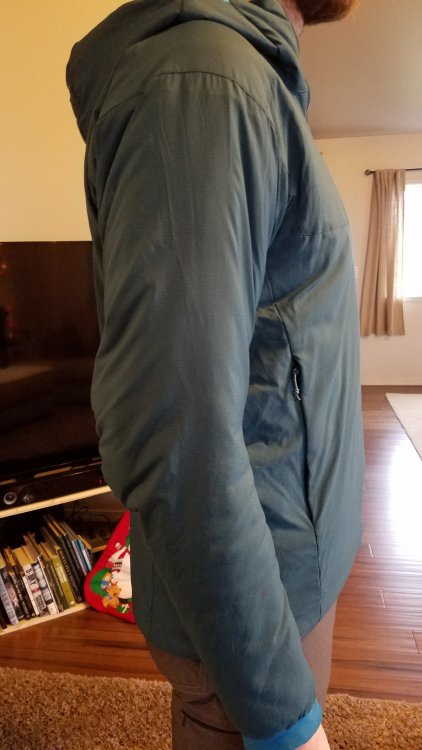
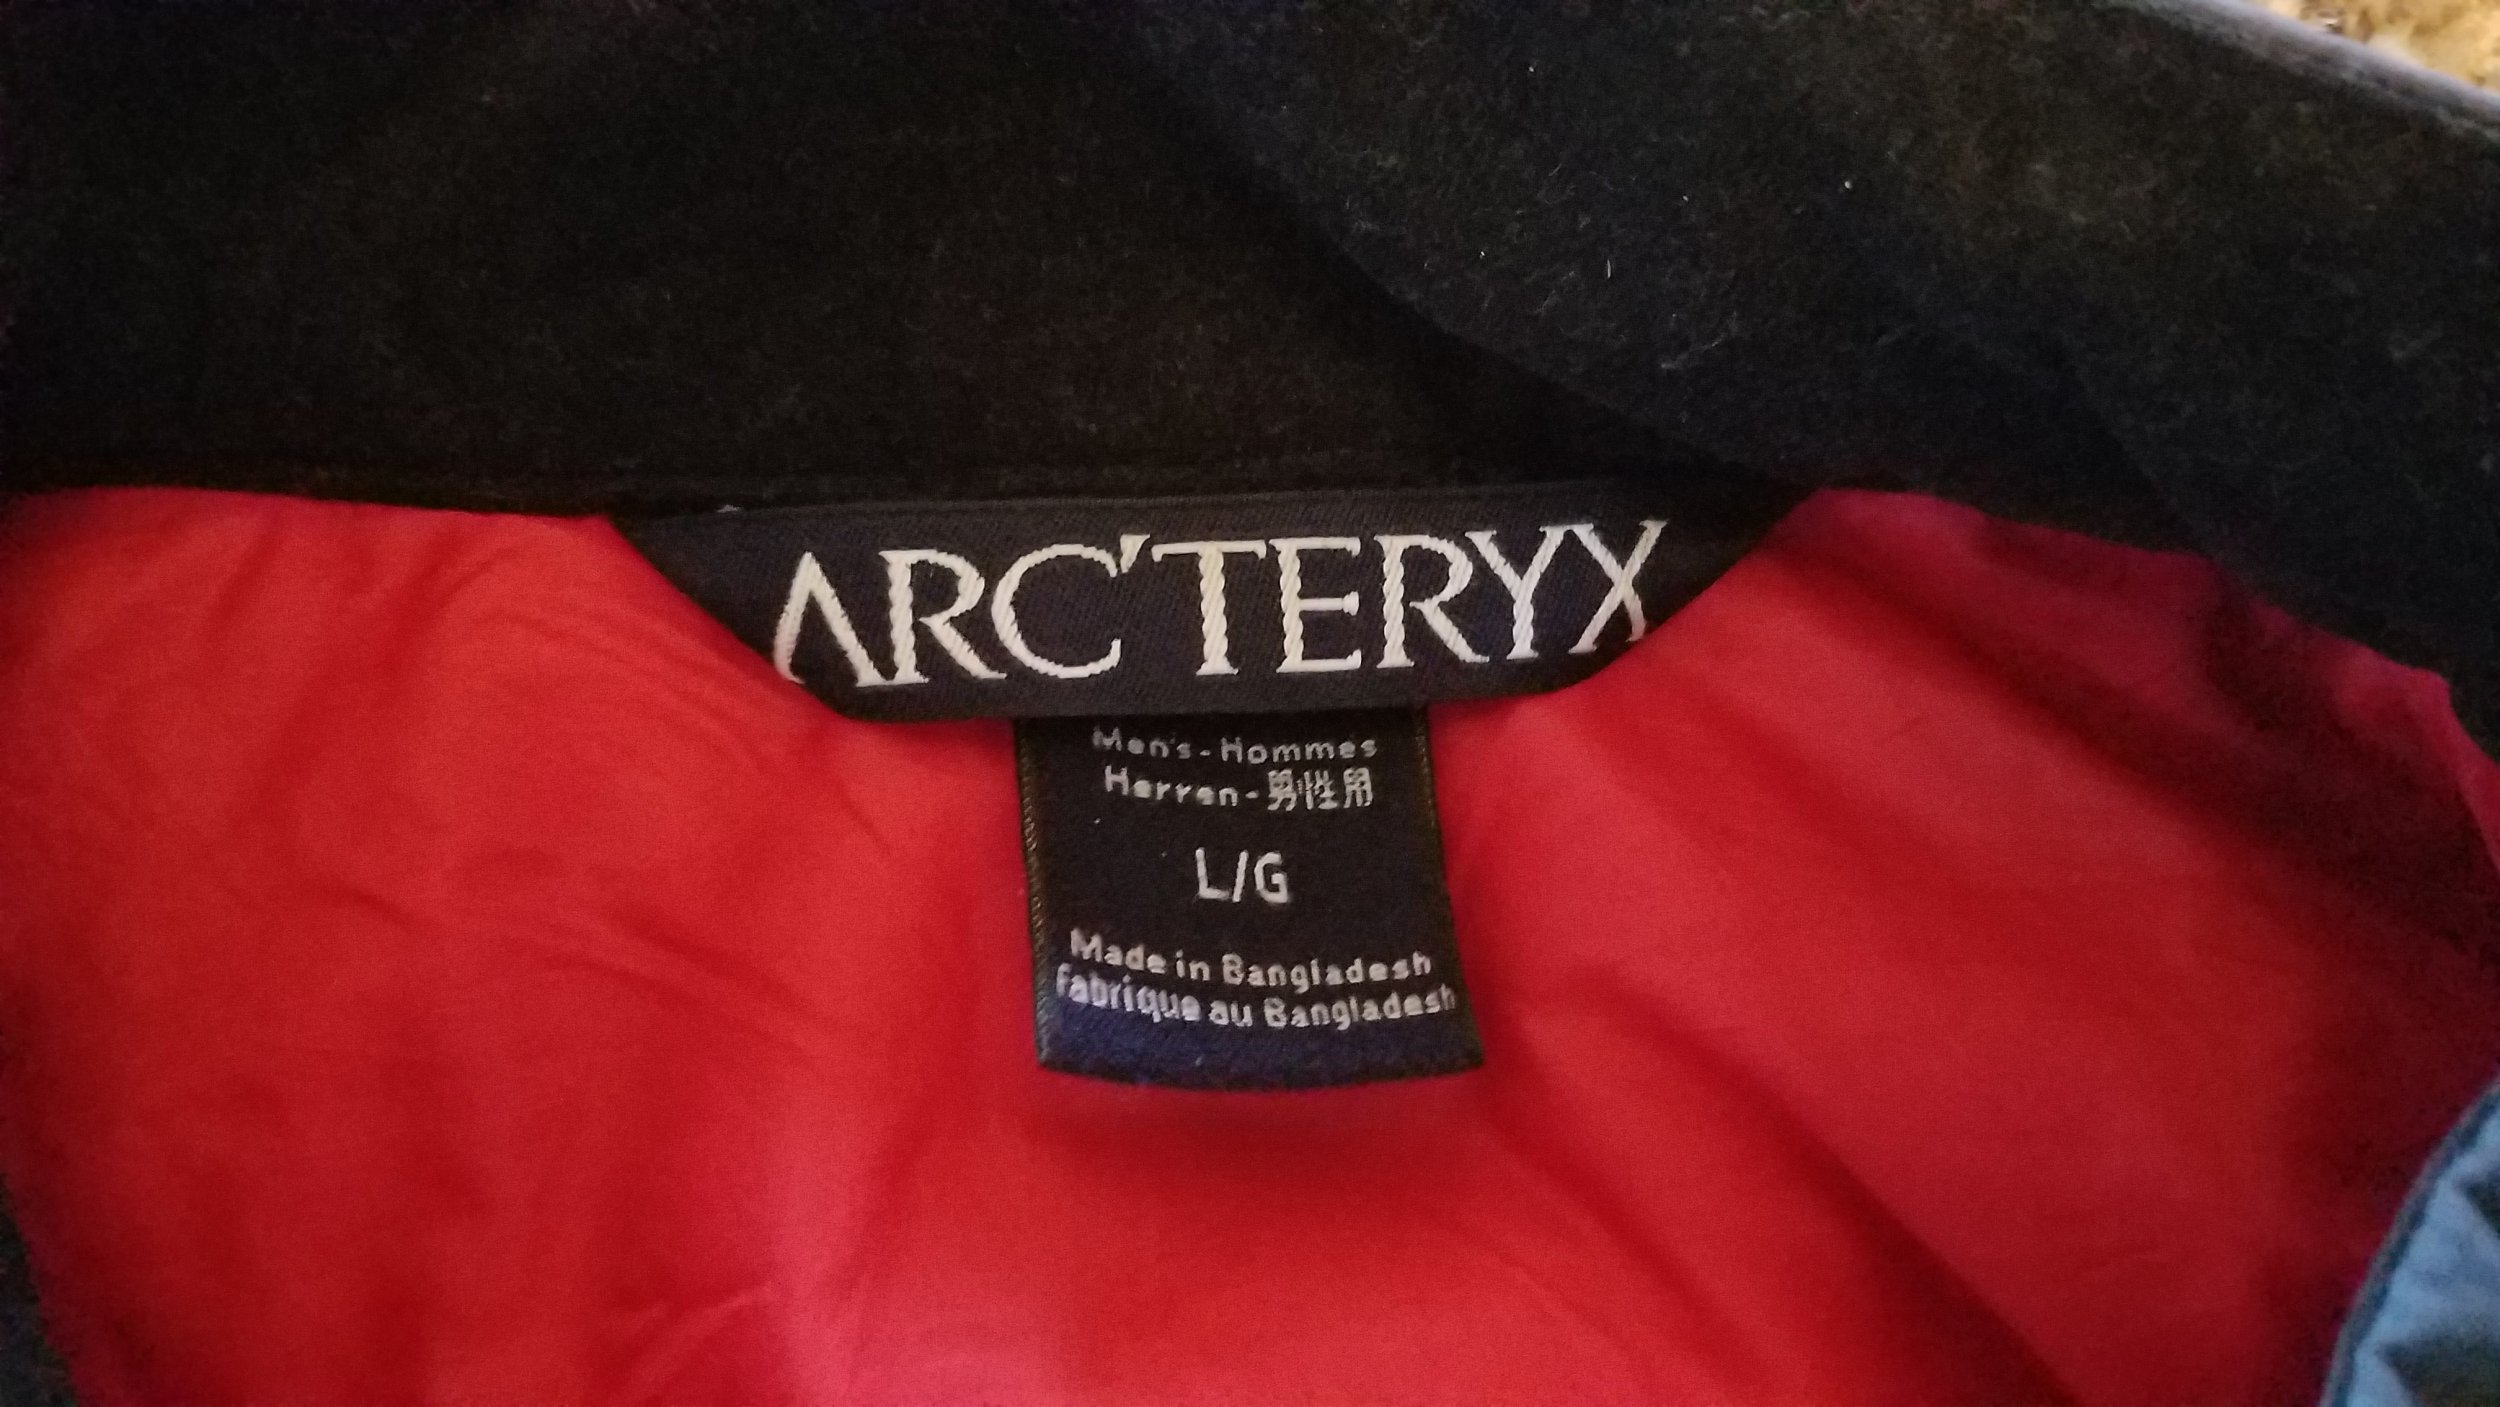
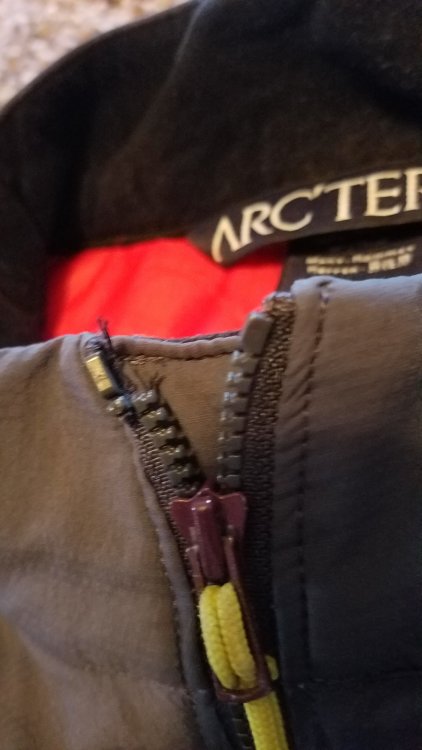
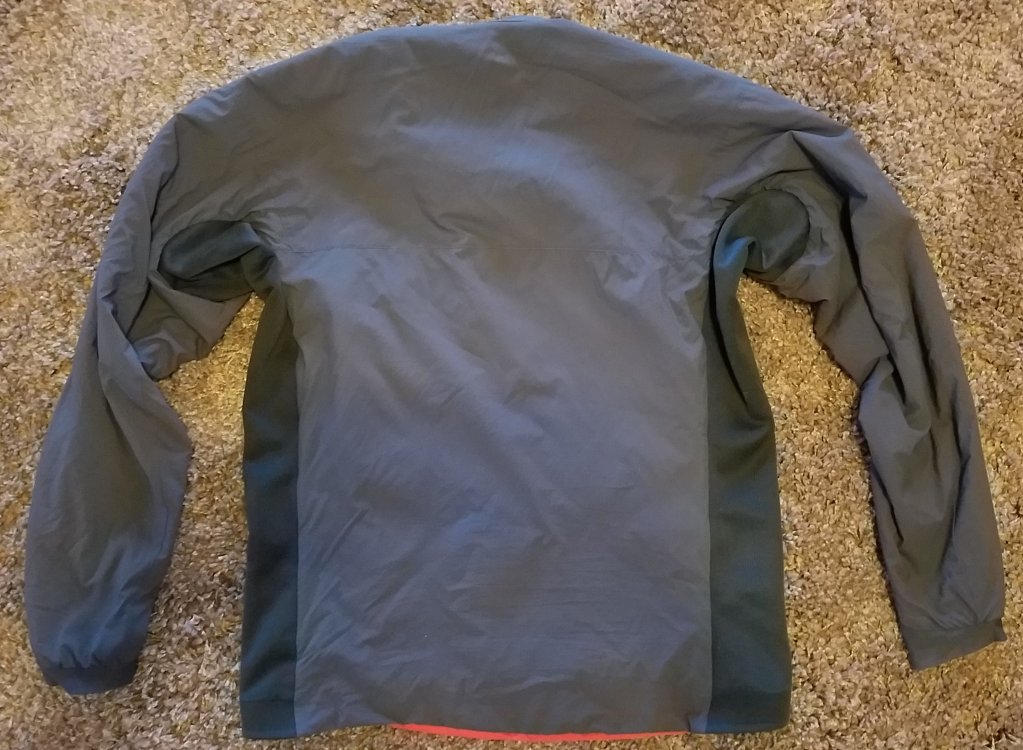
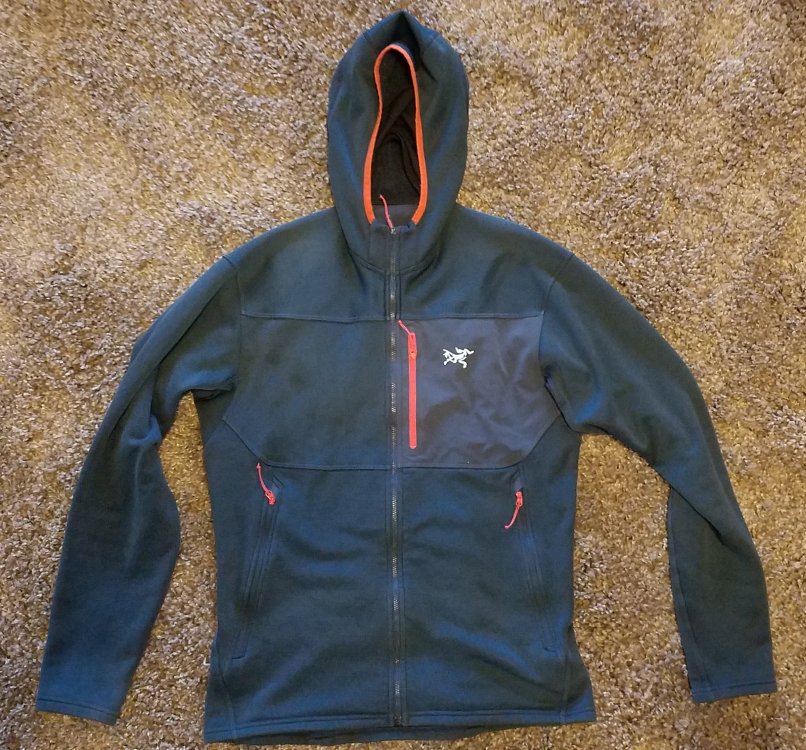
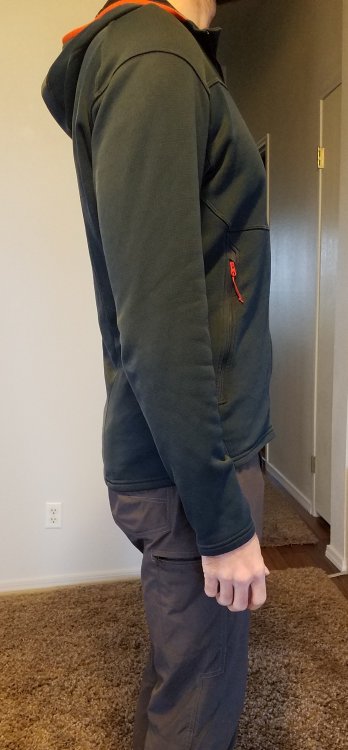
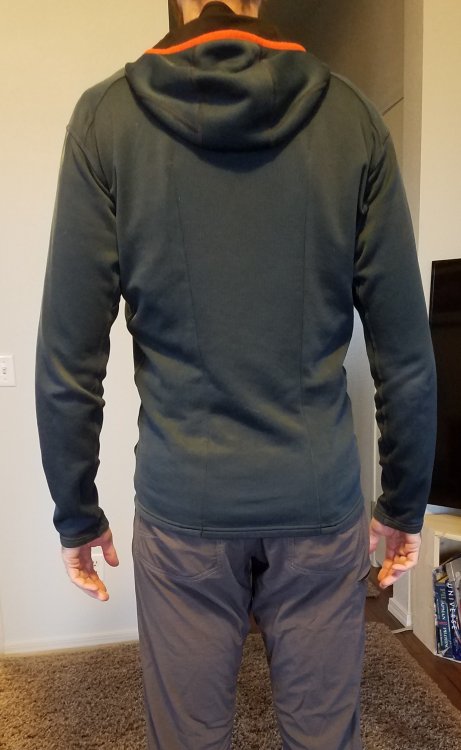
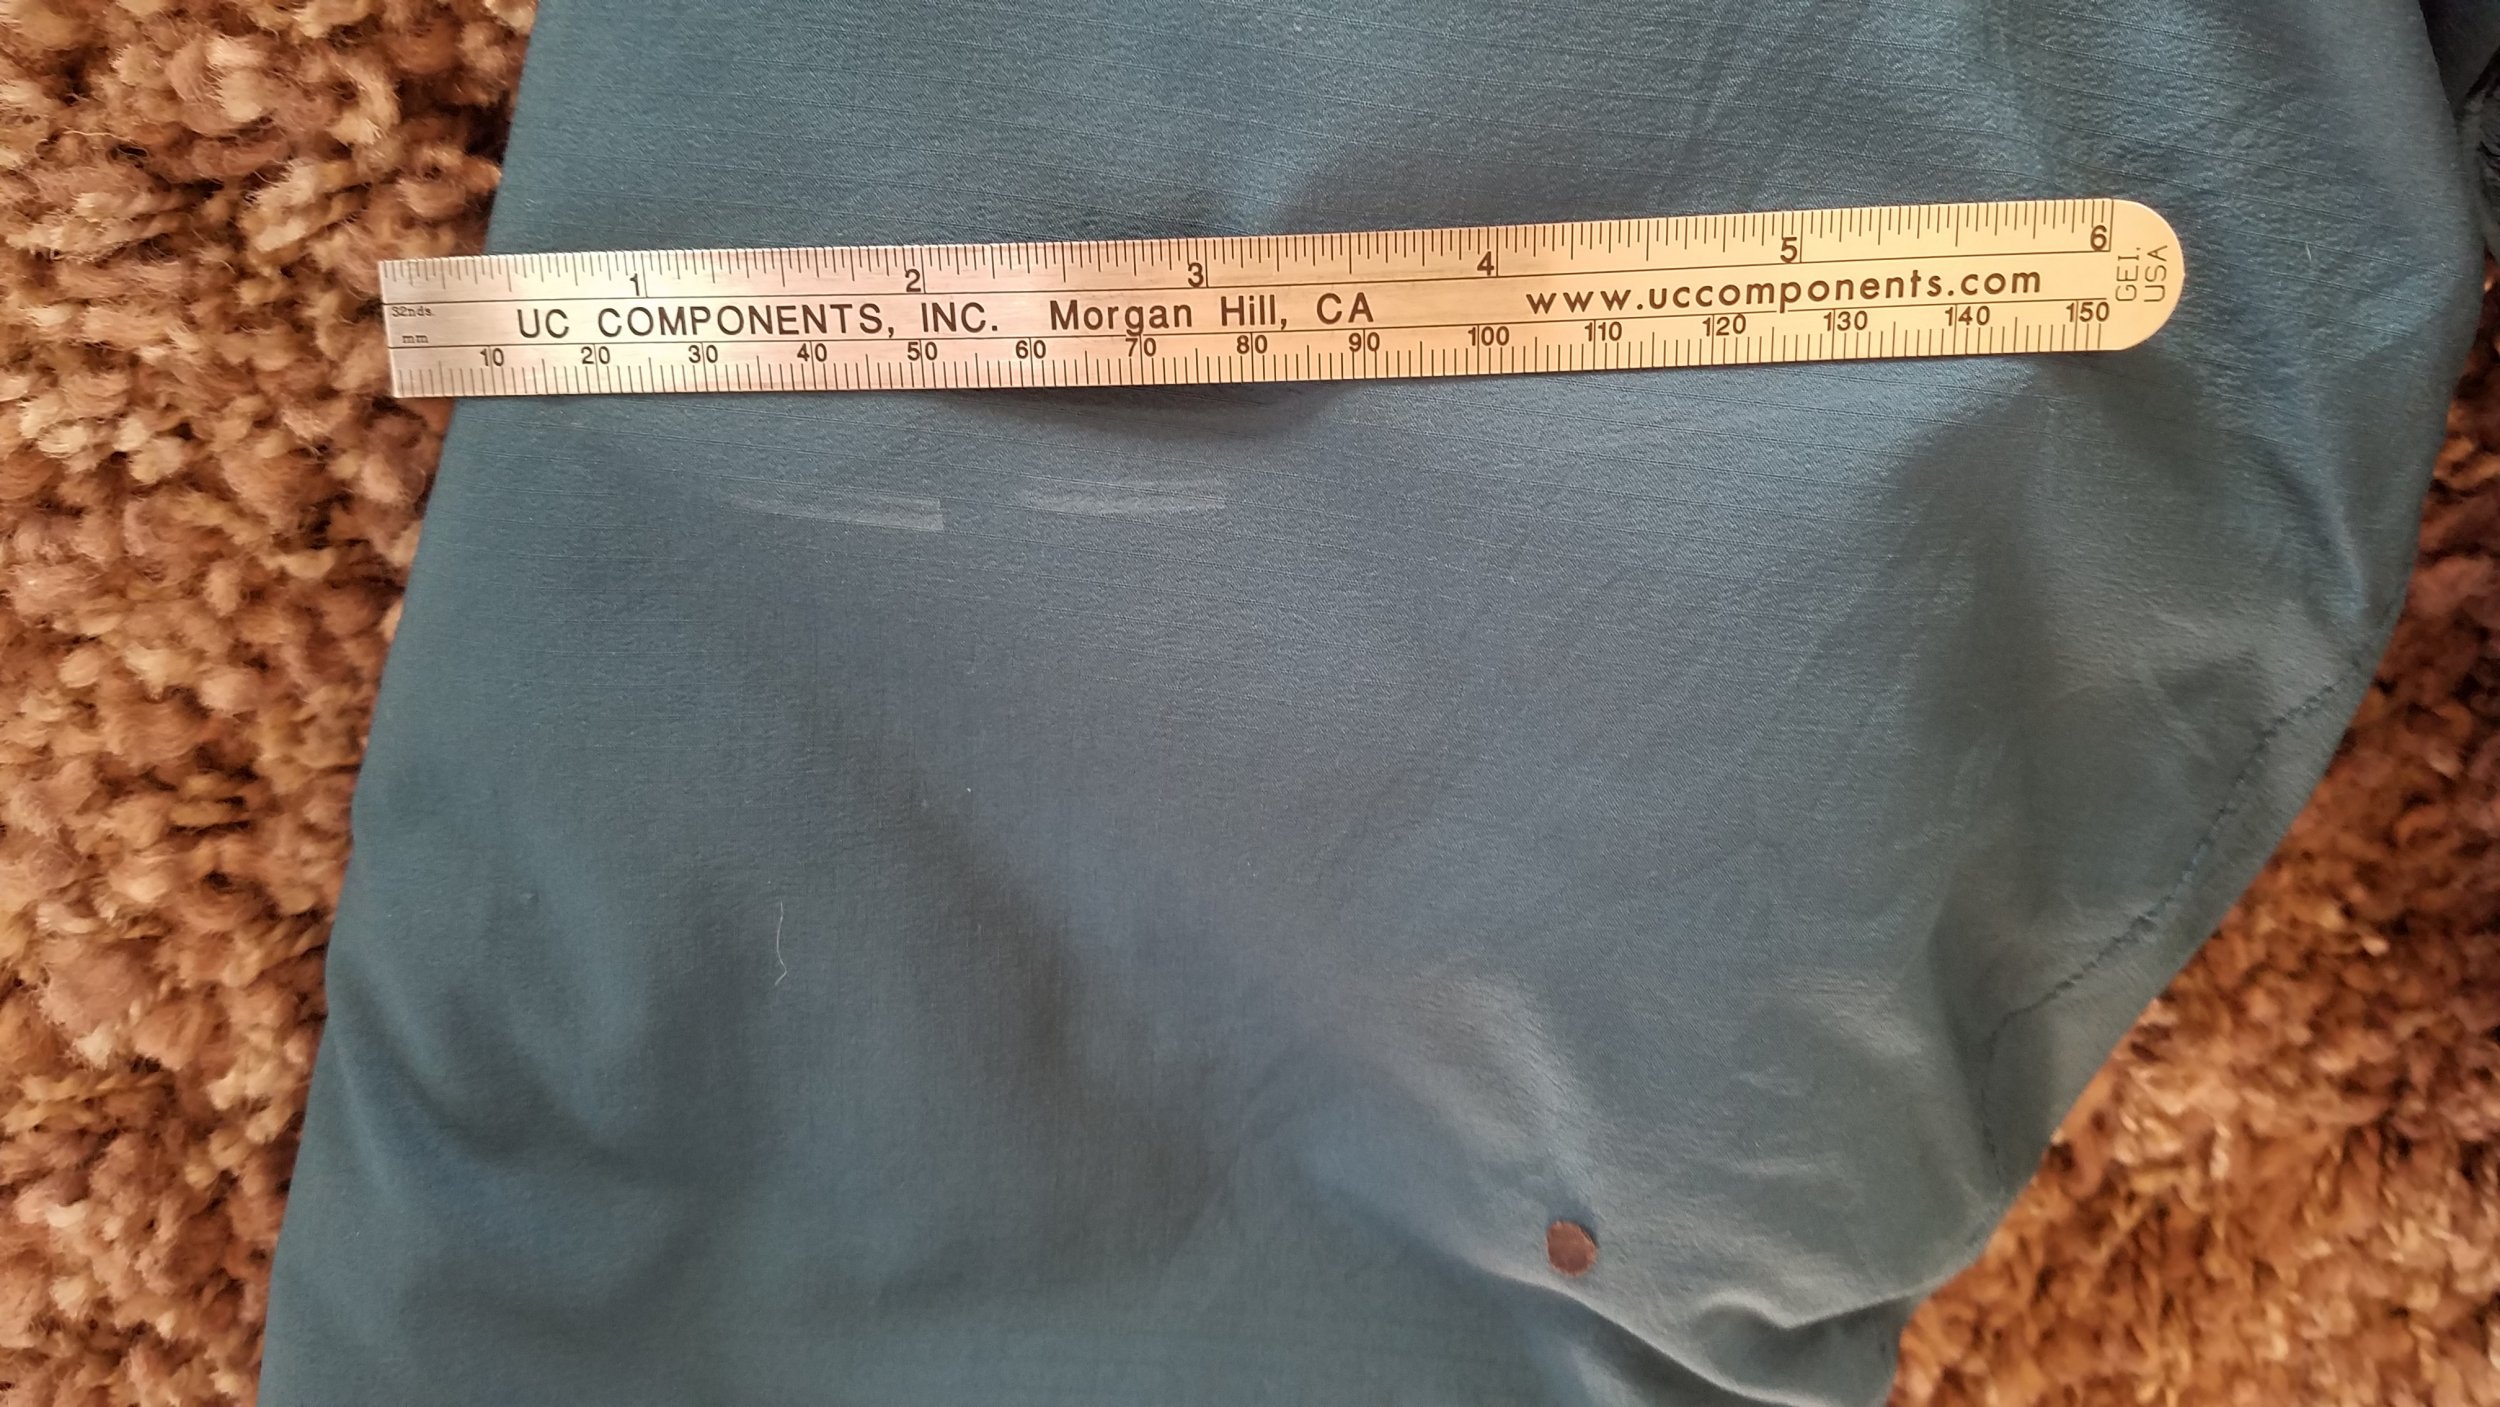
Shipping to lower 48 only. Payment via PayPal. *Prices include shipping and PayPal fees* Please contact me if you have any questions, thanks. _____________________ 1. Petzl Sirocco Helmet (Brand New Without Tags), Size S/M - $80 2. SOLD The North Face Dark Star -20 F Synthetic Sleeping Bag, Size Regular (6') - $160 SOLD 3. SOLD Big Agnes Q-Core Deluxe Sleeping Pad (Brand New in Box), Size: 25" x 78" - $145 SOLD 4. SOLD Scarpa Force V Shoes, Size 43.5 US Men 10 - $30 SOLD 5. SOLD Arcteryx Atom AR Hoody, Men's Size Large - $100 SOLD 6. SOLD Arcteryx Atom LT Jacket, Men's Size Large - $40 SOLD 7. SOLD Arcteryx Fortrez Fleece Hoody, Men's Size Large - $80 SOLD ____________________ 1. Petzl Sirocco Helmet (Brand New Without Tags), Size S/M - $80 2. SOLD The North Face Dark Star -20 F Synthetic Sleeping Bag, Size Regular (6') - $160. SOLD Purchased new in 2015 and I am the original owner. Has been used ~ 12 times. No rips or tears. https://www.thenorthface.com/shop/dark-star-20f-29c#hero=0 3. SOLD Big Agnes Q-Core Deluxe Sleeping Pad (Brand New in Box), Size: 25" x 78" - $145 SOLD More information: https://www.bigagnes.com/Q-Core-Deluxe?size=15 4. SOLD Scarpa Force V Shoes, Size 43.5 US Men 10 - $30 SOLD Have not been resoled yet. 5. SOLD Arcteryx Atom AR Hoody, Men's Size Large - $100 SOLD One small hole (less than a 1/4") on the back of the left arm was repaired with tenacious tape (see pictures) *Updated: Couple of small scuff marks on the same elbow as the small hole (see pictures) Otherwise in good condition with no other rips or tears. Color: Dark Blue See pictures for sizing. I am 6'3" tall with a 33" waist and 41" chest. 6. SOLD Arcteryx Atom LT Jacket, Men's Size Large - $40 SOLD There is a tear in the zipper which causes the zipper to come out of the top (see pictures). Zipper is still fully functional and closes properly for the length of the jacket. You could sew the tear in the zipper (I think) but I only found this a minor inconvenience and lived with it. The jacket is in otherwise good condition with no rips or tears. Color: Grey See pictures for sizing. I am 6'3" tall with a 33" waist and 41" chest. 7. SOLD Arcteryx Fortrez Fleece Hoody, Men's Size Large - $80 SOLD Color: Dark Blue When I bought this jacket I though it fit like a dress, fitted on the top near the chest but wide at the waist. I went to a seamstress and had two darts put in the back of the jacket to have it fitted around the waist (see pictures). The fit is excellent underneath a harness. If you are approximately my height and waist, it will probably also fit well (see my measurements below). I am not too sure but am guessing you could take the stitches out if you wanted it wider on the bottom. The jacket is in otherwise good condition with no rips or tears. See pictures for sizing. I am 6'3" tall with a 33" waist and 41" chest.


-

[TR] Mt. Hood - South Side - Old Chute 3/18/2016
Pete Wojcik replied to Pete Wojcik's topic in Oregon Cascades
March 18, 2016 My brother and I took advantage of the good weather last week and decided to give Hood a try. Our initial plan was to start at the timberline parking lot early Friday morning, head up the south side to the hogsback ridge, and from there try either the old chute or the pearly gates. There was a 1-2 inch breakable ice crust that stepped down into softer snow around the timberline parking lot when we arrived Thursday afternoon. After talking to ski patrol and others coming down it looked like these conditions would continue on up at least to the top of the Palmer. NWAC had forecasted three avalanche problems for the day; Wind Slab, Loose Wet, and Cornices. The temperatures were also forecasted to reach near the freezing level on the summit during mid-day. We wanted to mitigate the risk of the loose wet problem (south aspects) and any ice fall that may be encountered passing the rime ice towers on the traverse to and from the old chute to the hogsback by starting as early as possible and getting down before the sun hit the south facing slopes. We started from the parking lot at 1:30 am. There was some wind gusts in the parking lot but after ascending about 1000' it completely died down and was calm until we reached the summit ridge. I was definitely grateful for this...I had heard a few stories about high winds up to the hogsback. The breakable ice/wind blown layer was pretty firm in some places making for easy cramponing past the Palmer. After reaching the hogsback we decided to give the old chute a try. There was a nice bootpack and easy steps to follow all the way up the chute (thanks to everyone before us kicking steps!). The first 100 ft or so from the old chute to the summit on the summit ridge was a bit sketchy but we felt comfortable soloing it. We made it back to the hogsback just as the sun was starting to hit those south facing slopes in the crater and didn't have any issues with icefall from the rime ice towers. The snow began to soften up around the hogsback area when we started descending around 10:45 am. We postholed a bit on the east slope of the hogsback but after that we didn't punch down much further than our ankles and the ice/wind blown layer was still pretty firm in some places even down to the parking lot. Bring a helmet! I got nailed in the head by a piece of the breakable ice/wind blown layer that was kicked off by a climber above me while descending the old chute. I saw a couple of people heading to the summit without one so I thought I'd mention it. Link to GPX file: https://caltopo.com/m/80VQ Times: 1:30 am: Start at timberline parking lot. 4:00 am: Top of the palmer lift. 7:30 am: Hogsback ridge. 9:00 am: Summit. 10:00 am: Back at Hogsback ridge. 12:15 pm: End at timberline parking lot. Ready to head up the hogsback in the morning. Making our way to the old chute. Looking up the old chute. Old chute. Top of the old chute. Watch the edge! Summit ridge after exiting the old chute. Summit! POV video of the summit ridge headed back to the old chute. [video:youtube]c8BvZZ-tdIU Headed back down to the hogsback. Hogsback ridge. Sun halo and a couple of climbers headed up to climb the Devil's Kitchen Headwall. One last look at the hogsback. -
[TR] Mt. Hood - South Side - Old Chute 3/18/2016
Pete Wojcik replied to Pete Wojcik's topic in Oregon Cascades
My brother and I took advantage of the good weather last week and decided to give Hood a try. Our initial plan was to start at the timberline parking lot early Friday morning, head up the south side to the hogsback ridge, and from there try either the old chute or the pearly gates. There was a 1-2 inch breakable ice crust that stepped down into softer snow around the timberline parking lot when we arrived Thursday afternoon. After talking to ski patrol and others coming down it looked like these conditions would continue on up at least to the top of the Palmer. NWAC had forecasted three avalanche problems for the day; Wind Slab, Loose Wet, and Cornices. The temperatures were also forecasted to reach near the freezing level on the summit during mid-day. We wanted to mitigate the risk of the loose wet problem (south aspects) and any ice fall that may be encountered passing the rime ice towers on the traverse to and from the old chute to the hogsback by starting as early as possible and getting down before the sun hit the south facing slopes. We started from the parking lot at 1:30 am. There was some wind gusts in the parking lot but after ascending about 1000’ it completely died down and was calm until we reached the summit ridge. I was definitely grateful for this…I had heard a few stories about high winds up to the hogsback. The breakable ice/wind blown layer was pretty firm in some places making for easy cramponing past the Palmer. After reaching the hogsback we decided to give the old chute a try. There was a nice bootpack and easy steps to follow all the way up the chute (thanks to everyone before us kicking steps!). The first 100 ft or so from the old chute to the summit on the summit ridge was a bit sketchy but we felt comfortable soloing it. We made it back to the hogsback just as the sun was starting to hit those south facing slopes in the crater and didn’t have any issues with icefall from the rime ice towers. The snow began to soften up around the hogsback area when we started descending around 10:45 am. We postholed a bit on the east slope of the hogsback but after that we didn’t punch down much further than our ankles and the ice/wind blown layer was still pretty firm in some places even down to the parking lot. Bring a helmet! I got nailed in the head by a piece of the breakable ice/wind blown layer that was kicked off by a climber above me while descending the old chute. I saw a couple of people heading to the summit without one so I thought I’d mention it. Link to GPX file: https://caltopo.com/m/80VQ Times: 1:30 am: Start at timberline parking lot. 4:00 am: Top of the palmer lift. 7:30 am: Hogsback ridge. 9:00 am: Summit. 10:00 am: Back at Hogsback ridge. 12:15 pm: End at timberline parking lot. Ready to head up the hogsback in the morning. Making our way to the old chute. Looking up the old chute. Old chute. Top of the old chute. Watch the edge! Summit ridge after exiting the old chute. Summit! POV video of the summit ridge headed back to the old chute. [video:youtube]c8BvZZ-tdIU Headed back down to the hogsback. Hogsback ridge. Sun halo and a couple of climbers headed up to climb the Devil’s Kitchen Headwall. One last look at the hogsback. -
[TR] Mt. Hood - South Side - Old Chute 3/18/2016
Pete Wojcik replied to Pete Wojcik's topic in Oregon Cascades
I've been unable to post this trip report. After entering everything and checking it via preview, I click submit and it deletes everything and shows a blank post. I read a couple of other reports with this issue but no solutions. I have been trying to troubleshoot this and have not found a solution. It seems like after entering a certain amount of text or some defined length of the document it will delete everything and give a blank document after submitting, i.e. I can submit short sections of the trip report and see it after submitting but after a certain length it will delete everything and give a blank document after submitting. -
My brother and I took advantage of the good weather last week and decided to give Hood a try. Our initial plan was to start at the timberline parking lot early Friday morning, head up the south side to the hogsback ridge, and from there try either the old chute or the pearly gates. There was a 1-2 inch breakable ice crust that stepped down into softer snow around the timberline parking lot when we arrived Thursday afternoon. After talking to ski patrol and others coming down it looked like these conditions would continue on up at least to the top of the Palmer. NWAC had forecasted three avalanche problems for the day; Wind Slab, Loose Wet, and Cornices. The temperatures were also forecasted to reach near the freezing level on the summit during mid-day. We wanted to mitigate the risk of the loose wet problem (south aspects) and any ice fall that may be encountered passing the rime ice towers on the traverse to and from the old chute to the hogsback by starting as early as possible and getting down before the sun hit the south facing slopes. We started from the parking lot at 1:30 am. There was some wind gusts in the parking lot but after ascending about 1000’ it completely died down and was calm until we reached the summit ridge. I was definitely grateful for this…I had heard a few stories about high winds up to the hogsback. The breakable ice/wind blown layer was pretty firm in some places making for easy cramponing past the Palmer. After reaching the hogsback we decided to give the old chute a try. There was a nice bootpack and easy steps to follow all the way up the chute (thanks to everyone before us kicking steps!). The first 100 ft or so from the old chute to the summit on the summit ridge was a bit sketchy but we felt comfortable soloing it. We made it back to the hogsback just as the sun was starting to hit those south facing slopes in the crater and didn’t have any issues with icefall from the rime ice towers. The snow began to soften up around the hogsback area when we started descending around 10:45 am. We postholed a bit on the east slope of the hogsback but after that we didn’t punch down much further than our ankles and the ice/wind blown layer was still pretty firm in some places even down to the parking lot. Some notes/observations: - The bergschrund looked completely filled and several folks were passing directly over it. - Bring a helmet! I got nailed in the head by a piece of the breakable ice/wind blown layer that was kicked off by a climber above me while descending the old chute. I saw a couple of people heading to the summit without one so I thought I’d mention it. Link to GPX file: https://caltopo.com/m/80VQ Times: 1:30 am: Start at timberline parking lot. 4:00 am: Top of the palmer lift. 7:30 am: Hogsback ridge. 9:00 am: Summit. 10:00 am: Back at Hogsback ridge. 12:15 pm: End at timberline parking lot. Ready to head up the hogsback in the morning. Making our way to the old chute. Looking up the old chute. Old chute. Top of the old chute. Watch the edge! Summit ridge after exiting the old chute. Summit! POV video of the summit ridge headed back to the old chute. [video:youtube]c8BvZZ-tdIU Headed back down to the hogsback. Hogsback ridge. Sun halo and a couple of climbers headed up to climb the Devil’s Kitchen Headwall. One last look at the hogsback.
-
Trip: Ingalls Peak - South Ridge Date: 9/7/2015 Trip Report: My friend Mike and I climbed the South Ridge of North Ingalls Peak on September 7. We slept at the trail head Sunday night and got an early start Monday morning hoping to beat any crowds. After a couple of detours and stopping at Ingalls Lake for a bit we made it to the start of the climb in about 3.5 hours. It had snowed a few inches the night before and the weather was being a little moody while climbing. This was my first alpine climb and I got to experience climbing in fog, wind, and with cold fingers…it was awesome! We did the climb in 4 pitches instead of 3 like the majority of the trip reports I had read. I forgot to snap a good picture of the entire face and snagged a photo from another trip report by Alicia Broederdorf to describe our route. Her trip report is also an excellent description of the approach and route: http://ajtrekker08.blogspot.com/2012/08/ingalls-peak-north-summit-south-ridge.html We did 4 rappels down the same way we came up. Bring a 70 m rope if you want to make the rappel from the bolted anchors at 3 to the ledge at 2. Our route shown in yellow. Numbers show the end of each pitch. There are slings at 1 and 2, and bolted anchors at 3 and 4. View from Ingalls Lake with some fresh snow near Ingalls Peak. Making our way to the start. Mike heading up the first pitch. Belaying Mike up the second pitch. Mike heading off into the fog on the second to last pitch. Somewhere on the second to last pitch. Belaying Mike up the last pitch. Following up the last pitch. Scrambling to the true summit. Mike had better luck with the weather and had Mt. Stuart poking through the clouds in the background. Turned out to be an awesome day. Gear Notes: Singles to 3", set of nuts, a few single and double length alpine draws, 70 m rope. Approach Notes: Some snow at the base of the climb but it is probably gone by now.
-
Trip: Little Tahoma - Fryingpan-Whitman Date: 7/3/2015 Trip Report: My brother and I tackled Little Tahoma on July 2-3. We got a late start on Thursday afternoon from the parking lot, had plans to camp at the Meany Crest that night, and summit the next day. When we reached Summerland I was surprised to see how little snow there was leading up to the Meany Crest. The last time I was here in mid-July, 2011 the snow line was well below Summerland which made for an easy walk to the base of the Fryingpan glacier. After taking a look from Summerland, and looking at the map, we decided to try and gain the Meany Crest from the east. It ended up being a scramble to the peak slightly northeast of the Meany Crest and took a little longer than the route we took on the way back down. Once we reached the top of the peak, the Meany Crest was a short walk away along the ridgeline on the left. Awesome bivy site! We got an early start around 3:30 am Friday morning. There were clear skies and a full moon, which allowed us to navigate without headlamps most of the way before dawn. On the Fryingpan heading to the Whitman crest. Sunrise at the Whitman crest. Getting ready for the Whitman glacier. The crevasses had begun to open up but were still passable and easy to navigate. The notch we were shooting for is marked with an arrow in the photo below. Heading to the notch. At the beginning of the scramble on the rock looking east. Scrambling up the notch. After this snowfield there are occasional rock cairns which lead to the summit, however I found scrambling to the summit to be pretty straight forward both times I was up here. When I was near the summit in 2011 for the first time, I was led by another person in our group. I was unaware of the last roughly 30 feet of class 4 rock which leads to the true summit. No one in our party brought a rope or protection to the summit scramble (we left them at the notch). I was pretty disappointed in having to turn around without reaching the true summit! This time my brother and I brought our rope and some protection for that section. It was his first time being on something with that much exposure however, and he was not feeling it. I read a couple of reports of people tackling that section without a rope but just couldn’t bring myself to it. The north side is a huge 1000’+ drop, and the south side isn’t much better. It didn’t really bother me this time, I was just glad to be up there with my brother on a beautiful day. I’ll have to wait until next time to get the actual summit. My brother near the actual summit. Me near the actual summit. Shown below is the route we took down from the Meany Crest. After coming down that side, a couple of other routes on this side were pretty obvious. I think scrambling through loose rock to and from the Meany Crest tacked on about 2+ hours to the total trip time as compared to the last time I was up here. If I ever do Little Tahoma again I would want to hike in similar conditions to my previous trip with the snow level at or below Summerland. Gear Notes: Crevasse rescue gear. A few runners and cams for the last bit to the true summit.