


diepj
-
Posts
168 -
Joined
-
Last visited
-
Days Won
6
Content Type
Profiles
Forums
Events
Posts posted by diepj
-
-
This might not help if you've got multiples from the same spool, but what about a close up pic of the rope showing color/weave and then writing whatever data you want to maintain. This could be maintained in electronic or hard copy.
Alternatively, what about making some kind of tag and then somehow attaching it to a knot in the rope. You store it with this tag attached and when you pack the rope for a trip you take it off. When you return the rope to storage you tie a knot and re-attach the tag. The tag and attachment method could be almost anything you could imagine and have on hand. It could range from paper and string up to the stamped metal idea listed above. This should work great for personal rope stashes where you only have a rope or 2 out at a time.
Super dirtbag could be writing the info with a pen on some masking tape and wrapping it around the rope. You just would have to make a new one every time you brought the rope home.
-
-


Awesome job! We were on the Reid, I wish we would have spotted you up there at some point and snagged a pic.
-
Is that supposed to be a response to the question of the appropriateness of drones in the backcountry? Just because someone else can/does have an impact doesn't mean it is right. It also doesn't mean every other user group should automatically be allowed the same. That's a race to the bottom.
I'm not sure exactly where I stand on the issue, but it is a discussion that needs to happen within the climbing community and out society at large.
For now I am glad they are rare and unusual sights - I don't expect it to stay that way and I do wonder what it will mean for the outdoor and wilderness experience.
-
Double check your own existing coverages before you go too far. My insurance travels to Canada for emergency procedures/situations. Also, if you are a member of AAC and some other clubs, mountain rescue insurance may be included. I'm not saying you won't have gaps, but check them out first.
There is more discussion on the NW hikers thread, but Josh was on Medicaid which would have covered him in BC, but not in Alberta (No idea why...) Since he ended up hospitalized just over some arbitrary coverage border he was out of luck. It does sound like all appeals were exhausted before kicking into fundraising mode...
Heal well JL!!
-
You guys are right, the orange line in the photo doesn't turn left and go direct to the Queen's chair. It does seem like they were on that line, or maybe just to the right of it in the next slot. My main curiosity is where could they have cut over hard enough to get there once they passed #2. I don't recall any escape until more like #8. It could well have been another team too. When we left T-line, there were teams signed out for both Leuthold and Reid. We left before you Dozer, so it is possible there were people ahead on both routes. Anyway it's not very important.
Whenever I look at that photo I think about running it straight up to the rim from 3. I just wonder how bad it would be to climb that little headwall and connect back in around 9. Maybe you'd be really treed.
-
Now that I am looking at the photo of the two climber, are you sure they are on Leuthold? They were the ones we saw and they definitely started up the Reid. The basic Reid route cuts left (but not all the way into the Leuthold) once you get maybe halfway up. It is also possible to climb straight up the Reid and top out more on west crater rim.
When we were on the queen's chair, we didn't see any steps coming up Leuthold. I think maybre you guys just did different Reid variations. Maybe the other guys did this report?
http://blog.alpineinstitute.com/2015/02/route-profile-mt-hood-reid-headwall-ii.html
-
I did not see the pencil. I didn't approach the ridge until just before the photo is taken. Cathedral Ramp seems to be partially visible in the photo and that looked like it might have been in.
A hood FA won't come easy anymore - Check it out and let us know if it goes!
-
It was prime season on Hood this past Saturday. I wonder how many routes sent?
Off the top of my head, based on TRs and talking to people on the mountain I've got, clockwise from the north:
1. Wy'east
2. Pearly Gates
3. Old Chute
4. Reid HW
5. Leuthold Coloir
6. Sandy HW
I saw cards out for DKHW and Steel cliffs south face but don't know if they succeeded. I feel like I might have seen a light on West Crater Rim on the way up too. Did anyone tag Cooper or the North face?
-
Sweet! Everyone was getting at it this past weekend. We didn't see you but saw the party ahead of you crossing the Schrund shortly after 7a.
-
Sorry, no pics of the pencil, partners photos I've seen don't feature it either. Yocum ridge had a lot of water ice and verglas on the exposed rocky bits. It seems like there has been a lot of meltwater re-freeze on sun exposed parts of the mountain. Don't know if that helps.
-
Thanks for the TR! Climbing Hood and looking at Jeff on Saturday had me thinking it might be the best winter window you could ever expect to get high on this one. Way to make it happen! The pinnacle looks interesting...
-
Trip: Mt Hood - Sandy Glacier Headwall
Date: 1/31/2015
Trip Report:
We climbed the Sandy Headwall on Saturday. I took an old digital p&s camera. The upside is lots of pics, the downside is they're not very high quality and some of them look pretty retro.
We left Timberline just after 4AM and climbed steadily to Illumination Saddle, pausing briefly to don crampons at the top of Palmer. At the saddle we took a quick break and roped up to cross the Reid.
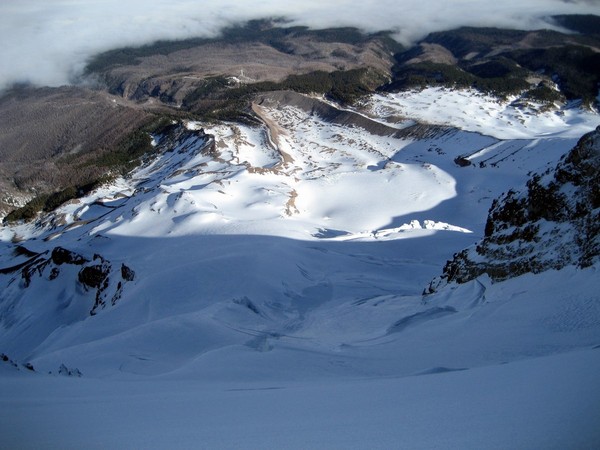
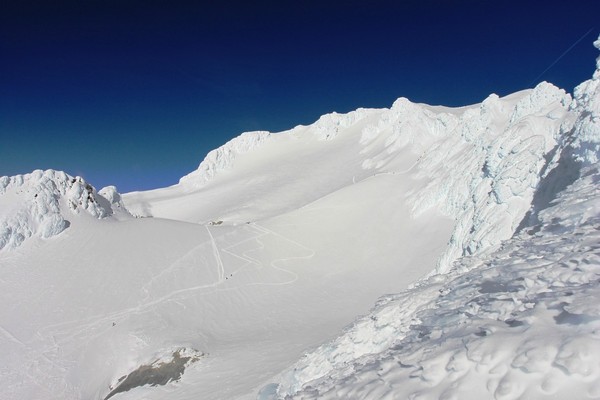
Crossing the Reid was pretty straightforward but not particularly direct. We did a gently falling traverse pretty high before descending directly down the western margin near Yocum ridge. There were a lot of open cracks and I would imagine if the snowpack was fat you could make more directly for the Yocum crossing.
Mountain Shadow Beyond Youcum Ridge

Reid Glacier
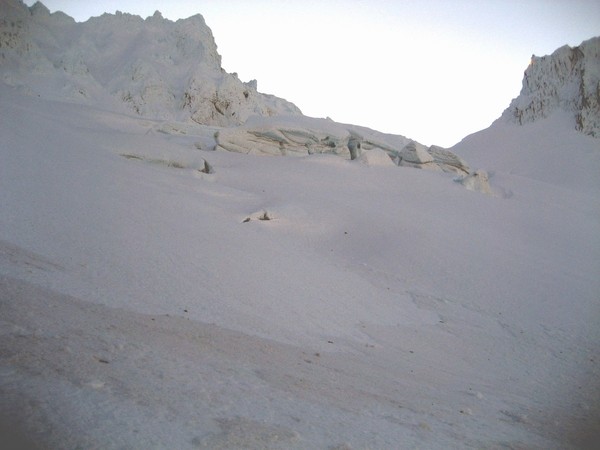
Sorry that Reid shot is looking back toward the saddle and not at the climbing route. Reid and Leuthold are in condition, but looking a little more chocolatey than you would expect for January/February. The bergschrund below the Reid is open but looks easily passable. There was a team on this when we went by.
We crossed Yocum ridge and got on the Sandy between 7800 and 7900 feet and it was very, very easy. Once on the Sandy we did a rising traverse to get under the headwall. The guidebook (Mullee) shows more of a level traverse and then attacking straight up the gut, staying left of two prominent rocks. We climbed into the route above these rocks, from the right. Either way would work and we were probably a little more direct. We had straight-forward navigation through more open and nearly open cracks. There was a lot of water ice on the lower west side of Yocum ridge. If the approach was an hour it would make a great crag.
Looking Straight Across the Sandy at Our Travel Path
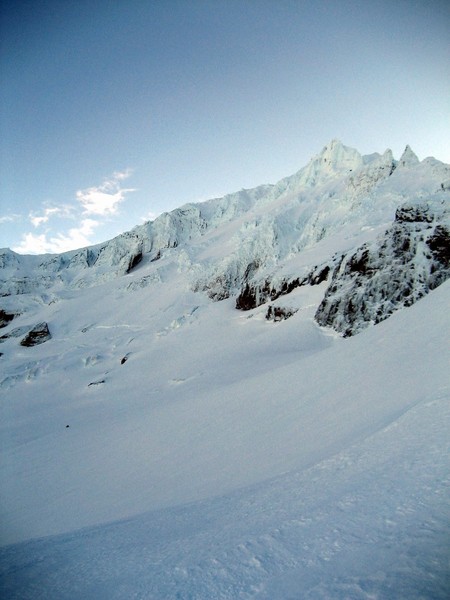
Crossing the Sandy Glacier
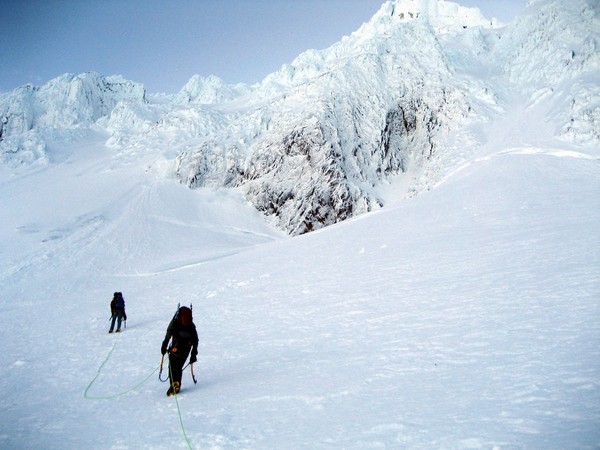
Rising Traverse on the Sandy

View from the Sandy Glacier
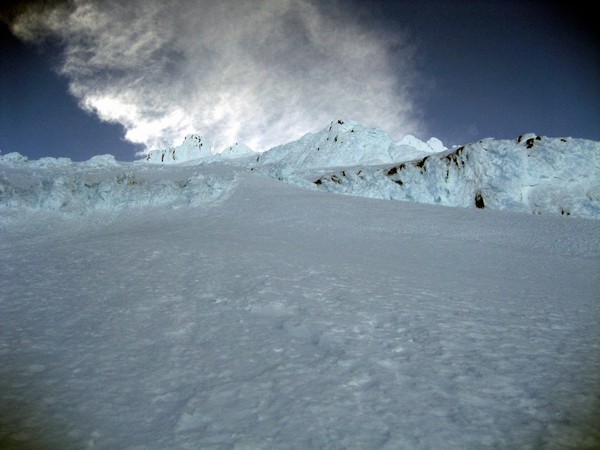
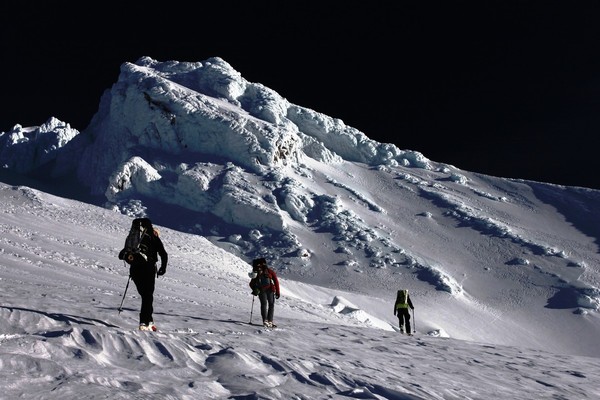
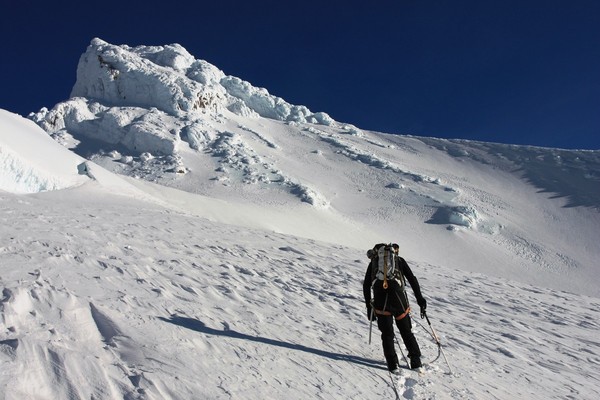
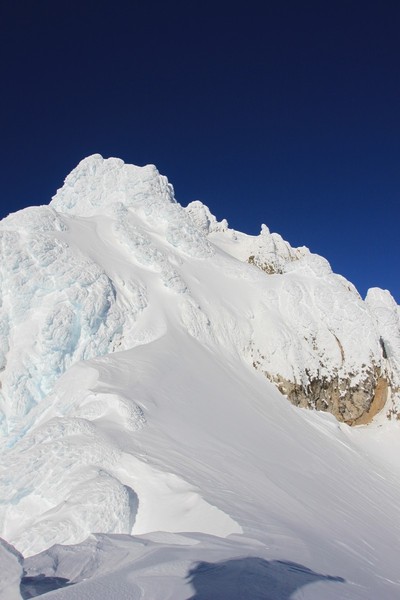
Once we got across and underneath the route all that was left was to climb! We headed straight up to the "hourglass" feature, which was more like a short band of cliff than and hourglass shape. Now that I am looking at the pictures, maybe the hourglass is the snow slope on the right hand side?? We climbed left of that because it just seemed more interesting, and we thought a route must have at least one step somewhere!
We climbed though a 6-8 ft tall nearly vertical water ice step and onto 50-55 degree water ice for about 40 feet. After this the slope eased back slightly and transitioned to alpine ice.
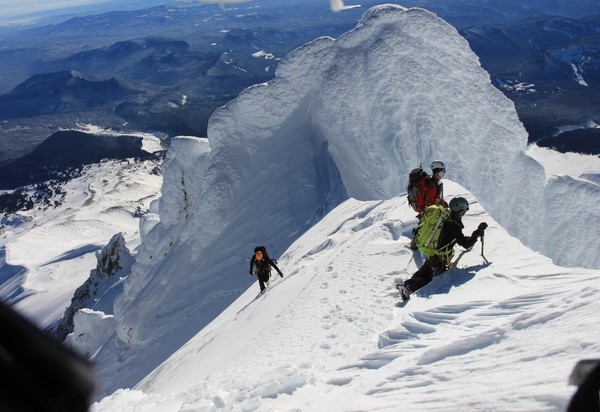
The climbing was very secure front pointing and daggers. The surface was firm but easy to chop a step into when you needed one. The slope is relentless! We climbed a little bit to the right on the upper headwall and came into the Queen's Chair right where upper Yocum Ridge dies in. The last 40 feet to the top was sweet kickable snow - the first snow of the climb. Sorry - only have pics near the bottom and the top.
"Hourglass Feature - Left
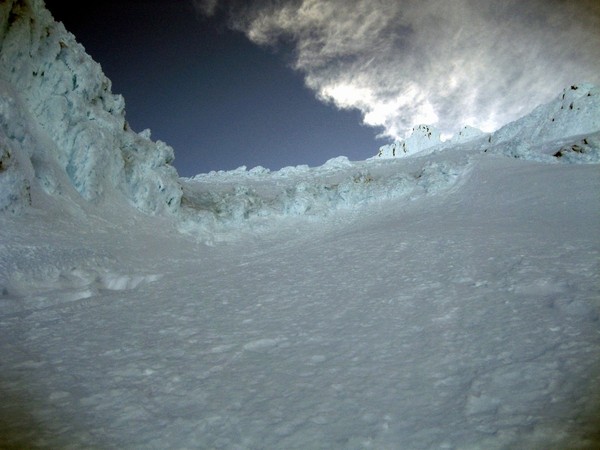
"Hourglass Feature - Right
Nearing the Top!
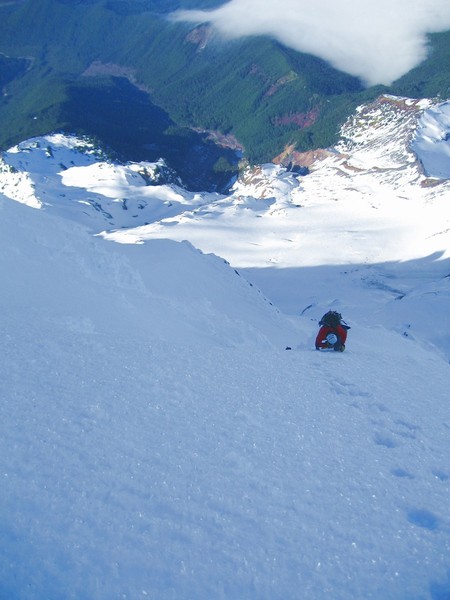
Topping Out

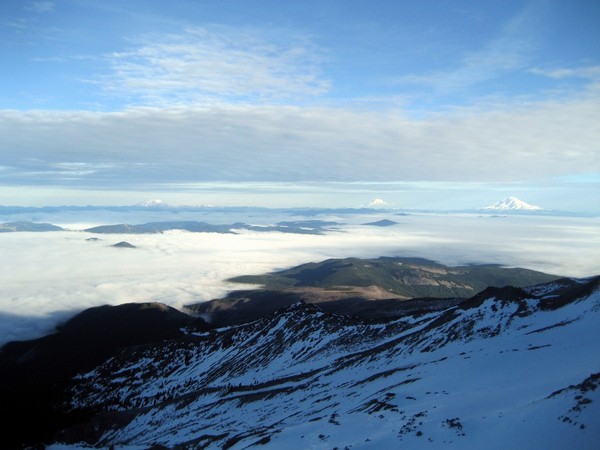
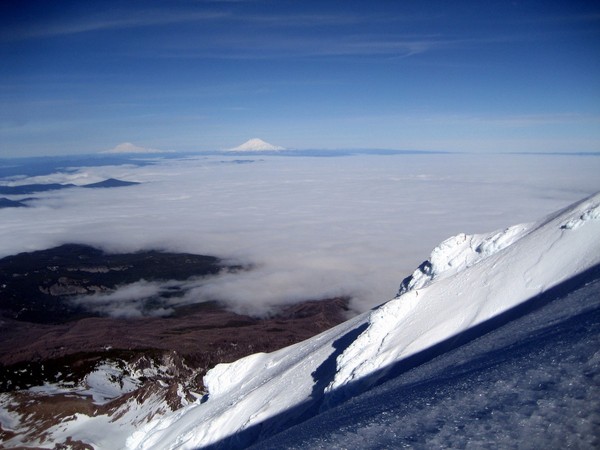
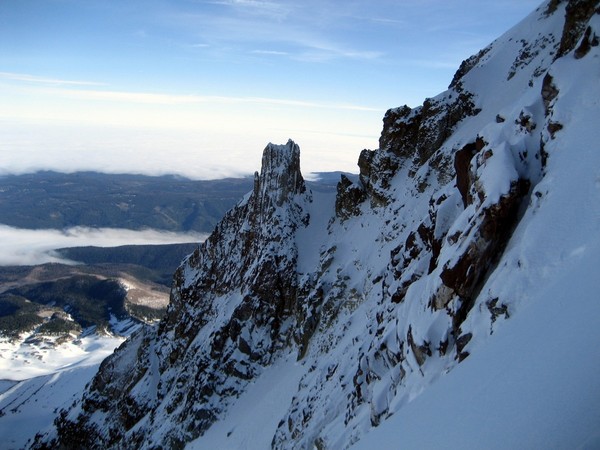
Once at the Queen's chair we enjoyed our first sun of the day and took a nice long break before heading for the summit. We had great views down the Sunshine route and over the Eliot.
At the Queen's Chair
Eliot Glacier
Cathedral Spire
Heading for the Summit

After a quick stop at the summit we downclimbed the Pearly Gates, greeted the rescue down at the hogsback and then headed for the cars.
In all the conditions were perfect for this route. The climbing might be easier on the headwall if is was more snowy, but the rest of the travel would have been much more strenuous. As it was we had firm footing all over the whole mountain, and never punched a single foot through on the entire approach. It was a great climb and fun to get to a less visited side of the mountain. The approach is long, but it rewards you with a climb that is long too. Highly recommended!
For those who have done this route and the North Face, how does the upper part of the two routes compare?
Gear Notes:
Glacier gear, selection of pickets and screws if you want the option to simul.
Approach Notes:
Timberline to Illumination Saddle, cross the Reid and over Yocum ridge to the Sandy at about 7800 feet.
-
No major concerns with regard to the weather. It will be a more spring-like climb. Watch the wind forecast.
One thing to keep in mind is the step at the base of the route, linking the lower snow on the White River glacier and the Steel Cliff South face snow field above. We solo'd through this step, which was maybe 10 feet of 60 degree rime gully. I would compare it to something you might find in the pearly gates. Since our climb there hasn't been much snow and instead there has been some warms temps and even rain. Be prepared for rime or maybe even water ice conditions here. Depending on your experience and comfort level with this type of terrain this might be your crux. If you leave the top of Palmer at 2AM you'll be facing it before sunrise.
When you get up the step keep heading left. Don't head straight up into any narrow couloirs. Read that again. When you look at route photos this should make sense, but it is easy to get drawn upward.
Be careful on the glacier. The bridges, especially at the margins, seemed thin (punched a leg in getting on the glacier) You'll be heading into this in the dark so it'll be harder to read the snow.
Have fun, climb safe, post a TR or update if you go.
-
Cool! Now that you mention it I saw that report back when. We took the red route. We speculated that you could climb the ridge proper, on your green line, but figured we'd go the easy way the first time up.
When we had to cross over the ridge to join Wy'East we also had some thin snow which was hollow over the rocks below. The angle was low, so the only concern was with breaking through but not with falling
-
Trip: Mt Hood - Steel Cliffs South Face
Date: 1/1/2015
Trip Report:
Here's a TR for something different on the South Side of hood.
Thursday we rang in the new year with a new (for us) route up Hood. From the top of Palmer we did a rising traverse to the White River glacier, roped up and droppped down slightly and then continued the rising traverse to the base of the steel cliffs south face.
Traversing east above the top of palmer
Crossing the White River glacier
Once at the base of the cliffs, the route is pretty straight forward. The small step to gain the snowfield was not unlike what might be encountered ordinarily in the Pearly Gates. Above the step follow the broad snow field up and left before hooking right to gain the Wy'East ridge.
Upper steel cliffs snowfield

From there the route is the same as Wy'East, including nice views into the crater from the east. There was a New Year's party happening at the base of the Pearly Gates.
Mt Hood Crate and Hogsback from the top of the DK headwall
Wy'East crux
Above the crux
On the summit we enjoyed some bubbly, which we were able to share with a couple who got engaged just minutes before we arrived!
We downclimed the pearly gates. This is the easiest condition I have ever seen the gates in. With the amount of snow in there it could be climbed with a single axe. With some more freeze-thaw it will get in better climbing condition.
No one climbed the old Chute yesterday, the snow was just way too deep to get over there.
The main navigational concerns for the day were related to staying out of deep snow. Crossing the white river involved some serious wallowing. As did sections of the cliffs snowfield, and the snow near the summit.
In all this is a fun, though not very technical route. It seems seldom done and I couldn't find another TR for it on the site. With firm snow this route could be done pretty quickly and would be a nice alternative to the normal south side routes of similar difficulty.
Gear Notes:
Gear for the glacier. Additional gear if feel it is warranted for the upper part of Wy'East. Conditions dependent for sure on that.
Approach Notes:
Timberline to top of Palmer. Traverse the White River glacier to the base of the cliffs.
-
Nope, sorry...
-
Found 11/18/. Identify it and we can work out a way to get it back to you.
-
Is this book currently stocked anywhere in the PDX metro? Based on the posts OMC seemed like it might but it doesn't show up on the website. I was going to buy directly from the publisher but I'd like to avoid the shipping fee.
-
Power lurker here. I'm with Jason except I generate 0.005% of the content he and many other regulars do. I only use the gallery to upload photos to for the purpose of linking into a TR or sale post.
I have never found anything valuable from browsing within the gallery itself. Generally the photos are a lot more interesting and meaningful within the context of the TR. Plus for every great sunrise photo there are 3 filthy backpacks that were for sale in 2003. And again, when I see that great photo I want to know what part of the season it was taken, on what route, etc.
The argument from another direction - There are certainly some great photographers on this site and some of the highest quality photography can be found in the gallery. However, very, very few of the photos represent mastery of the art and truly "stand alone" outside the context of a trip report. The 250th grainy shot of Sahale at sunrise, randomly browsed upon in the gallery, really isn't worth looking at. Except it is when it shows the current condition of the 'schrund, illustrates the fact that you overslept and your partner is already halfway up, or just exists to remind yourself and others how good it is to be out there when your stuck in here.
Honestly, if you want a photobrowsing experience to be any good, it probably has to be curated in some way, rather than the current free-for-all. Telemark Tips (RIP) had this kind of thing going with their shot of the day. If someone grabbed the very best of the photos and stuck them in a gallery (Hotlinked to the TR?) that might be nice. Mountain Project kind of has this going with its little slideshow when you launch the home page.
Bottom line (IMO) make it really quick and easy to get good photos into the TRs and skip the gallery function. If you are really ambitious, consider making it a sort of special feature that highlights the top 1% of content that really shines.
-
-
Are you guys thinking to use these in place of regular lockers? Or at the rope (or both?) ends of draws/runners? The video seems to promote the latter, at least as far as I watched. To me it seems pretty fussy for that. For rare situations I am really worried about coming unclipped it's not that hard to throw in a small locker. If this was used in place of standard lockers would you use it as a master point? Belay biner? Where?
-
Bump. Just unearthed these again in the gear closet...
-
Lost a pair of blue la sportivas and green millets in the main parking area at smith or on the road out. They were all on one blue OP oval biner. If you snagged 'em let me know I'd love to get them back... Reward kindly offered

Gear Recalls
in The Gear Critic
Posted
MSR Shovel Recall:
http://www.cascadedesigns.com/msr/snow-tools/shovels/replaceyourshaft