Leaderboard


Popular Content
Showing content with the highest reputation on 09/09/21 in all areas
-
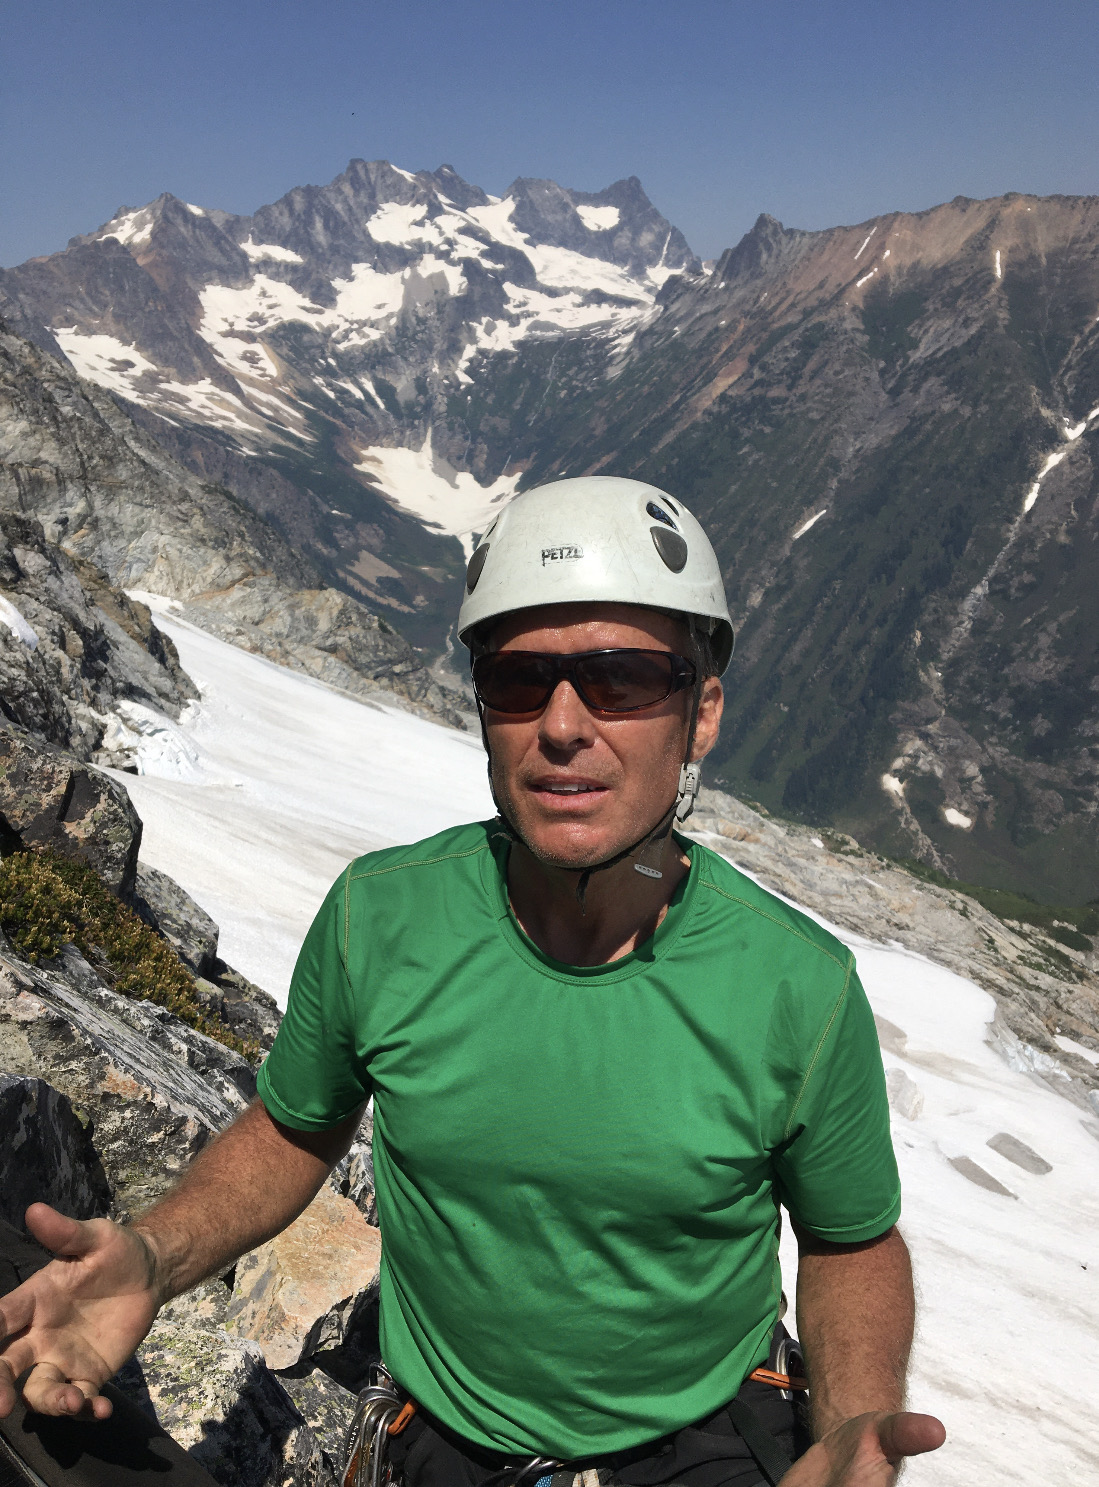
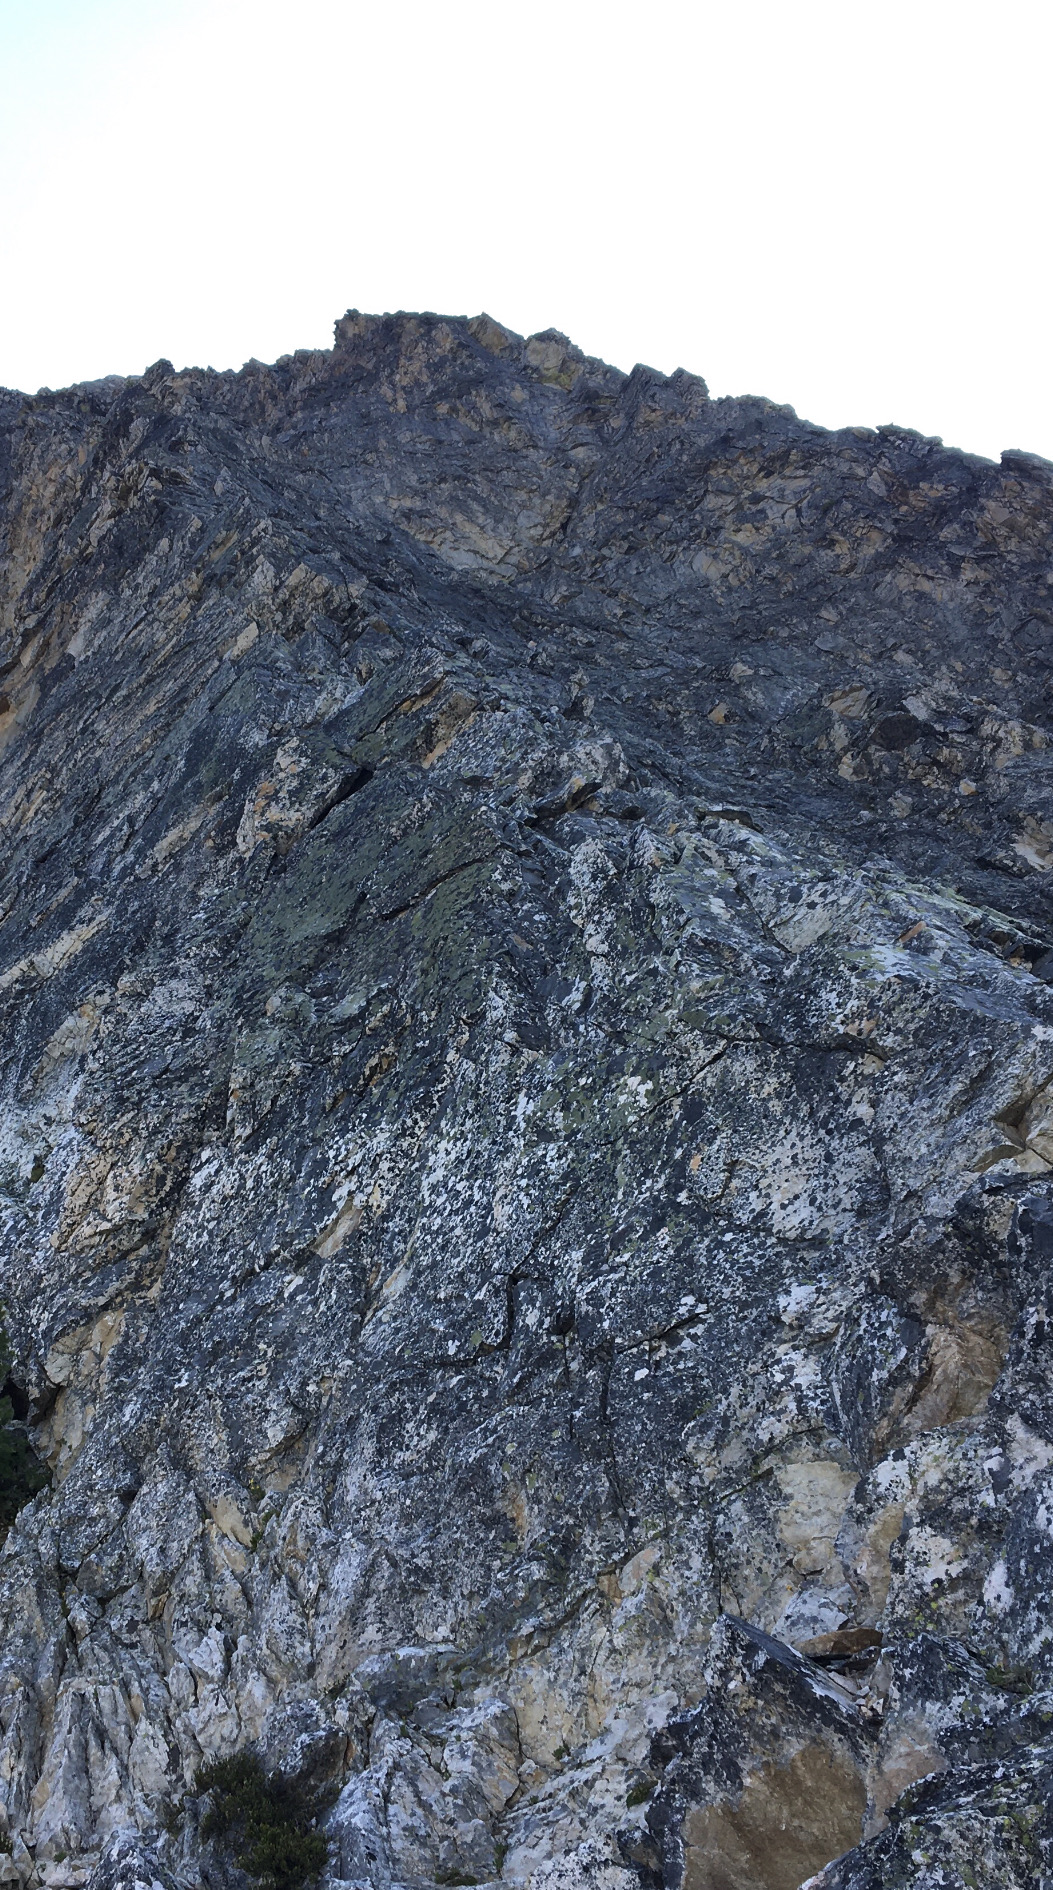
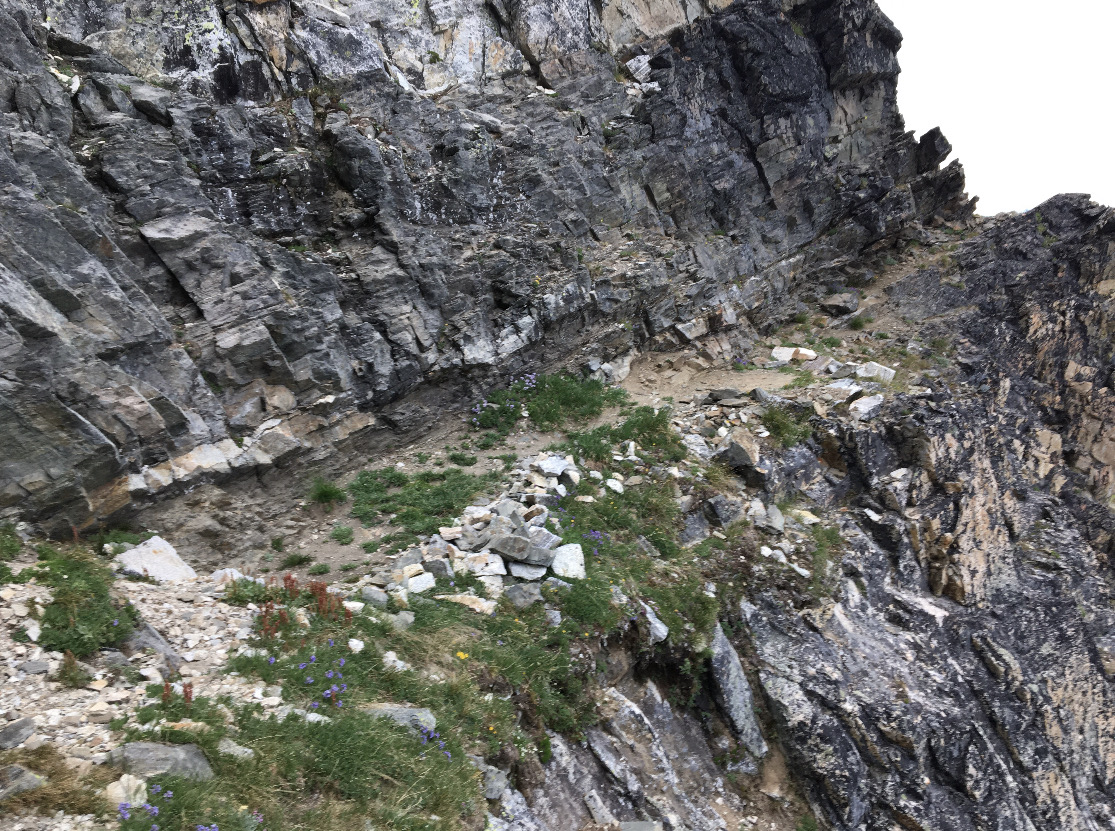
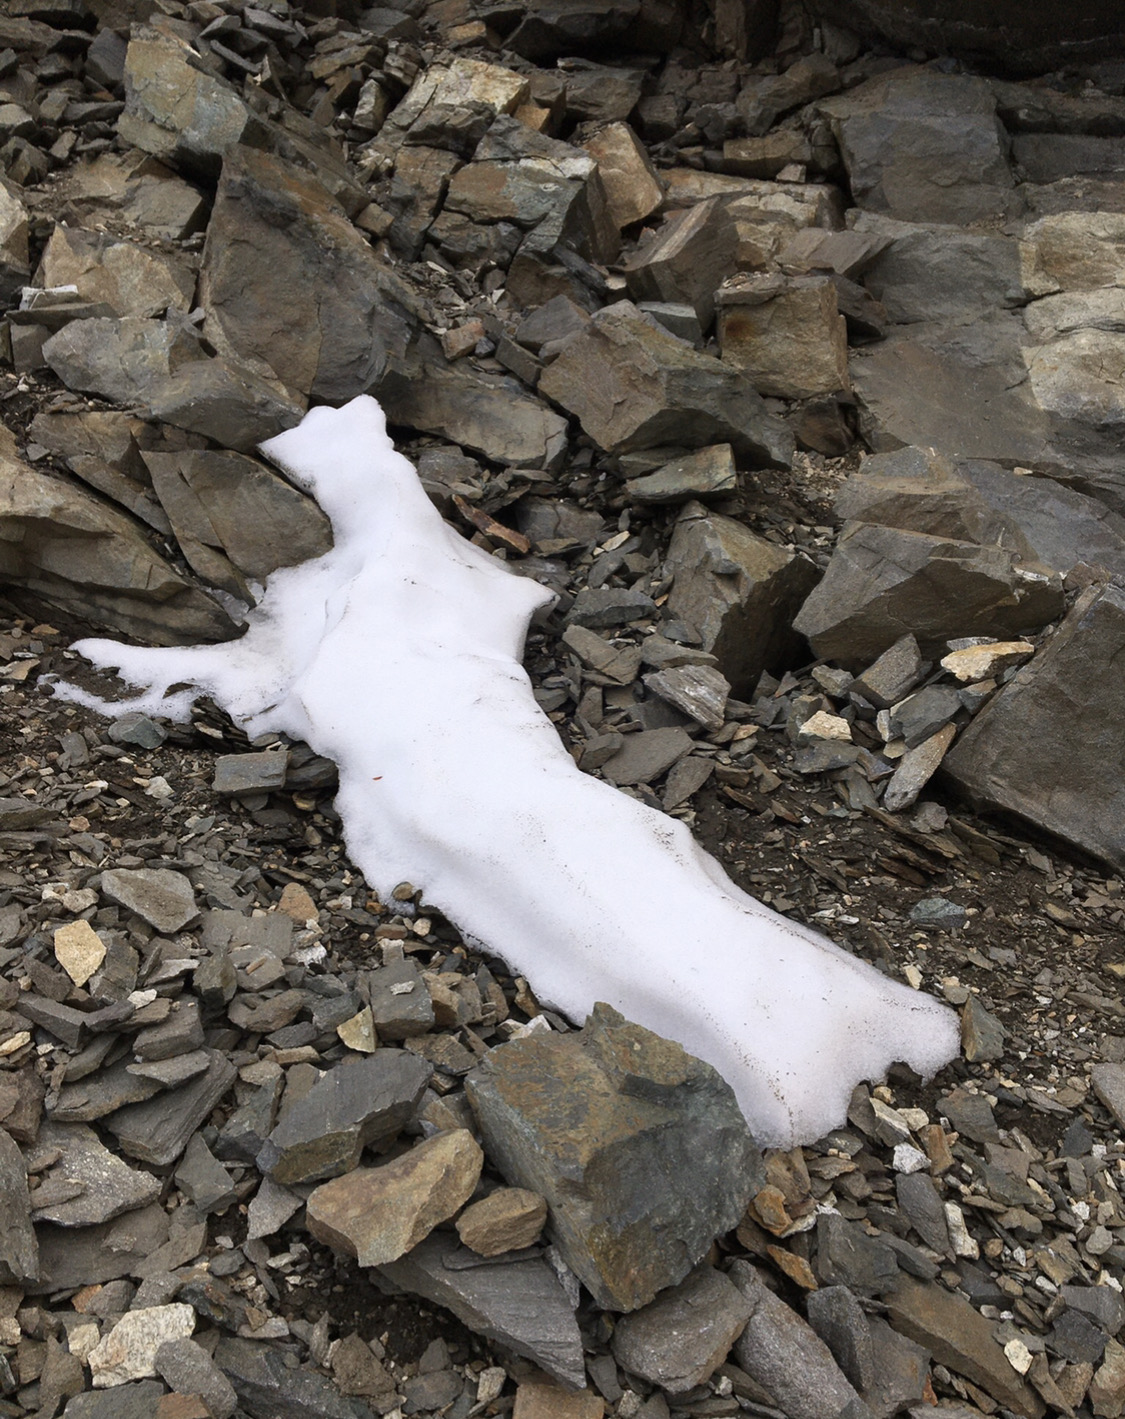
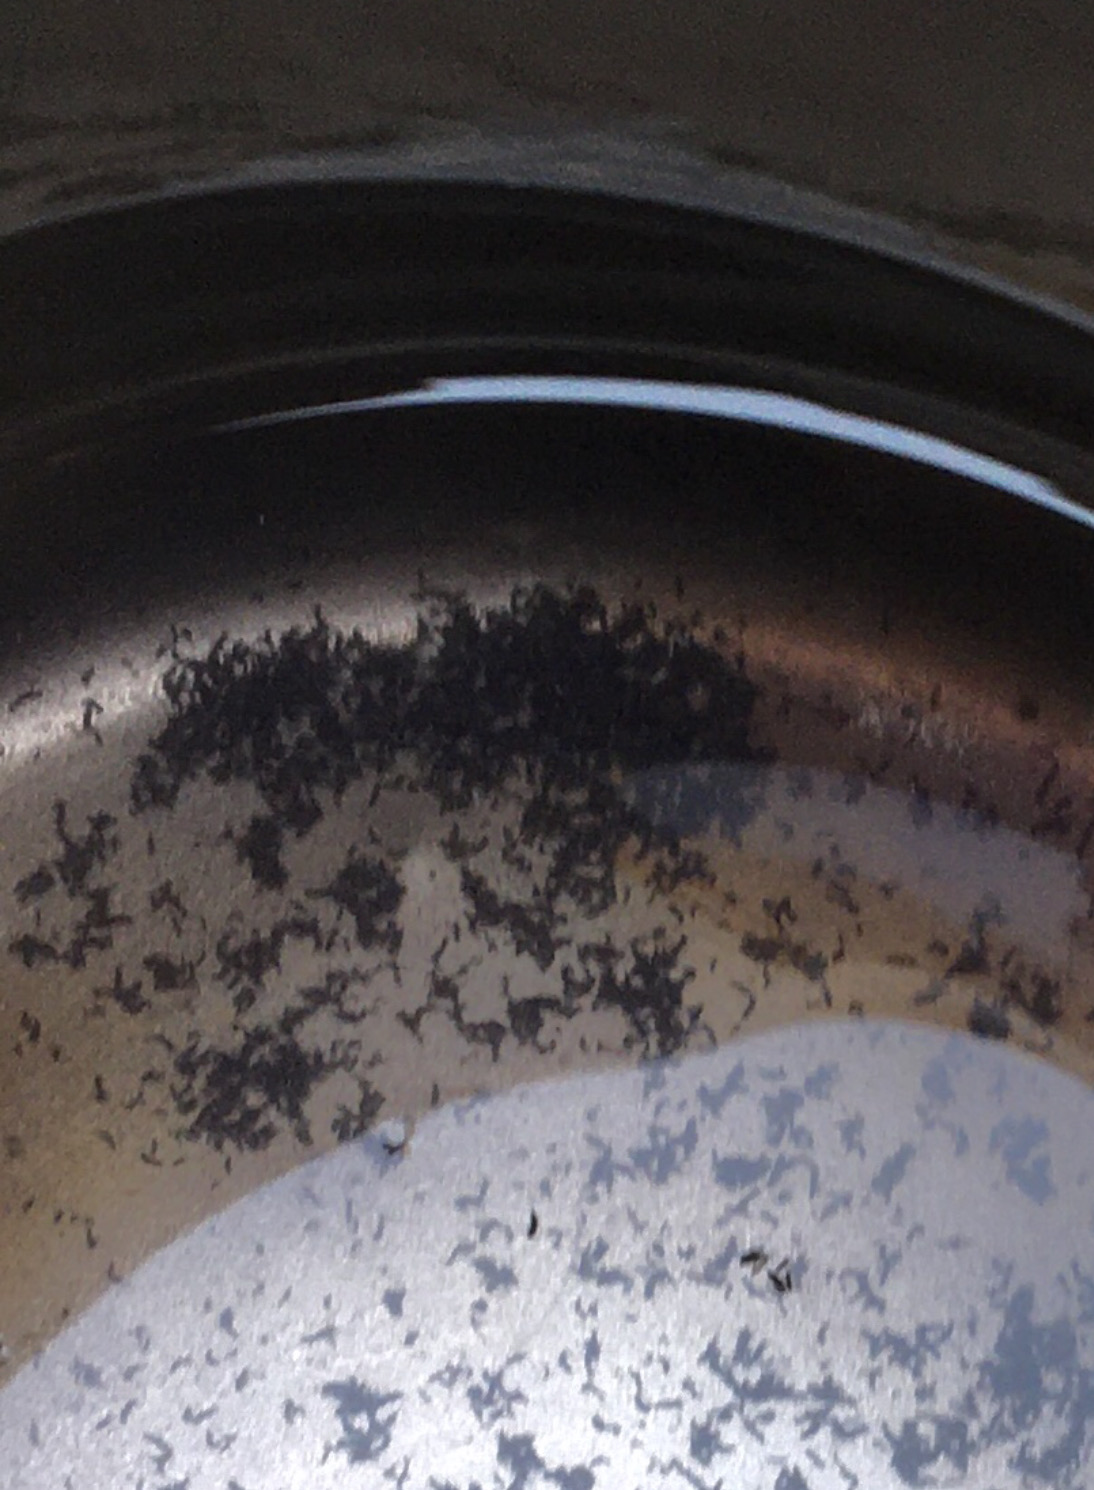
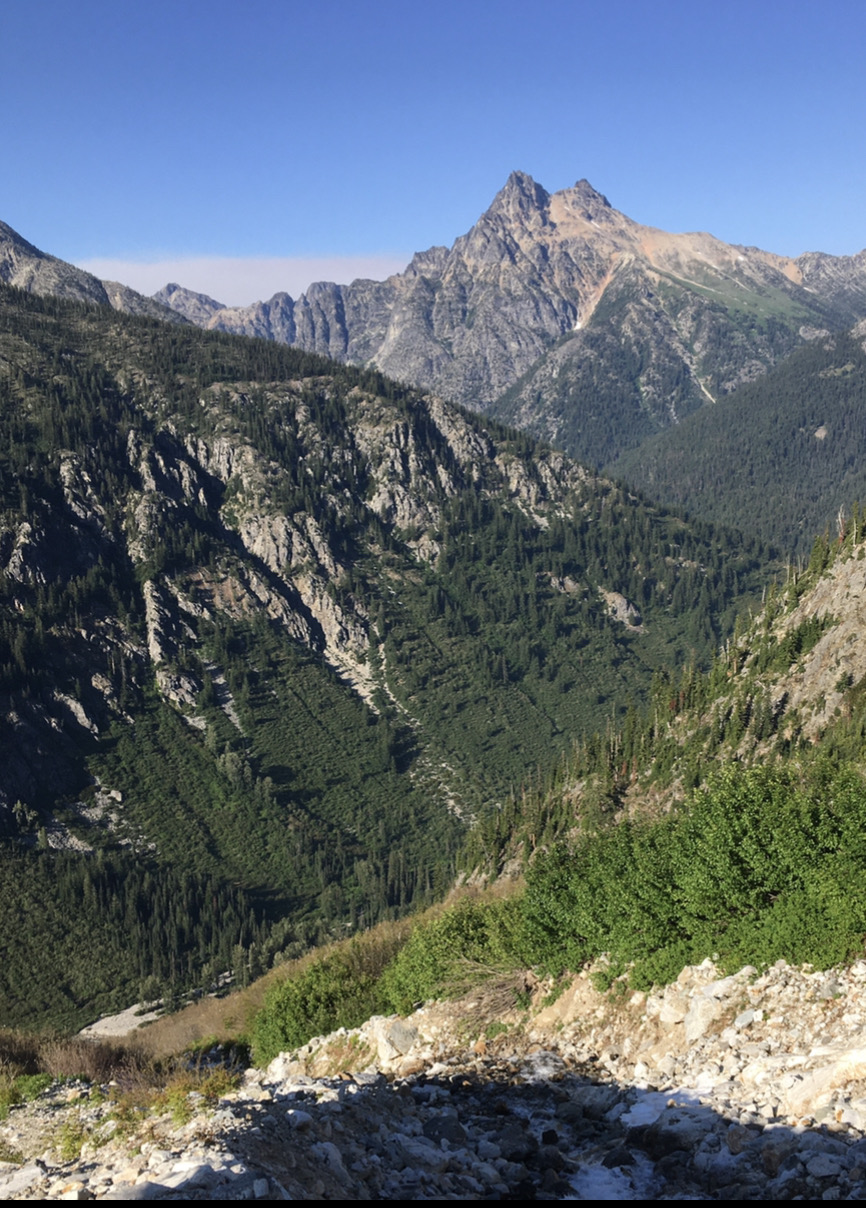
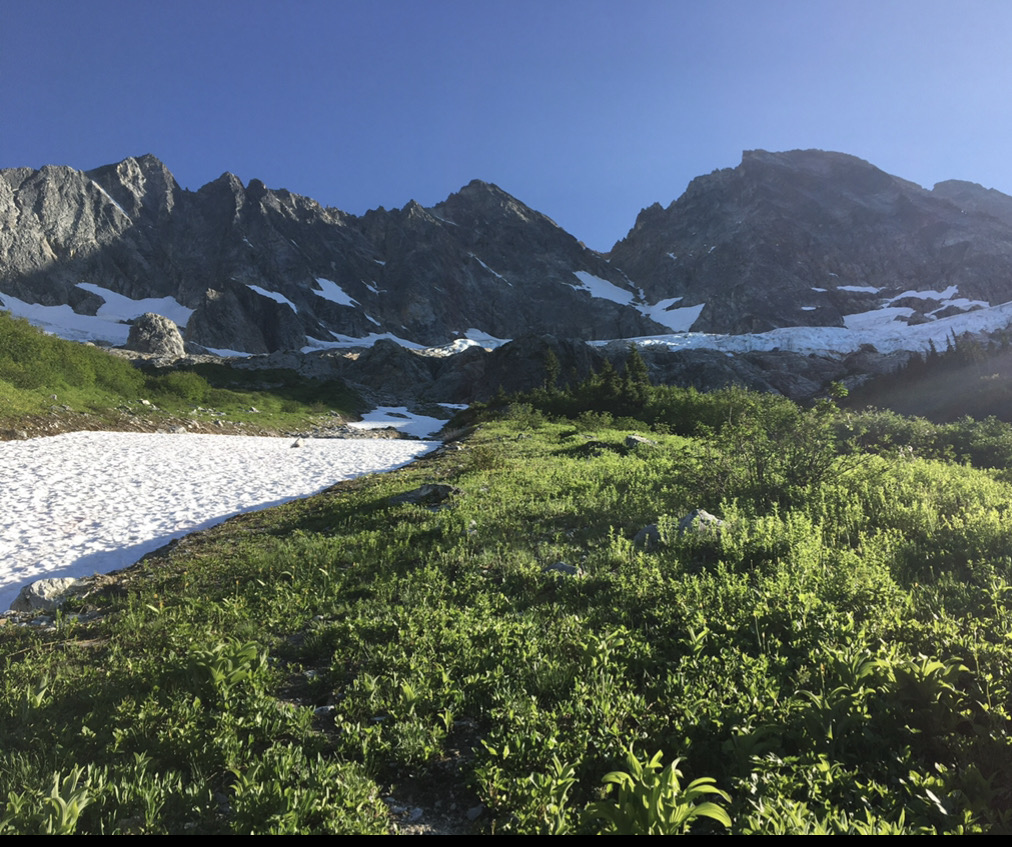
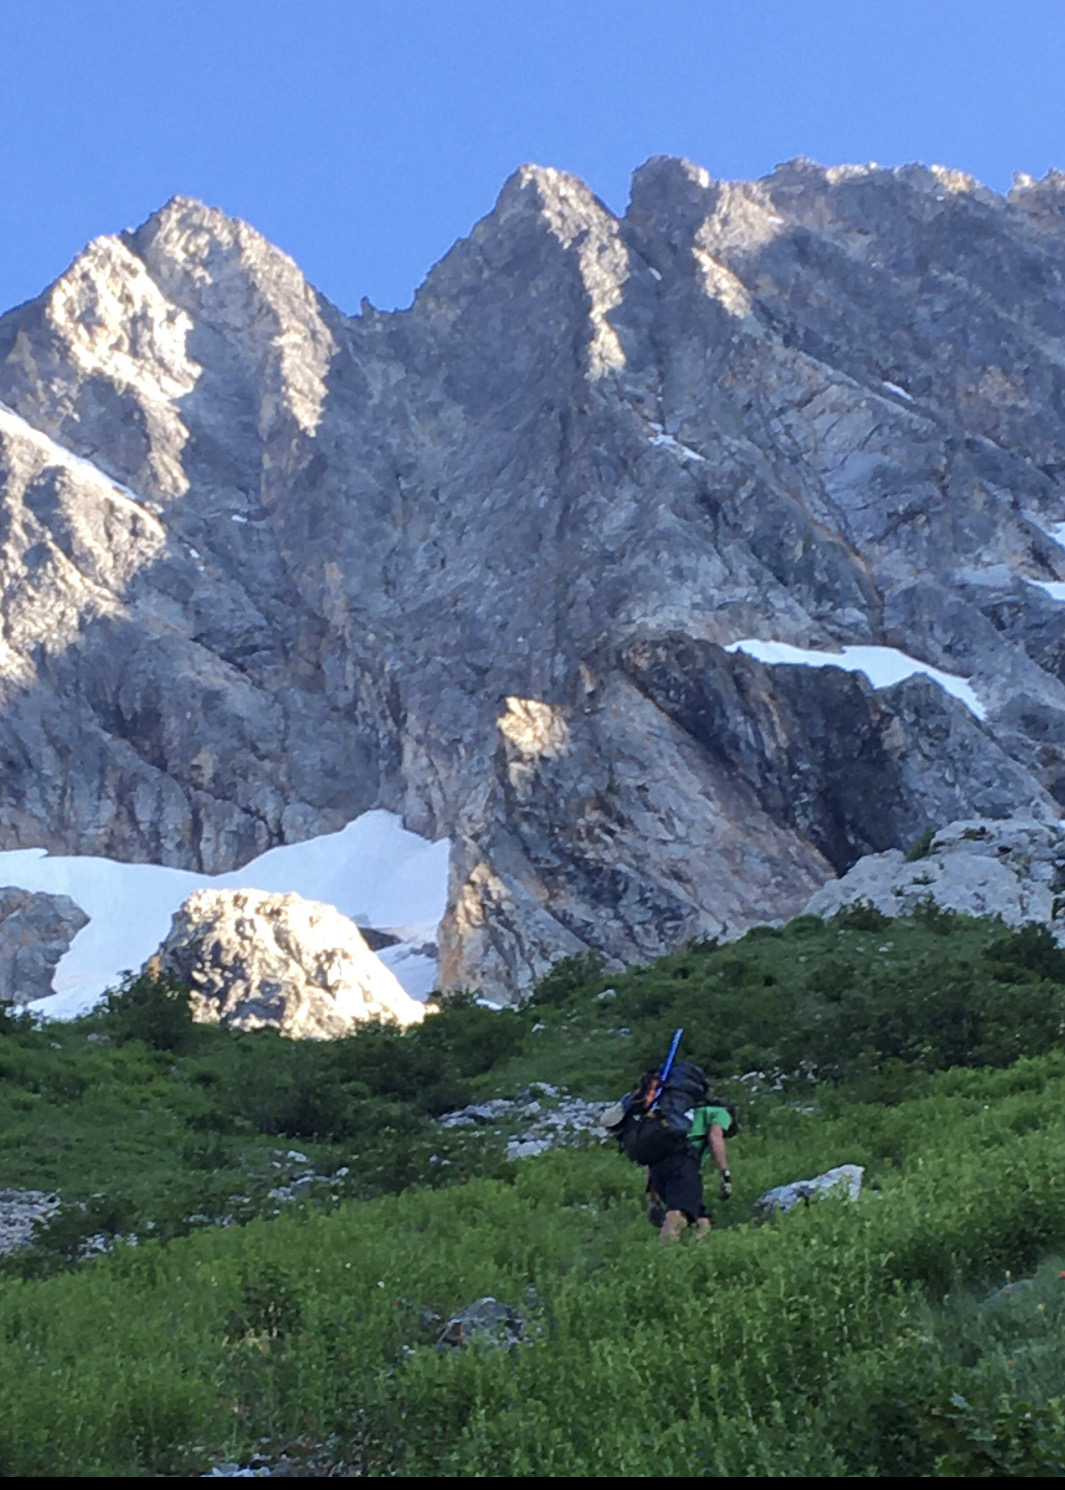
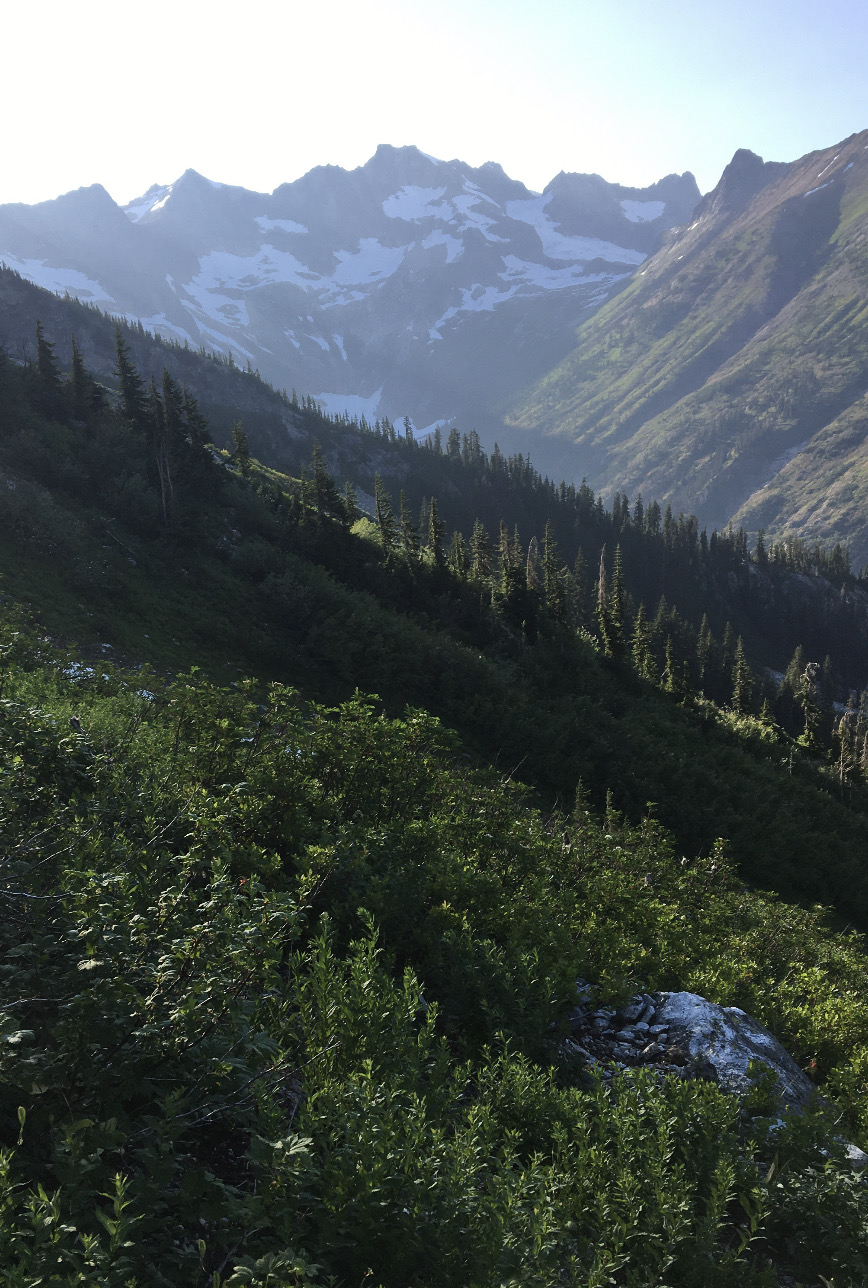
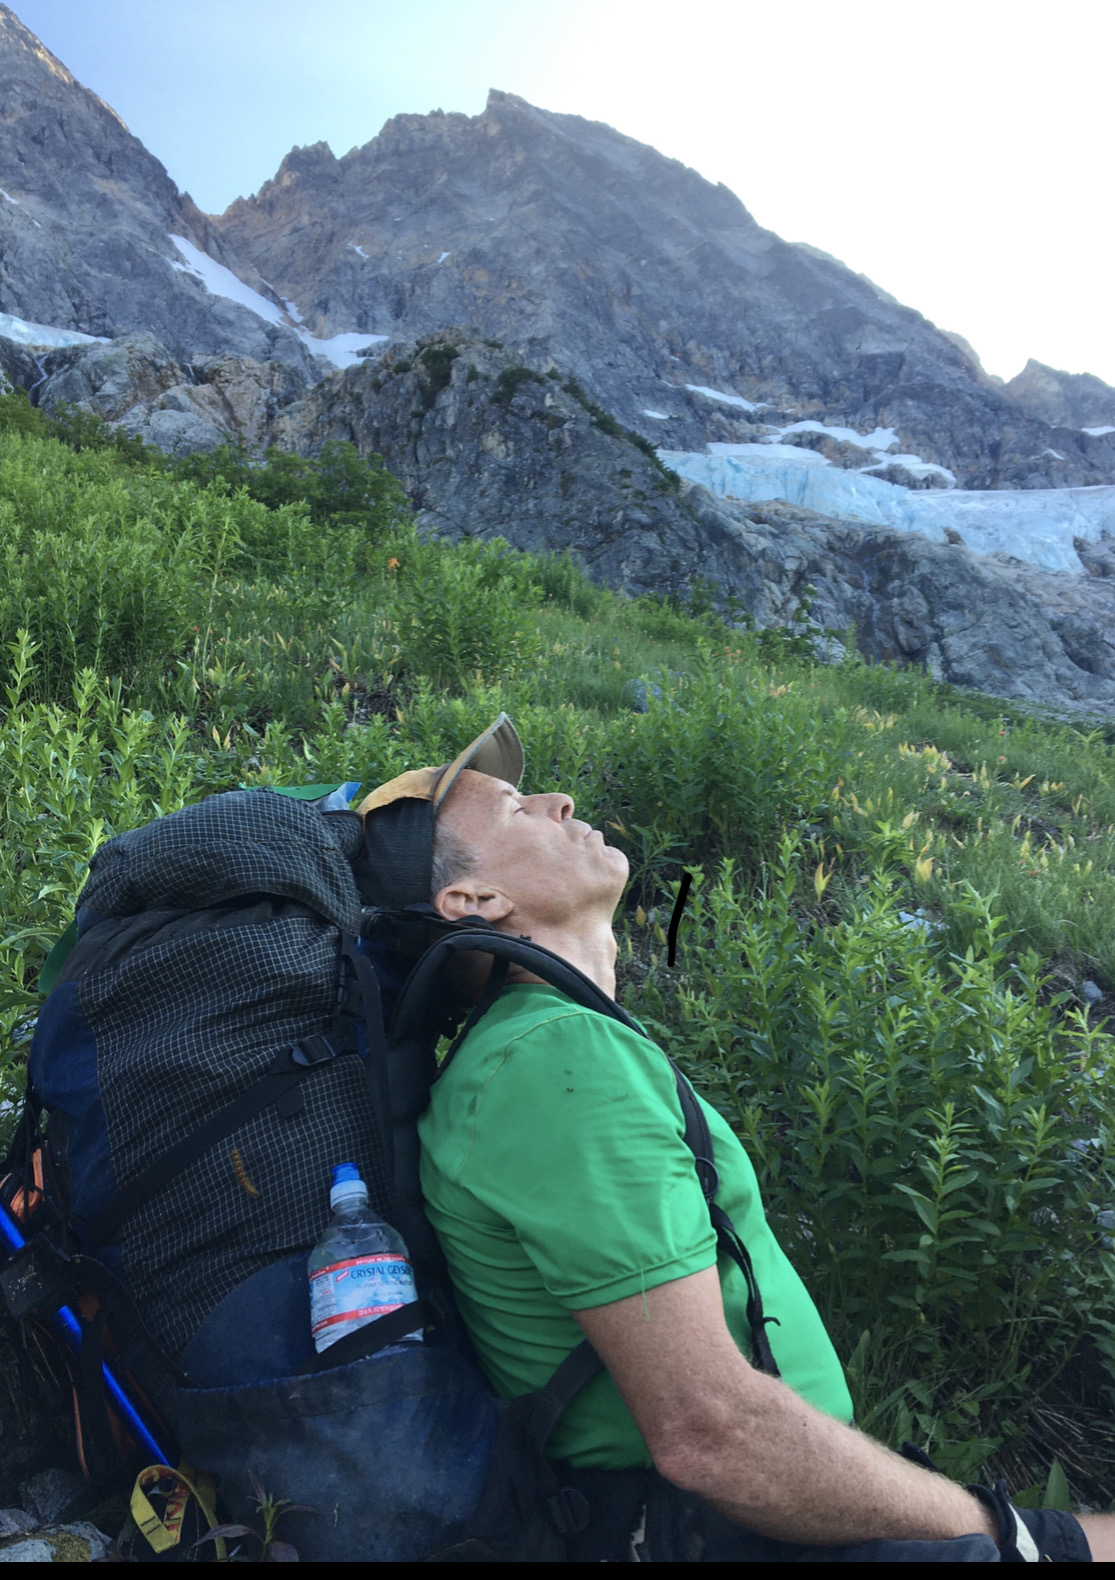
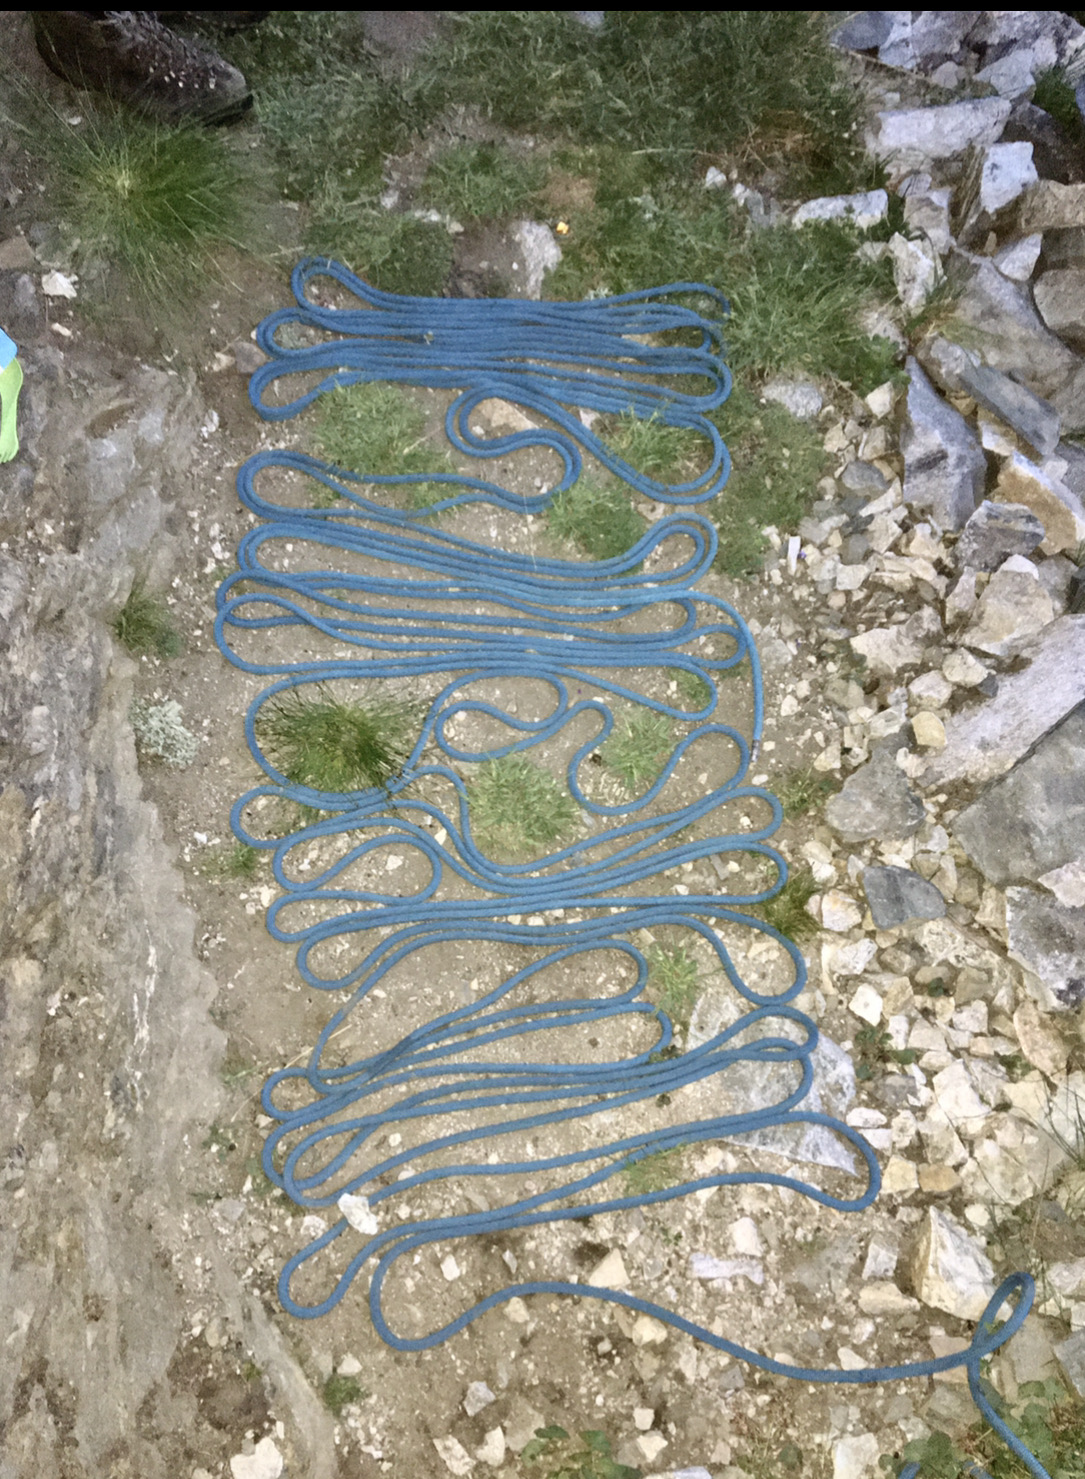
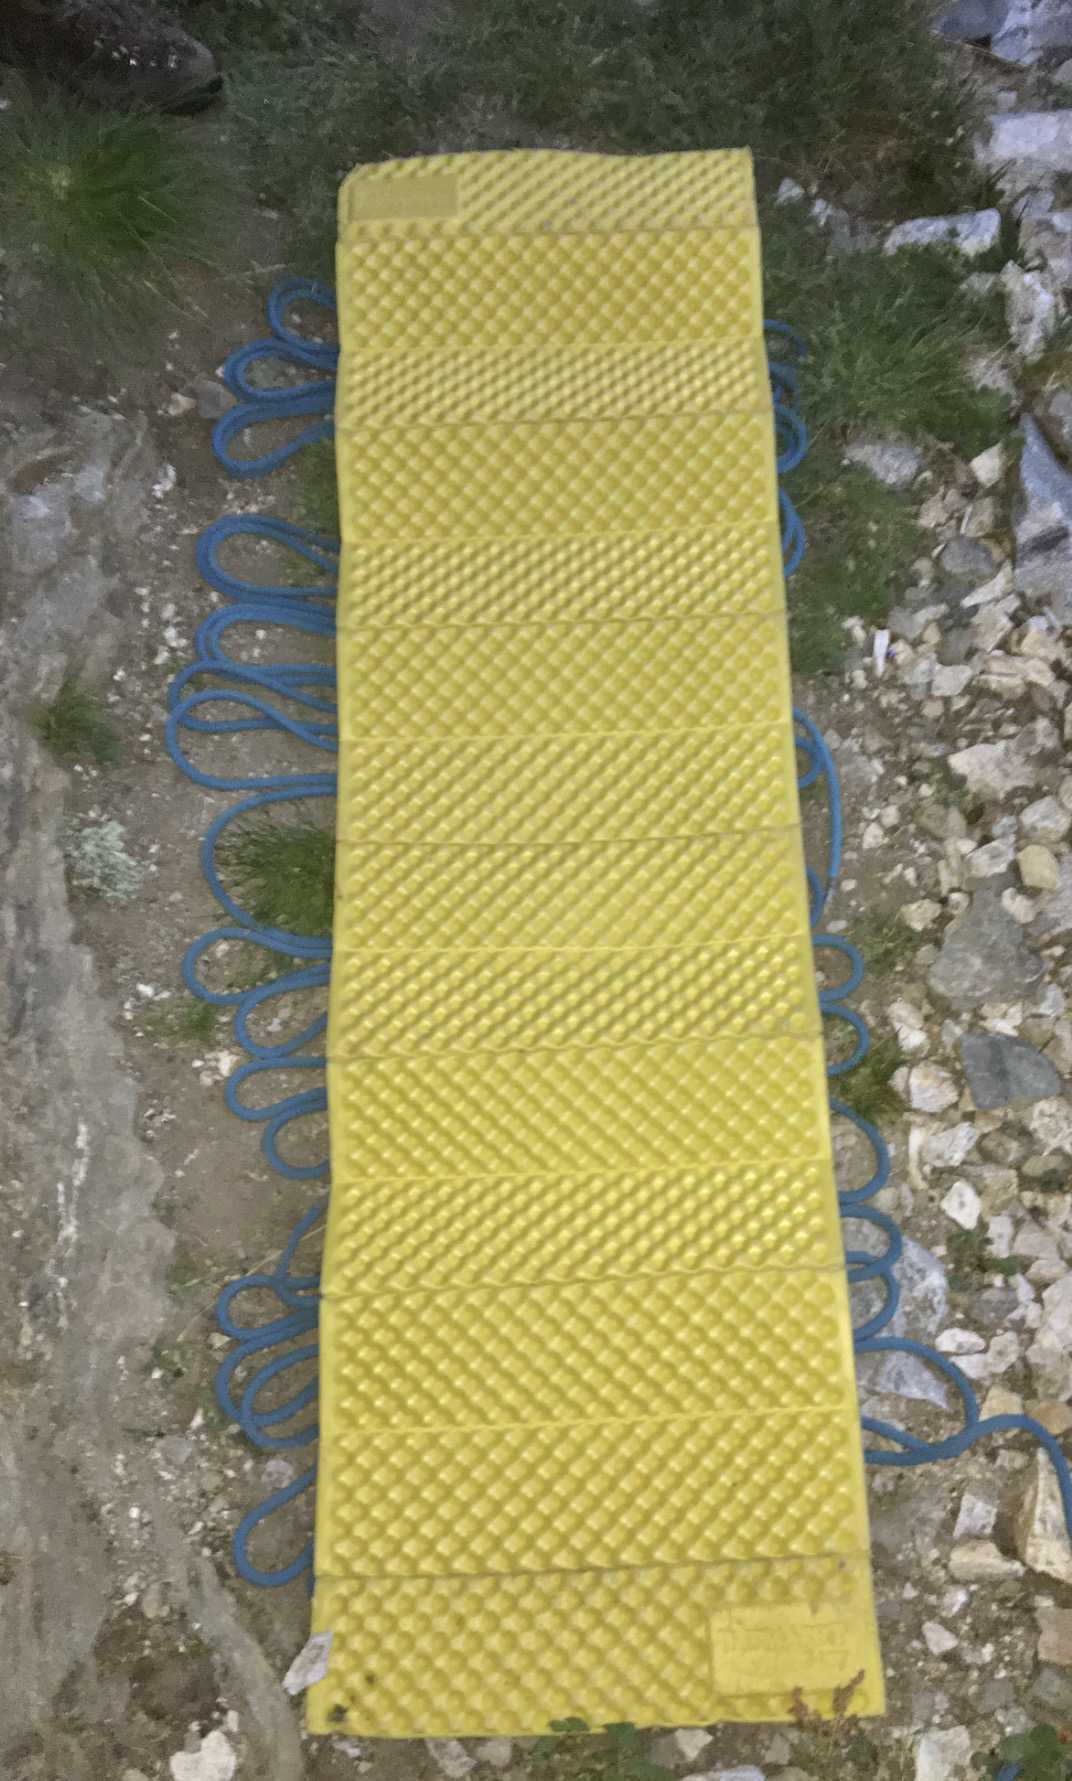
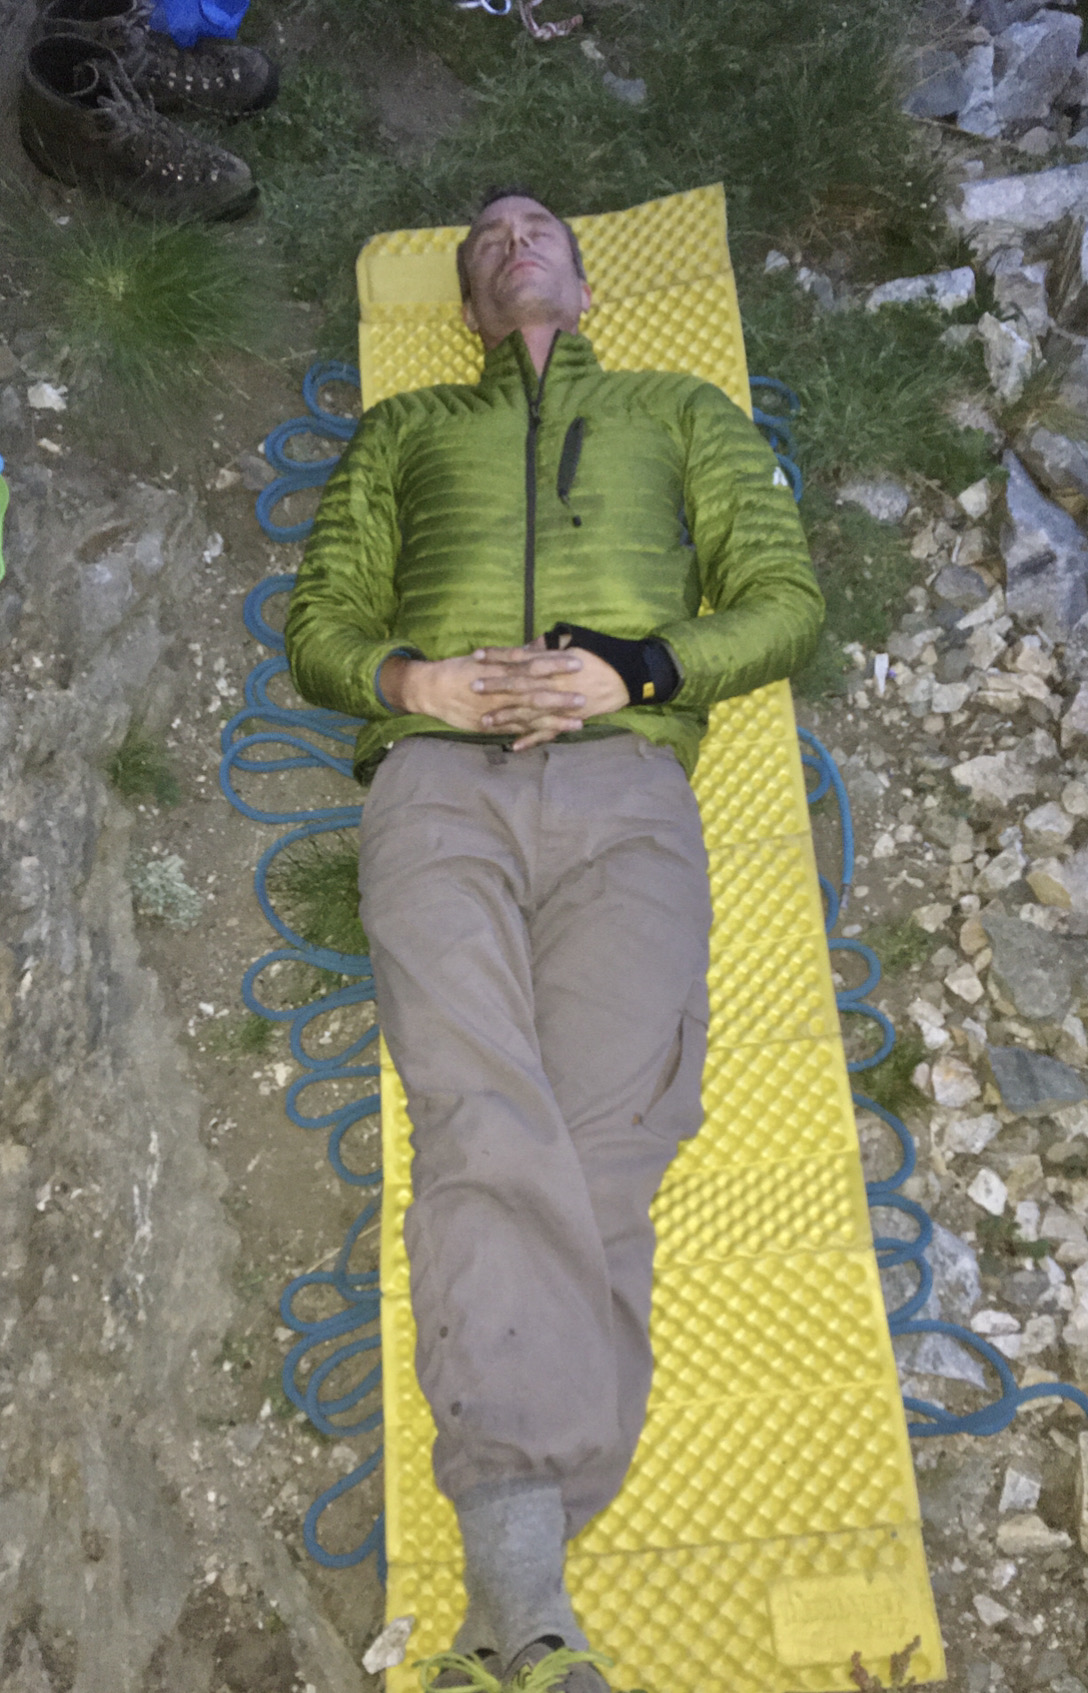
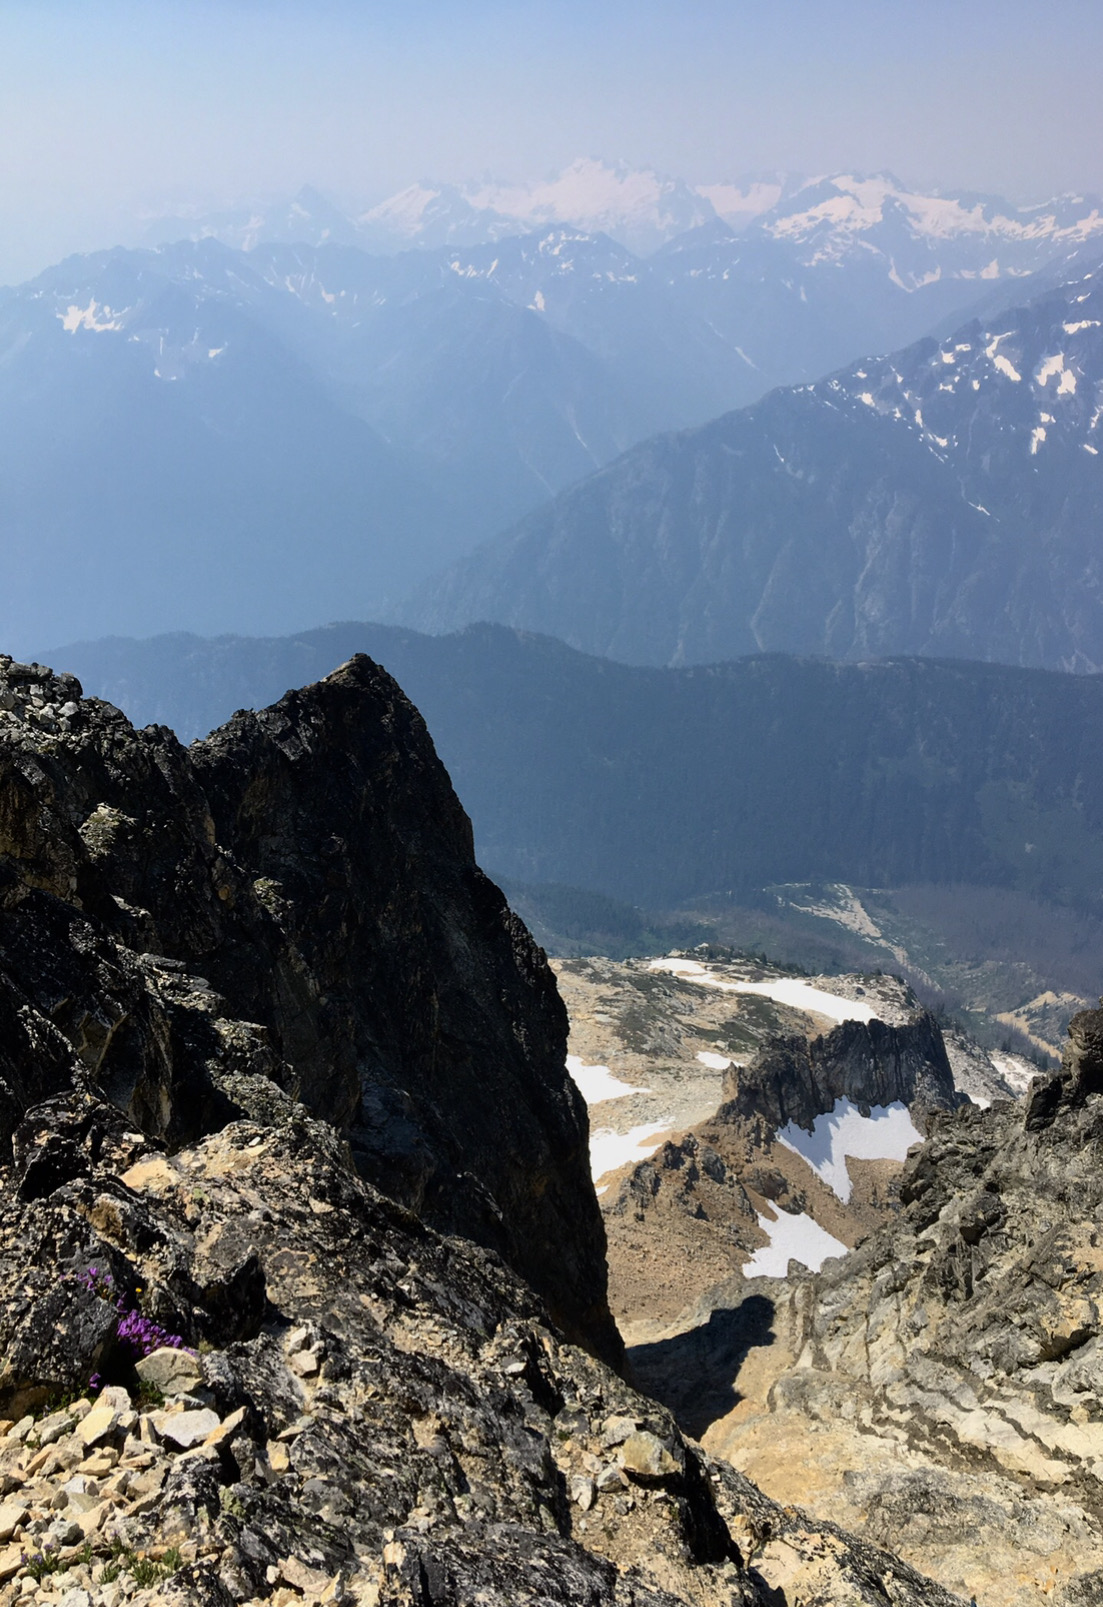
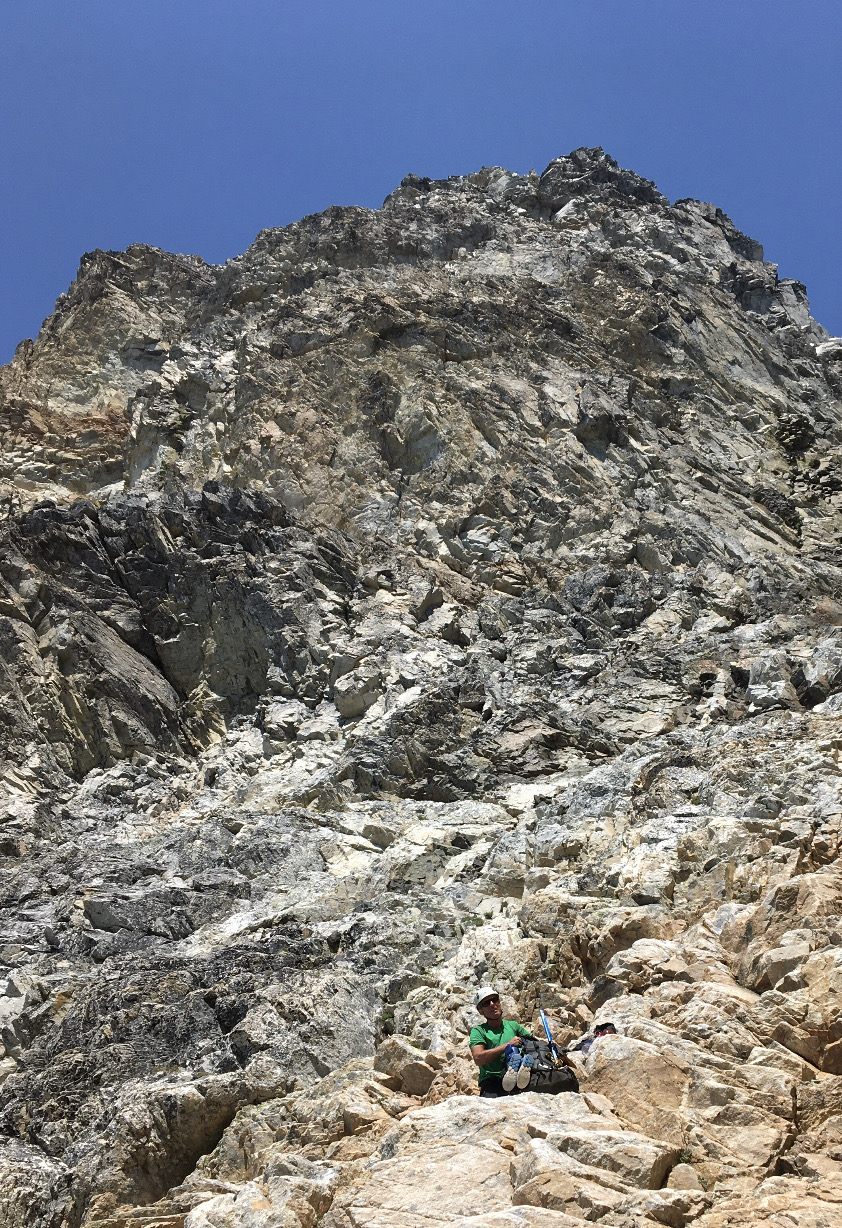
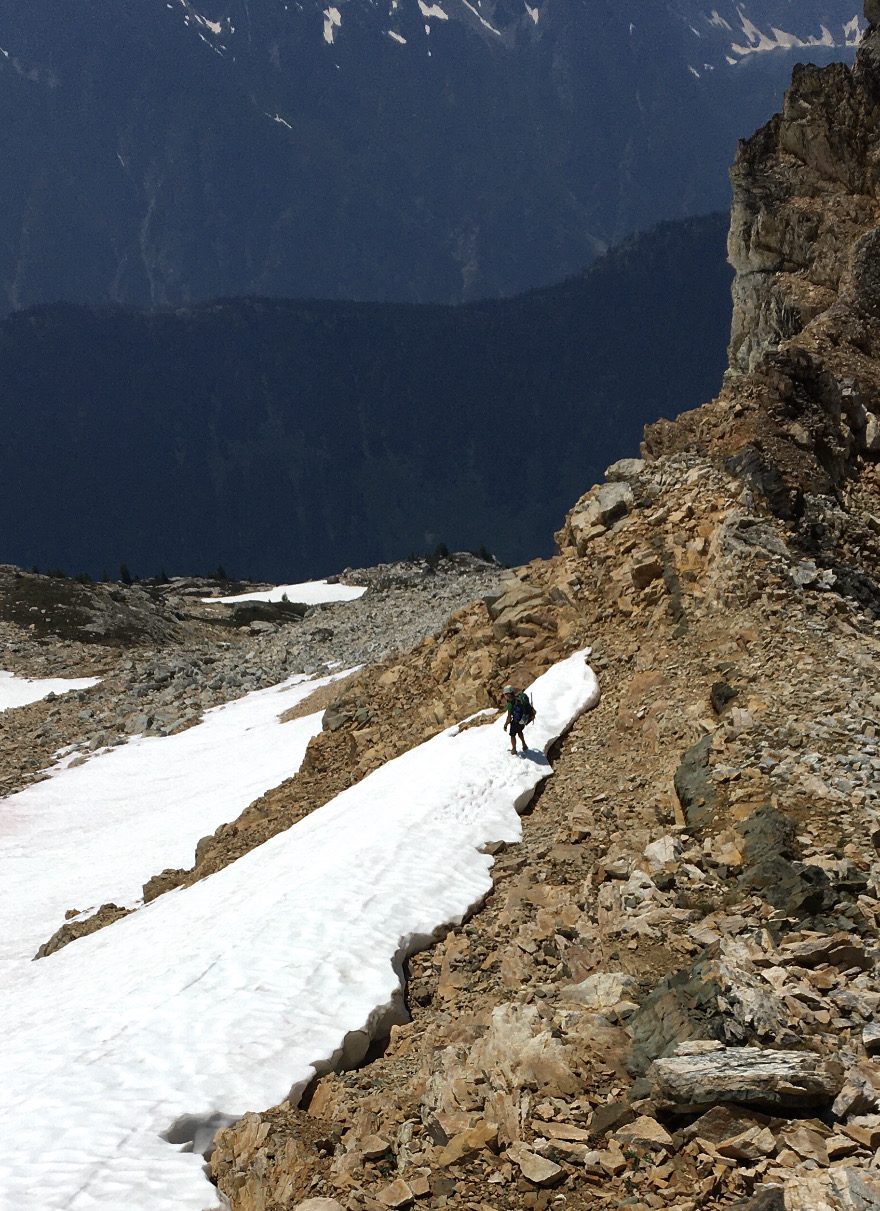
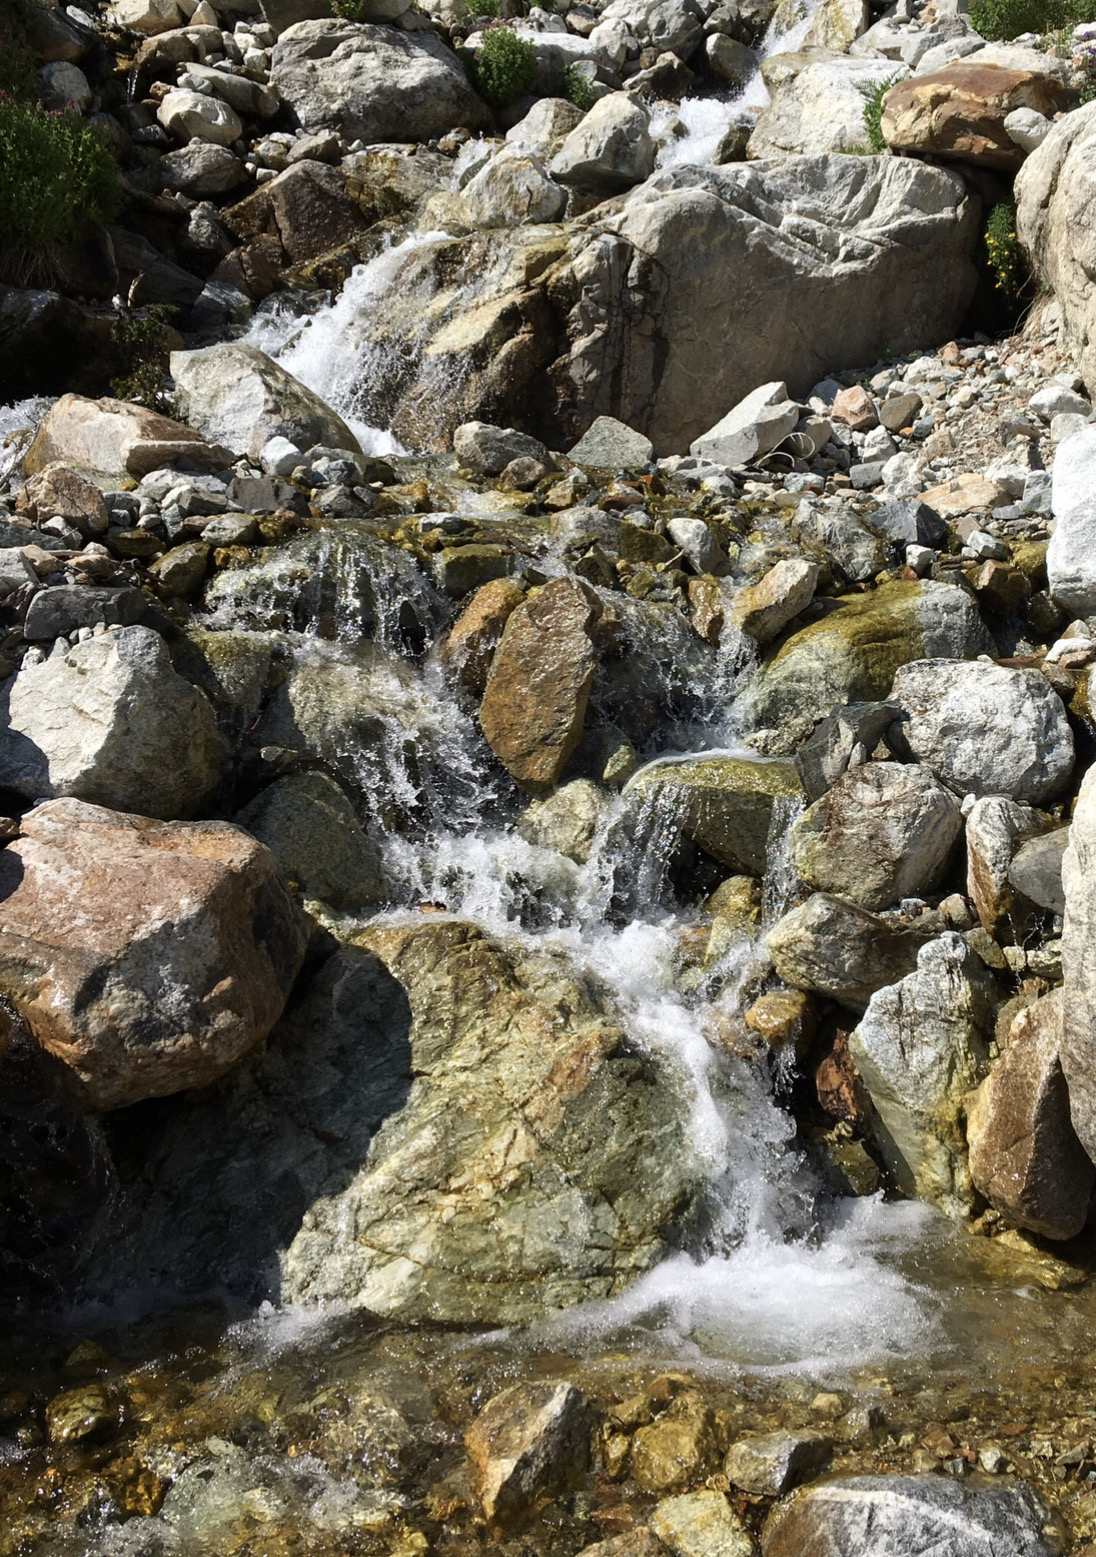
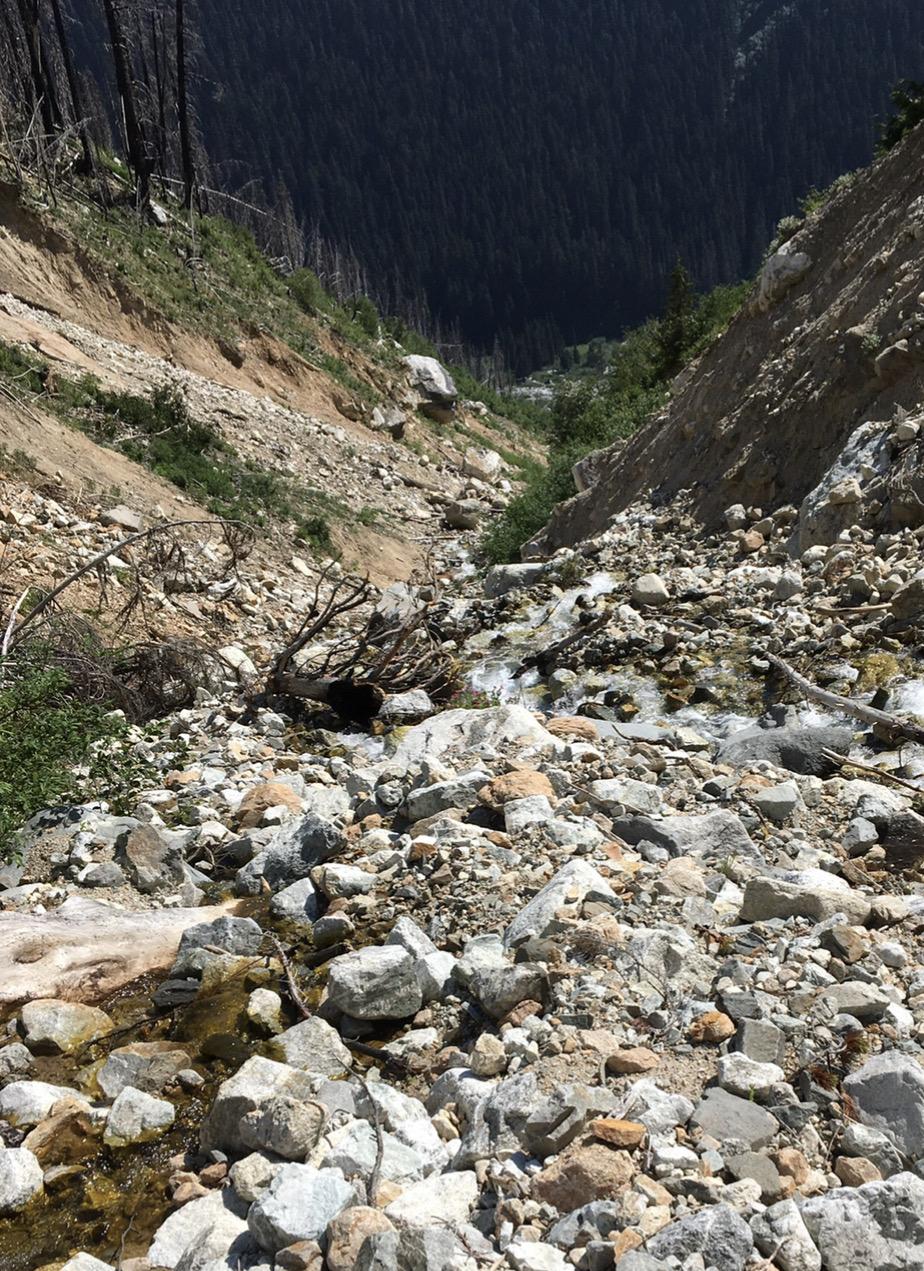
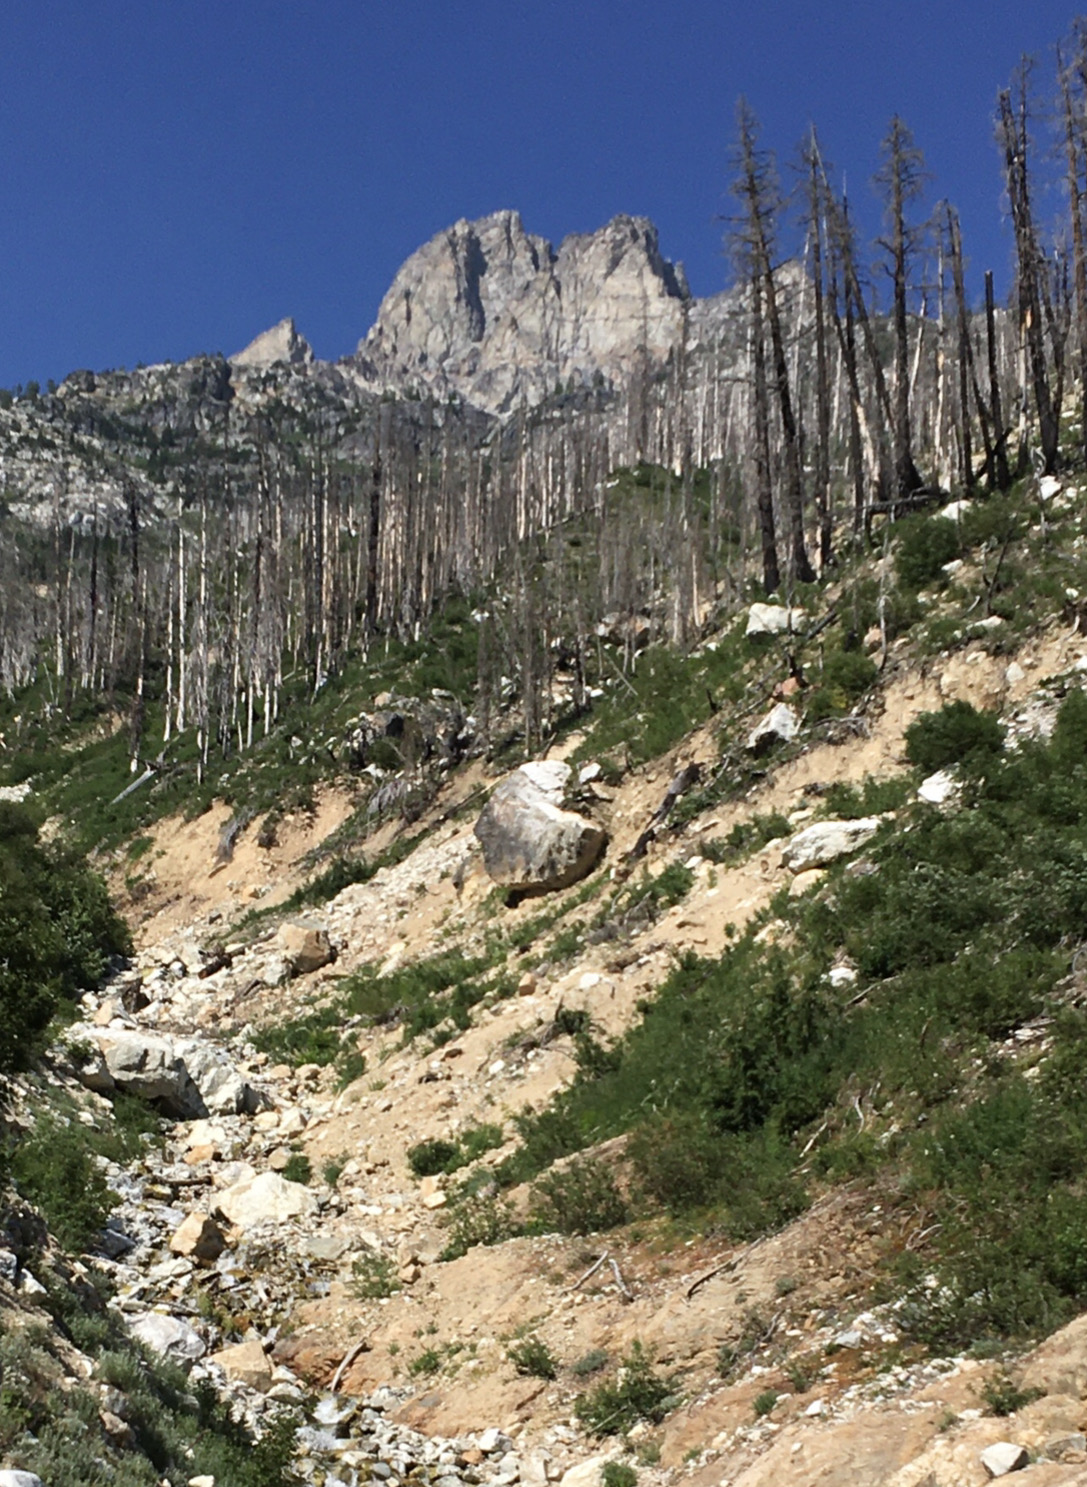
Trip: Stuart Range - Stuart Range Traverse Trip Date: 08/30/2021 Trip Report: I was Initially a little hesitant to write this report as it was certainly nothing groundbreaking, I don’t really have any super helpful beta and it just kinda felt like I was stroking my ego. Anyhow, here is a short report of beta I wish I had for the traverse. I'd also like to echo that this is basically a long dry sidehill. If you are expecting a bunch a great climbing, think again. It felt like a dangerous hike. The other day I climbed the Stuart Range Traverse over about 31 hours, including a 7ish hour nap near Prusik. I decided to start on the W-ridge of Stuart via Ingalls and out to the Snow Lake Trail. This is the straightest line on the map, and that appealed to me for some reason. Thankfully my friend Alastair was generous enough to shuttle me back to my car the next day. Thanks bud! The first crux for me was getting over to the east side of Sherpa. It seemed that one with a rope could easily rap over the other side of the summit and continue on their way, unfortunately I didn’t have that luxury. I chose to down climb the S couloir a little ways, and then follow a ledge system around the mountain to the east. This worked out in the end, but was time consuming and a bit circuitous. The next crux for me came at Argonaut. In classic fashion, I had only gathered just enough beta (literally just a picture looking up the S-face) to not fully epic, but not quite enough to know where I was going. I opted for the first gully (pictured below) up to the ridge, hoping for straightforward traversing to the base of the S-face. I encountered anything but. This side of the mountain consists of an incredible grouping of gullies, towers and fins. While striking, it makes for slow arduous travel. I later learned that other solo travelers had dropped low down to approach the face straight on. This would probably be faster/less stressful, but not nearly as cool. I eventually got where I needed to go. Getting off of Argo was definitely the most stressful part, and the spot that I really wish I had a rope. I ended up walking down to a 2-bolt 1-pin rap anchor, and down climbed from there. This bit was loose, slabby and just no fun. While not necessary, a rope here would be really really nice, especially after all the terrain you’ve already covered for the day. This spot also seems to seep earlier in the season, so a rope might be required most of the year. I believe there is a rap/downclimb route to climbers left that may skip it. More downclimbing on better rock took me down to the basin. A small snow patch below Argo provided a tiny trickle of water for me to fill up with. If It wasn’t for this, I would have only had one liter for the rest of the traverse. The rest of the traverse is mostly walking unless you stick to the ridges. The snow free walk off of D-tail is chill and cairned right now. I’ll certainly be taking this route in the future for getting off D-tail late season. There is a small glacier at the pass between Boola Boola Buttress and Lil A. When I hiked by, there was standing water between the dirt and ice. This may be a spot to fill up, but I didn’t look too closely at how nasty it was. GPS track found HERE Here's a photo dump for inspiration Gear Notes: 60m 6mm tag line, Dyneema sling for harness, Reverso + Locker would be a perfect rap kit. Minimum 3L water storage. Good music to keep you company. Brought rock shoes but never used them. Trail gaiters are $$$! Approach Notes: Choose your own adventure2 points
-
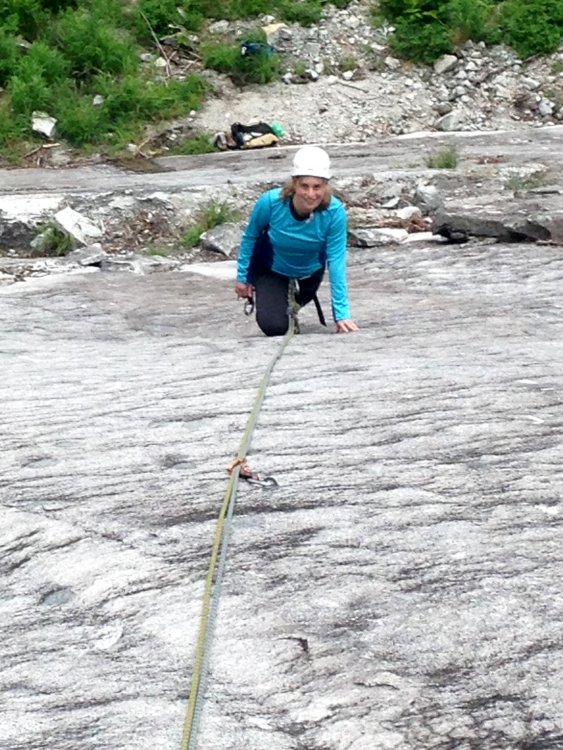
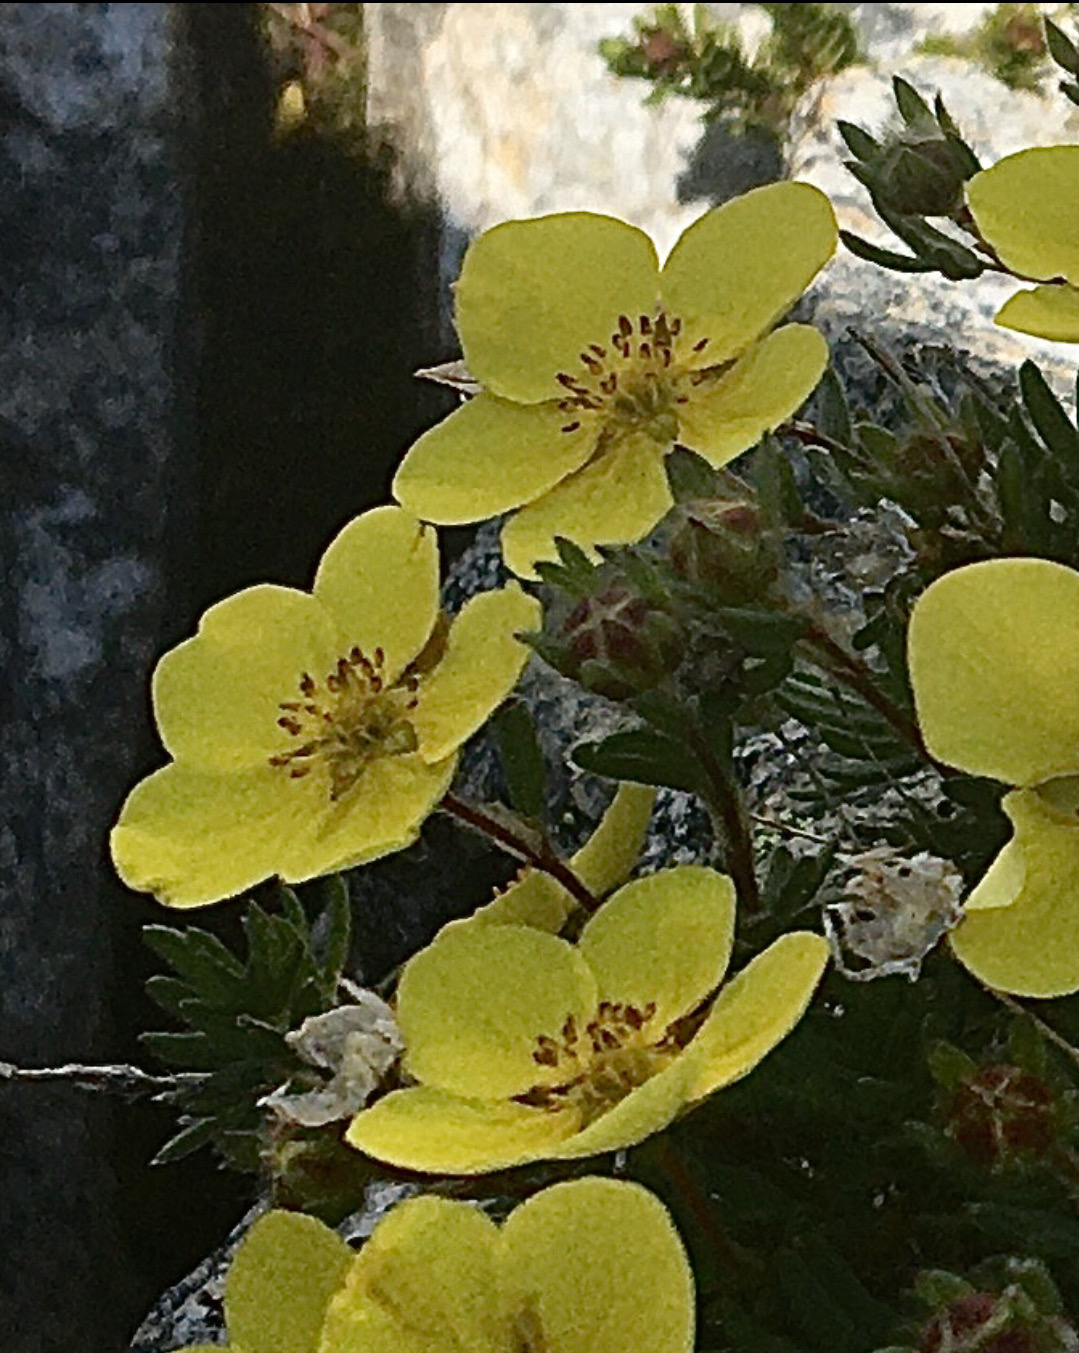
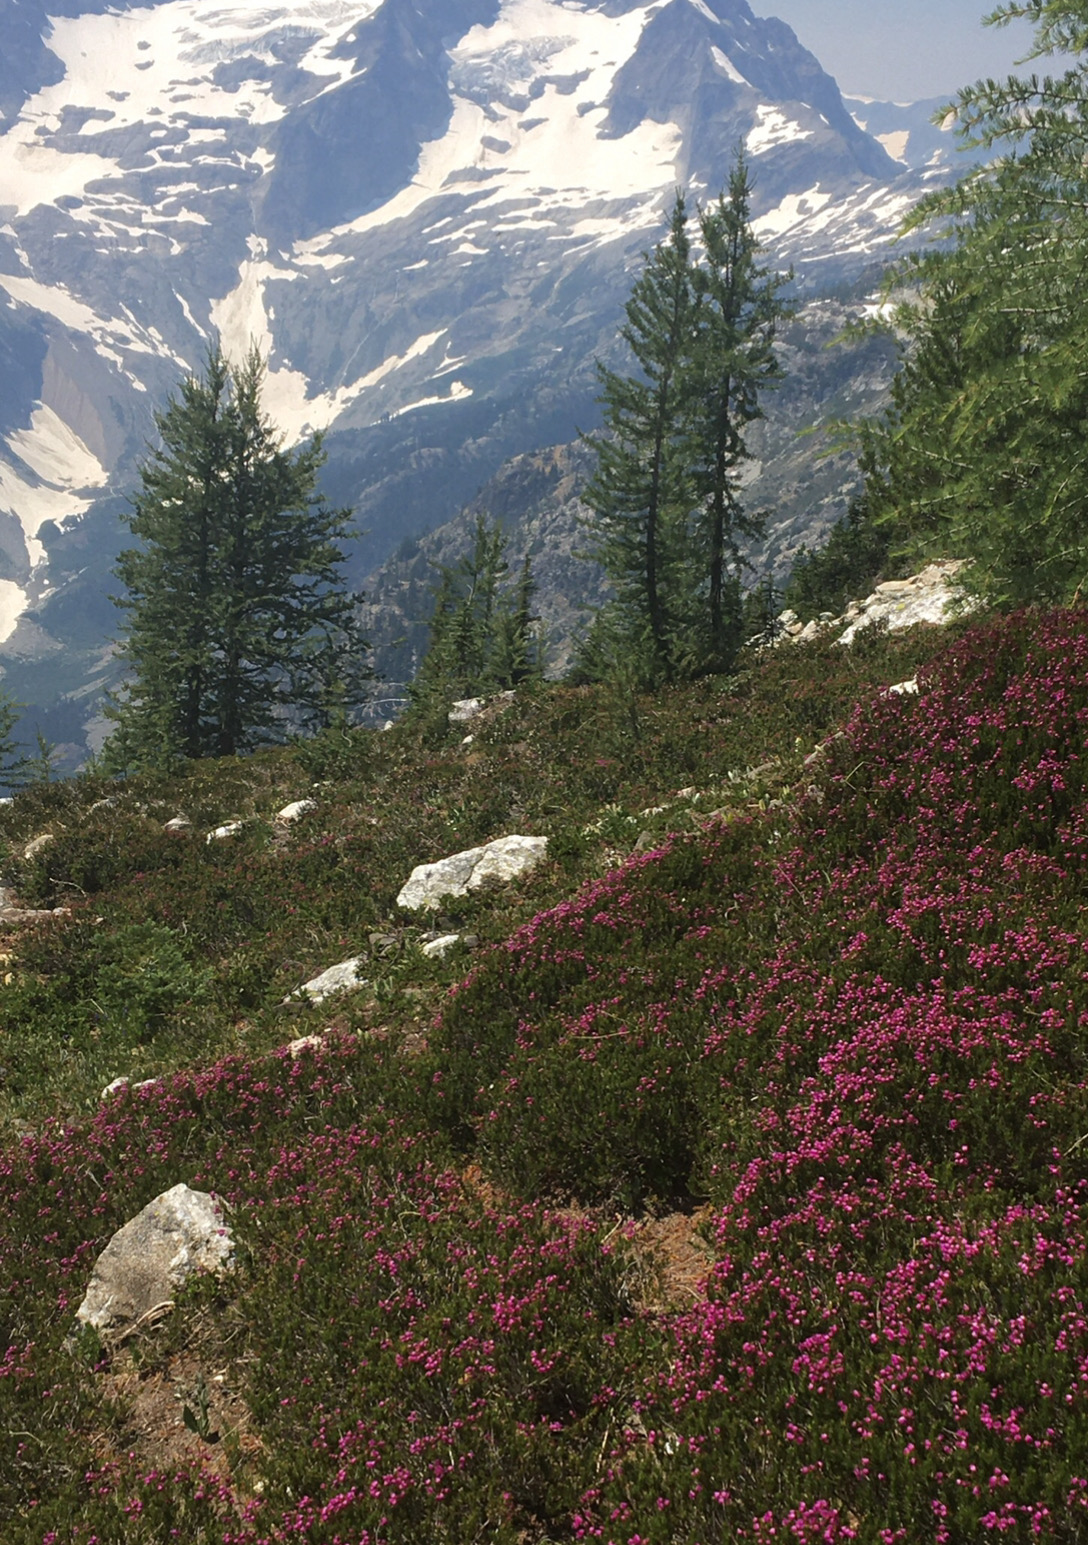
Trip: Mt Thomson - West (solo) Trip Date: 08/28/2021 Trip Report: Last Friday, my friend and I set out for a two-night trip to the Kendall Katwalk & surroundings. Due to car trouble and Portland traffic, our arrival was seriously delayed and we made camp at just a few miles in from the pass. Long story short, we set about doing our own things the second day and I wasn't at the base of the route till 15:30. I've never lead solo in the alpine before. Between that, my faster-than-expected dwindling water, and the hideous start time I had very strong "turn around" thoughts happening. But eh! I'm not above bailing on a few nuts if need be. Route goes up left skyline in pic above, mostly. I did it in 6 pitches, pitching out the very first short bit that's normally simul'd or solo'd. Great climbing! The hardest move IMO is the very very first one. Stepping off the first real belay ledge and getting into a chimney. My 40 meter rope barely worked, resorting to doing dumb shit like extending the anchor every now and then to get the rope to reach. Though movement was great, it was hard to enjoy because I was in such a hurry and thinking about rationing my water. Methodical climbing interspersed with dizzying handiwork to take down/build anchors and the occasional gulp. I was soon climbing by head lamp, resigned and in less of a hurry, and only the last pitch fully independent of the sun. Those summit views!! Thirsty but happy. The descent down the East ridge was mentally taxing. Nothing like wading through stunted conifers, grabbing onto them, leaning far looking down, and seeing only bottomless black before trying another likely dead-end. Compass and map were very useful. I did 3 raps. Found anchors the first two; for the last I left behind a locker and some cordellette. Note: if you find an oval locker up there that says "compromised"... it's not, that's just how I mark my gear. Drank a ton of water at the basin, then made it back to camp (saddle above Ed's lake) where friend had made my bed 1:15 and thankfully was sleeping, not worrying. Lovely hike out the next day! Gear Notes: Metolius blue to BD blue, tricams, many nuts, DIY 60 liter backpack (shout out to Stitchback gear!). Could've been a bit lighter. Approach Notes: What's with those weird ass rocks with star-like patterns?1 point
-
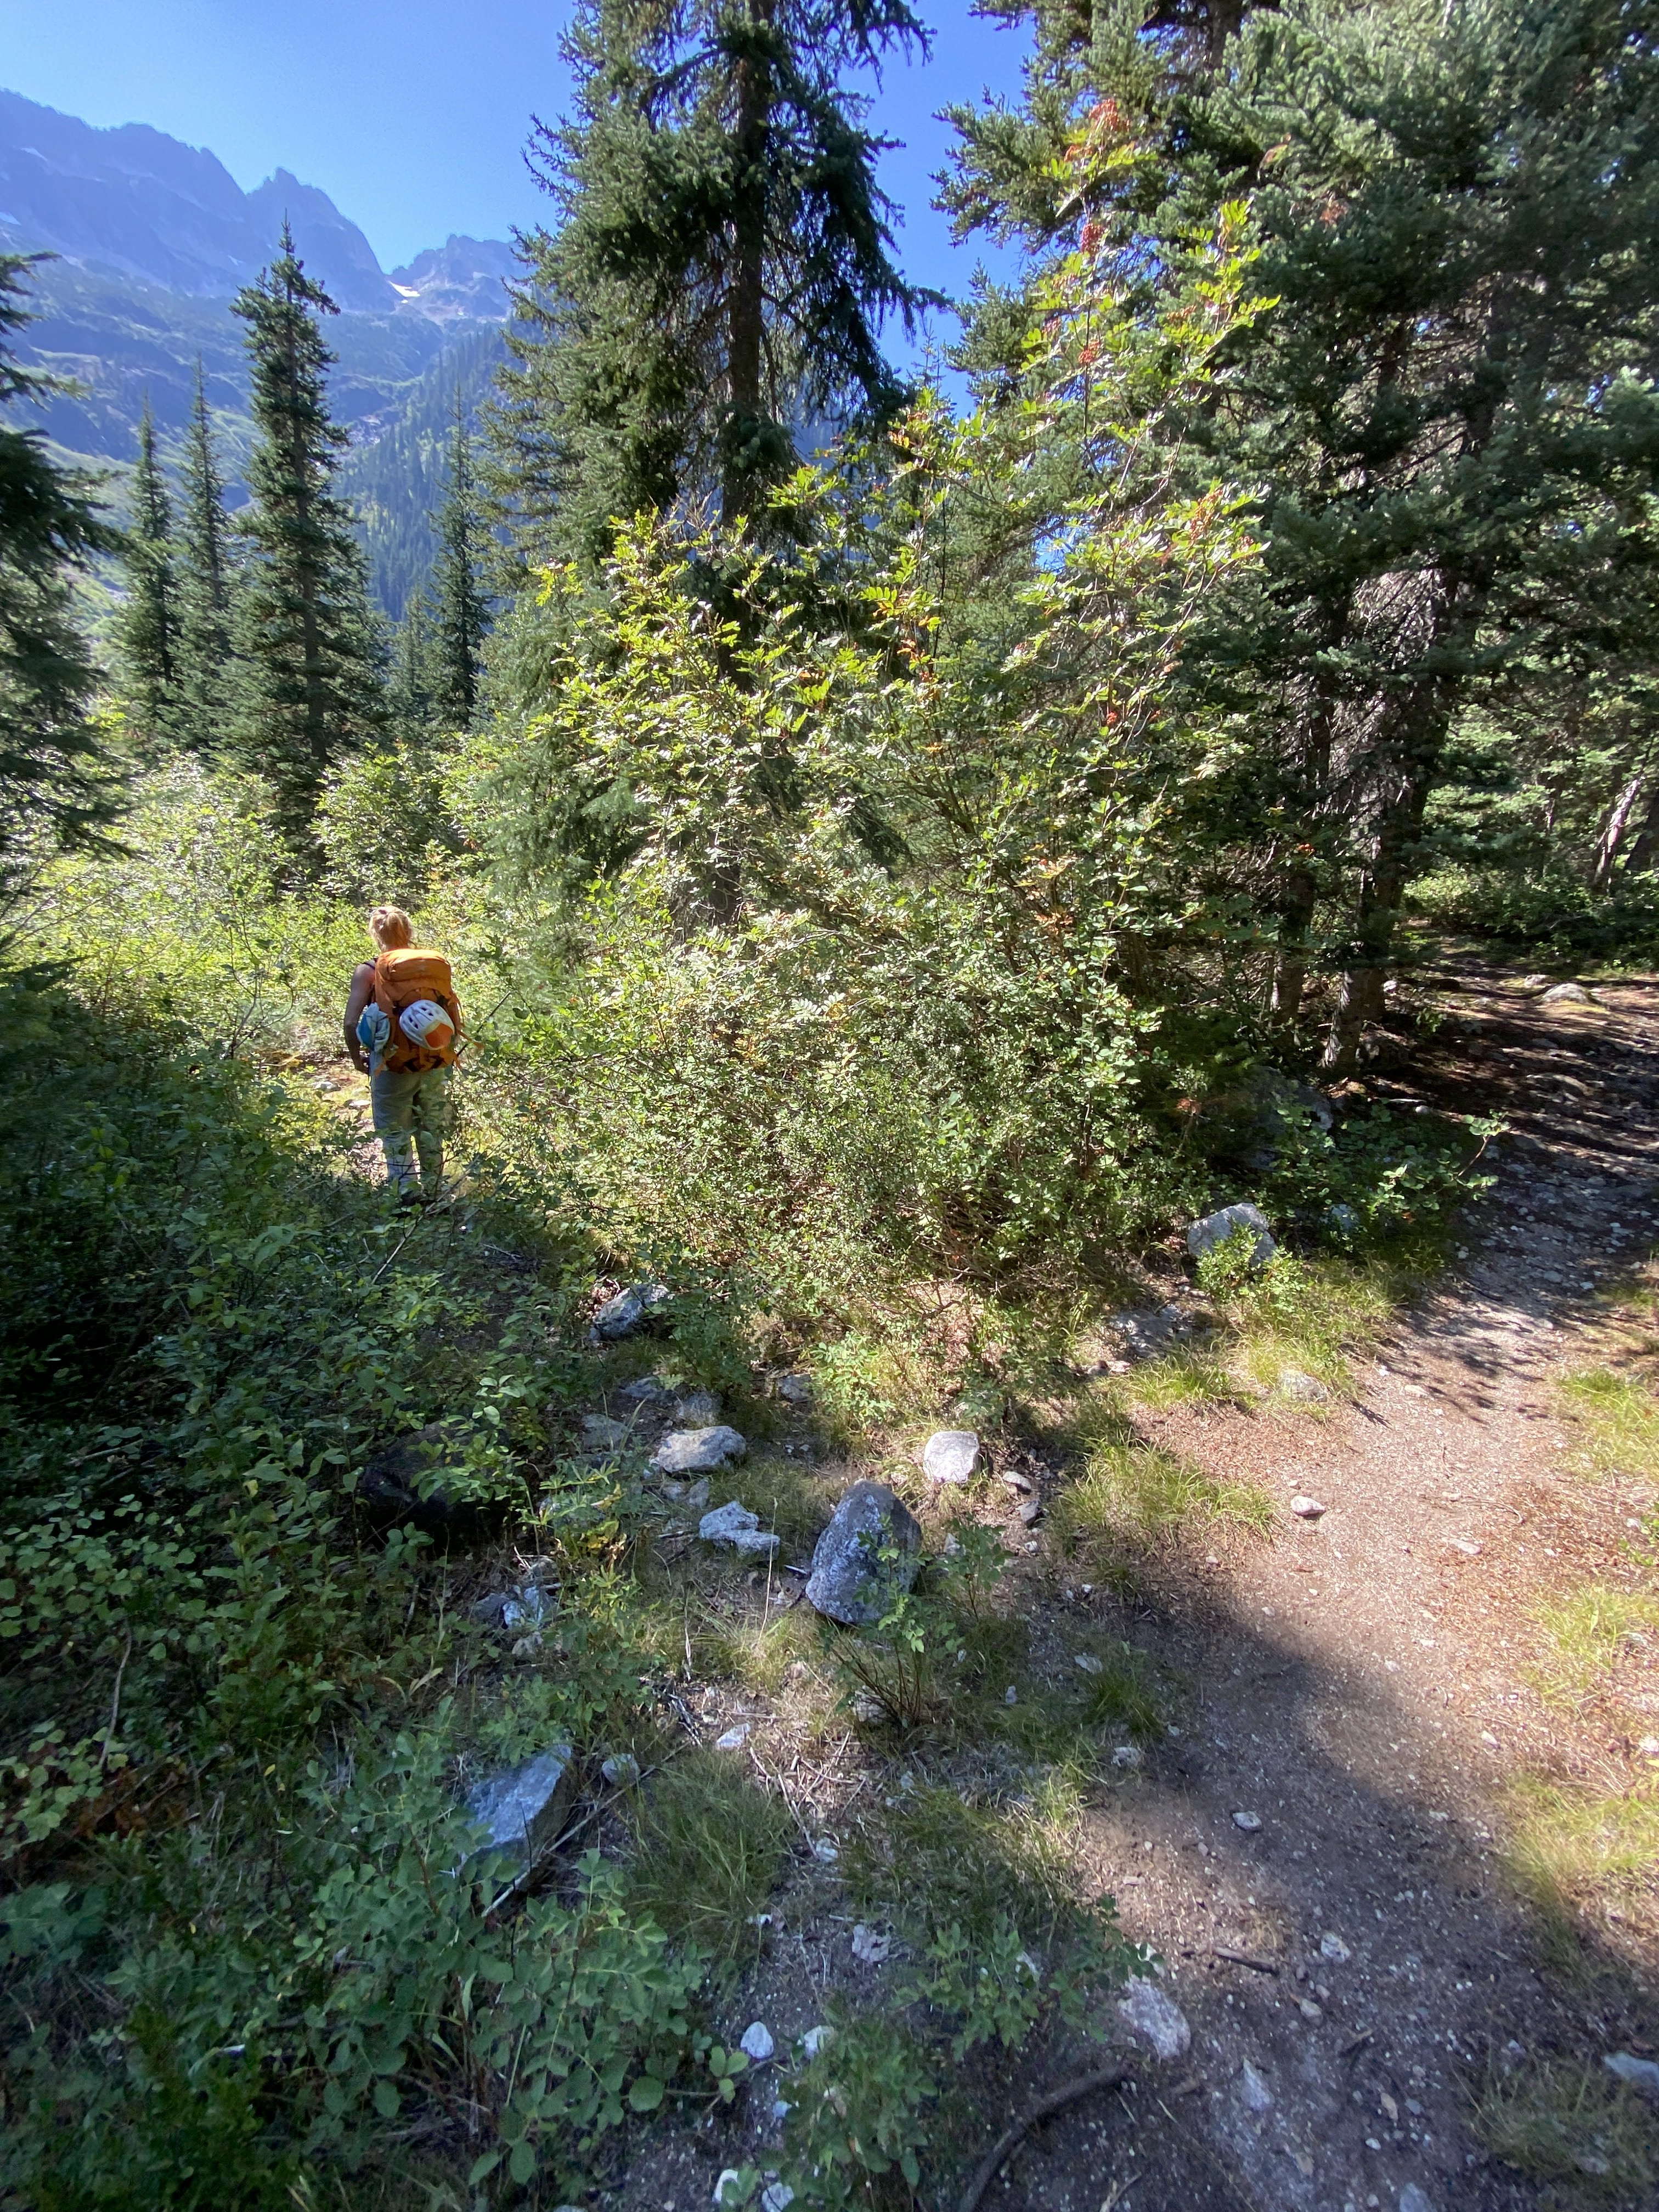
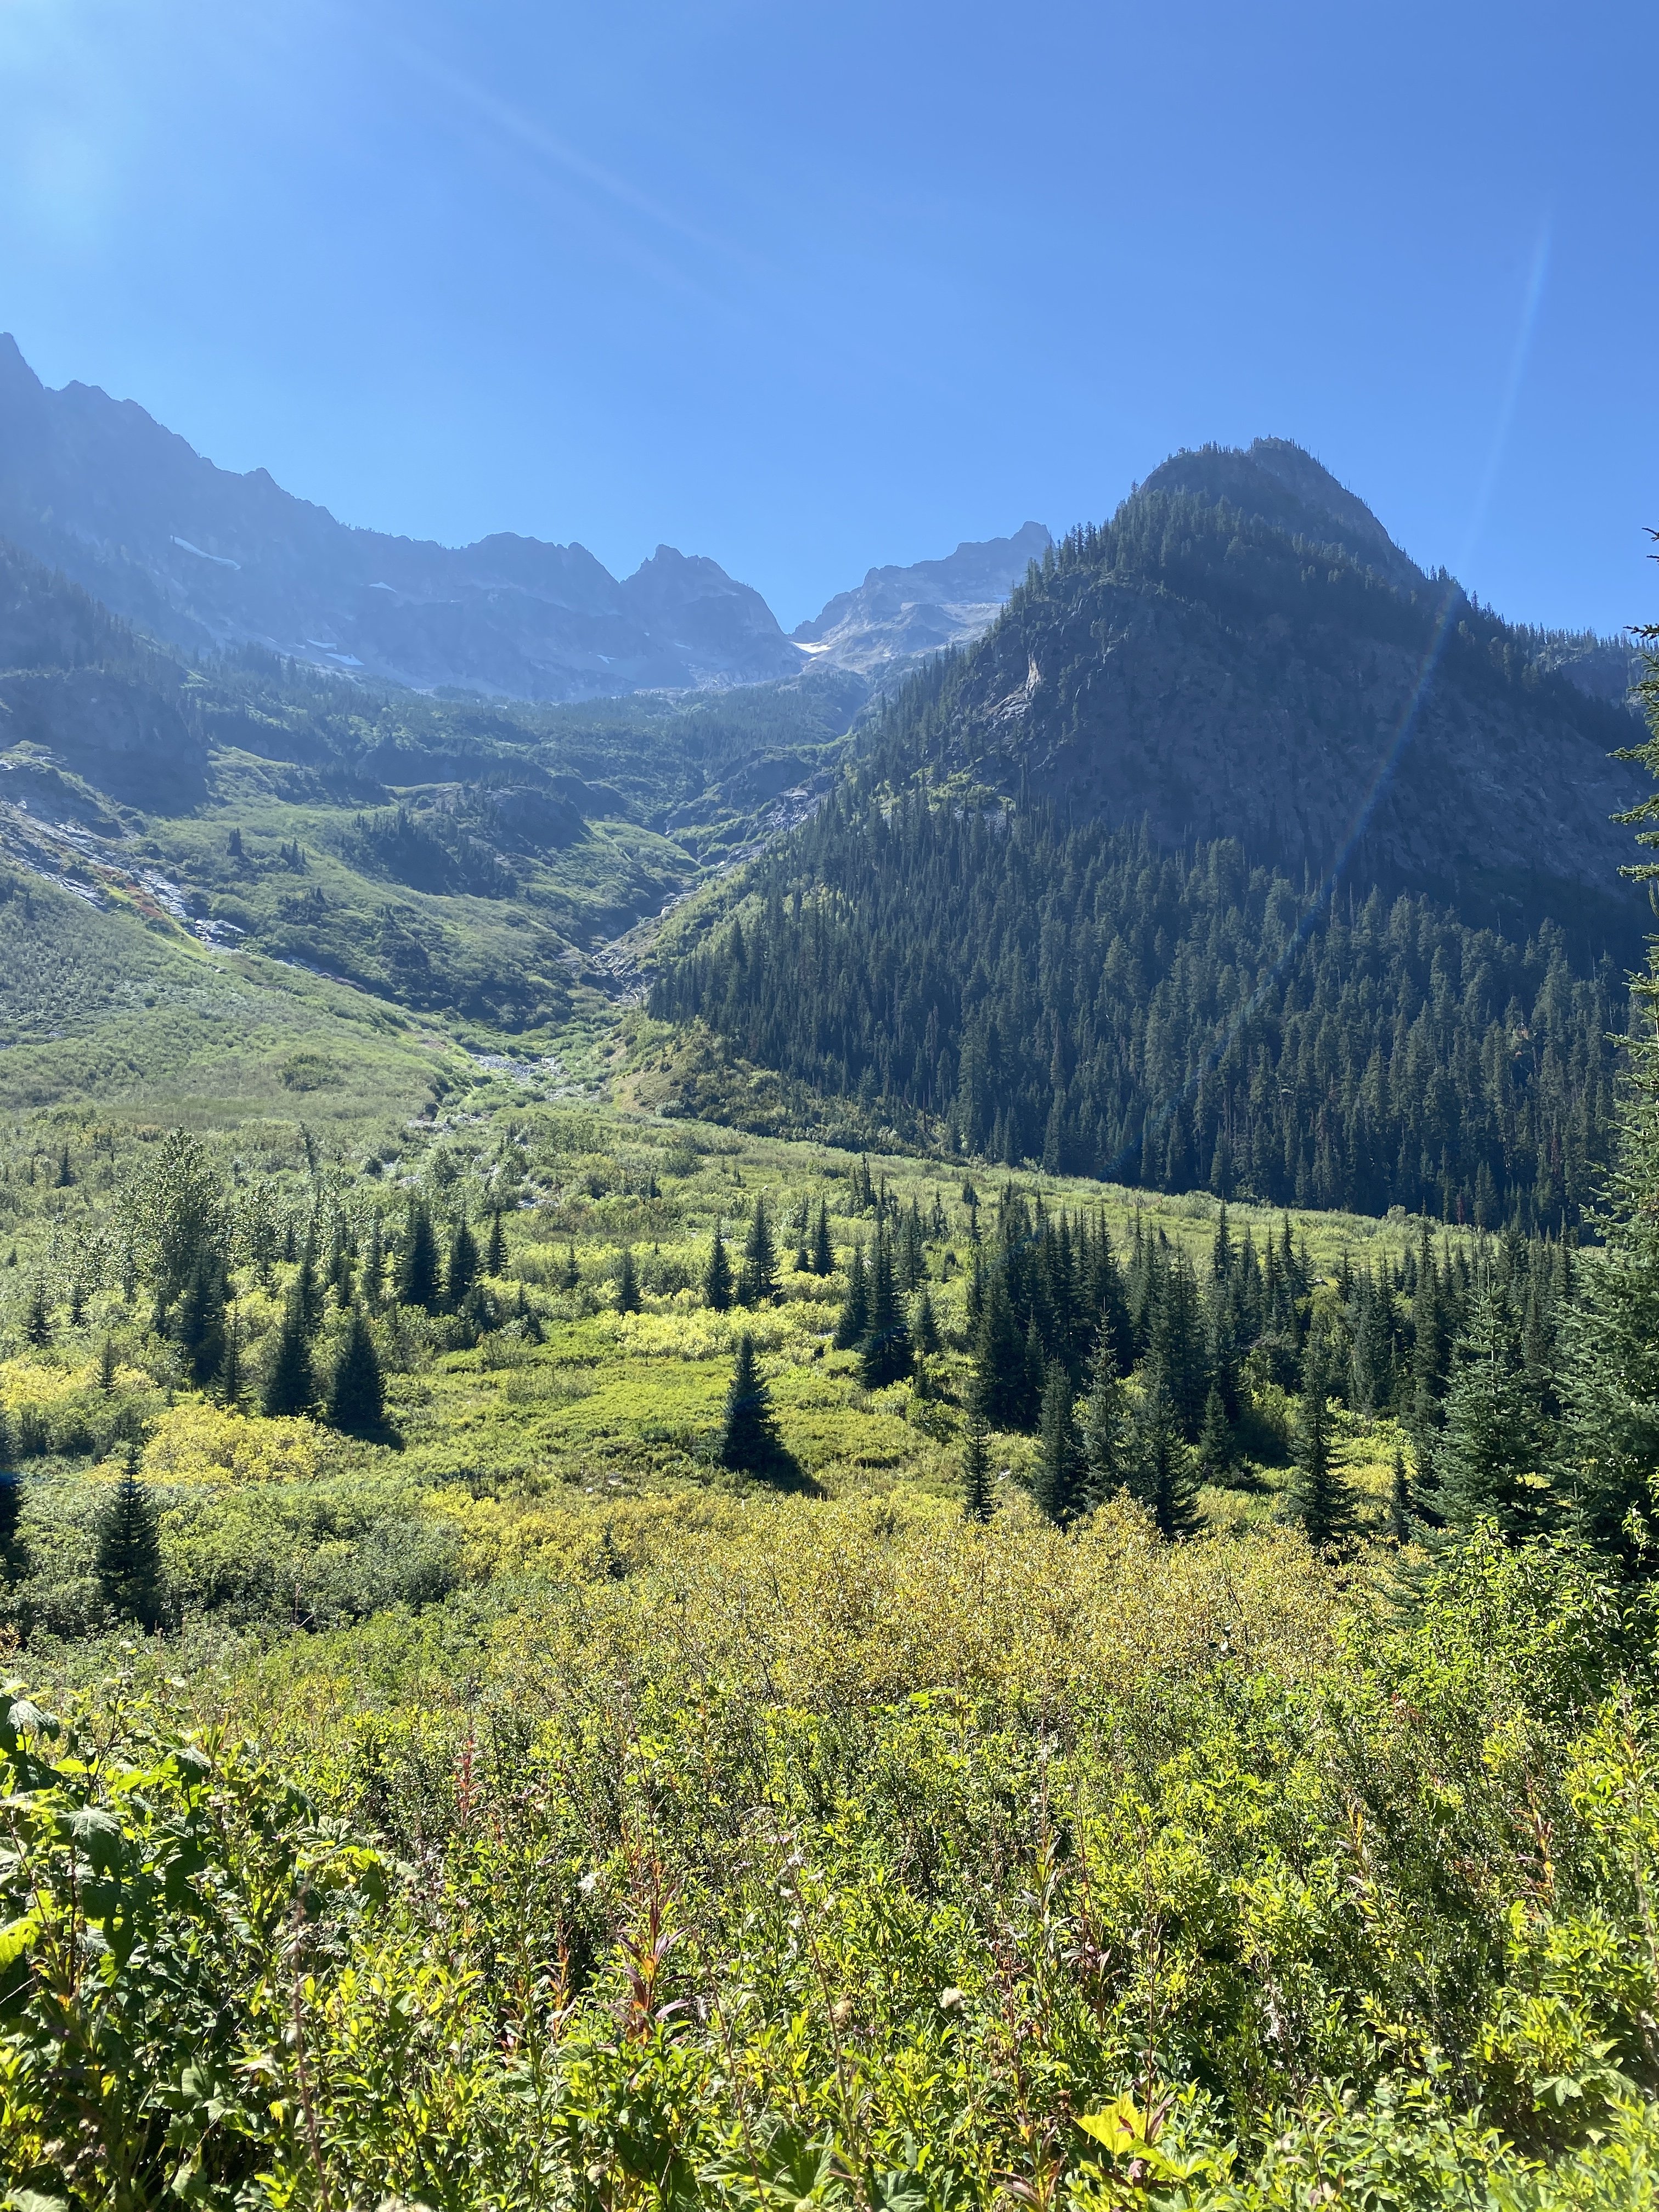
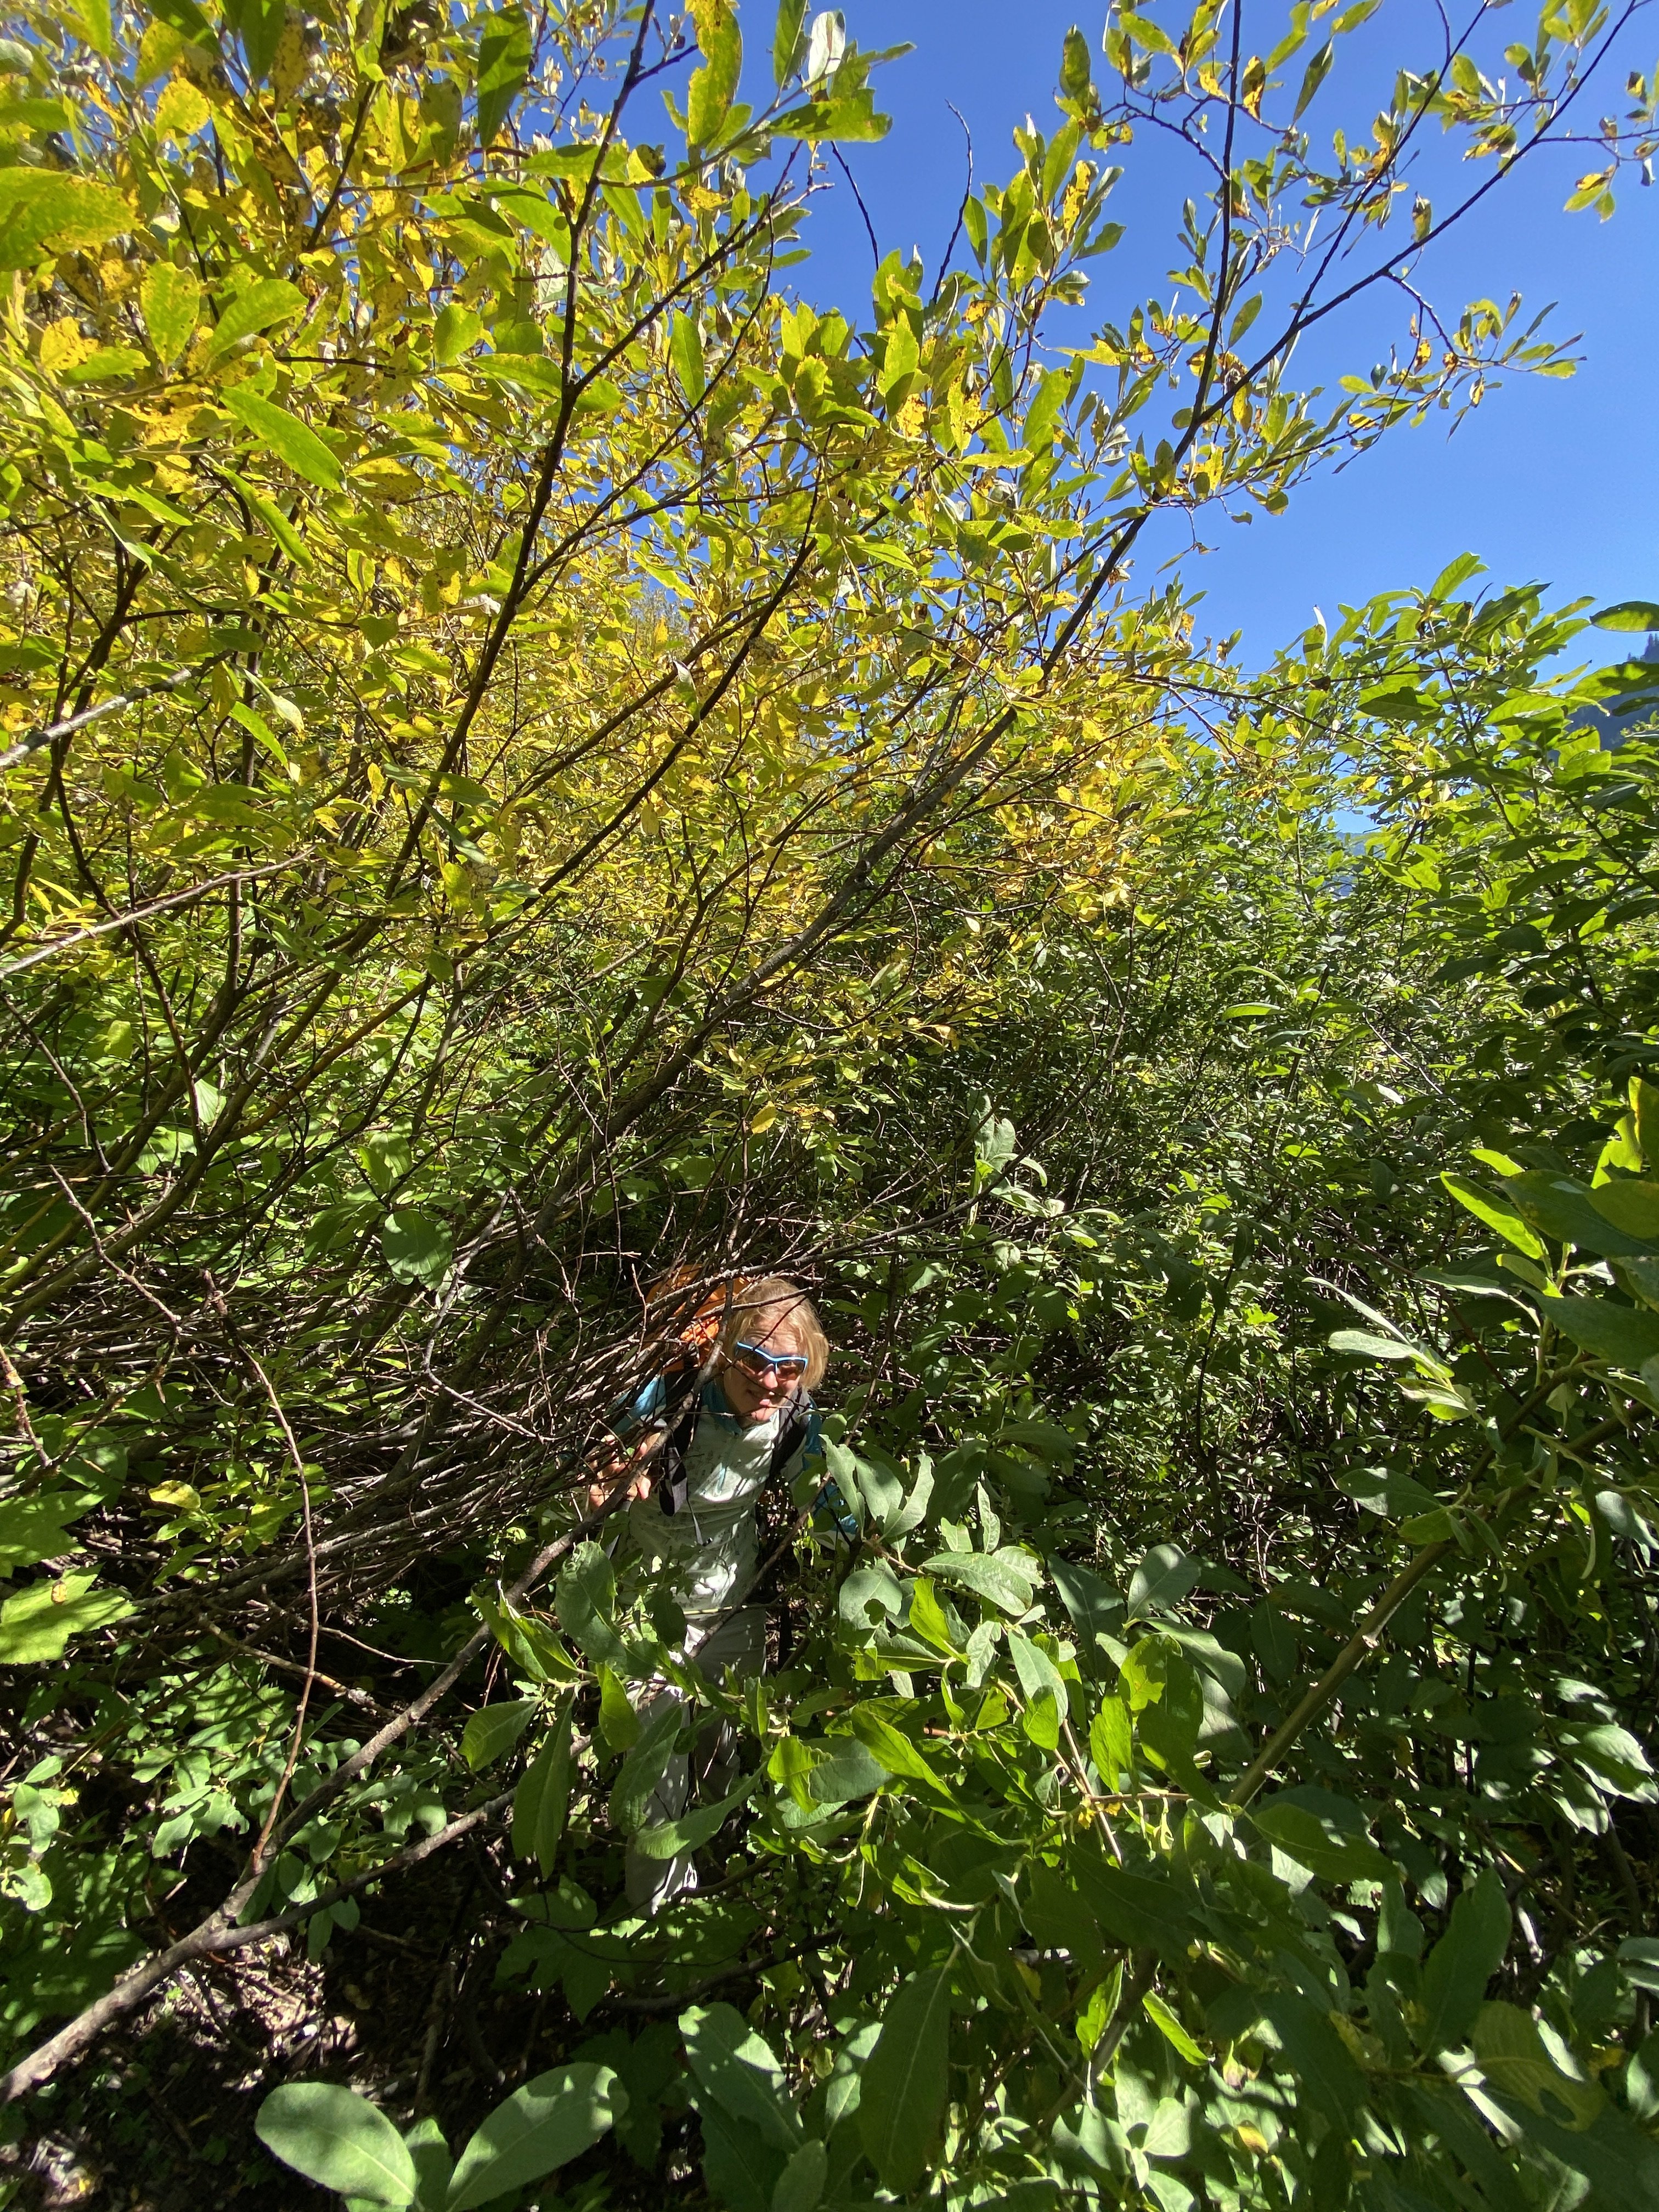
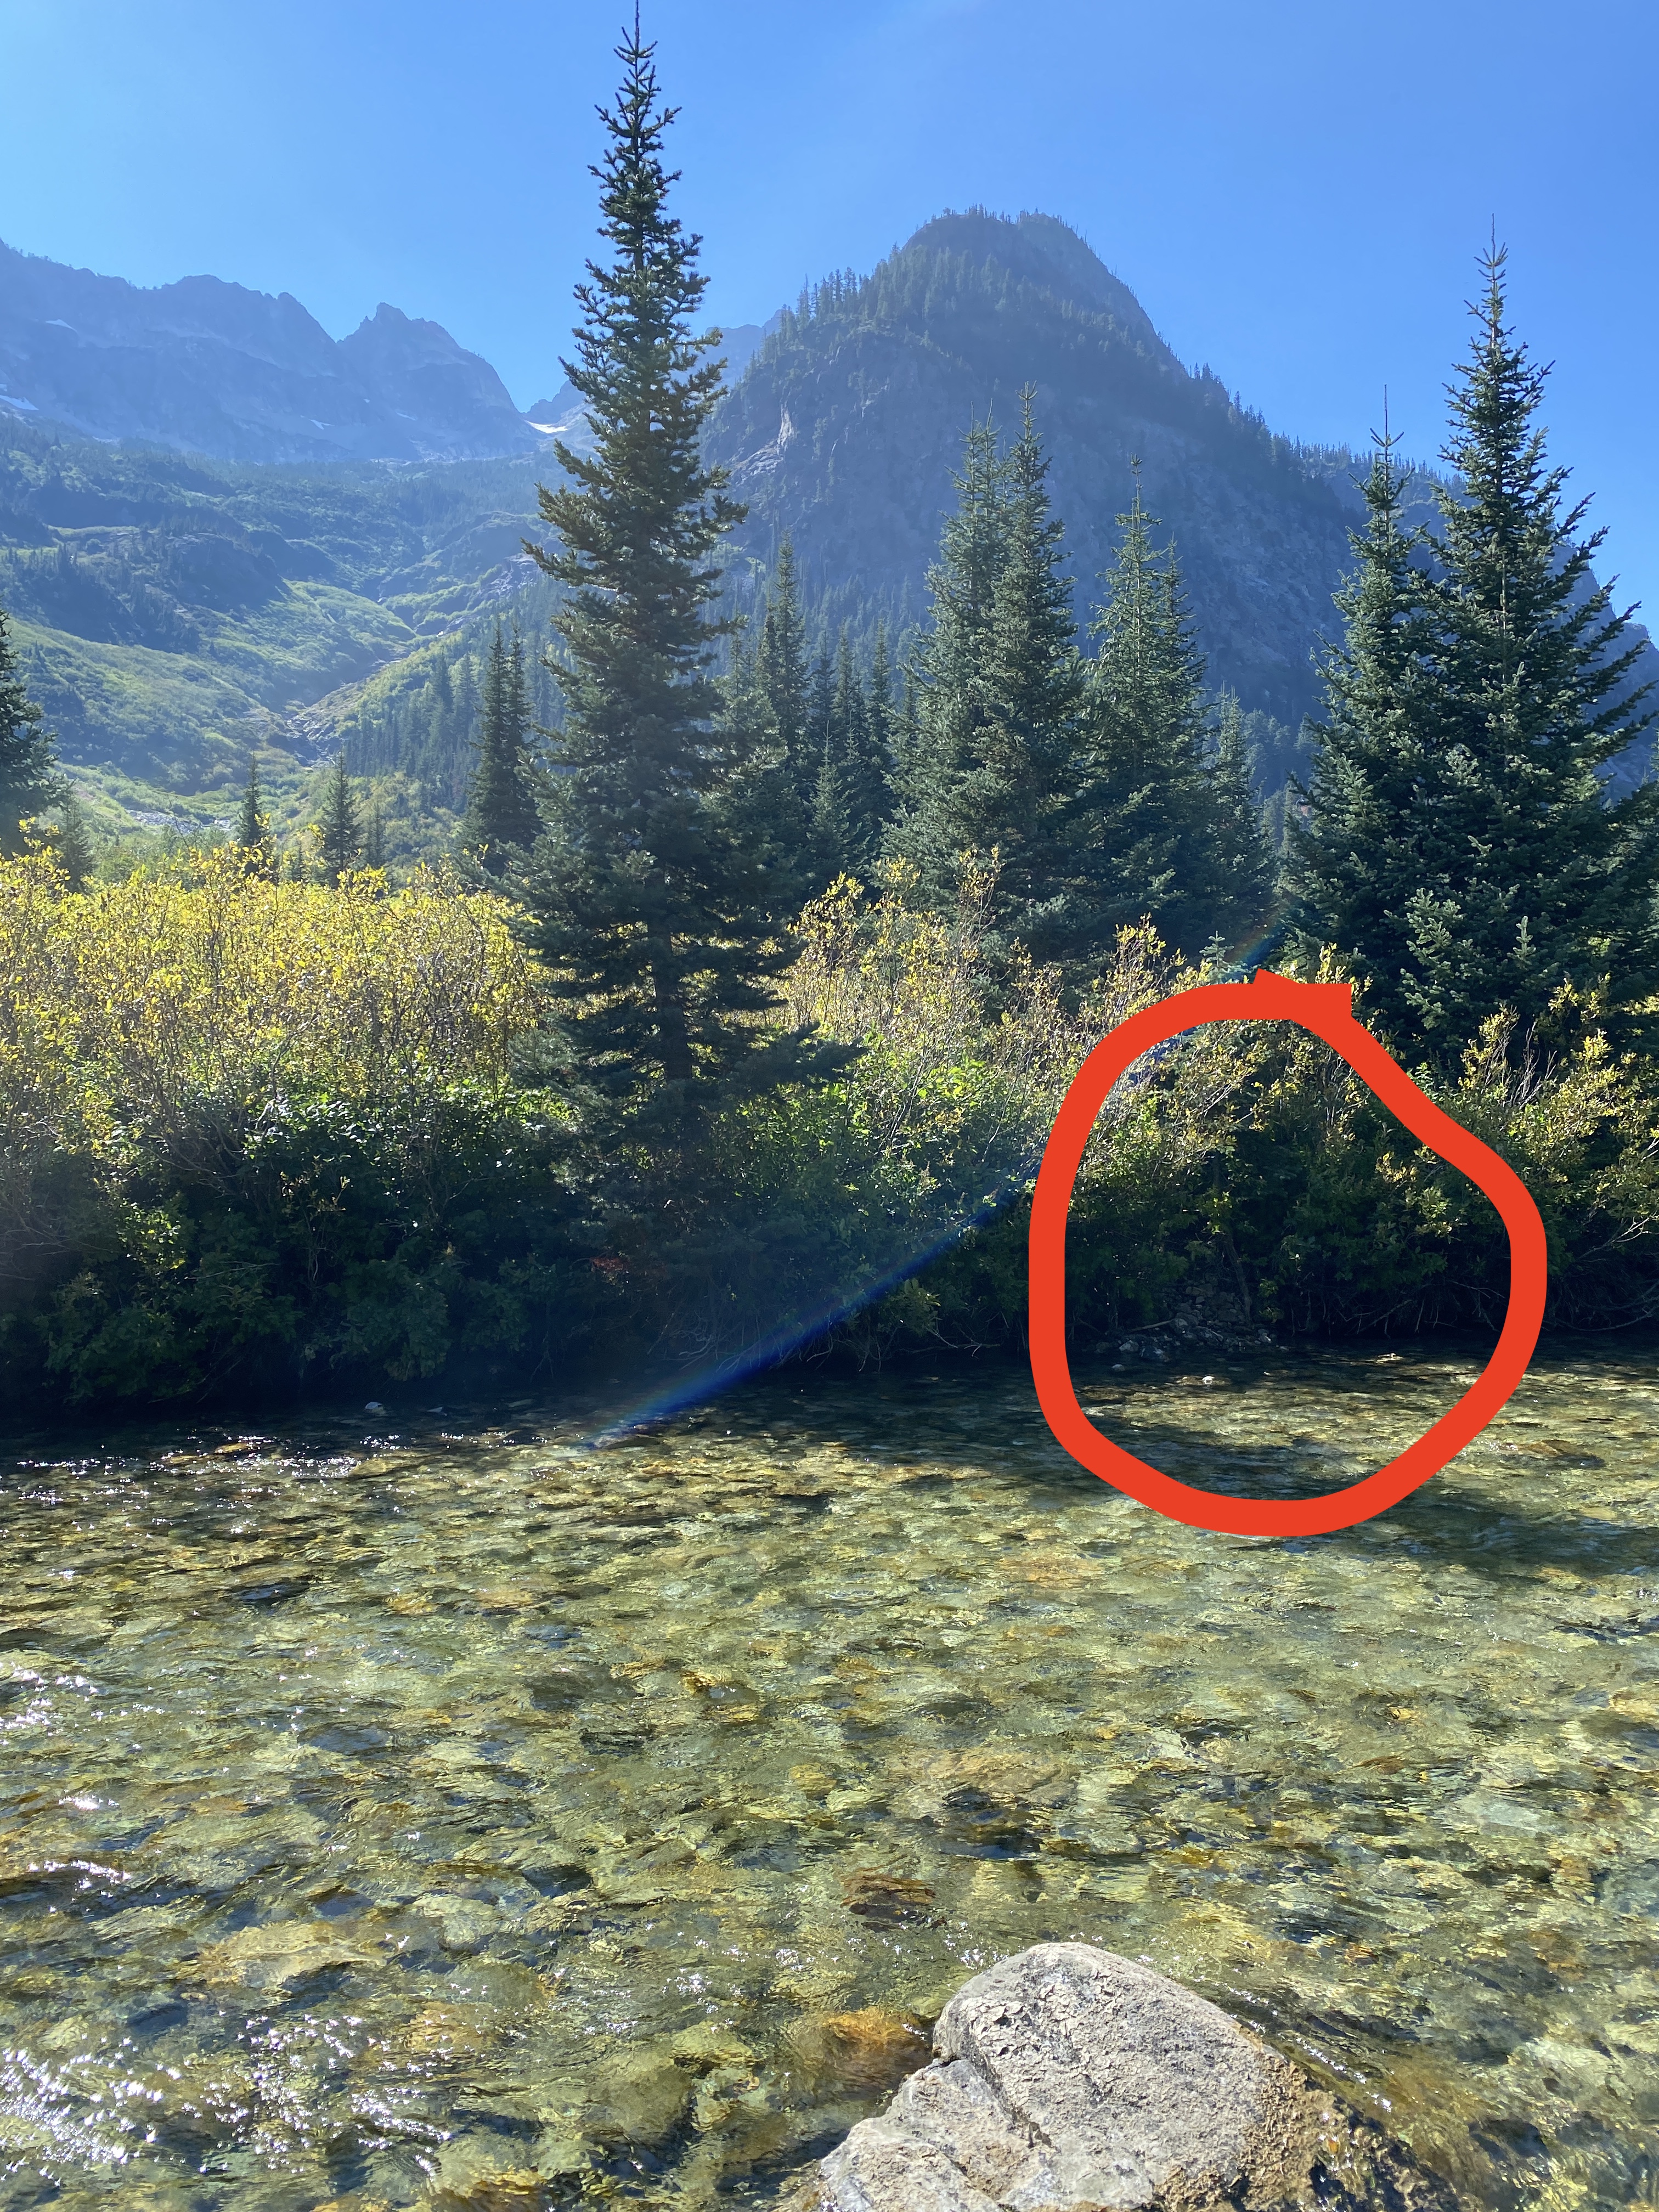
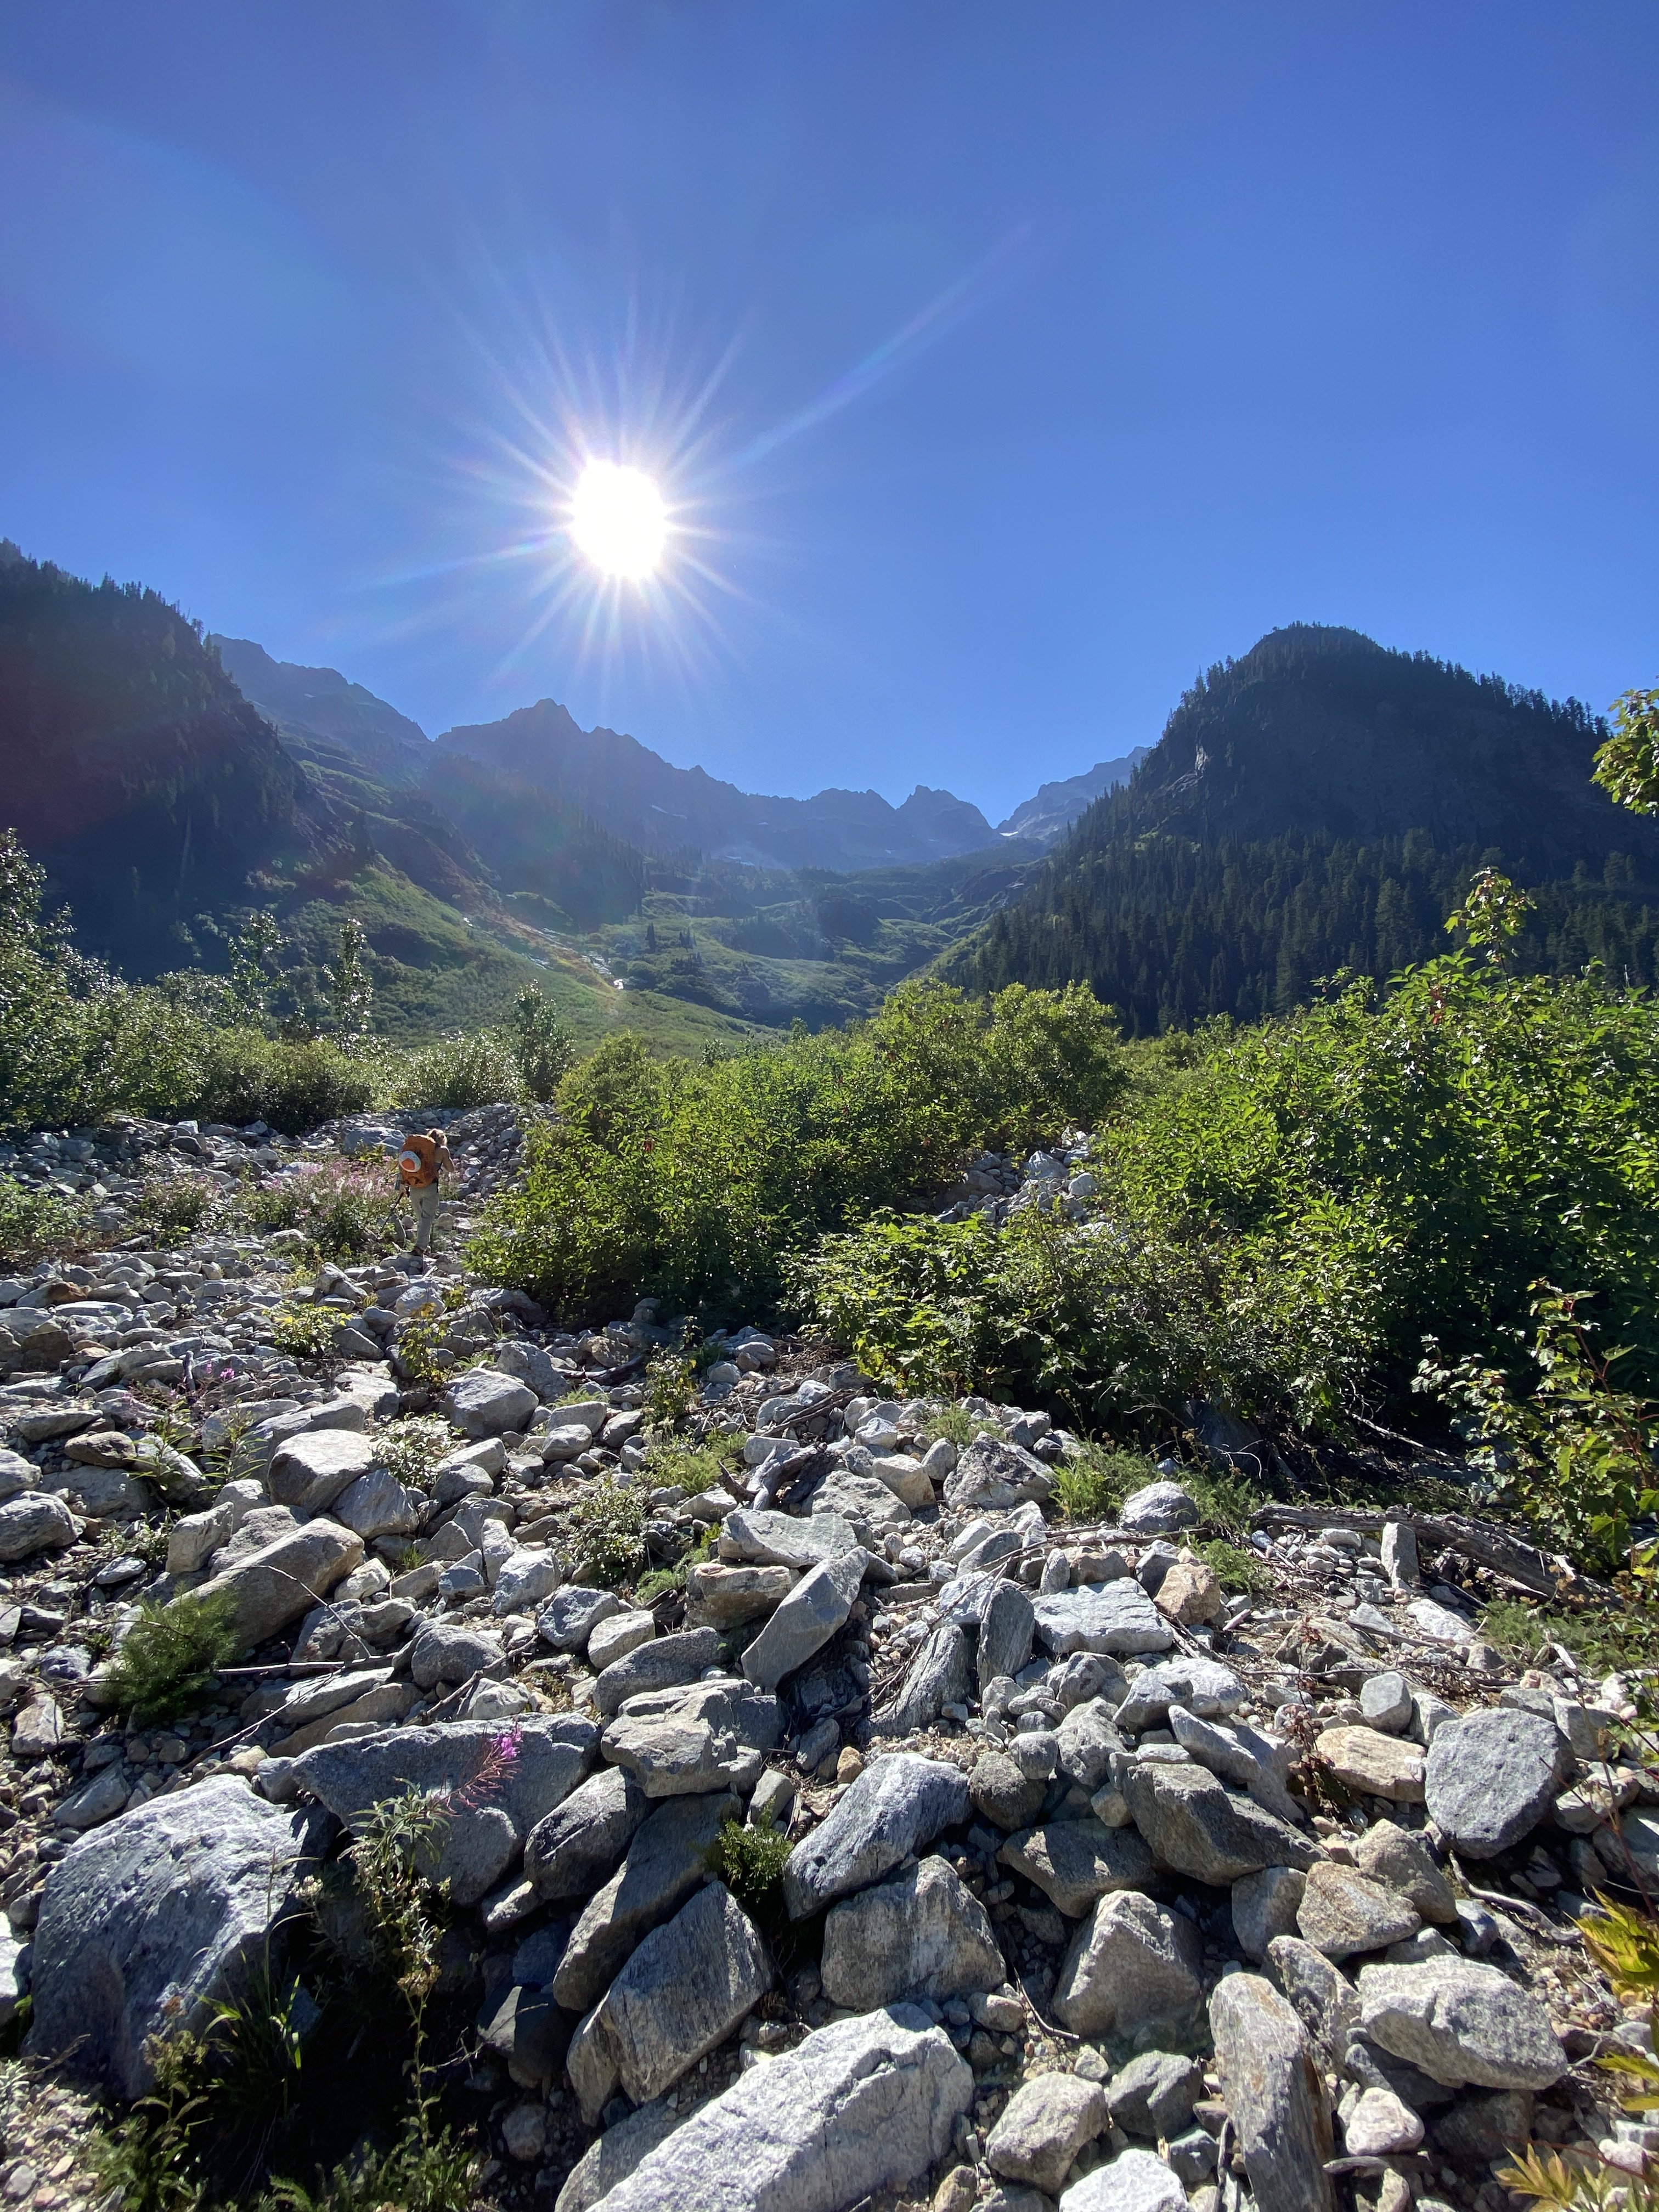
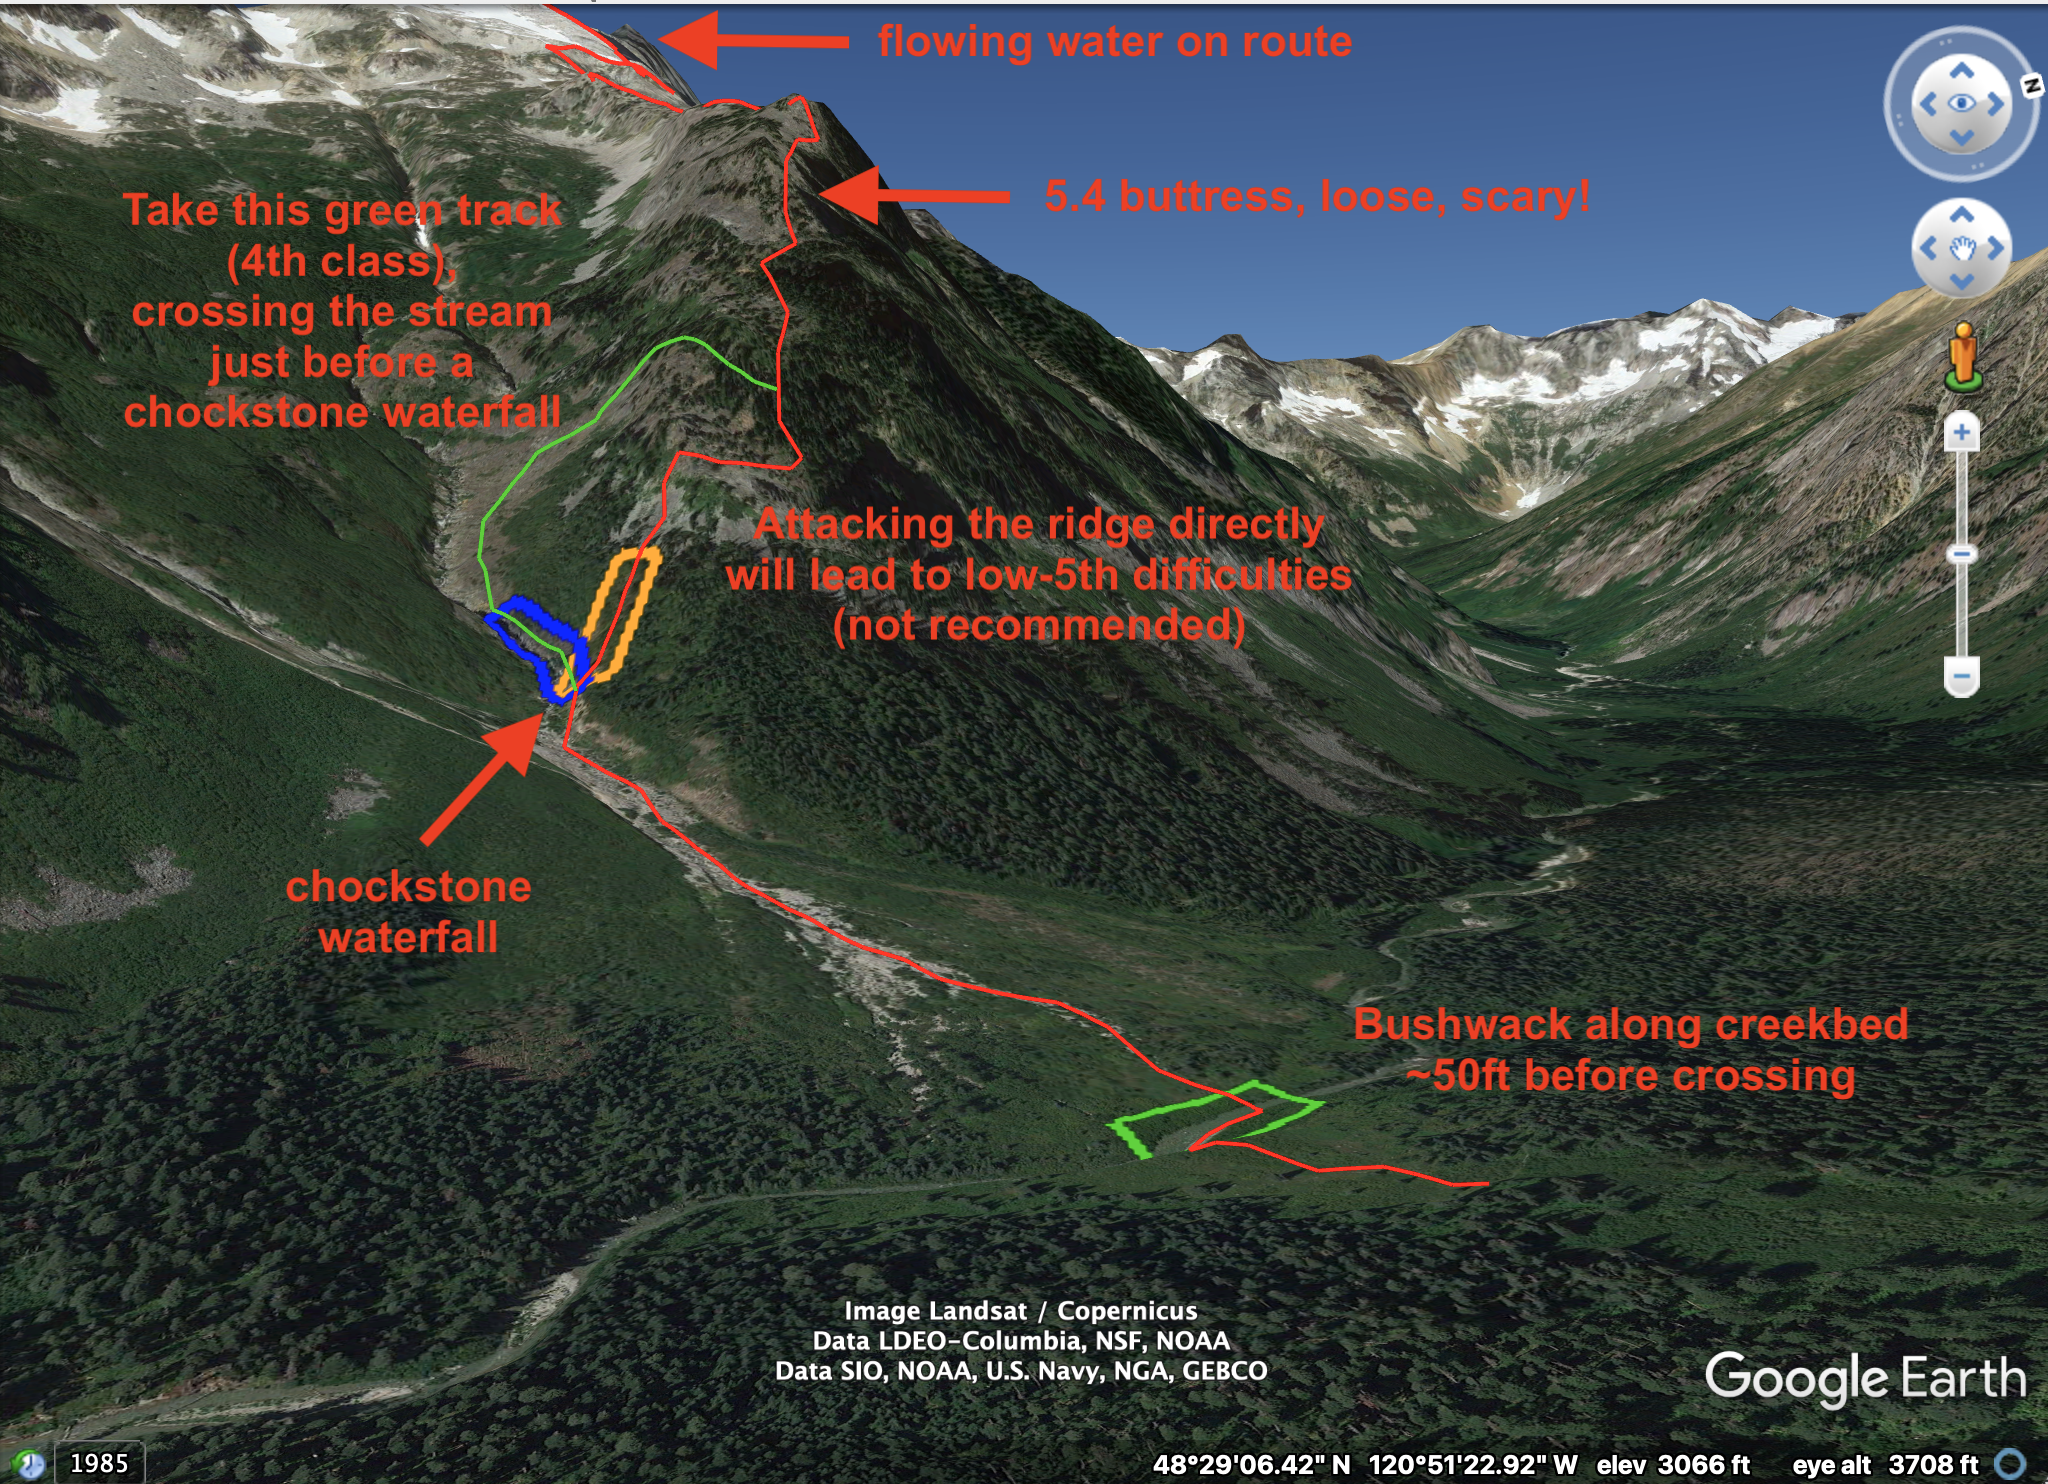
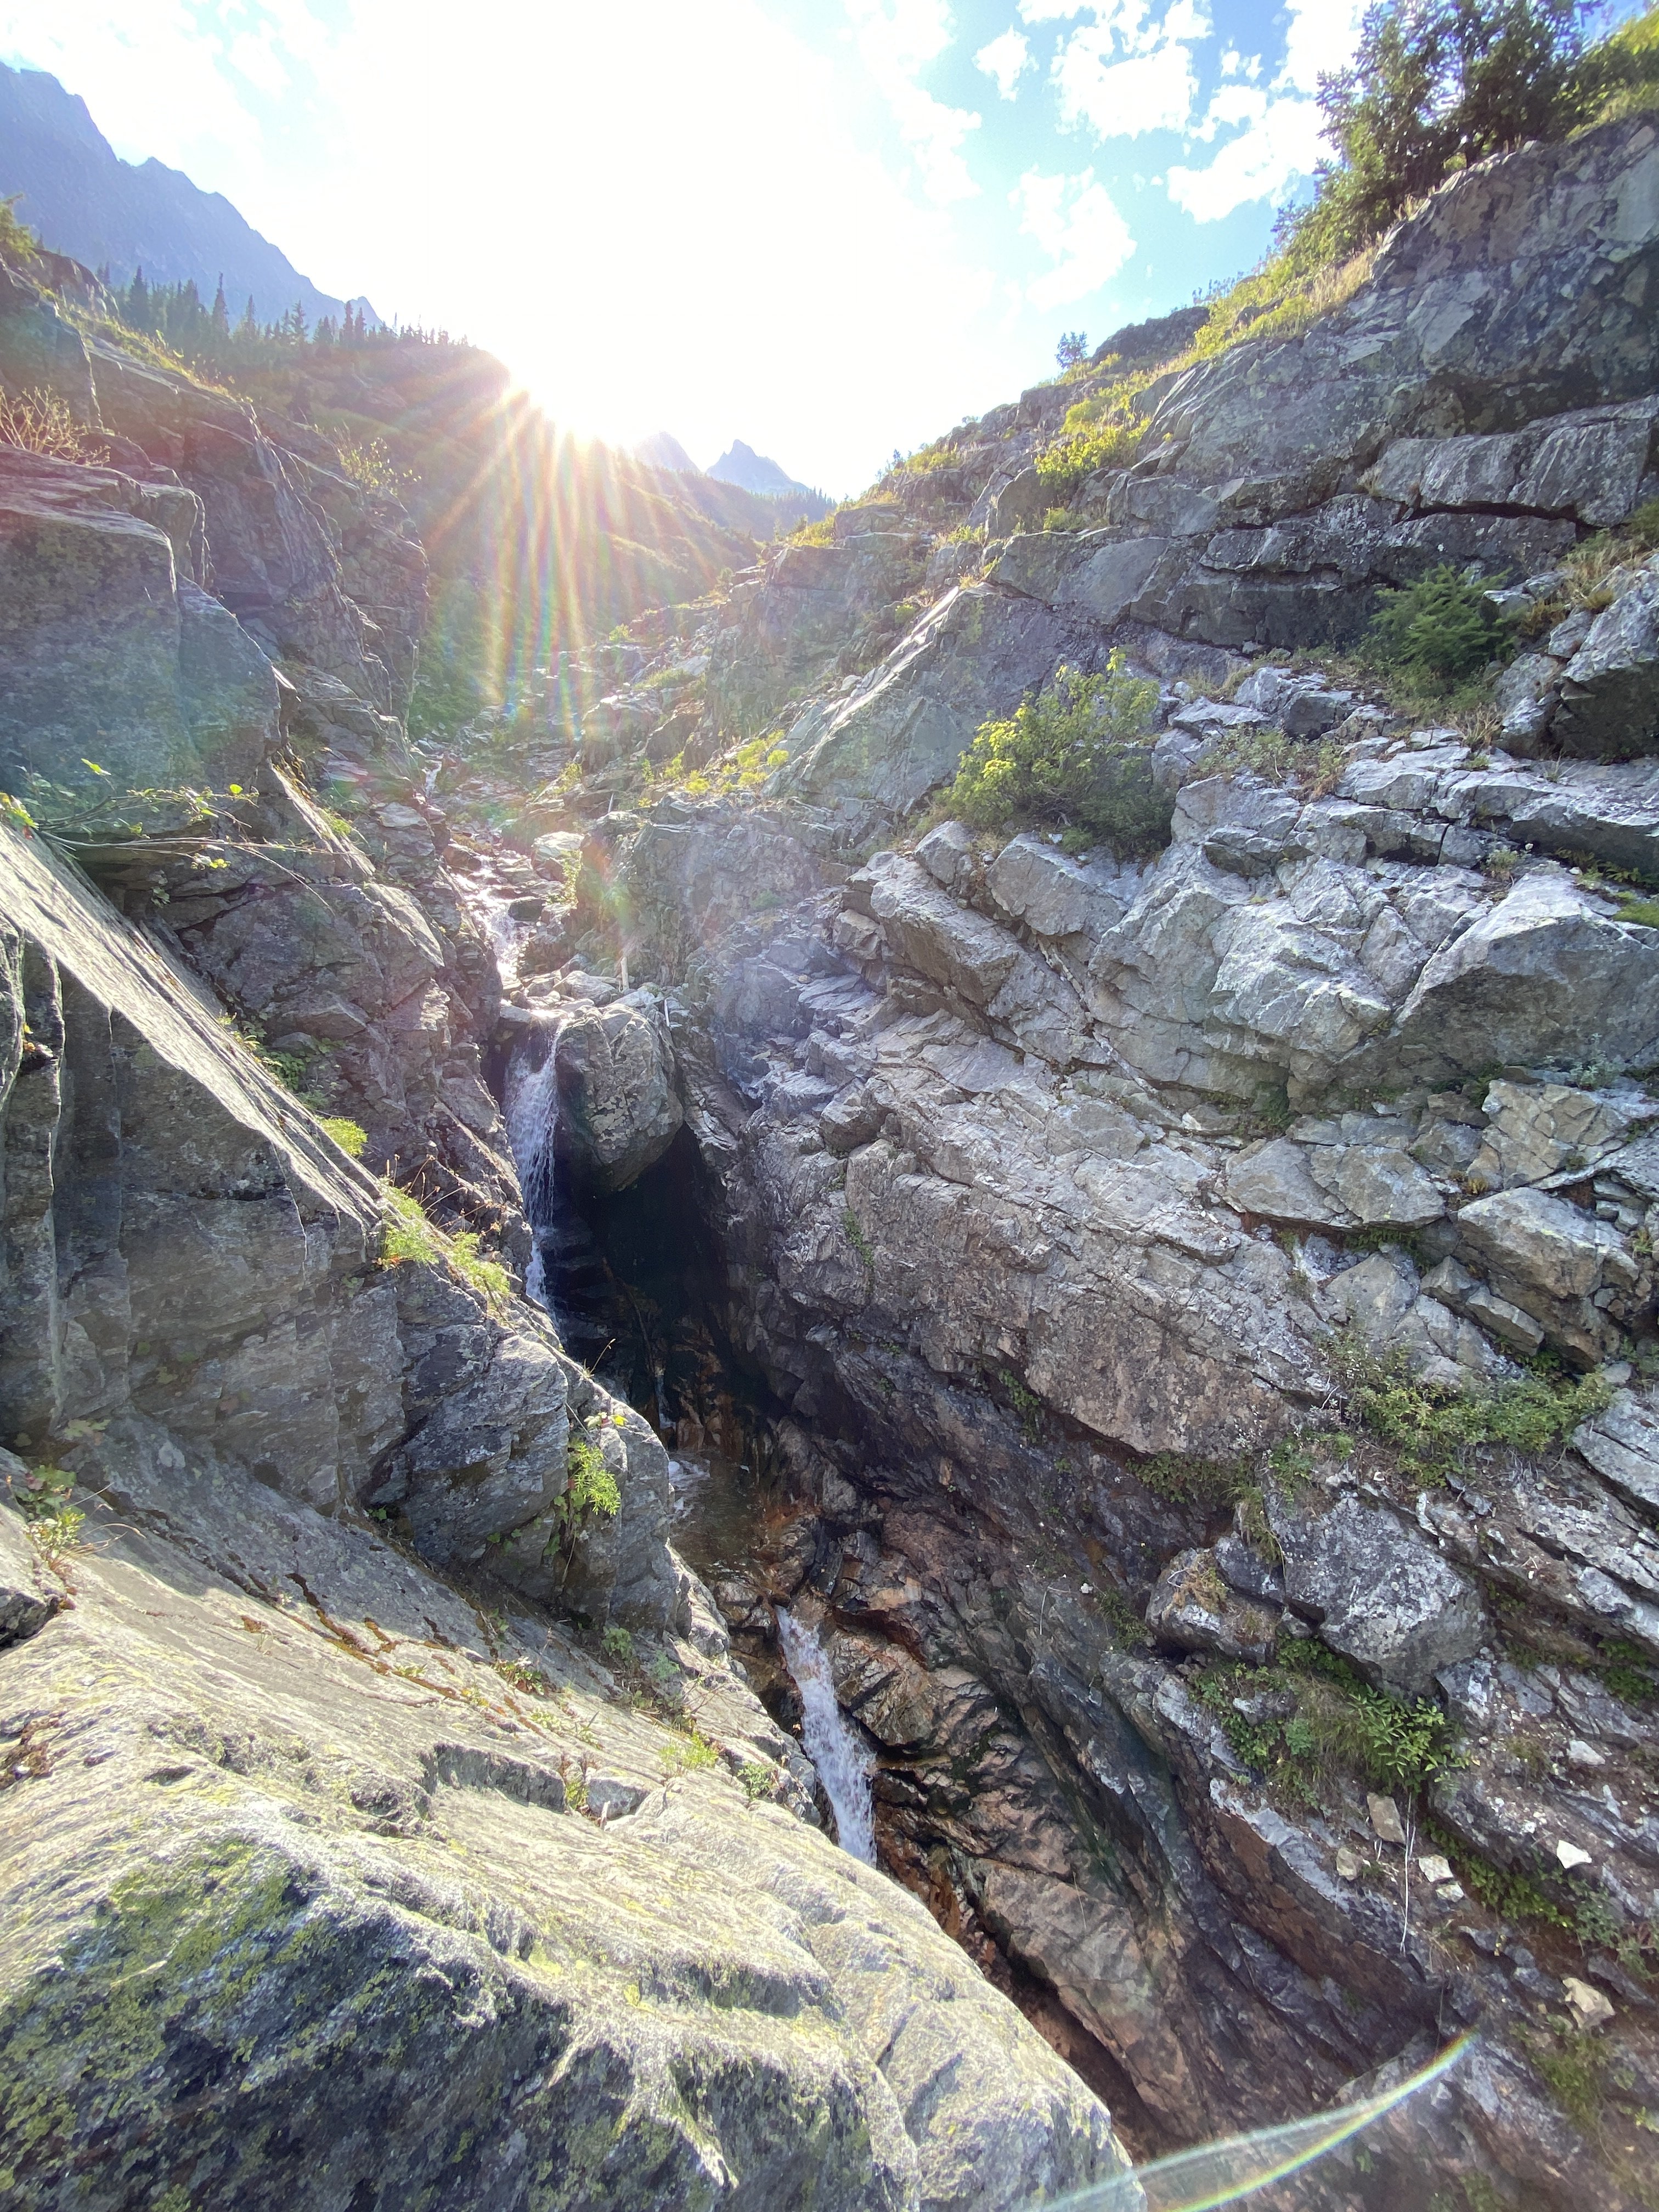
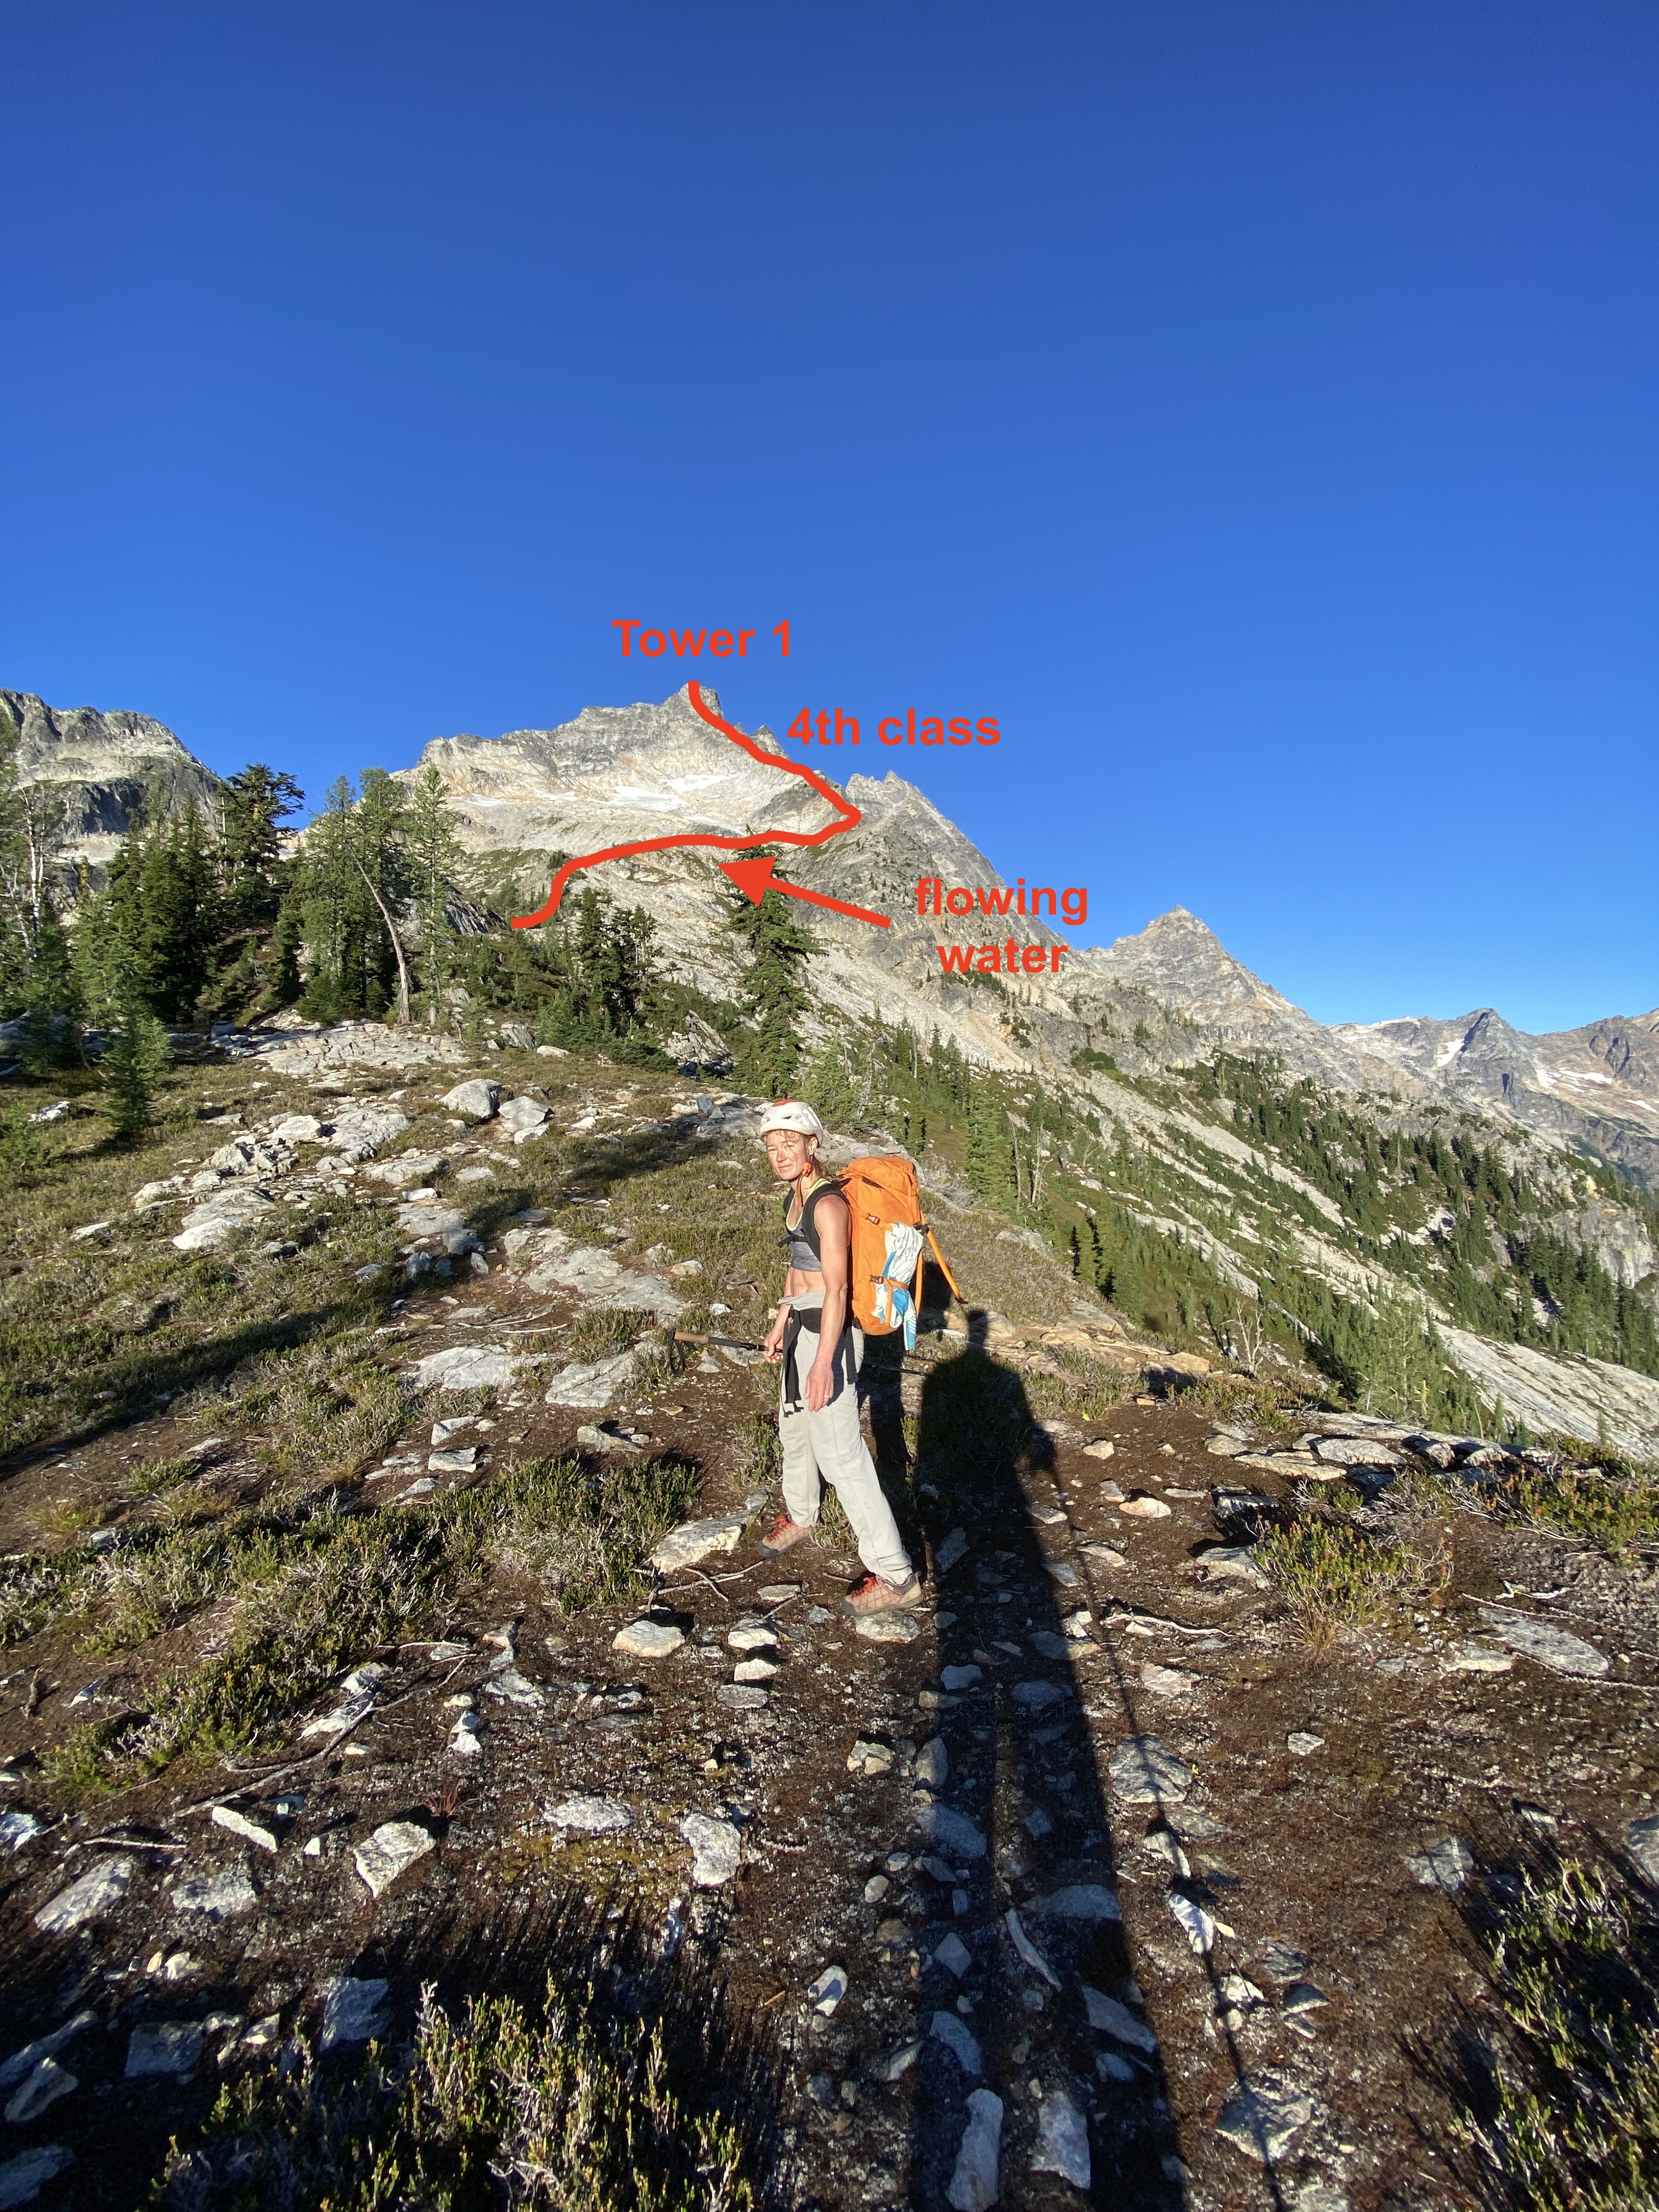
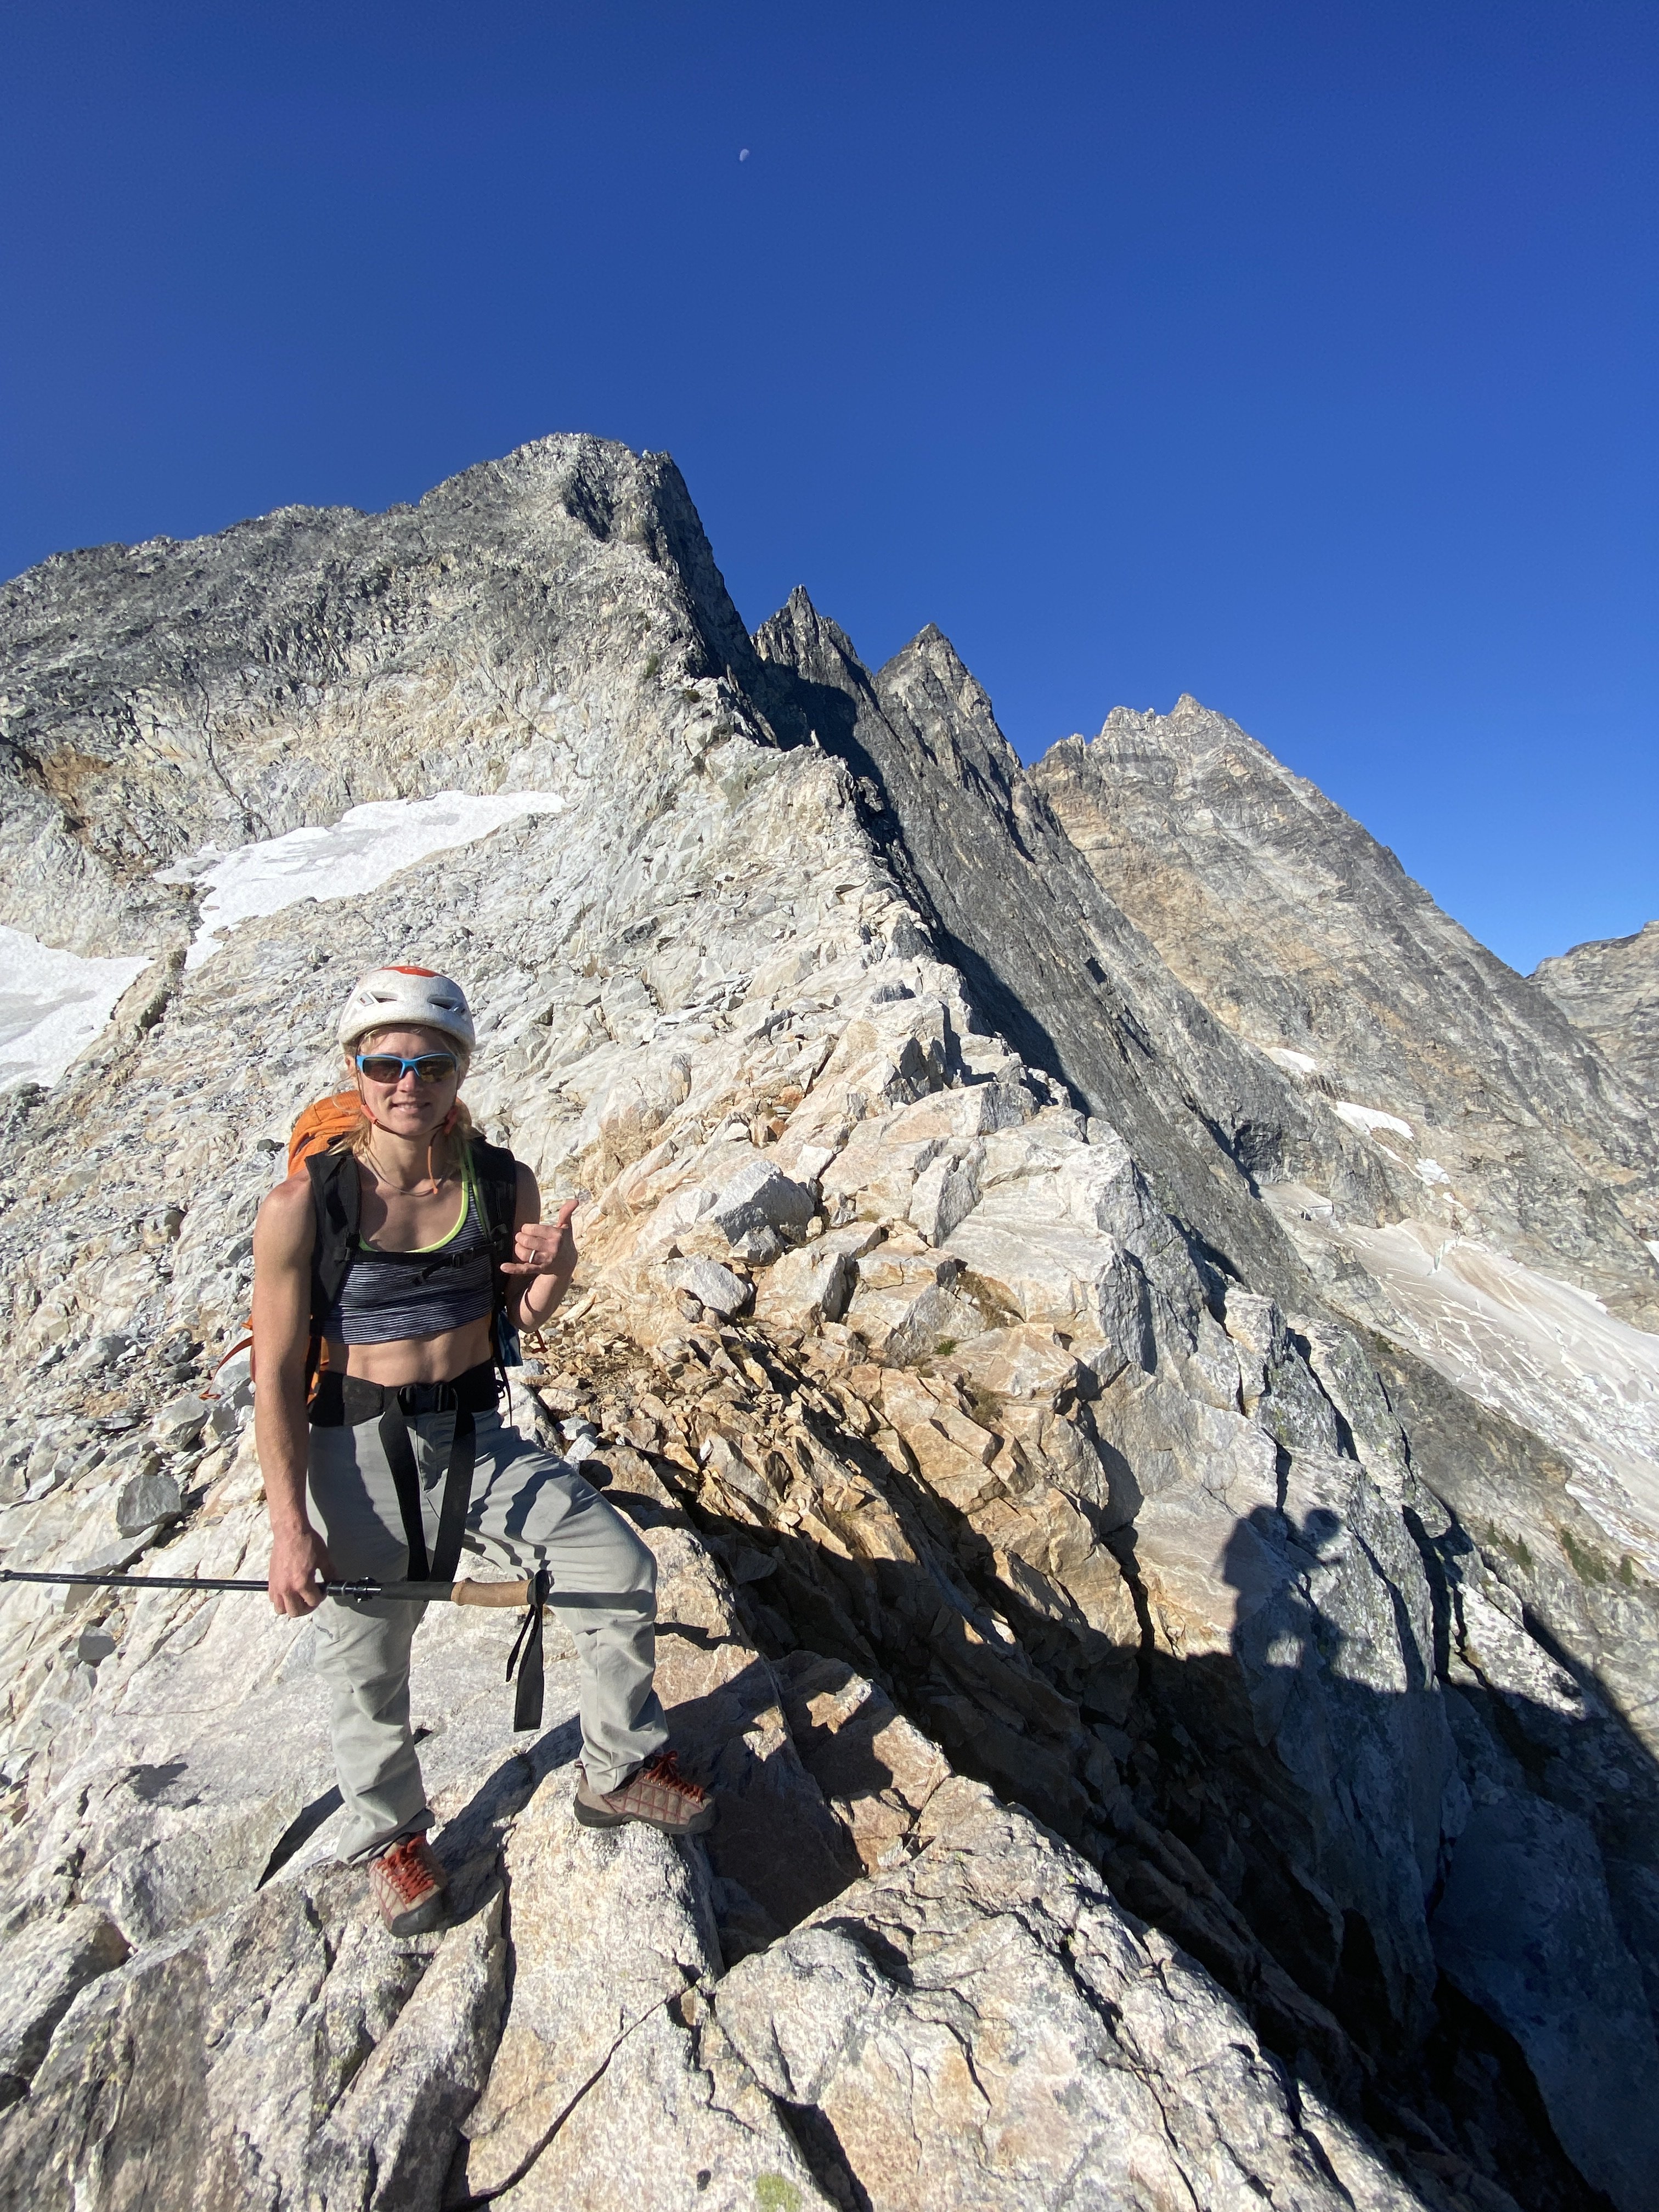
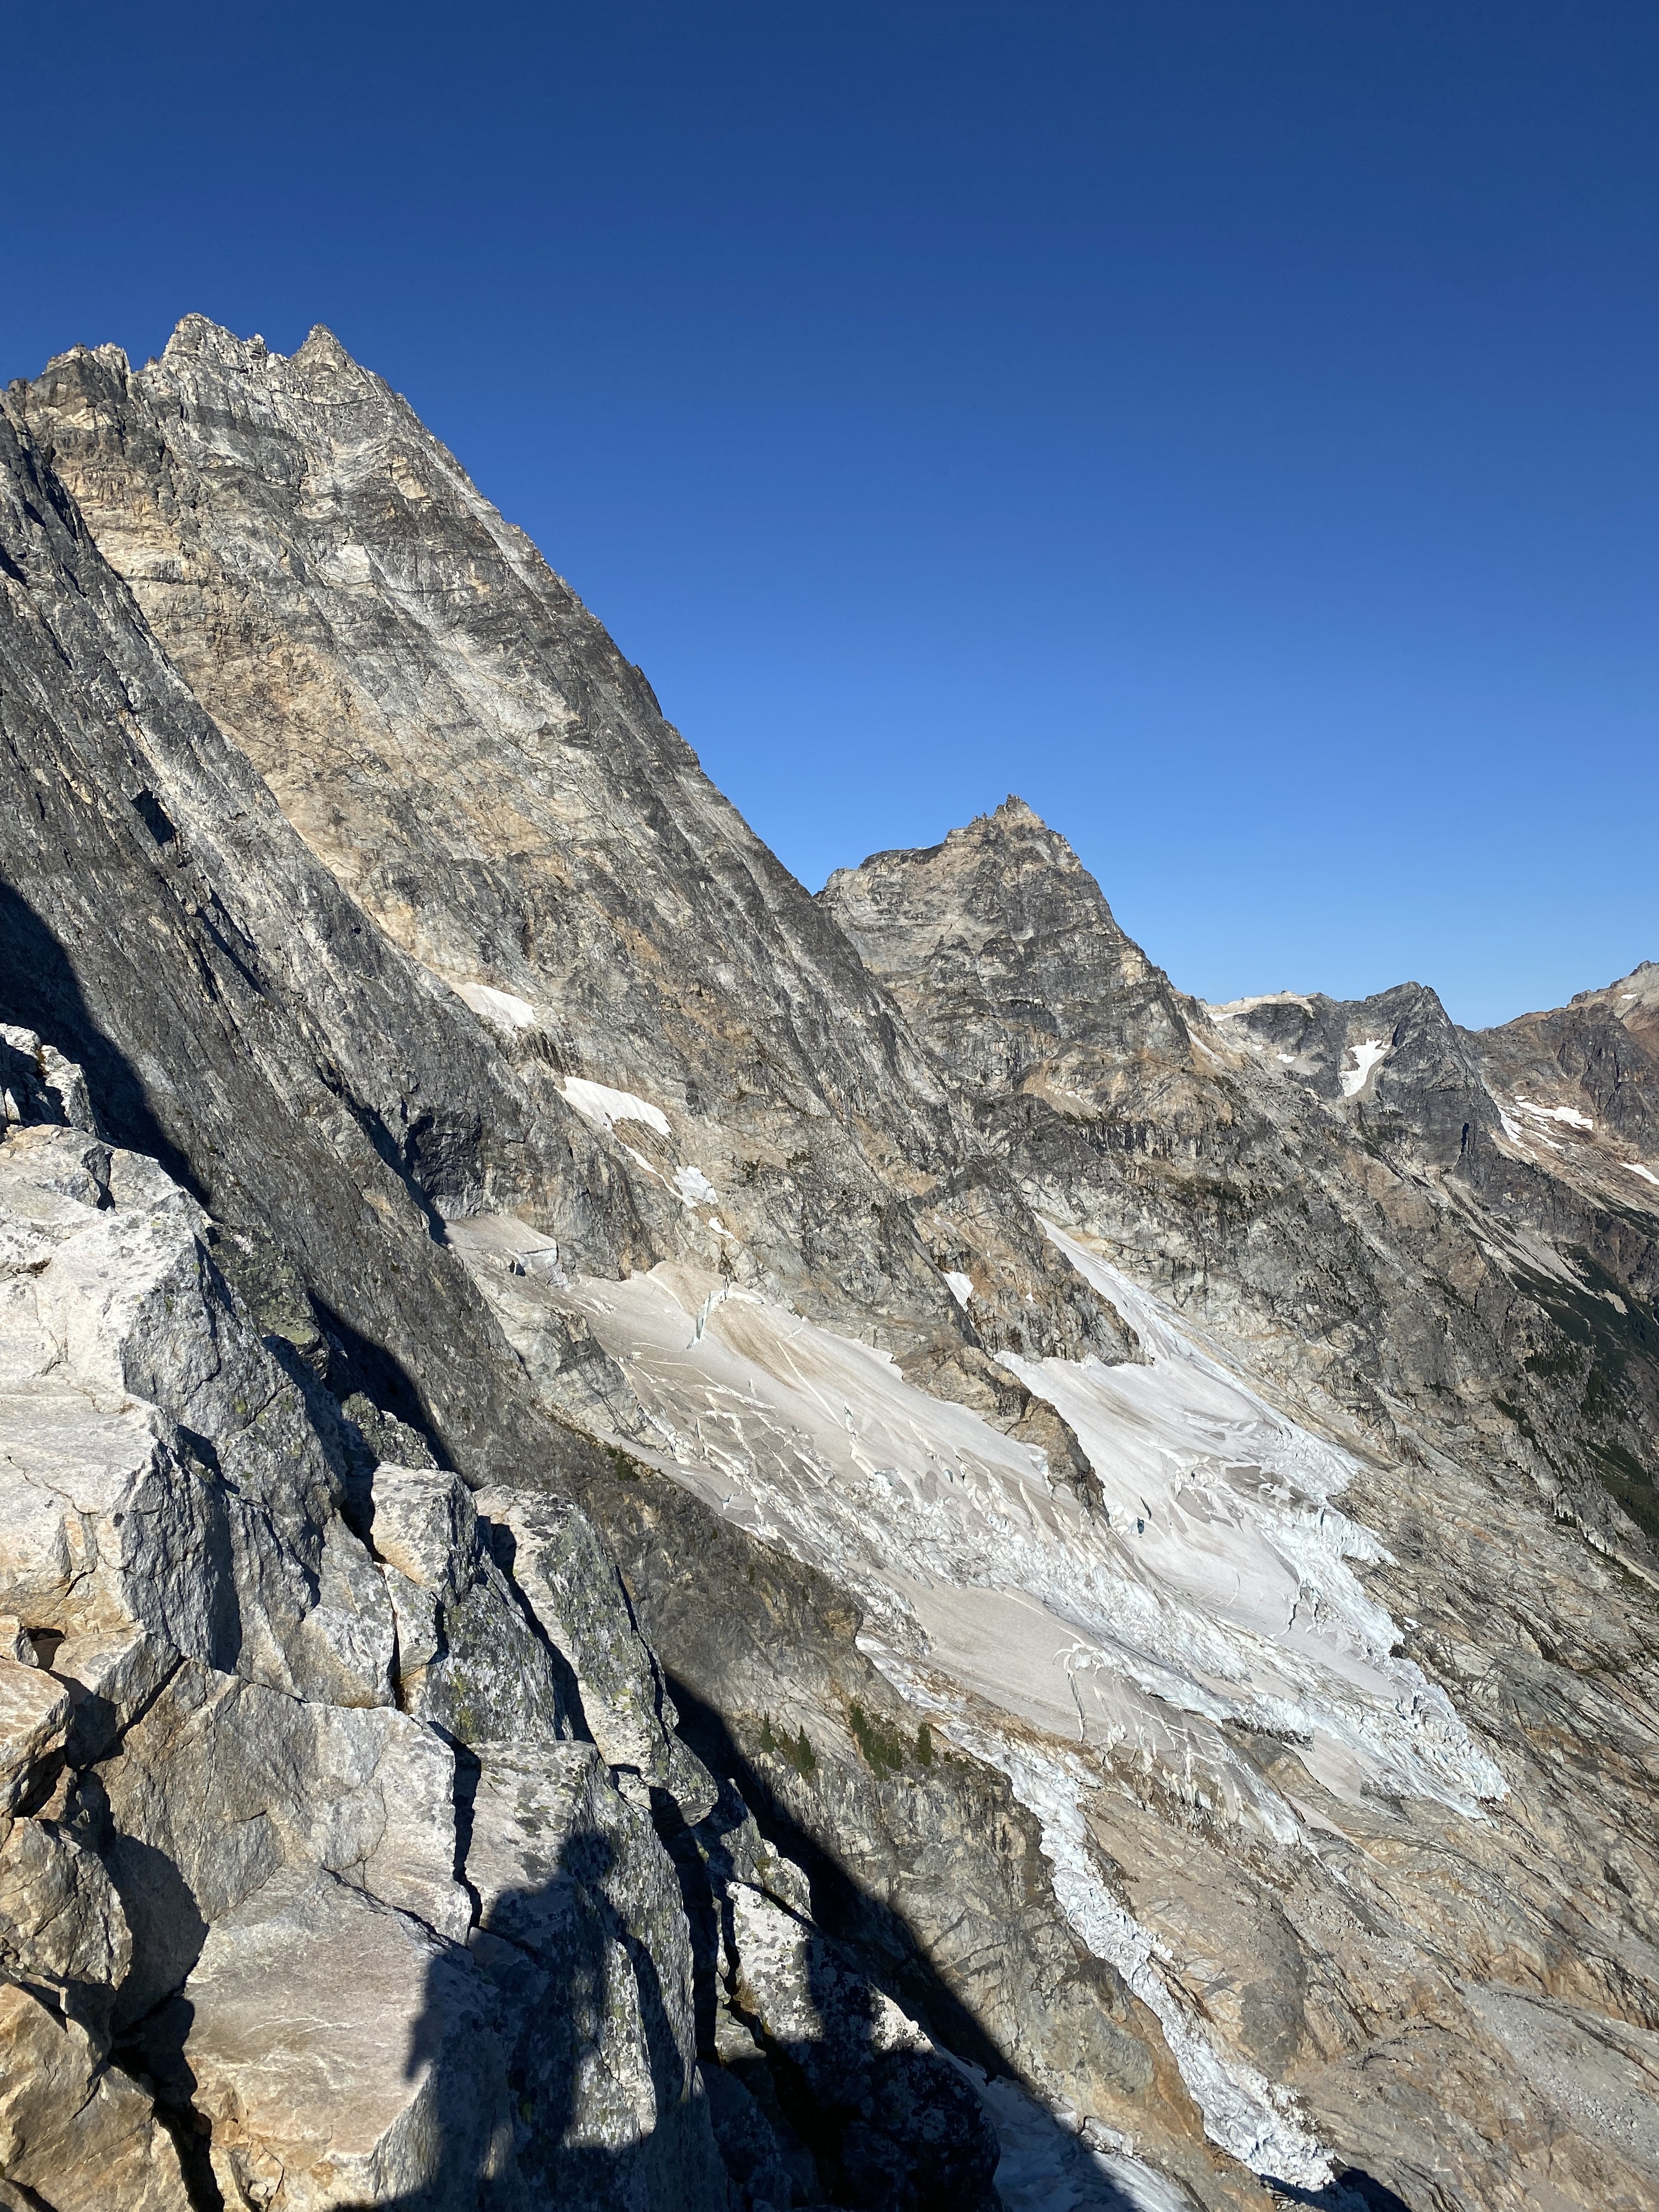
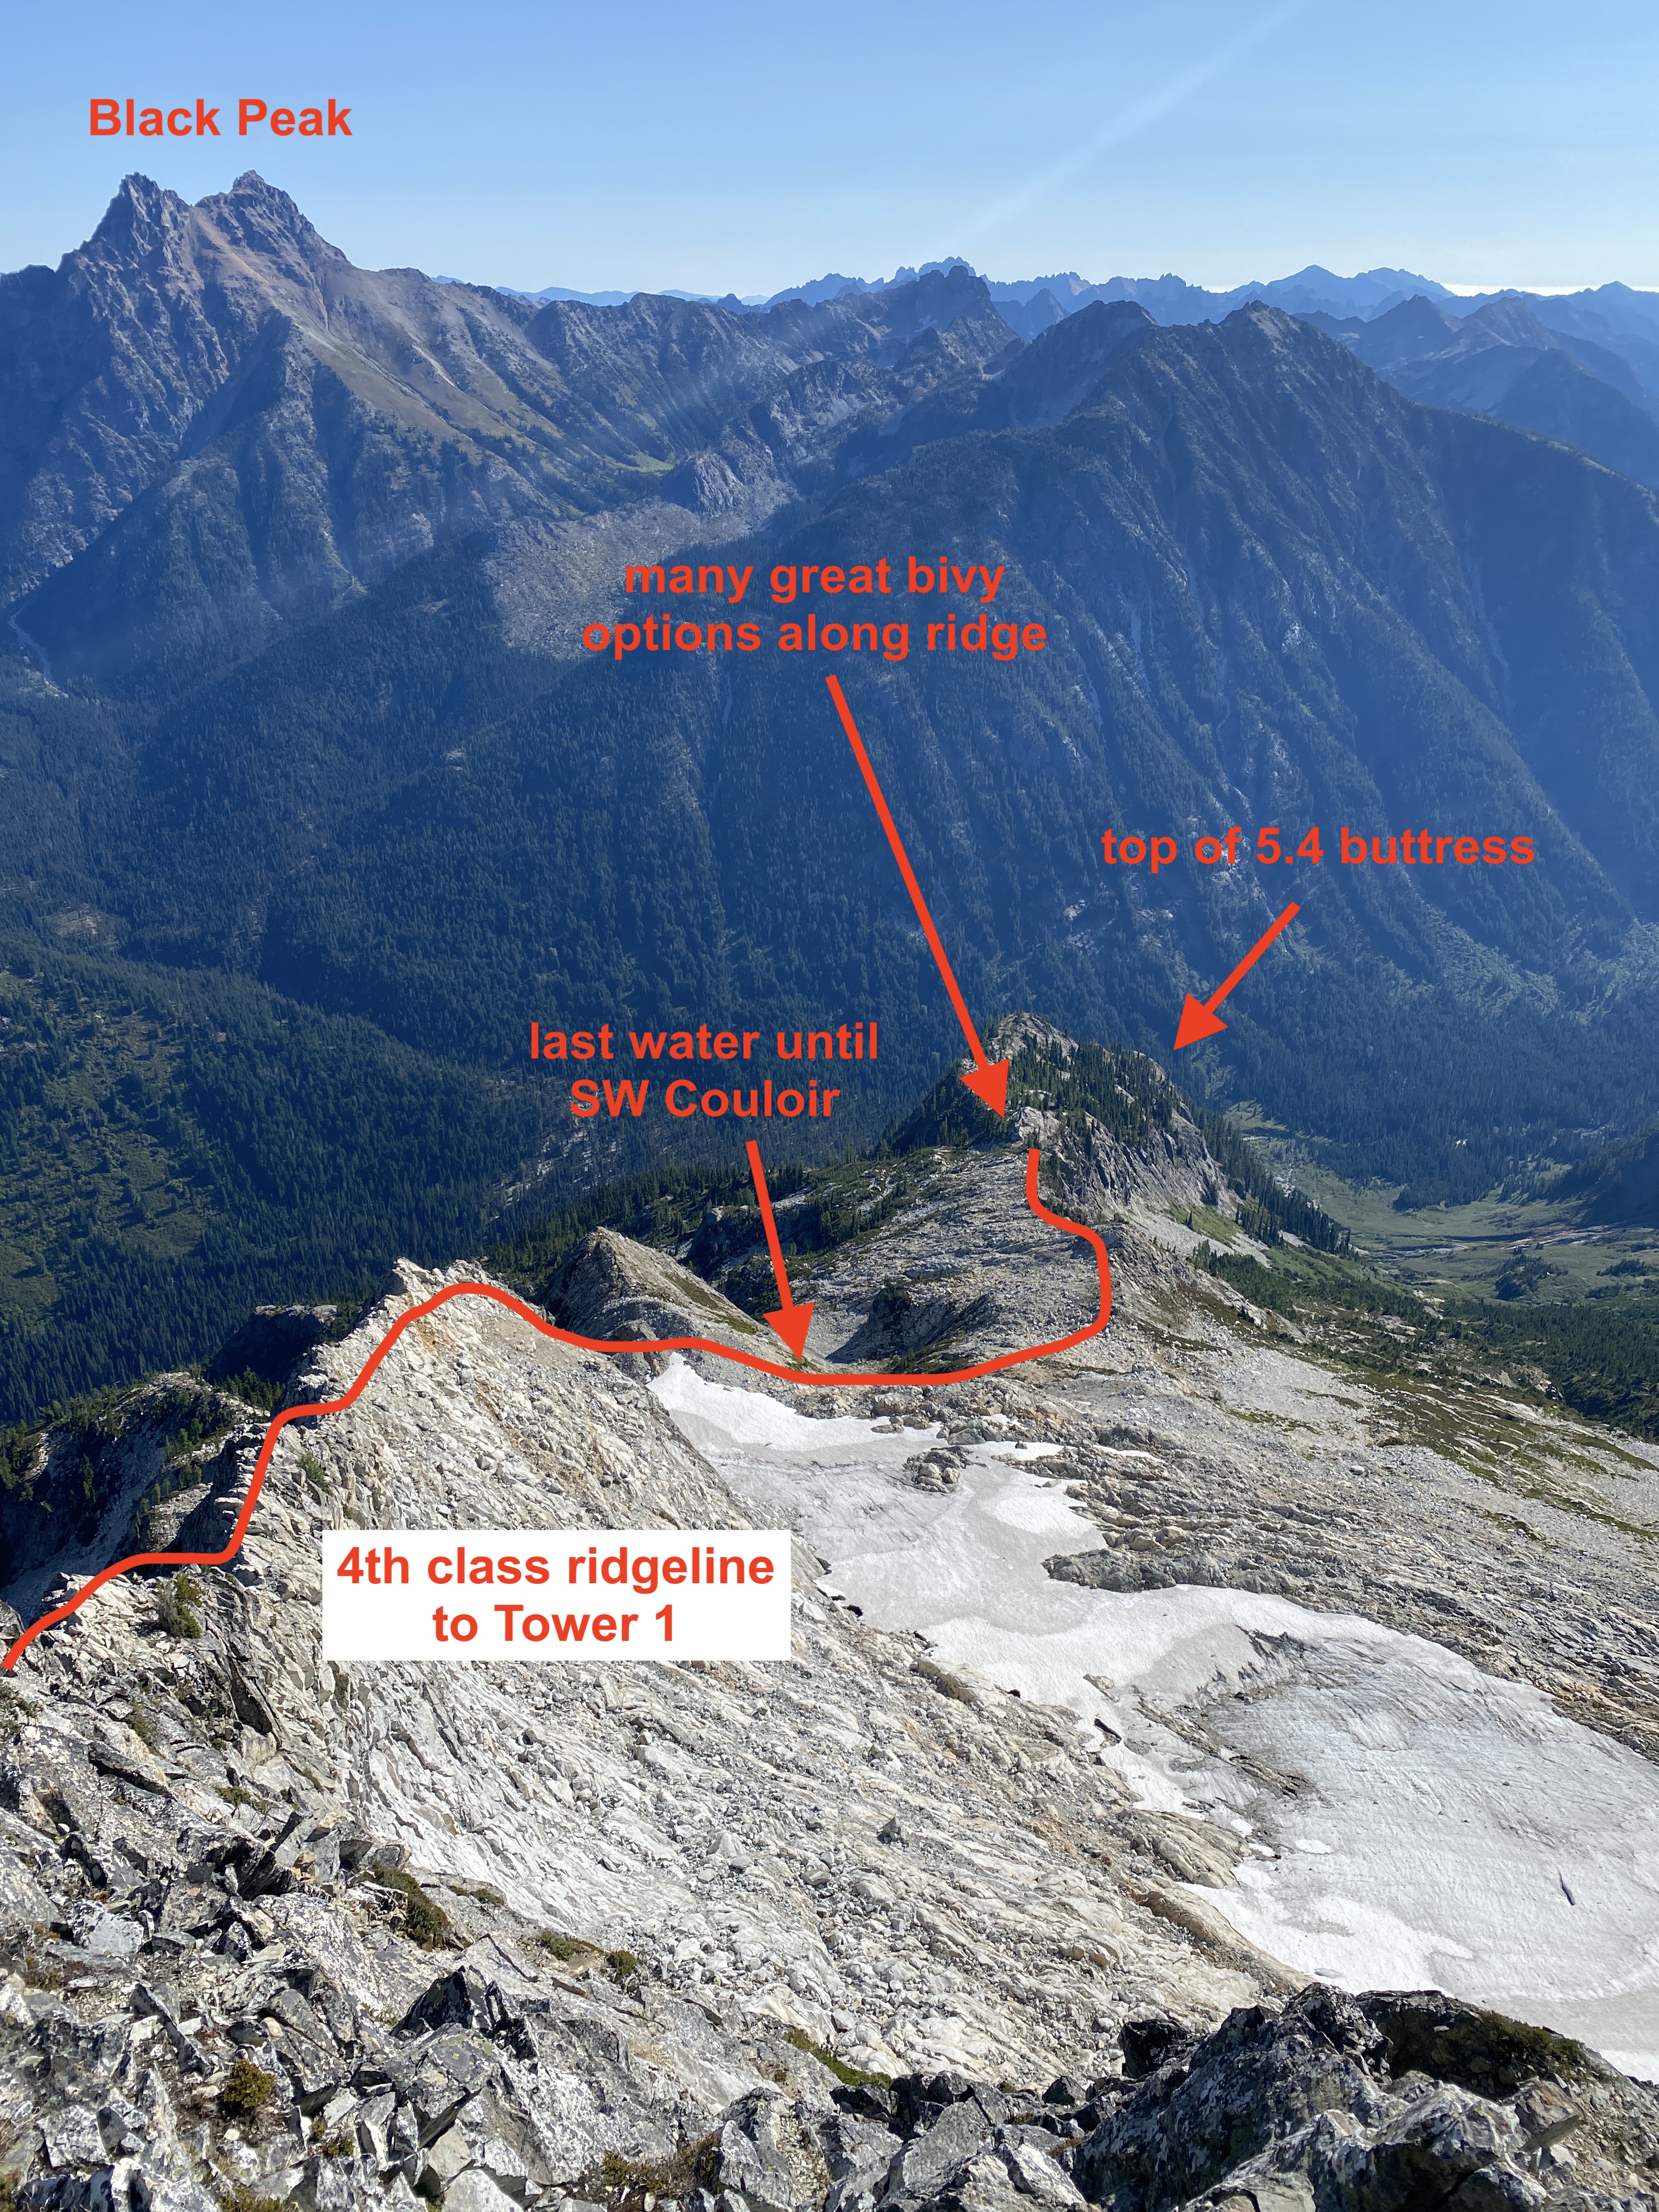
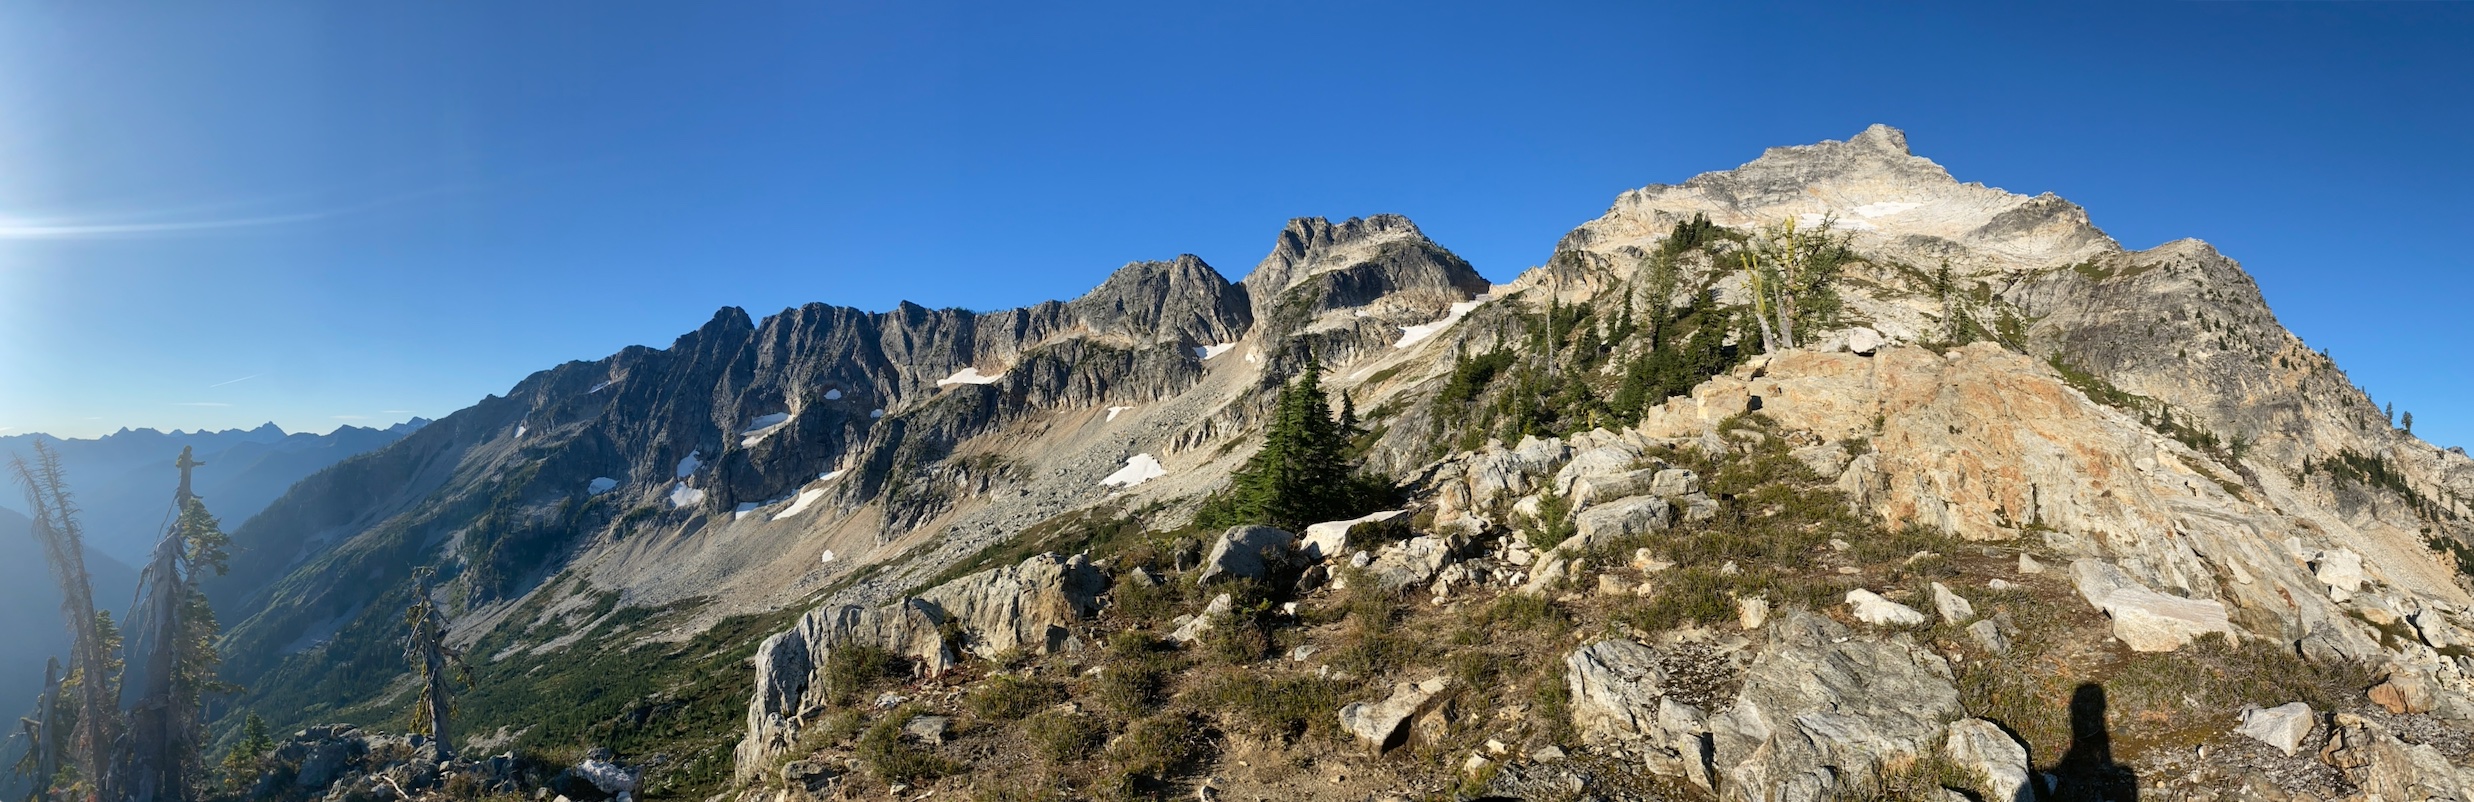
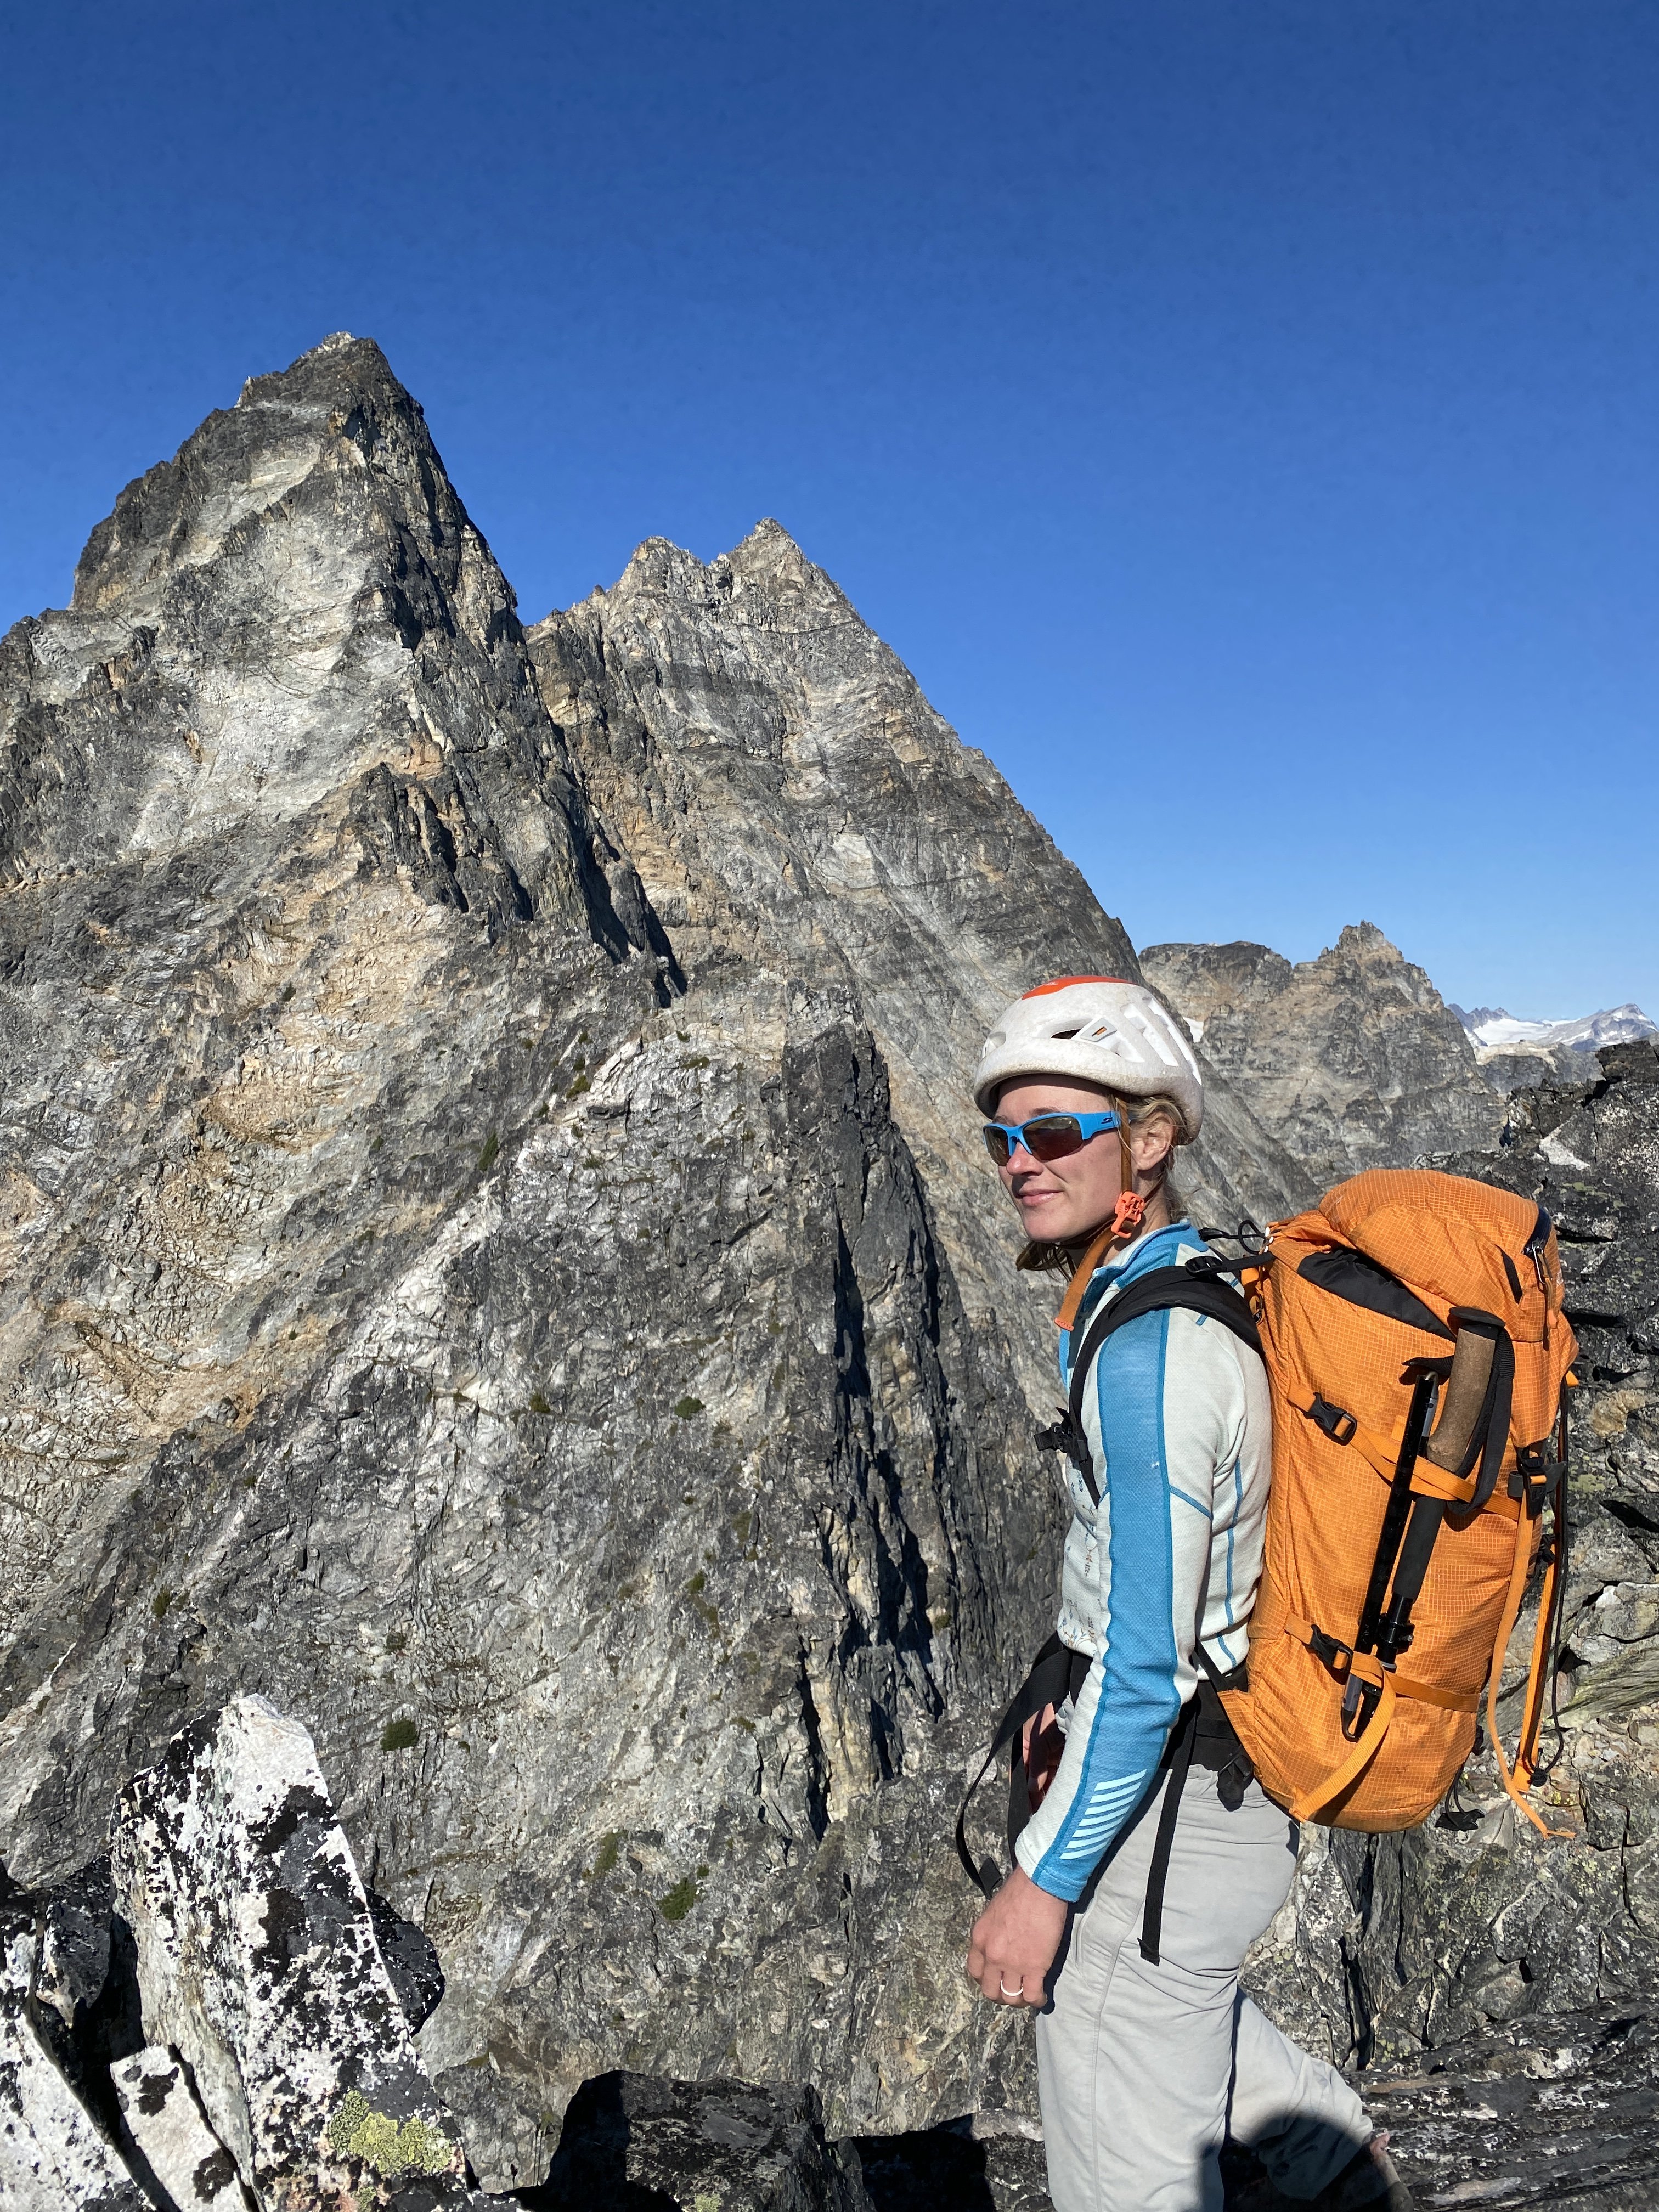
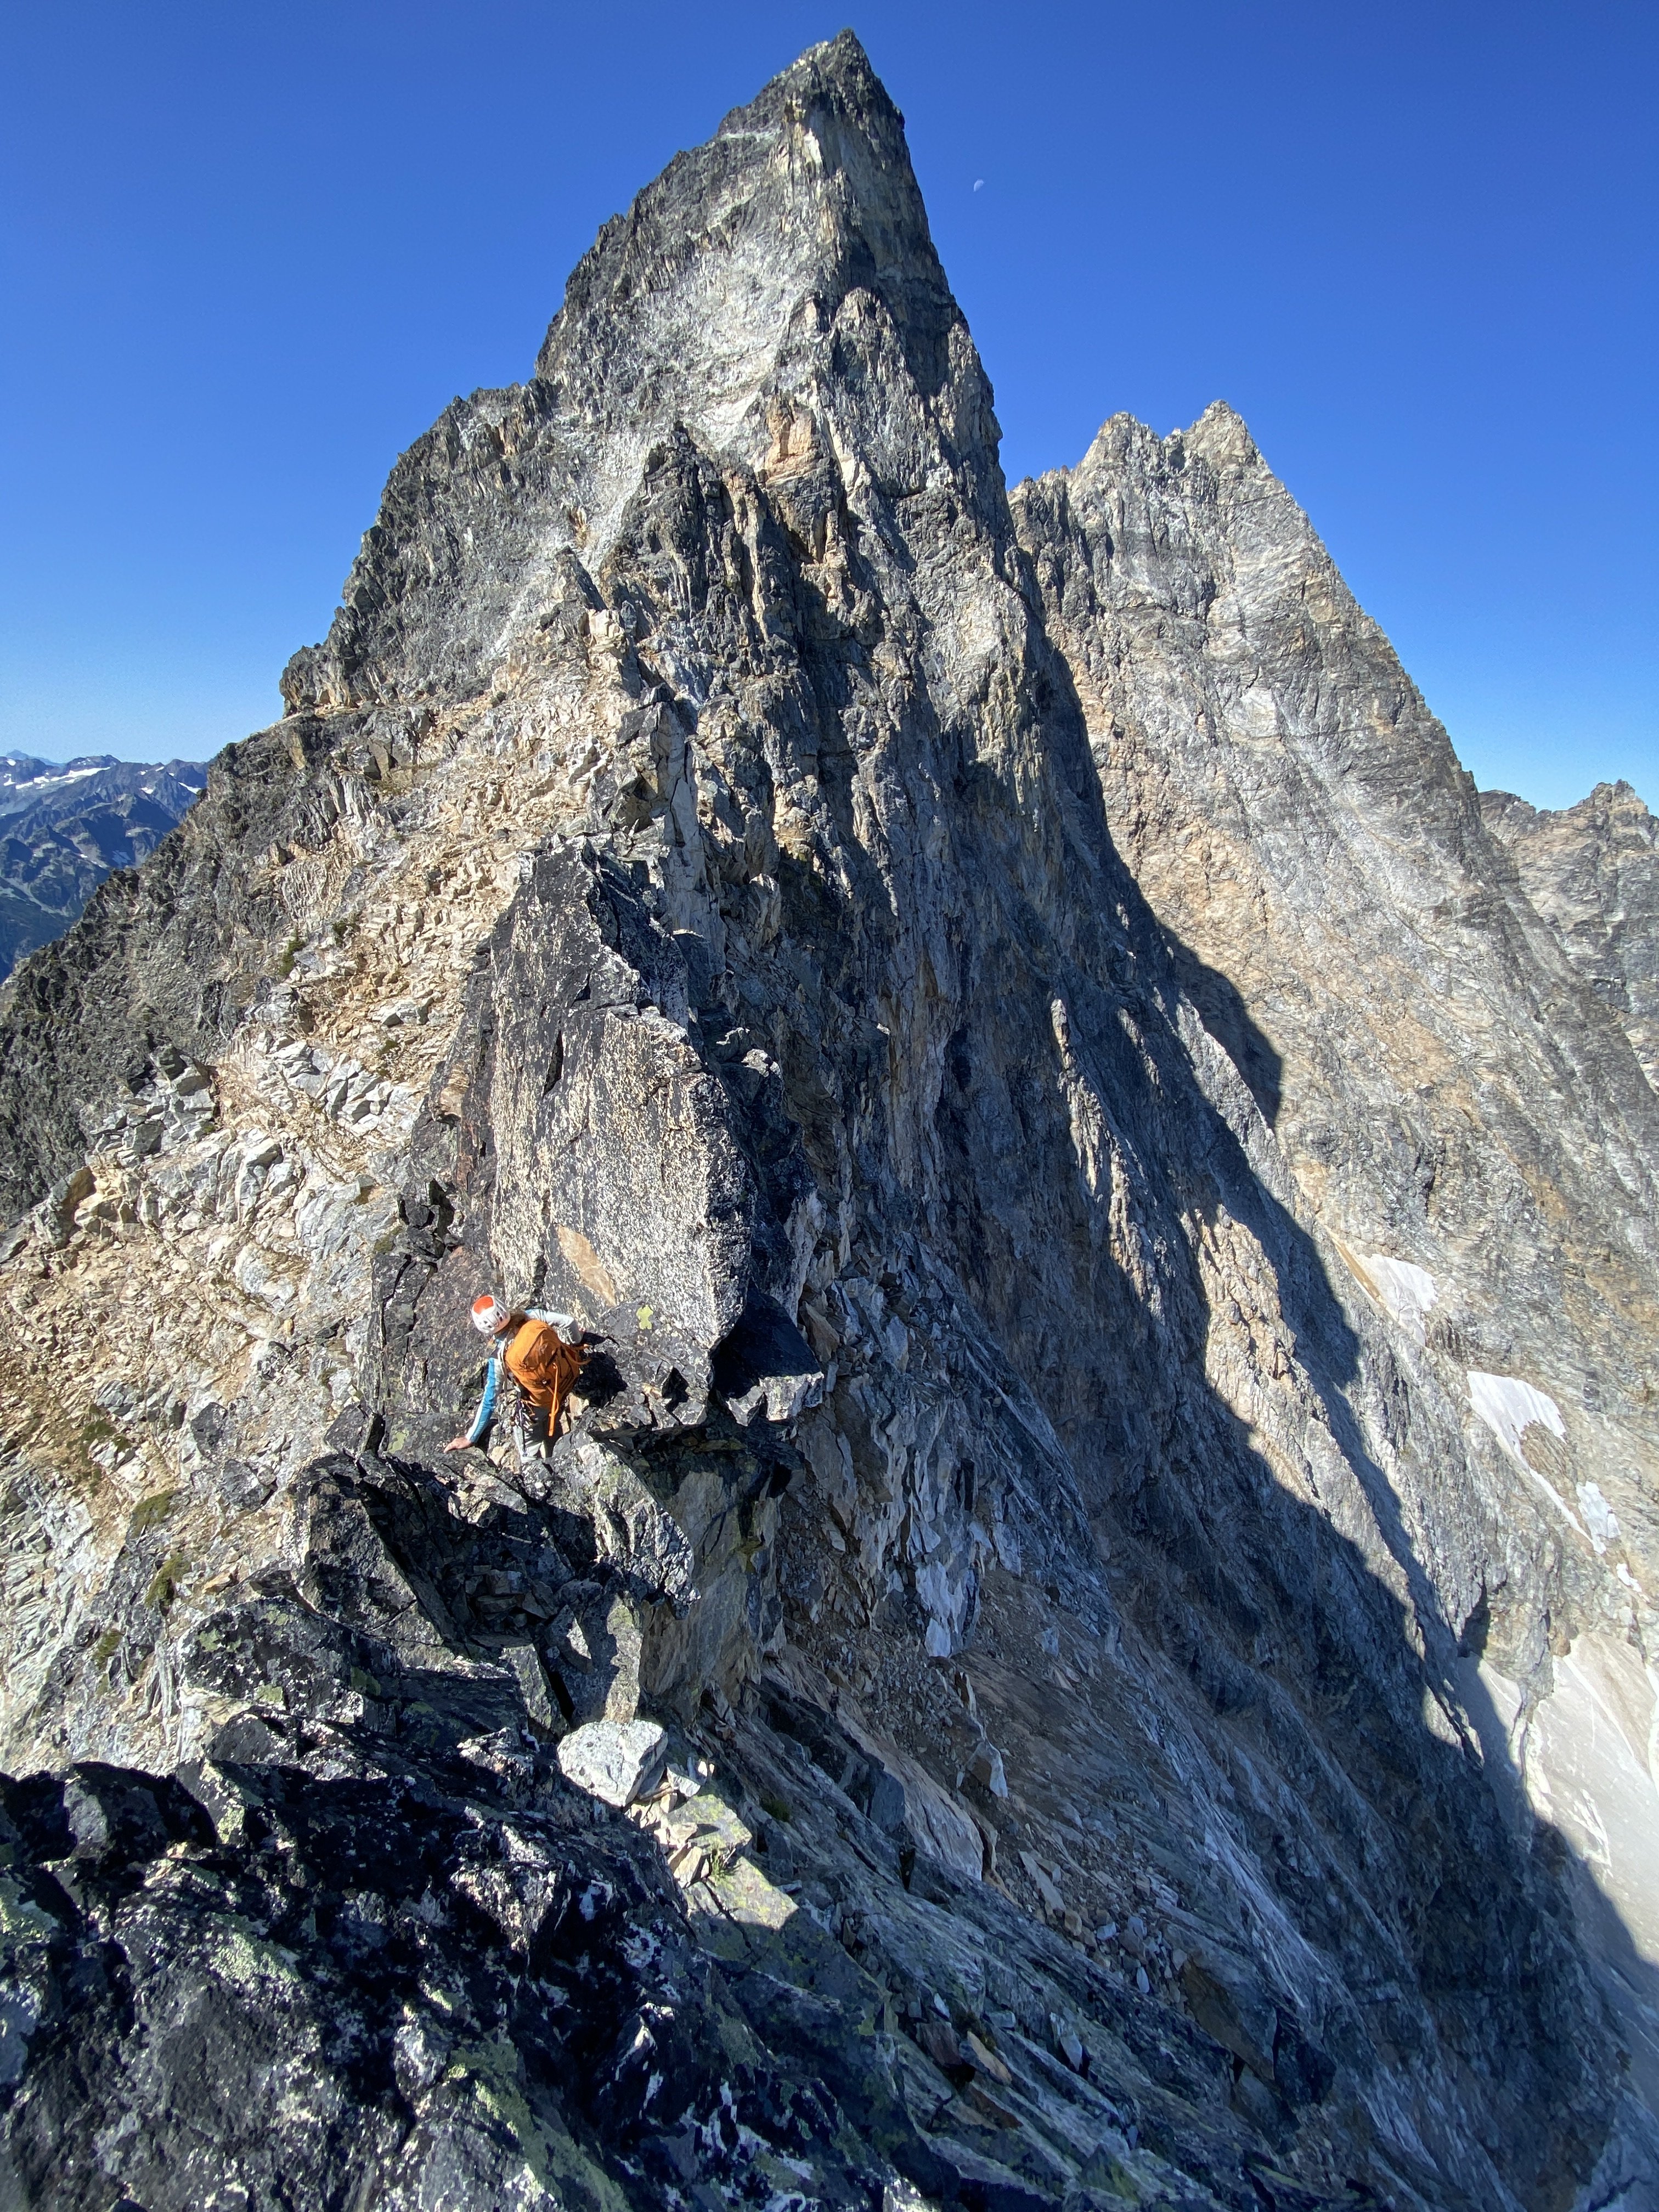
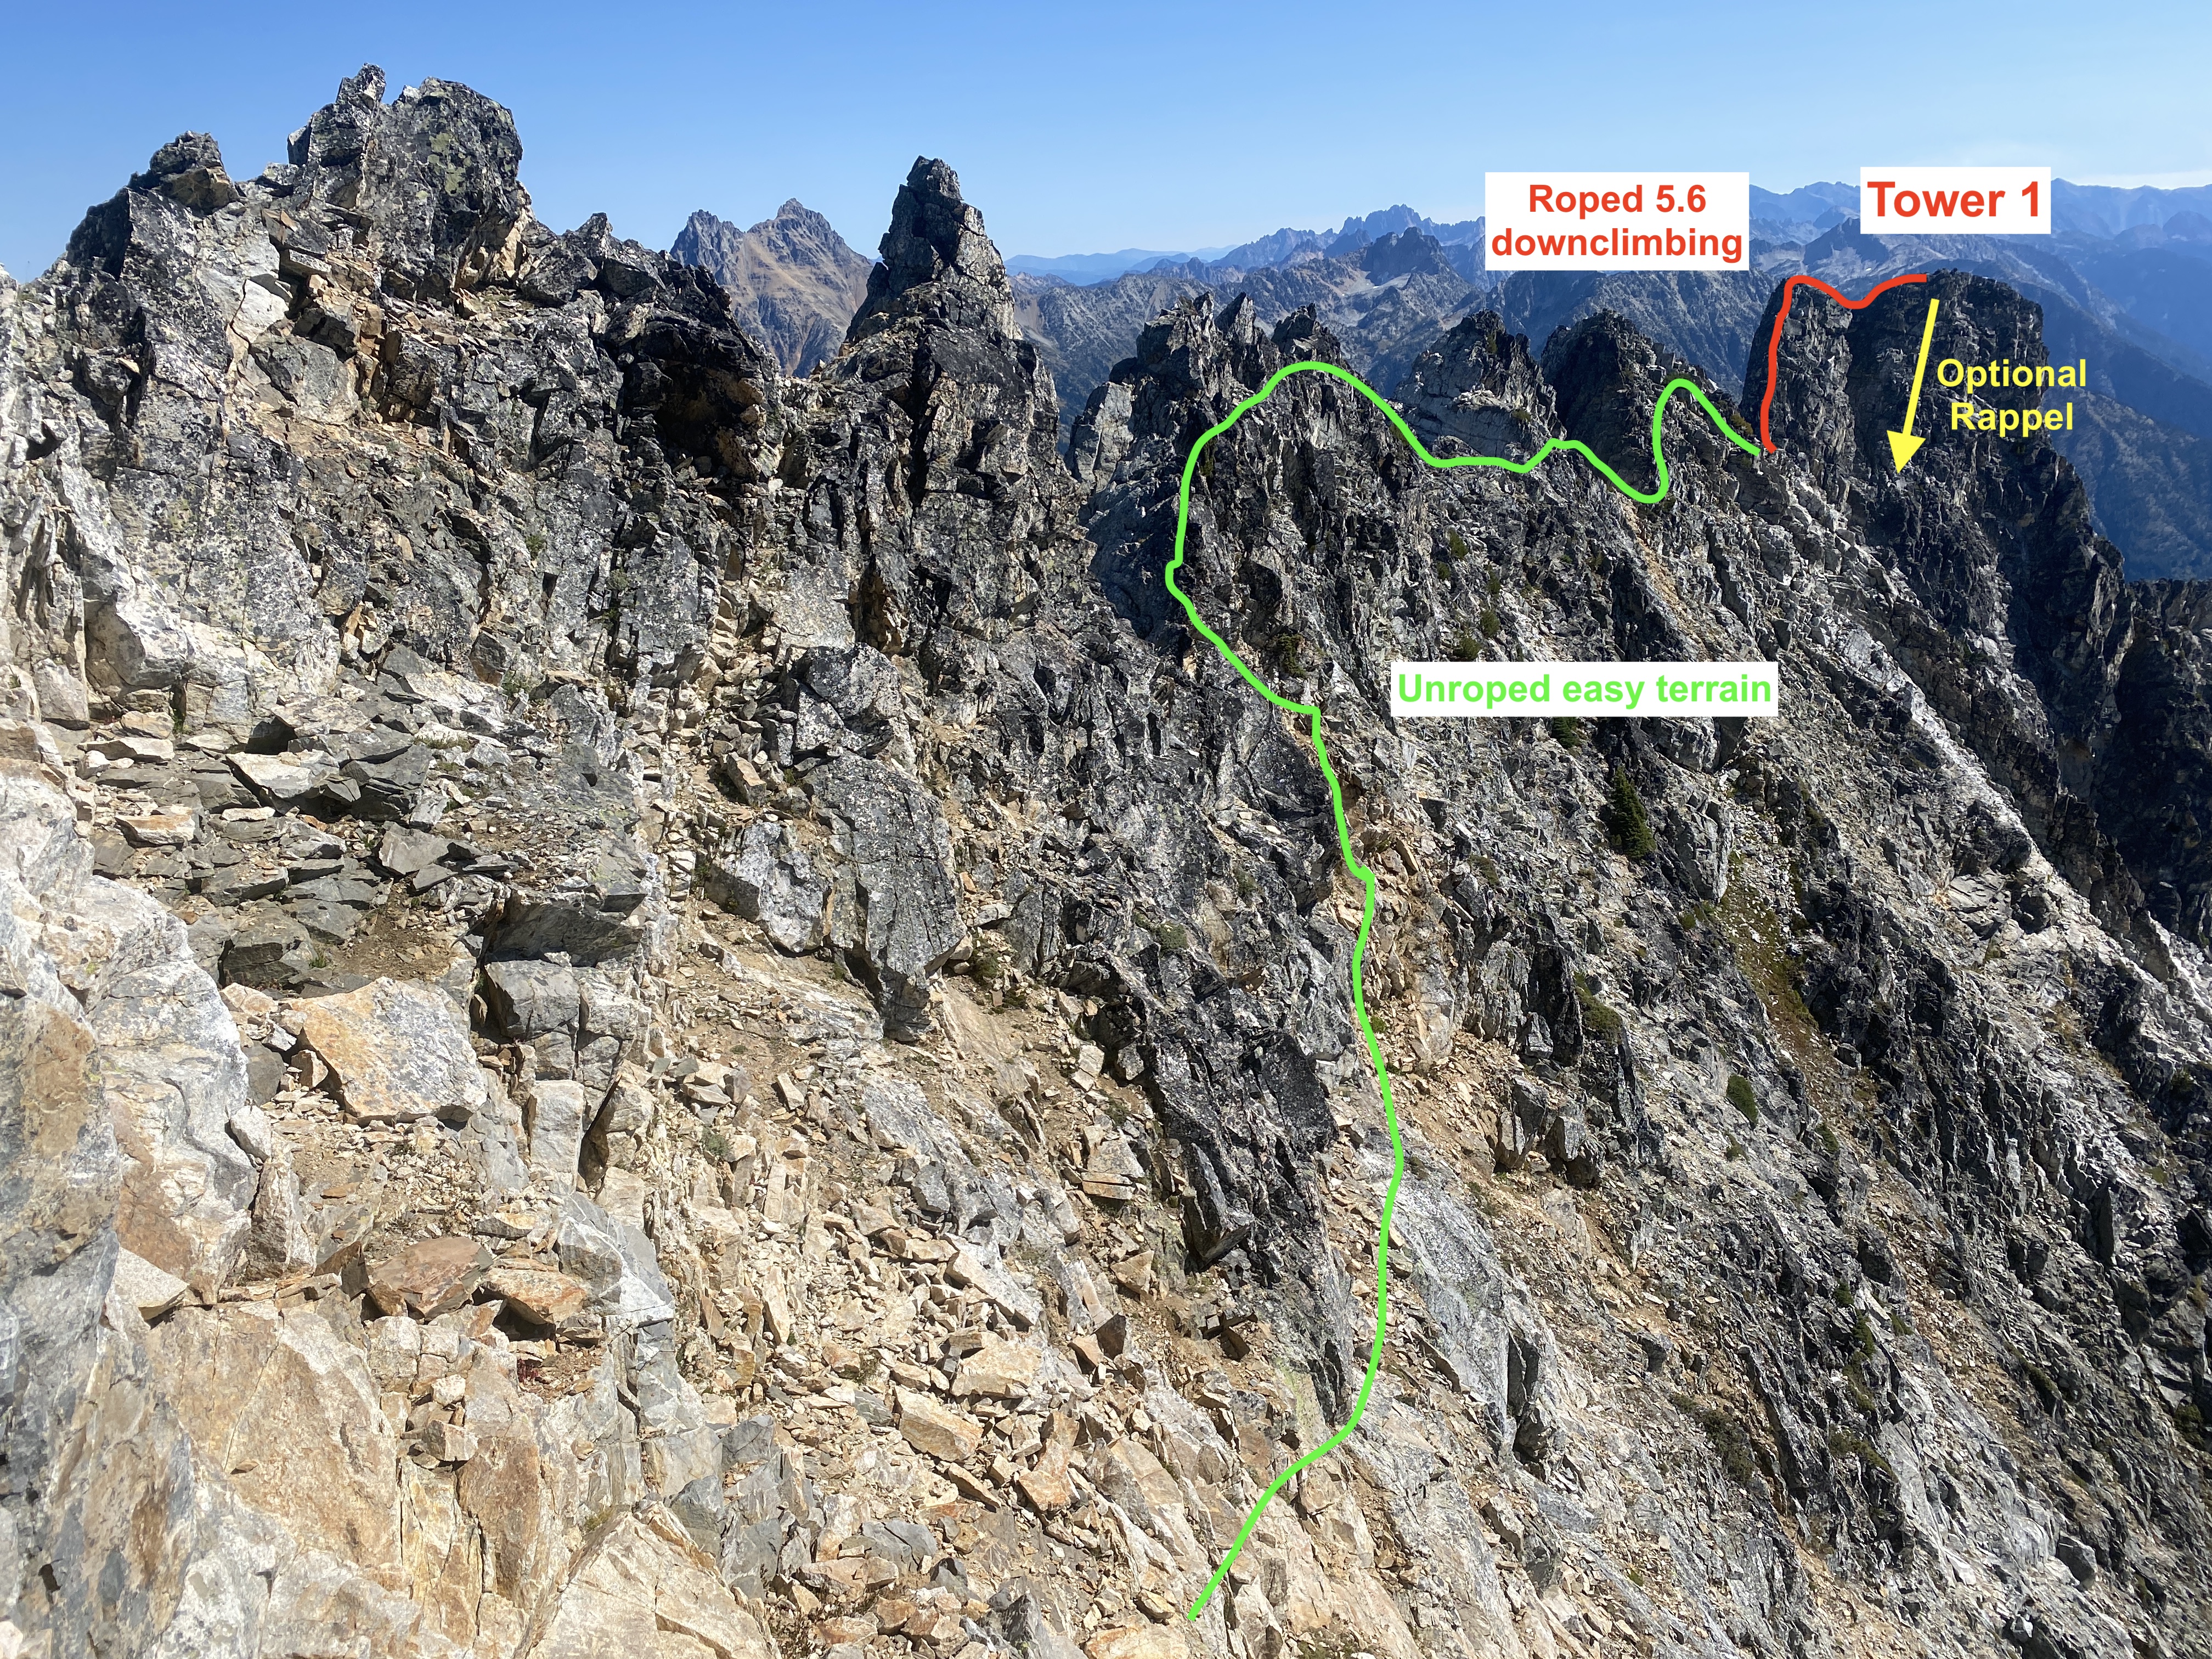
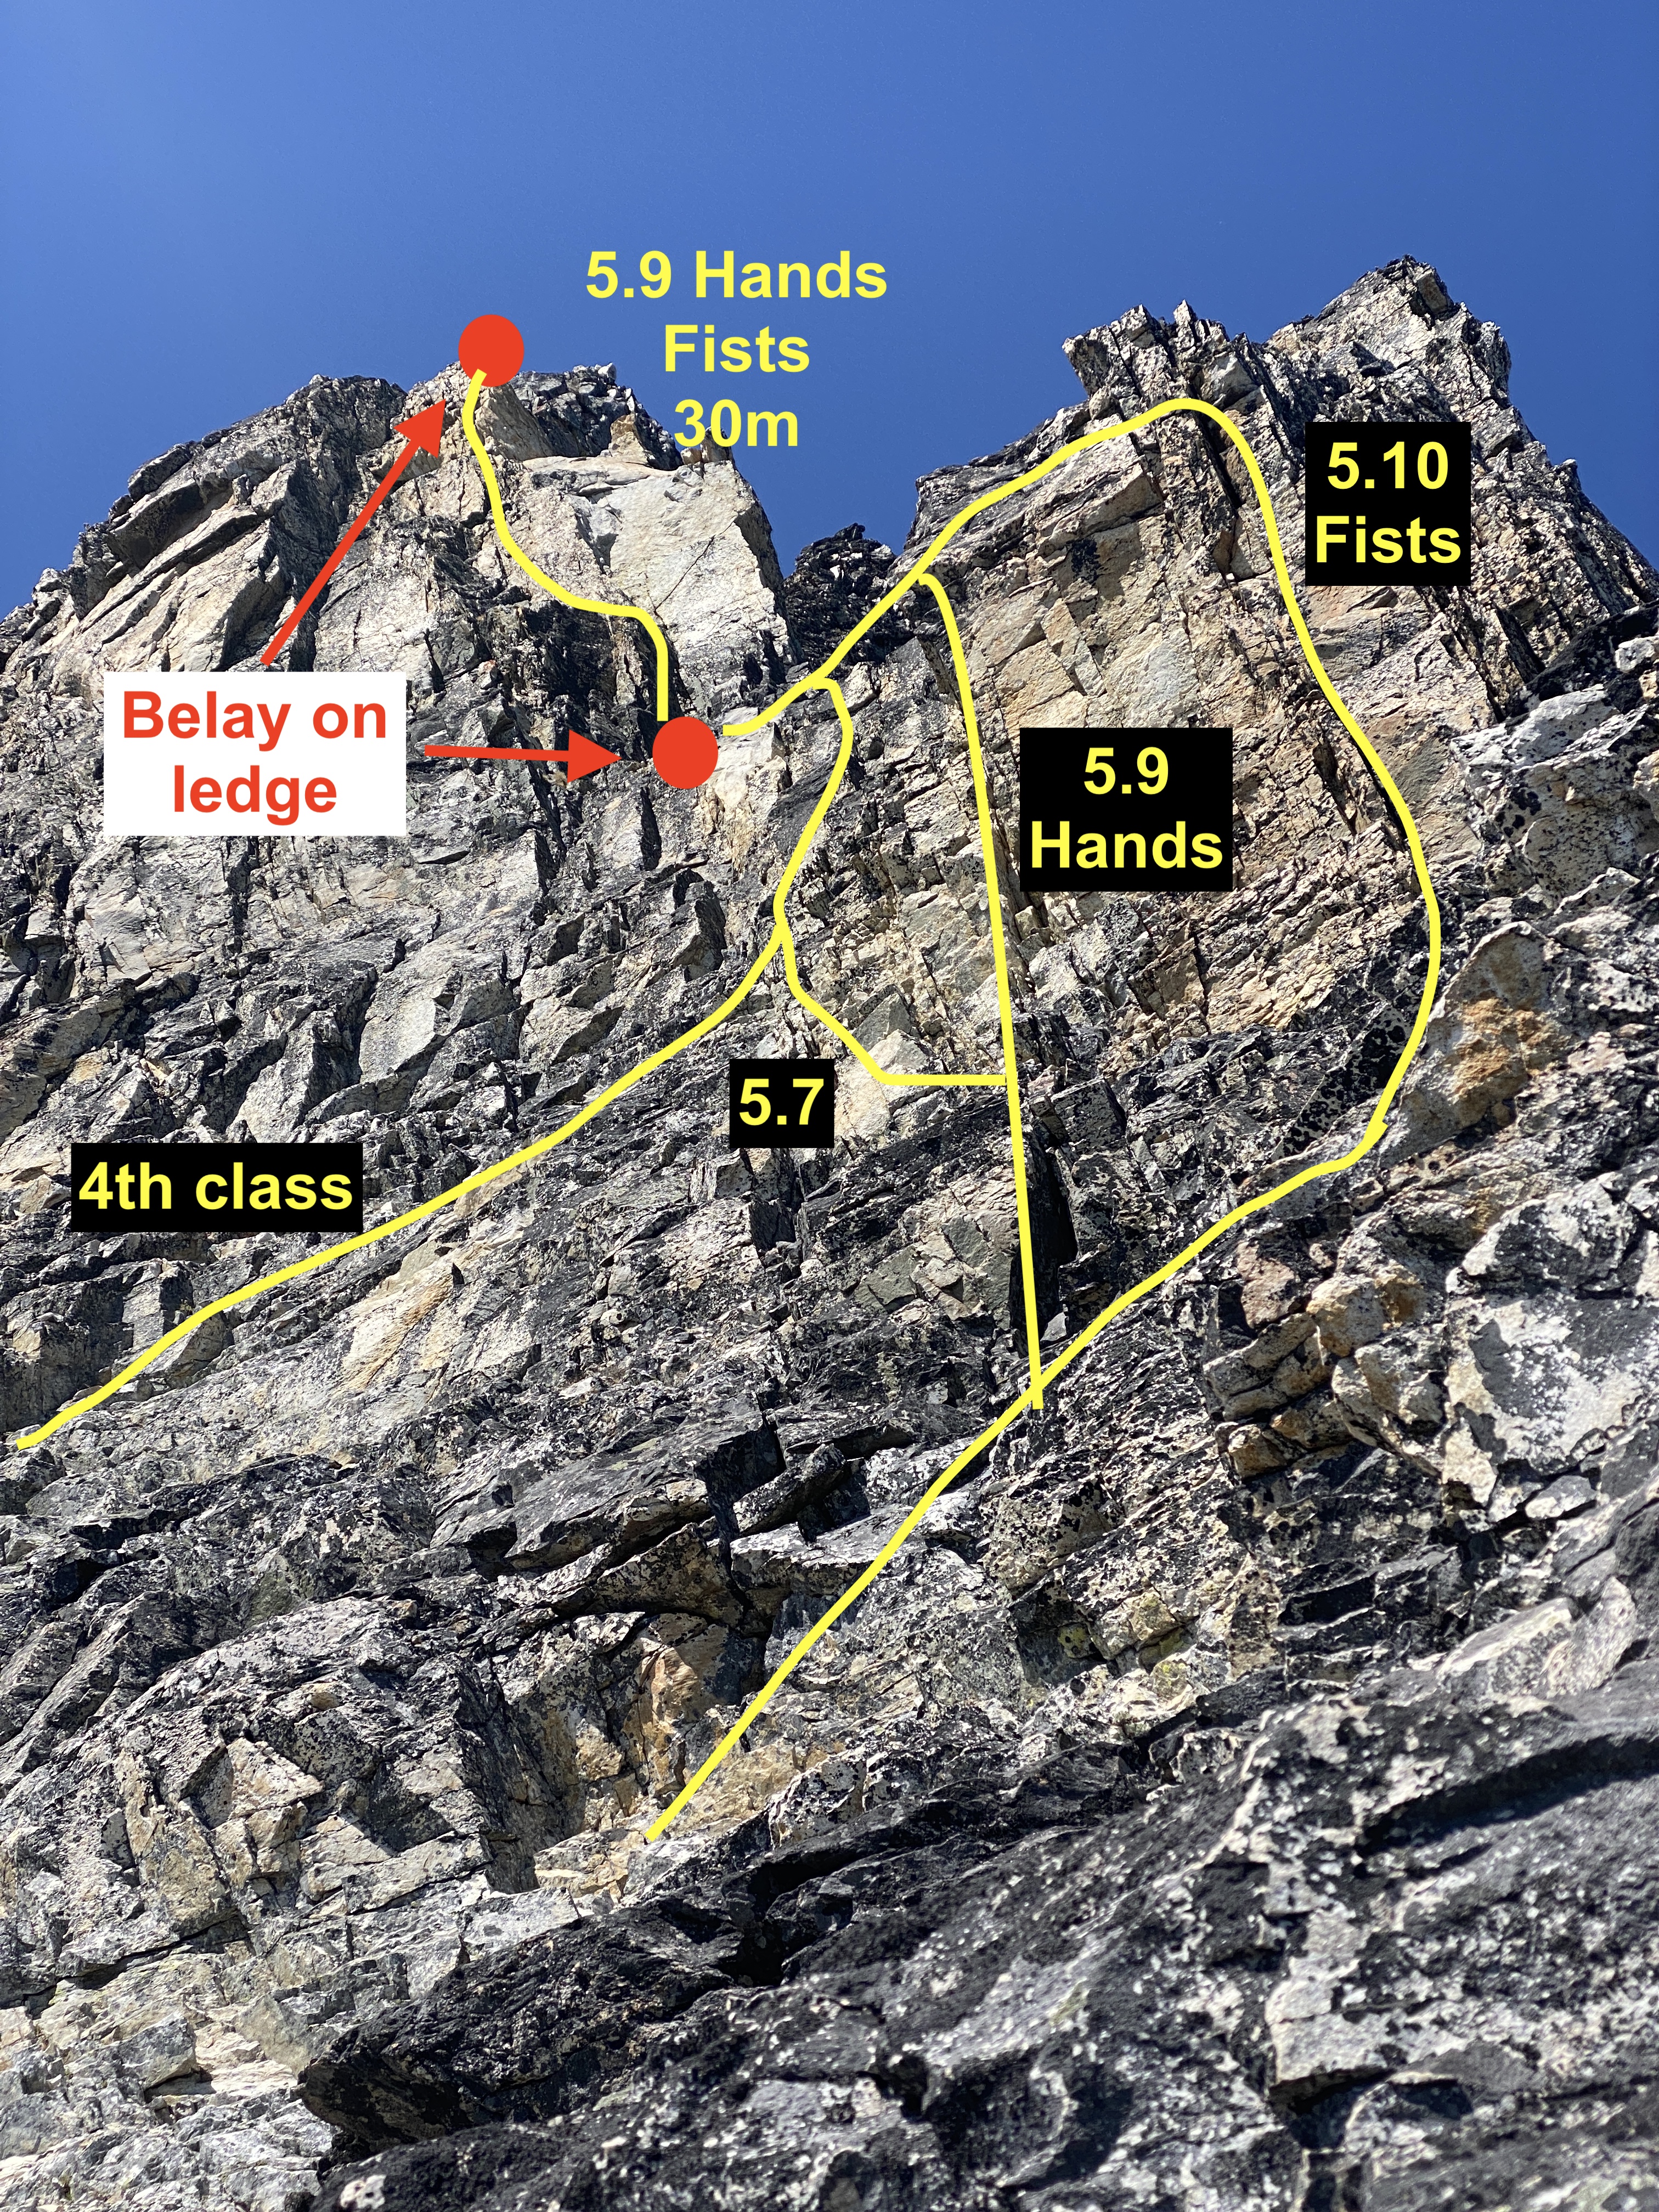
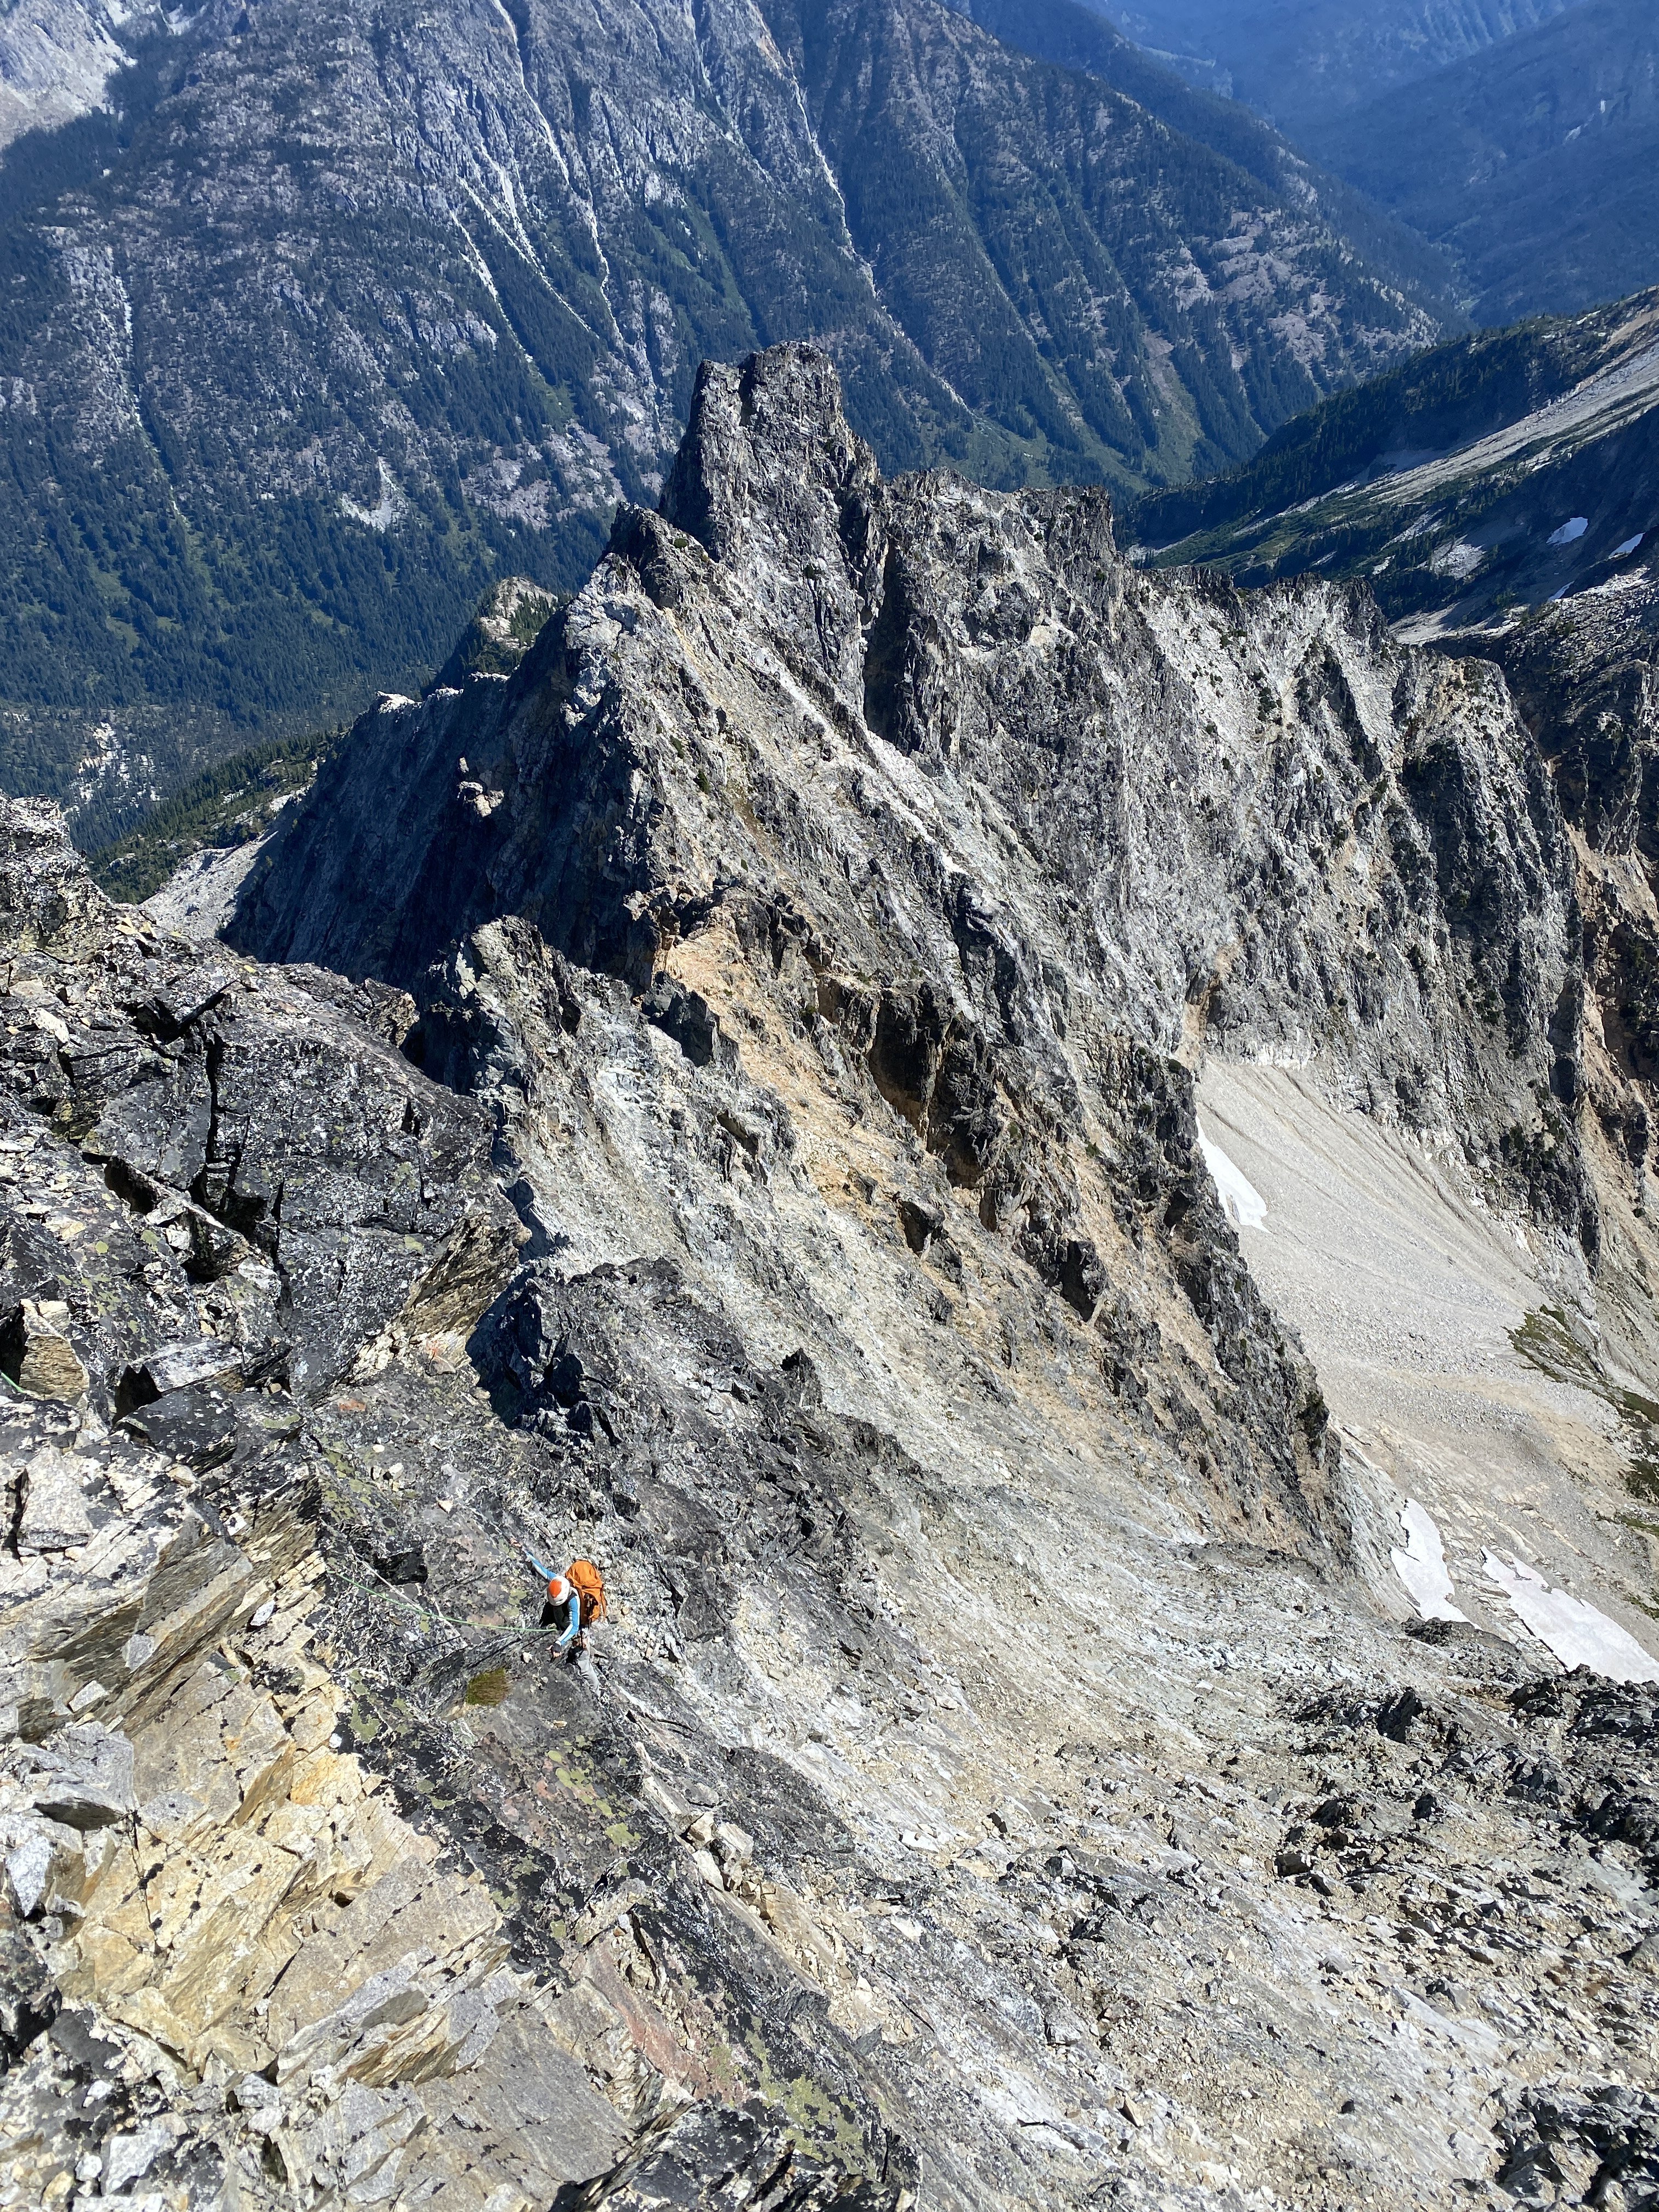
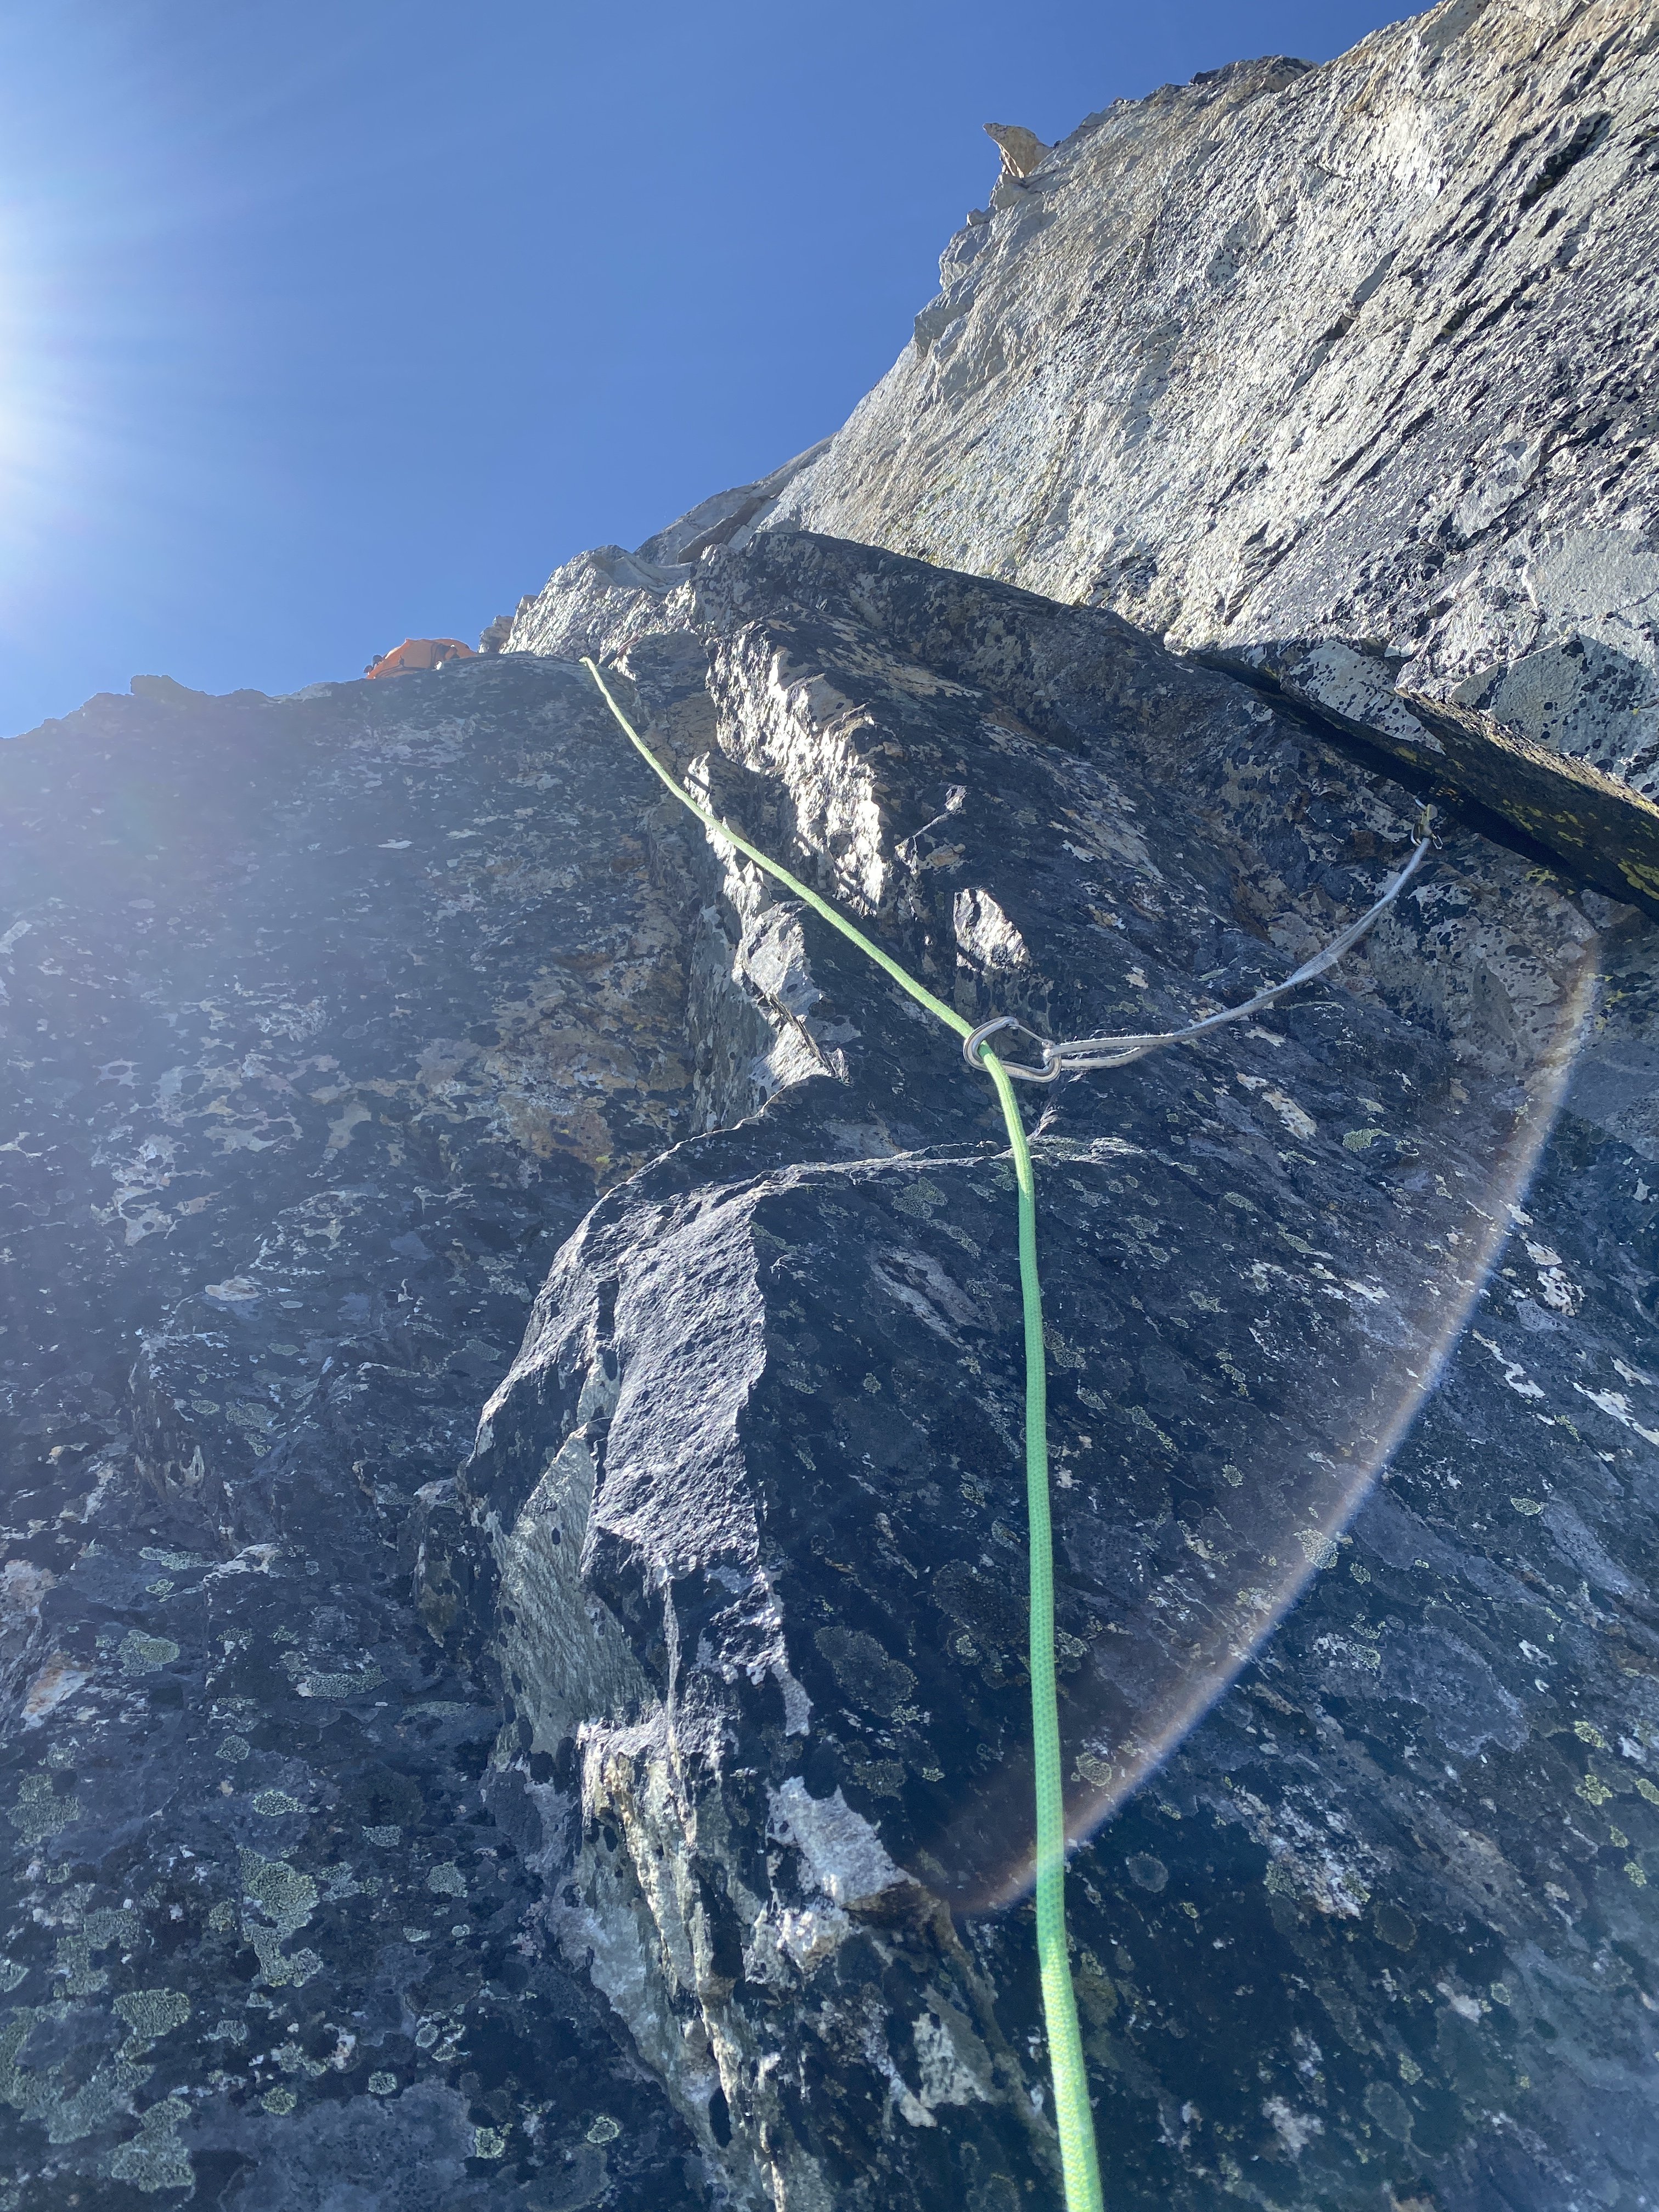
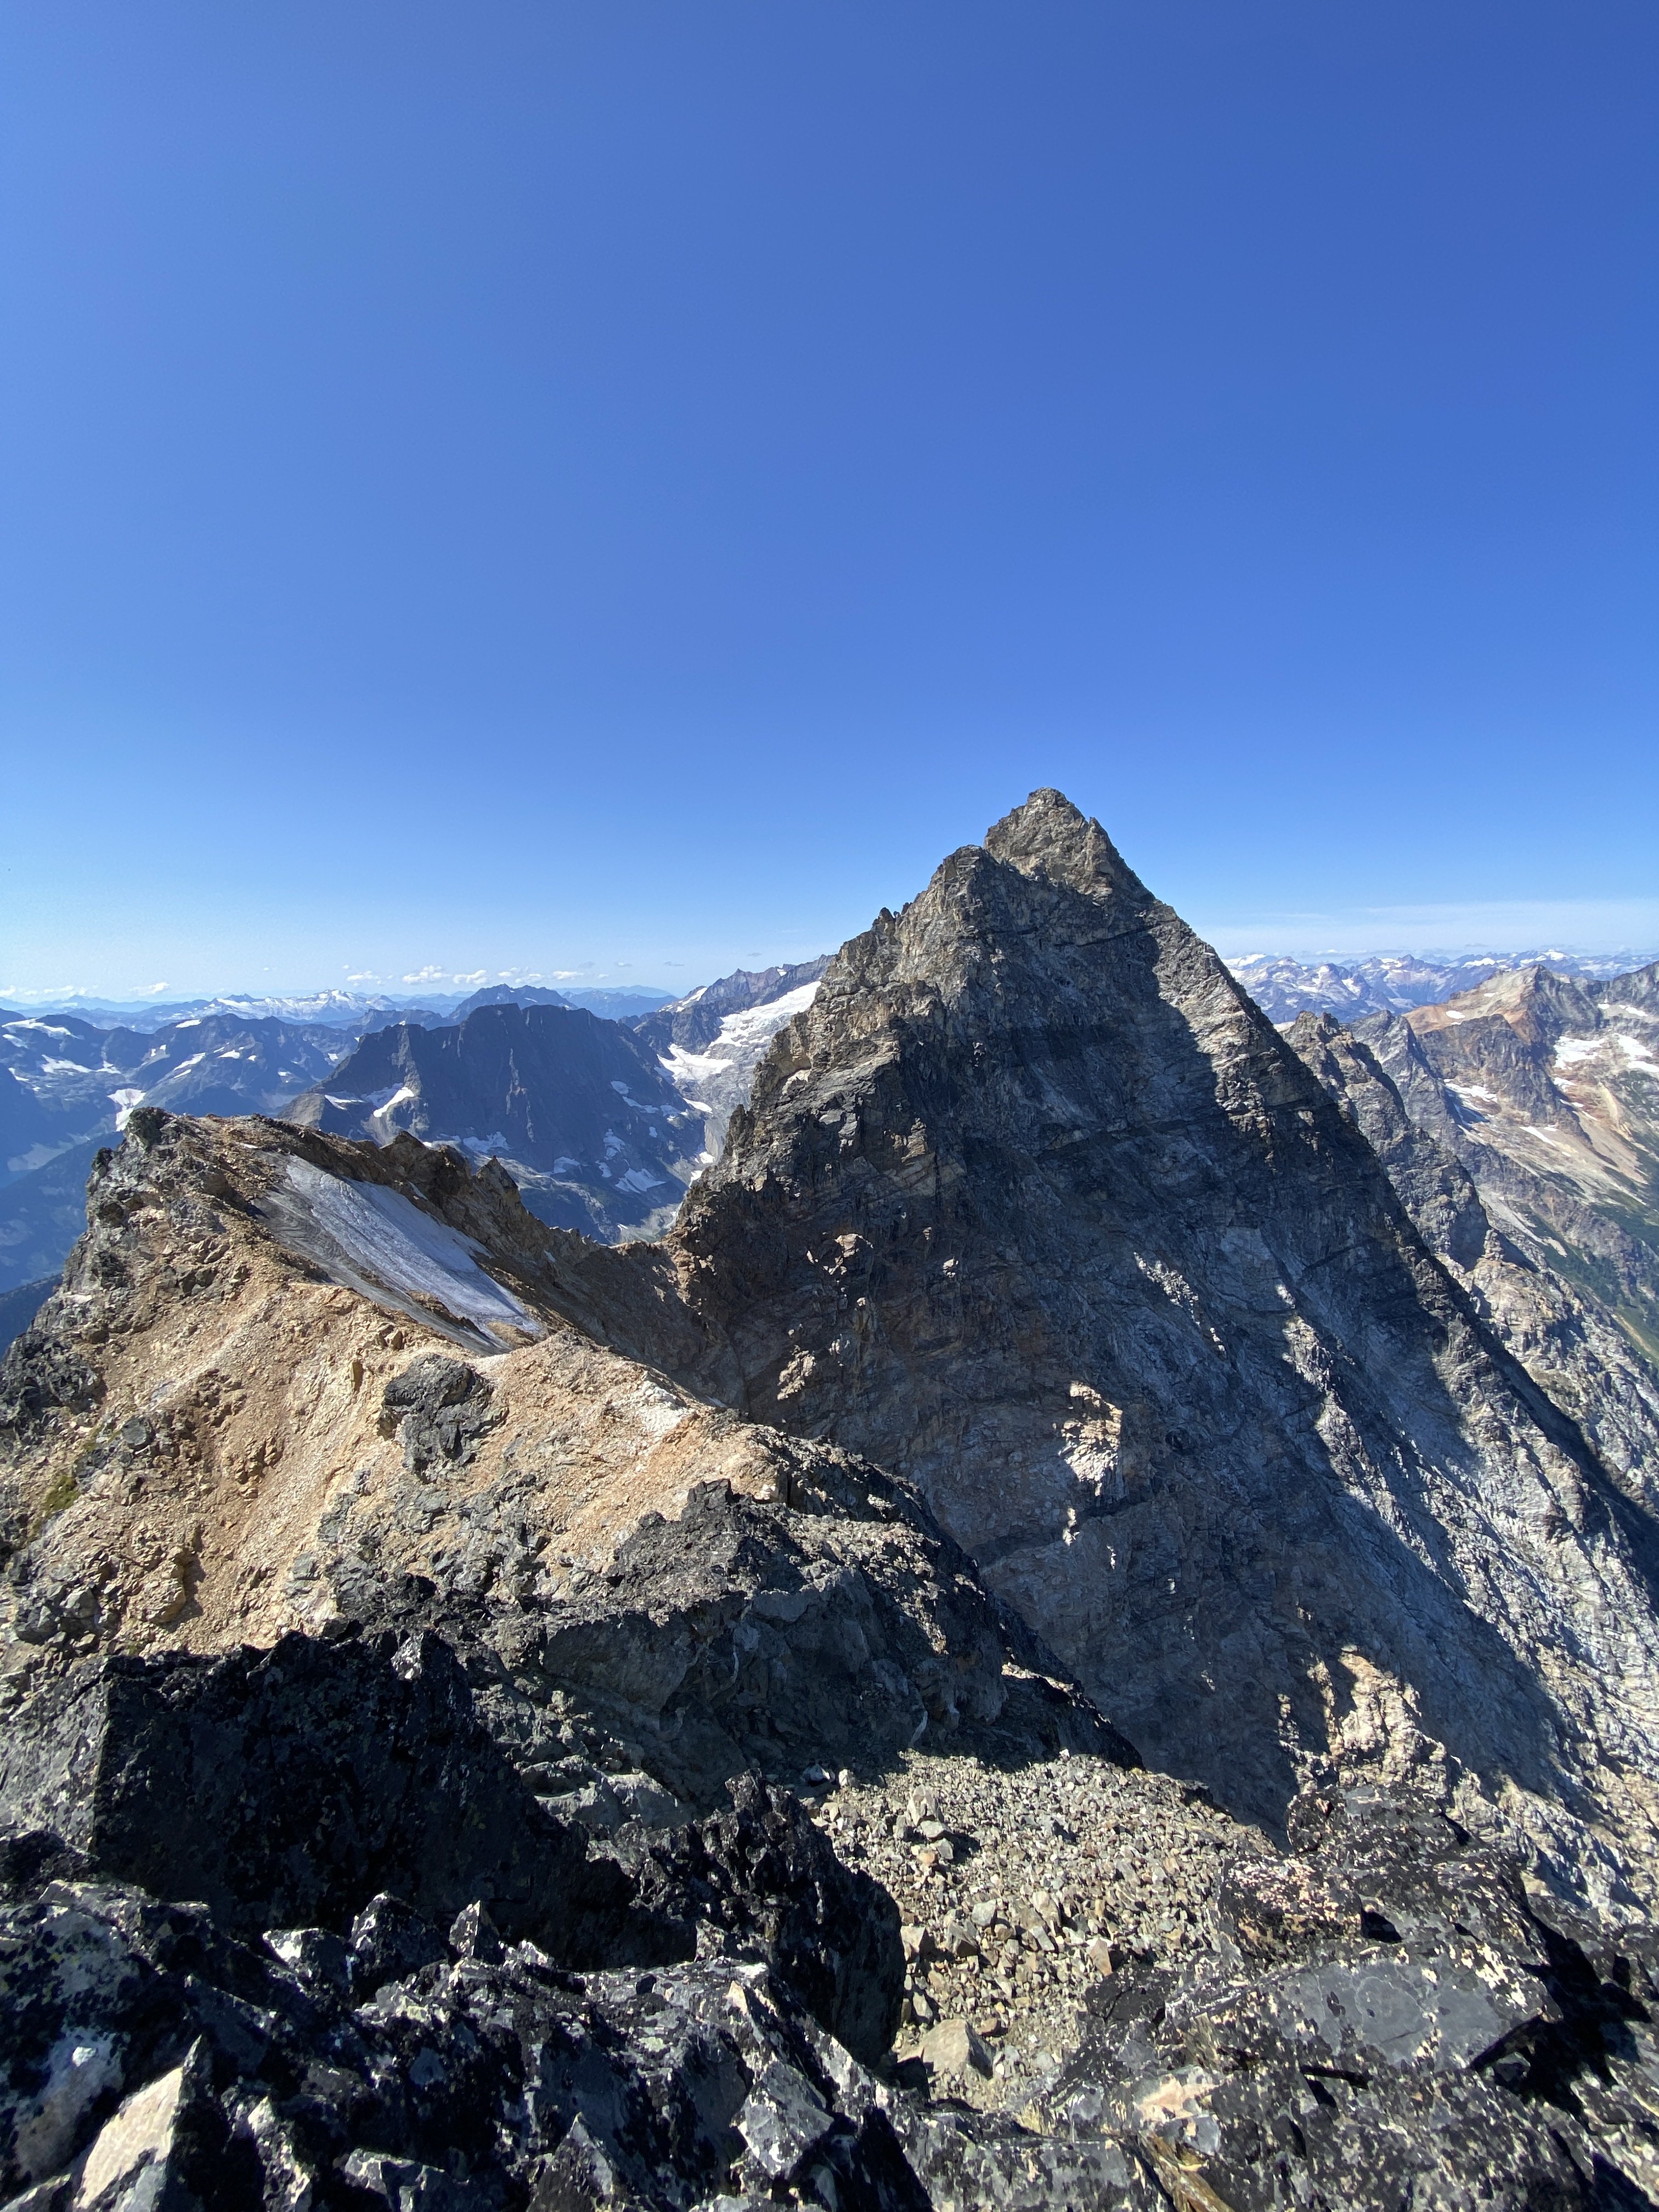
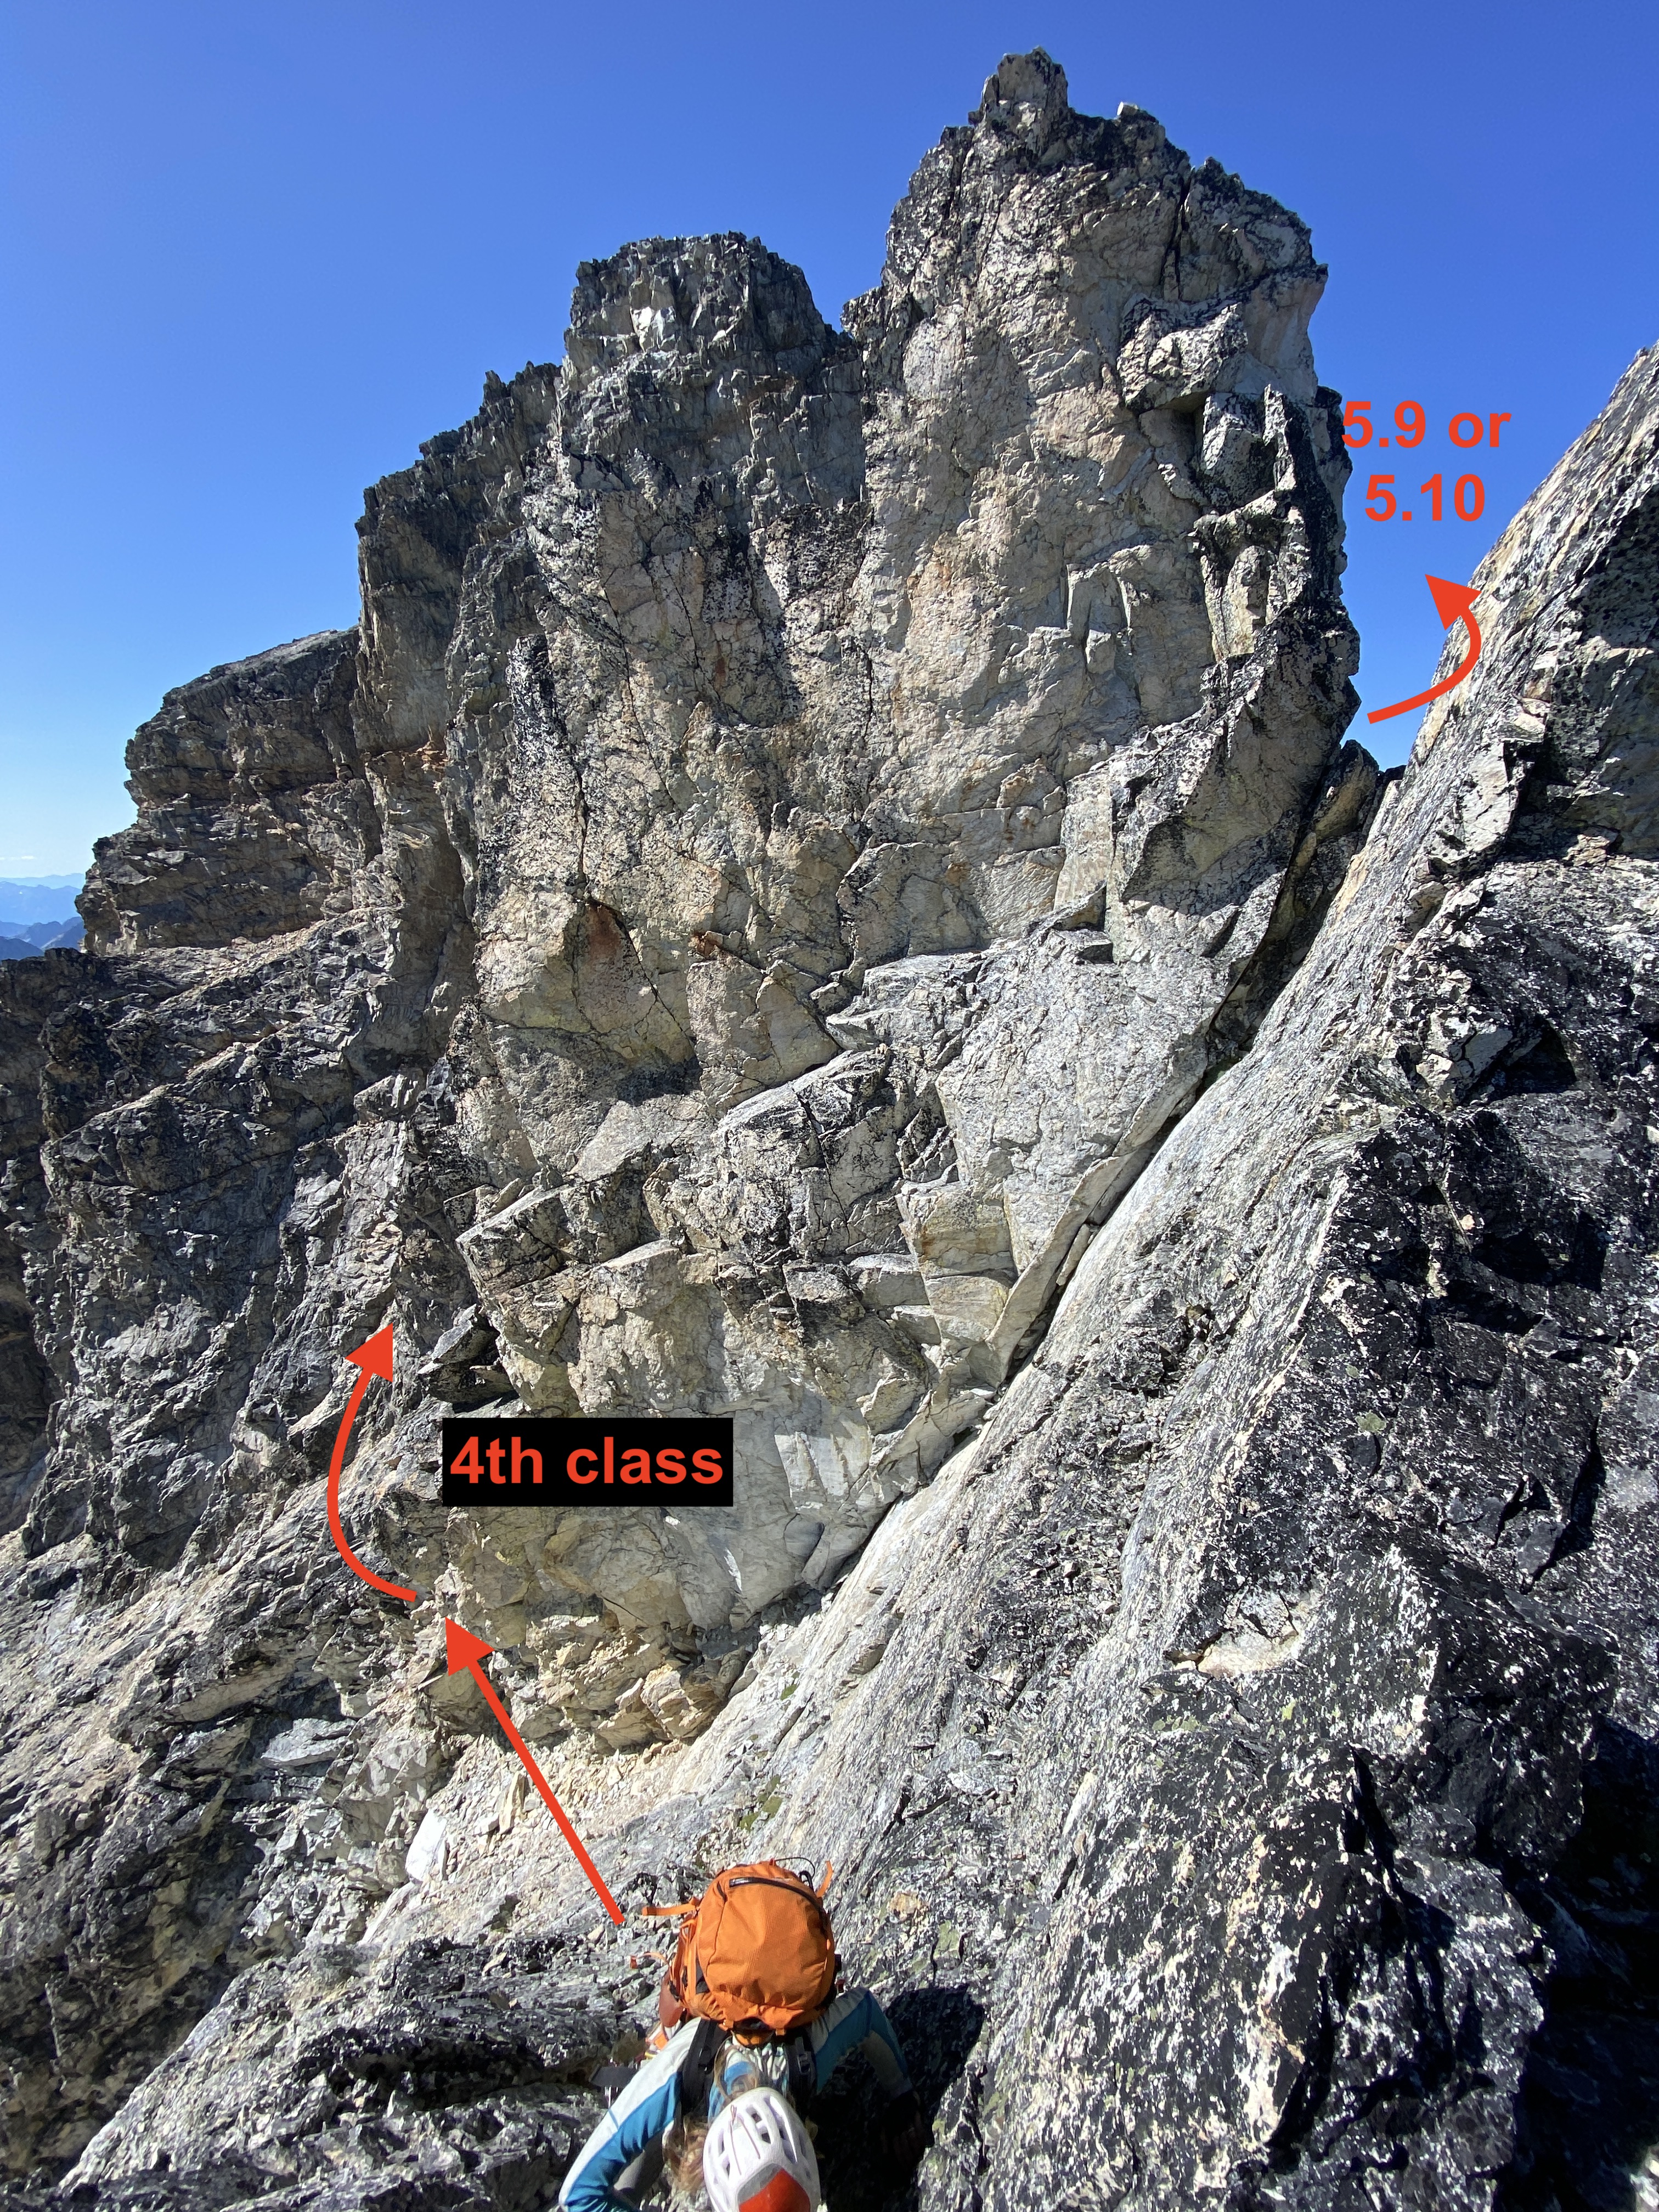
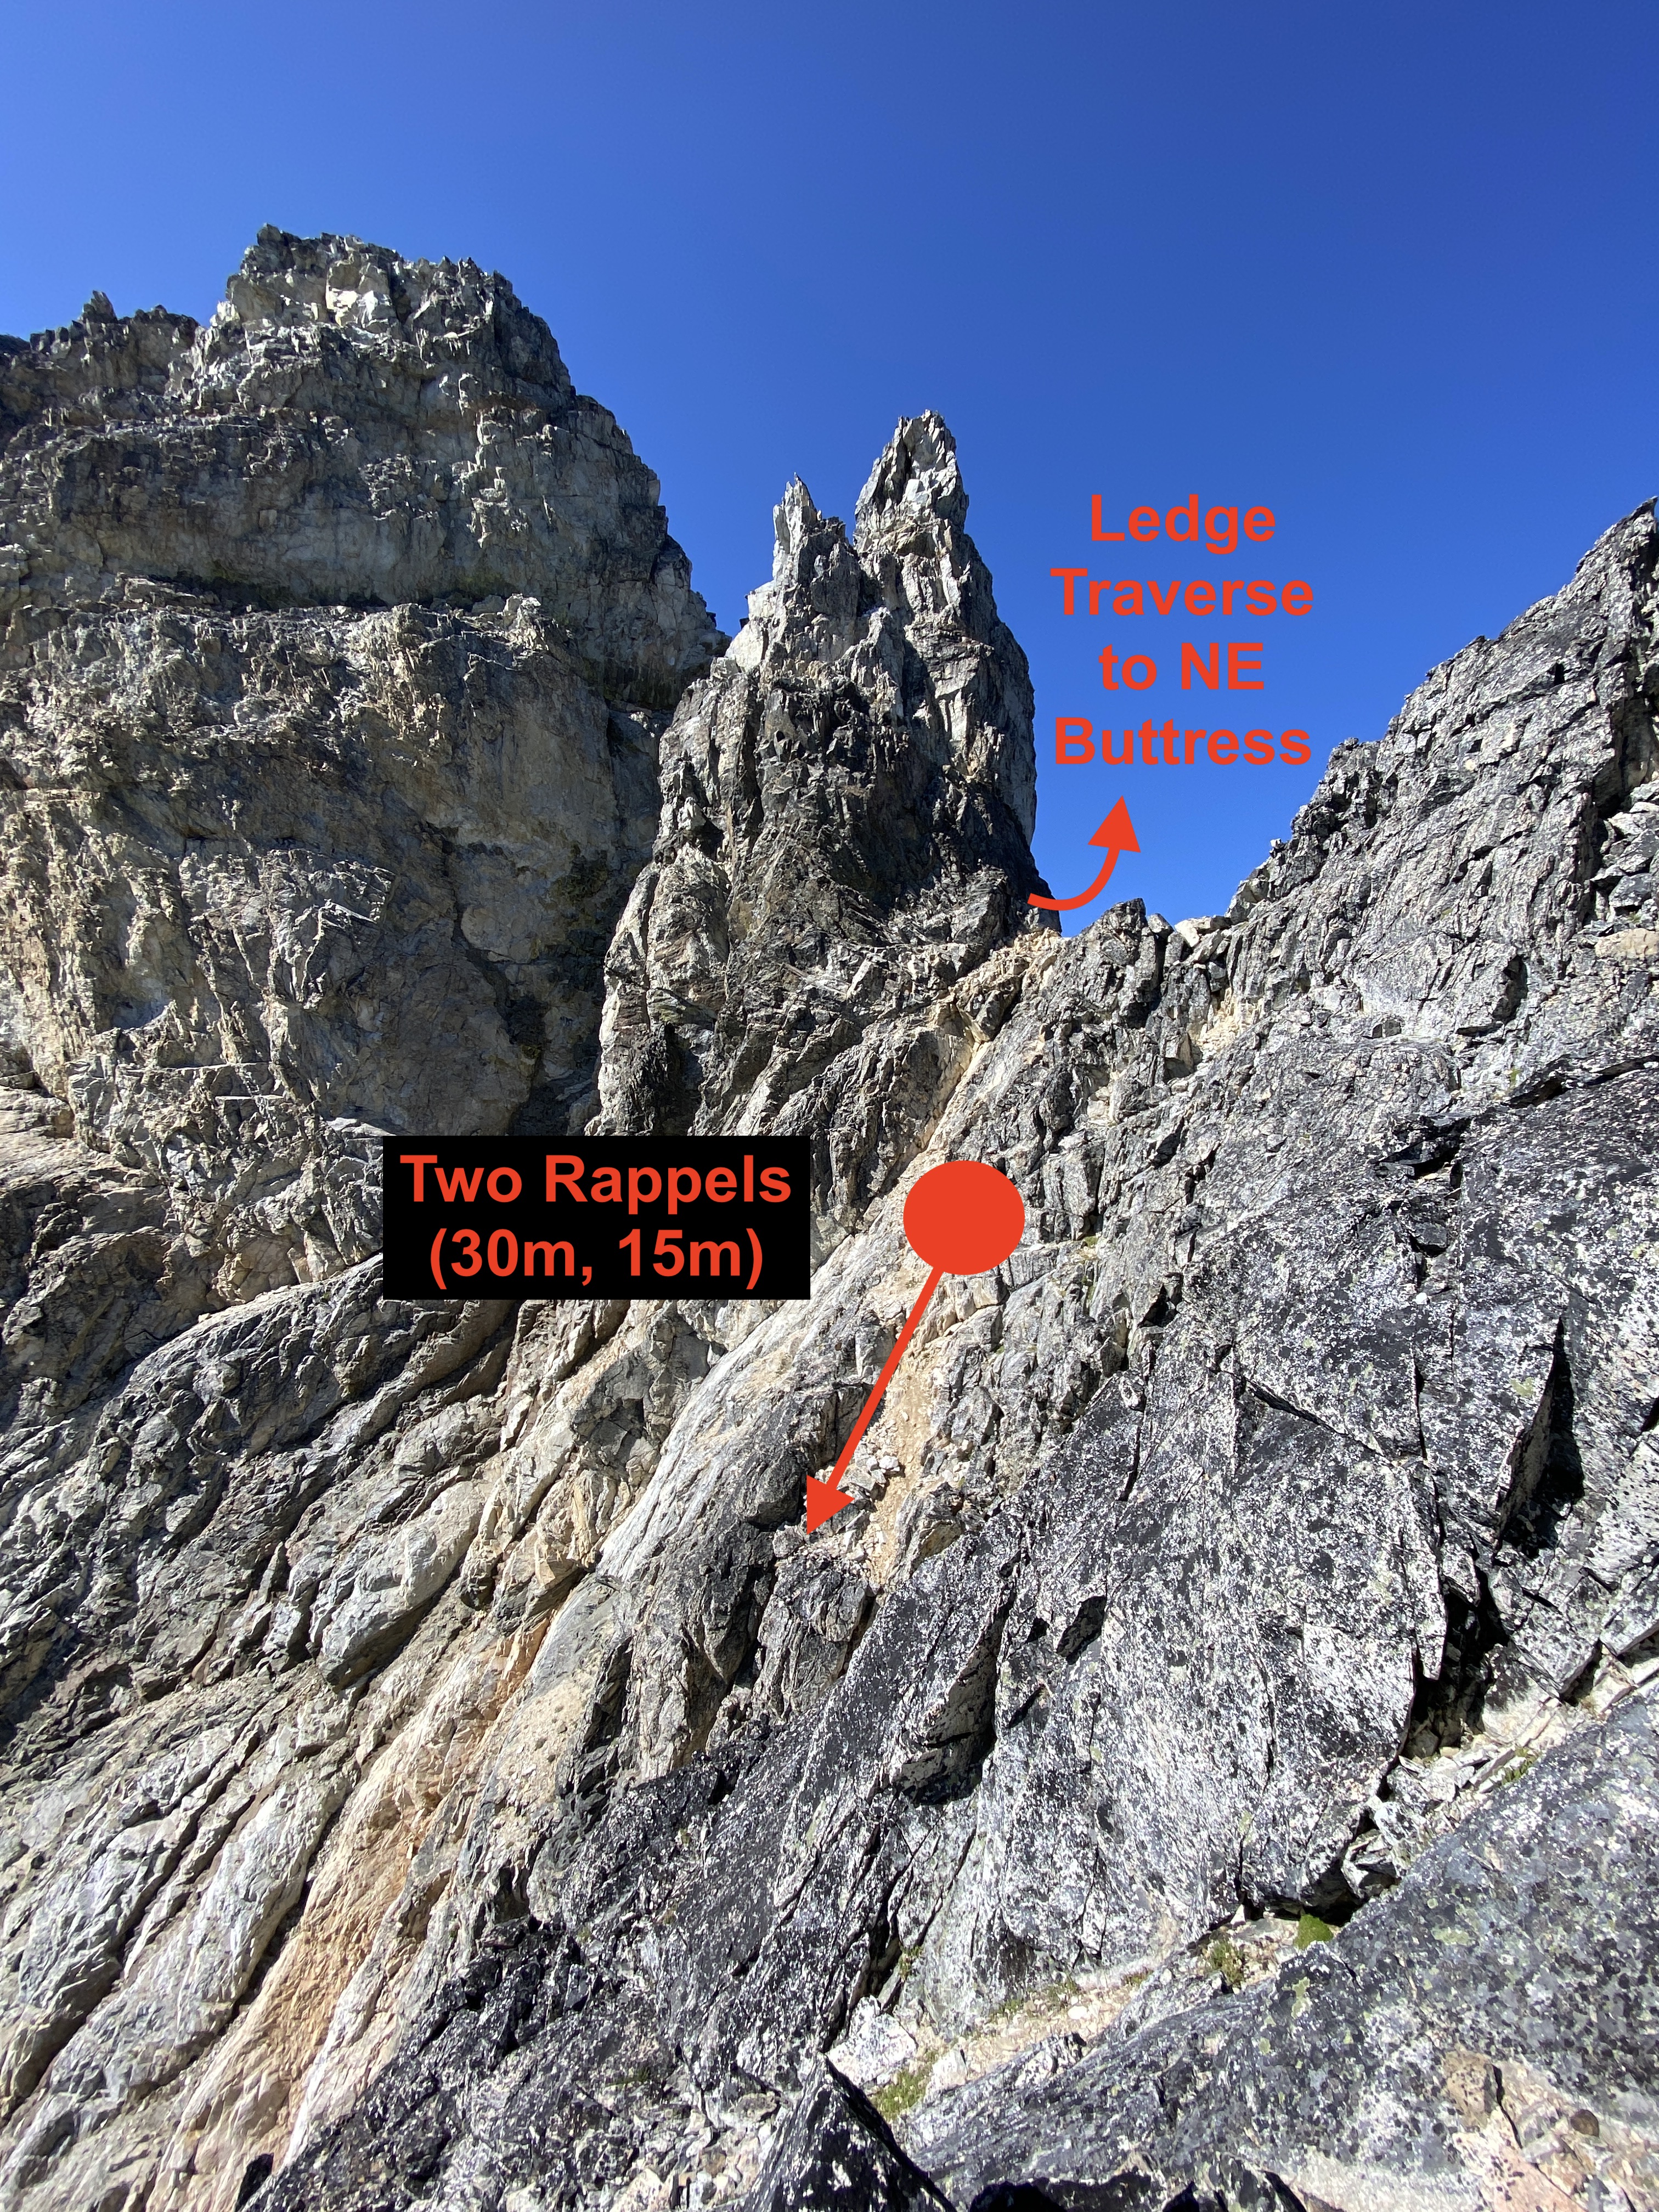
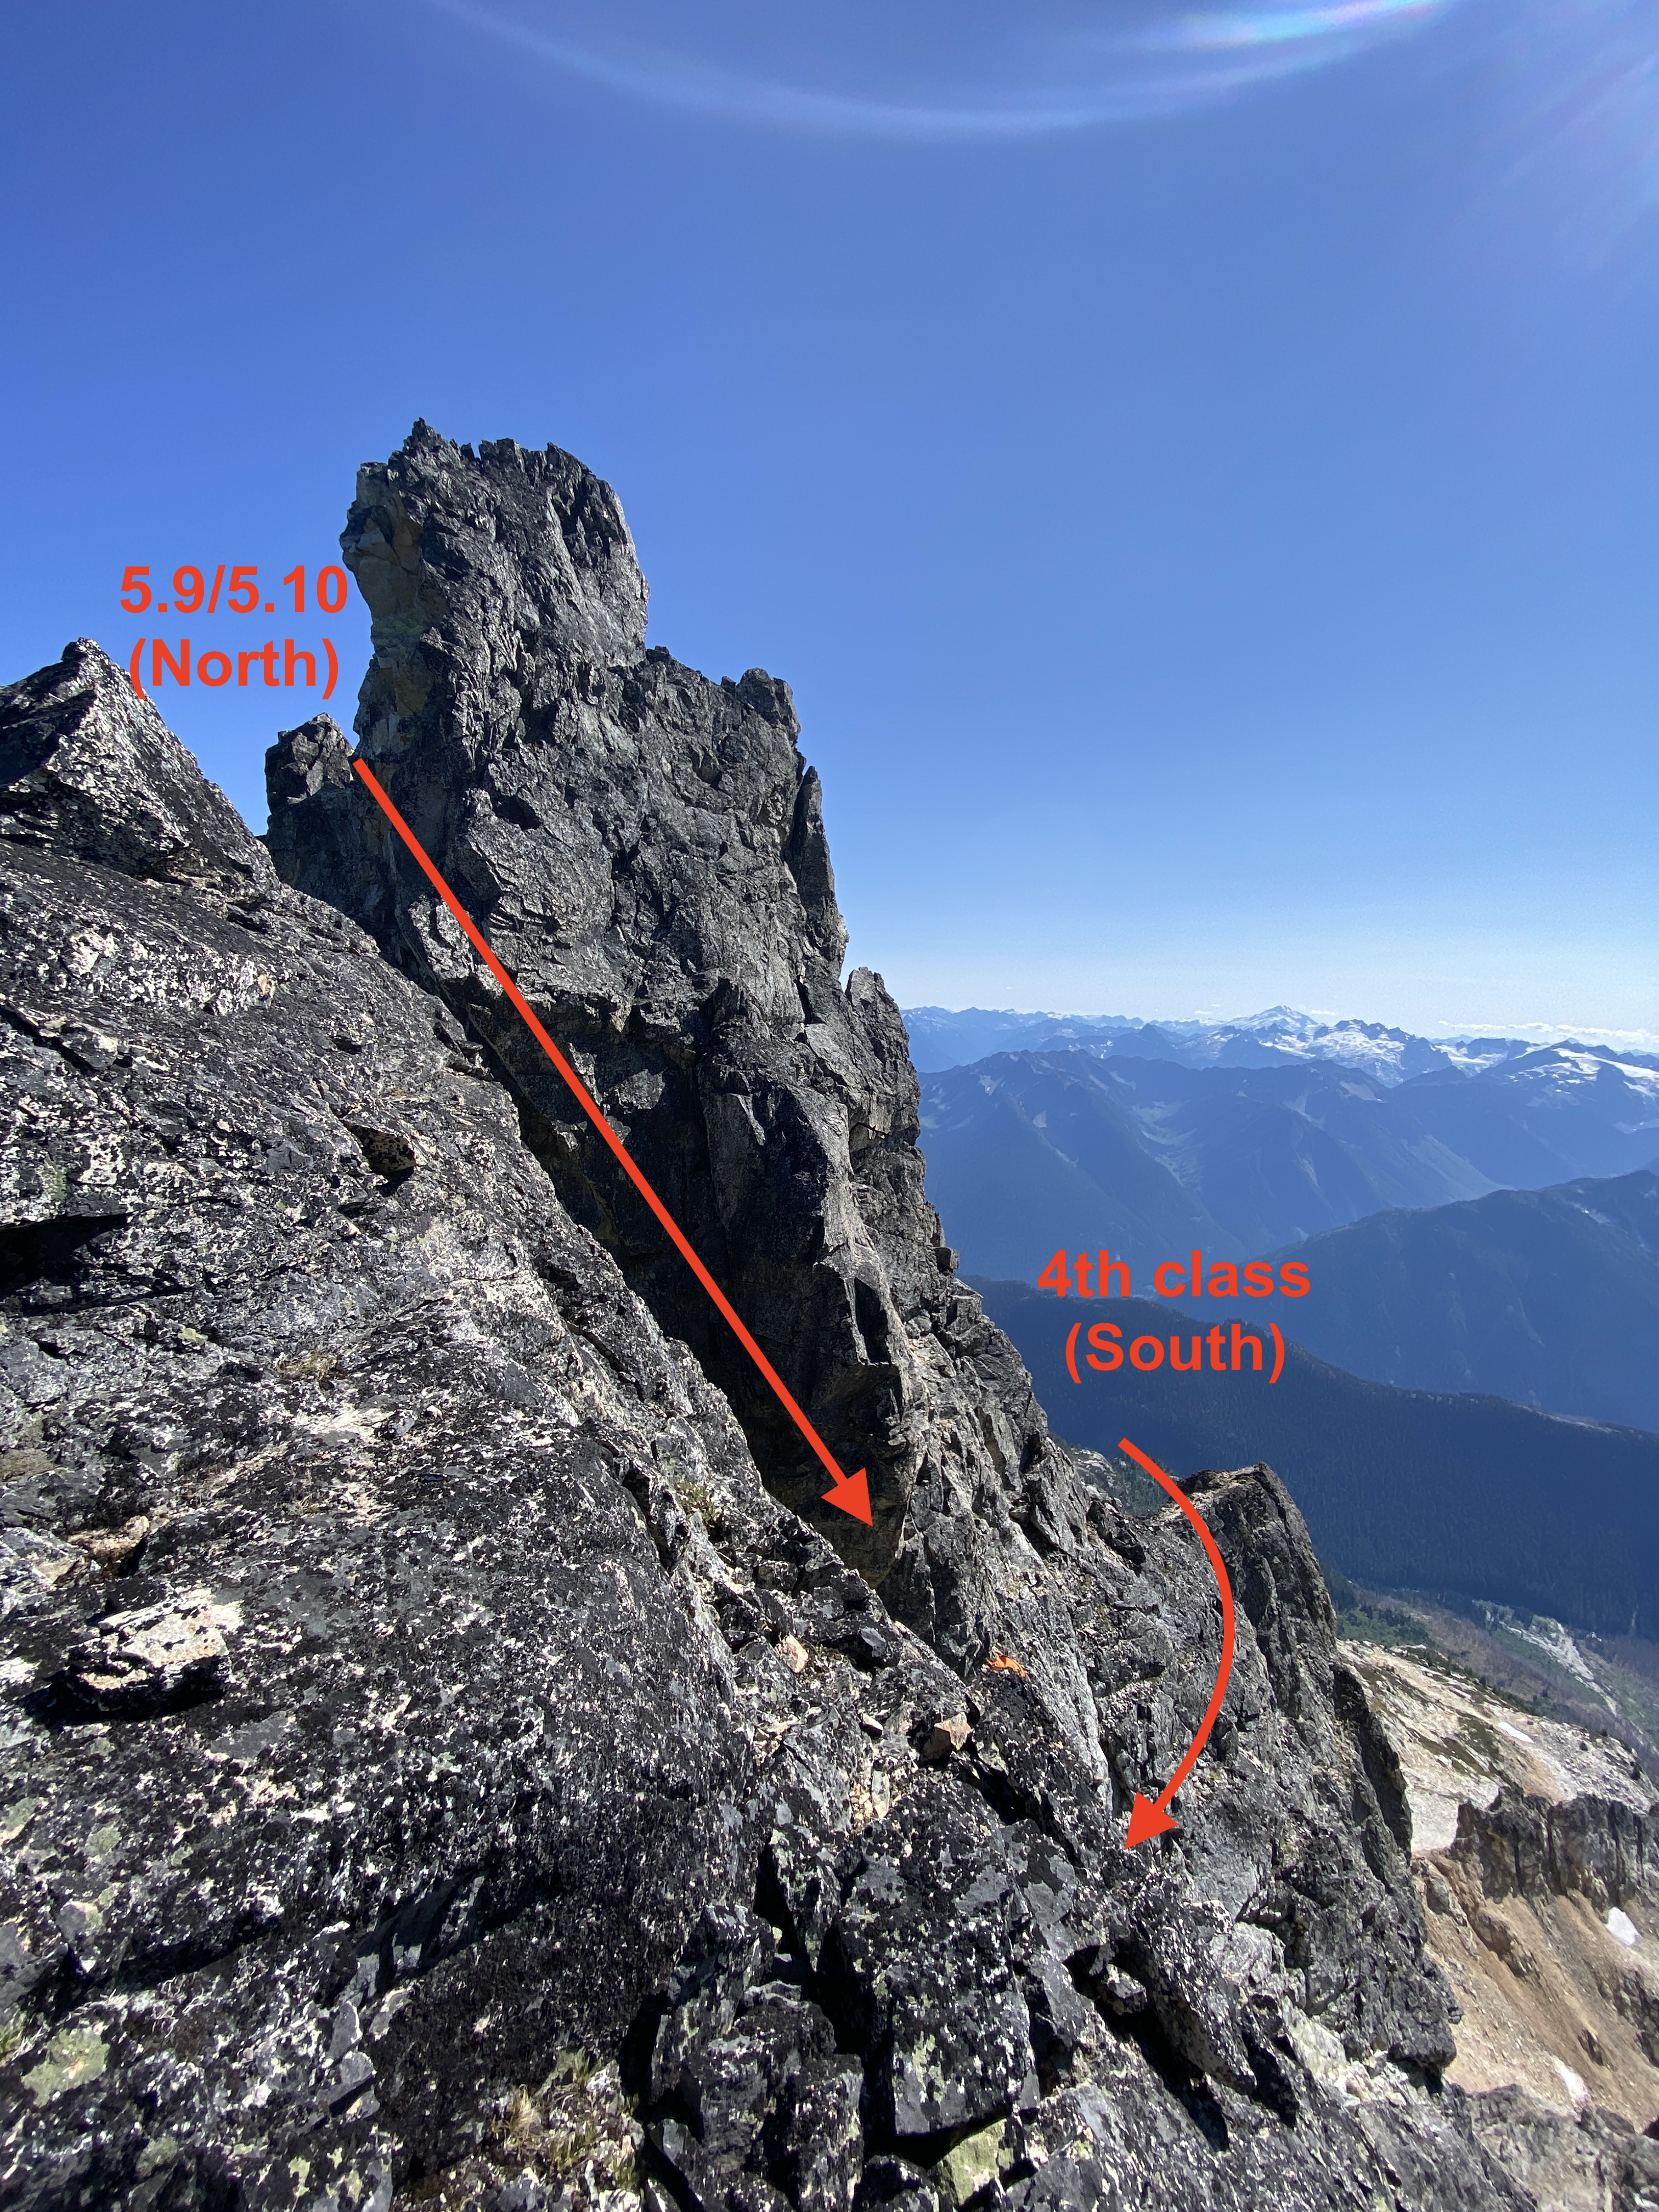
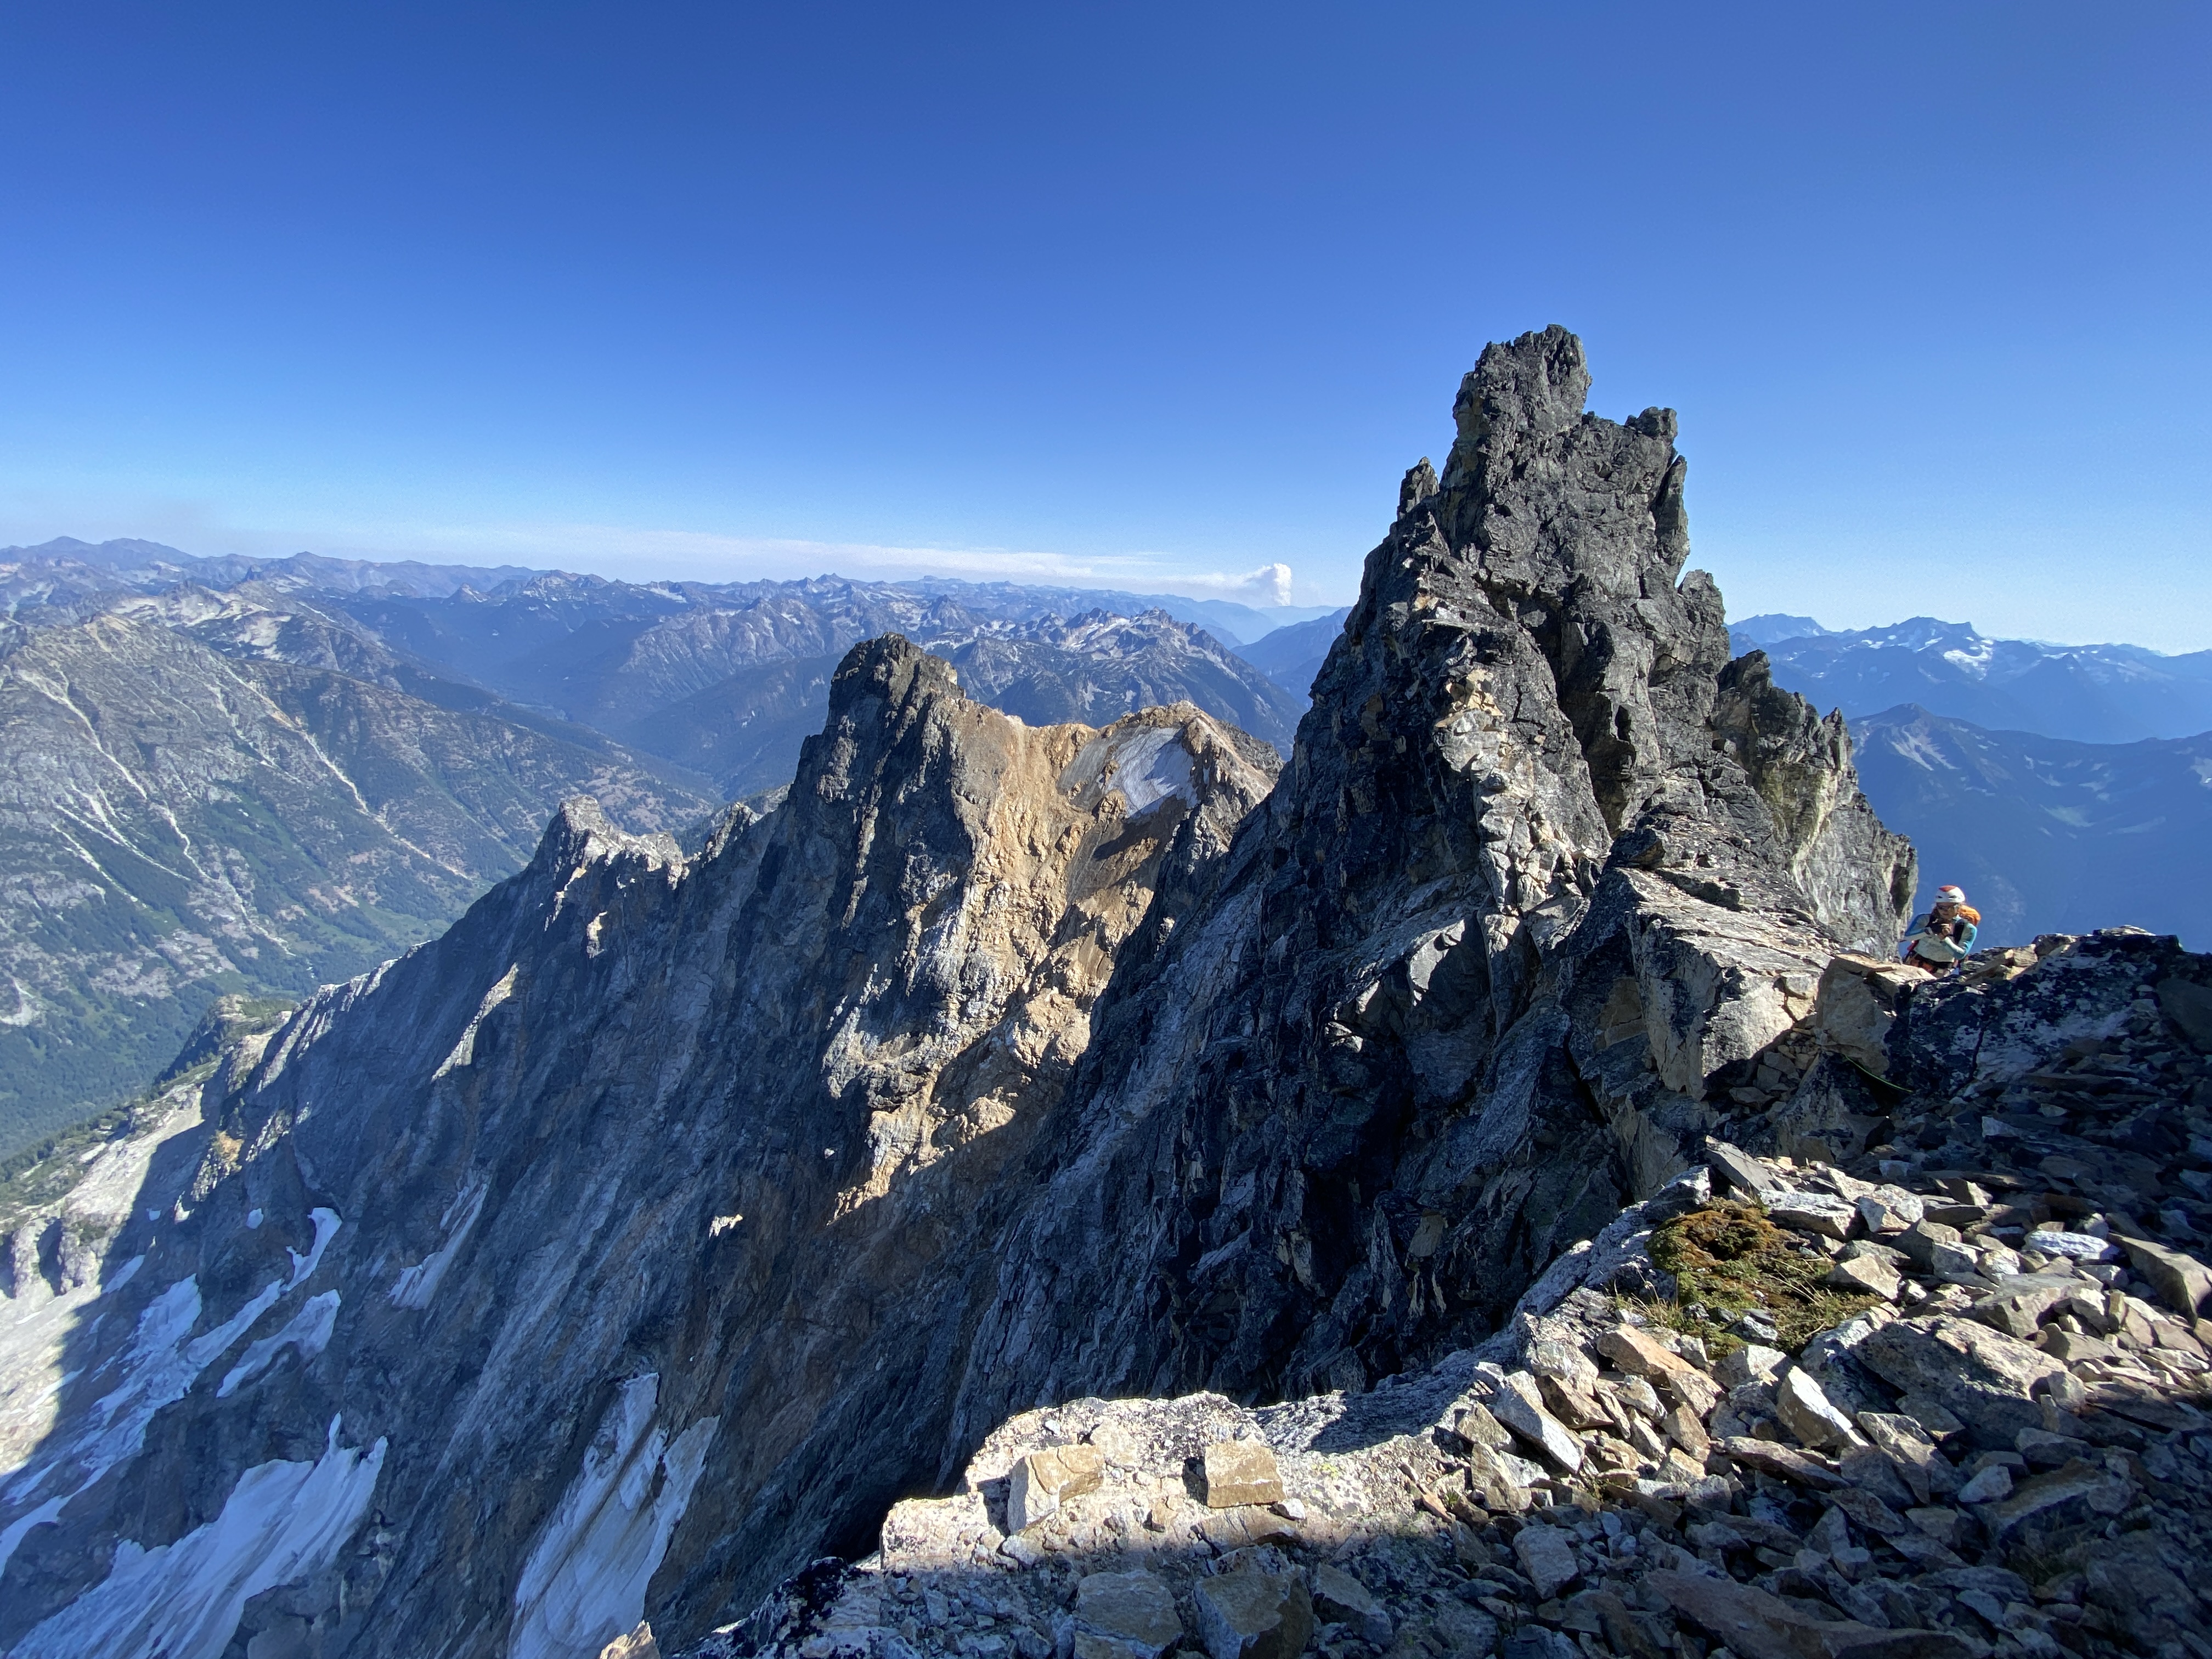
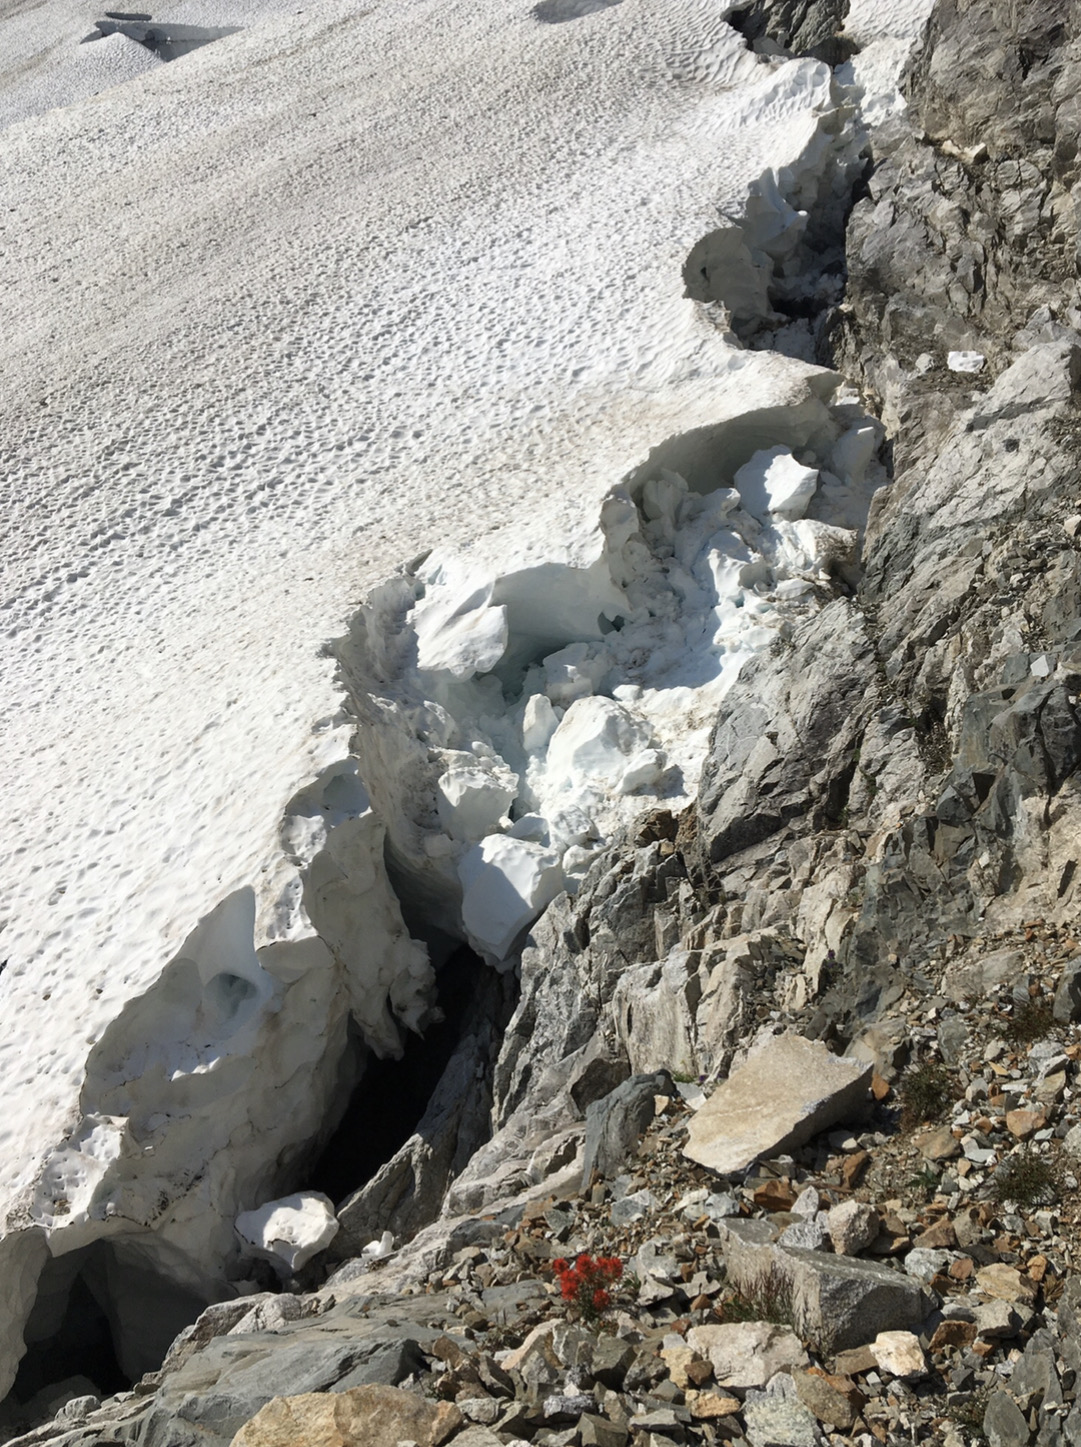
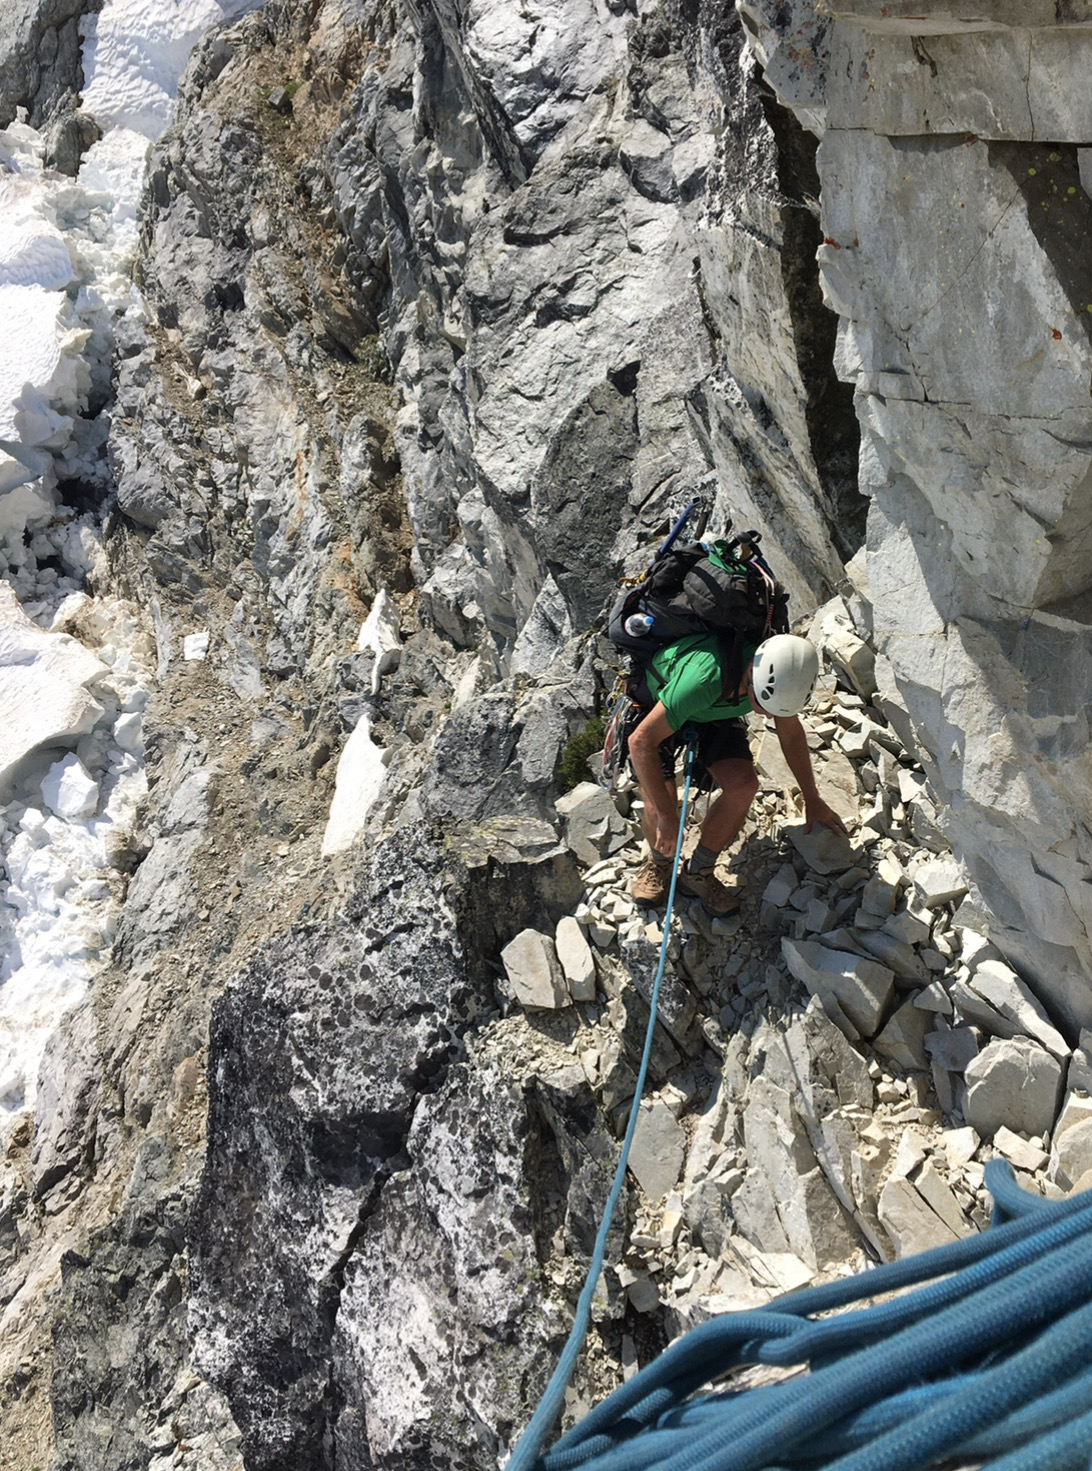
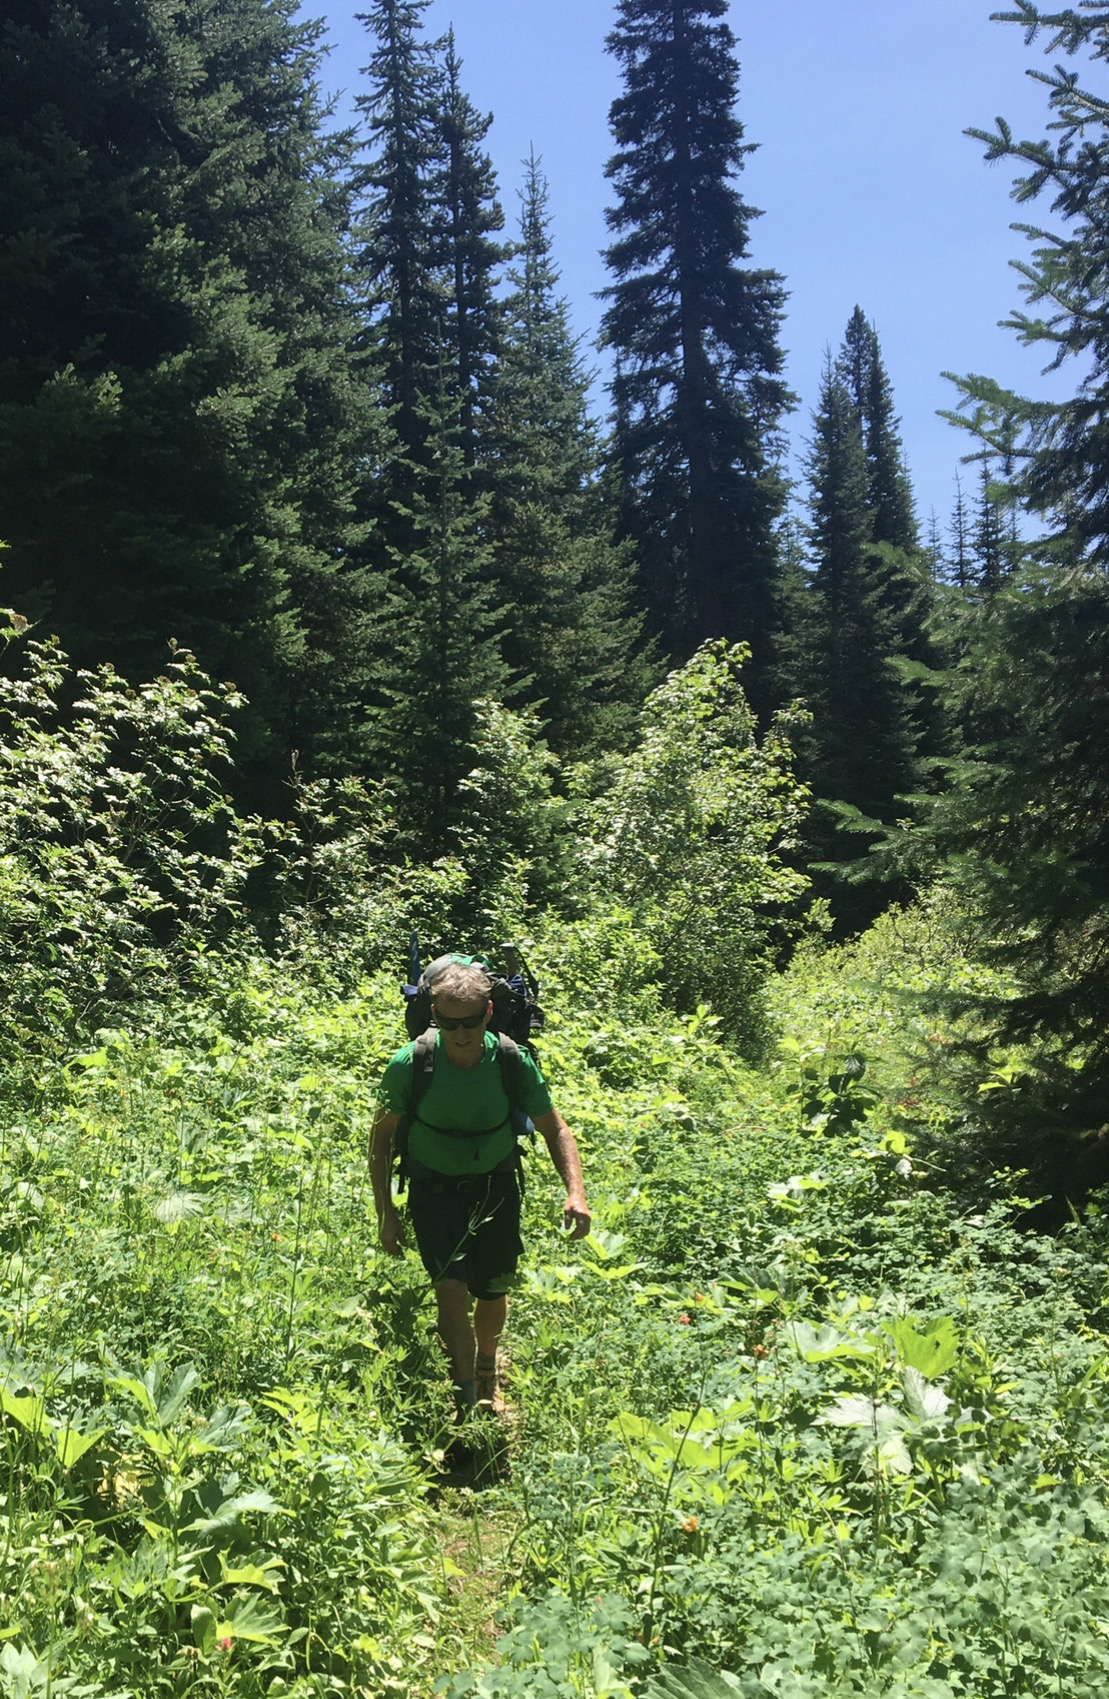
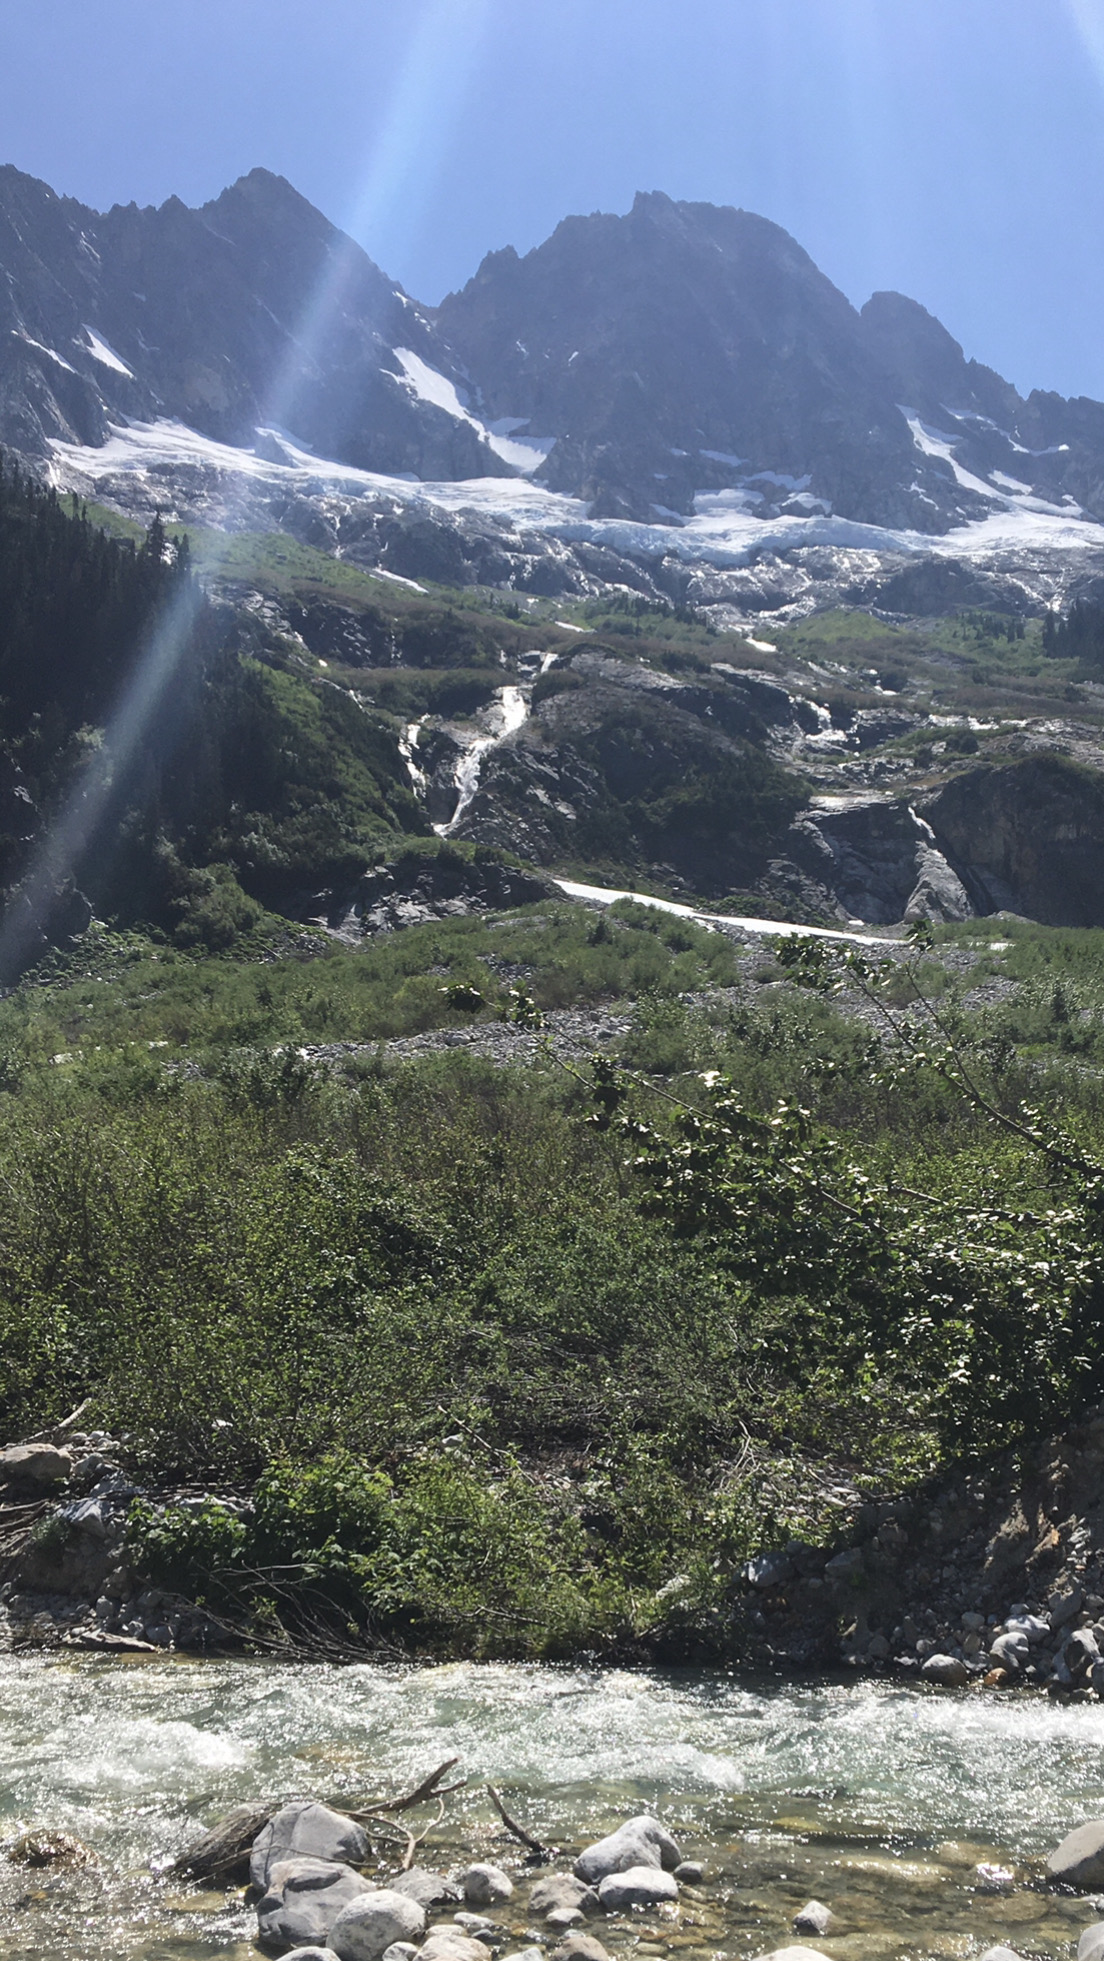
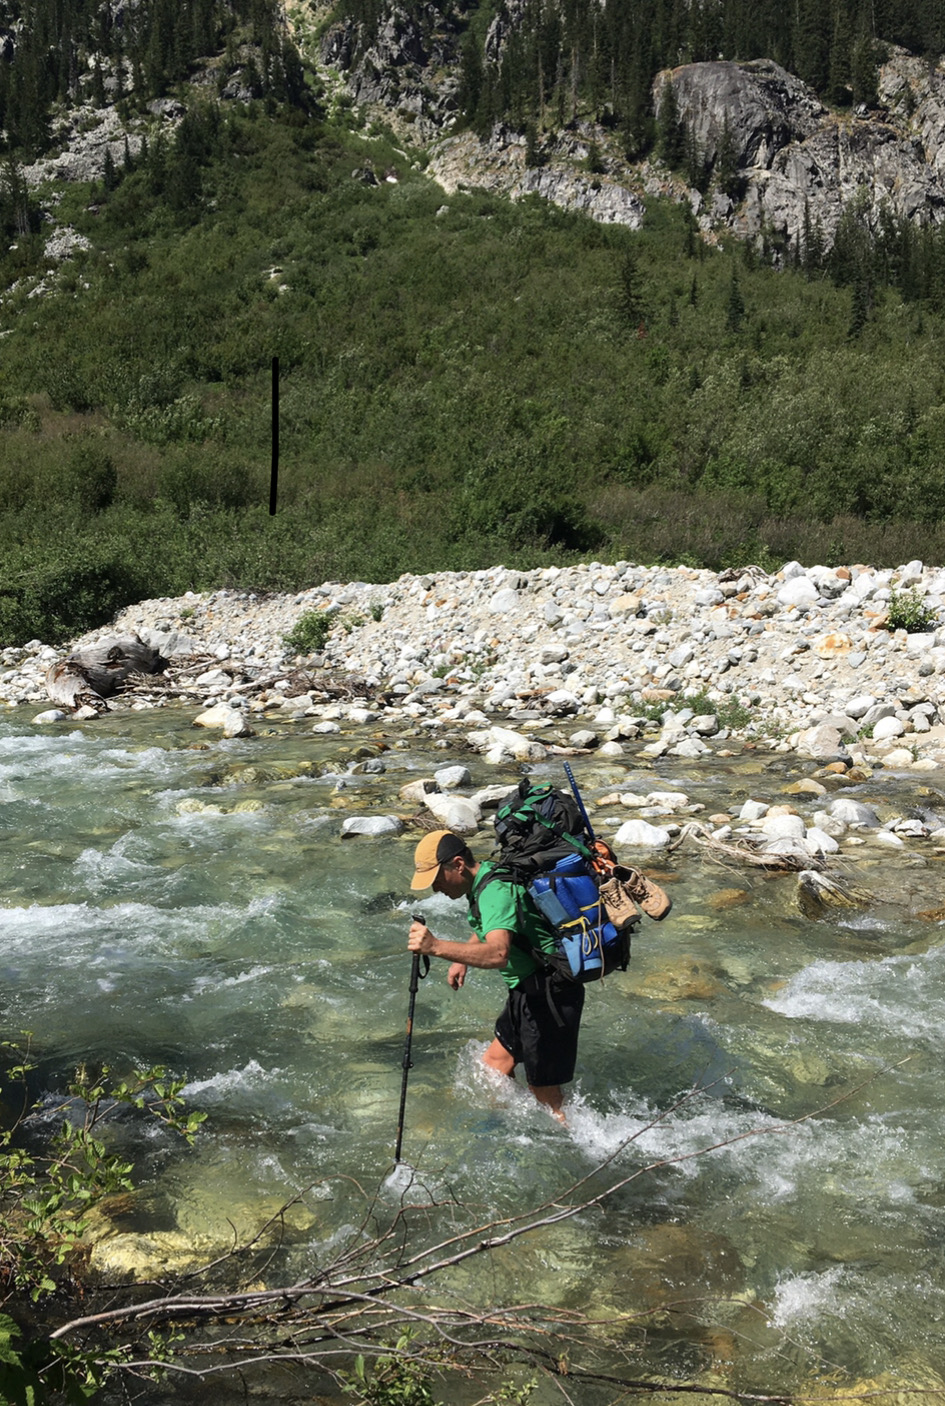
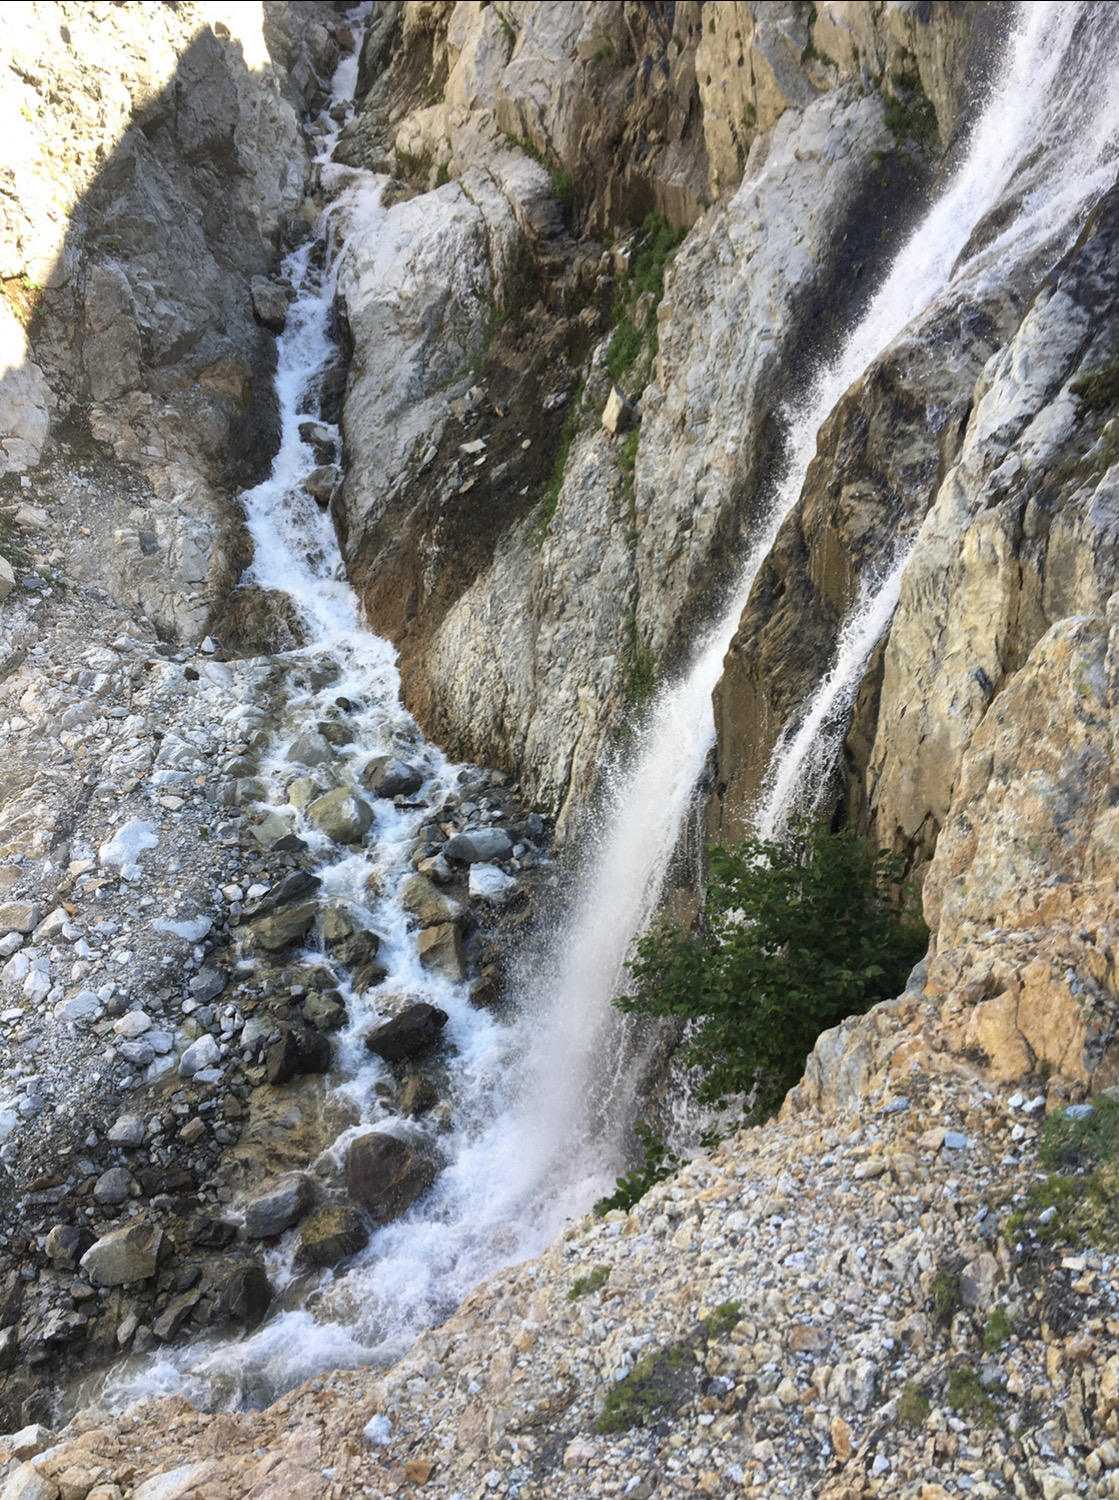
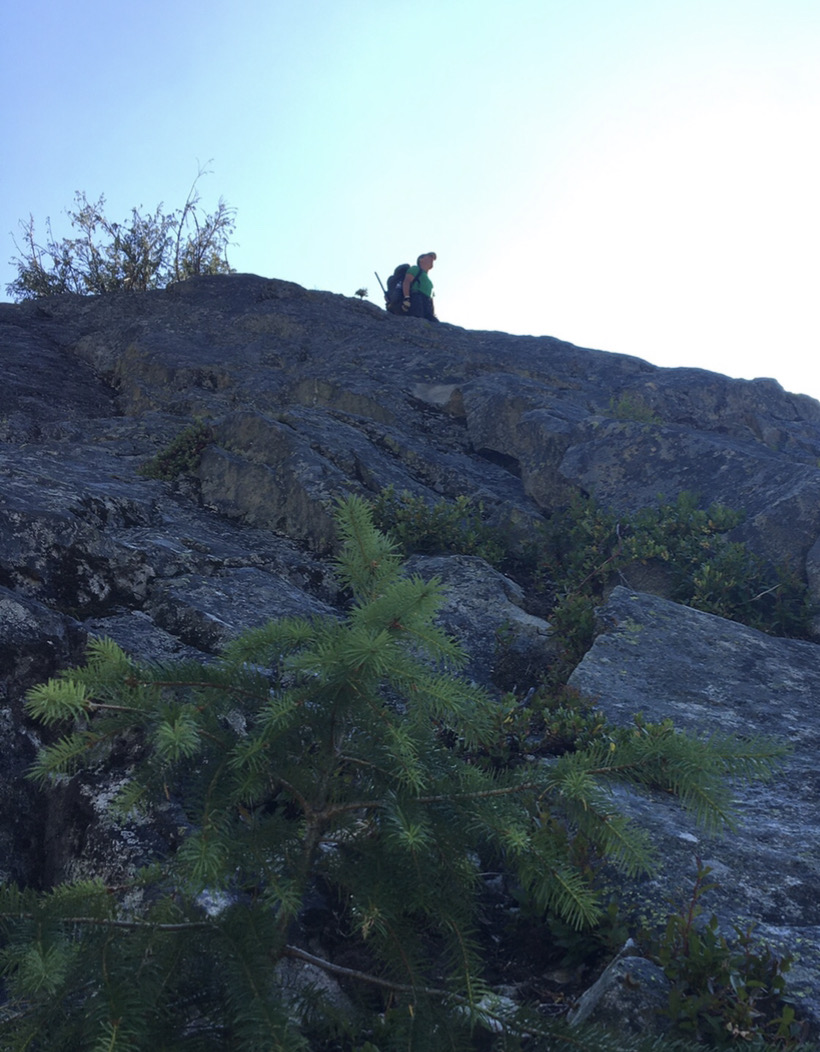
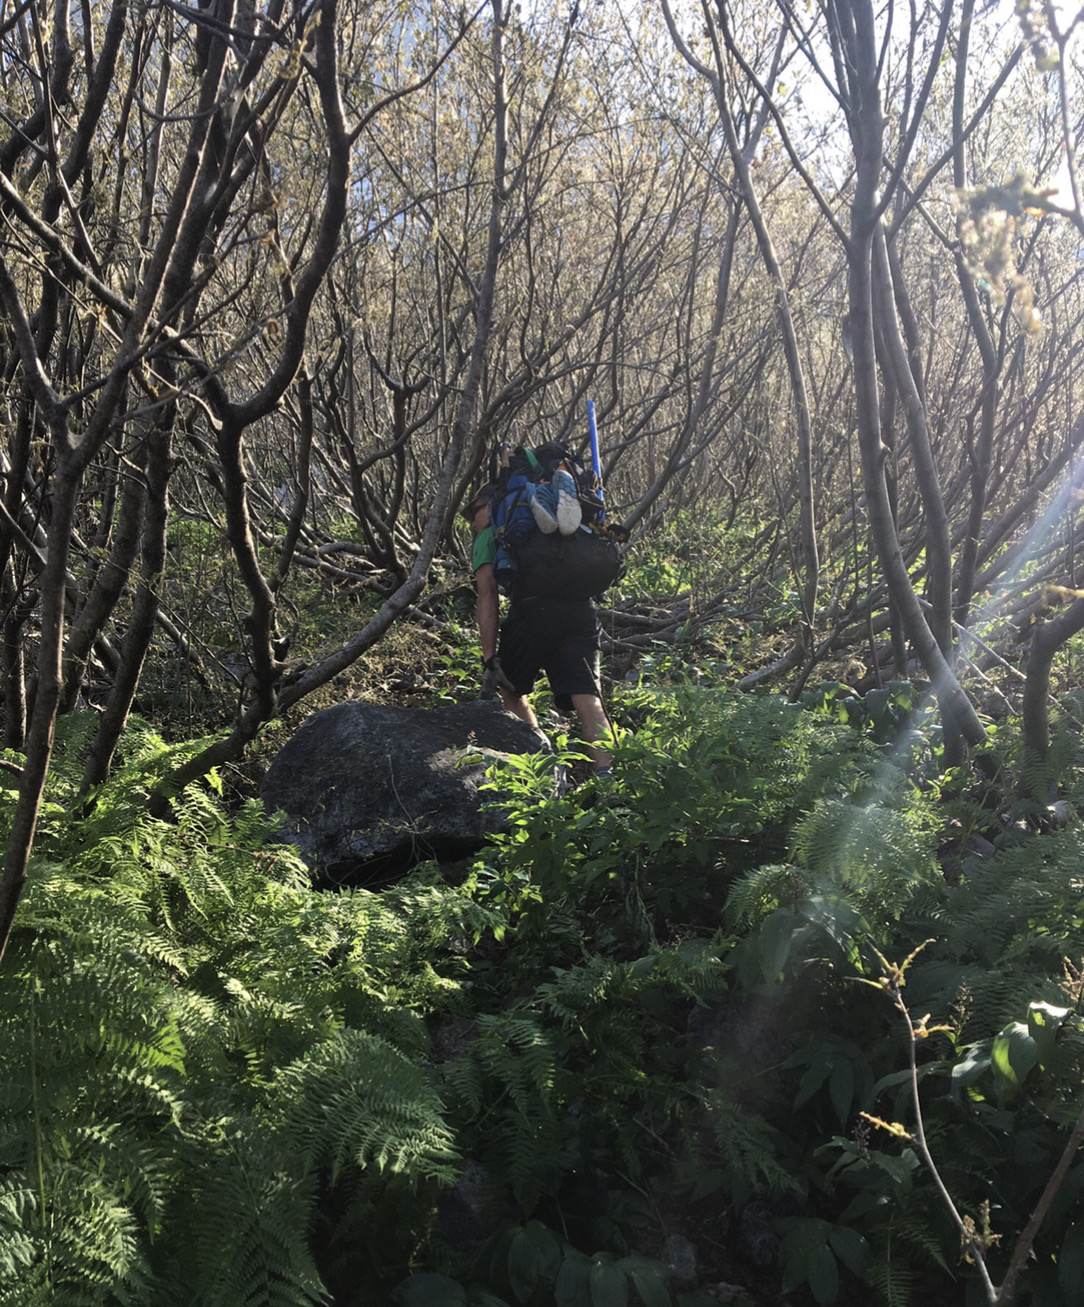
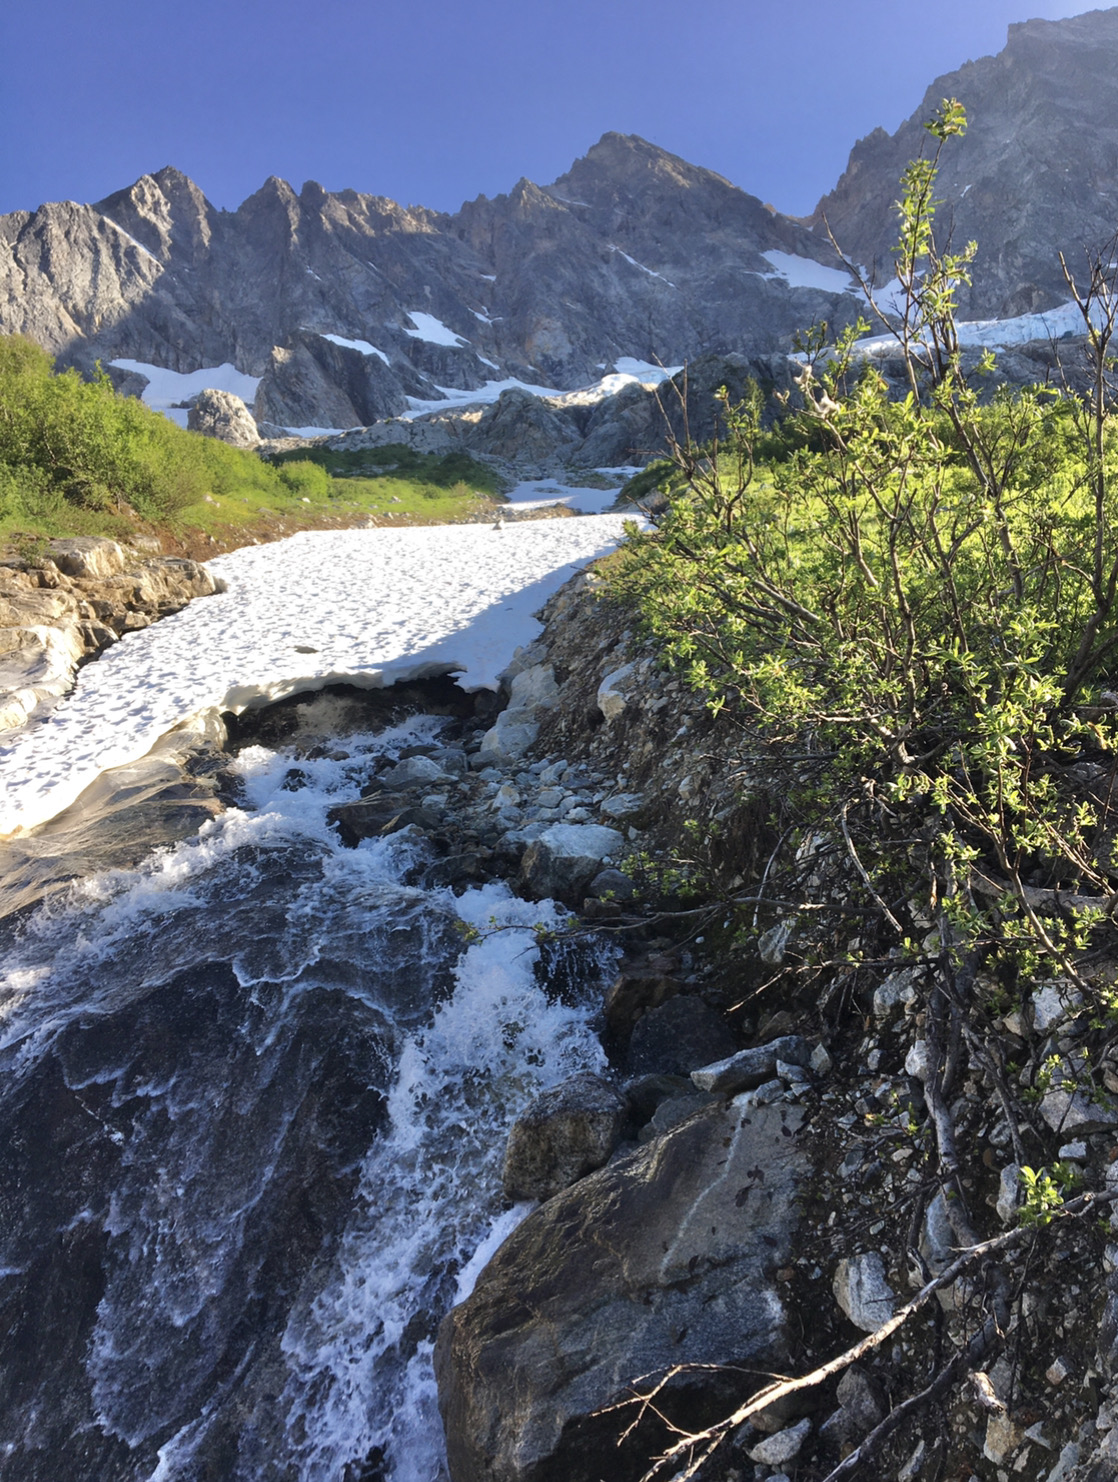
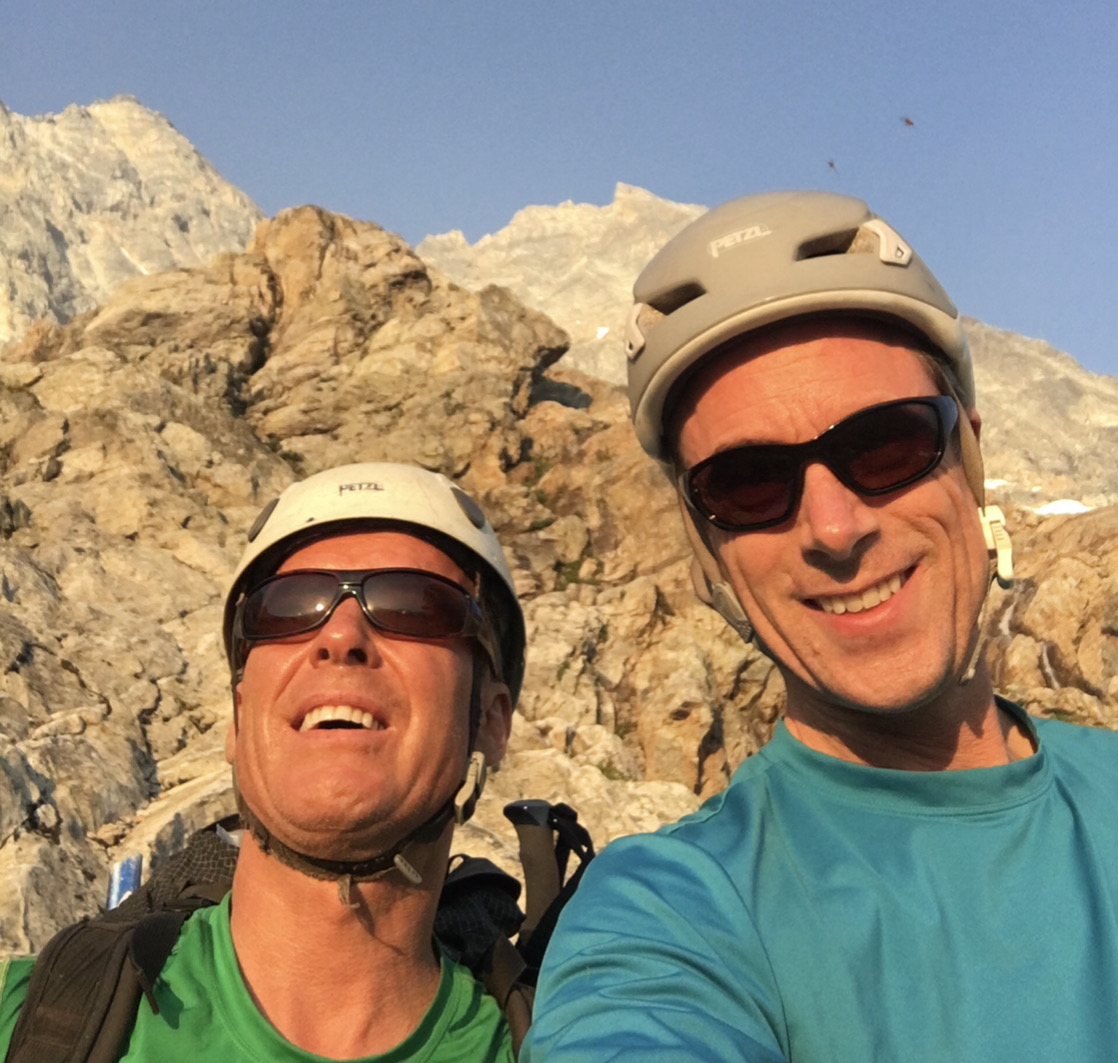
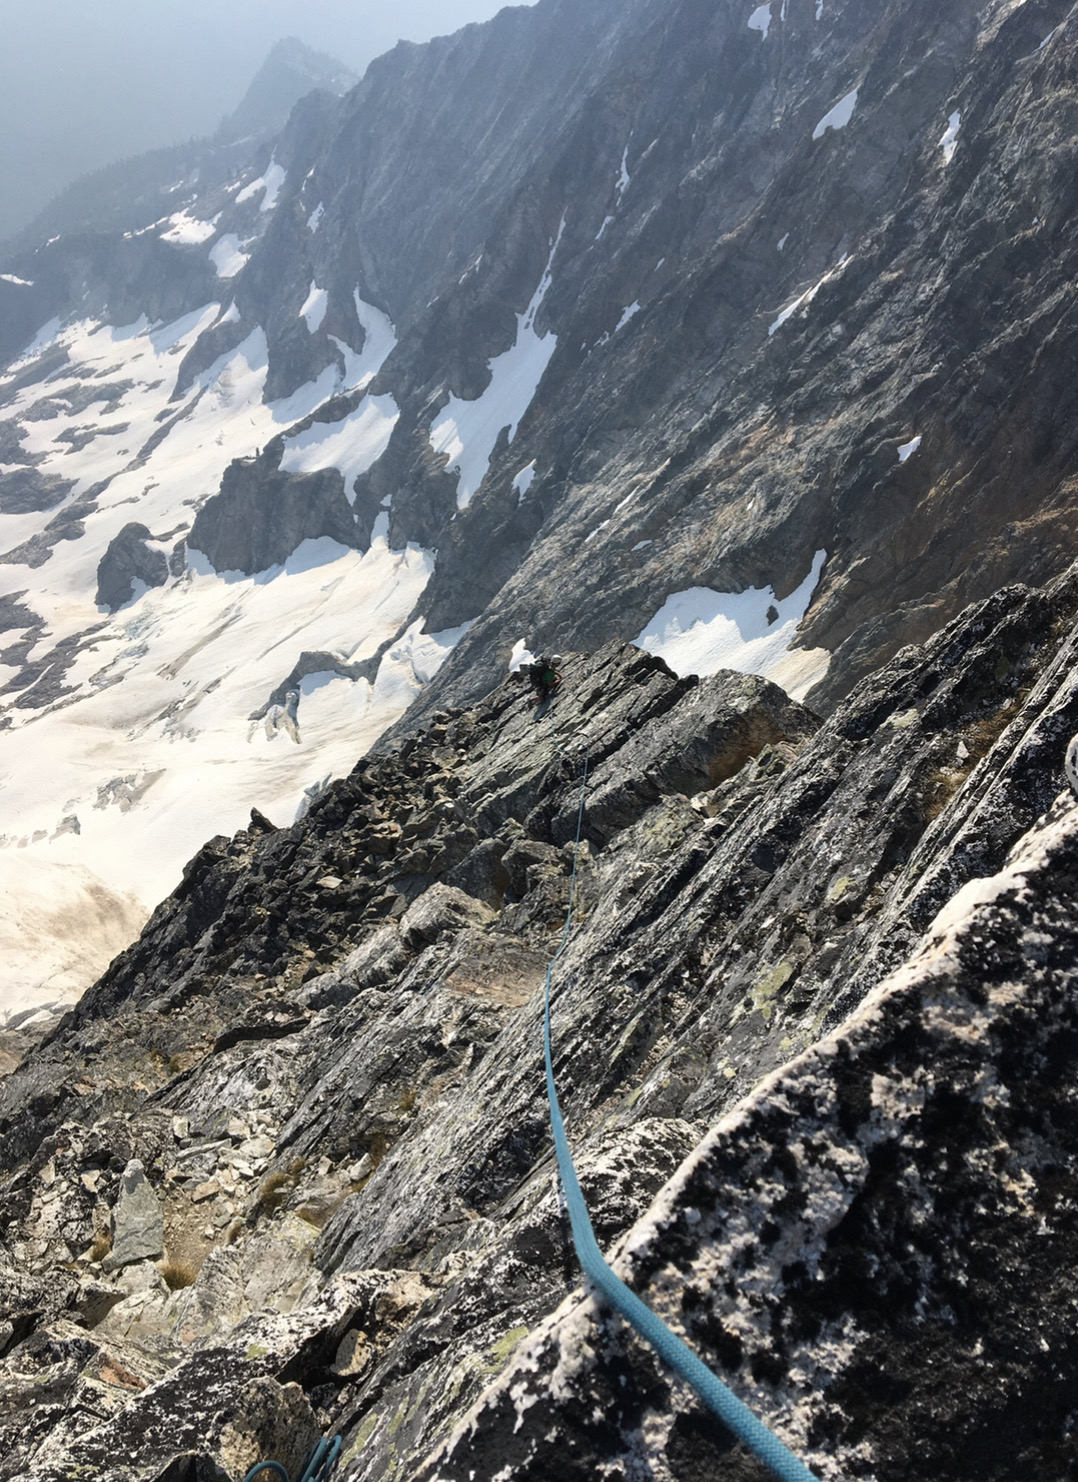
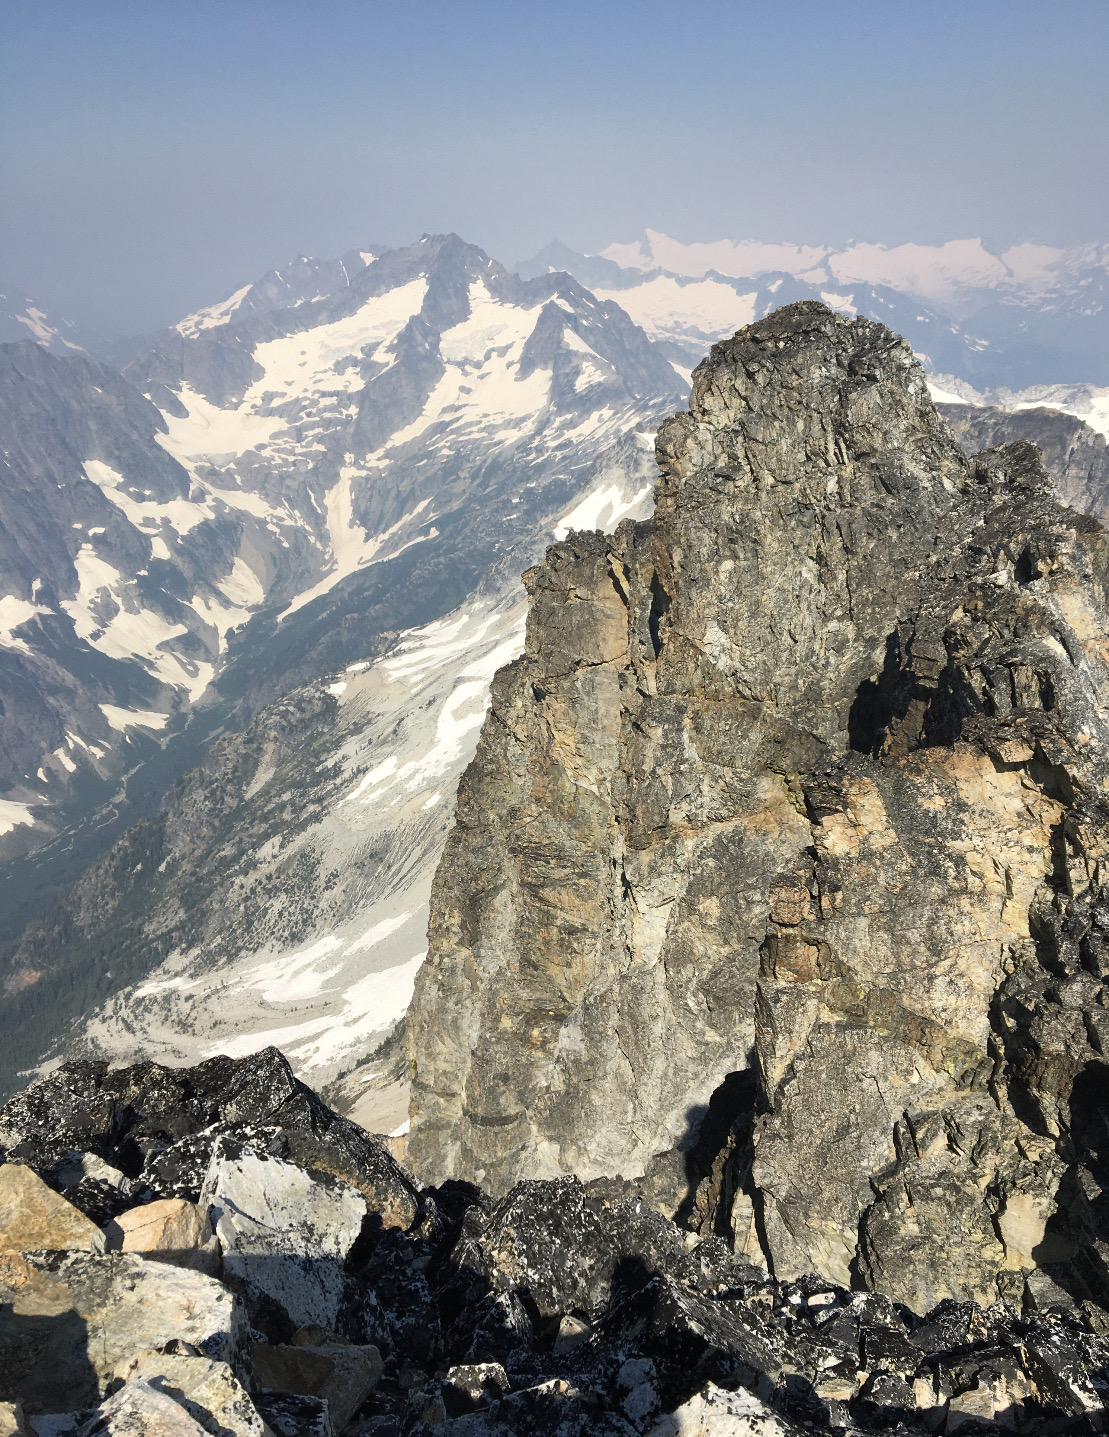
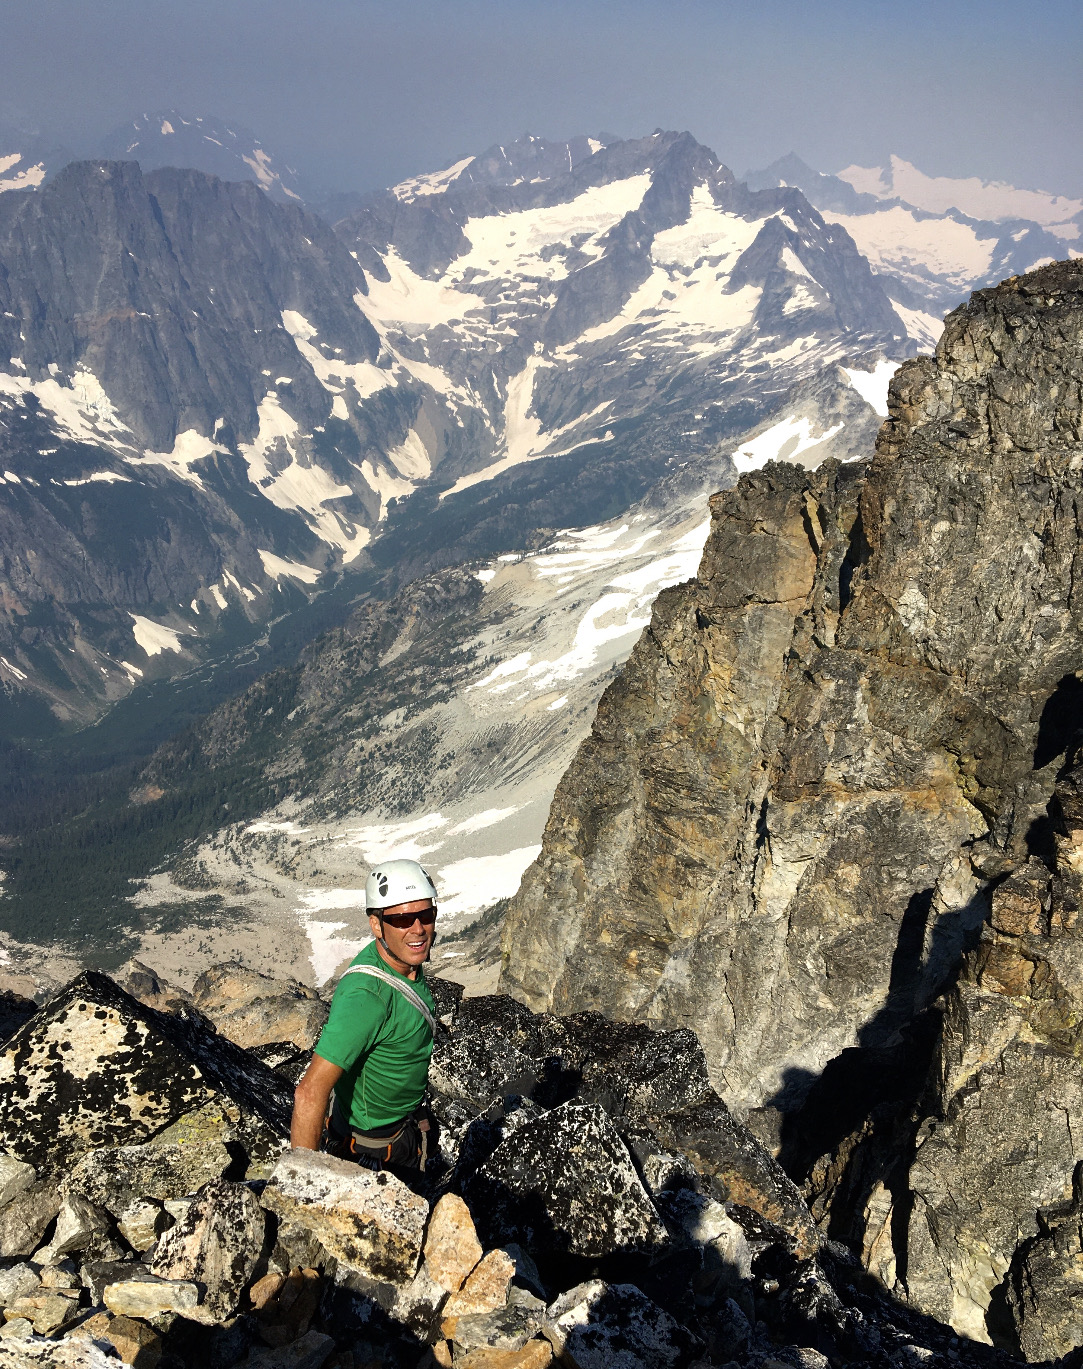
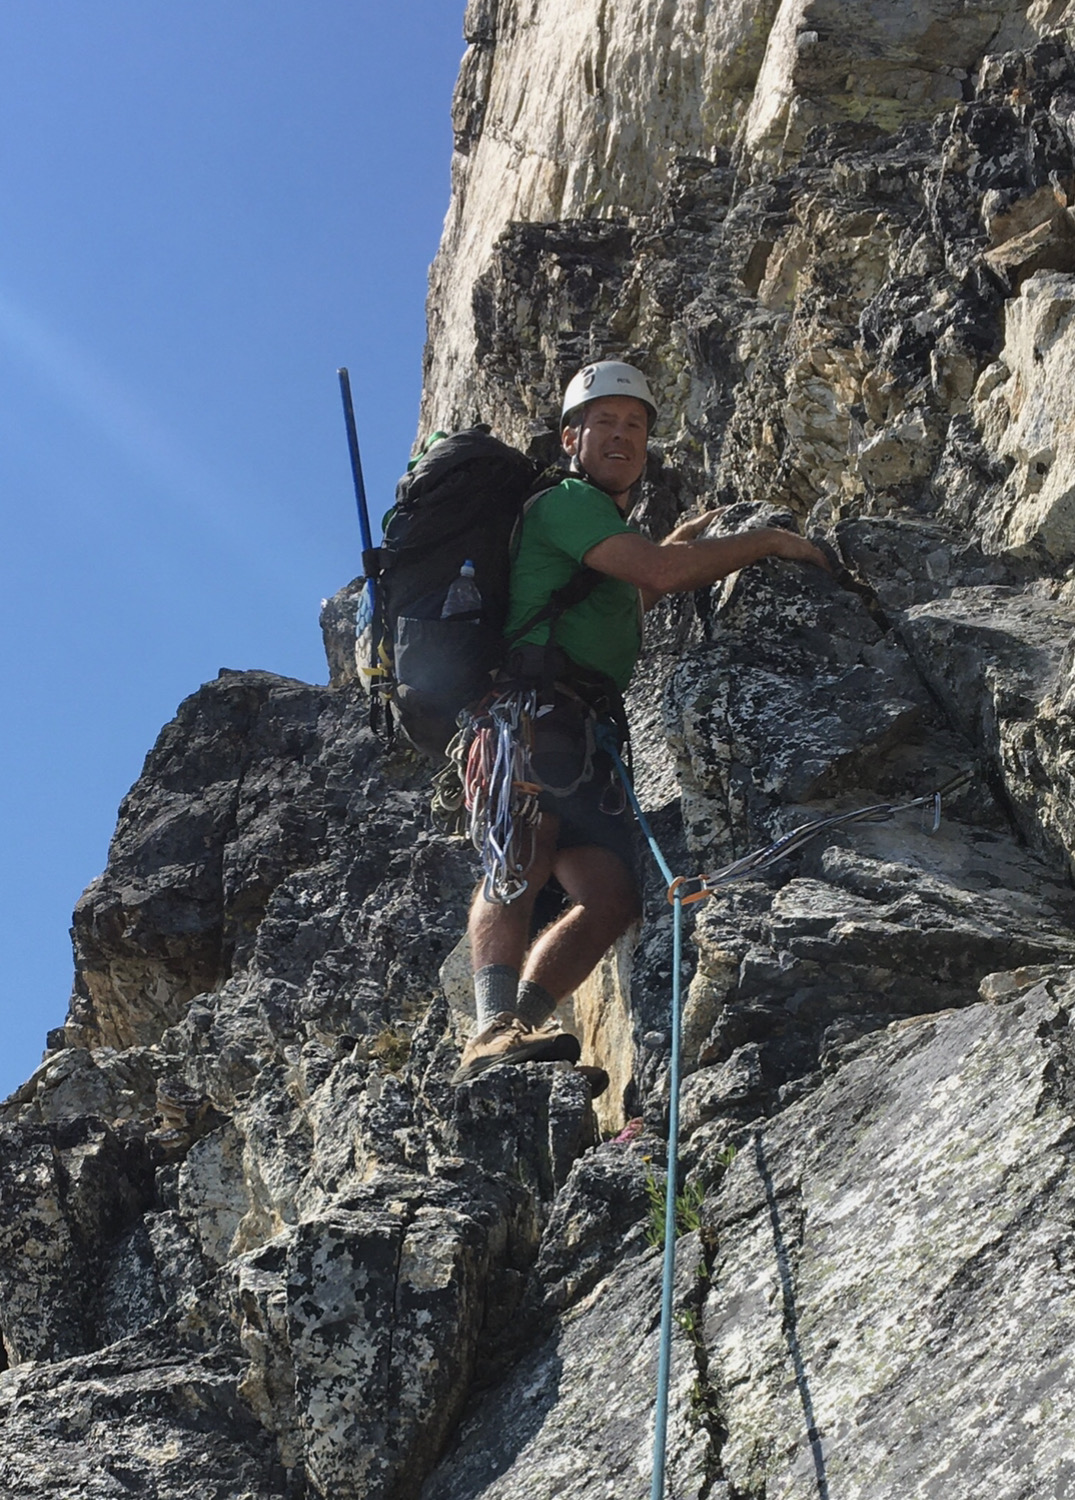
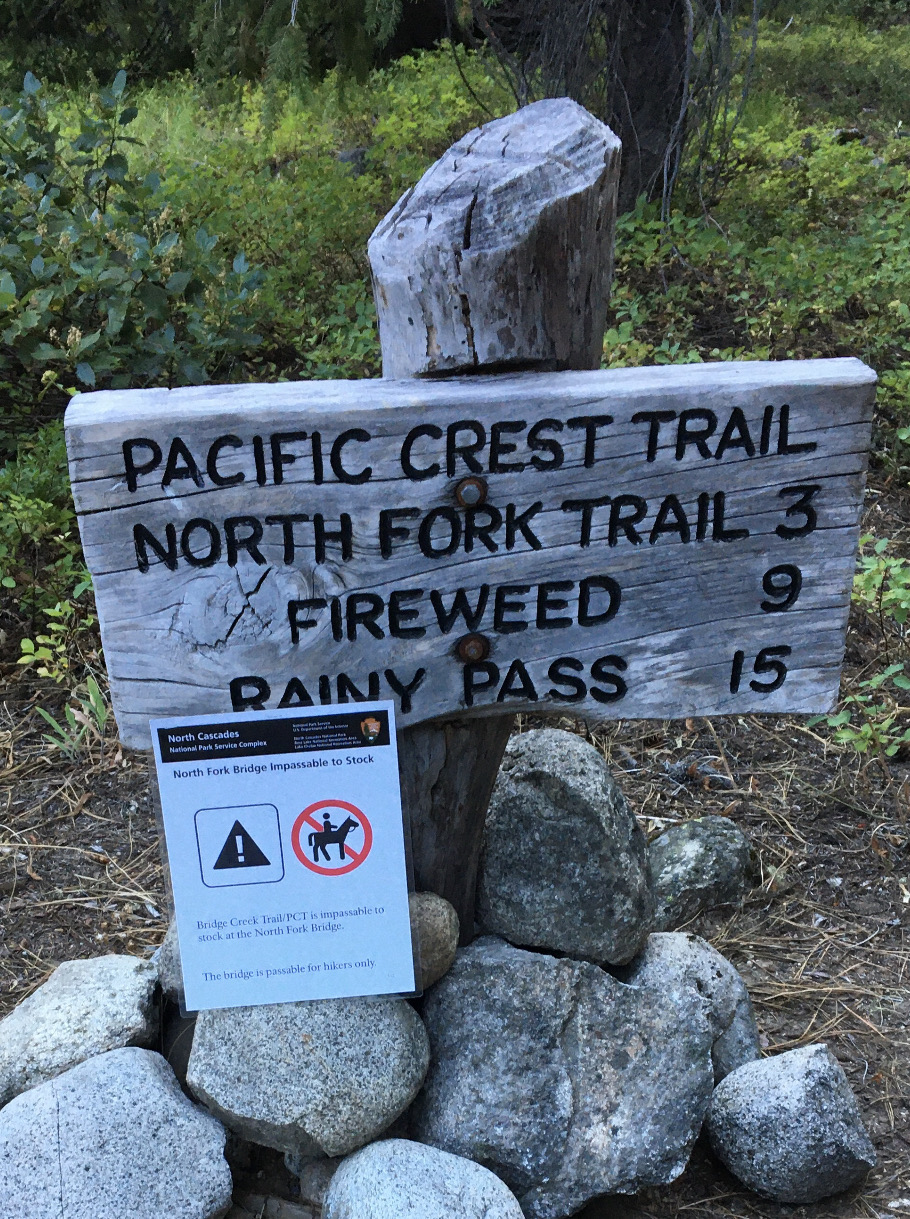
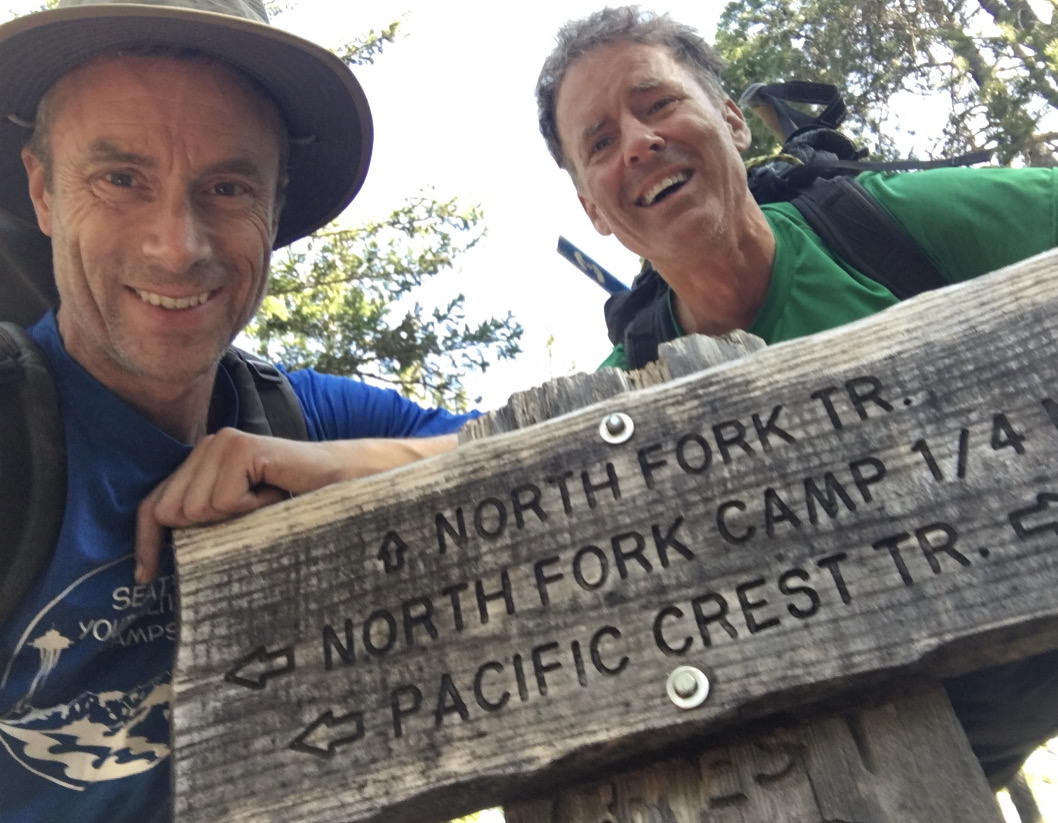
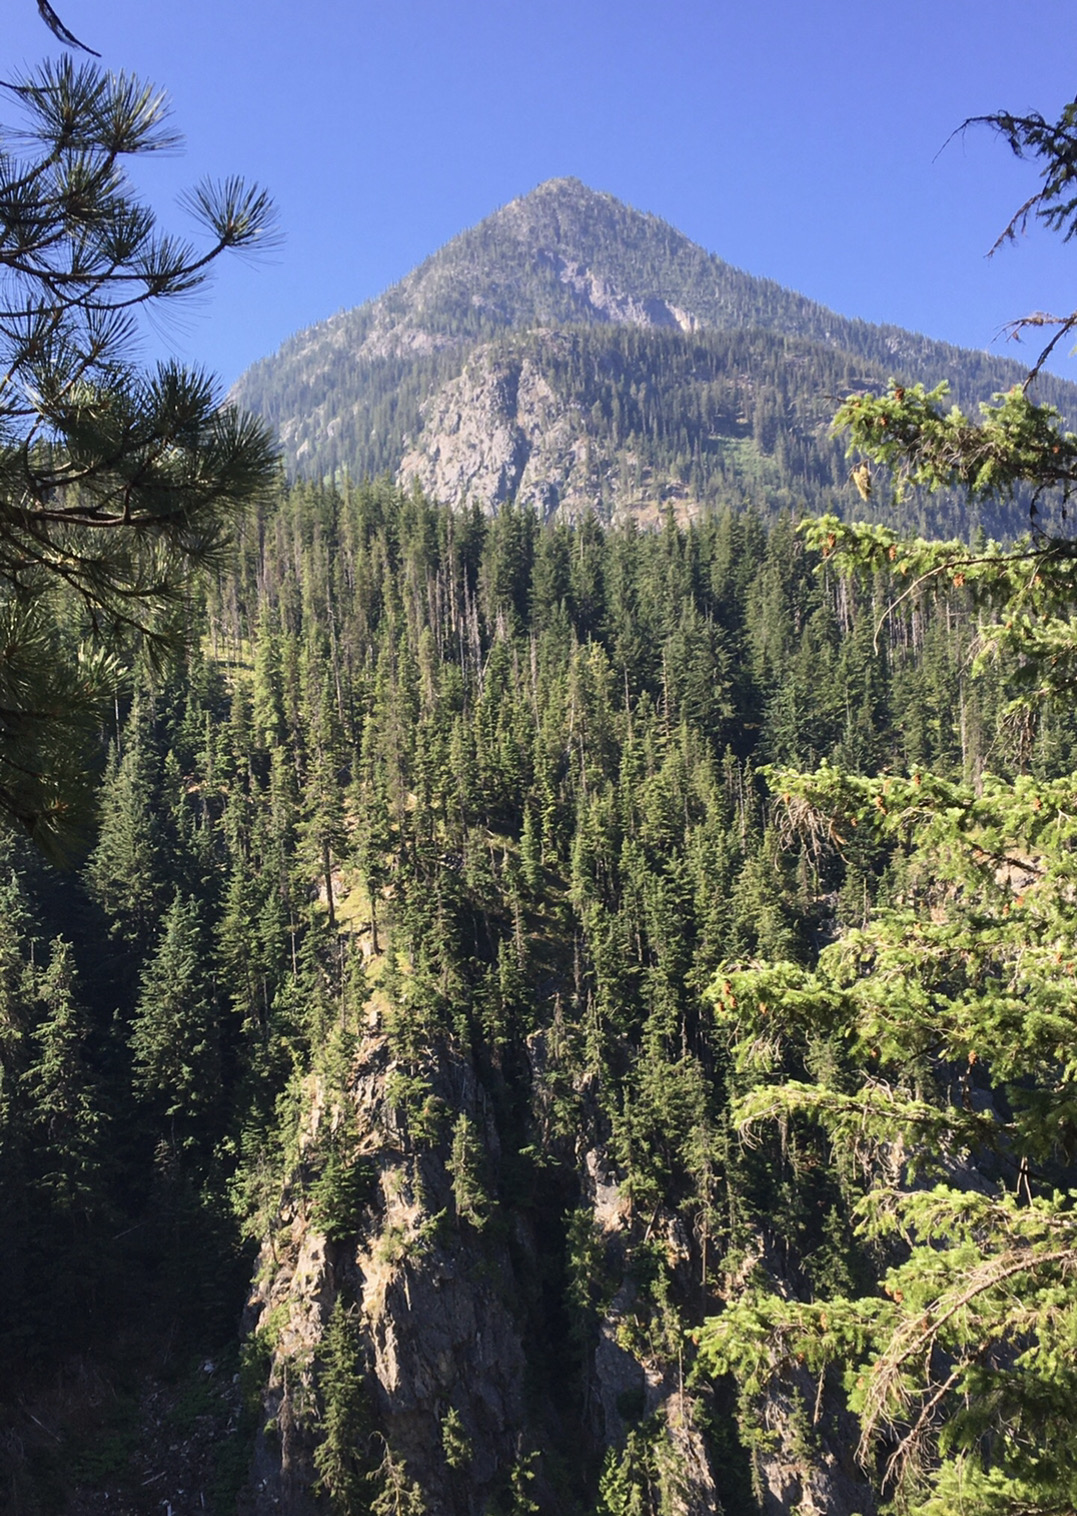
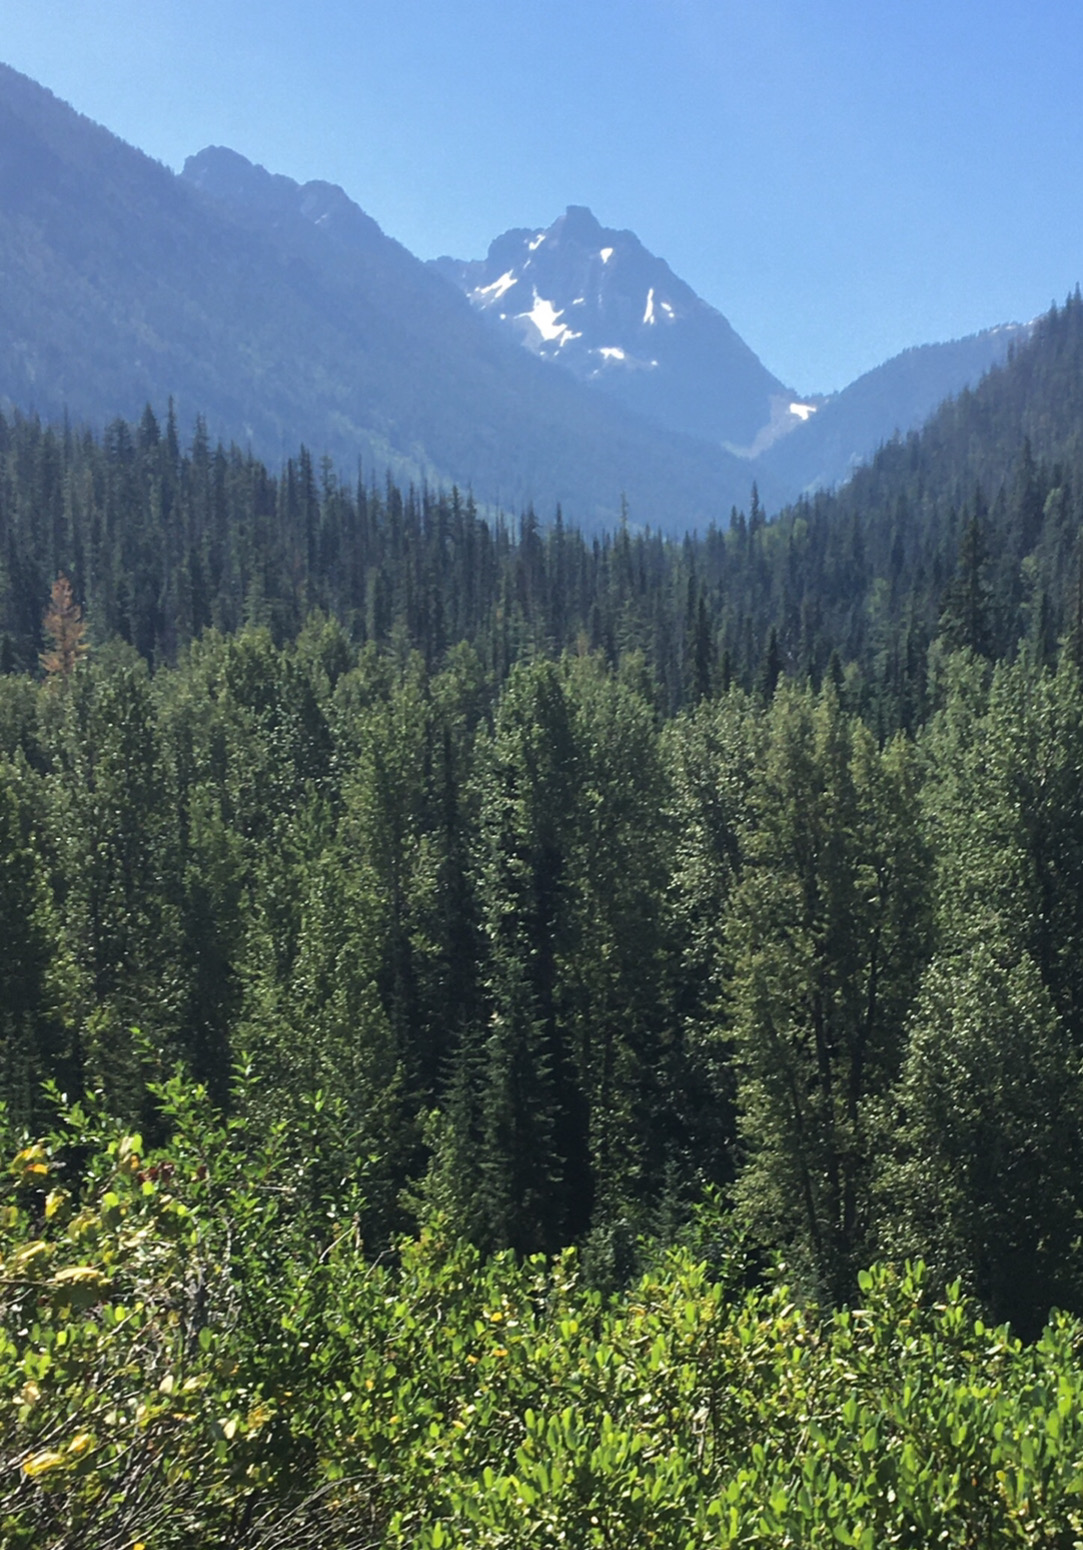
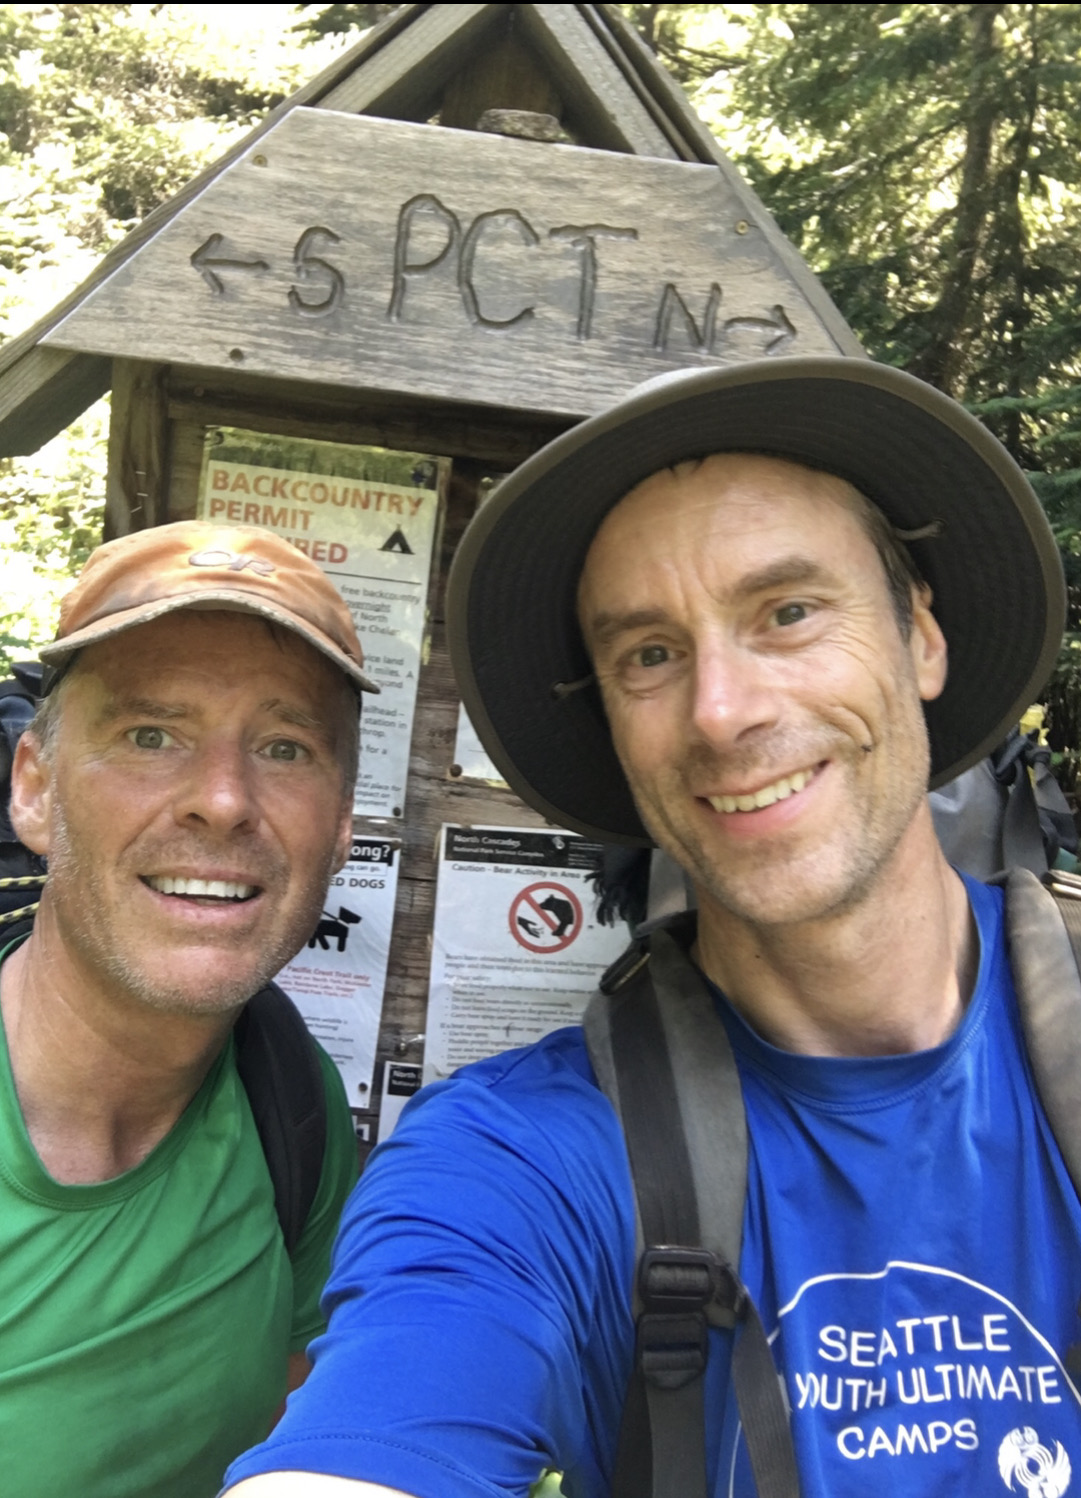
Trip: Goode Mountain - Megalodon Ridge Trip Date: 08/29/2021 Trip Report: Megalodon Ridge. An evocative name for an evocative climb on Goode Mountain, the tallest peak in the North Cascades National Park. Priti and I have been struck by its lore ever since we were students learning to alpine climb. It is another one of those mythical Cascades test pieces that rarely sees ascents (although it really should get more attention). Megalodon Ridge is the East ridge of Goode, joining with Memaloose Ridge and Goode Ridge from the Southeast before it reaches the summit. The climb ascends with foreboding views out onto Goode’s impressive North Face and the highly aesthetic, classic NE Buttress. Put up in 2007 by local legends Blake Herrington and Sol Wertkin over three days with recon by Dan Hilden, we were maybe the sixth known ascent. Dan and Jens Holsten made the second ascent in 2010 over a blistering 27 hour single push. FA TR: https://cascadeclimbers.com/forum/topic/53892-tr-mt-goode-megalodon-ridge-iv-510/?_fromLogin=1 Second Ascent TRs: - http://jensholsten.blogspot.com/2010/09/sound-of-goode.html - https://cascadeclimbers.com/forum/topic/76094-tr-mount-goode-megalodon-ridge-932010/ Other folks who have successfully put their hat in the ring include local heroes of ours: Alex Ford, Laurel Fan, Austin Siadak, Michael Telstad, and Sean Fujimori…all people we have no business having our names in the same sentence…which added to the improbableness of this climb. With new standards in moderate 5th-class choss tolerance, however, I think it’s time to lift the veil on this elusive climb. Named after the prehistoric behemoth of the ocean, fish-themed snacks are a must. 33.5miles and 8,500ft vert round trip make this climb a relatively chill 3-4 day outing, an ambitious 2 day outing if you’re a pro climber, and an unfathomable single push outing if you’re a demi-god. Being mere mortals, we did this as a casual 3-day outing with lots of time to spare. Since its inclusion in Blake’s 2015 “Cascades Rock”, those pages went unconfronted for six years until Michael and Sean posted of their adventure this past July, reigniting its possibility. Michael TR: https://cascadeclimbers.com/forum/topic/104101-tr-mount-goode-megalodon-ridge-07192021/ Michael had an amazing trip report that helped us immensely. The purpose of this TR is to sprinkle in some more micro beta if you choose to have less of an adventure. Strategy Tips The route could feasibly be done in 2 days by a very fast team of folks who are used to covering many miles of trail quickly. But it is actually a very moderate outing when done in 3 or 4 days. I'll outline all bivy options. You never really need to carry much water with you unless you plan to bivy on the summit. We chose to carry less water on the route, and skip the summit bivy, since it's just an hour or two down the SW Couloir to flowing water. The Goode Mountain summit bivy is truly remarkable and a destination in and of itself. There are two ledges at the very top which can fit four, then two more ledges 60m below the summit which can fit four more. Sleeping on top is REALLY COLD, however, and you can get away with bringing less clothes if you don't sleep on top. You really don't need to have a stove on this trip either since there is enough flowing water (unless the daily high's are below freezing in early season). We regret bringing a stove. Save every ounce In all of my anecdotal polling data, nobody has taken the alternate wraparound descent as described in Cascade Rock. Seems to be generally difficult and sketchy, requiring gnarly glacier travel and crampons. Most parties who do the NE Buttress go down the SW Couloir to Park Creek, and it's kind of nice to just take the normal descent and avoid any extra shenanigans. So...recommend just taking the normal descent. There is still some weirdness going down to Park Creek, however, and we had to check our tracks frequently. Many tracks are available on Peakbagger.com You can probably skip crampons and ice axe. The SW Couloir doesn't really require it, although you will find chill snow travel on descent. There is a snow ridgeline along Megalodon Ridge (the ski descent). Depending on the time of summer, you may be on top of the snow, in a moat, or in choss. If you're on top, you can probably get away with just belaying across if you're worried about the exposure. Pair down the weight!! We brought light glacier harnesses and loved it! We clipped gear onto our backpack waist straps and all draws went around the neck. There is really only 4 roped pitches. The descent is between 2 and 6 rappels depending on how much down-climbing you're comfortable with, so you don't really need a regular harness, unless you're bringing more than a single rack. A single rack .2-3 and a few small nuts is more than enough if you plan to solo <5.6 terrain. Bring more gear if you plan to simul. You can even skip the #3 if you are really confident at 5.9. Less is more. Headphones and downloaded podcasts make the 20 mile hike out go faster. Skip the chalk bag. Maybe bring a tiny tube of liquid chalk. If you're confident in climbing 5.8 in techy approach shoes, you could maybe skip rock shoes altogether. Cache beverages at Maple Creek on the way in so you have it on the way out! There are really just 3 mandatory pitches of climbing all stacked on the headwall, and two additional optional pitches (the rest is 4th class and low 5th). To start off, I personally highly recommend roping up at the top of Tower 1 for the downclimb to the first notch since it is megaloose 5.6 downclimbing with mega exposure (Note: the FA party rappelled 50m to the south, not recommended). Then unrope for the traverse up/over/around gendarmes until the headwall pitches (4th class and low 5th). Bypass gendarmes logically via lines of least resistance (sometimes up and over, sometimes around). Rope up for the three headwall pitches to the summit of the SE summit: 1) 35m of LOOSE 5.7-5.10 (depending on which variation you chose), 2) 30m of 5.9 (technical crux of route) with many hand cracks, 3) 70m (simul) of LOOSE 5.7 to the SE summit (you can stop before summit if you don't want to simul). Then unrope again, pass over the "ski descent" snow ridge, downclimb talus Gain the rocky ridgeline again and pass a prominent col (not to be confused with Black Tooth Notch) Continue on the rocky ridgeline, passing a piton and an old sling (5.6), continuing mostly on top of the ridgeline to the final gendarme just before the Black Tooth Notch. Blake describes it as "a pitch of well-protected 5.10 climbing on the north side of the crest down into the notch" (Michael down-graded it to 5.9). We found a 4th class route on the South side (climber's left) which bypassed the gendarme entirely, if you want to lose cool points. Cross over the Black Tooth Notch (the SW Couloir), notice the rap stations, then an exposed traverse (cairn here) meets up with the NE Buttress. Three 30m pitches of exposed and quality 5.6 (angling severely up and right) take you to the summit. We downclimbed the 5.6 back to the Black Tooth Notch, skipped the first rappel at the notch, scrambled down 15m to the next rappel, then made two raps (30m then 15m). I highly recommend not trying to downclimb these two rappels...just take them, it's steep, loose terrain. Approach Start from Bridge Creek Trailhead (just East of the Rainy Pass Trailhead) and take the PCT south, leaving it for the North Fork Bridge Creek trail (this is also the approach for the NE Buttress of Goode). Starting from the Bridge Creek TH instead of Rainy Pass saves an extra mile of hiking. Our downloadable tracks once you leave the North Fork Bridge Creek Trail and getting up on to the ridge are here: https://www.peakbagger.com/climber/ascent.aspx?aid=1748765 Pictured above is the turnoff from the North Fork Bridge Creek trail which matches the tracks. It's an obvious boot pack that quickly turns into easy bushwhacking through alder. This turnoff is approximately when the trail is closest to the creek. Pictured above is the minor bushwhacking (knee to waist) over the creek (hidden) to gain Megalodon Ridge (right side of the frame). The bushwhacking will be much harder if it's just after a rain. When you get close to the creek the bushwhacking goes over head just for a little bit. We took lessons that Michael and Sean learned and stayed on land through the dense brush, heading upstream for ~50ft along the creekbed instead of attacking the creek directly and wading upstream in the icy water. When you pop out onto the creek, don't get in the creek until you confidently see your egress point. You don't want to spend more time in the creek than necessary. I got screaming barflies just from our straight-line crossing. If you don't see the super obvious exit point (circled in red above), keep plowing upstream through the dense brush. Once on the other side of the creek, a little more bushwhacking takes you to a rocky stream bed which you follow for a ways until you reach a chockstone waterfall (get water here). You have 2-4hrs until you reach water again (approximately 1/4) up the ridge, so you don't need to carry too much. Chockstone Waterfall. Follow ledges high and right until it opens up. Follow the stream until you get to the chockstone waterfall (where the green track diverges). Cross the creek over to the North (Megalodon) side and skirt the the top of the canyon wall until it opens up...don't go straight up the ridgeline. Follow open slopes up to the top of the ridgeline until you get to a small saddle and a 5.4 buttress. This 60m buttress is super loose and scary, so spend some extra time looking for a safe route up. Above the buttress is a few more hours of 4th class hiking and scrambling to the top of Tower 1. There is mild exposure on the final ridge to the top of Tower 1, but it's easy climbing. From the top of the buttress to the water are several really good bivy sites. At the water source is flat snow and boulders (not really a good, dry bivy site), so find something lower down on the ridge and hike up to retrieve water. This is the last flowing water until the Goode High Camp basin below the SW Couloir (1-2hrs after reaching the summit), so fill up a day's worth or more if overnighting on the summit. You also have the option to melt snow at "ski descent" along the way if you chose (no flowing water here). 4th class ridge to the top of Tower 1. Looking over onto the North Face and the awesome NE Buttress route. Neat pic. Pano of Memaloose Ridge as it meets up with Megalodon at Tower 1 on the right. From the top of Tower 1. The "headwall" is on the left (SE Summit) which contains three roped pitches. The FA party rappelled 50m to the South then traversed to the notch (not recommended). Other parties since have downclimbed. The downclimbing is loose, exposed 5.6...highly recommend roping up! You can unrope again down at the notch (~2 rope lengths). Unroped, easy scrambling up/over/around several gendarmes to reach the headwall. The traverse from Tower 1 to the SE Summit Headwall. Once at the headwall, choose your own adventure. The first pitch is 30-60m (depending on how high up you start belaying) of 5.7-5.10 climbing. Belay under an obvious corner on a ledge. The second pitch is quality 5.8 or 5.9 (the technical crux of the route) hands and fists for 30m to a ledge below the final ridgeline to the summit. The third pitch is 70m of unprotect able 5.7 ridge climbing (stacked, loose blocks) to the SE summit. You can stop short of the summit if you don't want to simul. Blake suggested the SE summit as potentially a good bivy, but I didn't see anything that looked mildly comfortable. Press on to the summit or the Goode High Camp. Looking down from the belay at the top of Pitch 1. You can see the ridge traverse down to Tower 1 (center), Megaladon Ridge (left), and Memaloose Ridge (right). Could be a neat trip to take Memaloose into Megalodon Ridge! Looking up at pitch 2. Start in the corner and traverse left. From here we unroped for the rest of the way (and we're not very good rock climbers either). You can also put on your approach shoes for the talus. Cross over the snow (it is all choss now). Melt snow here if needed, no running water. Downclimb talus and start back up the ridge, staying mostly directly on the ridge. The final obstacle is a gendarme guarding the Black Tooth Notch. Go right (North) for the 5.10 original route (5.10 or 5.9) or downclimb and go around left (South) for our 4th class cheater-bypass route to gain the Notch. Once at the Black Tooth Notch, traverse right (North) to join the NE Buttress. Climb 3x 30m pitches of quality, exposed 5.6, trending right to reach the summit. You can then make 3 traverse-y rappels back down to Black Tooth Notch or downclimb. Recommend taking two rappels down Black Tooth Notch (30m, then 15m) since it is very loose and steep. Here is a really good description of the descent: https://engineeredforadventure.com/goode-mountain-northeast-buttress/ Looking back at the final gendarme before the Black Tooth Notch at the two route options (photo taken from Black Tooth Notch looking East). Photo of the entire Megalodon Ridge! By now, you should be able to pick out "Tower 1", "SE Summit", and "final gendarme". I'm not going to overlay them for you . The photo is taken from the ledge traverse on the North side looking back at Black Tooth Notch. Another view of the "final gendarme" and the 5.9/5.10 downclimb on the North (shady) side that we did not do. Fish-themed snacks are mandatory. Looking up from the normal descent towards the SW Couloir. A long, but straight-forward descent down to Park Creek Trail and 20miles on trail back to the car. There is a good High Camp bivy site with water in the basin below the couloir: N 48.48025° W 120.91991° Gear Notes: single rack .2-3, few nuts, 8 single alpine draws, 3 double alpine draws, light glacier harness Approach Notes: Tracks: https://www.peakbagger.com/climber/ascent.aspx?aid=1748765
 1 point
 -
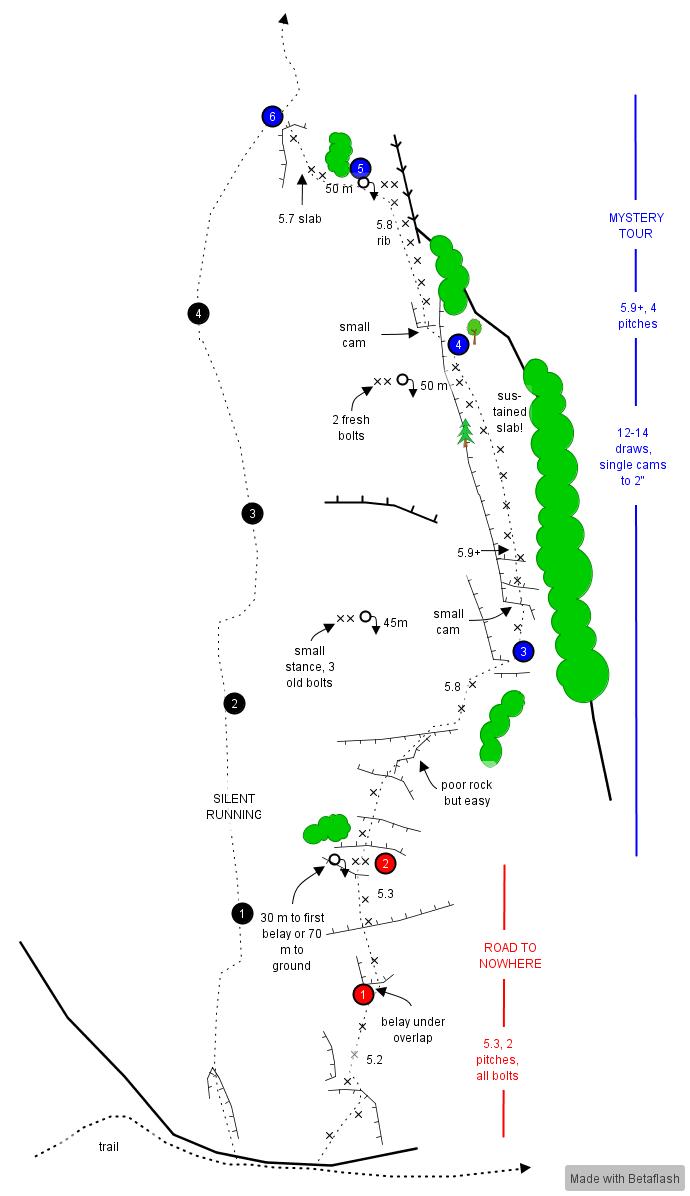
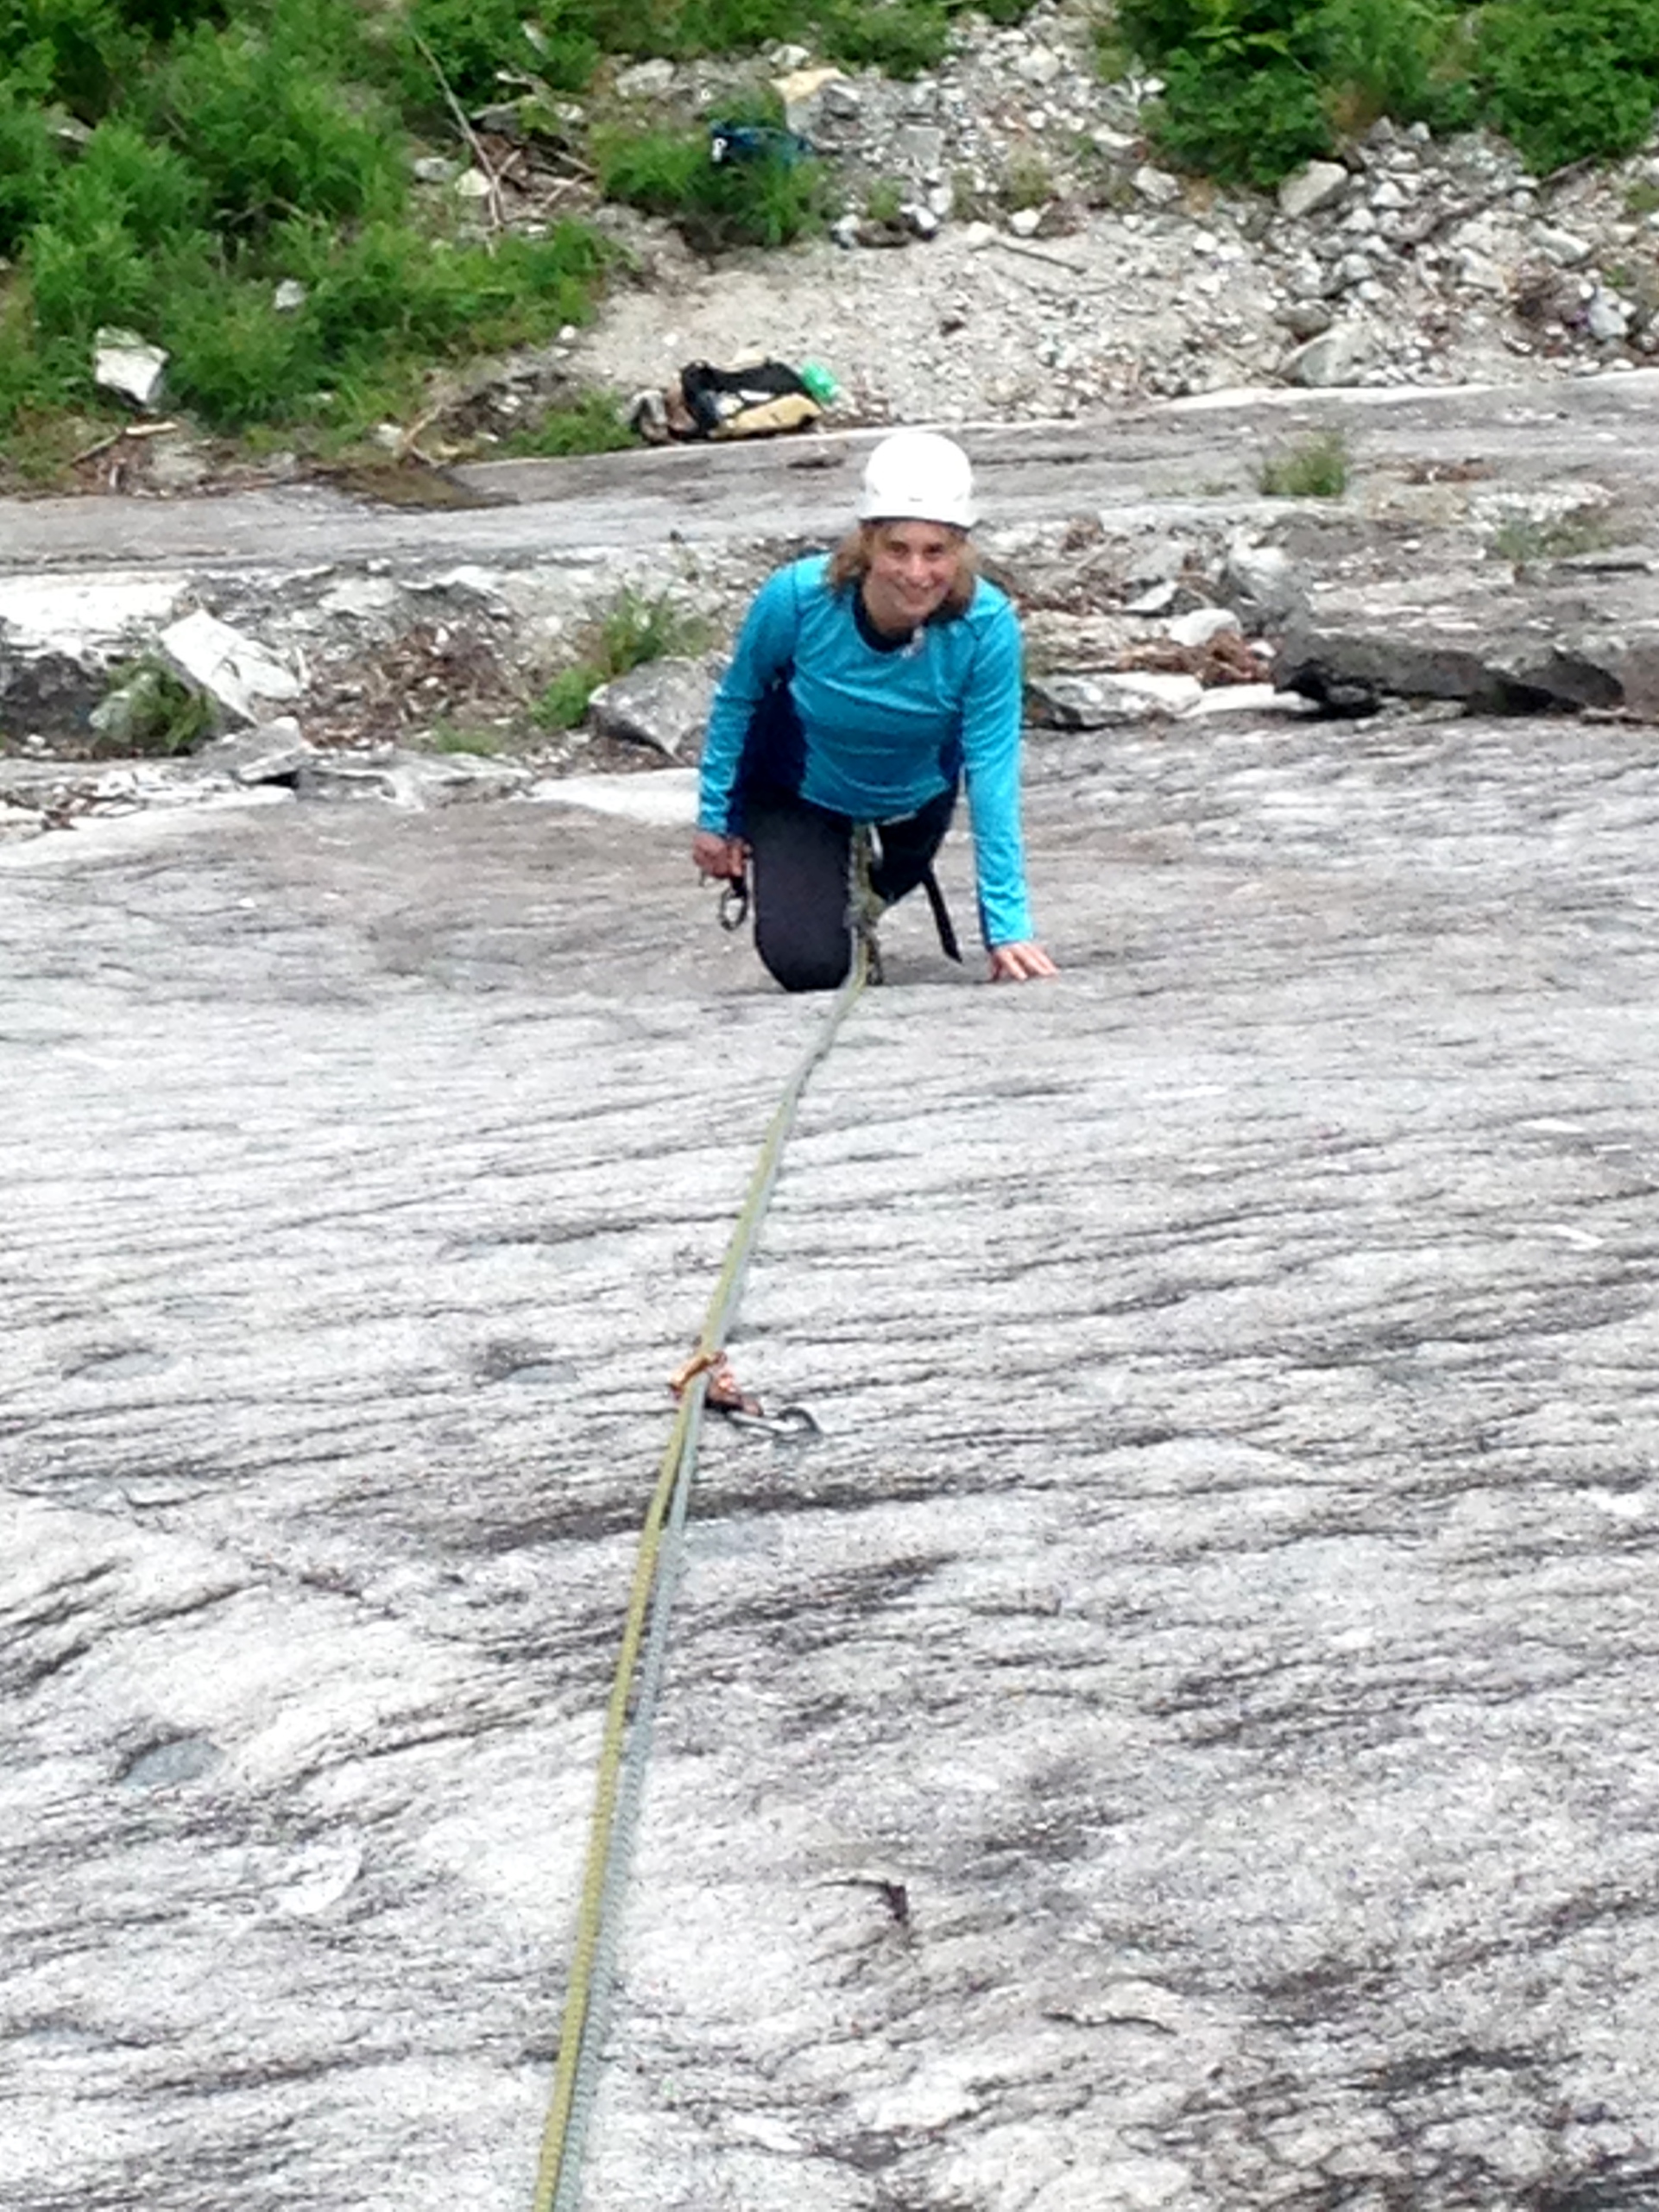
Trip: Three O Clock Rock - Road to Nowhere, Mystery Tour Trip Date: 07/20/2018 Trip Report: Hey, a quick update about some new options up at 3 O’Clock Rock...for those that care. Year after year, it seems that over 95% of Washington climbers find zero appeal in hiking to easy slab climbs. But that just keeps the quiet experience for the dedicated regulars and newcomers. Andy and I added an easy (~5.3) slab climb a bit right of Silent Running that features two short pitches. Road to Nowhere has proven a fun outing for novice slab climbers. If you want more challenge, try it hands free (though the FHFA has already been done). You will need 5 draws and one 70 m rope to get up and down. If you’re up for a more difficult experience and/or other parties are lined up for Silent Running, continue another 4 pitches up Mystery Tour, which wanders to the right-hand edge of the North Buttress (topo below). The second pitch of Mystery Tour (5.9+) is the standout, featuring 58 m of very sustained slab climbing. From there, continue up the rounded buttress at 5.8 and then a shorter pitch that ties into Silent Running. More beta and gear details are below. Currently, the easiest descent is down Silent Running, though we hope to have a separate rappel route tuned up in the near future. Leah on Road to Nowhere, pitch 1 Matt approaching the rounded buttress on pitch 3 of Mystery Tour. Climbers below and left are one pitch up Road to Nowhere Route topo Gear Notes: For Mystery Tour, you'll want double 60s, a single set of cams to 2" and ~14 draws. About 80% of pro is bolts. Approach Notes: FS road #2060 to Eight-mile trailhead, then 45 minutes of easy uphill (standard 3 O Clock Rock approach)

 1 point
 -
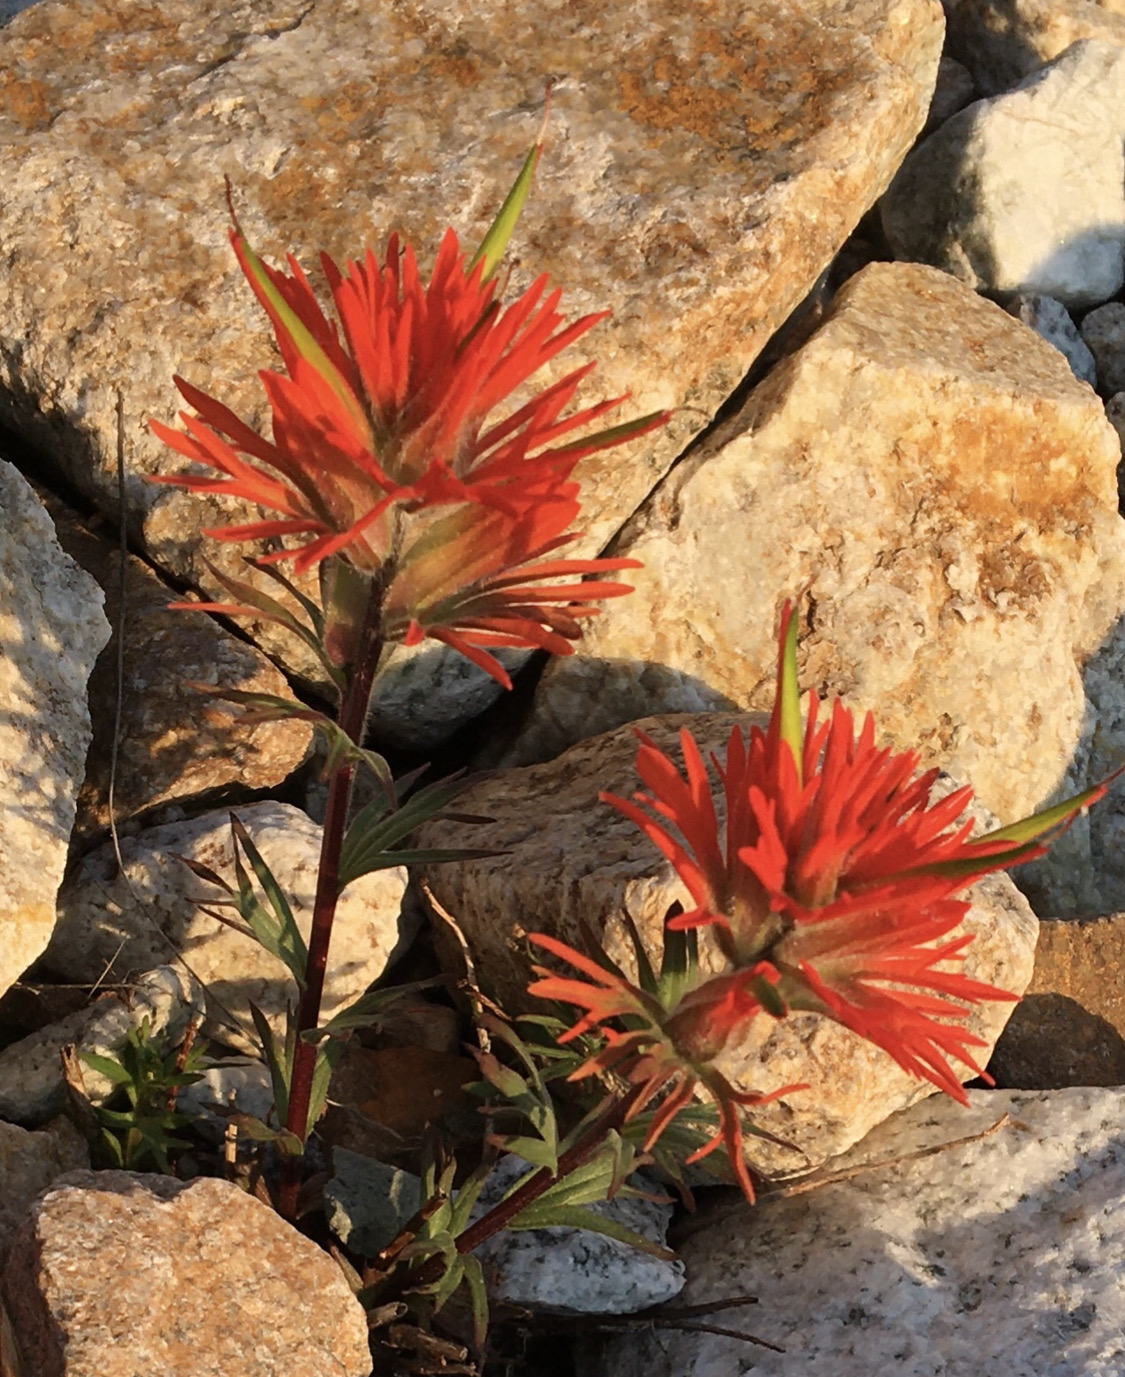
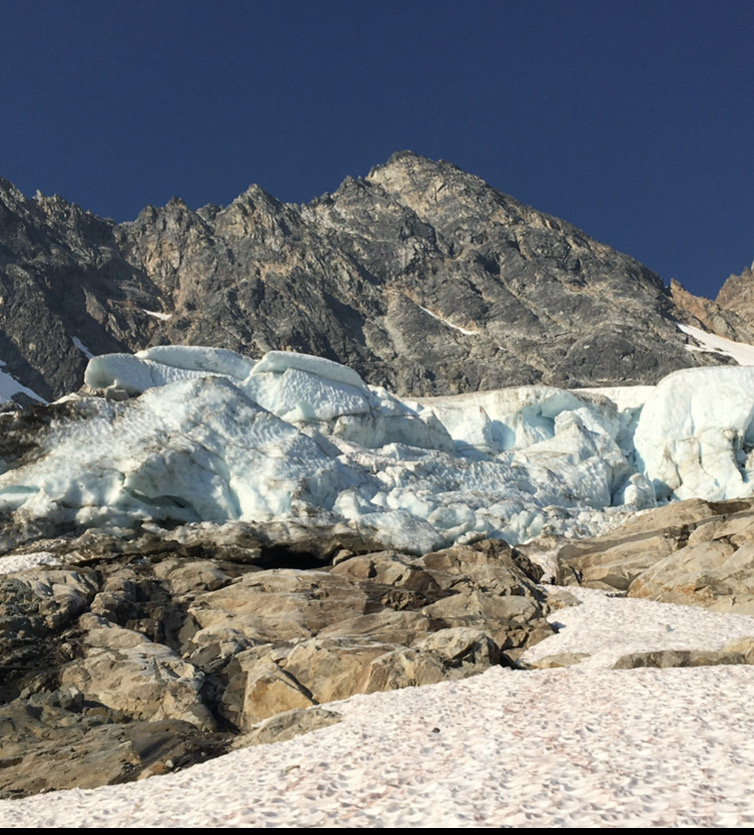
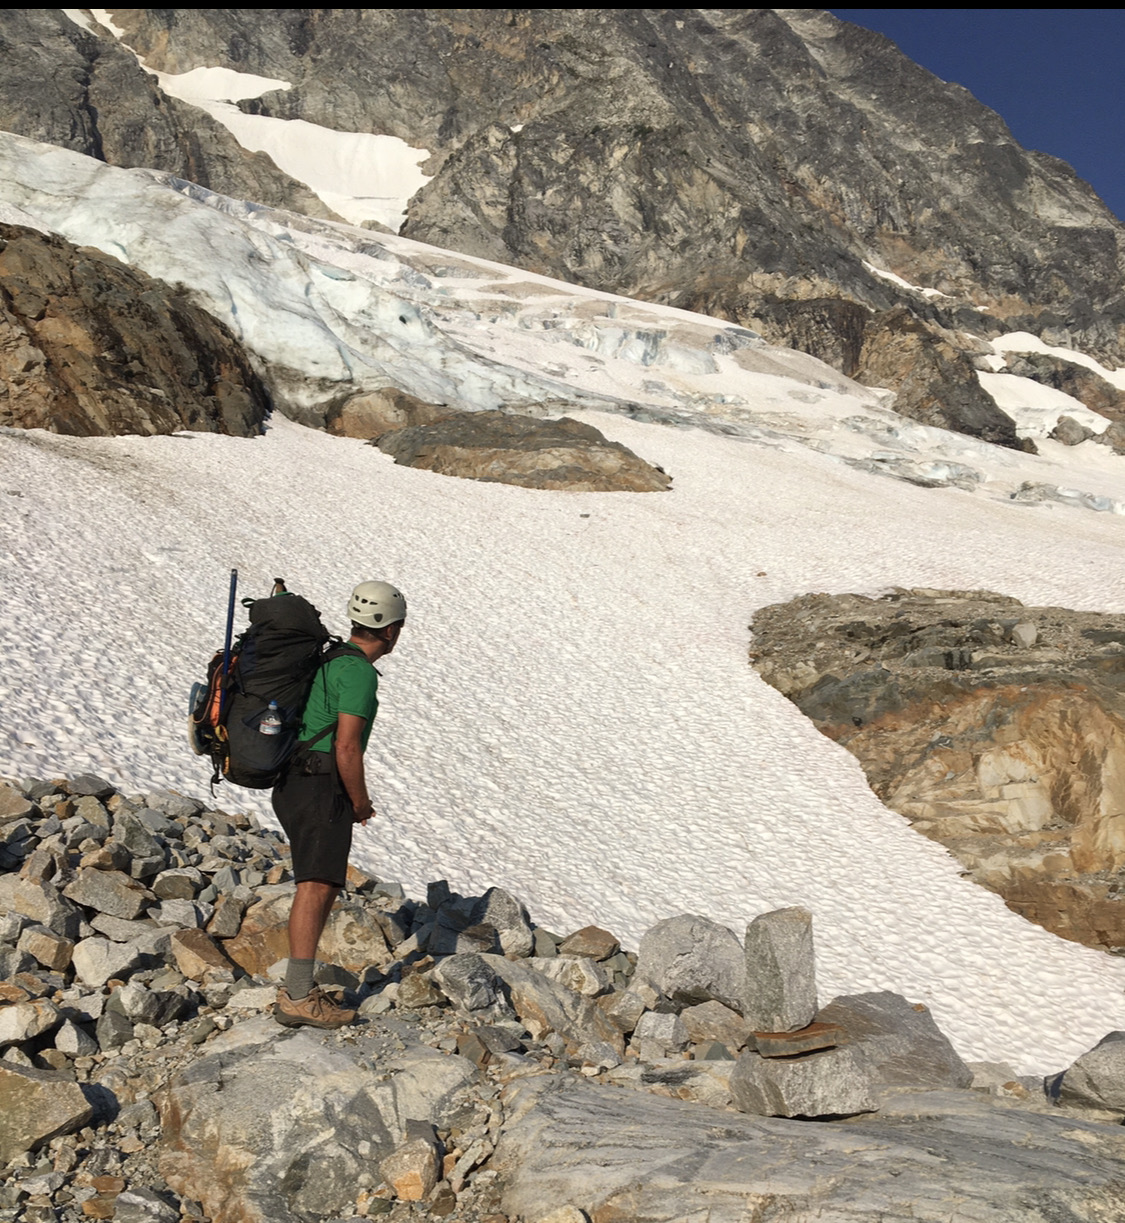
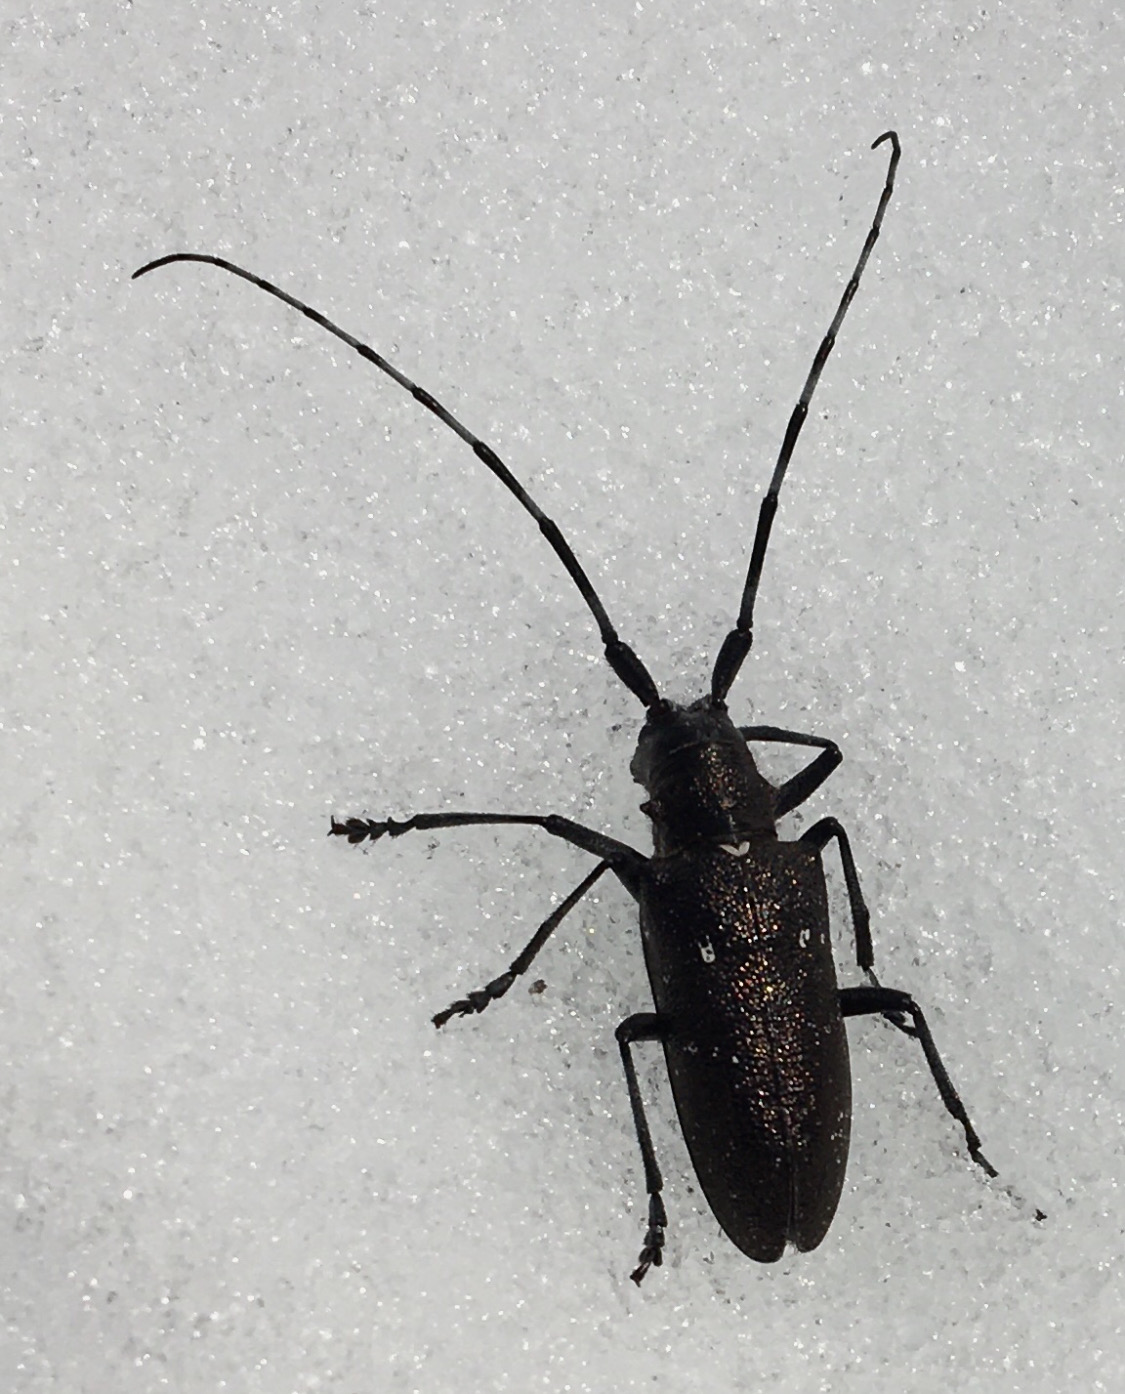
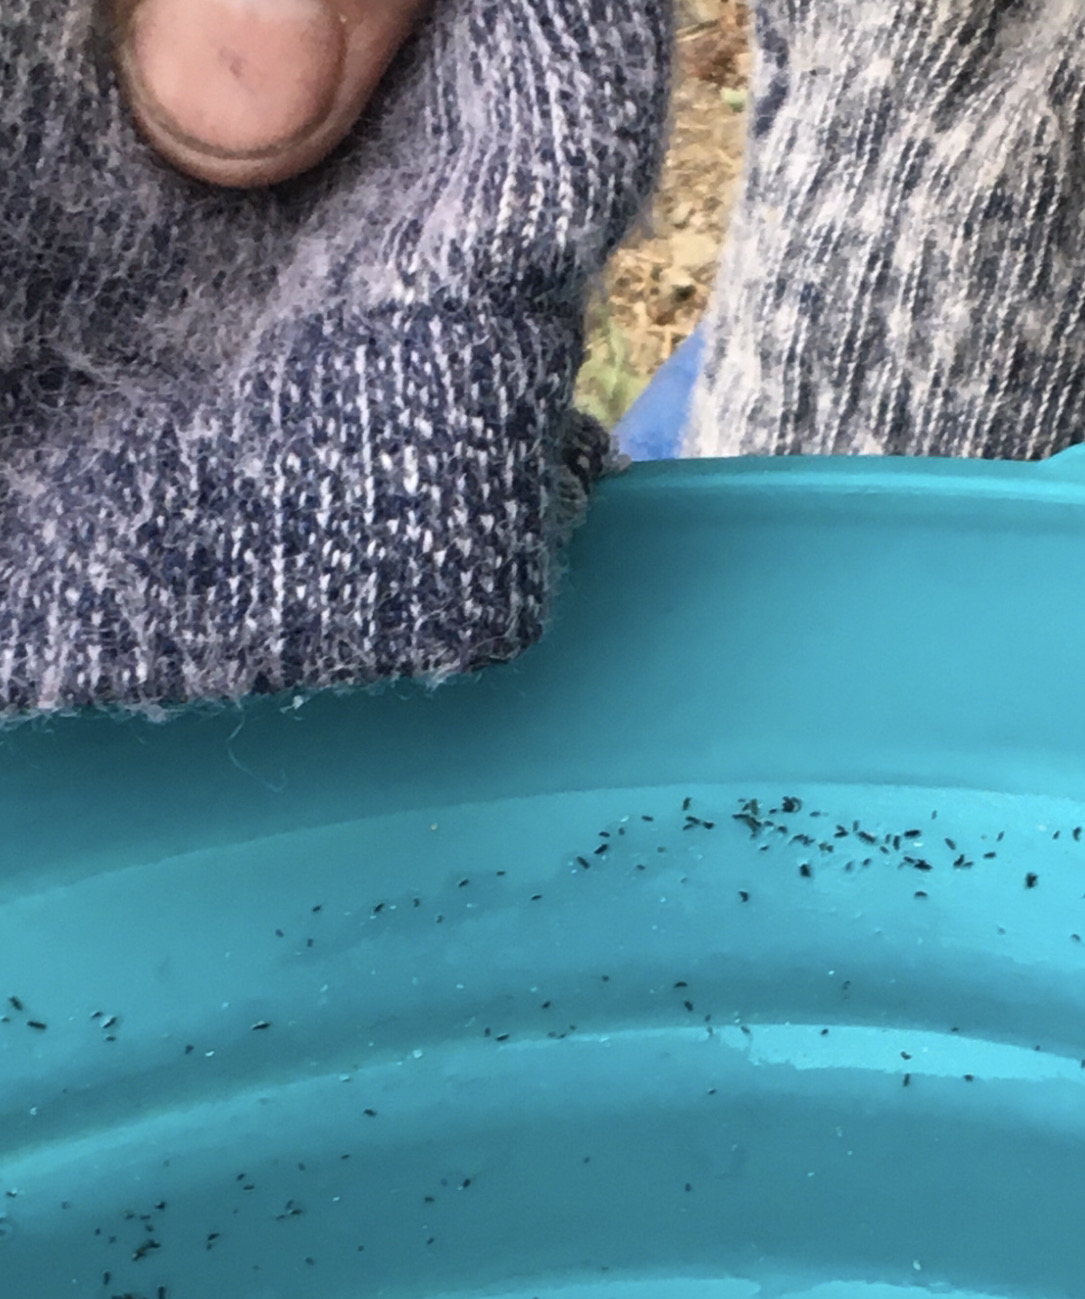
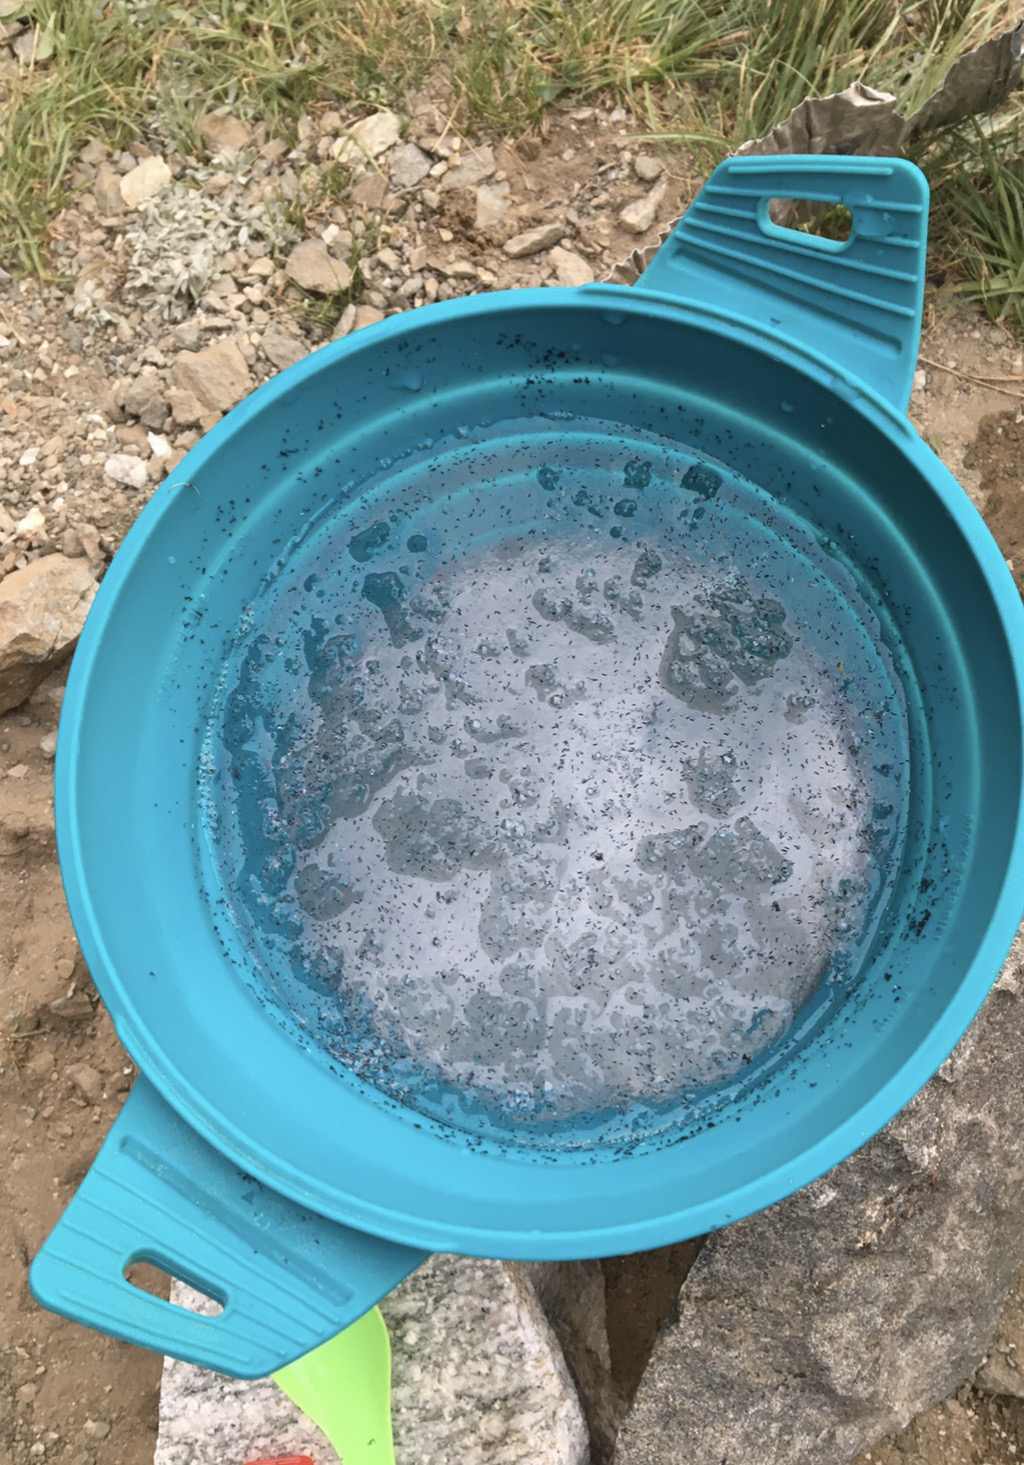
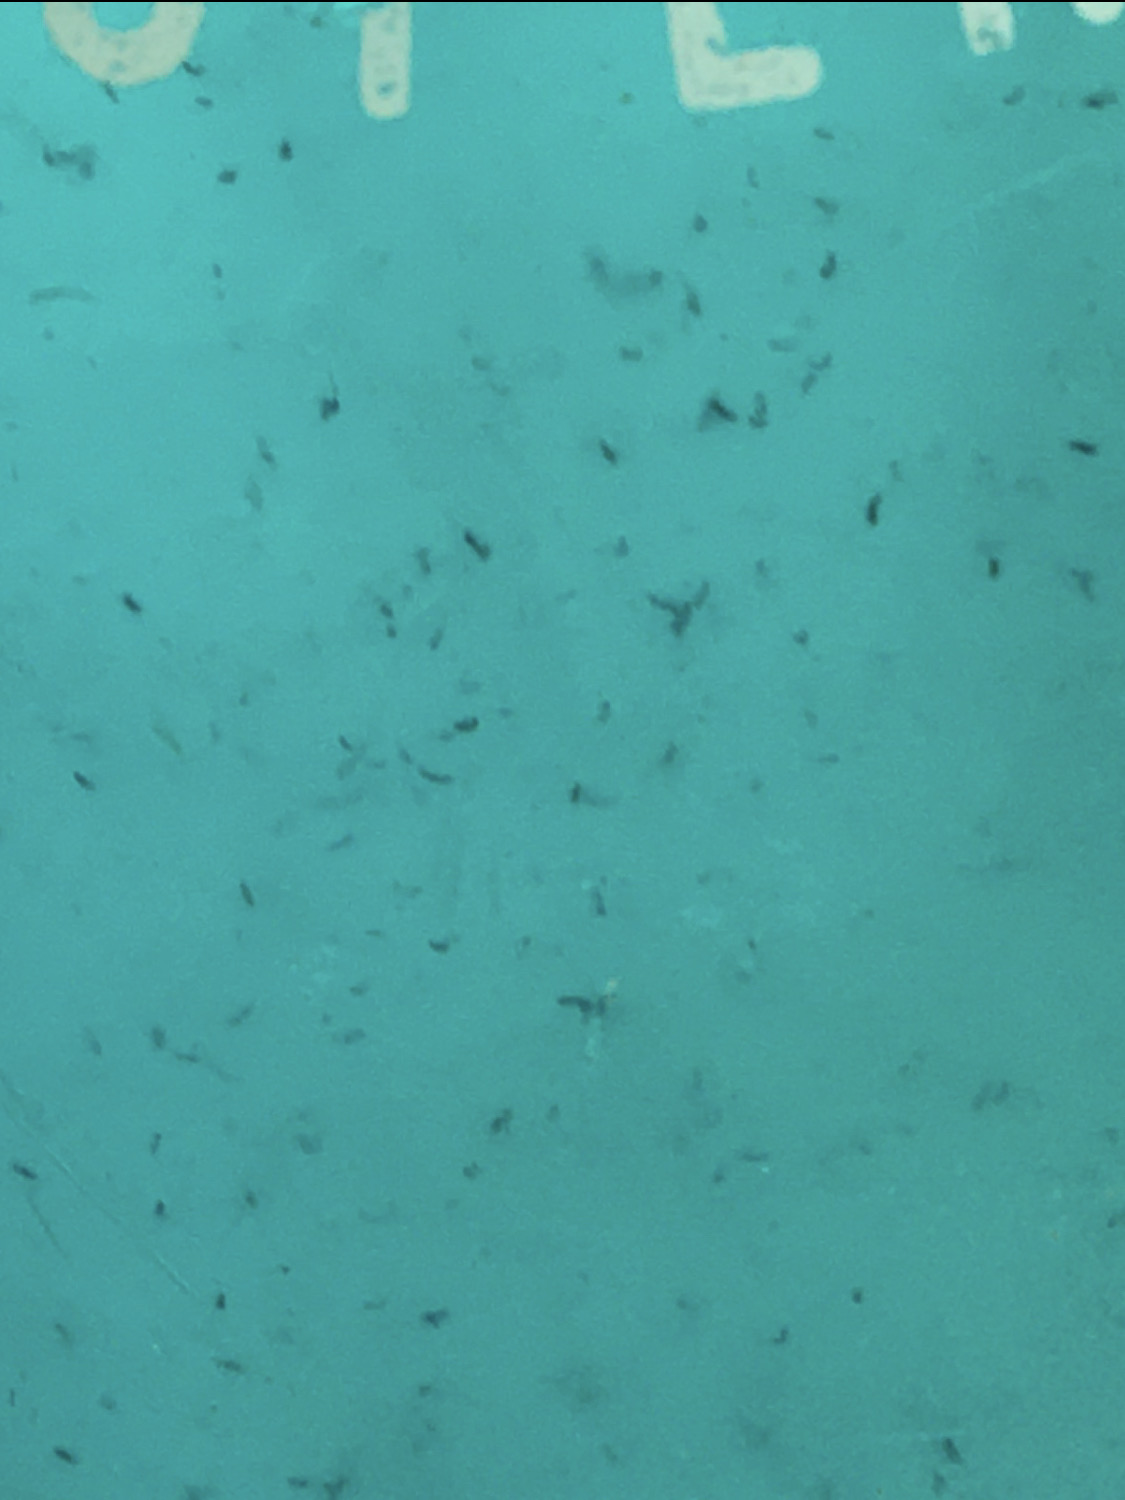
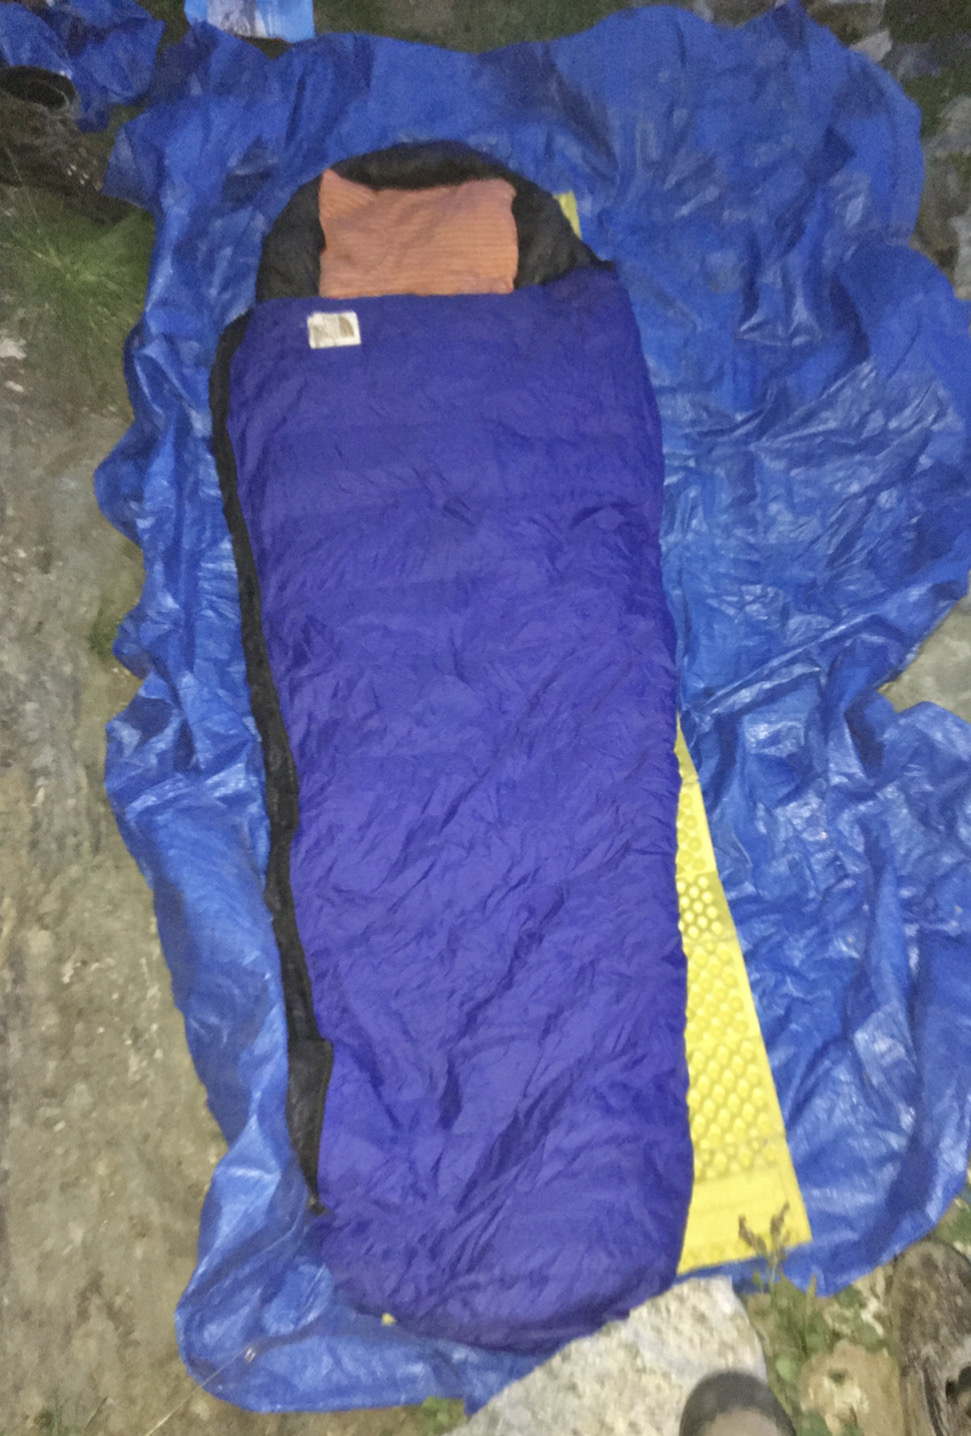
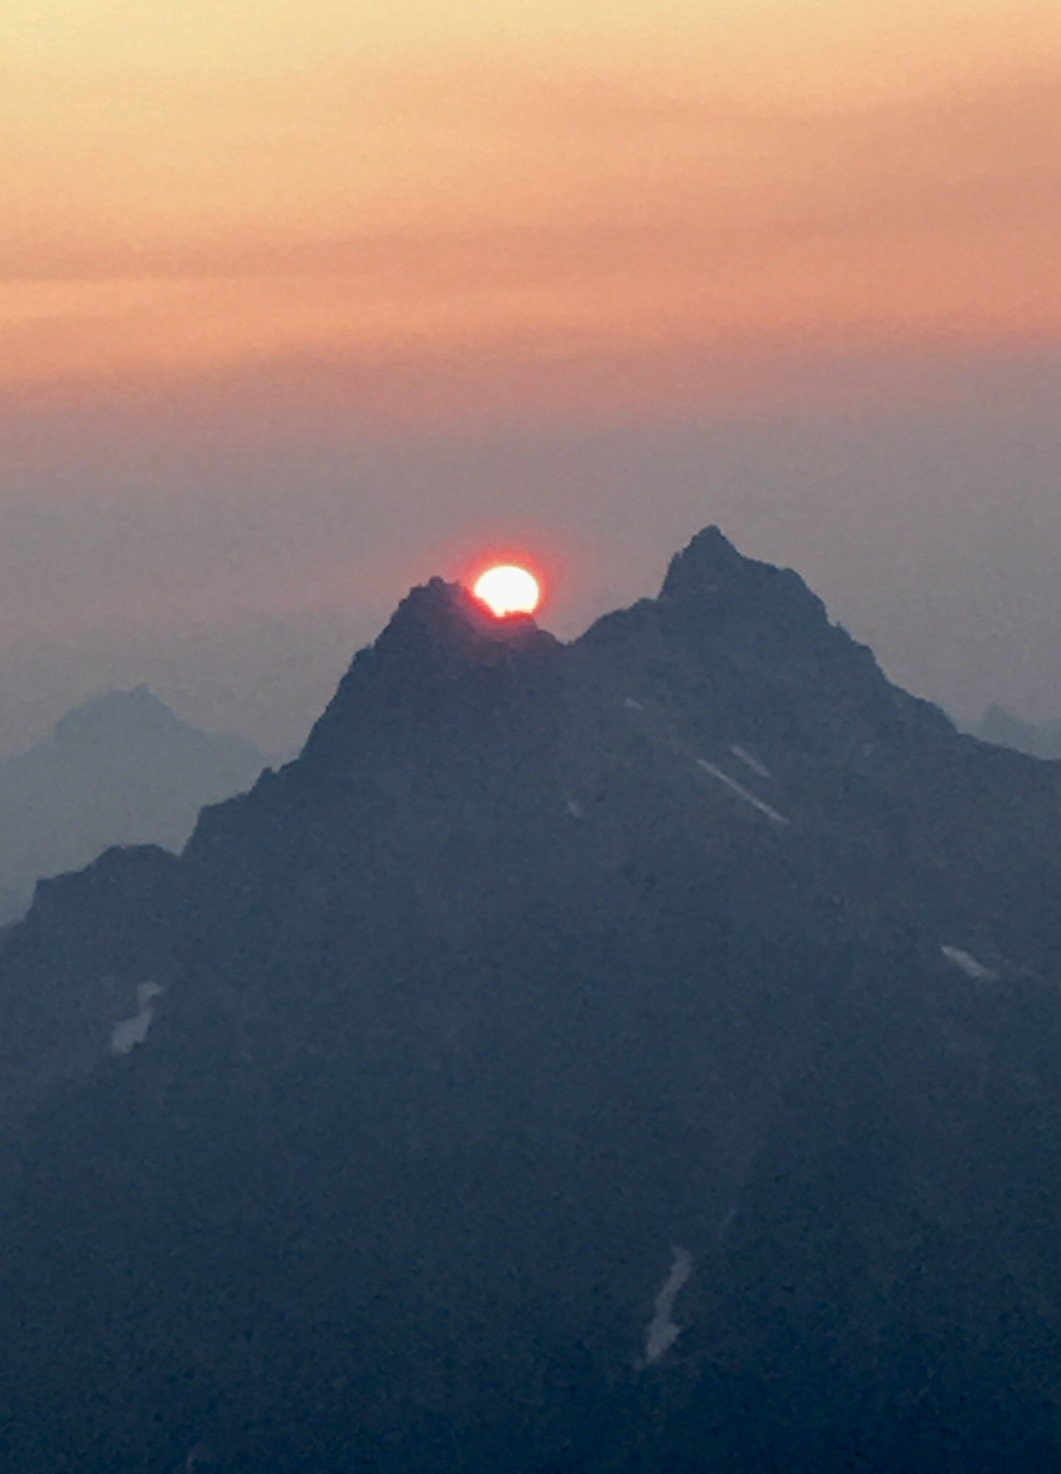
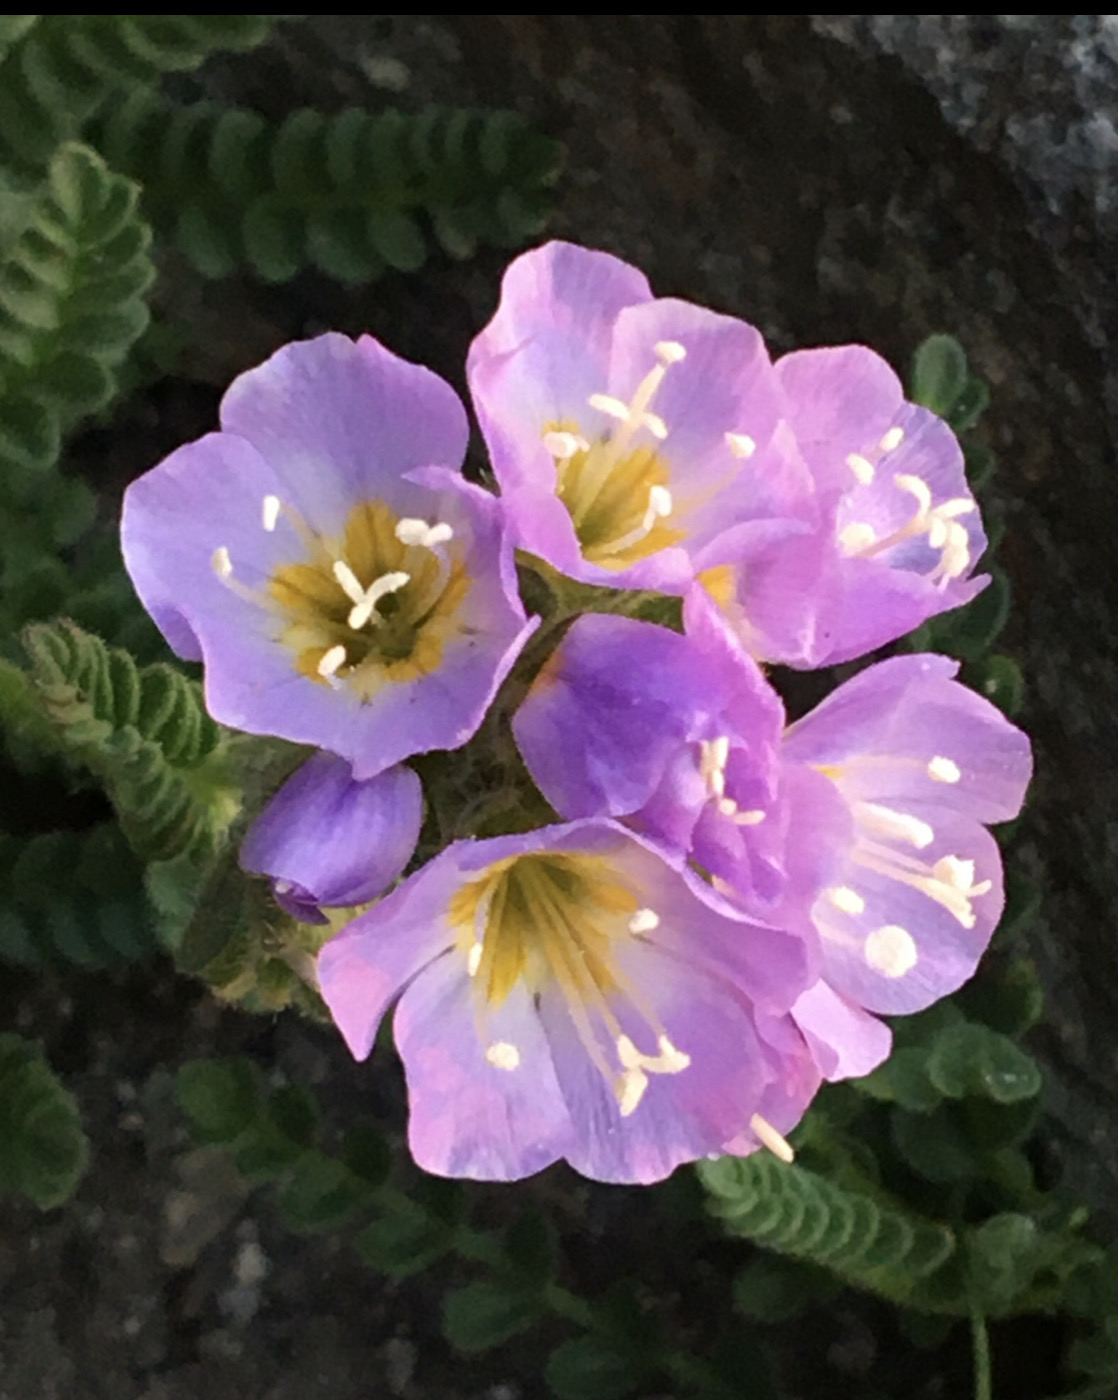
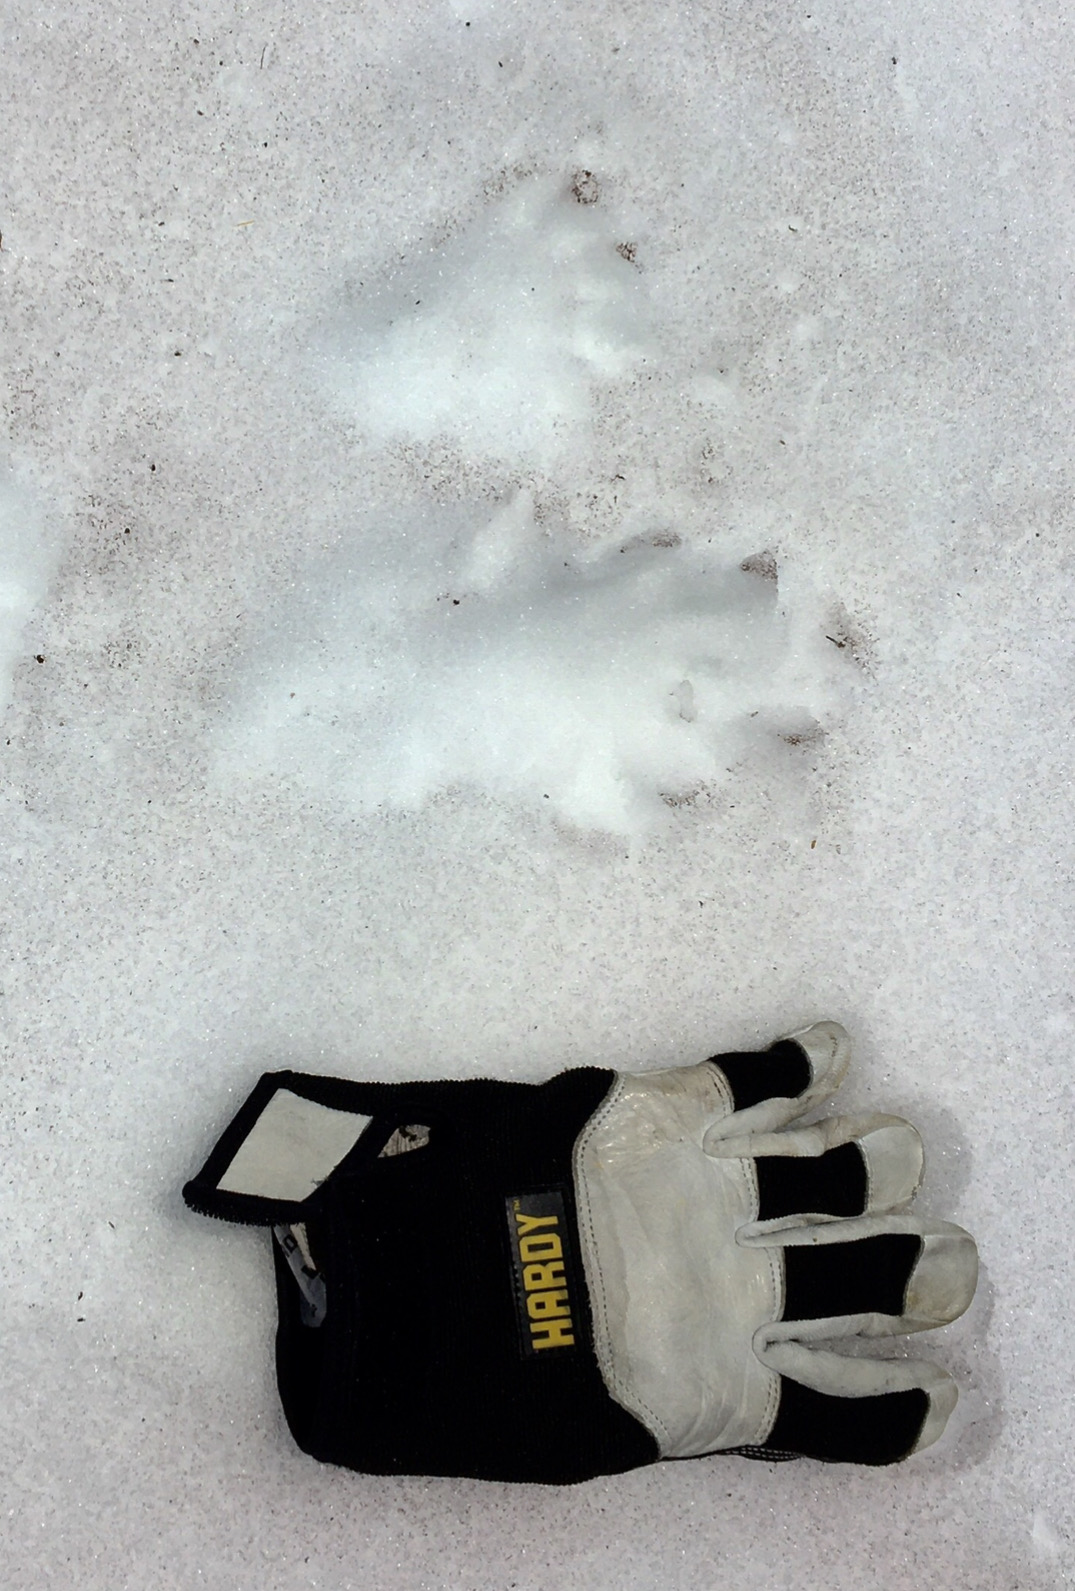
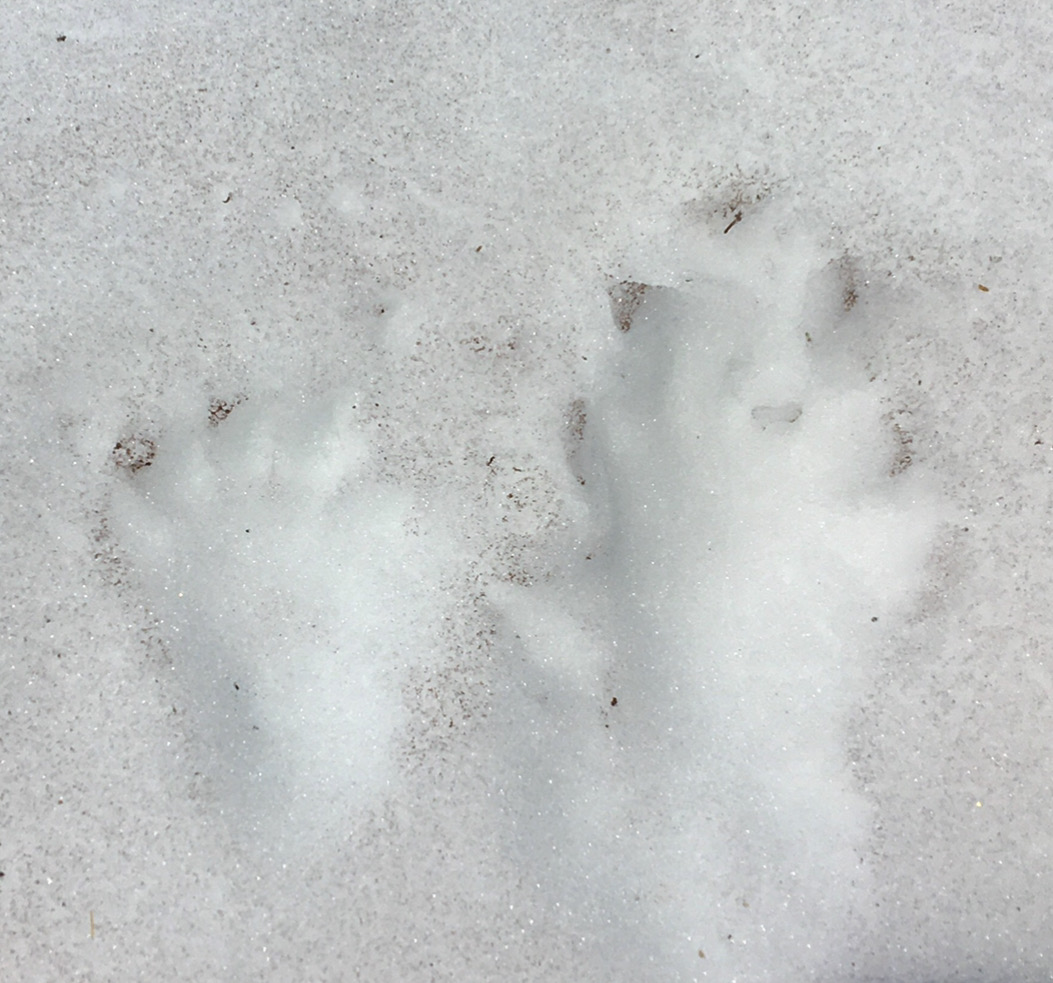
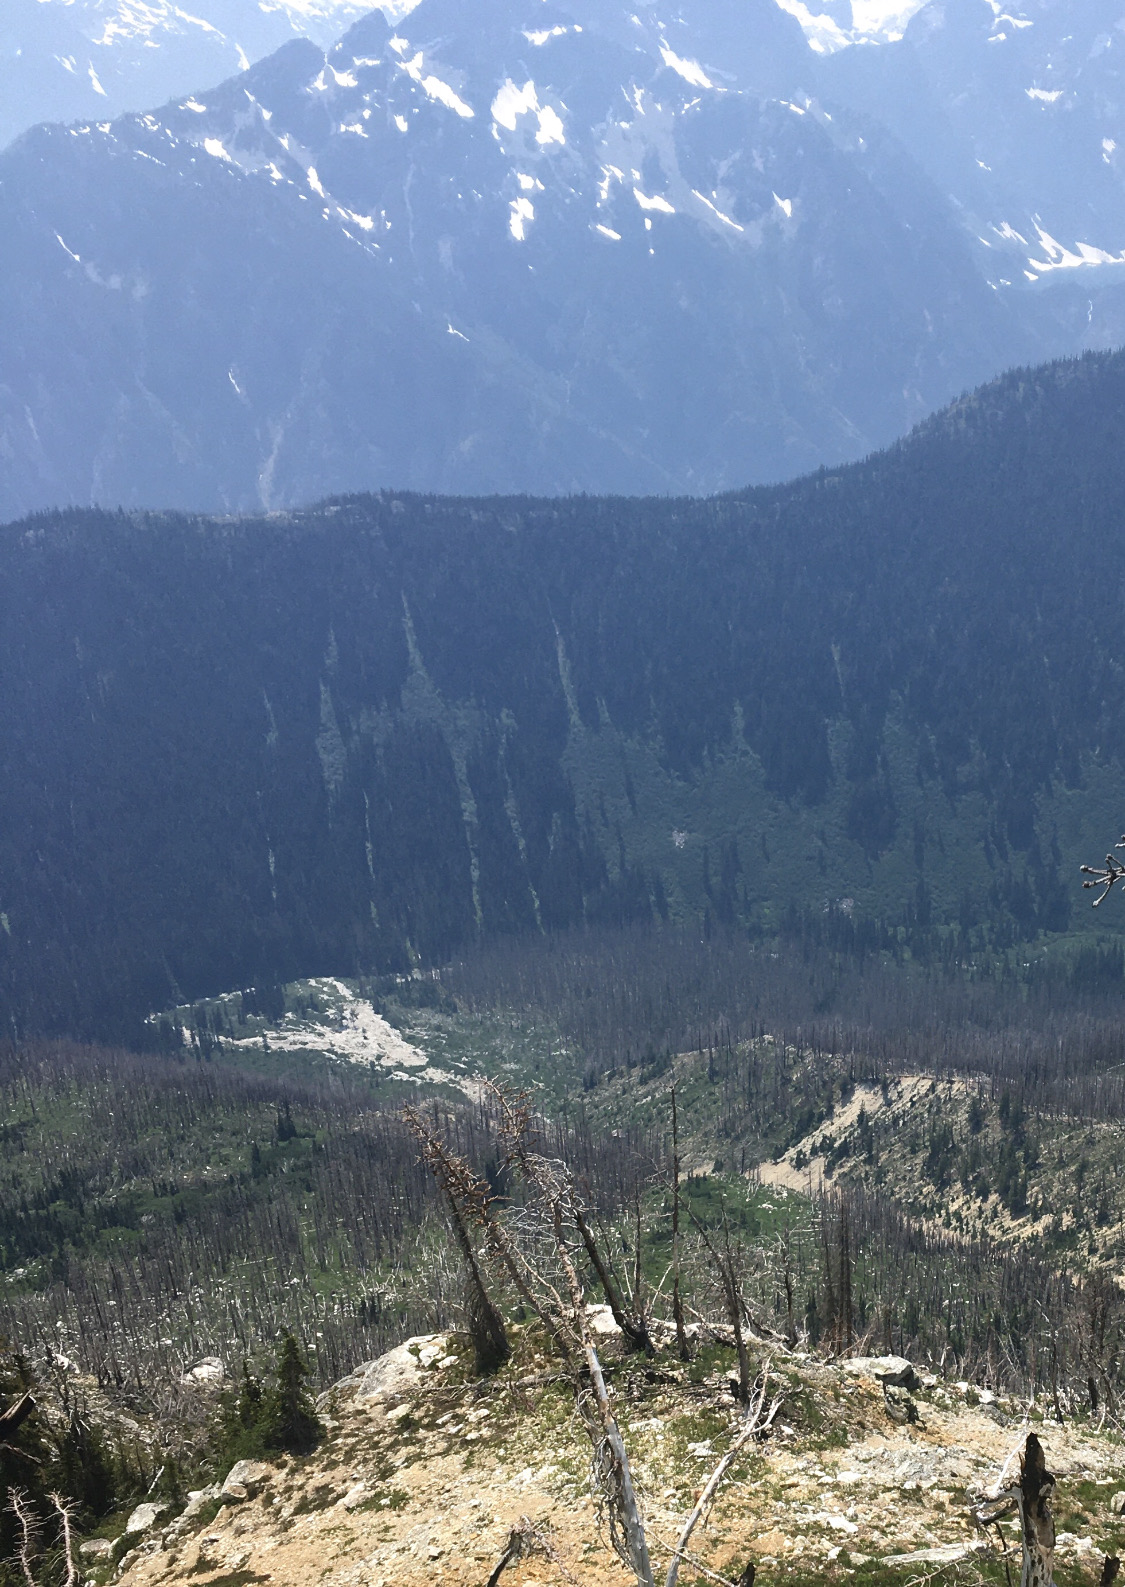
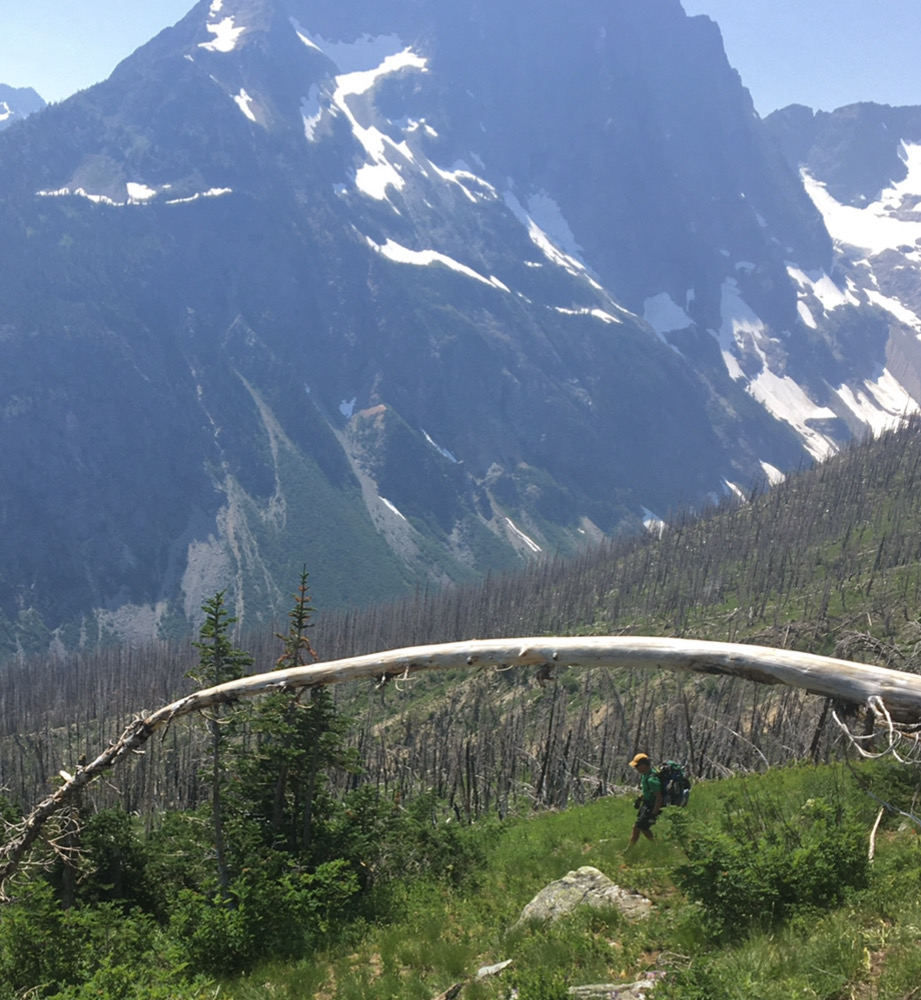
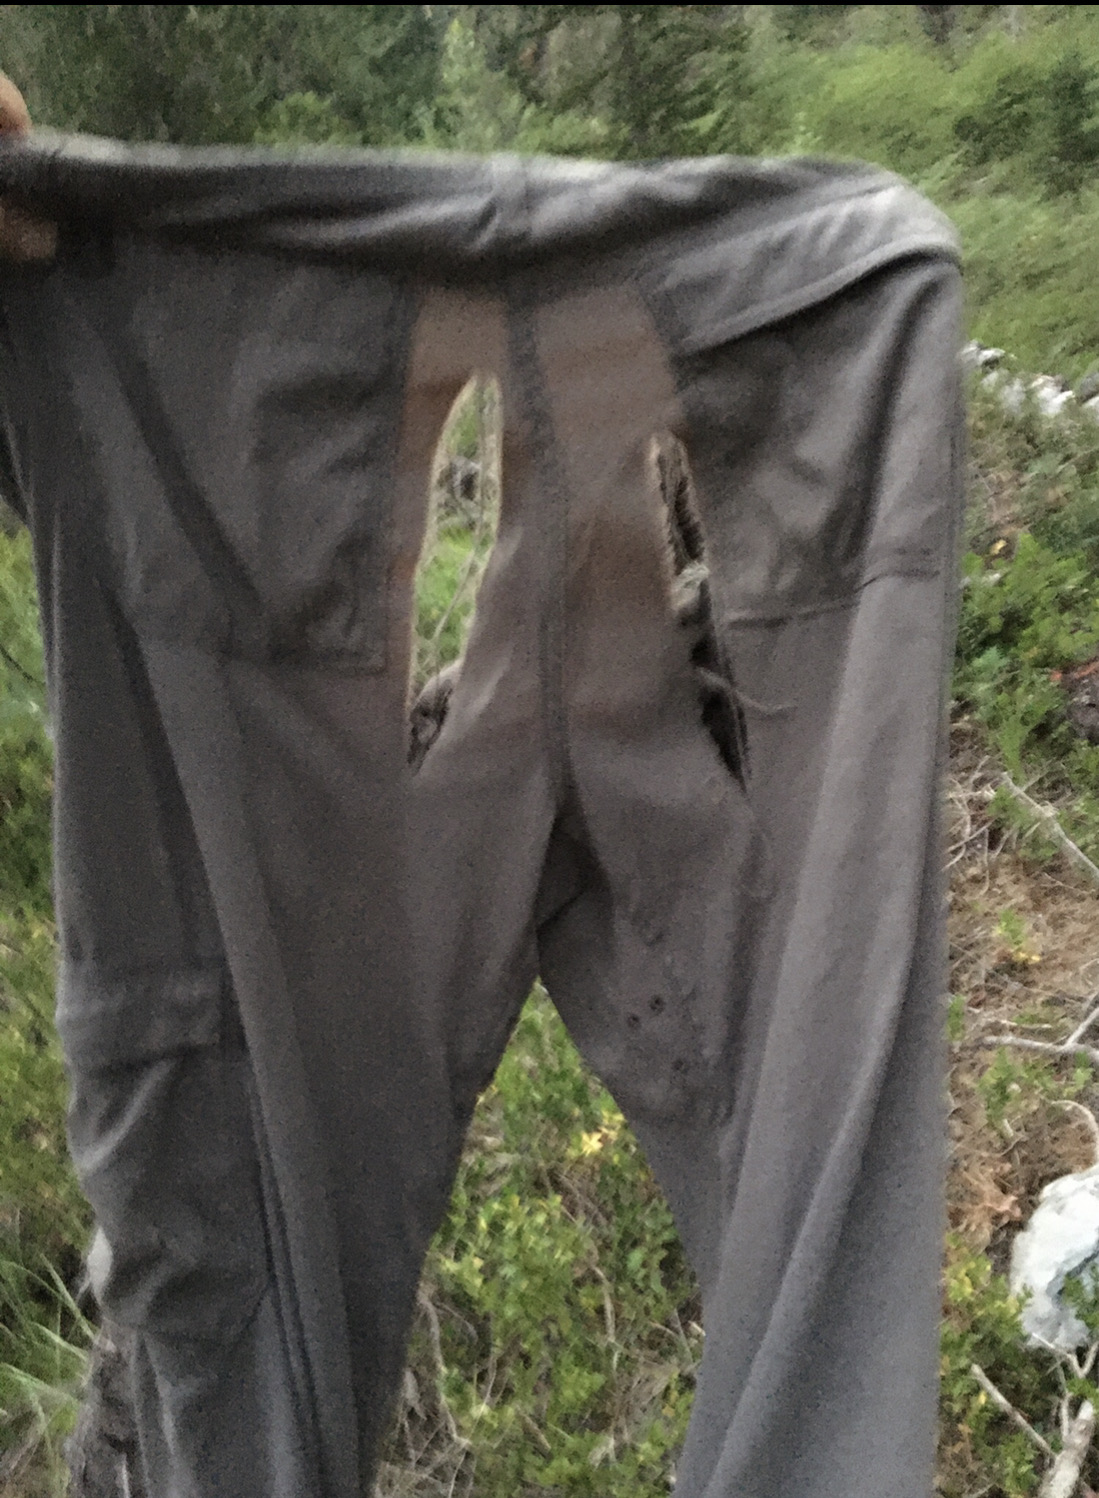
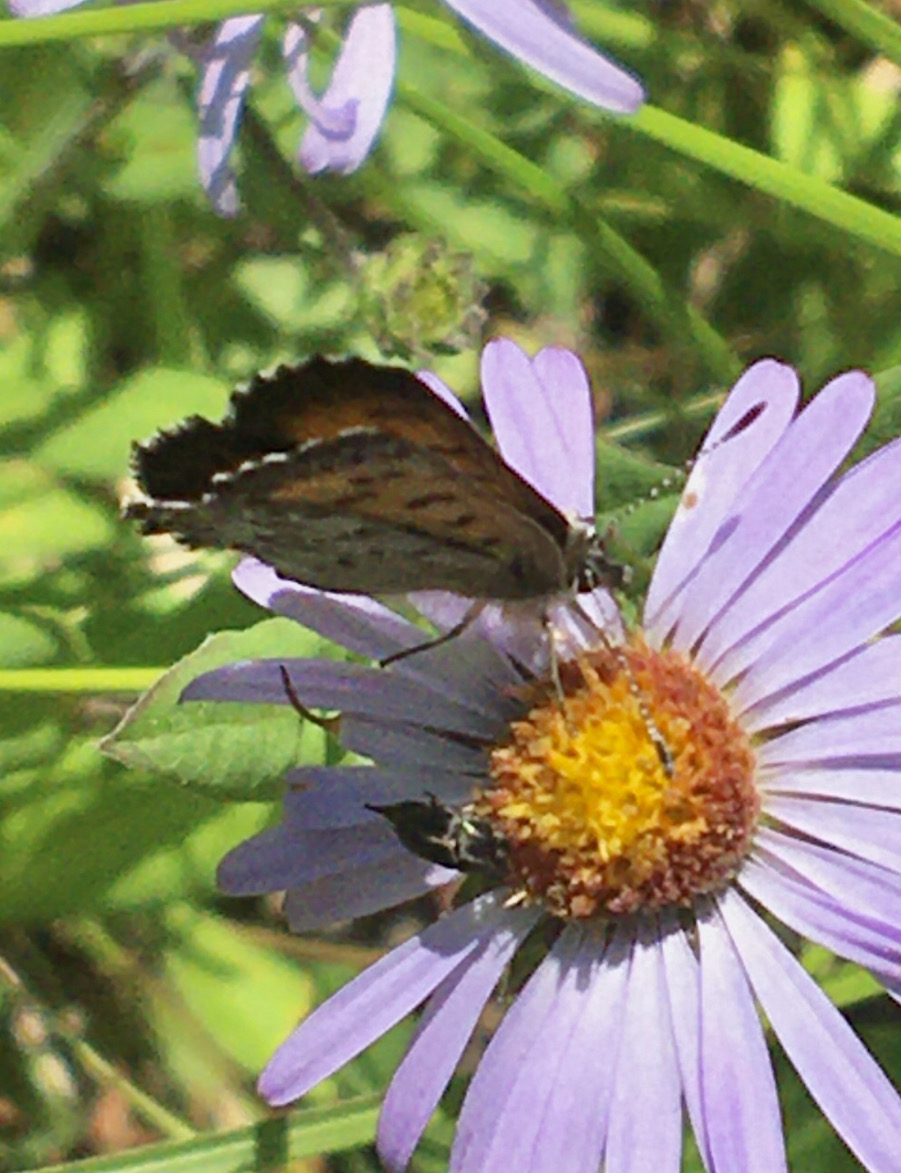
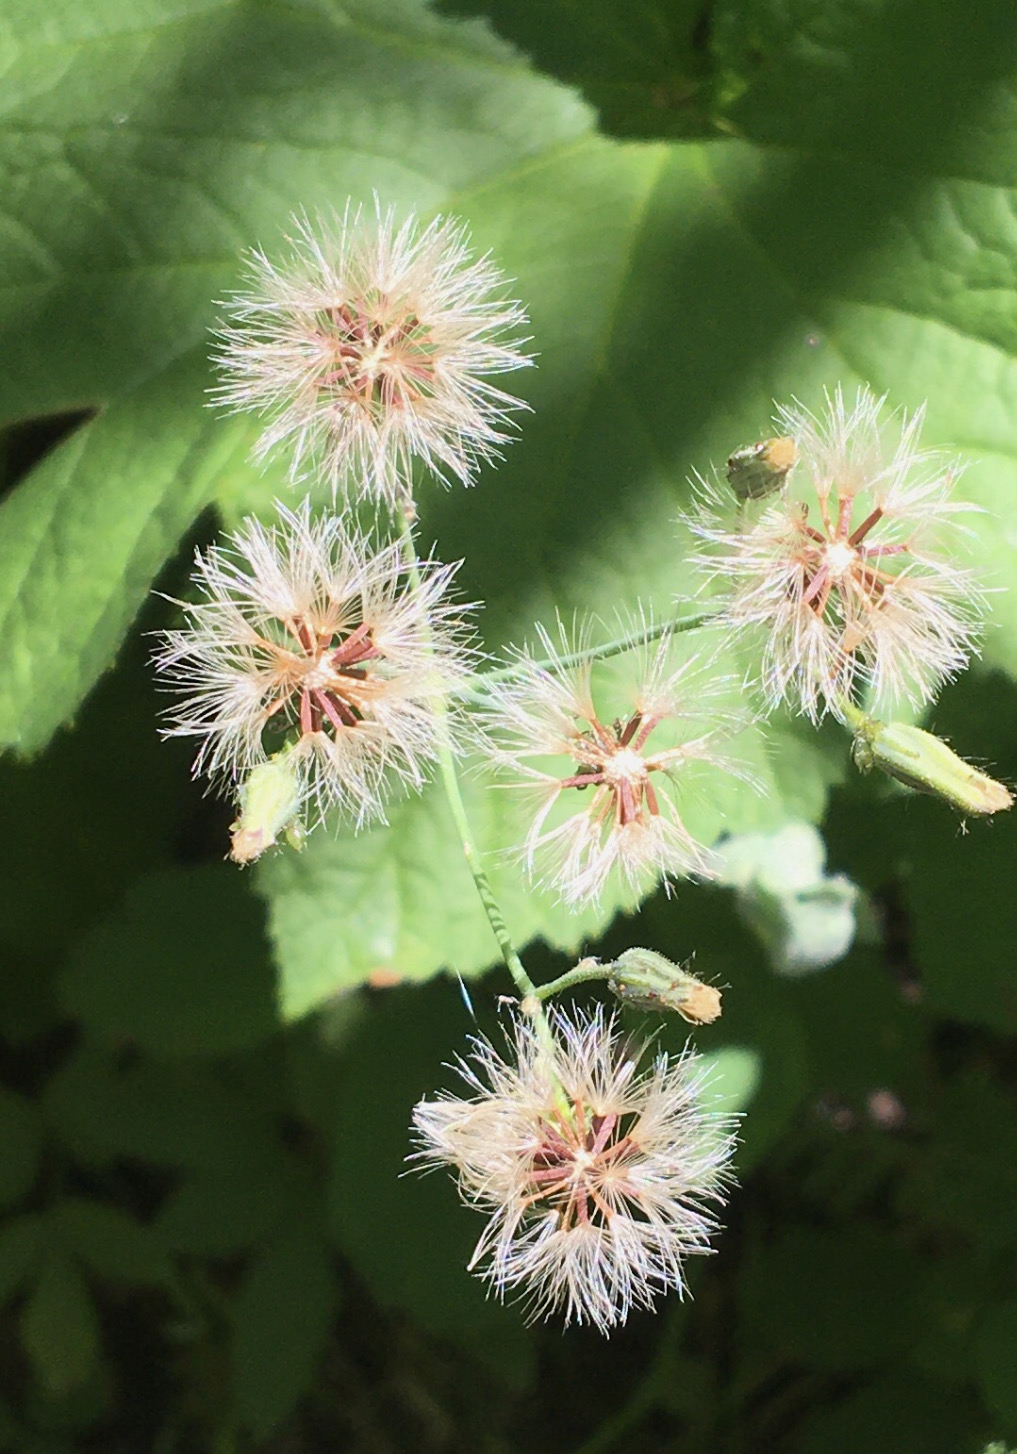
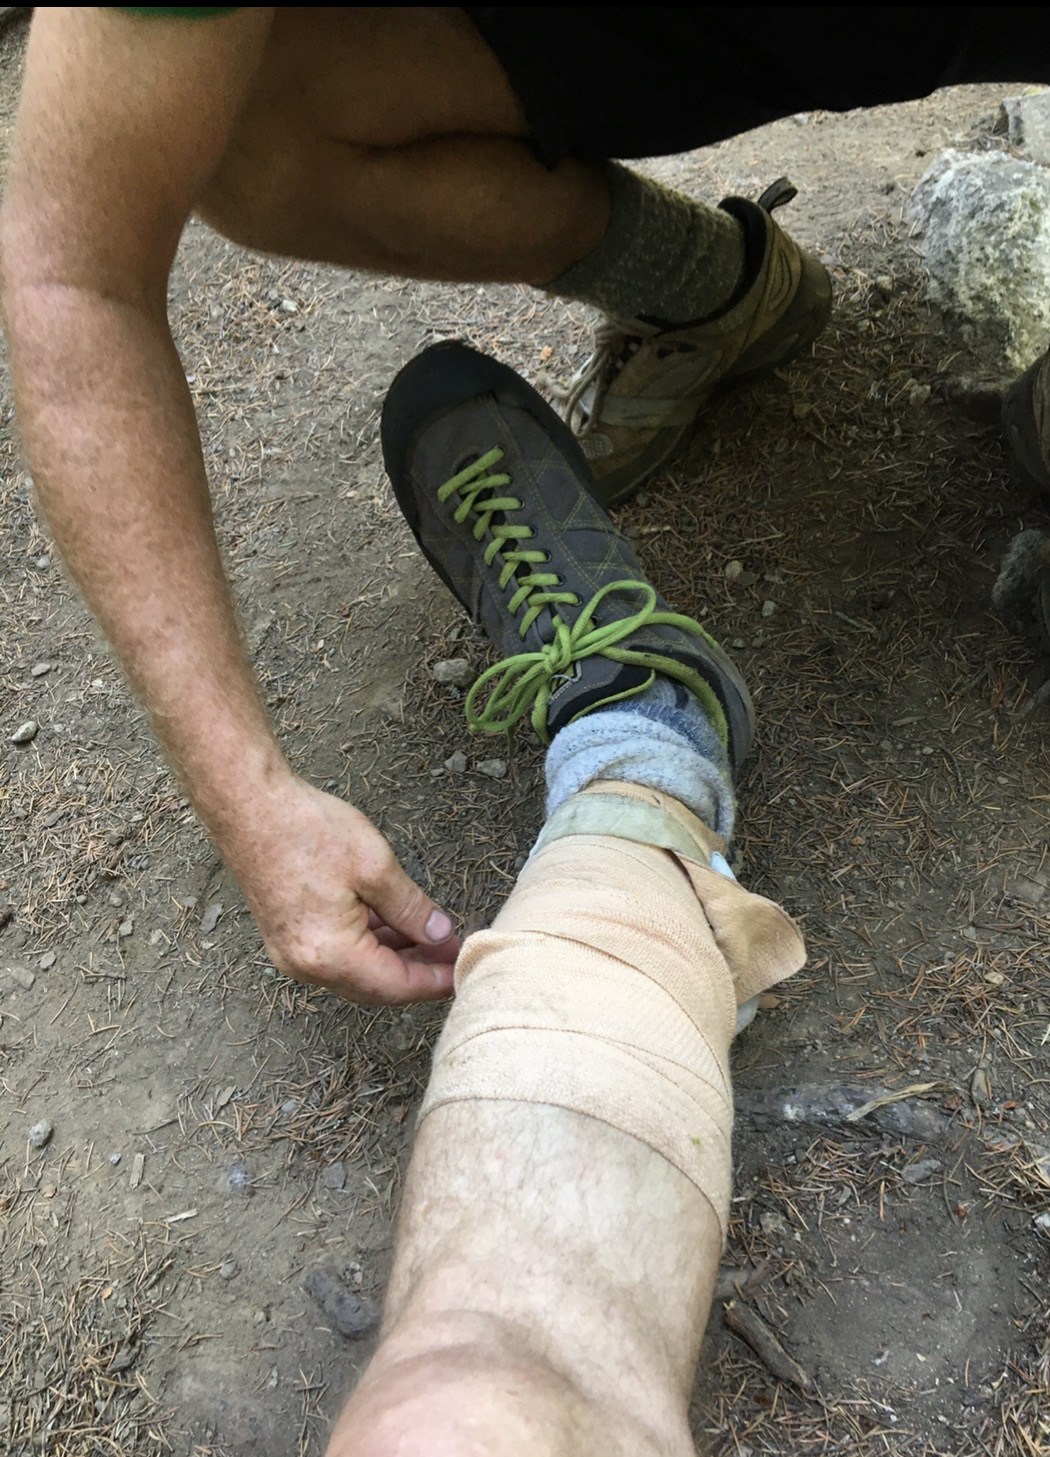
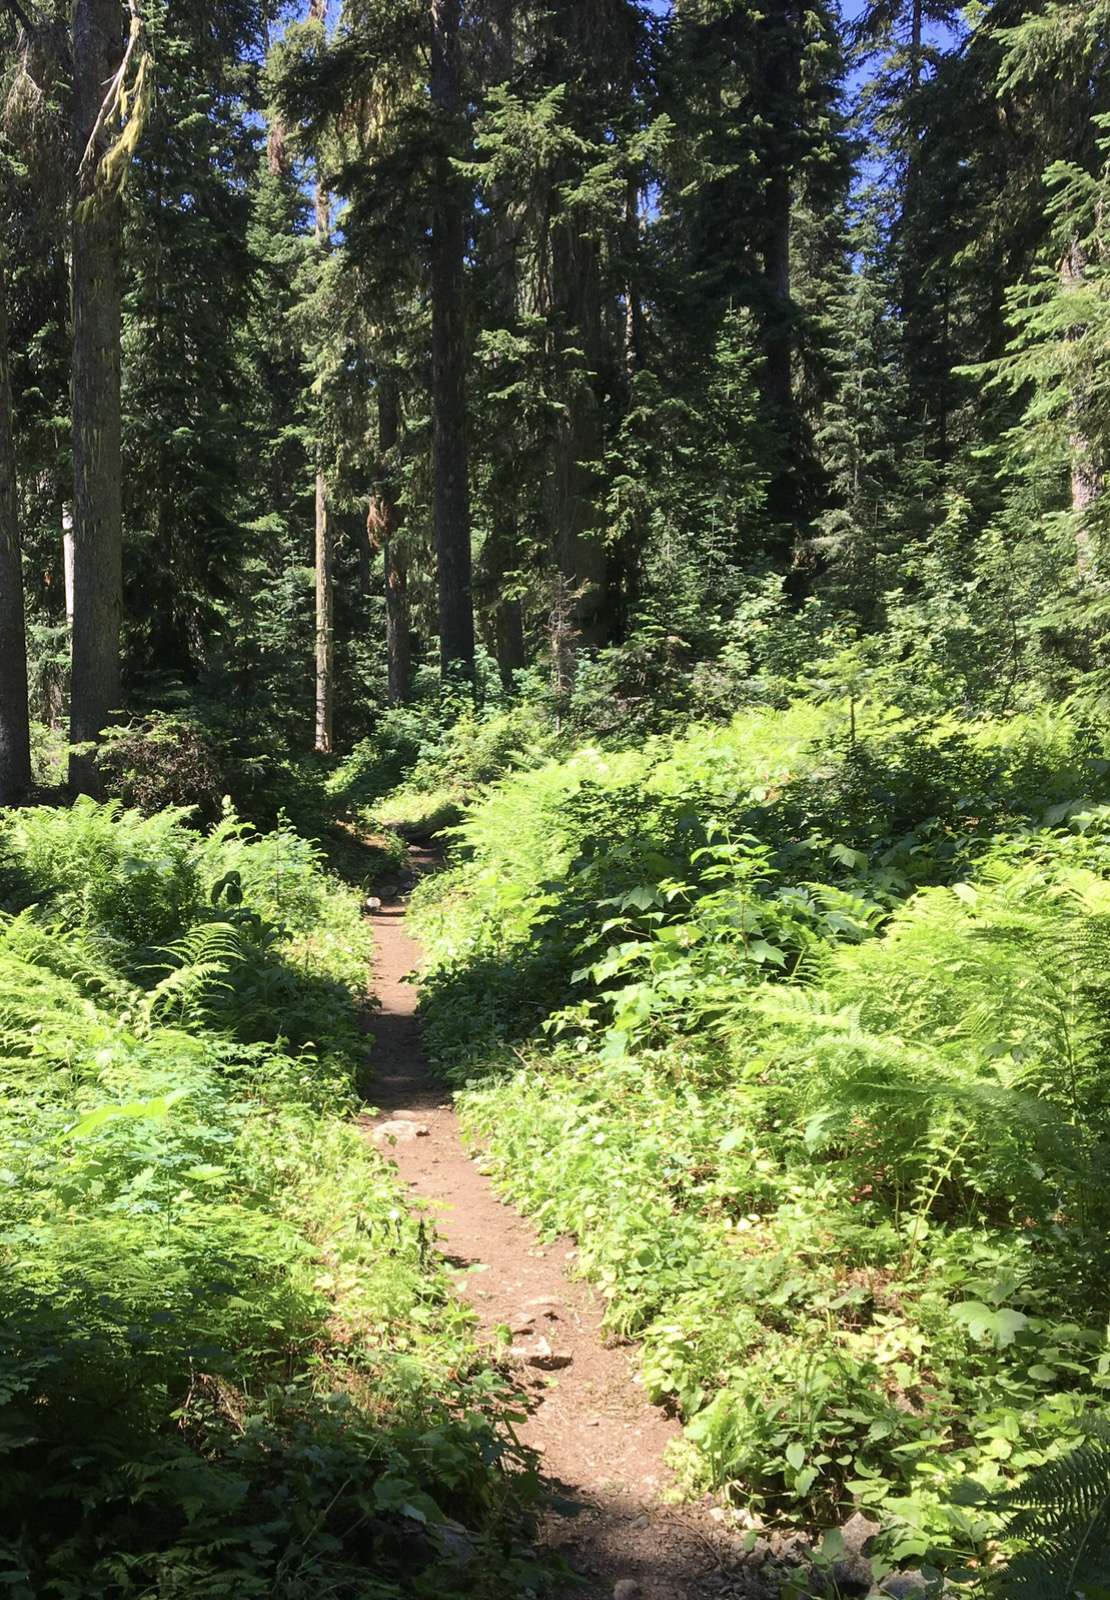
Trip: Mount Goode - Northeast Buttress Trip Date: 07/11/2021 Trip Report: David and I are highly skilled at turning classic, moderate alpine routes into masochistic adventures. You'd think we'd learn, particularly since we have over a century of outdoor experiences between us, but maybe the truth is that we like to suffer. Like many alpine routes, conditions on the NE Buttress of Goode are everything. Too early and the creek crossings are treacherous. Too late and the moat at the top of the glacier can be hard to cross safely. There's a third factor we didn't realize was important: water sources high on the route. That turned out to be the most memorable part of our trip, as you'll see. My biggest worry was the crossing of the N Fork of Bridge Creek. A week before our trip, during our record-breaking heat wave, a friend and his girlfriend had found the creek impassable and bushwhacked a mile upstream to find a safe way across, adding two miles of cross country travel to their trip. A day later, another party turned around entirely in the face of a raging torrent. But temps had dropped. Was the crossing better? I remembered there's a flow gauge on the StehekinIn River, downstream of the North Fork. The data were encouraging: the river was at 6500 CFS when multiple parties found the N Fork crossing impassable, and it had dropped to 2500 CFS at the time we were going. We were a go! The first ten miles on the Pacific Crest Trail went smoothly. It was fun to chat with PCT thru hikers just starting South on their journey. Just before the North Fork junction, we ran into four friendly climbers who'd just come off of Goode. They allayed my concerns about the crossing and gave us a key piece of beta for the descent. They gestured at my splinted thumb, which I'd jammed in the gym a couple of weeks earlier: "Can you hand jam with that?" "Should be OK", I said. Starting off the trip with an injury wasn't ideal, but I didn't think it would affect us much. Grizzly Creek was easily crossed on a log, and then the trail got a bit brushy. It was a warm day, but nothing too bad. When we emerged from the brush at the traditional crossing point, I was relieved to see that it looked pretty mellow. The whole route - 6000 feet from river to summit.- stretched up in front of us. Skies were clear, most of the seasonal snow had melted, and it was getting hot just in time for our steep ascent to camp. The river was just over knee deep. So far so good, but a hidden dragon was about to rear its head. David had spent the previous day on the Snoqualmie River with friends. He'd gotten quite dehydrated and hadn't really recovered. The afternoon heat was taking its toll on him, and his energy was waning just as we were about to start up 2500 feet of fairly steep terrain to our intended camp. Usually, David carries more shared gear as he's faster than me. Not today. He handed me the rope and we started up. There were a few sections of steep scrambling where a fall would be bad. My tolerance for high consequence terrain has waned in recent years, but this was still just third class. Lots of lovely waterfalls. Then there were two sections of holdless, licheny fourth class scrambling where a fall would be fatal. Being tired and having a heavy (for me) pack didn't help my confidence. David kindly trailed the rope on the second section and gave me a hip belay. Then the "Magical alder tunnel" began. The tent caterpillars had eaten almost every leaf in a long section, so there was no canopy to protect us from the afternoon sun. Eventually, we emerged onto a small ridge next to a snowy creek. It looks flat, but it's definitely not. The skies were mostly blue except for a funny looking cloud to the north...more on that later. We would head up to the sun/shade line and veer up and left to the 5600 bivy. In the hall of giants. I like to imagine Fred coming up this way on the first ascent in 1966, before North Cascades became a National Park in 1968, before the North Cascades Highway was completed in 1972, and before the Pacific Crest Trail was completed in 1993. Storm King David is a master of micro naps. If he gets 15 minutes ahead on the trail I'll find him fast asleep. I kept going, with the summit of Goode looming over us. We reached the bivy, ate, admired the sunset, and settled down for the night. No rodent visitors. A bright meteor flashed across my dreams. We were lucky. At dawn, it smelled like smoke. That funny cloud was smoke from a fire that would close Highway 20 during our trip. Would our egress be cut off? Who knew? For now, there was only one way to go: up. Smoky sunrise with a few mosquitoes photo bombing above my head. Paintbrush We moved right below a steeper section of glacier. The seasonal snow was mostly gone, and the glacier crossing was trivial. This three inch iridescent beetle was out for a walk, probably looking for tasty critters to eat. Approaching the toe of the buttress. l The moat, which can be treacherous late season, was very straightforward, thank goodness. Everything was going great... And then we had a kerfuffle trying to get over to the crest of the buttress. We knew the goal was to angle up and right to the crest, but we were turned back by several steep dead ends with absolutely atrocious rock. We backed off two lines before finally finding one that felt OK. No one else ever mentioned this section as a significant obstacle in the reports we'd read, so there was no beta. Oh well. Just keep trying. At the final lip, I was mantling over onto the crest, both hands pointed down, feet in the air, when I couldn't move. Something was holding me back. My last gear was 15 feet behind me. A fall would be ugly. Apparently a tricam on the rack dangling from my shoulder had lodged in a crack at the height of my knees. It cammed perfectly and set itself to prevent upward movement. Grrrr. I tried fiddling with it, blindly, with one hand while balancing on the other. No bueno. I had to reverse the mantle, find a stance, use the nut tool to clean it, and complete the mantle to gain the crest. F$%^ing hell! I was beginning to think the mountain was sending us a signal. We had finally gained the crest of the buttress after three hours of poking around on the choss in the sun. That certainly wasn't part of our plan. David and I both are very rational when it comes to sunk costs, and we had both internally come to the same assessment of our situation: Yes, it's a bummer that it's noon instead of 9AM, but we're here, we have plenty of water and gear, retreat would be very unpleasant, and we might as well just climb. So we put three hours of frustration behind us and started climbing. The route flowed pretty smoothly. We simul-climbed most of it, only stopping to belay three fantastic pitches that I got to lead. One was this nice arete feature. Shortly before the large bivy ledge, I looked down and saw a piton that Fred may have placed on the first ascent in 1966. We reached the bivy ledges in the late afternoon and decided it was best to stop as we didn't want to climb by headlamp, and we weren't sure if there was snow we could melt near the summit. As it turned out, there was only one small patch of snow left. It was about six feet long and a foot thick. We would melt most of it, but it wasn't as pure or tasty as we imagined. Step 1: bring snow over to our melting pot. Hey what are those black specks? Probably just lichen or dirt.... There sure are a lot of those black specks. We poured the water into my nalgene and David took a long drink. Hey, those black things look like pine needles - but there are no trees up here. They also kind of look like tiny worms. David looked down into the nalgene and the black bits swam away from him toward the bottom. AAAGGHHHH!!!! They're alive! And there sure were a lot of them. It's one thing to drink a pine needle or a piece of dirt. It's quite another to gulp down dozens of tiny, writhing worms eager to burrow into your brain. Actually, we reasoned that if they lived in snow they'd probably die quickly in our guts, but I didn't really want to test out that theory. David was patient zero. I've seen our local glacier worms. These were shorter. Maybe a larval stage? Or a different organism? My glasses and camera were not powerful enough to reallly see them, and I wasn't sure I wanted a clear picture of these critters anyway given that we'd be drinking this water in any case. I imagine that as the snow patch got smaller they packed tighter and tighter into the last remaining section. They seemed to sink. We tried decanting them and then wiping off the sides of the pot with a clean corner of my sock. Not very effective. So we filtered the melt water through a clean shirt as best we could. The host of worms that piled up was impressive. The filtrate was mostly clear, but it tasted like shrimp soup. I added Nuun and protein powder, but it still tasted absolutely vile. I almost gagged, and I'm not squeamish. This would be our only water until almost noon the following day. Drink up! We could only laugh. I laid out the rope for a nice nighttime nylon nest. Added my pad Testing. Testing. And ready! I really hoped we wouldn't spend the night fighting off a packrat (aka bushy-tailed woodrat). They are notorious for stealing belay devices, cups, lighters, and anything that might look nice in their midden, which is typically a huge pile of petrified poop and pee build up over decades under a large rock. I saw what looked like the main midden entrance and stacked some blocks in front of it in hopes of distracting the beast. We never saw hide nor hair of the vermin. The smoky sunrise was stunning. And some spectacular flowers caught the light just right. And then it was time to head for the summit. The last section was steeper than we expected but still quite moderate. Here is David coming up the last section to the summit, with our river crossing visible 6000 feet below. The views were great, except for the pesky smoke. We hoped we were heading away from it rather than toward it, but it was hard to tell. We'd heard there might be a snow patch in a notch just North of the summit. We found the notch, but it was bone dry. Good thing we stoped at the bivy ledge. It would have been a very thirsty night up on the summit. Wormy water is better than no water. We rapped down off the summit and belayed a short section of exposed scrambling on the way to Black Tooth notch. And then we could see our destination far below: Park Creek. Only a vertical mile to go. And now the beta the four climbers gave us came in handy: on the second rappel, go straight down a full 30 meters. If you angle skier's left, as the terrain seems to suggest, you then have to pendulum along steep terrain to get to the right spot. After that it was several hundred feet of choss gully scrambling to a small trail veering out of the gully to the left. The South Face loomed above us. We finally reached snow around 7500 feet. A short bit of boot skiing ensued. Then we found water that was far, far better than that nasty shrimp soup we'd been drinking. I found some mysterious tracks. Five distinct toes with claws - so not a cat. Probably too small for wolverine. Probably too big for pine marten. ermine, or mink. Maybe a fisher? I don't know. You tell me. Here's the North Cascades mammals list: https://irma.nps.gov/NPSpecies/Reports/SpeciesList/Species Checklist/NOCA/1/false l Another alpine micronap with the Ptarmigan traverse on the horizon. Looking back toward the summit. Sporadic flower snapshots help fend off the double vision I sometimes get from relentless downhill pounding. The heather was stunning. But we were about to enter the dreaded burn zone. We made our way straight down the ridge but never saw a climber's trail. It got more and more unpleasant as we got lower. David's dehydration was catching up with him. By the time we reached a small creek a half mile above Park Creek, David was stumbling nearly every other step. The burn zone and eroding creekbed was the worst terrain he could remember, with rocks moving under him with almost every step. My experience wasn't quite that bad, and I know we've done worse together, so we decided his dehydration was turning into heat stroke, a potentially serious issue. The trail seemed to move further away as we drew closer, a cruel jest. Finally, we reached the Park Creek trail. David was spent. We poured a liter and a half of cold water in him, and he took a nap in the shade. That helped. I carried as many heavy things as possible on the last section down toward Stehekin. The Park Creek trail had some blow downs that were not fun. Several times I took off my heavy pack and dragged it on the ground while I crawled under a log. Once clear, I'd hoist it onto my back and start walking, only to see the next ball buster log just down the trail. I wasn't dehydrated or suffering from heat stroke, but I was pretty spent, and my lower left leg had some pain with each step. It was starting to swell. My pants didn't survive the trip. We crashed at the Park Creek campground near the Stehekin River and wrapped my rapidly swelling calf in a compression bandage. I slept with it elevated up on my pack, hardly notcing the few mosquitoes flying around. The long but easy march back to the car began at 6AM. Here we are tightening the bandage on my leg for the final few miles. Side note: on the first trip David and I did together, Slesse, we had some heinous bushwhacking, and I came away with a swollen lower leg. It didn't go down after a week, so my wife, who is a physician, convinced me to have it scanned to see if it was deep vein thrombosis (DVT), which can spin off clots that can bump up to your heart and kill you. It wasn't DVT, but ultrasound showed a three inch laceration inside my leg that was bleeding internally. It would take a month to heal. I wasn't sure what was up with my leg this time, but I could walk just fine. I made sure to get ahead of the swelling by compressing it during our hike. As usual, good conversation made the miles move faster. Flowers, butterflies, and views don't hurt either. Back at the junction between PCT and North Fork. The North Cascades in their summer glory. Seeds ready to ride on the wind. Distant peaks. The final stretch of trail. And the end of our adventure. Highway 20 was closed just East of us, but we could drive West. Beers were cooled. And we swam in the lake. Another moderate masochistic march in the books. As sometimes happens on our trips, the hard parts were easy and the easy parts were hard. My thumb and leg have healed, but I'm still traumatized by the shrimp soup we had to drink. I'll never again hear "pure as the driven snow" without thinking of those mysterious worms. Gag. Gear Notes: 60m rope, rack Approach Notes: Hwy 20 via Pacific Crest Trail


 1 point
 -
Trip: Mt Index - North-Middle-Main Traverse Trip Date: 07/10/2021 Trip Report: The weekend of the 10th and 11th of July Bobby, Chad, and I spent 2 days climbing the North, Middle, and Main peaks of Mount Index. Done as a traverse from north to south this route offers amazing exposure, complex route finding, and engaging climbing. Most interestingly is the proximity to civilization; the remote feeling you get high up on the peaks in juxtaposition of the ever present crowds of Lake Serene and the thrum of the weekend traffic is a dynamic I have not found elsewhere in the Cascades. I have stared at this mountain many times over the years, but always put off the traverse due to timing, lack of solid parters, or lack of physical ability. Fortunately all of the pieces fell together this summer and I had no reason not to do the climb, besides the well deserved reputation of the mountain and the route. It is a big route indeed with over 4k feet of technical scrambling and climbing. Long sections of steep sometimes loose rock on the way up and committing rappels on the way down keep you from gaining each peak. Also for any normal person, it takes an overnight bivy on the middle peak that may or may not have water. For us it was two 14+ hour days, but they were rewarded with one of the most amazing bivies I have slept at and stunning ridge climbing with views not only of Glacier Peak, but Seattle and Bellevue as well. Information on this route was a little hard to come by and it was one of the first times in a while I found the Becky book to have the most reliable route description. We also used trip reports from Tom Sjolseth and Jason Griffith found on this site. Both were helpful. I have added some beta to this trip report for those interested as there were some definite holes in the becky description. We left the parking lot about 6:30 am and enjoyed a talking pace up to the lake on the steep trail. The first views of the route come just before the lake when you can see the traverse in its entirety. As we got to the lake we got fresh water. We did not know when we would be able to get water next as the N face appeared basically dry. Bobby pondering what he had gotten himself into. We skirted the trail along the west side of the lake until the talus slope then headed up to the base of the North Face. The North face of the North Peak of Index is about 2500 feet of technical climbing and scrambling. None of it is extremely hard, but protection can be poor and belays hard to come by at times. While we climbed we passed many rappel station of various quality as well as old fixed pins so it was not too difficult to know we were on route. Route overlay of North Face of North Peak of Index. From the toe of the NNE rib we started up very brushy trees until you could gain the rib. We followed the rib straight up for about 100' then cut left at a bushy section to get into an open book. Climb up this before trending back right onto a long slabby section. Ascend the slab until reach a small roof feature. There is an anchor here made form a pin and nut just under the roof. From here we began simul climbing off left trending around overhanging roof features. The steep walls will kept pushing us left until we gained a treed ledge with an open book above. This is the crux of the route. I climbed an open book, that is more of a face, up about 50-60 feet until it forces you off right on a sharp traverse to gain a long gully system. There were 2 fixed pins at the point of the traverse right that I clipped for pro. The gulley system can't bee seen from the lake or trail as it is facing north. We went up the gully for 300-400 feet until we were able to traverse right into the open bowl of the north face. This put us in about the middle of the bowl at this point. Once there we went left into the obvious large gulley system. Most climbing was done on the right of the gulley until you can traverse right to the notch at the start of the North RIb. The North Rib is pretty obvious once you are there. It is great exposed climbing for 2-3 pitches. Looking down from above the North RIb. Once above the North rib the climbing is below 5th class with mostly exposed moved of 4th class. The false summit is gained via steep heather gullies on the east. We were able to find a patch of Snow just below the False summit and refreshed our water supply. From the false summit you scramble through a series of steep gendarmes. While the climbing is technically easy the exposure it insane. The final climb to the true summit is on the North face and is mostly heather and loose rock. Nothing too difficult, just very exposed. Exposed scrambling along the ridge from the North False Summit to the North Summit. More Insane exposure along the ridge to the North Peak. North peak at top of picture. View toward Main Peak from North Summit. We summited the North peak at about 3 pm. This is where the real choice is made. It is still possible to descend the North face, but once you head down to the North-Middle notch coming back becomes much more difficult. Of course we didn't do all that climbing with overnight packs to not at least try to find our way. At this point it seemed very unclear from the becky description as to where to go. He illiterates to descending to 4880' in a gulley to the west, which is not at all what we did. We descended the south side of the peak to the first gendarme and rappelled to the west about a rope length down a gulley from a block that is kinda hidden behind the gendarme. HFrom the end of the rappel we traversed back up the east side under the gendarme and descended down a gulley to the east about 150'. We did one rappel down the gulley to the east, but could have easily down-climbed. From here you climb back west and up to a notch between the second and third gendarme and rappel down to the west side of the ridge. Traverse down along the ridge on the west side until you get just above the North-Middle notch then do one rappel down to the notch. Not too complicated right? North Peak as viewed from the Middle peak. One can see pretty well how the descent from the North Peak to the North-Middle notch is done from here. This is the second rappel shown in the picture above. The block with all the slings is a pretty obvious point to get to and know you're on the right track. Chad and I getting ready to rap off the block down to the west side of the ridge. Once down to the North-Middle notch it is a simple matter of getting up onto the ridge then climbing this up and over the false summit of Middle to a bivy site we were hoping would have a patch of snow near it. Exactly where to ascend up to the ridge from the notch was unclear. We ended up traversing left about 50' and ascending a shallow east facing corner, which I think is what becky describes in his guide. We could not see that the corner was shallower until we got right underneath it. Once we gained the ridge we were treated with some of the best climbing of the trip. Gorgeous views all around on a knife edge ridge that went on for about 3-4 pitches. We continued this up and over the Middle false summit to one slightly overhanging rappel down to the notch between the Middle Peak false summit and Middle Peak. And just as luck had it there was still a small snow patch to get water from for the night. Amazing ridge climbing in route to Middle Peak. Almost to the Middle Peak false summit. Chad hoping for the long day to be over along the North Ridge of Middle Peak. We got the bivy about 8:30 PM. We melted snow, drank a little Jim Beam, and settled in for the night. The bivy is first class given what else is on the route. Plush and flat with plenty of room for 3, and perfectly located to split the climb into 2 relatively equal days of work. Celebrating getting to the bivy and a good night of sleep. Beautiful sunset over Mt. Persis. The next morning we got going around 7:30 AM and began the ascent to the Middle peak true summit. Most of the mornings travels were fairly easy given yesterdays work. The Middle peak is gained by the east face. Traverse to the east side and ascend broken slabs and heater until the summit is gained. Bobby excited to get up the Middle Peak of Index, one of the most difficult to reach in the state. Sunset falls can be seen in the middle of the photo in the background. From here Becky describes getting to the Middle-Main notch in one sentence. "Descend easily to the Middle-Main Peak notch". I am gonna have to disagree with Becky on this one and say it was a bit more involved then that. We did 2 rappels on the way there and switched from one side of the ridge to the other multiple times. We started mainly on the crest until steep rock forced us down to a gulley to the east. After passing this first gendarme we were forced back onto the west side with a short rappel down to a ledge system. We traversed the ledge system until we went back east onto a broad series of light colored slabby ledges. These ledges had snow for water. From here we went down the slab until we cliffed out and had to cross back to the east side down a steep series of steps leading directly toward the notch. From here one can see the notch. A steep red colored gulley trends back east and we set up a rap anchor on a tree above this gulley then rappelled down it under a chockstone. At the end of the rappel we traversed into the notch. In all parts there was basically only one way to go or it cliffed out. During this whole descent we were treated with the view of the impending north face of the Main Peak. It is very ominous looked at straight on. Foreshortening can be a real mind killer, but it is all there and the climbing is moderate, if not loose and sketchy in places. Technical crux of Main Peak north face coming out of the Middle-Main Notch. We climbed a short chimney out of the notch that lead to more low 5th class climbing. overall the idea was to climb the initial steep wall out of the notch, then trend left until the main ridge emanating from the South Norwegian buttress can be gained. This is climbed until the Wedge gendarme is reached. The climbing involves sections of trees and exposed ridge as well as a cool left facing corner to gain the upper ridge. Once at the Wedge gendarme we down climbed a short section then up the main face until we found a suitable place to traverse across the giant red gash through the middle of the face. View of the North Face of Main Peak from the descent down to the Middle-Main notch. High quality rock we had to traverse to get out of the north face and onto easier terrain. Once across the gulley we traversed ledges until you can pass through a notch and onto the west side of the Main peak. From here the technical climbing is over and it is a short trip to the summit. We continued traversing south from the notch past 3 gullies until we could ascend a heather and dirt gully up to gentle slopes near the summit. Walk SE toward the broad summit of the Main Peak of Index. We were excited to reach the summit. 3 peaks in 2 days of 1 mountain and still we were only half way there. Index does not give up the goods easily and we still had the arduous descent of the Hourglass gulley to get done. None of us had crampons and I only had approach shoes on, so the idea of descending steep snow was questionable at best. The trip to the top of the gulley was a quick easterly traverse from the summit. At the top of the gulley system we stayed skiers left and did one initial rappel off a tree to get onto a snow field. We made a gingerly descent of the snow field to a band of rocks and trees and did two more rappels from here to get down below the hourglass feature. At the time we passed it there was a 5-8 foot wide moat at the bottom of the hourglass that was very deep. Tedious down climbing of snow and a few good snow bollards got us down to the talus slope and most of the difficult descent behind us. We headed down until we got to the top of the ridge visible from Lake serene. We followed the ridge along its crest and did one rappel along the ridge where it got very steep. Talus down to the lake and traverse along the south side until we got to the main trail. It was a long day to get down and we didn't get back to the parking lot until 10:30 pm. It was well worth it though to be able to do such a big adventure so close to home. I am pretty sure I could see my house from the bivy. I would recommend this climb to anyone looking for a big adventure. If you have honed your alpine climbing skills and wish to test them all then Index provides as it always has. Gear Notes: single 60 or 70m rope will work double rack to 2" and set of nuts Long slings for trees and horns. Extra tat for rapel anchors as necessary Approach Notes: Lake serene trail is pretty nice given some of the approaches to climbs in this state.1 point