Leaderboard


Popular Content
Showing content with the highest reputation on 07/28/21 in all areas
-
Trip: Mt Index - North-Middle-Main Traverse Trip Date: 07/10/2021 Trip Report: The weekend of the 10th and 11th of July Bobby, Chad, and I spent 2 days climbing the North, Middle, and Main peaks of Mount Index. Done as a traverse from north to south this route offers amazing exposure, complex route finding, and engaging climbing. Most interestingly is the proximity to civilization; the remote feeling you get high up on the peaks in juxtaposition of the ever present crowds of Lake Serene and the thrum of the weekend traffic is a dynamic I have not found elsewhere in the Cascades. I have stared at this mountain many times over the years, but always put off the traverse due to timing, lack of solid parters, or lack of physical ability. Fortunately all of the pieces fell together this summer and I had no reason not to do the climb, besides the well deserved reputation of the mountain and the route. It is a big route indeed with over 4k feet of technical scrambling and climbing. Long sections of steep sometimes loose rock on the way up and committing rappels on the way down keep you from gaining each peak. Also for any normal person, it takes an overnight bivy on the middle peak that may or may not have water. For us it was two 14+ hour days, but they were rewarded with one of the most amazing bivies I have slept at and stunning ridge climbing with views not only of Glacier Peak, but Seattle and Bellevue as well. Information on this route was a little hard to come by and it was one of the first times in a while I found the Becky book to have the most reliable route description. We also used trip reports from Tom Sjolseth and Jason Griffith found on this site. Both were helpful. I have added some beta to this trip report for those interested as there were some definite holes in the becky description. We left the parking lot about 6:30 am and enjoyed a talking pace up to the lake on the steep trail. The first views of the route come just before the lake when you can see the traverse in its entirety. As we got to the lake we got fresh water. We did not know when we would be able to get water next as the N face appeared basically dry. Bobby pondering what he had gotten himself into. We skirted the trail along the west side of the lake until the talus slope then headed up to the base of the North Face. The North face of the North Peak of Index is about 2500 feet of technical climbing and scrambling. None of it is extremely hard, but protection can be poor and belays hard to come by at times. While we climbed we passed many rappel station of various quality as well as old fixed pins so it was not too difficult to know we were on route. Route overlay of North Face of North Peak of Index. From the toe of the NNE rib we started up very brushy trees until you could gain the rib. We followed the rib straight up for about 100' then cut left at a bushy section to get into an open book. Climb up this before trending back right onto a long slabby section. Ascend the slab until reach a small roof feature. There is an anchor here made form a pin and nut just under the roof. From here we began simul climbing off left trending around overhanging roof features. The steep walls will kept pushing us left until we gained a treed ledge with an open book above. This is the crux of the route. I climbed an open book, that is more of a face, up about 50-60 feet until it forces you off right on a sharp traverse to gain a long gully system. There were 2 fixed pins at the point of the traverse right that I clipped for pro. The gulley system can't bee seen from the lake or trail as it is facing north. We went up the gully for 300-400 feet until we were able to traverse right into the open bowl of the north face. This put us in about the middle of the bowl at this point. Once there we went left into the obvious large gulley system. Most climbing was done on the right of the gulley until you can traverse right to the notch at the start of the North RIb. The North Rib is pretty obvious once you are there. It is great exposed climbing for 2-3 pitches. Looking down from above the North RIb. Once above the North rib the climbing is below 5th class with mostly exposed moved of 4th class. The false summit is gained via steep heather gullies on the east. We were able to find a patch of Snow just below the False summit and refreshed our water supply. From the false summit you scramble through a series of steep gendarmes. While the climbing is technically easy the exposure it insane. The final climb to the true summit is on the North face and is mostly heather and loose rock. Nothing too difficult, just very exposed. Exposed scrambling along the ridge from the North False Summit to the North Summit. More Insane exposure along the ridge to the North Peak. North peak at top of picture. View toward Main Peak from North Summit. We summited the North peak at about 3 pm. This is where the real choice is made. It is still possible to descend the North face, but once you head down to the North-Middle notch coming back becomes much more difficult. Of course we didn't do all that climbing with overnight packs to not at least try to find our way. At this point it seemed very unclear from the becky description as to where to go. He illiterates to descending to 4880' in a gulley to the west, which is not at all what we did. We descended the south side of the peak to the first gendarme and rappelled to the west about a rope length down a gulley from a block that is kinda hidden behind the gendarme. HFrom the end of the rappel we traversed back up the east side under the gendarme and descended down a gulley to the east about 150'. We did one rappel down the gulley to the east, but could have easily down-climbed. From here you climb back west and up to a notch between the second and third gendarme and rappel down to the west side of the ridge. Traverse down along the ridge on the west side until you get just above the North-Middle notch then do one rappel down to the notch. Not too complicated right? North Peak as viewed from the Middle peak. One can see pretty well how the descent from the North Peak to the North-Middle notch is done from here. This is the second rappel shown in the picture above. The block with all the slings is a pretty obvious point to get to and know you're on the right track. Chad and I getting ready to rap off the block down to the west side of the ridge. Once down to the North-Middle notch it is a simple matter of getting up onto the ridge then climbing this up and over the false summit of Middle to a bivy site we were hoping would have a patch of snow near it. Exactly where to ascend up to the ridge from the notch was unclear. We ended up traversing left about 50' and ascending a shallow east facing corner, which I think is what becky describes in his guide. We could not see that the corner was shallower until we got right underneath it. Once we gained the ridge we were treated with some of the best climbing of the trip. Gorgeous views all around on a knife edge ridge that went on for about 3-4 pitches. We continued this up and over the Middle false summit to one slightly overhanging rappel down to the notch between the Middle Peak false summit and Middle Peak. And just as luck had it there was still a small snow patch to get water from for the night. Amazing ridge climbing in route to Middle Peak. Almost to the Middle Peak false summit. Chad hoping for the long day to be over along the North Ridge of Middle Peak. We got the bivy about 8:30 PM. We melted snow, drank a little Jim Beam, and settled in for the night. The bivy is first class given what else is on the route. Plush and flat with plenty of room for 3, and perfectly located to split the climb into 2 relatively equal days of work. Celebrating getting to the bivy and a good night of sleep. Beautiful sunset over Mt. Persis. The next morning we got going around 7:30 AM and began the ascent to the Middle peak true summit. Most of the mornings travels were fairly easy given yesterdays work. The Middle peak is gained by the east face. Traverse to the east side and ascend broken slabs and heater until the summit is gained. Bobby excited to get up the Middle Peak of Index, one of the most difficult to reach in the state. Sunset falls can be seen in the middle of the photo in the background. From here Becky describes getting to the Middle-Main notch in one sentence. "Descend easily to the Middle-Main Peak notch". I am gonna have to disagree with Becky on this one and say it was a bit more involved then that. We did 2 rappels on the way there and switched from one side of the ridge to the other multiple times. We started mainly on the crest until steep rock forced us down to a gulley to the east. After passing this first gendarme we were forced back onto the west side with a short rappel down to a ledge system. We traversed the ledge system until we went back east onto a broad series of light colored slabby ledges. These ledges had snow for water. From here we went down the slab until we cliffed out and had to cross back to the east side down a steep series of steps leading directly toward the notch. From here one can see the notch. A steep red colored gulley trends back east and we set up a rap anchor on a tree above this gulley then rappelled down it under a chockstone. At the end of the rappel we traversed into the notch. In all parts there was basically only one way to go or it cliffed out. During this whole descent we were treated with the view of the impending north face of the Main Peak. It is very ominous looked at straight on. Foreshortening can be a real mind killer, but it is all there and the climbing is moderate, if not loose and sketchy in places. Technical crux of Main Peak north face coming out of the Middle-Main Notch. We climbed a short chimney out of the notch that lead to more low 5th class climbing. overall the idea was to climb the initial steep wall out of the notch, then trend left until the main ridge emanating from the South Norwegian buttress can be gained. This is climbed until the Wedge gendarme is reached. The climbing involves sections of trees and exposed ridge as well as a cool left facing corner to gain the upper ridge. Once at the Wedge gendarme we down climbed a short section then up the main face until we found a suitable place to traverse across the giant red gash through the middle of the face. View of the North Face of Main Peak from the descent down to the Middle-Main notch. High quality rock we had to traverse to get out of the north face and onto easier terrain. Once across the gulley we traversed ledges until you can pass through a notch and onto the west side of the Main peak. From here the technical climbing is over and it is a short trip to the summit. We continued traversing south from the notch past 3 gullies until we could ascend a heather and dirt gully up to gentle slopes near the summit. Walk SE toward the broad summit of the Main Peak of Index. We were excited to reach the summit. 3 peaks in 2 days of 1 mountain and still we were only half way there. Index does not give up the goods easily and we still had the arduous descent of the Hourglass gulley to get done. None of us had crampons and I only had approach shoes on, so the idea of descending steep snow was questionable at best. The trip to the top of the gulley was a quick easterly traverse from the summit. At the top of the gulley system we stayed skiers left and did one initial rappel off a tree to get onto a snow field. We made a gingerly descent of the snow field to a band of rocks and trees and did two more rappels from here to get down below the hourglass feature. At the time we passed it there was a 5-8 foot wide moat at the bottom of the hourglass that was very deep. Tedious down climbing of snow and a few good snow bollards got us down to the talus slope and most of the difficult descent behind us. We headed down until we got to the top of the ridge visible from Lake serene. We followed the ridge along its crest and did one rappel along the ridge where it got very steep. Talus down to the lake and traverse along the south side until we got to the main trail. It was a long day to get down and we didn't get back to the parking lot until 10:30 pm. It was well worth it though to be able to do such a big adventure so close to home. I am pretty sure I could see my house from the bivy. I would recommend this climb to anyone looking for a big adventure. If you have honed your alpine climbing skills and wish to test them all then Index provides as it always has. Gear Notes: single 60 or 70m rope will work double rack to 2" and set of nuts Long slings for trees and horns. Extra tat for rapel anchors as necessary Approach Notes: Lake serene trail is pretty nice given some of the approaches to climbs in this state.2 points
-
Trip: Chimney Rock - Free Friends Trip Date: 07/06/2021 Trip Report: God damn! This route is incredibly high quality and STOUT at the supposed pitch ratings of 5.9+, 5.10c, and 5.8+. It was a real pleasure getting up to Chimney again... better than I remembered. Full report with photos: SPOKALPINE Gear Notes: Doubles .2-4, triples .75-2. We used it all. Approach Notes: Sounds like the Western approach is the fastest option, and I've heard tales of being able to cross over to the East Face on the south of chimney rather than hiking around the North side. For this trip, we took the Eastern (Pack River) approach to enjoy the scenic hiking and try something new,1 point
-
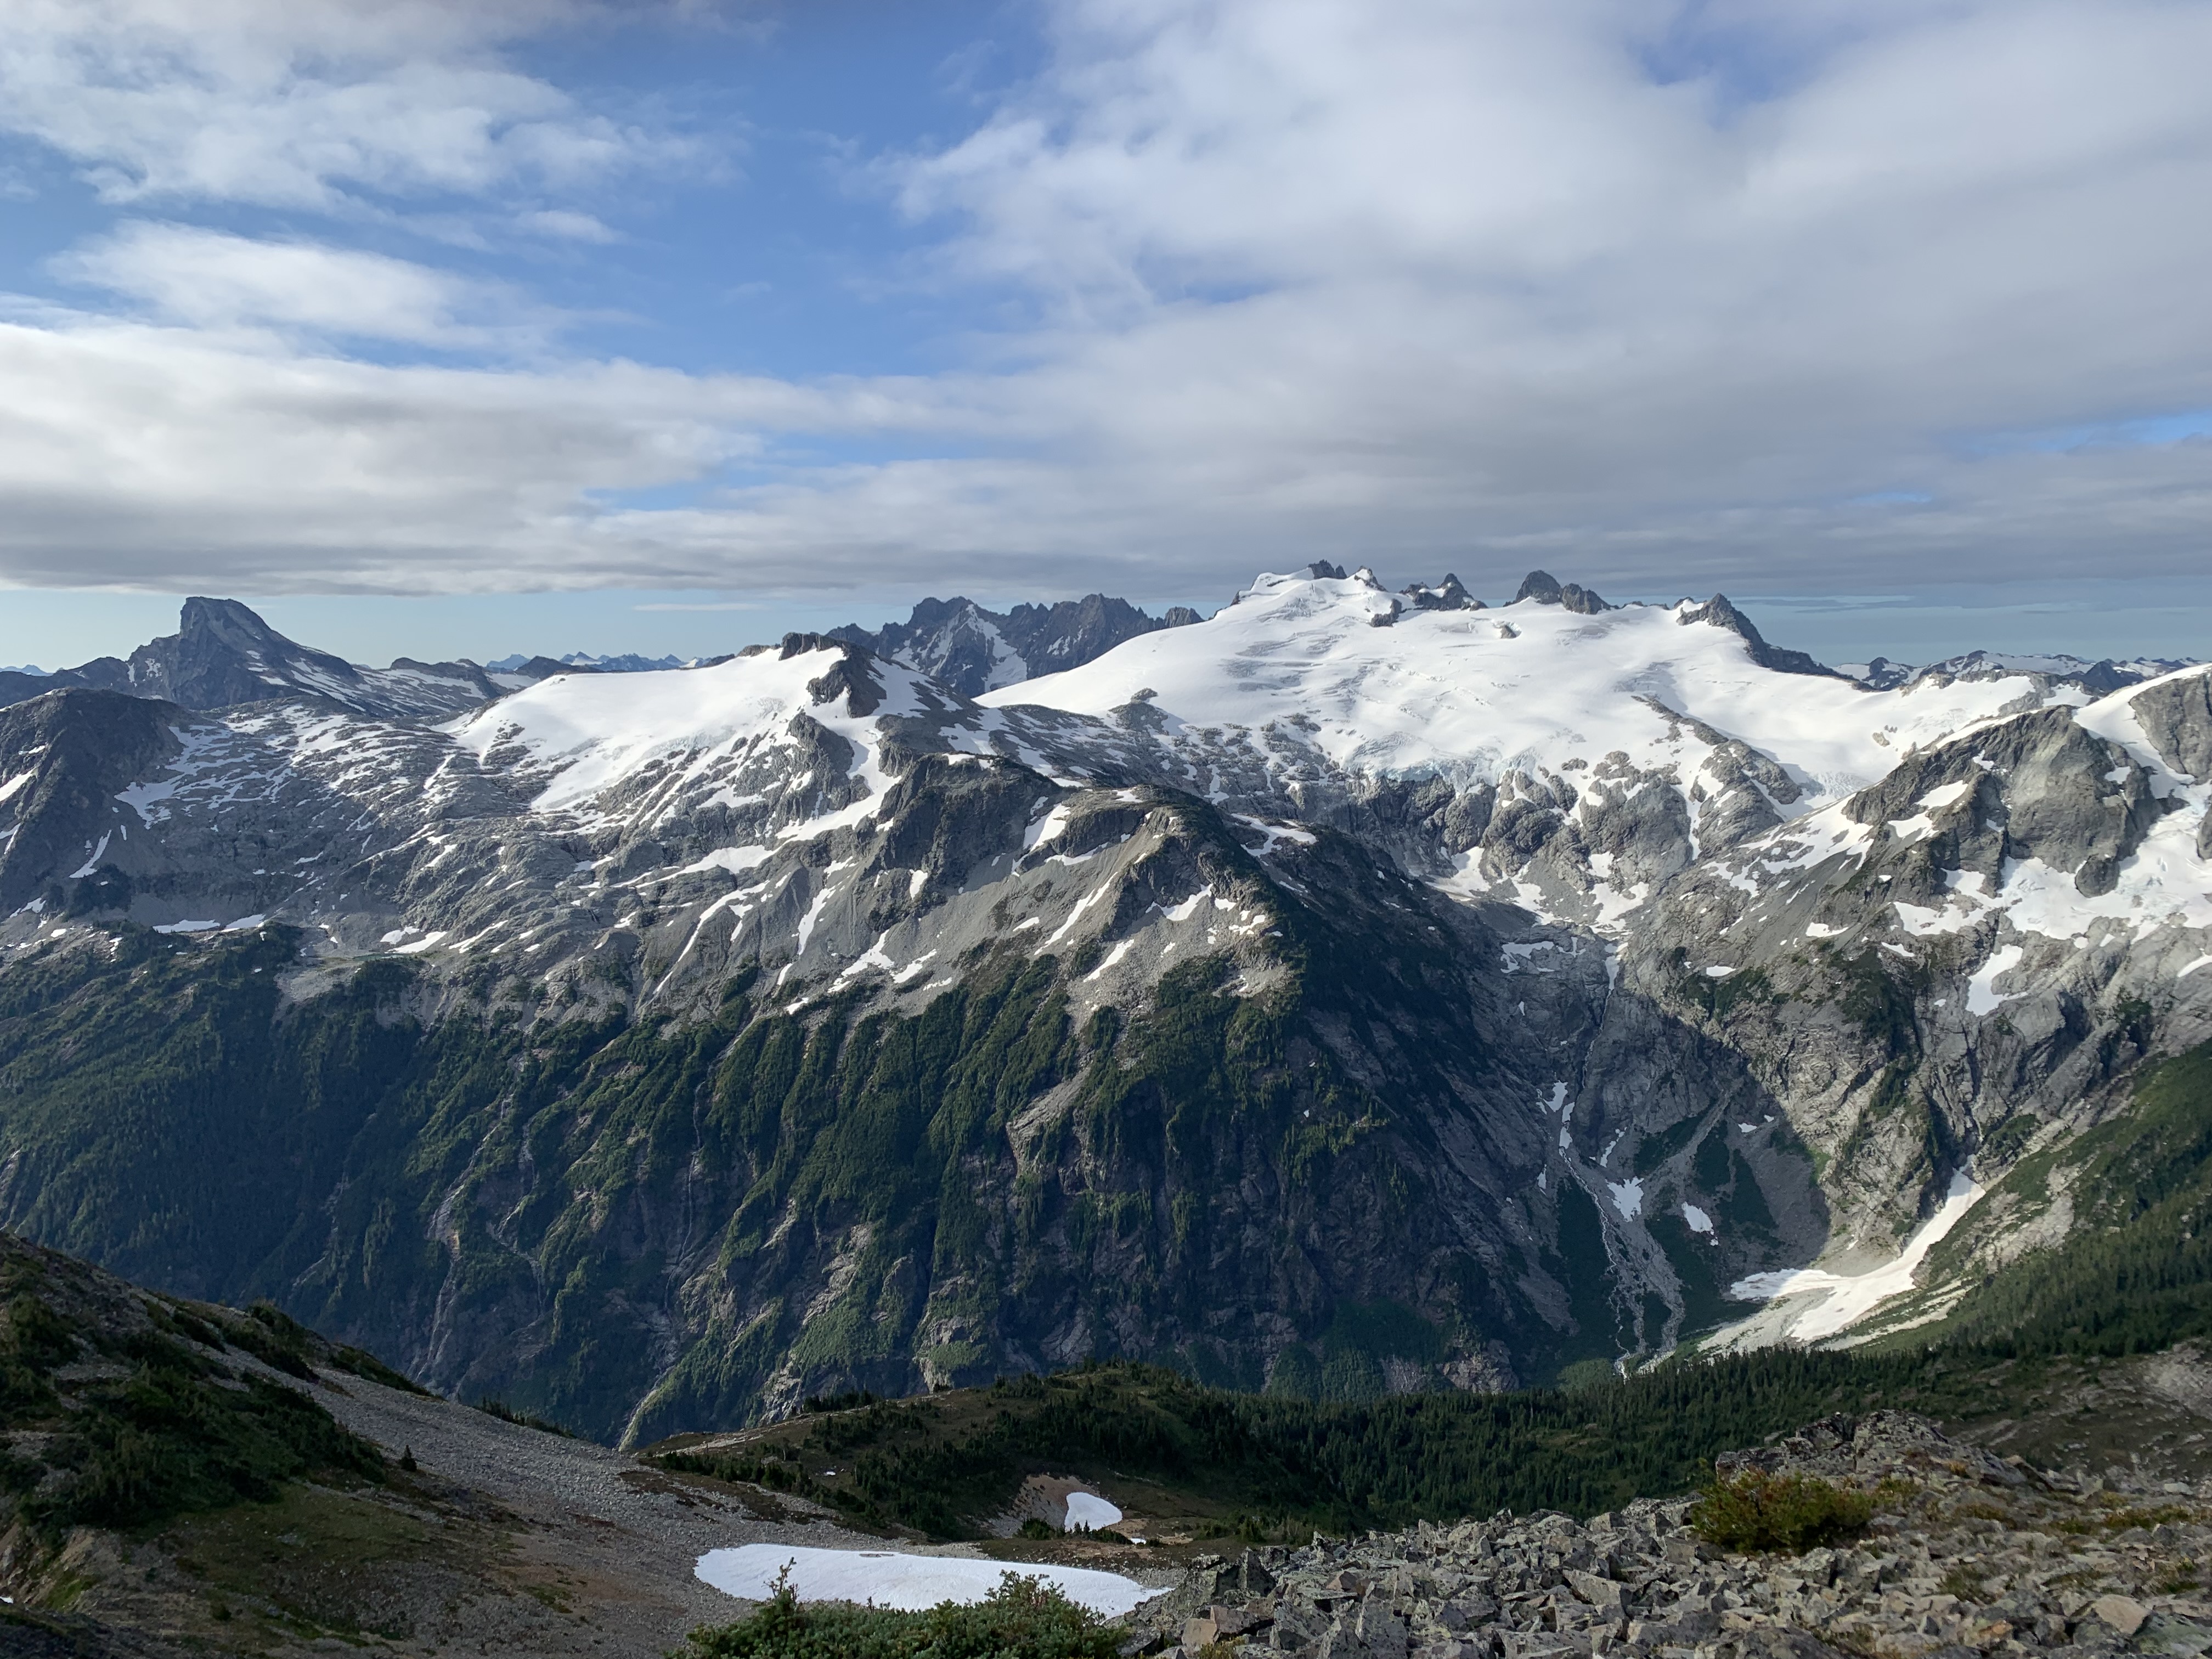
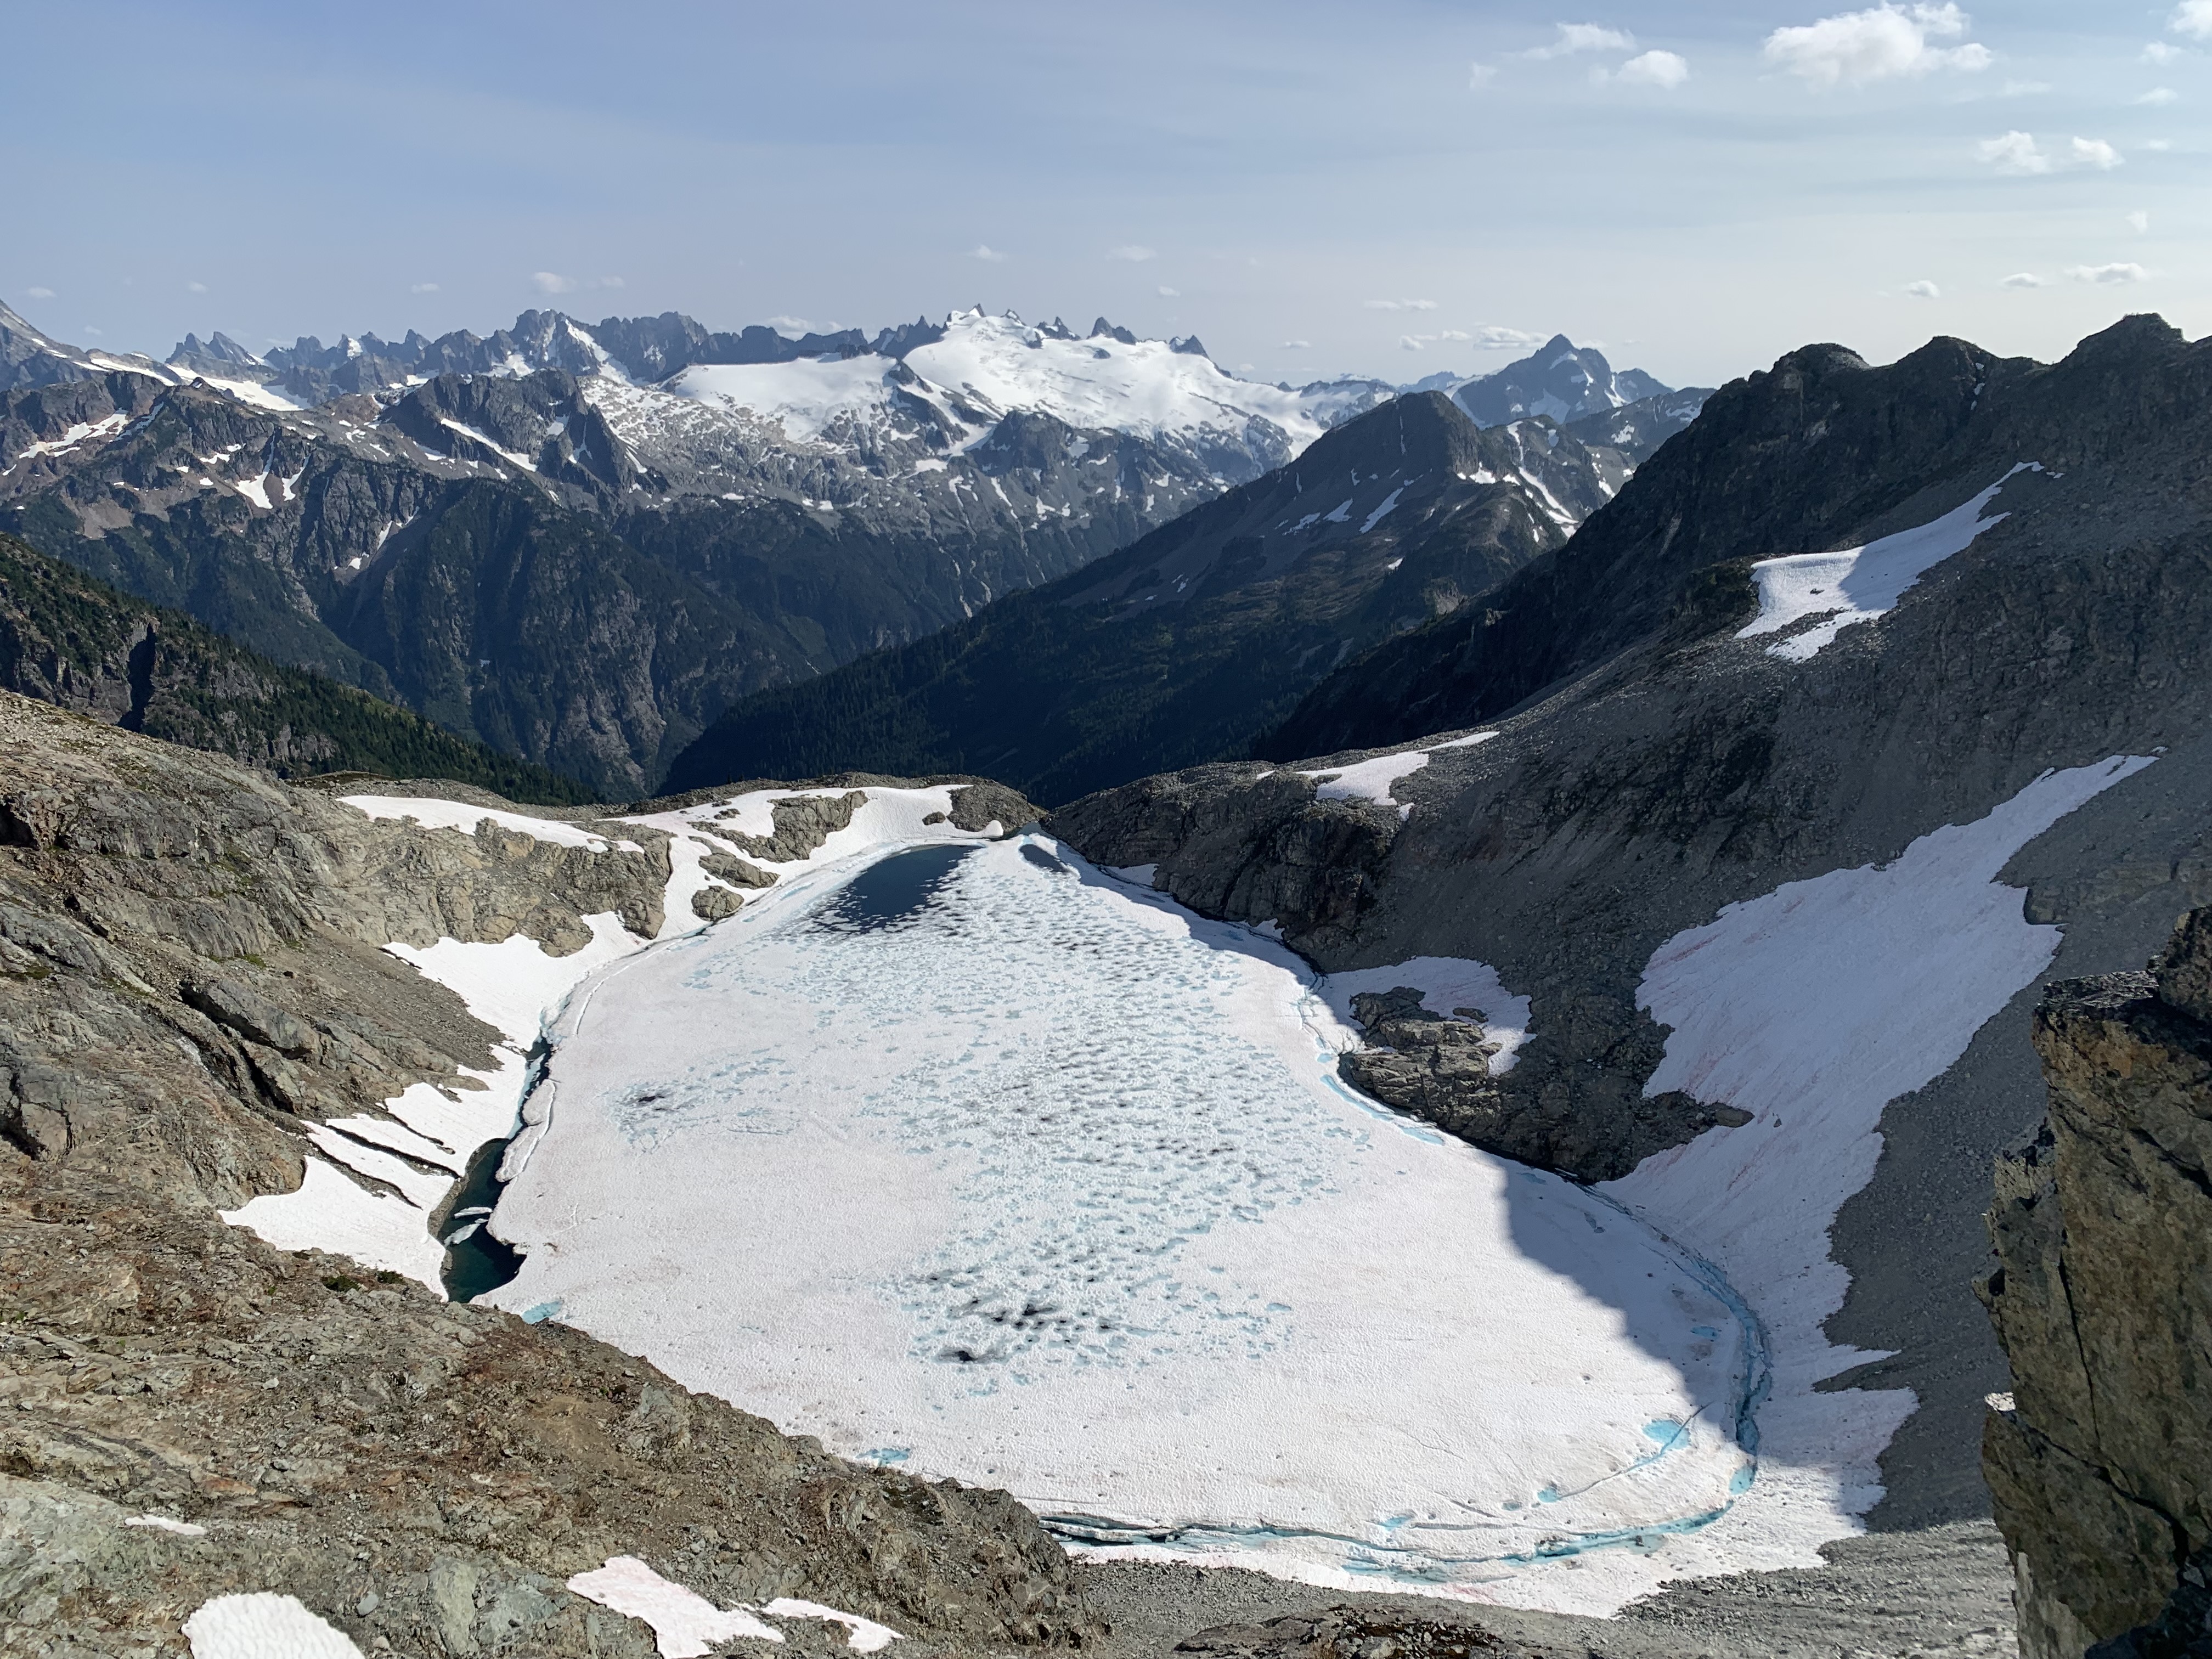
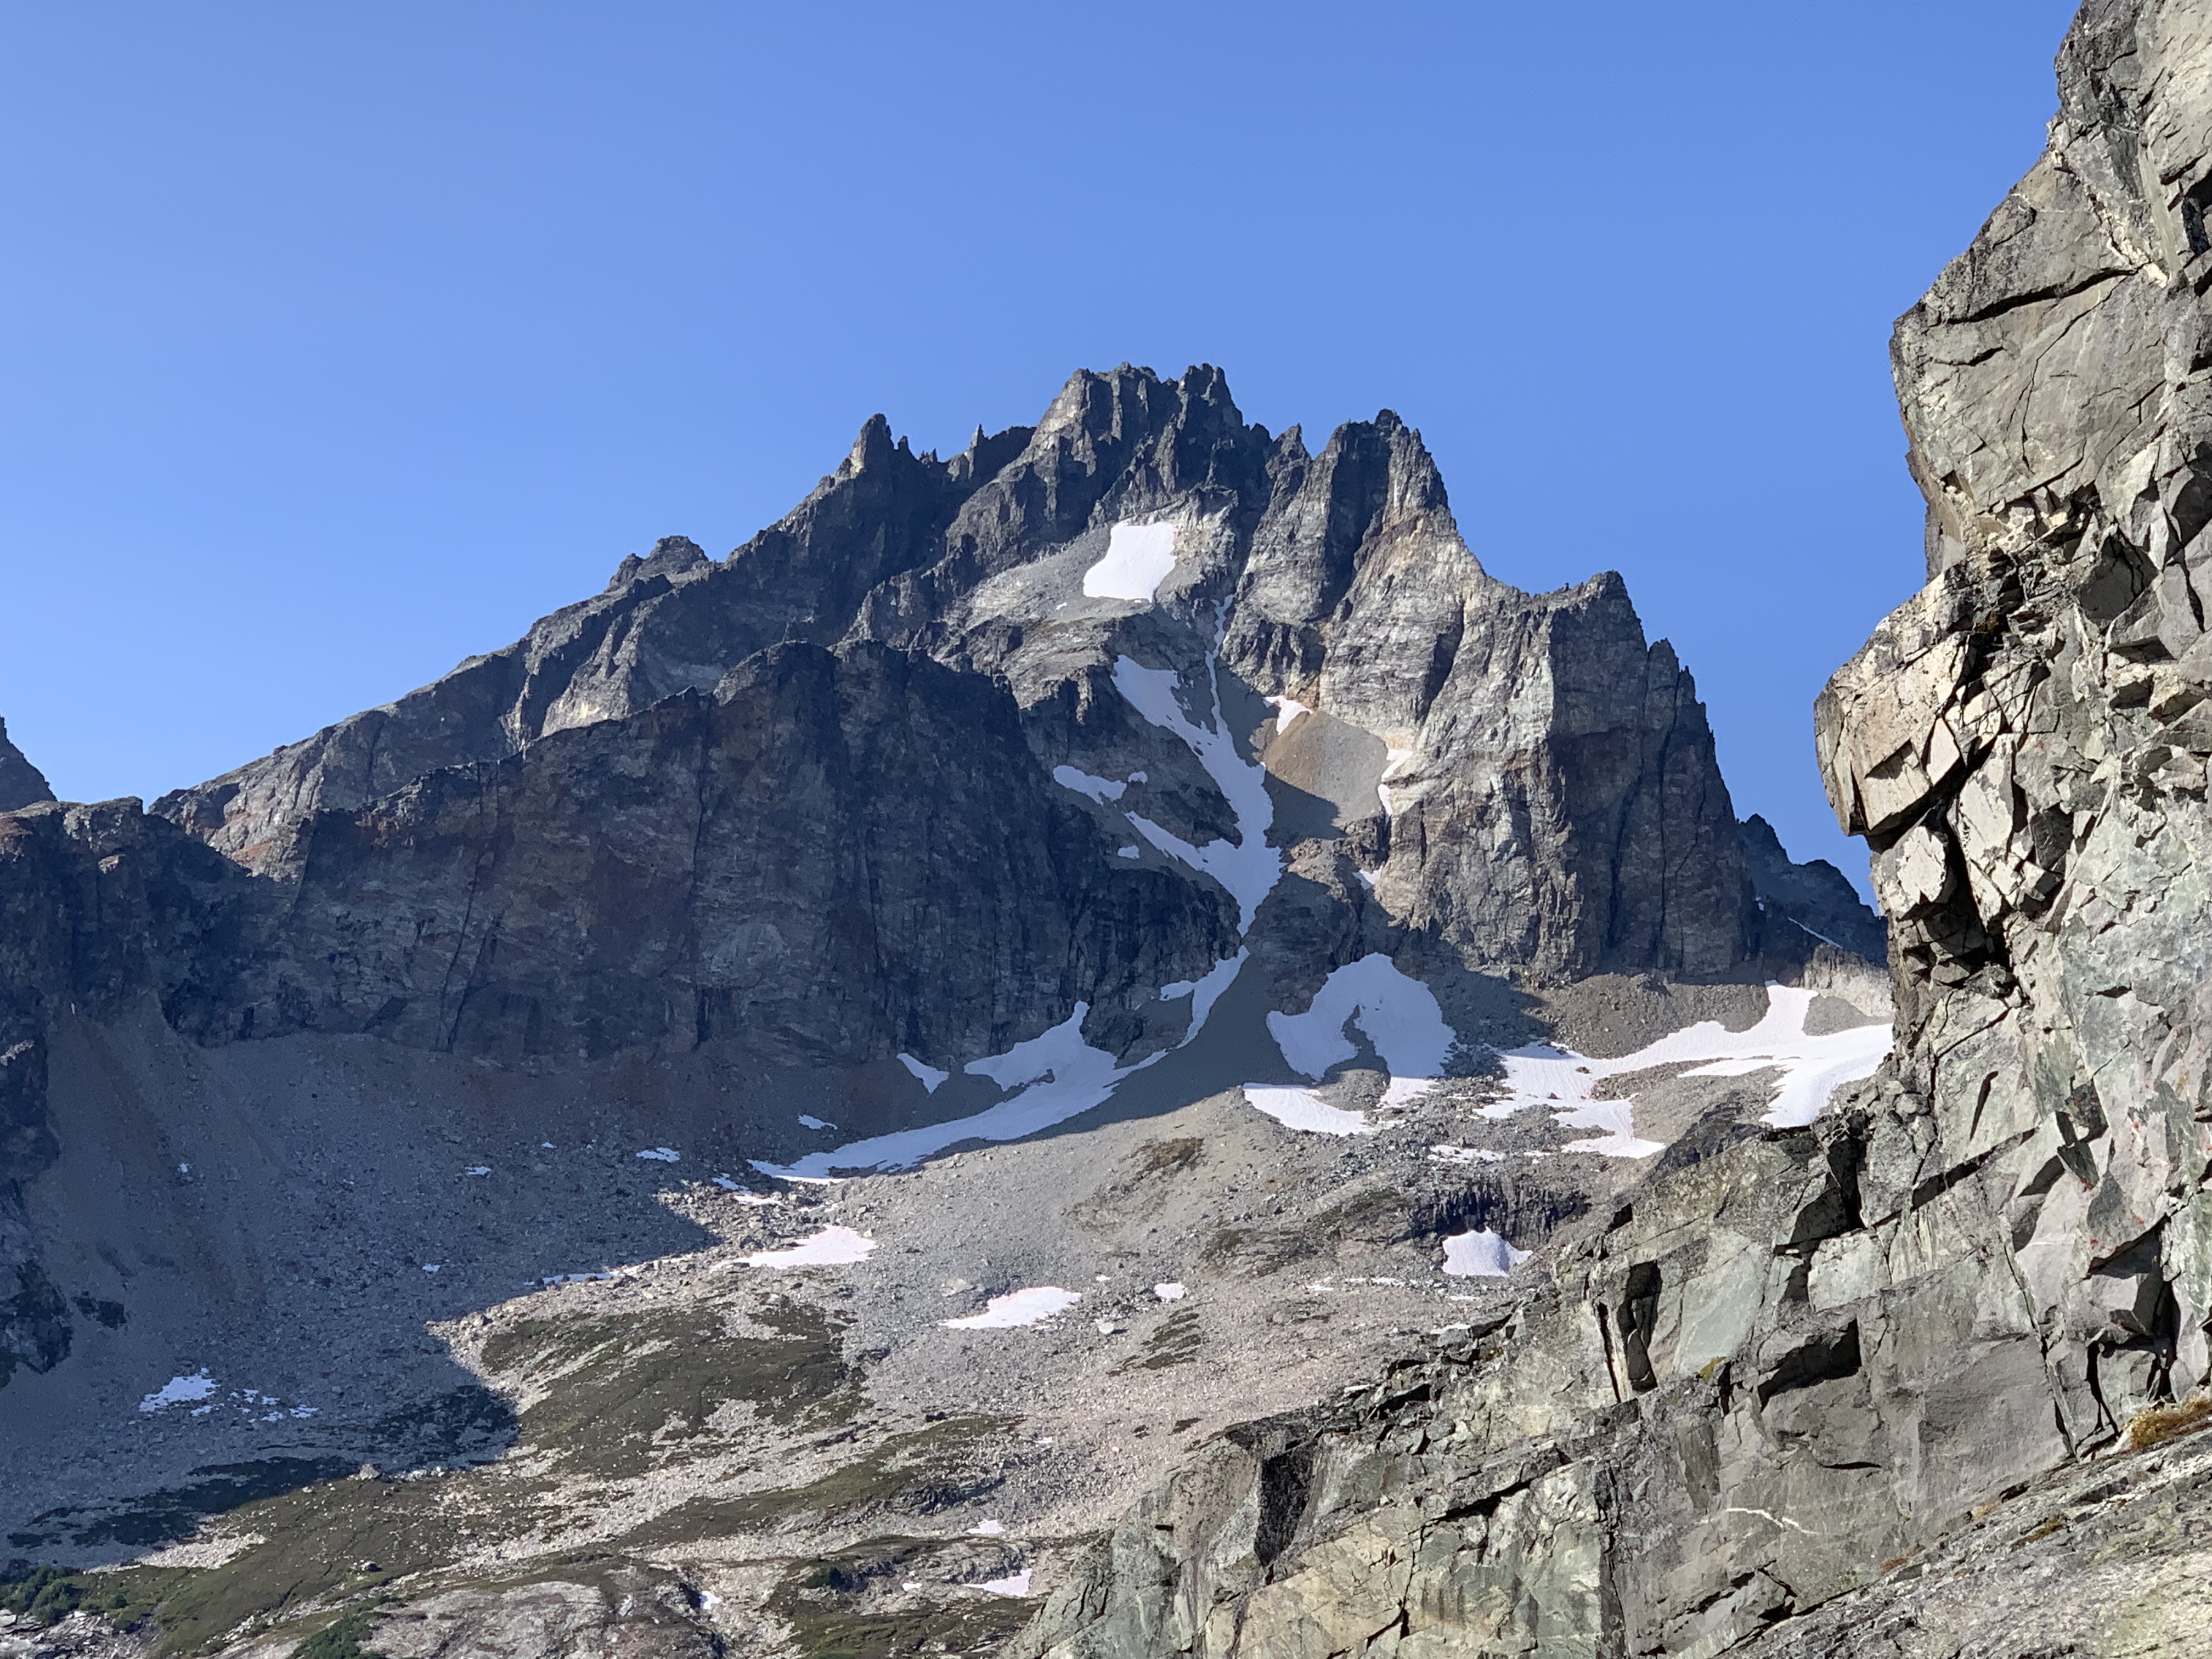
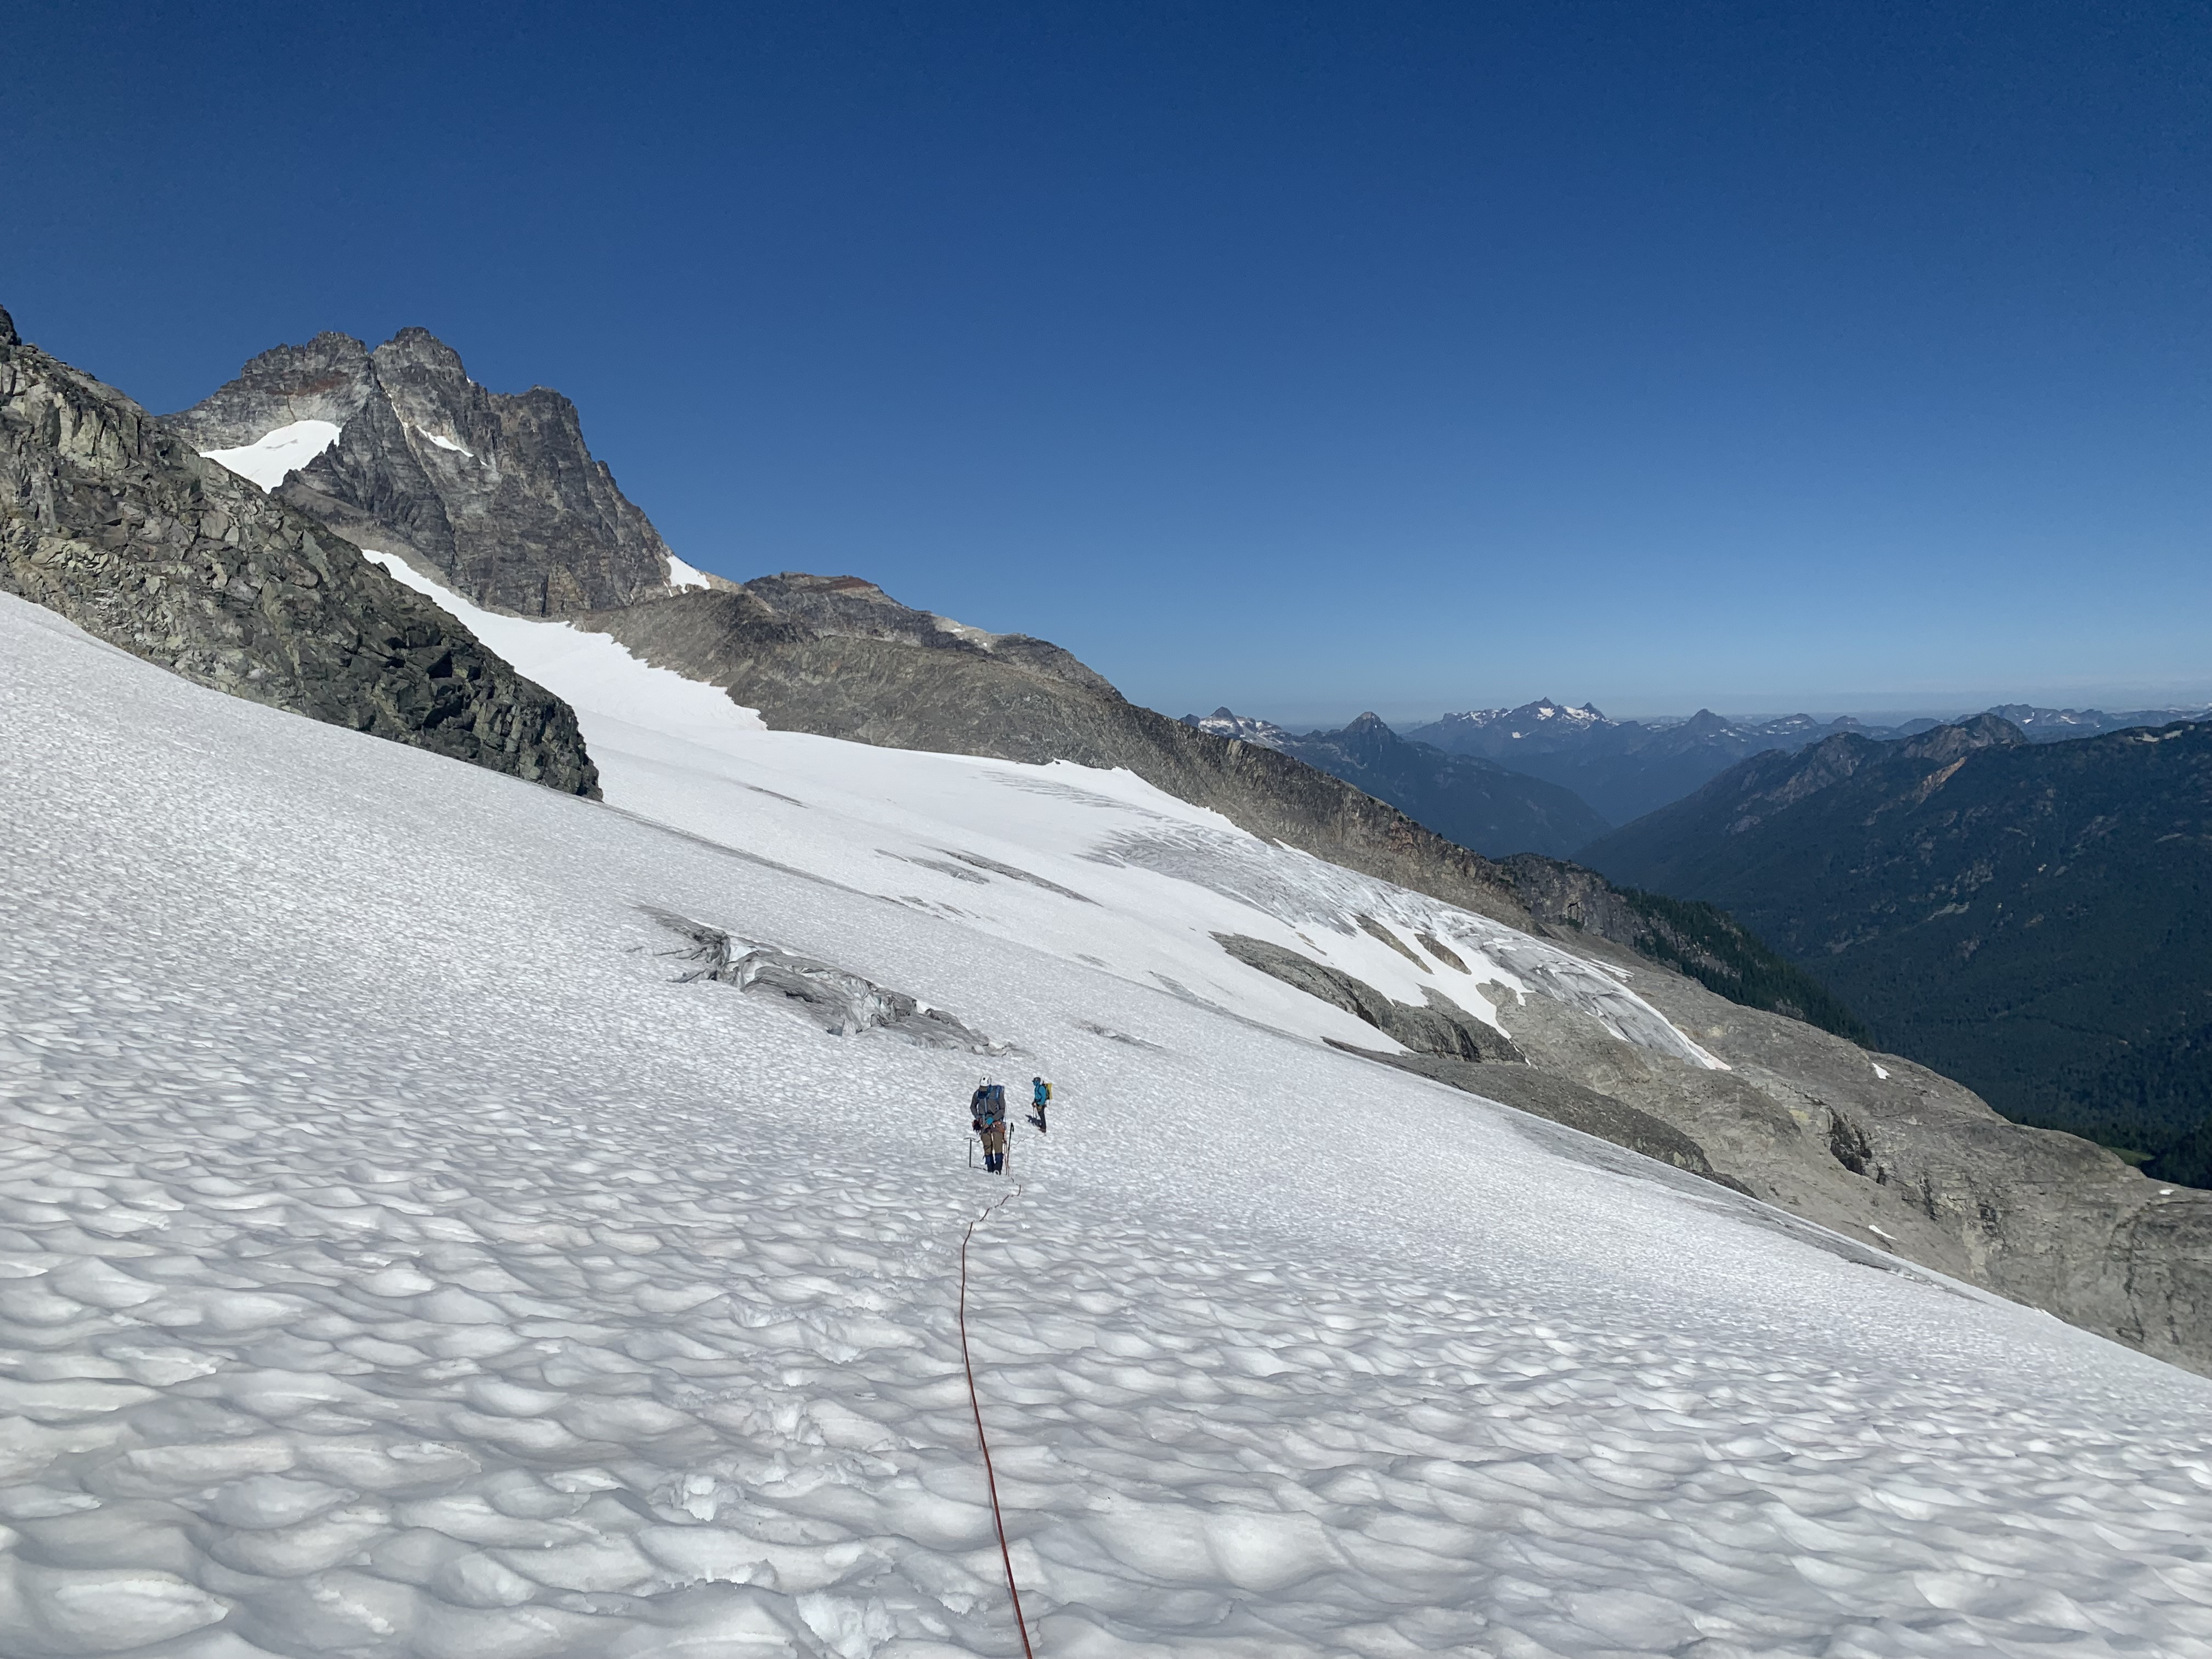
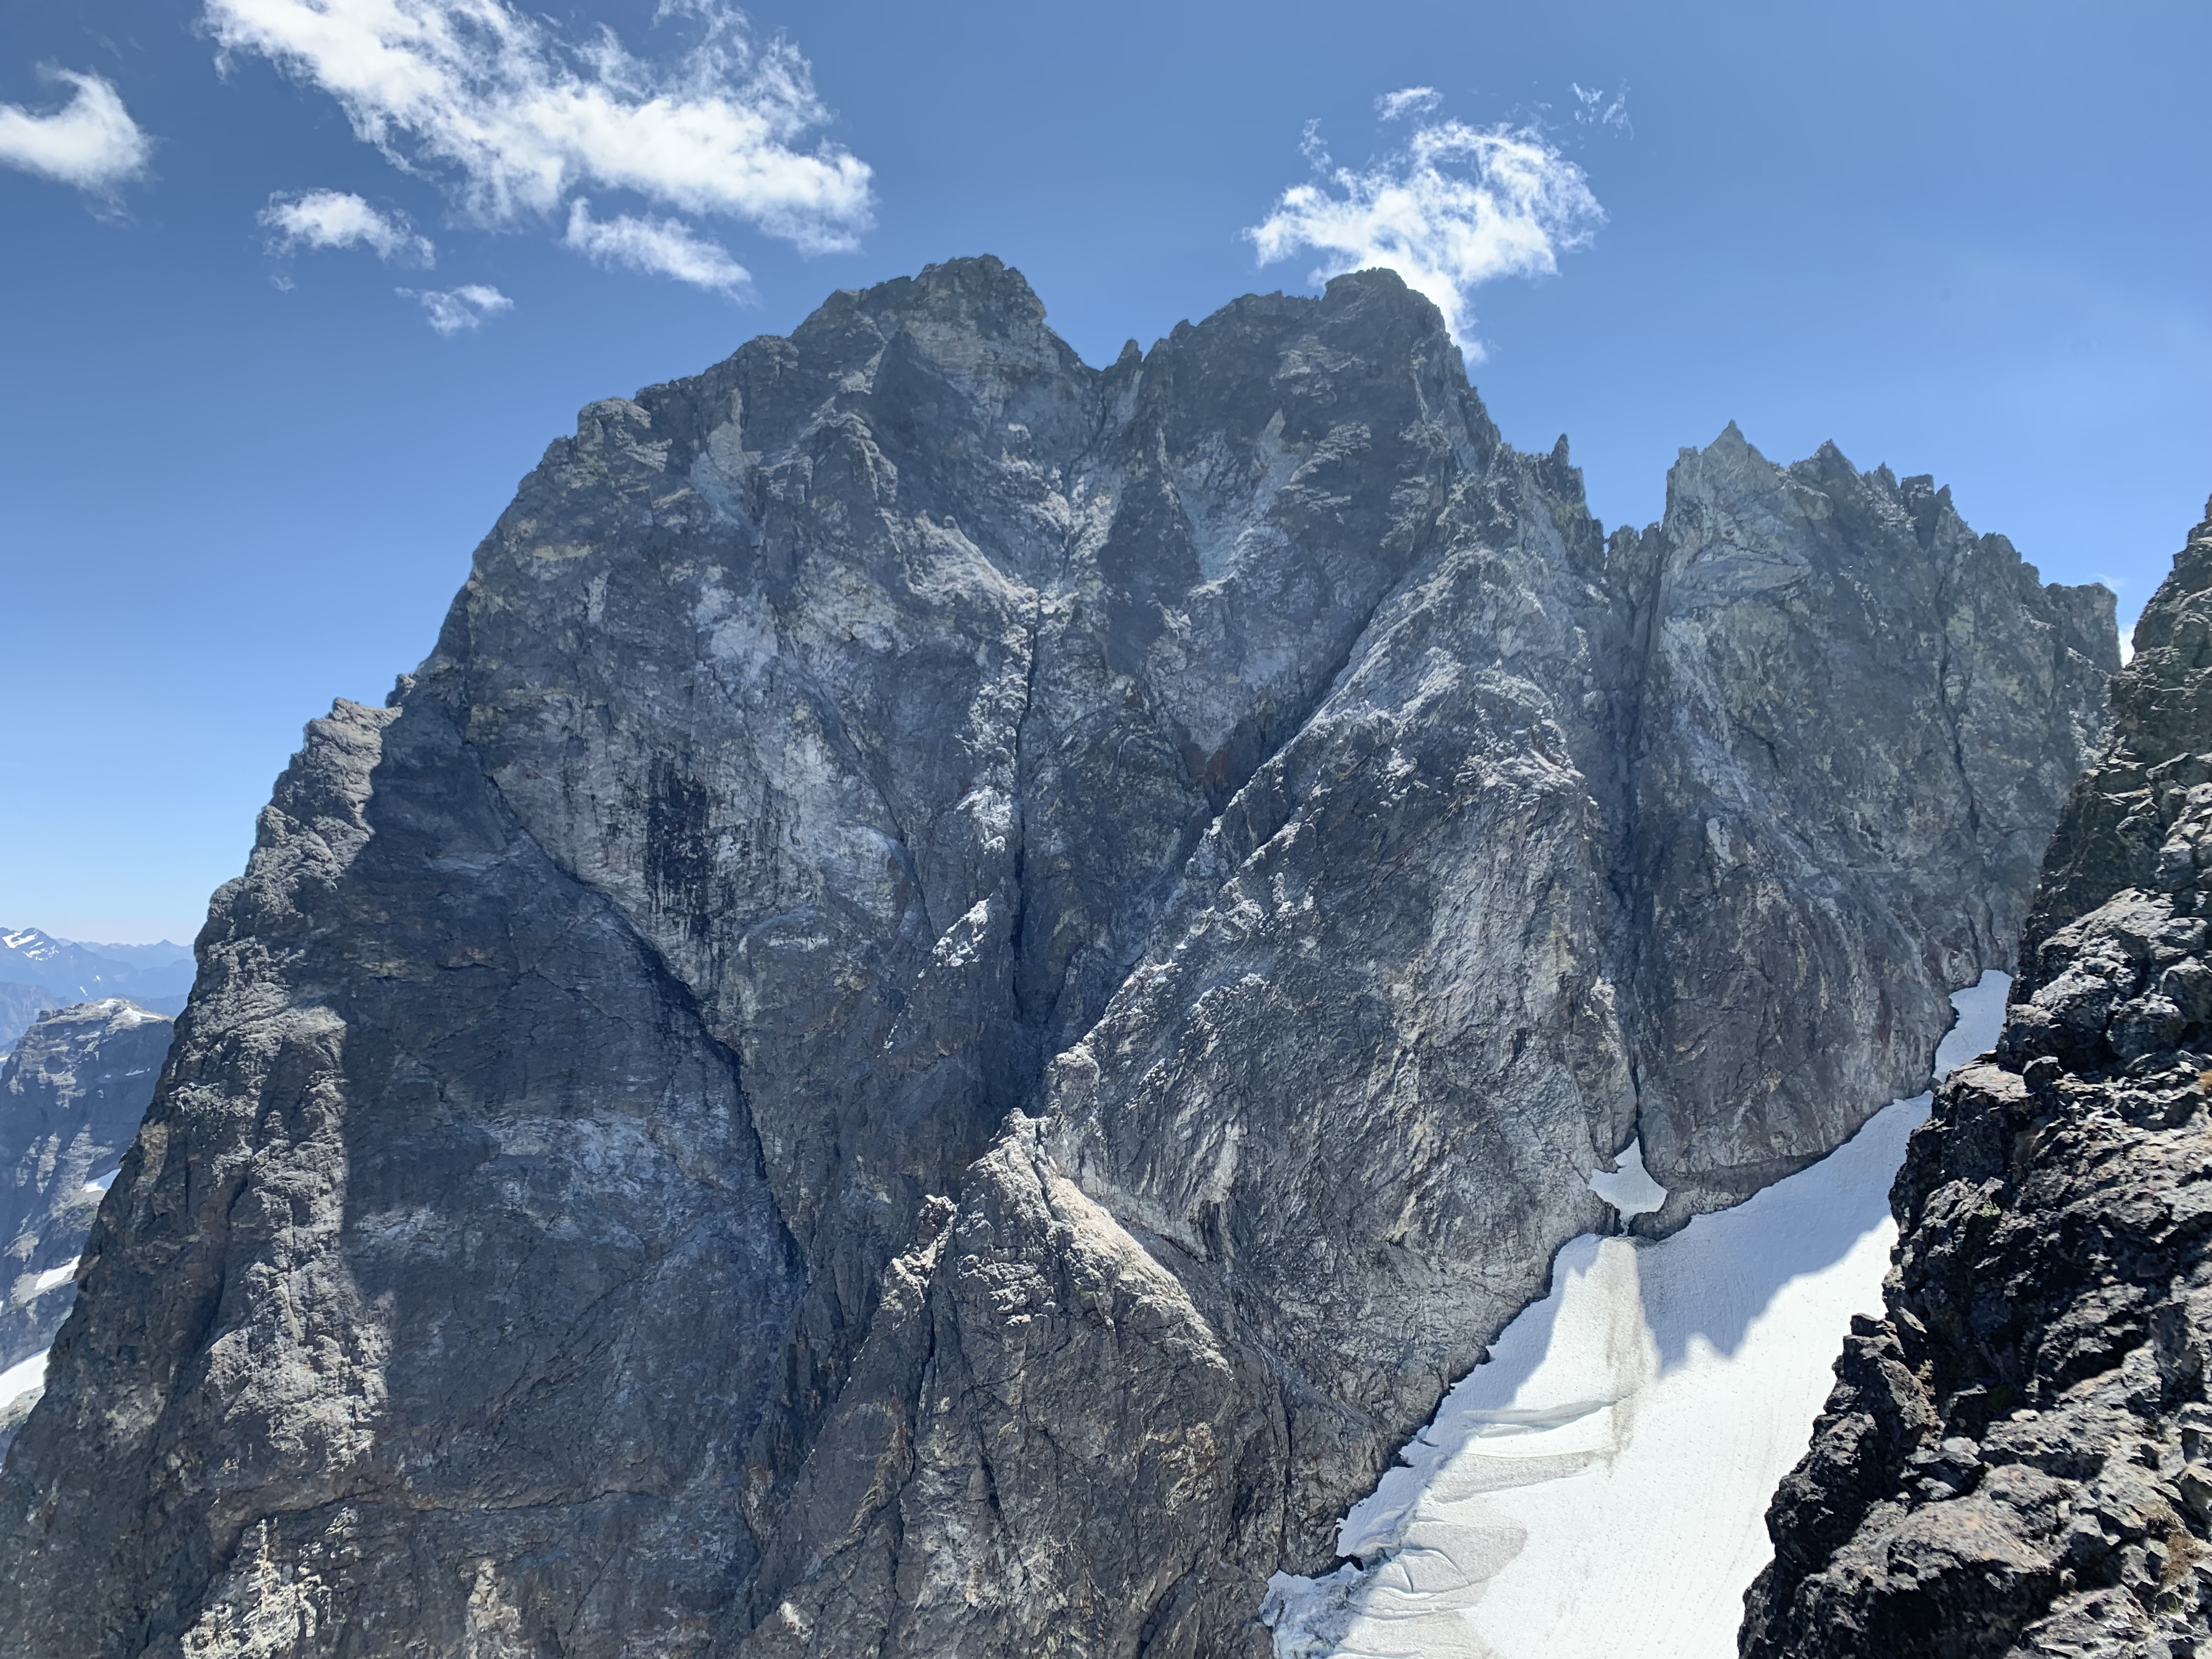
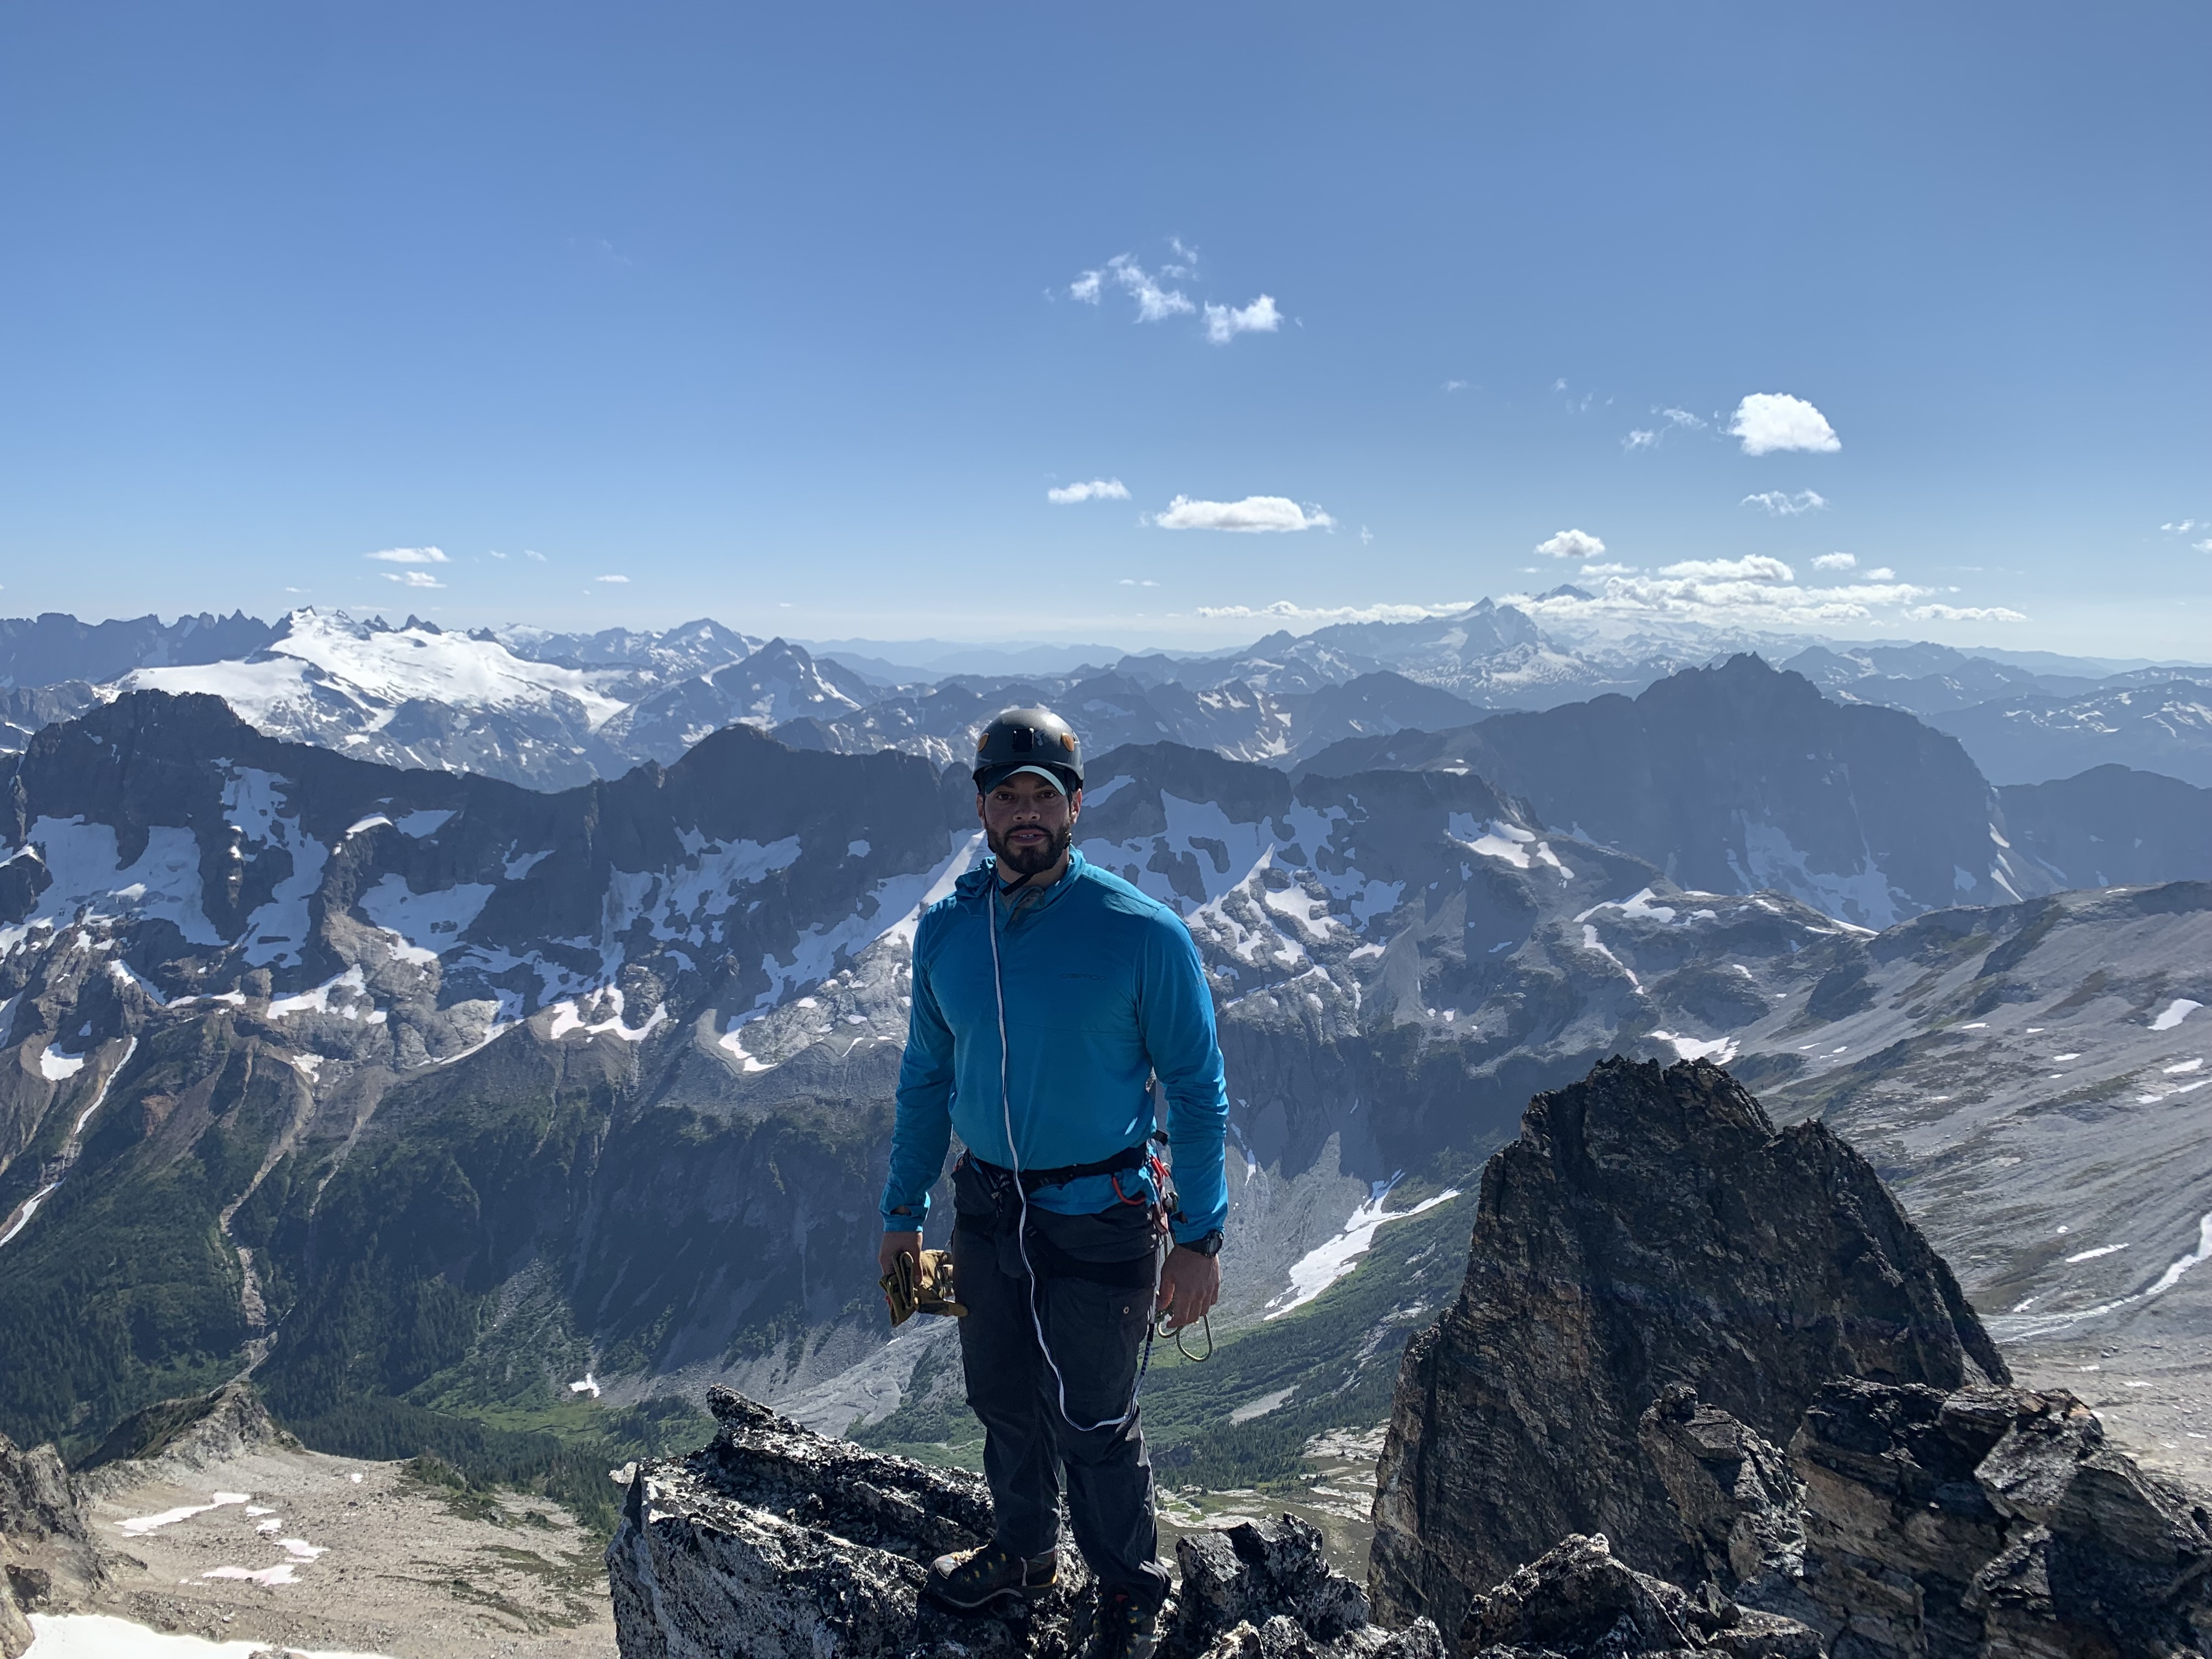
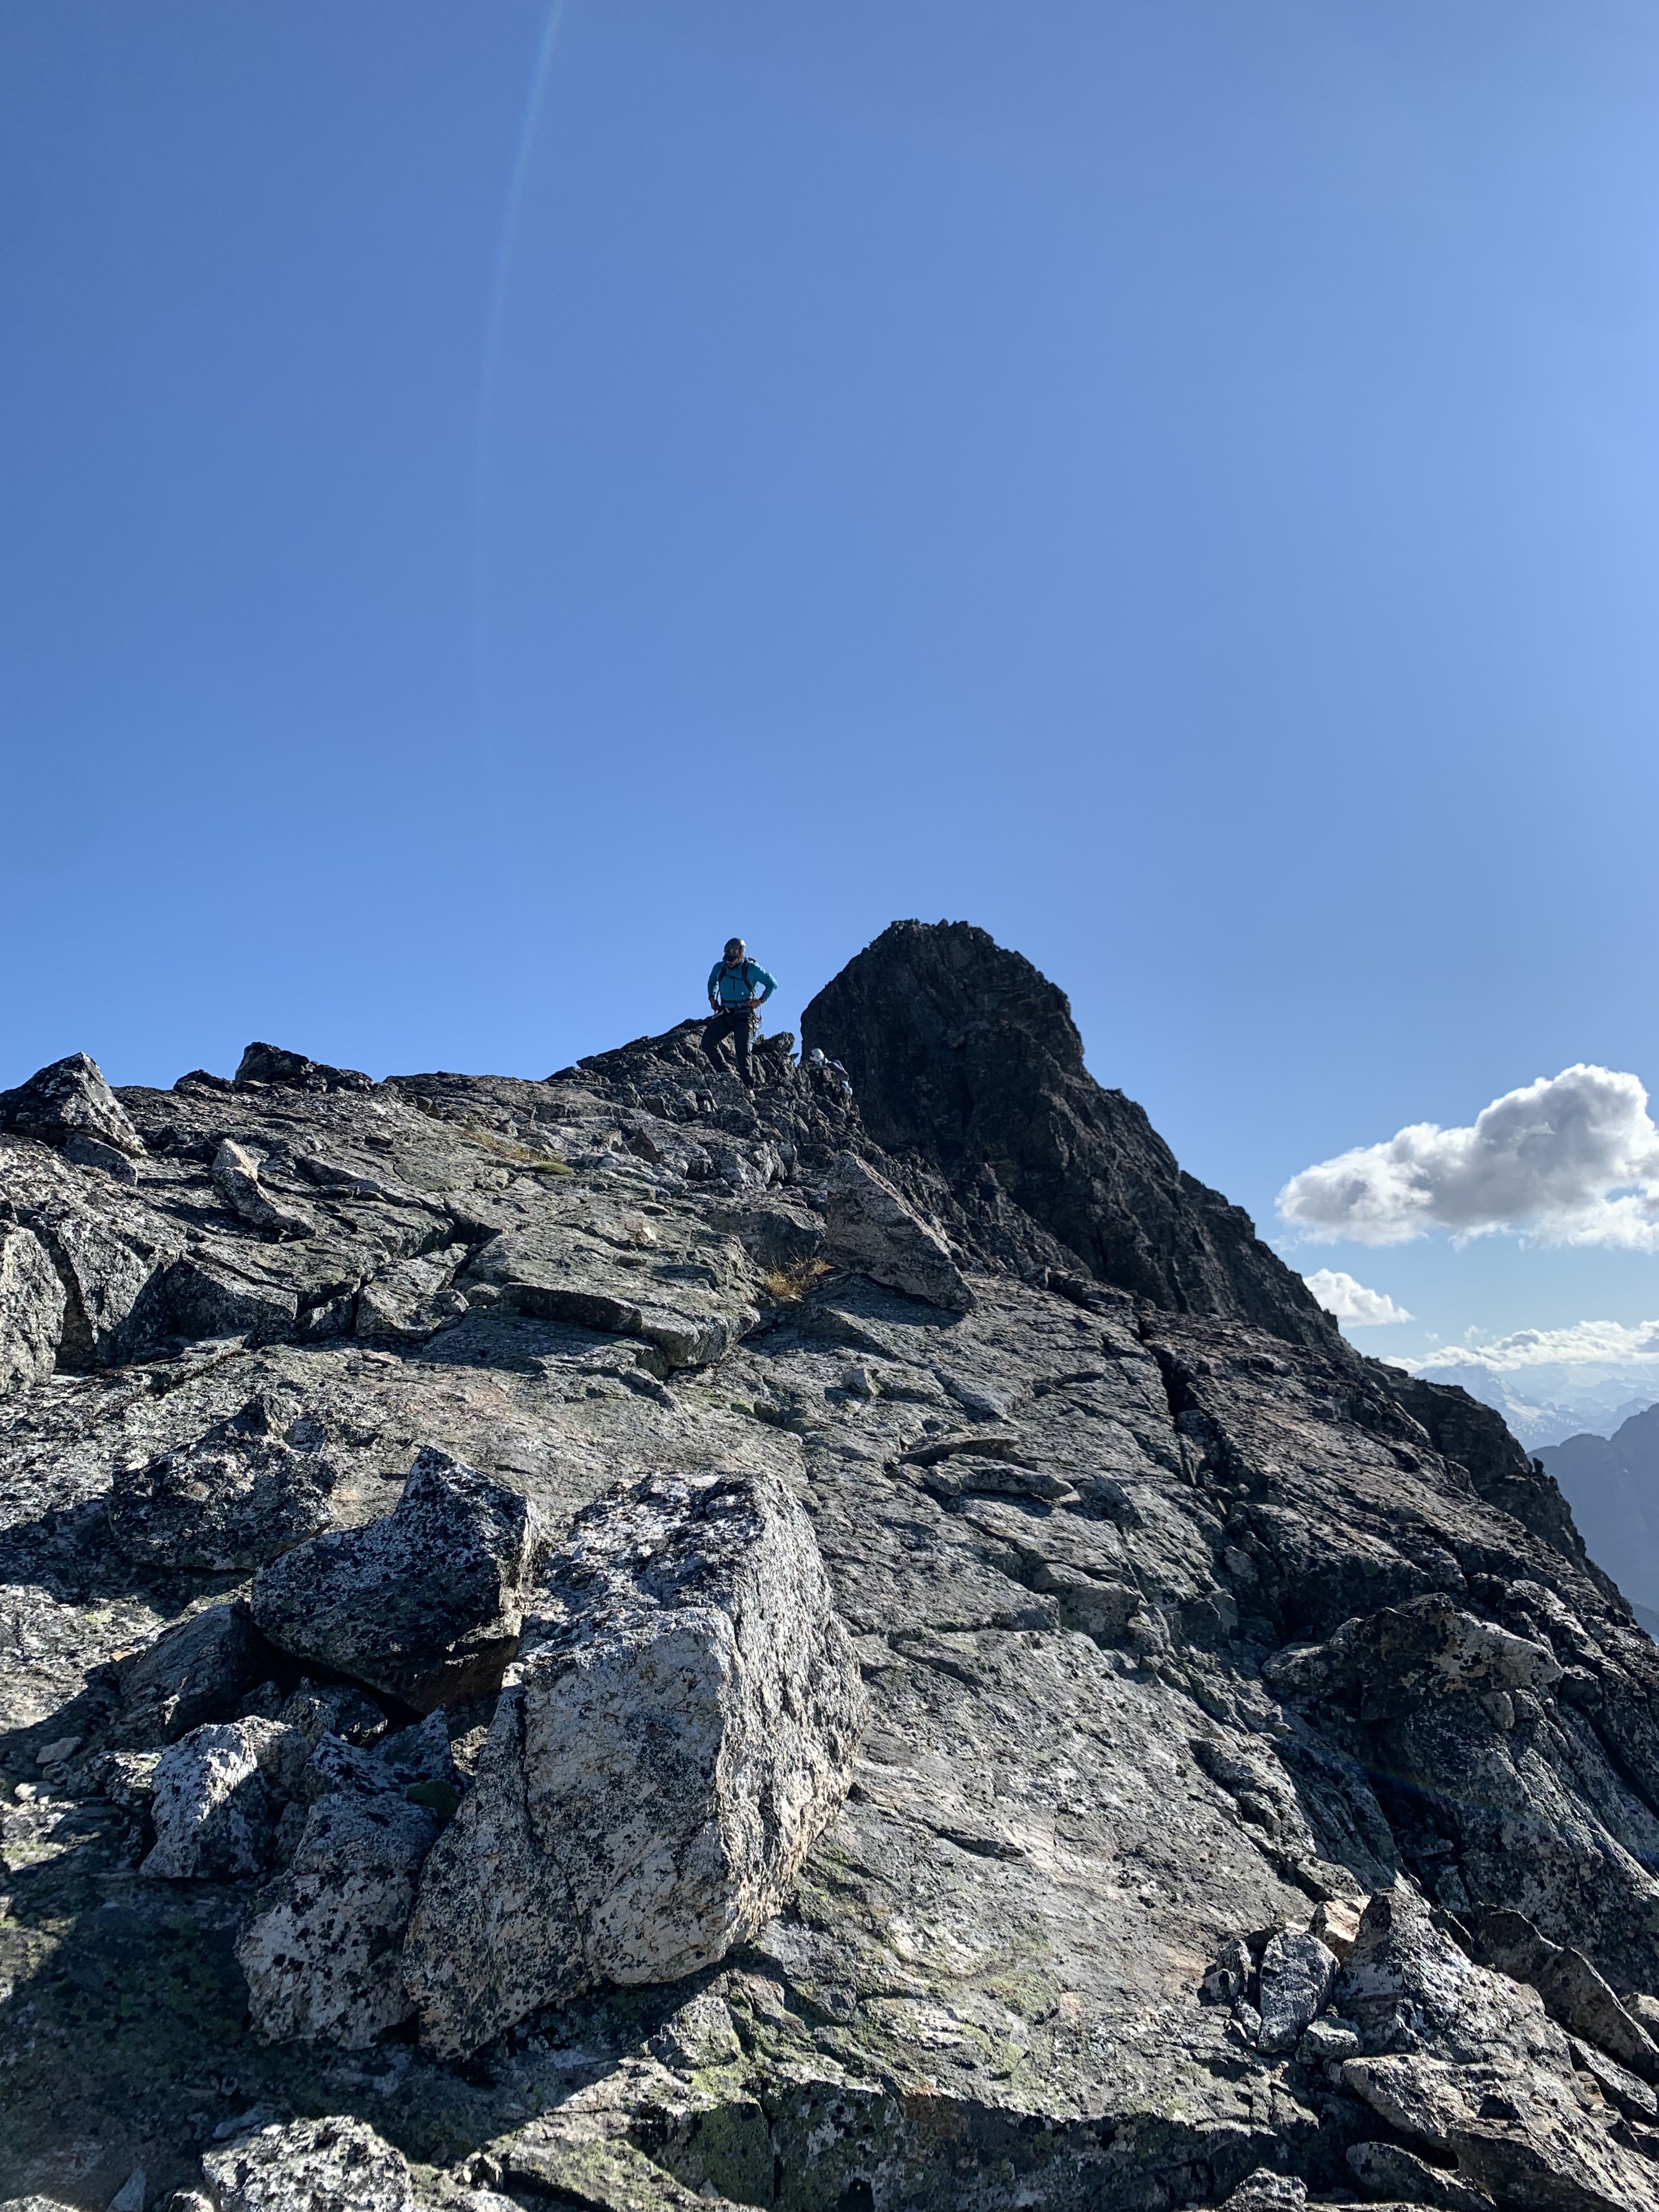
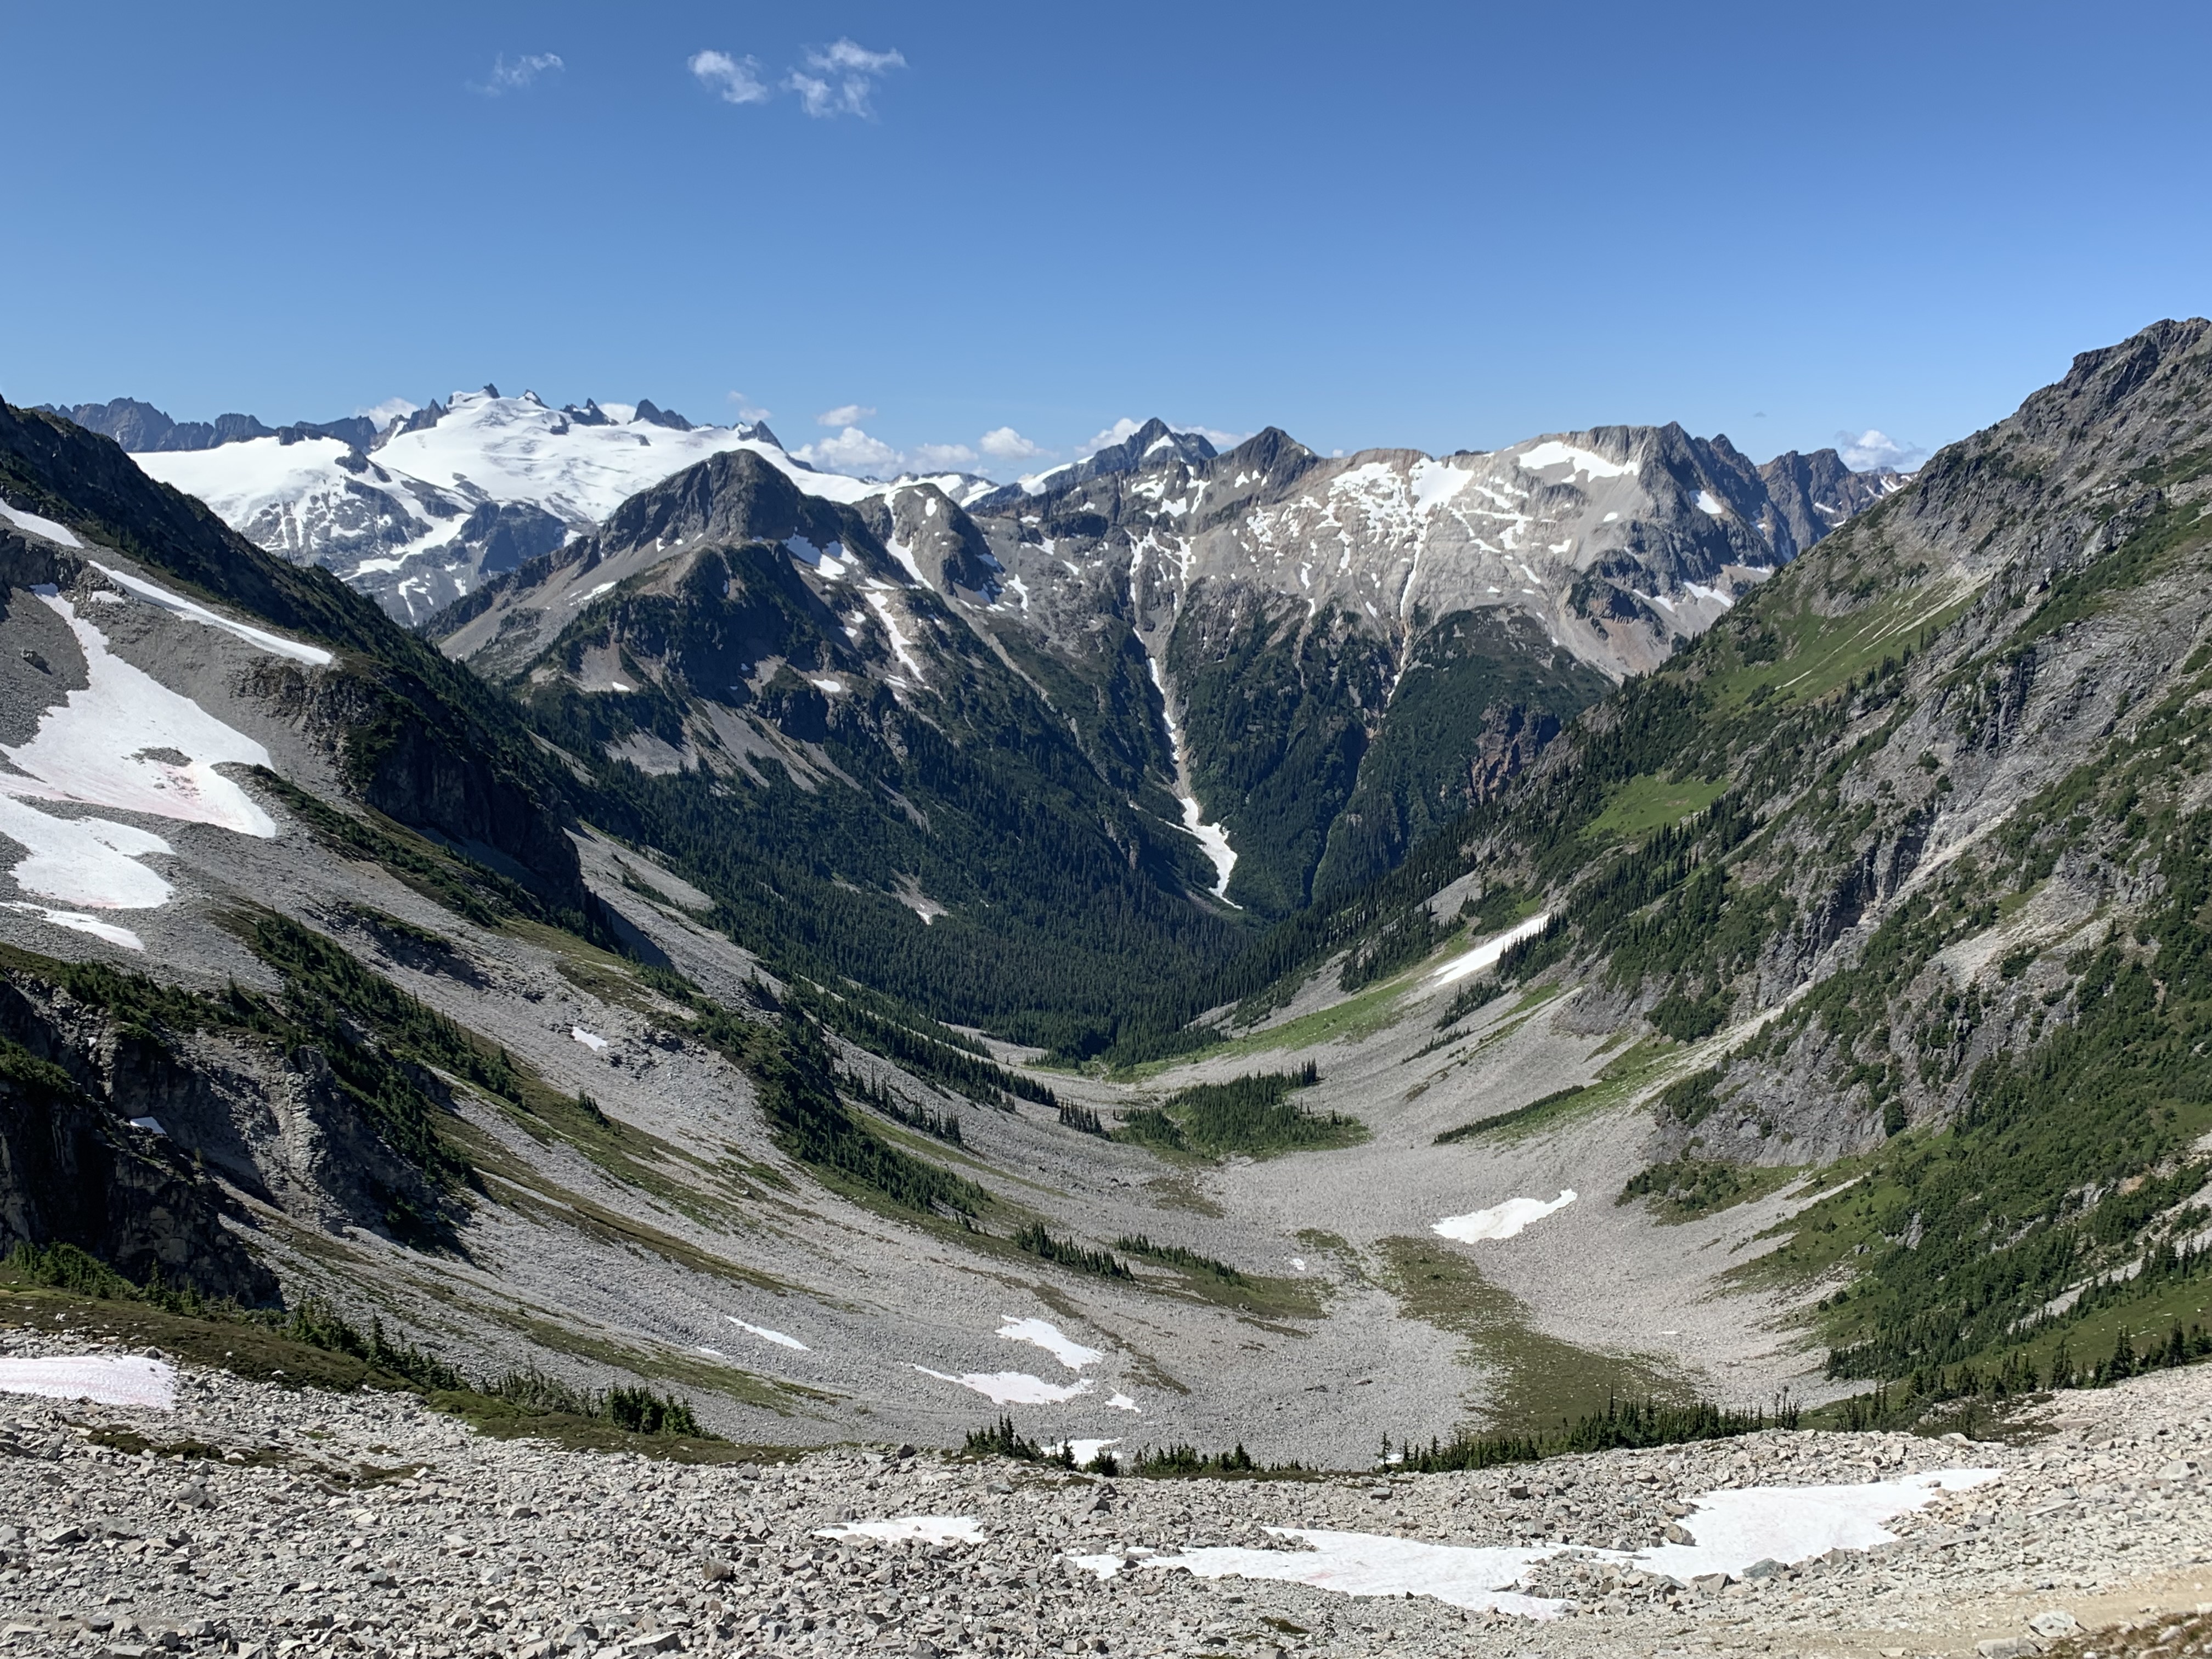
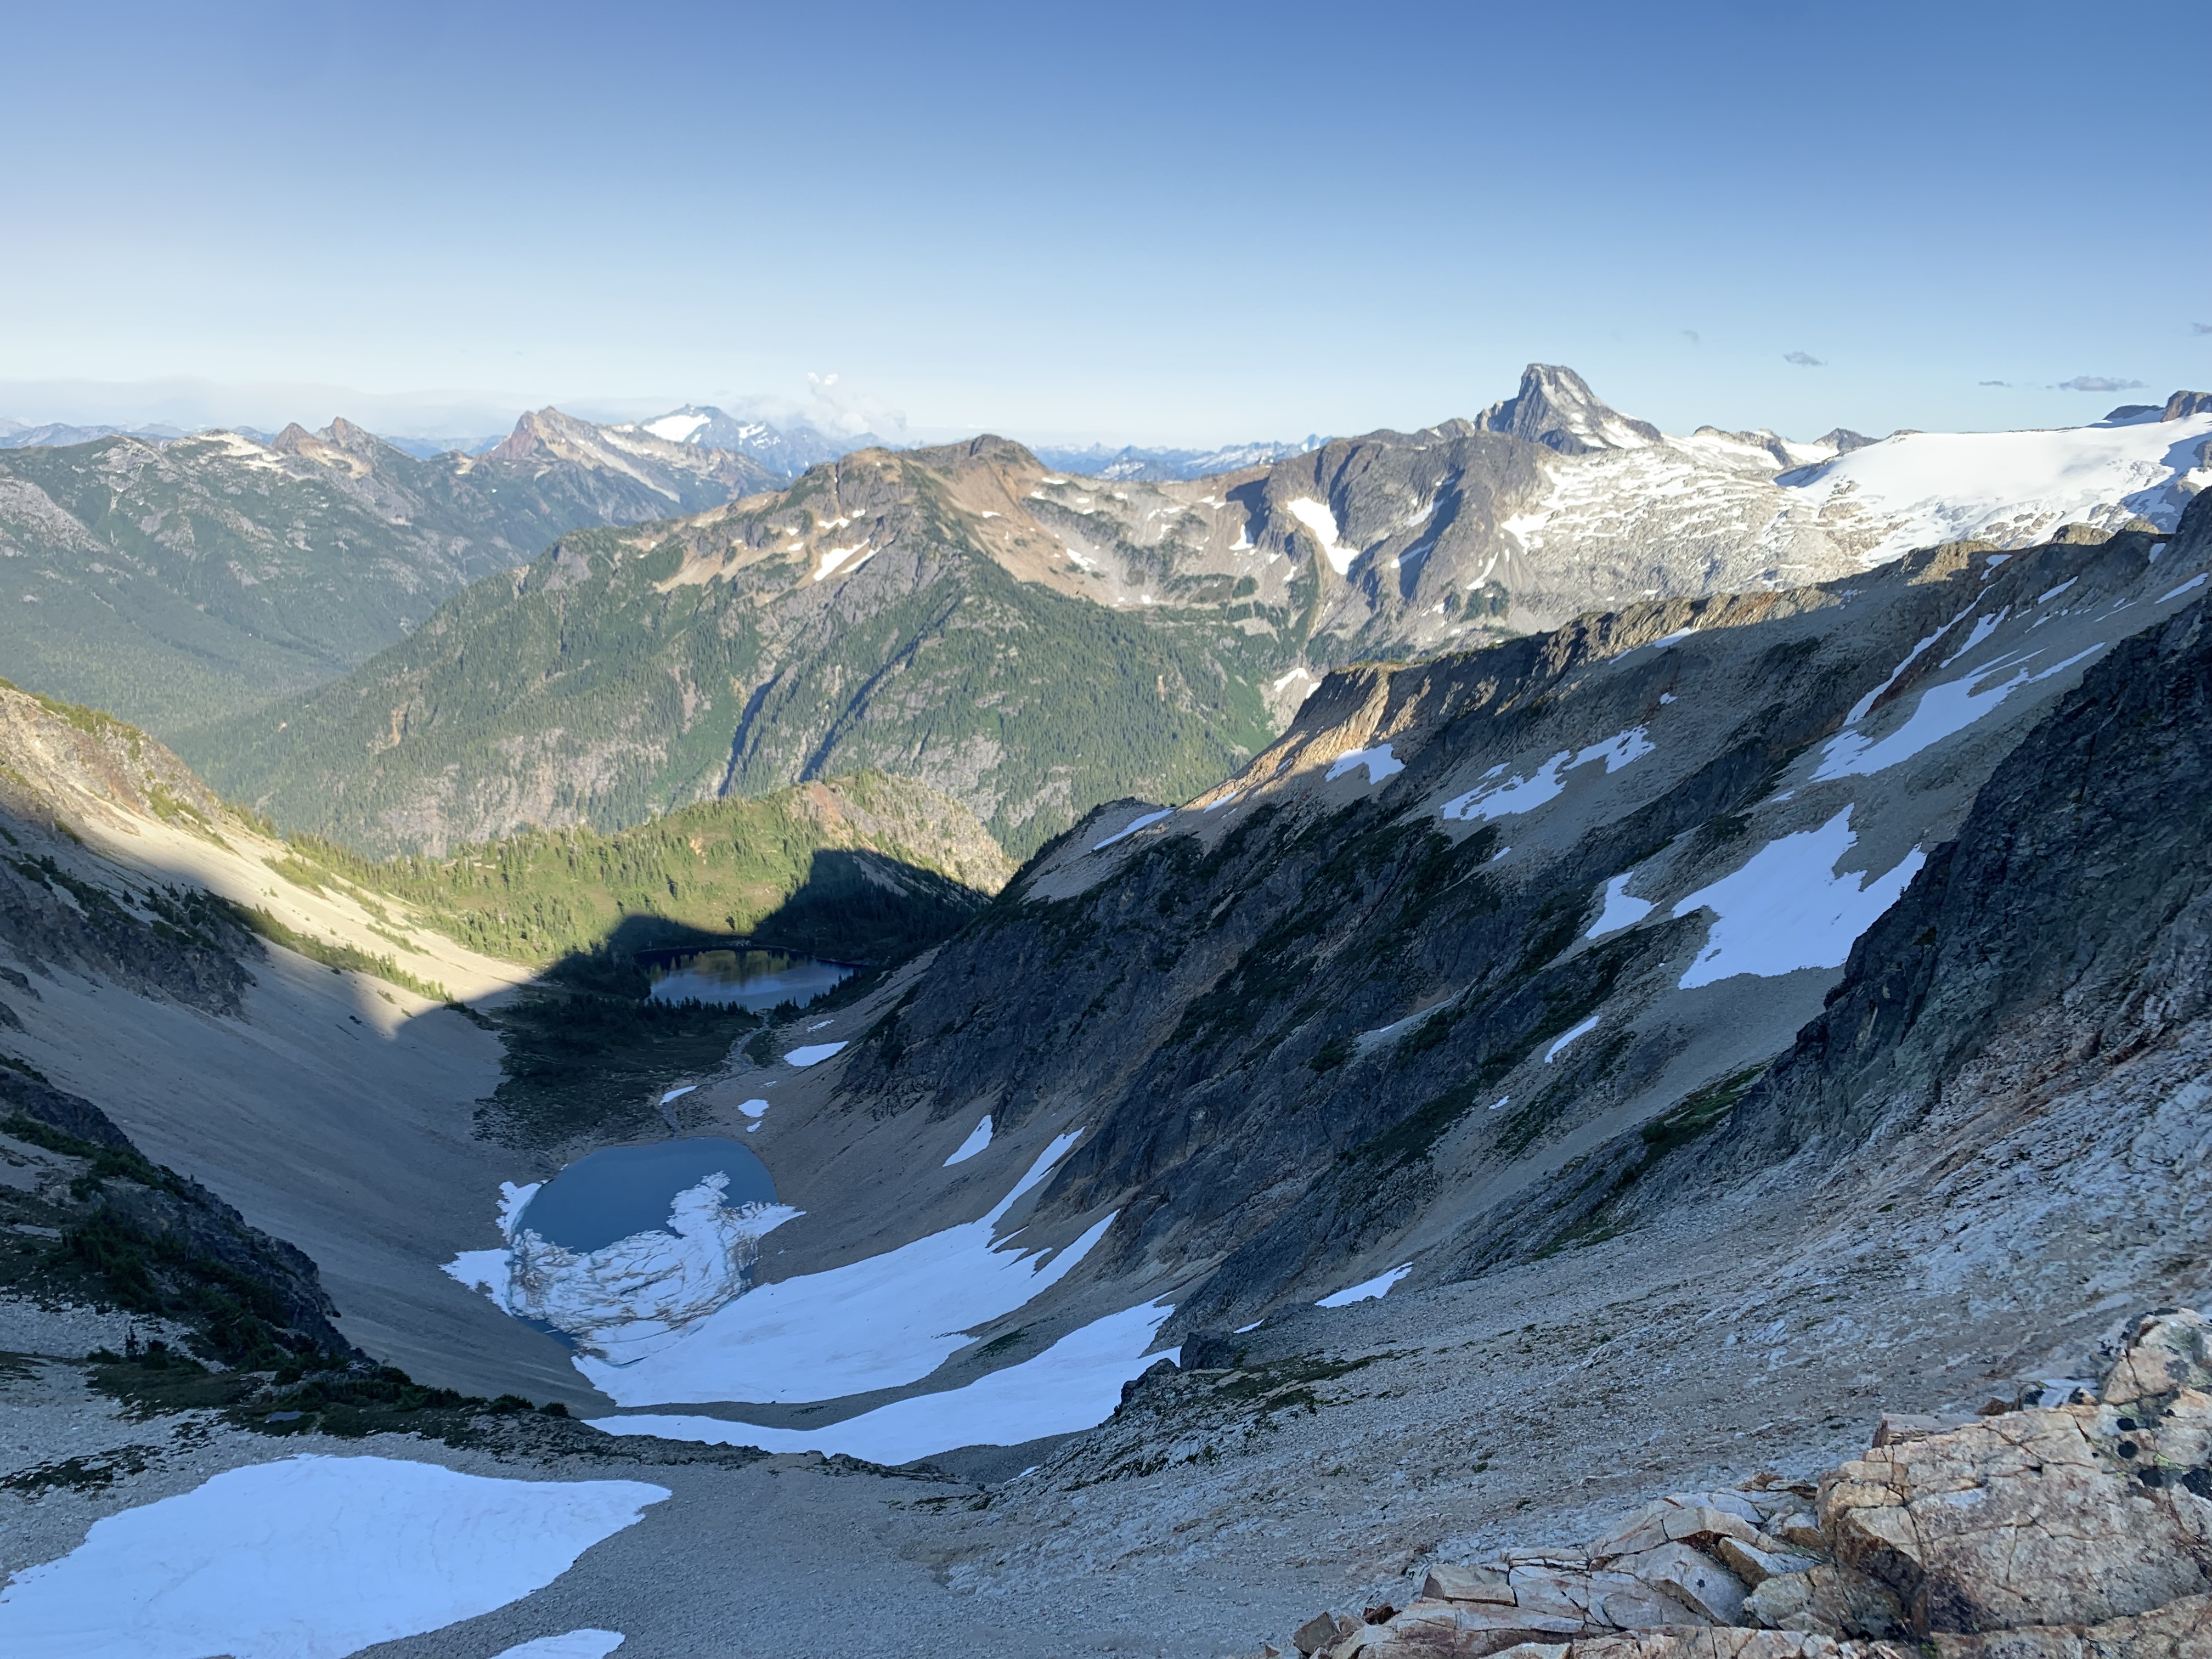
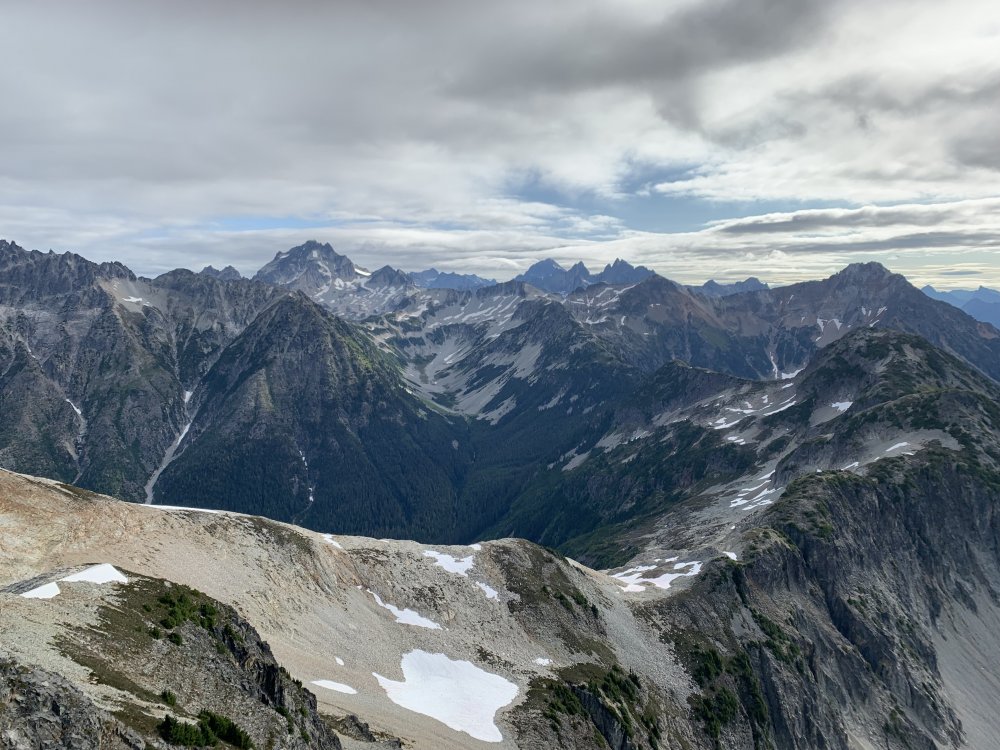
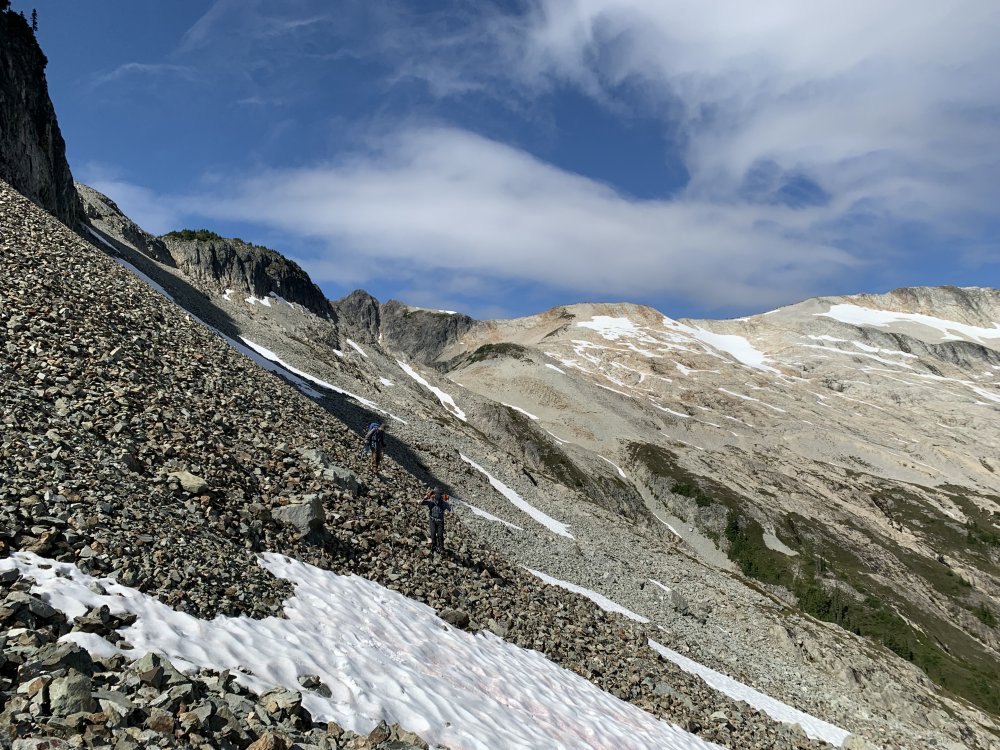
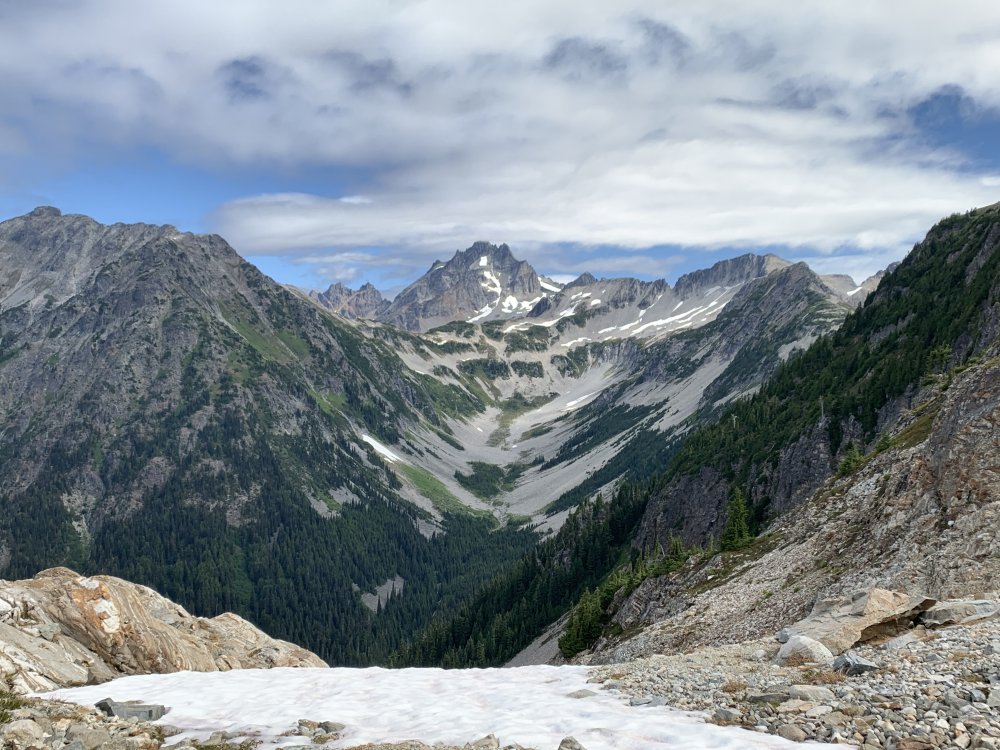
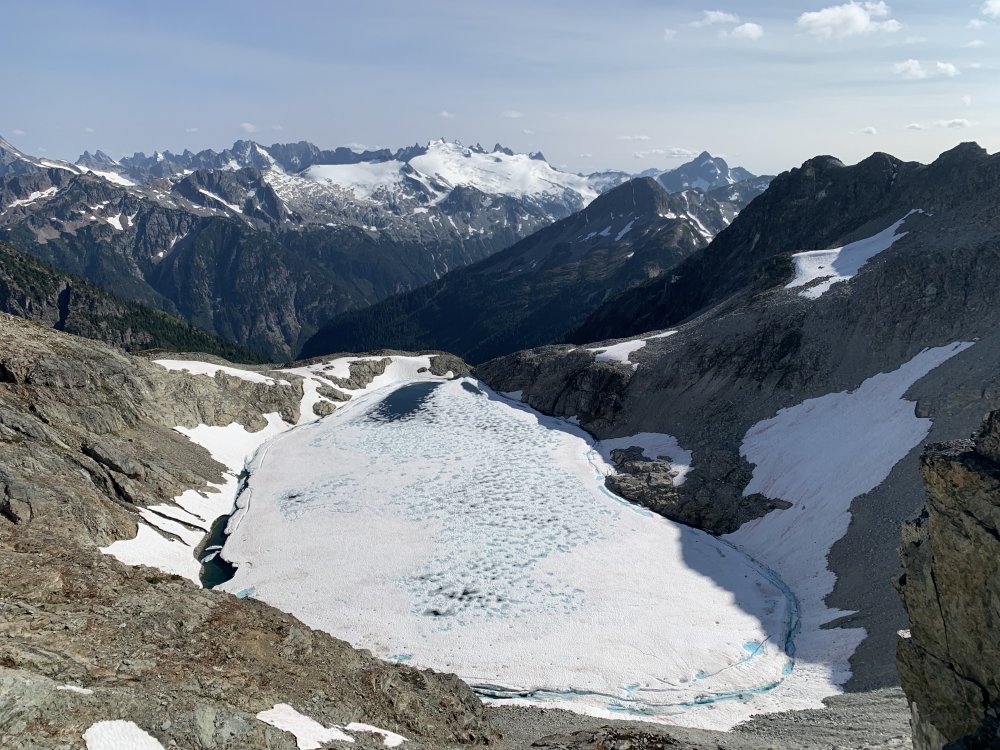
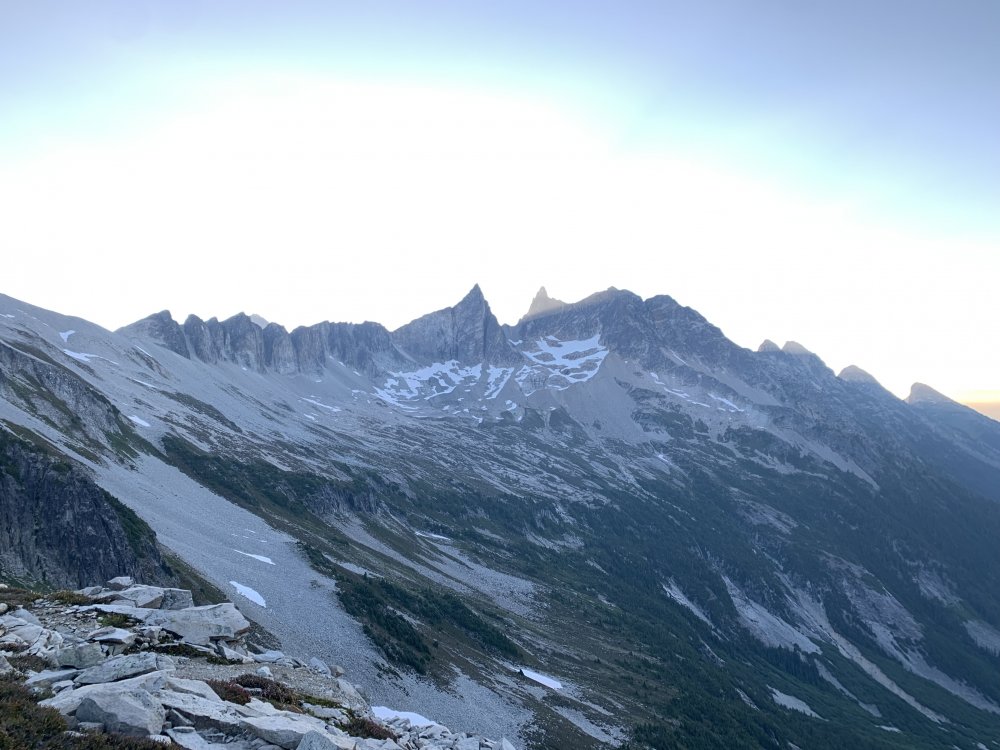
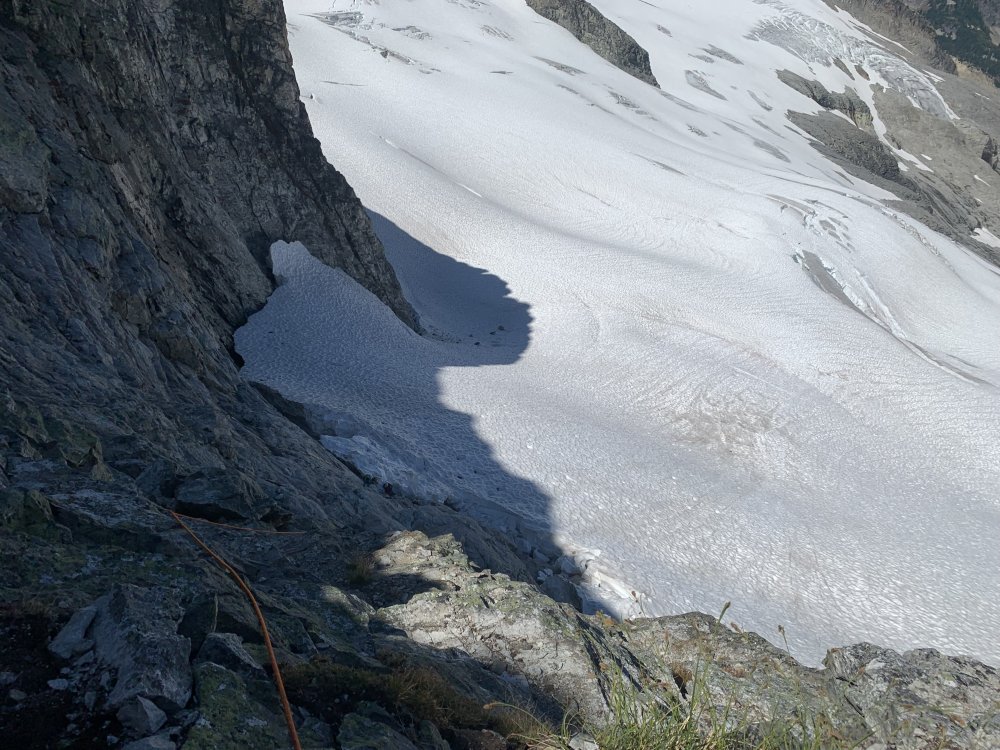
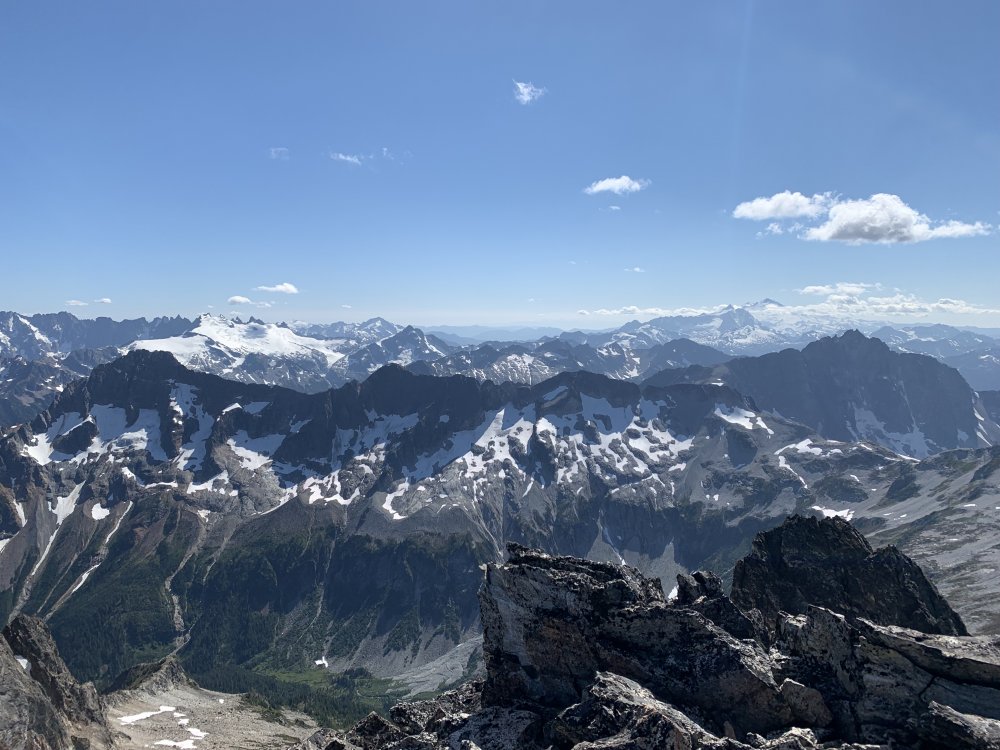
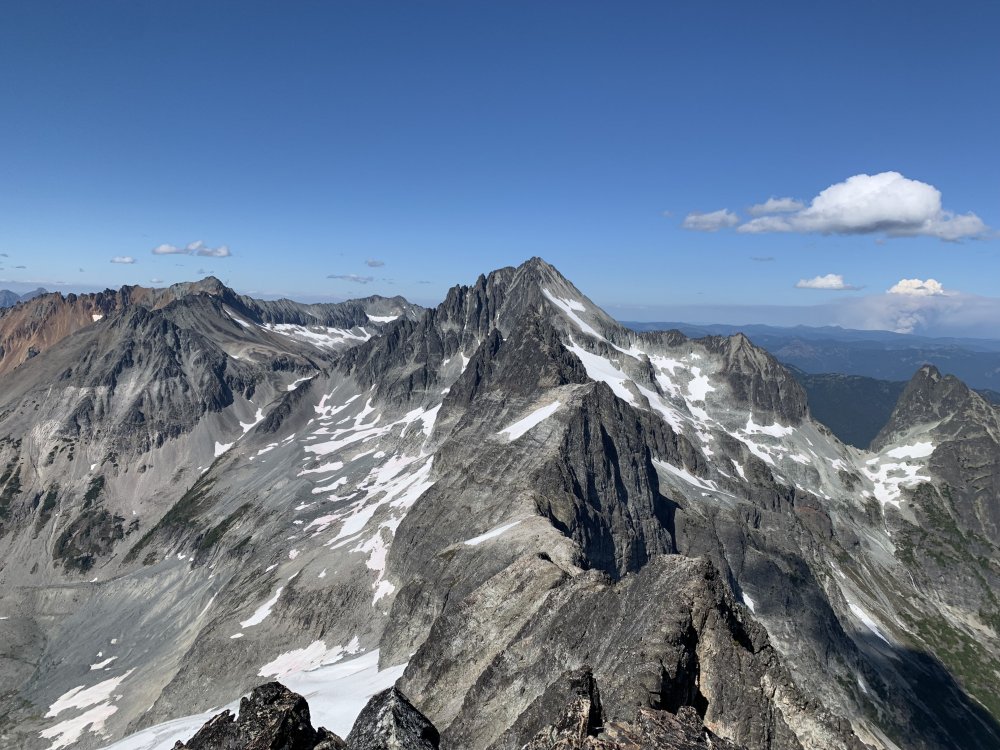
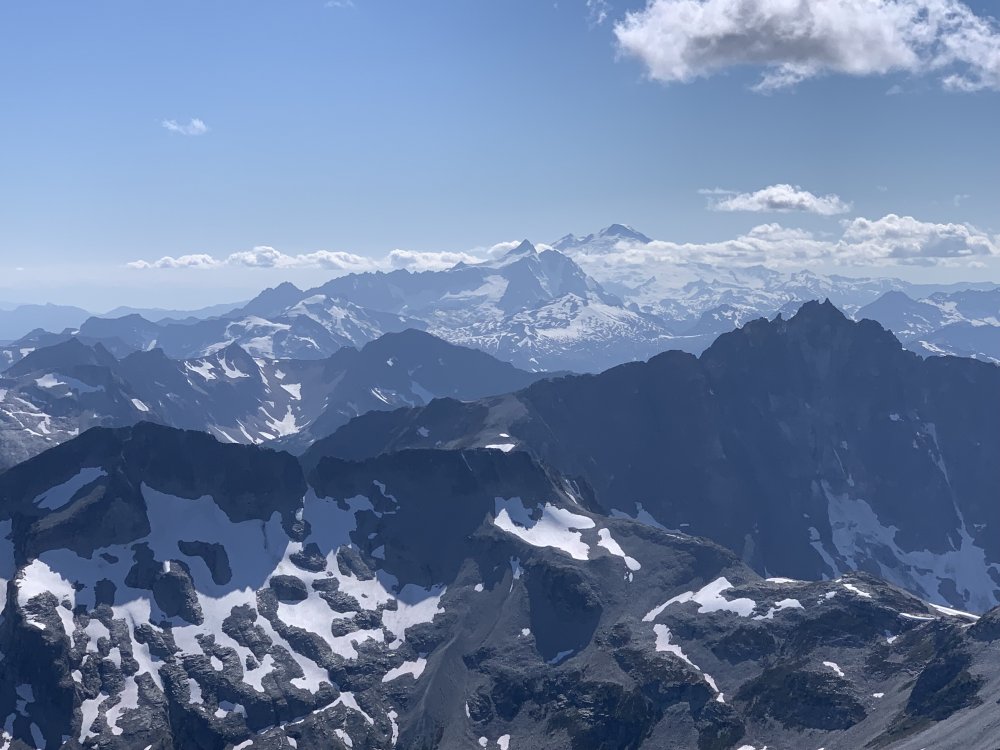
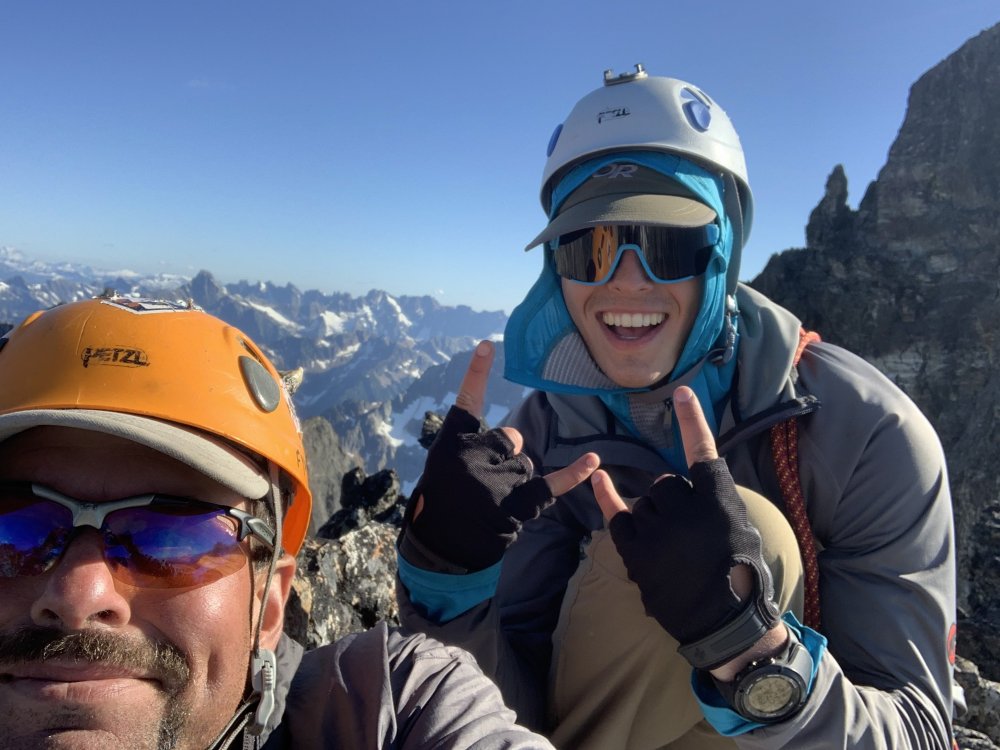
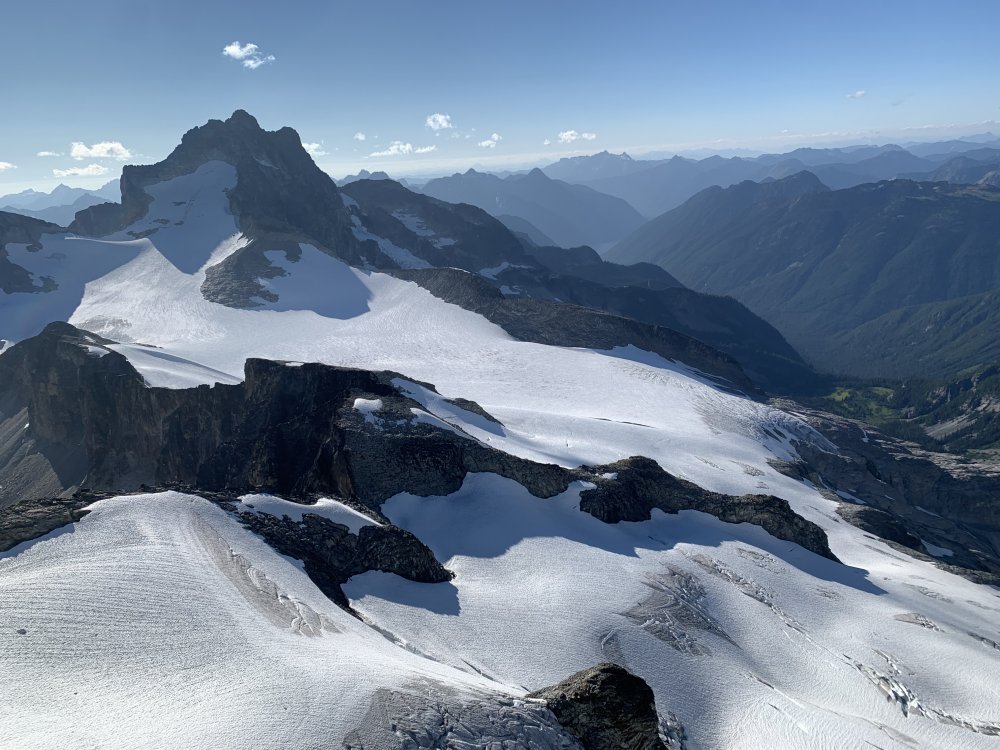
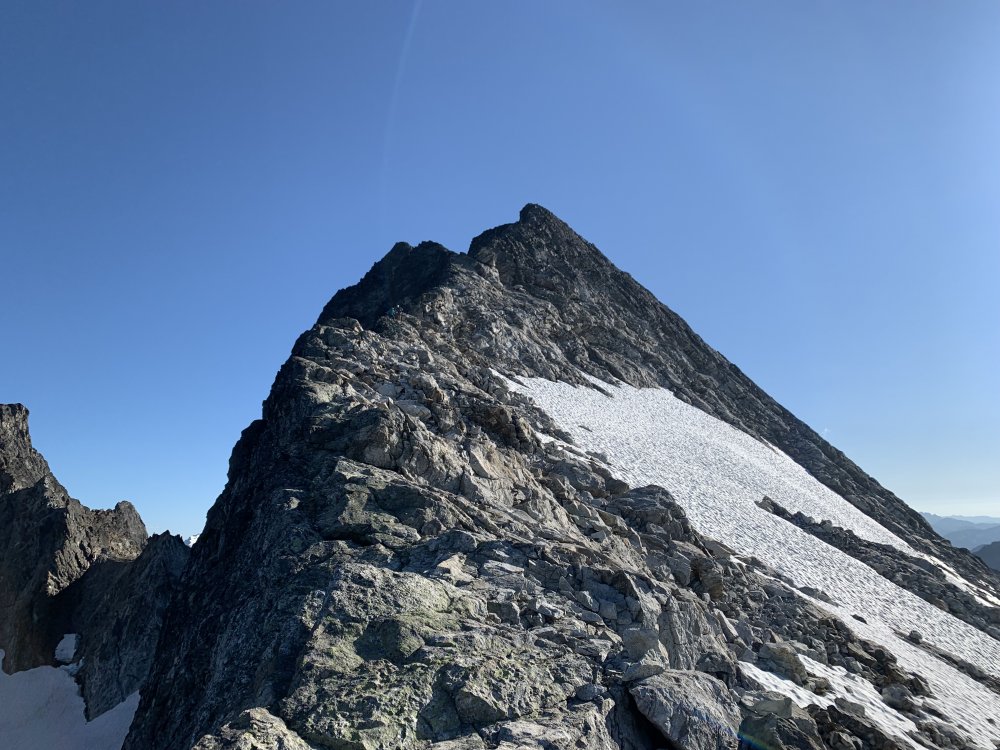
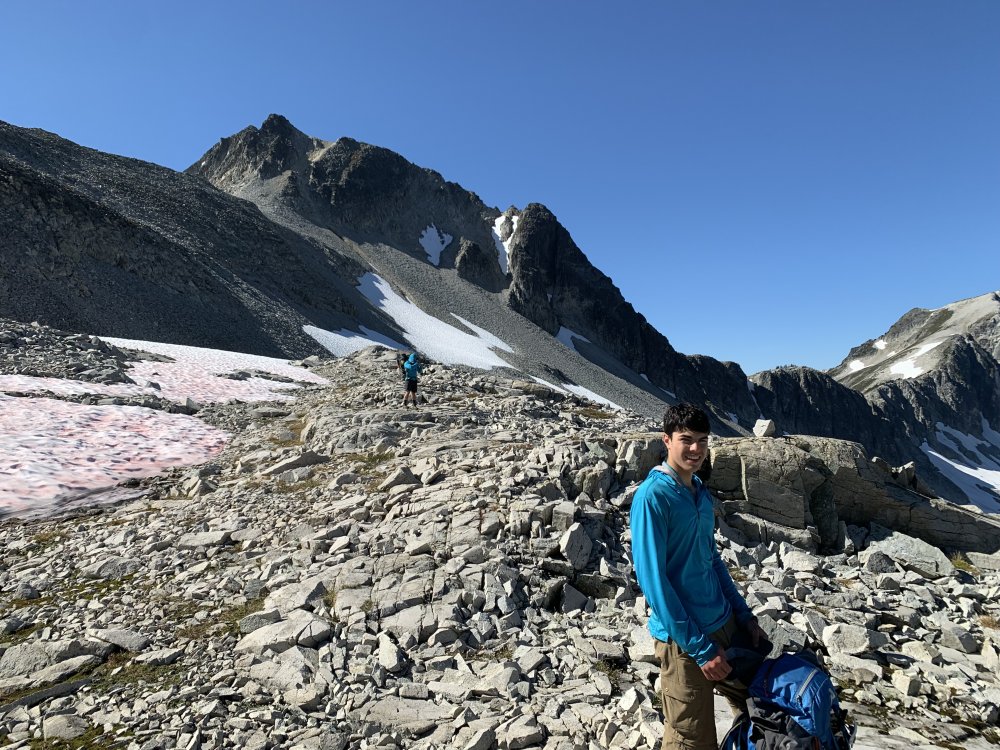
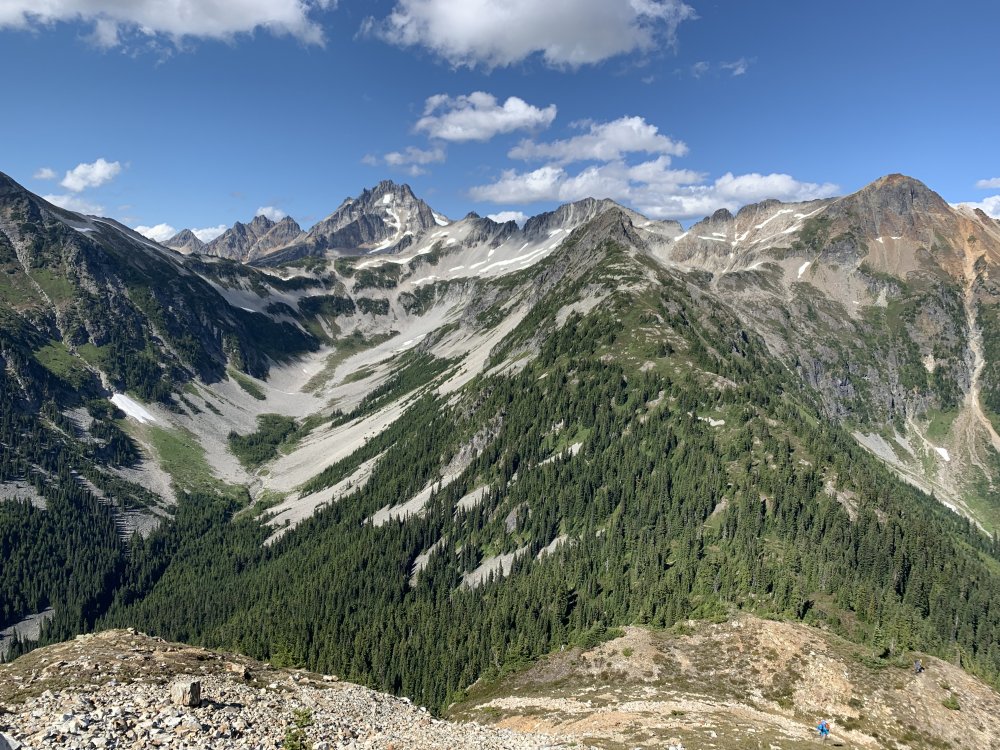
Trip: Mox Peaks - NW Peak (Easy Mox) - NE Ridge Trip Date: 07/24/2021 Team: @Stefan B @KaskadskyjKozak Trip Report: It's been a long journey tackling the Bulger list. And what a way to end it - with a long journey! A long fucking journey! In 2019 I was committed to slaying the beast, tackling 14 of 16 remaining Bulgers only to get blocked in late August in the Chilliwacks when we cut the trip a day - and a Mox - short due to an injury. Oh, well, that just left me with just two peaks to clean up in 2020 - Buckner and Easy Mox. Easy enough. Then there was COVID. As the border closure continued into June 2020, I began researching approaches from the US side for Easy Mox. No option seemed appealing, but two stood out as viable options: a high traverse via Whatcom or approaching via Silver Creek. I procrastinated, hoping the border would reopen, then finally tried each - and failed - in late summer. I utterly underestimated what these approaches would take, and despite being in great shape by that time of year, fell short. Oh well, I could just do the standard approach in July 2021, right? When it was obvious the border would not reopen in July, I began planning again. I coaxed and wheedled friends to try to join me for weeks - after all, who wouldn't jump on such an opportunity, especially to take multiple days off of work for a death march? The amazing weather we have seen in July held and held and held. The stars aligned on climbing partners. I pulled the trigger. There were three of us: my son, Jorge, and me. Applying lessons from my failed attempt in August 2020, I split this trip into a 5.5 day itinerary, which went as follows: Day 1: Evening hike to camp at Hannegan Pass. Not much to say here except we arrived later due to traffic and started up at 8 pm. So glad I built in buffer to my itinerary! Day 2: Got up early-ish and hiked trails to Whatcom Pass, then took by-trail towards Middle Lakes, camping by a small tarn with awesome views of Challenger and Whatcom. The tarn was warm and we even got to clean up before dinner. (7:15am - 5:15pm). Day 3: Got up early and did the high traverse, camping on slabs above Bear Lake, SW of the saddle extending below the SW-trending ridge extending from the SE peak of Redoubt (6 am to 7:30 pm). We had a small pool with running water *at* camp. The high traverse was inspired by a TR from a few years ago. In summary, we summitted Taps mountain, then traversed ridges NE-ly to the lake below Cave Mountain (Pass Lake?). We then traversed NW towards Bear, then NE towards Redoubt. Our biggest time sink on this day was due to bush-whacking through hideous, thick trees on steep slopes getting to the upper basin above the Pass Creek drainage. We took 3 hours in this section. Day 4: Long fucking day (6 am to midnight). This involved traversing to the ridge on the Depot-Redoubt Divide, traversing the Redoubt glacier, climbing the route, then doing it all in reverse. Some detail on our long climbing day: We ascended the SW ridge of the SE peak of Redoubt until about 7200', then downclimbed about 100-200' to talus and traversed to the first point we could cross on the E ridge of the SE Peak of Redoubt, roped up, then walked the glacier over to a fine snow ramp leading towards the low point on the NE ridge of Easy Mox. I led a full 60m pitch up the slabs above the snow ramp, only to be stopped about 30 feet short of scramble terrain, and then led a very short second pitch to the top rap anchor. We then scrambled the ridge. Holy shit, what an amazingly exposed, improbable ridge! We found the gully off the ridge easily and scouted out the final pitch and settled on two options. I tried the easier one (we had a picture from an online TR that made it look like the right start) but it dead-ended on the ridge so I downclimbed. Jorge then led the other option (which was correct) and set up a belay at the bottom rap sling. We then solo'd the final 25 feet or so (up to the higher rap anchor). We did two rappels, downclimbed the ridge, then did two more rappels. We were super careful to not get any ropes stuck on our pulls! It was now around 8 pm. We roped up and crossed the glacier which was very soft after a full-day of sun exposure. We essentially retraced our boot path, but punched through opening crevasses twice (on the eastern lobe of the glacier). As we rounded the rock spur to get to the W part of the glacier, the sun set and we unroped by headlamp. We then miraculously scrambled boulders, talus, and scree back to camp with minimal issues. Day 5: Slept in (8 am) and did the traverse back to our camp from Day 2. We got a late start due to the previous long day. It was hot and sunny - the hottest day so far, and we were grateful for lingering snow patches and fresh running water in many places. We followed a much better contour from the upper Pass Creek drainage back to the NE ridge of Peak 6874 which took us less than half the time to do. Bugs were bad at camp - noticeably the worst of the trip so far. (10 am to 8:30 pm) Day 6: Got up early and did the full 17.5+ mi hike out to Hannegan Pass. Bugs were hideous in the final few miles to Hannegan Pass. (6:30 am to 6:30 pm). Bulgers done. 100/100. Now for the pics! View of high traverse from the summit of Taps Mountain. Redoubt looks *far* from here: Views South from Taps Mountain. We were surrounded by these amazing views above treeline continuously for four days: Looking back at the first part of the high traverse from near and below Peak 6874 Indian Creek Drainage from the traverse. Bear Mountain on left: Traversing the lake above Pass Creek and below Cave Mountain. I believe it is called Pass Lake: Nearing the end of our traverse and camp. Redoubt is finally close! Summit Day taken just above our camp. The Moxes still look far. We had a lot of talus to traverse just to get to the glacier! Finally on the Redoubt Glacier! Looking down P1: Hard Mox as viewed along the N ridge of Easy Mox. The exposure and views are unbelievable! Summit views from Mox back towards our traverse: Spickard, Custer, Rahm. Been there, done those: Shuksan, Baker. Ruth looks far! TBH, I was not looking forward to the long walk back to Hannegan when I took this pic: Jorge on the summit: My son and I on the summit. KK rappelling. This, along with one I have from Storm King are my two favorite rap photos ever! Redoubt as the sun got lower in the sky and we downclimbed. The sidewalk in the sky: Longer view up the NE ridge: At camp on day 5, getting ready to traverse back to Middle Lakes: Looking down the Indian Creek drainage. Taken on the traverse back to Middle Lakes: Taken from a point about 6400' - the high point on the NE ridge of Peak 6874 that we climbed after the traverse above the Pass Creek drainage (right of frame, mostly out of view, blocked by the ridge): East Lakes as viewed on the traverse, near Taps Mountain: Descending to upper Middle Lake: Gear Notes: 60m rope, mid-sized rack, helmets, glacier climbing gear Approach Notes: Long, brutal, epic.


 1 point
 -
Wow. Even better to do it with your son! Awesome!!!!1 point
-
congratulations!1 point
-
Eric, on second look, I think you’re right. I lie corrected. Looks like Doug Leen and Brad Fowler did that south Perry glacier lobe on the 2A of SE Mox in 1968 (27 years after Fred and Helmy). Silas, Russ, and I repeated it in 1982 (up and down). Take that north Perry trophy off the shelf, but don’t tell anyone.1 point
-
@ryaneames your dad’s a rock star! His trip report on nwhikers of his own solo of this route definitely inspired me.1 point
-
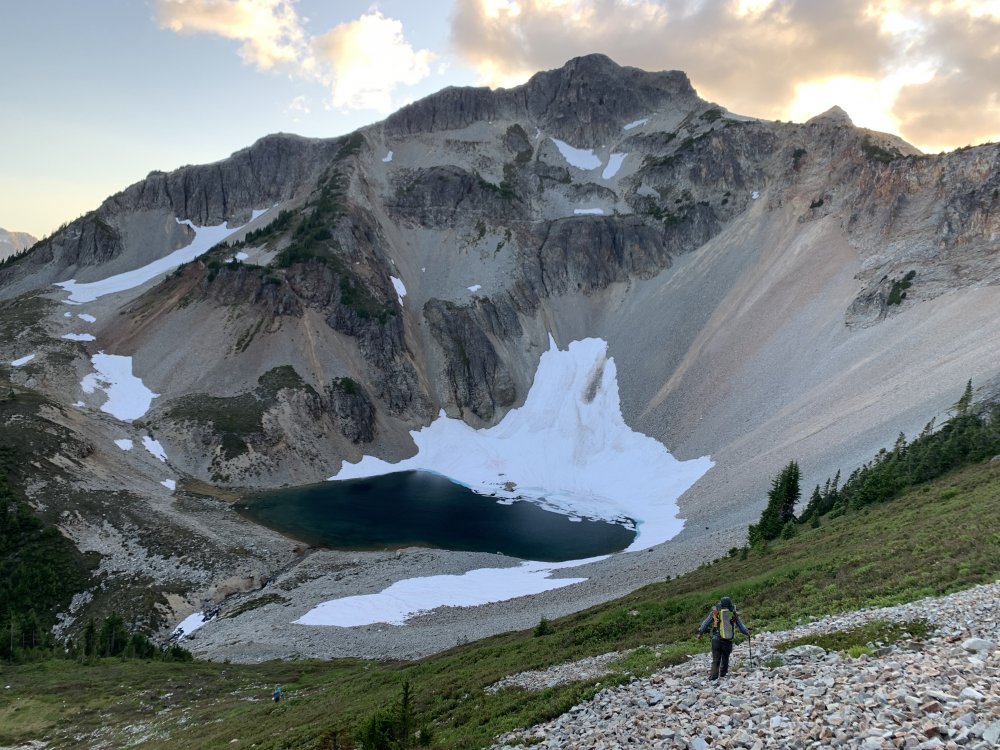
Trip: Kyes Peak (7227') & Monte Cristo Peak (7136') - South Ridge & Northwest Face Trip Date: 07/10/2021 Trip Report: I climbed Kyes Peak - South Ridge (7227') & Monte Cristo Peak - Northwest Face (7136') over the weekend. I started the climb from the Blanca Lake Trailhead Approach (Trail 1052) outside Skykomish, WA. The weather was looking perfect again and I had some more free time, so time for the mountains. I planned for a basic 2 day climb but it turned into a 3 day epic instead. Saturday: I drove to the Blanca Lake Trailhead and was starting the trip at 11:00am. I headed up the well traveled trail to Virgin Lake (4540’). I headed to the northeast side of the lake and looked for the climbers trail going north up the ridge toward Kyes Peak. I didn’t find a defined trail but I found something close and started up the ridge. The trail up the ridge comes and goes the whole way up. Sometimes the trail is beautiful and other times it disappears into oblivion. When the trail disappeared it was usually because it took a sharp turn straight up toward the crest of the ridge. The trail is vertical in several spots where you need to use tree branches to make it up. There are several sections of bushwacking in the middle of the trail & also a fair amount of loose rock. Once I dropped down below the west side of point 5845’, I was looking for a good route across the cliffy ridge to the open slopes above Columbia Glacier. I read a report that said you should go back up to the ridge once around point 5845’. I did not do that. I instead saw a nice looking traverse around the toe of the cliffy ridge. The traverse start elevation was about 5300’ and dropped down to about 5200’ while crossing. I hugged close to the toe of the cliffy ridge and found good game/climbers paths throughout the cross over. Some bushwacking through trees and brush on the way over but not bad. The traverse spit me out right in front of a stream and into much better terrain. I climbed up to about 5500’ and found a nice bluff to setup camp, right between two streams and flat. Called it a day at 6:00pm. Sunday: I left the bluff camp at 7:00am and climbed straight up toward the Roundabout Point gap. Took me an hour to get to the gap and then another hour to reach the summit of Kyes Peak. The climbing was relaxing and straight forward. The ridge to Kyes Peak looks pretty steep and exposed from a distance but once on the summit ridge it is basic Class 2-3. A great start to the day and I was making good time. I was thinking that I had plenty of time to hit Monte Cristo Peak next and get back to camp and then head out. Ignorance is bliss. From what I had read, Monte Cristo Peak has several class 3-4 routes up the mountain so I was just going to pick one and make it happen. I traversed below Roundabout Point and decided I wanted to do the Southwest Ridge route to Monte Cristo. I needed to make it down to the Columbia Glacier where I would head straight over to the ridge. Sounds easy. I spent the next 3 hours trying to find a route down to the Columbia Glacier finding nothing but cliffs and deep gullies that both required rapelling to make the glacier below. My only problem being that I did not bring a rope, thinking both peaks were going to be basic class 3-4. I needed to find a section I could down climb without too much risk. Finally at the end of the 3 hours I found the only rock ledge system that would get me to Monte Cristo Peak without a rope. I had to go high up to the base of the cliffs above, and traverse around at about 6650’. The ledge system led to the snow basin between Monte Cristo and the NW ridge of Kyes. I crossed the snow basin to the SE Ridge of Monte Cristo. The SE Ridge of Monte Cristo is supposed to be class 3-4 with a section of 5th. The route looked more like class 3 straight into vertical class 5 for several pitches. I decided to circle around the east side of Monte Cristo to see if there was another section that fit the Class 3-4 description. I made it to the North Col between Monte Cristo and Cadet Peak and still everything looked too vertical. I circle around to the NW Face of Monte Cristo and finally found a section that looked like Class 3-4 down low. I decided to climb this route thinking this must be another one of the Class 3-4 routes up. Wrong! The Class 3-4 turned into 5th Class about 50 feet up the route. I came across 3 different sling/piton setups for placing protection or rappelling along the route. Evidently I was right in the middle of the mid 5th Class route going to the summit, possibly climbing up the rappel route. All of the rock I was encountering was loose, downsloping, steep and nasty. Full suck mode was engaged. The rock quality was so poor that there was no way I wanted to attempt to down climb any of the route. My best option was to keep climbing to the summit and find an easy route down. Finding good holds going up was difficult at best. The rock on the entire side of the mountain was garbage. I would try going left or right to find better rock, but it did not matter, it all sucked. After a few more hours and several years off my life, I finally made the summit at 7:00pm. I found the summit registry in a PVC pipe. The registry was completely water logged and dissolving into pieces. Only the main portion of the summit log remains intact. The PVC pipe summit registries that I have been coming across do not keep out water and seems to absorb water into the pipe. Waterproof paper is a must for the summit registries. Now it was time to find the easy route down off of Monte Cristo. Yeah right! Monte Cristo Peak is basically a giant gravel pit with downsloping loose rock everywhere. The easiest route that I could find was going down the South Face. This was slow and tedious, like walking on marbles spread out all over a hardwood floor sloping off to a cliff. Did I mention that the rock on Monte Cristo Peak sucks? I finally made it down to the snow just as the sun was going down. Thank you Jesus! Out come the lights and I travel back to camp over much easier terrain arriving at 12:30am. I under estimated Monte Cristo Peak and paid a hefty toll. The best lessons are learned the hard way, that way you remember them forever. Monday: I left the bluff camp at 9:30am. I reversed my route all the way back to the car arriving at 4:30pm. I decided to make a stop at Blanca Lake to relax on the way back. Looking up the lake to the Columbia Glacier, there is a giant horseshoe of cliffs surrounding the glacier. The only easy way to the glacier is walking up the side of the lake to the base of the glacier. One thing I wished I knew before starting the climbs. Some Tips and Notes: 1. I’ve climbed a lot of peaks and I can say without a doubt that Monte Cristo Peak has some of the worst rock quality of any peak in the North Cascades. 2. If climbing Monte Cristo Peak, bring a rope for rappelling. Down climbing on the loose garbage rock is about as fun as slamming your hand in a car door. 3. The lower traverse from 5300’ to 5200’ across the toe of the cliffy ridge before the nice slope under Kyes Peak worked well both ways. 4. If you are not bringing a rope, the only route I could find to get to Monte Cristo’s SE Ridge from Kyes Peak is a ledge system at 6650’, on the NW side of the NW Ridge of Kyes Peak. 5. The ridge between Virgin Lake & the Camp below Kyes Peak is dry. Be sure to carry enough water. 6. There are several good camp options on the way up to Kyes Peak, look for the bluffs. Travel Time for reference: Saturday: Car to bluff Camp – 7 hours. Sunday: Camp to Summits, back to Camp - 17 hours Monday: Bluff camp to Car - 7 hours Gear used: Whippet, Crampons, Helmet - Could have used an ice axe & a rope Virgin Lake still mostly snow covered. Ridge Trail down low. Ridge Trail up higher. Looking straight across cliffy ridge traverse from 5300' View up toward Roundabout Gap and cross over bluff from camp. Summit ridge of Kyes Peak. On the way to Monte Cristo. Part of 3 hour tour getting to Monte Cristo. Cross over bluff, excellent camp spot. Looking back at the 6650' rock shelf to the SE Ridge of Monte Cristo. Monte Cristo South Face & SE Ridge. On Northwest Face route of Monte Cristo. Relaxing at Blanca Lake. Gear Notes: Gear used: Whippet, Crampons, Helmet - Could have used an ice axe & a rope Approach Notes: Blanca Lake Trailhead (Trail 1052) - Climbed ridge north of Virgin Lake to camp.1 point
-
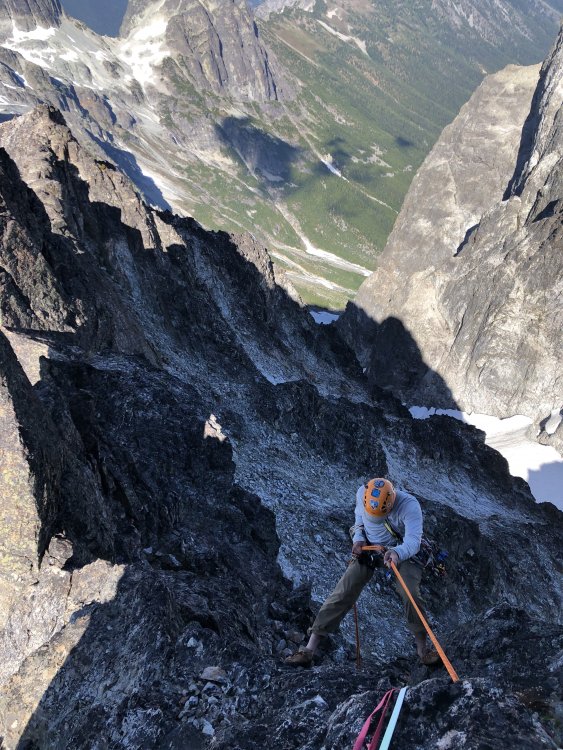
Direct North Buttress - Bear Mountain Dates: 8/11 - 8/13 Synopsis: Incredible route on a huge face in a remote, rugged, classic NW setting made for a trip of a lifetime. Approach: From the parking area at the end of the Chilliwack lake road, the first 1.5 or so miles follows an overgrown road. From there, the trail slowly deteriorates over the course of a couple miles until it becomes essentially non-existent just before the border, and bushwacking beyond this point is a slow, futile study of marshes and sharp, pointy botany. On the way in we spent hours searching for markers in vain trying to stay on the "trail." On the way out we waded through a steamy salmon orgy from the outlet of bear creek until we were within 500 yards of Chilliwack lake. For future parties approaching this route, we would STRONGLY recommend not even bothering with the trail. Instead, once you're about a half kilometer beyond the south end of the lake simply take your pants off and wade the rest of the way to the Bear Creek camp. This might not be as easy earlier in the summer, and water shoes (stashed at bear creek camp) would have been very nice. Once at bear creek camp, there is a nice trail for the first 500 ft or so of elevation gain up the ridge. After the trail ends, it's another 1000 feet or so up nice old growth before waging battle with 500-750 feet of elevation gain through thick 3rd-4th class slide alder. I began questioning my life choices near the top of this, Eric kept his composure. Once above this it's straightforward to the notch at the base of the W ridge of Bear. We bivied 100 ft or so below the notch and found a stream just below our camp for water. Route: We climbed 6 pitches and a short simul block to the snow patch (the 10a pitch was Eric's self-proclaimed proudest lead yet in the mountains). Another 2 pitches above the patch brought us to the point where the 1967 Beckey route traverses in. The Beckey bypass that joins the route at this point looked fun if your idea of fun is dodging rockfall and scrambling up unprotectable 4th class ramps covered in scree. Another 2 pitches brought us to the offwidth. We climbed 15 feet up the chimney at its base before bailing right onto easier terrain. Another 3 pitches above this along the ridge crest took us to the top of the buttress. A quick traverse below the summit pyramid and a fun ridge scramble brought us to the summit with 1.5 hours of daylight to spare. World class views from the summit and making it back to camp with 20 minutes of daylight to spare capped off one of my most memorable days in the mountains yet. Base of the route to summit took us about 11.5 hours. Gear: Double rack from 0.5-3 camalot, a single #4, a single 0.4, and blue to red Totem basic cams. Small set of nuts. #4 came in handy enough to justify its weight. 60m single rope. Water shoes, mosquito hats, gloves for the devil's club and alder, napalm, and a lack of interest in self-preservation are not necessary but recommended. Eric expressing his feelings for devil's club Bear Mountain summit in the distance Eric on the 5.alder approach pitch, wondering why he moved from Washington to Massachusetts a few years back The route coming into the sun (we chose to save weight by not taking sunglasses or sunscreen up the route. We chose poorly) Eric on the lower crux pitch Eric on the pitch above the snow patch World-class belay stance Sam on a pitch high on the buttress How could you not be smiling in a place like this Summit!!! Eric becoming the first person to ever LEAVE the United States by wading across a river1 point