Leaderboard

Popular Content
Showing content with the highest reputation on 08/05/20 in all areas
-
Who cares what people wear...or if they work in tech...how genuinely kind they are is what counts! But while we're on the topic, I totally started the trend. 😎2 points
-
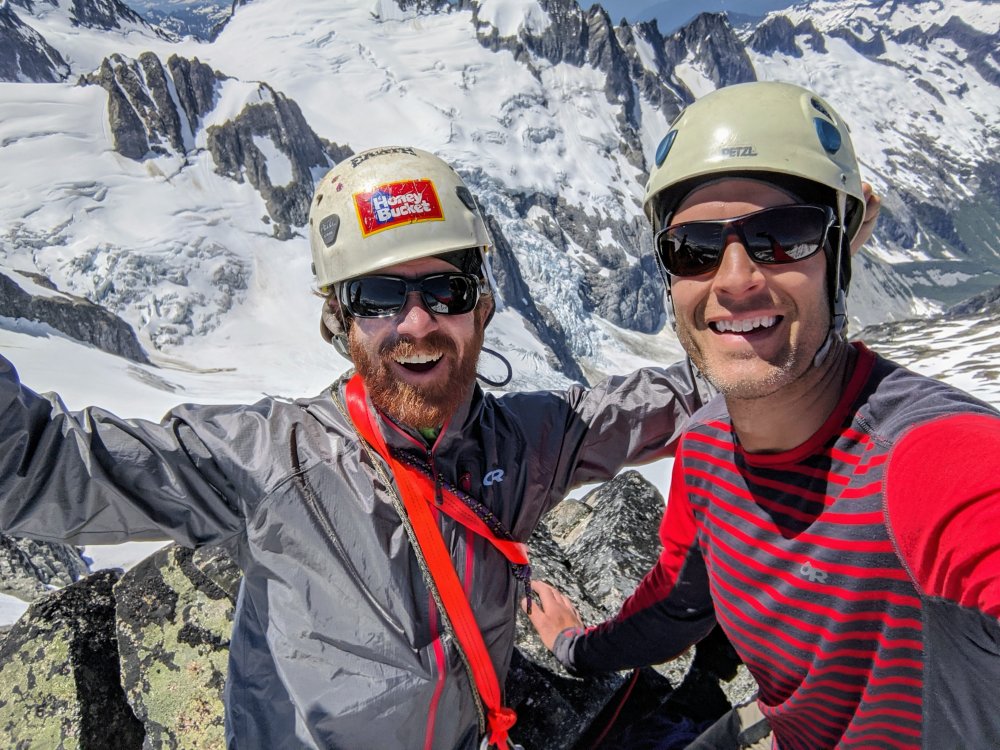
Trip: Salami Slab, Darrington - Snagglepuss Trip Date: 07/05/2020 Trip Report: My COVID-era partner and son, Ty and I made a quick trip to the Salami Slabs to test-drive a new variation to Snagglepuss. You may not be aware of Snagglepuss because it is not among the ‘Only Darrington Routes Worth Doing’ identified in climbing books and the internet. But it is fairly long (7 pitches) and has some good climbing that might entertain you adventurous non-slab-phobic types. Ty looking relaxed among the knobs, dimples and scoops of pitch 4. Leading the Catwalk – which follows the thin white dike angling left Team selfie at top of the route, spitting distance from the Snagglepuss tree The Snagglepuss – a massive Doug-fir with a silvery dead top that that looms over the route Hanman and I kicked off the Snaglepuss Project about four years ago, followed by the neighboring Purdie Shuffle. Both routes have good to great climbing with excellent views of nearby peaks and the Clear Creek valley. The Catwalk variation creates an excellent 7-pitch hybrid option that is slightly easier than the original. CV on FA, July 2016, with the giant snag visible in upper left Hanman below the gleaming goodness that would become the Purdie Shuffle For an abundance of details on how to get there and what you’ll find, check the stuff posted on another climbing website. The approach is comparable in scale to Three O Clock Rock but a bit more 'interesting' (don't worry, no brush). Much of Snagglepuss is mid-fifth with harder sections up to 5.8+, though the easiest line is not always obvious. There are bolts where you need them, runouts where you don’t, but nothing approaching an R rating. If you are offended by bits of moss and needles on your granite, skip pitches 6 and 7. Returning to grand Salami ledge on the descent. Gear Notes: Standard Dtown toolkit - dozen slings, single cams to 3", double 60s Approach Notes: FS Road 2060, take left branch over bridge, park at first boulder drainage, hike uphill. Approach details can be sleuthed from link mentioned in TR
.thumb.jpg.5d3fd25dd3896bb02a1d22f8447cfa36.jpg)
.thumb.jpg.e1309a8f8265a6cbd78bc508ce13a999.jpg)
.thumb.jpg.10854069be10768df2867cab5465ef3f.jpg)
.thumb.jpg.f881748c153426ab8e47084e11bc55d8.jpg)
.jpg.86b2b2a8fe67e11dbab9bbc8dc7a8096.jpg)
.thumb.jpg.7d483264c8b4c53ae6d2fca37353f8cd.jpg) 1 point
1 point -
Trip: Mount Terror - West Ridge Trip Date: 07/25/2020 Trip Report: Mount Terror 8151’ Trip Report I did a solo 3-day climb of the West Ridge of Mount Terror over the weekend. The weather was perfect all weekend and hot (80’s). Very few people do this climb in a given year. I was the first person on the summit registry this year. This is a climb you earn through suffering but the payoff is worth it. This climb tests your navigation skills, fitness, and your overall mountaineering skills. I was thinking about not bring a rope for the climb since I had heard there is a 4th class route up the steep start of the ridge climb. I was glad that I brought the rope. The supposed 4th class route looked like dog shit in my opinion, and I climb some loose, nasty rock on a regular basis. The low 5th class route up the middle looked pretty good, so I climbed that instead. I would not want to climb down that section, one slip and you are FUBAR. I brought a 30 meter glacier rope for rappelling and it worked perfectly for this trip. Some Tips and Notes: 1. Bring full gaiters for the extensive bushwhacking required for the approach. I brought half gaiters and wore shorts to start because it was hot and it saved some weight. My legs now look like hamburger. 2. The 30 meter glacier rope worked great for me but a longer rope would give you more options. There are plenty of anchors already established. I brought anchor material but didn’t need it. 3. DO NOT LOSE THE TRAIL. If you lose the trail go back and find it. The terrain in the Pickets does not suffer fools. You can wander for days out there and still not get anywhere. 4. Crossing Terror Creek sucked! The water is high right now and moving fast. The only place I found to cross was about 15 minutes downstream of the trail on the nice side. It was a log that goes about 2/3 of the way across the creek to some rocks that you can jump on to get across. It takes twice as long on the nasty side to get back to the trail that goes straight up the ridge. Falling in the creek at that spot would be bad. 5. Water on the ridge up to camp is non-existent. Get all the water you will need at Terror Creek before you start up the trail going up the ridge. There is no water from 2200’ to 5600’. 6. The trail heading up to the ridge is one of the steepest climber’s trails I have ever climbed up. I tapped out at 5600’ on day 1. 7. There is a sharp turn in the trail at around 3800’ that puts you on the ridge in a nice spot. It is marked well with a dead tree that has a stick across it and flagging tape. 8. There is still a lot of snow above 5600’. I was on snow until the very top of the Terror Col on summit day. The snow in the gully to Terror Col is steep, and when it is soft it is nerve-racking. Travel Time for reference: Day 1 (approach), 9 hours – Day 2 (summit), 11.5 hours – Day 3 (back to car), 6.5 hours. Gear used: Ice Axe, Trekking Poles, Crampons, Helmet, 30 meter Rope & Harness. Rocky tent platform at Terror Creek. If you don't come across this spot, you are off route. Trail start on the other side of the Terror Creek for the death march up the ridge to bliss. Remember this spot, it is very important. Terror Creek crossing location. It is not as nice as it looks. View of the route to Mount Terror gully from the 6400' camp at the Barrier Col Base of Terror gully (full of snow). Yes, it is that steep. Potential 4th Class section up to West Ridge? I call bullshit. Side view of lower part of 5th Class up ridge. Straight on view of wall you will be climbing. It doesn't look quite that steep in person. View looking down the 5th class sections. Heather goat trail that leads to the actual summit block. Airy summit. Summit Registry, Thanks Fay Pullen! Is the effort worth it? The pictures do no justice to the beauty of the area. Gear Notes: Ice Axe, Trekking Poles, Crampons, Helmet, 30 meter Rope & Harness, Bring Full Gaiters for the bushwhacking. Approach Notes: Terror Creek crossing sucked, See Tip #4. Limited water on approach, See Tip #51 point
-
With some time on my hands with the quarantine and all, I decided to compile some research. Here's a list of "forgotten" Cascade alpine testpieces (ice focused) or FACTs. Feel free to add some others I left out! Who's gonna be the first to tick the entire list? I apologize for all the weird formatting. I just copied this post from my blog https://climberkyle.com/2020/03/22/forgotten-cascade-alpine-ice-routes/. I90 I90 climbs offer the best access and easiest conditions to predict. There are undoubtedly many more climbs to be discovered in this area with easy access, generally good rock, and surprisingly rugged little mountains. Mt. Kent, North Face (multiple variations): the greatest north face in the Snoqualmie region with many long 1000 ft lines. Bonus: you can see conditions from I90 near exit 42 while driving west! This has been super high on my list to explore. Snoqualmie Mt, North Face (multiple variations): an abundance of mixed ice lines like the classic New York Gully and the lesser known Pineapple Express and Blue Moon. Abiel Peak, North Face (multiple variations): the “Ben Nevis” of the PNW has many shorter alpine ice and mixed lines. Bryant Peak, Hot Tubbs: Maybe this route hasn’t been around long enough since Jacob and I published it, but it reportedly hasn’t seen much action, so I think it’ll be forgotten soon enough… Summit Chief Mountain, North Face: Colin Haley said this line had “more ice climbing than any other Cascade ice climb” he had ever done at the time. Big compliment. The North Face is much like Dragontail, just fatter. Peak 3964, False Idol: An incredible 10 pitch ice route off the Middle Fork Snoqualmie that needs very cold temps to form. I believe this is just scratching the surface of the ice potential in the Middle Fork. US2 US2 offers some hotspots like the Stuart Range, with its steep granite peaks, and a sprinkling of other incredible routes in the Lake Wenatchee area. Weather is generally colder and drier on the east side, which is good for ice. Chiwawa Mountain, Intravenous: Cutting edge Colin Haley mixed route deep in the Glacier Peak Wilderness. Buck Mountain, Buckshot: Another bold line in a wilderness setting. One of the great underrated north faces in Washington. Mt. Index, North Face: Steepest peak in Washington, visible from the highway. Always an involved matter for a sub-6000 ft peak. Another huge route is Murphy's Law. Dragontail Peak, NE Couloir: This route feels much more full on than Triple Couloirs next door, and seems to be difficult to get in proper (fall) conditions. Colchuck Peak, NE Buttress Couloir: Often overlooked with Triple Couloirs and the North Buttress Couloir next door. Ends with a cornice-tunnel! Argonaut Peak, NE Couloir: Also a rock/snow route in early summer, this can be a fantastic mixed/ice route in late fall. Mt. Stuart, Ice Cliff Glacier: a technically easy but deceptively committing and full-on climb in a wild setting. Argonaut Peak, Chad Kellog Memorial Route: Challenging new age mixed route in the heart of the Stuart Range. Mt. Stuart, Lara Kellog Memorial Route: Climbs the incredible NE Face of Stuart above the Ice Cliff Glacier. Looks directly across to the Chad Kellog Memorial Route. Mt. Stuart, Stuart Glacier Couloir: A classic route where the crux is arguable climbing the west ridge in mixed winter conditions. Nason Ridge, Alpine Dropout: A fantastic looking ice route that sits just above Lake Wenatchee. Mountain Loop Close to Seattle but tragically overlooked, the peaks of the Mountain Loop are as rugged as anywhere in the North Cascades but with surprisingly decent winter access. The myriad of big climbs in this little region speaks volume to the incredible terrain. Big Four Mt, North Face (multiple variations): multiple routes, including the famous Spindrift Couloir. This is a mighty north face, and routes often take multiple days. Hall Peak, North Face: little brother to Big Four supposedly has some ice routes. Three Fingers, NE Face: This is a big route on a surprisingly big mountain. I believe there’s much more potential on the east side of Three Fingers. Whitechuck Mt, E Face Couloir: A very aesthetic couloir ice/mixed route. Access can be challenging unless it is a very low snow year. Whitehorse Mt, E Couloir: This steep route splits the Squire Creek Headwall for a fantastic line. I think it might even be visible from Darrington?! Sperry Peak, E Face Gully: Another beautiful, long, moderate ice/mixed route that likely varies in technicality from fall to spring. Sloan Peak, Full Moon Fever: This route climbs the weakness on the NW Face of Sloan. Having been at the base, I can say there is HUGE potential all over the place near the route. Sloan Peak, Superalpine: I certainly hope this climb isn’t forgotten, as Porter and I believe it is truly the best moderate alpine ice route we have climbed in the Cascades (better than Cosley Houston or the NW Couloir of Eldorado), but I know how things go around here… Lake 22 Headwall: who would think that one of the greatest alpine walls in the Cascades was just a short hour drive and hike from Seattle? There are so many unclimbed 2000 ft lines up this face, and you can get conditions updates by searching Instagram! Highway 20 Highway 20 undoubtedly has many huge ice lines, but difficult winter access has limited exploration. During lower snow years, the Cascade River Road could be a great area for exploration and development. Eldorado Peak, NW Ice Couloir: This route was sort of “remembered” in Fall 2019 when probably 20 parties climbed it (me included), but it’s a fantastic easier route, so I’ll leave it here. Colonial Peak, North Face (multiple routes): The mega line Watusi Rodeo offers 4000 ft of front point terrain and is “easily” accessible all winter. First Date is another attractive route. Pyramid Peak, NE Face (multiple routes): Home to some challenging mixed/ice routes on a wonderfully aesthetic peak. Graybeard, North Face: Everyone seems to report this deceptively big route deepened their sense of mortality. Davis Peak, No Milkshakes: the north face of Davis Peak is supposedly the steepest vertical mile drop in Washington. Silver Star, West Face Couloir: Originally planned as a ski descent, it actually turned out to be a huge ice climb! Visible from the highway, but you probably need a sled to get up there. Cutthroat Peak, Cauthorn Wilson: Gaining popularity lately, can be climbed right before the highway closes or after it opens. Early Winters Couloir: This one is sort of a classic and can be climbed in both fall and spring. Highway 542 The areas around Baker and Shuksan are generally well explored, but still offer great adventure. The Black Buttes are one of the centerpieces for hard alpine ice climbing. Lincoln Peak, Wilkes-Booth: A huge, challenging route on one of the hardest peaks in Washington. Assassin Spire, NW Face: Considered by many to be the toughest summit in Washington, this was also the first peak where the first ascent was made in winter. Colfax Peak, Ford’s Theater: The “forgotten” next door neighbor of the ultra classic Cosley Houston. Mt. Rainier / Tatoosh This area is dominated by the mountain, but I’m guessing the Tattosh have good stuff and certainly easy access. Rainier, Mowich Face: A long moderate route on the “quiet” (NW) side of the big hunk-a-hunk. Rainier, Ptarmigan Ridge: A steeper, more sustained route than its next door neighbor, the world-renowned Liberty Ridge. Mt. Hood I don’t know much about Hood, but I’m sure there are some great routes that are infrequently climbed, so I’ll take suggestions here!1 point
-
Trip: Glacier Peak & Mt. Pilchuck from Puget Sound Round Trip in Single Push - Standard from South (N. Sauk) Trip Date: 07/25/2020 Trip Report: As the "location" description states, this was a "single push", all human powered, sea-to-GP-to-Pilchuck-to-sea, 27 hrs and 44 min. I reached the Glacier Peak summit from sea (Puget Sound) level in 11 hrs and 7 minutes, starting at 10PM on Fri, 7/25/2020 from a point on the water a few miles west of I-5 and Marysville, after a 60 mile combination paved and unpaved bicycle rides via Barlow Pass, then heading out on foot from the North Sauk River TH. My time from the TH to the summit was 6 hrs 49 min, and that includes the windy/cold 14 min transition to some different gear (but still minimal/light) and a concentrated downing of food at a lower/base camp on the White Chuck Glacier a bit off from the beaten path because of the great rock to sit on, so it was worth the travel extra time. I did have a physical problem during the bicycle ride that caused a collective delay for me that was timed as over 12 minutes, so without that snafu my sea to summit time would have been sub-11 hours. Round trip from the TH to summit was 13 hrs 24 min, including both that 1st 14 min trans and a second 16 minutes one on the way back, and also enjoyed 9 amazing minutes on the summit. Glacier Gap (high camp) to the summit was 2 hrs 2 min. which included the time to put on Kahtoola light crampons (not their Microspikes, which I did use also but on the lower glaciers, etc.). So travel time was sub 2 hrs. I Did a bit of running on the river trail on the way out, but not on the way back because it would have compromised the sizable amount of work I still needed to do after returning to the TH. This was a supported trip, including my super talented guide, Aaron Mainer, that I've worked with on these projects over a period of 13 years, who I met up with at the White Chuck Glacier transition point, and he expertly paced me from there to the summit. Even when I lead on the exposed lower rib scree stretch, he monitored me closely. Pacing is important, but even more so is the safety aspect. On ult-high endurance endeavors my wife appreciates that I have a skilled guide to climb with who knows how to maximize safety (as well as speed and fun all at the same time). Back at the TH, I bicycled back down to the Mountain Loop Biway, then back up to Barlow Pass (tough), then back down again to 1,000 ft before starting up the Mt. Pilchuck road. Anyone who has been there knows how bad the road up is, but on an off round bicycle you can wind your way through the potholes so it's manageable (and exciting on the way down). TH at 3,000 ft, and then hiked the remaining 2,300 ft to the fire lookout (5,341 ft). Summit-to-summit was 12 hrs 12 min. Sub 12 would have been nice but let me tell you that after almost 24 hrs on the move, one does what they can. It was at about 9:30 PM and there was a party going on in an around the lookout, with people putting up decorations inside. This was troubling to me both because I don't know it that's allowed to be taken over, especially during a pandemic (...but whatever...), and also because I was tired and just wanted to enjoy the bit of emotional peace, quiet I was expecting to have, plus solitude (except for Aaron, who hiked out and then drove to the TH to go up with me and make sure I was safe coming down the bouldery/hazardous upper have of the trail when coming down in the dark fairly fast). People surely wondered why I was wearing a helmet, but I didn't care that they had no idea what I'd done before getting there. After the wild night ride back to the hwy passing cars along the way, and then back to the start, the total time was 27 hrs and 44 min. So I finally finished all 5 WA volcanos, round trip single-push from sea level, with extra peaks included for extra challenge. Before this I did Columbia River (Kalama/Woodlind) to Mt. Adams/St. Helens summits single push and back, in 2018. My Cascade Climbers post for Shuksan/Baker in 2011 is: https://cascadeclimbers.com/forum/topic/82364-tr-mt-shuksan-and-mt-baker-in-single-push-fisher-chimneys-shuksan-and-park-glacier-baker-8132011/?tab=comments#comment-1026406 And before that in 2008 was Puget Sound/Rainier Summit/Puget Sound in 19 hrs 57 min. Like all the other things, like video from NWCN, etc. It's all disappeared. So much for documentation on the internet (frustrating ) But here is an important remaining reference to me on this site. Someone gave me credit:https://fastestknowntime.proboards.com/thread/54/mt-rainier-wa That's it. Shuksan/Baker made it onto the front page of the Sunday Bellingham Herald with a big picture, but they long ago purged all their old stories because the parent company wanted them to. I begged them to bring it back, and they did, but then it disappeared again. Same with Tacoma News Tribune (top 10 adventures of the year article). I'd like to get the Seattle Times to pick this up, but we'll see. I'm generally private about my endeavors, for various reasons you can imagine, but now that I've finished the 5 volcanos (and I'm deep into 57 yrs old now) I want to write out them. Not a big social media guy, but have considered YouTube, Outside Mag., etc. Any other ideas? -Randall Nordfors, Woodinville WA. Washington native. I also go by "Randy" sometimes. Gear Notes: Went light. Short pants, Kahtoola microspikes and Kahtoola lightweight crampons. Poles, and light boots with gaitors, minimal pack. No ax or helmet. Knew from experience on GP that it was an okay gear choice on a perfect day (which it was). Approach Notes: West of Marysville by bicycle to North Sauk River TH, then standard route from south.1 point
-
They'd think you're soft, Bronco. =;-) There are two things I wish I'd had on that route in July1999: heavy-duty garden gloves and a cell phone. One of these wishes has been well documented. Big Jim Nelson wishes he'd had more cans of grape soda. Way to move fast on a route that can really sap your energy and mess with your head. I'd like to think that Doug Walker was smiling from above and watching over you.1 point
-
Trip: Forbidden Peak - Northwest Face Trip Date: 07/25/2020 Trip Report: I had a great time on the NW Face of Forbidden this weekend. Conditions were great, but it's a long walk back there. Full report with photos: https://spokalpine.com/2020/07/29/forbidden-peak-nw-face-iv-5-8/ Gear Notes: Singles .2-2, doubles .3-2 Approach Notes: Long, but scenic1 point
-
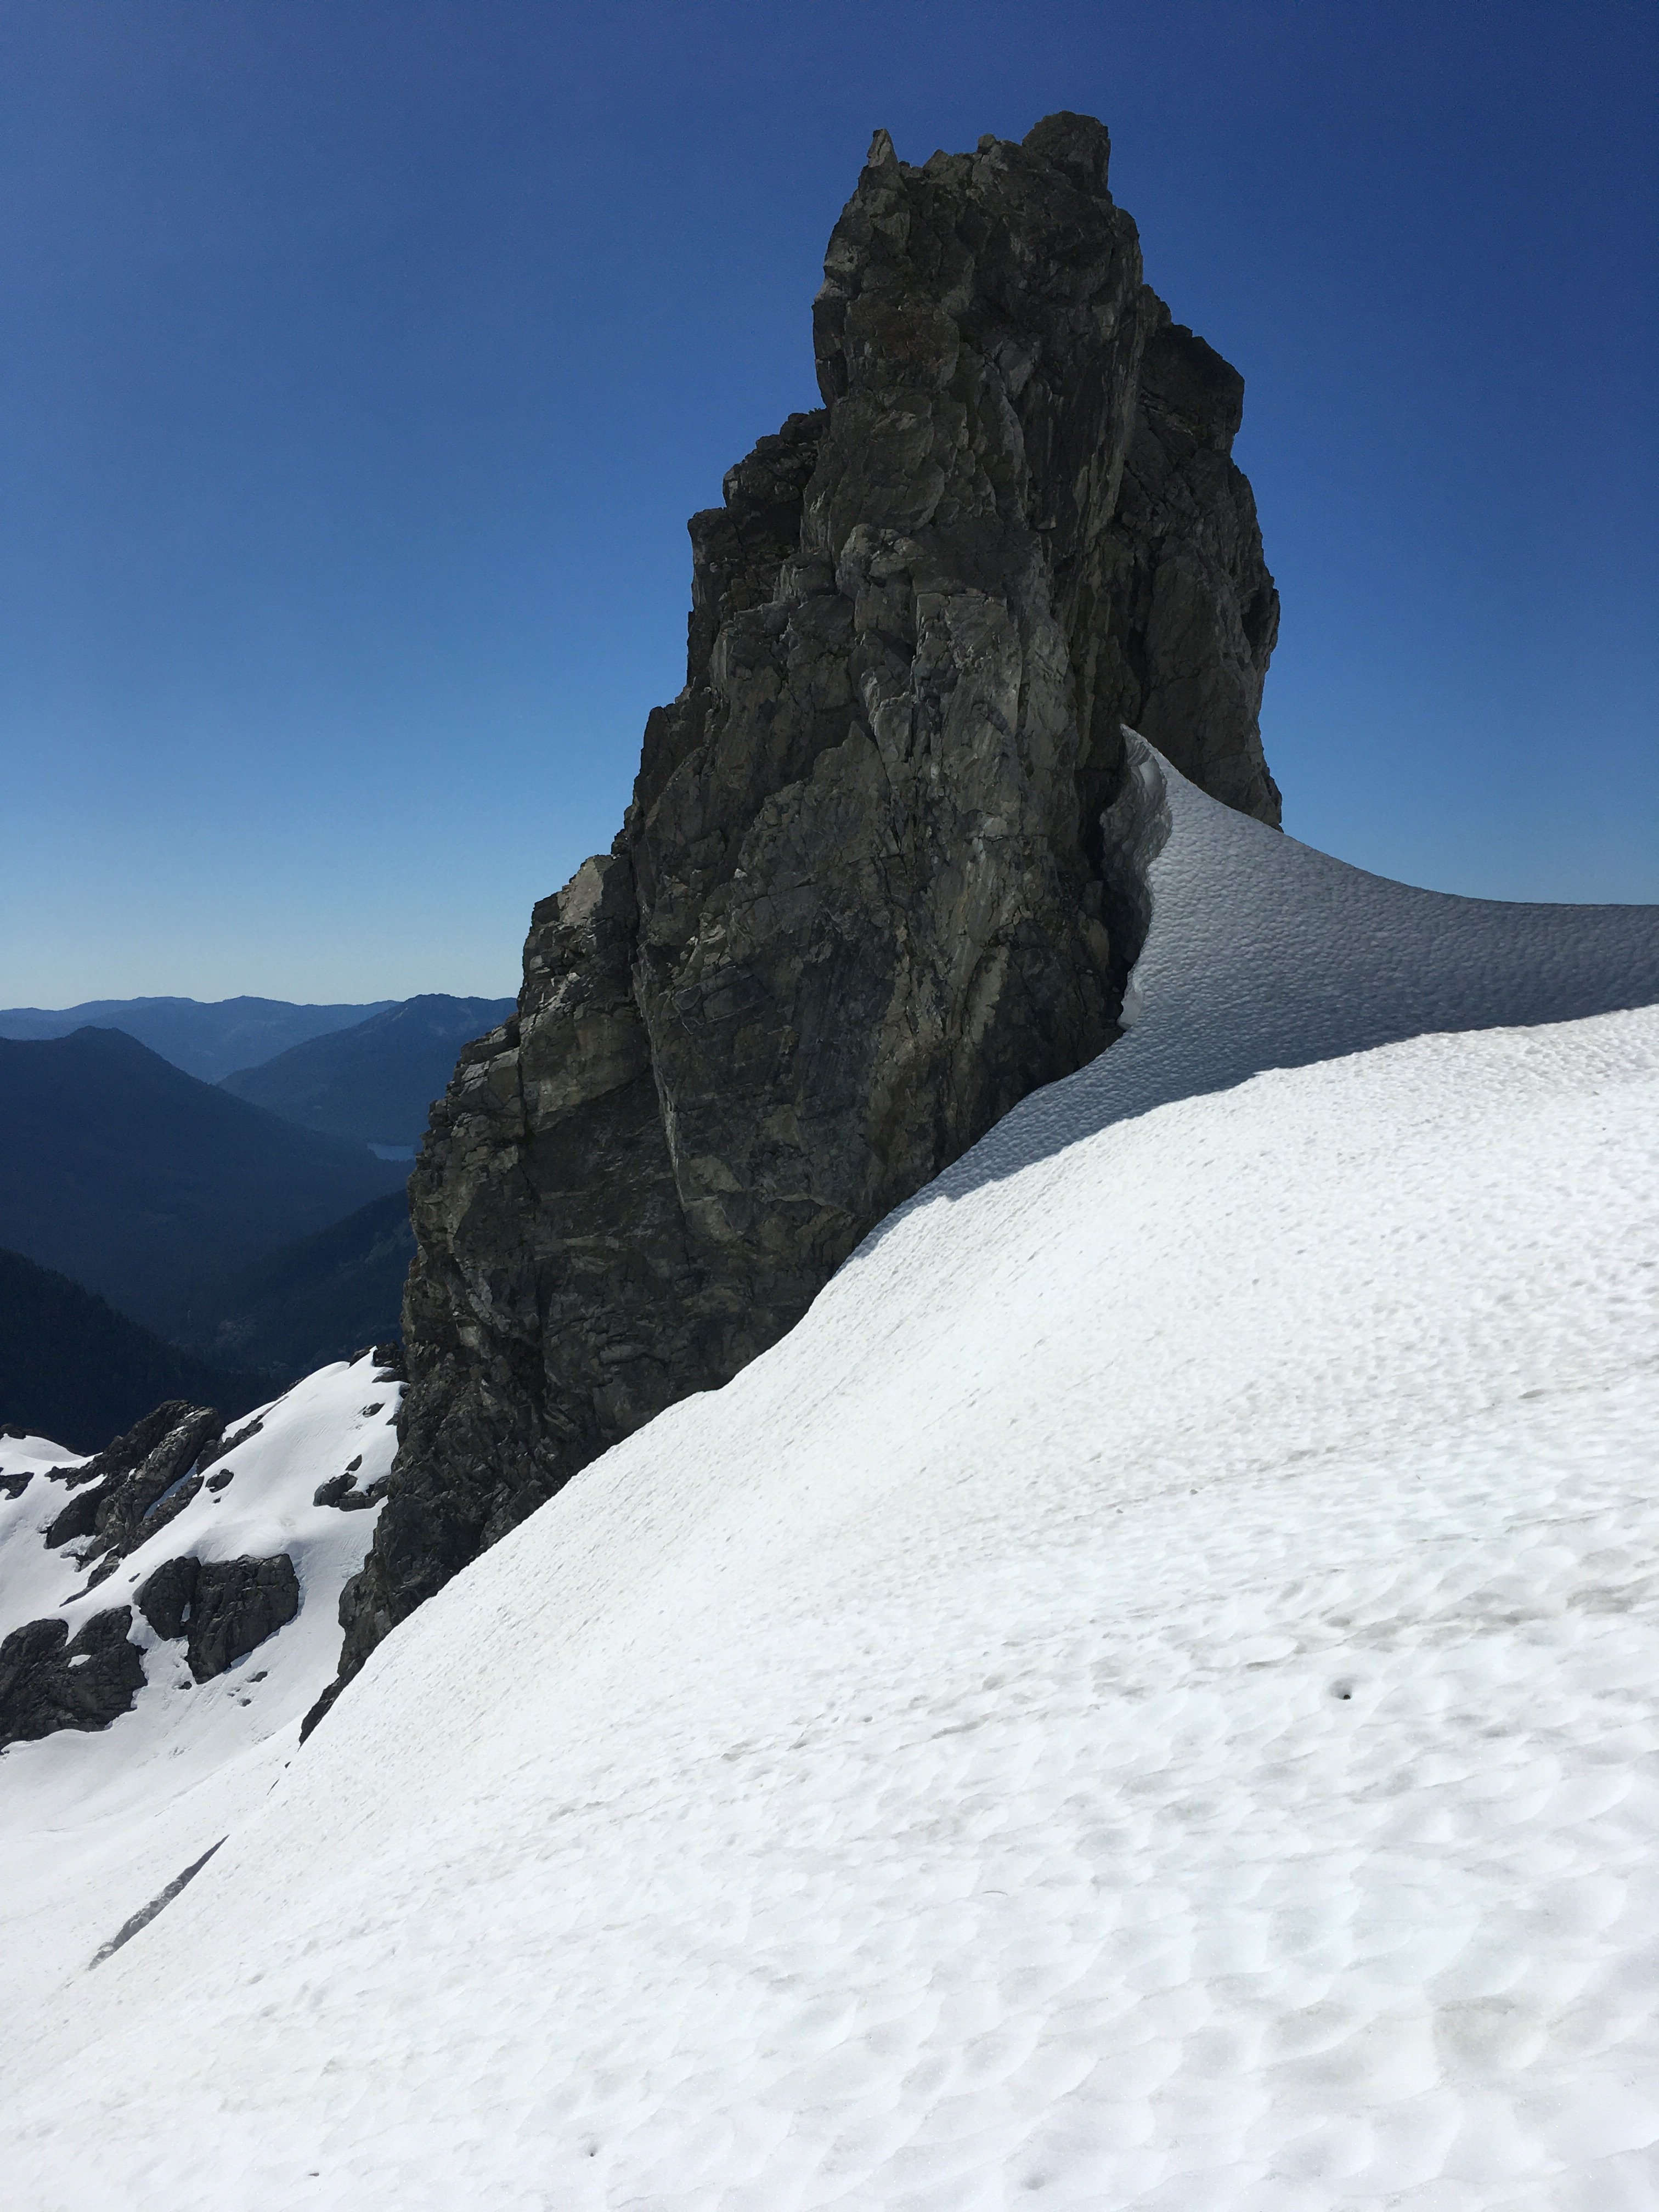
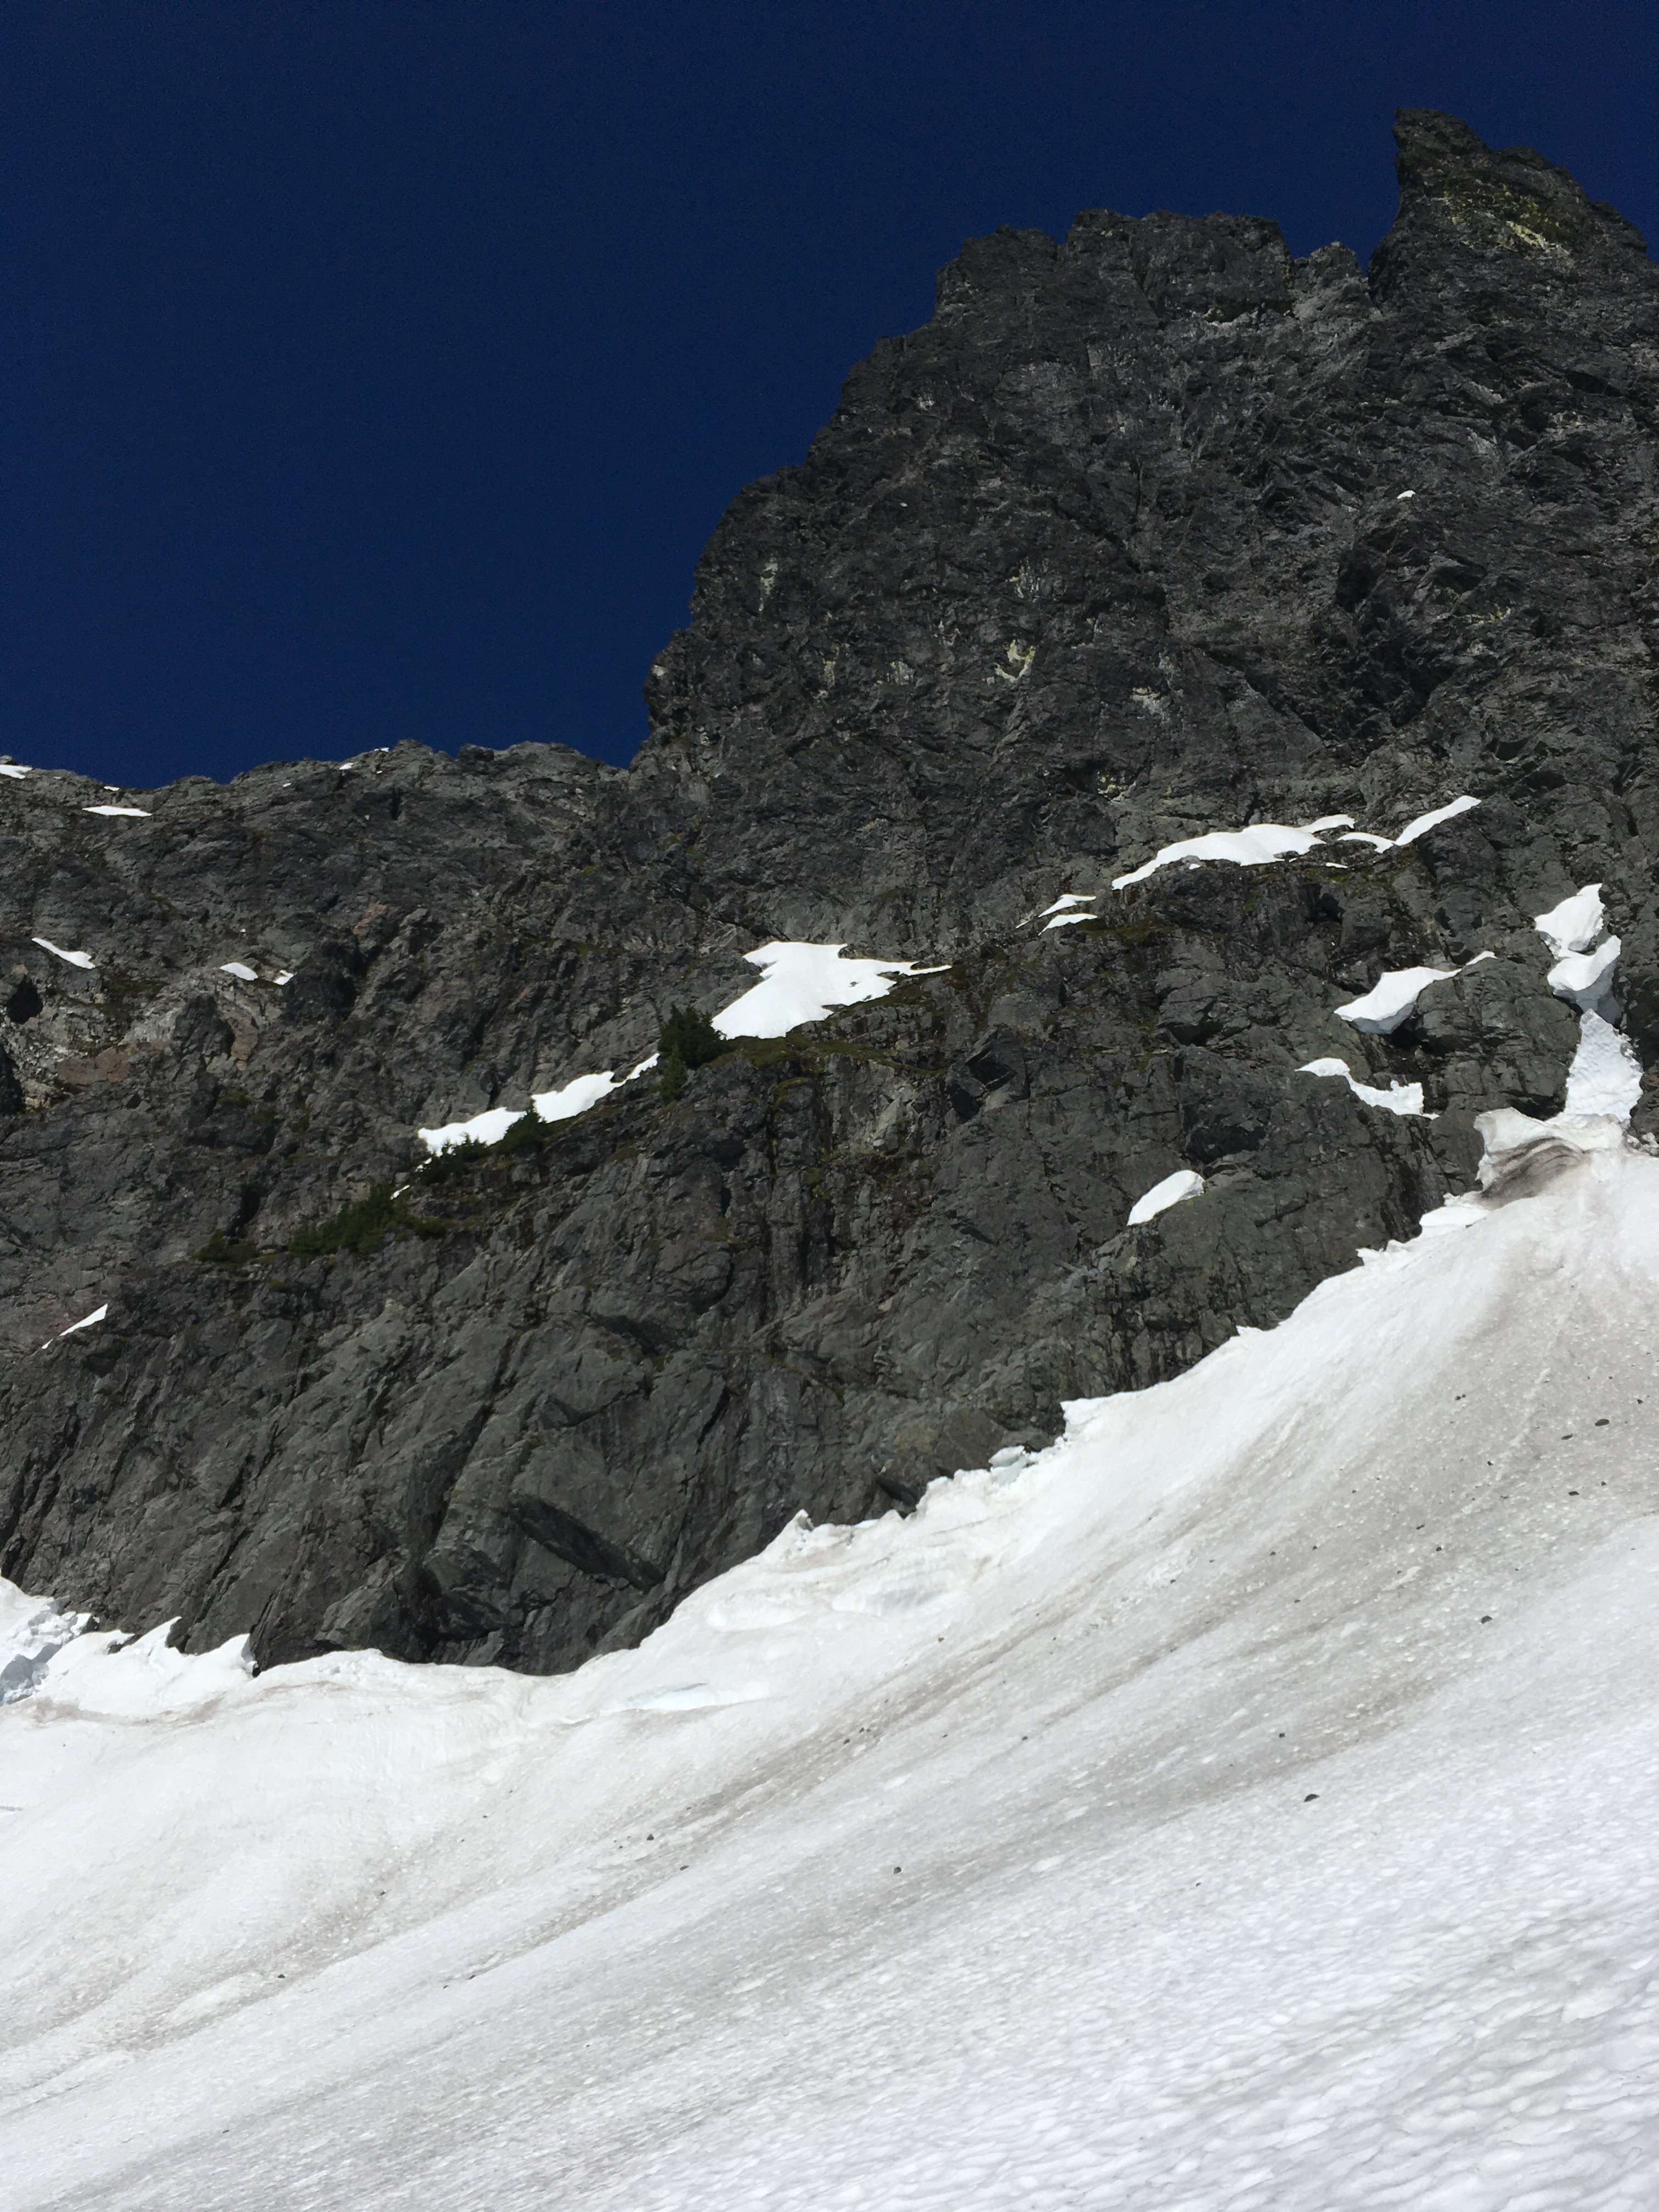
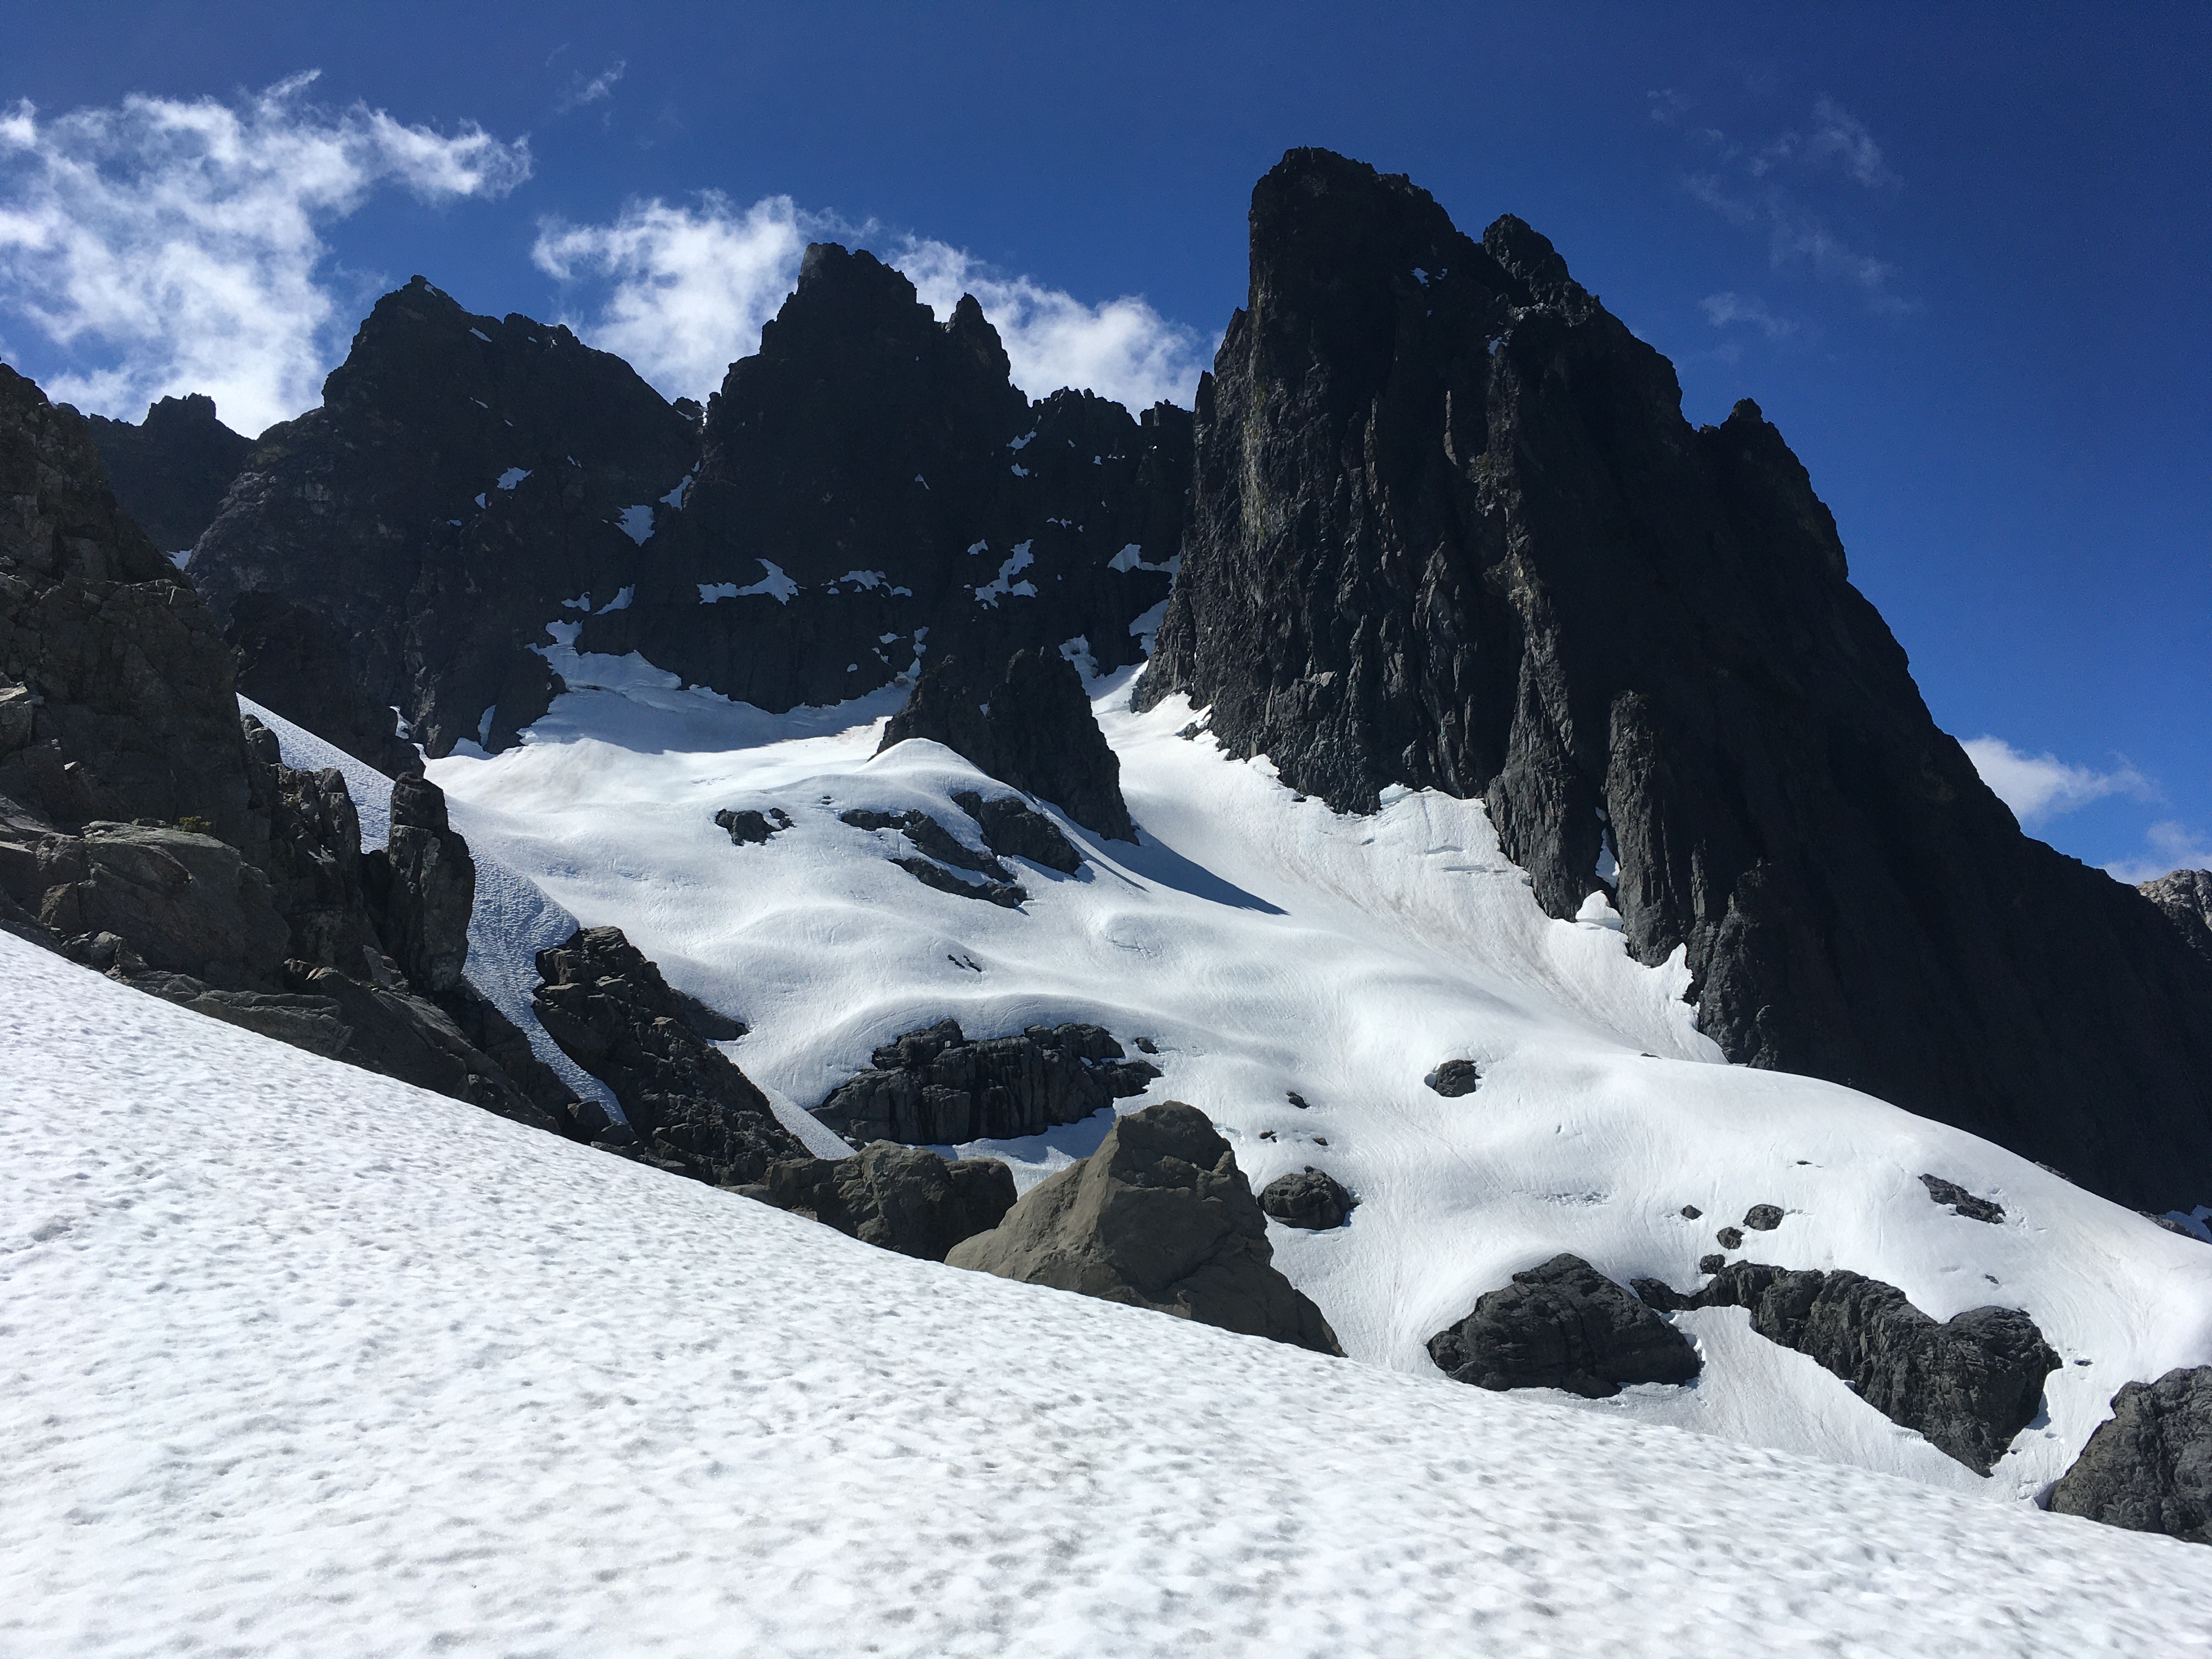
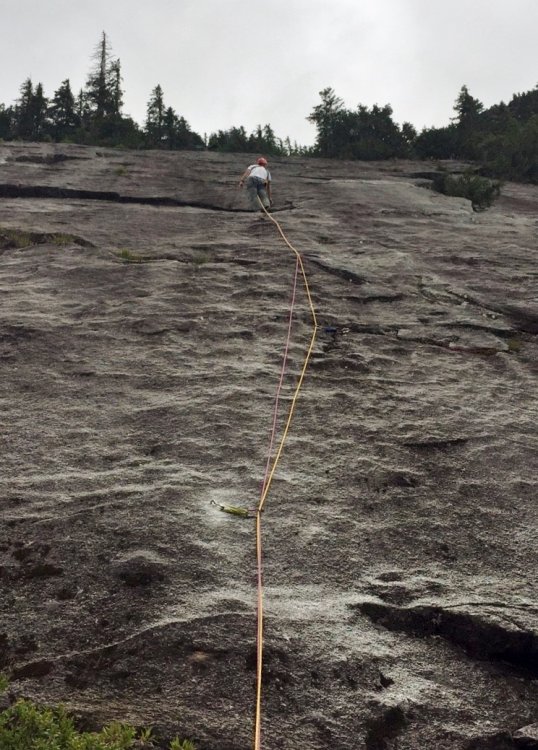
Trip: Chimney Rock - E Face Trip Date: 07/18/2020 Trip Report: Low 5th solos came to mind as an option given the pandemic and I thought I’d check out chimney rock. Hit the road on Friday later than intended so I didn’t start the hike until 6:30pm which didn’t leave a lot of time to get to the bivy before dark. Even so, scratching up the climbers trail in the fading light, which is at points extremely steep, wasn’t too bad. Made it to the bivy area as the stars were coming out (about 3.5 hours?) found a reasonably flat rock and enjoyed fantastic star gazing as I drifted off. I’ve seen singular bright flashes a couple times while star gazing recently. What is that? Took my time in the morning, left around 8am. Proceeded to nearly lose my phone in a crack between a rock and snow while putting on crampons. Luckily was able to blindly excavate it with my axe. Glacier approach was uncomplicated but once at the rock I checked 3 or 4 different options twice each before picking a way onto the rock that was just barely tolerable solo. A trip report from a week earlier mentioned snow straight onto rock but this seemed to already be deteriorating. By now the block of snow I stepped on is probably gone. Sometimes these things have a way of getting worse but then improving again depending on how snow melts and how the rock is. So I wouldn’t rule out getting onto to the rock now, but assume it will not be trivial. The route was pretty easy to follow. I had screenshots of the copious internet beta to help (good thing I rescued my phone ). I wore climbing shoes for extra security. All the 4th + 5th seemed pretty reasonable to me, managed to almost entirely avoid sketchy rock. There are cuts everywhere in the rock which keeps things low stress. No committing slabs or down sloping sections that I can remember. The most insecure part was the snow on the 2nd pitch, which was quite steep and exposed, had to switch back to approach shoes and crampons and axe for that. Treated to great views from the summit. I hadn’t got around to climbing anything in the area before. Stuart and Thomson are the closest I had yet been. It’s a worthwhile summit, I was pleased to be there. The descent wasn’t very fun, no surprise there. I could have paid more attention to the rap anchor locations on the way up. Had to do some wandering and down climbing less than clean exposed 4th to find a couple of them. I’ve been spoiled by steeper routes where one rap glides smoothly into the next. Packing the rope and scrambling between raps I kept tangling the rope. Finally made it back to the glacier, I think on the 7th rap, which easily got me over the moat. Things went smoothly from there and my spirit was high until near Pete lake. By this time the evening was getting on, around the same time as my approach the previous day. For some reason the bugs the day before were pretty annoying but not horrible, but this day they were absolutely insatiable and soul crushing. I ran as much as I could (good thing the trail is flat), threw my bag in the car, flailed my arms and legs around for a minute, jumped in the car and sped away. Gear Notes: 60m rope for raps Approach Notes: Most of climbers trail easy to follow once you find the log crossing but https://www.peakbagger.com/climber/ascent.aspx?aid=1424334 gps track was appreciated. No issues on glacier, moat was just starting to get complicated.


 1 point
 -
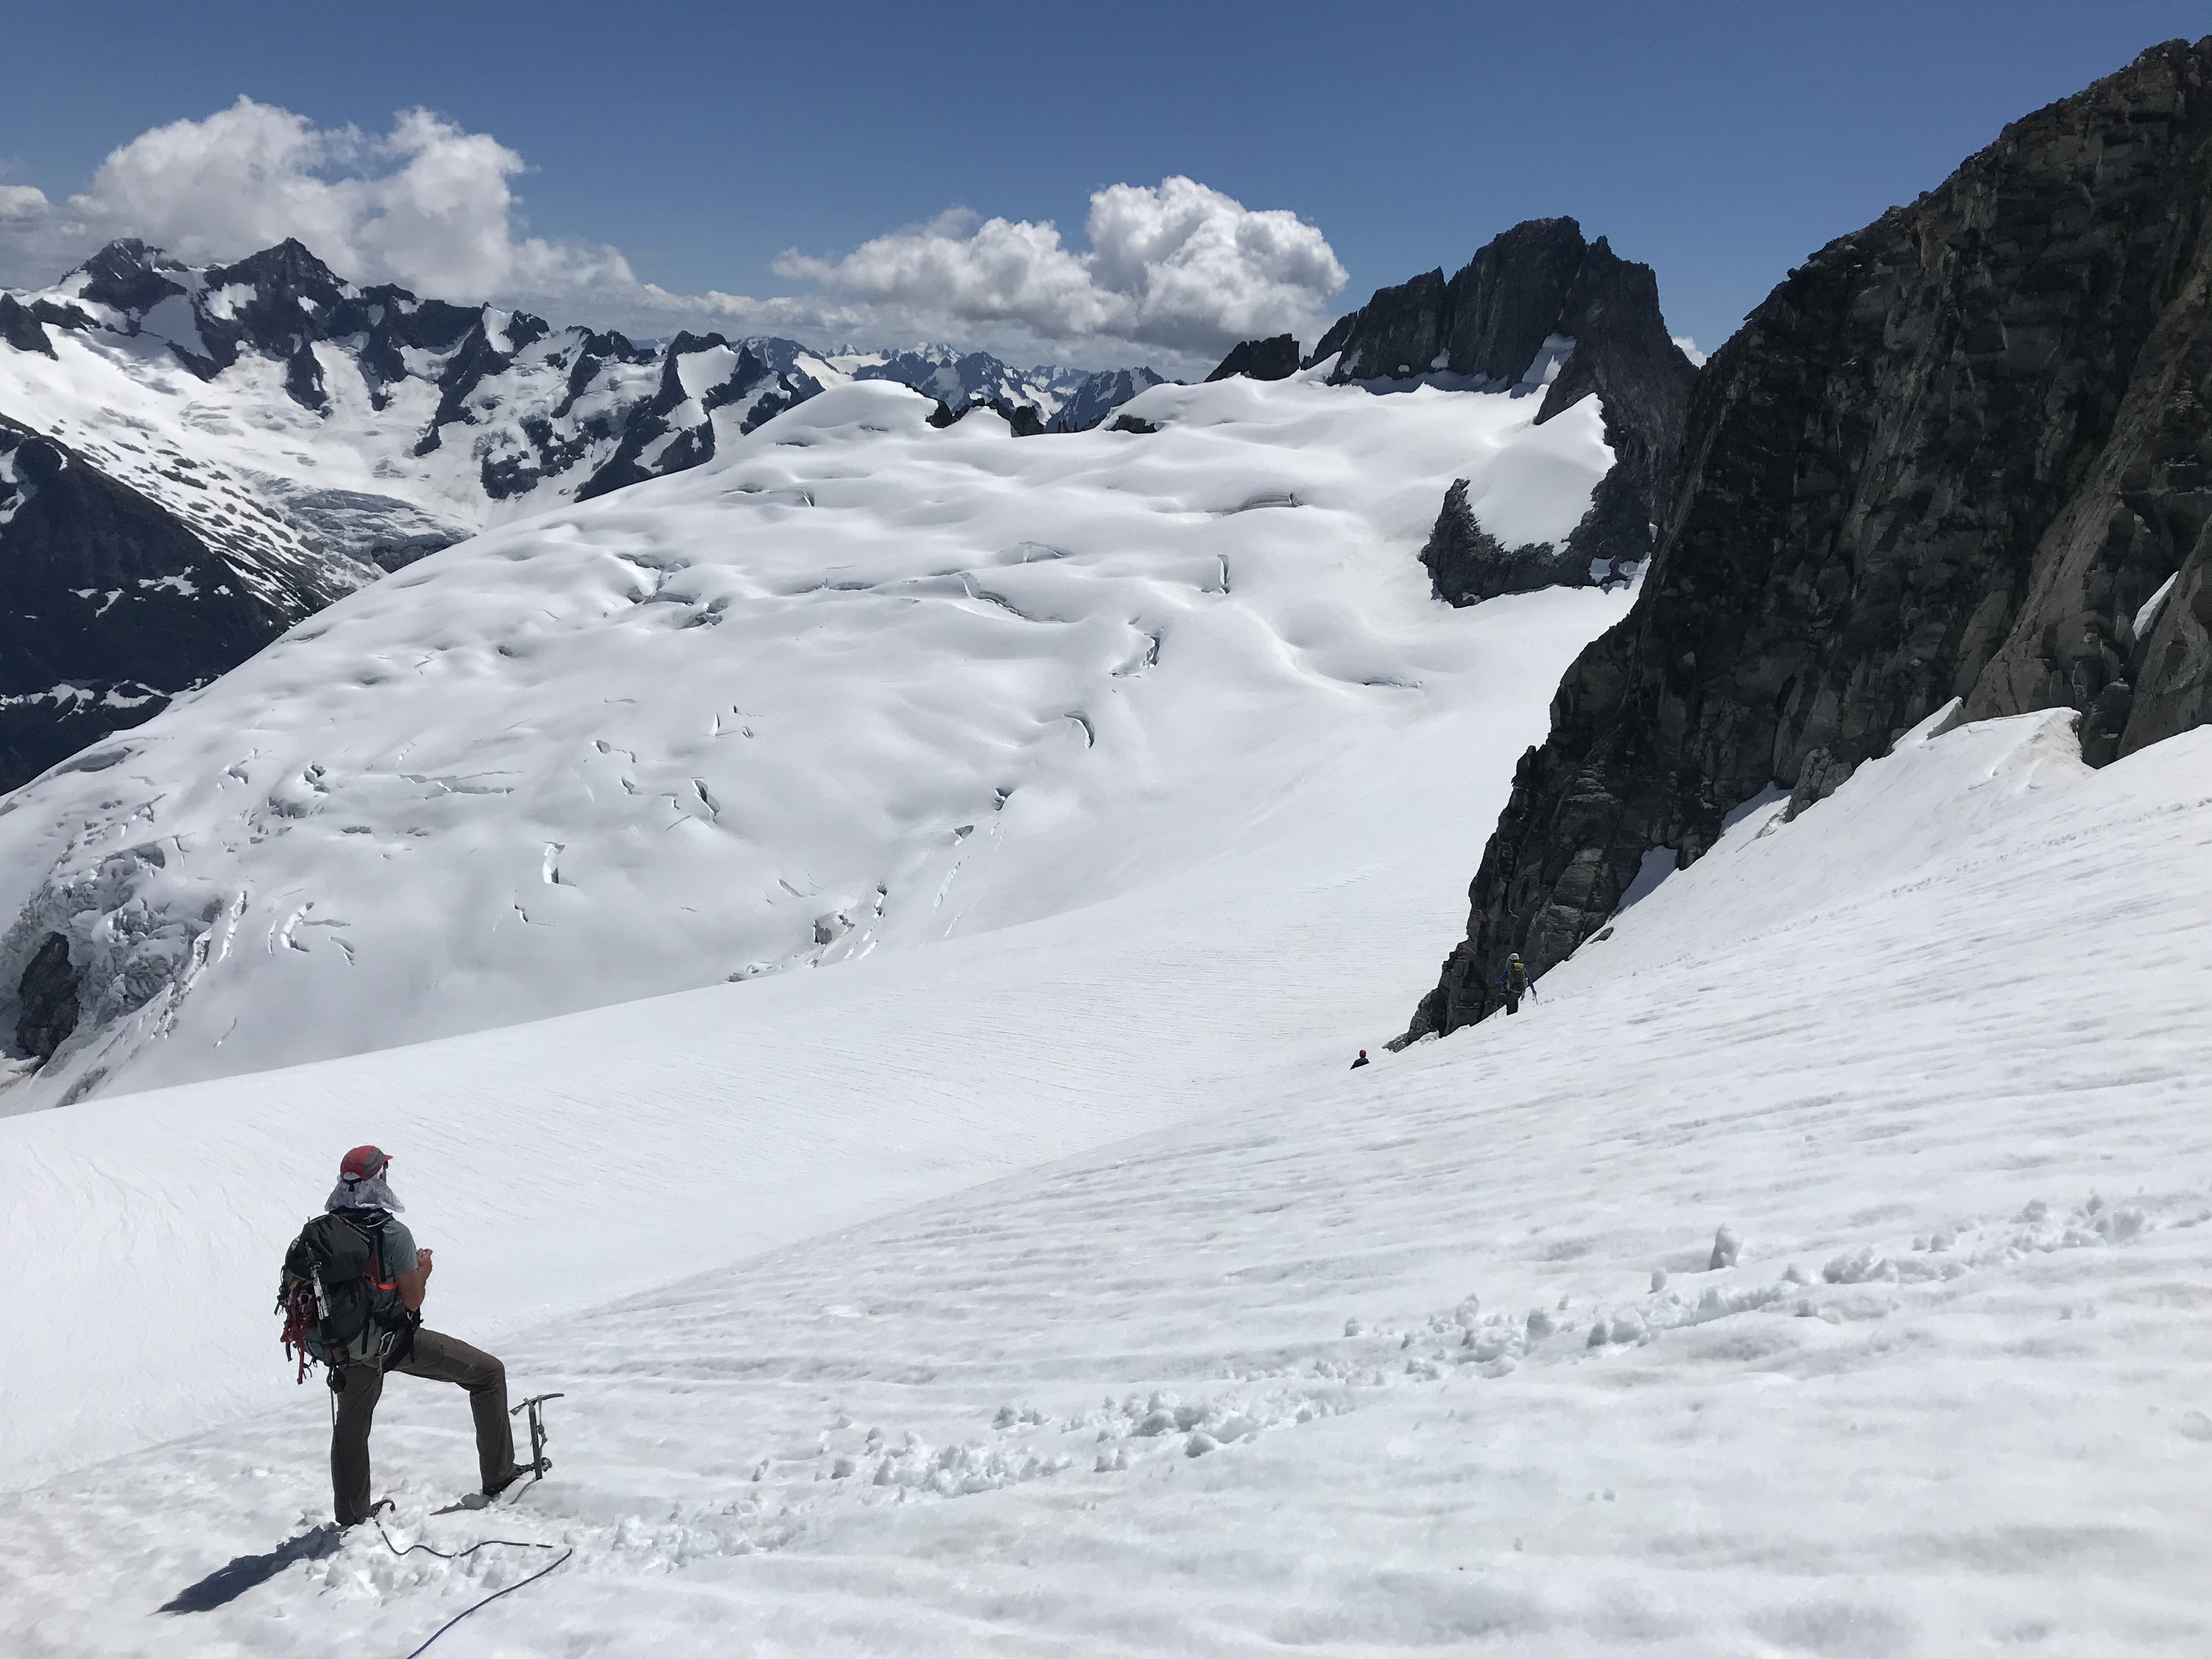
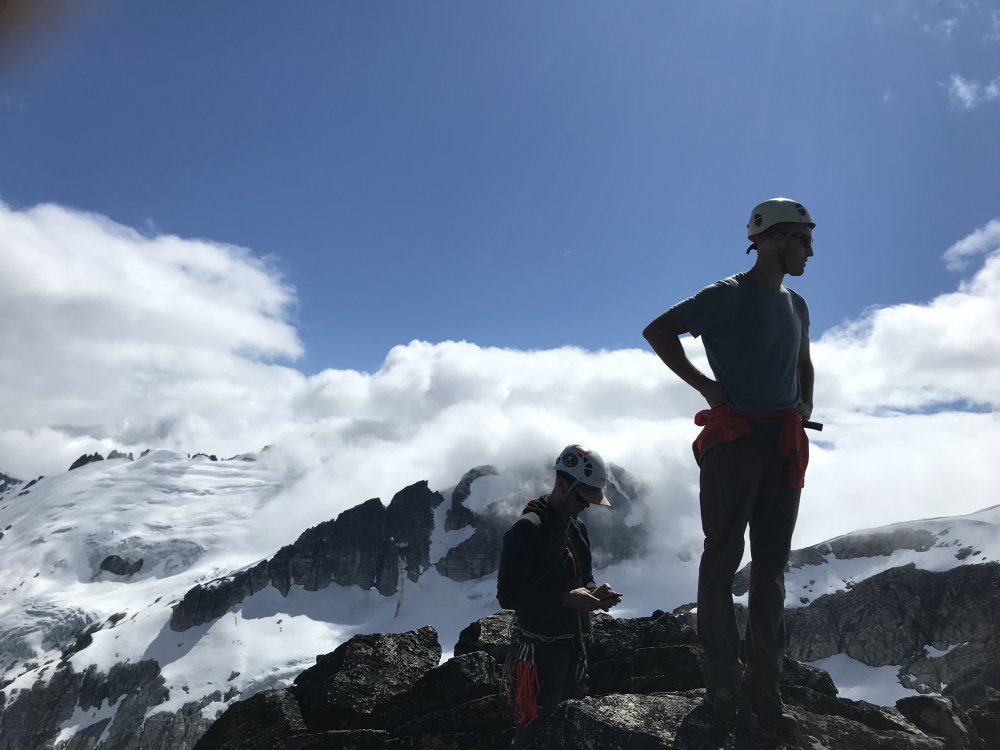
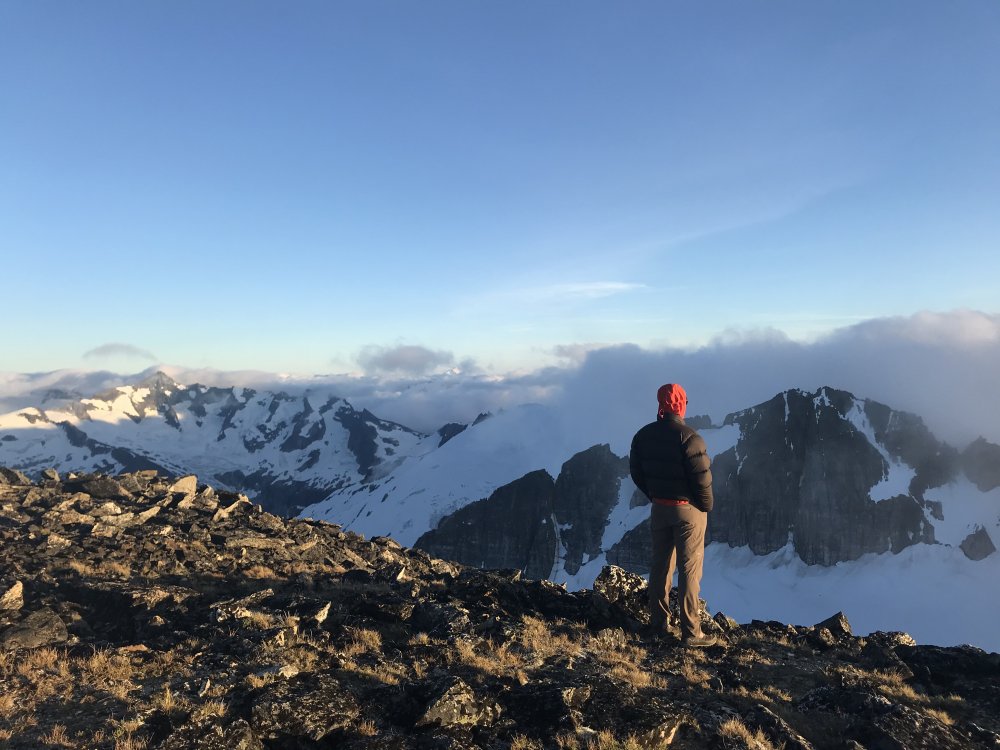
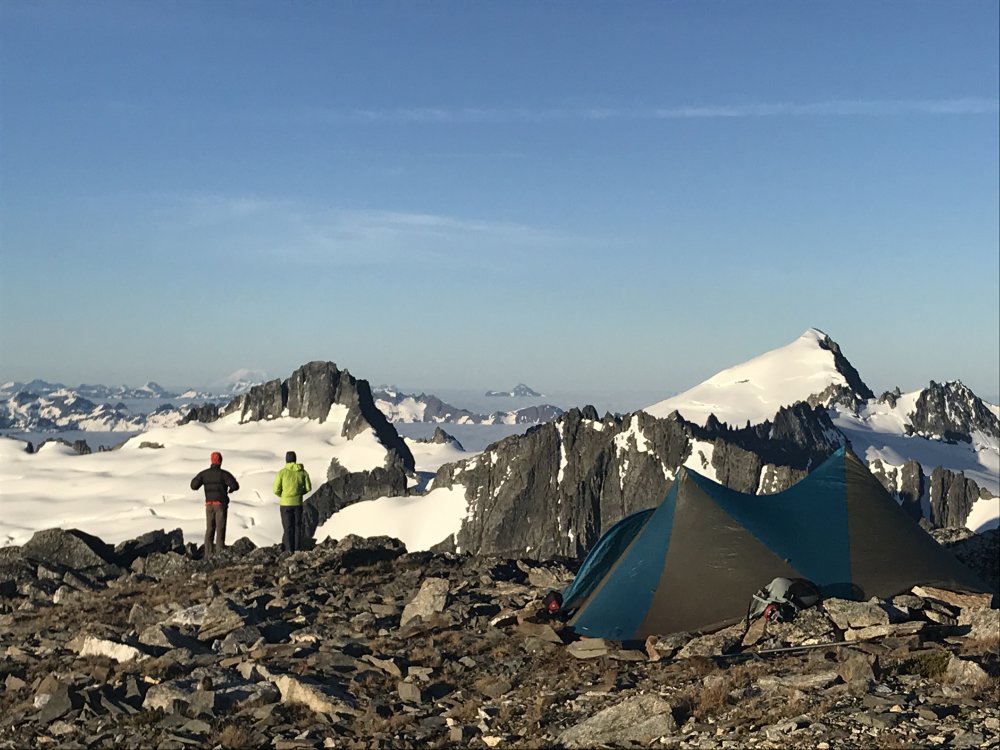
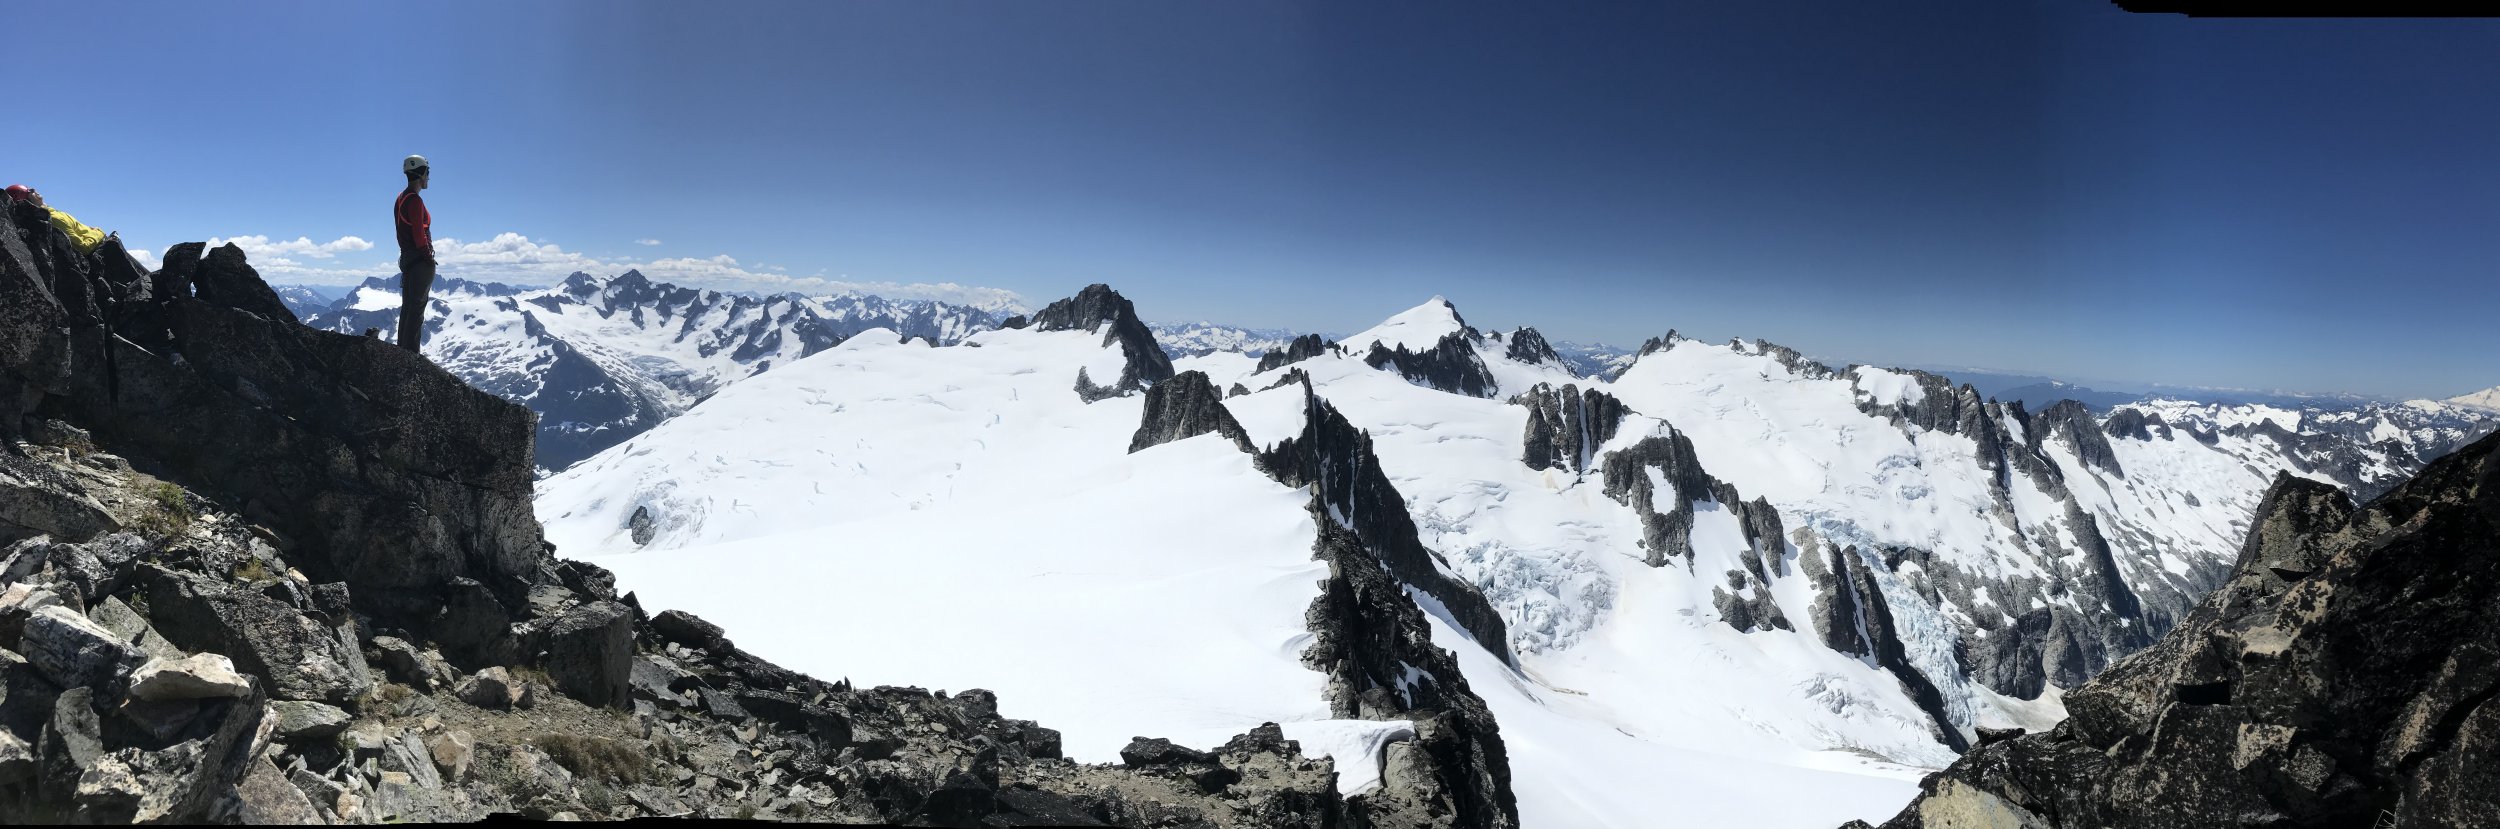
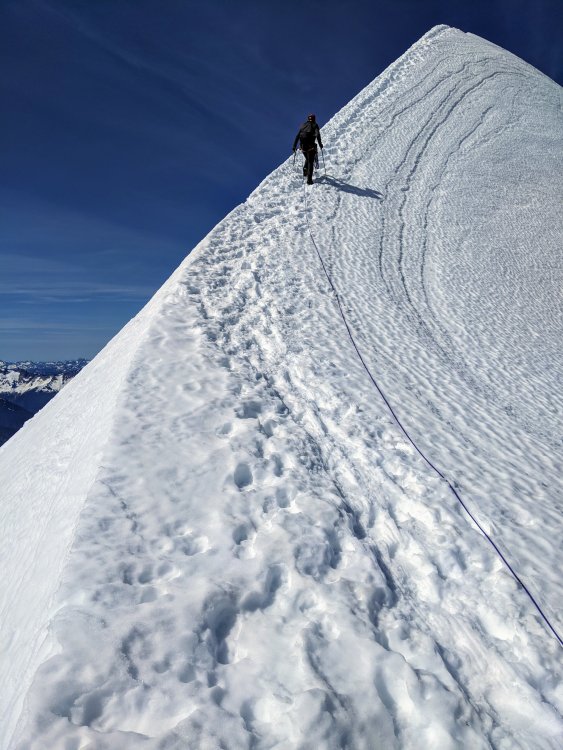
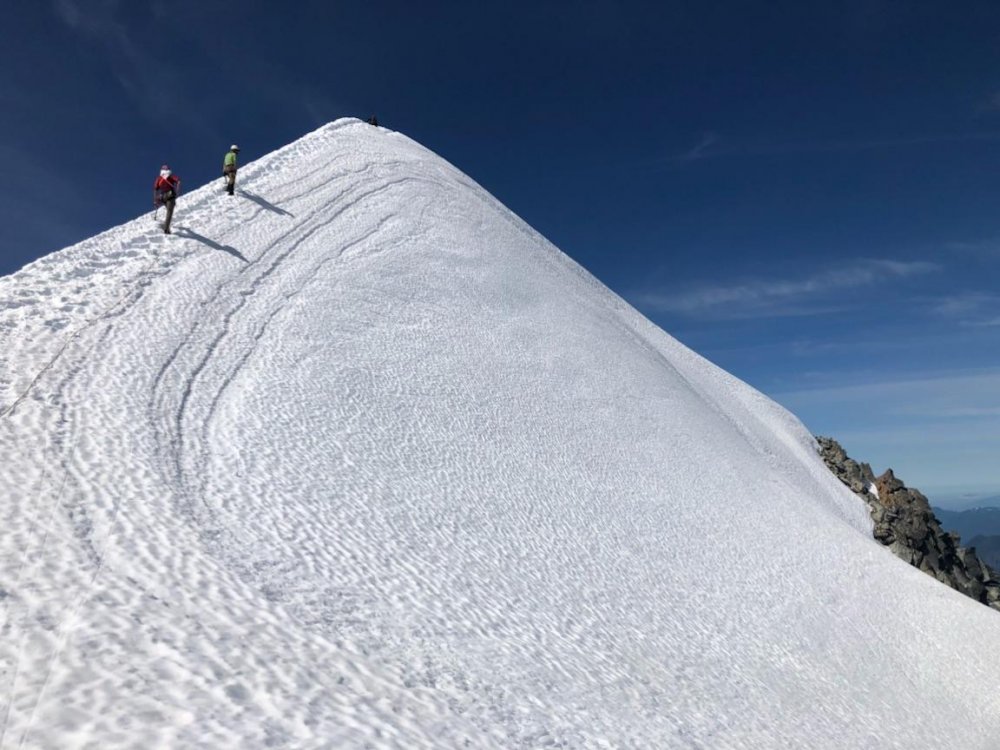
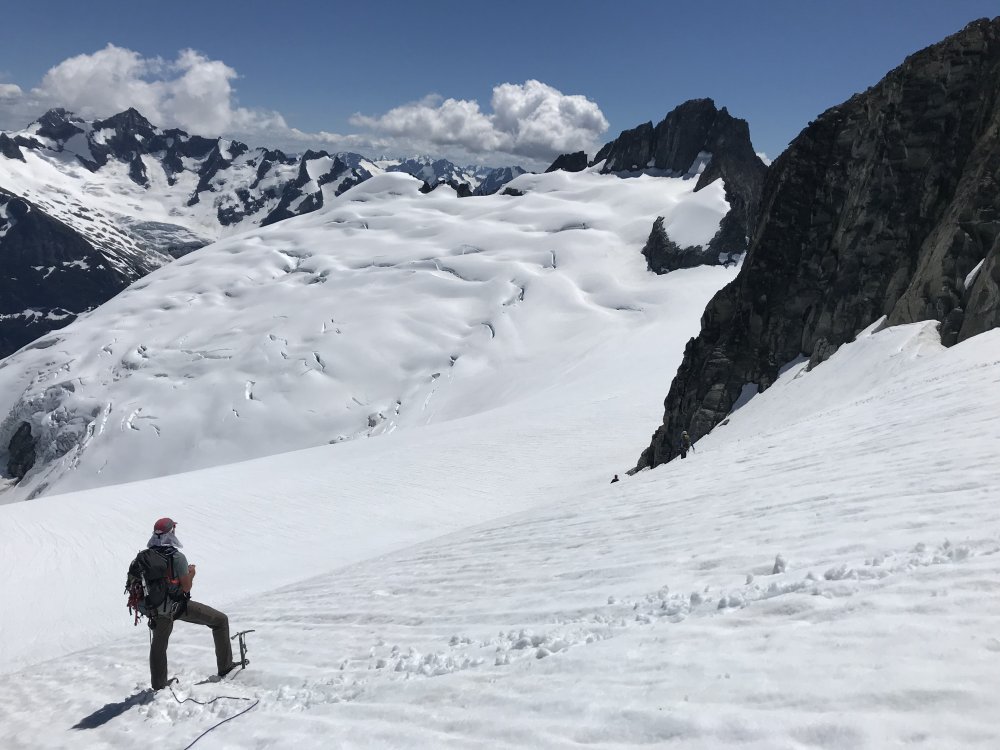
I was going to post a trip report for the Inspiration Traverse July 17-20 from North to South, but the important approach beta would seem redundant. I will just add to the visual stoke and affirm that this is one of the better traverses that I have done in the Cascades. \


.JPG.d15a84f0684bb21d9b161d3438addffb.JPG)

 1 point
 -
Trip: Tetons - Cathedral Traverse + some other stuff Trip Date: 07/18/2020 Trip Report: I spent the past week in the Tetons. On Saturday my friend Lucas and I attempted the Grand Traverse in snowy early season conditions. We did fairly well, minus a route finding snaffu on Owen, but were slowed down a lot by snow/ice and route finding difficulties on the North Ridge of the Grand. We had bivy gear but opted to bail from the Lower Saddle. A couple thoughts for would-be suitors... If you want Sierra-esque conditions this is a mid-August to early-September objective. Rolo's beta page on the Pataclimb site is good but not super detailed and would be worth looking up some more pictures if you are trying to onsight like we were (I'd been up the Grand before but never on the North and Lucas had skied Garnet Canyon once). Italian Cracks and N Ridge in general is not obvious splitter climbing, be prepared. You need to be super stoked if you want to walk right past an easy trail down and continue up Middle and the rest of the traverse, or don't be cause you've already done the best parts (so I was told, and tell myself to soothe my battered ego ). The next few days were spent climbing at various crags (all have directions on MP, but identifying routes isn't always easy)... Rock springs buttress is AMAZING and also an amazingly sustained steep long hike for a crag. I took 2 hrs and was worked. I think camping up there would be sweet and the rock is awesome but S/SW facing so its really a morning-only venue. You can also take the tram or gondola from Teton Village but that costs a lot of money. Teton Canyon's Shady Wall is a short approach and shady all day (big surprise). It's also HARD (sandbagged 10+ warmup, 1-2x hard 5.11, several 12s/13s) and on weird rock (featured granite with flowstone (like limestone) over the face in places). There are other cool crags in Teton Canyon, we did a cool multipitch limestone sport route in a wild location one day but its hard to describe the location and kind of a locals' secret, maybe ask around? Blacktail butte in the NP is also nice limestone sport cragging on vertical edges. People talk sh!t about it but given that I don't get to climb limestone often I thought it was nice and had some good routes. I also went to solo the CMC route on Moran with a leisurely overnight at the CMC camp. I bushwhacked instead of canoe'd, which was a nice mini-cascades flavor, and ended up going in one way and out the other to see both options for going around Leigh Lake. The guidebooks all say to go out the Valley trail and on the East side of Leigh Lake and then bushwhack around the N side of the lake to the gully/creek leading to the the CMC camp, but on a map it looks much better to take the Paintbrush trail around the West side of the lake and then bushwhack in from there. Turns out the guide books were correct (who'da thunk?) and going the E side of Leigh is much more efficient although longer mileage (it's still a pretty decent shwack with neck high ferns, steep side hilling, and downed trees). Anyway, all the jungle blundering was for naught as I got rained on all night at CMC camp and was socked in by cloud all morning. I hiked out only to have things turn perfectly bluebird for the entire afternoon... c'est la vie. Will post some pics later this week. Gear Notes: Approach shoes and an extra pair of socks for when they wet out with the snow travel and post-thunderstorm shwackage. Approach Notes: What the guide books say...1 point
-
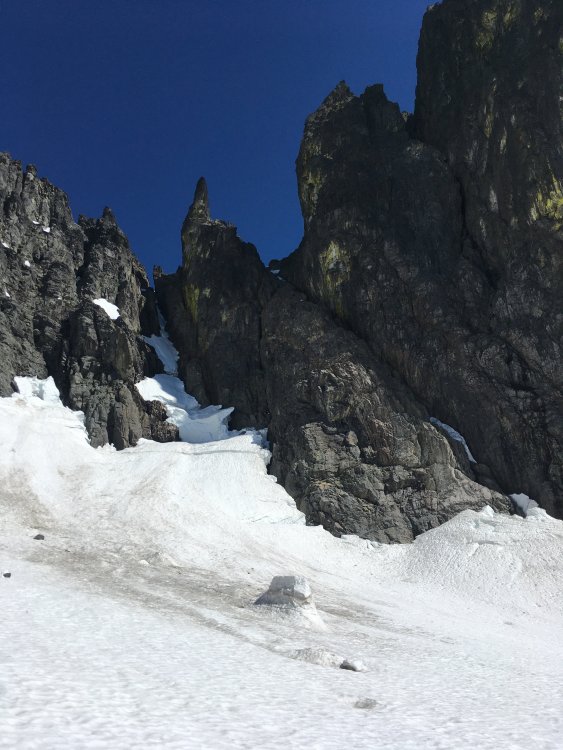
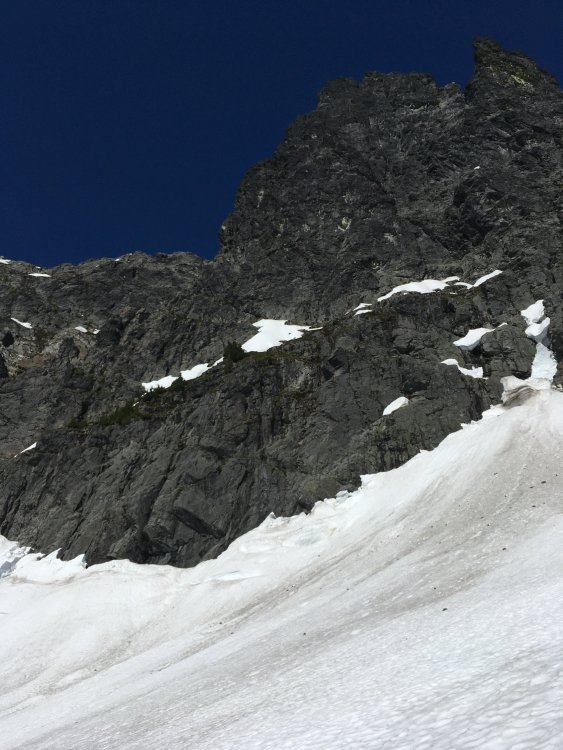
Checking if anyone has knowledge of ascents of the below feature (yellow line.) I found no info after consulting the web, Red Fred and asking the Method Valley ''ol timers' . We did not detect previous passage. Silver Star massif from west. Red flag is West Silver Star summit. Dashed YELLOW is line of ascent in question; a rib extending west, forming right wall of W Face Couloir (Allen, Keller '05) Photo & pilot by John Scurlock, taken from Mark Allen's TR http://alpinelines.blogspot.com/2008/10/fa-silverstar-mountain-west-face.html
.jpg.2102a6144ecb126edcfc15a0b7899d76.jpg) 1 point
1 point -
Trip: Mt. Goode - NE Buttress Trip Date: 07/18/2020 Trip Report: Climbed the NE Buttress with Steve July 18-20. The trail from Highway 20 was largely brush free until Grizzly Creek, which we crossed easily on a log. From there, it was a brushy caterpillar orgy. The direct approach, climbing just right of the leftmost waterfall, was easy and fast. Glacier navigation was simple, although we did cross some blue ice and bridges. We were able to gain the buttress just below the red ledges via a collapsed snow moat. Climb was great! Plenty of snow patches on the route to fill our bottles with. From the summit we scrambled NW to the next notch and found a huge patch of snow which we melted for abundant water. Descent was a long day but not too bad. Once down at the 7400 ft heather benches, keep traversing skier's right until reaching the burned ridge that divides the drainages between Storm King and Goode, take that down to the Park Creek Trail. https://climberkyle.com/2020/07/18/mt-goode-ne-buttress-5-5/ On a side note, it appears from the summit logs that quite a few parties have climbed Megalodon Ridge. Most mentioned that they never found the 5.10 pitches, so perhaps it is easier than 5.10 or these difficulties are simple to circumvent. Goode Glacier and NE Buttress. On lower route. Le Conte and Sloan. Forbidden, Eldo, and the Twin Sisters. Sahale and the sound. Silver Star. Douglas Glacier on Logan. Rapping down. Gear Notes: Trail runners, aluminum crampons, and ice ax for the approach. Climbing/approach shoes on route. 60 m 8mm rope. Cams .4-2, 9 slings, tricams, nuts. Oh, and 10 lbs of camera gear (including a full sized tripod) for Steve. Approach Notes: When you reach the open valley beneath Goode, ford the river, ascend up easy boulders/snow. Climb the 4th class slabs just right of the leftmost waterfall. Continue upwards through the magical alder tunnel. Eventually you'll emerge into wildflower meadows and then the camps atop the lateral moraines.1 point
-
I recently found my hard copy of this guide and seeing it has not been posted up (at least I could not find it) I thought for fun I would post it. It was written probably 25 plus years ago by Make Dale. The Cascade Brush and Bushwhack Rating System by Mark Dale For years there has been something sadly lacking in the climbing world. Something necessary to help describe the total mountaineering experience in those areas blessed with challenging peaks surrounded by primeval forest. That something is a brush and bushwhack rating system. After years of the hand-to-limb combat encountered in below-timberline approaches, one comes to realize that this part of an ascent can be half or more of the battle. (Notice the use of fighting terms.) And yet, just how does one accurately relate this important facet of a climb in words? "It was ugly, real ugly," "Brutal," "A freaking flail," "Oh, not too bad, but I did lose a pint of blood." Well, these are pretty good subjective descriptions, but what's missing here is something more definitive. What we need is a way to portray in a more precise manner those endearing struggles with the brush. Therefore I propose the Cascade Brush and Bushwhack Rating System. This system is so named because most of my experience in the past ten years of climbing has been in the Washington Cascades. It's perfectly applicable, though, to other ranges of a similar nature, e.g. the Olympics, Northern Selkirks, British Columbia Coast Range, Alaska Range or any mountain group where below-timberline approaches necessitate brush-beating and bushwhacking. This system rates both difficulty and grade much like the technical climbing ratings in use today. Before defining system nomenclature here are a few guidelines for describing your favorite flail: 1. Conditions described must be when the approach is snow-free, since snowpack greatly affects most bushwhacks, reducing their difficulty considerably. 2. More demanding terrain, e.g. cliffy or steep, will increase a bushwhack's difficulty and grade as compared to one with the same vegetation on level ground. 3. Both the density and the type of brush are important factors. I'll take an open area of mature devil's club over a dense stand of slide alder any day. 4. Grade is determined by both time and distance involved in completing the approach, as well as the duration of the difficulties. 5. Since creek and river crossings play an important part of many approaches, a special sub-rating has been devised for these. 6. When a mechanical device such as a machete is used the bushwhack is no longer "free," and an aid sub-rating must be used. Difficulty Ratings These apply to the "free" difficulties (no aid used) and range from BW1 to BW5, where BW stands for "bushwhack." Difficulty ratings apply to those areas of worst brush that can't be avoided. BW1 Light brush. Travel mostly unimpeded, only occasional use of hands required (e.g. mature open forest). BW2 Moderate brush. Occasional heavy patches. Pace slowed, frequent use of hands required. BW3 Heavy brush. Hands needed constantly. Some loss of blood may occur due to scratches and cuts. Travel noticably hindered. Use of four-letter words at times. BW4 Severe brush. Pace less than one mile per hour. Leather gloves and heavy clothing required to avoid loss of blood. Much profanity and mental anguish. Thick stands of brush requiring circumnavigation are encountered. BW5 Extreme brush. Multiple hours needed to travel one mile. Full body armor desirable. Wounds to extremities likely, eye protection needed. Footing difficult due to lack of visibility. Loss of temper inevitable. Aid Ratings When artificial means are used to penetrate brush, then an aid rating should be used to describe the device required. These ratings range from BA1 to BA5, where BA stands for "brush aid": BA1 Machete or sickle BA2 Gas-powered weed-eater BA3 Chainsaw BA4 Agent orange BA5 Bulldozer Creek and River Ratings These ratings are used to describe the difficulty in crossing watercourses. The range is WA1 to WA5, where WA stands for "water": WA1 A dry crossing is possible by using rocks or logs. WA2 Possible wet crossing, but a dry crossing can be accomplished with some finesse. WA3 Wet crossing, ankle- to calf-deep. WA4 Wet crossing, calf- to knee-deep. WA5 Wet crossing, greater than knee-deep, possibility of getting swept downstream. WA6 Water deep enough to require swimming. WA7 Water temperature, current velocity, to factors make an attempt to cross potentially lethal. (Frequently a factor in Alaska and New Zealand, for instance). Grades Grades range from I to VI and follow the same general guidelines as climbing grades: I Brush beating can be done in a few hours or less. II Generally will take less than half a day. III Could take most of a day, but hardened parties will be able to complete in a short day. IV Will take a long day and involve continuous battle. V A 1+ to 2-day bushwhack, difficulty rarely less than BW4, large quantities of bandaids and wound dressings will be needed unless properly attired. VI The most extreme of bushwhacks, requiring over 2 days to complete with probably a BW5 encountered along the way. Epic Ratings E1 Unplanned delays require explanations to significant other. E2 Same as E1, but with companion of opposite sex (not significant other). E3 Overnight bivy required. E4 Same as E3, but with companion of opposite sex. ... E10 Whole party vanishes. Following are some examples of rated bushwhacks: Picket Range, Goodell Creek approach -- Grade III - IV, BW4 Mt. Shuksan, White Salmon approach -- Grade I - II, BW4- Mt. Spickard, Silver Creek approach -- Grade V, BW4+ Mt. Blum, Blum Lakes approach -- Grade III, BW3+, WA5 Devils Peak, Coal Creek approach -- Grade I, BW2 Monashees, Thor Creek approach -- Grade VI, BW4, BA1 Chimney Rock, standard approach -- Grade II, BW2 And there you have it. No longer must one try to decipher the deranged mutterings of a victim of jungle warfare. A person needs only to apply the appropriate brush ratings to relate his brutal experience to others. And who knows? With advances in bush technology and the competitive nature of climbers, we'll probably see difficulties pushed to BW6 and beyond. And there just HAVE to be some Grade VII's out there! So come on, folks! The next time you report a mountaineering trip that involves green hell, use the Cascade Brush and Bushwhack Rating System to tell others about it. They'll be glad you did!1 point


.jpg.74ac5110f001001c9054b7f5f5536842.jpg)
.jpg.b4c89268ce07ea65d067b9ce77c7db25.jpg)
.jpg.cc3913456a25d431e834b1bbd6b09c22.jpg)
.jpg.e88e4eda829fdbb91f3696aa420b0fed.jpg)
.jpg.0177ed0e31de0d552a40f62bdff65bc7.jpg)