Leaderboard


Popular Content
Showing content with the highest reputation on 03/06/19 in all areas
-
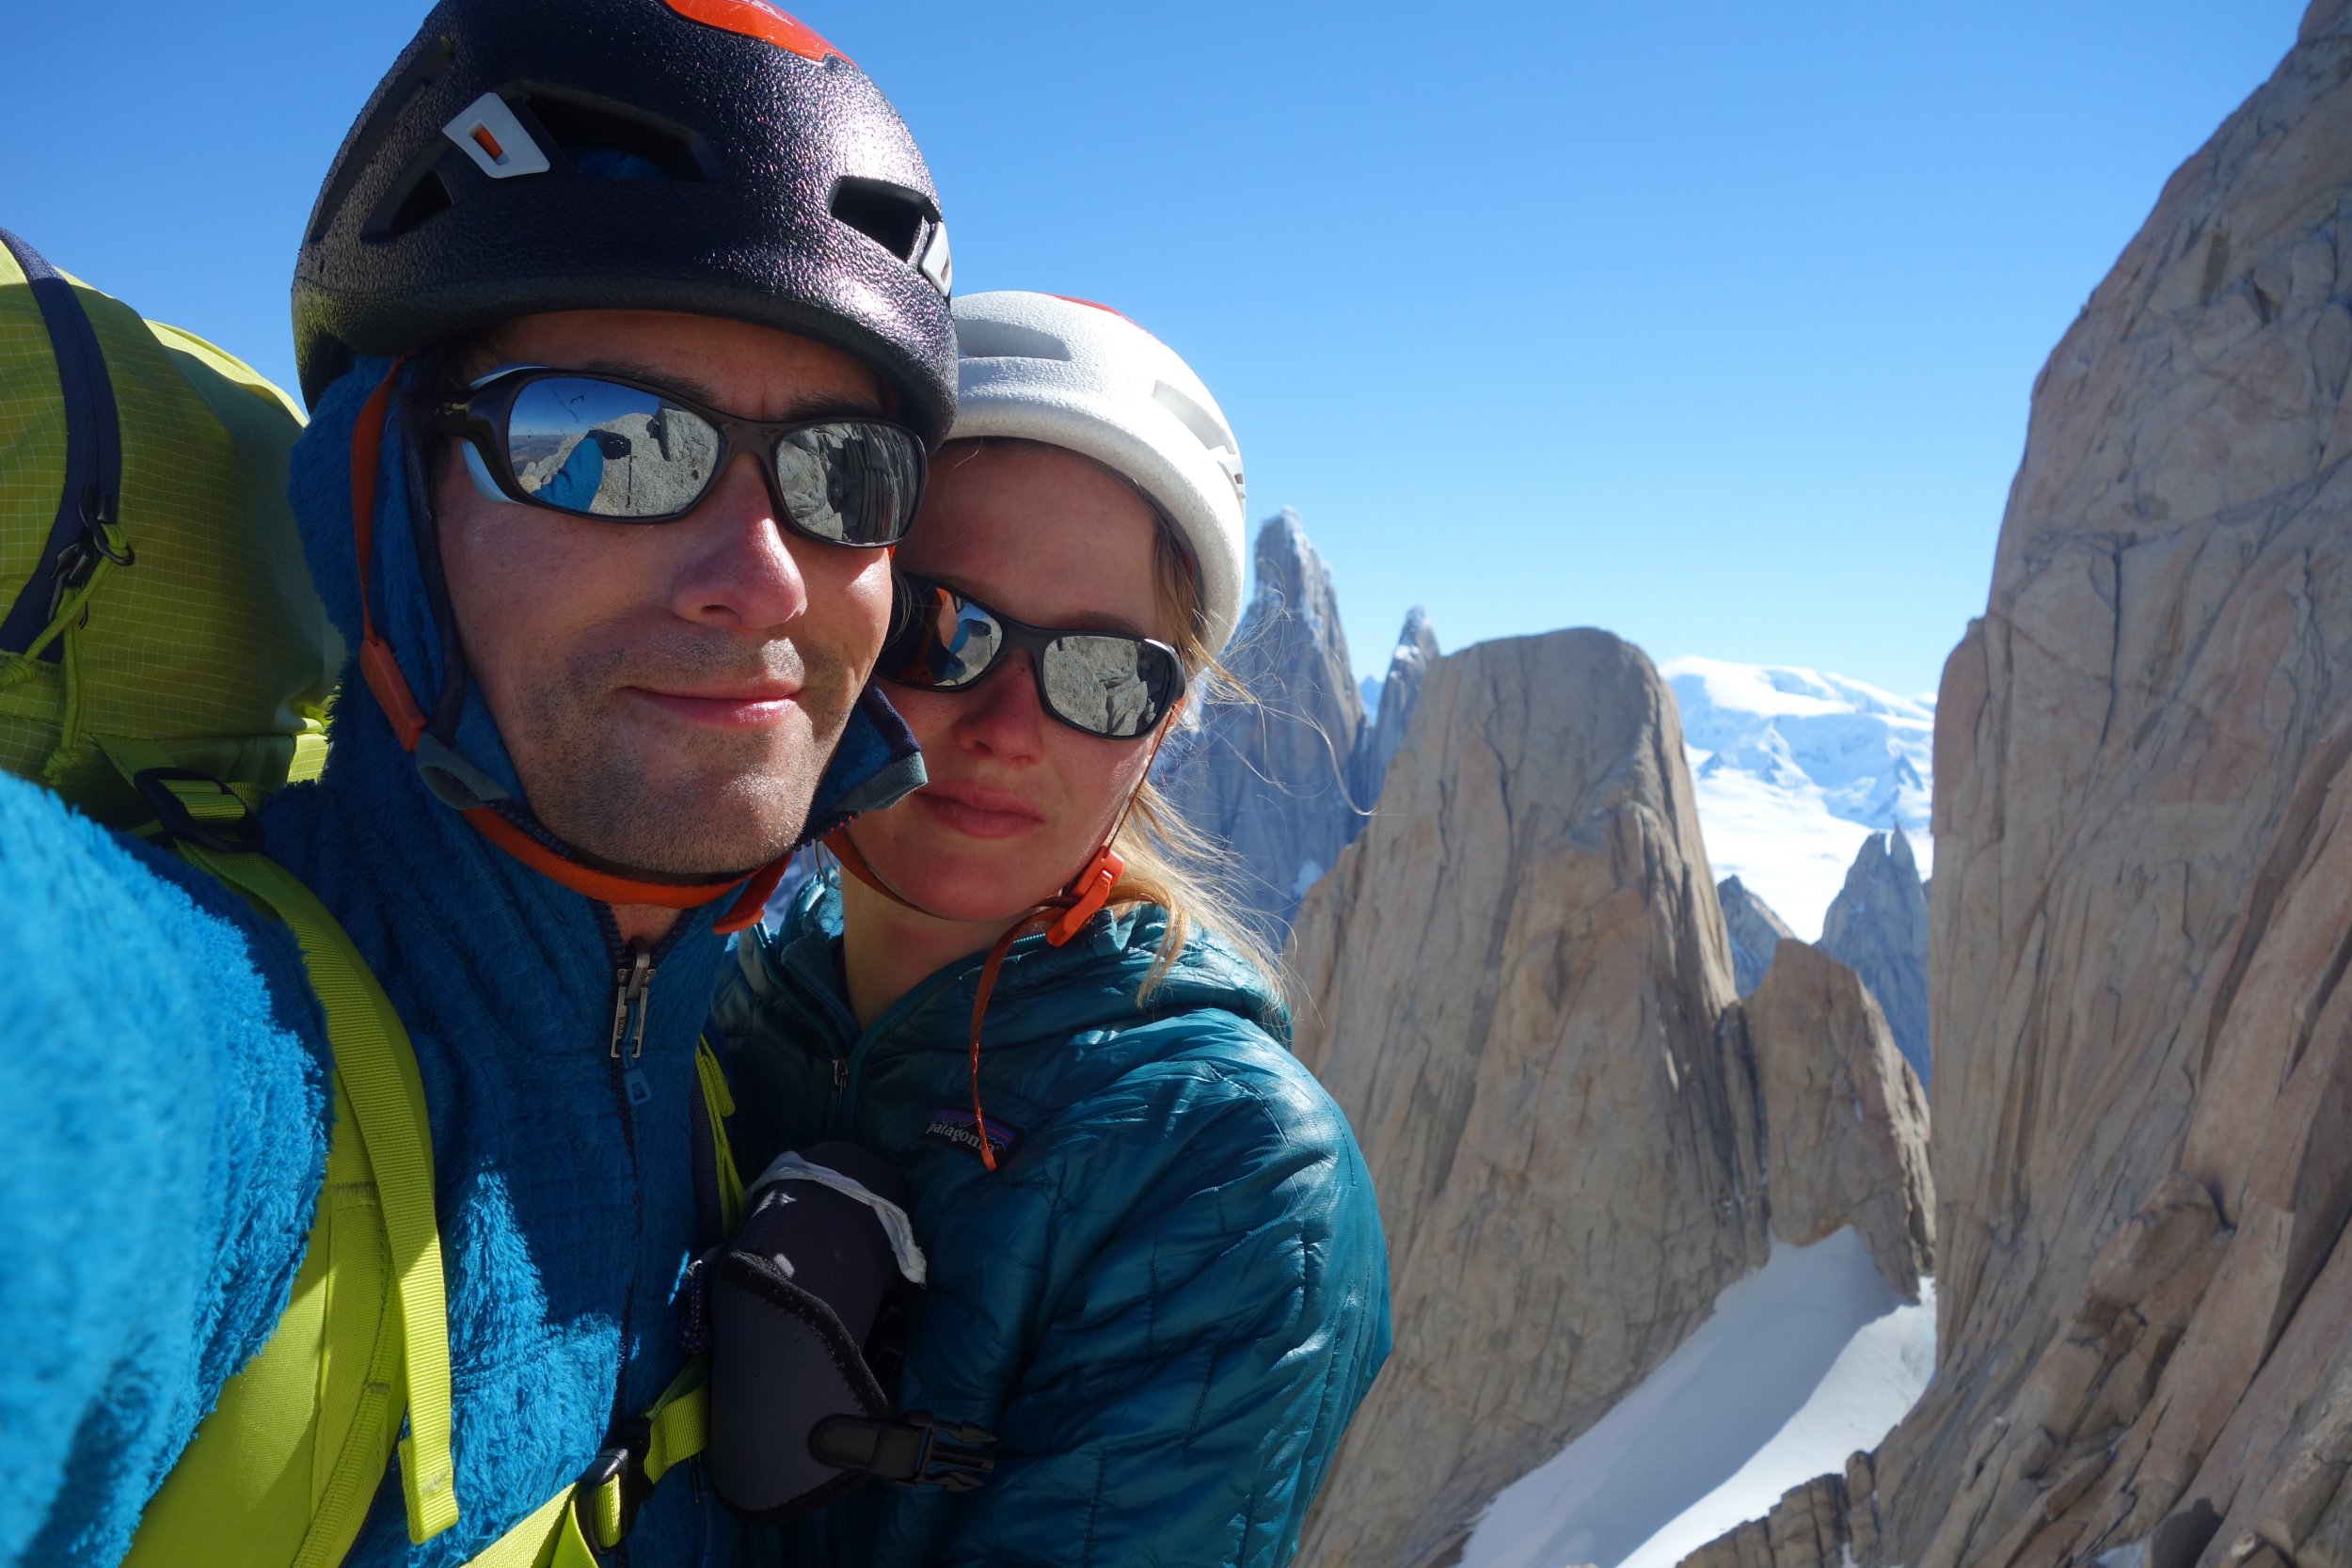
It can't be said enough: Jeff and I are so blessed, and so thankful that we got to climb Fitz Roy! Nothing is ever guaranteed, and certainly not alpine climbing in the Fitz Roy range. Everything kept falling into place! And it was spectacular!!!! 🙏 🤘😍 . . . Timeline: Thursday: Planning for a climb on Mt Hood. Jeff calls from working remotely in Charleston. Let's go to Patagonia! Friday: Asked for time off work. Plane tickets look reasonable. Wait, where are our passports? We bought tickets anyways. Saturday: Jeff arrives in Seattle. So do our passports. We buy some more gear! (and pack) Sunday: Planes. Work from plane Monday: Planes and working remotely from BA, AR Tuesday: Plane to El Calafate, bus to El Chalten, say hi to MF Seba, call in to work meetings and grab a bite with Scott, Sami, and Lauri Wednesday: Hike up to Lago de Los Tres to check out conditions. They are cold, wet and windy. Okay! Thursday: Hike from El Chalten to Paso Superior and camp Friday: Approach to La Brecha and camp. The rock looks a bit wet, but the weather is great! Saturday: Climb! all day. all night. some wetness, some ice, but it's okay Sunday: sit for an hour and watch the sunrise on the summit of Fitz Roy. Rappel Sunday night: hike all the way back to El Chalten. No sleep Monday morning: Catch our shuttle to the airport with 20 minutes to spare. Finally sleep on the shuttle Monday: Fly out, work from plane Tuesday: Arrive in Seattle! (go to work)
 2 points
 -
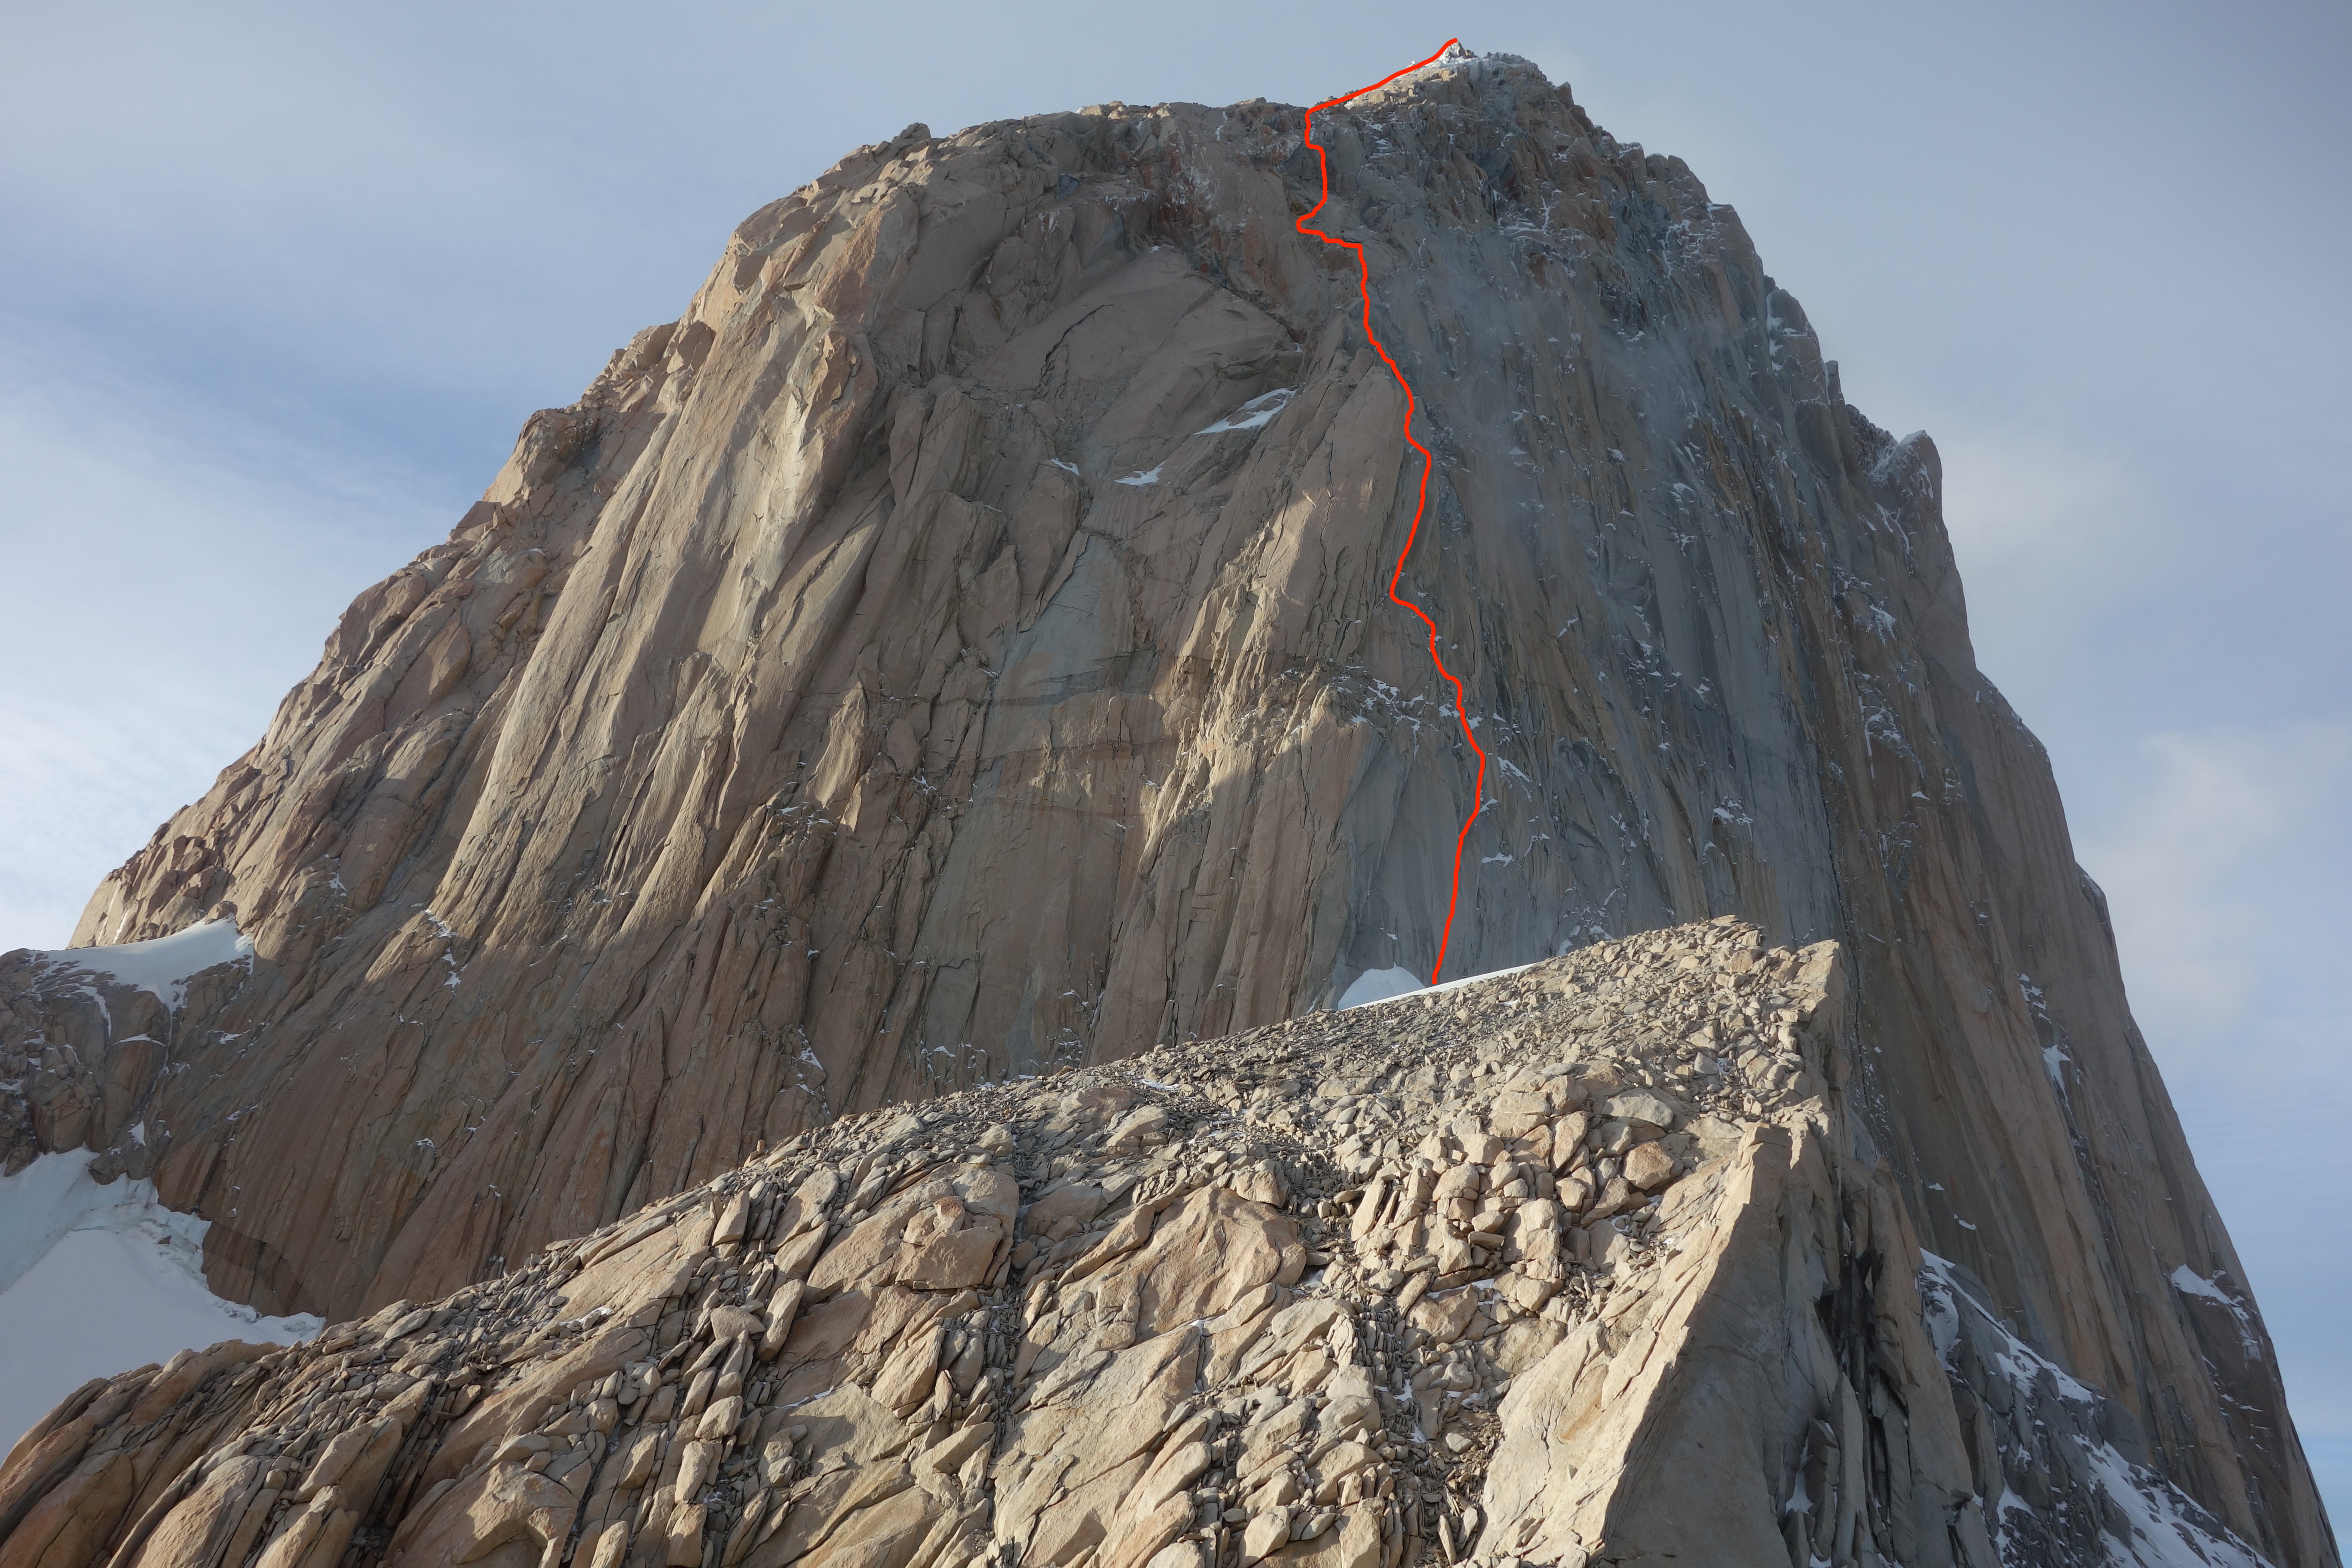
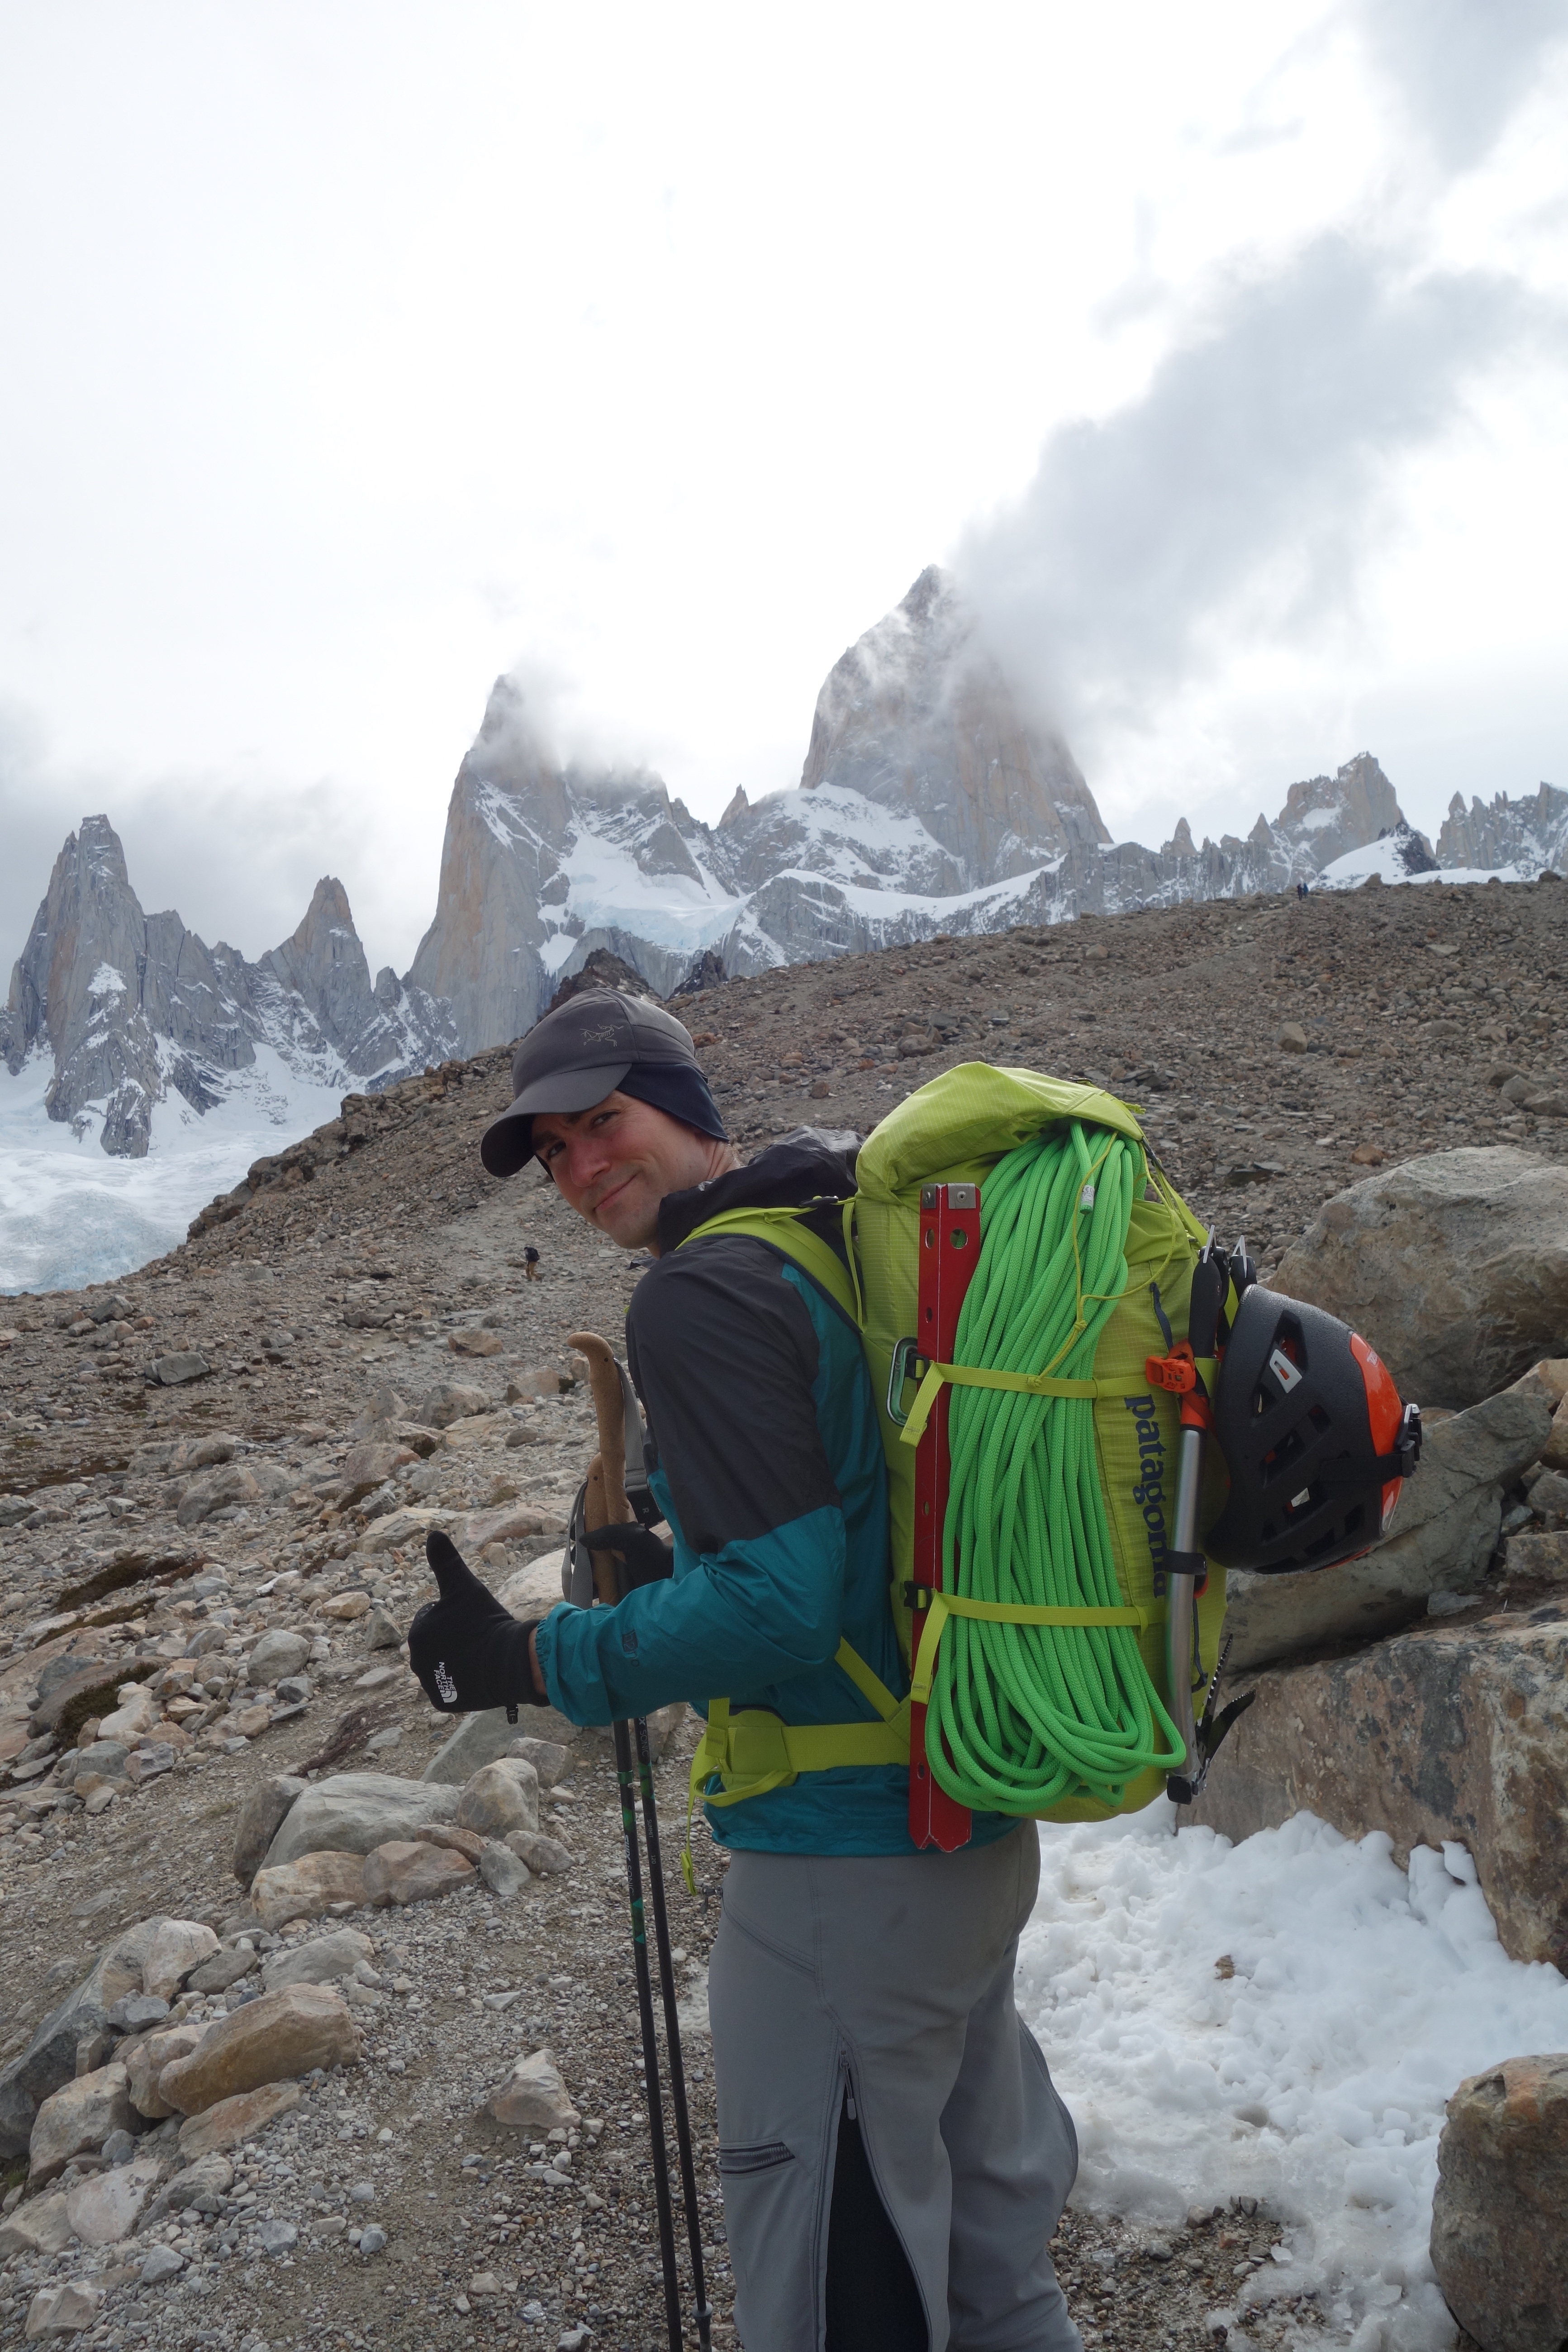
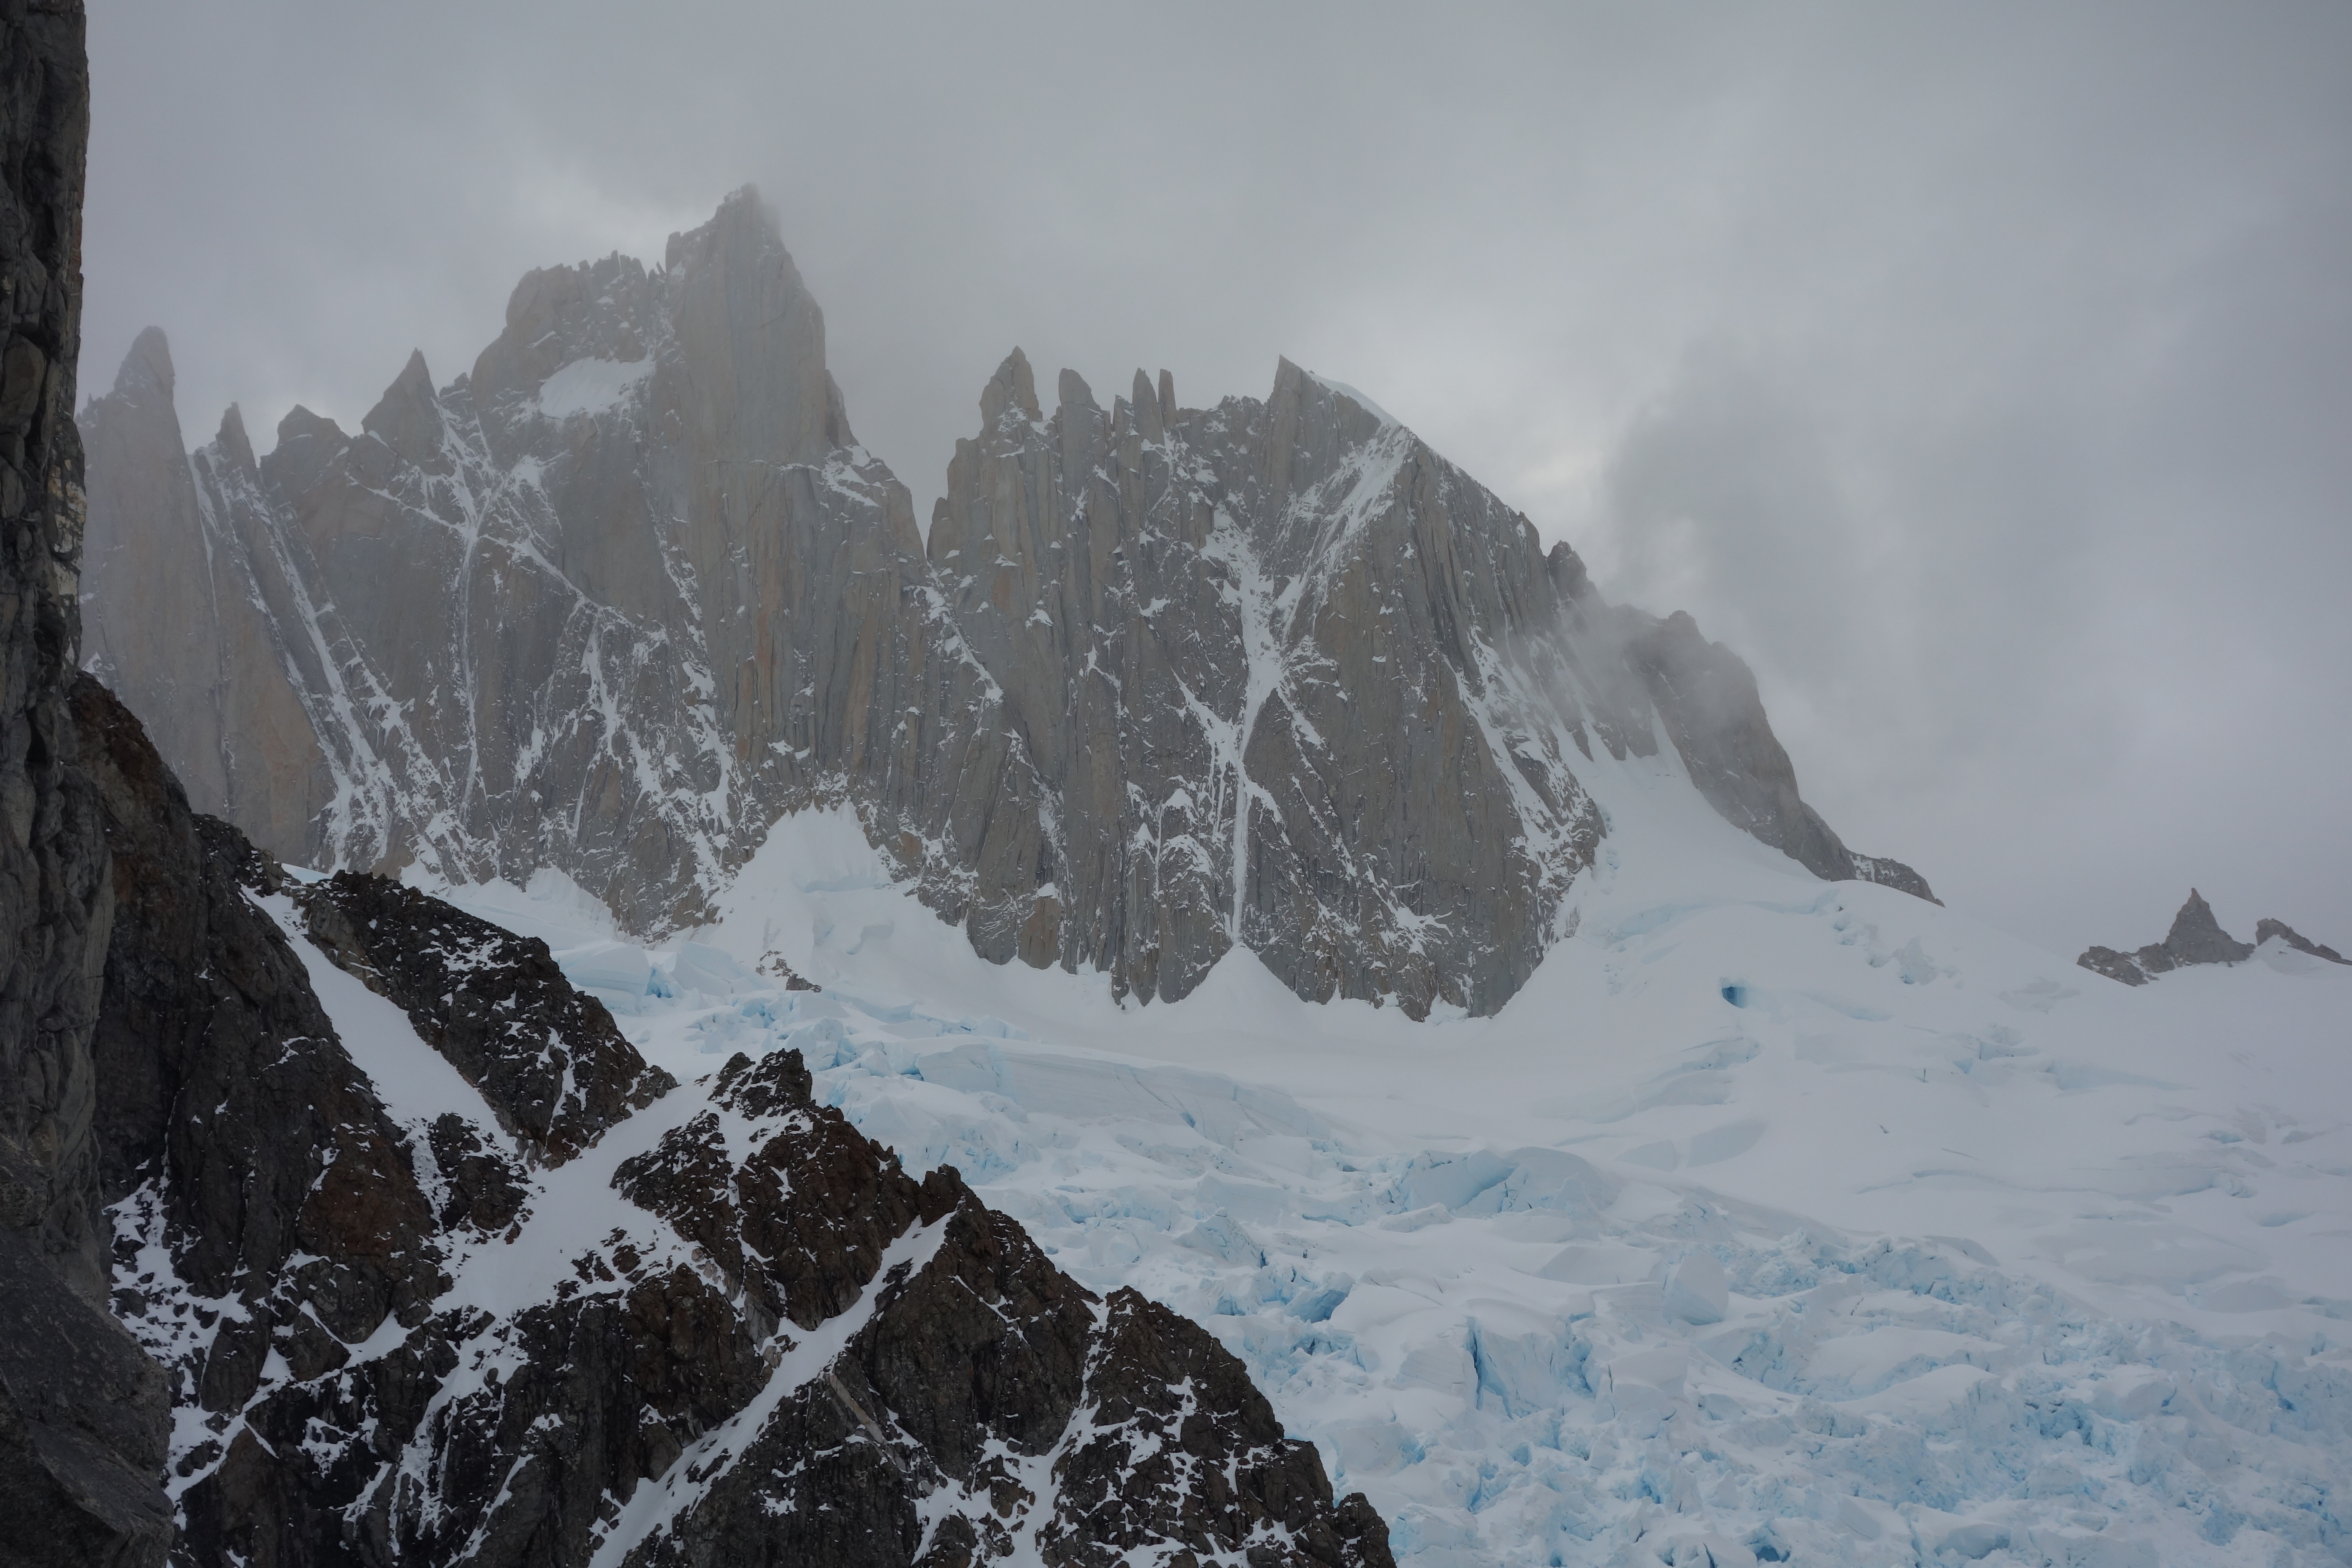
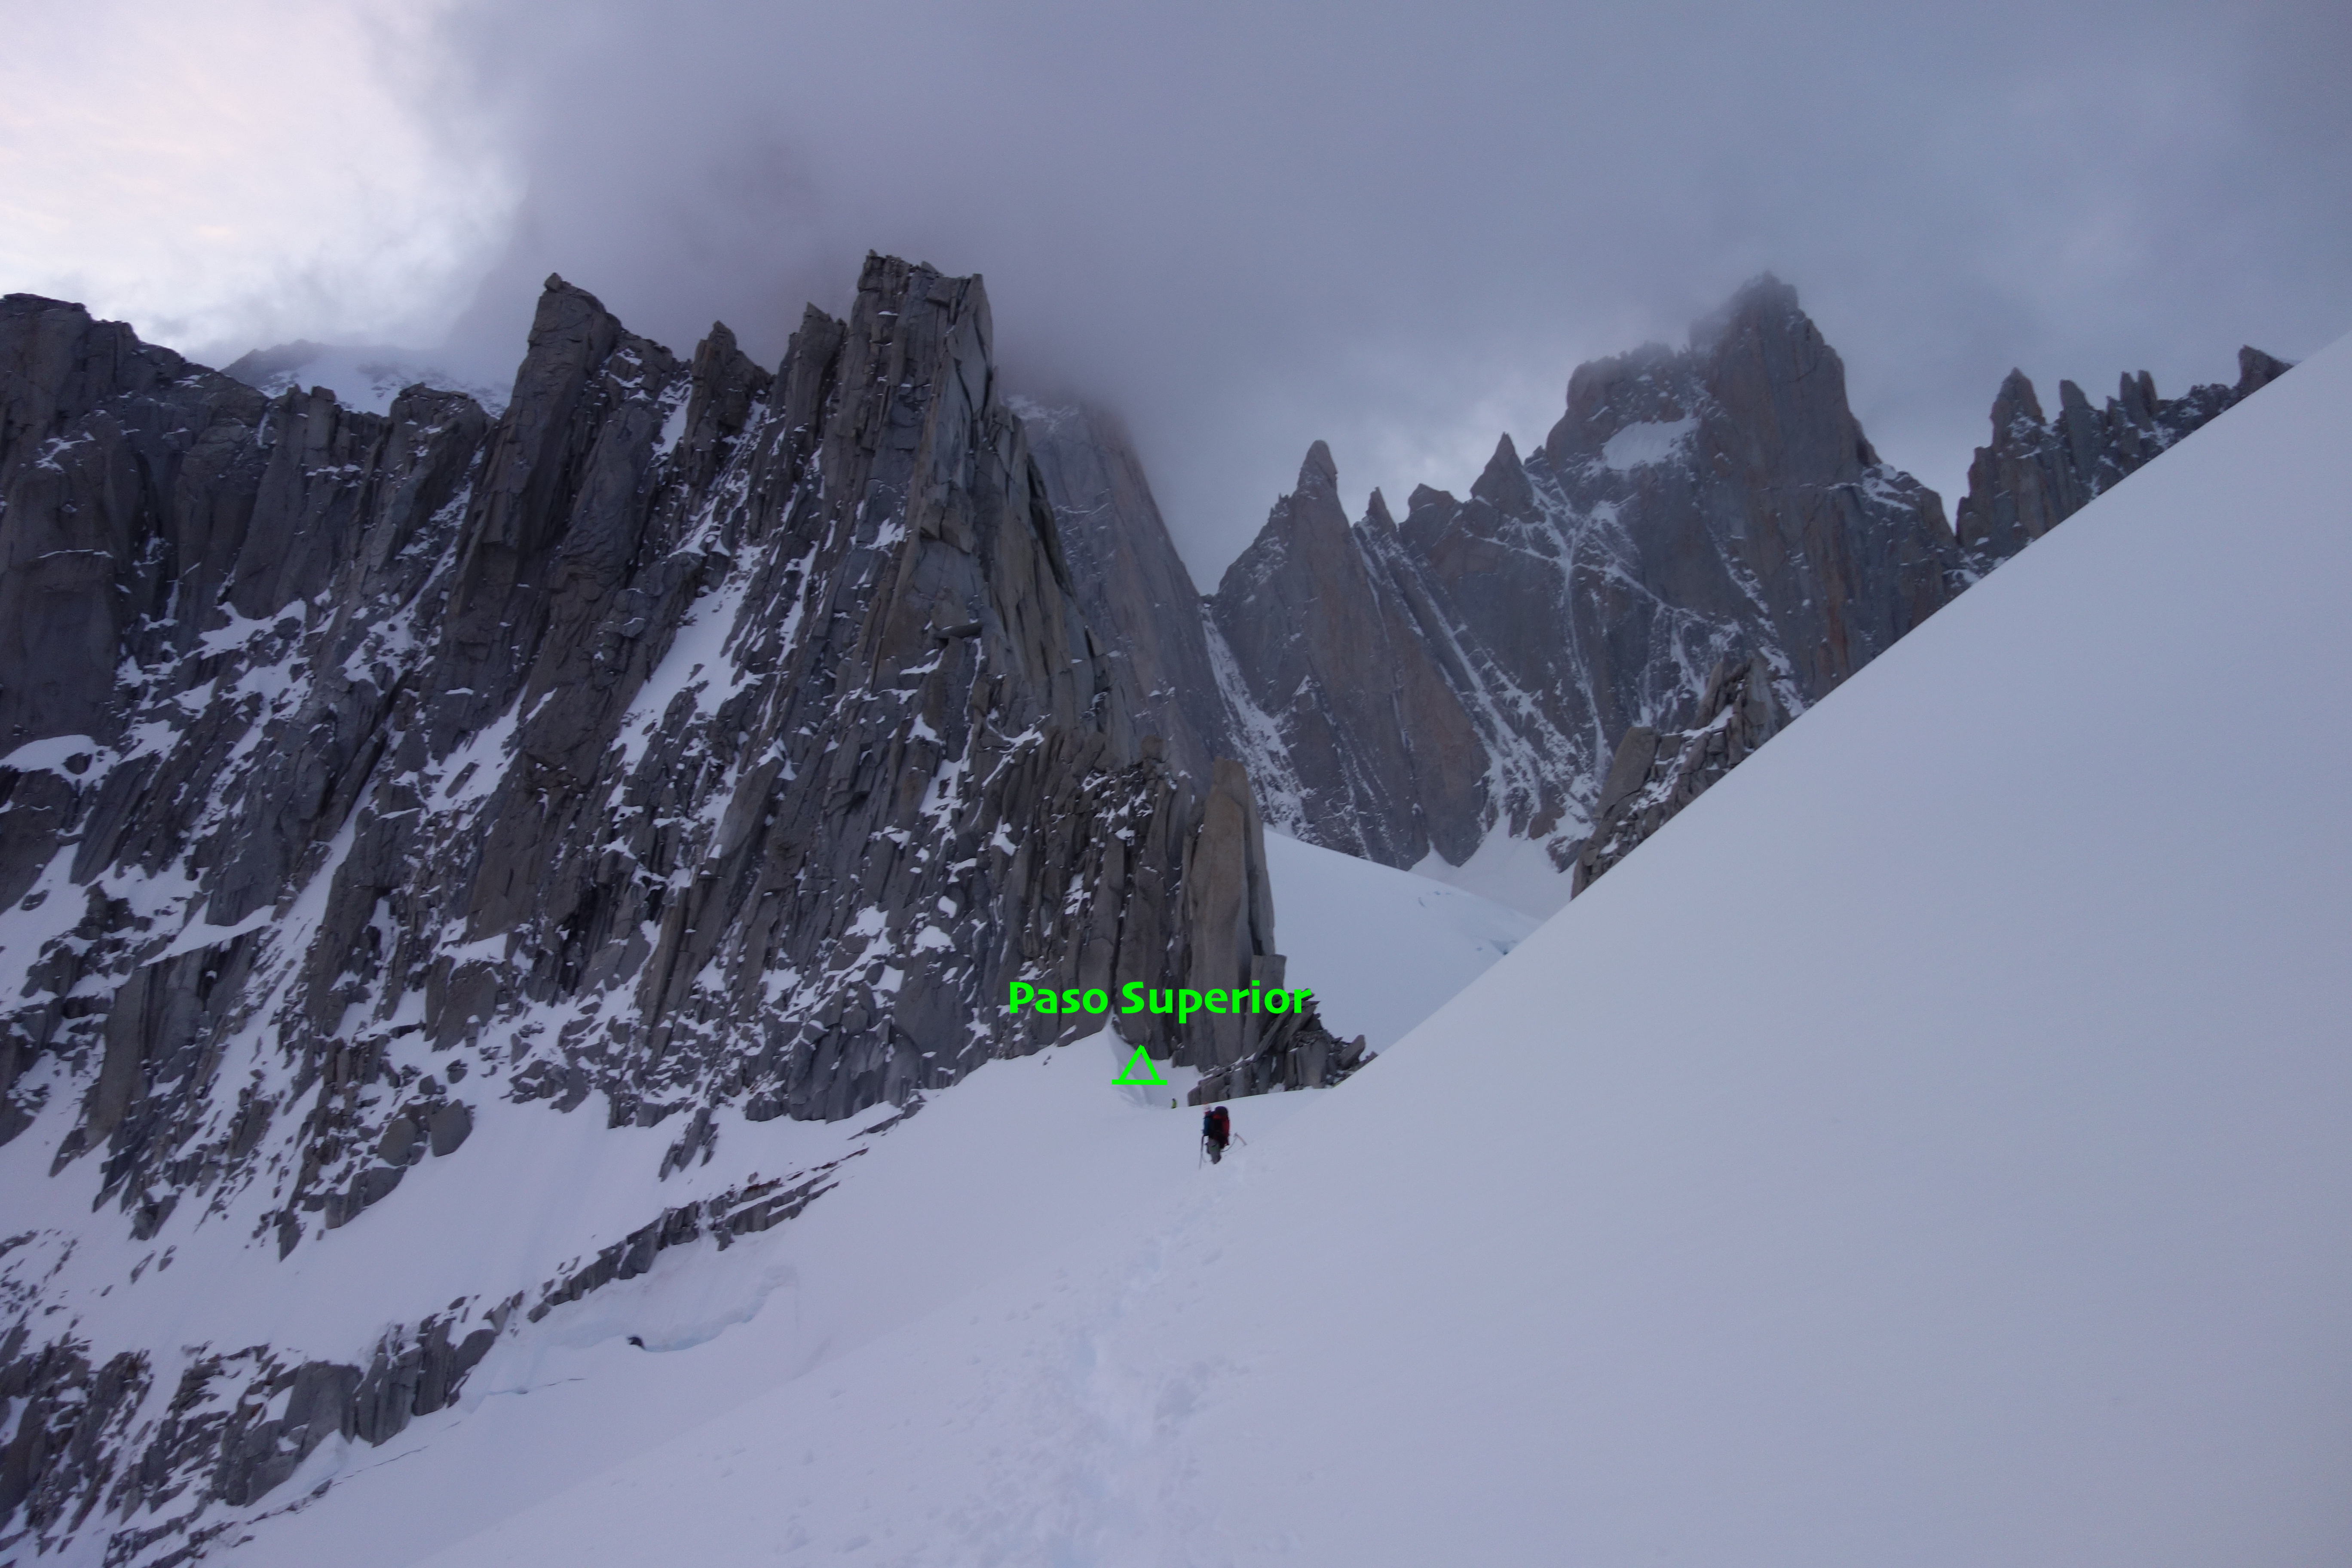
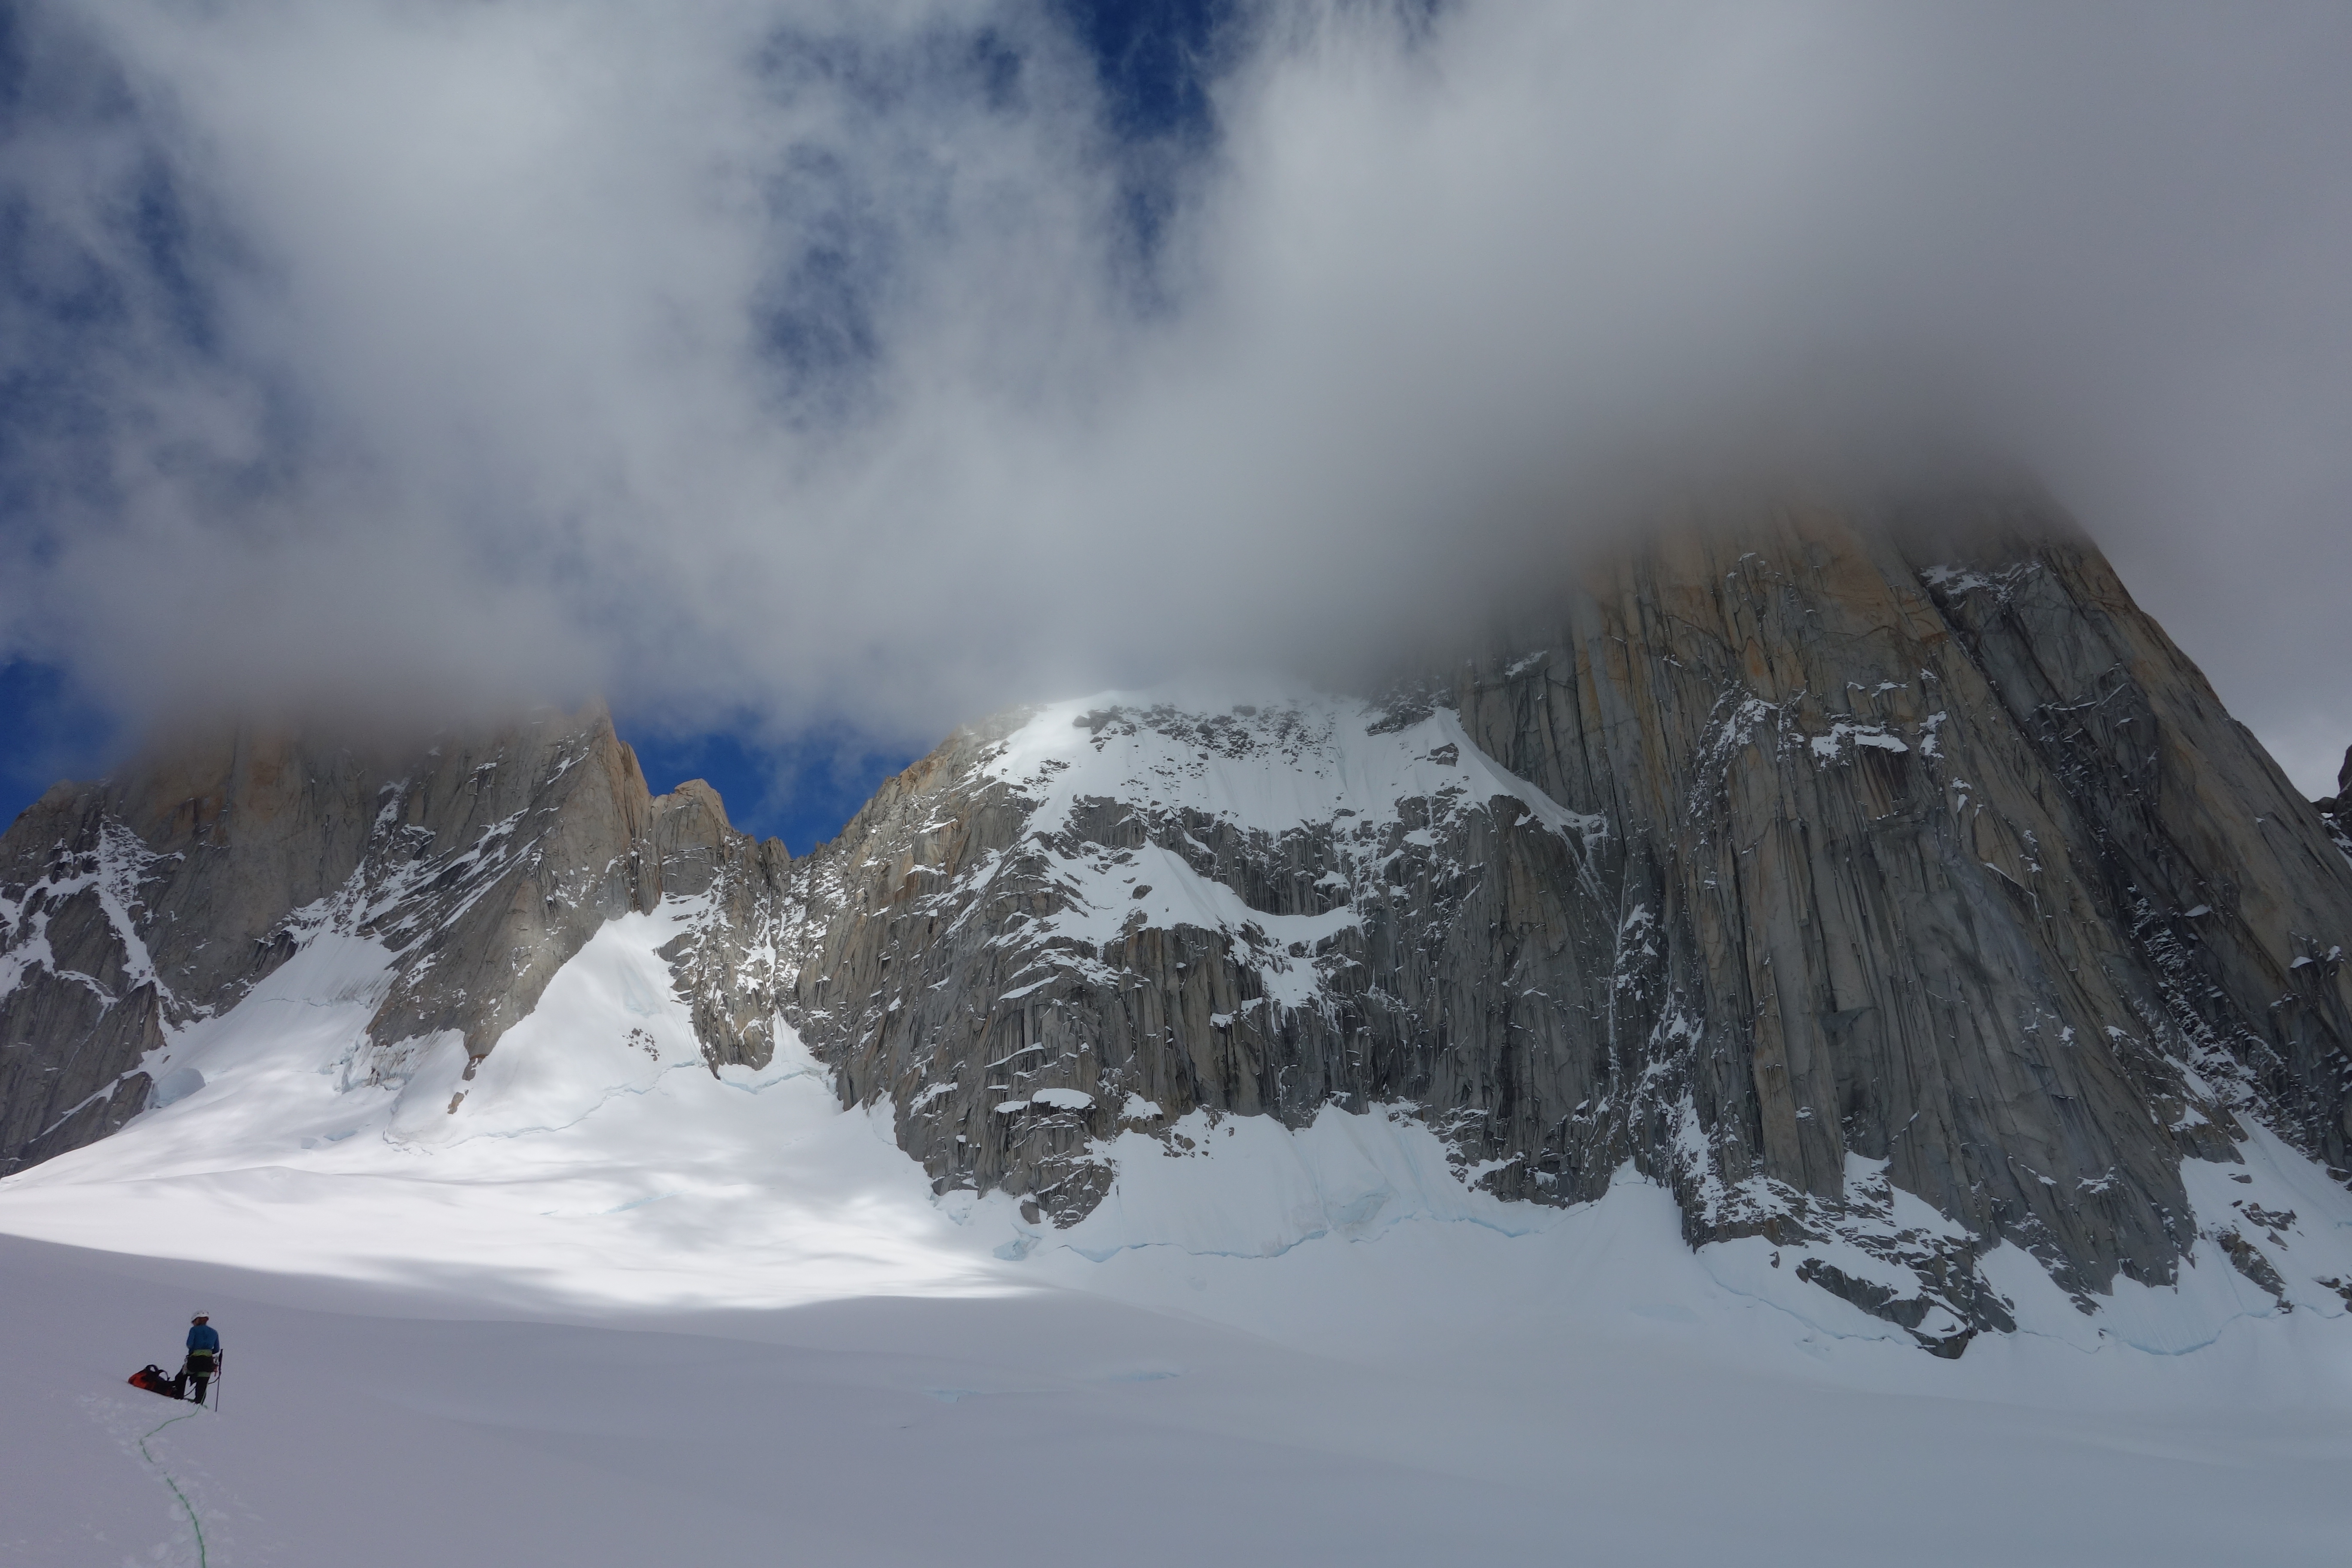
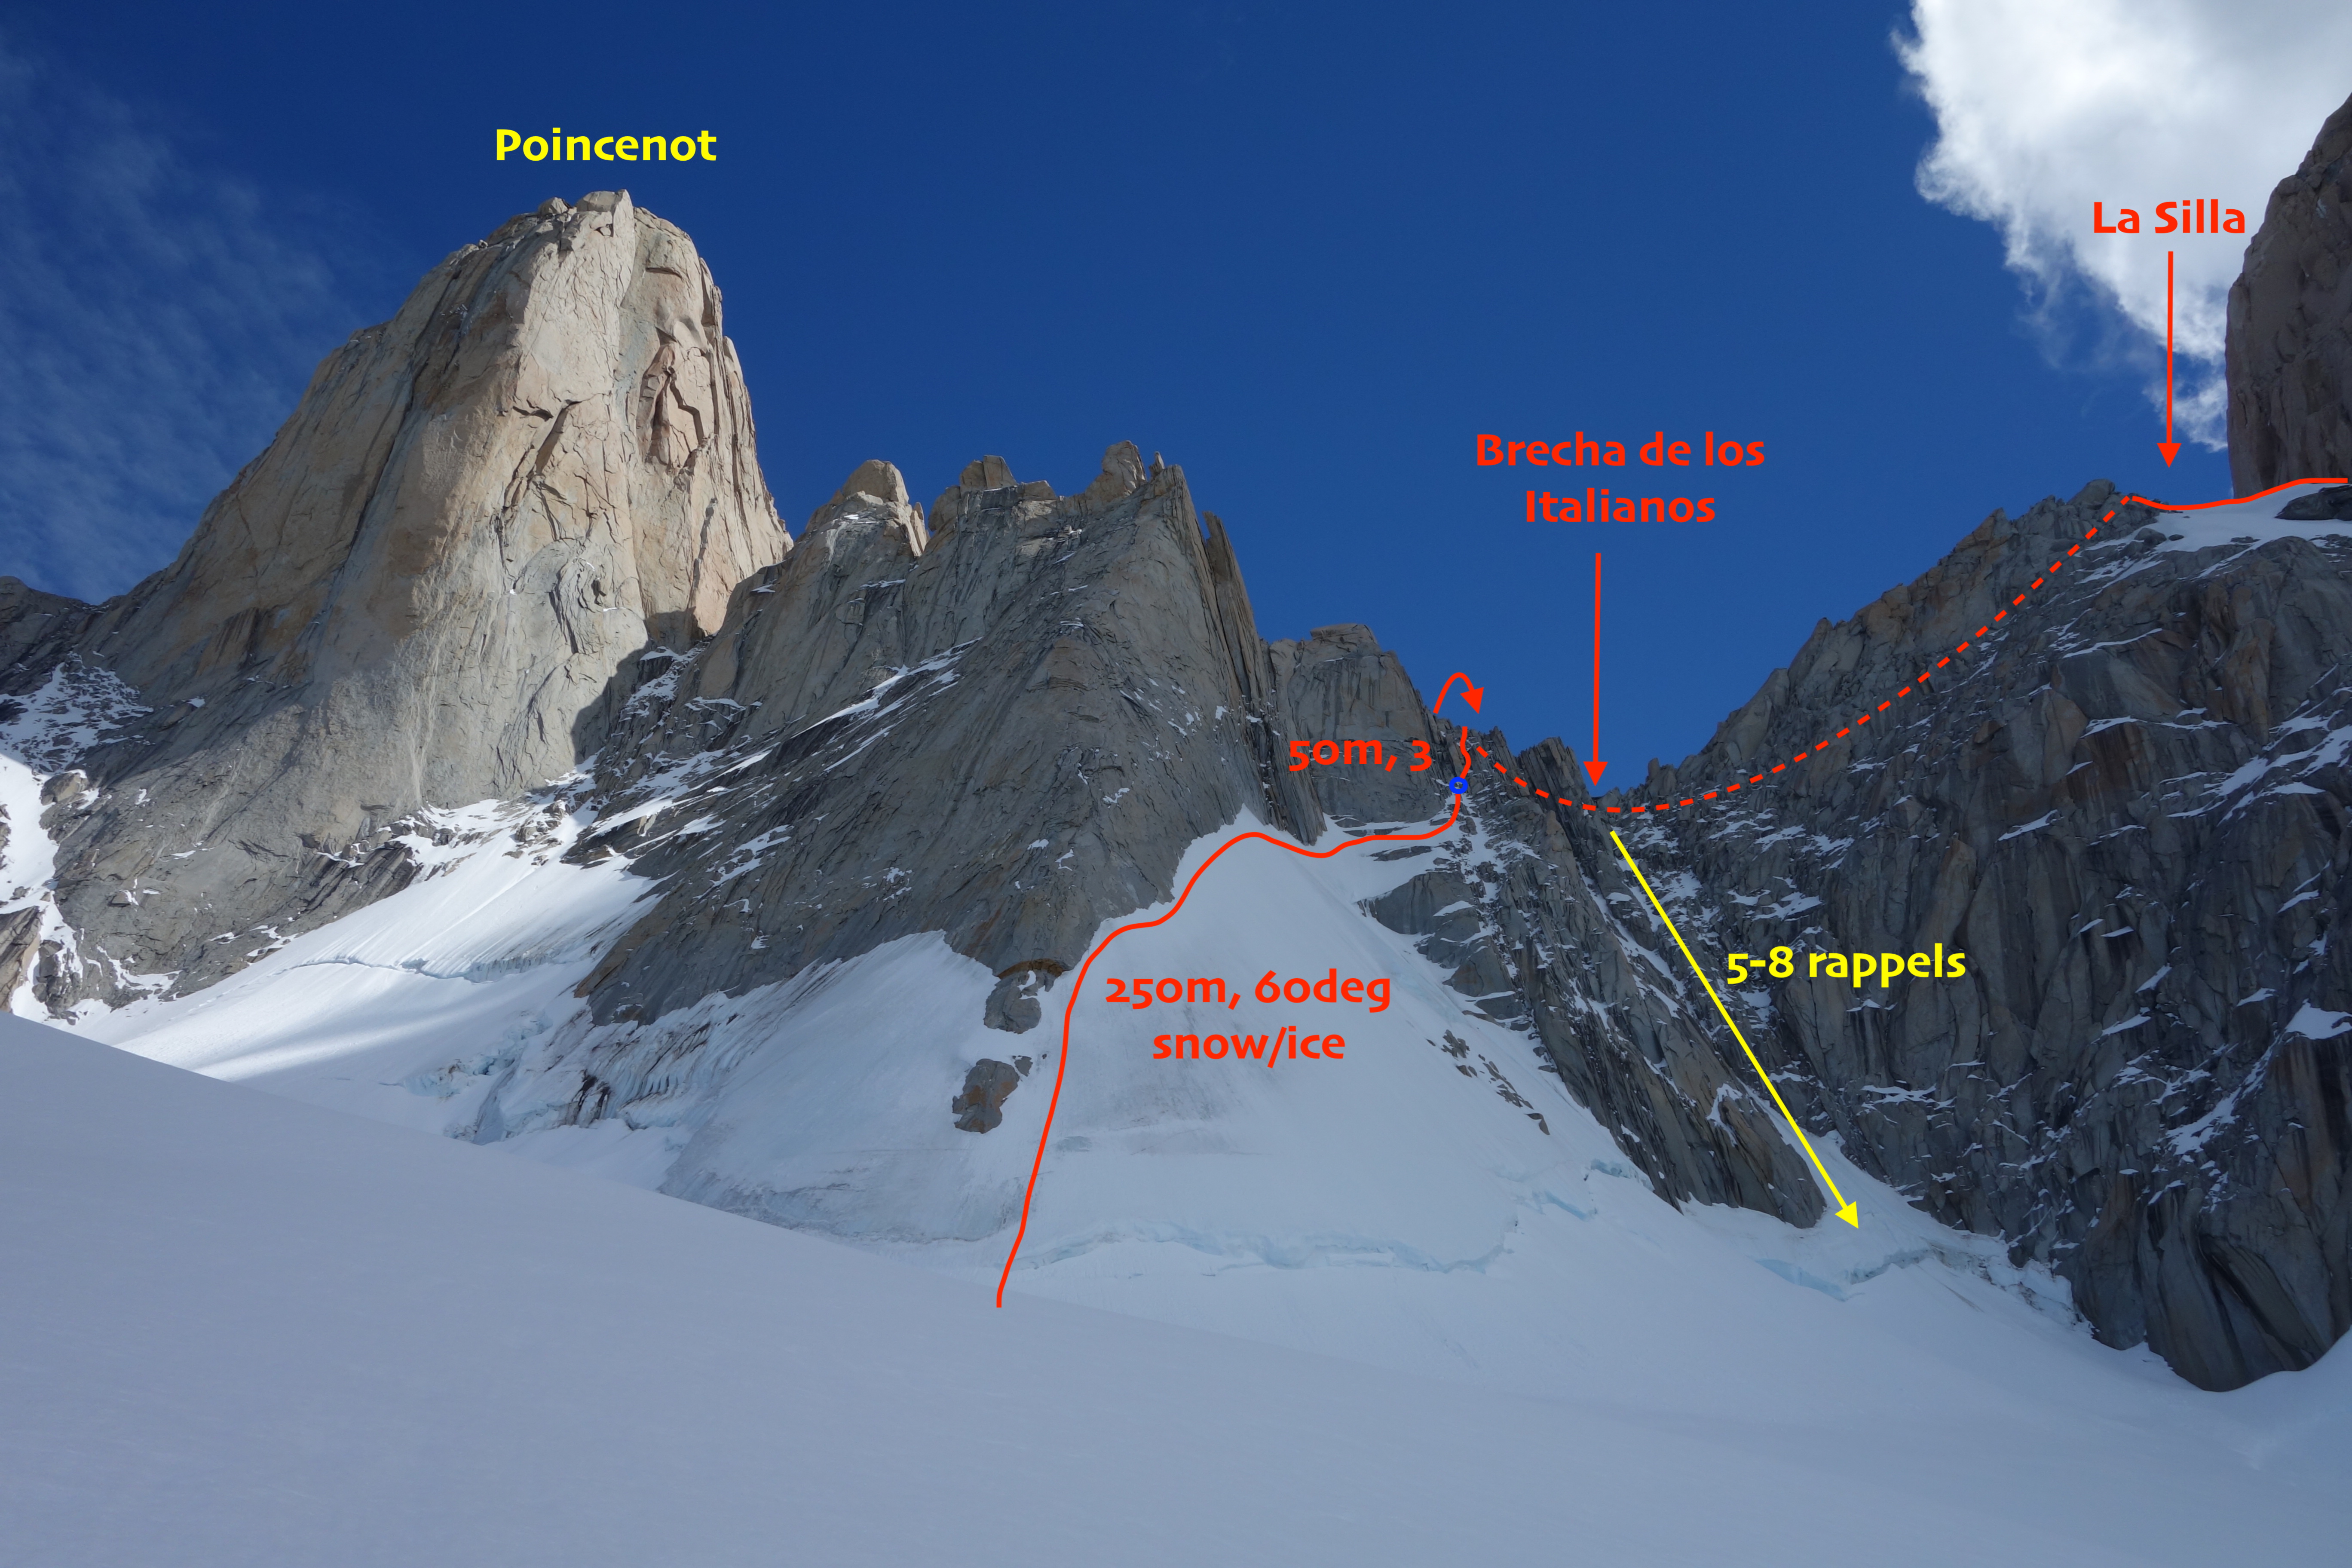
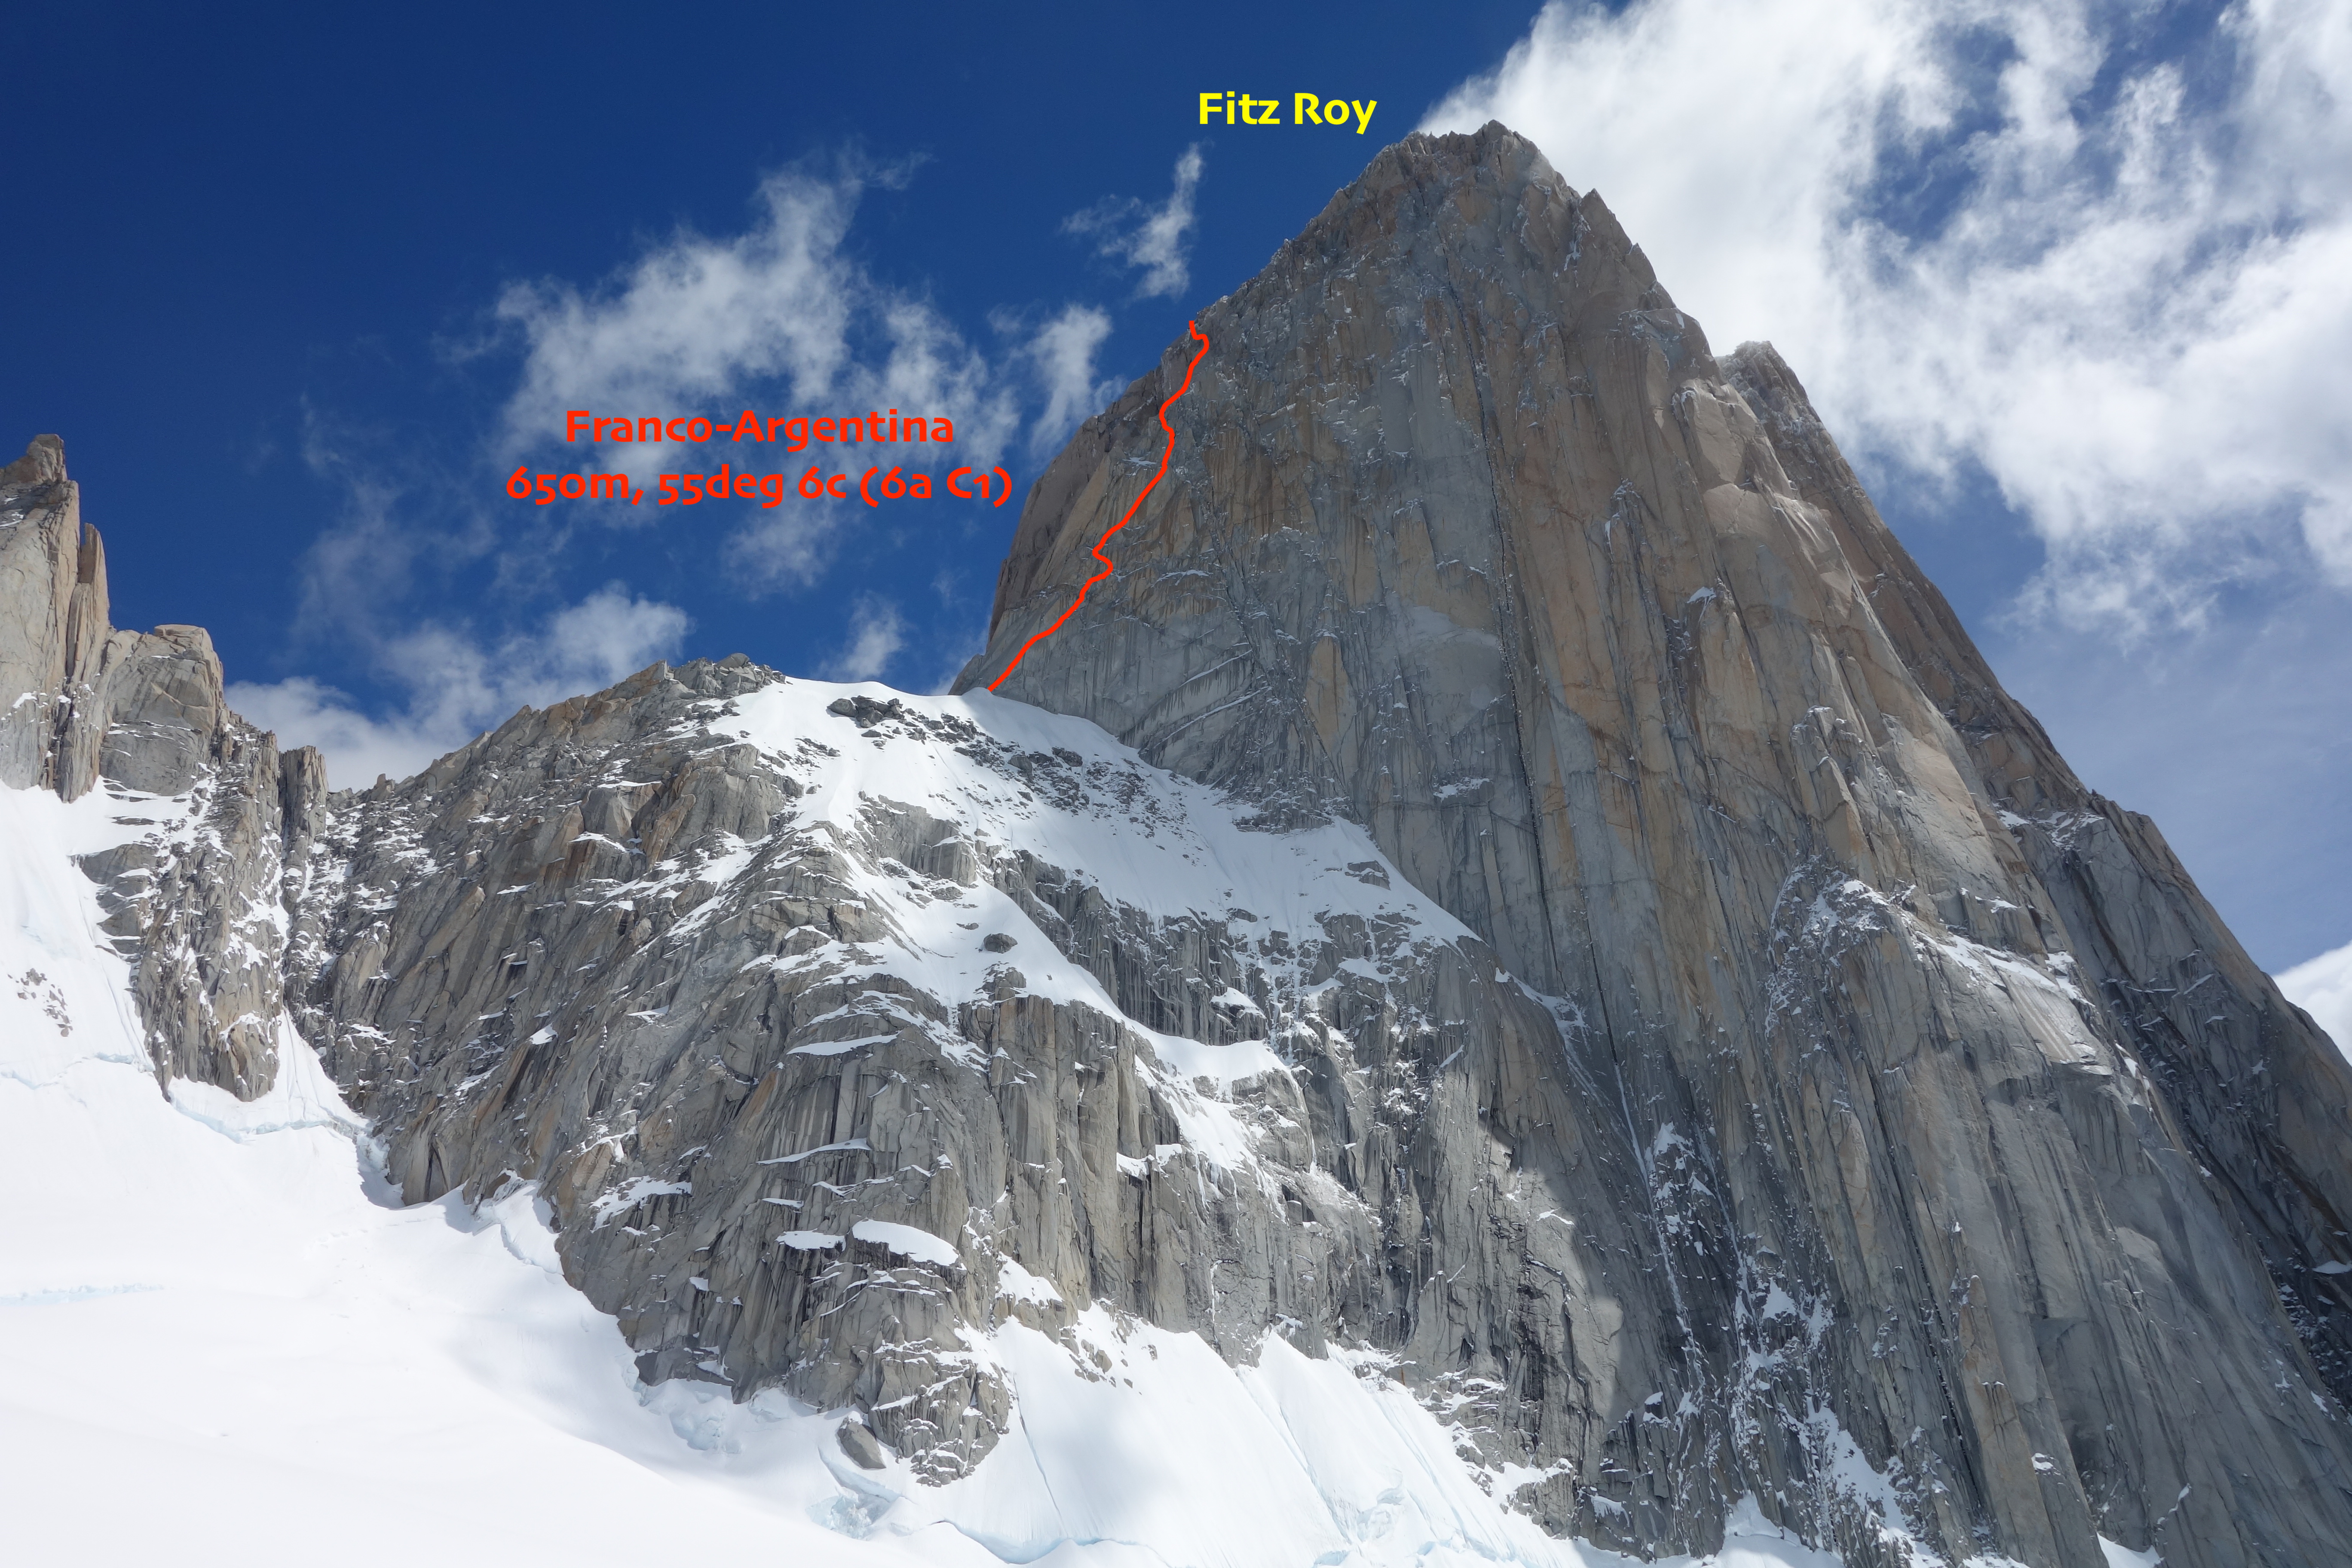
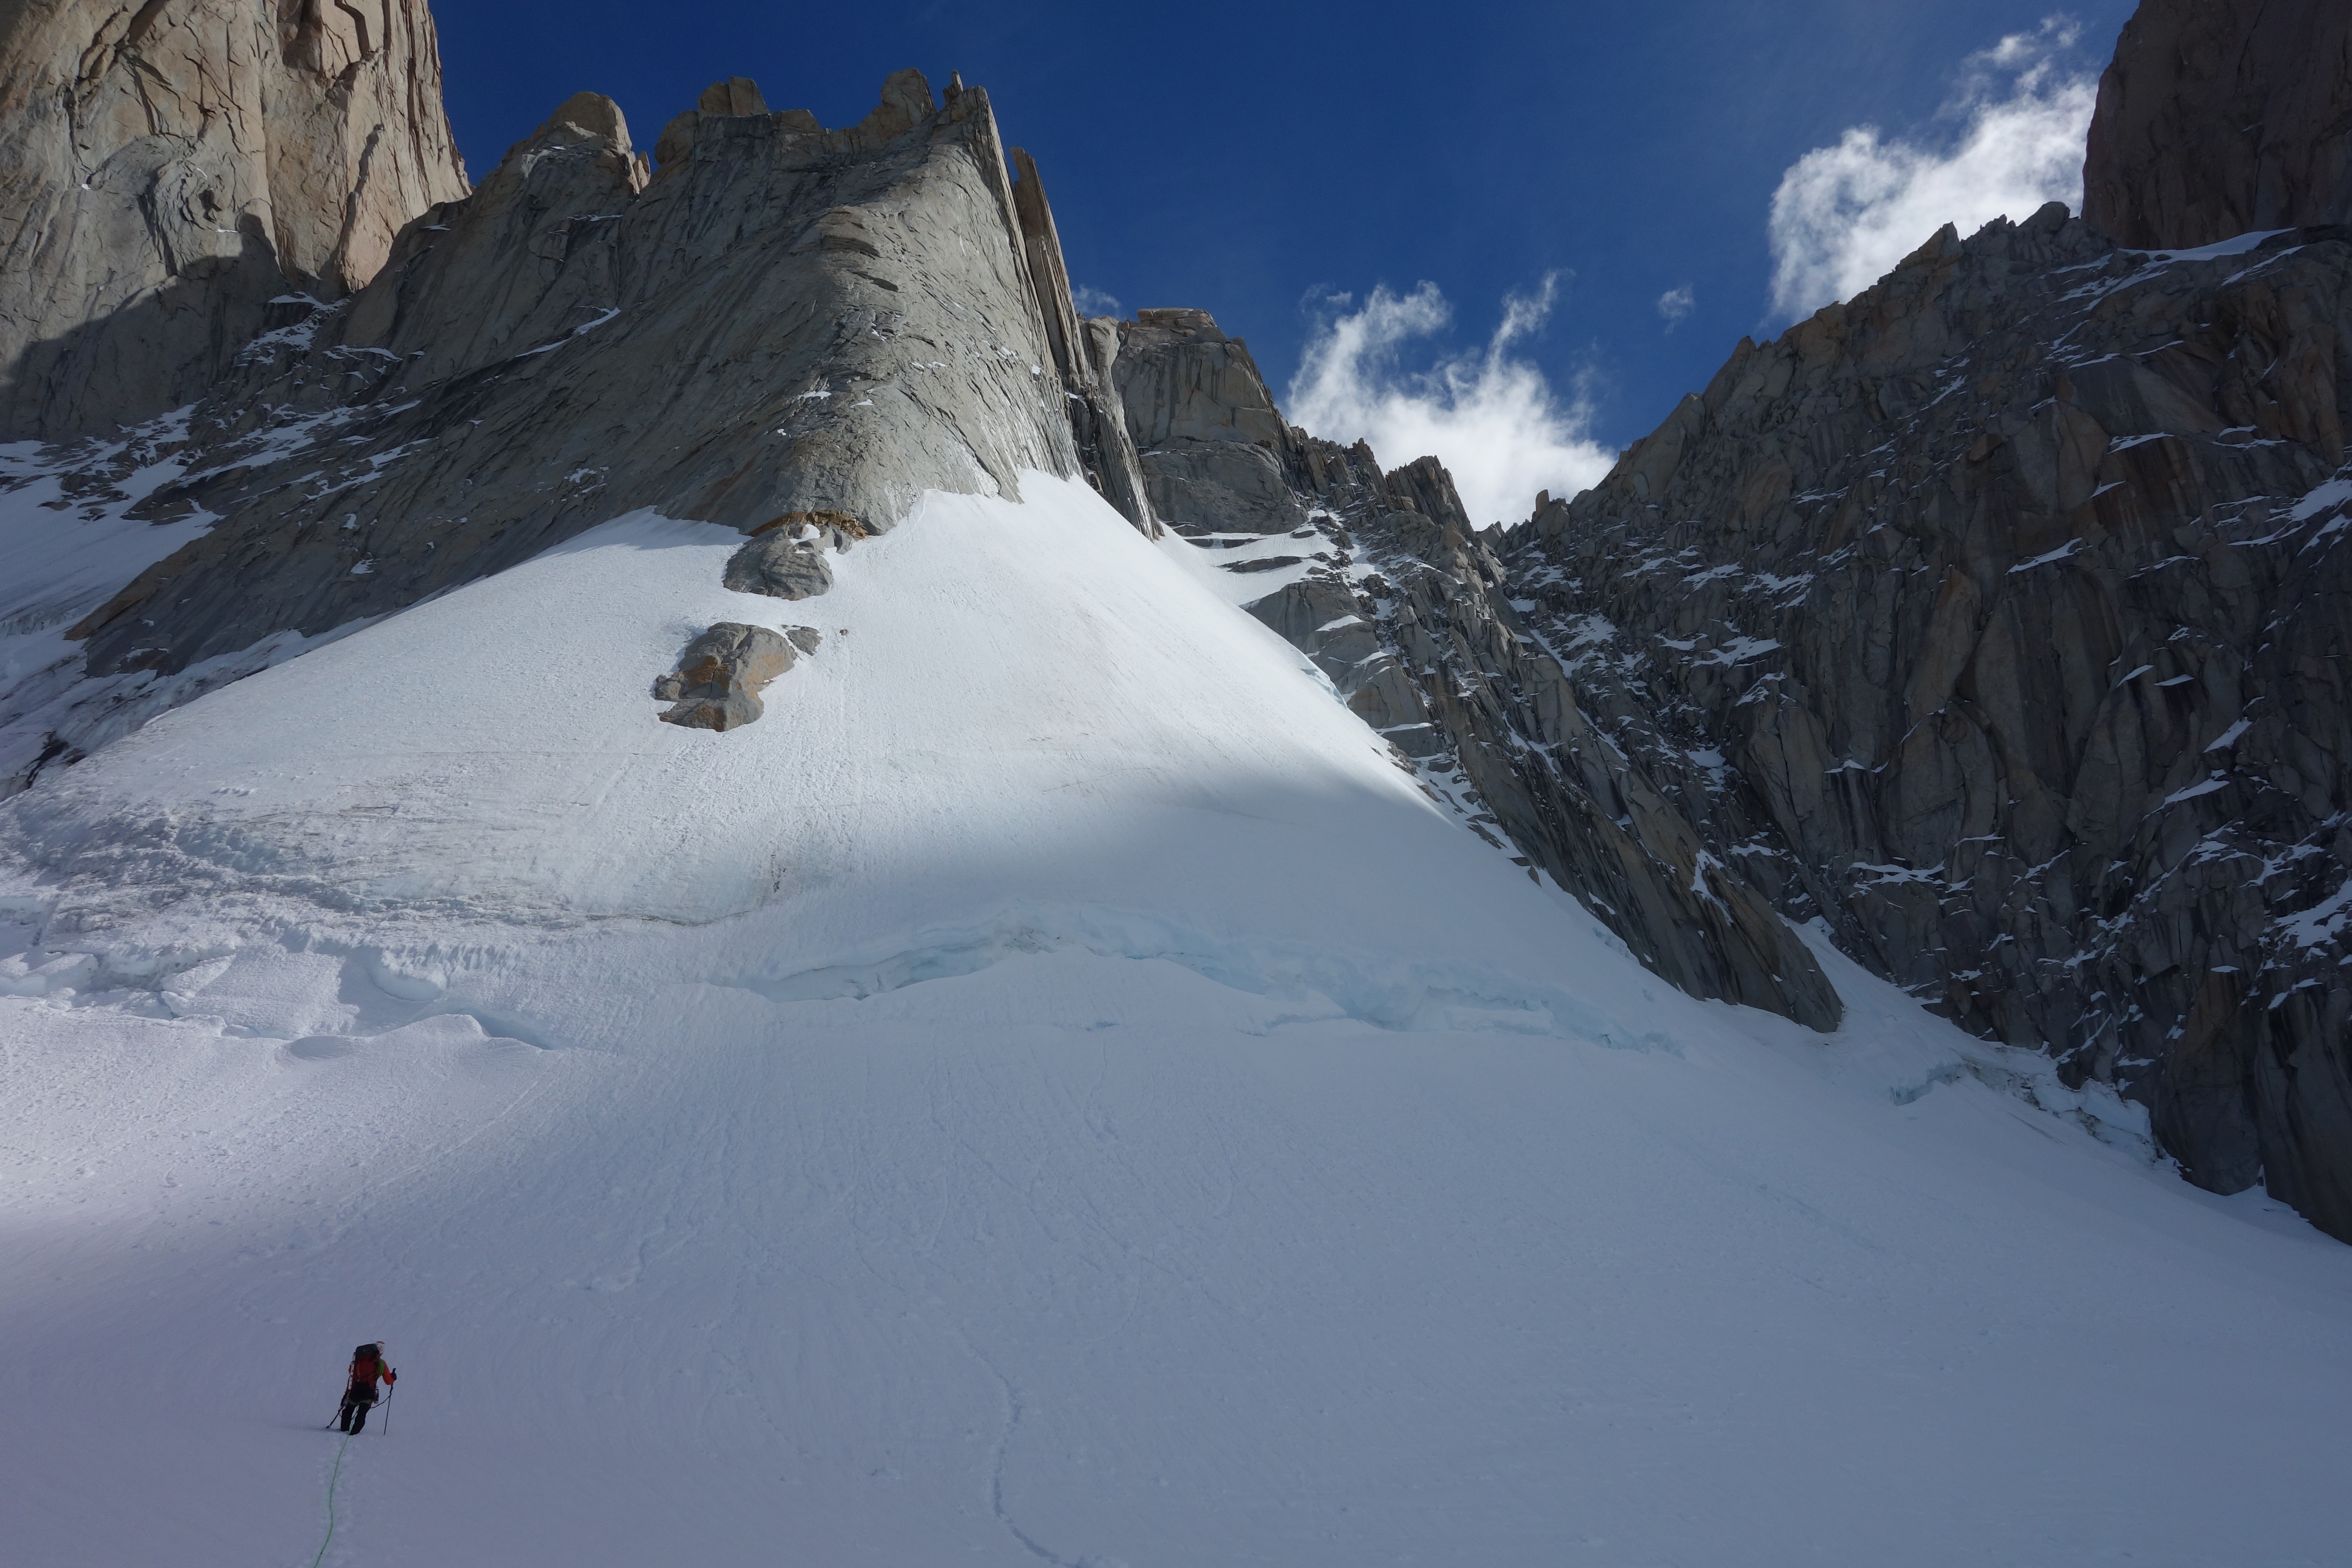
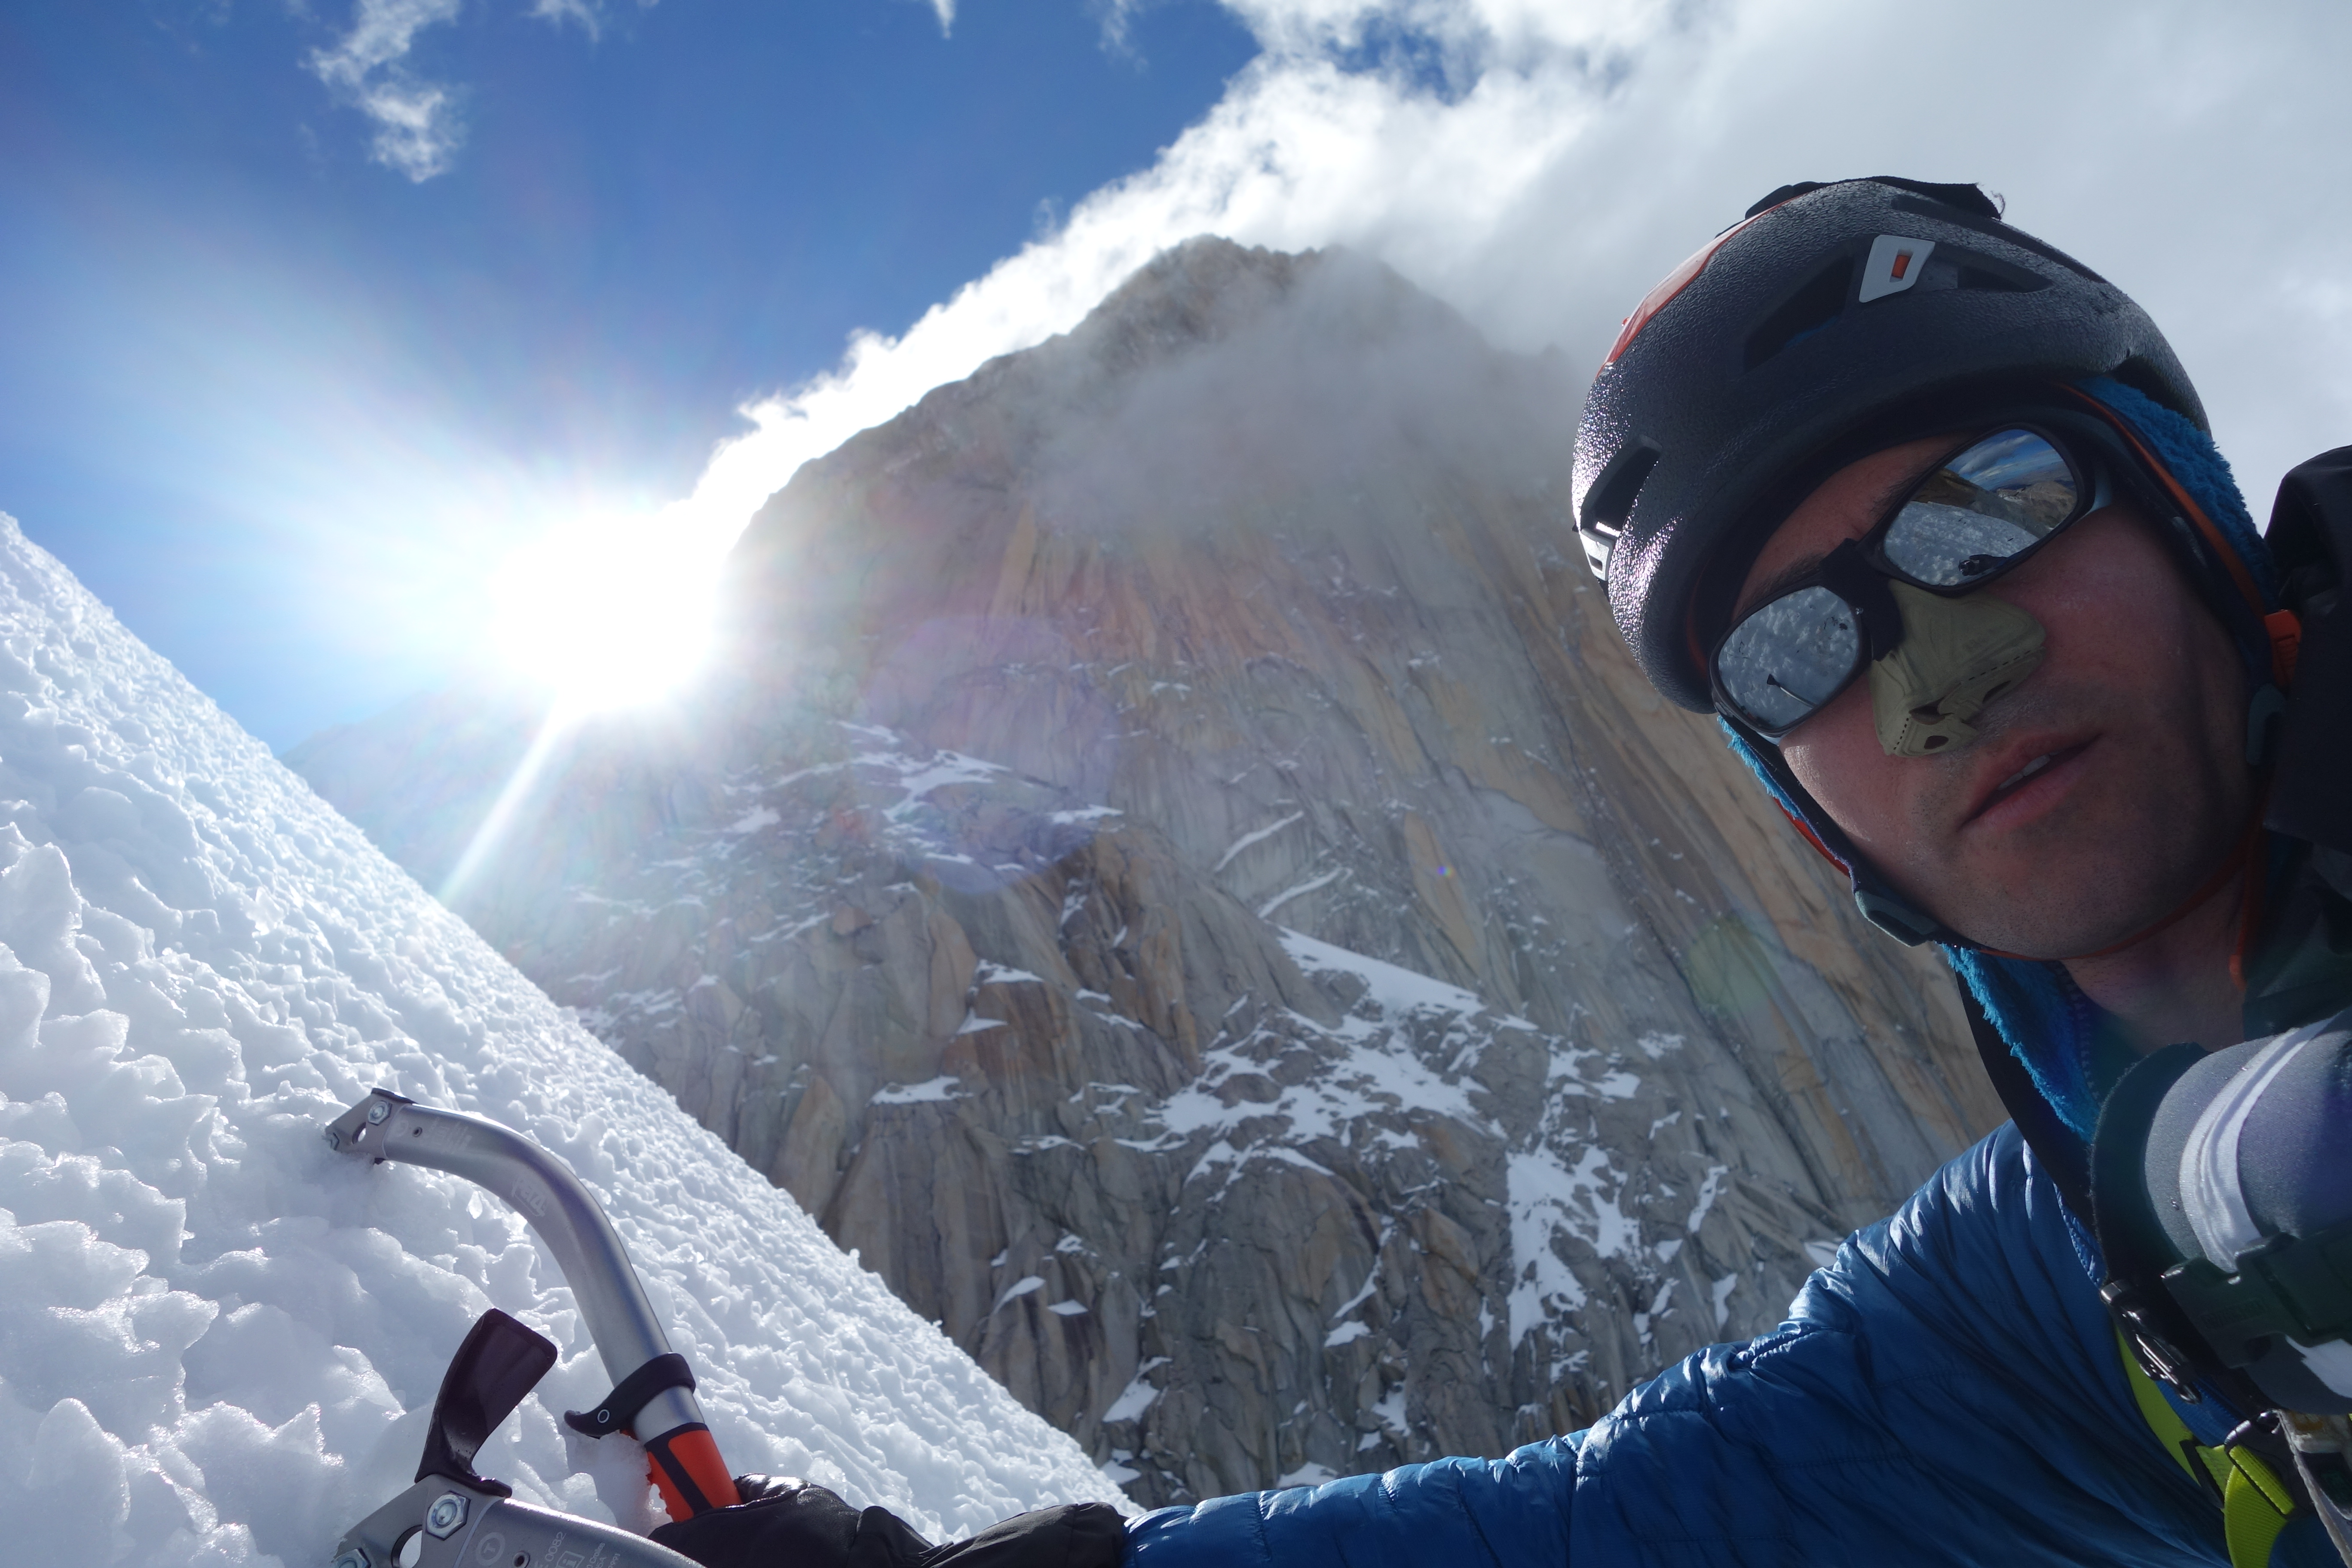
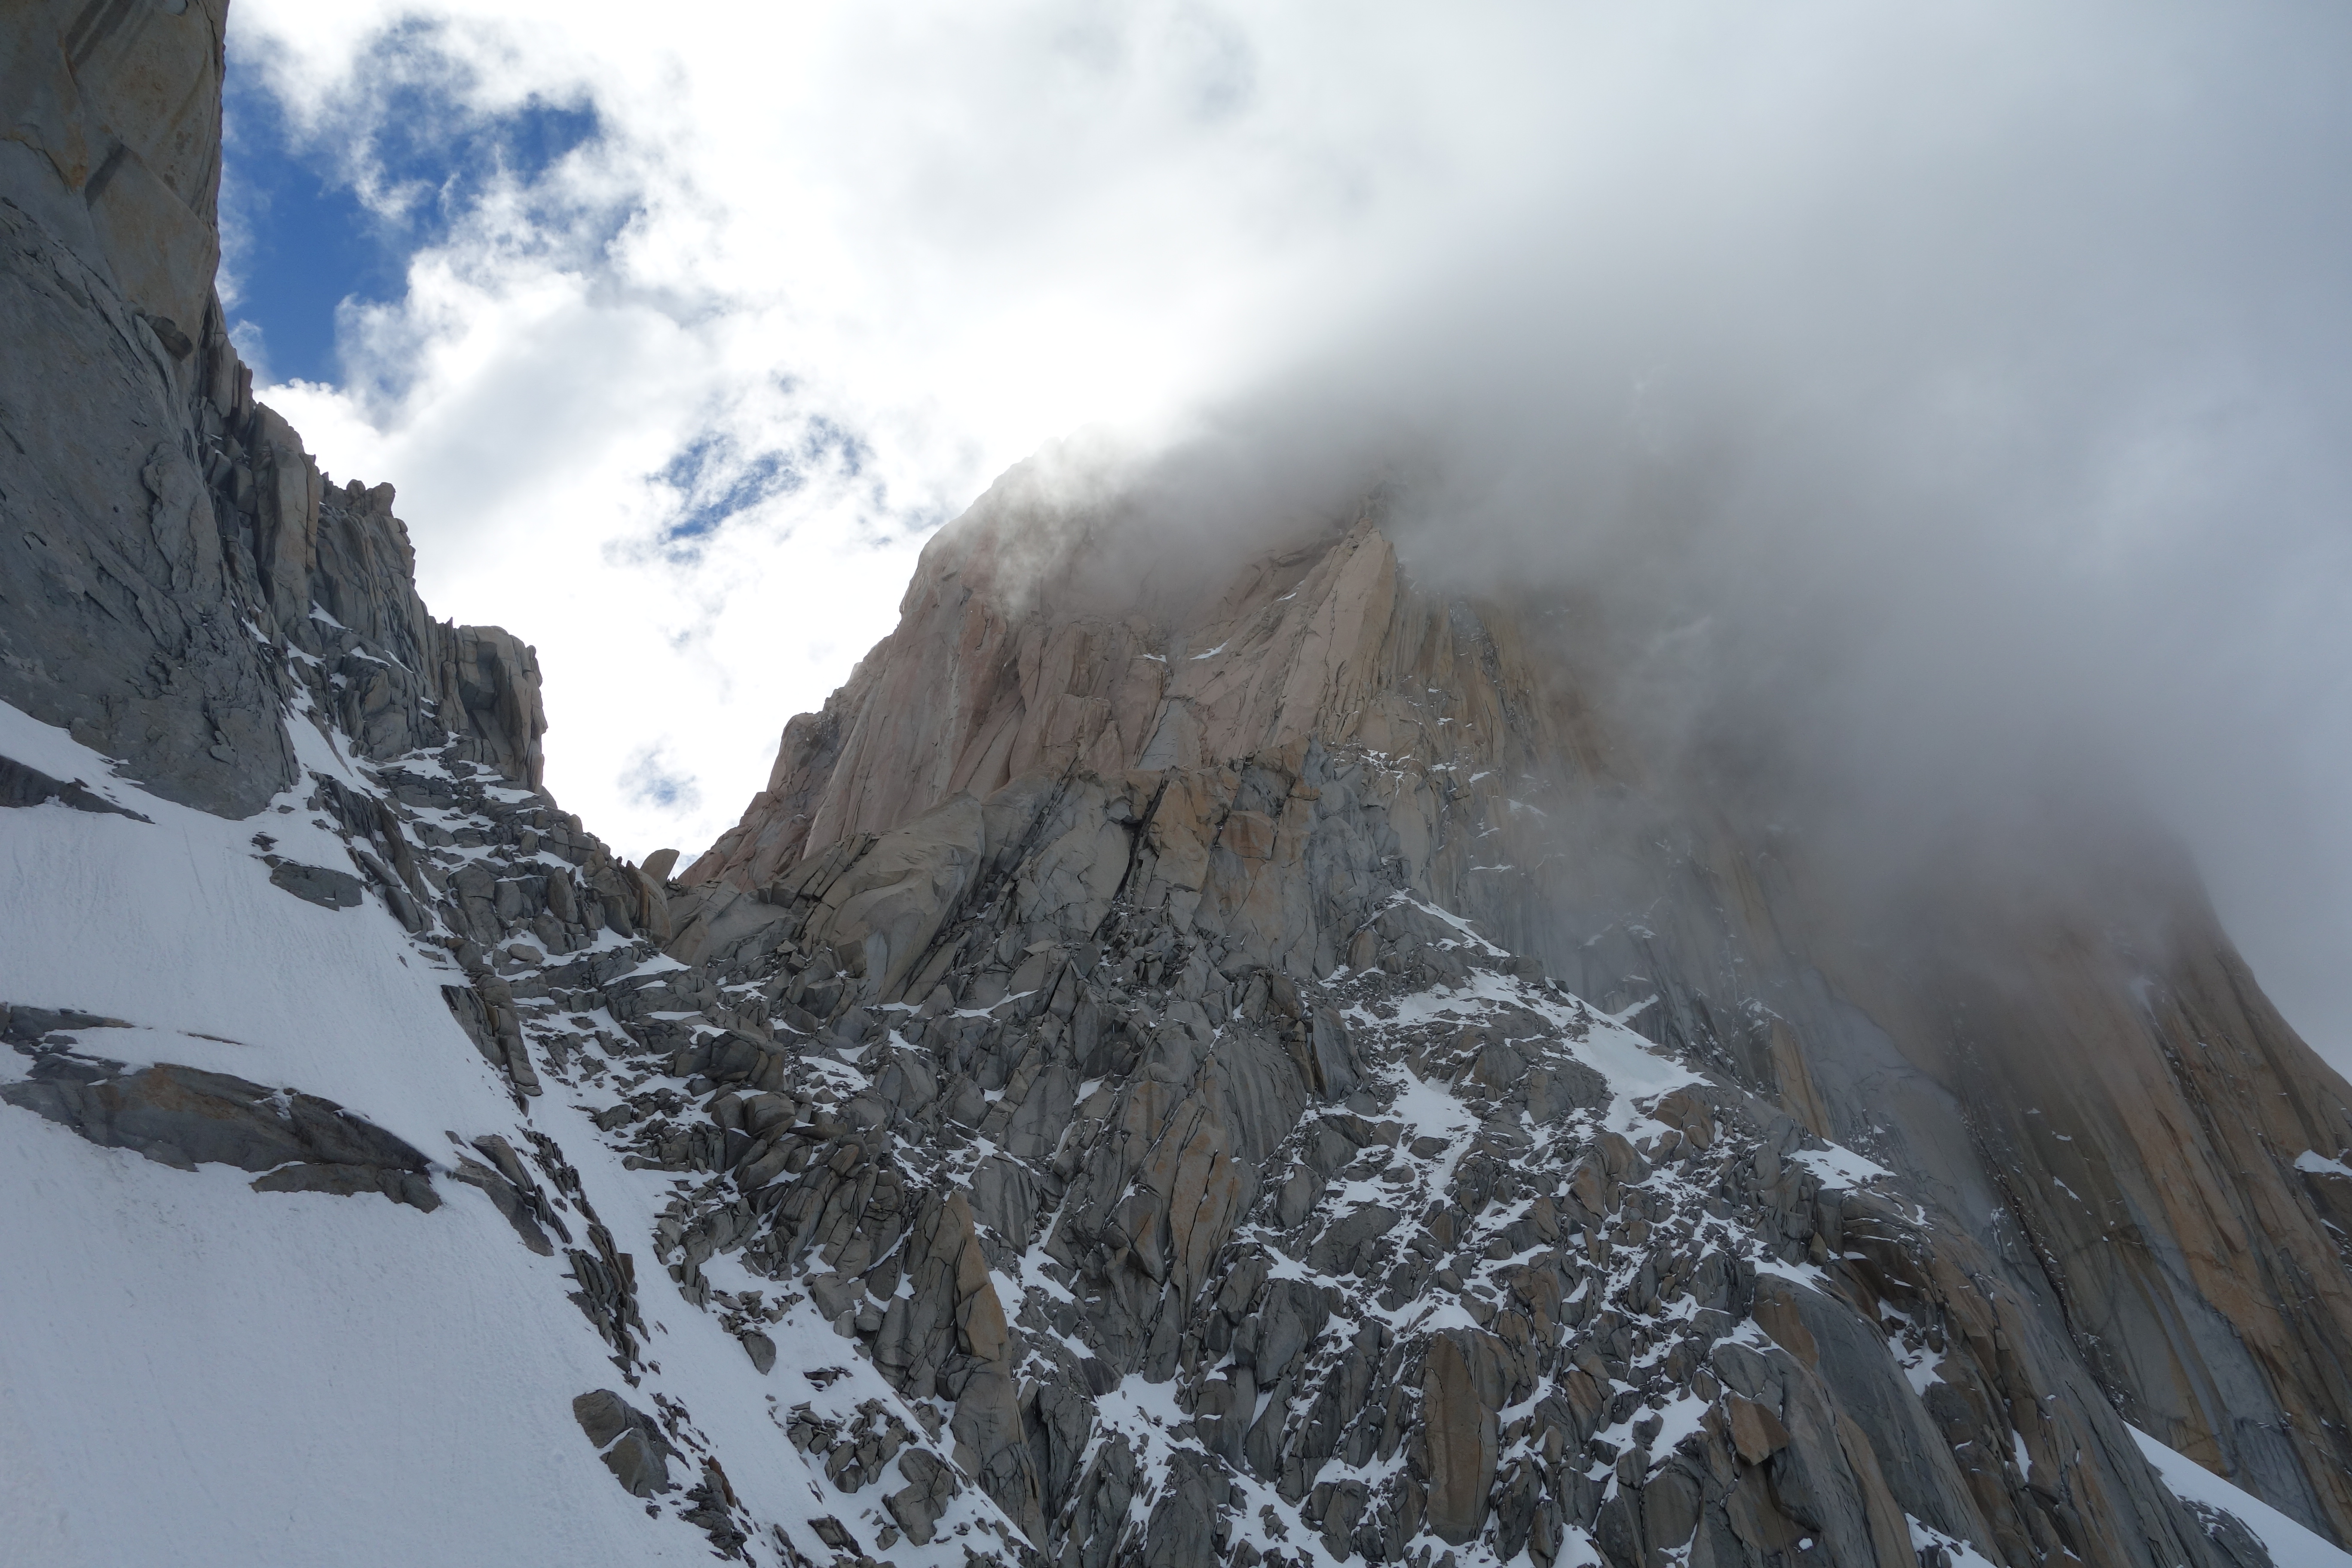
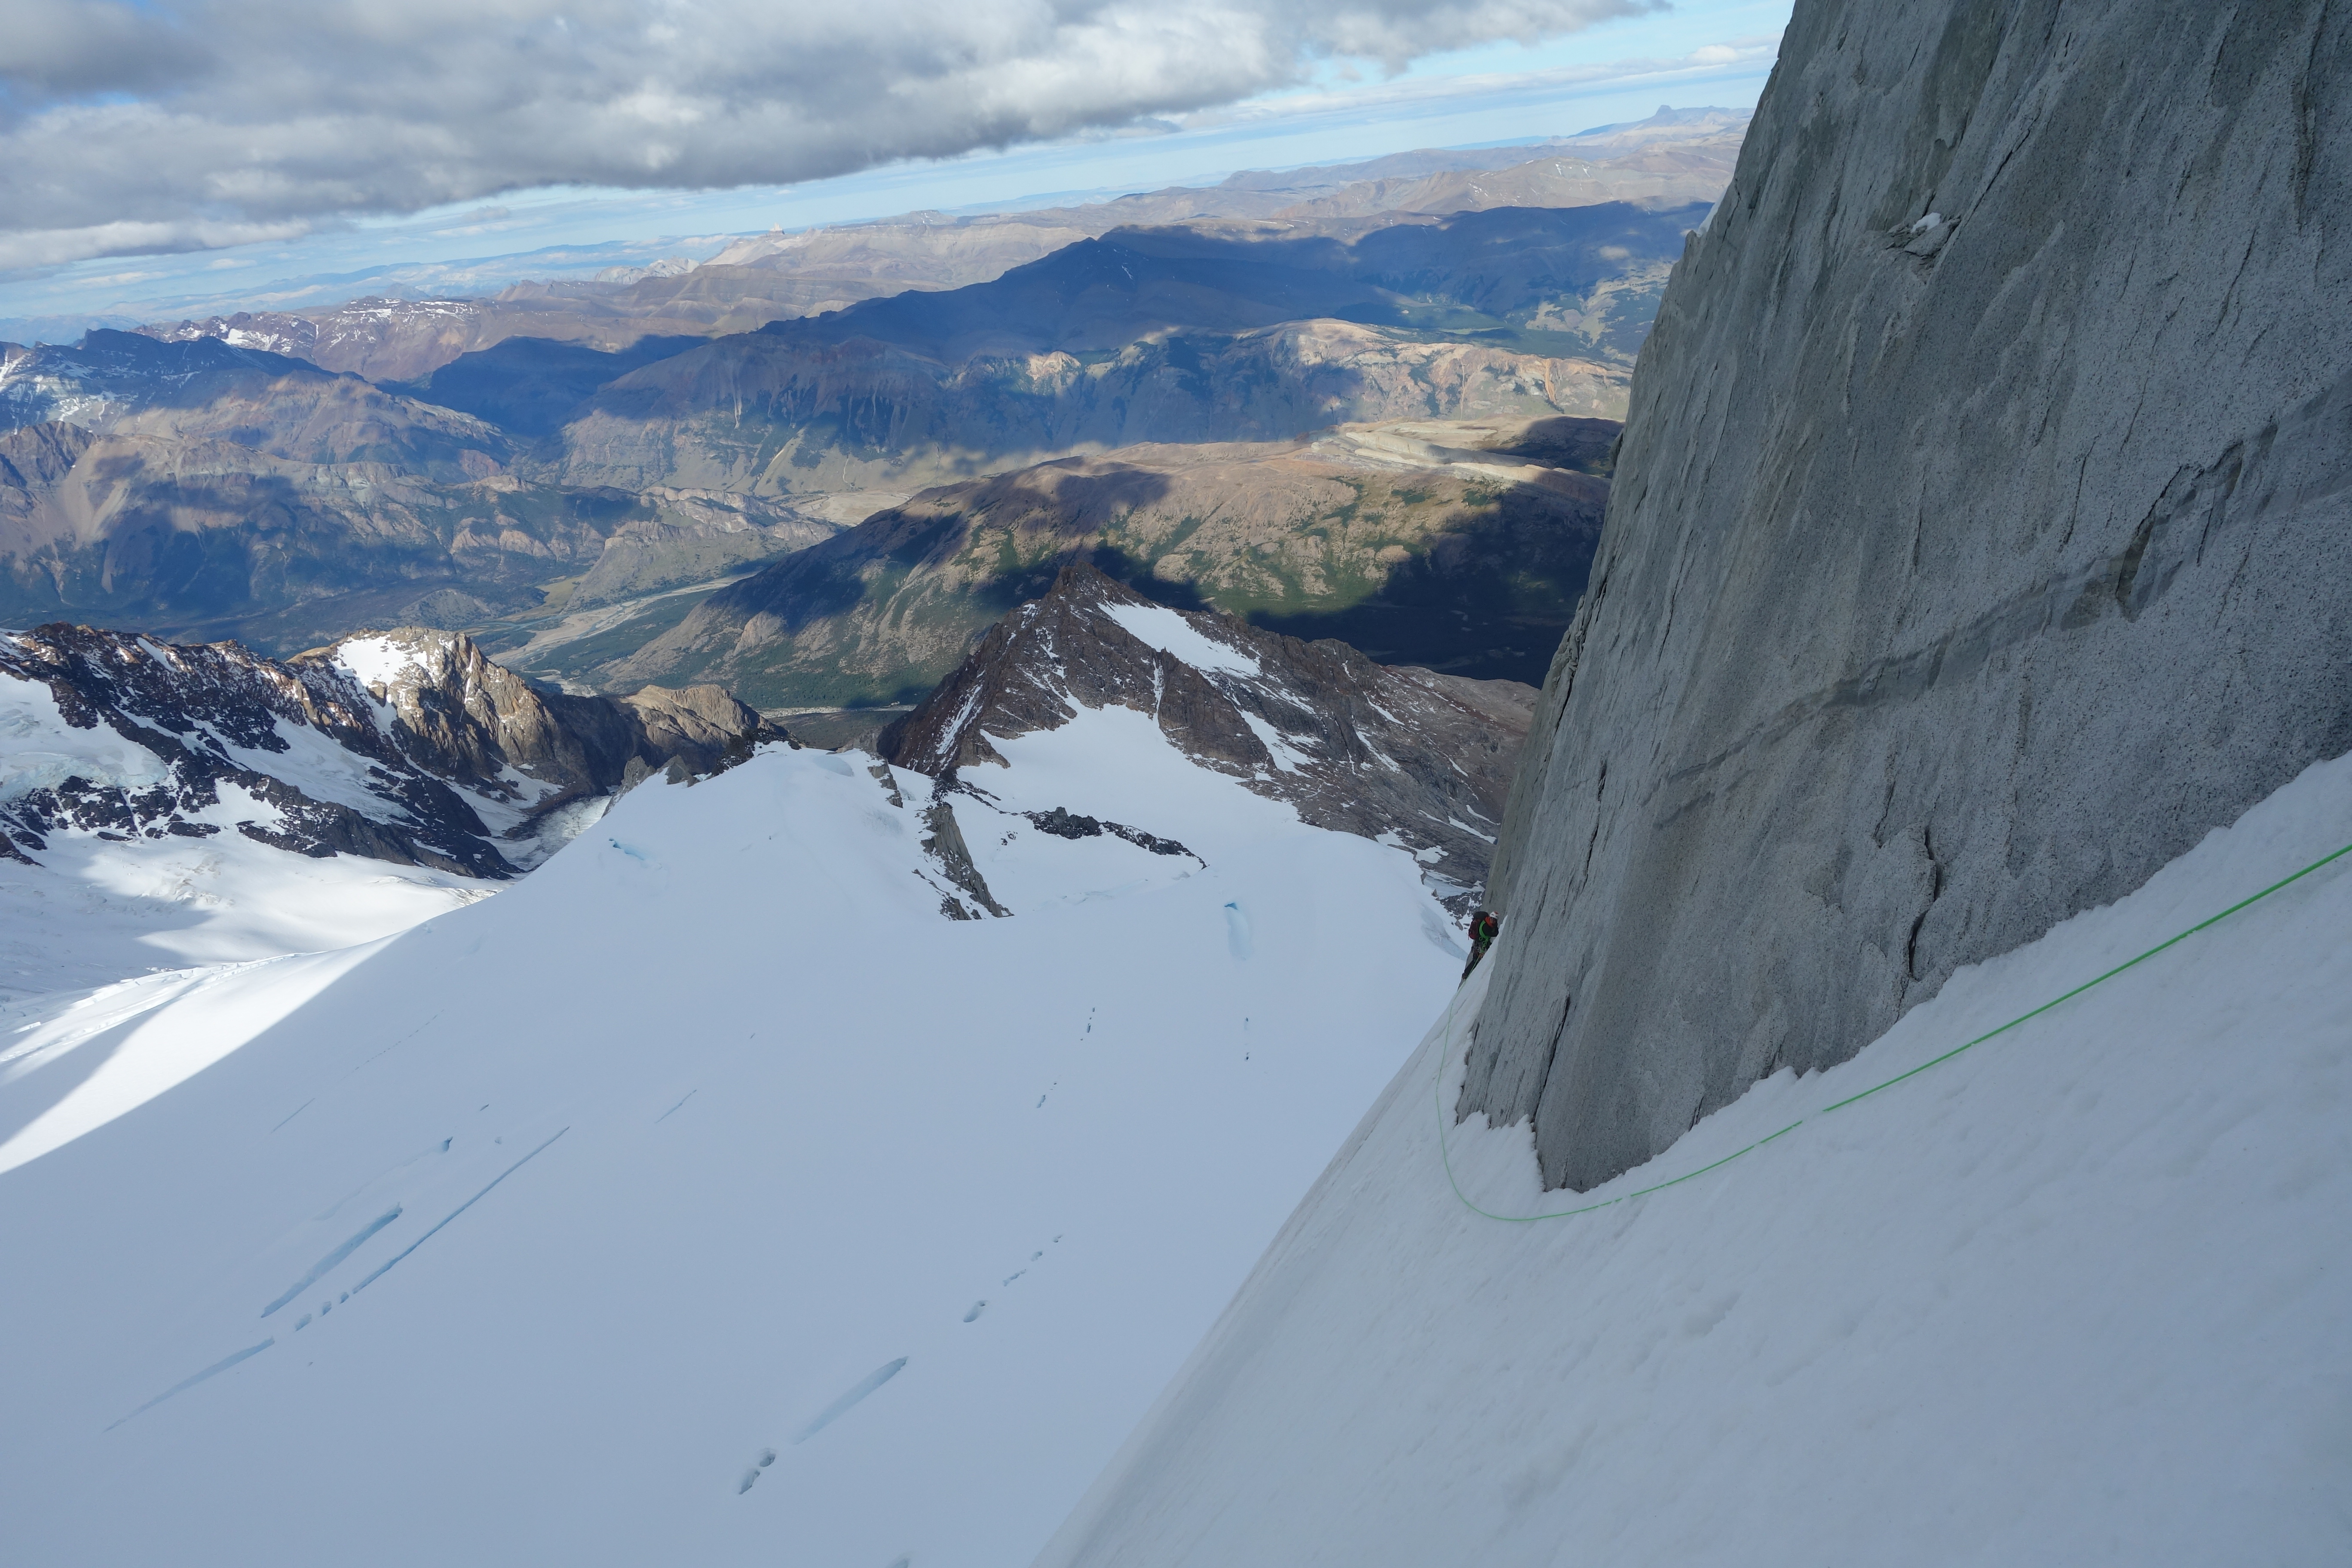
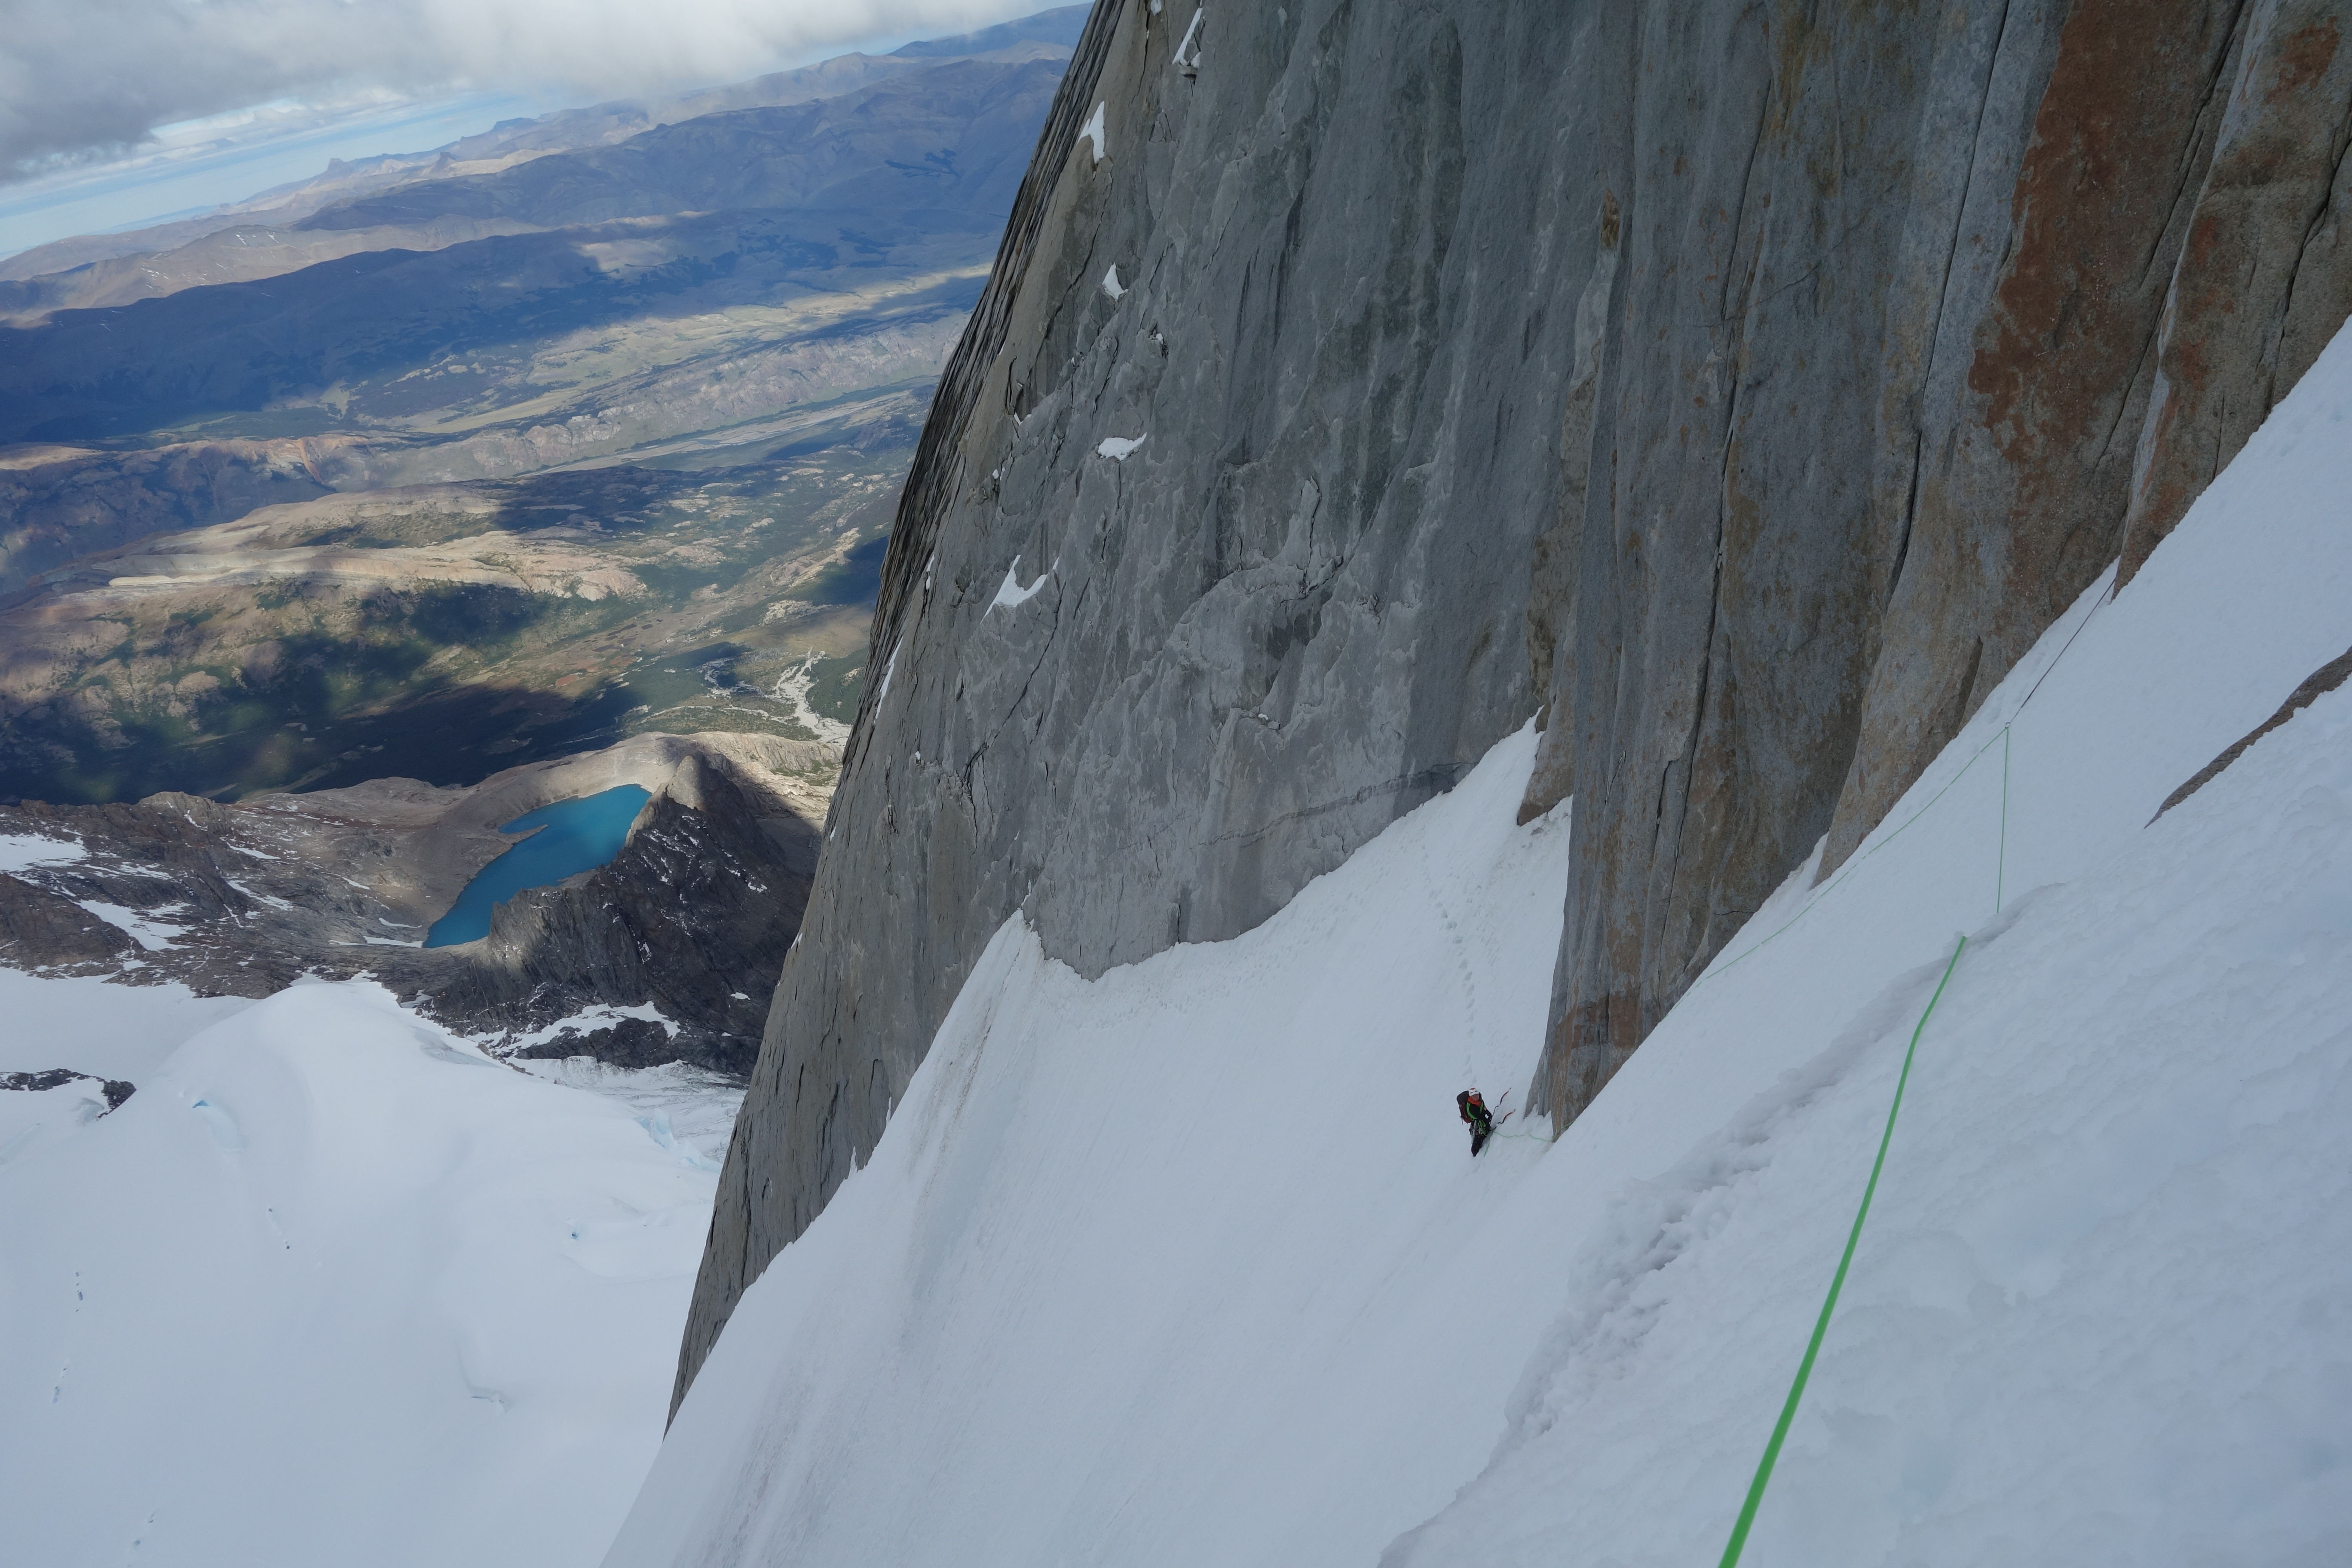
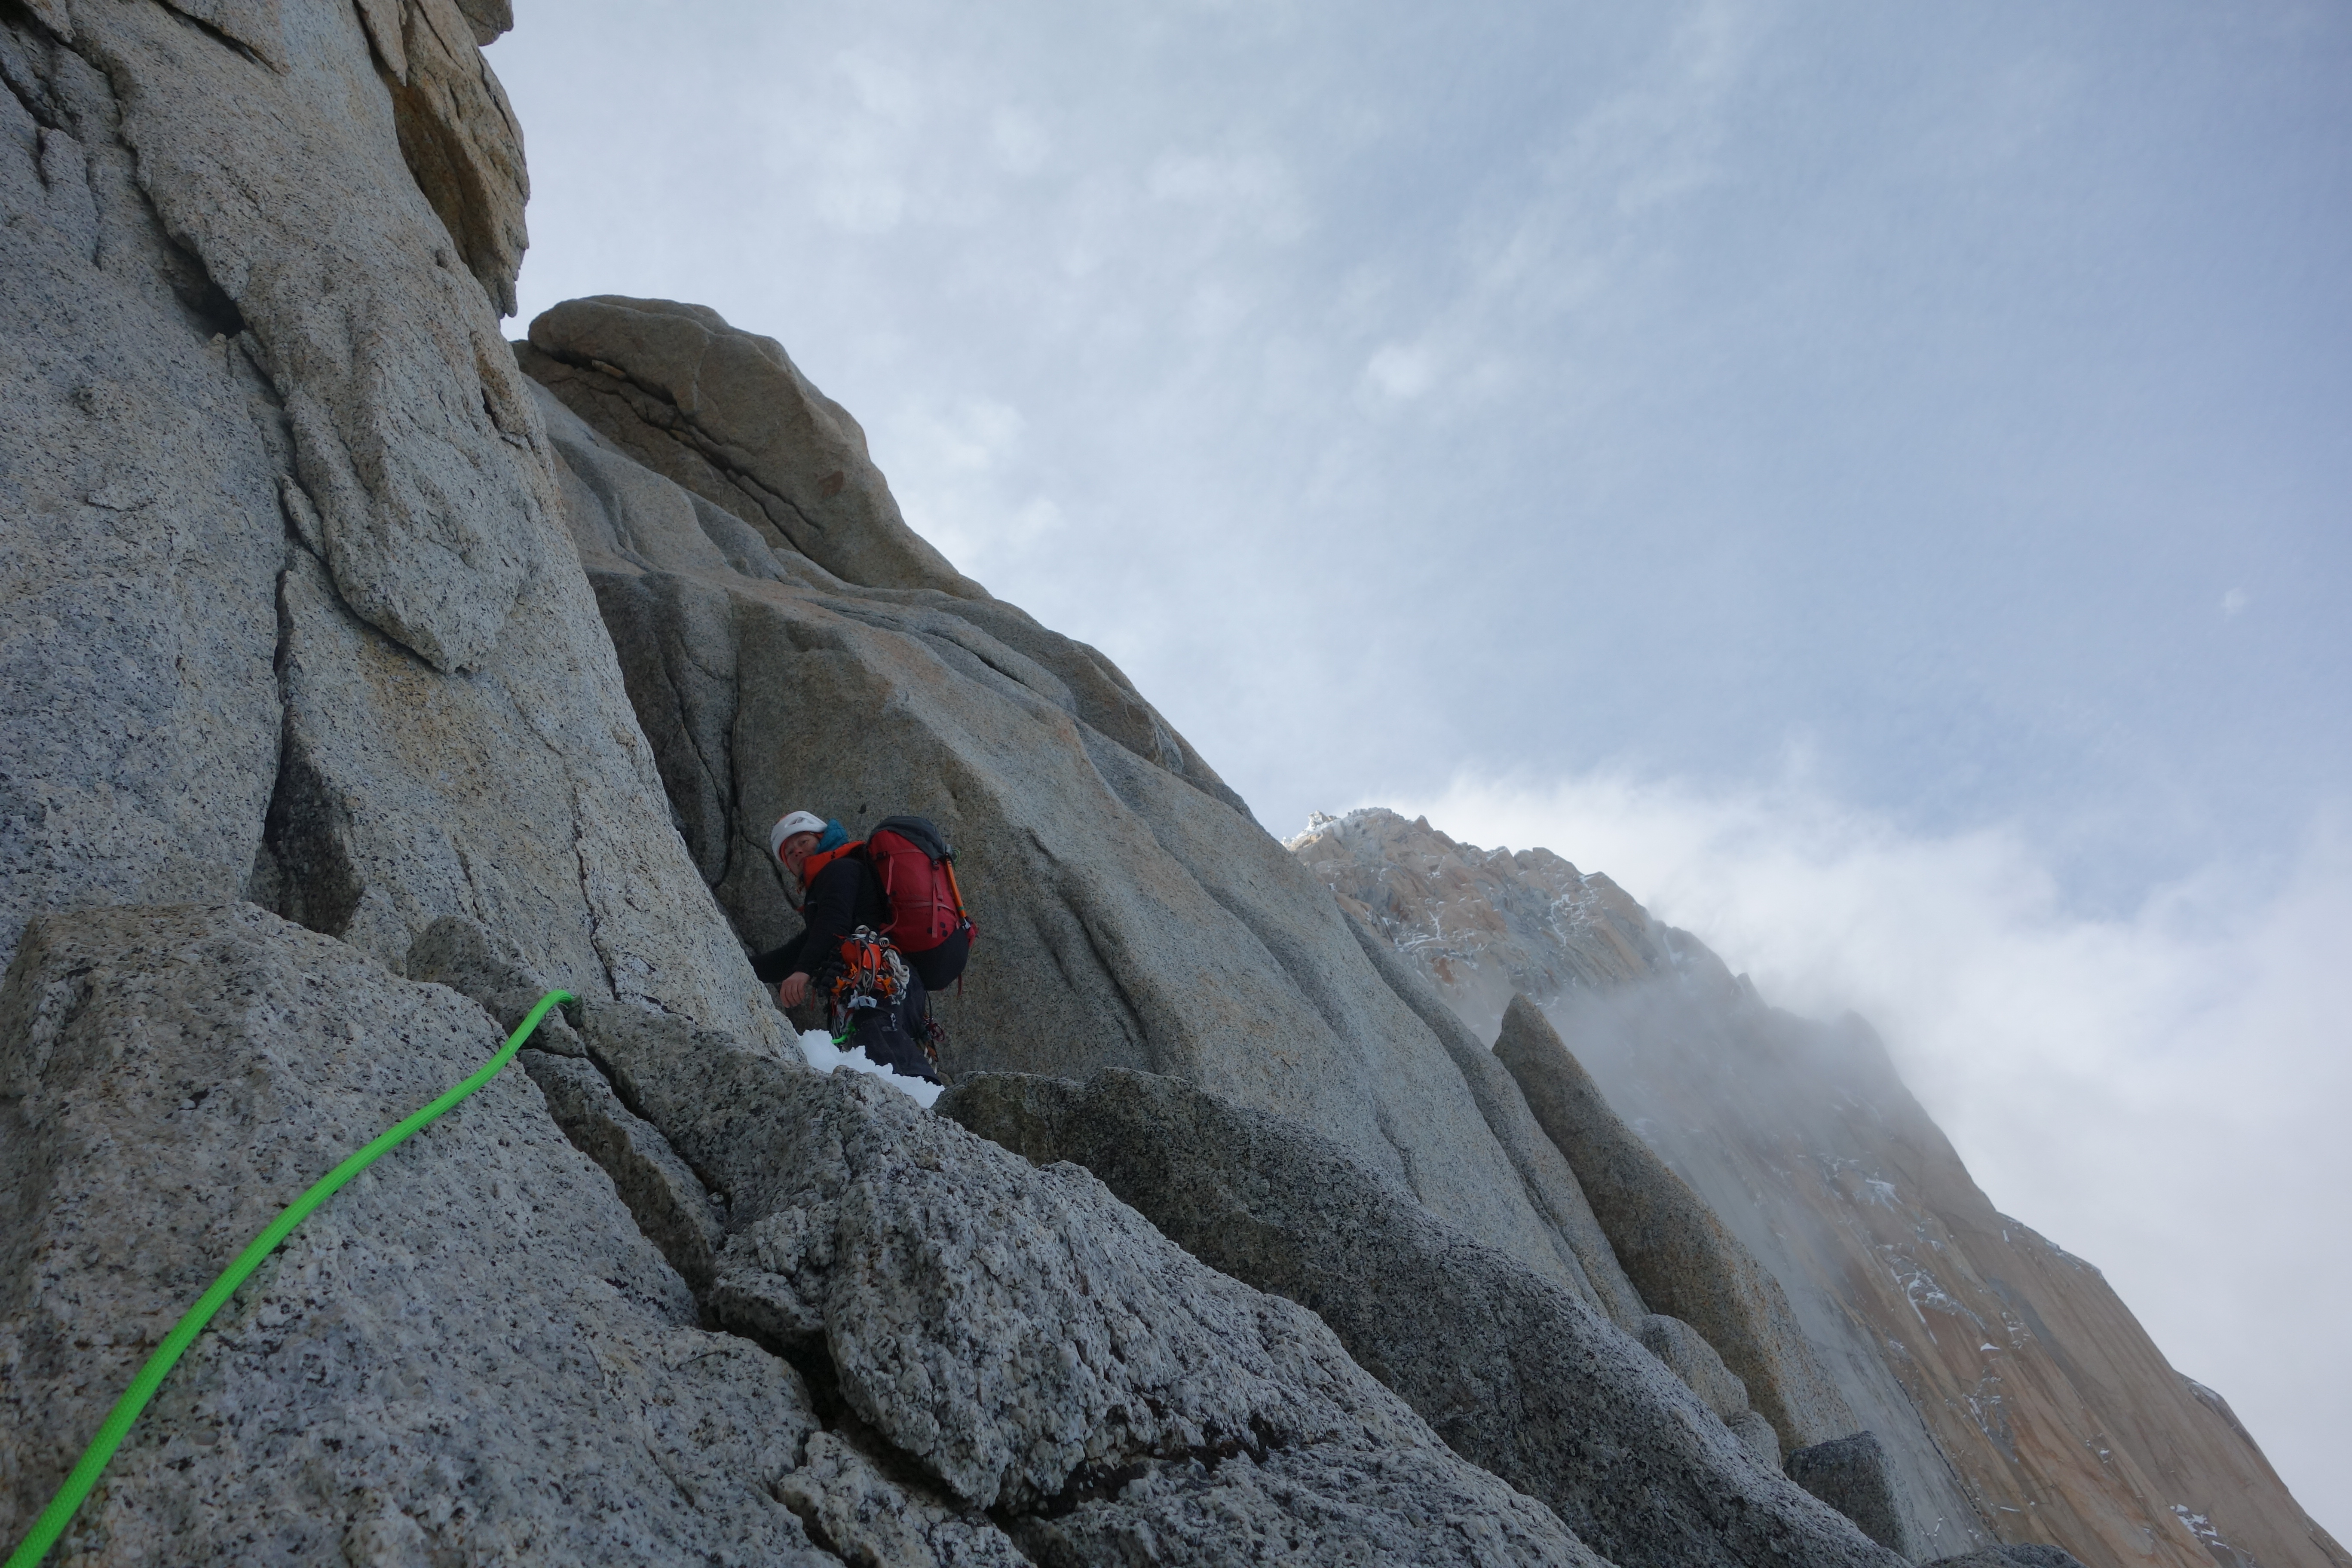
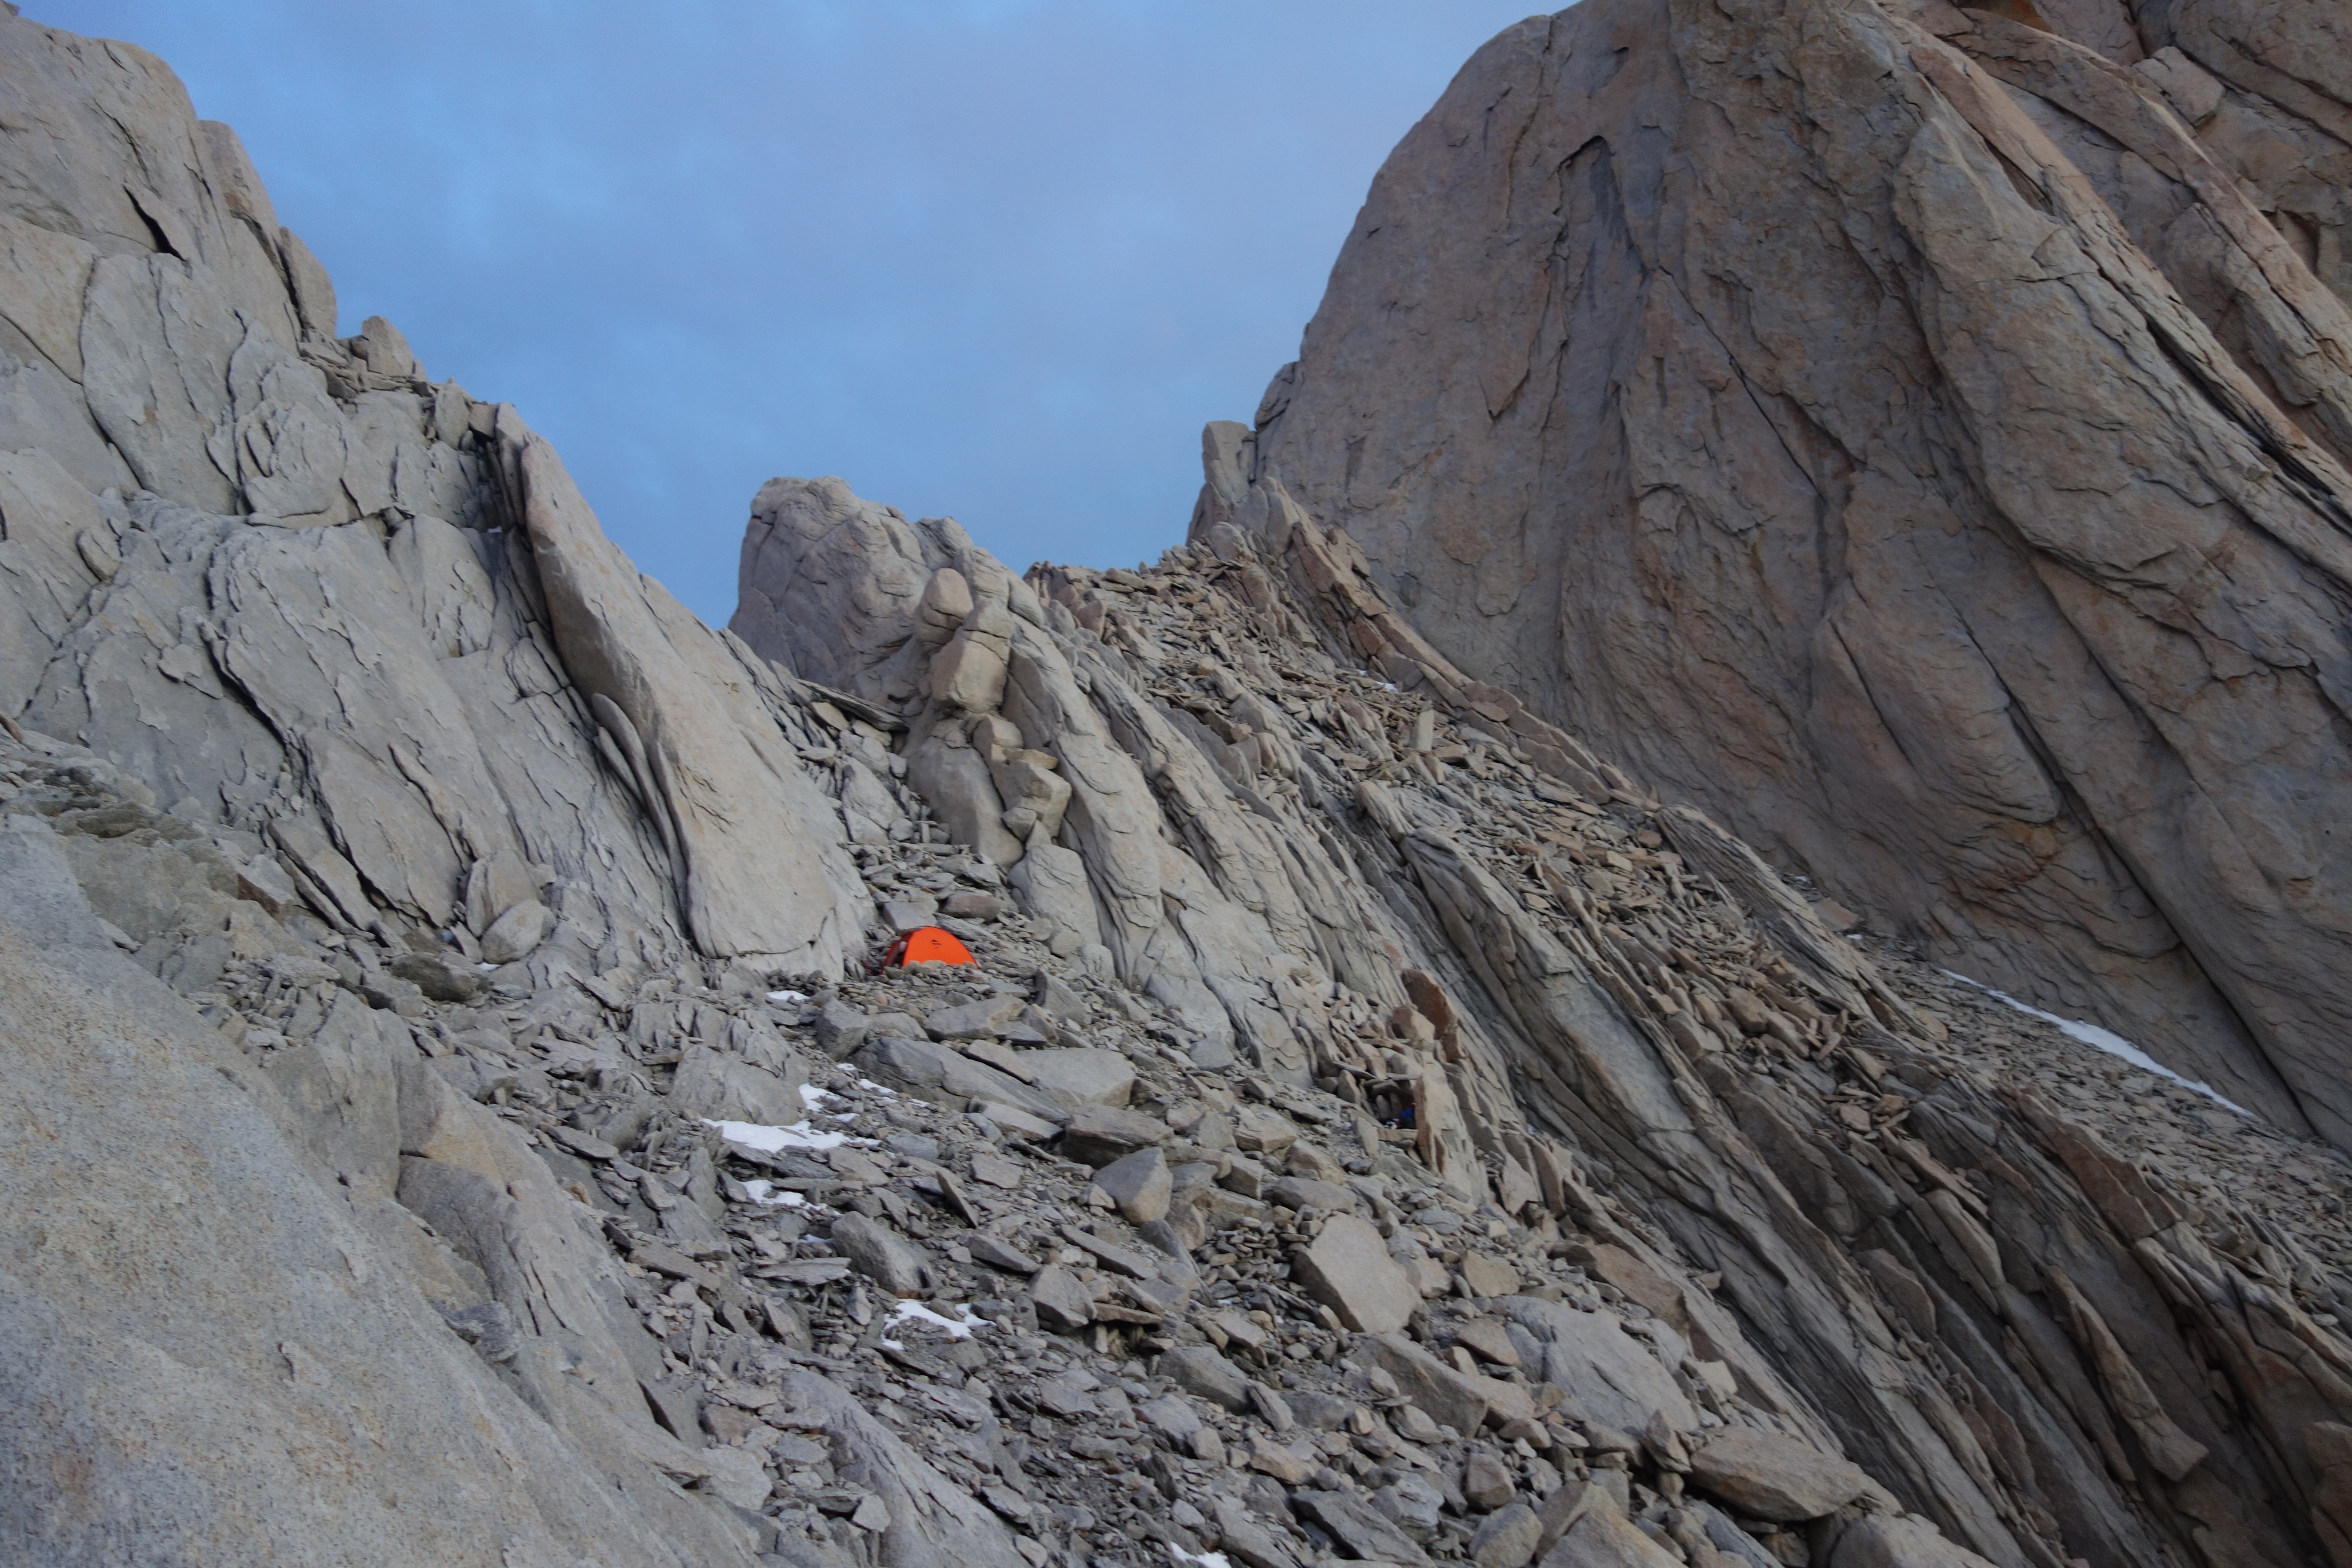
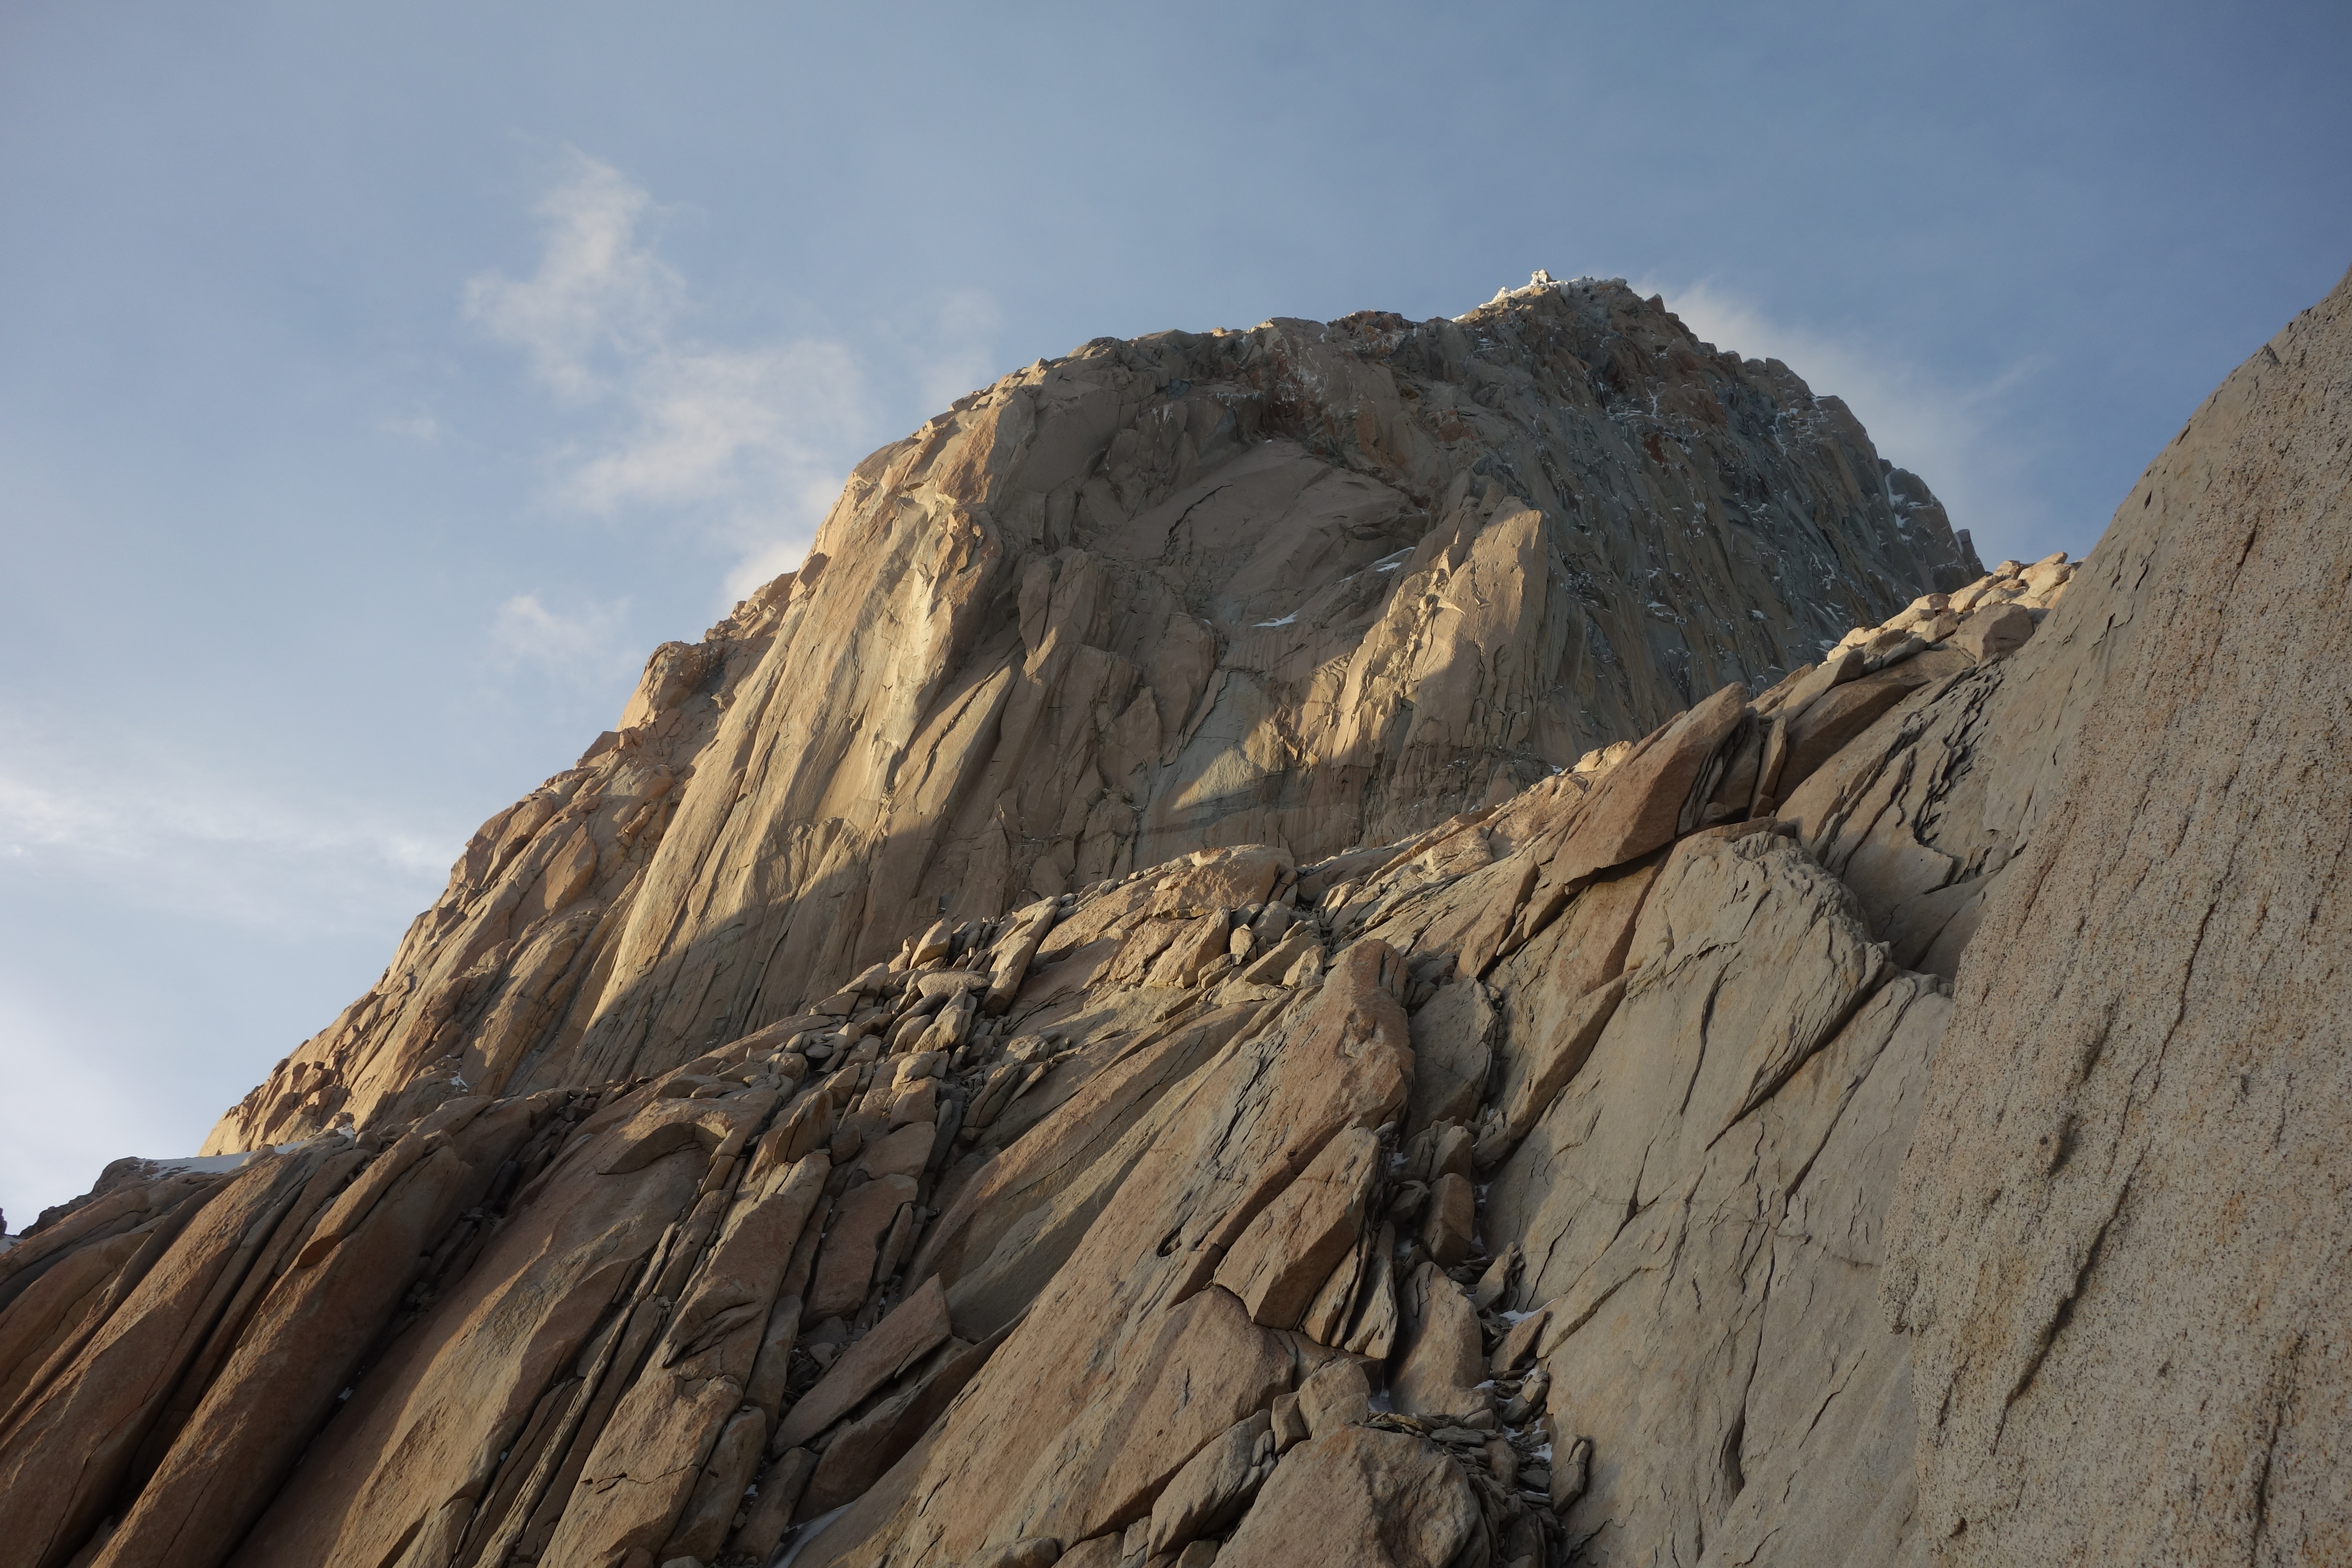
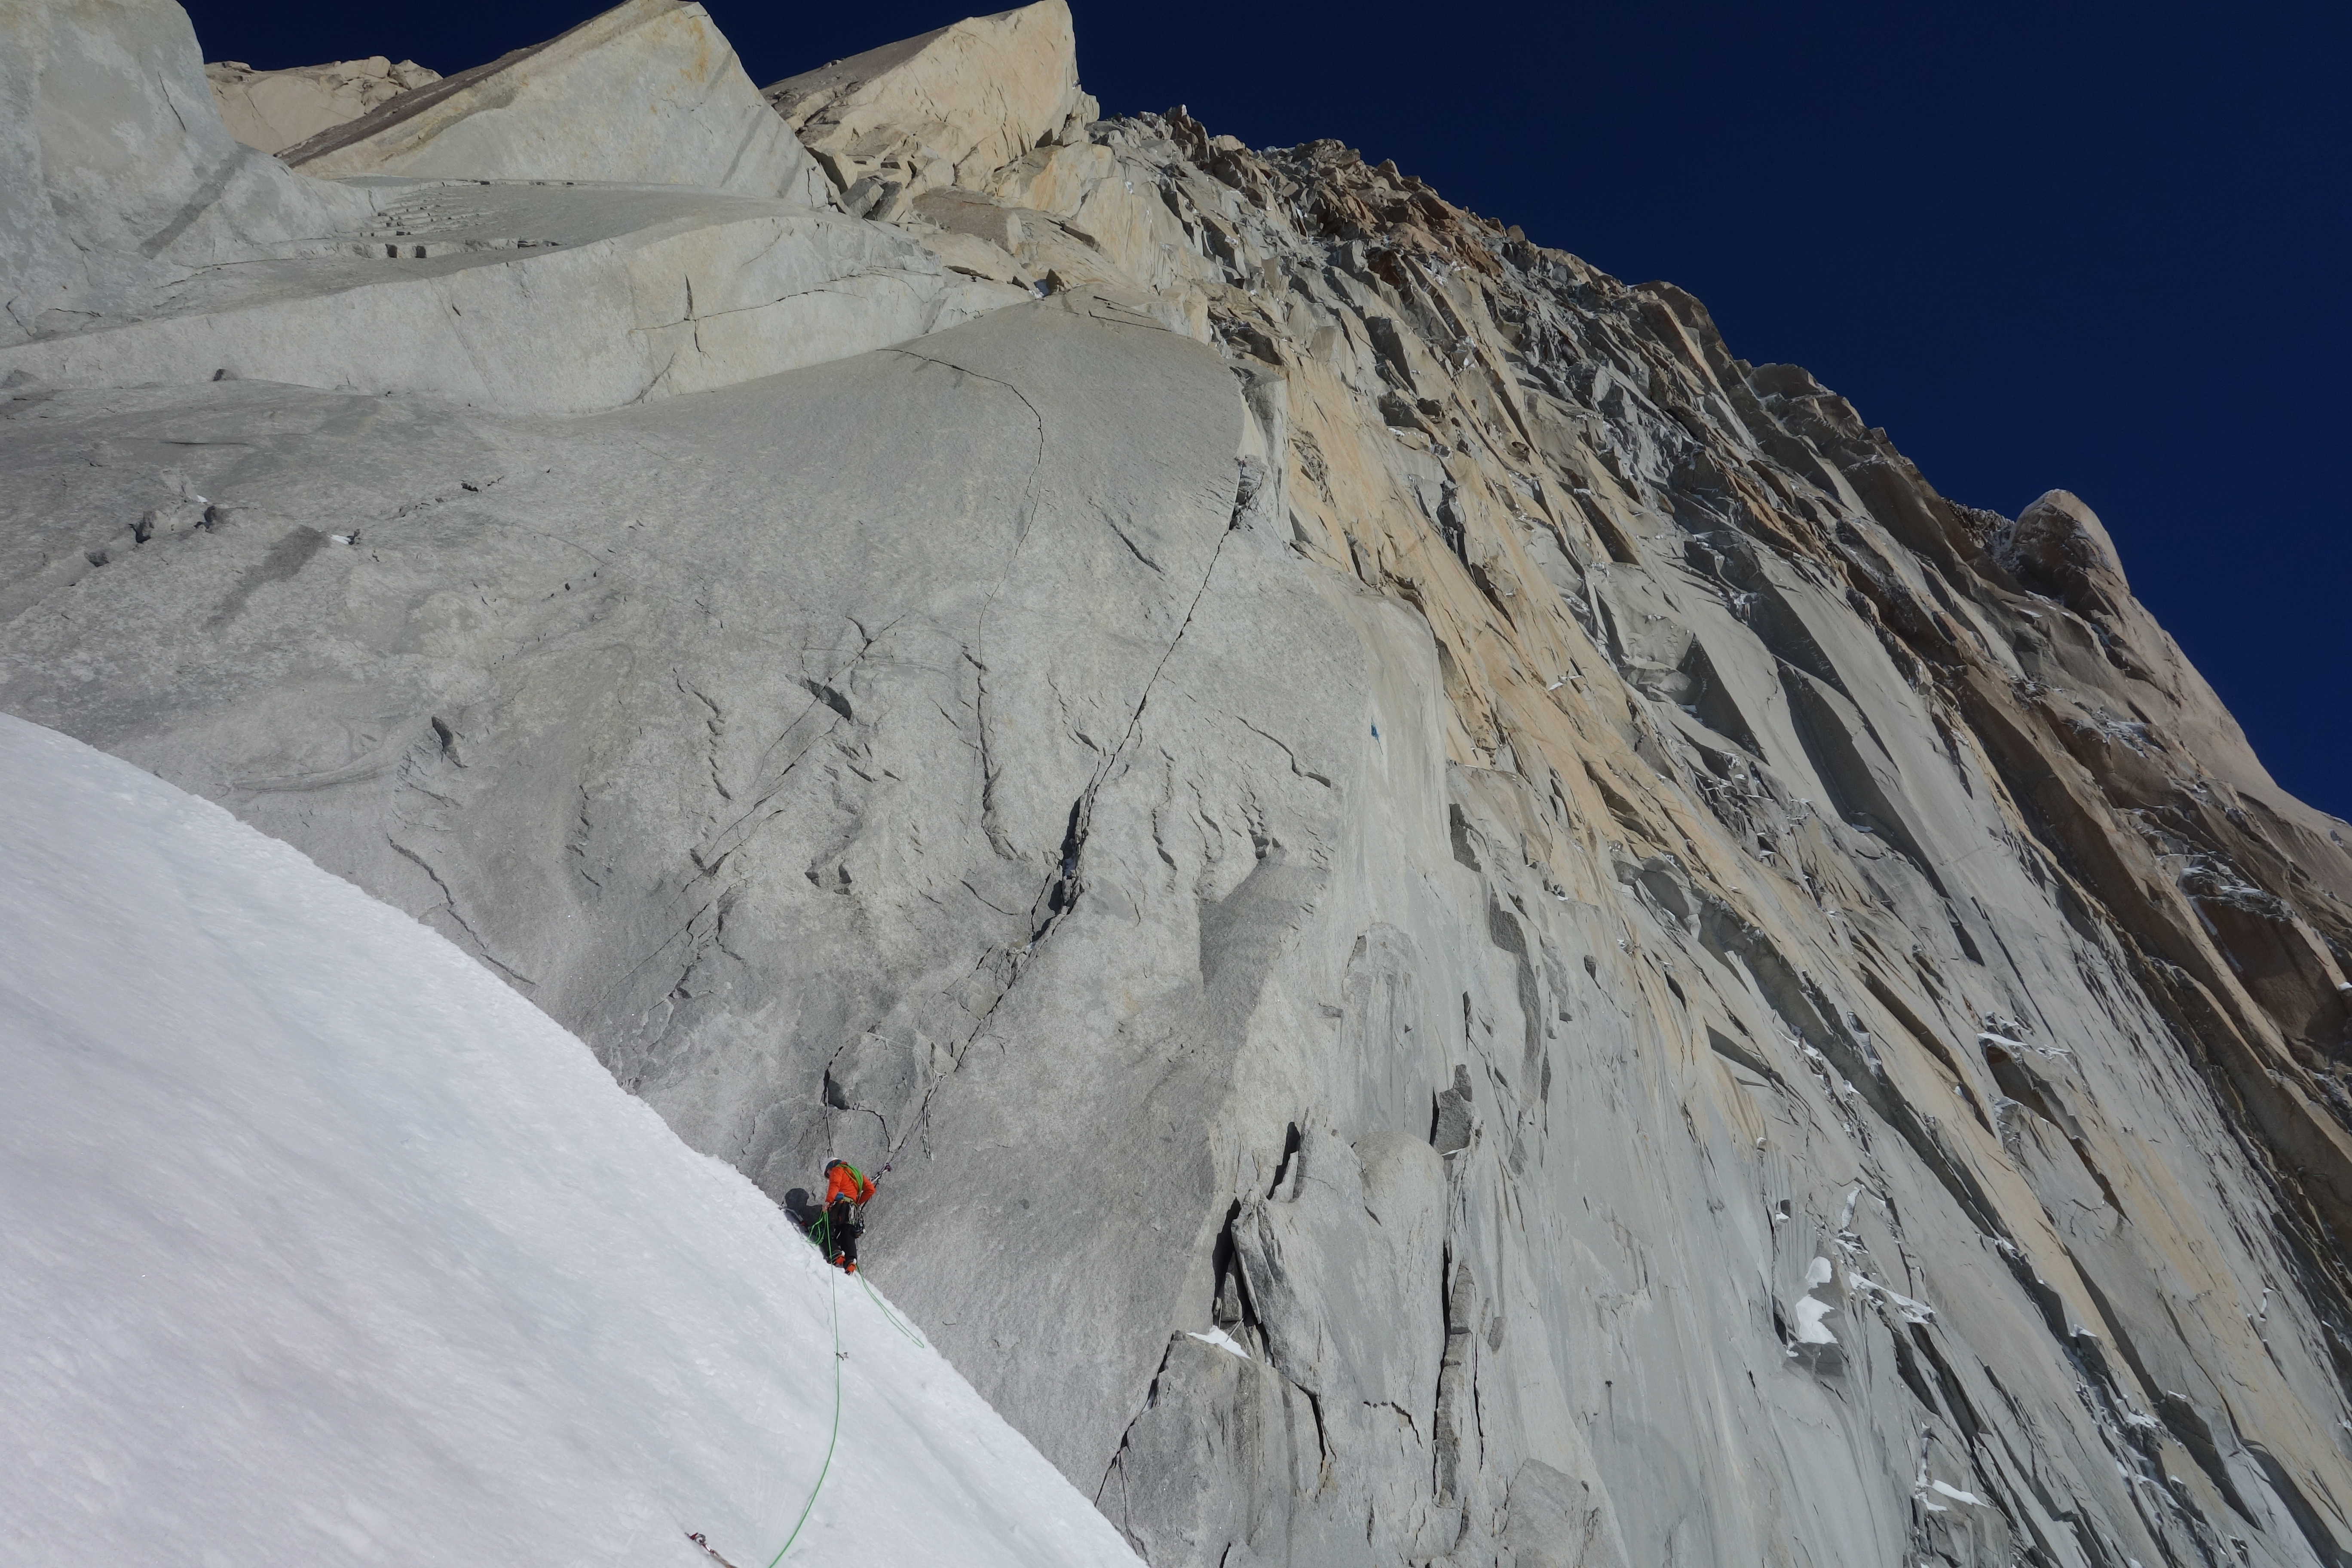
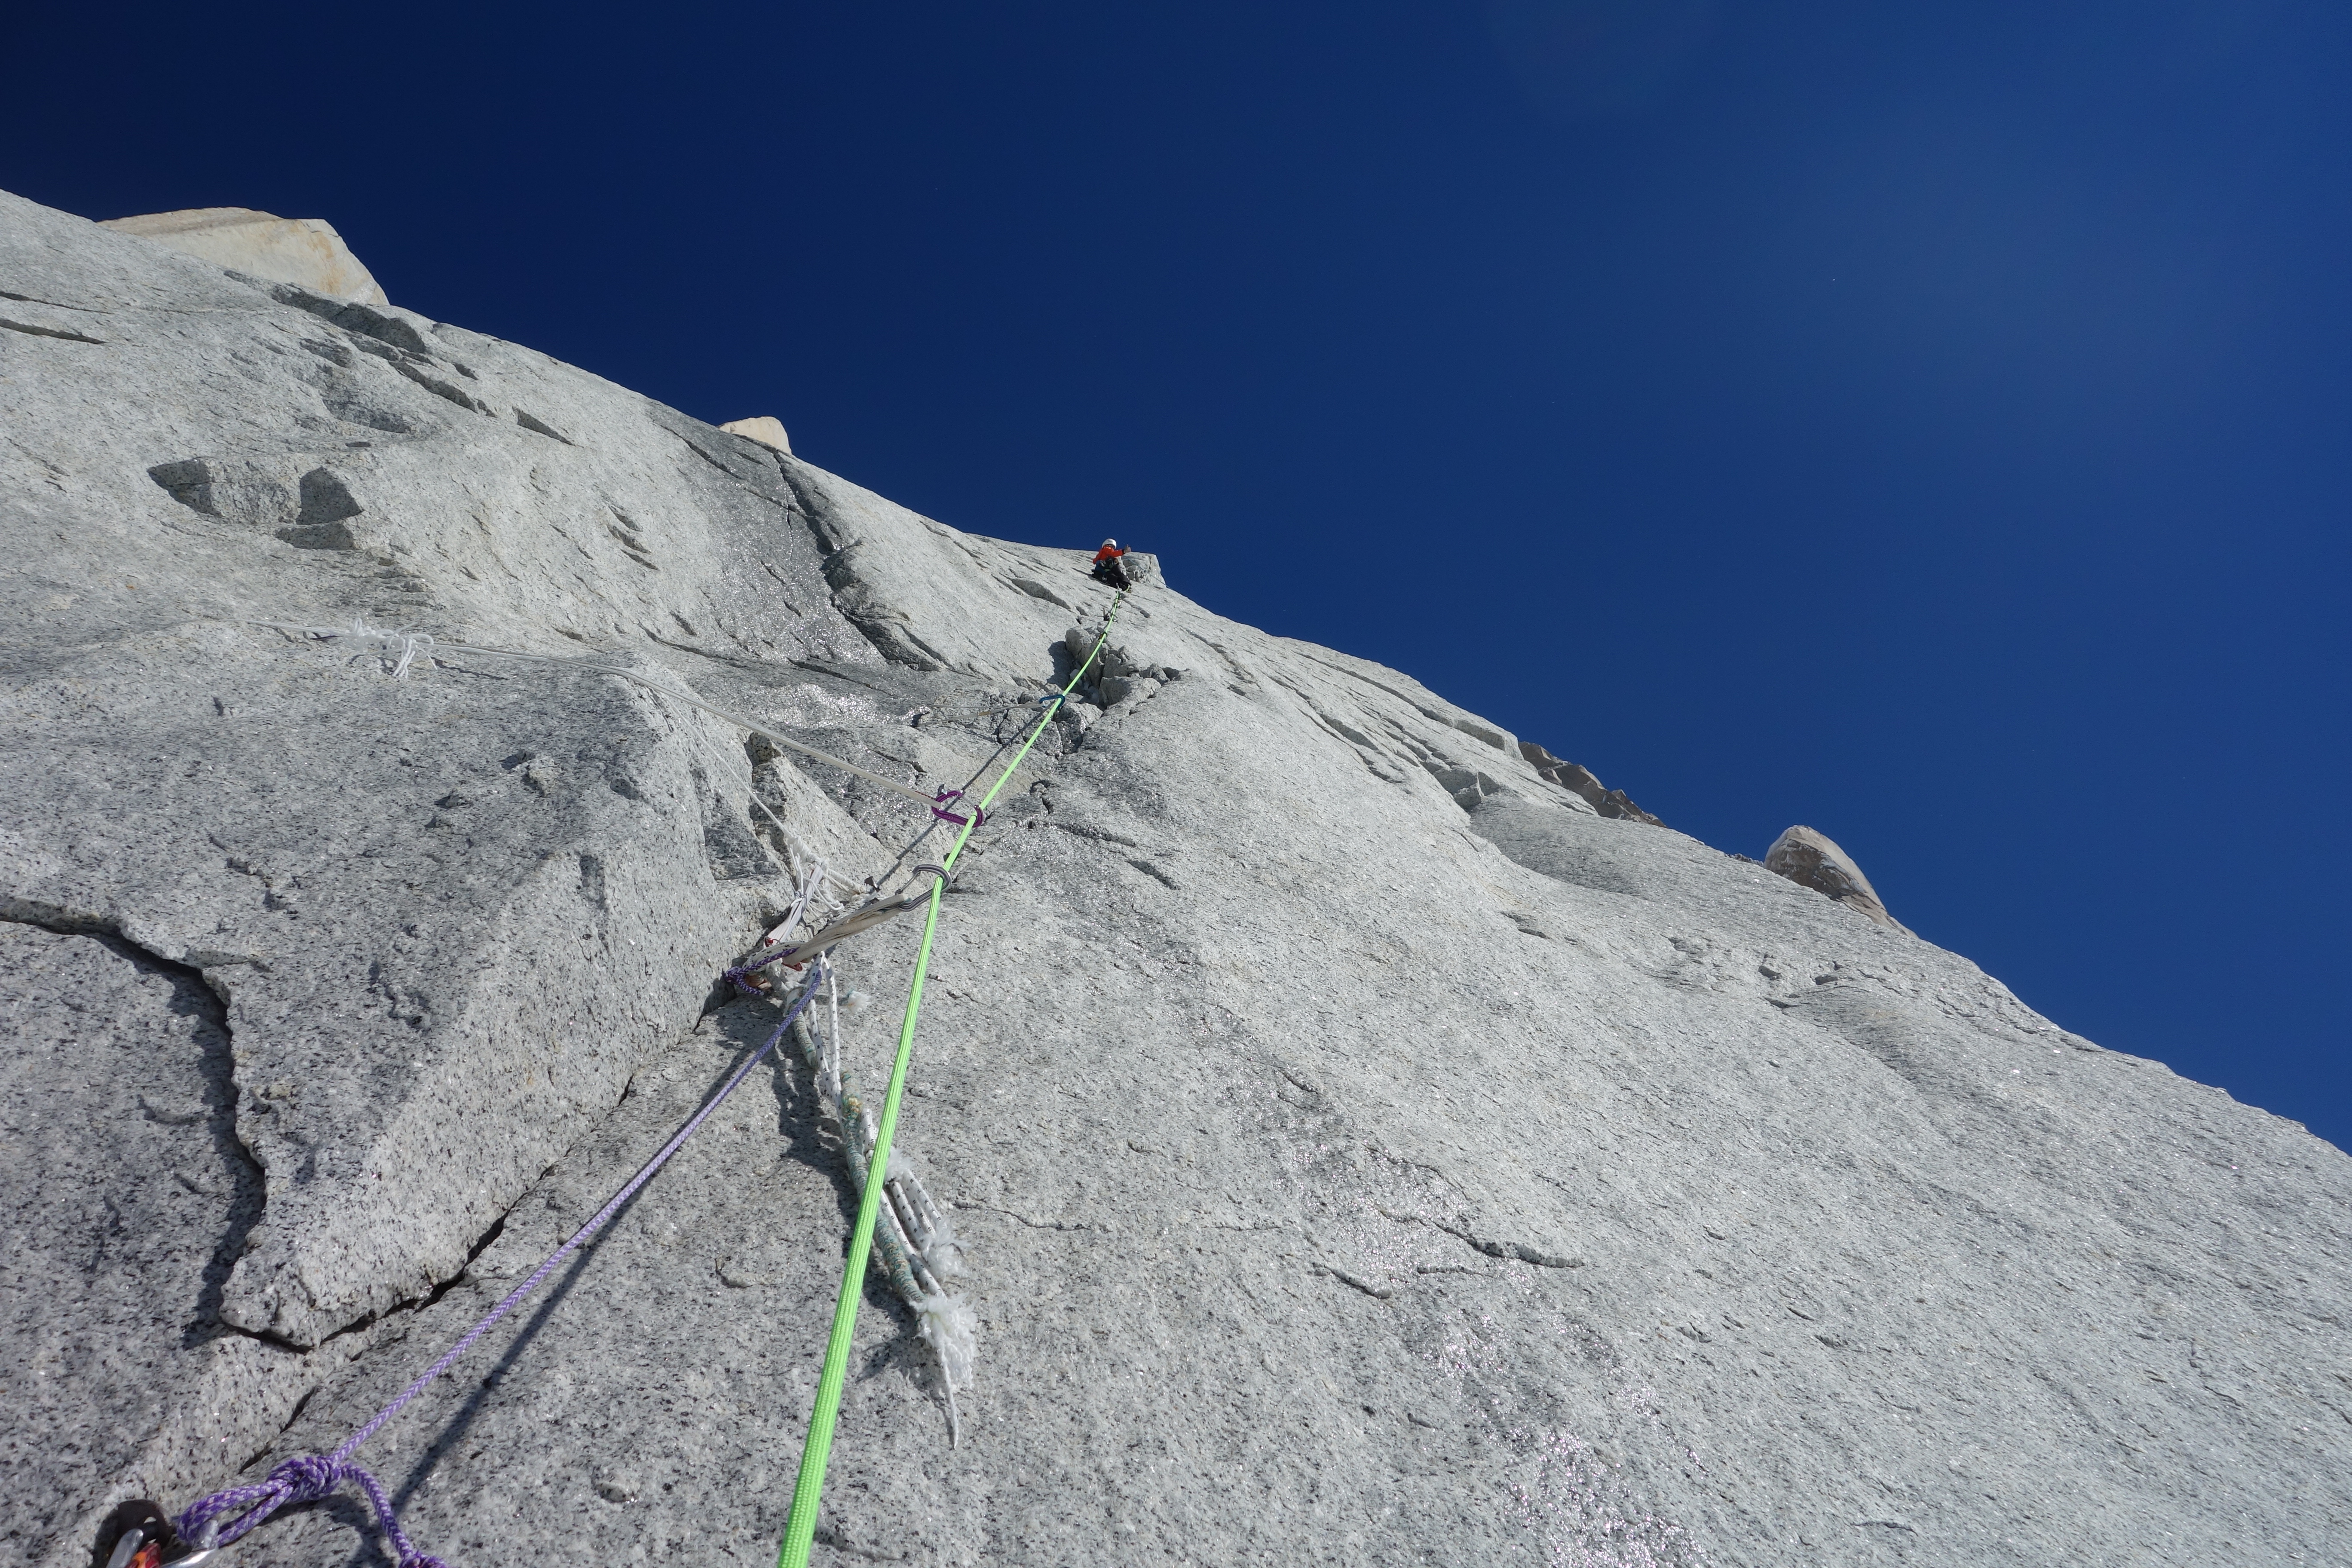
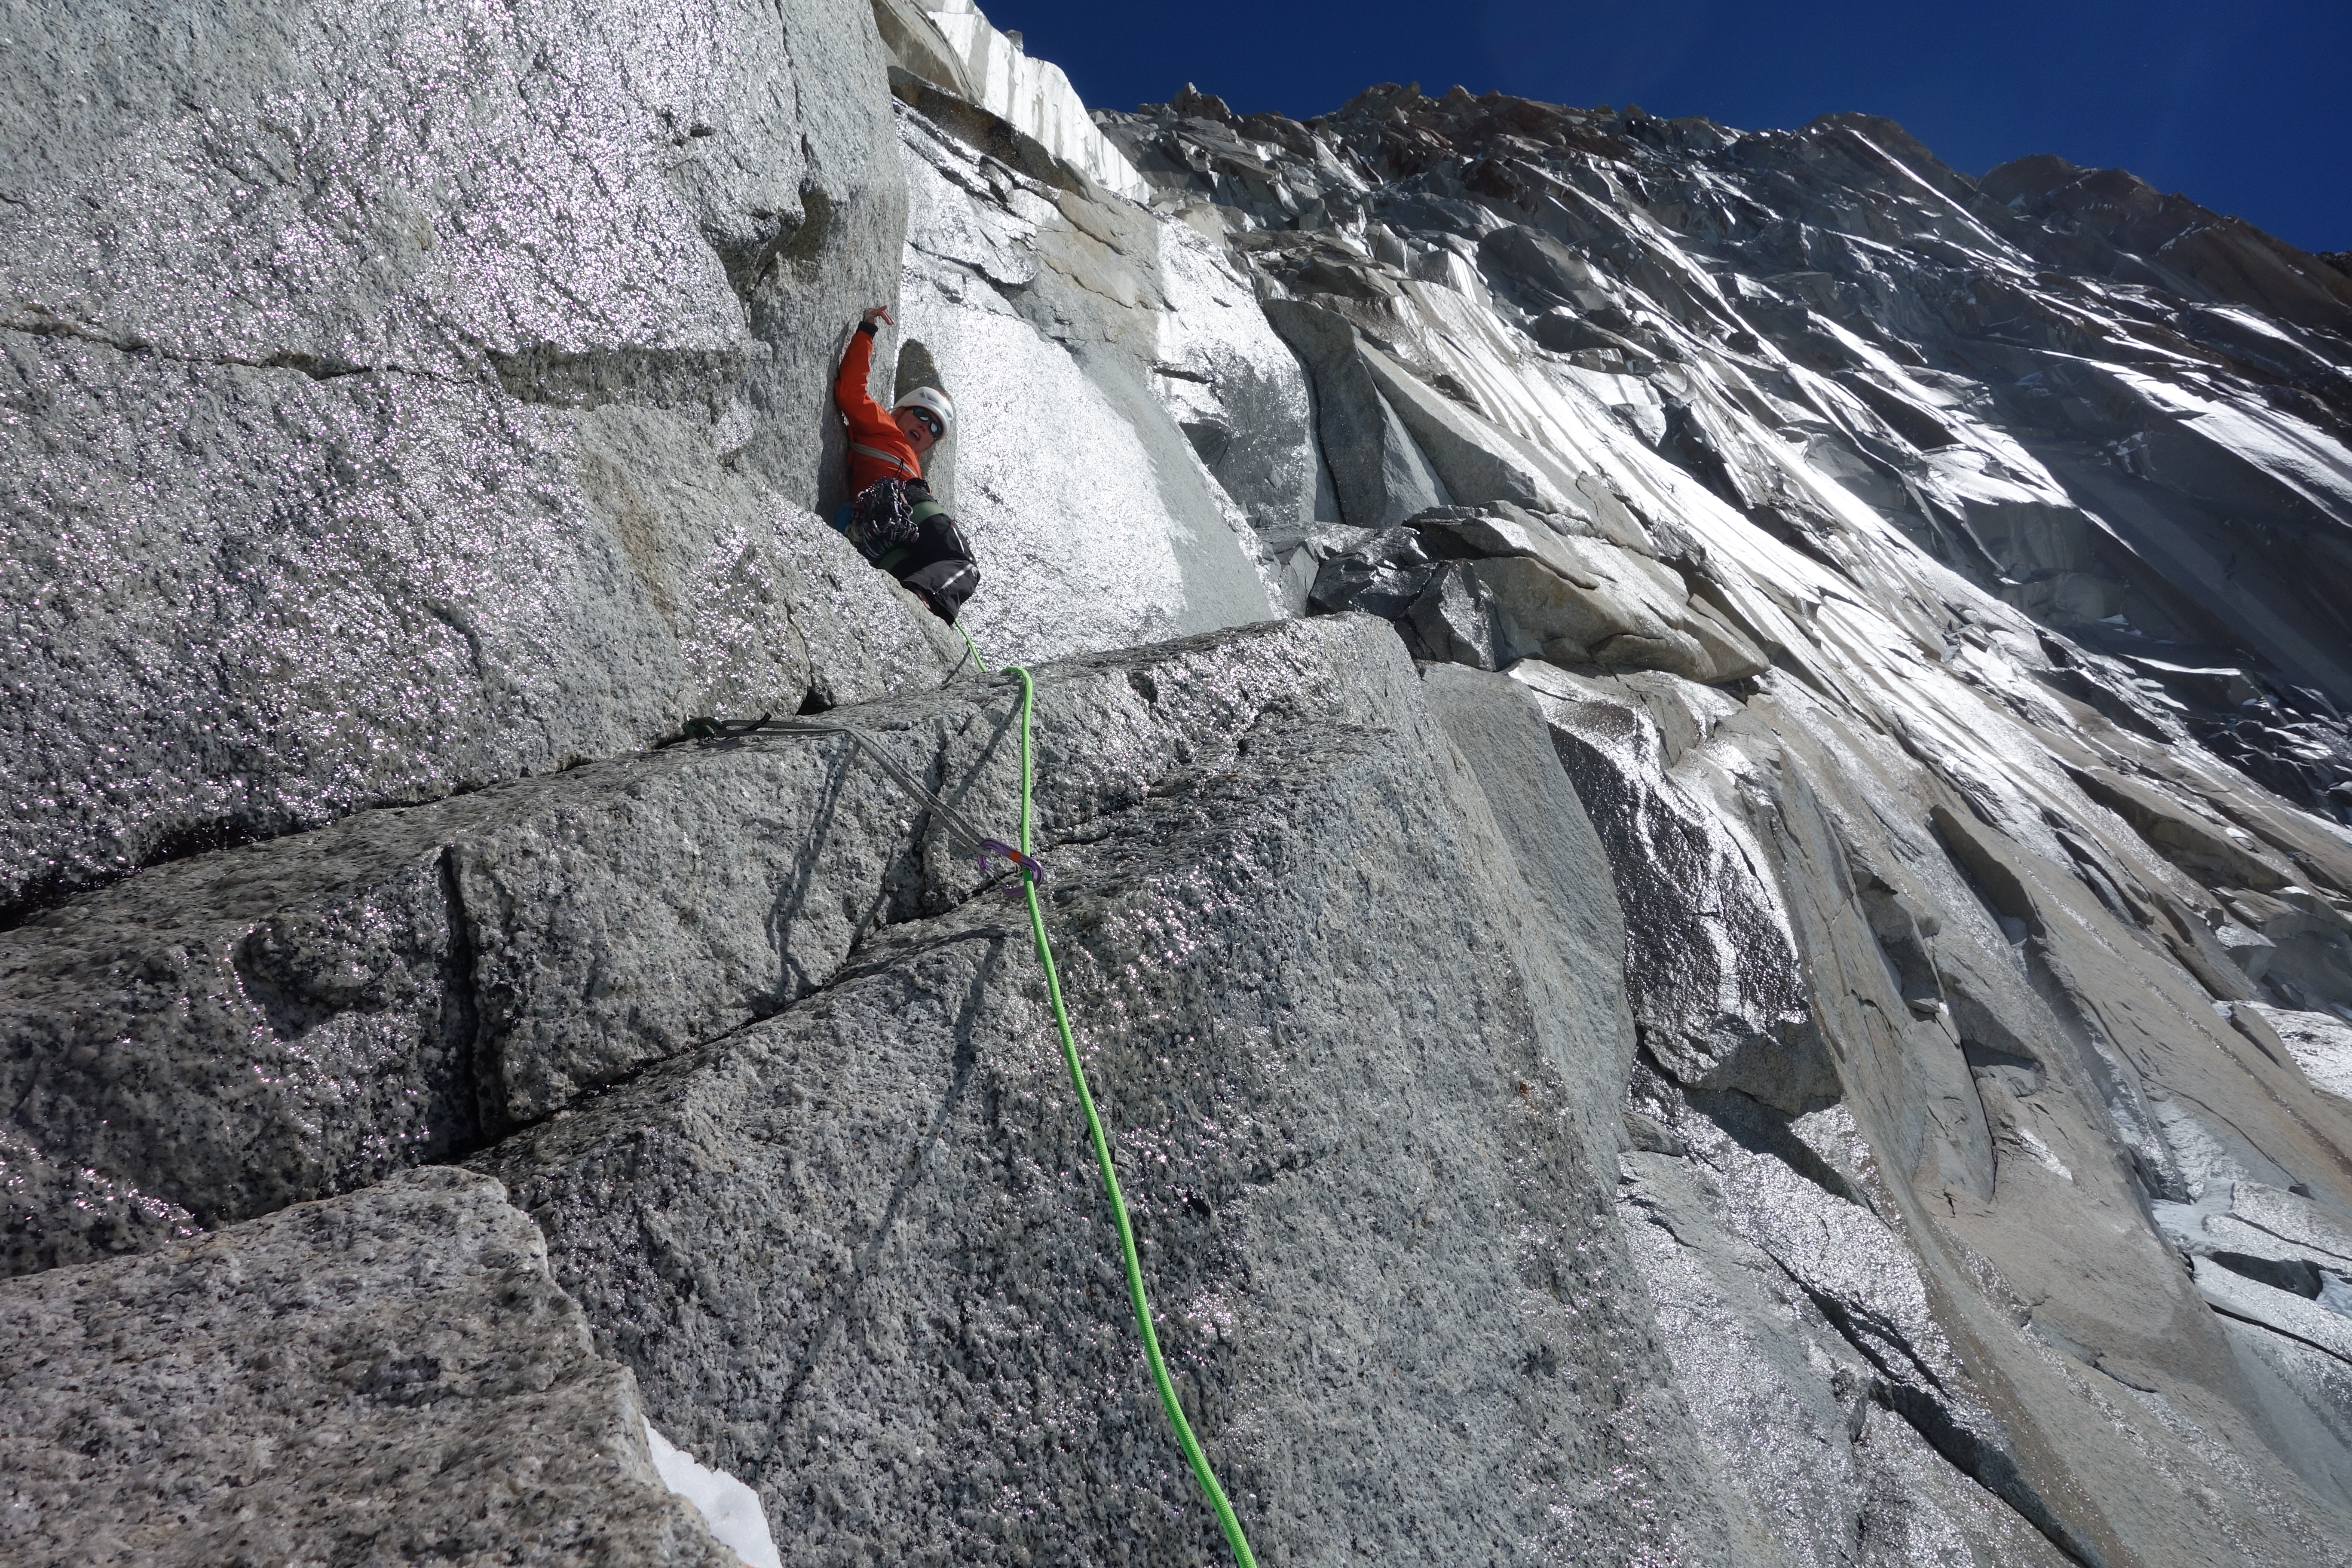
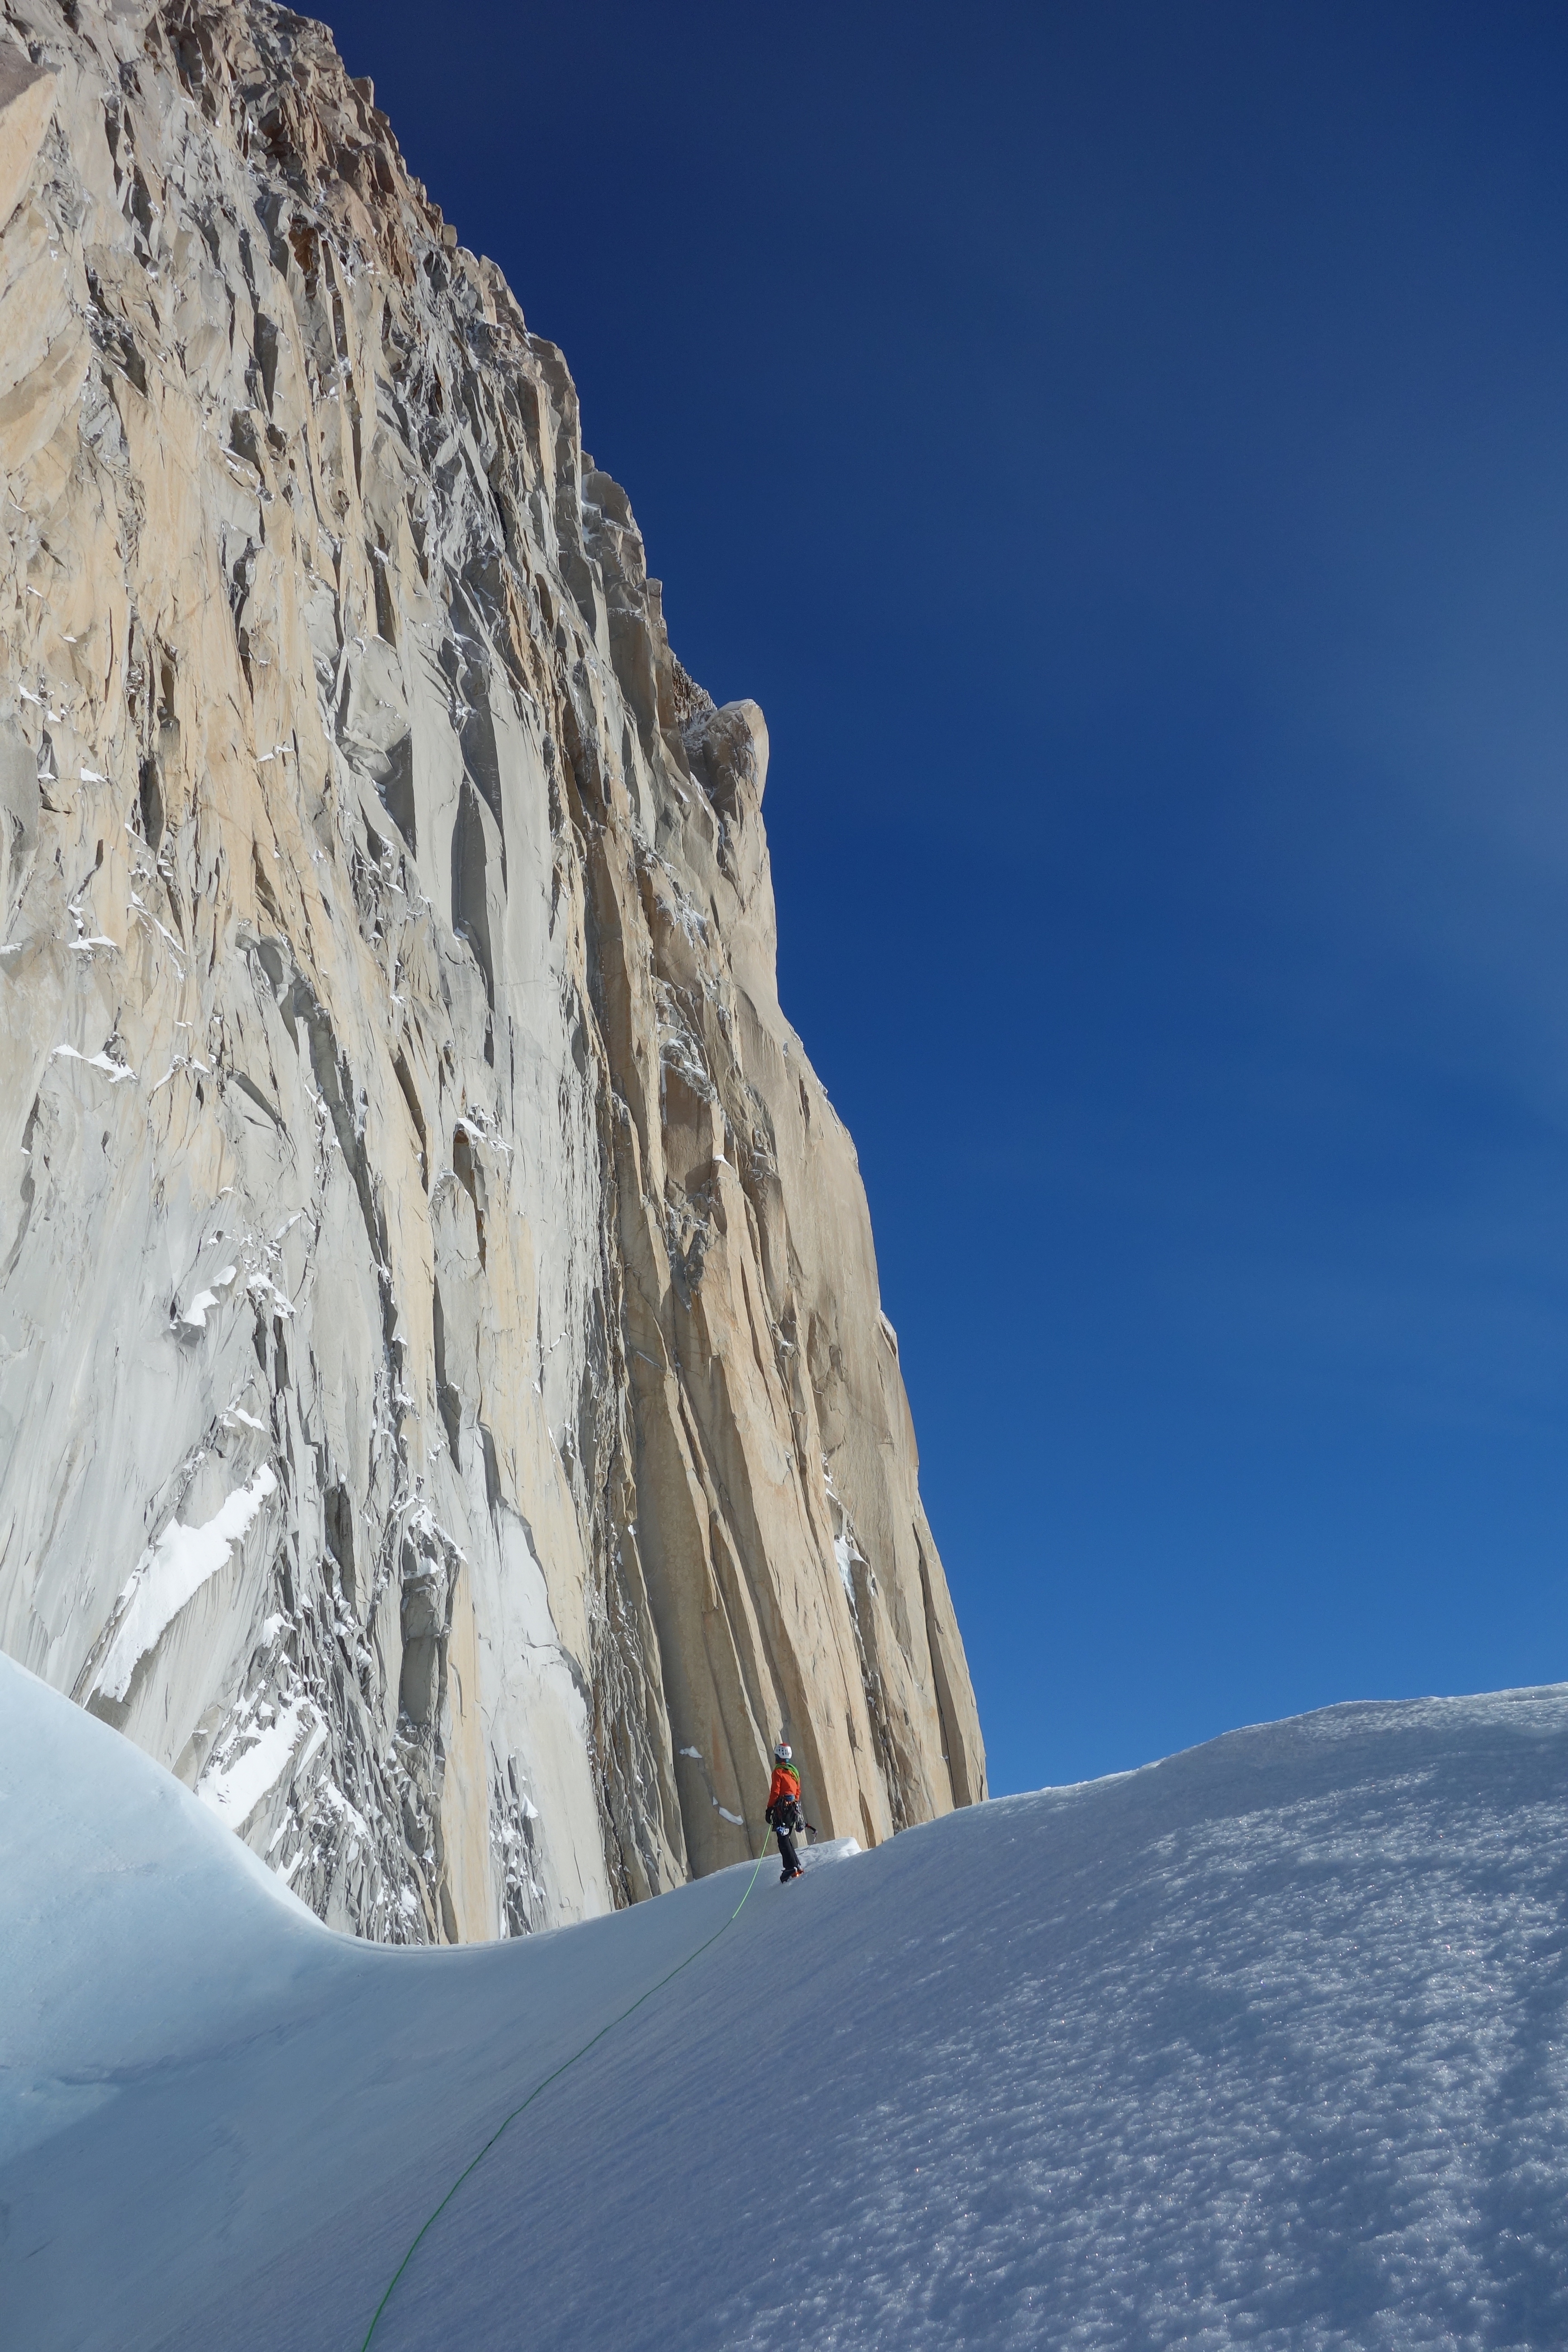
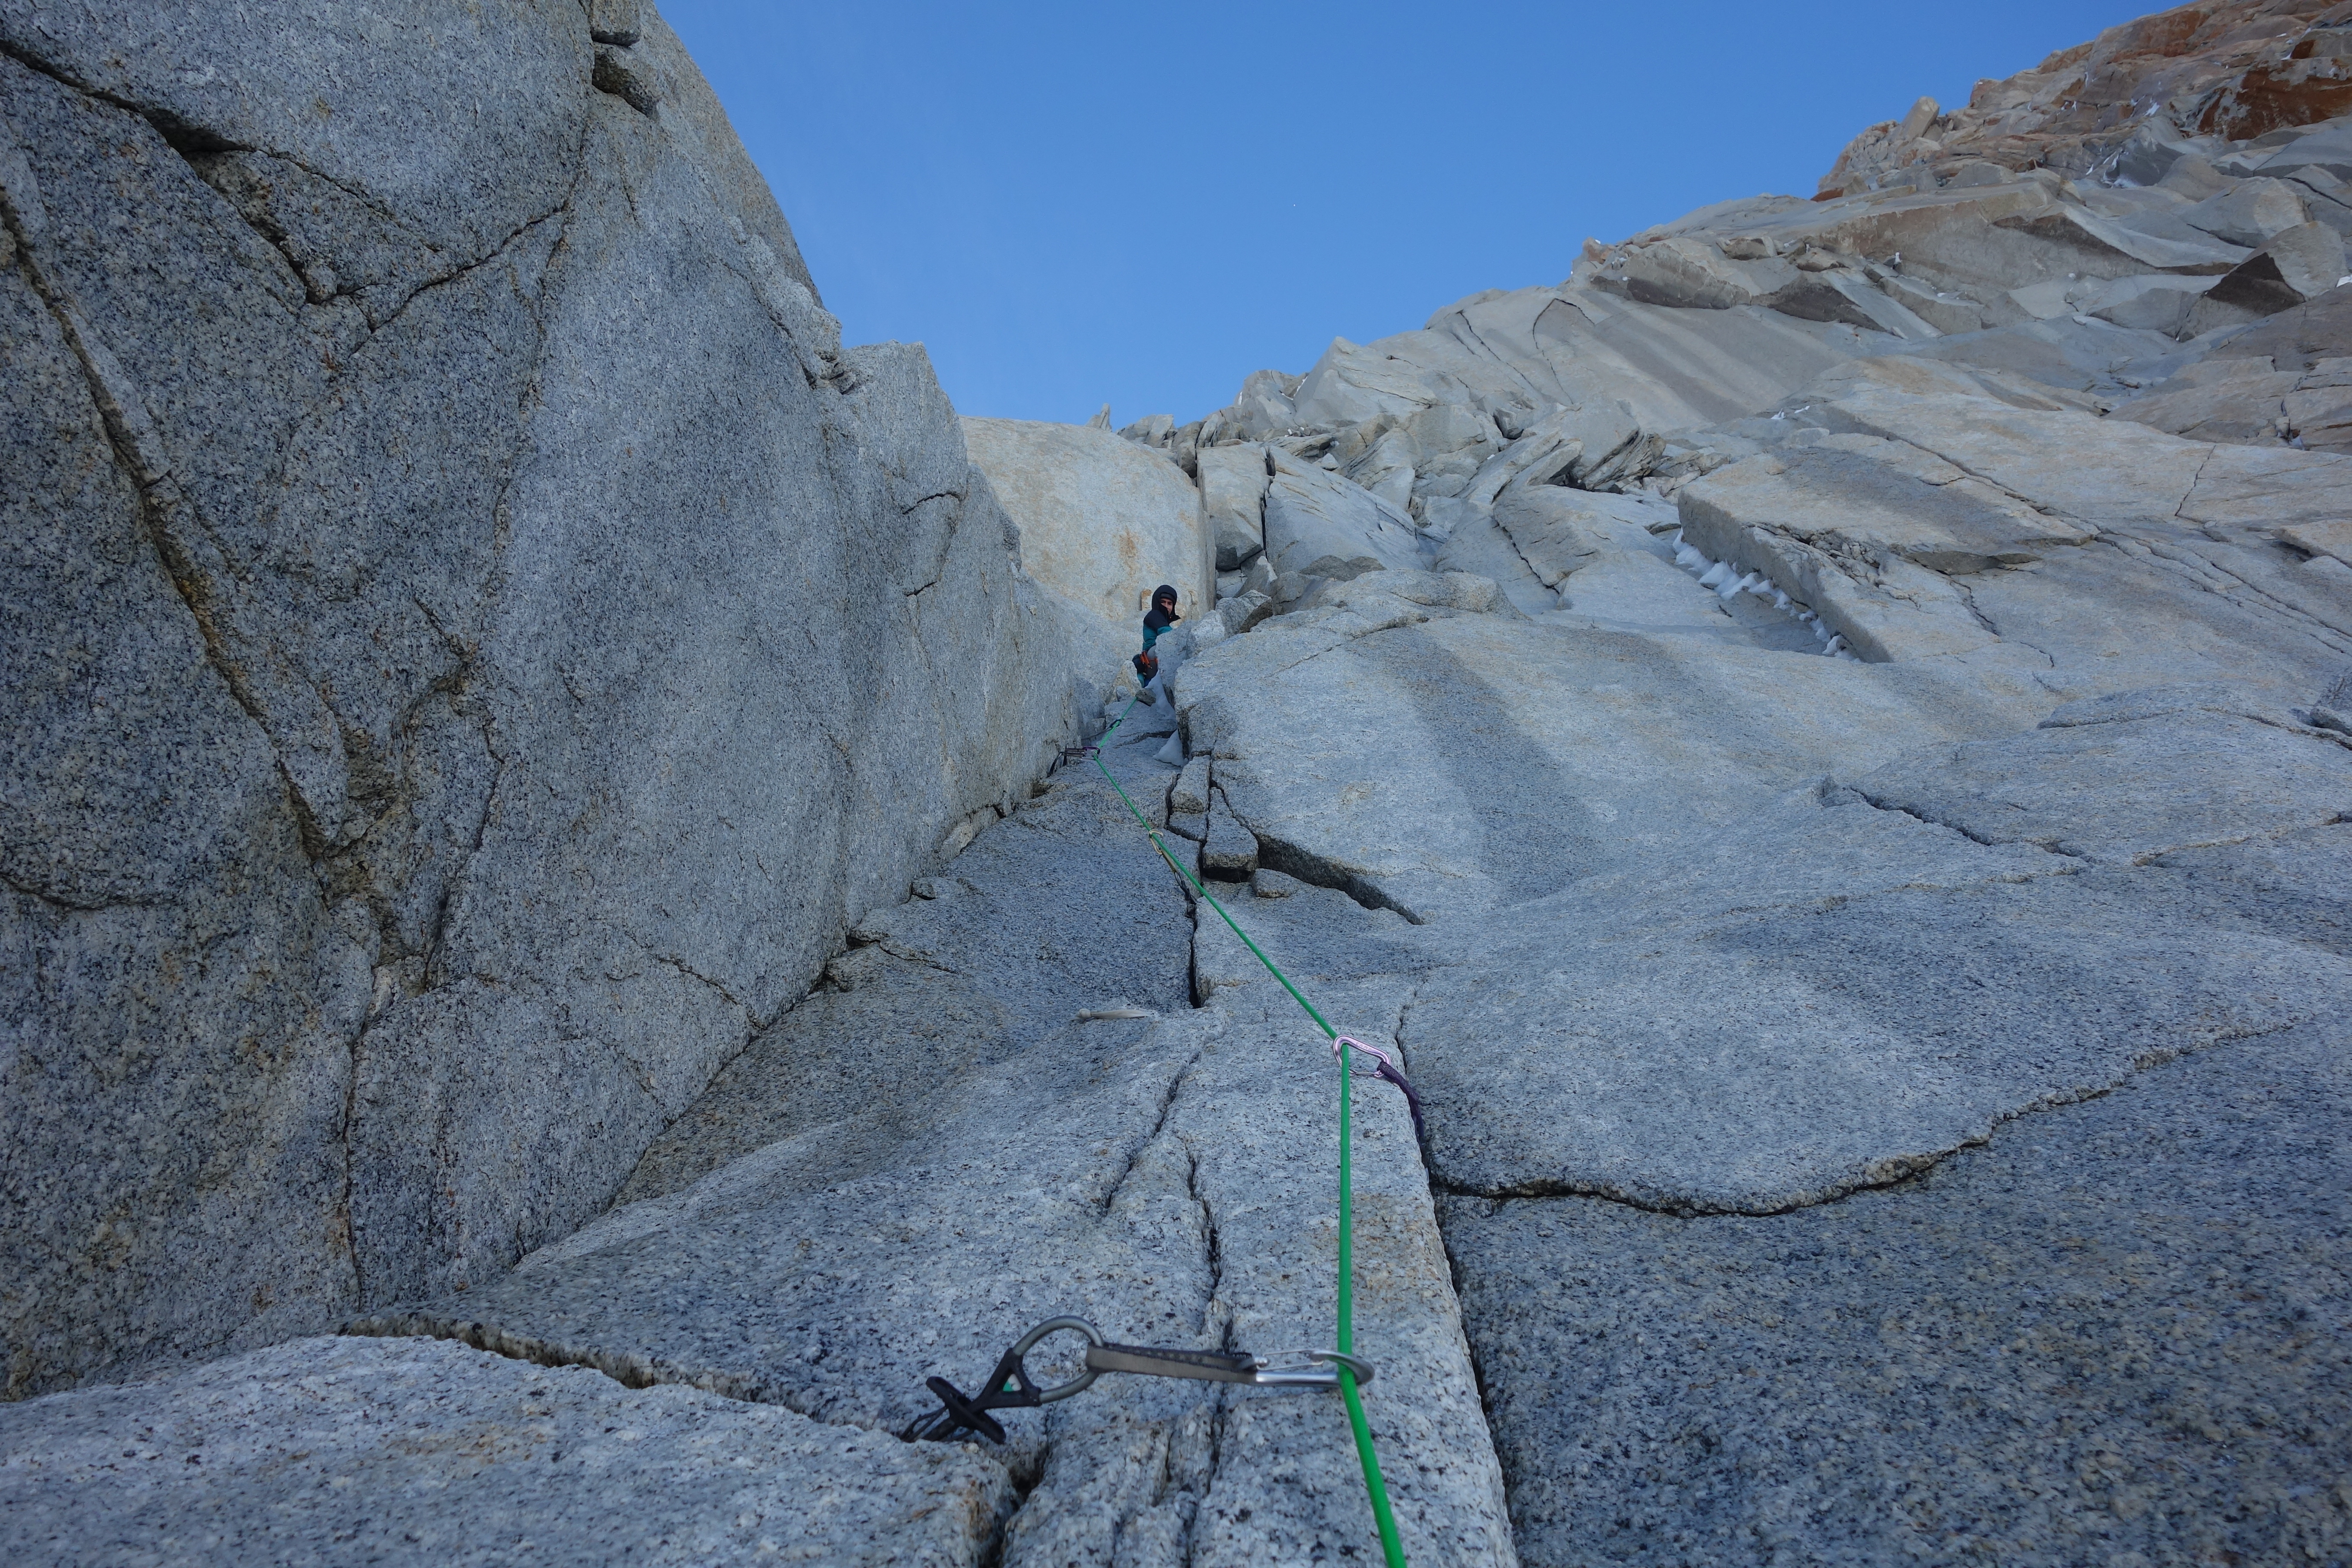
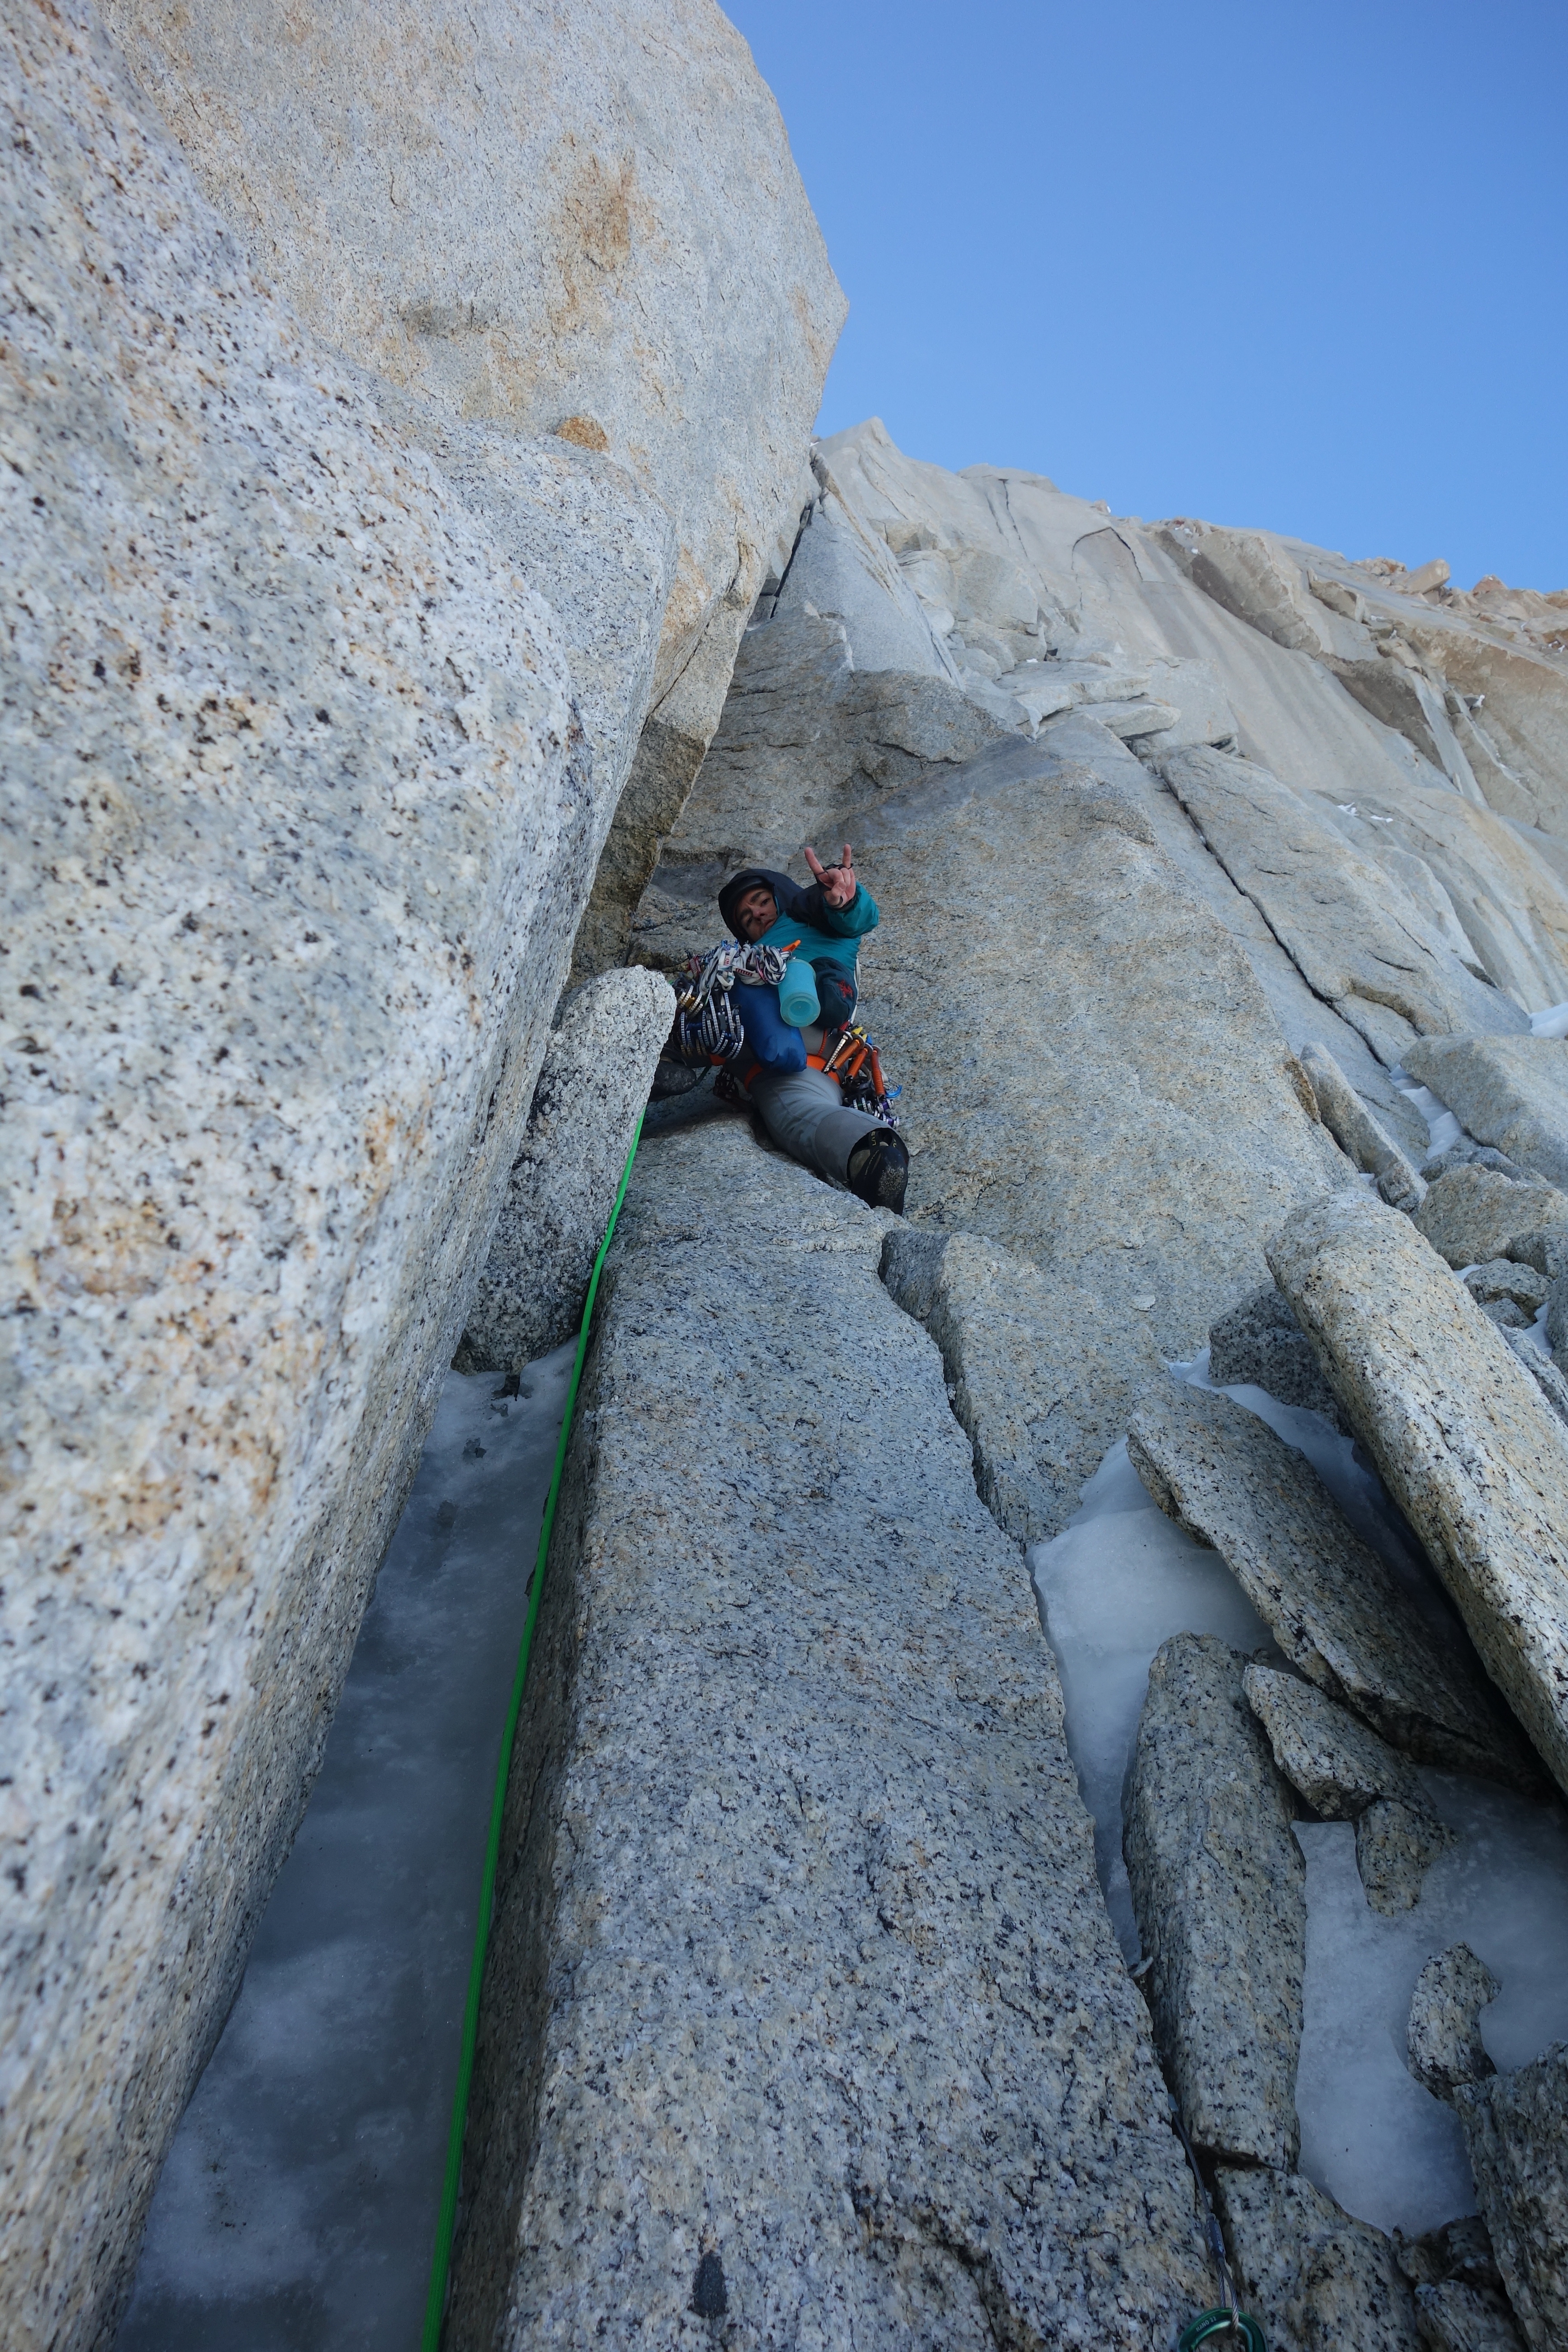
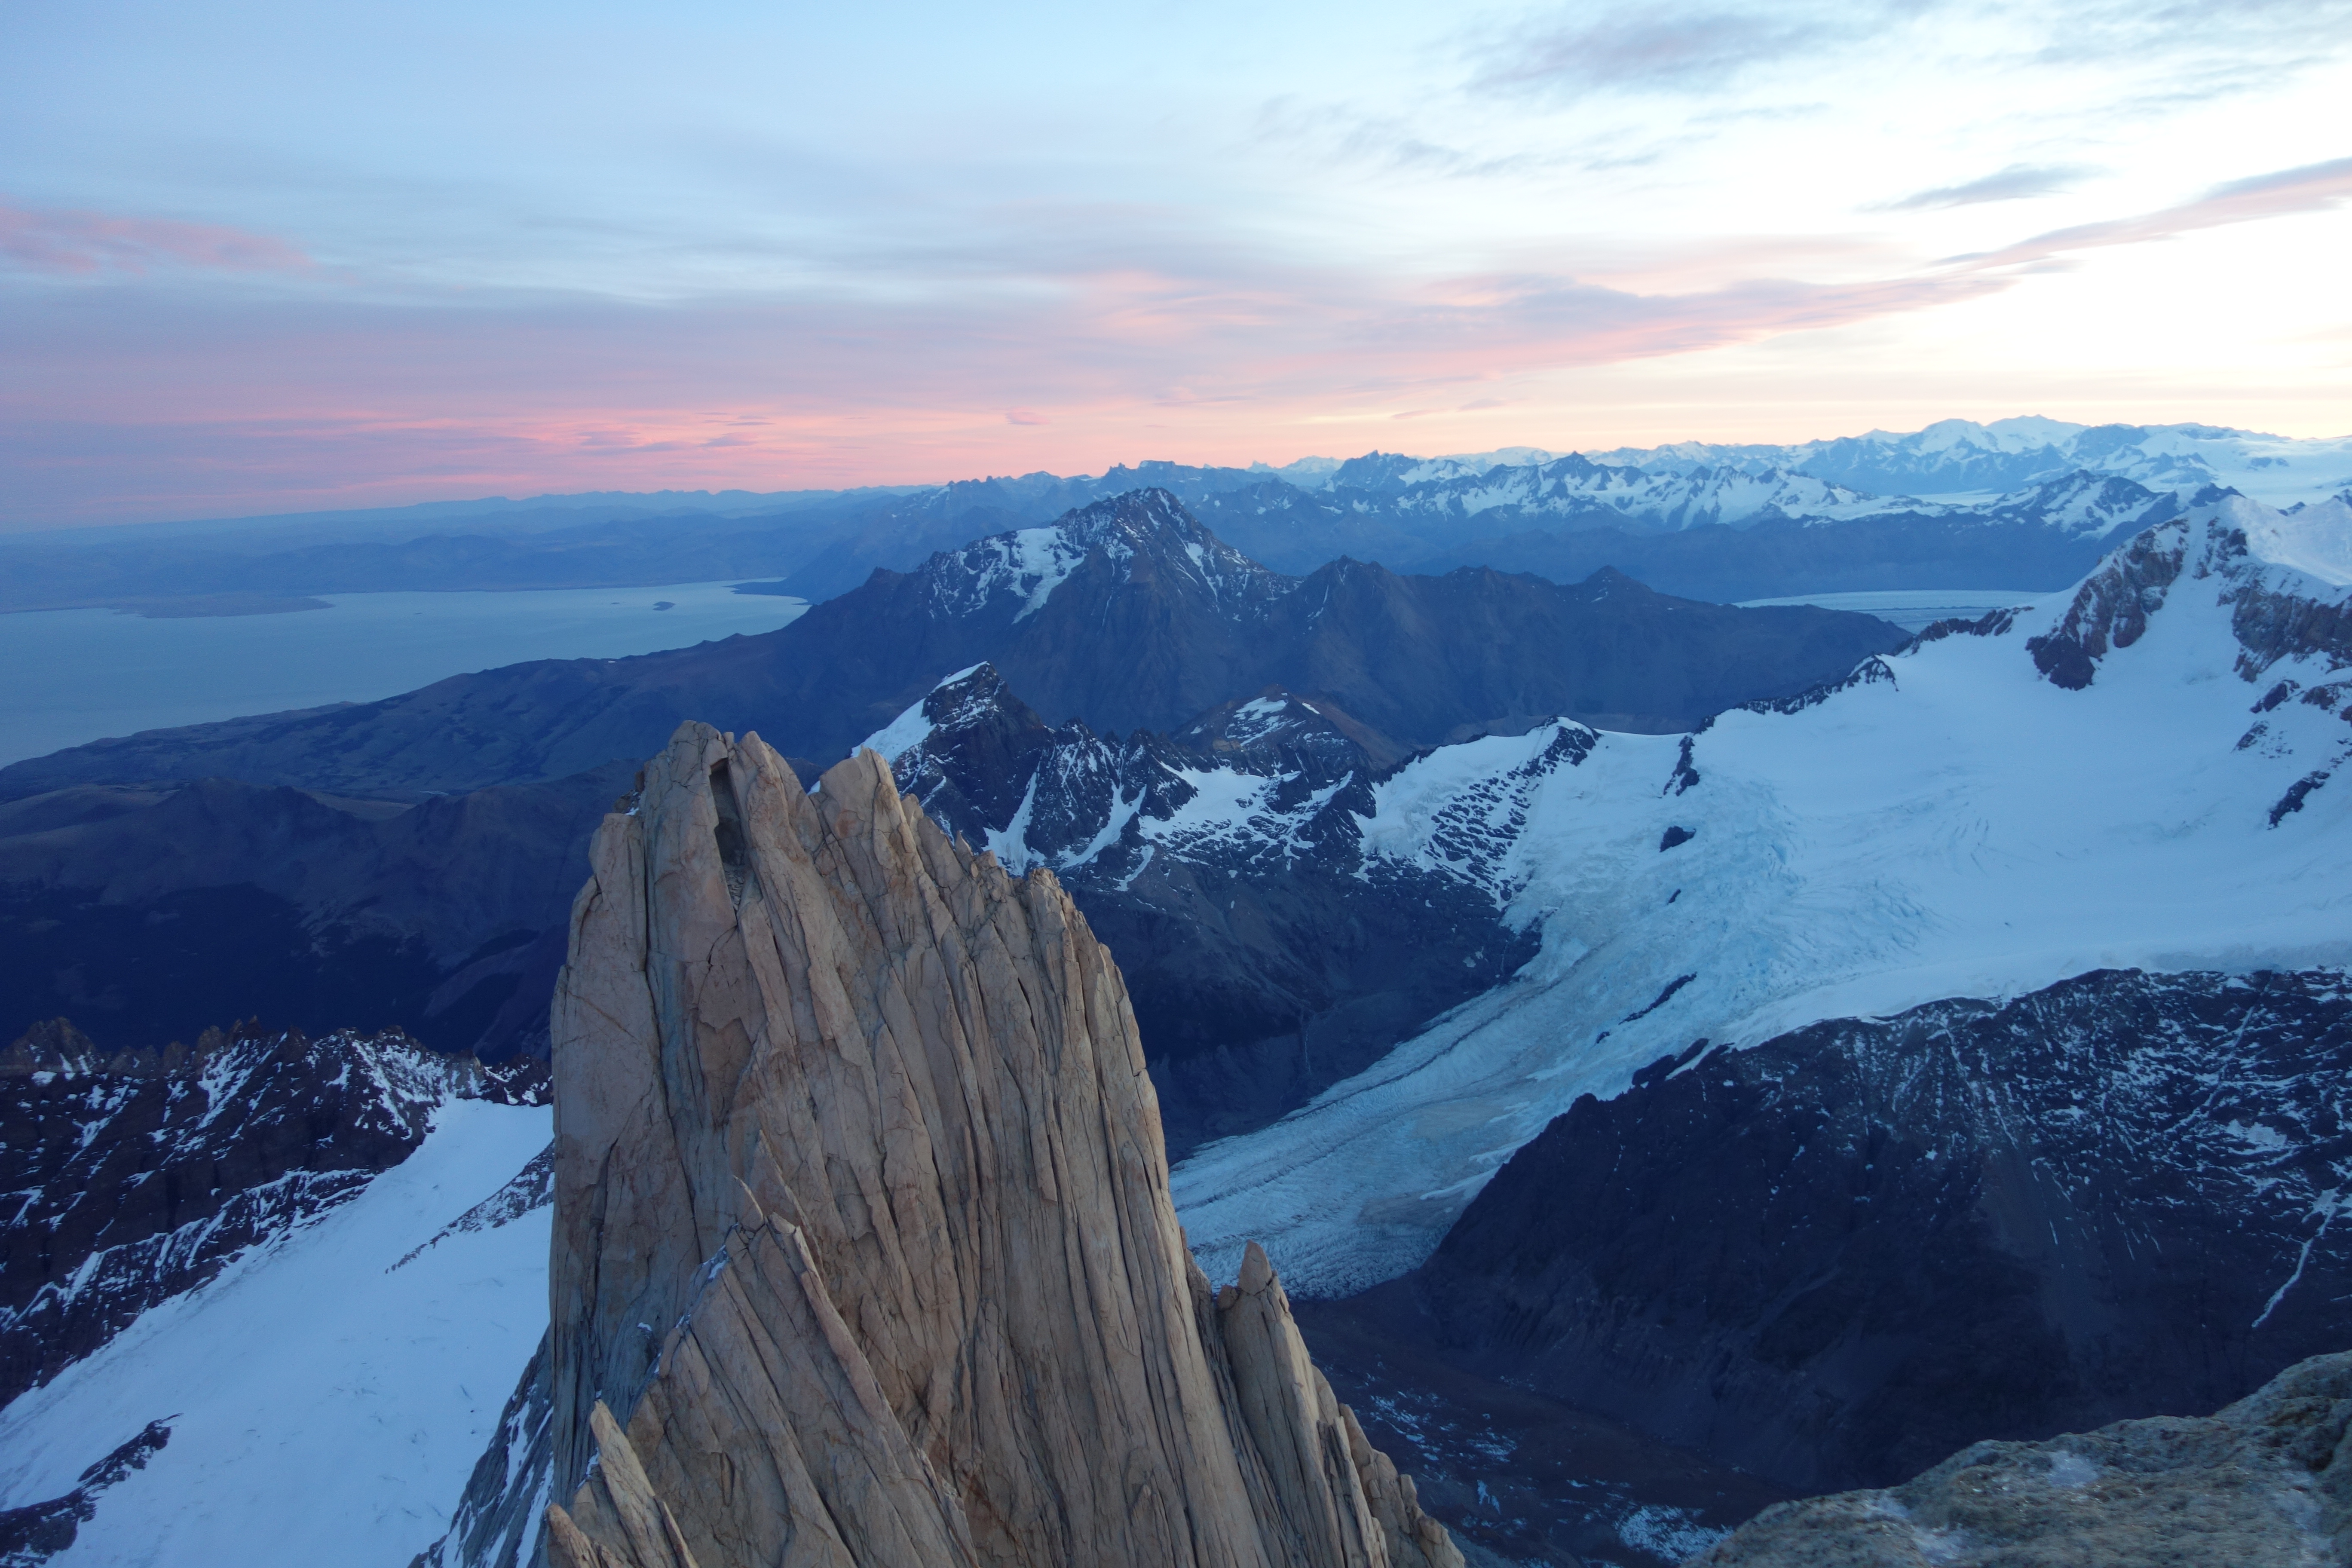
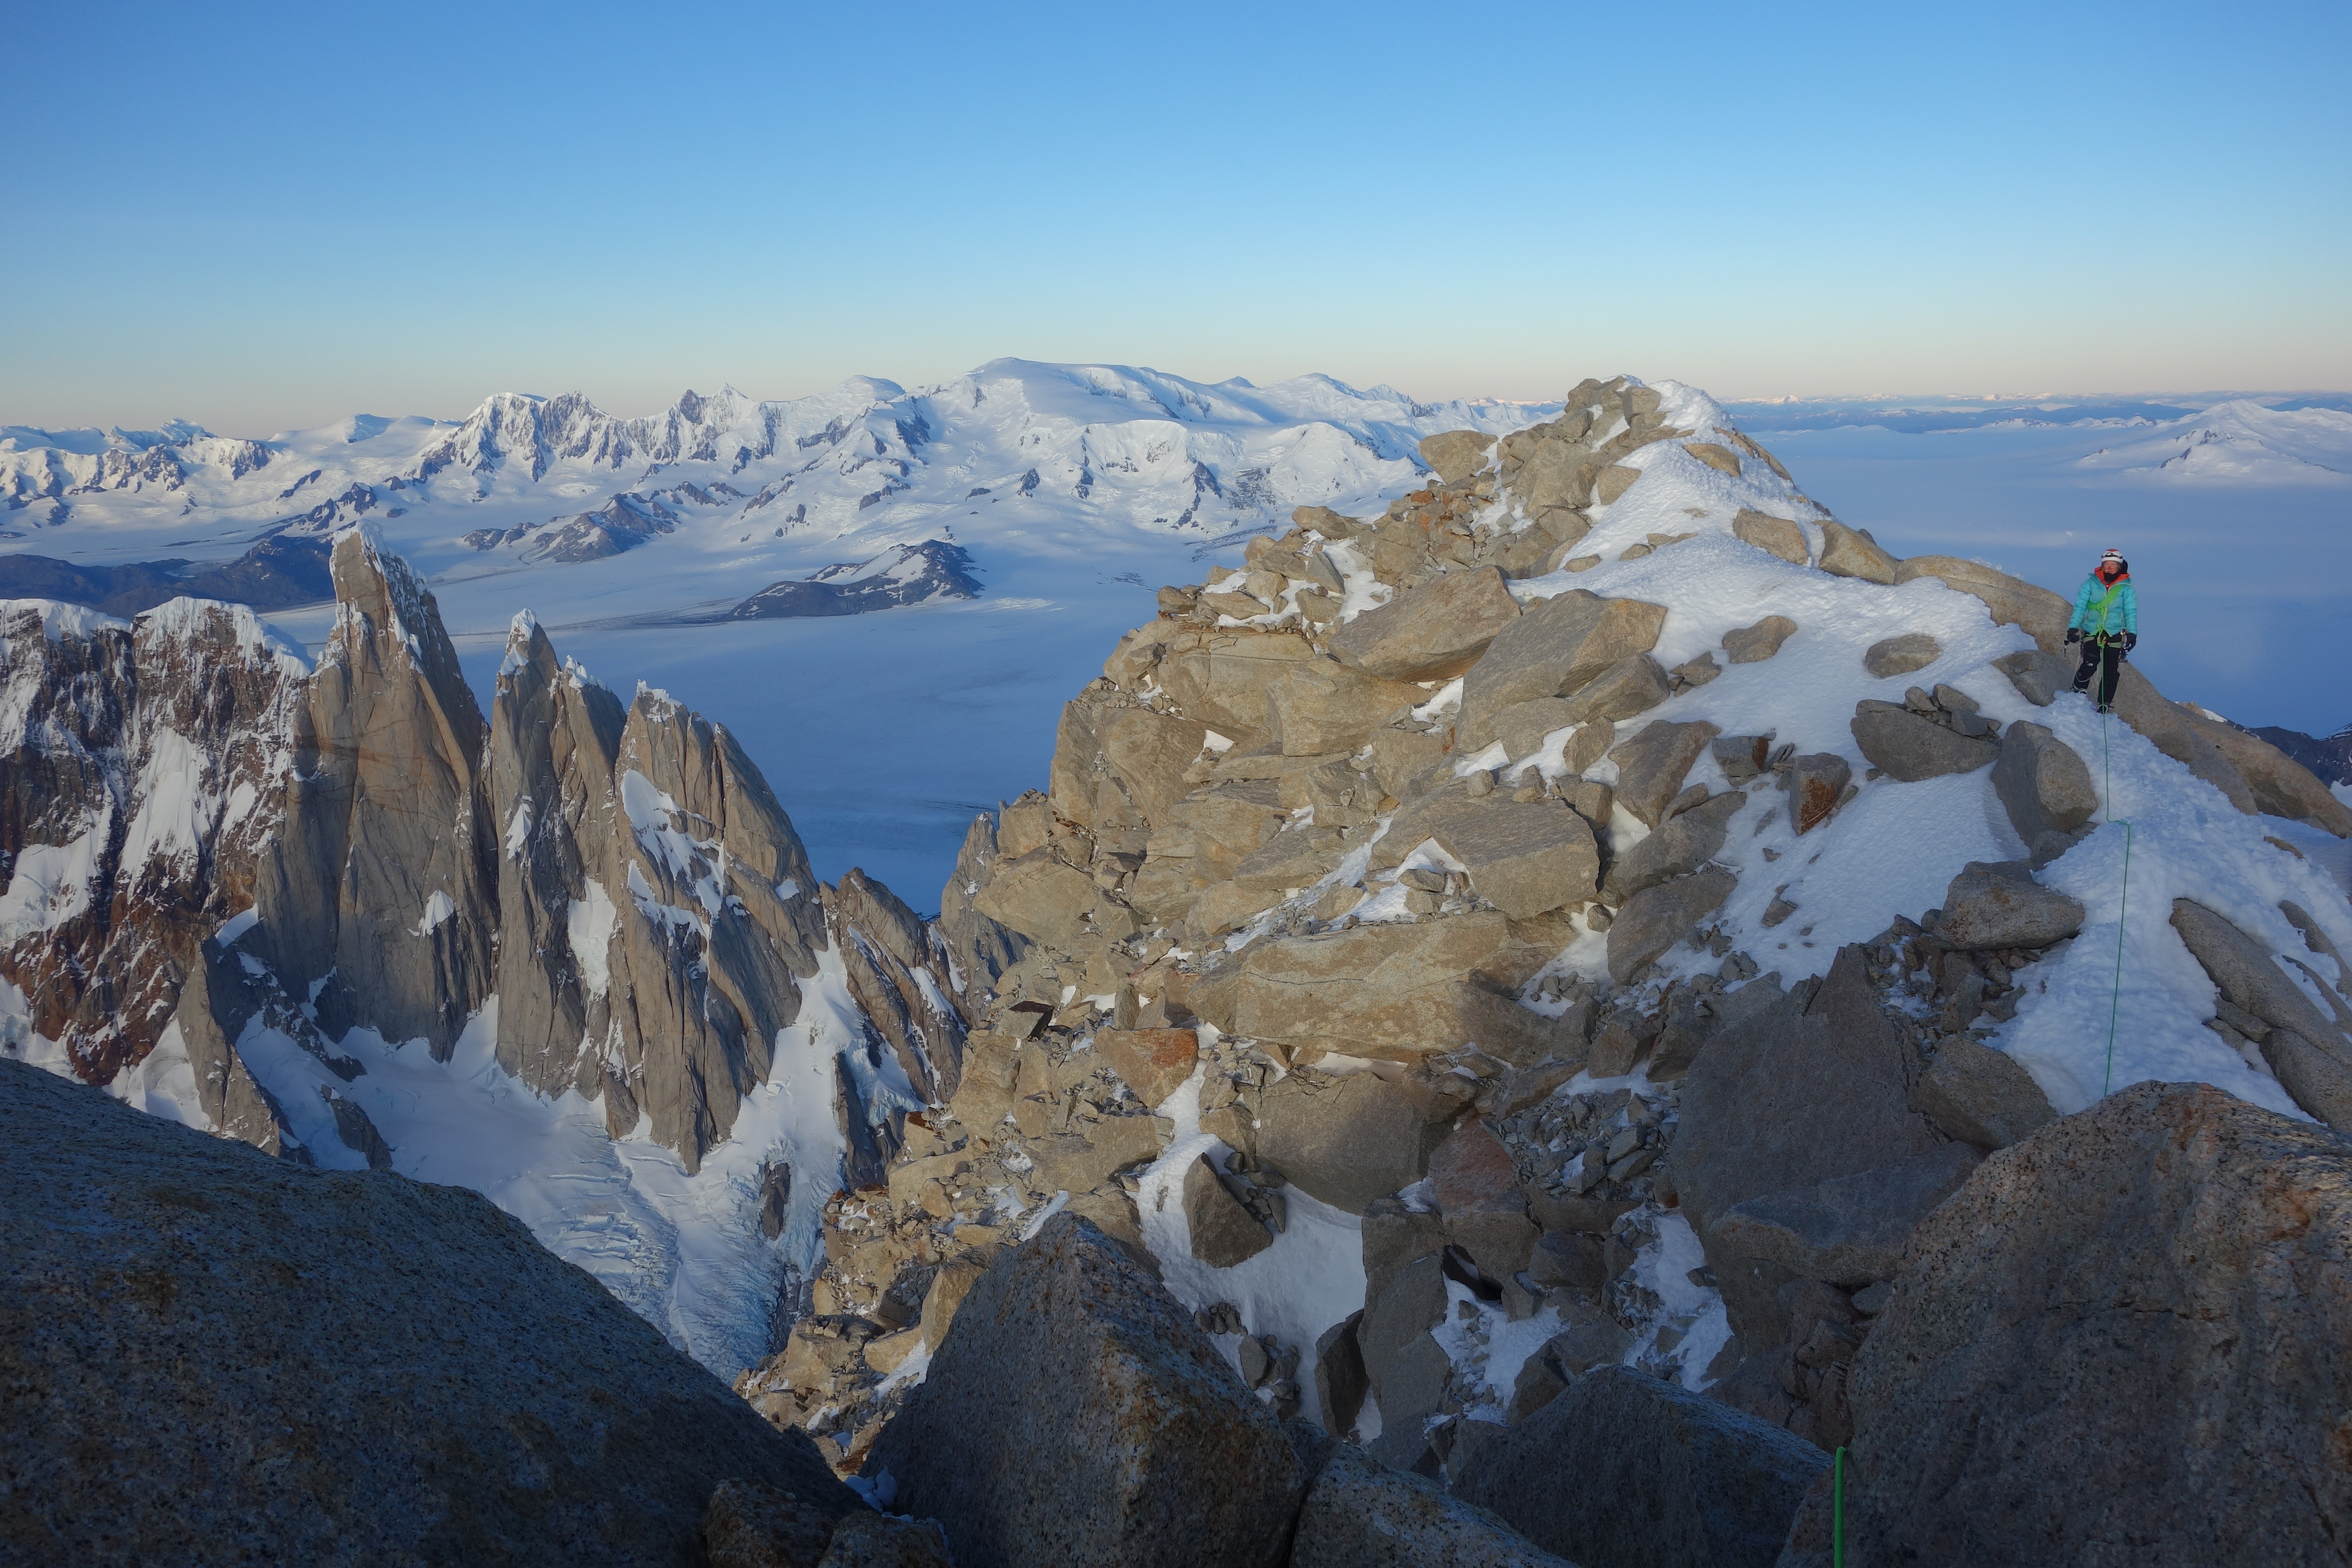
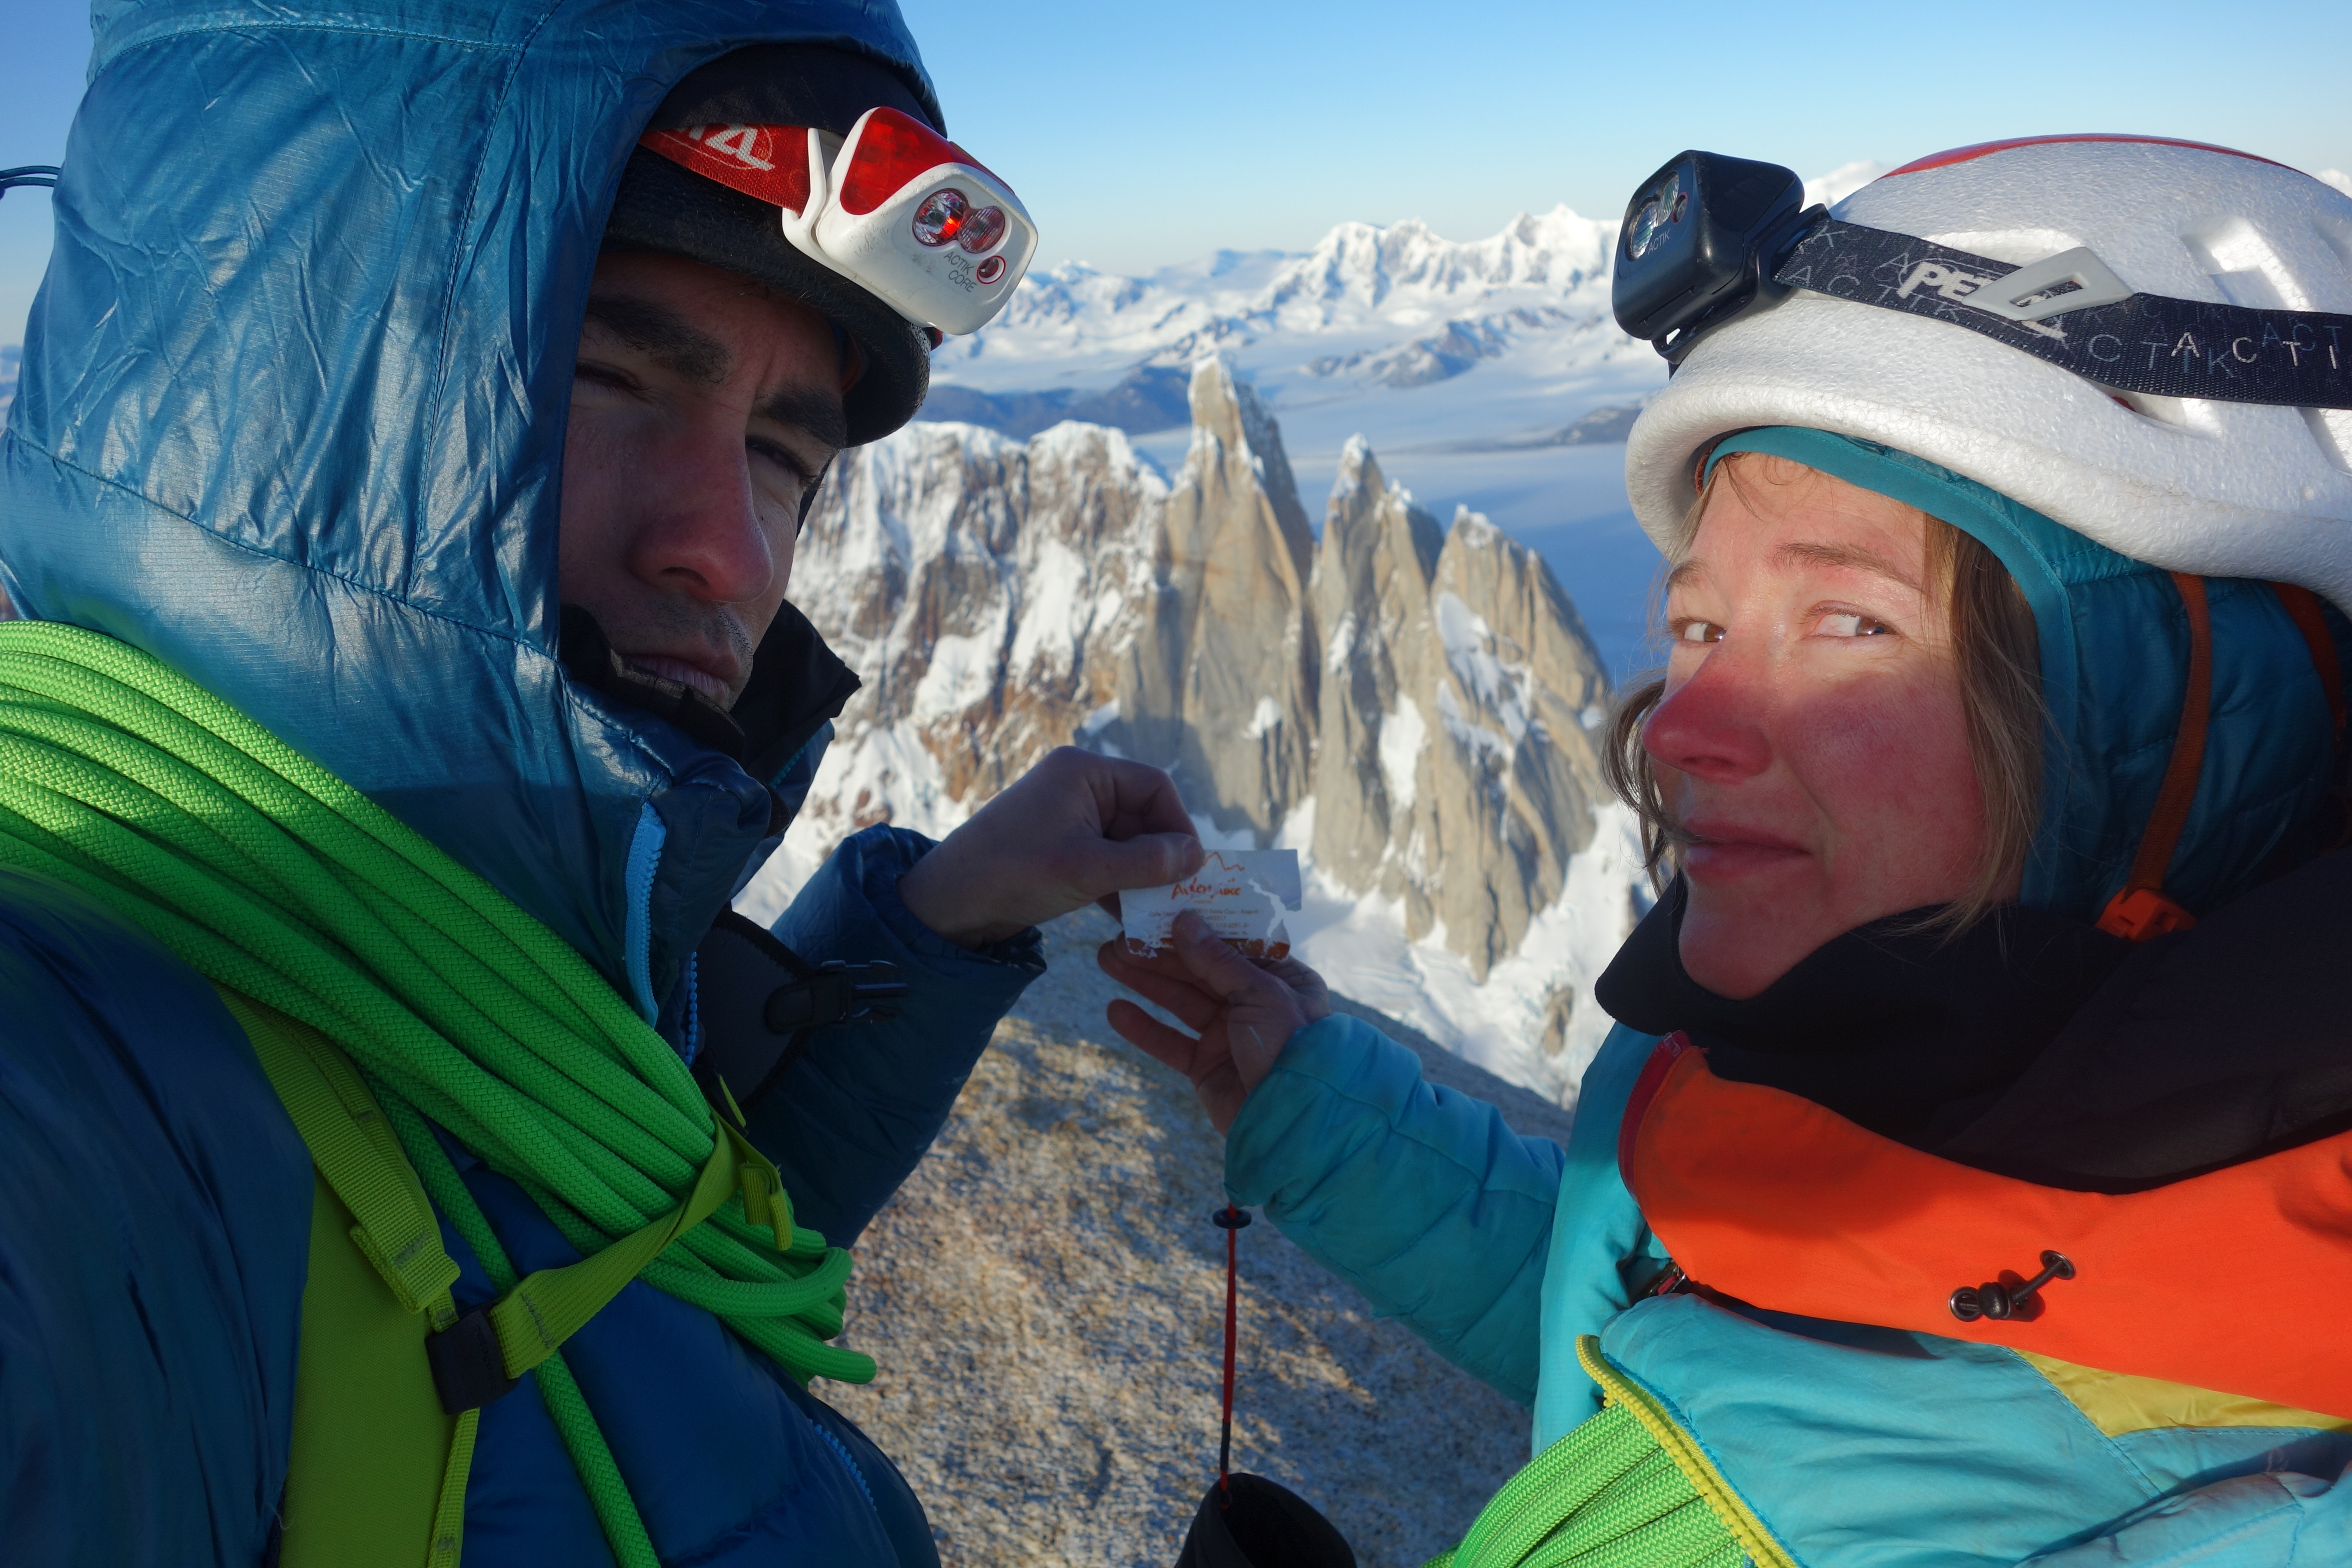
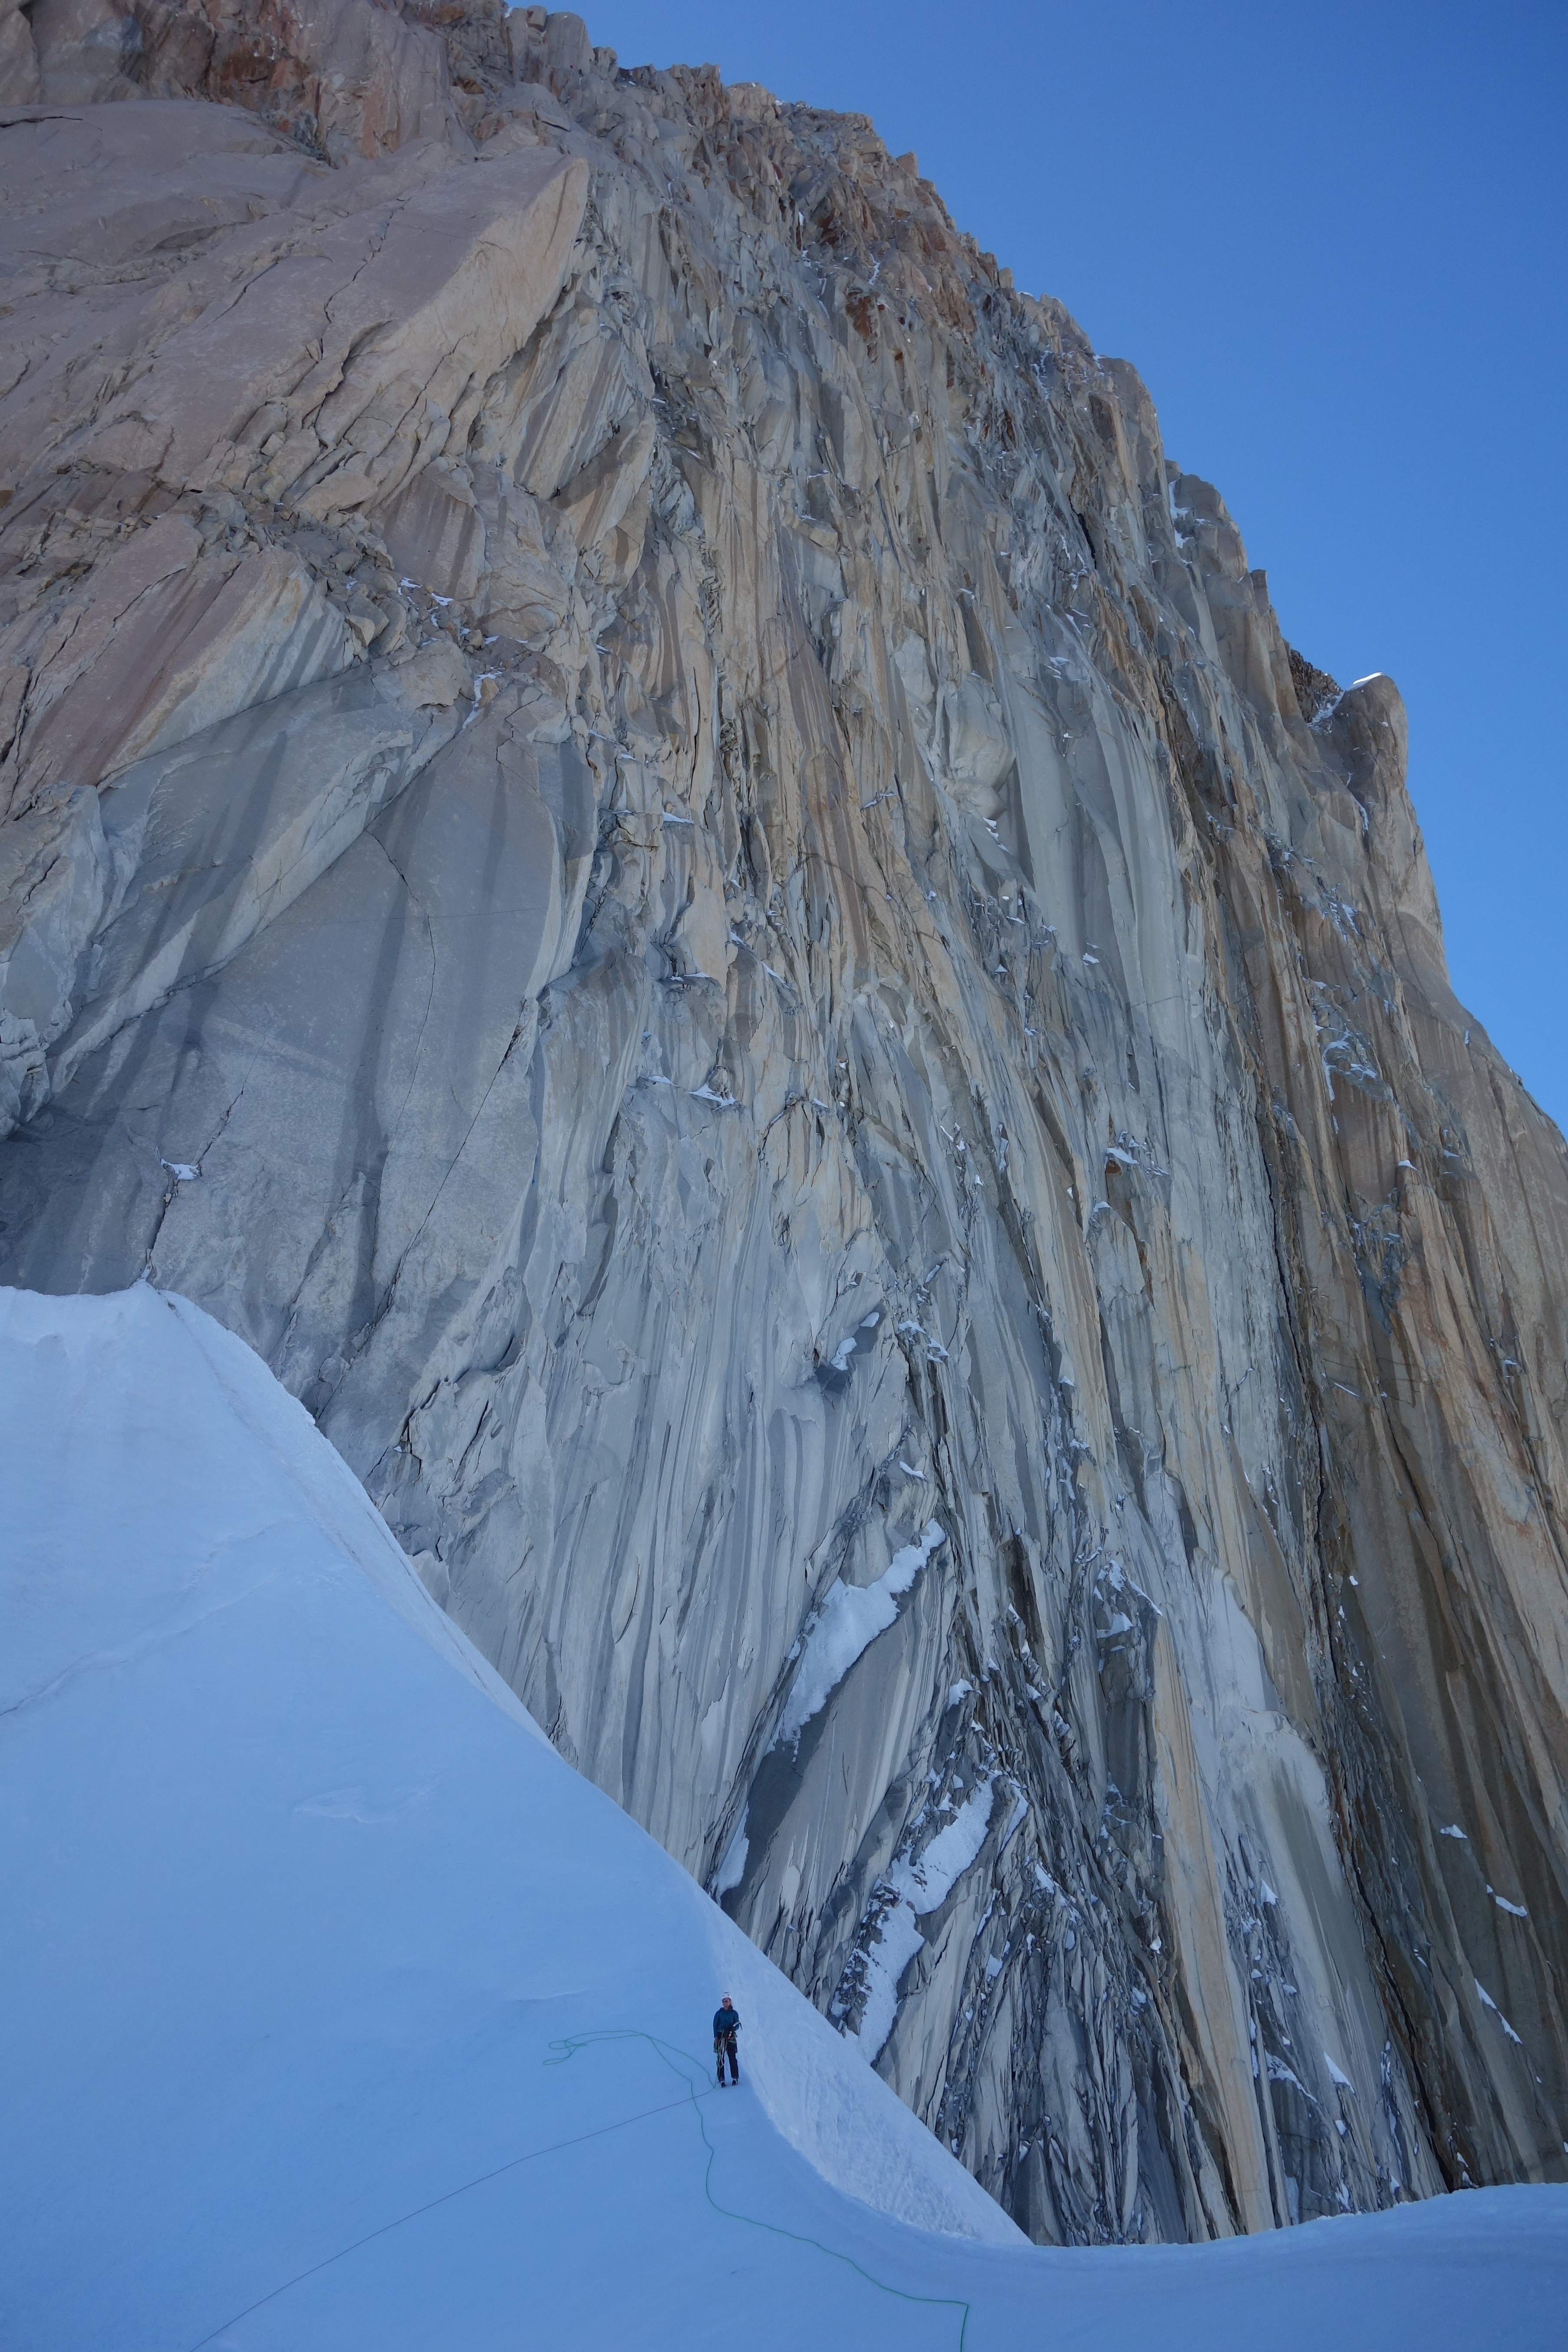
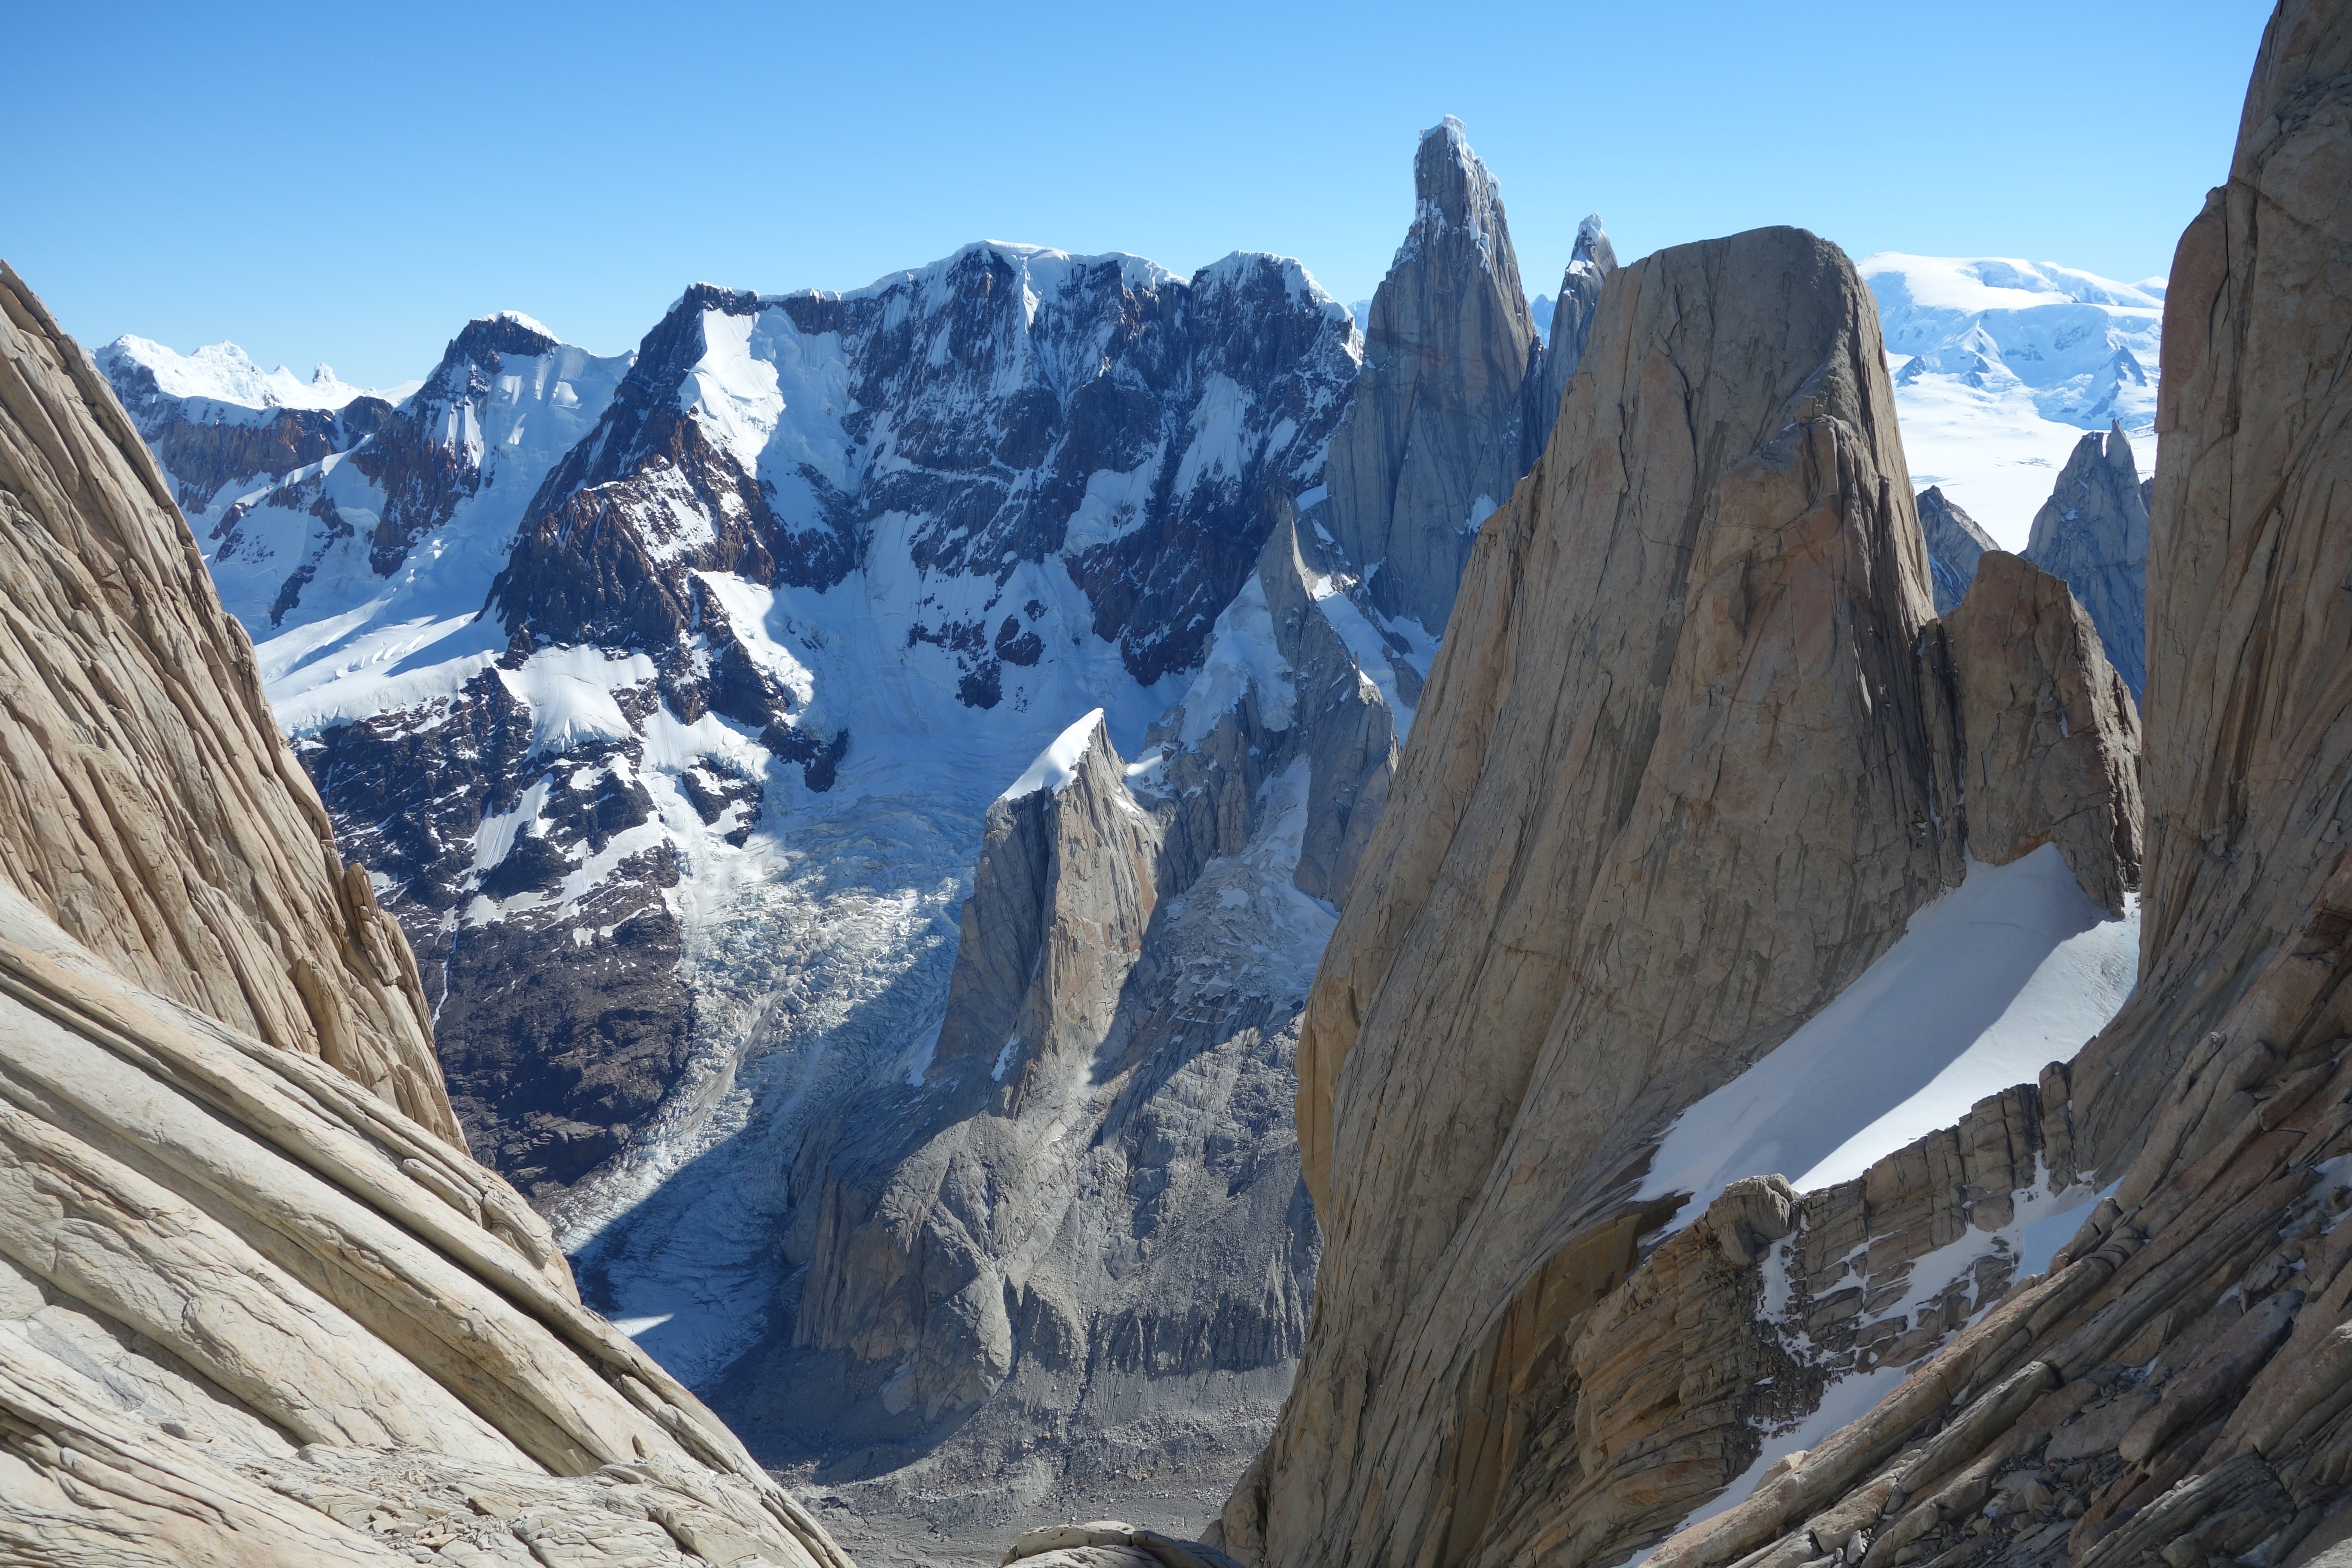
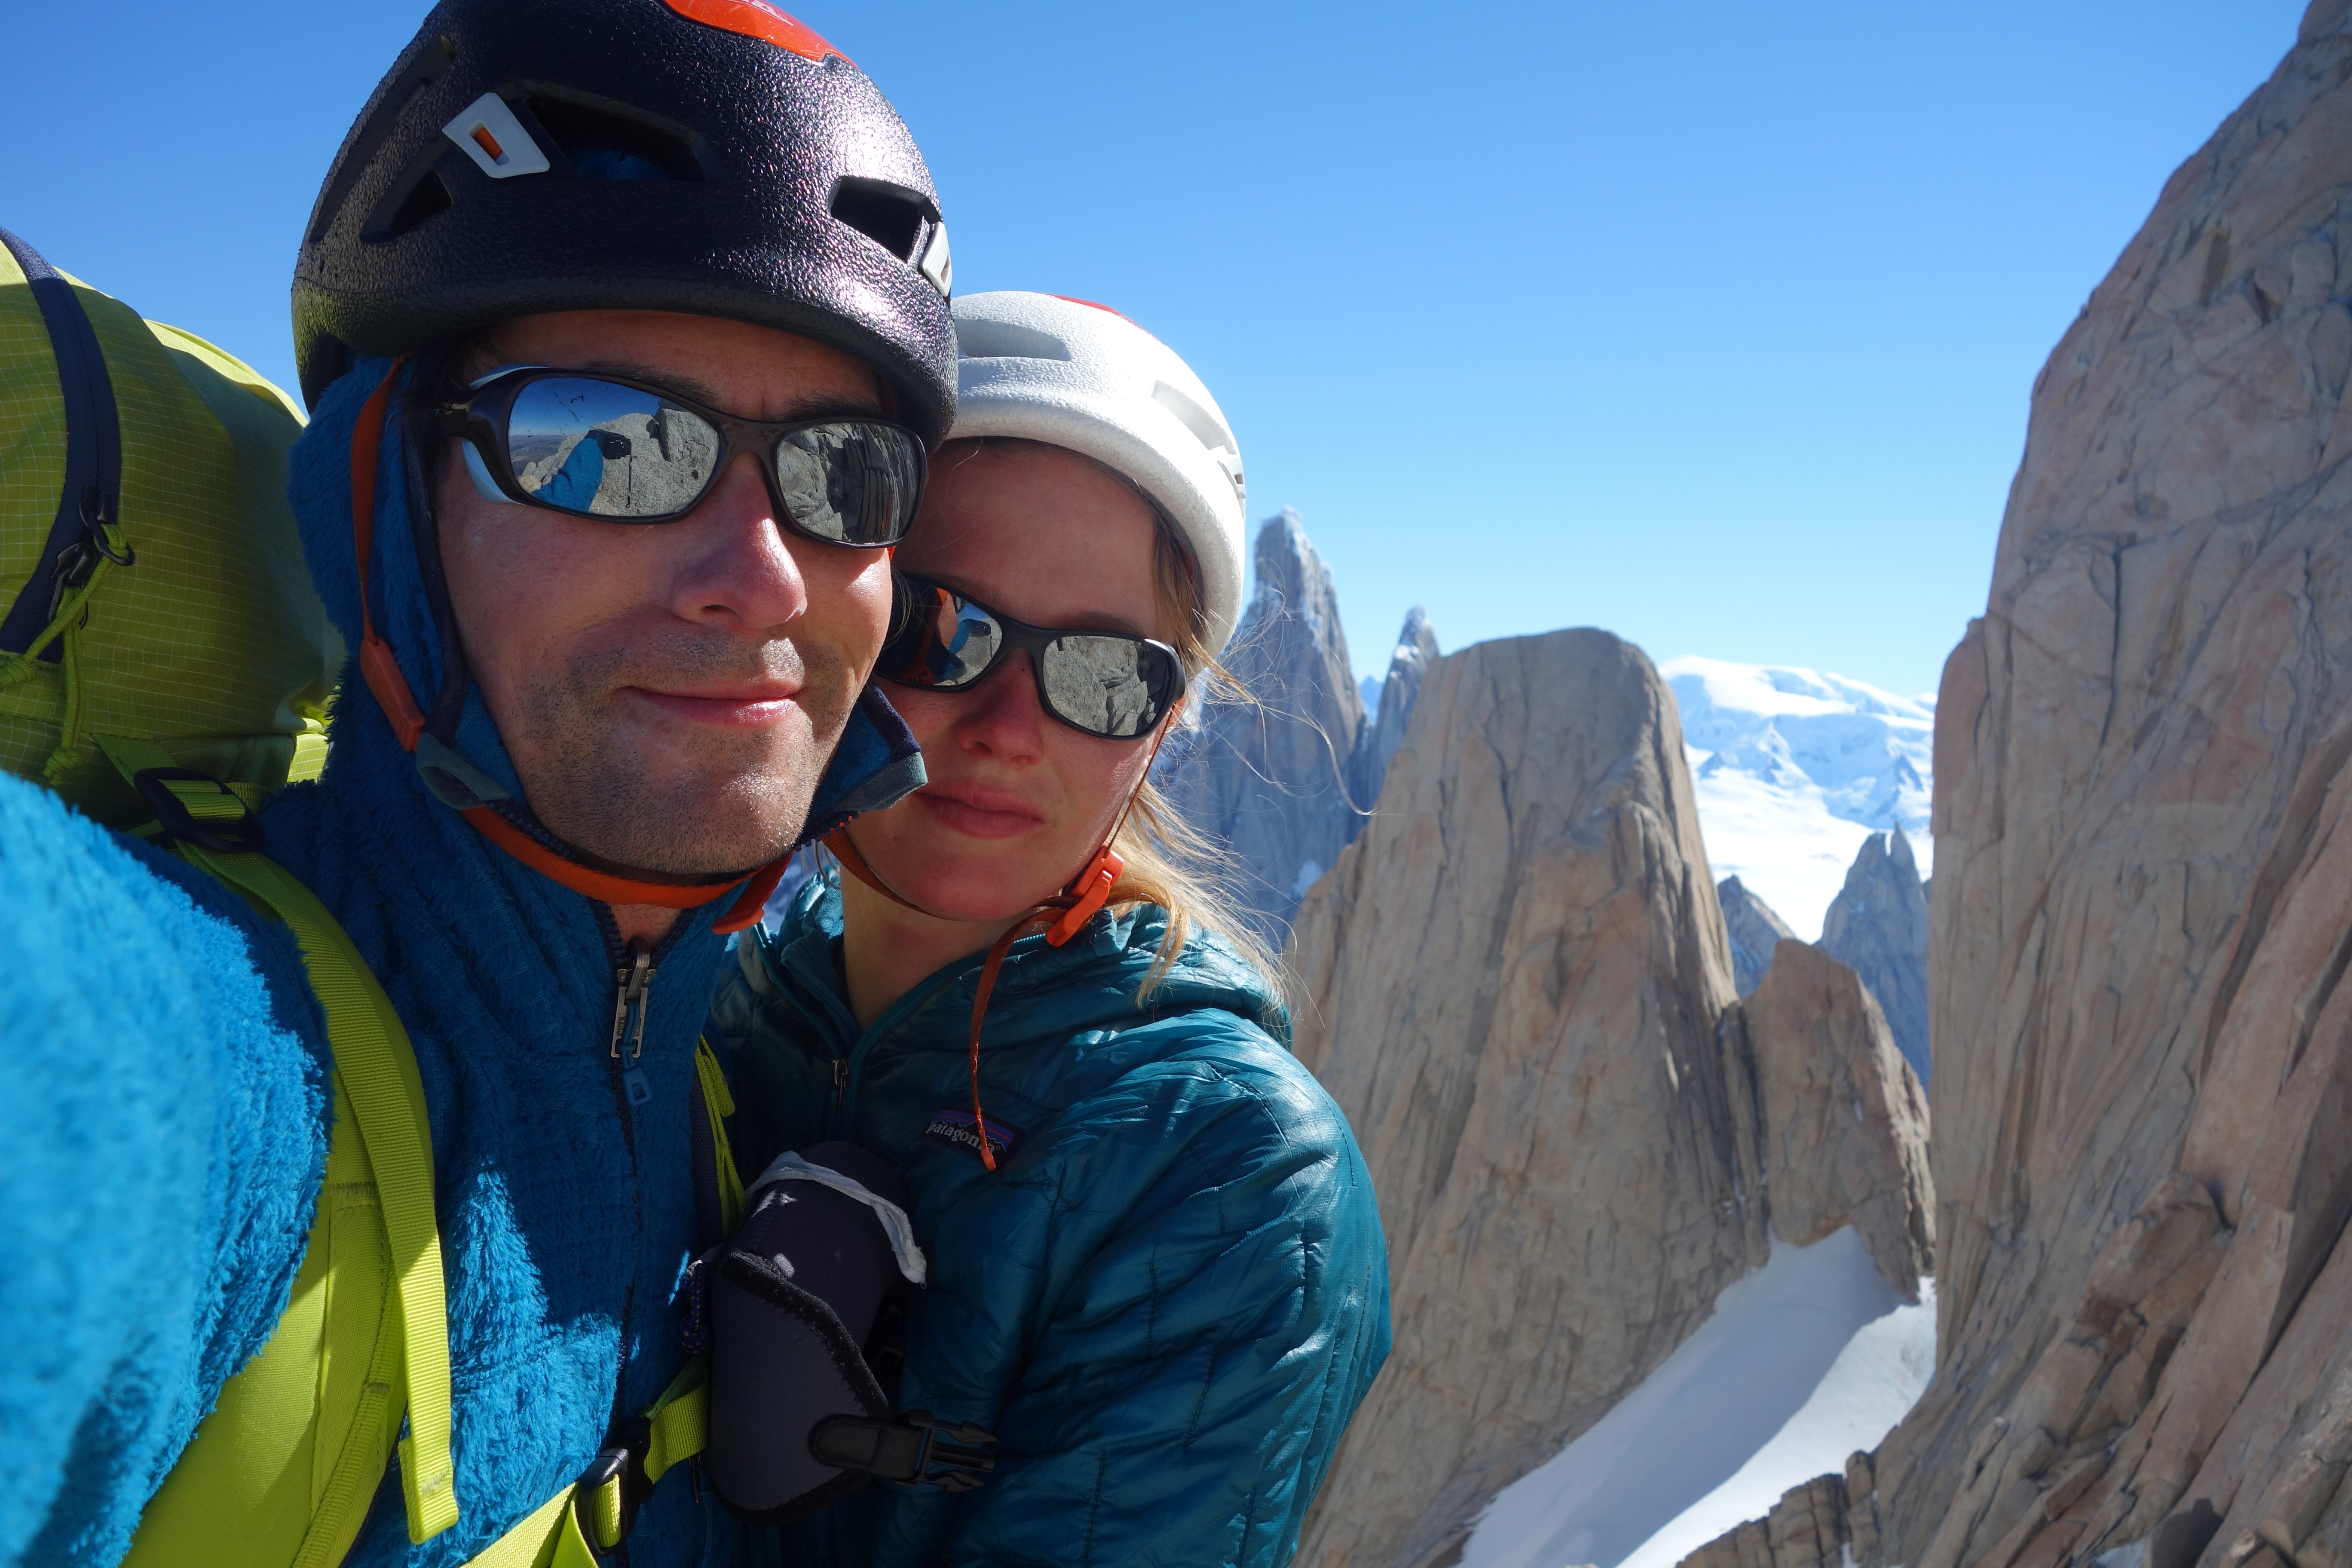
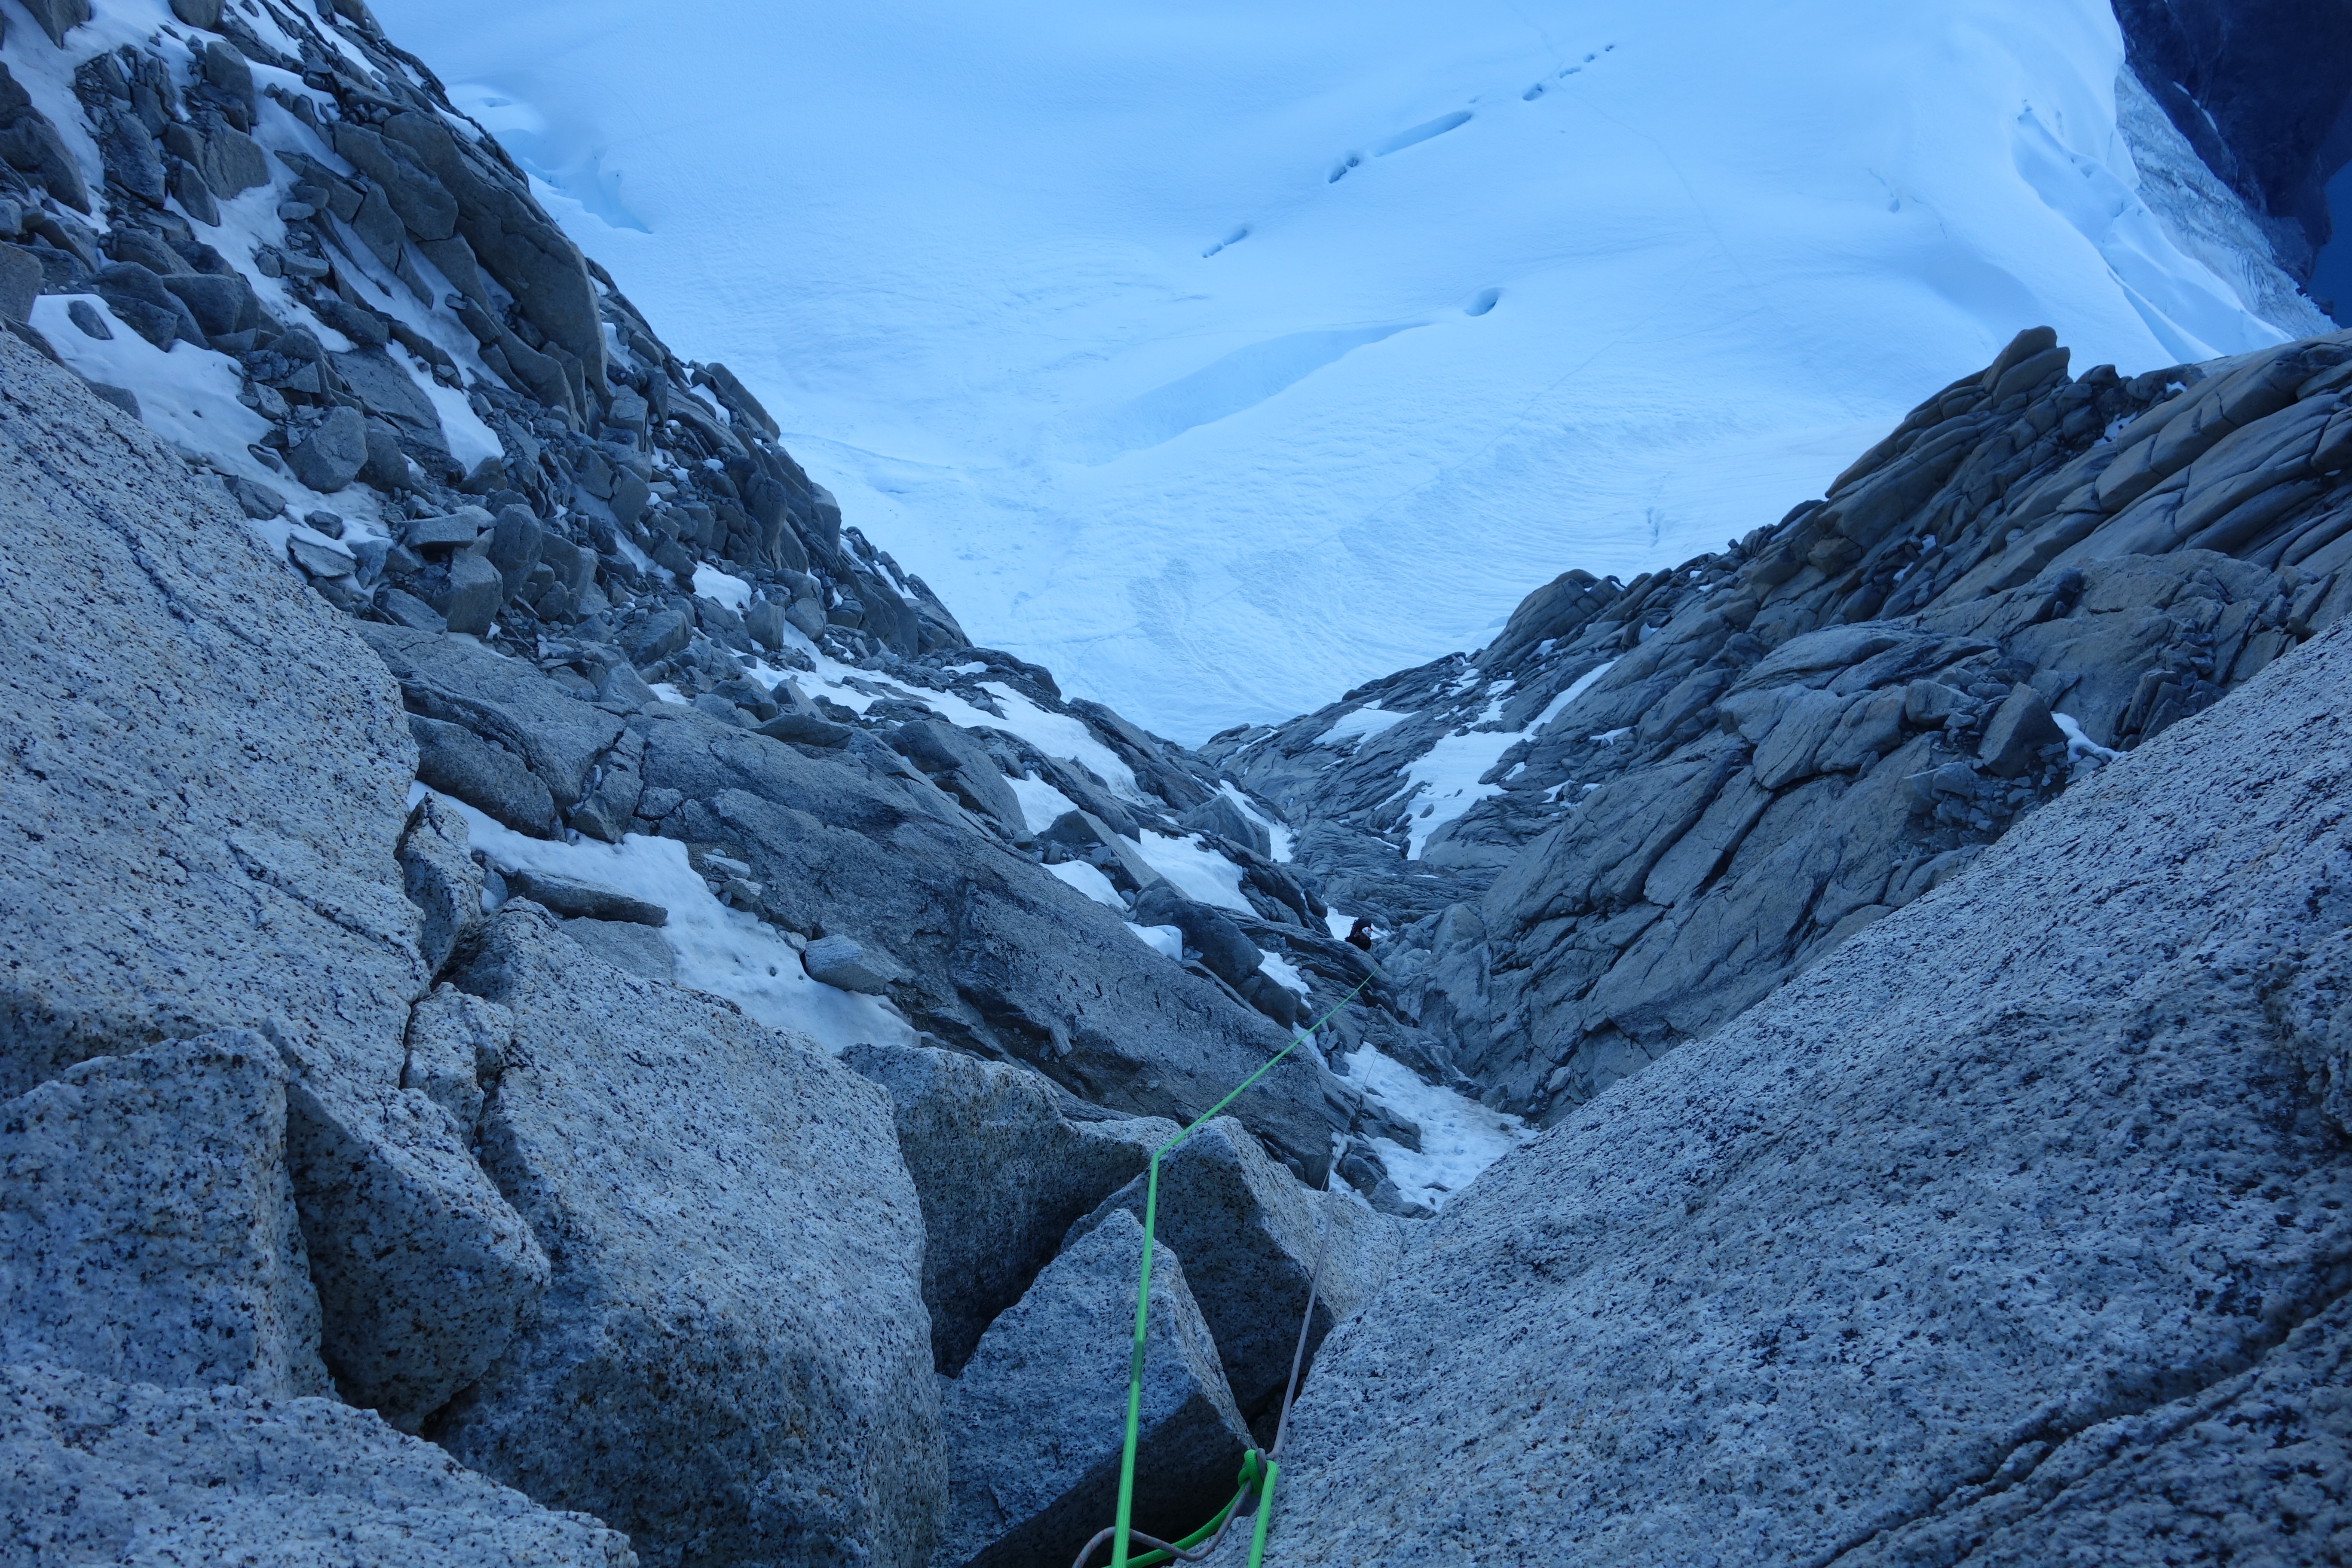
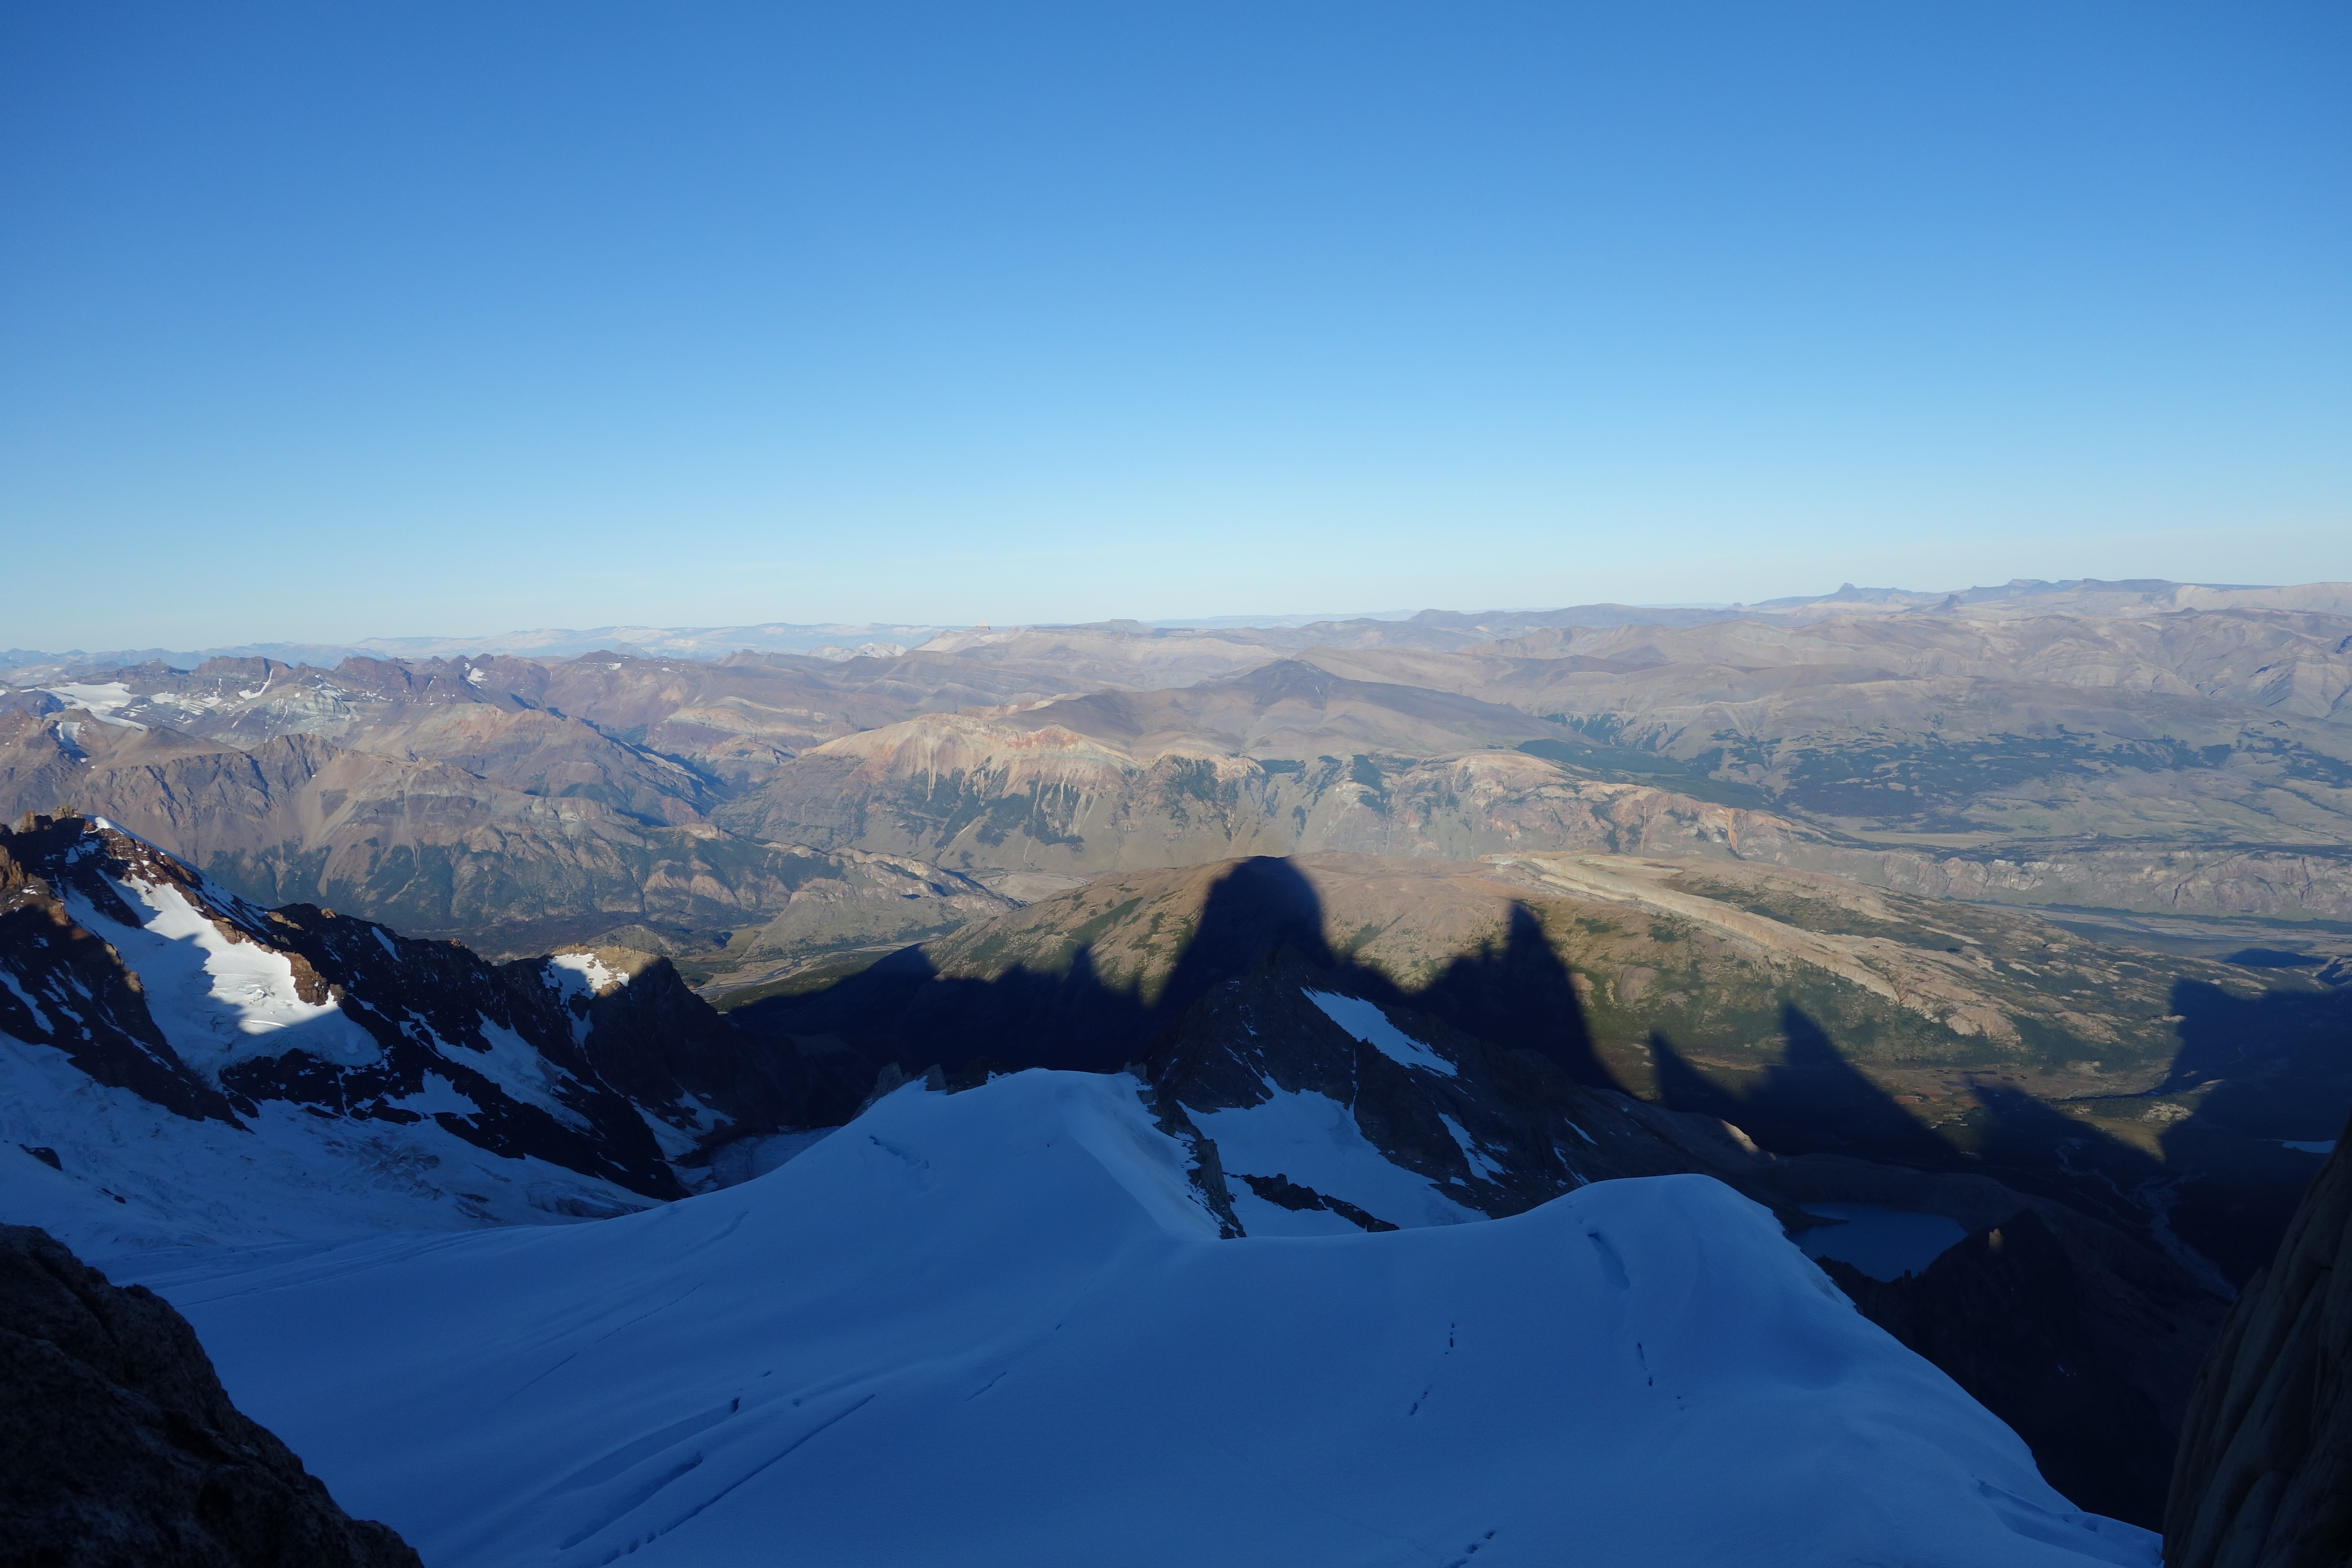
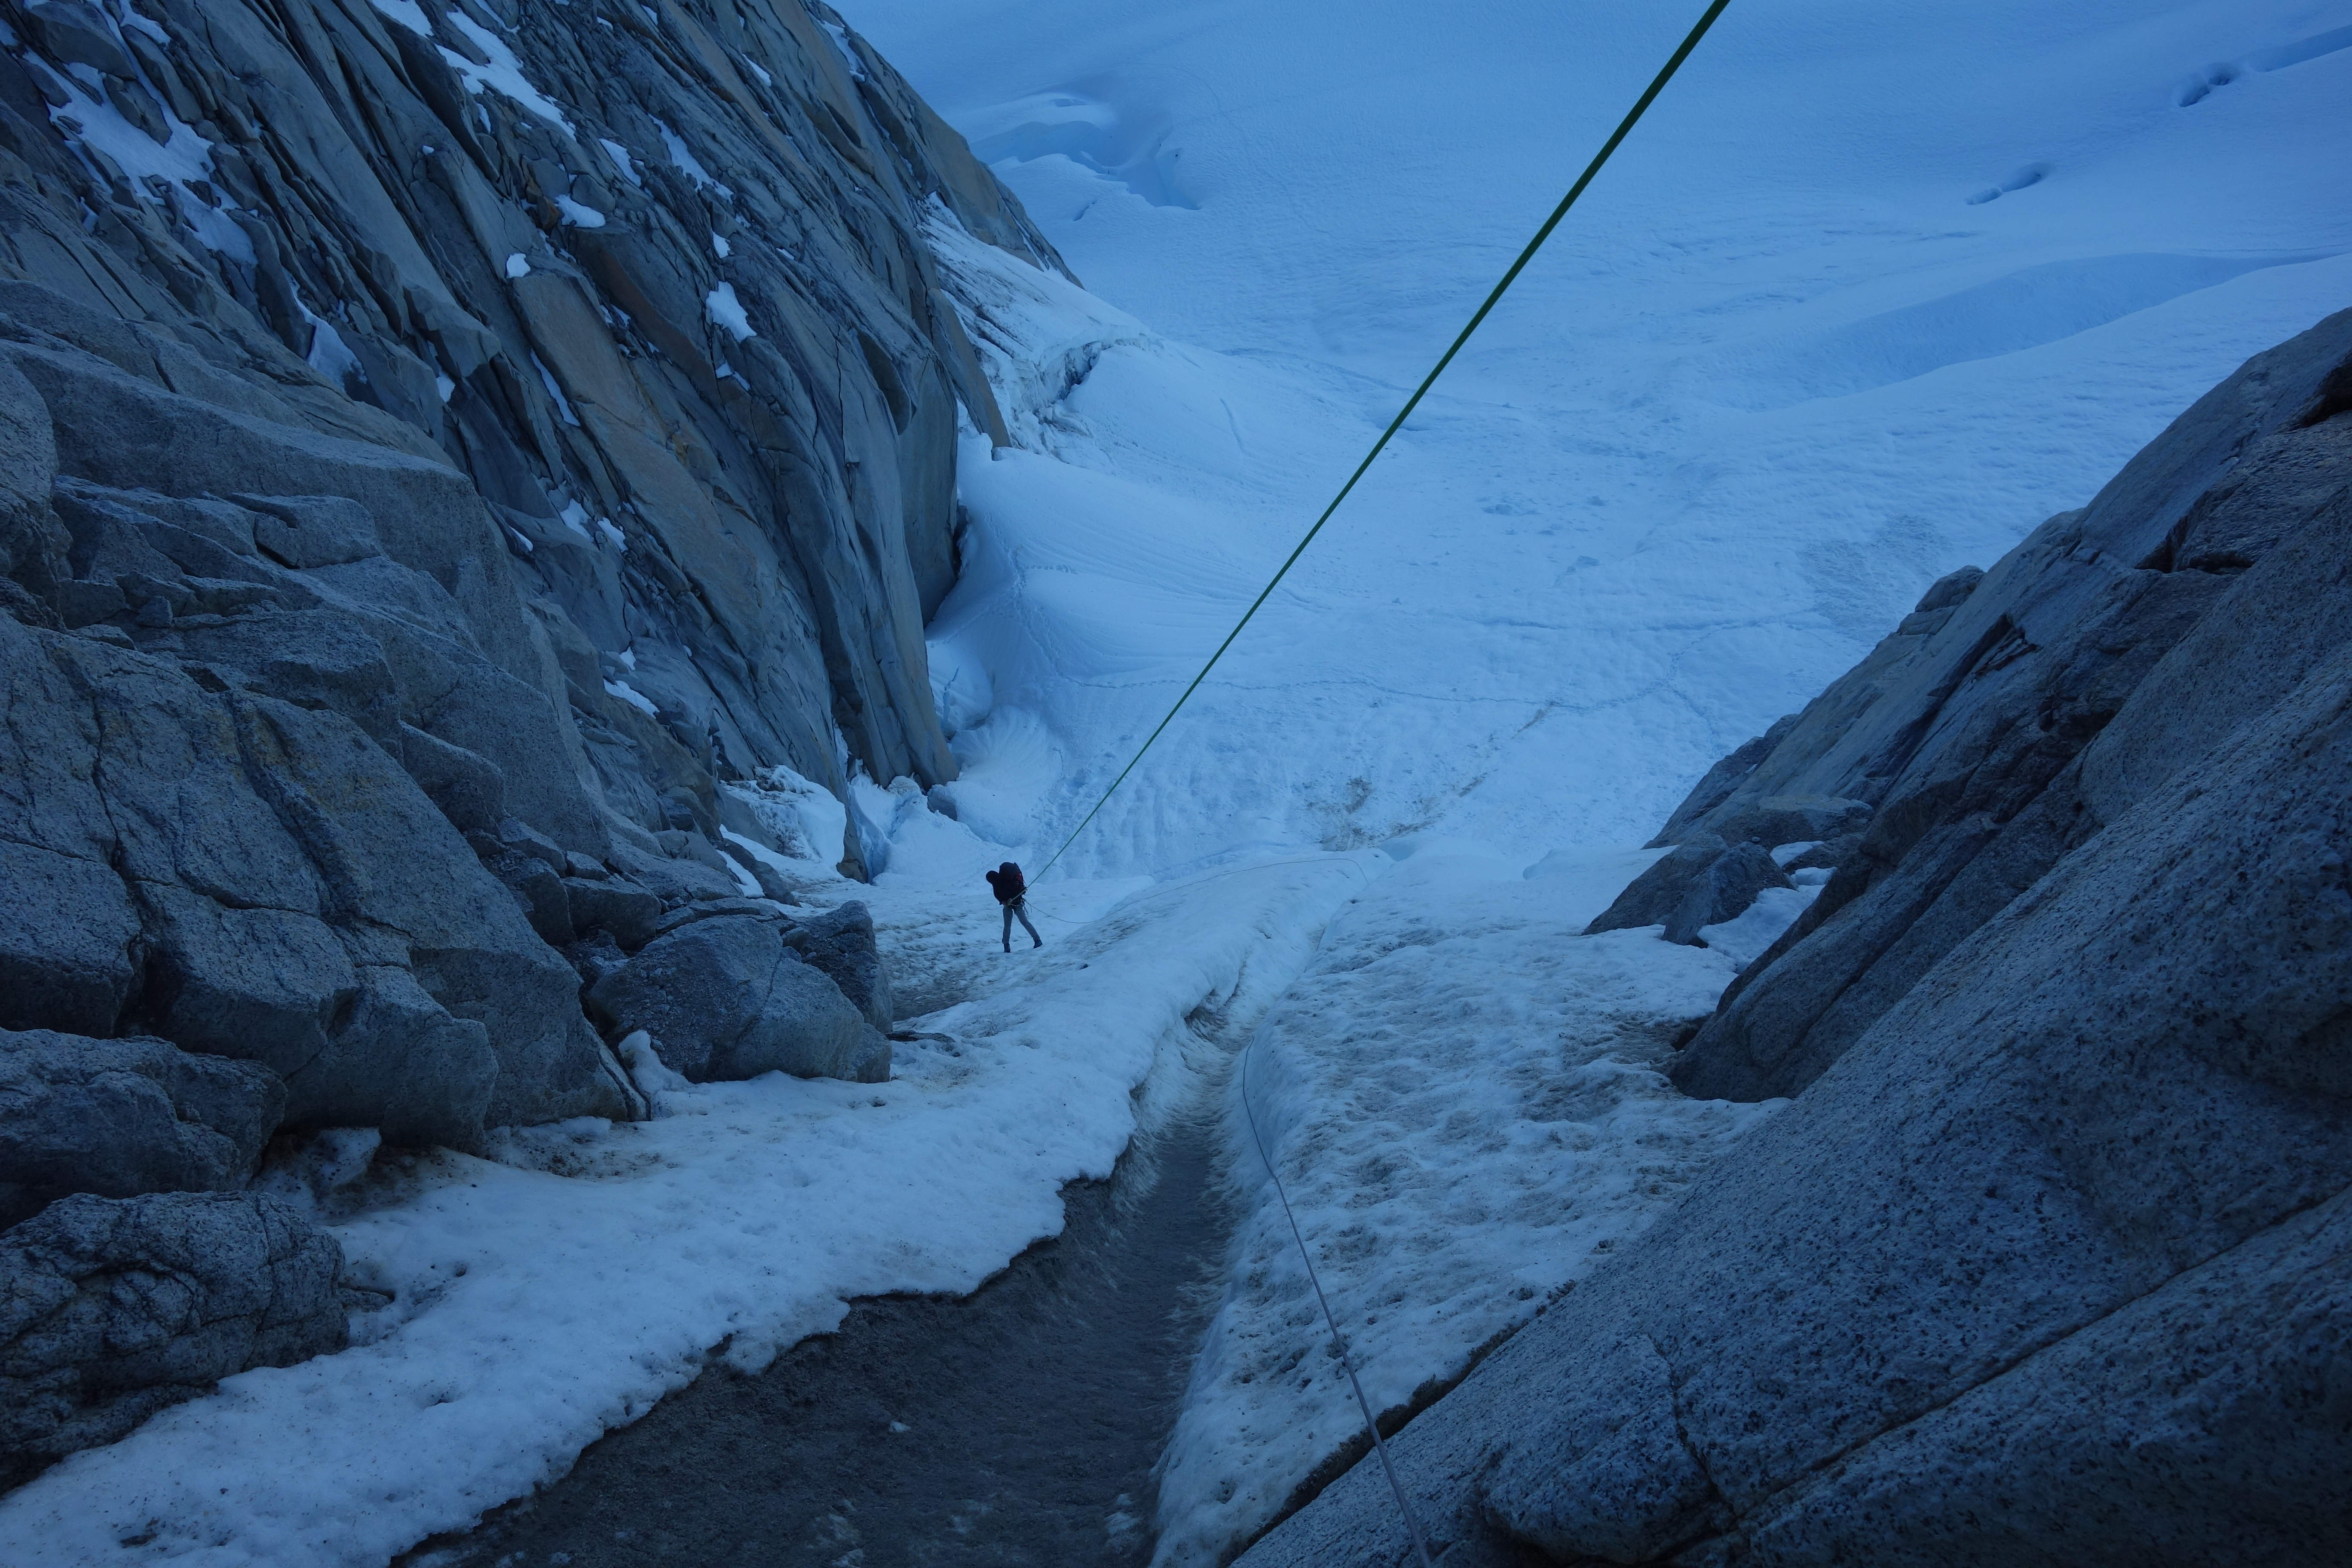
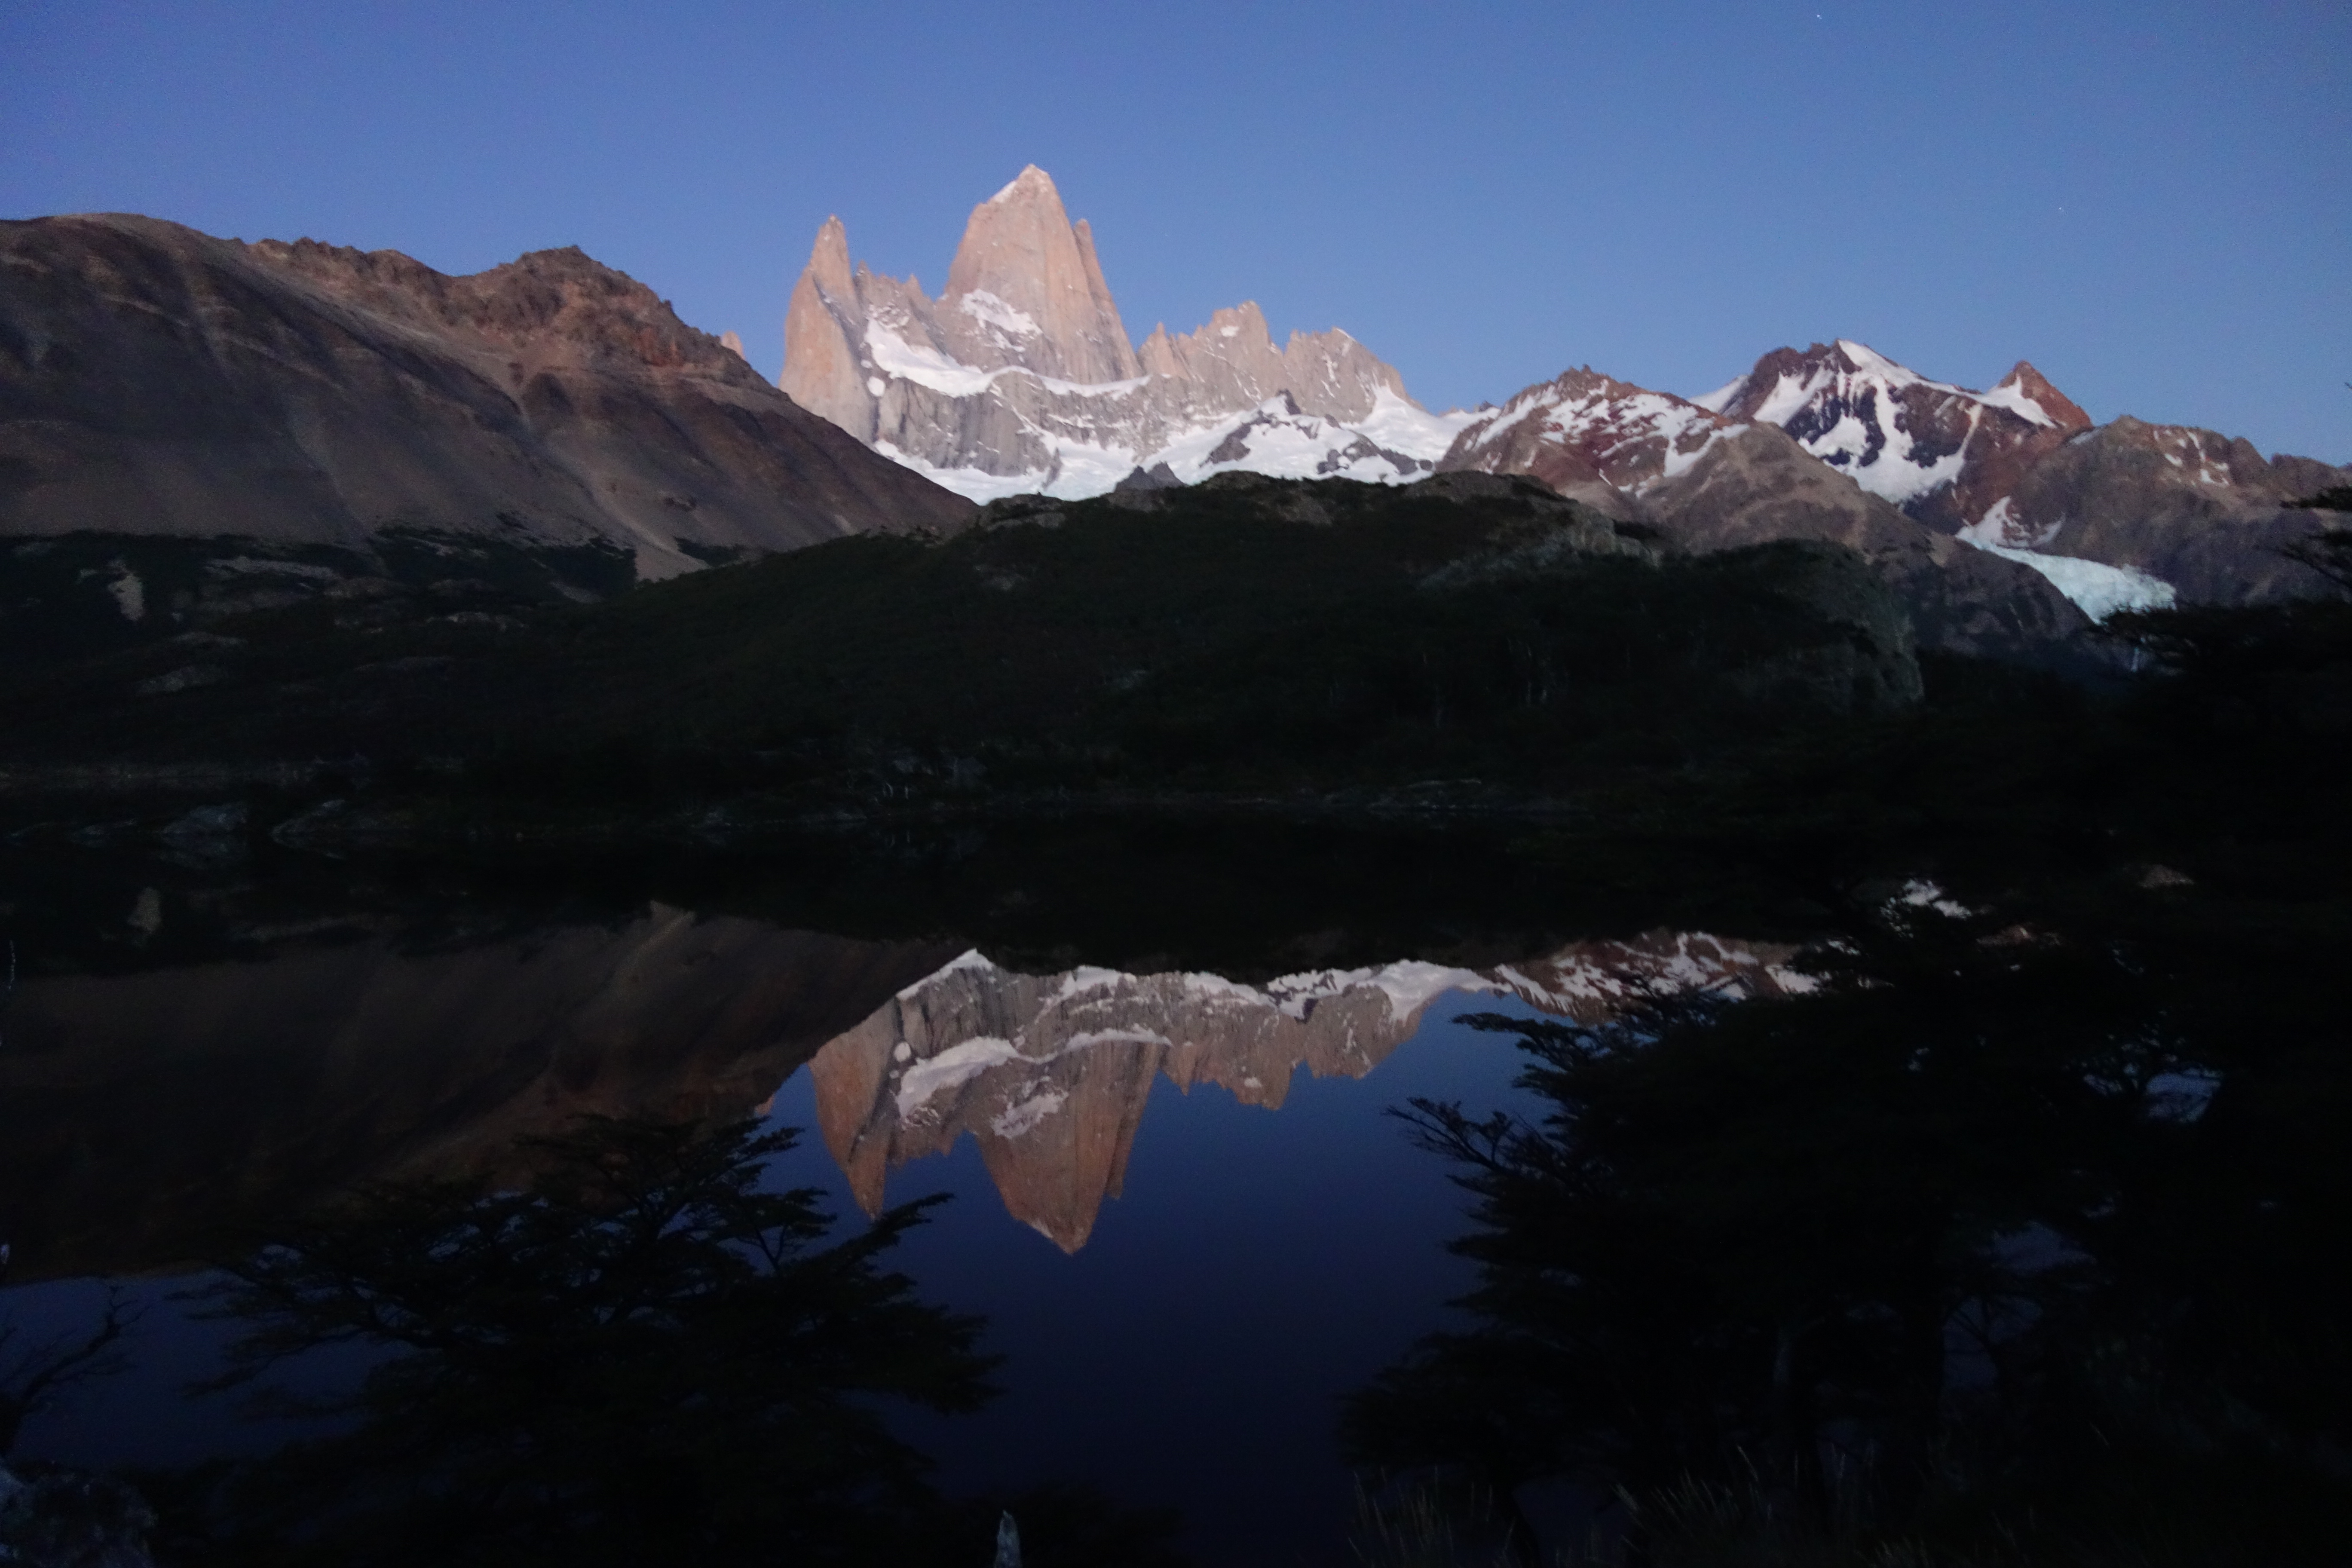
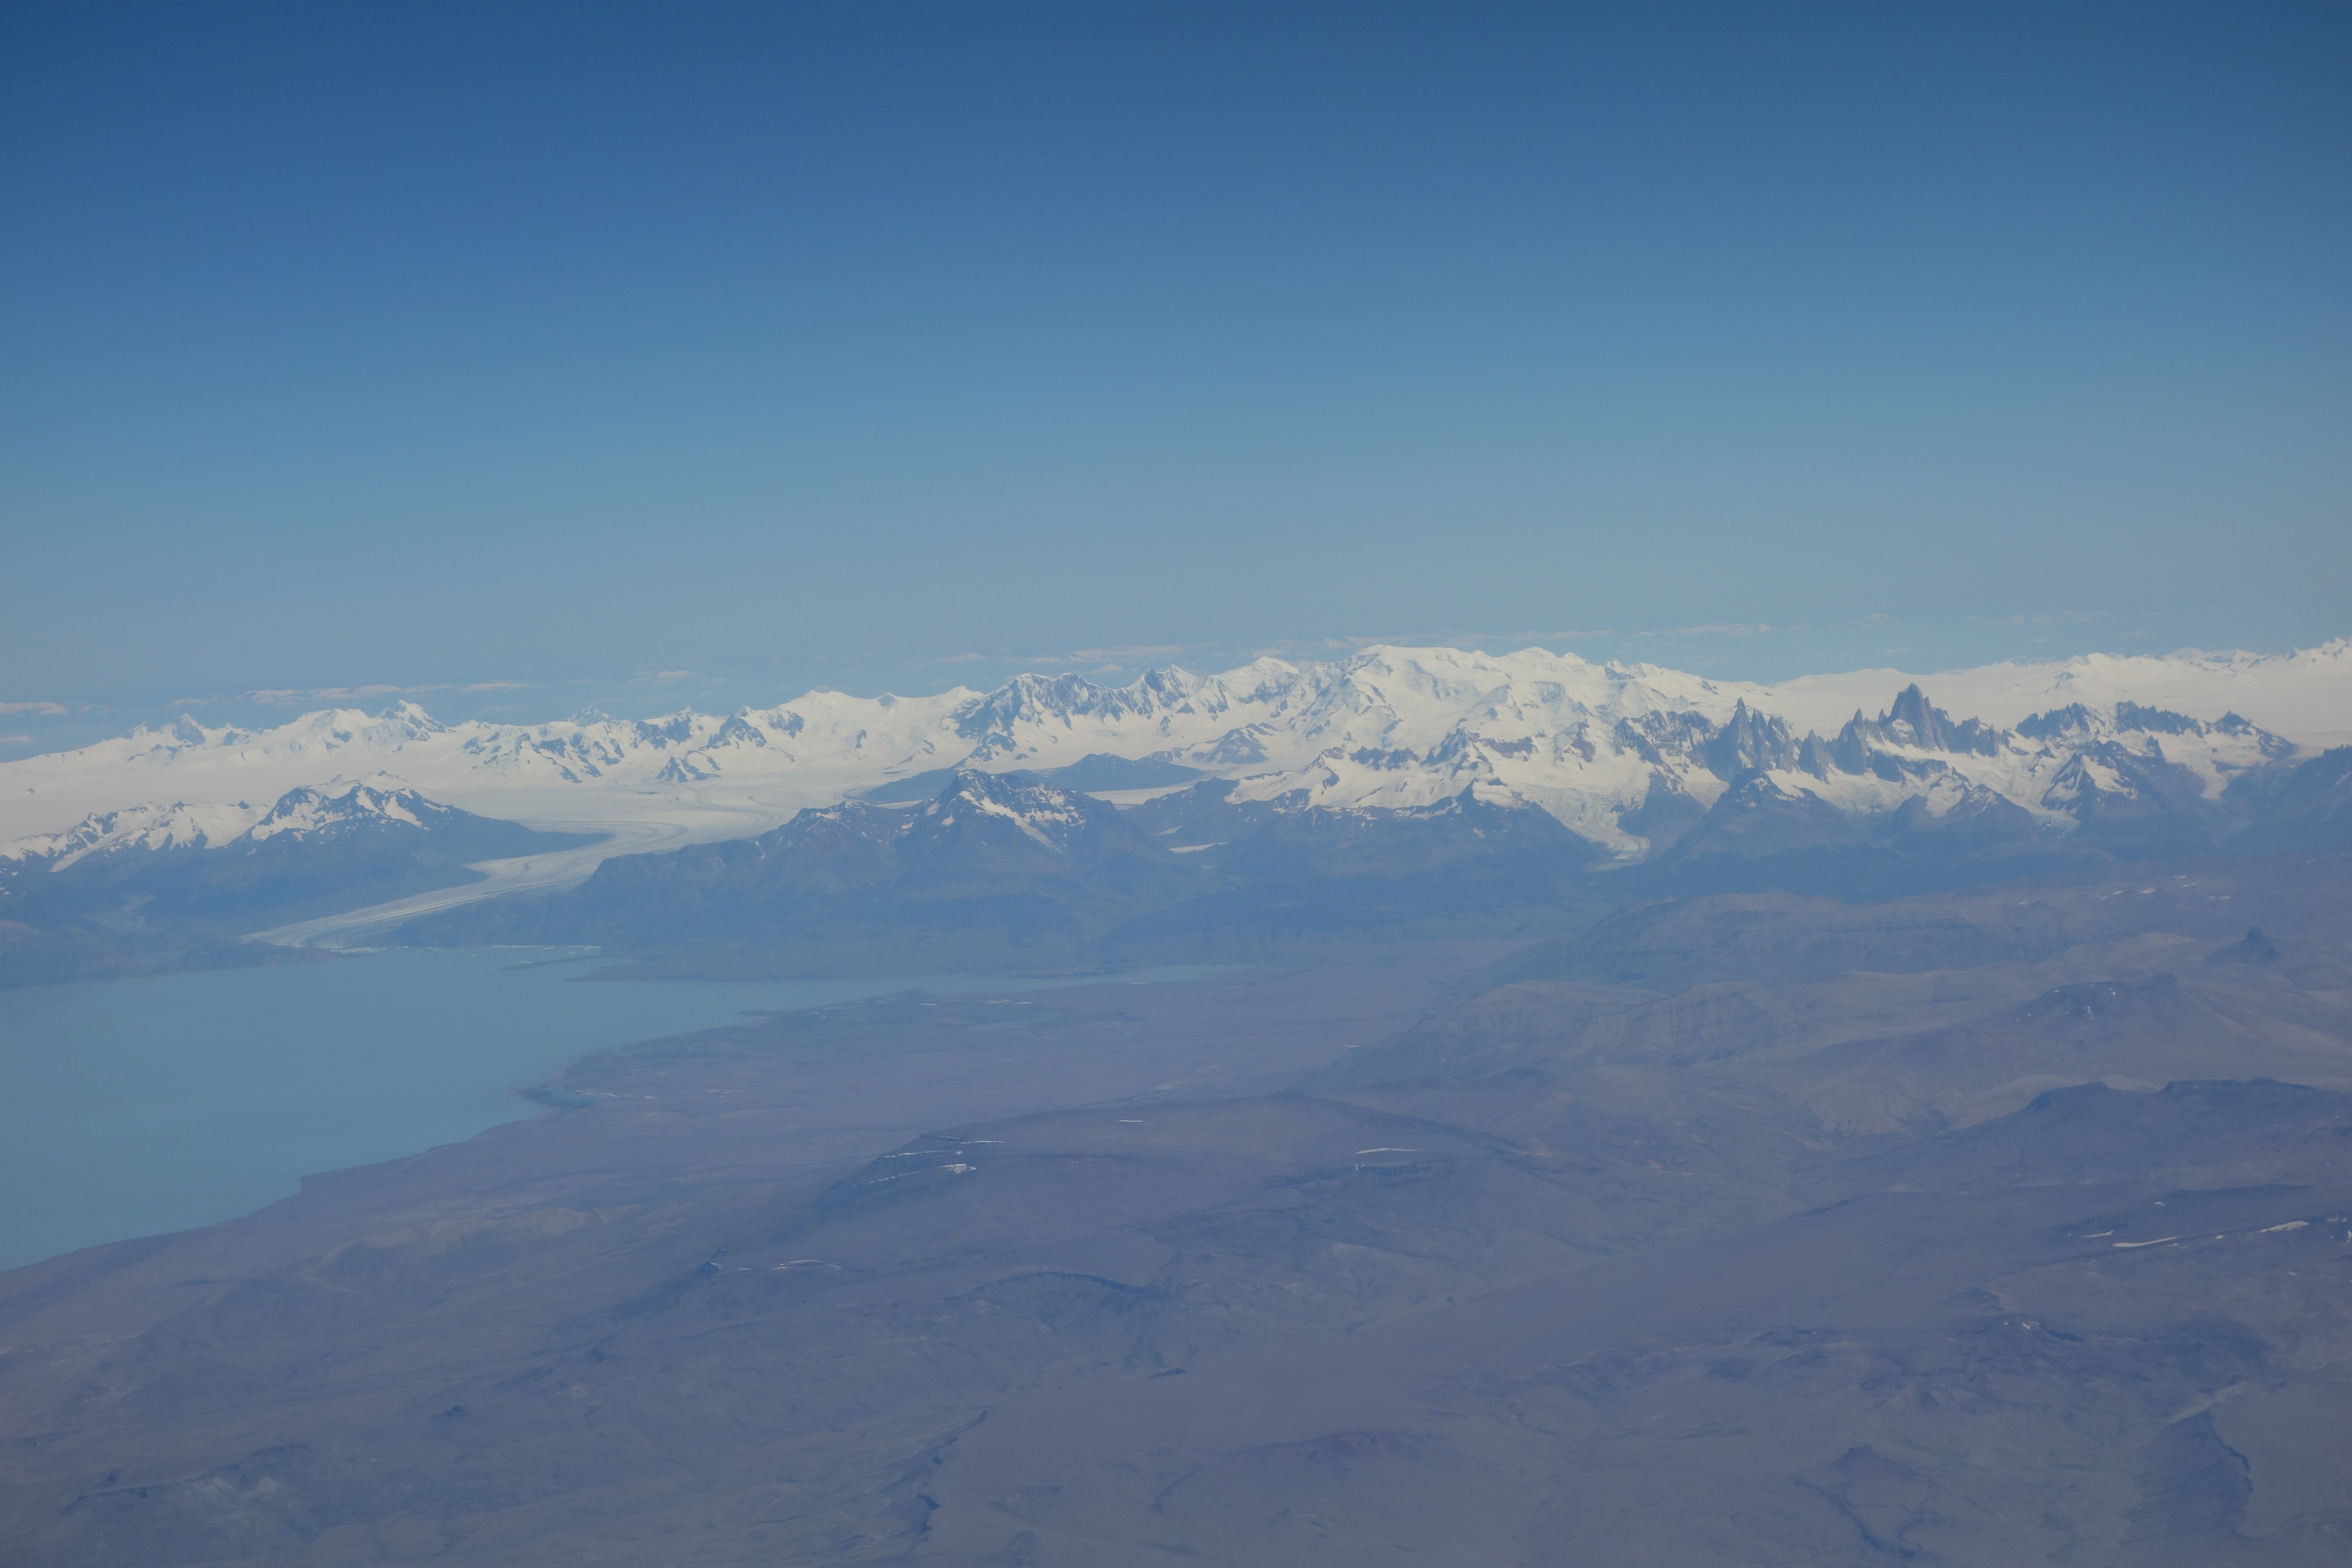
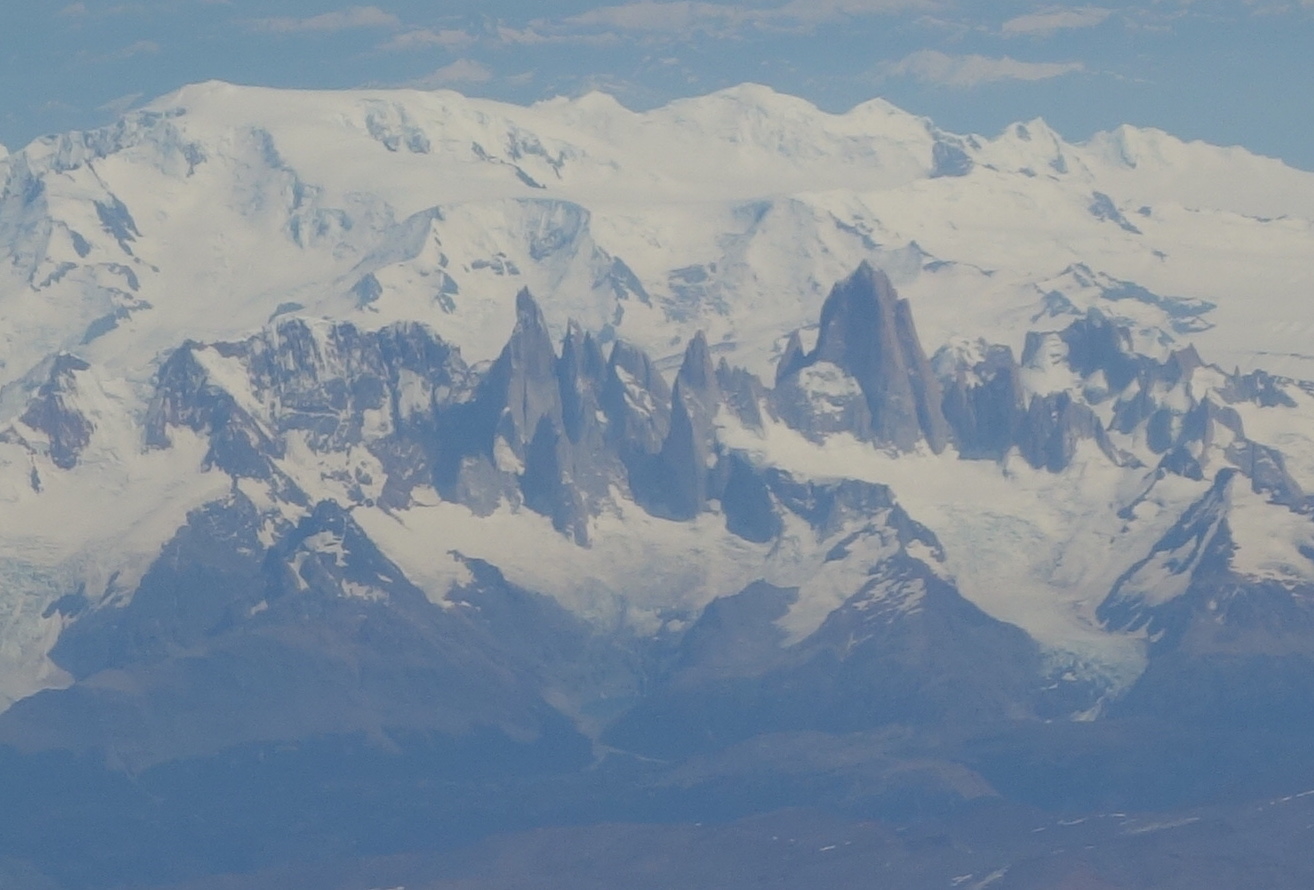
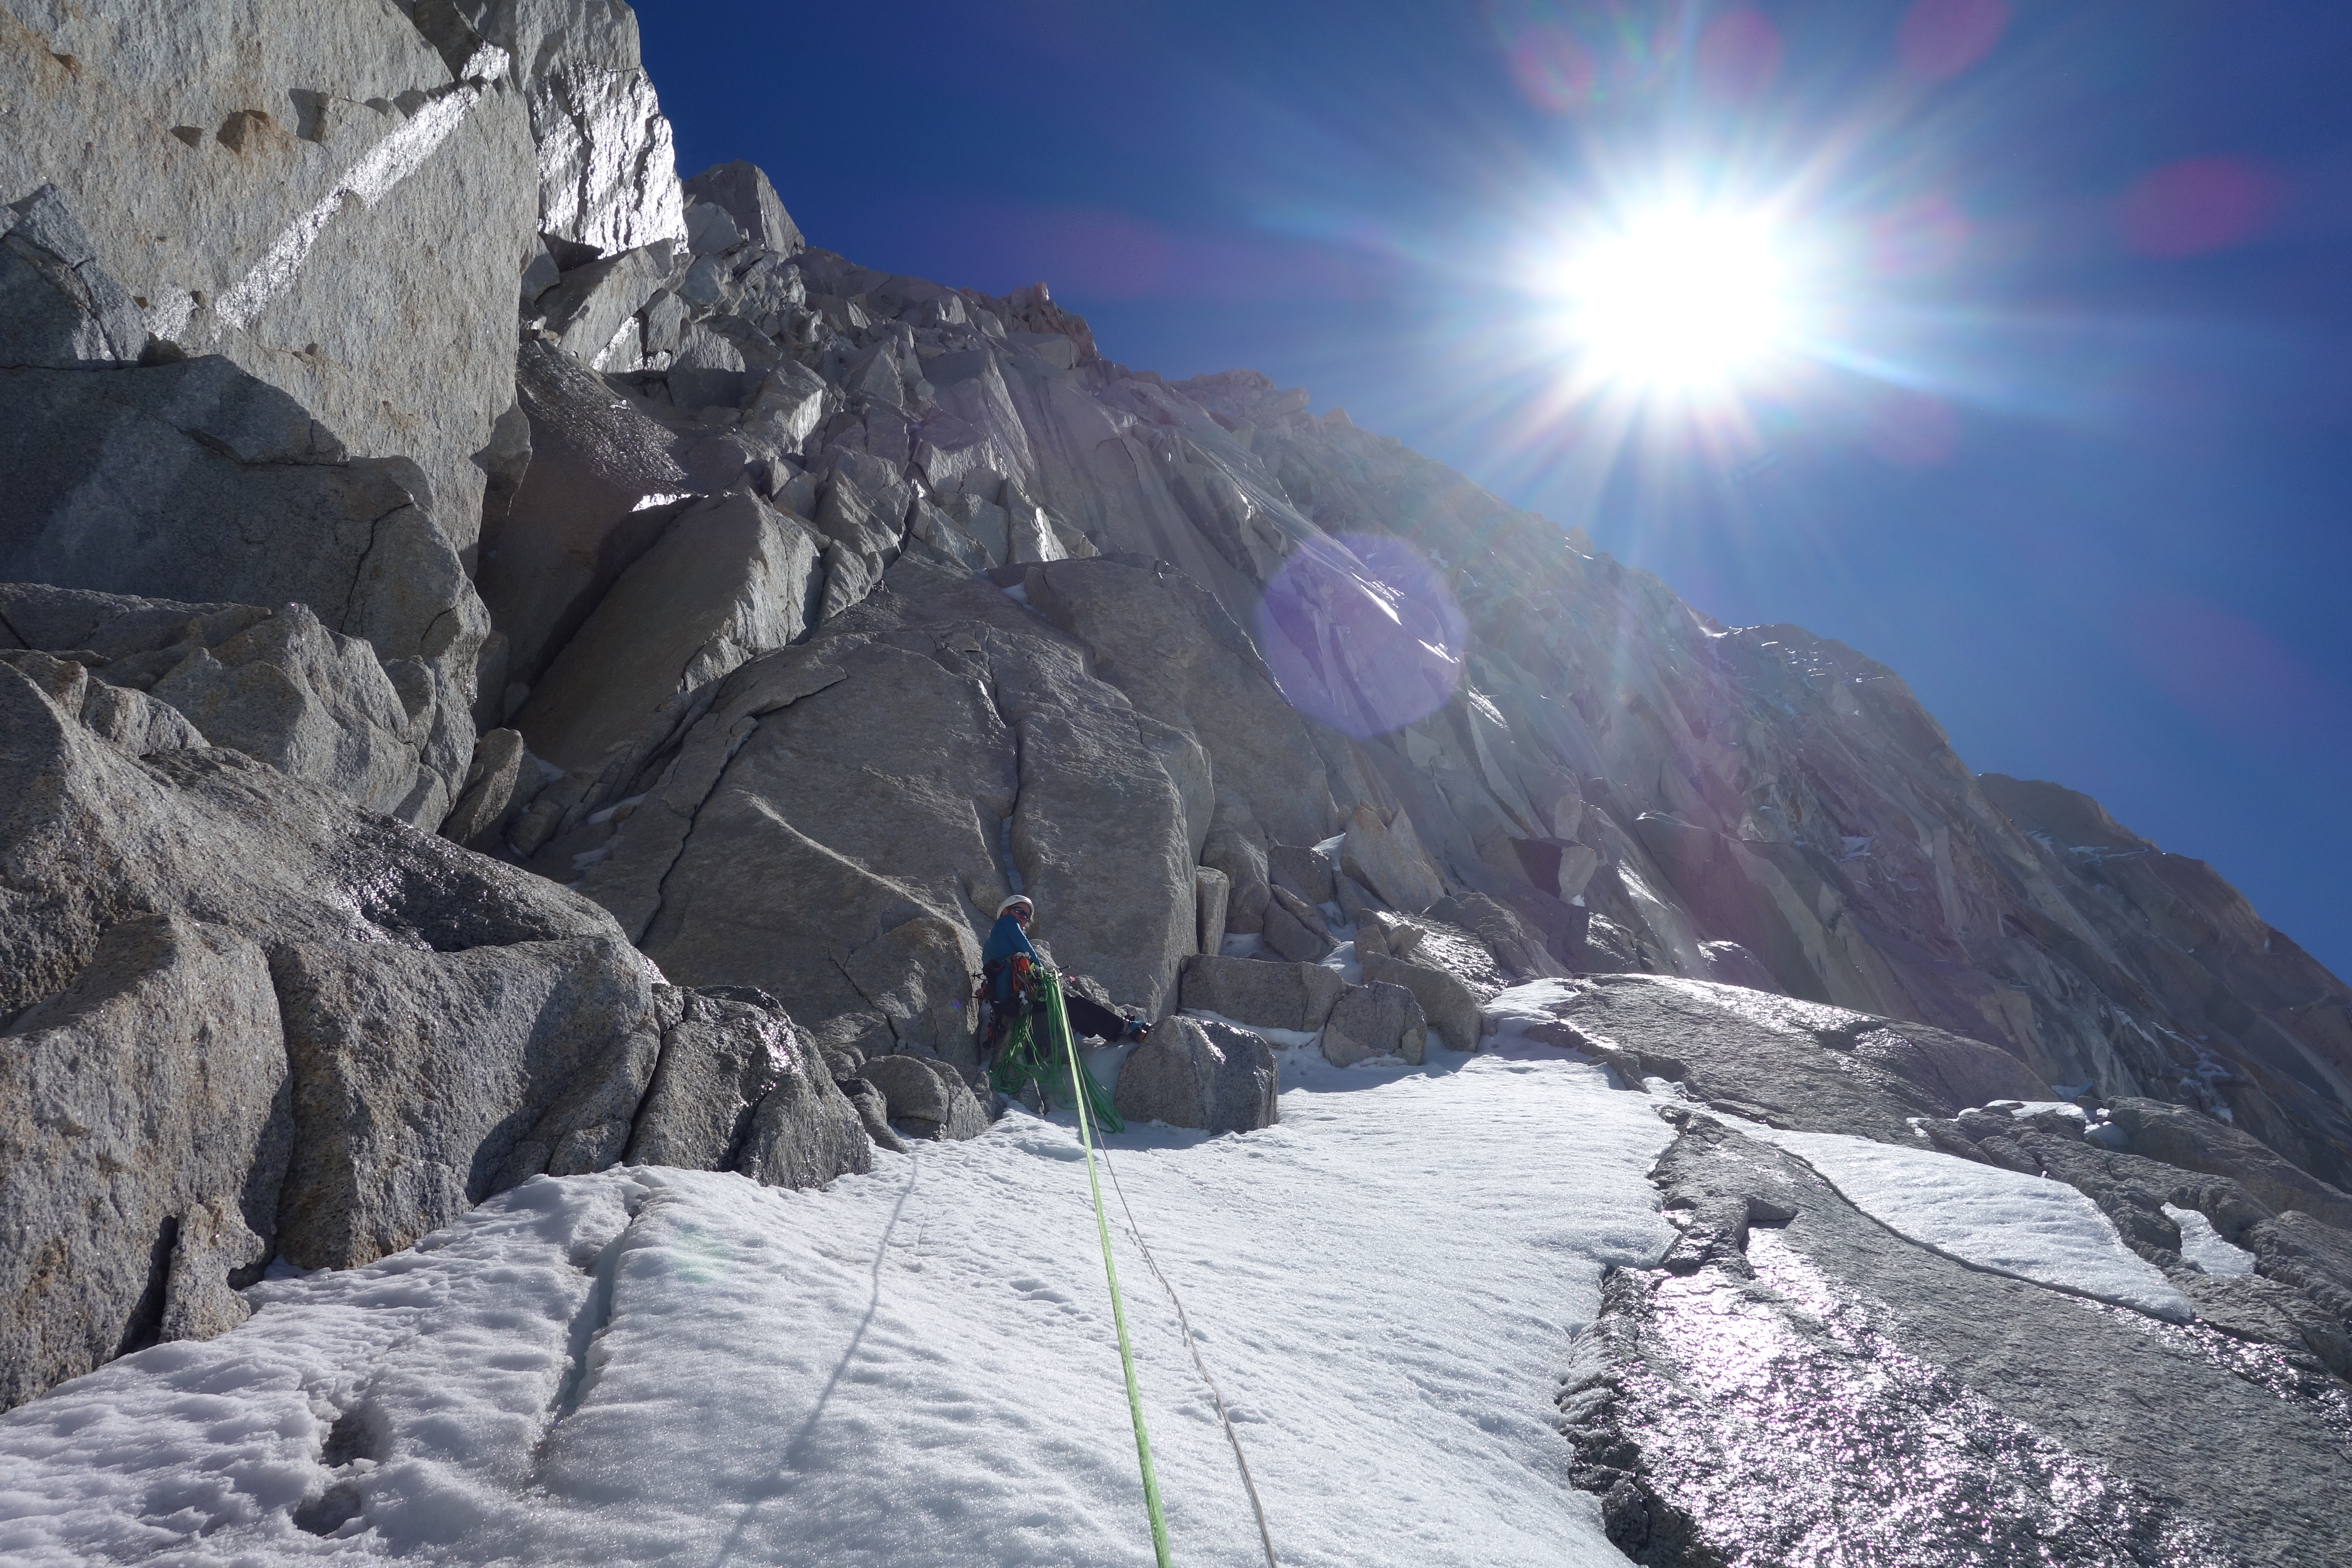
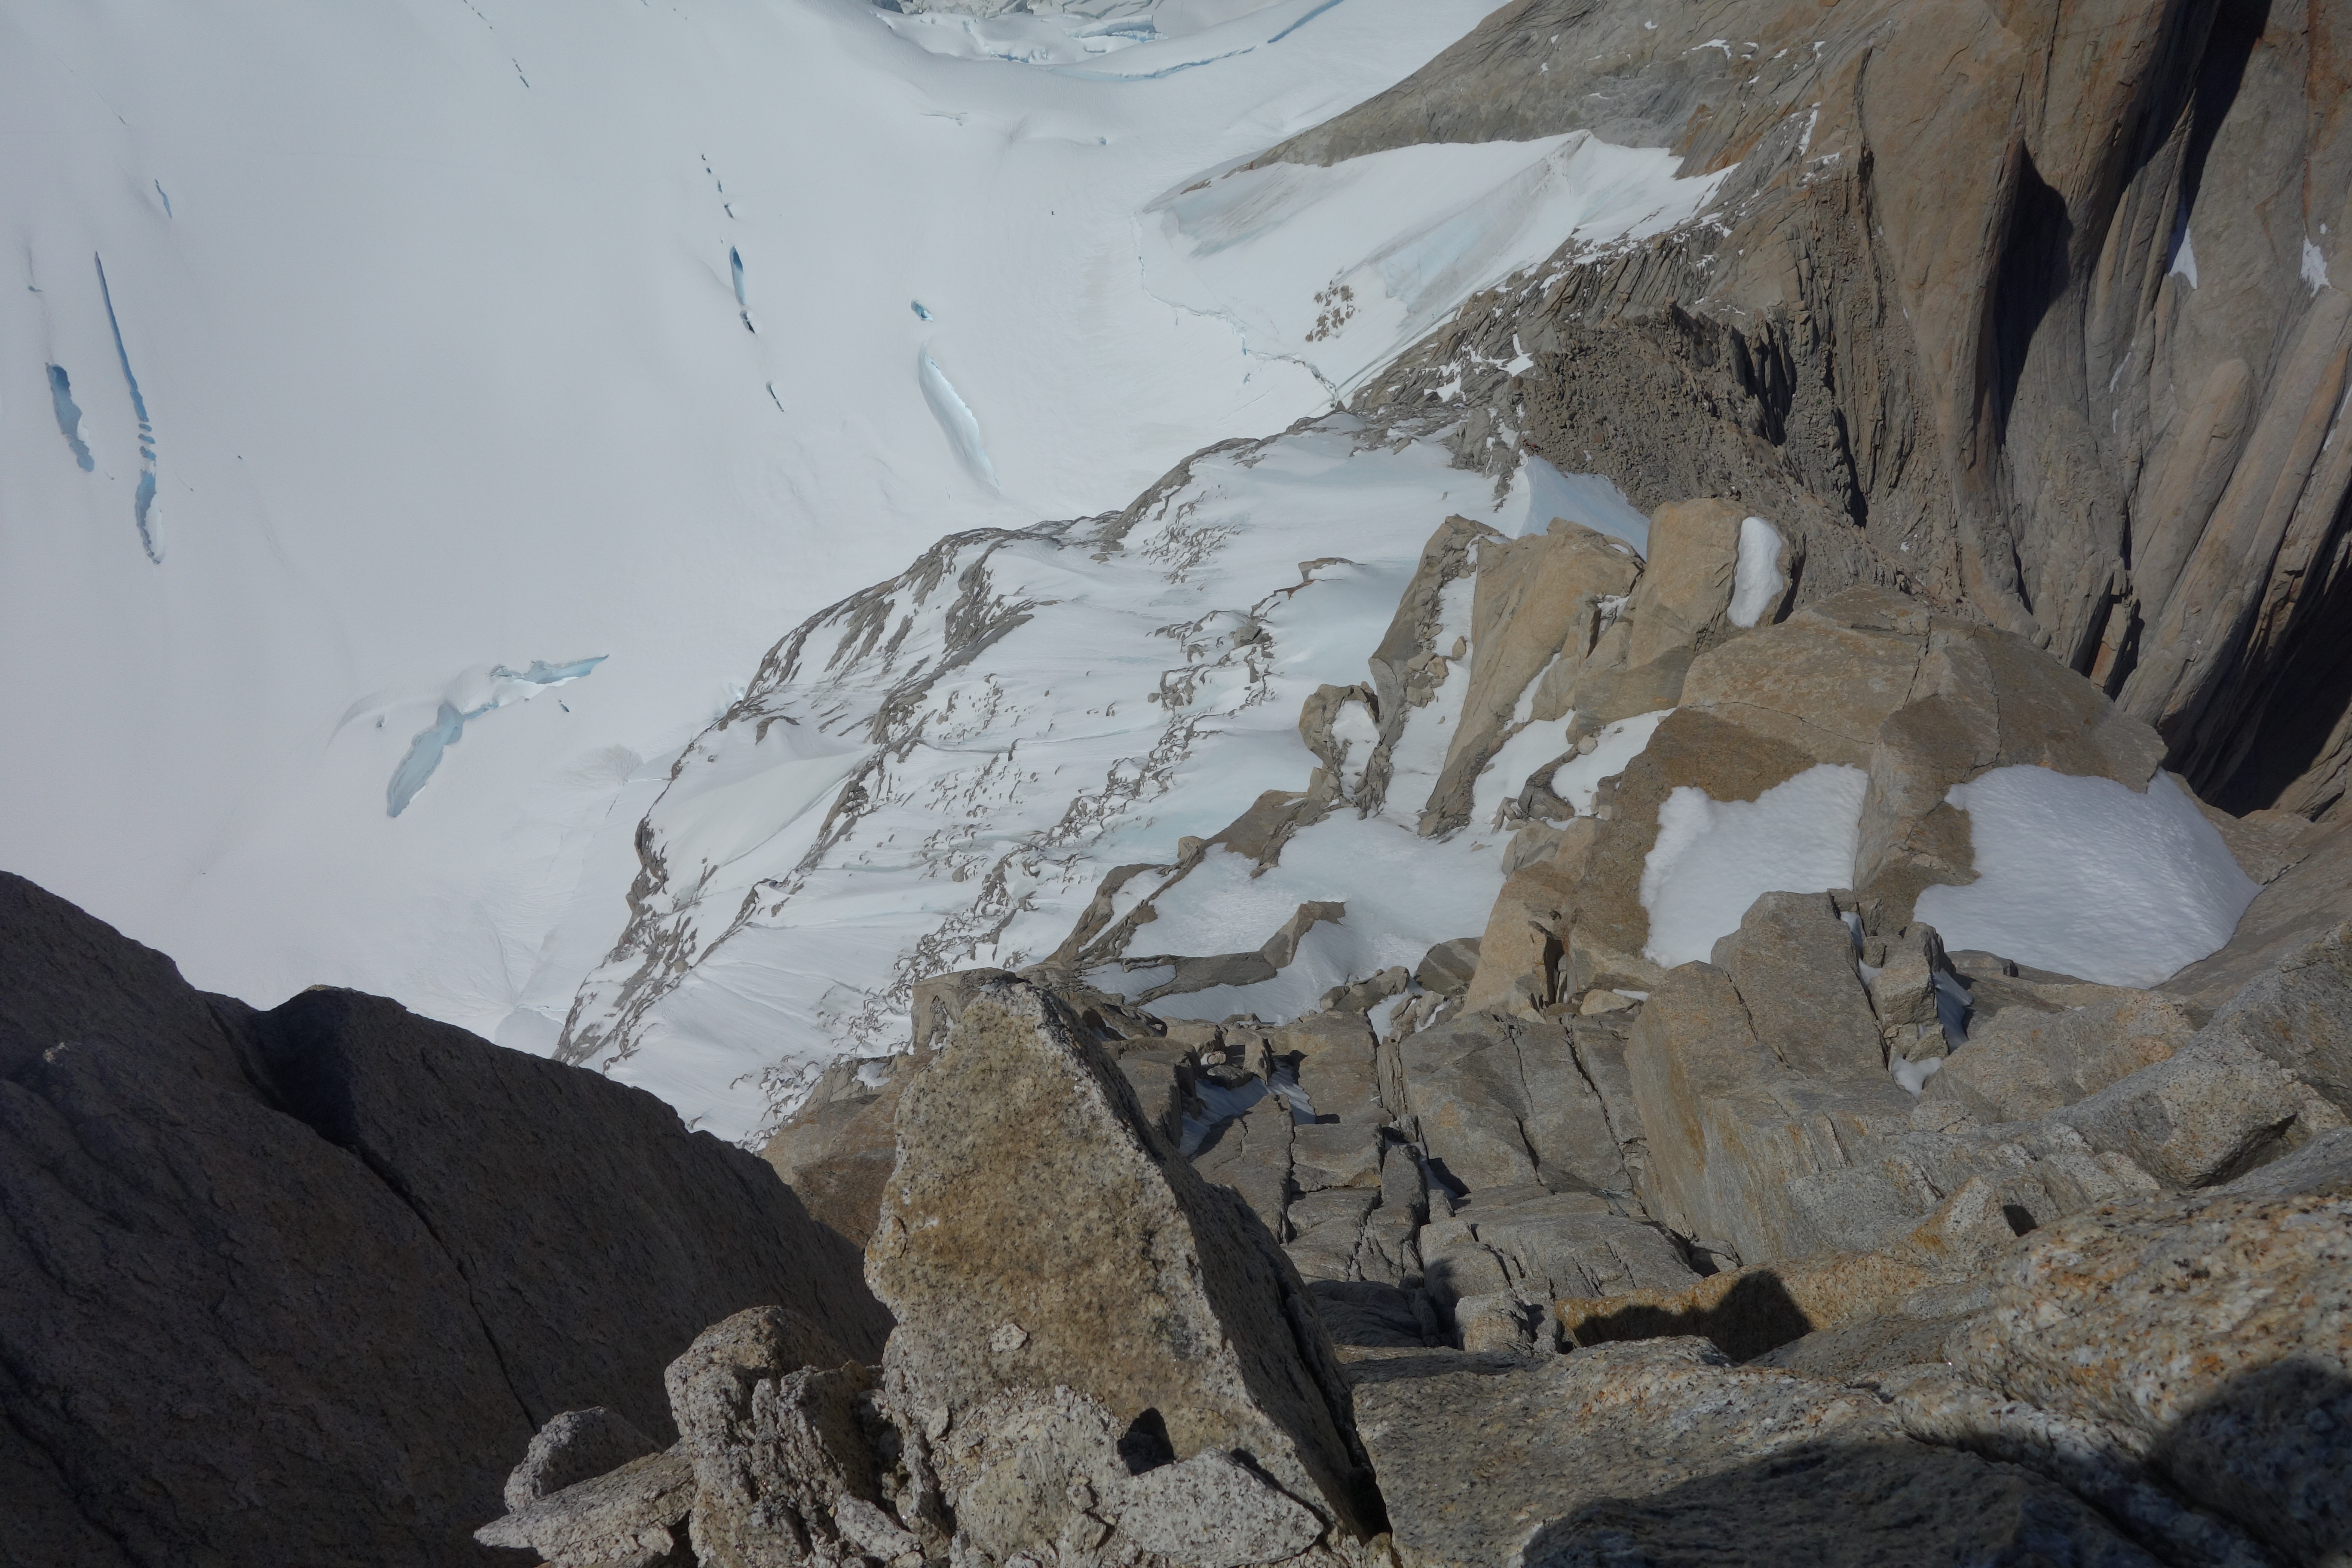
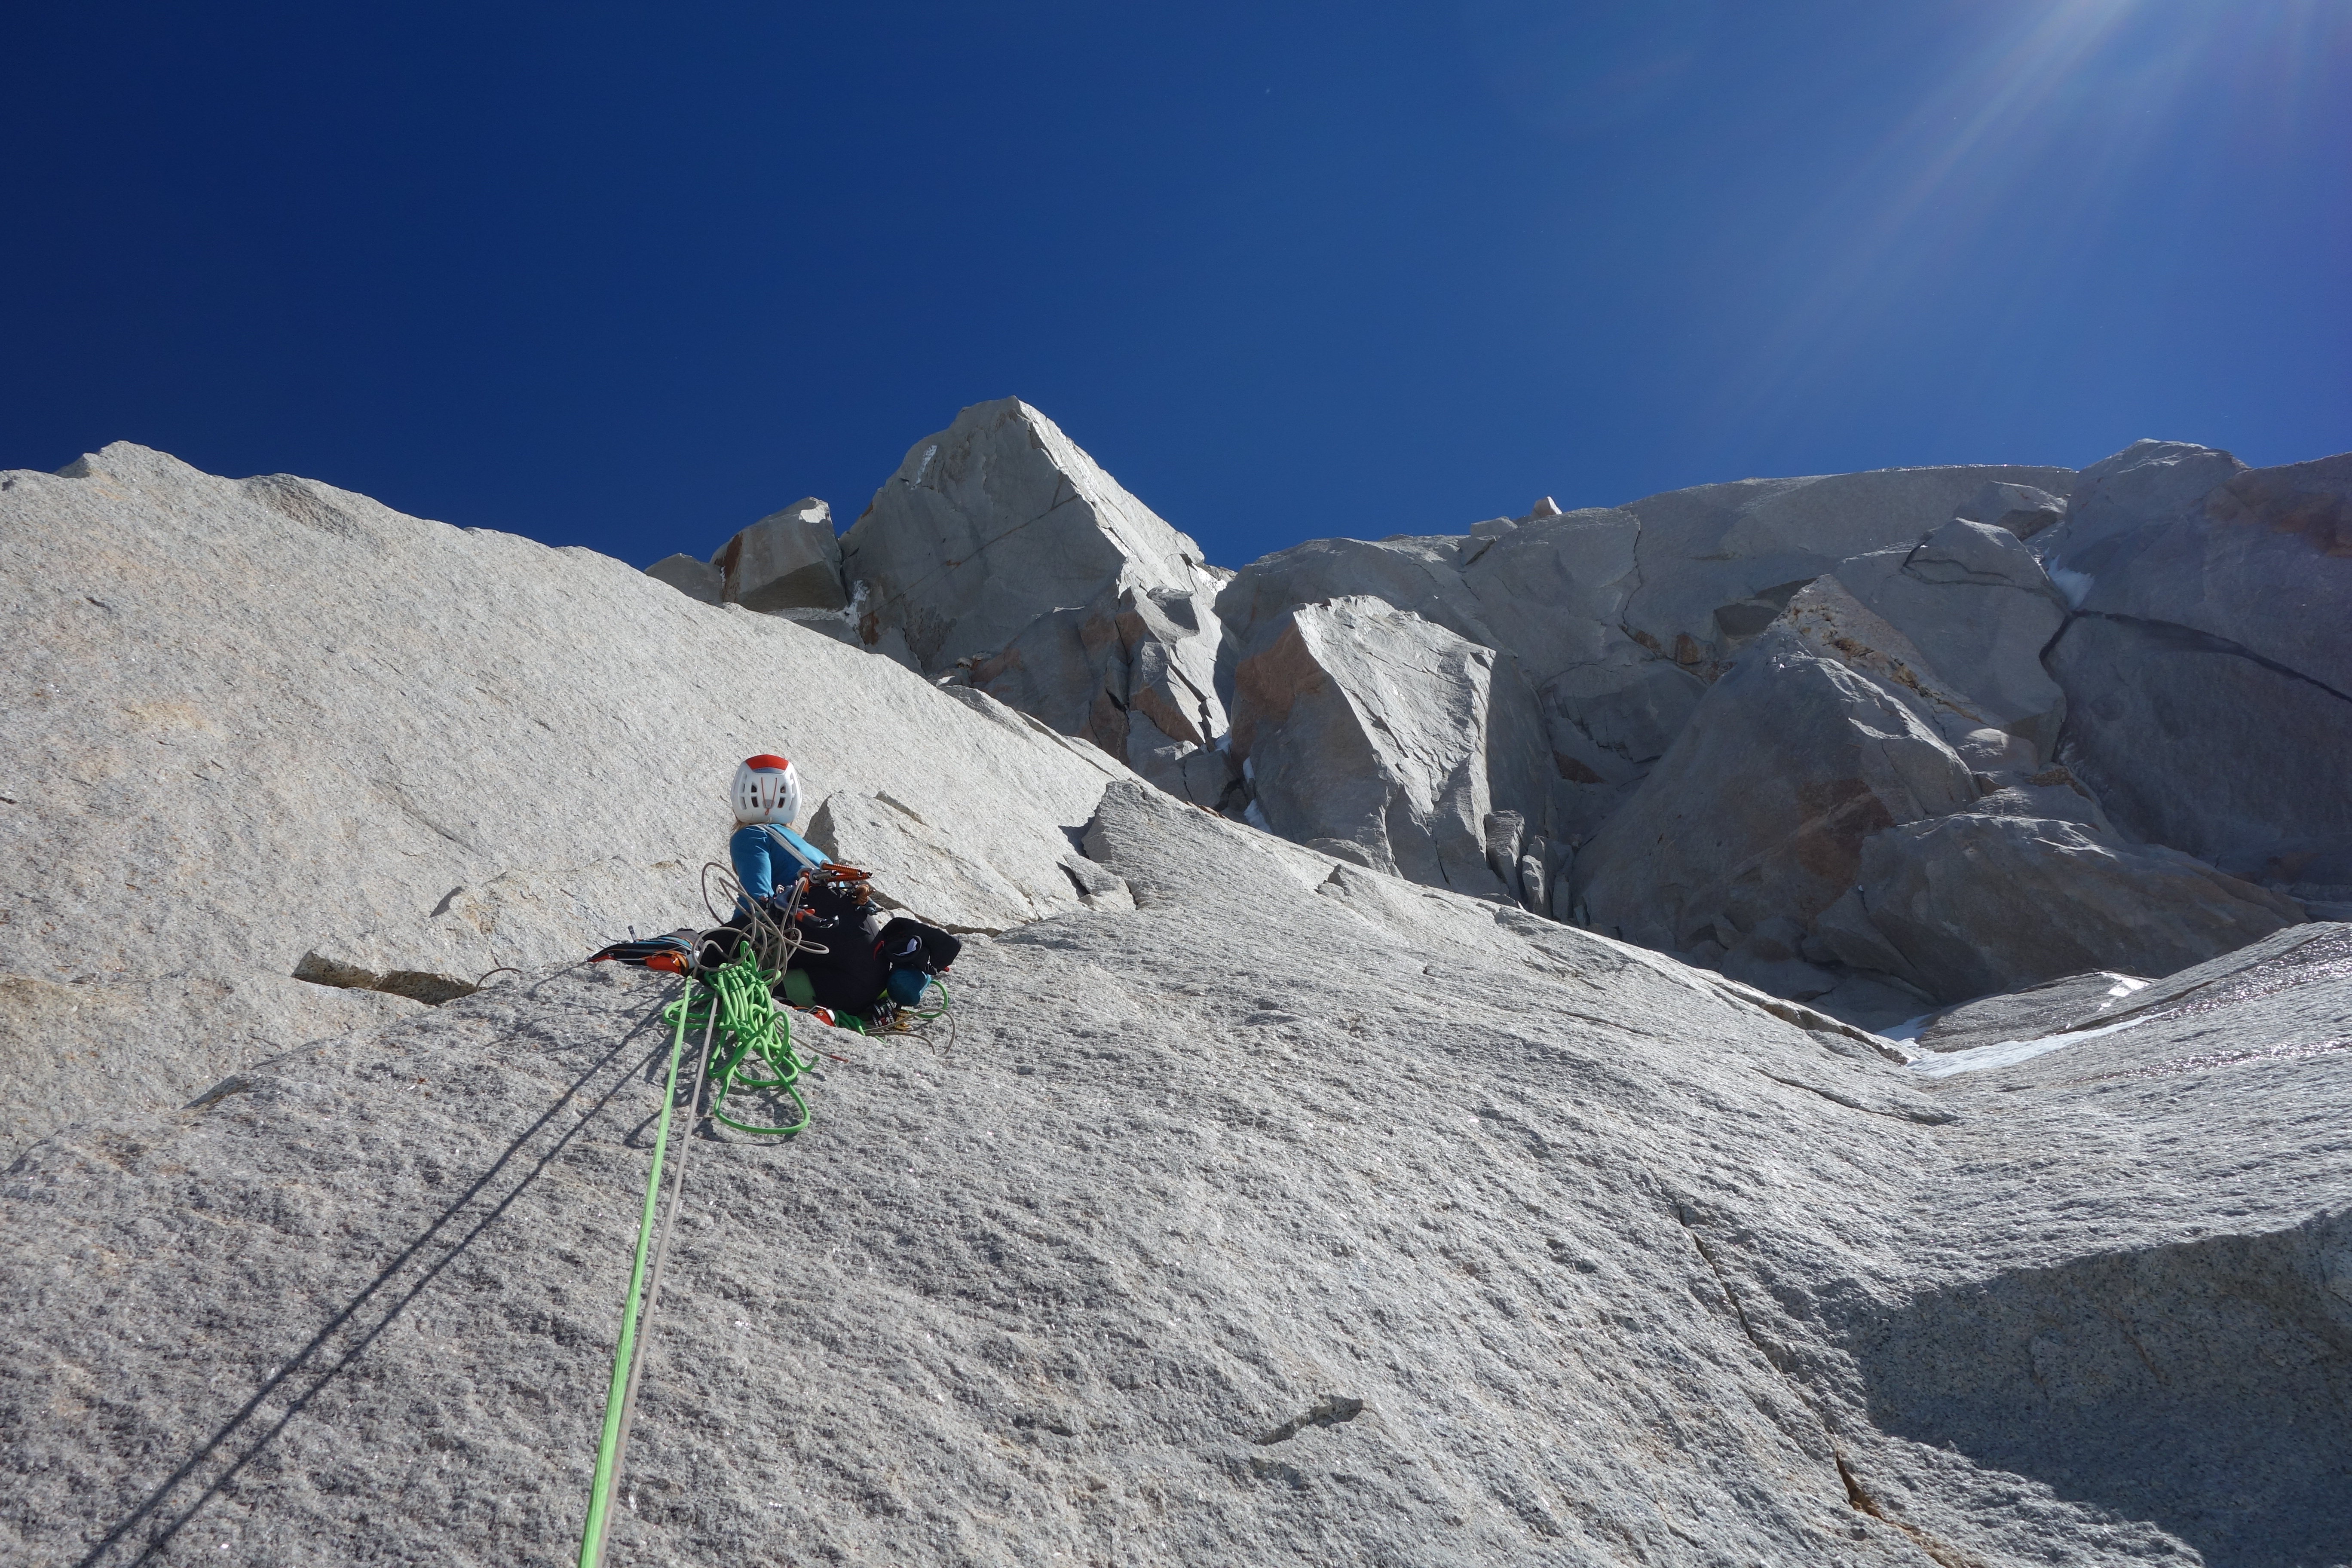
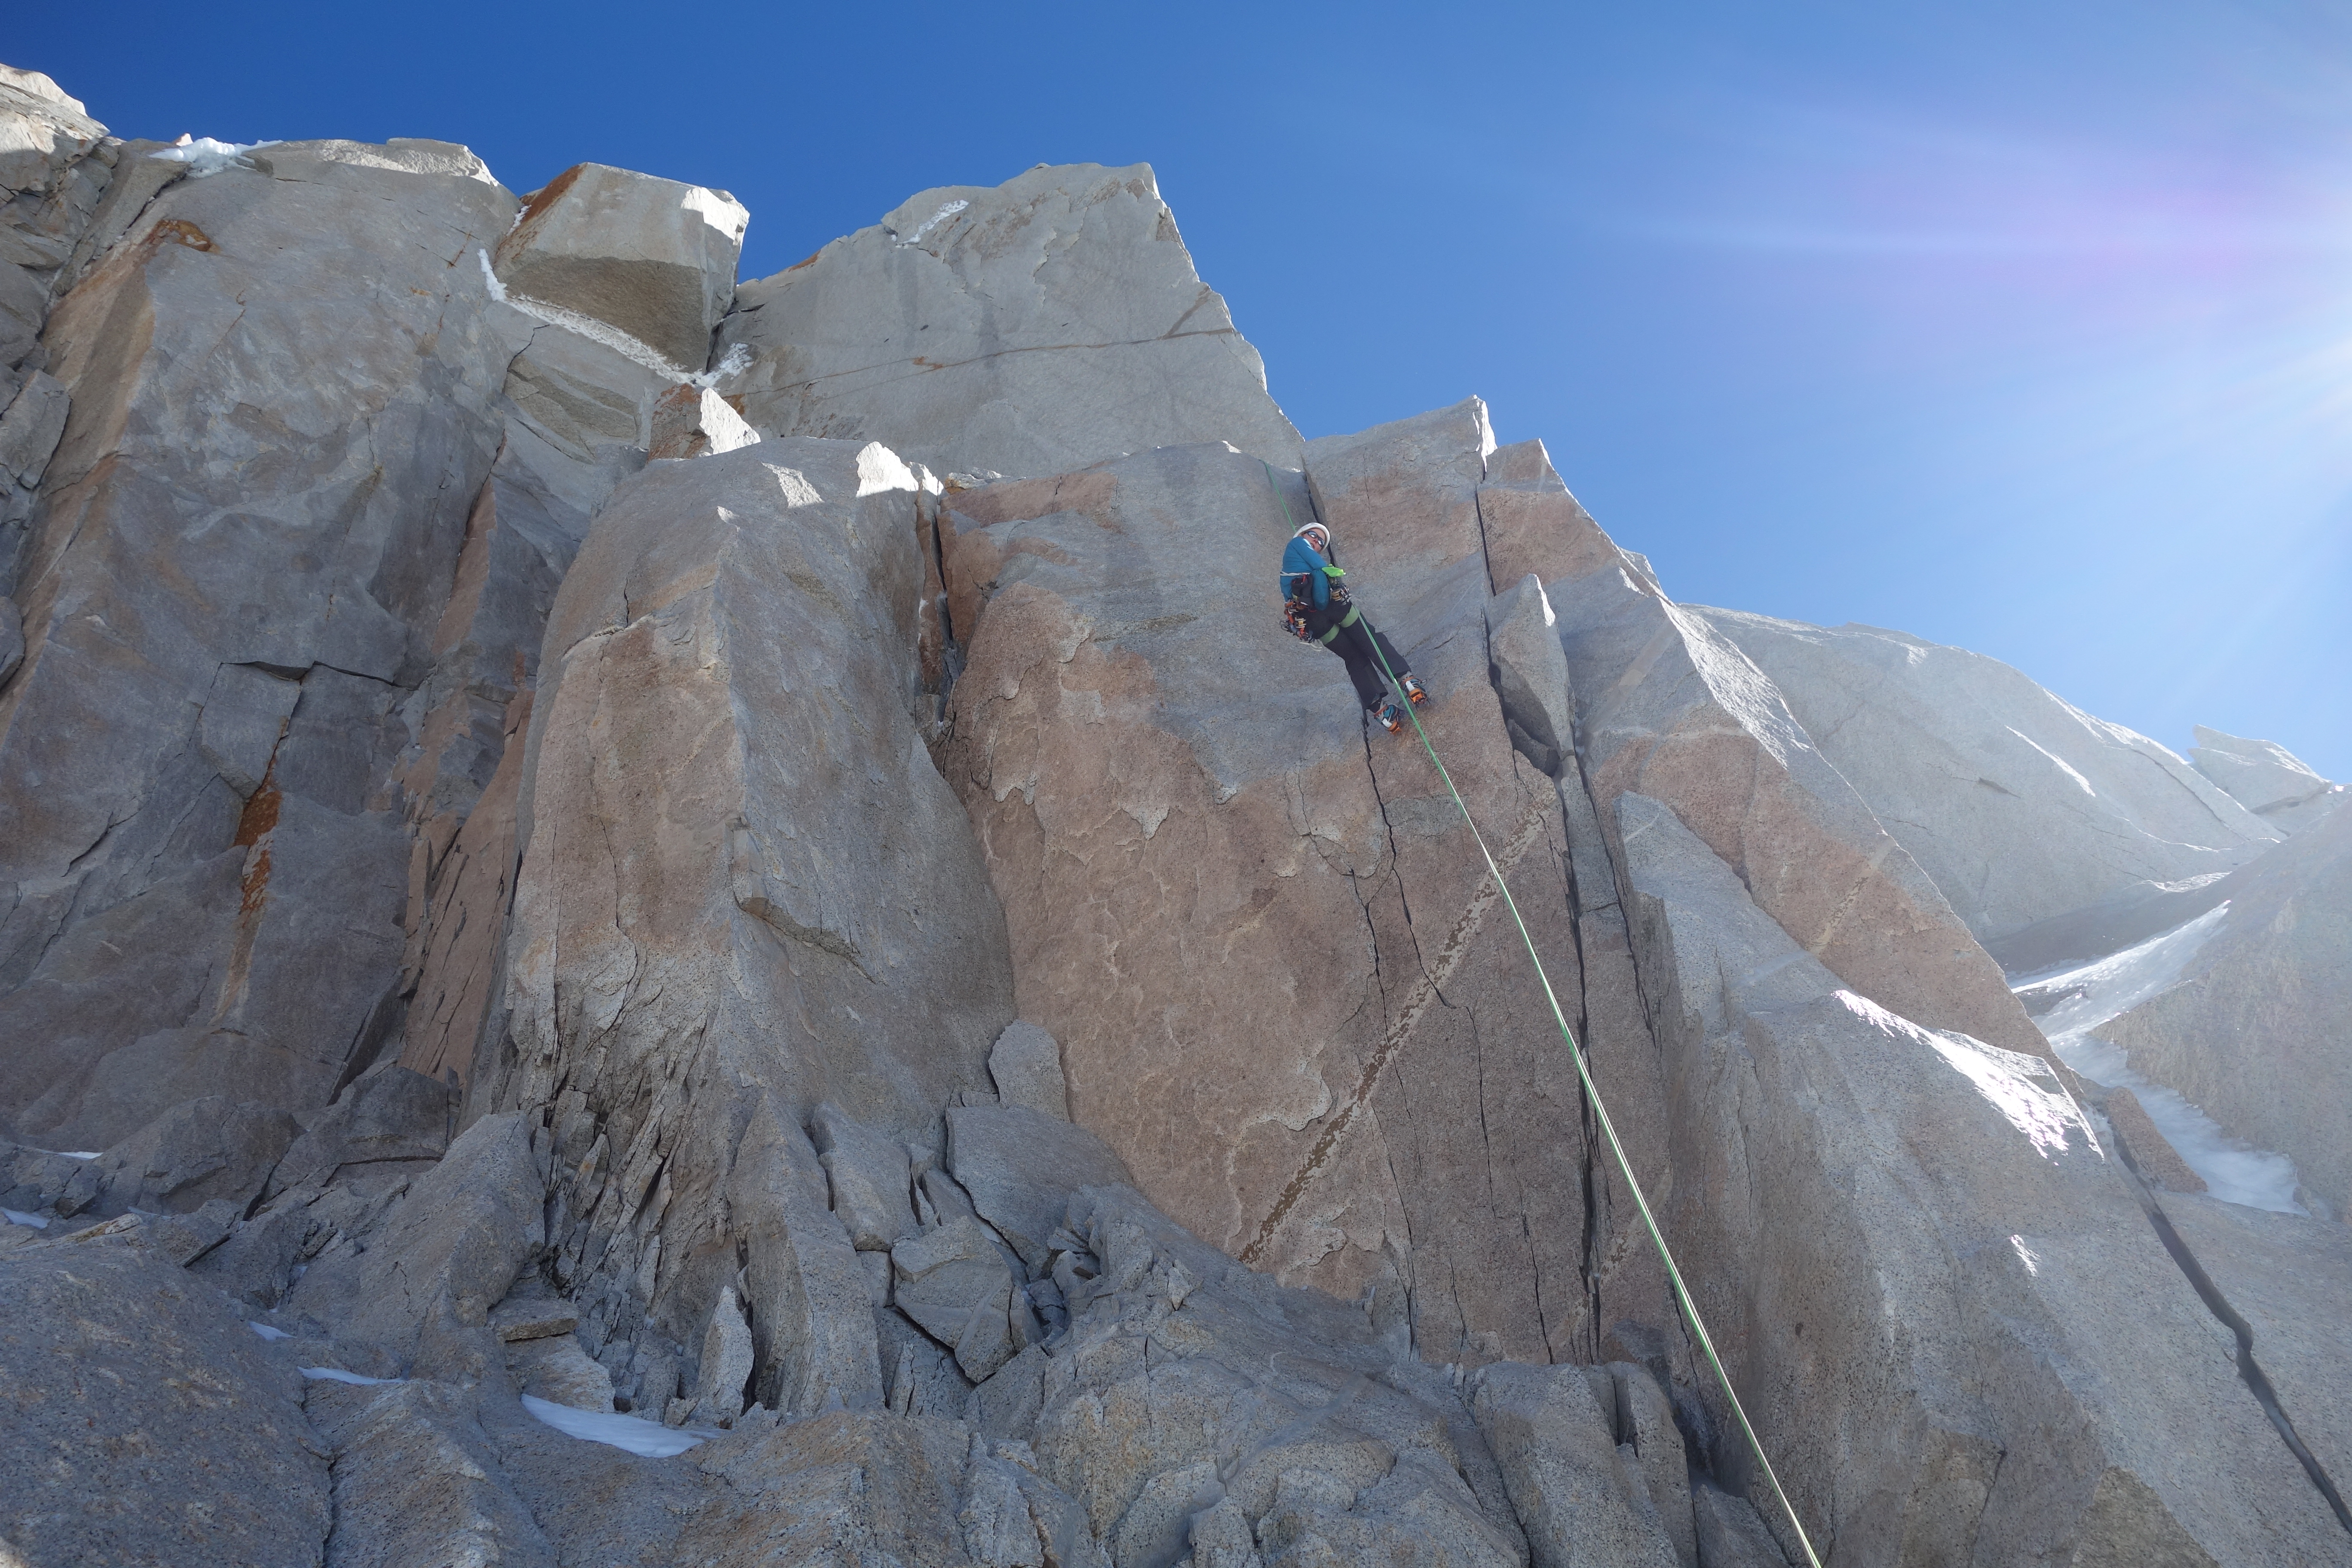
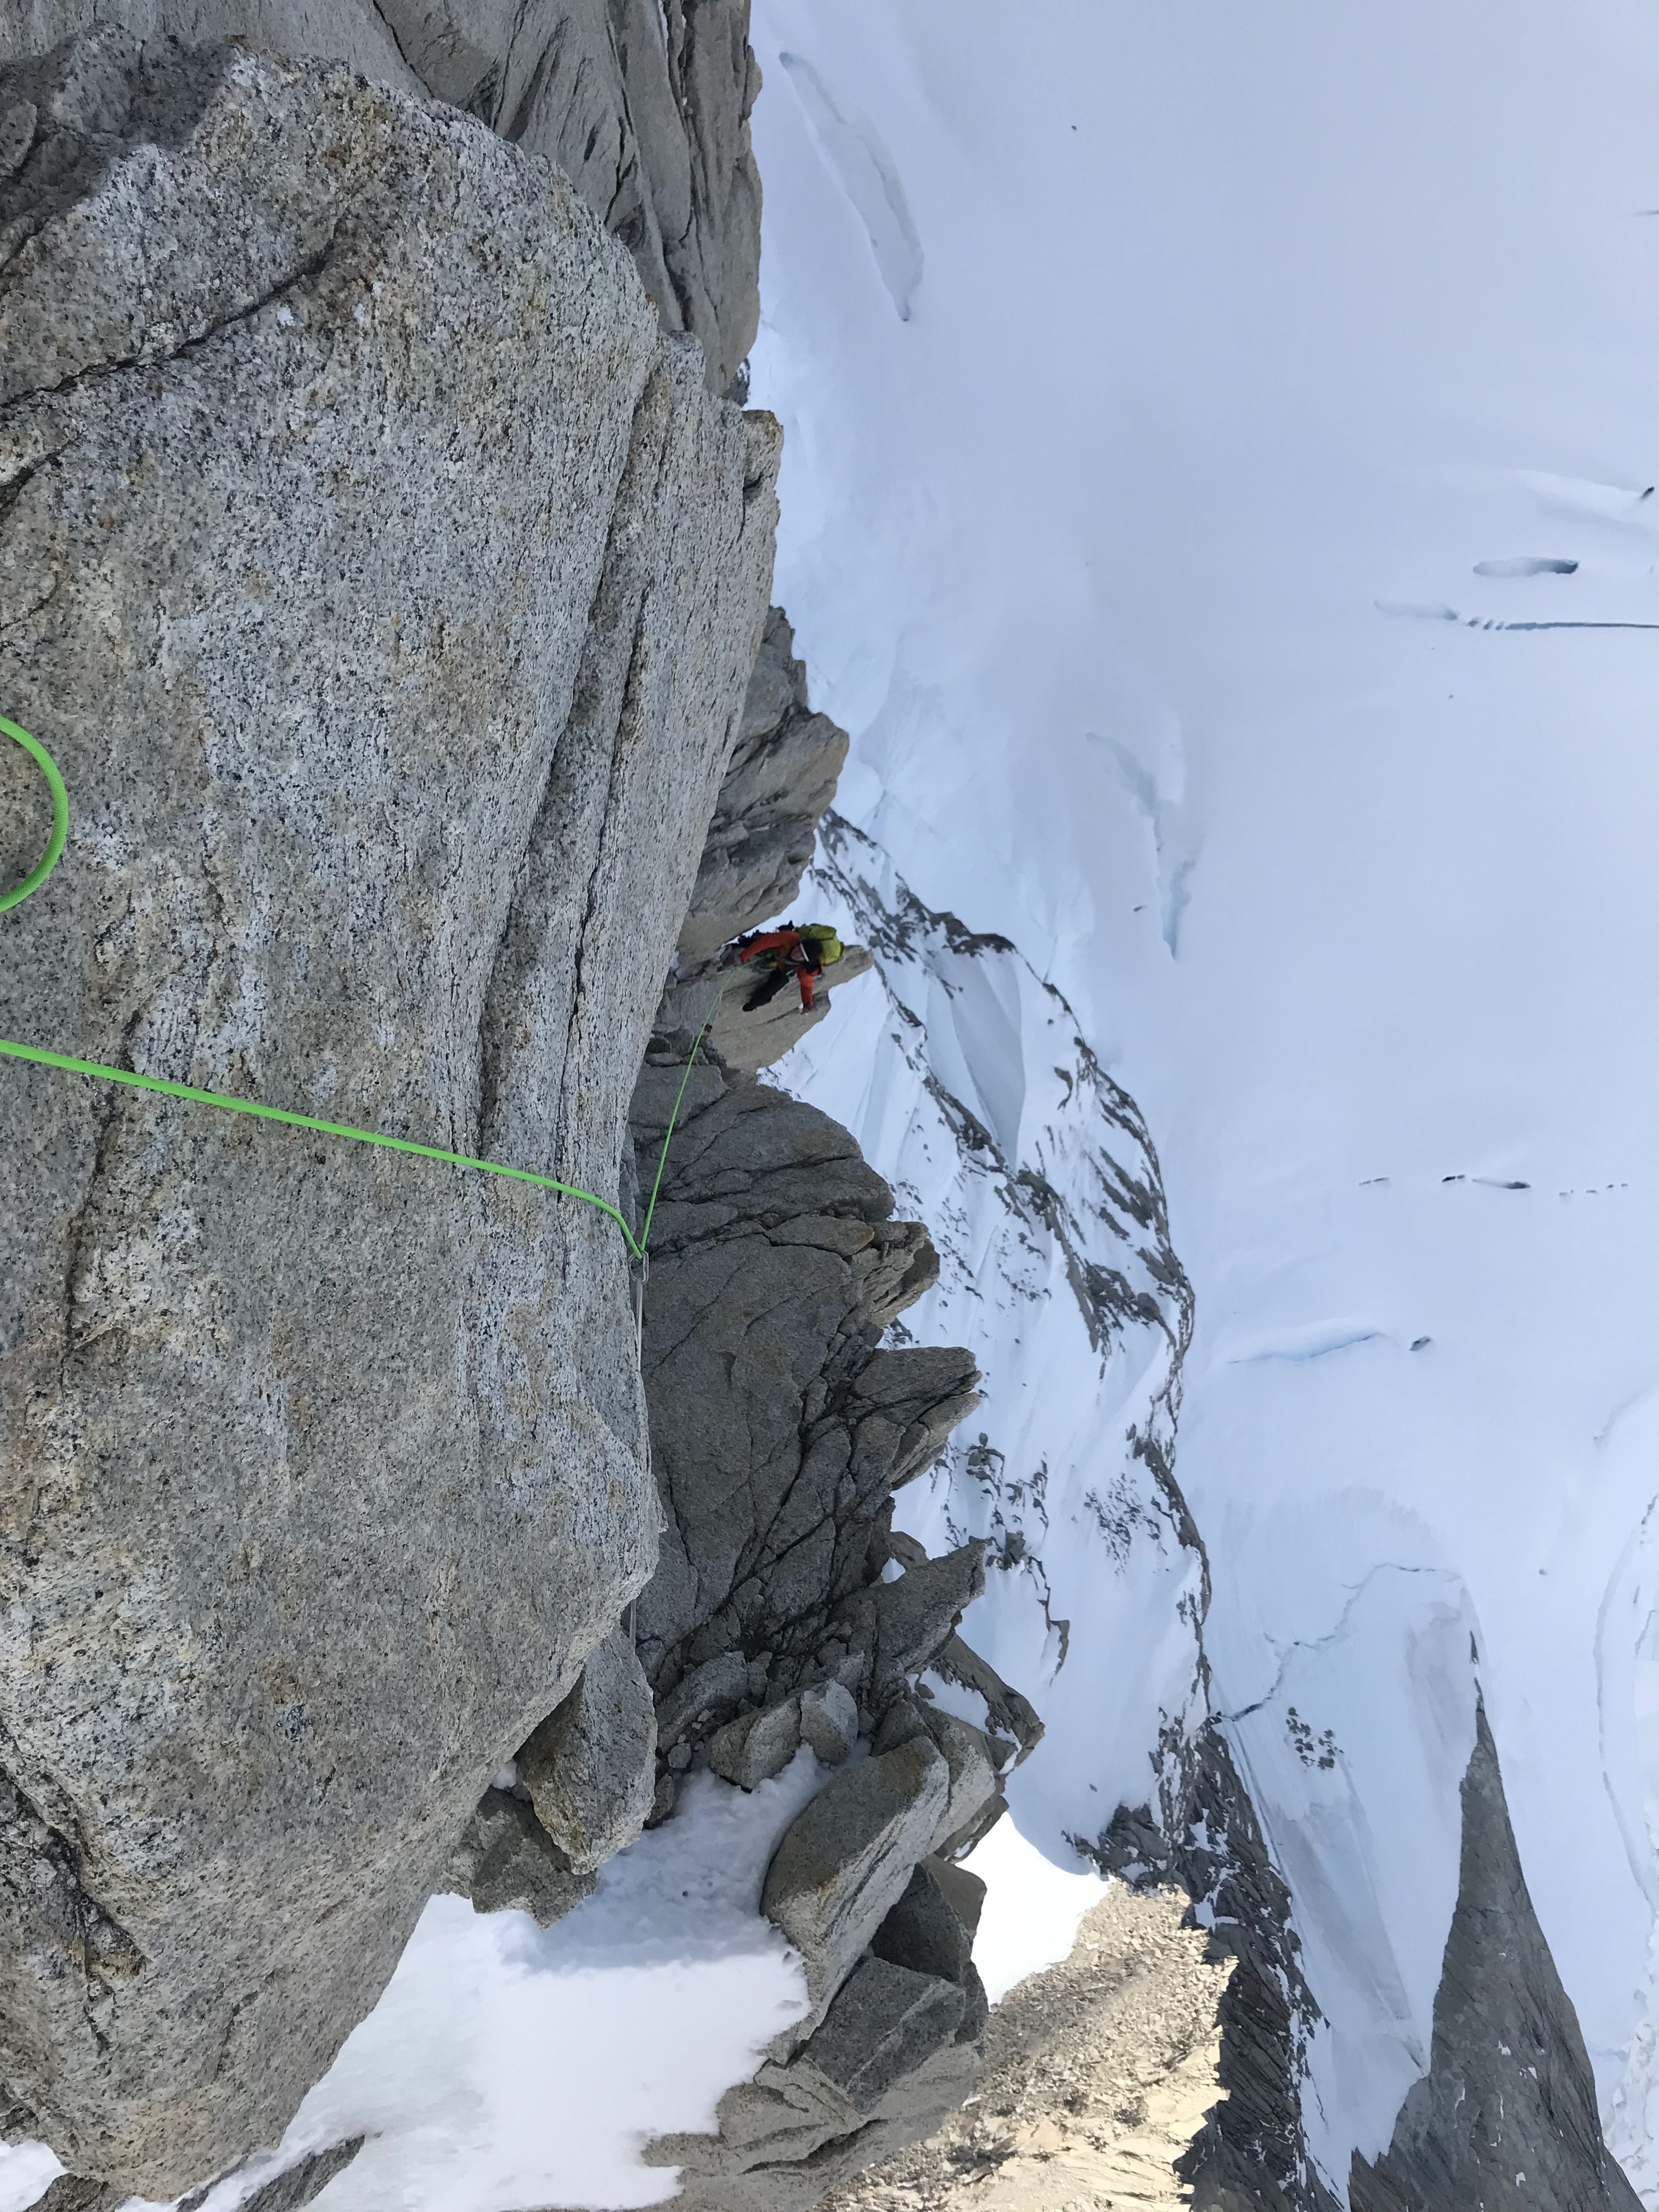
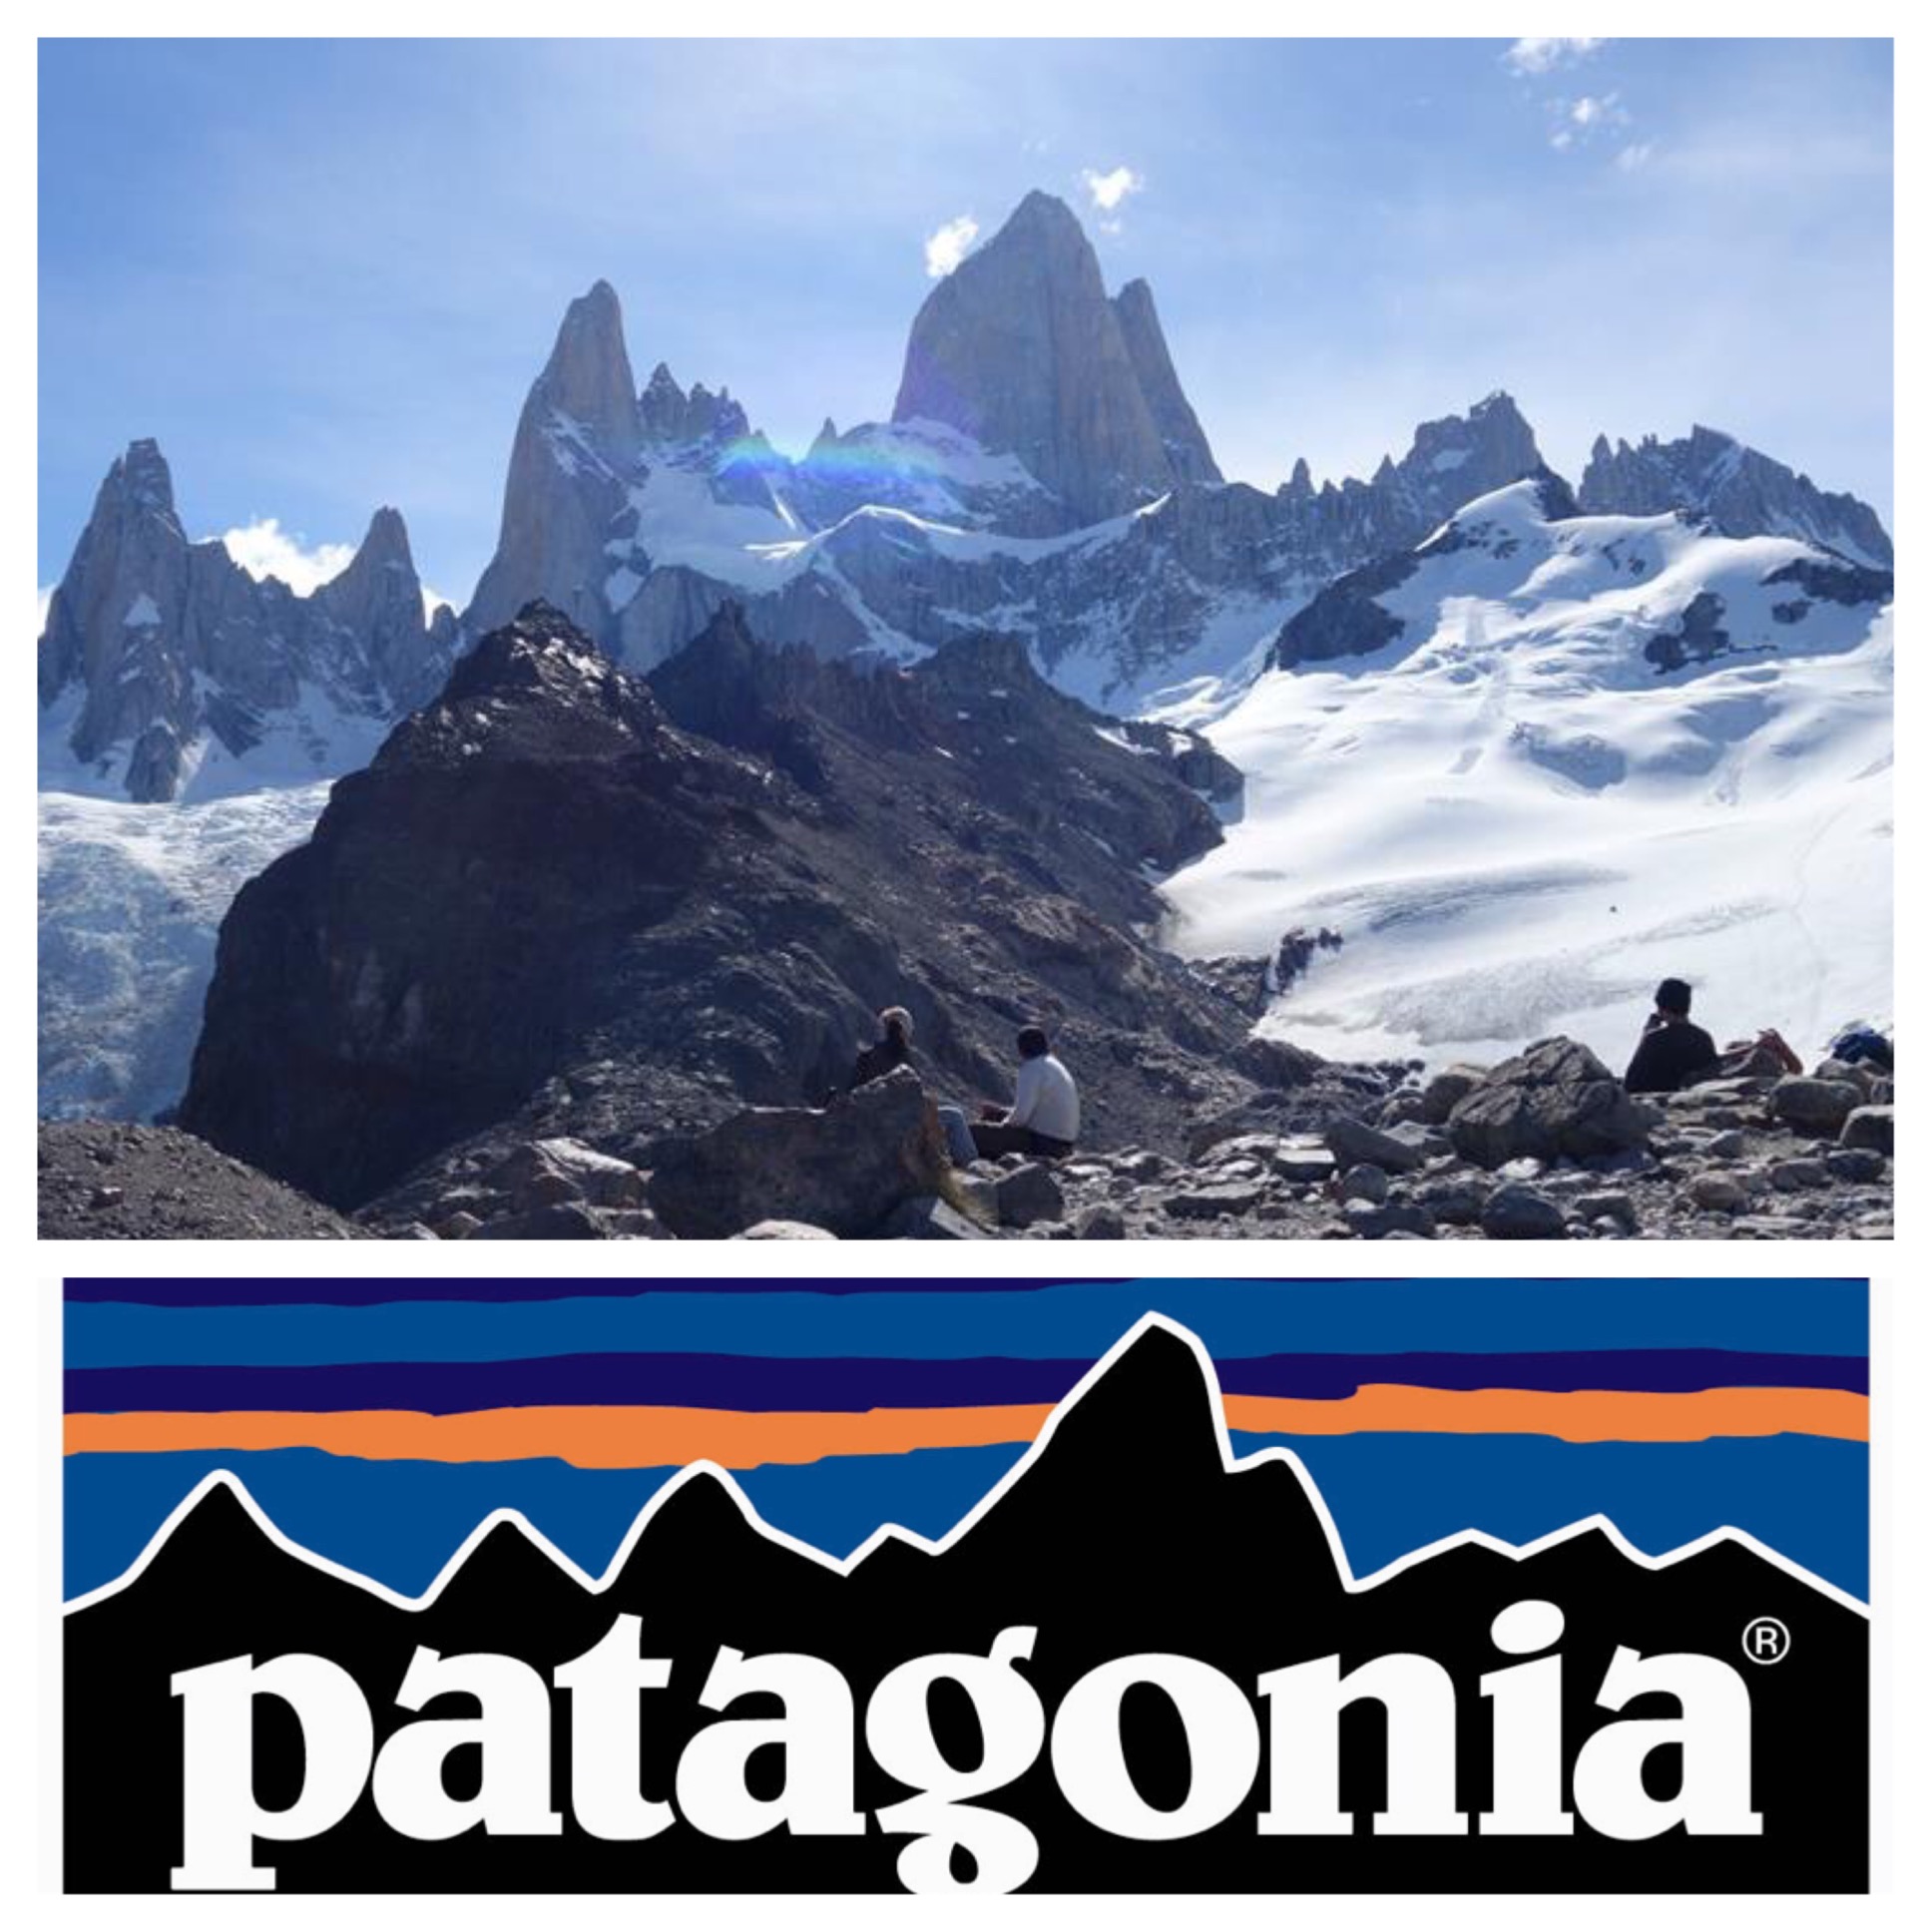
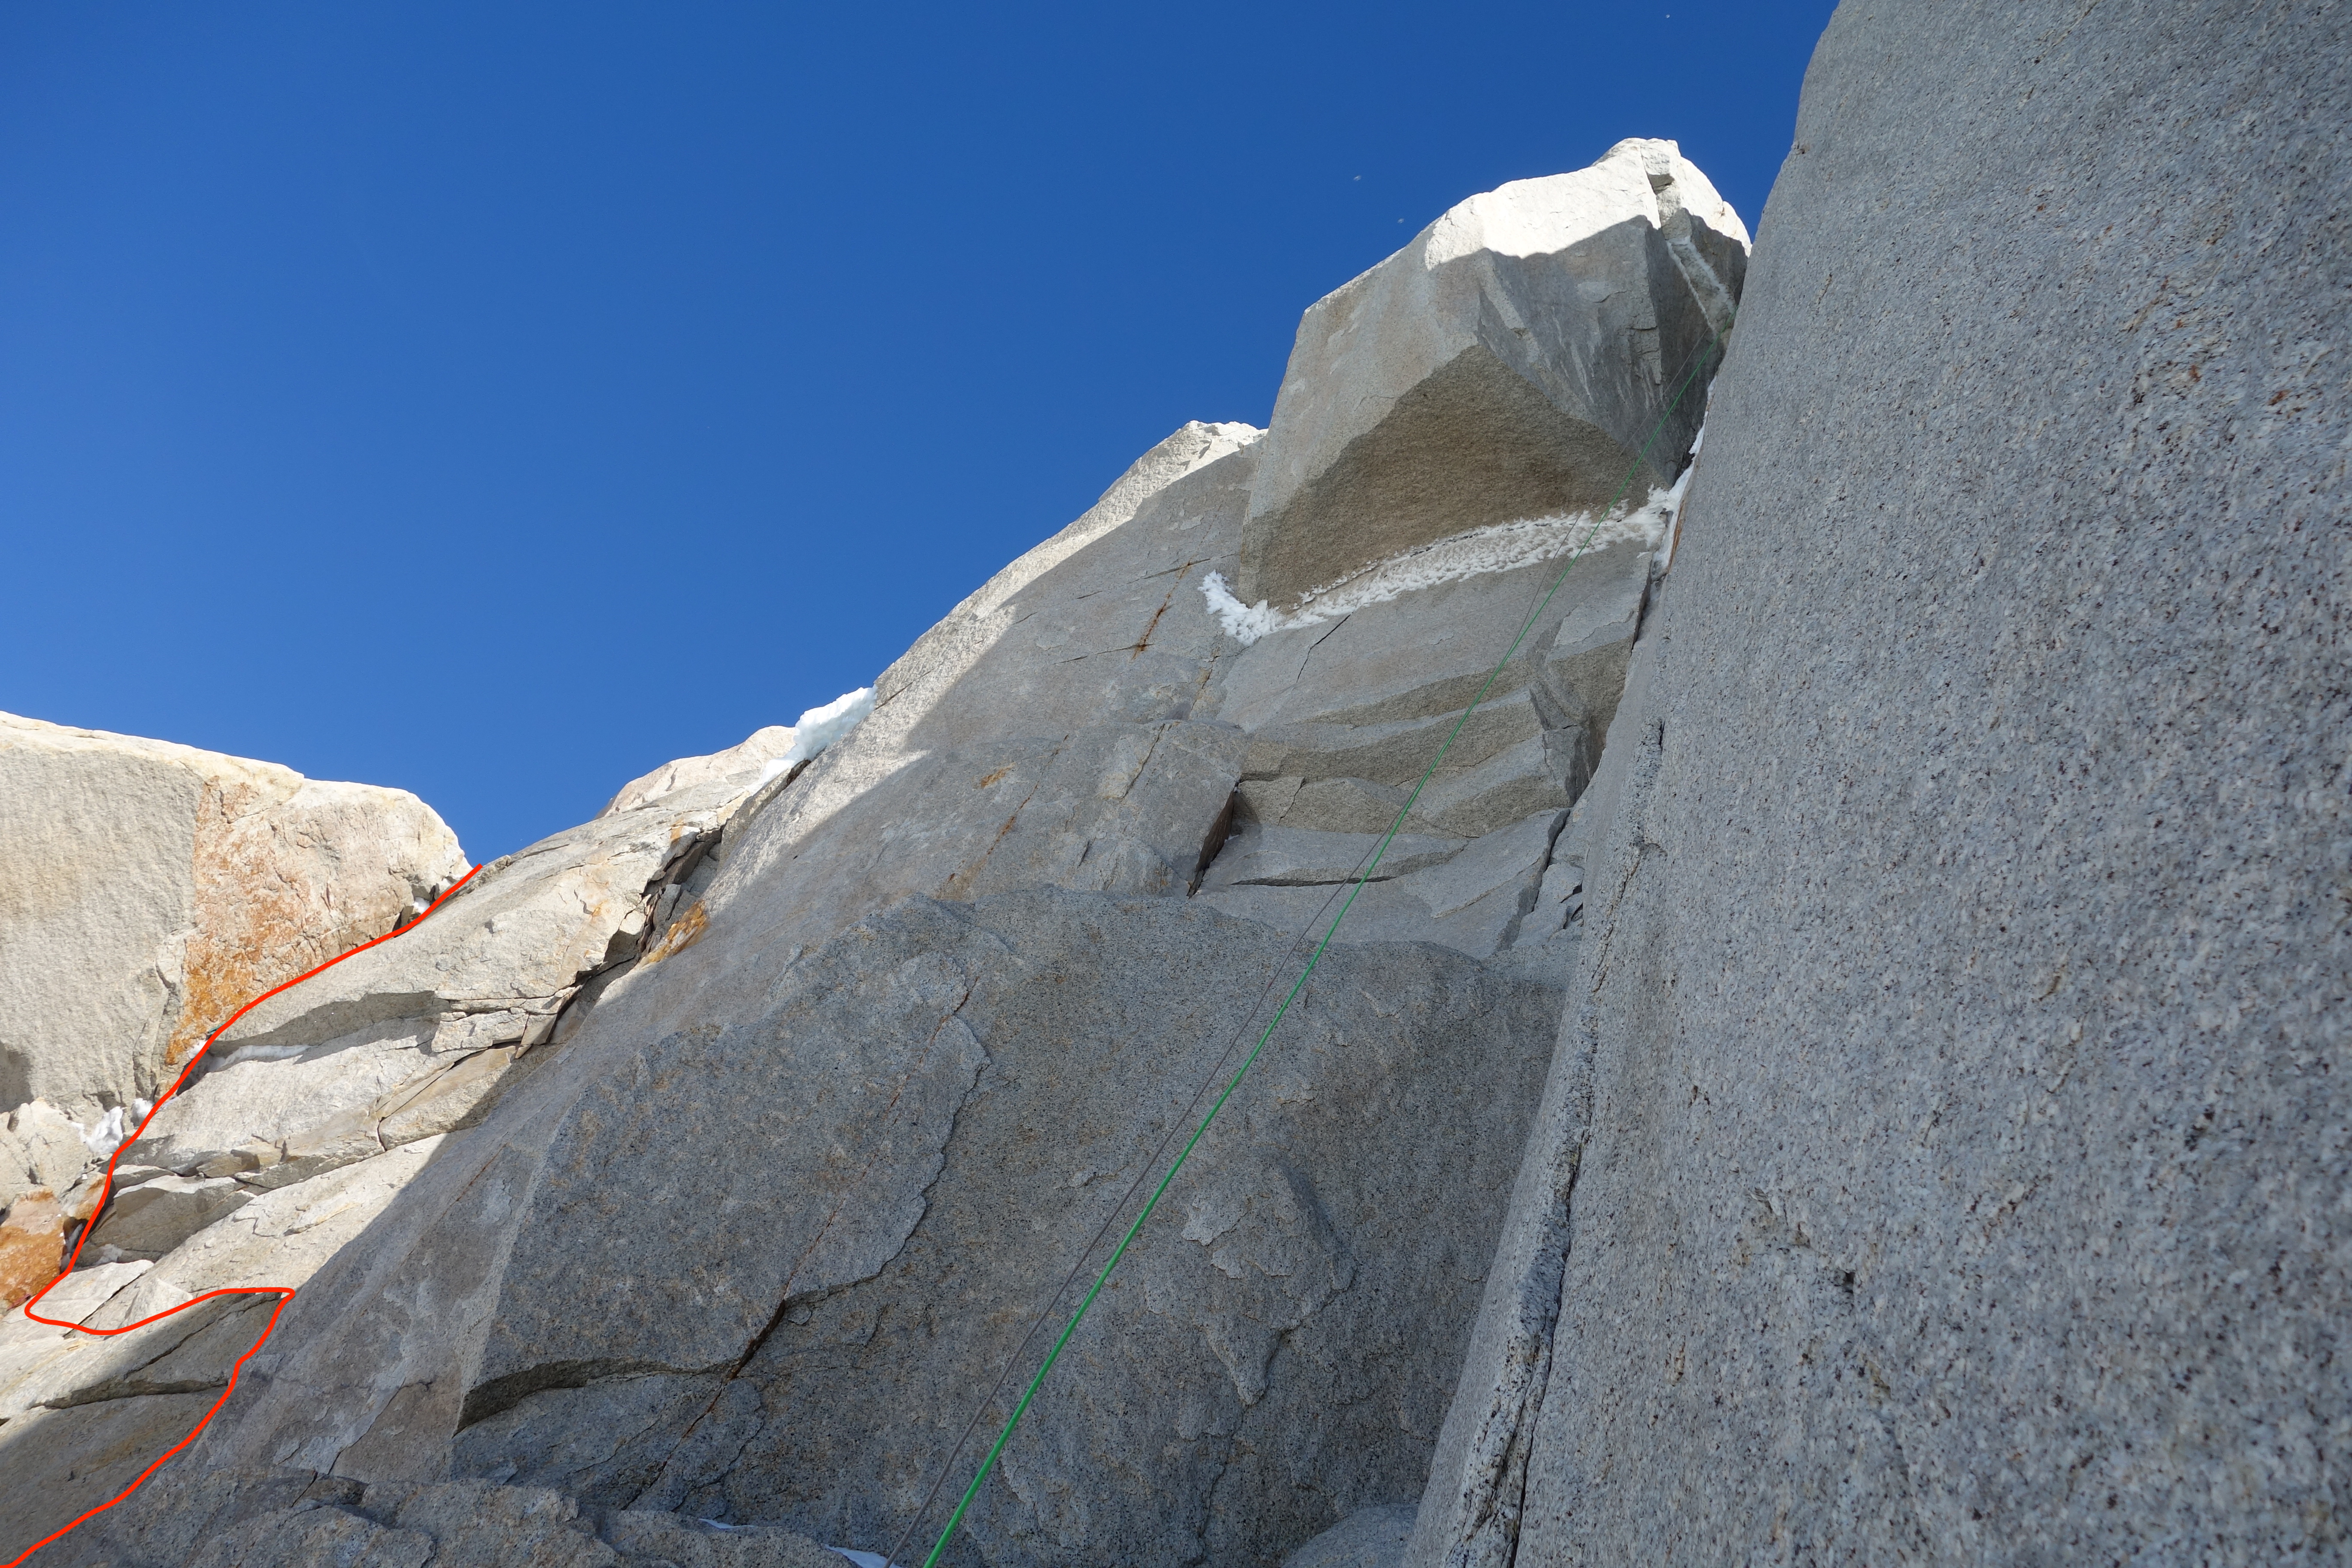
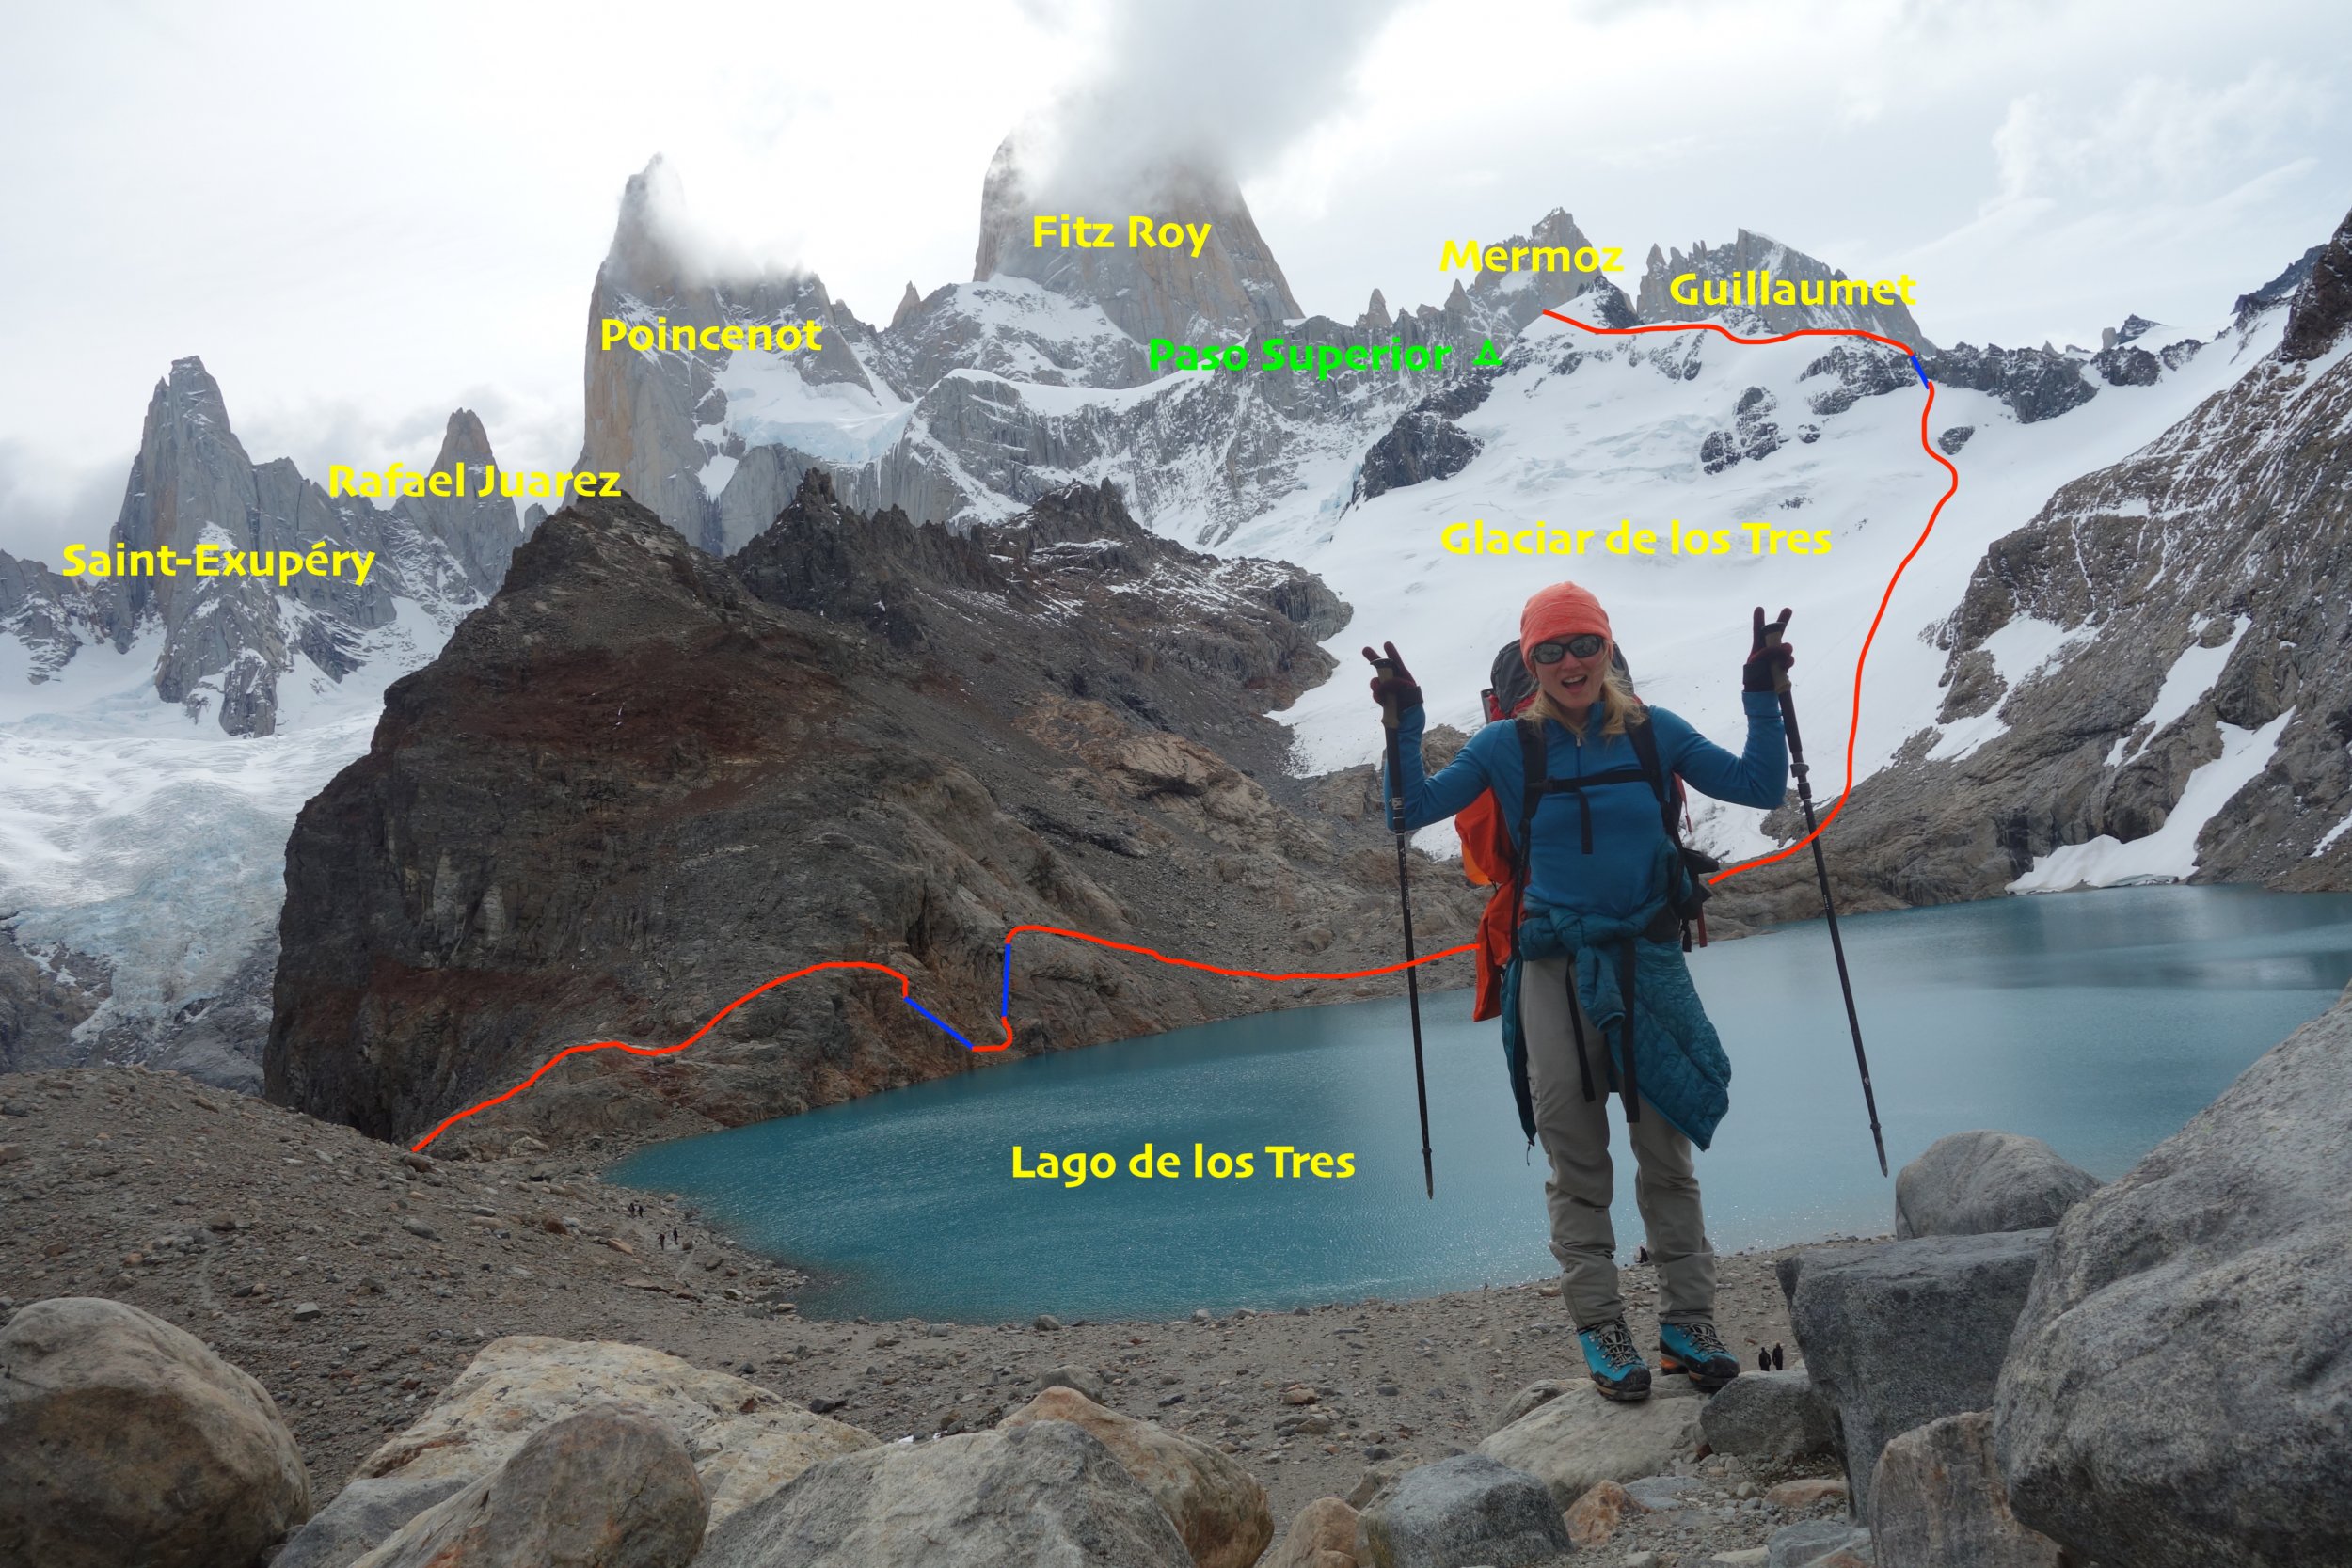
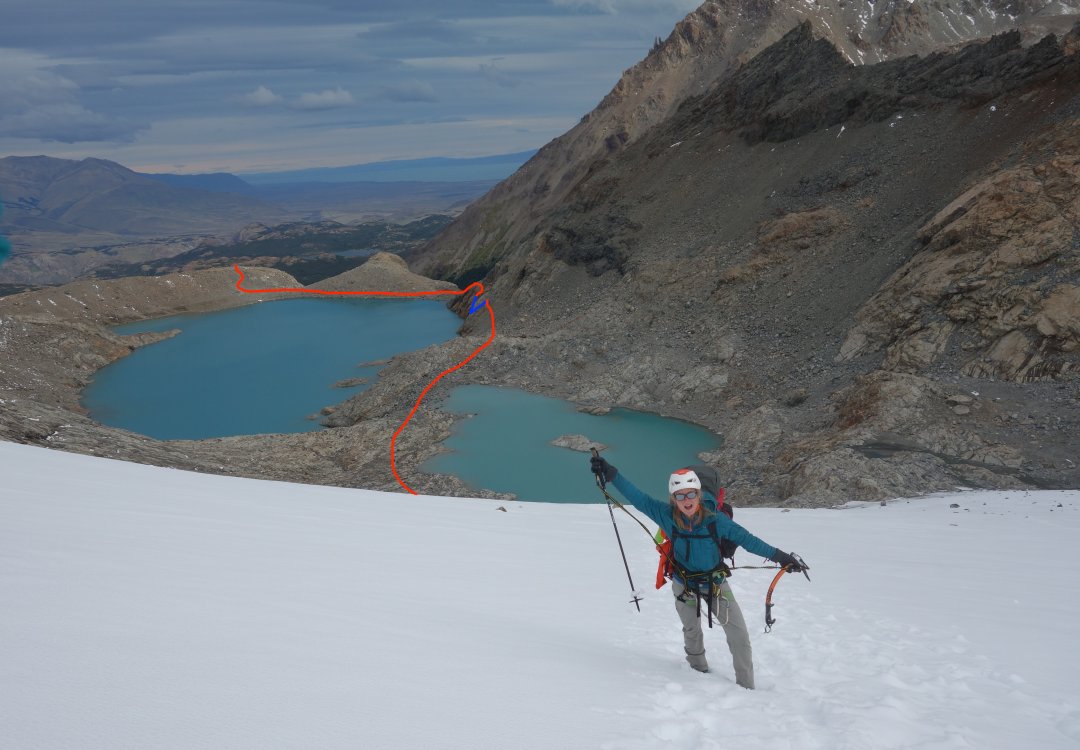
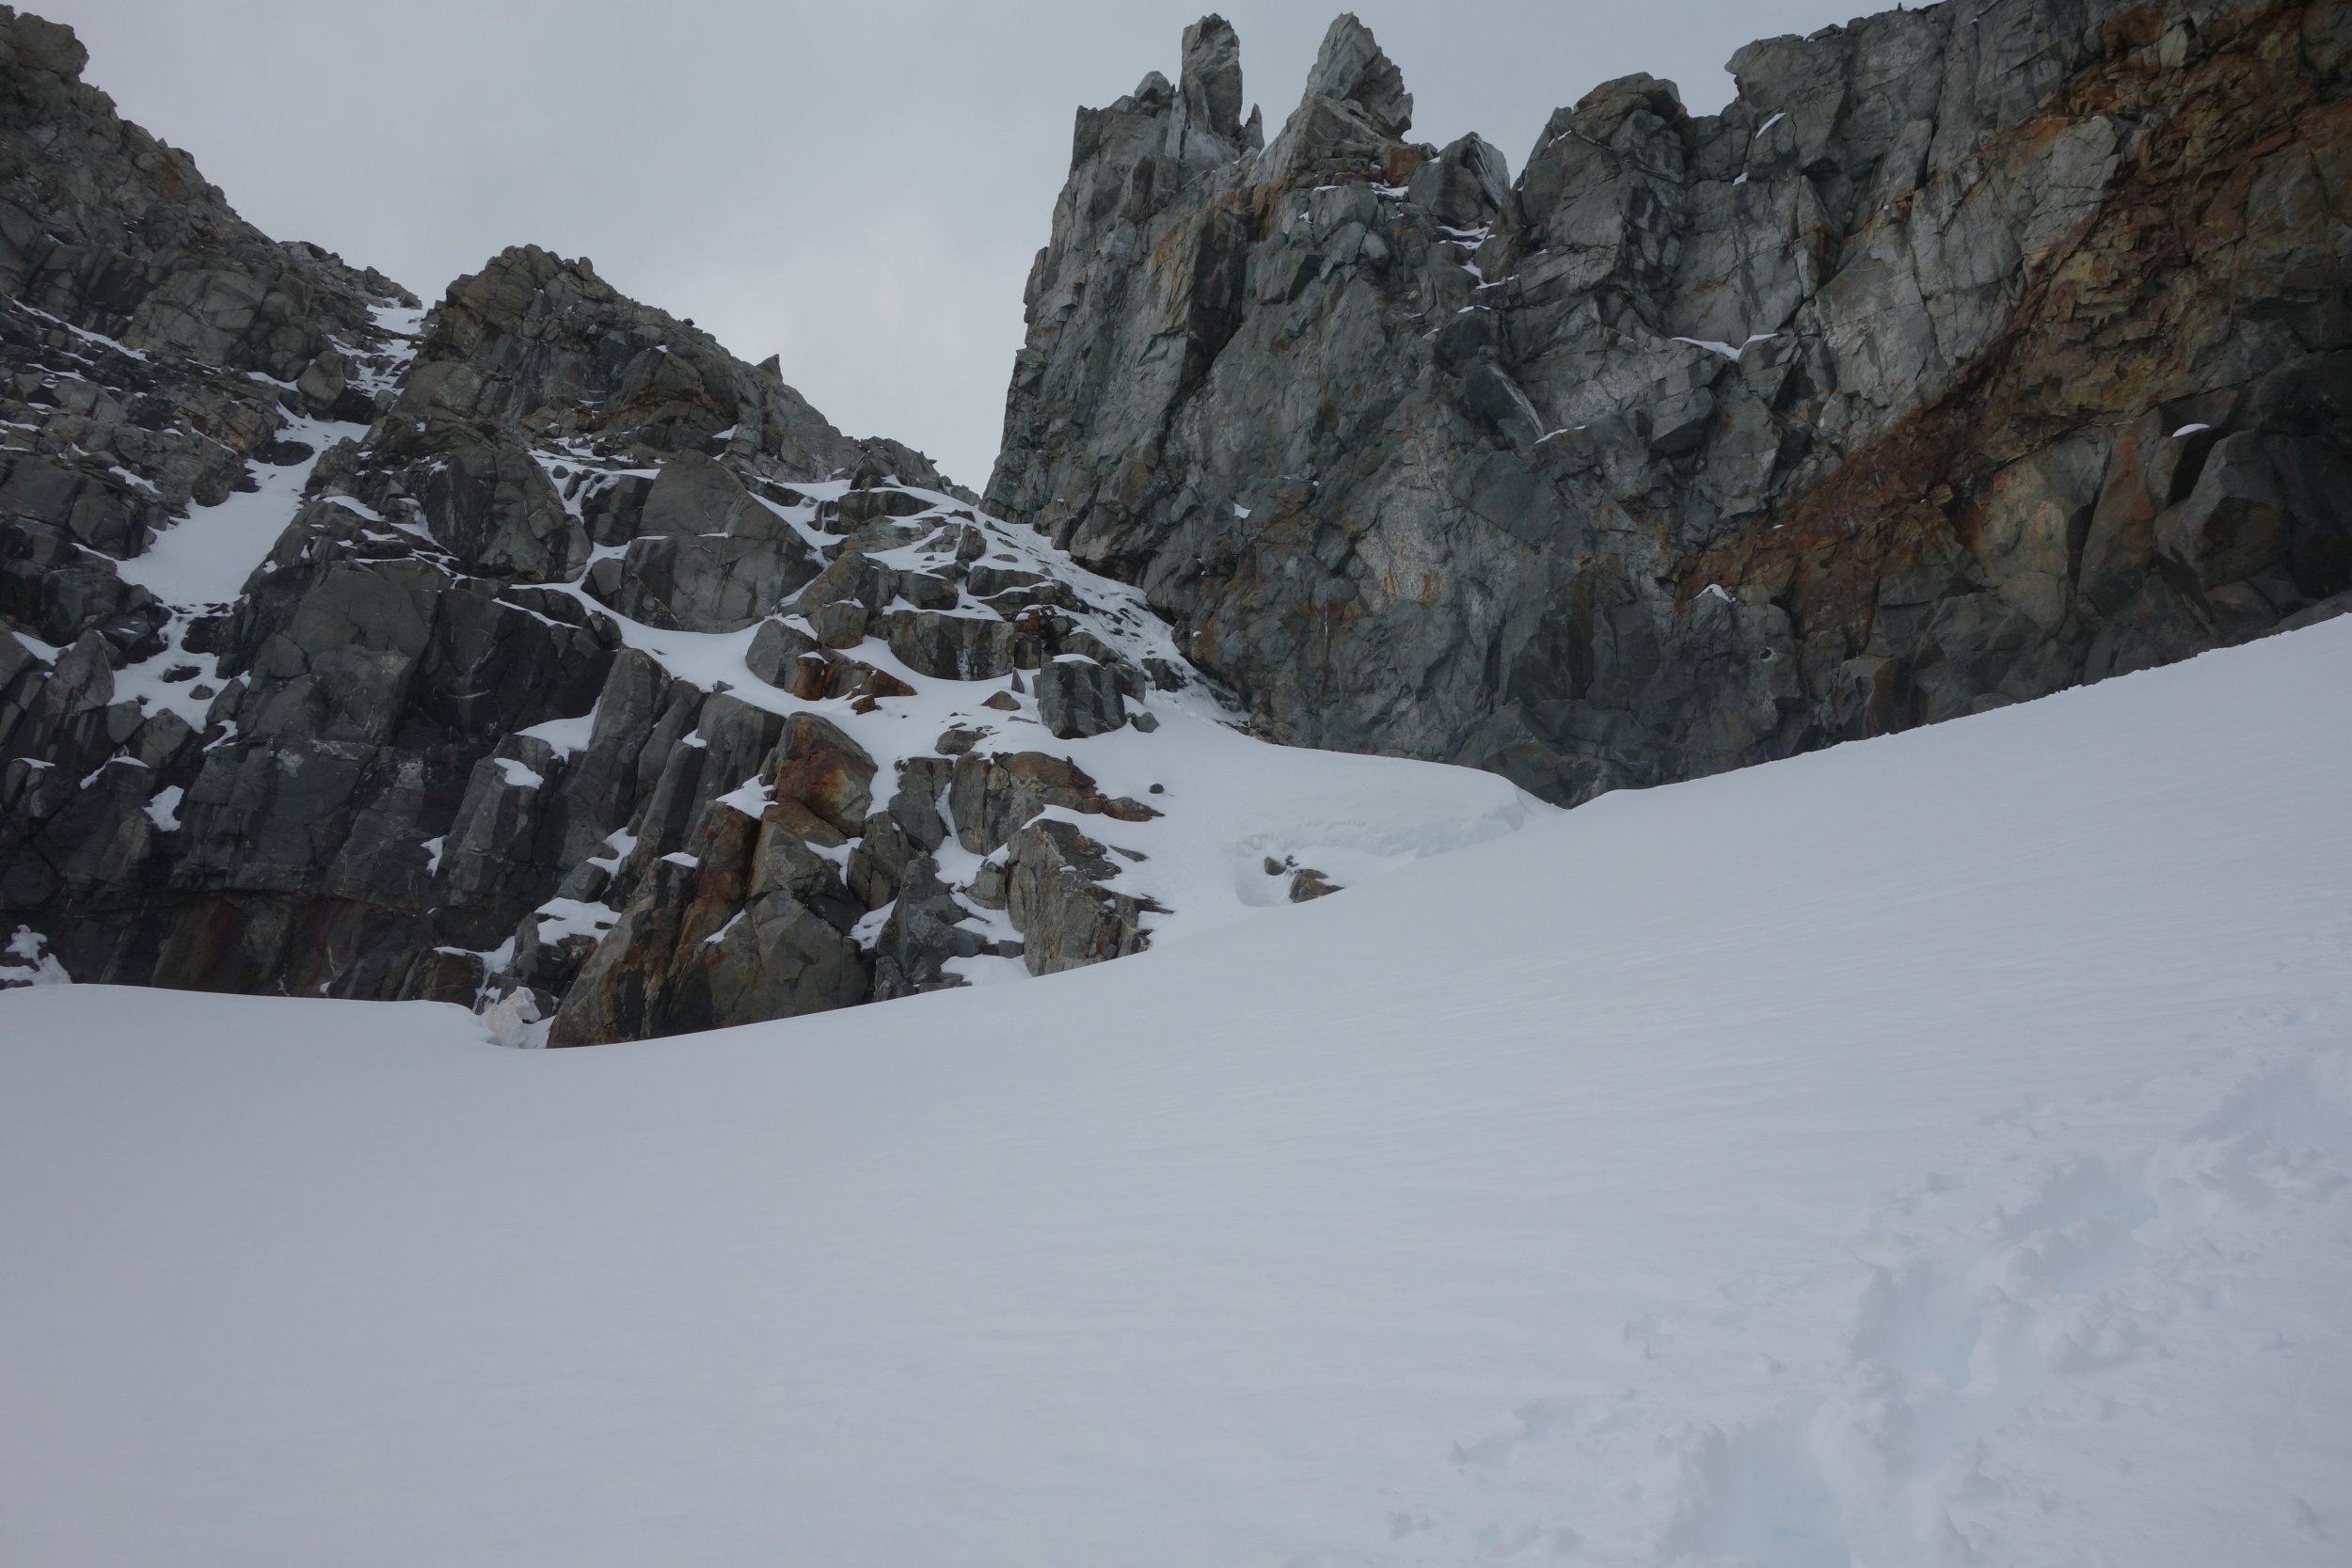
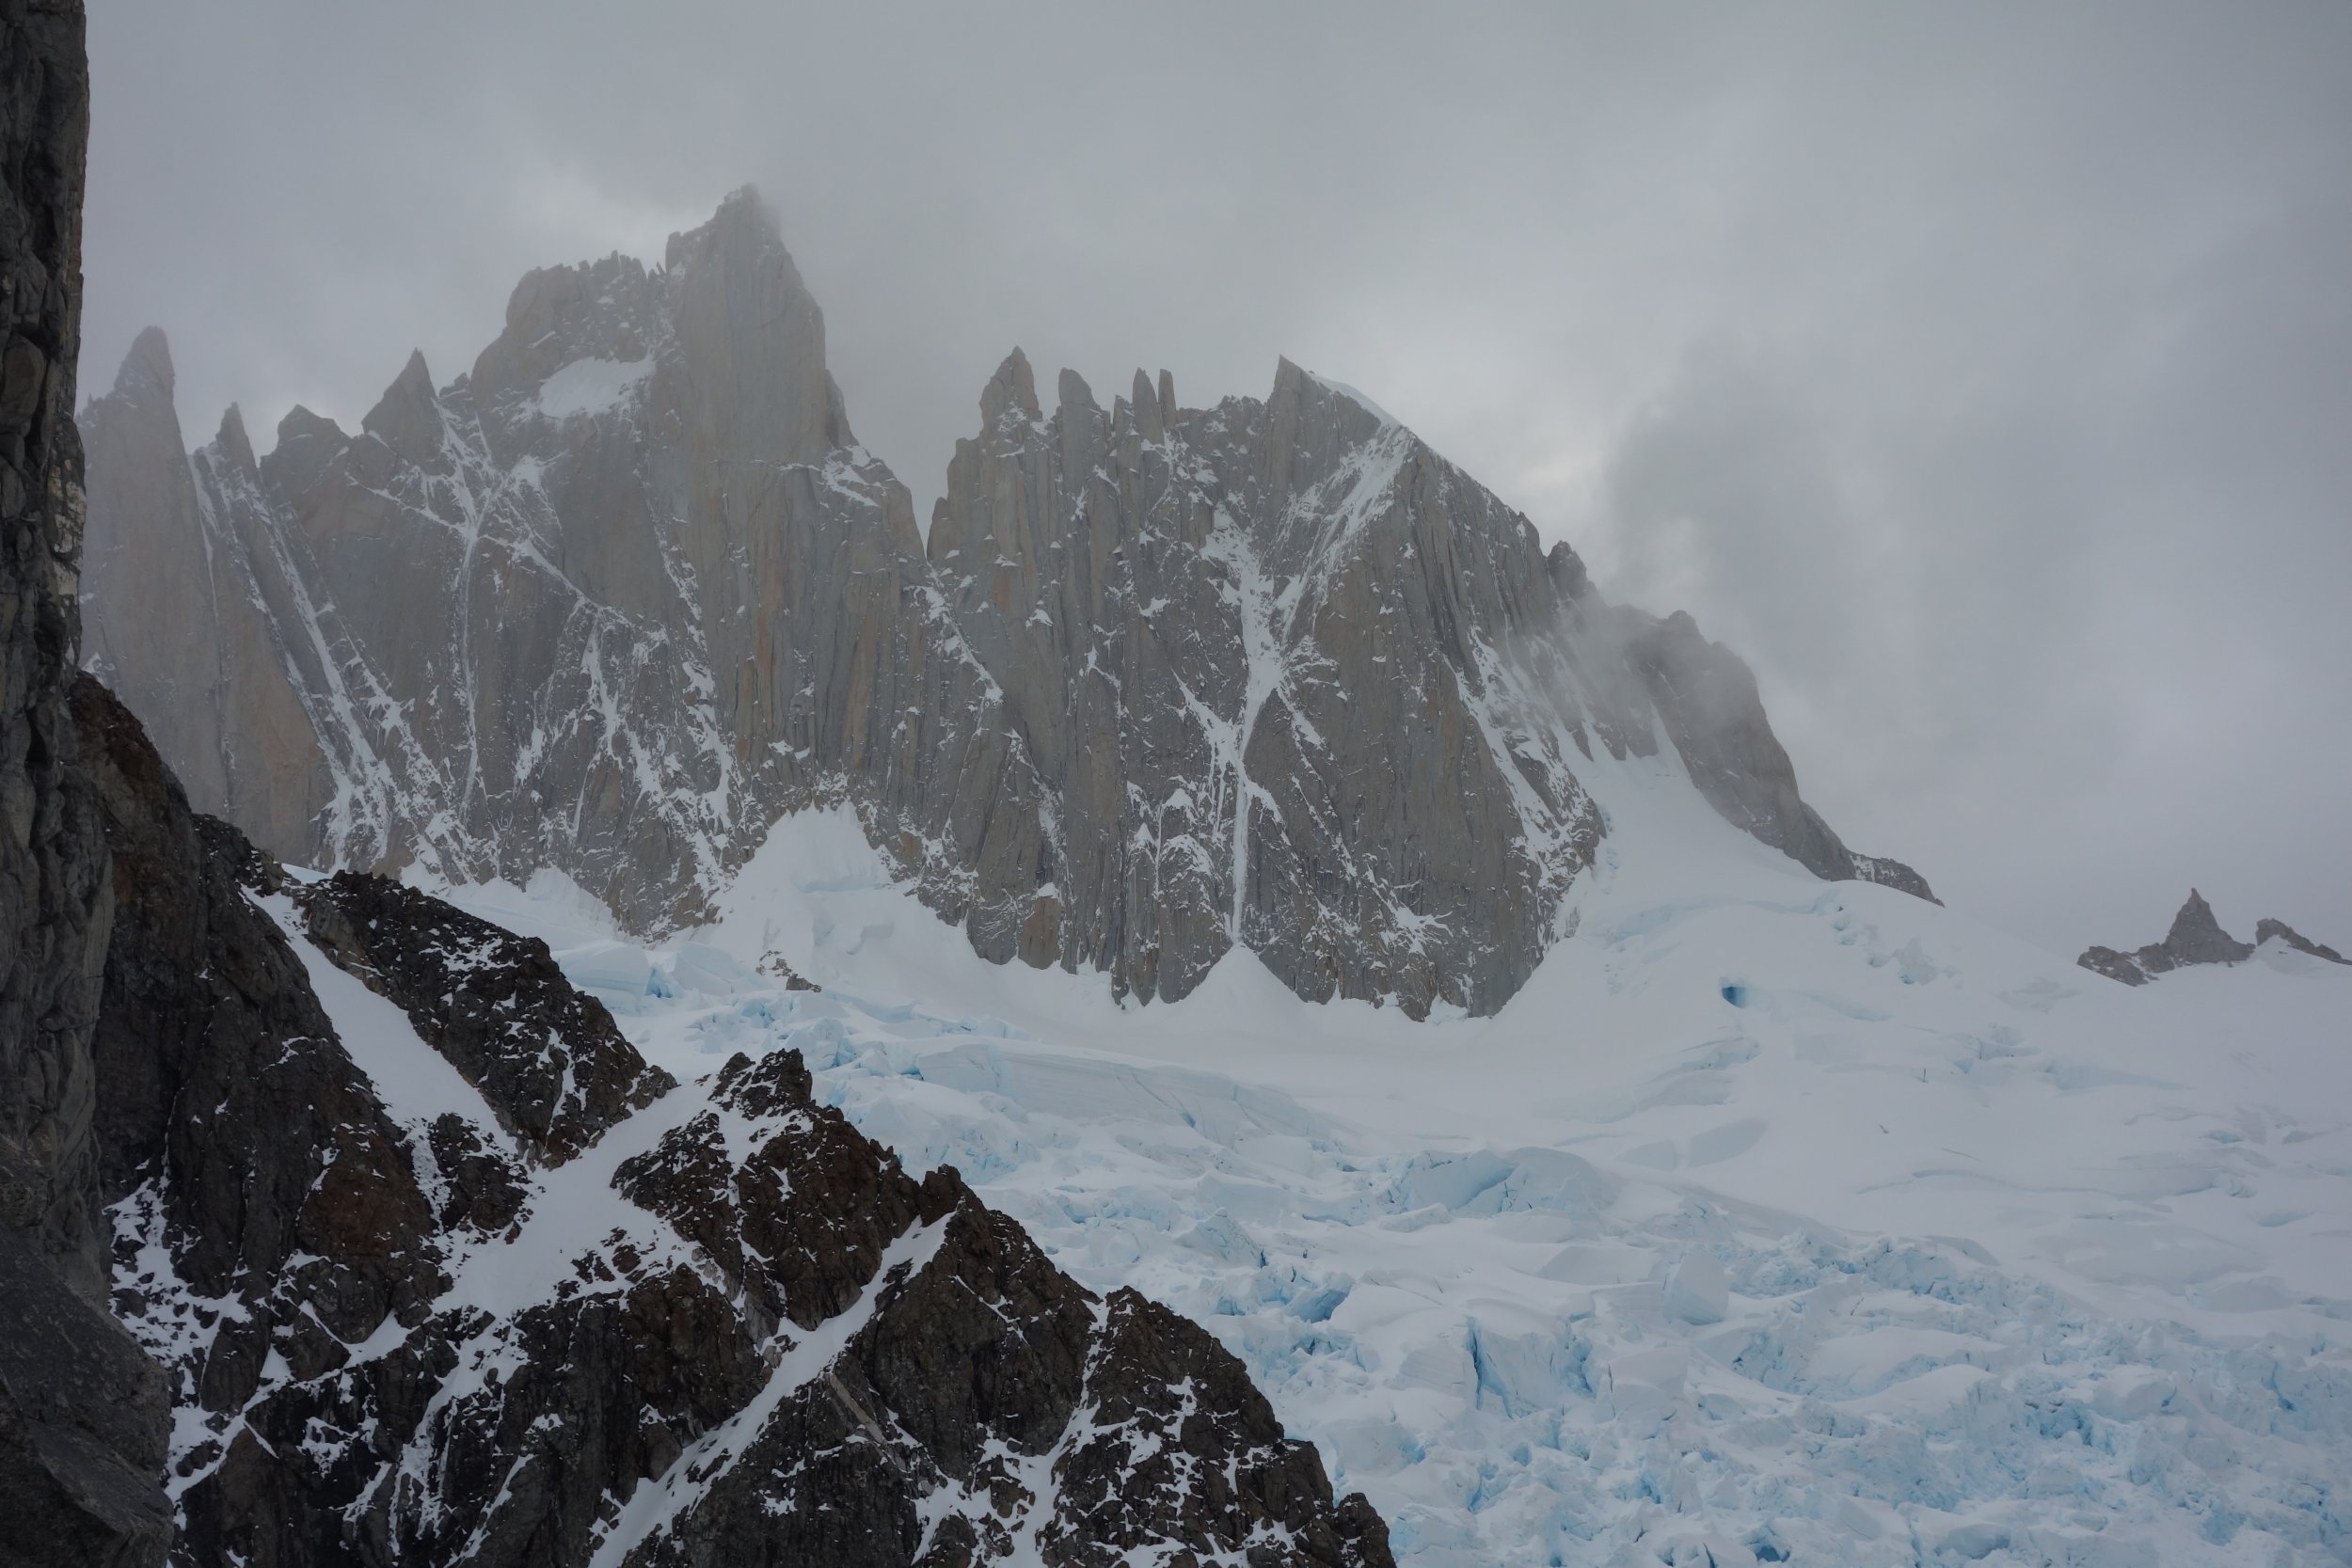
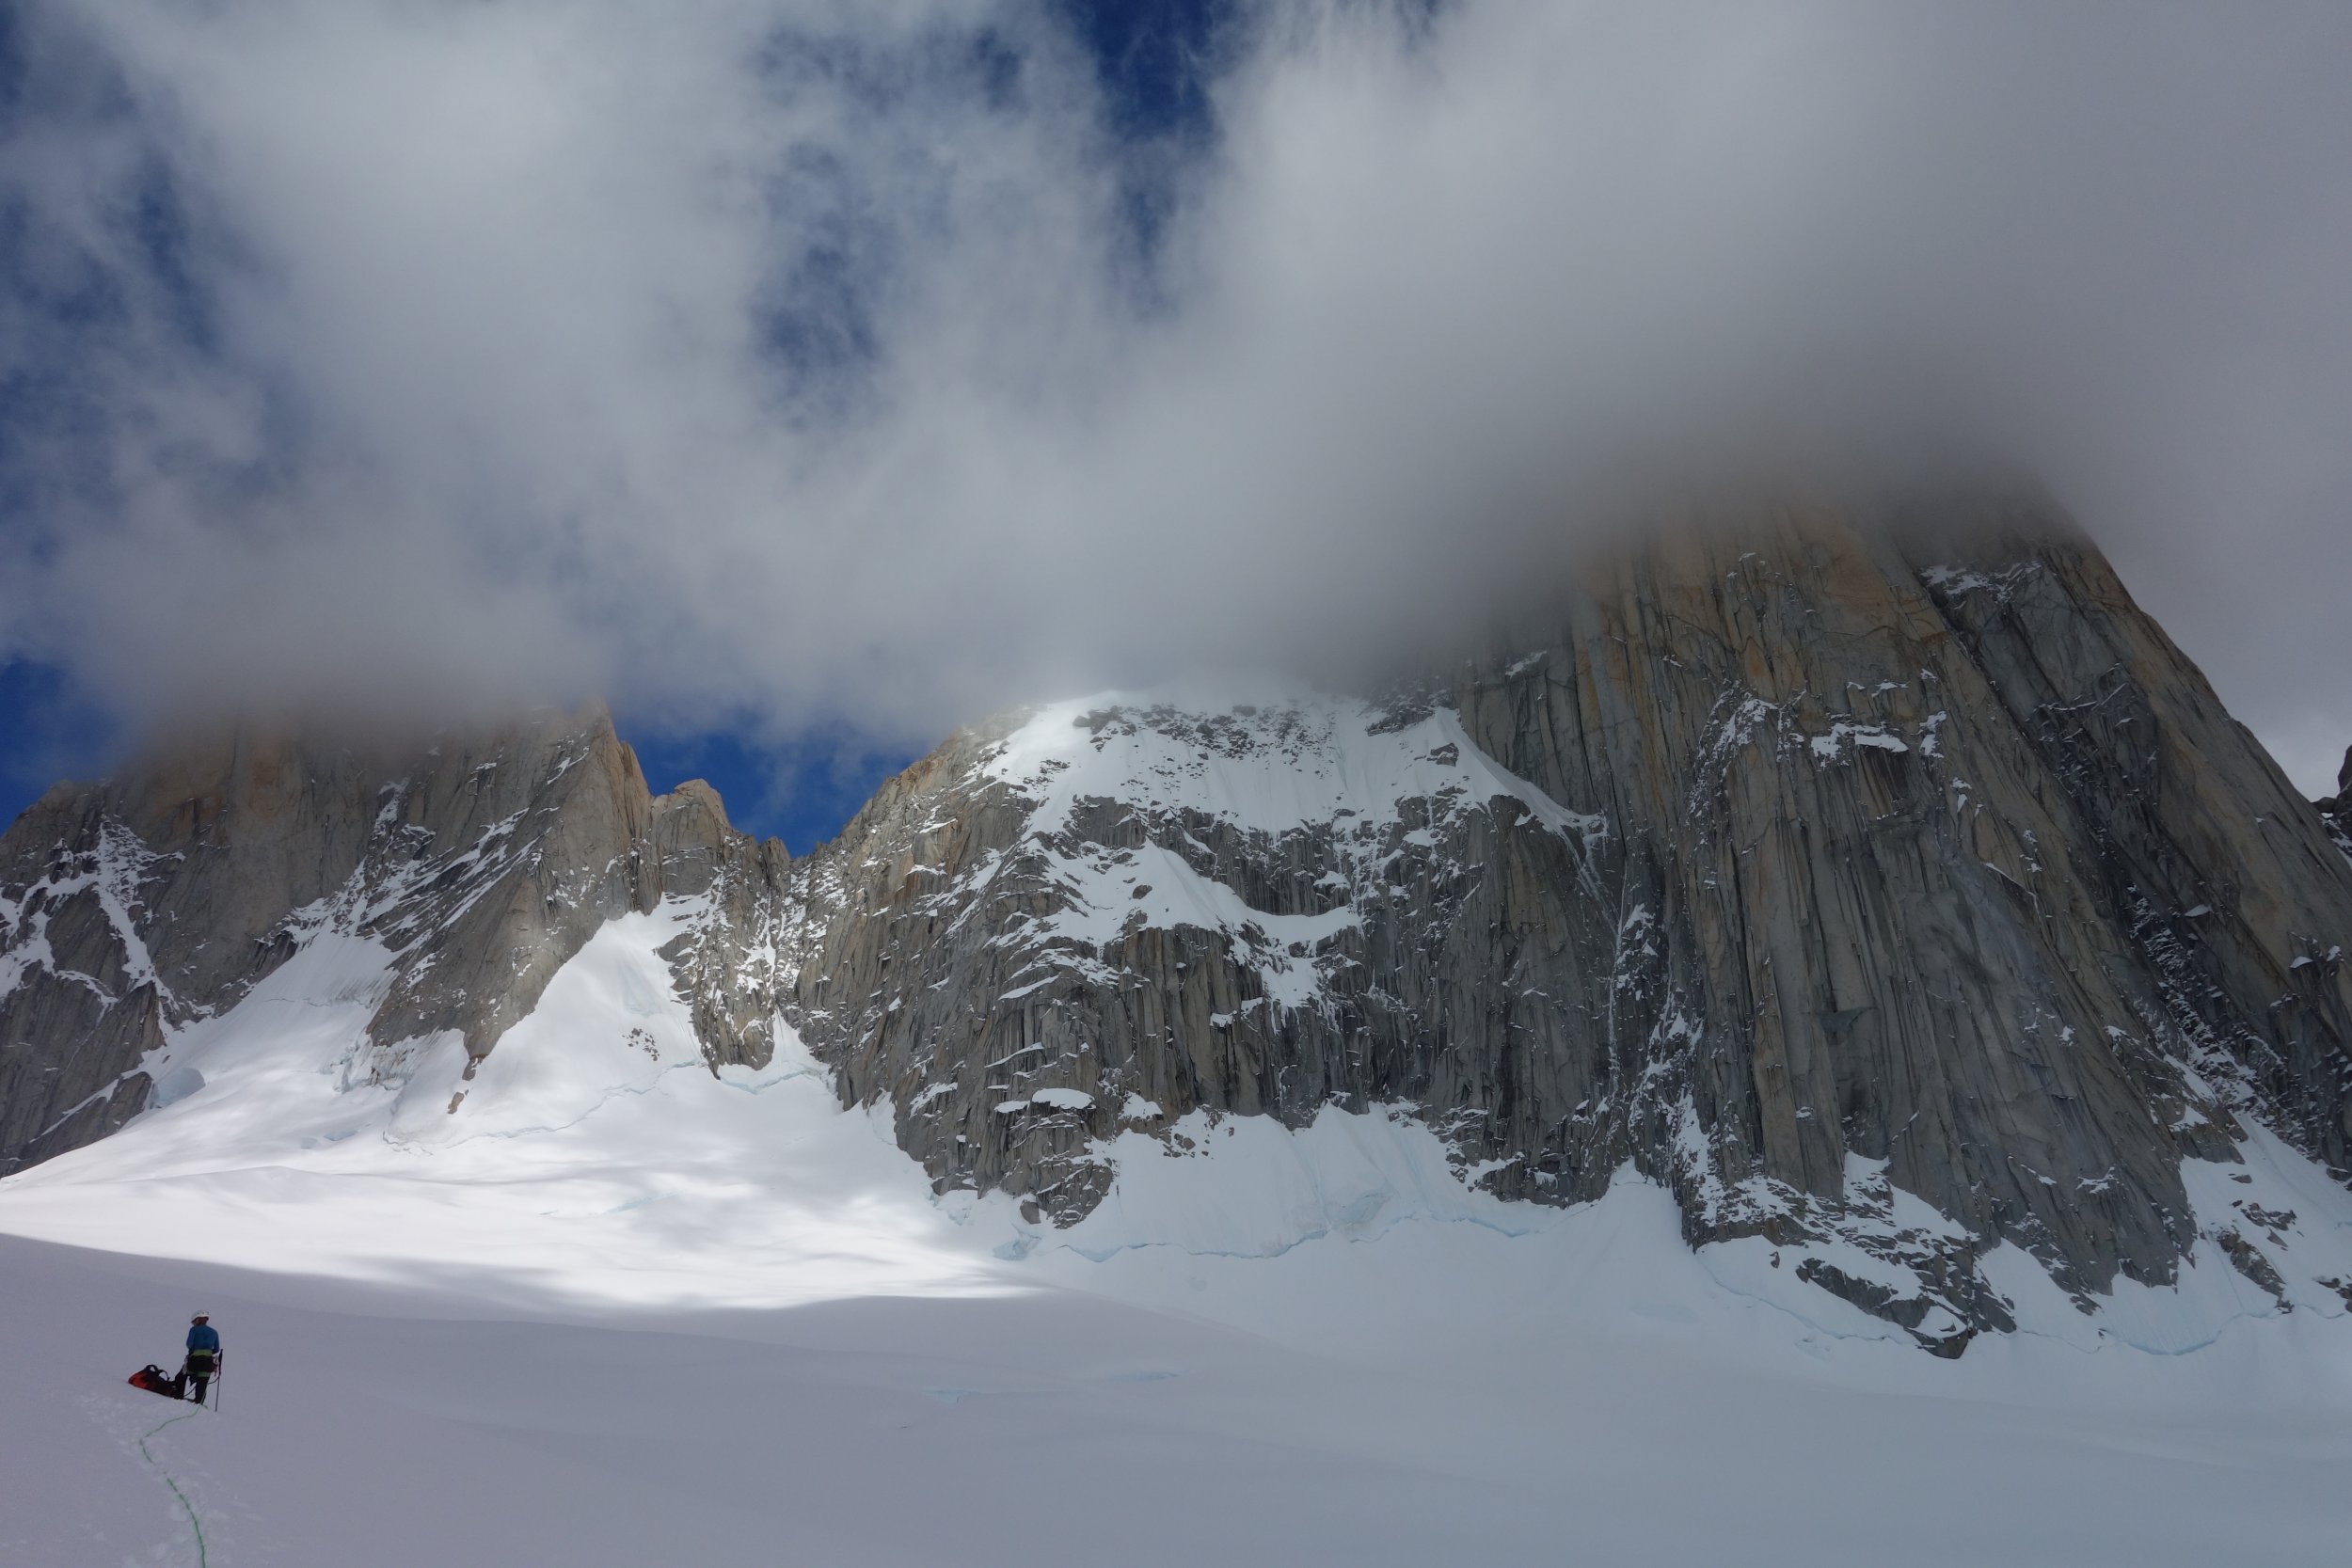
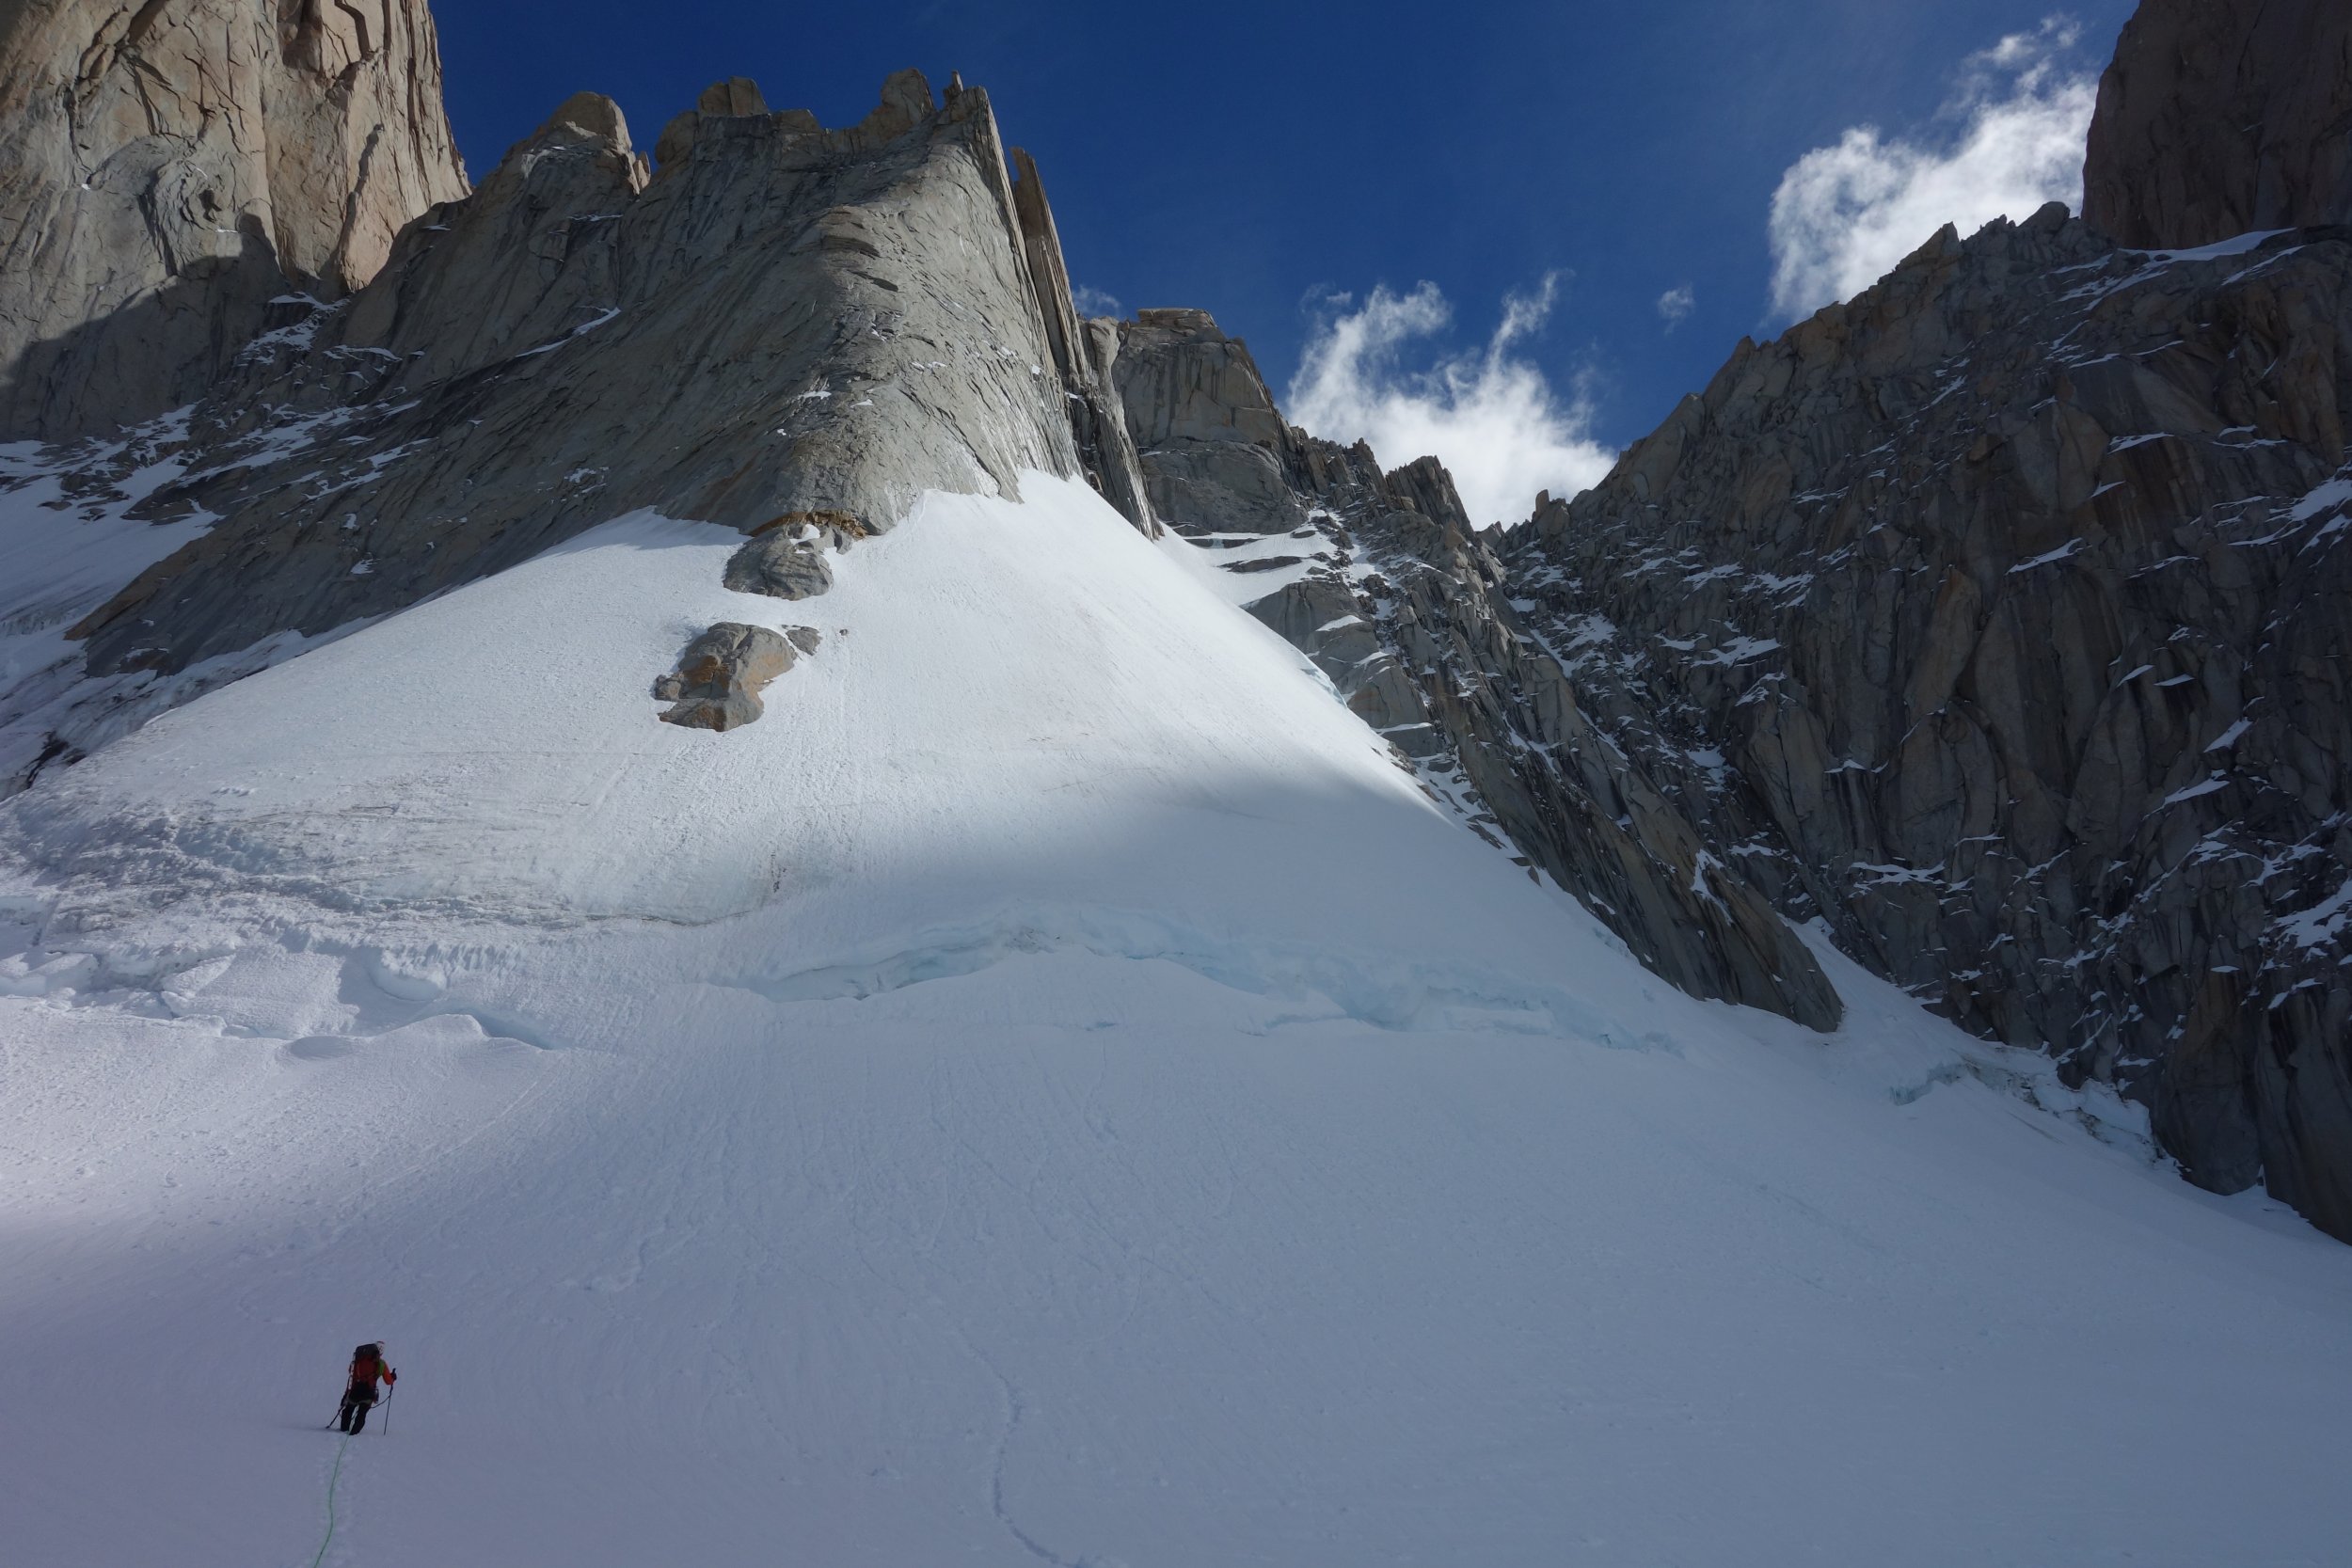
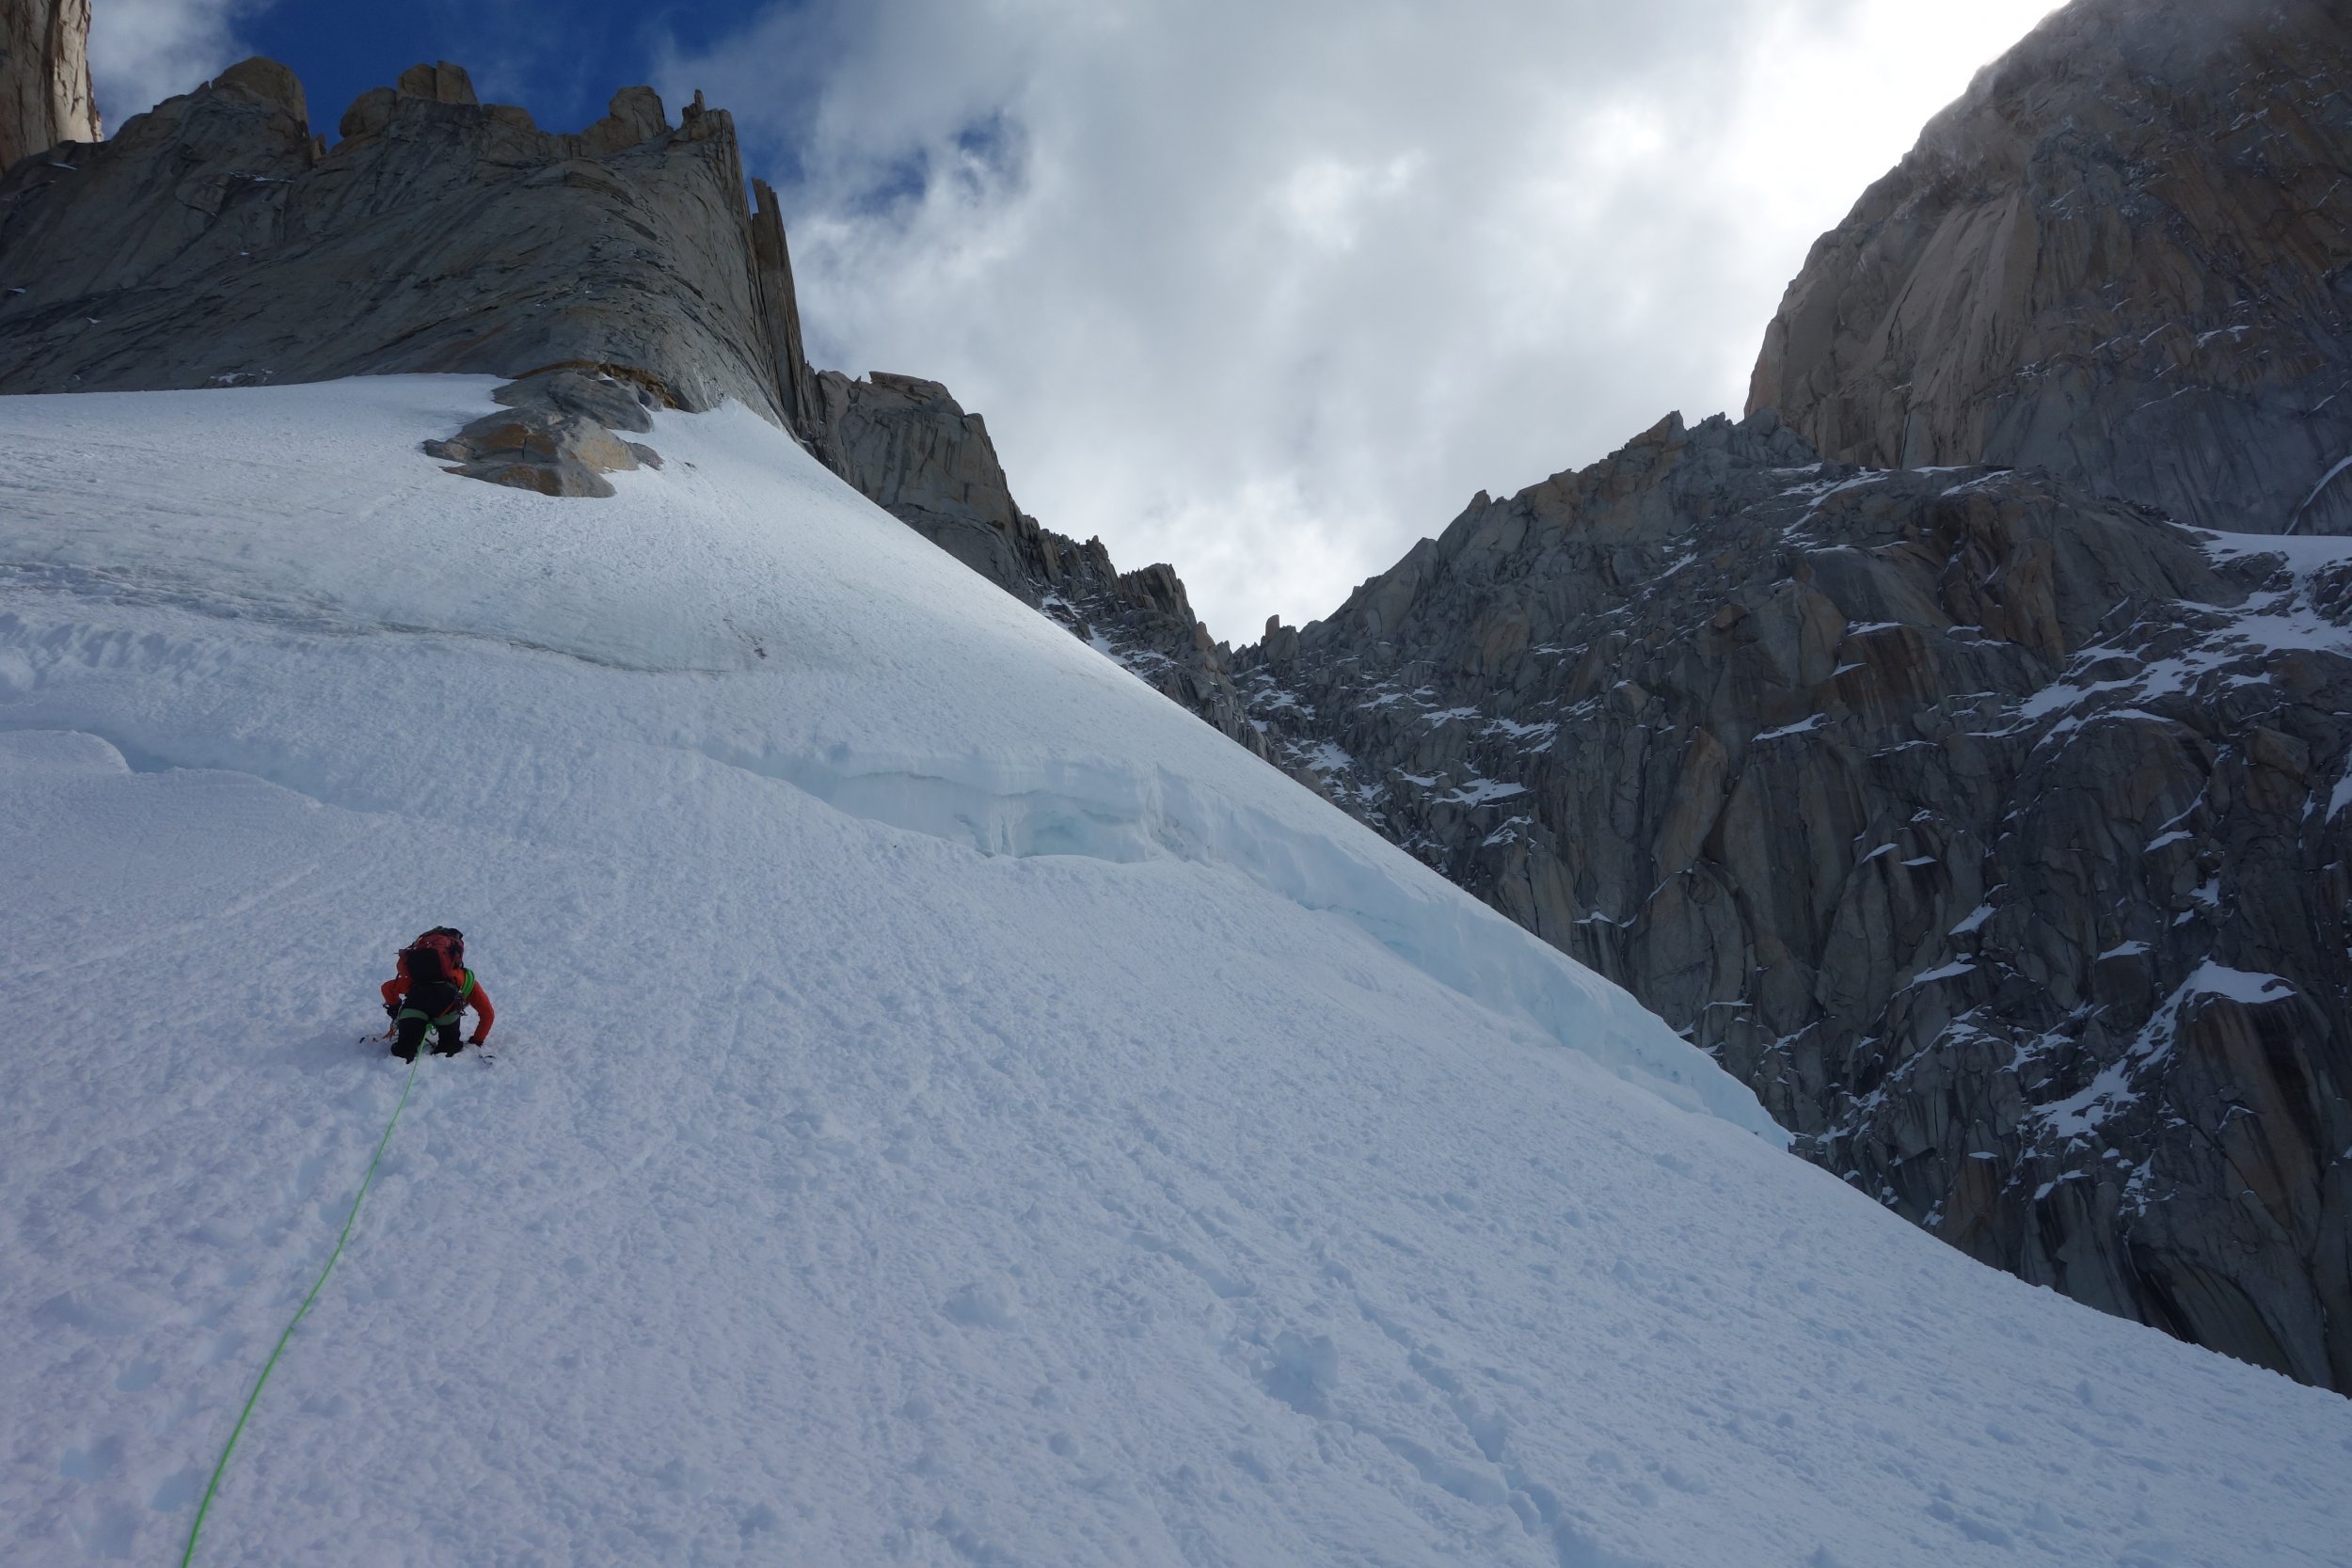
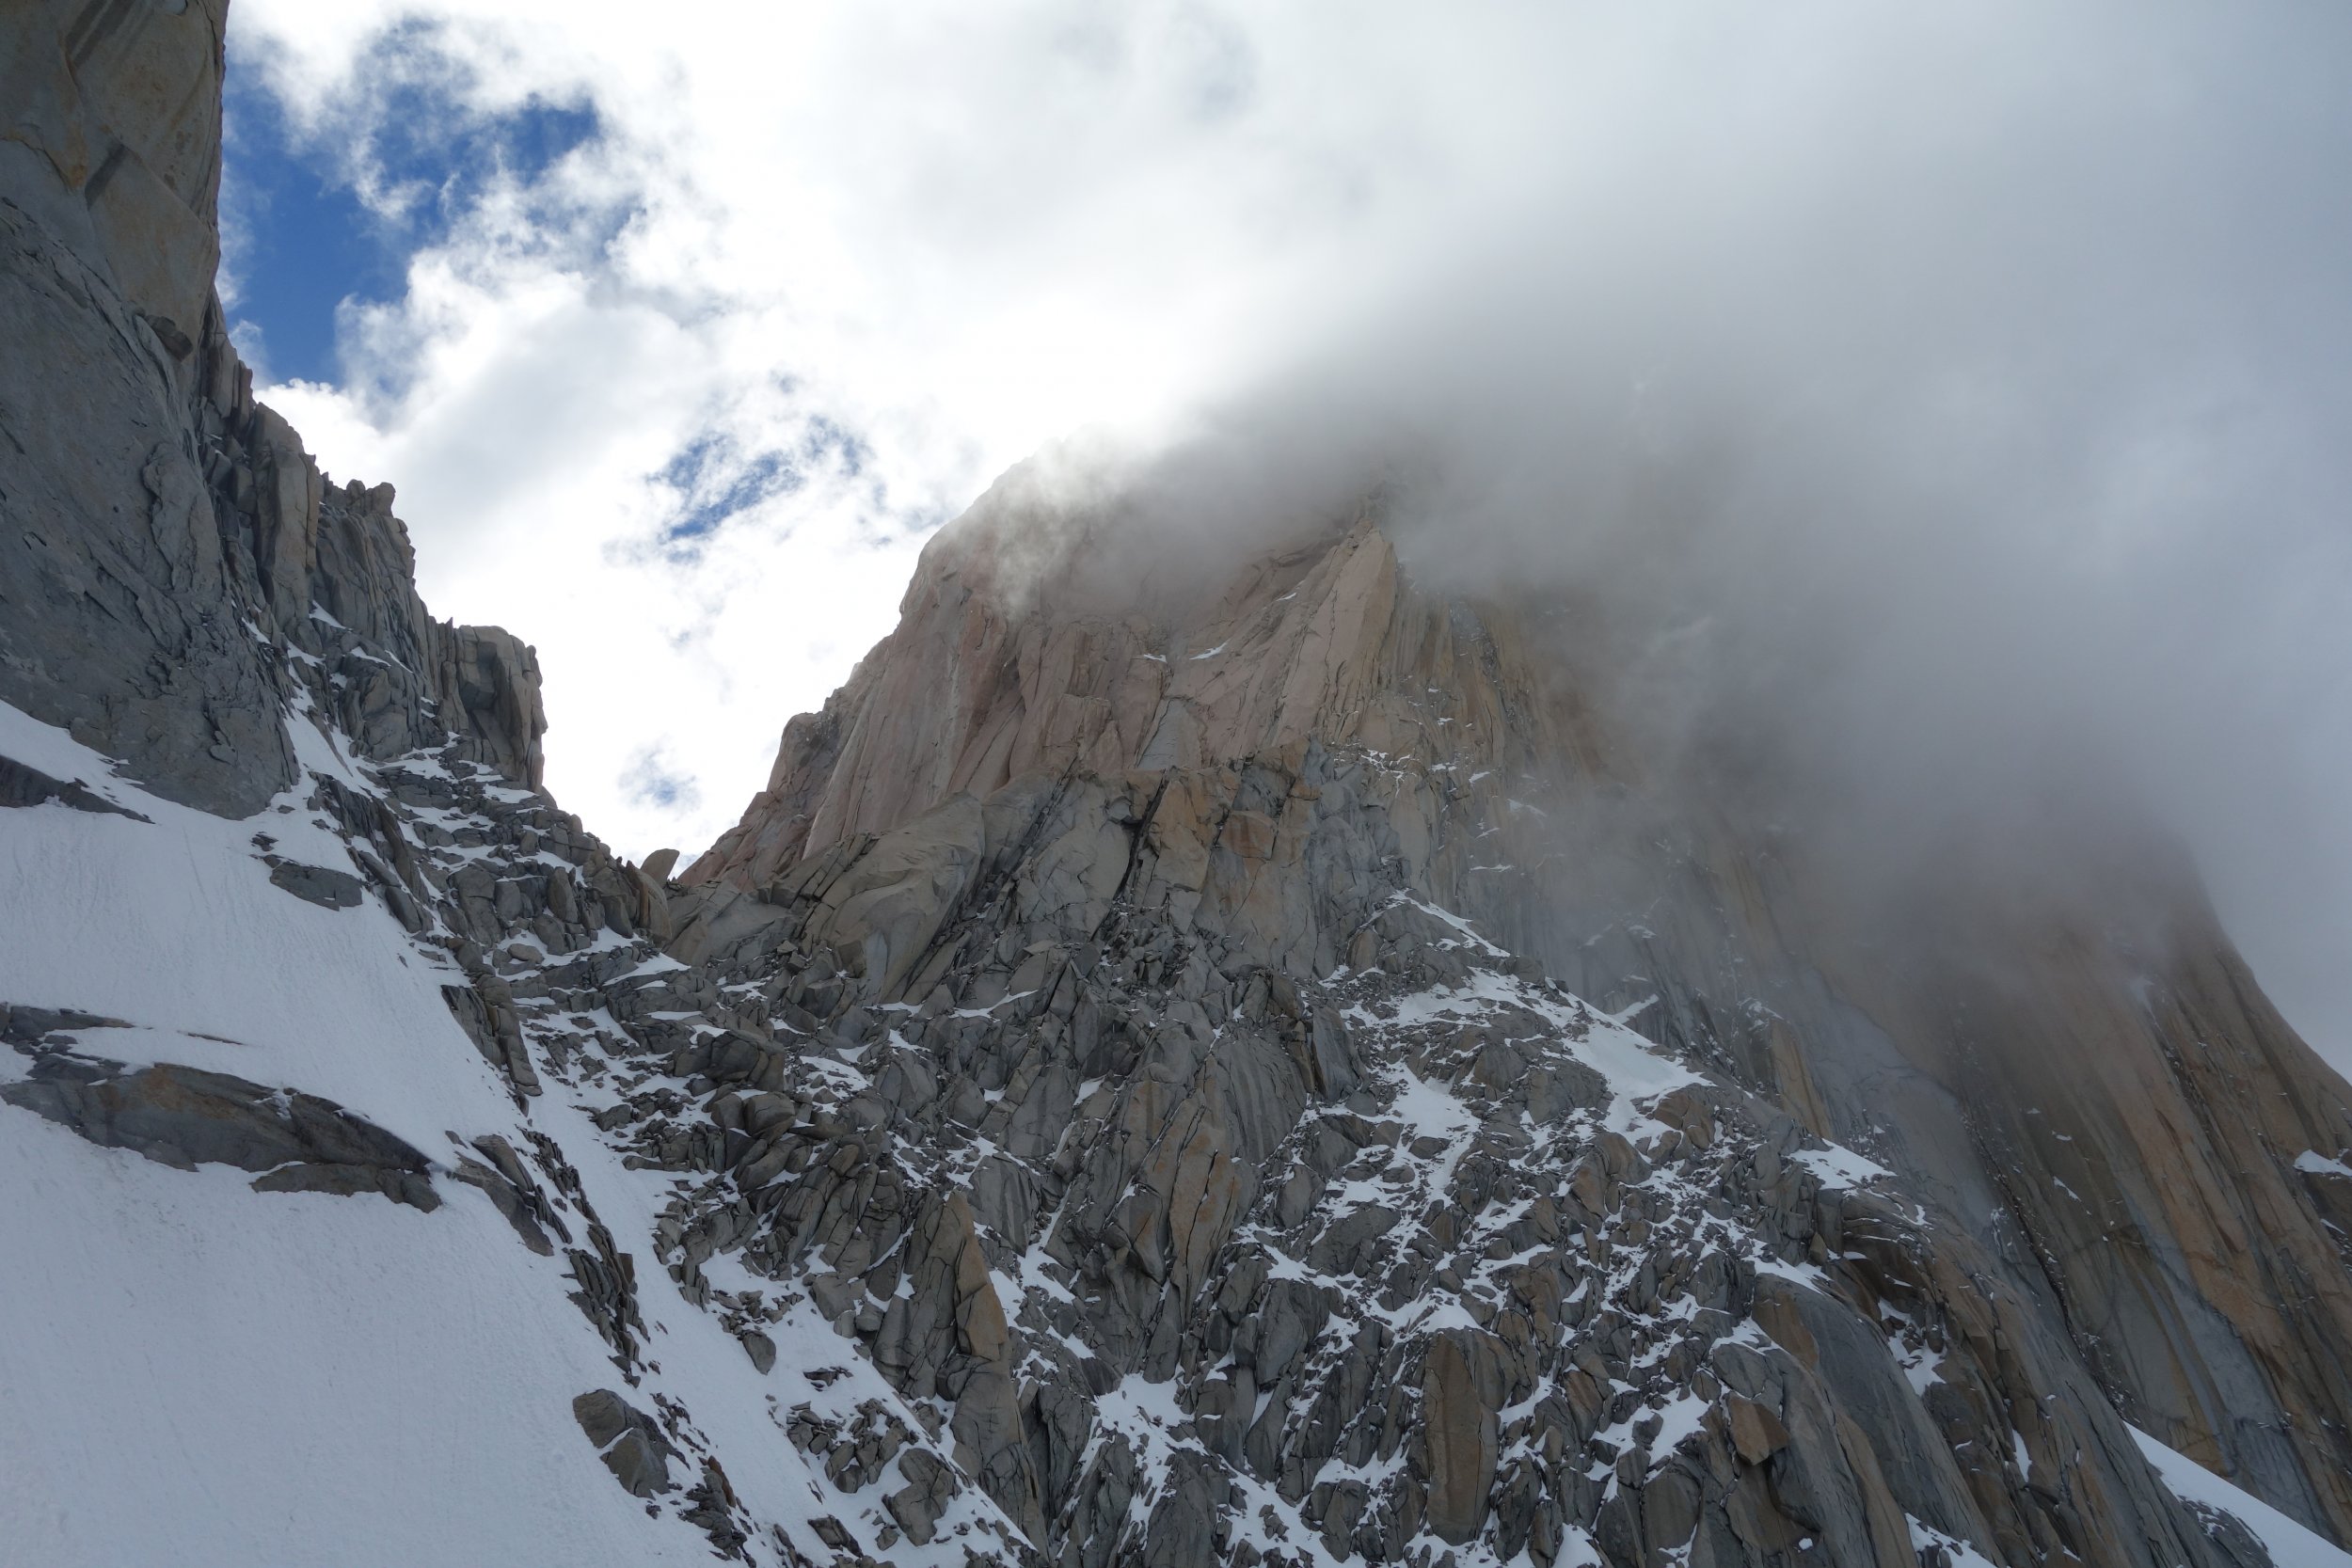
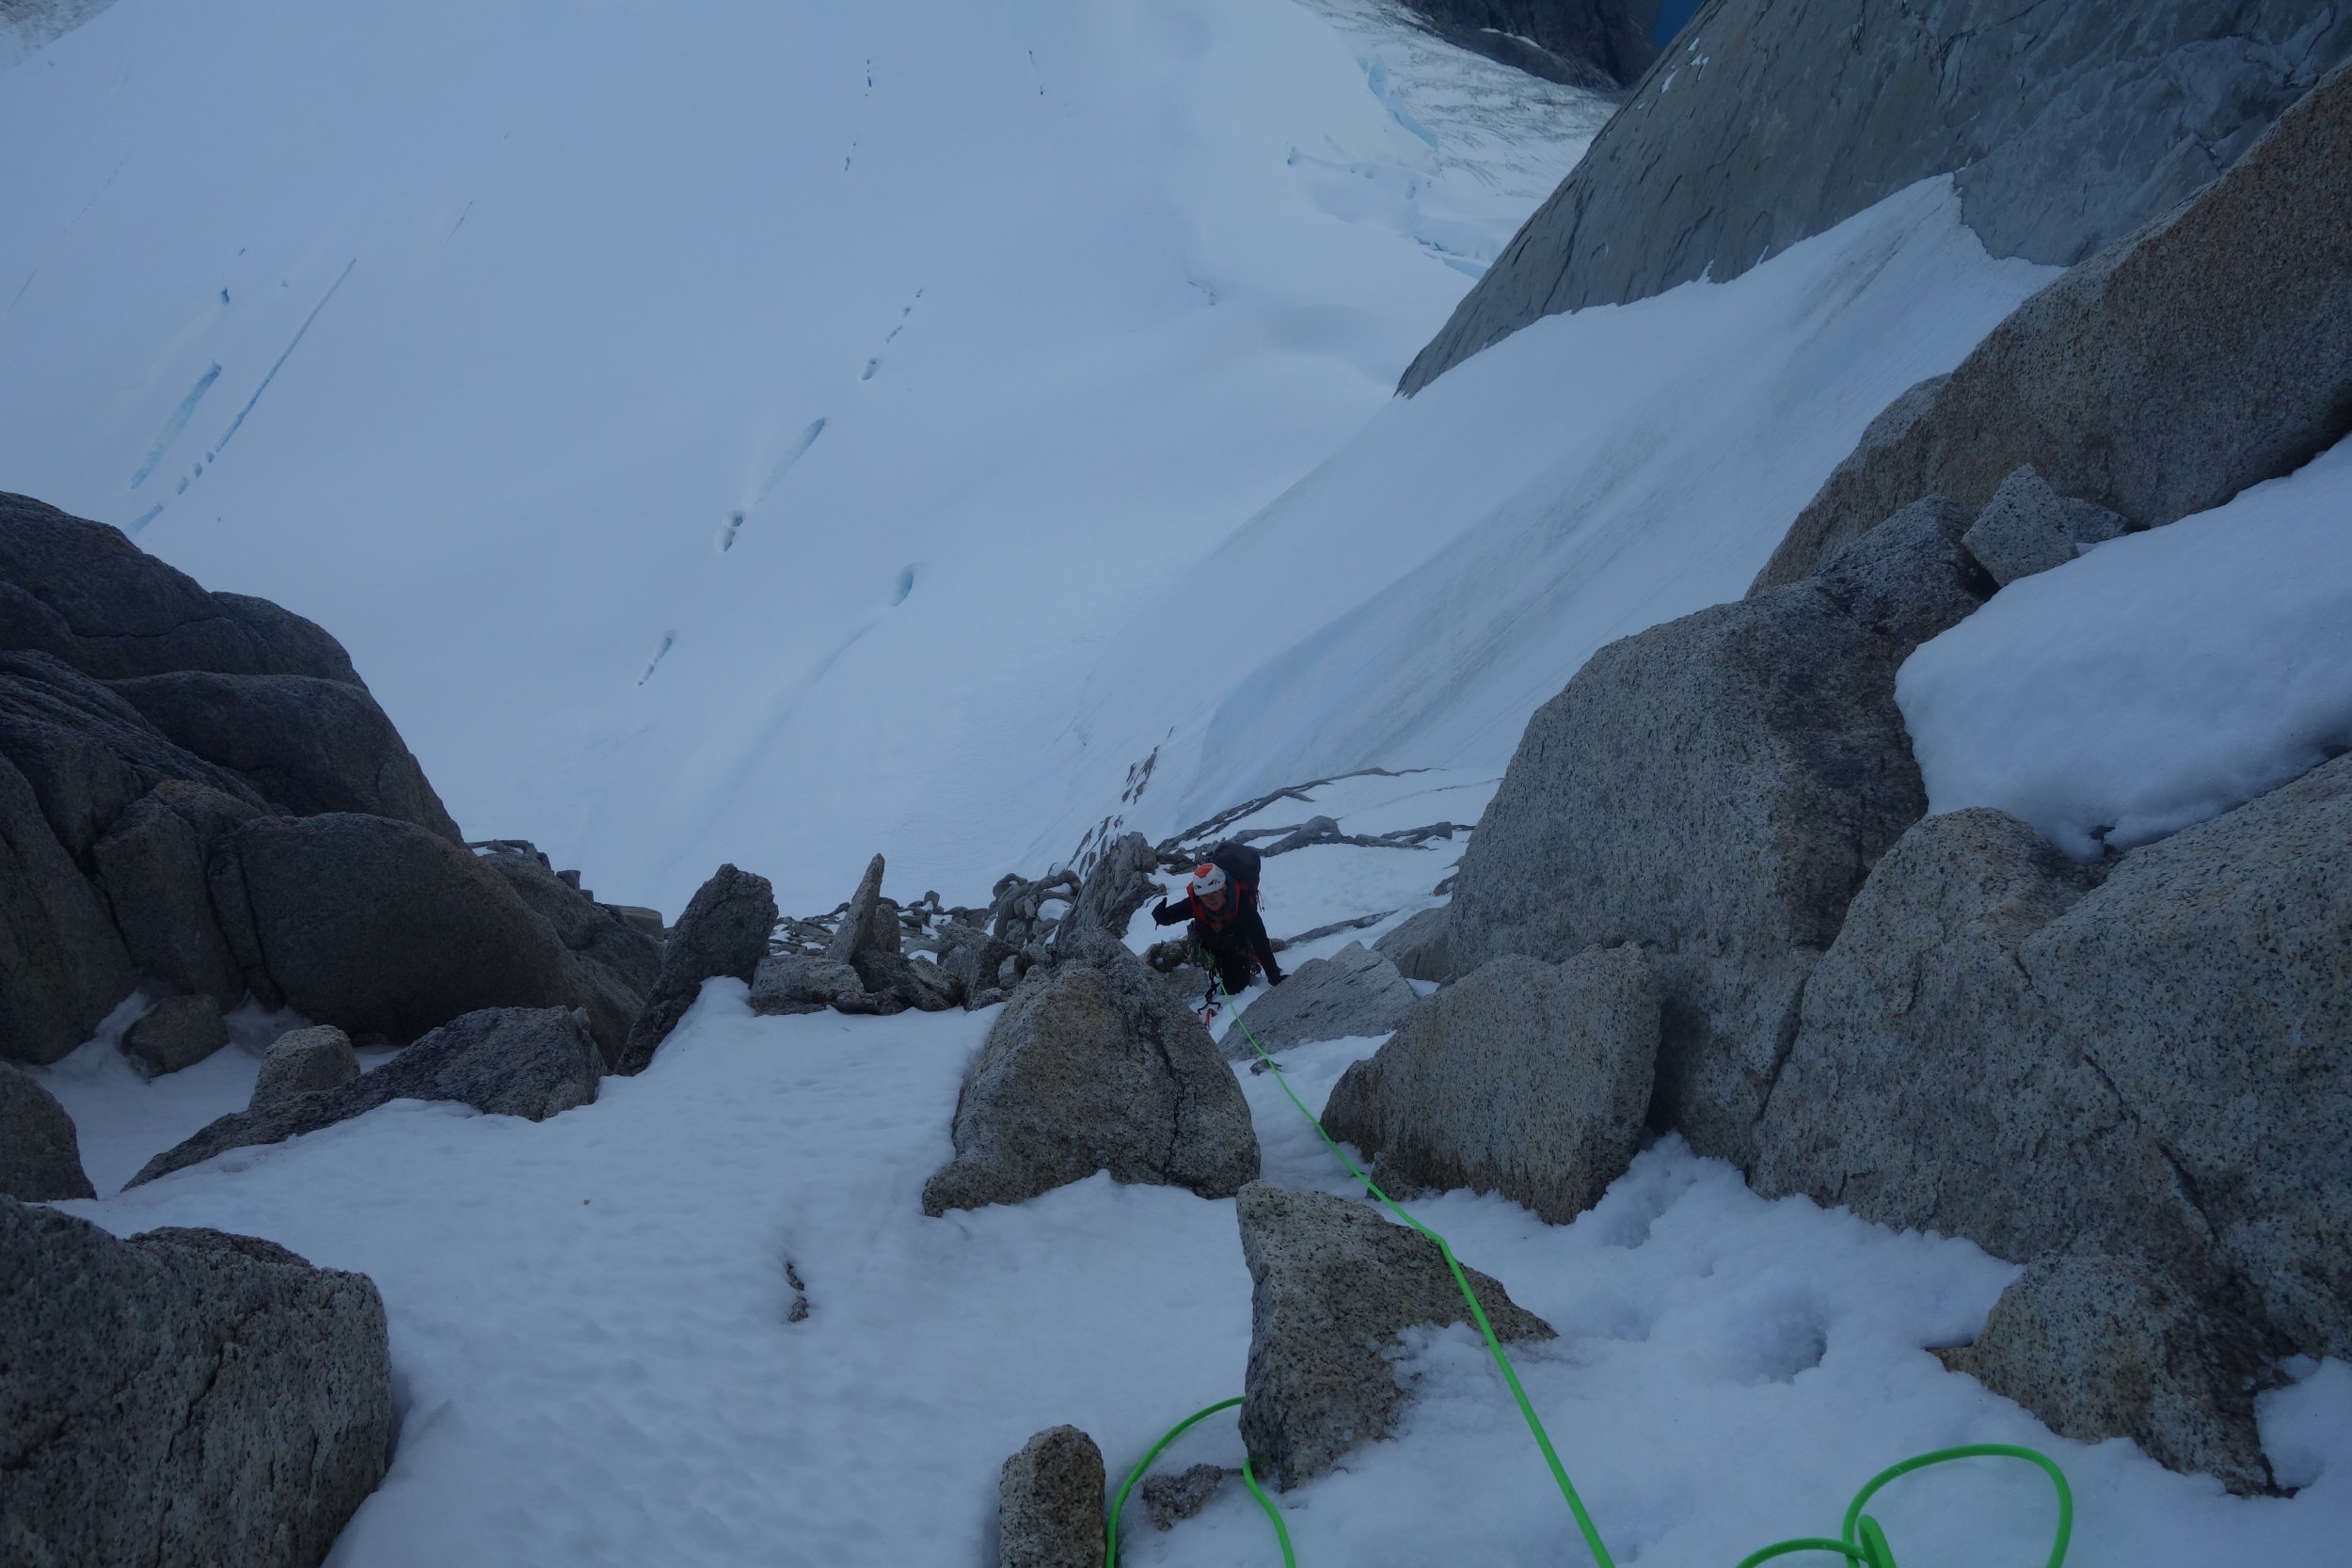
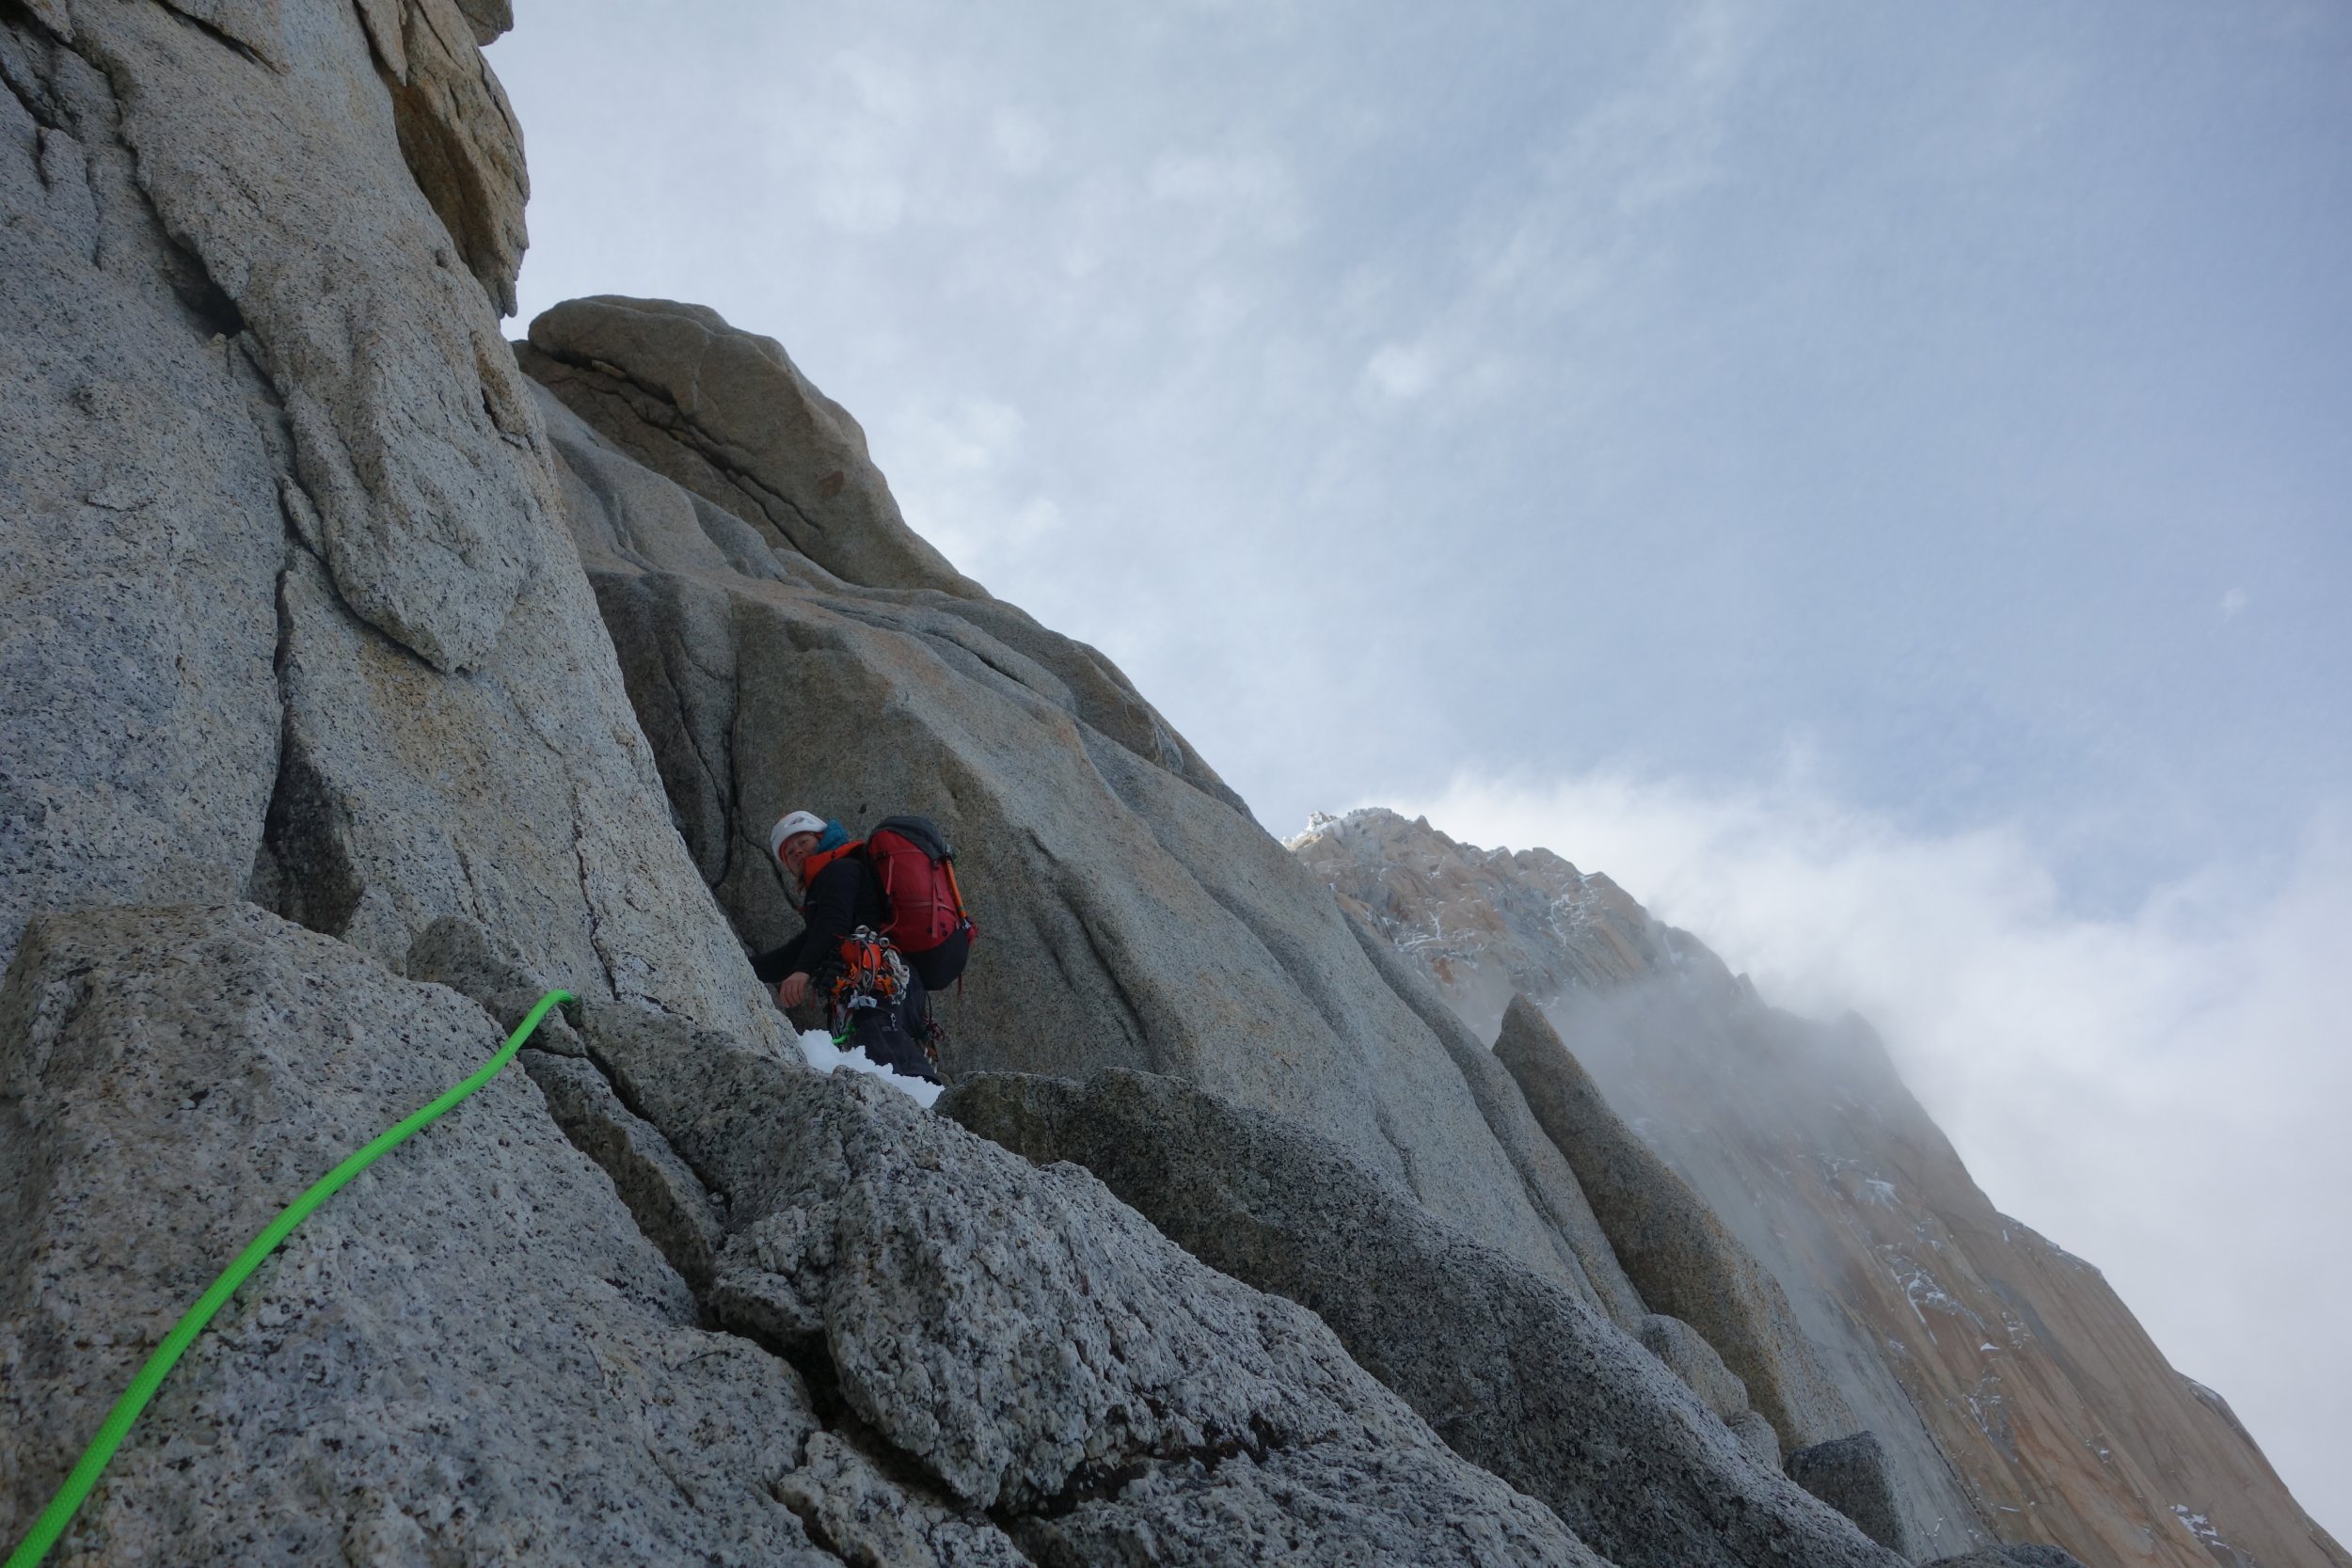
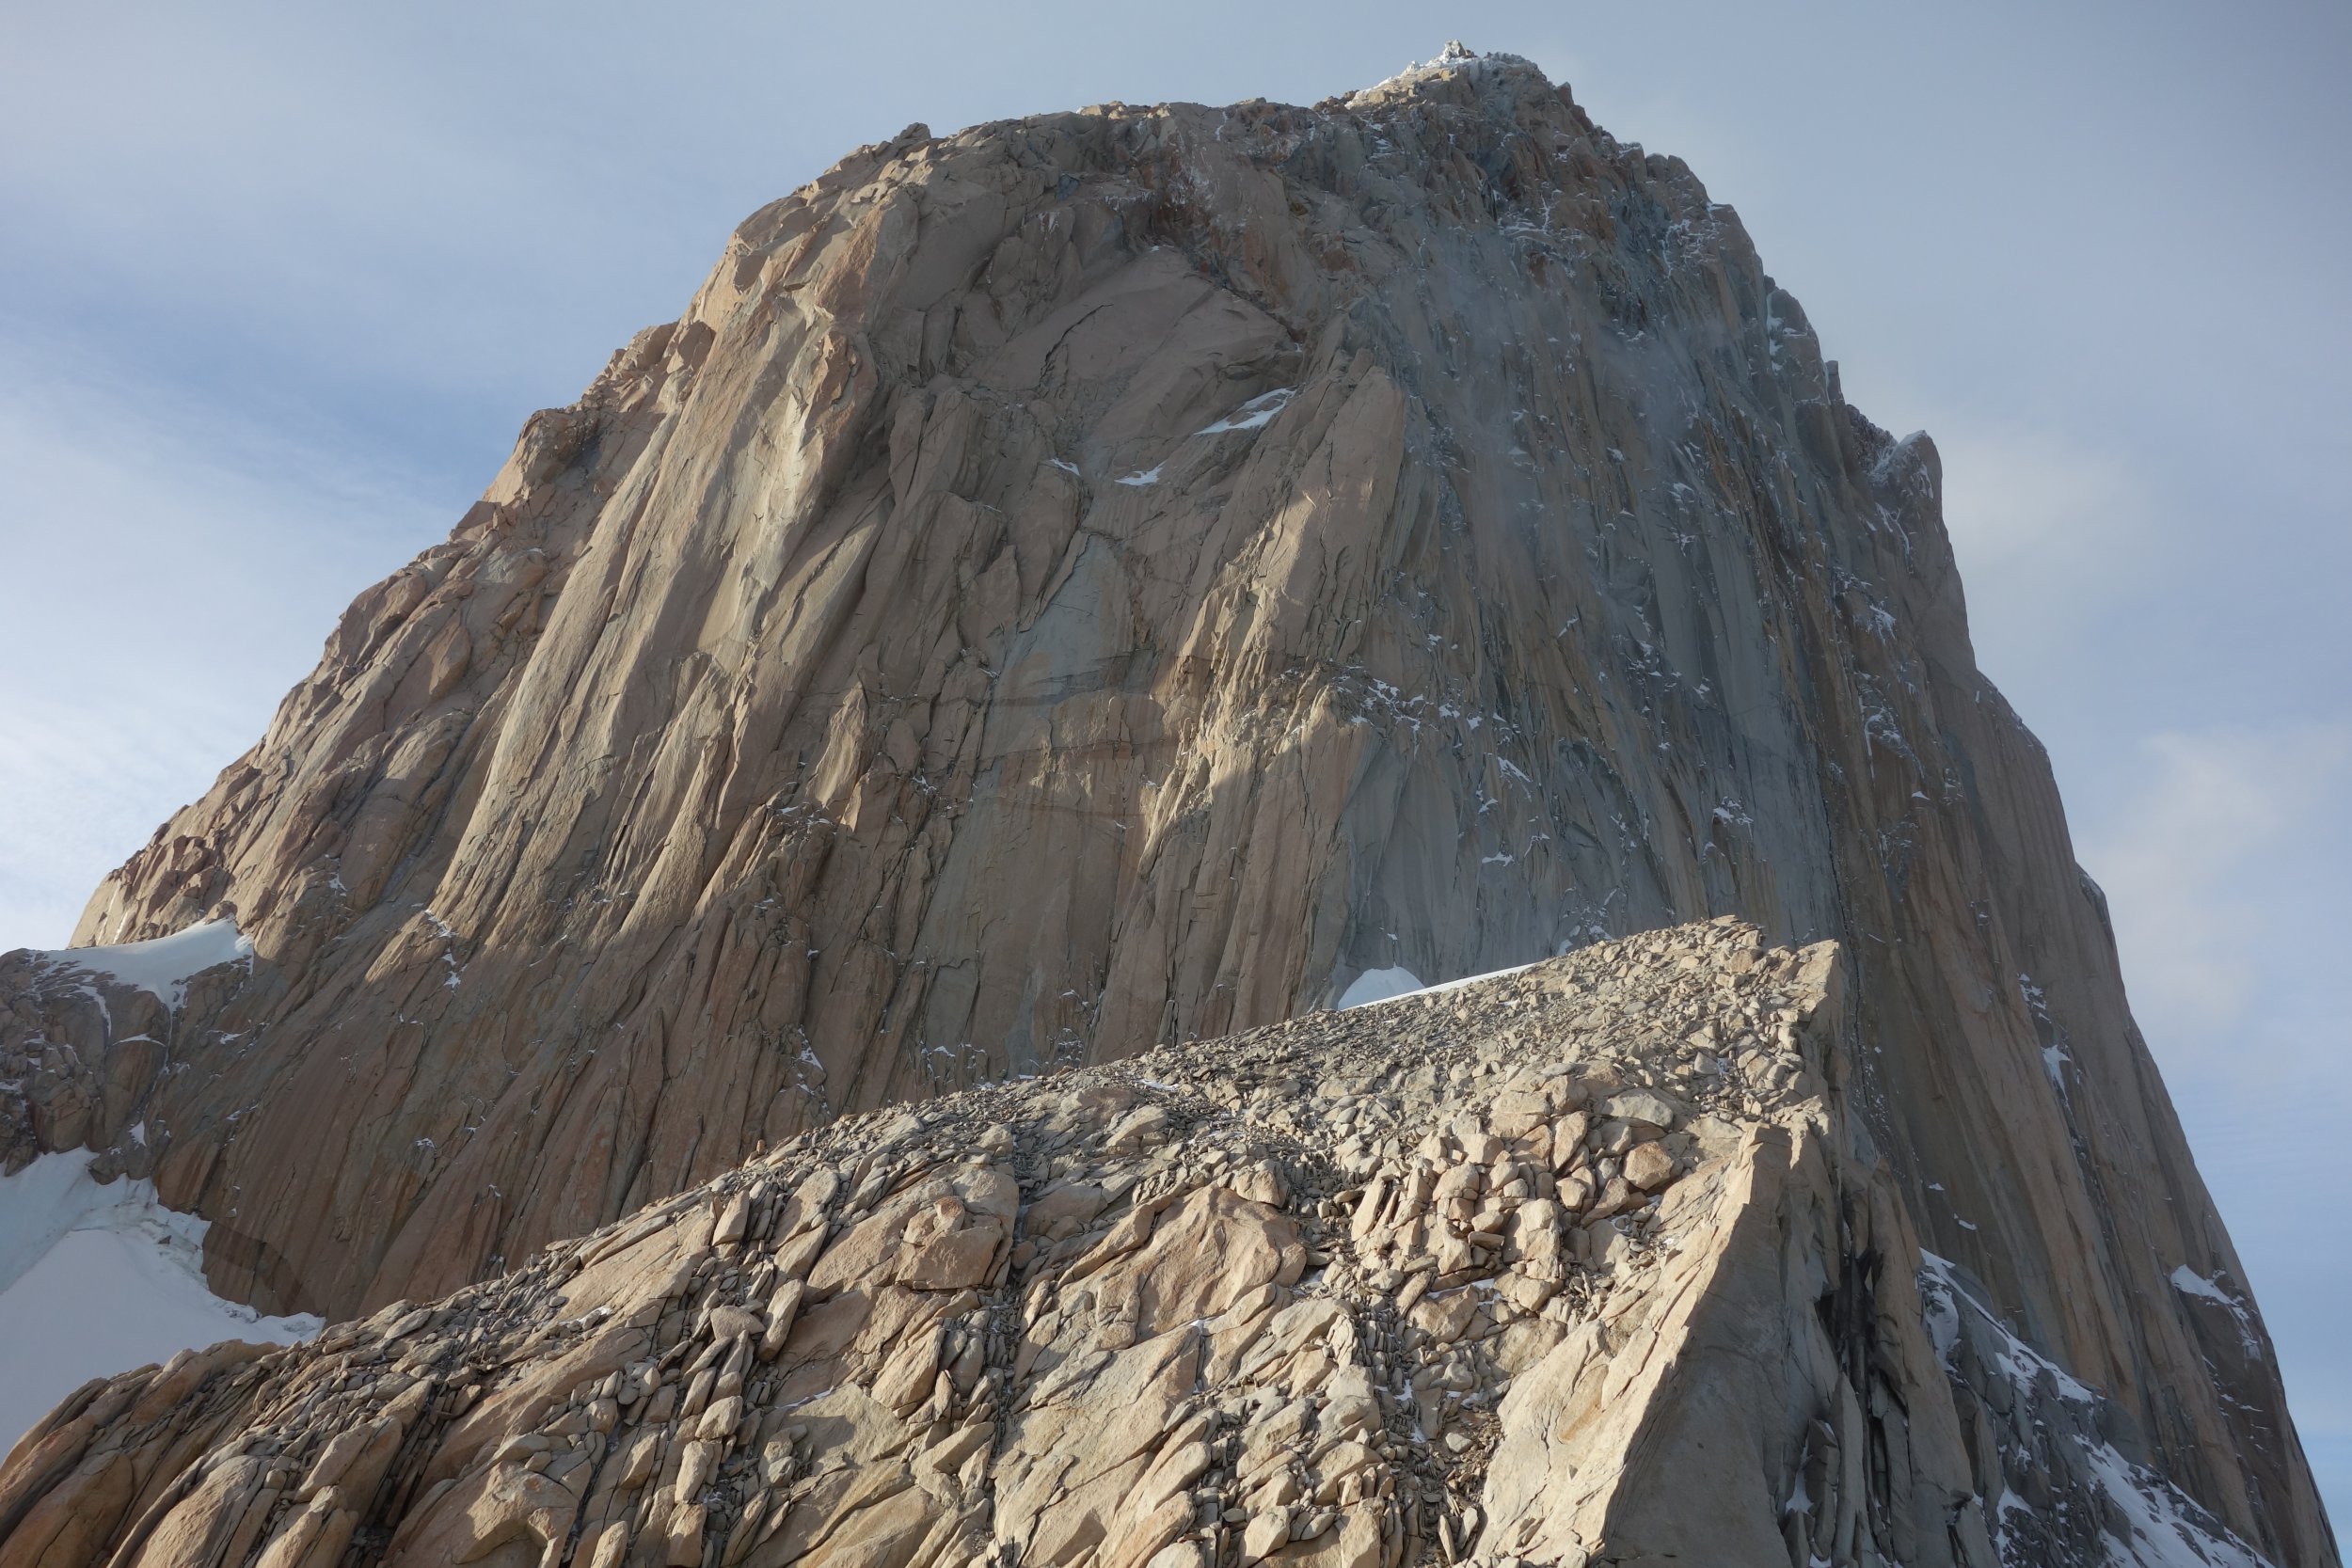
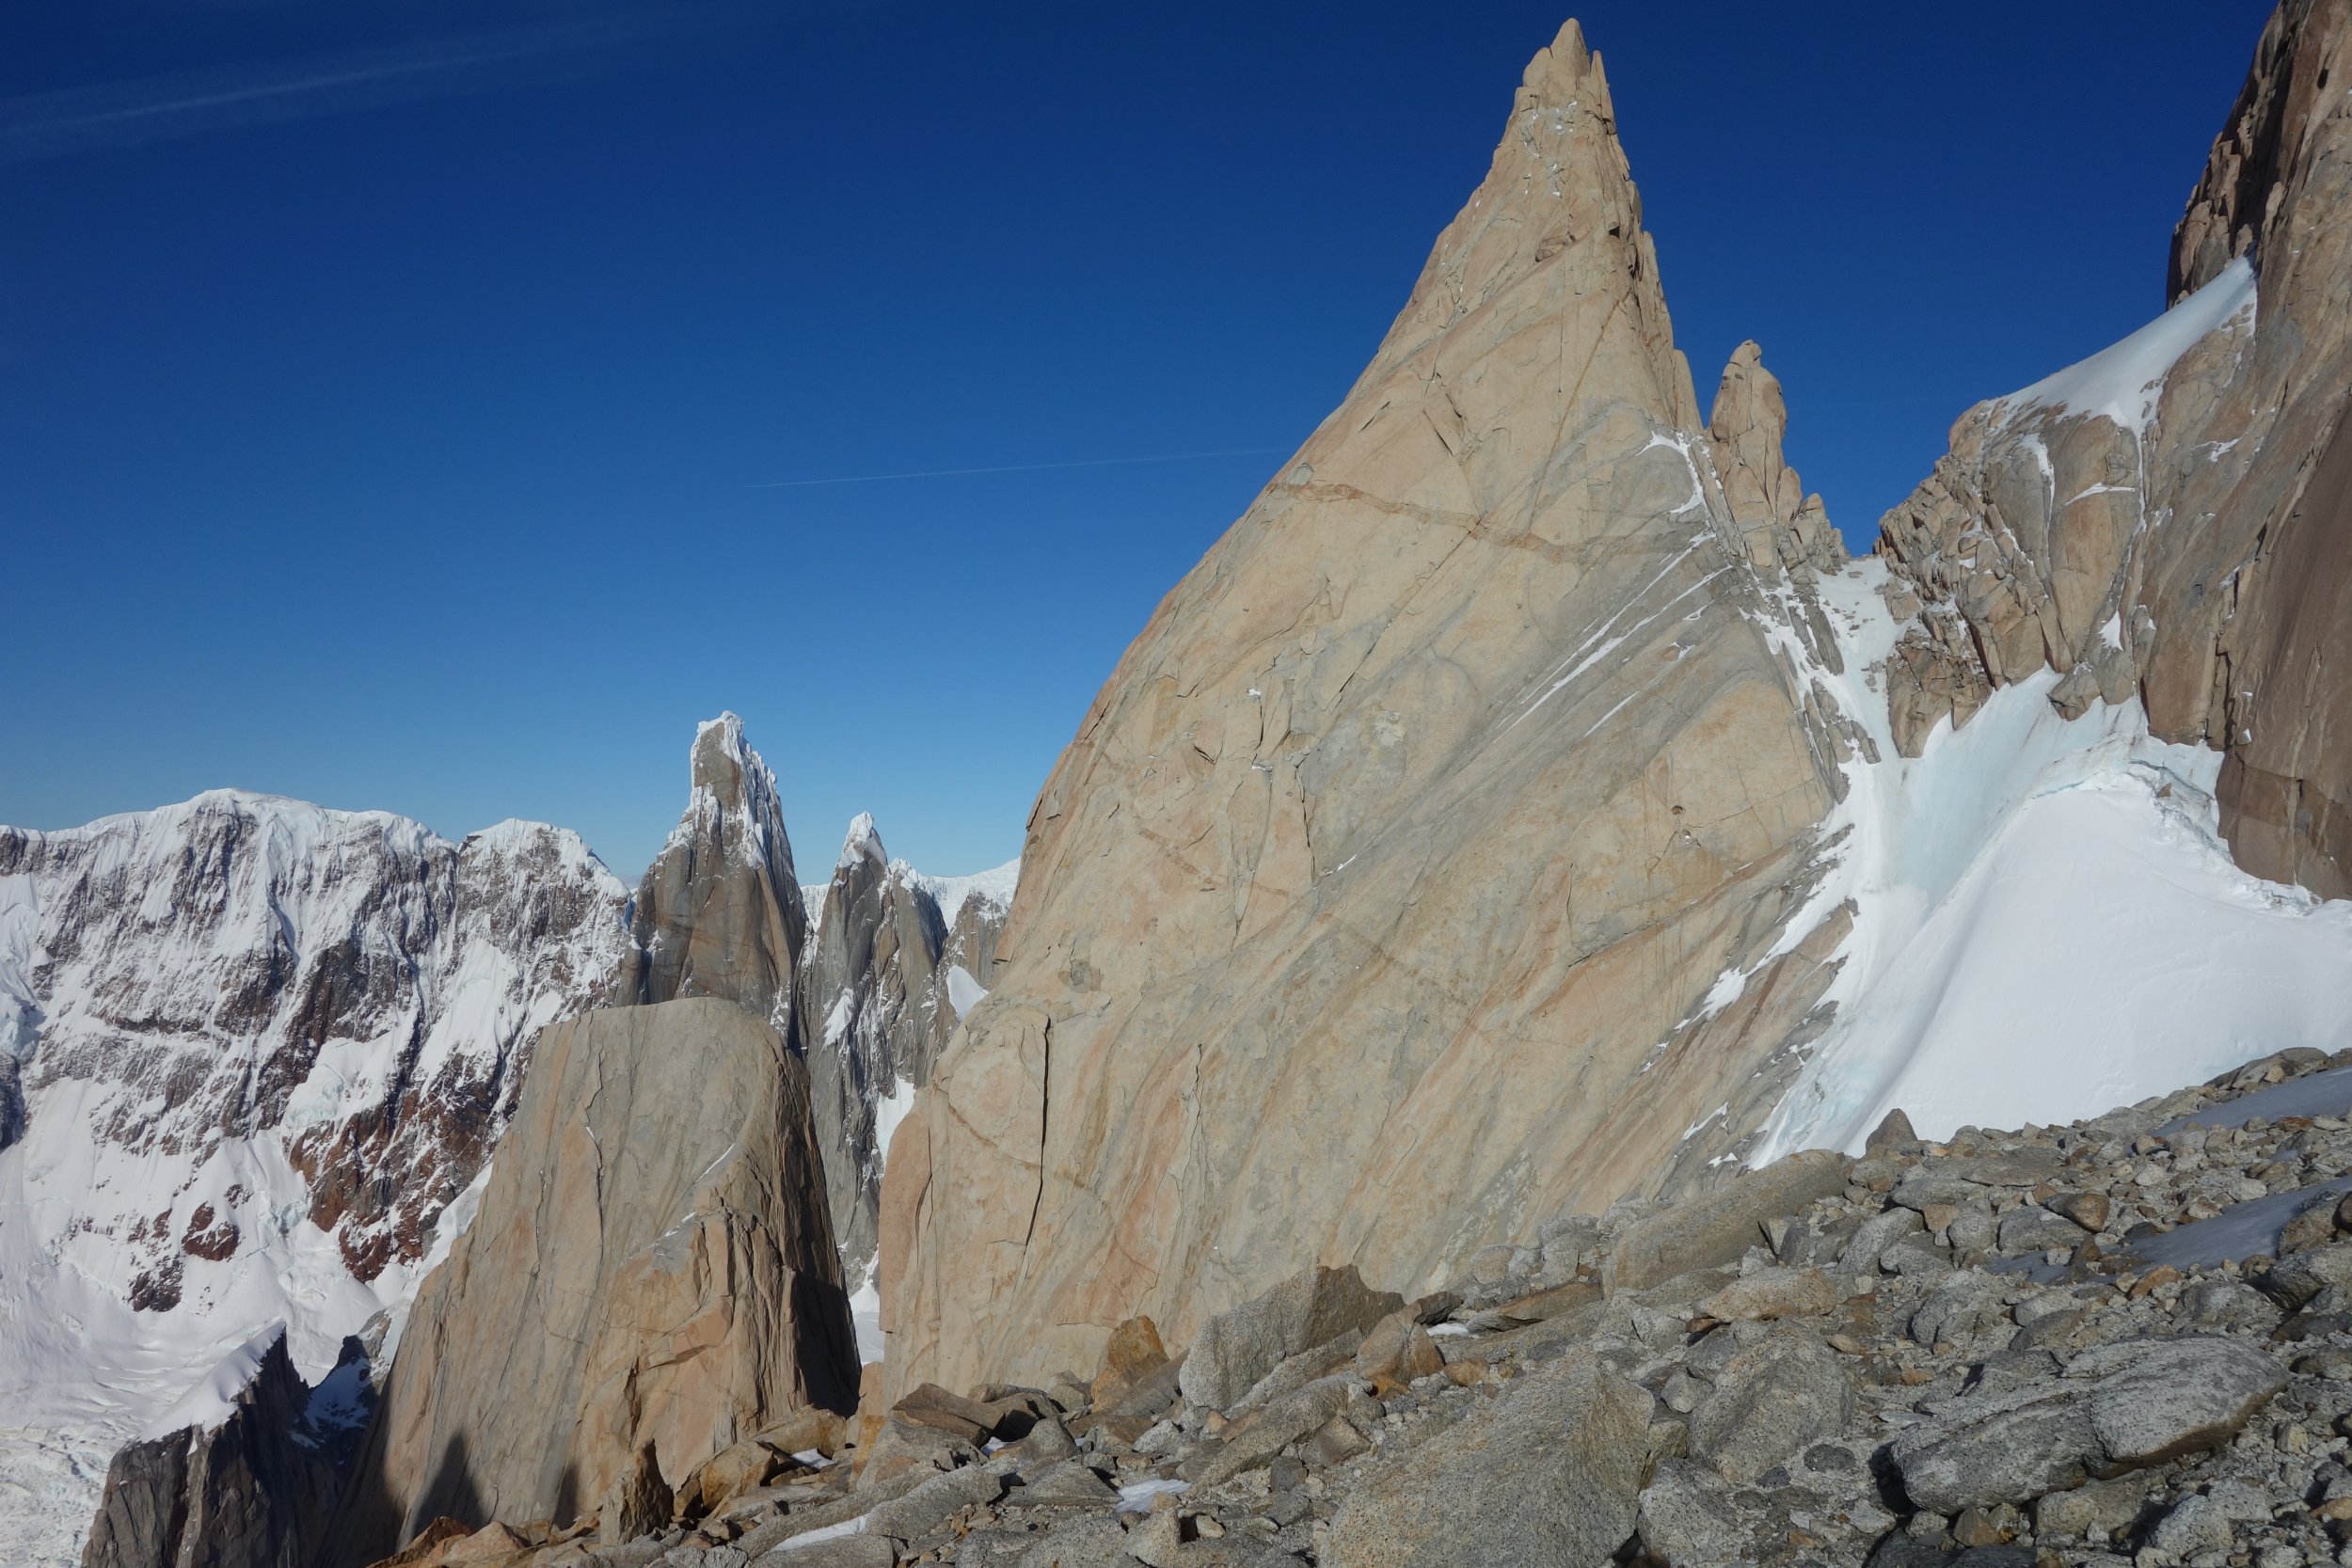
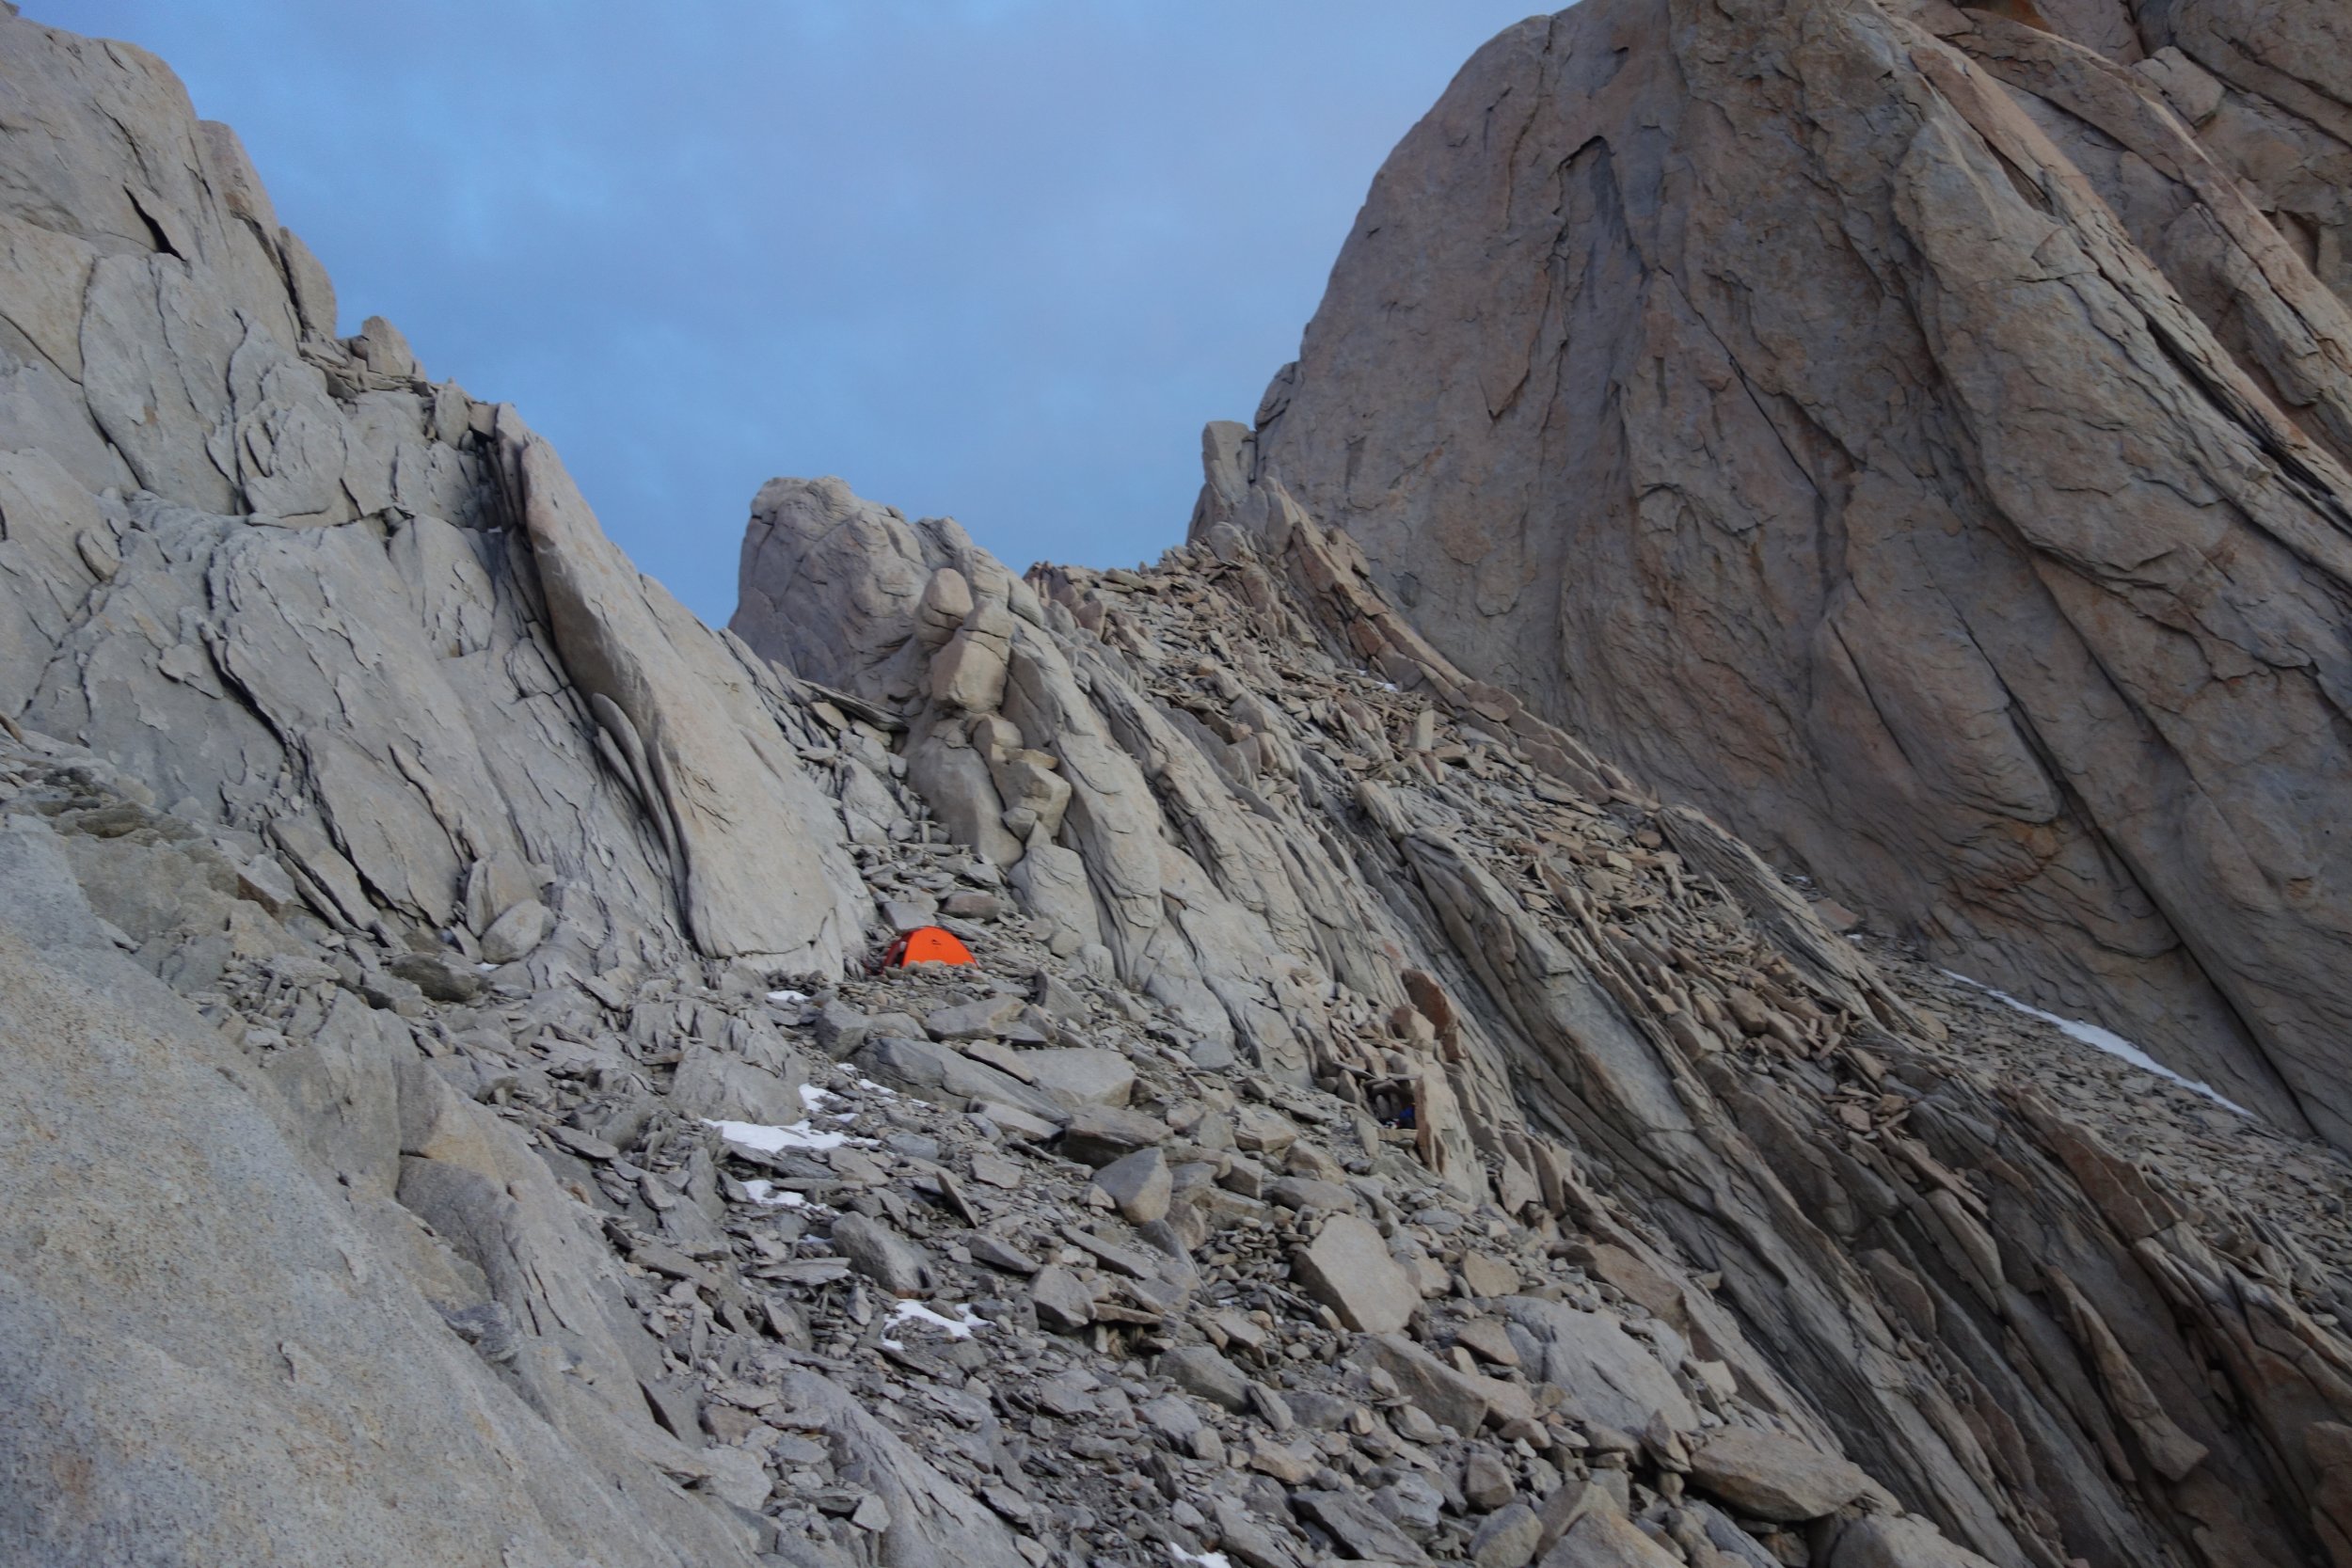
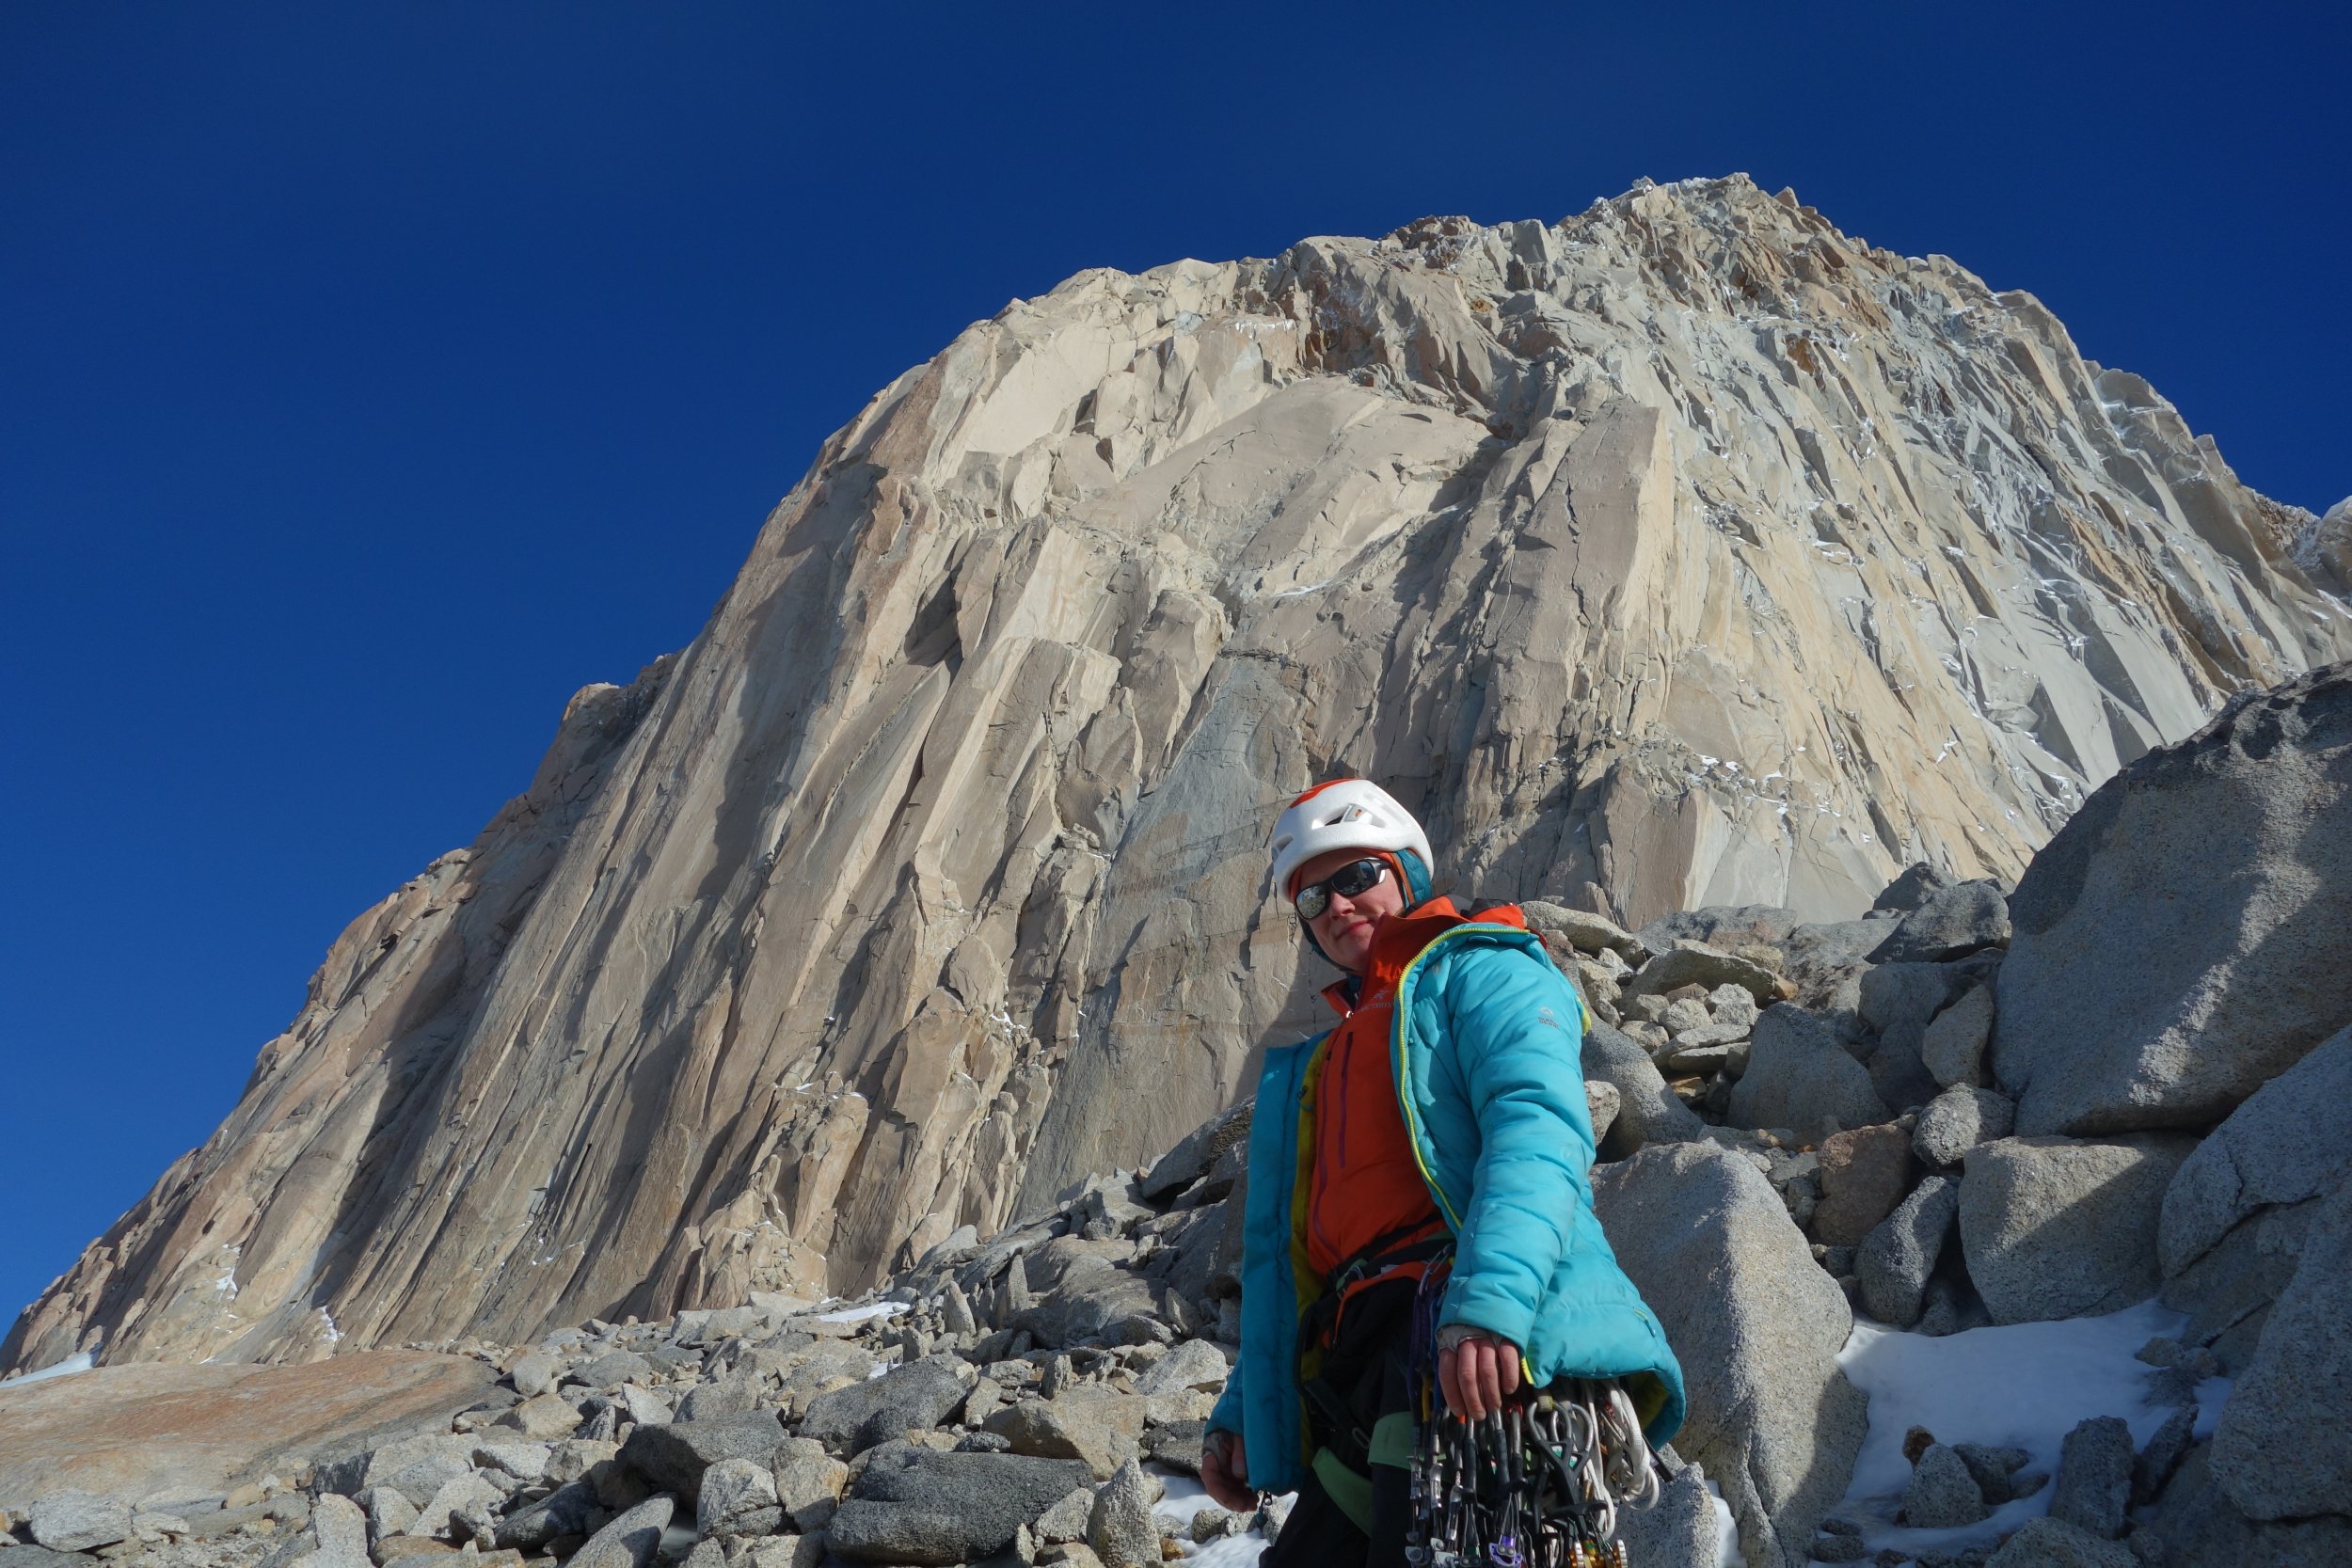
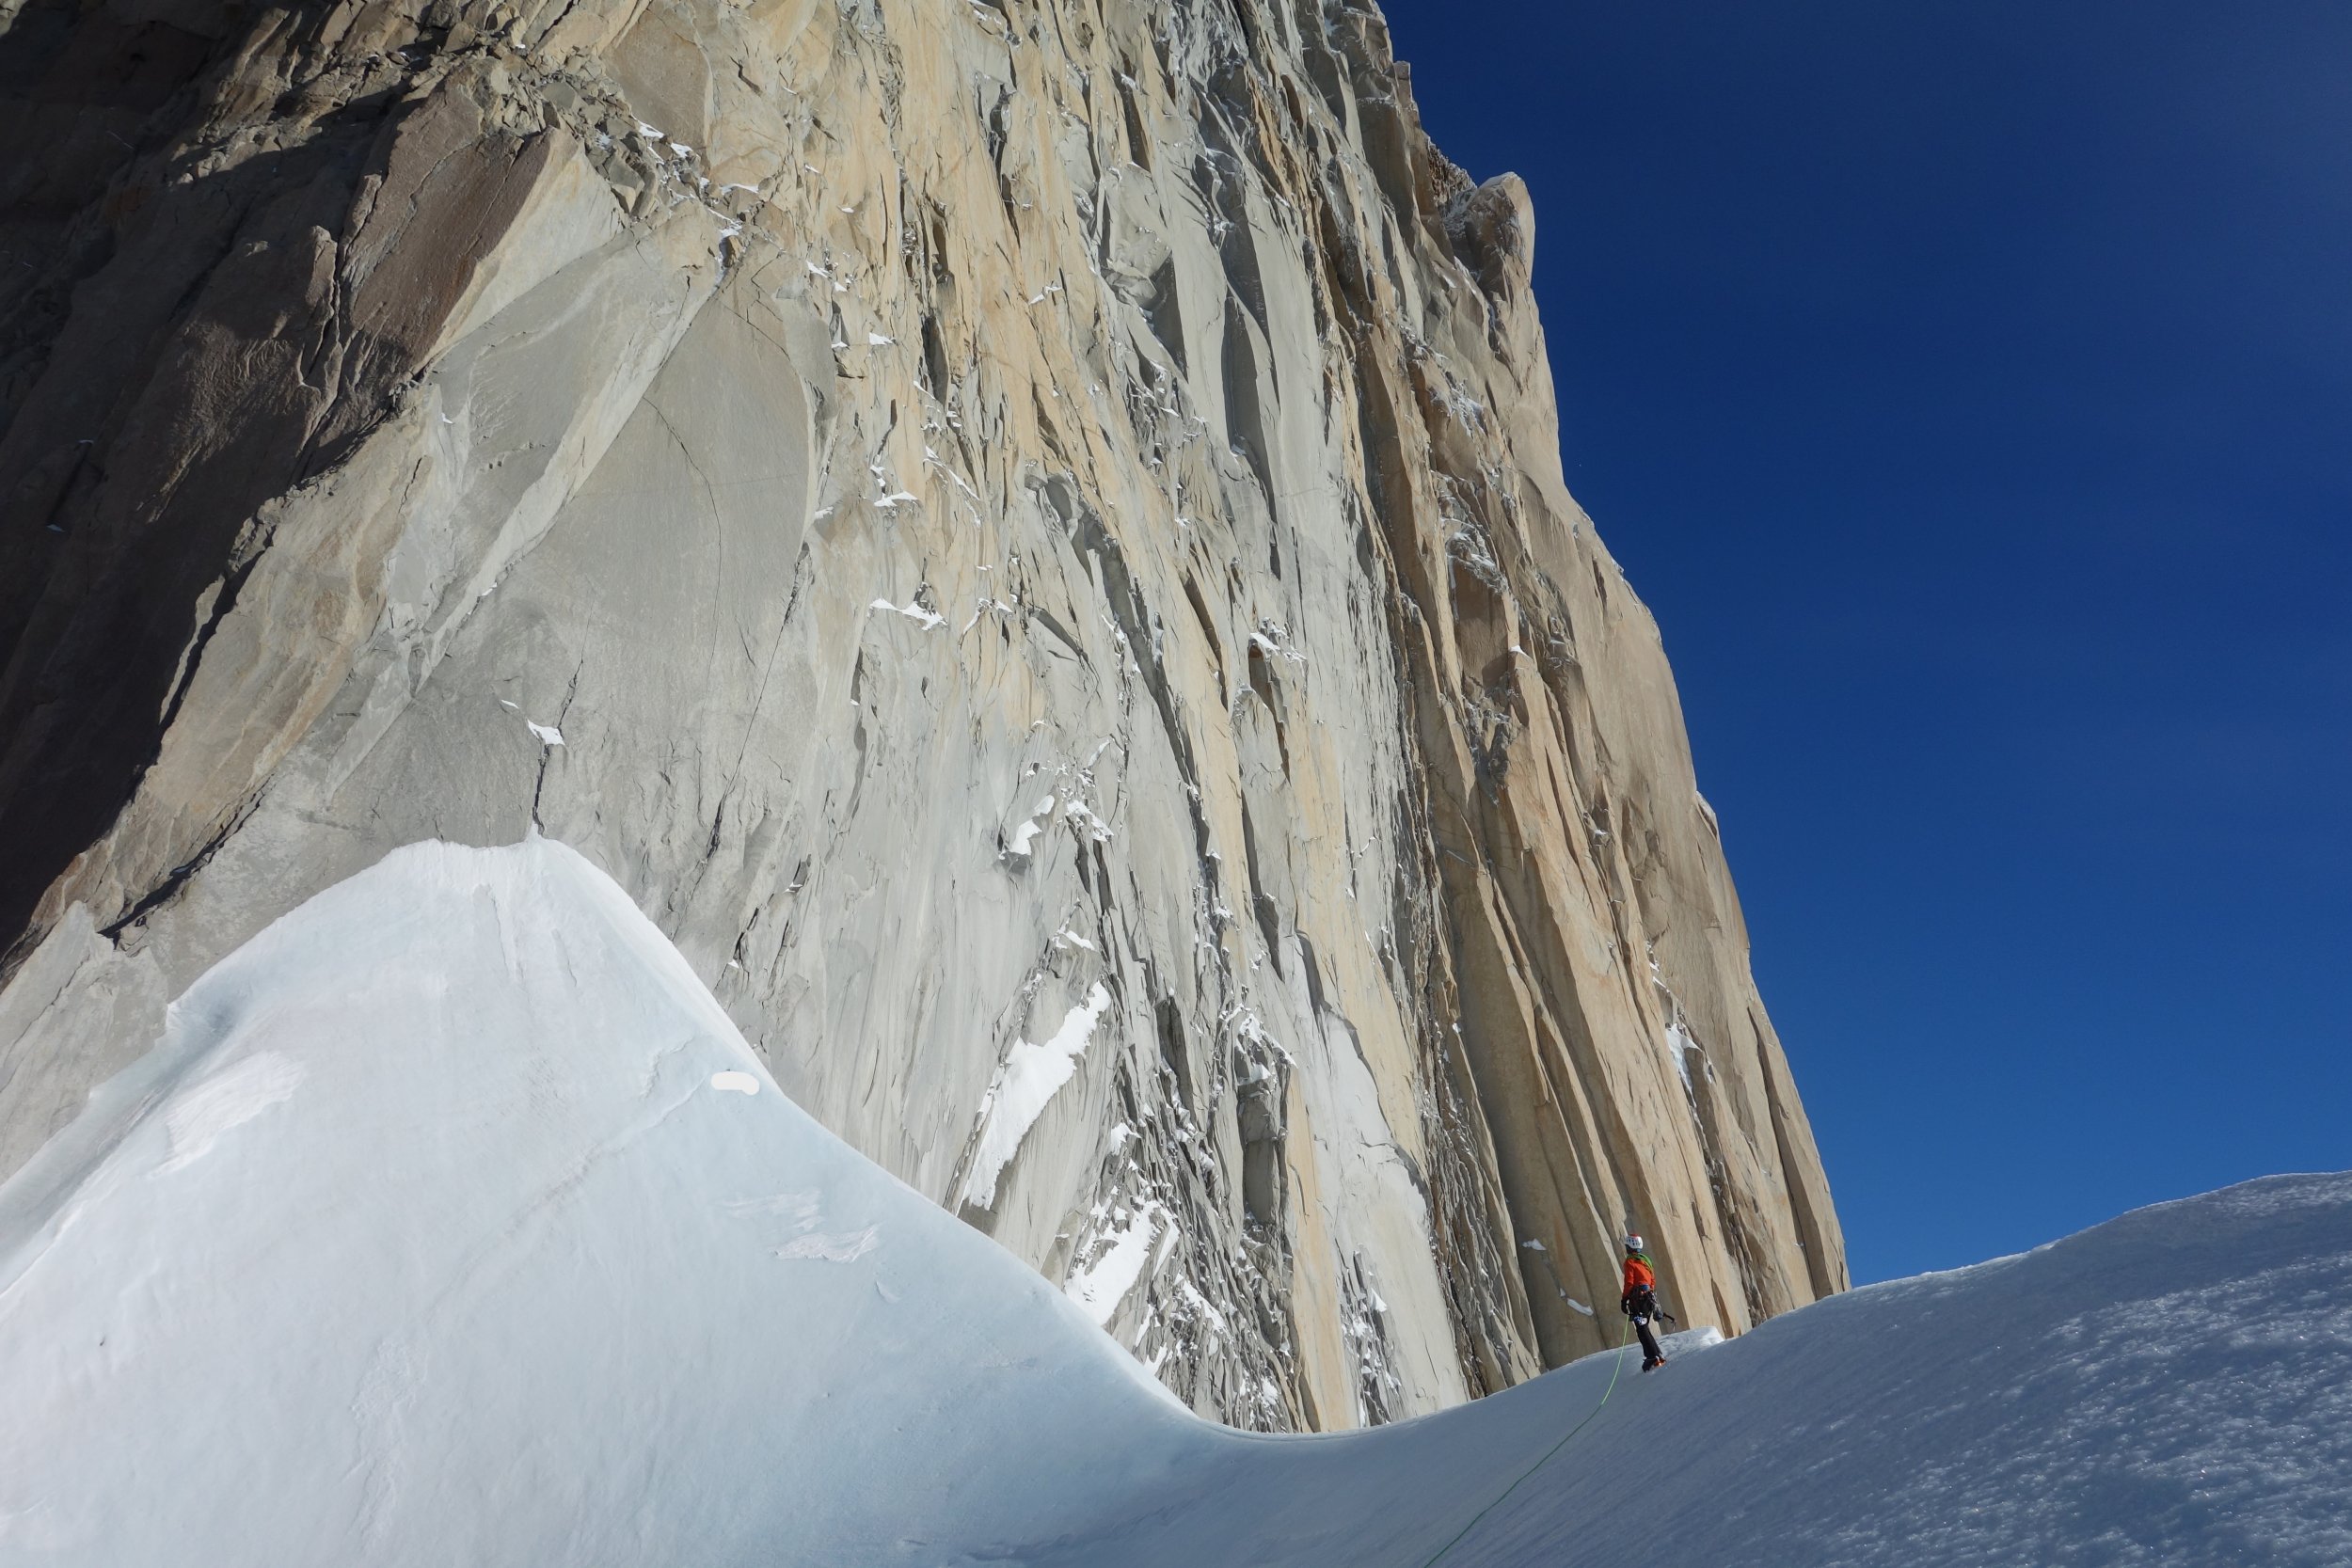
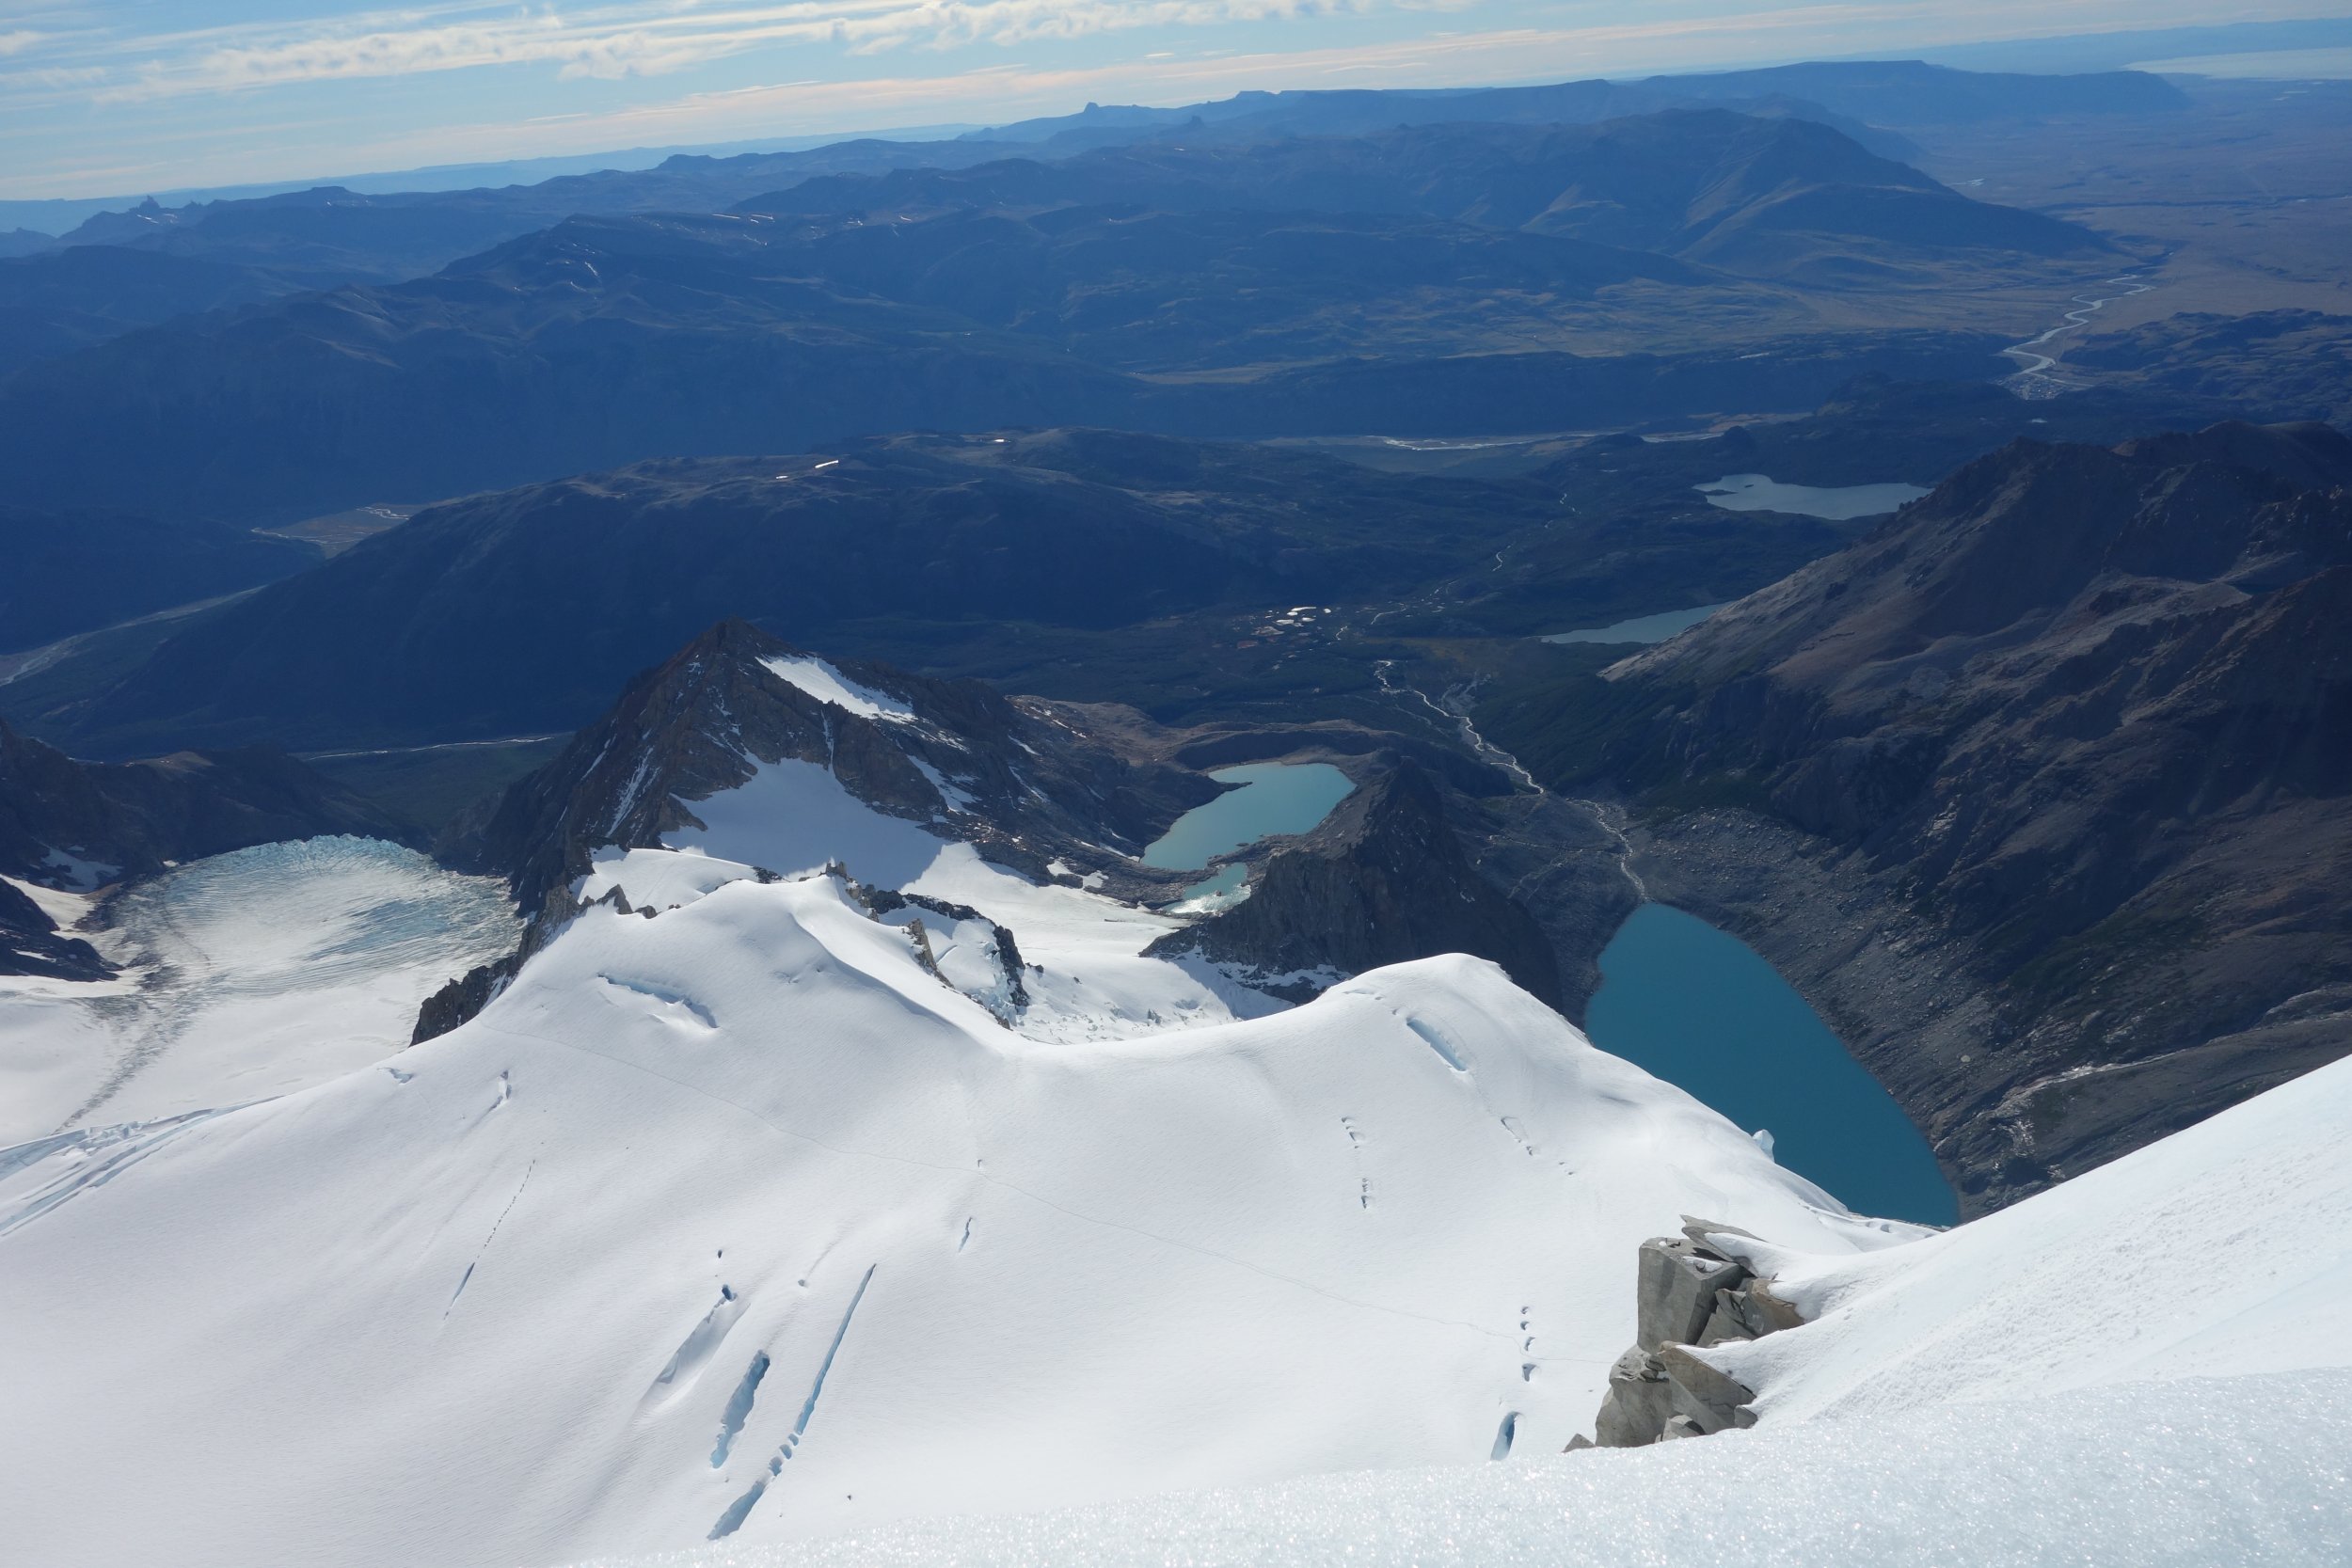
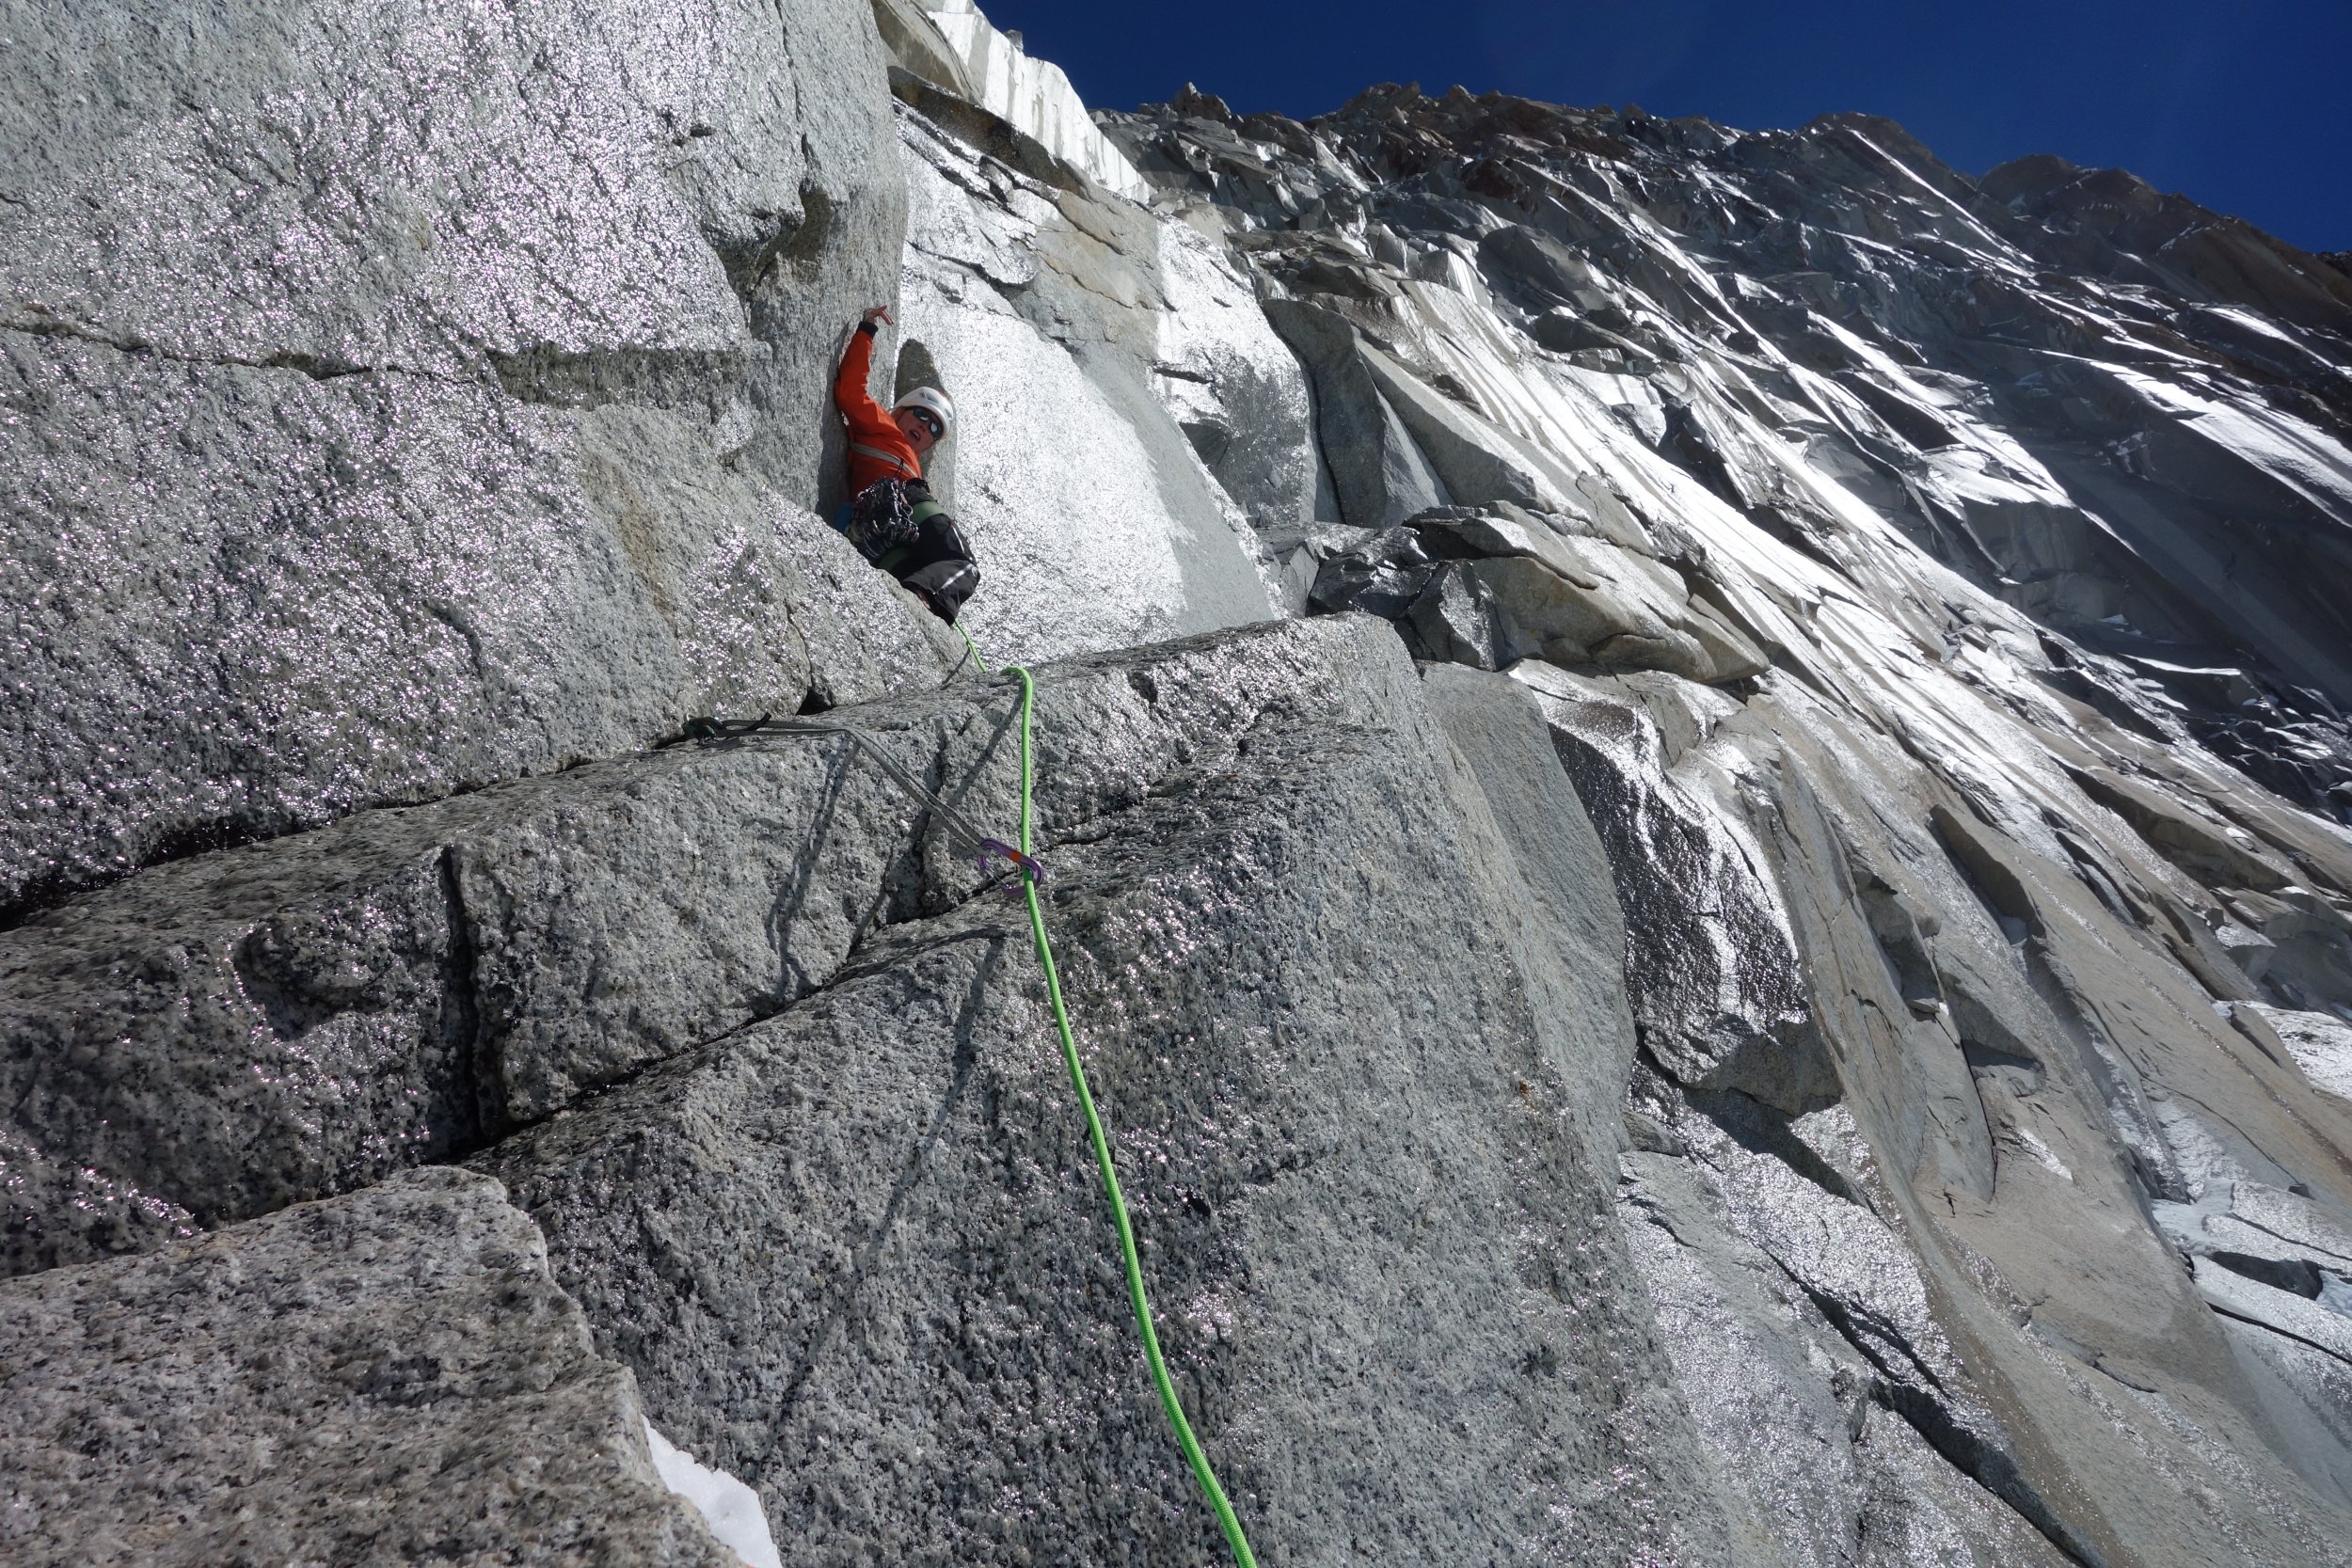
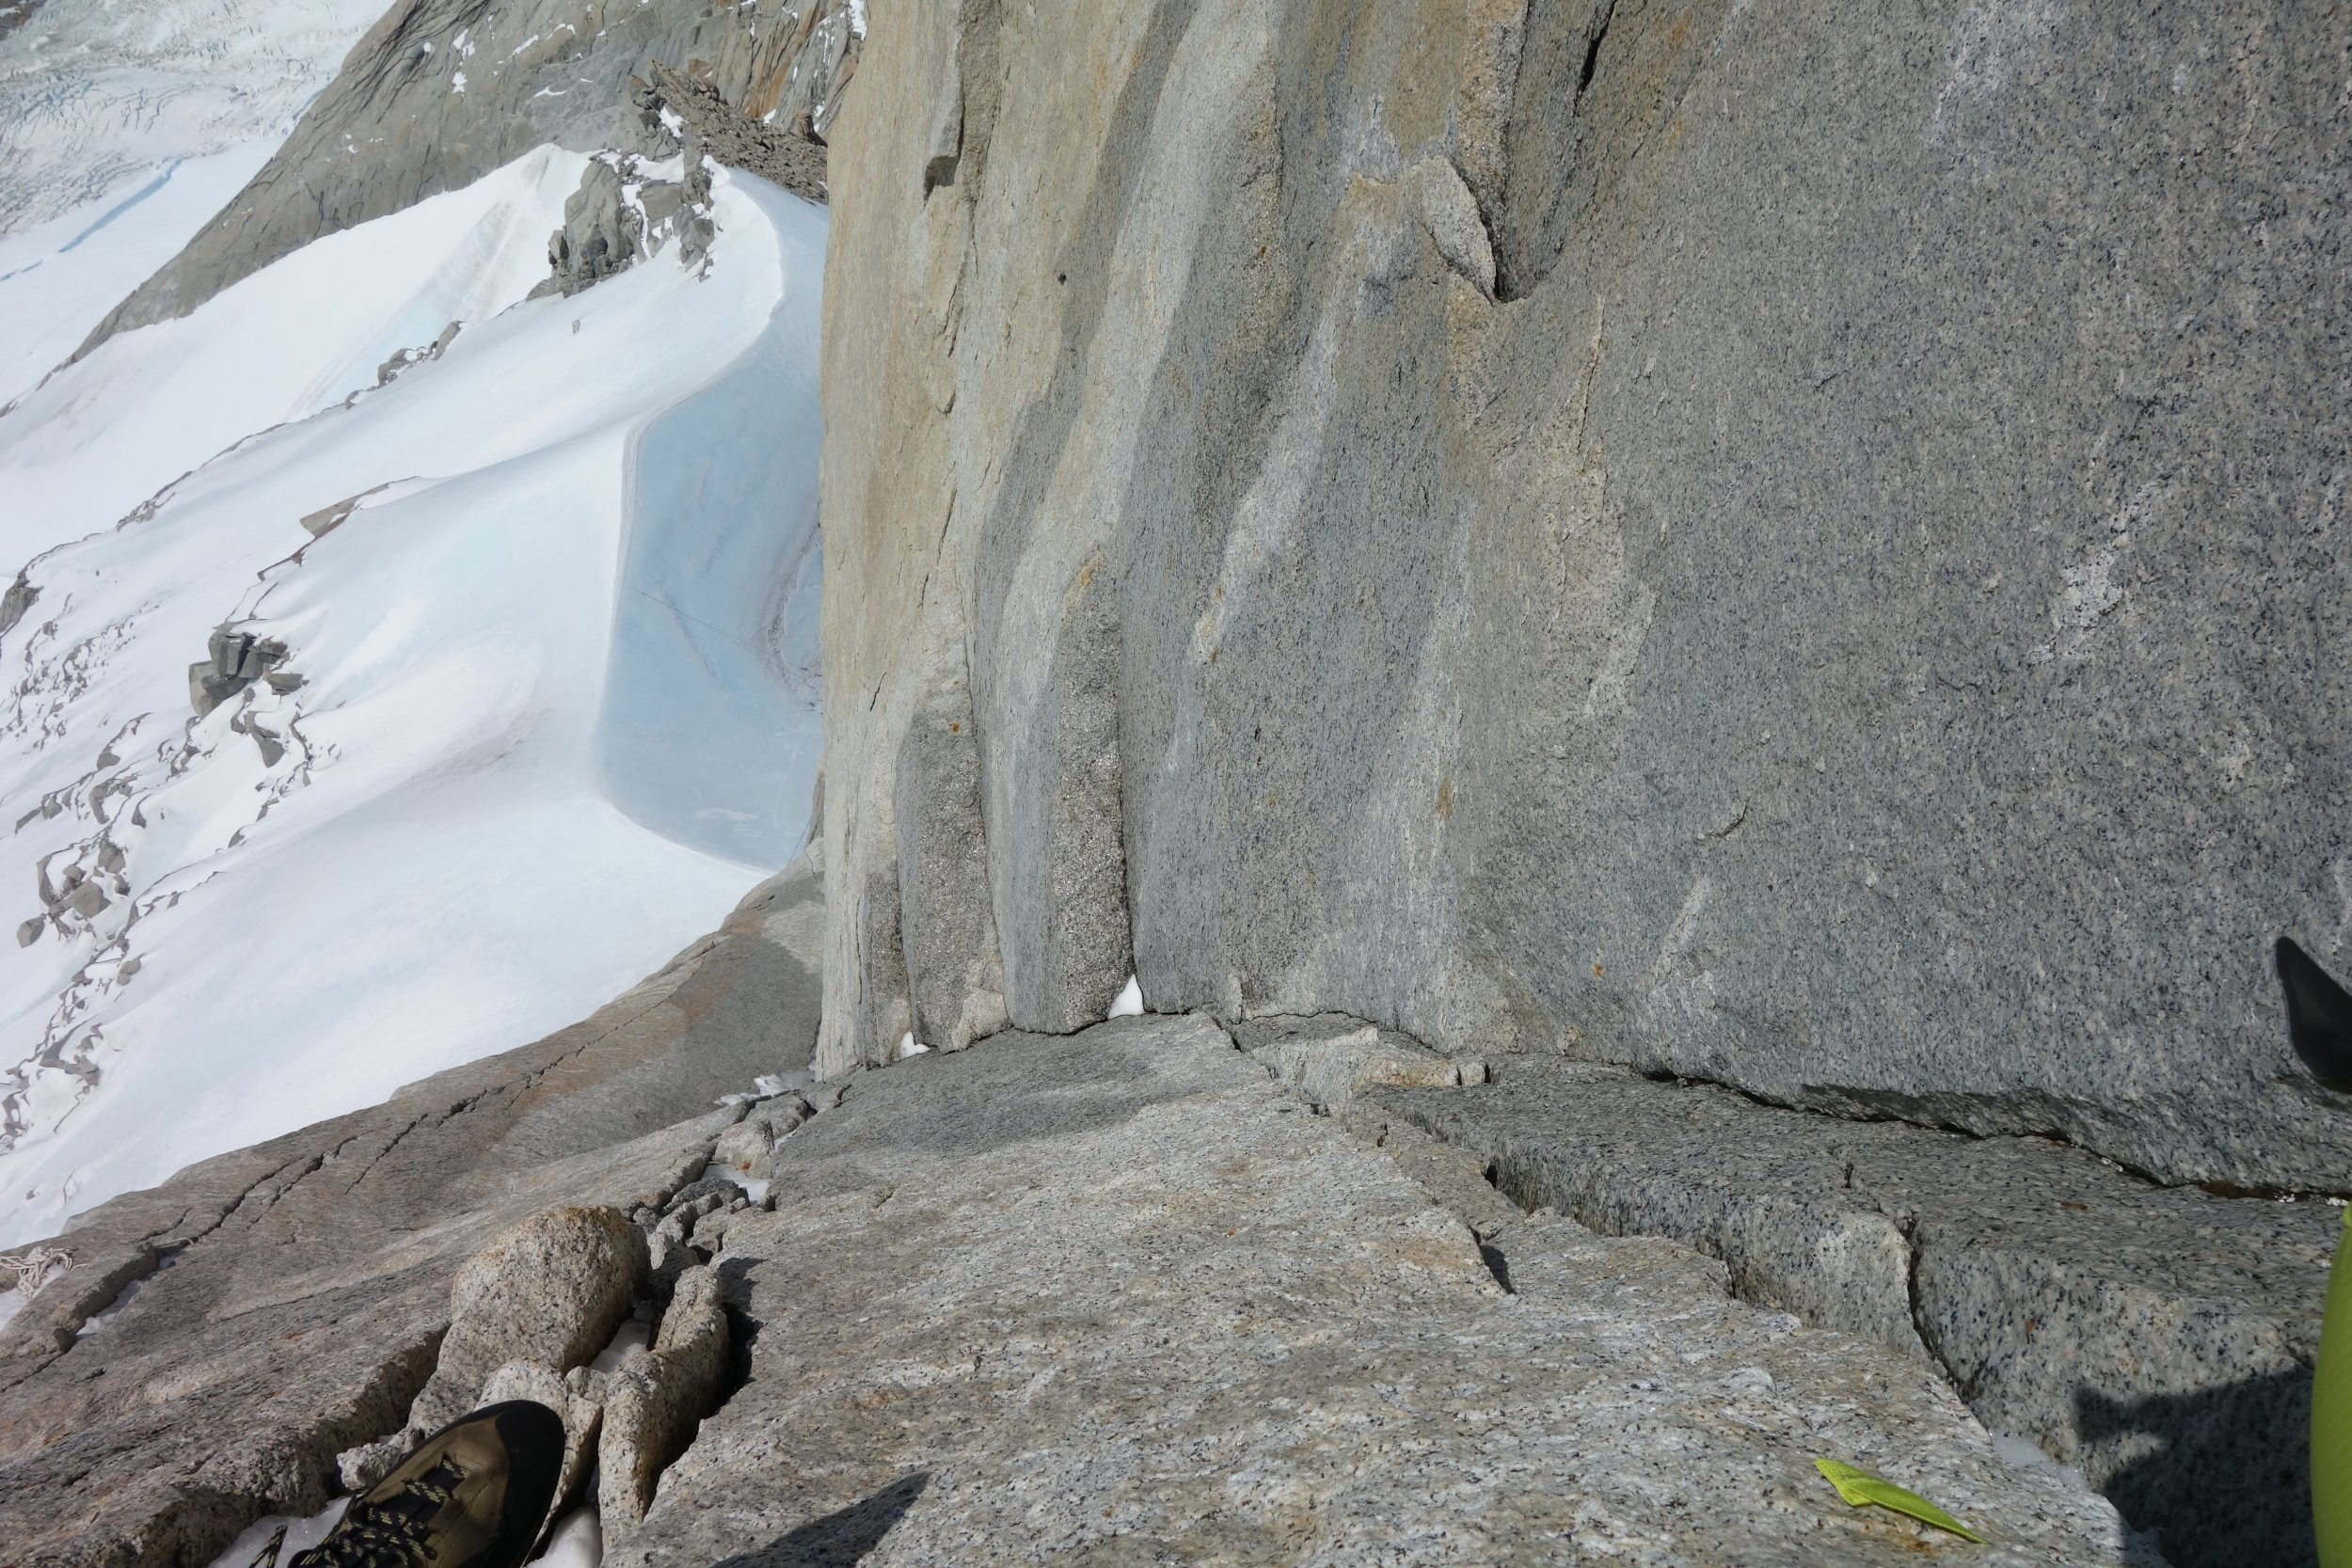
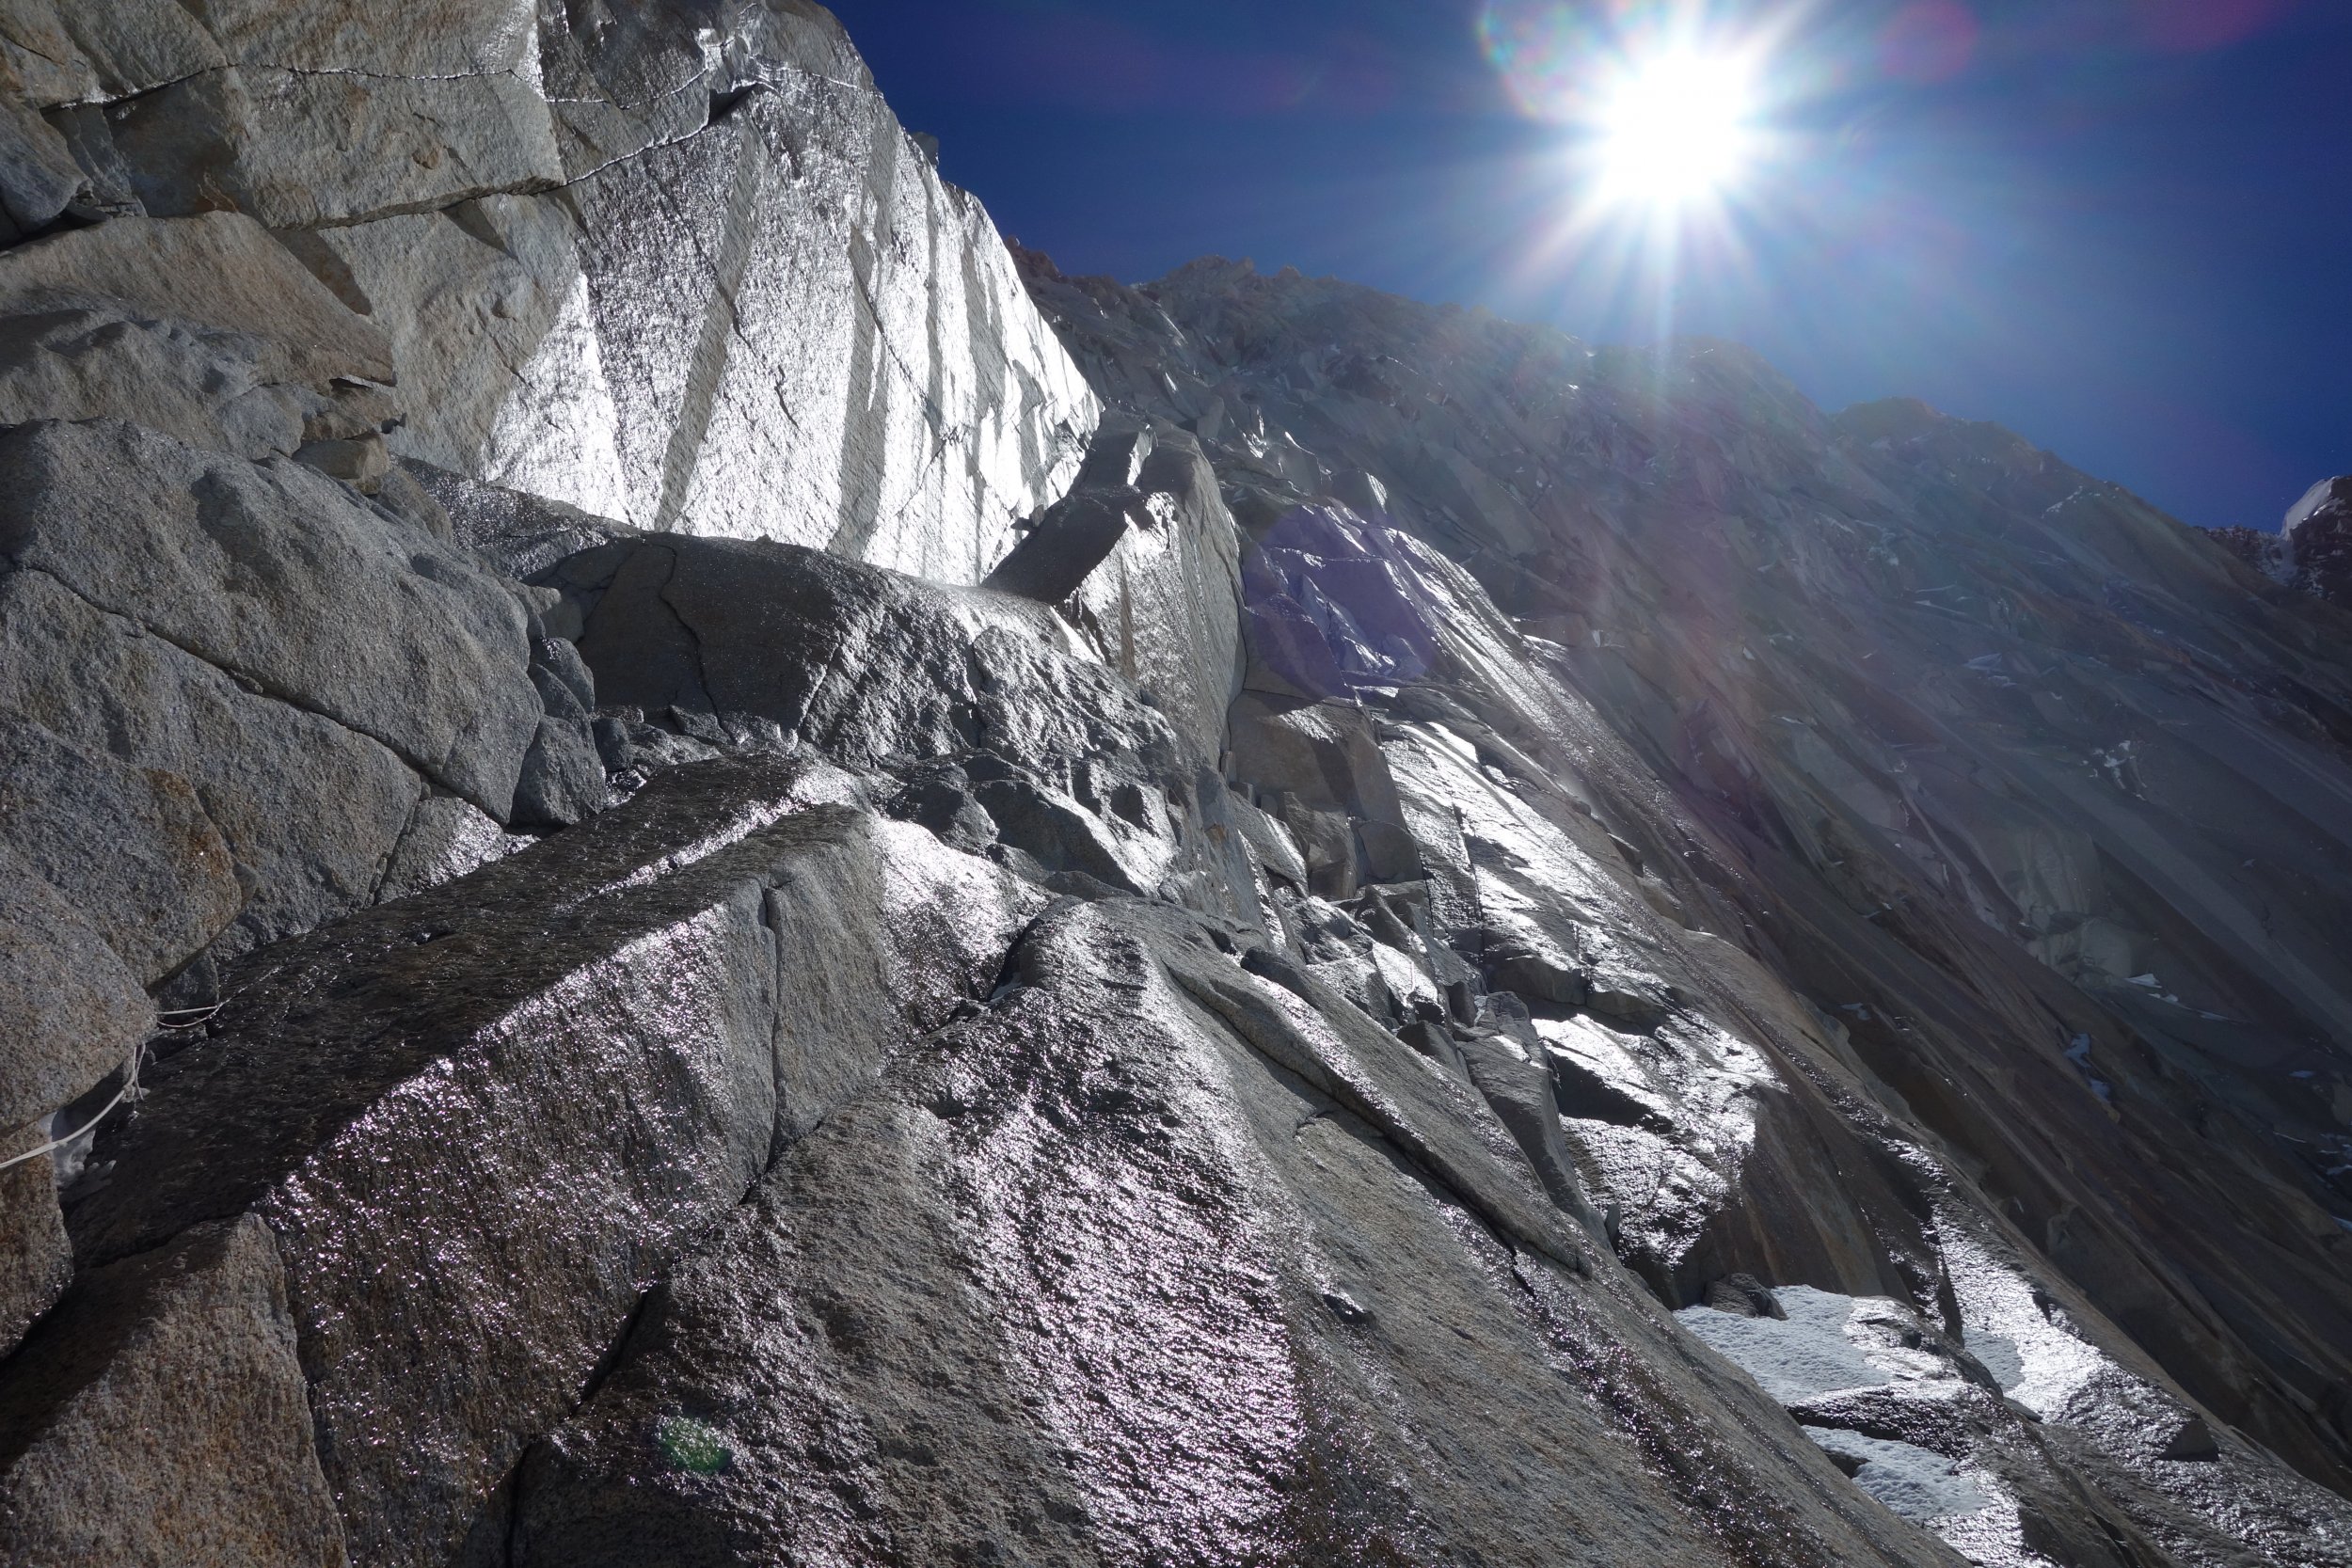
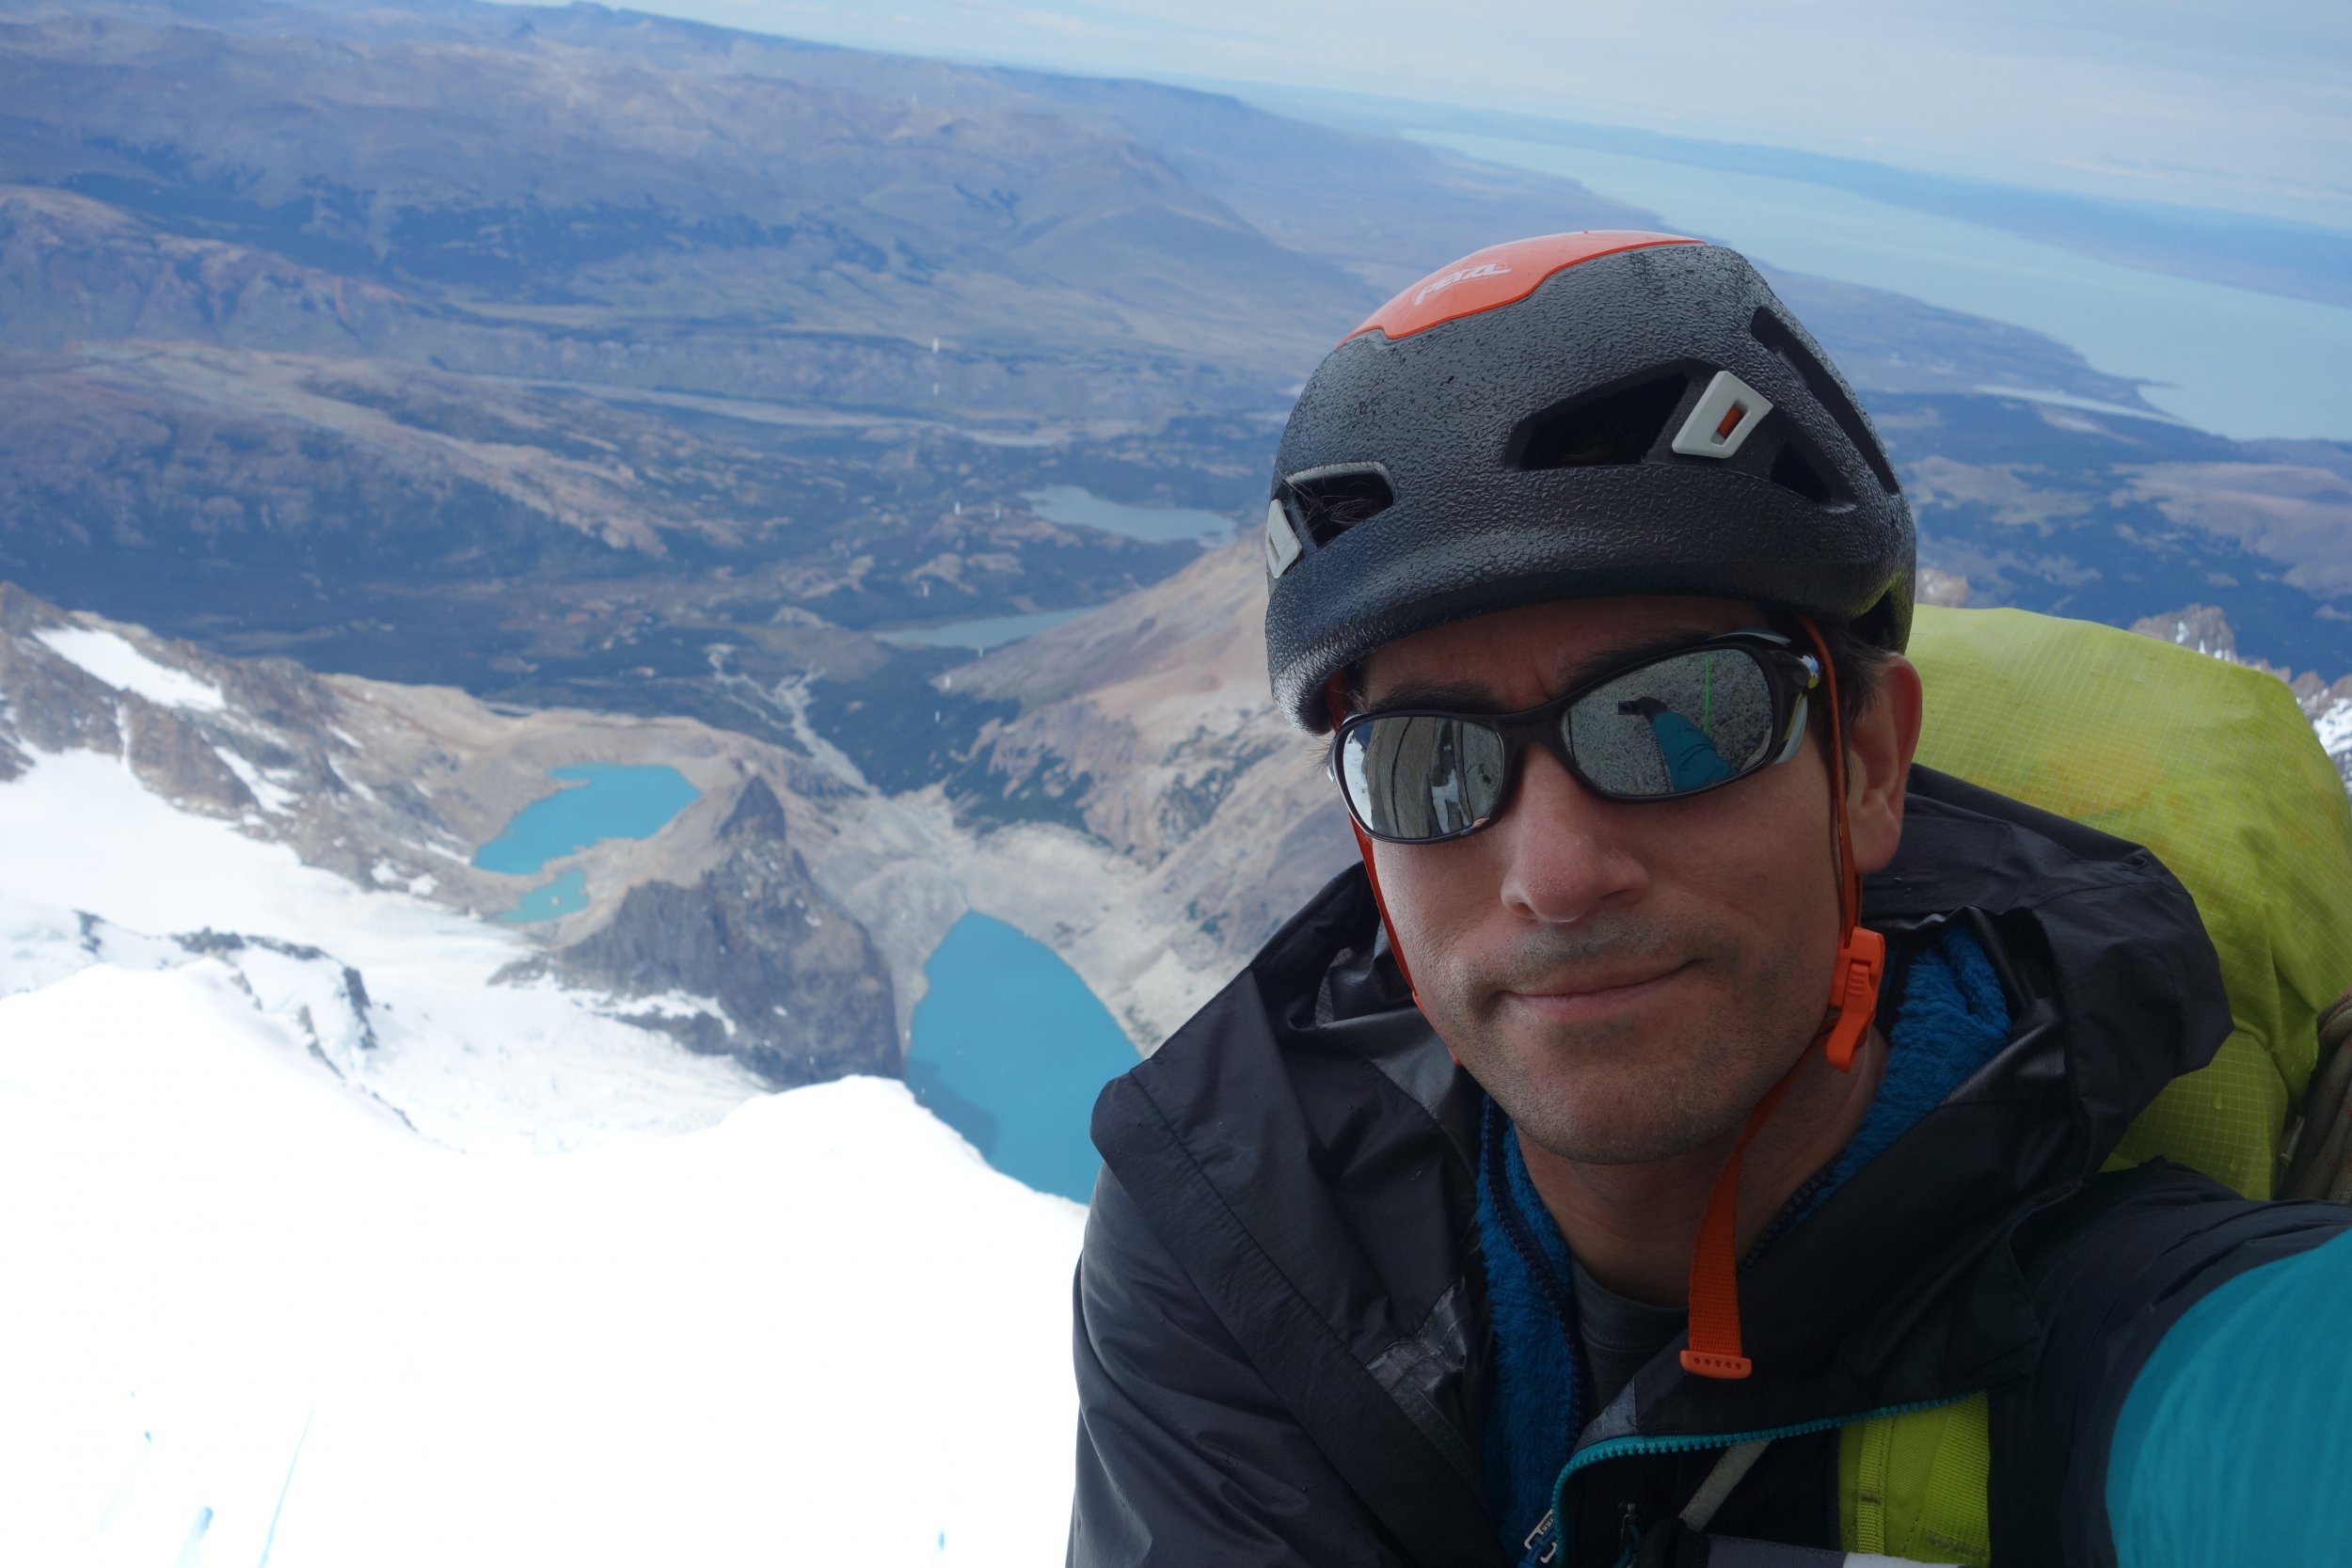
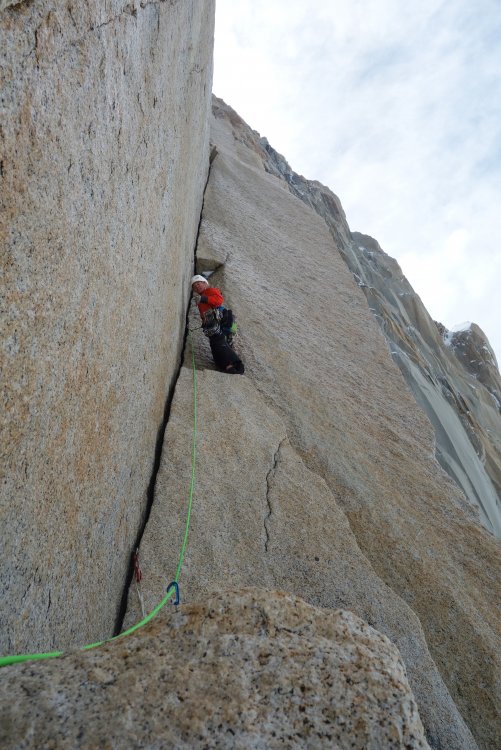
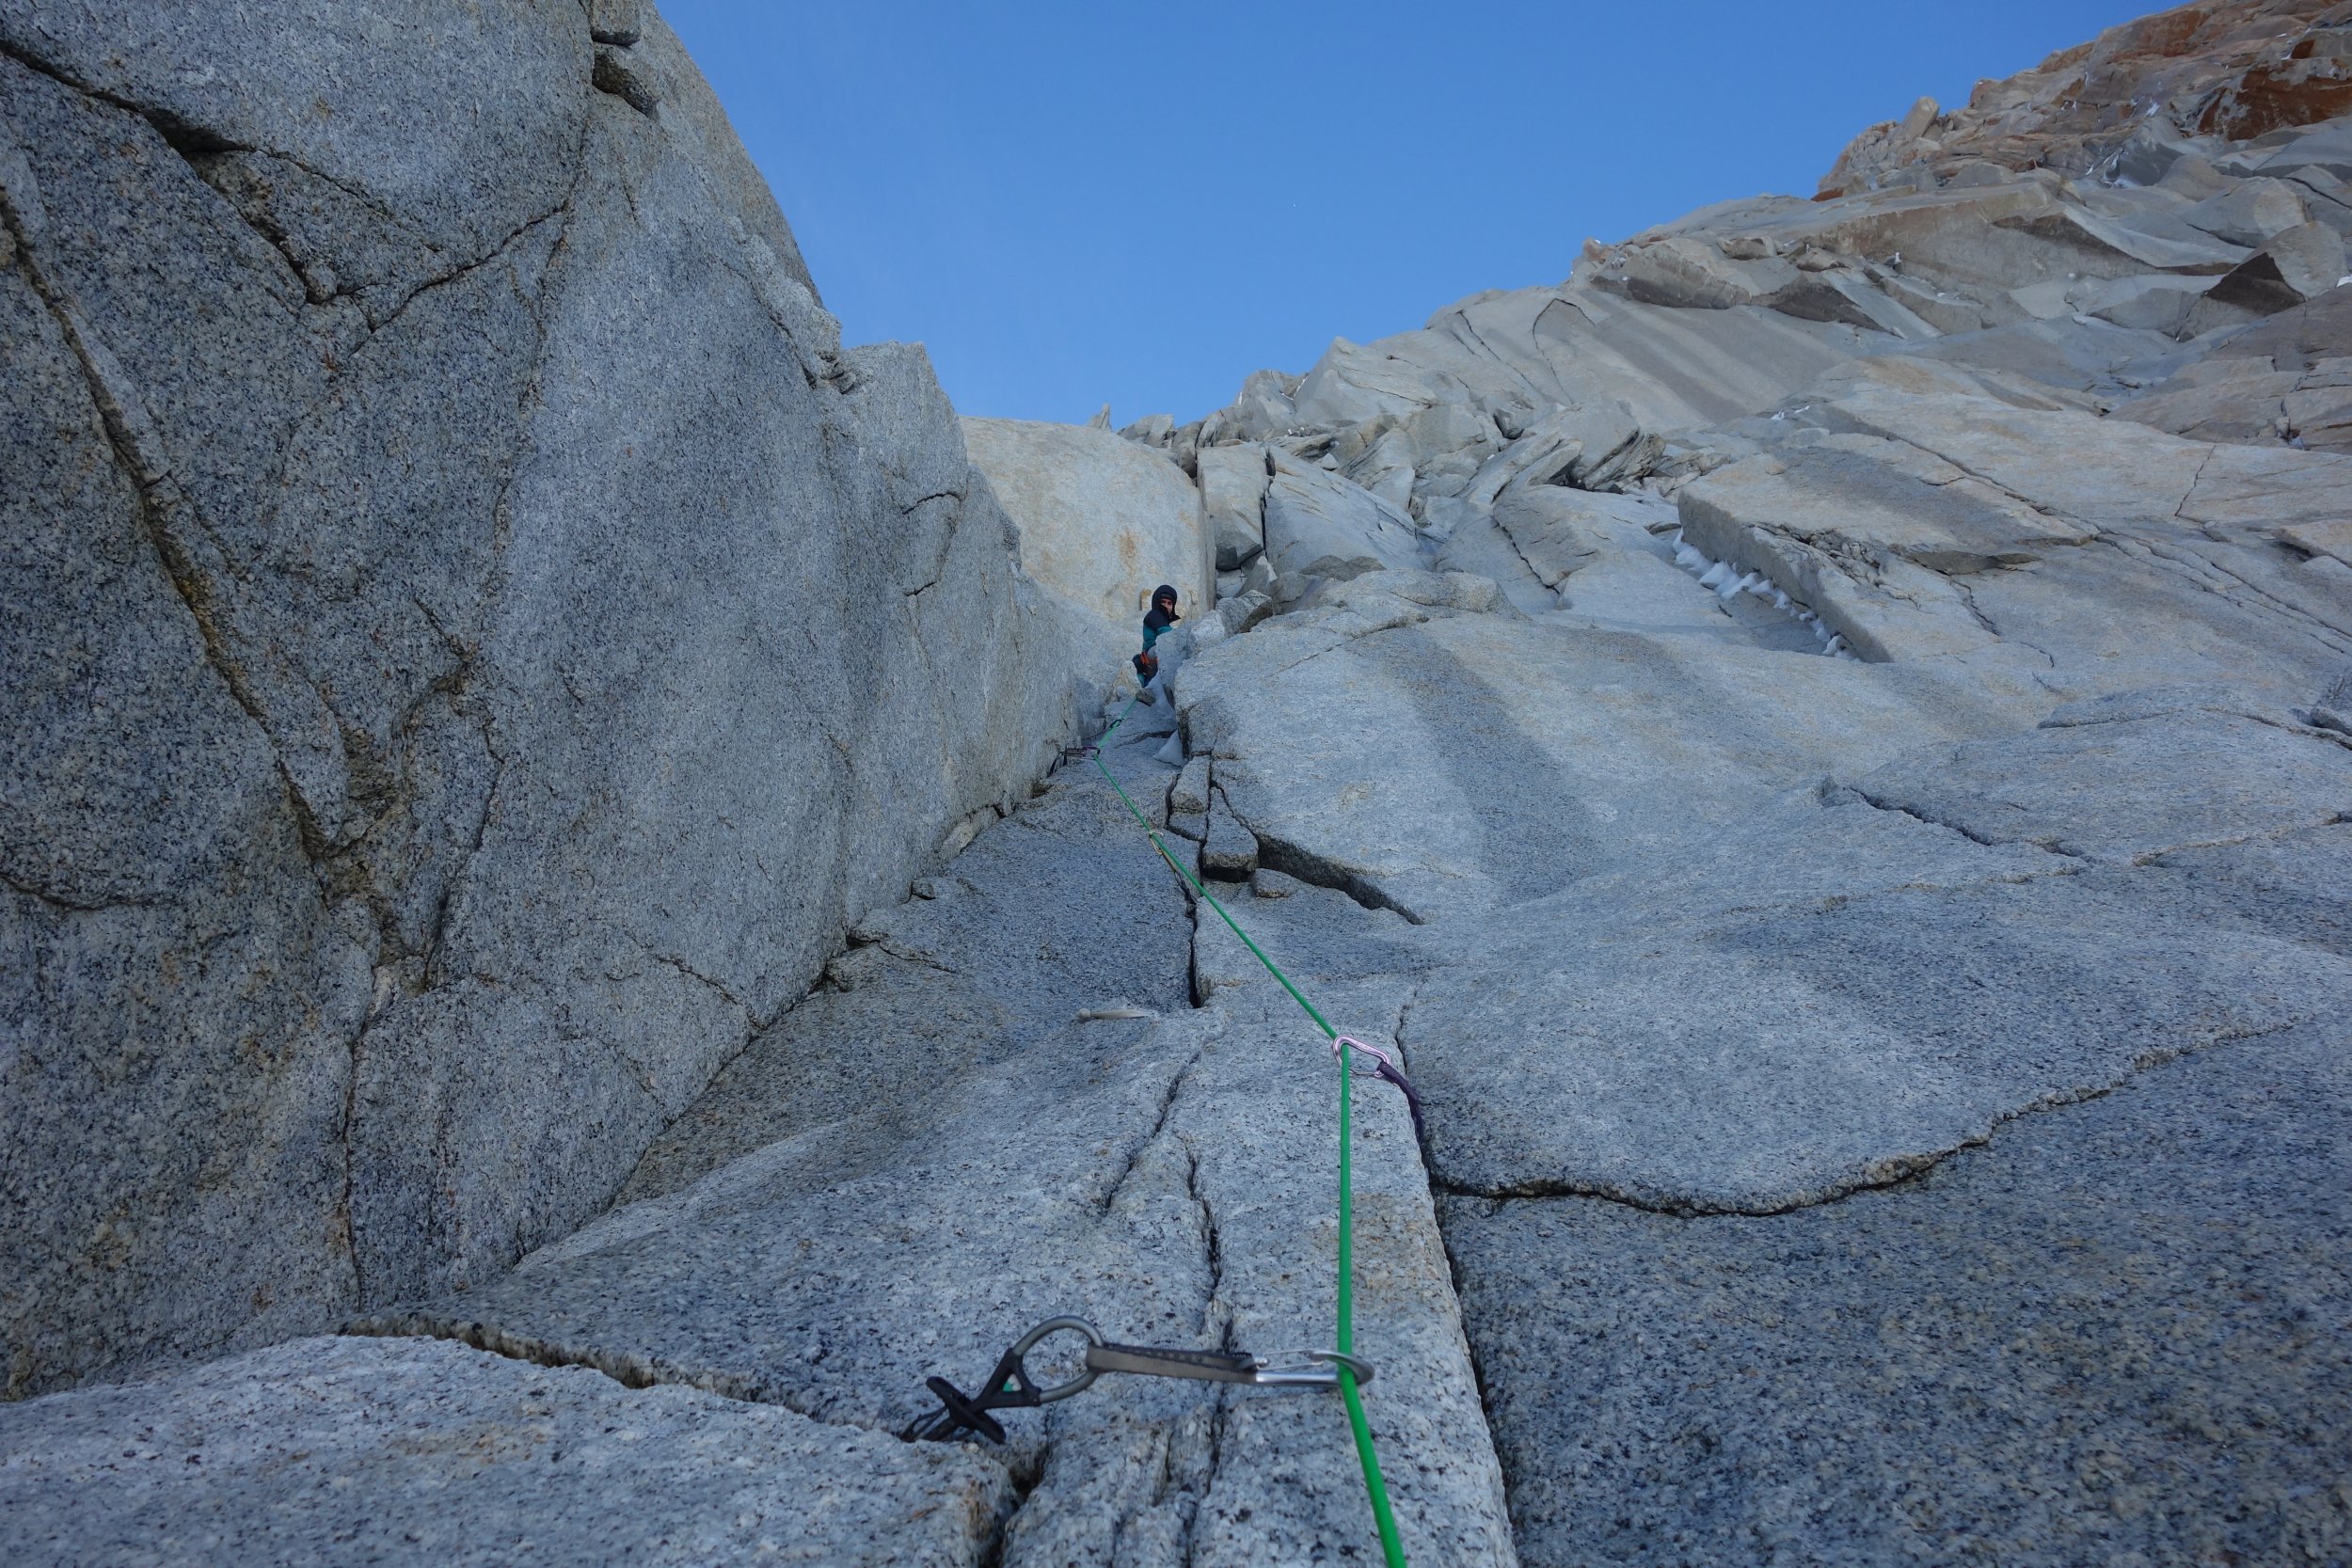
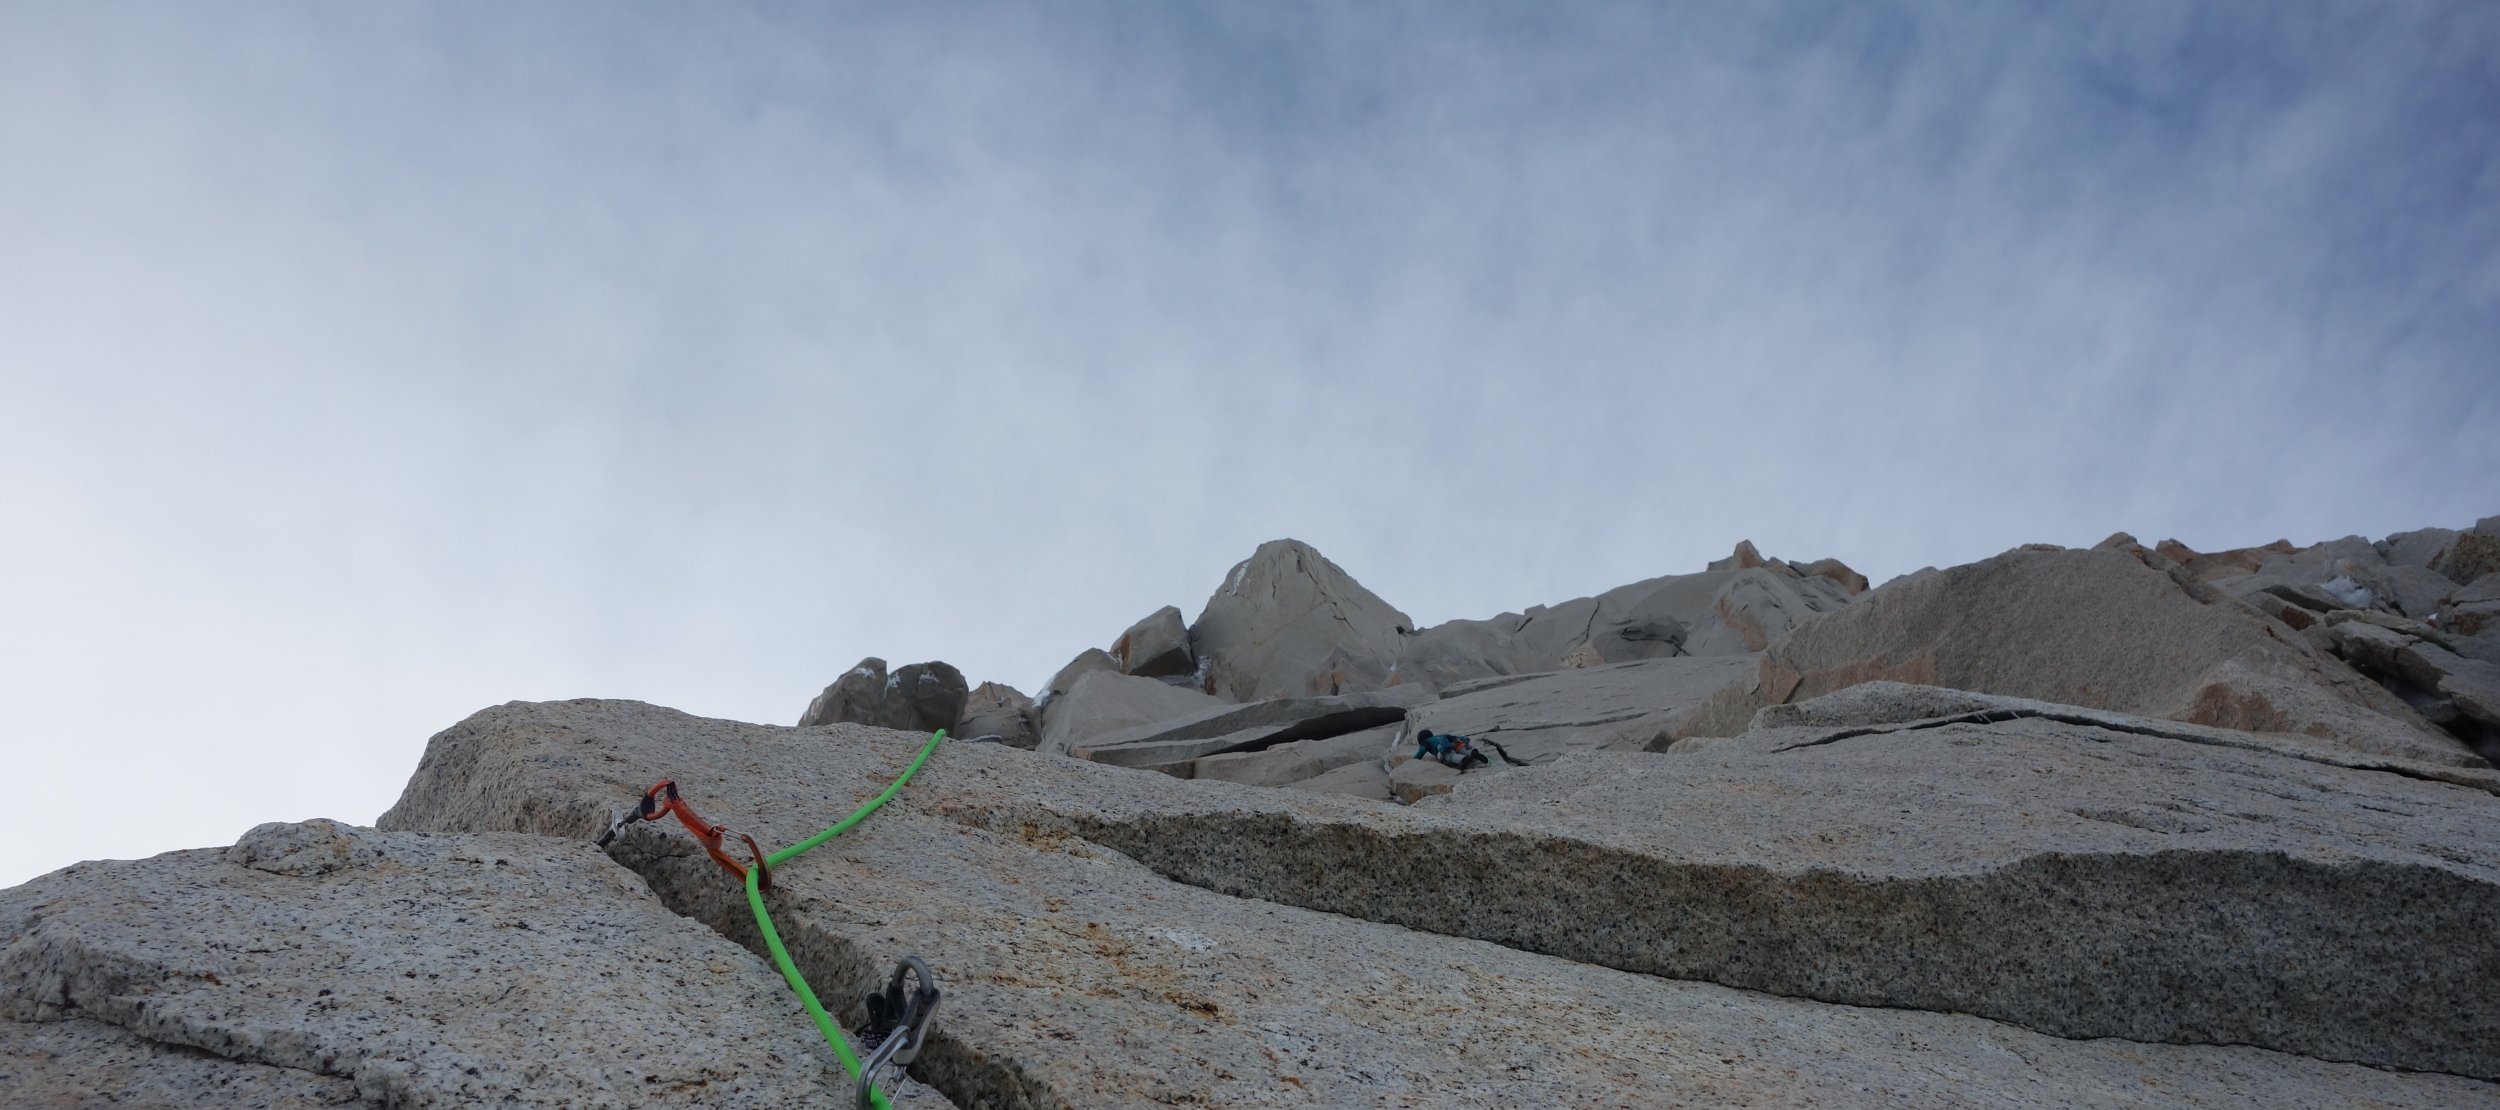
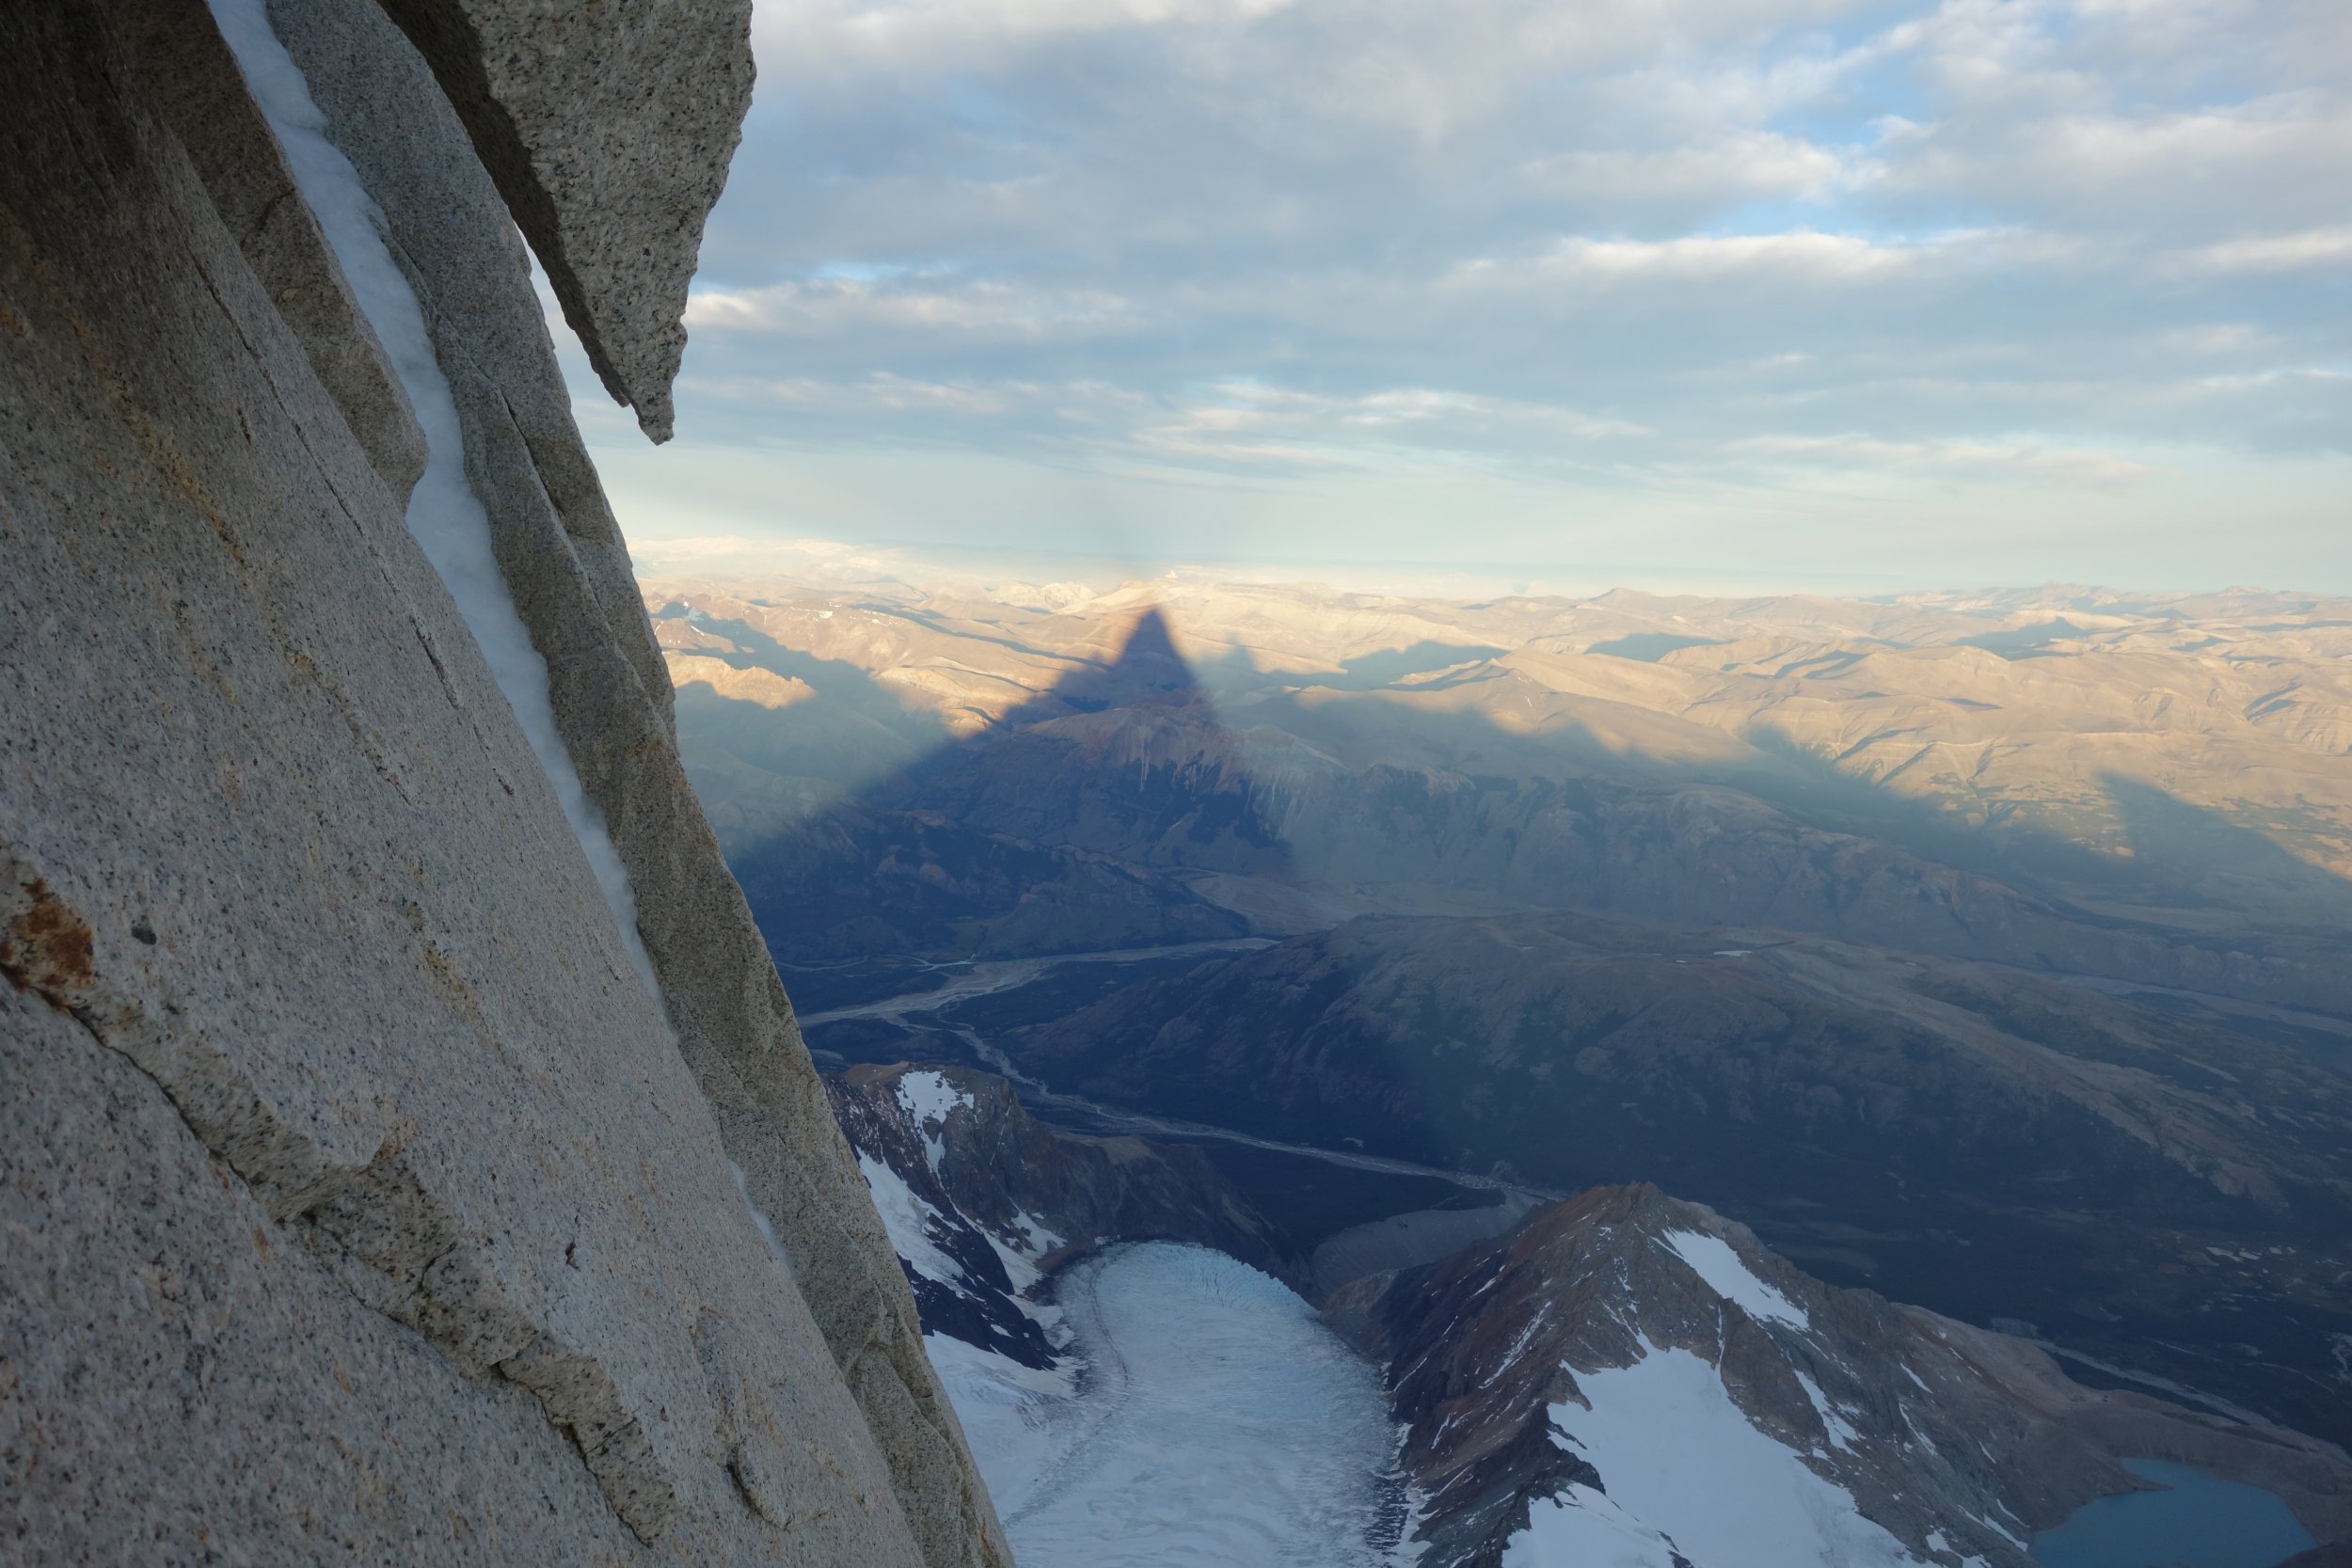
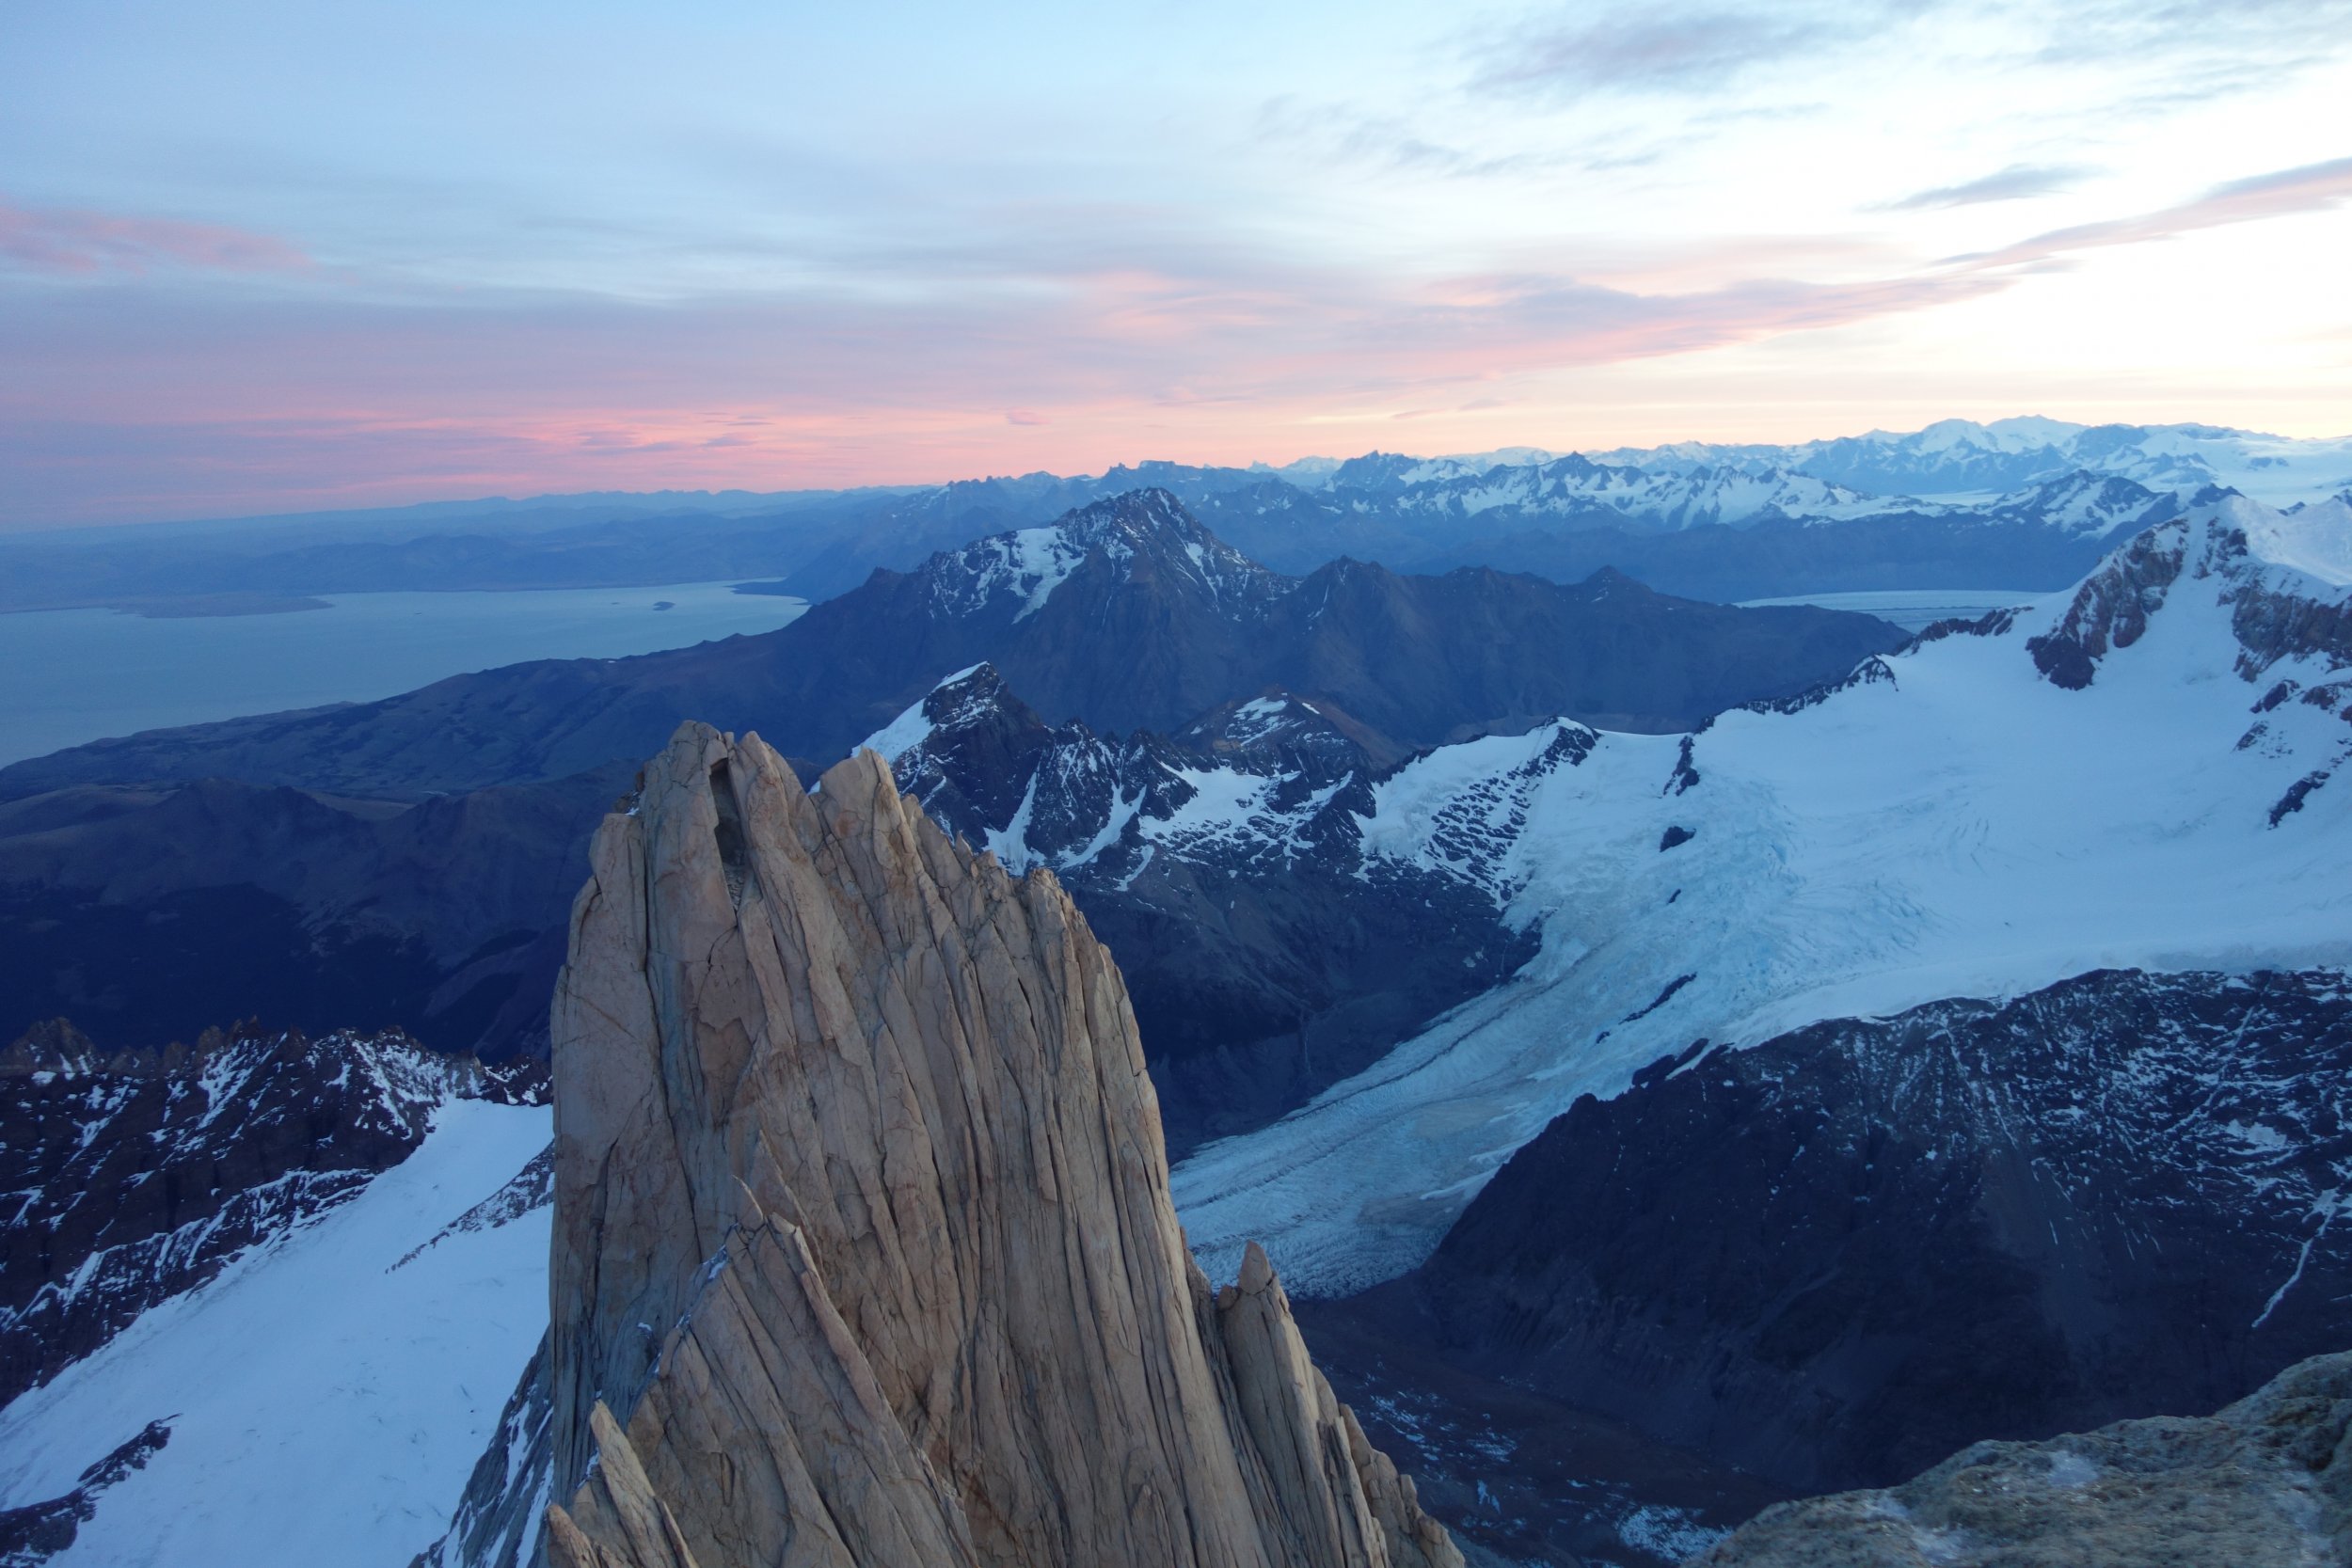
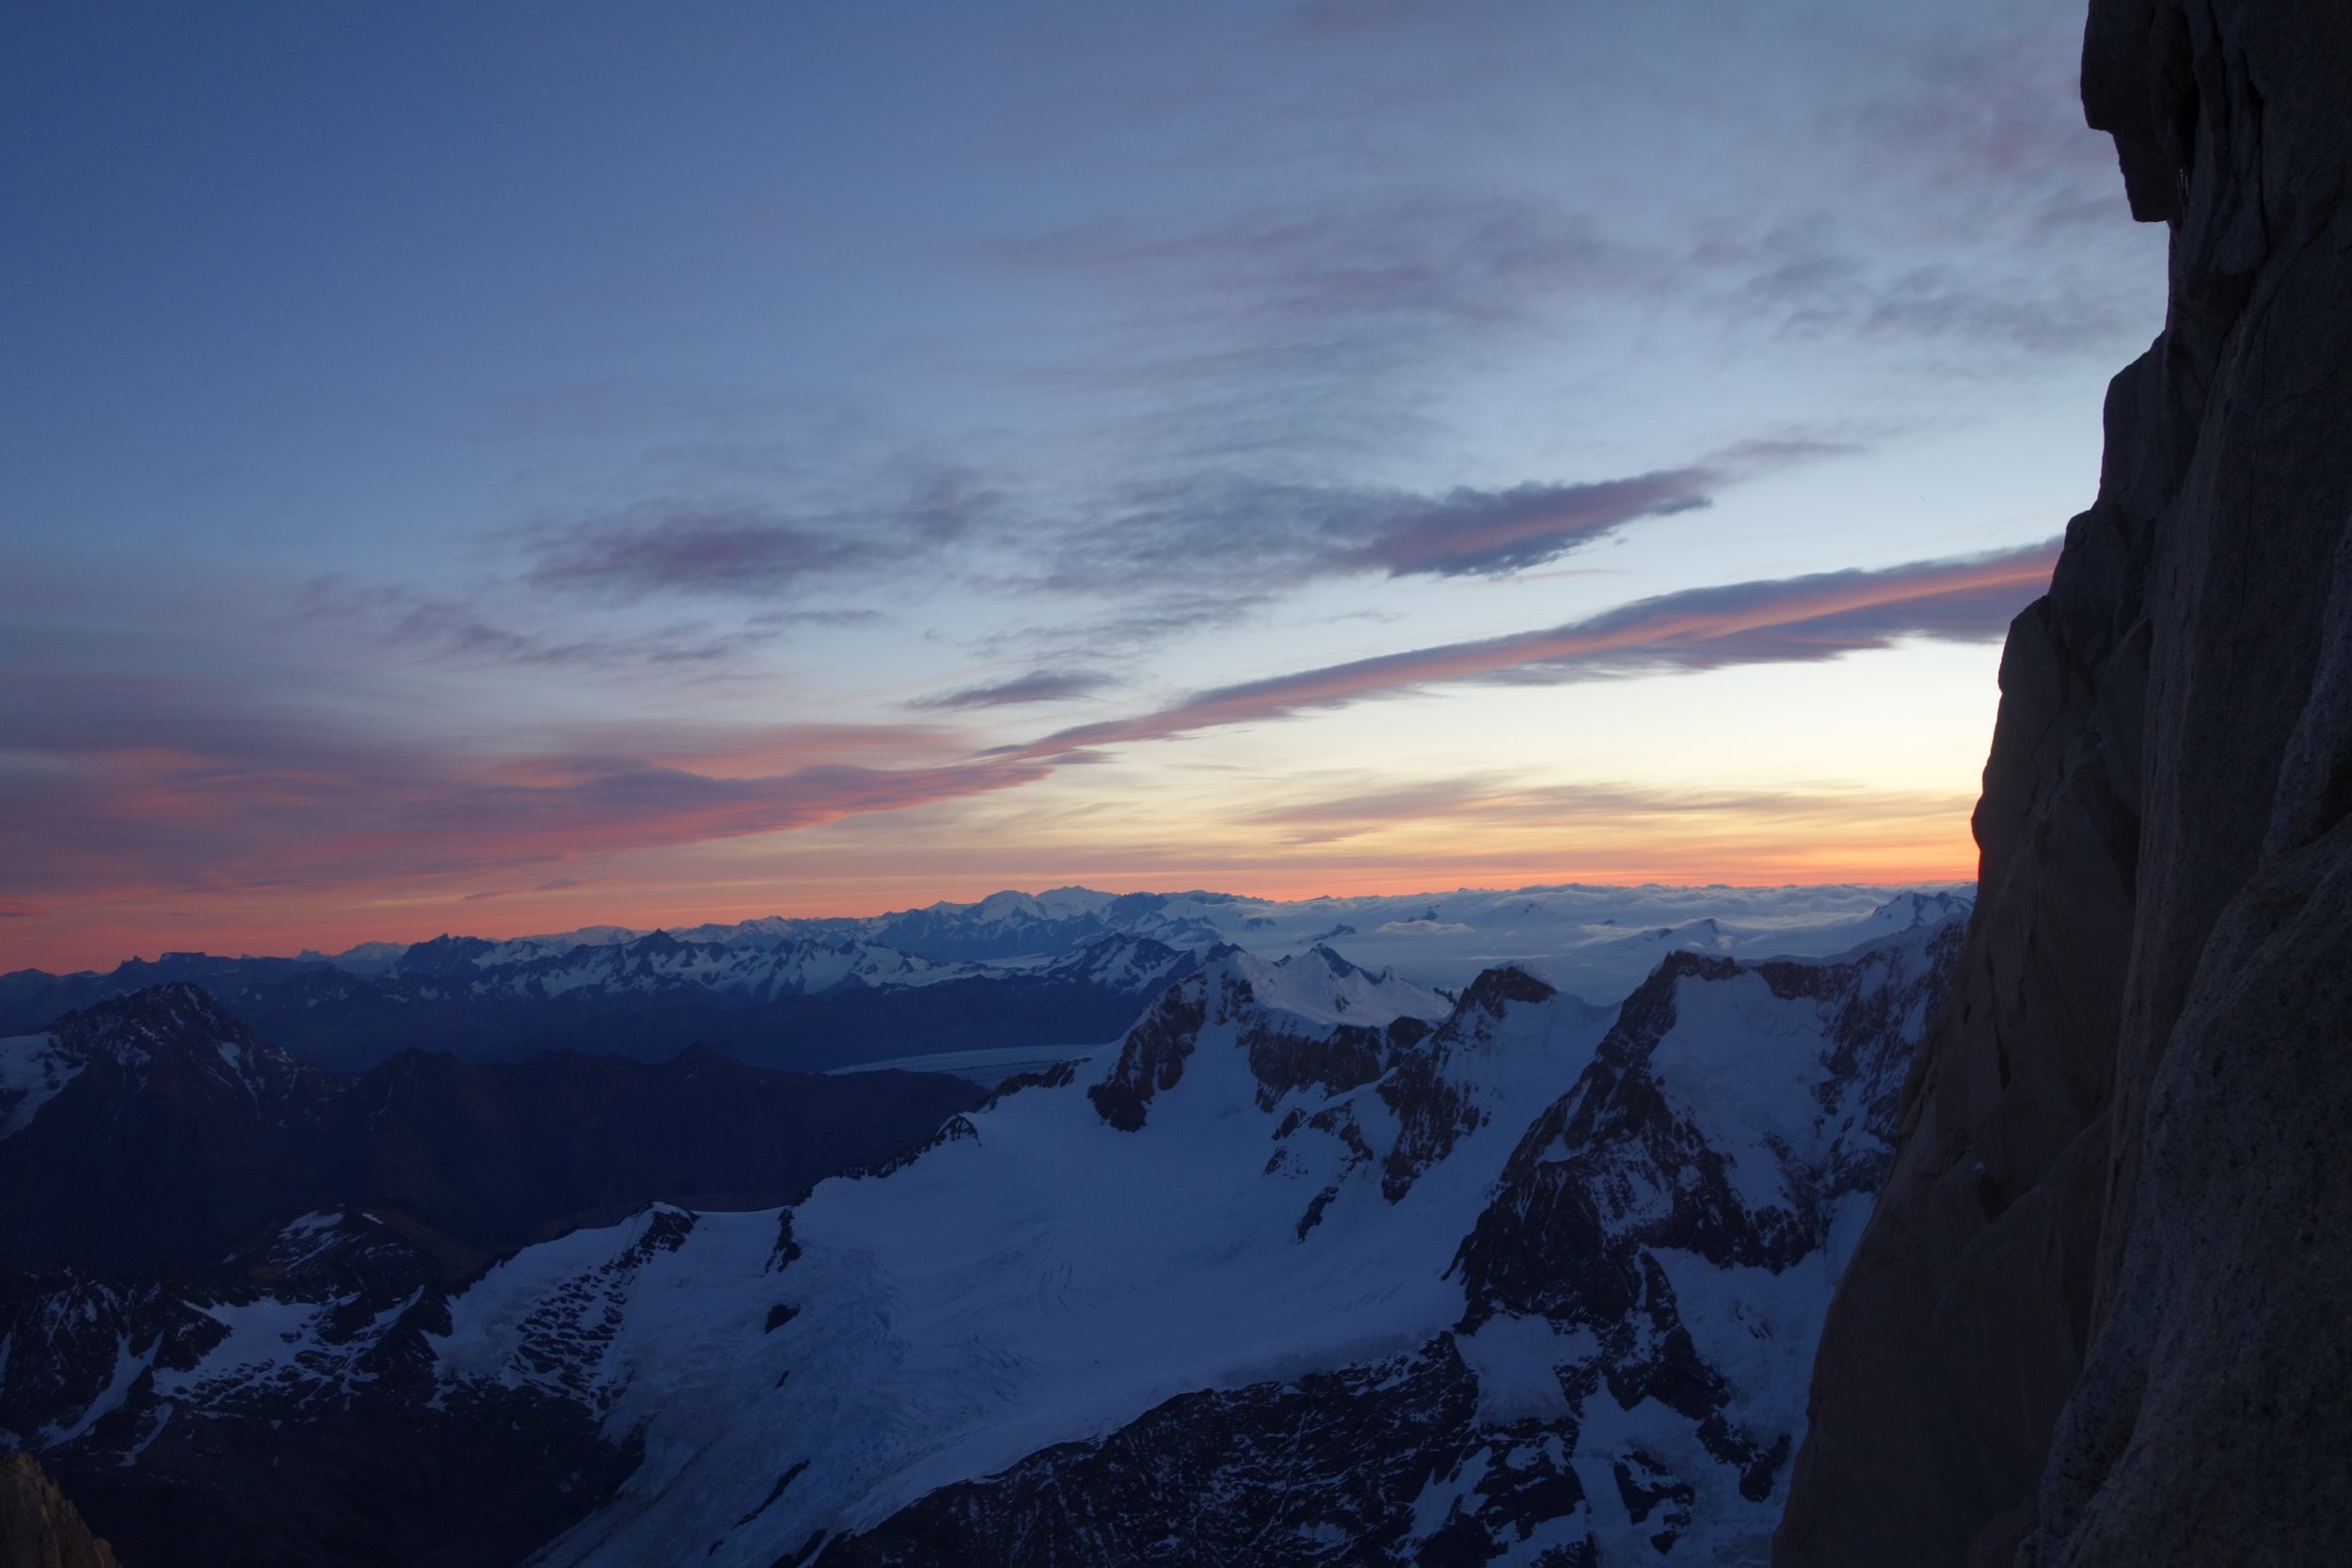
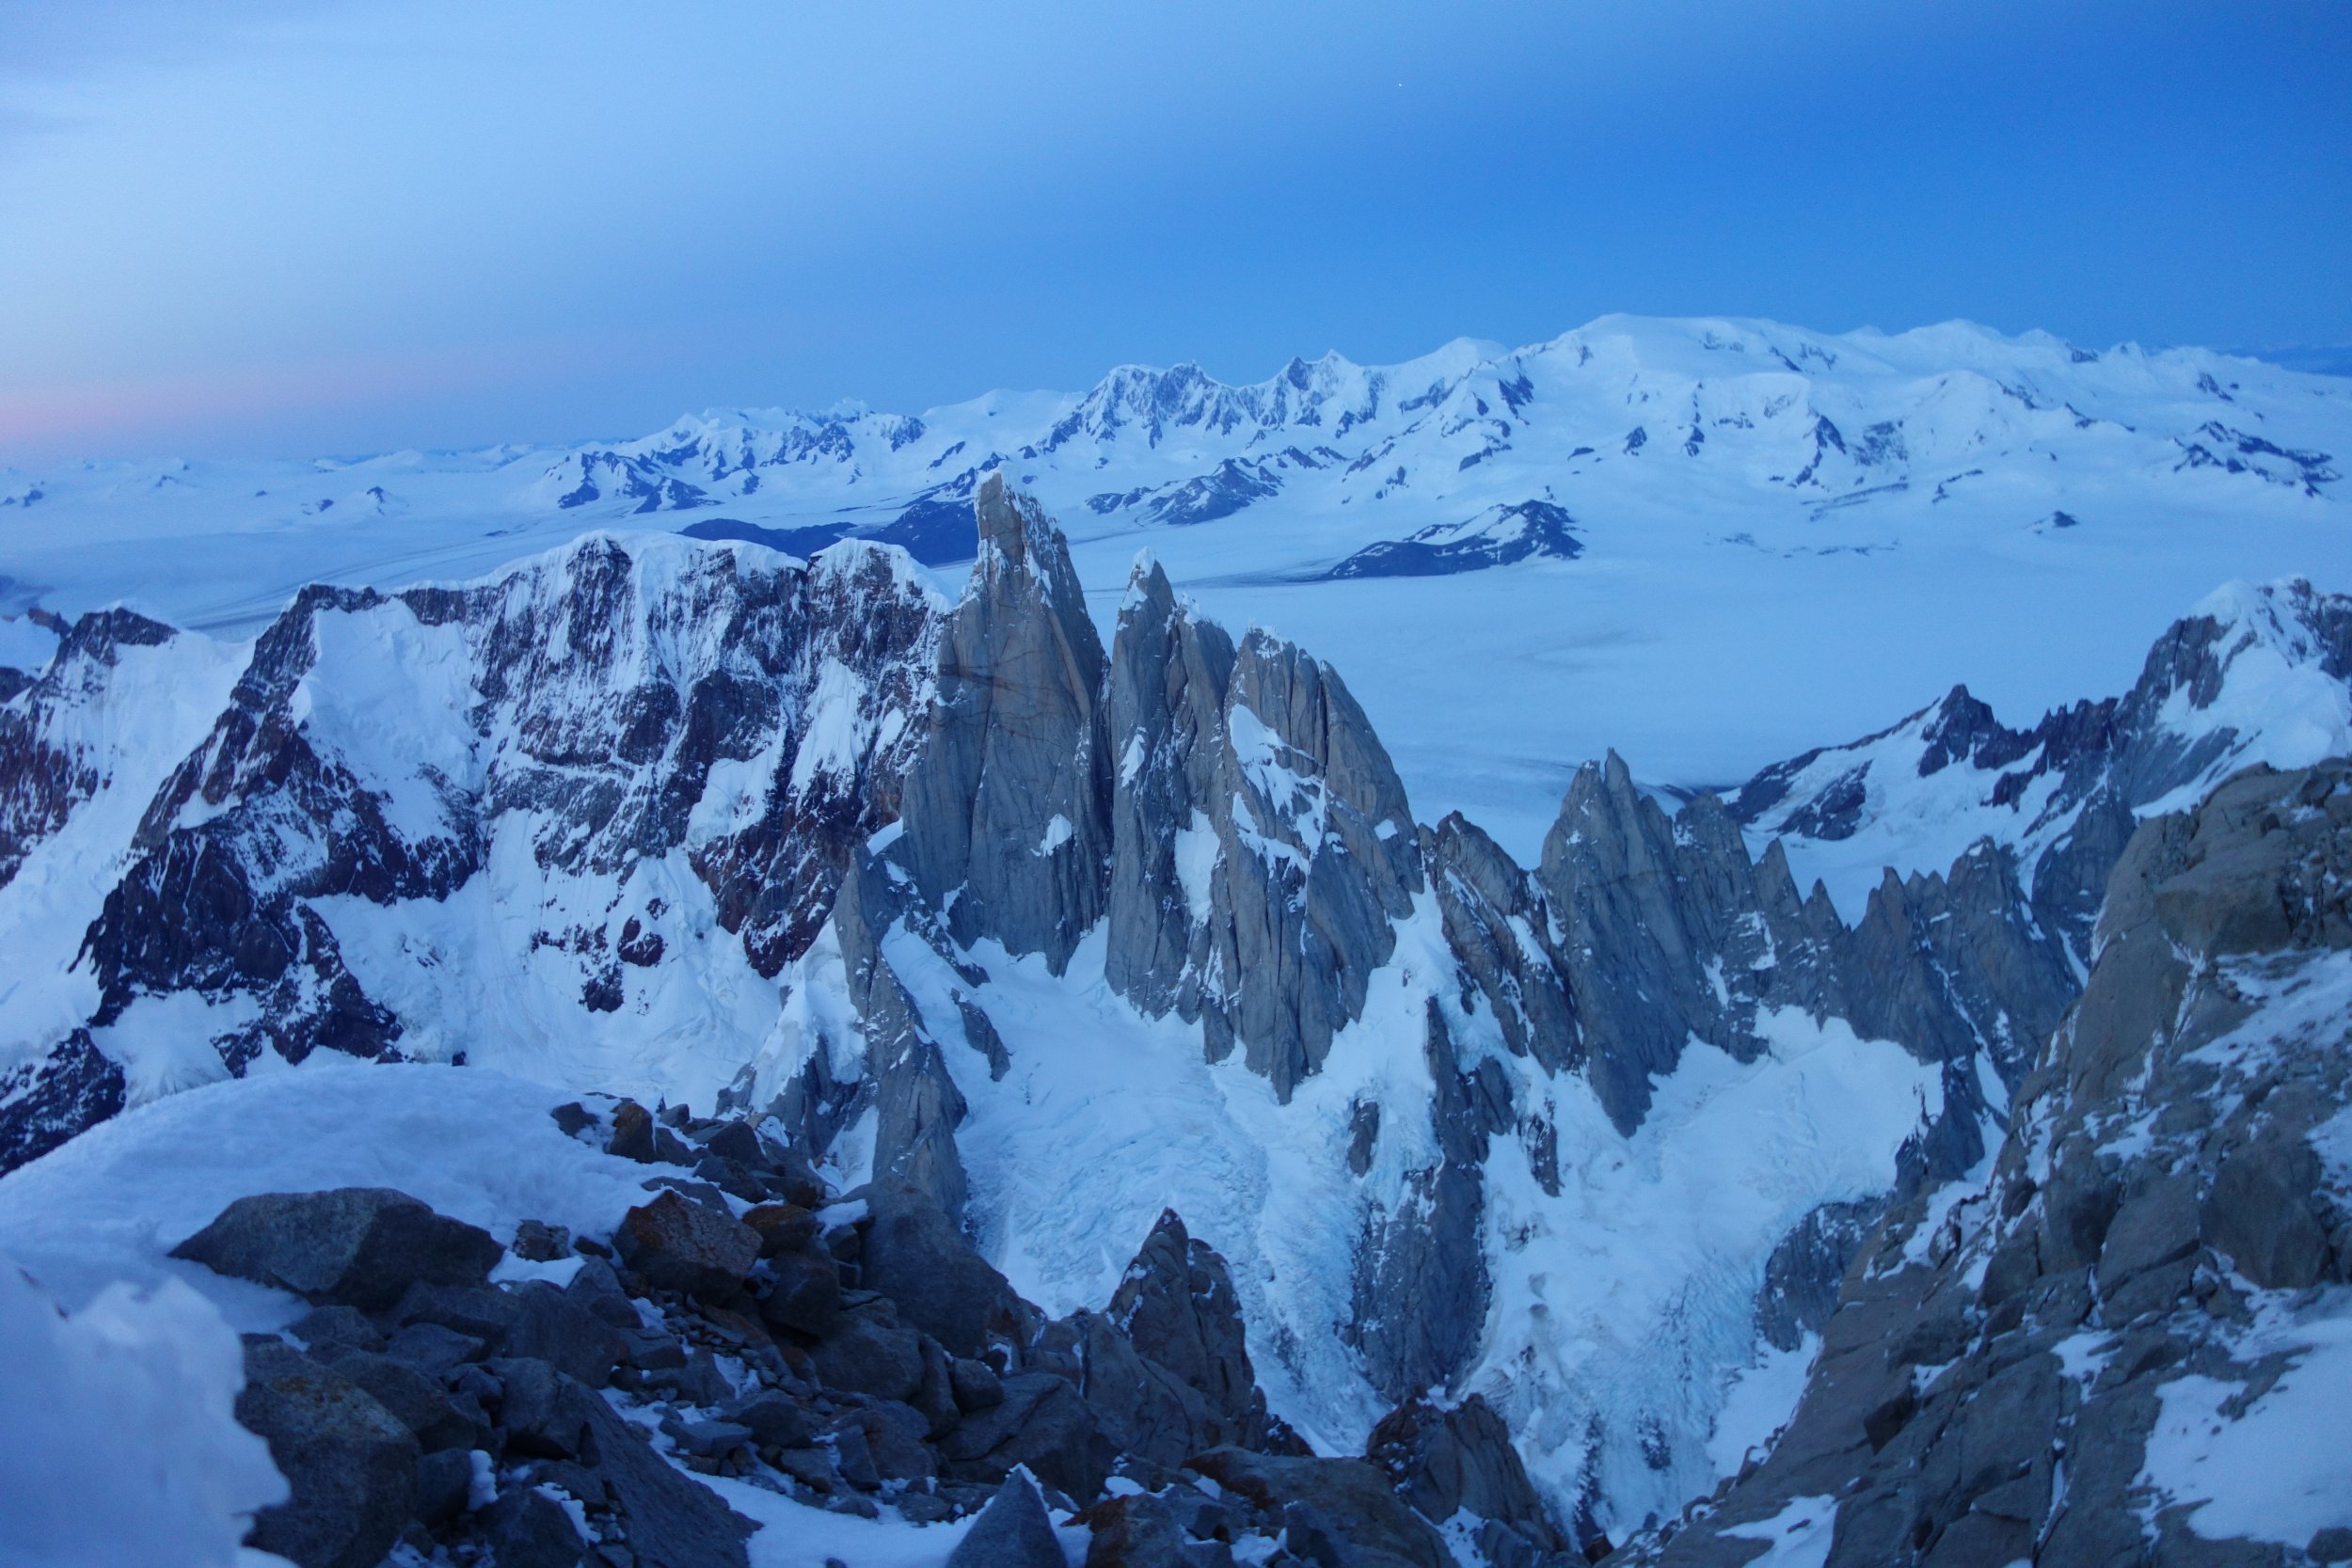
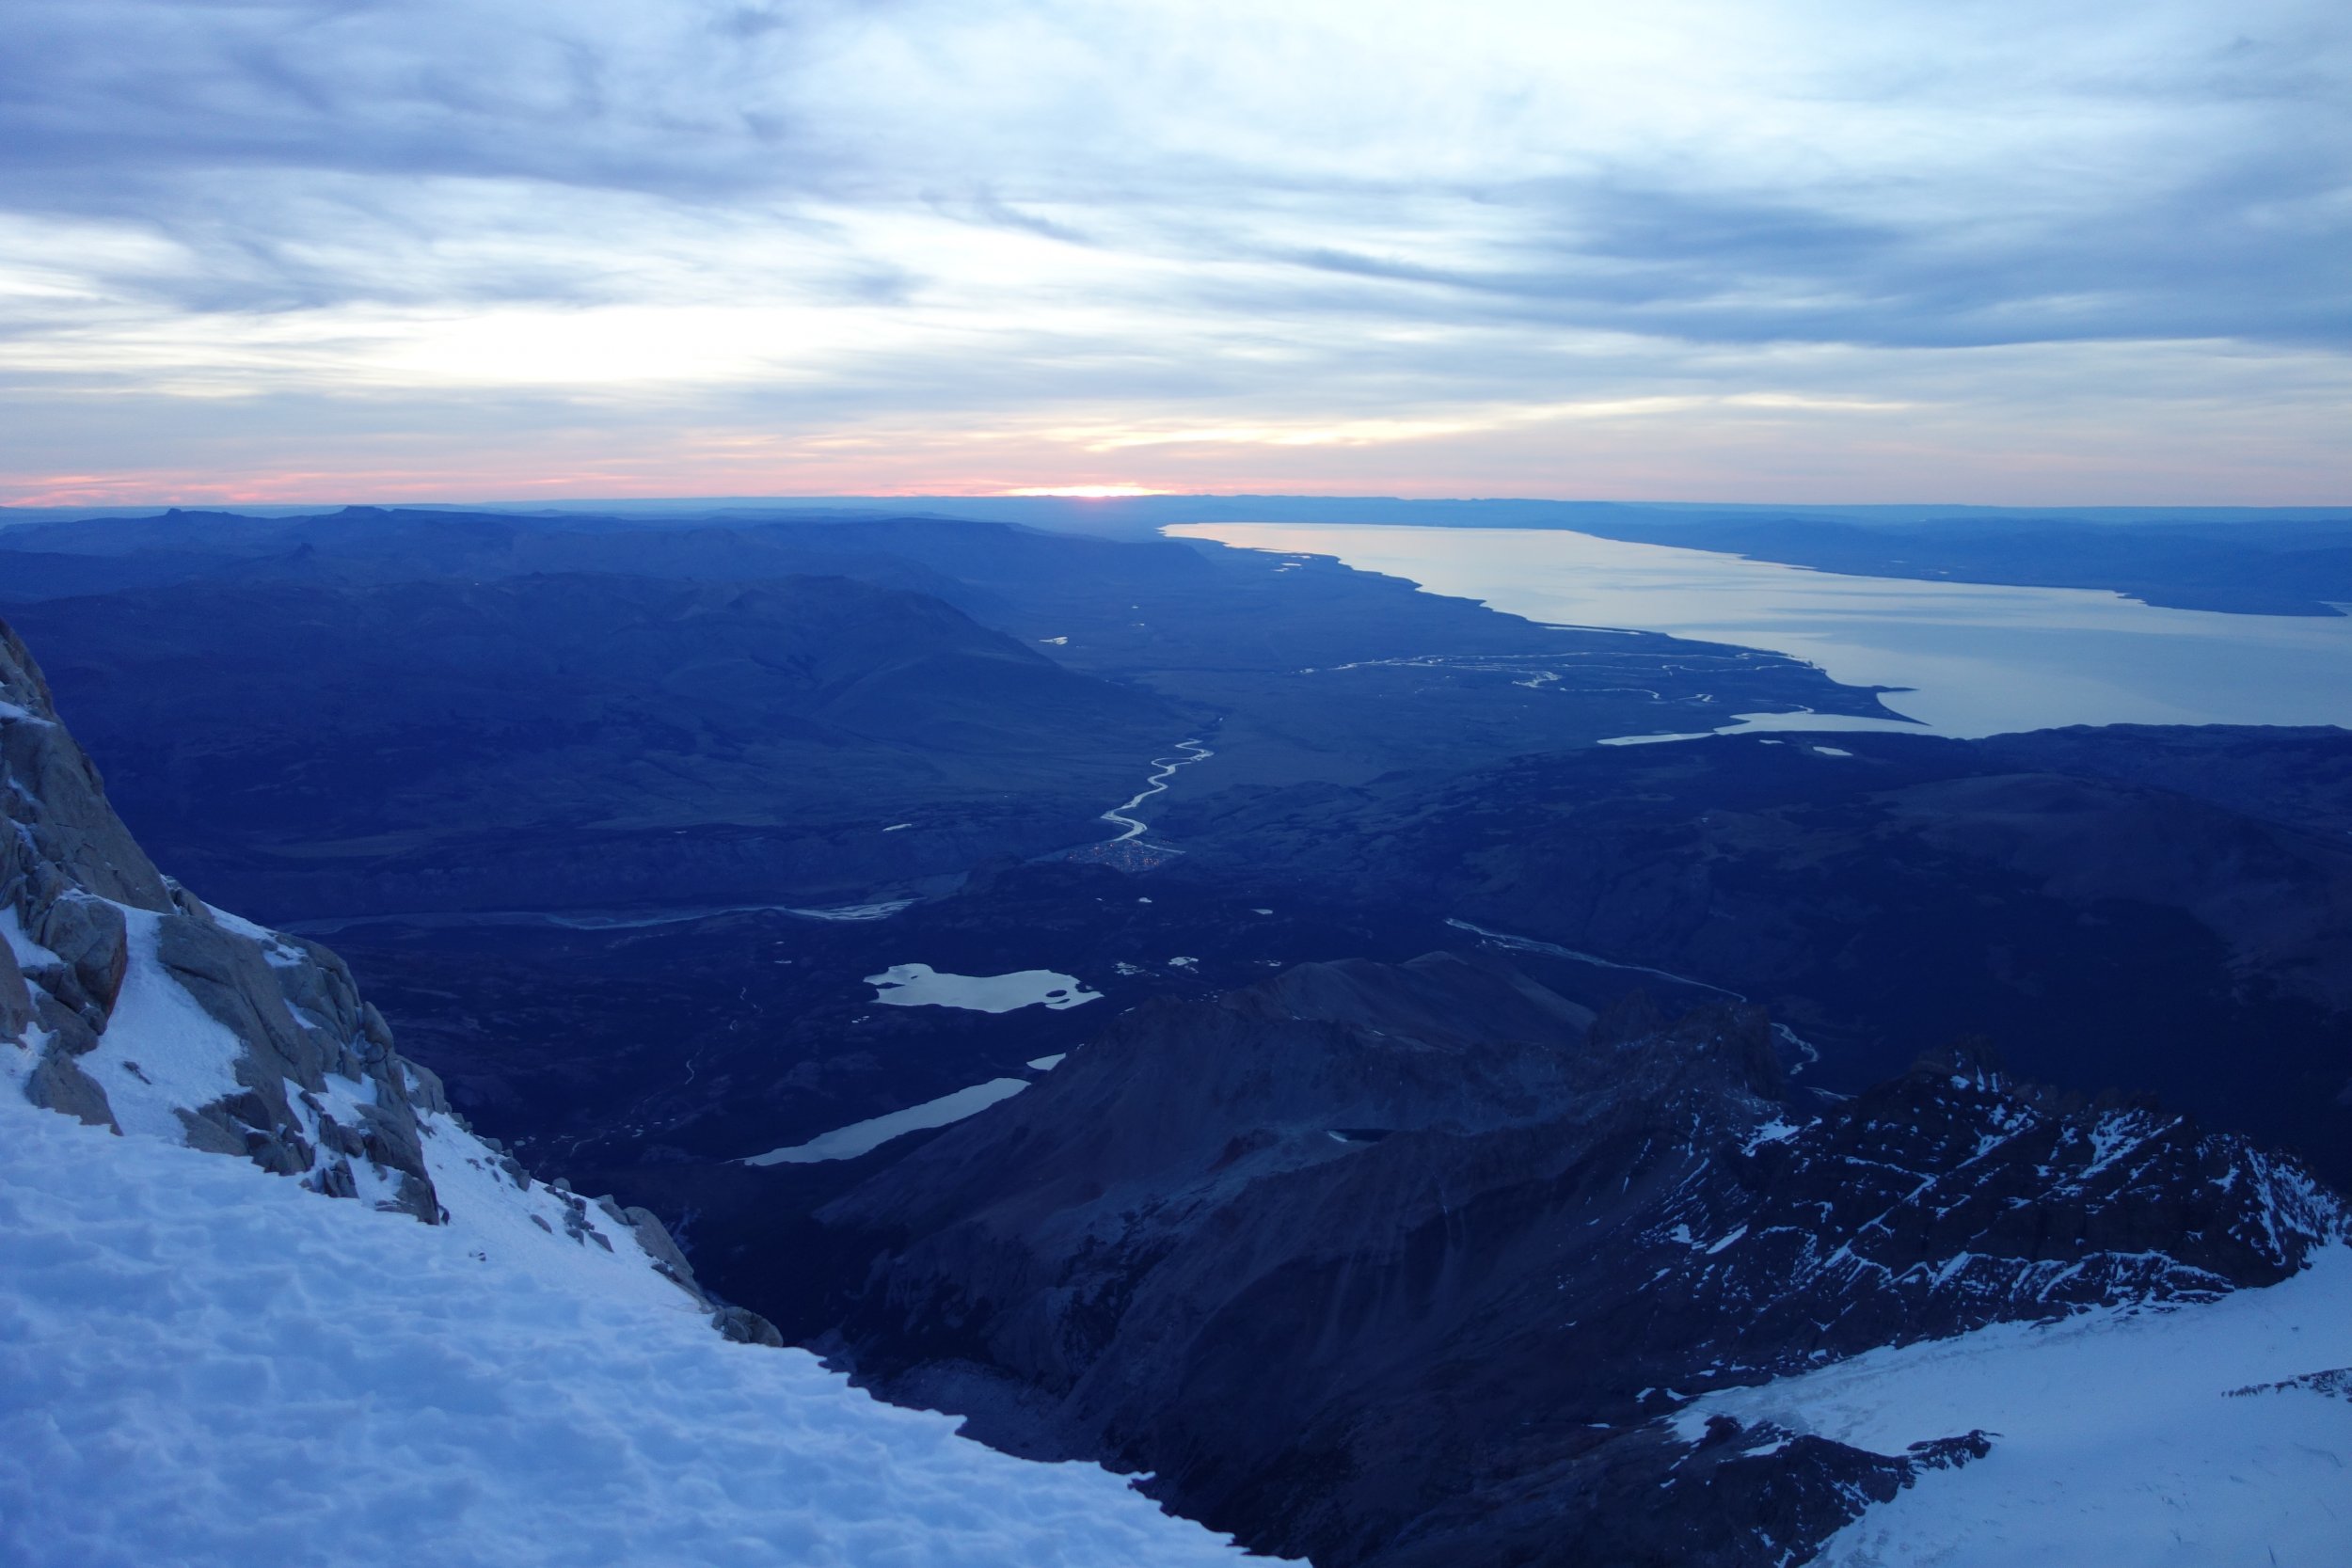
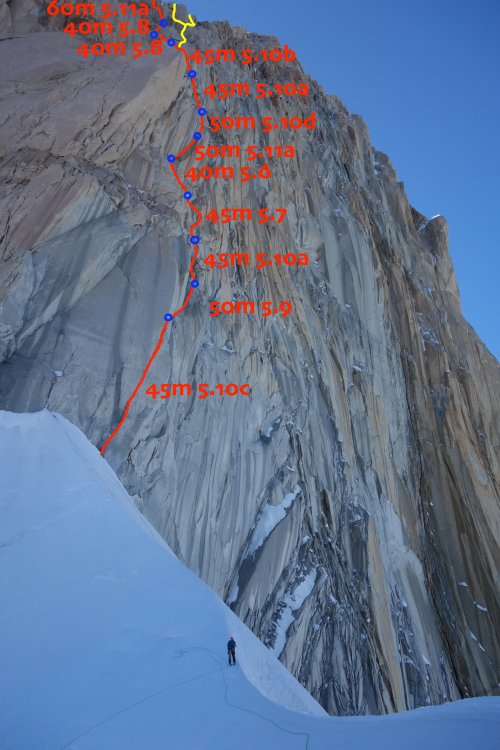
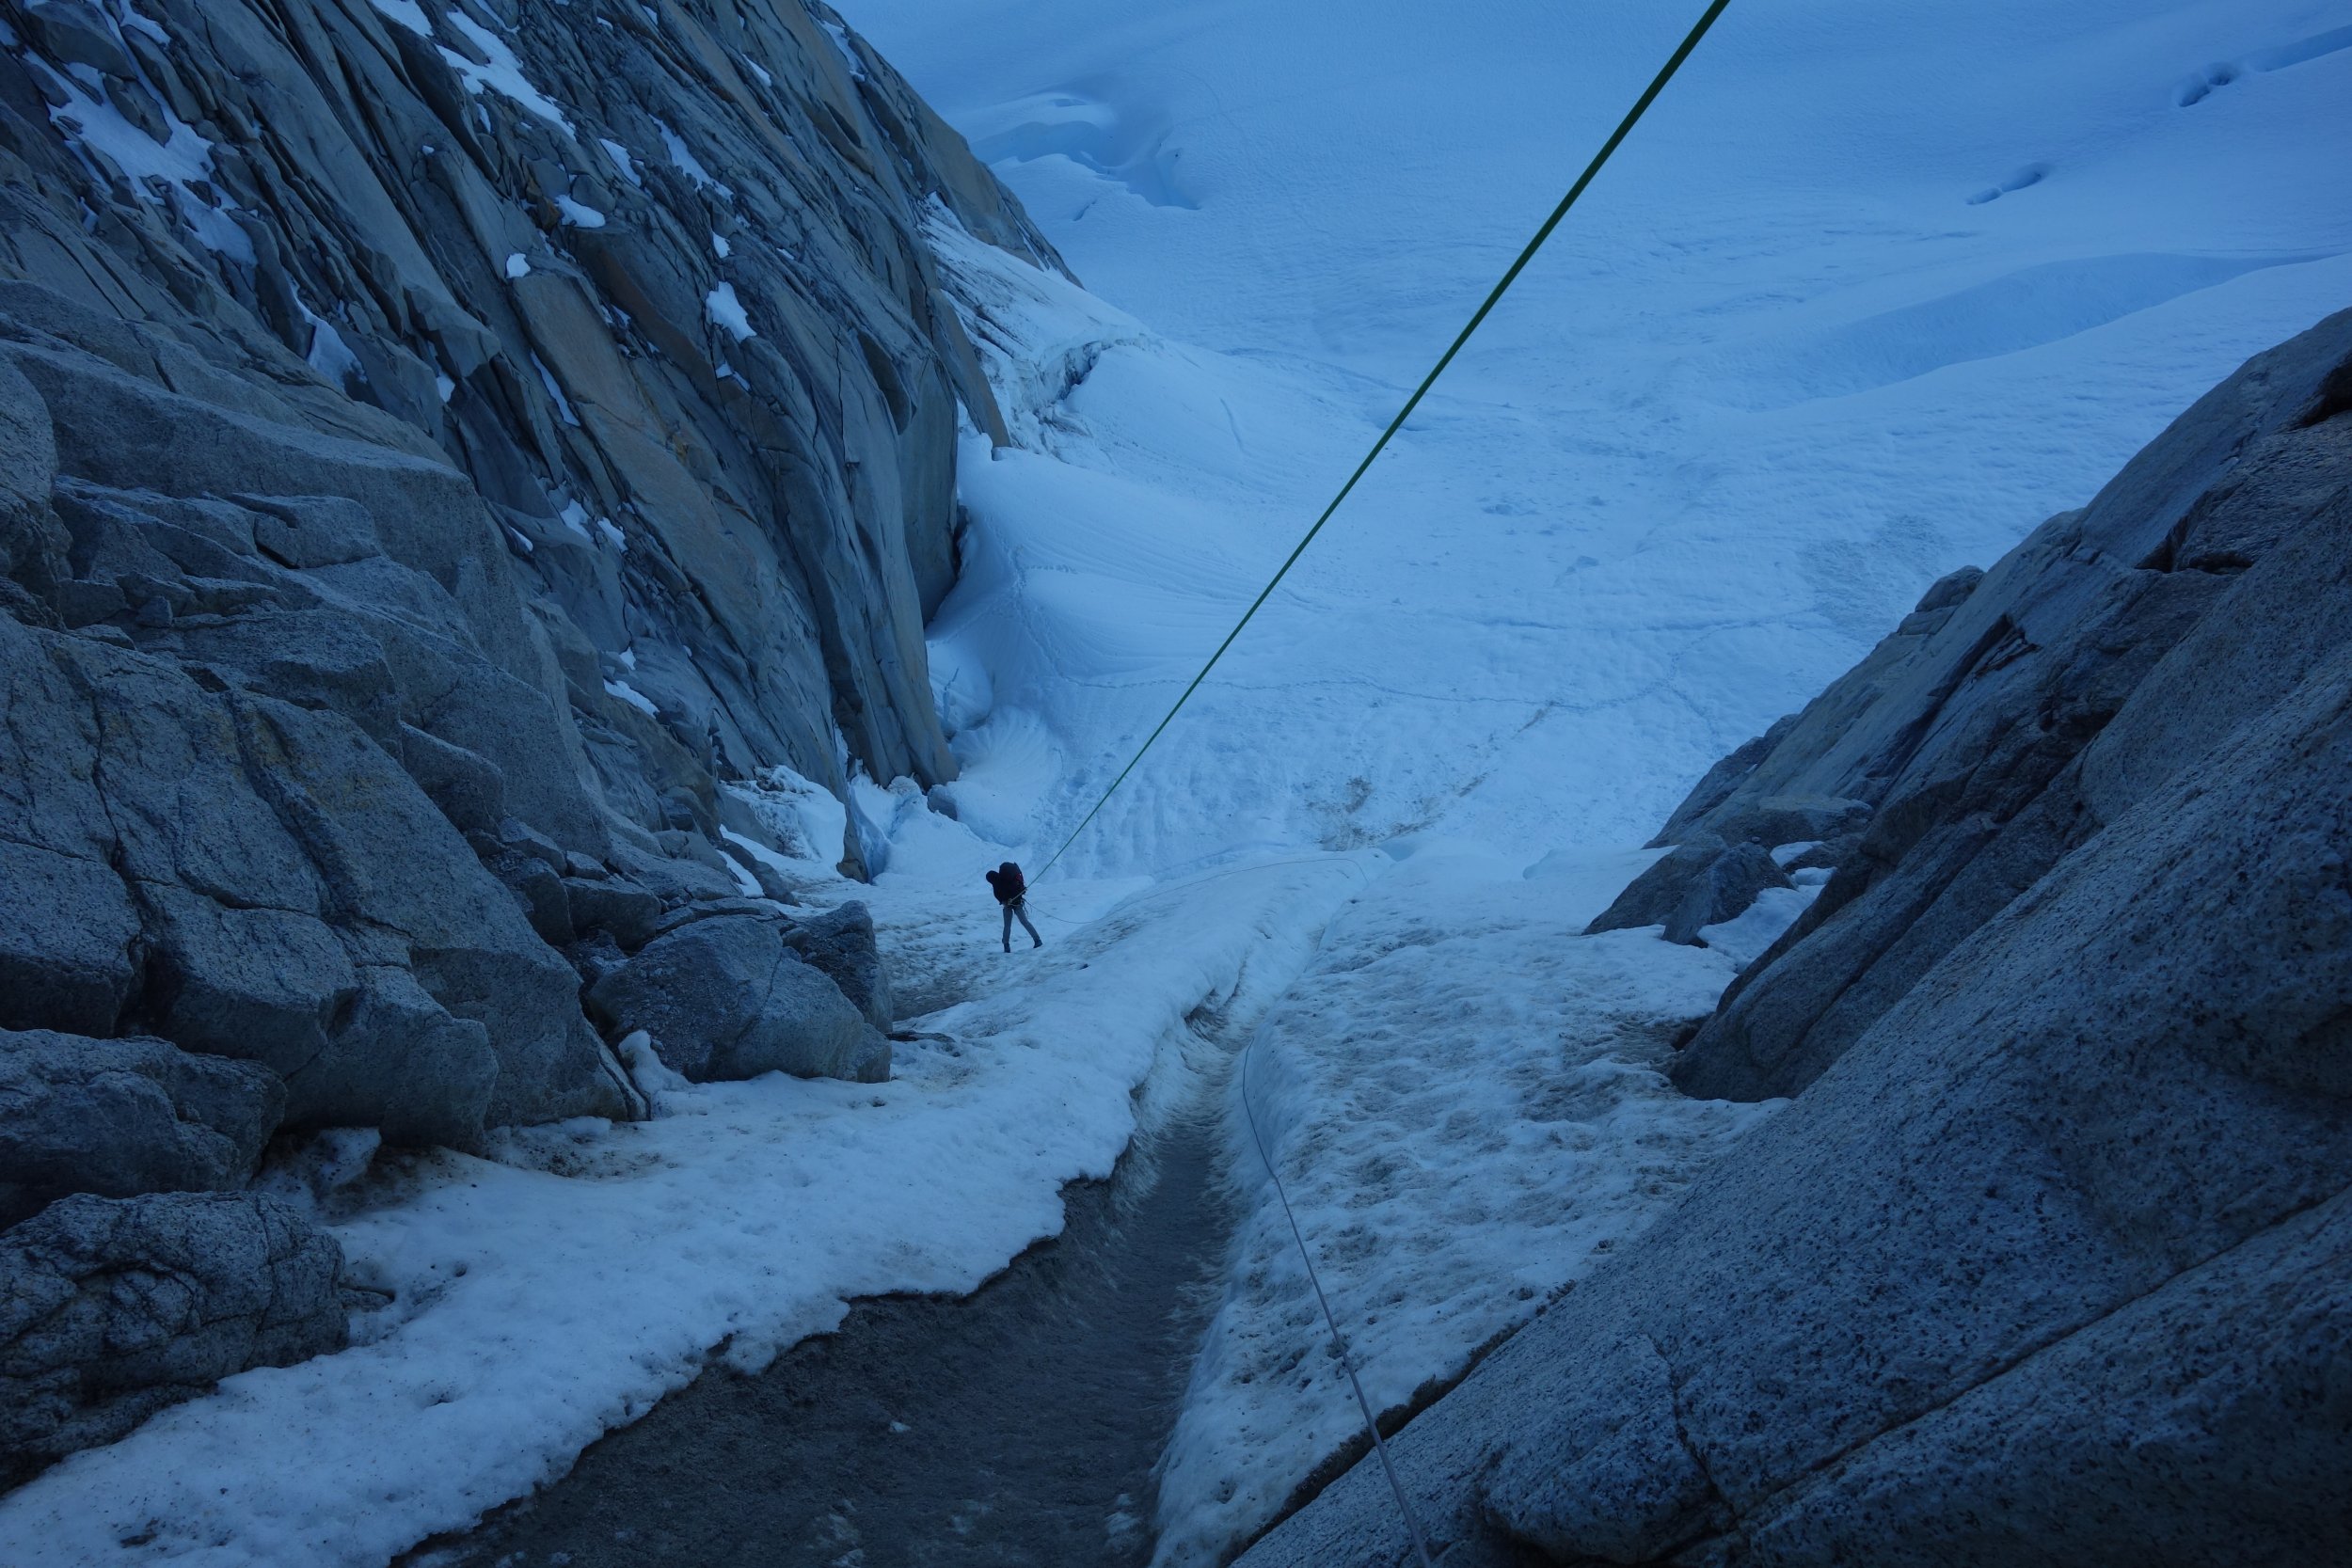
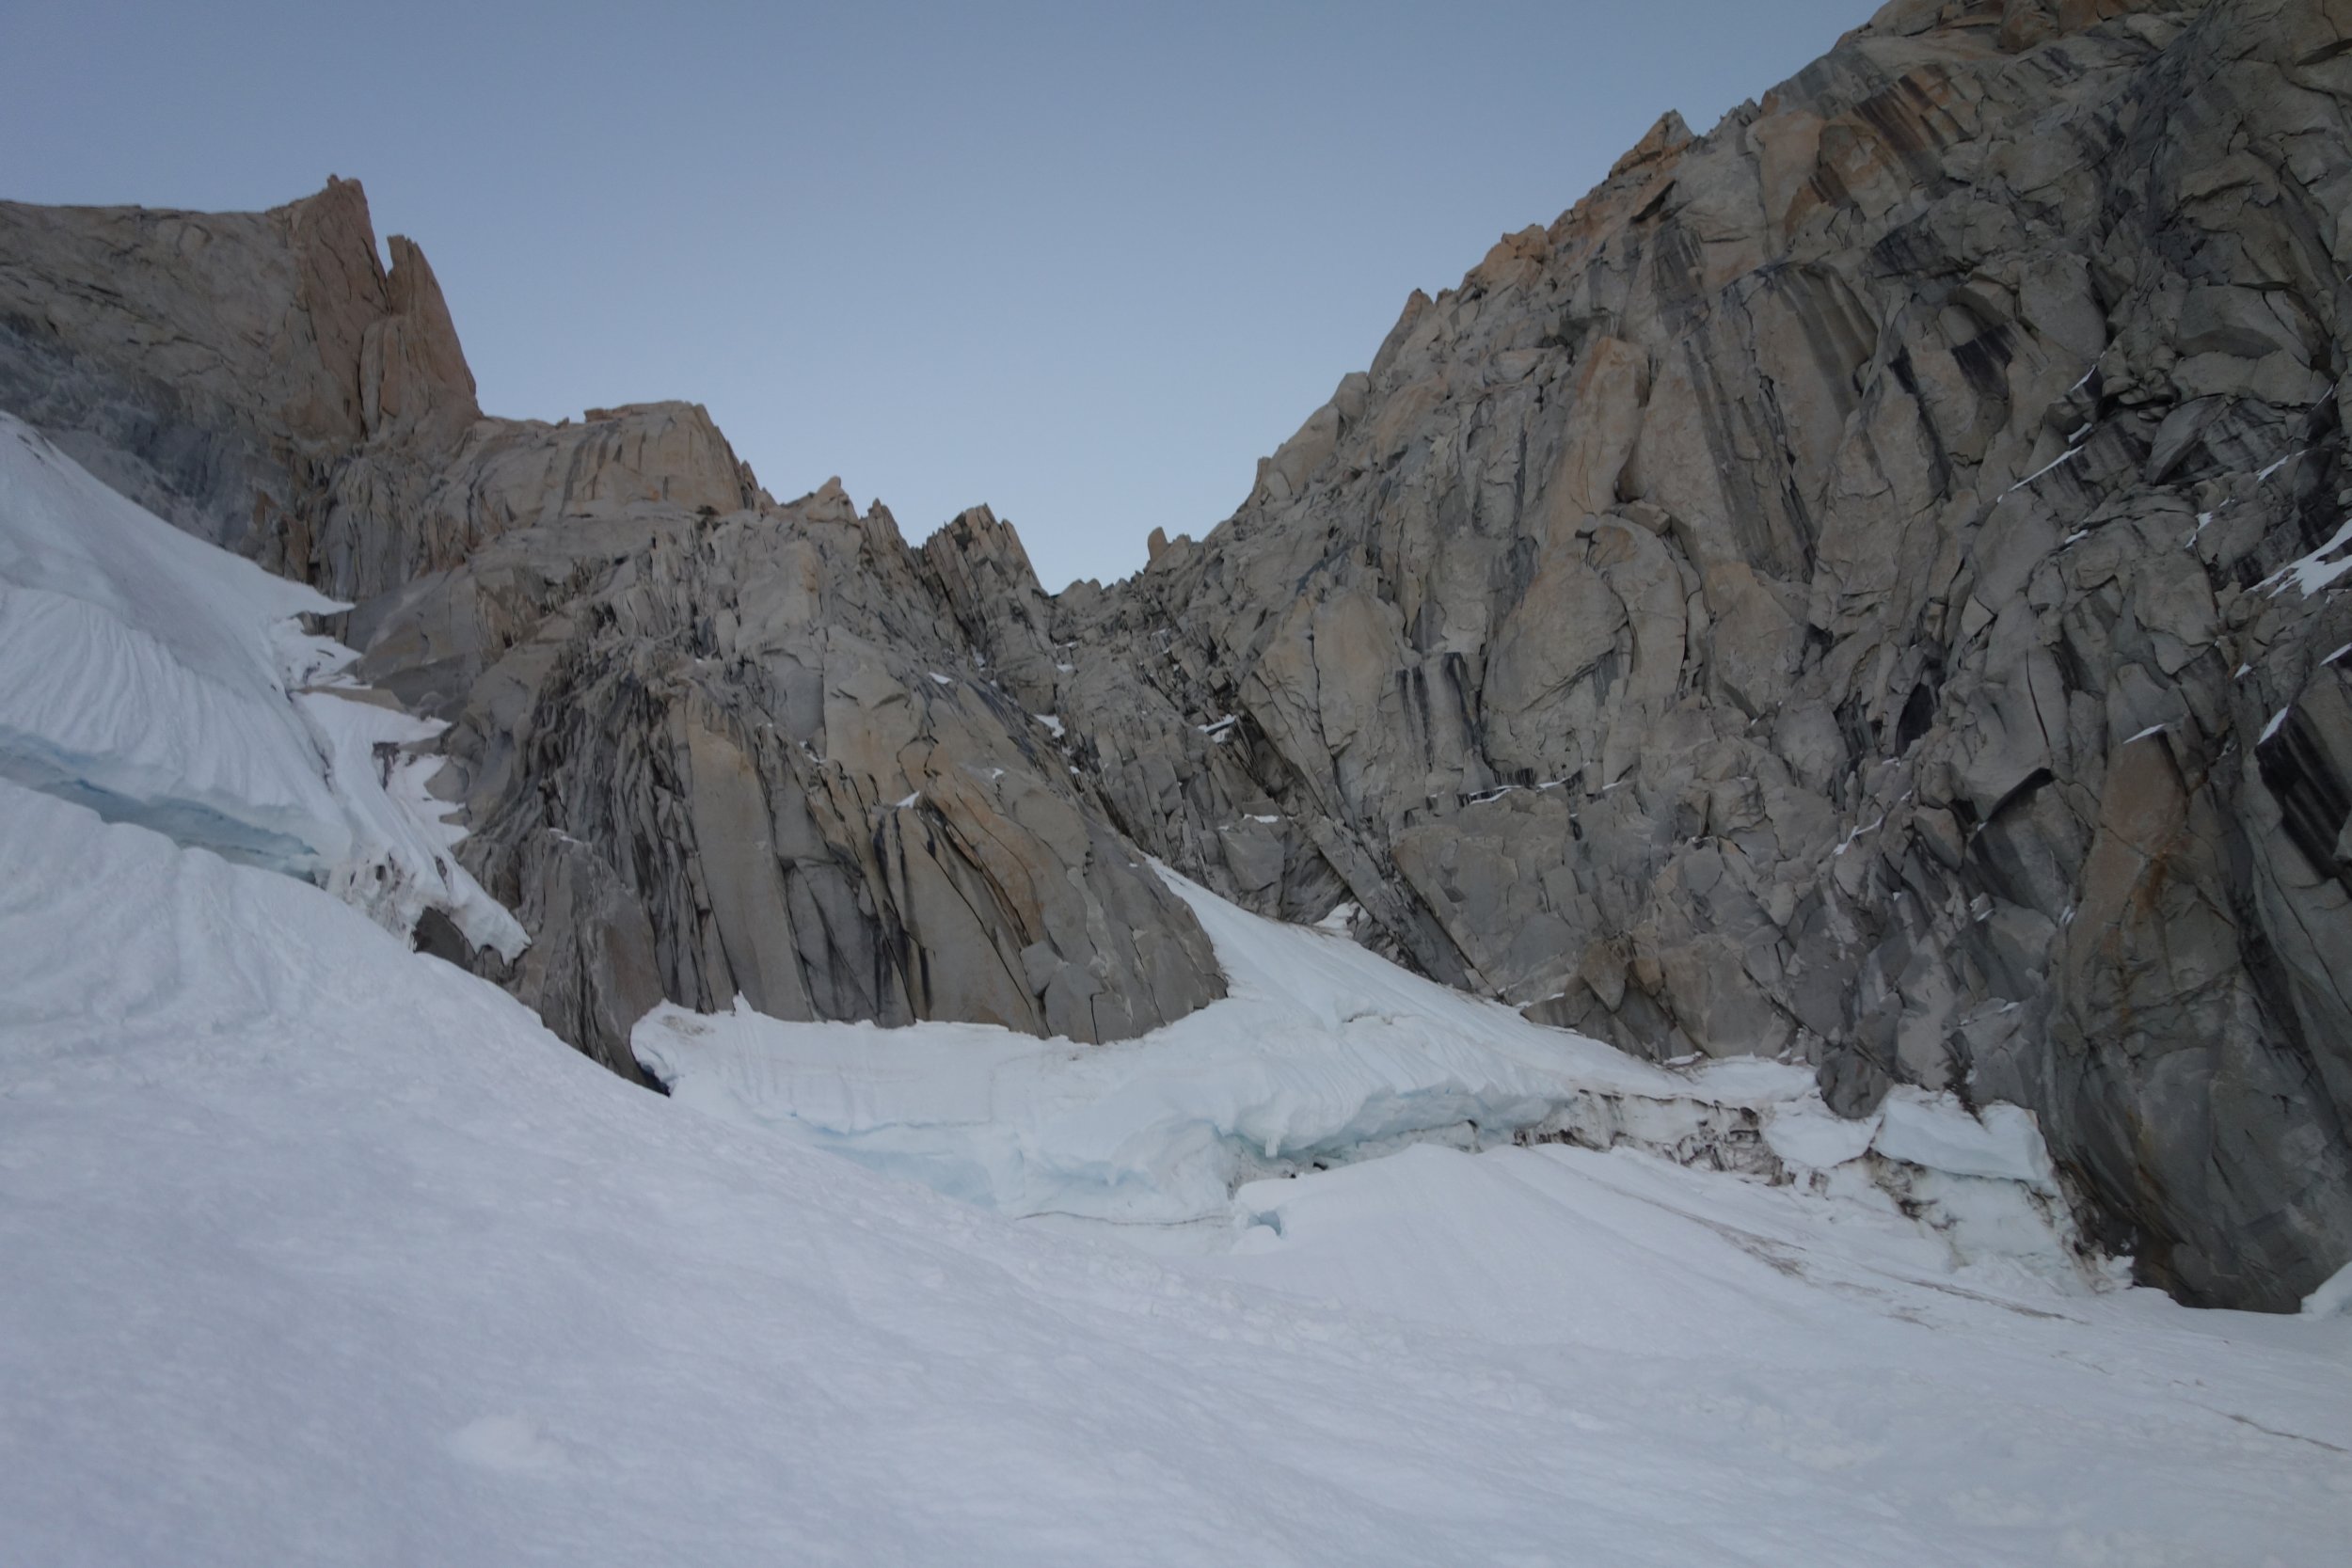
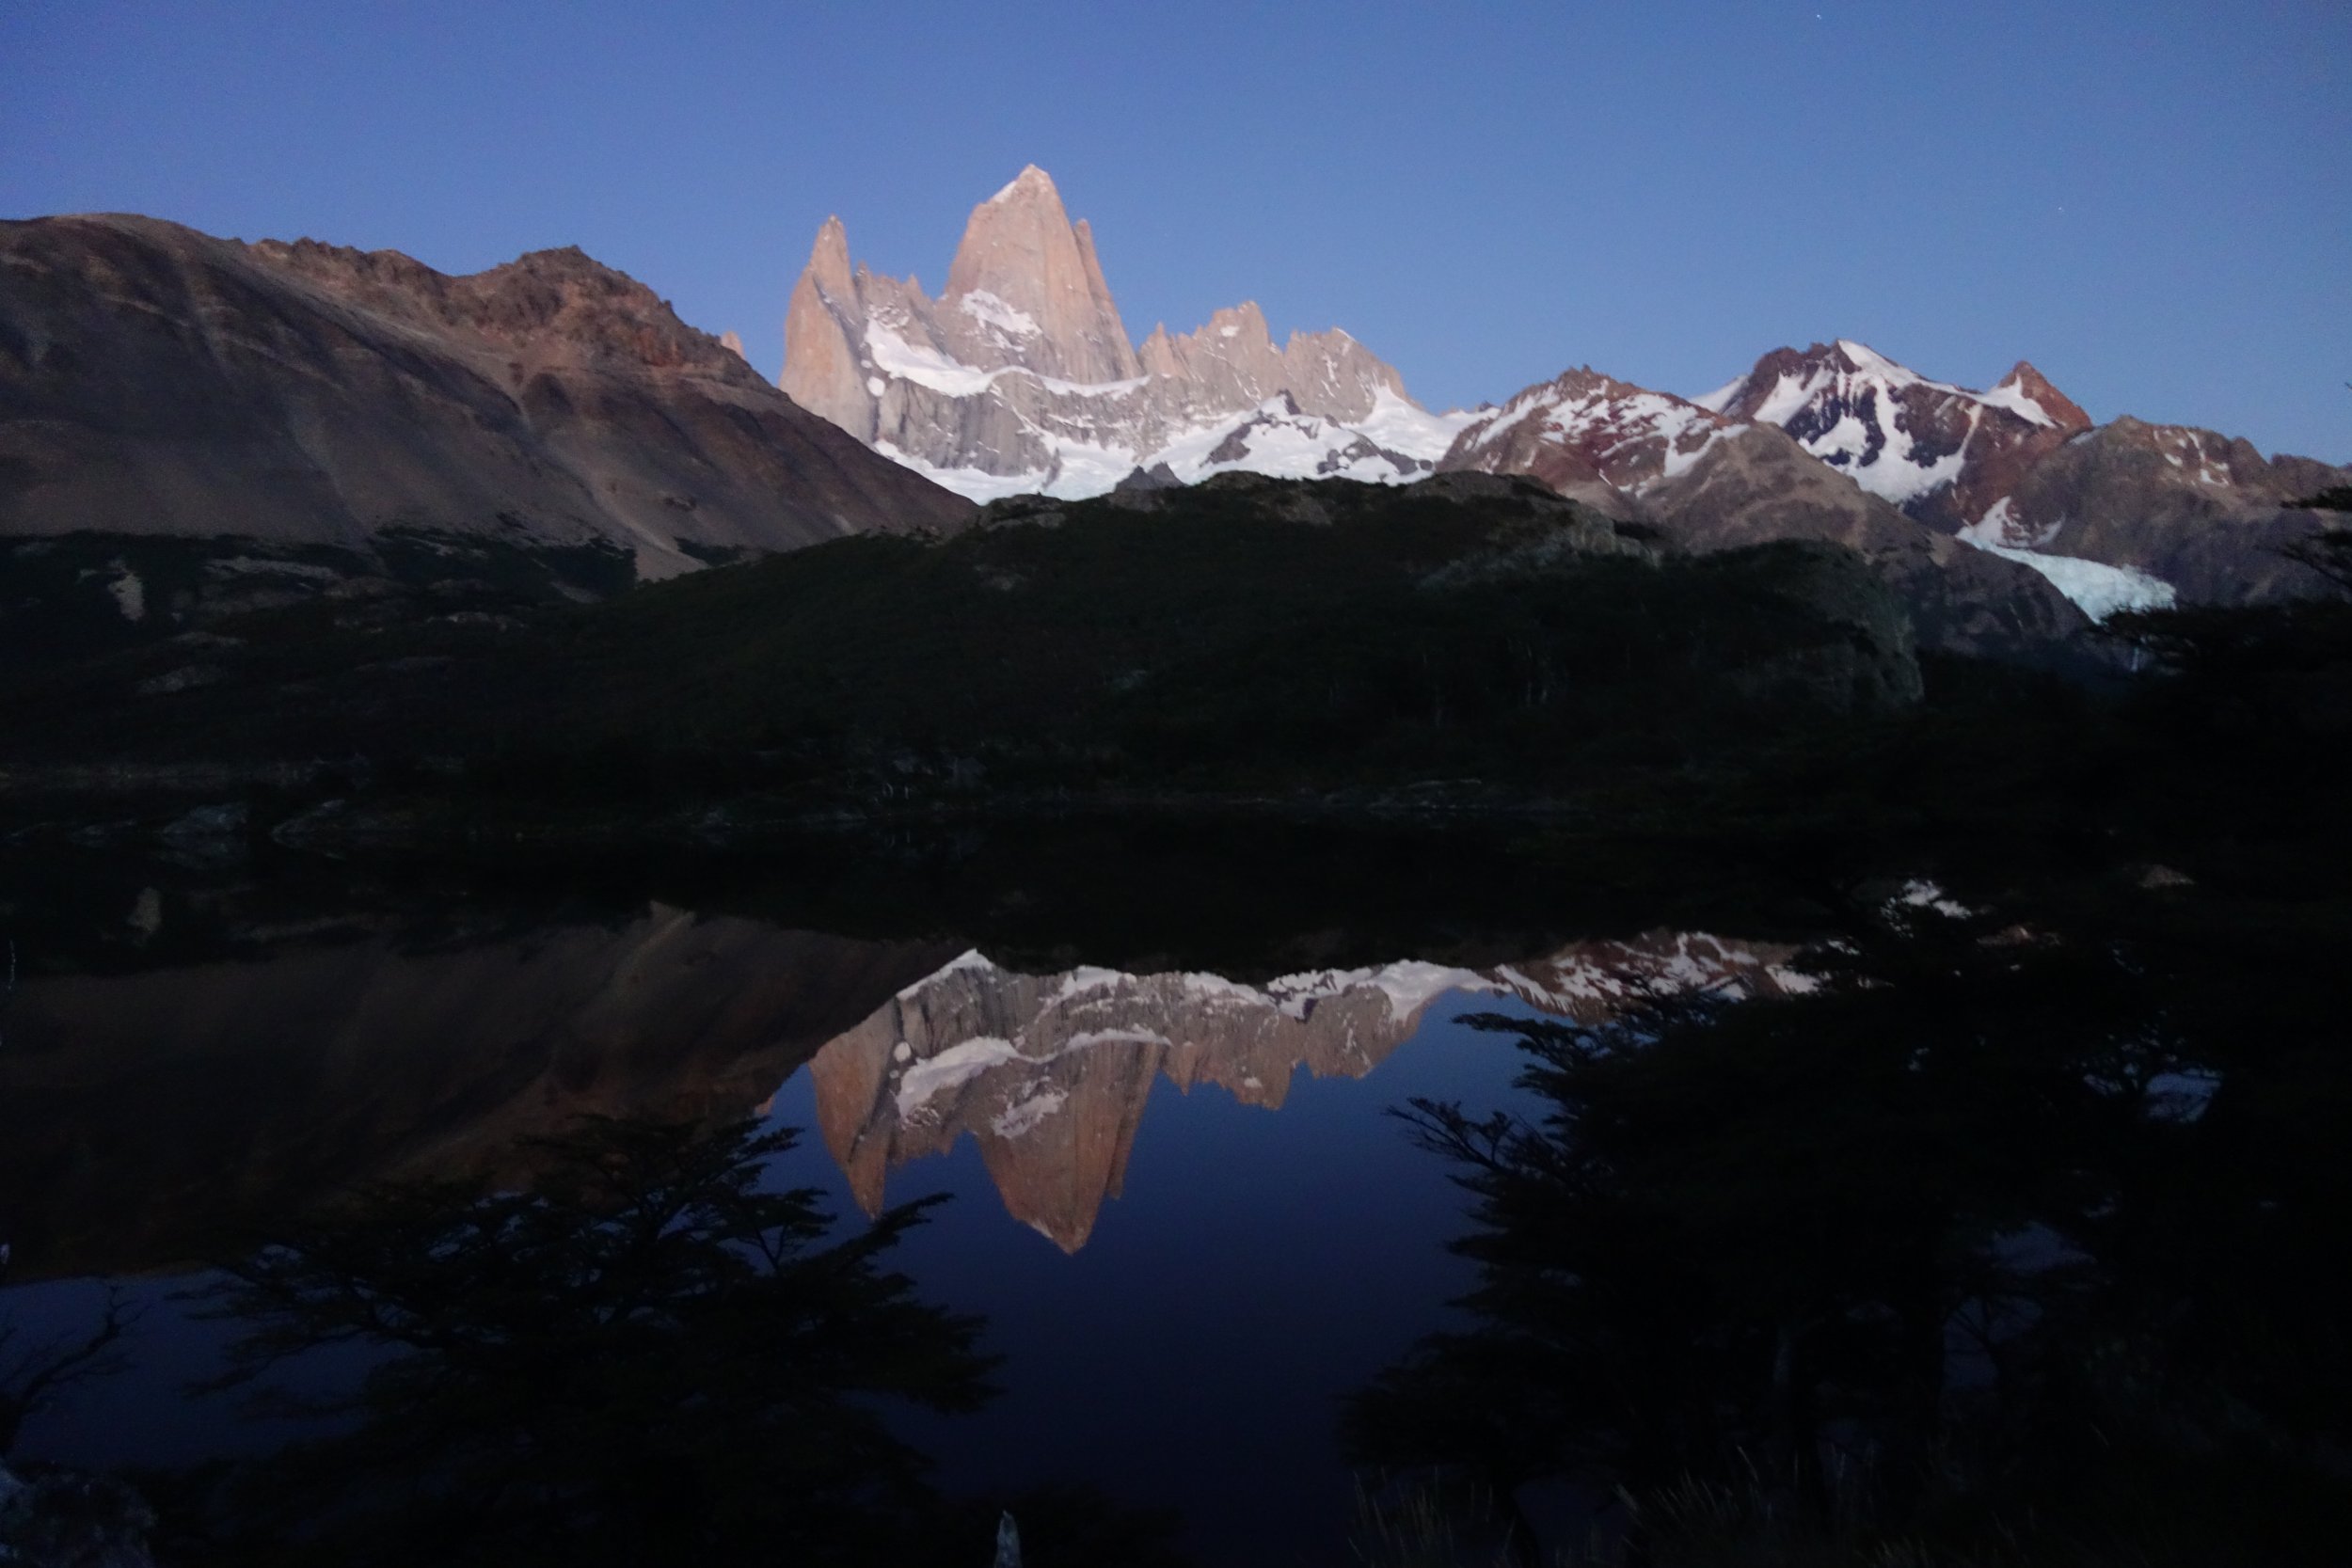
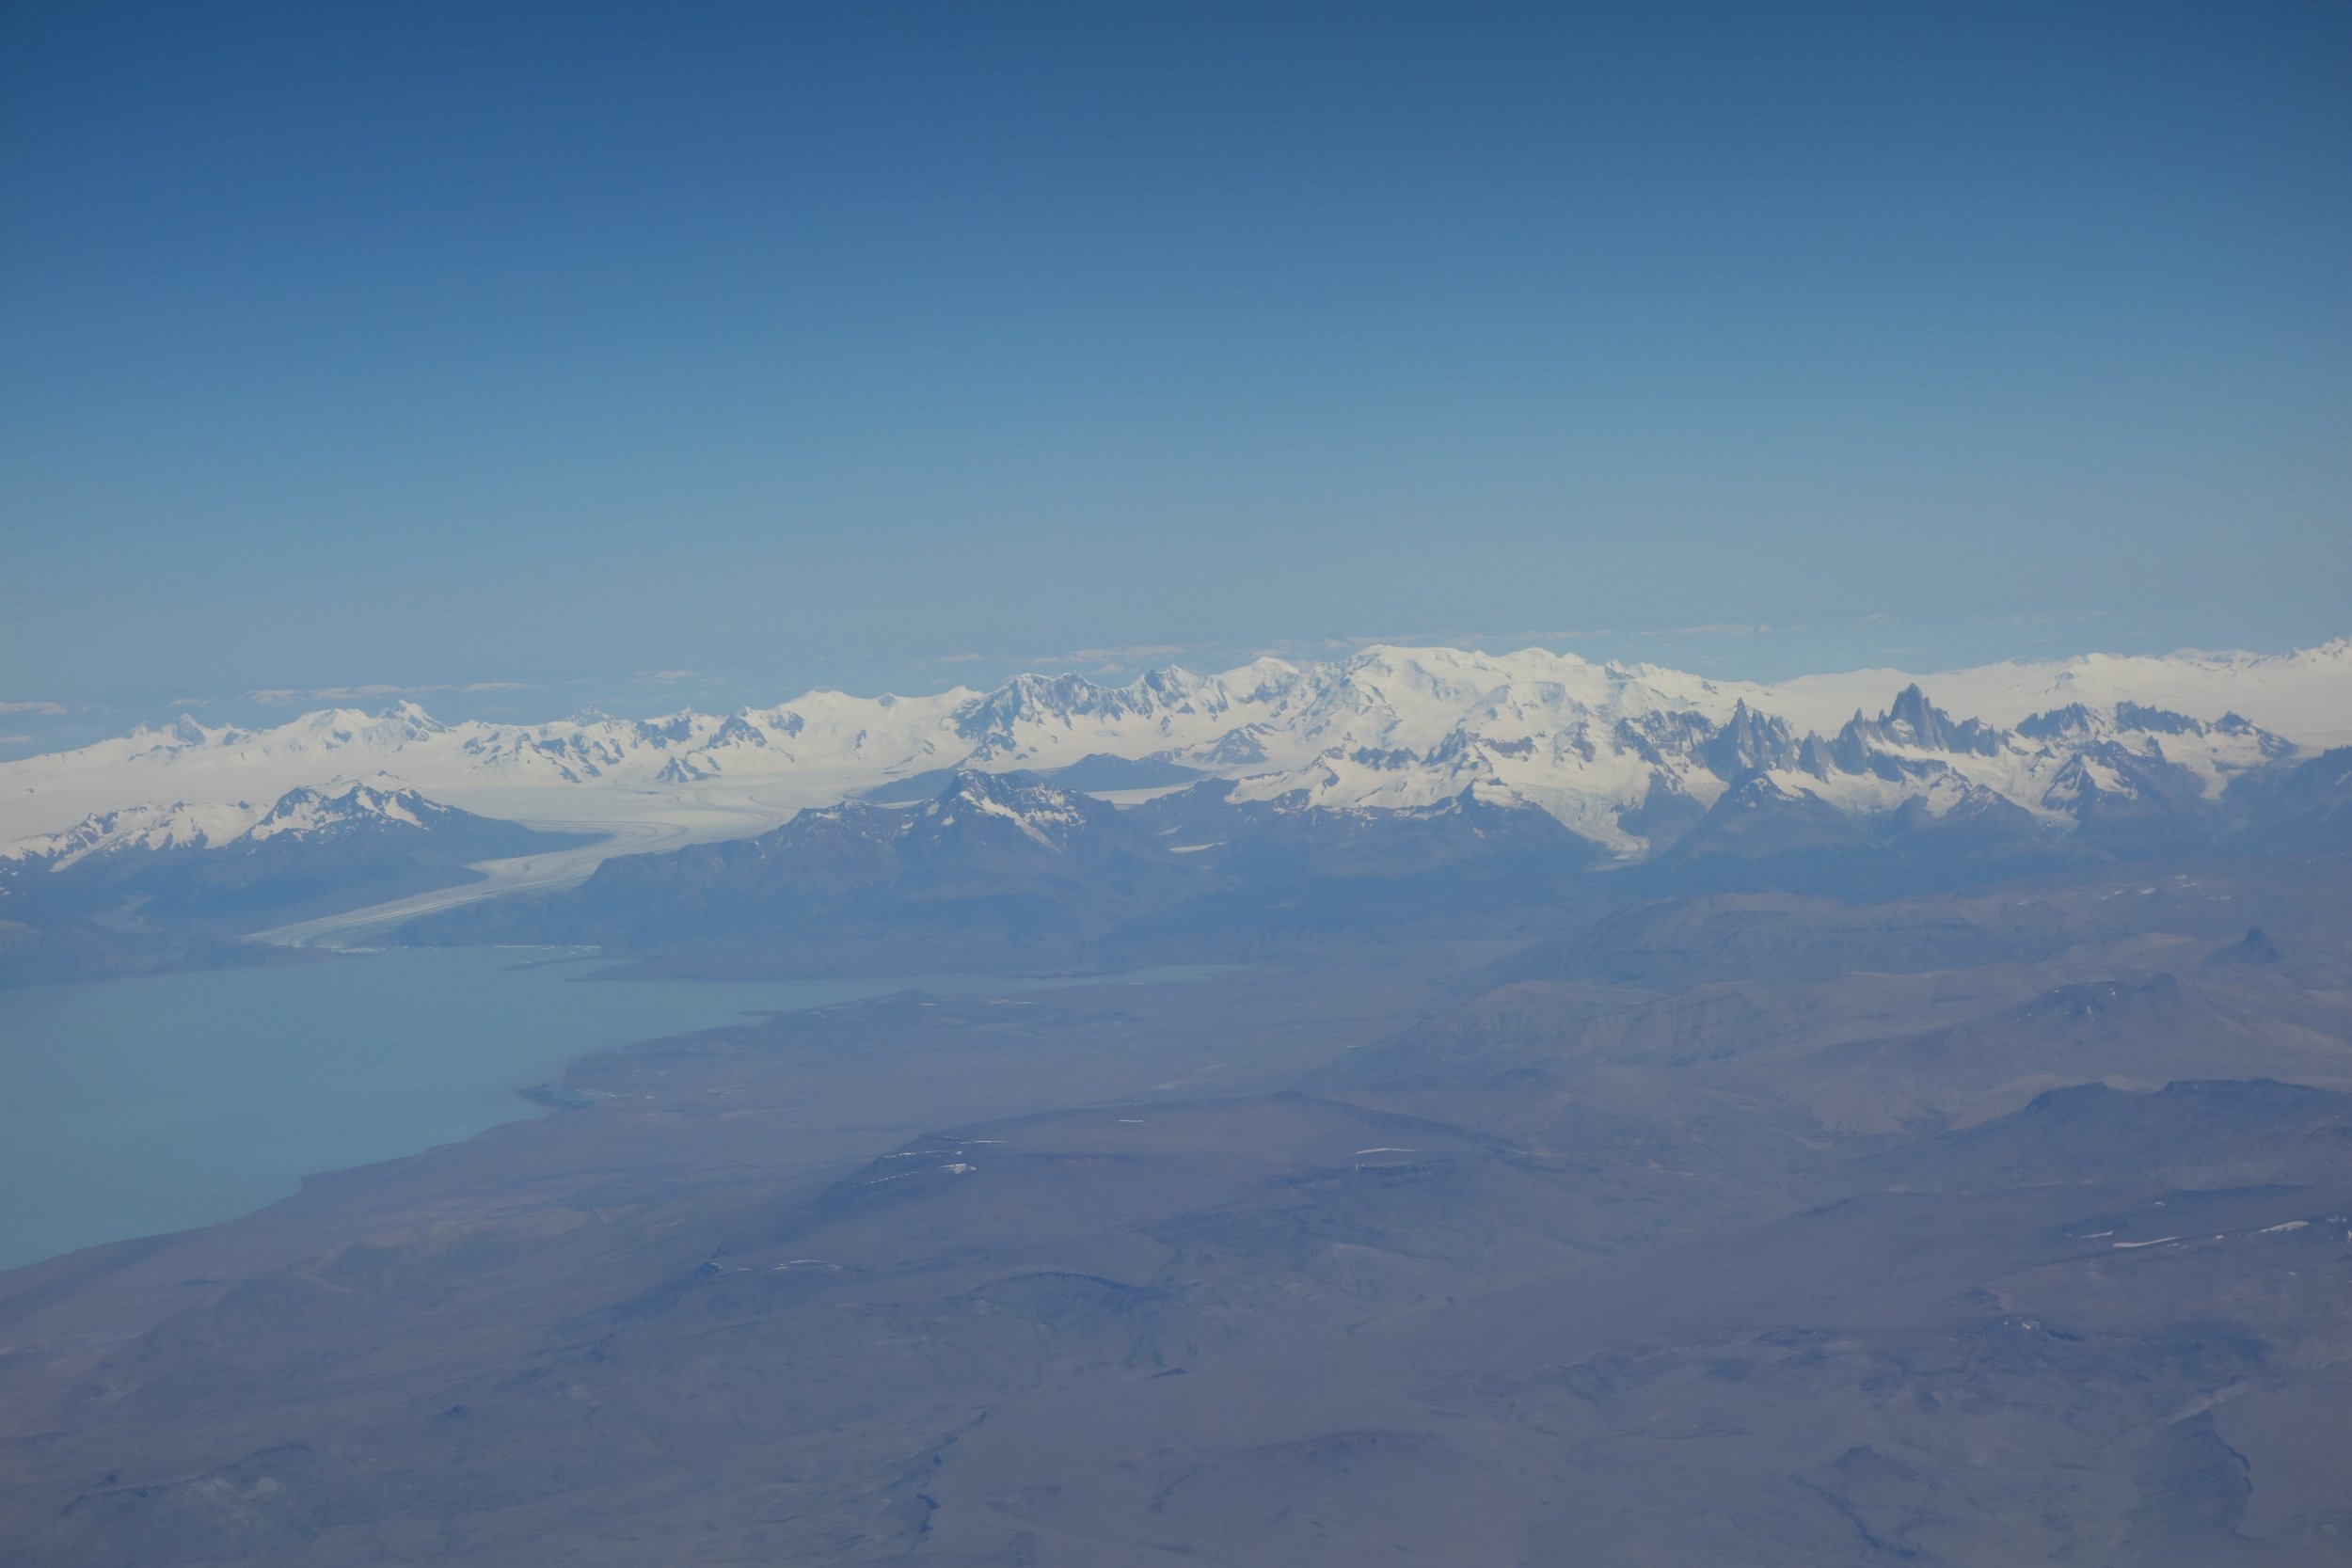
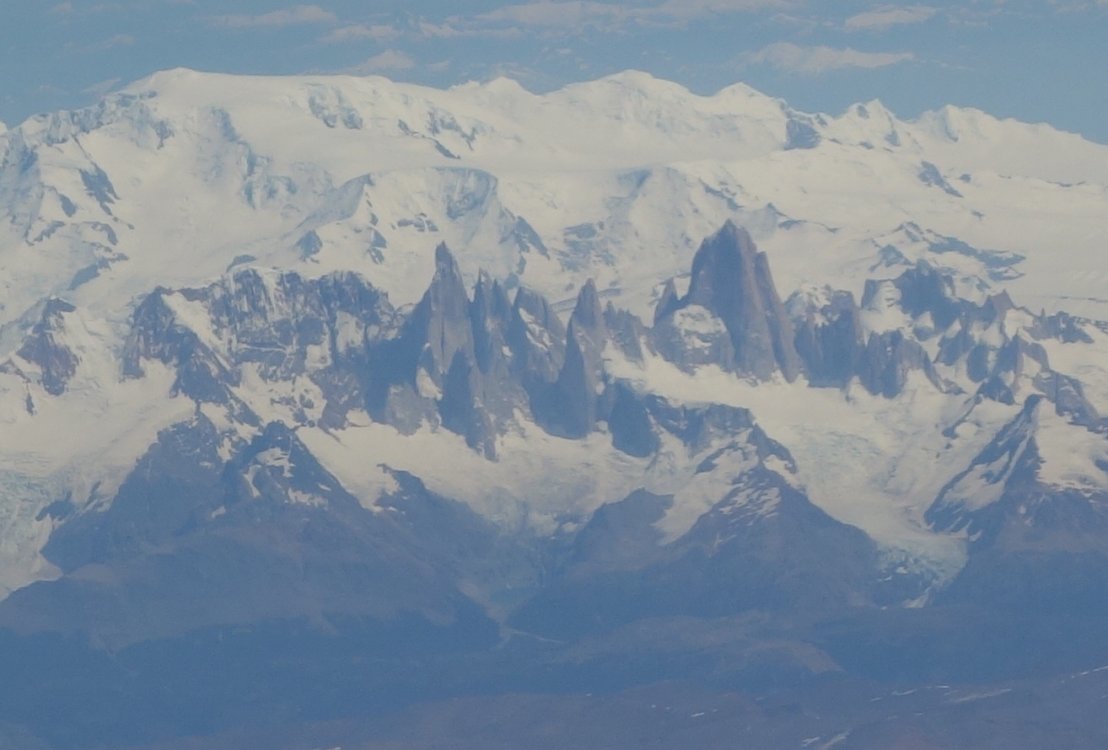
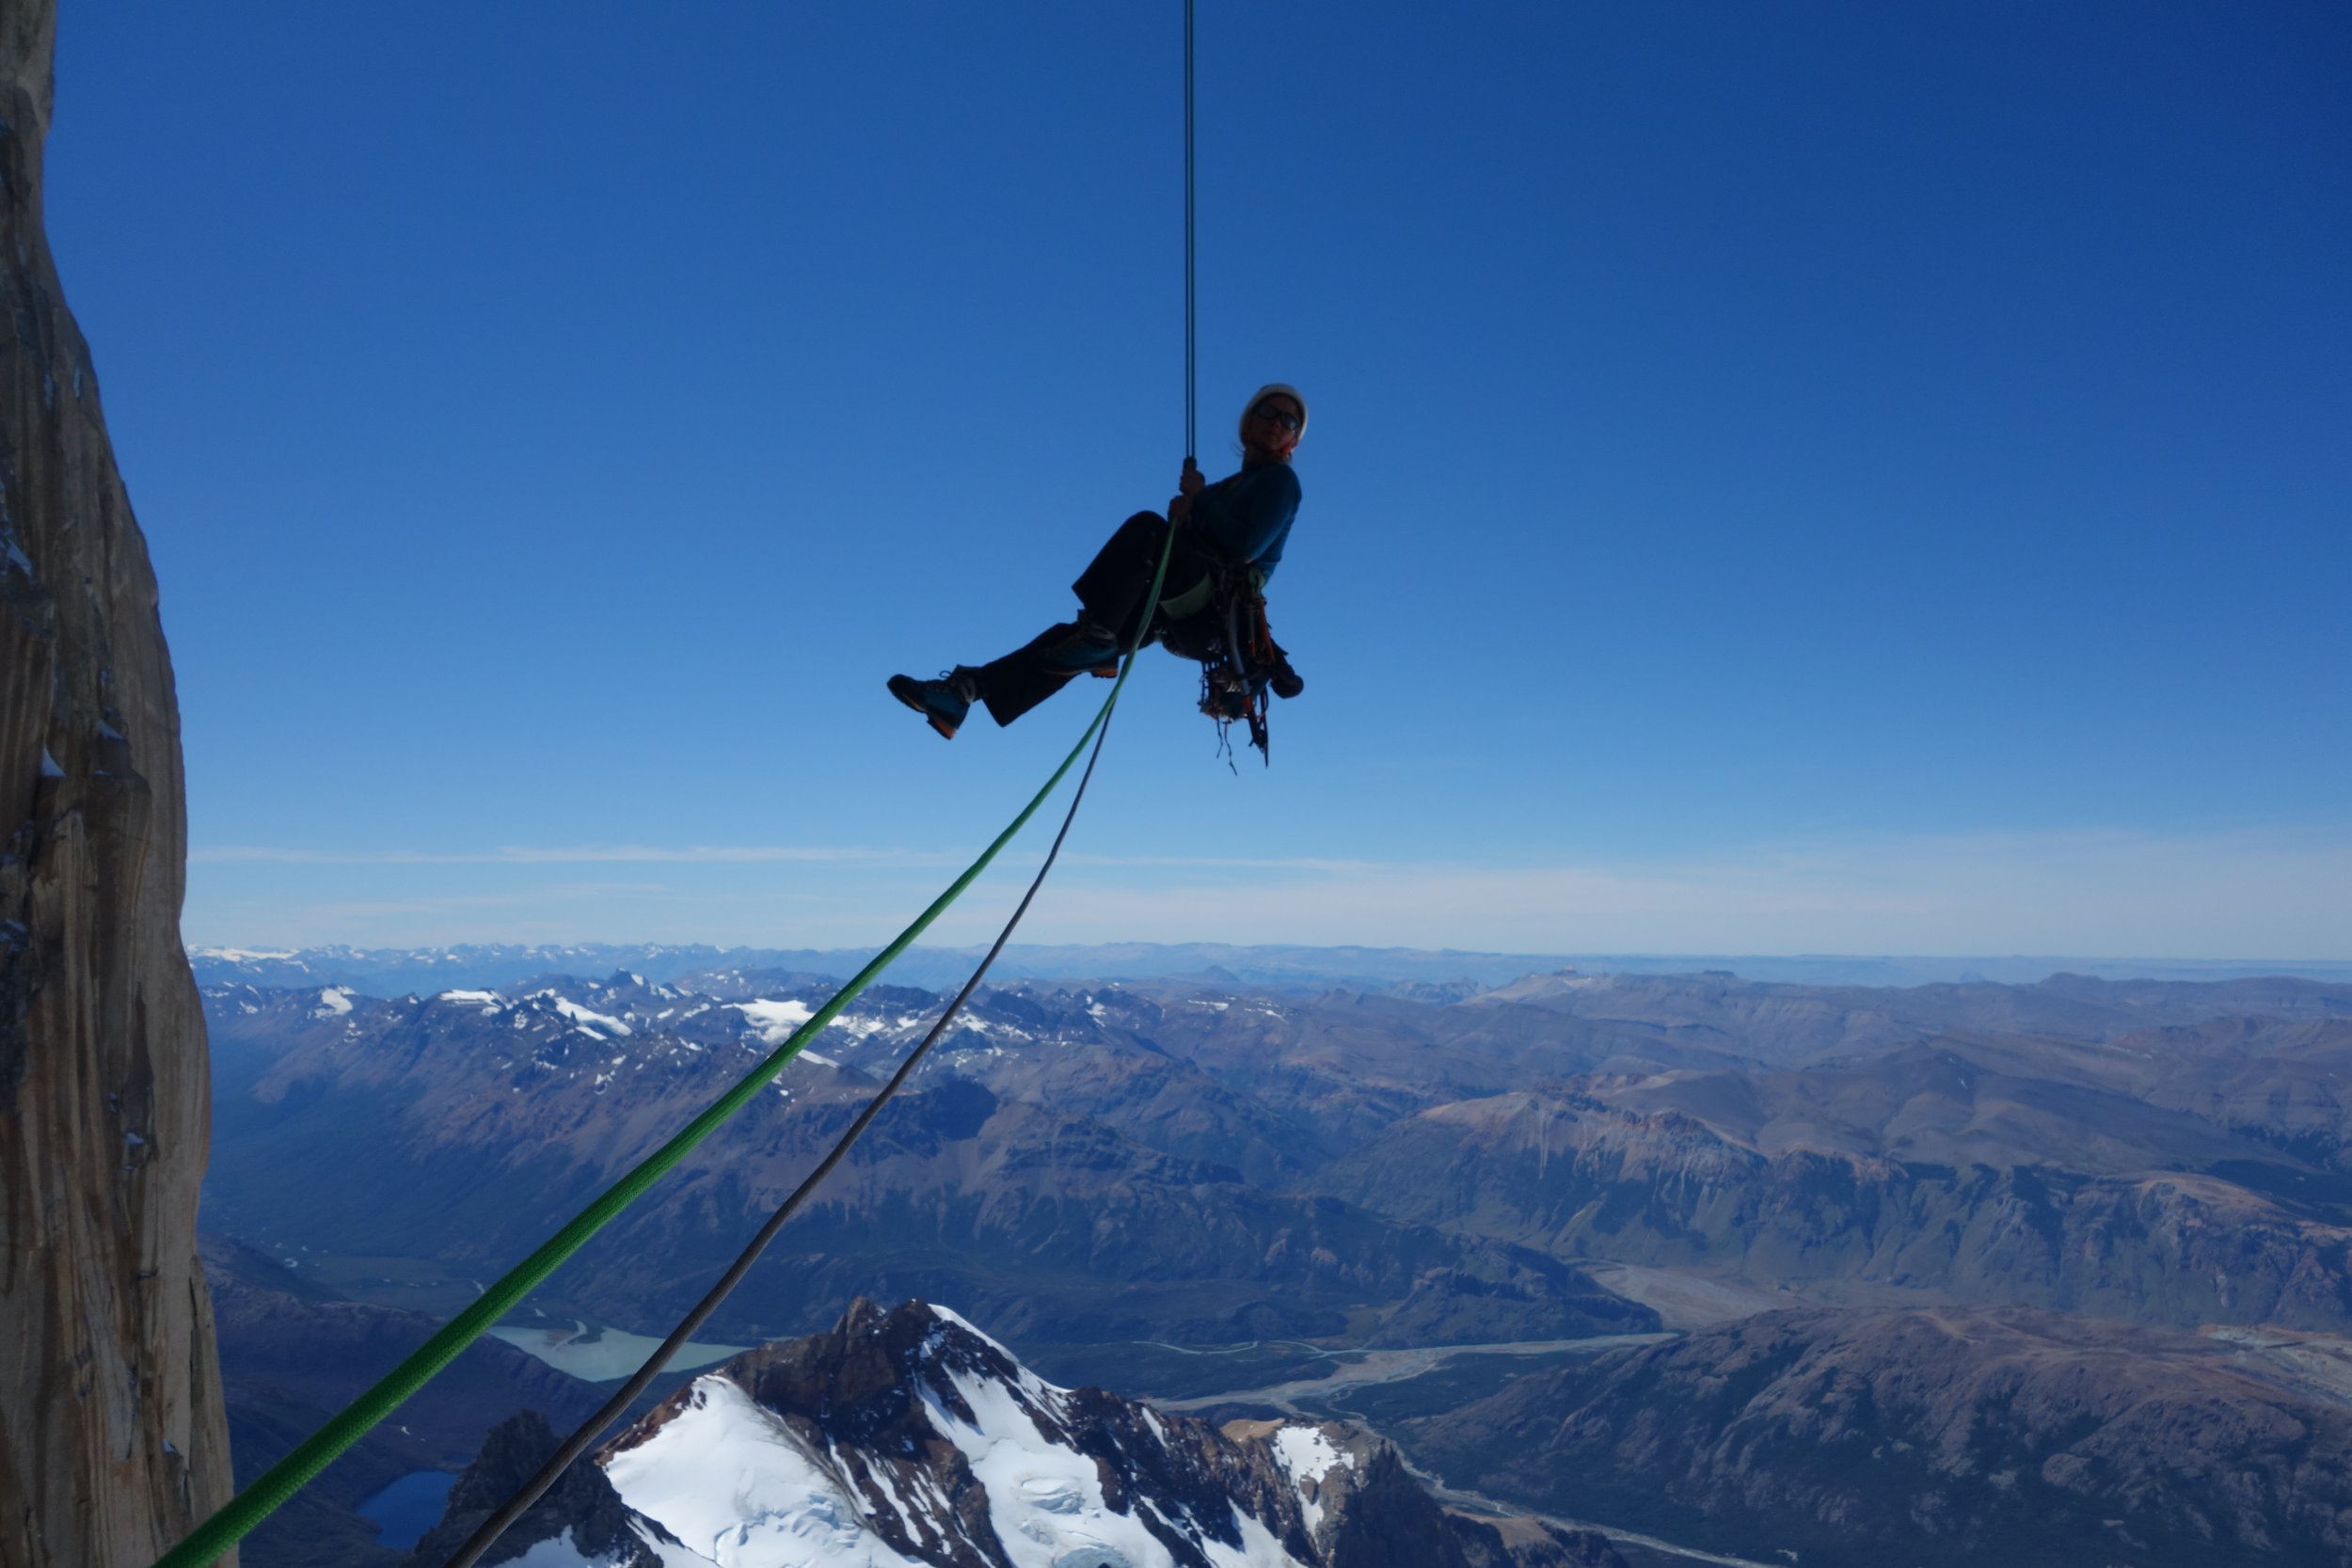
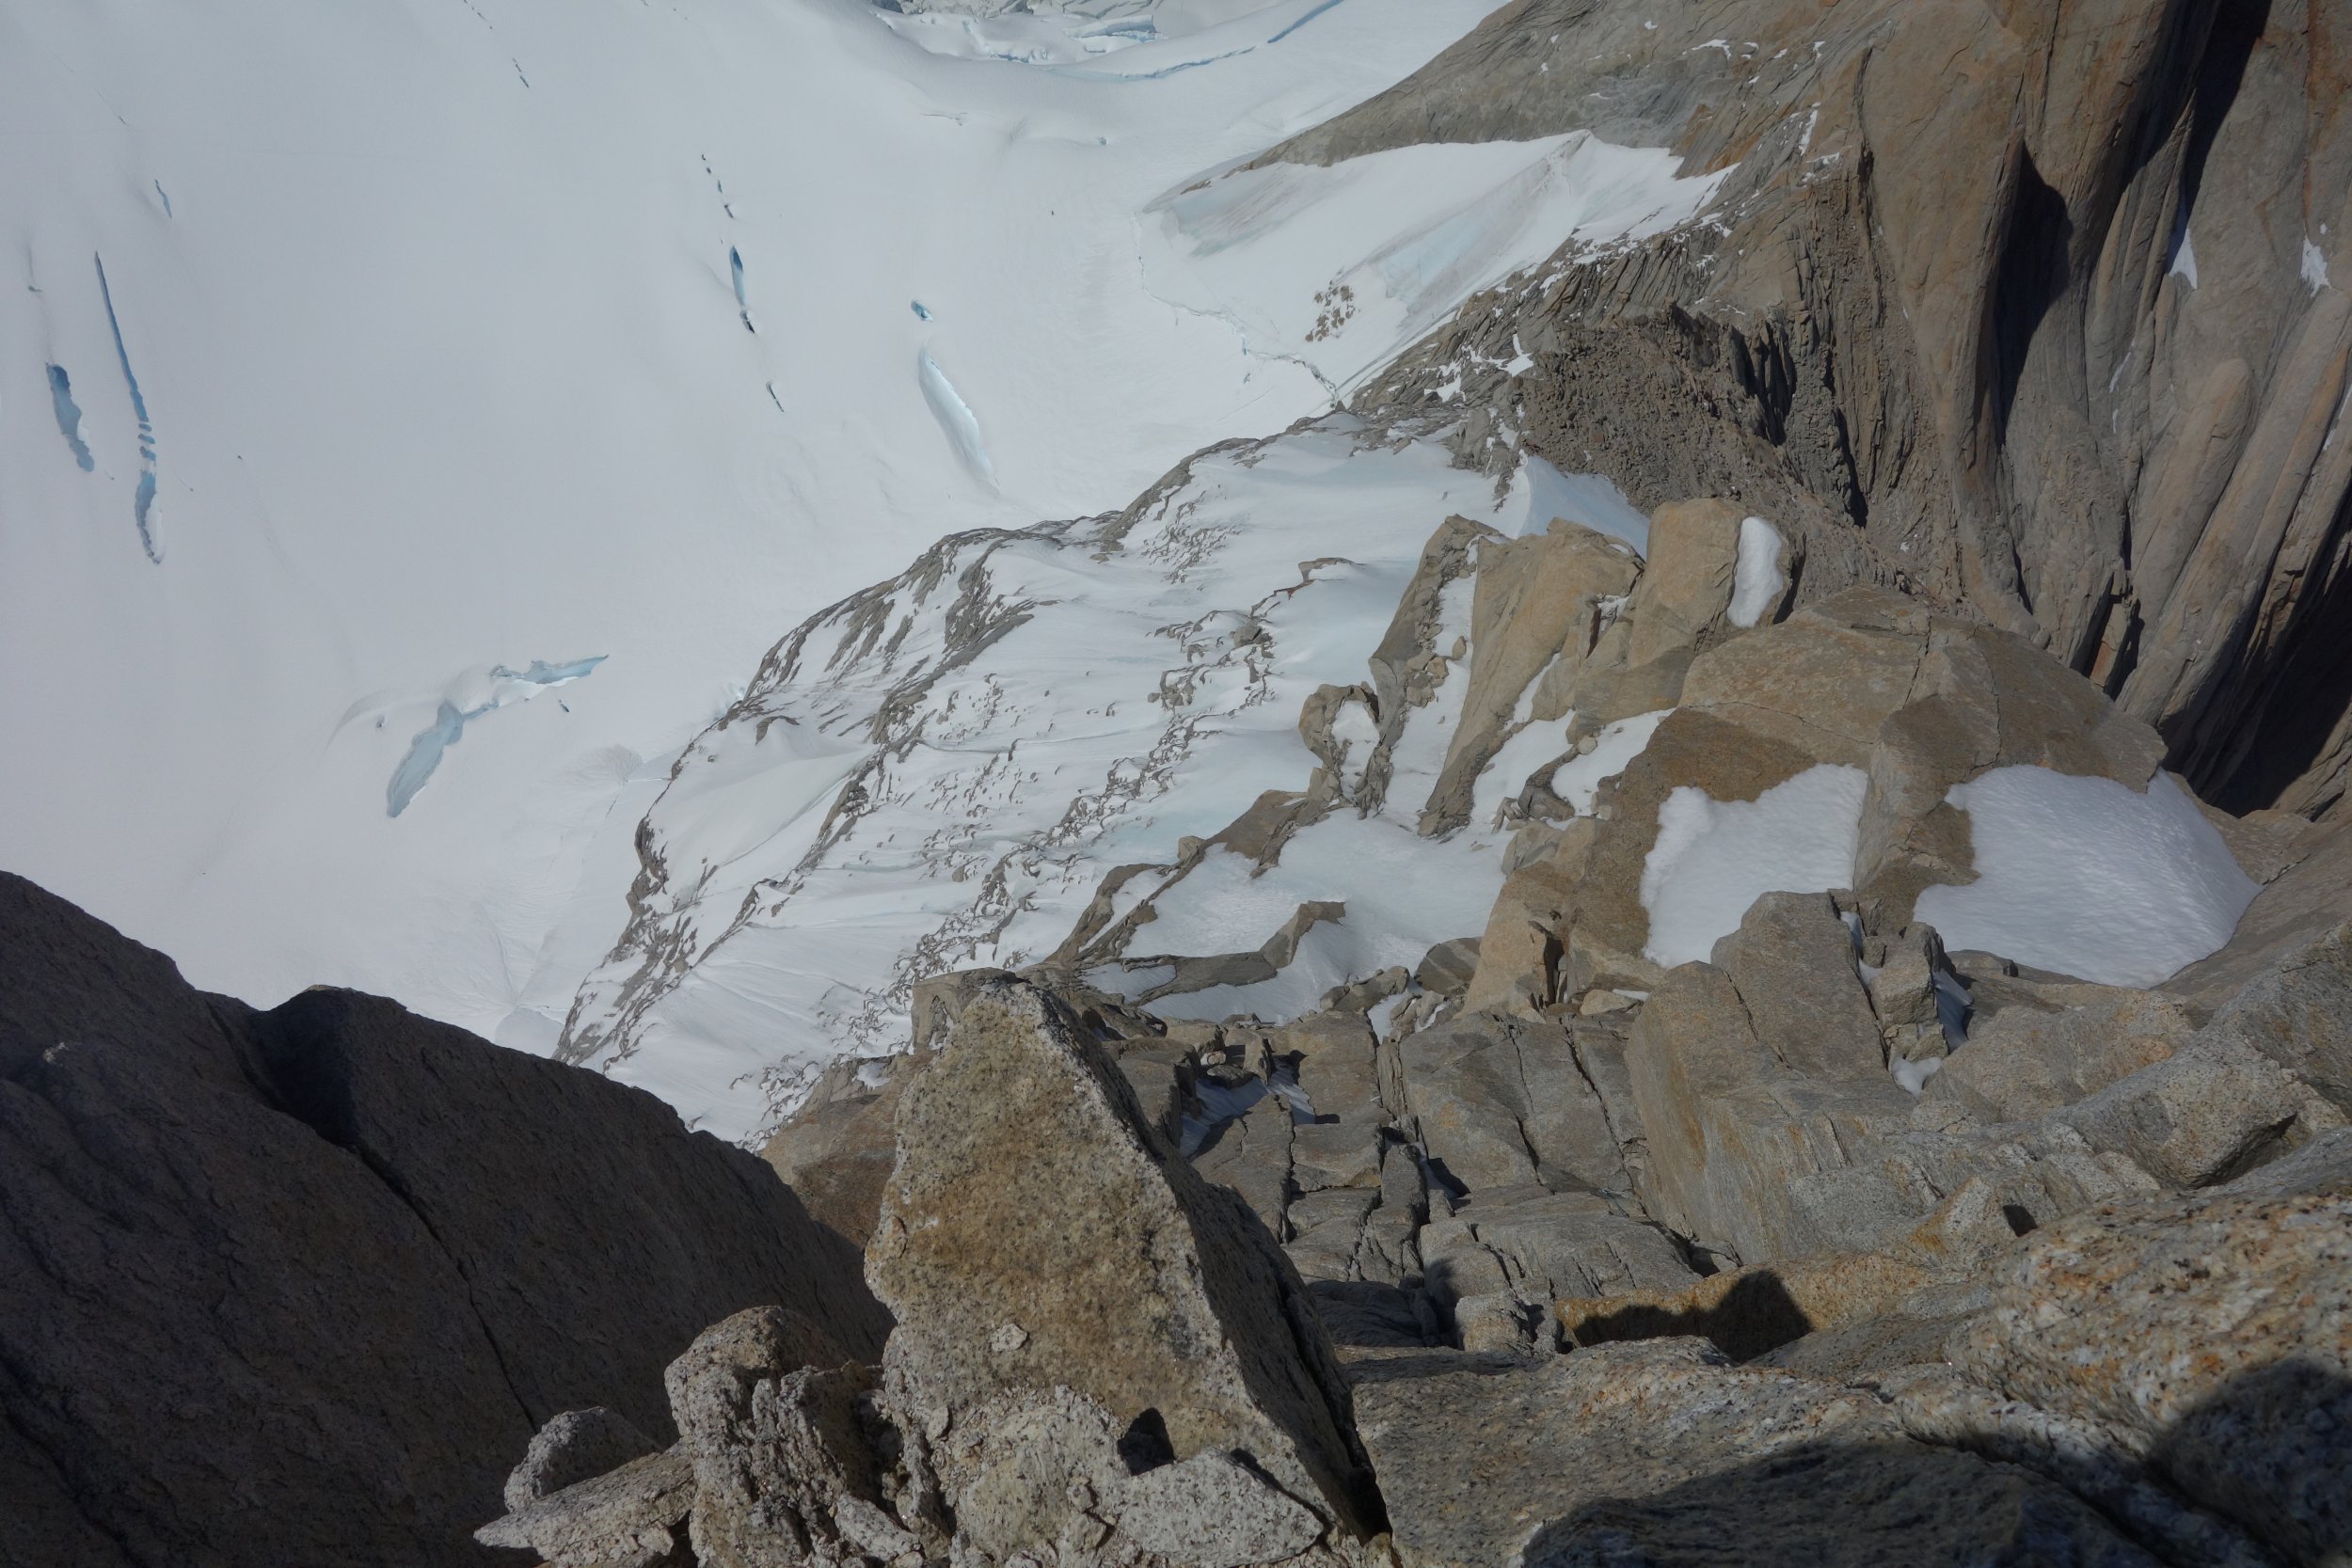
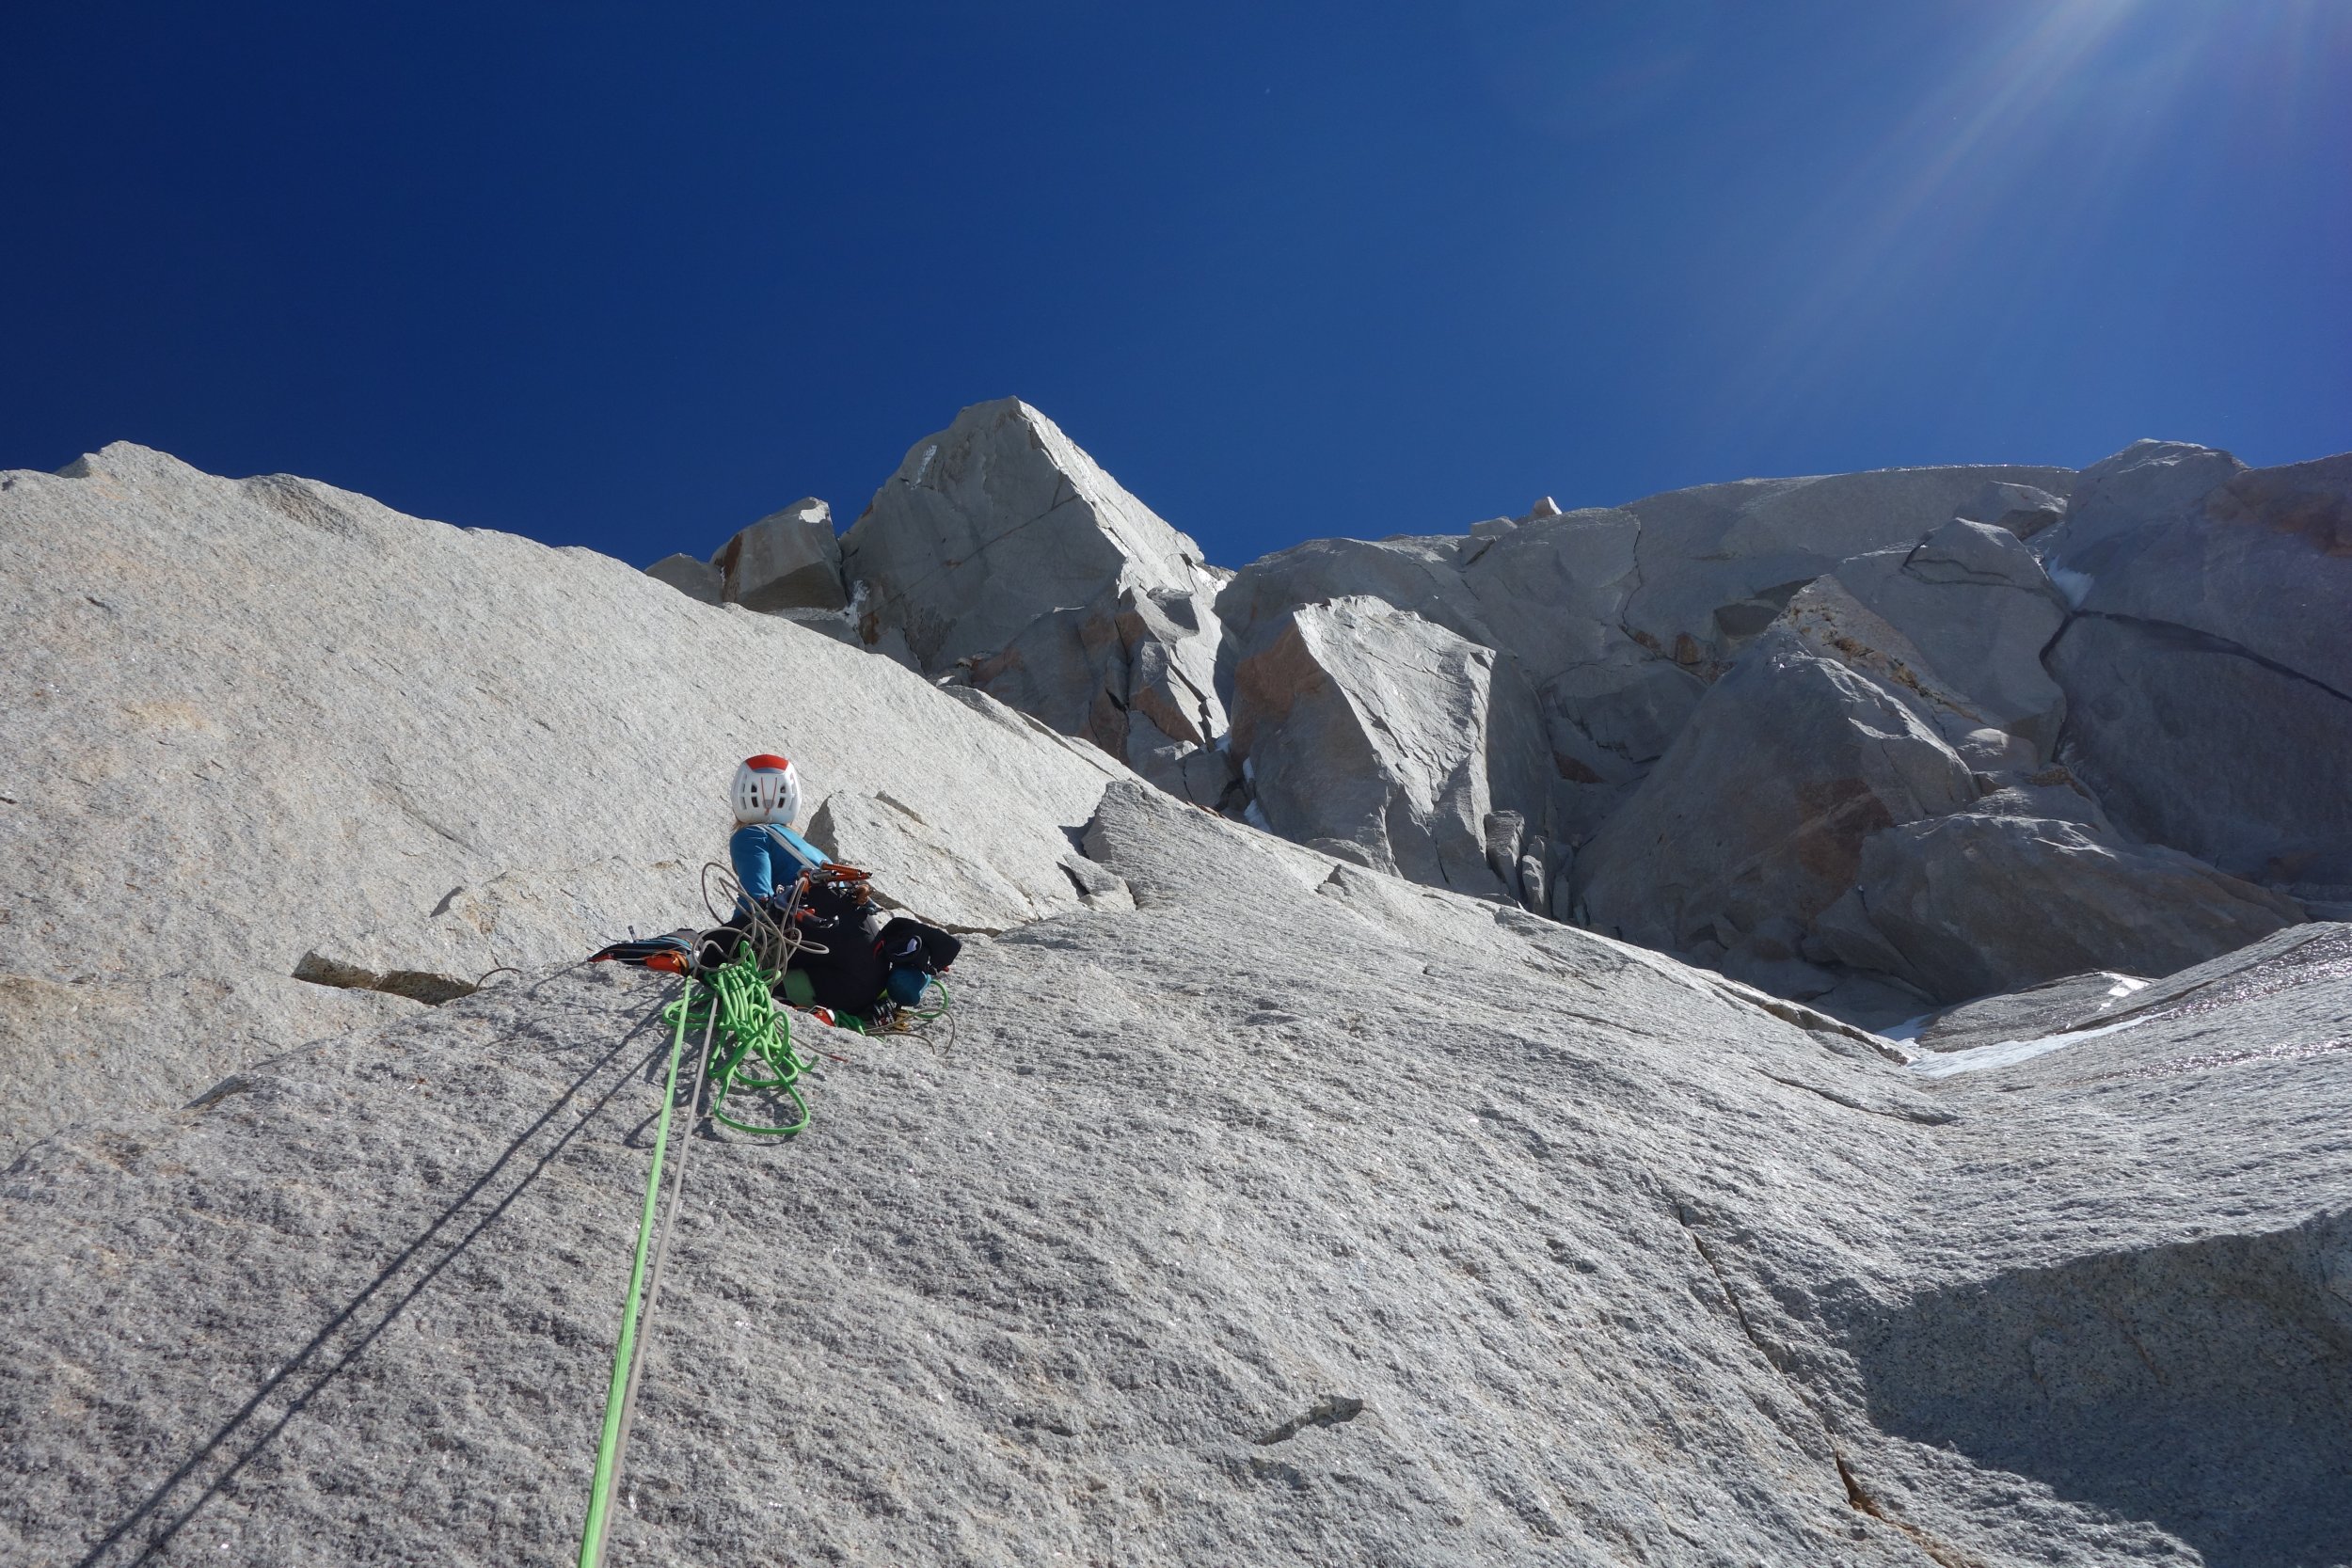
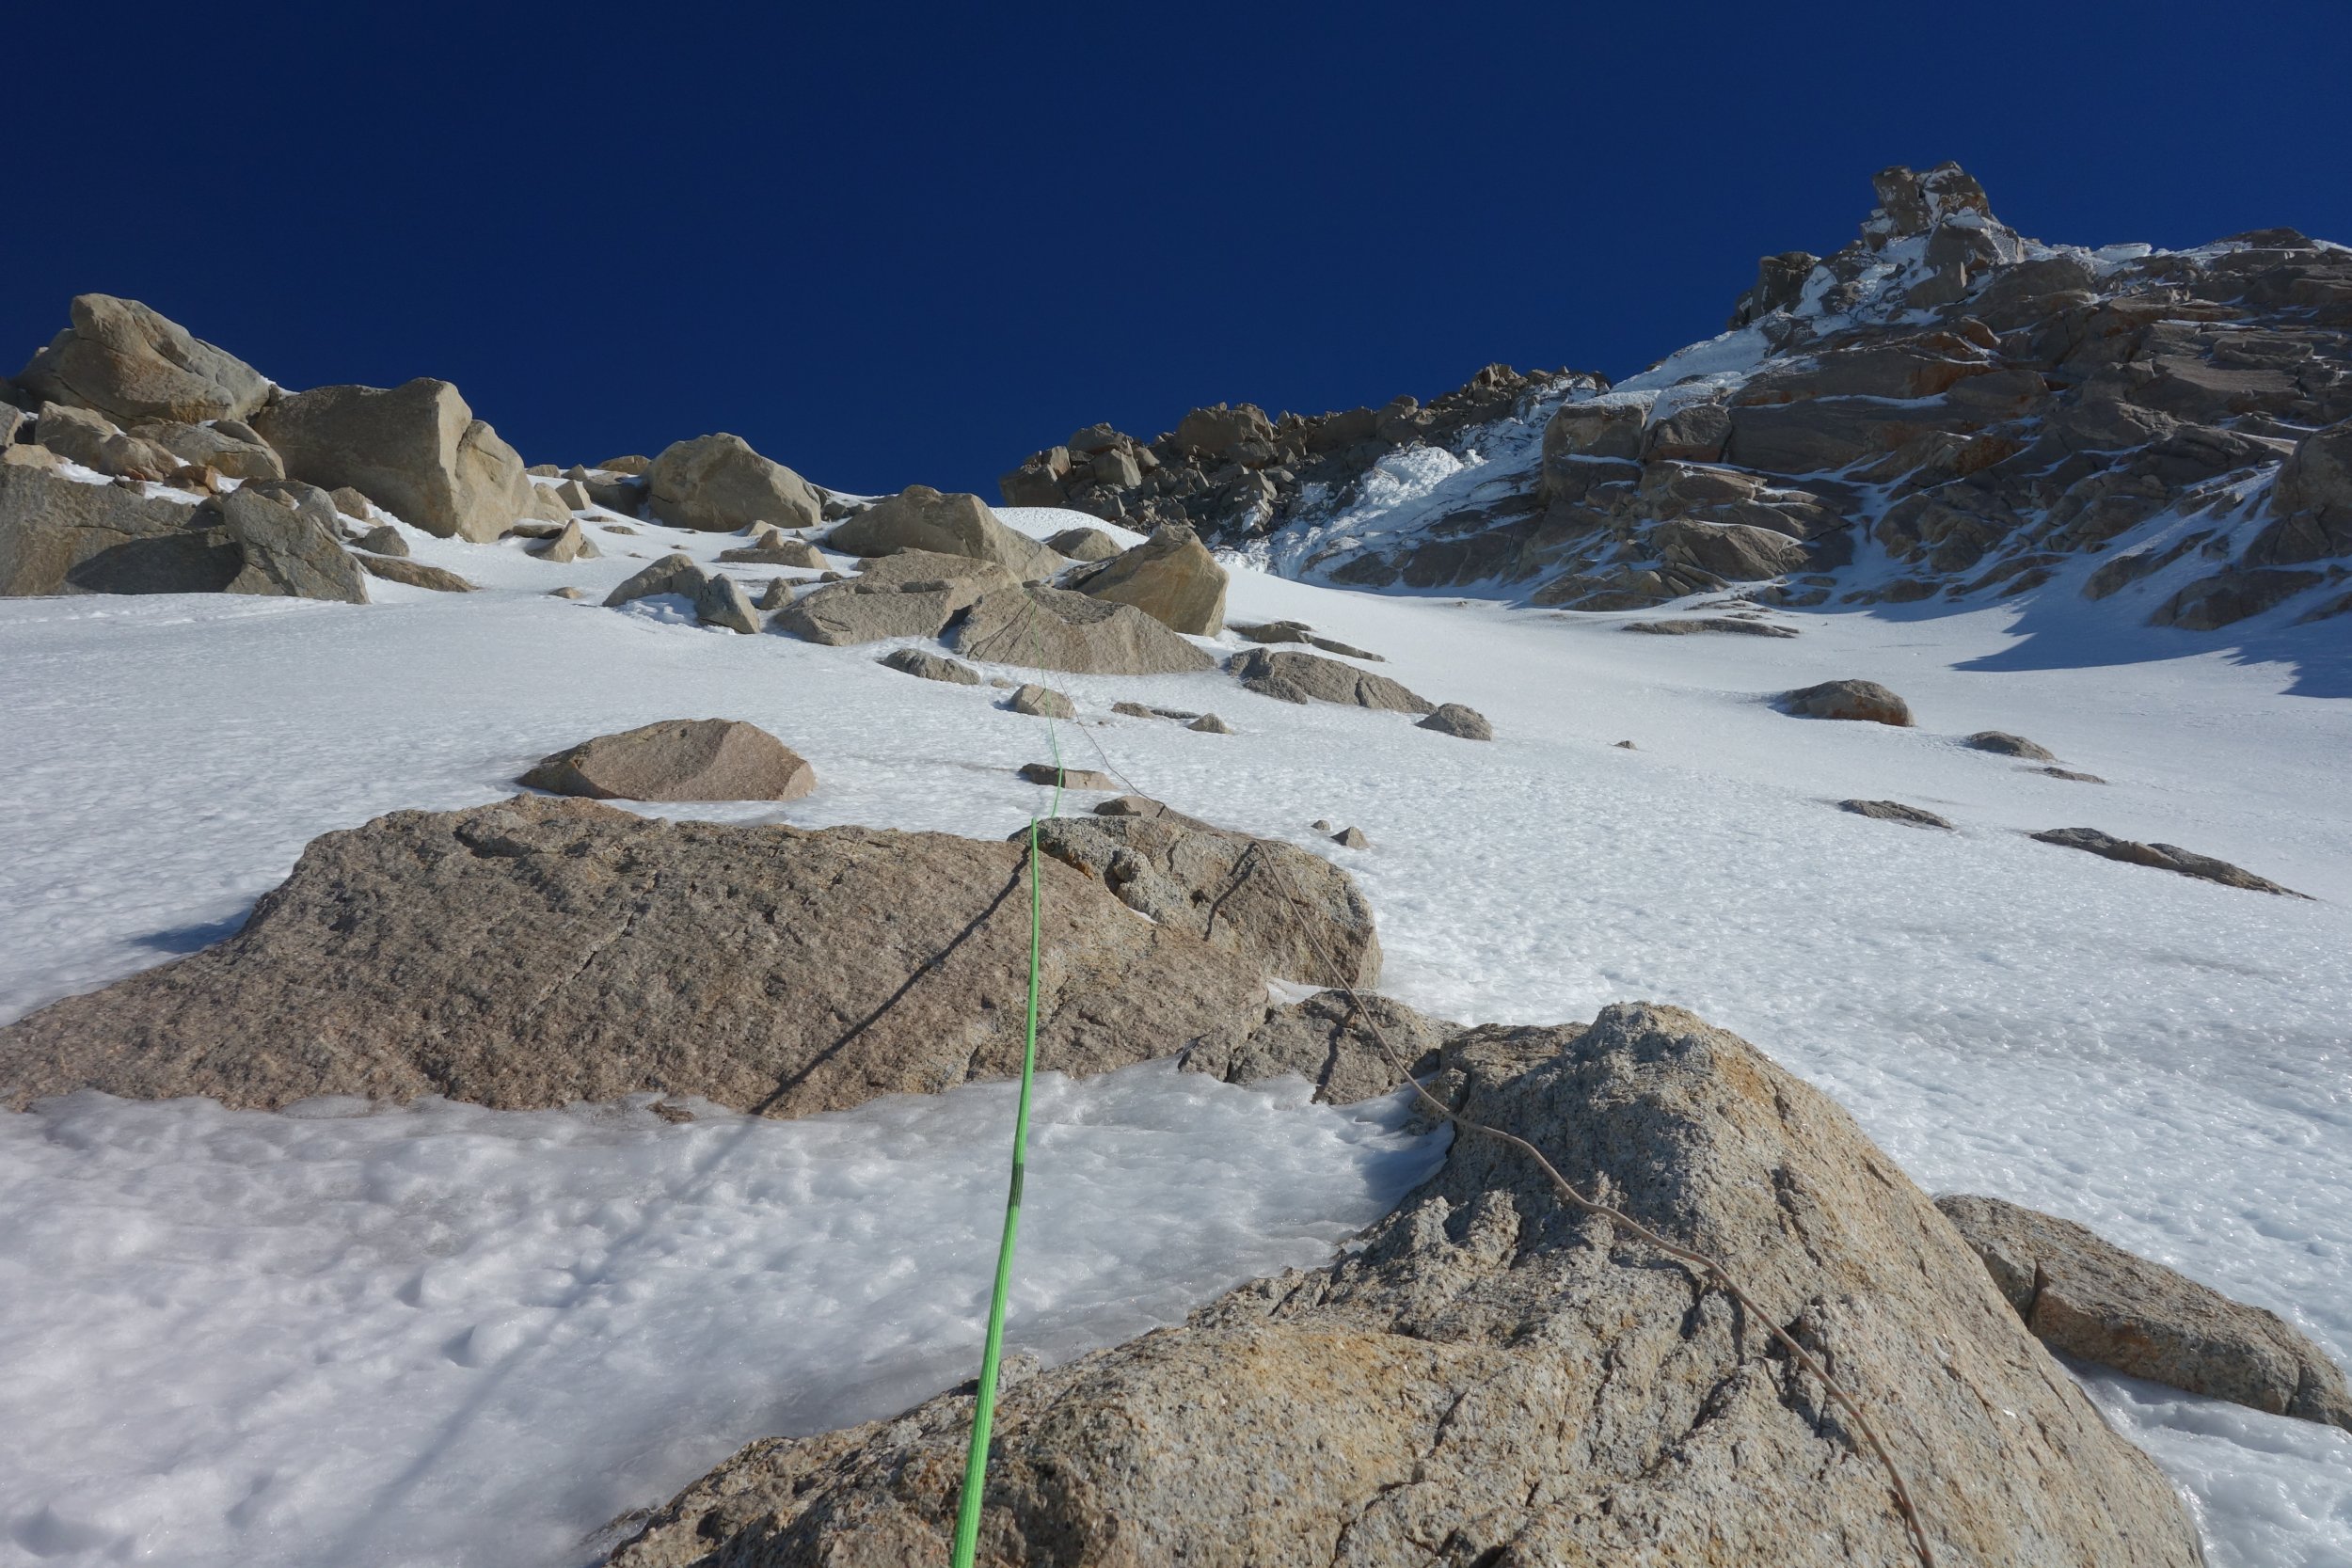
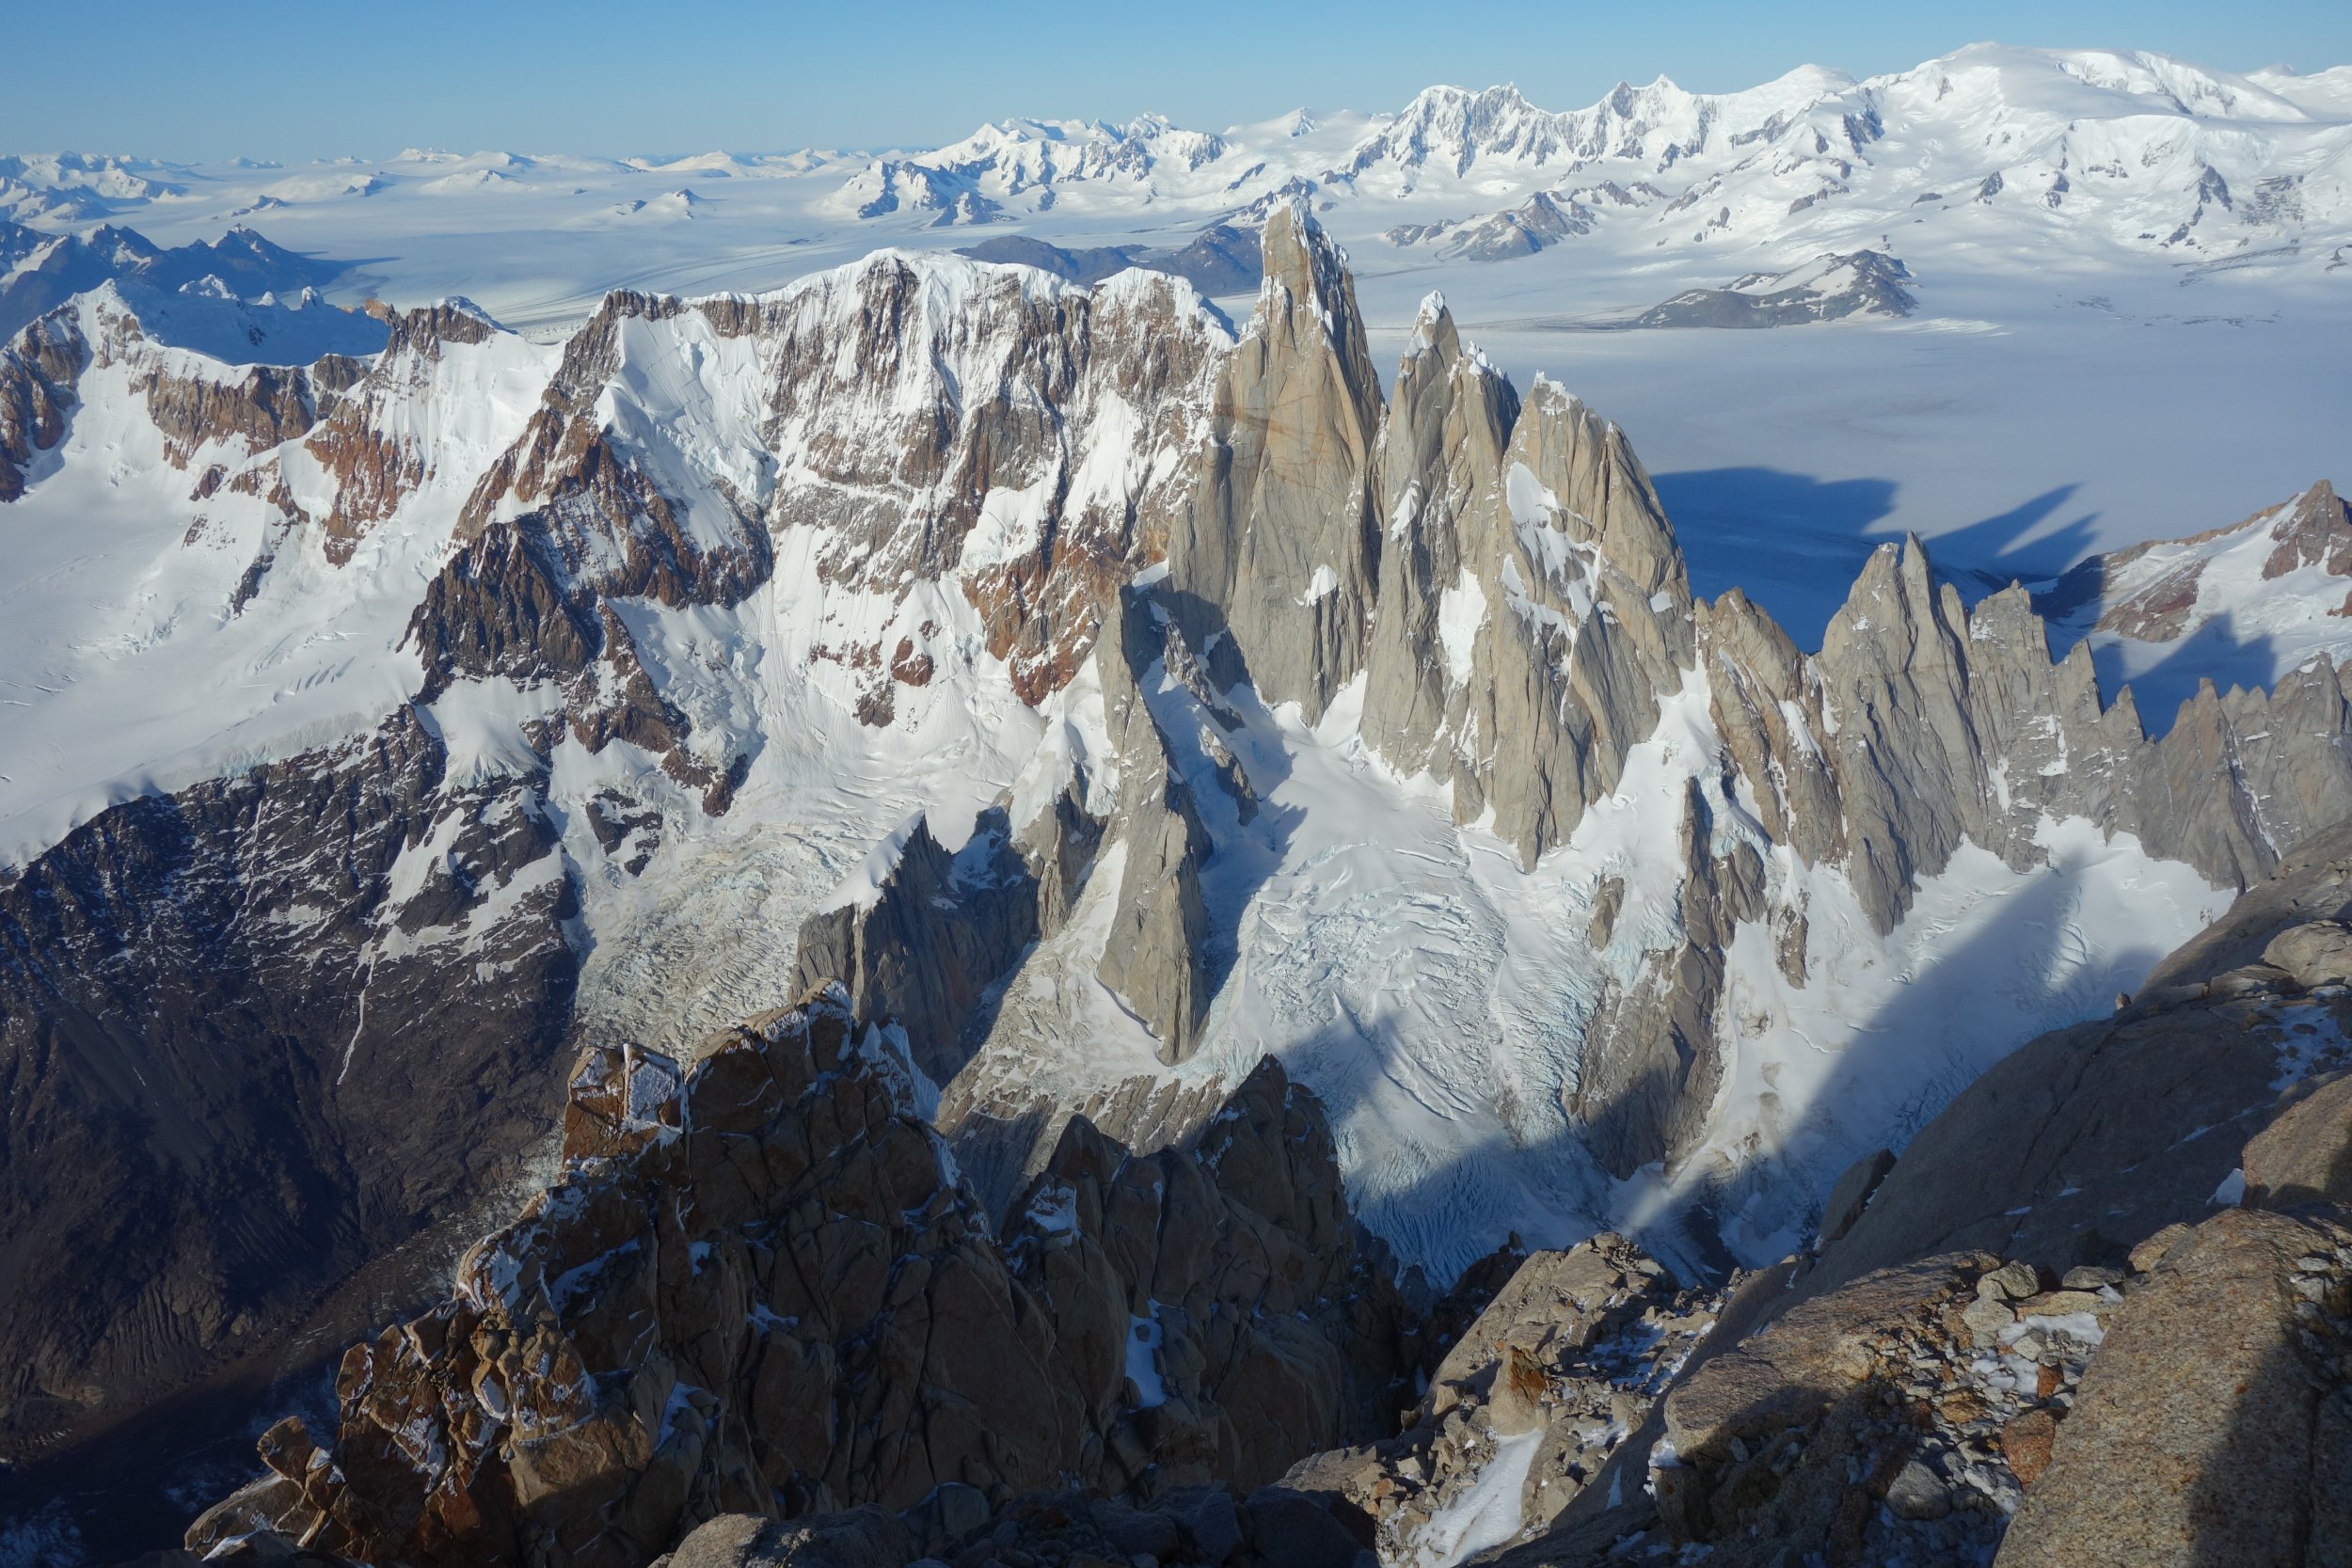
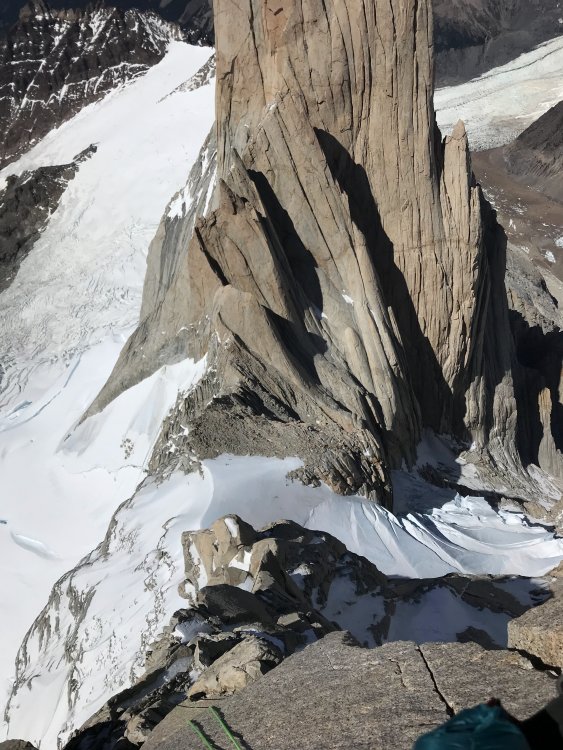
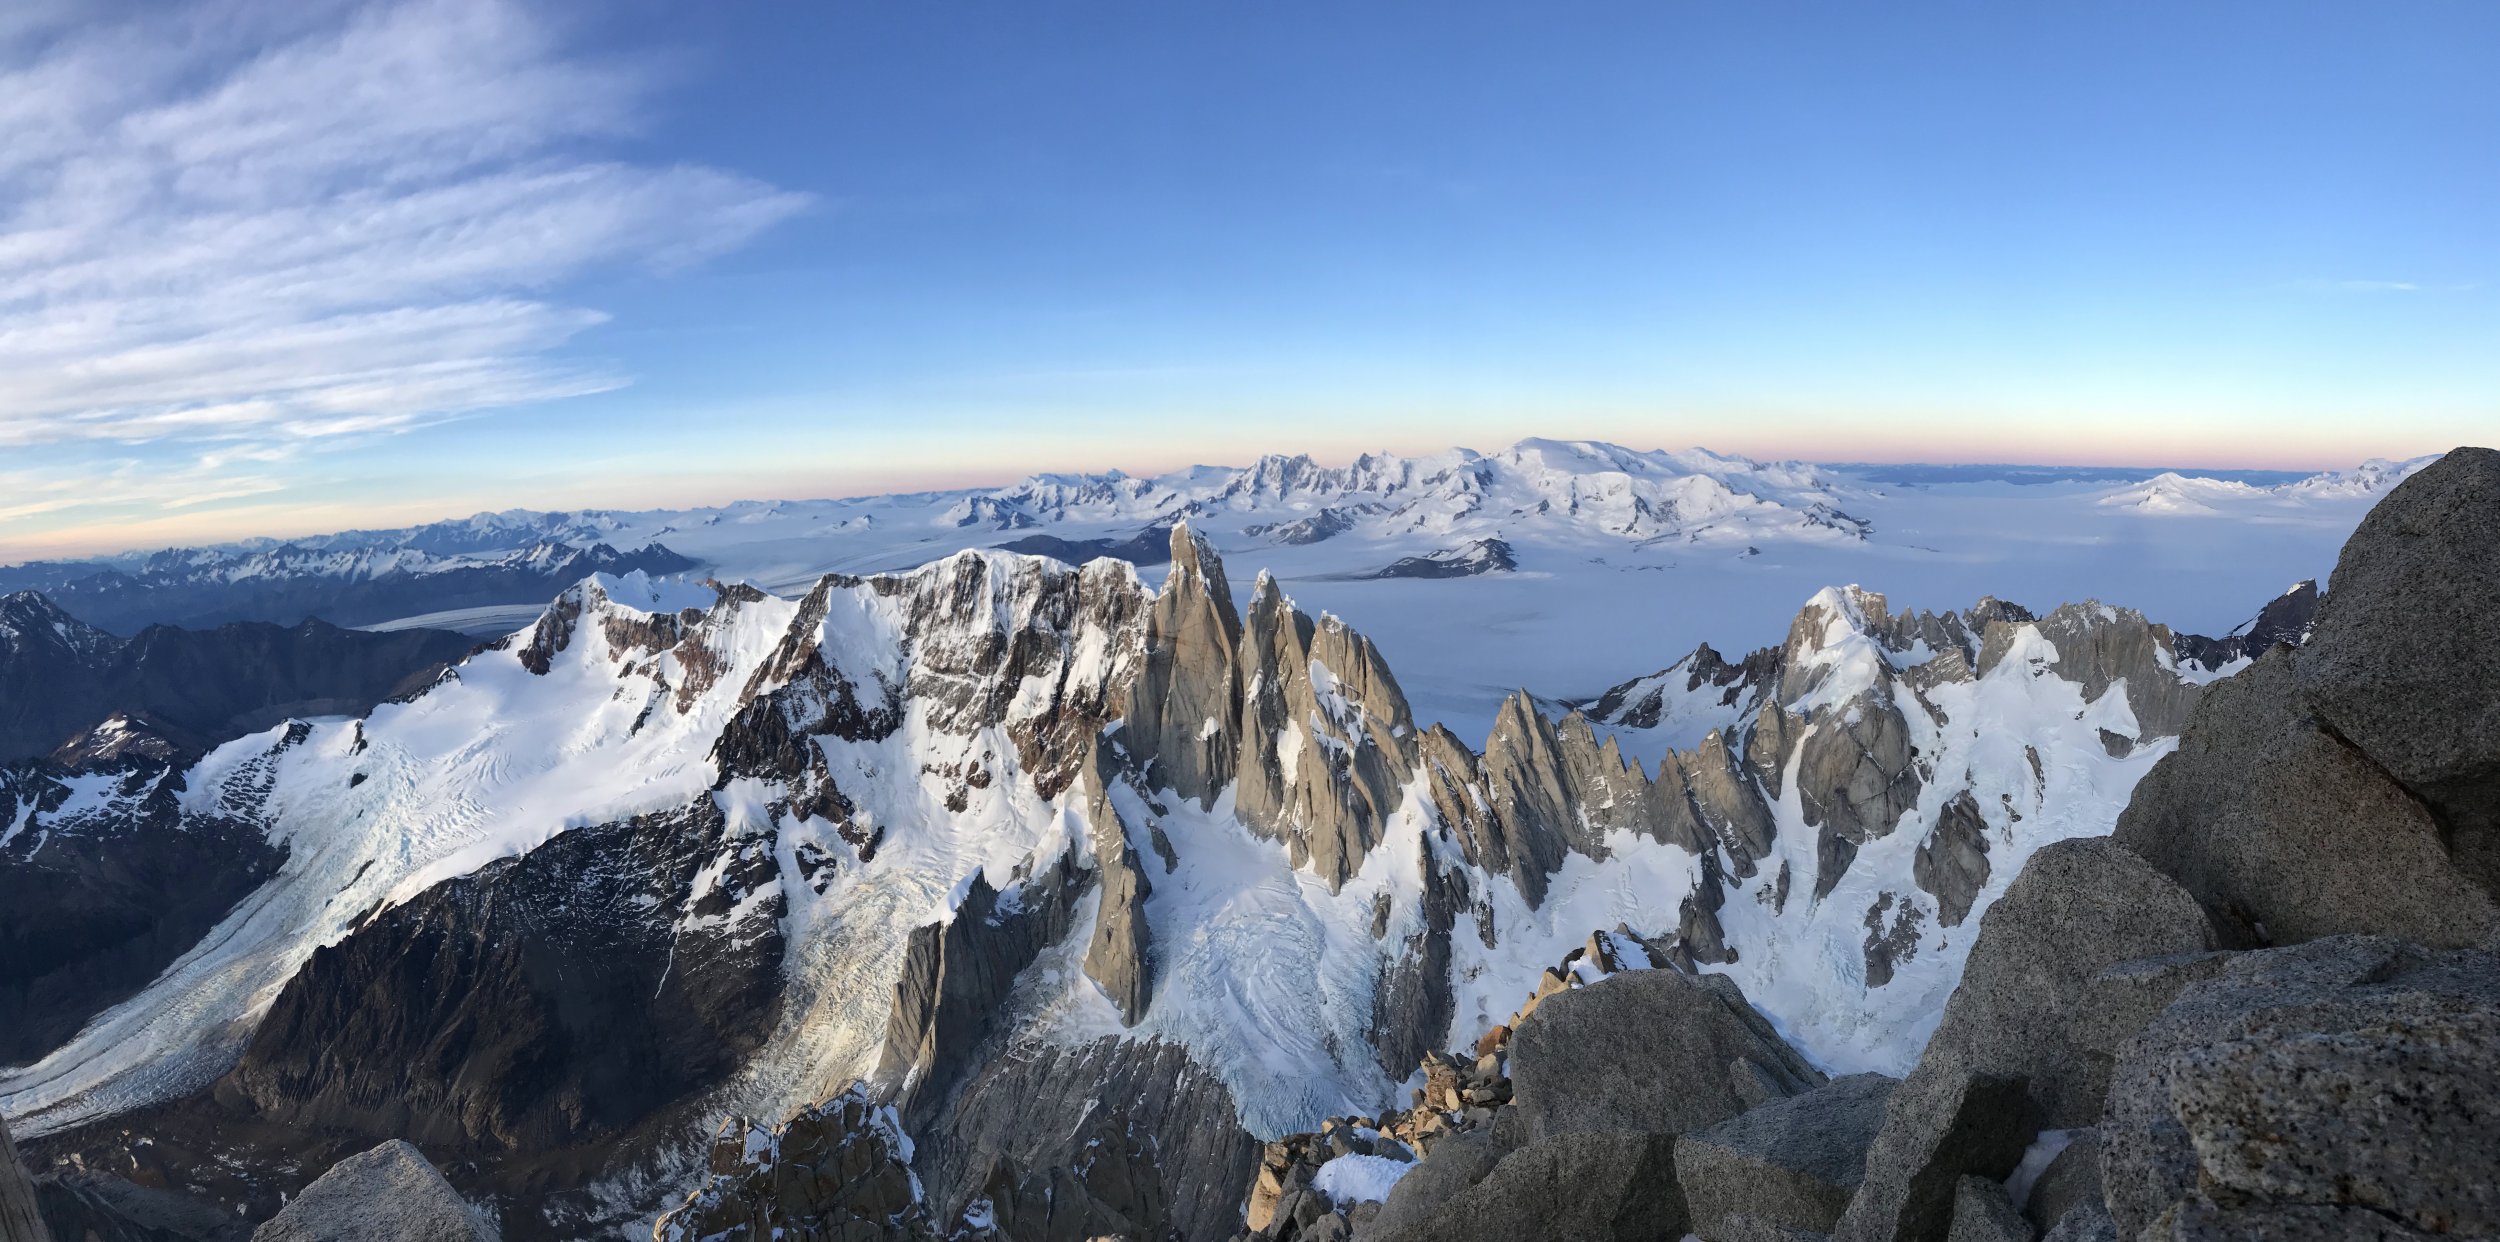
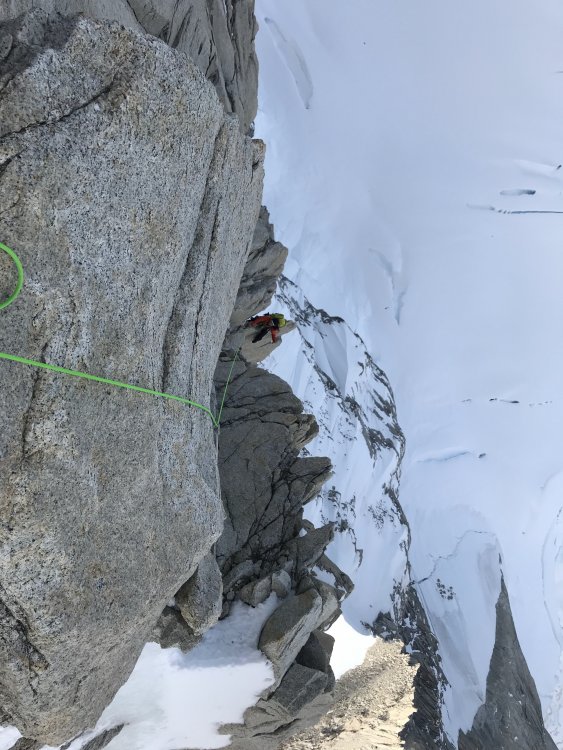
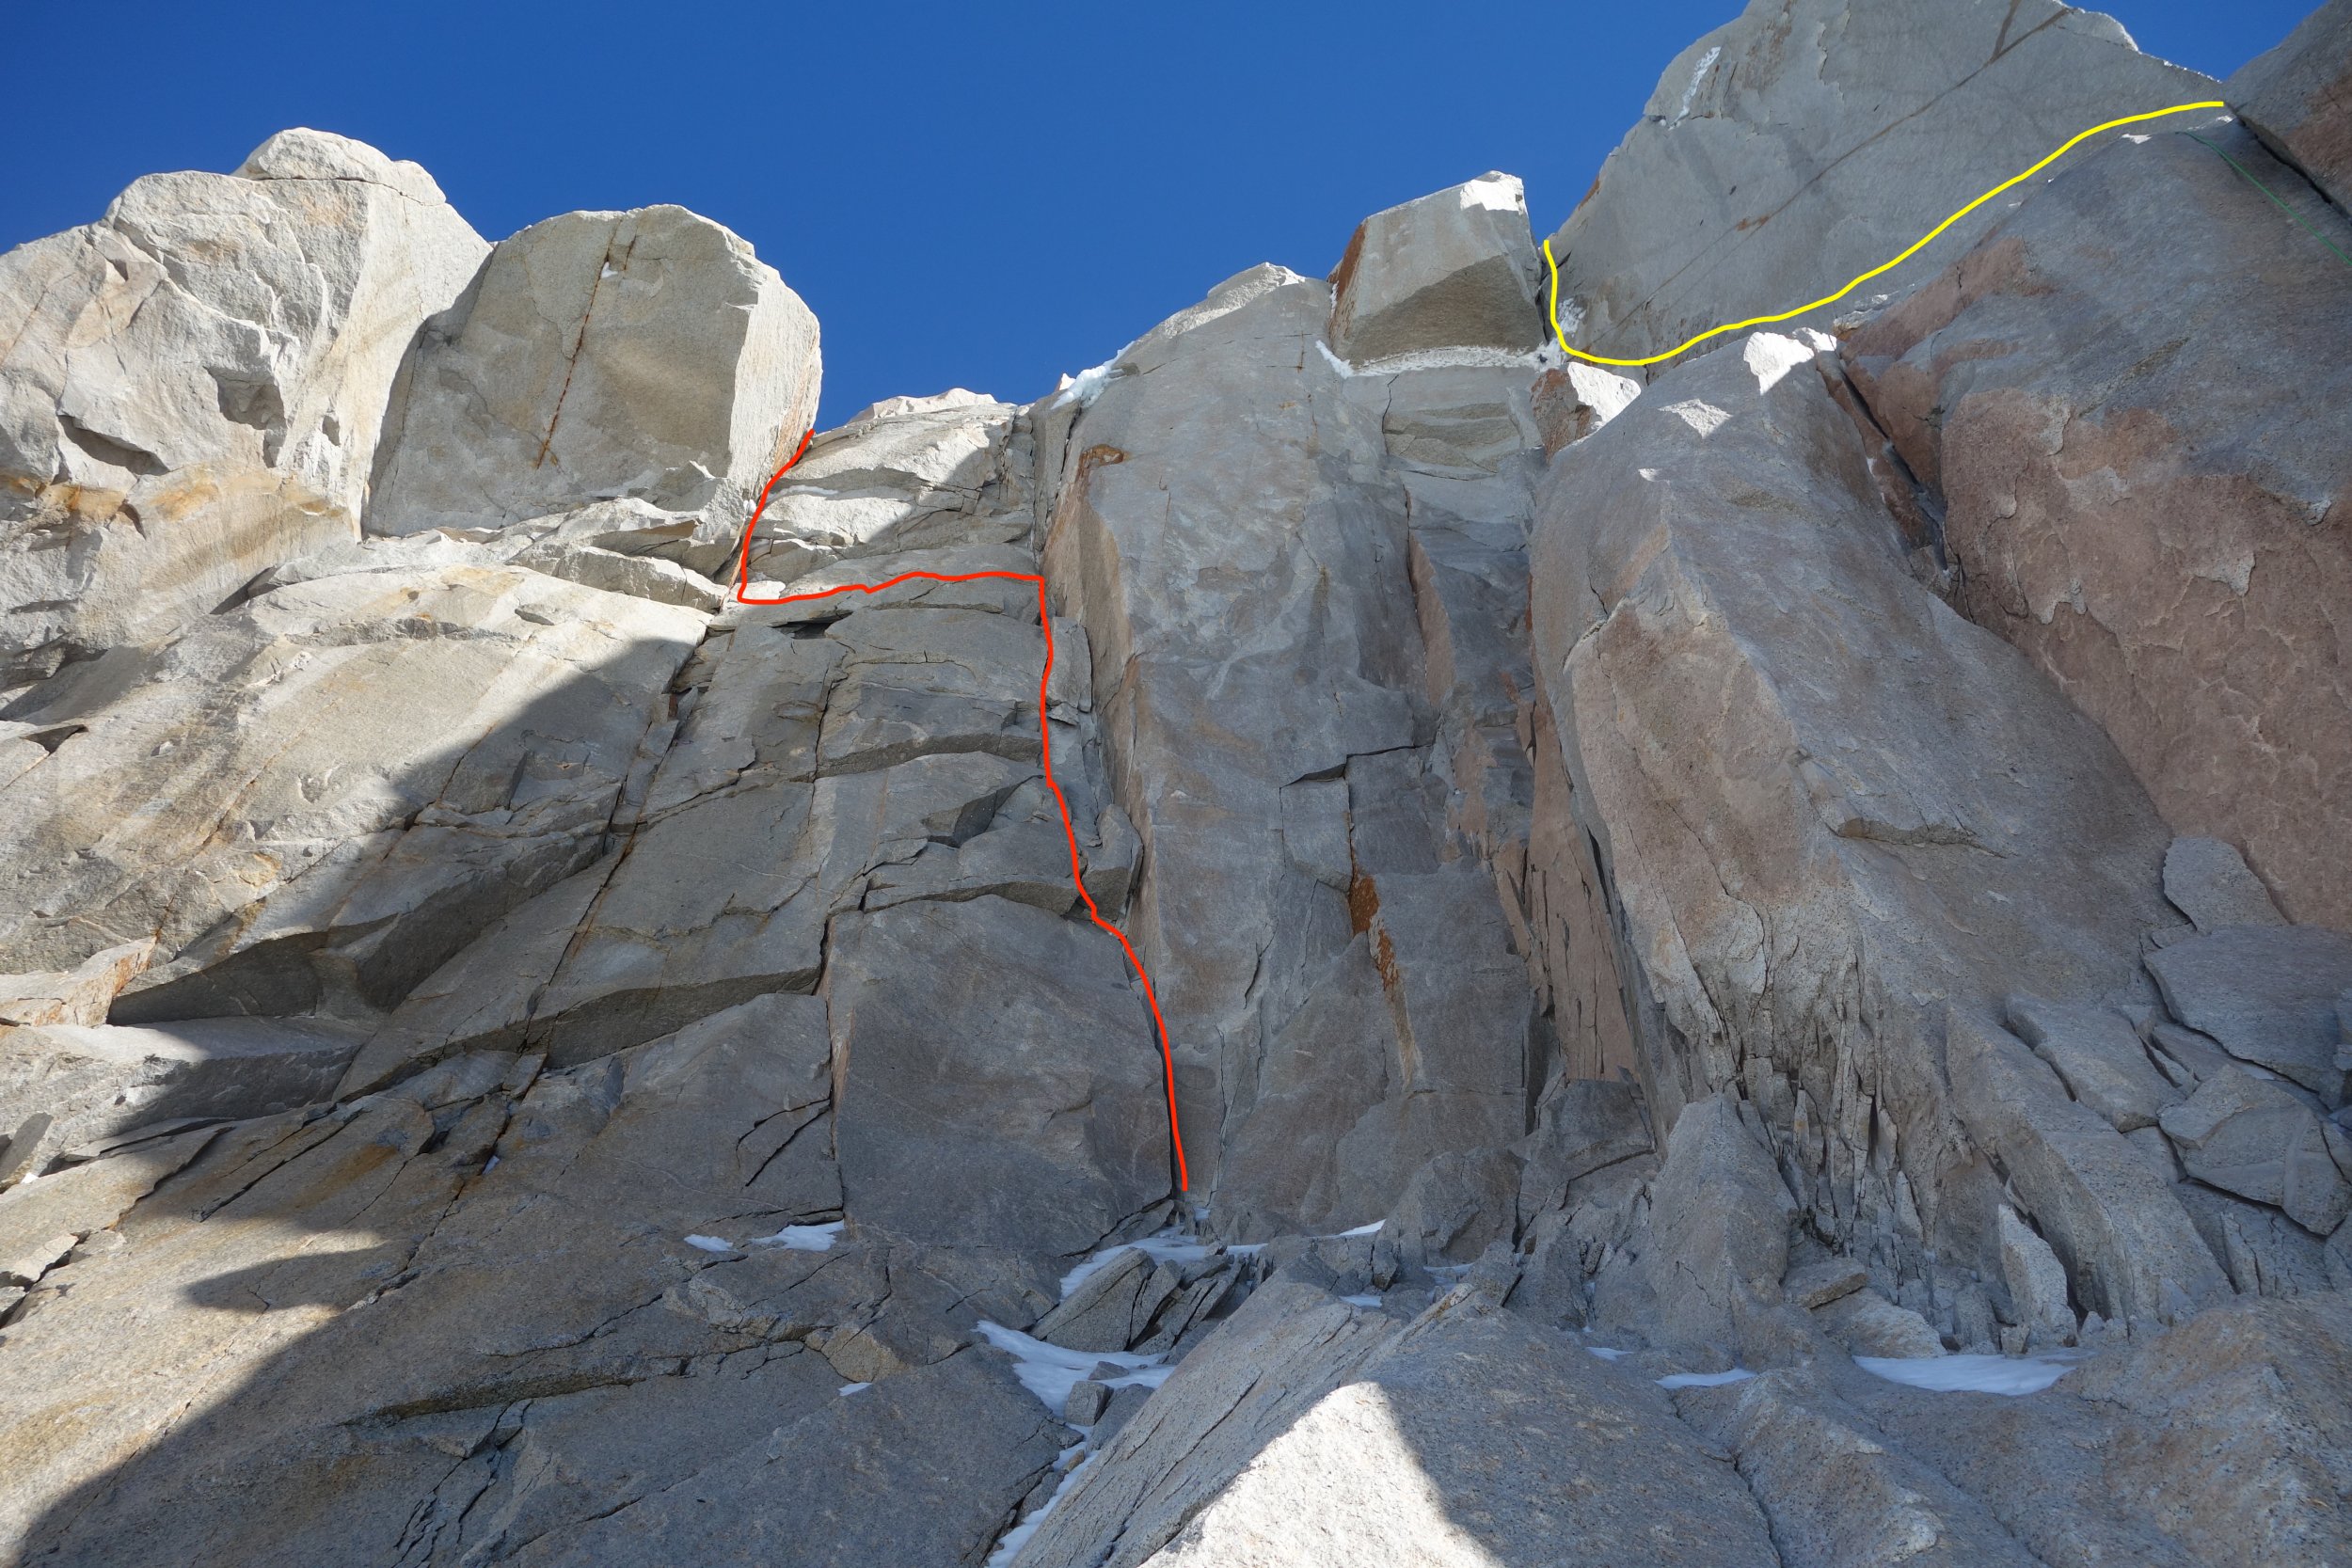
Trip: Patagonia - Fitz Roy Smash 'n' Grab 9 Days Seattle-to-Seattle Trip Date: 02/03/2019 Climbers: Jeff and Priti Wright Location: Patagonia - Chaltén Massif - El Chaltén, Argentina Peak: Monte Fitz Roy (Cerro Chaltén) Route: Franco-Argentina 650m, 55deg 6c (6a C1) High-Res Video (turn up the volume!): Google Street View Photo Sphere: https://goo.gl/maps/nLvcGHAQTqu Trip Report: Feb 3, 2019 Priti and I summited Monte Fitz Roy in Patagonia near El Chaltén, Argentina via the Franco-Argentina Route. We had been watching the weather every day each season for the past three years and finally saw a good enough window to buy last-minute flights and make use of the beta sheets we made four years ago. The trip was 9 days Seattle-to-Seattle. We climbed the Franco-Argentina link-up which is a variation on the first ascent route and is the "normal" route up and the standard rappel line for all routes on the mountain. Franco-Argentina is a highly aesthetic line combining glacier travel, steep snow, mixed terrain, and hard/pure rock climbing. The technical portion of the route is 650m long containing 14 (or so) rock/mixed pitches up to 5.11b (or 5.10b/C1...heavy emphasis on the C1) and many hundreds of meters of 45-55deg hard snow/ice. Starting from the town of El Chaltén which sits at roughly 1,300 feet, you ascend 9,710 vertical feet over 10.5mi to reach the summit of Cerro Fitz Roy (Cerro Chaltén) which towers over all the surrounding granite spires of the Chaltén Massif. The upper summit slopes require crampons, boots, and ice tools which were carried in a single pack by the follower. We were four days and four nights away from town which included bivouacs at Paso Superior, La Brecha de los Italianos, the summit (for a 1hr sit-rest waiting for sunrise pictures), then hiking all night back to town on the fourth/final night. From La Brecha, we woke on the third day and moved sleeplessly for 48 hours to get back to town so we could make our bus for our flight back (and we had 20min to spare!). We were lucky to experience rare, cloudless, windless, perfect weather in this harshest and otherwise unforgiving land. We've suffered so much in these mountains on our previous two trips; this was a welcome change. For those of you who don't know, the Patagonia (r) logo (tm) is an actual range, called the Fitz Roy range which is located in the Chaltén Massif. The big peak in the center of the logo is Fitz Roy. The founder, Yvon Chouinard, was a member of the Fun Hog Expedition in 1968 who road trip'd from California to Argentina, surfing and skiing along the way. They completed the third ascent of the mountain and established a new route, Californiana (or the "Fun Hog Route"). Note: whenever I mention "the topo", I'm referring to the topo as found in the 2nd edition of Patagonia Vertical, by Rolando Garibotti and Dörte Pietron, published by Sidarta Guides, which can be purchased online or in the States at most Patagonia retail stores. Rolo has a companion website to the book, PATAclimb.com, which is an equally invaluable resource. All pictures below are high resolution. Click on the pictures to open them in a new tab and zoom in. The adventure begins from the town of El Chaltén where you hike the popular trail approximately 10km to Lago de los Tres. Then scramble up the left (Southern) slopes of the lake to find a fixed line. The fixed line is hidden away from tourists and is very difficult to find. Stay low as you scramble up the slopes, maybe 30m until you find an obvious, lone, random bolt along a ledge. If you were to continue from here, you would see a smattering of 4 more random bolts which (I assume) make a rappel anchor for guided parties. Instead, go straight downhill from the first bolt to a large cairn and another bolt with the fixed line. 3rd class down climbing will take you back to the shores of the lake where you will soon see the second fixed line which ascends the 4th class hillside to a scree field. Cross the moraine (bivy options here) between the larger and smaller lakes to the glacier (Gl. de los Tres). Ascend the glacier to find yet another short (15m) fixed line on a low-angle rock or mixed corner (shown below). Ascend the ridge on the North side (climber's right) and make your way back to the South side (climber's left) to gain the upper snow field. Follow easy snow to Paso Superior (high camp). A very snow Mermoz and Guillaumet Paso Superior is a popular advanced base camp from which most objectives in the Massif may be accomplished in a push. It is relatively sheltered in a snow bowl, but may be exposed in high winds. On the back (North) side, there is a fixed rope down 20m of 4th class terrain to get down to the glacier (Gl. Piedras Blancas). Ascend the glacier to get to the bergshrund (1-2hrs). According to the guidebook, there are three ways to gain the ridge: the rappel couloir (just below the Brecha de los Italianos), the rock spur just left of the couloir, and the steep snow further left. Approximately 100% of all parties (give or take) approach via the steep snow (the third option), as we did. From the bergshrund just below the toe of the rock (usually just a step-across, but may go "out" in late season), we harnessed up with rock and ice gear, ascending steep snow and ice (up to 60deg) for 250m. We stayed close to the rock and protected with rock gear since the angle was steep enough and the consequences fatal enough, but many parties solo the snow/ice, roping up for the last rock portion. Since the steep snow was endless, calf-burning front-pointing, we were glad to have steel, hybrid, horizontal crampons here and also on the summit slopes, although many climbers just wear strap-ons (of the aluminum variety). Once near the ridgeline, there are likely a few ways to ascend the rock from 3rd class to low 5th but rock shoes are not necessary. Choose your adventure. The entire technical portion of Franco-Argentina is shown in red, above, which starts at the end of the snow bench ("la Silla"). Once over the ridgeline and on the West side, you are rewarded with views of Desmochada, Cerro Torre, and Aguja de la Silla. There are a couple bivy spots where a tent can be set up just under Brecha de los Italianos (shown above). From here, in order to gain the ridgeline from la Brecha to la Silla, there are many possible low-5th class routes. However, the best way is to find a 45m fixed line on the right, just past la Brecha and climb 4th class terrain to a 3rd class walkway just under the ridgeline (still on the West side) until you get to the snow. You can also climb various 4th/low-5th class gullies (seen below). La Silla is usually always icy but is low angle (and exposed!) to the base of the route and may be protected with ice screws if you like. Crossing la Silla to the base of the route. Looking back down at Glaciar Piedras Blancas. Our tracks from Paso Superior can be seen, faintly. Pitch 1, finally!! 5.10c diagonal hand crack. There is a rappel anchor just at the end of the pitch, over the edge, but there is a comfortable belay if you go up on top of the ledge. Approximate pitch layout shown side-by-side with original photo (open picture in new tab to zoom in). The lines in yellow are the two options for the actual Franco-Argentina route as shown in the topo. We diverged (on purpose) where the actual route is in yellow. Priti high on Pitch 1. Above: Looking back down Pitch 2 which takes a corner then goes out on an easy crack system on the face (5.10b). Priti leading Pitch 3. Looking up at the 5.11a corner system (Pitches 6-7) while on Pitch 5. Another view of the corner system (Pitches 6-7) while on rappel. Above: Priti starting up Pitch 6 corner system (5.11a). We swapped leads after Pitch 7, and I started up the 5.10a corner/chimney system on blocky terrain. Pitch 9 was harder corners and chimneys (5.10b) and the cracks started to get icy up here! Looking down the blocky Pitch 9. This view is just nuts! Crazy granite monoliths that look like a cluster of orange crystal formations. Looking down, you can see the swirly line of snow on La Silla which separates Aguja Poincenot from Fitz Roy. Pitch 10 (5.9) and looking up at the remaining 4-5 pitches on the upper headwall. It was during this pitch that the cracks became prohibitively icy on the standard route which would have required two tools and crampons for the leader, so I chose to explore off-route. Just above where you see me in the picture above is a long roof. There is a rappel anchor (off-route) out left of the corner system. This anchor is shown in the topo with three pitons on a ledge and is normally only used as a rappel anchor. I bailed to this anchor, then continued left (left of the prominent arête as shown on the topo) and found icy, mid-5th class ledges. The final 5 pitches were off-route from the topo but made for a fine alternative if the cracks are too icy on route. The final pitch! In yellow on the right, the 6c (5.11b) variation as shown in the guidebook topo. This overhanging crack was chock full of weak ice when we rappelled it and would have been nearly impossible to climb free or even get any pieces in to French Free it. We took the variation in red (left), not shown on the topo, which has many fixed pieces and pitons from previous parties and probably also goes free at 5.11a, although we climbed it French Free due to the icy cracks, darkness, and weak climbing abilities! Priti followed in the dark, jugging with two Petzl Micro Traxions. I would recommend following the zig zag in red (as we did) and not going straight up as that would be much harder. This is a good alternative if the rest of the route is icy, although you have to get off route during Pitch 11 (much earlier) to get to the base of this variation. Note: two more pitches of low-to-mid 5th class were required above this pitch before getting to the snow field. Rappel ropes shown going down the 6c variation. For reference, the line we took (red) is also shown again. Once past the technical climbing, you reach 250m of hard snow/ice up to 50deg (more endless front-pointing). This leads to the summit mound, which looks intimidating, but we went hard left to the left-most rocky ridge which was easy 3rd class scrambling to the final summit ridge. There is a small bump along the summit ridge which is not the actual summit although appears to be the high point! Continue to the end of the horizontal-ish summit ridge to reach the actual summit. There is an AMAZING bivy site for 1-2 with a roof and walls just under the summit block. Advertising for our awesome hostel, Aylen-Aike, from the summit. Cerro Torre behind. The first rappel down the upper snowfield. After 3-4 rappels down the upper snow field, we couldn't find the rappel anchor that's shown in the topo which is just (climber's) left of the prominent prow/arête at the top of the route. Instead, we rappelled straight down the 6c (5.11b) variation from the topo with no difficulty. If in doubt, just rap down this 6c corner. The next rappel (shown above) is from a ledge just to the left of the prominent prow/arête. You can see a giant block jutting out in the photo above. To the right of this block is the 6c (5.11b) variation. This is generally the most popular way to finish the technical portion of the ascent. The 5+ variation is further right (out of view) from the prow. In general, the rappel lengths and locations of anchors were spot-on on the topo. There are so many anchors everywhere, so be sure to follow the topo guidance for rappel lengths if you want to skip some anchors and have longer rappels. The rappel block above "La Araña" snow patch, which looks like a spider halfway up the route. A particularly harrowing rappel just below La Araña which goes down the shear, overhanging wall which is above the dihedral (Pitches 6-7). The leader has to make sure not to miss the belay ledge and do some free-space swinging to catch the ledge. The first rappel down the East side of la Brecha de los Italianos. The second to last rappel. Stick to the (skier's) right in this photo and hug the wall. There was an anchor just above the bergshrund where you make the final rappel. The Chaltén Massif from the air. Tracks: https://caltopo.com/m/CVF0 More info: https://pataclimb.com/climbingareas/chalten/fitzgroup/fitz/french.html#franco https://pataclimb.com/climbingareas/chalten/fitzgroup/fitz.html https://www.summitpost.org/fitzroy/153622 Gear Notes: Double Rack to 3 with triples .4-1, single #4, 4 ice screws (1 shorty), 1 picket each (approach only), 60m single rope, 60m Esprit pull cord, steel hybrid crampons, 2 tools each on approach (we brought two tools total on route, although many parties bring three tools total on route). On route, the follower carried a single 40L (Patagonia Ascensionist) pack with both of our boots, crampons, pull cord, 1 sleeping bag, one therm-a-rest pad, water/food for both, summit jackets, summit mittens, and two tools (total). For the upper slopes, each person had a single tool, but two each would have been luxurious. Approach Notes: Approach on steep snow left of serac ('S2c' from the guidebook)


 1 point
 -
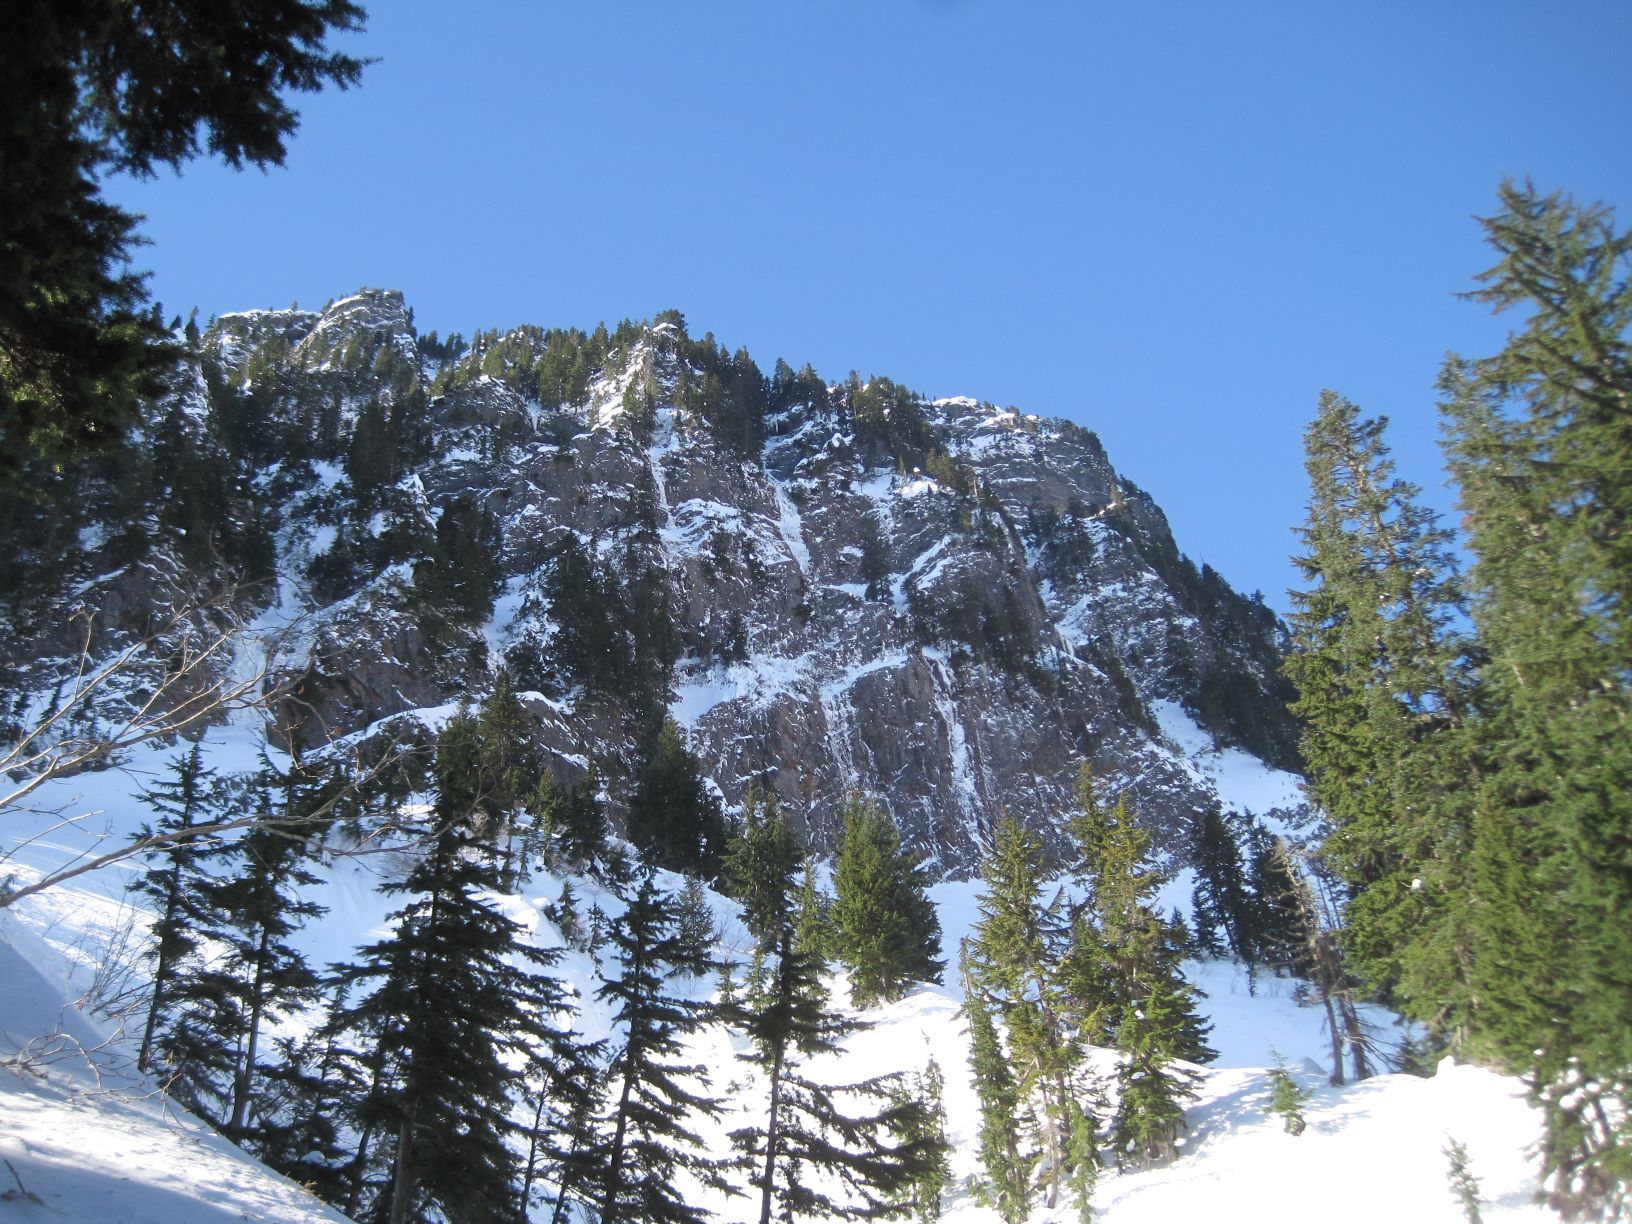
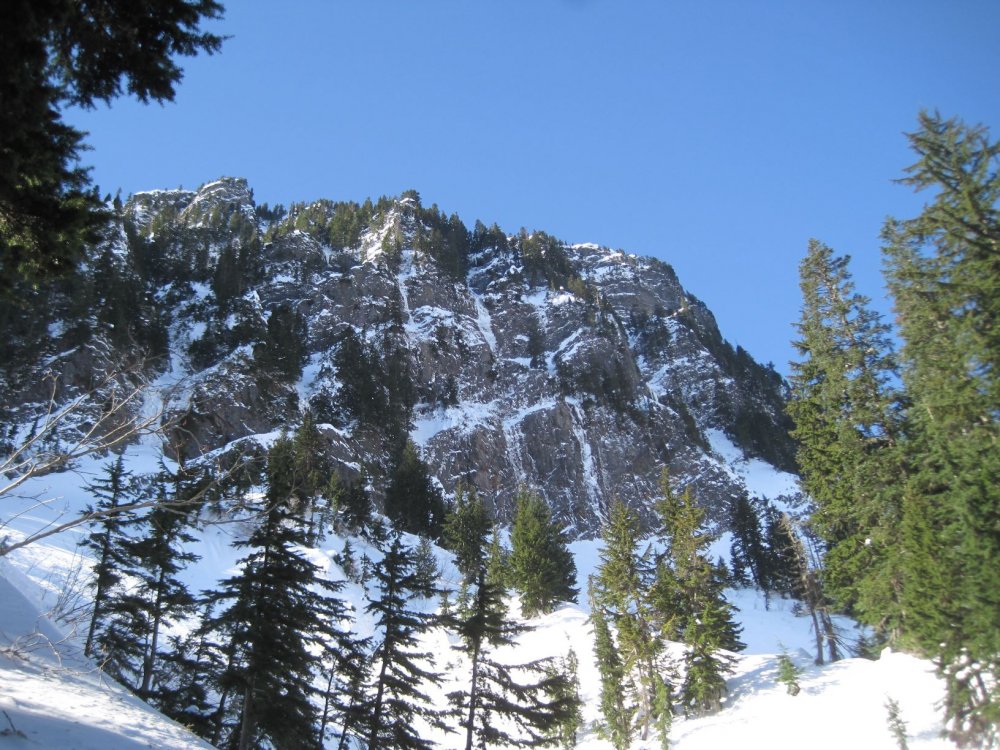
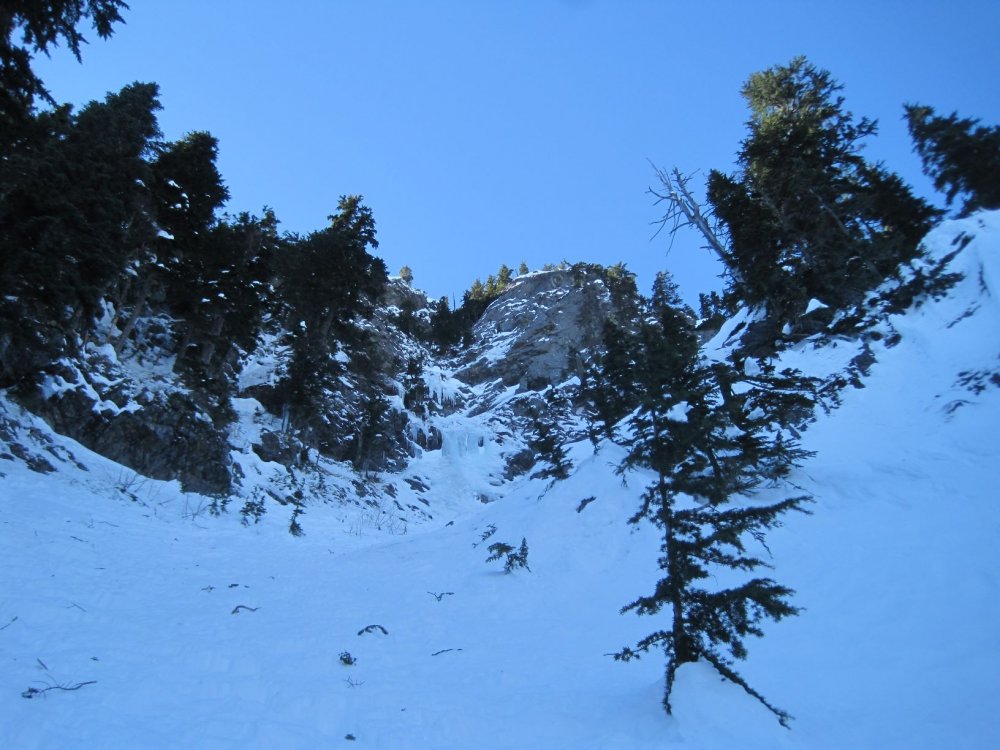
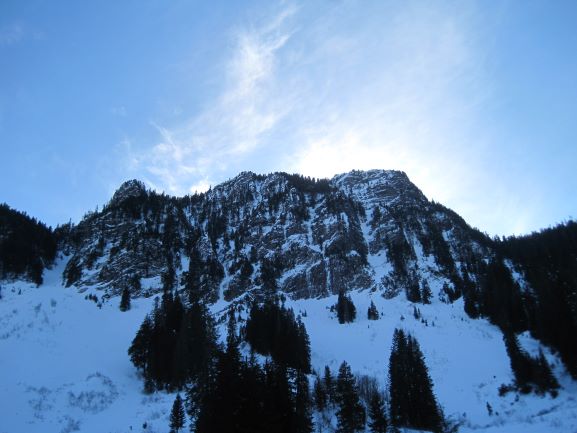
Trip: mt. kent - north face Trip Date: 03/05/2019 Trip Report: sub-alpinism seems to have understandably fallen out of favor given conditions in the coulees, sw b.c. and patagonia. couple of overview photos from yesterday: yesterday's route provided a half dozen entertaining ice/turf/rock steps. once above the last step, ~300 v.f. of forest take you directly to the summit. the quickest descent is down the east ridge then down the large avalanche gully on the left side of the face: there is old red webbing around a tree on skier's right but it is now easily down climbed. if you mistakenly drop down the burdick/fortier gully as i initially did, you could probably do a couple raps down the final two steps w/ one rope. the last couple of steps before the forest: annotated photo from ~2007: the photo above was copied from this thread: Gear Notes: the usual sharp stuff. Approach Notes: xc up east side of alice creek.
 1 point
 -
Leutholds was in good shape, easy climb and manageable ski. Great pics of us on the Queen’s Chair, thanks!1 point
-
Wow! Congrats! Looks like your detailed homework paid off in a big way.1 point
-
http://rjrice.com/cascades-take-two/1 point
-
anthony- I have a "vintage" north face "lightrider" (their bag for bicycle touring) that is lightly used and may work for your purpose. total weight is just over a pound - I used it for a summer bag, 3-season with extra clothes, and as a liner for an over-sized three-season bag for "extreme cold". It has a very wide "comfort range" because it has no side-block baffle opposite the zipper, so you can shake all the down to the top side for colder conditions, or shake more to underside for hot nights. It was always a bit short for me, so I replaced it a few years back with a longer 1-lb bag from Mountain Equipment... if you're interested, you know how to reach me... come take a look at it -- it would be inexpensive... -Haireball1 point
-
Trip: MT. HOOD - Wy'East Face Trip Date: 01/26/2019 Trip Report: With the warm inversion taking place and fairly certain most other routes would be full of falling ice Mike and I decided to climb the Wy'East. We left the car at 4:30am with the temperature in the mid 40's, but the surface/snow temps fairly reasonable. Mike and I left the car with the intention of getting to the top of palmer in under and hour but unfortunately for the 5th time so far this year we just missed it and managed to hit the top of palmer right at 5:36am. Once at the top of palmer we traversed slightly up as we made our way over to the White River glacier. We did rope up to cross the glacier although everything is pretty covered up right now. From here we had a quick look at the South face of the steel cliffs just to see if it might be in condition and it definitely was not so we continued down and around to the standard Wy'East route. This was our first time climbing the full Wy'East route and overall we think that the conditions were pretty good. The guide book is pretty spot on with the description although the traverse really inst that exposed and the overall climbing is extremely straight forward and mellow. With surface temps being a lot better than we had planned we topped out and then decided to run down to illumination rock and see if we might be lucky enough to hit one of the south west side routes before they became ice/rockfall funnels. Unfortunately once we got there and started to head down we quickly realized that we might be a dollar short and a day late as ice was just screaming down. Overall it was a great day with stellar spring like conditions. Gear Notes: 2 x pickets (didn't use them and not really any need for them on this route) Approach Notes: Standard south side route up to Palmer then traversed up and over to the White River Glacier. We roped up for this crossing although everything is pretty closed up right now.1 point