

shwacklife
-
Posts
3 -
Joined
-
Last visited
shwacklife's Achievements
")
Gumby (1/14)
0
Reputation
-
 Pete - yes, I'd recommend Solar System if you don't feel comfortable pushing your limits to the 5.10c of Life on Earth but still want to climb an incredibly aesthetic face. Life on Earth is more highly praised than Solar System, but I really enjoyed the climb. HHinkkala - yes, the #4 fits well just at the slight overhang on pitch 1! It can also be useful on pitch 5, I think, although it isn't mandatory.
 -
Trip: Mt. Habrich - Squamish, British Columbia - Solar System 5.10a Date: 9/21/2014 Trip Report: Seeing as there is zero information on the internet about the route Solar System (5.10a) on Mt. Habrich, I thought I'd put out some notes in comparison to the very brief and difficult to understand description provided in Alpine Select. The SW face and the pitches Pitch 1: "Start just left of Life on Earth" and gain a series of flakes." Life on Earth (LOE) Direct starts at the very bottom of the SW face of Habrich. Solar System starts lookers left, uphill of the direct LOE start, where there is a bit of a beaten path in trees to a little belay spot. This pitch and pitch 4 (if you climb the route in 6 pitches) seem to be the hardest of the route. This is a sustained pitch with decent hands. The rock is friable as you pull a slight overhanging. Finish the pitch with an exposed and unprotected slab climb, then traverse right to a 2-bolt belay. Pitch 2: "3 bolts for aid lead to an obvious ramp." This pitch starts with a 3-bolt aid section, followed by an exposed climb trending left over slab to a fairly loose and creaky flake for protection. Either climb straight up and over unprotected slab to the ramp, or traverse hard left from the flake to gain a small piece of protection, followed by exposed slab up to the ramp. Some parties have made a gear belay immediately at the ramp to be able to still communicate with each other. Otherwise, climb along the easy ramp to the left until it hits the first crack system leading straight up. Gear belay. http://cascadeclimbers.com/plab/showphoto.php?photo=100063&title=pitch-2&cat=500 Pitch 3: "…lead to an obvious ramp, beyond which slabs lead…" The "slabs" in the Alpine Select description are the very end of pitch 3. Instead, leading off of the easy left-trending ramp is a decent flake (maybe slightly loose) and a few more good placements in slightly friable rock to the slabs. Climb 4 meters of exposed slab to the base of the large dihedral. Gear belay. http://cascadeclimbers.com/plab/showphoto.php?photo=100064&title=pitch-3&cat=500 Pitch 4: "…slabs lead to a large dihedral." This pitch and pitch 1 seem to be the hardest, although that distinction varies with each climber's preferred style of climbing. This pitch is not too long, but the dihedral requires a lot of body position changing and stemming. Look out to your right for a random good placement. Towards the top, look out right for chicken heads for easier access to a good belay ledge instead of following the dihedral all the way up into nothingness. Gear belay. http://cascadeclimbers.com/plab/showphoto.php?photo=100065&title=pitch-4&cat=500 Pitch 5: "The final pitch is difficult; an overhanging flake crack followed by a scruffy chimney." Although the "overhanging flake crack" is a challenging move, the remaining part of the pitch is a simple dihedral with good hands and feet, although a bit loose in places. Gear belay after pushing up through a scruffy tree on a nice ledge. http://cascadeclimbers.com/plab/showphoto.php?photo=100066&title=pitch-5&cat=500 Pitch 6: 4th/5th class roped climbing (full 60m) to a bolted belay. Leave the ropes and packs at the final belay area unless you intend to rap the NE face! Easy scramble to the summit. Hike back down towards the bolted final belay. Descend slight left through the juniper bushes, popping out with slabs to your right and the bolted rap station of Life on Earth just below. Downclimb to the first rappel. Gear Notes: Everything from BD C4's 00 to 4. No passive pro needed. A couple double or triple slings for the aid section are useful.
-
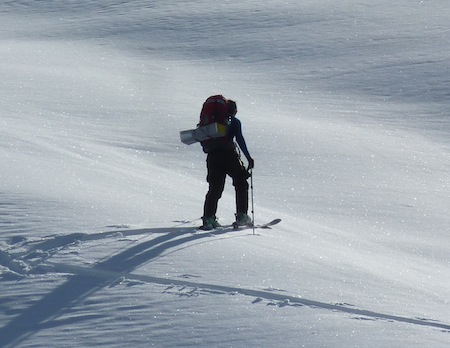
Trip: Squamish, British Columbia - Garibaldi NE Face Date: 10/14/2013 Trip Report: On October 14th, two friends and myself drove up the Brohm Ridge logging road from Squamish. We were able to drive right to the summer gate that is currently locked. For those driving up Brohm, be sure to take the forest service road just after the Cat Lake parking lot. The first forest service road (the northern one) has a bridge washed out 2/3 of the way up. Once at the gate we hiked in our ski gear up to the Brohm Ridge Chalet, owned and operated by Black Tusk Snowmobile Club. At the chalet there was enough continuous snow to skin. Once on the proper ridge, there was enough snow to be able to comfortably ski! The afternoon sun had turned the west facing slopes to butter. Around two-thirds of the way up the ridge we came upon (what I've been told) Brohm Tusk. Climbing up was simple, but climbing down was and adventure full of robust alpine hemlock trees and powdery snow over loose rock on a knife-edge ridge. Fun for the adventure, but definitely not the timely option. Once we reached the edge of the Warren Glacier, we found a perfectly sheltered nook from the light wind and set up camp. Ice bouldering is quite the way to warm back up! The next morning, October 14th, we left camp at 09:15 and proceeded directly above camp. Soon enough we discovered we were on top of an icefall, forcing us to retrace down to camp and descend along the edge of the glacier to an area roughly 150 meters (walking distance) lower. All of the main crevasses were open and obvious, but skis permitted peace of mind while crossing those potential snow bridges. Once across the Warren Glacier we took the most direct route off of the edge and up a rocky face to gain access to the ridge of Garibaldi leading up to the NE face. The actual climbing up the rocky knob was an unfortunate combination of sugar snow on loose rock. Pending more solid snow quality, this would be a much more quality ascent. Looking back on the Warren Glacier The NE face was full of large and obvious crevasses. Route finding was simple, but the snow quality was lacking for stable skinning. We encountered sugar snow mixed with graupal roughly 5 inches deep on top of a smooth and solid base layer. Ski crampons helped only after kicking a ski a few times through the sugar. The bergshrund was easily crossed via a new-snow ramp that was windblown in on climbers left edge. We left skis/snowboard just below the bershrund. From here it was easy bootpacking up to the summit. We topped out around 14:15. After a straightforward bootpack back down and across the bergshrund, we opted to carry skis through the crevasses of the NE face until we had a clear shot back down to the Warren Glacier. Turns were darn fine for the middle of October, with wind-buff and powder on the NE aspect, turning to butter on the western aspect. Our ski descent brought us to a final crevasse obstacle that we crossed on belay - luckily the snow offered solid picket and axe placements! Once again on familiar ground we skinned back to camp under alpenglow, packed up as quickly as possible, and skied our way back down the ridge first in the sunset and then under moonlight. We were back to the gate and the truck by 21:00. A most enjoyable Canadian Thanksgiving.