

ldr66
-
Posts
15 -
Joined
-
Last visited
ldr66's Achievements
")


-
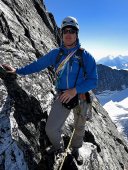
 ldr66 changed their profile photo
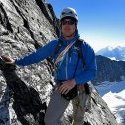
 -
[TR] Ingalls Peak - First Alpine! - South Ridge 10/2/2016
ldr66 replied to travisjburke's topic in Alpine Lakes
Nice work. I think we passed you guys on the trail down...I was one of the two middle-aged trail runners that asked you what you climbed. Lee -
My regular climbing partner is climbing in Vietnam right now so I'm in need for someone for the Gerber-Sink on Dragontail as soon as possible. Did Triple C last year about this time and had a blast. I'm fit and know my way around the mountains. Please be fit and experienced yourself, but I'm happy to lead any hard stuff (though there's not much on this route). I've got all the gear. Lee
-
[TR] Dragontail - Triple Couloirs in Stellar Condition 4/30/2015
ldr66 replied to Buckaroo's topic in Alpine Lakes
Very well done. -
If you belay at the beginning of the first runnel, it's about two full pitches to the next couloir. I'd rate this first pitch at WI2 when we did it (solid, easy ice at 60-70 degrees). In the first photo Jordan is about 2/3rds the way up this first pitch. This brings you to the second belay, an obvious shallow alcove on your right (.5 and .75 Camalots work well here). From there, the second pitch traverses up, slightly left (see the next photo above) and then goes straight up to the narrow runnel (next photo) to the bottom of the second couloir. I'd put this pitch at WI2+ (75+ degrees with some small rests) and was more solid water ice than the 'snice' found through the rest of this section. It's all considered easy by ice climbing standards. But given that it's not always easy to hone your skills and gain confidence on ice here in WA, "easy" is not necessarily that easy. And then there's the exposure factor, but that's always a part of alpine climbing. The second runnel getting between the second and third couloir is much shorter and less steep...more of an afterthought once you get through the first one. Have fun!
-
Trip: Dragontail Peak - Triple Couloirs Date: 4/20/2015 Trip Report: Like many of you, we'd been envious of all the activity on Dragontail until we finally got our turn. TC was in probably as good as shape as it can get. The ice was so good that when we got to the first runnel we decided to keep on going and soloed up the first pitch to the usual belay spot. The second pitch was equally delightful! The rest of the climb went without a hitch and a big thanks to all the folks on the GST (Gerber-Sink Thruway) the day before who left a staircase up the last half of the third couloir. Fun story of the day...my partner dropped one of his nice new BD gloves about a hundred meters from the top, only to find it waiting for him at the base right where where we put our crampons on. Left the car at 4am and topped out at 11:30am to blue, windless skies. Gear Notes: 3-4 screws, 2 pickets, 3 cams and a few nuts. Used most of it. Approach Notes: Easy as can be!
-
Trip: Dragontail - Triple Couloirs Beta Date: 3/30/2015 Trip Report: Hiked up Colchuck yesterday (3/30/2015) and since many of you are looking at TC this time of year I'd thought I share what I saw. Plan to add 3+ miles as you hike the road from the gate off Icicle Creek. It took us a little over an hour up but seemed like an eternity on the way back. Road is snow free (but as I write this Stevens is getting hammered). This makes it a one way trip of almost 10 miles and 7000' gain. The trail to the lake was mostly dirt(!) though the hard ice in places made our micro spikes well worth it. Where there is snow/ice, it's rock solid but with spikes and light hikers you can cruise through with ease...but again...new snow is here. The lake is well frozen for travel, but you'll have to look closely for water sources once there. The myriad of streams coming down from Aasgard aren't accessible yet and I had to walk half way across the other side to find something. We were up for the day and so didn't bring a stove. Getting to the route is easy enough. The one party we spoke with said the access is tricky on climbers left, though the right looked solid, yet steeper. Make what you will of the runnels via the photos. Our party said they were fine and took short screws well. Yesterday was quite warm and if this new low pressure hadn't come in I'd say you'd have a week or two to get on it. Now it's hard to say but a bit of new, wet snow certainly won't hurt. There was a very nice boot track coming down Aasgard on descent. Have fun! Entrance to TC The top of couloir 1 is just visible, then the runnels, then couloir 2 and the lower part of couloir 3... Close up of the main runnels... From the top of Colchuck...nice day, eh?
-
New price...
-
$800 Everything is brand new, never used. Skis are unmounted. You can get all the specs online. K2 Backup - 181cm, very light and a great PNW crud buster Marker M10 Tour BD STS Skins BD Traverse Adjustable Poles Pieps DTS Transceiver (retail $450) BD Deploy 3 Shovel Osprey Kode 3 Pack Local sales only, no trades. I live near Bremerton but am in Seattle on occasion. Will gladly meet you at the ferry dock.
-
Trip: North Cascades - Ptarmigan Traverse Date: 8/6/2012 Ptarmigan Traverse Though the Europeans created the buffet, surely it was the Americans to put the all-you-can-eat spin on it. This is the Ptarmigan Traverse: a high, alpine ramble that has something for just about every backcountry palette—and lots of it—with more than 40 miles of glaciers, lakes, meadows and peaks down the backbone of the Cascade range. The report below isn’t a comprehensive review or trip report but simply some answers to questions that, in hindsight, we would have found helpful. No doubt you’ve sifted through the mountains of info available online, so hopefully this adds something new. Difficulty If you’re a seasoned veteran of Cascade peaks the Ptarmigan will present few technical difficulties. Outside of a handful of steep snow sections, there’s relatively little that should worry you. On the other hand, if you’re an experienced backpacker looking for greater adventure, the Ptarmigan will feel quite challenging in places, and will tax you mentally as well as physically. Whichever the case, basic mountaineering, route finding and backcountry camping skills are prerequisite. I’ve climbed a bit in the Cascades and feel comfortable soloing steep snow and moderate rock. That said, there were two places that caught my attention. The first was the 100’ snow traverse onto the Red Ledges; it’s steep and quickly dumps into a moat below so a slip here would not be good. The second was the traverse of the upper Middle Cascade glacier. It’s fairly steep with crevasses below and if frozen, presents at least a mental challenge of staying focused on the narrow track in front of you. The Ptarmigan is mostly entry level when it comes to glacier experience needed. While you do cross glaciers along the route, they aren’t that active and crevasses are minimal. This doesn’t mean that challenges don’t exist, so be prepared. I make this point only to say that it’s not like wandering around the Emmons Glacier on Rainier looking for the next feasible snow bridge. For a trip like the Ptarmigan, I prefer to bring ski poles and try to keep the axe and crampons on the pack as much as possible. In hindsight I found the energy/time tradeoff to be in favor of using crampons a little more than I did, at least when the snow was frozen. A few times I got halfway across a slope only to realize that crampons would have been quicker and less fatiguing overall. Then there's the issue of route finding in difficult weather. While we had good weather most of the time, it’s clear that thick clouds would make things interesting. In hindsight it's all pretty straightforward but (if you're like us) you'd spend a lot of time double checking yourself). In late summer you’ll find a trail much of the way except the little bit of permanent snow and glaciers. Equipment Notes Light is right. The traverse offers great camping all along the way with plentiful water supply. All of the traditional camping spots are sup-alpine and offer at least some protection in weather or wind. In good weather a bivy sack would be perfect but bugs are likely in early season. The real question is what do you take in terms of boots and technical gear? I used the Scarpa Triolet, which I found to be the perfect balance of support, weight and walkability. Lighter boots will walk better but you’ll work more on hard snow or have to use crampons on more often. Any of the similar hybrid boots should be fine. I carried an old pair of trail runners for the approaches and camps in between. Unless your plans include rock climbing, there’s no need for rock pro or shoes. I carried lightweight aluminum crampons and an aluminum ski mountaineering axe and they were more than sufficient. A self arrest ski pole instead of an axe could be ideal. A 7-8mm, 30m ski mountaineering rope is fine for a party of 2-3. Since you won’t use this gear much and never for anything extreme, a minimalist approach works well. This might change if you want to do a technical rock route along the way but you can scramble many of the peaks with basic gear. Getting Down We did the trip the traditional way and started in the north at Cascade Pass. Climbing Mix-Up arm and traversing to the Cache Glacier present no real challenges and you don’t need any permits as long as you don’t camp before Cache Col. Once over the col the entire route is outside the National Park and so National Forest rules apply. The descent is a little trickier. We had thick clouds going up and over Spire Col from White Rock Lakes. The col is the lowest point on the ridge descending SE from Spire Point, at the head of the Dana Glacier. If you can’t see anything, here’s what to do: travel straight up the lobe of the Dana Glacier below Spire Point (easy to find), keeping close to the rock face that will be on your left. Using this as a handrail, find the first (and lowest) point in the ridge at the top of this lobe as the rock face curves around to your right. If you keep traversing up to your right toward Spire Point you'll only go higher and away from where you cross. In good weather it’s obvious but not so much in bad. Cross the col and scramble down the scree (boot track) to the snow on the other side, about 100-150' vertical. From there, traverse skiers right to the furthest gulley, just below Spire Point then take a sharp left down the wide, shallow gully. It’s all easy unless you head down the wrong gulley (we first took the gully right below the col and it ended in cliffs). From there the descent down Itswoot Ridge and into the Cub Lake basin is straightforward. Cliffs ring the basin but you’ll find the trail through these directly east of Cub Lake. Again, all this is easy with low snow and good weather. Once you climb out of Cub Lake basin to the pass above the headwaters of Bachelor Creek the descent begins in earnest. (Note: As of 2012 the trail down Bachelor Creek, which is no longer maintained by the FS, is at least a good quality boot track along the upper section where most of the route finding challenges exist. So, if you lose it in brush or snow, stop immediately and find it again, it is there.) Our descent down the upper portion of Bachelor Creek was straightforward. As the valley steepens the trail takes you through significant avalanche debris, mostly on your right. The only route finding challenge we encountered was between approximately 5000’ and 4000’ feet where the trail starts level out into the valley floor. You enter older avalanche debris (again, with Bachelor Creek on your right) and in this section it’s up, over and around logs and downfall. The trail is there, though certainly faint in places. Again, if you lose it, STOP, turn around and find it again. You’ll regret just charging ahead hoping to find it out there somewhere. This section isn’t long and once you get through it’s smooth sailing for a while. As for the infamous bushwhack section of Bachelor Creek, we found it to be much less formidable than legend would have us believe. In fact, it was almost fun if you adopt the right mindset. The trail is all there and easy to find, though it’s hard to see your feet most of the time given the dense brush. The great exception to this would be after a fresh rain (large trash bag with your arms poked through?) or if you’re carrying skis or anything that sticks above your pack. No fun at all. The log crossing is easy, again, taking you from Bachelor Creek being on your right to being on your left on descent. I say this because we seemed to be second guessing ourselves all along the way even though we read all the online beta beforehand. From there you just cruise down the Bachelor Creek trail until you get to the intersection with Downey Creek. At this point we got mixed up so I’ll explain what to do (this is really simple if you have the full USGS map for Downey Creek; ours ended with the upper reaches of Bachelor Creek so were guessing…and you know how you get when you’re beat). In our tired stupor, we assumed the trail crossed Downey Creek and descended the right hand side to the Suiattle River Road. This false view was supported by a faint trail that leads you to a log crossing Downey Creek, where once across you’ll find camps, flagging and other signs that others have been there before. (Part of our problem is that we assumed, falsely, that all these trails would be overgrown and more difficult to find than they actually were.) Instead, the trail crosses Bachelor Creek just a few yards upstream from where it dumps in to Downey Creek. There’s a good bridge and the near perfect trail picks up right away down the left side of Downey Creek to the Suiattle River Road. Once you get to the road it’s simply a matter of putting your head down for a few hours and pounding out the nine miles to the car. Again, this is simple if you have maps that show the trails. Much more could be said, but, again, this report just addressed some of the issues that we felt would be helpful for a first time group. Have fun and if you have any specific questions feel free to email. Lee Zach and Megan just before descending into White Rock Lakes Camp at White Rock Lakes Megan above Yang Yang Lakes The Infamous Log Crossing on Bachelor Creek White Rock Lakes Kool Aid "Lake" Zach just before the Middle Cascade Glacier Red Ledges LeConte Glacier Spire Col Megan above Yang Yang Lakes Yang Yang Lakes Upper Middle Cascade Glacier Looking back to Cache Col from Kool Aid Lake Bachelor Creek Bushwhack Mt Formidable Just past Art's Knoll with Mt Formidable in Background Art's Knoll Camp Dome Peak from White Rock Camp
-
A friend and I climbed the NE buttress today (Monday, 2/6) and one of his crampons popped off at the top of the upper ice bulge and stopped on the face below. If you happen to be up there before it gets buried in the next storm please let me know. Condition are fantastic, by the way. Many thanks. Lee 360-865-1489
-
Sorry, it sold a few days ago.
-
Sorry, it sold a few days ago. The story: basically a friend of a friend bought the skis, boots and bindings a few years ago and never went out. I think he thought it would be a great sport to get into and had the money but never use the gear. So I have him some $$ for it and added the skins for a package. I made a little above what I paid for it but not much. Thought at first I might keep it for my oldest son but he wouldn't get the use out of it. Thanks, Lee
-
Sorry, it all sold a couple of days ago. An older guys doing the Houte Route next year. Thanks, Lee
-
New in Box...$350 email: lee.riley@earthlink.net
-
[font:Arial]Here's what I've got: K2 Shuksan Skis - 174cm Dynafit Comfort Bindings w/ brakes+leashes (same as Verticals) Garmont Dynamite Boots w/g-fit liners - 28.0 BD Ascension STS Skins All of these items are NEW and have never seen snow. Boots still have tags and are in the box. Skis have original wax. Bindings are shiny (the silver color is really cool), skins are uncut. This is a great NW climber/skier package...yours for cheap. Complete set for $750 Email me at lee.riley@earthlink.net[/font]